Casey
-
Posts
15,091 -
Joined
-
Last visited
Content Type
Profiles
Forums
Events
Gallery
Everything posted by Casey
-

Revell '78 GMC 4wd-to-2wd conversion?
Casey replied to brodie_83's topic in General Automotive Talk (Trucks and Cars)
I didn't mention that option because it was mentioned in the topic I linked to, but it is a good option for keeping everything 1/24 scale: One thing to be aware of if you decide to go that route, Jordan-- the van upper control arms are different lengths/widths, as the van frame is offset to the right side. Again, all are 1/25 scale, and I have my doubts they would look right on a 1/24 scale frame. Usually 1/24 can be sapped over to 1/25 and not look too out of place, but the other way around doesn't usually work too well. Plus, the AMT Chevy van UCAs are blocky and thick-- not great options IMHO.
-
Revell 1969 Mustang Boss 302............My take with pics!
Casey replied to MrObsessive's topic in Car Kit News & Reviews
-
MPC/Round 2 - Pony Express is back from the grave!
Casey replied to Faust's topic in Car Kit News & Reviews
-
1) Research either the kits or subjects you wan to build models of. If it's a Ferrari Testarossa, find out (or ask here) which kits are best, have the best fit and finish, etc. Once you decide that... 2) Buy the best kit you can afford. 3) Treat every part or sub-assembly (say the engine, interior, etc.) like a complete model, taking your time to do the best you can from separating each part from its gate(s), to final finish application. 4) Plan, plan, plan. Research the real thing to understand how the parts fit together, and you'll end up with a better finished product. 5) The old painting adage applies here-- a cheap paint job over great body work will look much better than an expensive paint job over poor body work. Take the time to create a proper foundation, no matter what the part is. Mold seams, sinks marks, ejector pin marks, etc-- all, if not properly attended to, will decrease the quality of the finished product. Also, read all of these: http://italianhorses.net/Tutorials/tutorials.htm
-
Canada, your turn to shine: https://designyoutrust.com/2018/12/impressive-photos-that-capture-street-scenes-of-vancouver-in-the-late-1970s/
-
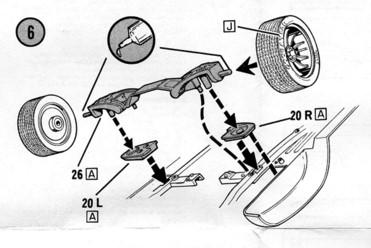
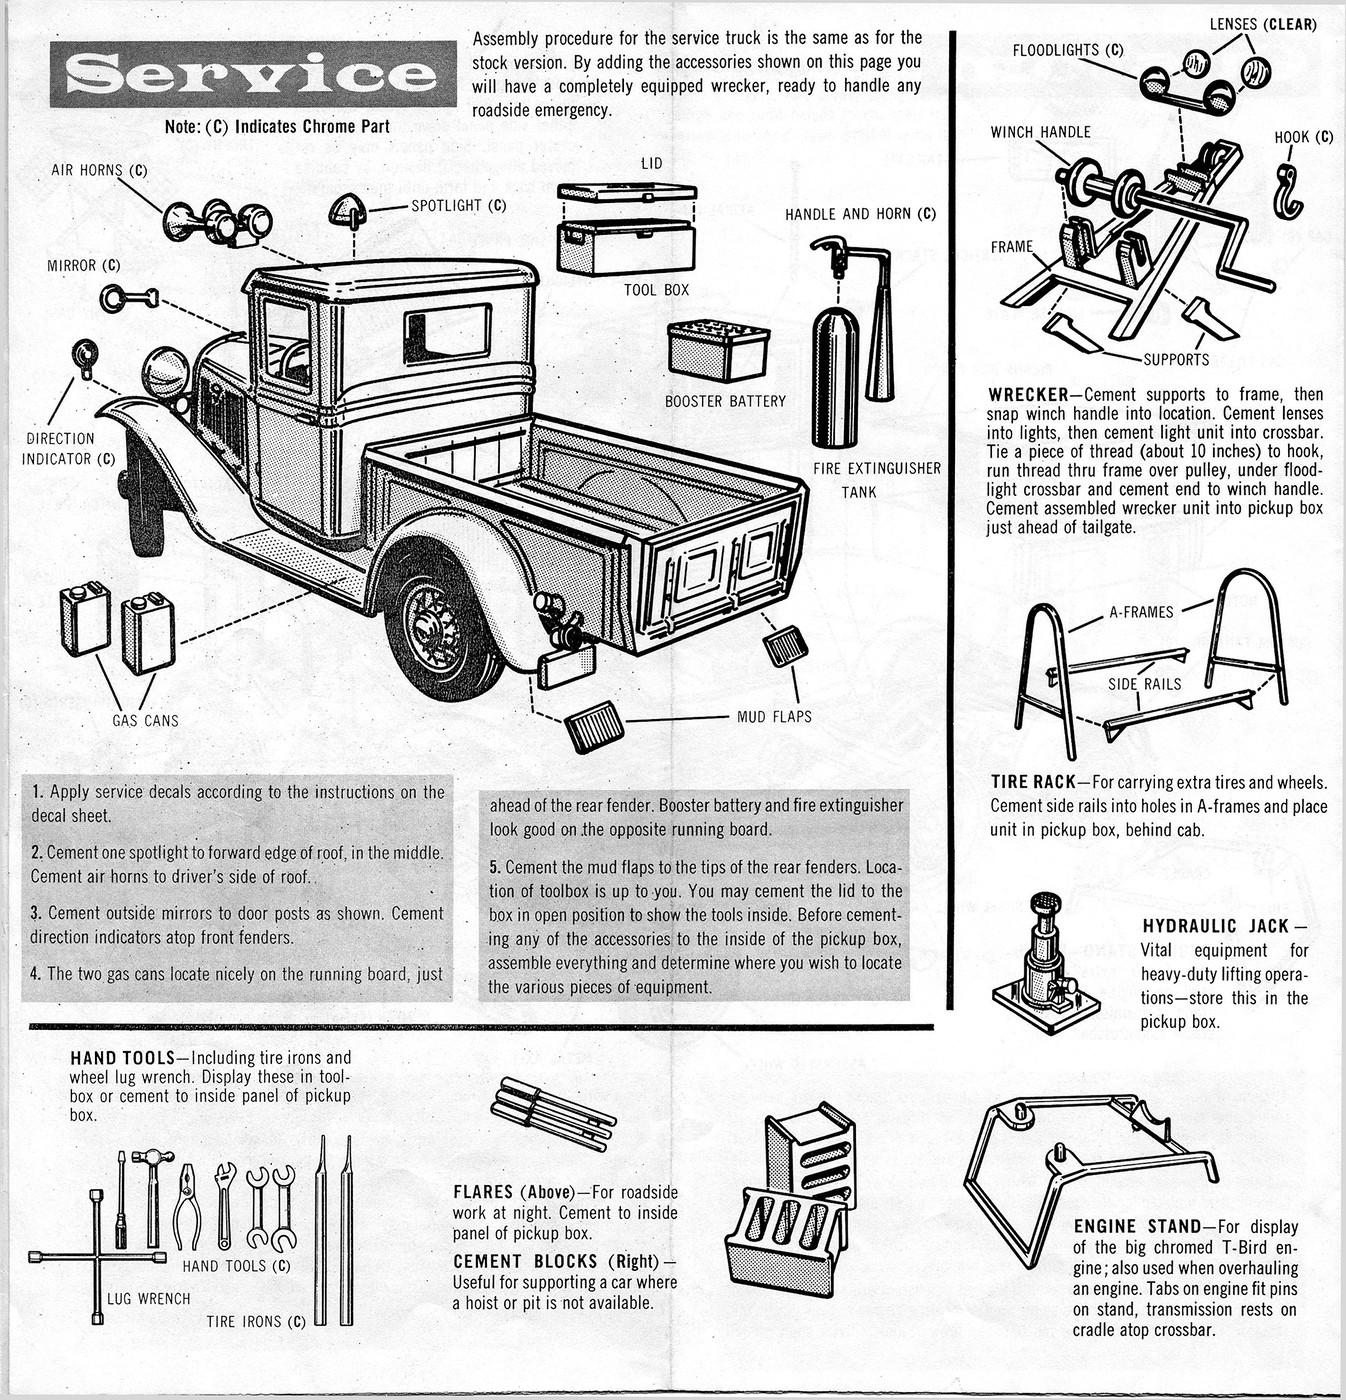
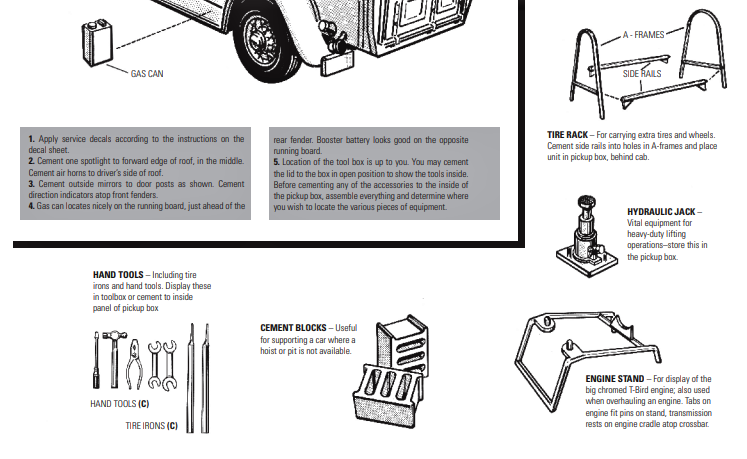
Comparing 196..4? and 2018 instruction sheets, we can see which geegaws have been lost over time. Vintage '60s sheet: 2018 re-issue sheet, with the flares, adjustable wrench, and lug wrench, fire extinguisher, and one gas can no longer present:
-
Revell '78 GMC 4wd-to-2wd conversion?
Casey replied to brodie_83's topic in General Automotive Talk (Trucks and Cars)
Yes: -
Revell '78 GMC 4wd-to-2wd conversion?
Casey replied to brodie_83's topic in General Automotive Talk (Trucks and Cars)
While not technically correct, you might want to look into the 1/25 Revell Chevy Caprice/Impala SS front suspension parts. Some were shared with the GM M-Vans (Astro/Safari), so while technically not correct for the '73-'86 GM pickups, they are a bit larger being from a full-size car, and would probably be more proportionate than 1/25 scale GM pickup or van kit parts. -
Revell 1968 Chevy Chevelle SS 396...........My take
Casey replied to MrObsessive's topic in Car Kit News & Reviews
Oops, I should've said C.O.P.O. rather than Yenko, as that was most likely what I was thinking of from an '80s issue of MuscleCar Review, similar to this '69: I guess we'll see what the future holds. -
Revell 1968 Chevy Chevelle SS 396...........My take
Casey replied to MrObsessive's topic in Car Kit News & Reviews
I would bet on a '68 or '69 427 Yenko version from Revell, all debate regarding the legitimate existence of a '68 Yenko 427 aside. Not sure if Revell still has the Yenko licensing or not, but they've released Yenko versions of both the '69 Camaro and Nova kits previously (yes, it was a different company, understood), but I don't think it'd be too much of a stretch. A non-SS grille, a bench seat(?), some steels wheels and dog dish hubcaps, and some Yenko decals and boom, you've got a 'new' '69 Yenko Chevelle 427 kit. -
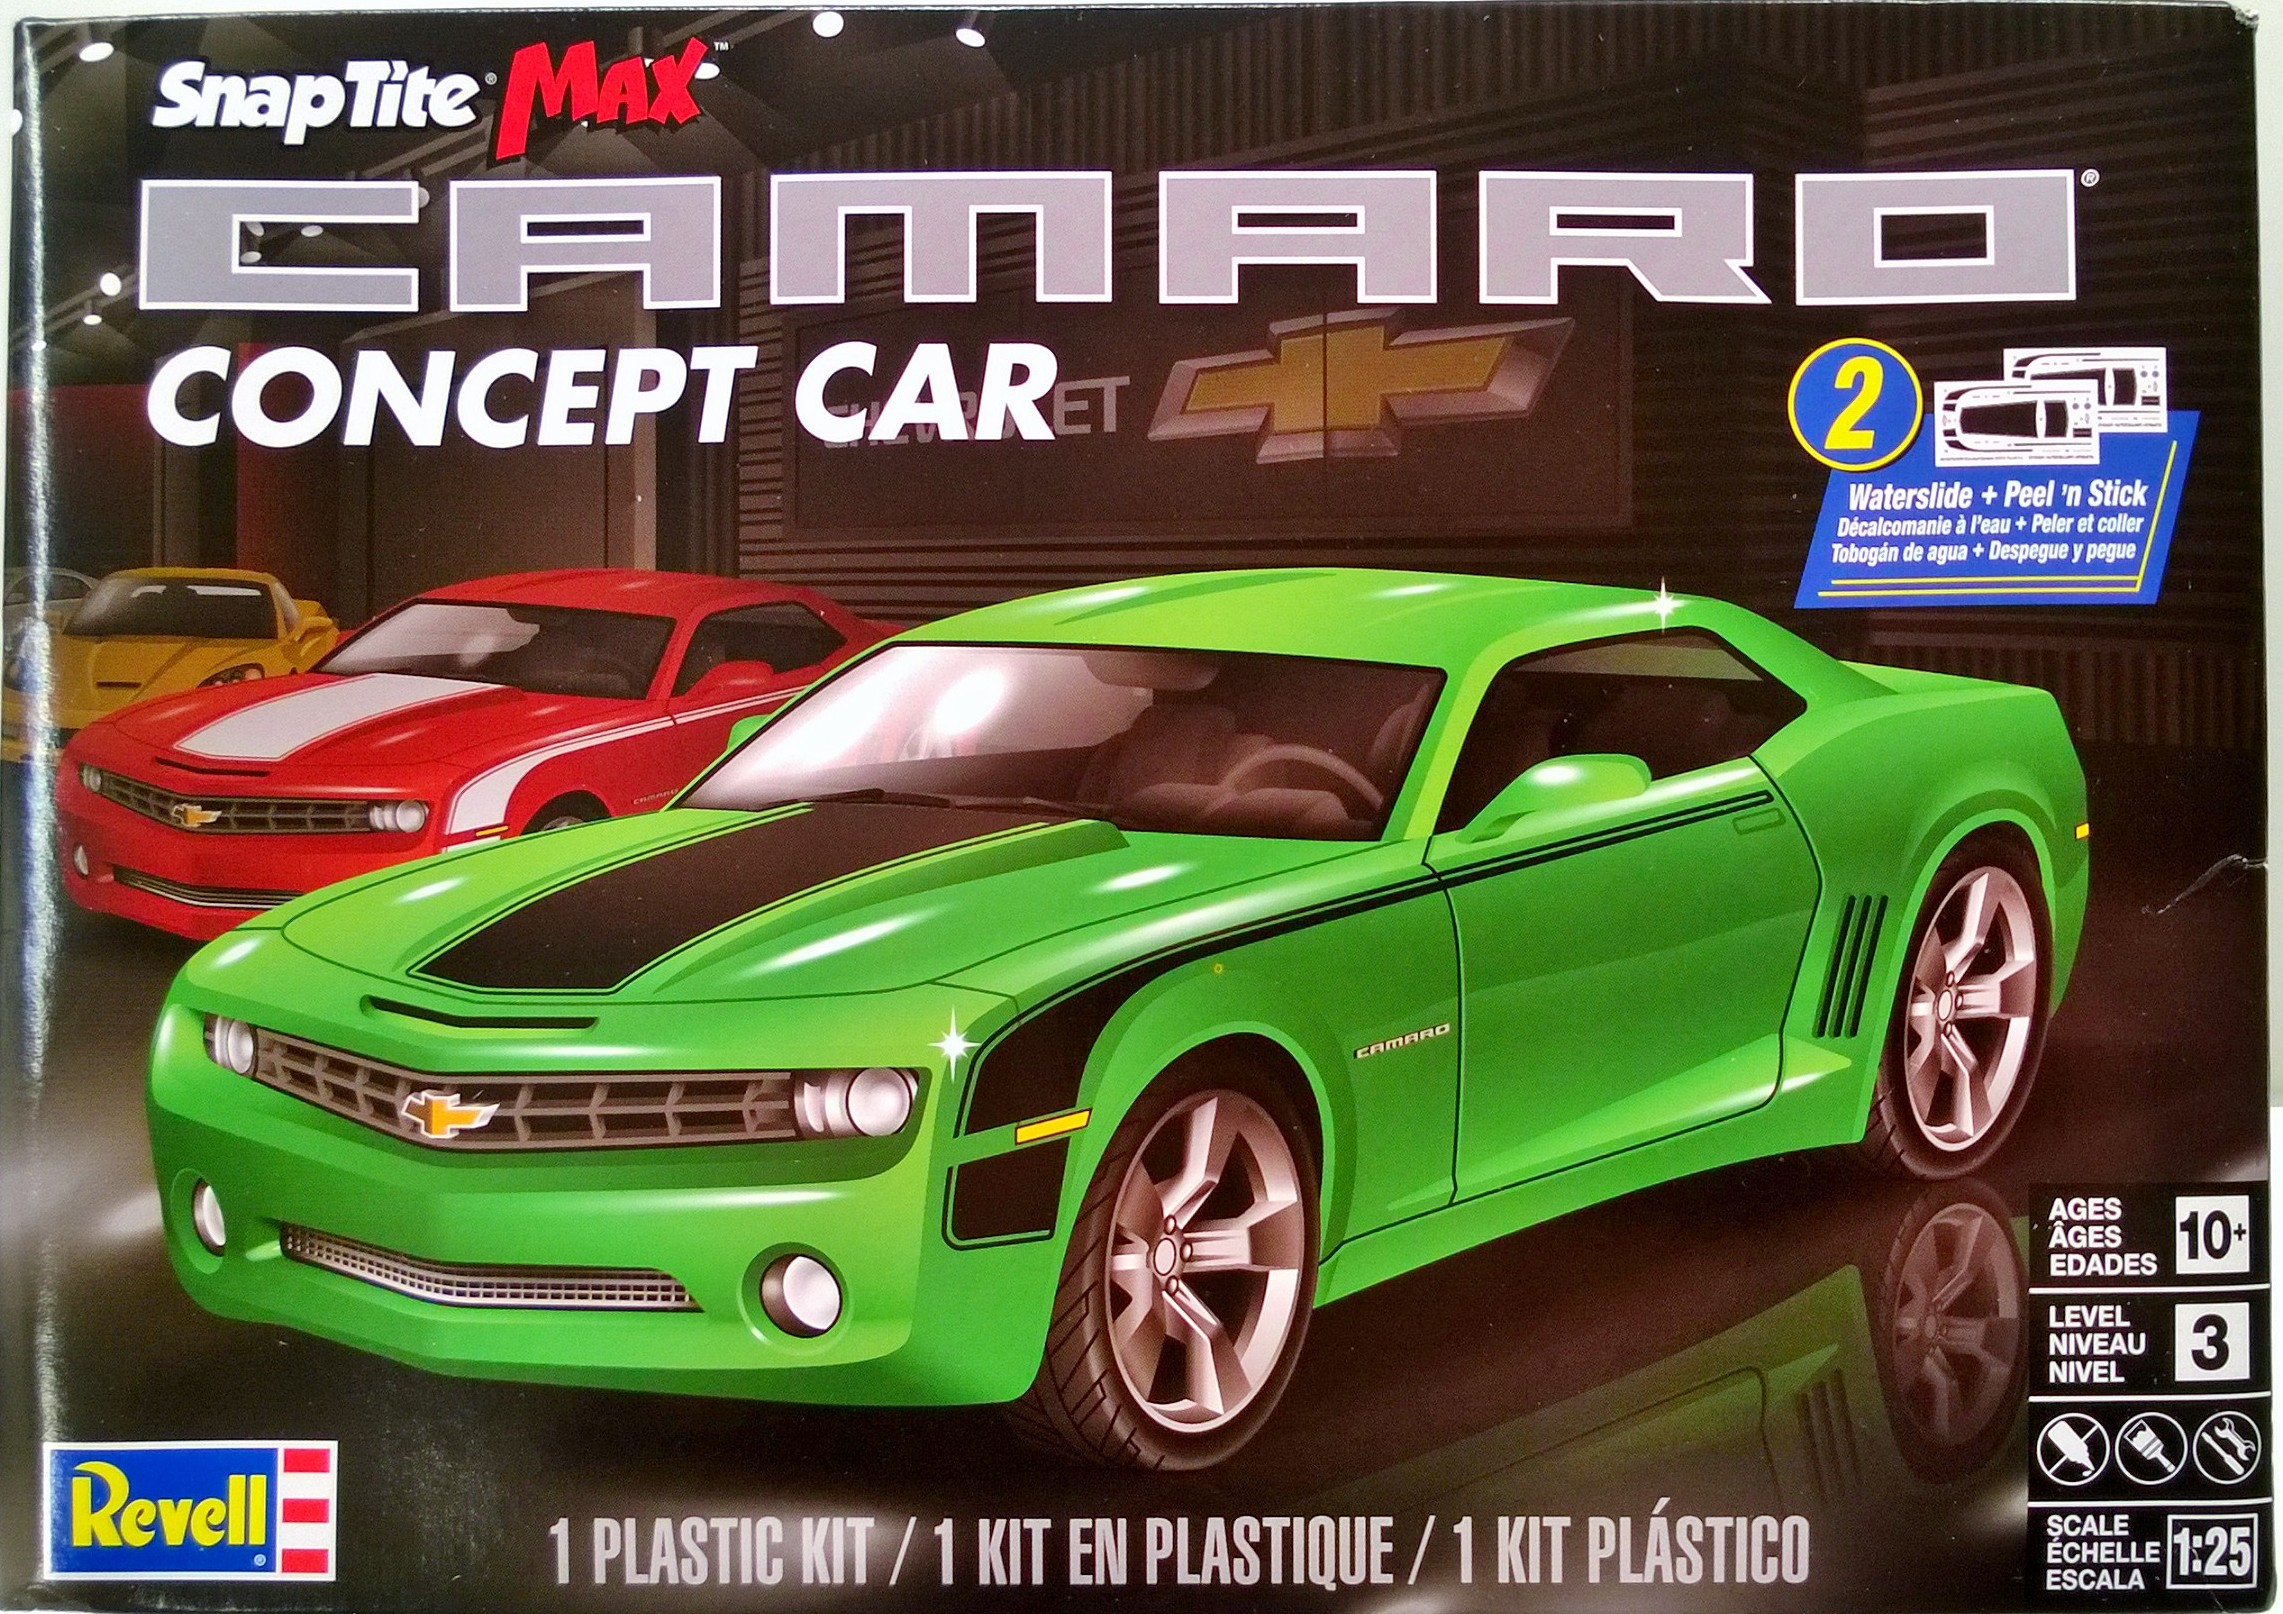
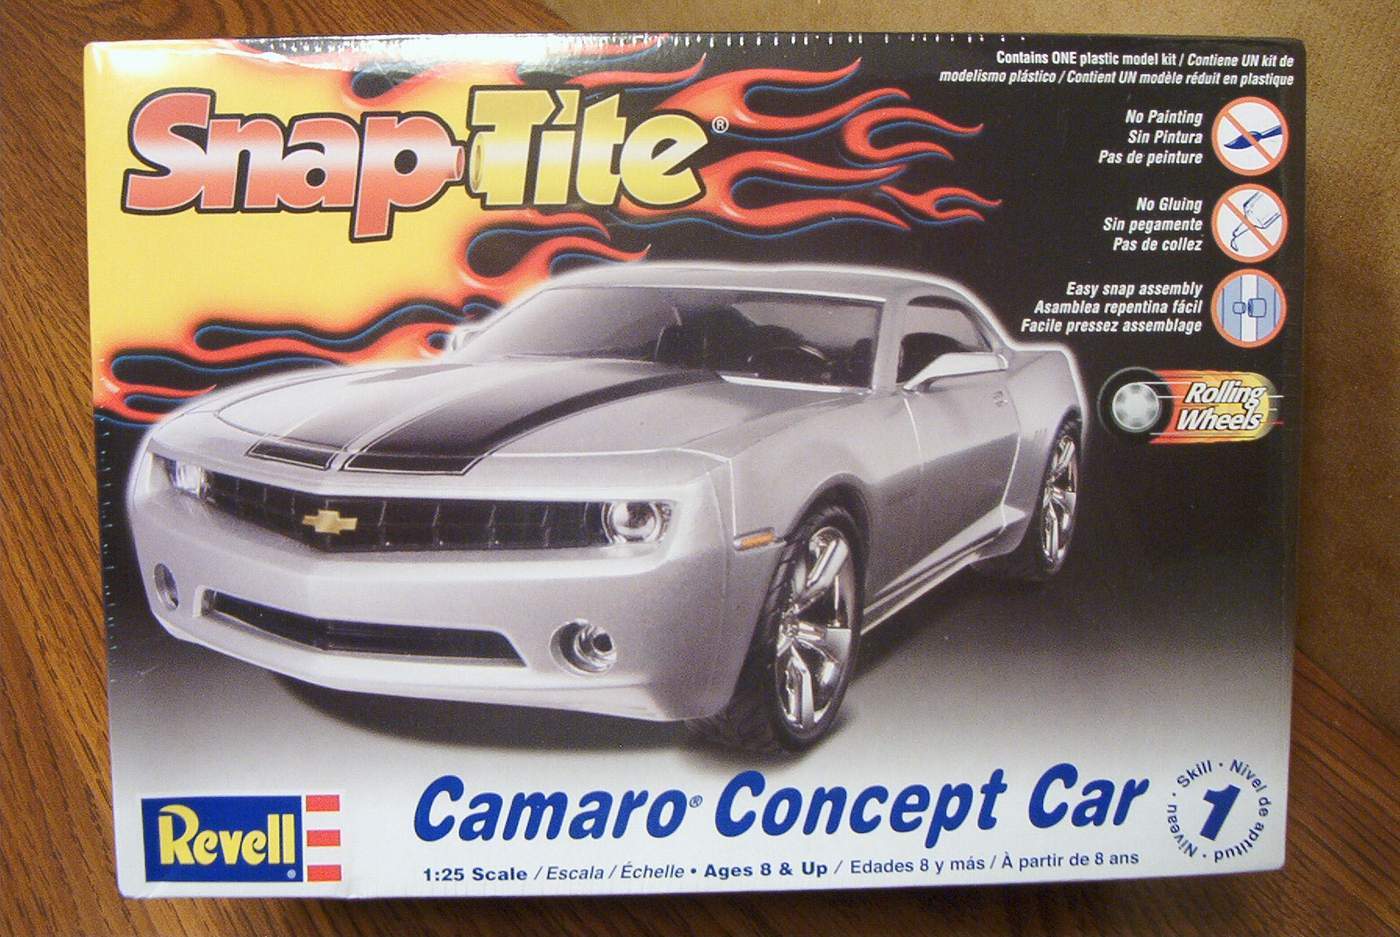
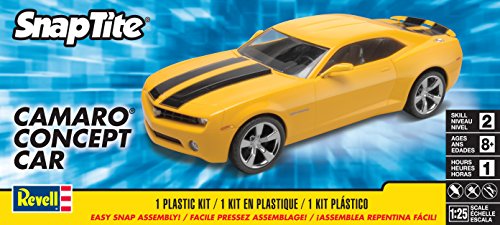
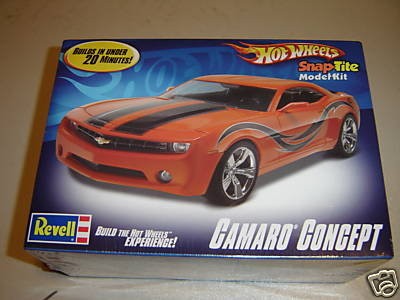
Here's a look at what's inside the 1/25 Revell Camaro Concept SnapTite Max, kit 85-1527, this time molded in lime green, and with both water slide decals and stickers included: http://modelkitreviews.proboards.com/thread/957/revell-1527-camaro-concept-snaptite This is pretty much the same Revell Camaro Concept kit first released back in 2006, with some minor changes as noted above. Previous kit versions were molded with silver, orange, and yellow bodies, and I believe the silver version was also offered in Revell's Build & Play program, too:
-
Yes, it is, and I would say the 'flake' is very in scale, too. No bass boat 'flake here.
-
No, lime green:
-
At a show two, along with the others shown.
-
Anybody got this kit New one AMT 1965 Buick Riviera
Casey replied to Mr mopar's topic in Car Kit News & Reviews
-
Revell 1969 Mustang Boss 302............My take with pics!
Casey replied to MrObsessive's topic in Car Kit News & Reviews
To be more clear on what Raoul said, the 1/25 Revell '69 Mach 1 428 Cobra Jet kit has always included the '69 Shelby interior, so it was never correct...and still isn't in this new '69 Boss 302. As mentioned, this new Boss 302 appears to be the Revell '69 Mach 1 428 Cobra Jet kit with some new parts. 'Glass' is nearly identical (save for the elimination of the lenses molded in the would-be headliner area), tail lights are the same, and it's clear an insert was created to include the new hood, too. The engine parts are all new, since both the '69 Shelby and Mach1 had 428 big blocks, and even without that, the runners for the two new groups or parts have larger radii at the corners than the old runners cut in the '80s when the '69 Shelby kit was new. Thank you to those who mentioned the quarter window, shock tower, and interior accuracy issues. -
I took some pics of the kit, with detail pics of the new front fascia and grille, both of which appear to be very well done. After a test fit against the body shell, I see no problem areas, no inappropriate contours, no excessive gaps, etc. There appears to be a sliver of extra material around the perimeter of the body shell where it meets the front fascia, so getting a near-prefect fit between the two should not take very much work at all: http://modelkitreviews.proboards.com/thread/956/revell-4313-1969-boss-mustang?page=1&scrollTo=981 The grille's perimeter trim piece forms a small flange, allowing the grille to sit in the fascia at the correct depth. The two parts are a near perfect fit, so after painting both, they should fit together with barely any adhesive needed.. It's clear there was a lot of attention given to the fit between the body shell, fascia, and grille, and it shows. The hood also fits very well and aligns correctly with all its neighboring parts, so leaving a small allowance for paint thickness should be the only necessary precaution.
-
?? These arrived yesterday. ?
-
Same here, but I recently starting working on one and saw something which was not quite right, detailed here:
-
-
What's the "issue" with each? It wouldn't help for other to make suggestions if they suffer from the same (or worse) issues. The early Buick V8 in AMT's '66 Riviera is decent, but has some problems, too, I recently discovered. The Chrysler 426 RB-seies V8 engine shouldn't be too difficult to replace, though.
-
STEVE SCOTT ,A.KA . [ UNCERTAIN T ]
Casey replied to bpletcher55's topic in General Automotive Talk (Trucks and Cars)
Have you contacted Atlantis and asked them if they have this mold? -
Bench seat and grille for '69 Roadrunner
Casey replied to vintagercr's topic in Car Aftermarket / Resin / 3D Printed
https://hartspartsresin.com/product/69-plymouth-gtx-roadrunner-back-bench-seats/ -
adhesing sheet styrene to "not" watercolor paper
Casey replied to tom q vaxy's topic in Model Building Questions and Answers
We shouldn't have expected someone using a fake name to be forthcoming about anything, even if that person asked for help. -
adhesing sheet styrene to "not" watercolor paper
Casey replied to tom q vaxy's topic in Model Building Questions and Answers
You're trying to bond cold-pressed watercolor paper to sheet styrene. Is thickness of the final product a factor? As in, do the sheet styrene and watercolor paper need to end up as close to a scale thickness as possible., or will the thickness be hidden? Which scale are you building in or better yet, what specifically are you doing with these two materials together? A tonneau bed cover, interior upholstery, or something else?