BK9300
-
Posts
1,986 -
Joined
-
Last visited
Content Type
Profiles
Forums
Events
Gallery
Everything posted by BK9300
-

’72 Dodge Demon Drag Racer 1/25 scale
BK9300 replied to AmericanMuscleFan's topic in WIP: Drag Racing Models
Goodness, Francis, you are amazingly proficient at creating these scale marvels. The effort you've put in is well understood - a continuing pleasure to watch! -
Mack B-61 Dump Body
BK9300 replied to Scott Eriksen's topic in WIP: Model Trucks: Big Rigs and Heavy Equipment
Should be a looker, Scott, based on that awesome inspiration photo! -
1967 Freight Shaker
BK9300 replied to J.B. Customs's topic in Model Trucks: Big Rigs and Heavy Equipment
Very nice build - lots of respect for the tribute. -
Wonderful craftsmanship - well done!
-
Will be a good build to follow.
-
Western Star 4900 FA plow truck
BK9300 replied to BK9300's topic in WIP: Model Trucks: Big Rigs and Heavy Equipment
Thanks, Gary - going a little crazy, I guess! And I appreciate you continuing to check in on things, Francis - thanks! -
Marvel's Hydra coupe 1/12 scale full scratch build
BK9300 replied to François's topic in WIP: Model Cars
It's hard to imagine all the settings and/or conditions that must be 'right' for a print to come out the way you need it to. In any event, you always seem able to correct any problems. Just a magnificent creation! -
Western Star 4900 FA plow truck
BK9300 replied to BK9300's topic in WIP: Model Trucks: Big Rigs and Heavy Equipment
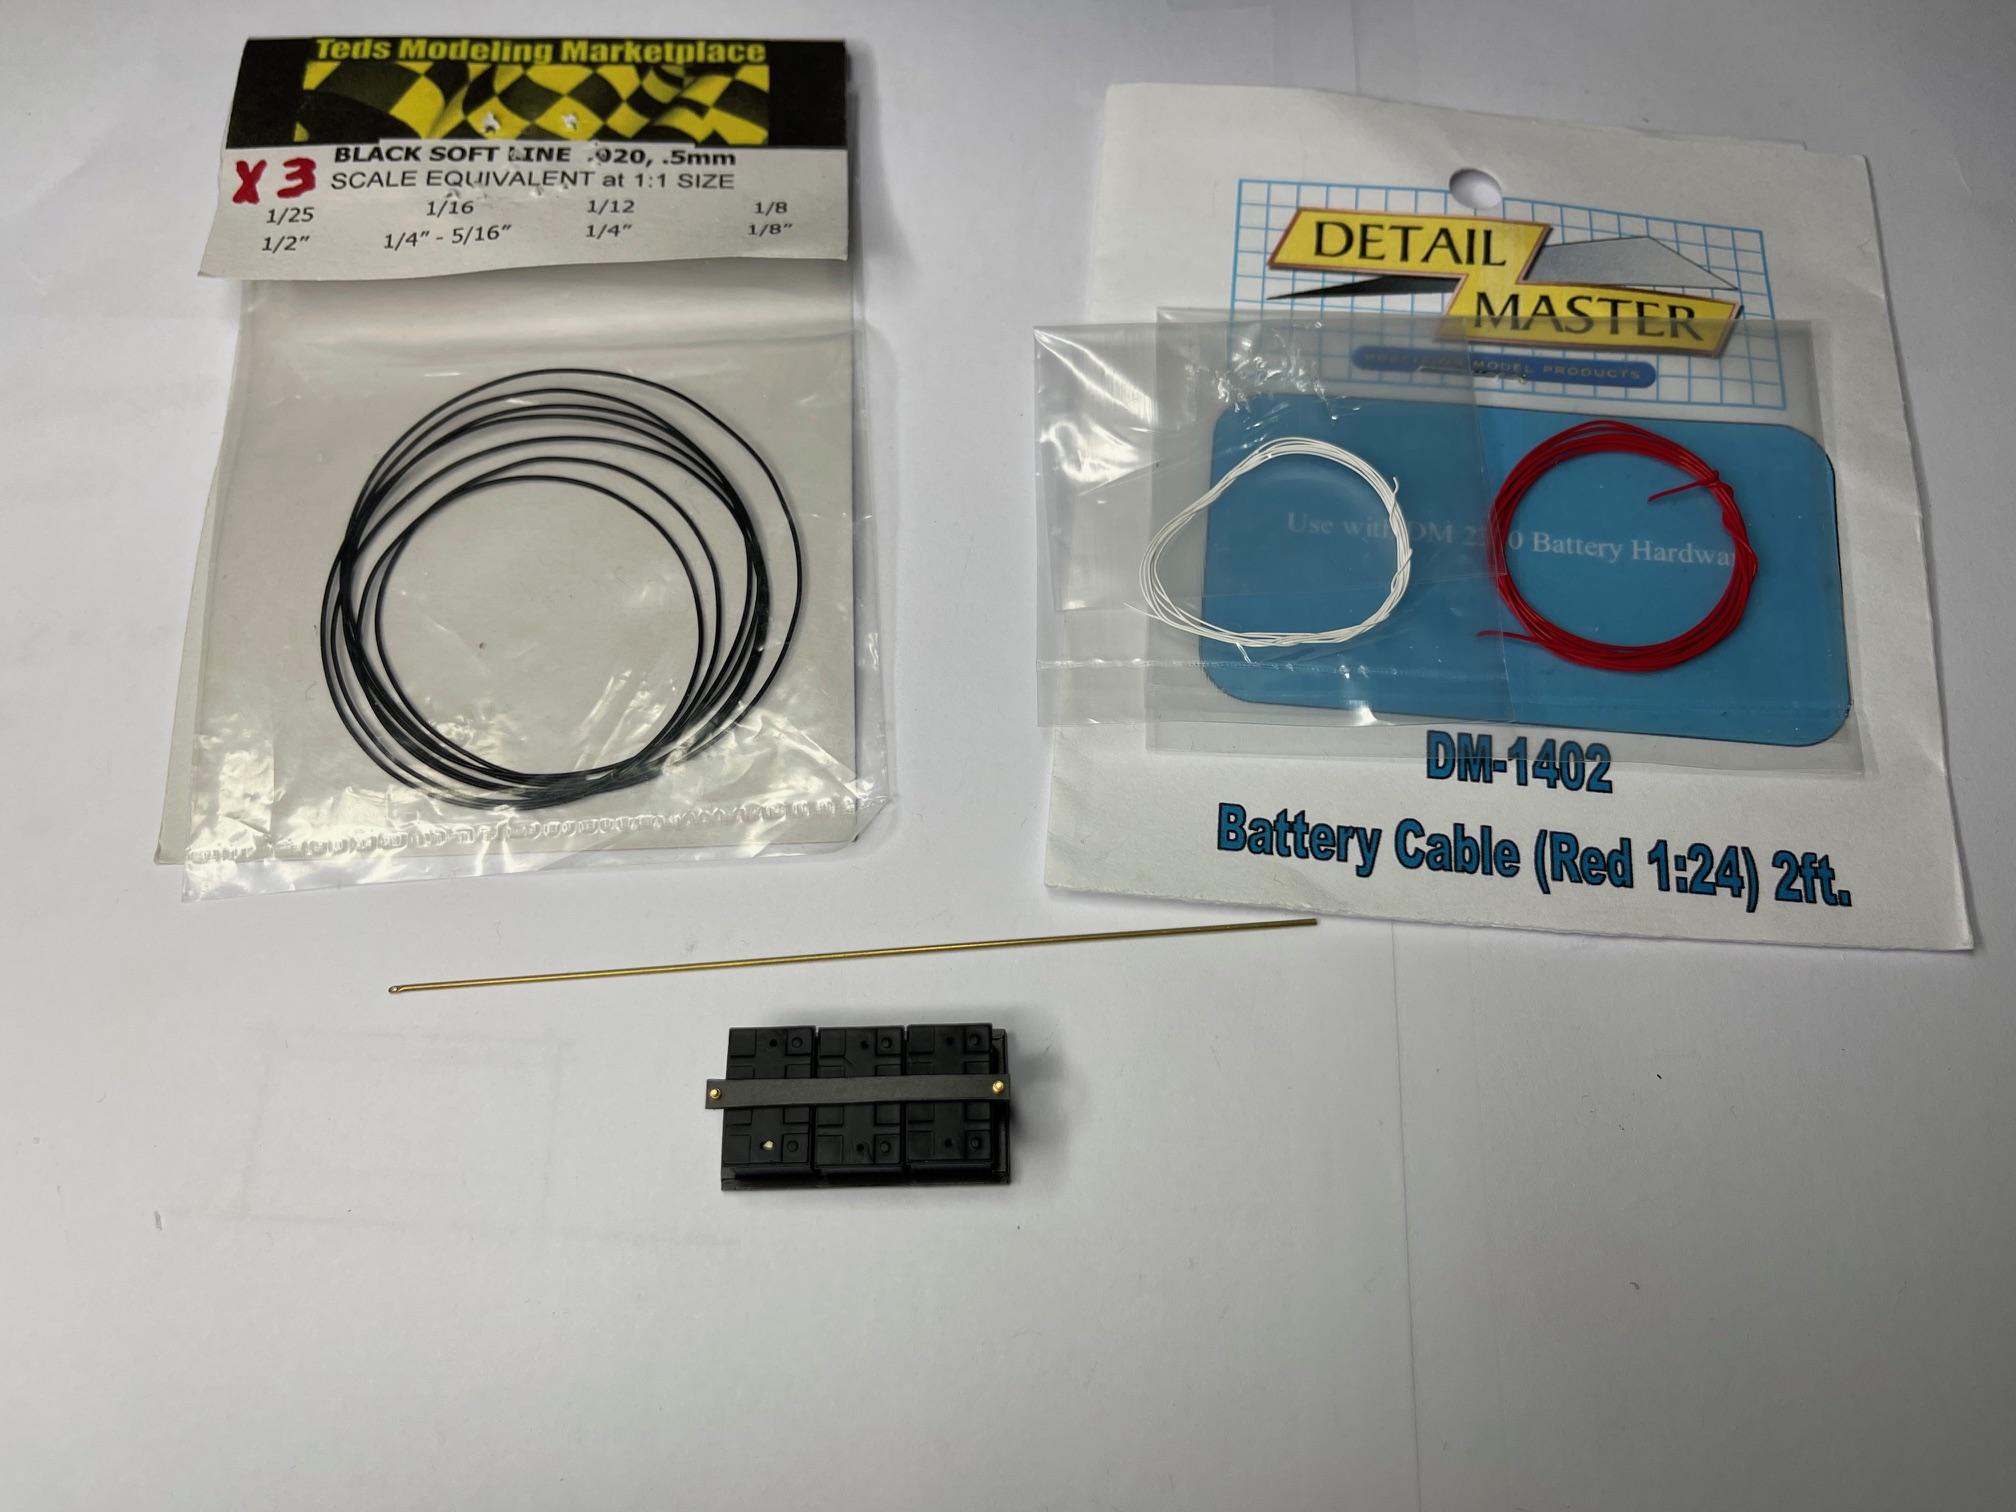
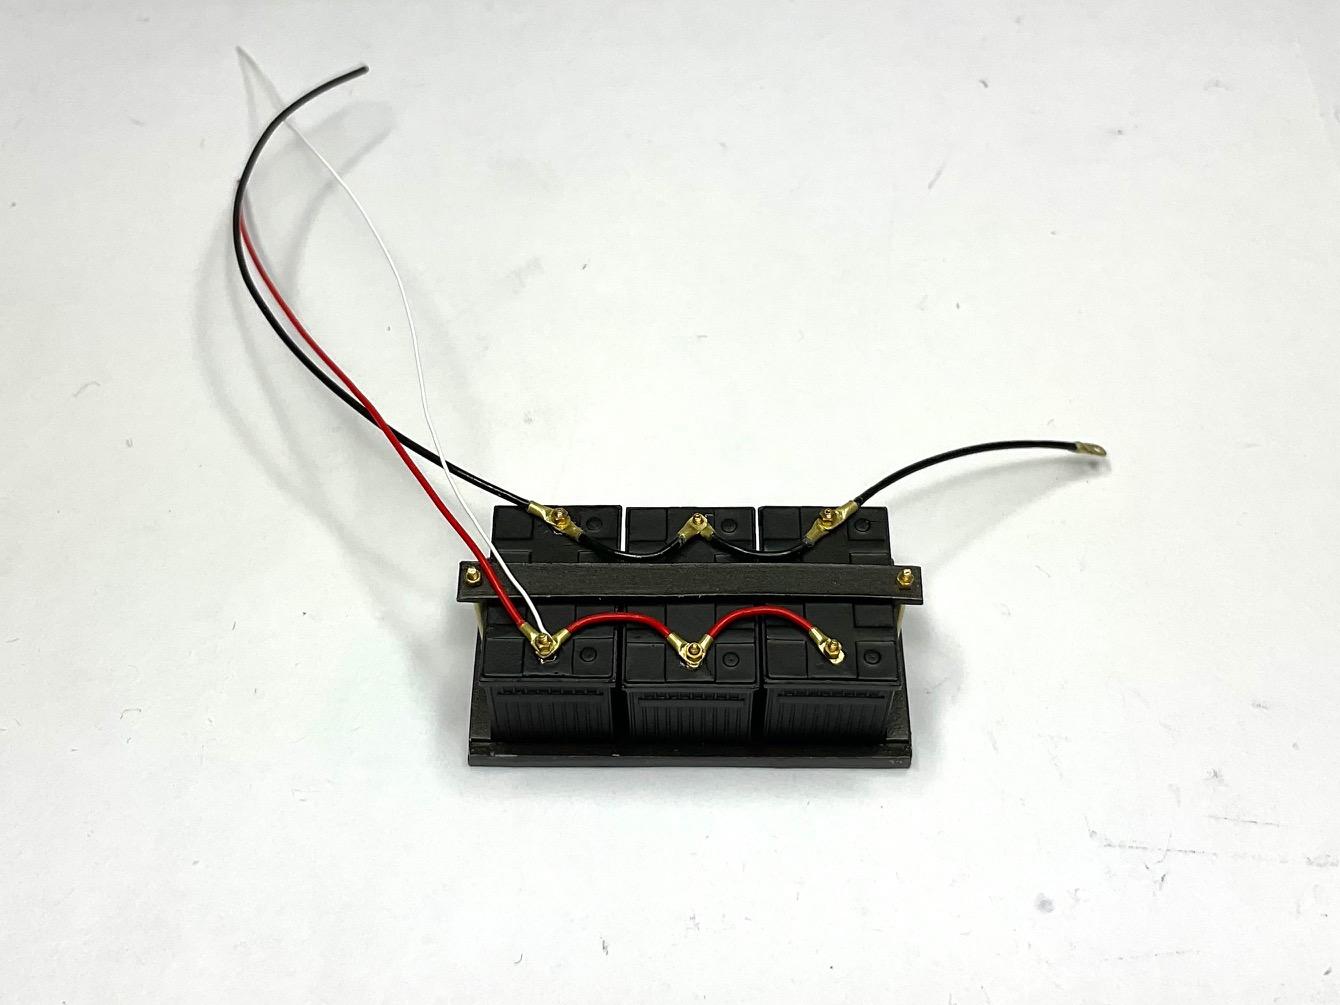
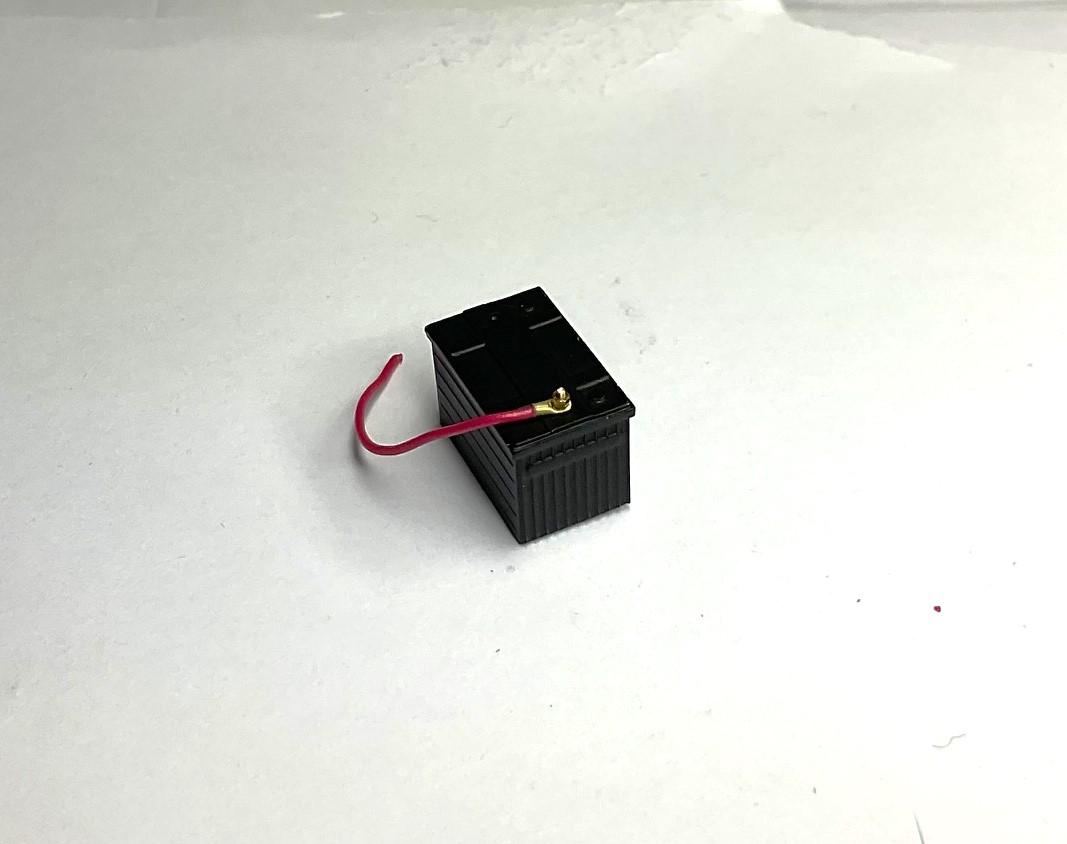
Had a good session at the bench today - battery day! The needed bits have been gathered - Started in with cable ends, like with the test piece I did earlier - Half the ends completed! - I taped around the batteries because I didn't want to wear any paint off the edges while handling. Threaded posts have been added at this point and about to starting bolting the cables down Had to check my reference pics a few times, but finally settled on this cable arrangement. I'll have to finish the other ends of the cables once the box is mounted on the frame and I know the lengths to the starter that I will need. Several of my reference pics showed two or three additional, white power wires, but I chose only to do one, because, well, I just wouldn't know where to terminate them! The one white wire often powers the ECM (thanks @Scott Eriksen!), so I'll see what I can do with that. Pretty happy with this outcome. I'll remove the ground wire out the back of the battery box, and attach it to the frame before I glue the boxes to the frame - should be able to thread the ground back into the box and re-attach it later. Besides the latches, still have one more little detail to add to the battery box cover, but need to make it first! Thanks again for all the generous comments - much appreciated!
-
Western Star 4900 FA plow truck
BK9300 replied to BK9300's topic in WIP: Model Trucks: Big Rigs and Heavy Equipment
Thanks, Gary - I'm trying hard to figure out how to do it, but I don't think I left any room on the firewall for the starter relay! -
Western Star 4900 FA plow truck
BK9300 replied to BK9300's topic in WIP: Model Trucks: Big Rigs and Heavy Equipment
That's very funny, Jürgen! Maybe I need to make a scale model shop, too. Thanks for your generous comments! Thanks, Scott - lot's of parts to scratch ones like this, so, would be good if the process could be made a bit easier using some printed ones. Will need to keep refining the design! -
That trailer would be an awesome addition to your build!
-
‘55 El Camino
BK9300 replied to NOBLNG's topic in WIP: Model Trucks: Pickups, Vans, SUVs, Light Commercial
Excellent job on the body work and those hinges, Greg - precision work! -
Beautiful job! Lots of work hours put in by that old girl! Terrific weathering, too.
-
Western Star 4900 FA plow truck
BK9300 replied to BK9300's topic in WIP: Model Trucks: Big Rigs and Heavy Equipment
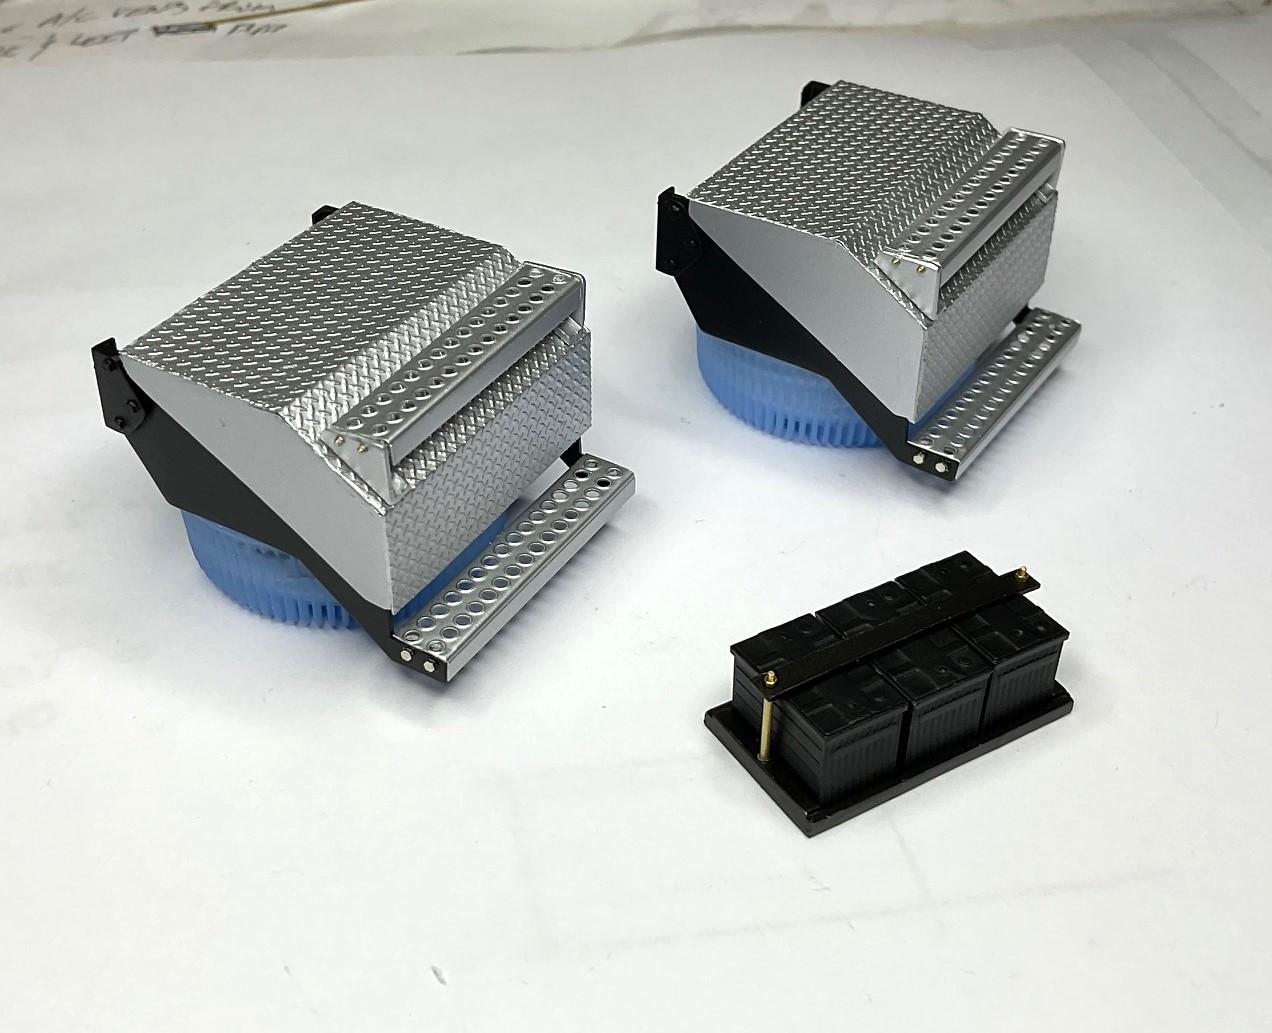
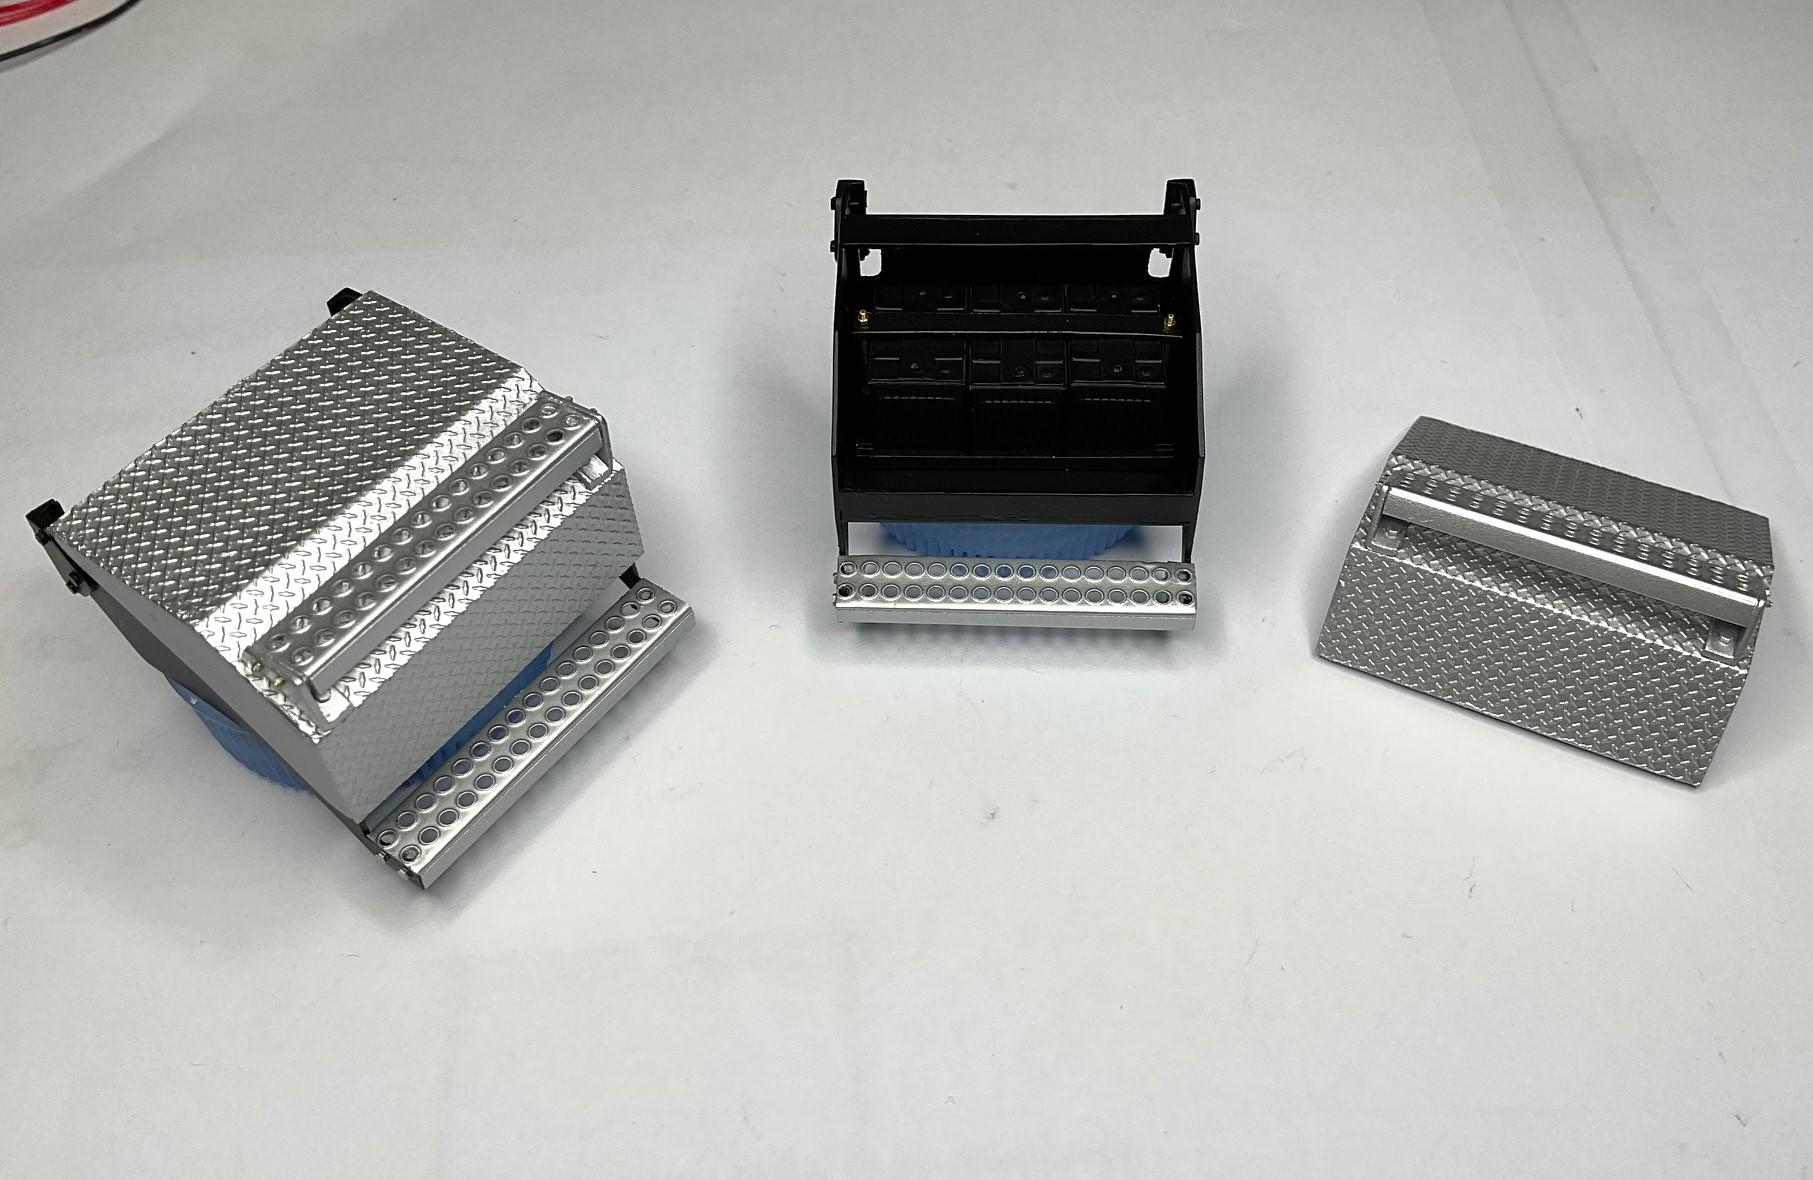
Still fussing with the battery/tool boxes - I will eventually work on something else! Today was just a partial reassembly day for them, after painting. The box covers have been painted with Alclad White Aluminum and very happy with how they turned out. Not going to use any kind of clear on them, so they literally got the white glove treatment today. Added the bolts for the step treads as well. Batteries are CA glued to the tray and the hold down bar and bolts are also glued in place - Very hard to make out the battery detail, with the lighting from the desk lamp, but did want to show that paint layers are thin enough to allow the lid(s) to be removable with ease. Will be making cables tomorrow! Take care.
-
Western Star 4900 FA plow truck
BK9300 replied to BK9300's topic in WIP: Model Trucks: Big Rigs and Heavy Equipment
Thanks a lot, Brenton - appreciate the comment! -
Jeff, you're going to need a bigger bottle of CA glue! Should look terrific once you have it all together and some of your classic weathering (and tarring!) applied.
-
Nova Salt Flat Racer
BK9300 replied to Pierre Rivard's topic in WIP: Other Racing: Road Racing, Land Speed Racers
Awesome detailing, Pierre - the seat and dash look very 'purpose' built. Treat to follow along. -
Western Star 4900 FA plow truck
BK9300 replied to BK9300's topic in WIP: Model Trucks: Big Rigs and Heavy Equipment
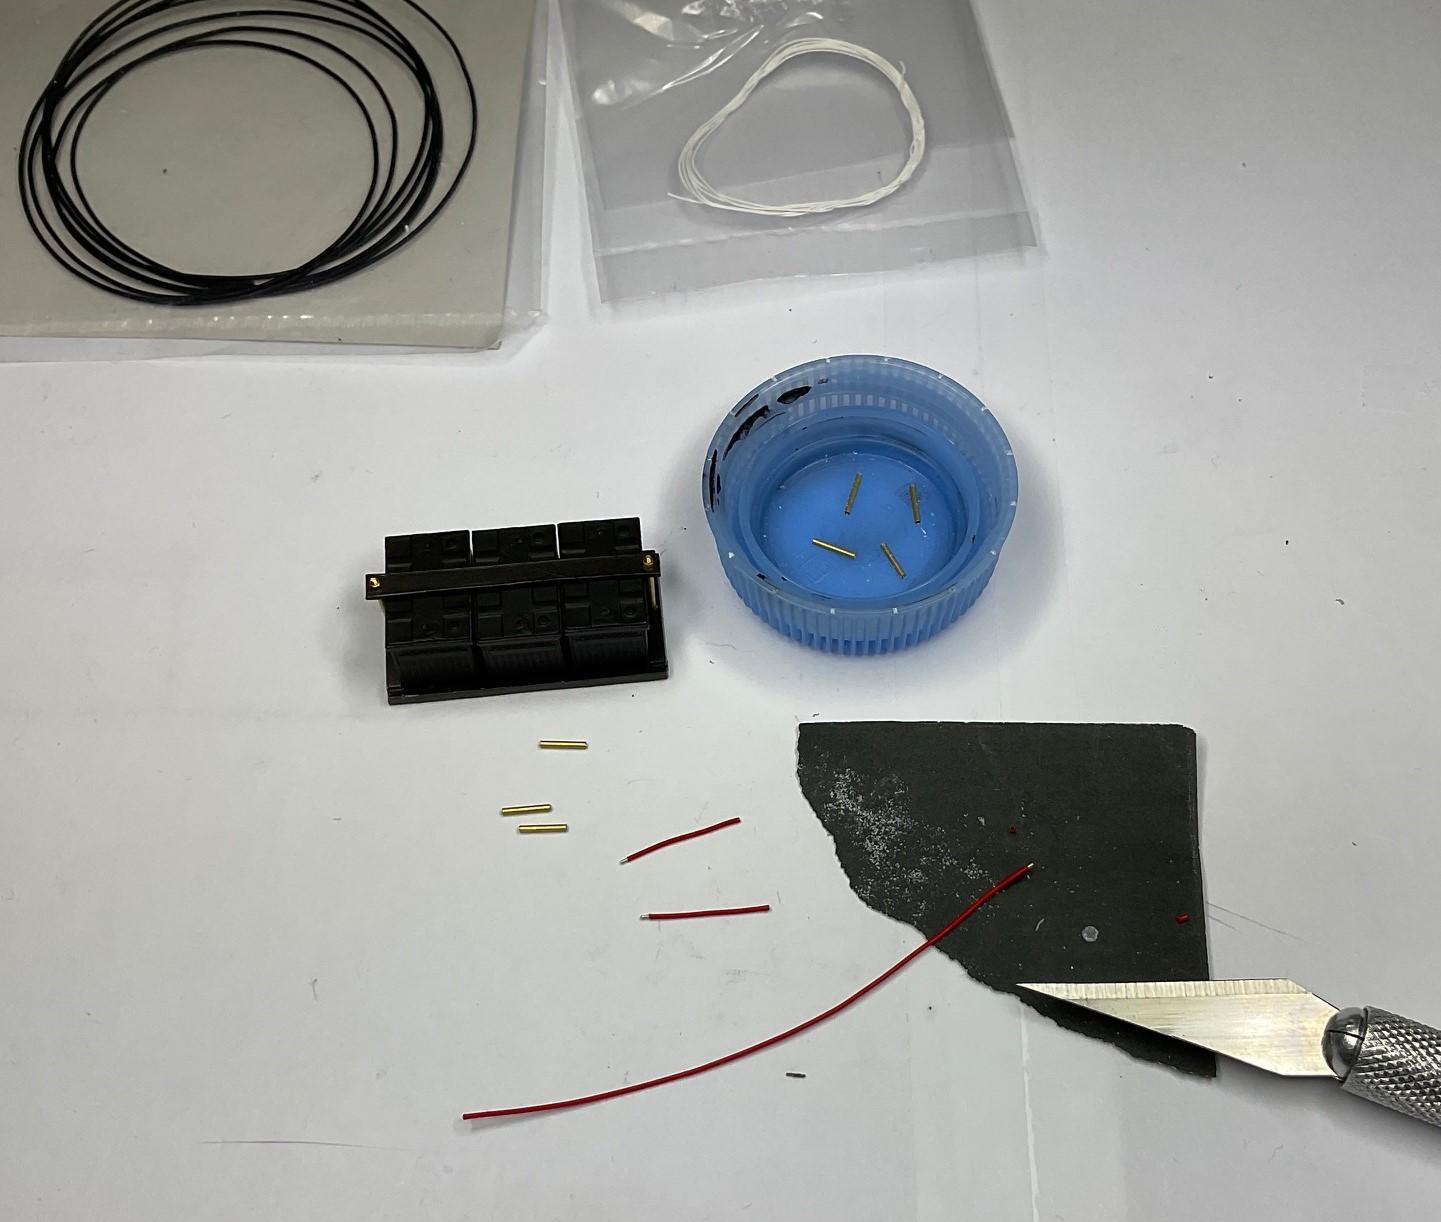
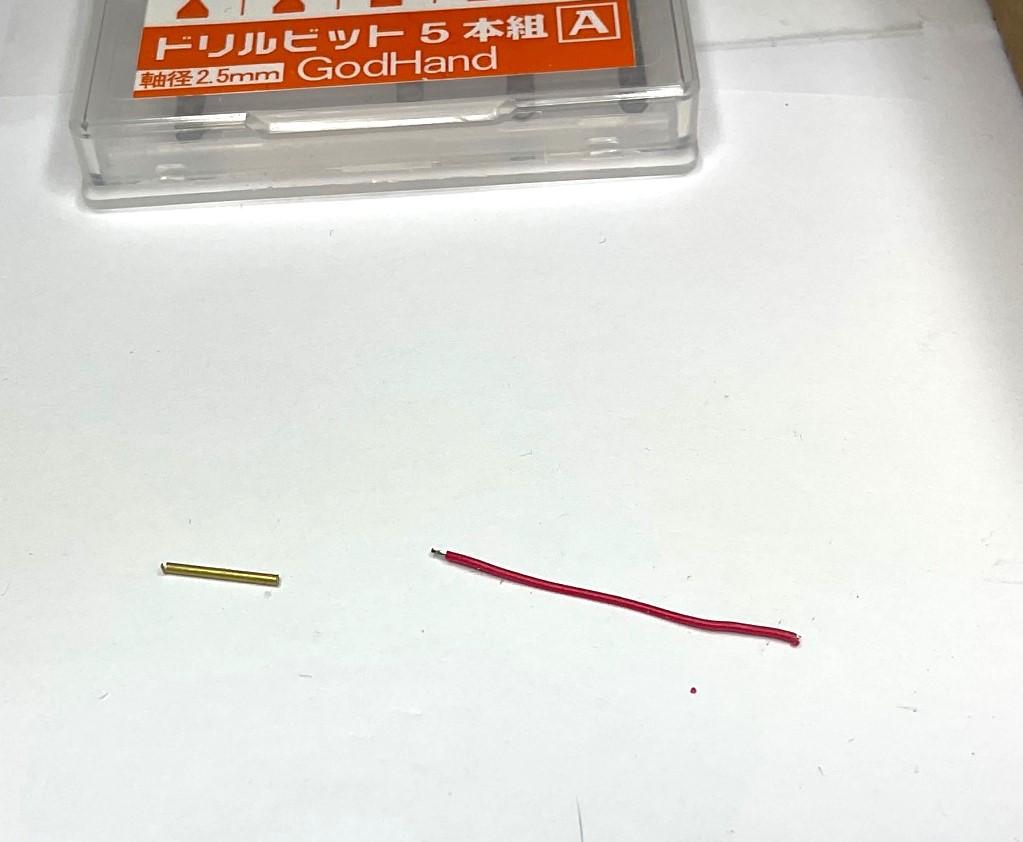
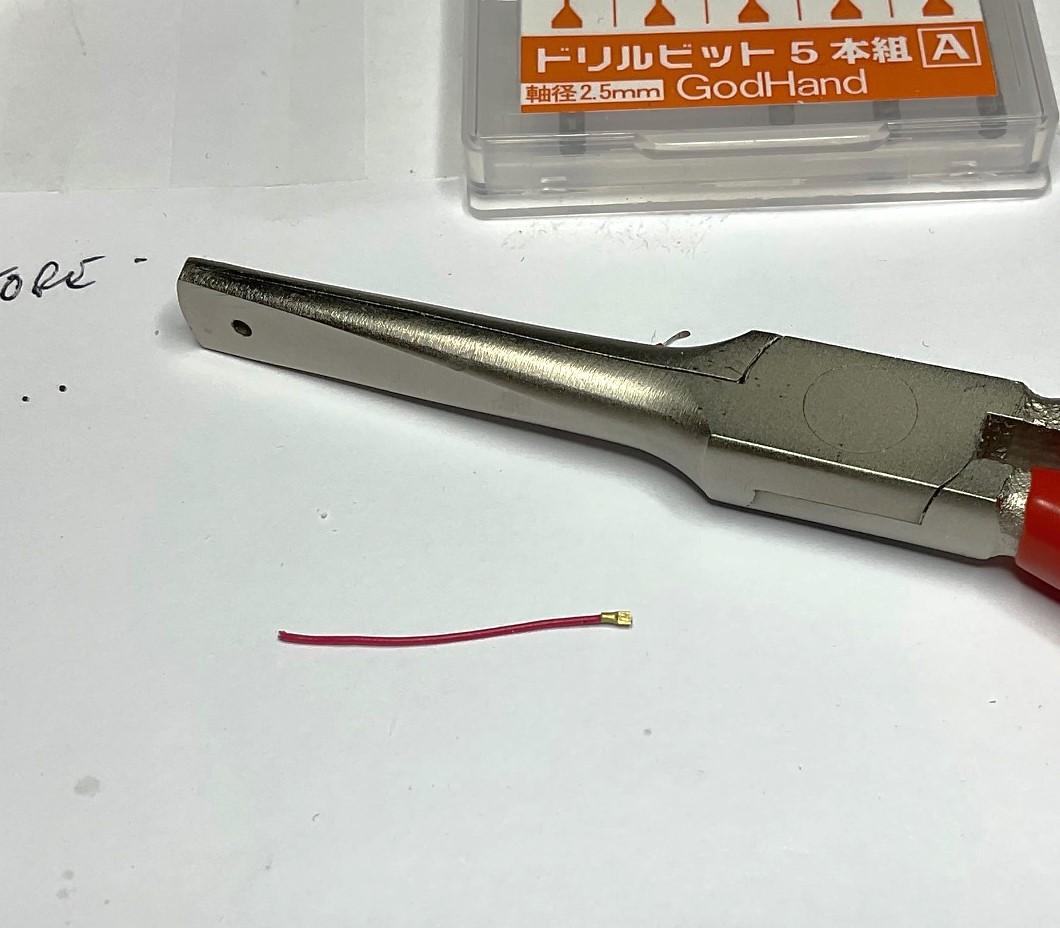
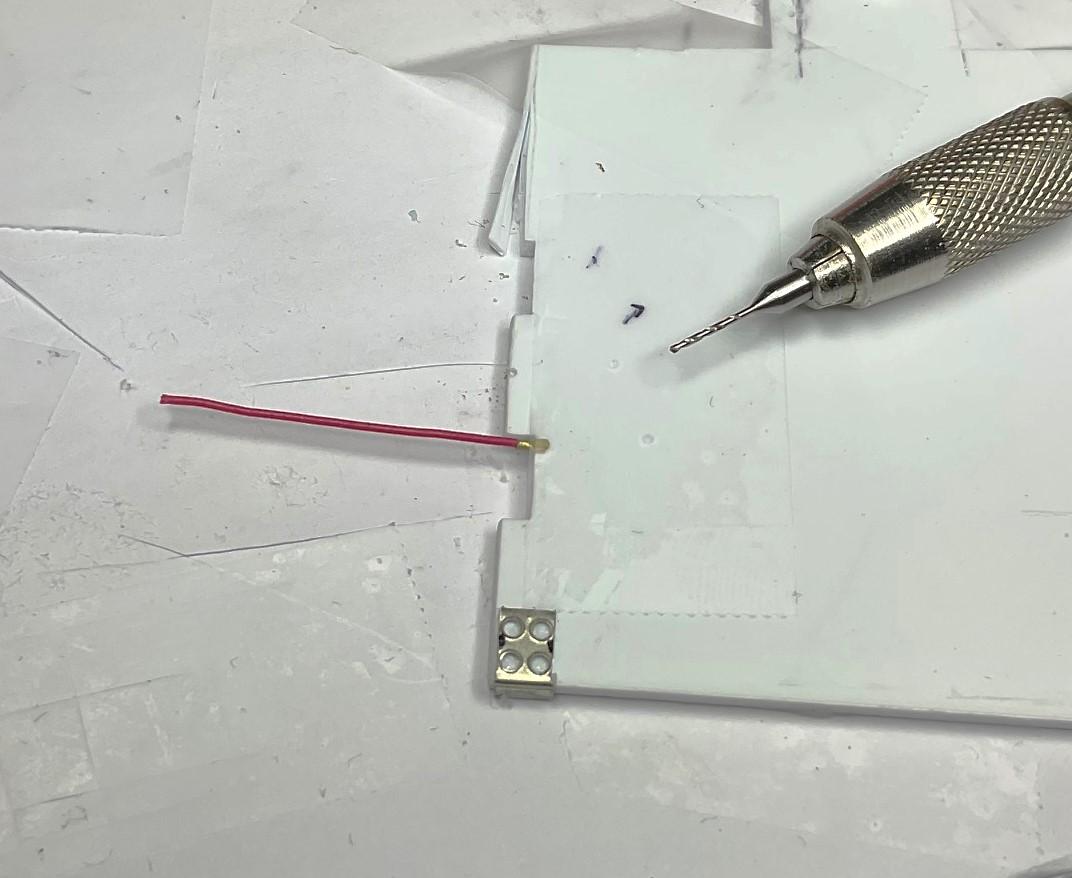
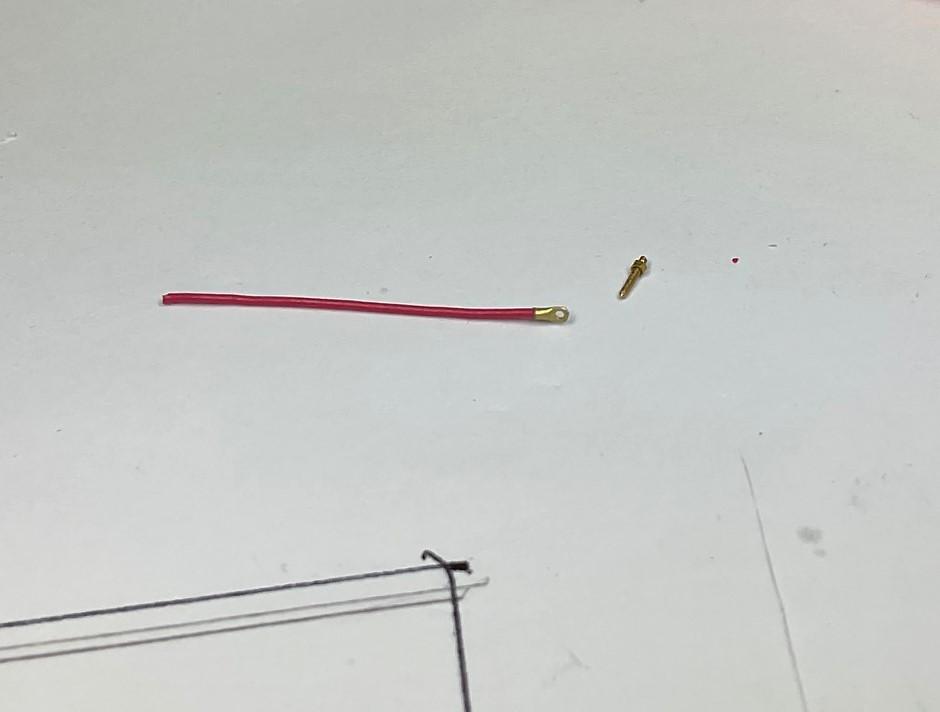
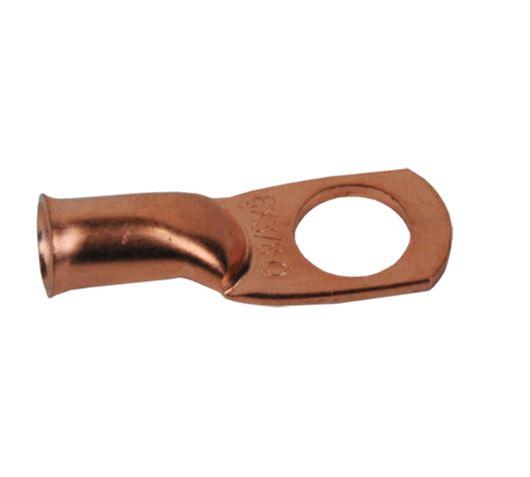
More paint drying going on, so did a little experimenting with my battery cables. Again, going with threaded terminals because it makes things a bit easier for me. This is the type of cable end I need to make - Started with some more Gopher ignition wire, with a bit stripped off one end and a section of 0.8mm brass tube - I shortened the tube length, then crimped one end and CA glued the stripped wire into the other end - I couldn't hold the small cable end to drill it, so I taped it to a piece of styrene and drilled it out with a 0.6mm bit - Using a Scale Hardware nut, and a bolt with the head cut off, I had the threaded terminal and cable end ready for the battery - A sample cable, half done and not yet glued in place - I need to make 9 more cable ends and wire sections, plus add a couple smaller, auxiliary power wire runs. Then CA glue the batteries in the tray, add the cables and glue the tray into the painted battery box. More to follow!
-
Western Star 4900 FA plow truck
BK9300 replied to BK9300's topic in WIP: Model Trucks: Big Rigs and Heavy Equipment
I'm happy with it, too - I'm thinking the only thing better would be photo etch - haven't found any this exact size - and I don't think I'm going to learn how to do that at this late stage! -
An excellent conversion - very realistic looking Sheriff's Tahoe. Another great build, Alberto.
-
Western Star 4900 FA plow truck
BK9300 replied to BK9300's topic in WIP: Model Trucks: Big Rigs and Heavy Equipment
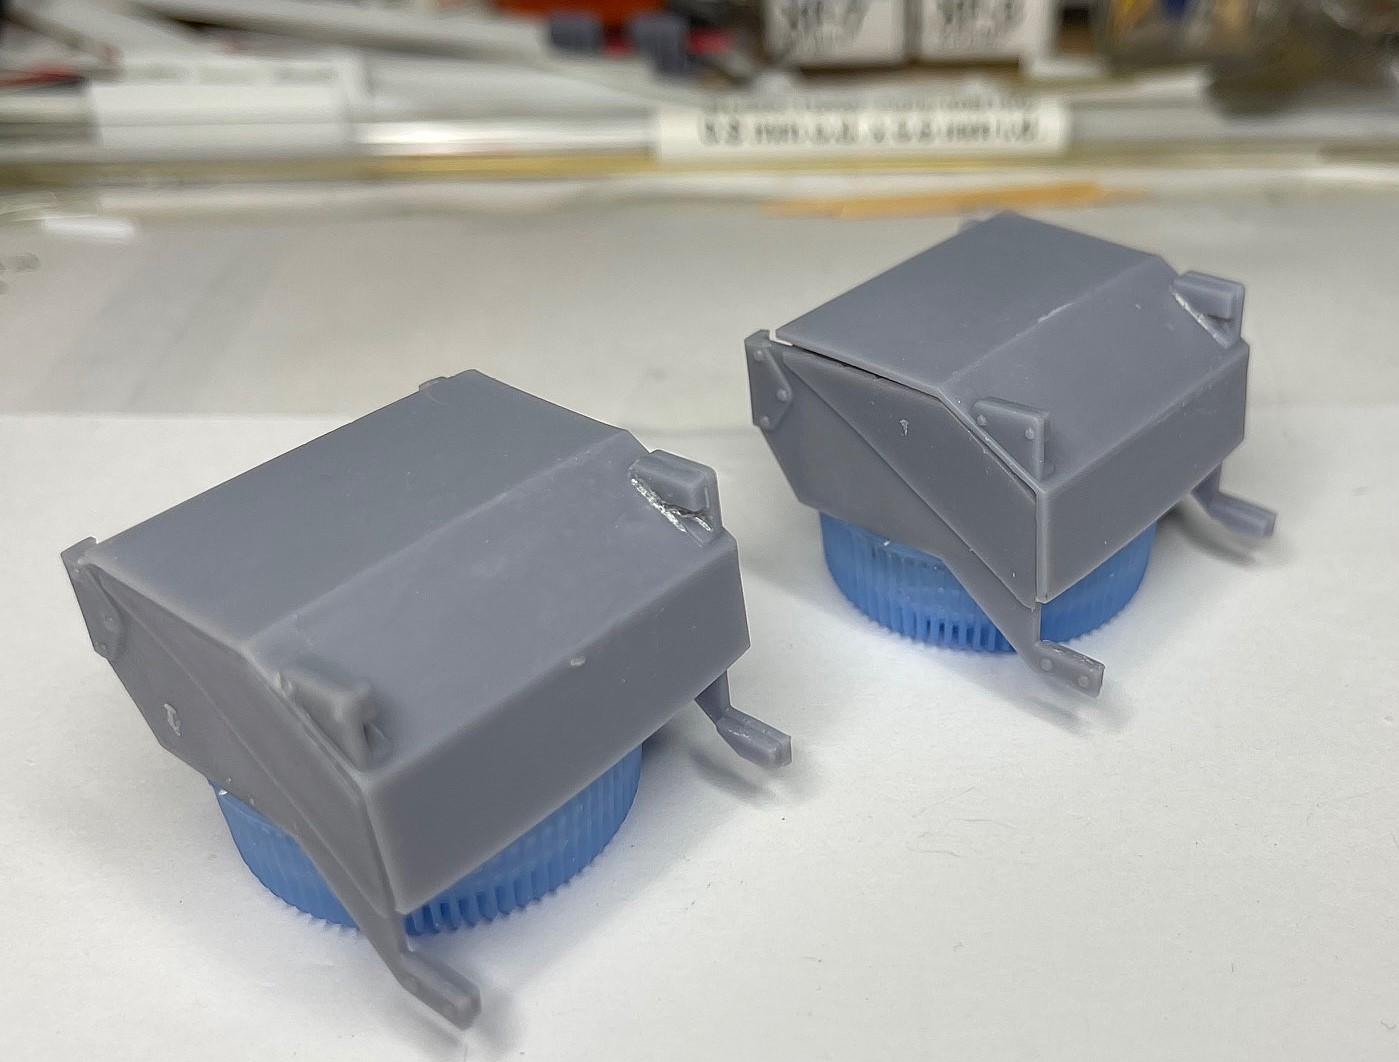
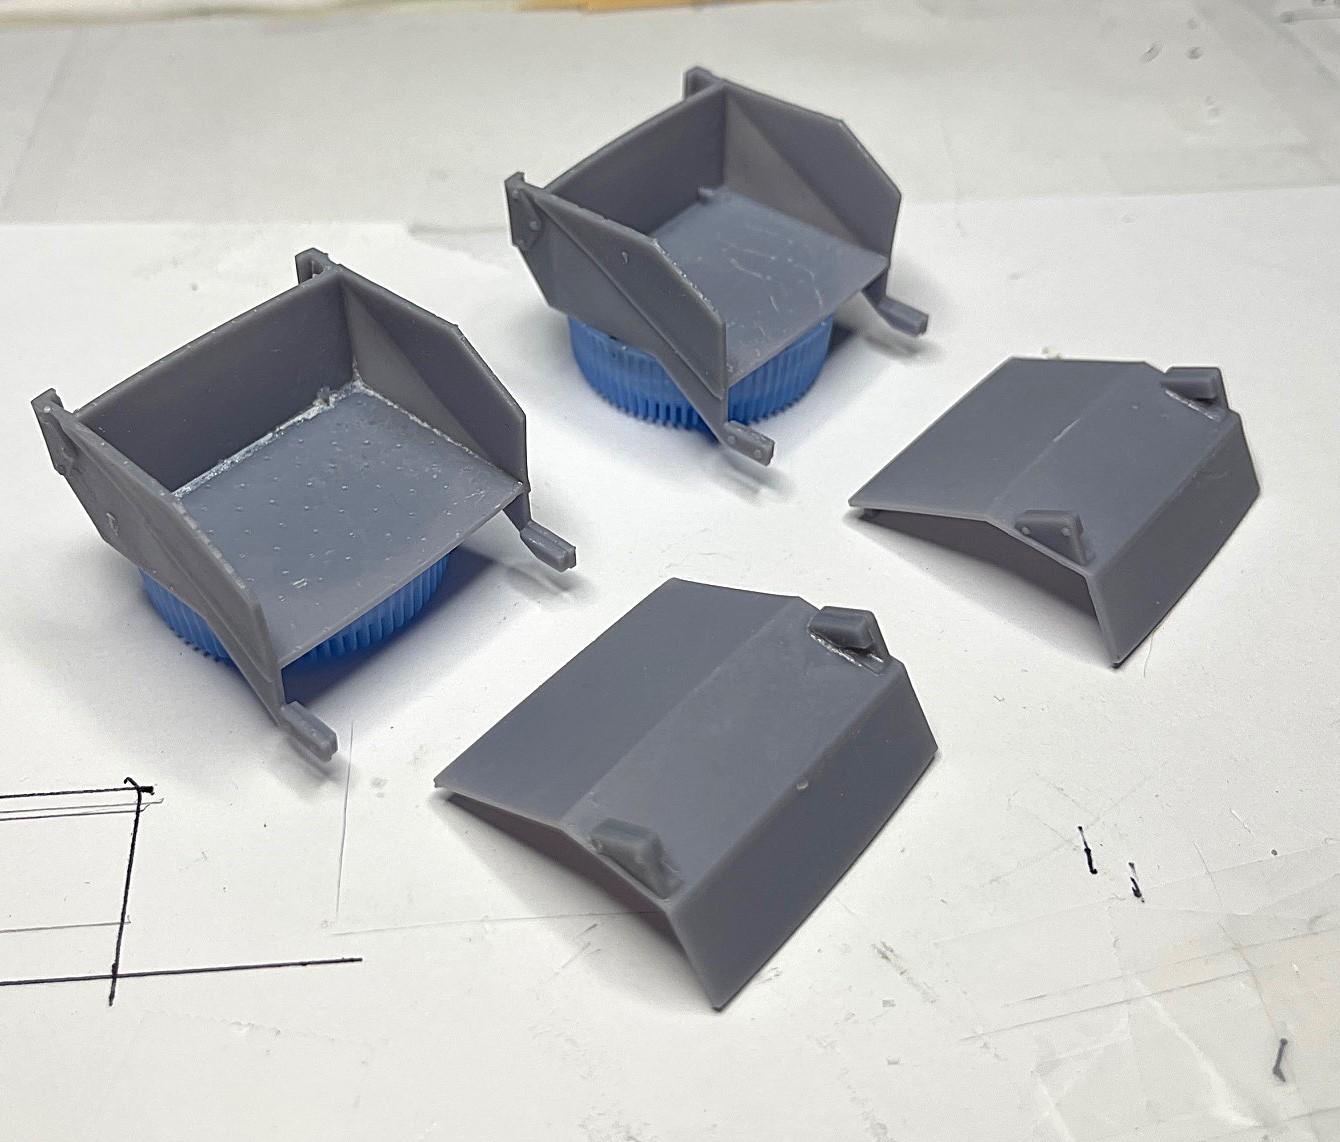
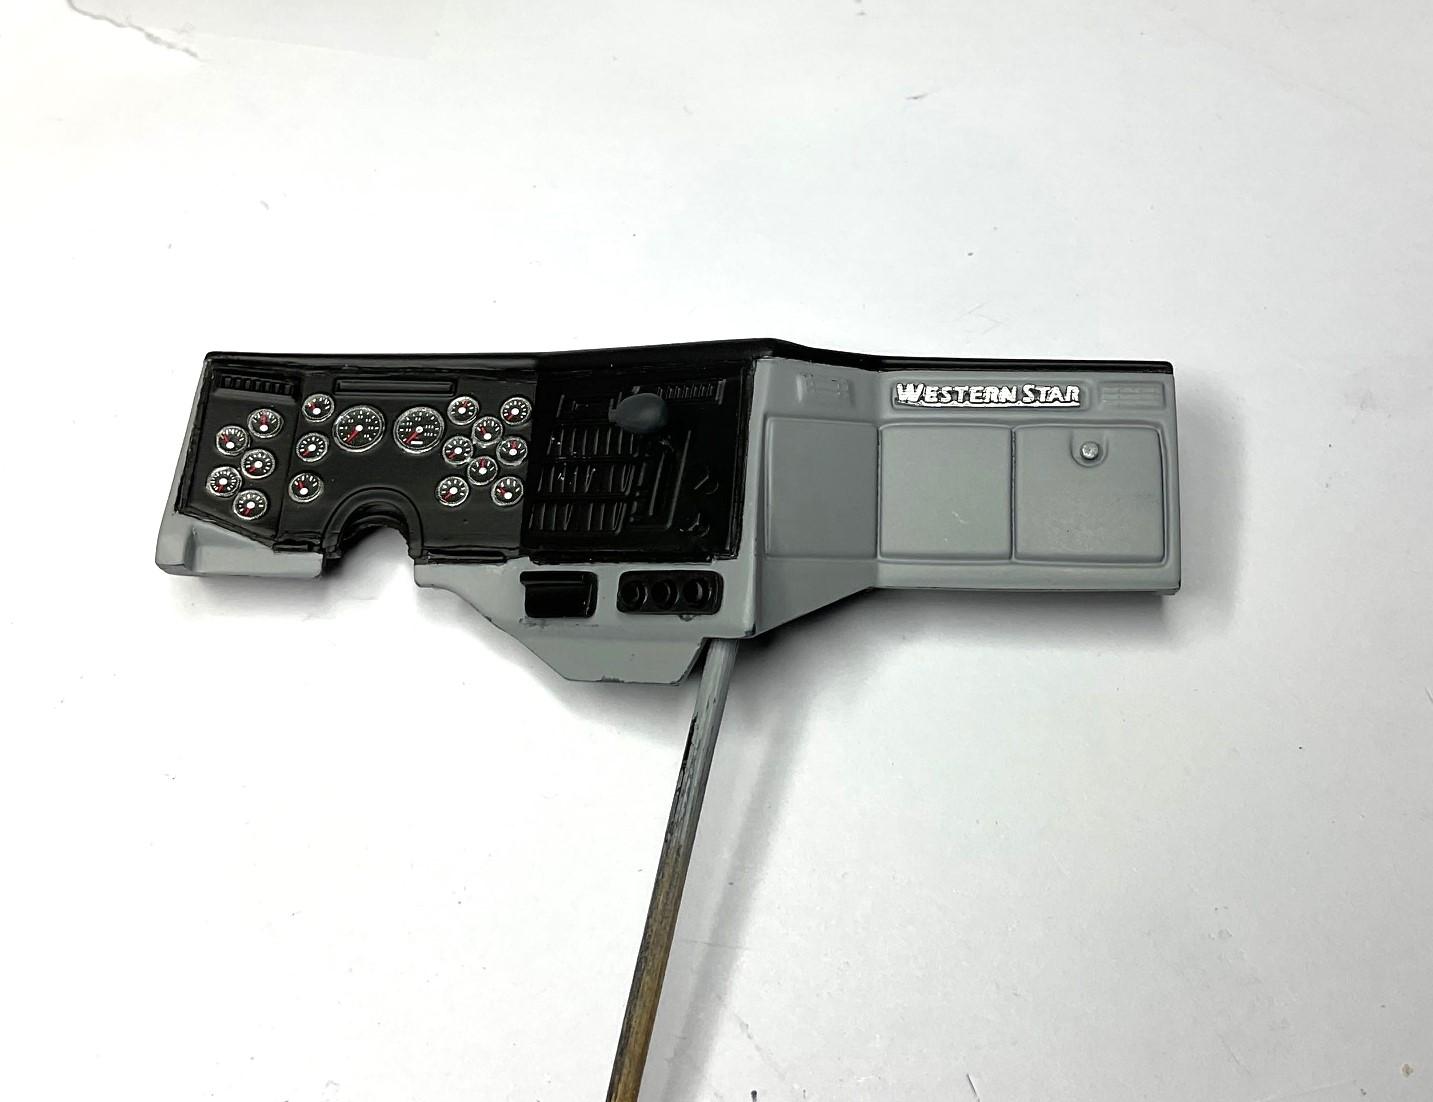
Boxes are out being painted and now waiting till next coat(s) and colour changes. Did receive a small package of printed items from @Bren today - another bonus! I had asked him if he would try and print the battery boxes, even though I had designed them with very thin walls. He certainly gave it a good go and even though he advised me the walls may be too thin, a few turned out with just some slight warping to deal with. He also did another experimental print for me - a Western Star dash logo. I think, with some work and some straightening effort on my part, the boxes could be made very workable - maybe for an older truck that actually did have bungee cords holding the covers in place! The covers are still removable, but are not diamond plated - my software program couldn't specify that for Bren to print. They would still look great with the Auslowe step treads added on - I think the logo will look great when peering in from the passenger window. Bren sent me several prints, so I will try to do some very delicate cleanup on the back, where the print supports attached. More painting to do, so all for now.
-
Western Star 4900 FA plow truck
BK9300 replied to BK9300's topic in WIP: Model Trucks: Big Rigs and Heavy Equipment
I wonder if any of those socket sets are available 'out there' - I'll do some checking and see. I will try the CTM latches, just to see, but always good to have a plan 'B' - I could always make a set of bungee cords to hold the covers down! Thanks, Francis. Thanks for the generous comment, Håkan - I appreciate it! Thanks, Scott - the tanks look perfect on the side of your wrecker, for sure. -
34 ford
BK9300 replied to johnyrotten's topic in WIP: Model Trucks: Pickups, Vans, SUVs, Light Commercial
It’s been fascinating to watch this weathered, die hard, come to life - if this is your first weathering attempt, it sure turned out well. I haven’t found the courage to do that to a model yet. -
T41 Bugatti sport coupe
BK9300 replied to charlie libby's topic in WIP: Other Racing: Road Racing, Land Speed Racers
A lot of elbow grease has been used here - just amazing mirror finish on your paint! Do you ever find paint buildup around your bolt holes to be a problem when you get to re-assembling? Beautiful model. -
Charles Carpenter's '55 Chevy Pro Sportsman
BK9300 replied to Zippi's topic in WIP: Drag Racing Models
White is a very difficult colour to lay down well, but you’ve done a very good job - hope no overspray gets on that shiny red paint job behind you!