BK9300
-
Posts
1,988 -
Joined
-
Last visited
Content Type
Profiles
Forums
Events
Gallery
Everything posted by BK9300
-
 Special build, Steve - really likes the camera! (not sure how I missed it before but like the roof antenna addon)
 -
I'd say so, too. I've got a panel line tool, but not sure I'd get four, new lines in as straight as you have - looking good!
-
Western Star 4900 FA plow truck
BK9300 replied to BK9300's topic in WIP: Model Trucks: Big Rigs and Heavy Equipment
Well Francis, it probably is a bit of madness on my part, to do all this work - I guess I'm still hoping for additional impact when the truck is displayed with the hood open! Thanks very much, Jürgen - looking forward to seeing your new hood in place! Thank you, Håkan - I appreciate that from someone as knowledgeable about trucks as yourself. -
Your interior details really stand out - looking really good!
-
Mack Superliner
BK9300 replied to Jürgen M.'s topic in WIP: Model Trucks: Big Rigs and Heavy Equipment
Jürgen, the hood you designed looks amazing as a resin print. Further evidence of your good designs - very nice! -
Western Star 4900 FA plow truck
BK9300 replied to BK9300's topic in WIP: Model Trucks: Big Rigs and Heavy Equipment
Too funny, Scott - glad you stopped by - that was good for a laugh! -
Terrific build, Steve. Easy to appreciate all the detail you've added along the way. Very clean, fast looking truck!
-
Western Star 4900 FA plow truck
BK9300 replied to BK9300's topic in WIP: Model Trucks: Big Rigs and Heavy Equipment
Thanks kindly, Steve! -
1/25 AMT Peterbilt 359 California Hauler
BK9300 replied to cifenet's topic in WIP: Model Trucks: Big Rigs and Heavy Equipment
Your paint repairs are coming along as expected! Looking at your collection of chrome parts, I'm hoping my mirrors and and other chrome bits I have yet to do, turn out as well as yours. Great work, Steve! -
Kenworth W-925 (mild custom)
BK9300 replied to Gary Chastain's topic in WIP: Model Trucks: Big Rigs and Heavy Equipment
Your mockup looks good, Gary! Could you remind me where you get your front floats? I don’t have any with that tread pattern and need to get some. -
Western Star 4900 FA plow truck
BK9300 replied to BK9300's topic in WIP: Model Trucks: Big Rigs and Heavy Equipment
I appreciate the generous comments, Steve - thanks for stopping by again! -
Western Star 4900 FA plow truck
BK9300 replied to BK9300's topic in WIP: Model Trucks: Big Rigs and Heavy Equipment
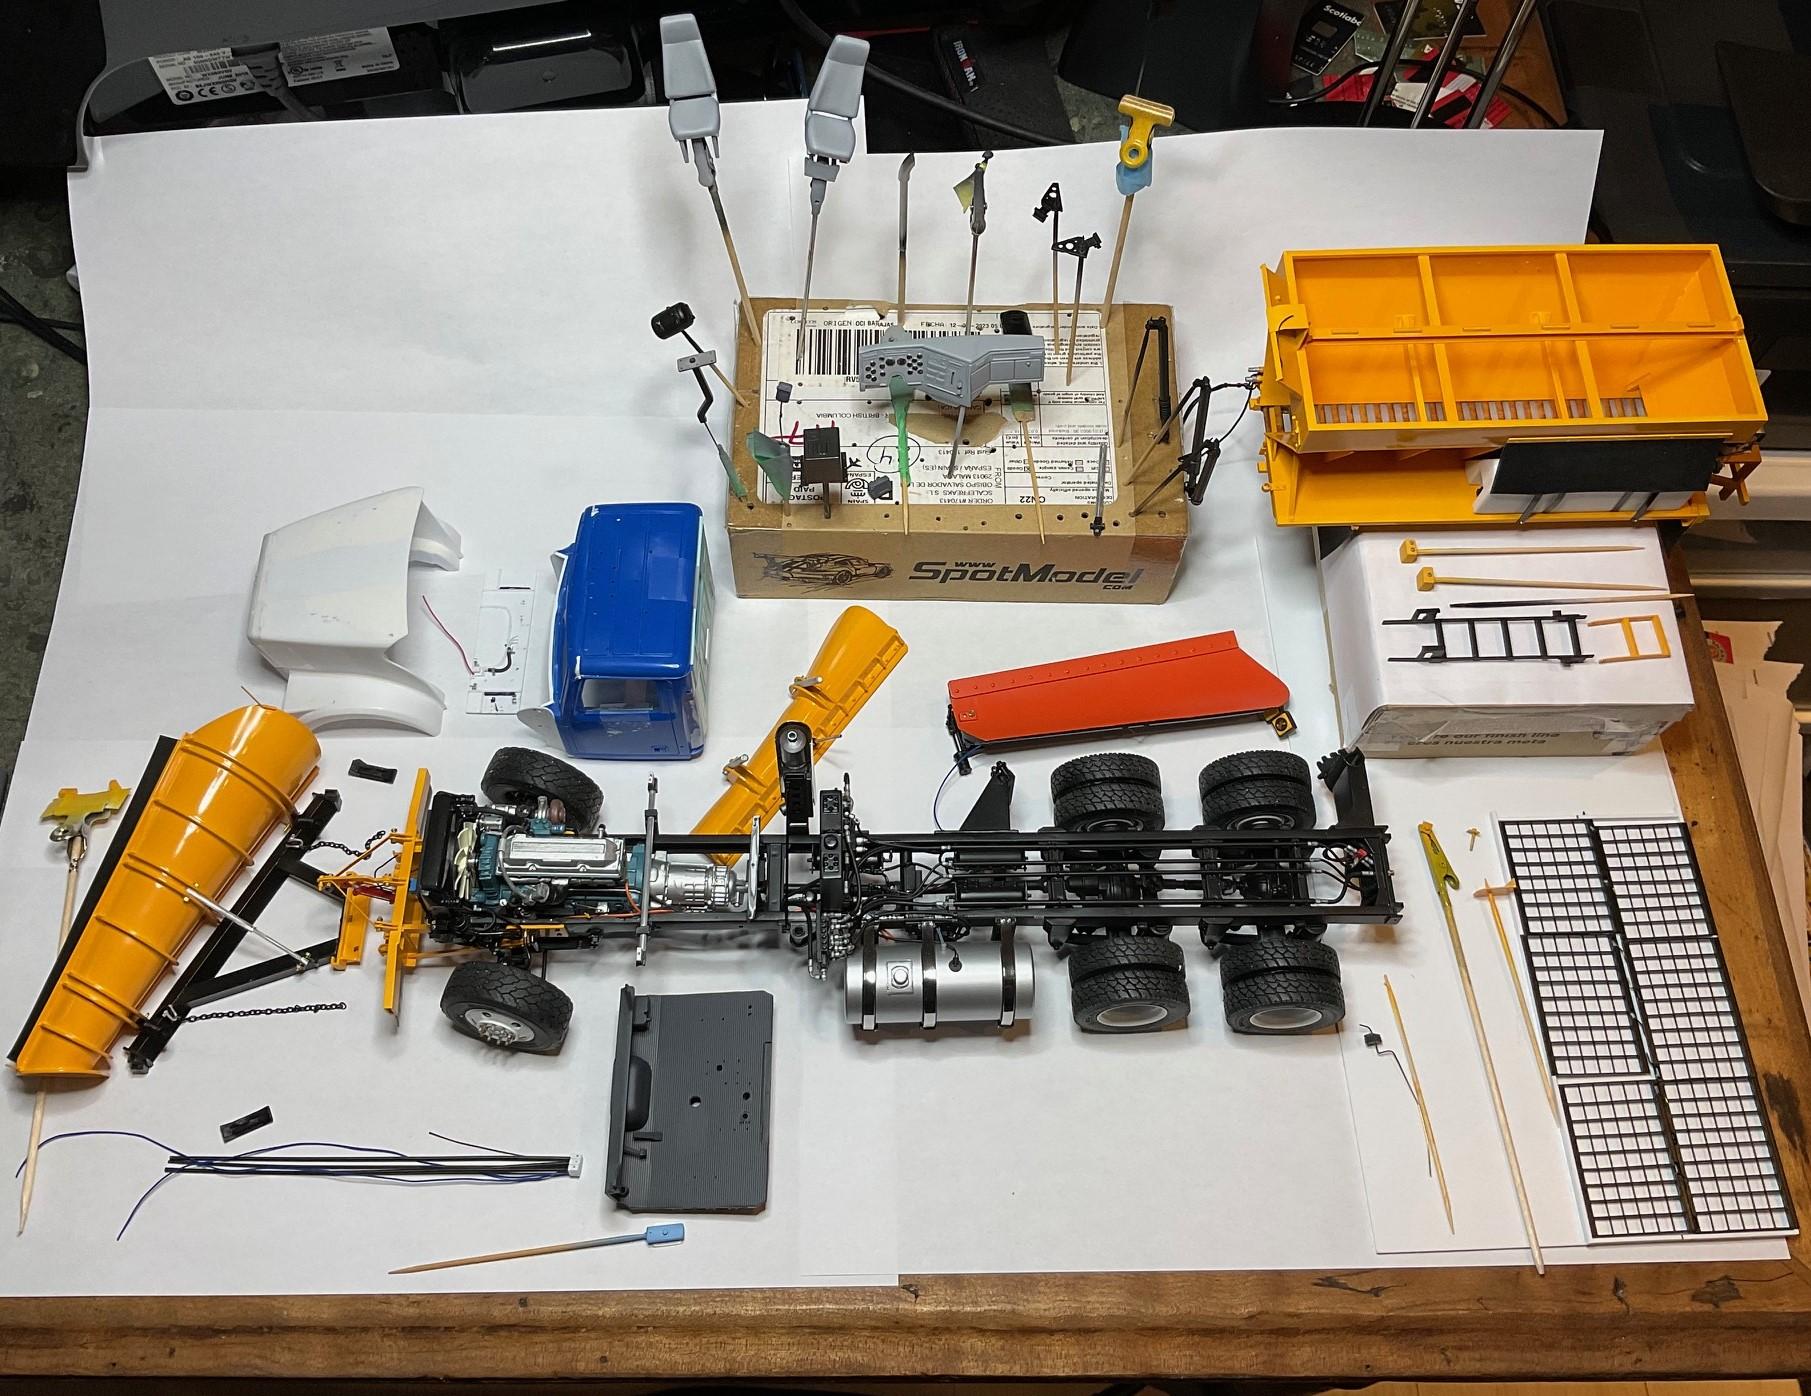
Will be taking a few more days off - some spring (in North Vancouver), yard chores are piling up! Still, gathered all the assemblies that are finished (mostly) plus most of the pieces yet to be added and took a group photo. Like I said last post, I need to lay out an 'order of assembly' to make sure I don't glue something in its final position out of order and can't properly add or finish detail another part further along. The photo is going to help put some written steps in place to help with that. Hopefully won't be off too long - I'm feeling the push to finish! When I'm not working on the parts and pieces, I have them stored in a glass display cabinet - one of our cats has sometimes taken a little bag or two of parts off my bench and chewed on them Looking at all these pieces together should make it easier to write out my 'instructions' for most of the remainder of this build. Much to think about still . . .take care!
-
Welcome, Tim. Frames for cars, pickups or big rigs? Doesn't matter, though - you'll find lots of examples of each in the forum!
-
You are so very talented at weathering and creating realistic dioramas - excellent display!
-
62 International Travelall
BK9300 replied to Scott Eriksen's topic in Model Trucks: Pickups, Vans, SUVs, Light Commercial
Very cool build, Scott - especially like your engine - you always do 'above and beyond' on engines! -
Almost incomprehensible amount of detail, at this scale. Truly a labour of love - very well done!
-
KENWORTH K123 Cabover
BK9300 replied to Brutalform's topic in WIP: Model Trucks: Big Rigs and Heavy Equipment
Great shade of orange, Tom - should be a nice contrast to all the mirrors and other chrome parts. -
Western Star 4900 FA plow truck
BK9300 replied to BK9300's topic in WIP: Model Trucks: Big Rigs and Heavy Equipment
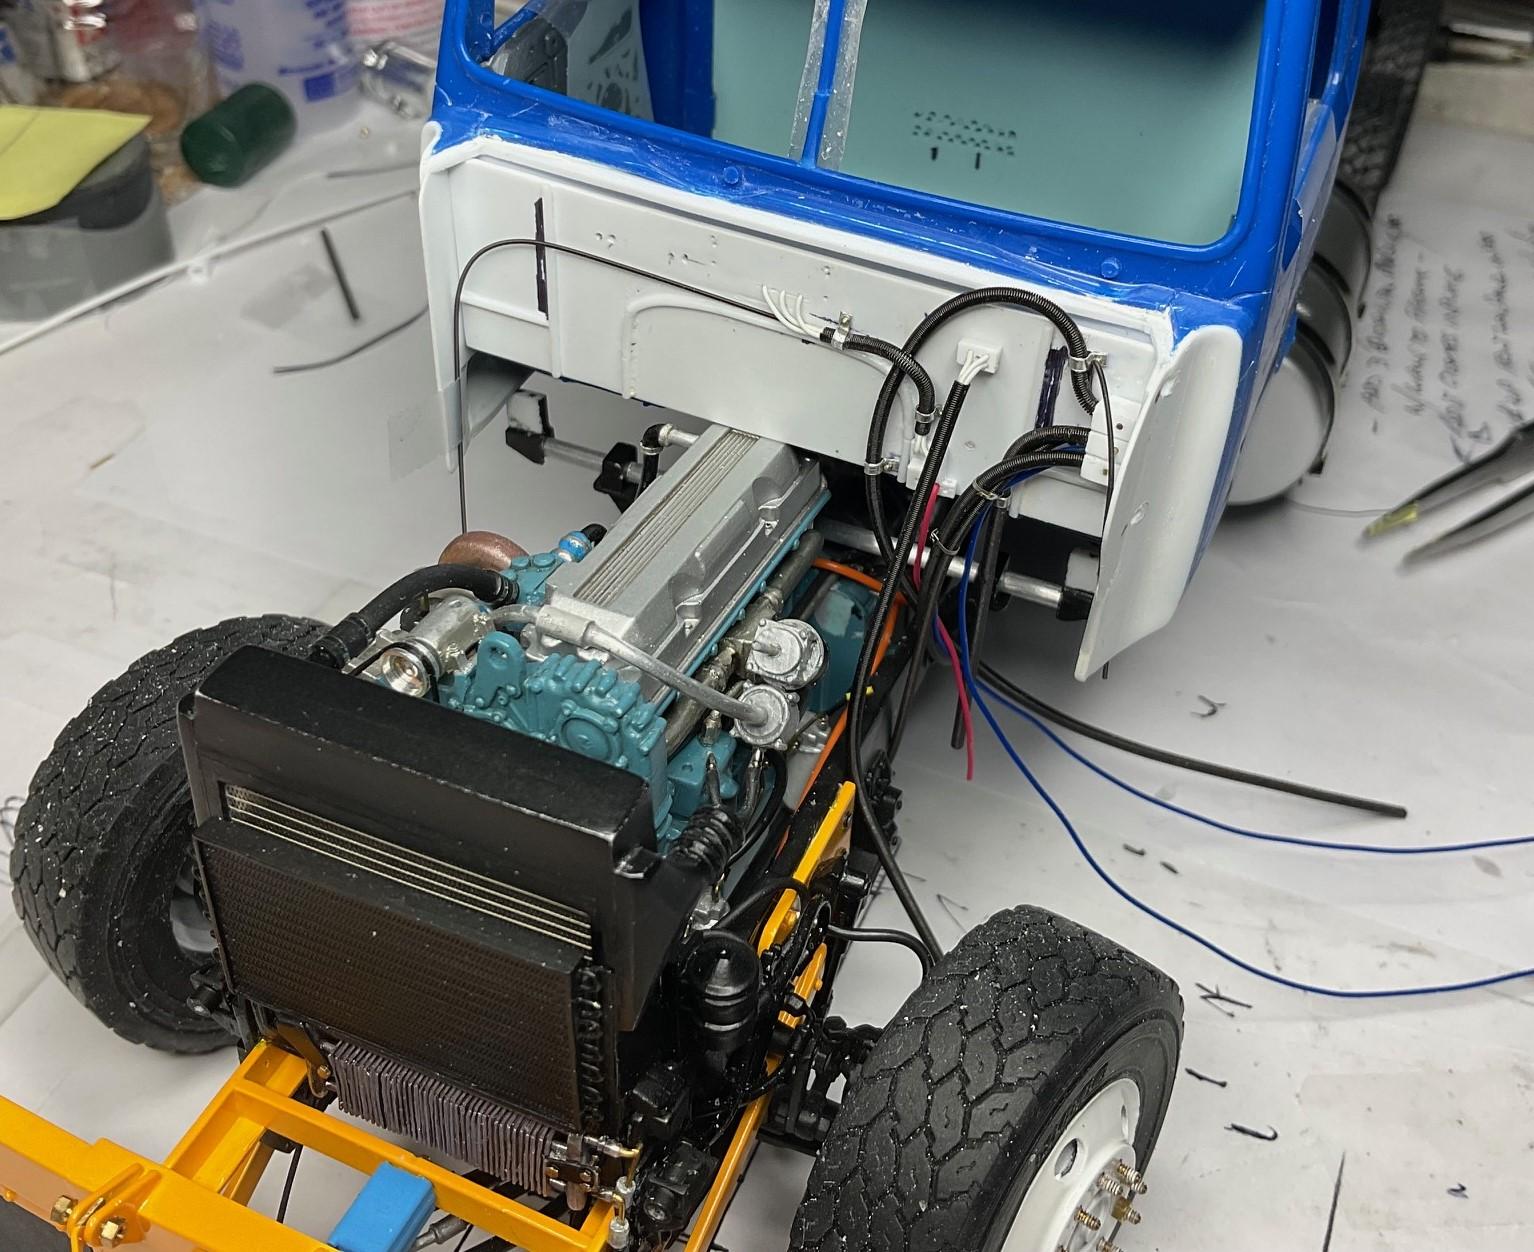
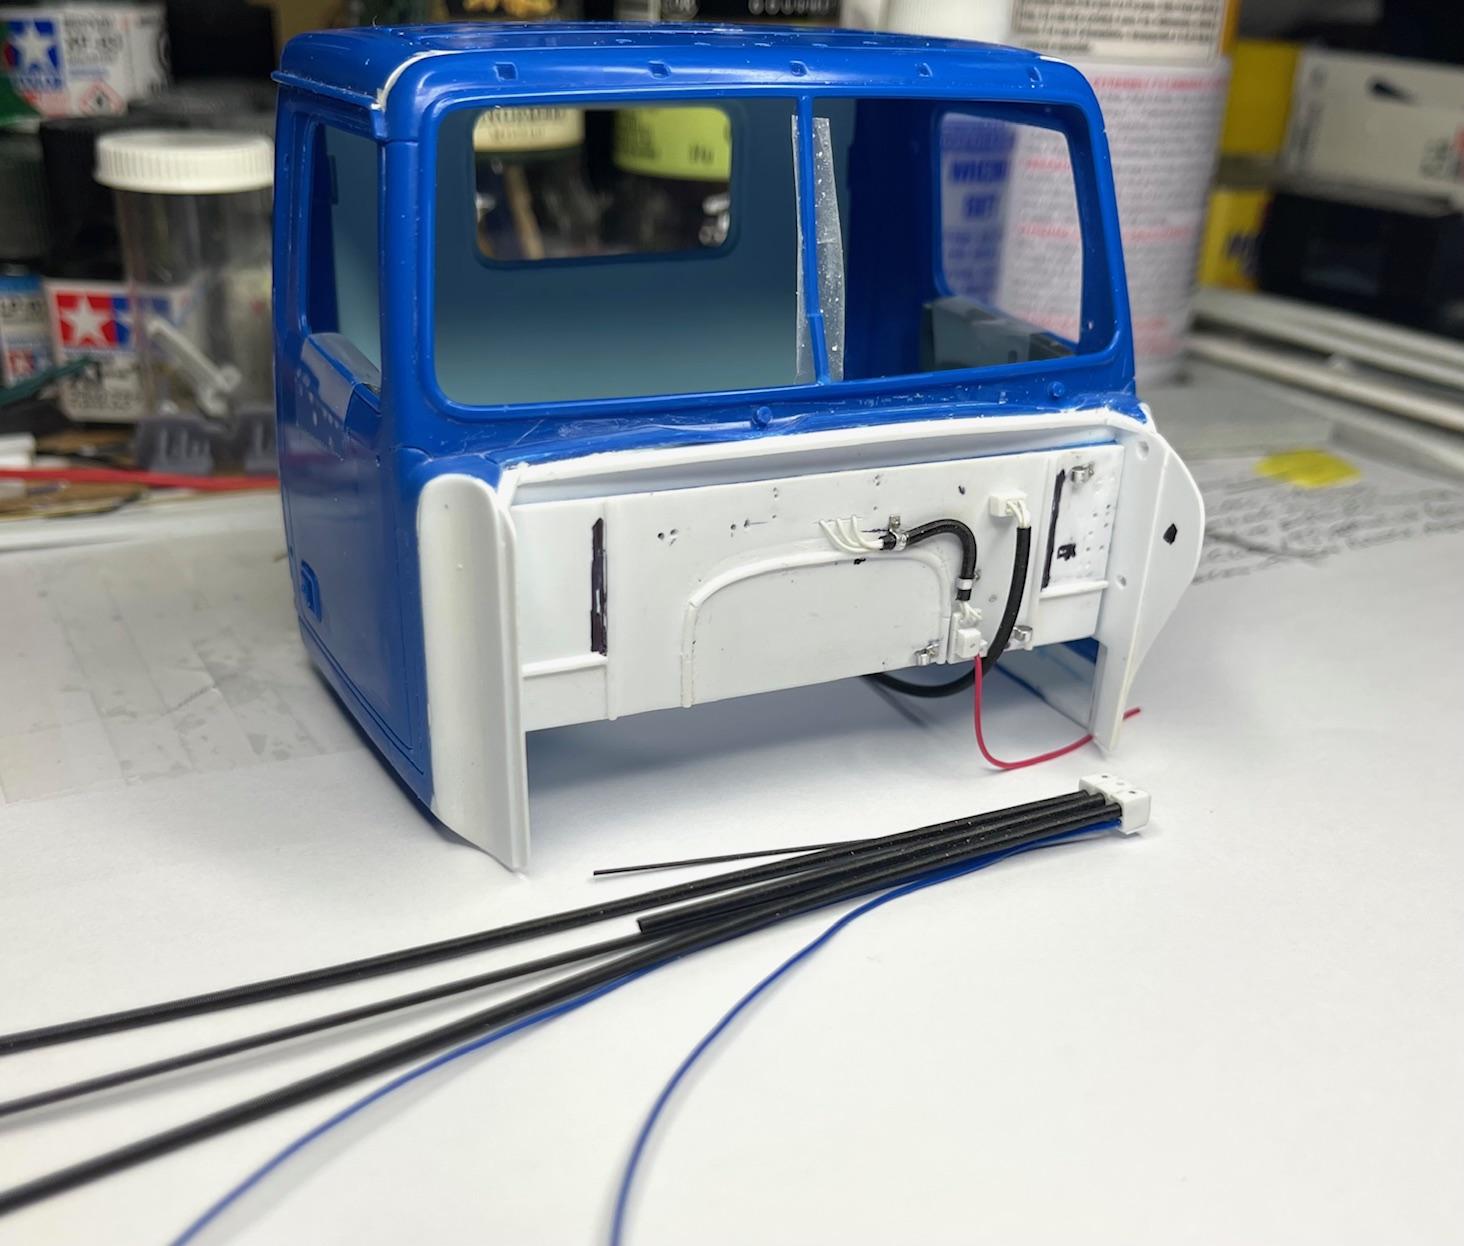
Moved on with a couple of those 'next steps' I was thinking about yesterday. It is becoming clear that it will not be as simple as 'unplugging' pieces from the temporary firewall and 'plugging' them into the model's firewall. Too many parts need to be handled separately, so, even though the temp firewall has been very helpful, I think I will need to re-install the parts on the actual firewall, following all the steps I used on the temp one. All that, of course, after the cab has been painted. In the meantime, some nerve wracking progress achieved today! With the epoxied looms and wiring well set in place, and the three connectors all one piece now, I started weaving the looms into place Most of the bits are in temporarily in place now. Just below the Engine connector, I still want to add the five, pass through air lines that come through the firewall just above the steering rod. They will be made from the thin, flexible rubber hose I got from Ted's Modeling. I also hope to use an 1.5mm Albion rod for the steering rod - likely one of the last things to be installed after all the wiring runs are in place. I labeled this pic, as much for my future use as anything, because I need to run the ABS and Main chassis connector runs under the cab, terminate them at some reasonable point along the frame rails behind the cab, and I wanted to be sure which run is which. The hood supports are just sitting in place for now and will be more aligned once I finally glue them in place on the firewall - they are just in place at the moment, to make sure everything will fit together. This mock up gives an idea of what all will look like (can't set cab all the way down because of temp firewall) - will still need to adjust final position of some of the looms, like the ABS run which is looping too high at the moment. The black Sharpie lines are where the hood supports would be attached. As an example of needing to set out the order of assembly, I will need to first attach the distant end of the Engine connector loom along side the engine, up against the ECM, then loop the loom underneath the cab and back up into the position it's in now - wouldn't be able to do it in the reverse order without a big mess. From the looks of it, I'll have just enough room to run the wiring to the passenger side plow light, by routing it between the rad and the trans cooler, along with the loom for the front lights. Still lots of unanswered process questions at this point, but the questions are getting fewer and the 'to-do' list is getting a bit shorter! Take care.
-
Looking really good, Ron - don't know if you said elsewhere, but where did you get your universal joints from?
-
Western Star 4900 FA plow truck
BK9300 replied to BK9300's topic in WIP: Model Trucks: Big Rigs and Heavy Equipment
Thanks for the kind words, Gary. Sensory overload is a good description for me, too! At the end of yesterday, I had no clear idea how to tie it all together - just lots of ‘next steps’ that all seemed to conflict with each other! -
Kenworth W-925 (mild custom)
BK9300 replied to Gary Chastain's topic in WIP: Model Trucks: Big Rigs and Heavy Equipment
Quite the finish on that custom rig in the video - every square inch of the paint looks to have been polished. Wouldn’t want to face that project’s final cost! Lots of good ideas for your build. -
Western Star 4900 FA plow truck
BK9300 replied to BK9300's topic in WIP: Model Trucks: Big Rigs and Heavy Equipment
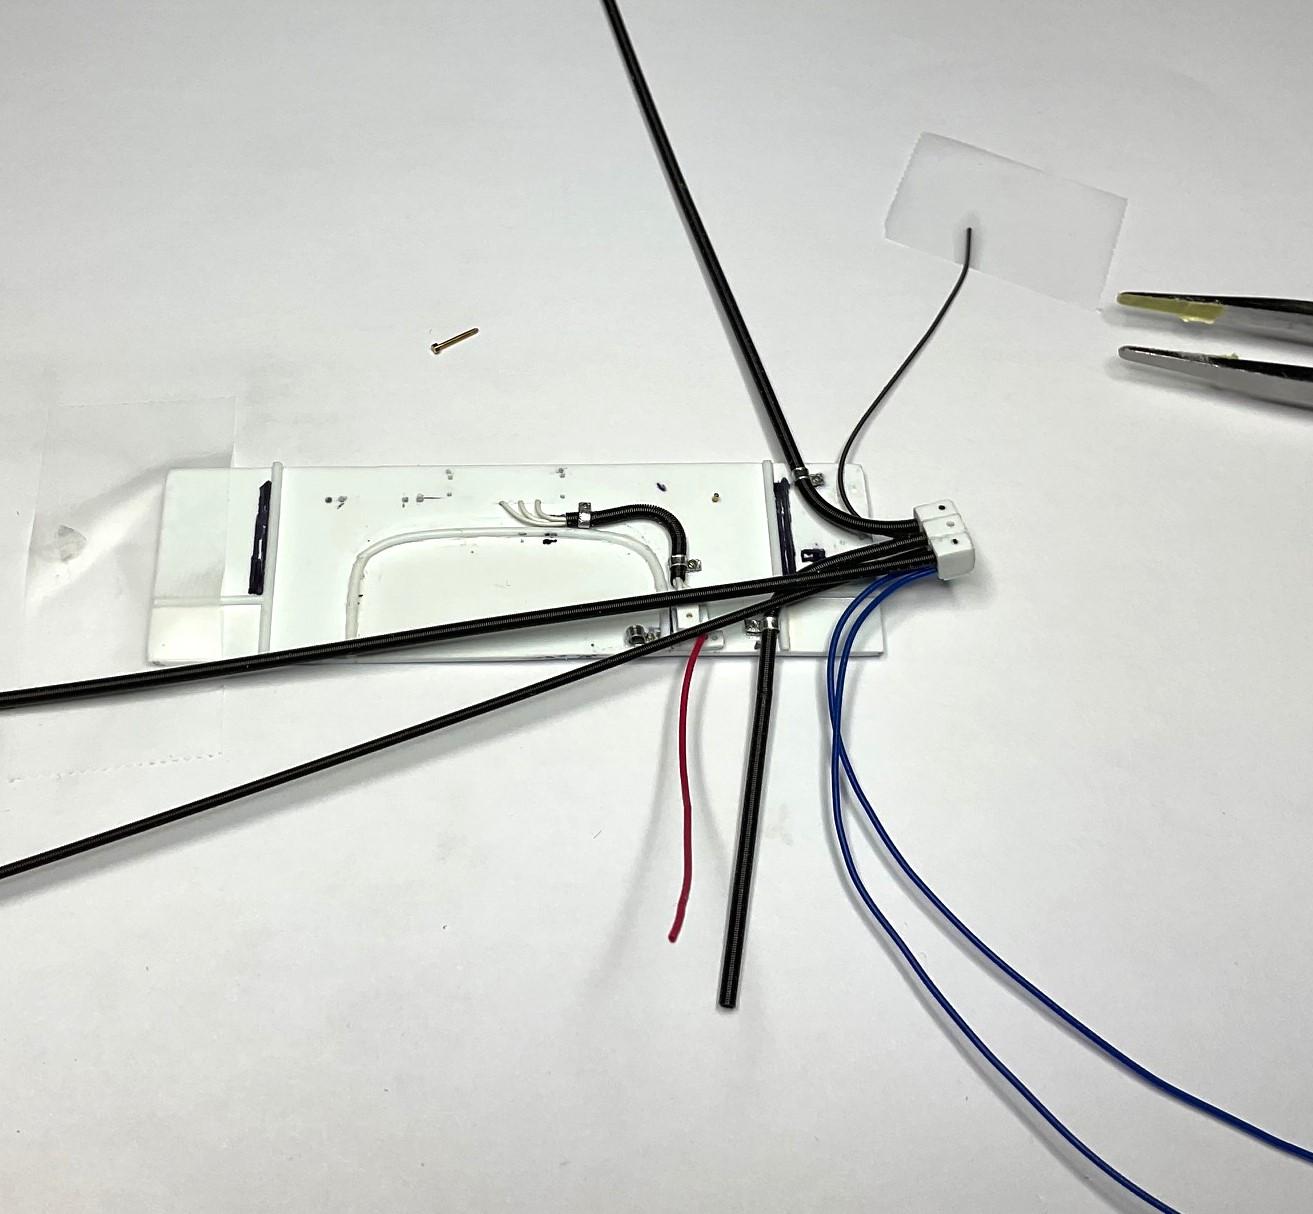
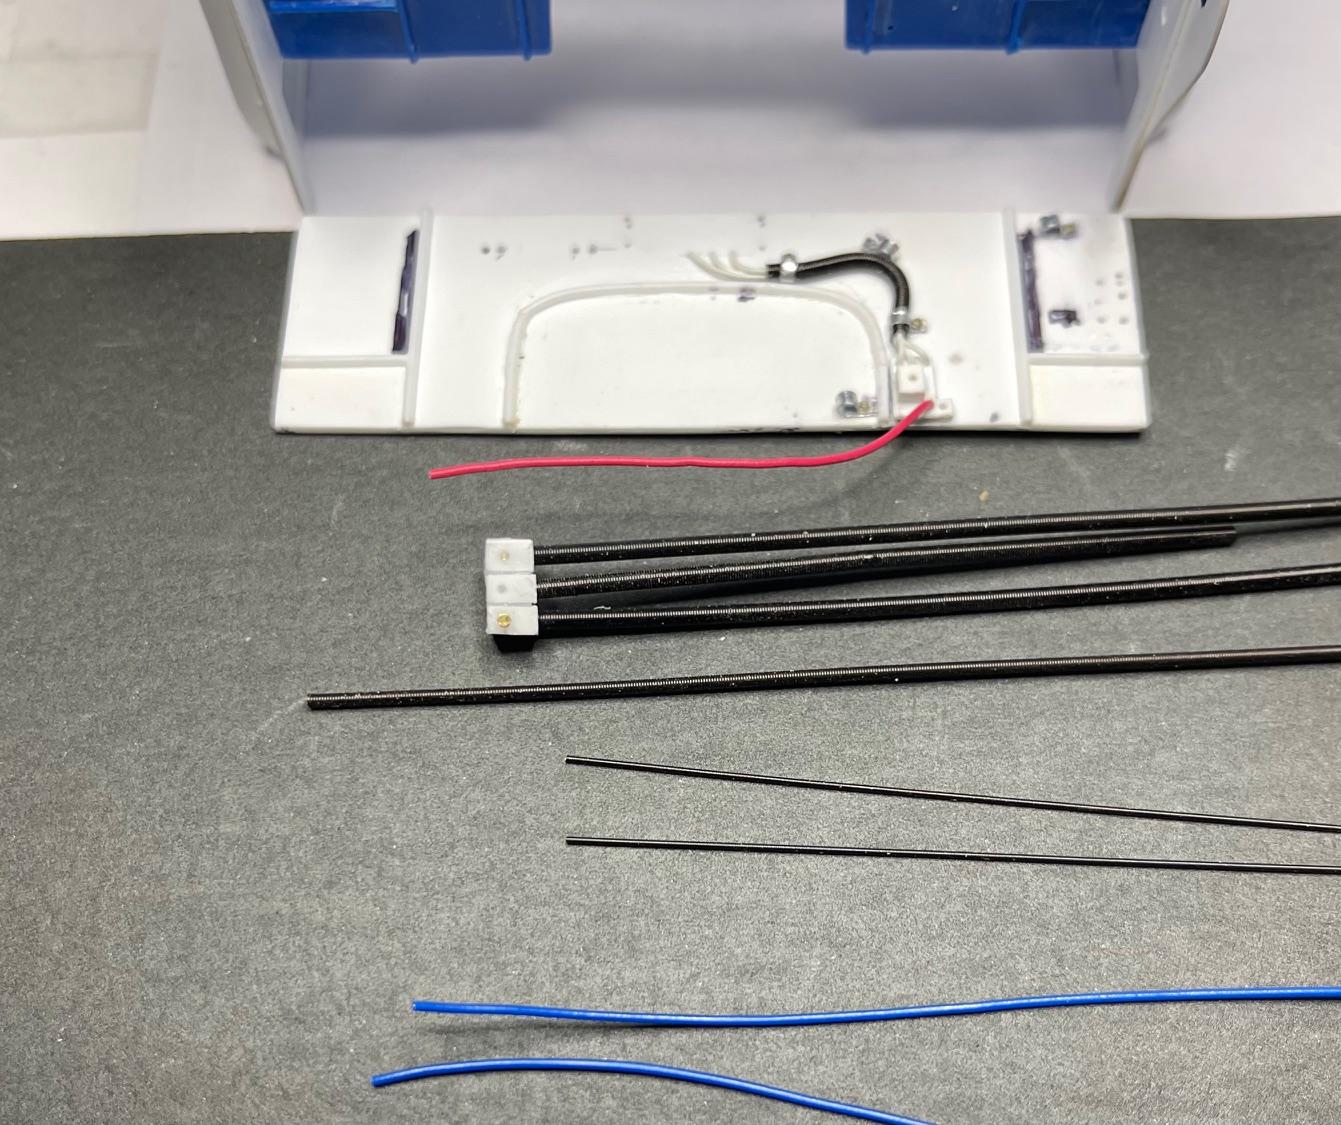
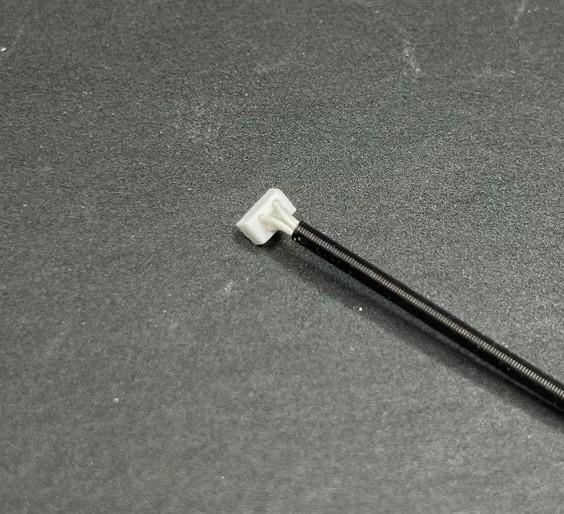
A few more tiny bits made up for the firewall assembly I've been working on. Still one more item to fabricate, paint and plumb - the heater/AC plumbing manifold on the passenger side of firewall. But, fairly soon now, I'm going to have to get the cab prepped, primed, repaired if needed and painted, so I can get the work I've been doing on the temporary firewall transferred to the model's firewall. I do see light at the end of the tunnel! A bit out of focus on the firewall, but got three more clamps made and set in position to test fit looms through. The three firewall connectors are made and three 1.5mm looms have been epoxied in place. A 1.0 mm and a 0.5mm loom still need to be added to the connectors, along with the two, blue wires for the front plow light runs This is my representation of the Electronic Control connector that mounts on the firewall, above the pass-through air lines outlet. It's a 40 pin connector, but 4 wires will have to do! I'm using the smallest wire I can find - 0.0125 from Detail Master The EC connector is pinned temporarily to the firewall and the remainder of the looms and wire runs have been added to the three connectors. I had to modify the three connectors and make them one piece, while still looking like three parts, because the individual connectors weren't going to take the stress of shaping the looms along the firewall. After the epoxy I used on the connectors is well set, I hope to be able to weave the appropriate looms through the clamps. If this all works out, I will need to make replacement clamps to attach to the model's firewall, and re-weave the looms through to their final positions. Still lots of fiddly things to do, and a few weeks work left overall, but the build is much closer to being done than I thought. Apart from decals, cab and hood exterior details like mirrors, lights, etc., it will soon all come together in small space between the firewall and the rad! Long day at the bench for a little bit to show, but that's all I managed for today - take care!
-
Kenworth W-925 (mild custom)
BK9300 replied to Gary Chastain's topic in WIP: Model Trucks: Big Rigs and Heavy Equipment
Yes, I can! I think it will all come together sooner than I think. -
Kenworth W-925 (mild custom)
BK9300 replied to Gary Chastain's topic in WIP: Model Trucks: Big Rigs and Heavy Equipment
Must feel good to be on to a new project - you're off to a good start! Hoping to have that feeling myself, soon! -
KENWORTH K123 Cabover
BK9300 replied to Brutalform's topic in WIP: Model Trucks: Big Rigs and Heavy Equipment
Nice progress Tom - really like the rust treatment on your exhaust system