BK9300
-
Posts
1,991 -
Joined
-
Last visited
Content Type
Profiles
Forums
Events
Gallery
Everything posted by BK9300
-

Western Star 4900 FA plow truck
BK9300 replied to BK9300's topic in WIP: Model Trucks: Big Rigs and Heavy Equipment
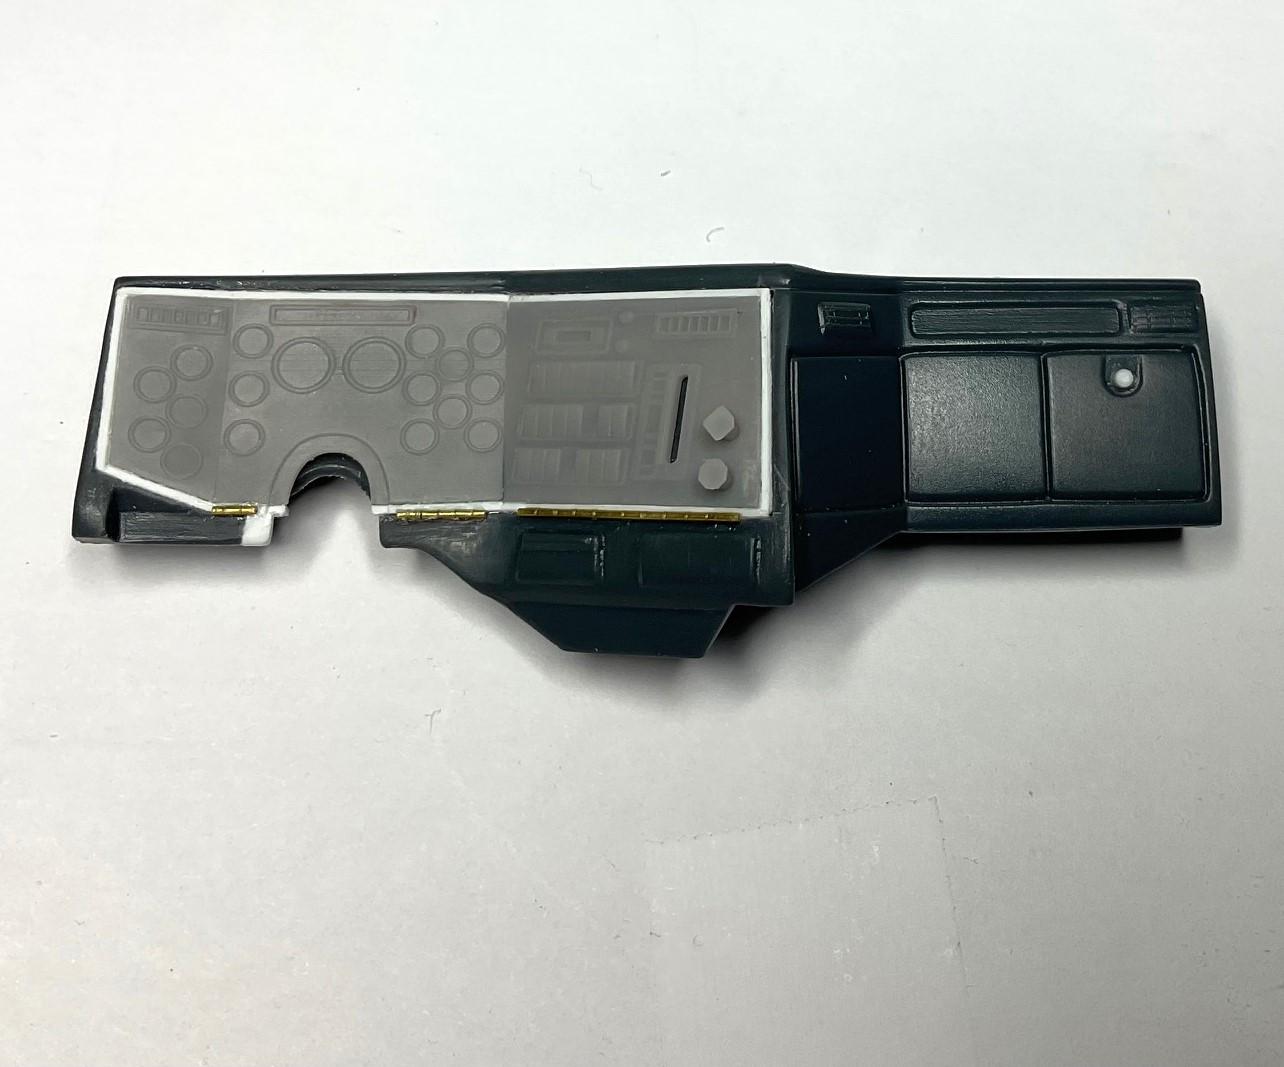
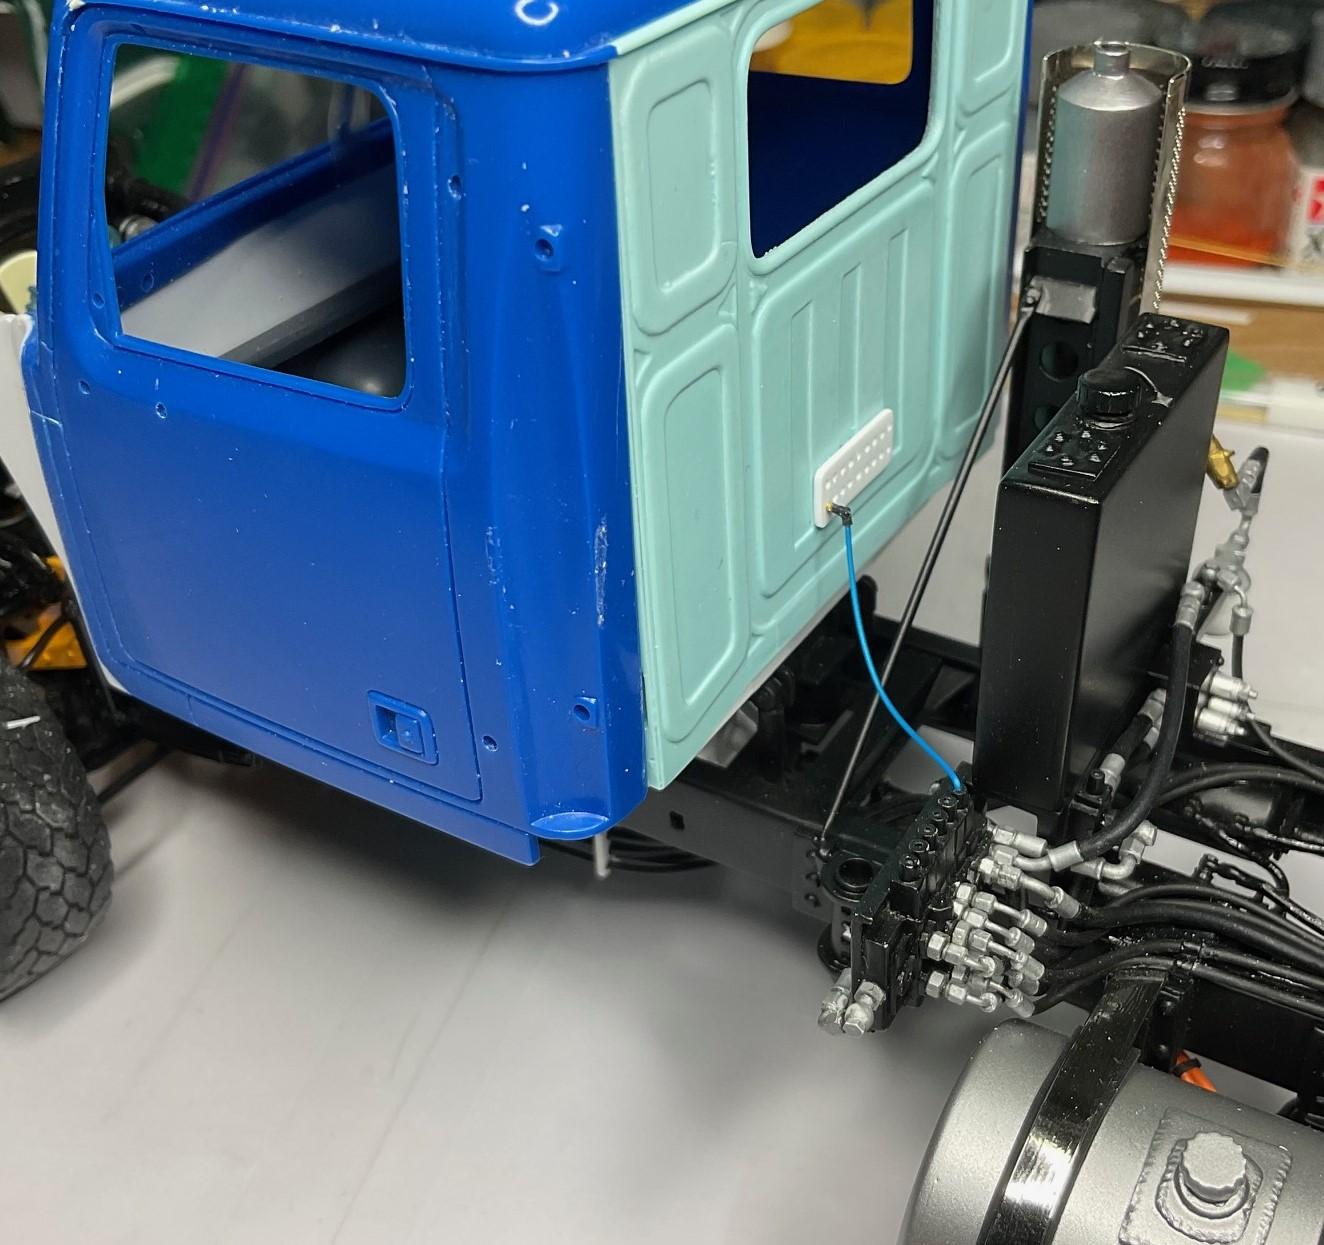
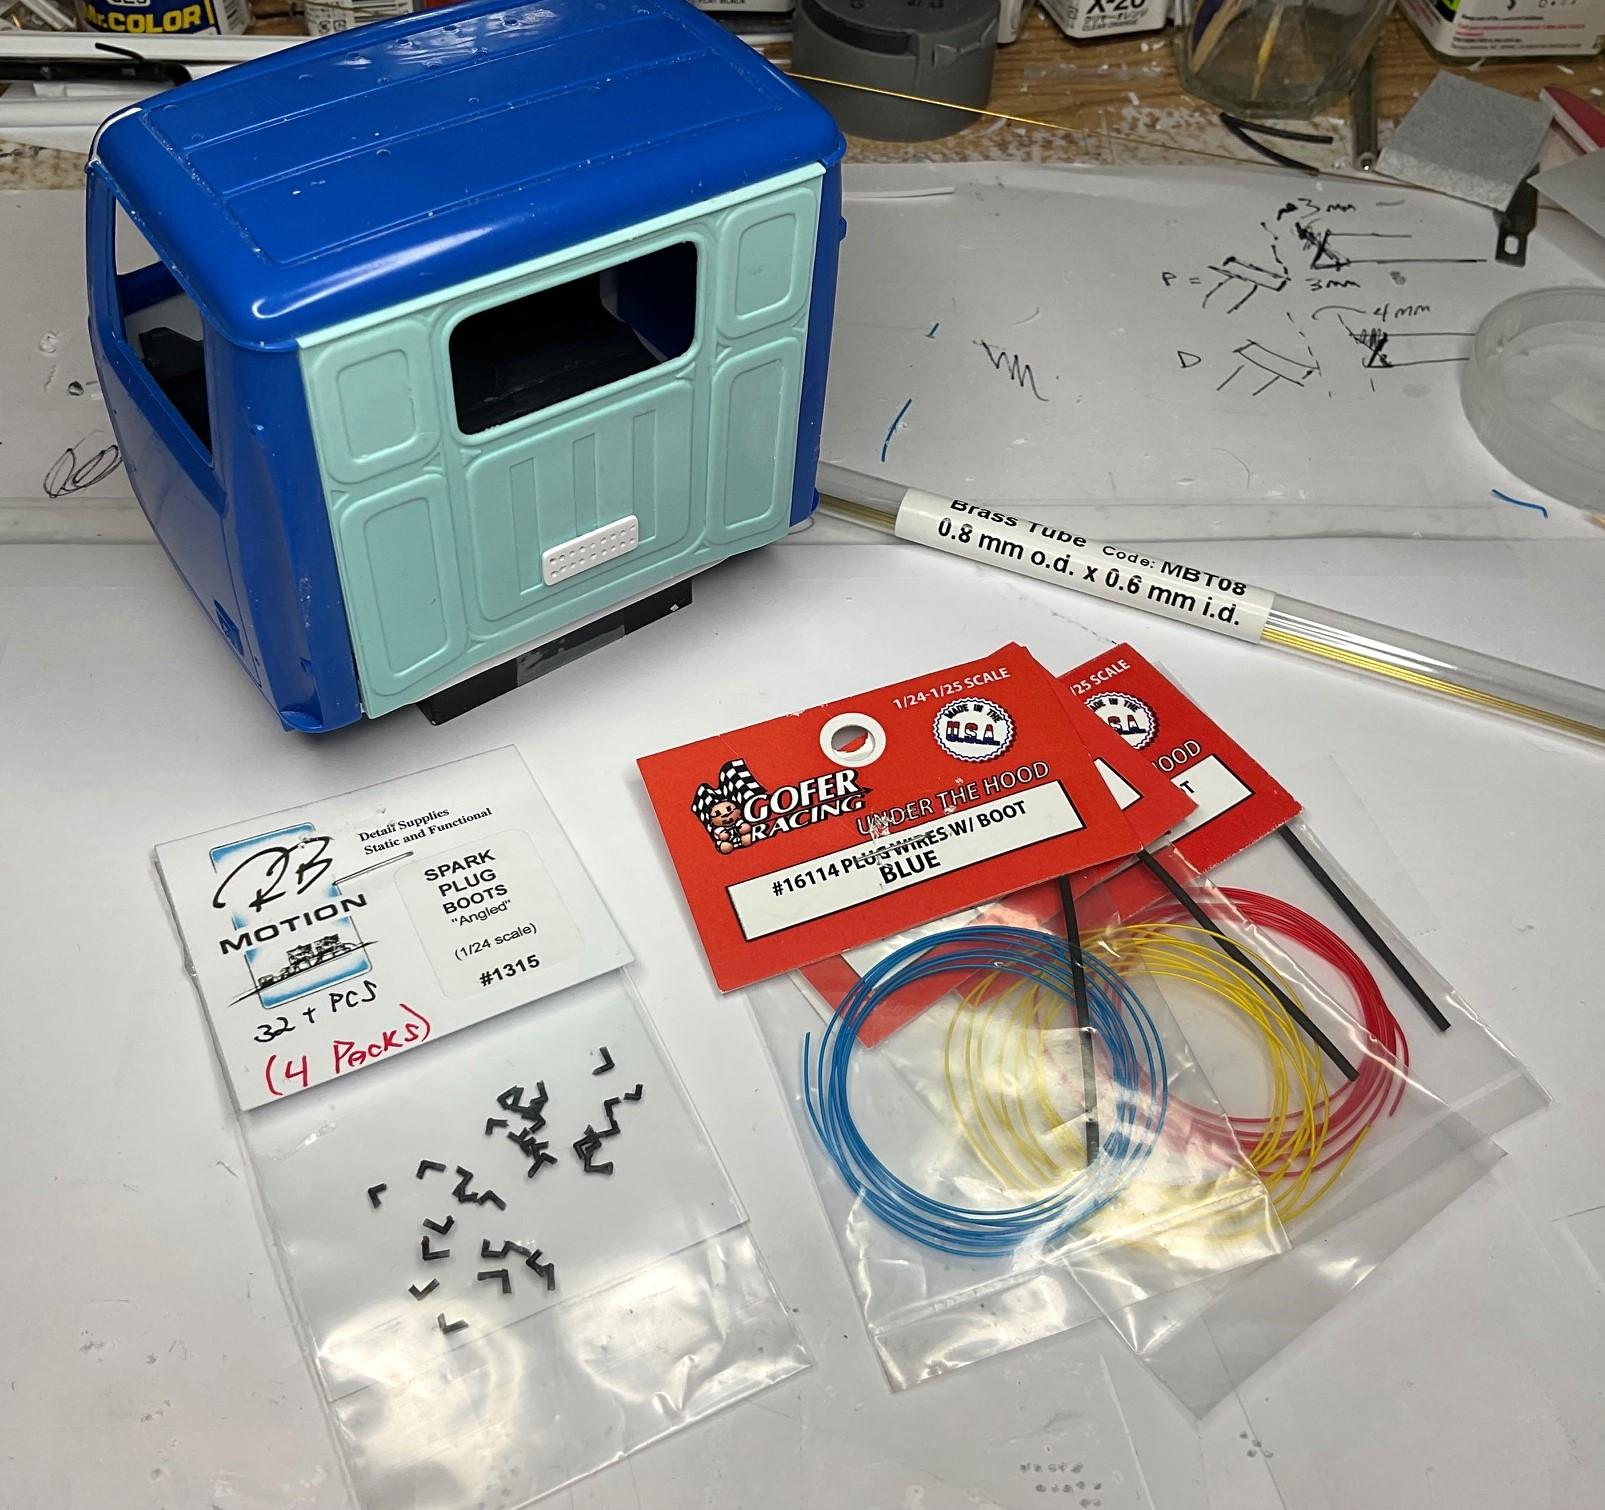
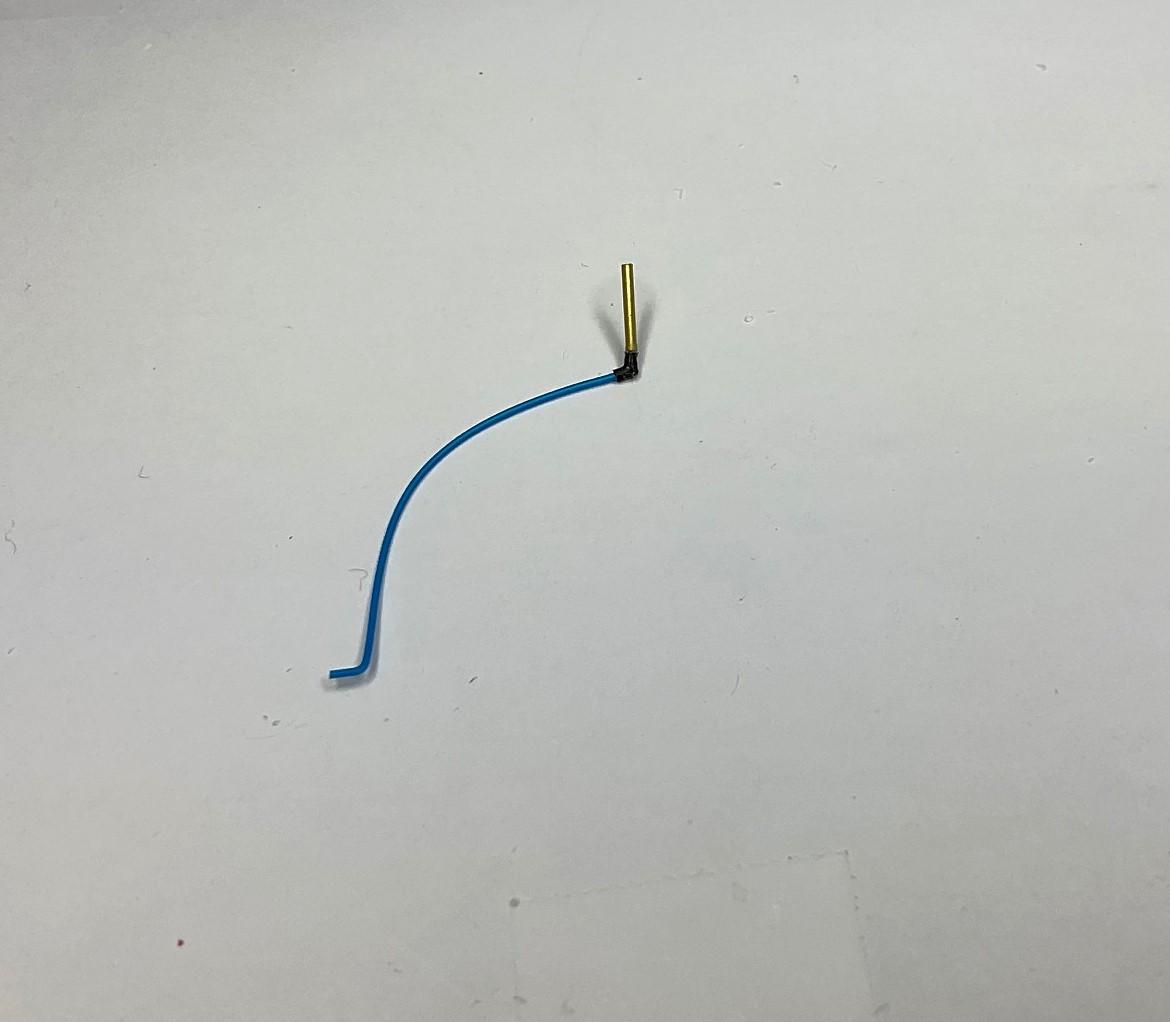
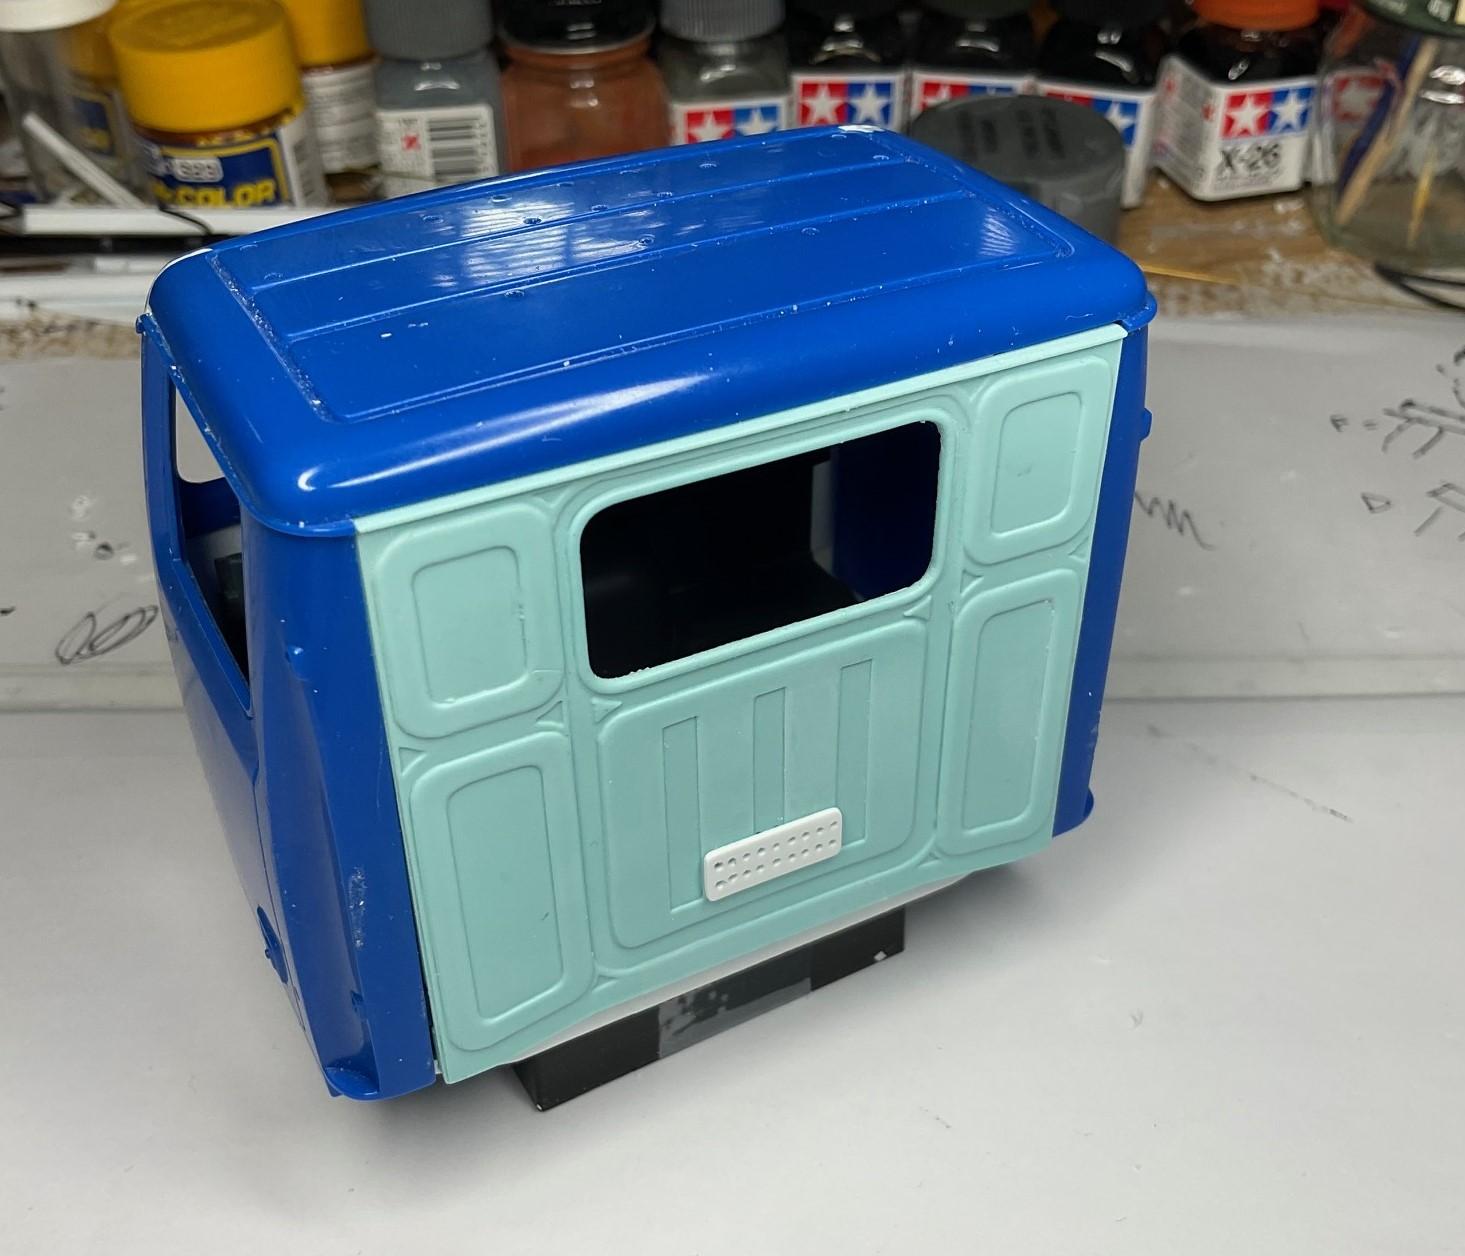
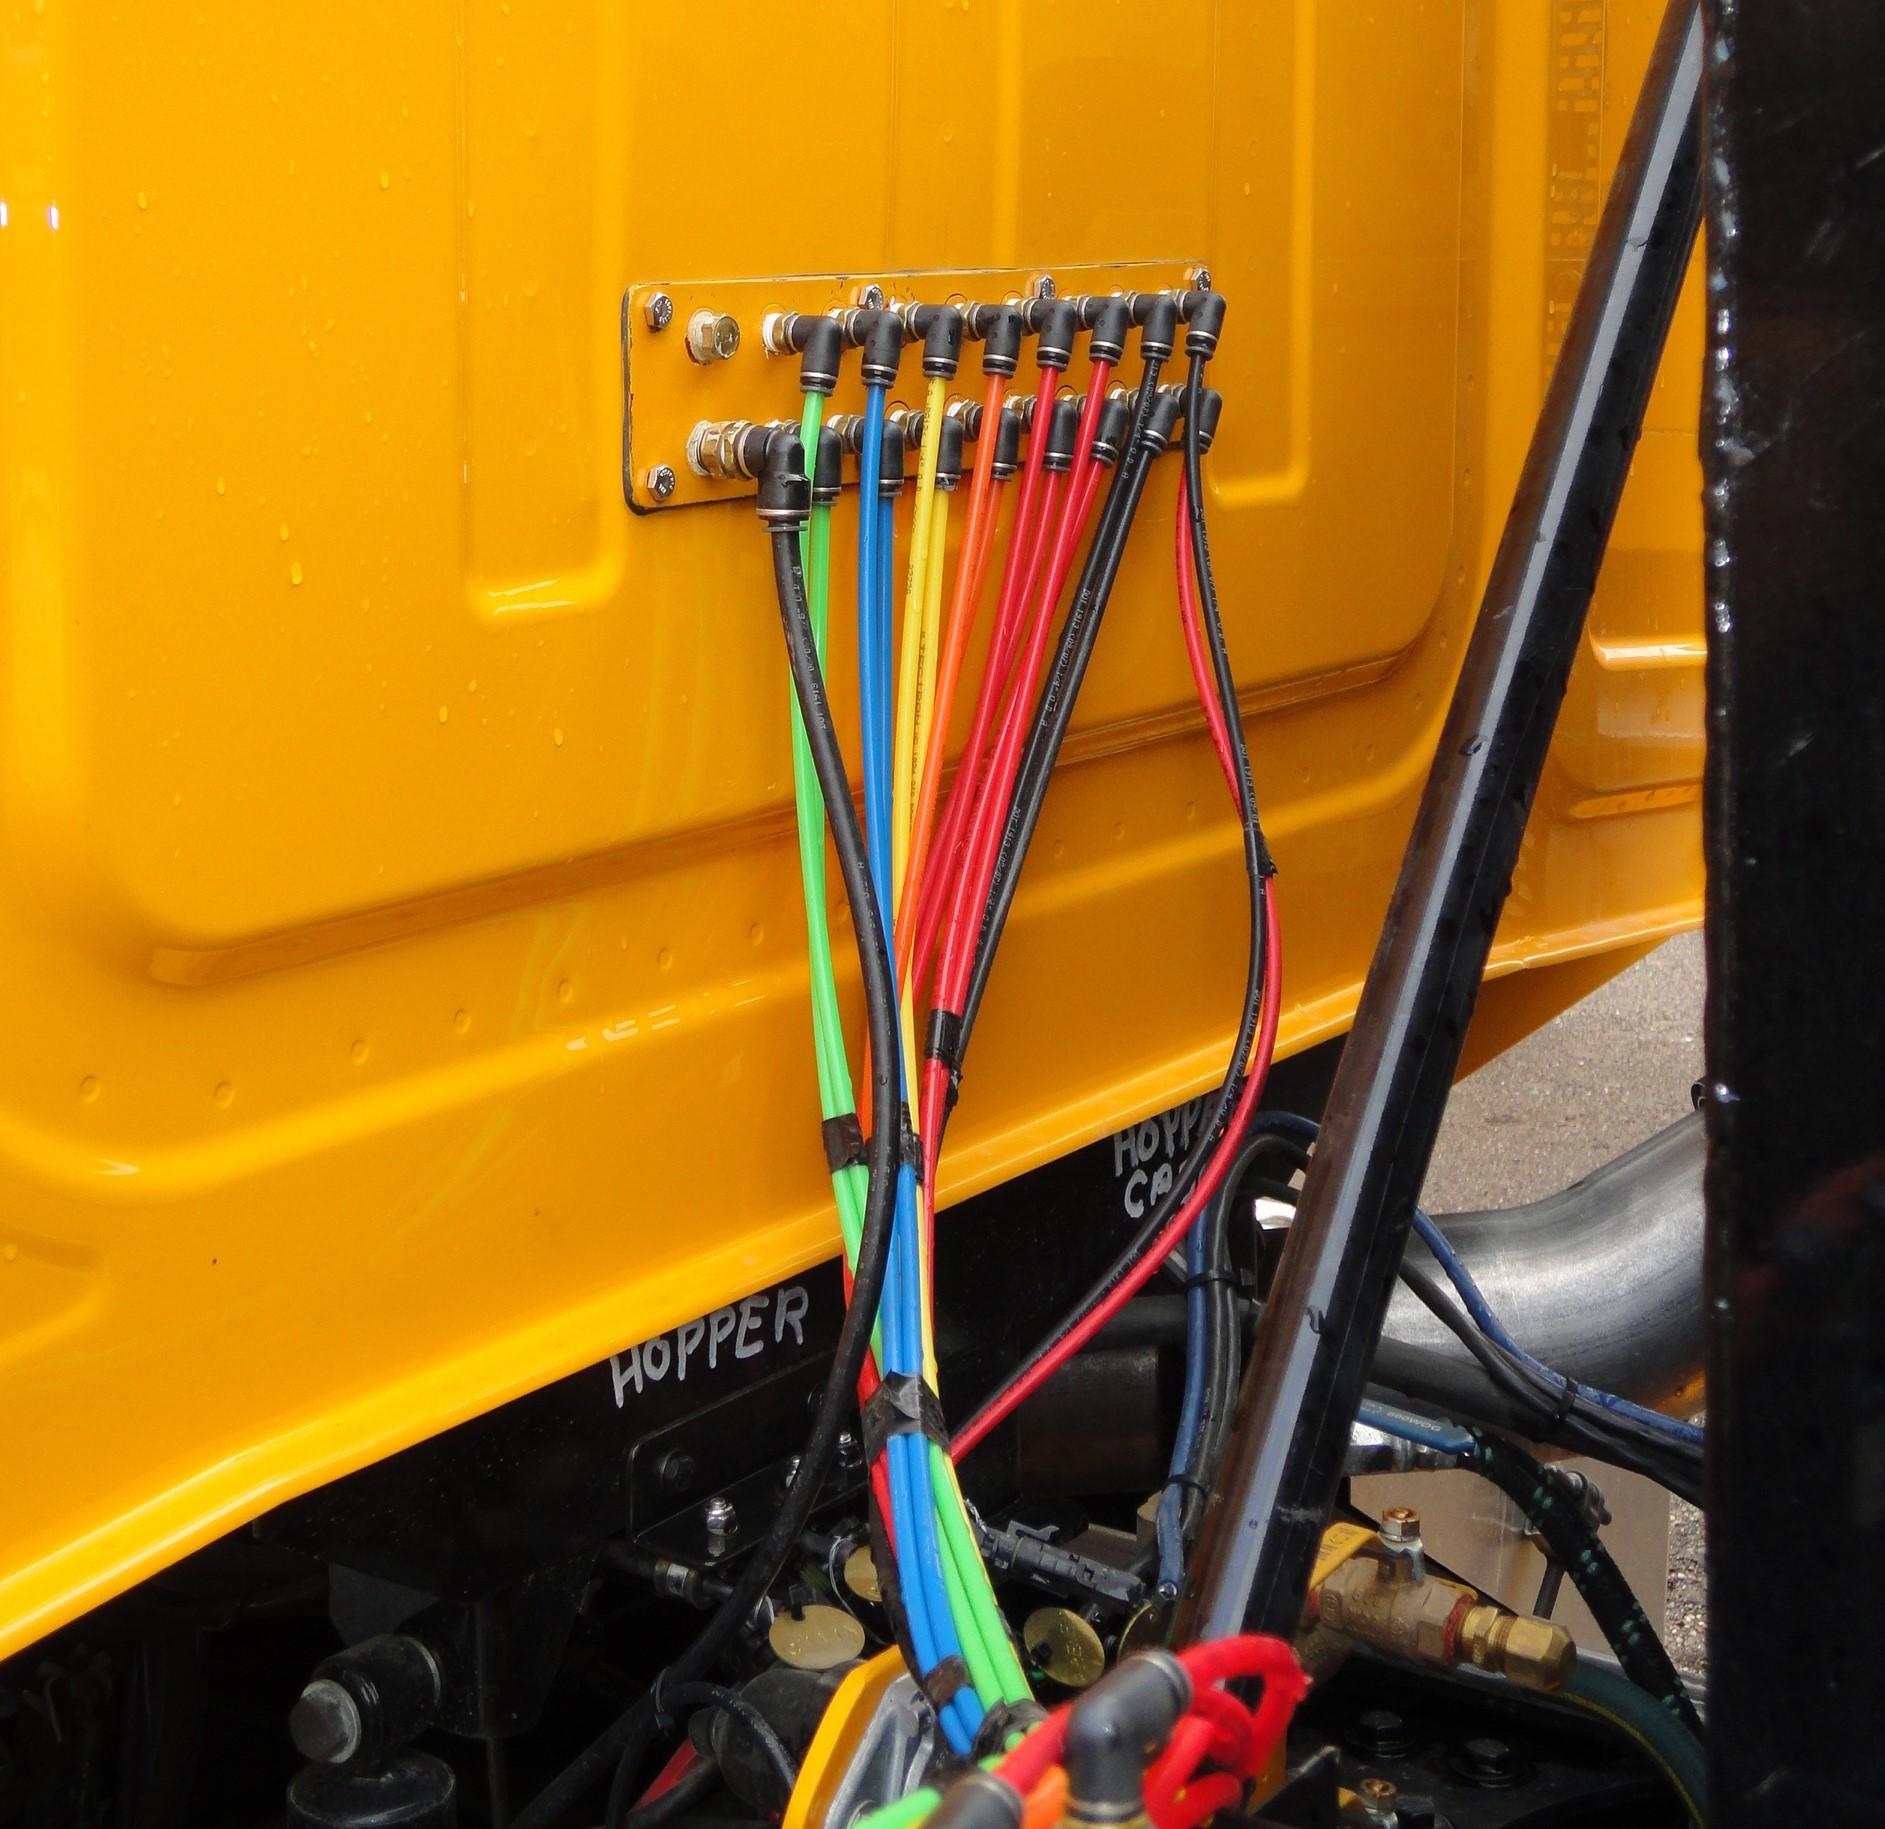
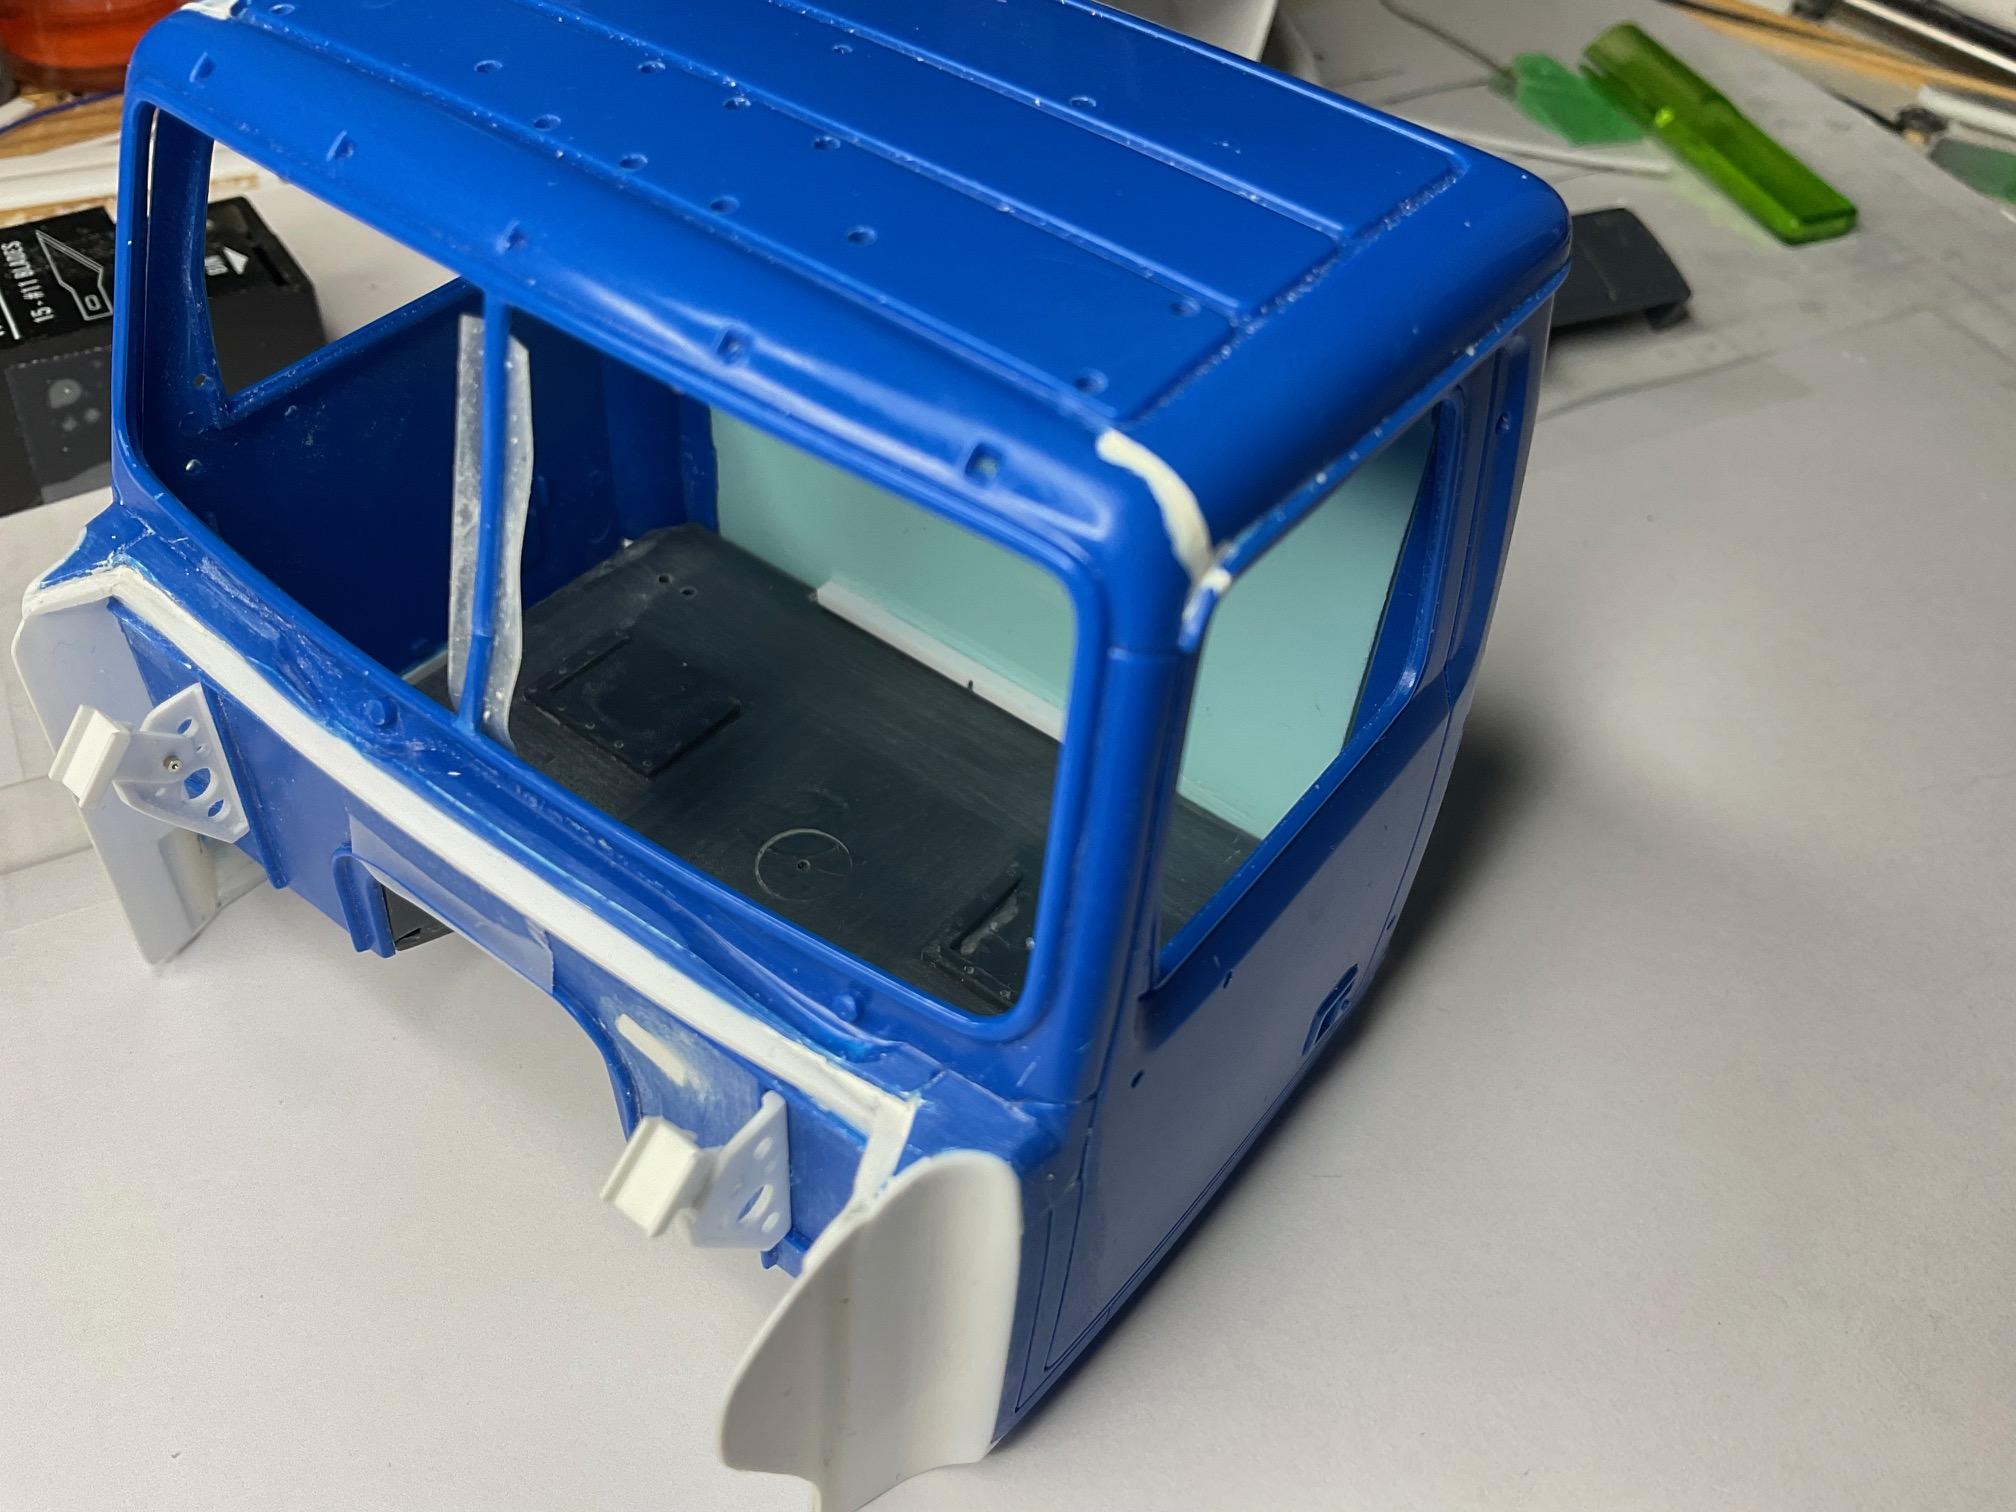
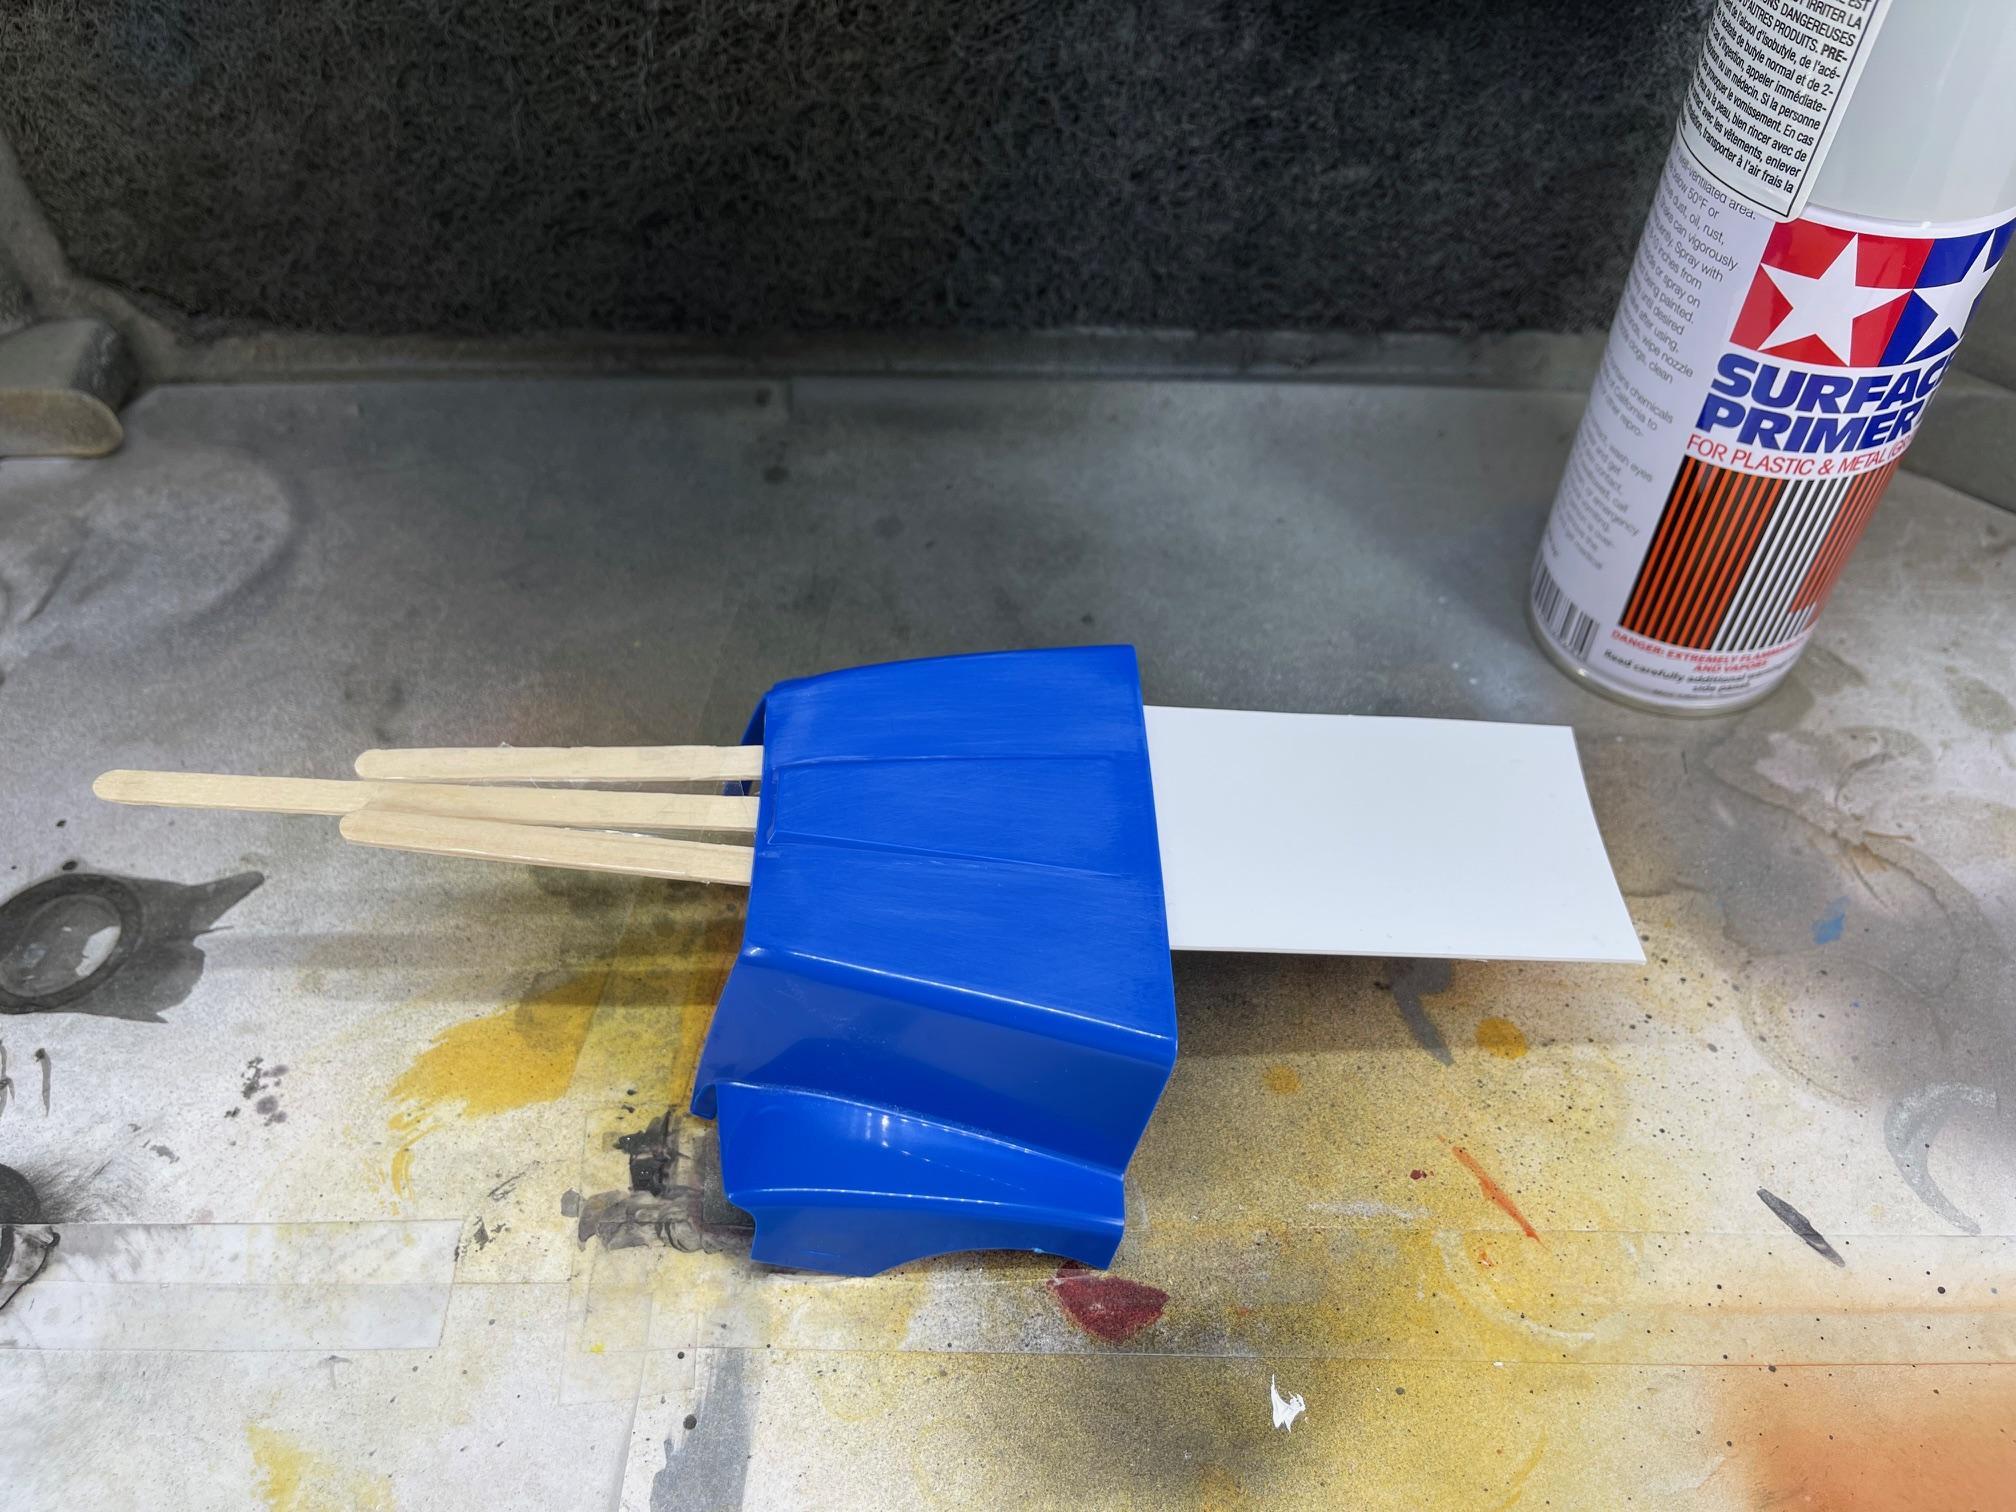
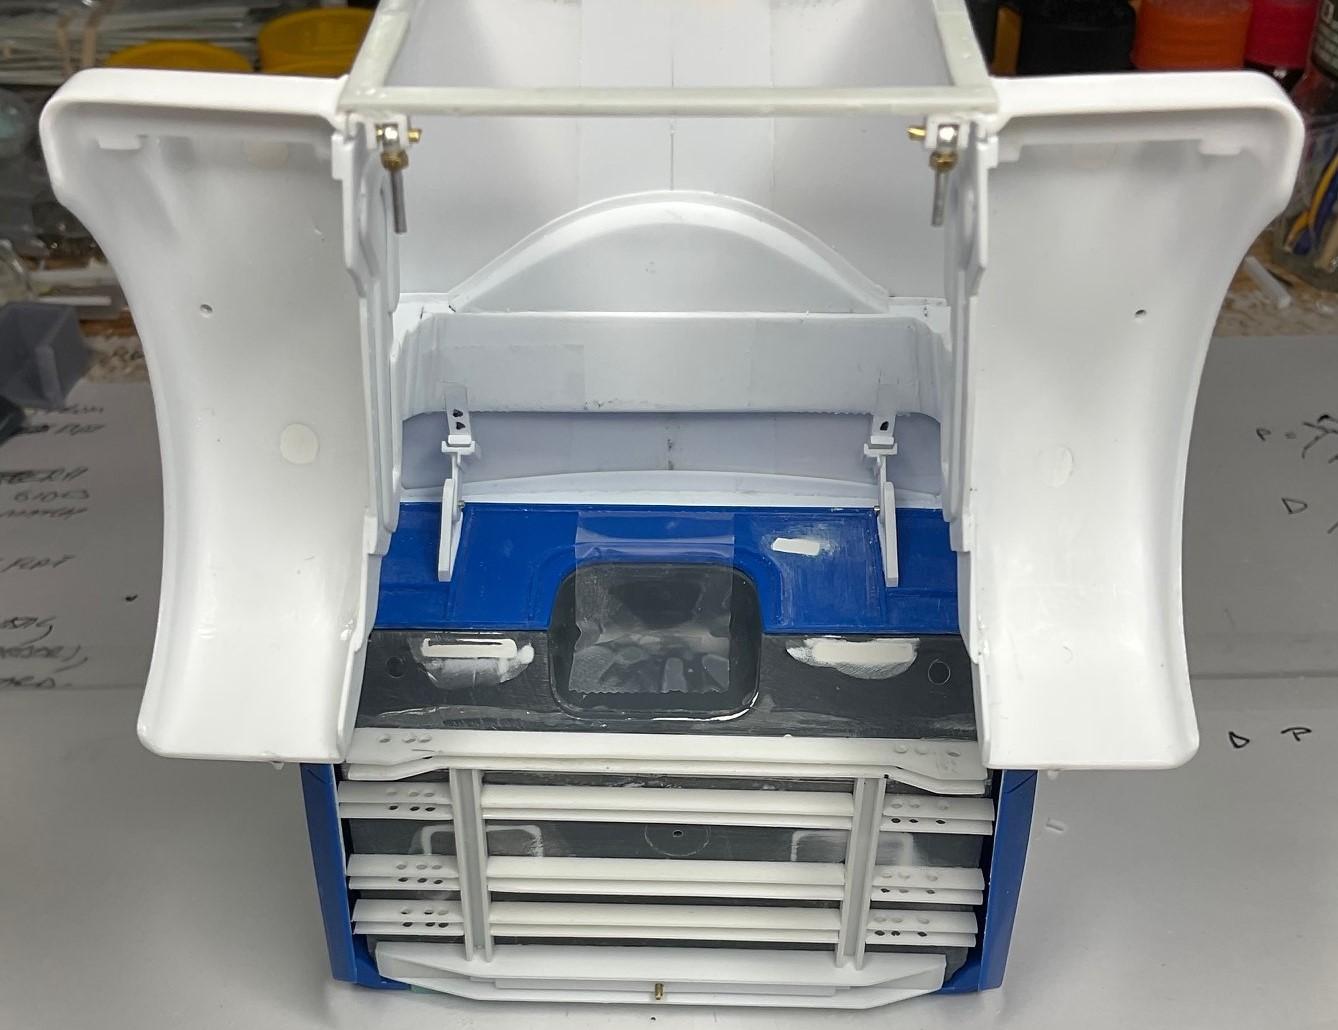
Got a little bit more done on the dash yesterday, but now need to make a trip to hobby shop for some paint before I do more on it. Carried on with some work on the back of the cab. I needed to make the mounting plate for the pass through air lines that supply the valves on the main hydraulic manifold. Added the short styrene filler strip under the center dash panel and the button for the glove box; also added some brass rod, rolled with the edge of an X-acto knife, to simulate the hinges to open the dash panels; a bit more detail to add then will start painting Made the mounting plate for air lines to the valve manifold; then got a bit side tracked, stopping to figure out how this might look when finished This another pic of real plate and air lines - at the very bottom of the pic, you can see a couple of the air lines at the valve manifold as well I had planned to use some brass tube to simulate fittings, some silicone, R&B Motion spark plug boots and some plug wire for the air lines Put together a sample air line to mock it up on truck Pretty good idea what this will look like when finished - the air line at the valve manifold will also have a boot on it when I put this all together Have the heater on in the shed and will do a couple coats of colour on the test hood later this afternoon - not seeing any bleed through from the blue styrene to the white primer, so far! Might seem like I'm bouncing all over, but it is making some sense to me and progress still happening - take care!
-
Western Star 4900 FA plow truck
BK9300 replied to BK9300's topic in WIP: Model Trucks: Big Rigs and Heavy Equipment
Thanks, Steve - sure lots of time spent looking through the magnifying desk lamp! -
You’ve really brought your paint job to life, Daniel - all that prep and polishing sure paid off!
-
Ritchie Bros Auctioneers sold one in Edmonton in 2023 that had a 420 in wheelbase - I’d say you’re spot on.
-
Resto Rod Autocar
BK9300 replied to Gary Chastain's topic in WIP: Model Trucks: Big Rigs and Heavy Equipment
Very happy, and relieved, to see an update from you, Gary! Your truck looks amazing with the cab and hood now painted. Don't over do it, but again, glad to see - take care! -
Beautiful scratch building - another very detailed build.
-
Mack Superliner
BK9300 replied to Jürgen M.'s topic in WIP: Model Trucks: Big Rigs and Heavy Equipment
You’re making significant changes to the way you design and print out your parts. It shows up in the improving quality of the finished parts. Well done, Jürgen! -
Revell's Peterbilt 359: WIP
BK9300 replied to David G.'s topic in WIP: Model Trucks: Big Rigs and Heavy Equipment
Great progress, David - the blue is a striking colour. Your improved chrome parts should really stand out next to that colour! -
Western Star 4900 FA plow truck
BK9300 replied to BK9300's topic in WIP: Model Trucks: Big Rigs and Heavy Equipment
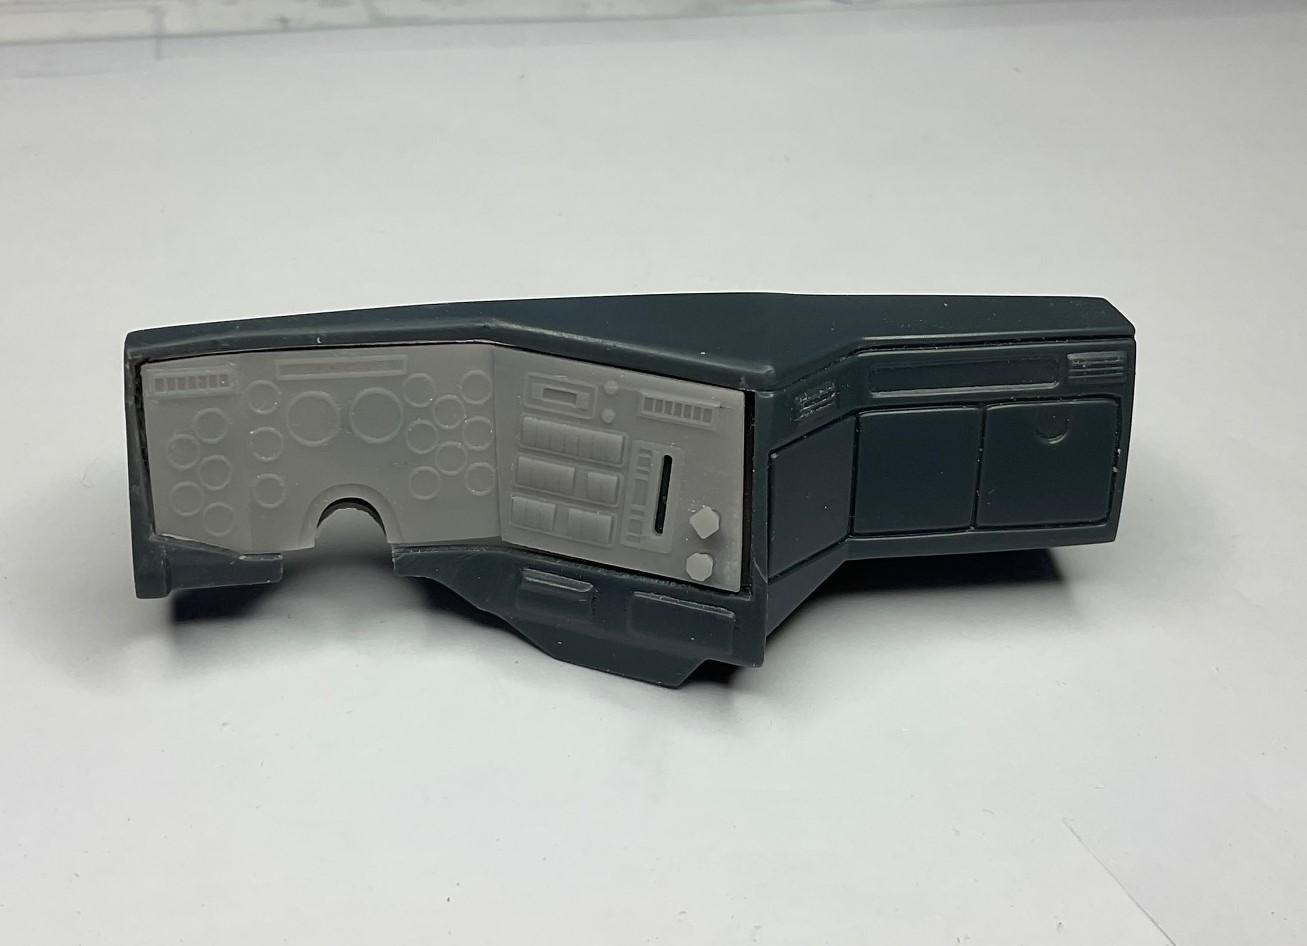
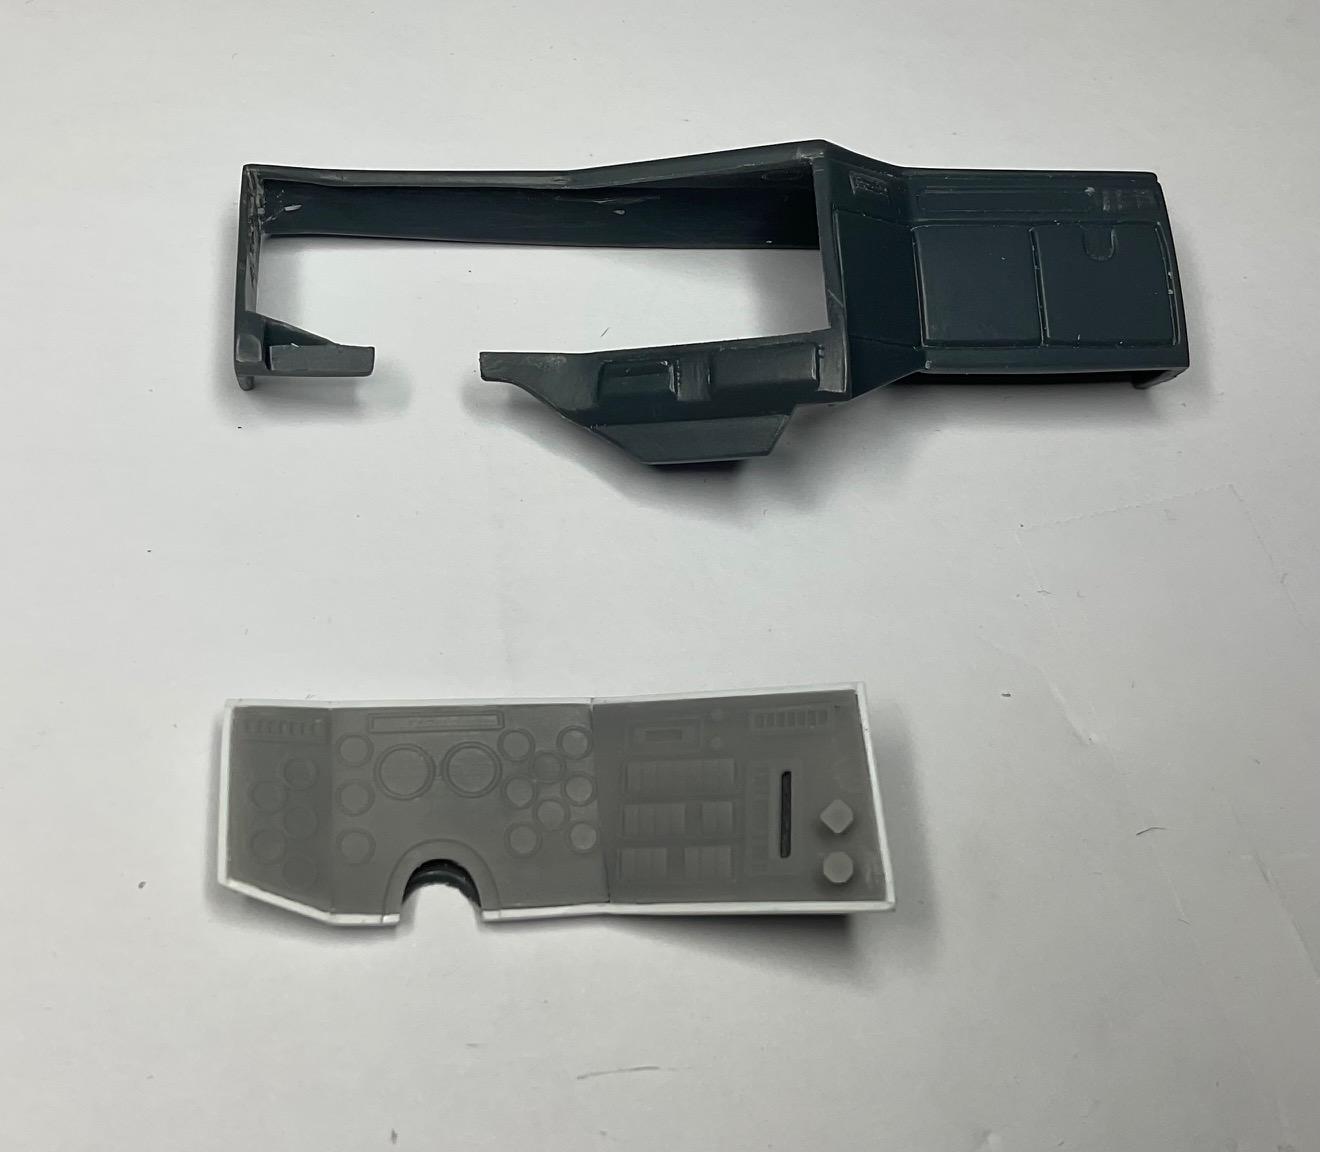
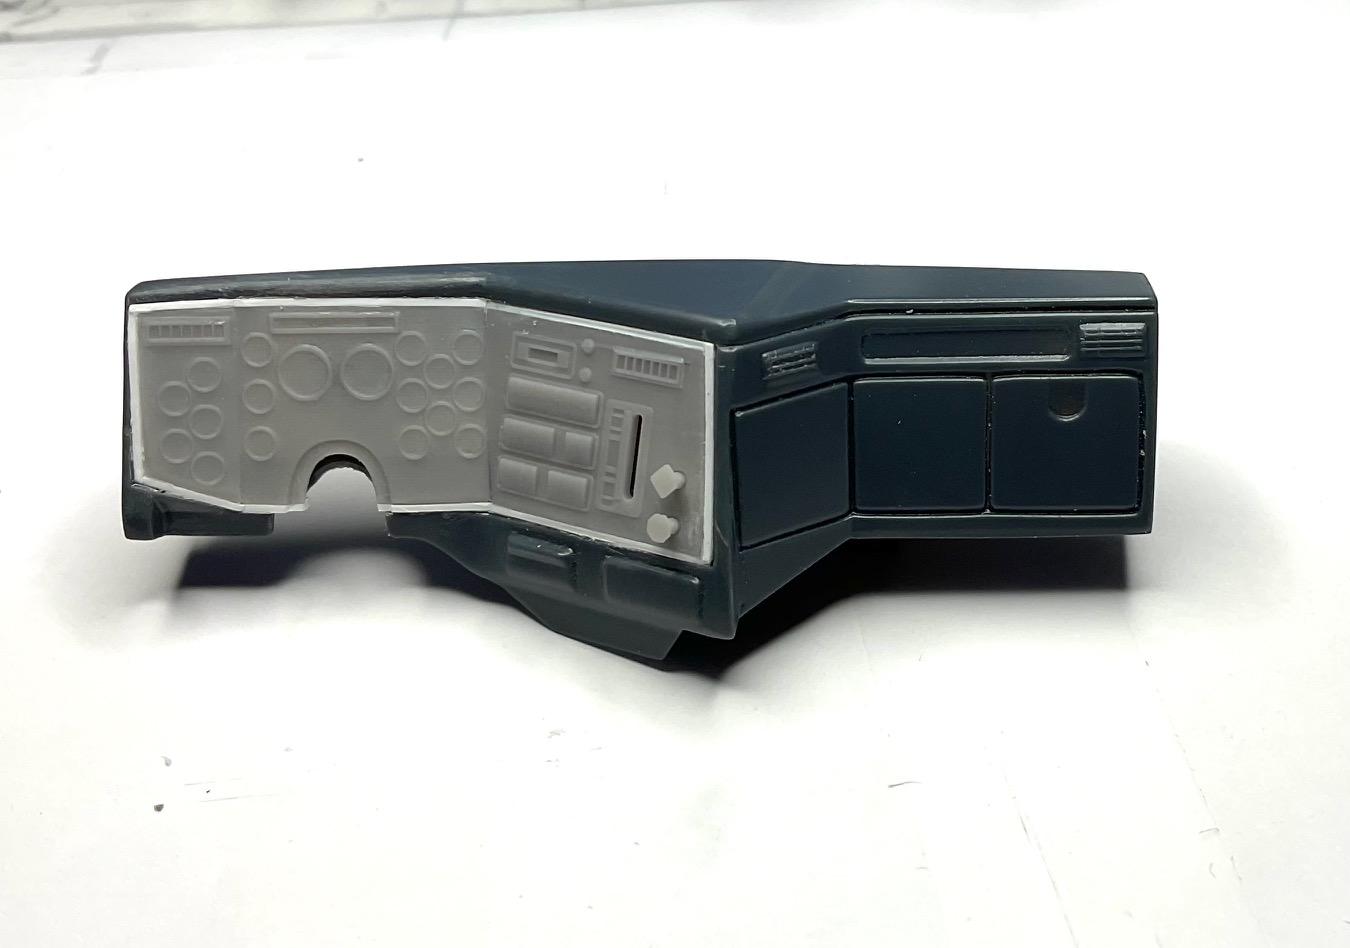
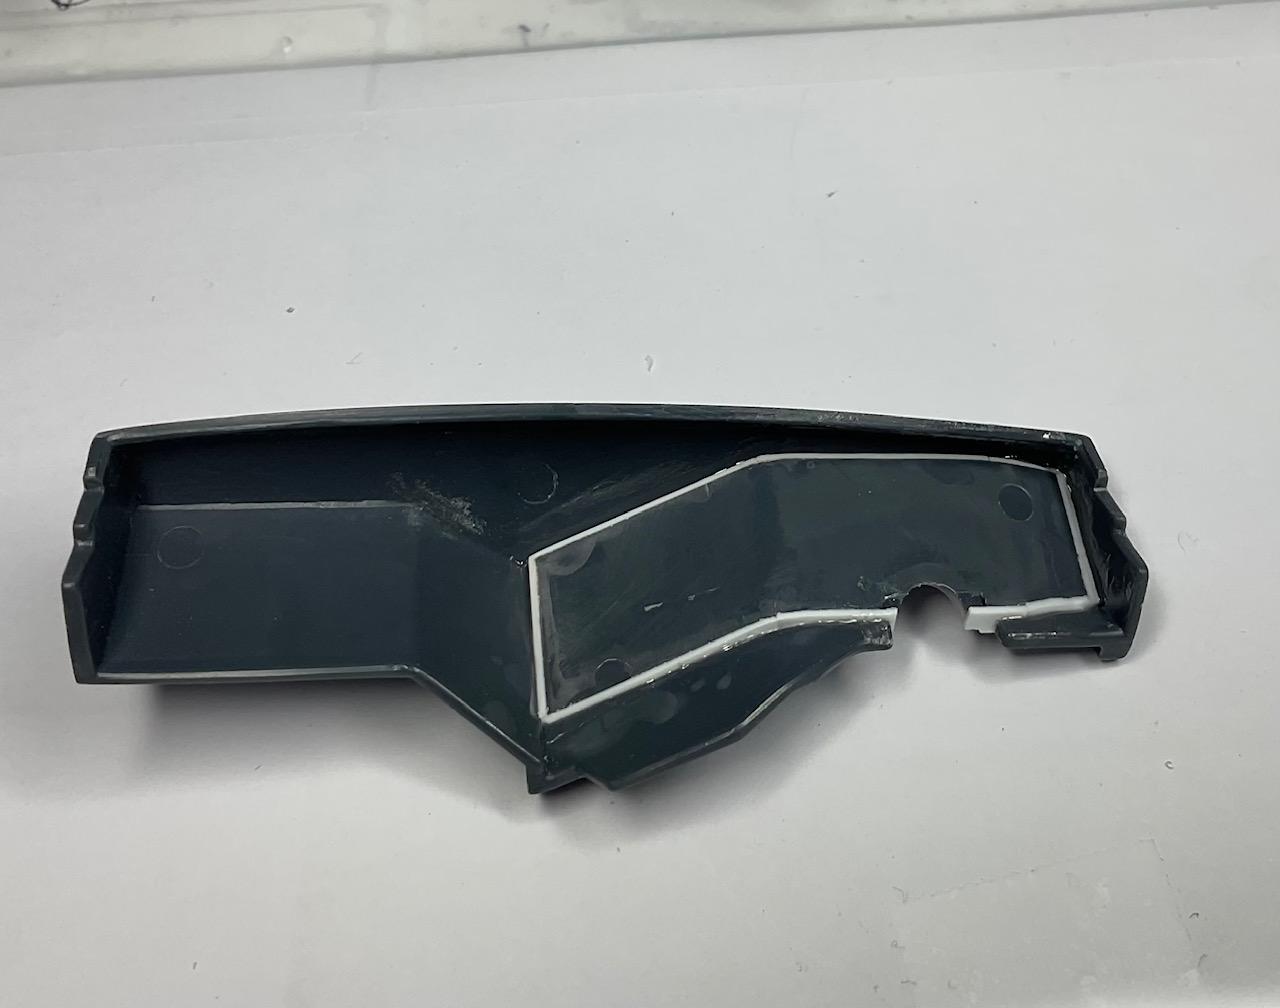
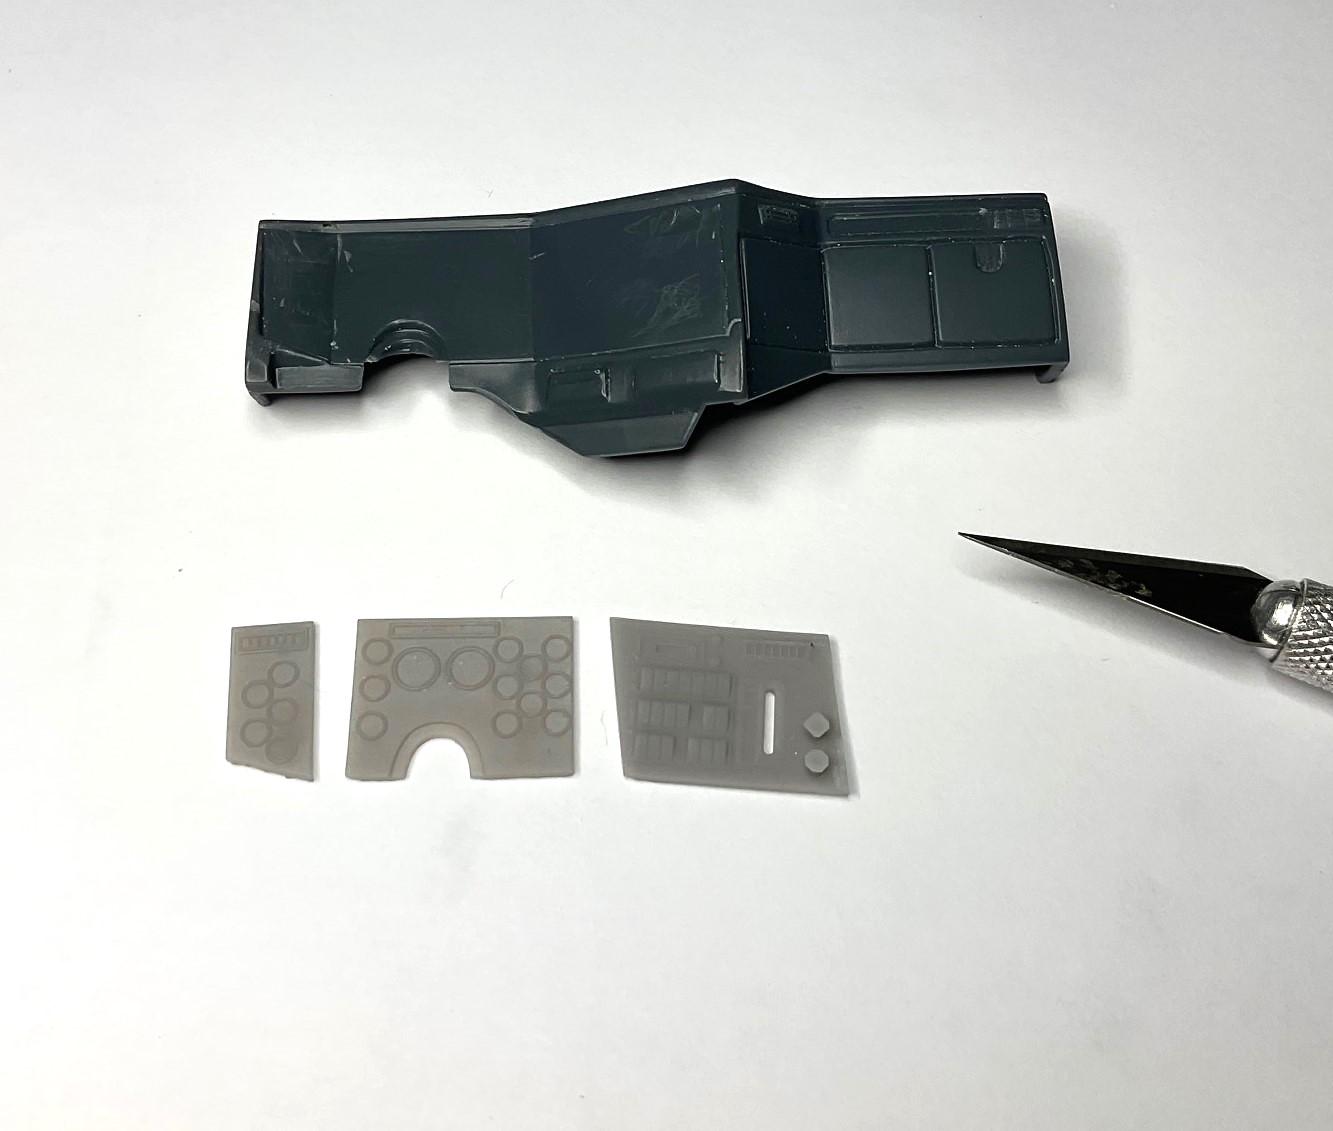
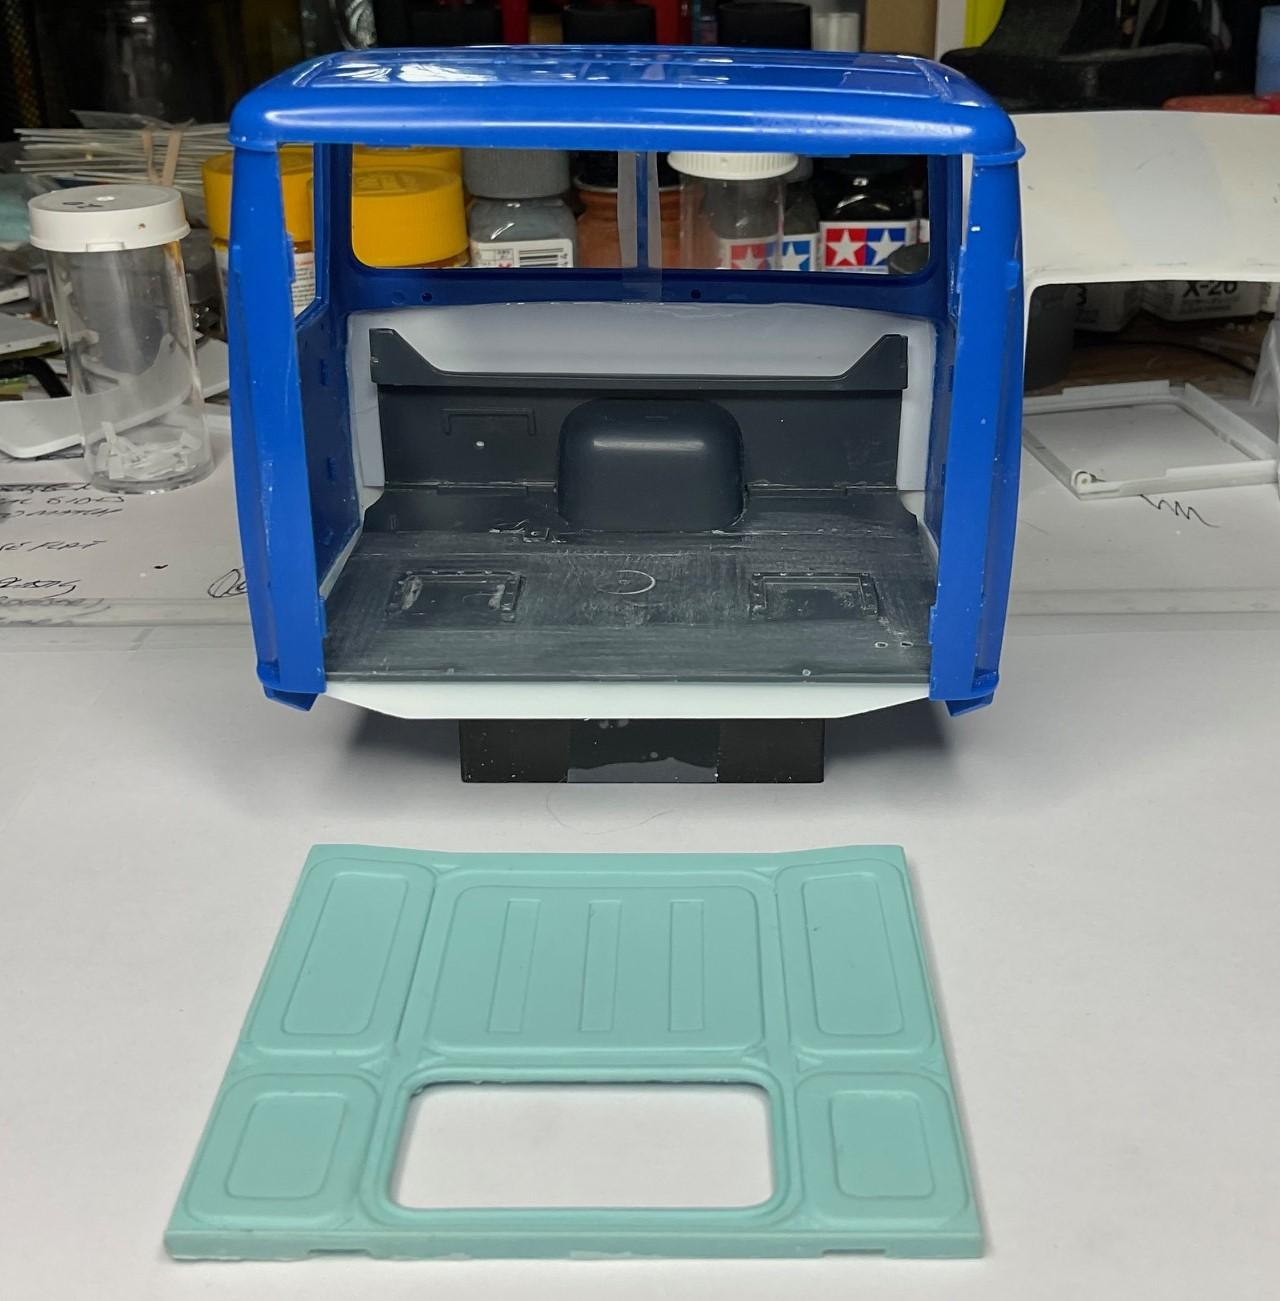
Started in on the dashboard late yesterday afternoon - cutting out the flat surface where instrument decals where meant to go. I did manage to carefully scrape away at the line around the panel area and get it out as one piece. Lots of fussing later, this morning and afternoon, and I had the 3D printed panels back in the dash. At this point, the panels had been temporarily spot glued onto dashboard insert that I had cut out yesterday - the dash board insert is held in place with tape from behind I used the back of an X-acto blade to scrape around the dash board insert, and after cleaning up the opening and the edges of the insert, I needed to add a 0.5mm styrene strip around the perimeter of the insert to fill the gap I had originally thought I was going to need extra strips behind the dashboard to support the insert, but the styrene strip and some fine shaving of the opening to make the insert fit properly, meant it was a tight enough fit that solvent glue was all that was needed to secure the insert in place. My main reason for going for 3D printed dash panels was because I needed a shift gate and shifter in the right hand panel for the Allison automatic transmission. Once I had designed that panel, it only seemed right to carry on and do something for the other two panels. Still some cleanup (always!) and a small strip to add underneath the center dash panel, to the left of the steering column opening. Regardless, I'm very happy with how this turned and now I can make that shifter! Going to carry on with mocking up the steering, mounting the dash board onto the interior tub, test fitting in cab, then onto the floor, do a bit of painting and maybe get to the control tower early next week. Have a great weekend!
-
Very clear to follow your process - excellent results!
- 766 replies
-
- 1
-

-
- stalled builds
- quick builds
- (and 2 more)
-
Very detailed build - well done! Really like the freight pallet in the back - taking parts to the field for an on-site repair job.
-
Western Star 4900 FA plow truck
BK9300 replied to BK9300's topic in WIP: Model Trucks: Big Rigs and Heavy Equipment
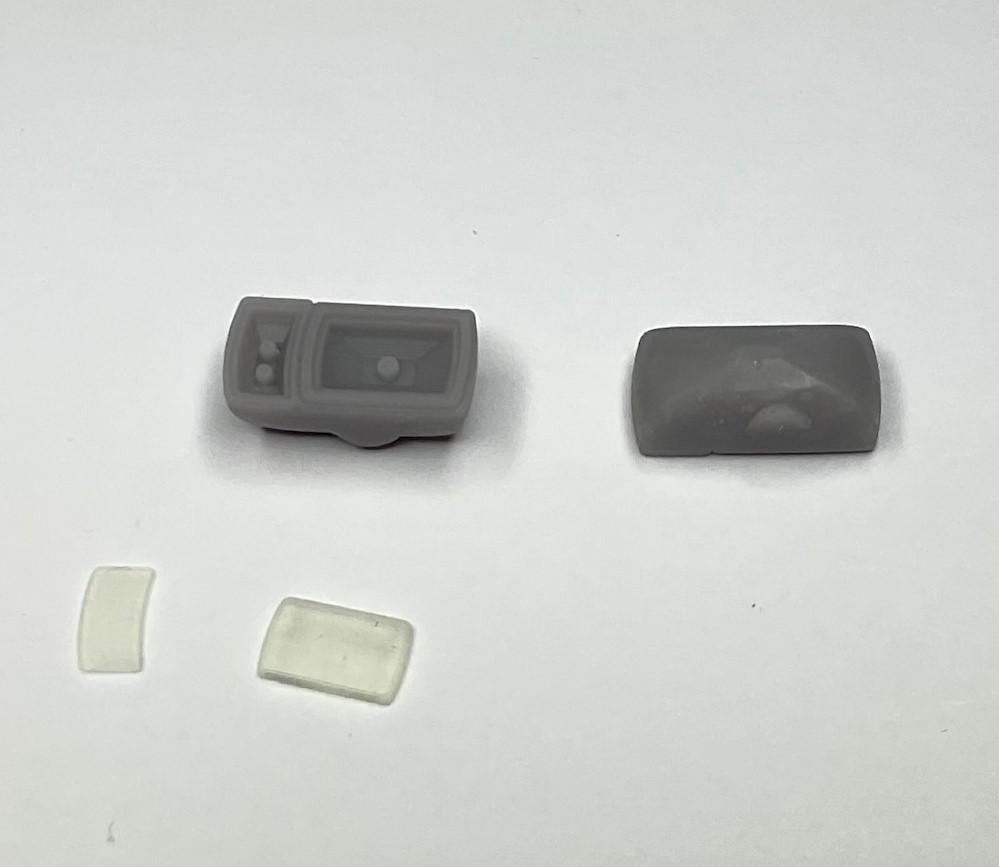
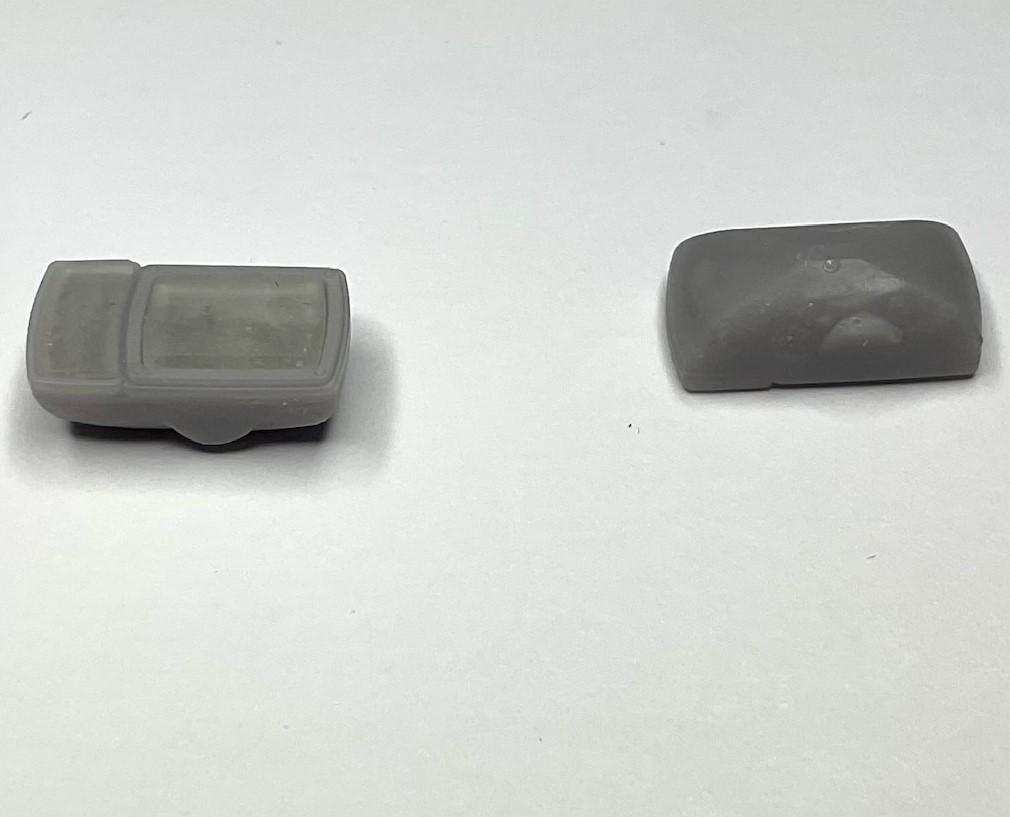
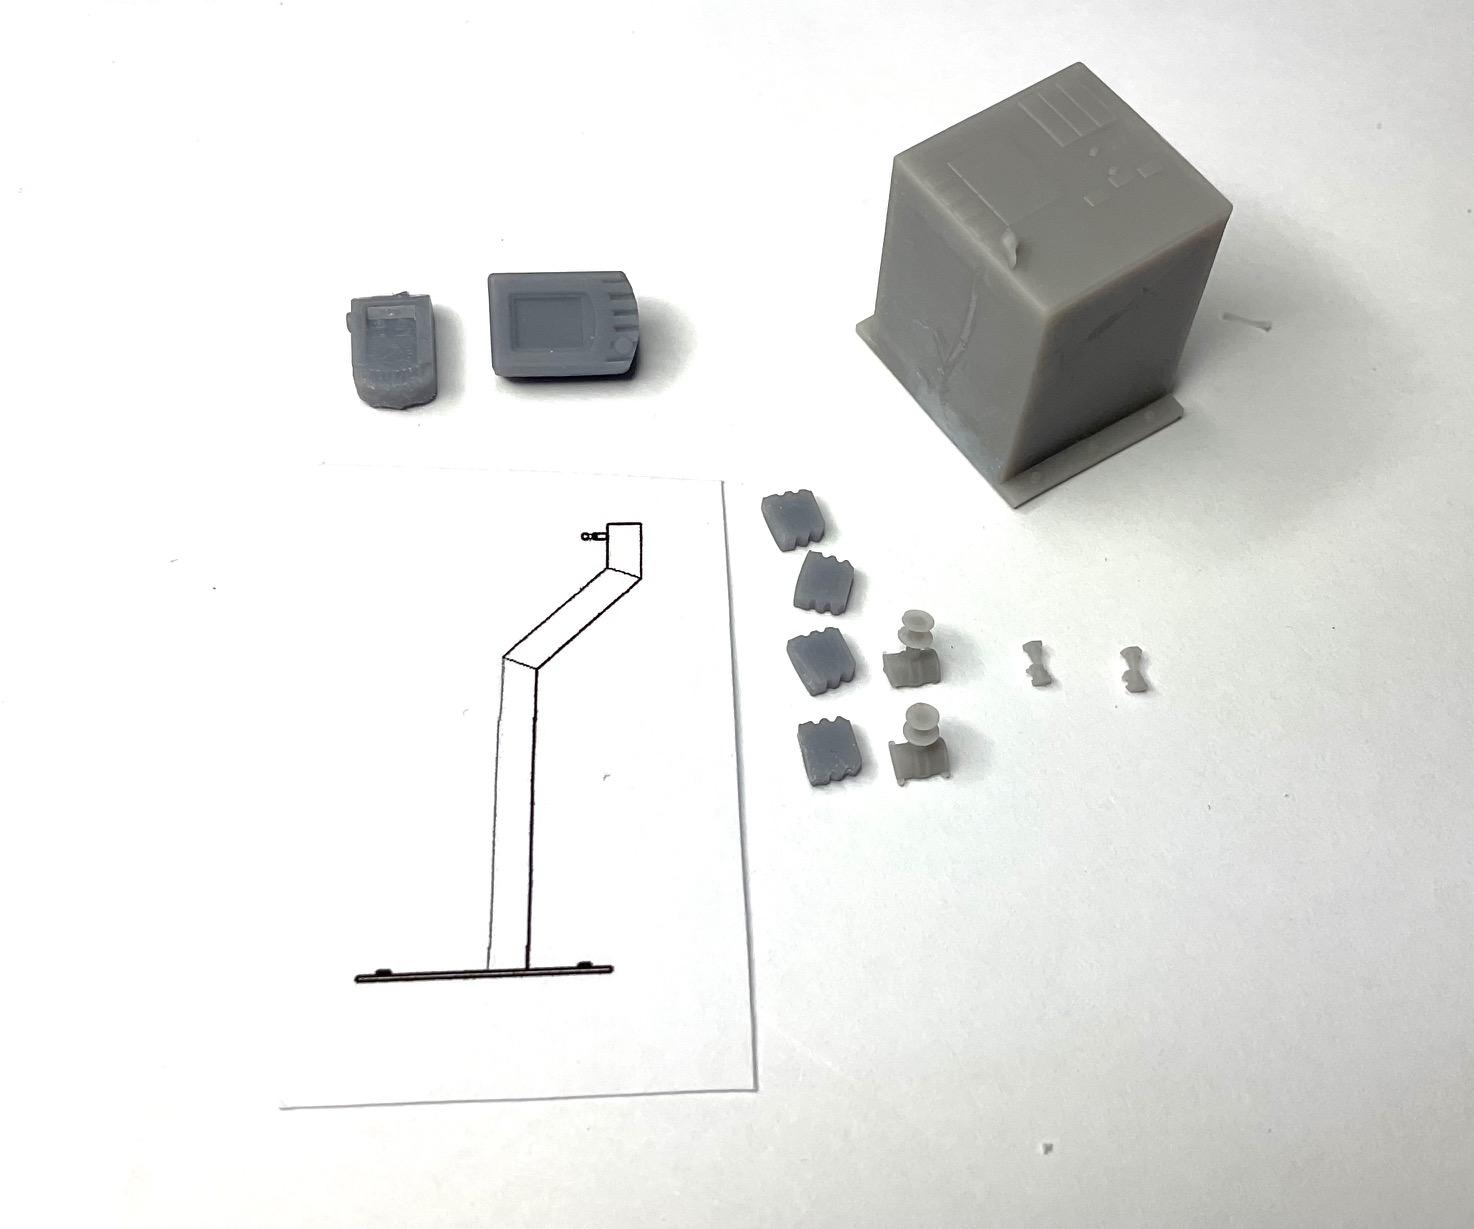
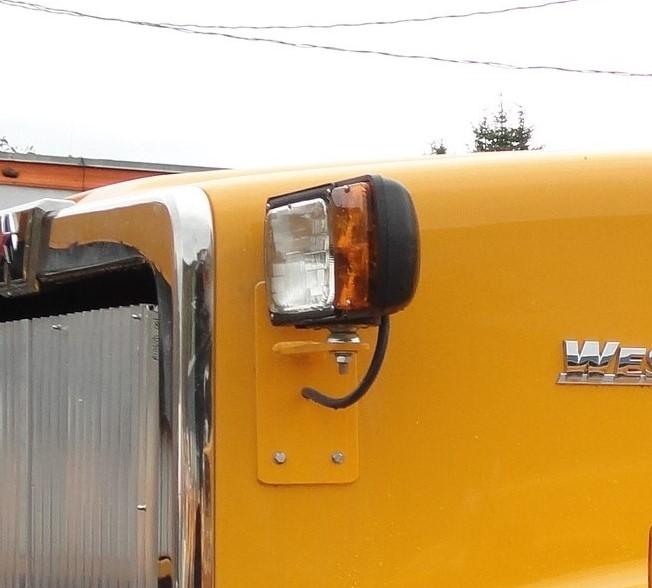
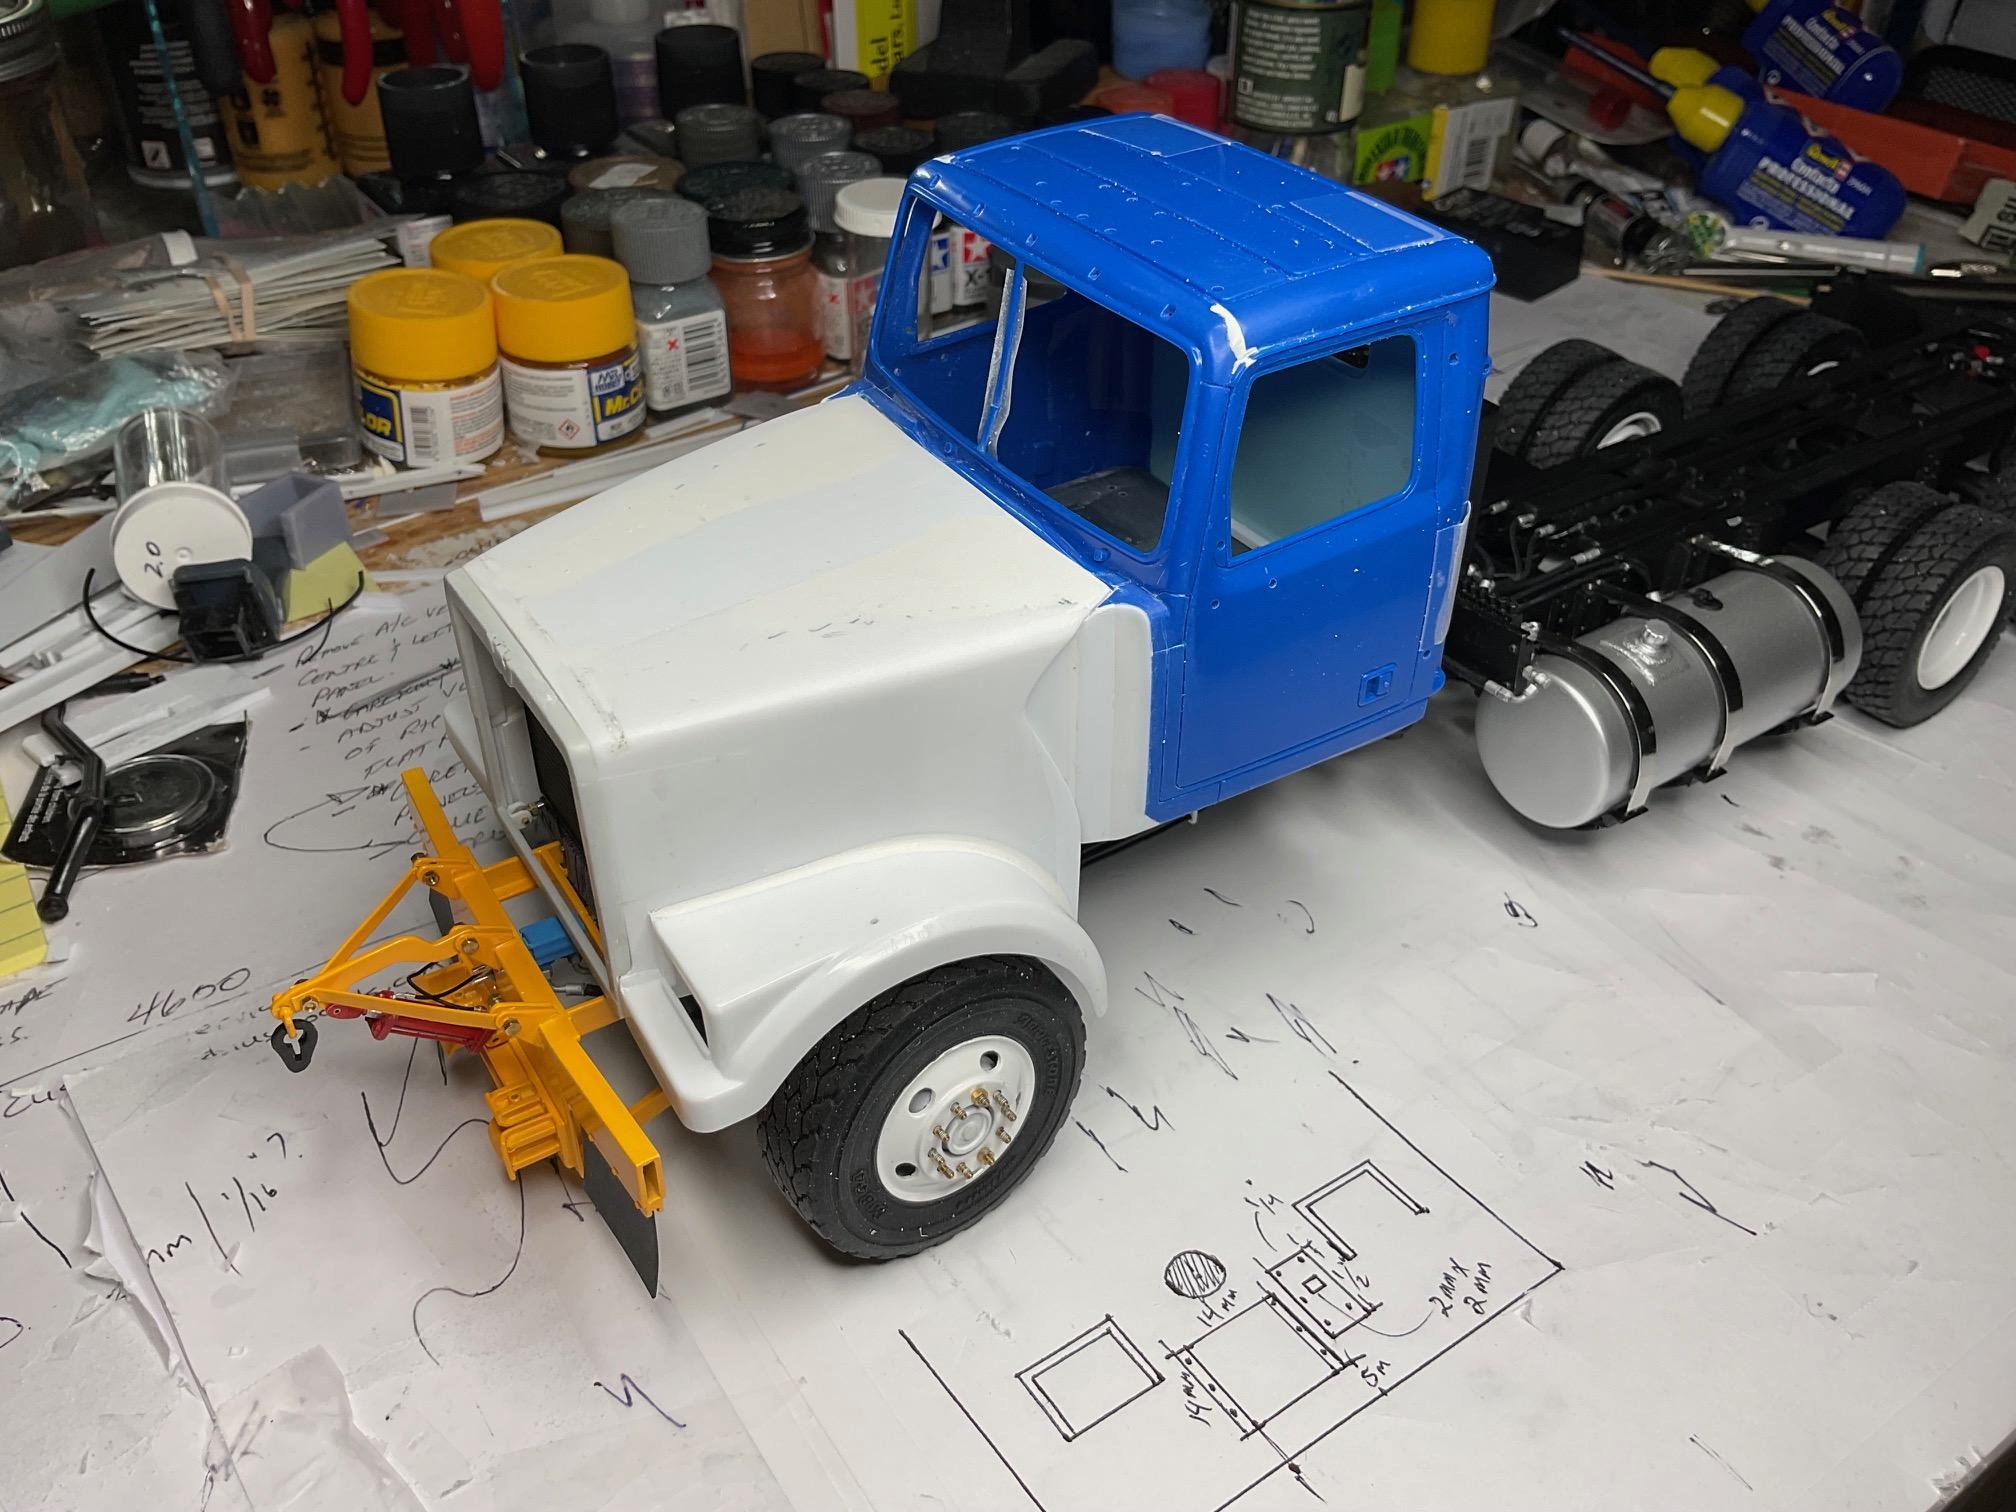
Test painting of spare hood still looking ok - I'll put the colour coats on tomorrow. Spent last couple days mostly thinking about how to tie the remaining build items all together and in what order to do them. Most everything, it seems, requires something else to be done first, so started making a list - I'm a couple pages into it and more items keep popping up! I did start laying out some of the 3D printed parts, in an effort to refocus, and I've settled on doing the interior next. For the plow lights, this bracket is what needs to be fashioned - First though, I laid out the plow lights, to consider how best to replicate mount, and to check fit of lenses and decide how best to make the bracket thin enough for scale, and strong enough to support the lights; will paint inside of housings chrome or chrome silver Exterior of light housings will be painted Tamiya Rubber Black and the turn signal lenses with clear orange; I'm hoping the clear resin lenses of the main lights will show better once inside of housings are painted bright But the interior is what I want to concentrate on next - I'm going to remove the flat instrument panel sections of the kit dash board as one piece. Then, hopefully the resin printed panels can be glued to that section and the combined instrument panel fitted back into the dash with some additional bracing in behind the dash, if needed. Then comes the control tower - I had previously received the main body of the tower as a single unit, but I found it too difficult to properly detail paint the component pieces. I was fortunate to get @Bren to reprint some of the various valve controls as separate pieces, to paint them easier. Will also need to make some very small control levers/handles to mount on top of the 'rubber' boots for various plow controls. The drawing is the template for the 2mm x 2mm mast to mount the two monitors on. I had thought early on that I would open the driver's door, but not going to go through with that. Even though all the interior detail won't be visible, I still think I can, with the right lighting, see inside well enough and also get a few decent pics once the interior is finished. As far as getting the finished interior back into the cab, I may need to revert to Italeri's instruction sheet and do it through the back of the cab. Not my preferred way, as I hope to paint the entire cab before putting the glass and interior back in, but I'll make sure I can do that before gluing the day cab panel to the back of the cab! Like I said some time ago, I tend to bog down a bit when my way forward isn't totally clear. Past couple days there has been a lot of model building going on, but all in my head! Anyway, the list will help. Some more test panel painting tomorrow and a start on the interior. Take care!
-
revell K5 Blazer
BK9300 replied to Falcon.Studio's topic in WIP: Model Trucks: Pickups, Vans, SUVs, Light Commercial
Great prep work for your weathering - looks like it's a bit sun faded even now! -
1958 Ford F 1000
BK9300 replied to leafsprings's topic in WIP: Model Trucks: Big Rigs and Heavy Equipment
The body work on your tanker sure looks smooth under your paint - great job! -
Really beautiful looking car - well done, and superb engine detailing, too.
-
Nice job, Scott - always like your engine compartment details - and nice little added touch with the open sun roof!
-
1974 Peterbilt 352
BK9300 replied to DRIPTROIT 71's topic in Model Trucks: Big Rigs and Heavy Equipment
I know very little about real trucks like this, but I sure can appreciate the care that went into your build of it - very nice, indeed! -
I like your updates, Paul - always so much detail to take in - very cool!
-
The work on your console is instructional - every part cleaned up and the edges slightly rounded - it’s that kind of attention that makes a scratch built part look so good when painted. Enjoying your progress!
-
’72 Dodge Demon Drag Racer 1/25 scale
BK9300 replied to AmericanMuscleFan's topic in WIP: Drag Racing Models
Your styrene work is always as flawless as your metal work, Francis! And your pictures always have more details to find the longer they are looked at. Beautiful work on the roll cage - fish mouthed joins and those tiny gussets on the roof section (still looking - probably more I haven’t discovered yet!). -
Very nice build, so far! I remember senior year in high school (1969!), the son of the local Ford dealer had a '66 Fairlane, with a blueprinted and balanced 429. Up front the car just hummed as it went by with a nice throat out back - quite the car!
-
Western Star 4900 FA plow truck
BK9300 replied to BK9300's topic in WIP: Model Trucks: Big Rigs and Heavy Equipment
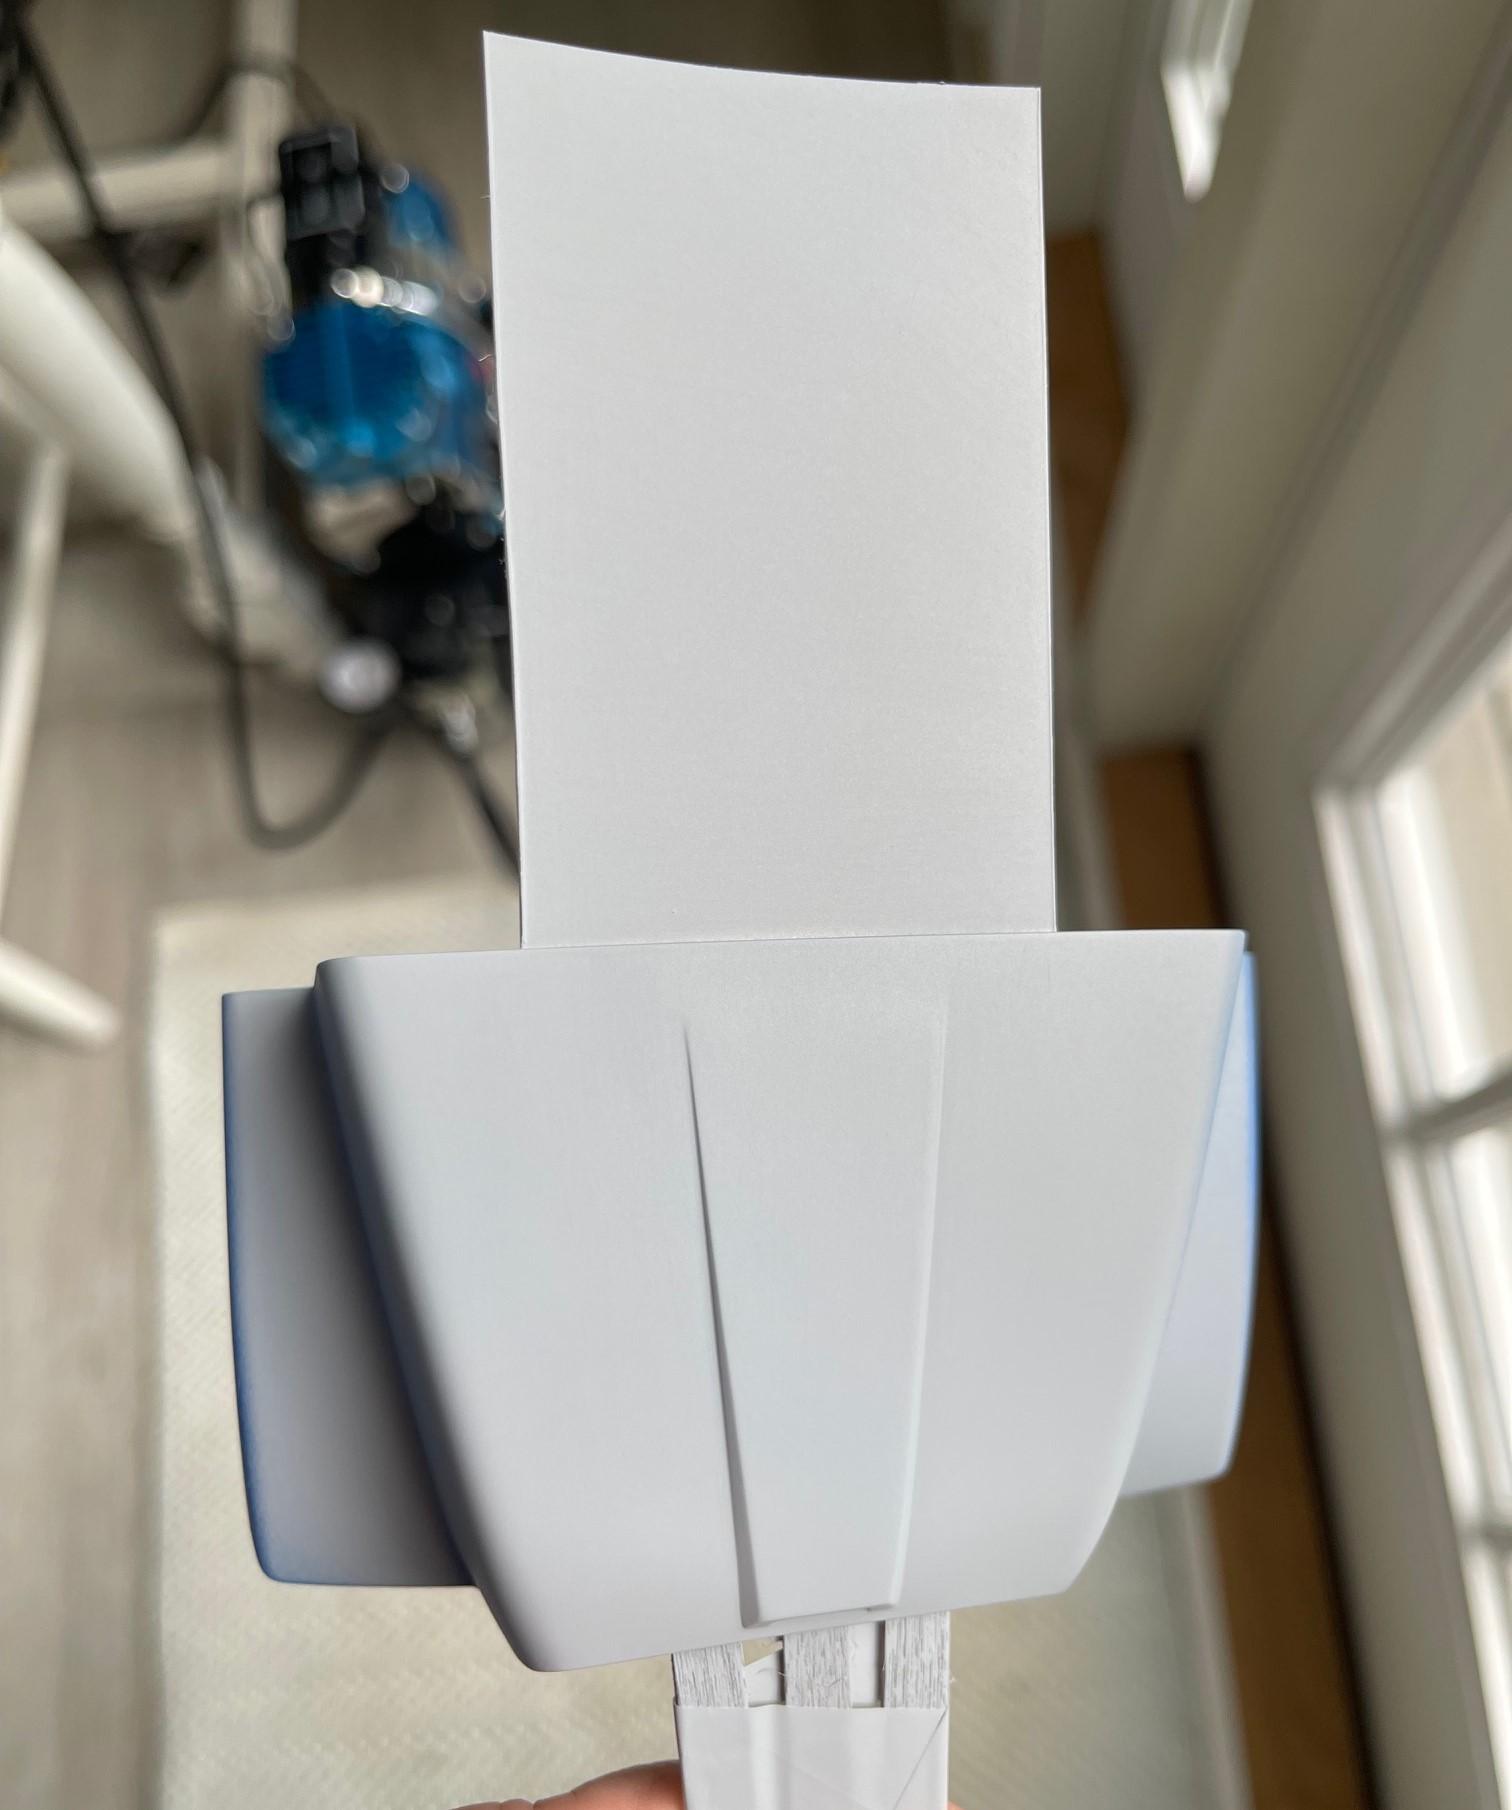
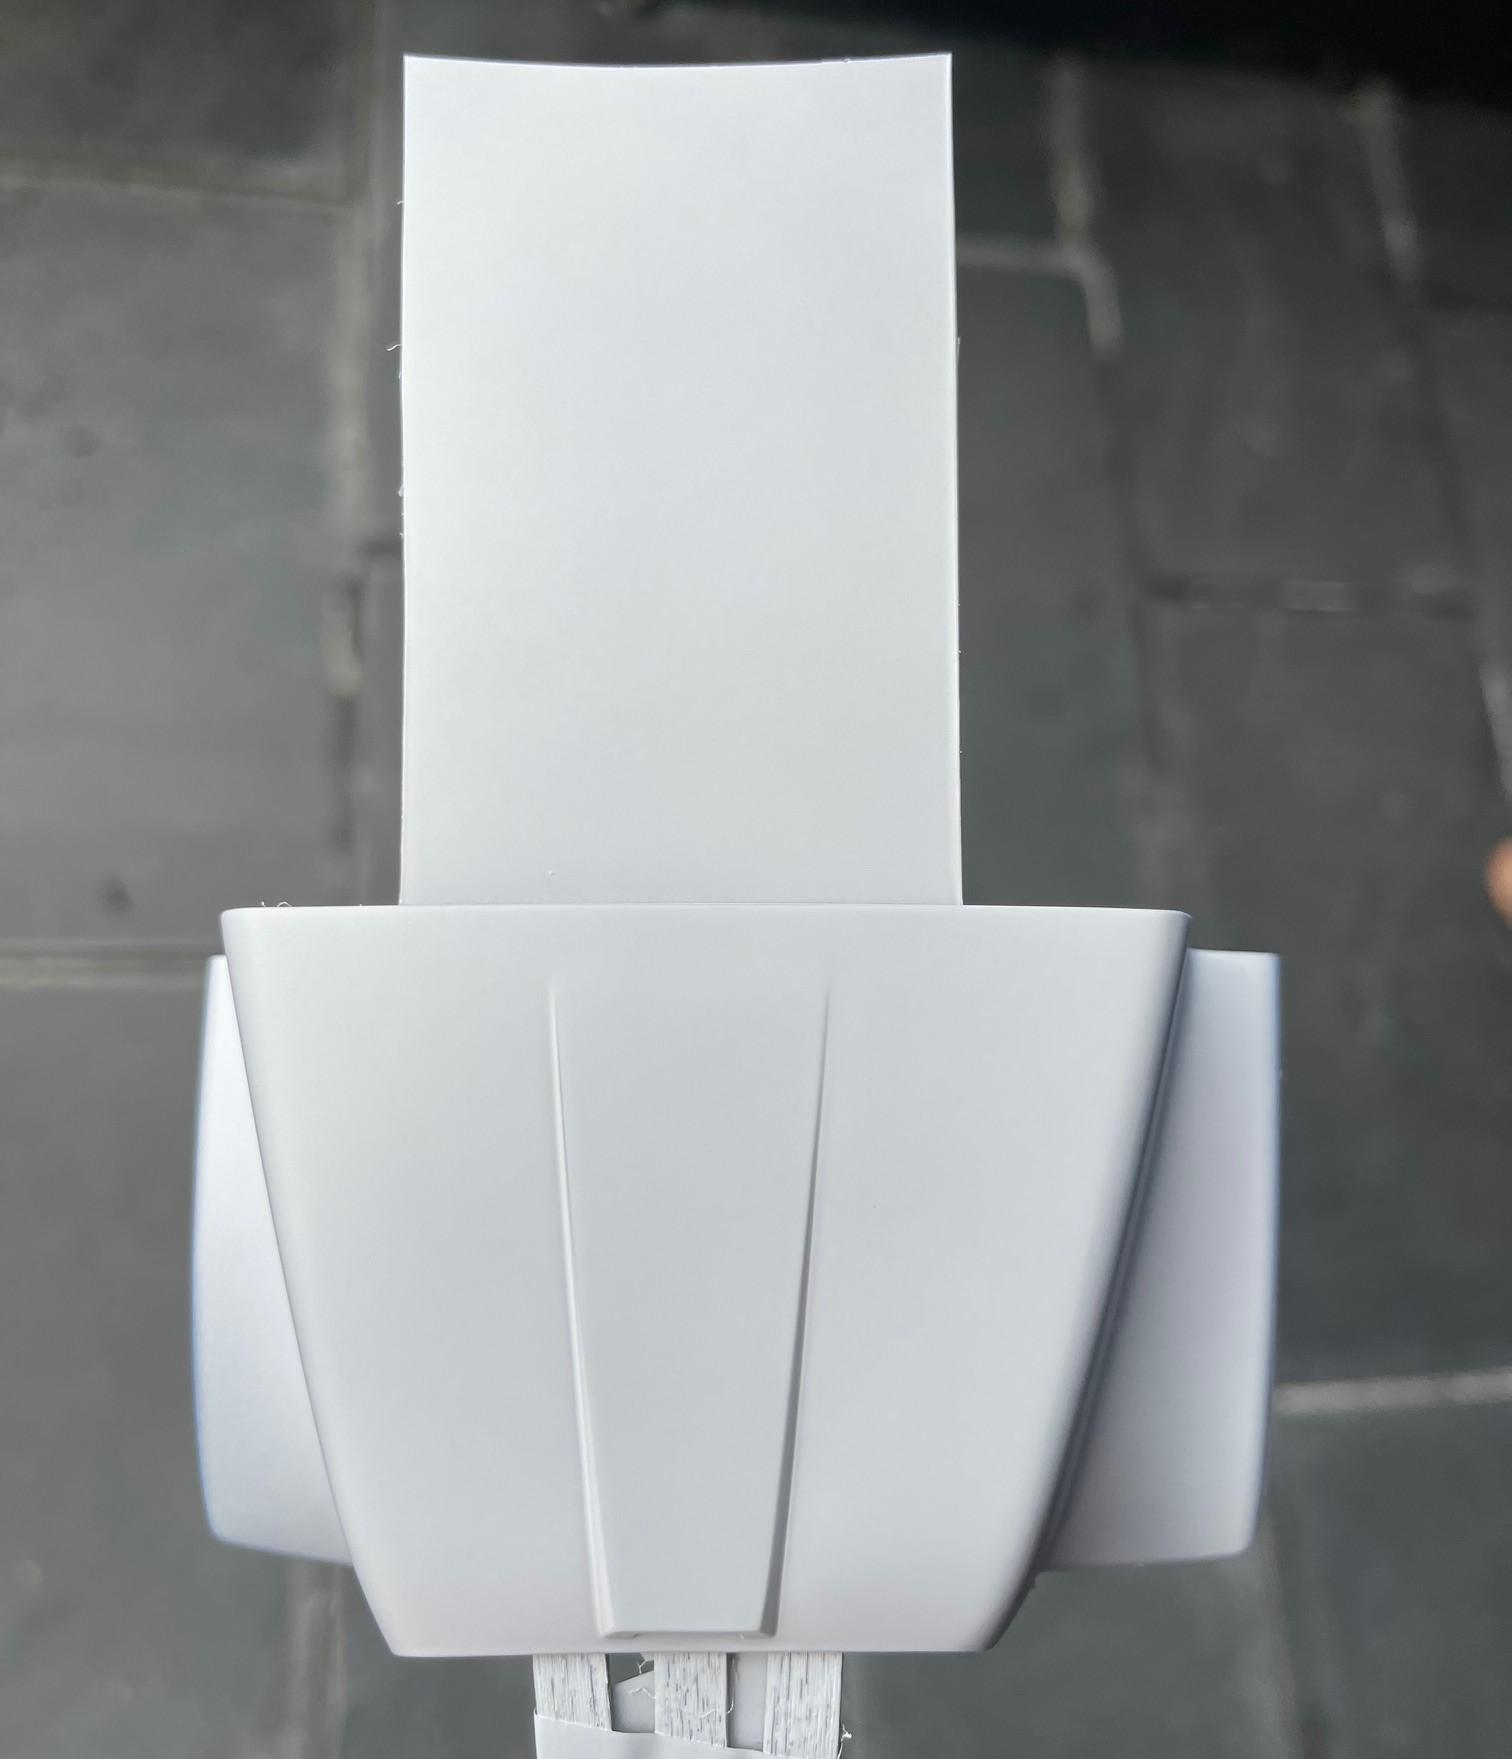
Got the test painting underway - Two different styrene colours to cover One medium thick coat of grey primer (not worrying about painting sides of hood or fenders); pic taken in natural light coming through door, and . . an hour and a half later, a medium coat of white primer, bit over cast outside. Under the fluorescent light of my magnifying lamp Will leave it for a few days until giving it two coats of colour and then let it set for a week or so, to see what happens (thanks again for the heads up, Steve!)
-
Western Star 4900 FA plow truck
BK9300 replied to BK9300's topic in WIP: Model Trucks: Big Rigs and Heavy Equipment
Thanks, Jeff - not sure I'll be focused on topping it - just hope to find something interesting and have a go at it! -
Your paint jobs are just killer, Luke - pleasure to see!
- 766 replies
-
- 1
-
-
- stalled builds
- quick builds
- (and 2 more)
-
Western Star 4900 FA plow truck
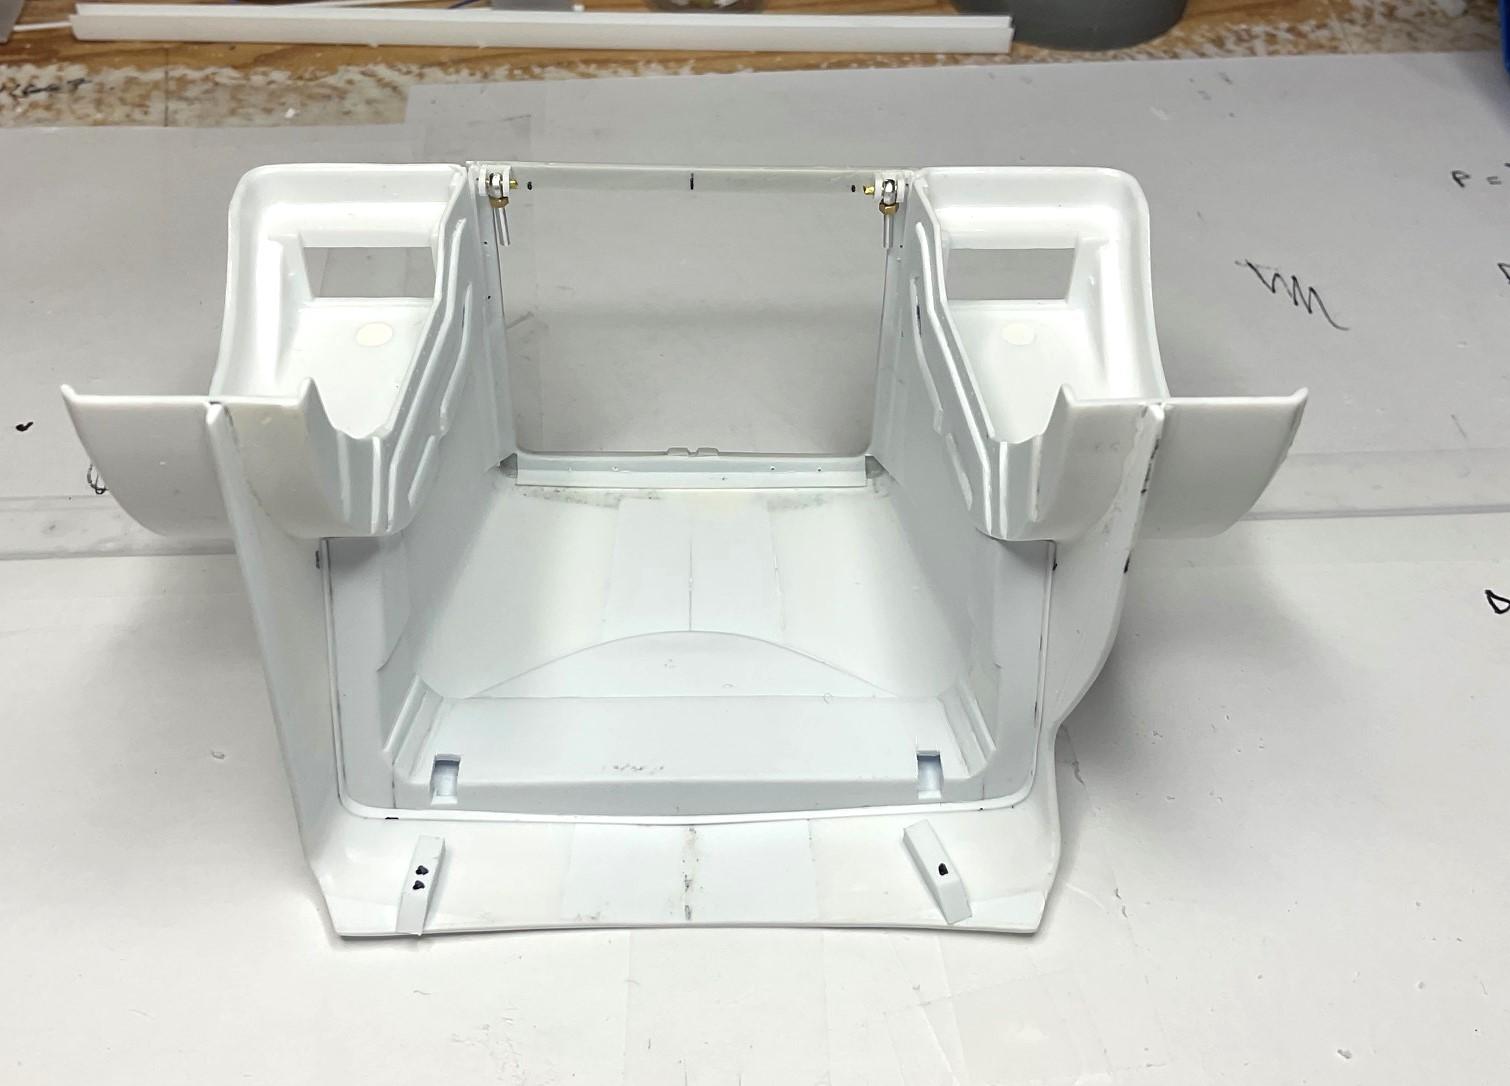
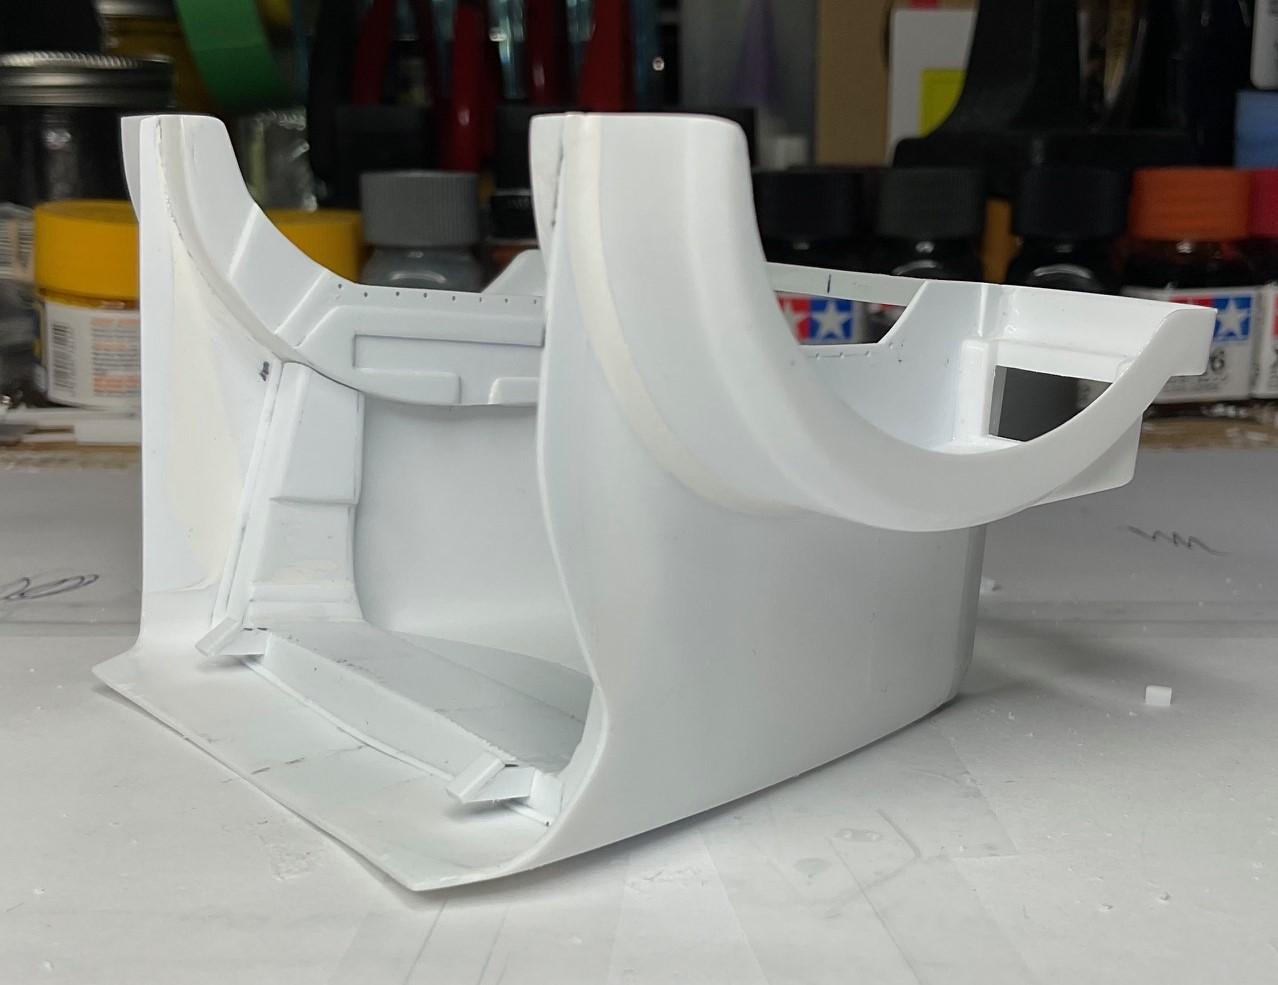
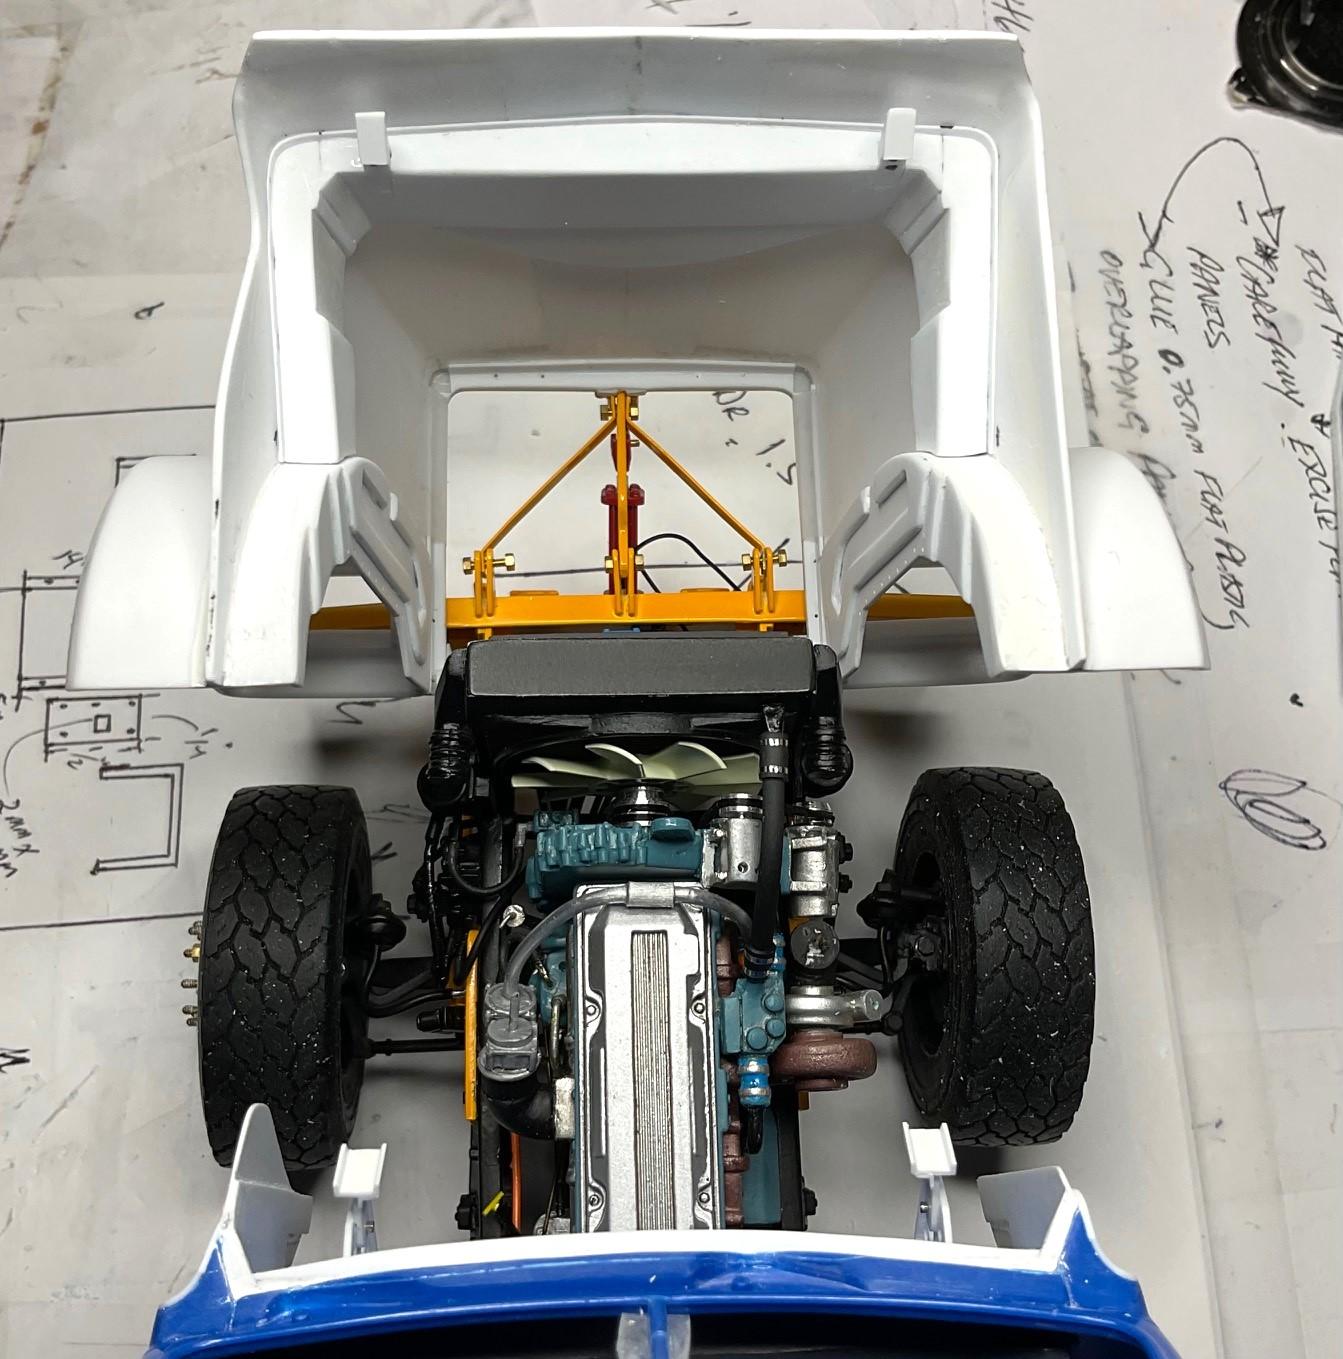
BK9300 replied to BK9300's topic in WIP: Model Trucks: Big Rigs and Heavy Equipment
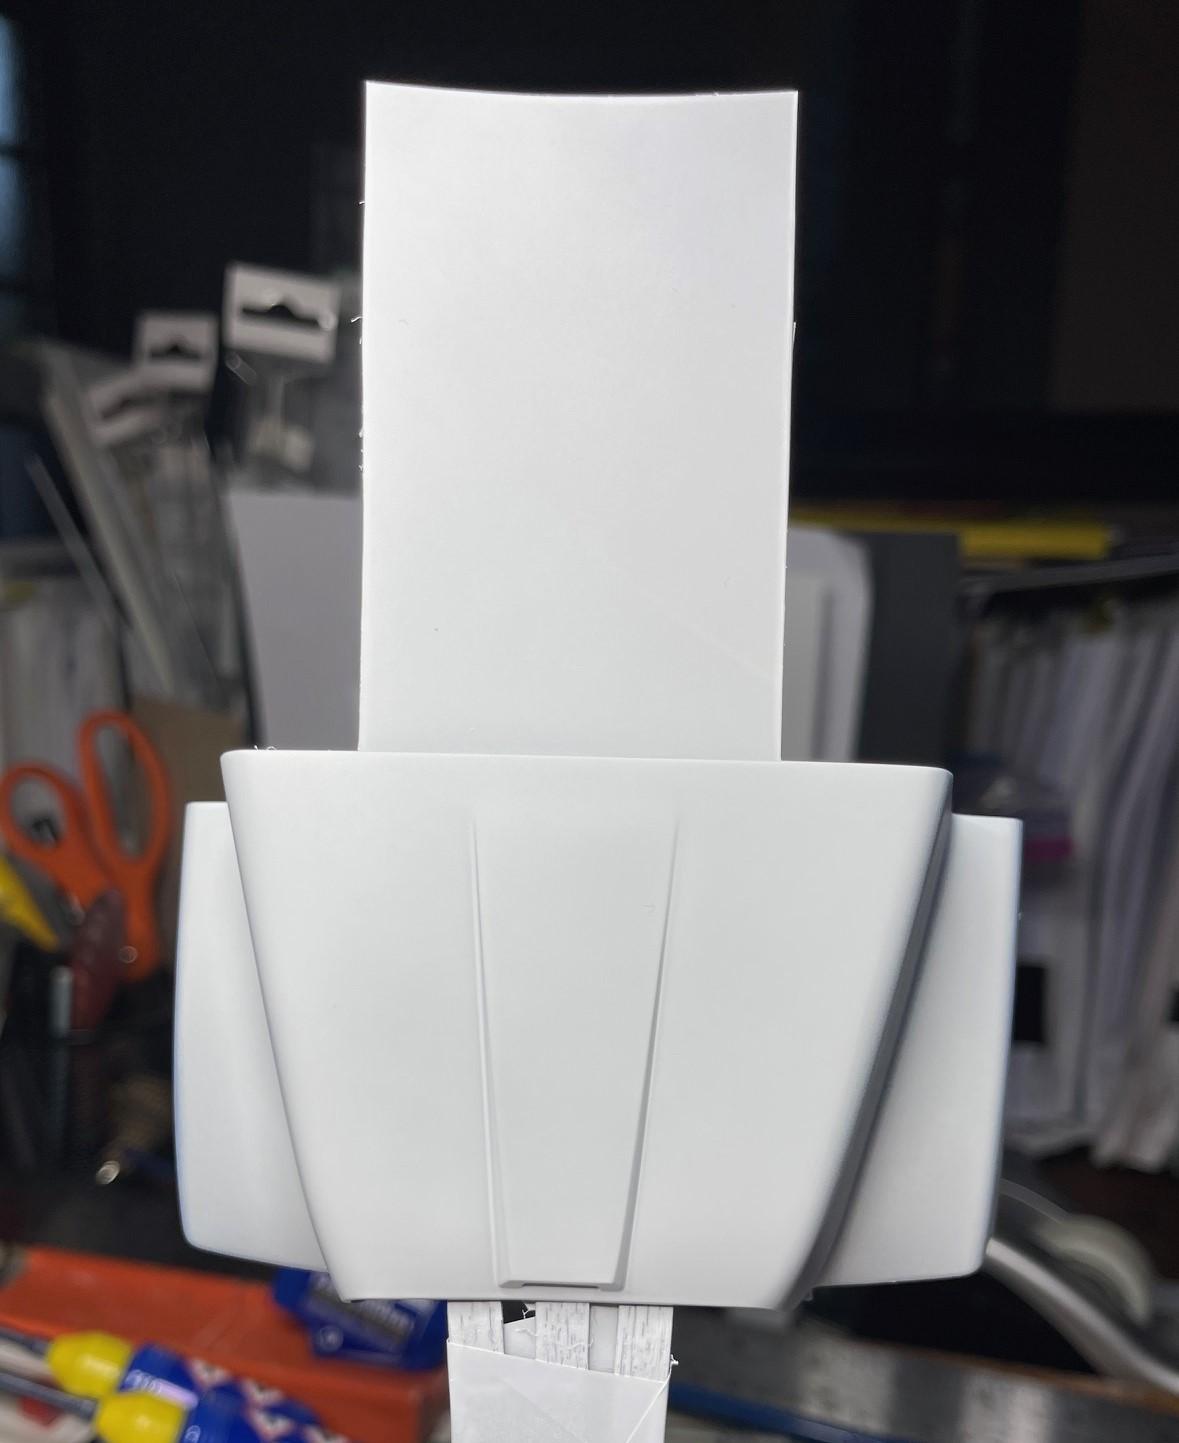
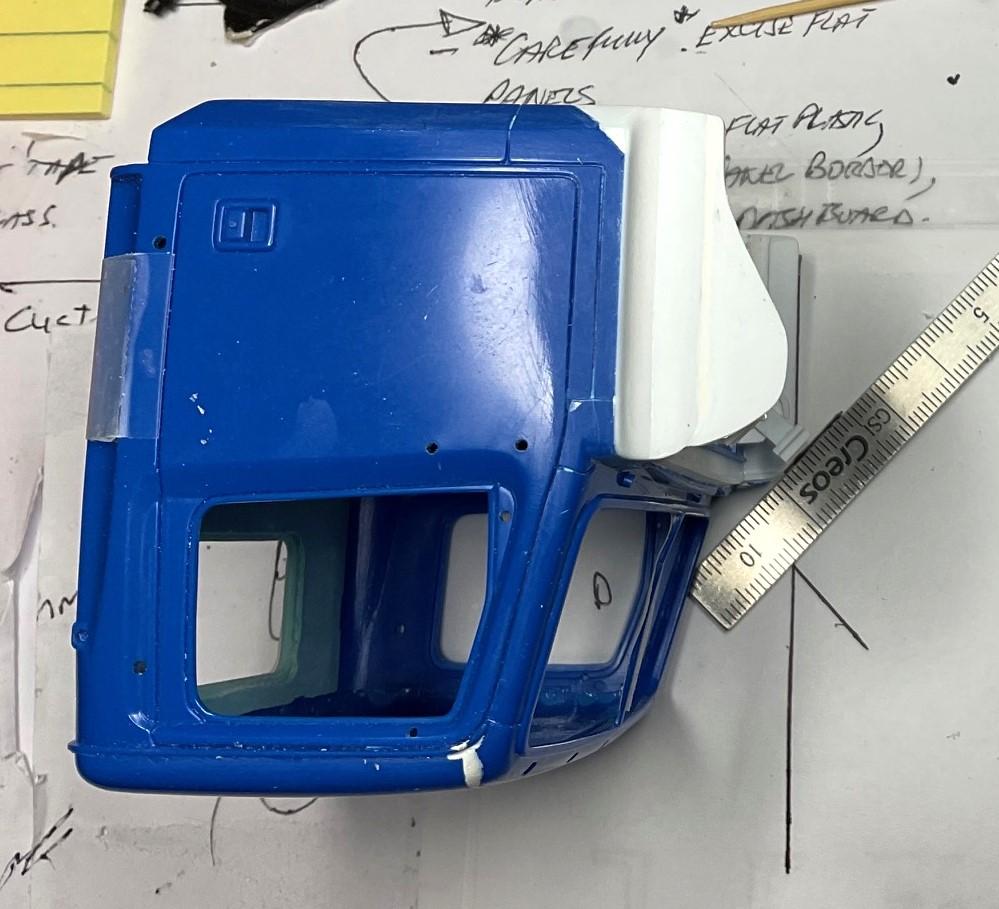
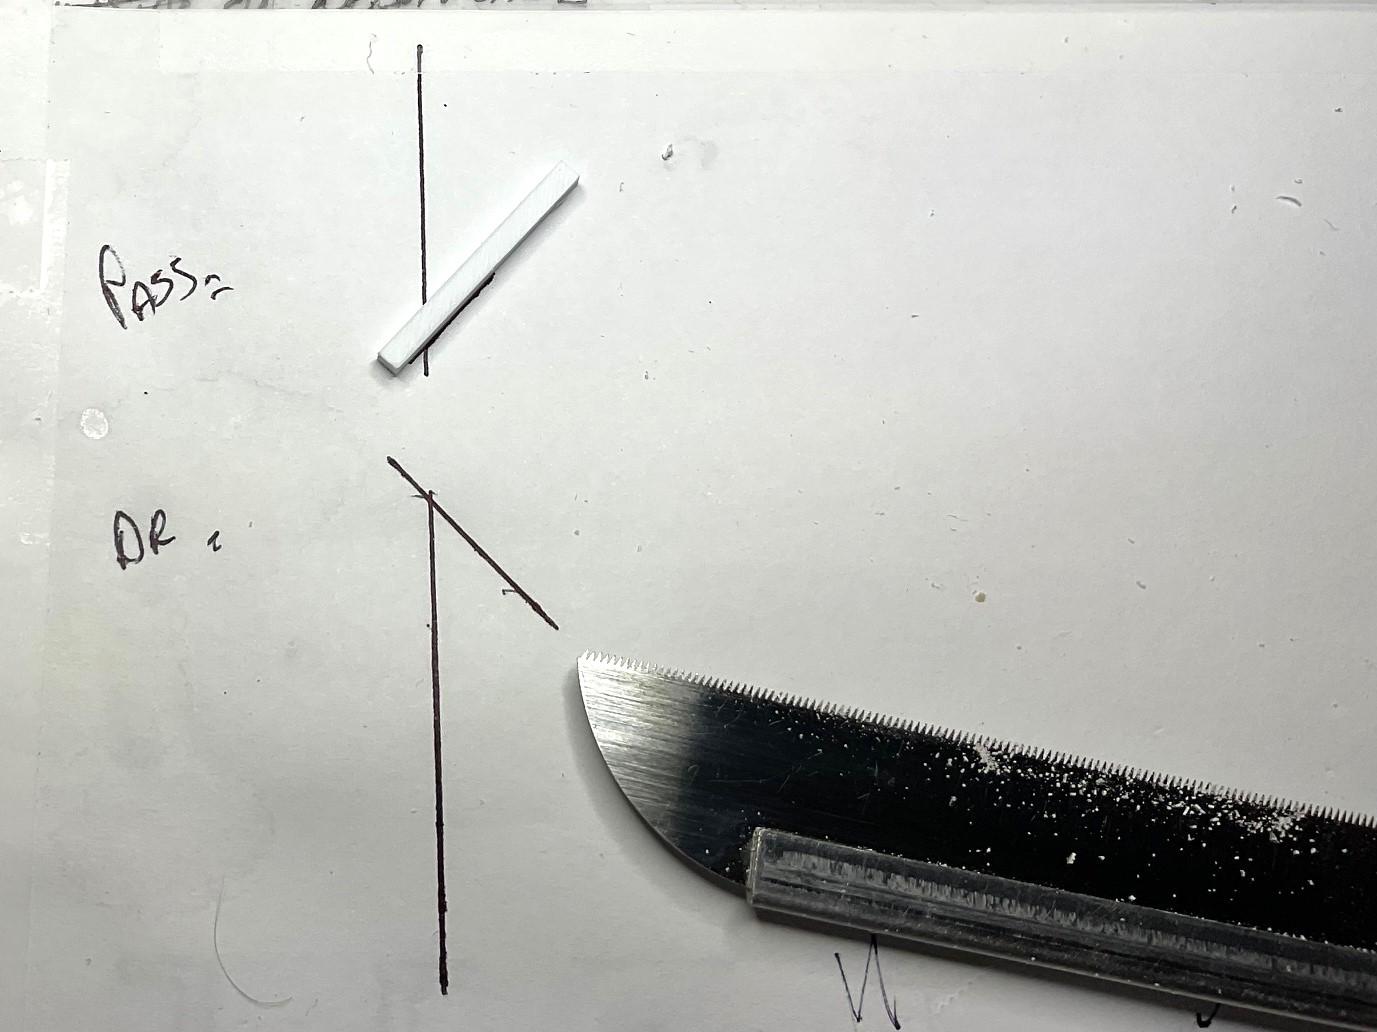
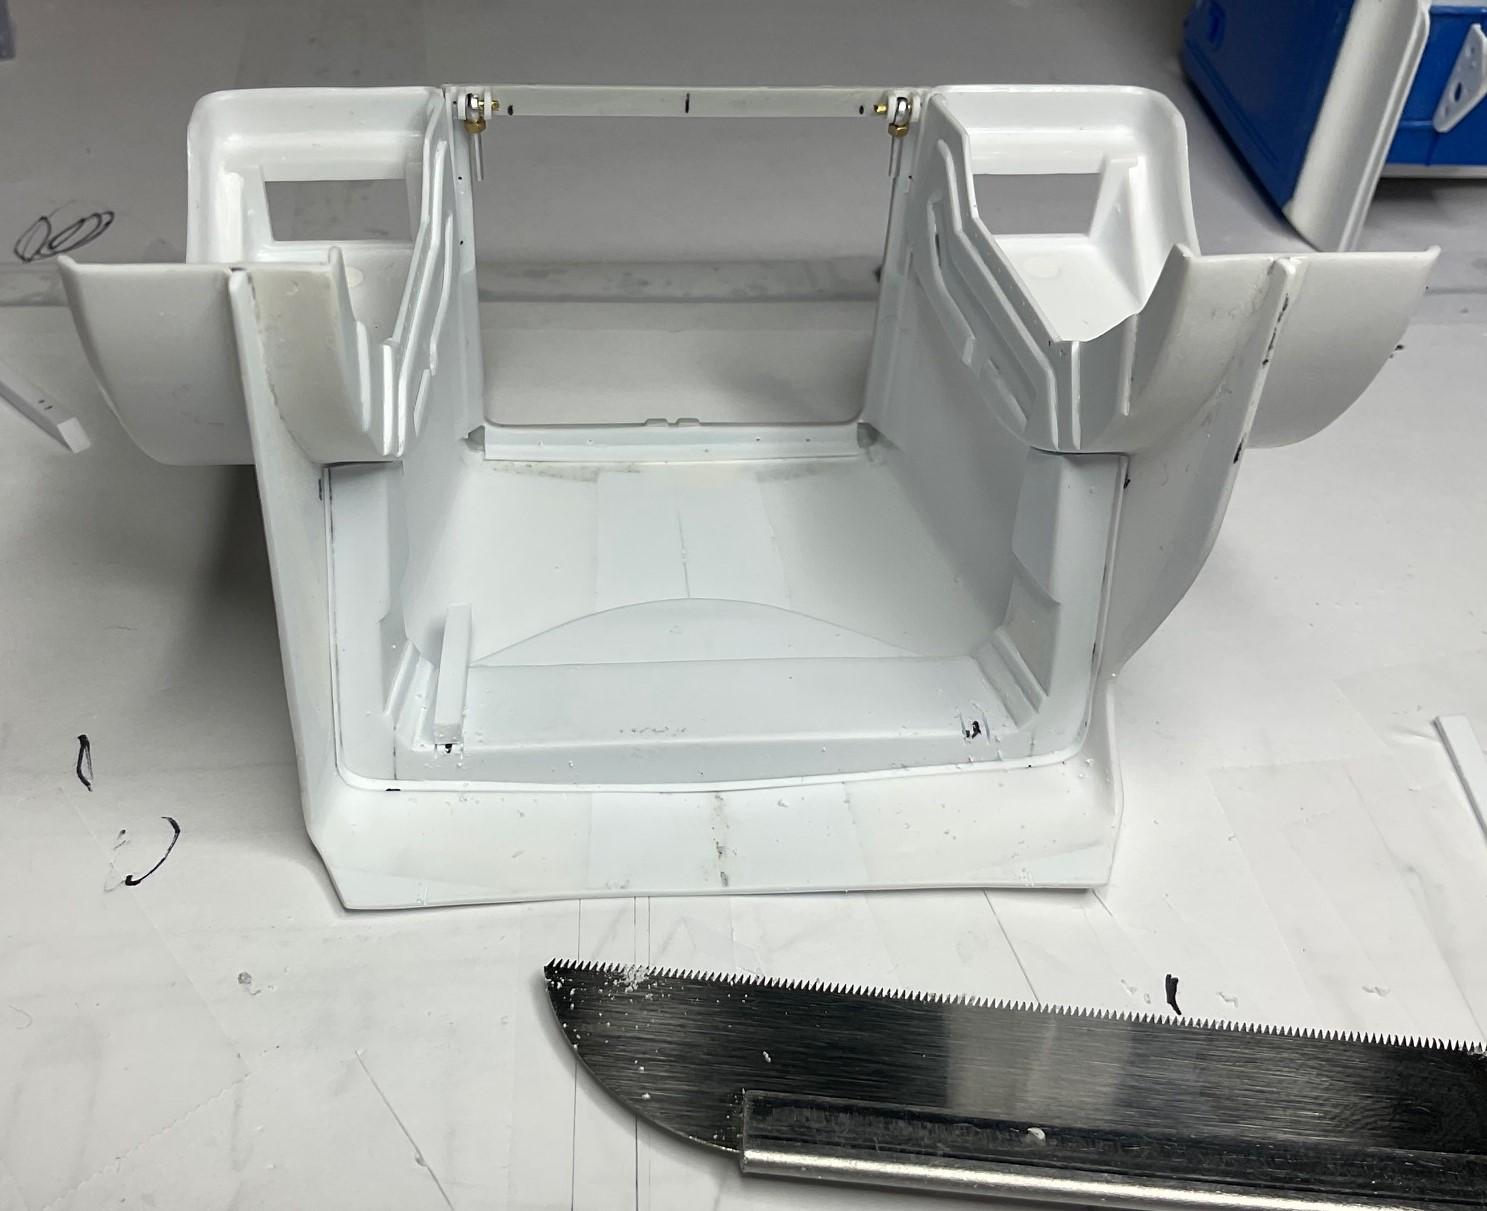
Another tedious item off the list today - the hood mount support halves that attach to the hood's inner brace. Spent some time looking at pics and finally figured the only way to make a up this portion of the mounts, and have them be solid, was to do a little surgery on the top portion of the inner brace. So, out with the razor saw and a new blade in the X-acto knife! A very low tech way of establishing the angle that the other half of the mounts need to be at, to meet up with halves on the firewall I ended up taping the 2mm x 2mm stock down and cut it along the 'vertical' line Then I needed to make two openings in the leading edge of the inner brace - I wanted the resulting mounts to be very solid and this would hopefully achieve that; marked the outside edges of cut with razor saw And trimmed out the balance of the openings with new, sharp #11 blade. The dots are my way of keeping track of which side goes where - one mount was a tick longer than the other and I likely wouldn't have remembered which was which any other way! 'Rubber' pads added to end of mounts - the mounts are just taped in place for now, to check alignment Cab and hood taped together once again. The mounts line up! I do not intend to have them actually touch - I'm sure paint will take up a bit of room in the gap that you see, but the mounts more give an impression of hood support than actually provide it! Next two pics are final test of alignment and unobstructed hood operation with mounts in place All good and hood closes up tight! Its a nice afternoon out and the studio shed has the heater on, so going out to do a primer test on that spare hood. Will see if I get to a colour coat later this afternoon and will post a pic, regardless of how it turns out! Thanks for having a look and I have appreciated your thoughts and comments! Take care.