BK9300
-
Posts
1,991 -
Joined
-
Last visited
Content Type
Profiles
Forums
Events
Gallery
Everything posted by BK9300
-
That’s a nasty (in a good way!) looking engine compartment, Daniel!
-
Your latest decals are a huge improvement over the earlier ones
-

Western Star 4900 FA plow truck
BK9300 replied to BK9300's topic in WIP: Model Trucks: Big Rigs and Heavy Equipment
Thanks, Jeff and Scott - it's a bit made up, although I did see one pic online of a Western Star dash with an Allison shifter - just filled in the space to the left of the shifter with as many switches as looked appropriate! -
Western Star 4900 FA plow truck
BK9300 replied to BK9300's topic in WIP: Model Trucks: Big Rigs and Heavy Equipment
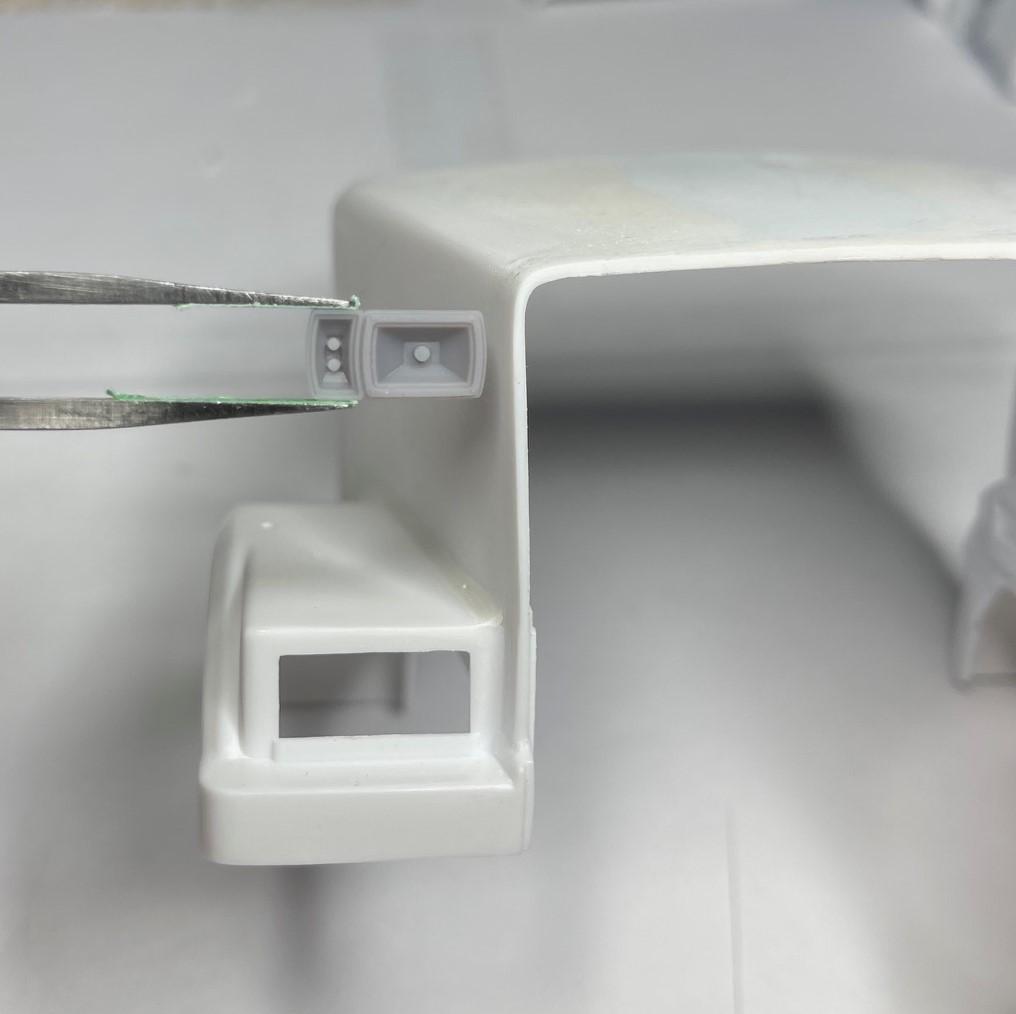
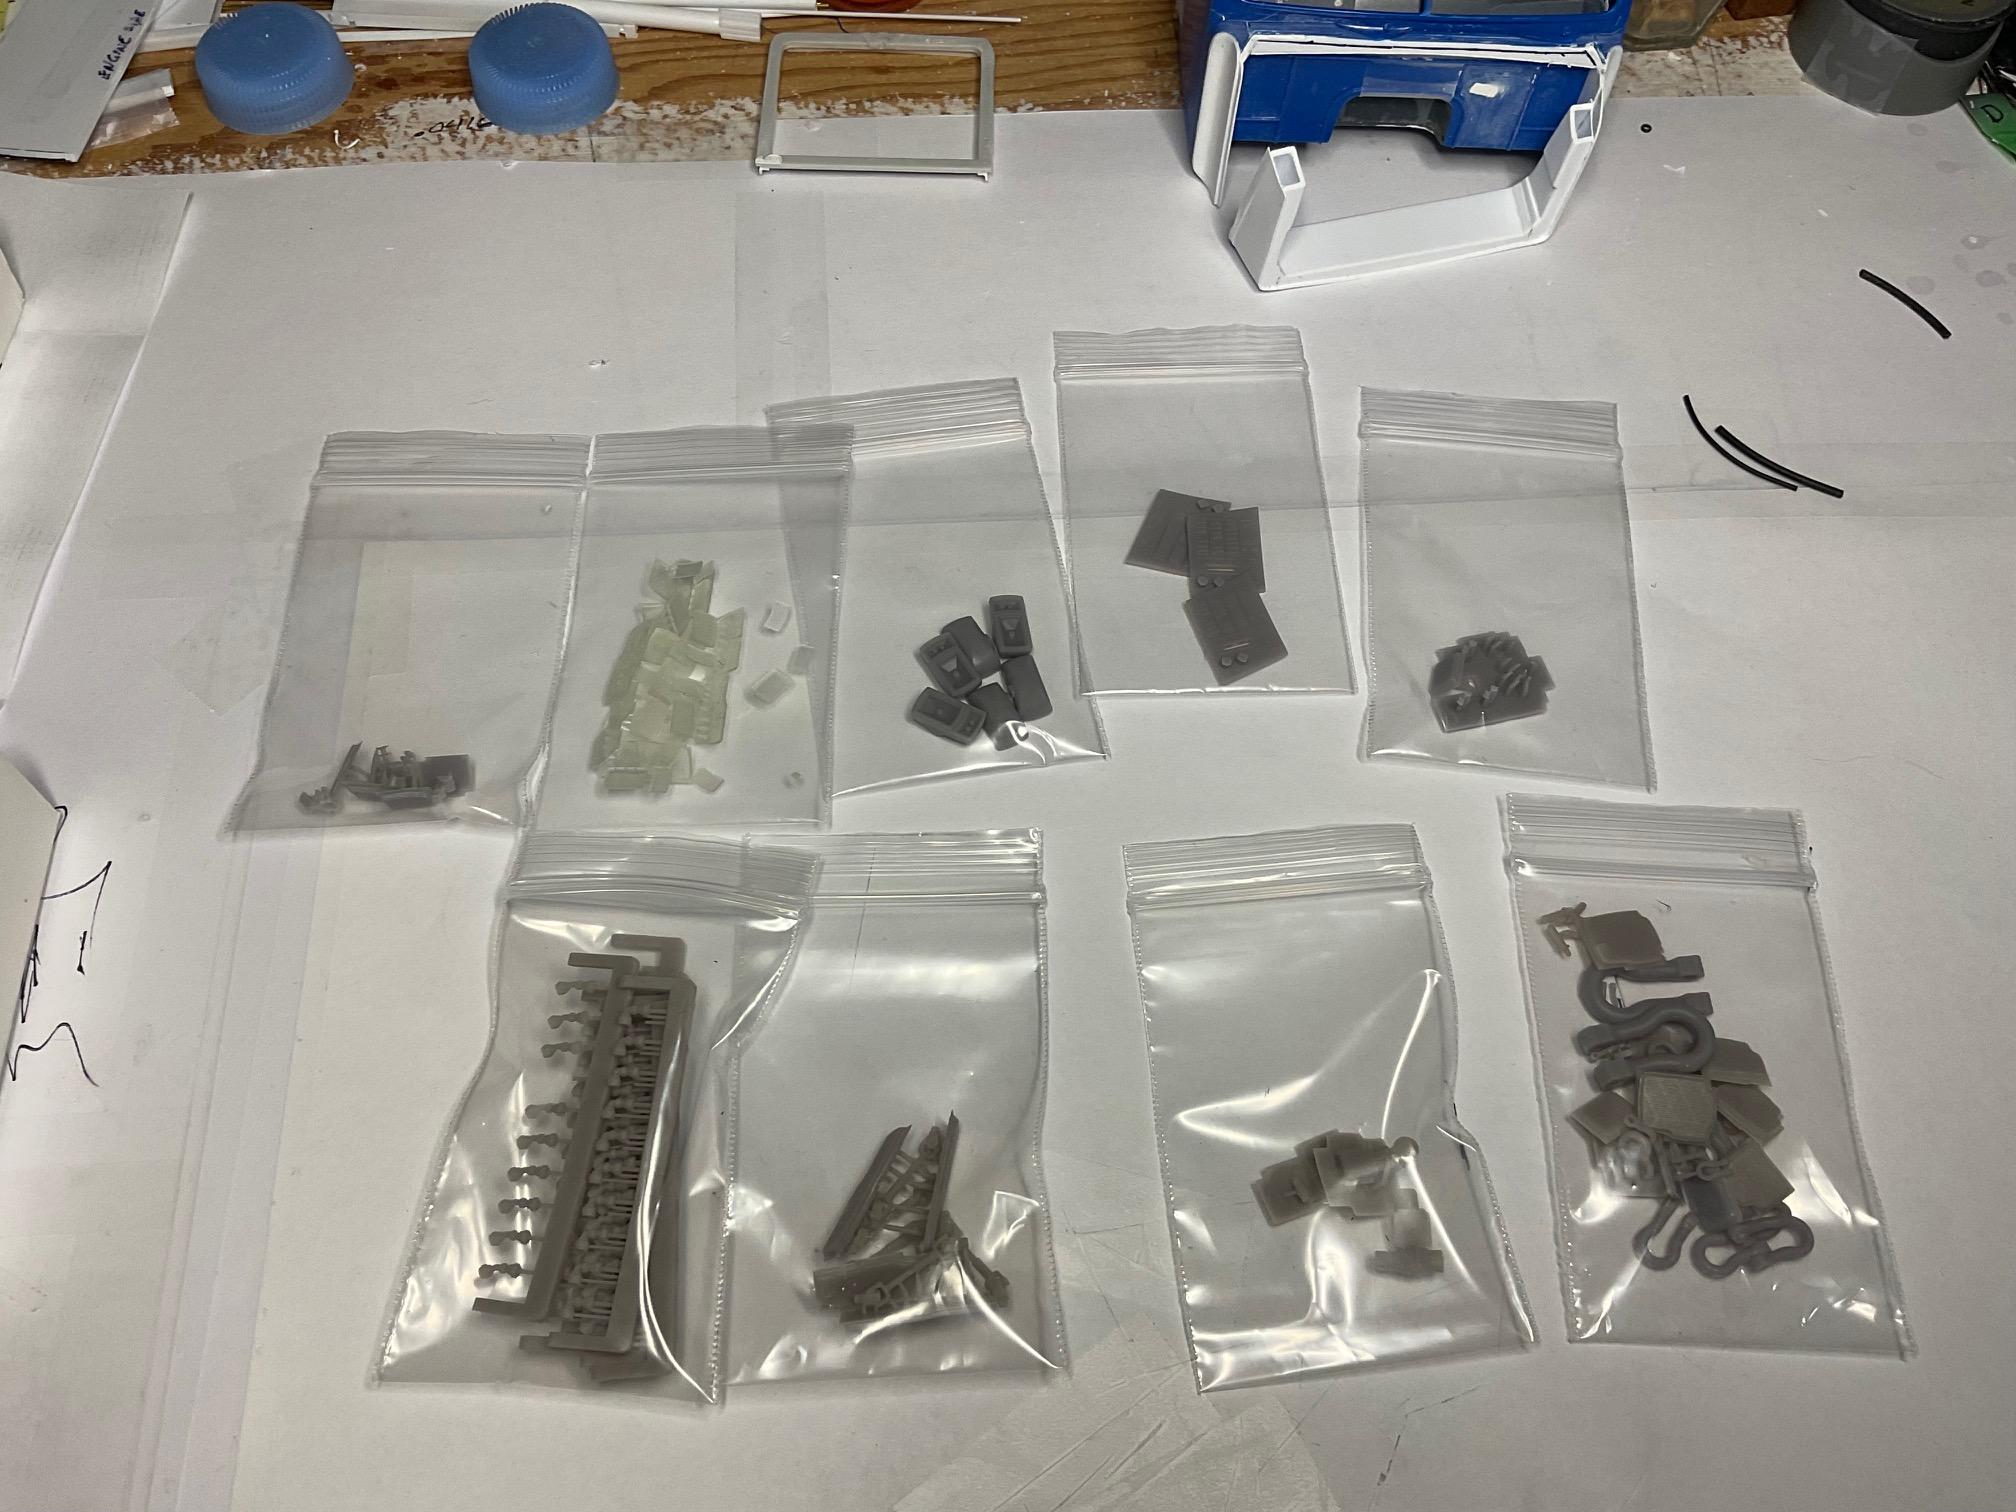
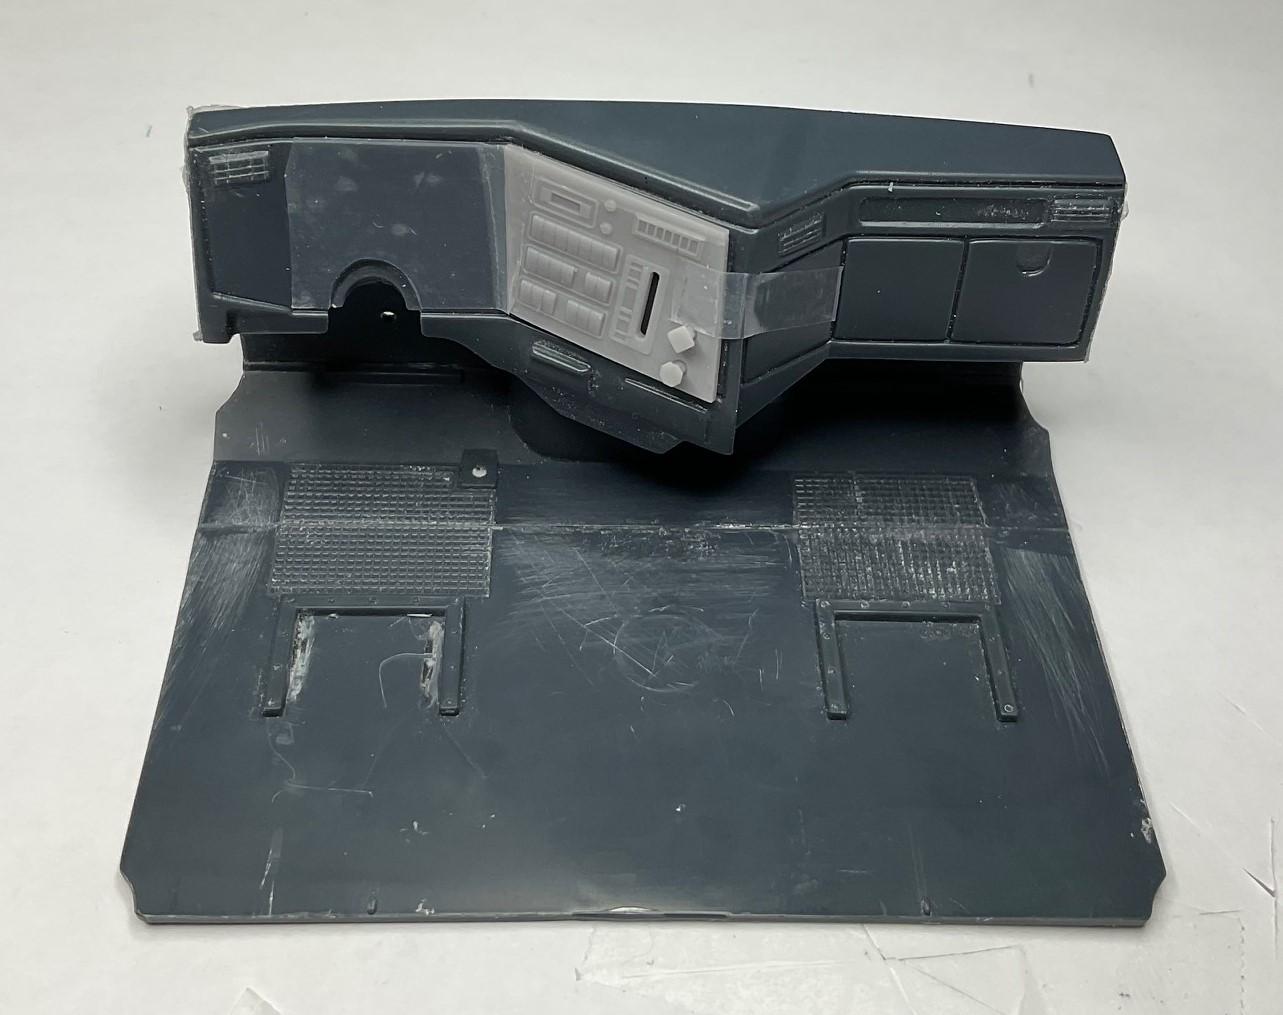
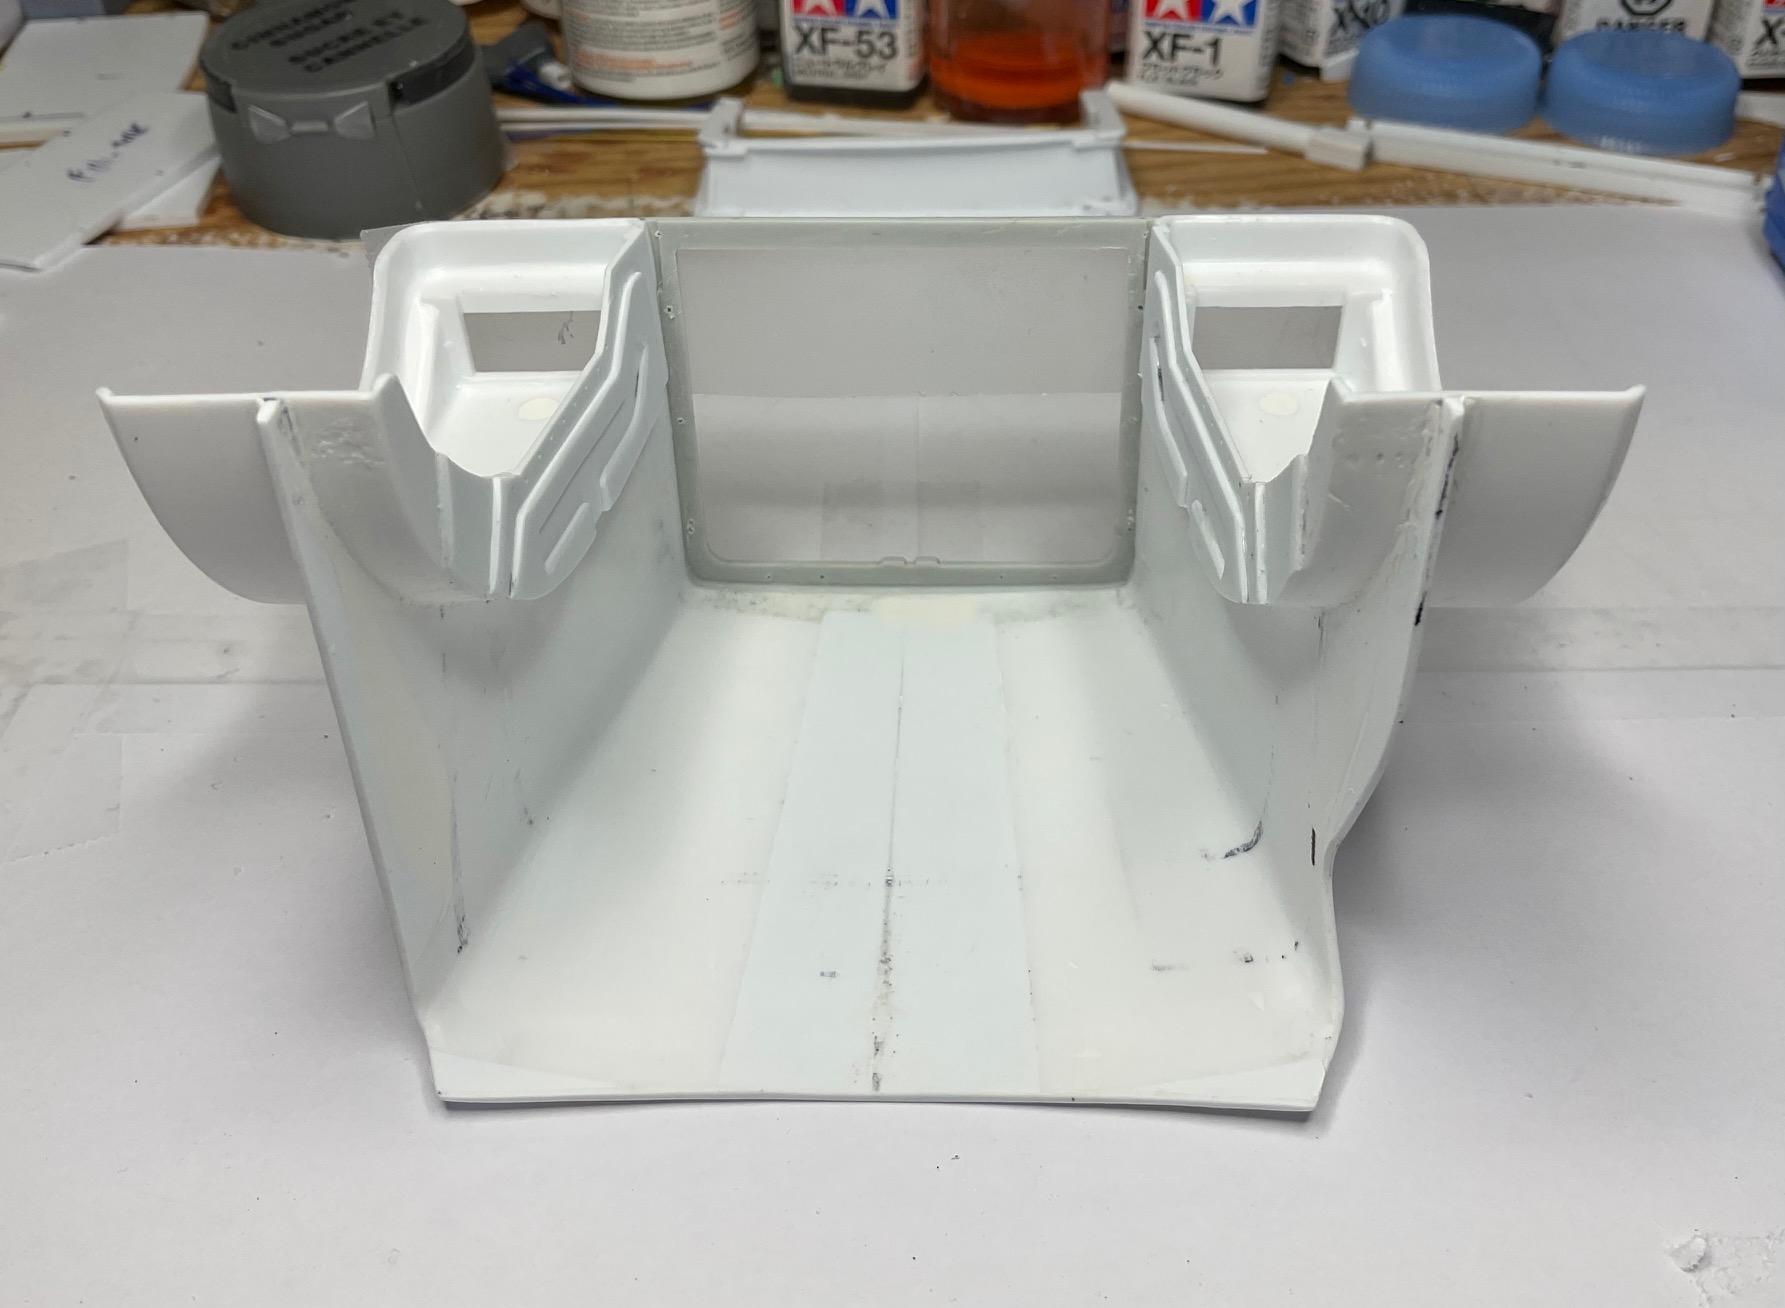
Another package of my parts, printed by @Bren , arrived today, along with a few bonus items thrown in to check out! - Some small valve handles for my plow control tower (so I can paint them more easily), plow light housings and lenses, crankshaft pulley driveshaft, hydraulic hose connections, electrical connectors, and a sampling of clevises with separate pins. Hydraulic pump drive shaft Plow light housing Right hand dash board panel - made this panel because I wanted a dash mounted shifter for the Allison automatic transmission. May need to make center and left hand panel sections as well because the kit decals won't look very good along side the right hand panel. Will have to carefully cut out the kit's flat panel to fit the right hand panel in place and add the shifter handle. Should be ready to work on the cab/interior early next week.
-
Your patience (and skill) with such tiny PE is beyond me - I look at that little stair section crossing over from the platform on the stack, and wonder how you ever held on to it to place it, never mind glue it! Well done.
-
Western Star 4900 FA plow truck
BK9300 replied to BK9300's topic in WIP: Model Trucks: Big Rigs and Heavy Equipment
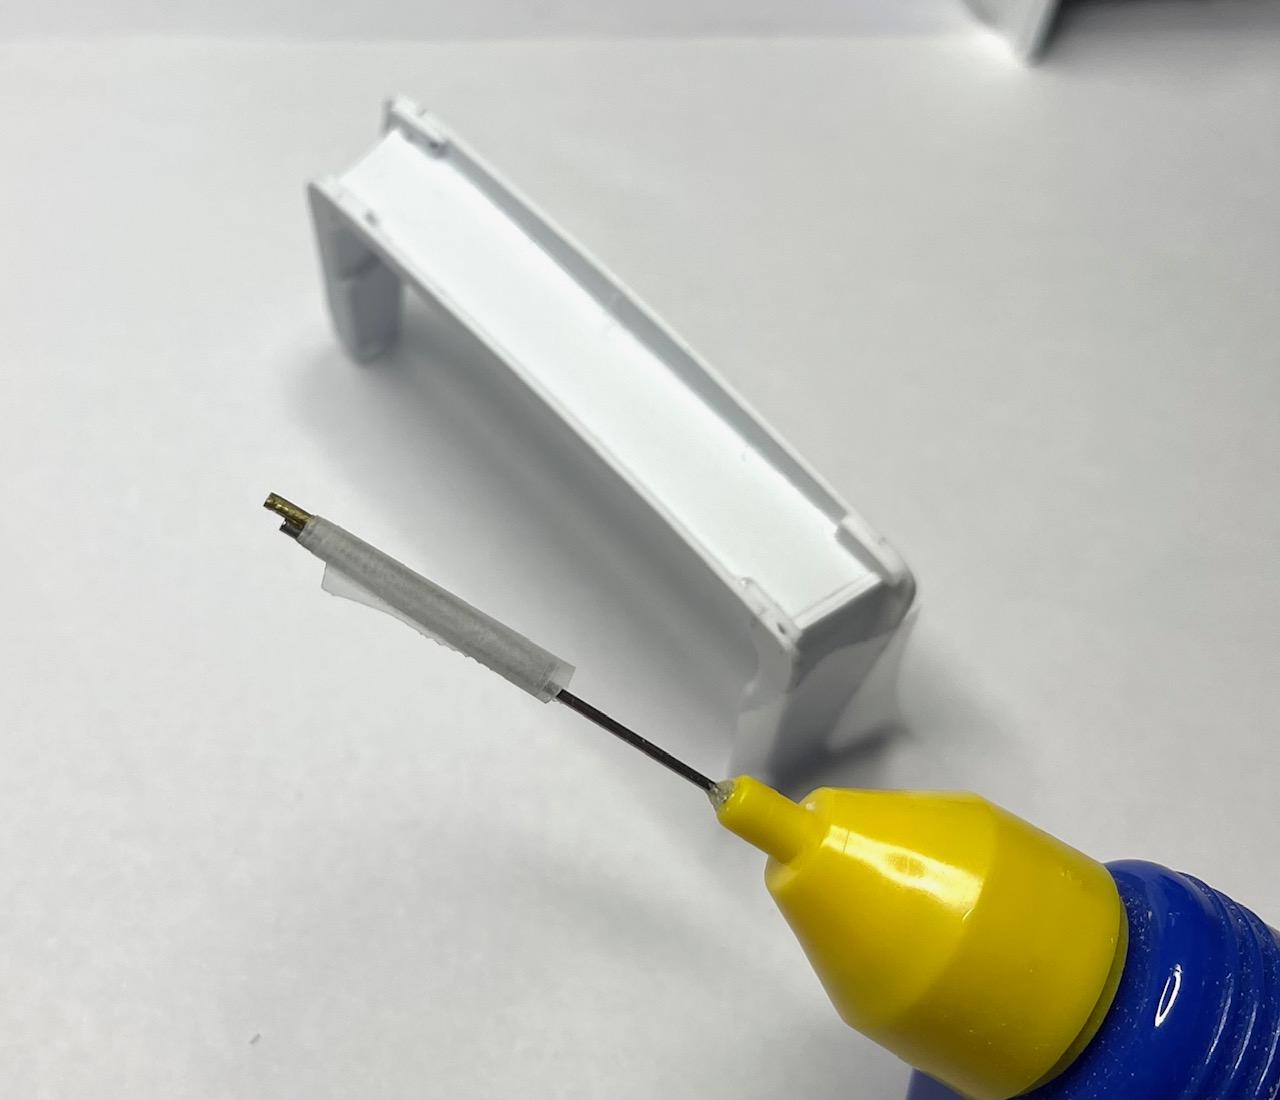
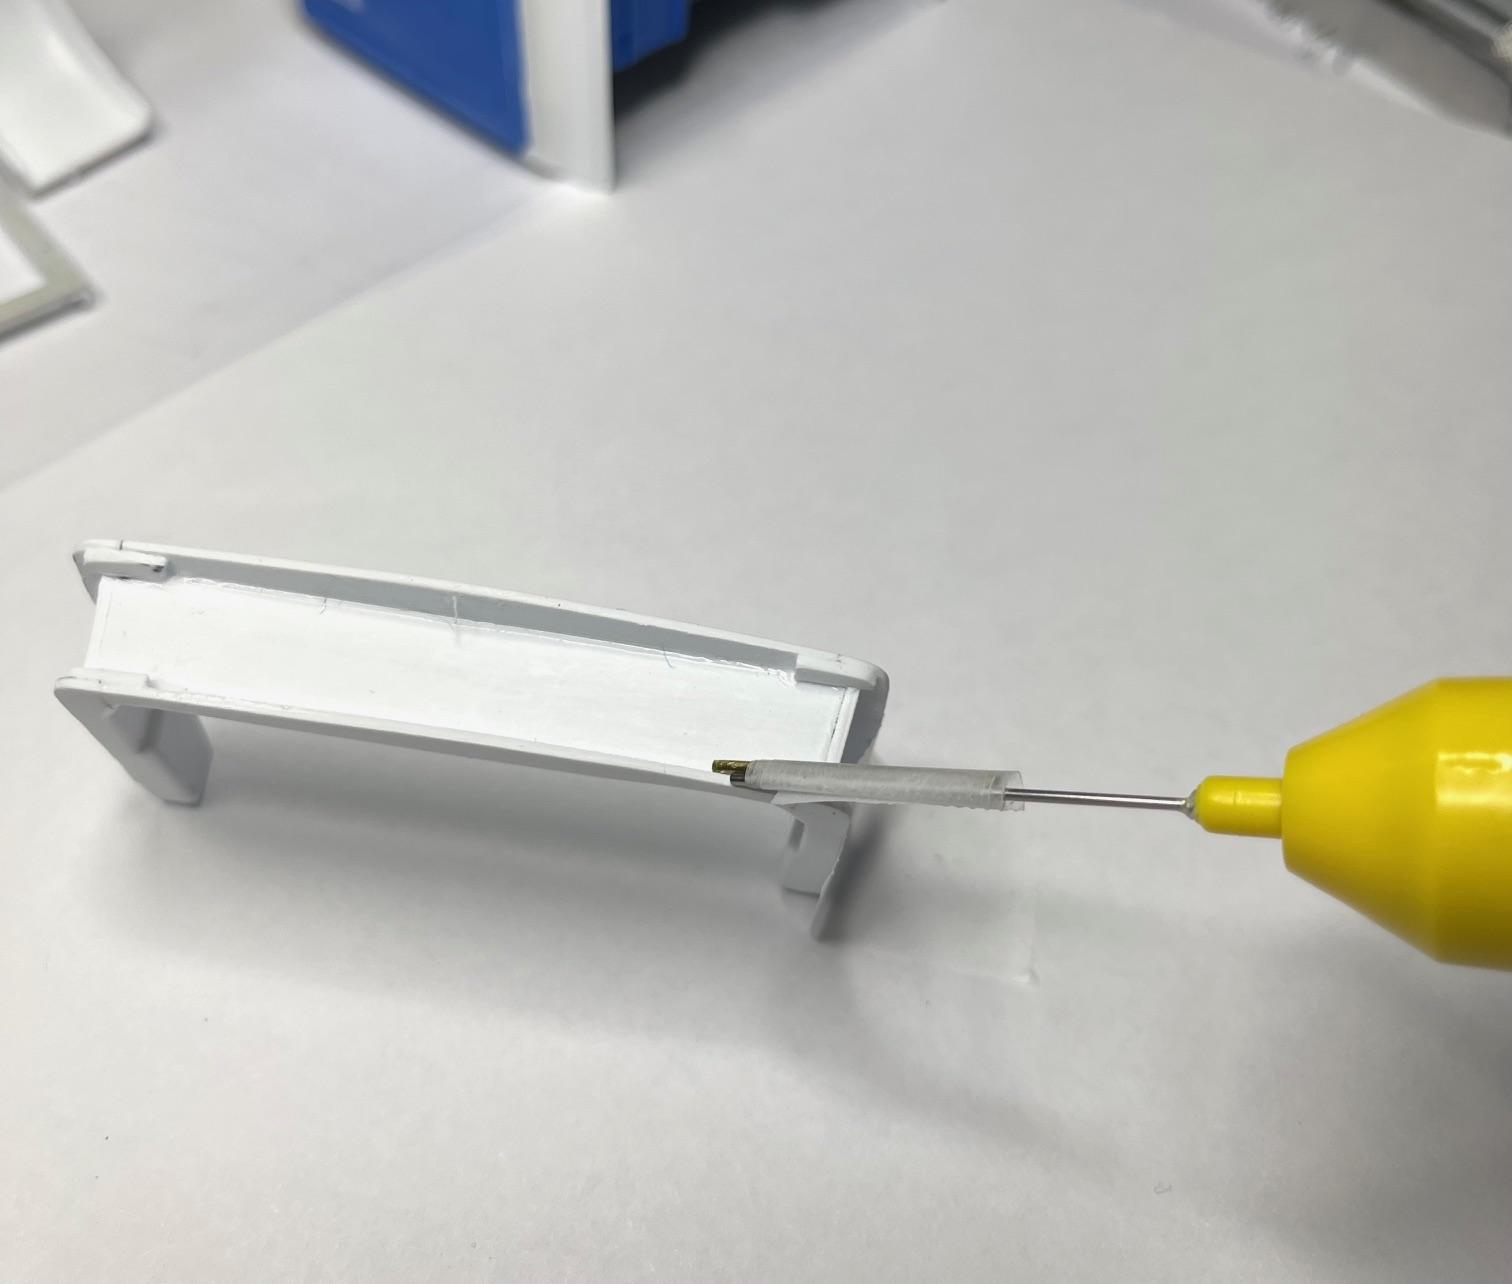
Not much to post today, but did want to pass on a little tip, new to me, that helped me out today. Wanted to glue a thin piece of plastic sheet to the back of the inner hood brace, and trim it to look like the mounting flange around the edges of the brace. I have to brace my hands quite steadily or I can make a very 'shaky' and messy glue pass. Didn't want a much of a mess, because flange is so thin, so, made a quick guide for my Revell liquid glue dispenser. Needed a 'non-messy' application of glue along outside edges of brace to glue a section of 0.2 mm sheet to backside of brace. I taped a short length of brass rod to, and extending past the end, of the dispenser tip - I could then lay the applicator tip along the edges needing glue, and using slight pressure against the brass rod, apply the glue without the slop over I sometimes get with hands that shake a bit! The 0.2 mm sheet set in place and trimmed to width - Only a little bit of cleanup needed along the flange area - saved myself some extra work! All for now - off to do some work on the cab - thanks!
-
FDNY Wrecker
BK9300 replied to Scott Eriksen's topic in WIP: Model Trucks: Big Rigs and Heavy Equipment
Your wrecker looks ready to haul that stranded pumper back to the garage! Any chance your light bar lenses can be painted with red clear? -
’72 Dodge Demon Drag Racer 1/25 scale
BK9300 replied to AmericanMuscleFan's topic in WIP: Drag Racing Models
Definitely happened to me, too - very frustrating! I let Dave Ambrose know, but others continued to have problems. All I could do was keep trying to post and eventually got through. Hope they find their way to a resolution soon! -
Mack and heavy equipment project
BK9300 replied to TrucksMT's topic in WIP: Model Trucks: Big Rigs and Heavy Equipment
It already looks well used and worn - nice start to your weathering! -
Western Star 4900 FA plow truck
BK9300 replied to BK9300's topic in WIP: Model Trucks: Big Rigs and Heavy Equipment
Appreciate the heads up - I'd have to try it on my old WS hood first - seems its a 'test bed' for my body work! -
Your 'prep' work looks like a very expensive matte wrap on a real car!
-
Western Star 4900 FA plow truck
BK9300 replied to BK9300's topic in WIP: Model Trucks: Big Rigs and Heavy Equipment
Thanks, Jeff! Like I mentioned to Ken above, new ideas about what to add keep popping up, but just doing the ones I think I can actually complete! -
Western Star 4900 FA plow truck
BK9300 replied to BK9300's topic in WIP: Model Trucks: Big Rigs and Heavy Equipment
Thanks, Francis, this made me smile! My youngest brother used to work in a body shop and your comment reminded me of that and some of the problems he had to overcome with some of his jobs. -
Western Star 4900 FA plow truck
BK9300 replied to BK9300's topic in WIP: Model Trucks: Big Rigs and Heavy Equipment
I appreciate the comment, Steve and I agree about the body work - I'm thinking I've made good progress and then I discover all the putty pinholes in the top of the hood that need fixing. Hoping the second go round of putty will solve that - might just need to fill them with primer! -
Western Star 4900 FA plow truck
BK9300 replied to BK9300's topic in WIP: Model Trucks: Big Rigs and Heavy Equipment
Thanks for the compliment, Ken - new ideas for things to add seem to keep coming! -
1962 Marmon-Herrington HDT
BK9300 replied to Jürgen M.'s topic in WIP: Model Trucks: Big Rigs and Heavy Equipment
Jürgen, you're making fantastic progress! It has to be very gratifying to design and build your own kit(s)! It may be my imagination (or less than perfect eyesight!), but does your white filament print a bit more smoothly than the darker filament? Well done! -
1/25 AMT Peterbilt 359 California Hauler
BK9300 replied to cifenet's topic in WIP: Model Trucks: Big Rigs and Heavy Equipment
Very thorough on your thought processes about difficulties that you found in laying out your build. Interesting to follow and take note of! -
I agree with Steve - very fine printing and cleanup - excellent paint finish, too.
-
Western Star 4900 FA plow truck
BK9300 replied to BK9300's topic in WIP: Model Trucks: Big Rigs and Heavy Equipment
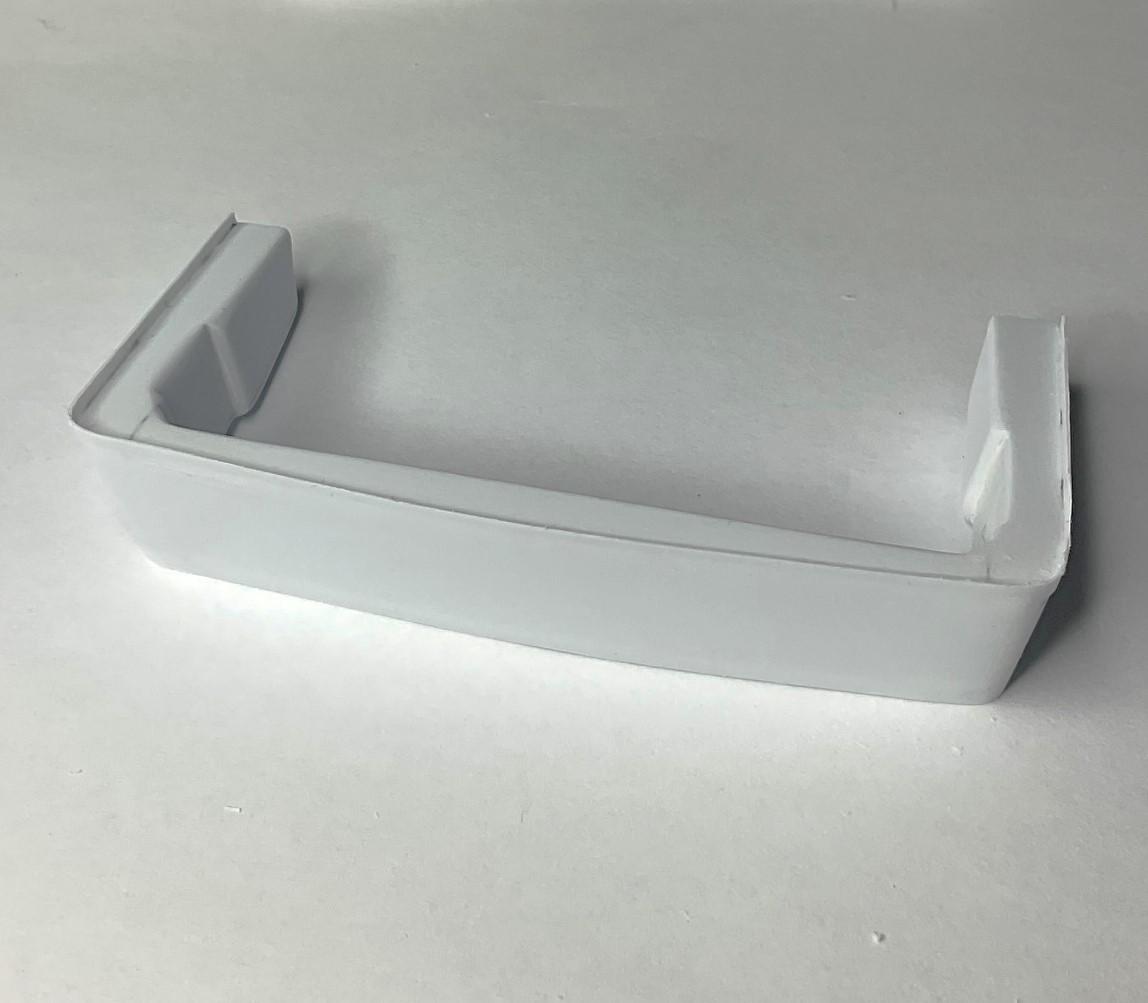
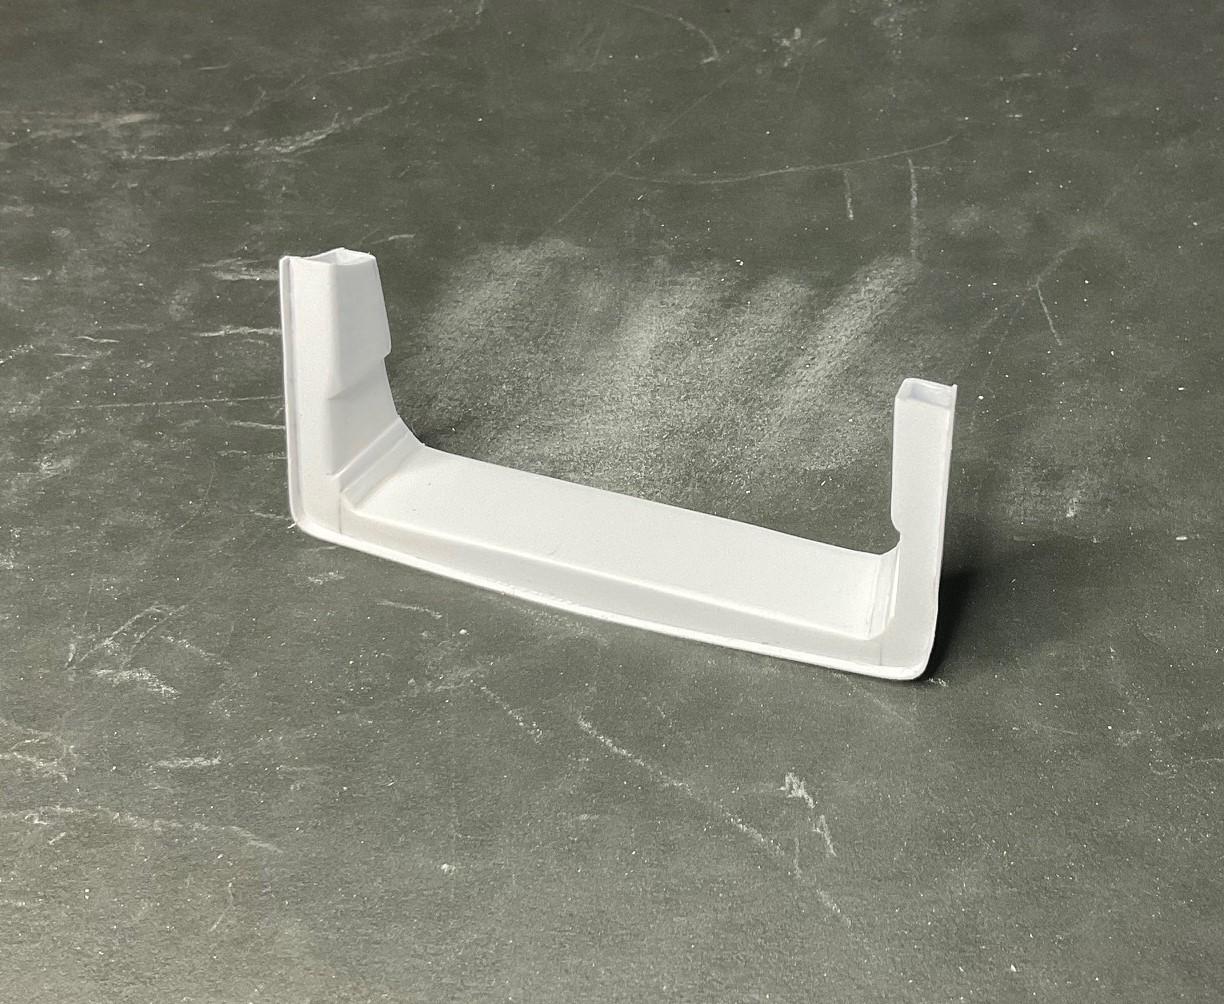
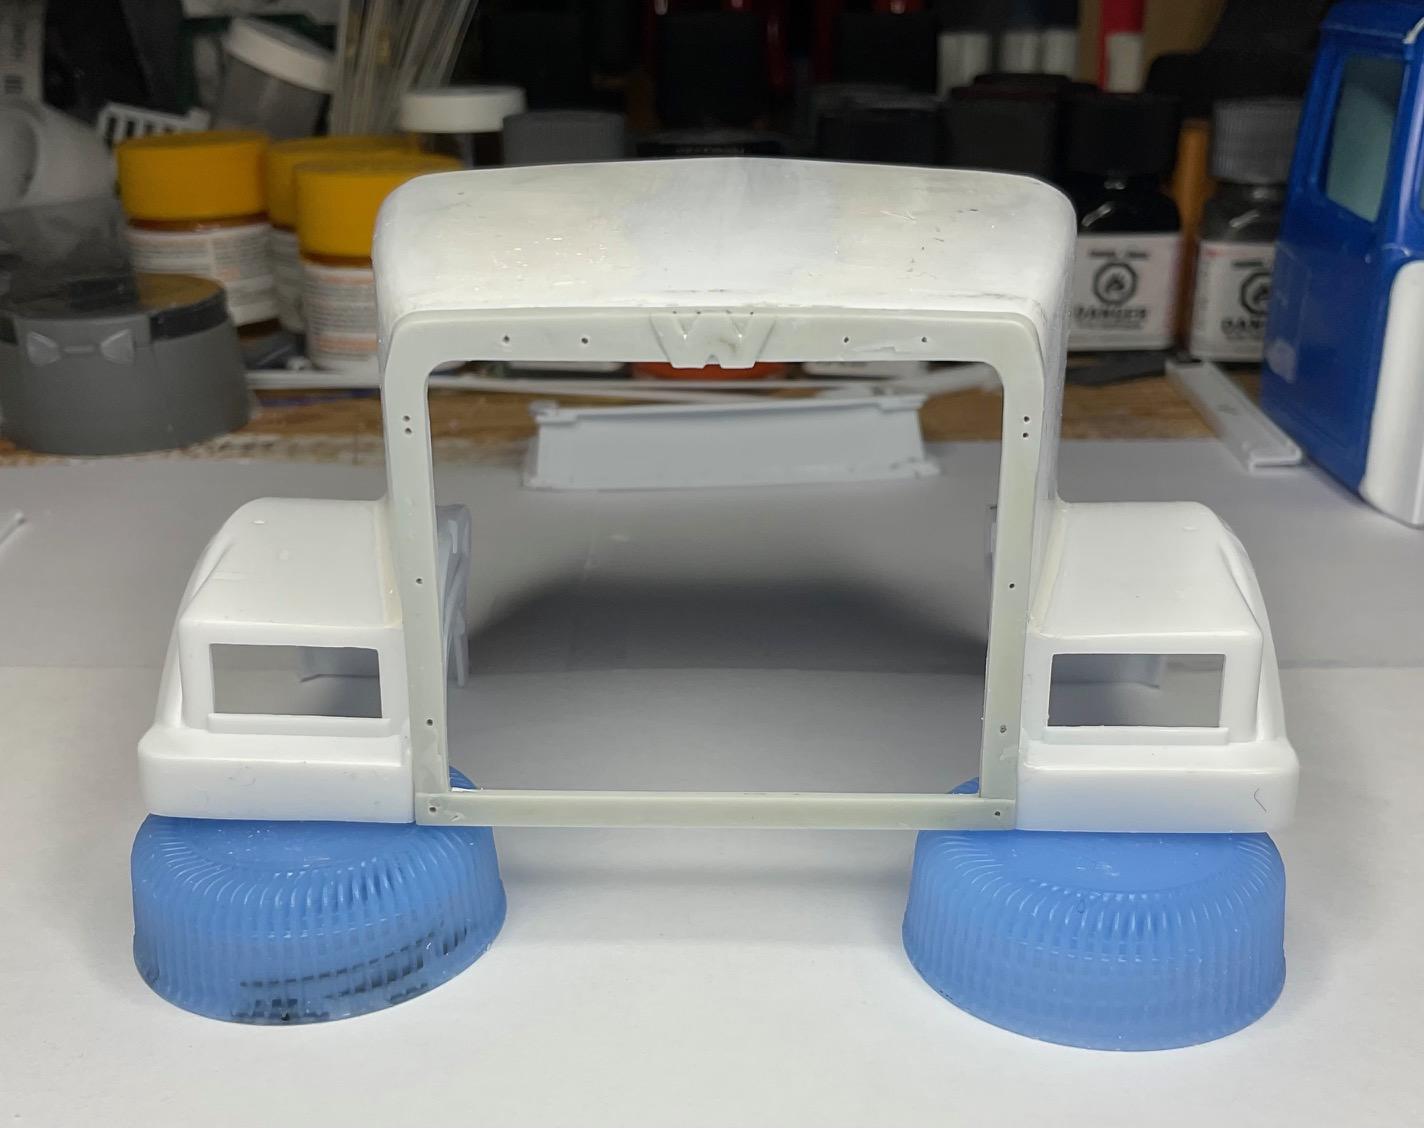
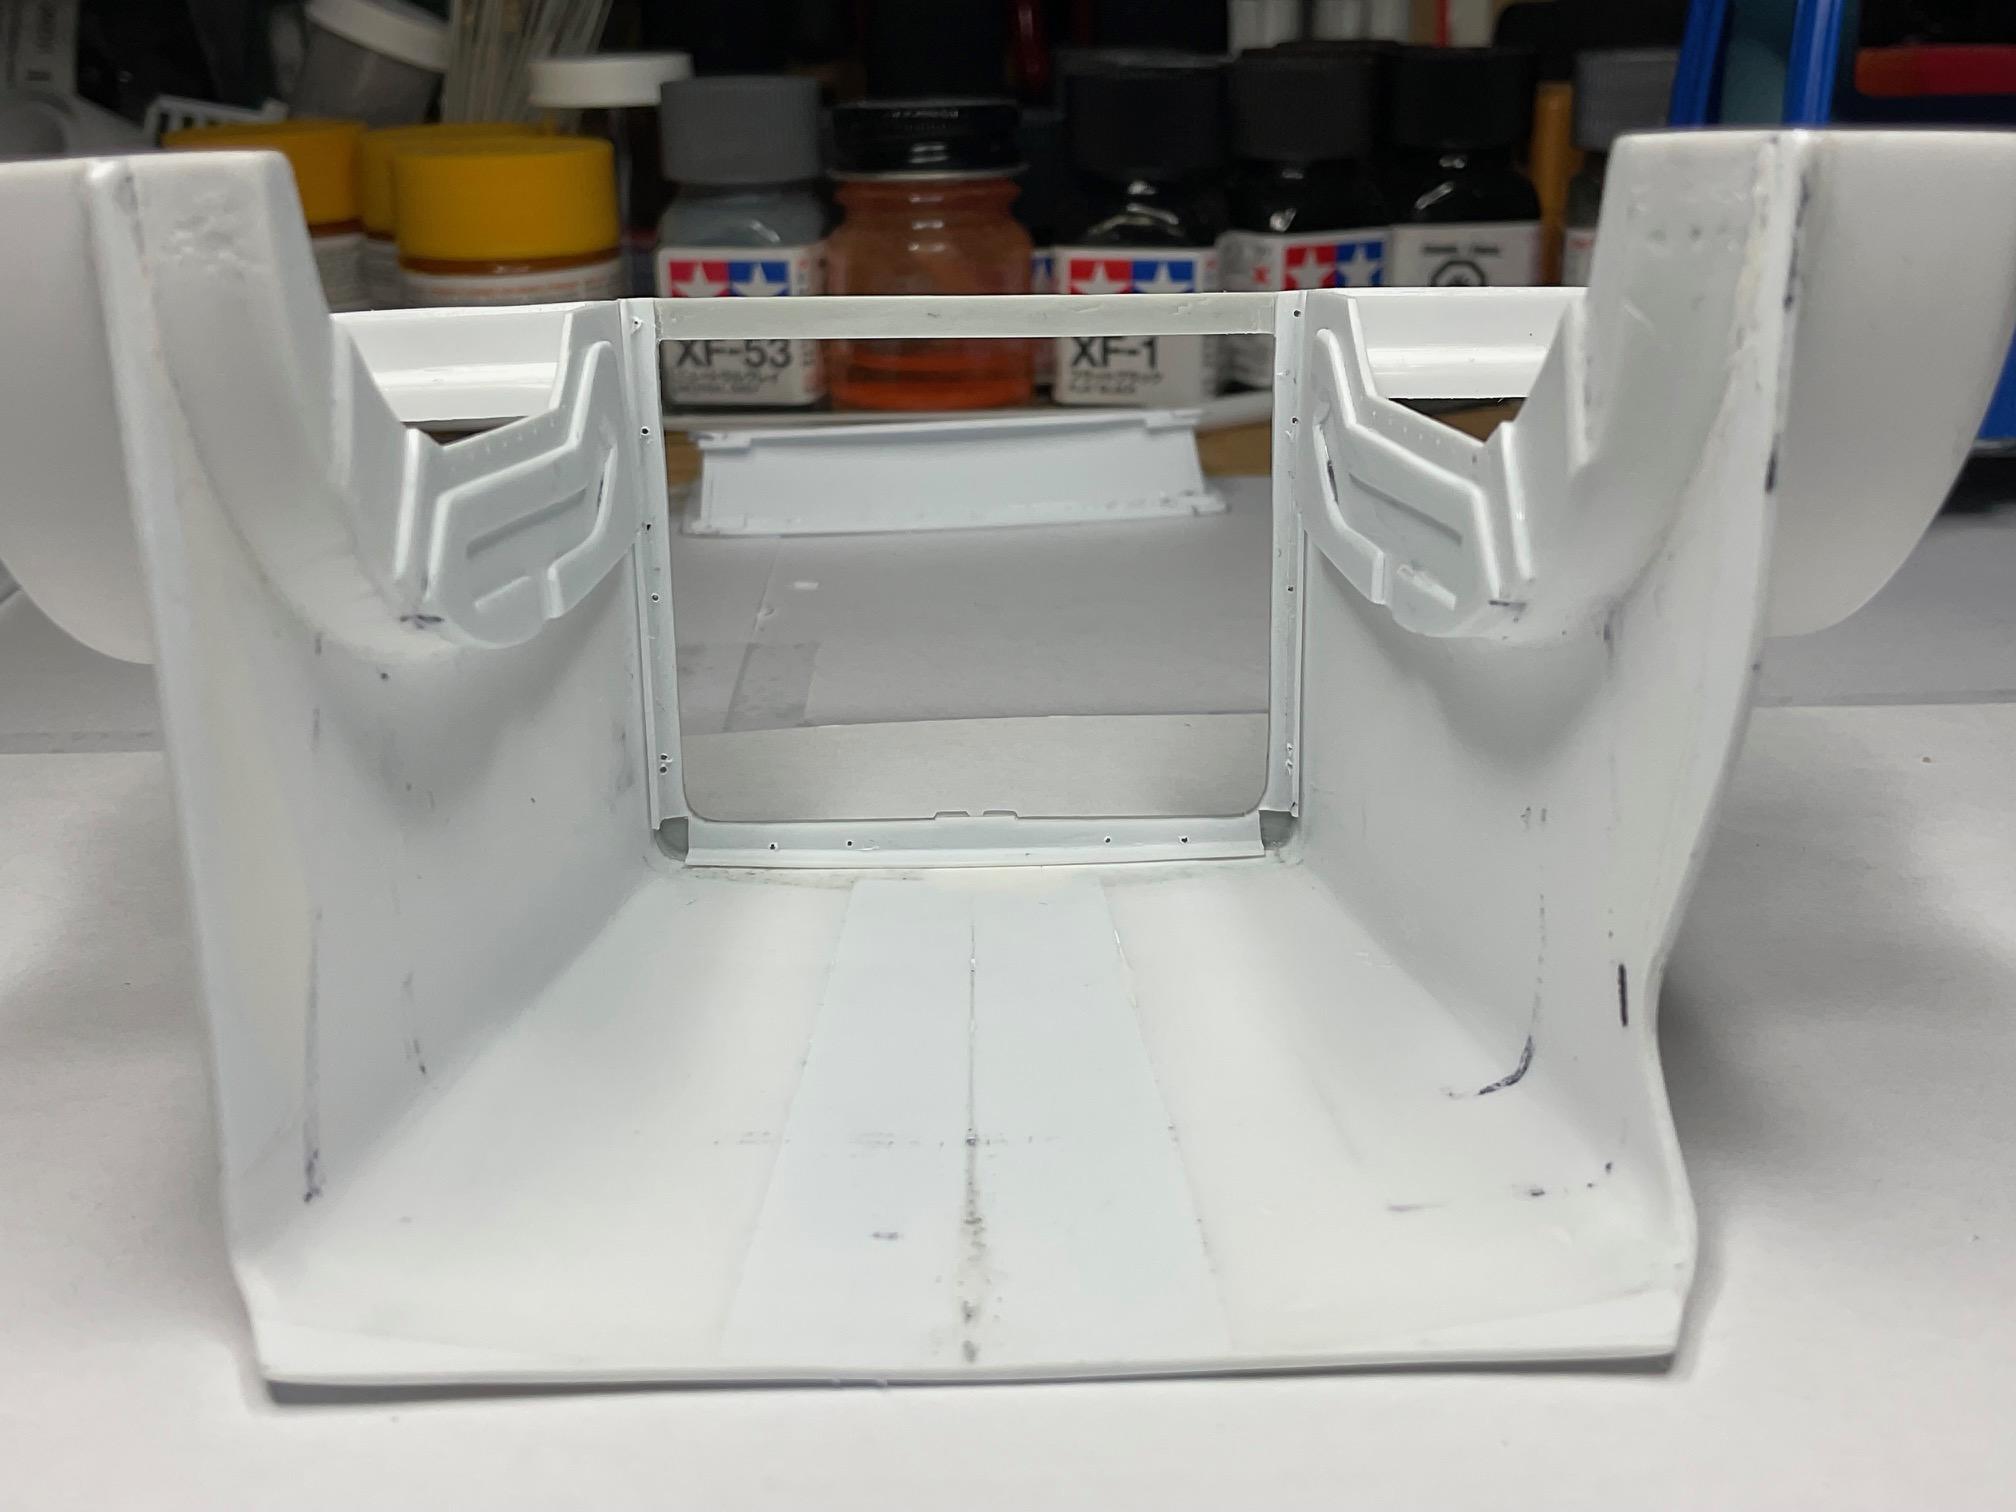
Rare event in North Vancouver here yesterday - 8 inches of snow, so spent the morning on the end of the snow shovel! Did get a few hours in at the bench this afternoon, mulling over the hinges that I need to make. The brace, hood and cab are out in the shed with another thin coat of putty setting up. While thinking about the hinges, noticed the front grille surround on the kit doesn't have very good locators, come time for it to be glued on, so I decided to 'flange' the inside perimeter of front hood opening, like a real hood is. Only difference is, I attached the flange to the inside of the grille surround to better position the surround when I need to glue it in place. In preparation for work I need to do on the hinge, I removed all the chrome and drilled out the rivet holes around the outside of the surround - have some Top Studio rivets to use after grille is re-chromed. The surround is taped to the outside of the hood at the moment. Rivet holes drilled out - the surround is a tiny bit too wide for the outside edge to edge of the hood, so will do some work on that too, before re-chroming Angle iron flange added to three sides of surround - Now the surround is very easily located in place. I will tape the surround to the inside of the hood and do the slight sanding fitment on the outside edges, bringing them in profile with the sides of the hood Quick session this afternoon, but more tomorrow, unless there is more snow! Thanks for having a look!
-
That's an awesome looking rig, Ron - I need to check out that designer on Cults!
-
Western Star 4900 FA plow truck
BK9300 replied to BK9300's topic in WIP: Model Trucks: Big Rigs and Heavy Equipment
Thanks, Charles - yes, they don't stay that clean for very long at all, but, everything has to have a 'day 1' look! -
Western Star 4900 FA plow truck
BK9300 replied to BK9300's topic in WIP: Model Trucks: Big Rigs and Heavy Equipment
Thanks, Scott - were a couple 'moments' early on with the inner brace when just about decided there wasn't going to be an inner brace! -
KW 86 inch Aerodyne
BK9300 replied to k100's topic in WIP: Model Trucks: Big Rigs and Heavy Equipment
Looking good, Mark - details are superb! -
I second that!
-
Western Star 4900 FA plow truck
BK9300 replied to BK9300's topic in WIP: Model Trucks: Big Rigs and Heavy Equipment
Thanks, Francis - I'll have to keep that in mind next time I have close quarters - thanks for the tip!