BK9300
-
Posts
1,991 -
Joined
-
Last visited
Content Type
Profiles
Forums
Events
Gallery
Everything posted by BK9300
-

1962 Marmon-Herrington HDT
BK9300 replied to Jürgen M.'s topic in WIP: Model Trucks: Big Rigs and Heavy Equipment
Marvelous how it all comes into being, starting with your ideas inside a software program, Jürgen - great progress! -
Farm Floater Truck 1/24th scale
BK9300 replied to Randy D's topic in WIP: Model Trucks: Big Rigs and Heavy Equipment
Fascinating work, Randy! Wouldn’t say your progress is slow at all - each component or ‘segment’ of your build so far (motor, cab) could stand on their own as separate model displays - tremendous detail to marvel at! (And a tease with a partial peek at your control monitor mast and wiring, too). -
Very cool looking combo, Pat - and very nicely finished!
-
Build of IH Pumper
BK9300 replied to Chariots of Fire's topic in WIP: Model Trucks: Big Rigs and Heavy Equipment
Geez, Charles - hope your arm heals quick as possible. -
Western Star 4900 FA plow truck
BK9300 replied to BK9300's topic in WIP: Model Trucks: Big Rigs and Heavy Equipment
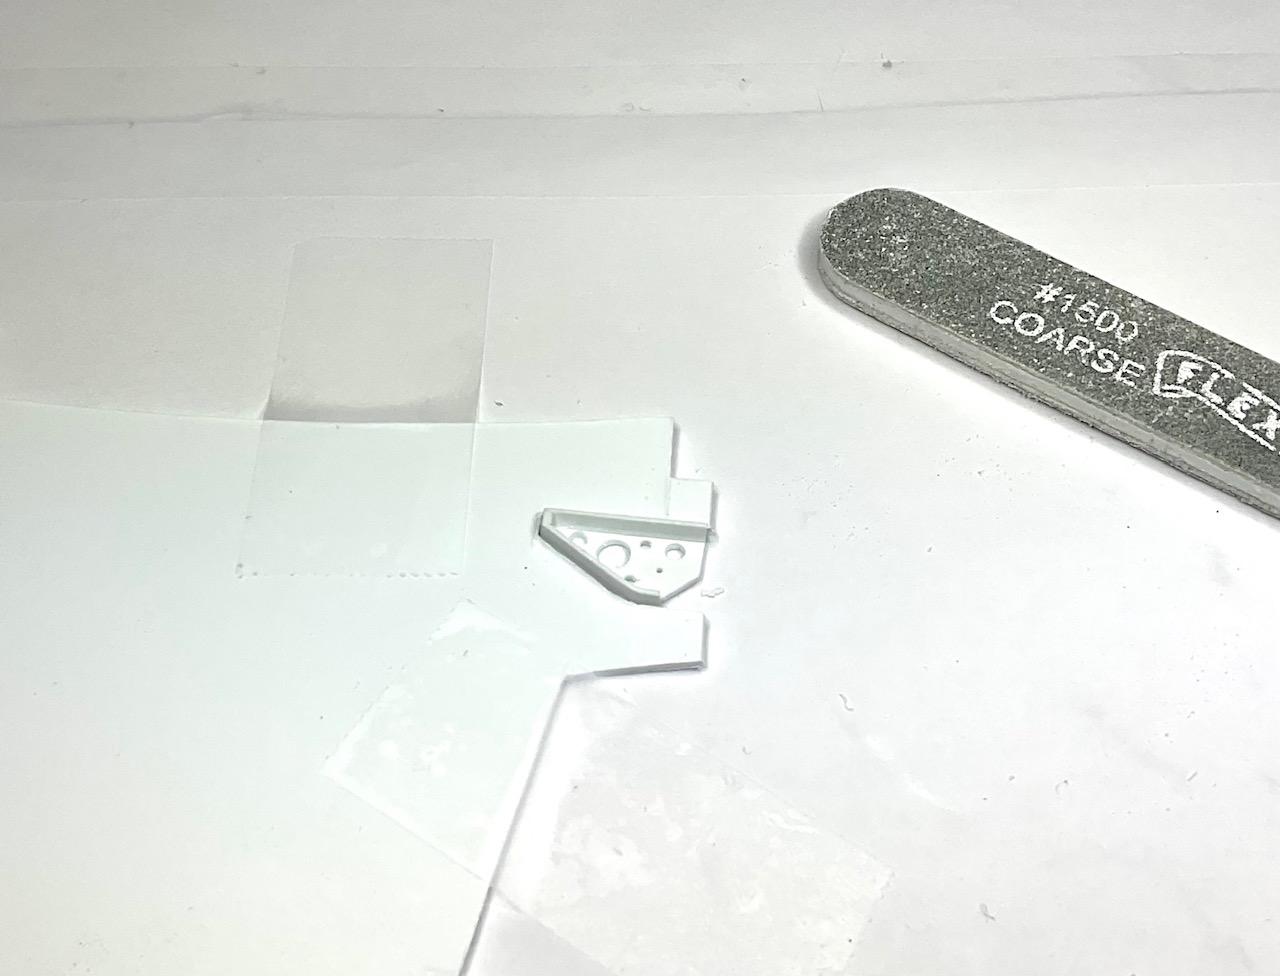
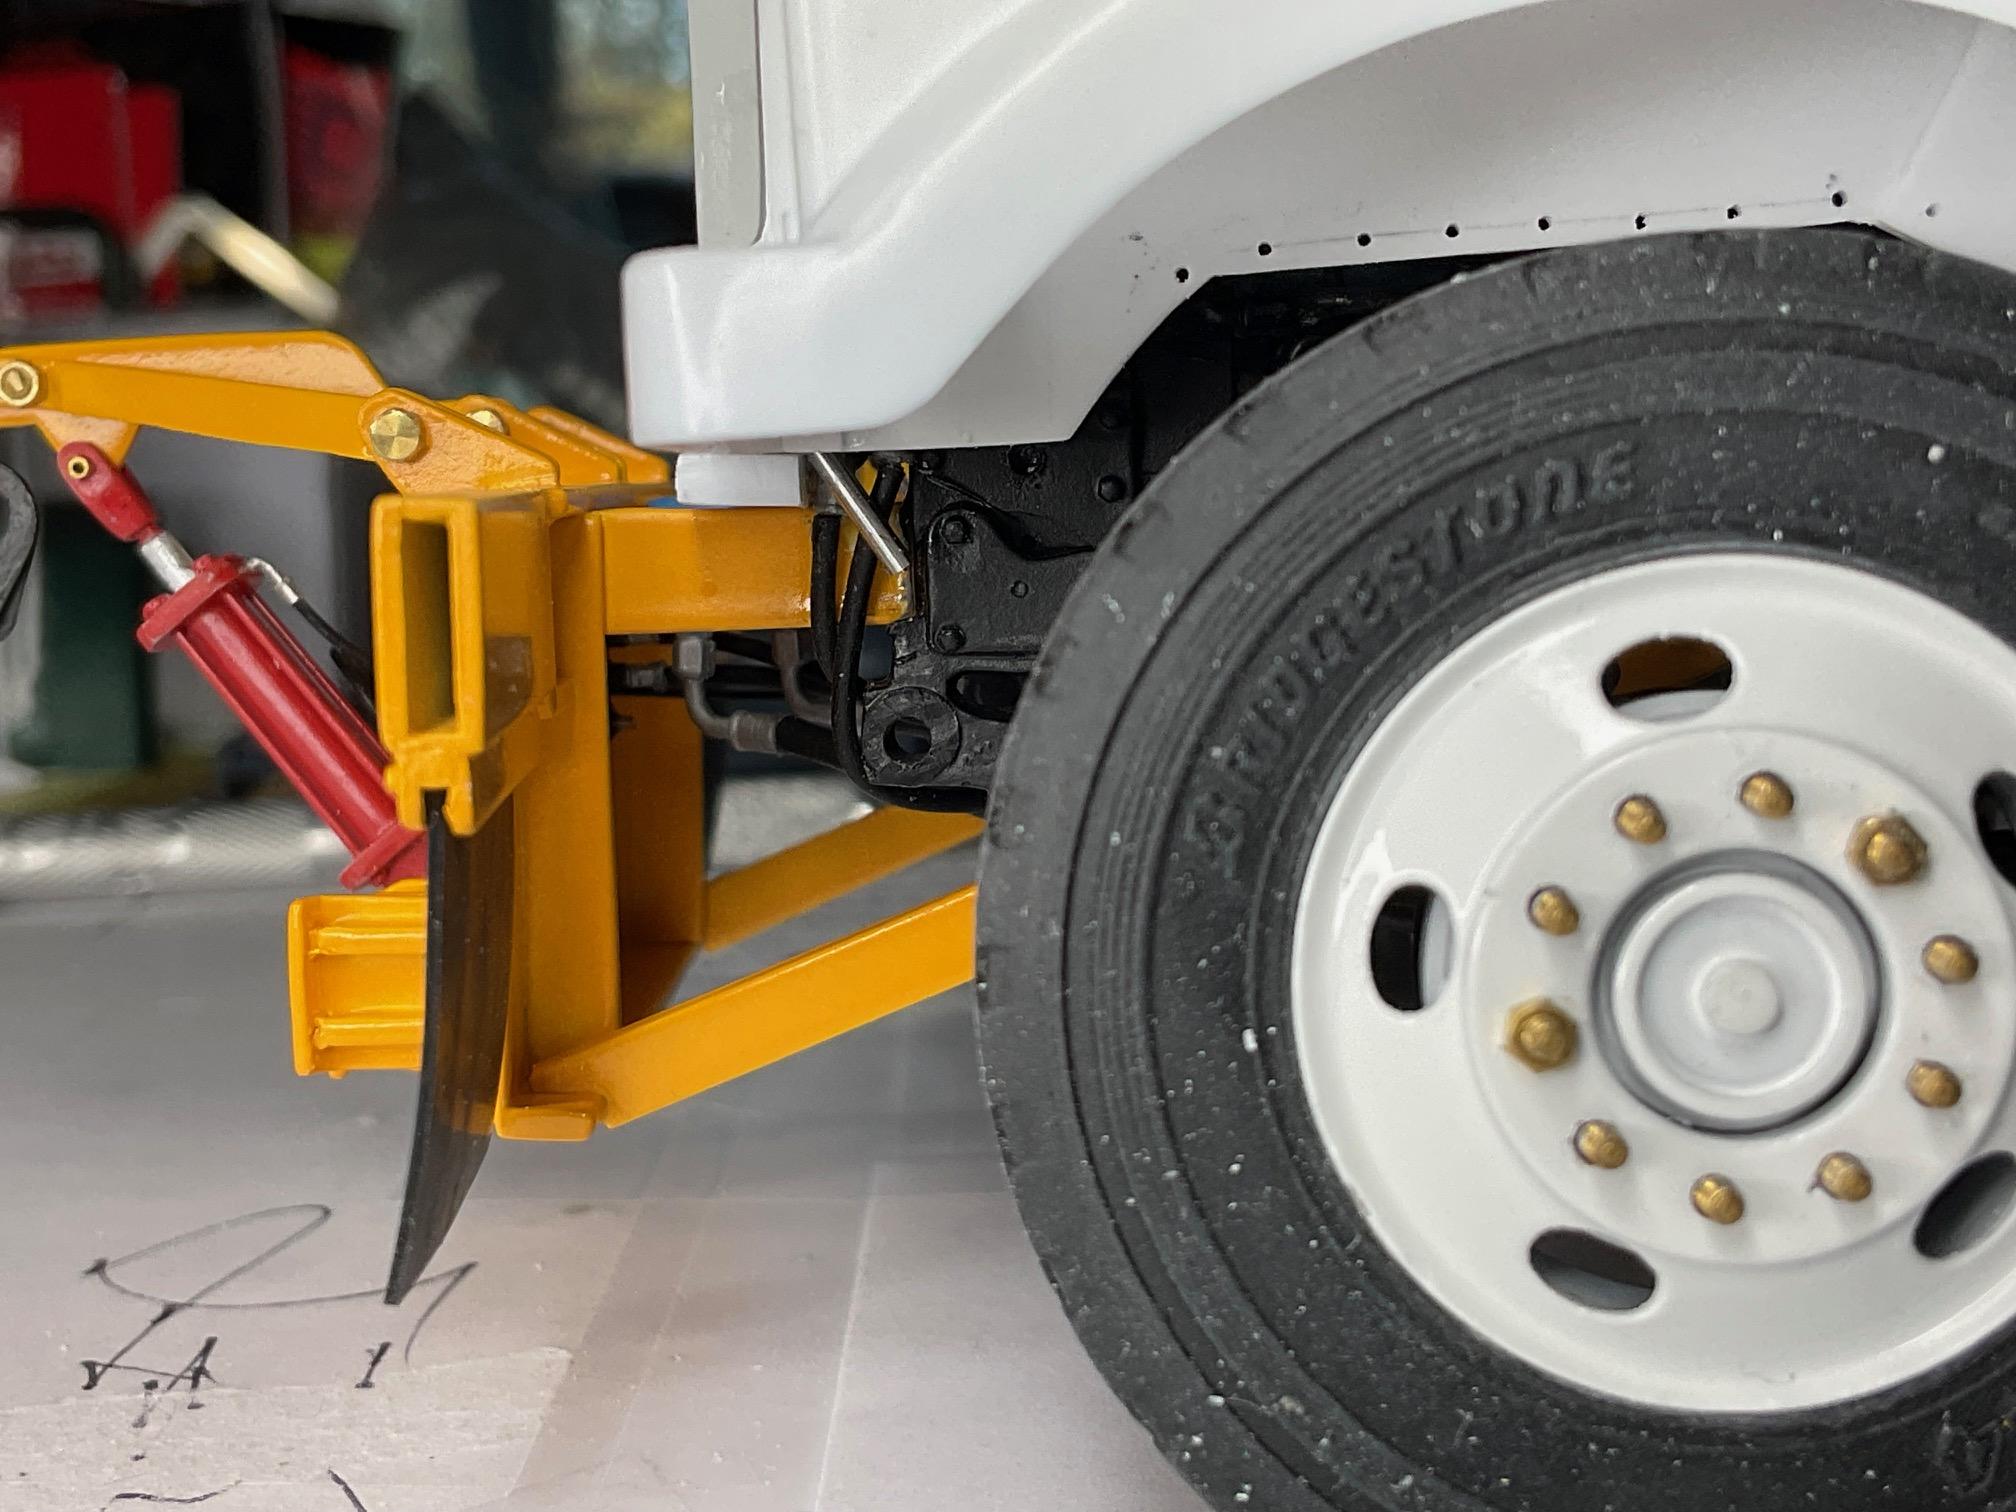
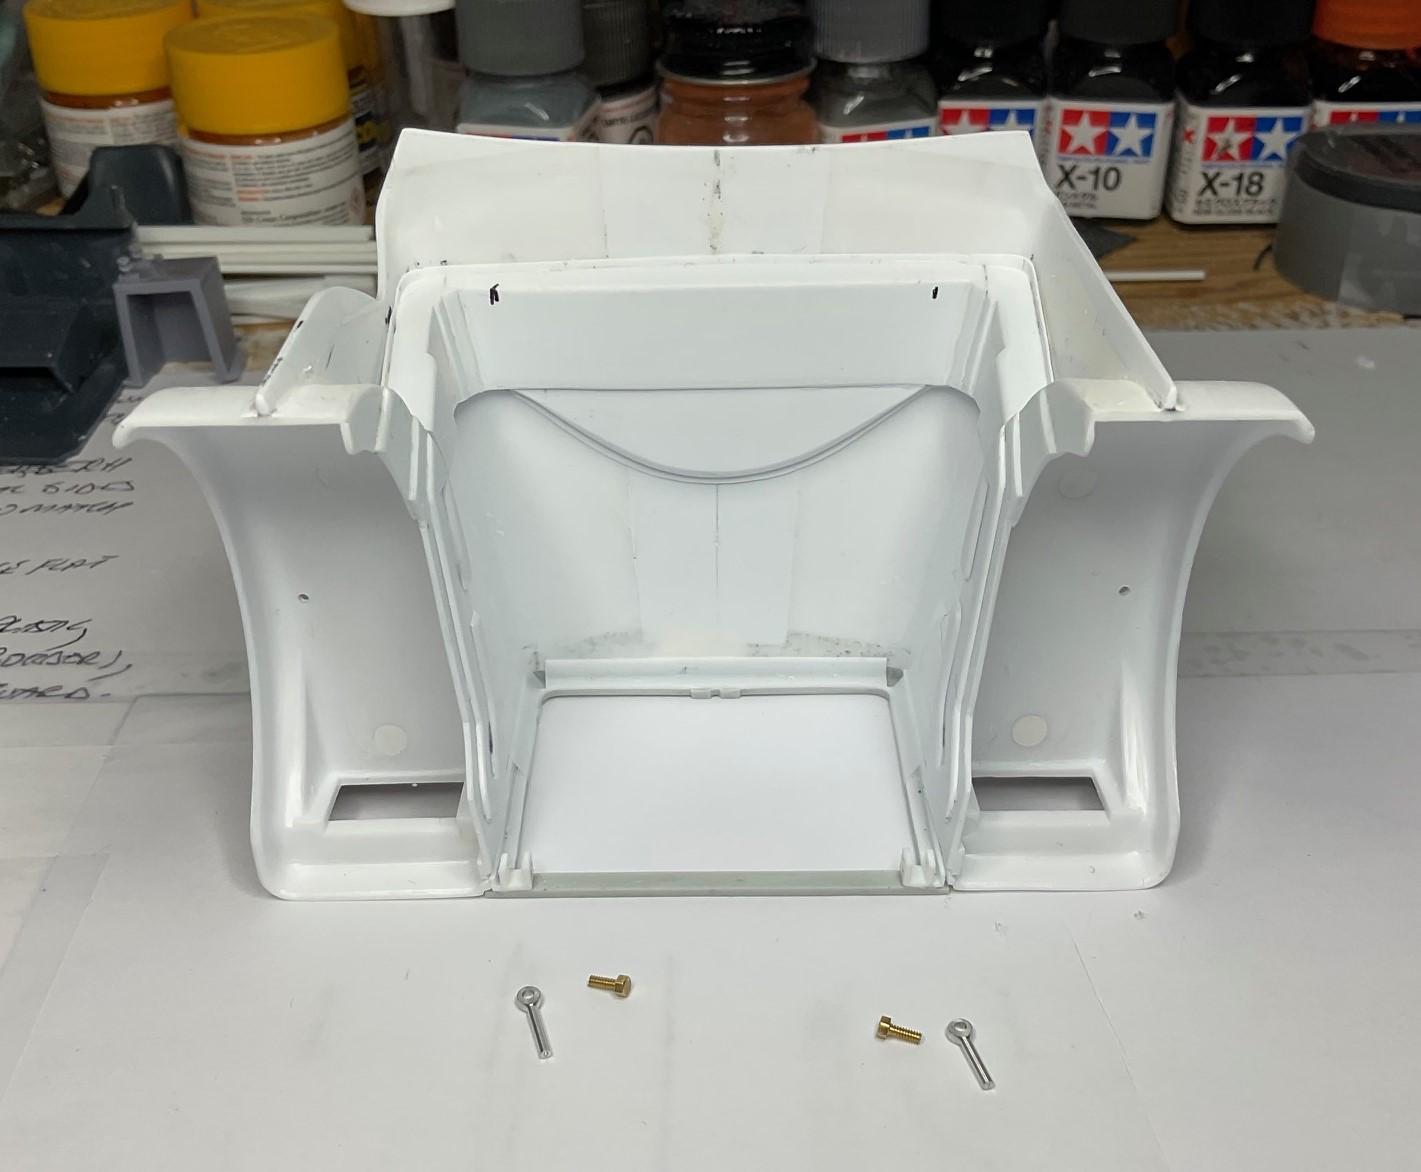
Before I made a start on the hood hinges, I did a bit of tidying up on the hood support platforms on the firewall. After that, best efforts were made to take finicky measurements (with eyes that need much assistance from readers and magnifying lamps!) to start in on the hinges for the hood. In looking at previous pics of the hood support platforms, they appeared 'heavy' to me. So, firstly, I added some weight reduction holes like those on the actual truck - I think I took some liberties with the number of holes! Secondly, in order to thin the flange on the supports, I made a cutout in the shape of the support in 1.0 mm sheet, wedged the support in the cutout and sanded the edges flush with the sheet The supports now look, to me, to be lighter and more scale appropriate in their place on the firewall The flange is now just a tad over half as wide as it was before This hinge assembly and it's mount to the frame is the goal of the next few days - at least something resembling it and functioning like it! After lots of measuring, re-checking, and mocking up the hood in place on the truck, I fabricated the hinge brackets out of some rectangular tubing, trimmed them to fit the width of the rod end pivot and glued them in place The fasteners in the pic are too big for scale - I likely won't use this size when finishing the hinges - they are mostly being used to position the rod end to see about how/where I need to make the hinge mount that attaches to the frame The hood is very close to it's final position - the plastic spacer underneath the grille surround is needed to determine hinge mount location, because the bottom edge of the hood will pivot down a bit Not trying to be repetitive with the pics, but this pic now shows me the relationship of the rod end shaft and the approximate location I will need to attach the hinge support to the frame Once the hinge assembly is sorted and temporarily in place, I can re-tape the cab and hood together, set the rod ends into the hinges and the cab on it's rear support and then, finally, set the front cab support to the correct height. Hope to have brass pin locators for cab supports put in so the constant mockups for fit can be consistently repeated. Doesn't seem like much went on today, but overcoming these details are huge for me. Once cab and hood consistently fit in their final locations, then can get on to the remainder of detailing for hood, start on the cab interior and finally get to primer, paint and hopefully start final assemblies in a month or so - take care!
-
Western Star 4900 FA plow truck
BK9300 replied to BK9300's topic in WIP: Model Trucks: Big Rigs and Heavy Equipment
A considerably generous compliment, Randy - I take inspiration and motivation from builds such as yours! -
Awesome work on the whole build and especially the engine - looks very cool.
-
1962 Marmon-Herrington HDT
BK9300 replied to Jürgen M.'s topic in WIP: Model Trucks: Big Rigs and Heavy Equipment
You're making excellent progress, Jürgen - always issues to overcome and you always find solutions for yours! -
Resto Rod Autocar
BK9300 replied to Gary Chastain's topic in WIP: Model Trucks: Big Rigs and Heavy Equipment
I'm sorry to hear about this situation, Gary. Take care of yourself and all best wishes for positive outcome. -
I never tire of watching the talent displayed by those of you who can work with brass at this scale - wonderfully intricate fabrications on an already small car - marvelous!
-
Western Star 4900 FA plow truck
BK9300 replied to BK9300's topic in WIP: Model Trucks: Big Rigs and Heavy Equipment
Thanks, Steve! I’m able to see the end in sight, although I keep delaying it with little side trips like these supports - this build has been a real ‘test bed’ for me and thankfully, it’s mostly turned out very gratifying! I appreciate that, Steve. Still some cleanup on the supports to do, but pleased with the result so far! High praise from you, Francis, thanks very much! Thanks, Jeff - appreciate the technical help along the way! Thanks, Gilles, I’m glad you checked this out! -
Good work on the lift cylinders, Steve - overall, this is leaps and bounds above what you started with. Terrific job!
-
KW 86 inch Aerodyne
BK9300 replied to k100's topic in WIP: Model Trucks: Big Rigs and Heavy Equipment
I think the plumbing all looks fantastic! Lots of resin 90’s and Tees (I seem to break a lot of them!). Well done! -
Western Star 4900 FA plow truck
BK9300 replied to BK9300's topic in WIP: Model Trucks: Big Rigs and Heavy Equipment
Thanks a lot, Victor - much appreciated! -
Western Star 4900 FA plow truck
BK9300 replied to BK9300's topic in WIP: Model Trucks: Big Rigs and Heavy Equipment
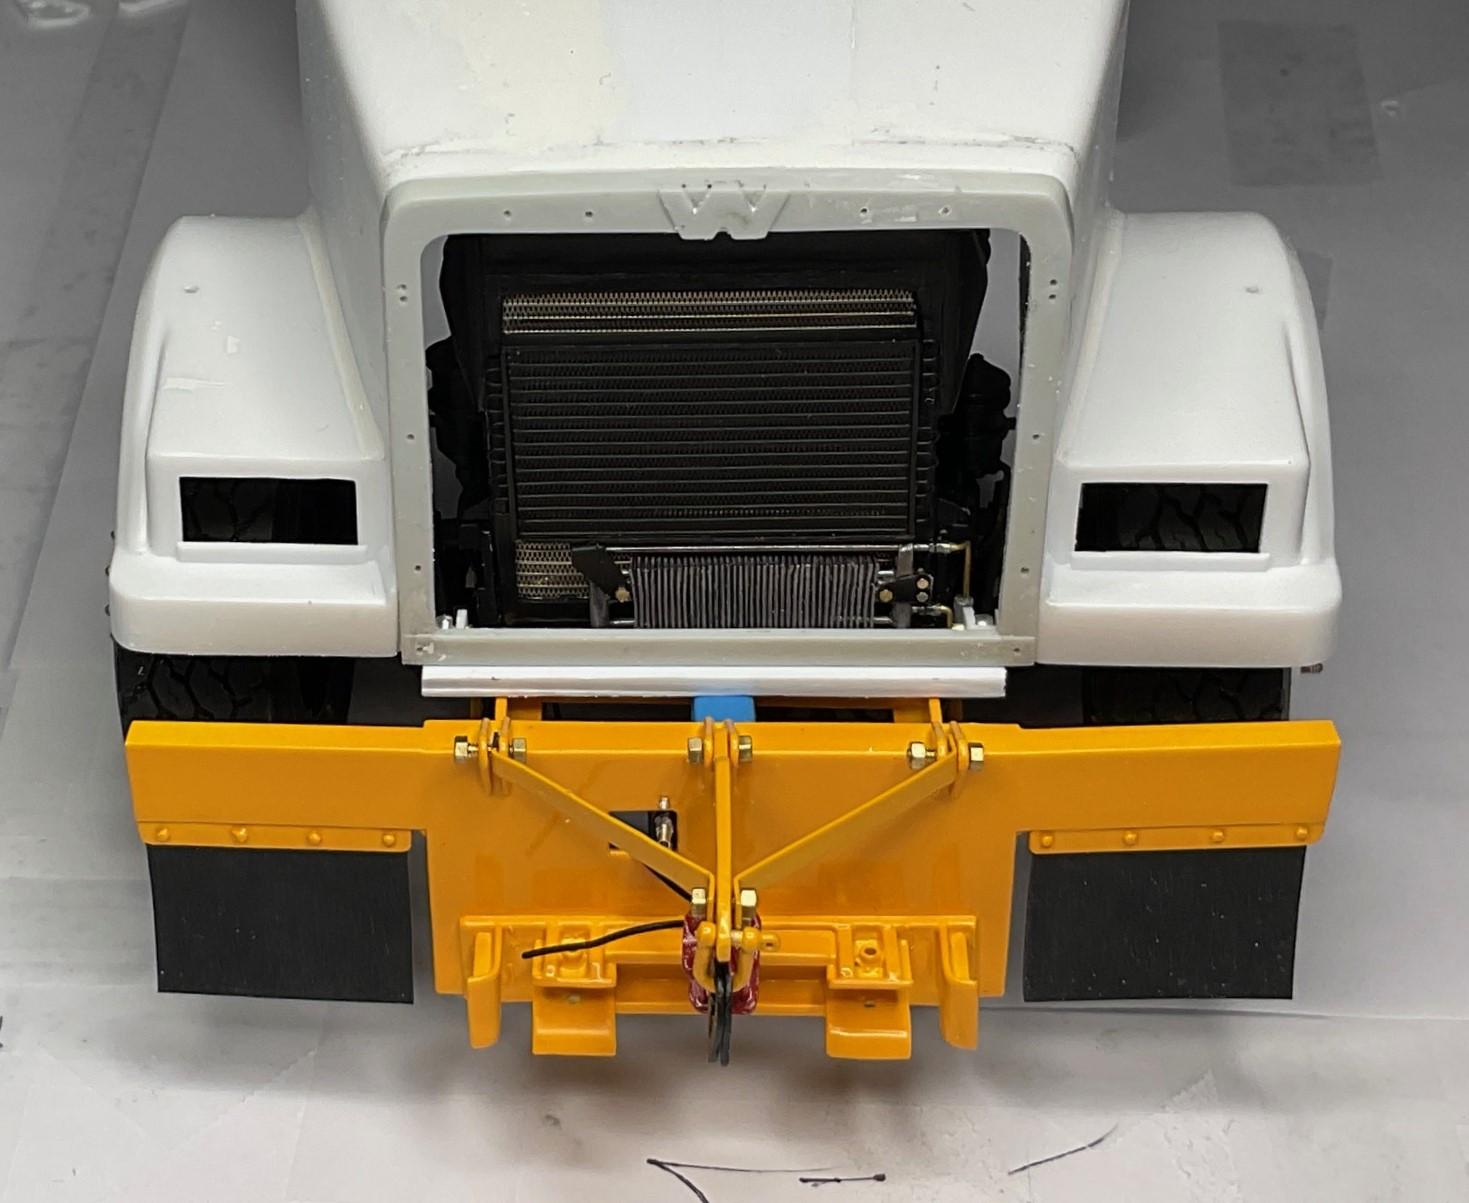
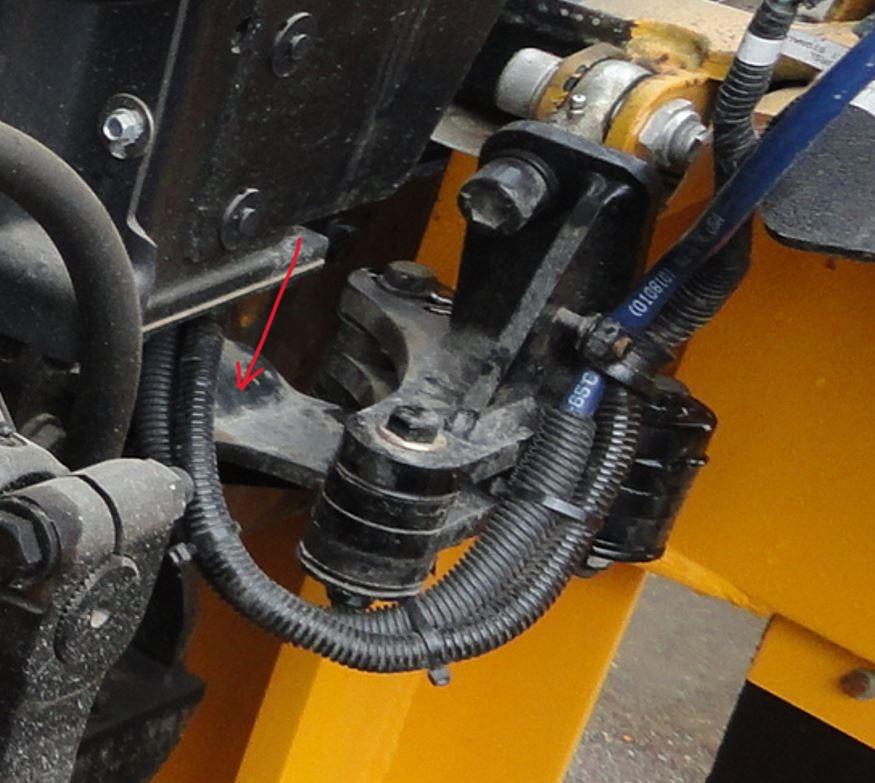
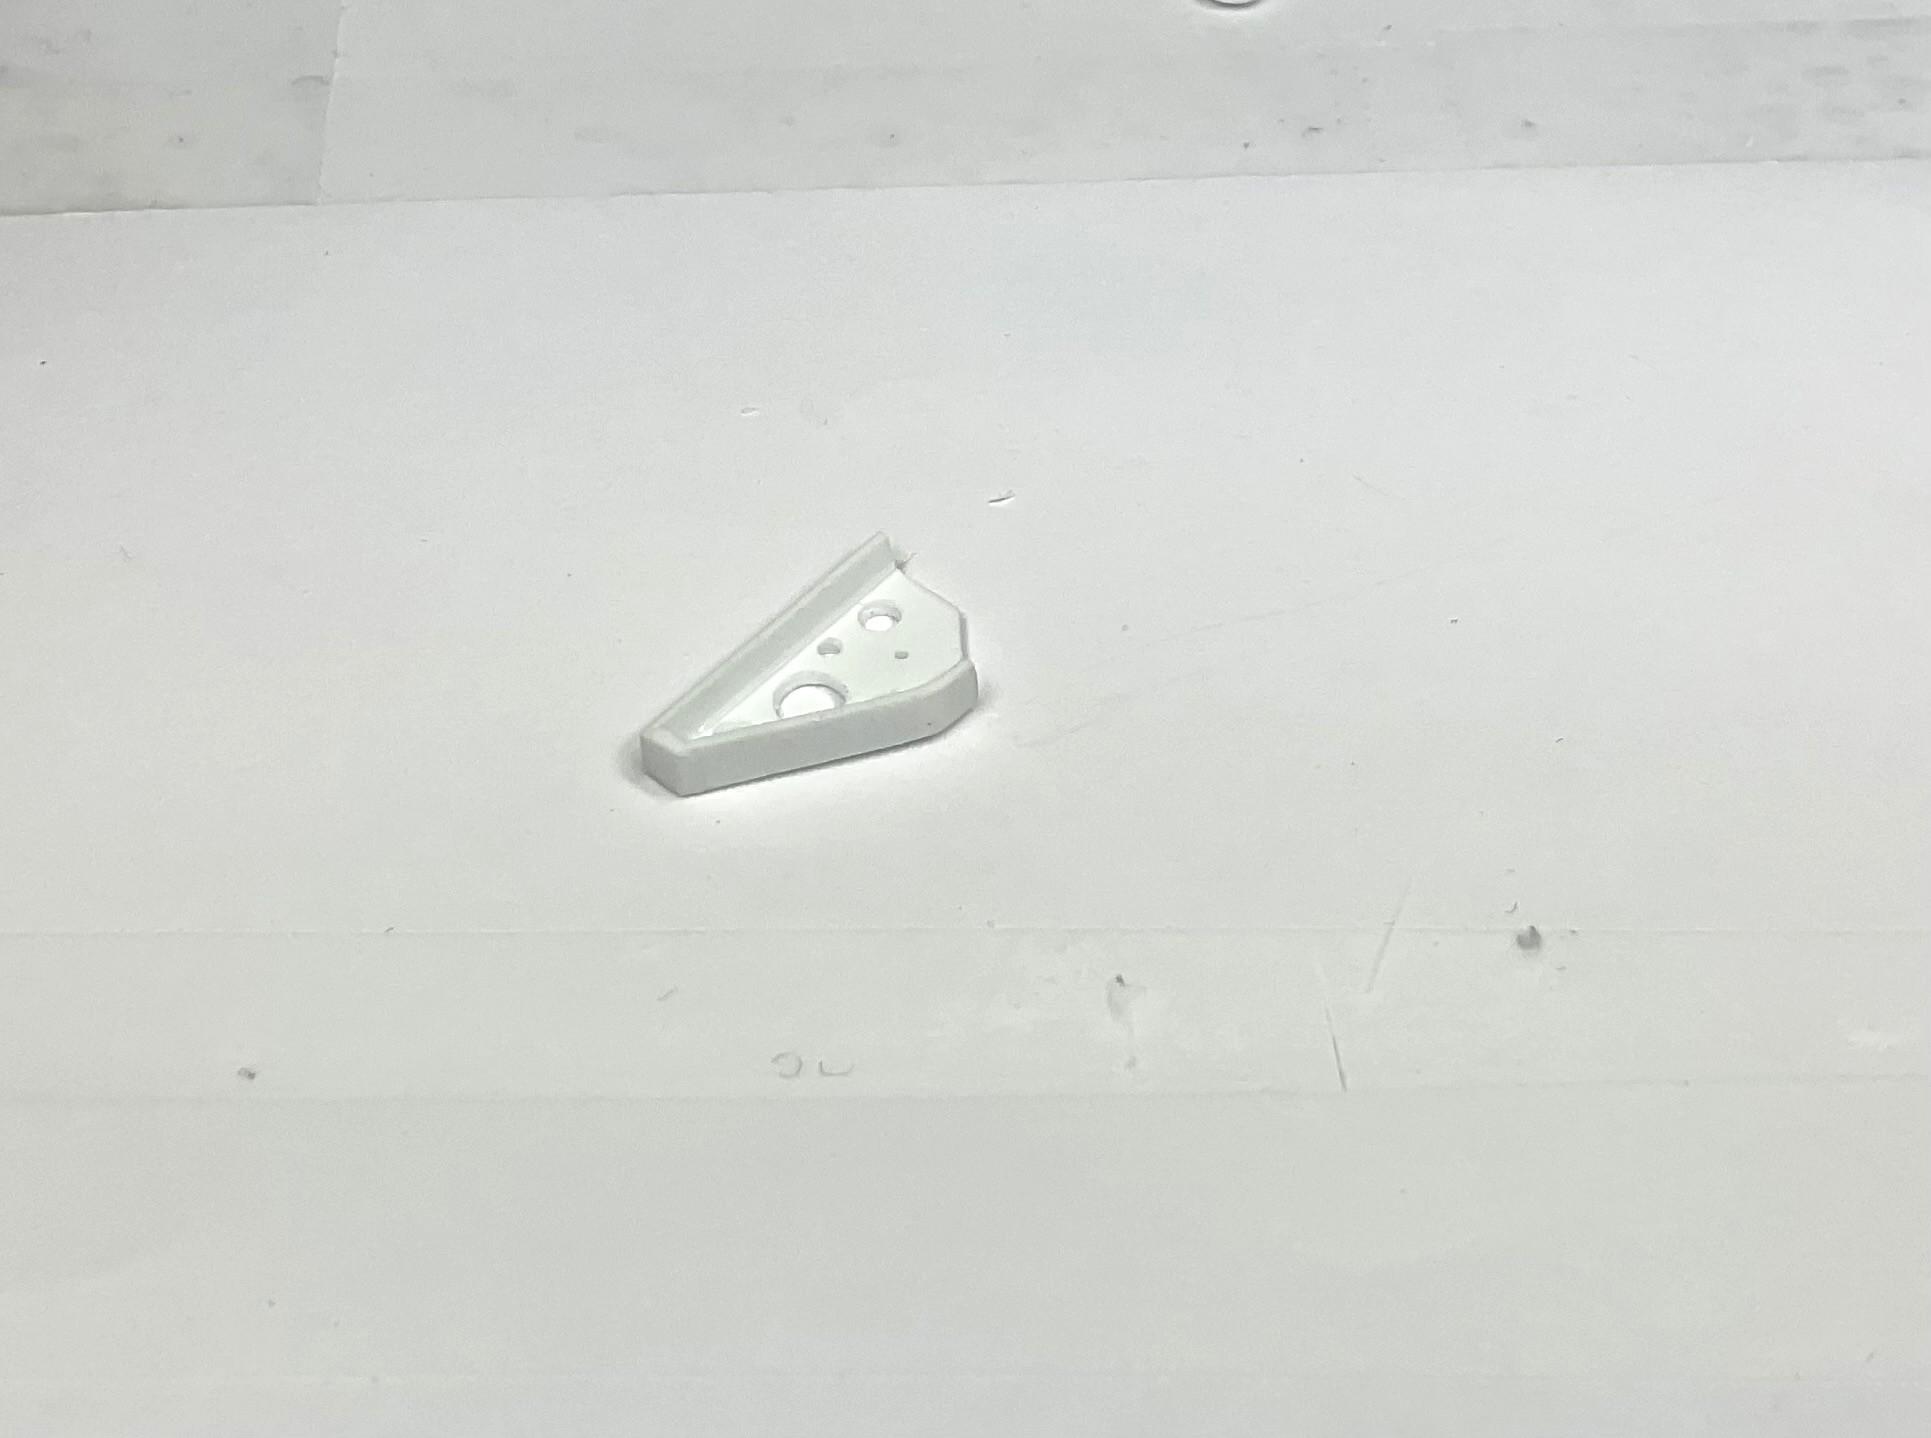
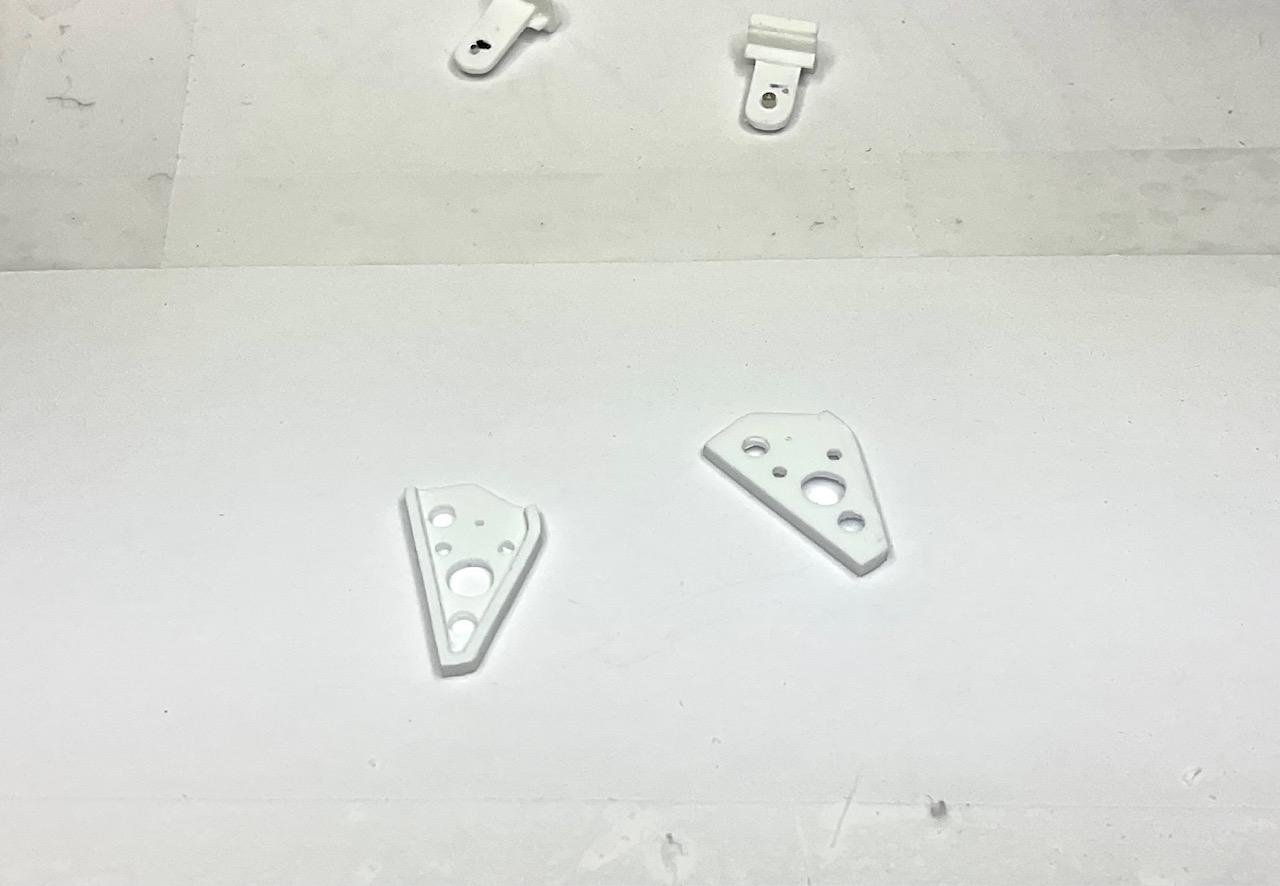
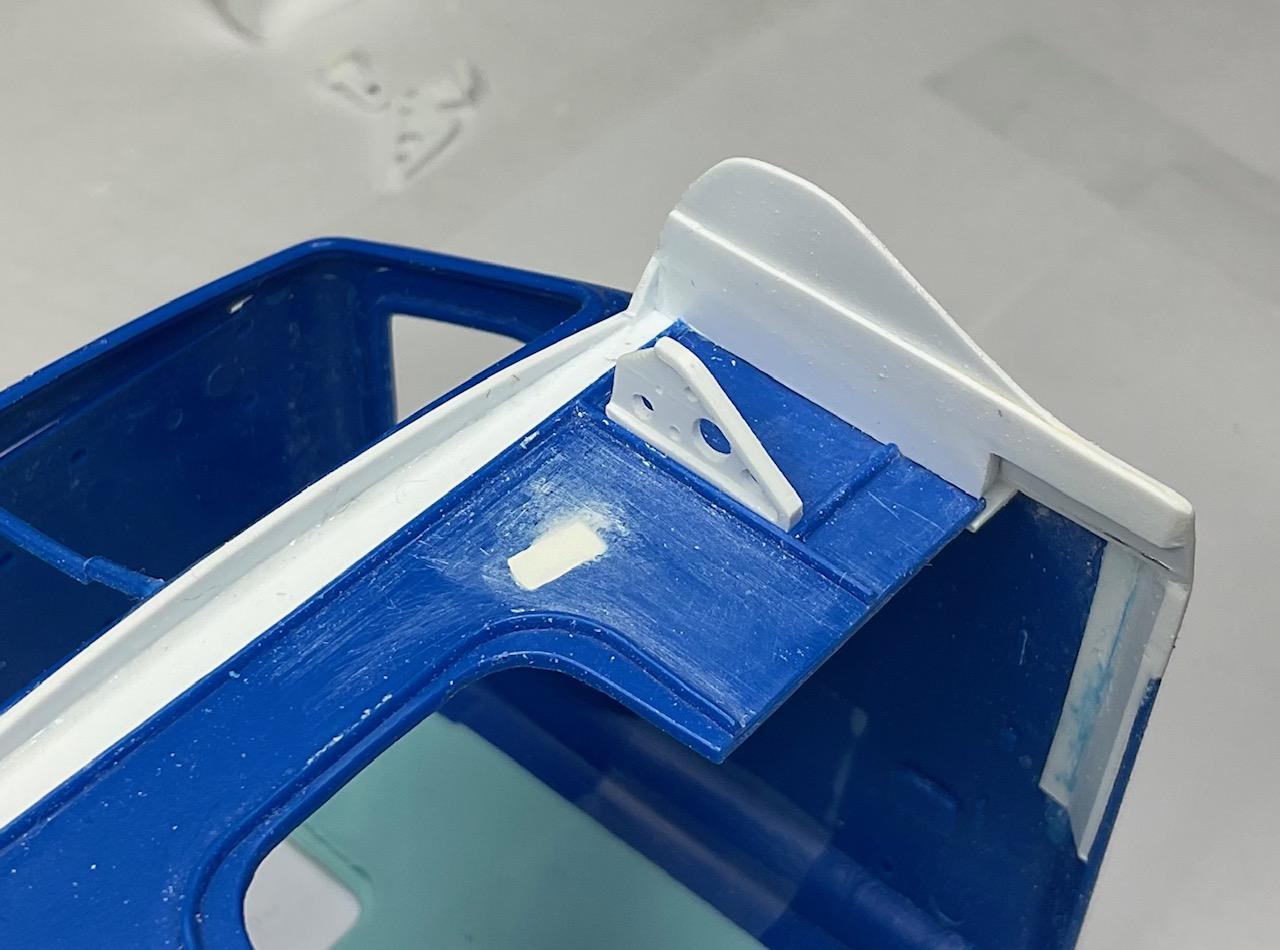
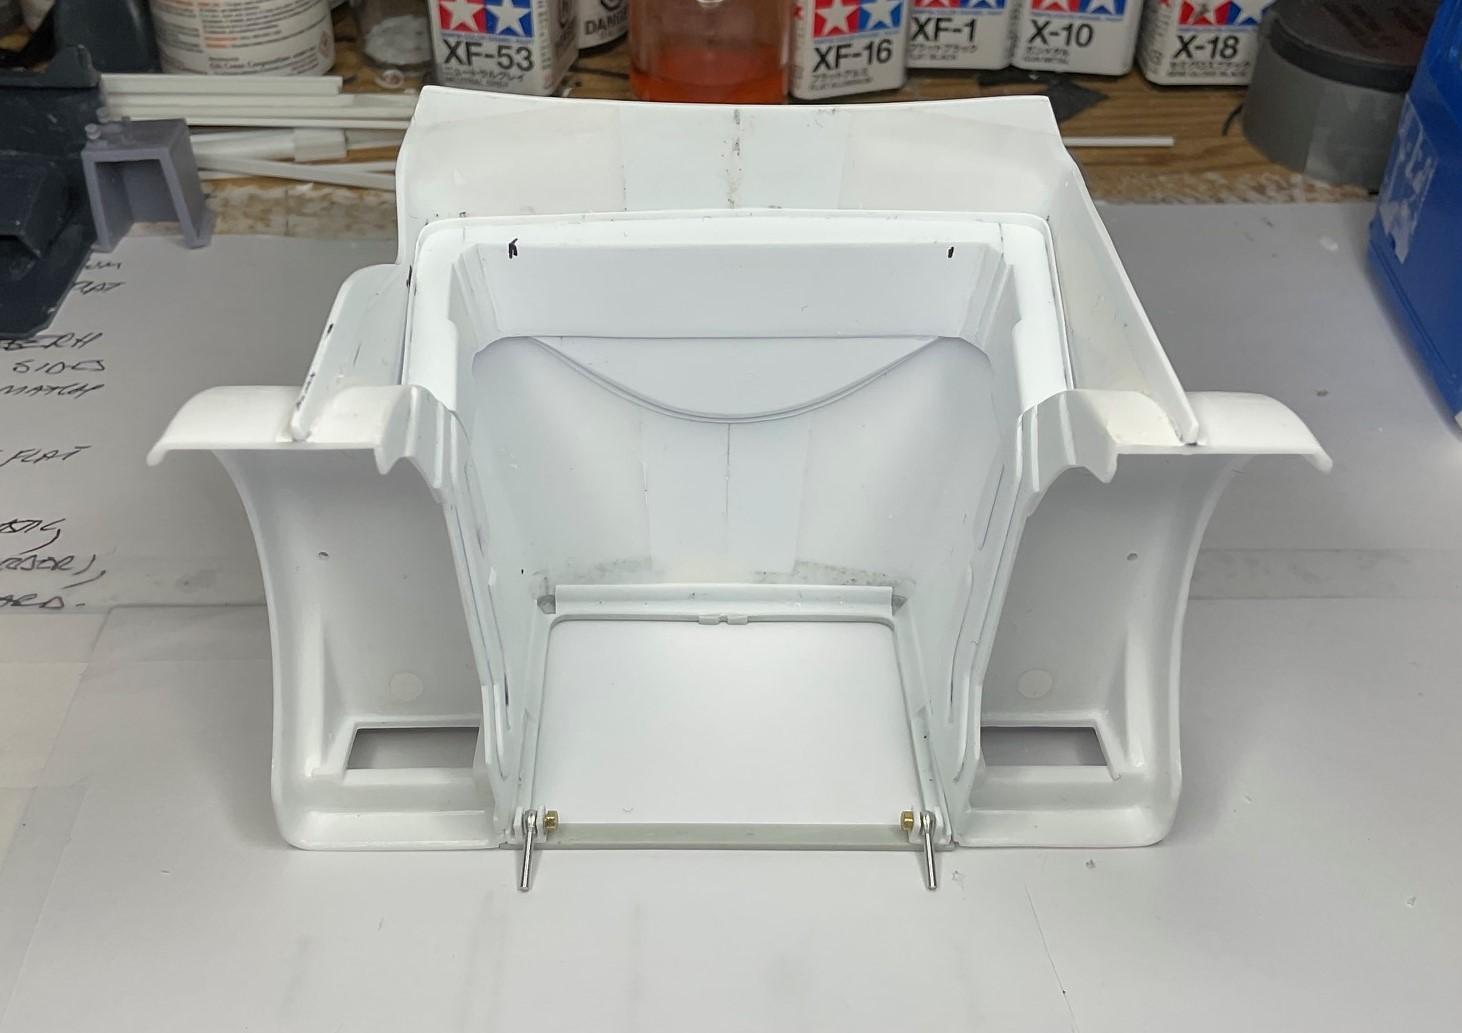
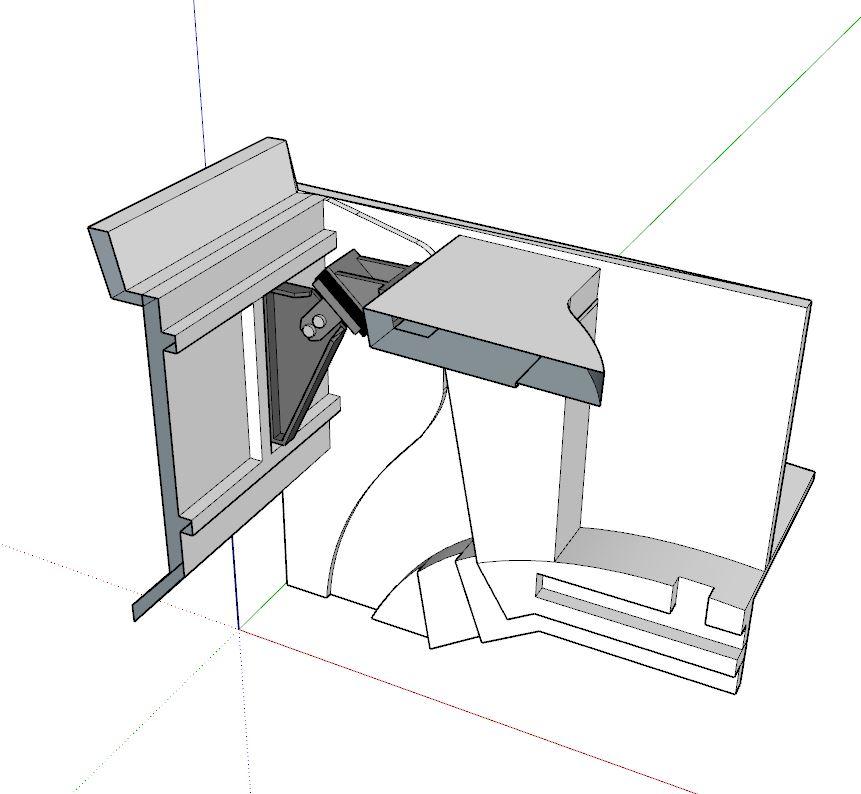
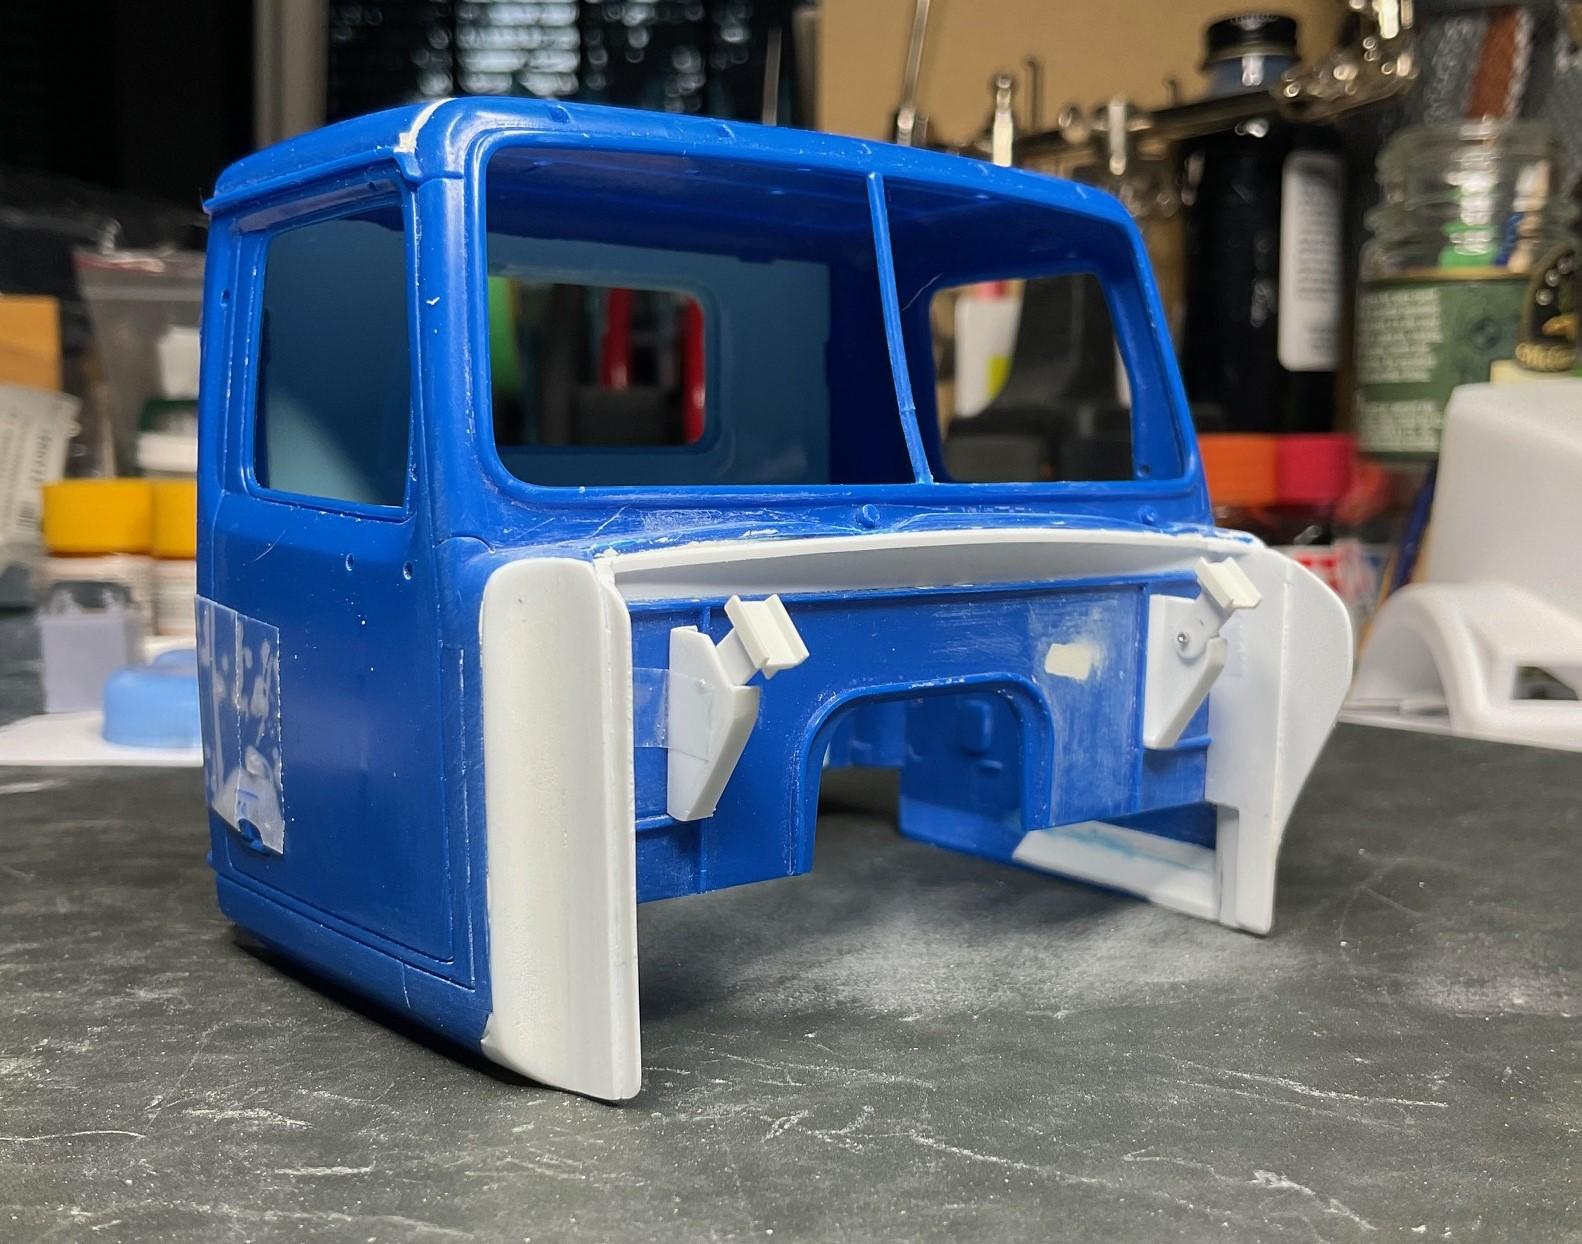
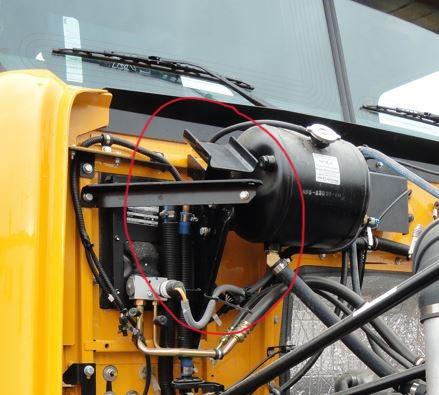
Continuing with work on the cab and hood, I was looking at pics of the real truck's firewall and noted, for the first time, the two hood support platforms. The mating sections of the hood supports are mounted on the inner hood brace and I thought about how they could be made. Seems I can't just sit down and make anything out of my head, so I made a 3D model to visualize the supports. With an idea of how the parts go together and pics of the real truck supports, I had my day set out! The real truck hood support - My 3D model - invaluable to me, because its built to scale of the model and I can get precise measurements from the digital model - thankfully! Support platform brackets assembled and platforms about to be put together - The temporarily mocked up brackets and platforms are pinned together so the platforms can swivel to line up with parts of the supports to be mounted on the hood brace (not made yet - hopefully, tomorrow) - Black mark for locating the other part of the hood support - I did go back and check some different pics and the steering rod will come out of the firewall between the hood bracket and the white, repaired patch on the firewall Calling it a day - really appreciate all you who've had a look along the way and for all the generous comments, too - thanks!
-
8 Car Transporter (71 Mopar’s)
BK9300 replied to Mopar - D's topic in WIP: Model Trucks: Big Rigs and Heavy Equipment
I agree - going to be a good build! -
1/25 AMT Peterbilt 359 California Hauler
BK9300 replied to cifenet's topic in WIP: Model Trucks: Big Rigs and Heavy Equipment
Very enjoyable to follow along with, Steve - lots of explanation of your issues and solutions. -
Mercedes Benz SSK
BK9300 replied to Pierre Rivard's topic in WIP: Other Racing: Road Racing, Land Speed Racers
Beautiful modifications to your exhaust system - big improvement, Pierre! -
Delicate surgery and cleanly done! Good idea to be able to tuck the tires more.
-
Farm Floater Truck 1/24th scale
BK9300 replied to Randy D's topic in WIP: Model Trucks: Big Rigs and Heavy Equipment
The valving system you've created looks like my floor's hot water in-floor heater manifold! So very intricate - can't wait until you get to your sprayer bars! Well done. -
’72 Dodge Demon Drag Racer 1/25 scale
BK9300 replied to AmericanMuscleFan's topic in WIP: Drag Racing Models
More awesome creations, Francis. Glad you were able to get past your posting problems - would be a shame not to witness these pieces being made! I've always marveled at your end results - to be able to machine the pieces is one thing, it is quite another to imagine how you hold these little components in place, at the right angles, to solder them into a whole! -
Luke, I've heard that 'Chameleon' paint can be difficult to work with. Looks like you've mastered it - paint came out awesome!
-
Western Star 4900 FA plow truck
BK9300 replied to BK9300's topic in WIP: Model Trucks: Big Rigs and Heavy Equipment
We just about made it through this winter without snow - decided to all come in one snowfall! Thanks for the compliment, Steve! I'm fortunate to have taken a lot of decent pics of the truck way back when, so, been doing my best to make a good representation of what I'm able to. And I've only got one (or two) pinholes left! -
FDNY Wrecker
BK9300 replied to Scott Eriksen's topic in WIP: Model Trucks: Big Rigs and Heavy Equipment
Very impressive angle shot of your emergency light pylon, too! Meant to ask you earlier - what did you use to bond the brass frame to the checker plate (plastic?)? - looks very sturdy. -
Western Star 4900 FA plow truck
BK9300 replied to BK9300's topic in WIP: Model Trucks: Big Rigs and Heavy Equipment
Yes, I'm very pleased with how well the small pieces turned out! They are of such small size that I needed to get some of the hydraulic valve handles/switches printed separately - I was messing the surface of the tower up, trying to paint them when they were initially part of the tower. 3D parts certainly have a place as far as I'm concerned, because I simply cannot make items that small any other way.