BK9300
-
Posts
1,991 -
Joined
-
Last visited
Content Type
Profiles
Forums
Events
Gallery
Everything posted by BK9300
-

Western Star 4900 FA plow truck
BK9300 replied to BK9300's topic in WIP: Model Trucks: Big Rigs and Heavy Equipment
Steve, glad you found something useful here! Hope my luck with the hood holds up during the puttying stage. Thanks for having another look and for your generous comments! -
Western Star 4900 FA plow truck
BK9300 replied to BK9300's topic in WIP: Model Trucks: Big Rigs and Heavy Equipment
Scott, just recognized the plow lights on the truck in your pic. 2,800 miles between Prince George, BC (home base for the YRB truck) and the Township of Algonquin and both use same plow lights. Must be good lights for both mechanical shops to use same ones! -
FDNY Wrecker
BK9300 replied to Scott Eriksen's topic in WIP: Model Trucks: Big Rigs and Heavy Equipment
I agree - looks great to have the cab set in and lots of your plumbing finished - each time I look it seems like you've added more plumbing along the frame, too. When do you hope to have the truck on its wheels and tires? -
Western Star 4900 FA plow truck
BK9300 replied to BK9300's topic in WIP: Model Trucks: Big Rigs and Heavy Equipment
Hey, Scott - maybe you can do something similar as well! I've attached a pic of the WS hinge set up - I hope to make something that at least works with the same hinge point. I had the hood open for this pic and in the background and you can see the right set of ears for the lift arm support bar and other parts of the front plow lift through the grill surround opening. If the angle of the pic was taken a bit more to the right, you would see the lift arm itself sticking up through the opening. Should be fun to try and get all that lined up and have the hood close ok!
-
Western Star 4900 FA plow truck
BK9300 replied to BK9300's topic in WIP: Model Trucks: Big Rigs and Heavy Equipment
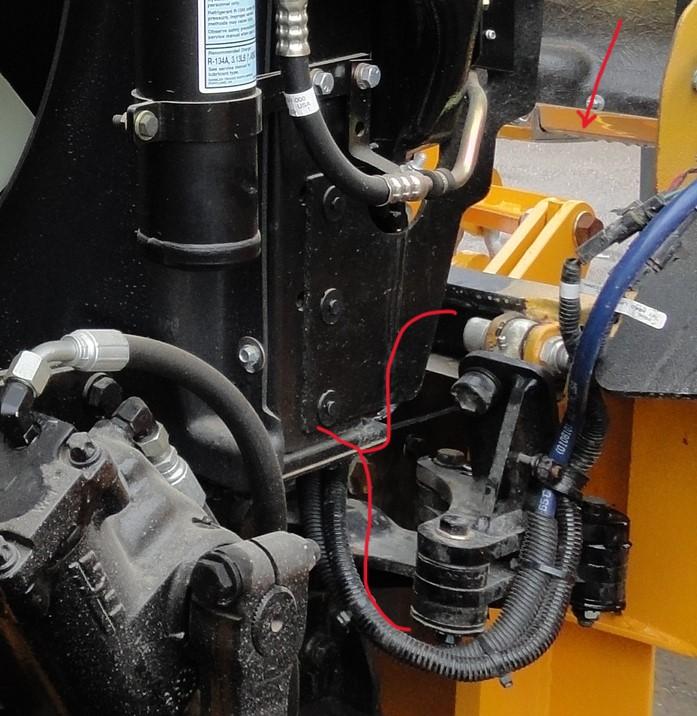
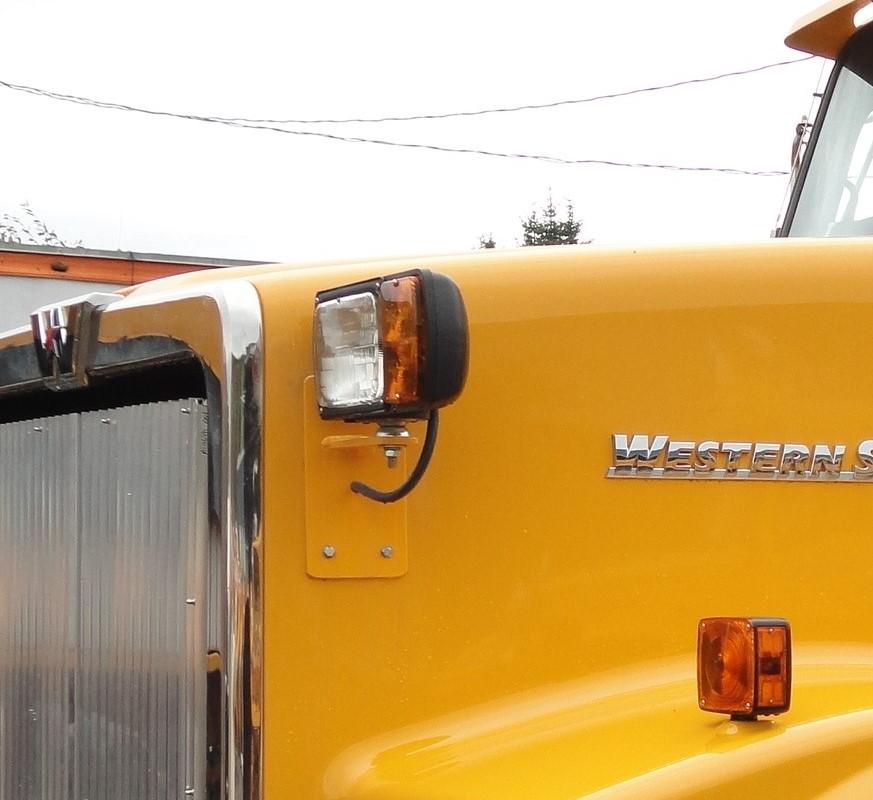
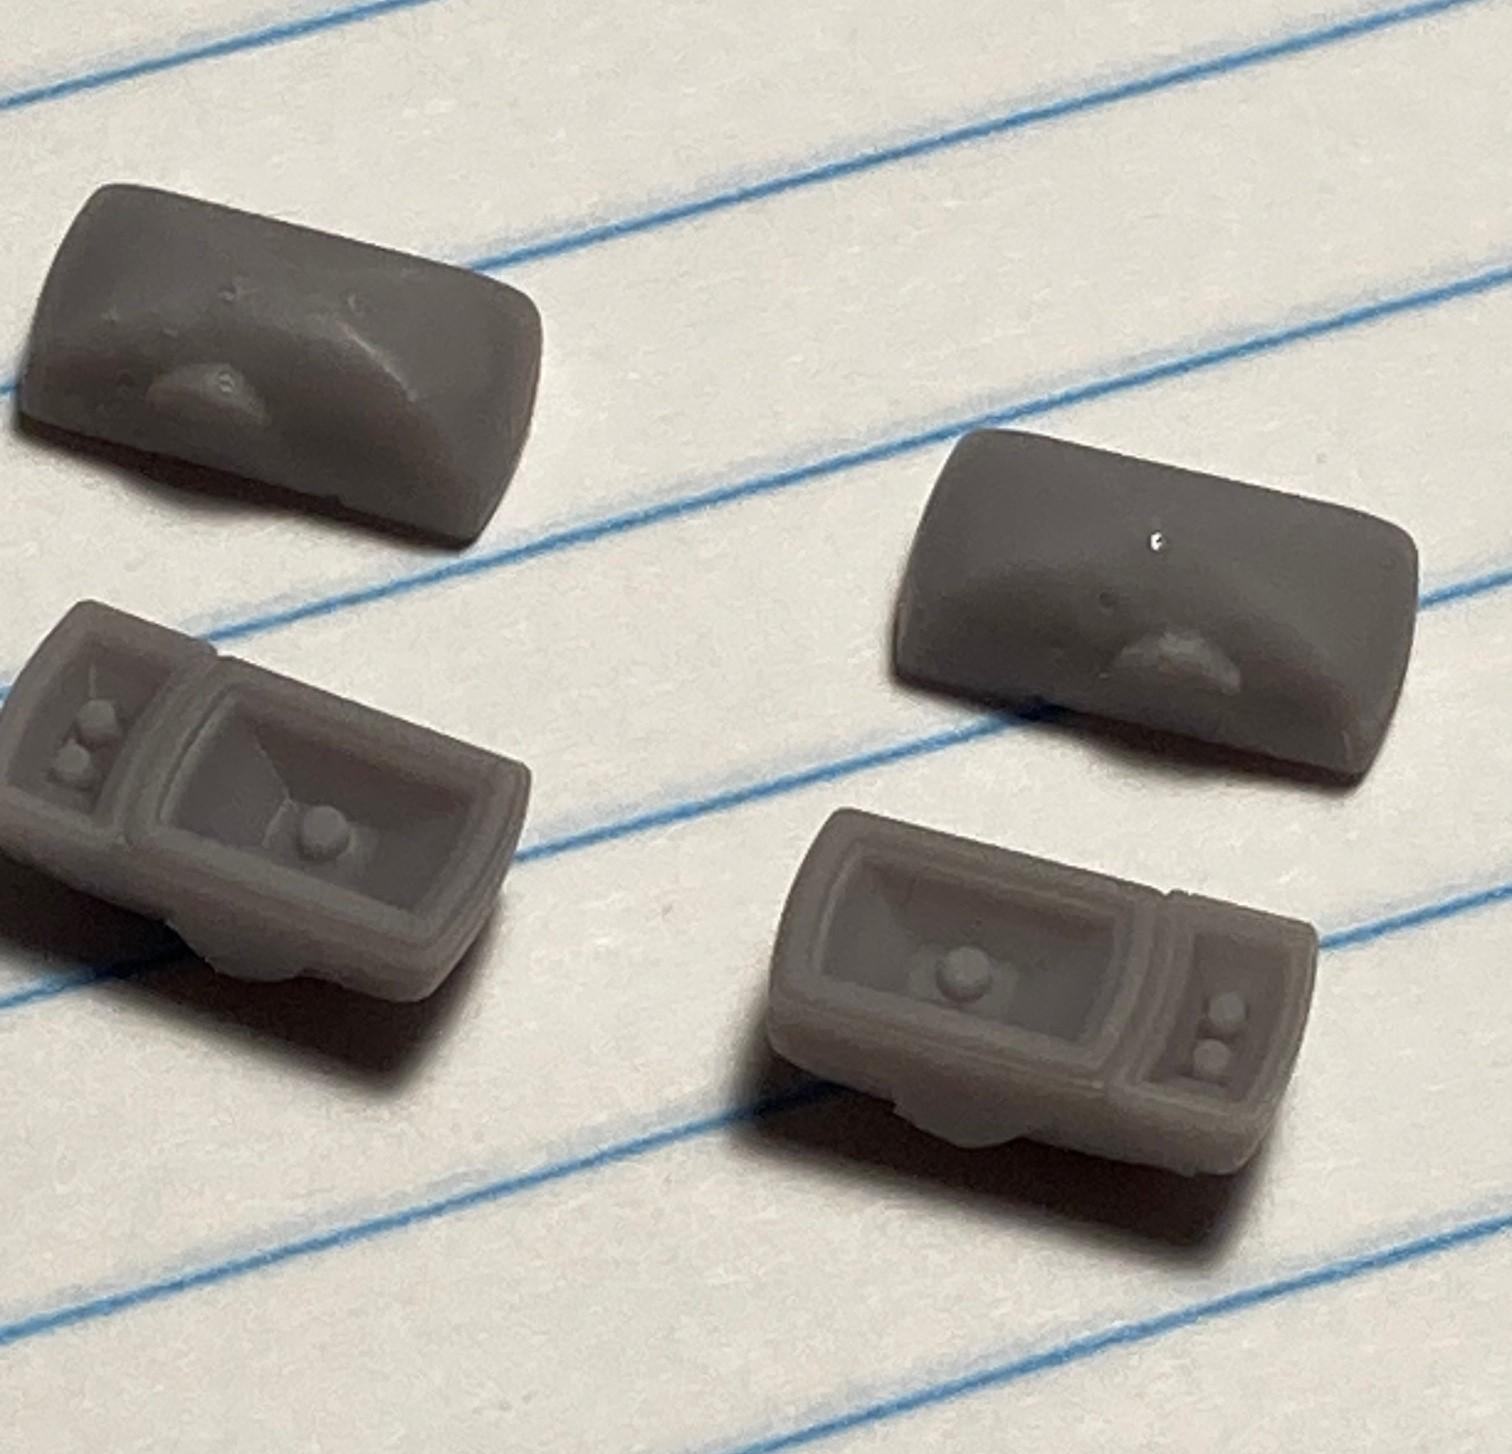
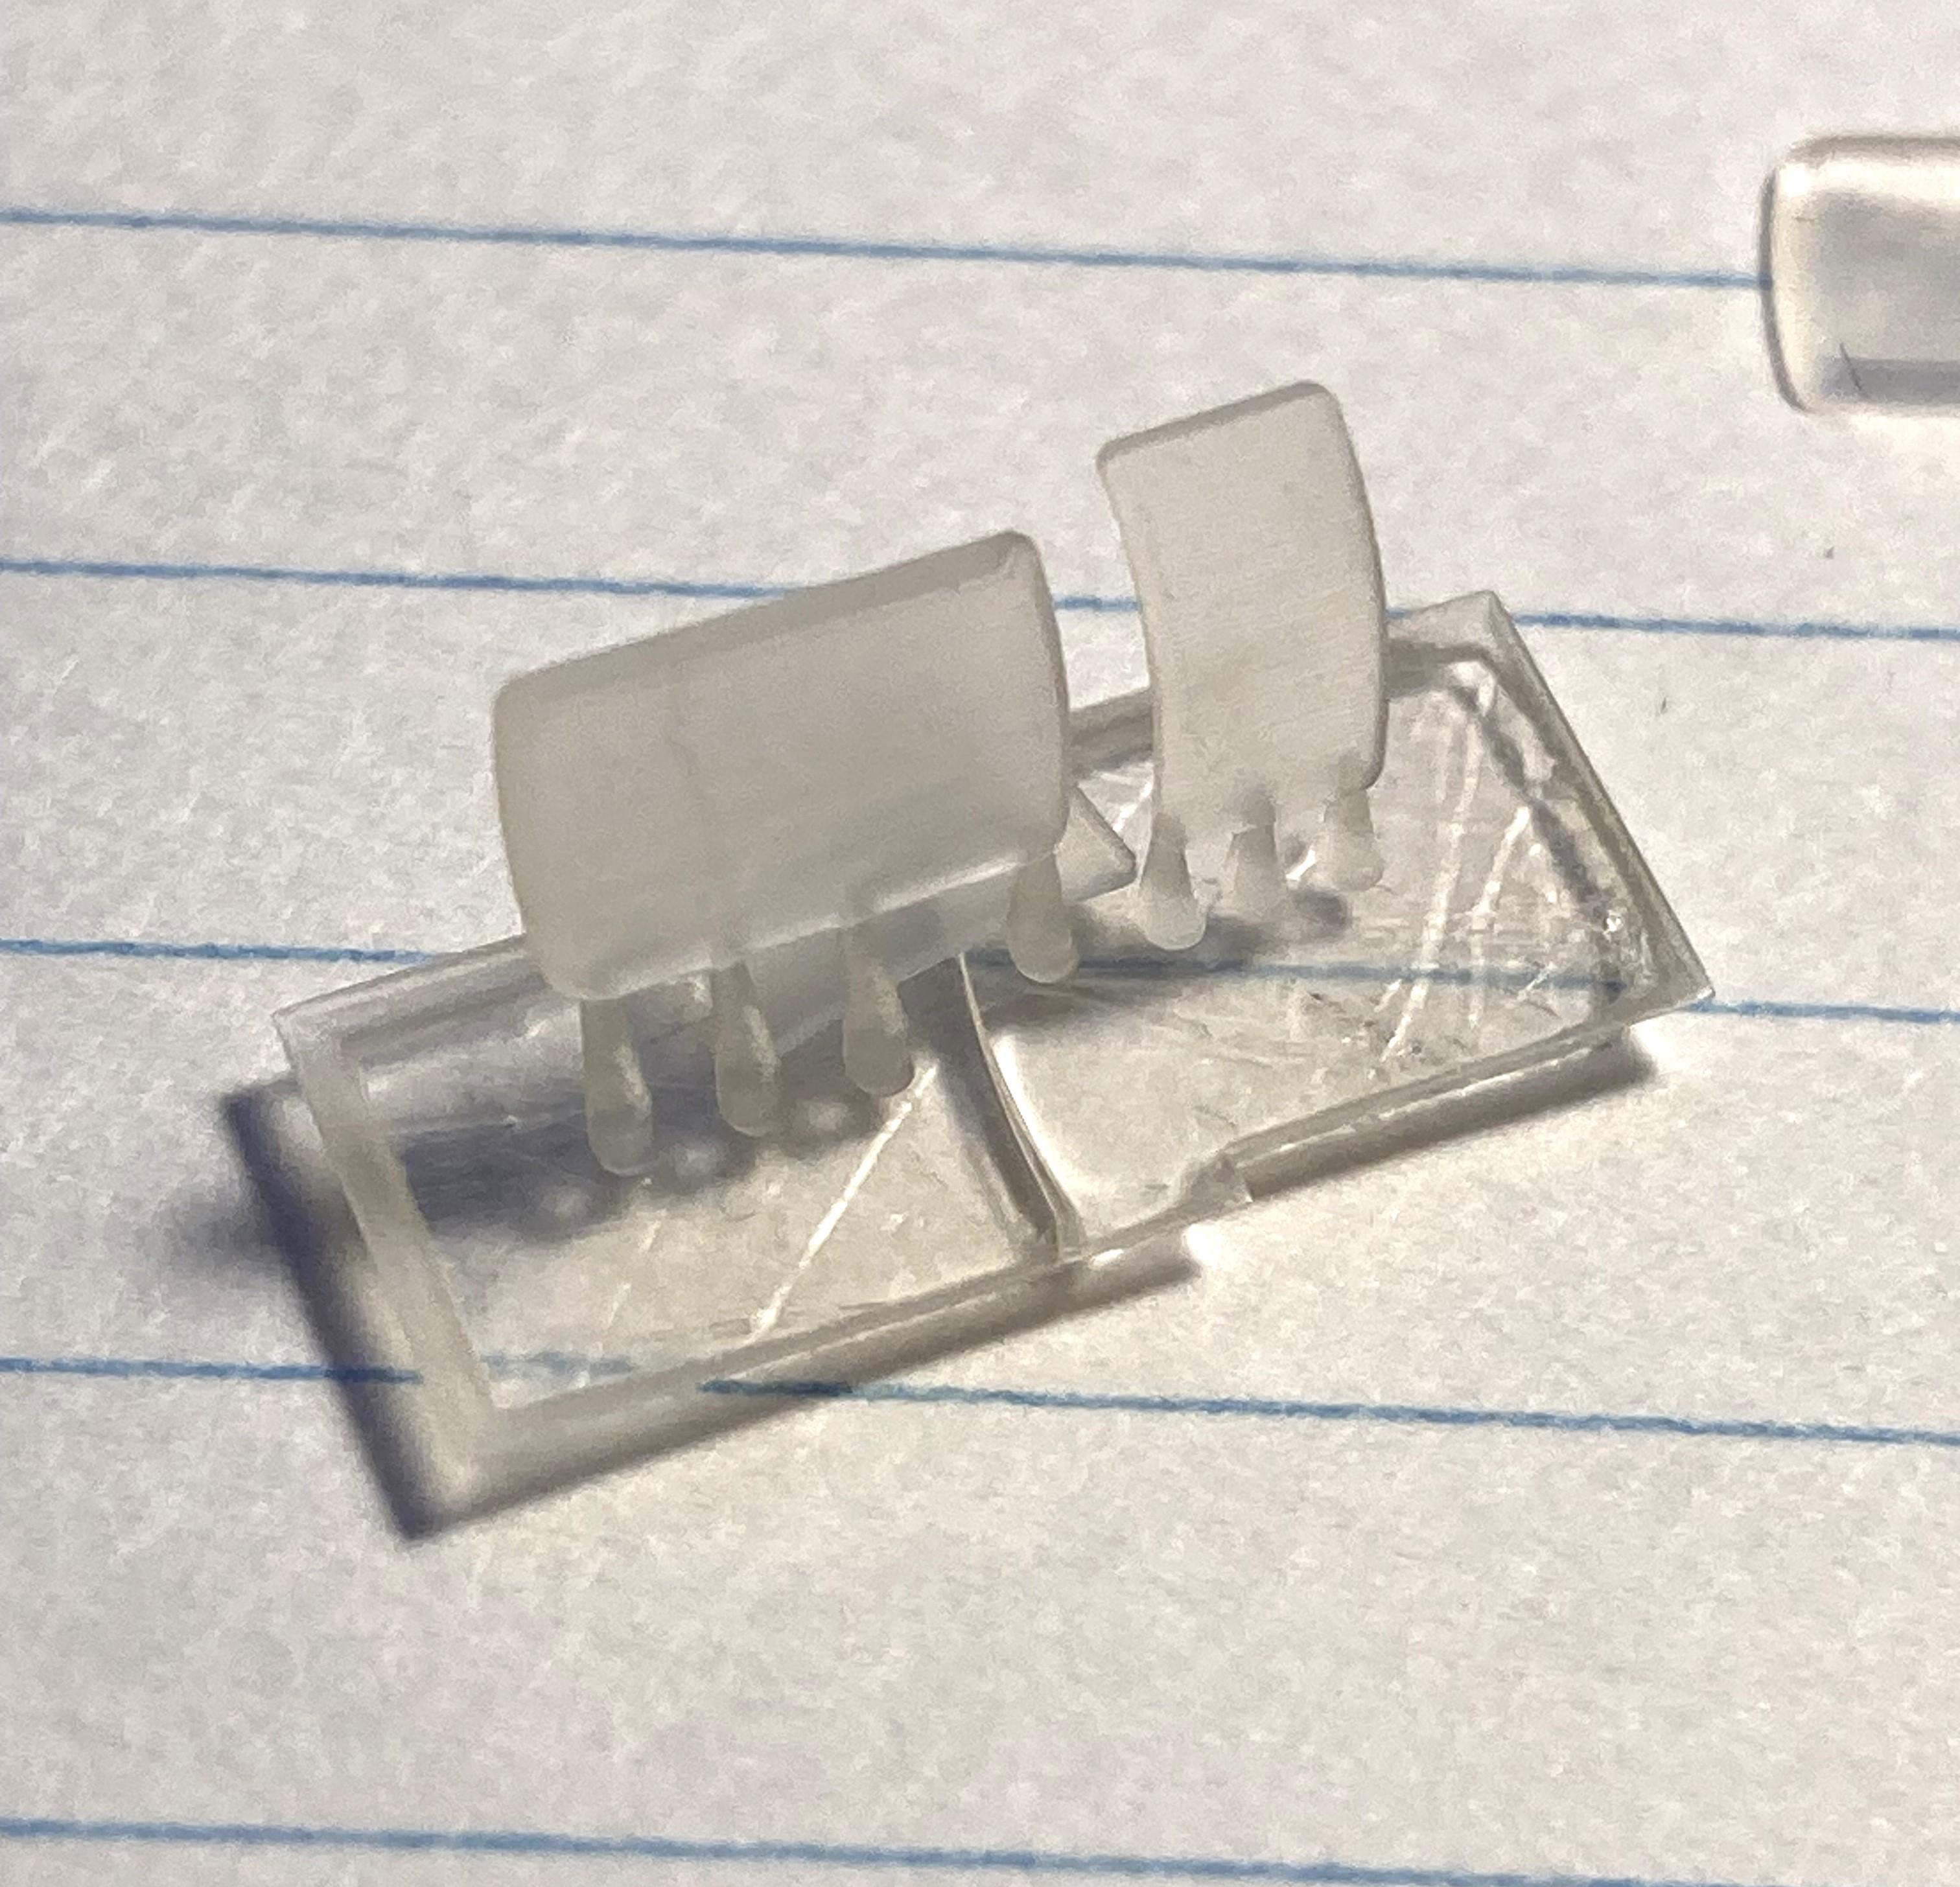
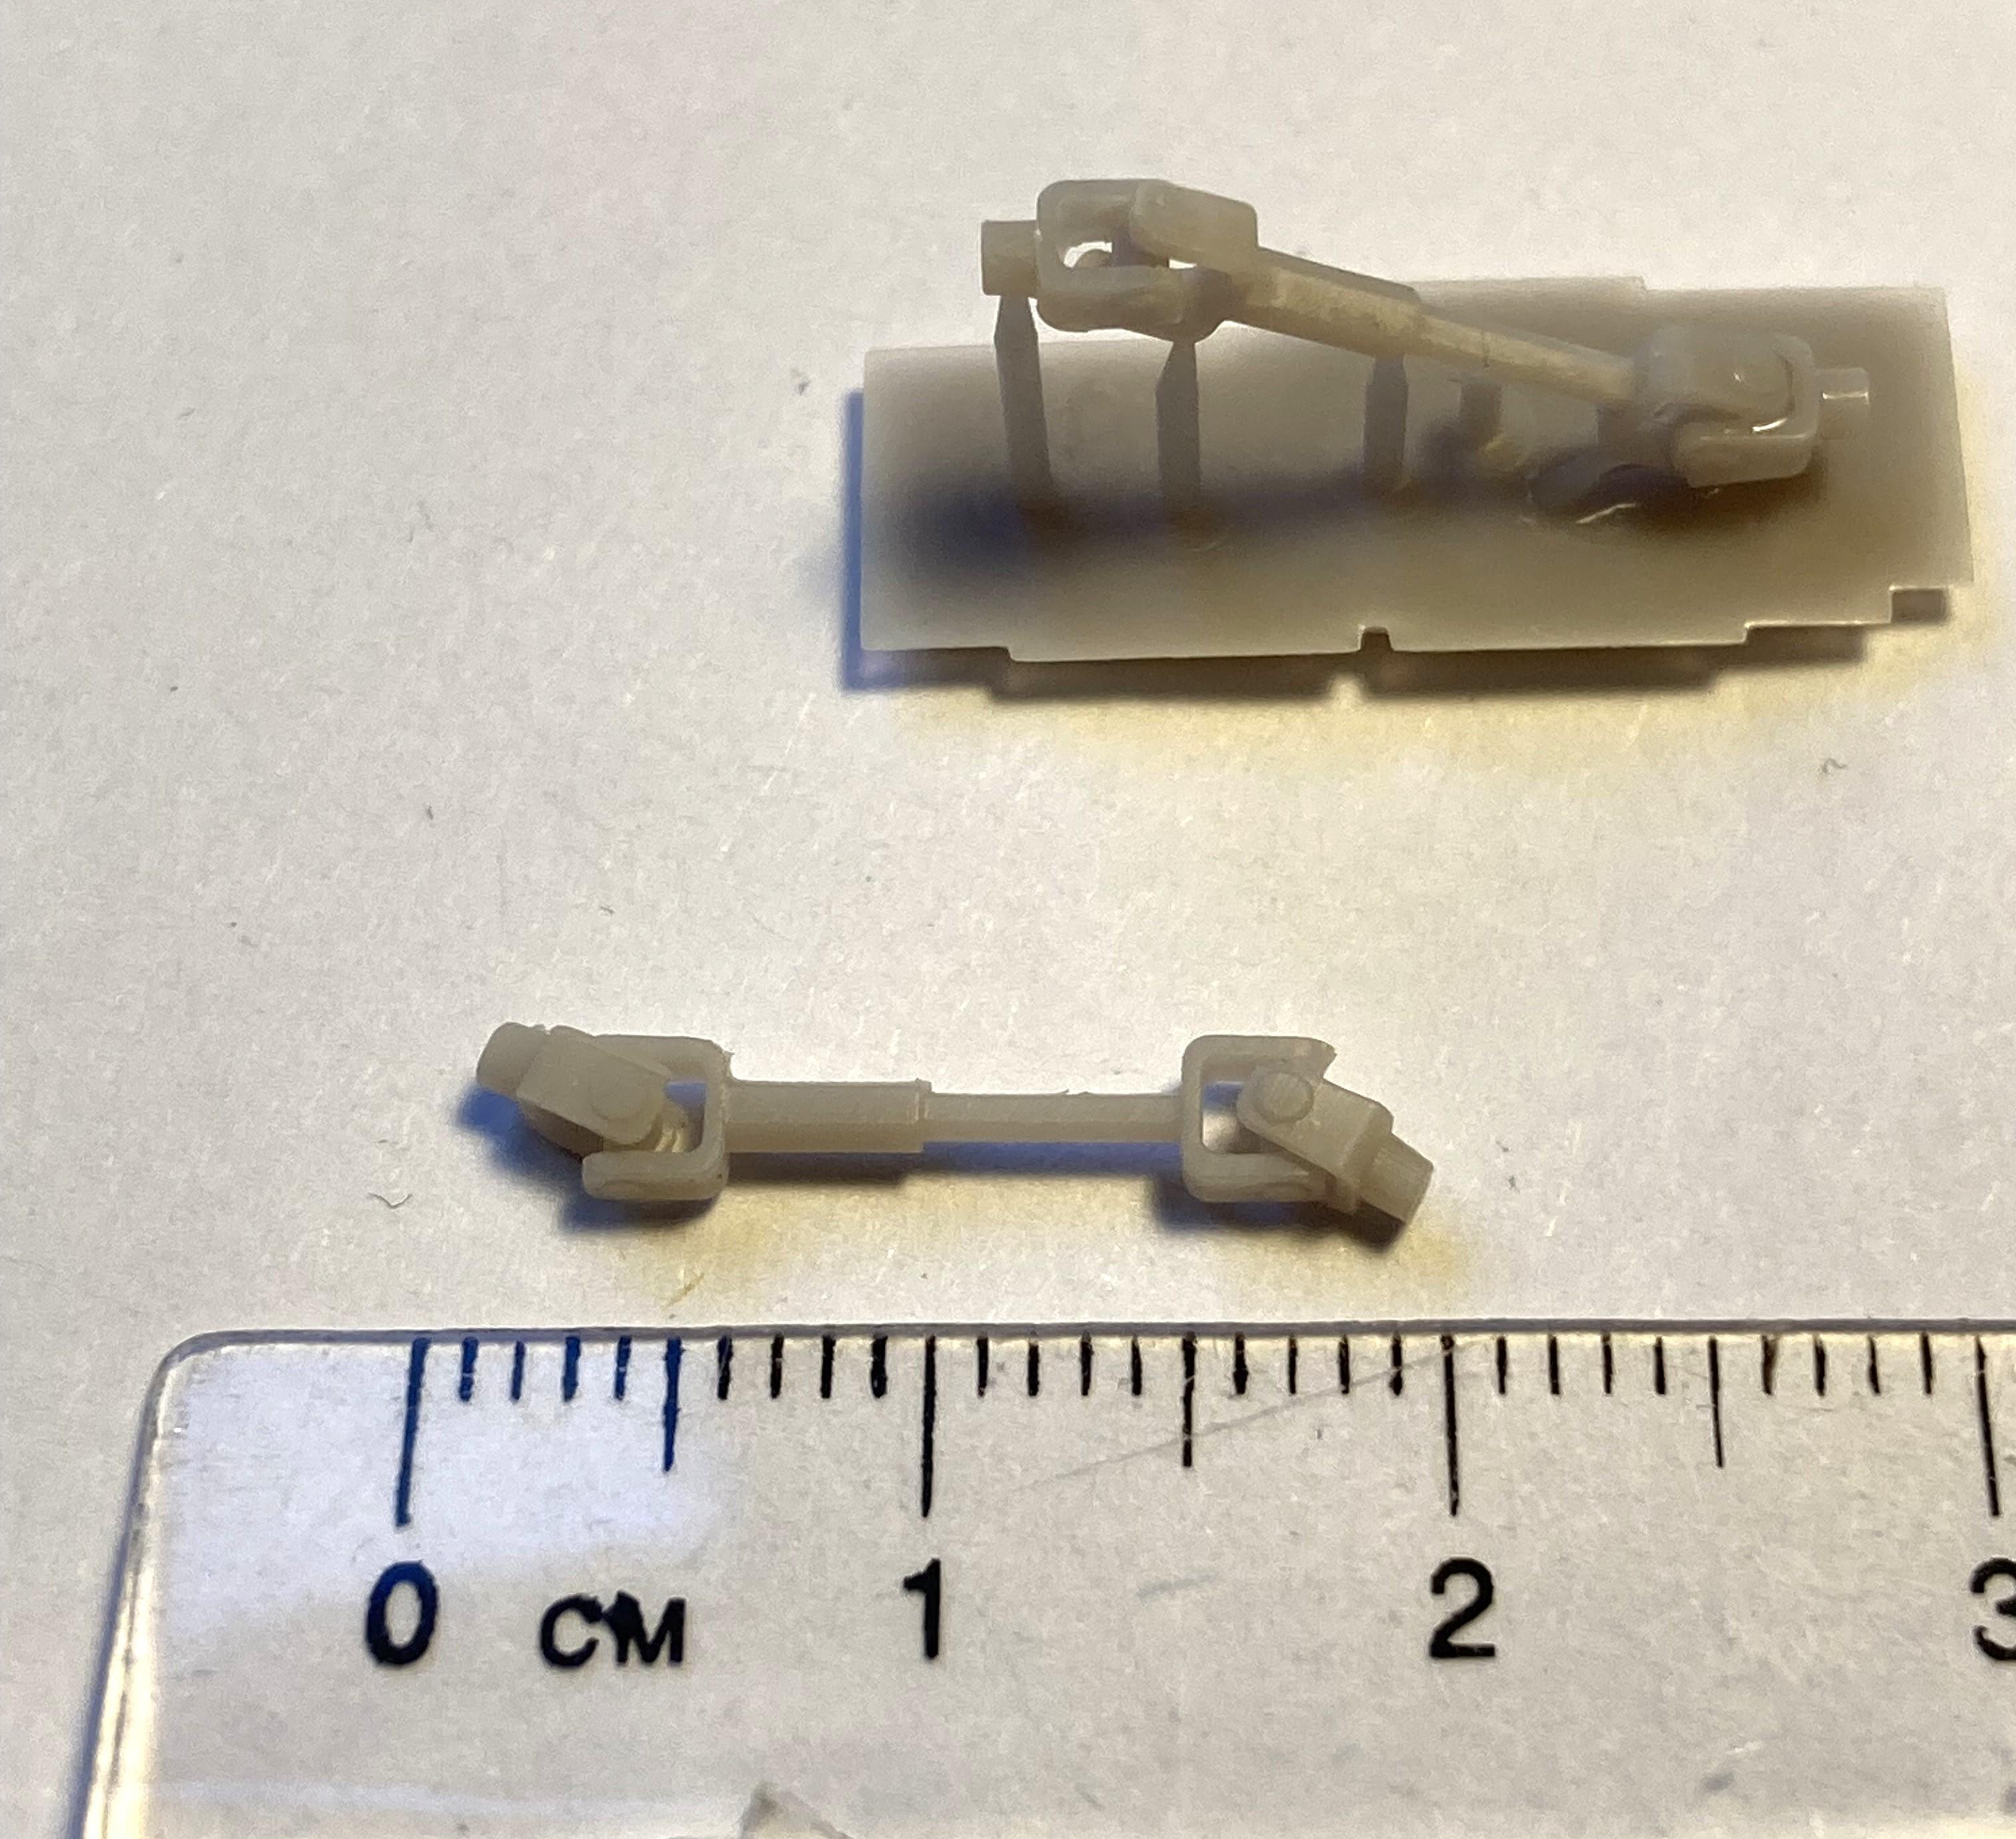
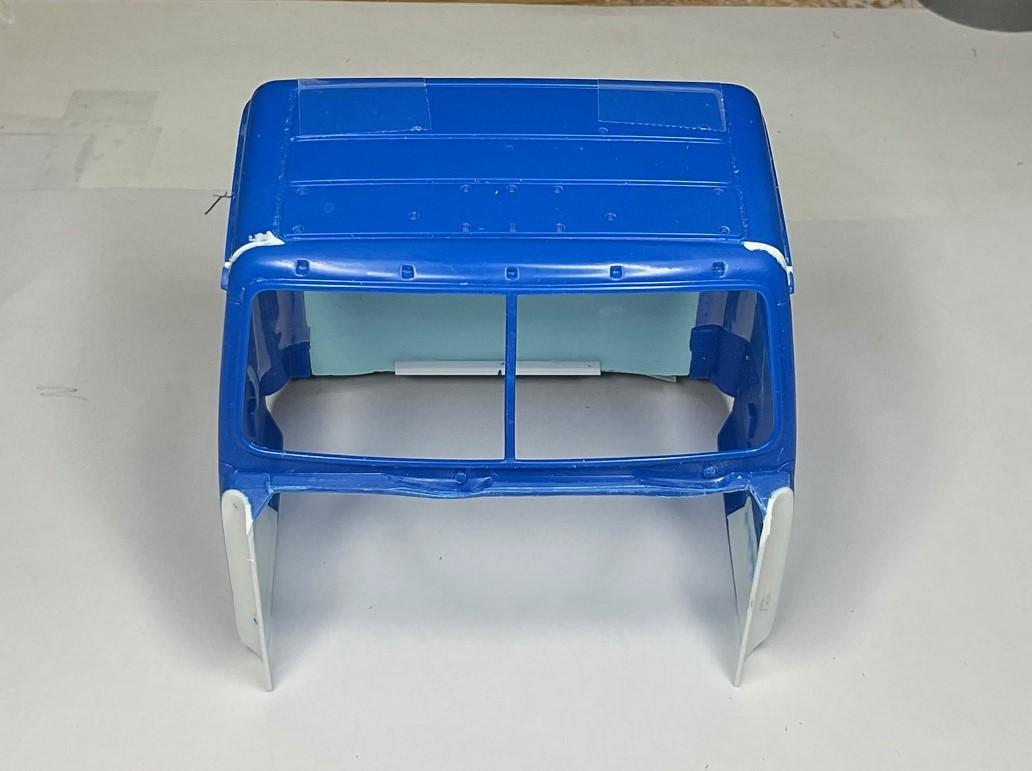
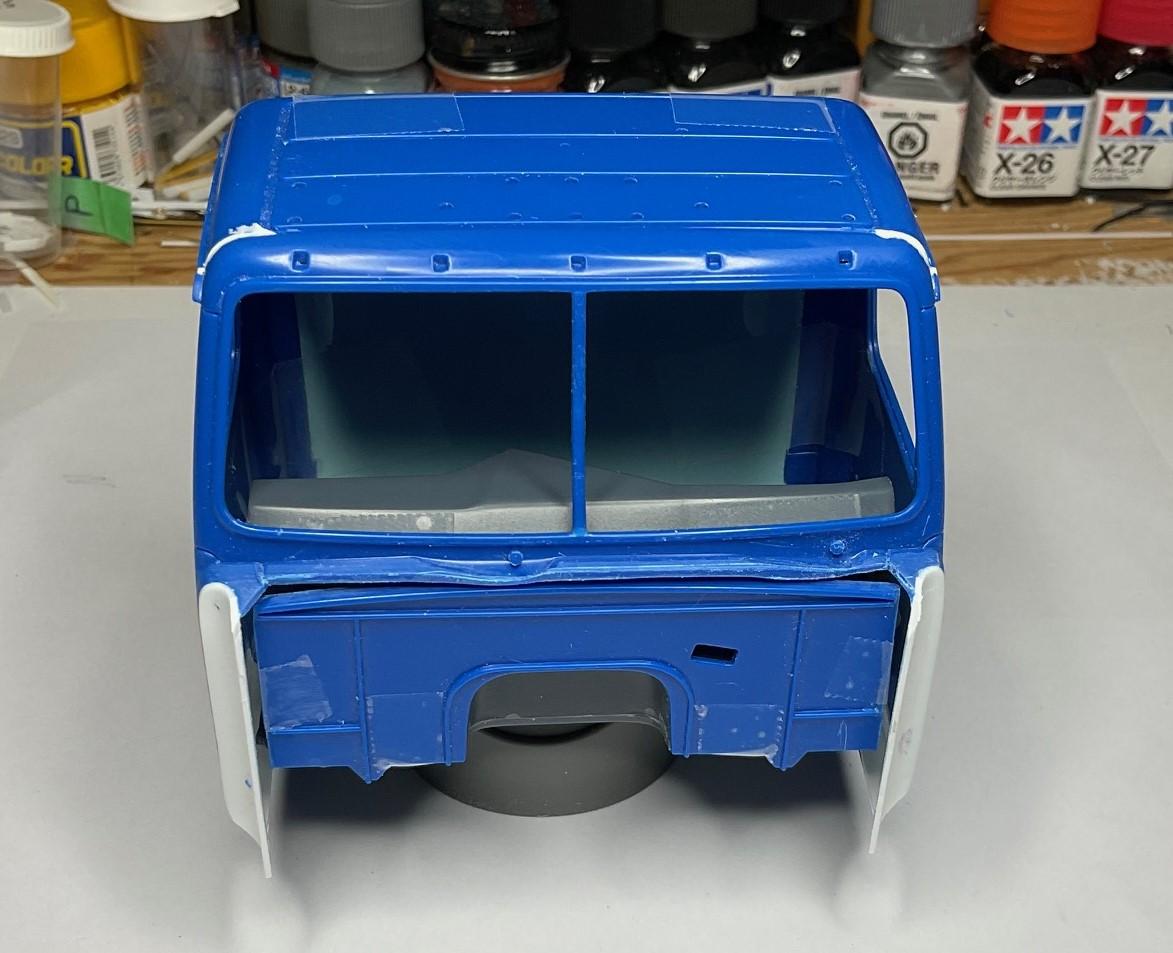
In between working on the cab and hood, other items have been getting some attention. The hood needs a set of extra lights - plow lights - that are mounted high up, at the front of the hood to clear the plow. Also, the issue of a short driveshaft to power the hydraulic pump needed resolution. Wasn't able to find anything suitable online, so I turned to Sketchup again, and, again, many thanks to Bren for printing these items for me. Finally got the firewall filler in and the firewall glued back in place, and extended the firewall skirts slightly to complete the area surrounding the firewall 'Plow light" on real truck I modeled the lights in Sketchup Bren was also able to print the lenses I made, using clear resin. Crankshaft pulley drive shaft to run hydraulic pump on front bumper. I get that this is not an ideal operating angle for these type of drive shafts - I guess that when I installed the engine way back, maybe it sat a little high in the frame (but fan lined up with rad opening, so?). Not enough thought was given to a better line up with pump that would have been required in real life. As it is, it will be a little topic of conversation, should anyone ever notice the drive shaft's angle on the finished model! Made a paper template, then cut out the filler piece that needs to go between firewall and dash board support bracket Filler piece glued in place Firewall glued back in place - top edge of firewall was replaced with a strip of 1mm plastic and scribed to match (mostly!) the curve of the cab - the small remaining gaps will be puttied; also, extensions added to side skirts to form a lip for the vertical sides of hood to close into. Rectangular hole in firewall was for the Constellation kits's under hood air cleaner to mount - needs to be filled in. Now that the firewall has been fixed in place with the filler piece in behind, the interior floor pan now has location points on the filler piece and the back wall of the cab to keep it in its original position - it can be removed, worked on, and the fitting retested fairly easily before it needs to be glued in place. Skirt extension on driver's side still needs to have hole cut out for air intake plenum to pass through from air cleaner, and some finish puttying and sanding Like Steve said above, one modification can affect many other things. Because I made the front plow bumper mount with lift arm, the kit's hood hinges, which are a bit oversized and have a very low pivot point, wouldn't let the hood tip very far before the front of the hood hits the front bumper. I will need to make hood hinges that are similar to the real truck, so the hood pivots higher, just at the base of the front grill surround. I'll need to detach the grill bars from the surround and mount them on the rad, so the grill surround will allow the hood to open fully and not impact the lift arm on the front plow. Still lots to do, but, if the hinges can be sorted out ok, the rest of the work on the hood should go quickly! I appreciate you looking in and thanks for commenting.
-
Western Star 4900 FA plow truck
BK9300 replied to BK9300's topic in WIP: Model Trucks: Big Rigs and Heavy Equipment
Thanks, Steve - been slow because not my favorite thing to do! I've given in to that 'knock on' effect a lot in this build - especially when, like you said, I miss things right there in my photo research. About the old days, those talented at hand drafting must have been in high demand. I hope to get the cab all sorted in the next couple days, then more on the hood. Thanks again! -
Western Star 4900 FA plow truck
BK9300 replied to BK9300's topic in WIP: Model Trucks: Big Rigs and Heavy Equipment
Thanks, Scott - but I don't know about that - your fabrication's looking top drawer these days! -
Very cool to have discovered what so many of you already knew - a seriously talented, and innovative builder - thanks for posting the link.
-
T41 Bugatti sport coupe
BK9300 replied to charlie libby's topic in WIP: Other Racing: Road Racing, Land Speed Racers
It's quite a testament to your metal working abilities, that the body should look so good after the initial coat of primer. A truly amazing achievement in craftsmanship! -
FDNY Wrecker
BK9300 replied to Scott Eriksen's topic in WIP: Model Trucks: Big Rigs and Heavy Equipment
Your paint job is really shining - reflecting! - in these pics. Looks great put together, even if some is just sitting in place at the moment! I may have missed it, but did you clear over your decals (guess I could go back and check!) -
Western Star 4900 FA plow truck
BK9300 replied to BK9300's topic in WIP: Model Trucks: Big Rigs and Heavy Equipment
Thanks, Francis - very complimentary! I think a count of the puzzle pieces might..., well, maybe not! -
Western Star 4900 FA plow truck
BK9300 replied to BK9300's topic in WIP: Model Trucks: Big Rigs and Heavy Equipment
Thanks very much, Gary - appreciate your comments, as always! -
Western Star 4900 FA plow truck
BK9300 replied to BK9300's topic in WIP: Model Trucks: Big Rigs and Heavy Equipment
Thanks, Jeff - the pictures always show up the worst parts of my efforts, but some cleanup will make the parts better. Looks good when I'm sitting looking at it, though! -
Resto Rod Autocar
BK9300 replied to Gary Chastain's topic in WIP: Model Trucks: Big Rigs and Heavy Equipment
Maybe you could keep the painted battery box and make different support braces for the sides, to mount the PE steps on, rather than re-making the whole battery box? Going to look great once you've got it sorted! -
’72 Dodge Demon Drag Racer 1/25 scale
BK9300 replied to AmericanMuscleFan's topic in WIP: Drag Racing Models
I really enjoy watching the precision on display in creating your parts, Francis! When drilling holes in your calipers or wheels, is your chuck able to be rotated in specific degrees or are you determining new drill locations by hand? And, maybe its been done on elsewhere on this forum, but a tutorial on resistance soldering such small items would be very interesting! -
Do you think a coat of clear over your decals might have made the decal background be less visible or disappear? Have any decals left over you could experiment with on a spare piece of painted plastic?
-
Styrene solvent glue and Tamiya putty
BK9300 replied to BK9300's topic in Model Building Questions and Answers
Thanks for this, Greg - no layers to build up, just an area, part styrene and part filler, that needs a strip of 1mm styrene added on top. Likely need two glues, like you suggest. -
Styrene solvent glue and Tamiya putty
BK9300 replied to BK9300's topic in Model Building Questions and Answers
Thanks for this link - might not suit me immediate purpose, but is very interesting! -
Marvel's Hydra coupe 1/12 scale full scratch build
BK9300 replied to François's topic in WIP: Model Cars
That's quite the accomplishment, François - so much detail to take in! -
1921 White Model 45
BK9300 replied to RoninUtah's topic in Model Trucks: Big Rigs and Heavy Equipment
Good technology for its day - sure would have been a rough ride! Good looking truck, Ron. -
Western Star 4900 FA plow truck
BK9300 replied to BK9300's topic in WIP: Model Trucks: Big Rigs and Heavy Equipment
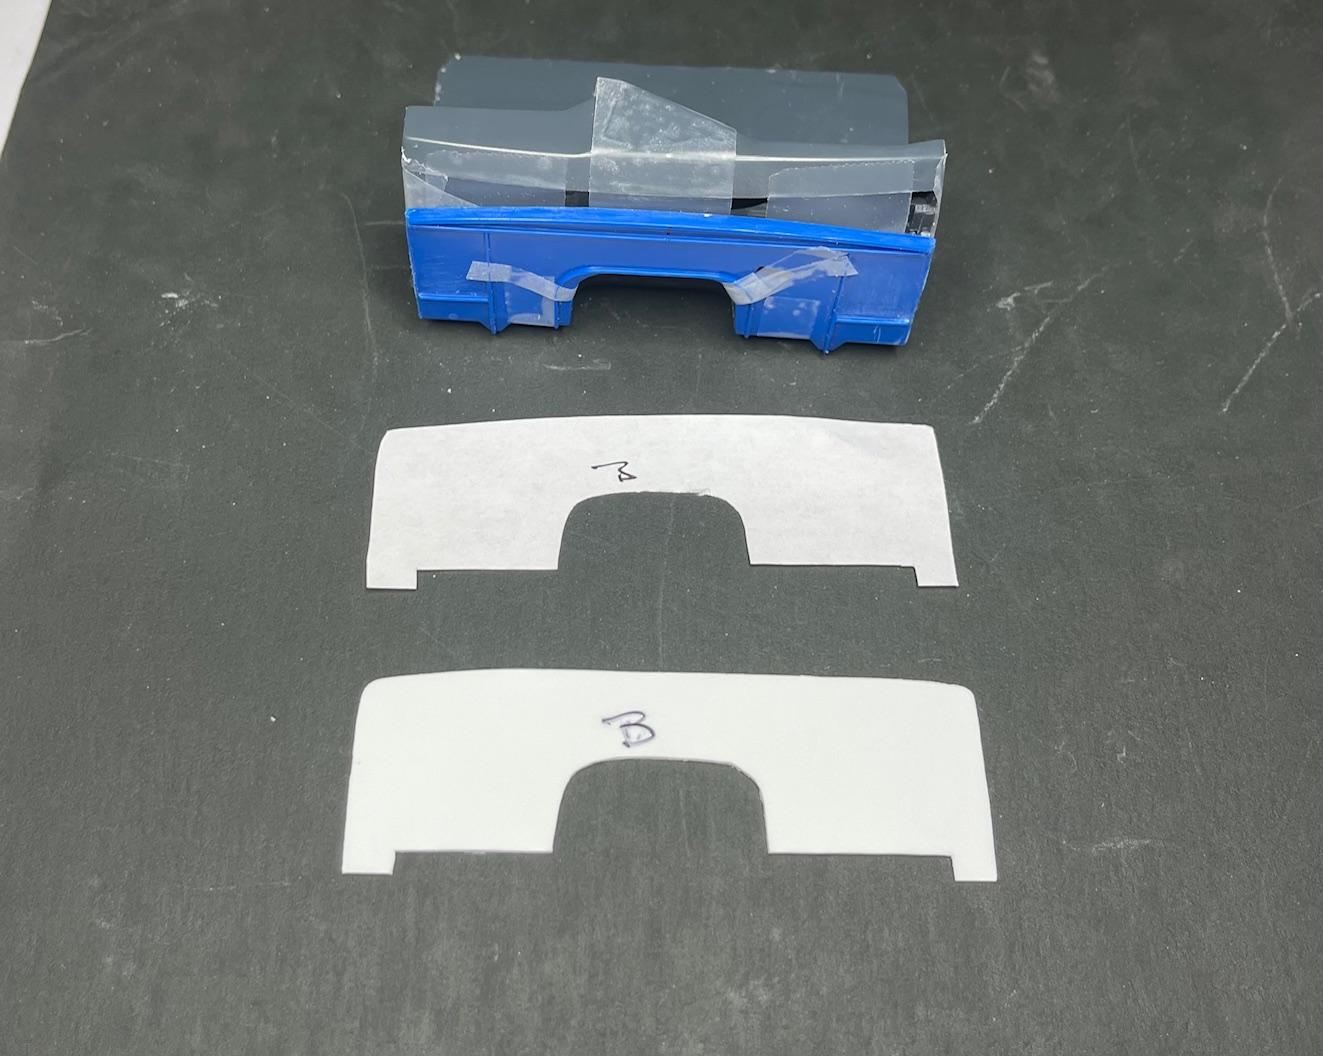
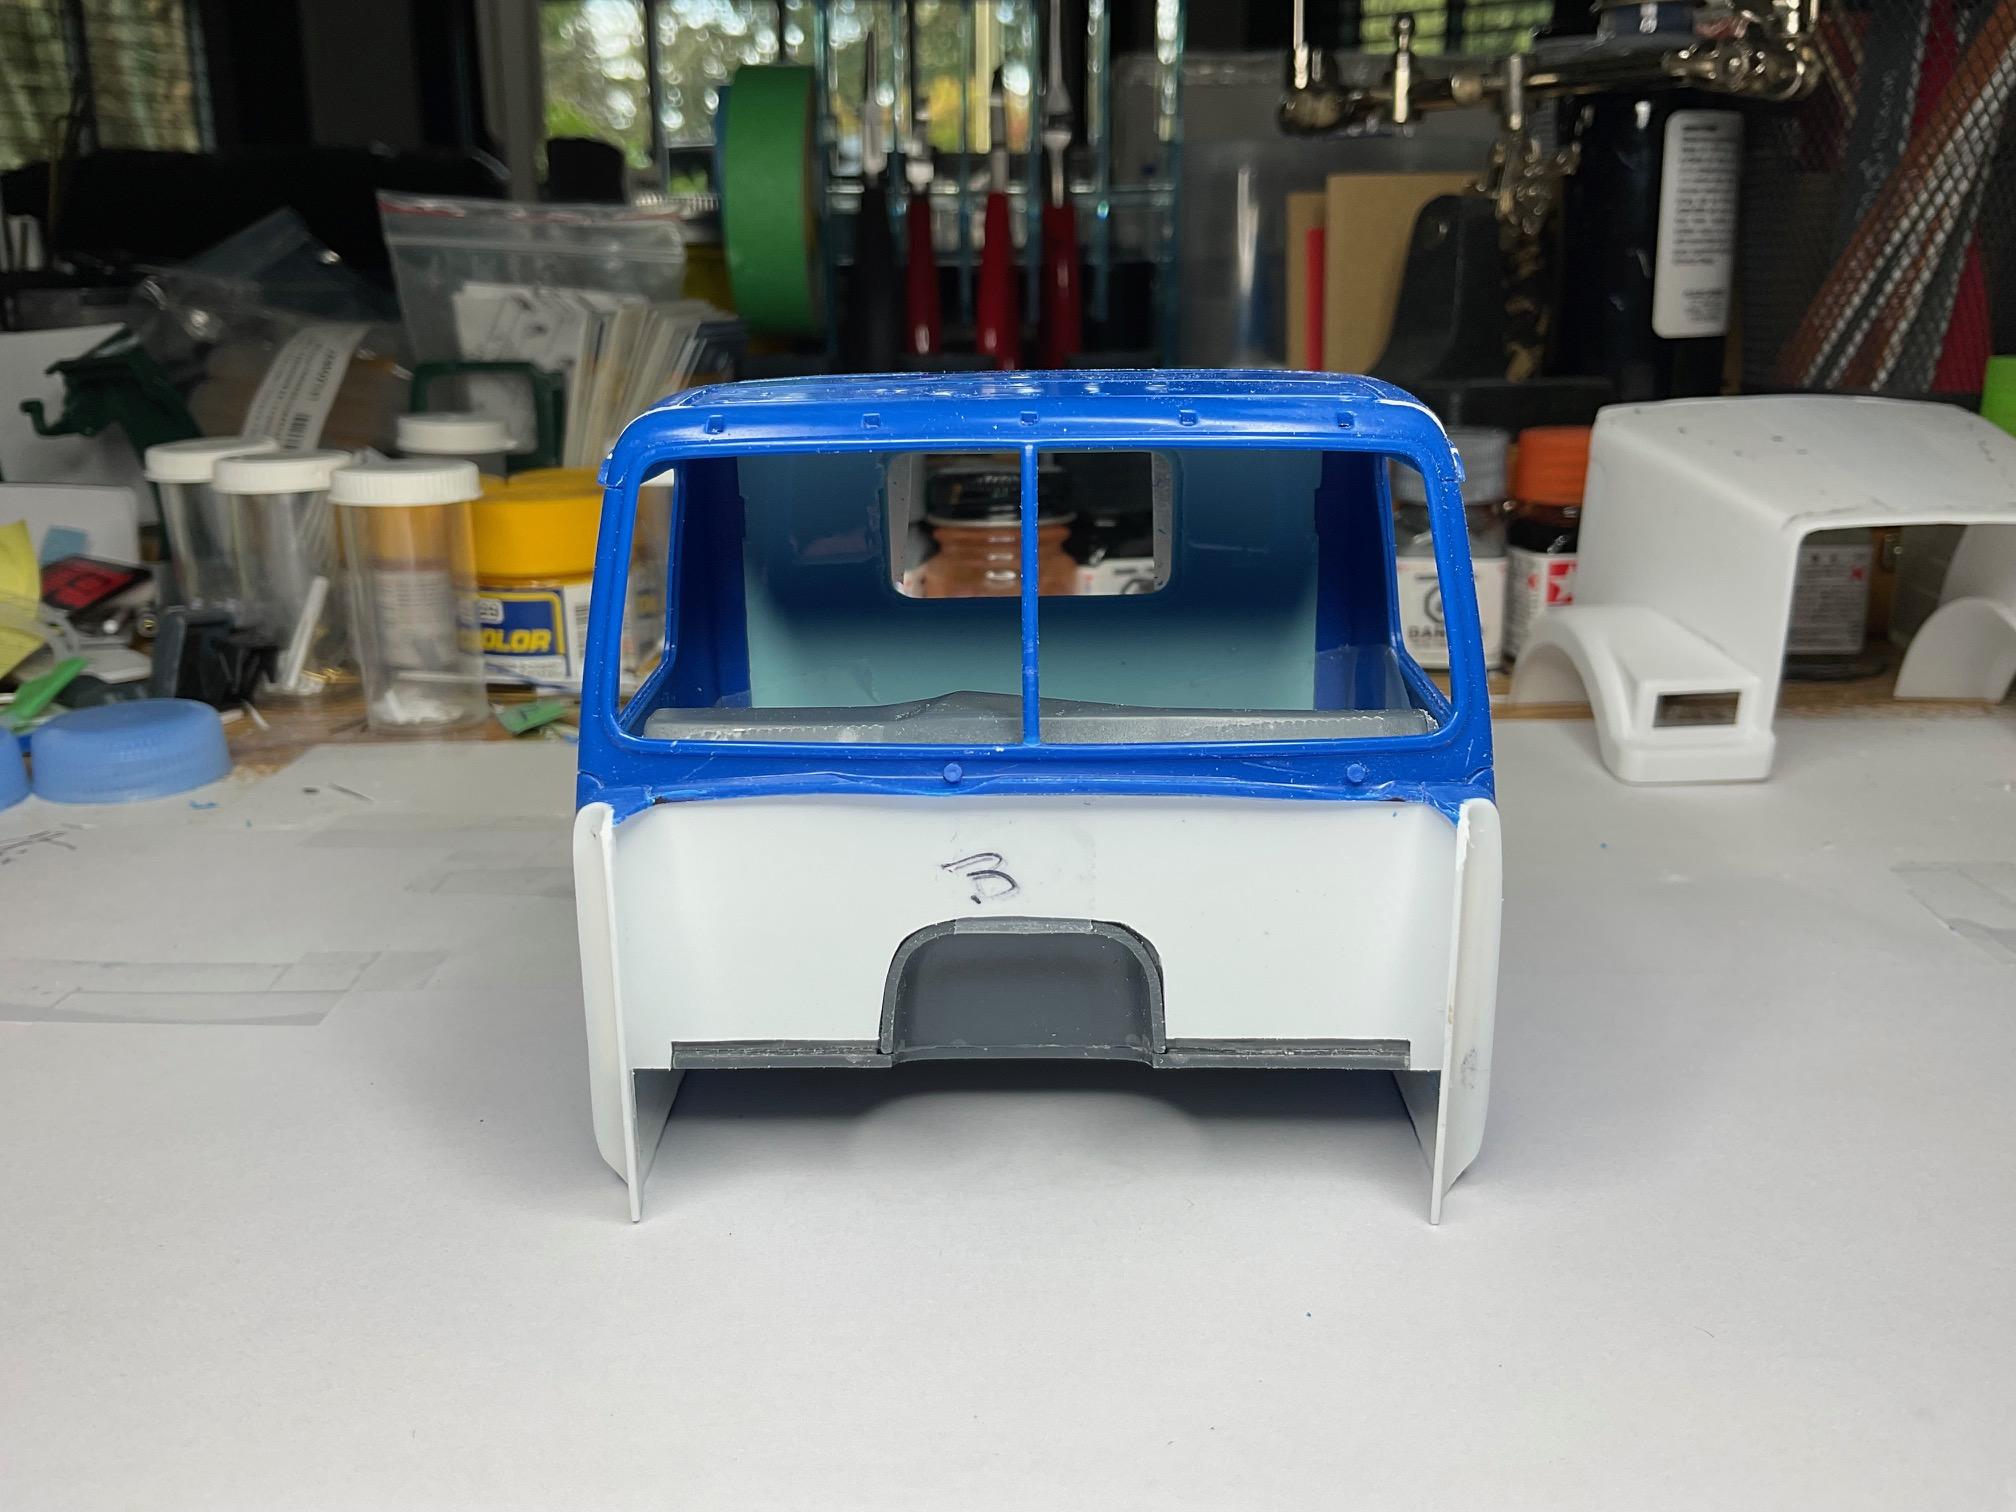
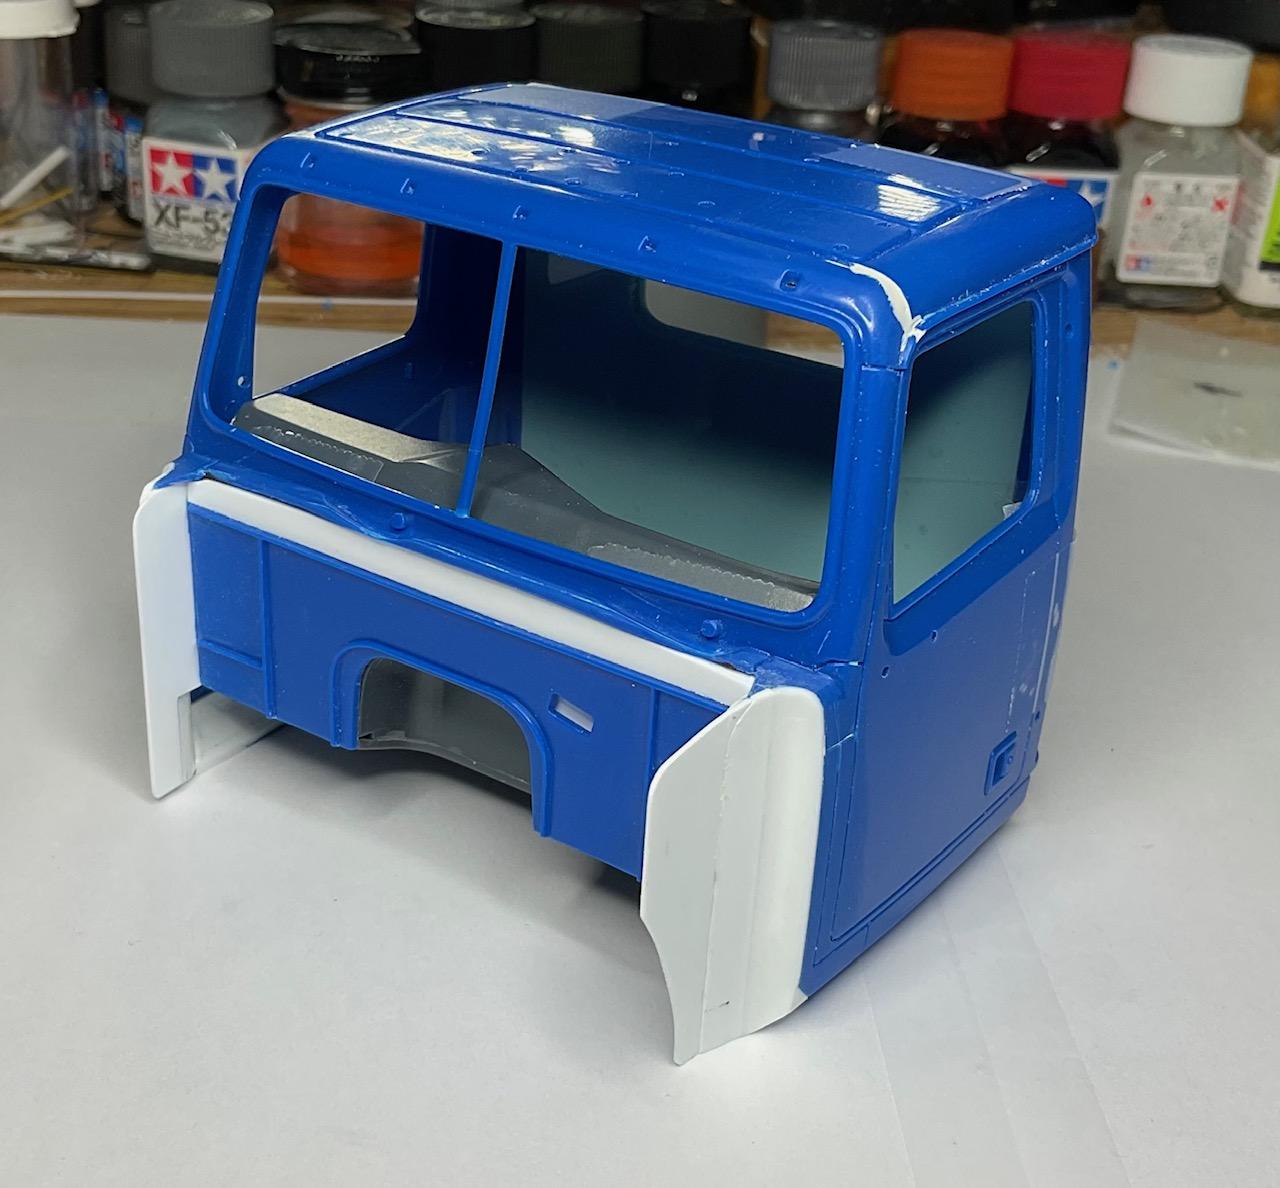
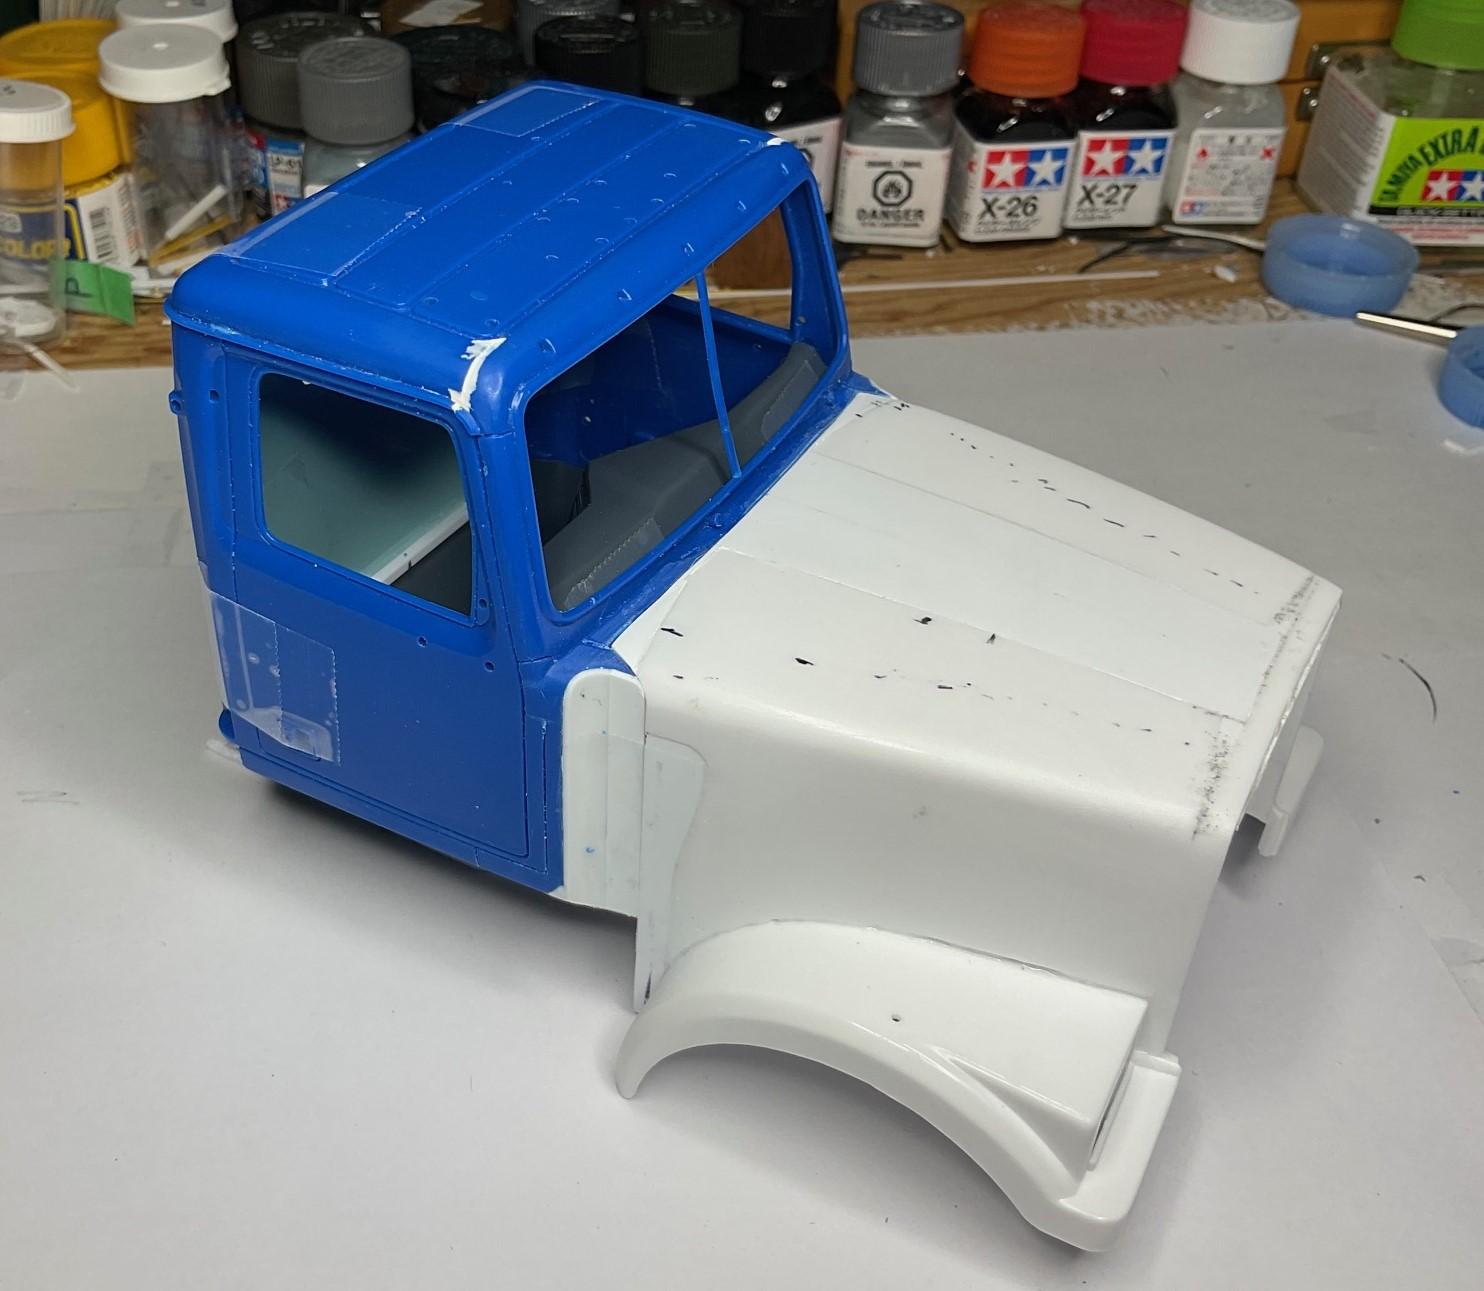
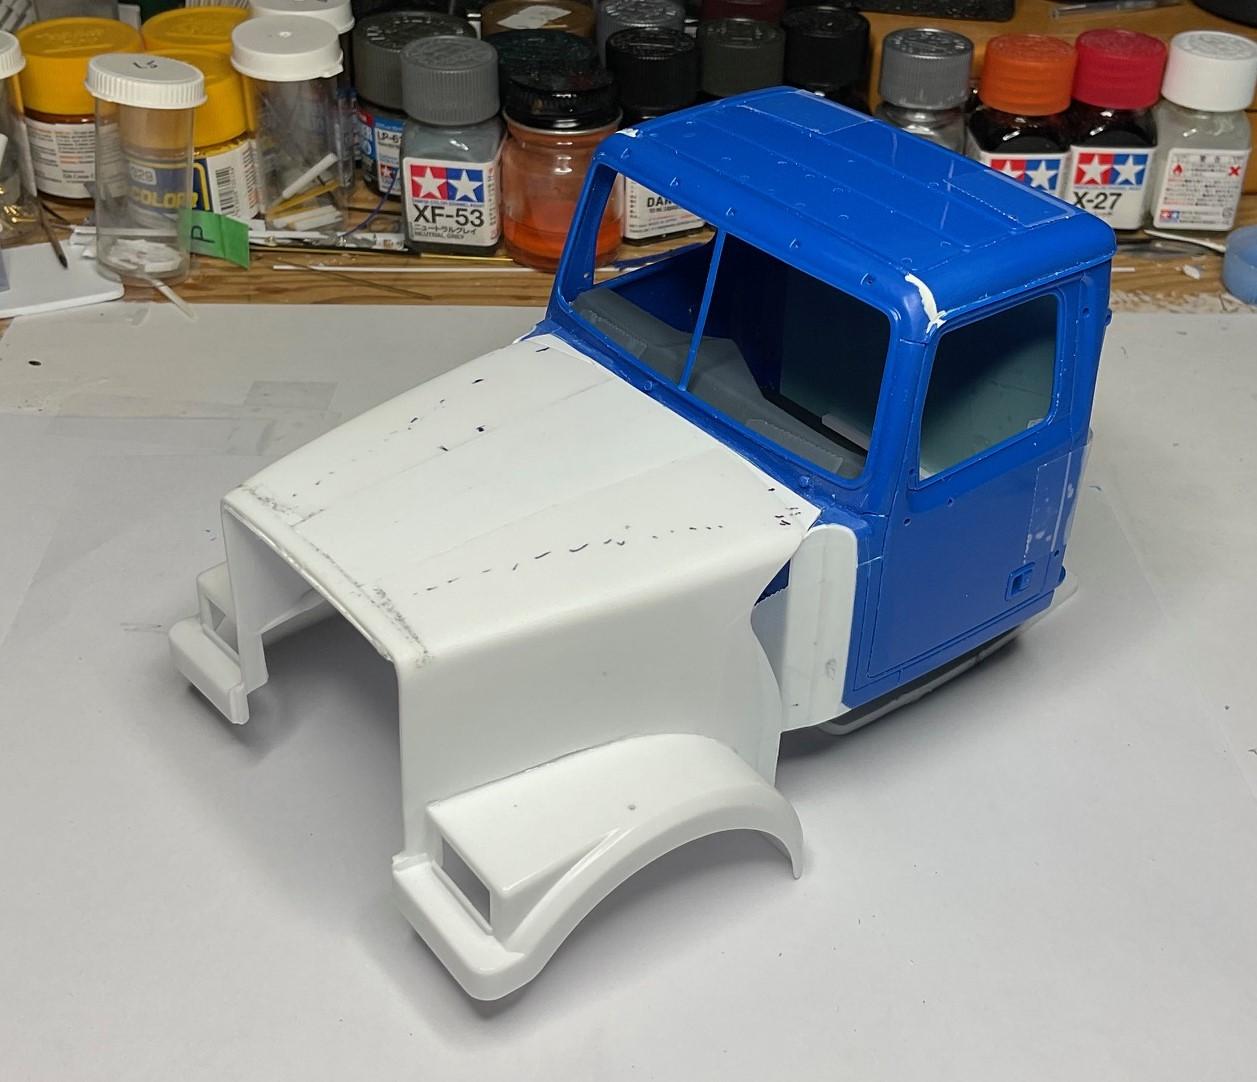
I got the hood to fit in place on the cab today. I need to remind everyone that my hood to cab join is lacking some geometry of the full size truck, but I went as far with it as I think could reasonably be accomplished. It looks good - I just know its not 100%! I taped the hood in place and scribed the cutline needed - used back of X-Acto blade to make the cut Firewall and dashboard back in place to check for filler pieces that will be needed to mate firewall up with cab on three sides; a new lip, around the left fender skirt and across the top of the hood opening, will need to be added for hood to close against - the skirt on the right side needs to be extended to cover the air inlet opening in that side of the hood. I now need to keep all this in alignment when I make the new hood hinge assemblies and have the hood open and close this tight afterwards! (the black markings on the hood roughly border the area that I need to address with some Tamiya putty) Starting the finishing work on the hood tomorrow - take care!
-
Western Star 4900 FA plow truck
BK9300 replied to BK9300's topic in WIP: Model Trucks: Big Rigs and Heavy Equipment
Thanks, Jeff - gray hairs are all done for me a long time ago! I read an article a long time ago, about using a 3D scanner and importing the scan mesh into Sketchup - never pursued because I didn't have anything I needed to scan (plus I don't have a scanner!). Might be something to look into -
Never worked with Tamiya putty other than to fill small holes/gaps. I need to cover part of an area of a hood to maintain an curved profile and then add a strip of styrene down the center of the hood. The strip will cover an area made up of bare styrene and some Tamiya putty. I've always preferred using solvent glue to bond styrene to styrene - does solvent glue bond with Tamiya putty or do I need to use a different glue (CA, epoxy, ?) to attach this strip? Thanks for any suggestions!
-
Restoration project
BK9300 replied to cdntrucking's topic in WIP: Model Trucks: Big Rigs and Heavy Equipment
Great looking restoration, Lewis - such a familiar site when I used to live in the interior of British Columbia. -
Your tribute has inspired me to check out some of his threads - and looking forward to following your work here.