BK9300
-
Posts
1,990 -
Joined
-
Last visited
Content Type
Profiles
Forums
Events
Gallery
Everything posted by BK9300
-

1/25 AMT Peterbilt 359 California Hauler
BK9300 replied to cifenet's topic in WIP: Model Trucks: Big Rigs and Heavy Equipment
You pay great attention to parts detailing and to prepping your truck for paint - I'm certain it will turn out as you expect and will likely look amazing! -
IH Emeryville with Flatbed
BK9300 replied to DRIPTROIT 71's topic in Model Trucks: Big Rigs and Heavy Equipment
Very nice build - really like the colour! Lots of extra details like the A/C lines add another layer of interest. Good looking combo! -
Western Star 4900 FA plow truck
BK9300 replied to BK9300's topic in WIP: Model Trucks: Big Rigs and Heavy Equipment
double post !? -
Very rich looking interior, Steve! (love the shifter, too)
-
Western Star 4900 FA plow truck
BK9300 replied to BK9300's topic in WIP: Model Trucks: Big Rigs and Heavy Equipment
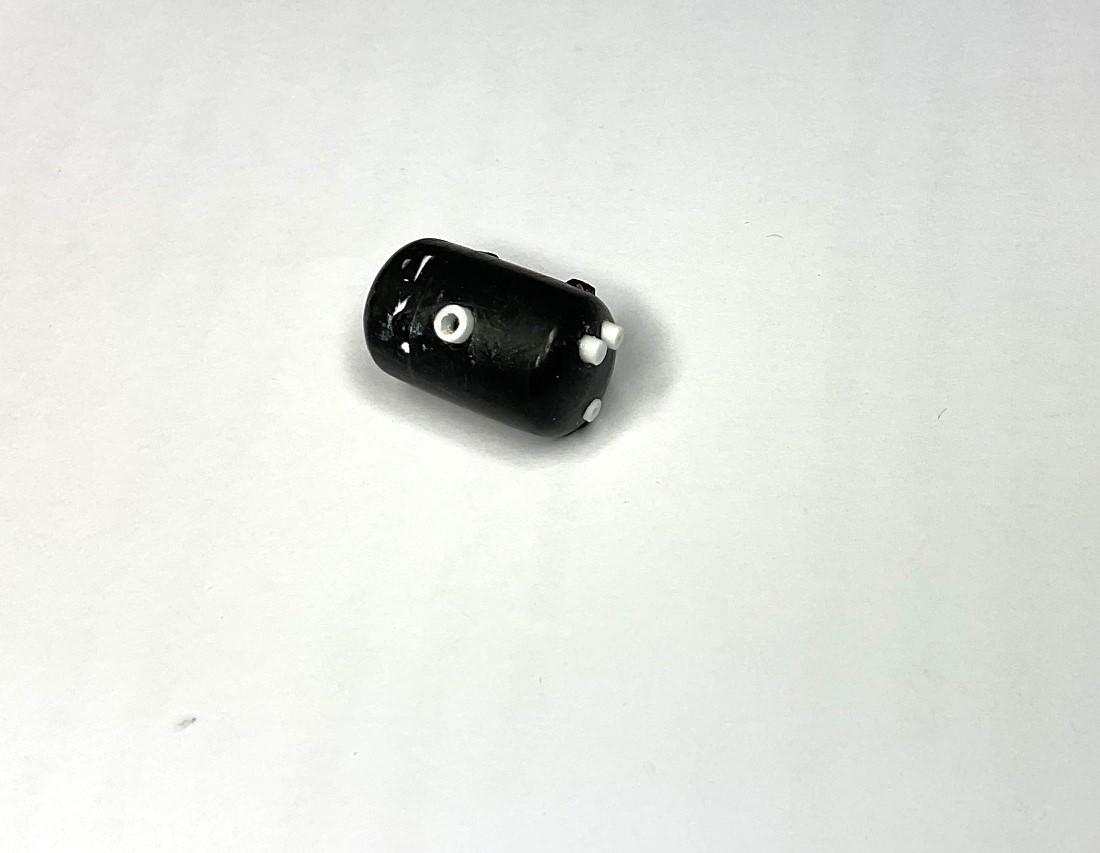
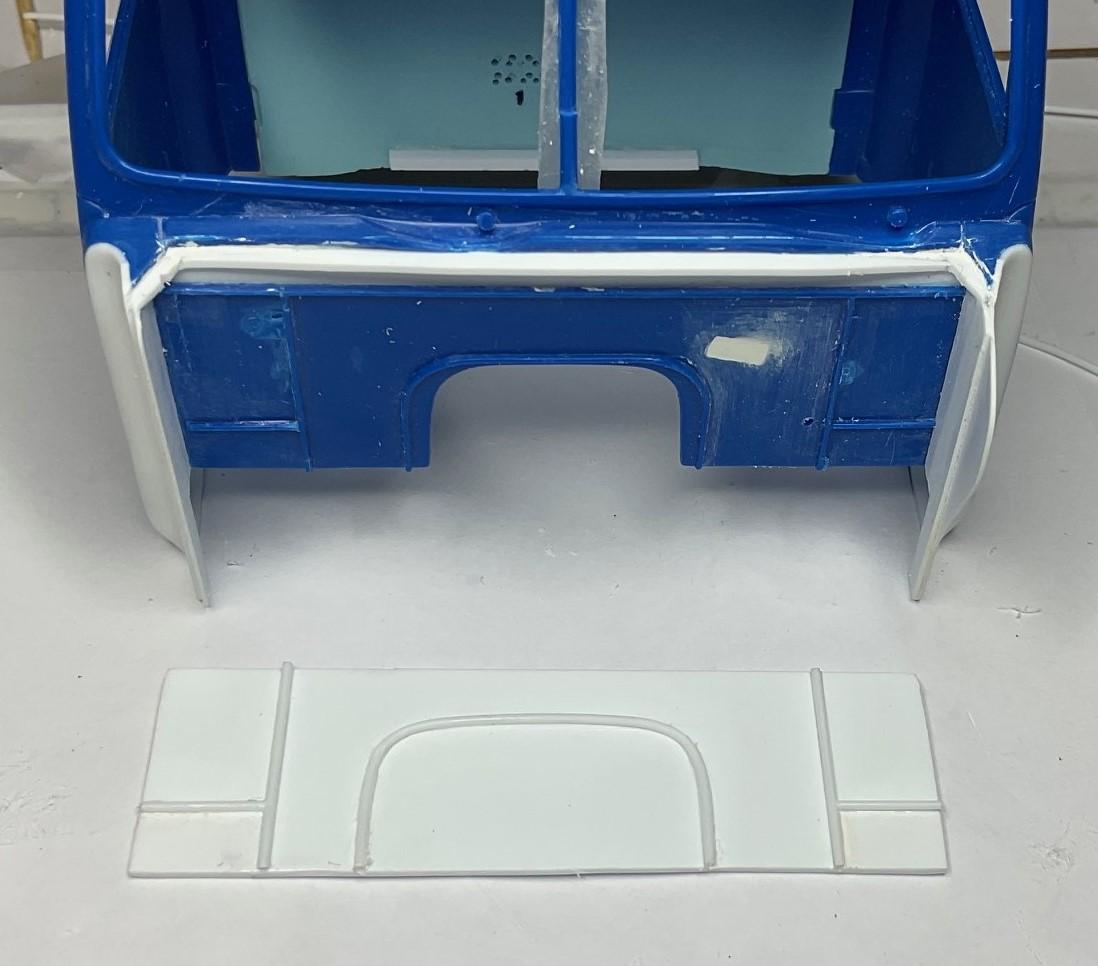
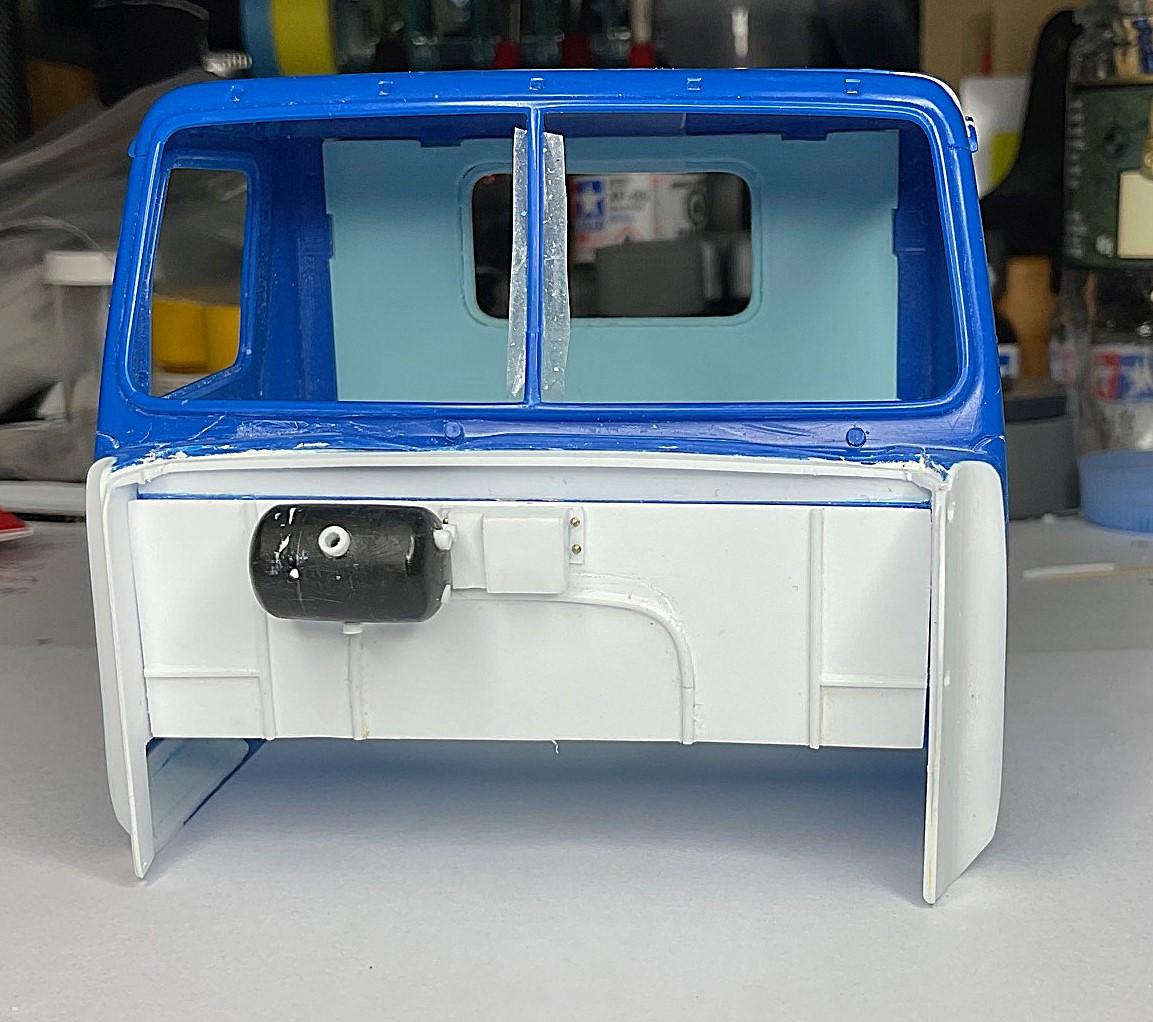
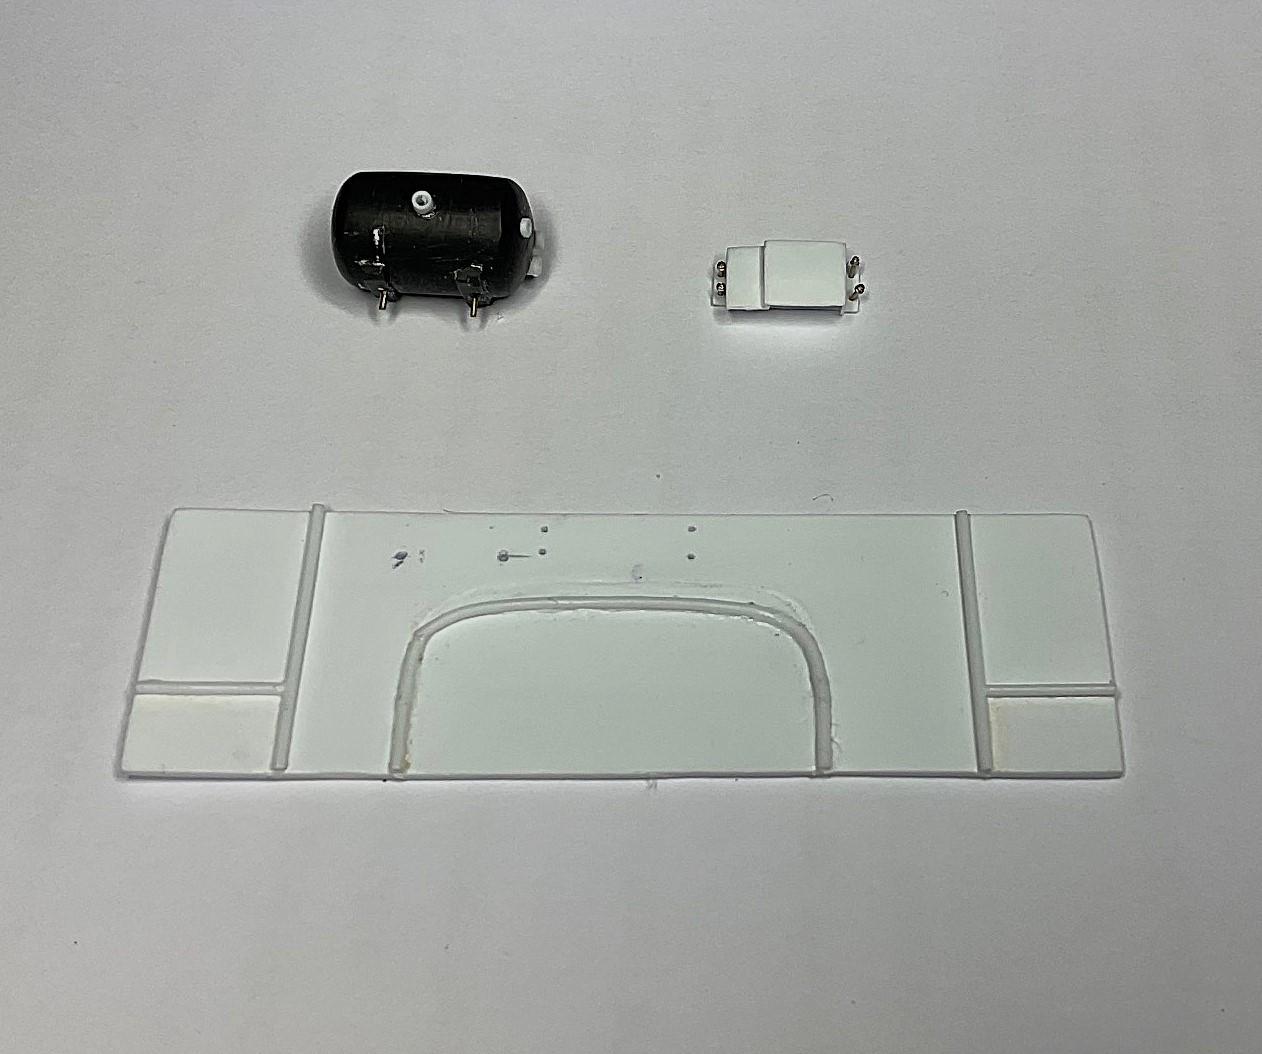
I'm sticking to the model's 'punch' list for the time being but still waiting on some fasteners from Model Motor cars (Scale Hardware). A while back, I broke the center windshield brace - and in keeping with the list, I have to do work on the firewall, so, to minimize handling the cab, I reproduced the shape of the firewall on a piece of similar thickness styrene and began making the parts I want to add to the firewall. I am going to be pinning the items I add and drilling holes for some others, so the temporary firewall will also allow me to use it as a template for drilling the holes into the cab's firewall. I then won't have to handle the cab very much, once it's painted (and repaired!) when I add the pieces to the cab's firewall. Temporary firewall - looks distorted a bit, but think that's just the two different angles of the firewalls Modified an air tank to be a smaller, rad overflow tank - two 0.5mm brass pins were added to the brackets on the back side This is the cover for what a Western Star Body Builder bulletin calls the MEGA fuse box - I'm also going to see if I can add the Power Distribution box that feeds this fuse box Holes for the tank mount pins and the fuse box flange bolts have been drilled into temp firewall Temp firewall mocked up in place - I know I said the temp firewall was so I didn't handle the cab as much, so this mockup really won't happen often anymore! Going to have a go at using some more of the Wave springs, different sizes, to make a highly simplified version of the harnesses between the power distribution box, the fuse box, and also make the harnesses to the three connectors that are on the driver's side of the firewall. If this actually turns out, in theory I should be able to move the tank and fuse box, and 'unplug' the harnesses and connectors from the temporary firewall and 'plug' them into the cab's firewall. Or, it might end up as a 'maybe next time' project! More slow going, but still getting further along - take care!
-
Western Star Classic heavy haul
BK9300 replied to Biggu's topic in WIP: Model Trucks: Big Rigs and Heavy Equipment
Good job on the air cleaners - they look good painted the body colour and not all chrome. Really like the ‘dusted’ up look, too - your weathering always turns out well! -
MACK SUPERLINER HEAVY HAUL
BK9300 replied to Swamp Dog's topic in WIP: Model Trucks: Big Rigs and Heavy Equipment
Great looking engine and I like your headache rack and winch cage setup. Whatever you're using for winch line sure looks the part, too. Very nicely done! -
69 Dodge Polara CHP Cruiser in Queue.........
BK9300 replied to Scott Eriksen's topic in WIP: Model Cars
My Dad had one of these as a company car - ‘armstrong’ steering, plain inside, but a good looking car to me. -
Western Star Classic heavy haul
BK9300 replied to Biggu's topic in WIP: Model Trucks: Big Rigs and Heavy Equipment
The tape definitely looks toned down, and presses in nicely to show all the detail in the tread plate - good solution! -
Mack Superliner
BK9300 replied to Jürgen M.'s topic in WIP: Model Trucks: Big Rigs and Heavy Equipment
Another 3D creation has come to from the 'flat' bed of your printer - looks good, Jürgen! -
Great news about the opportunity for in person measurements - terrible news about your bicep. Hope the healing goes well.
-
Western Star 4900 FA plow truck
BK9300 replied to BK9300's topic in WIP: Model Trucks: Big Rigs and Heavy Equipment
Too funny! I really do want to stick to the ‘list’, but wanted to do something while waiting for stuff - thanks, Gary. -
Resto Rod Autocar
BK9300 replied to Gary Chastain's topic in WIP: Model Trucks: Big Rigs and Heavy Equipment
I’m curious to see what uses you can find for it, too - looks interesting. -
Western Star Classic heavy haul
BK9300 replied to Biggu's topic in WIP: Model Trucks: Big Rigs and Heavy Equipment
Looks right at home in there! You still had DD valve cover decals left over from another build? -
’72 Dodge Demon Drag Racer 1/25 scale
BK9300 replied to AmericanMuscleFan's topic in WIP: Drag Racing Models
Wonderful job on your latest creations, Francis - the closeups always bring the scale back into focus, to remind us just how small these works are! -
1962 Corvette street/strip build (replica)
BK9300 replied to keviiin86's topic in WIP: Drag Racing Models
A really fine model in progress here - your dashboard/interior looks so detailed and, well, so does your engine! Terrific results! -
Even at this scale, the Hellcat looks like a powerful engine! Nice job.
-
Western Star 4900 FA plow truck
BK9300 replied to BK9300's topic in WIP: Model Trucks: Big Rigs and Heavy Equipment
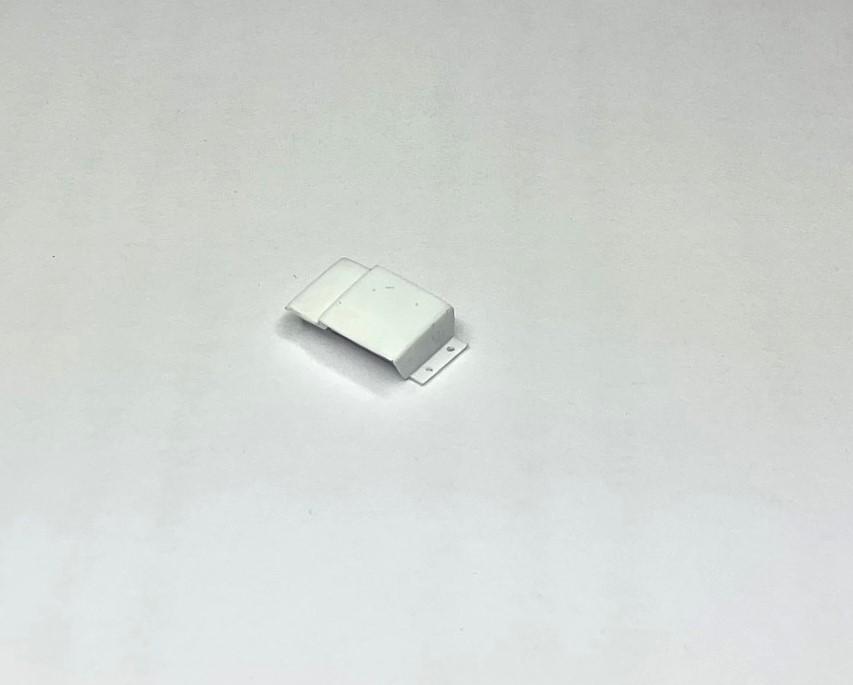
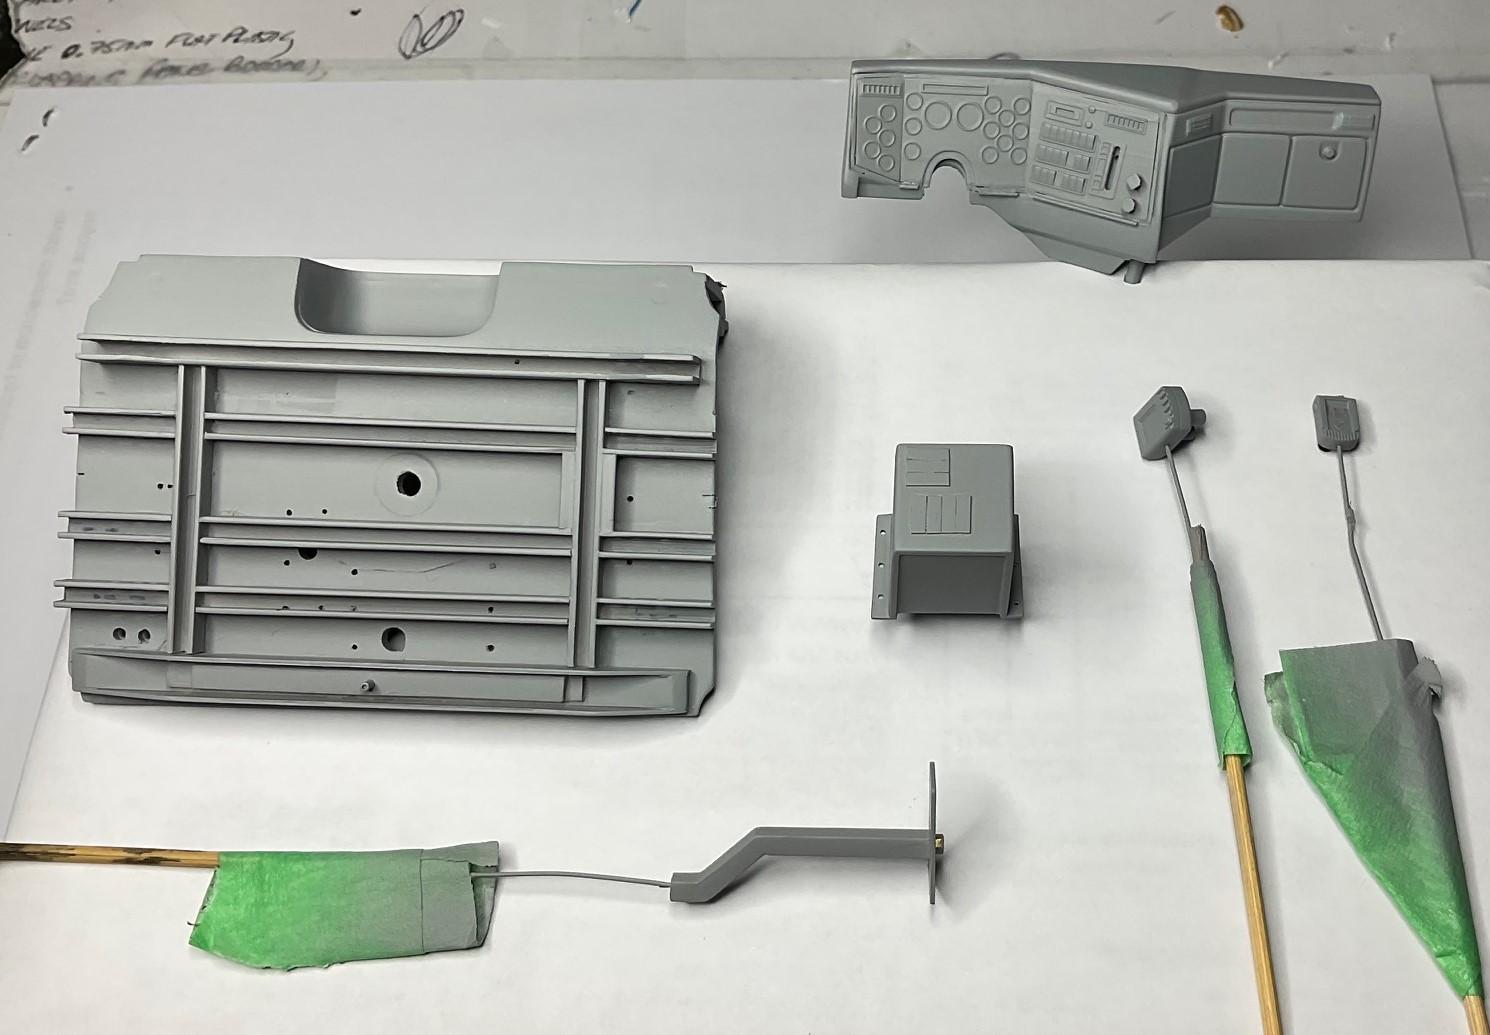
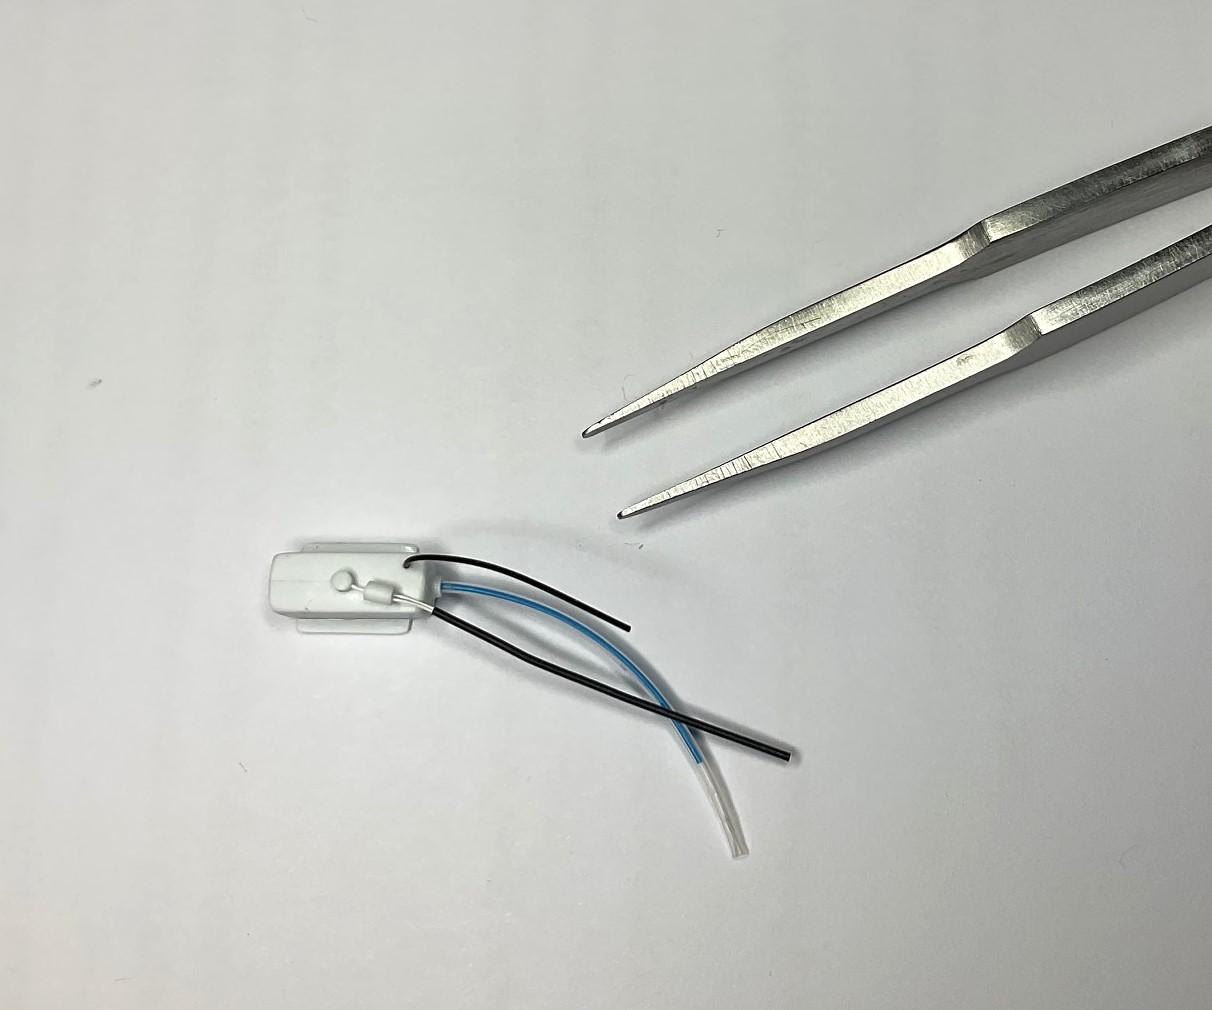
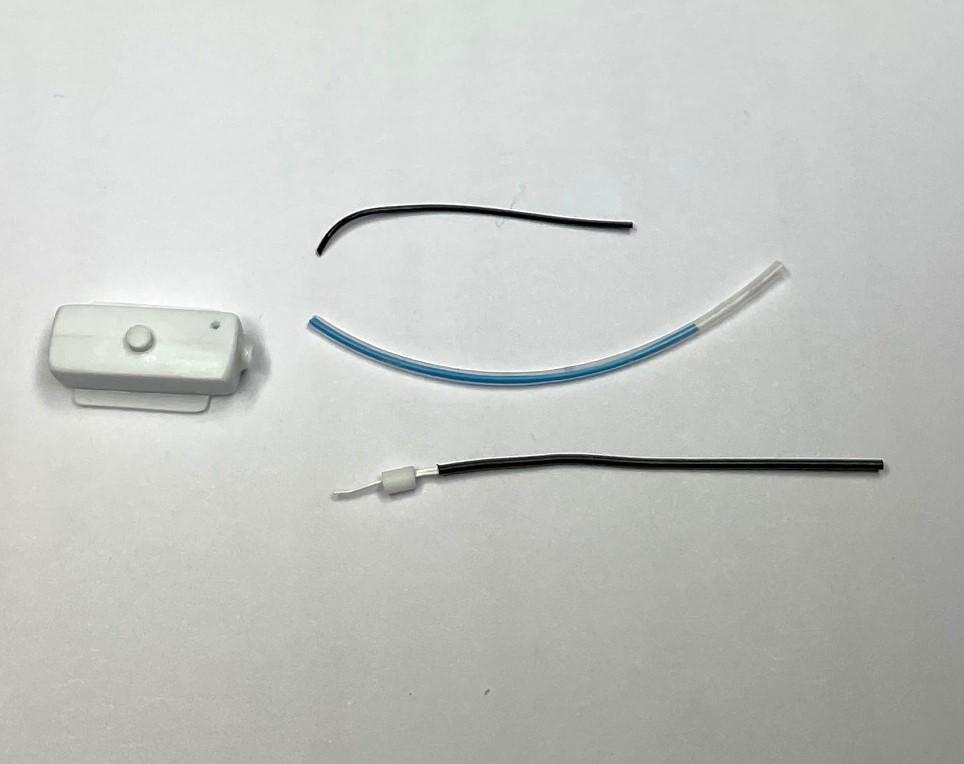
Last few times at the bench, I've been getting some smaller items ready for priming. I can't see it when I look at the pieces with just my glasses, but taking pics of everything shows lots of fuzz that needed to be smoothed away. So, lots of time spent doing that and finally, was able to get some primer on some pieces yesterday and today. Because I've been waiting for parts and more paint, and while waiting in between primer coats, I built something I hadn't expected to do for this build - one of those 'out of sight, but I know it's there' things! Little bits primed with second coat; prior to priming I had added base plates to the control tower, that the valve handle boots would mount onto in the real truck; I added two electrical sockets to the back of the monitor - each socket has been drilled for some .012 wire that will feed into the wire looms Found my self a bit idle the last couple days, between coats of primer, and, decided to fabricate the windshield washer fluid reservoir that mounts under the floor pan, below the driver's seat. The lengths of the pieces of tubing/wiring will likely need to be changed up a bit once the reservoir is painted and in place. The 'washer fluid' in the clear filler tube is a piece of Gopher, ignition wire - the wire will be painted the same colour as the 'full' reservoir - because it will be full, I won't need to slant the level of fluid in the filler tube! The reservoir is upside down at the moment and the bits on the bottom are the low fluid level sensor/sending unit and the outlet hose to the washer pump Mocked up in place. The wire loom for the sending unit will be fed into the drilled hole in the front cross member. If I move the reservoir back slightly, I might be able to feed the filler tube through the cross member as well, without kinking the tube This wasn't on the list of outstanding things to do, but I'm glad I did it. Actually might be able to just see it when looking at the back corner of the cab. I think I better stick to the list from now on, instead of adding new things to it - take care and thanks for having a look!
-
Western Star Classic heavy haul
BK9300 replied to Biggu's topic in WIP: Model Trucks: Big Rigs and Heavy Equipment
Still something I need to figure out for my next build - I'll come to you for advice! Looks good, Jeff. -
Western Star Classic heavy haul
BK9300 replied to Biggu's topic in WIP: Model Trucks: Big Rigs and Heavy Equipment
Very tough looking rear suspension - bet that would feel pretty solid driving down the road, especially without a load! Good to see your update. -
Mack Superliner
BK9300 replied to Jürgen M.'s topic in WIP: Model Trucks: Big Rigs and Heavy Equipment
Another impressive looking build, Jürgen - hope your hood arrives soon - it will be the finishing touch! -
NuNu Hobby BMW M6 GT3 Rundstrecken Playstation
BK9300 replied to Katsusauce's topic in WIP: Model Cars
Your safety net and interior wiring details are very realistic! What type of wire are you using for your smallest wires, along the driveshaft tunnel? Very impressive detailing. -
You do a lot of good work, in the wee hours
-
I like how the decals laid out, too - the carrier film isn't noticeable. Had you cleared over the decals at time of taking your photos or are you going to leave them as is? Looking very good!
-
Terrific handiwork, Jim - very interesting to see how you are making all the add-ons along the way.