DanL
-
Posts
538 -
Joined
-
Last visited
Content Type
Profiles
Forums
Events
Gallery
Everything posted by DanL
-
A real beauty... Gotta love that cross ram manifold and carbs! Cheers DanL
-
real nice detailing Cheers DanL
-
Thanks
-
very nice
-
Thanks for the positive comments... Cheers DanL
-
Forgot these two close up pictures during the build...

-
Nice work...
-
Nice work... Roadkill is building one of these right now. Almost identical to yours
-
Thanks... I'm pretty happy with the results DanL
-
Thanks guys.... cheers DanL
-
Thanks guys...
-
Thanks to everyone for the nice comments... Cheers DanL
-
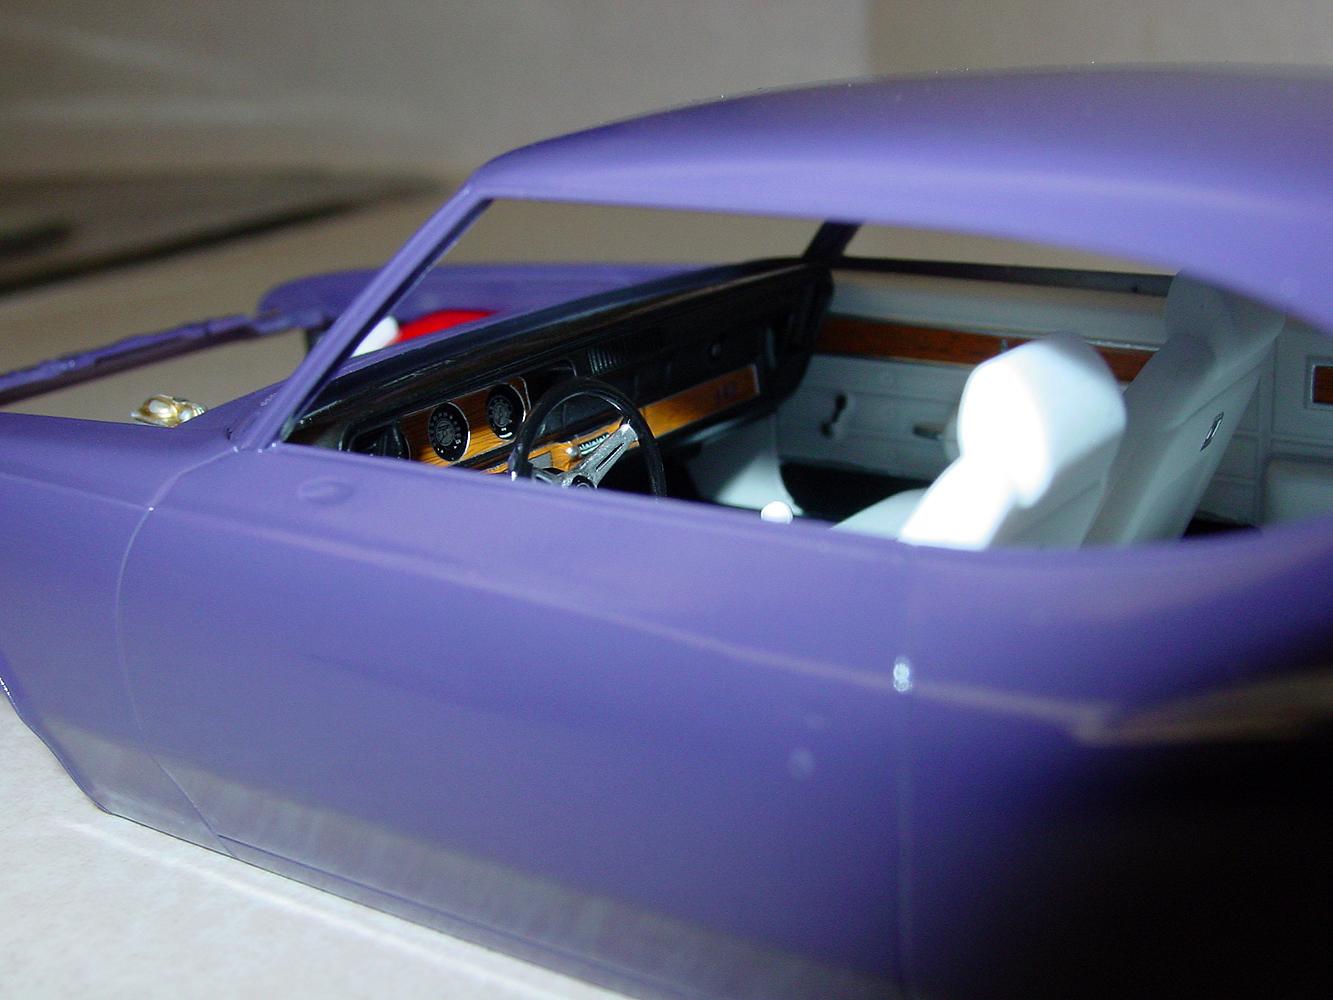
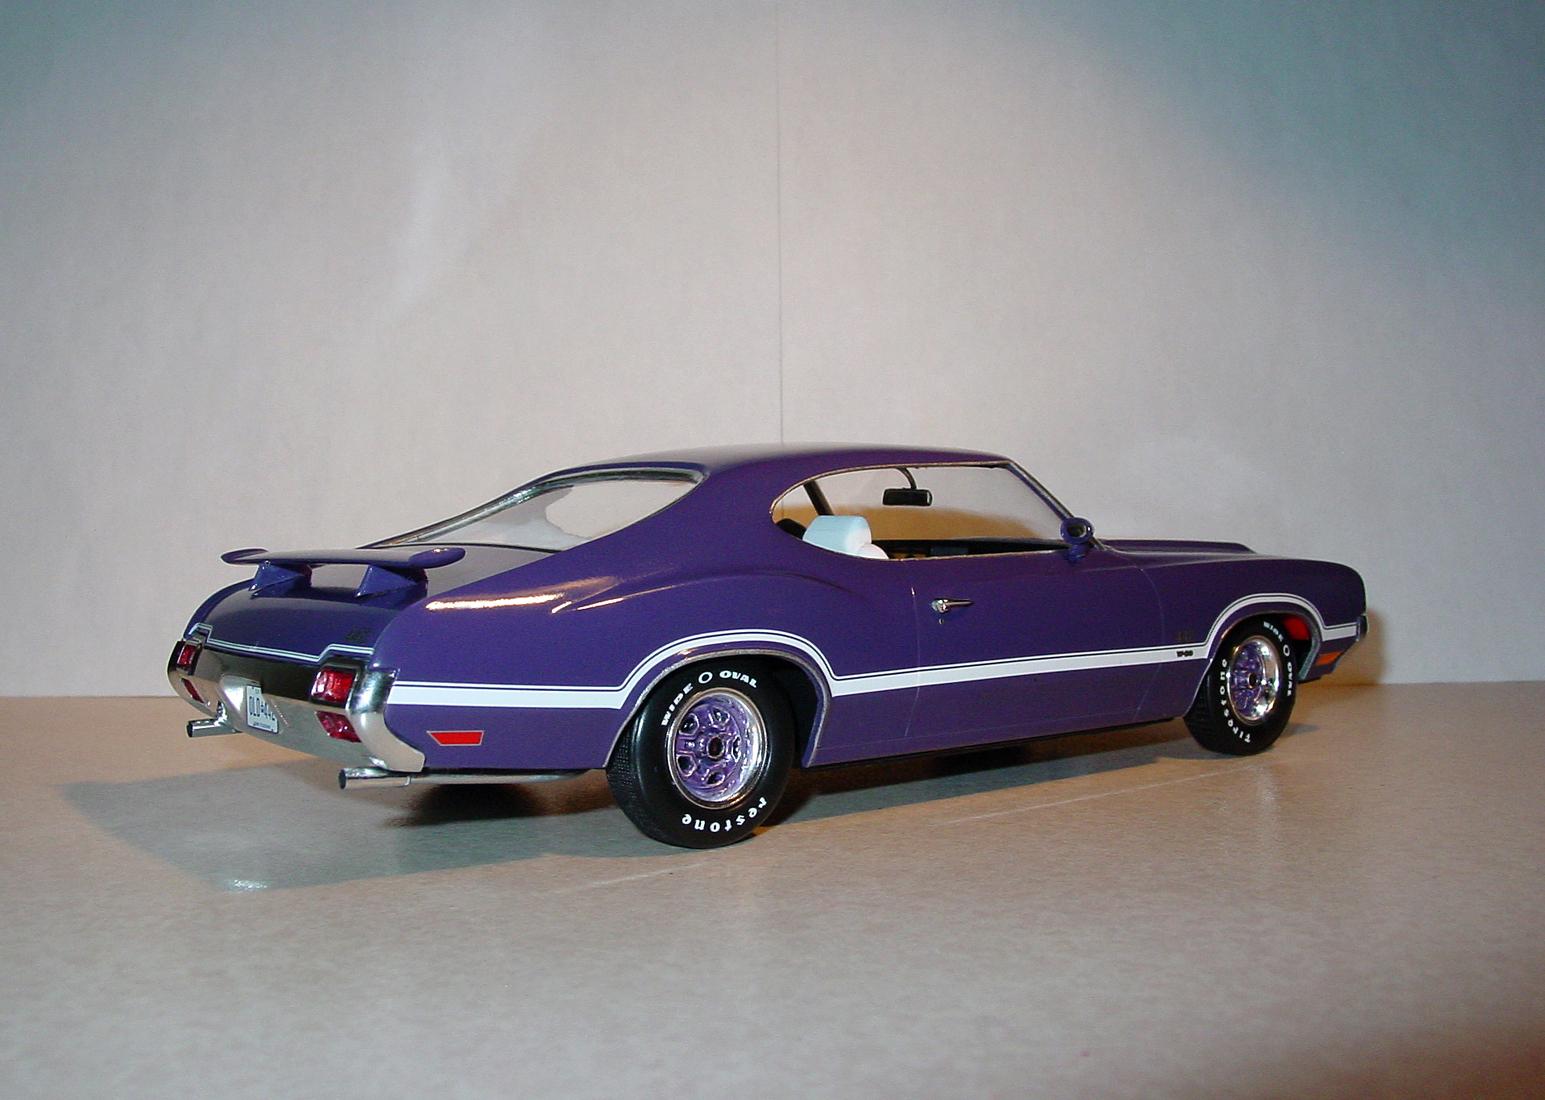
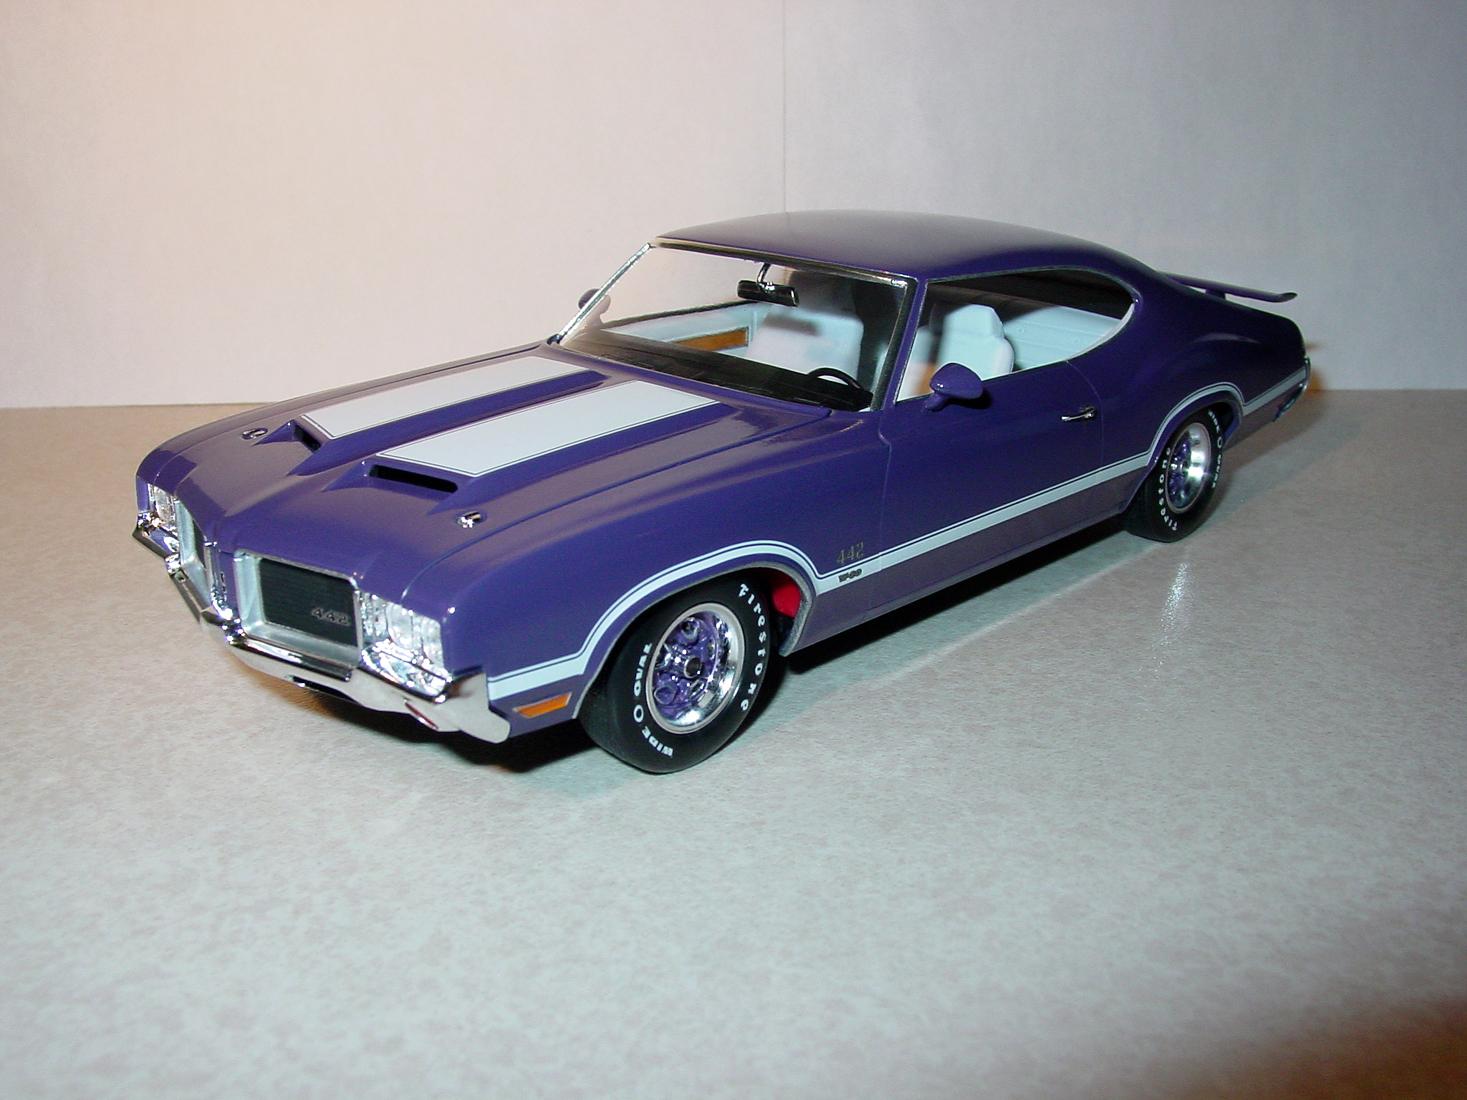
Really nice freshly tooled kit with lots of fine detail. Some small issues particularly with the directions, such as showing the valve covers mounting upside down and some unclear mounting spots. The hood with hinges mounted is also very finicky. But all in all a pleasure to build. I obviously used a non-factory color but it turned out well with the white stripes. This was my second attempt at using bare metal foil and it turned out 100% better so I'll keep using it. Remember to wash all your parts before painting ... I ran into some issues with grease or oil left on the sprues. Highly recommended kit
-
Really nice....
-
Nice work... I'm just finishing up my build of one of these and it really is a great kit. Cheers DanL
-
 Wouldn't mind seeing more of that car...
 -
full detail 1/16th Gordie Bonin BubbleUp Trans Am Funnycar
DanL replied to Ian McLaren's topic in WIP: Drag Racing Models
Saw 240 Gordie run many times here in Edmonton and spent my fair share of money at Pacemaker Automotive... Good memories Cheers DanL -
Well done... nice paint
-
Looks good...
-
Thank you for the comments.... Cheers DanL
-
a lighter version but it still looks great...
-
That's a beauty... Cheers DanL
-
Thank You... Cheers DanL
-
nice work
-
Krylon silver spray paint just like the chassis and engine bay....