Andy Oldenburg
-
Posts
345 -
Joined
-
Last visited
Content Type
Profiles
Forums
Events
Gallery
Everything posted by Andy Oldenburg
-
Wonderful patina work. I can feel the salty crust and sand of the decades.
-
Great work so far and a pleasure to watch the progress! I´m very interested to see where this will end.
-
Very well executed build, perfectly done? I like the upgrading you did by reducing the trim, the engine bay is very clean and the customized engine fits perfect to the body.
-
Great paint job, best shine! And no polishing required?!! Foiling looks good too. I know that feeling when it comes to foil (and decals btw...) This is going to be a beautiful build.?
-
I´m always fascinated with 3d printing, don´t do it myself yet but who knows? It looks very interesting for a start and there is much room for detailing and customizing. Did you print it yourself?
-
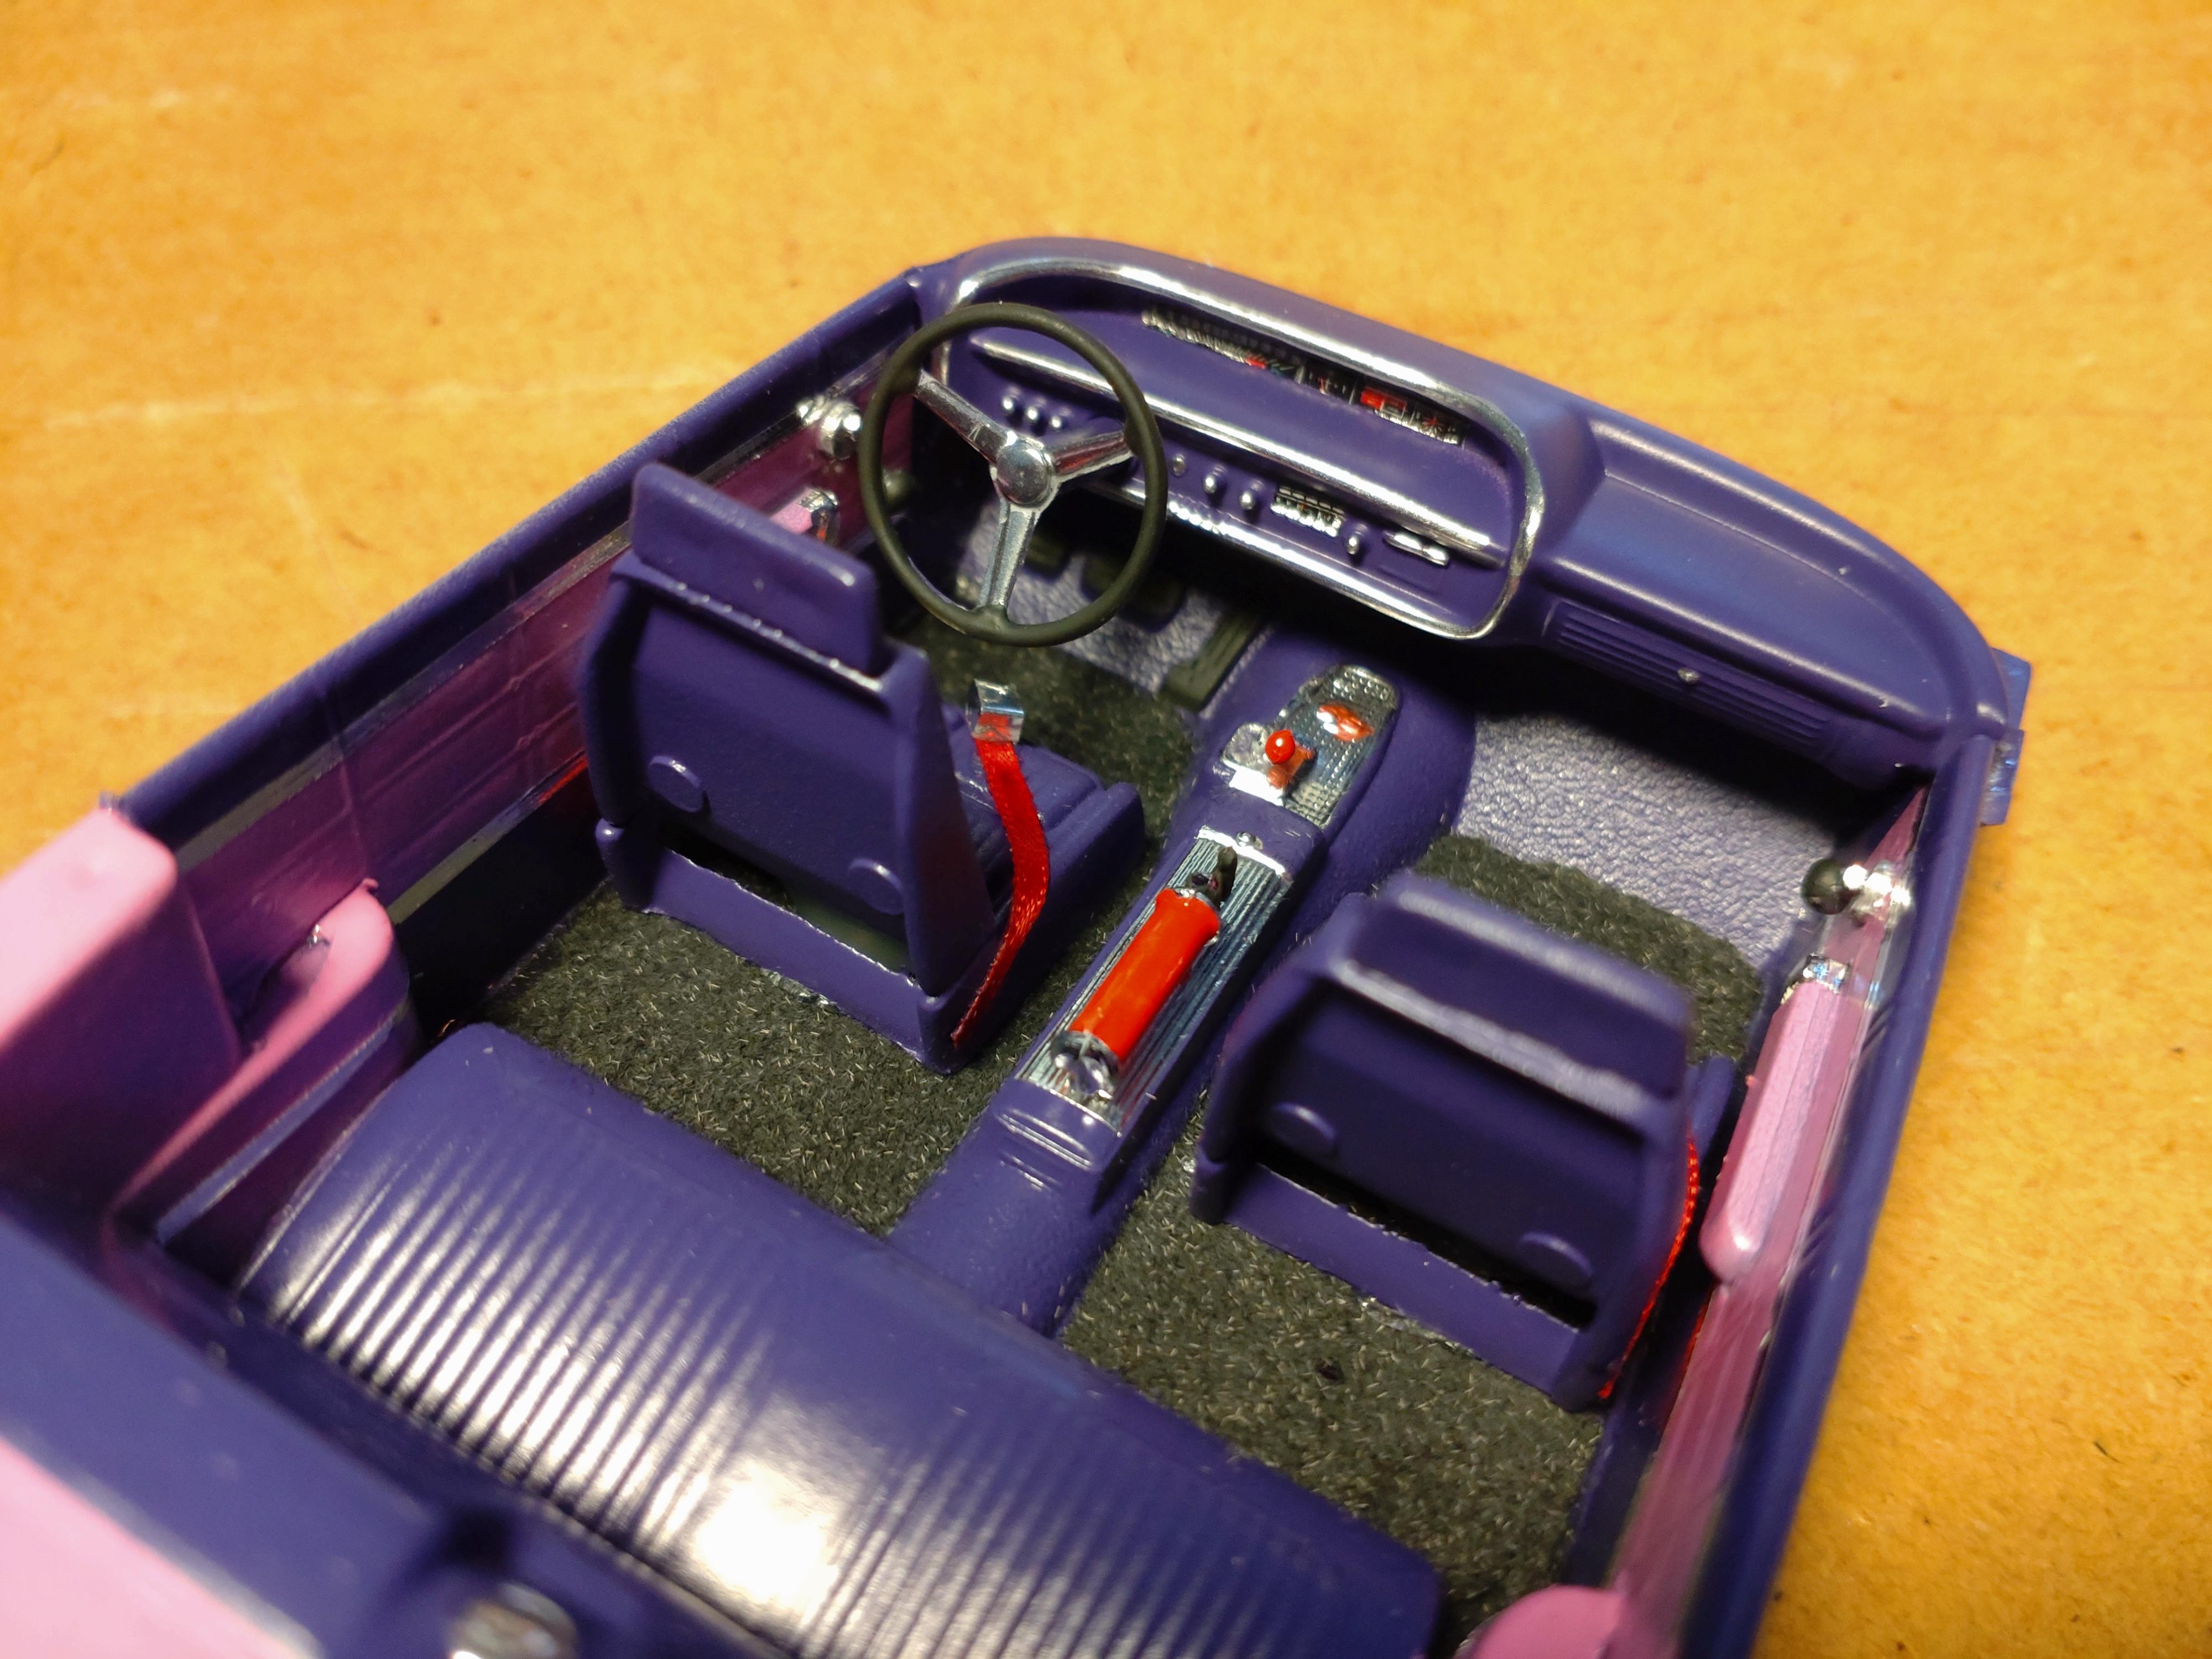
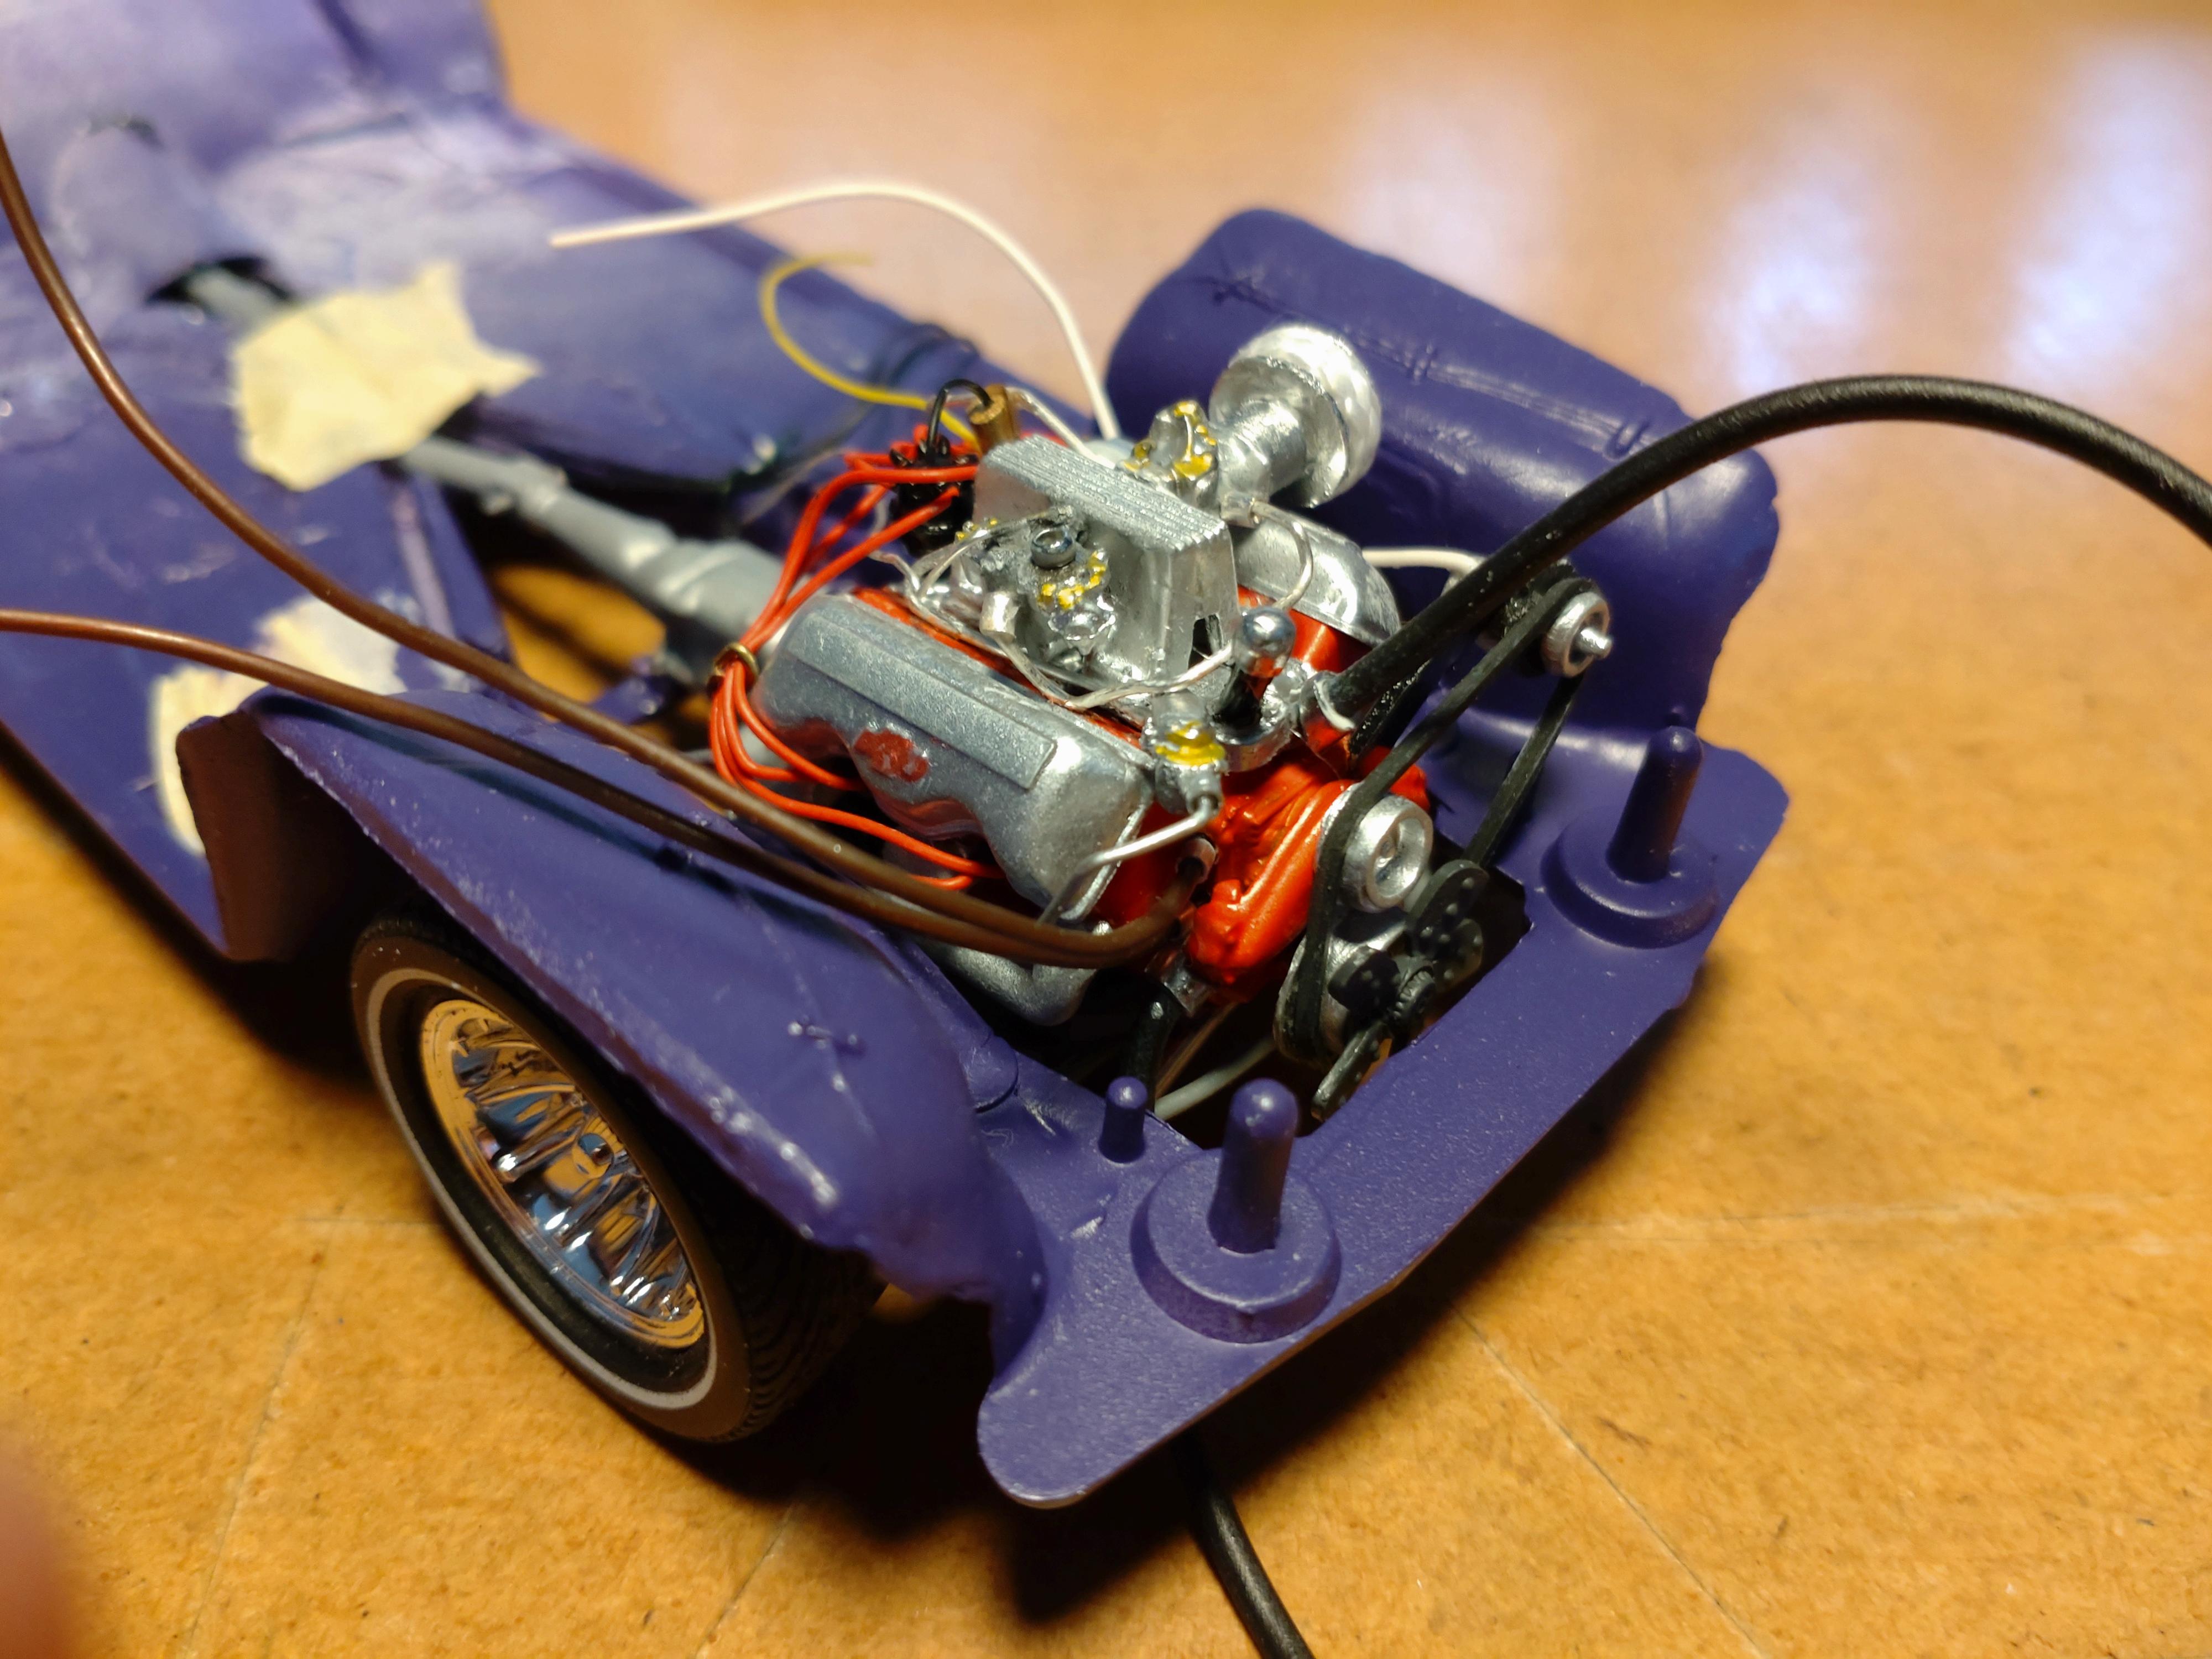
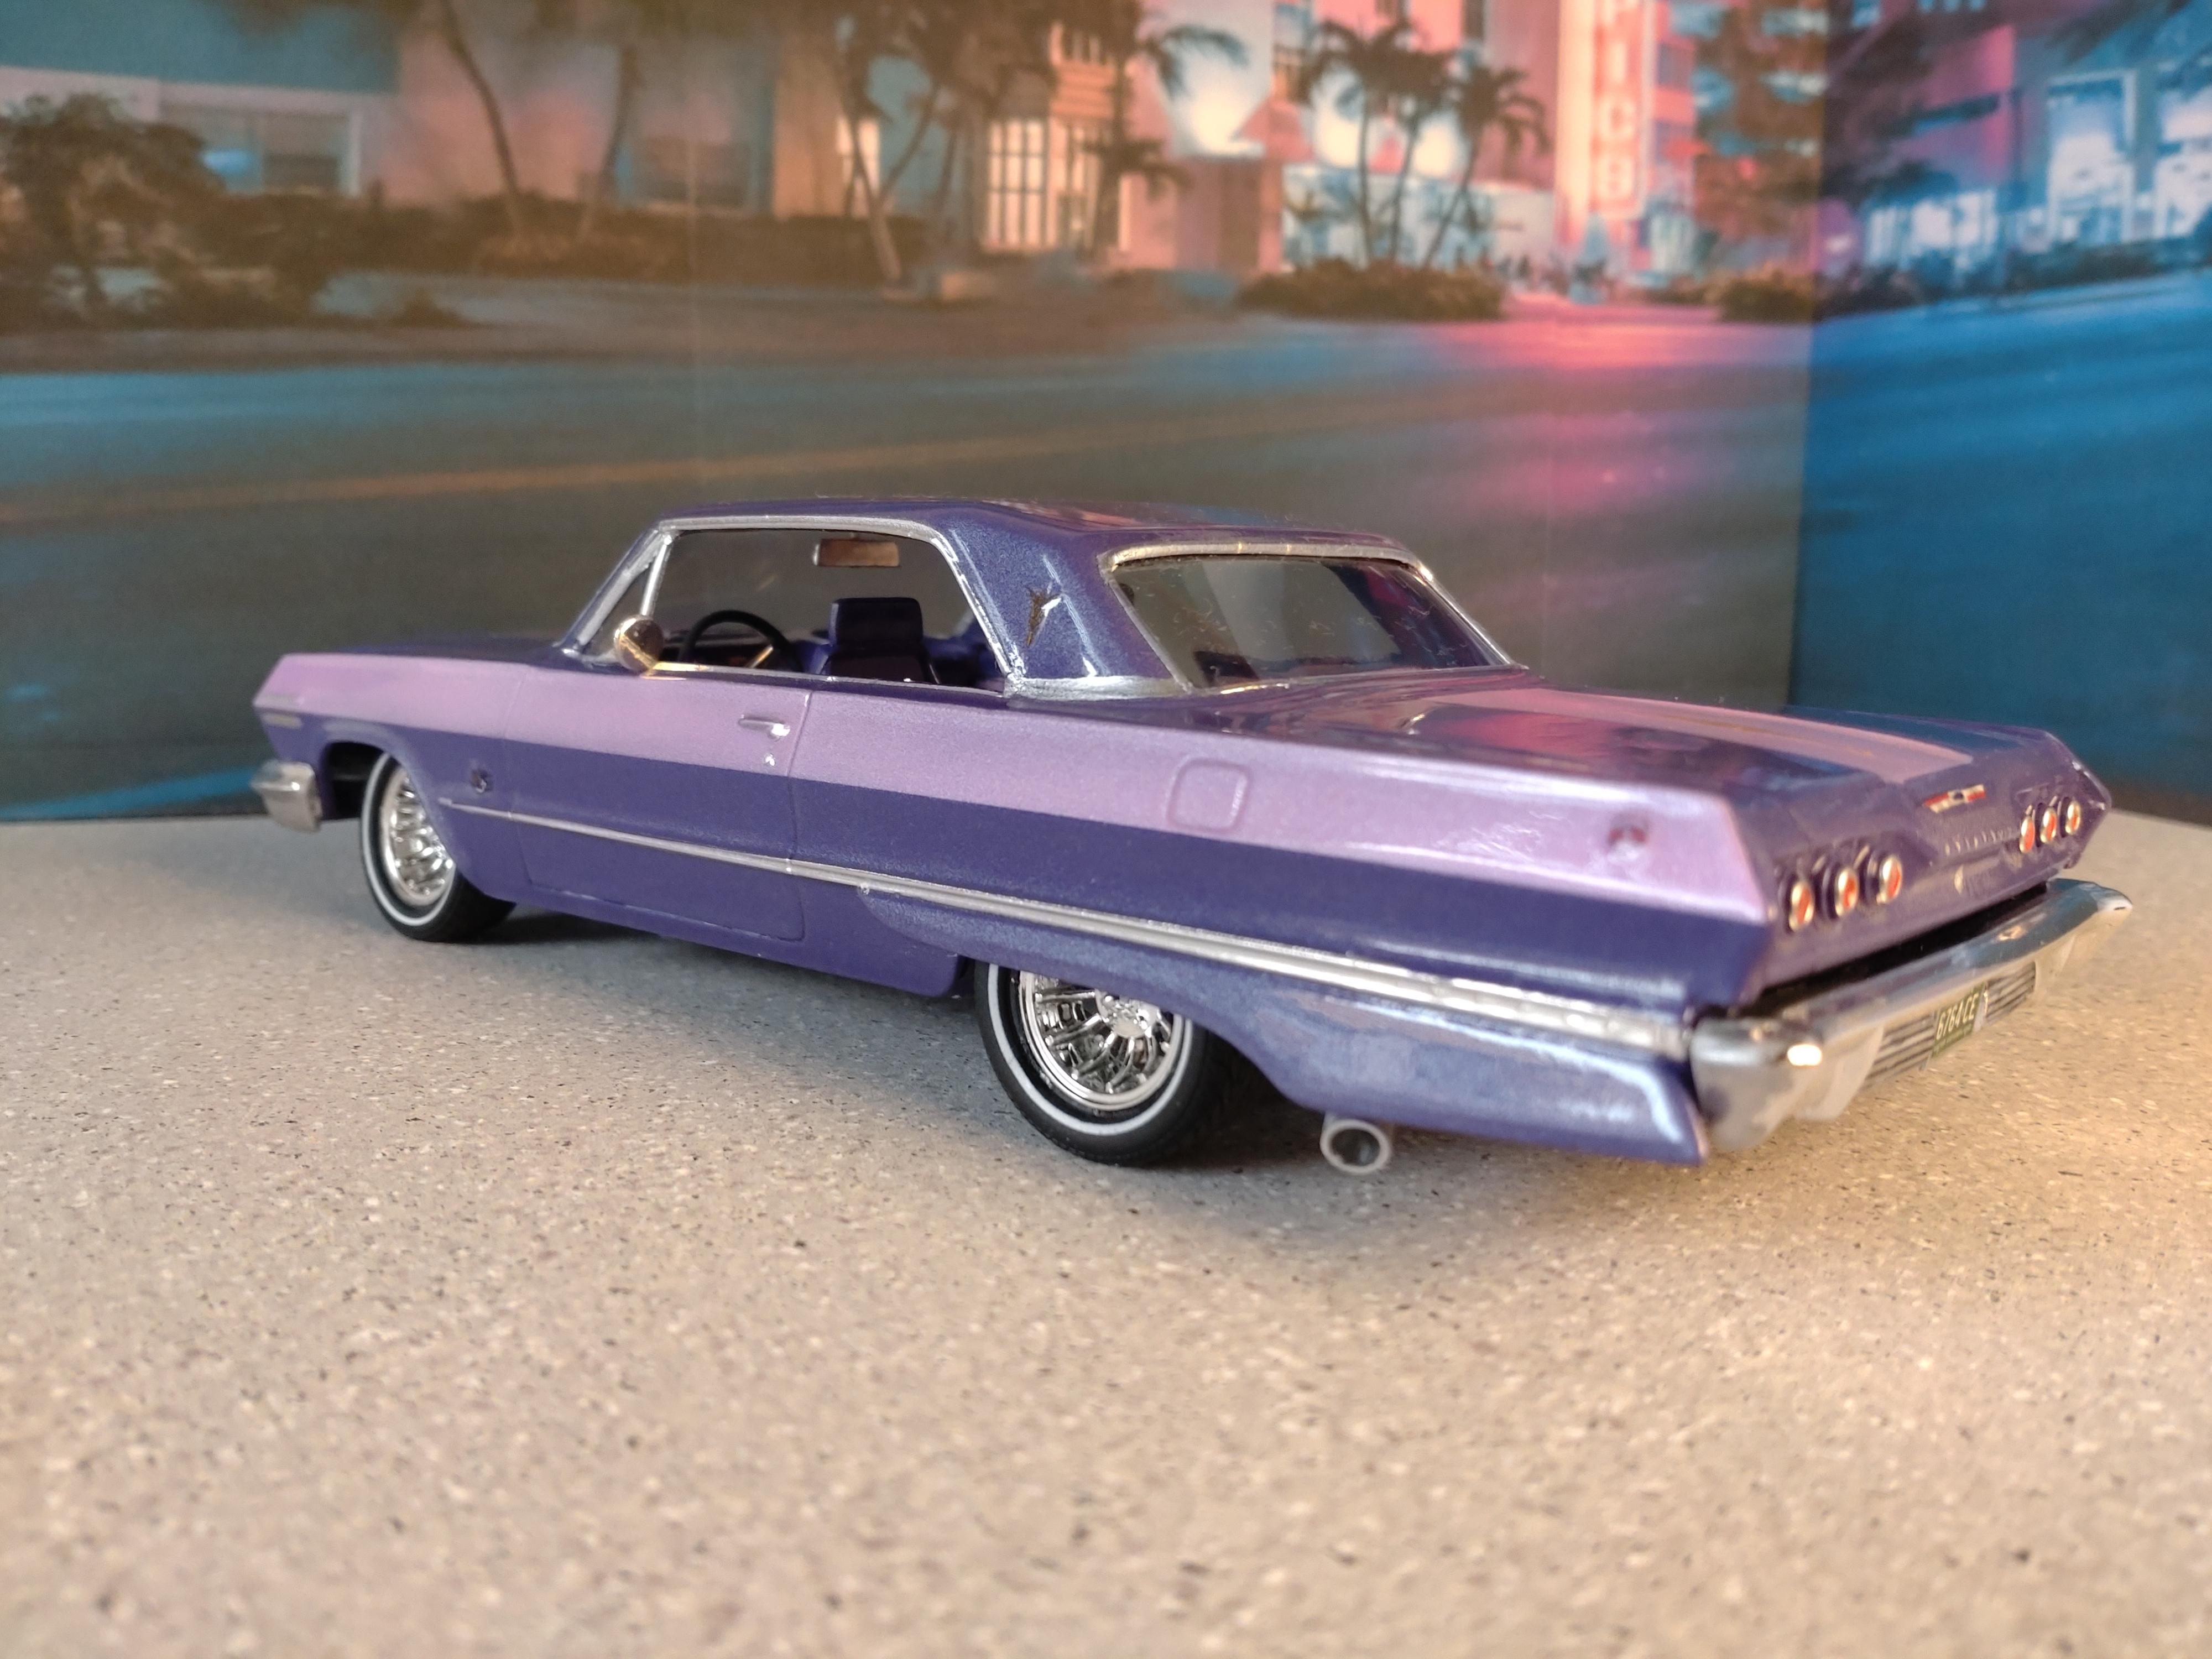
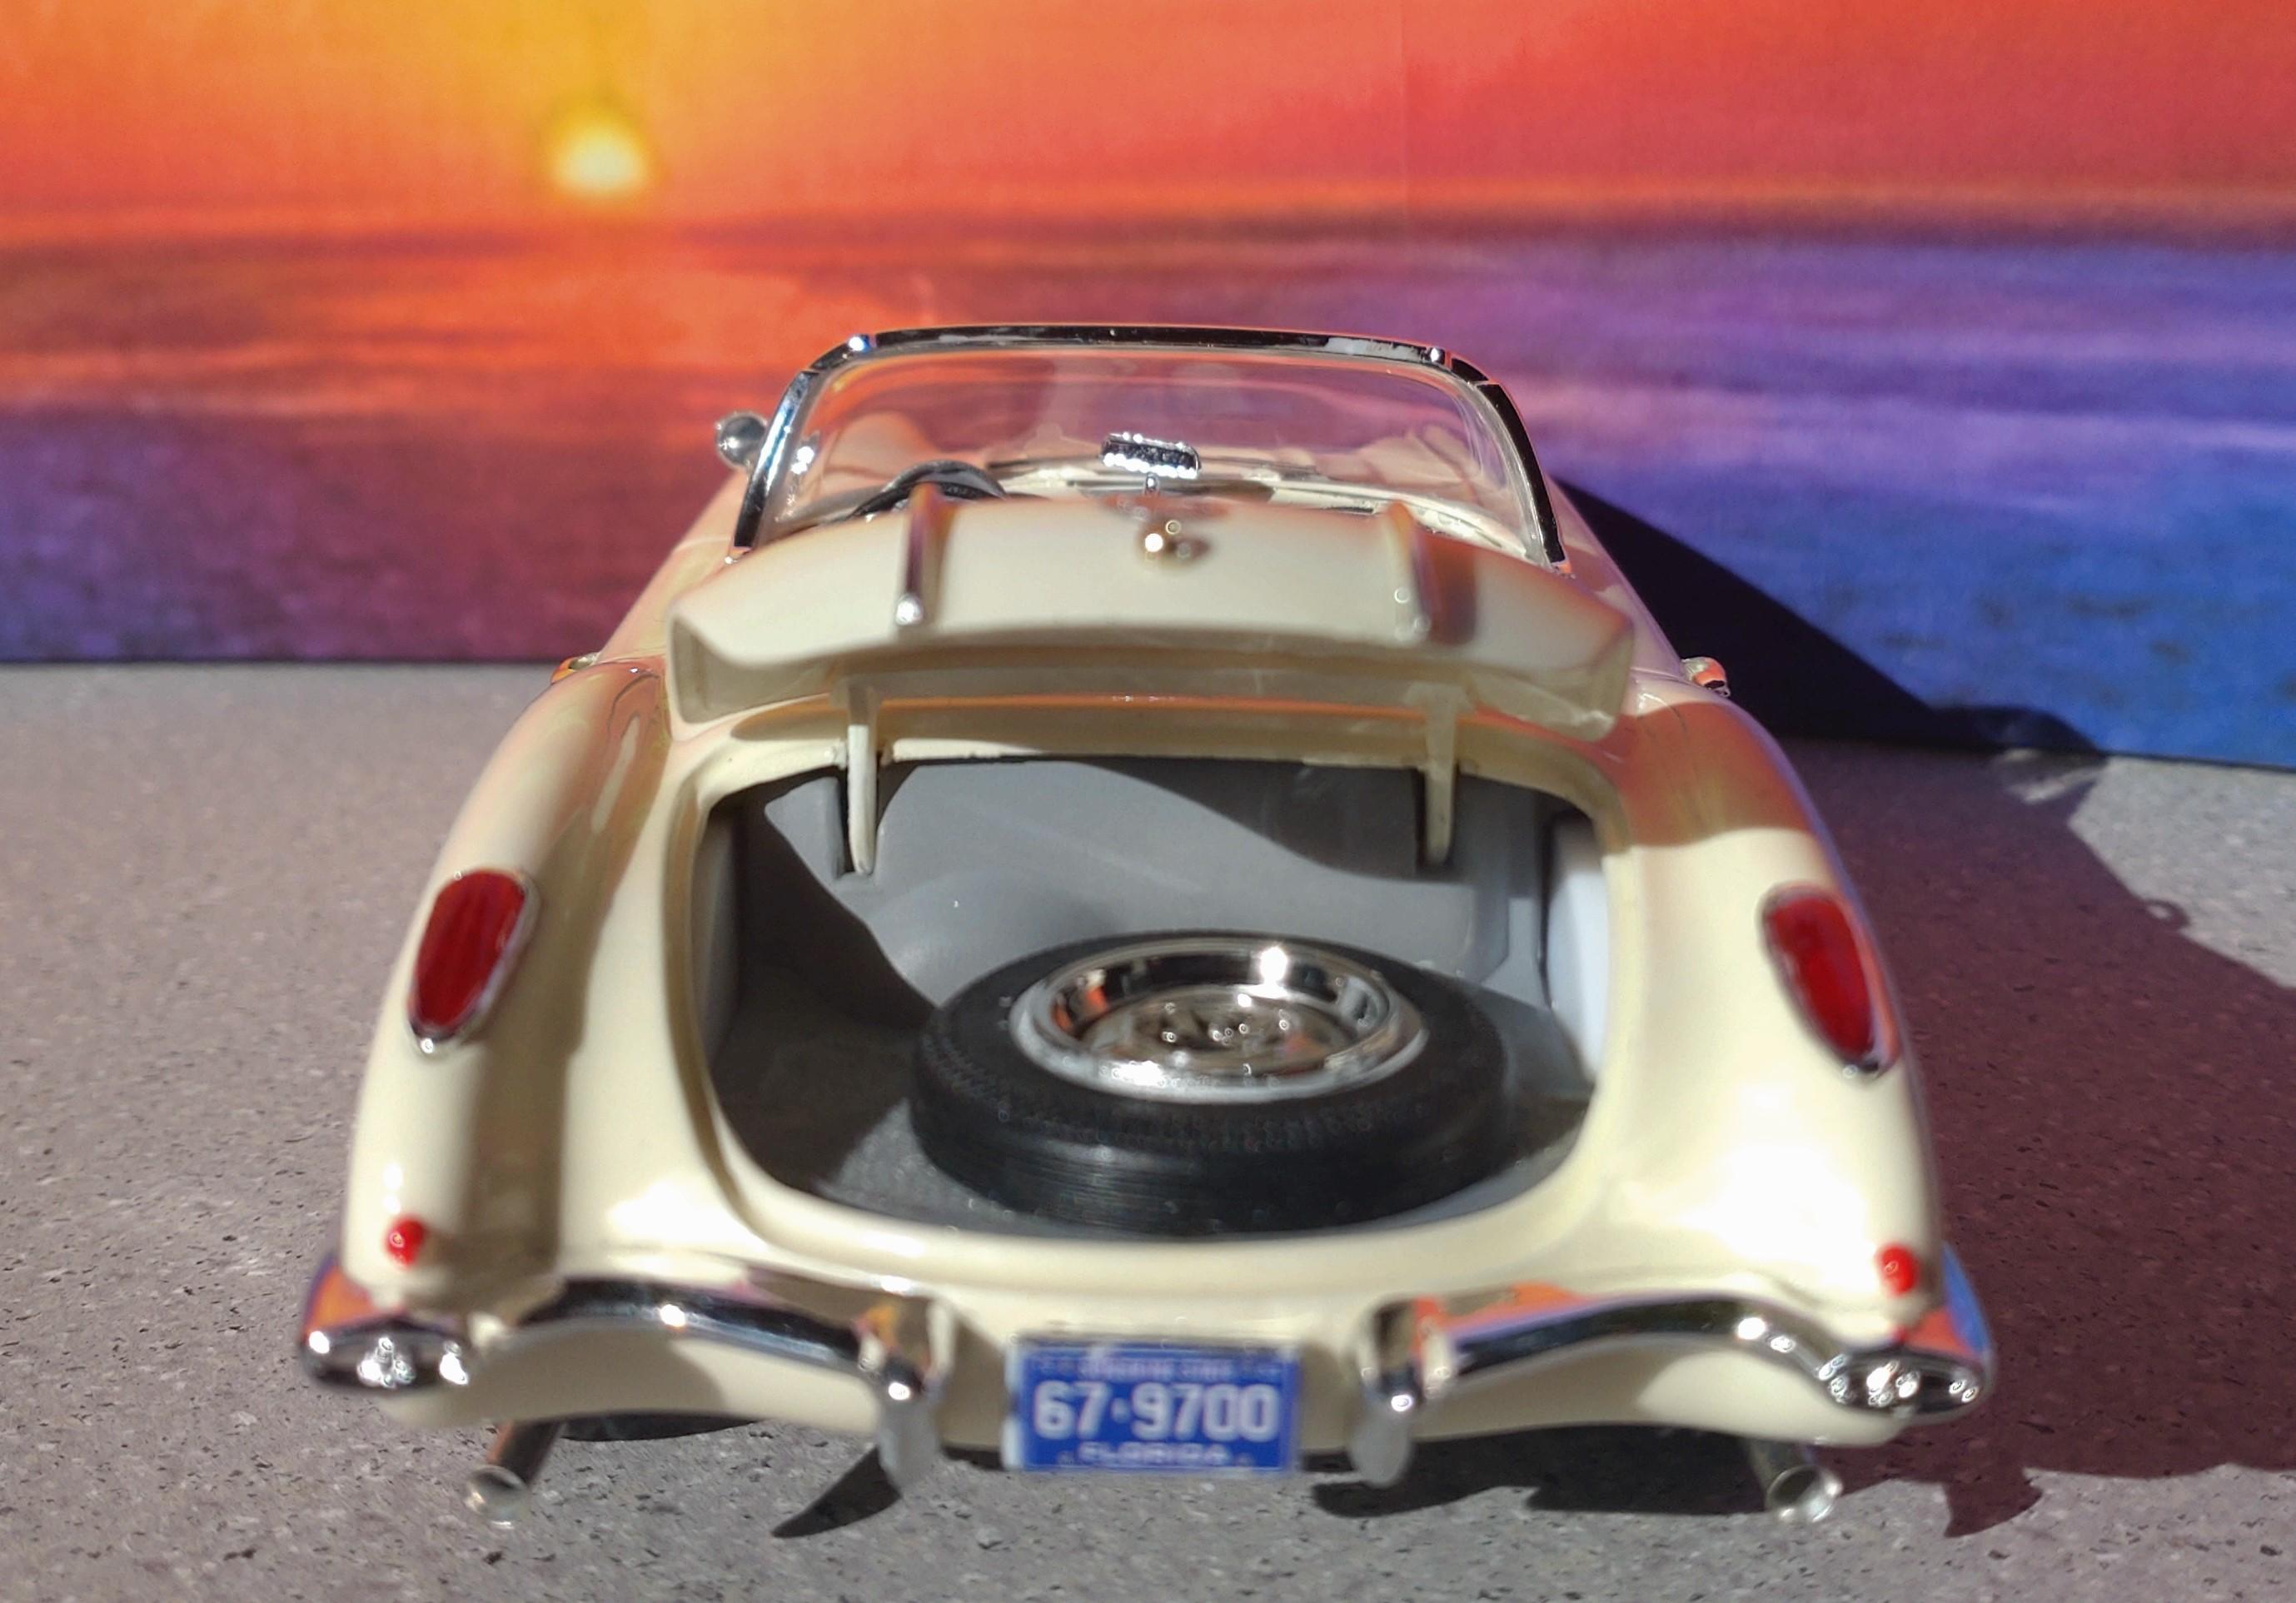
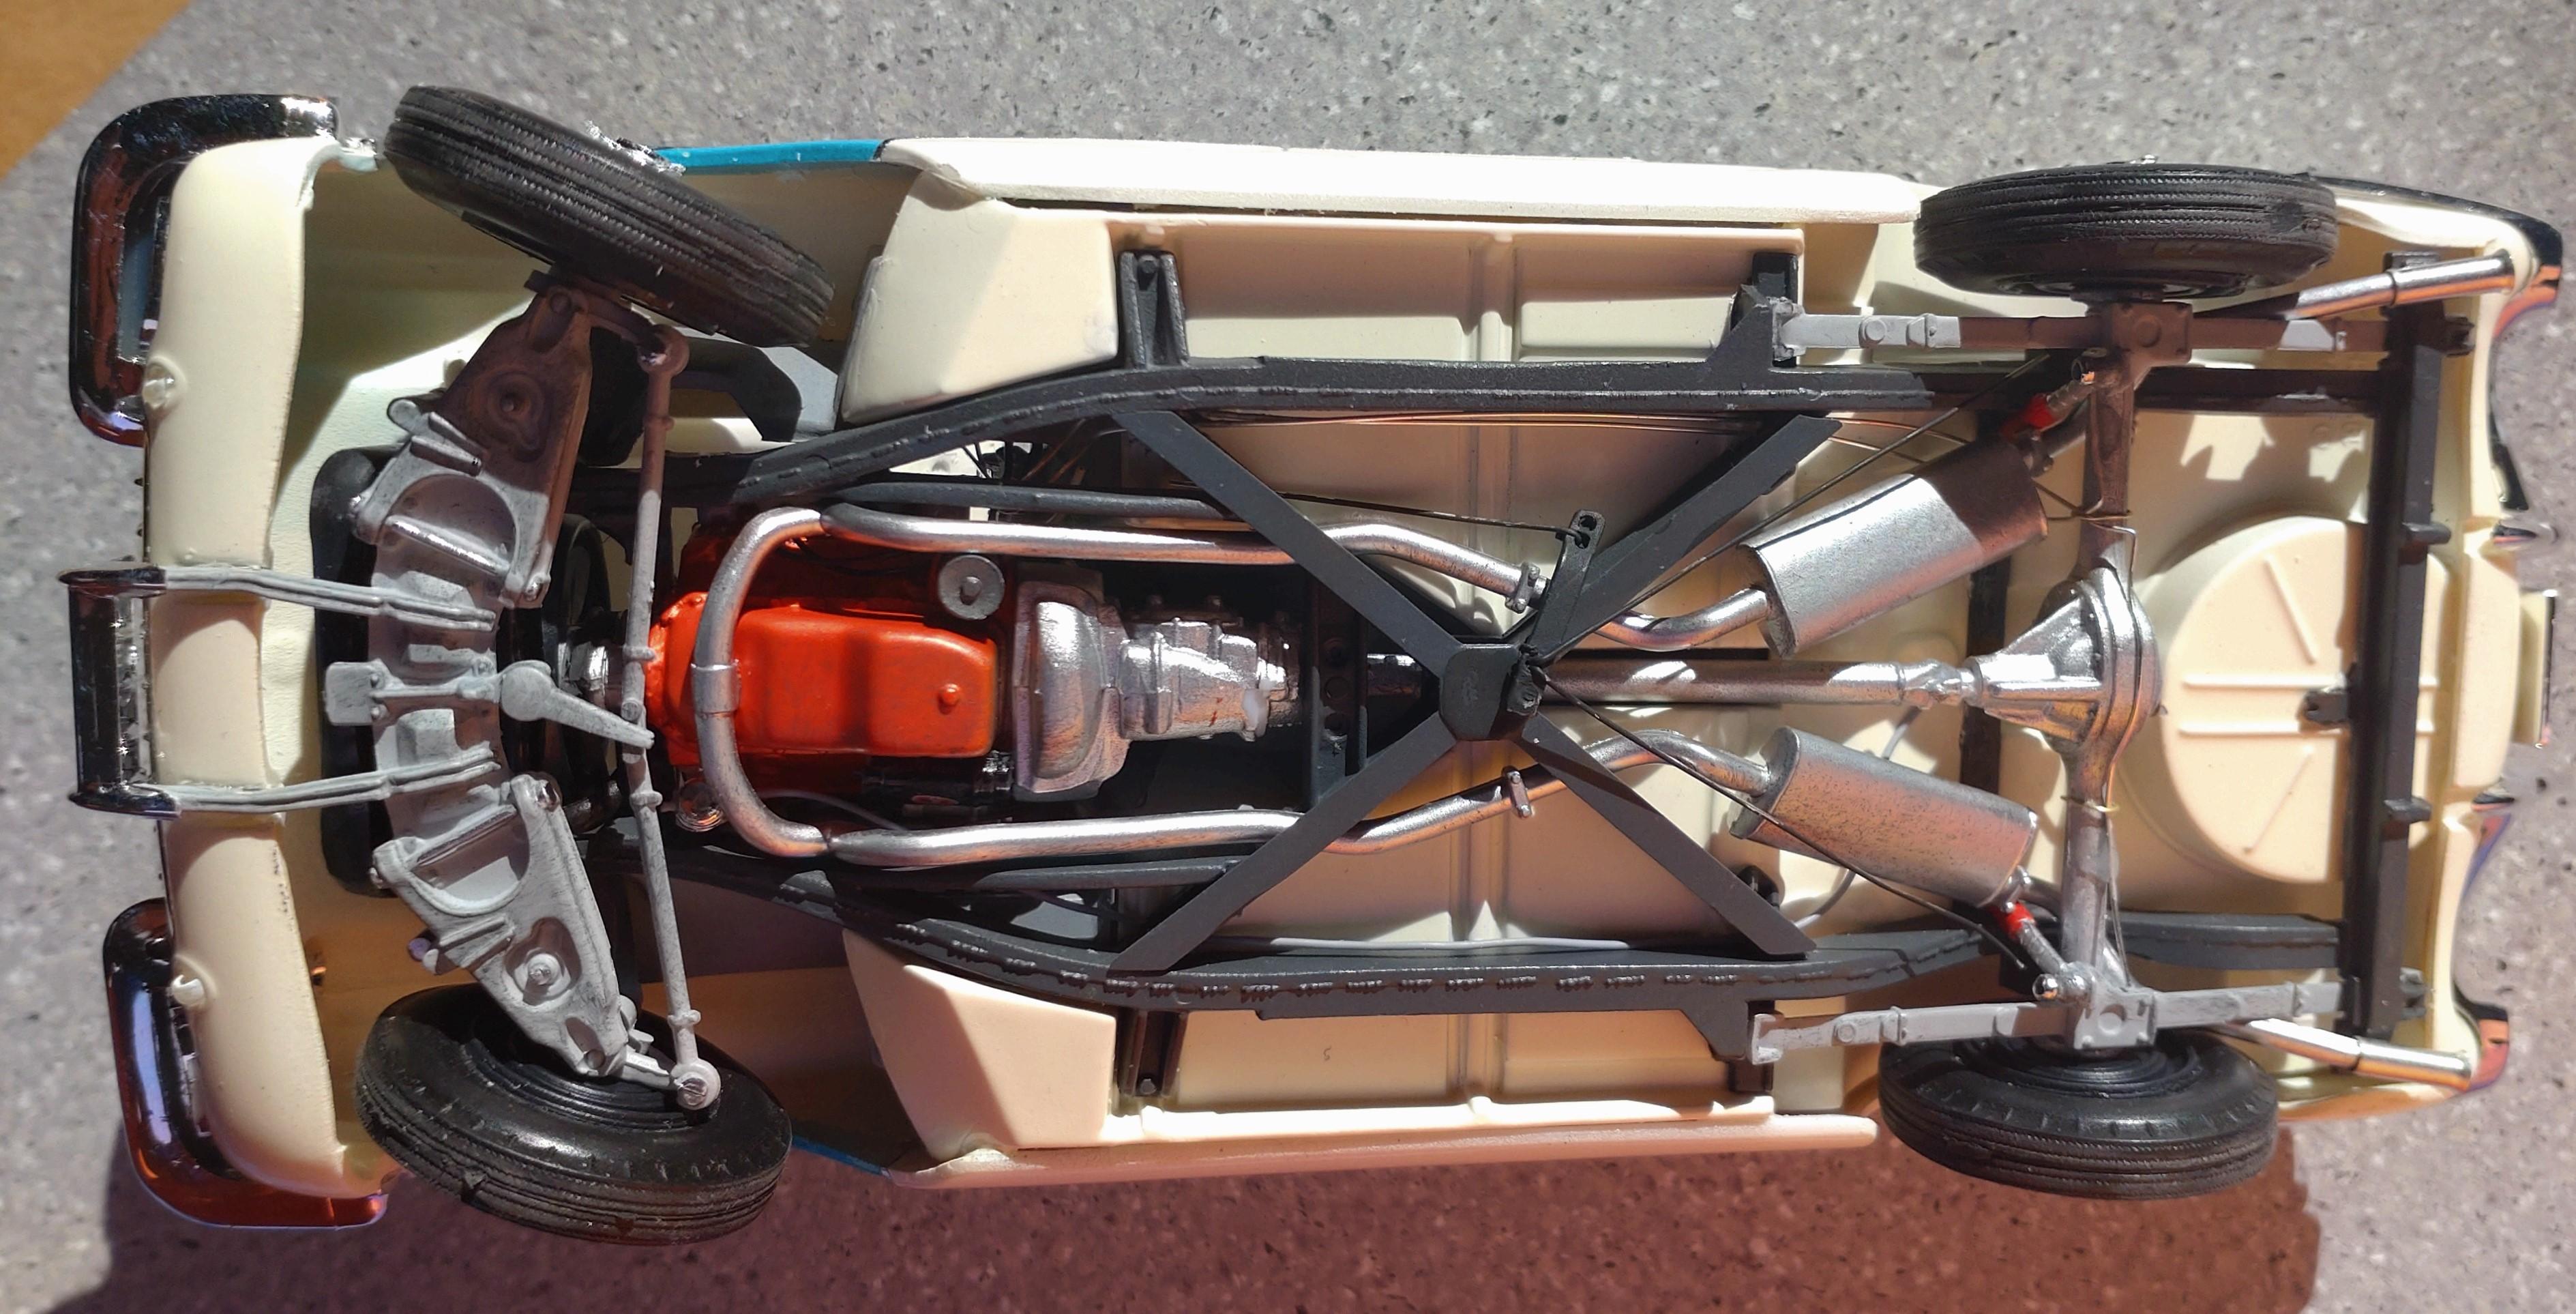
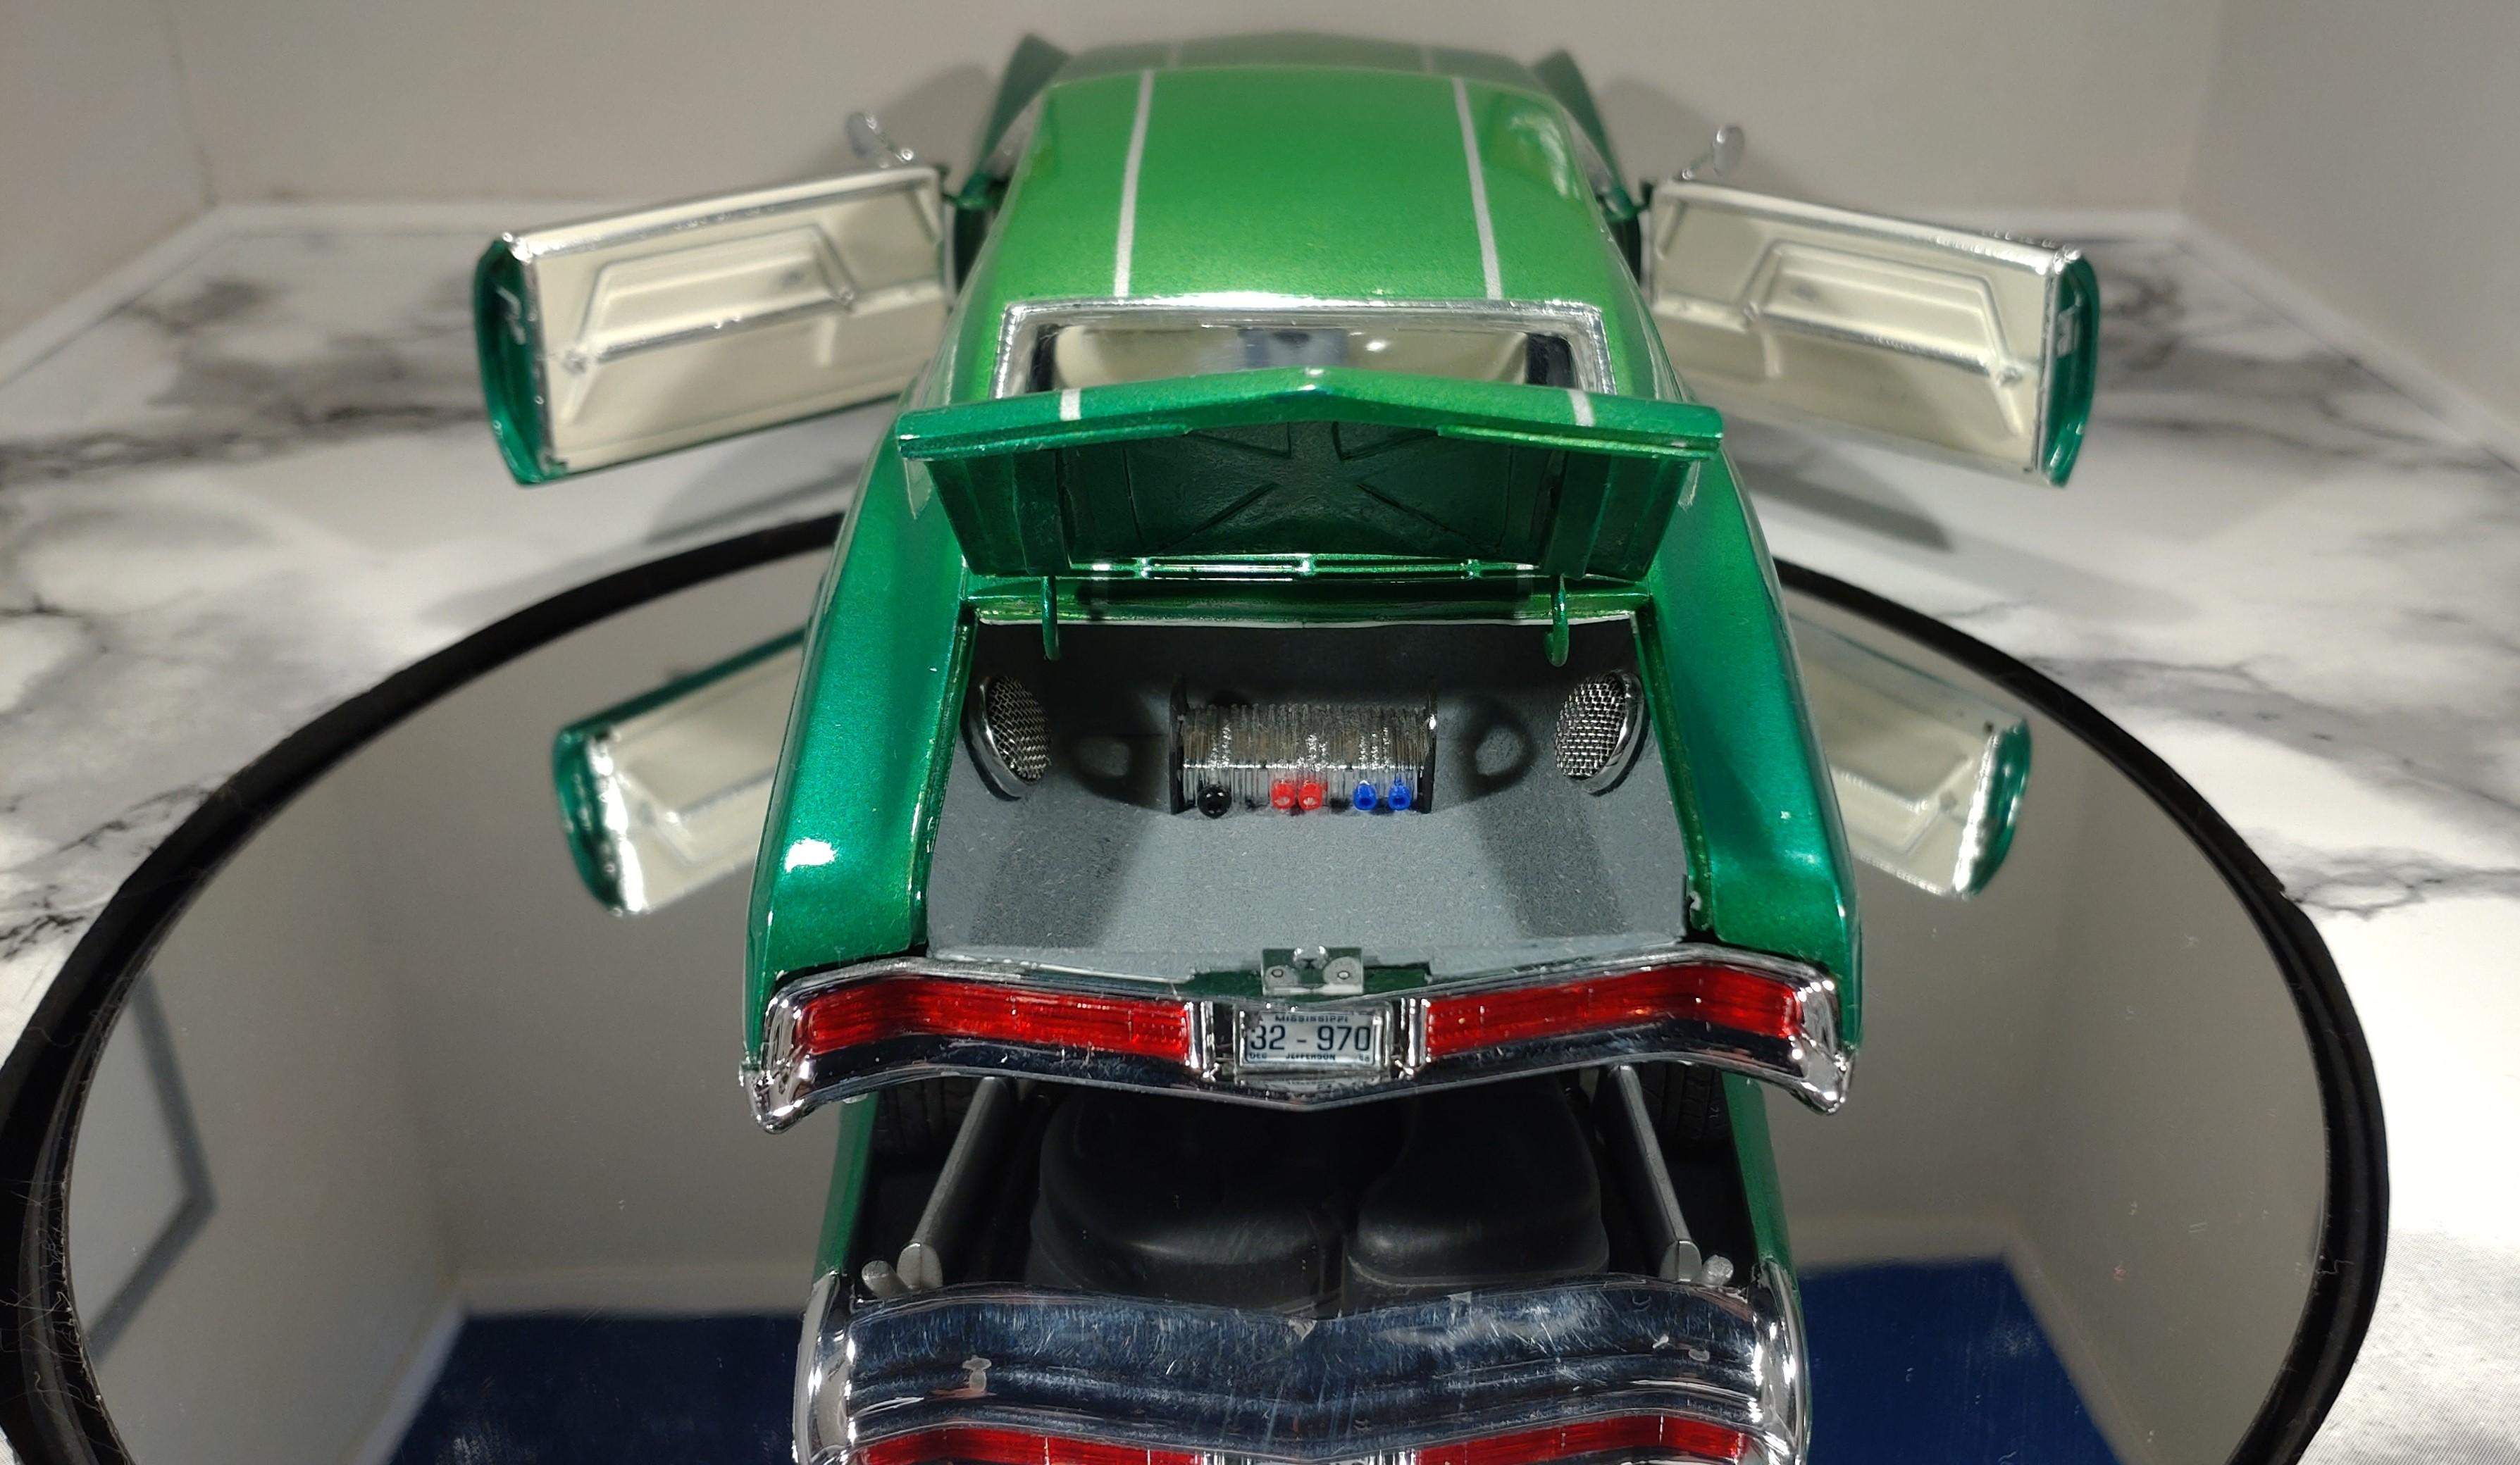
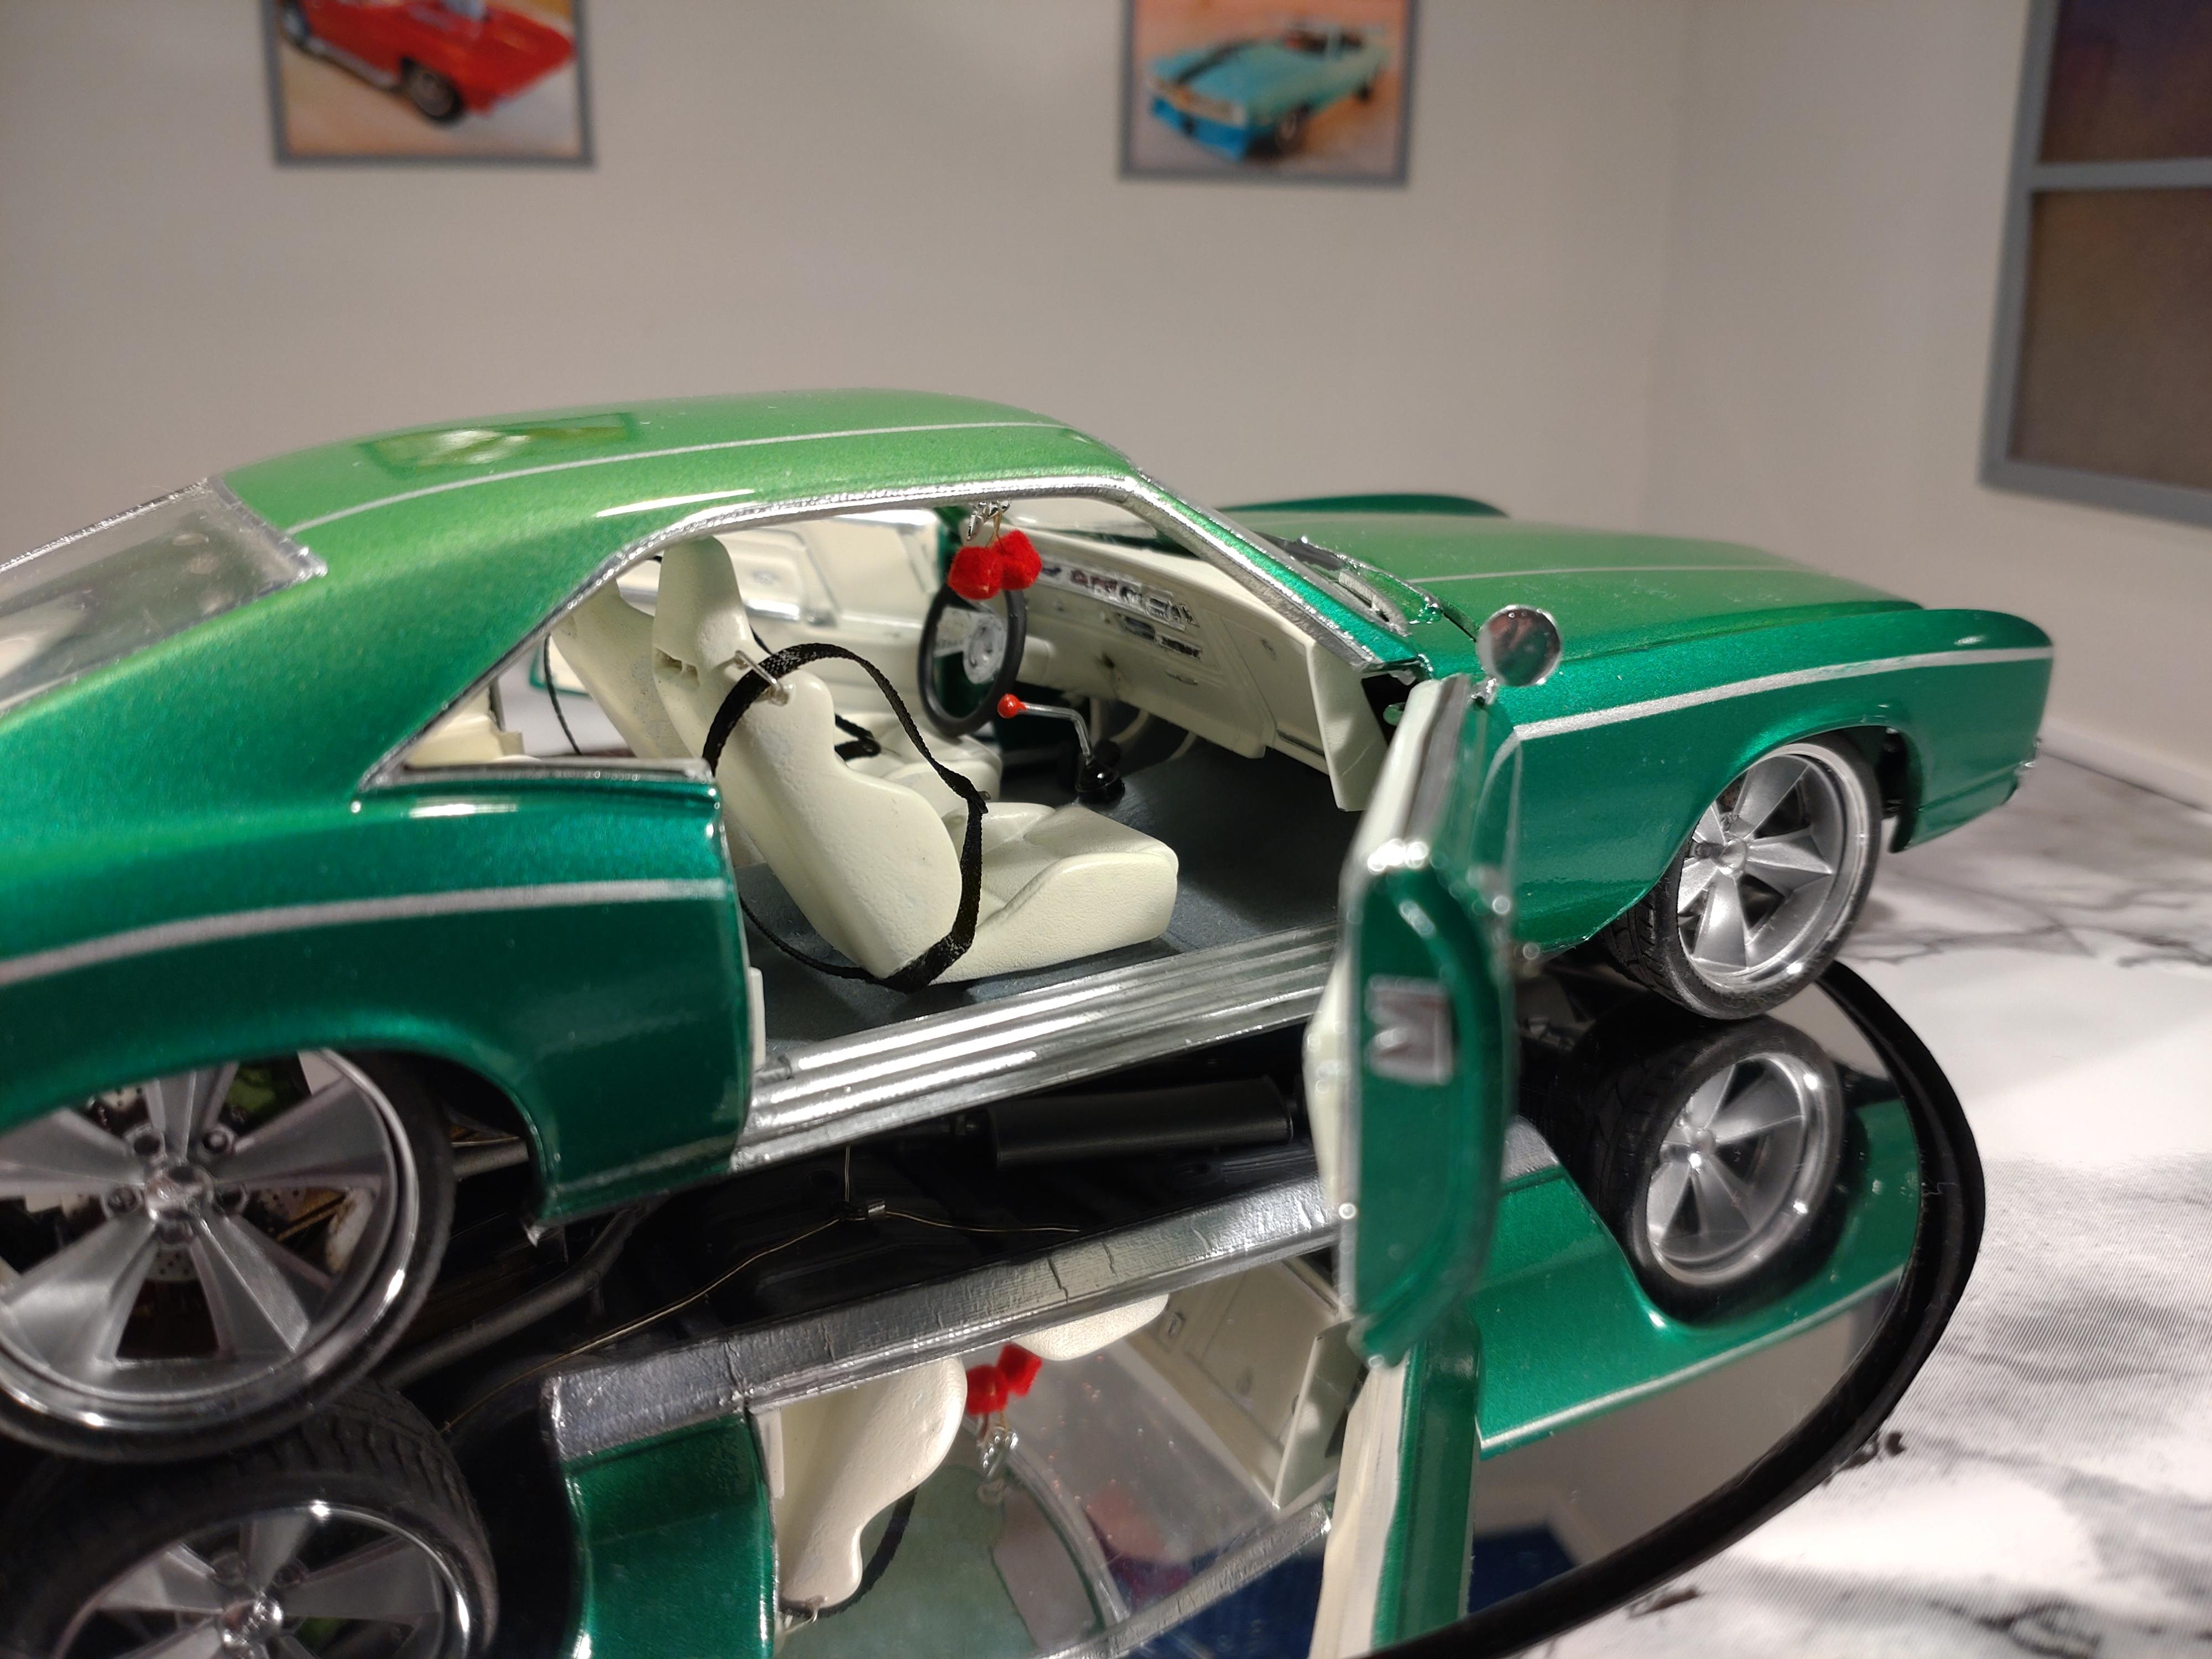
Unboxing this AMT kit I knew I had some work ahead. I like this ´63 Chevy model but the kit is on a low level of detail. The undercarriage is basically just one piece of plastic with a simple array of details. I have been through this before so I had no inhibitions to chop up the floorboard. The x-frame keeps it all sturdy and in shape. Looks like a mess, but it will work out in the end. Next I filled the cavities with sheet styrene in 0.5 and 1mm. I extended the x-frame and filled the cracks with putty. Then sanding, filler spray and a second round of putty. Next came all the missing parts: Suspension, driveshaft, differential, exhaust system. The differential I modeled with FIMO plastic clay on an 6mm aluminum tube. All the other parts are cut and glued from styrene profiles or sheet. Shock springs are 1mm aluminum wire. The bumpy area in the middle will be covered again with the exhaust system so I refrained from investing too much time in getting it smooth. Here is what it ended up into. The mufflers I scavenged from my spare parts box, but the pipes I finger bent from 3mm styrene rod. Look like a fat 3 inch system. The V shaped front suspension parts I rescued from the deconstructed cut-outs. All the other rods and stuff are hand made from styrene. The interior is show car. I added a flock floor and the seatbelts. The doors had about no structure at all, so some detail work with styrene was necessary. Chrome is Bare Metal and Molotow pen. The kit engine is a joke. I had enough parts to build a 409 HEMI and just happened to have a leftover fuel injection from my last corvette. It took a while to get all the parts and lines to fit, but I´m very happy with the results. The belt is a thin strip of rubber on the deconstructed pulley system. And here we have the finished model. This AMT kit is something of a disappointment. You can feel that the mold must be 50 years old. The body has a few dents and the window line sags on one side. Many parts didn´t fit, but I discarded most parts anyway so that didn´t matter much. Funny how they include a TV-set, a bunny and other stuff, but no rear mirrors, no red taillights etc... If I had known ahead about the low level, I would still have bought this kit. The 1963 Impala was a beautiful car and I love to work the plastic and customize. The color coat is a Molotow black line graffiti spray. Very fine spray cap and a good flow, although a matt finish. The pink areas are Schmincke Aero Color mixed with metallic fluid. After that I carefully sprayed the whole body with slight touch of metallic to give it a sparkle. Next 2 coats of AK clear gloss and a good polish. The wheels and tires are from my scrapbox, the grill I cut open and inserted a mesh metal. All the chrome is Bare Metal under the last clear coat. Thanks for taking a look!

- 1 reply
-
- 2
-

-
Beautiful build, very close to the original stock? Your paint job is perfect. What do you use to hold the ignition cables together? I´m still looking for a clamps like that.
-
Thanks for your kind response! Yes, the engine was a bummer I didn´t want to use in a model, but didn´t want to throw away either. The chrome work is with Molotow chrome markers, which come very close to the original thing. I use 2 and 3mm markers. The scoop had very bad mold edges that had to be sanded off, with the chrome gone too. The 3mm Molotow was good for this "big" surface. For the finer parts I use the 2mm directly or I pump the tip on my table to make it leak a bit. I take up the paint from the felt tip or table with a fine sable brush. Molotow also offers 1mm pens, which I cannot advise. The tips dry out easily or they will burp out a blob of paint while your doing your detailing, very aggravating! They also offer liquid chrome, that you can even airbrush with a 0.2mm nozzle. I met a guy who masks his whole model and does the body chrome work with an airbrush. The shine does not compare to bare metal though.
-
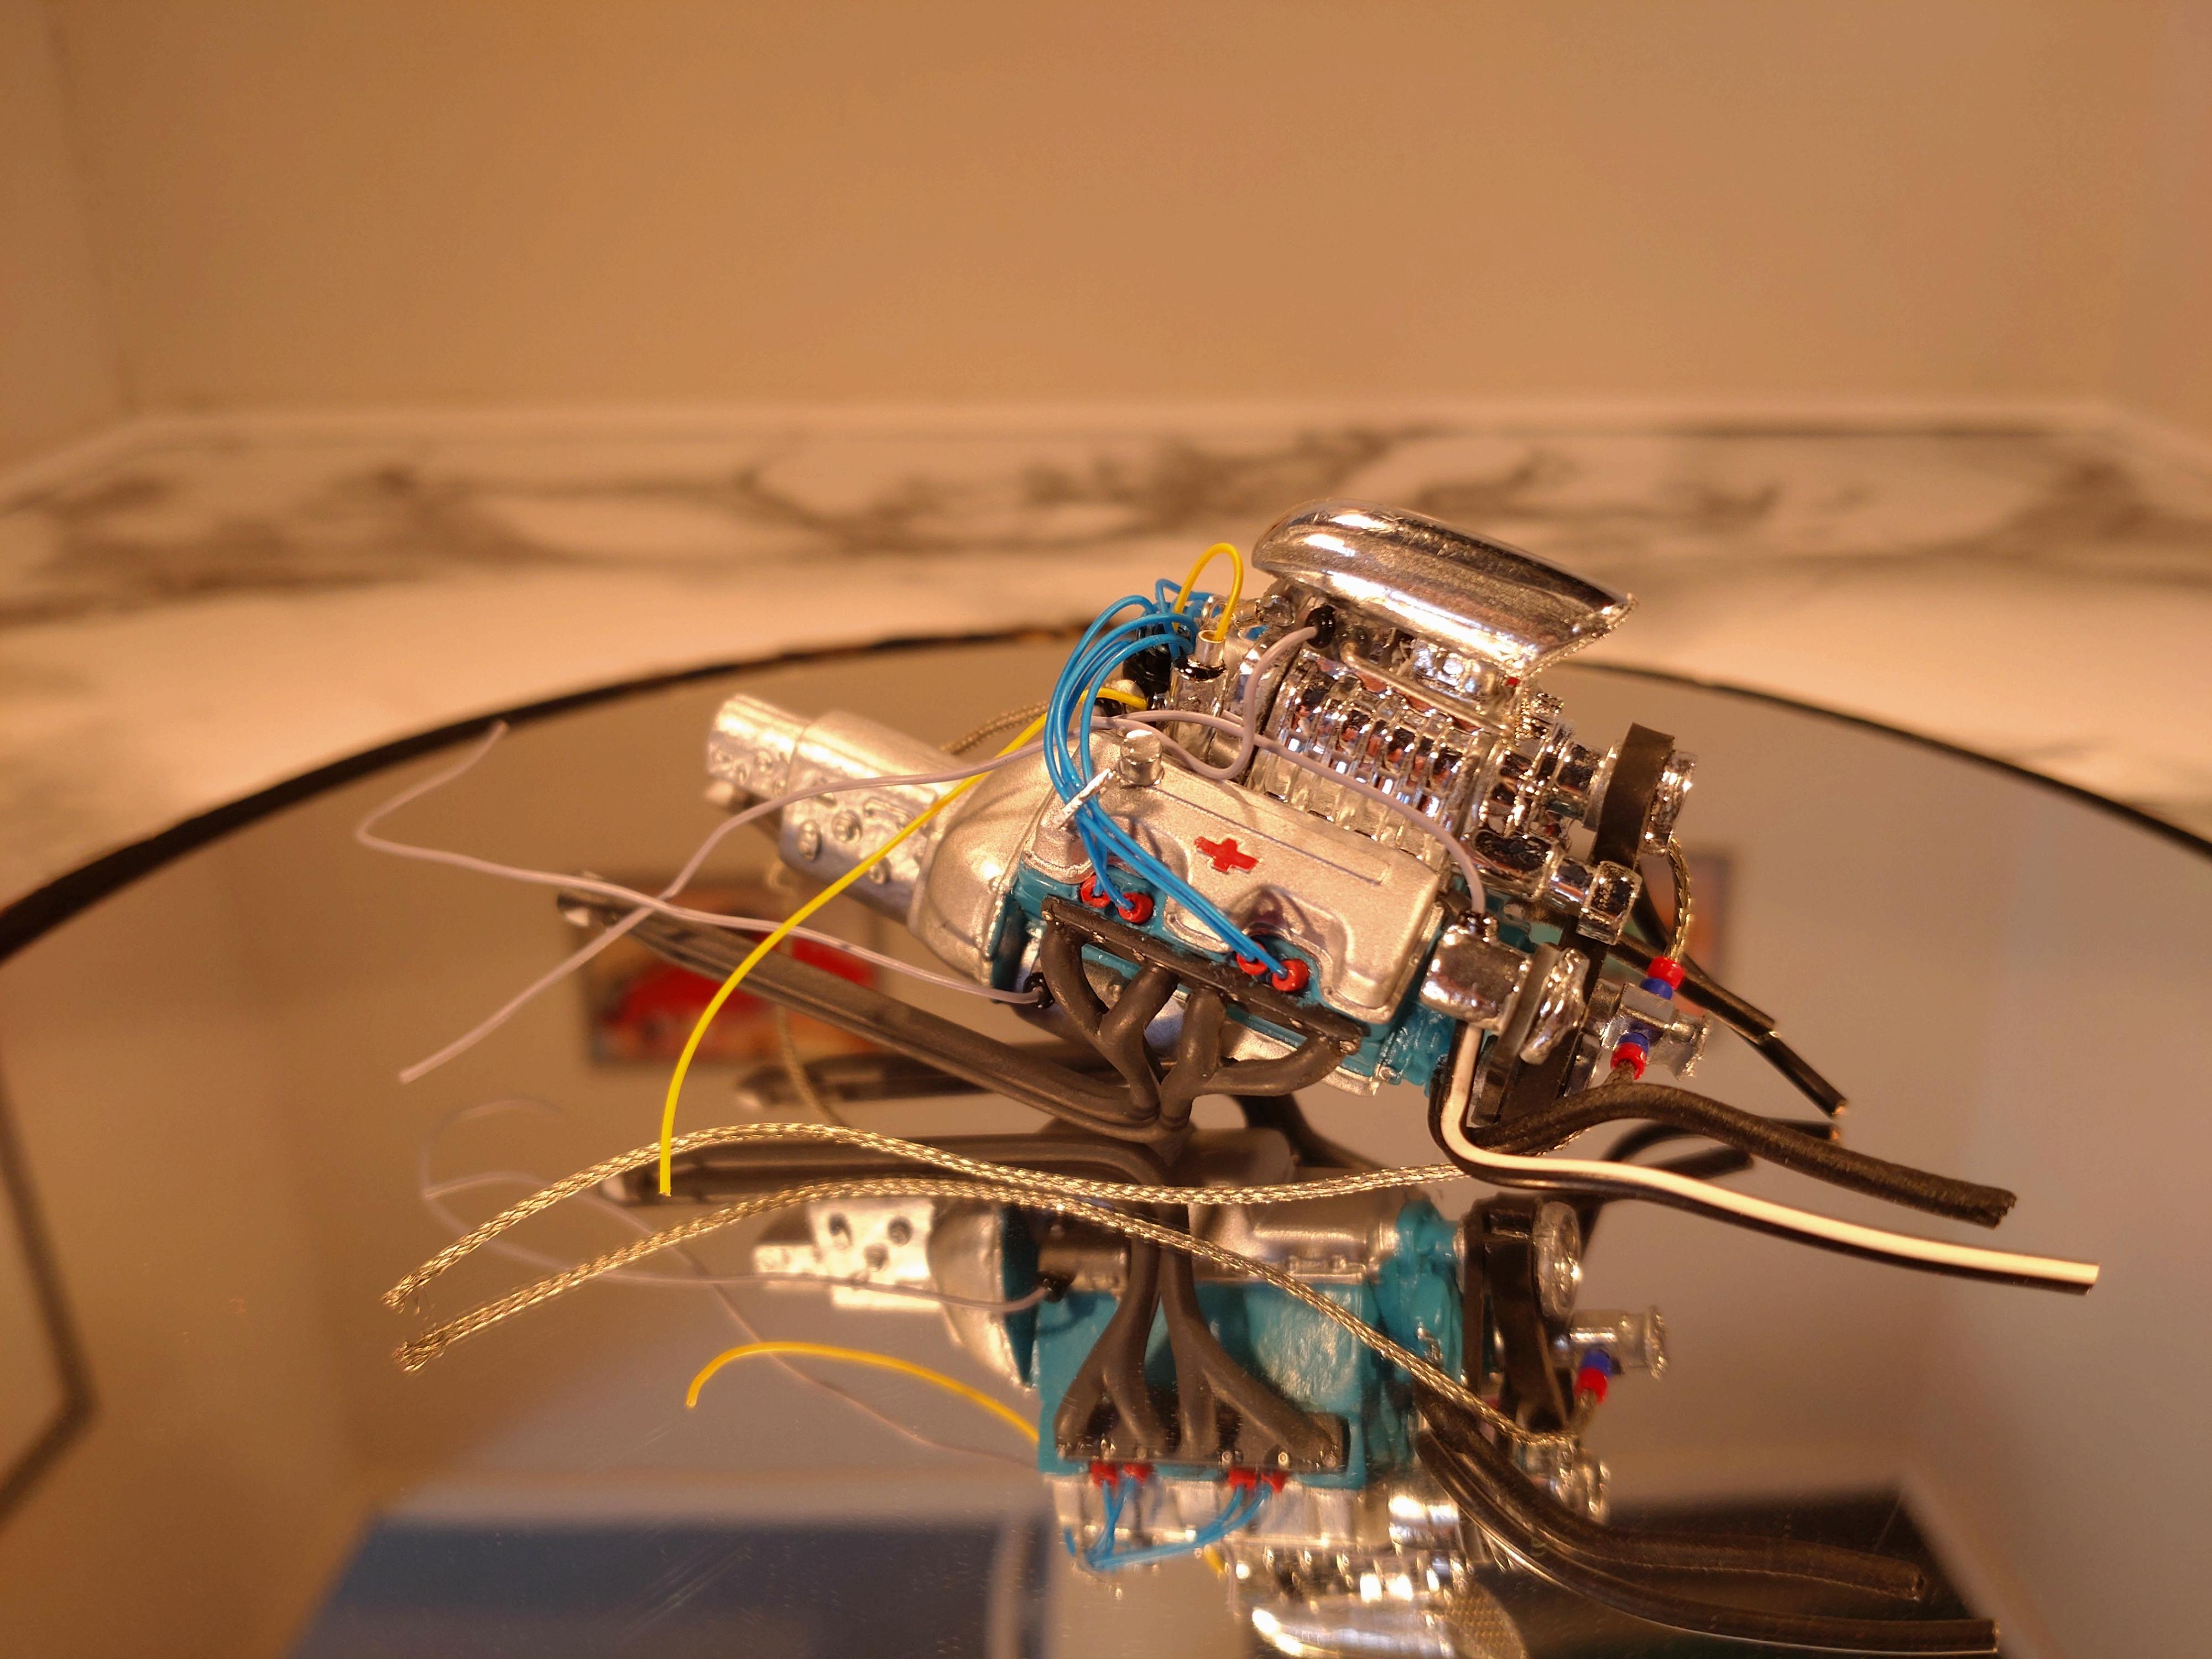
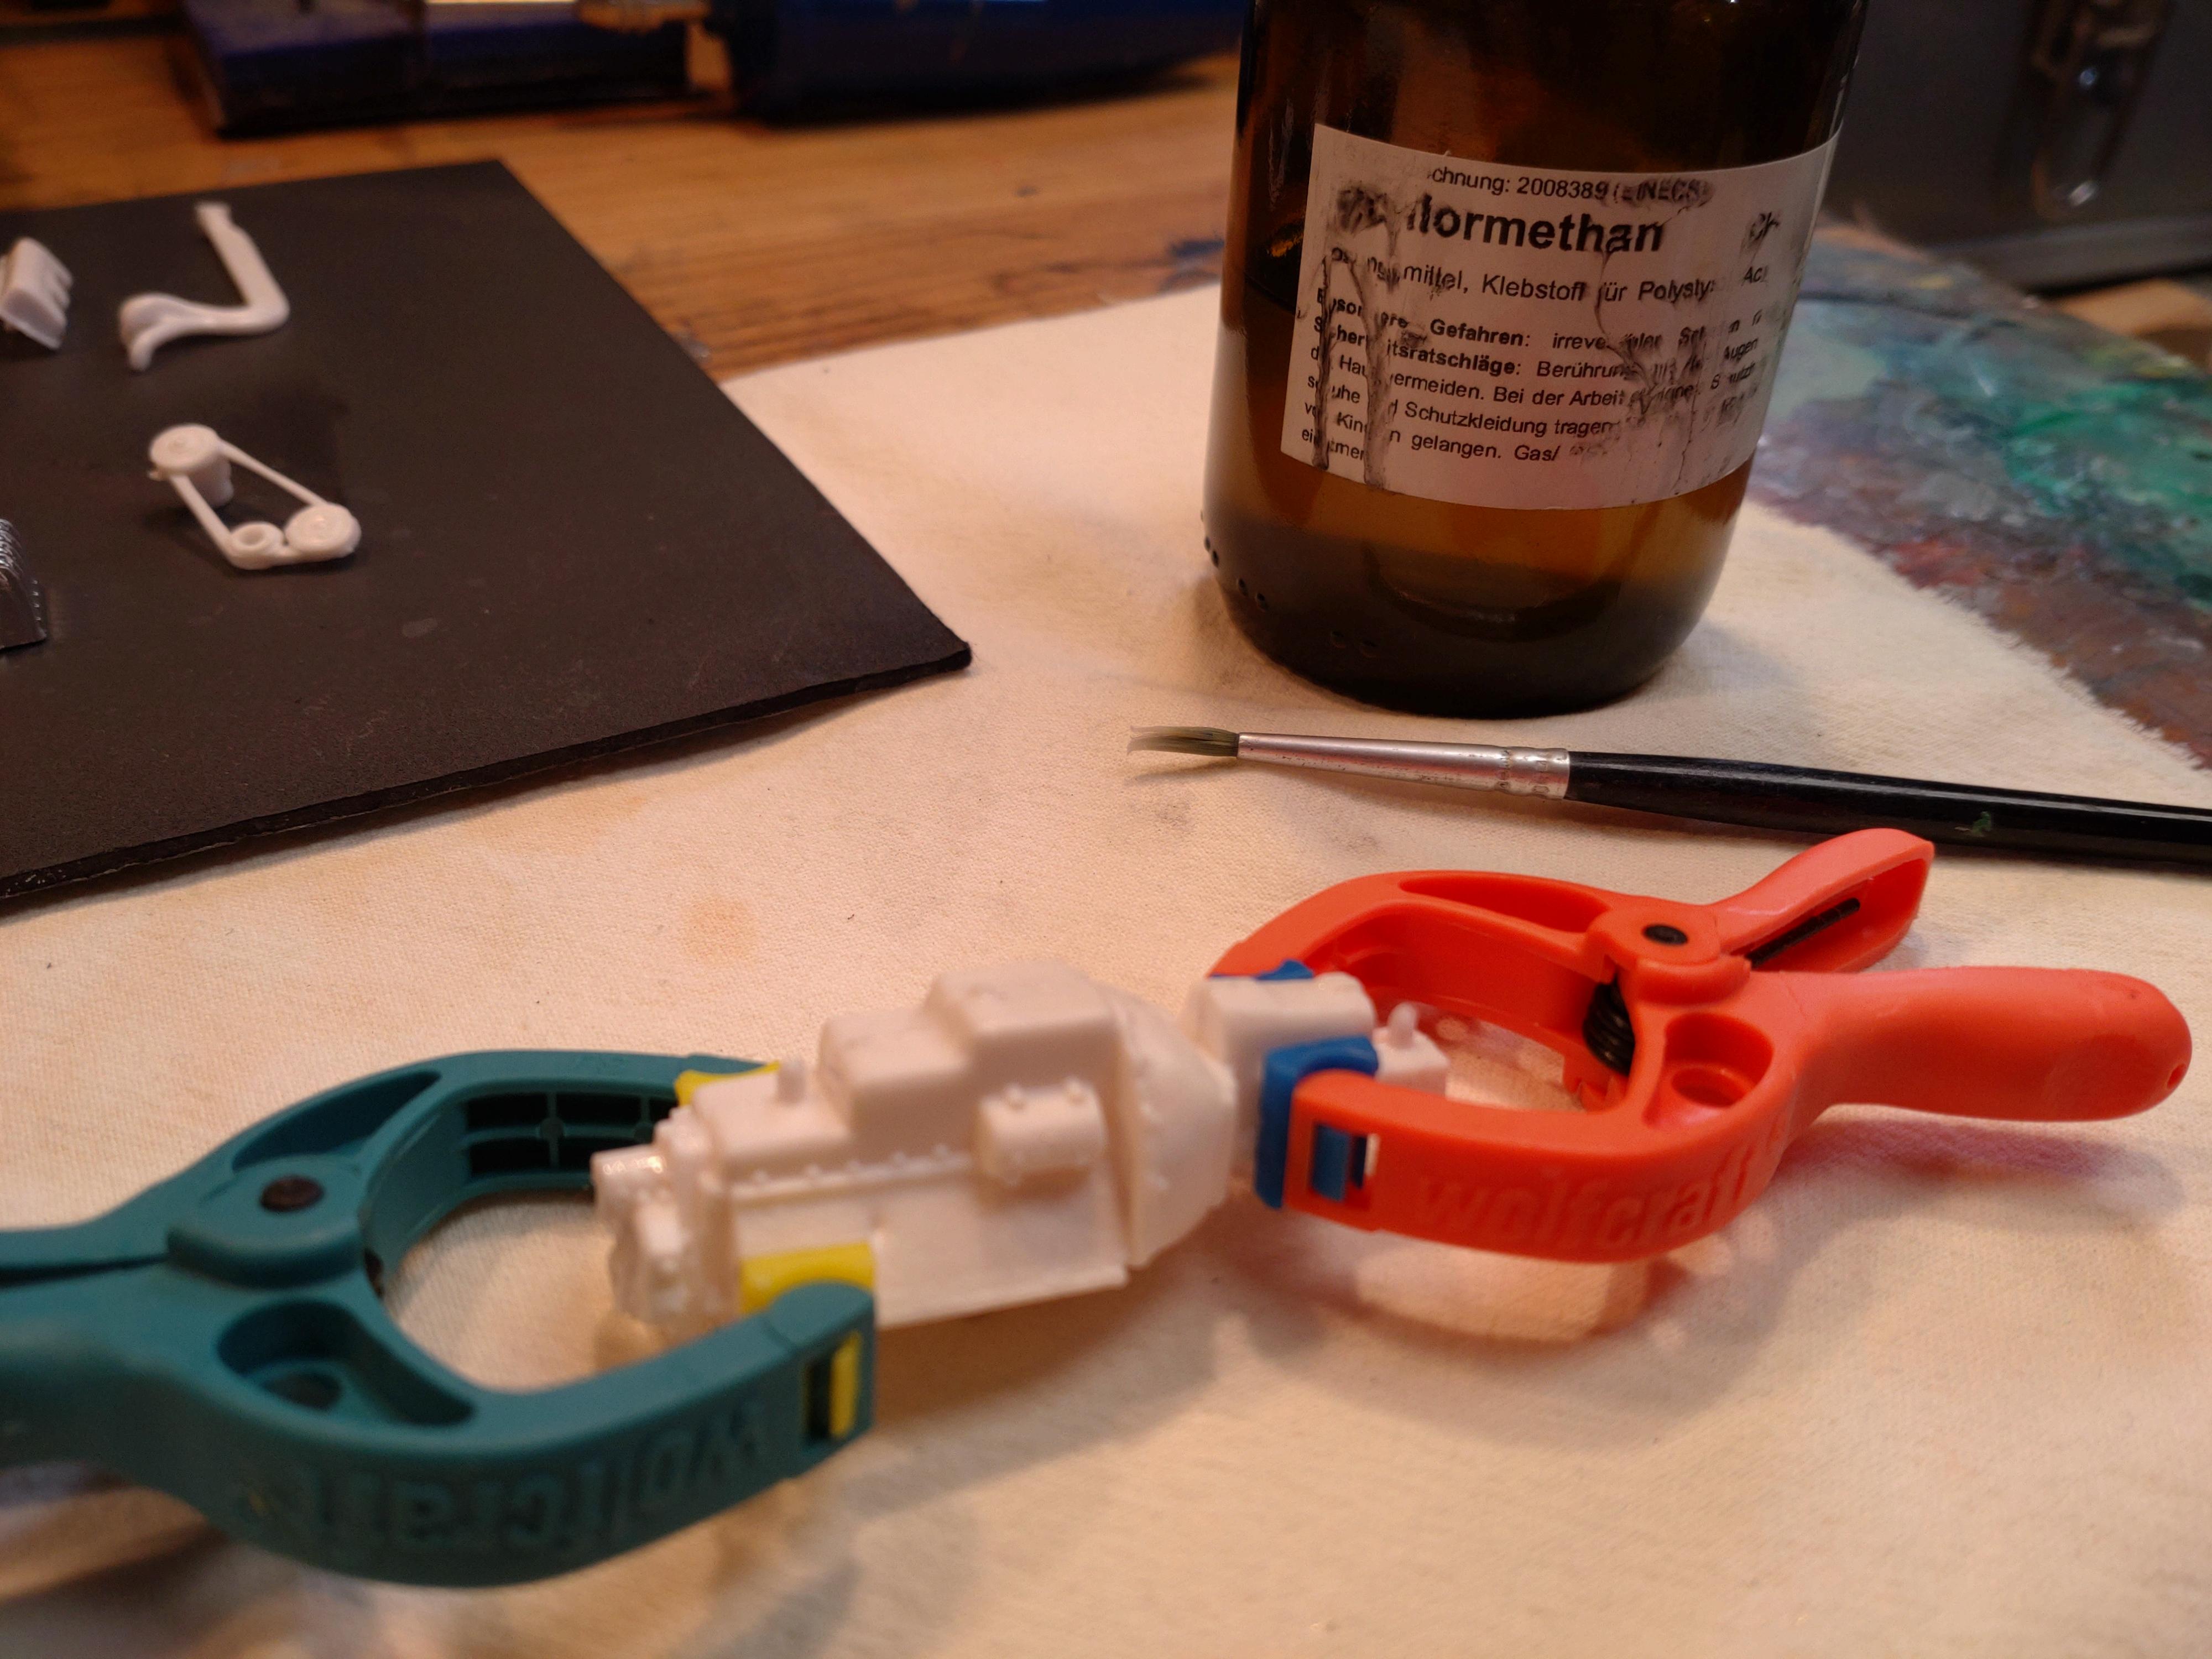
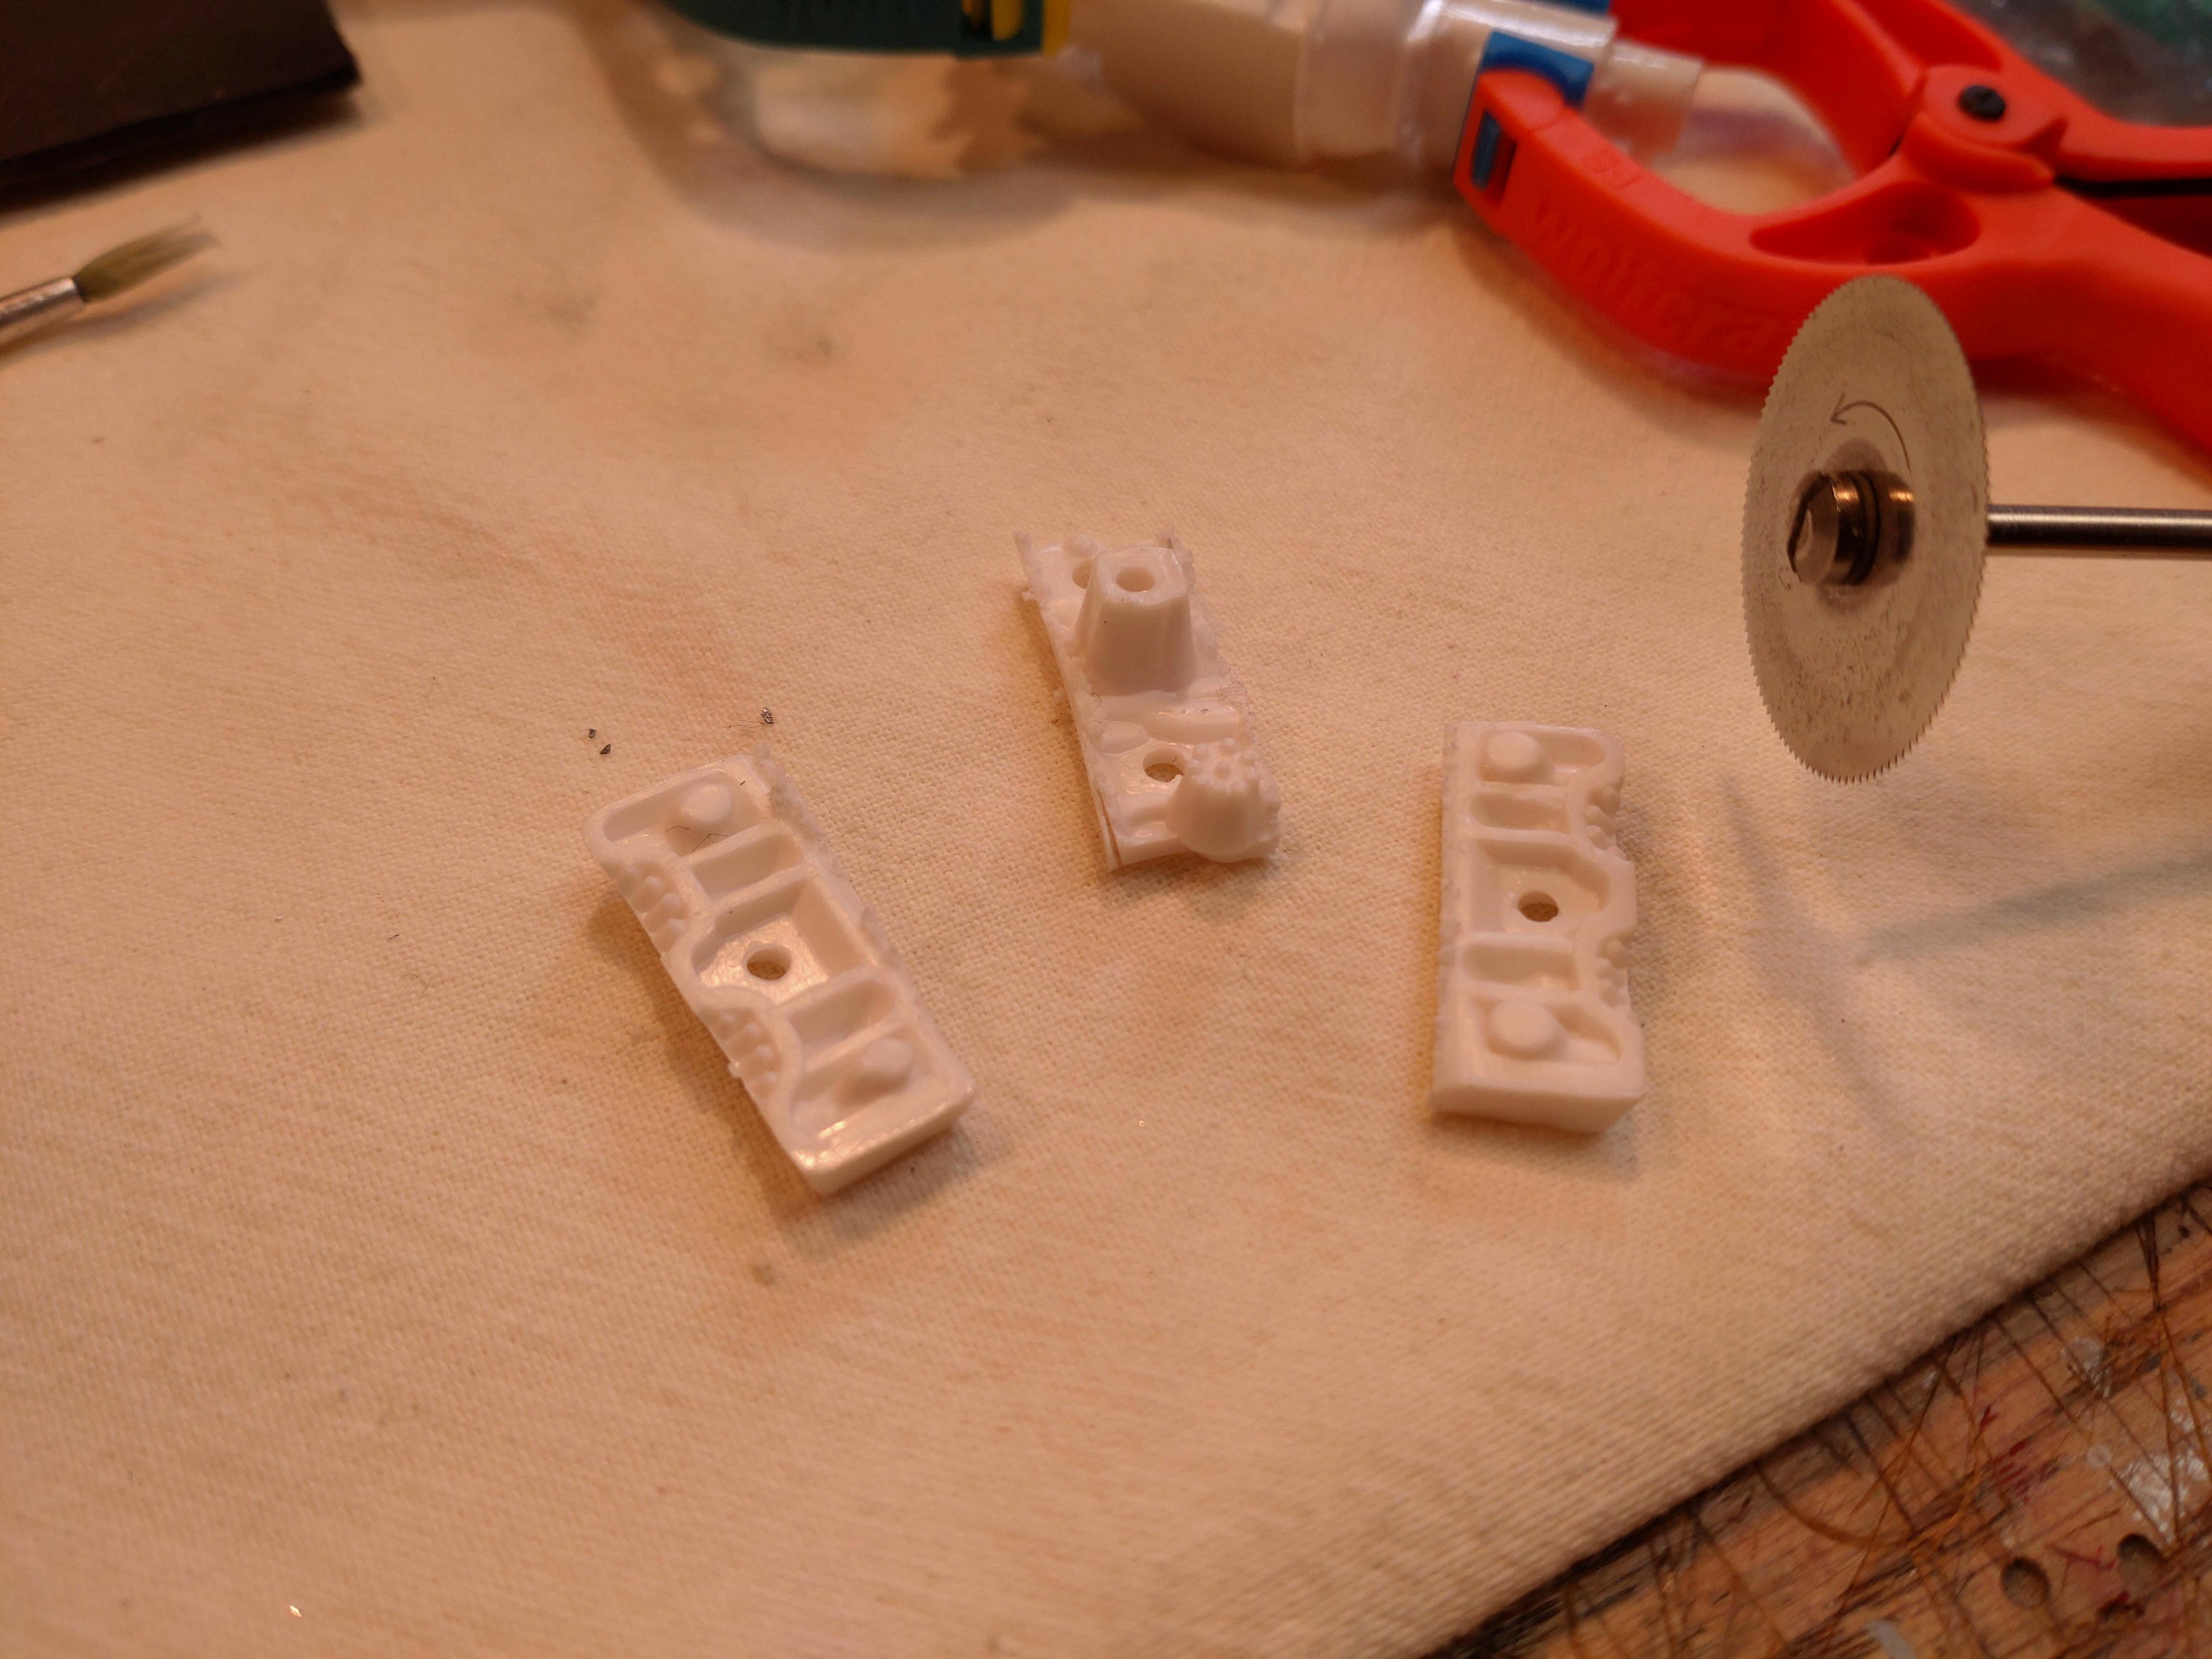
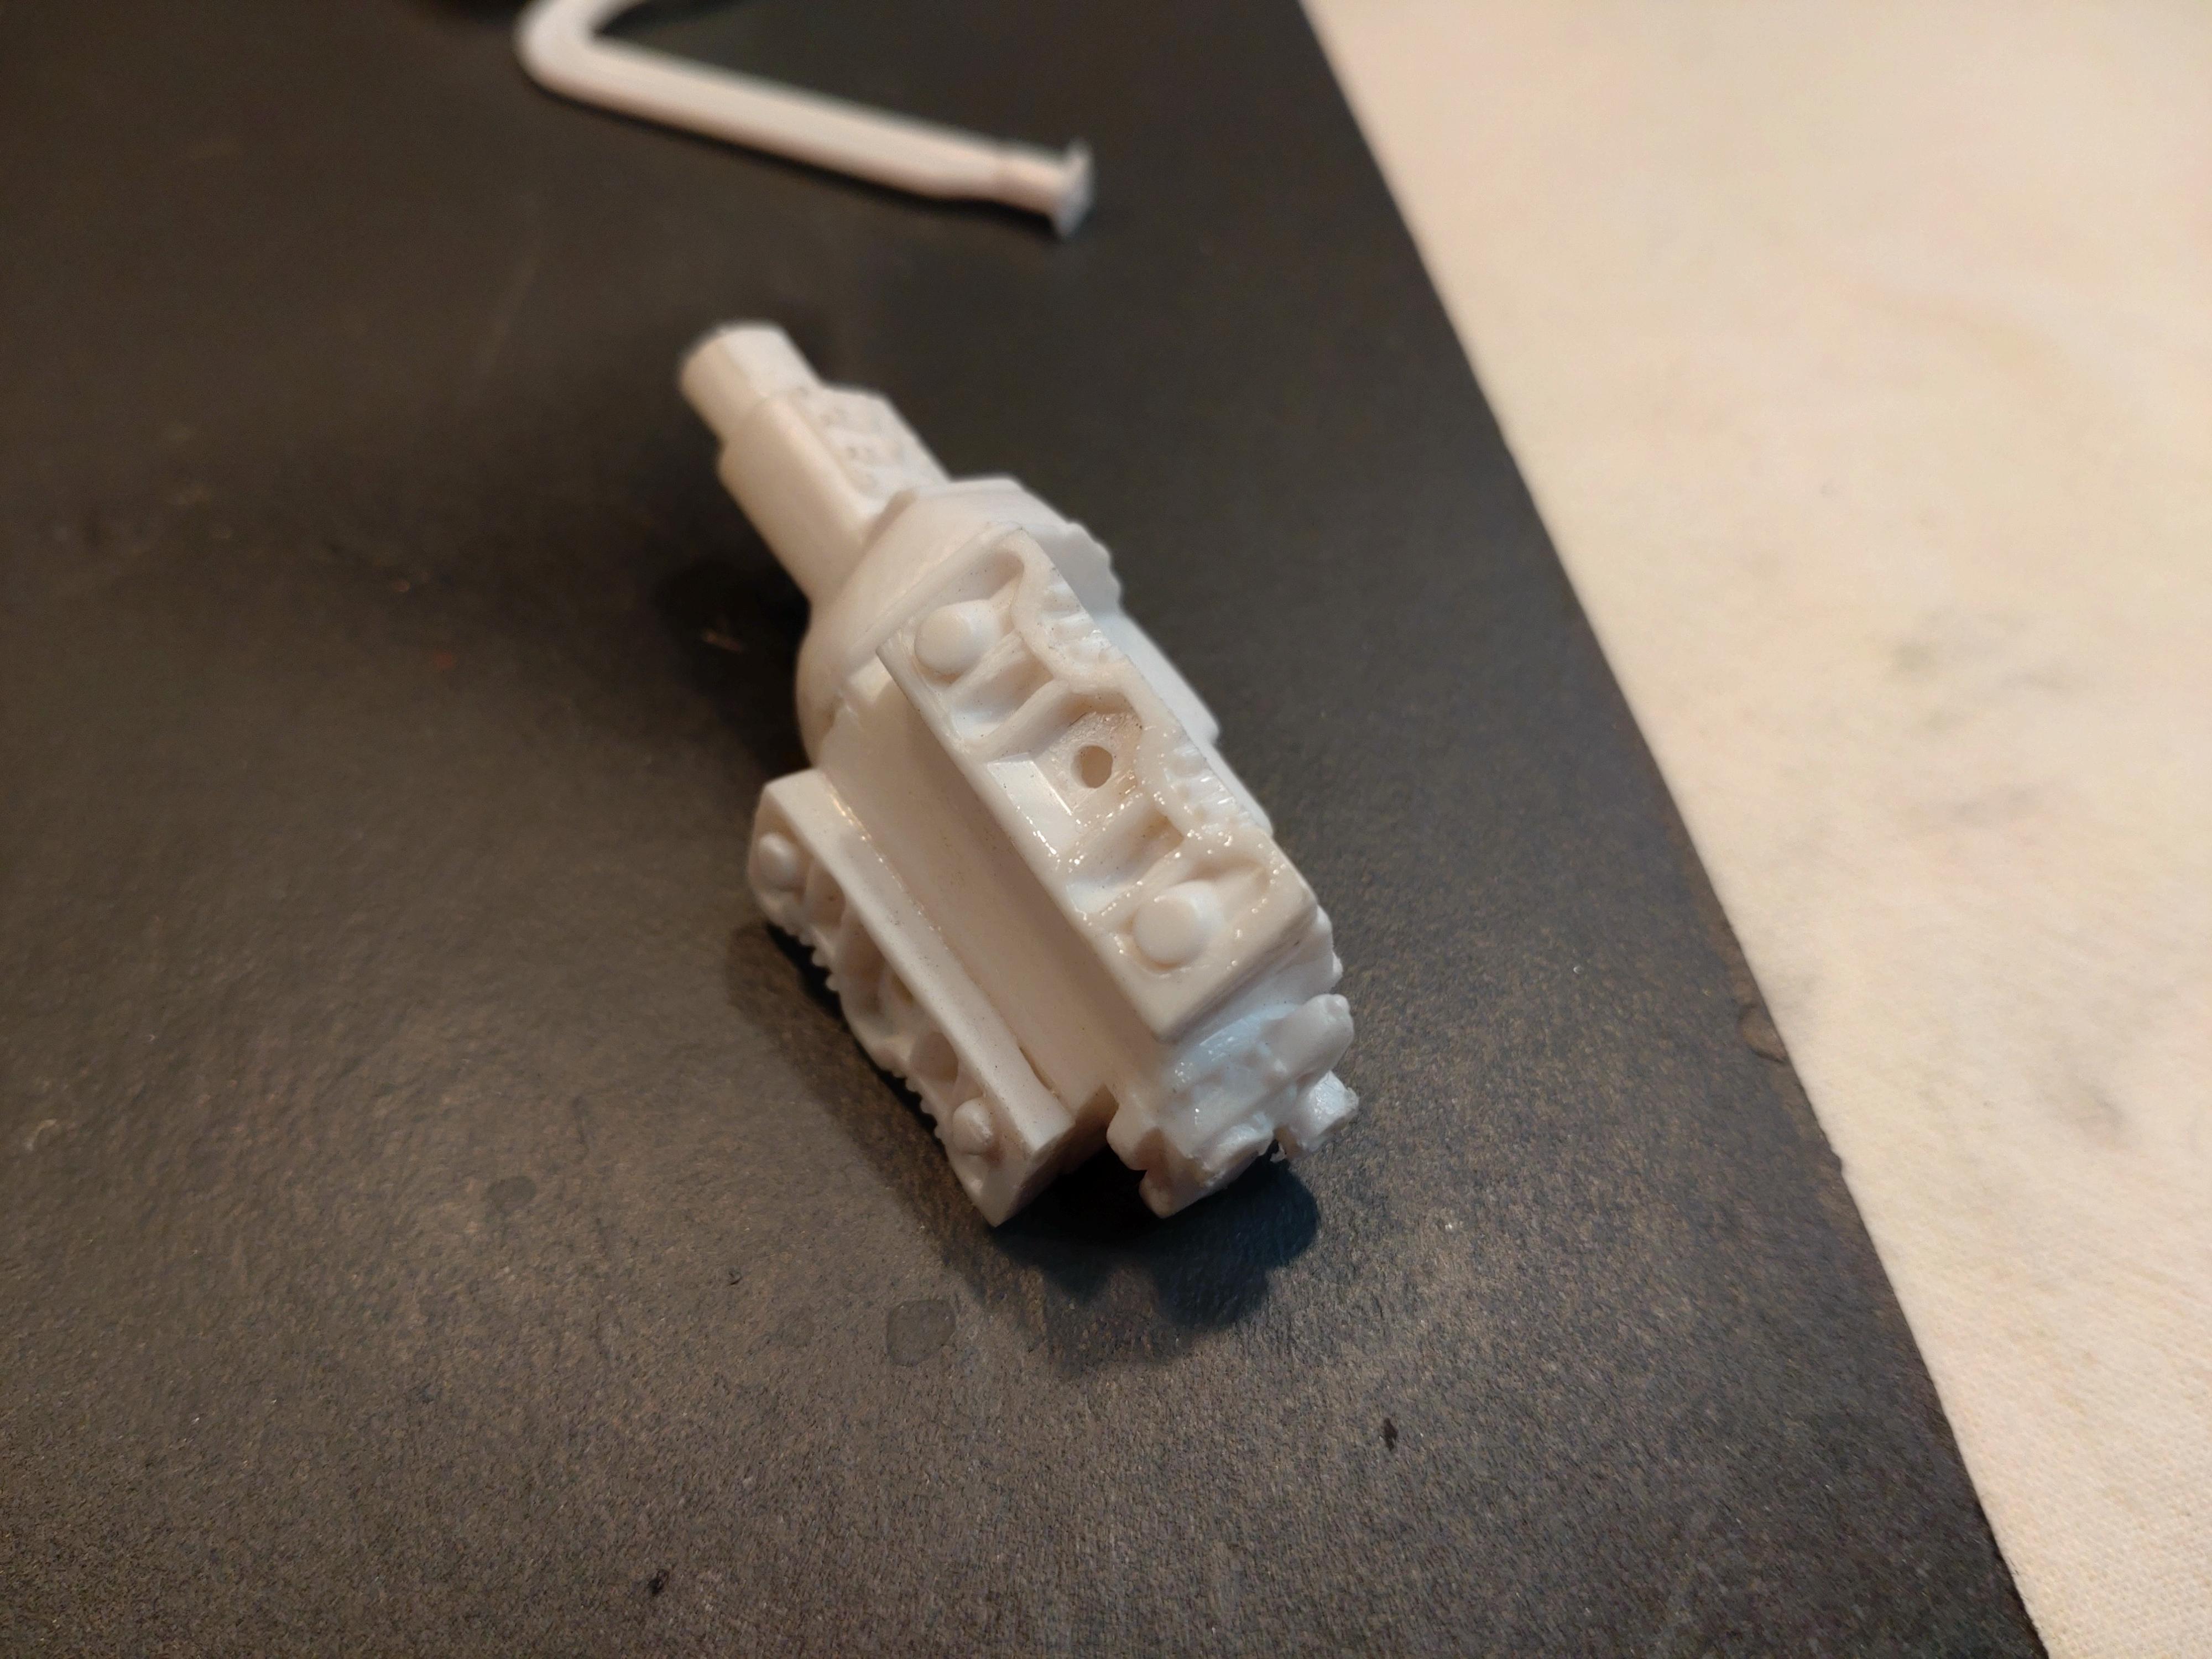
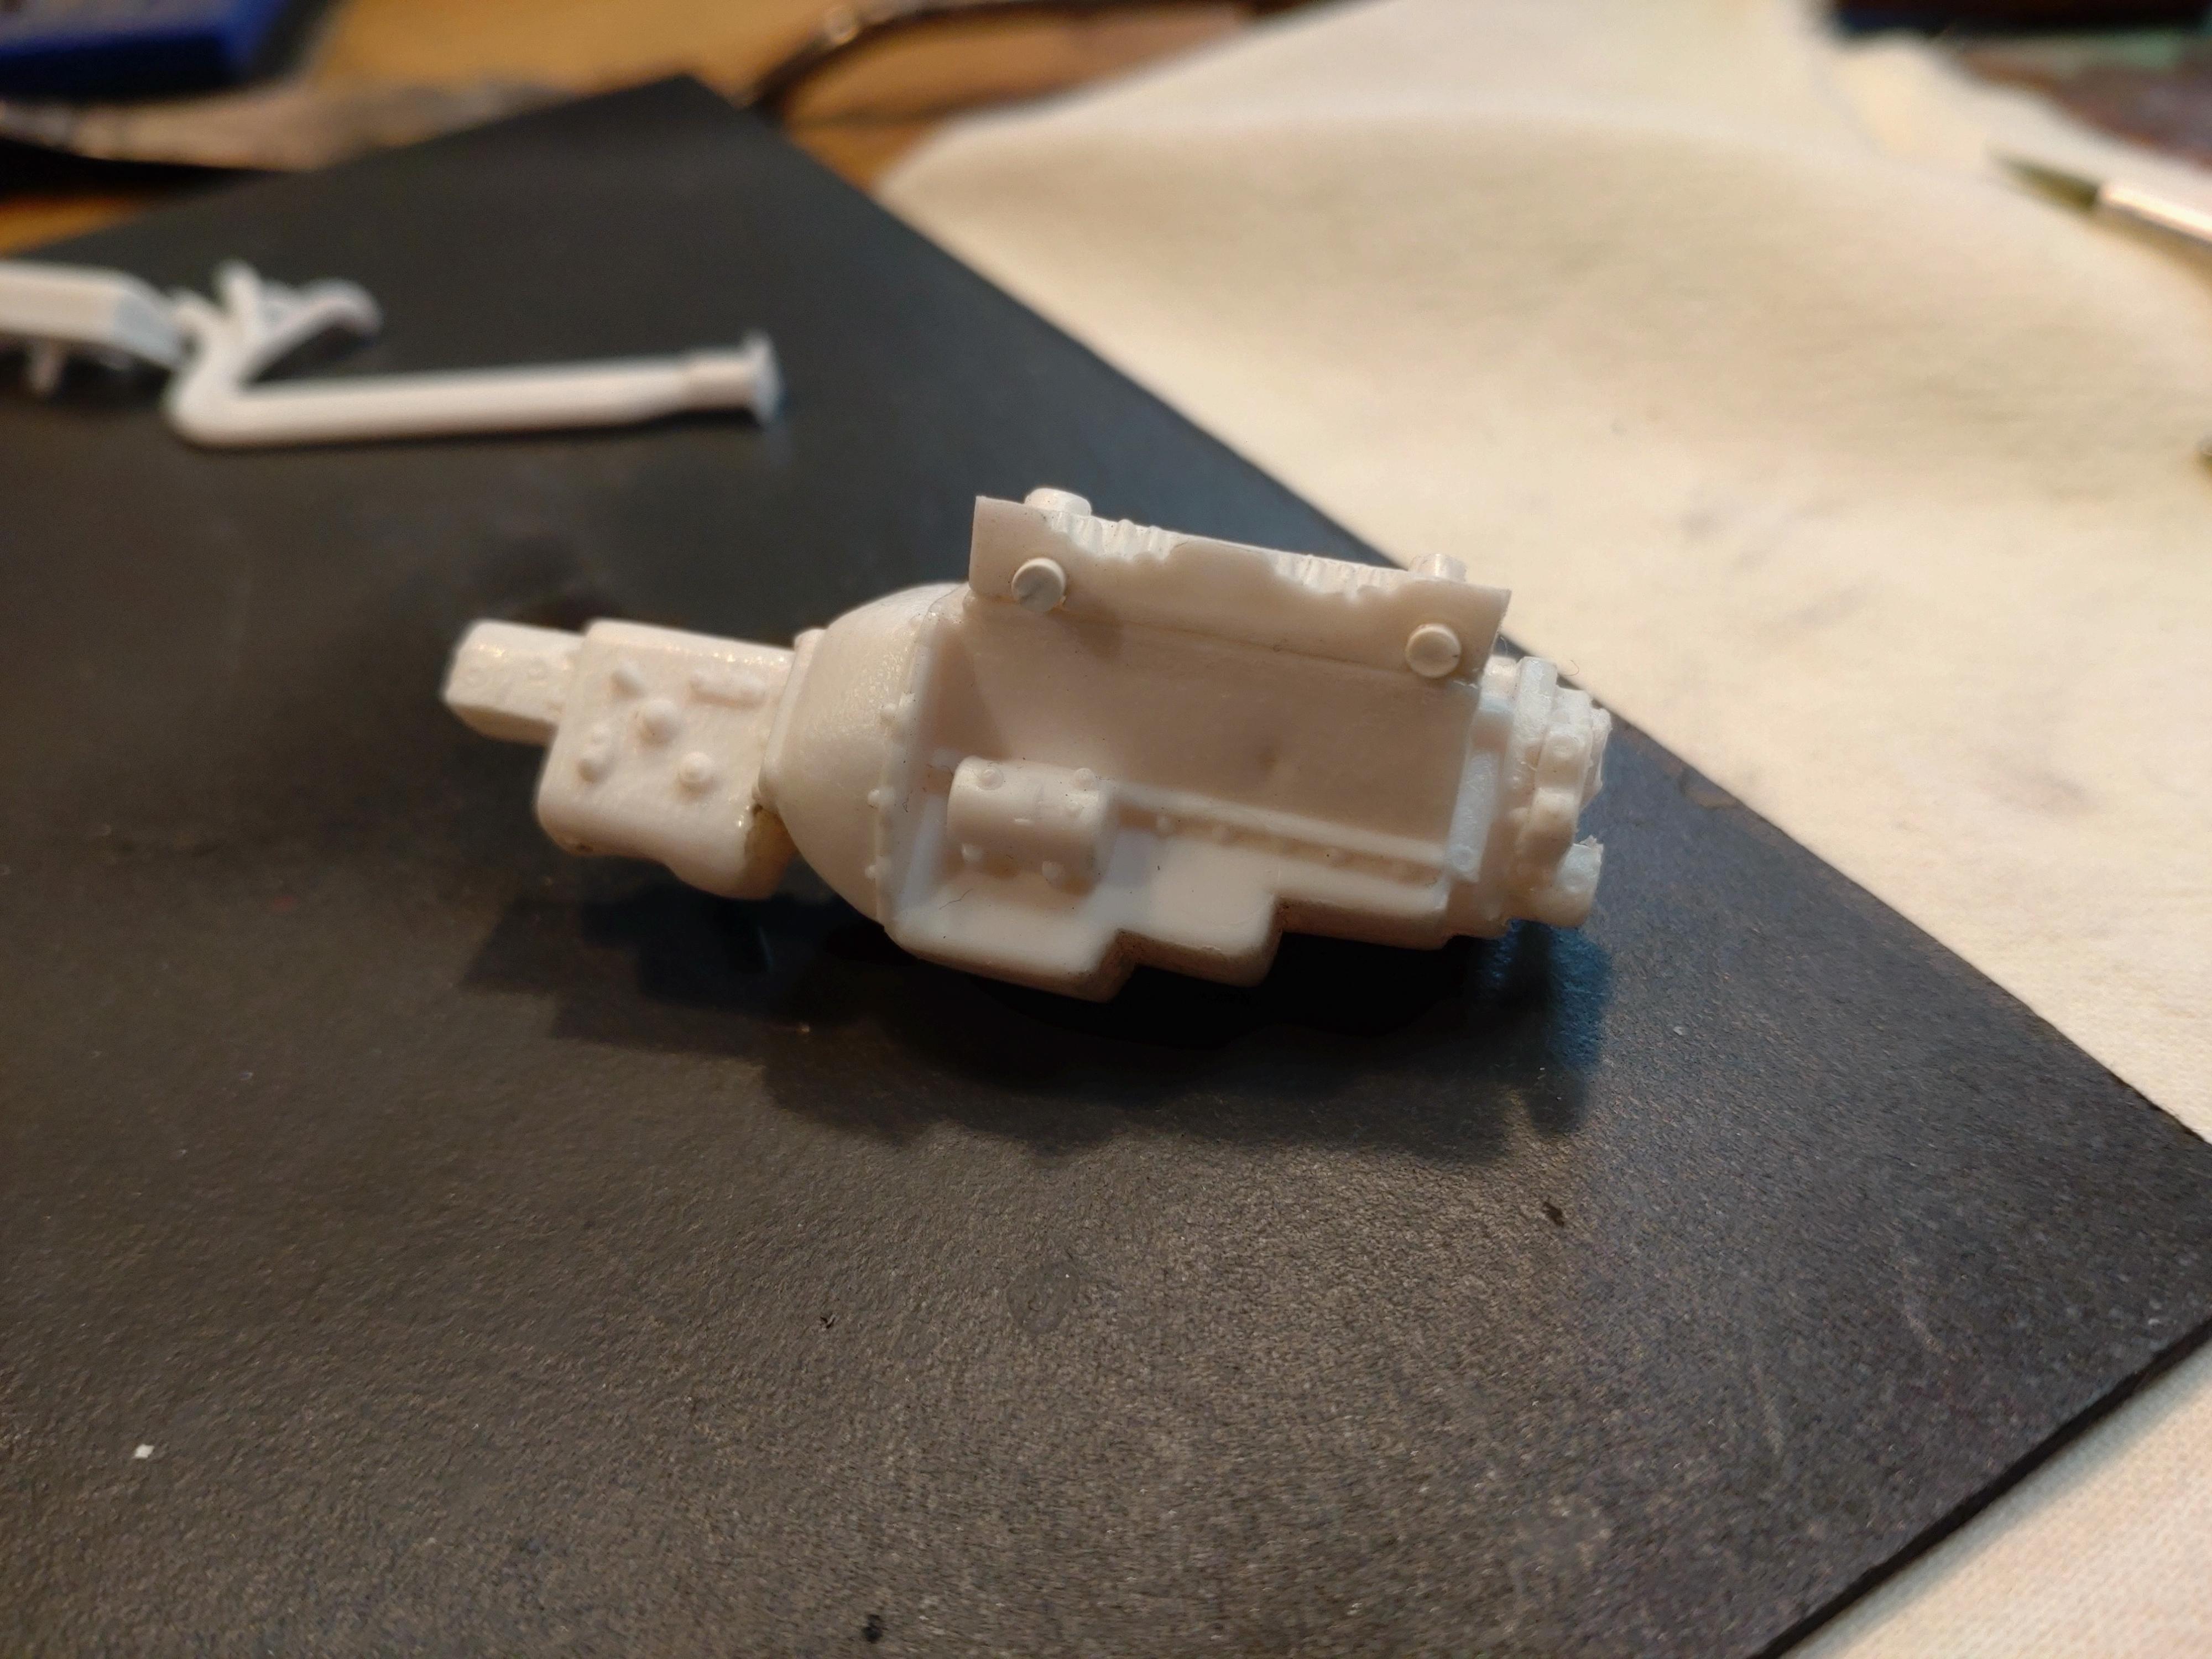
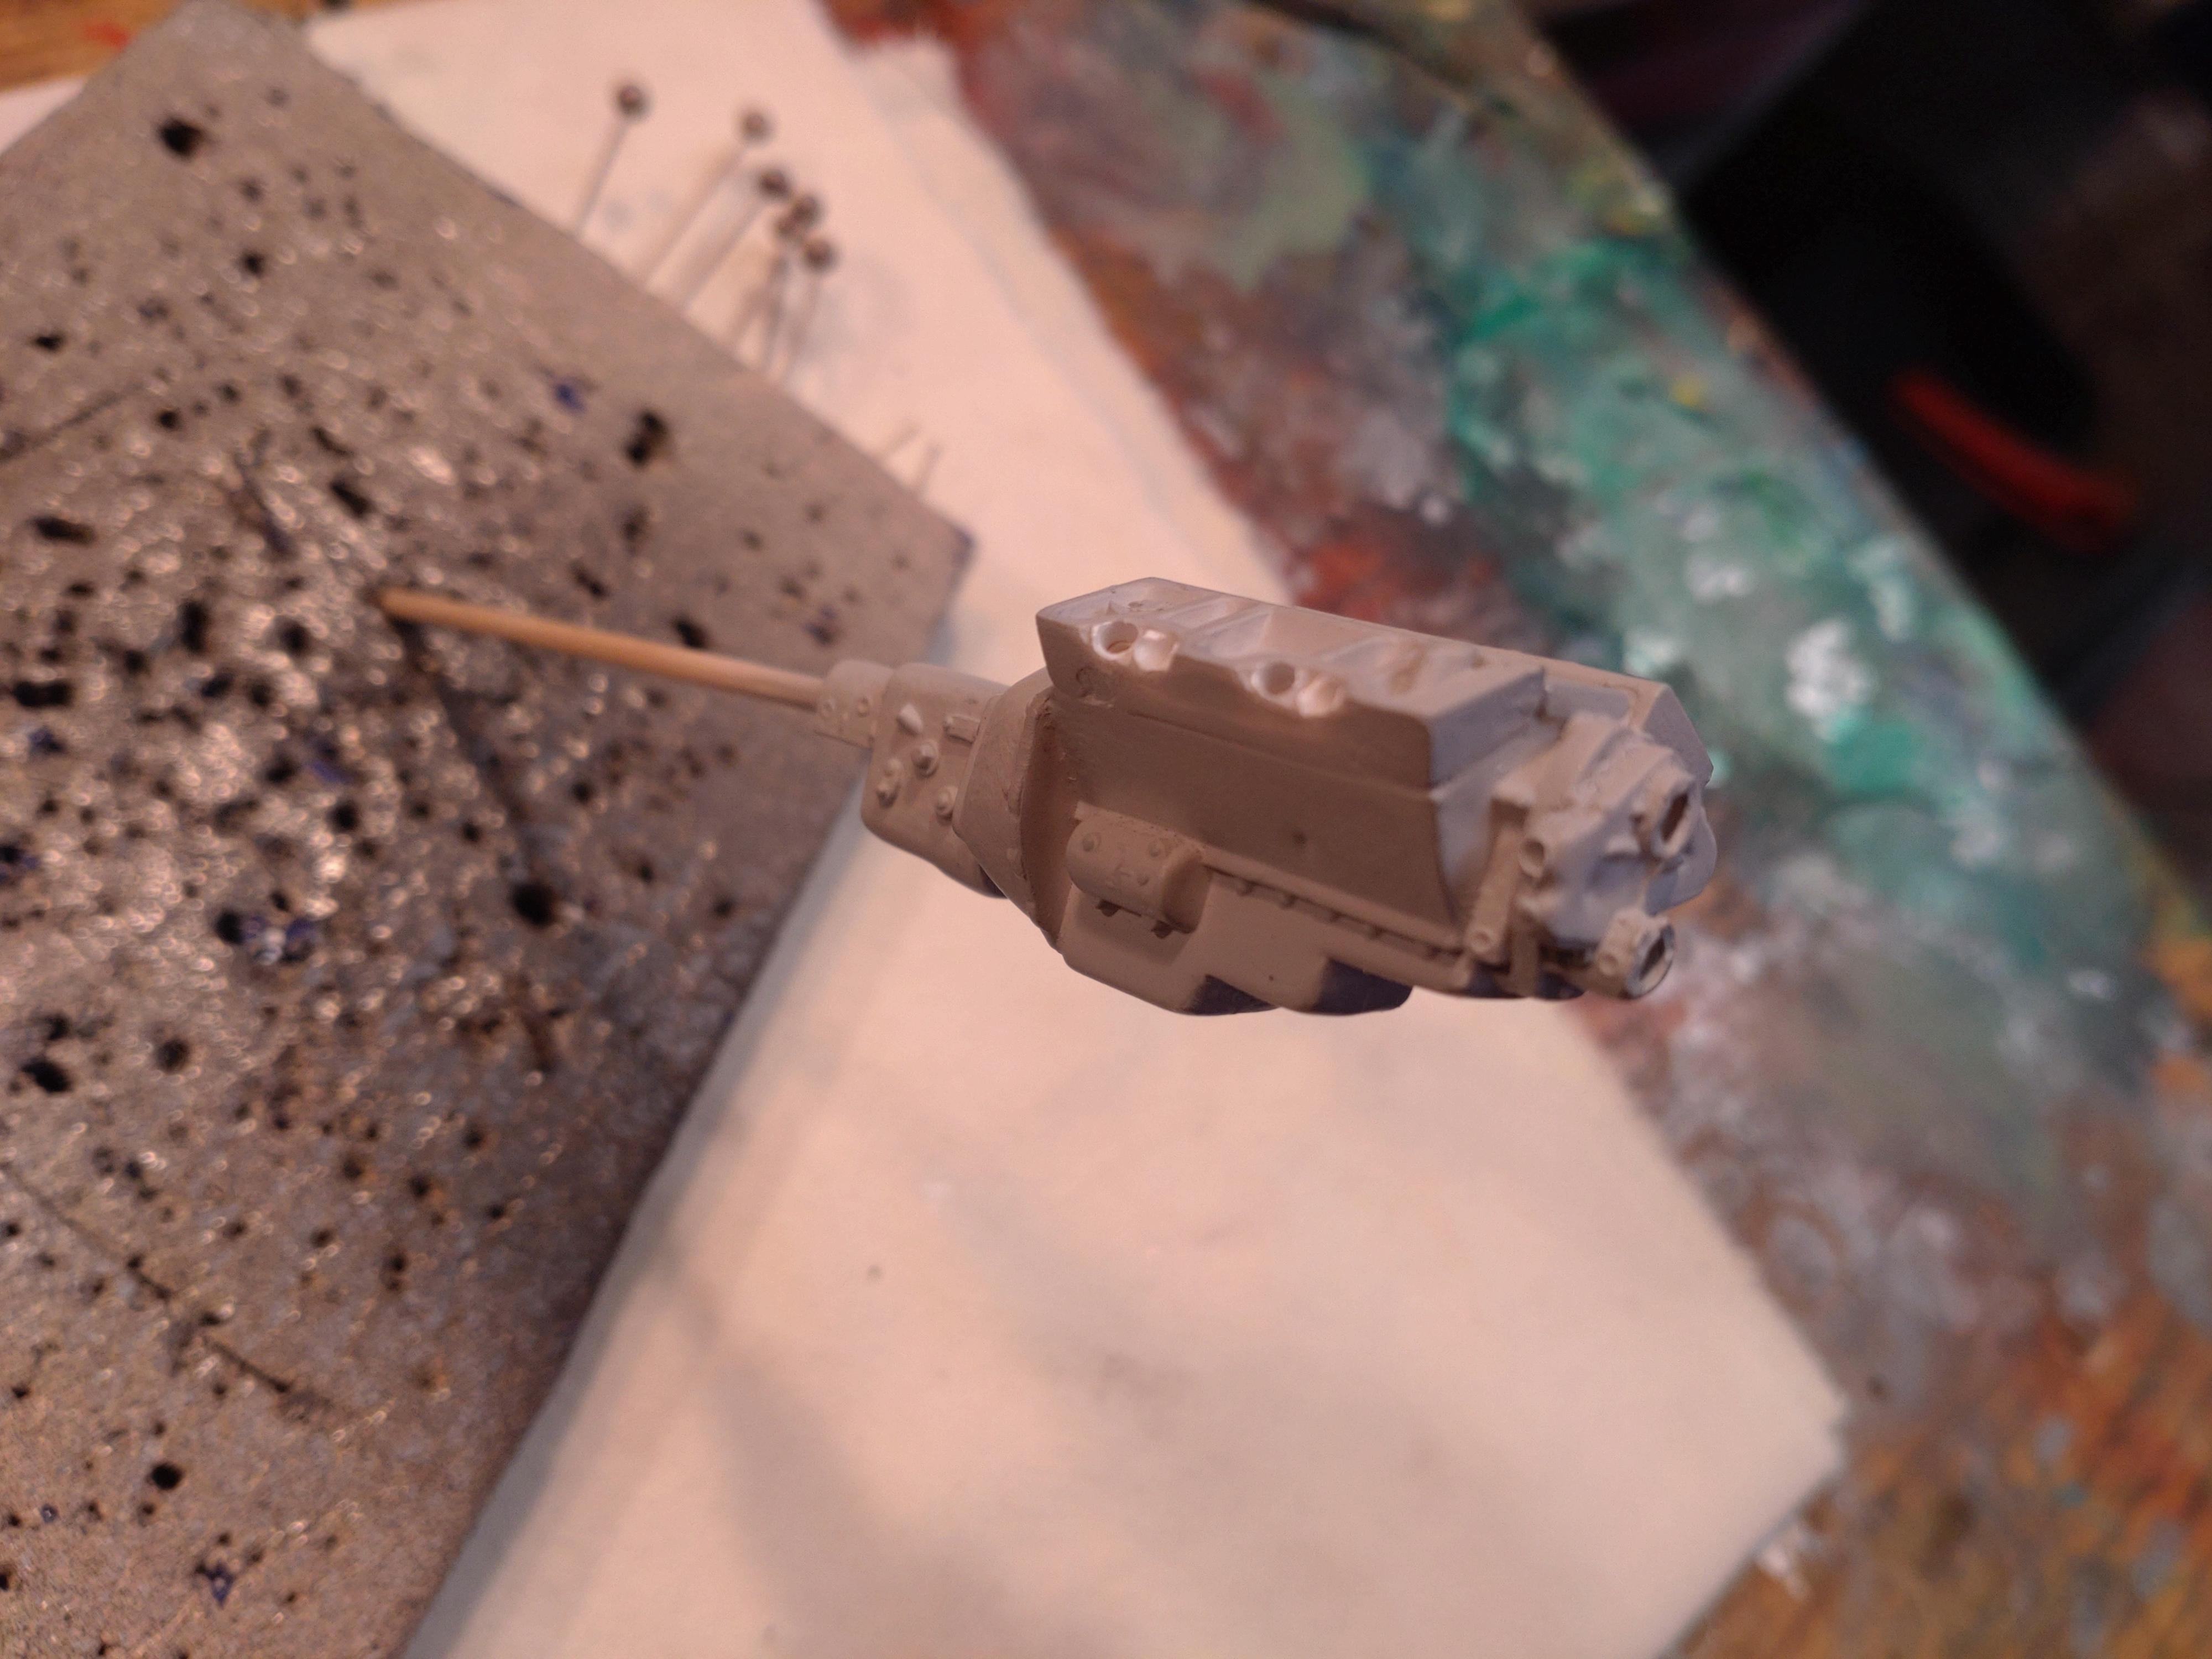
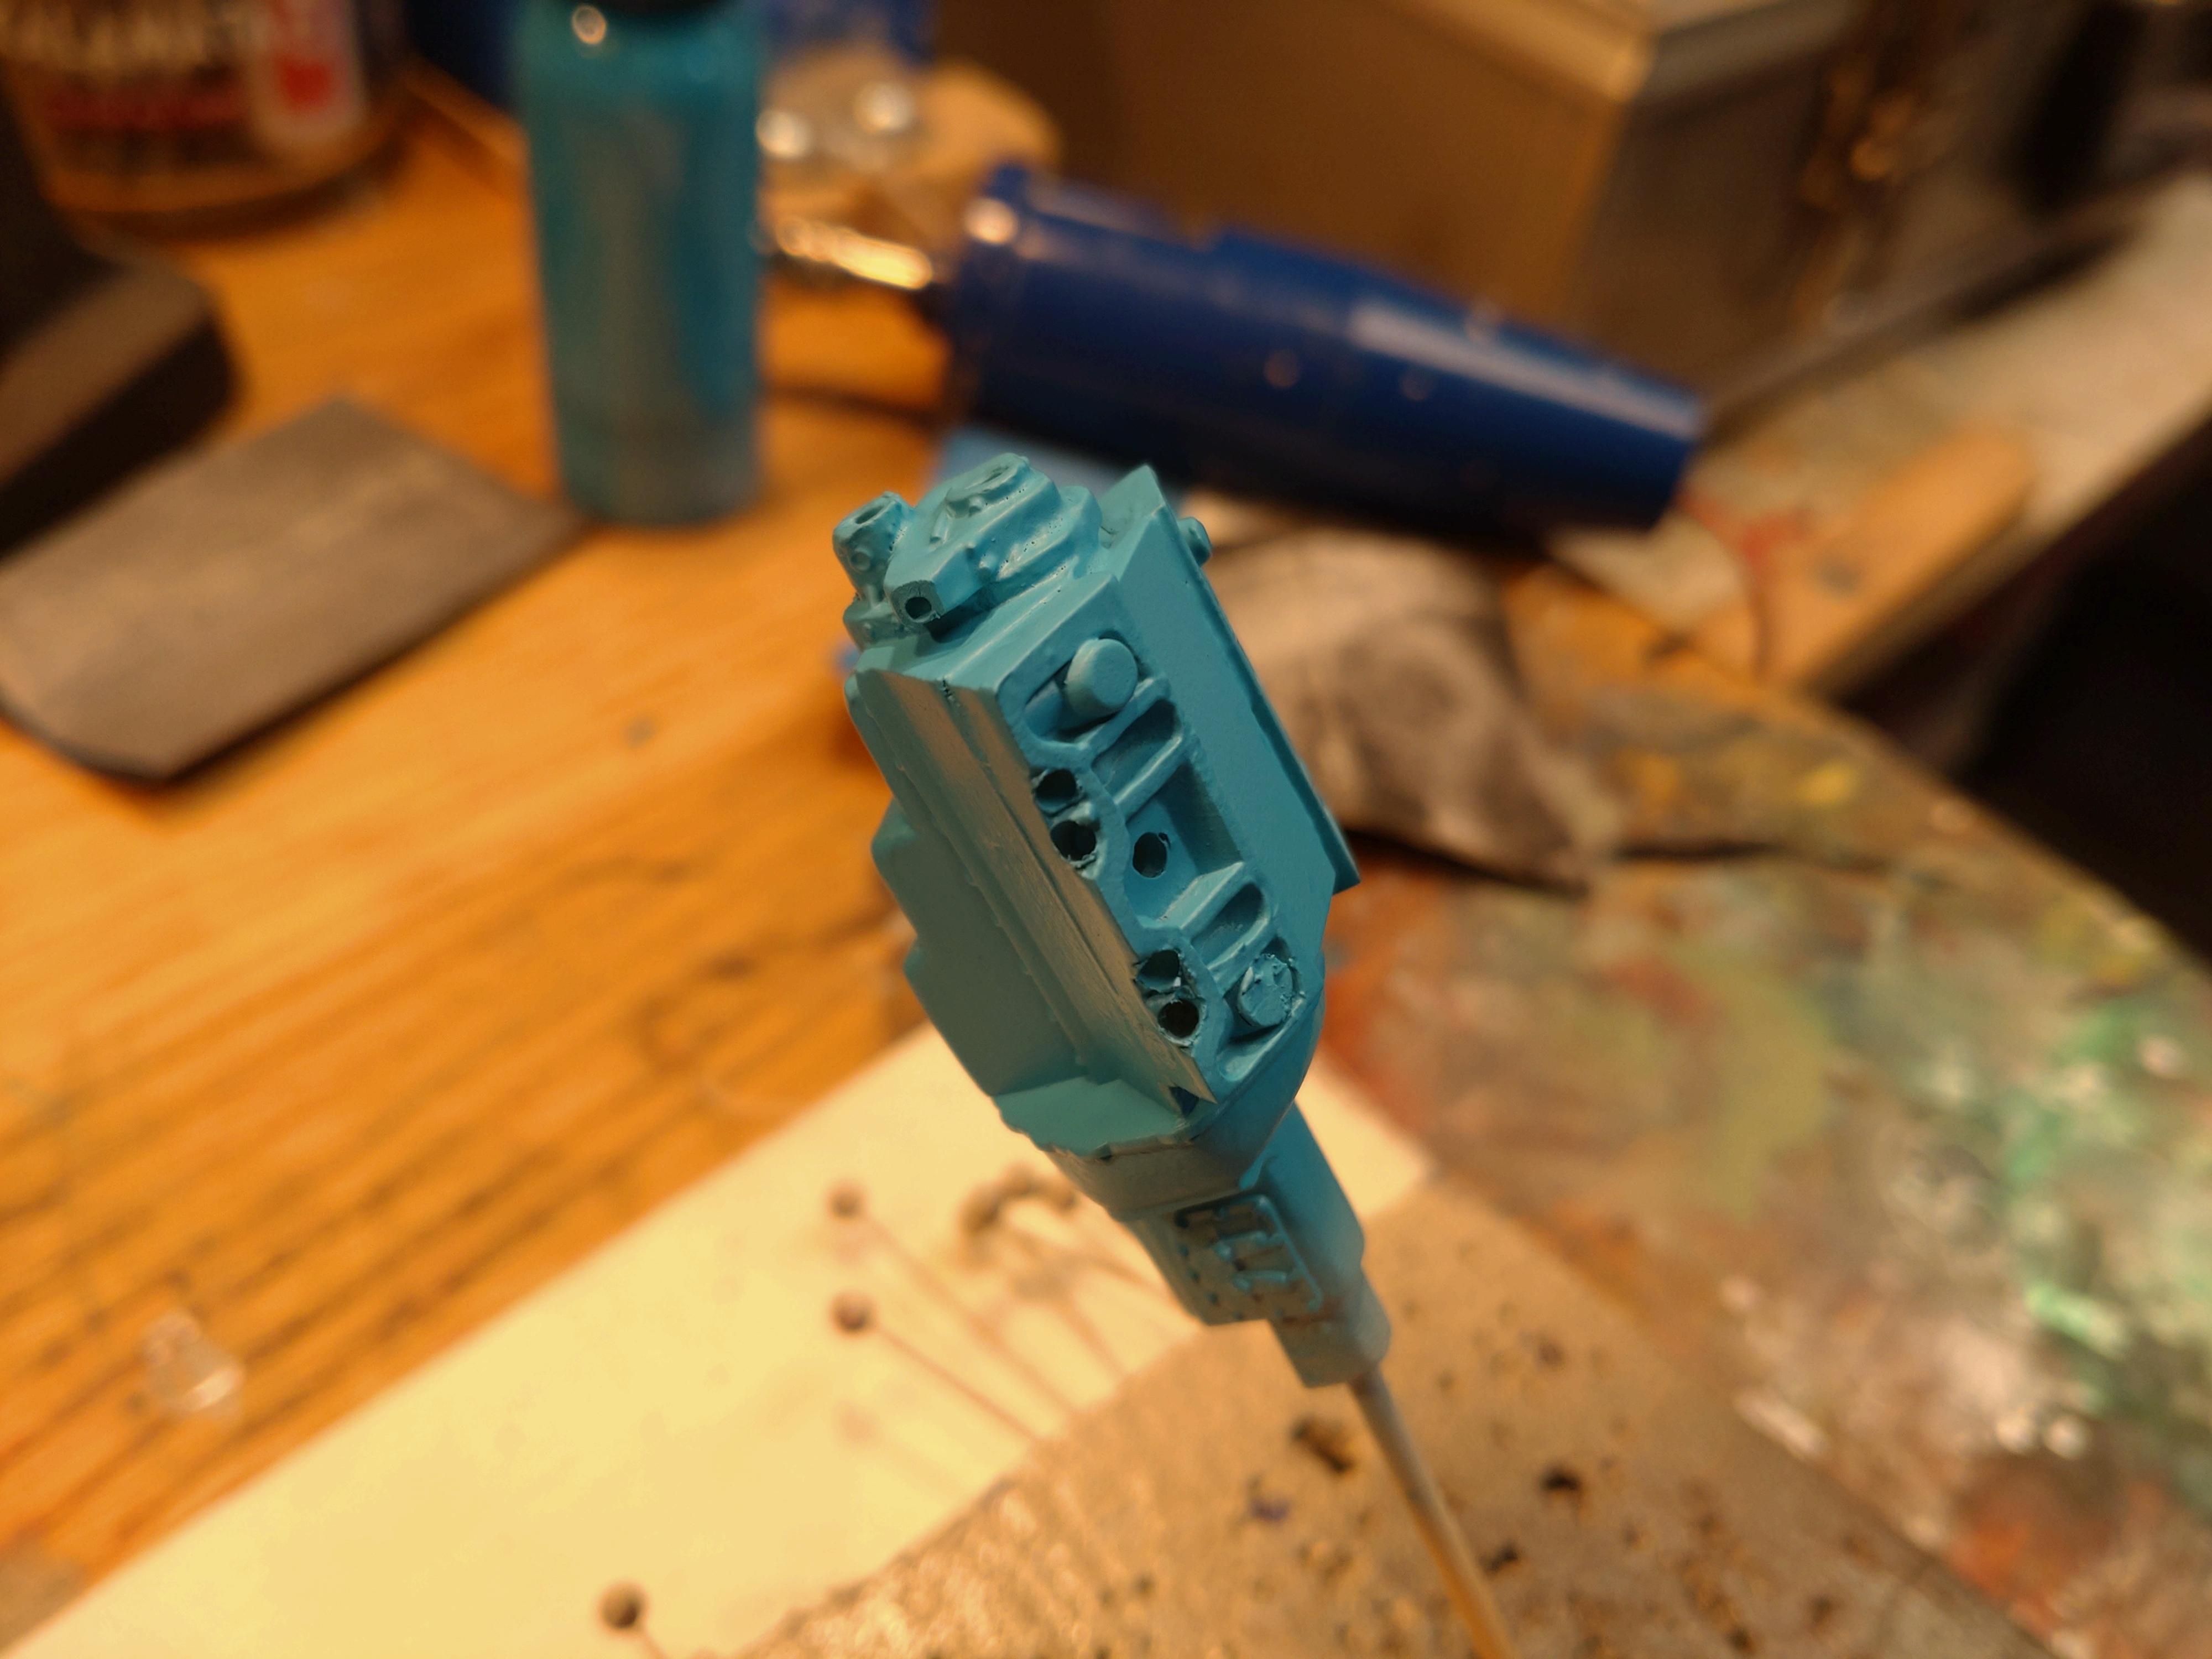
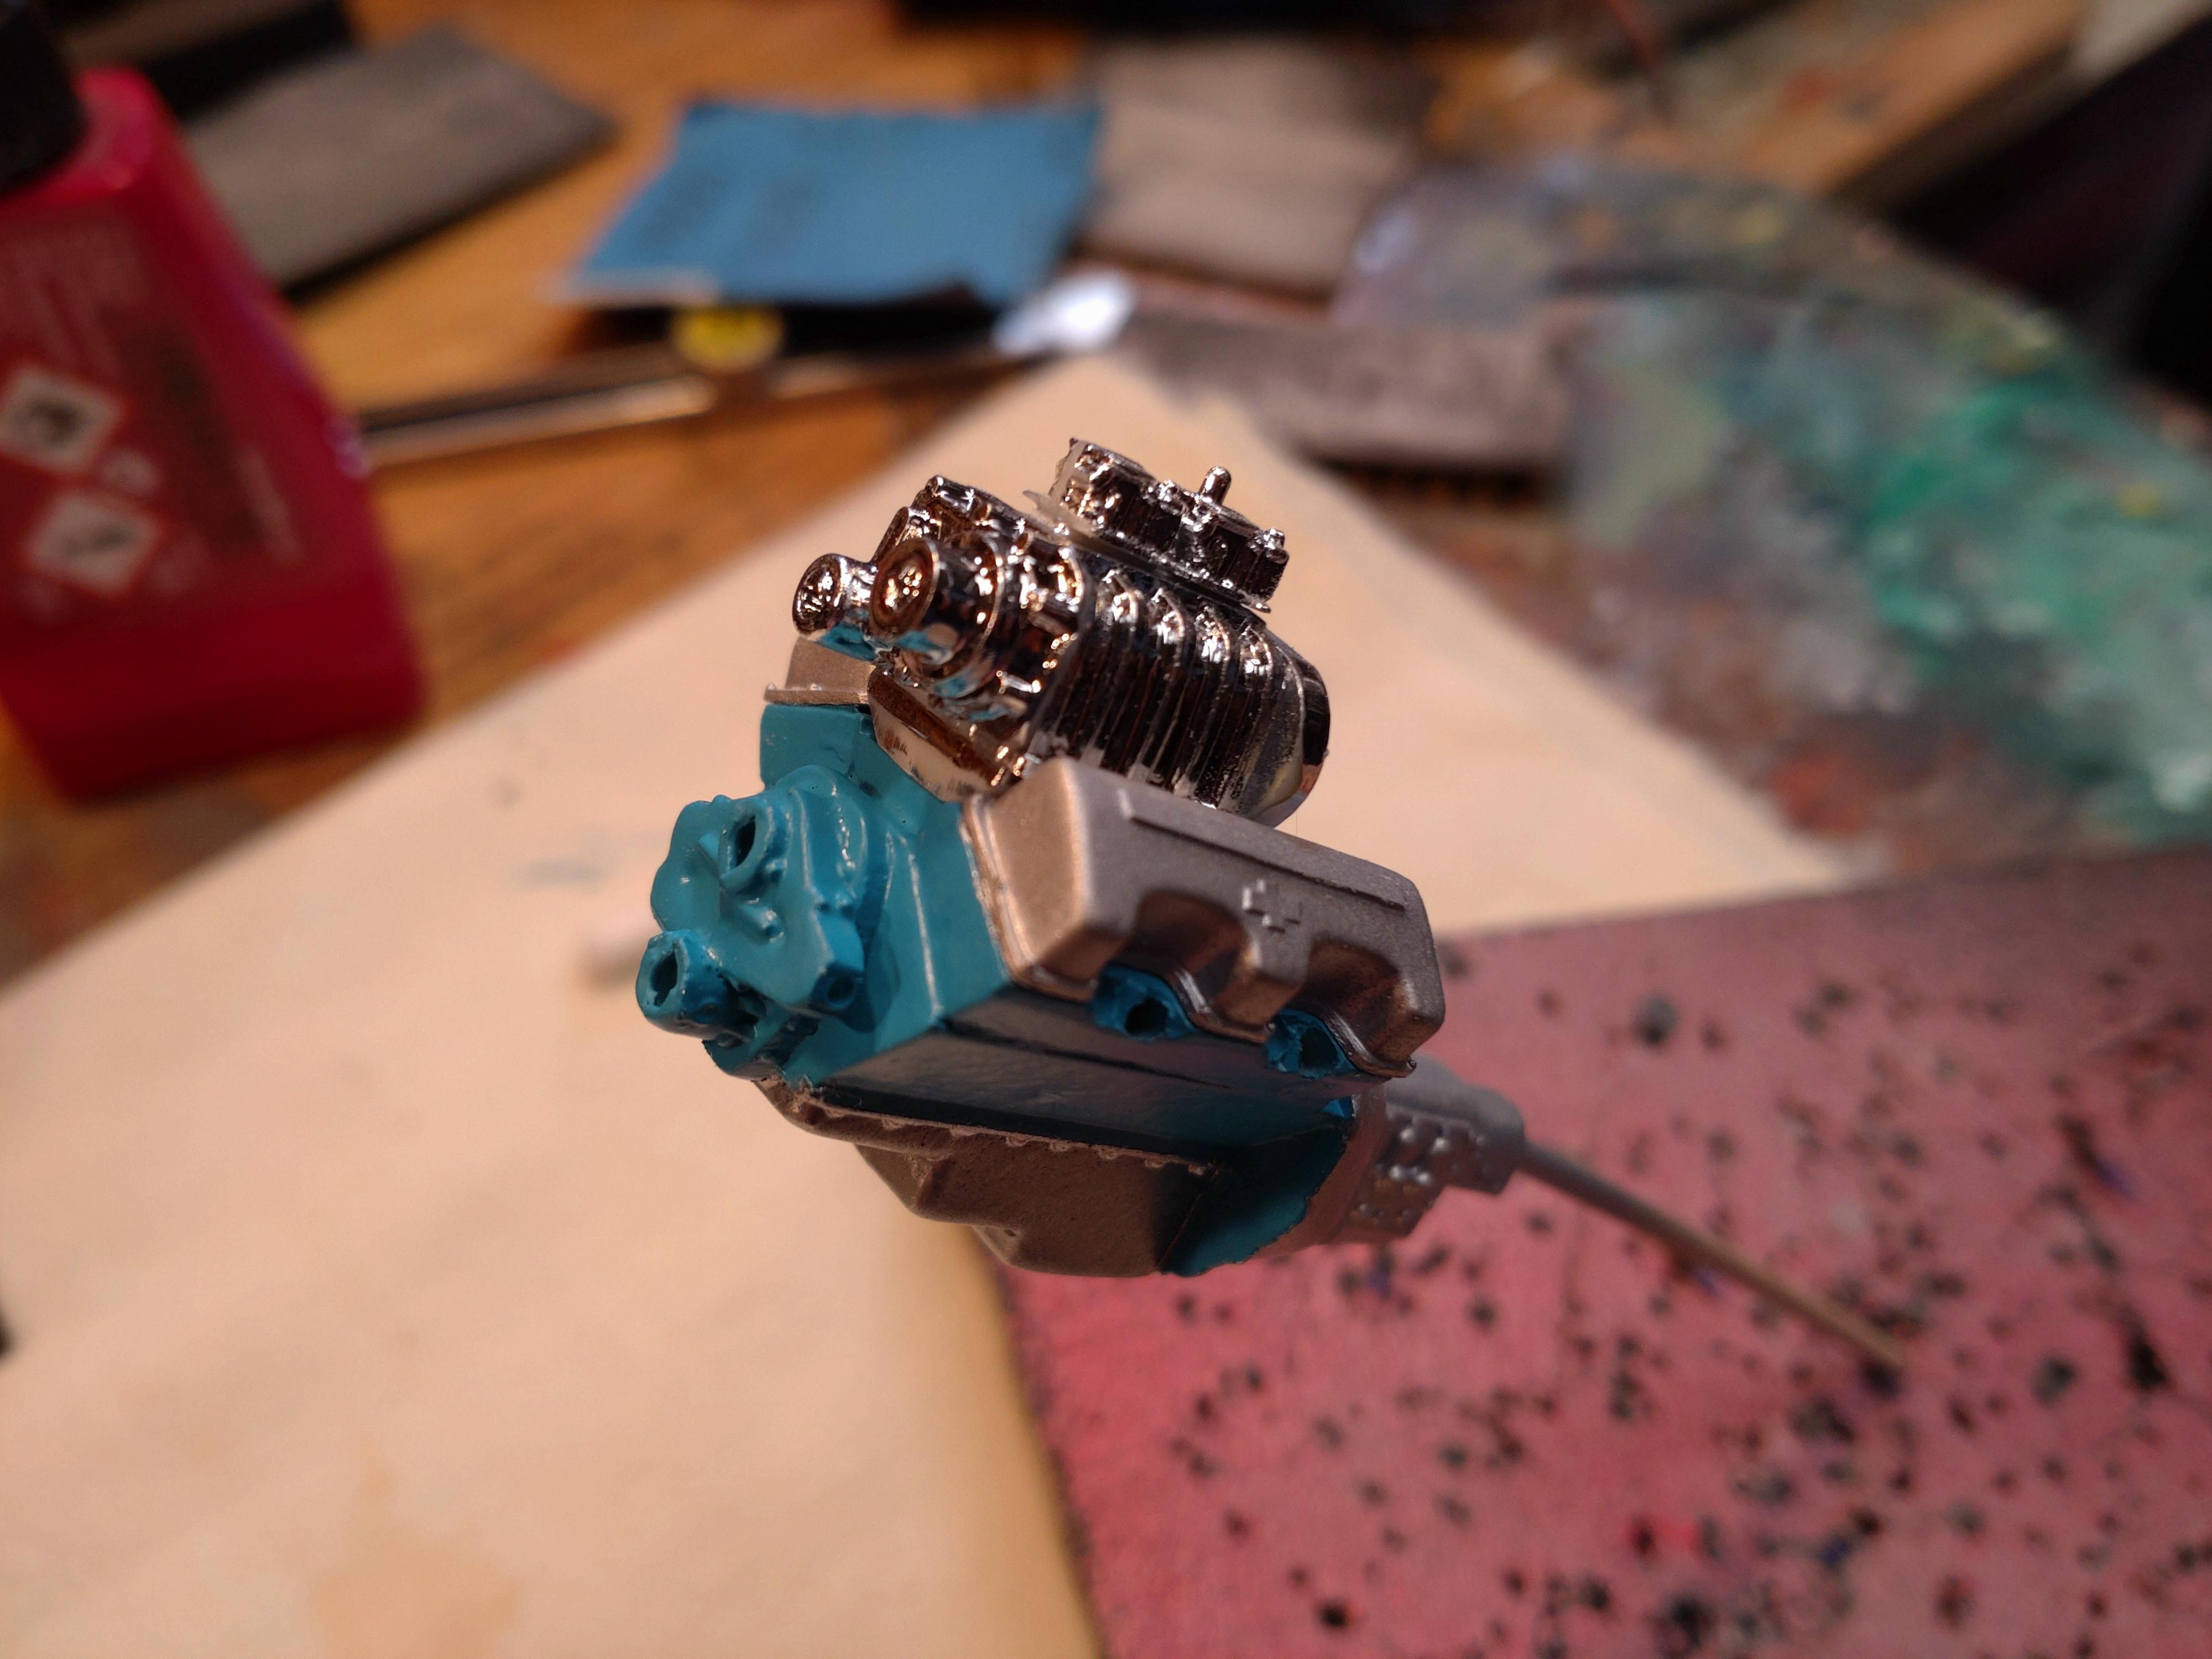
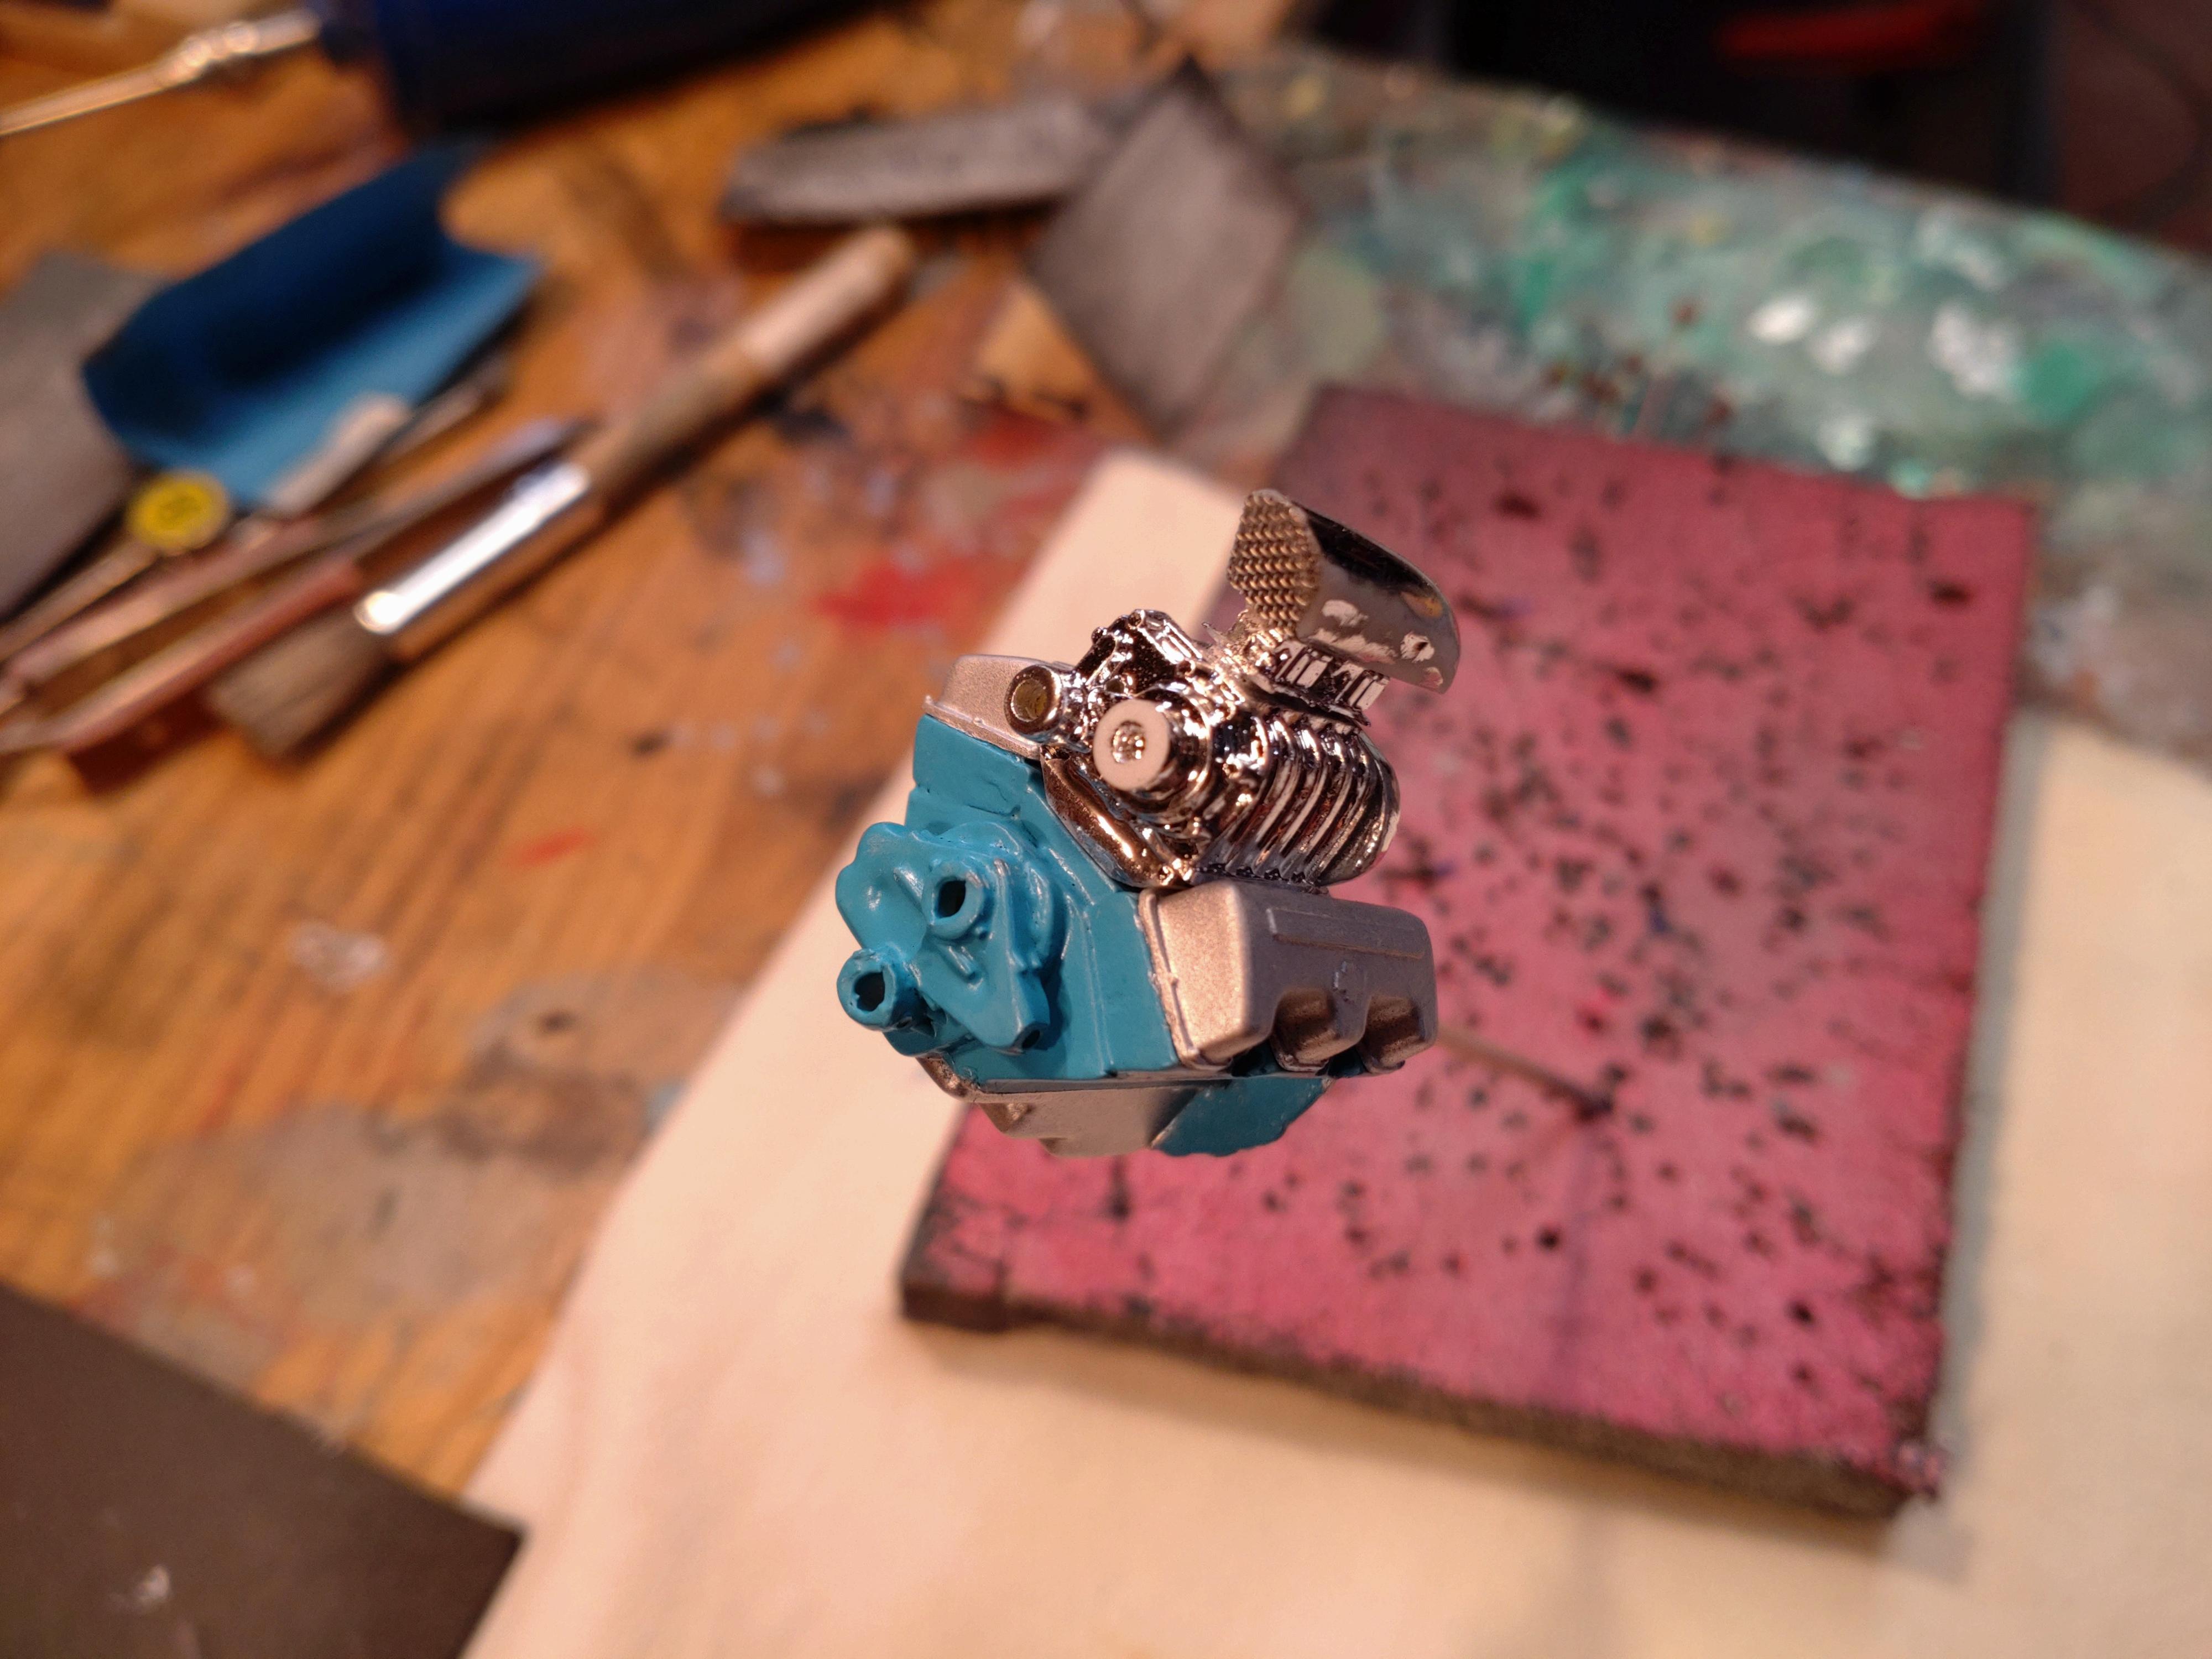
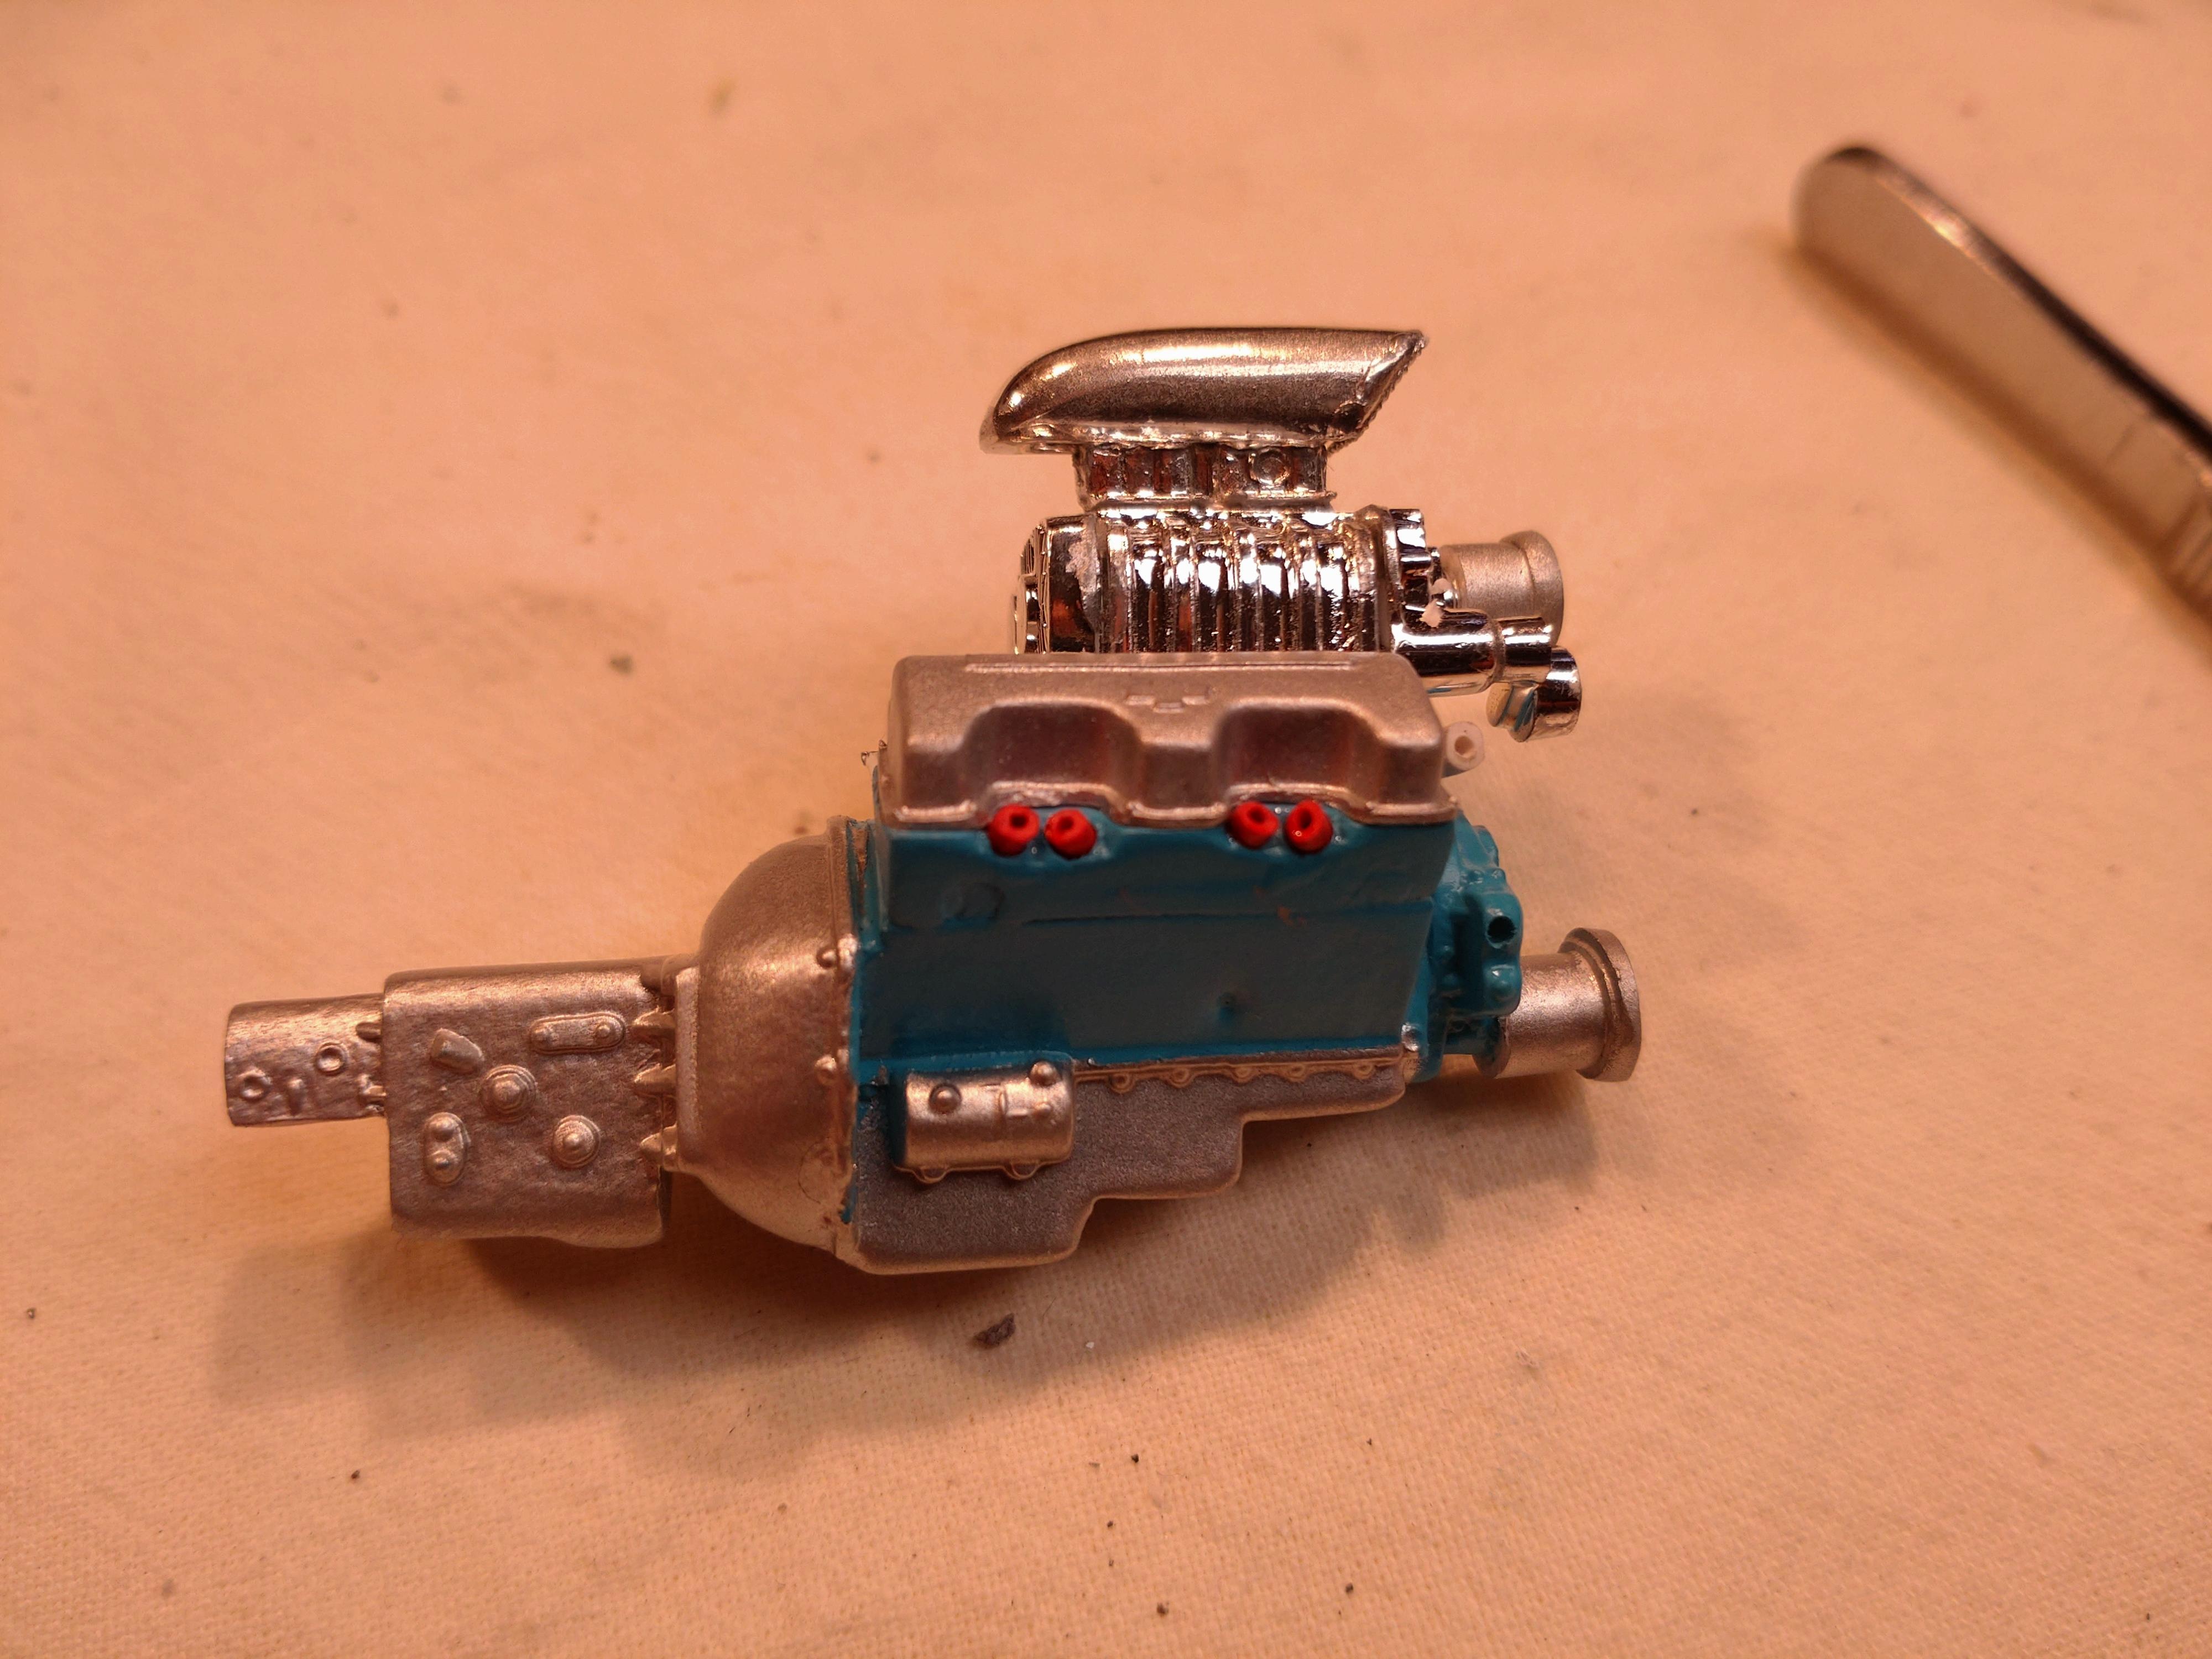
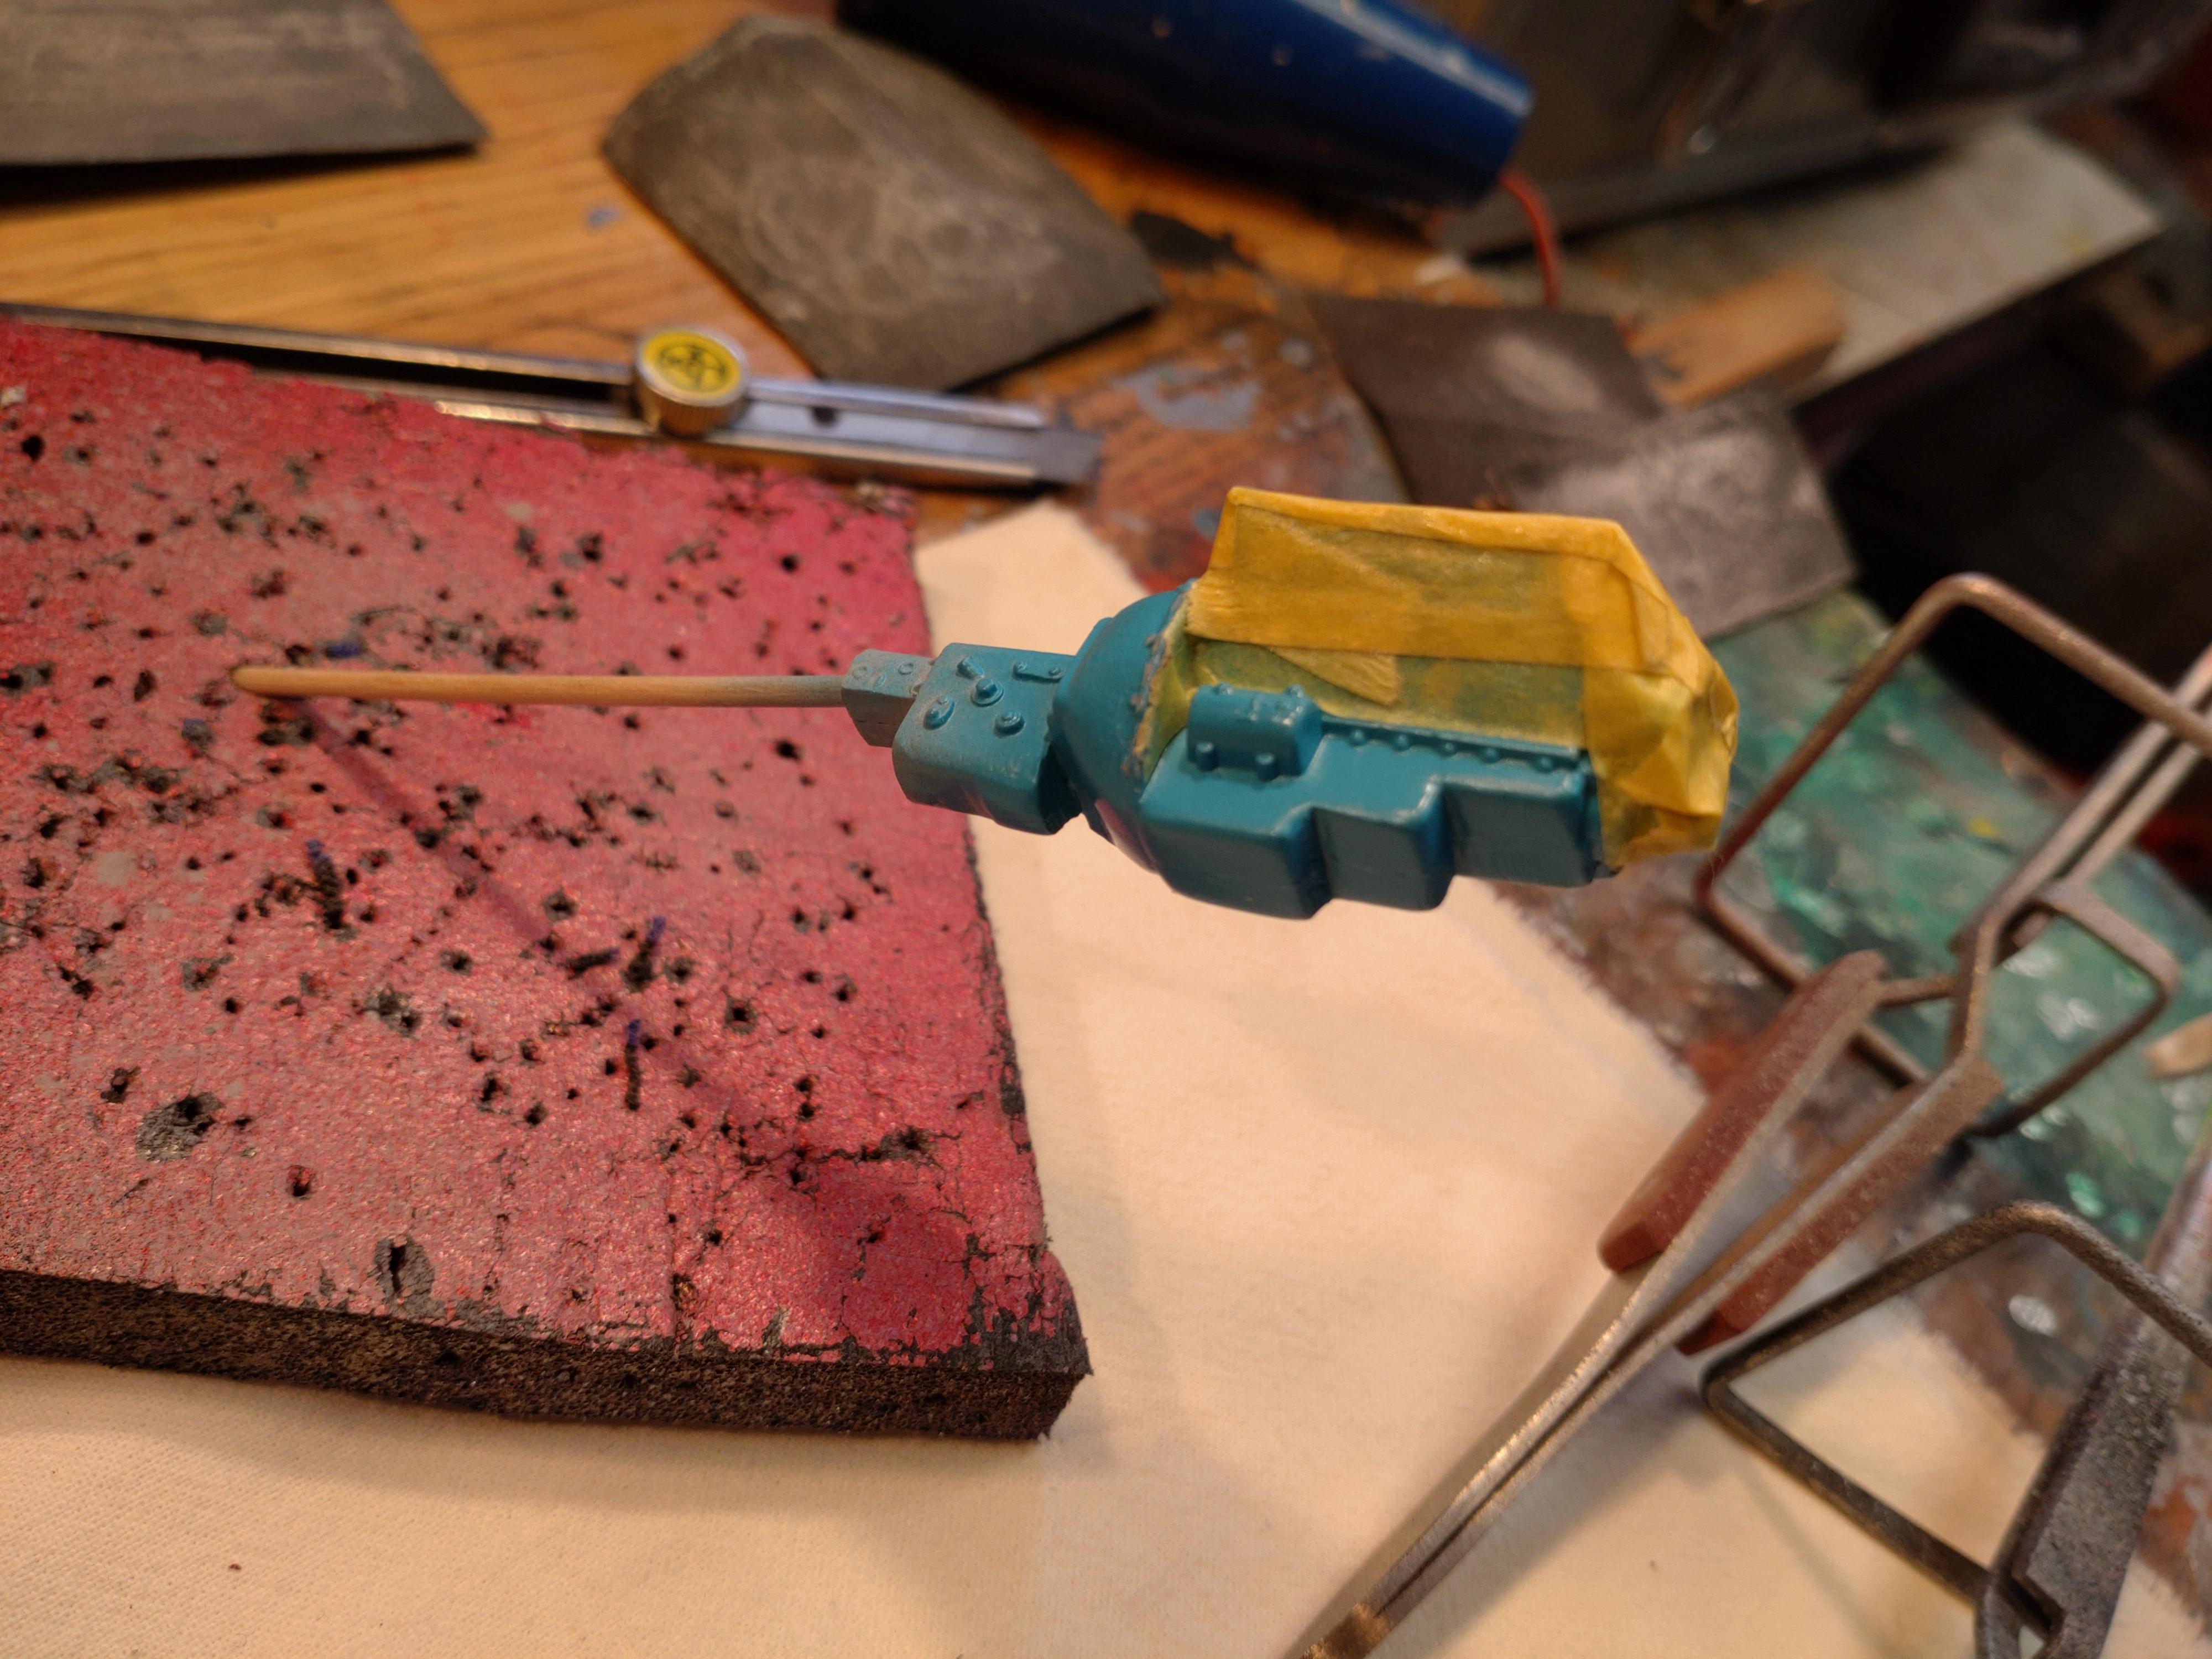
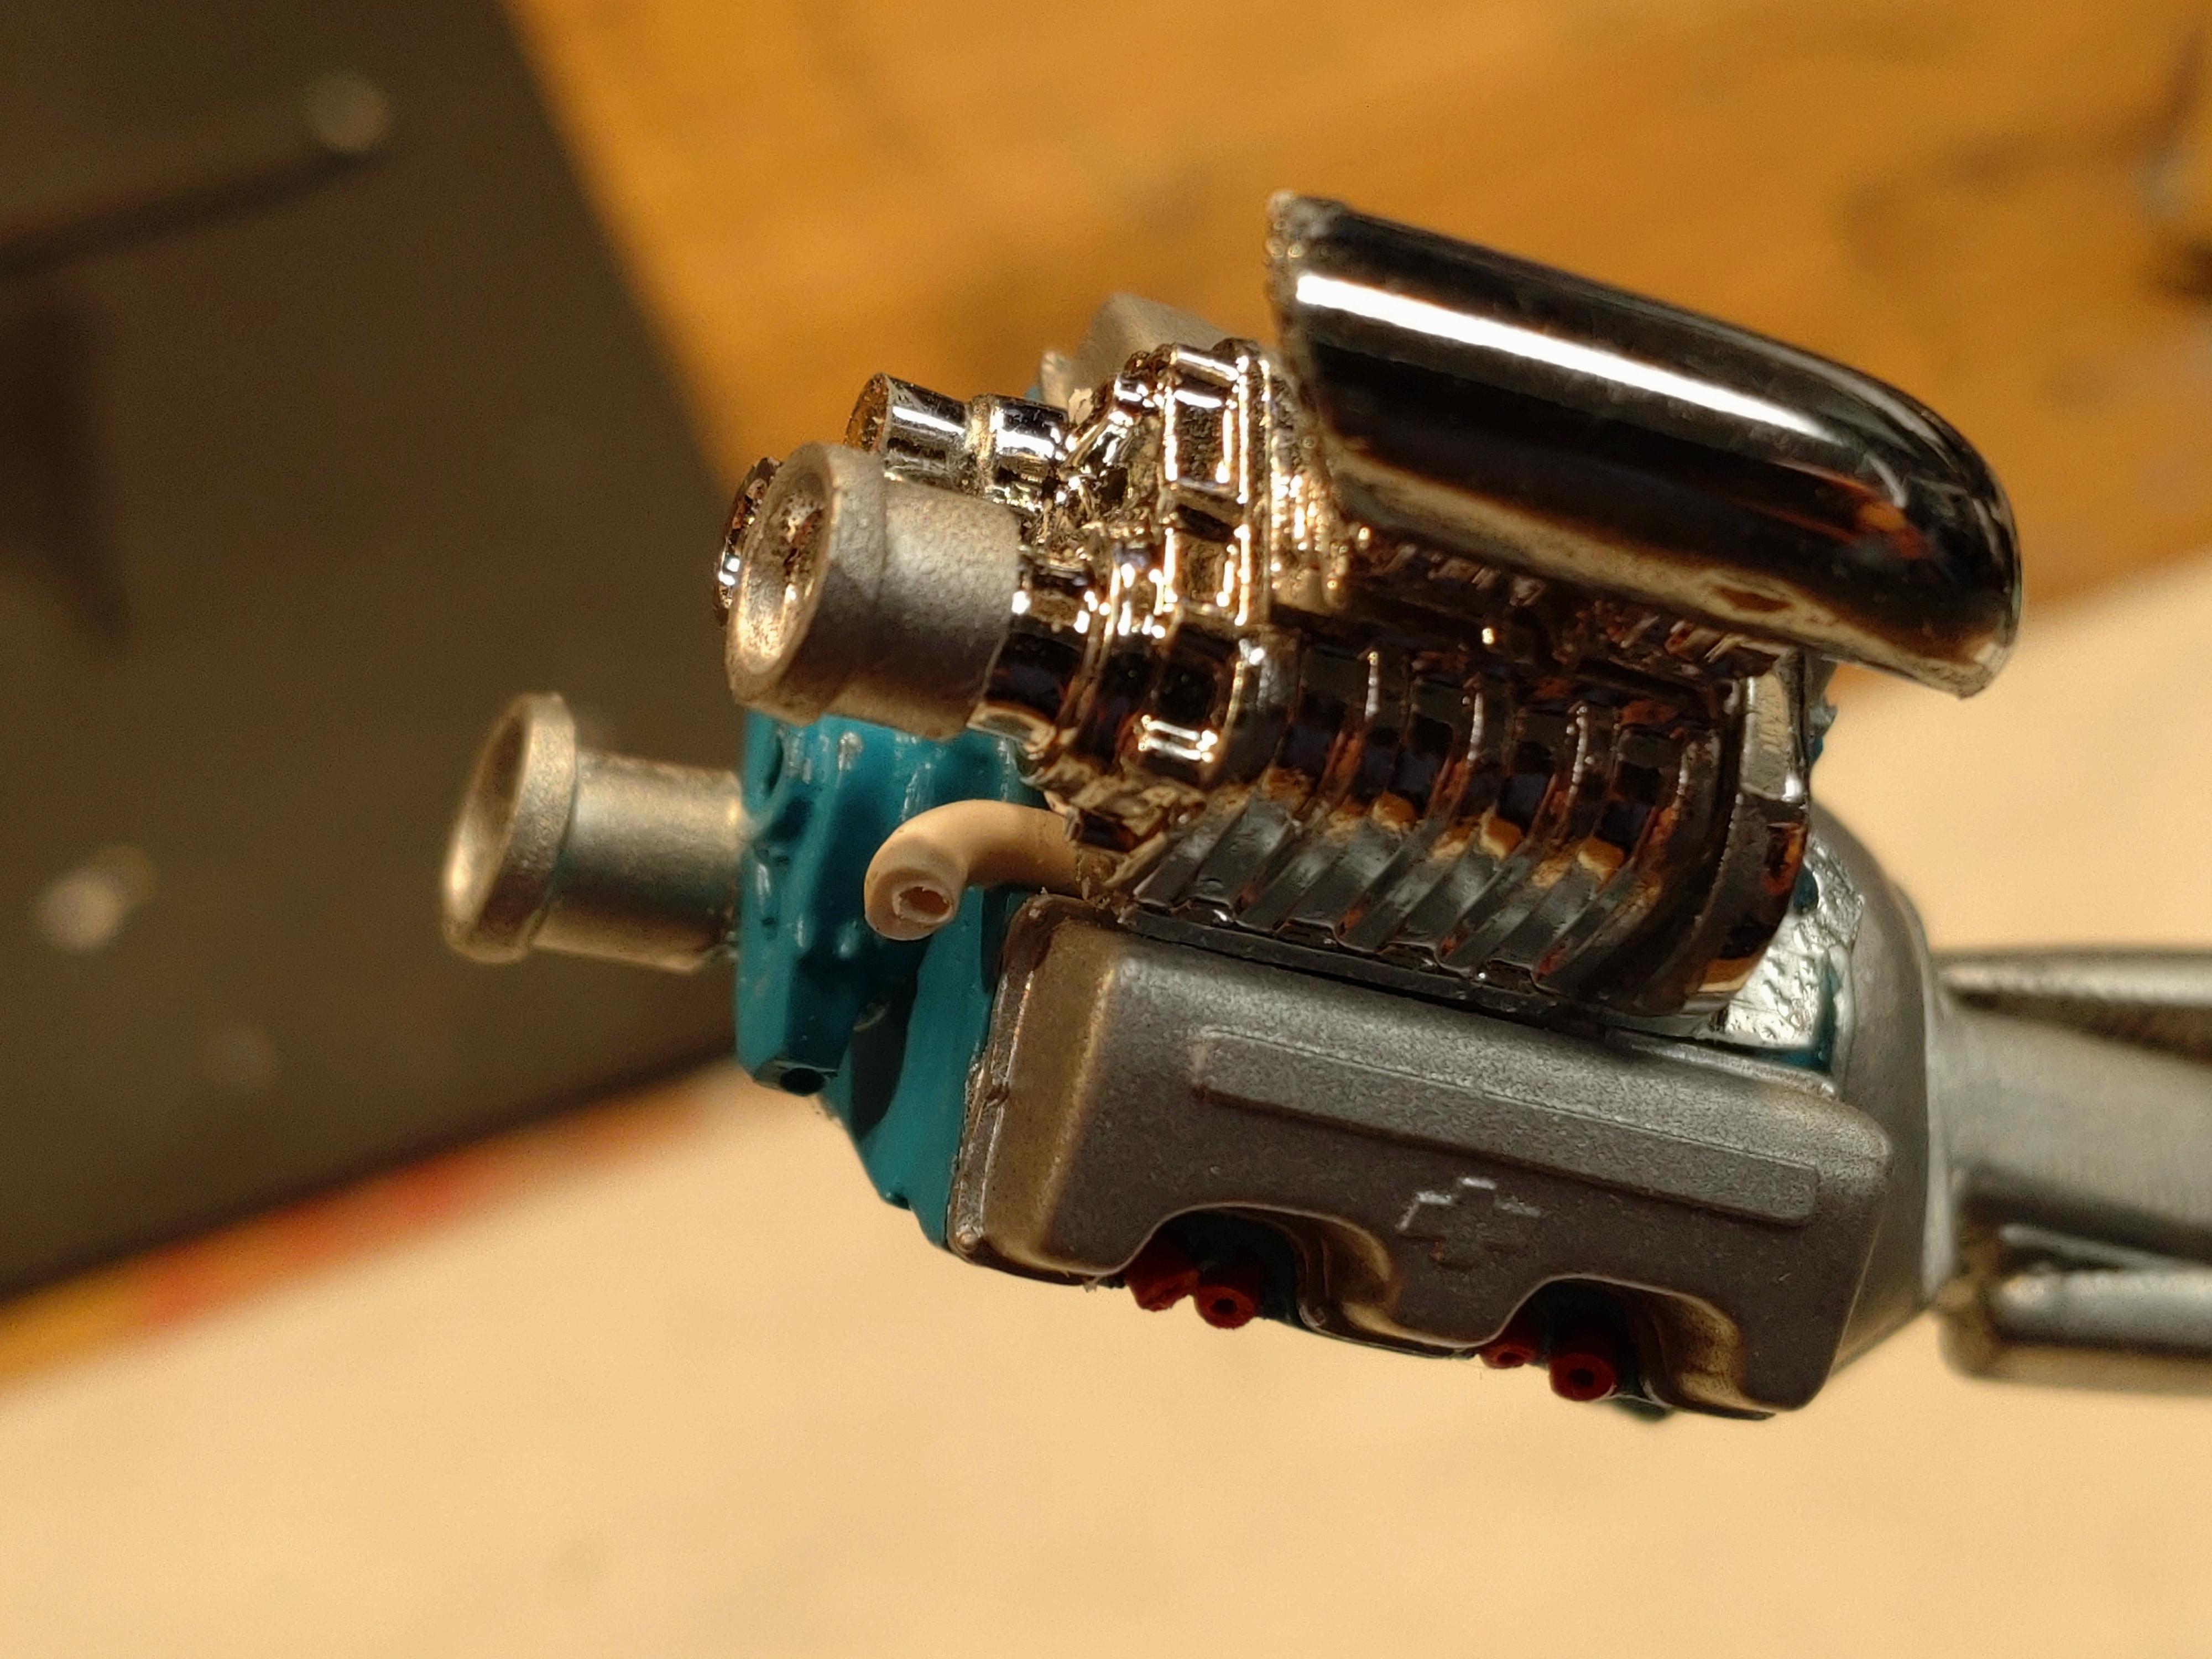
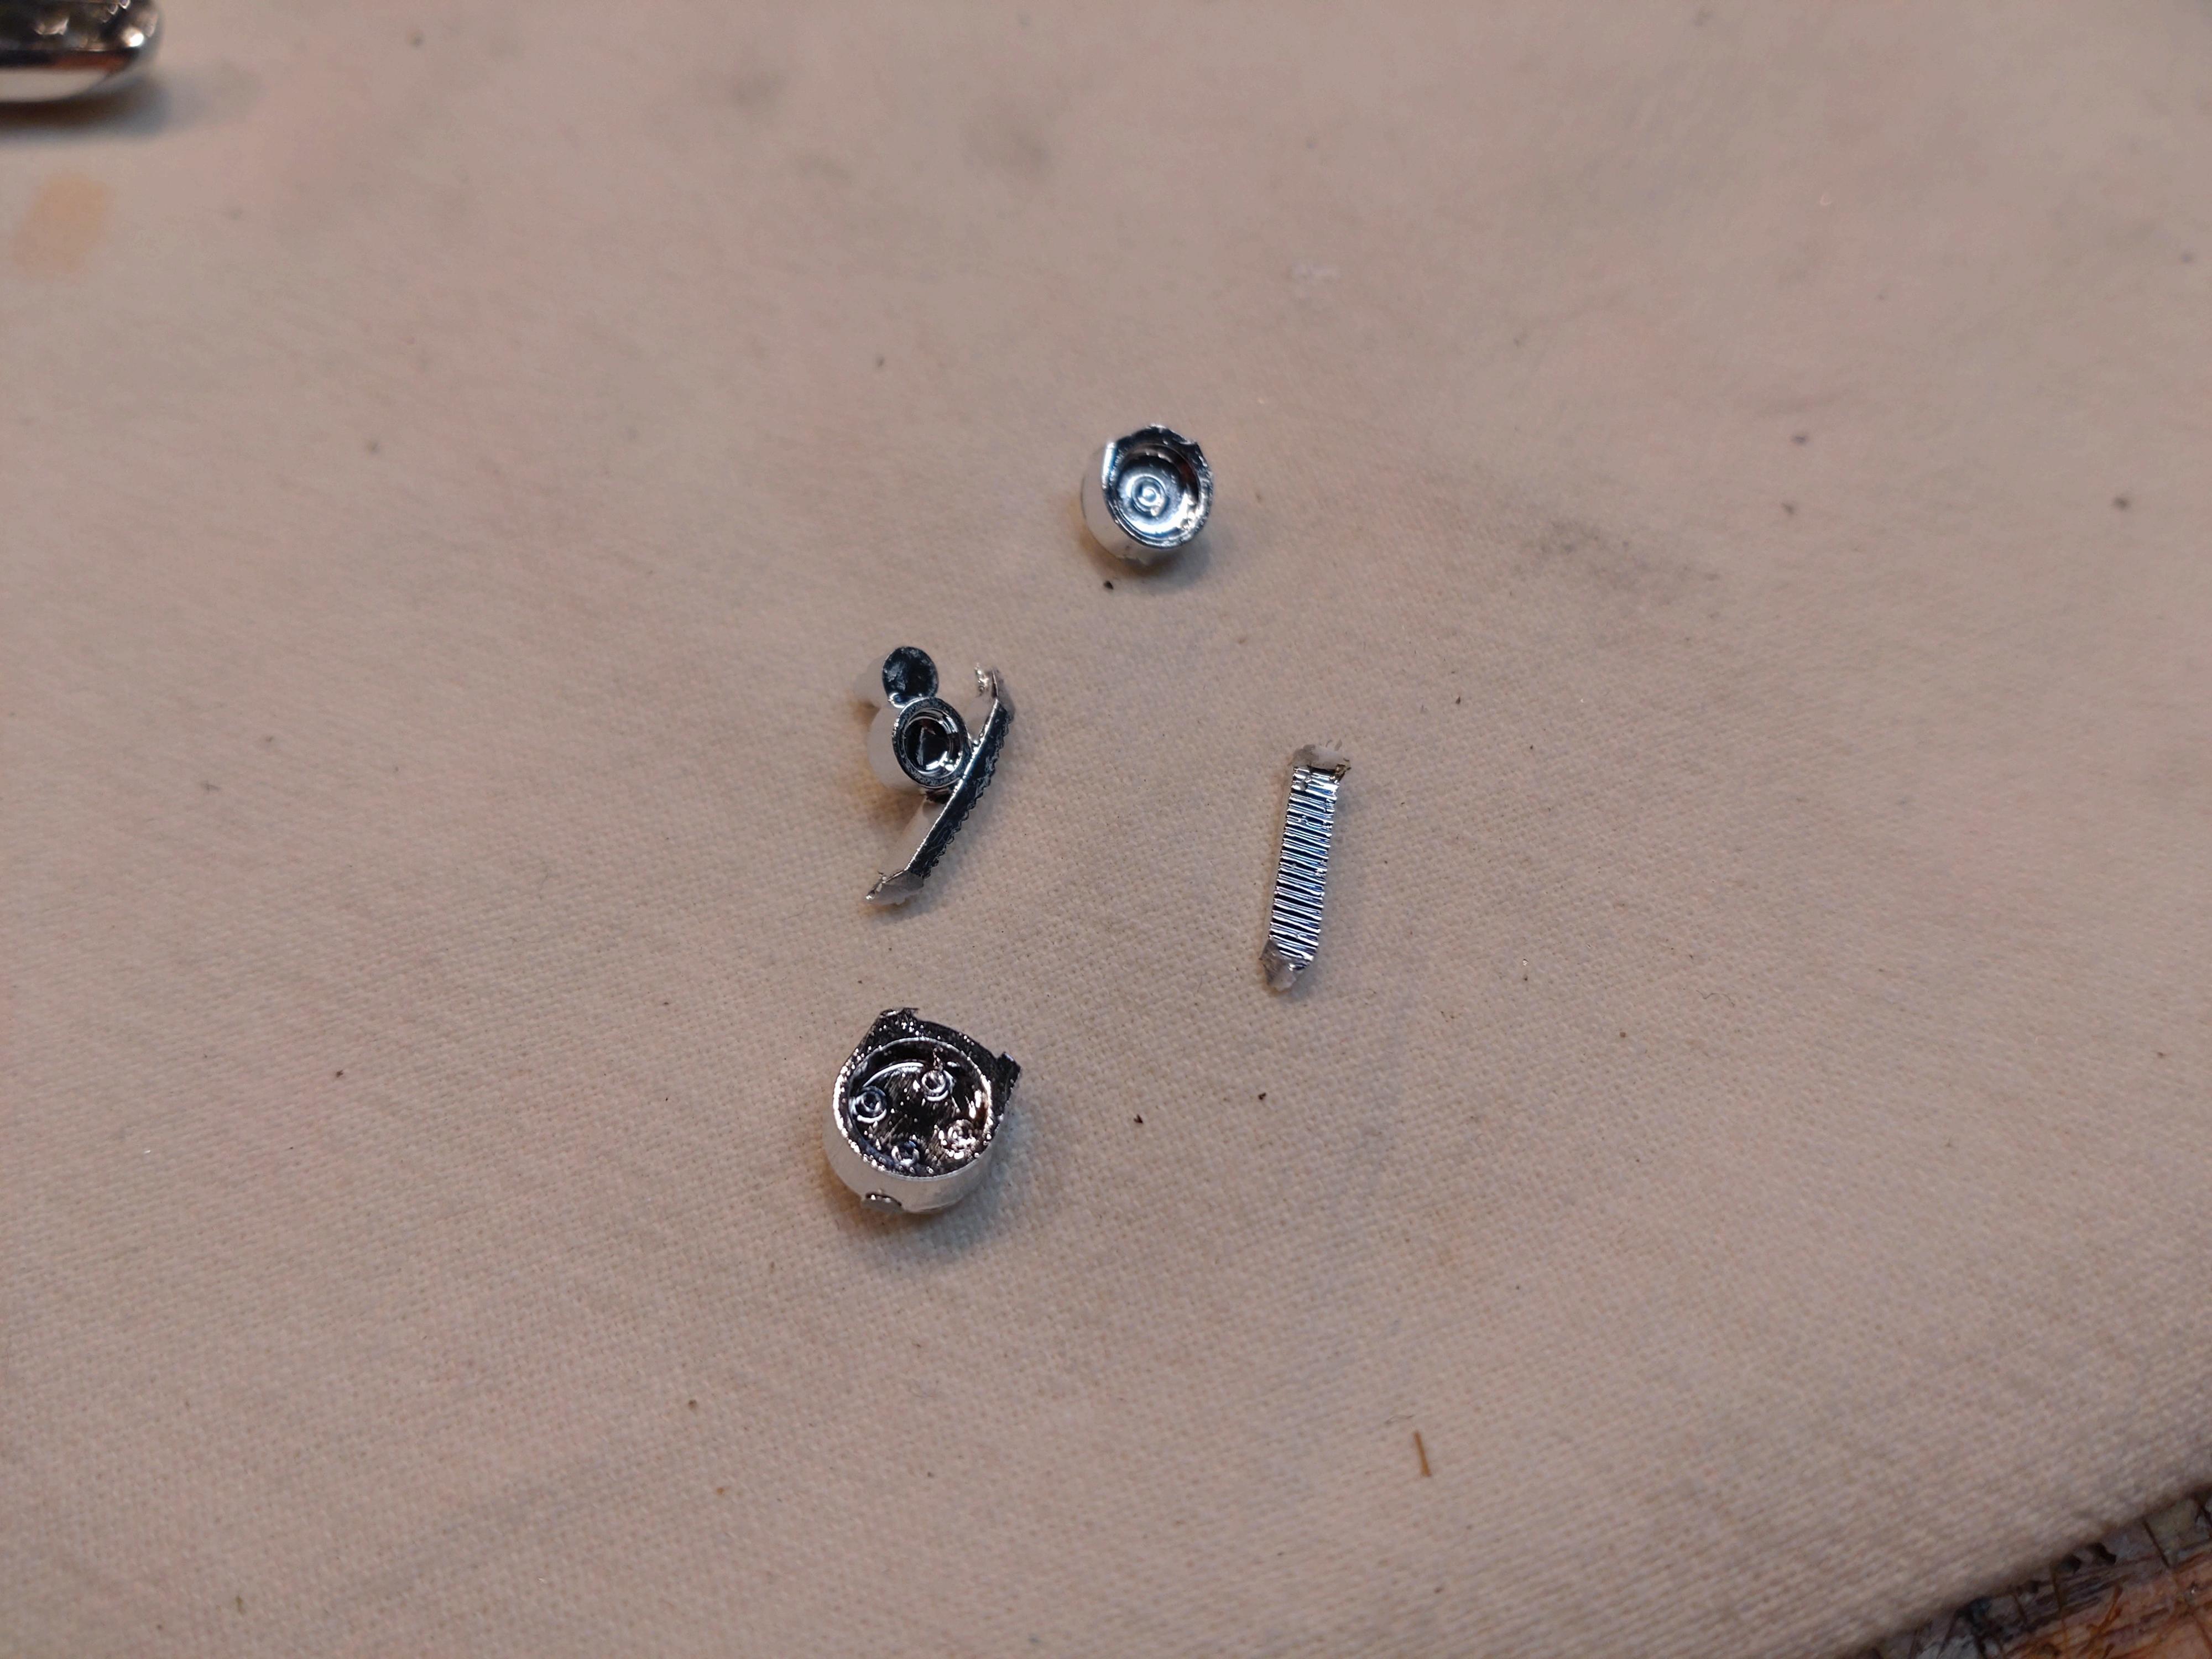
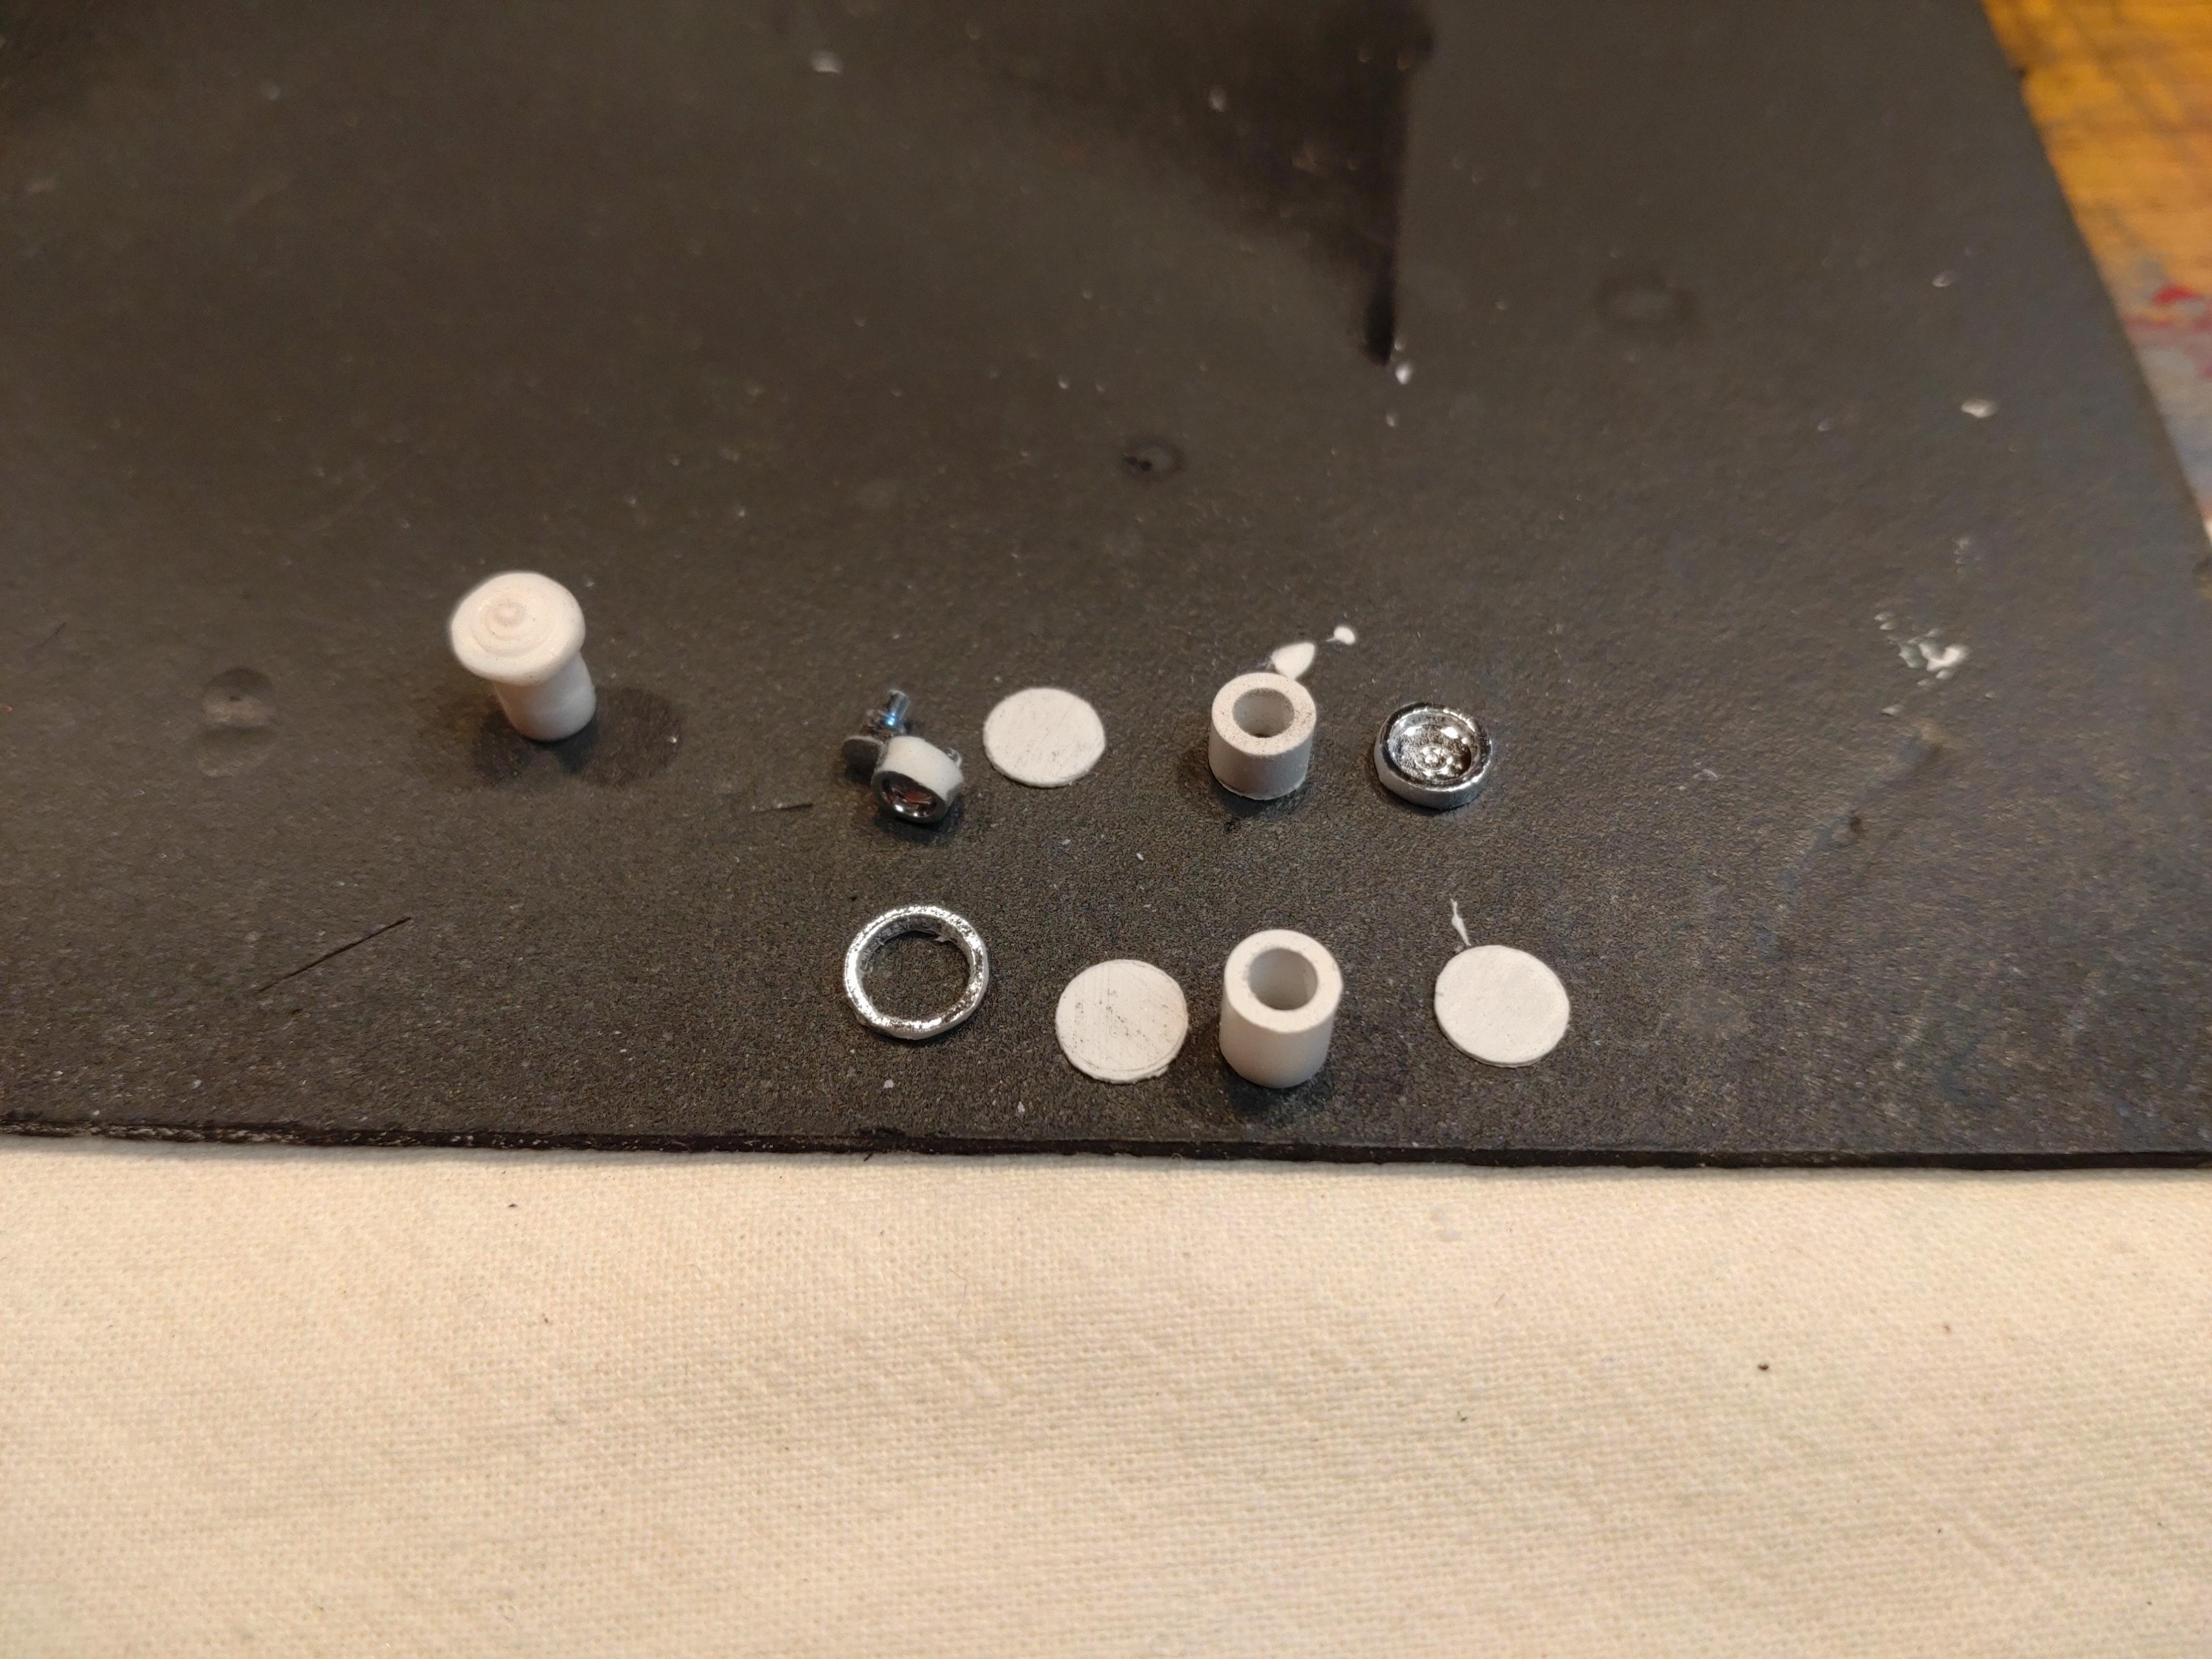
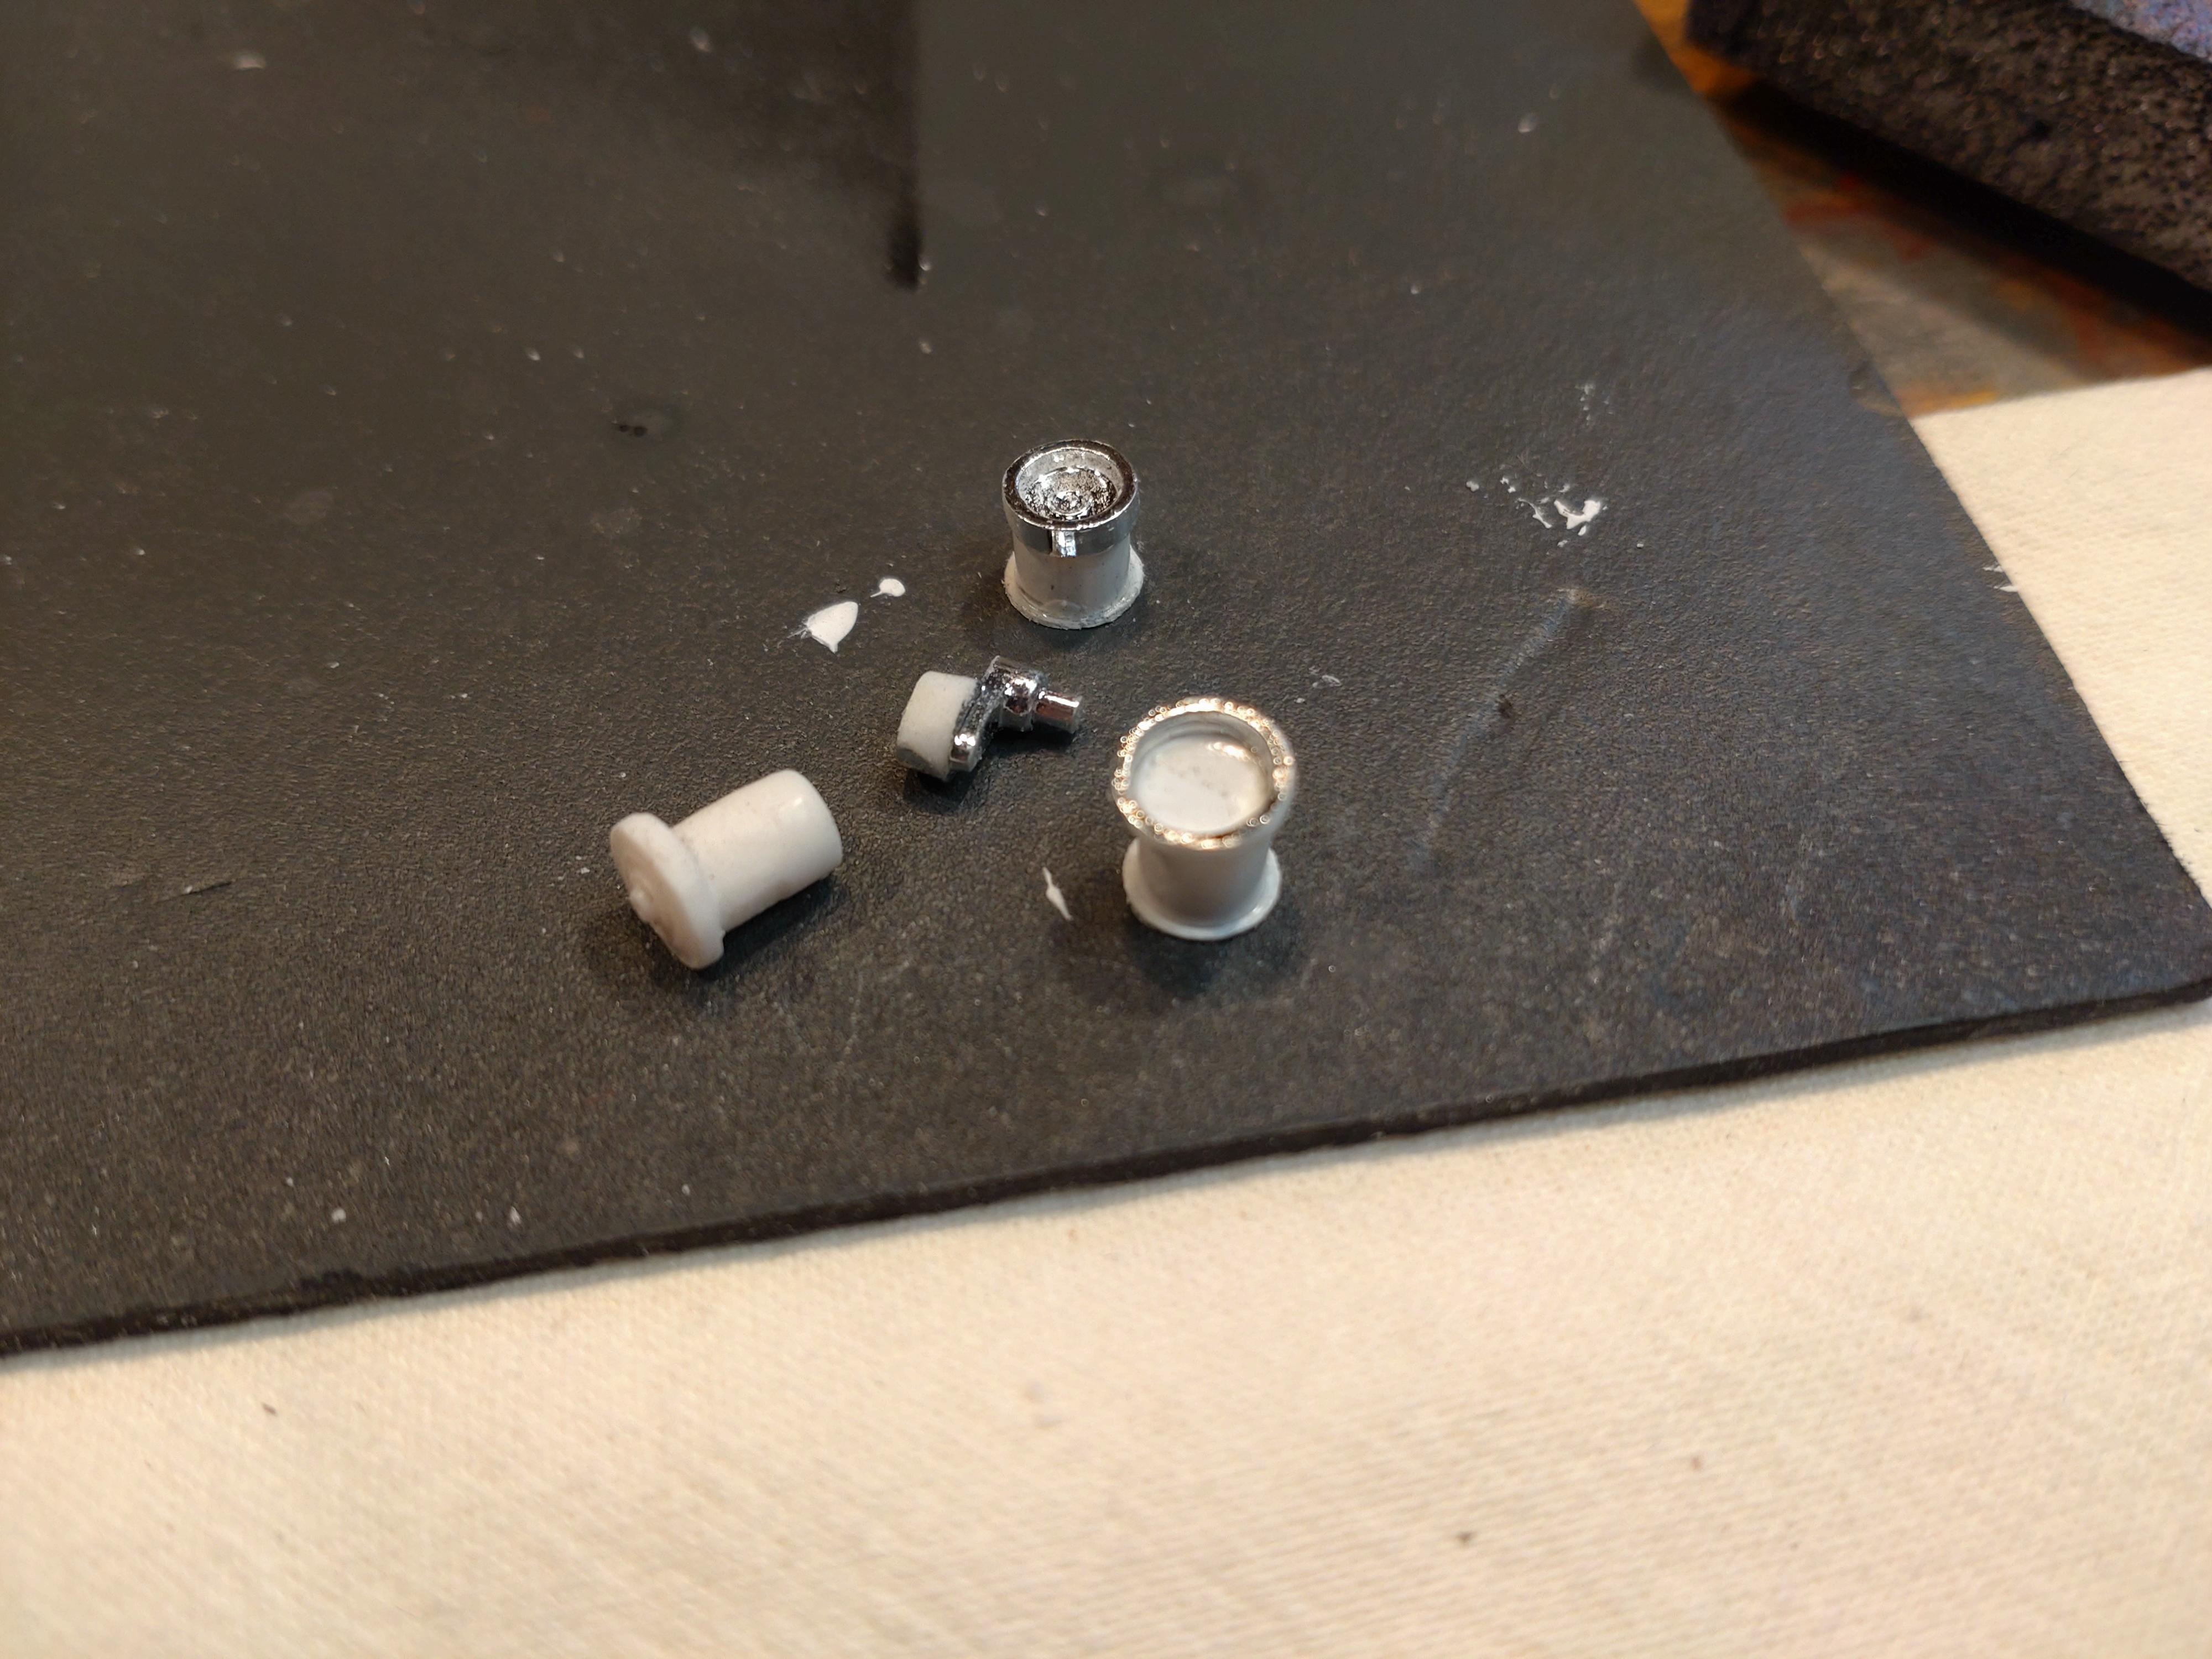
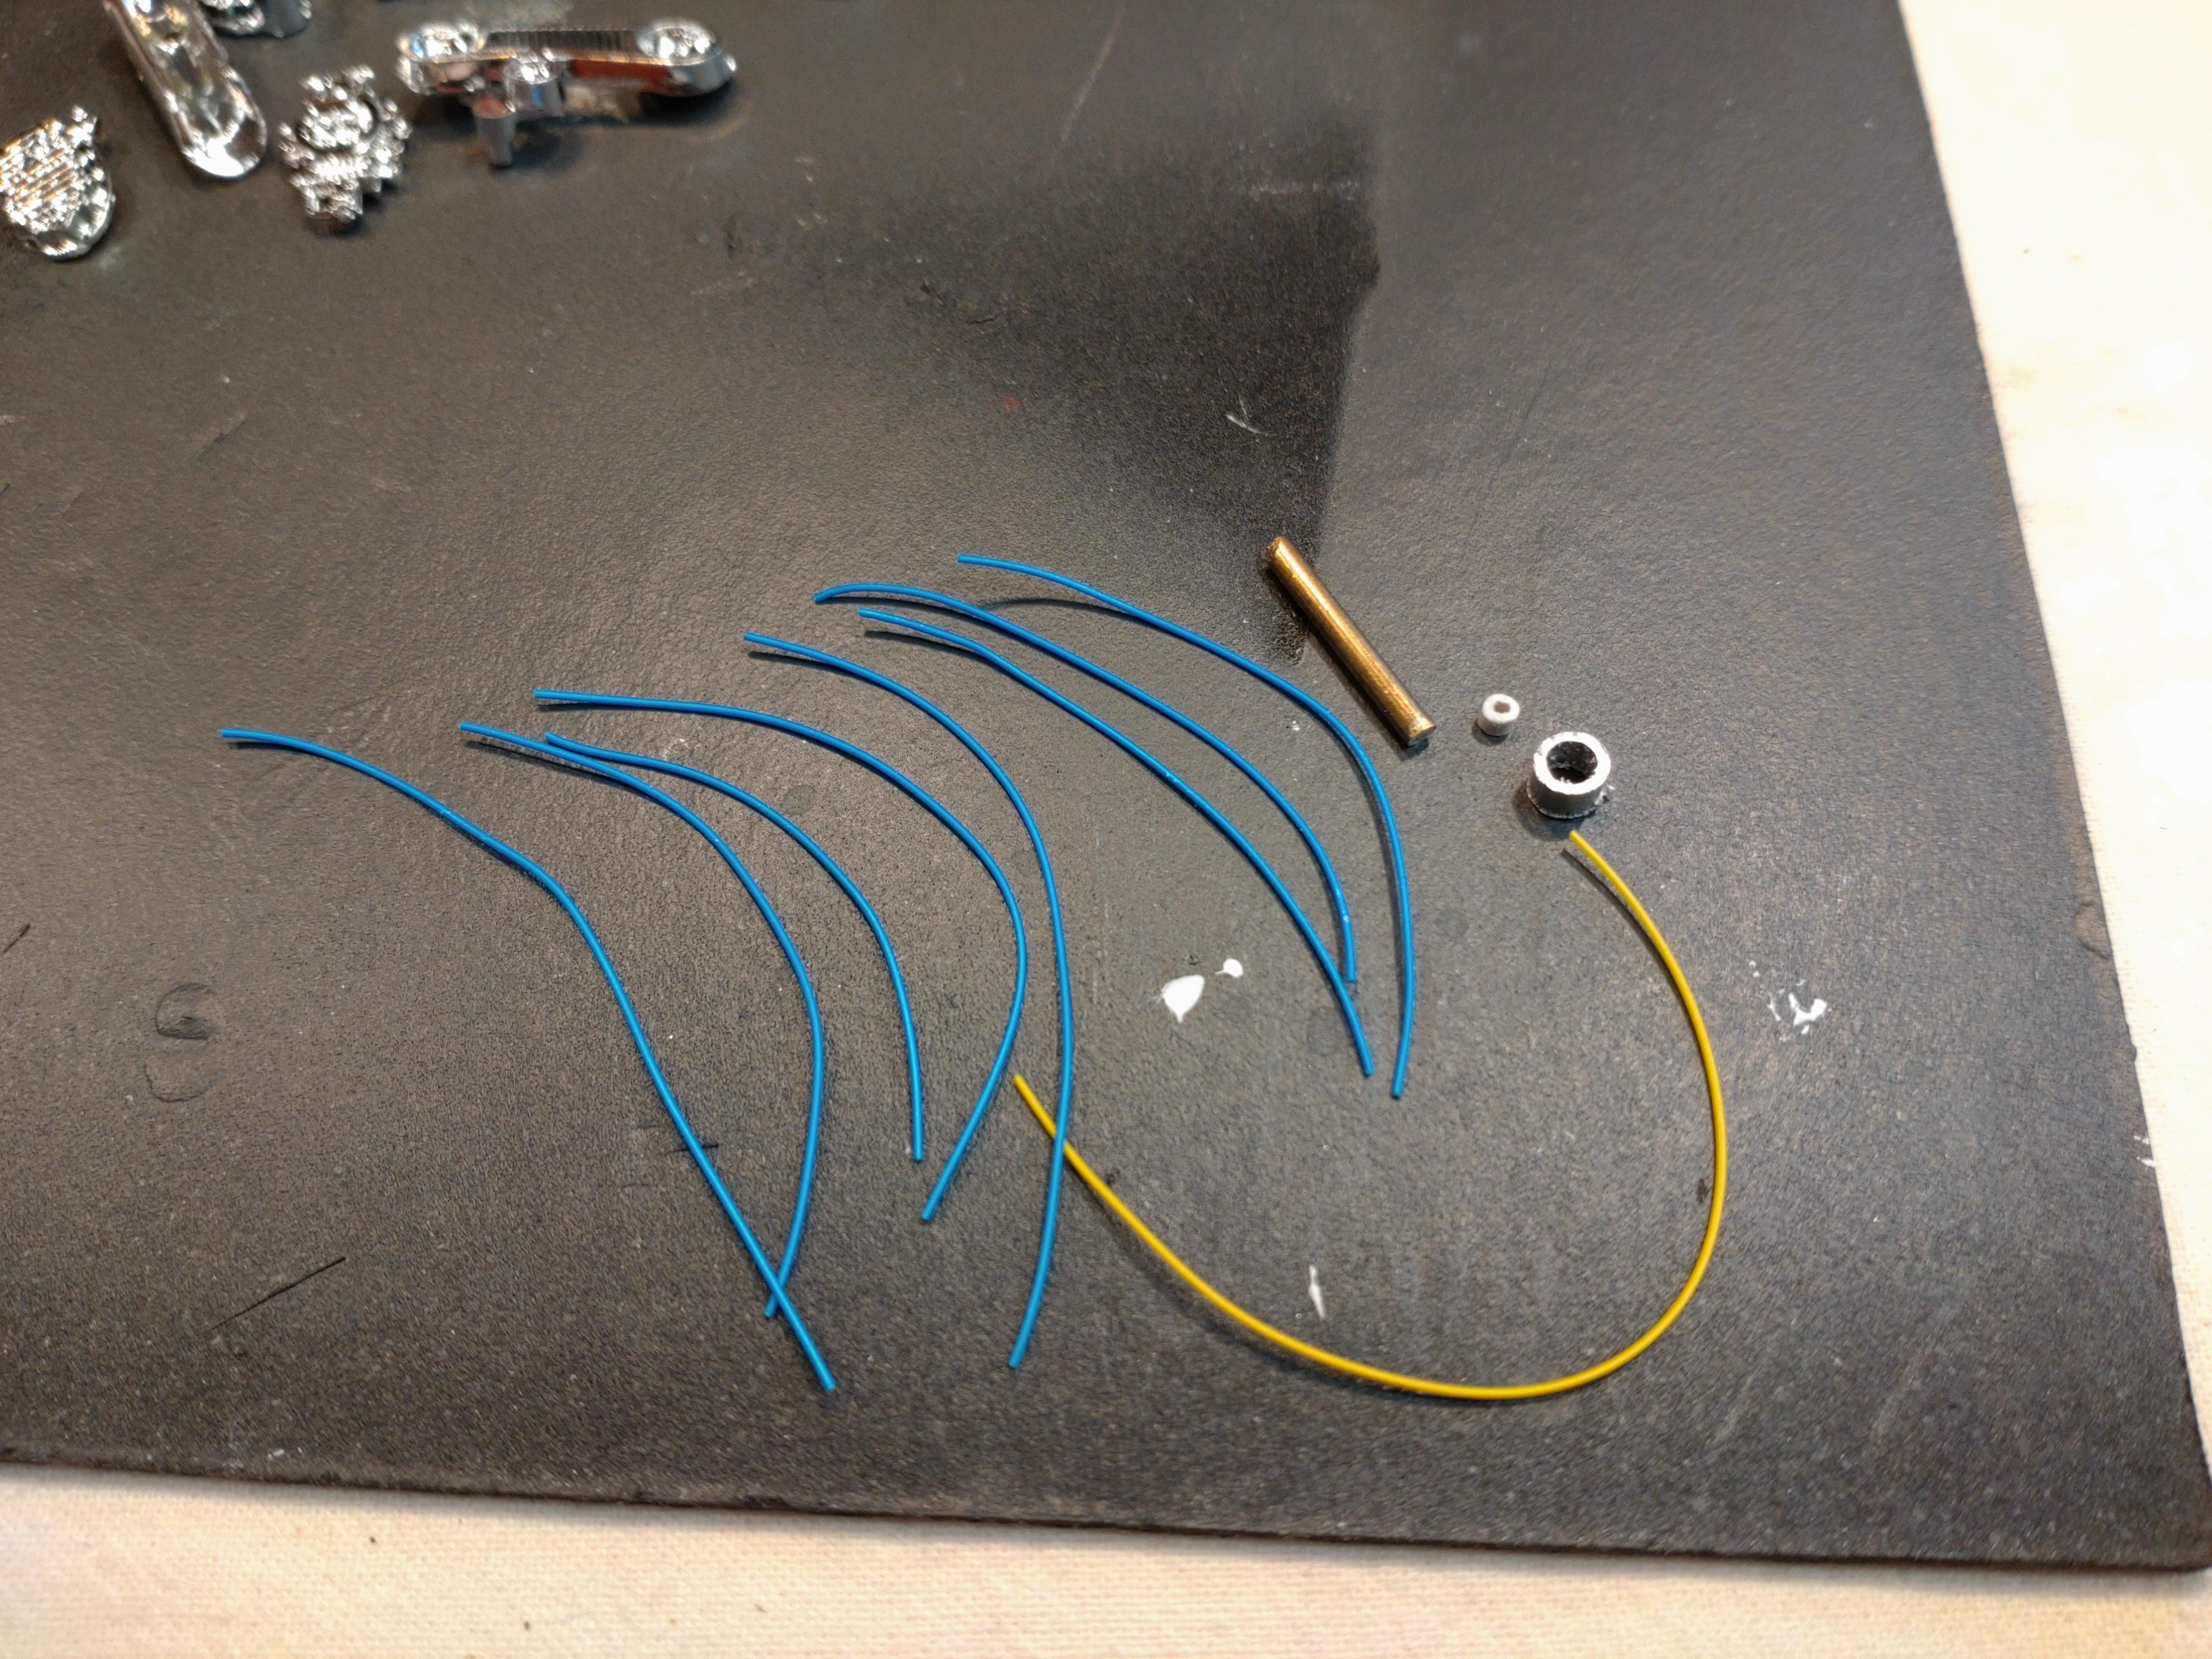
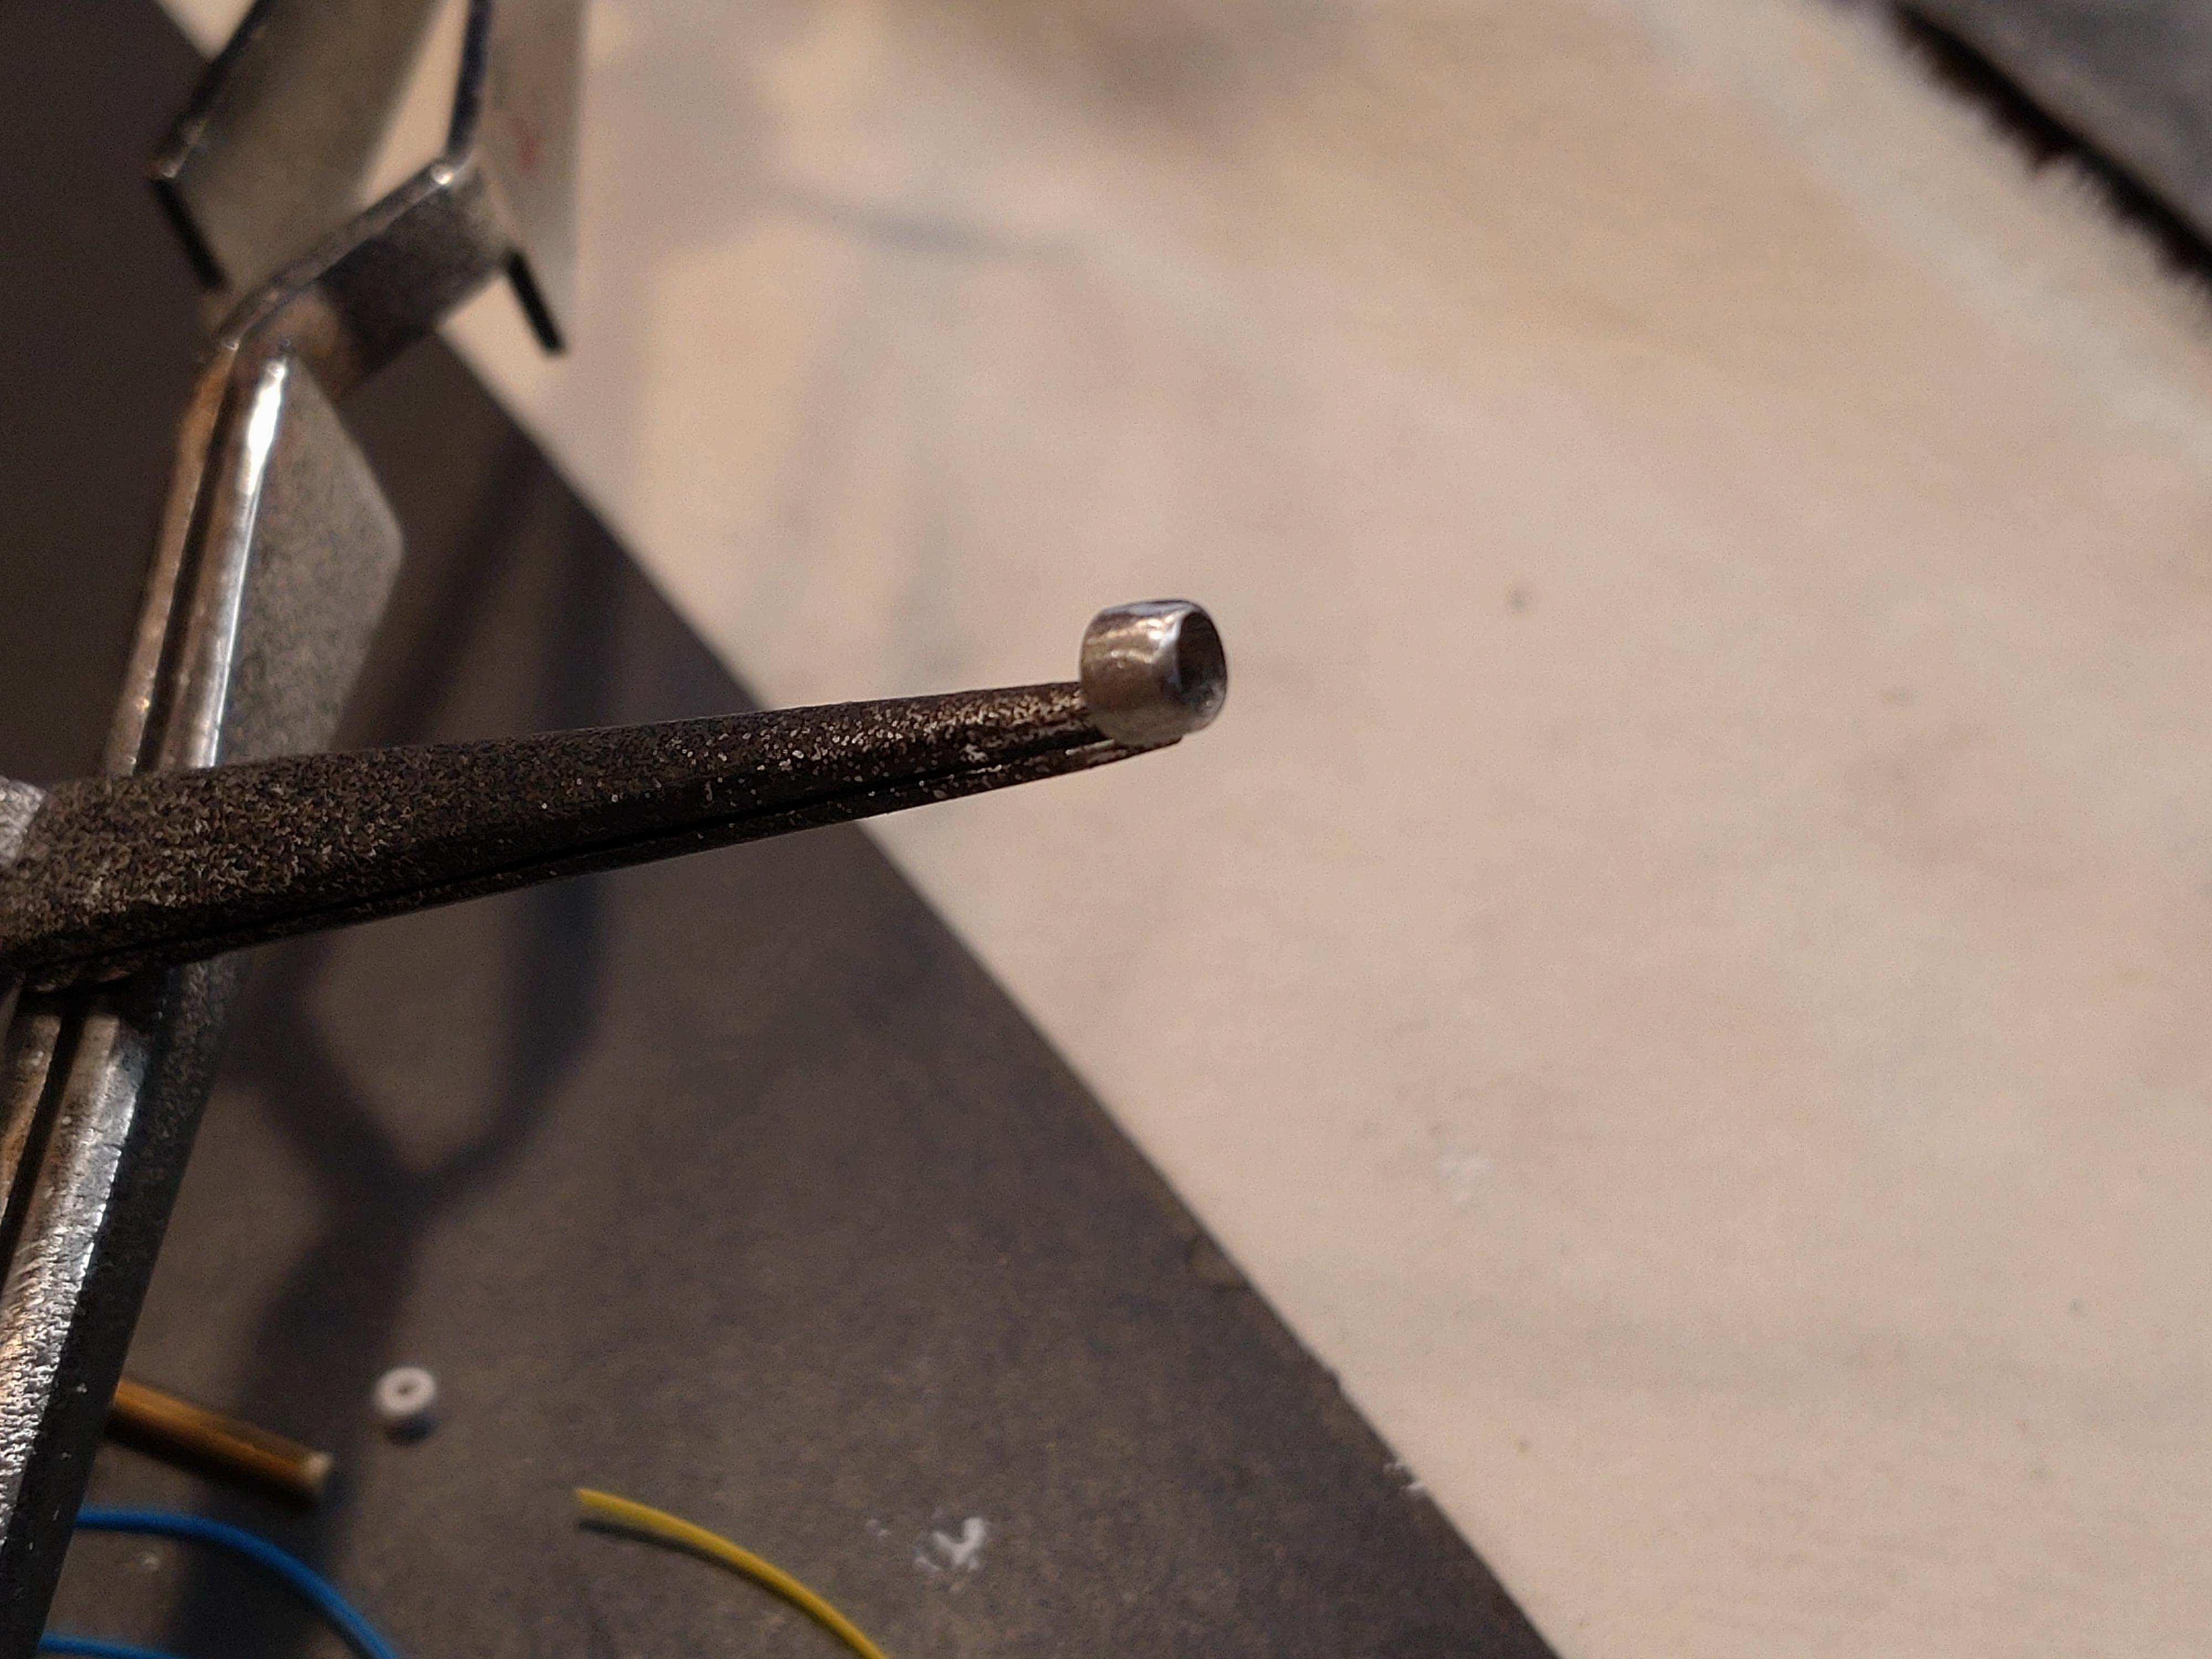
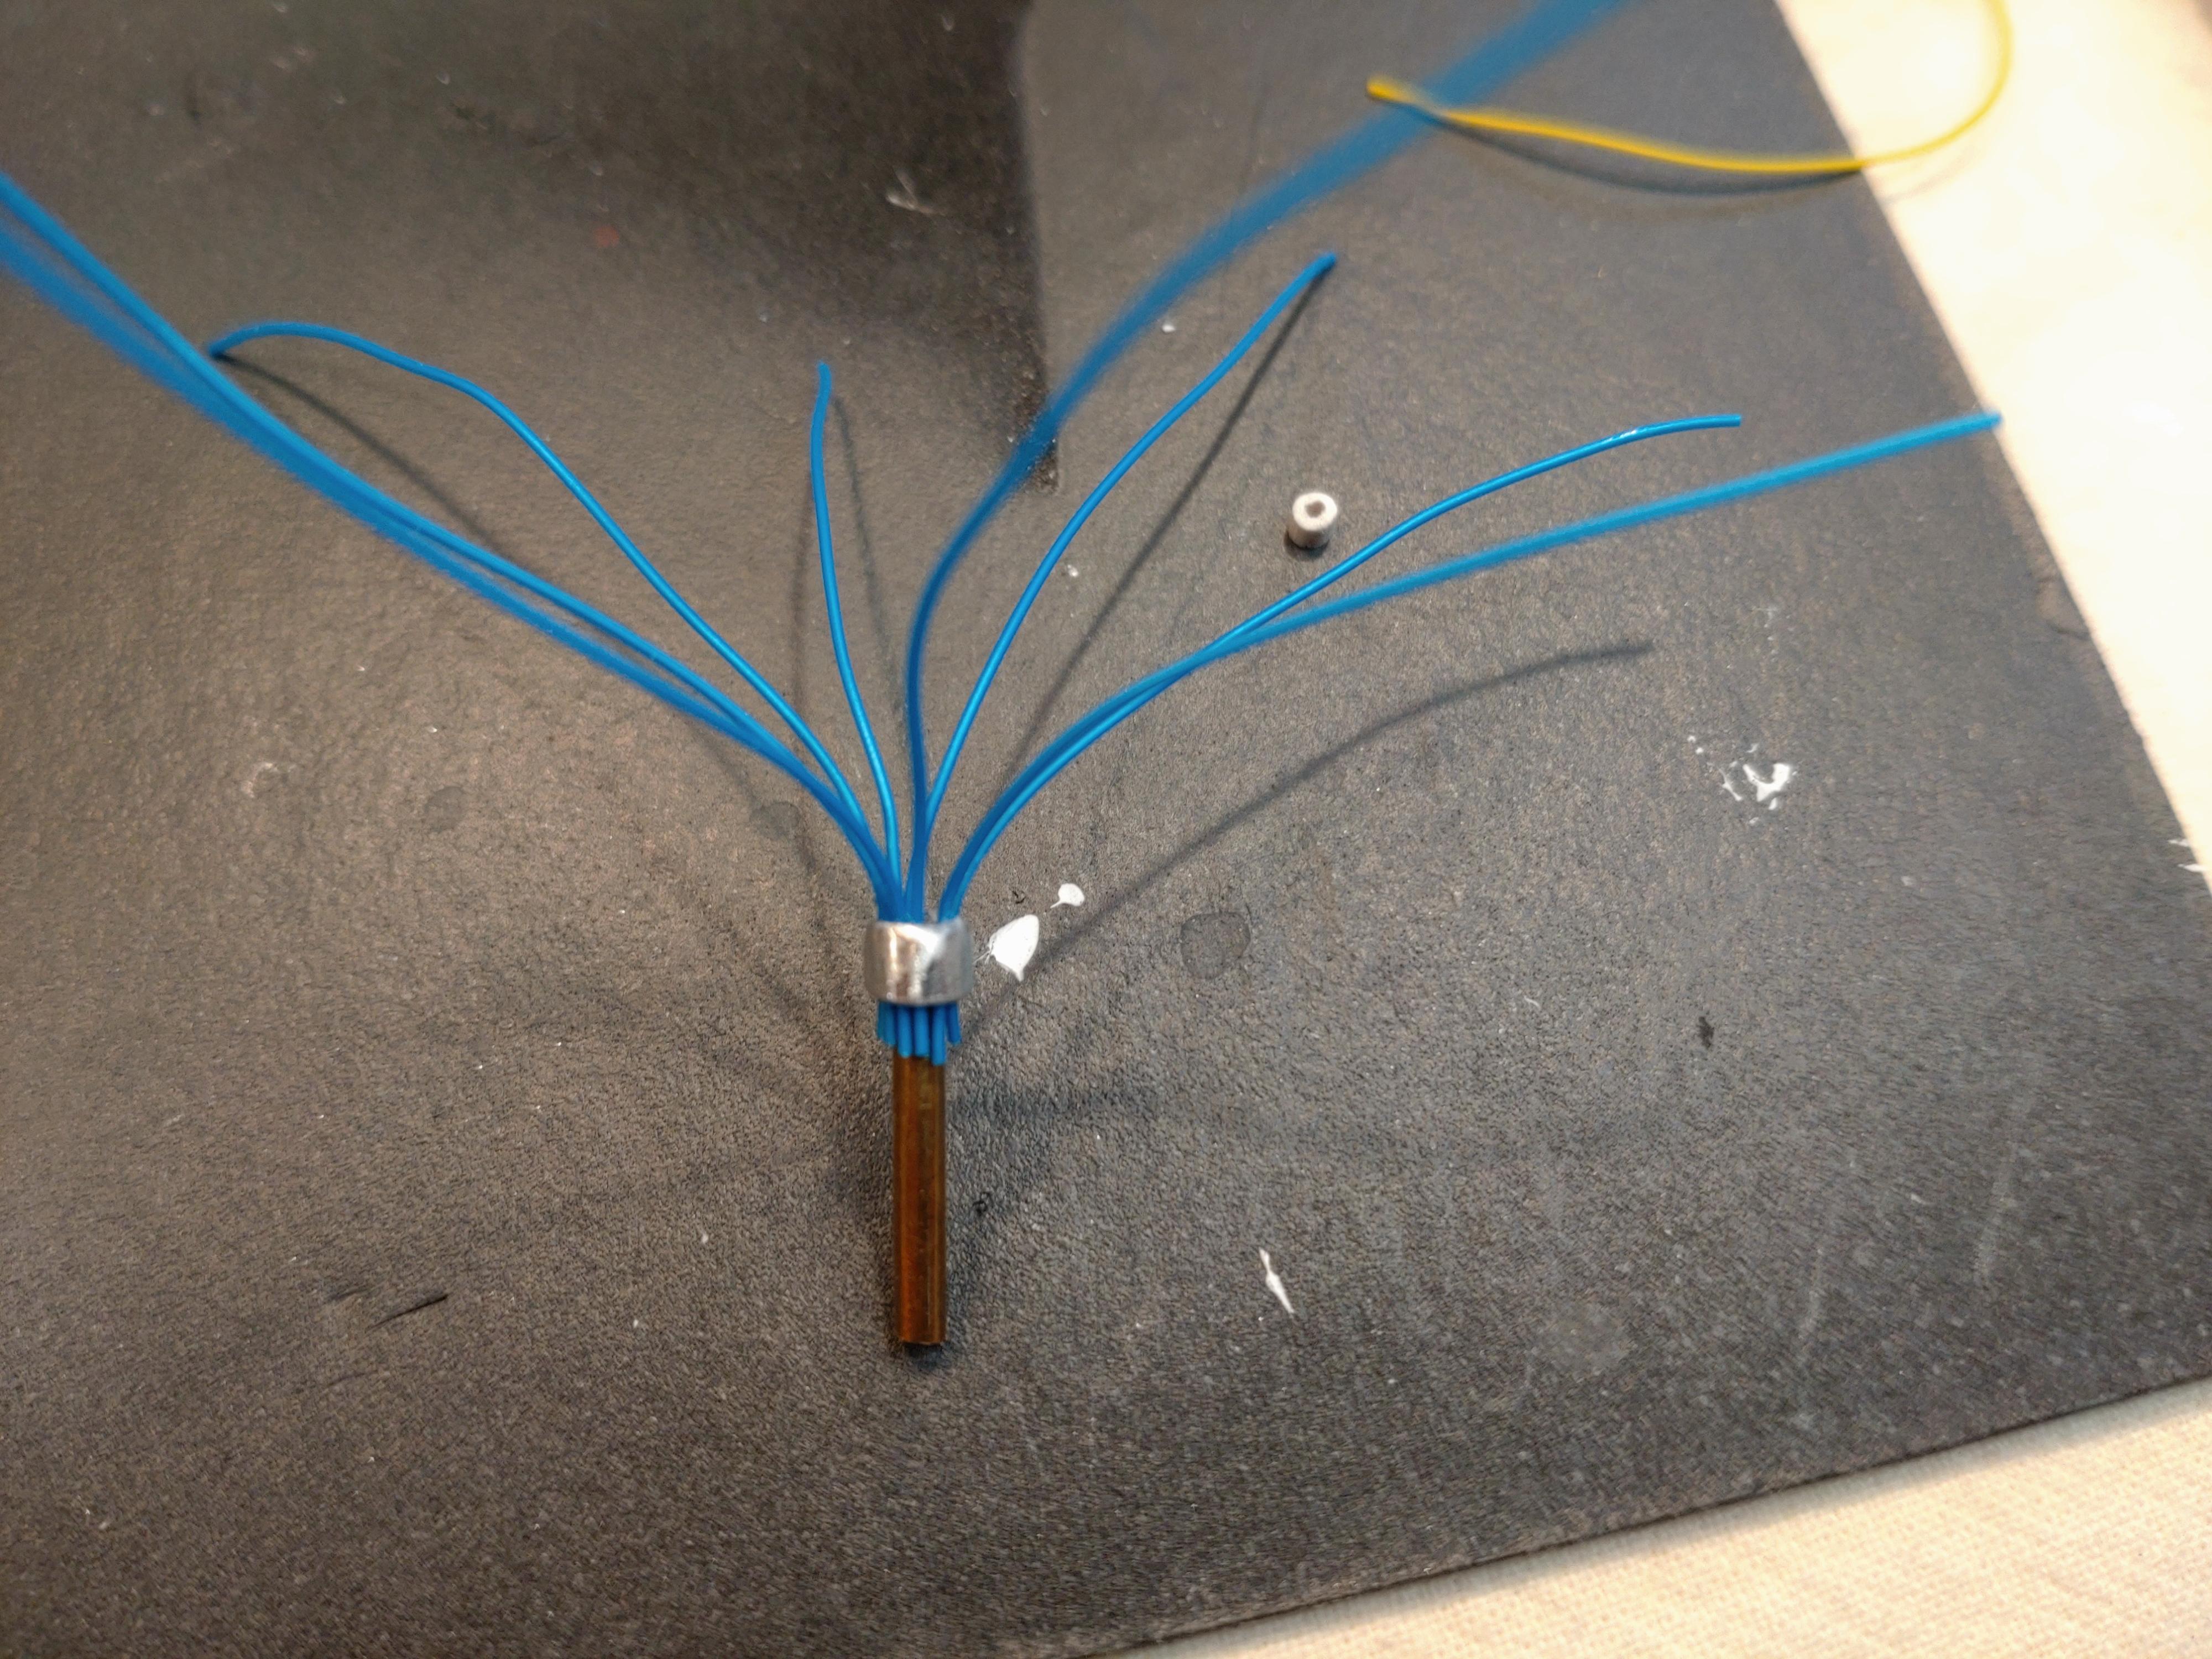
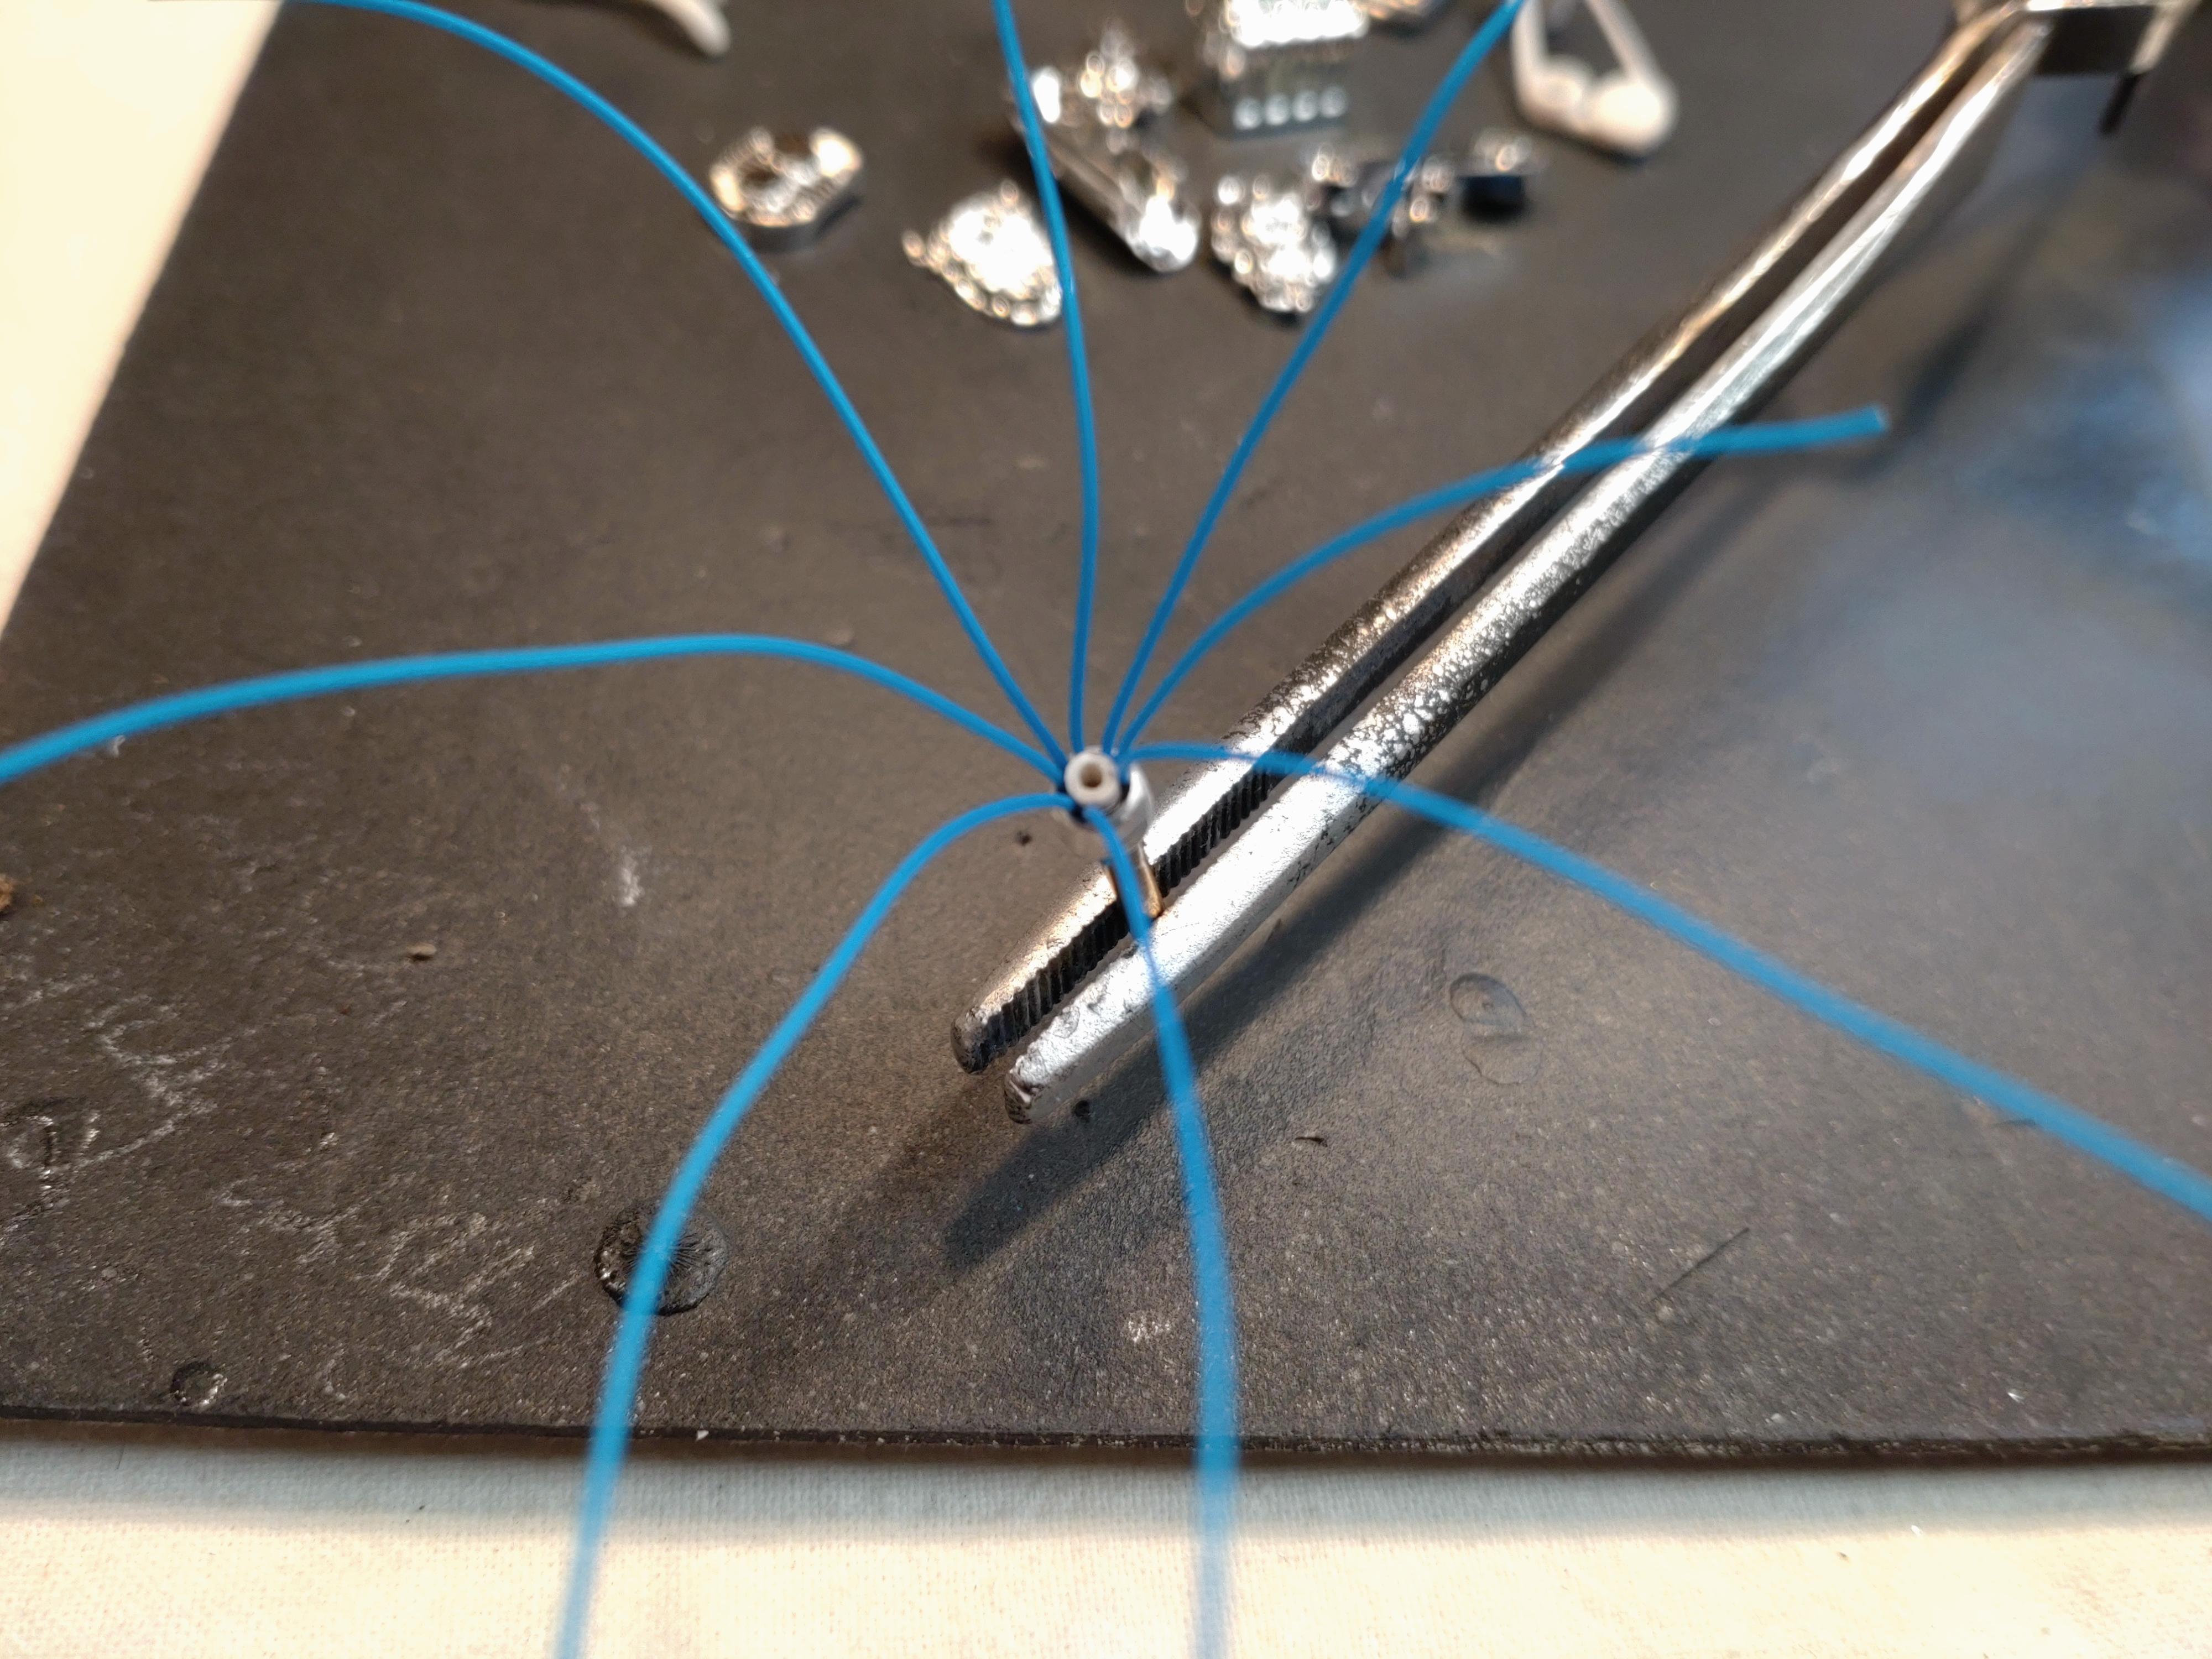
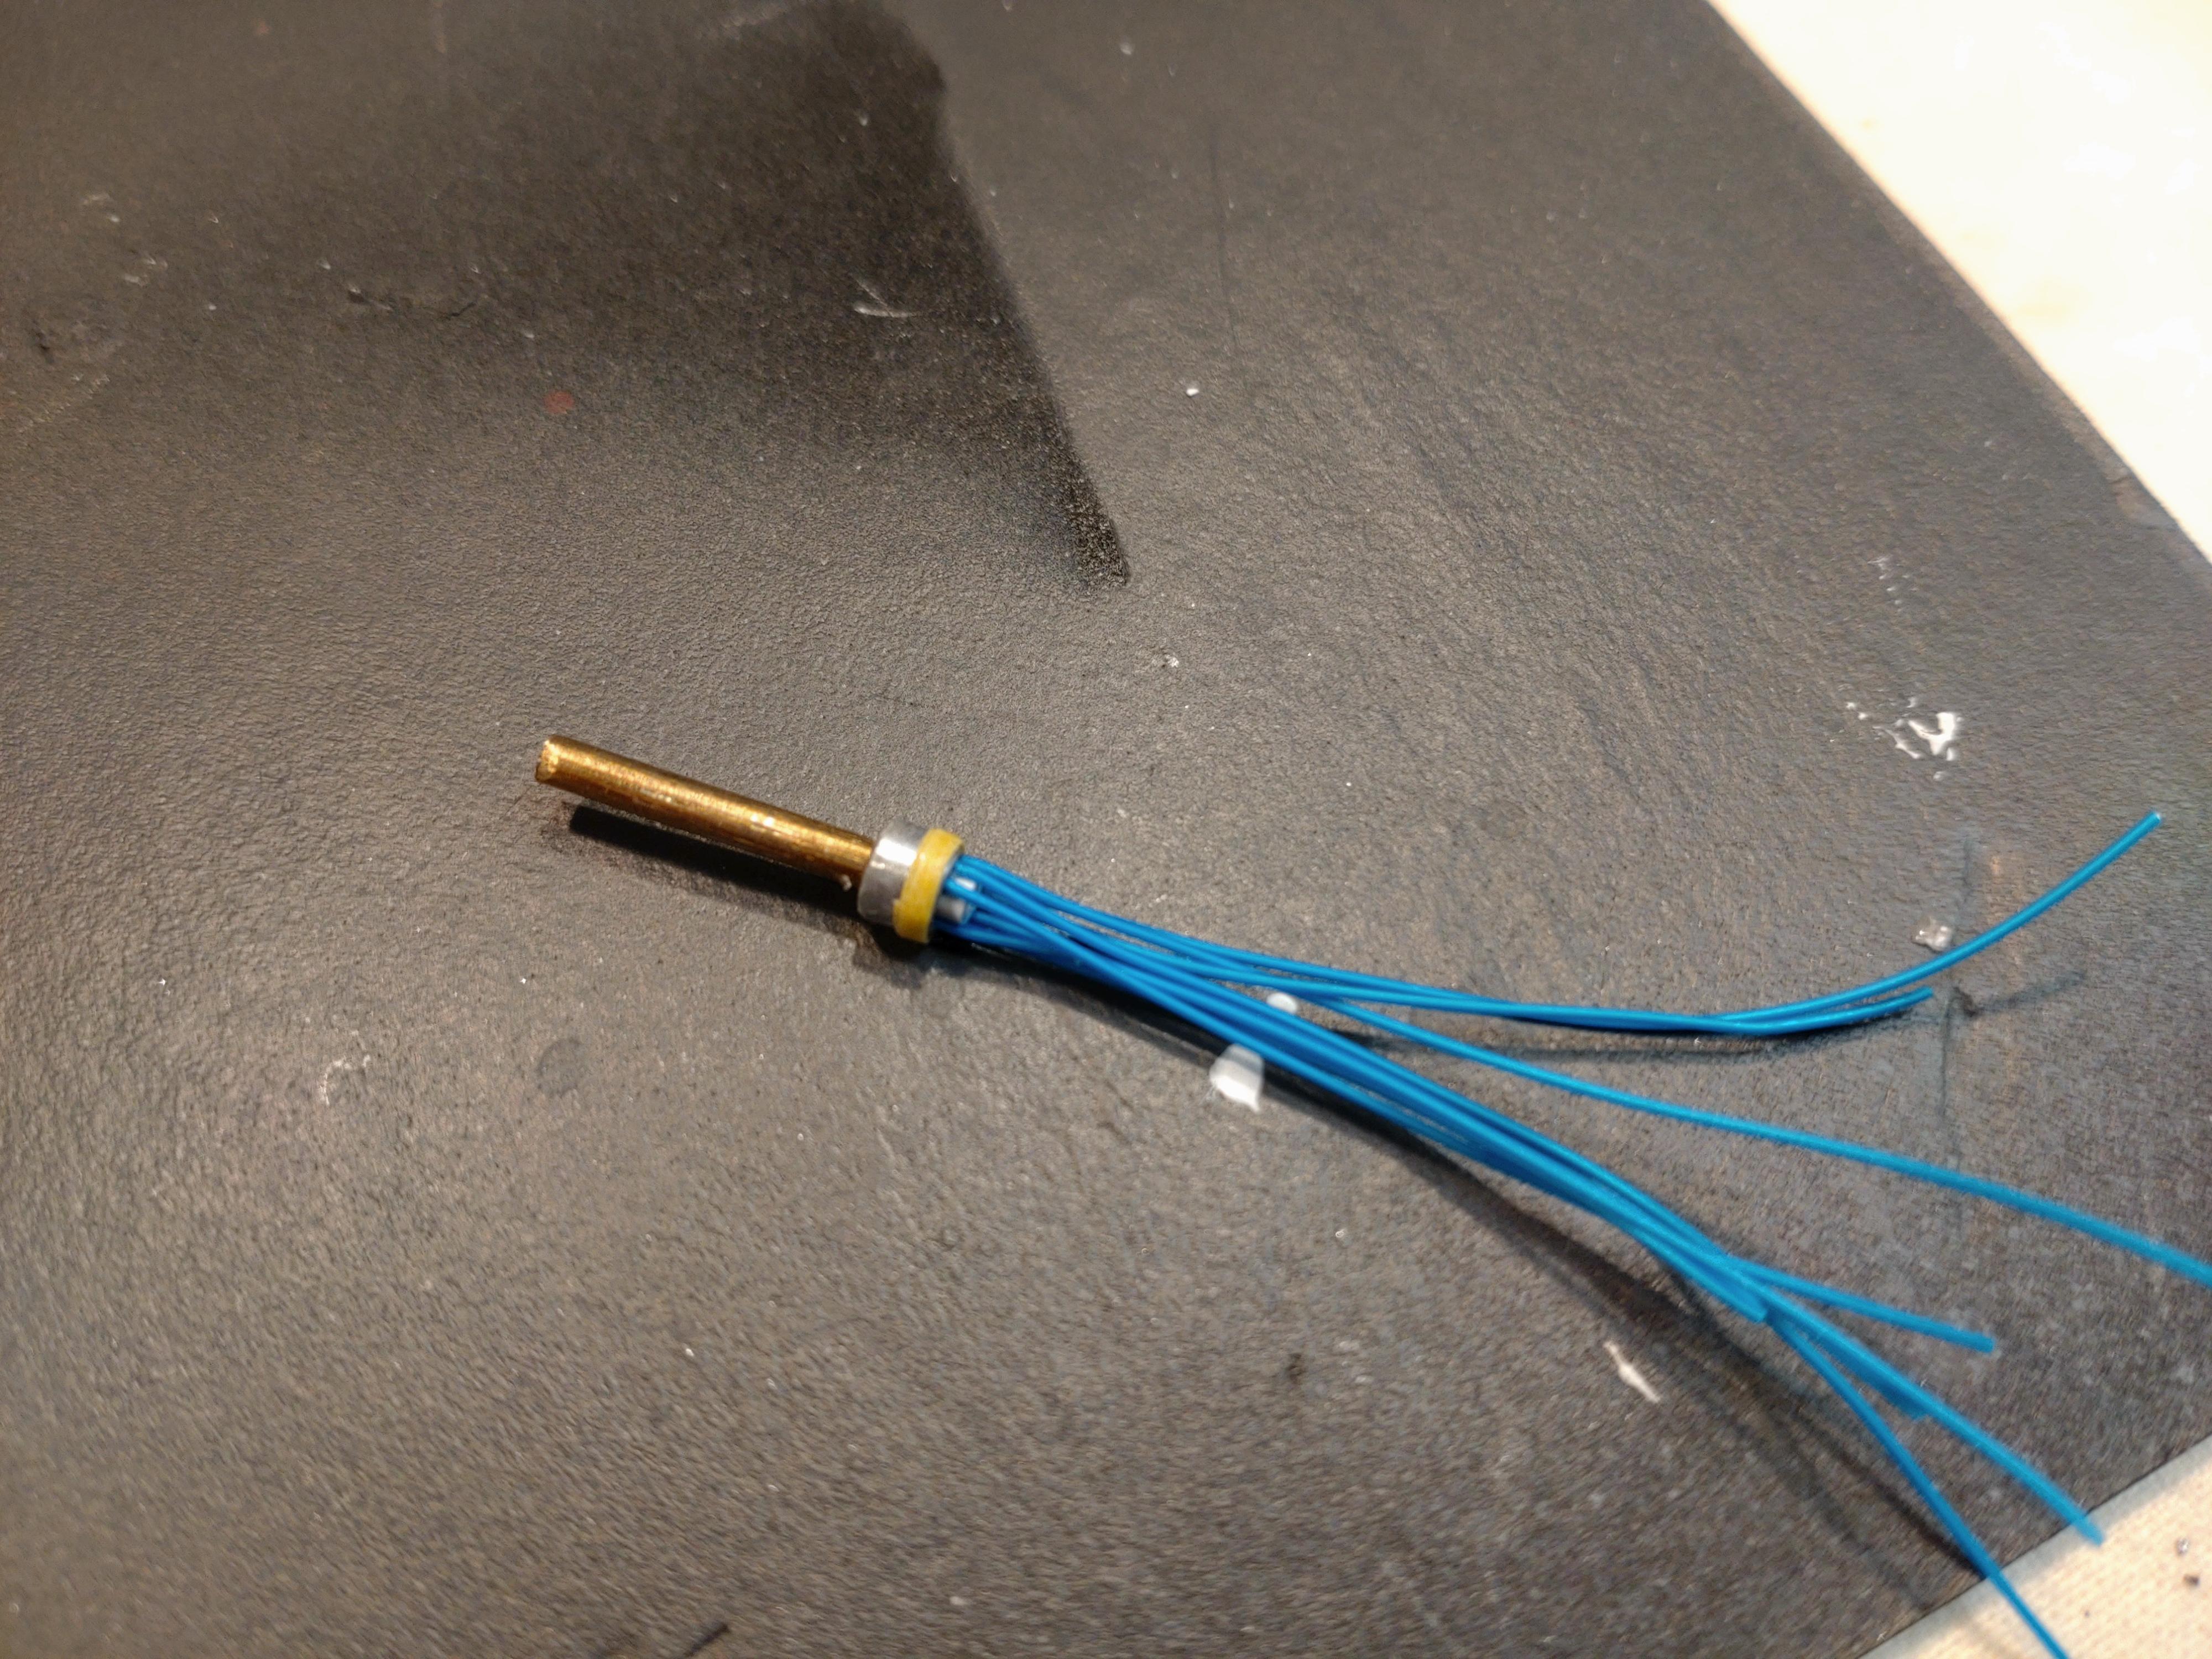
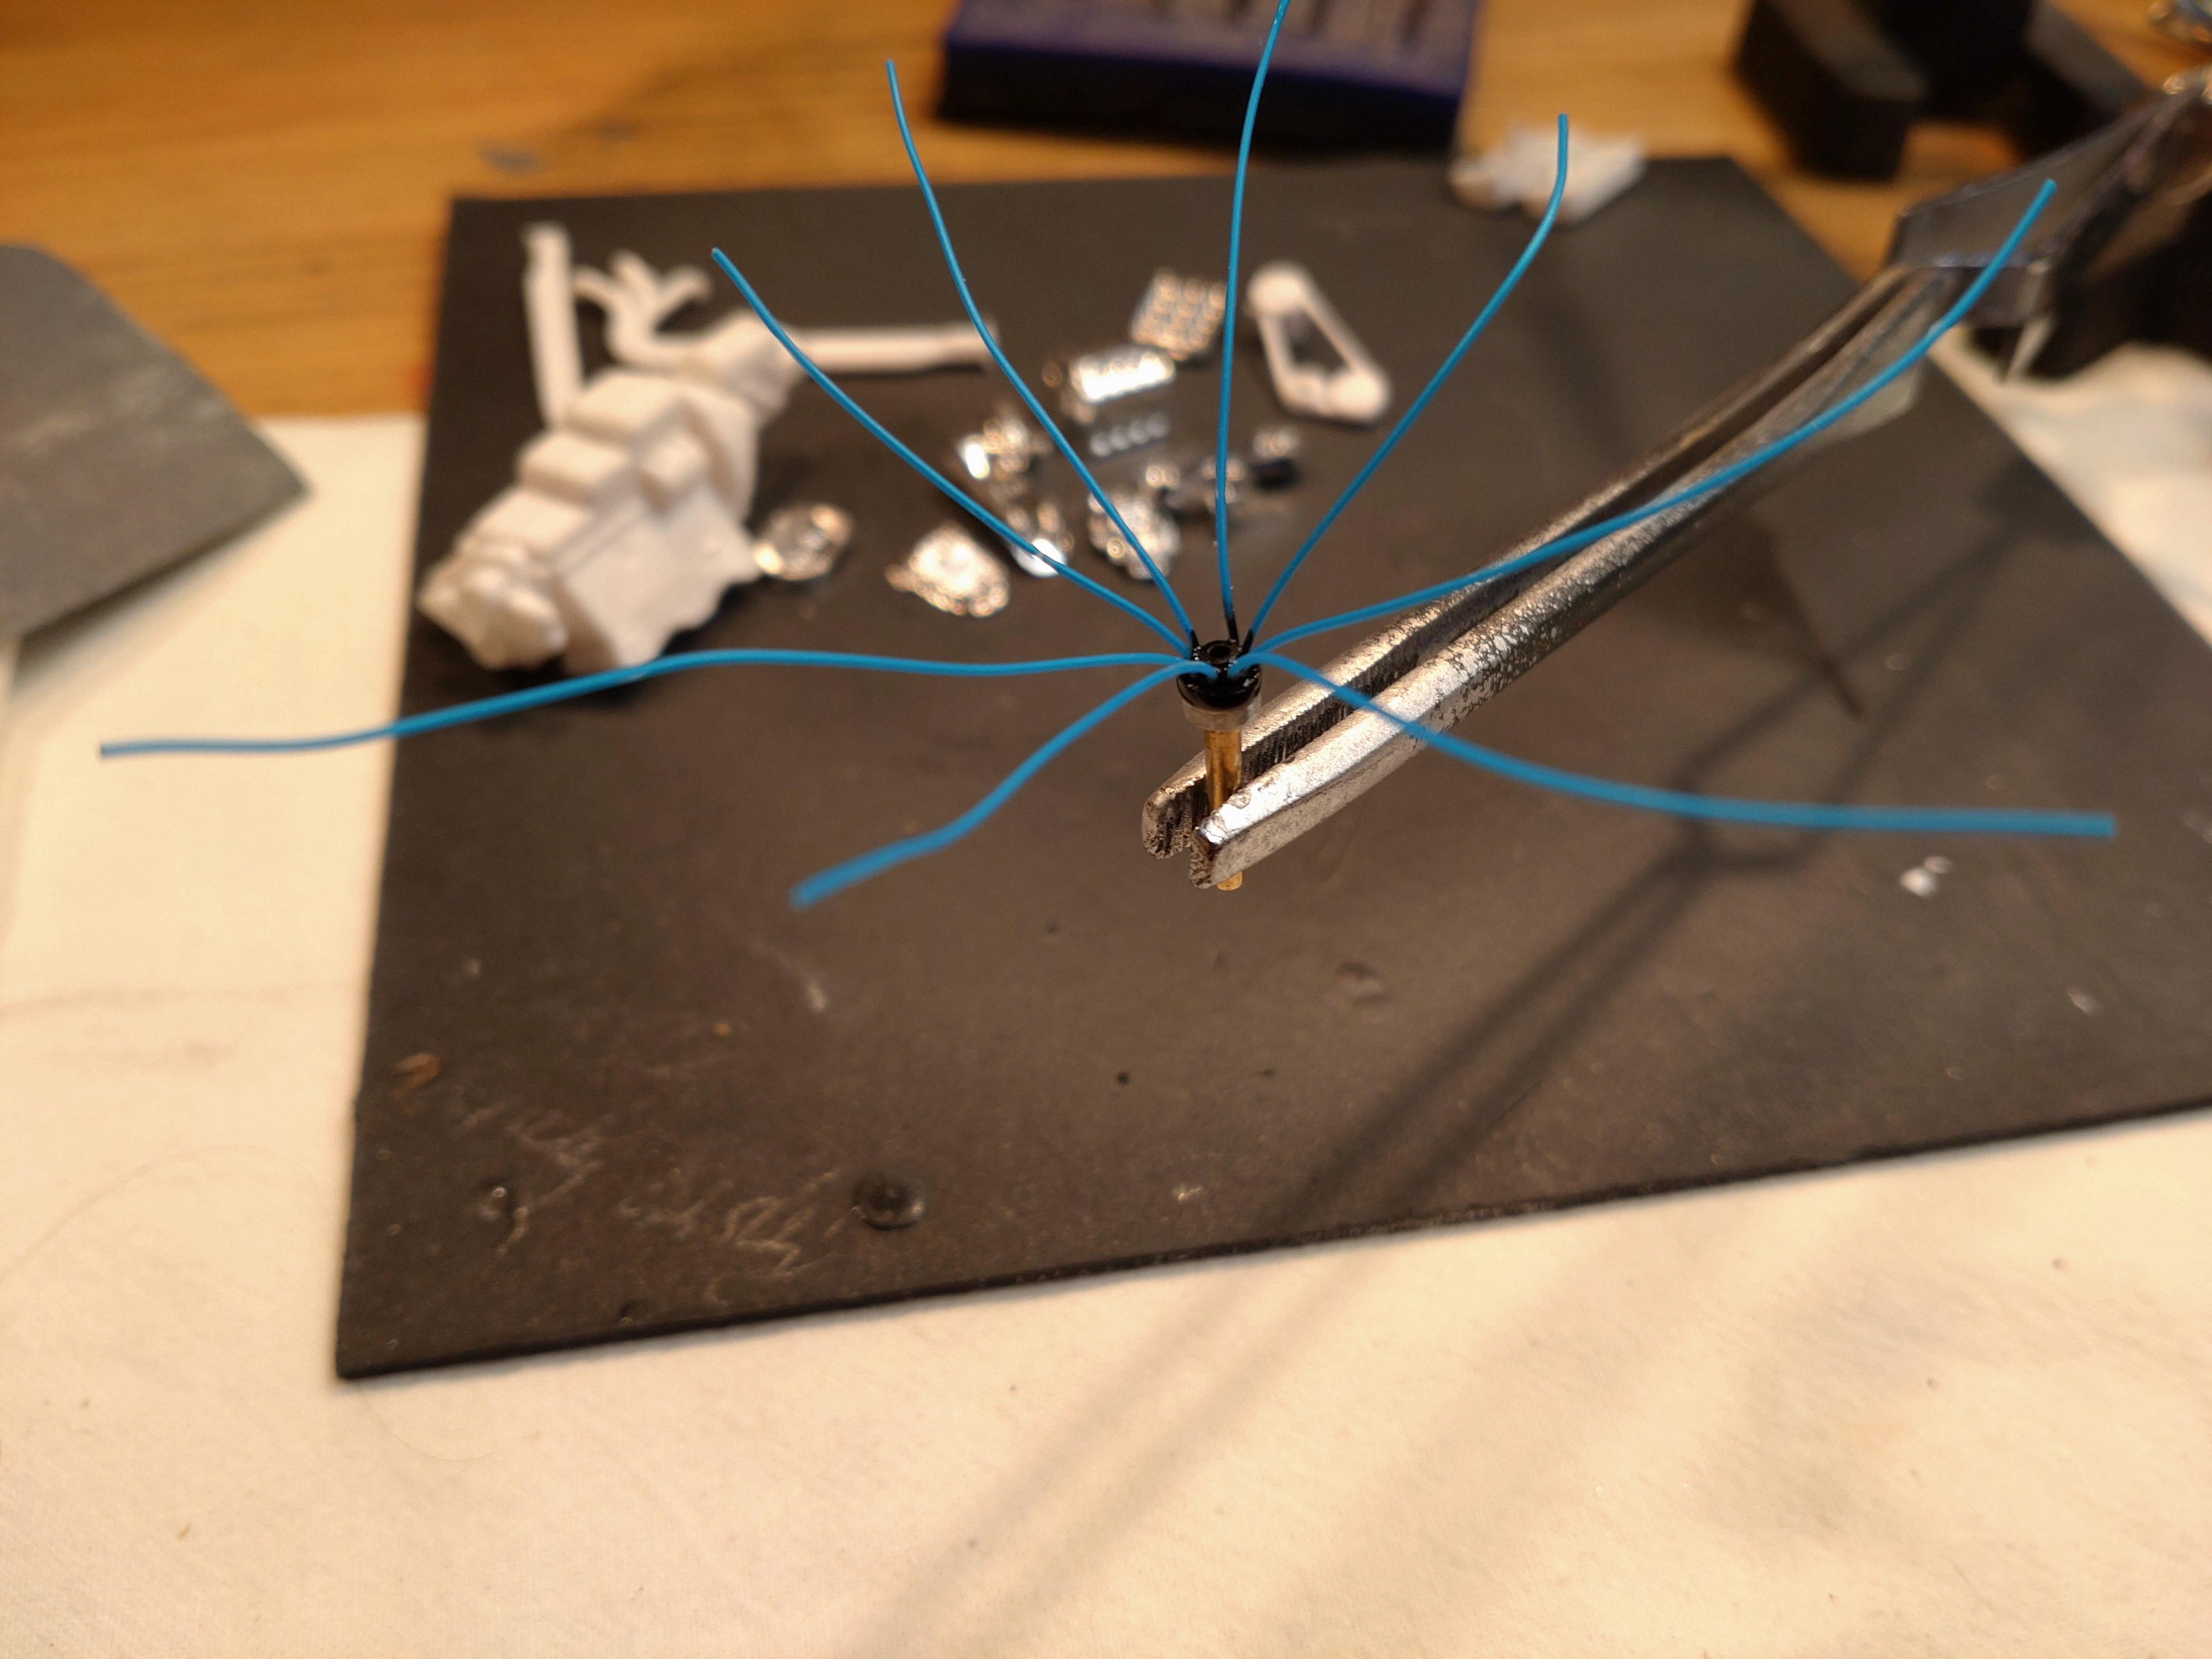
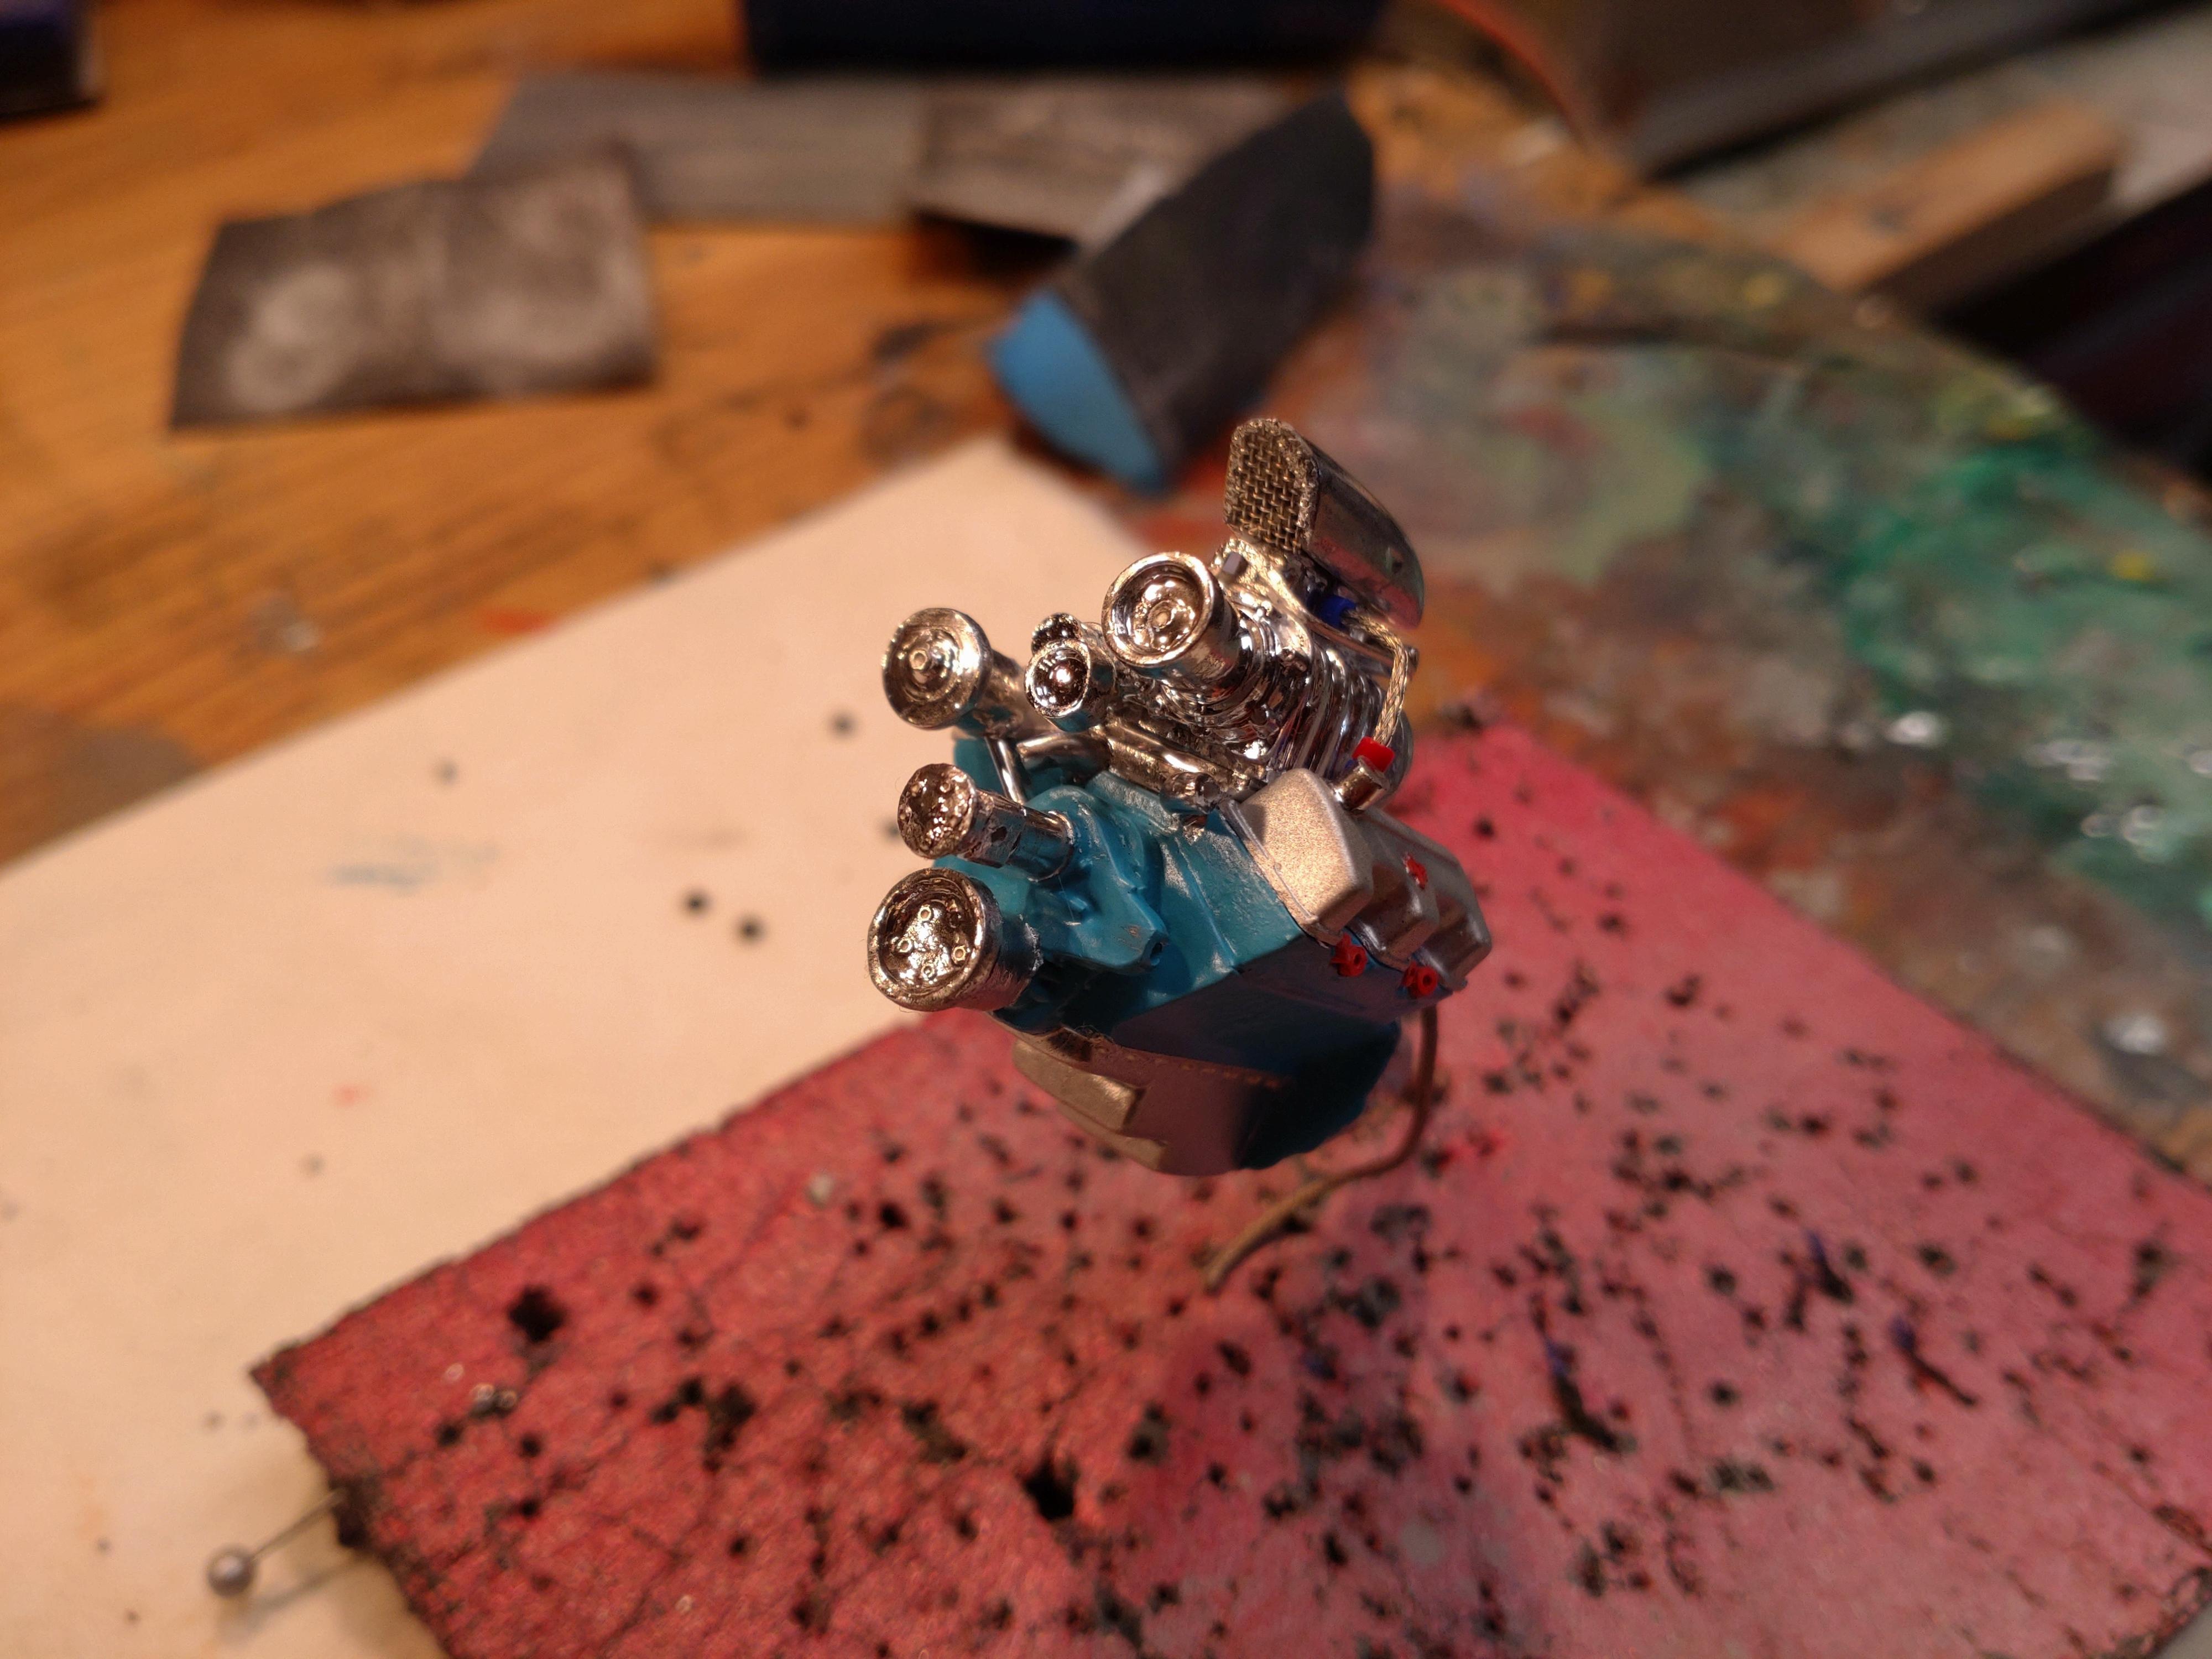
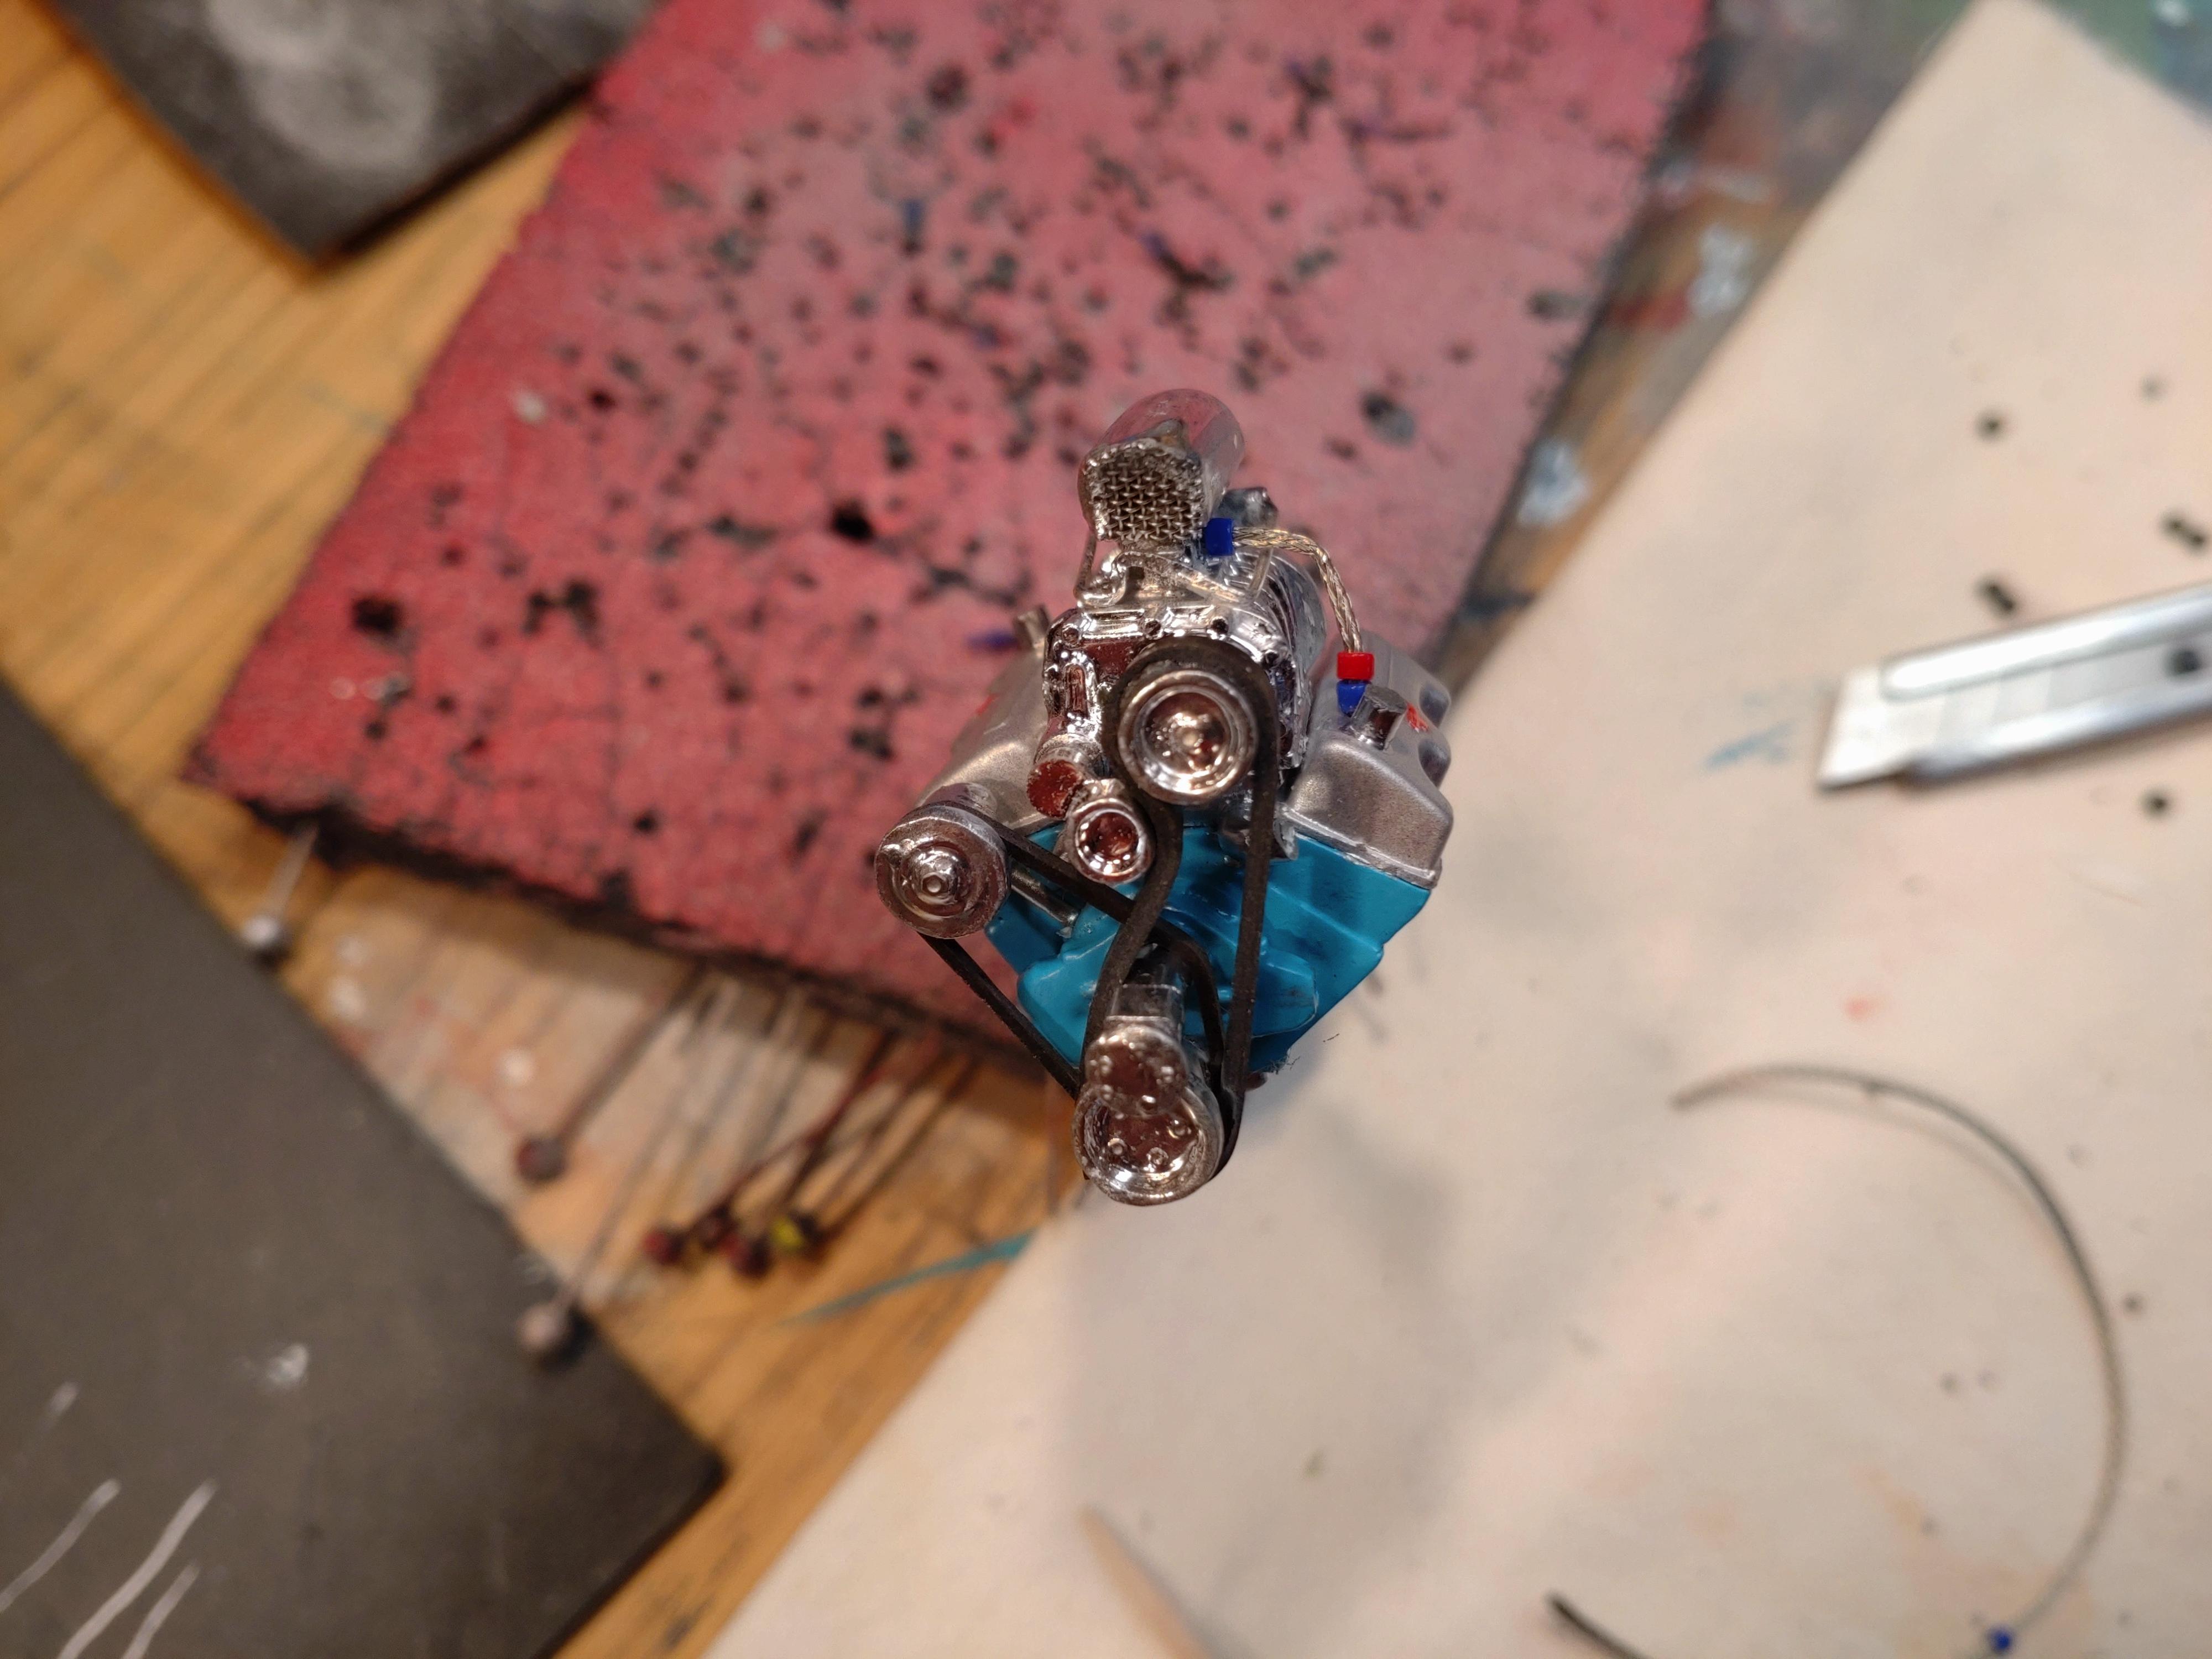
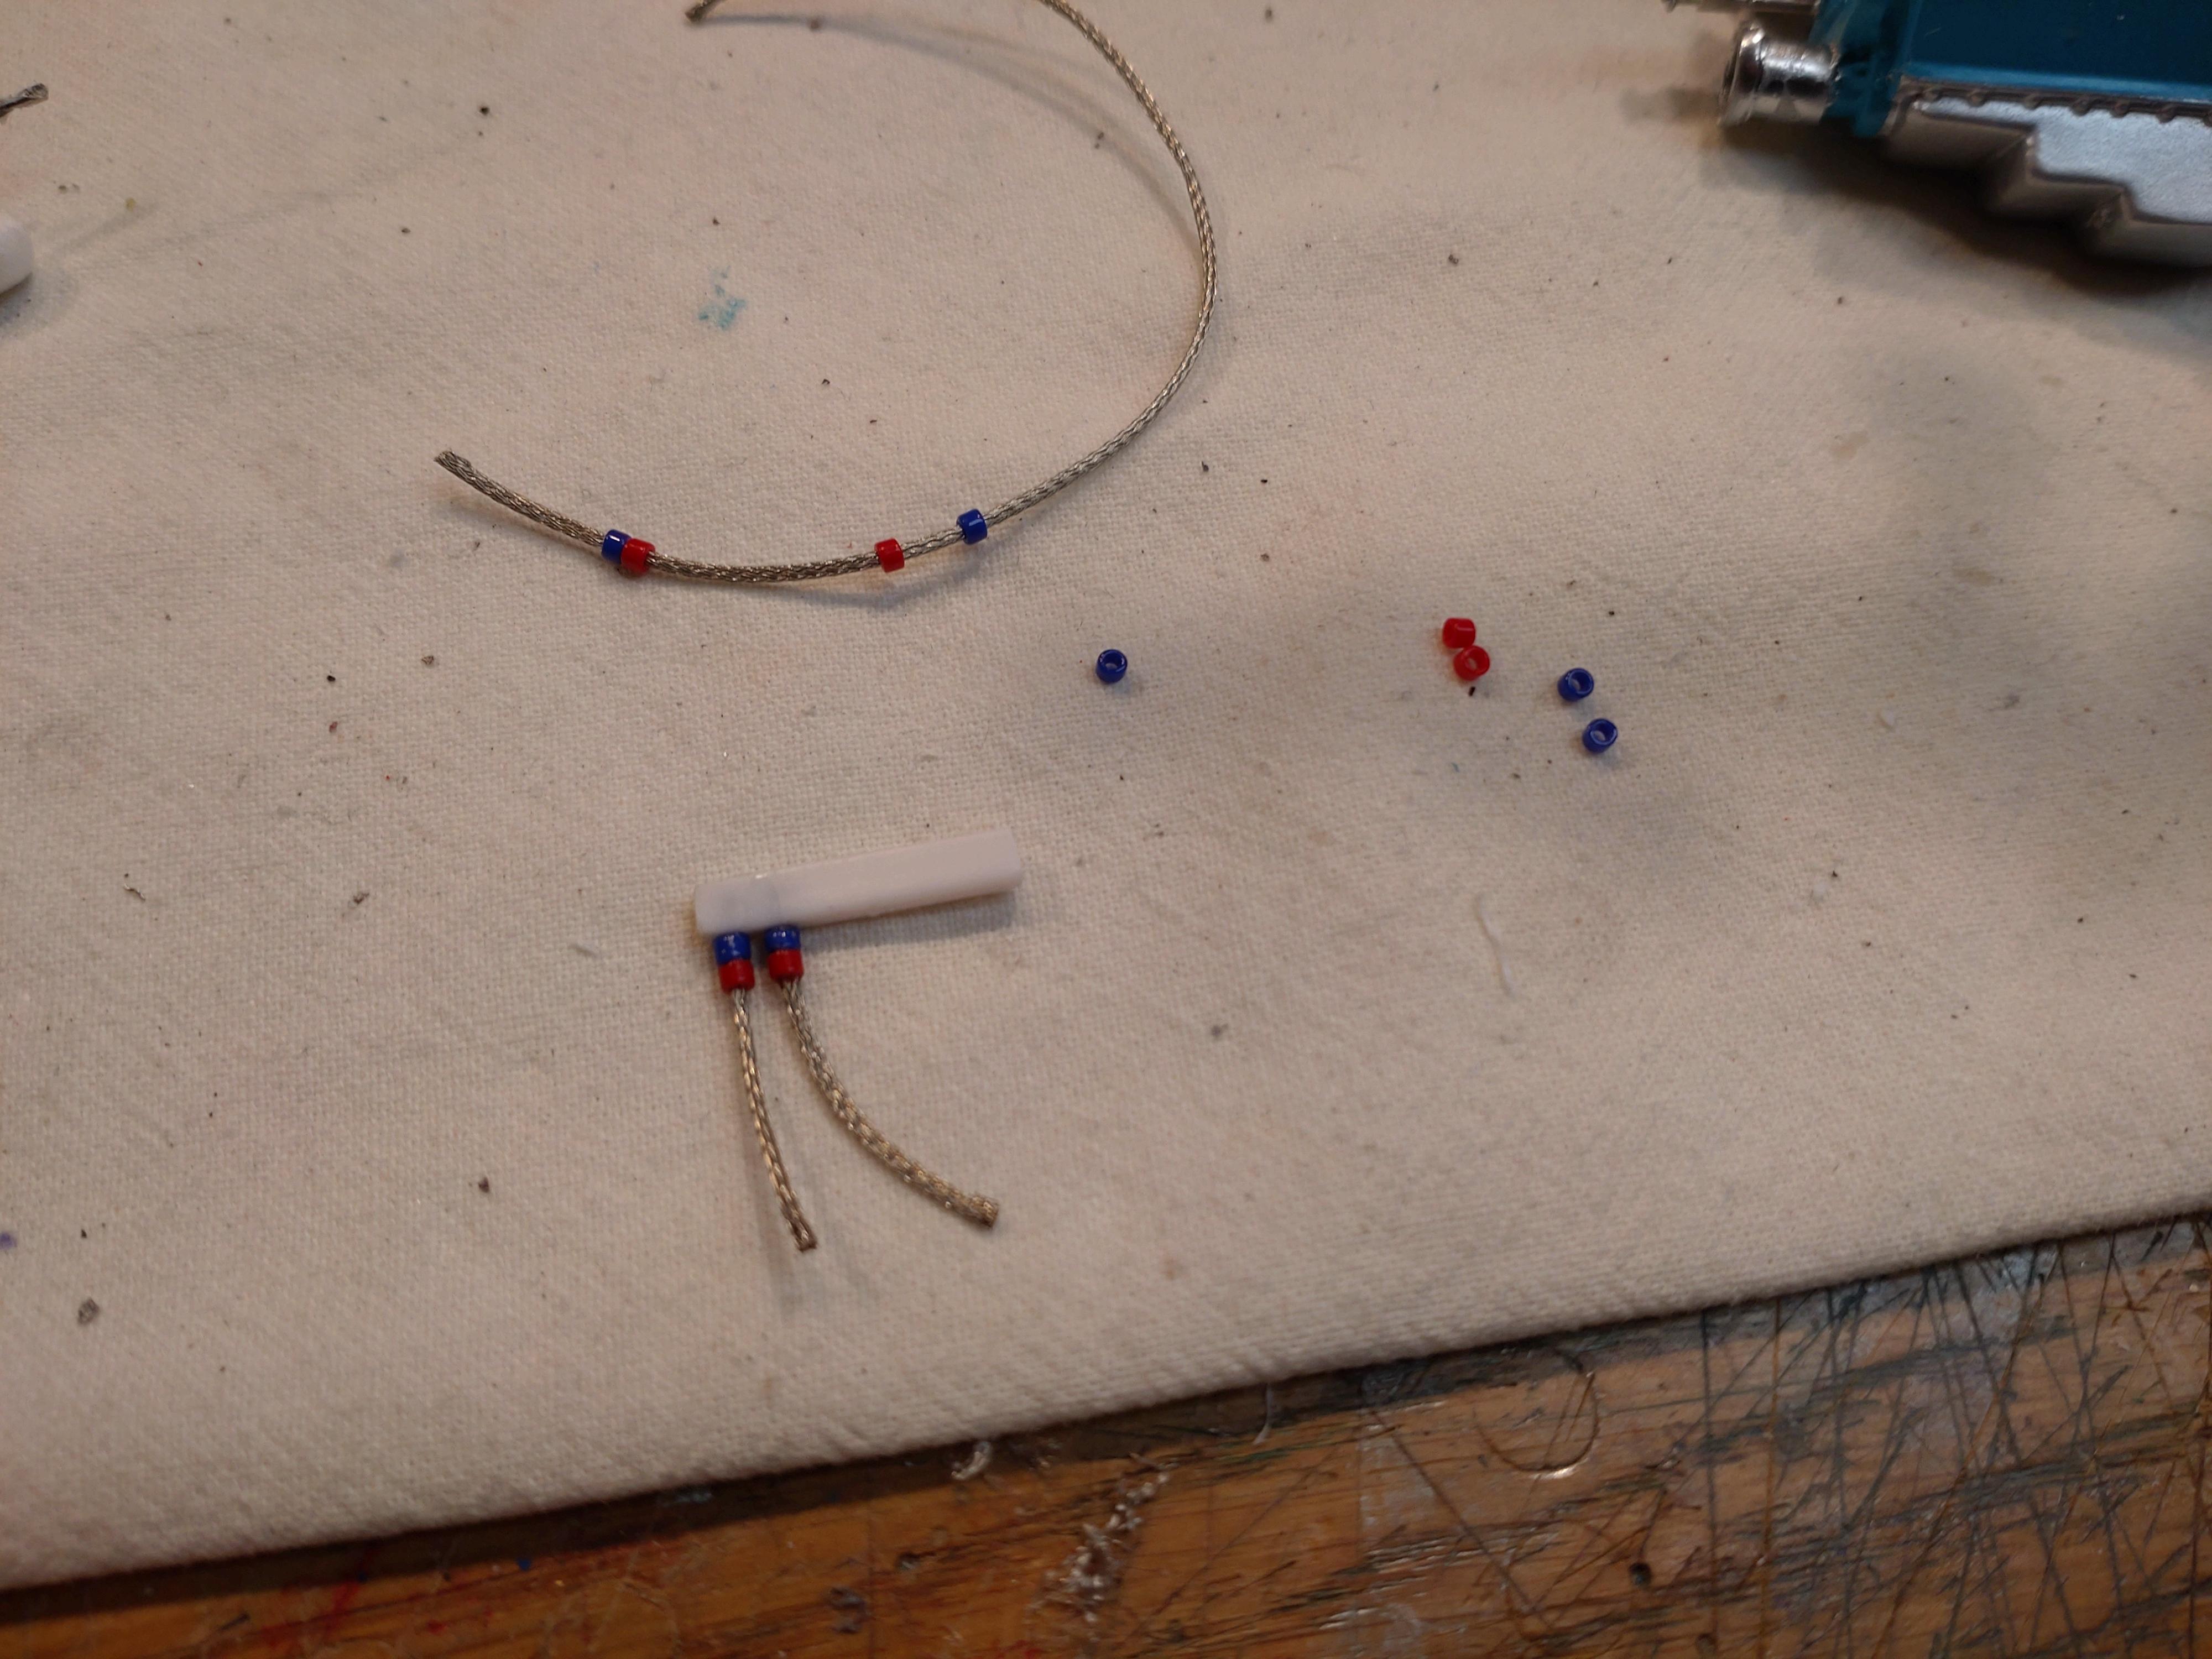
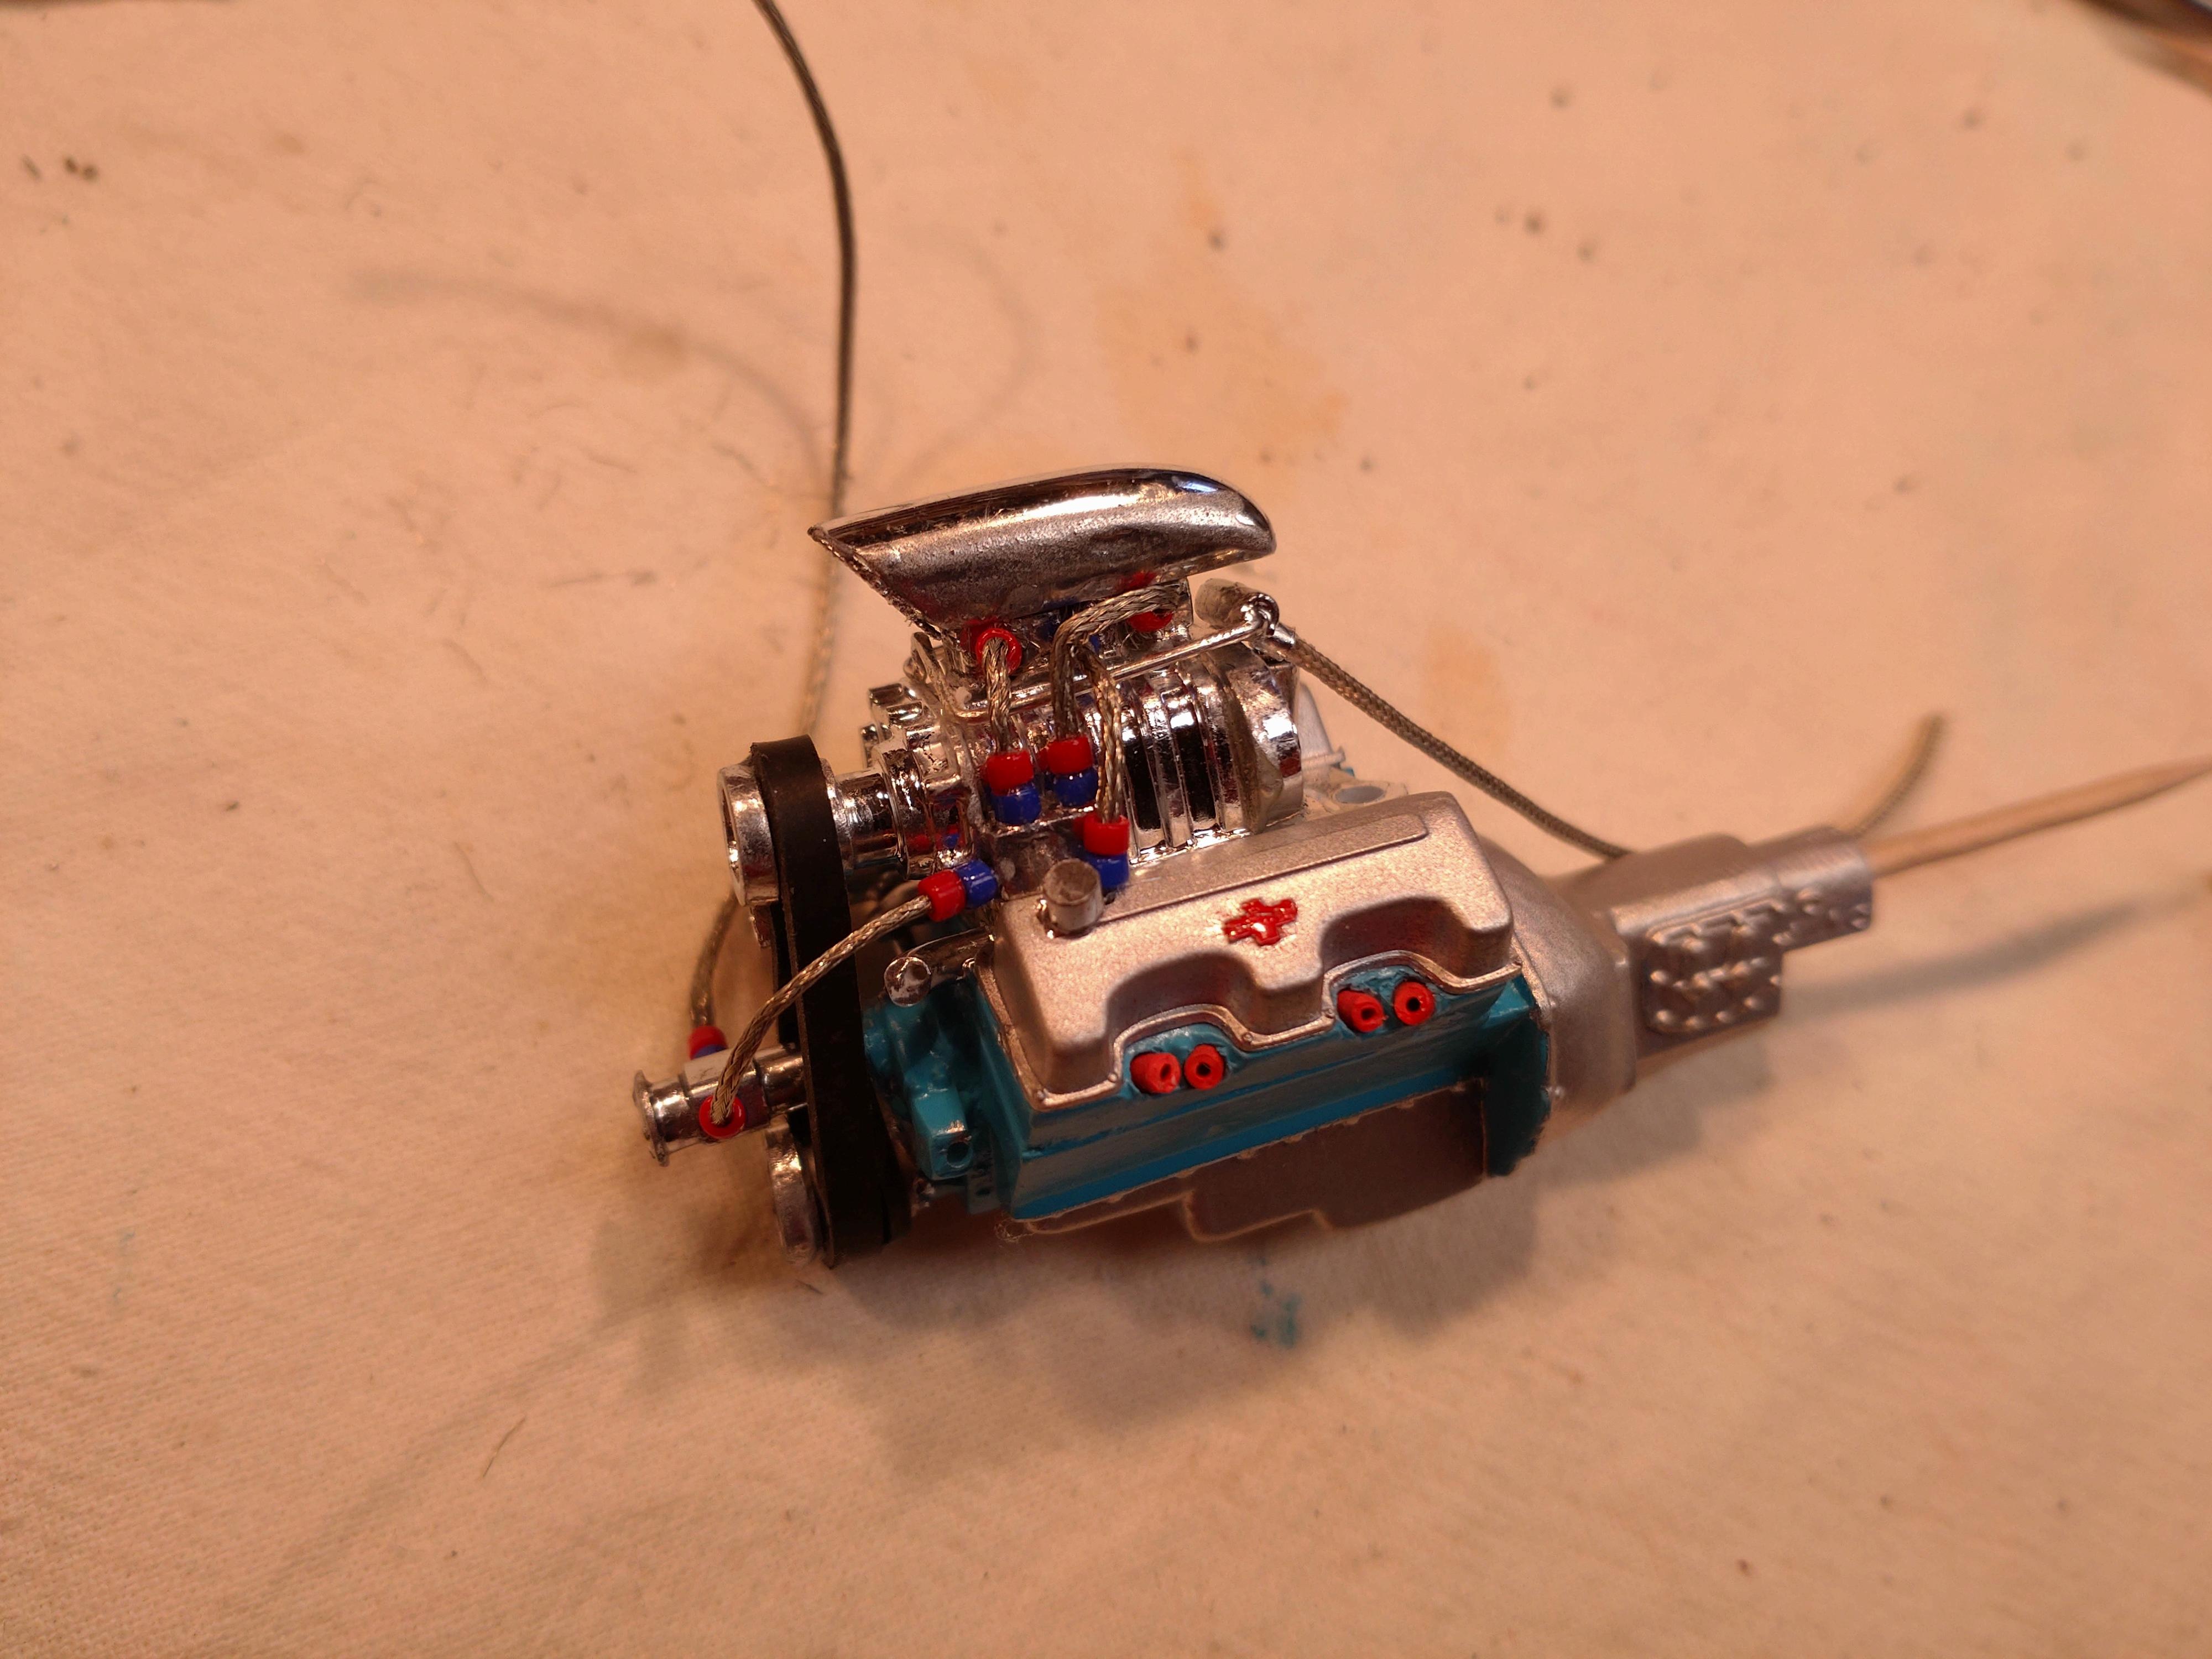
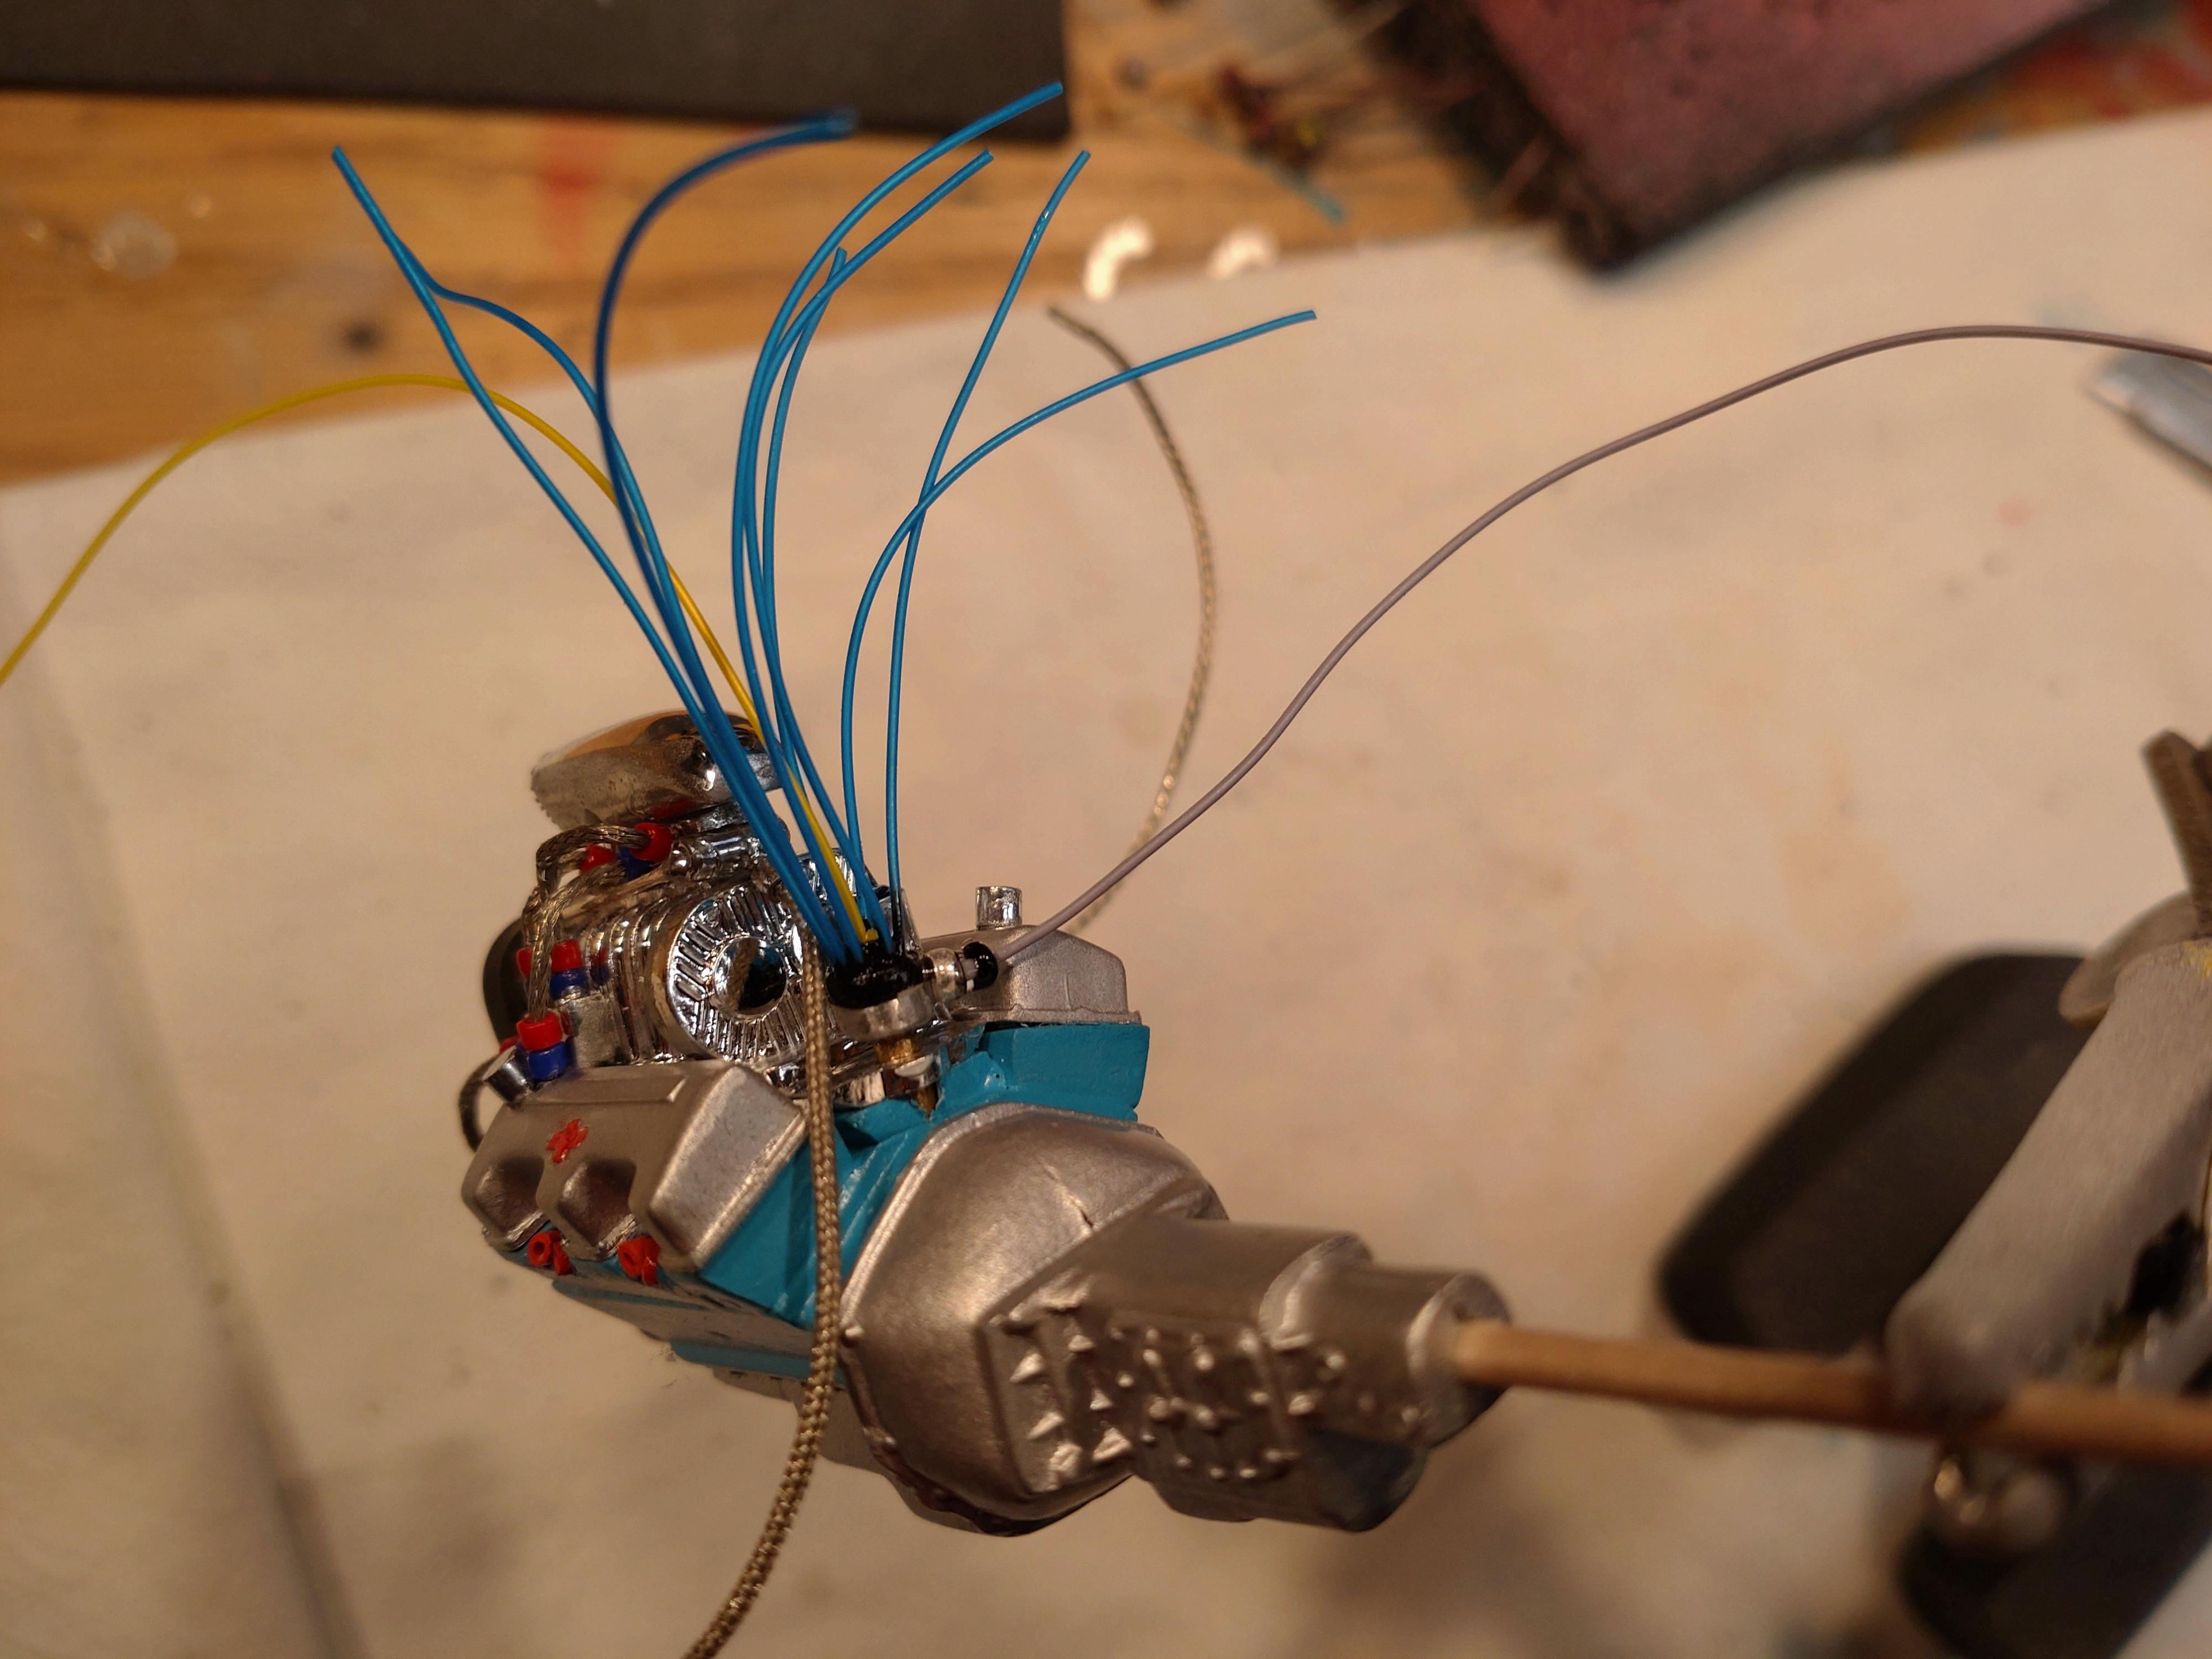
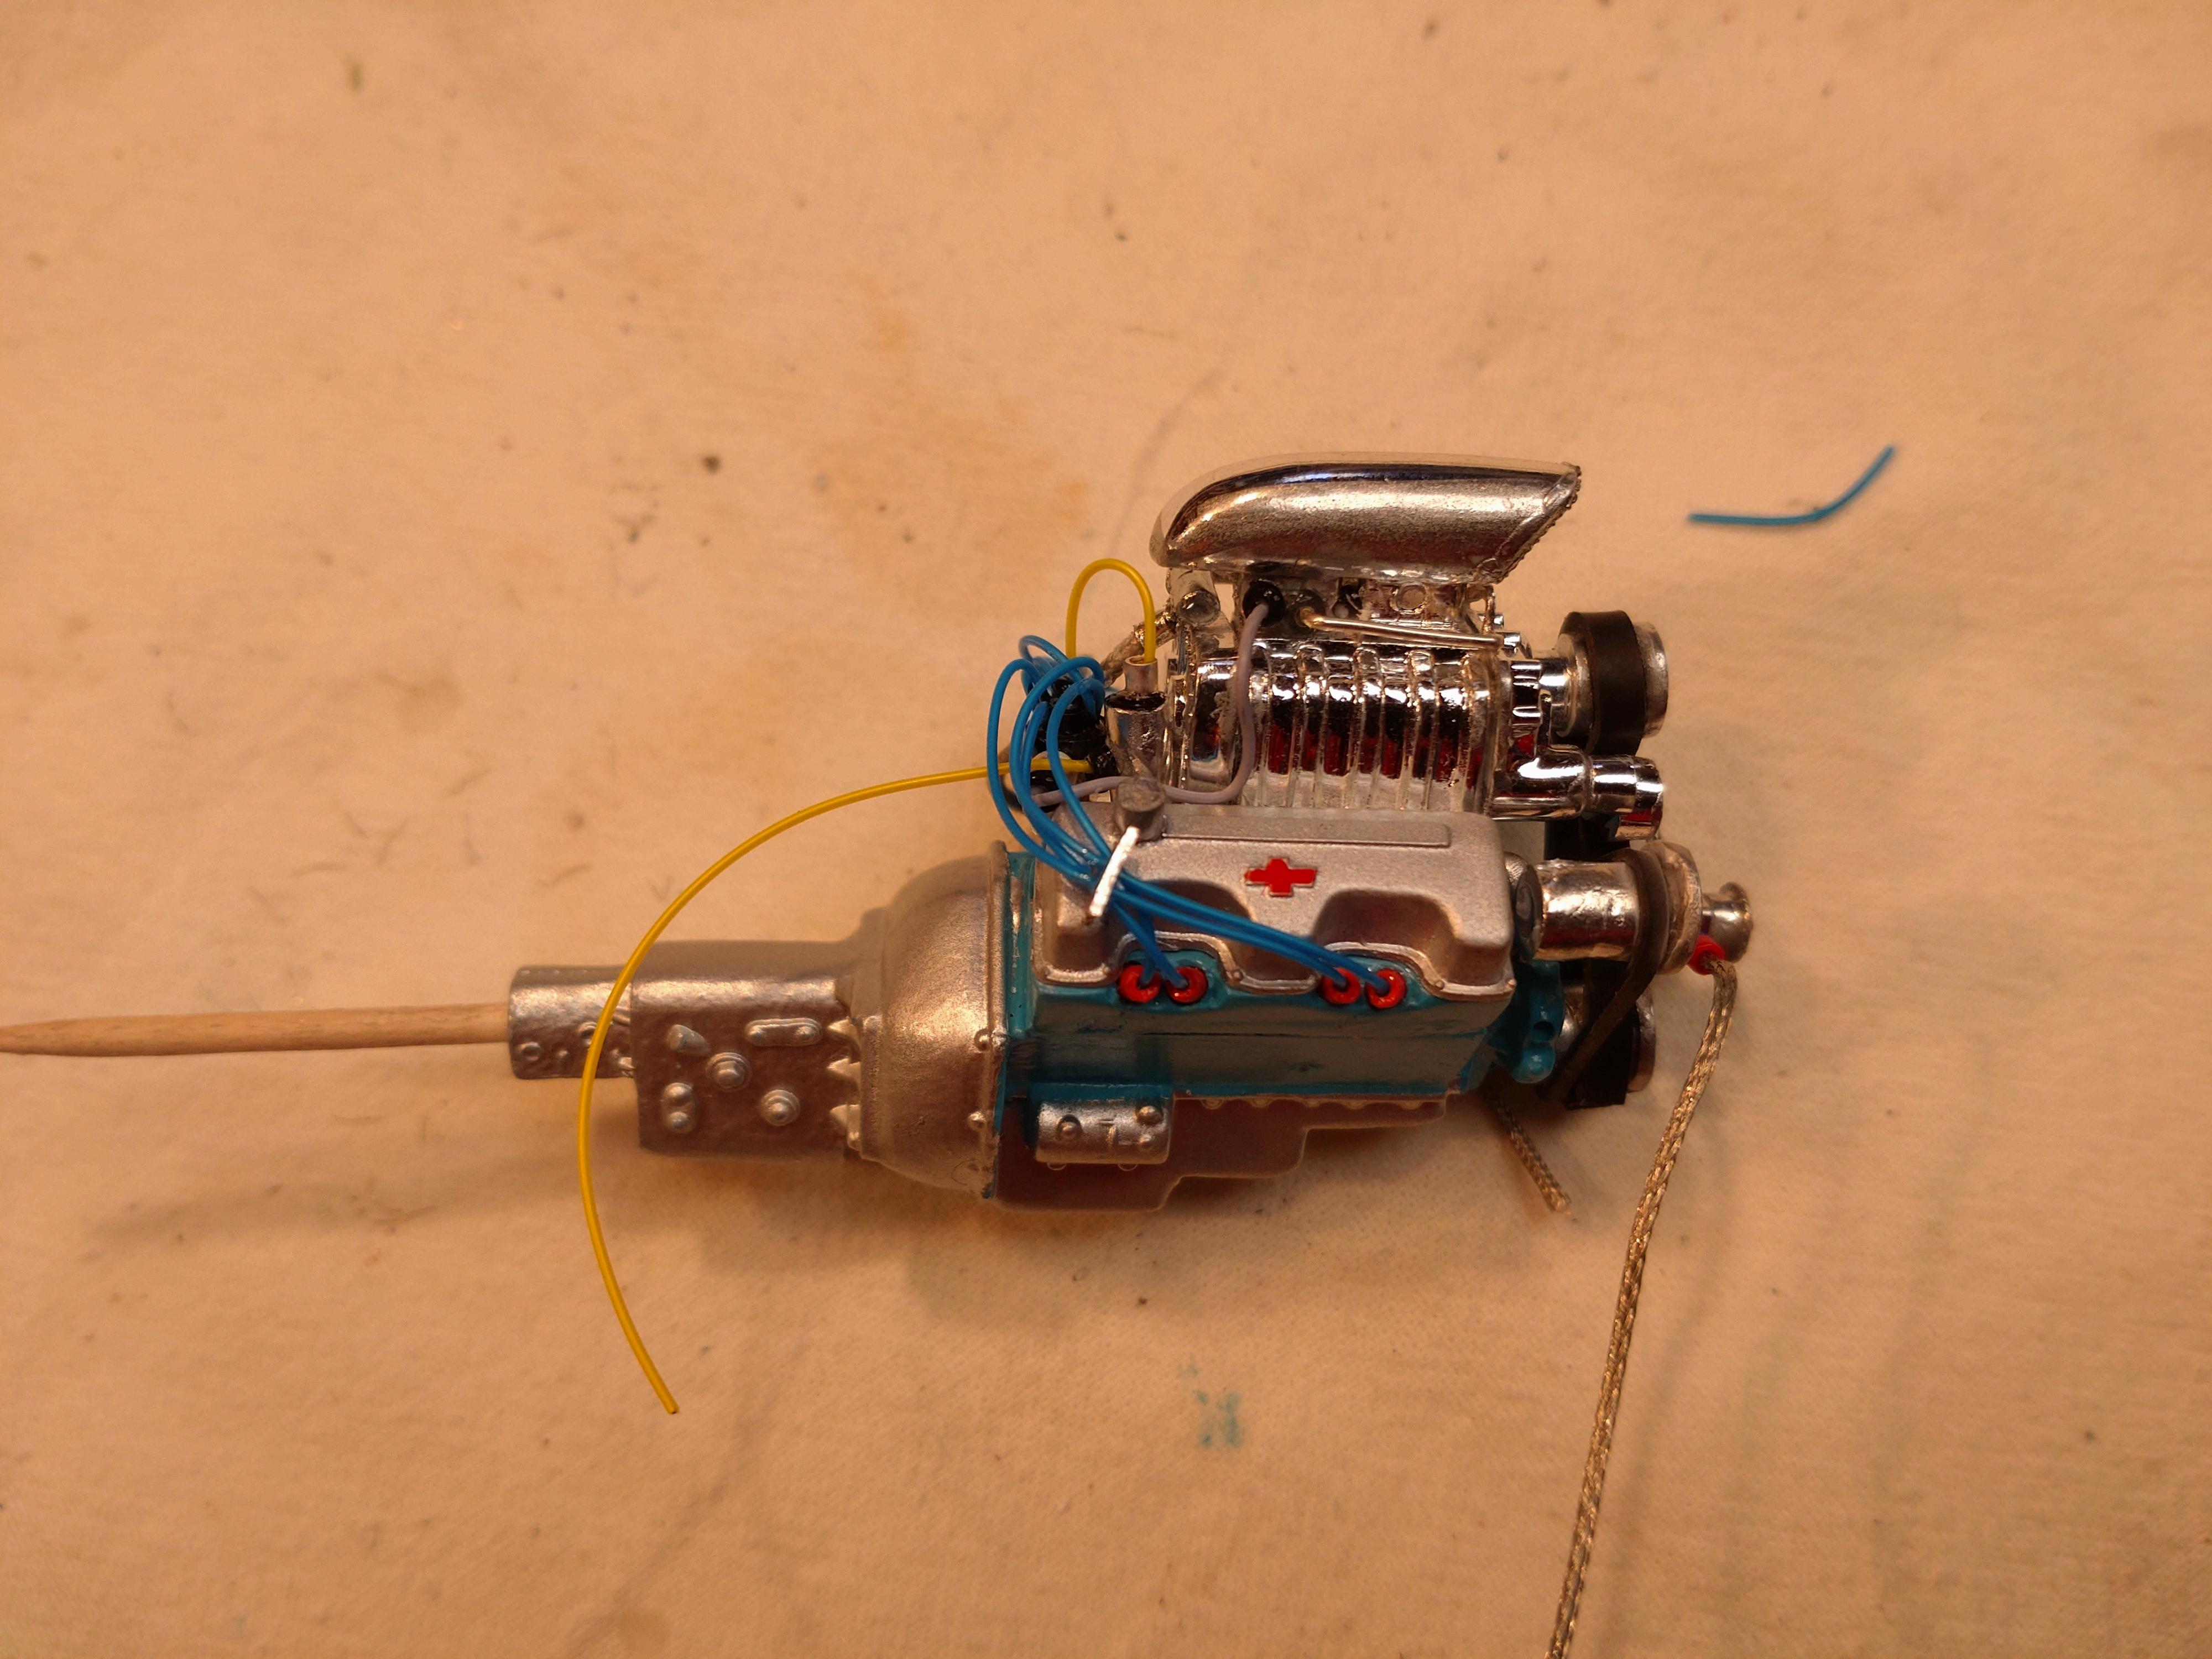
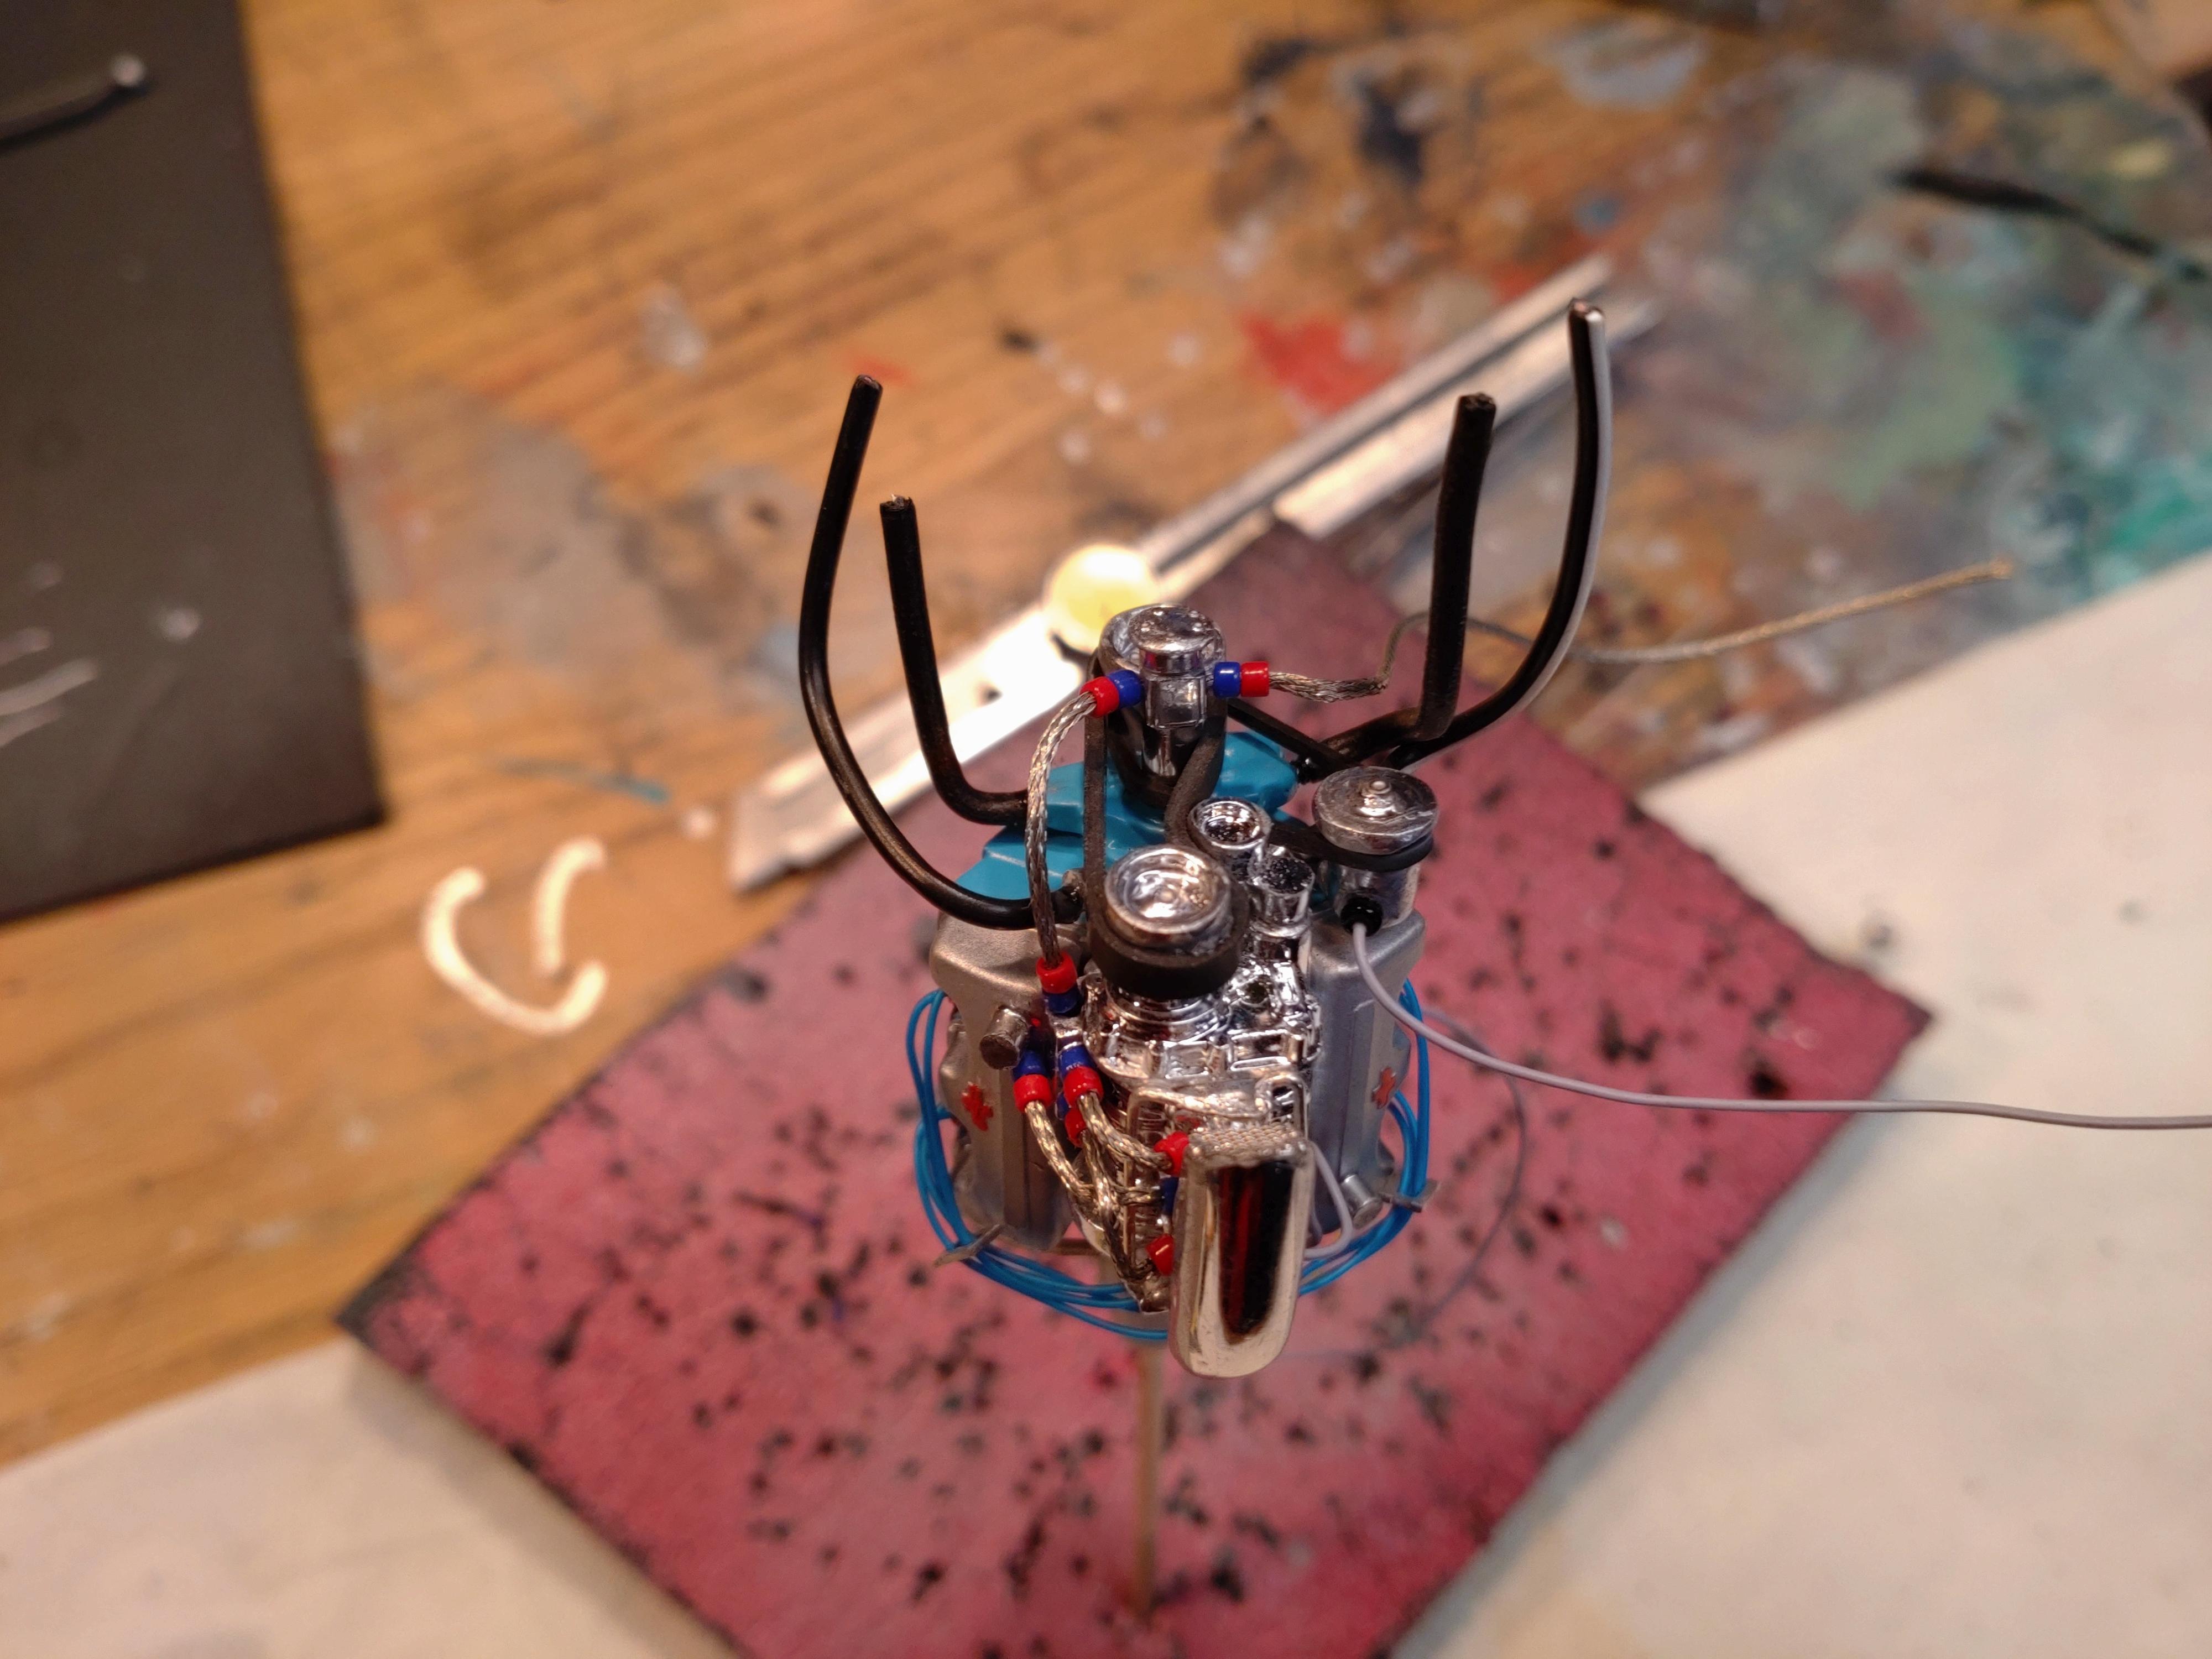
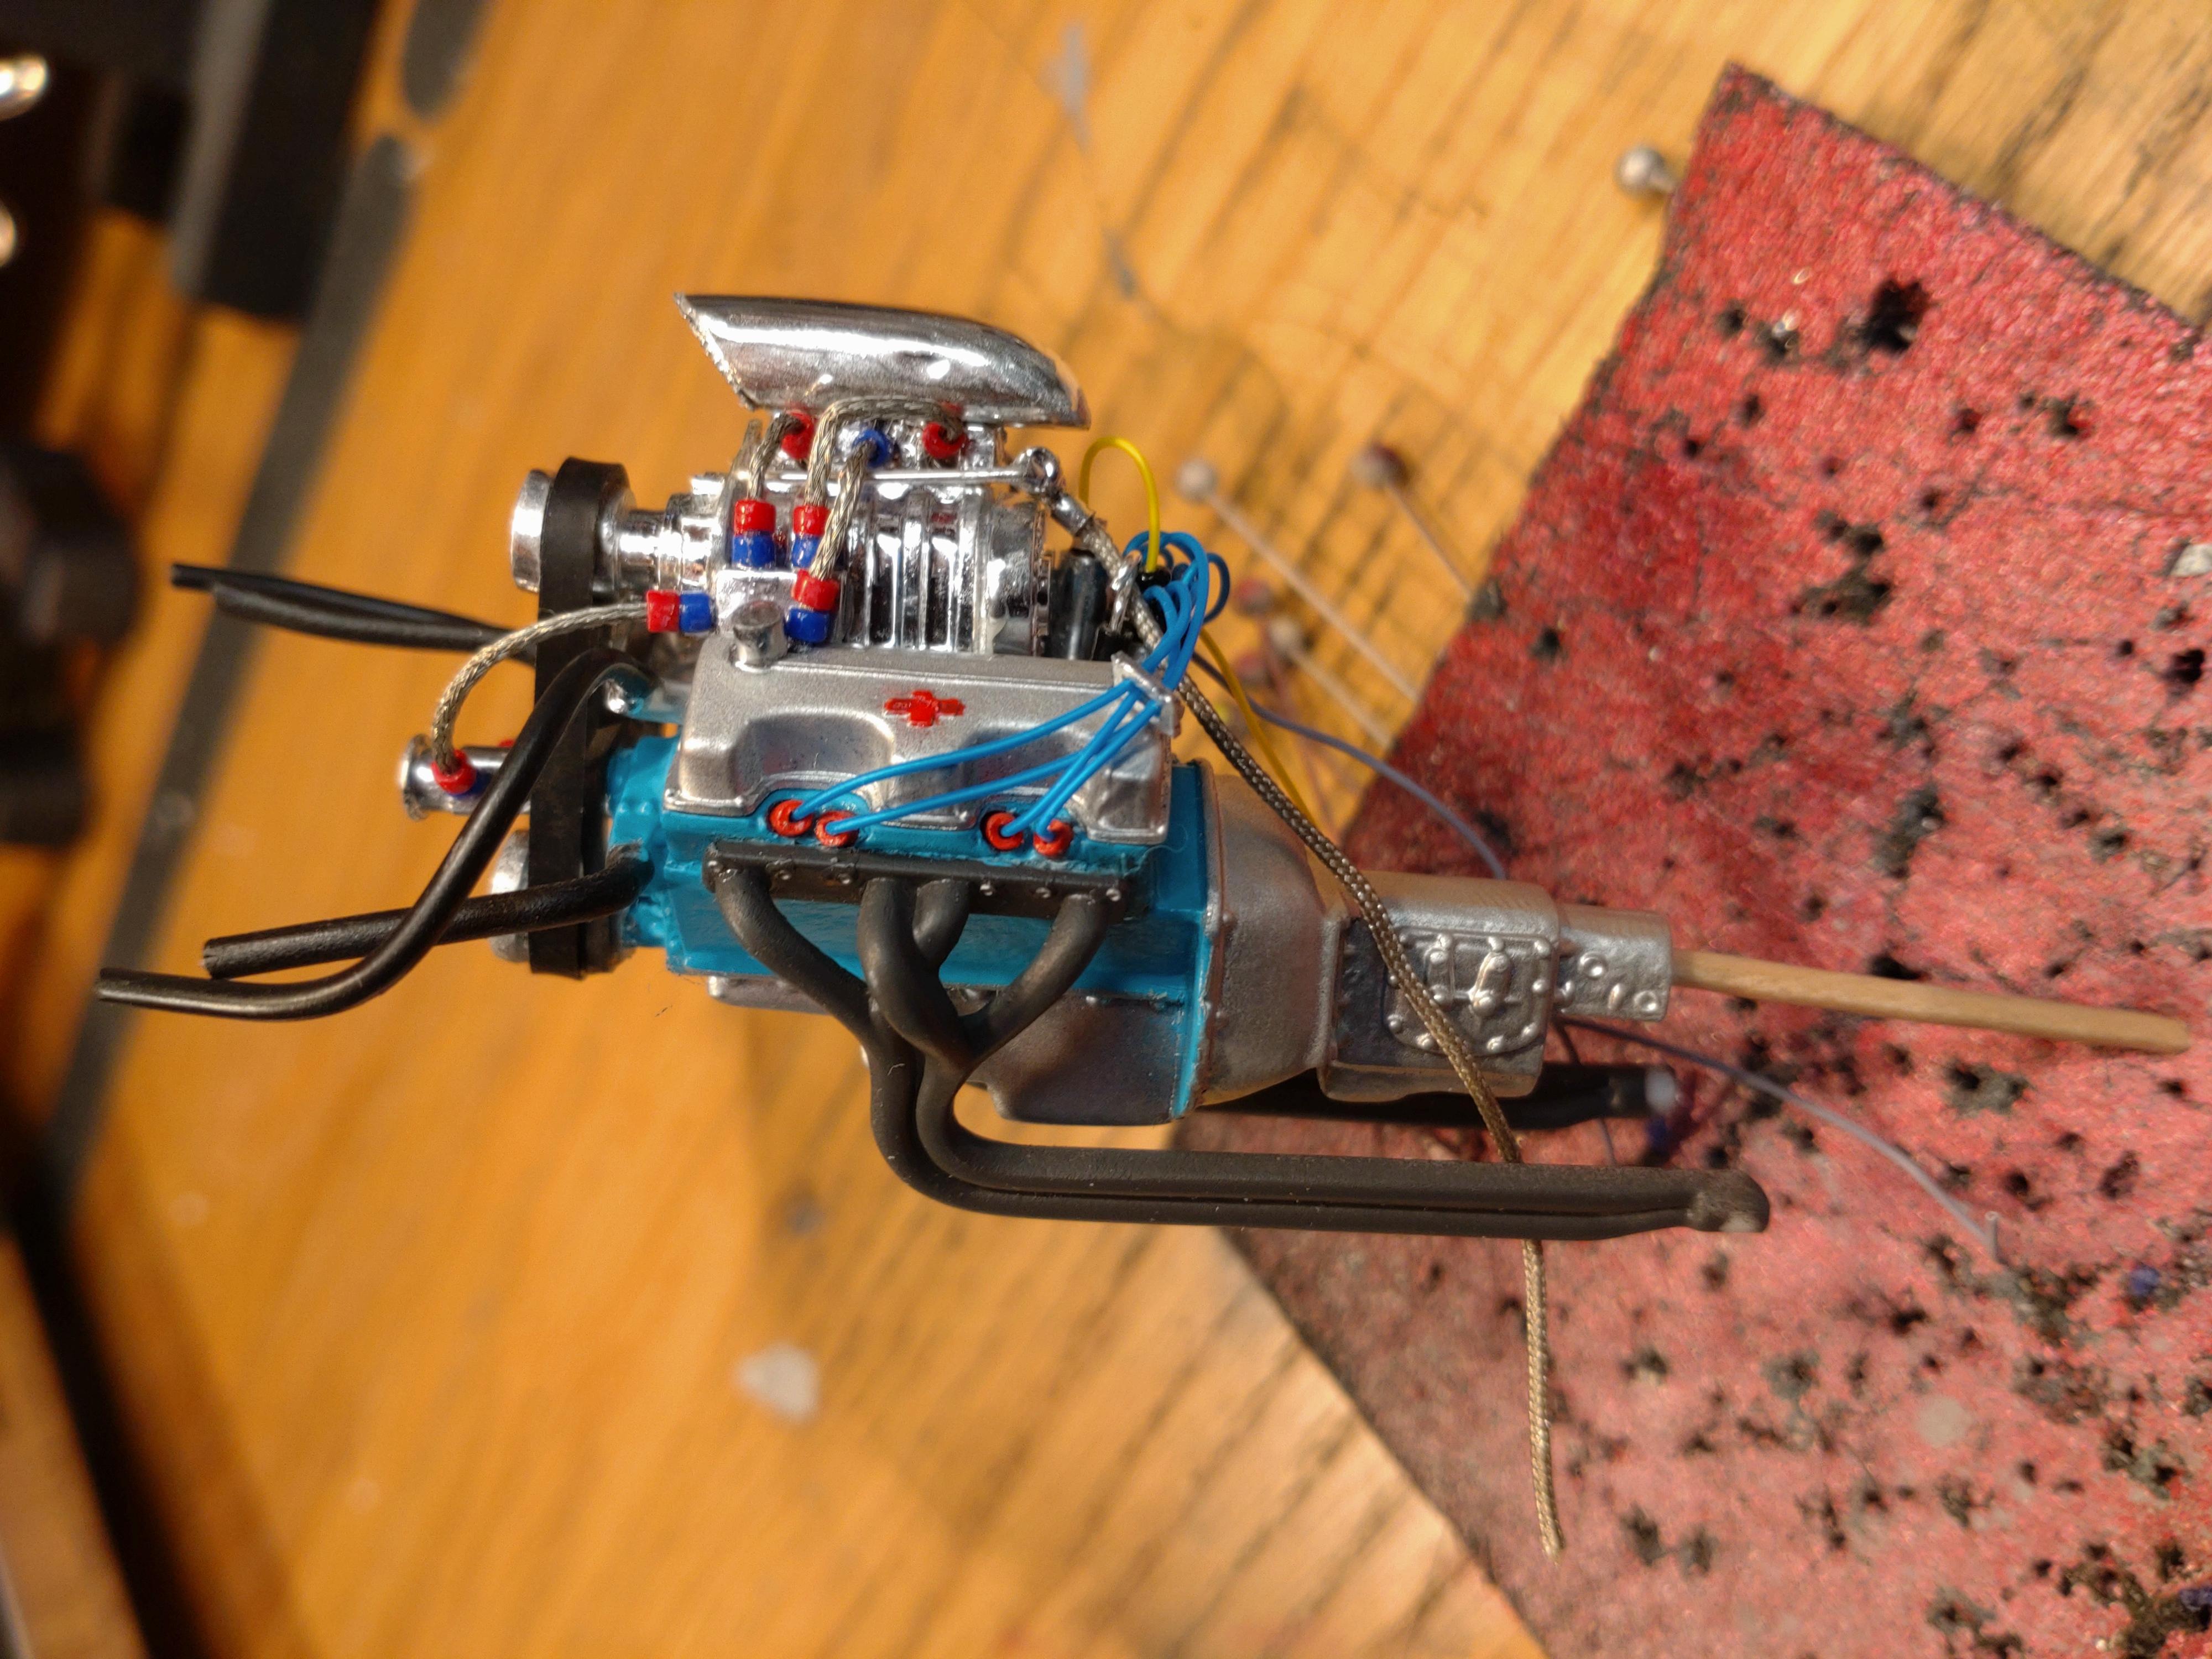
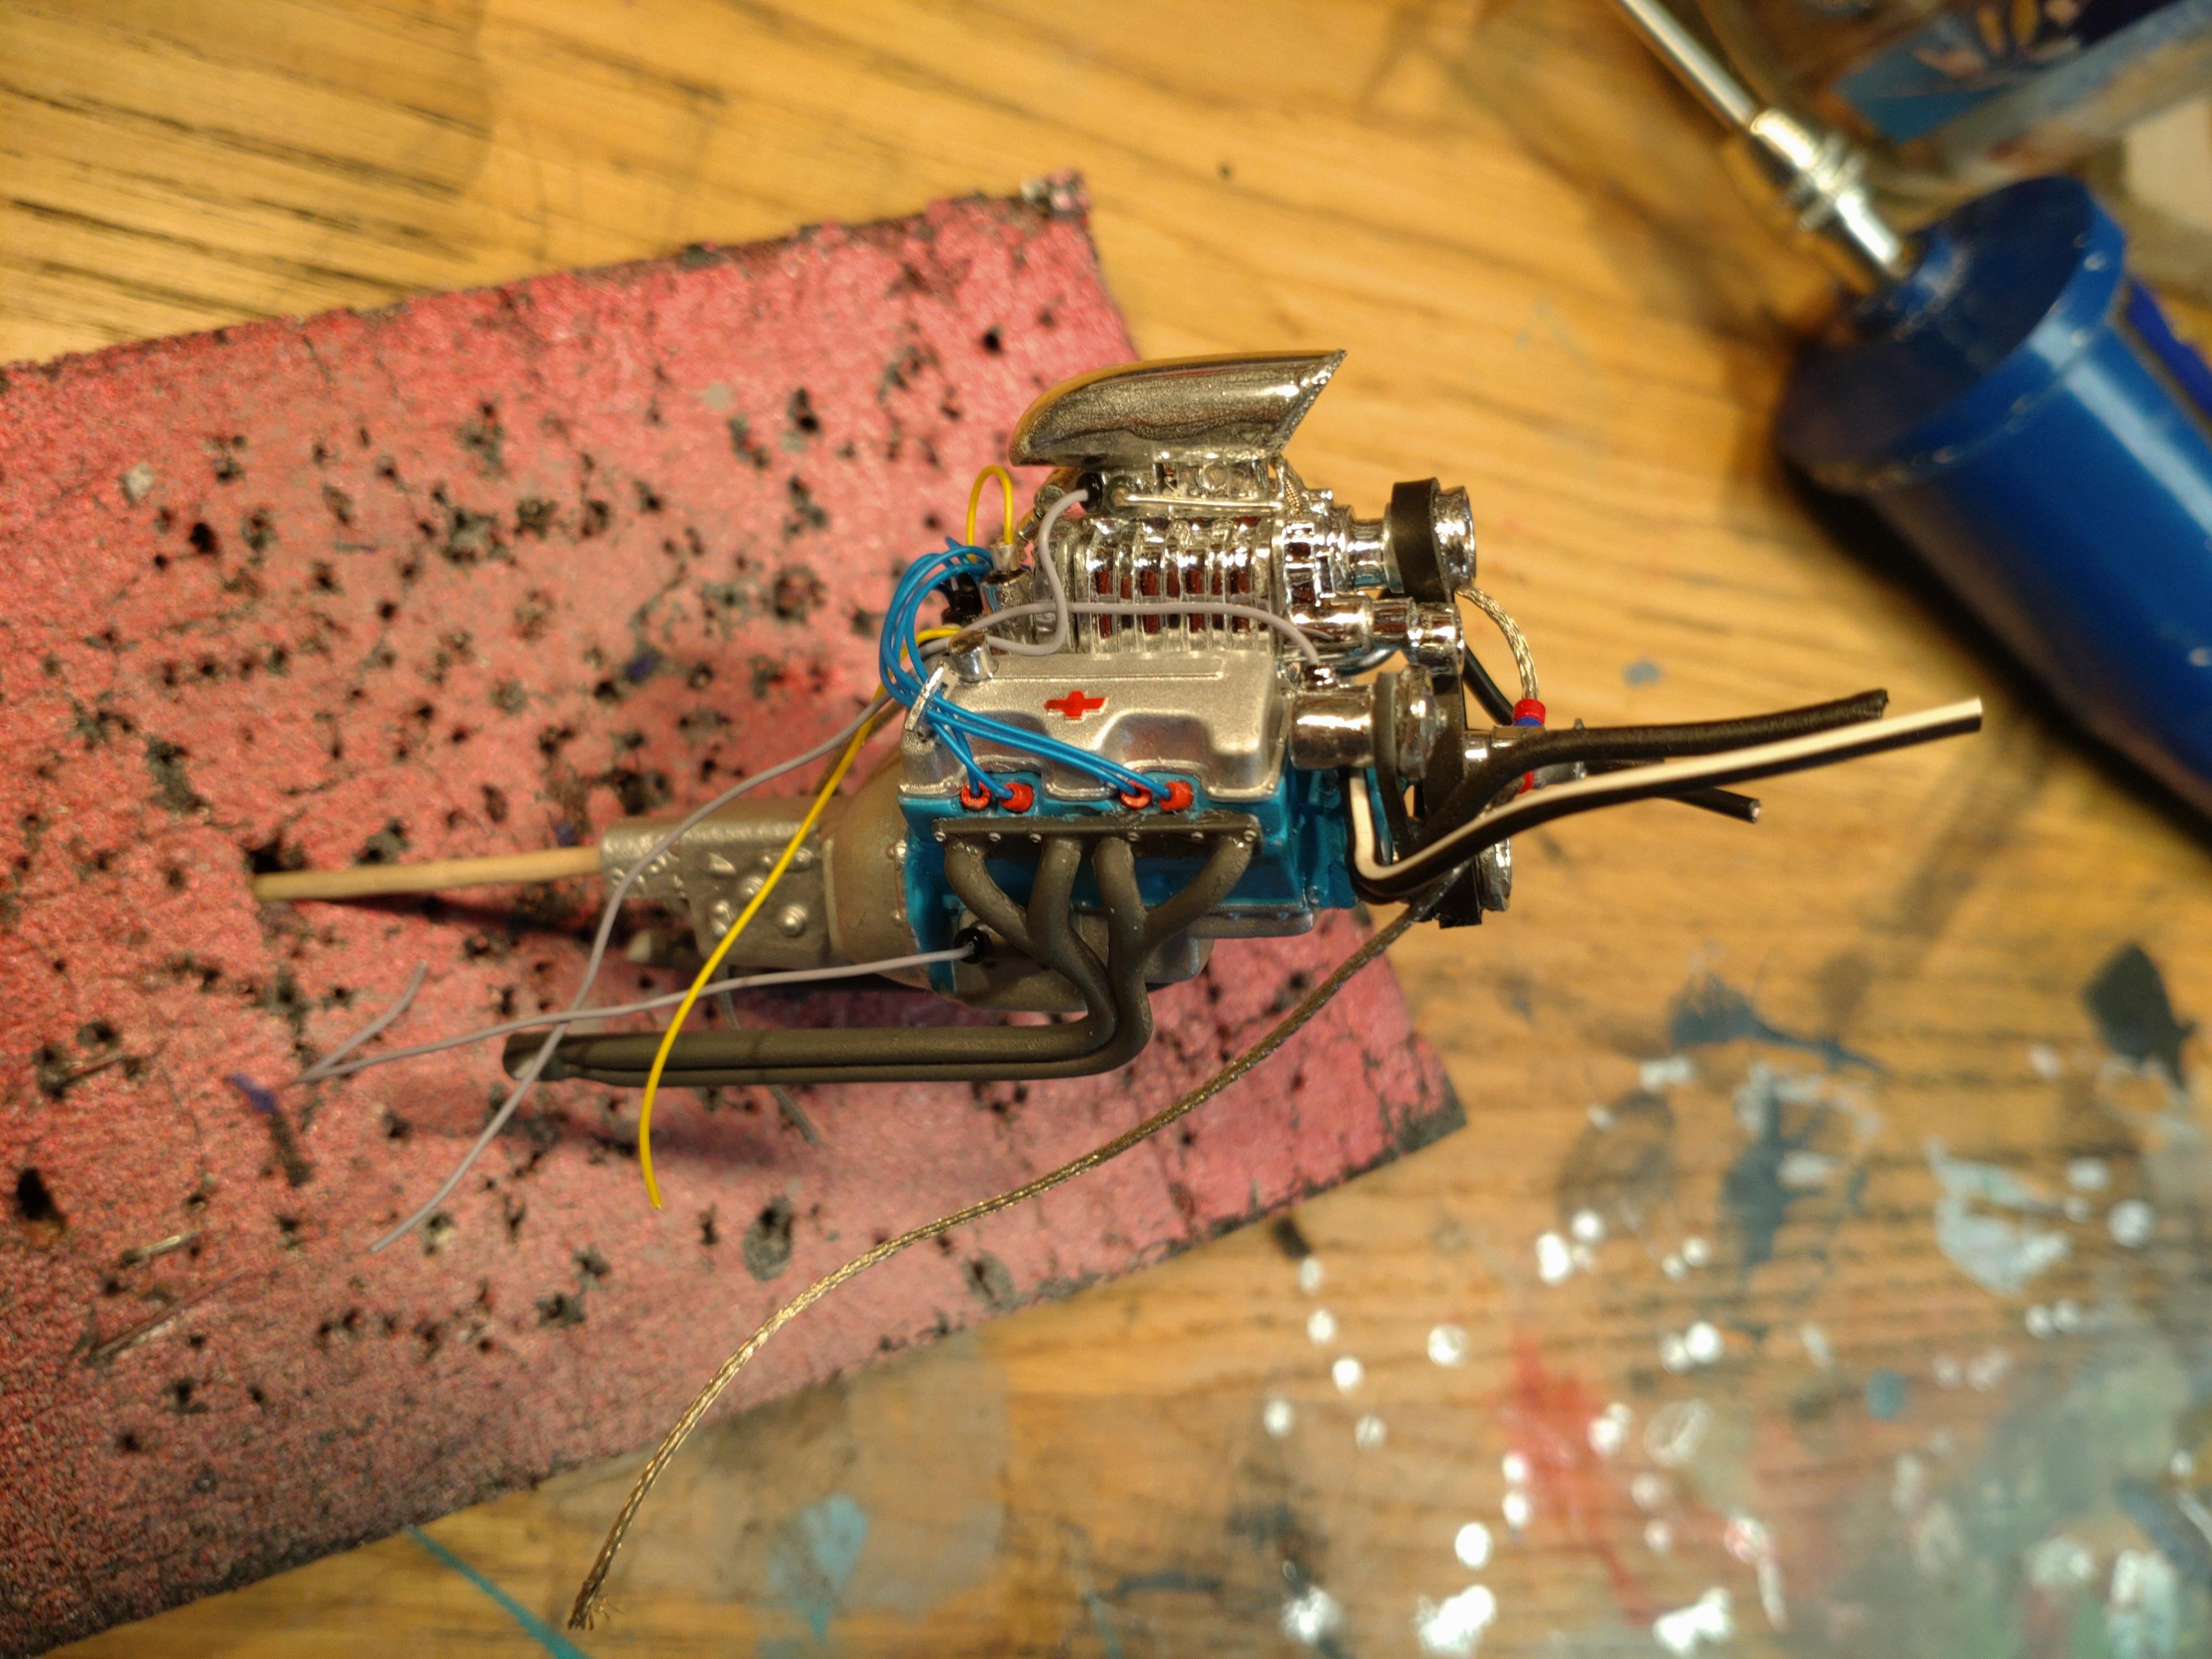
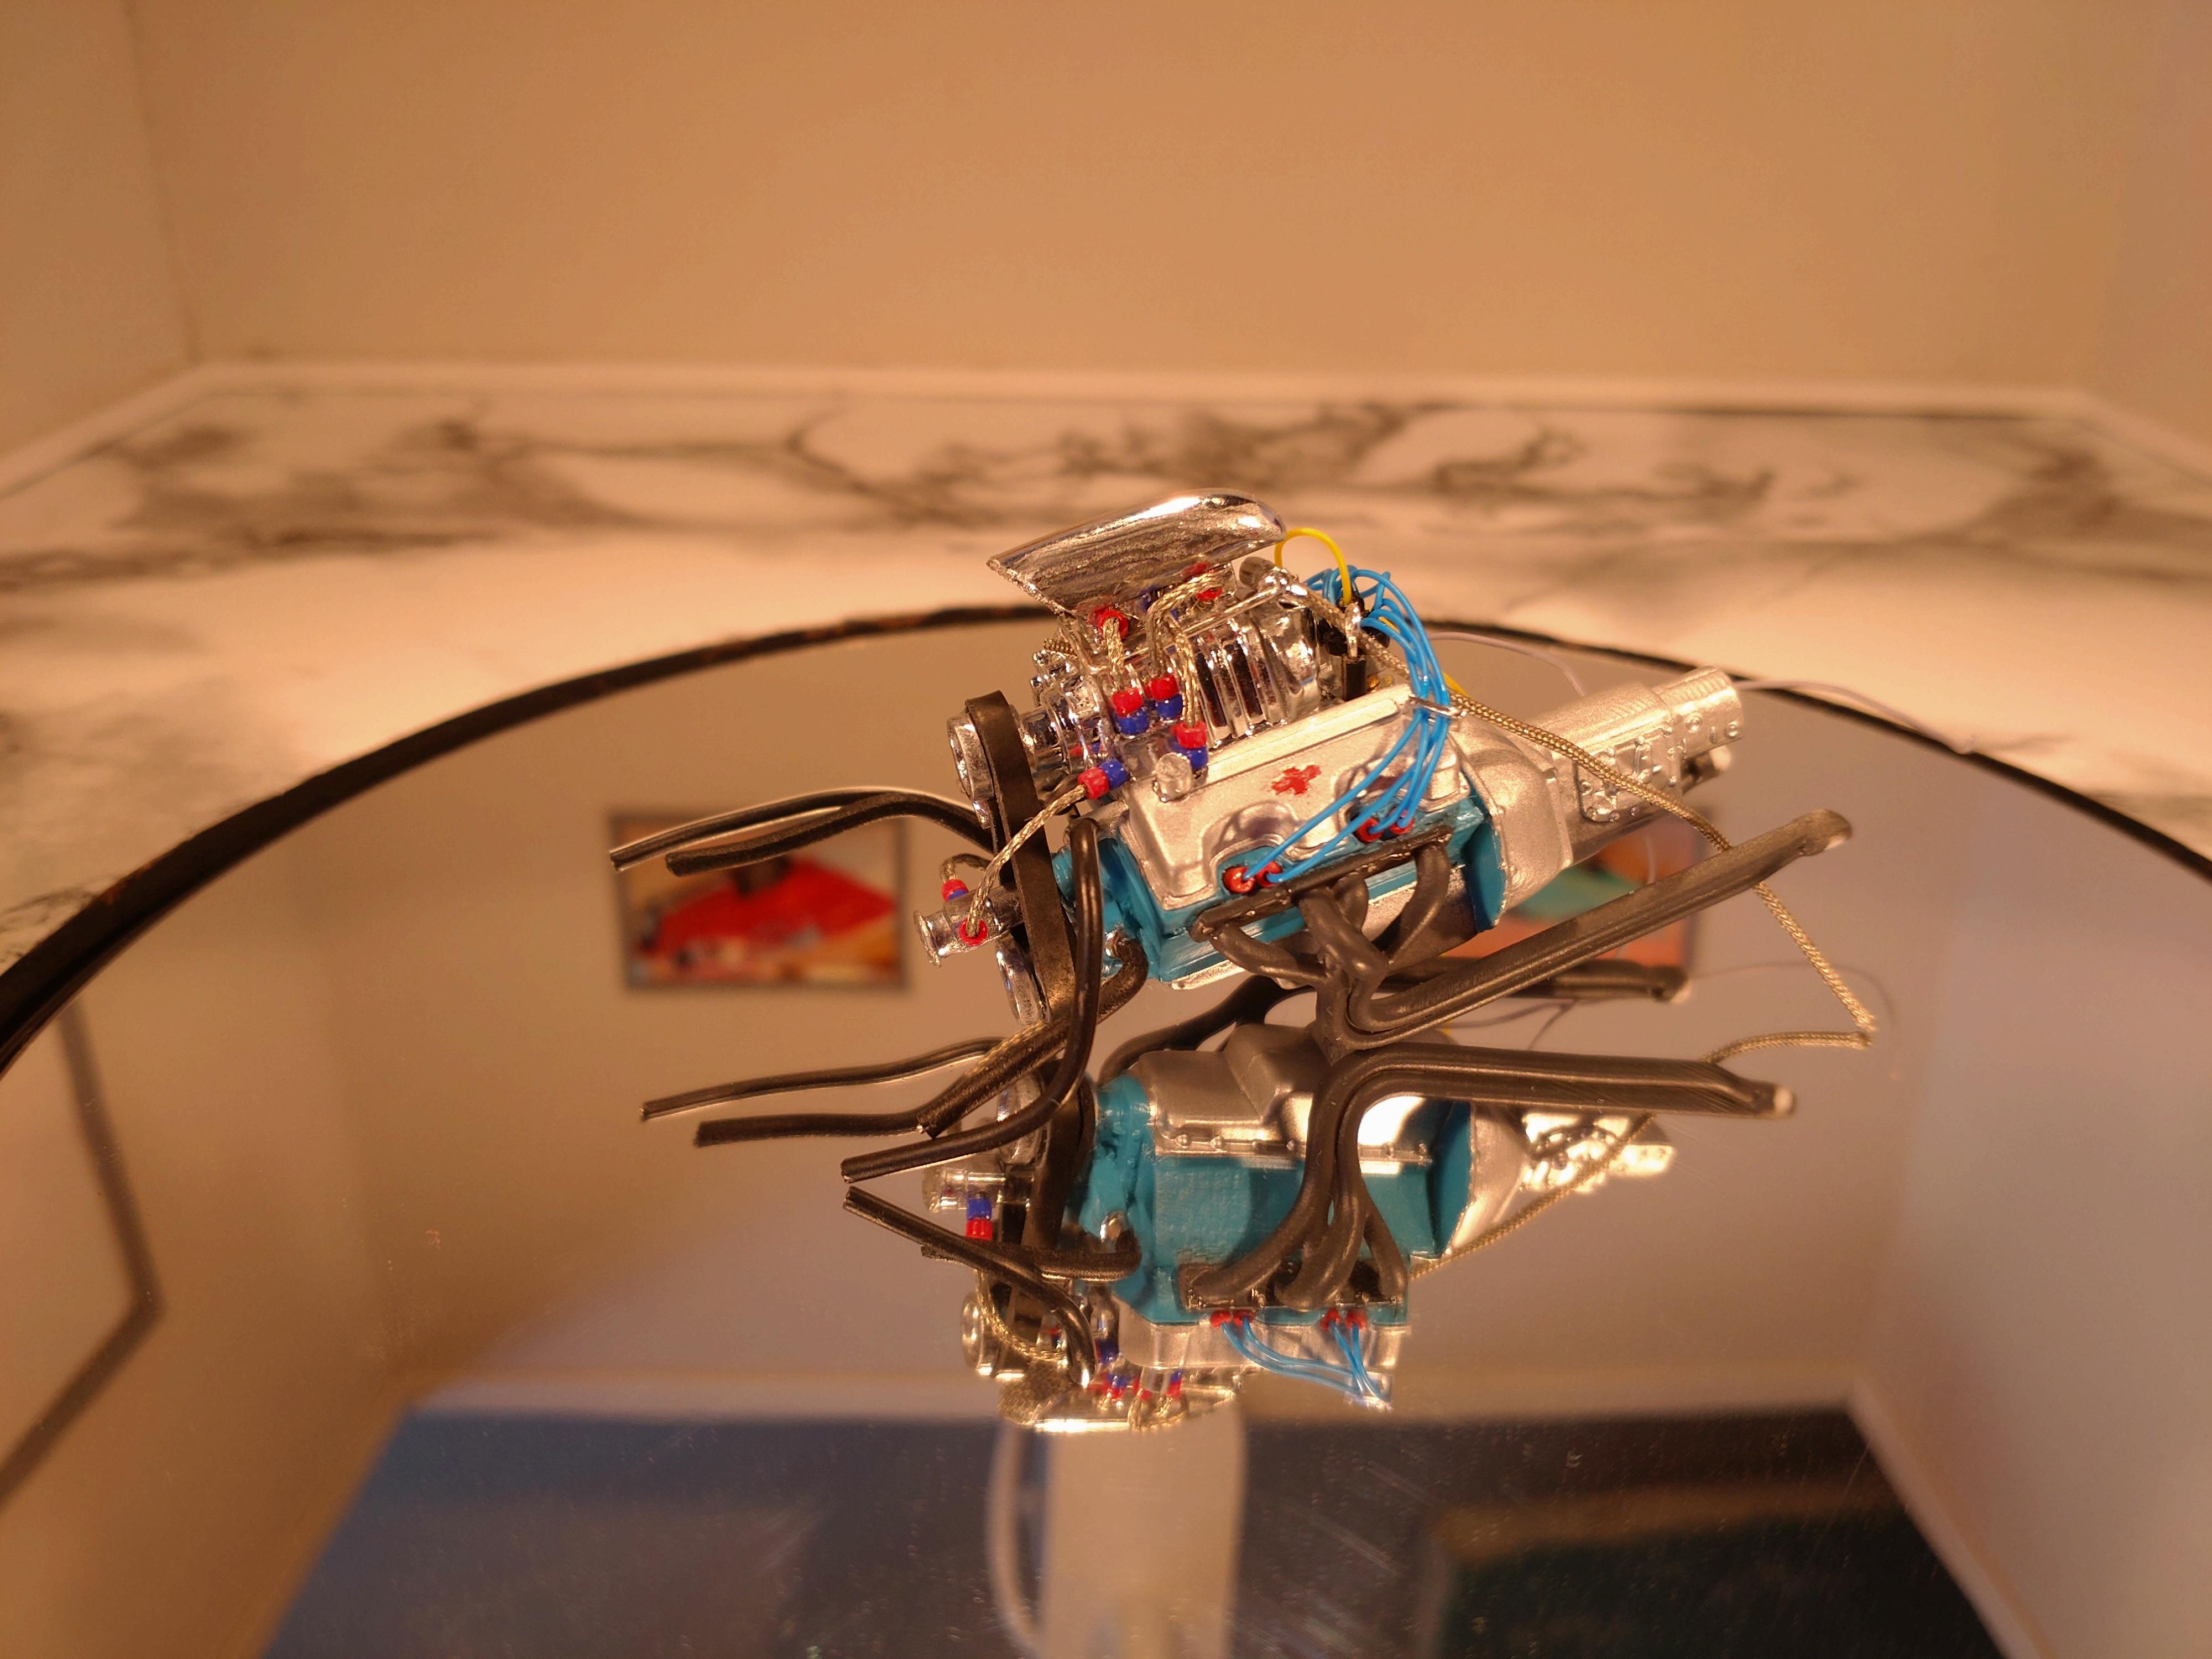
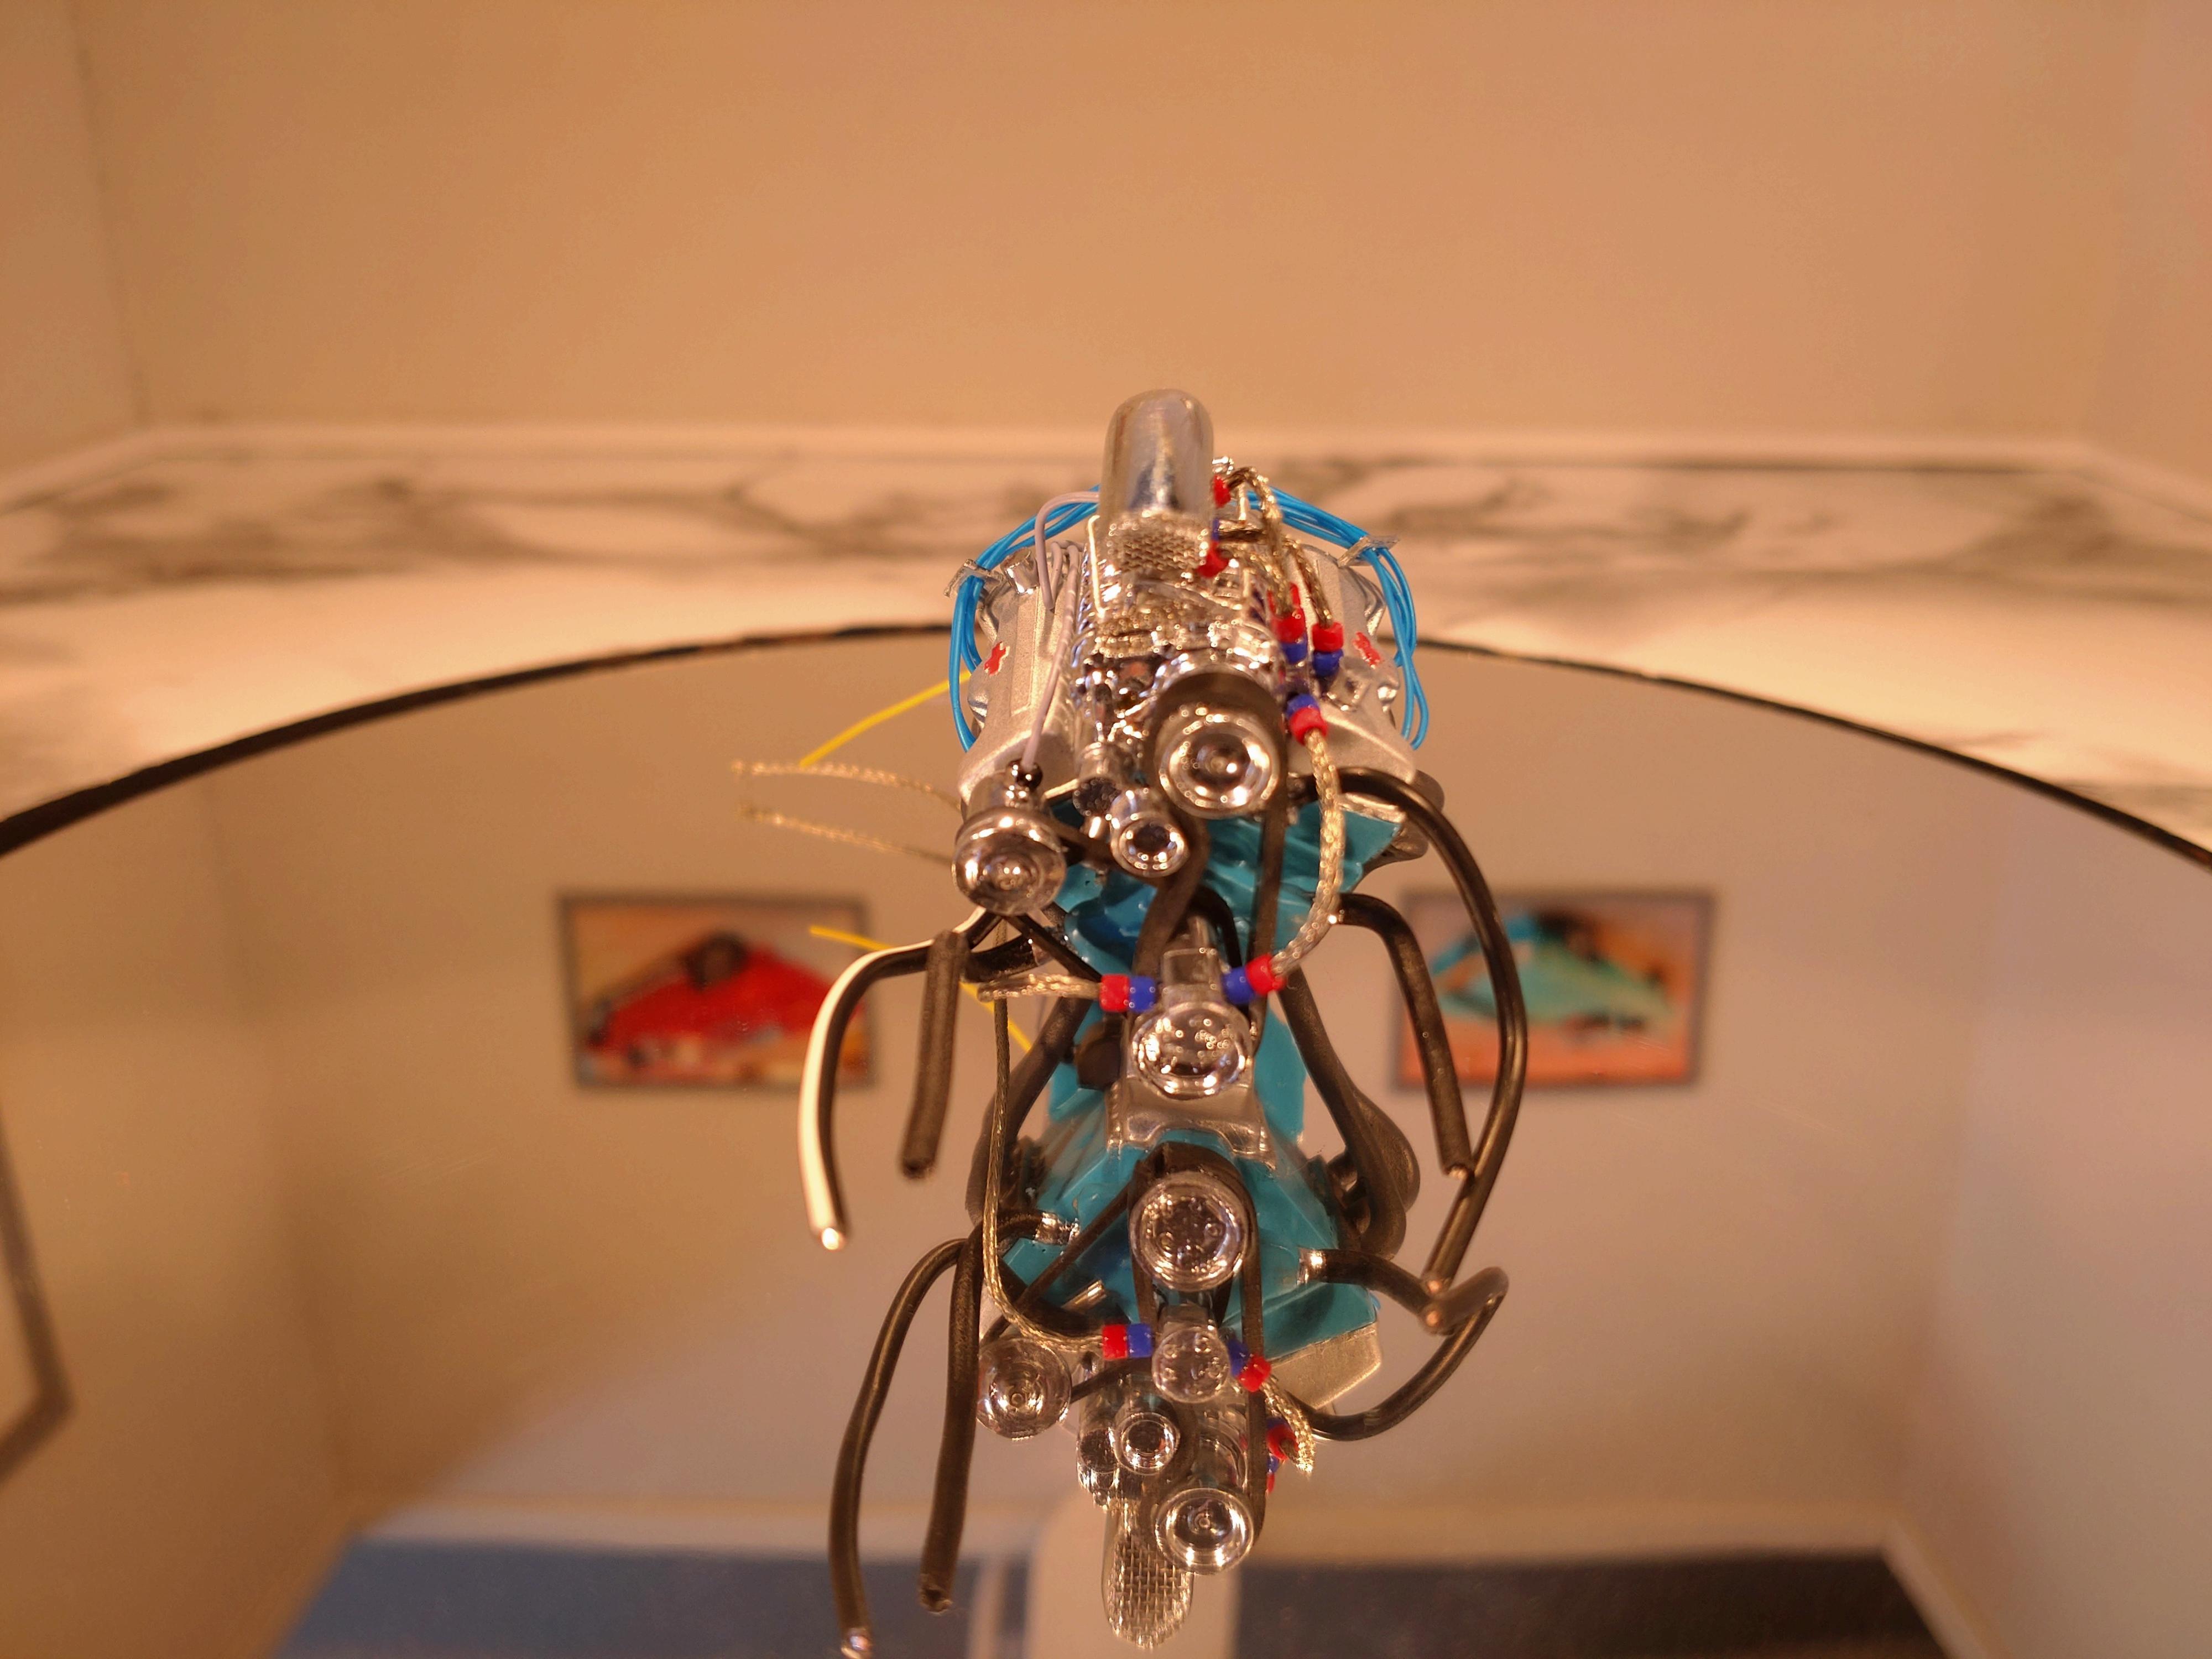
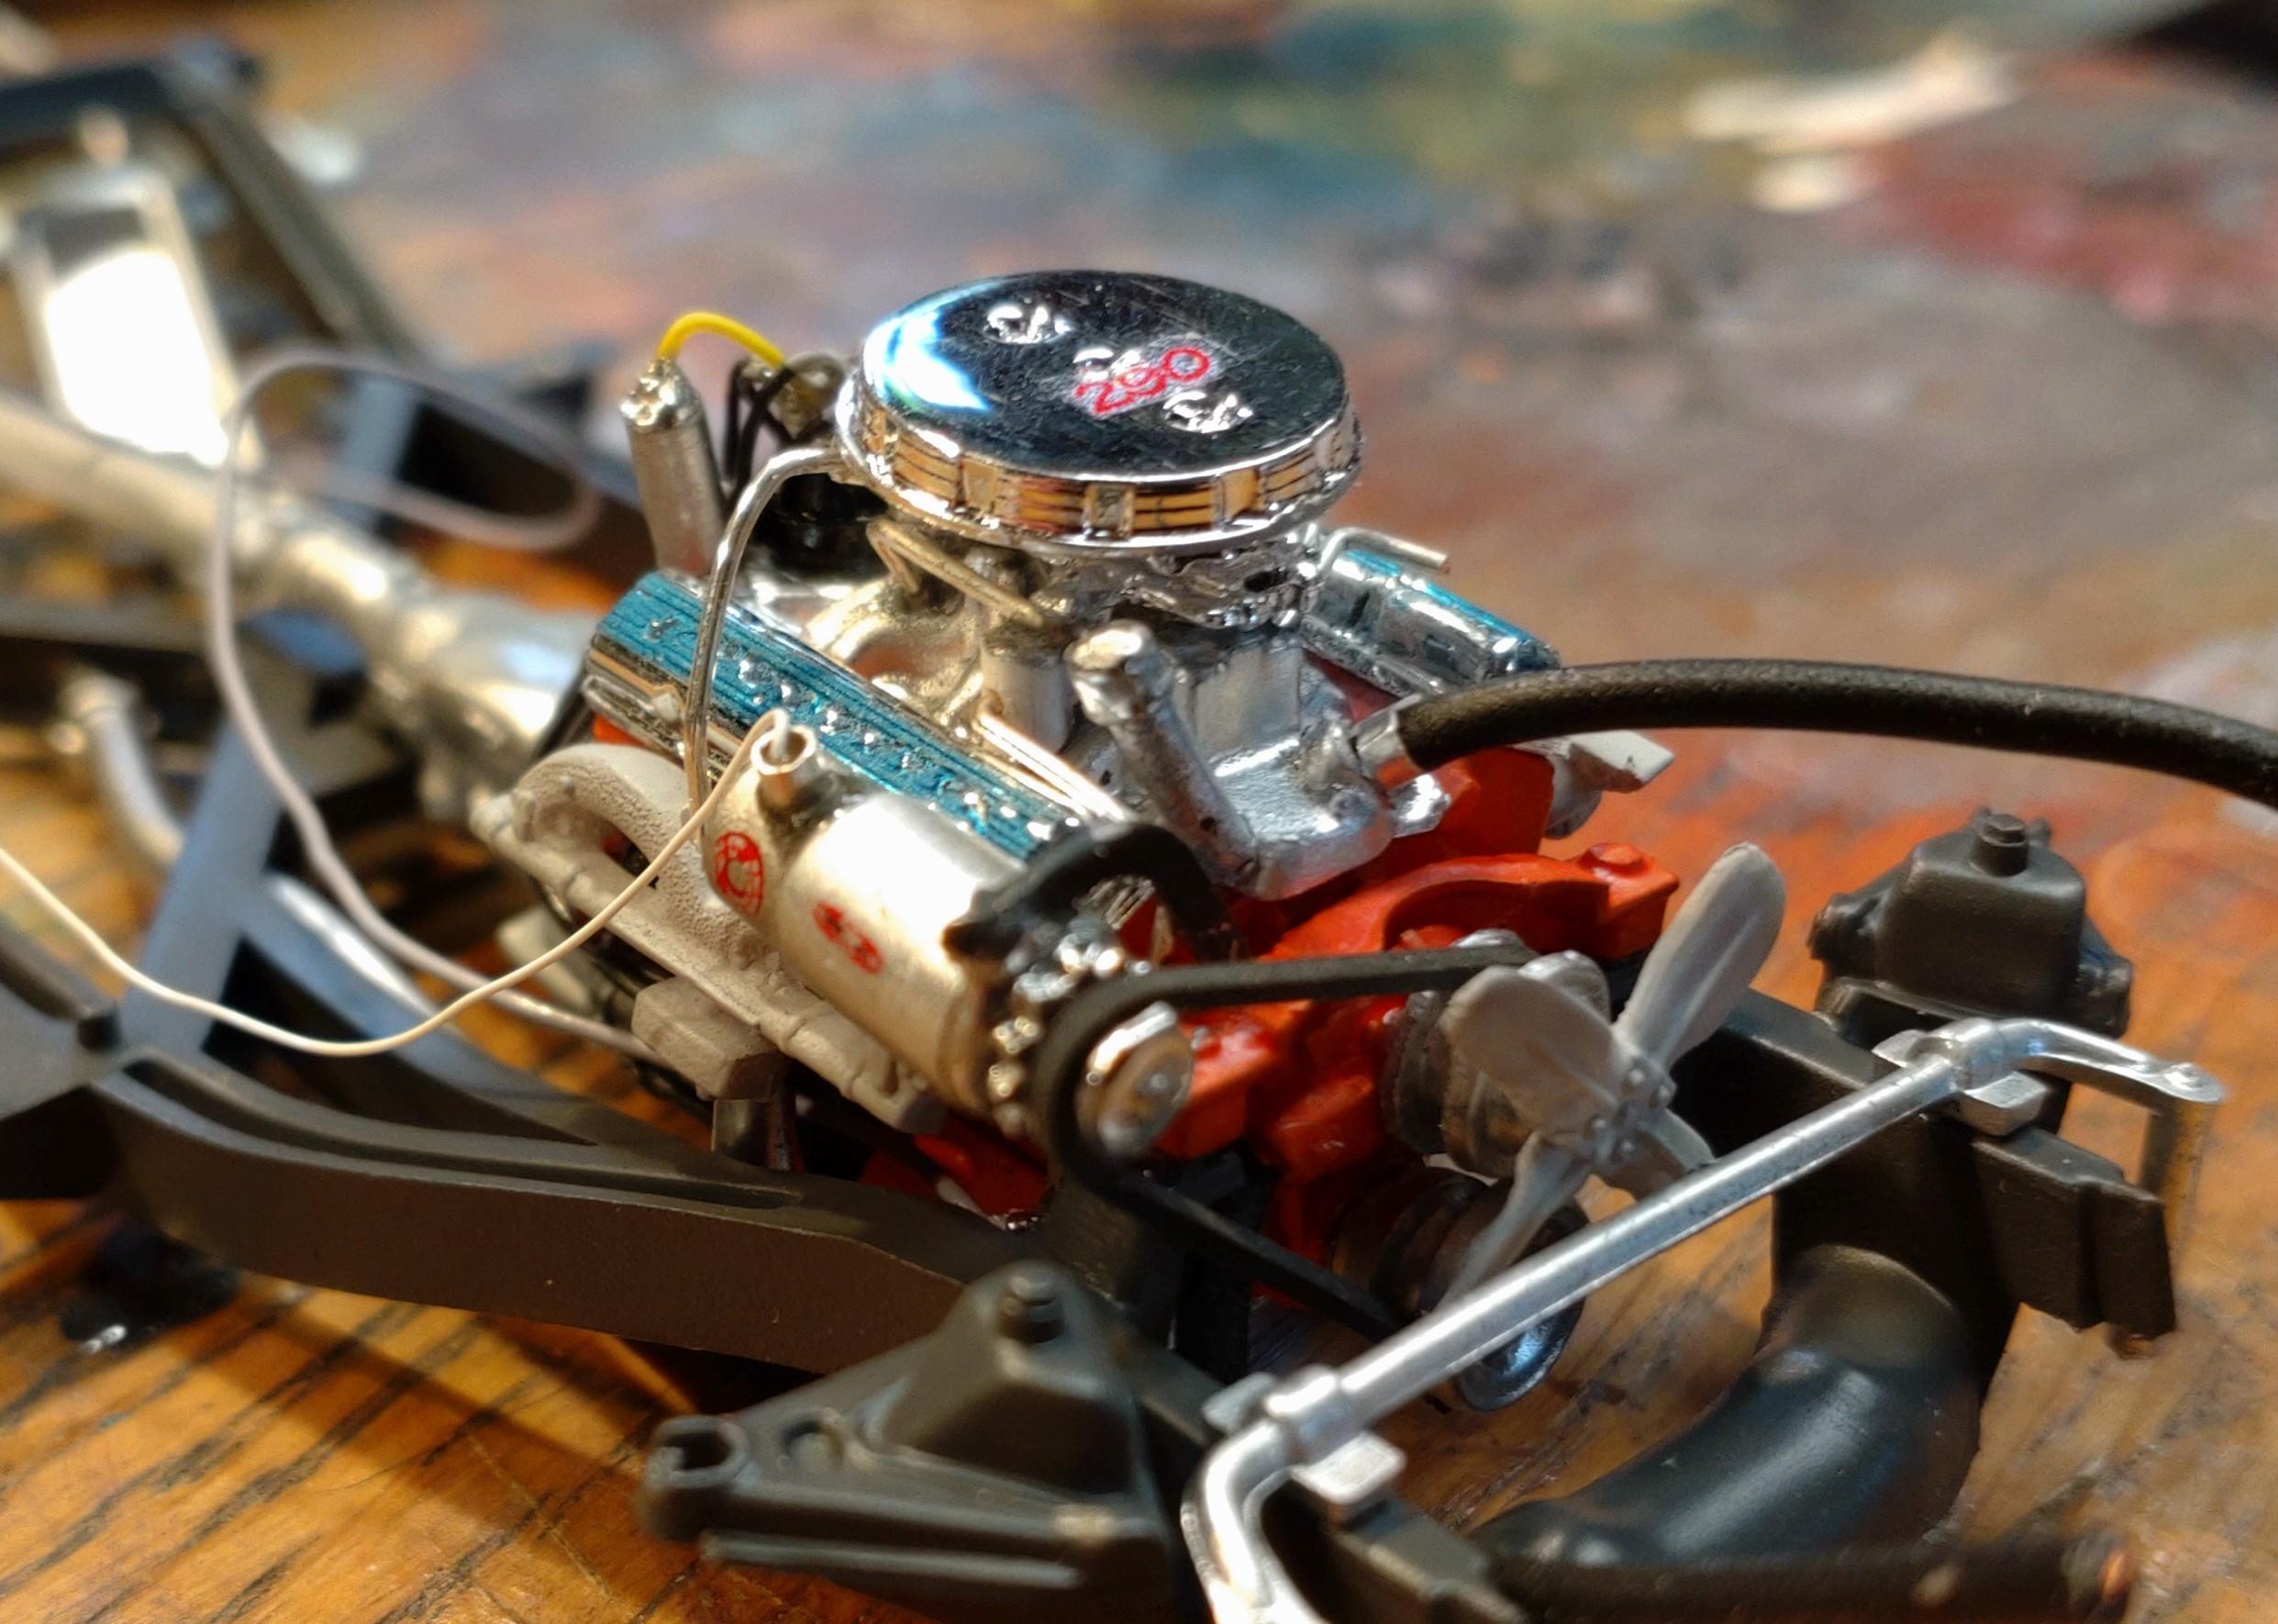
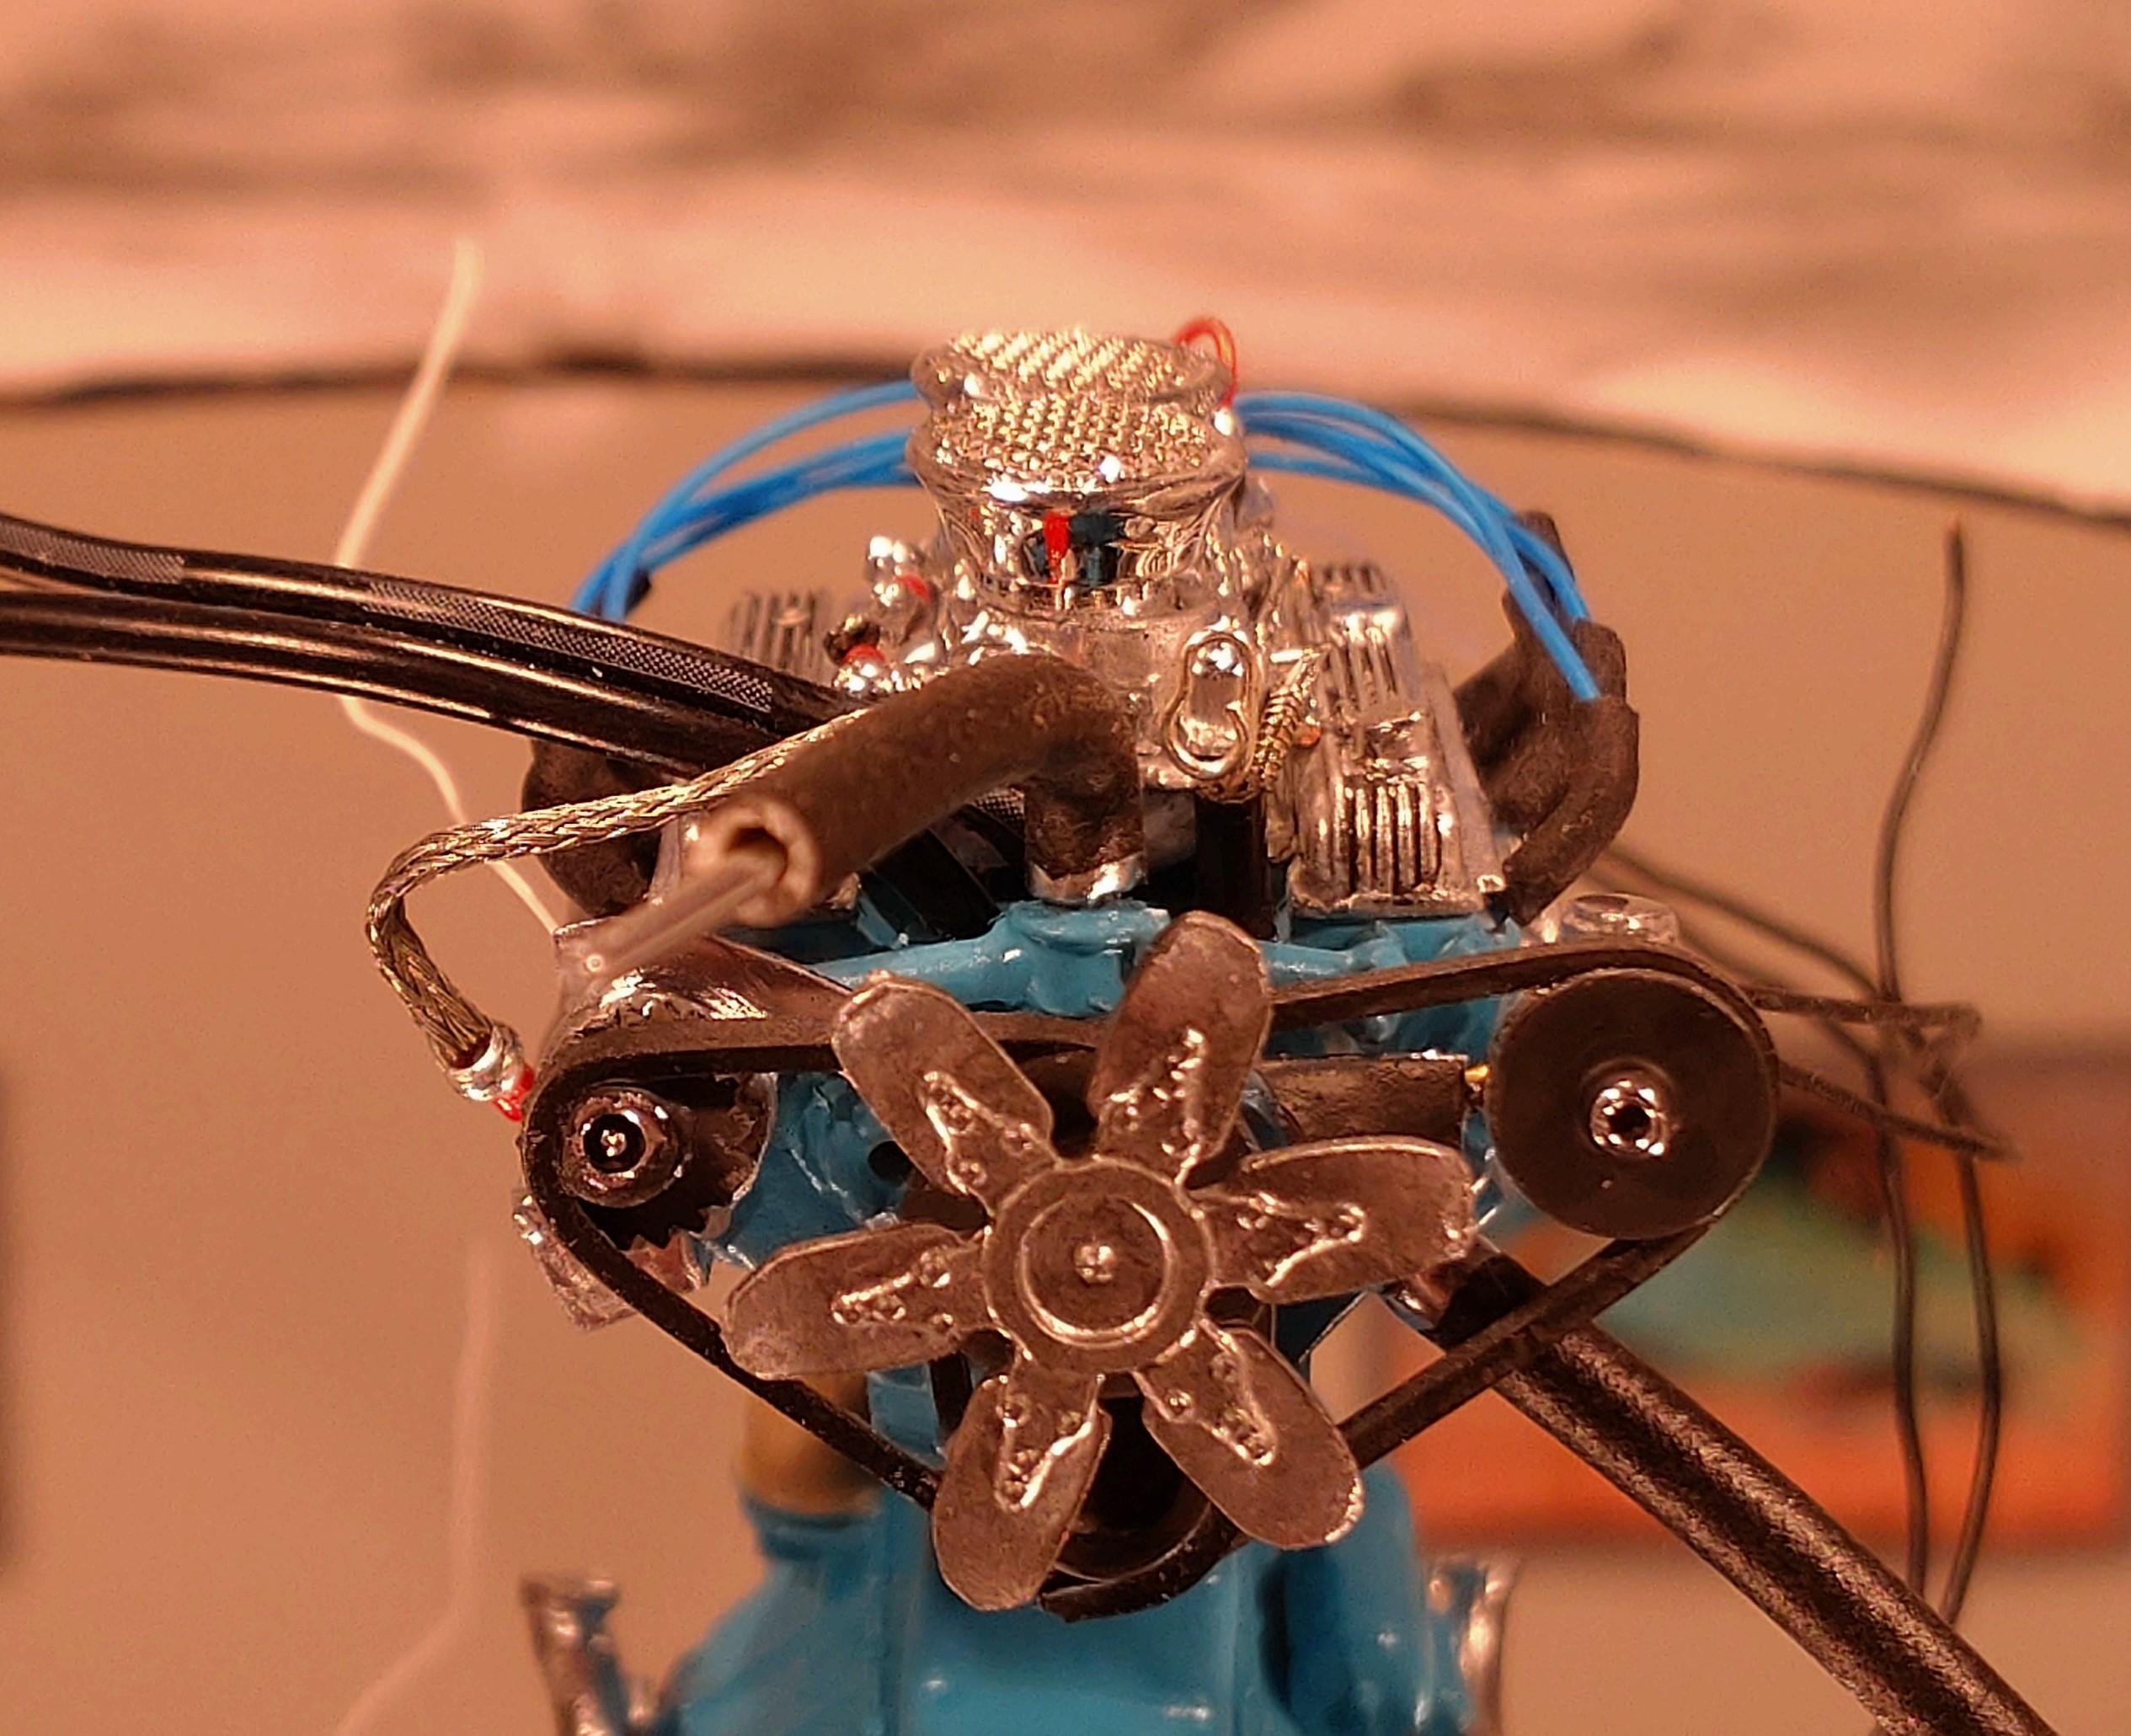
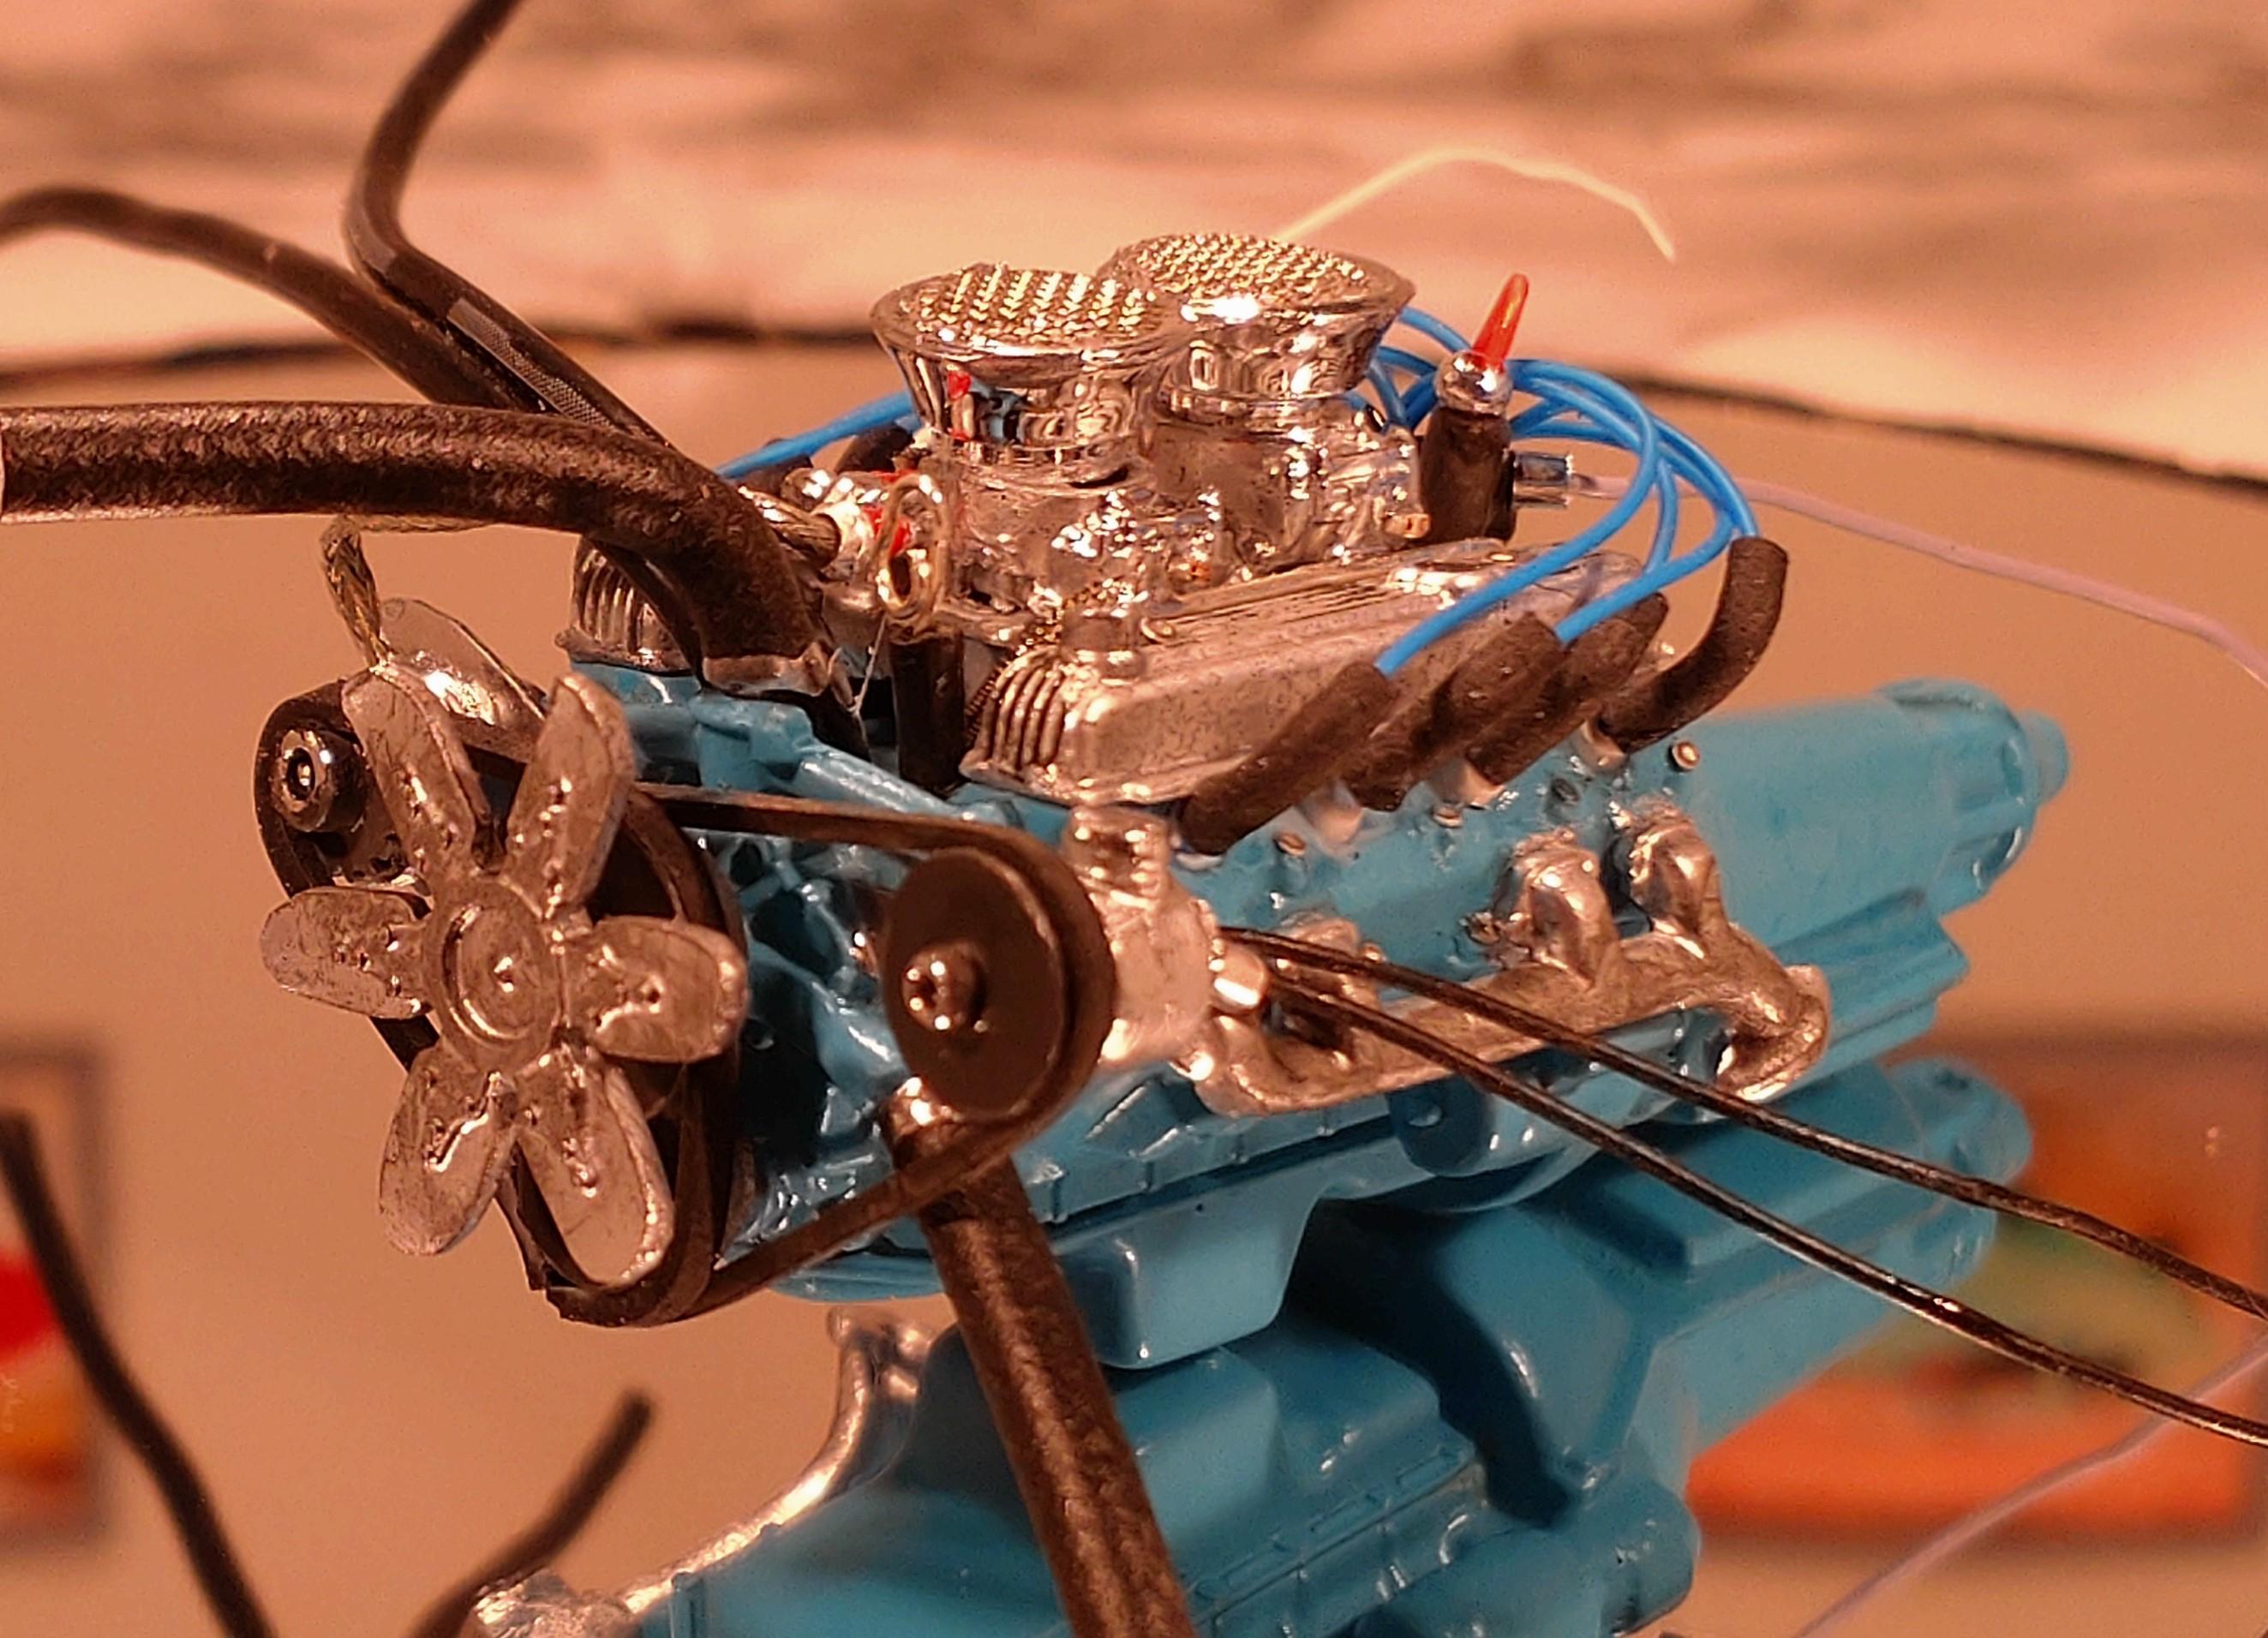
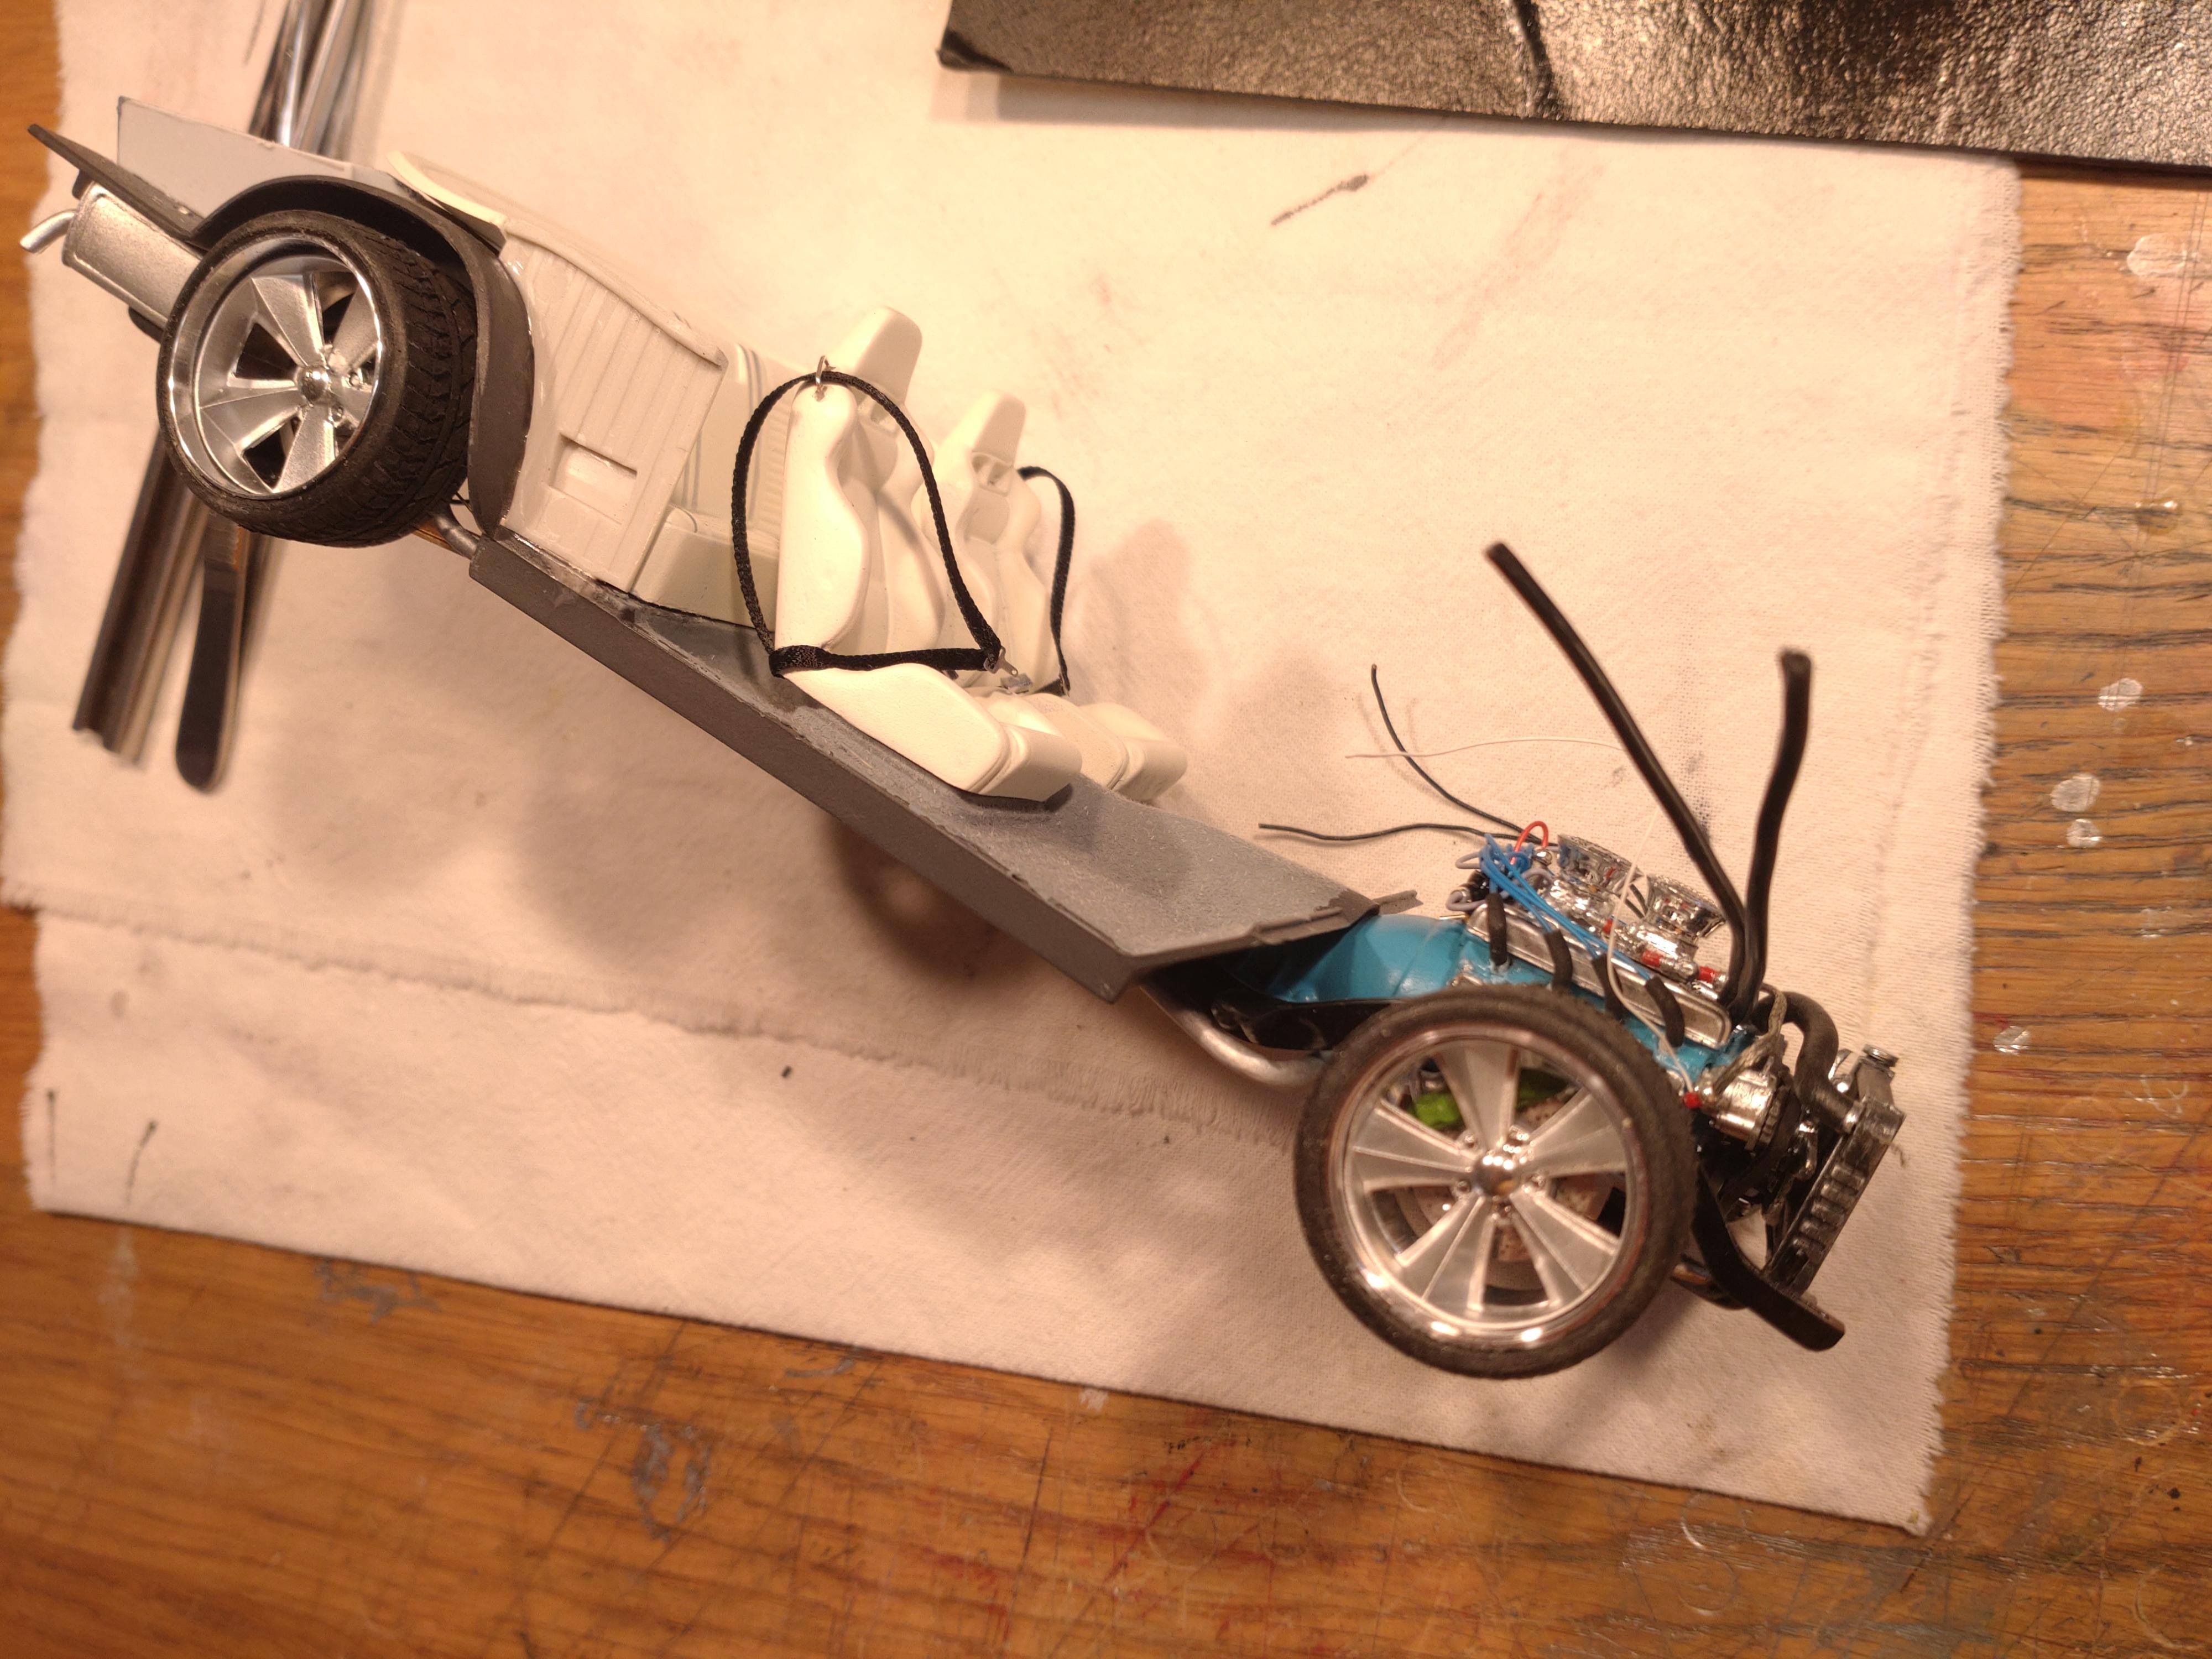
I had no kits on the shelf (imagine that!) and my order hadn´t arrived yet. But my fingers were getting itchy so I though of spending my time with a project, that I could use later. I dug into my spare parts box and found enough to build an engine. I will be building a hot rod in the near future so I decided to build a supercharged. Since I was getting some praise for my detailing (a big THANKS to everybody!) I would like to go through my steps. First, here is the finished project: The parts come from at least 4 kits, so I had to do some adapting. This is what I had to start with. To get ahead fast I like to use a solvent that I buy from an artist and craft store in my town. The shop also sells items for architecture modeling like styrene rods, sheet and other materials. And "Dichlormethan". Only takes about 30 seconds to stick and then I can move on, but it dosn´t work good for the fine stuff. The engine block is quite simple and in no time I had the major parts attached. The holes for the exhaust had to be filled and puttied. After sanding a coat of filler primer. The major holes for the sparkplug boots and the cooling hoses I drill before painting. The block is airbrush sprayed with Schmincke Aero Color acrylic artist paint and sealed with a semi matt coat. The transmission and the pan were sprayed next after masking the block. The charger parts I had to sand a bit to fit between the cylinder heads. The carbs were a triple that I reduced to double. The scoop didn´t match to the carbs so it had to get it made to fit and I added a metal grid to the front. Like many supercharged engines this one gets a secondary cooling system, which I had to prepare before I start building the pulley system. For the pulleys and belt I go the hard way and build it all new. Usually I deconstruct that part in the kit to save the wheels, some times I have to build the pulley wheels out of sheet styrene or short pieces of tube. Here´s what I started out with and the steps to the finished wheels: About now it´s time to build the ignition distributor. You guess it, I build it myself. I was tired of trying to connect the wires to that tiny bud. My distributor is made of 2mm brass rod, 4mm aluminum tube, a tiny piece of 2mm styrene tube and the wires. I use 0.5mm wires that fit between the tube and the rod. Sand the tube a bit to get the edges round. Getting the wires into the gap isn´t that hard with a little practice, use a superglue but don´t forget to spread the wires into a spider to keep the glue from running up the open wires. After the glue is dried you can cut off the prodruding wires. Insert that little tube piece for the coil line. To simulate a cap I wrap 2 layers of 1mm masking tape to the top end and then paint the cap black. Behold a distributor. Pulley time! This engine needed an alternator and fortunately I found one in my boxes (not the finest one, but I satisfied for it). I attached it to the block with a 1mm brass rod and glued all the pulley wheels to the block. The engine also needed a fuel pump, which I added to the front (built with pieces of styrene tubing). The belts are made of 1mm synthetic rubber sheet. I´m still looking for something thinner but have not found yet. Even bicycle inner tubes are 1mm thick. I cut a 0.5mm strip for the alternator and fuel pump and a 5mm strip for the charger. While moving on I enhance the pulleys fronts with tiny photo etched hex nuts. Now I connect the fuel lines. For cable and line ends in general I have become fond of beads. Yes, little glass or metal beads. You can get them in craft stores, but it´s hard to find the REALLY tiny ones, meaning 1.5-2mm diameter. Those smallest ones often come from Japan and I take every opportunity to visit new craft vendors to check their variety. In this case I thread them onto braided lines. Comes very close to those heavy duty connectors you seen on hot rods or drag racers. Now it´s time for the ignition system. The holes in the cylinder heads I fill with pieces of heat shrink tube that I found at a model fair. (Yes, shrink before inserting...) You can probably get it from electronic suppliers too. The thinnest size shrinks down to 1.6mm with a hole big enough for a 0.6mm wire. Here you can see the finished setup with the coil and also the a part of the throttle system. Attaching the heating hoses comes next. I´m not sure yet how the cooler will look like one day but the hoses are long enough to fit. And last but not least the exhaust manifolds. They received some hex nuts also. So, I hope this didn´t bore you. I will not say that it´s all easy, but a matter of time and lust. From all I can see in this forum, there is a lot of workmanship out there and I might have inspired someone to try this out, or maybe parts of it. Some details get lost once the engine is dropped into the bay, sad to say. But I love work like this. Thanks for watching and now the finished engine:
-

Revell 66 Chevelle Retro Street Machine
Andy Oldenburg replied to Dragline's topic in WIP: Model Cars
Looking HOT!?? Eager to see the finished model! -
A very interesting Model and well built? I hope it won´t turn out to be black. Would make it look like a funeral car. But that could be cool too...
-
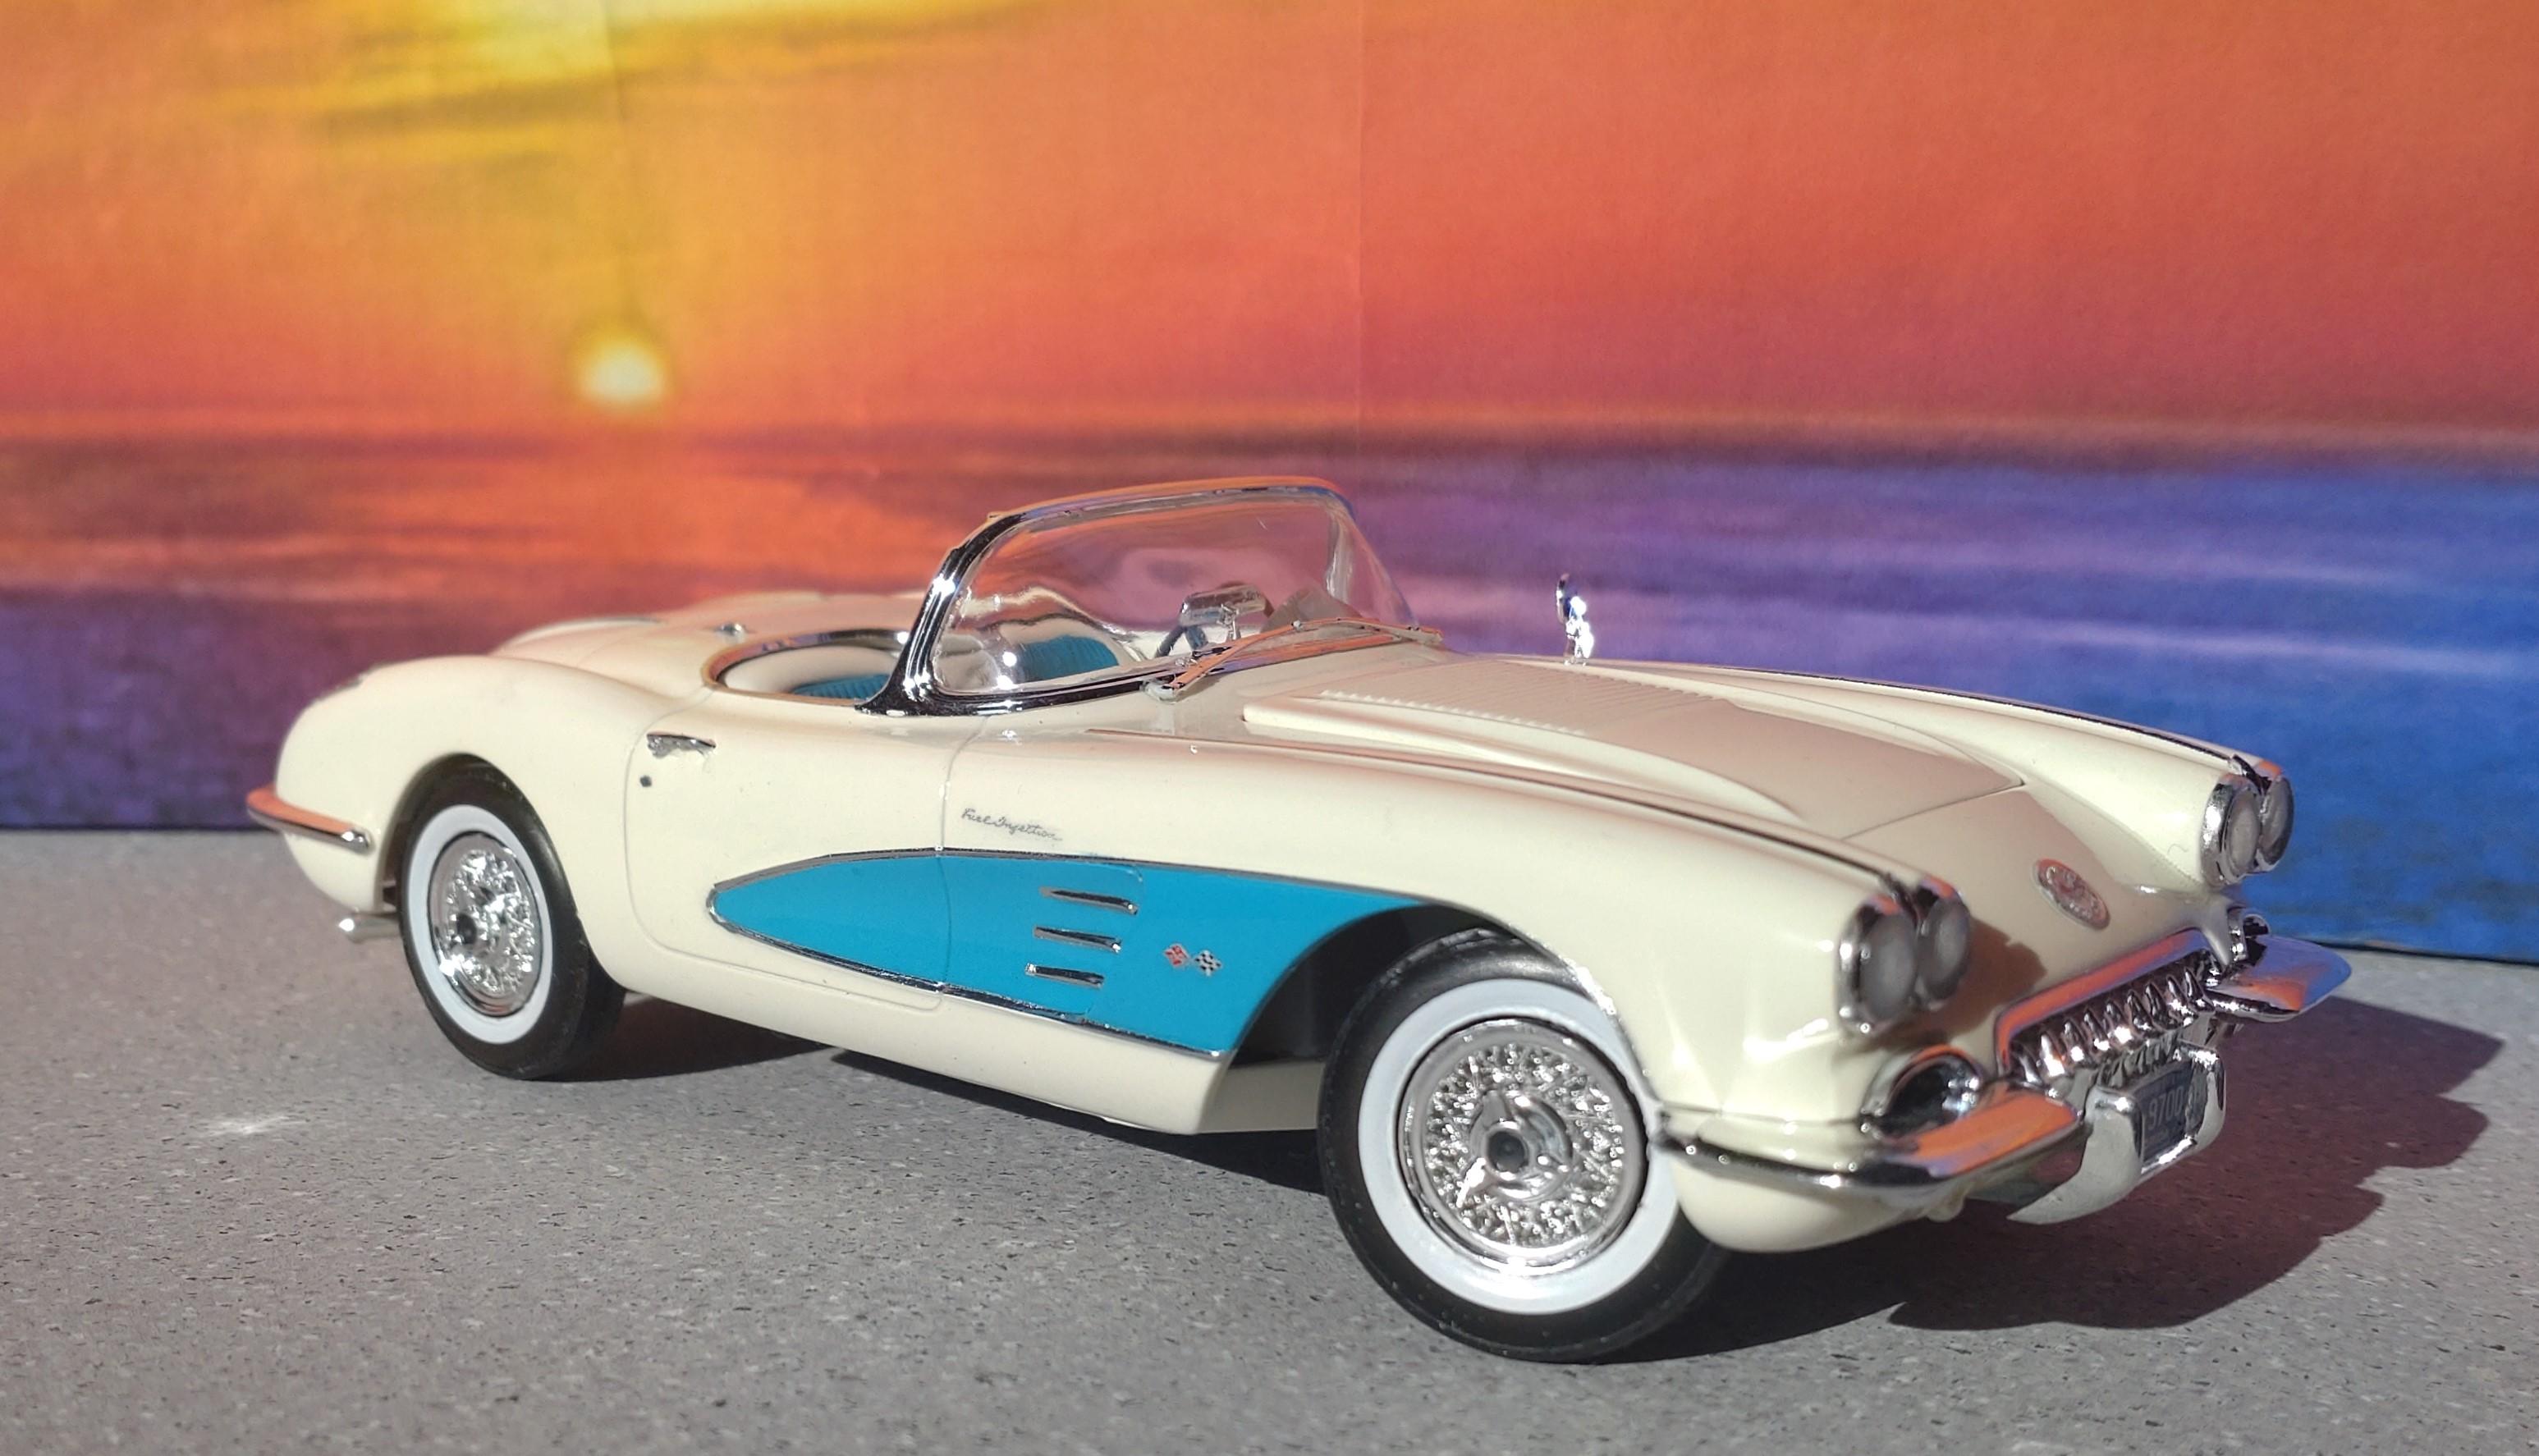
This is a Revell kit, looks like for the European market. Maybe it is available outside Europe with a different packaging. The quality is superior: no flake, all parts fit and the detailing is crisp. The front wheels steer too. I was in the mood for a "simple" stock build with no body work. I just exchanged the wheels for stylish wire spokes and added my details to the engine, interior and undercarriage. Oh yeah, and the spare wheel. This color mix was not standard. A popular mix was light blue with white, but I discovered this scheme while looking for ideas on the web and fell in love with it. Paint is Molotow creme white, turquoise I mixed with Schmincke Aero Color Acrylic Airbrush. Chrome details are bare metal and top coat is AK crystal clear. The interior floor and the trunk are flocked. Seats belts are custom. The kit contained an option of building the engine with a classic carburetor or fuel injection. I chose the carb and let myself get inspired by images on the web. The fuel injection I used on a following model. On the undercarriage I added some more detail with the brake lines. Thanks for taking a look!
-
Thanks everyone for your kind response!
-
Very good build??! Everything from color to details make your model a hottie. Did you print the engine as one part, or how many parts to fit together? And are the tires, rims and spokes printed as one piece? Seems I might have to think about getting into printing....
-
Really good paint choice and execution! Chrome trim done very neat. A classic built so often but always nice to look at. If I had to choose one classic from the 50´s, it would be a tri-5 Bel Air.
-
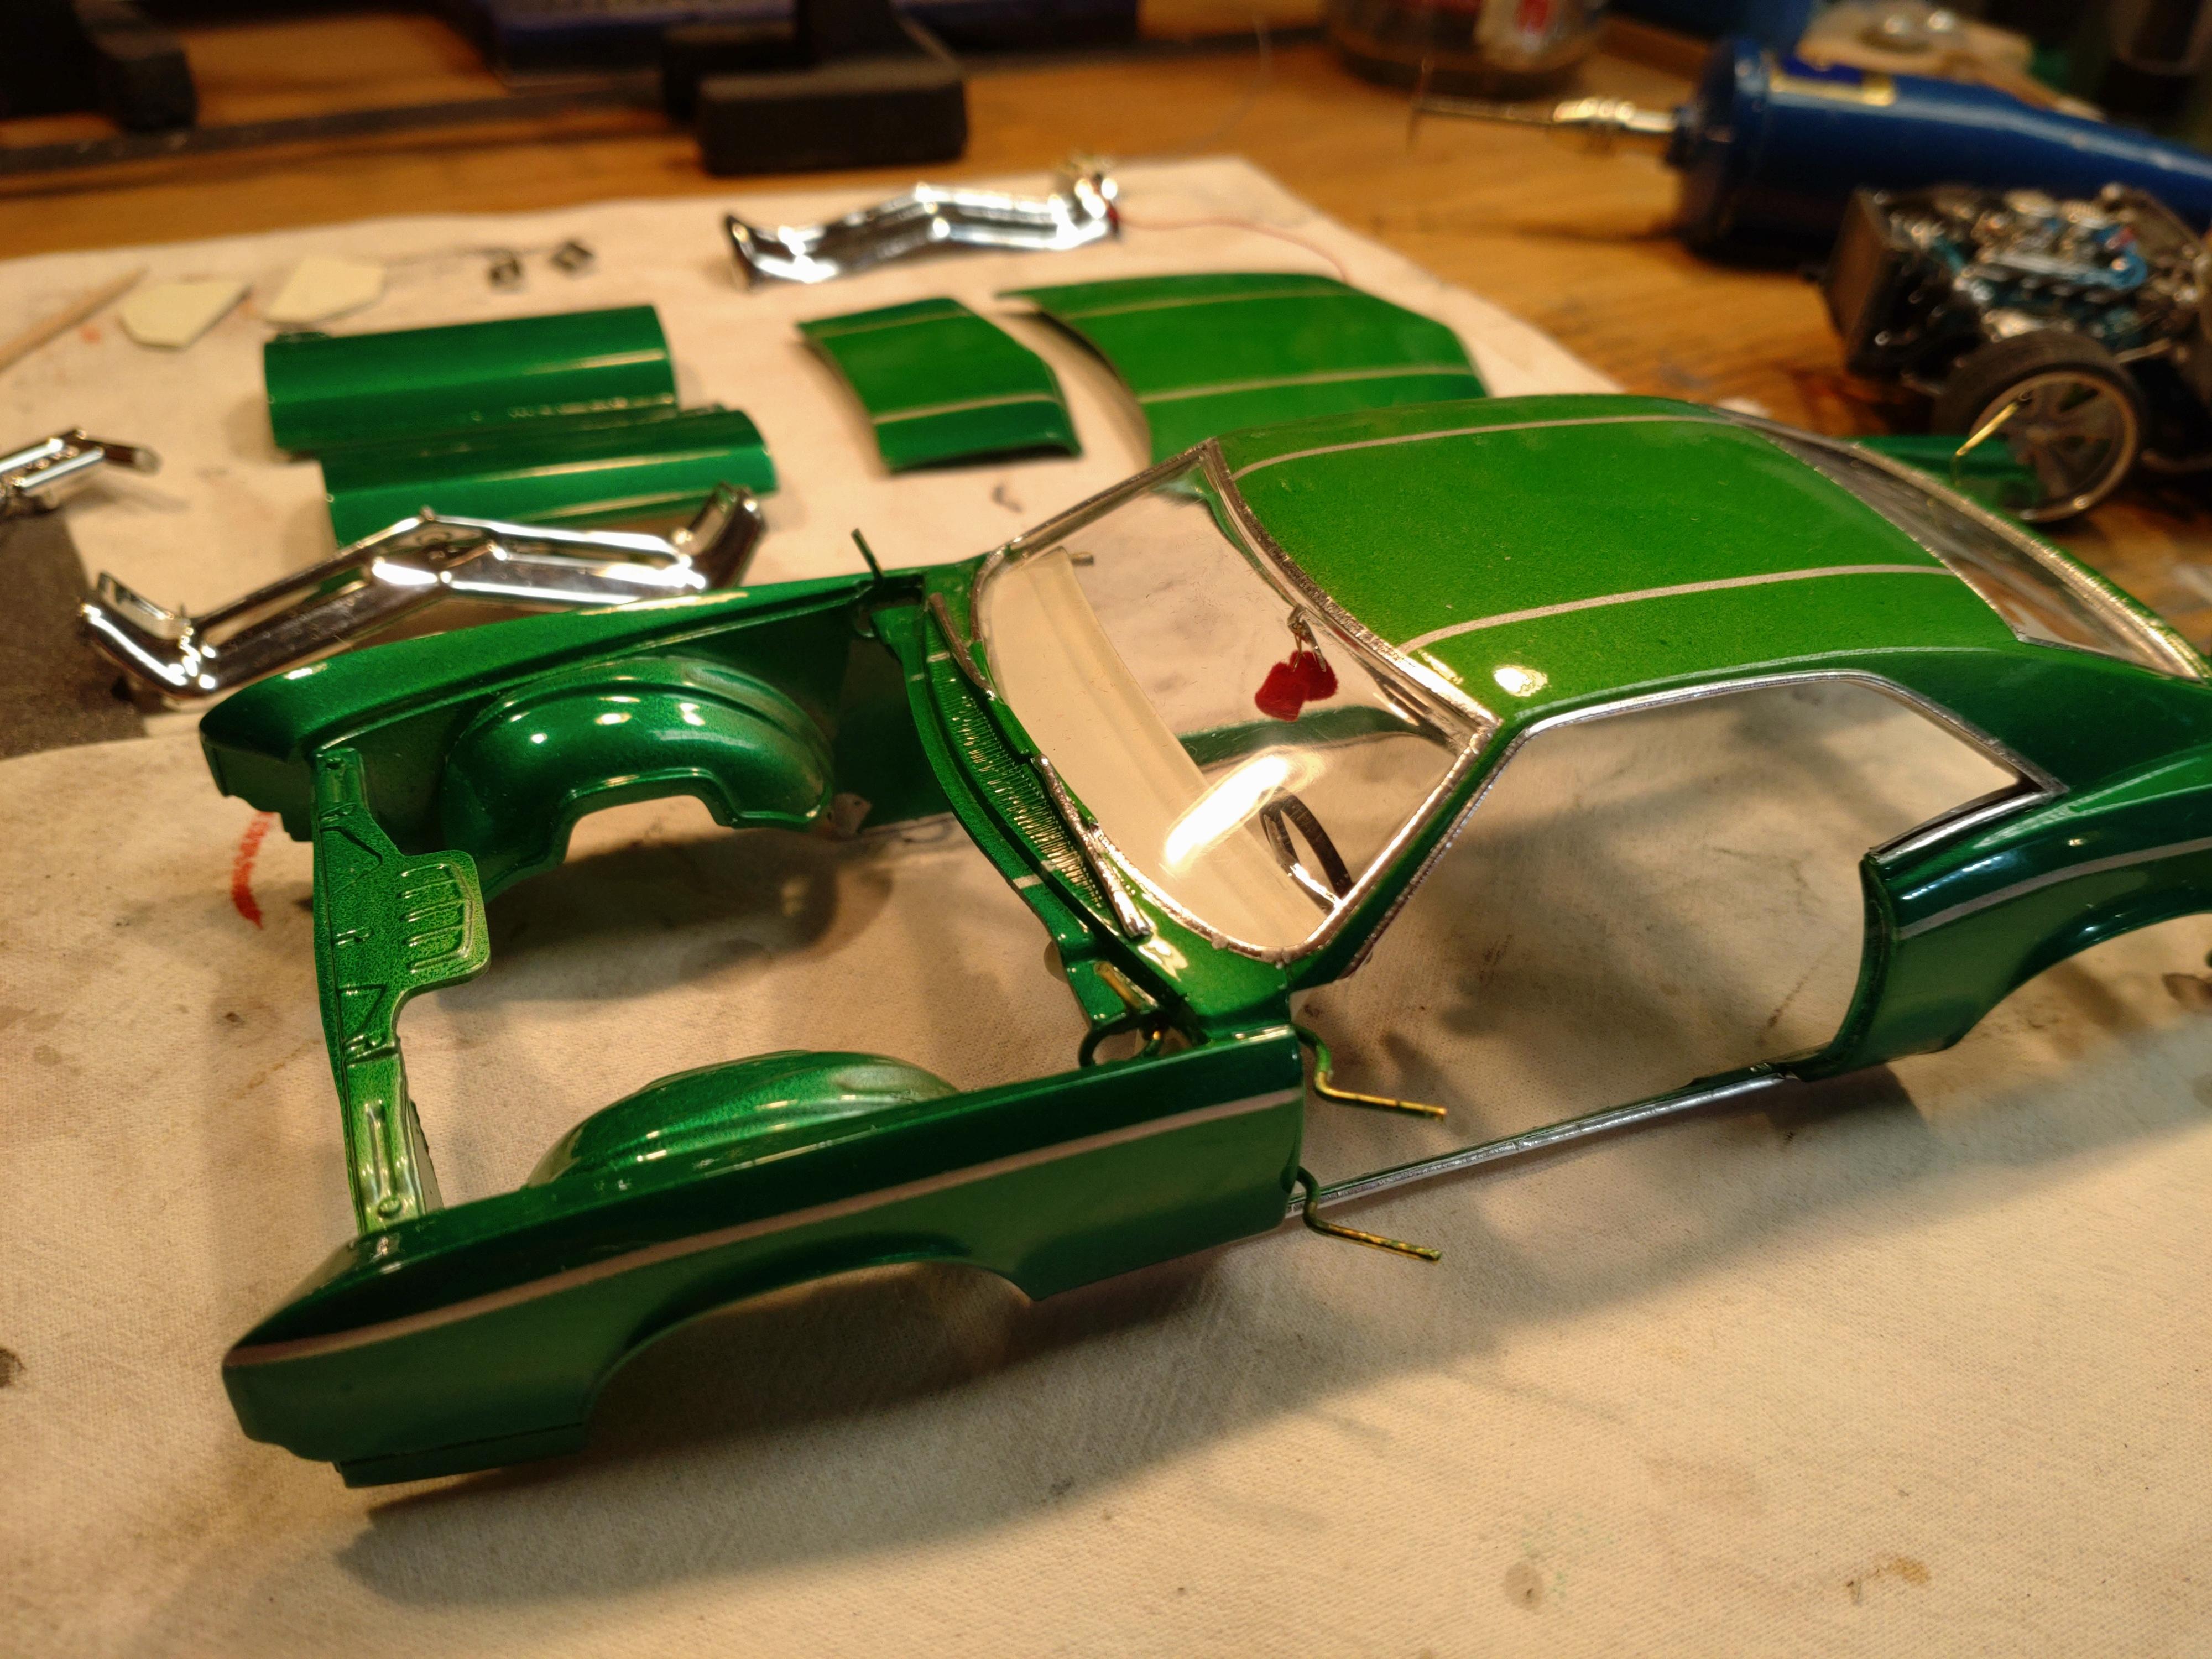
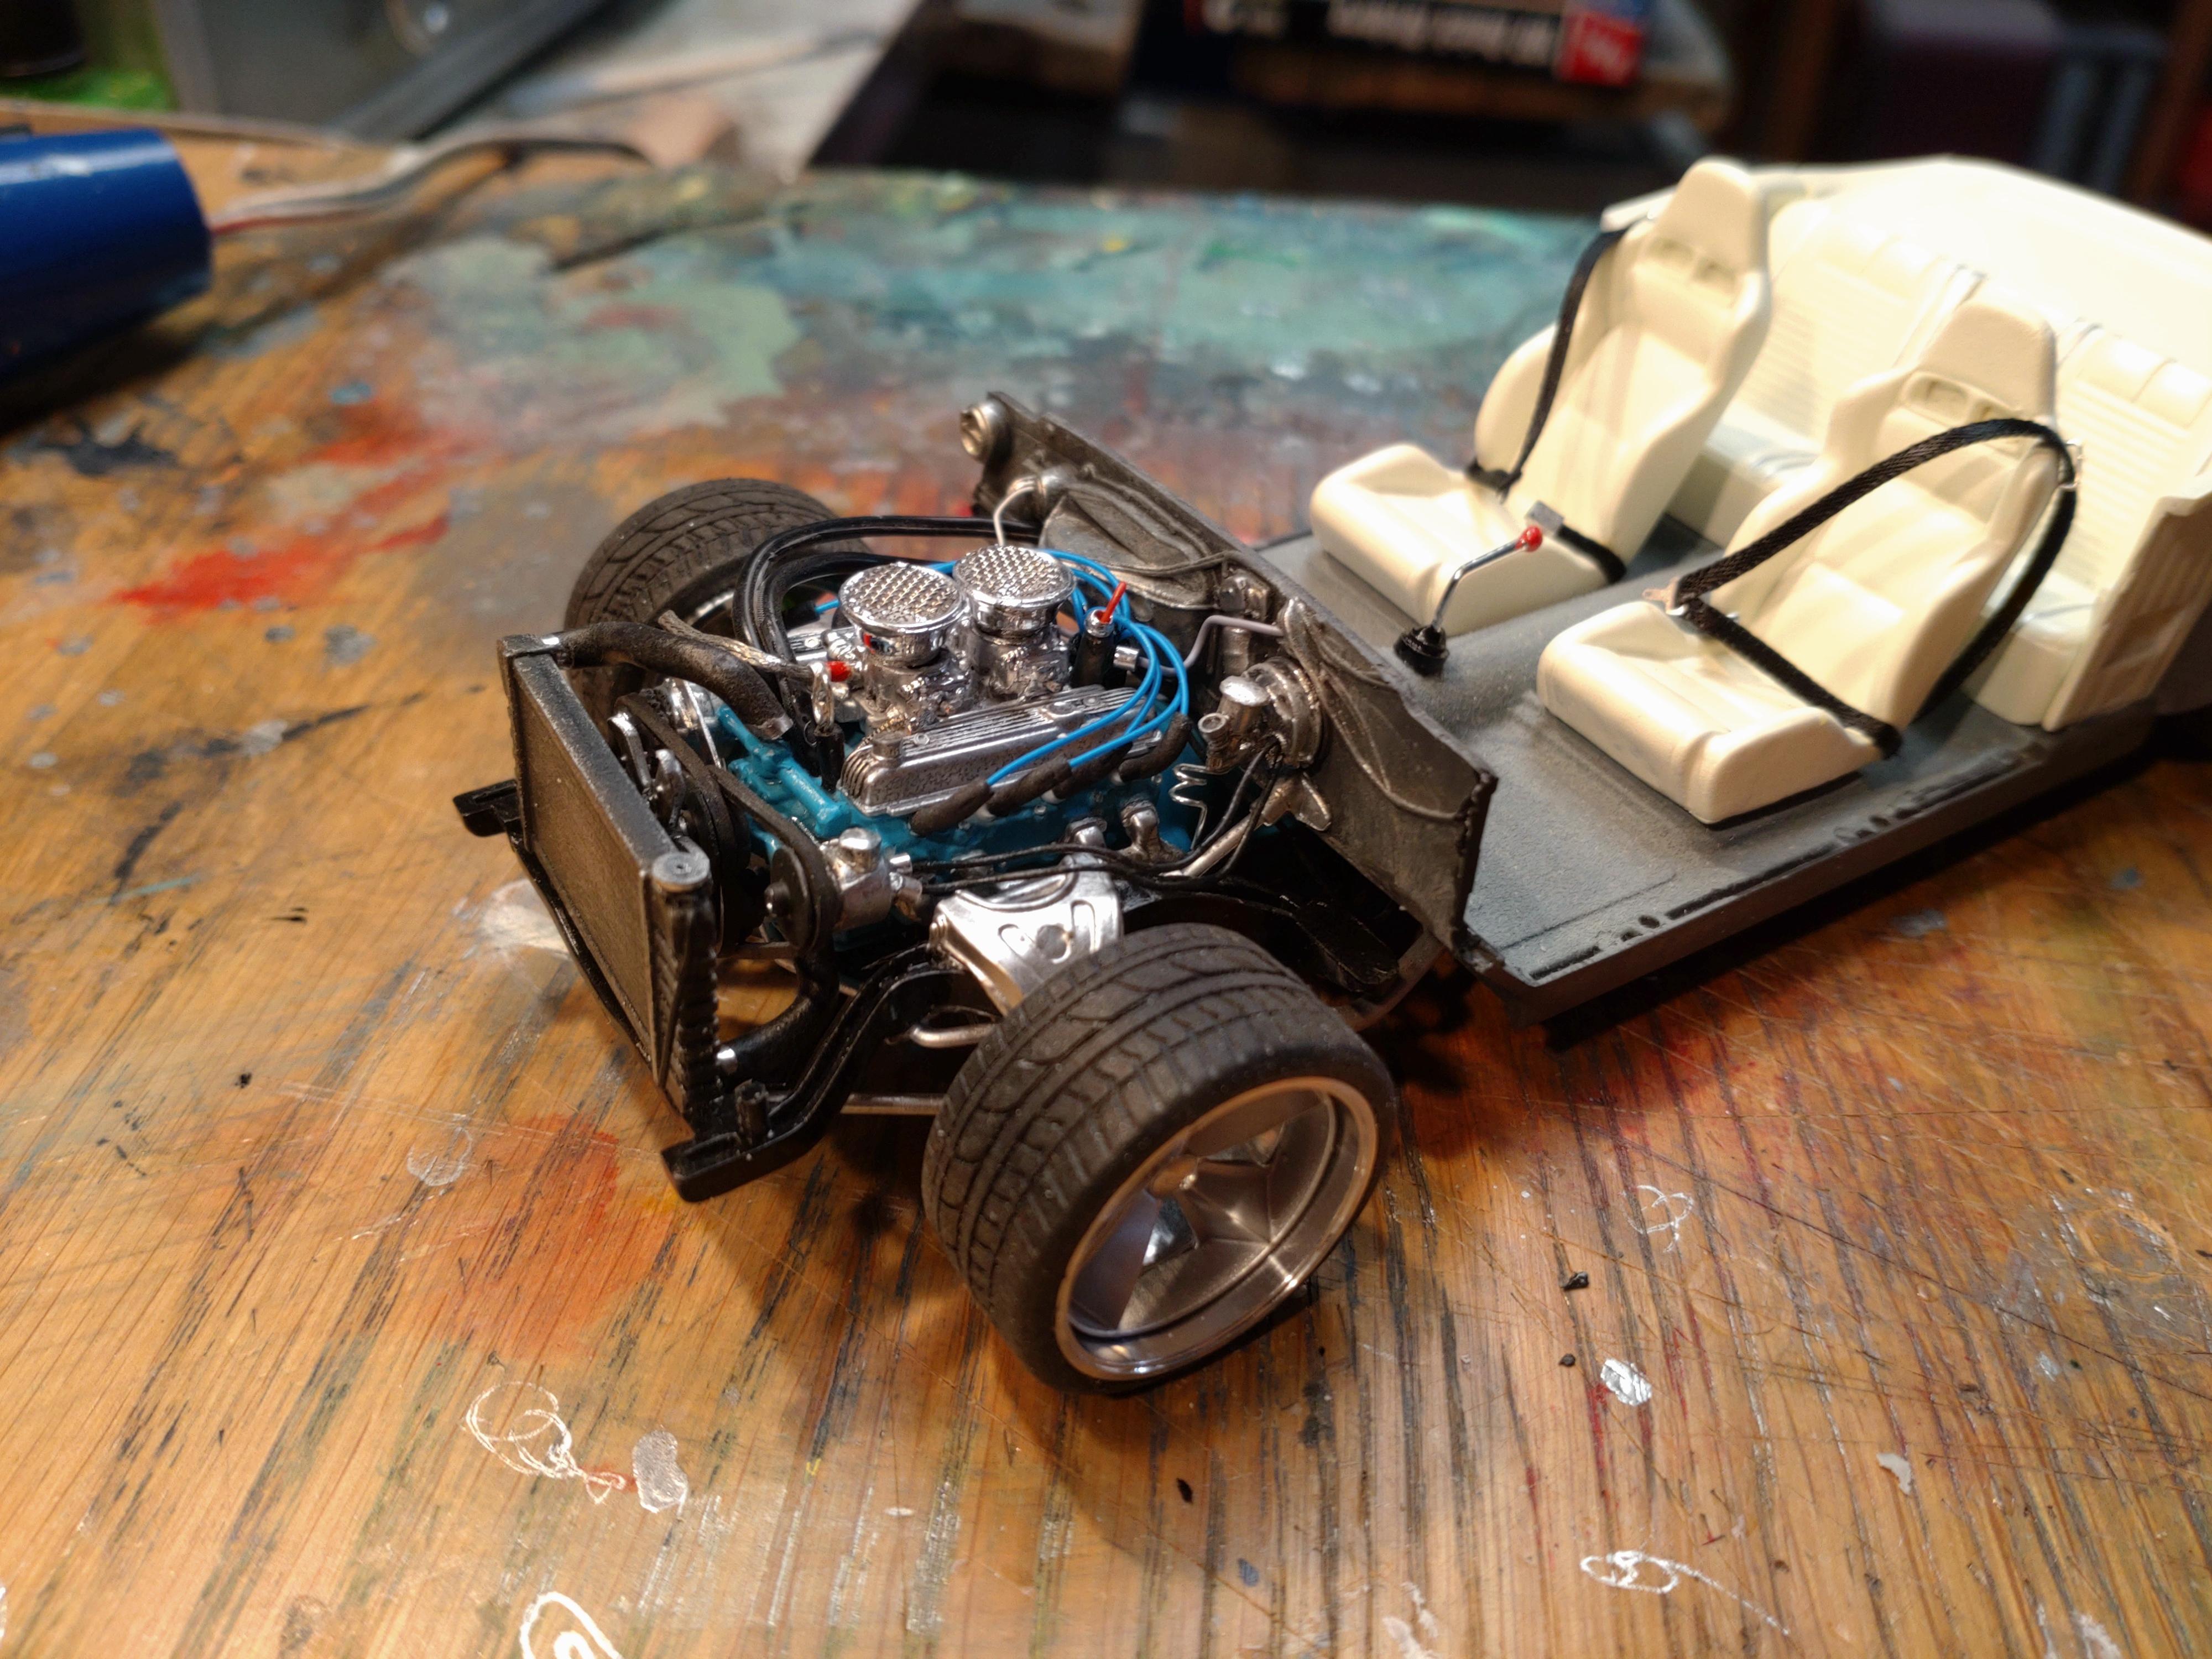
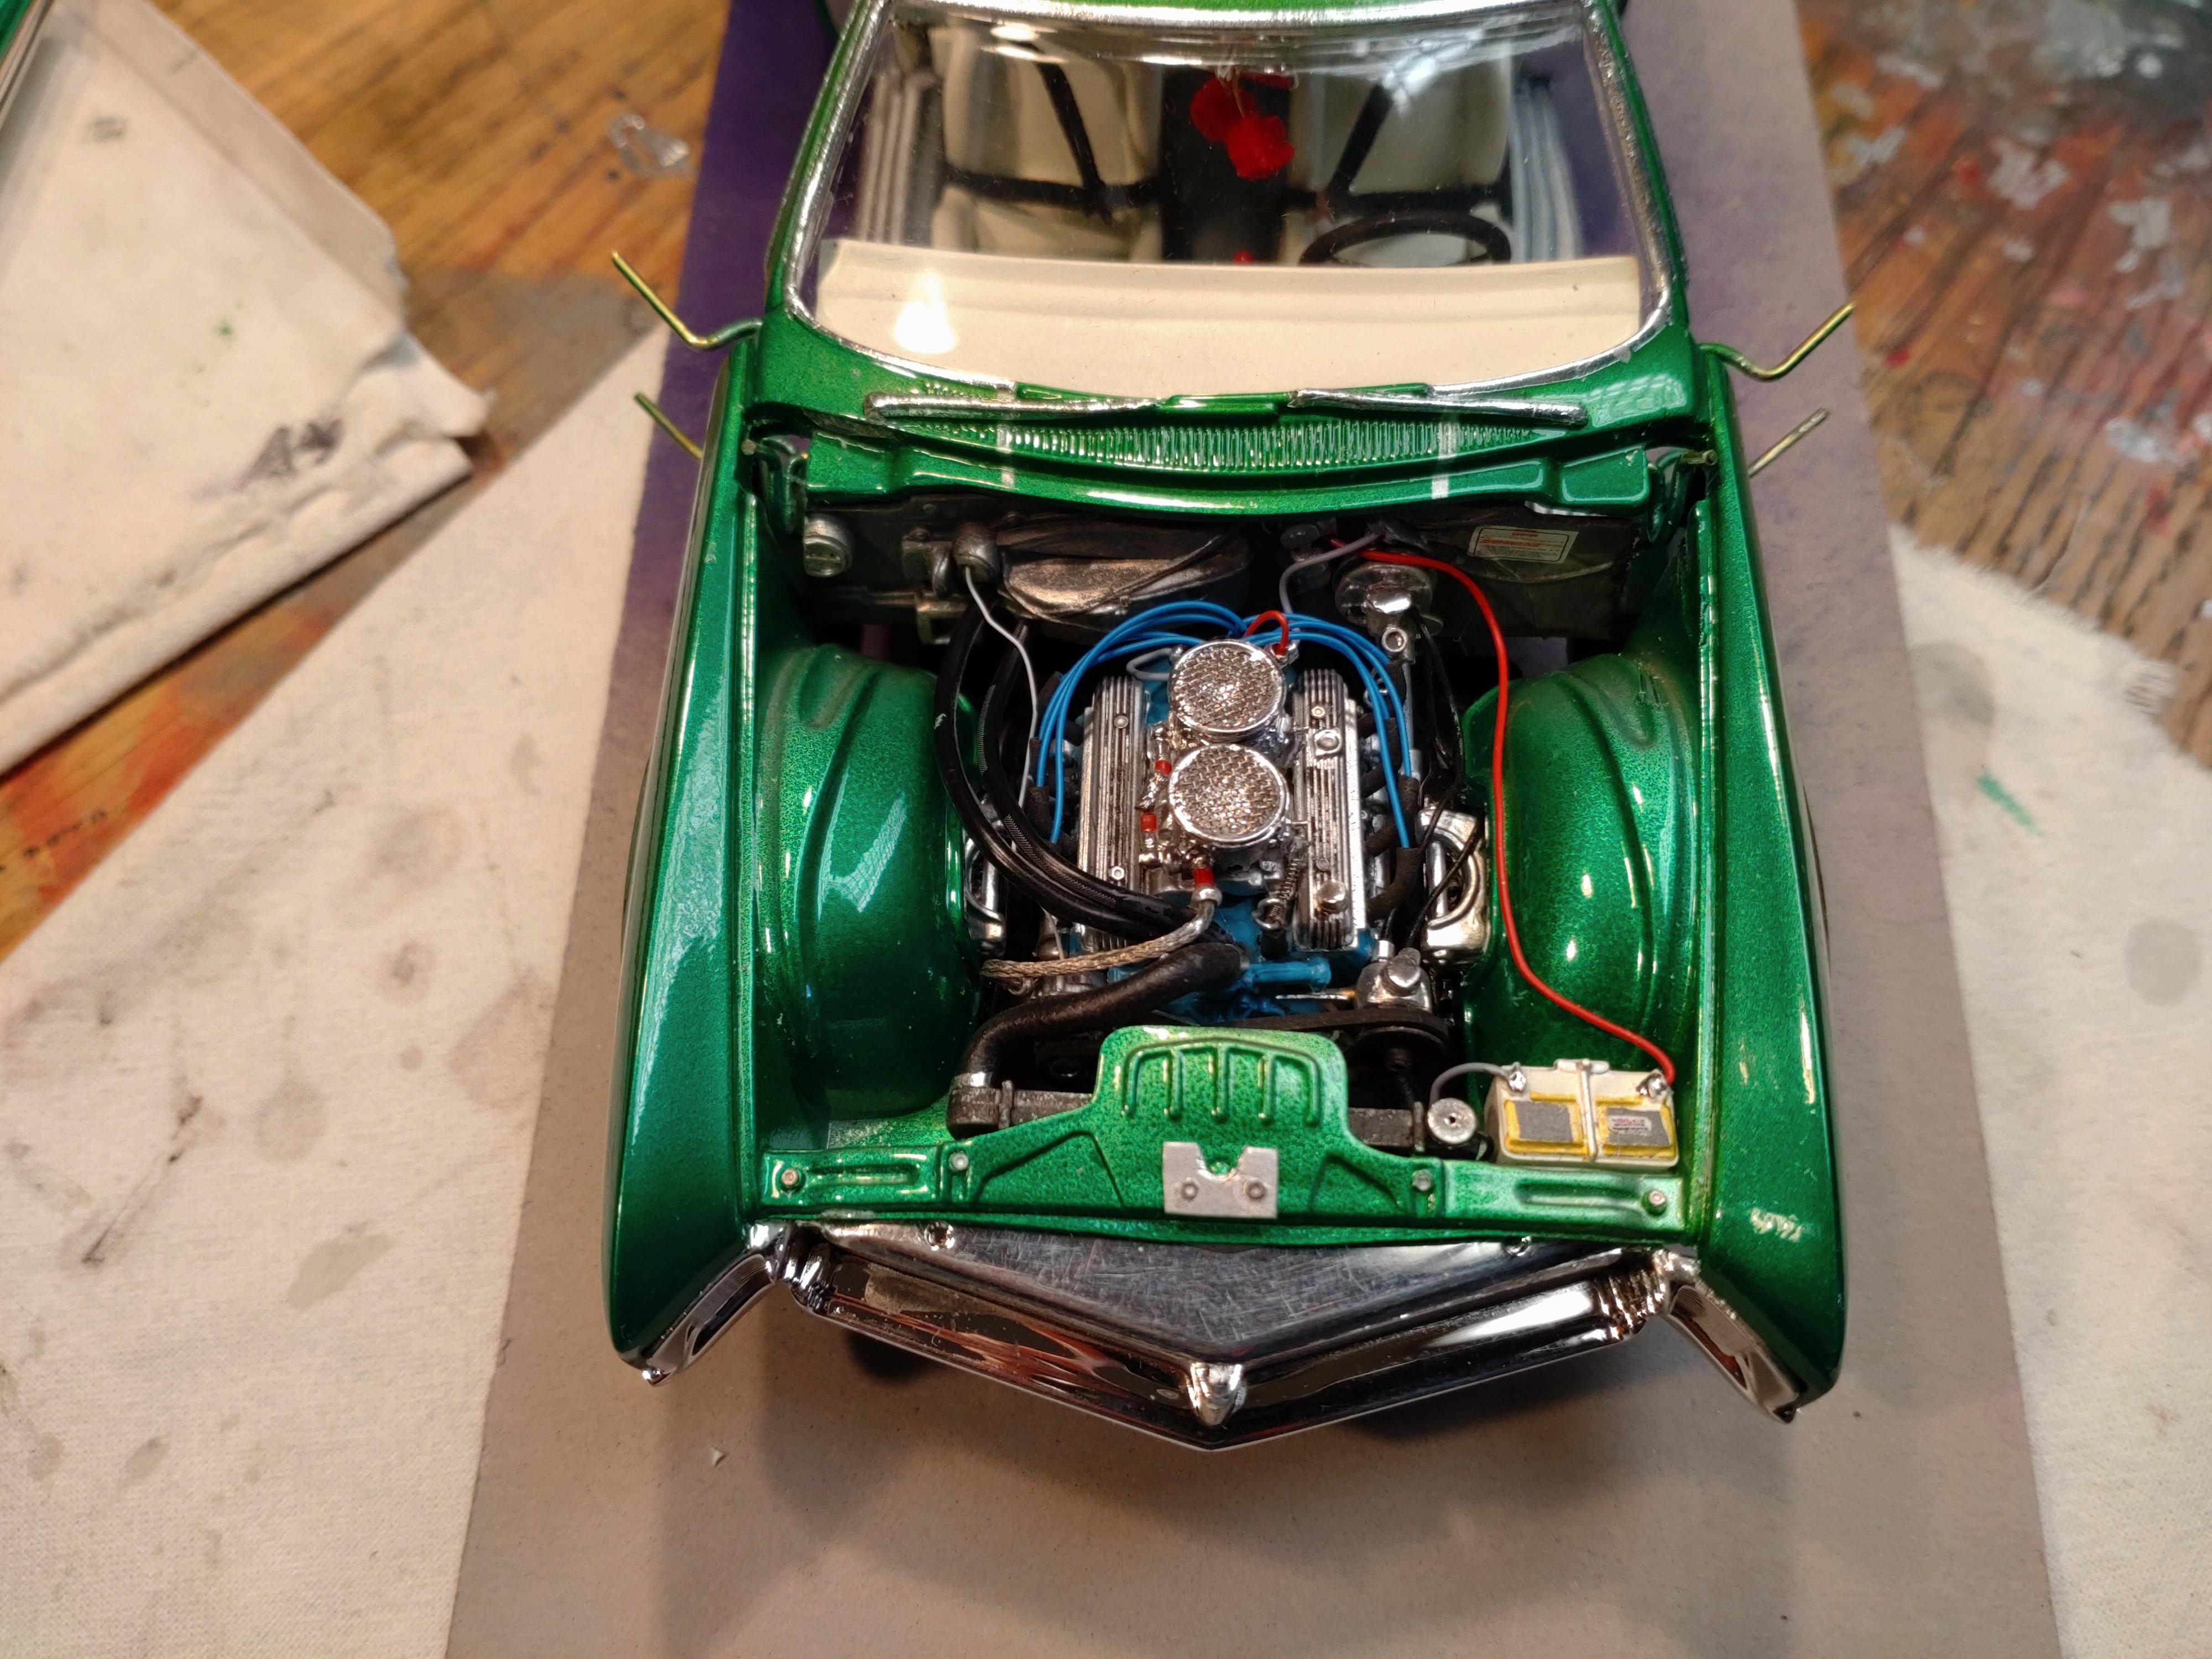
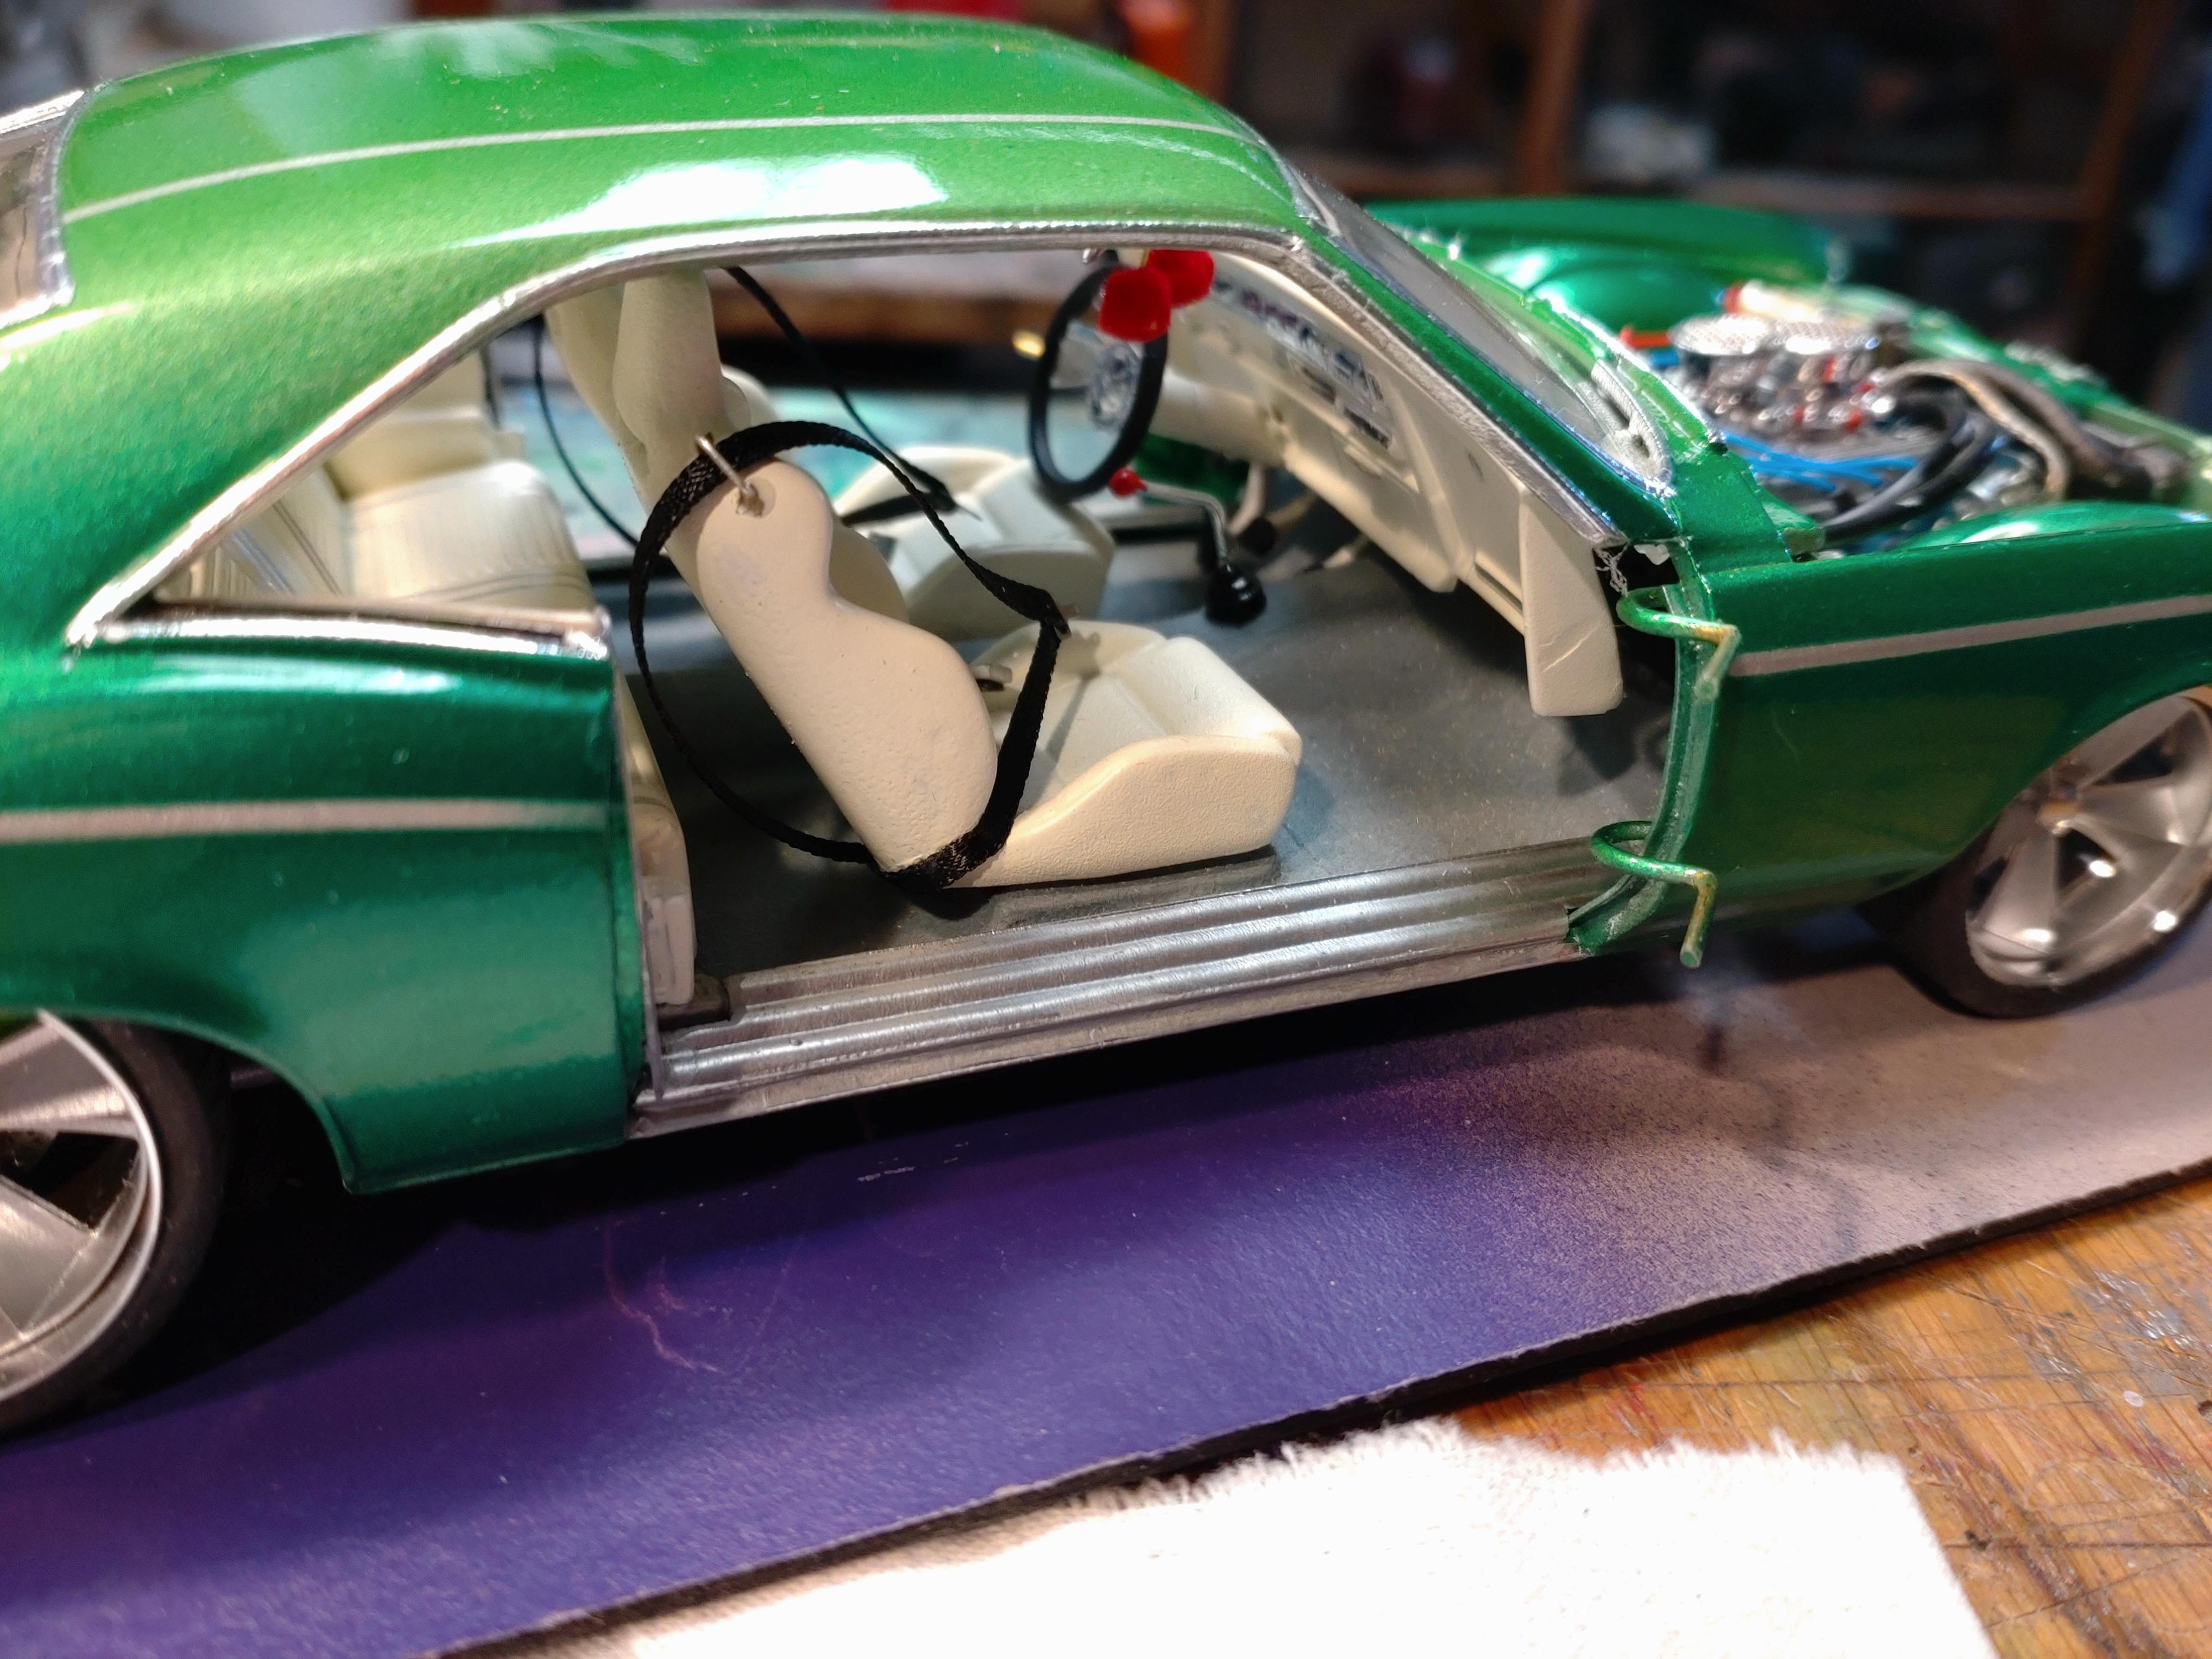
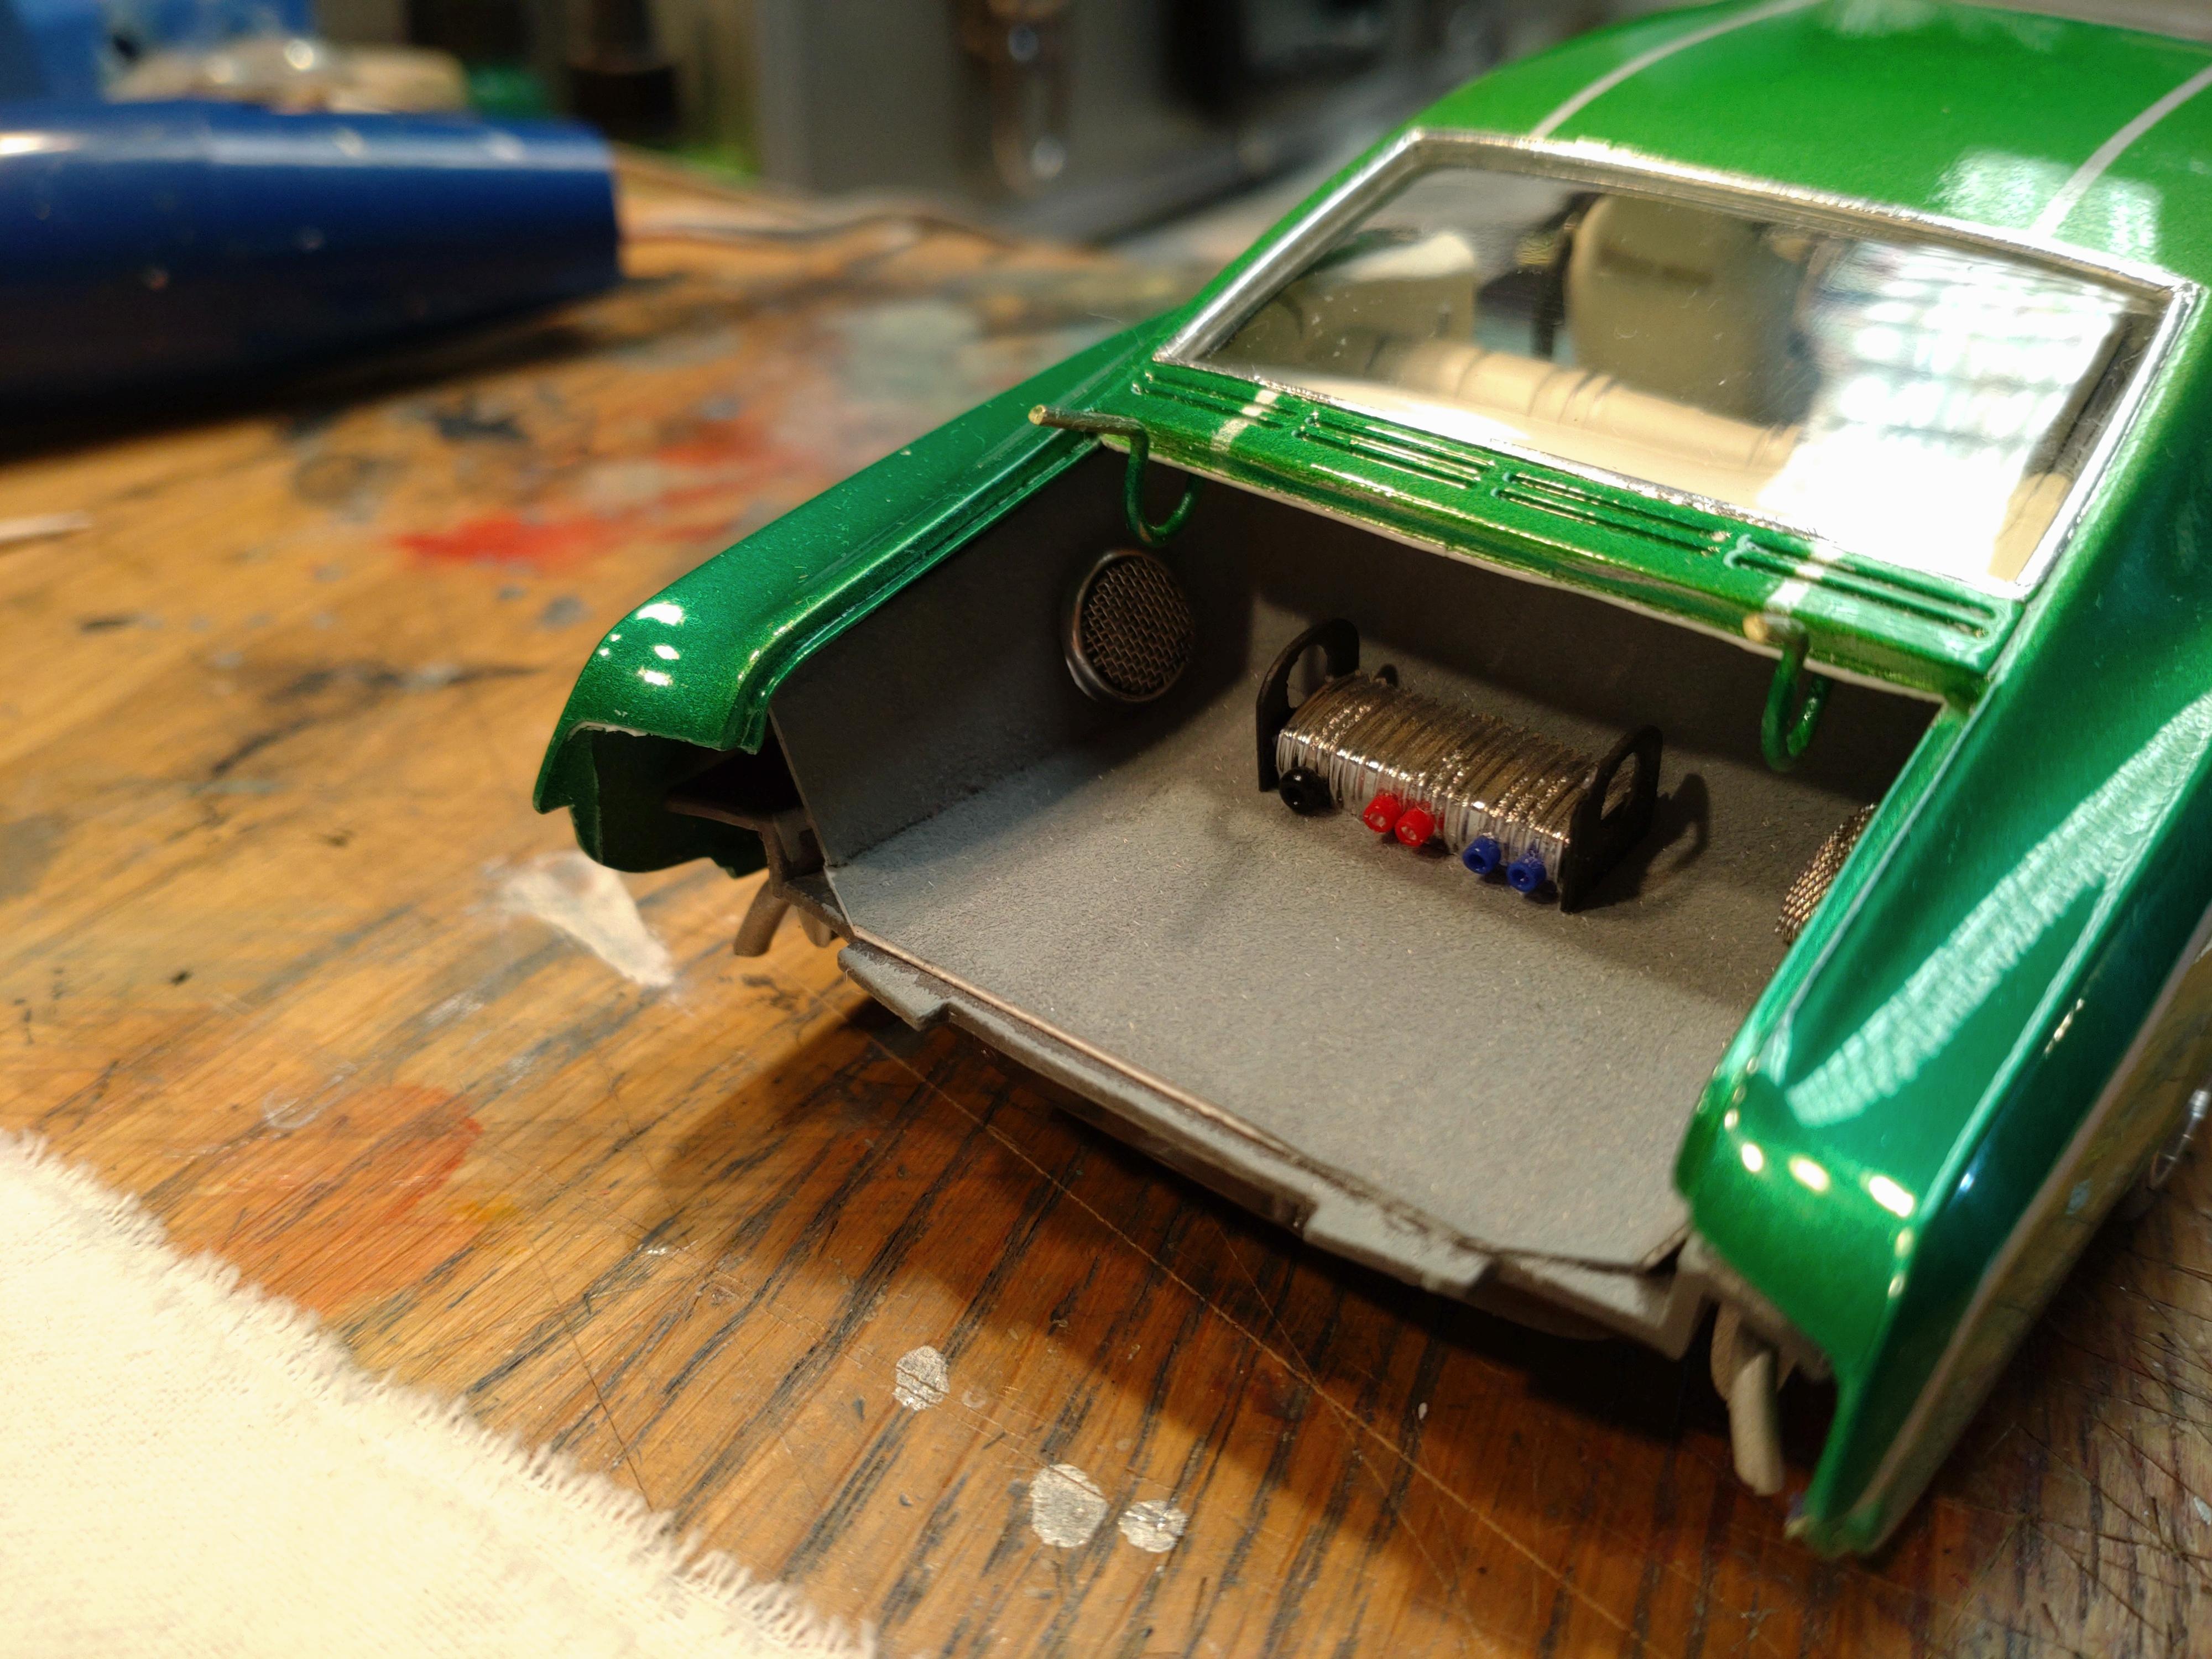
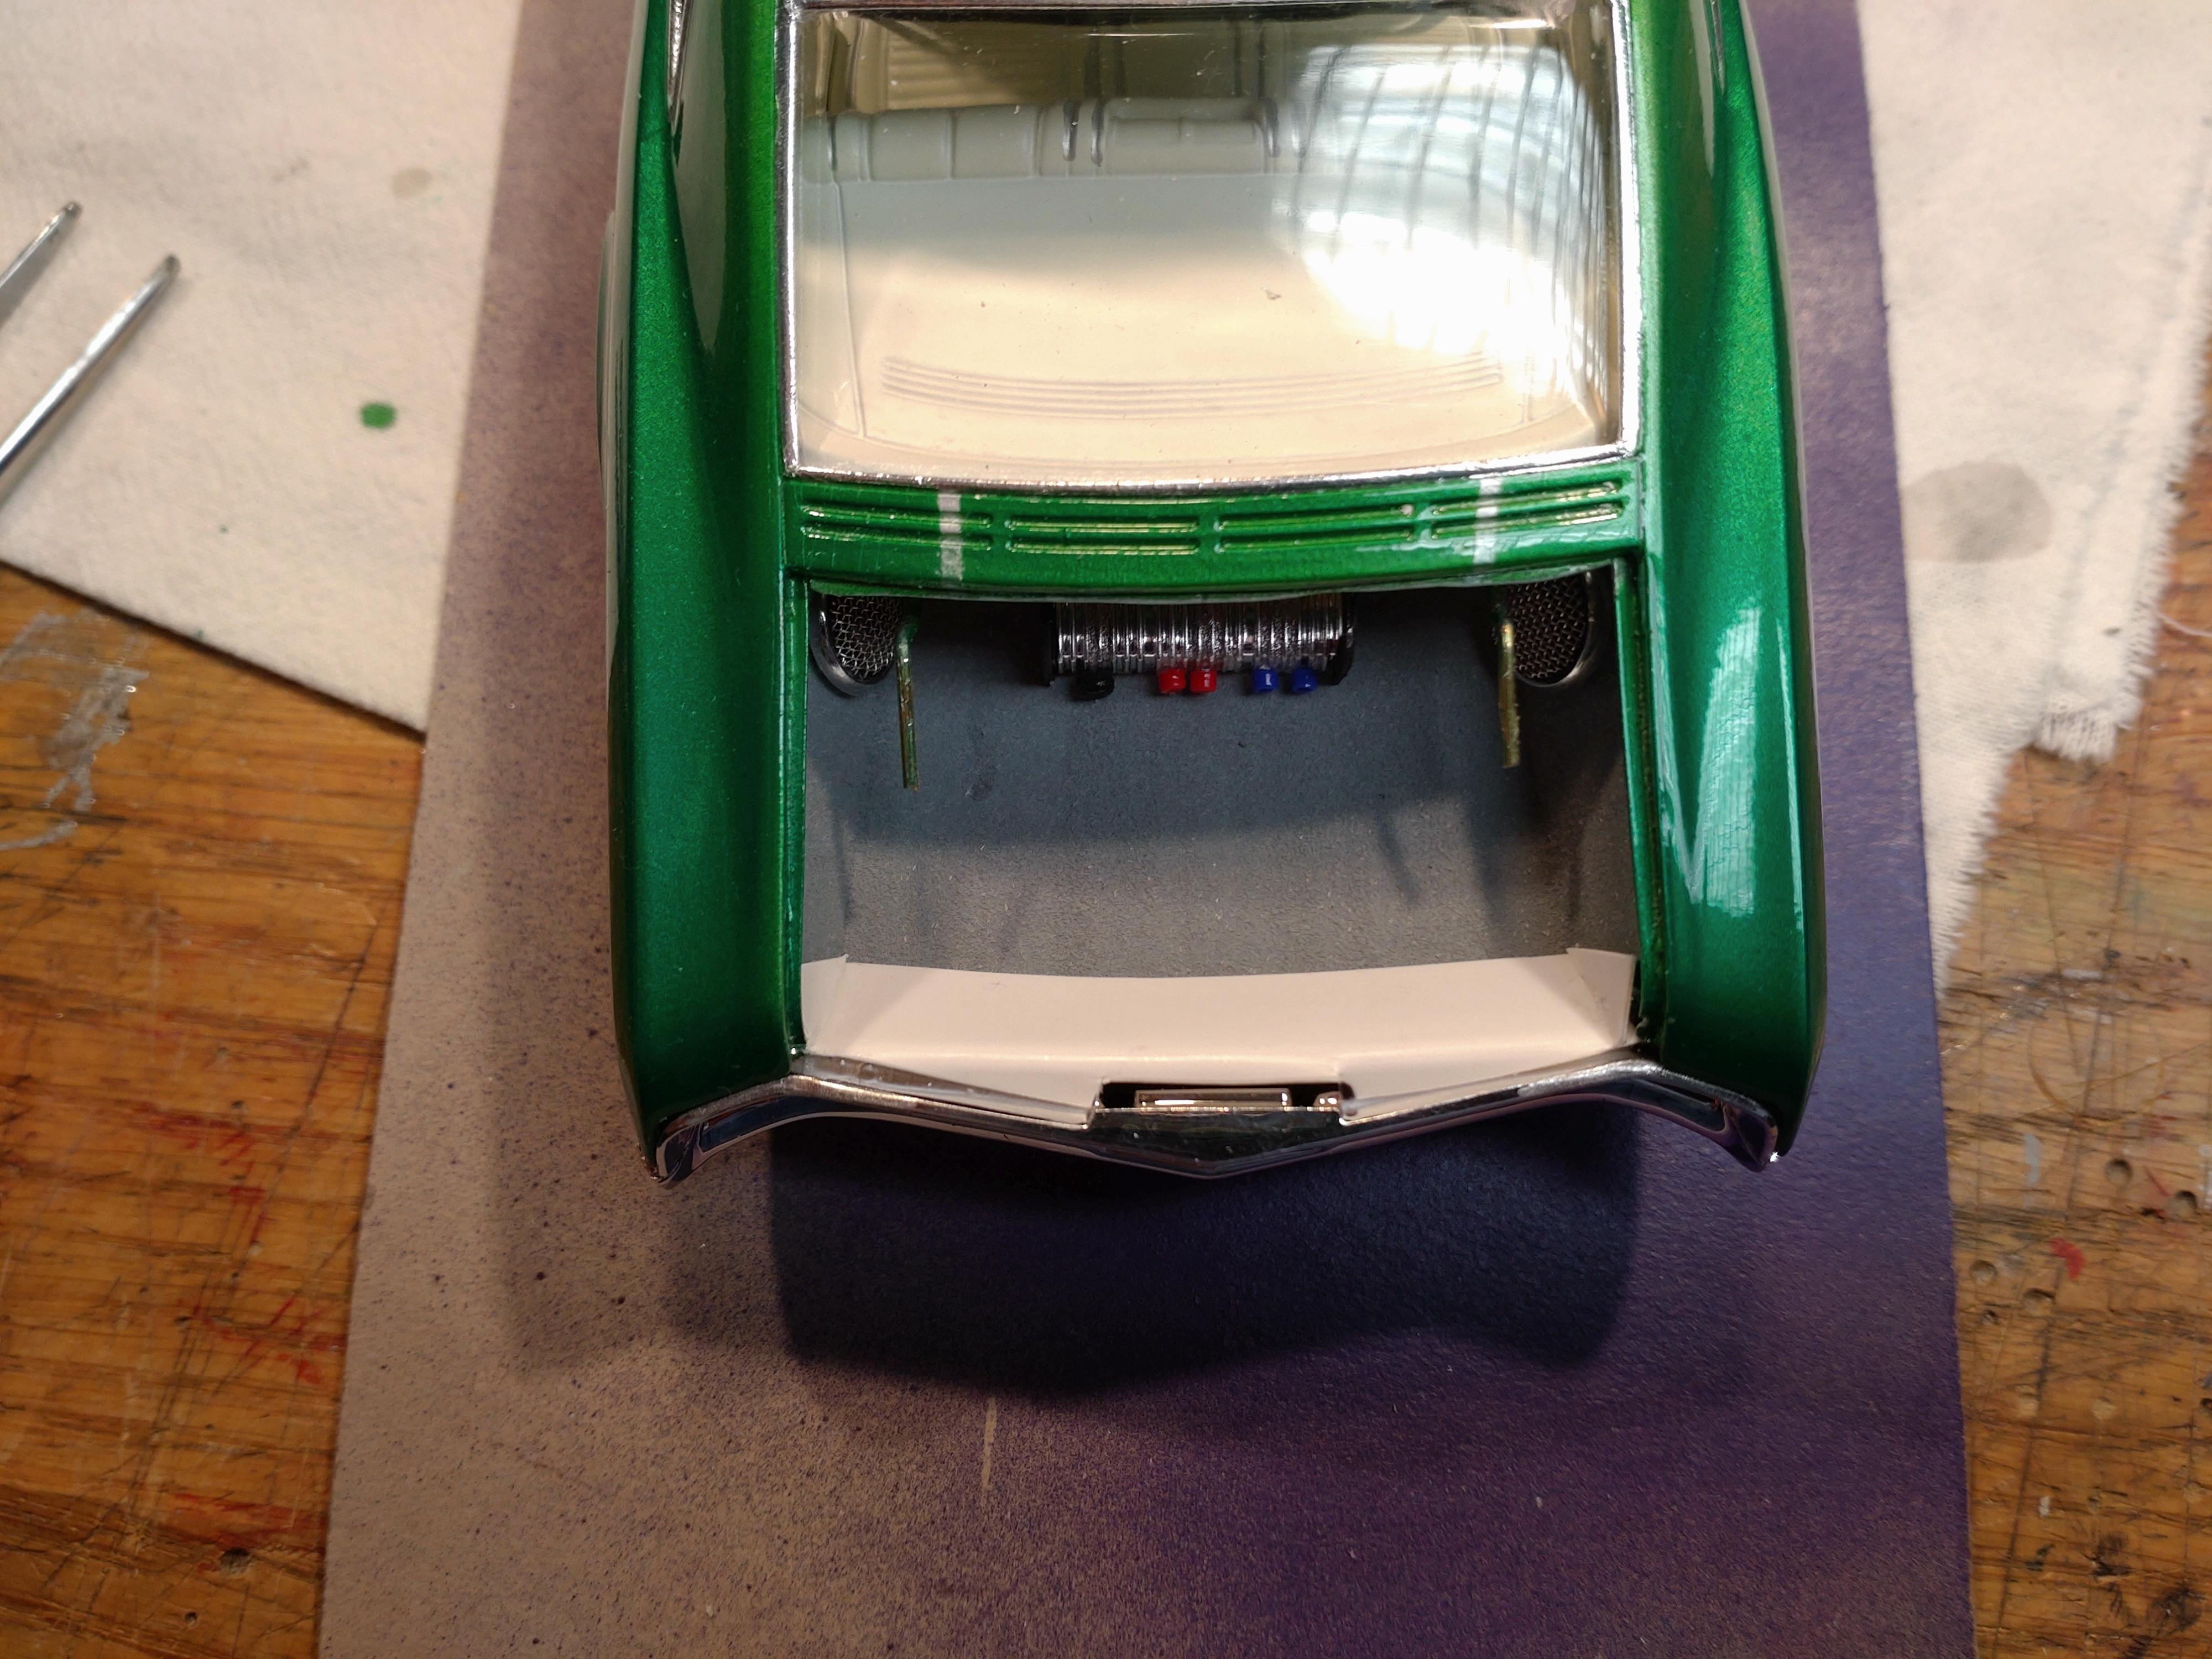
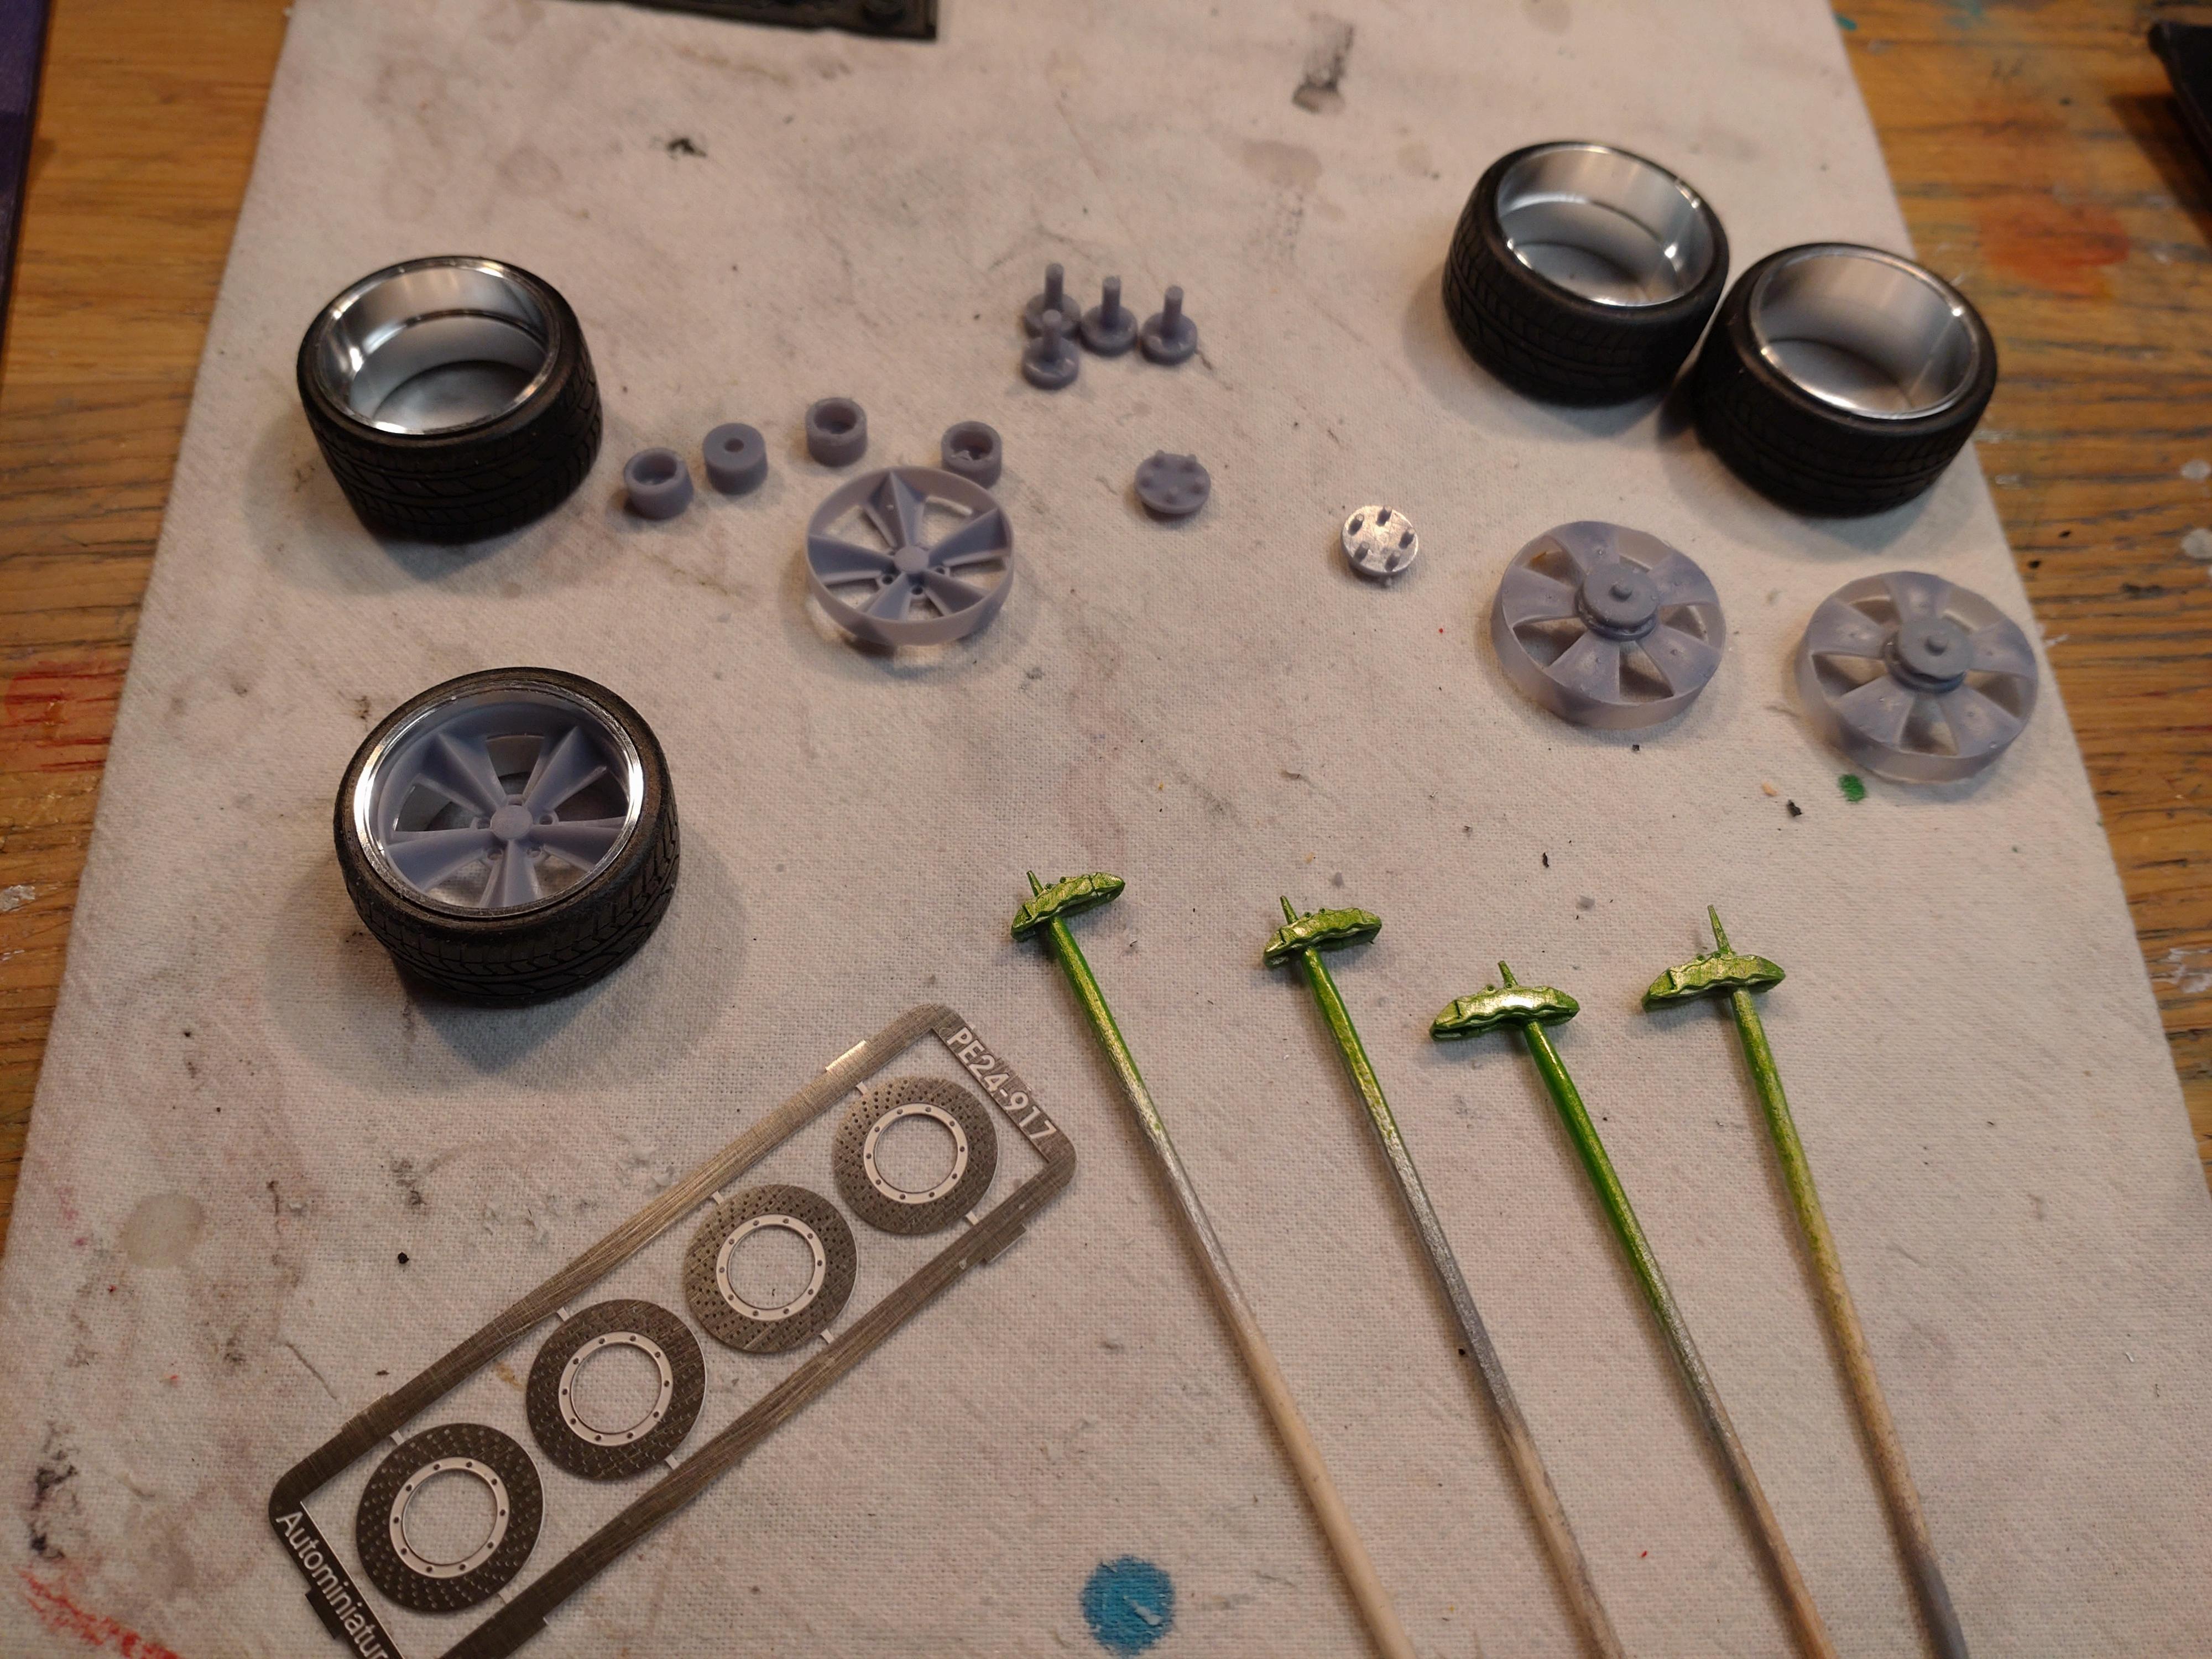
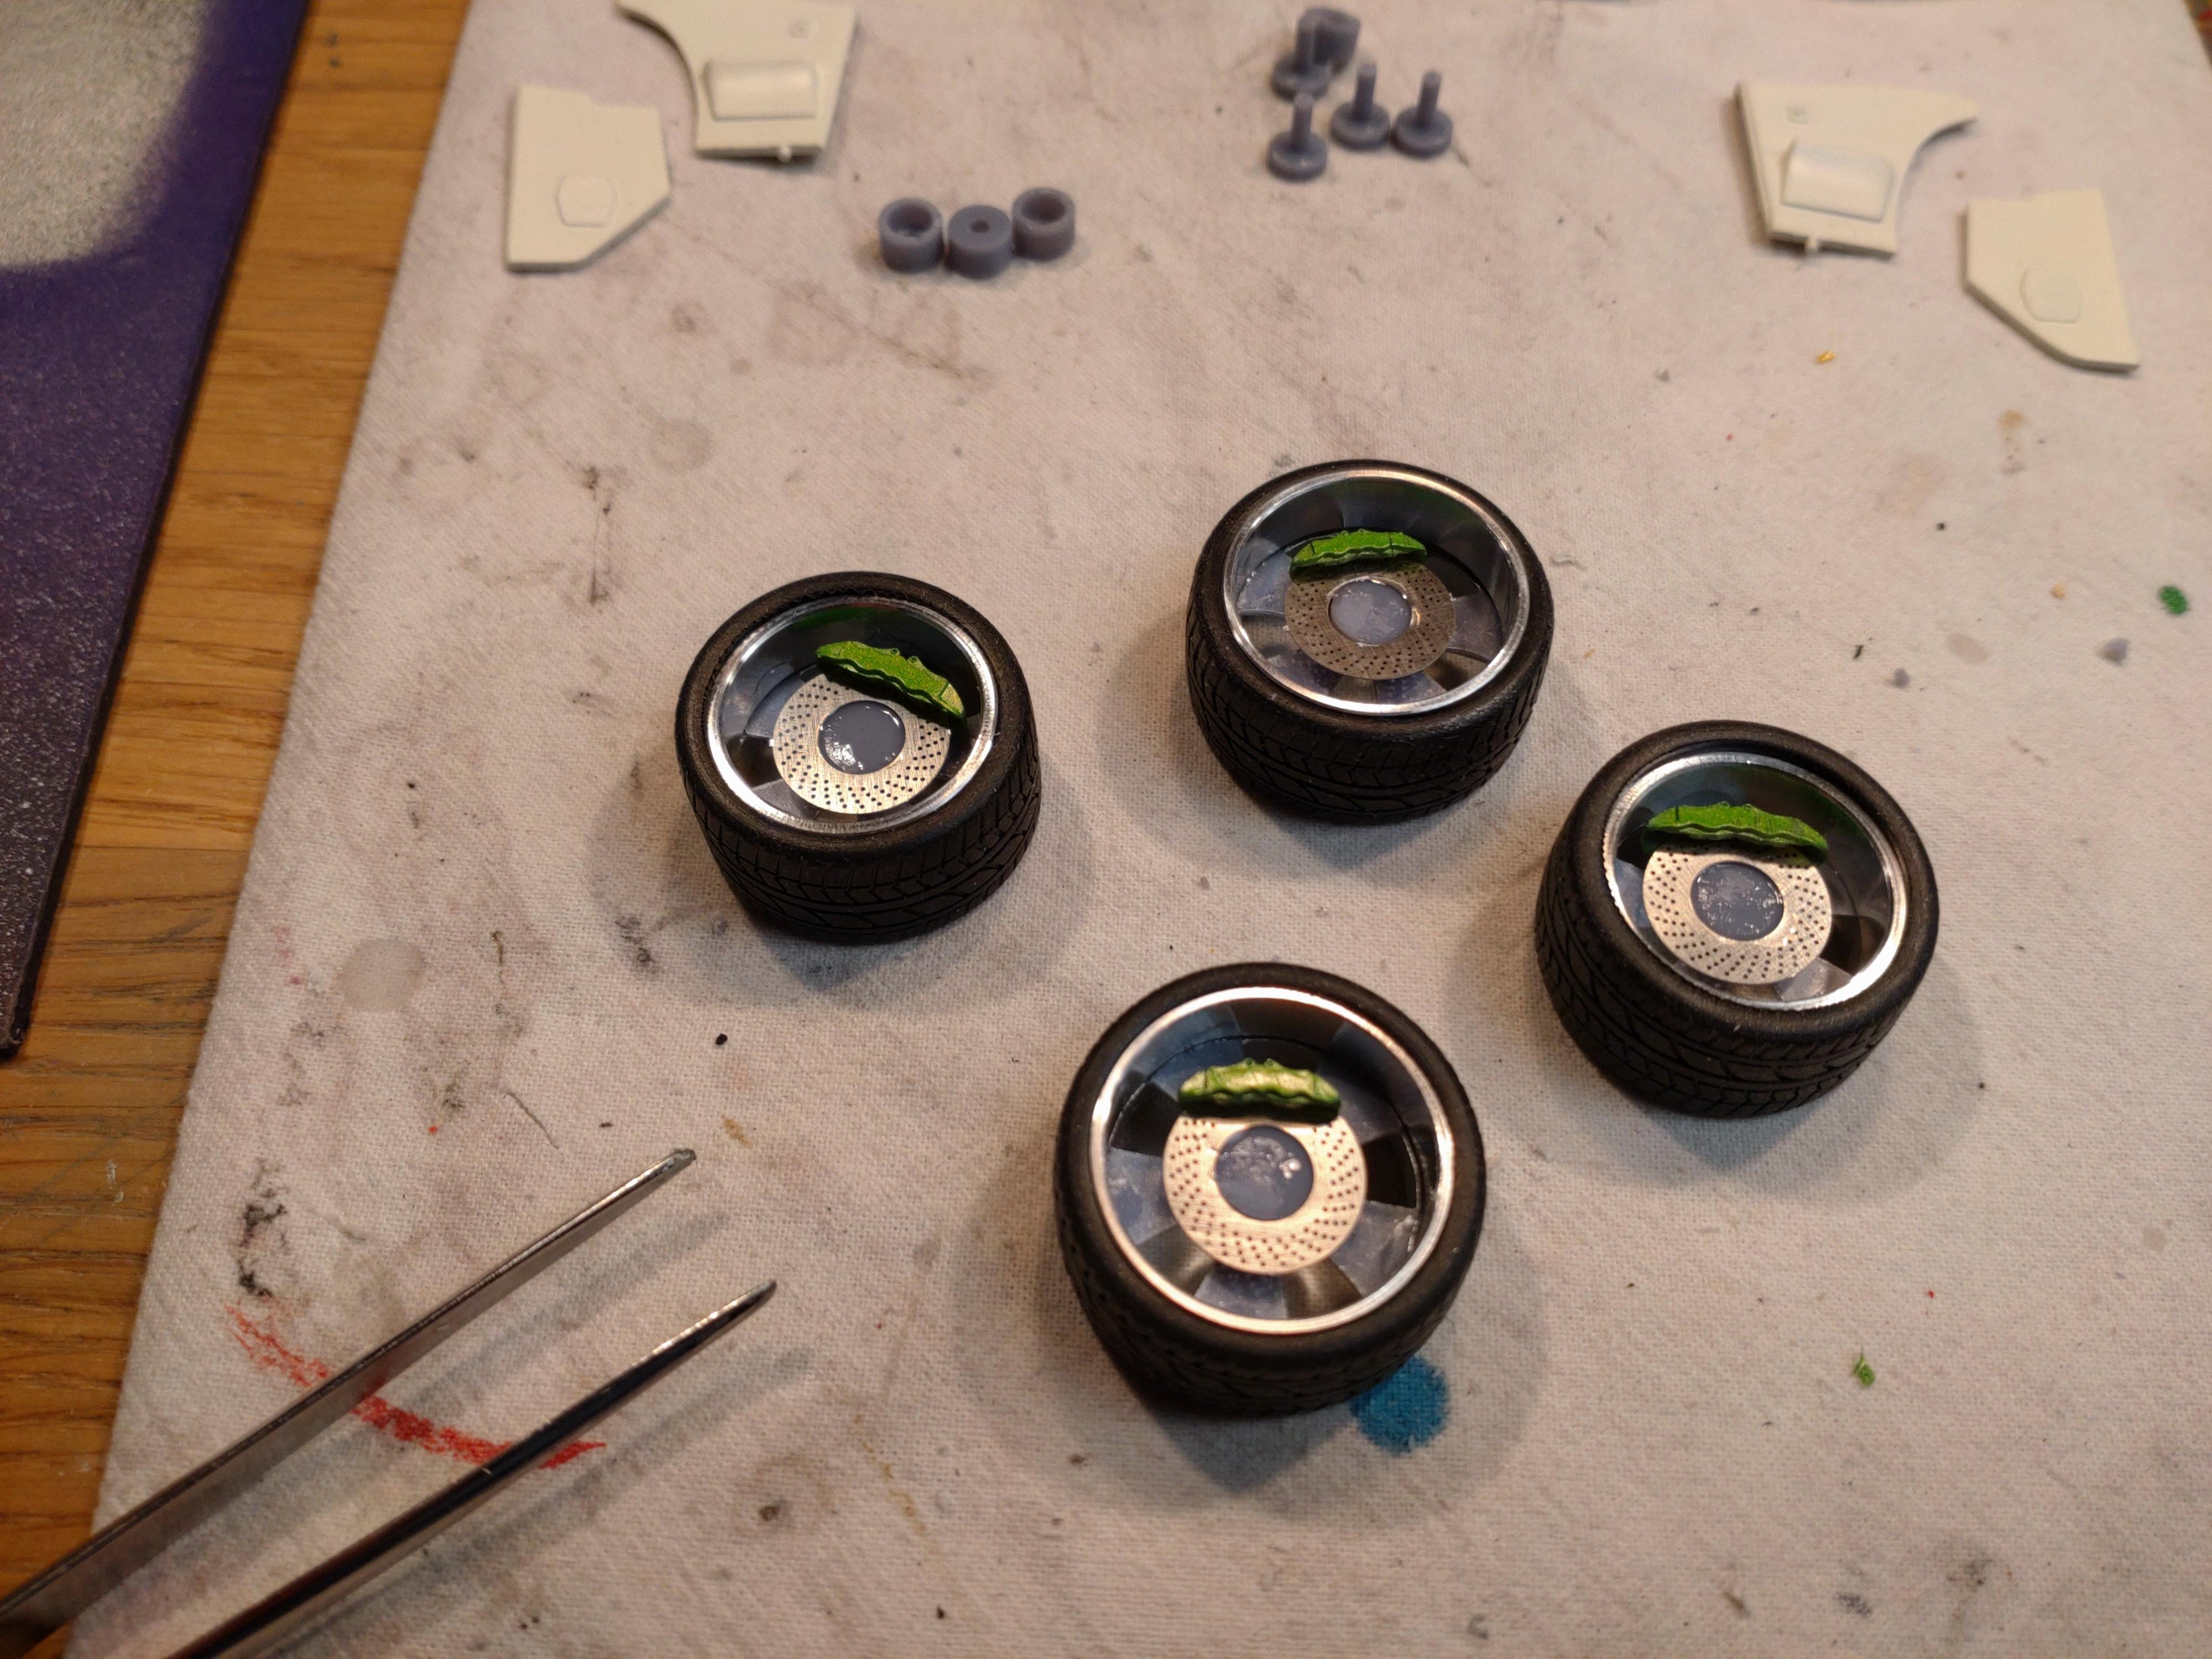
This AMT kit has a medium skill level, which was OK for me because it left much room to customize. The missing parts I was able to craft myself and in the end the parts fit quite well and had only little flack. This build has taken longer then any of my former models. After trying out one opening door on my last Hudson Hornet I went all in and decided to build a model with both doors, trunk and front hood on hinges. Cutting came quite easy because most cuts were straight. The paint job was inspired by YouTubes I saw from car shows. I mixed two different greens out of Schmincke Aero Color with 25% metallic fluid. The silver stripes were masked with 1mm tape after laying a base coat of silver. I started with the light green on top over most of the body and then gently moved from bottom to the middle line with the dark green. Then covered with three coats of clear, in between Bare Metal, and a polish in the end. I eliminated all logos and emblems and even sanded the bonnet flat. The Wheels are custom, aluminum rims with epoxy spokes, from my favorite supplier. The design is Foose Nitrous II and I love the looks! Maybe you can see the steel brake discs and the green calipers. Getting the hinges in the correct place was tricky, but it all fit in the end. Time consuming was filling the hollow places in the doors, rockers and the trunk. I gave the trunk a sound system after flocking the floor and walls. The interior has a flocked floor and custom seats. These are Viper buckets with added seat belts. This model was originally an automatic but I added a shift and the clutch. Steering wheel is from my scrap box. The kit contains hardly any decals so I had to do my best with the dashboard. The engine is mostly stock, but of course I had to add lots of detail. Instead of the stock air system I opted for more "power" and a custom intake. The undercarriage received a special treatment as well. Brake lines and a mild weathering. Thanks for taking a look!
-
1964 Pontiac Bonneville Convertible.
Andy Oldenburg replied to StevenGuthmiller's topic in WIP: Model Cars
Looking cool again? keep up the good work! -
Looks great! Show us mooooore!? (please)
-
Wonderful build with cool details and a clean workmanship? This car looks perfect!
-
I´m finally coming to an end. The body parts have received the necessary bare metal and I sanded down all of the labels at the start, so no decals are applied. Three layers of clear coat and a good polish. The fireboard is installed and all the hoses, wires and lines are connected. The chassis and body actually fit at the first try. This does not happen every time and therefore one worry less on this build. Next I had to take care of the rockers. I grew a few gray hairs on this because the panel for the back bench was too far forward and I didn´t notice it before I glued the body and chassis together?? Some open heart surgery was necessary to cut out as much as possible without wrecking the body, rocker or seat. I´m satisfied with the result and will take better care on the next project. The trunk I built with 0.5mm sheet styrene and flocked in the same color as the interior. I customized it with a sound system and so far the hood still fits. Next step will be connecting all the moving parts and I hope they all still fit the way they were supposed to. Big suspense! The final images will be shown "under glass". Thanks for watching!
-
1964 Pontiac Bonneville Convertible.
Andy Oldenburg replied to StevenGuthmiller's topic in WIP: Model Cars
Looking really fine? Is that Bare Metal or do you paint the the frames with Molotow? -
The wheels have finally arrived, beautiful pieces. I have a supplier here in Germany that copies original wheels, usually racing and custom. These ones are Foose Nitrous II and fit perfect to a low rider. I added the photo etched brake discs and painted the calipers to match the body paint. The interior is moving on too. I didn´t want to have the seats and panels in a body color and remembered show cars with a complete light leather finish. So this design I chose for my interior. I discarded the kit seats and replaced them with racing seats. In this case "original" Viper buckets and also added standard three point harnesses. The paint job is inspired by show cars I saw searching the net. After priming I sprayed a base coat of metallic silver (Molotow black label). On this I added thin coats of Schmincke Aero Color. I mixed two different greens to match my taste and added 25% metallic fluid. Schmincke Aero Color is originally an artist color, but it´s very fine and even passes through a 0.1 mm nozzle, much finer than say Createx. I´m quite happy with the blend from dark at the bottom to light and lime on the roof. Next step now is the clear coat and bear metal. Thanks for watching!
-
Hello Kimmo, good job and a bit heart moving to hear that you and your son have (or had), a common hobby. That is quite rare and you should cherish those memories.
-
1964 Pontiac Bonneville Convertible.
Andy Oldenburg replied to StevenGuthmiller's topic in WIP: Model Cars
Hello Steve, a very inspiring build, lots of details and very well crafted??? I´m waiting to see where and how this will end! -
I´m not into military at all, but the models you have shown are very impressing! Looks like the real thing, your weathering skills are awesome. Cars should come easy for you. You just build in your usual way and polish the bodies to glossy... not. ? Looking forward to your next builds!