Andy Oldenburg
-
Posts
345 -
Joined
-
Last visited
Content Type
Profiles
Forums
Events
Gallery
Everything posted by Andy Oldenburg
-
A good looking understatement rod, no flames or decals. I really like it! Fine color and nice details under the hood.
-

53 Ford Victoria Crestline Woody - completed
Andy Oldenburg replied to SpeedShift's topic in Model Cars
Cute build and a good job with the wooden grain! Looks very era correct? -
Hello John, I have just learned that something like decal paper exists? I will check out, if I can source that here in Germany. It took a bit of web research to find Chevy emblems and logos of different eras. I this case even on a single sheet, but way to big for a 1/25 scale model. I just copied the image and reduced it continuously to various sizes in a A4 word document. Printed on stationary paper looks quite dull, but I happened to have gloss photo paper, bright colors and sharp printed images. Cut them out with a small silhouette scissors and attached them to the body with white glue. I did the same with the speedometer on the dashboard and in the meantime found era conform images of a vintage radios. So there is a cheap and fast way to get more detail into a model. I hope this was of help to you. Good luck!
-
Thanks guys for your response! Bob, anecdotes about some of us knowing someone "back then" does make me realize how old we must have gotten... If we hadn´t found the fountain of youth called model building!??
-
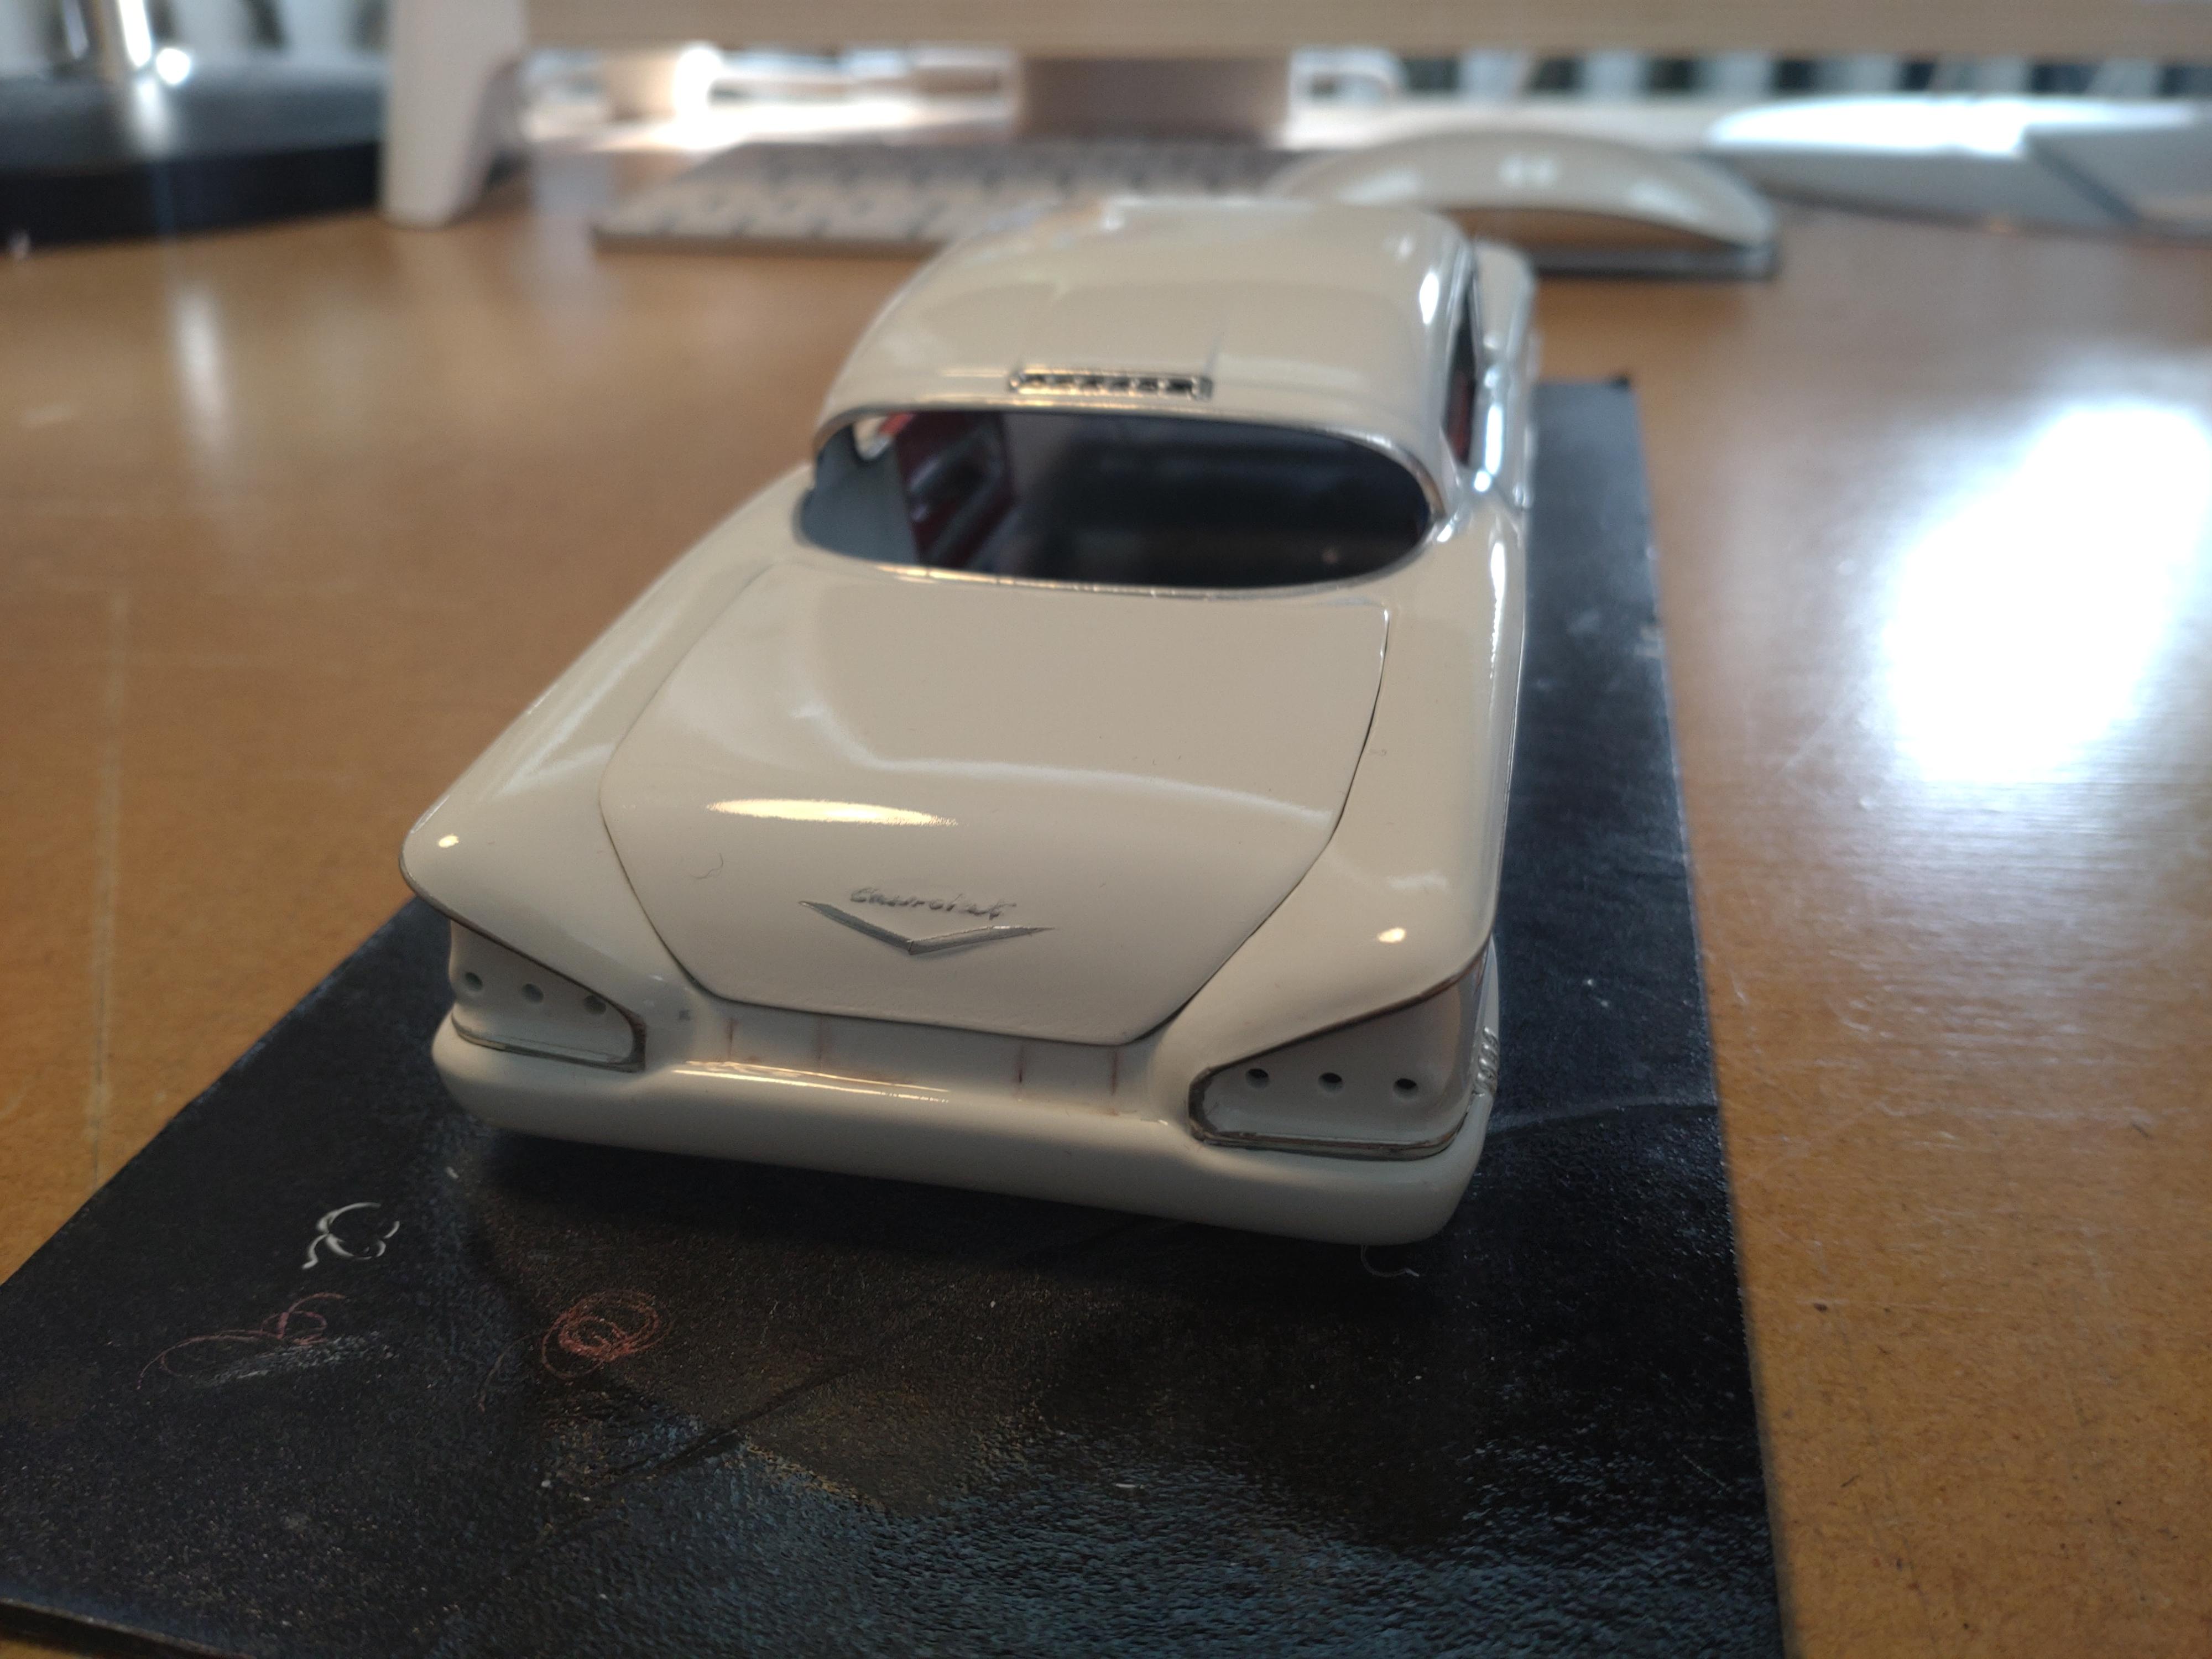
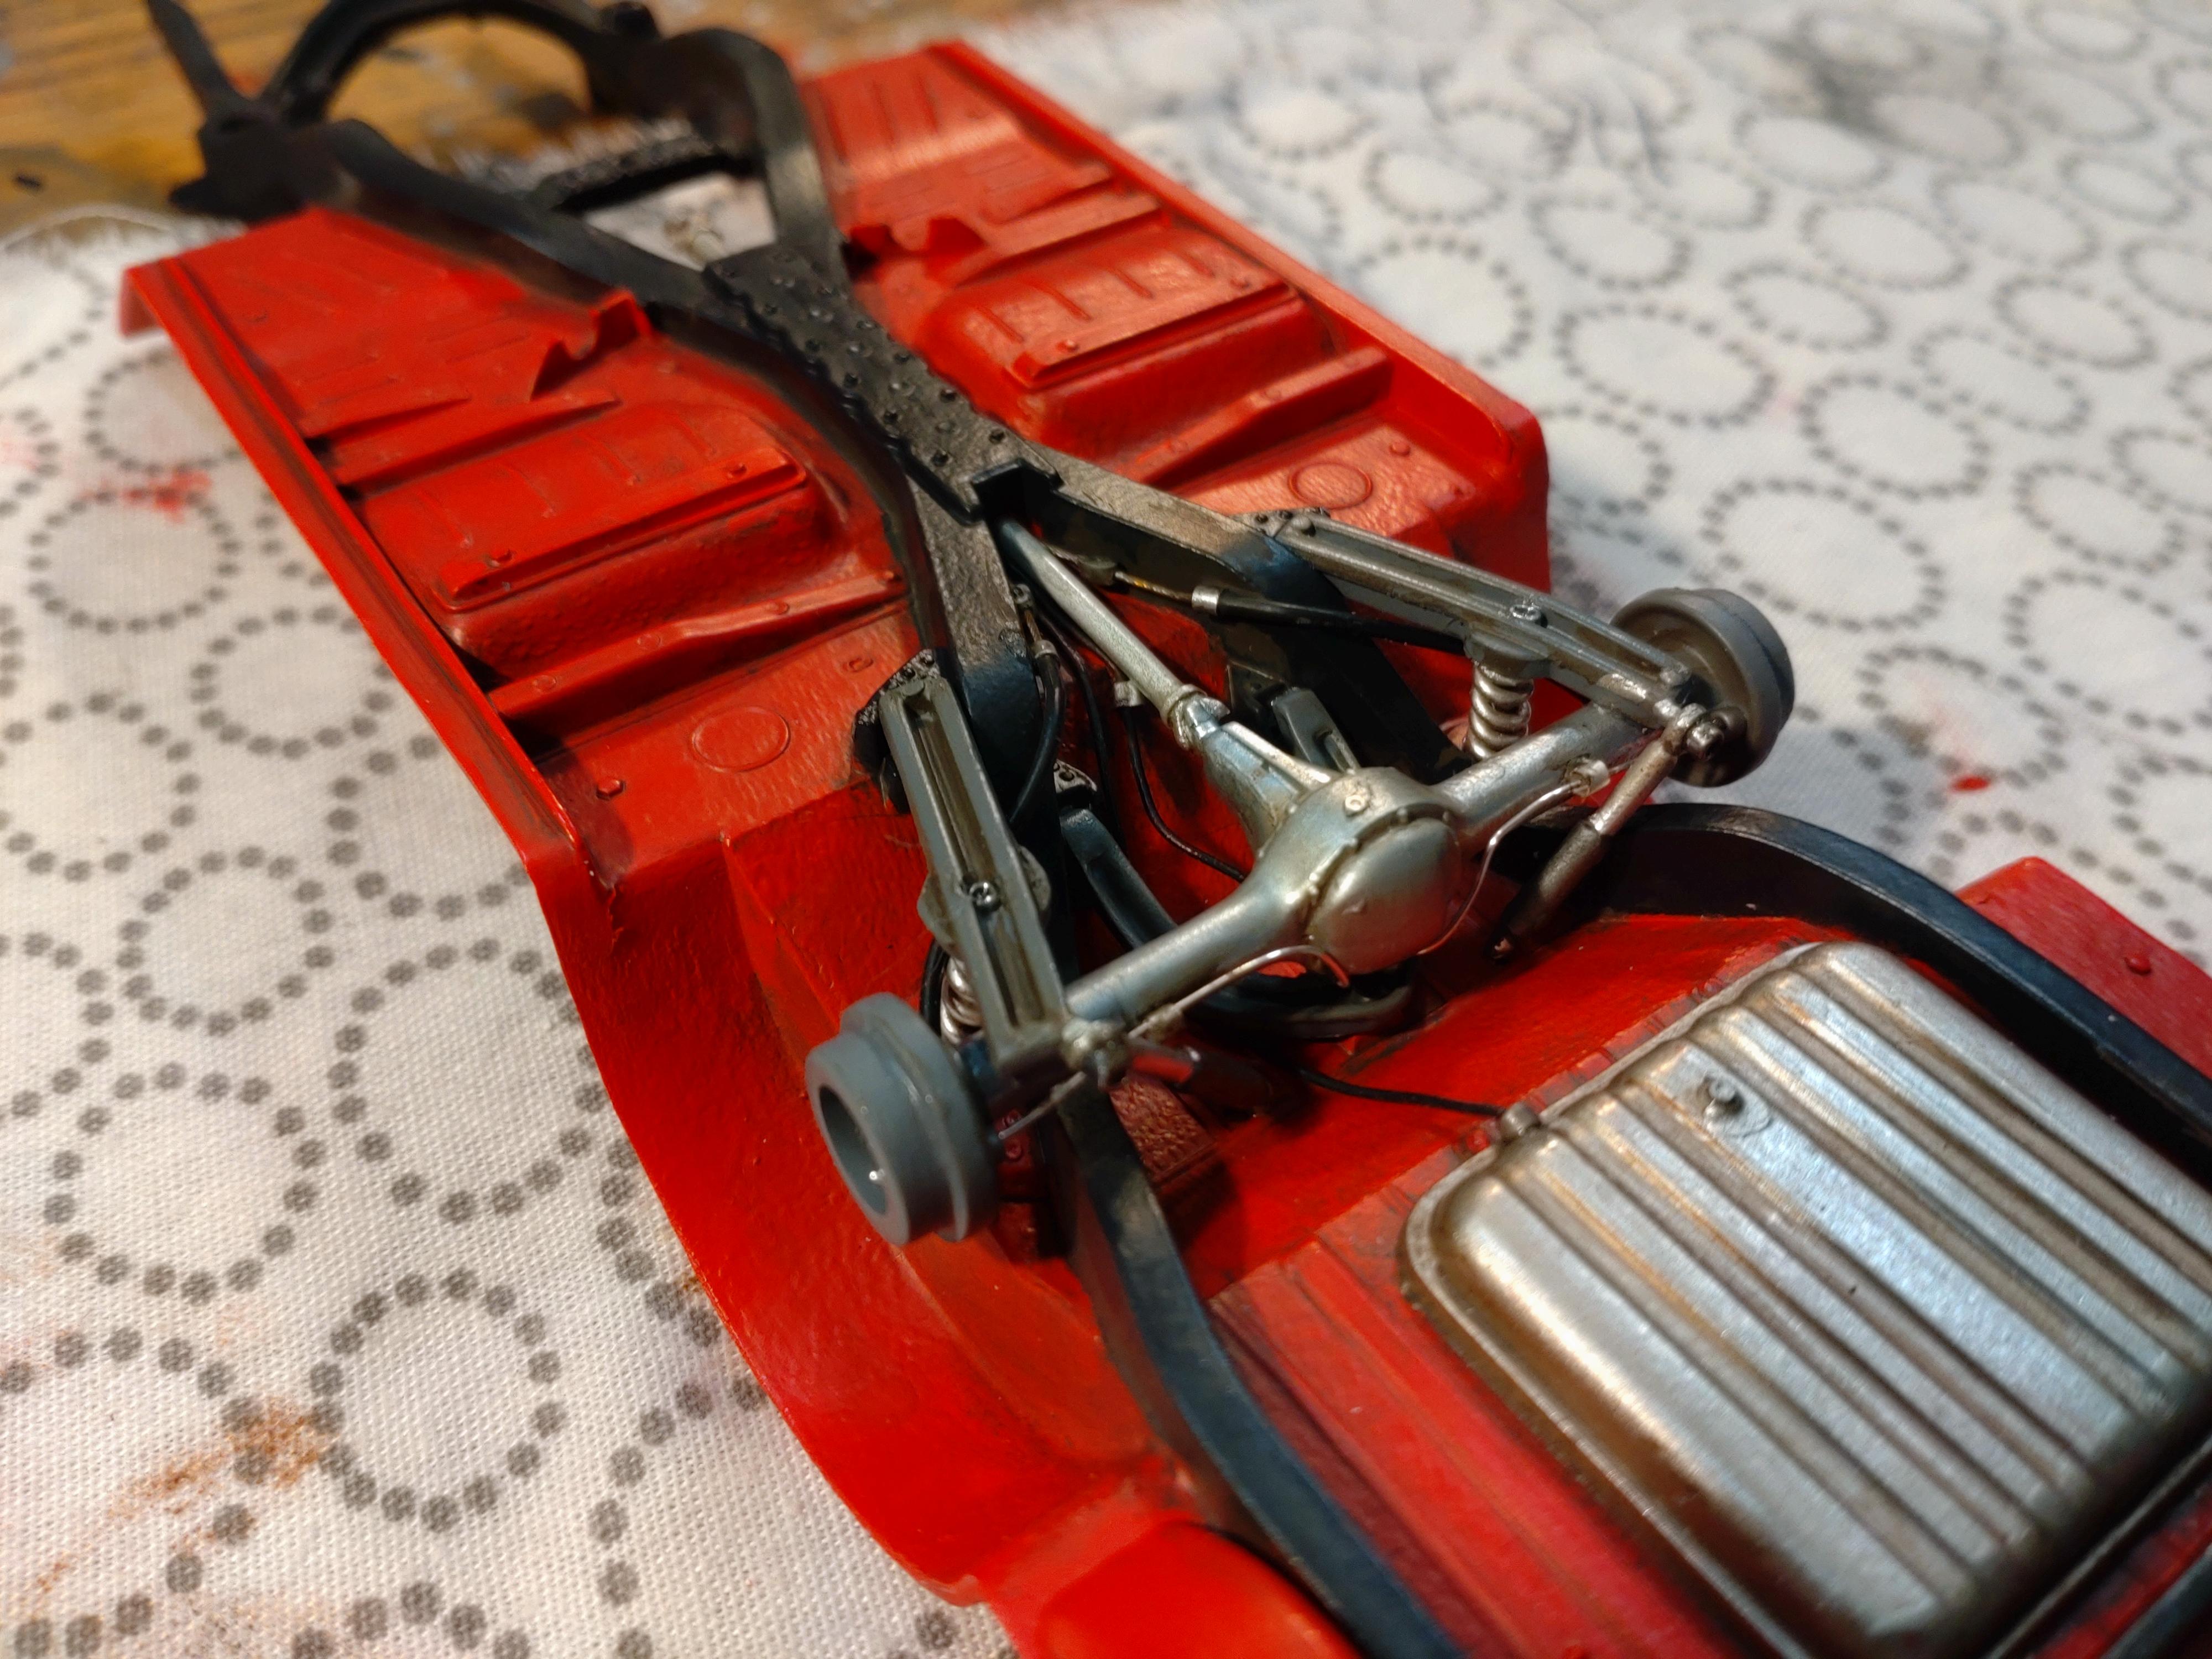
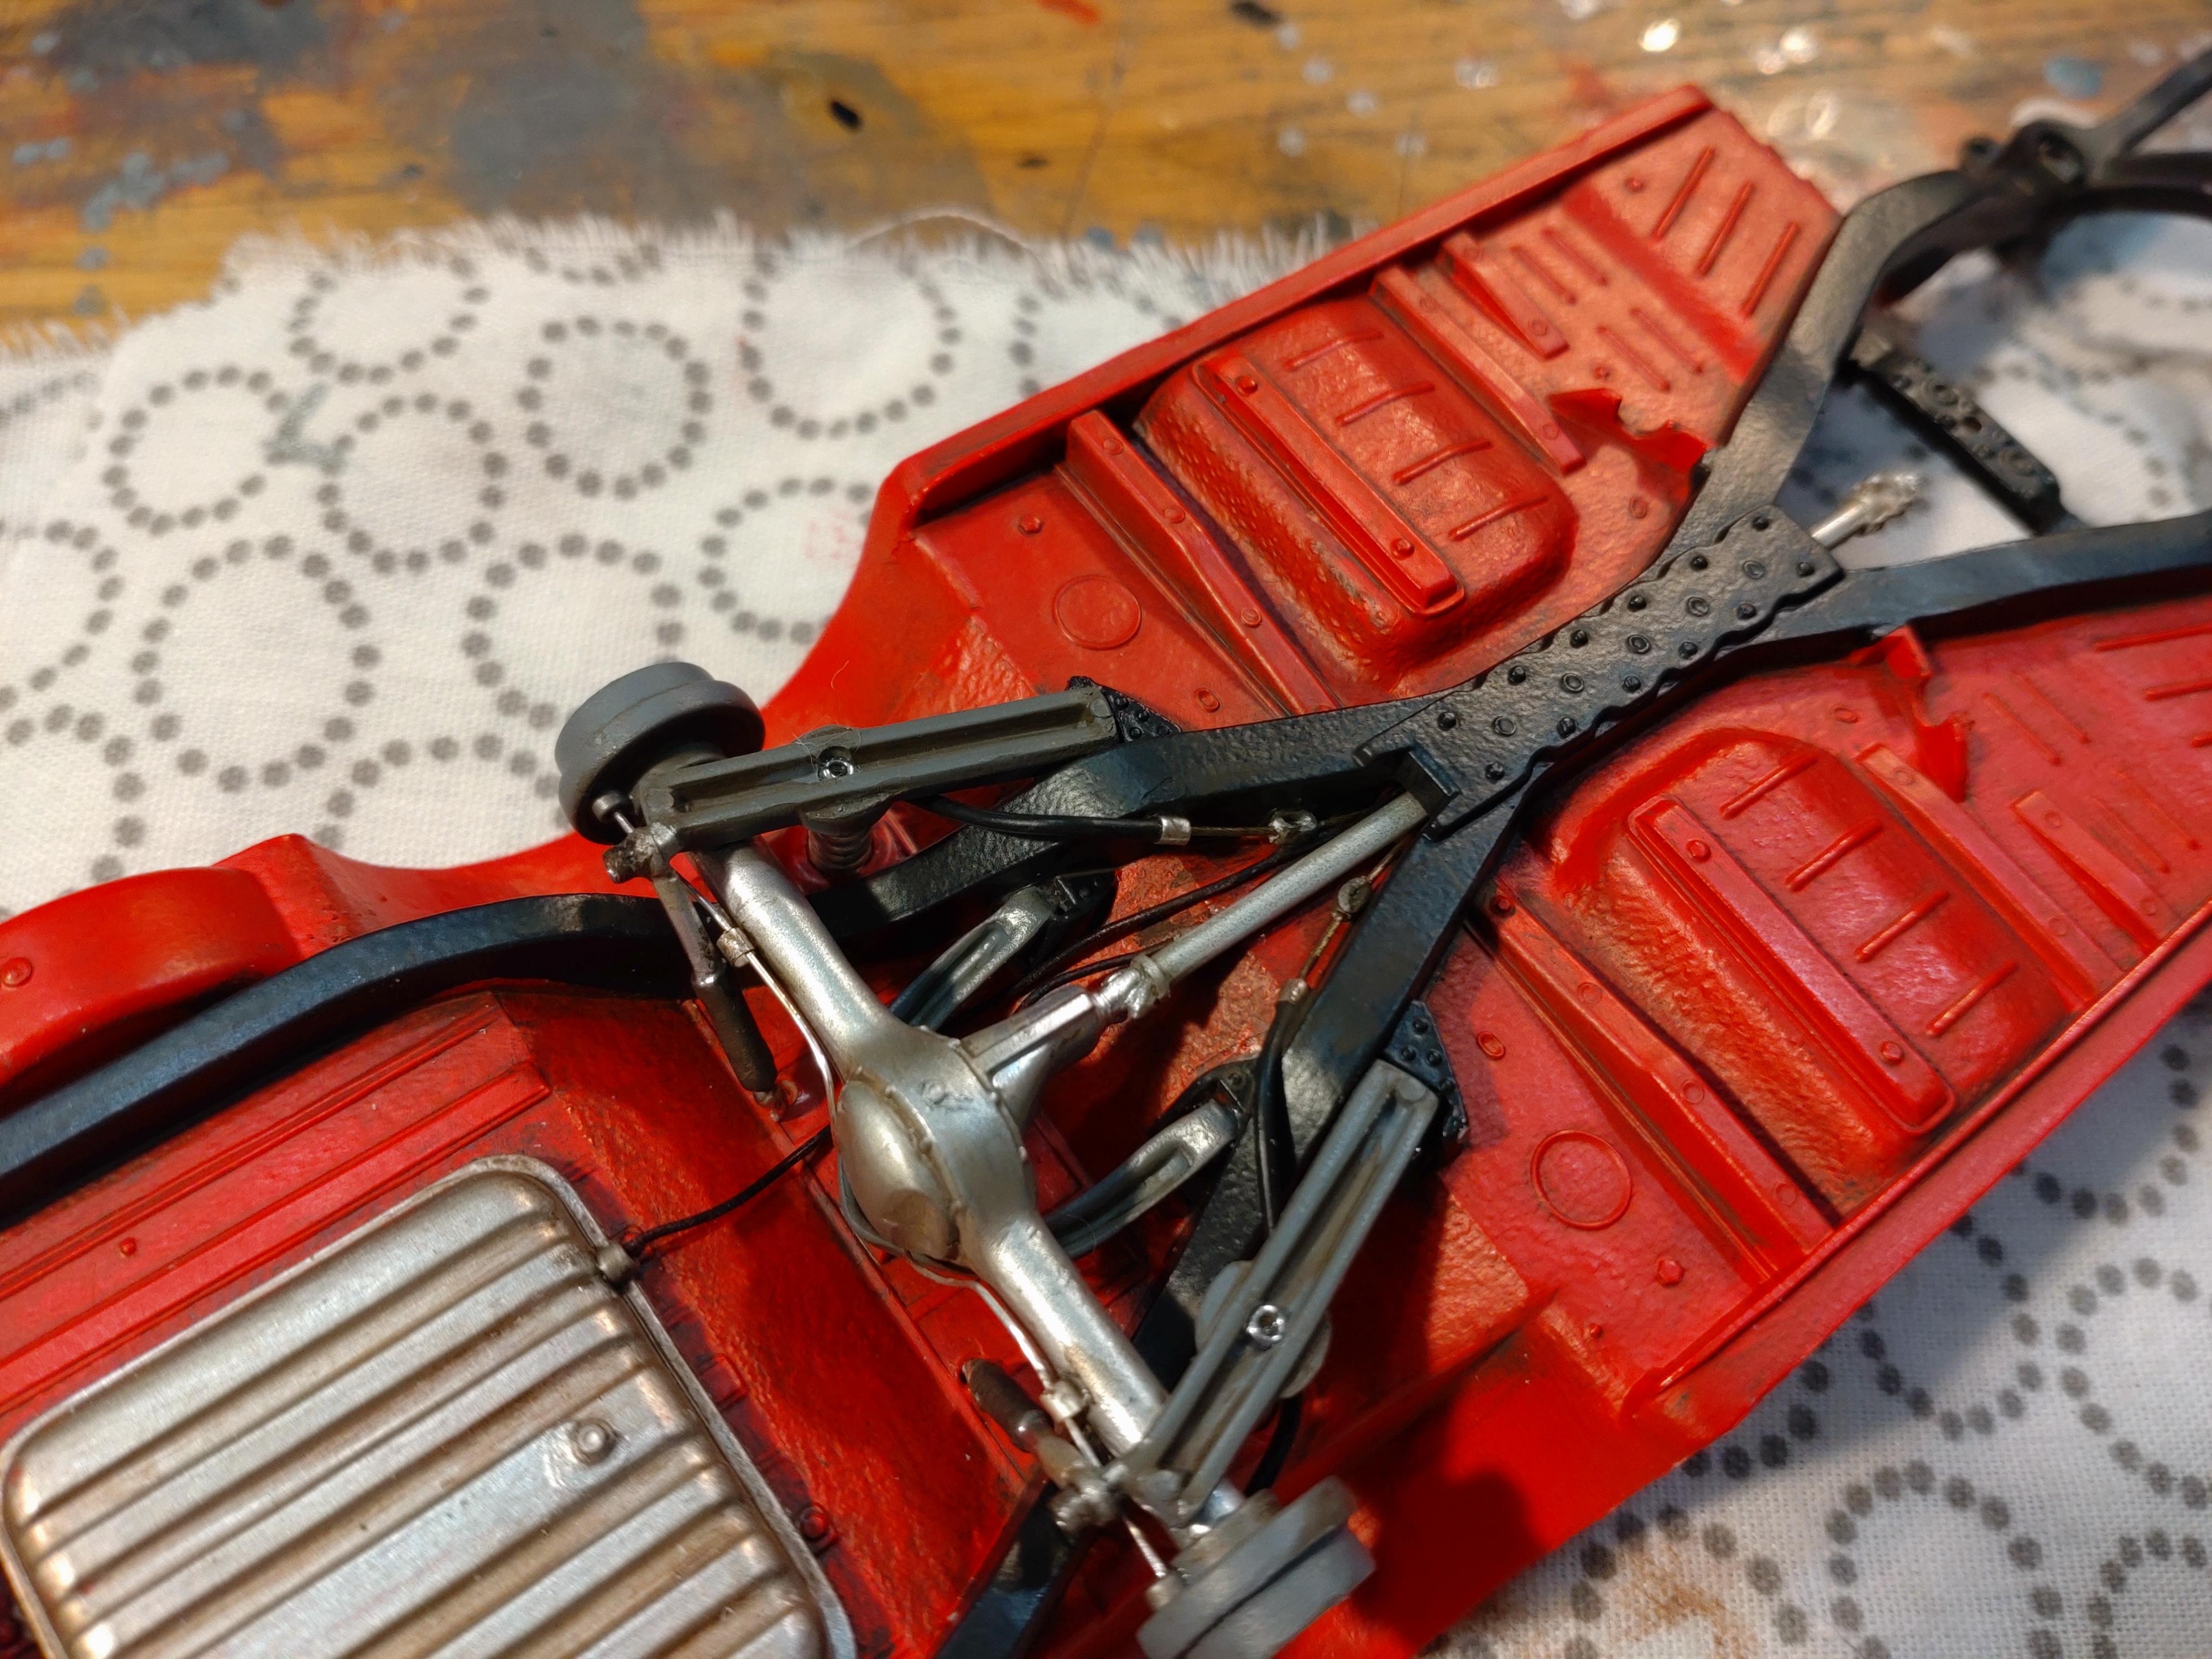
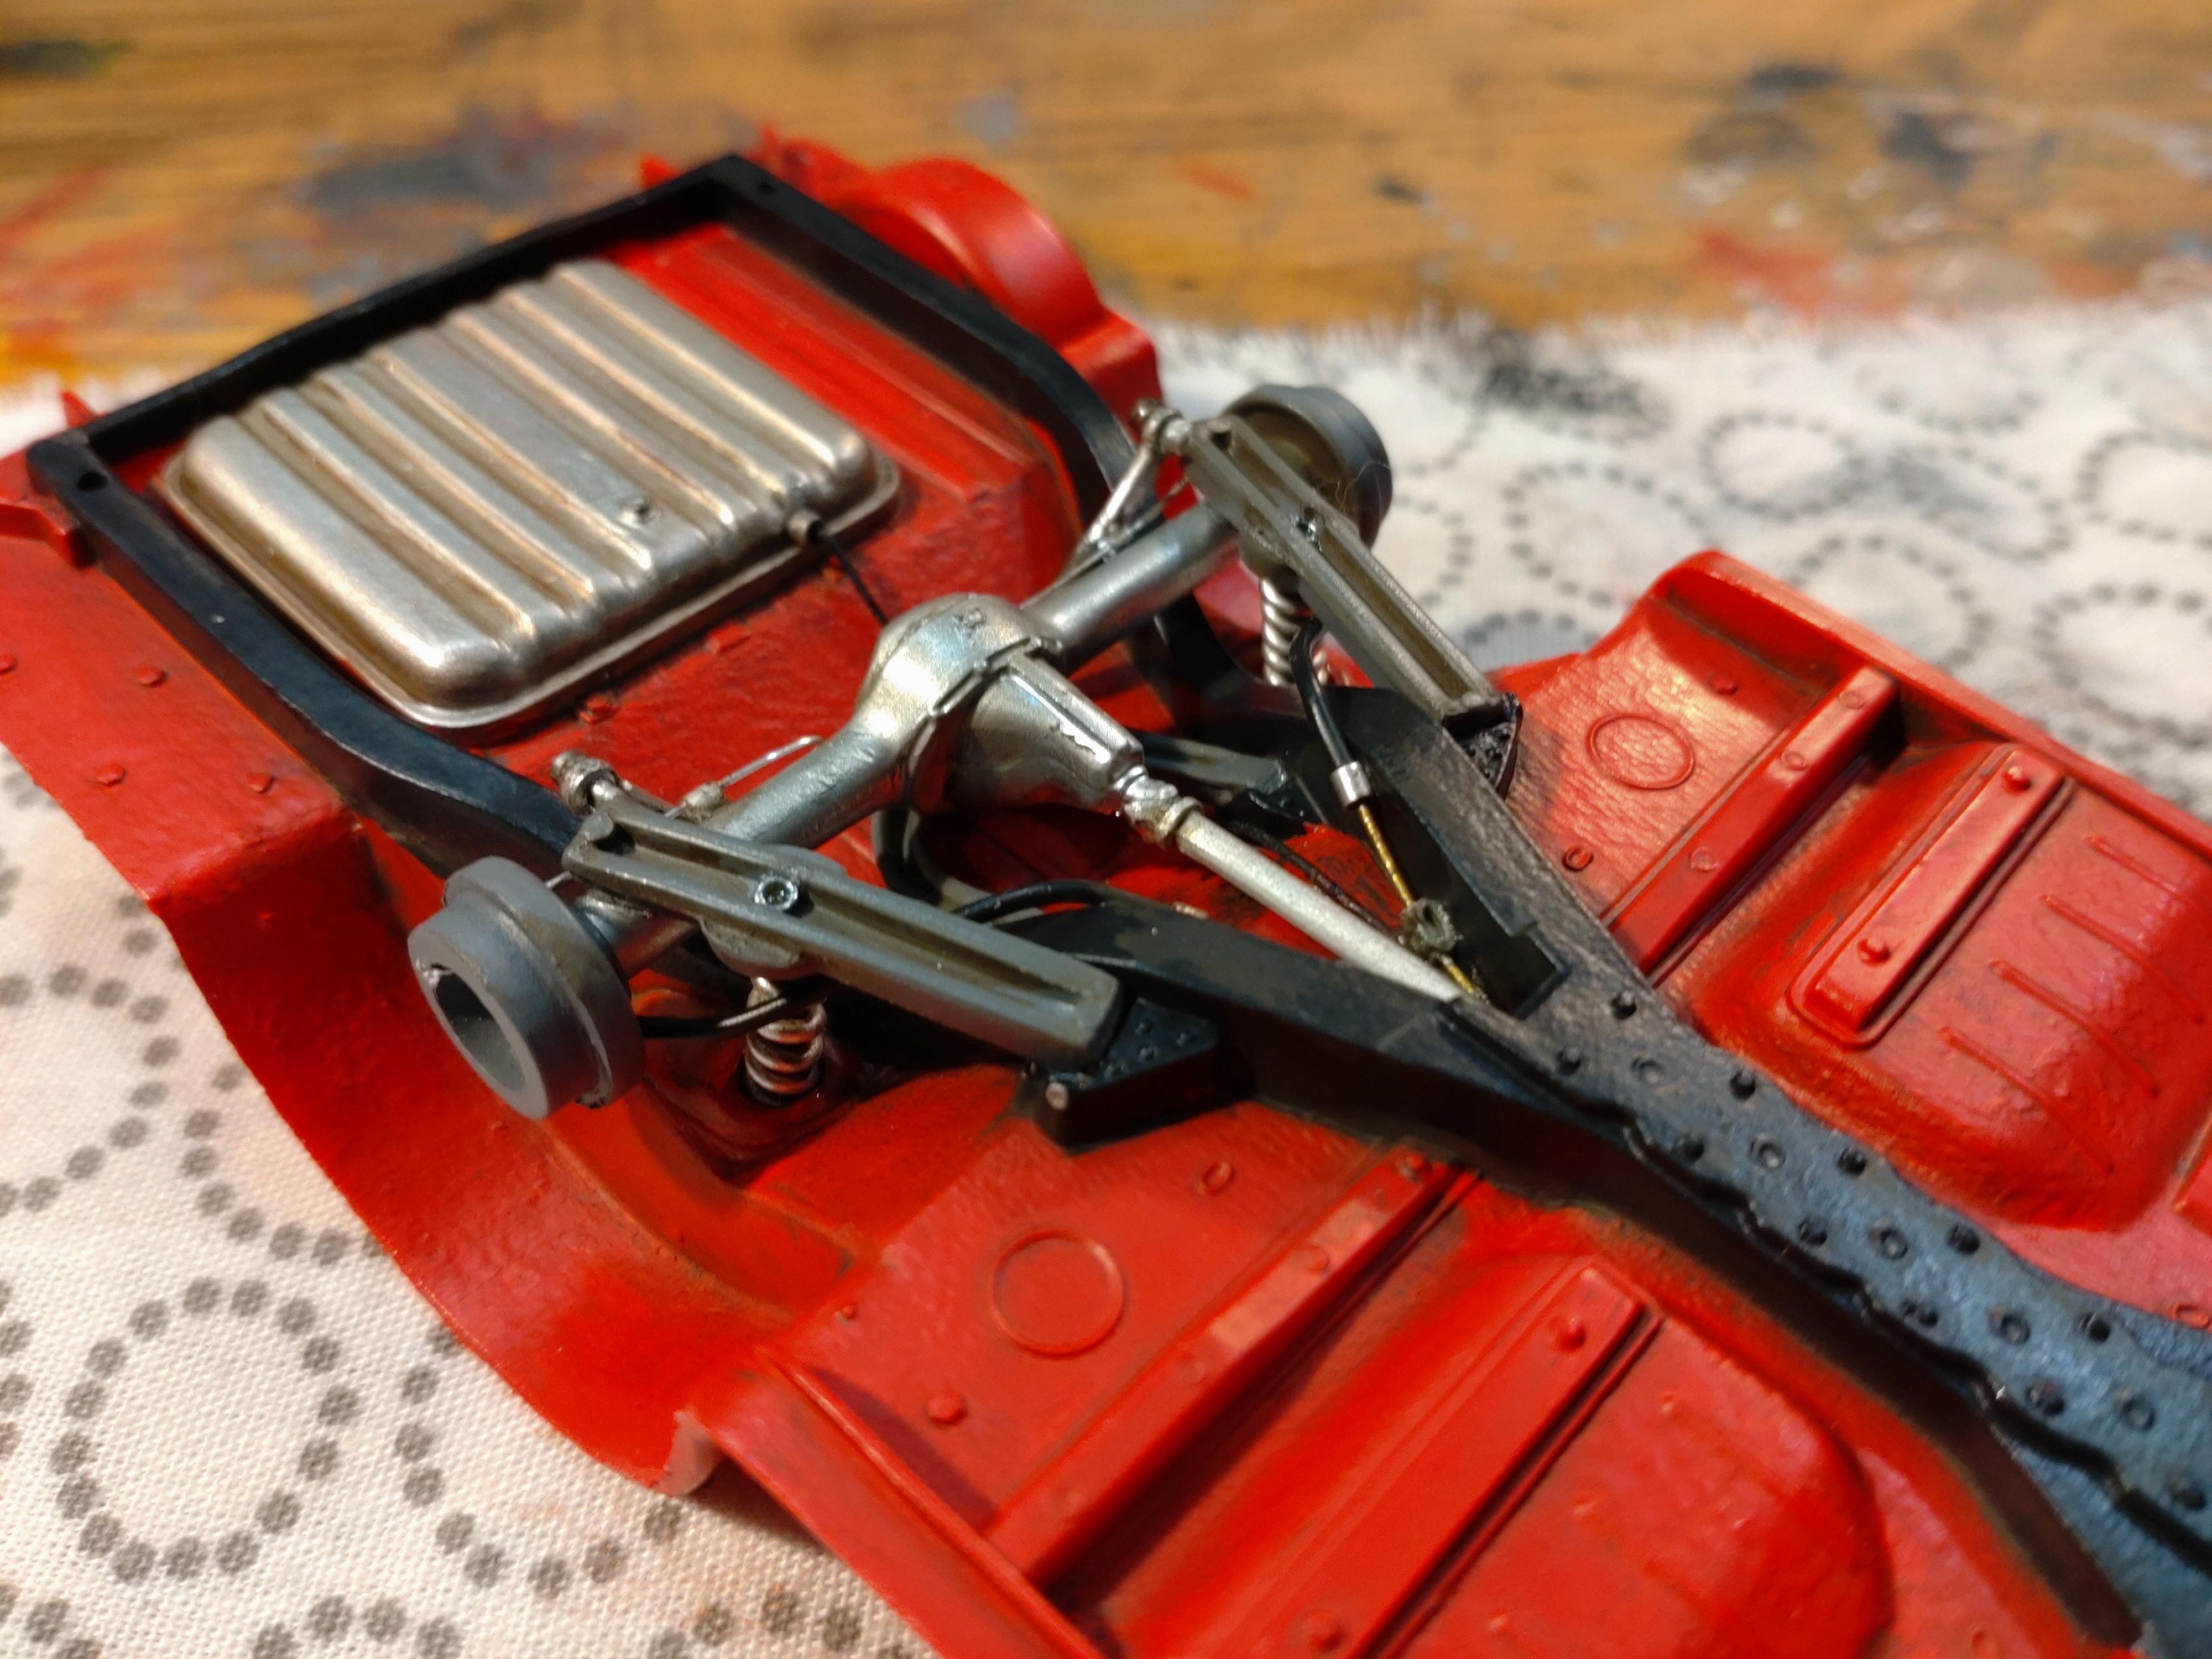
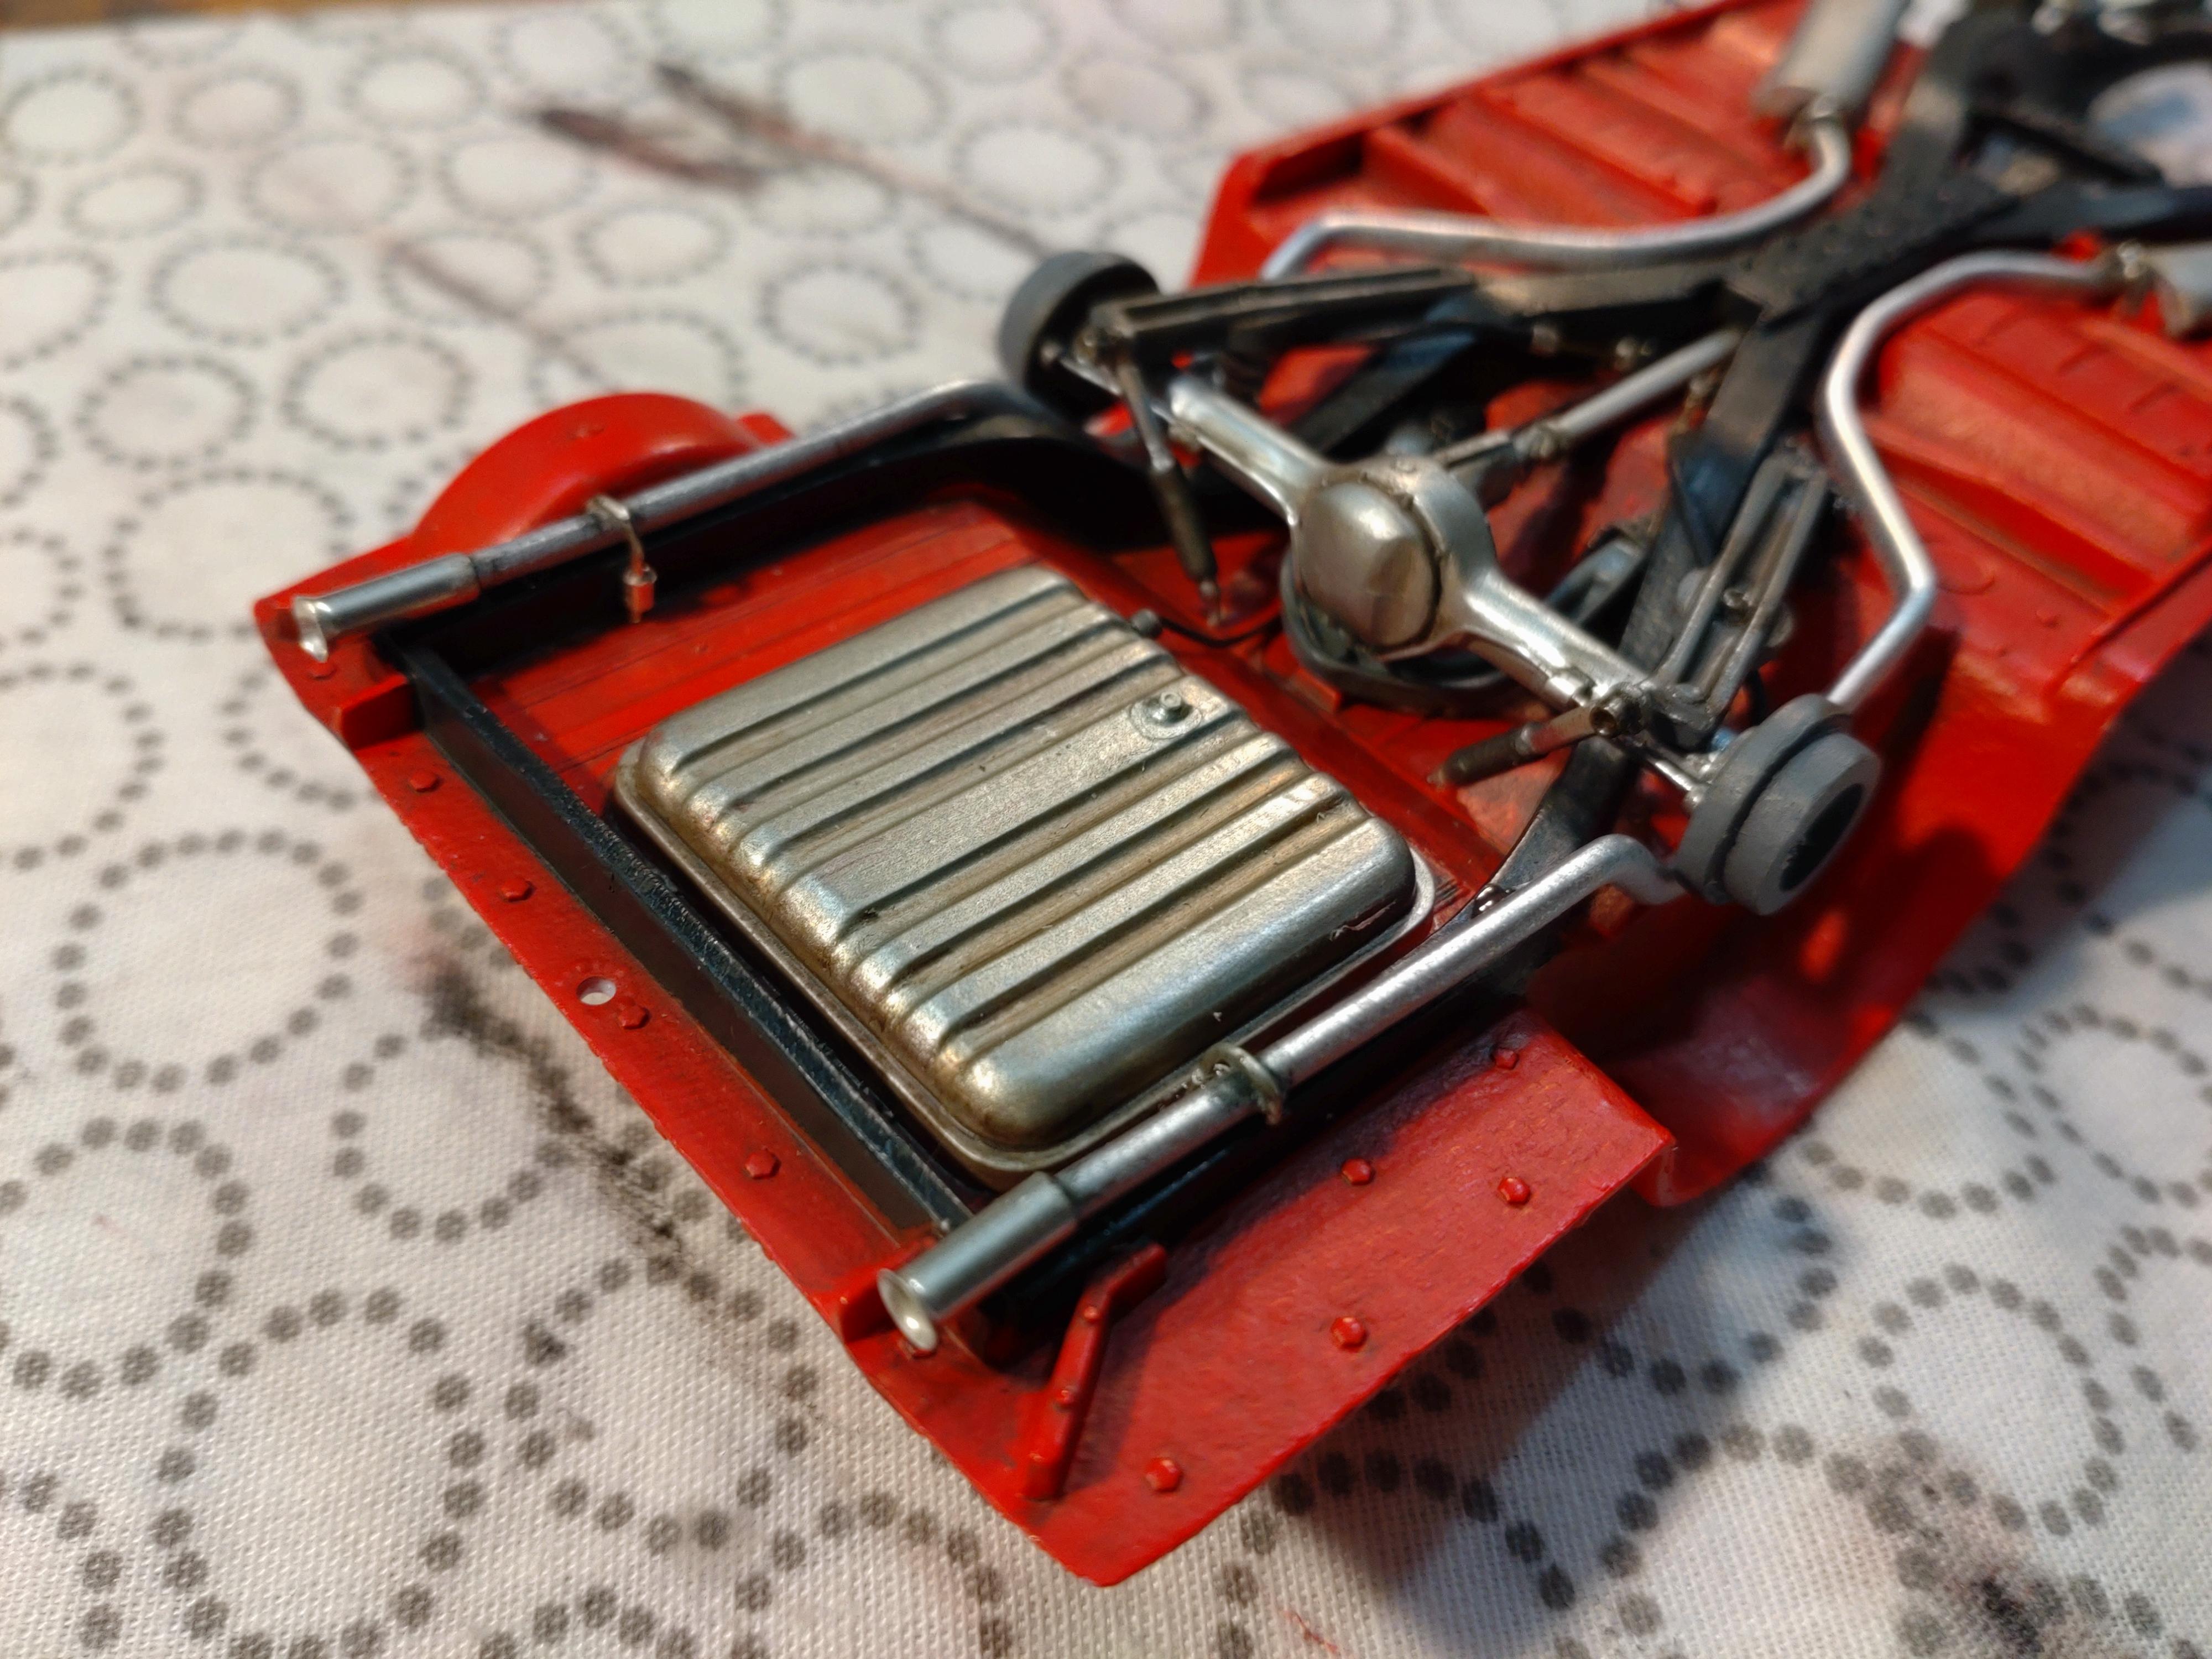
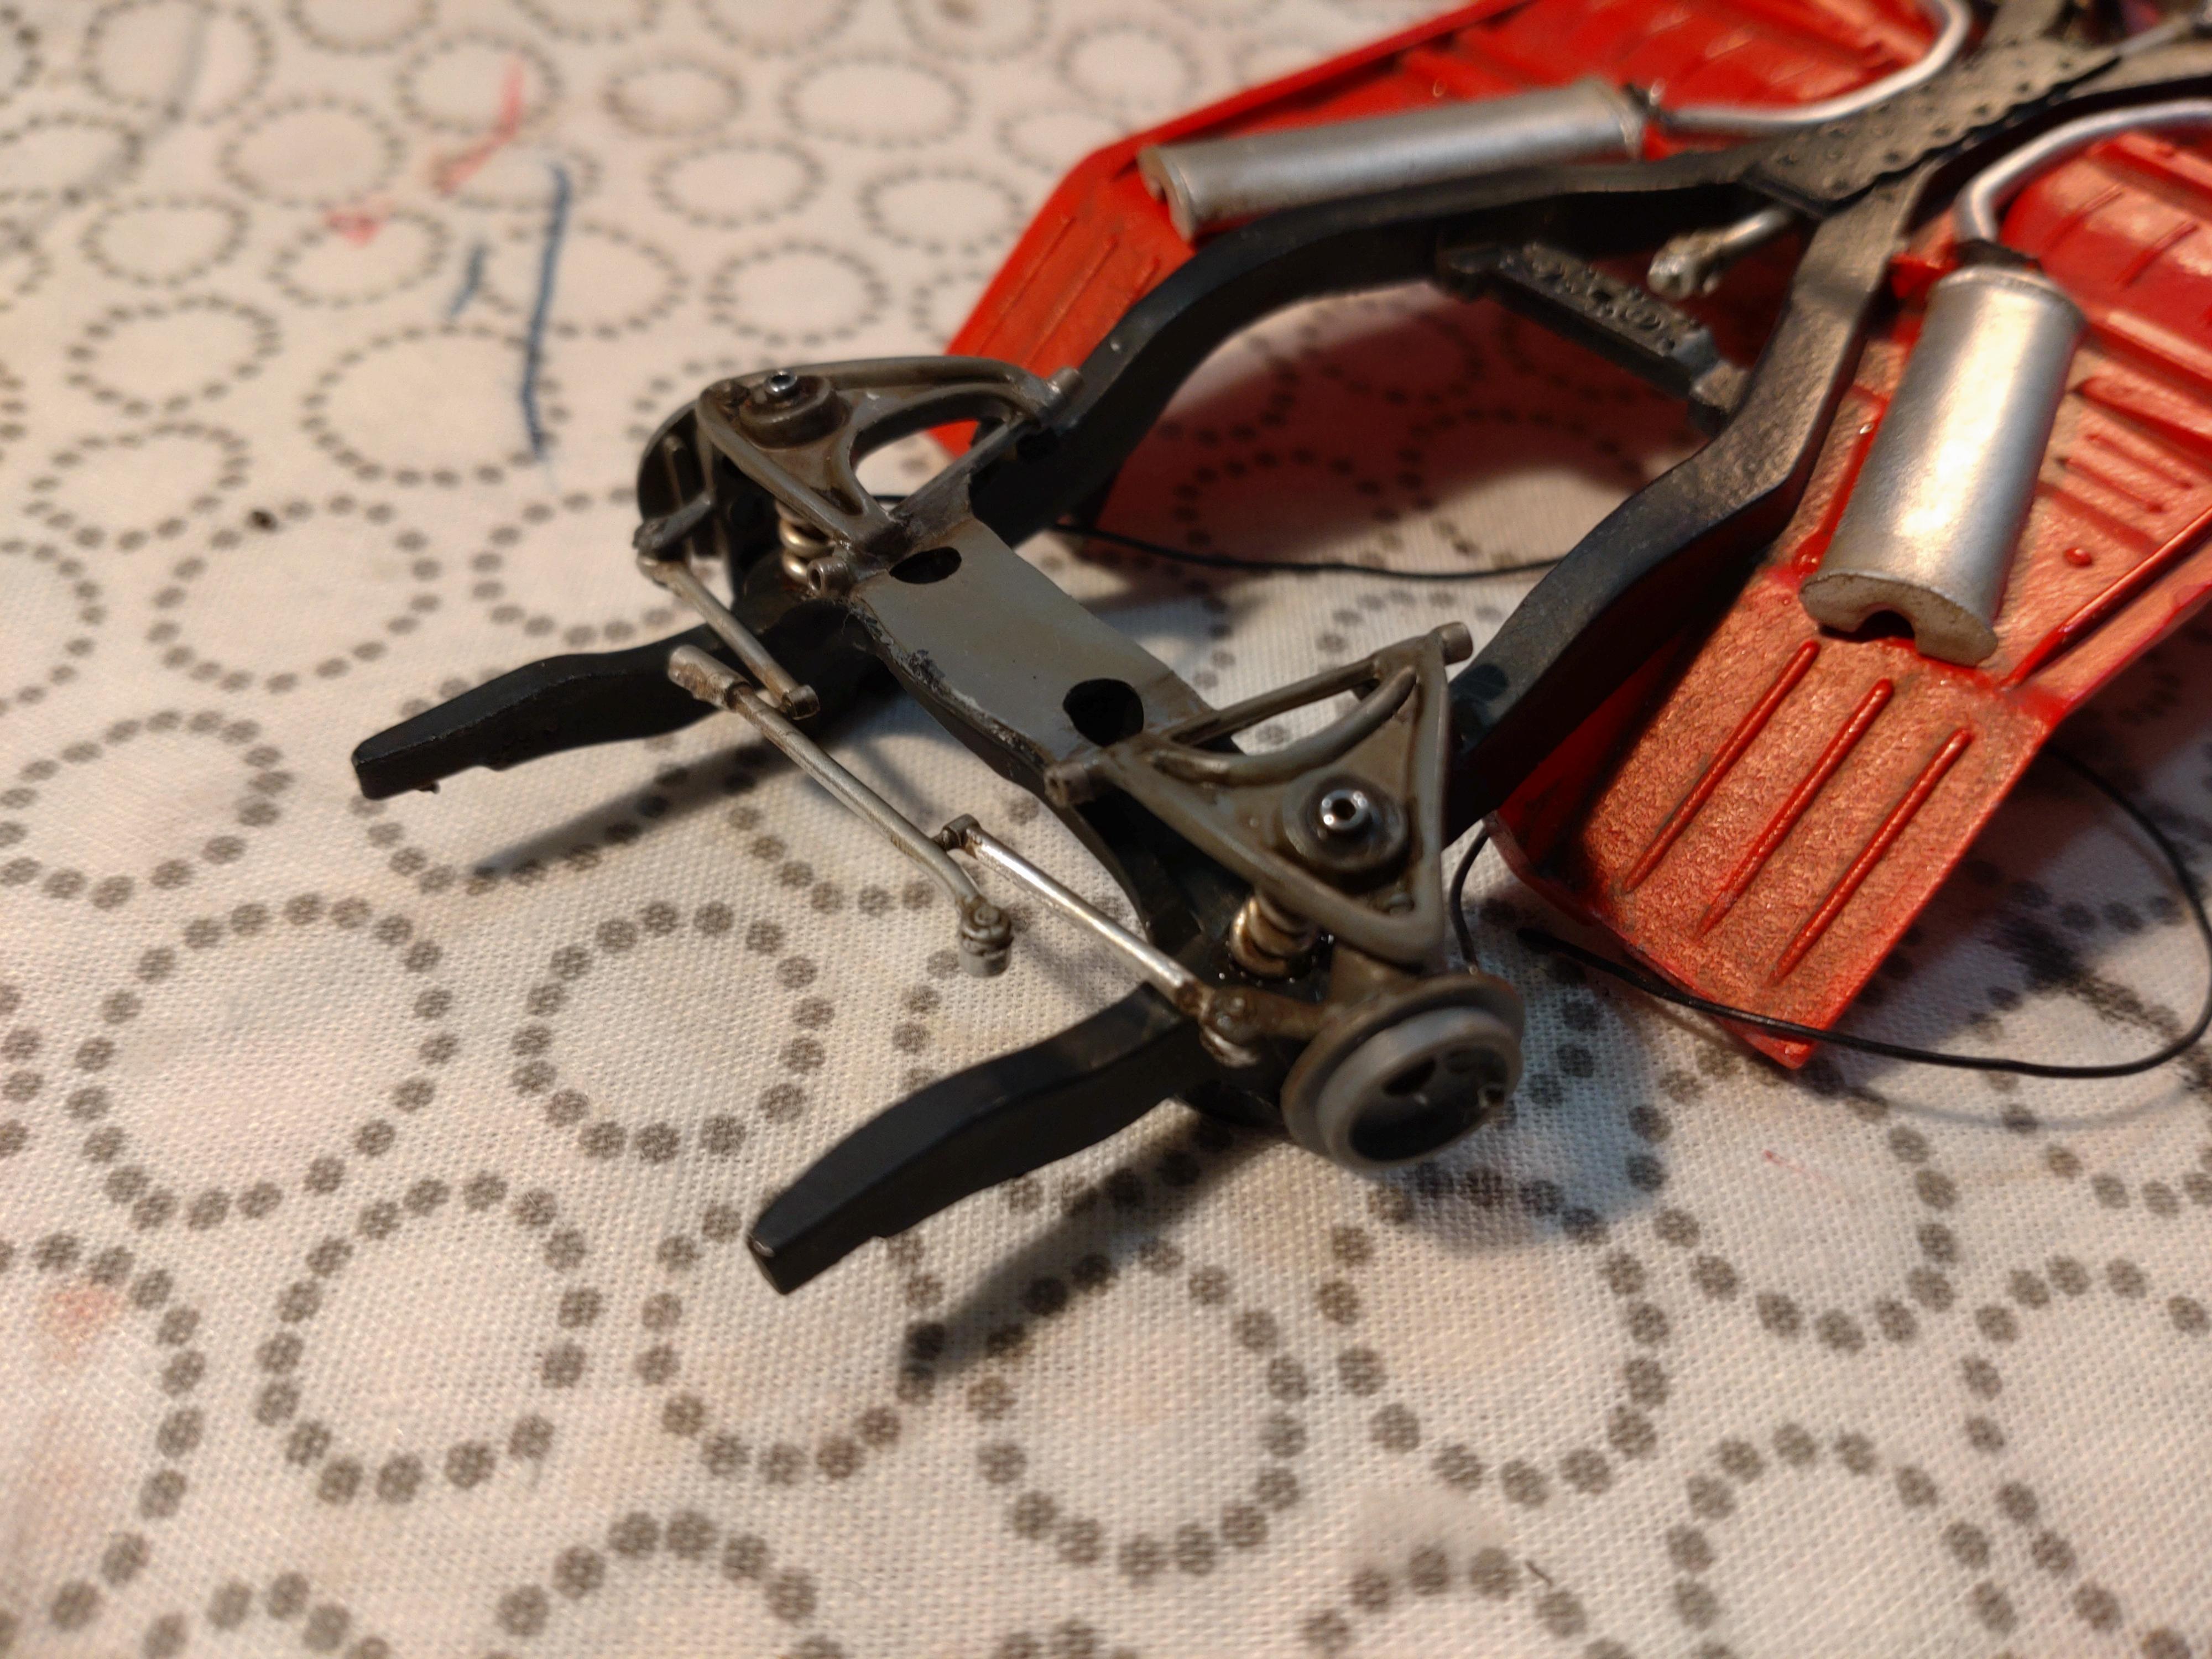
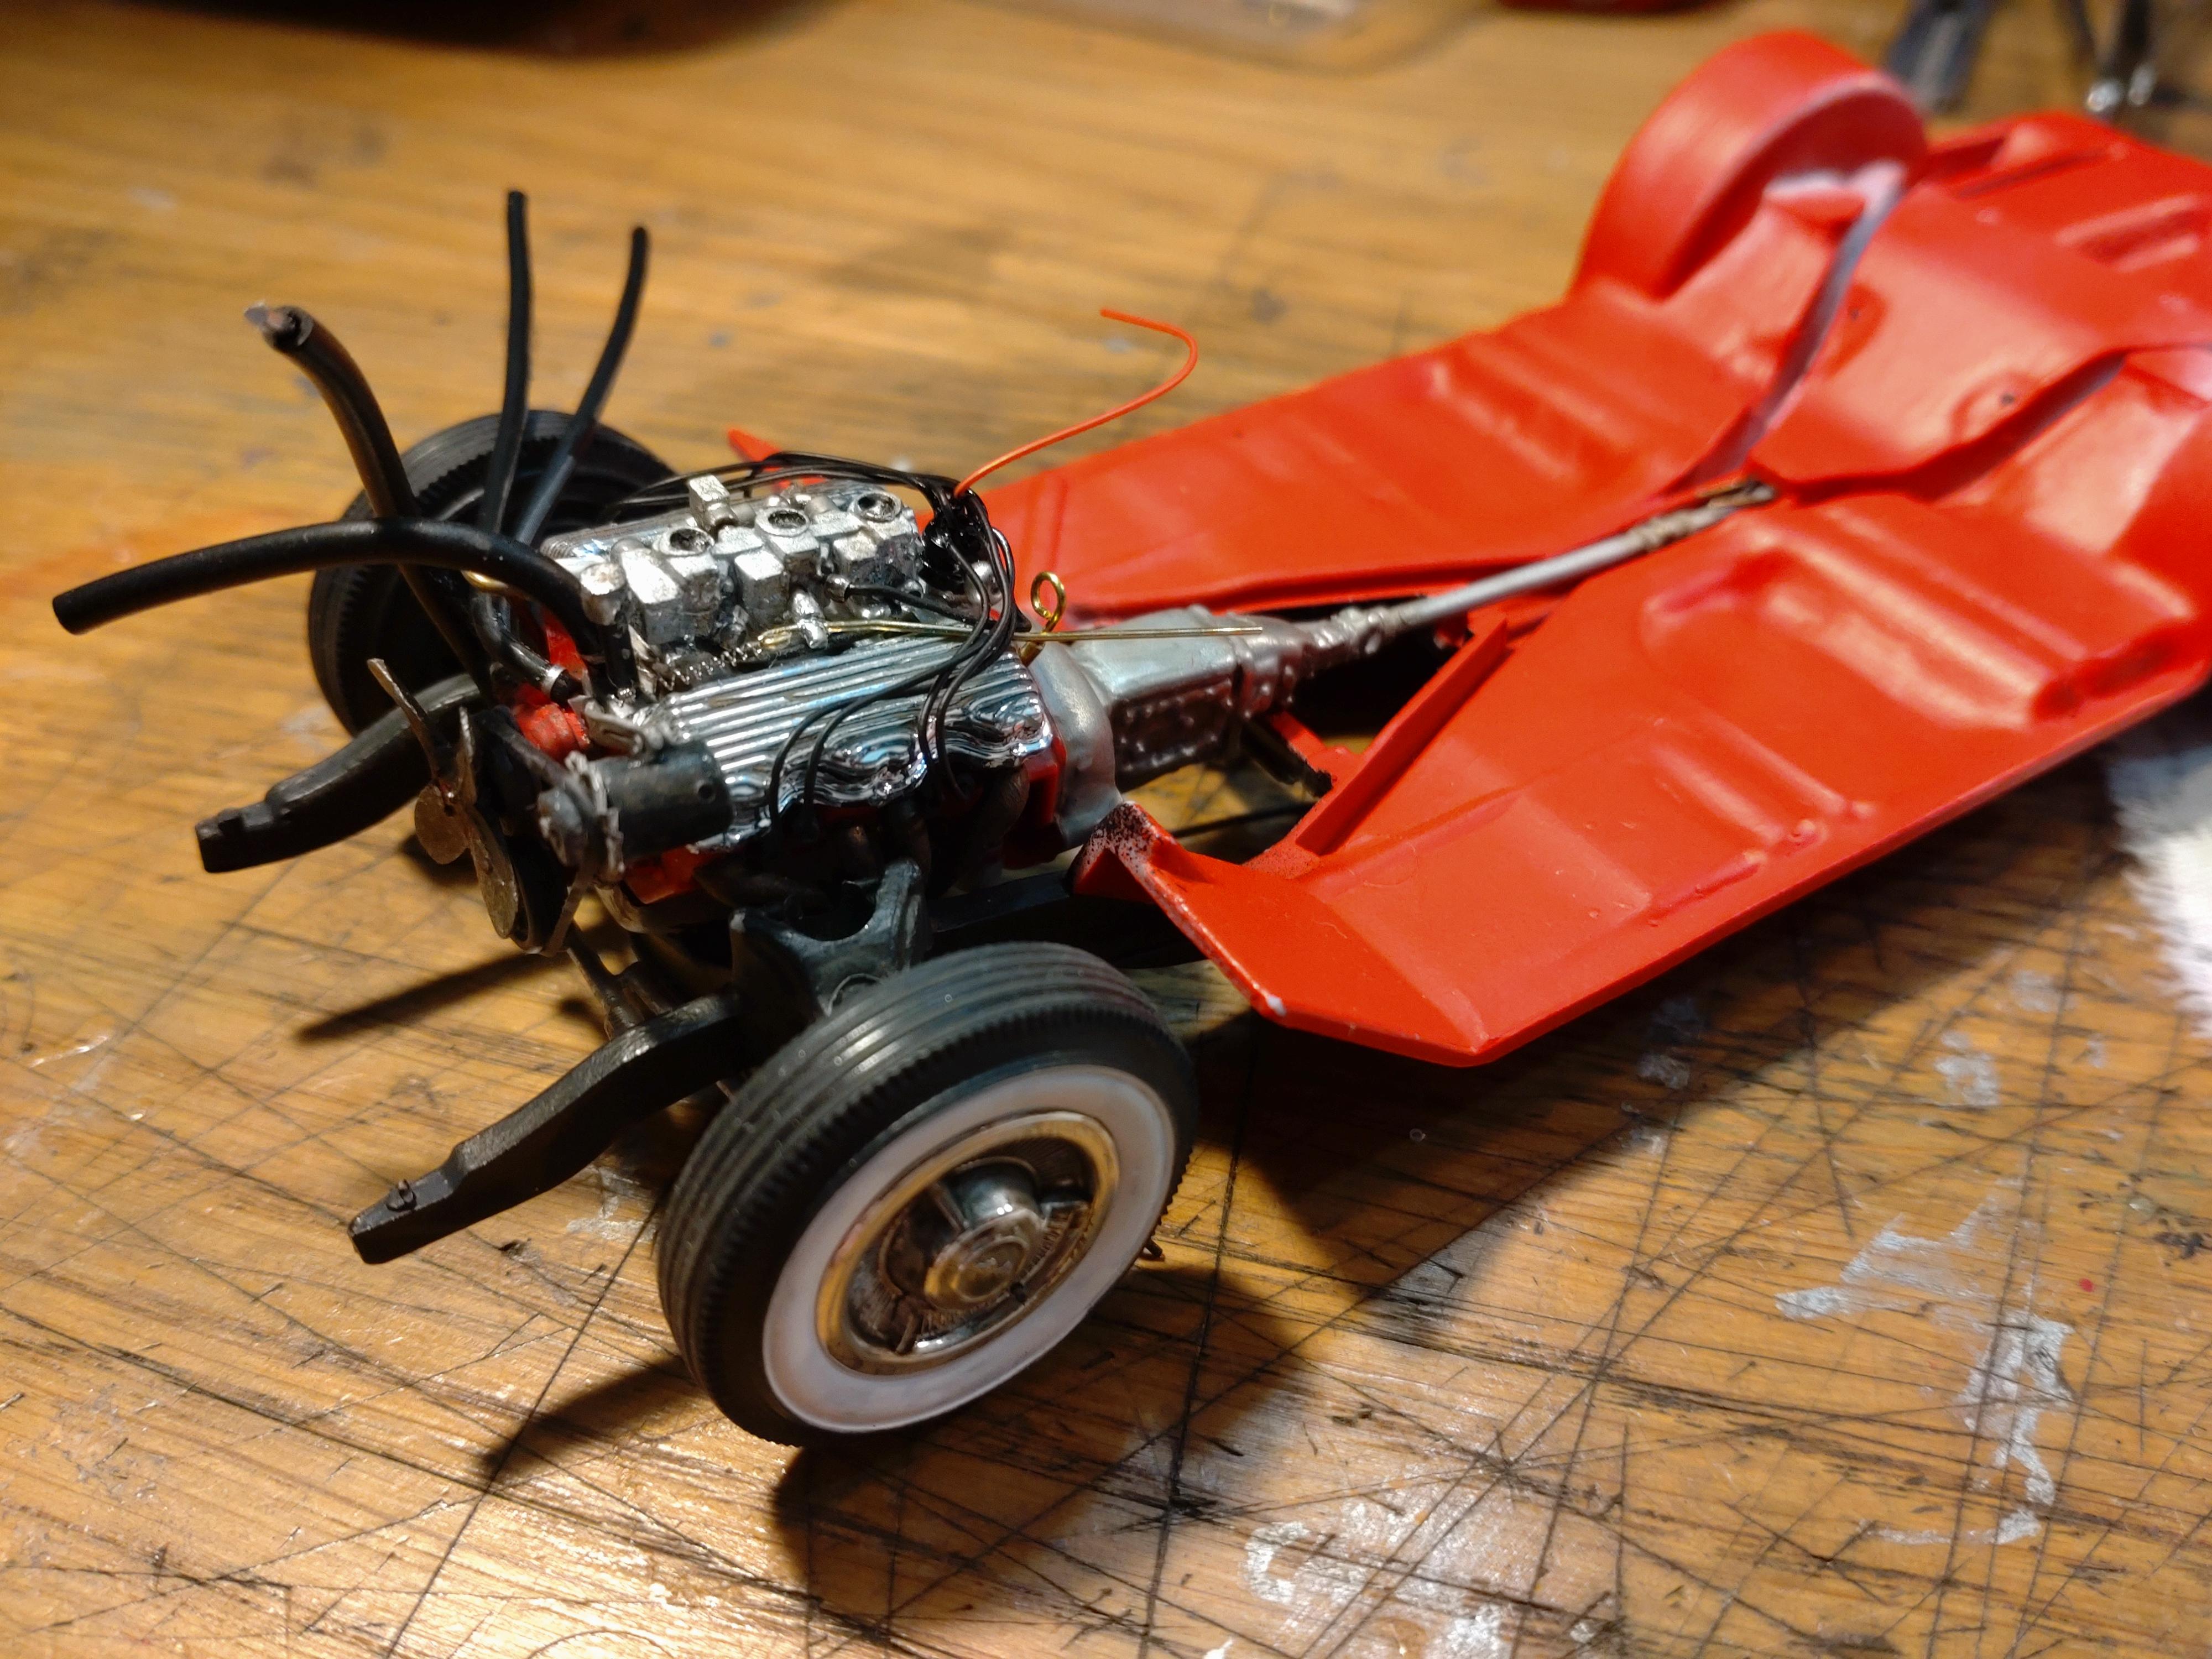
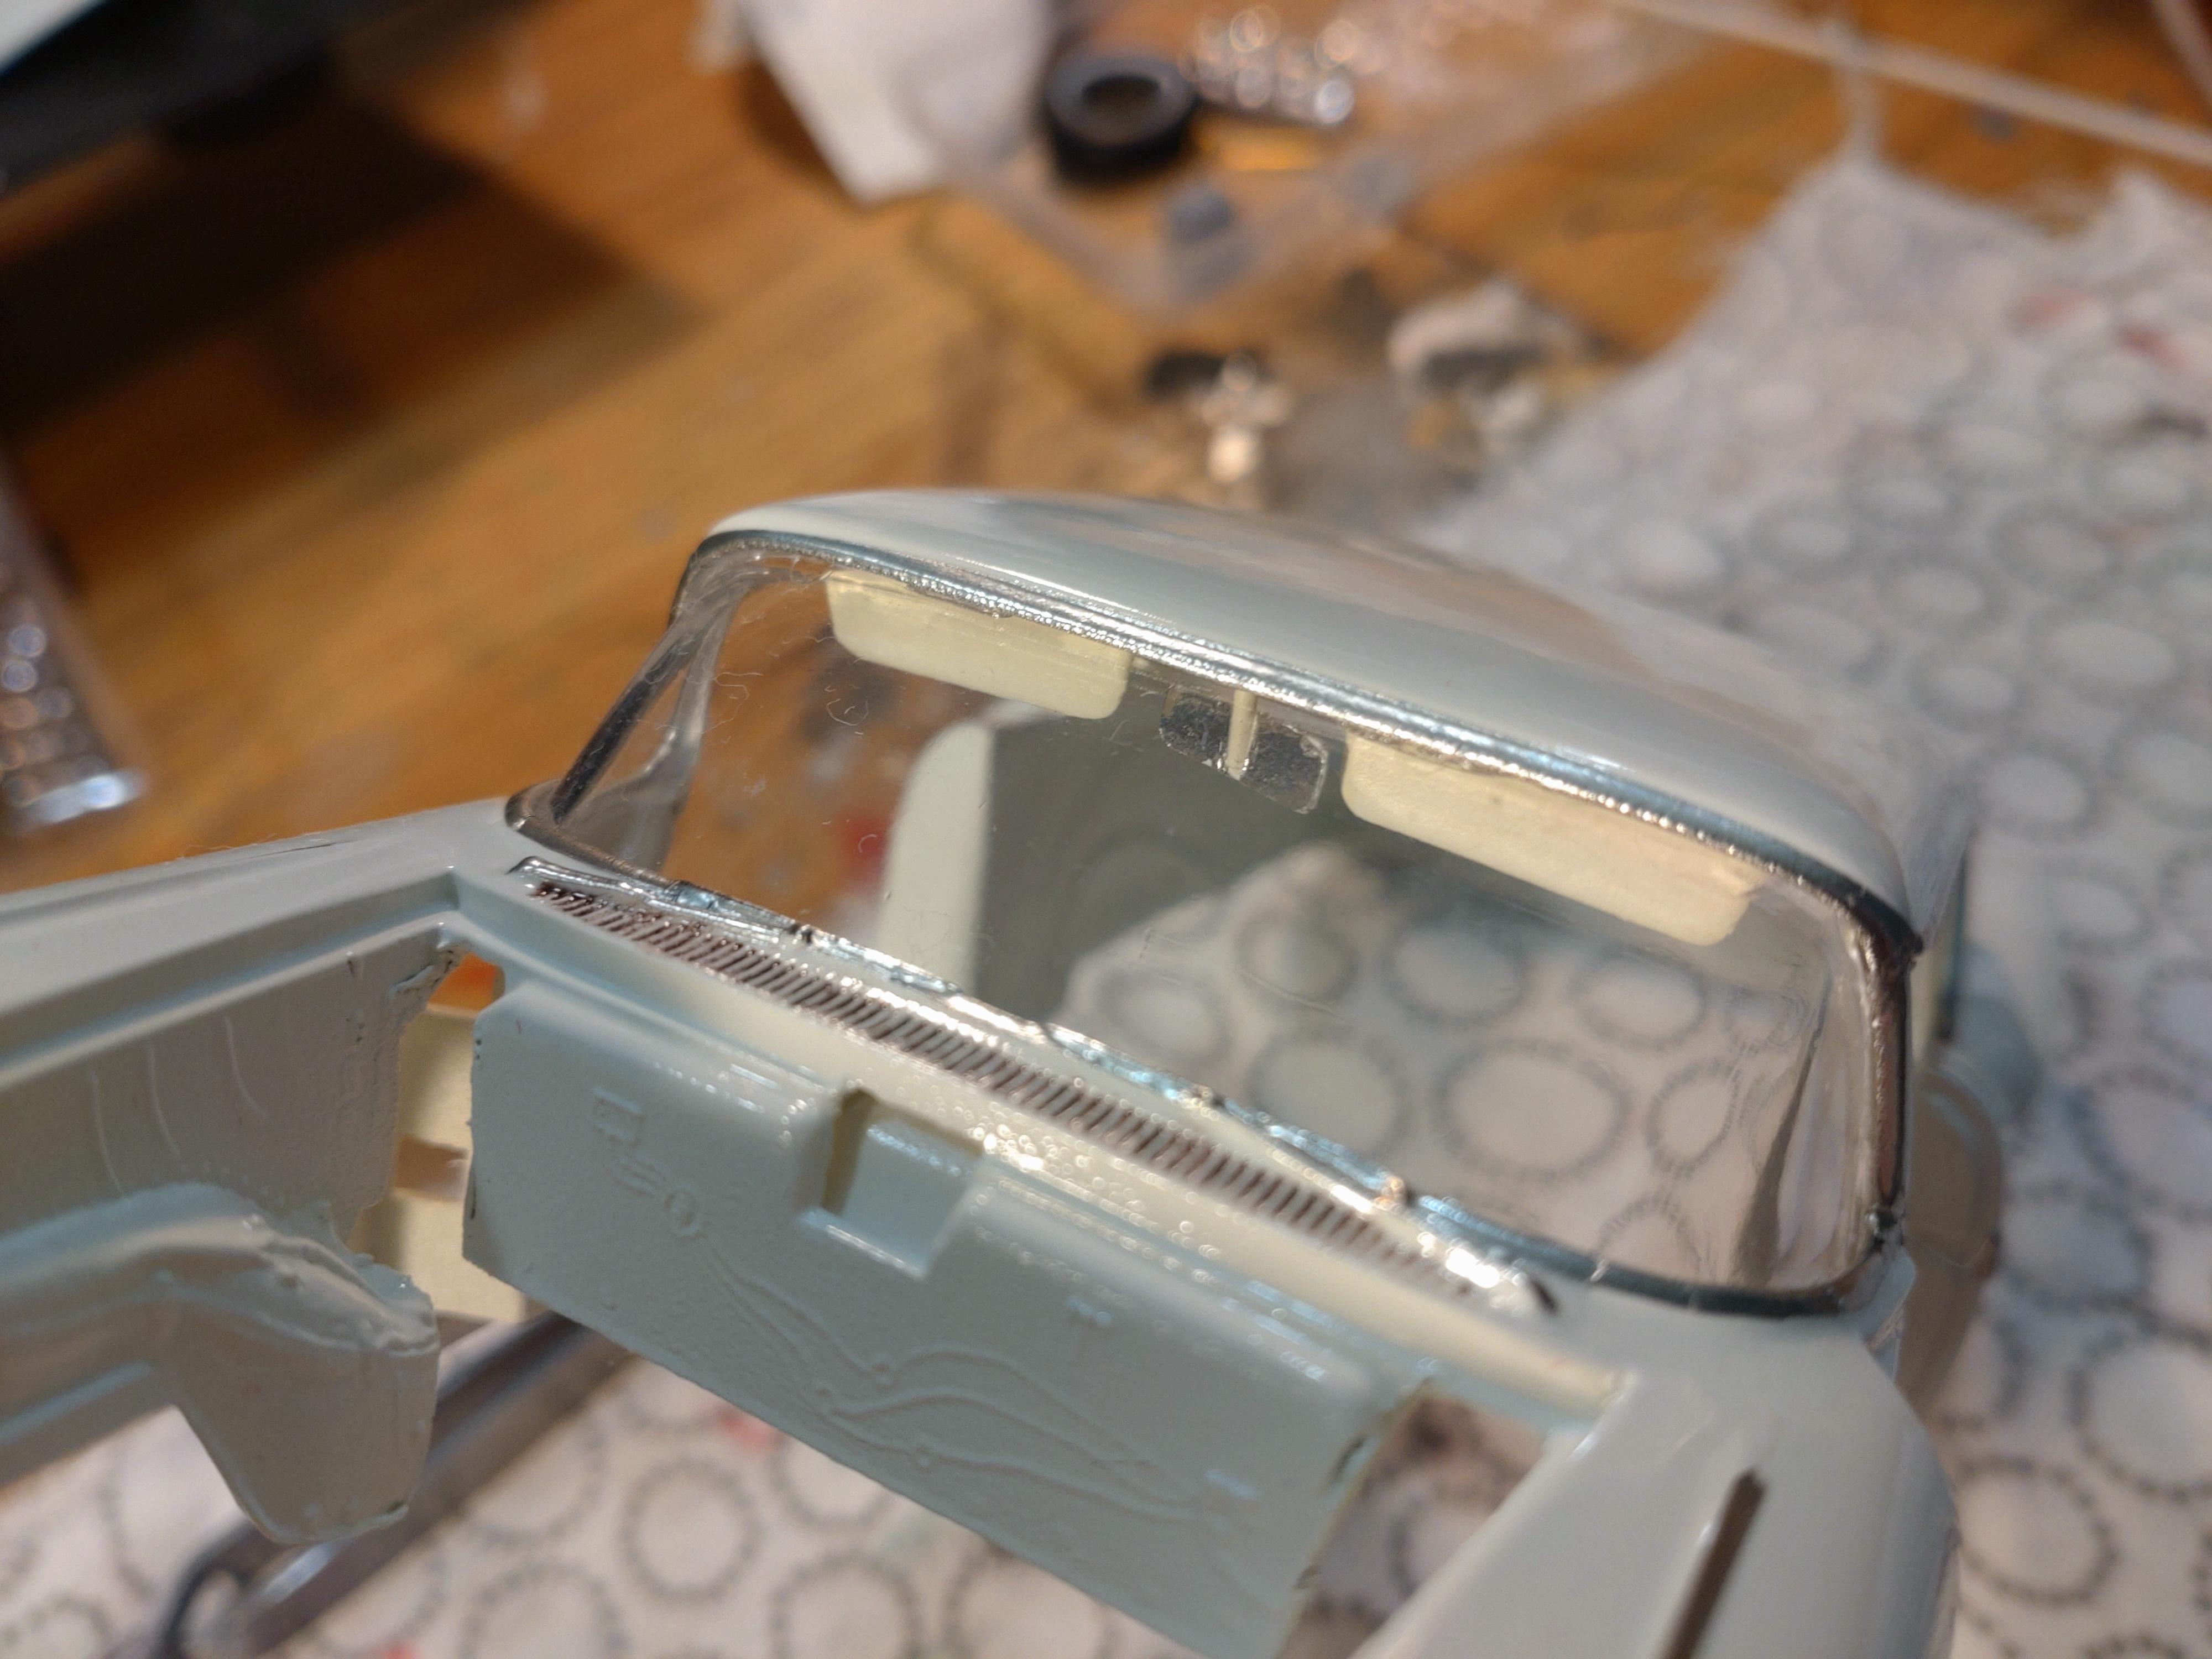
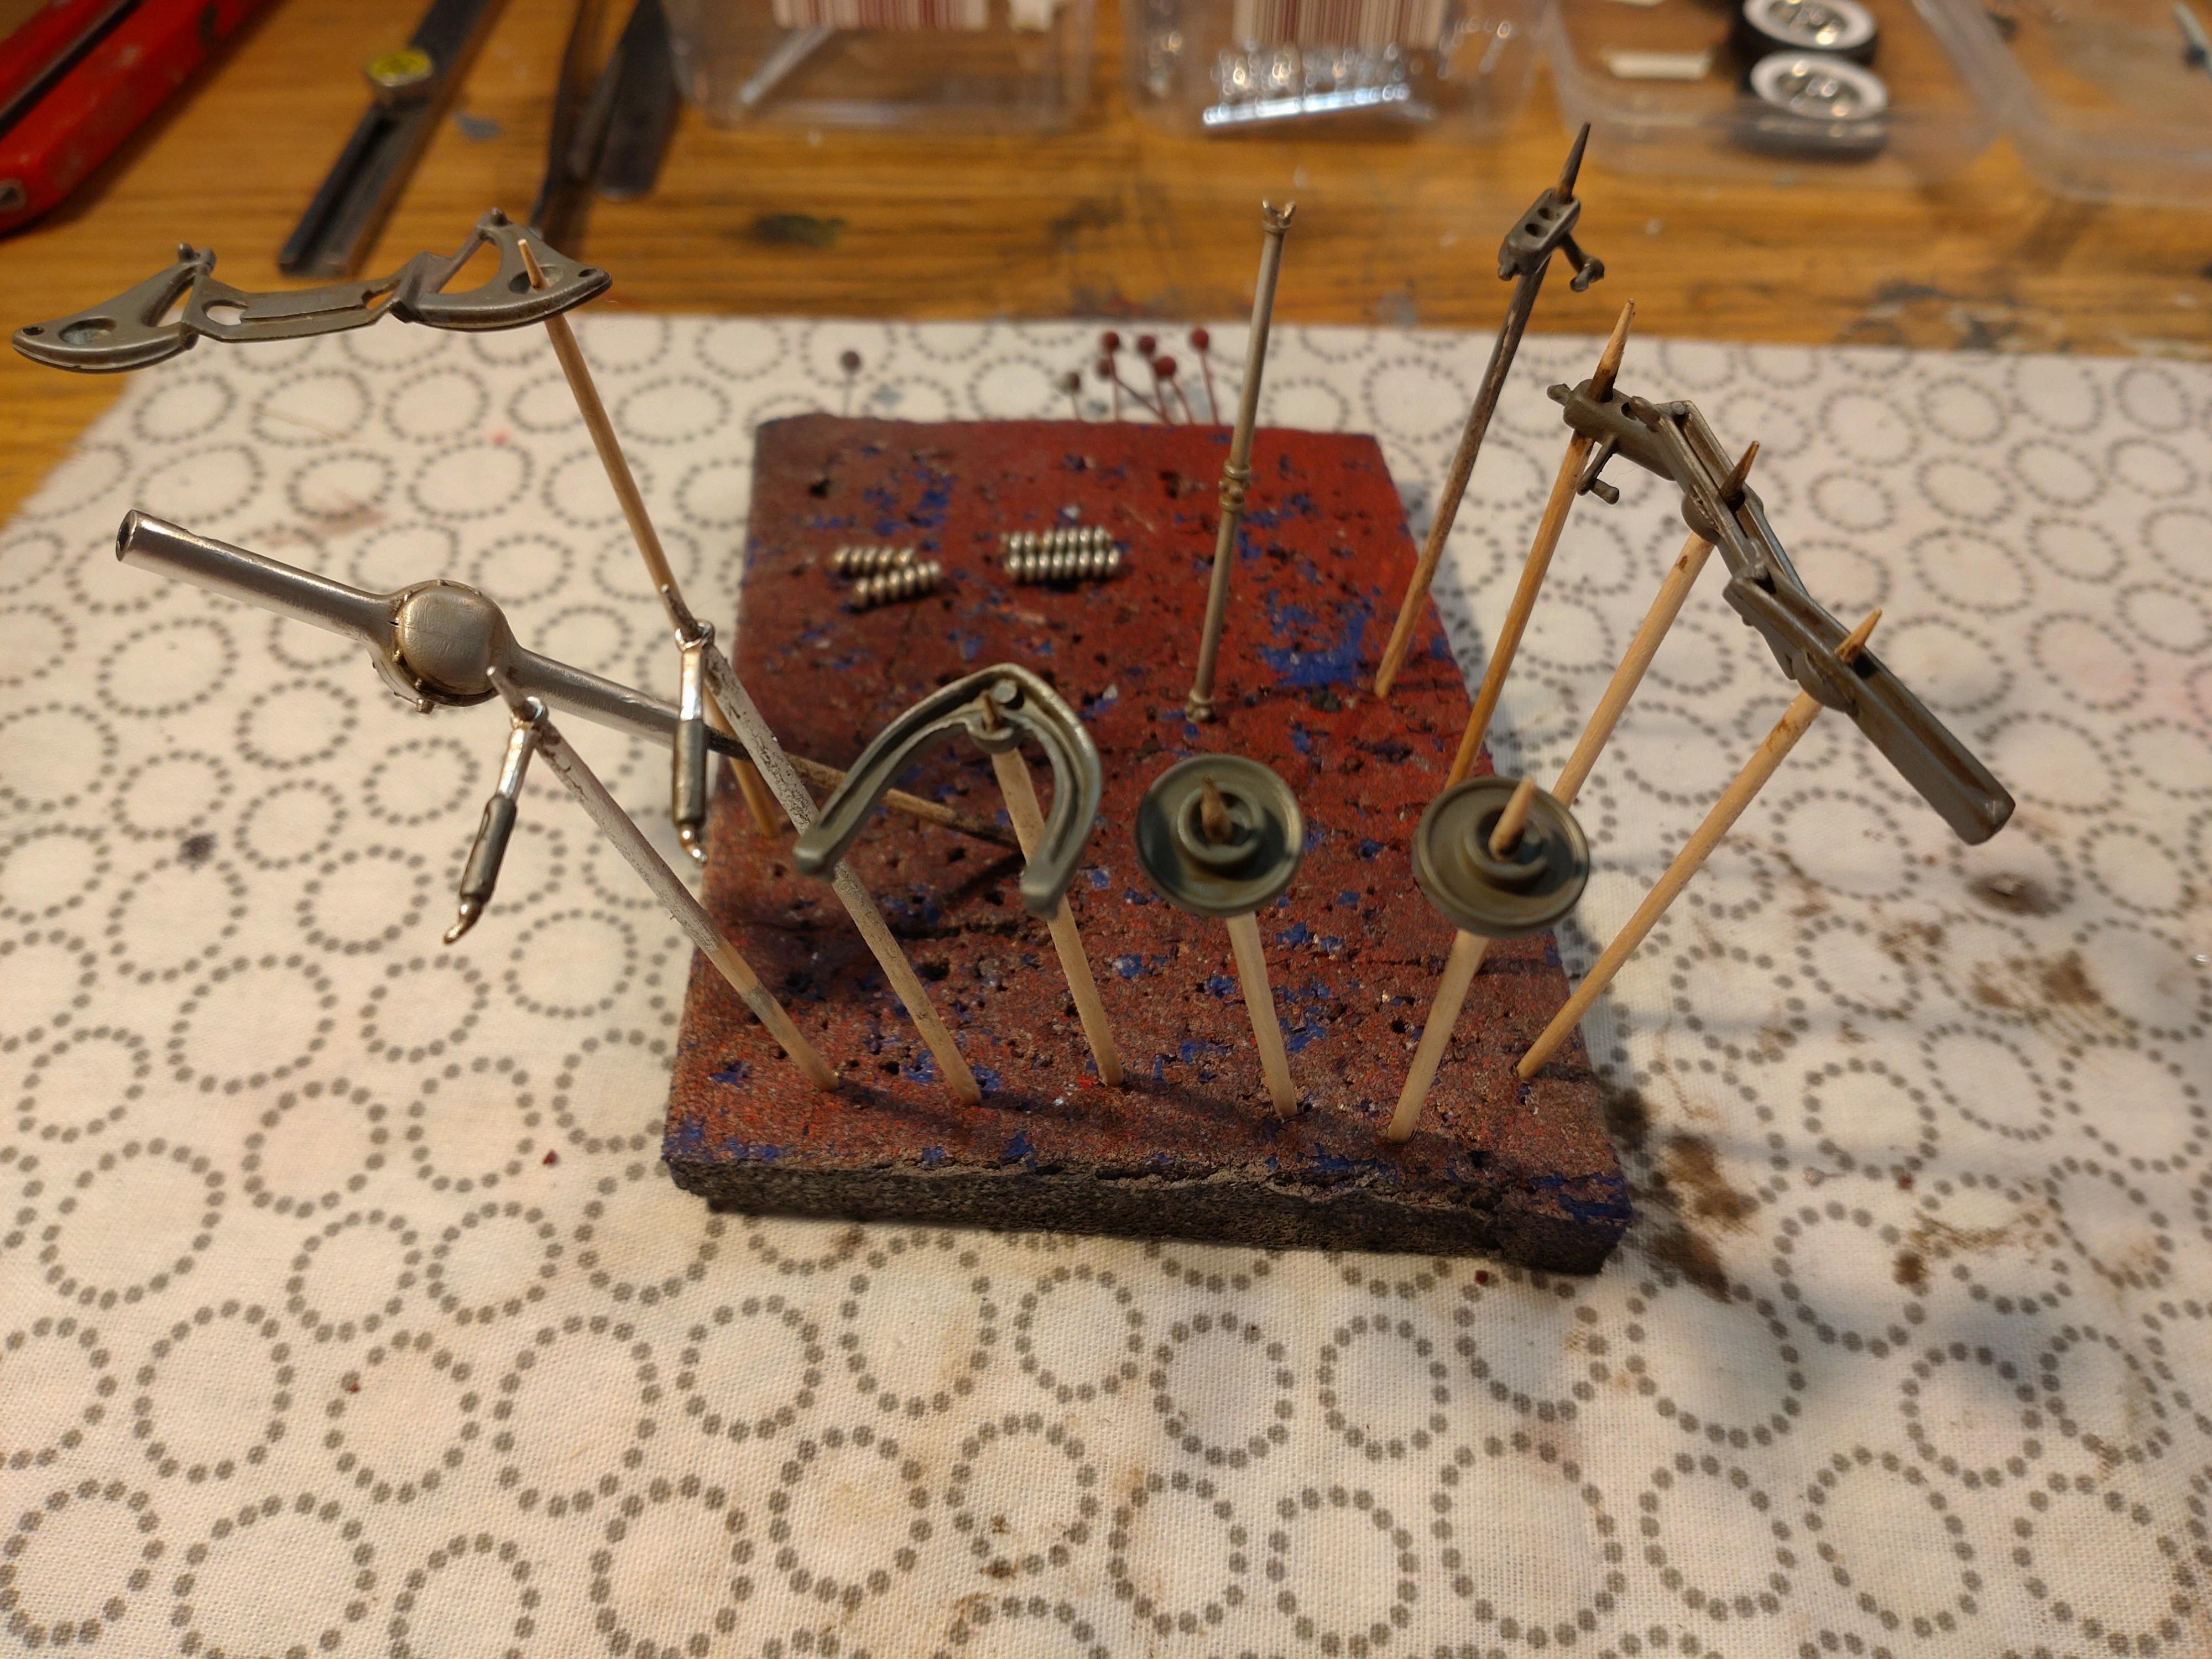
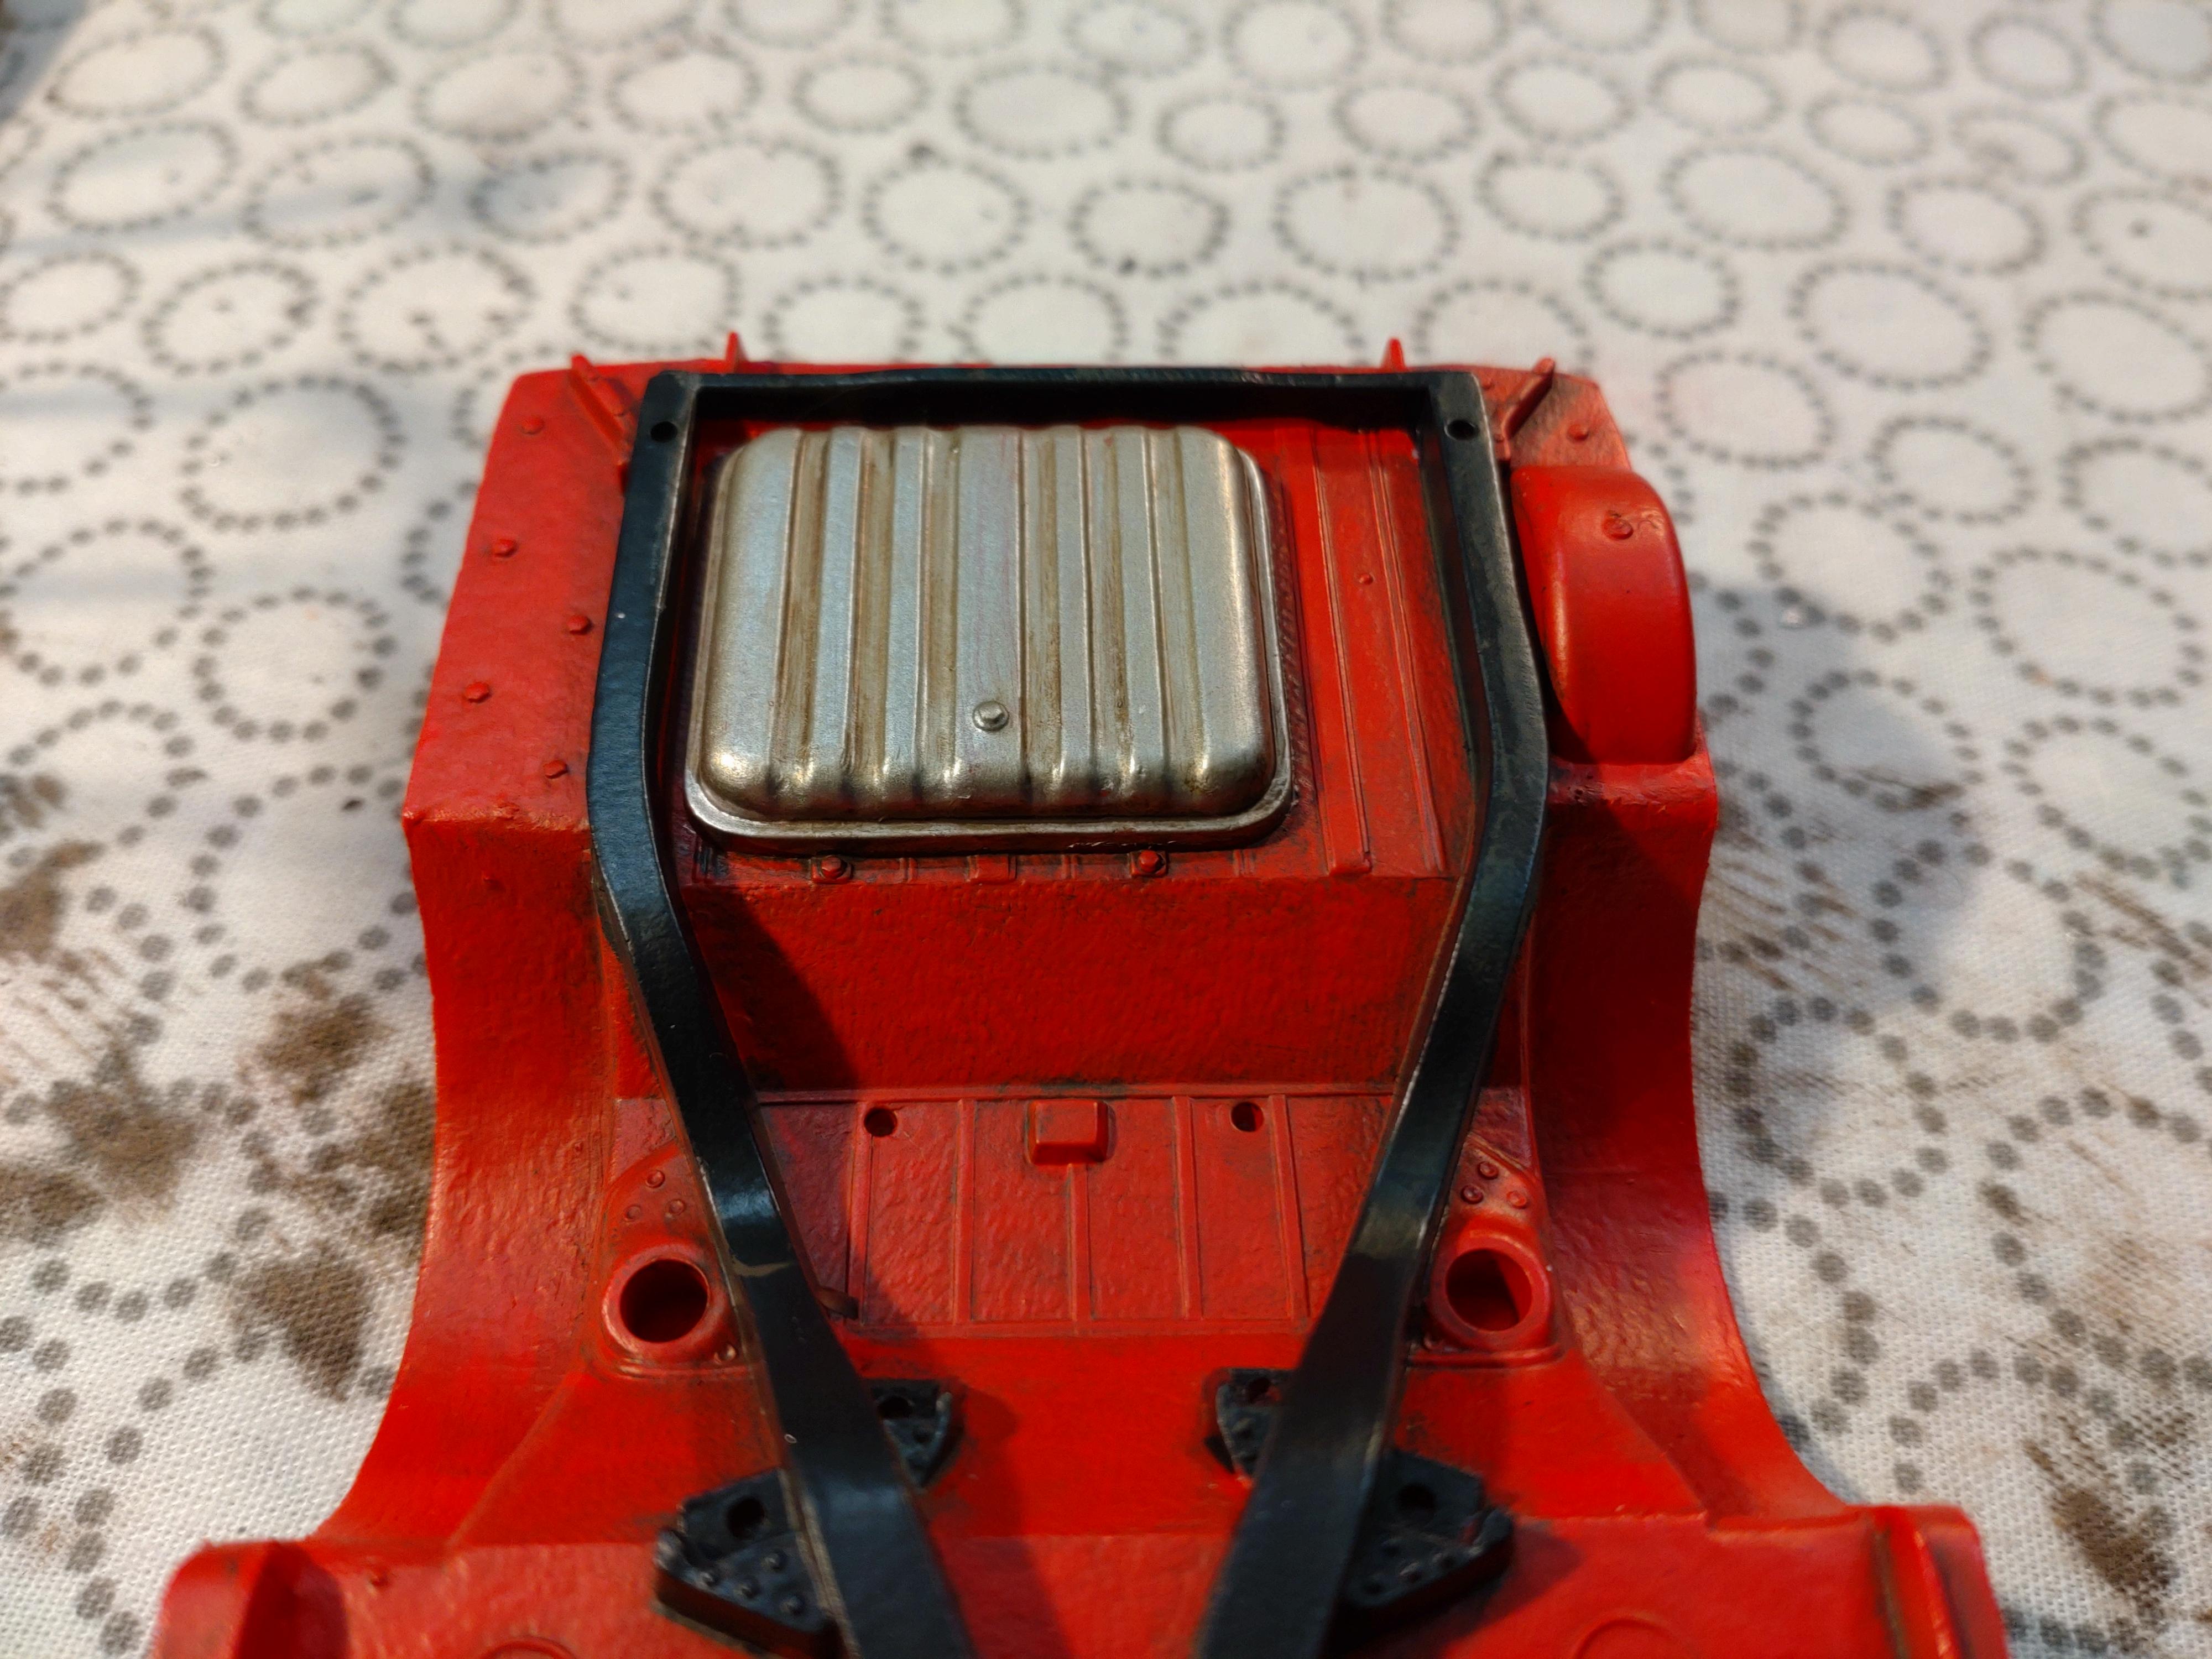
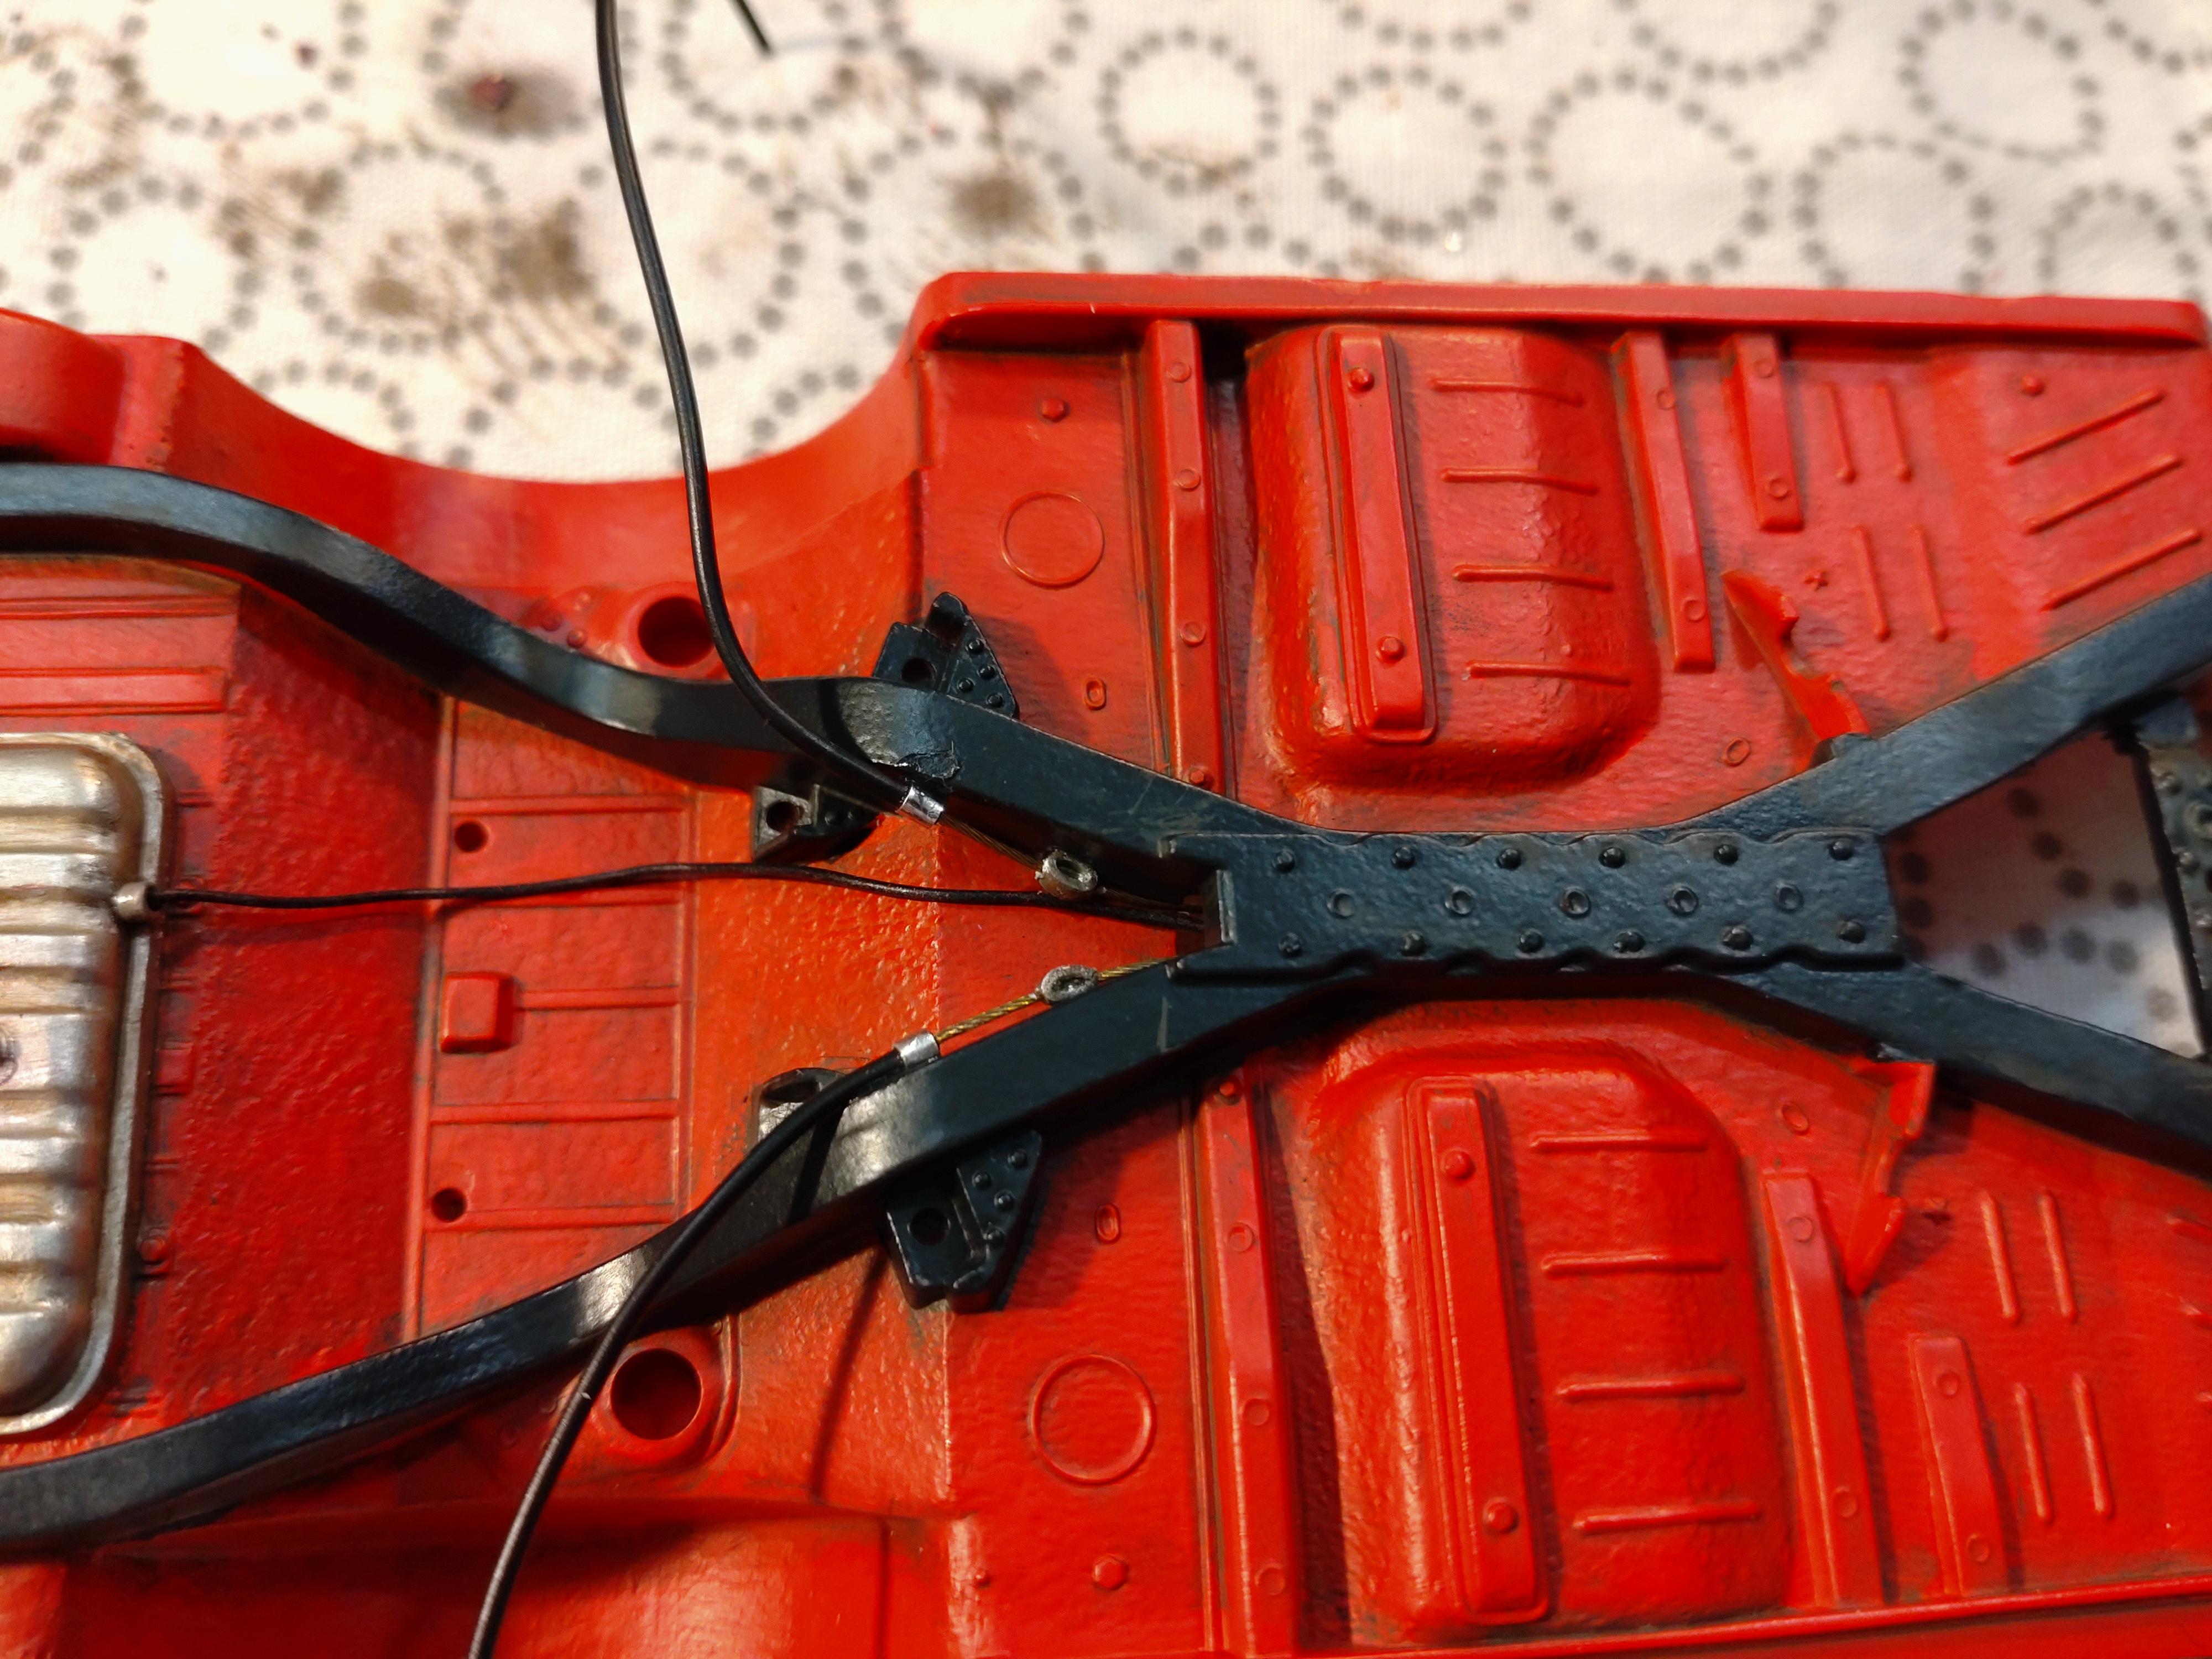
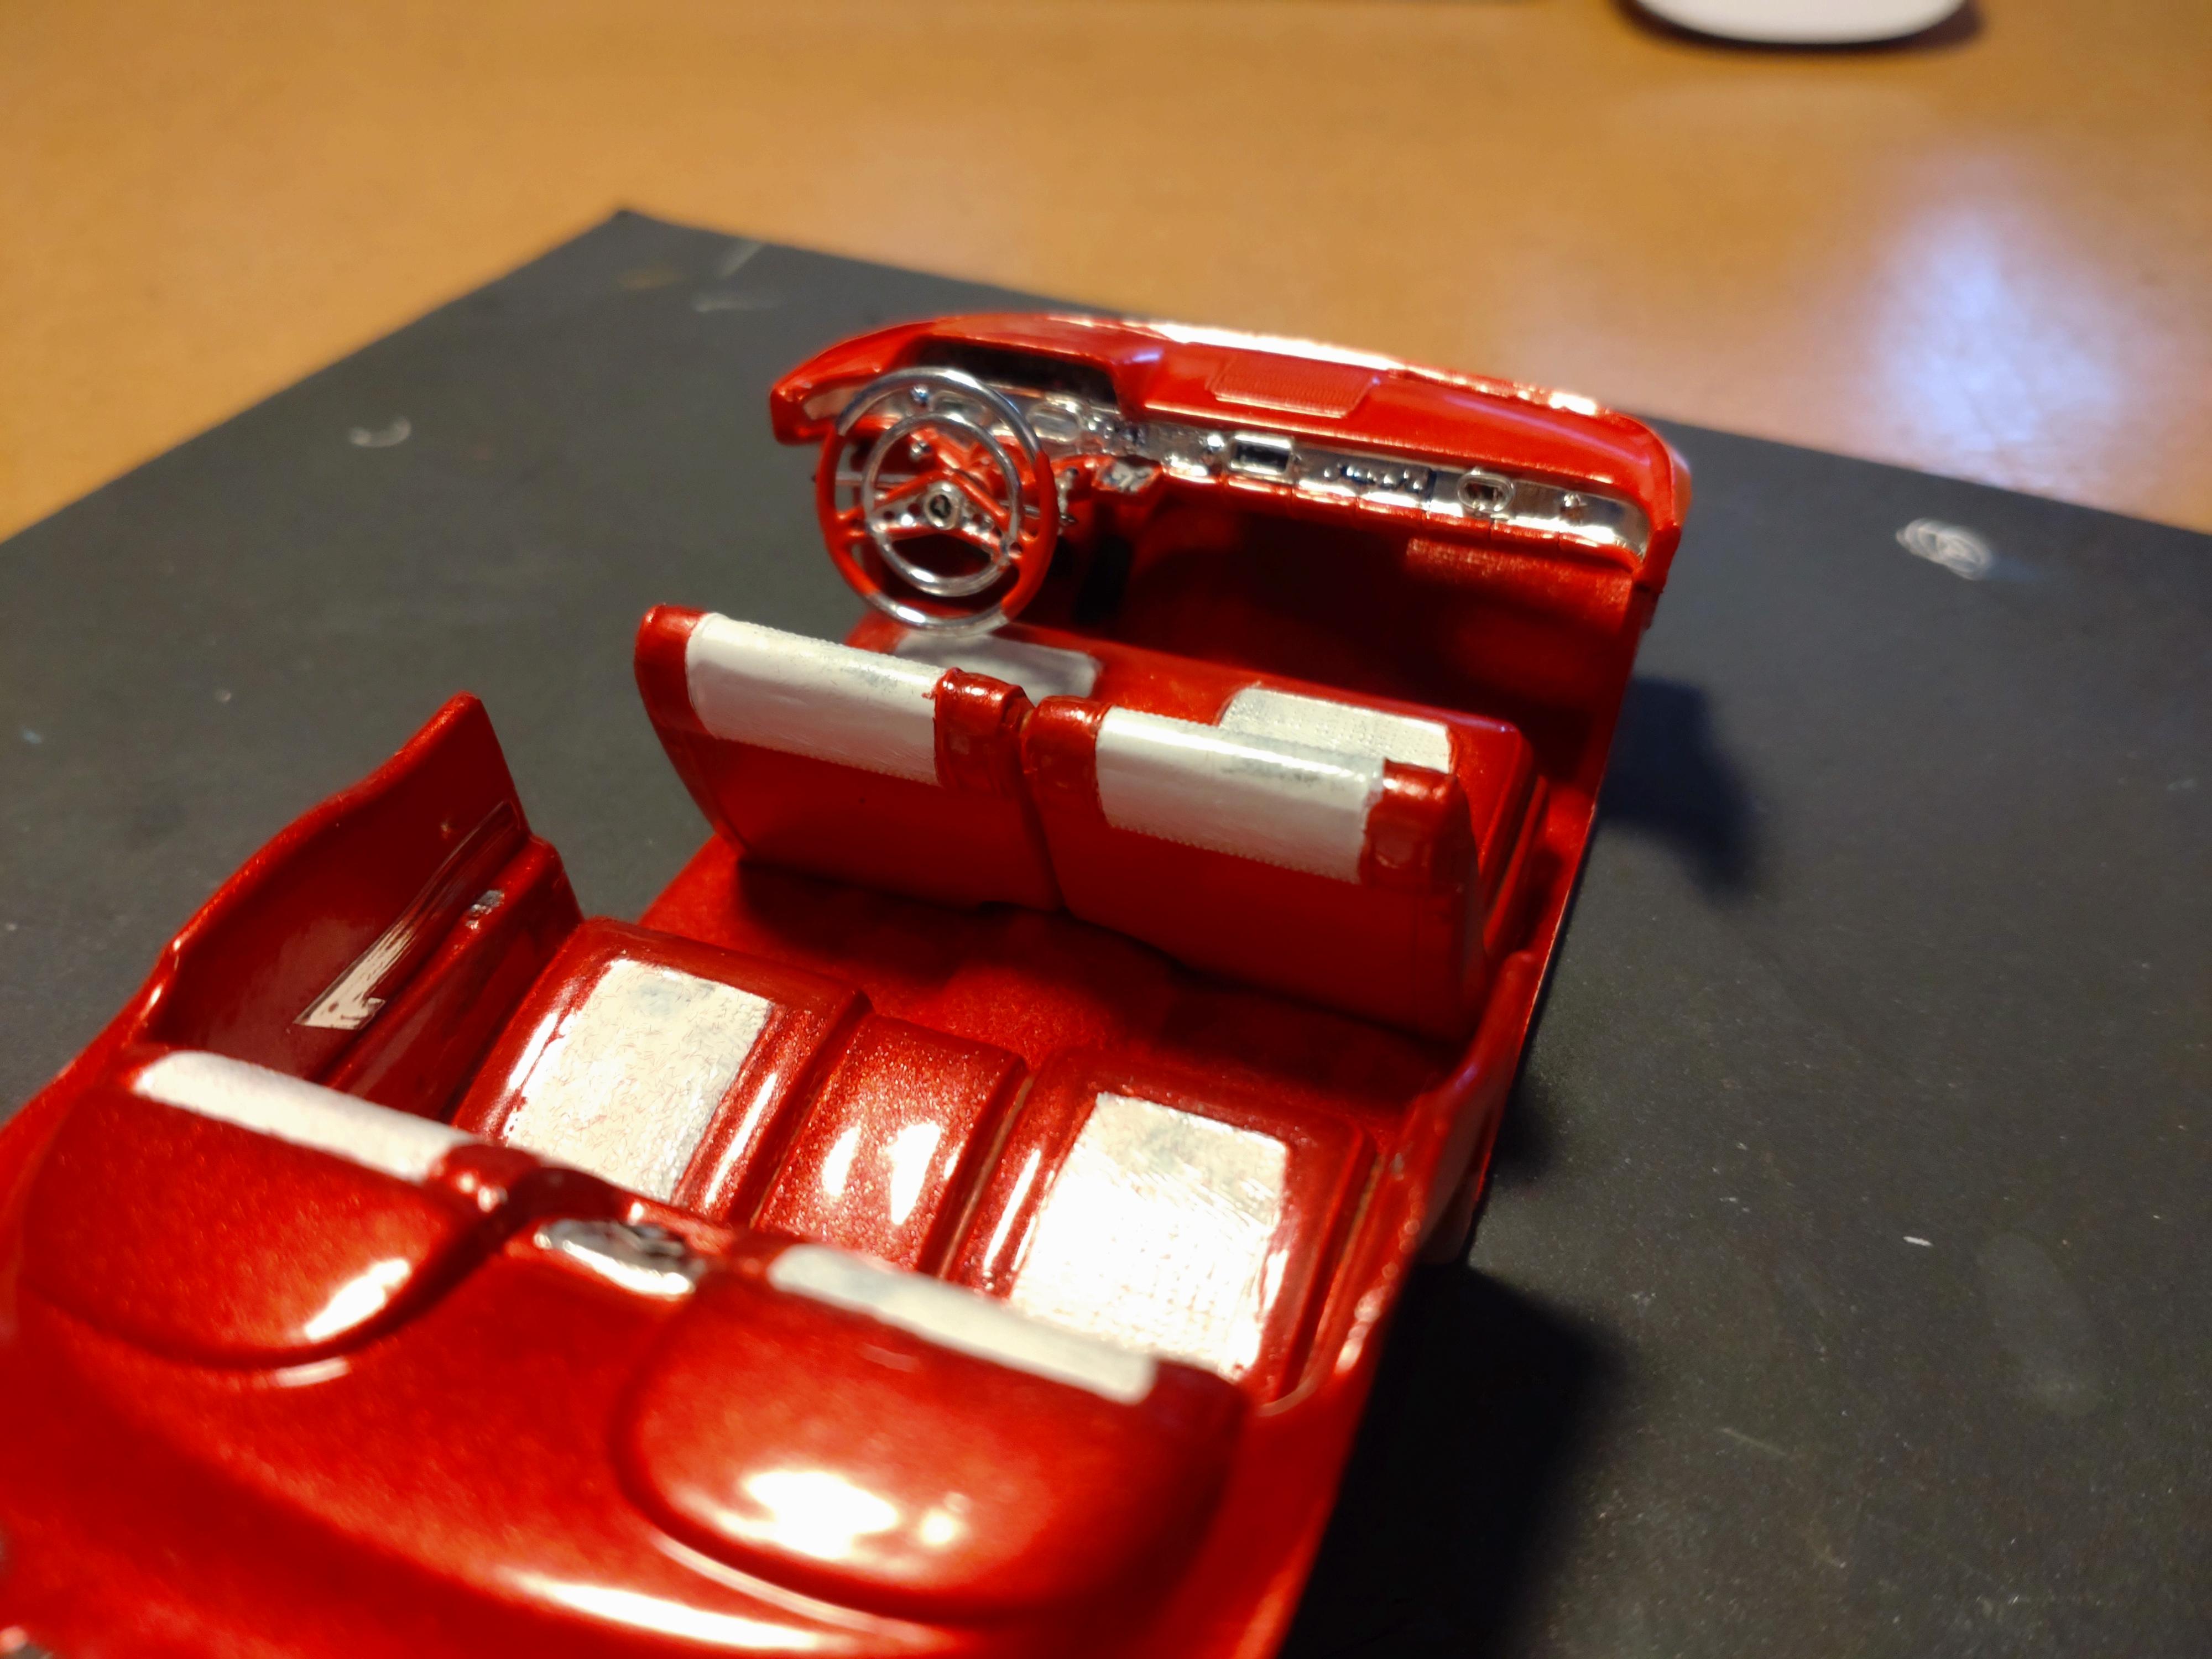
About time I showed some more images of my progress. The body is coated and sealed with AK clear varnish (rattle can). I´ve tried a few products but made the best experiences with AK. It flows into a great shine (if you warm the can before using) and is very mild to any other paint that might be underneath. No cracking or orange peel. The emblems on the hood and sides are printed images on glossy photo paper and the AK spray didn´t bother them either. One shot did the job this time. To contrast the white body the interior and the undercarriage will be in a bright red. The bottom will see some weathering and a bit of rust (not much). Then come the additional details to the drive and suspension. I started with the parking brake lines and the gas line. The transmission and suspension parts all received some smudge. I replaced the plastic springs with home made coils made of 1mm aluminum wire. Also added etched hex nuts and tiny beads for details. The brake line is 0.4mm silver plated wire. The exhaust system needed hook ups and some patina. The front suspension got wire springs too. The king pins are still steering! The wheels are mounted and all touch the ground?. I wasn´t happy with the kit tires and replaced them with spares out of my rumble box. The white walls are painted with a white gel pen. As always, fitting the engine was a pain. Something gets in the way; exhaust manifold, cooling hoses.... I still have to make and attach the missing part from manifold to muffler. This kit comes without any mirrors. With the rear view I built a pair of sun visors and attached them after gluing the windows. In the meantime I gave the clear coat a week to harden and then did a mild polishing. Since I opened the trunk the interior tub is a bit too long. I must shorten it very carefully to fit, not leave a gap under the rear window and leave some room for the trunk hinges. tricky.... I´m working on a trunk tub next, but for the moment I can already present my spare wheel. Thanks for watching!

-
My take on the most famous ‘55 gasser street machine’…
Andy Oldenburg replied to OldNYJim's topic in WIP: Model Cars
Beautiful job Jim, thumbs UP!? Impressive challenge getting it to look like the original example and you did it. I haven´t been into drag racers myself but your build has triggered some thoughts....? -
My take on the most famous ‘55 gasser street machine’…
Andy Oldenburg replied to OldNYJim's topic in WIP: Model Cars
Hello Jim, great job on the engine! What do you use for the belt? Your weathering and smudge look just perfect! ??? -
I spent a whole afternoon applying the bare metal. This baby has a lot of chrome and I didn´t want to mess it up, many curves and long trim. The decal sheet is a big disappointment. You get a load of logos for oils, spark plugs and hot rod accessories, but not a single emblem. I surfed the web and copied the emblems I needed and reduced the size until it fit. Printed it on high gloss photo paper and was very happy with the results! Next step for the body is the clear coat with AK Gloss Varnish. On the side I finished the dashboard and interior. Of course the decal sheet didn´t contain any dash images either. So I found and copied images of the original dashboard and reduced the size to fit. I was surprised that enough details are still noticeable. The speedometer and a few gauges bring life to the dash and even the tiny logo on the steering hub looks fine. I enhanced the radio and gauges with 0.4mm silver plated wire. The ashtray with the cigarette and the key chain were some extra fun. The metal work on the dash and the doors are bare metal and a dip of Molotow pen here and there. Seeing these images magnified so much I guess I will have to take care of a few corners where the red and white collide..... The seats received a bit of patina. Thanks for watching so far!
-
Well thanks everybody for your nice comments!
-
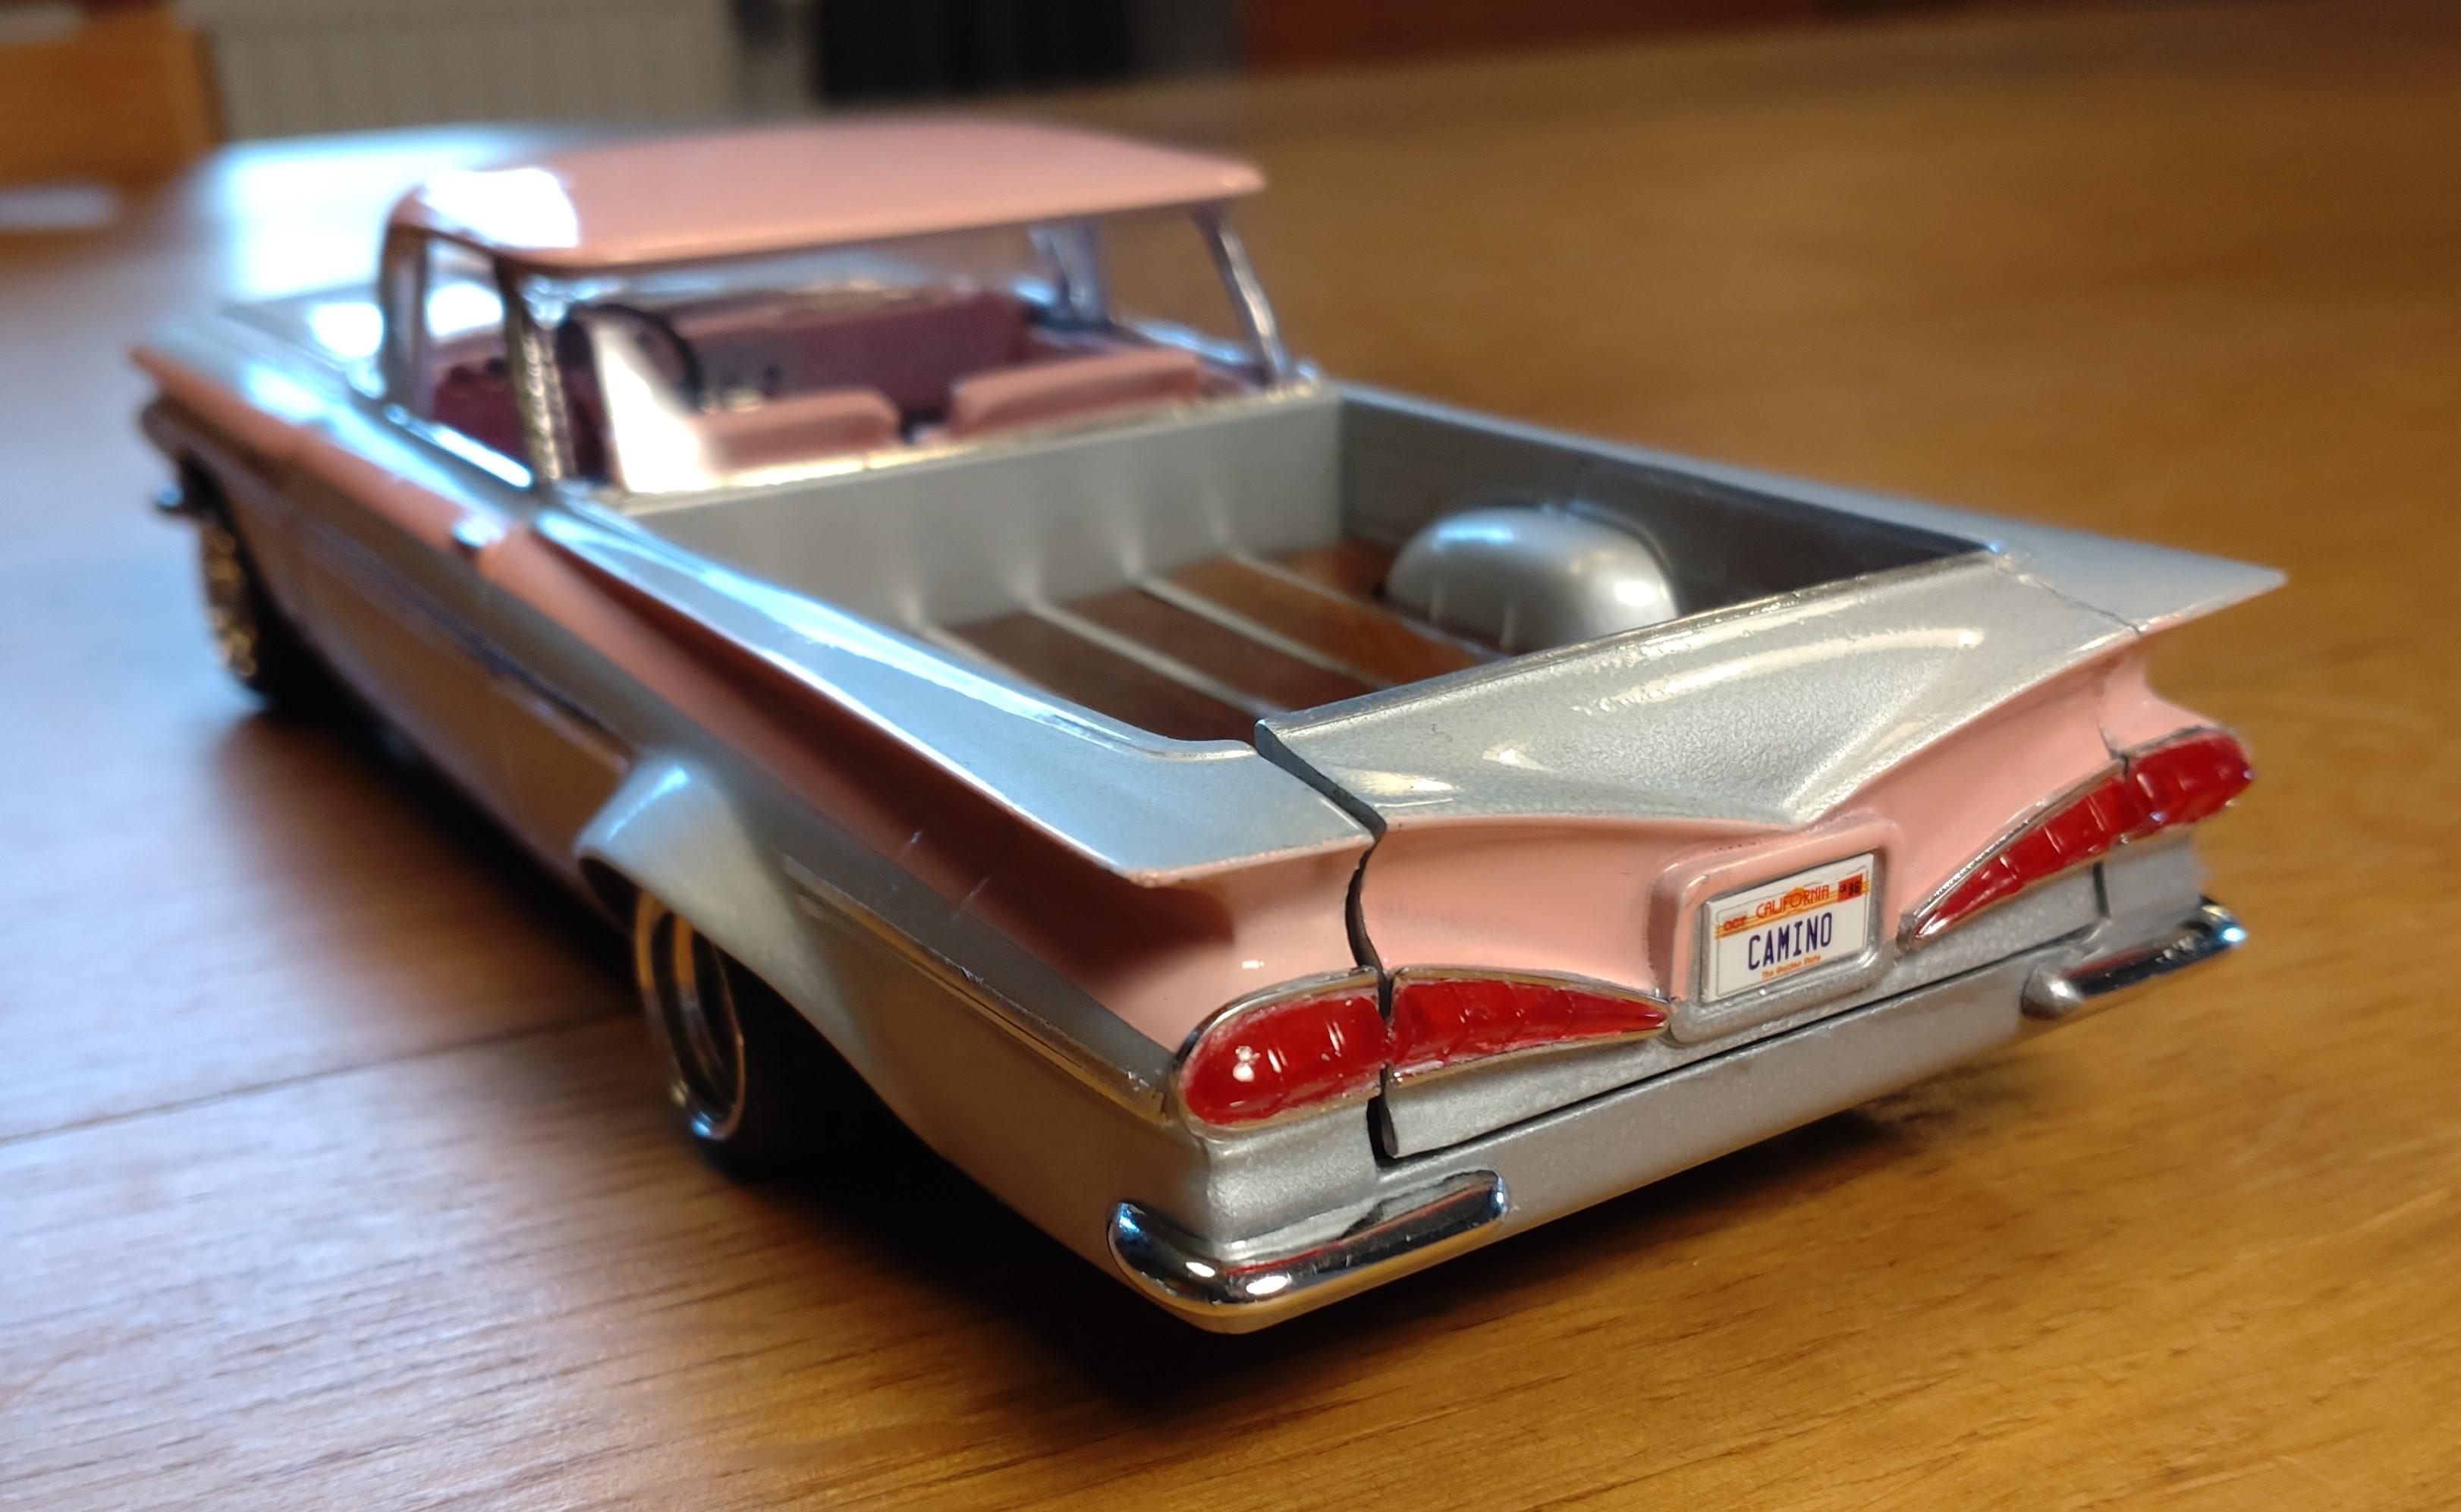
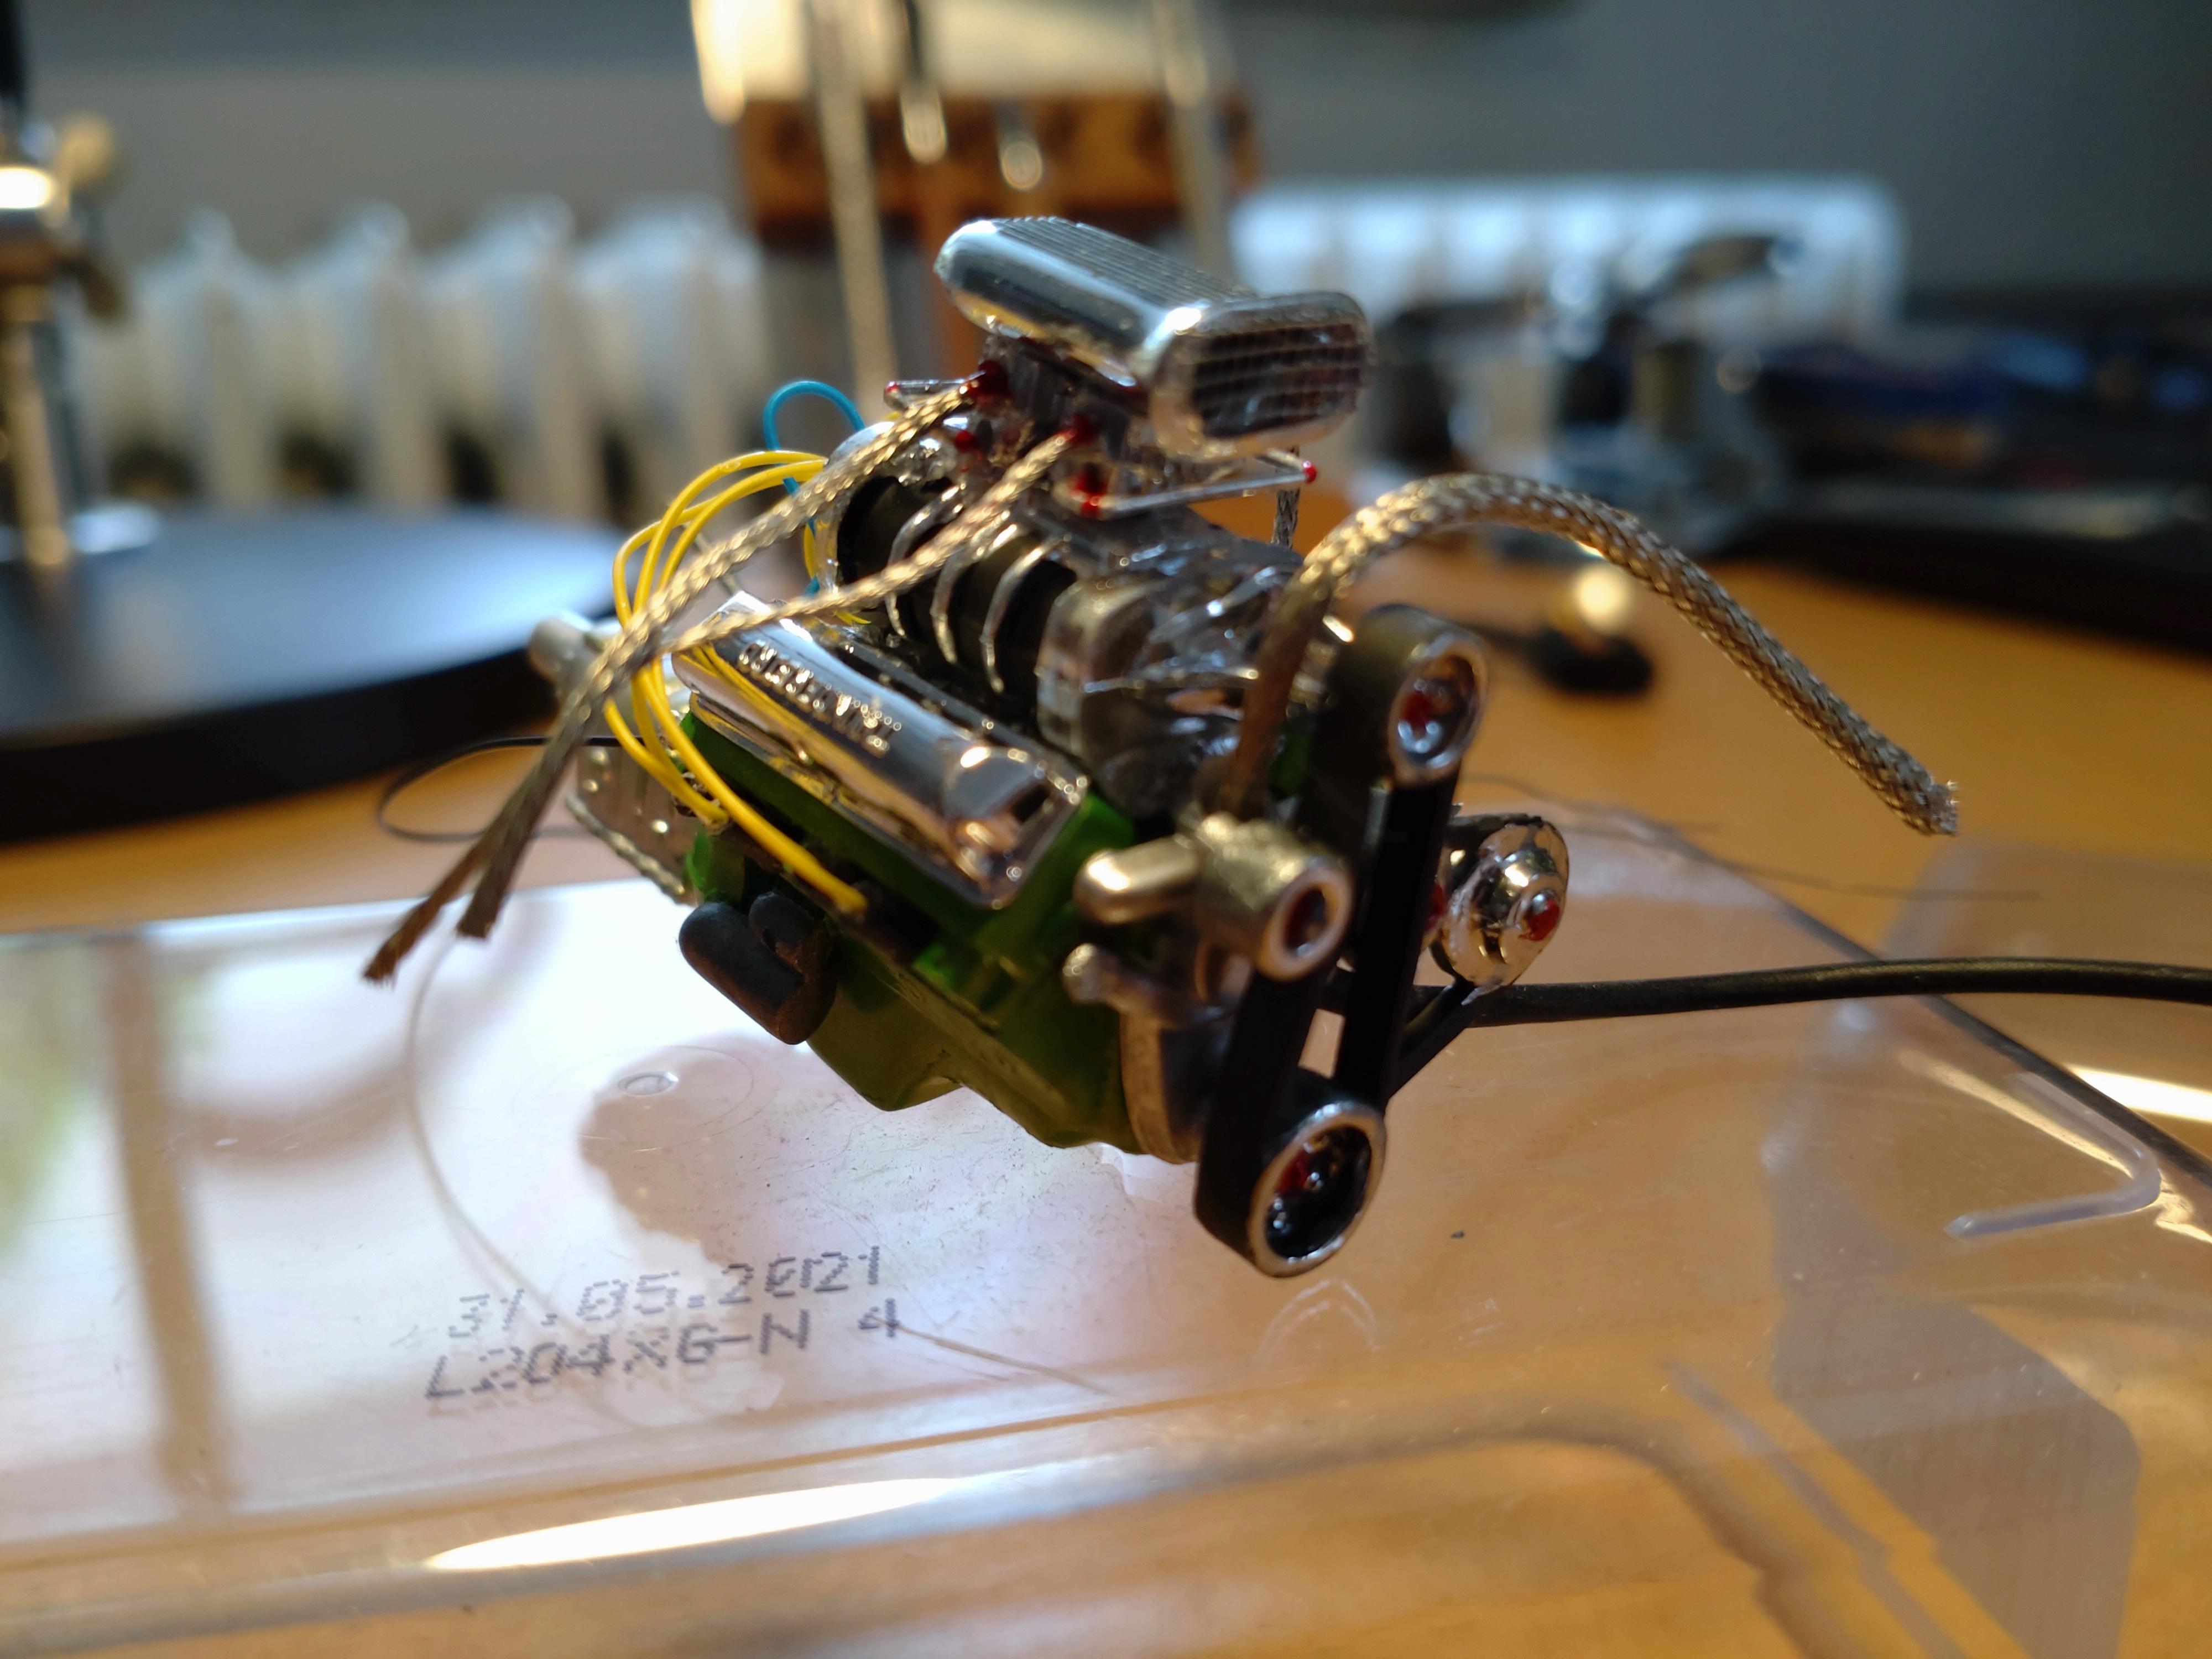
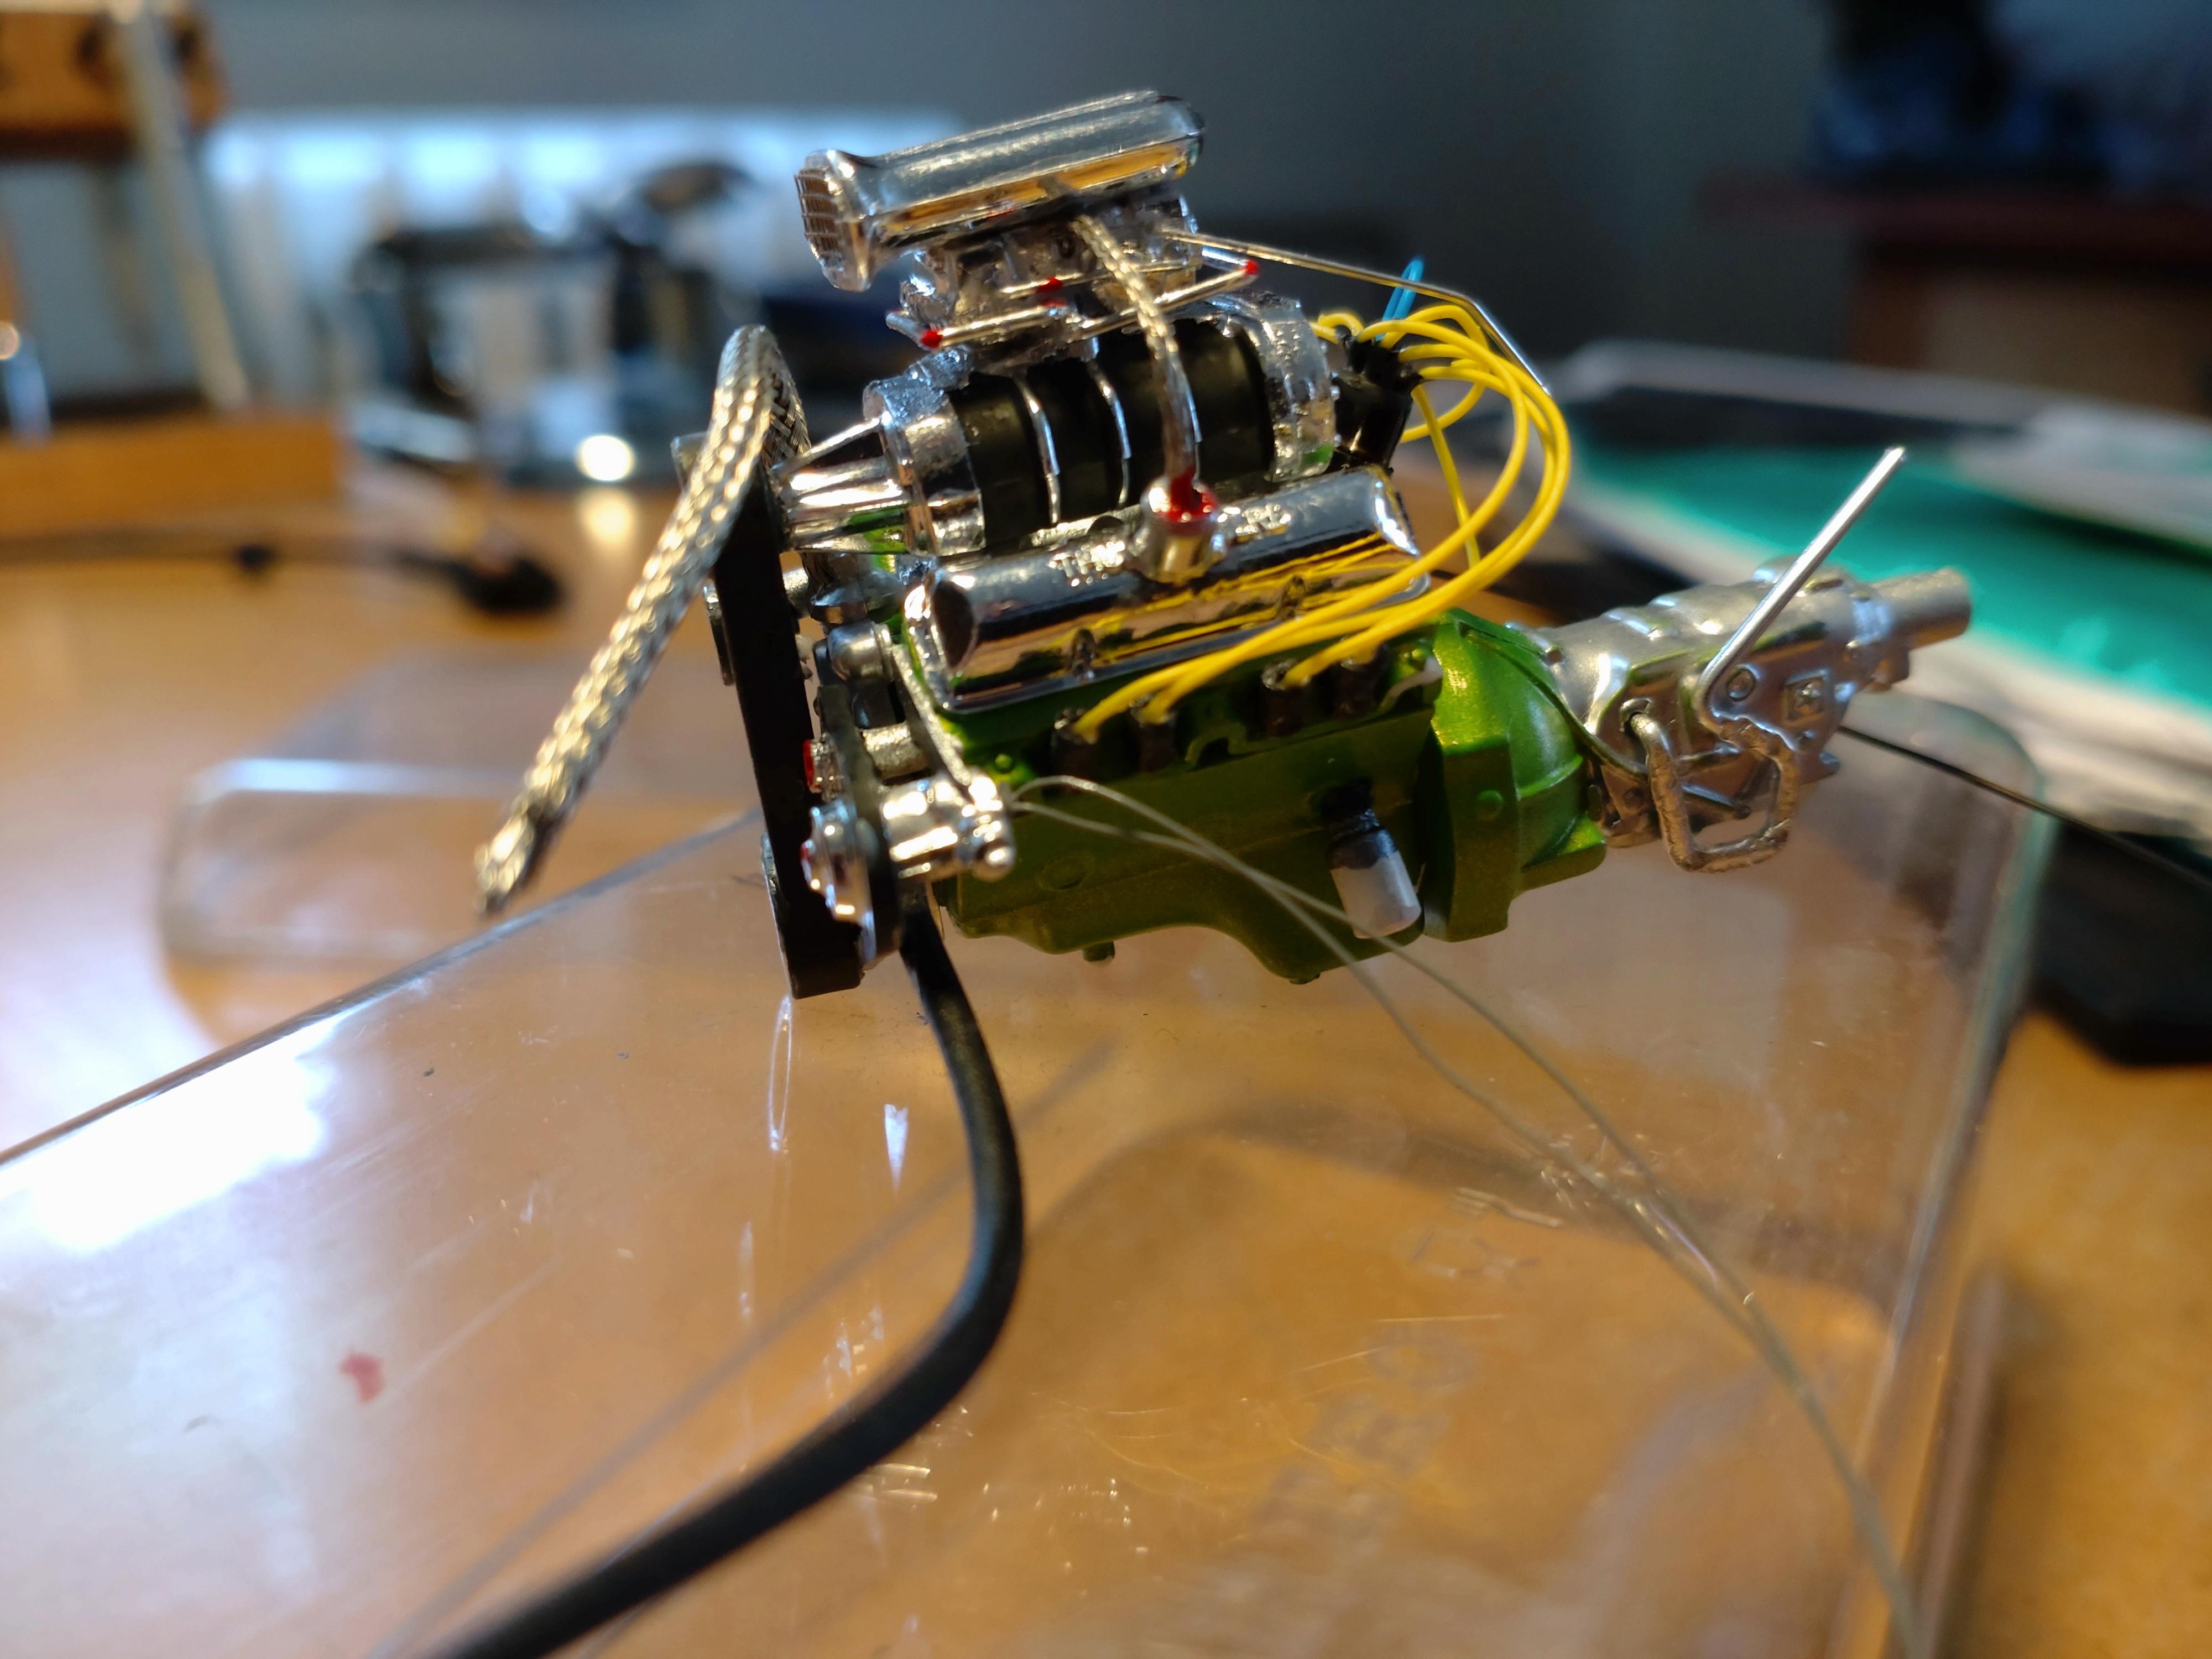
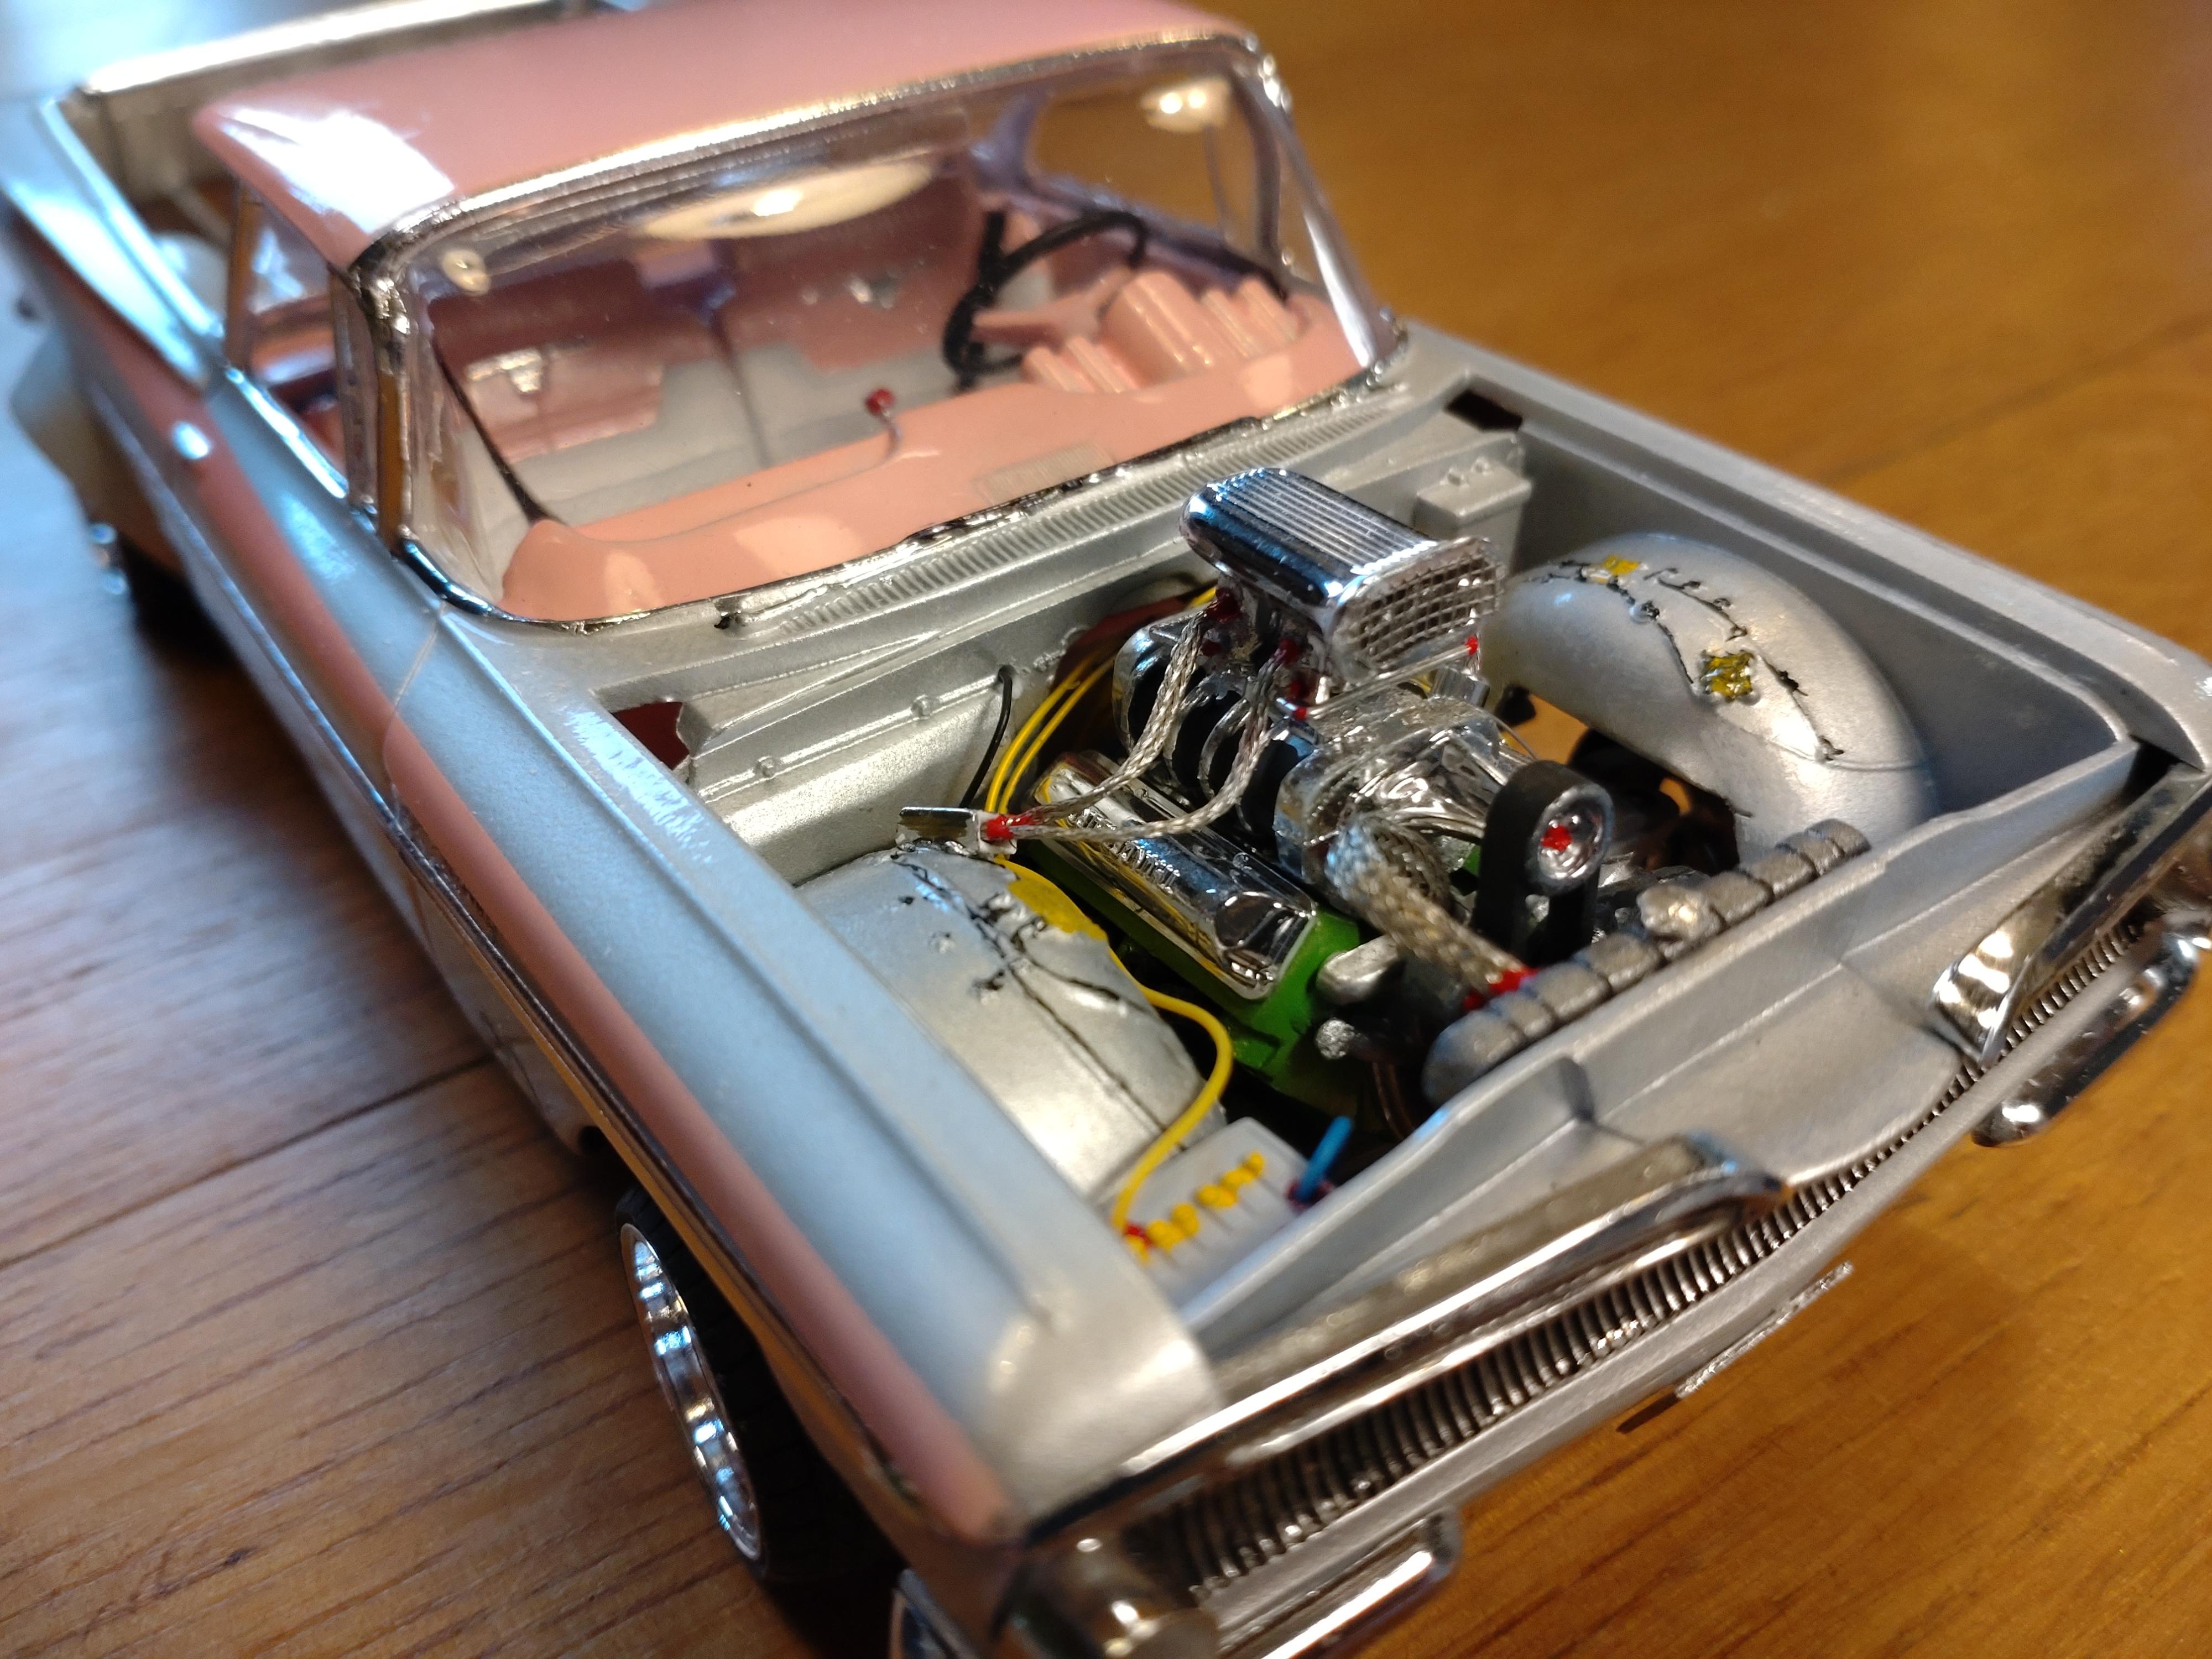
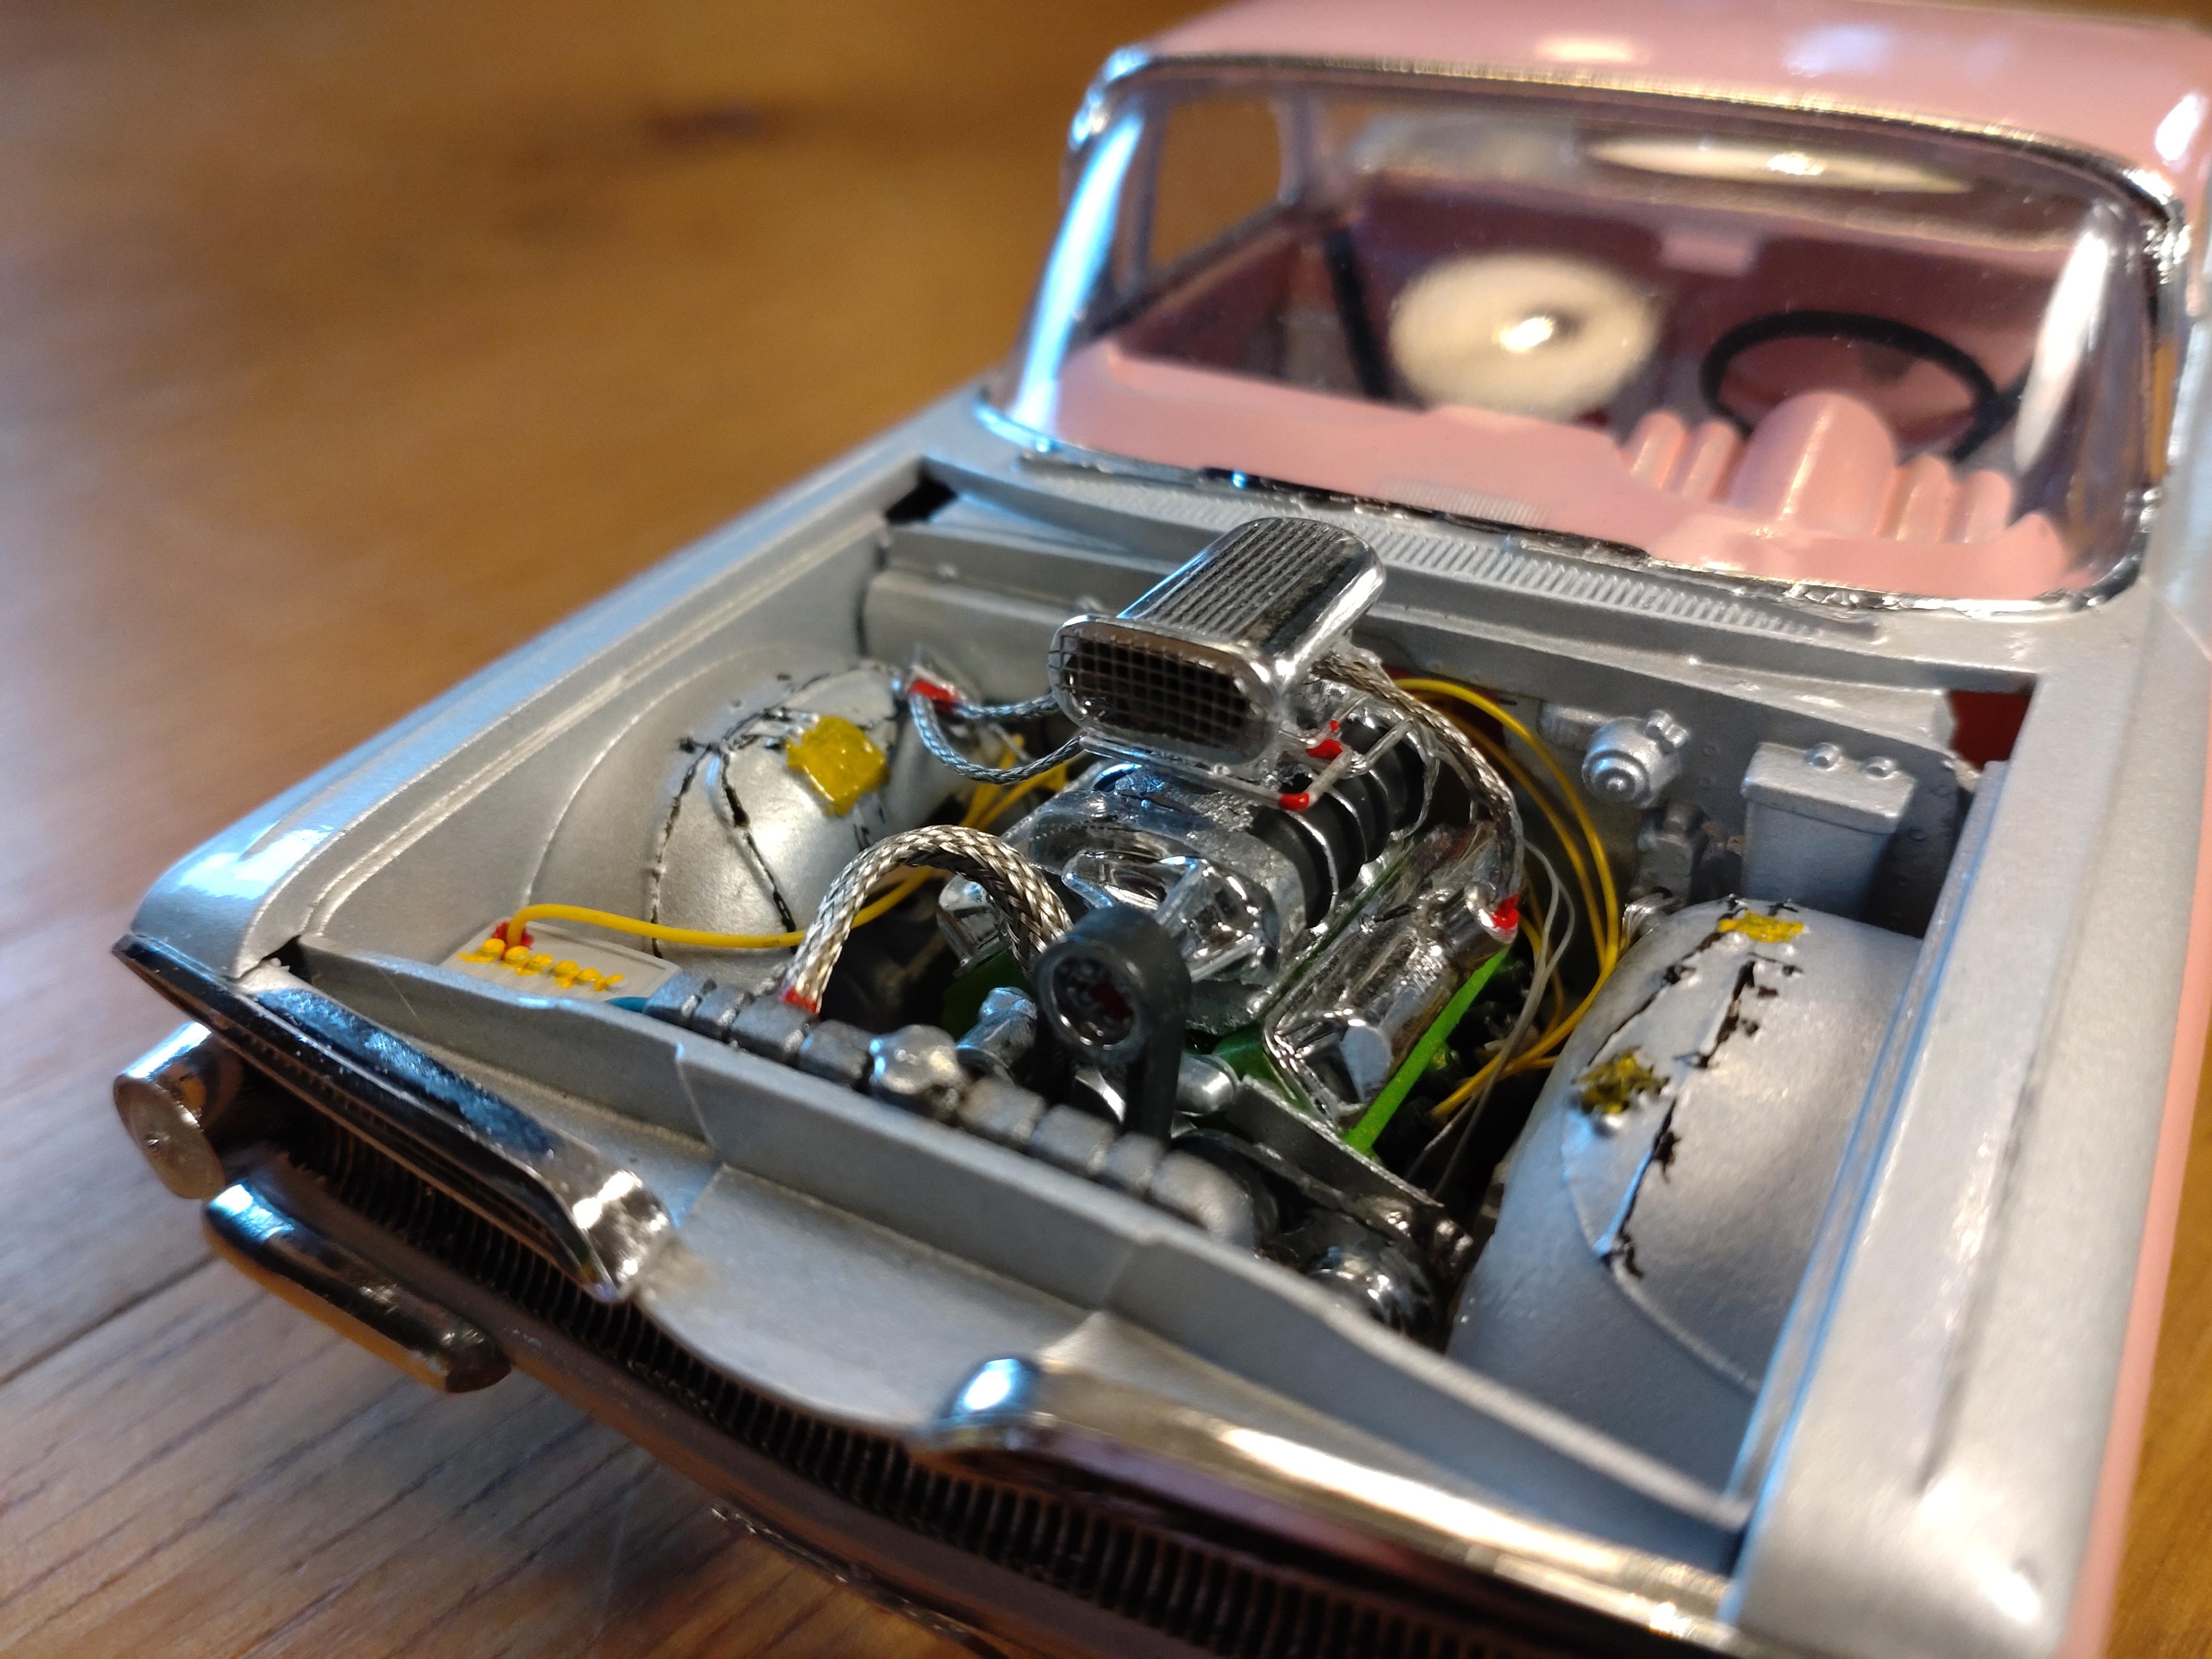
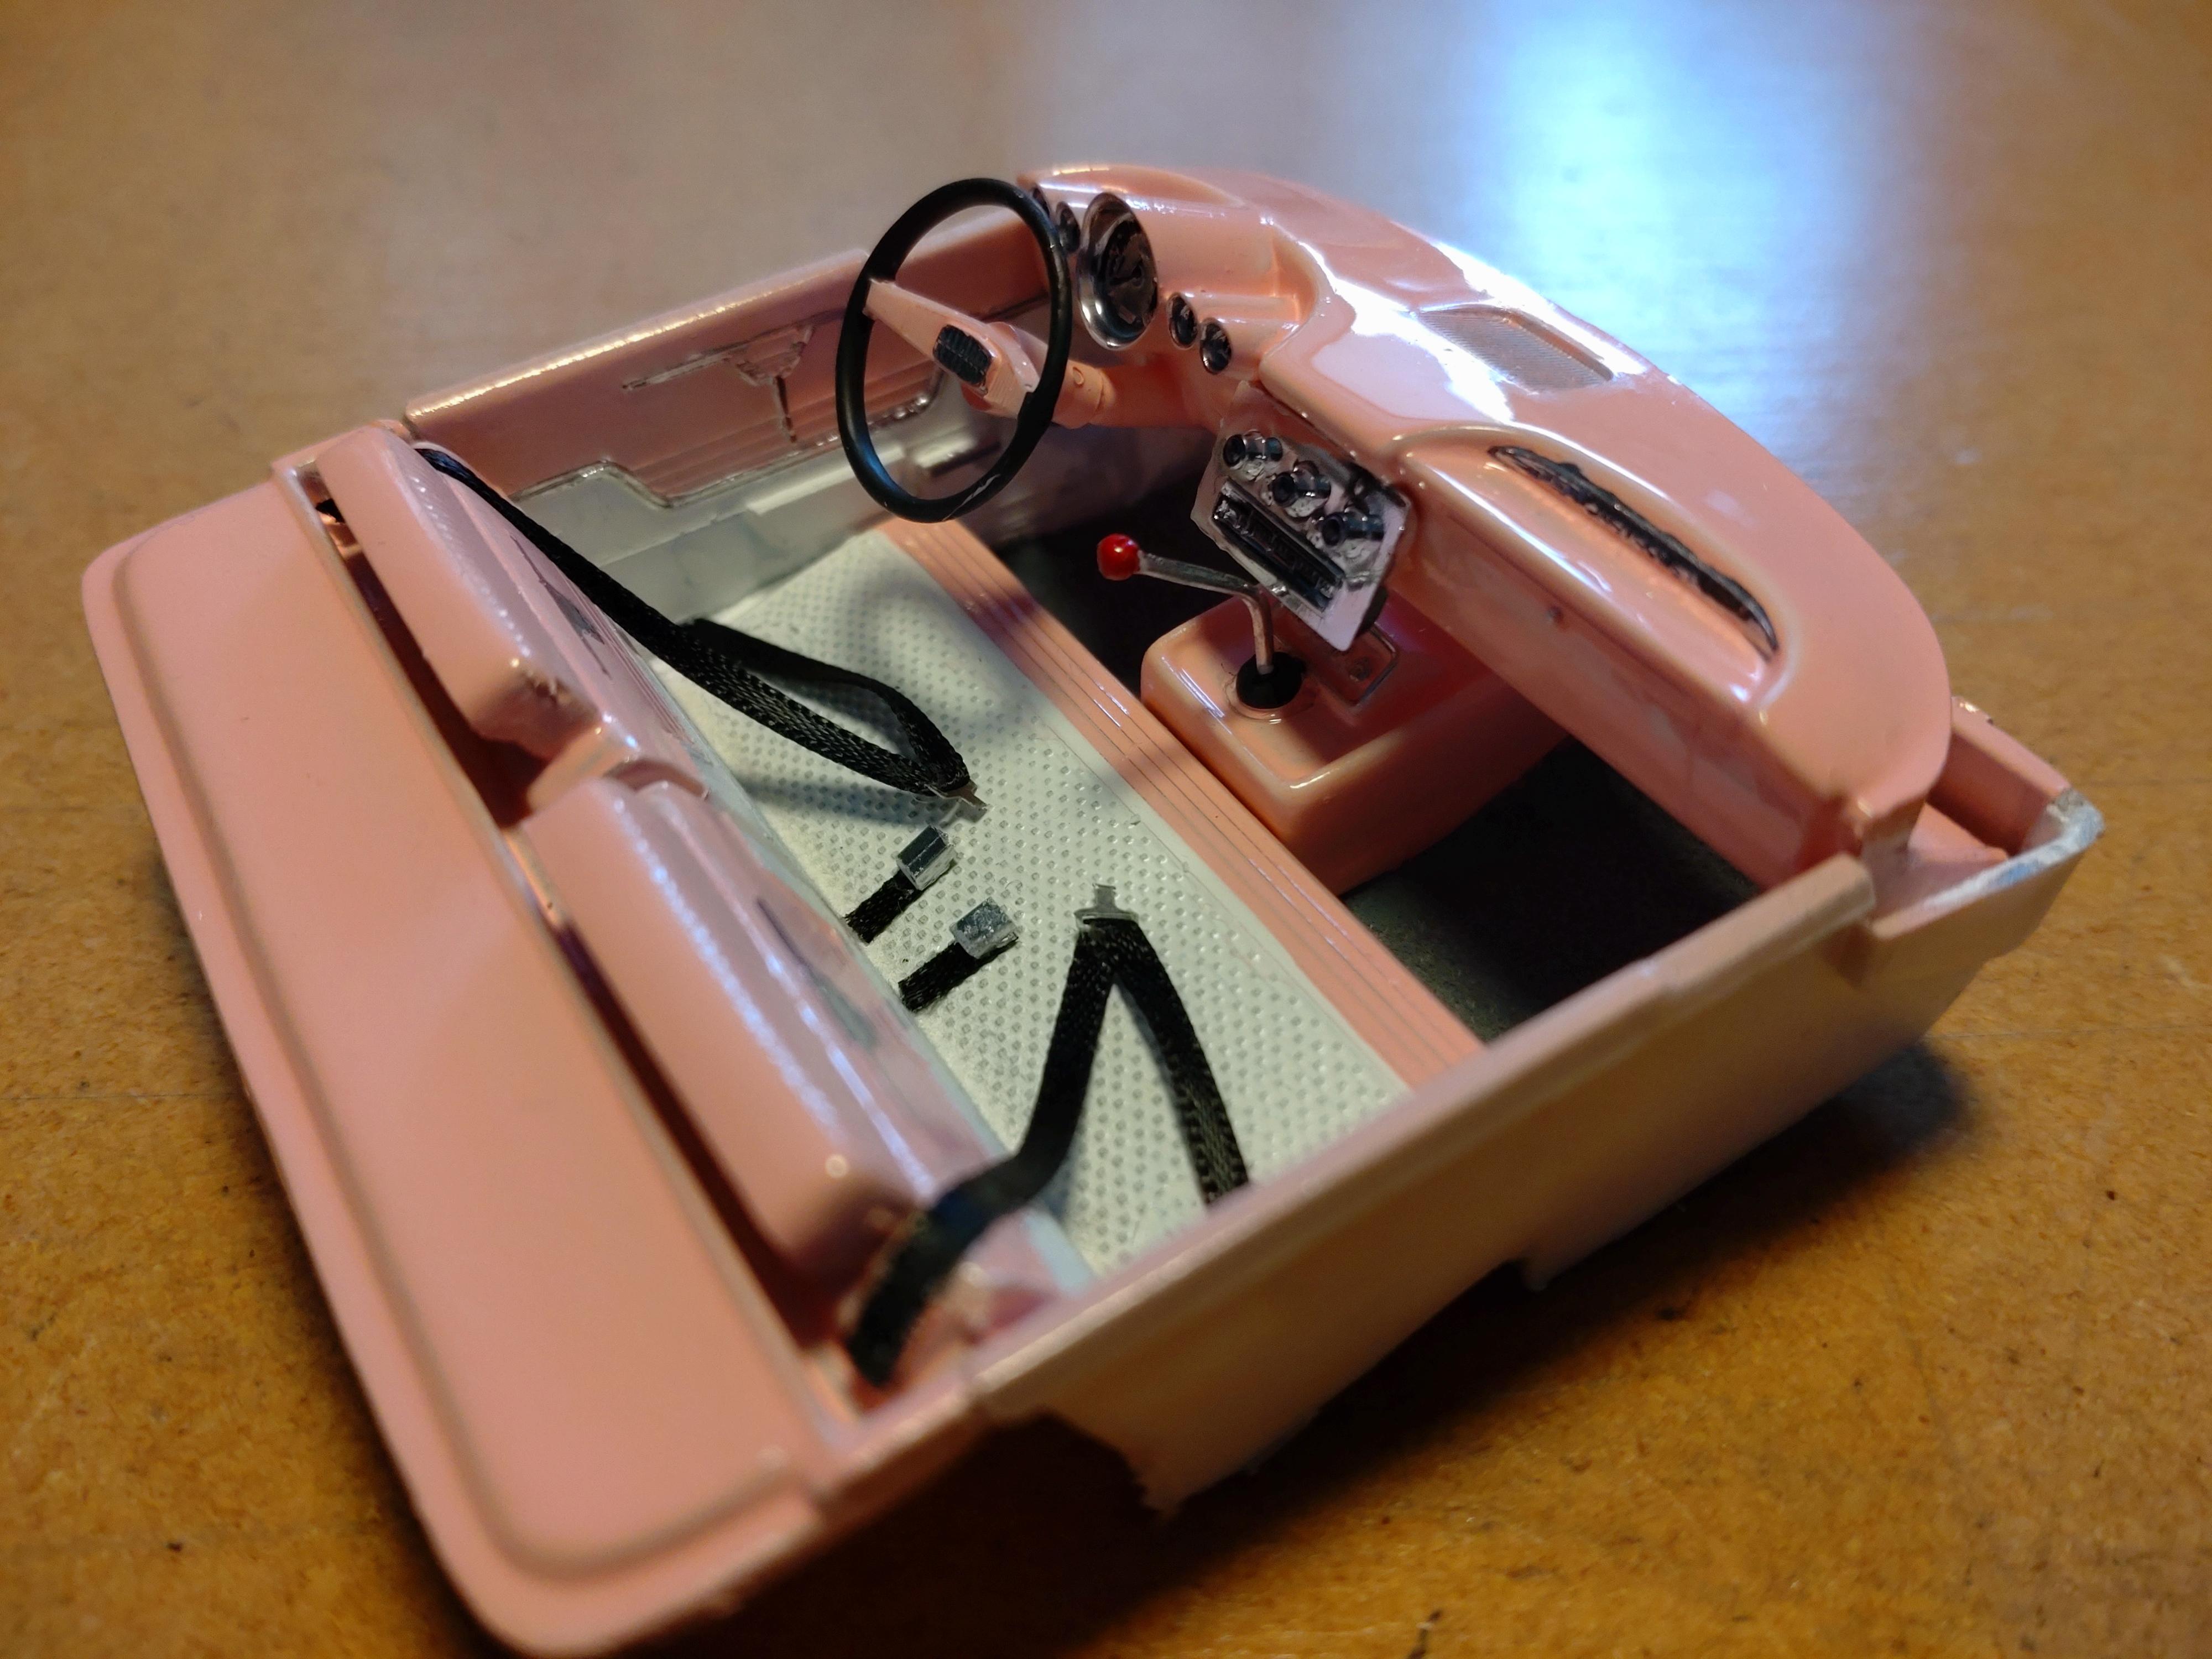
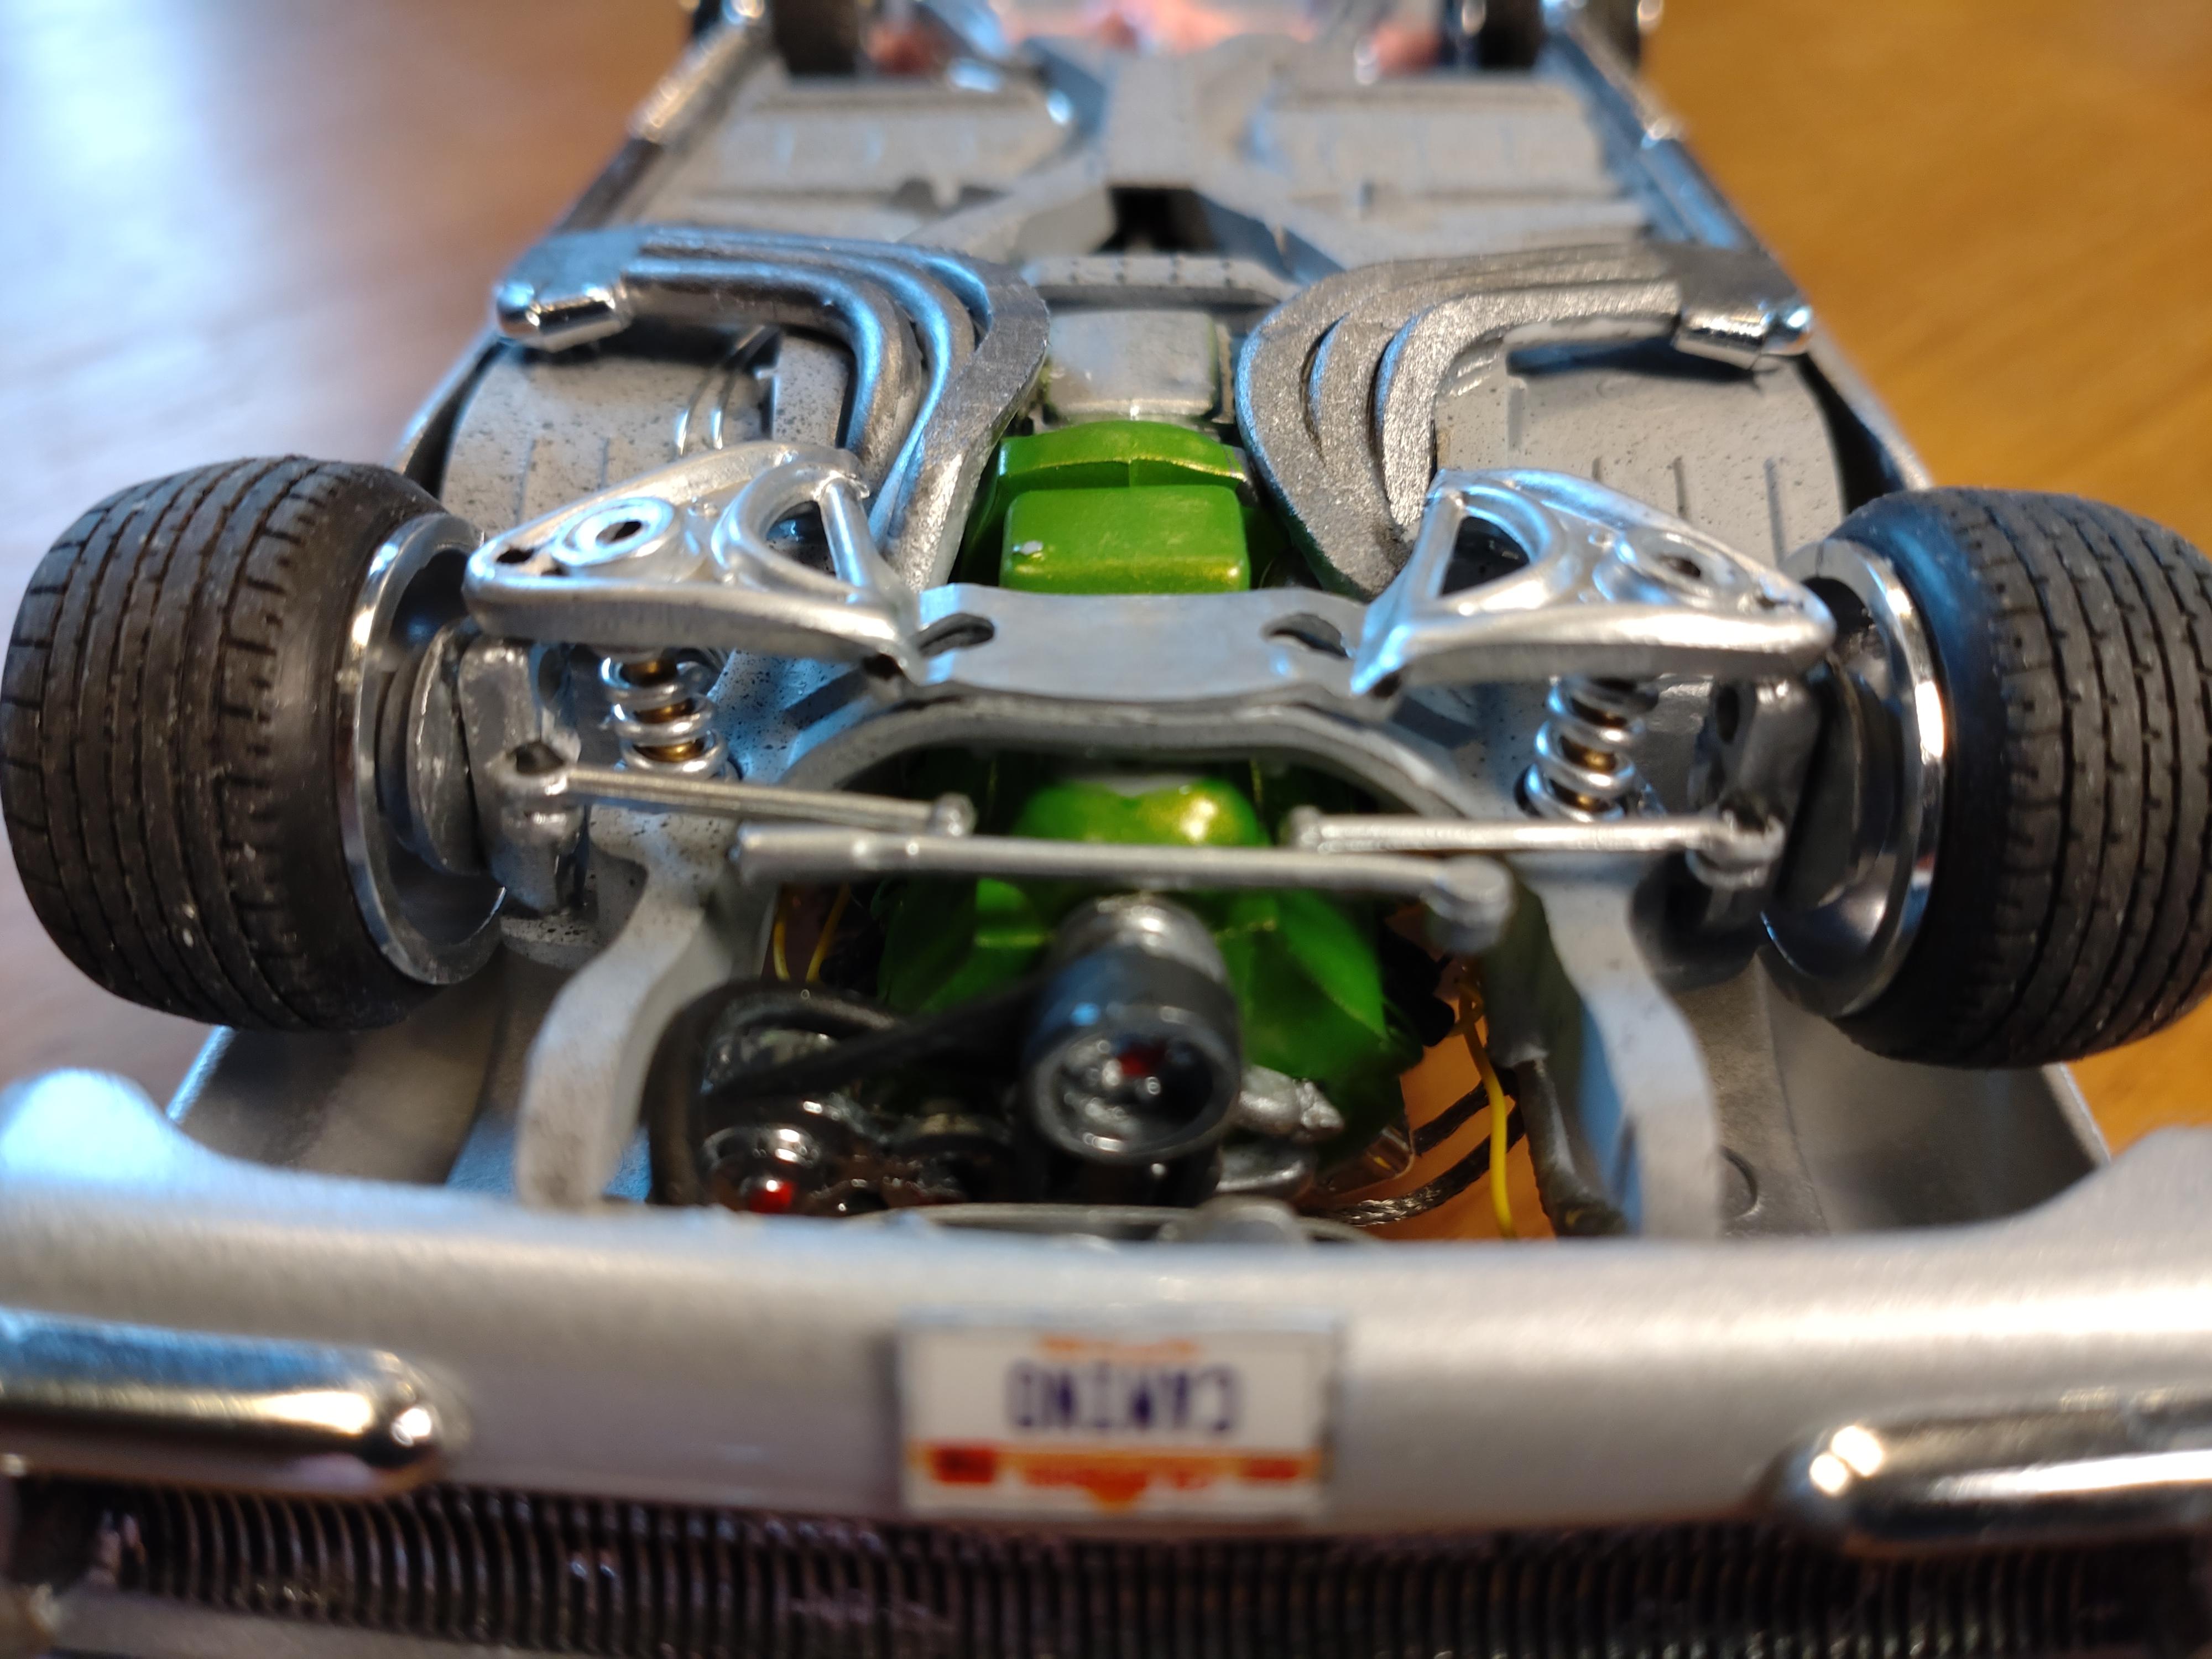
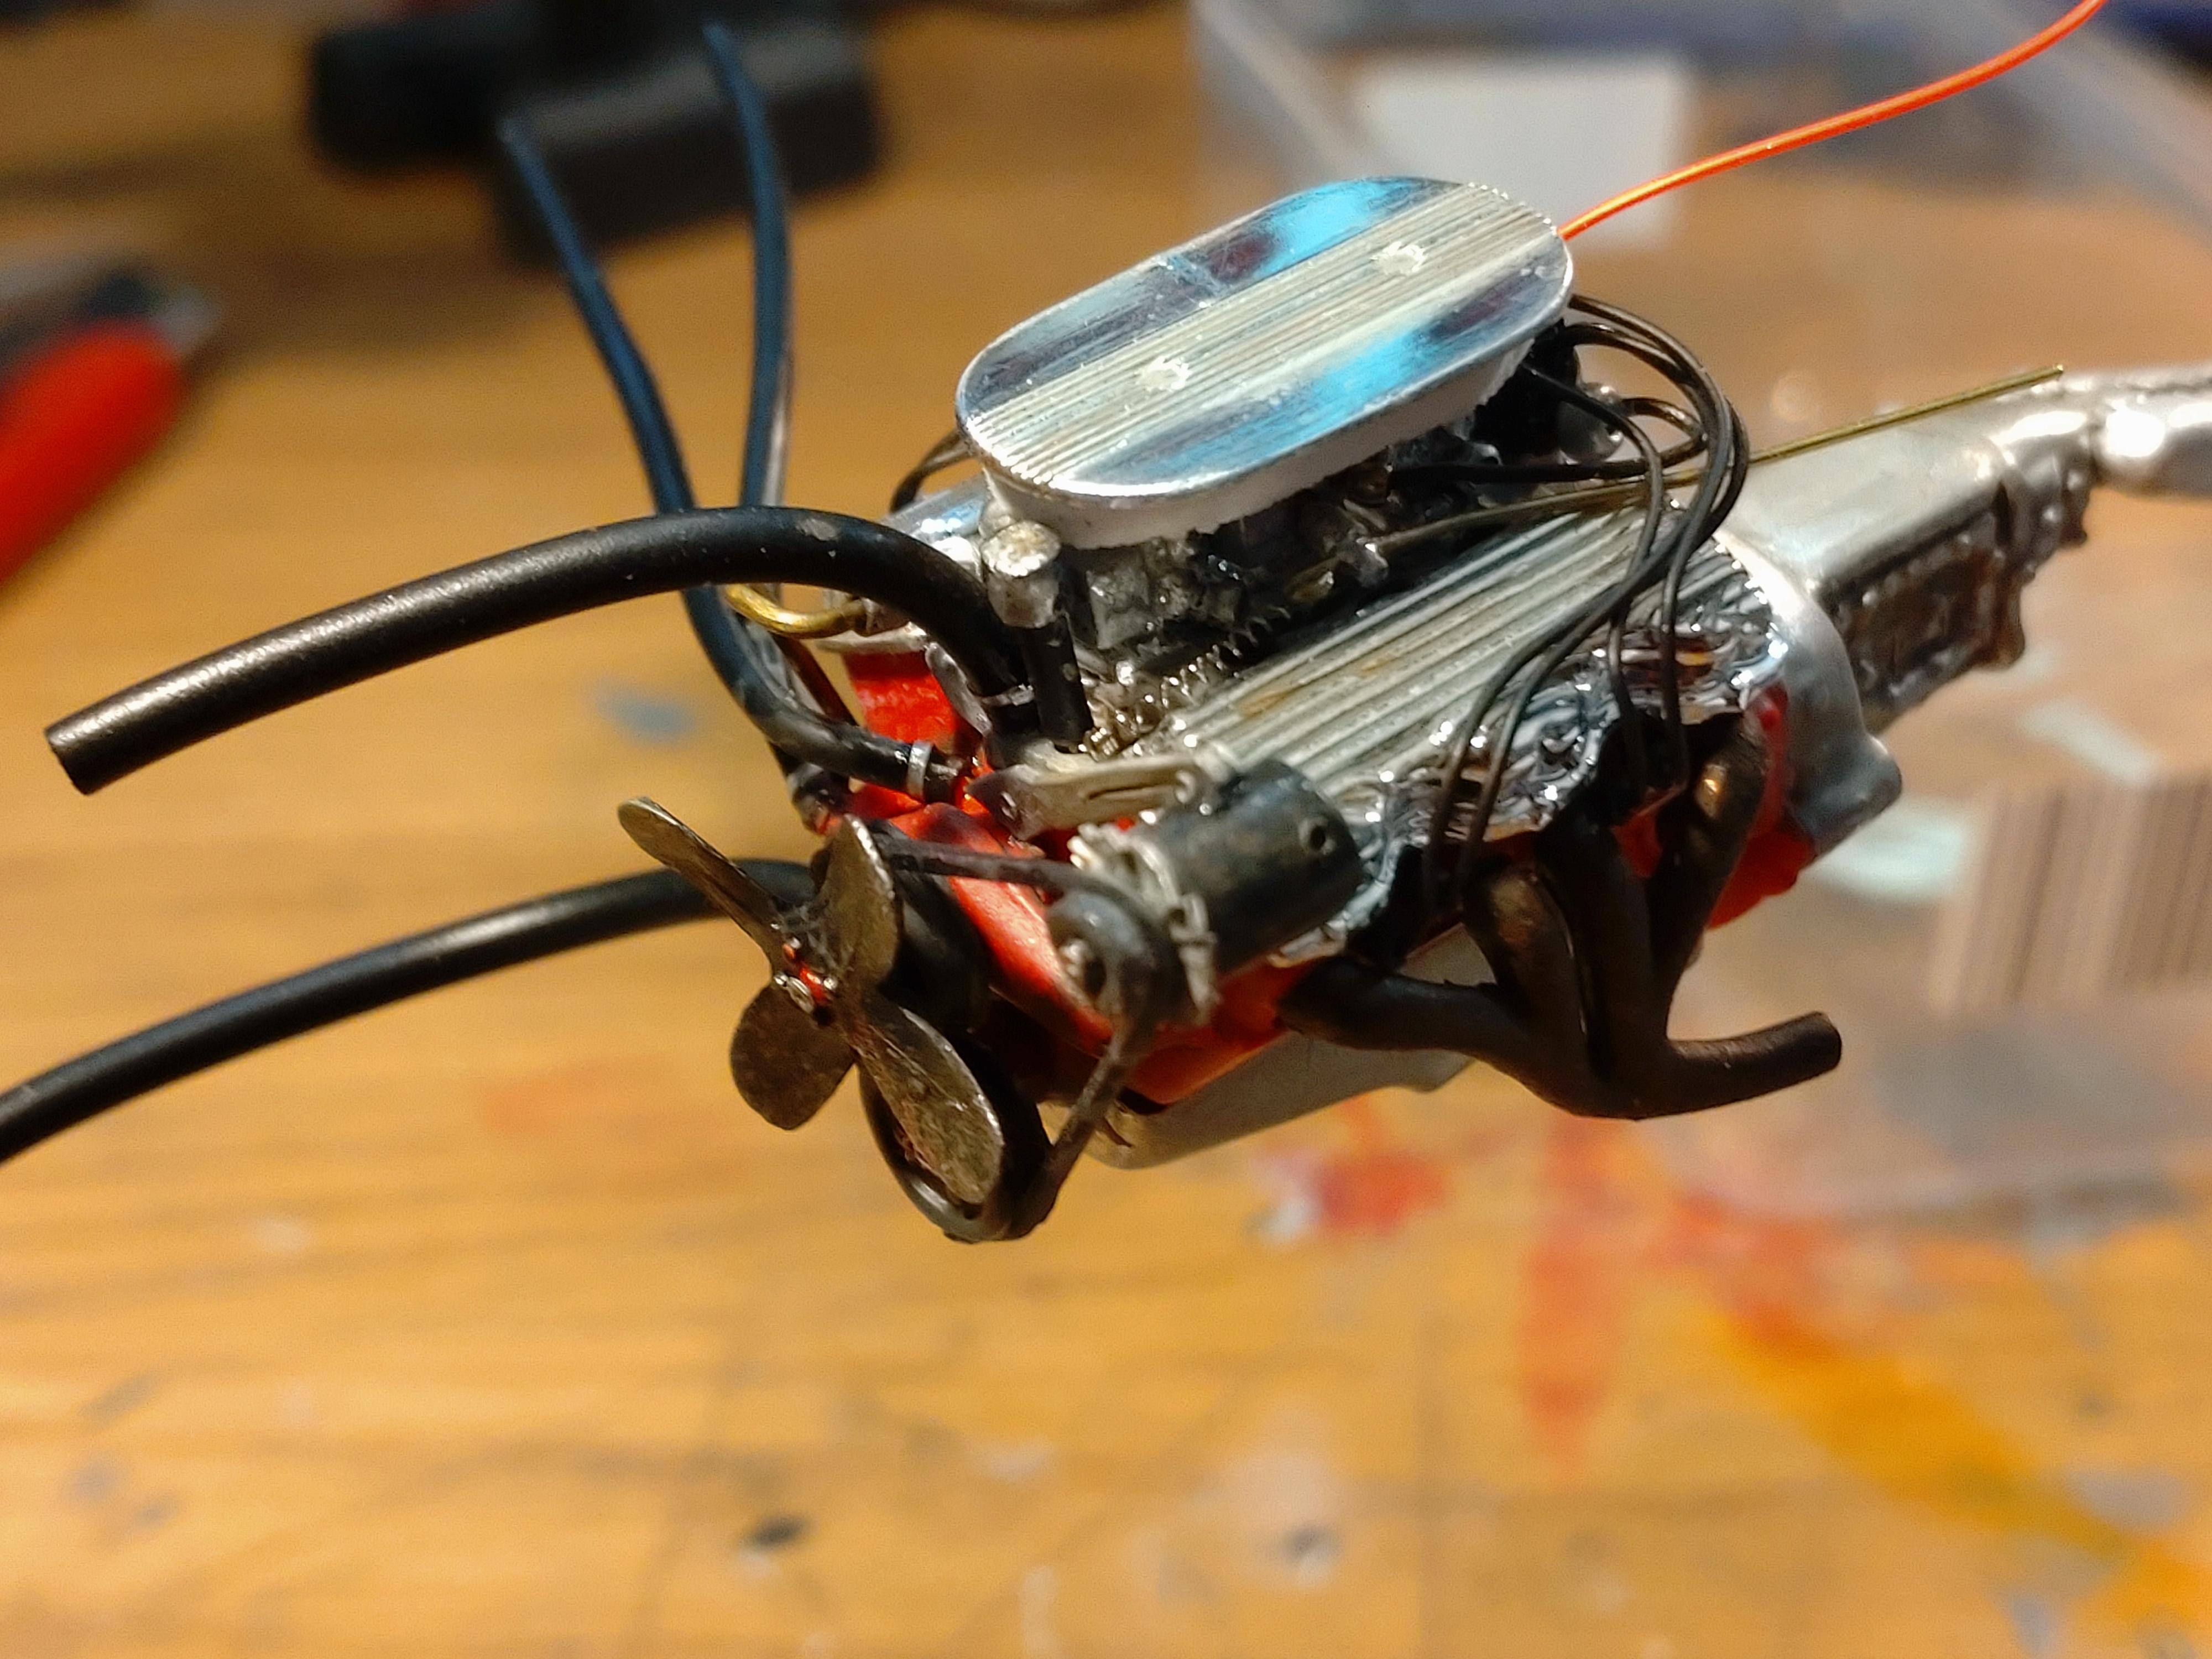
This build is about 2 years old, but still one of my favorites. I am a big fan of Quentin Tarantino and really like every film of his. In "Kill Bill" there is an important character that is not human: It´s that yellow "Pussy Wagon". This came to my mind and inspired me when I bought this Chevrolet El Camino kit. I wanted to build my very own version of a P-Wagon. I chose to build a low rider with a maximum amount of muscle and hot rod appeal, but with a feminine touch to the paint job. The wheels are custom by Scale Production and actually for a racing car. Very low profile tires lets the car hug the street. To make room I widened the rear fender with an arch of 0,5mm styrole and filled and worked it until the surface was smooth. The body is in a silver metallic and enhanced with a baby pink (Tamiya). The finish was with 2 crystal clear coats and a good polish. From the box I only used the big block engine. The custom parts in the kit were not hot enough for my needs. I used parts from my leftover box and added some home-made details. I was really happy to have found a supplier for those wire braided cables and hoses. The setup resembles a full-blown engine I discovered while googling. For the bed I didn´t have a supplier for wood veneer back then. I opted for popcicle sticks and sanded them down until I got tired of it. Colored with walnut varnish makes it look real enough to me. The "springs" in the kit did not satisfy me, they didn´t look much like springs at all. I wound coils of 1mm wire around a 2mm brass rod for the front and rear suspension. The interior is VERY pink. The floor is covered with velvet flocking an a few extra details like the radio and seat belts were added. I had a lot of fun building. Unfortunately, this dream of mine will not come true in real life..... Thanks for watching!
-
I´m finished with the engine. The alternator is attached to the block with a .8mm brass rod. This is necessary because the rubber belt has too much tension and pull. I covered the rod with a strip of styrene and added the top attachment. Both are enhanced with photo-etched hex nuts. The ait filter isn´t Chevy, but I believe it fits well to the triple carburetors. I´m finally at ease with the gaps at the trunk lid. Had to fill a corner after the filler primer and now the body is sprayed in an off white. The surface is sanded with grit 6000 and ready for the bar metal work. A lot of chrome work ahead....
-
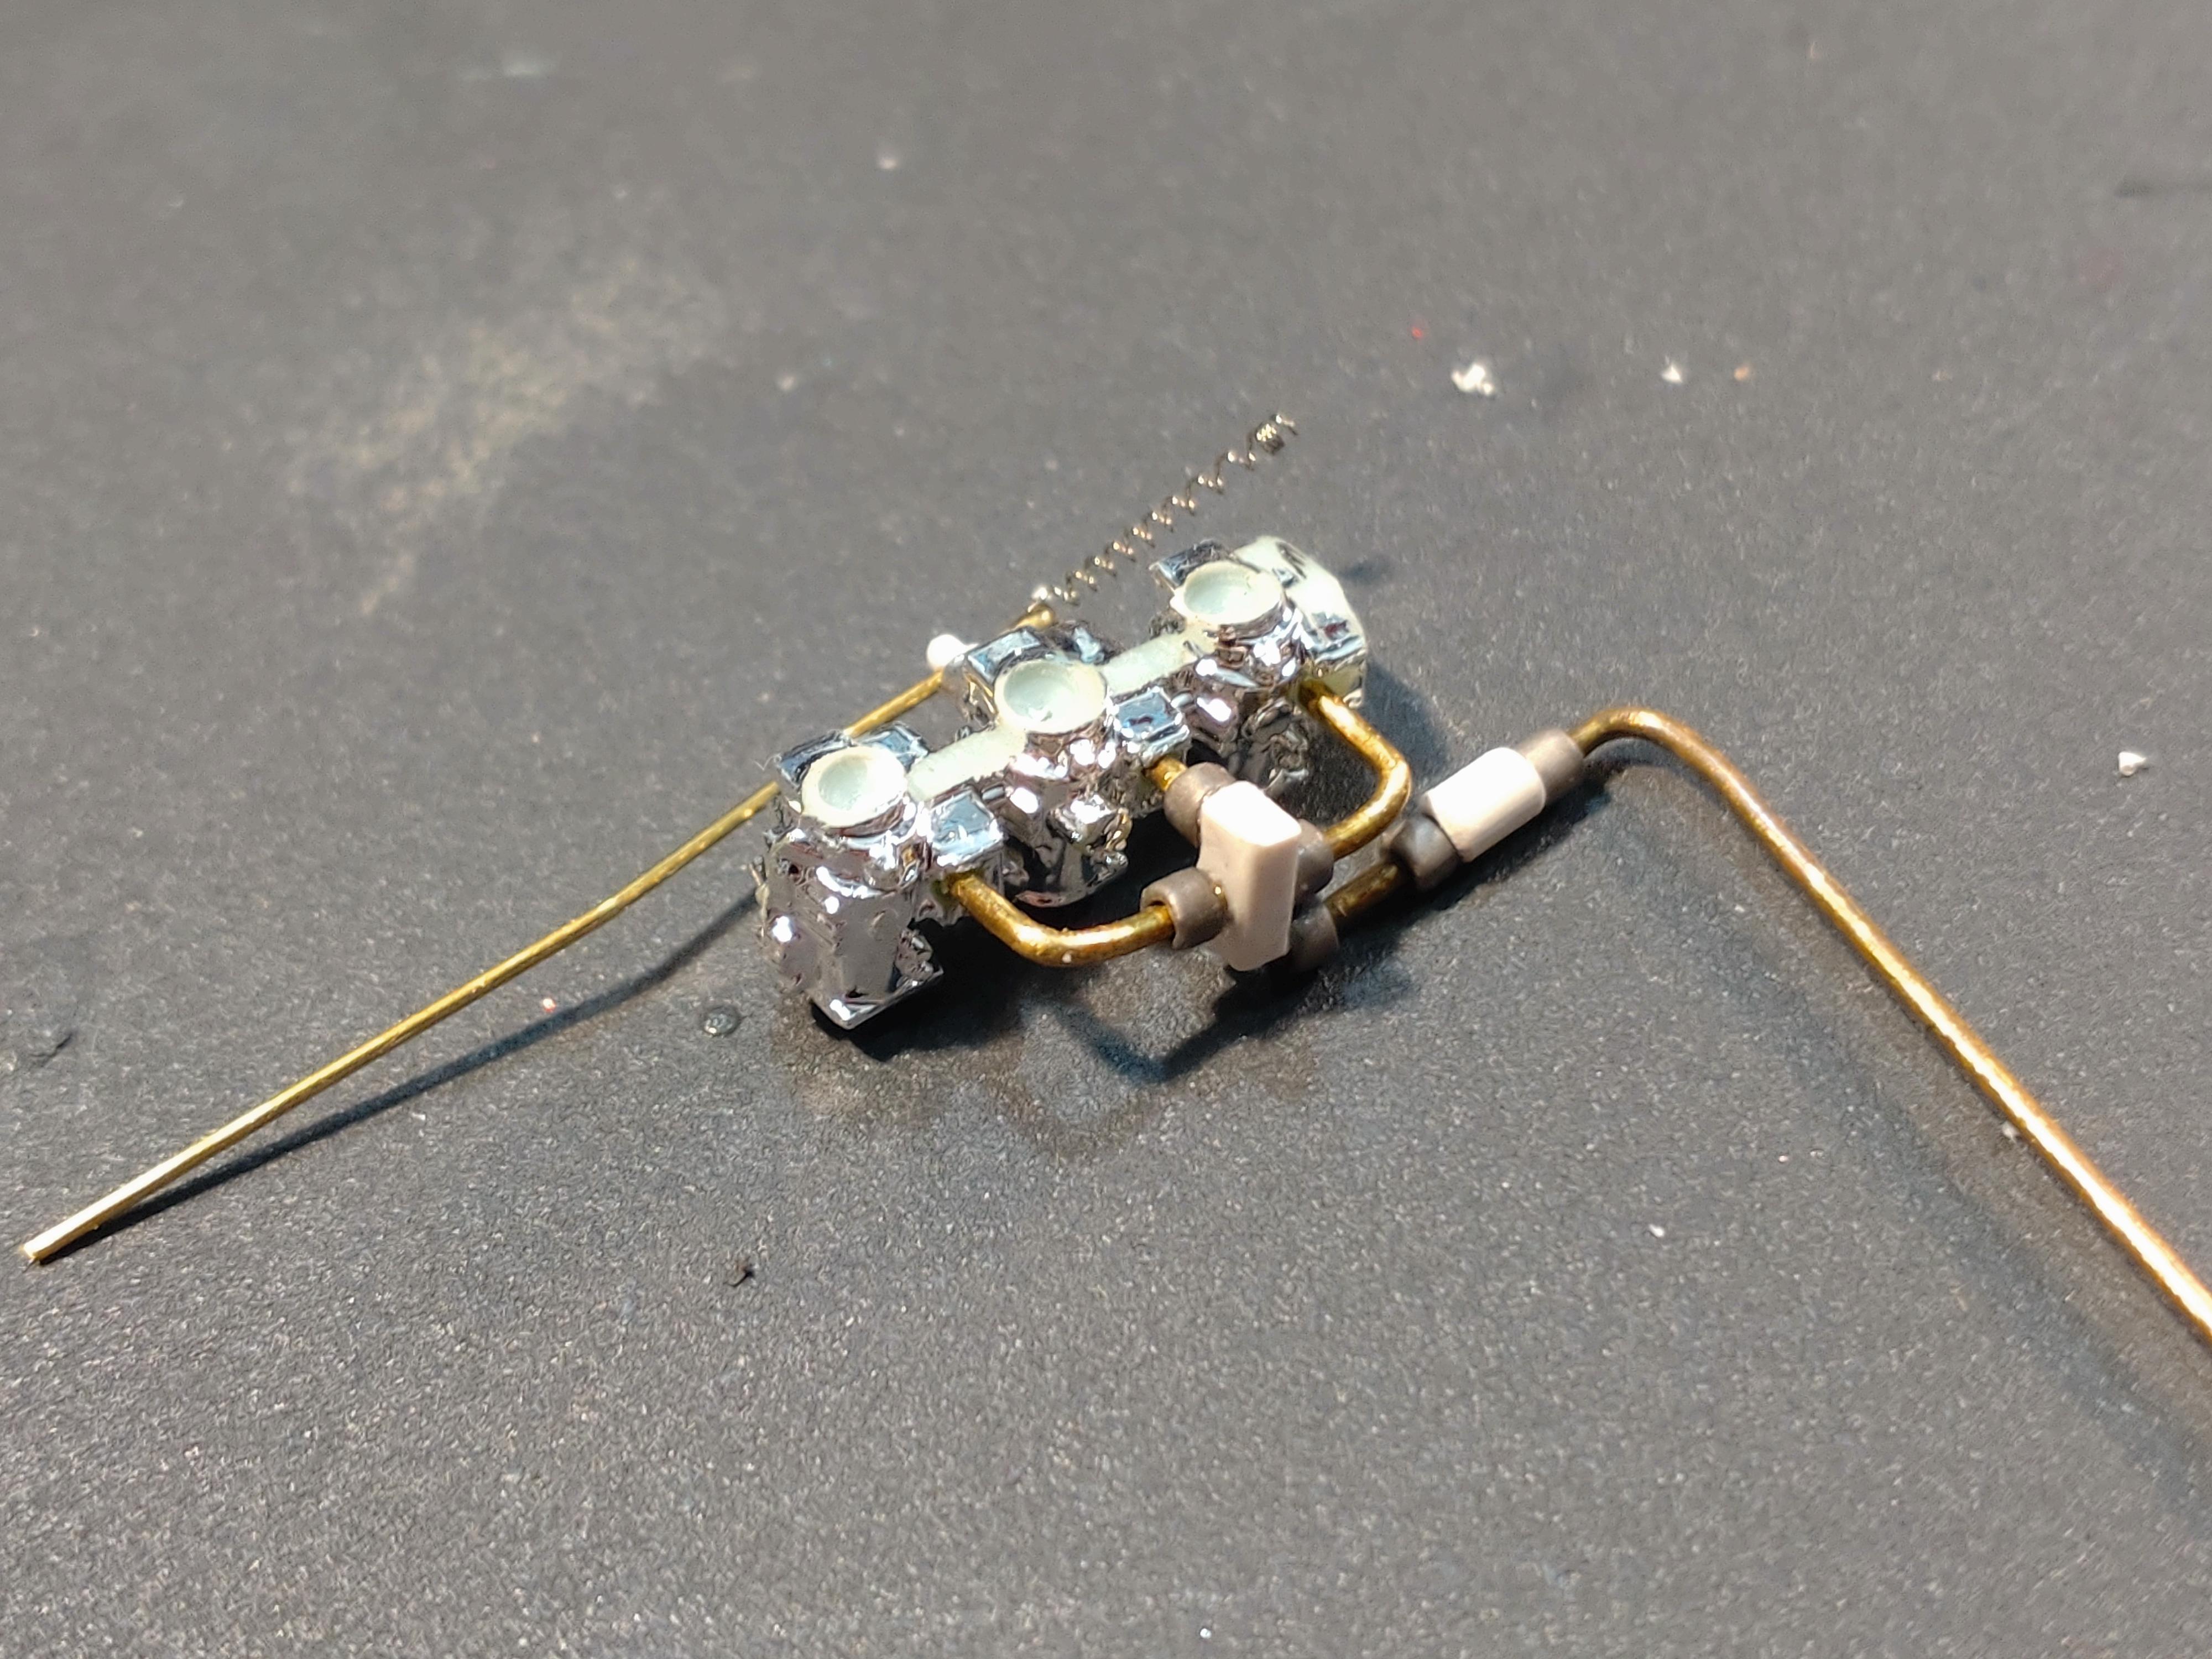
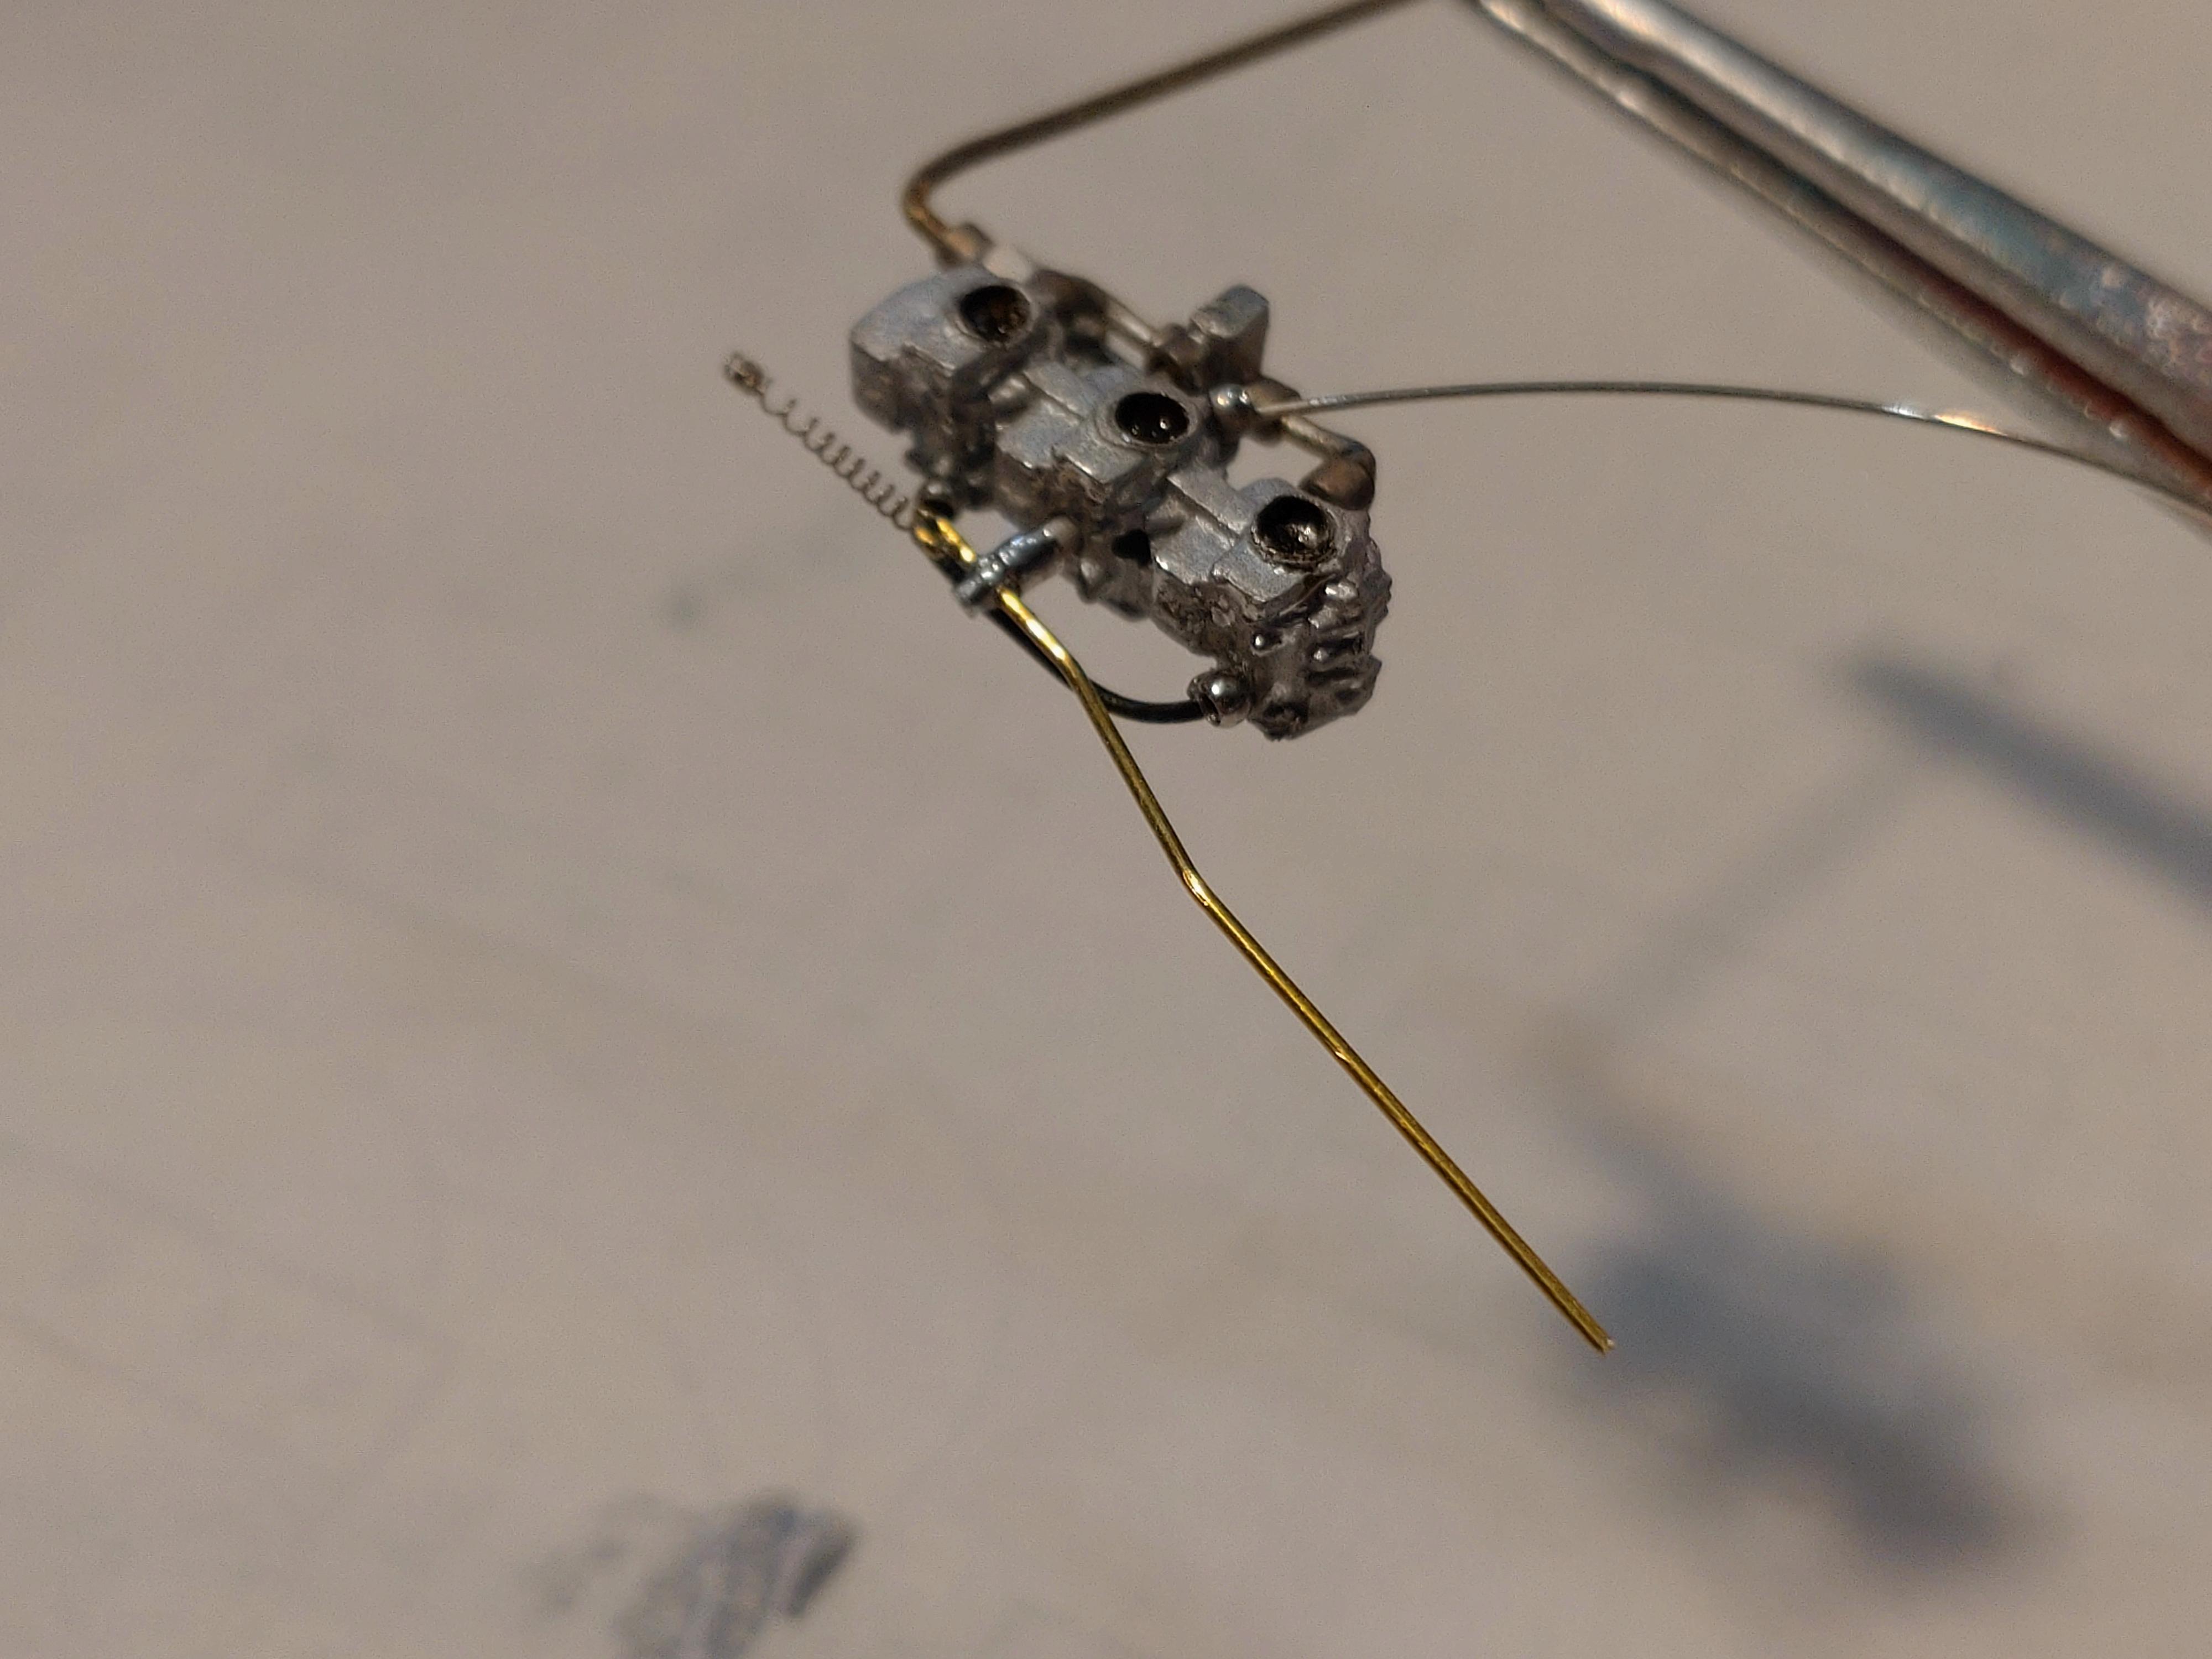
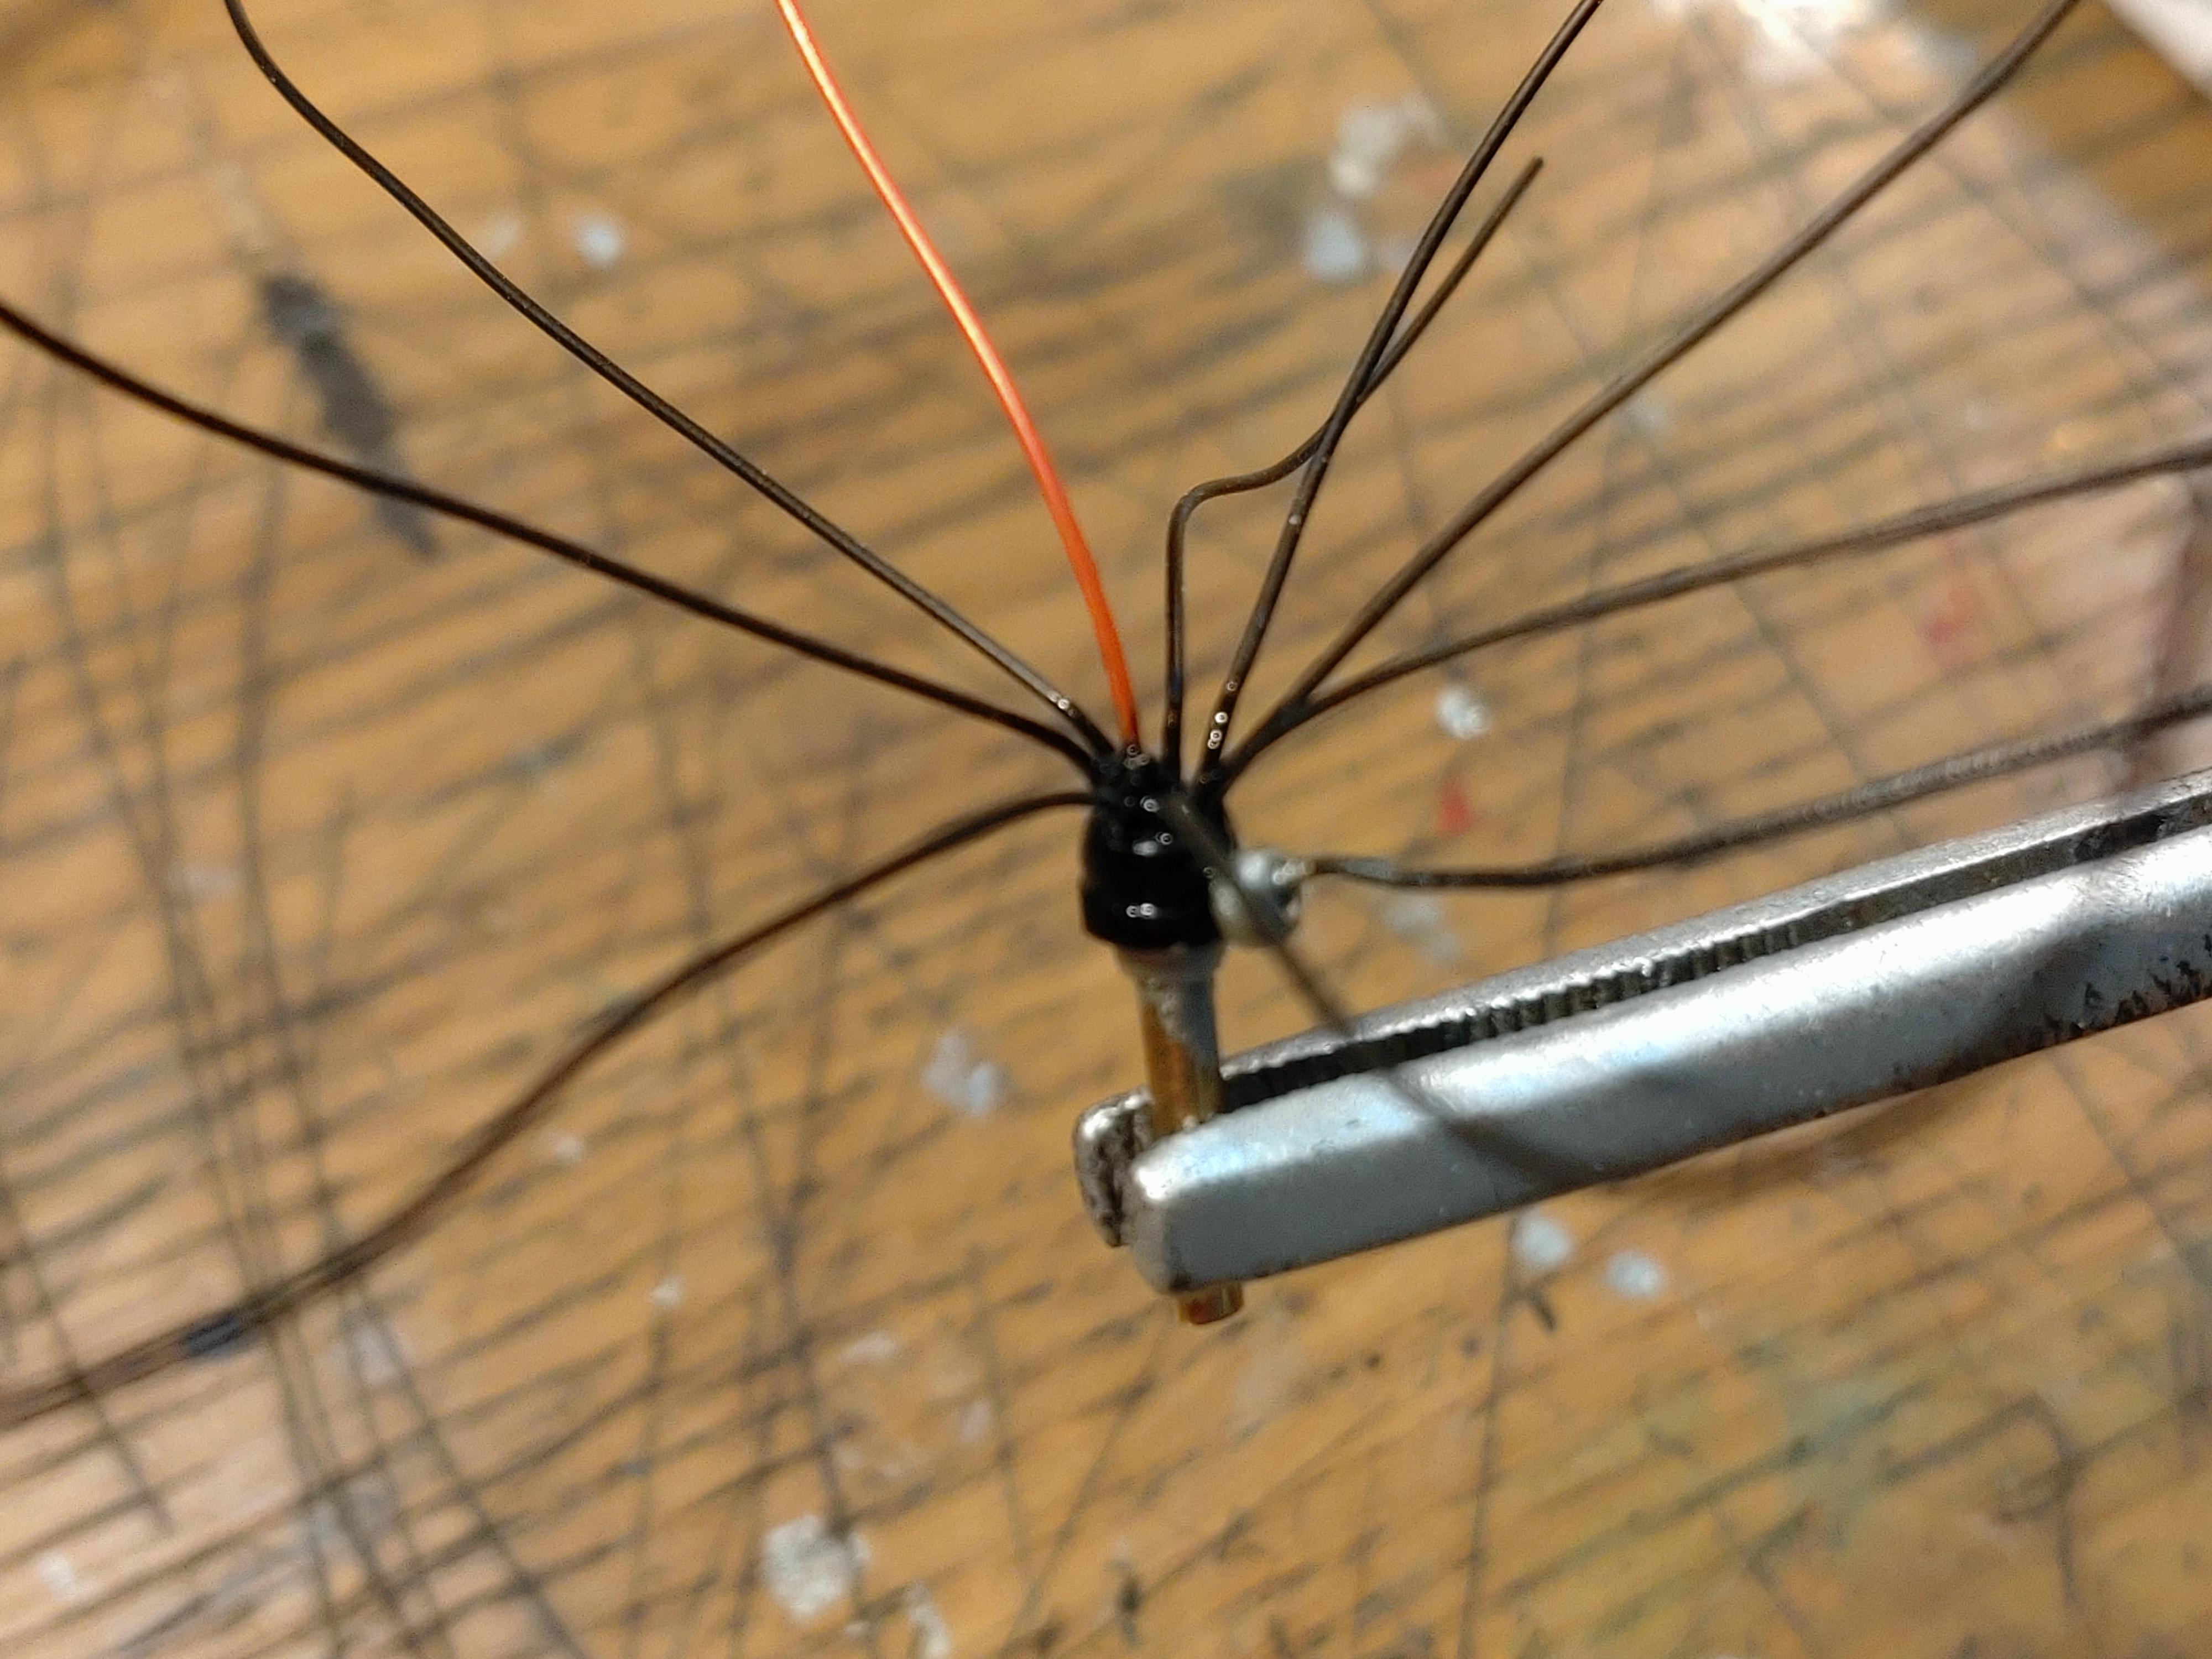
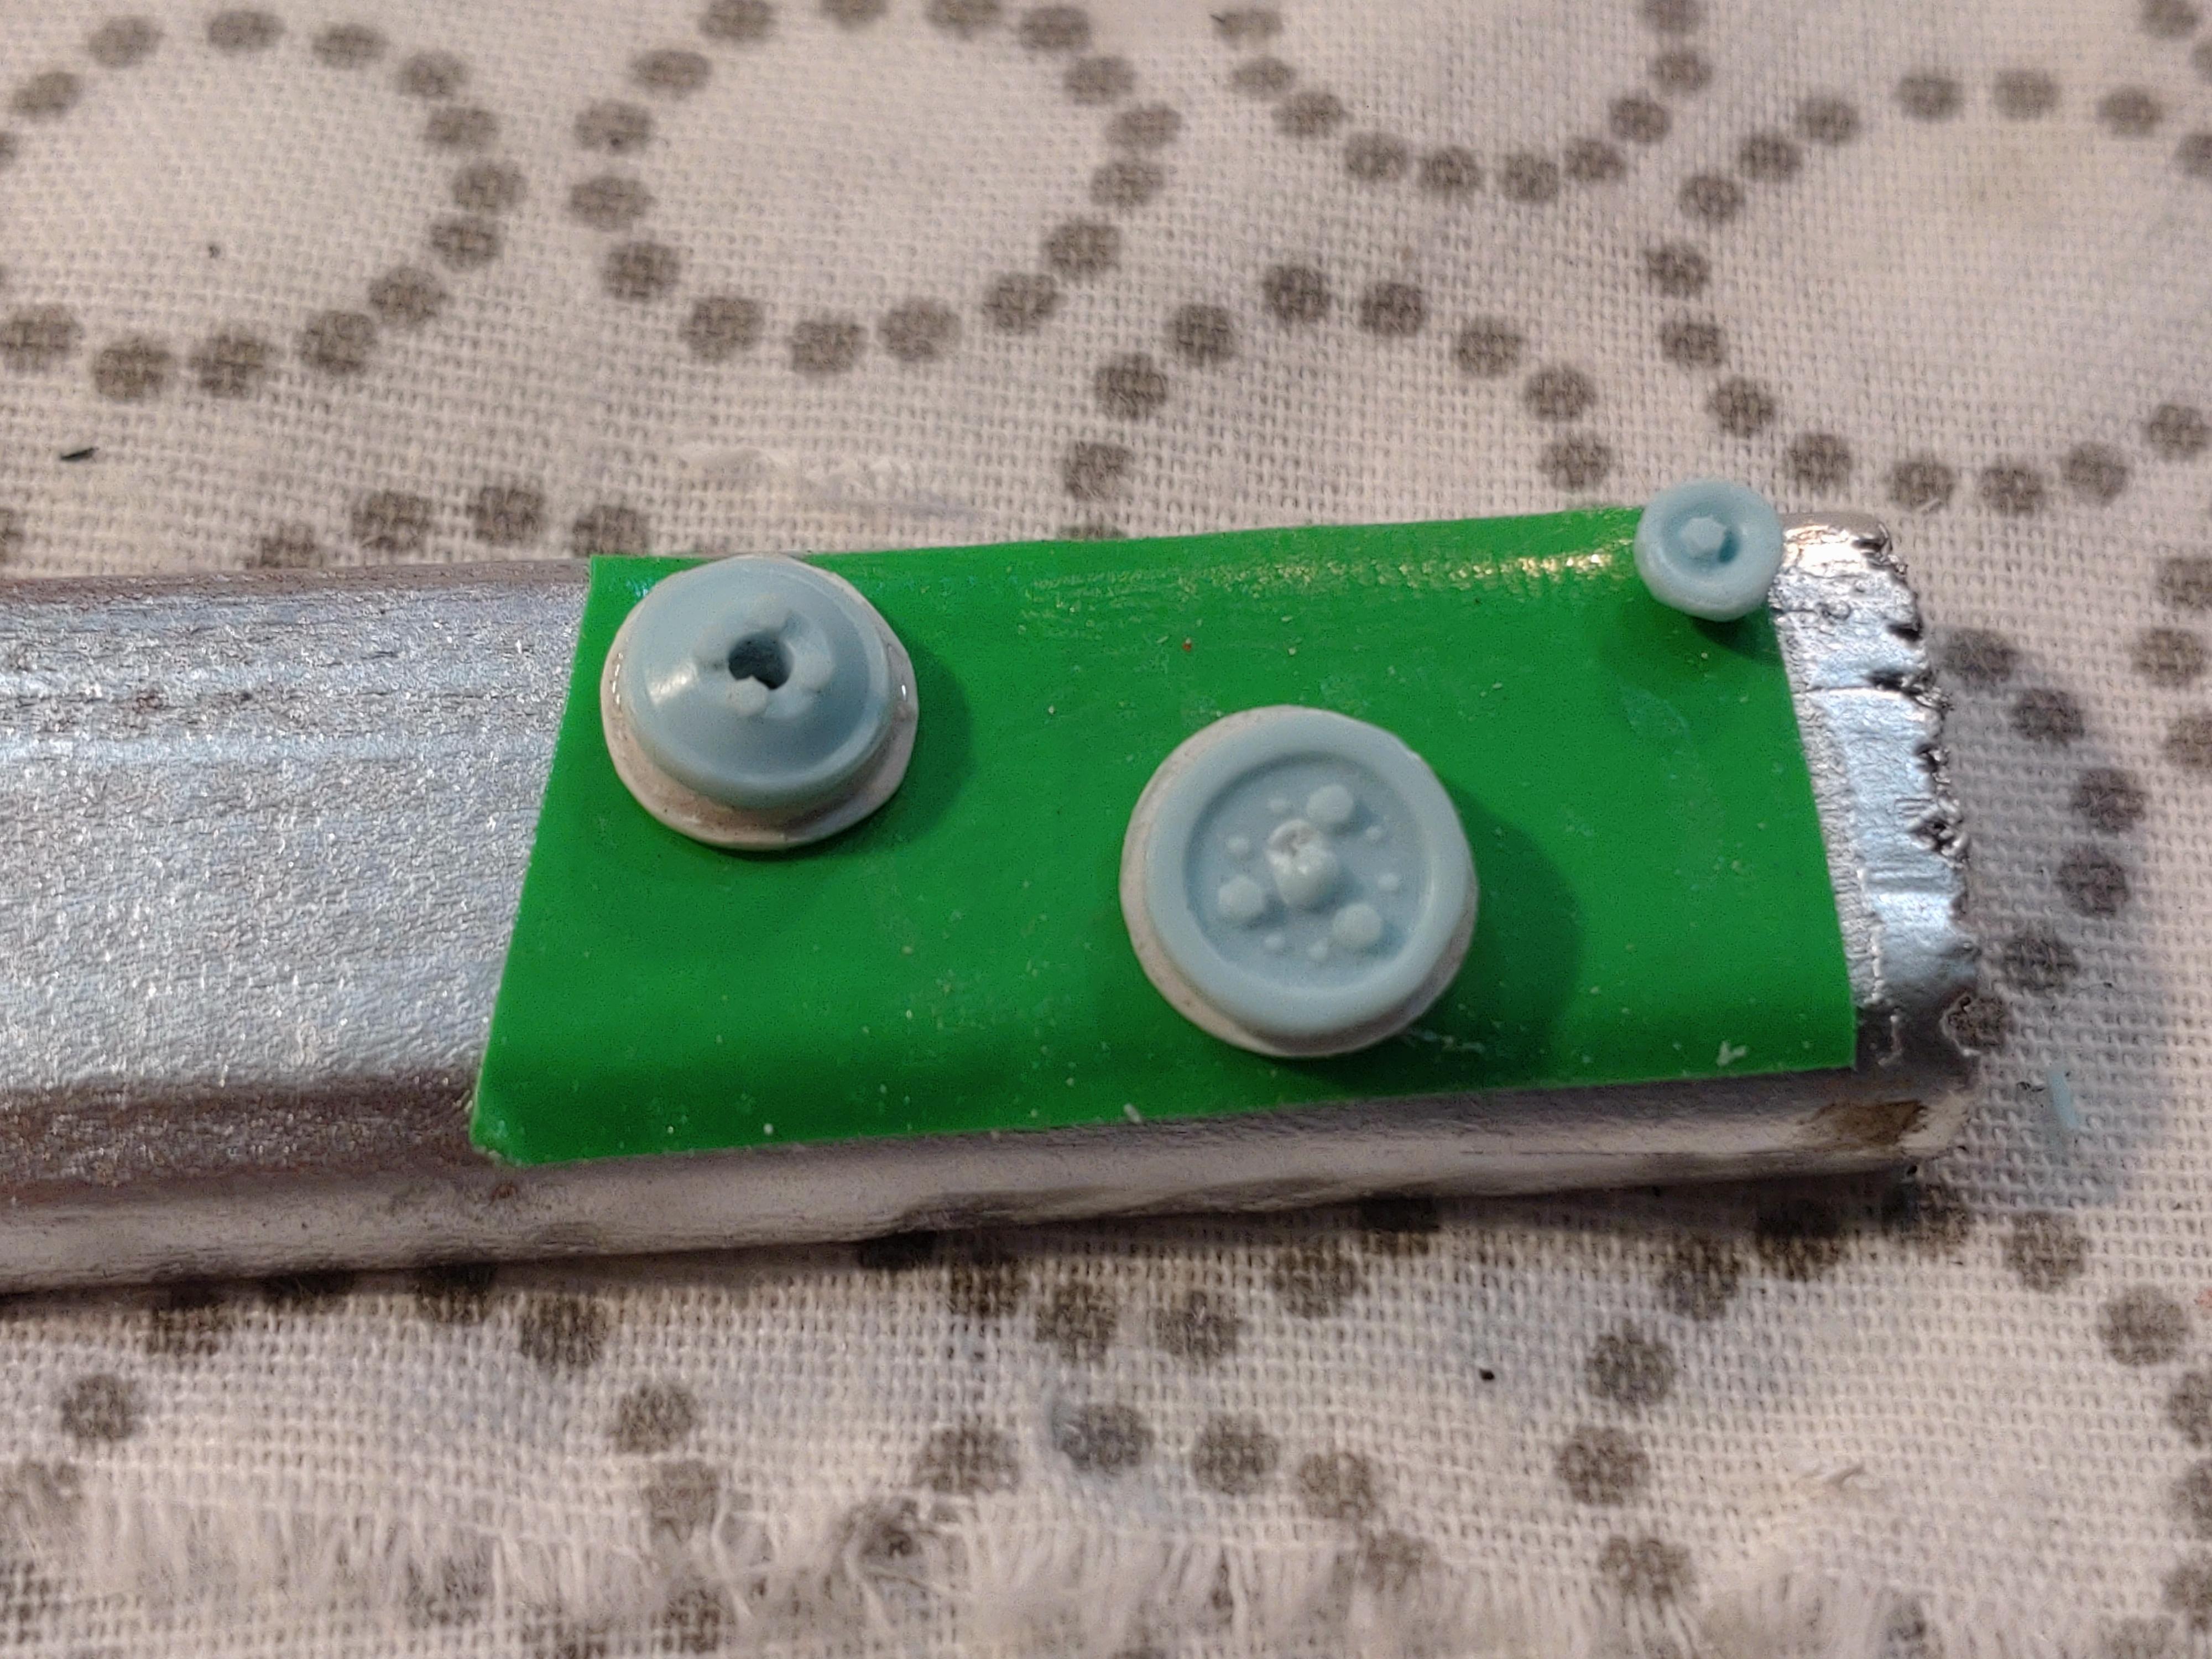
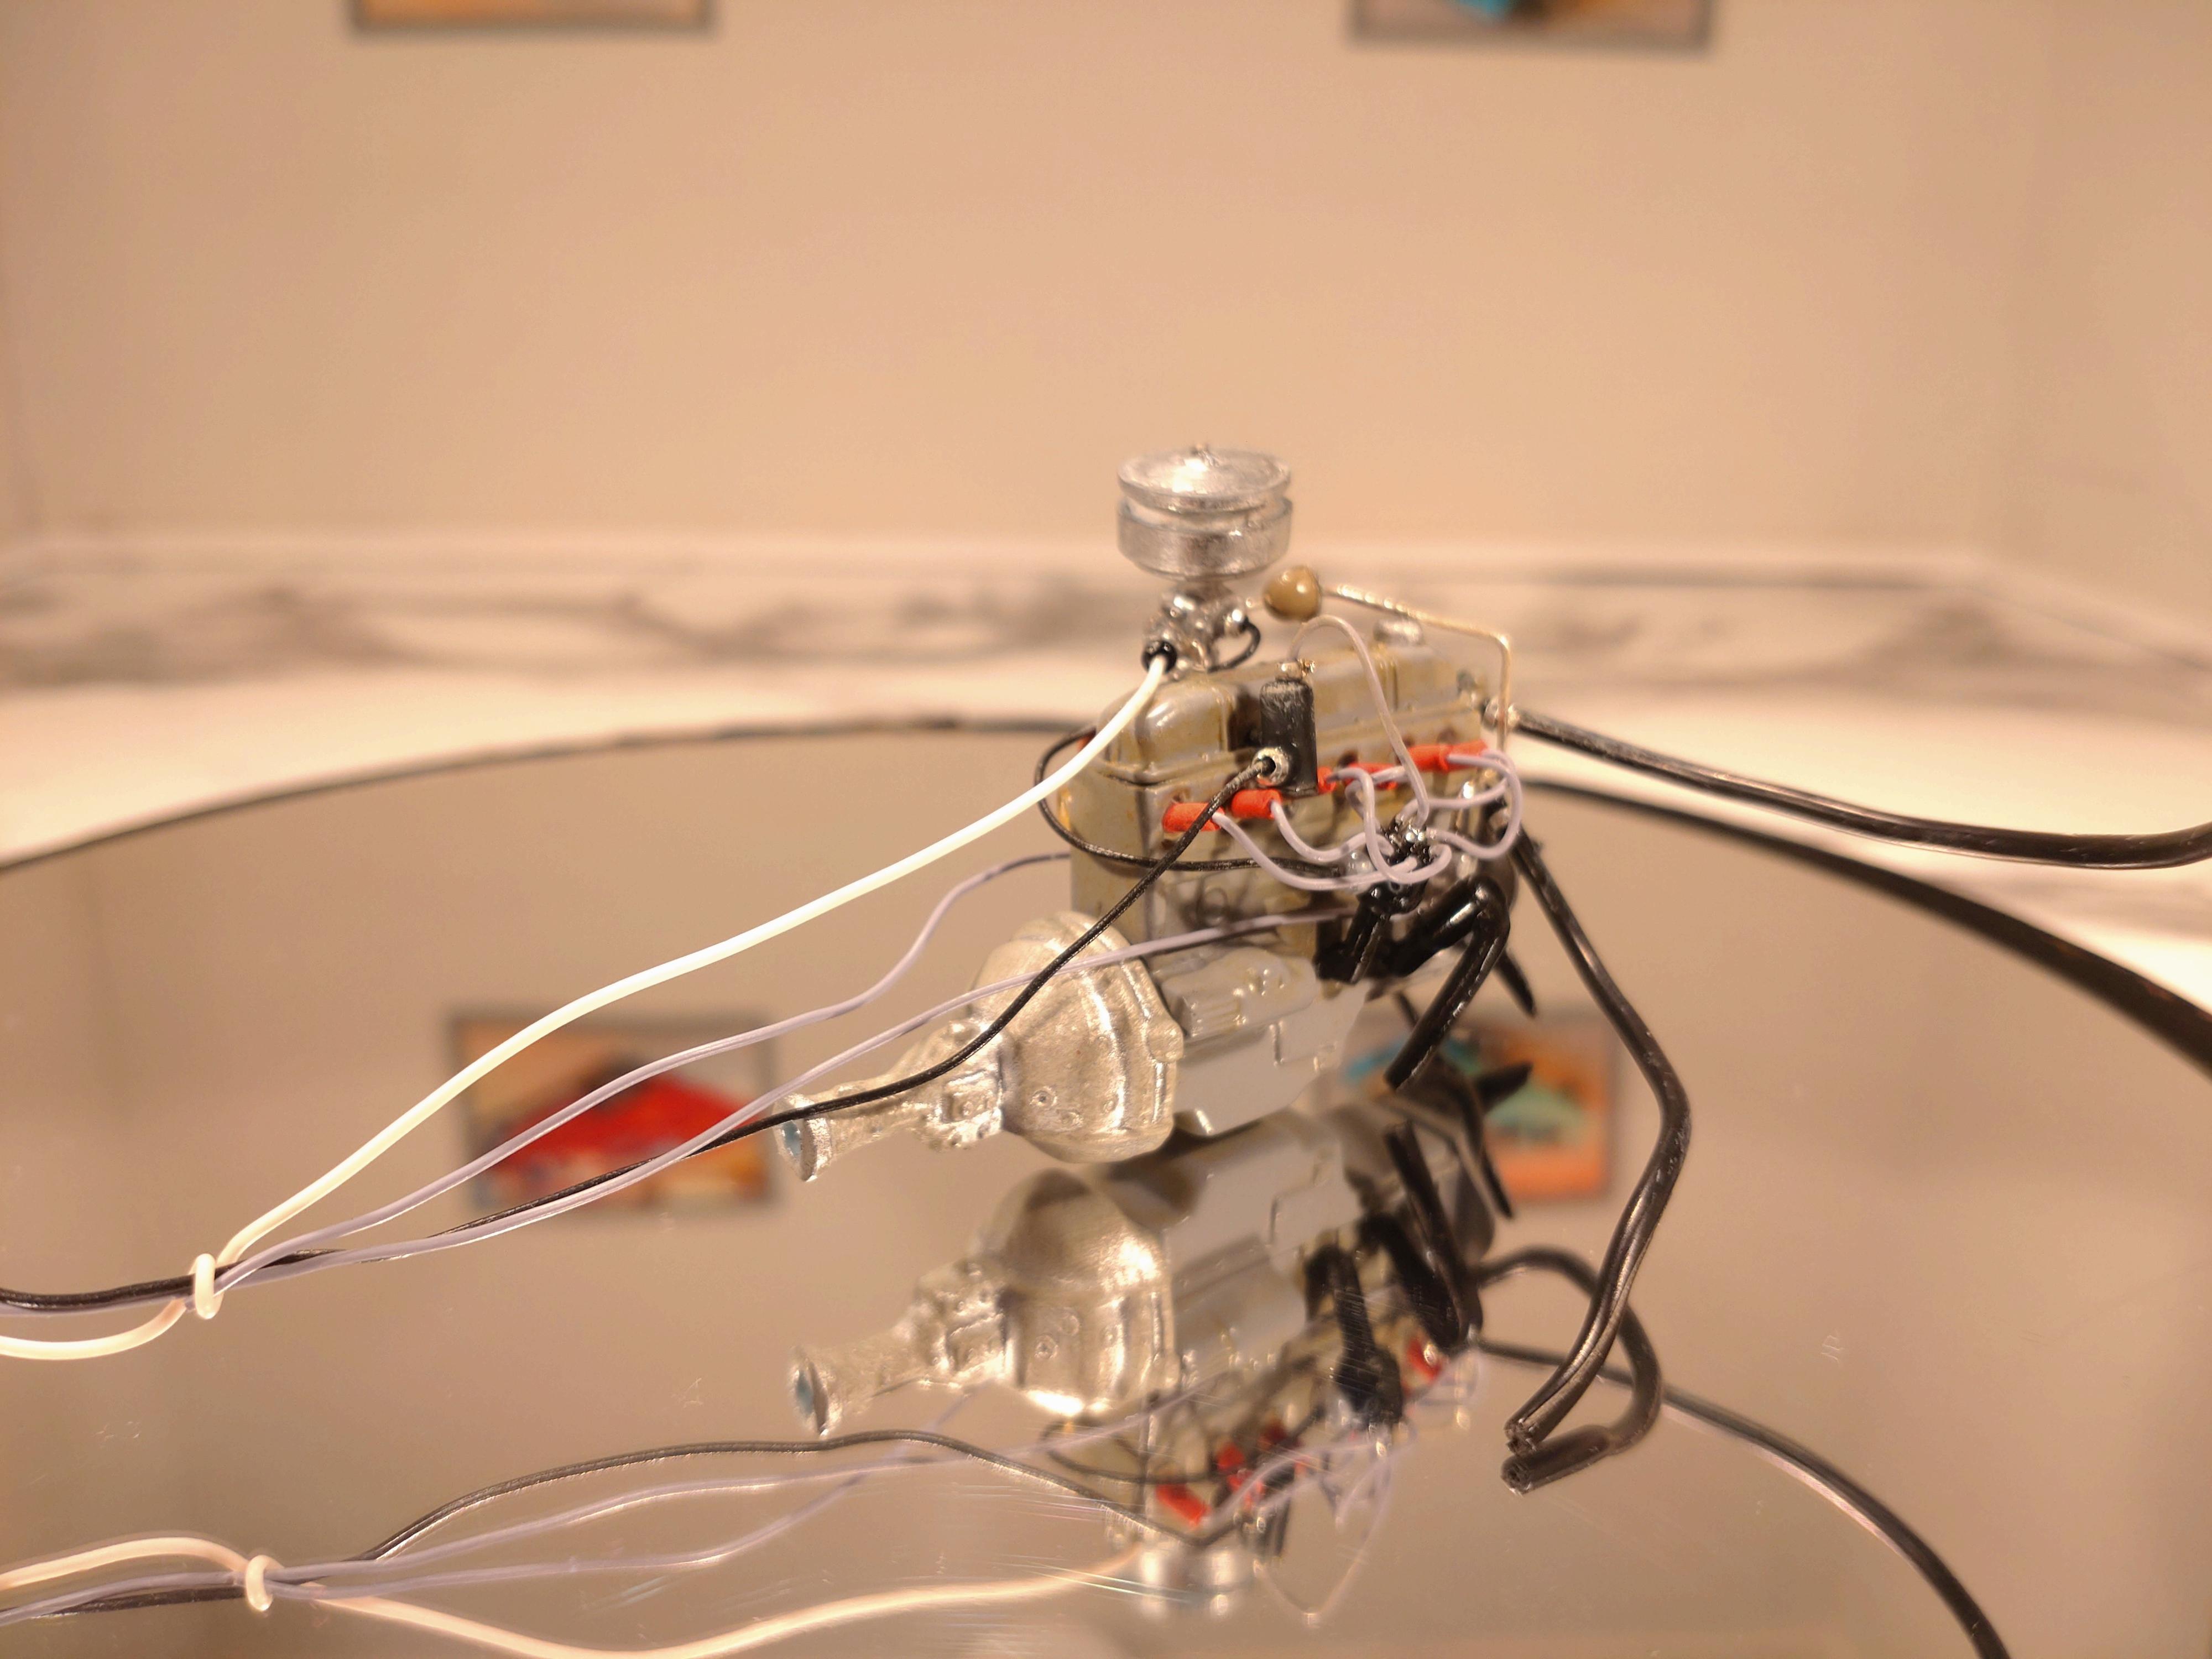
As I had expected, the first paint coat revealed where I had to tidy up my work. But then again, it isn´t that much save that I didn´t do much chopping on the body. I was a bit messy with the trunk lid though. I am not that happy with the width of the gaps, so I decided to add some styrene where the gaps are too wide. Next step will be sanding them down until it fits fine. After gluing the door panels I discovered that both doors wouldn´t close correctly any more. So I did have to remove about 1mm to make them fit and close again. While waiting for the paint and putty to dry I started building the engine. I´m choosing the revved up option, although the overall looks will be stock. And because it´s an old car in a "now" world, it does need a bit of grime. Building carbs are the fun part for me. I like bending wires to make lines and cables. This is a first mock up of the carb before I do the paint work and patina. Got to get away from that chromium look. This looks much better. And attached to the manifold. I build my distributors from: 6mm aluminum tube, 2mm brass rod and the ignition cables are 0.4mm from Scale Production. They fit smug between the rod and the tube and after a few drops of super glue they an take a hefty pull. On top comes the lead to the coil and the after painting black I add the line to the carb. Now I´m working on the pulleys. I deconstructed the pulley wheels from the kit part and sanded them thin, added 1mm discs and a .3mm back. The wheels will be looped with a thin rubber belt. Back to the shop now.
-
1964 Pontiac Bonneville Convertible.
Andy Oldenburg replied to StevenGuthmiller's topic in WIP: Model Cars
Steve, you are an artist and are building models in your own league. May I say, a Michelangelo of car model building (or da Vinci...?). This thread was a revelation to me and gave me many moments of science. It showed me what is possible and where my journey as a model builder can go. You definitely have more experience than me (building for about 3 years), but I can see my progress and maybe one day...?? What impresses me most is your stoic ability to work on a detail, until you are completely satisfied, whatever it takes. When I started, one aim was to get finished as fast as possible! Next kit, a model a month. Eventually I found more sense in taking it easy and directing my attention to workmanship. Your work is the gold standard to me and I caught myself thinking "how would Steve solve this challenge?"?. Beautiful Bonneville! Thanks for sharing this WIP! Looking forward to your next build! -
Your right, there was a ton of chrome plated steel on this Chevy, as on just about every automobile back then. Just received a new sheet of BMF recently and the quality is much better than the Corona age delivery. I do want the chrome to be as smooth as possible.
-
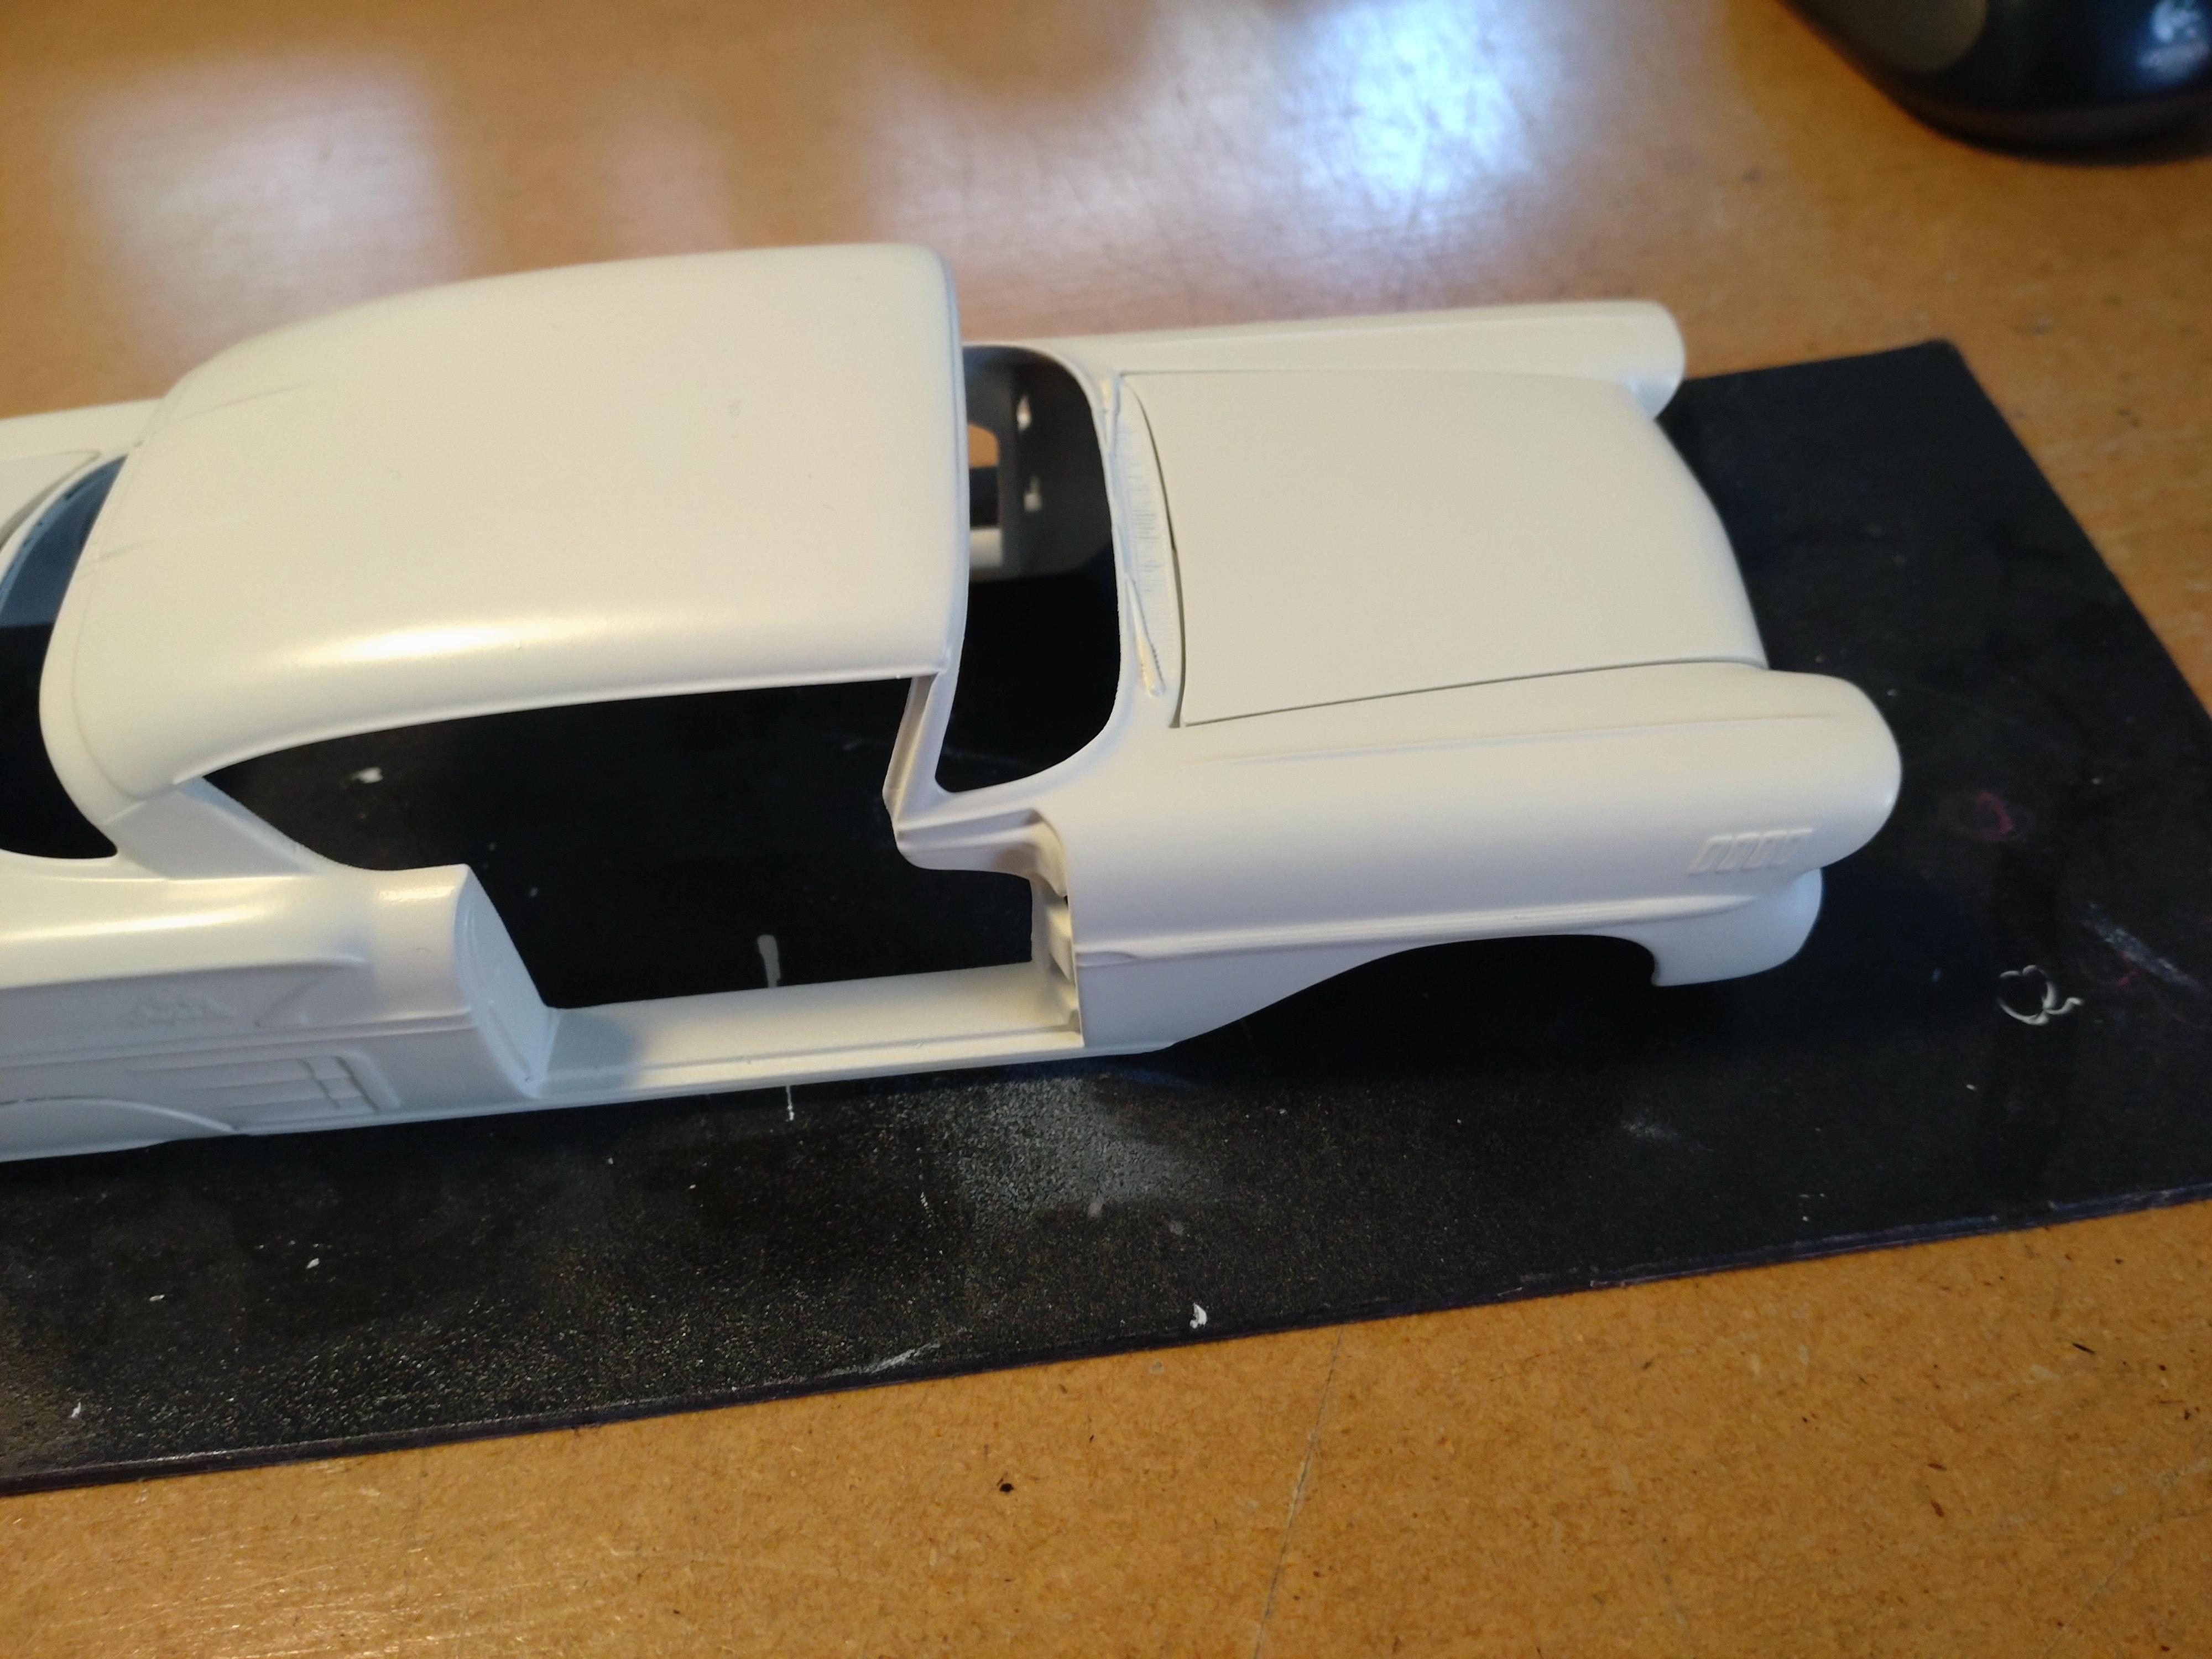
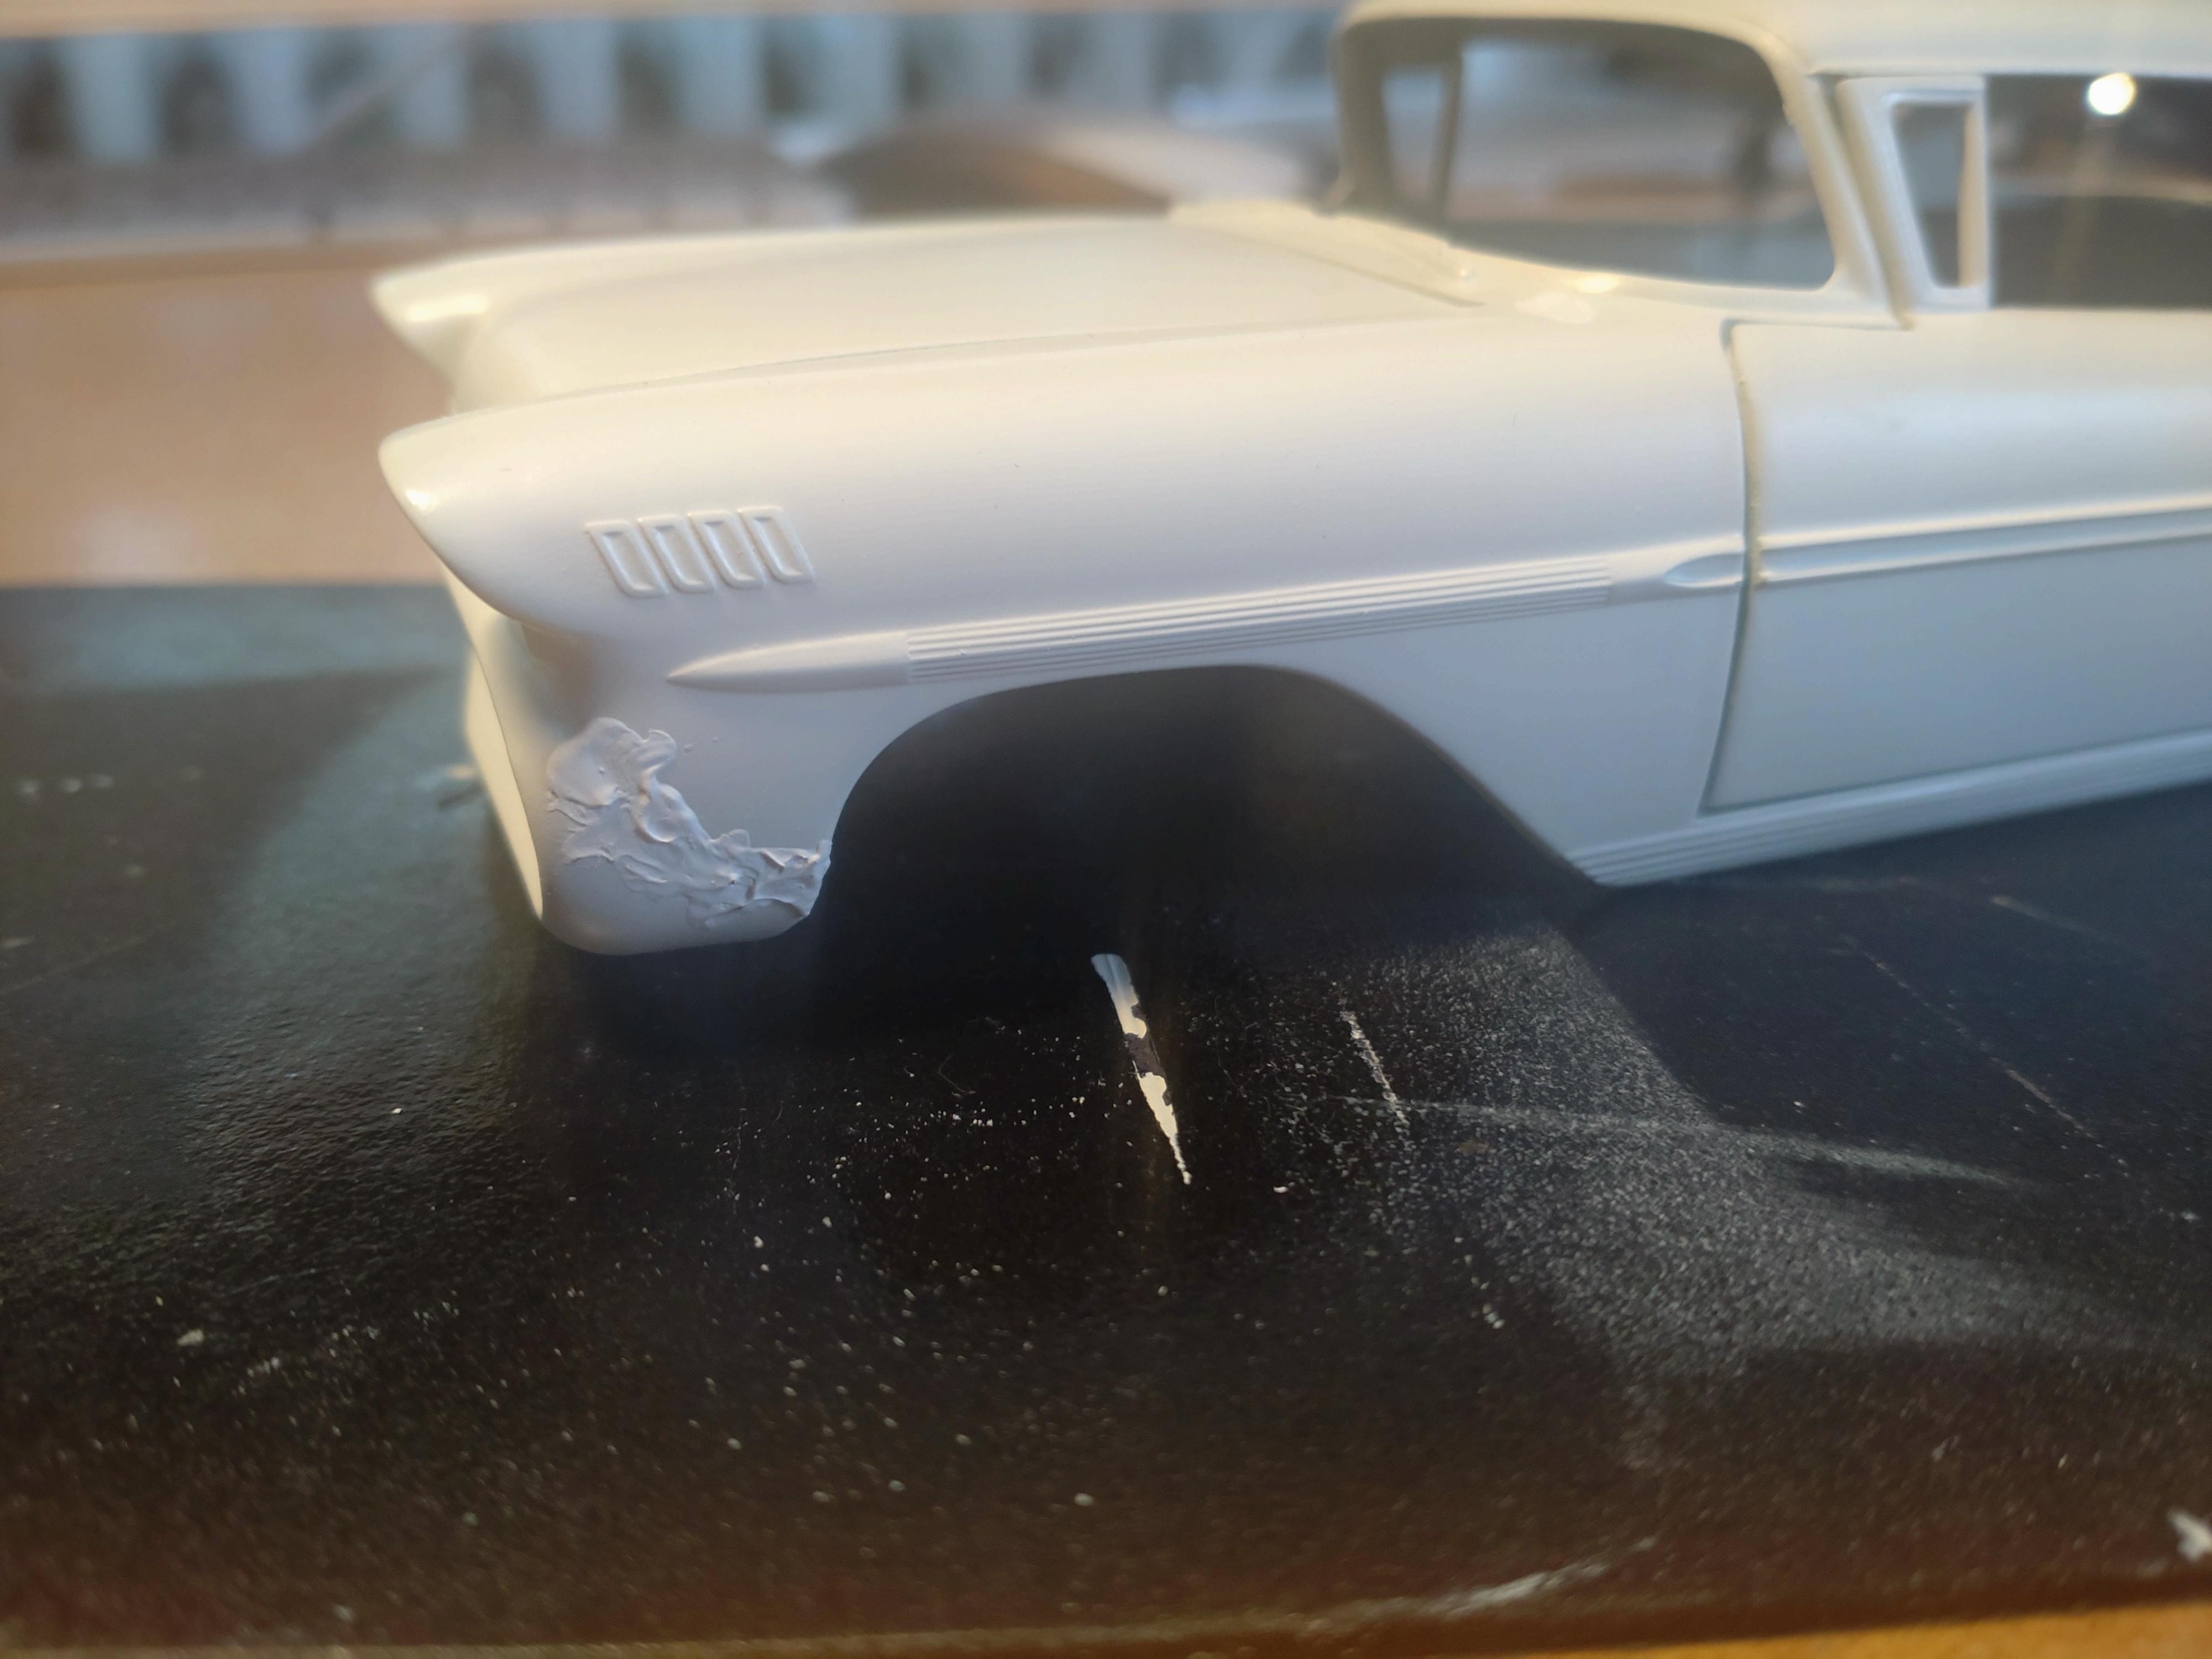
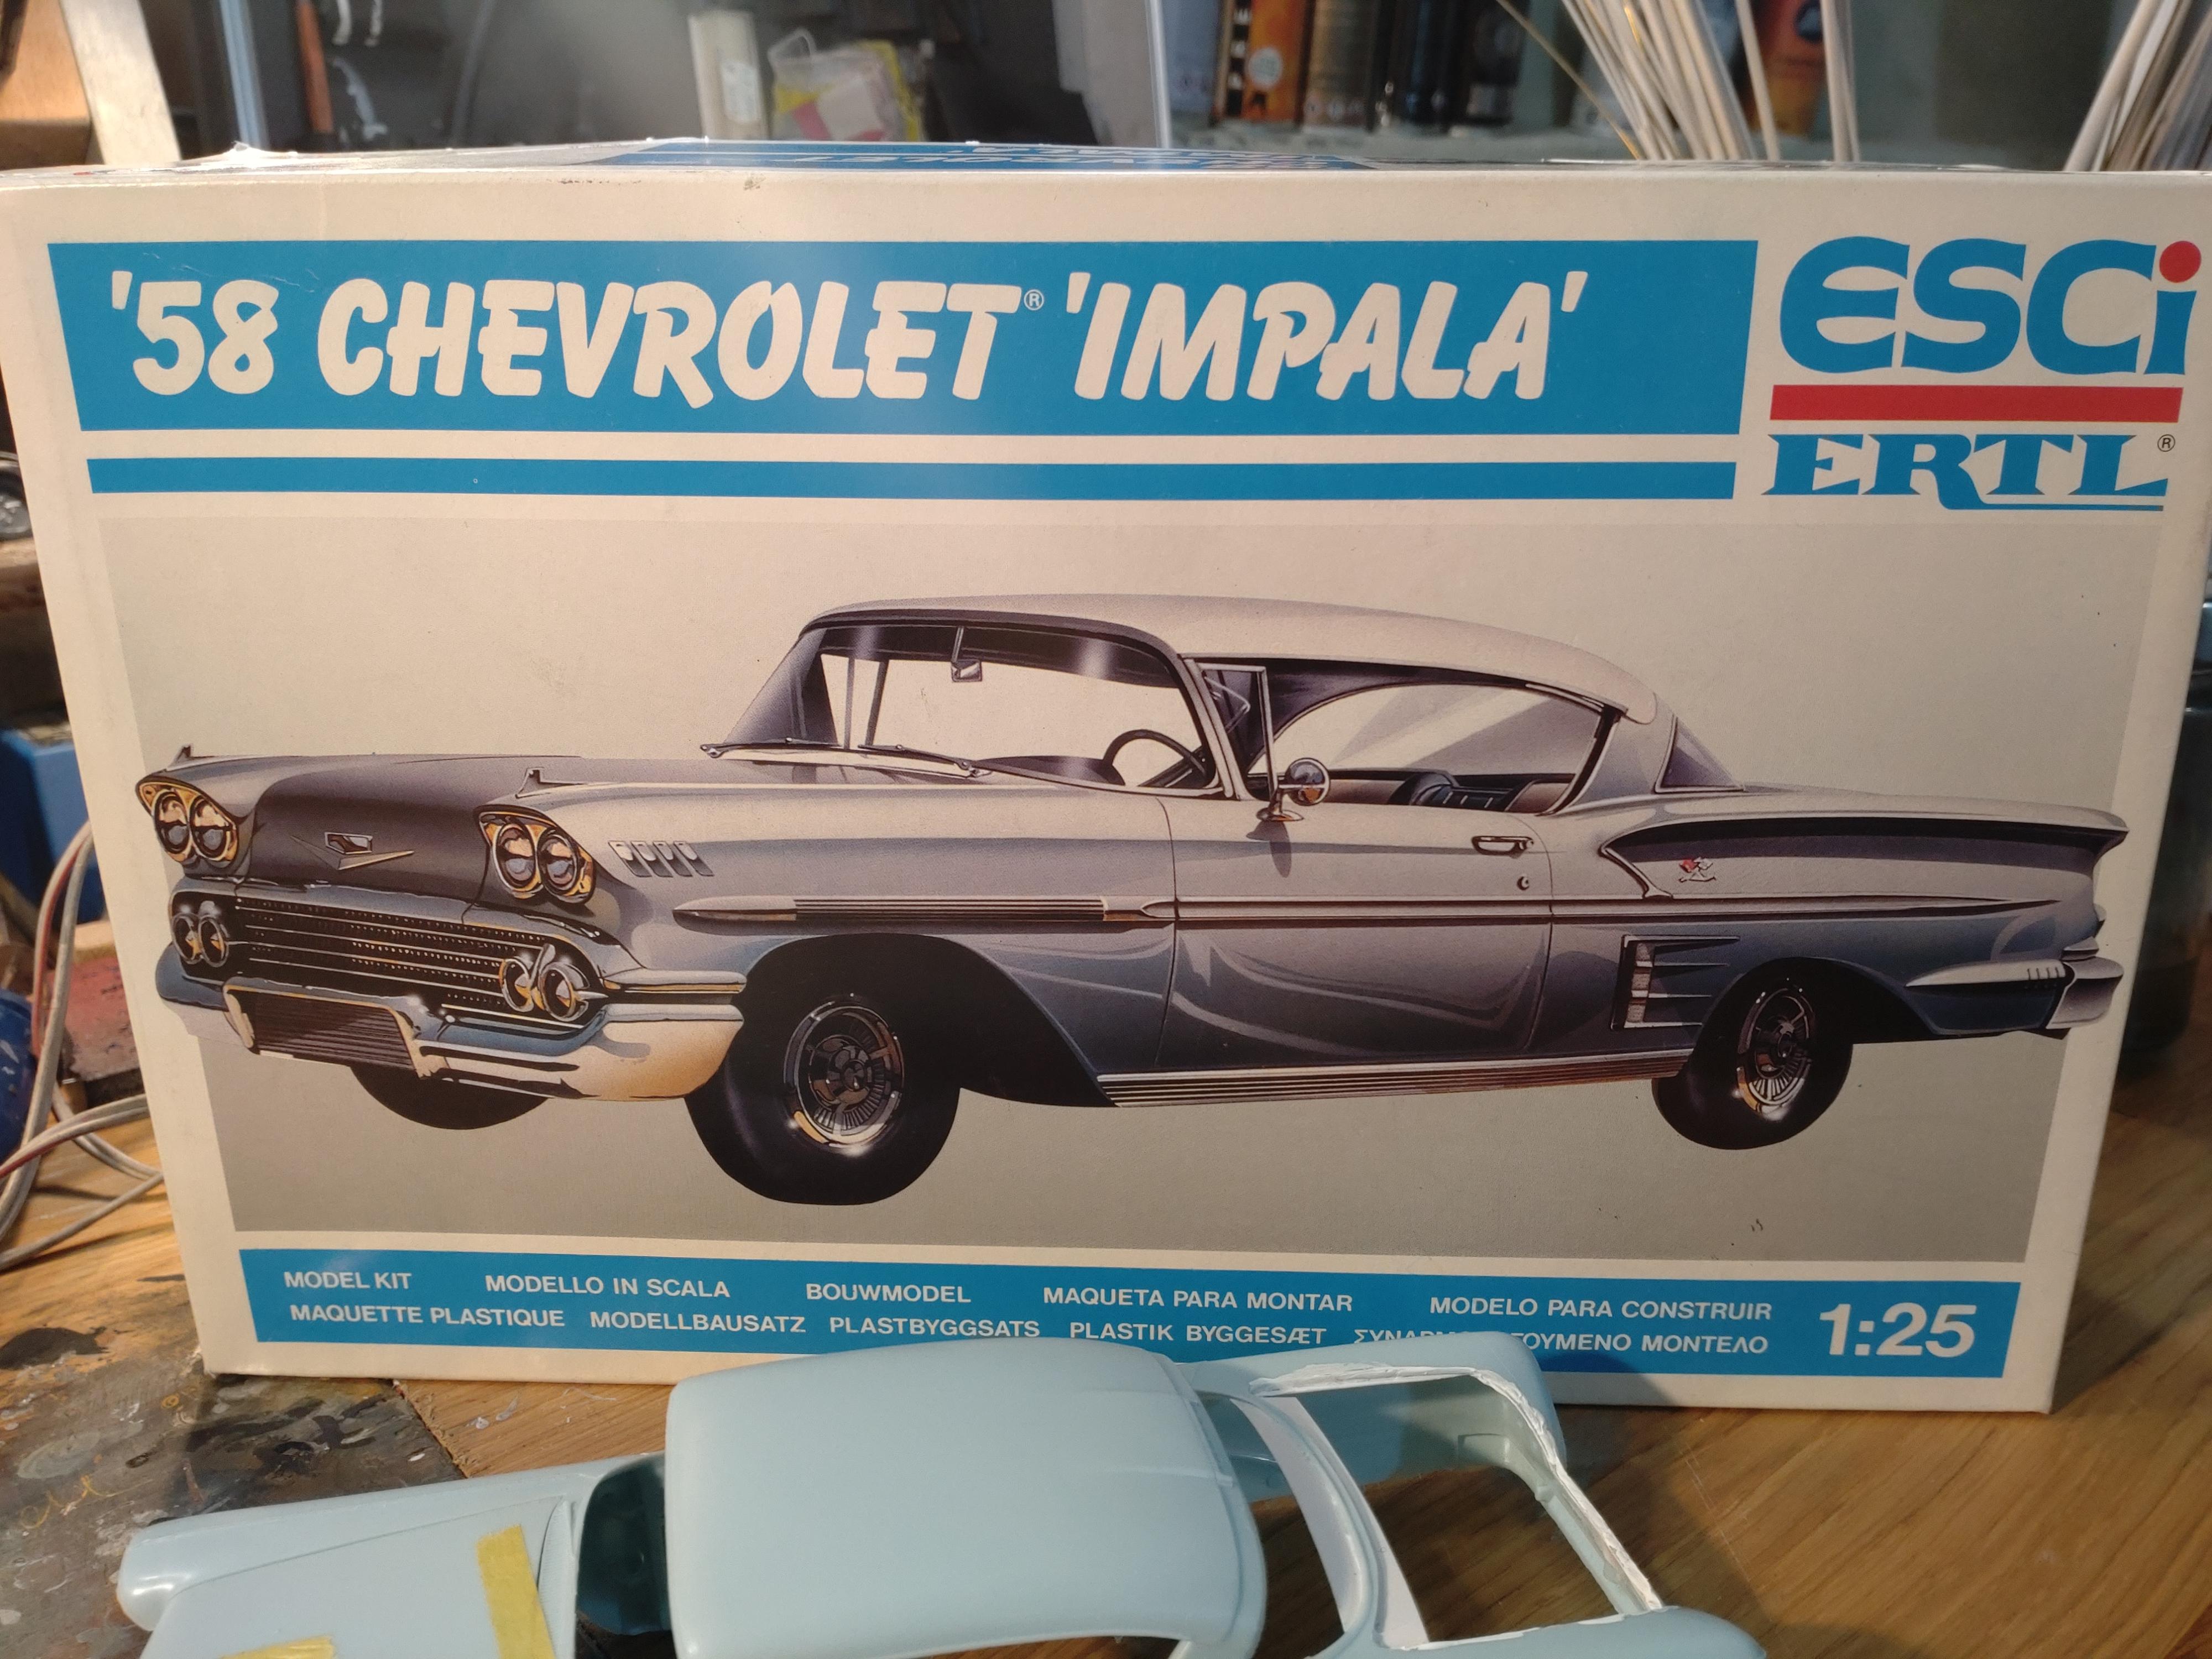
I was actually looking for the ´59 Impala but instead stumbled over the "original" Impala from ´58. (If anyone could give me a hint for the ´59 I would deeply appreciate it!) This kit was totally unfamiliar to me and it really looks old, though I bought it just recently from a model car vendor. The quality is very good and there are lots of nice details (somehow a second body sneaked into the box, see what I can do with that one day?). I was in the mood for making opening doors and hinges again and to my relief this kit got em. So I can at least open the trunk and add that. Also, the hood needed hinges. Cutting out the trunk lid was a bit of work because the body is quite thick and heavy. I make it a habit to add another layer of 0.5mm styrene under the lips. The paint layers do add up later and I want the lids to close tight and snug. Then I cut the extra layer clean and have sharp edges to apply the putty. The trunk lid did turn out a bit messy after cutting. For a clean edge I applied a thin styrene layer to the edges before I fill the cracks with putty. After the first sanding the fit is quite good. Now its time for the lips. First the raw stage: And now after cutting and sanding to shape: Although this will be more a stock build, it will include some fancy things like fender skirts and the custom front. Some putty work is also necessary for the front fenders because the body has some serious dents around the headlights. To avoid the gap at the vent window I attached small strips of styrene. The hinges are attached to the bonnet and the trunk lid. 0.75 mm brass wire in styrene tubes. Next step will be the first primer coat and then see whats left to do to the body before painting. Color will must probably be the very common eggshell white.
-
Hello Randy, a classic muscle pony, beautiful job on the engine bay! ?
-
Hi Keith, clean build, nice paint job and some fine details. ?
-
You have every reason to be proud of this build! Looking very cool with an aggressive stance and fine details. Thanks for showing!
-
A cool match of car and trailer, very well executed. Wondering if something like that ever did exist? Whatever, a fine show!
-
Great paint job and overall look perfect?
-
Hi Guys, thanks for your kind response! Means a lot to me.
-
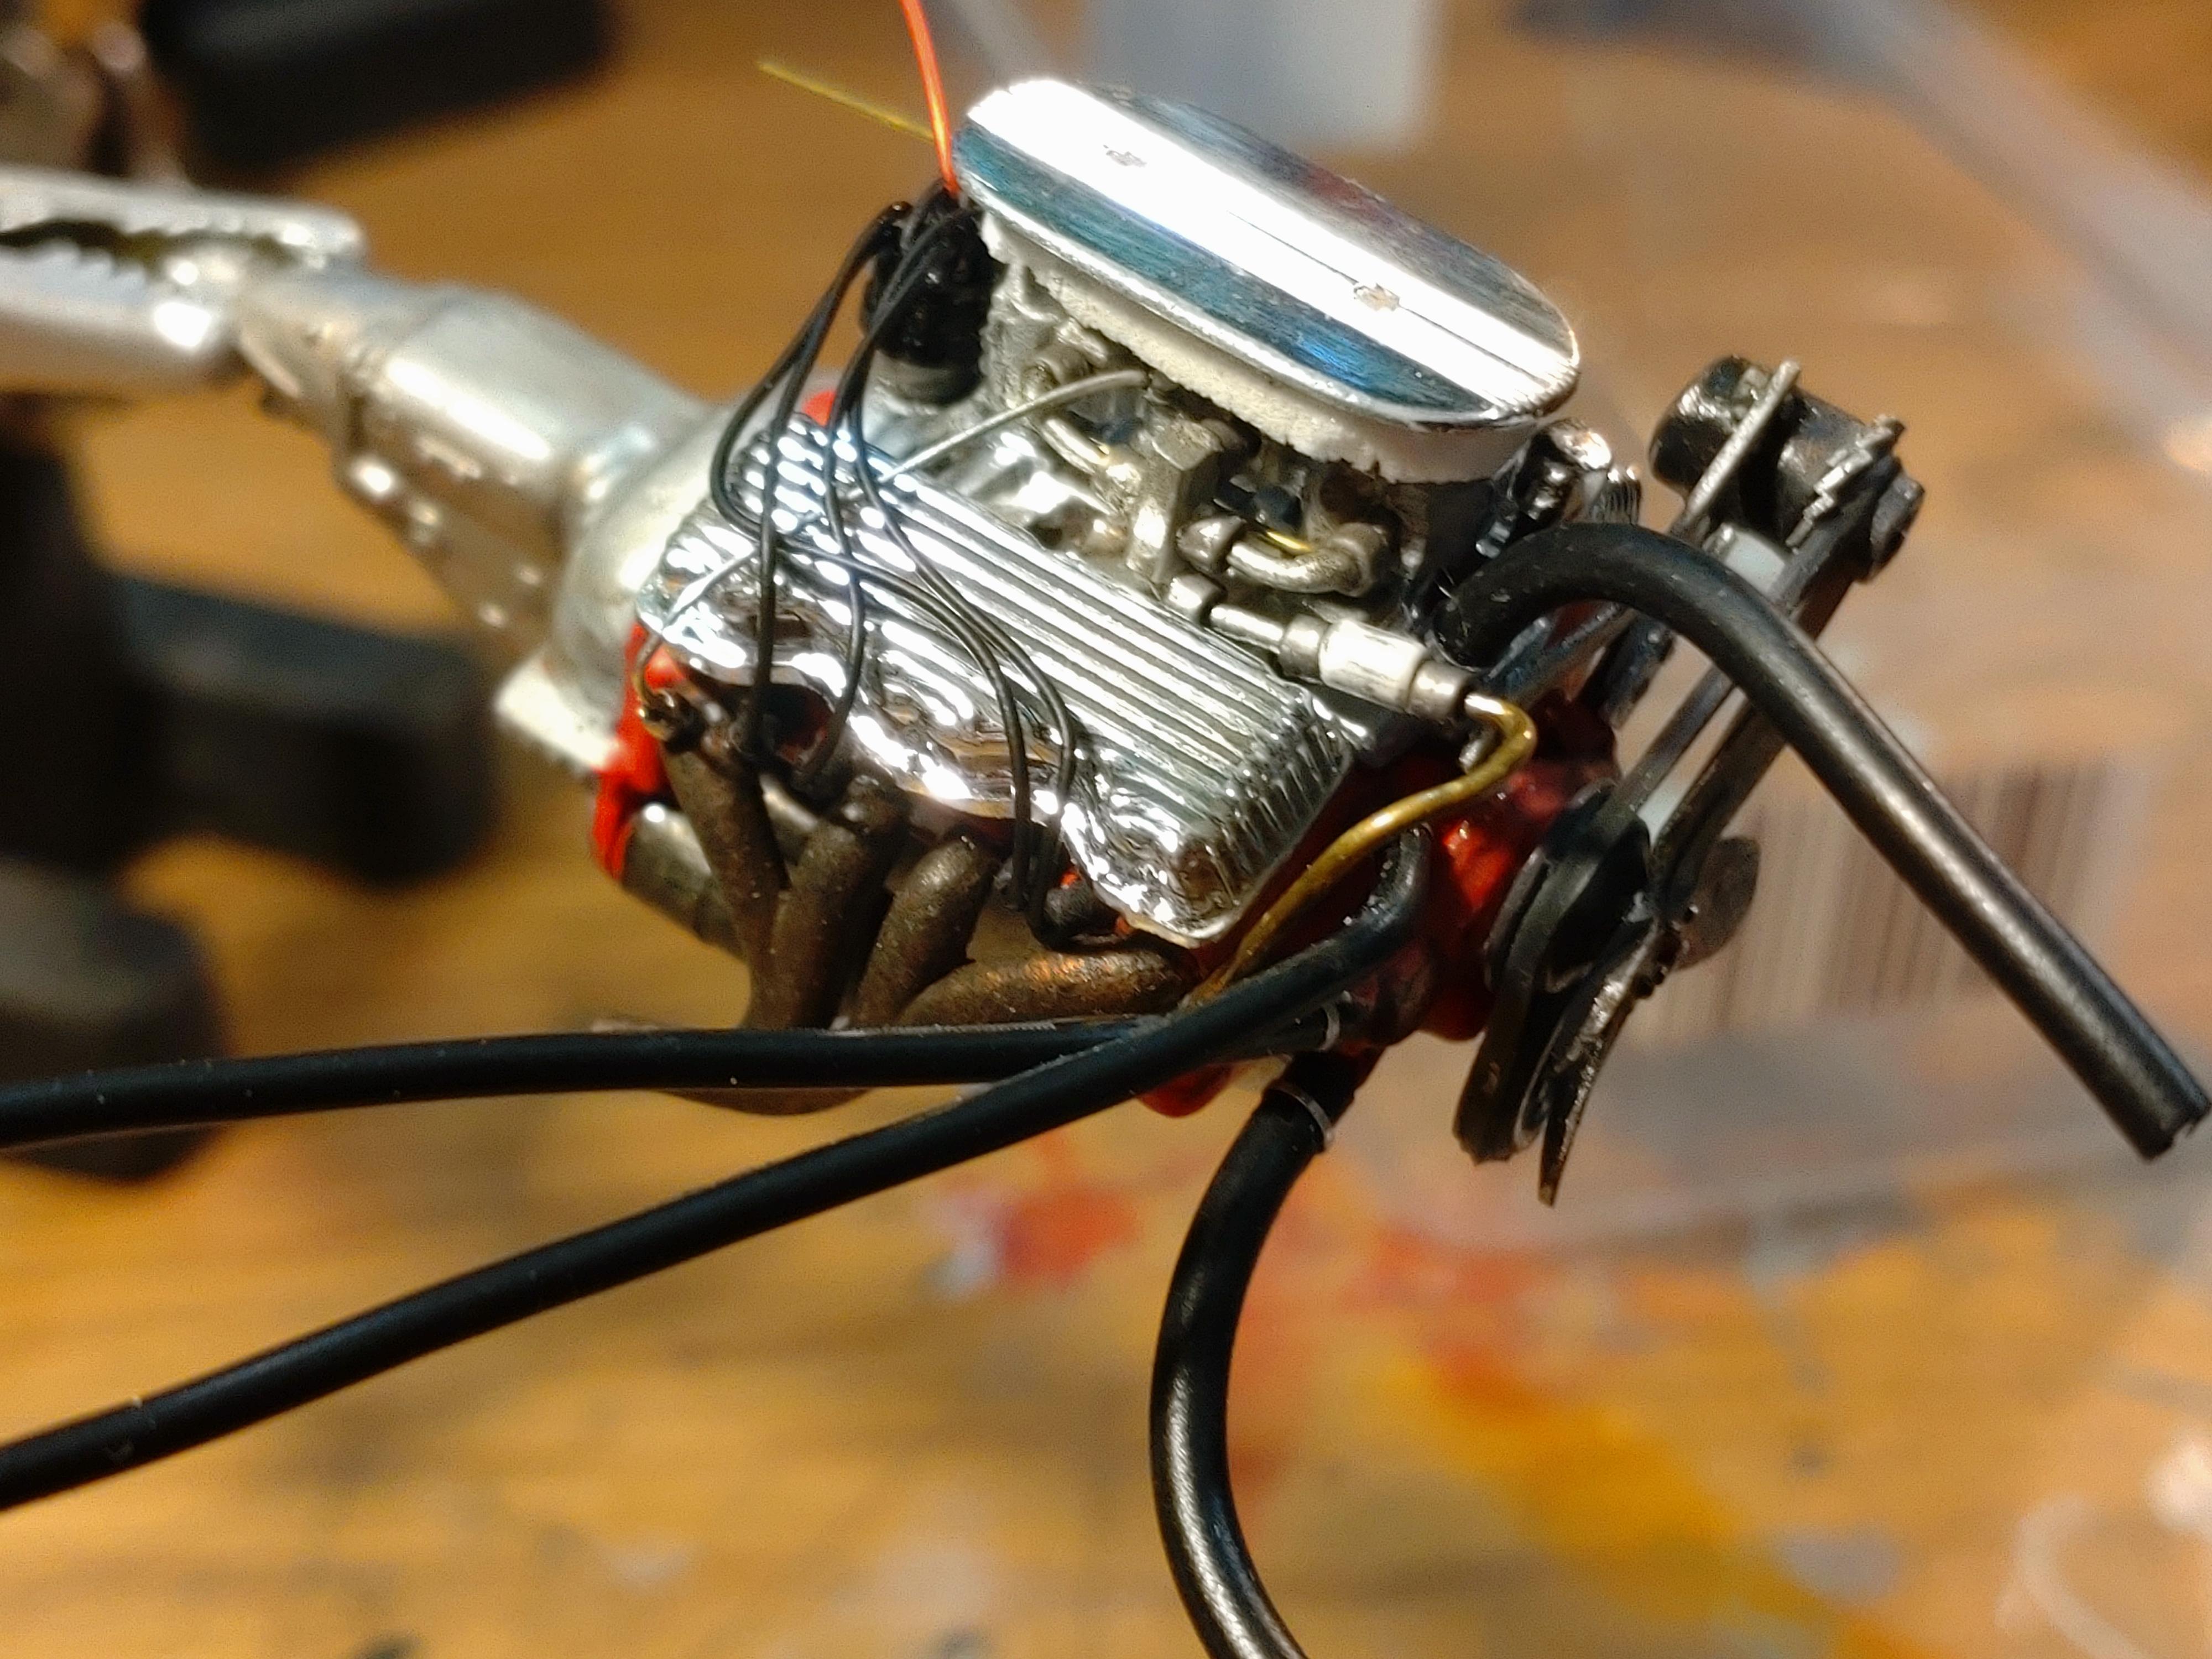
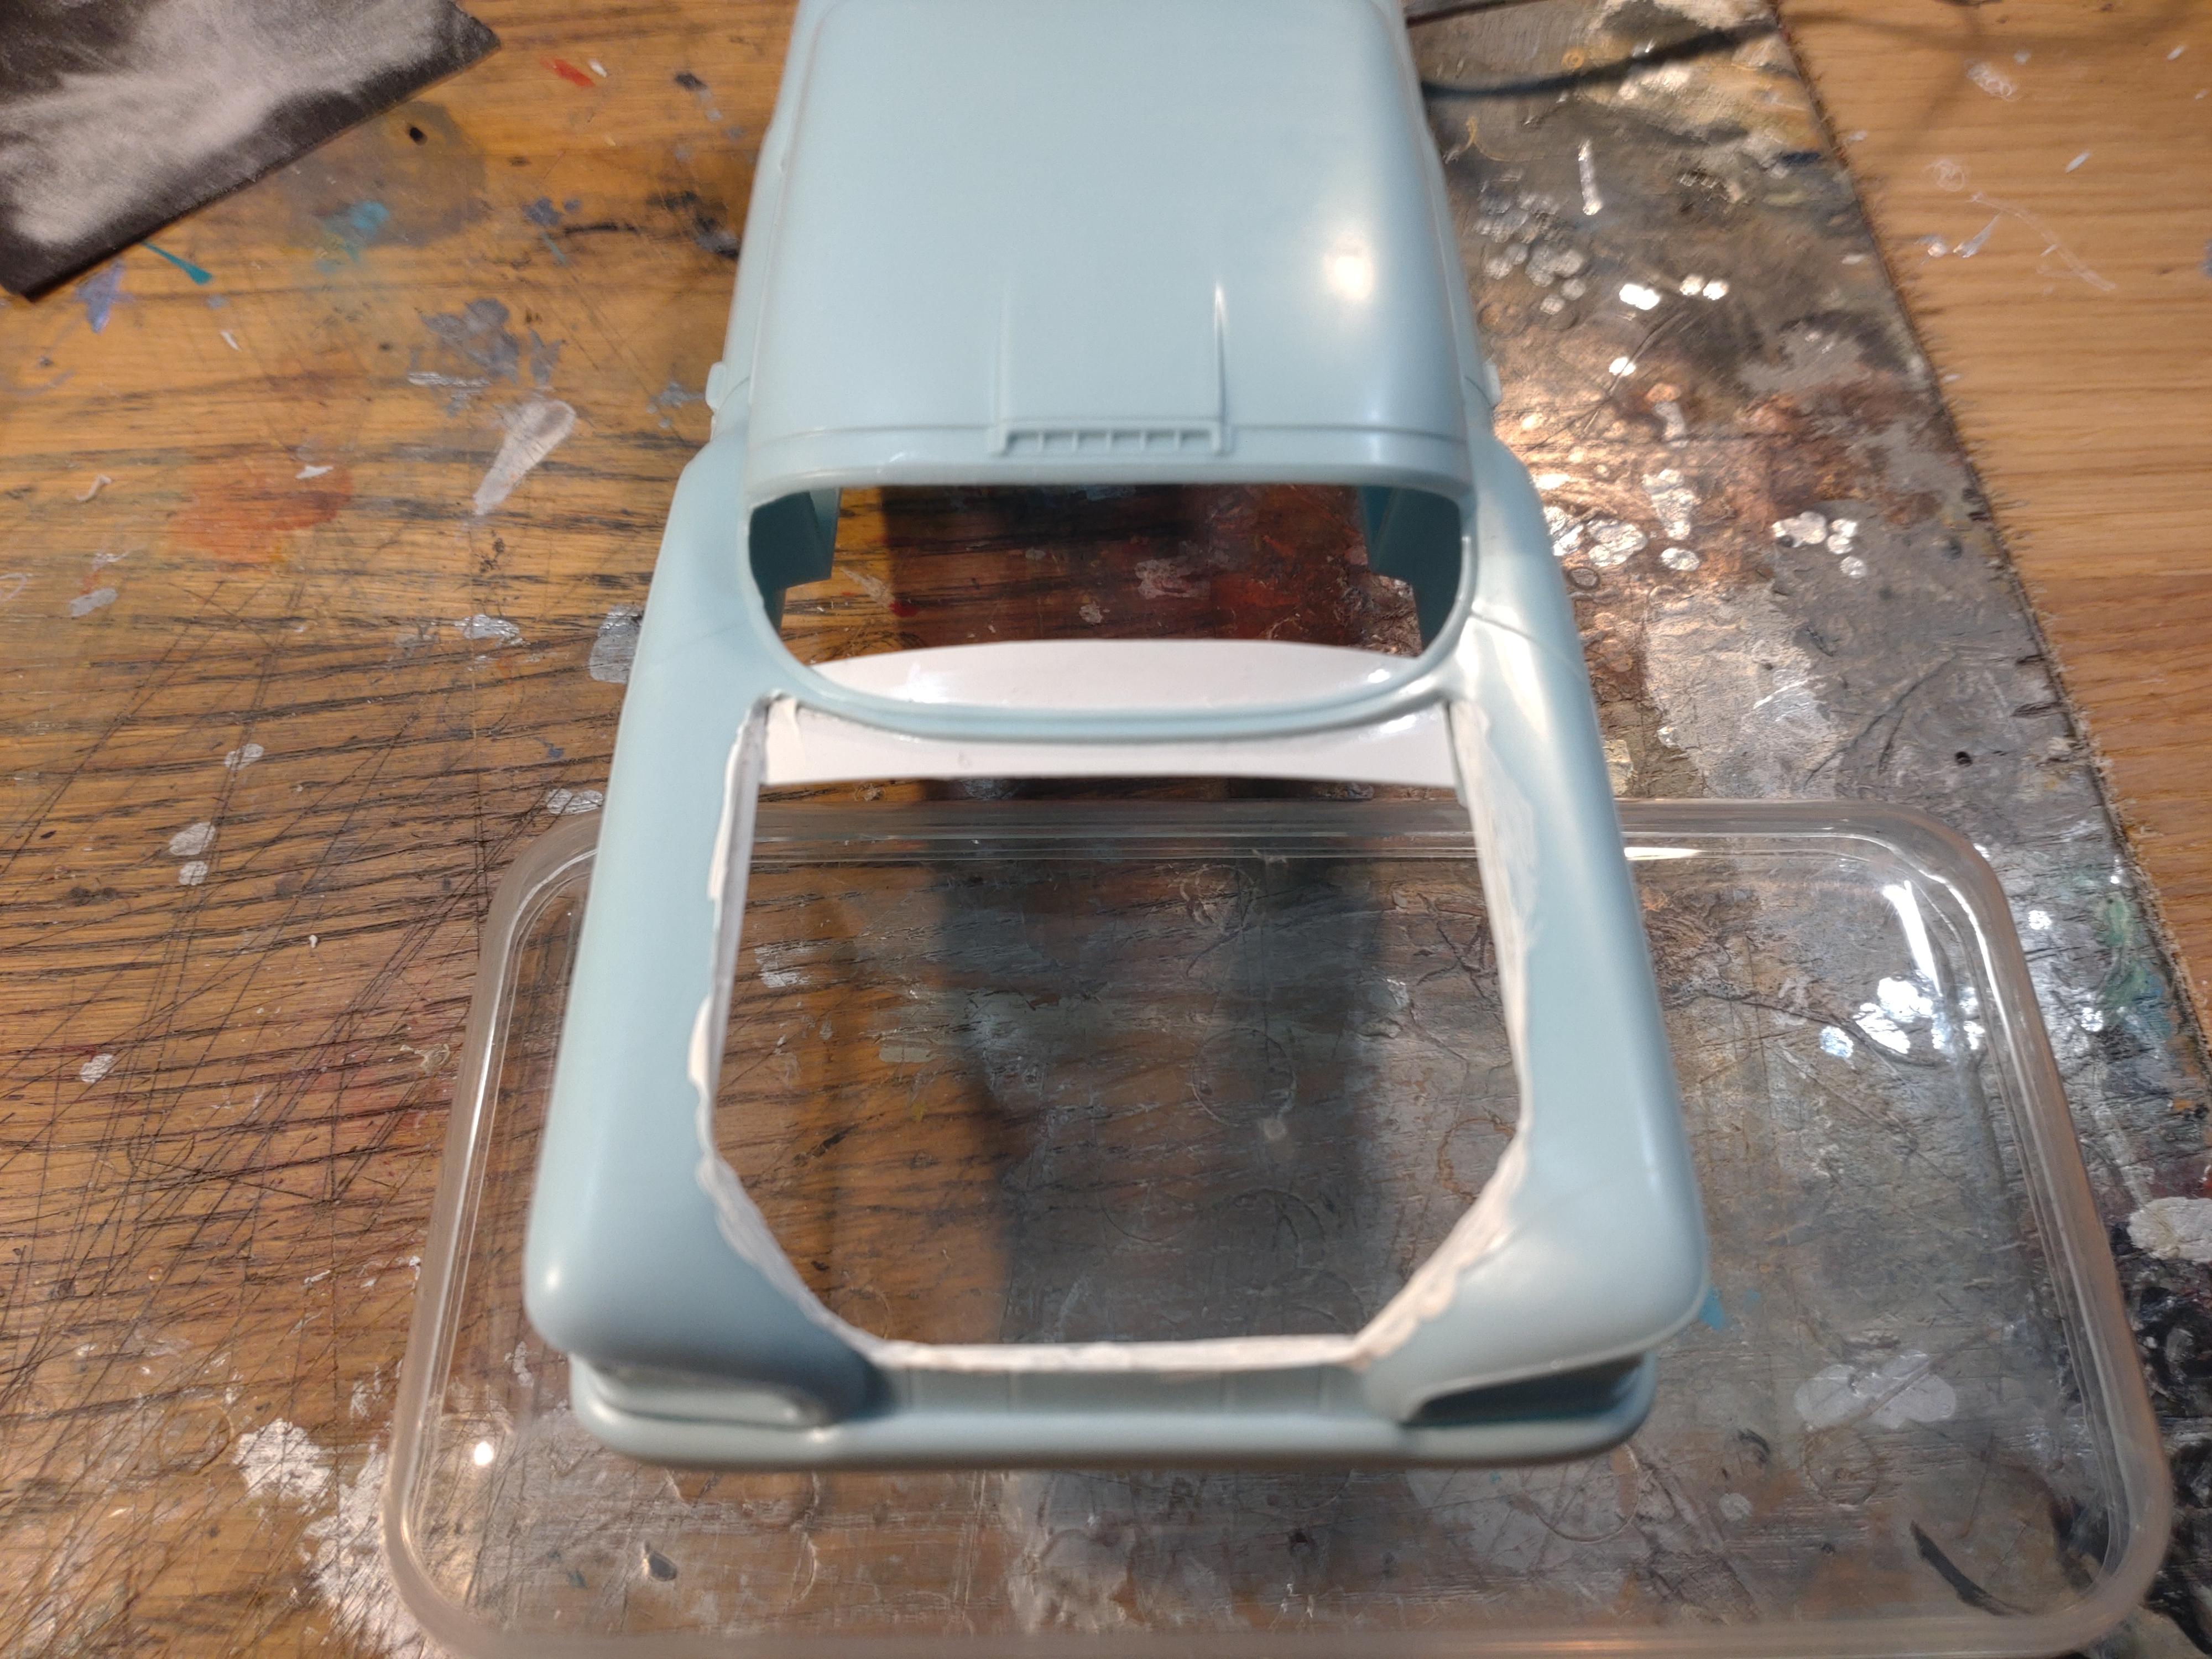
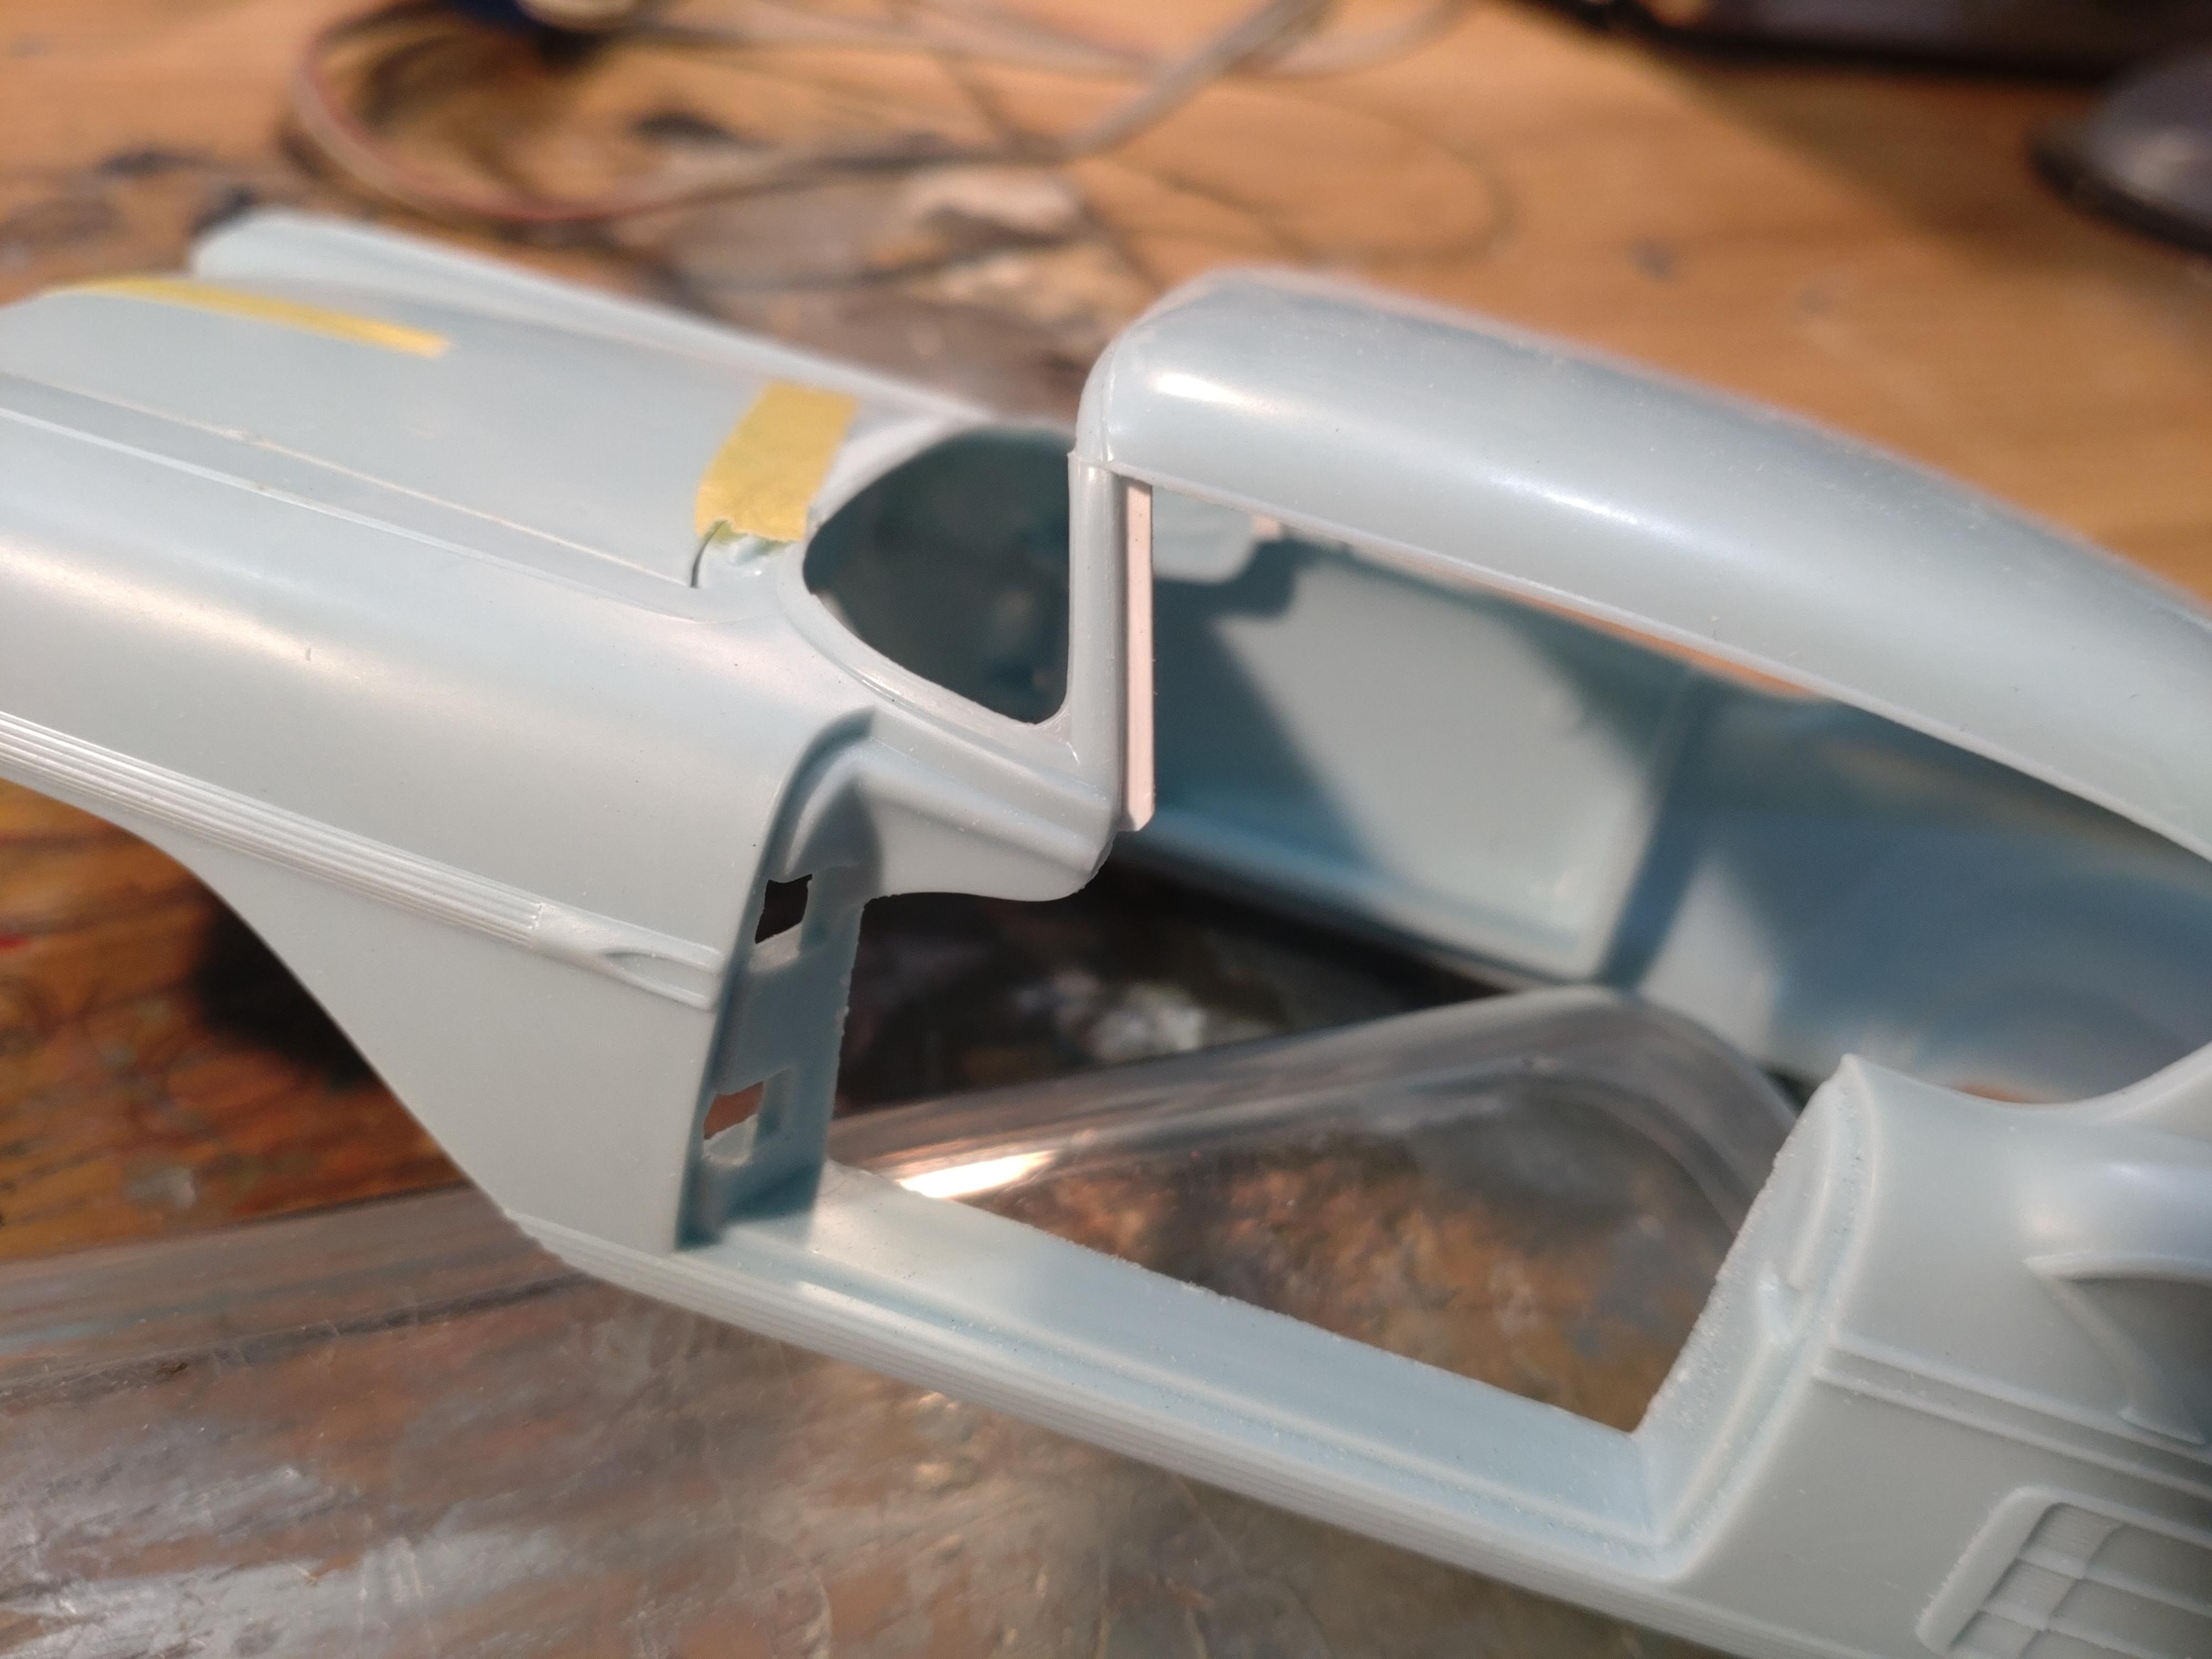
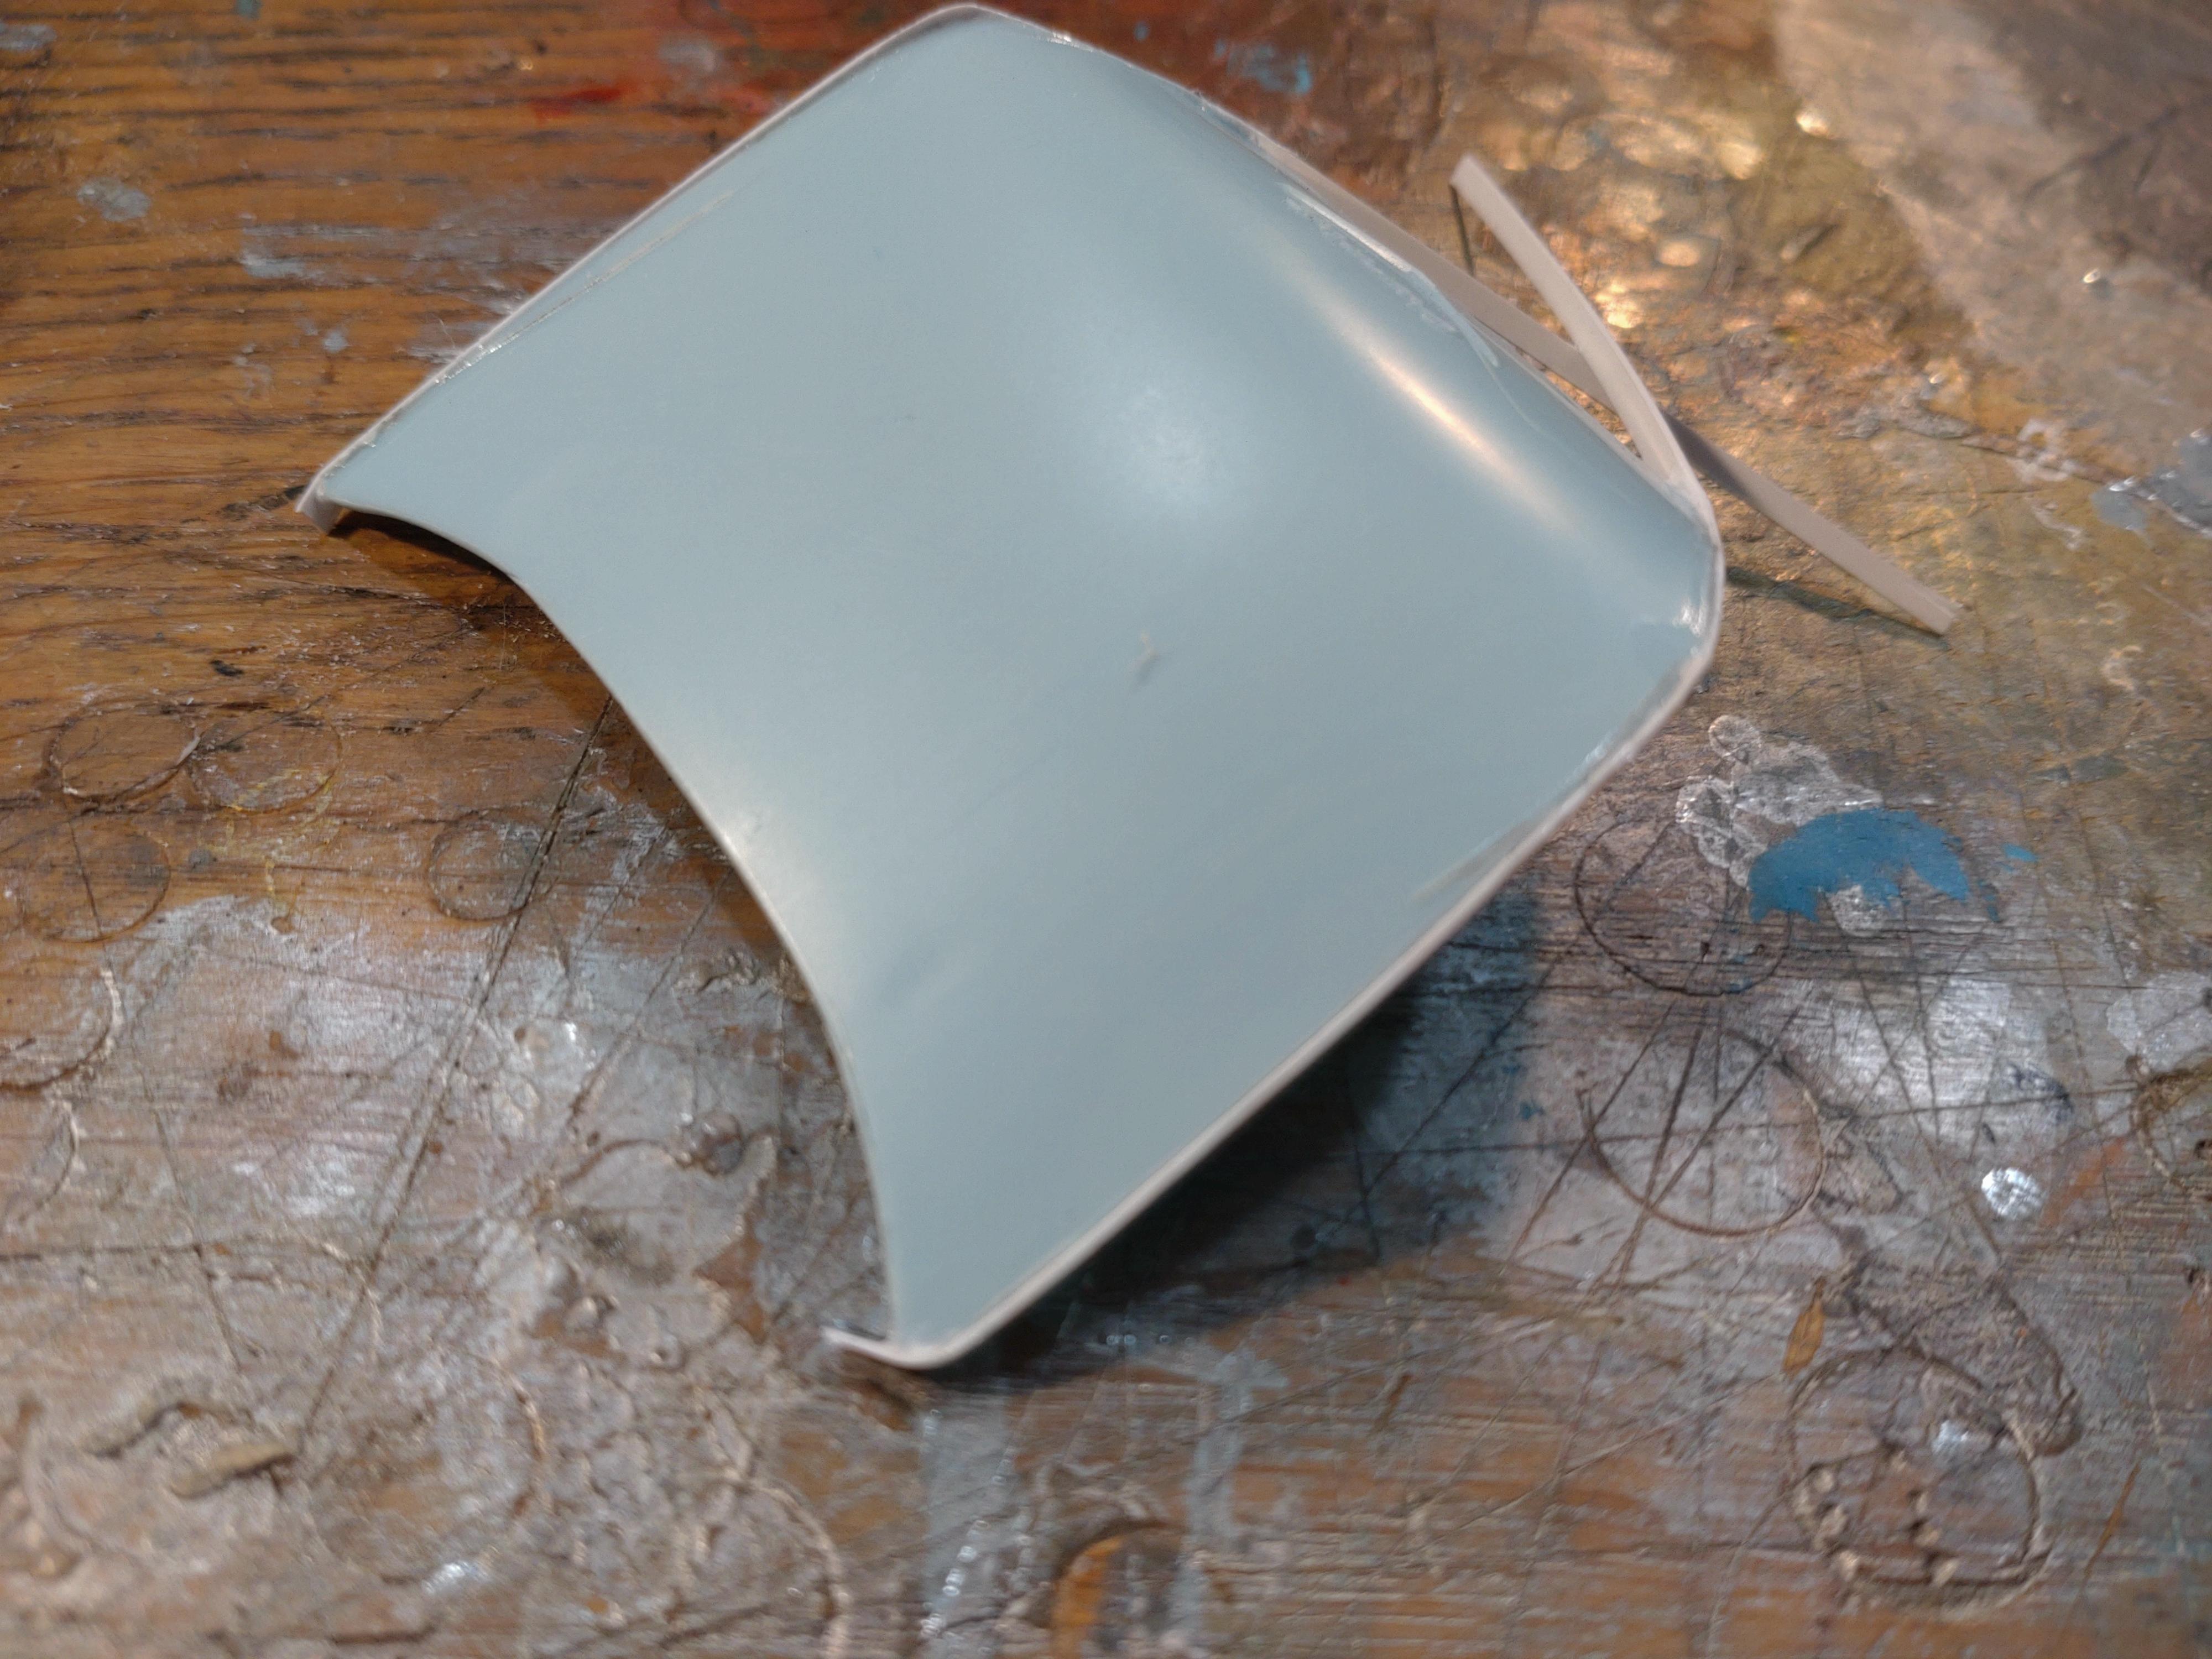
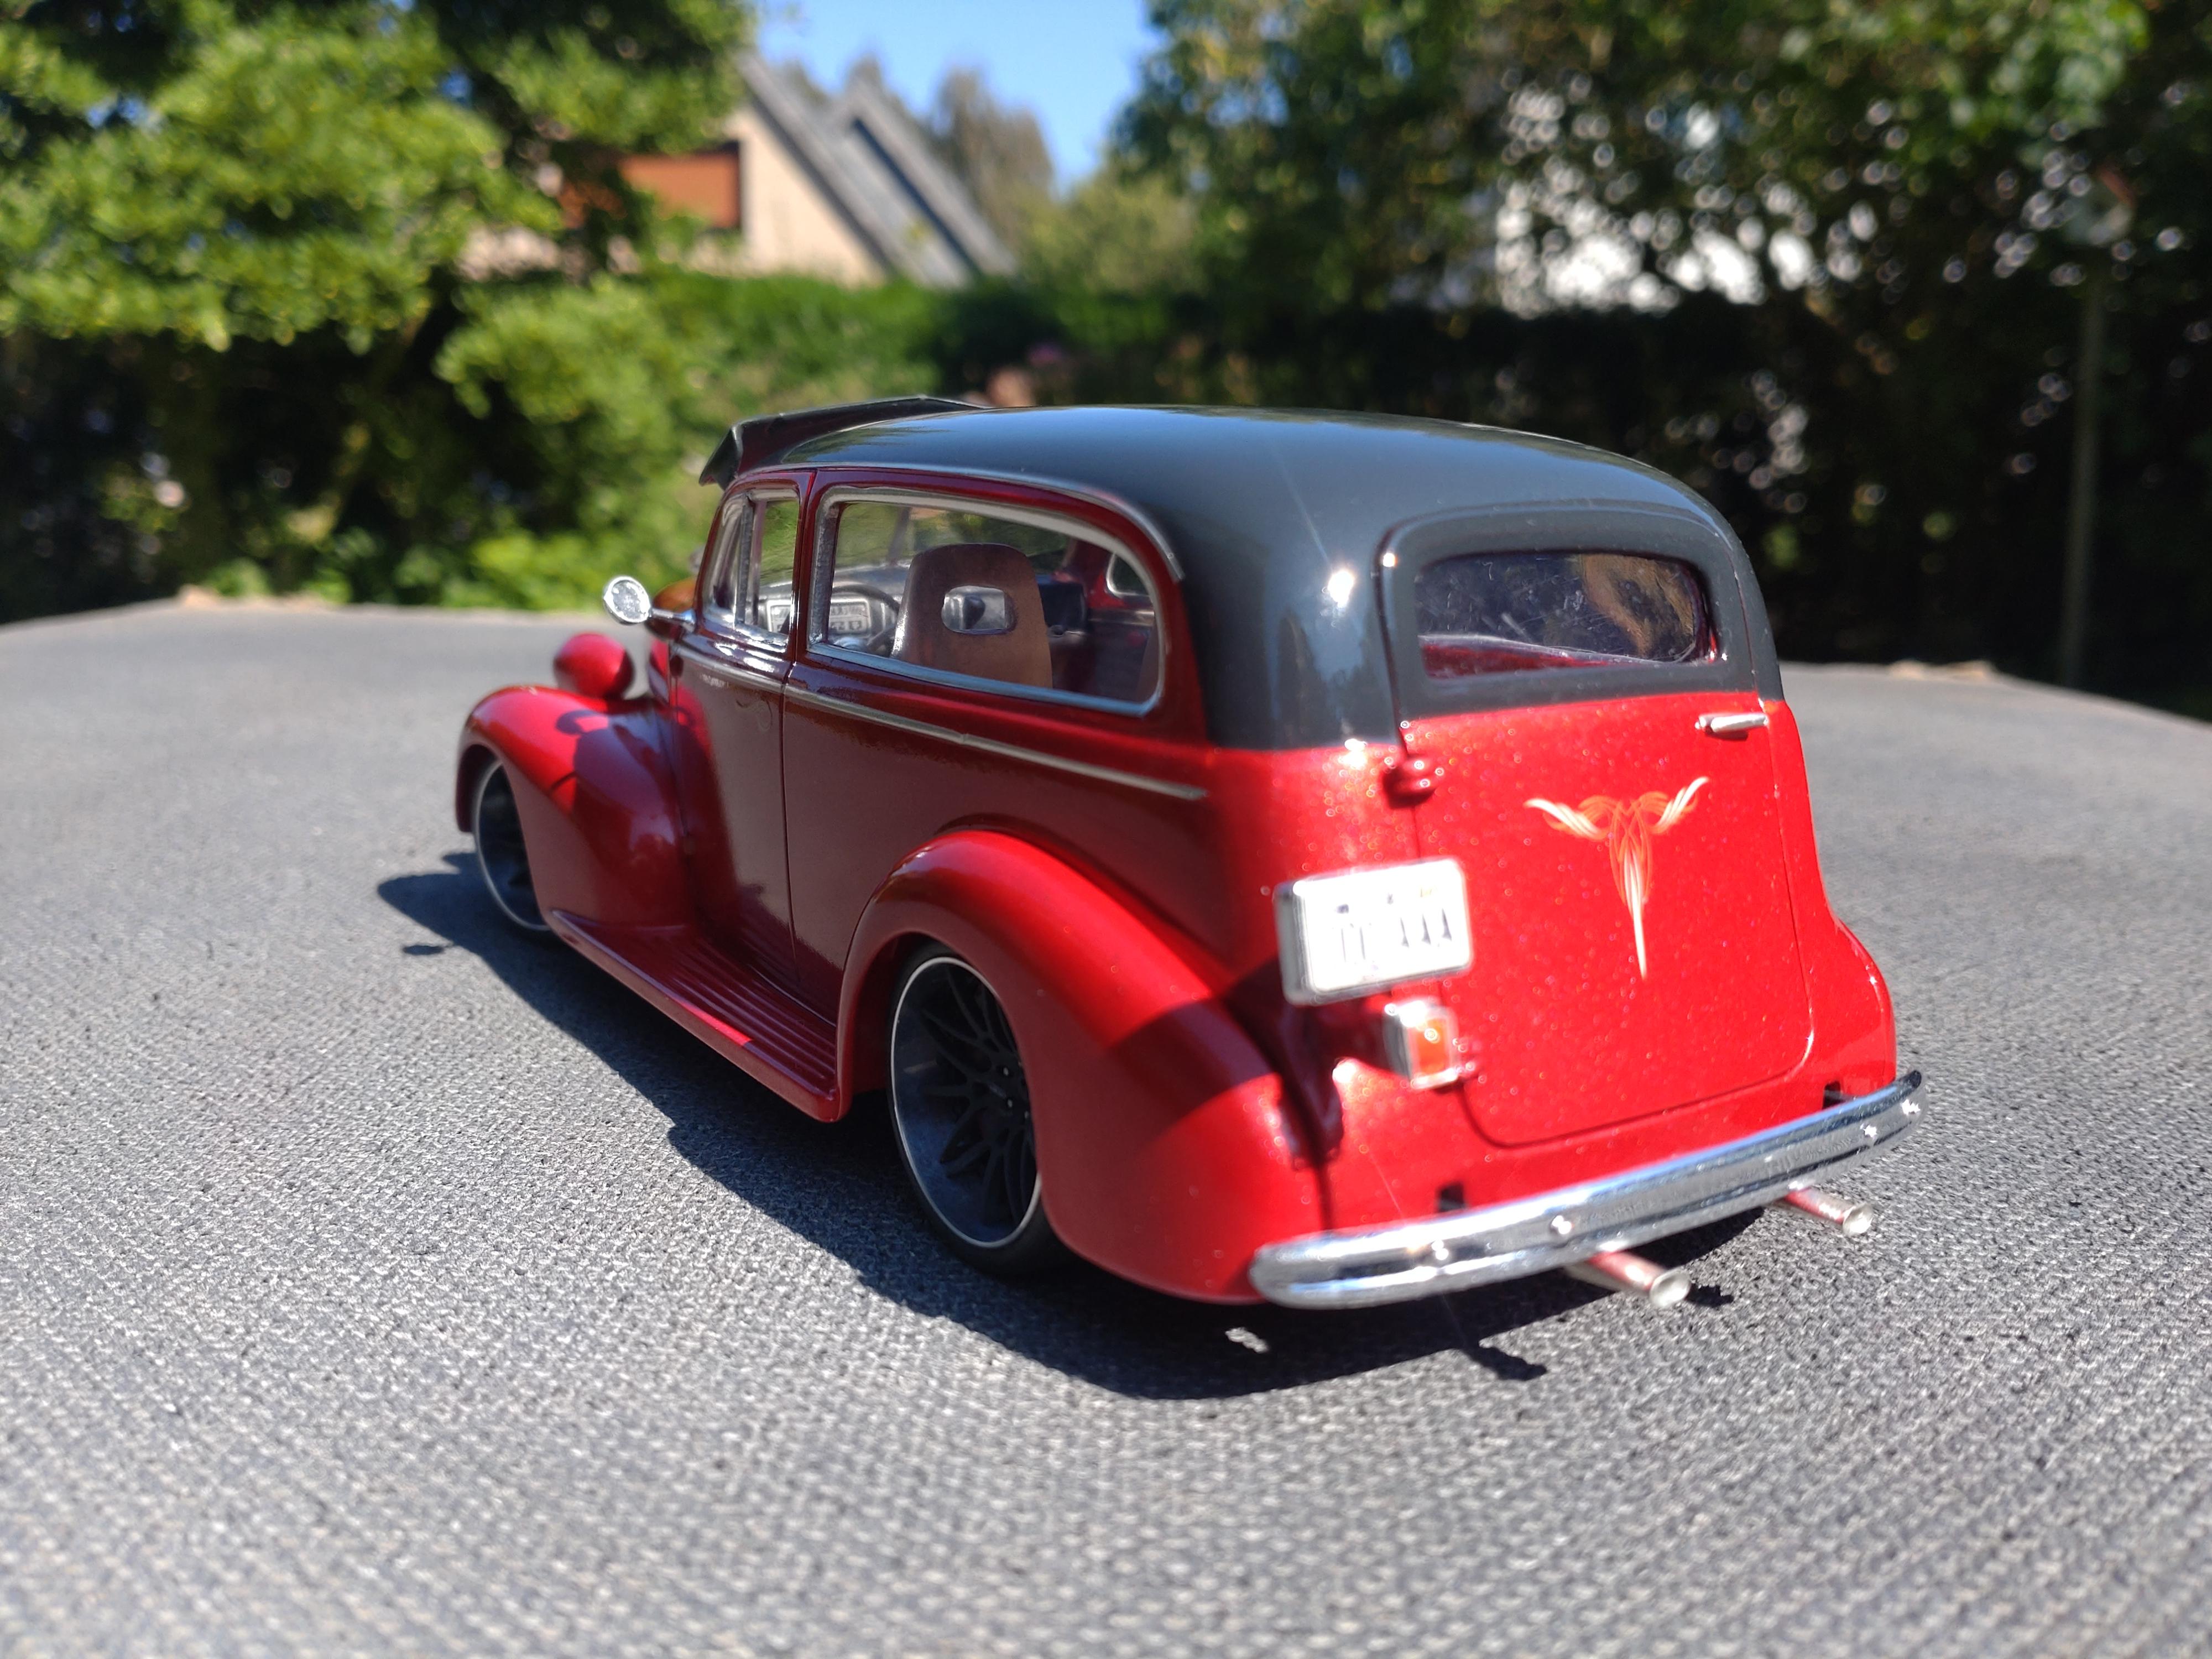
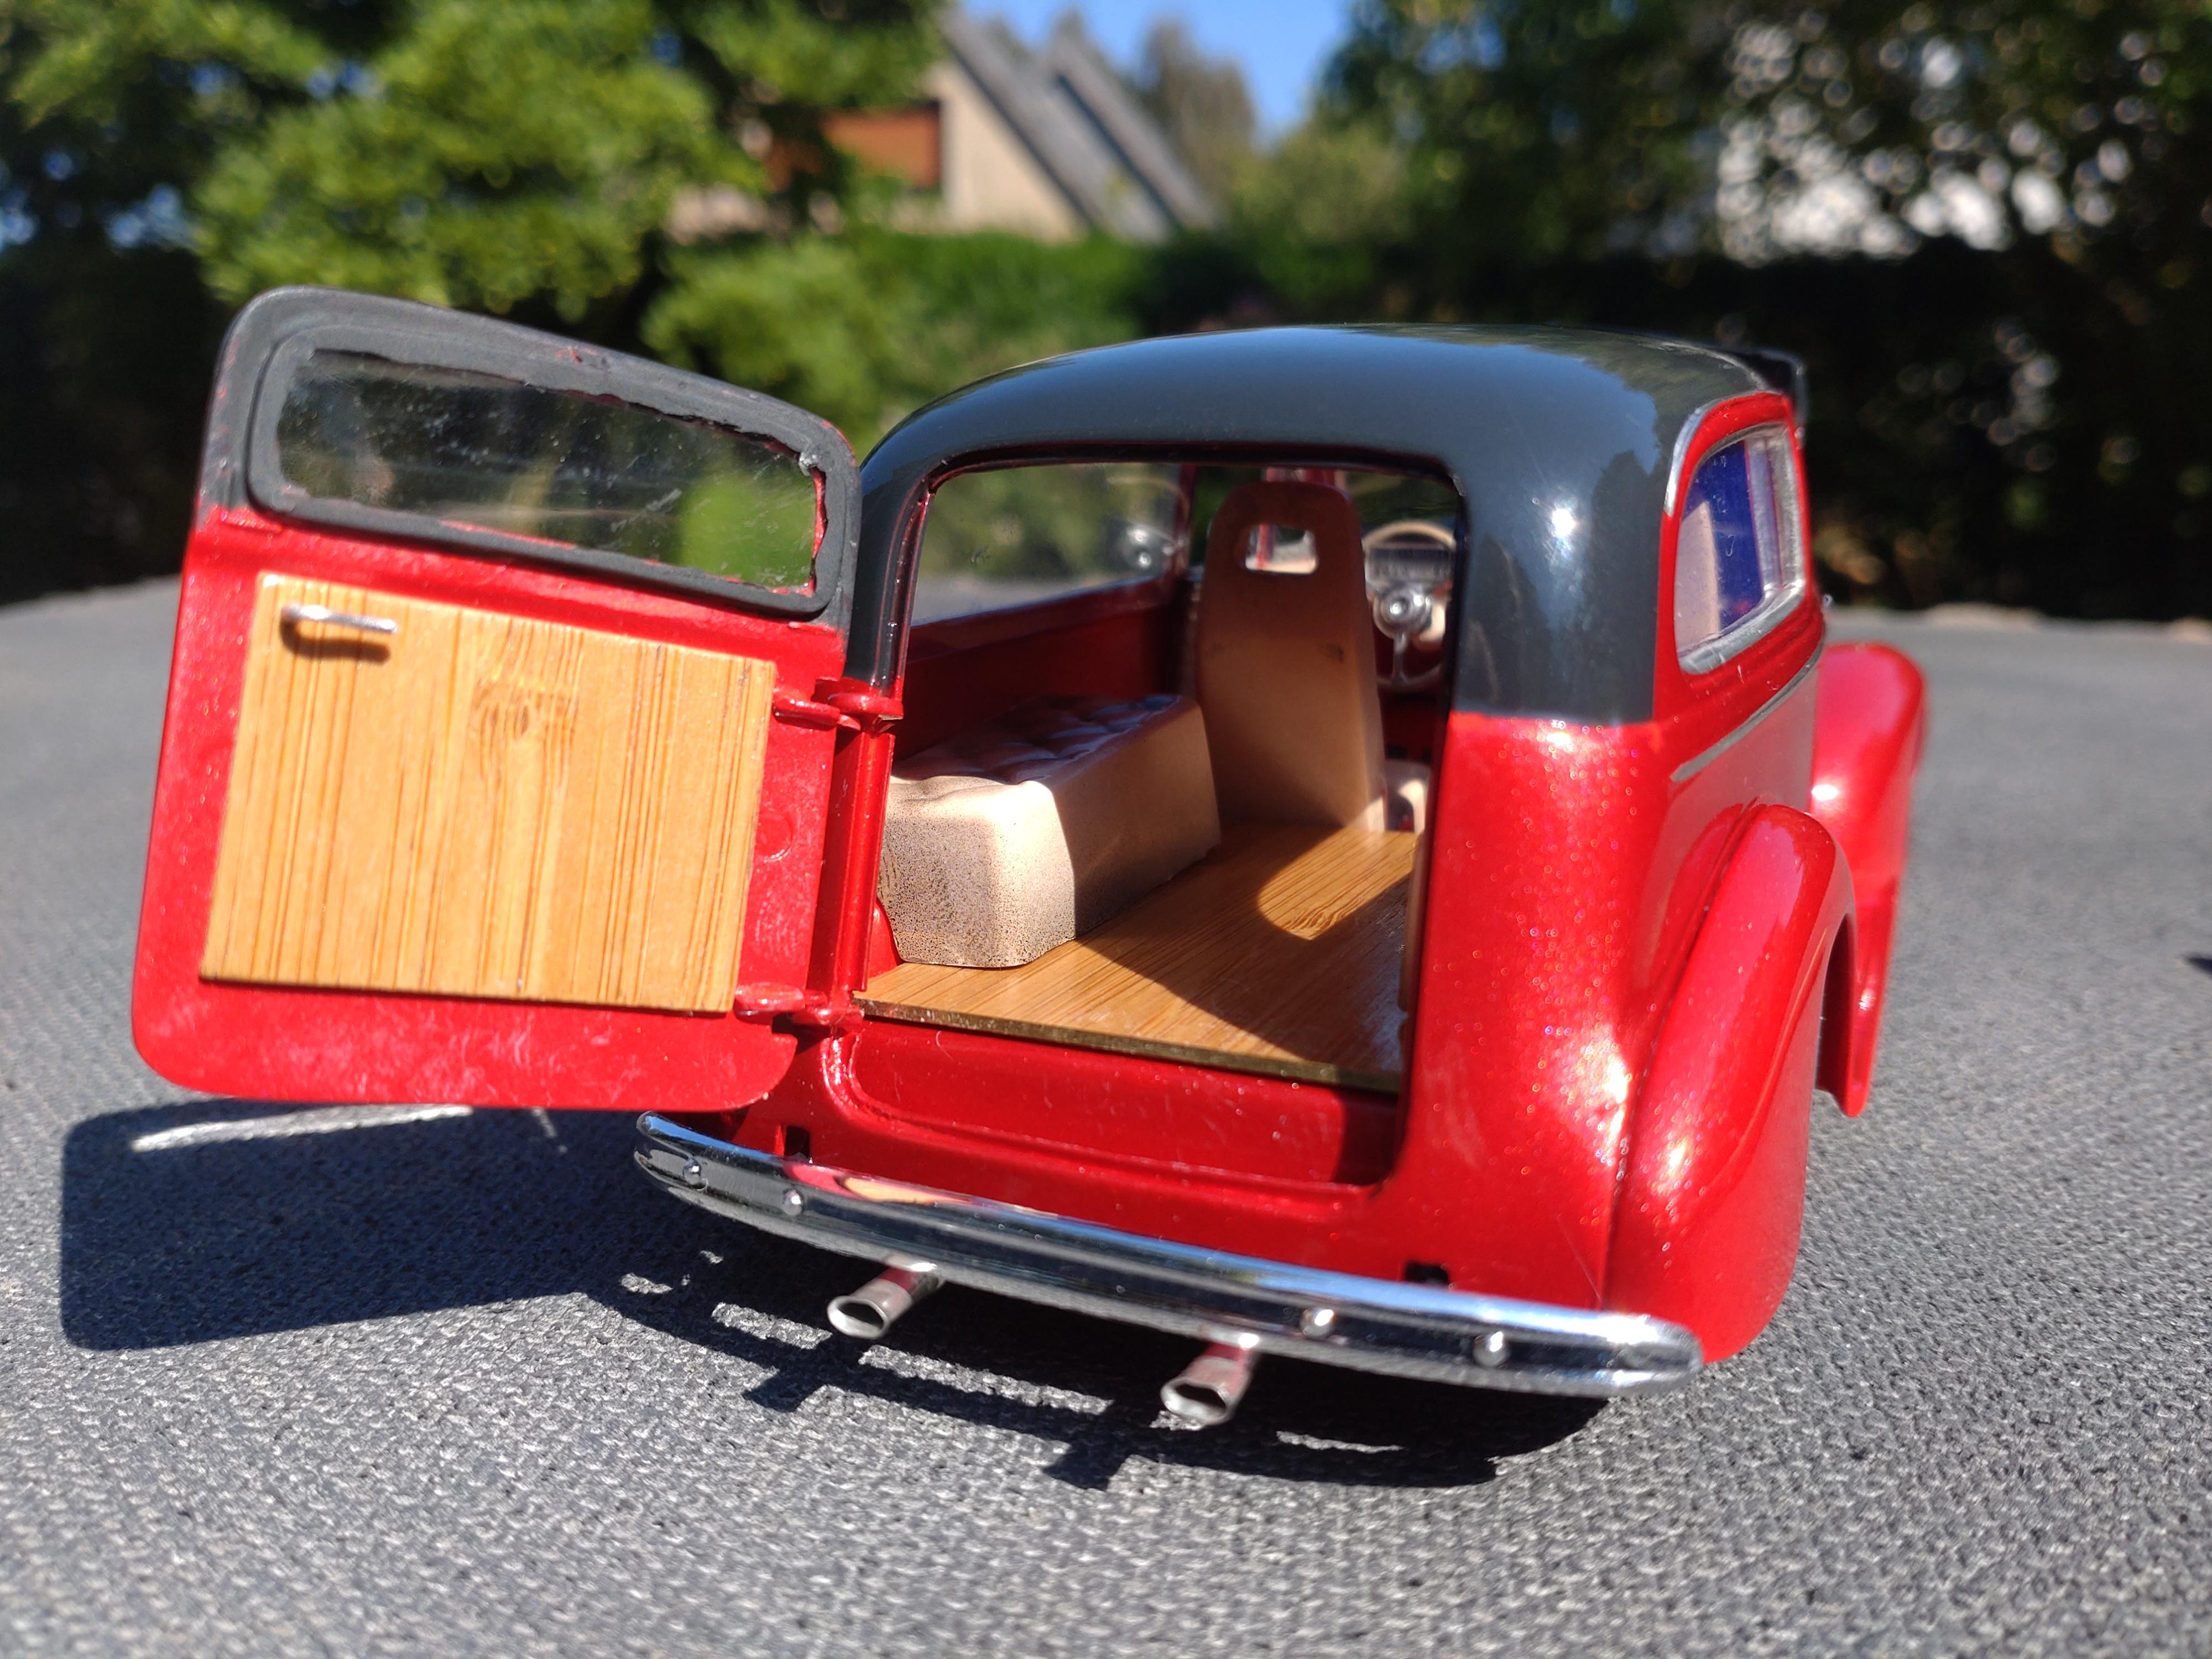
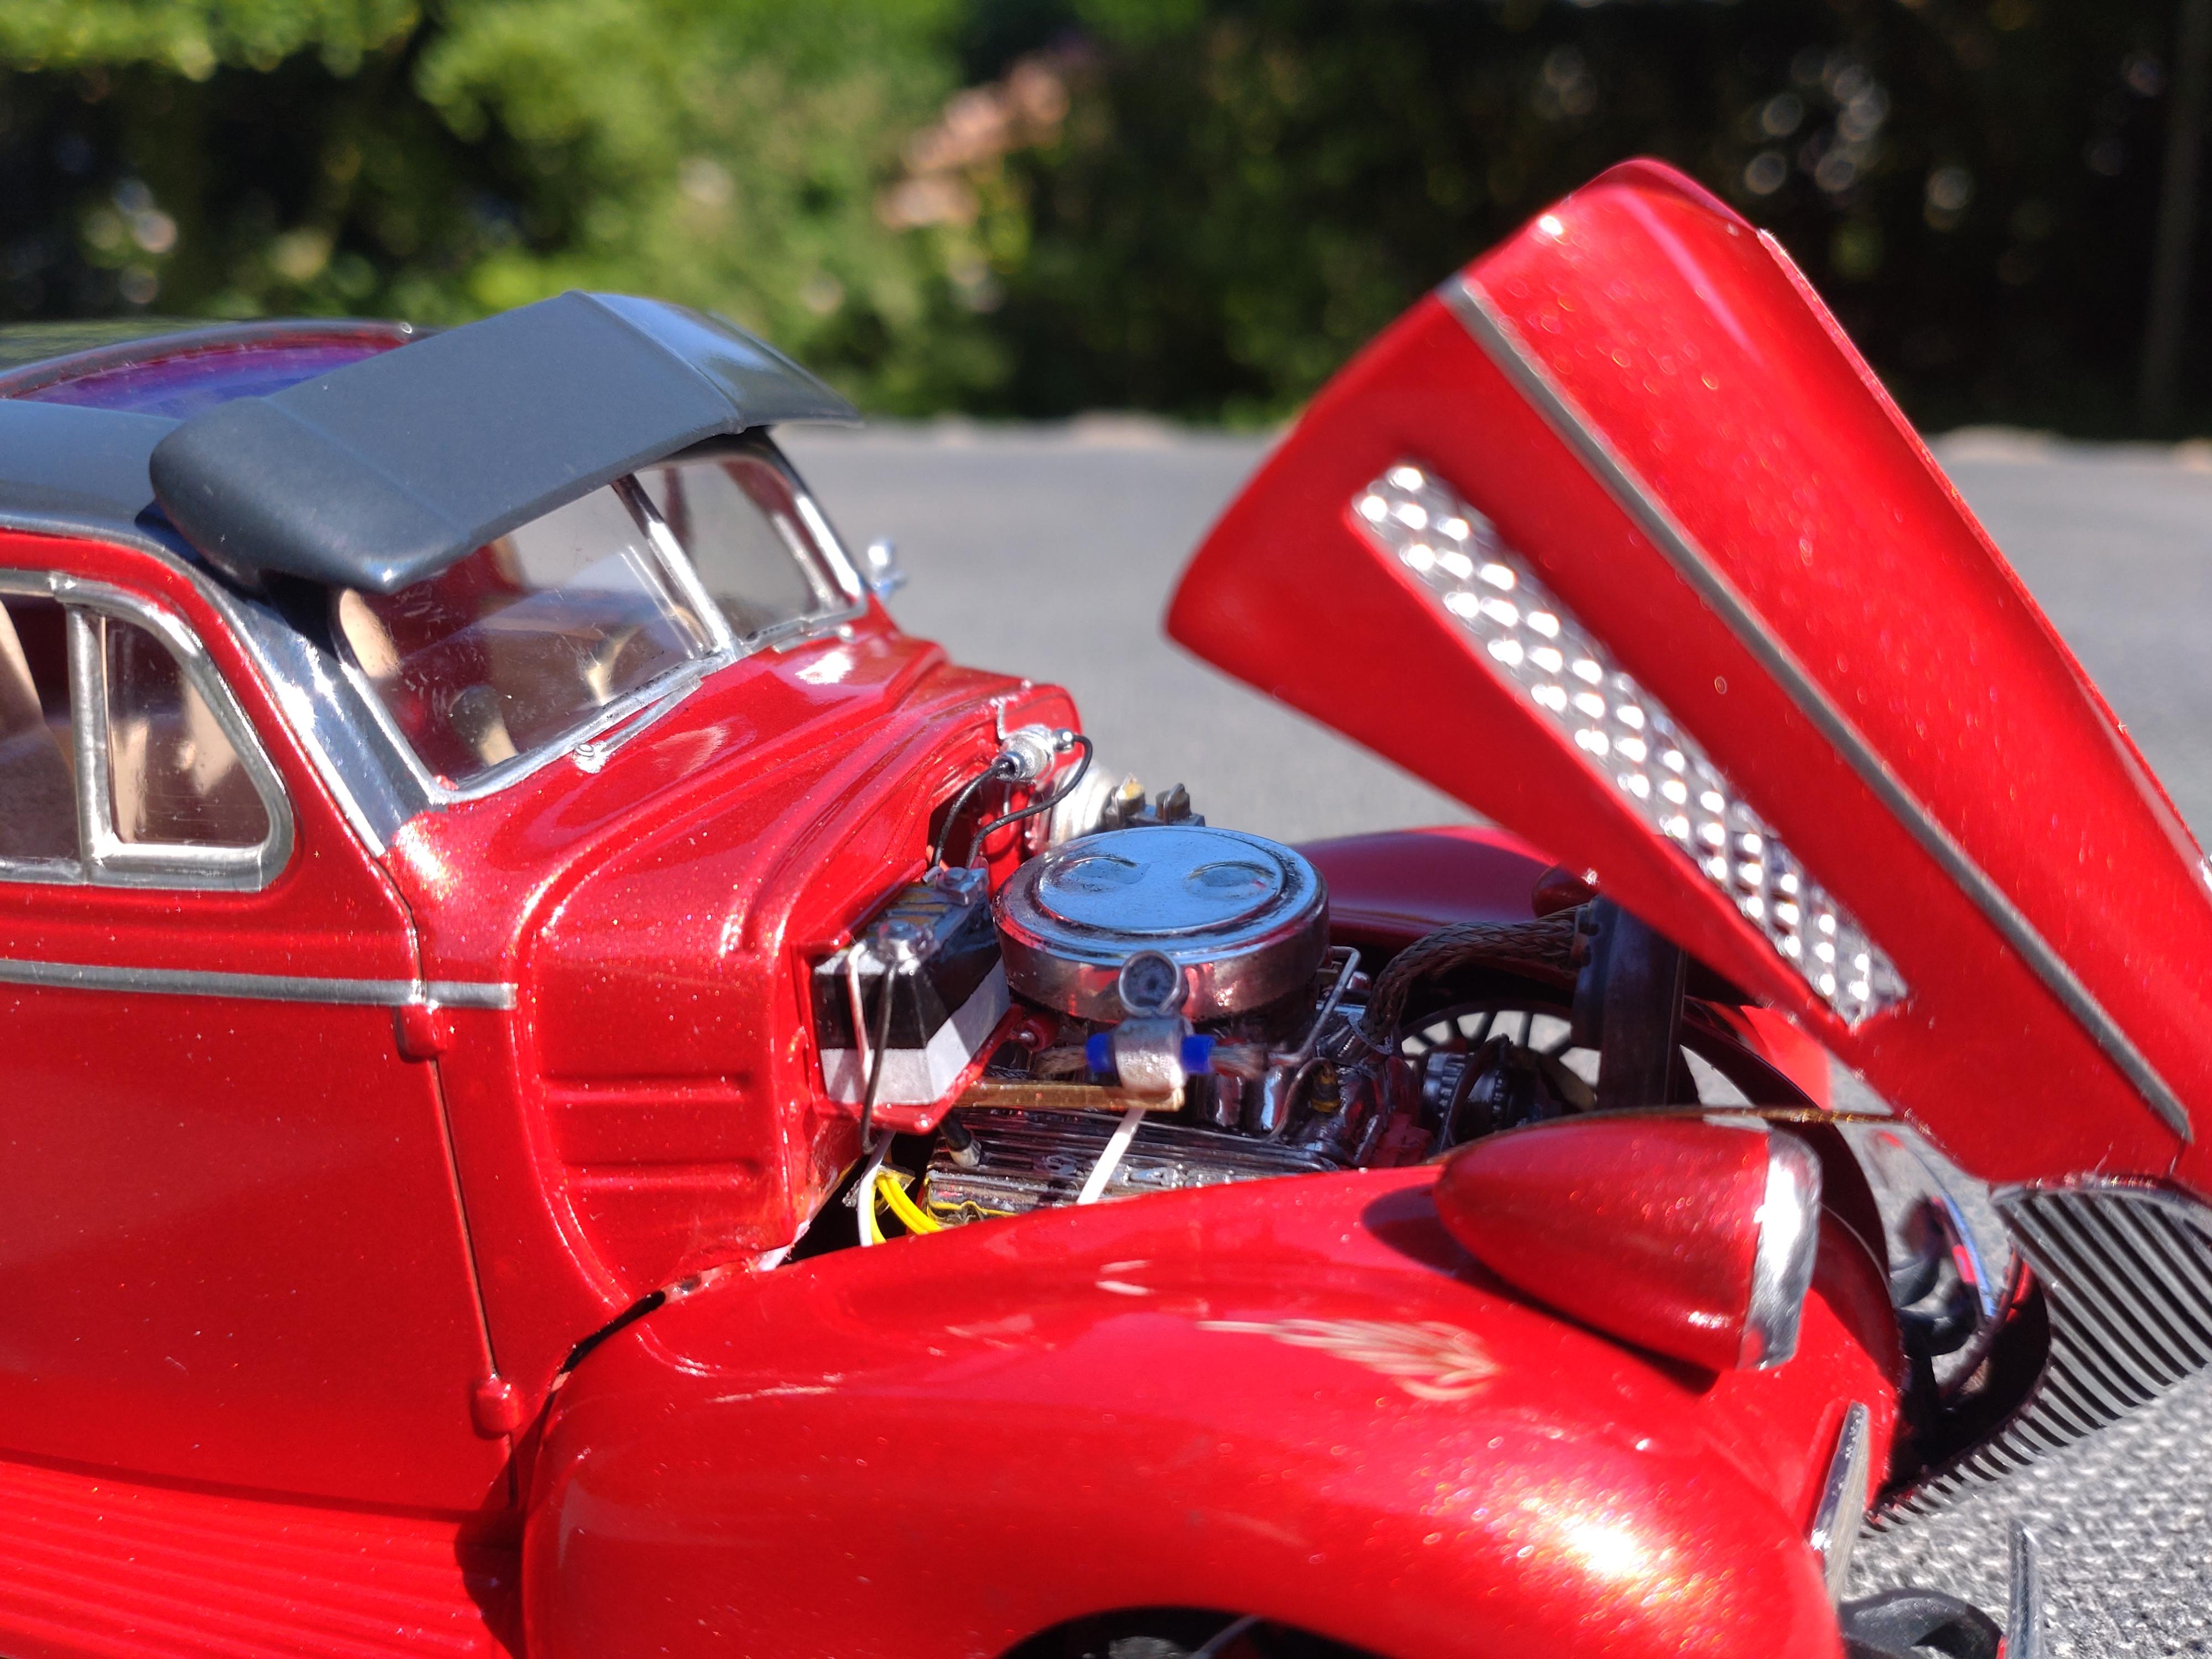
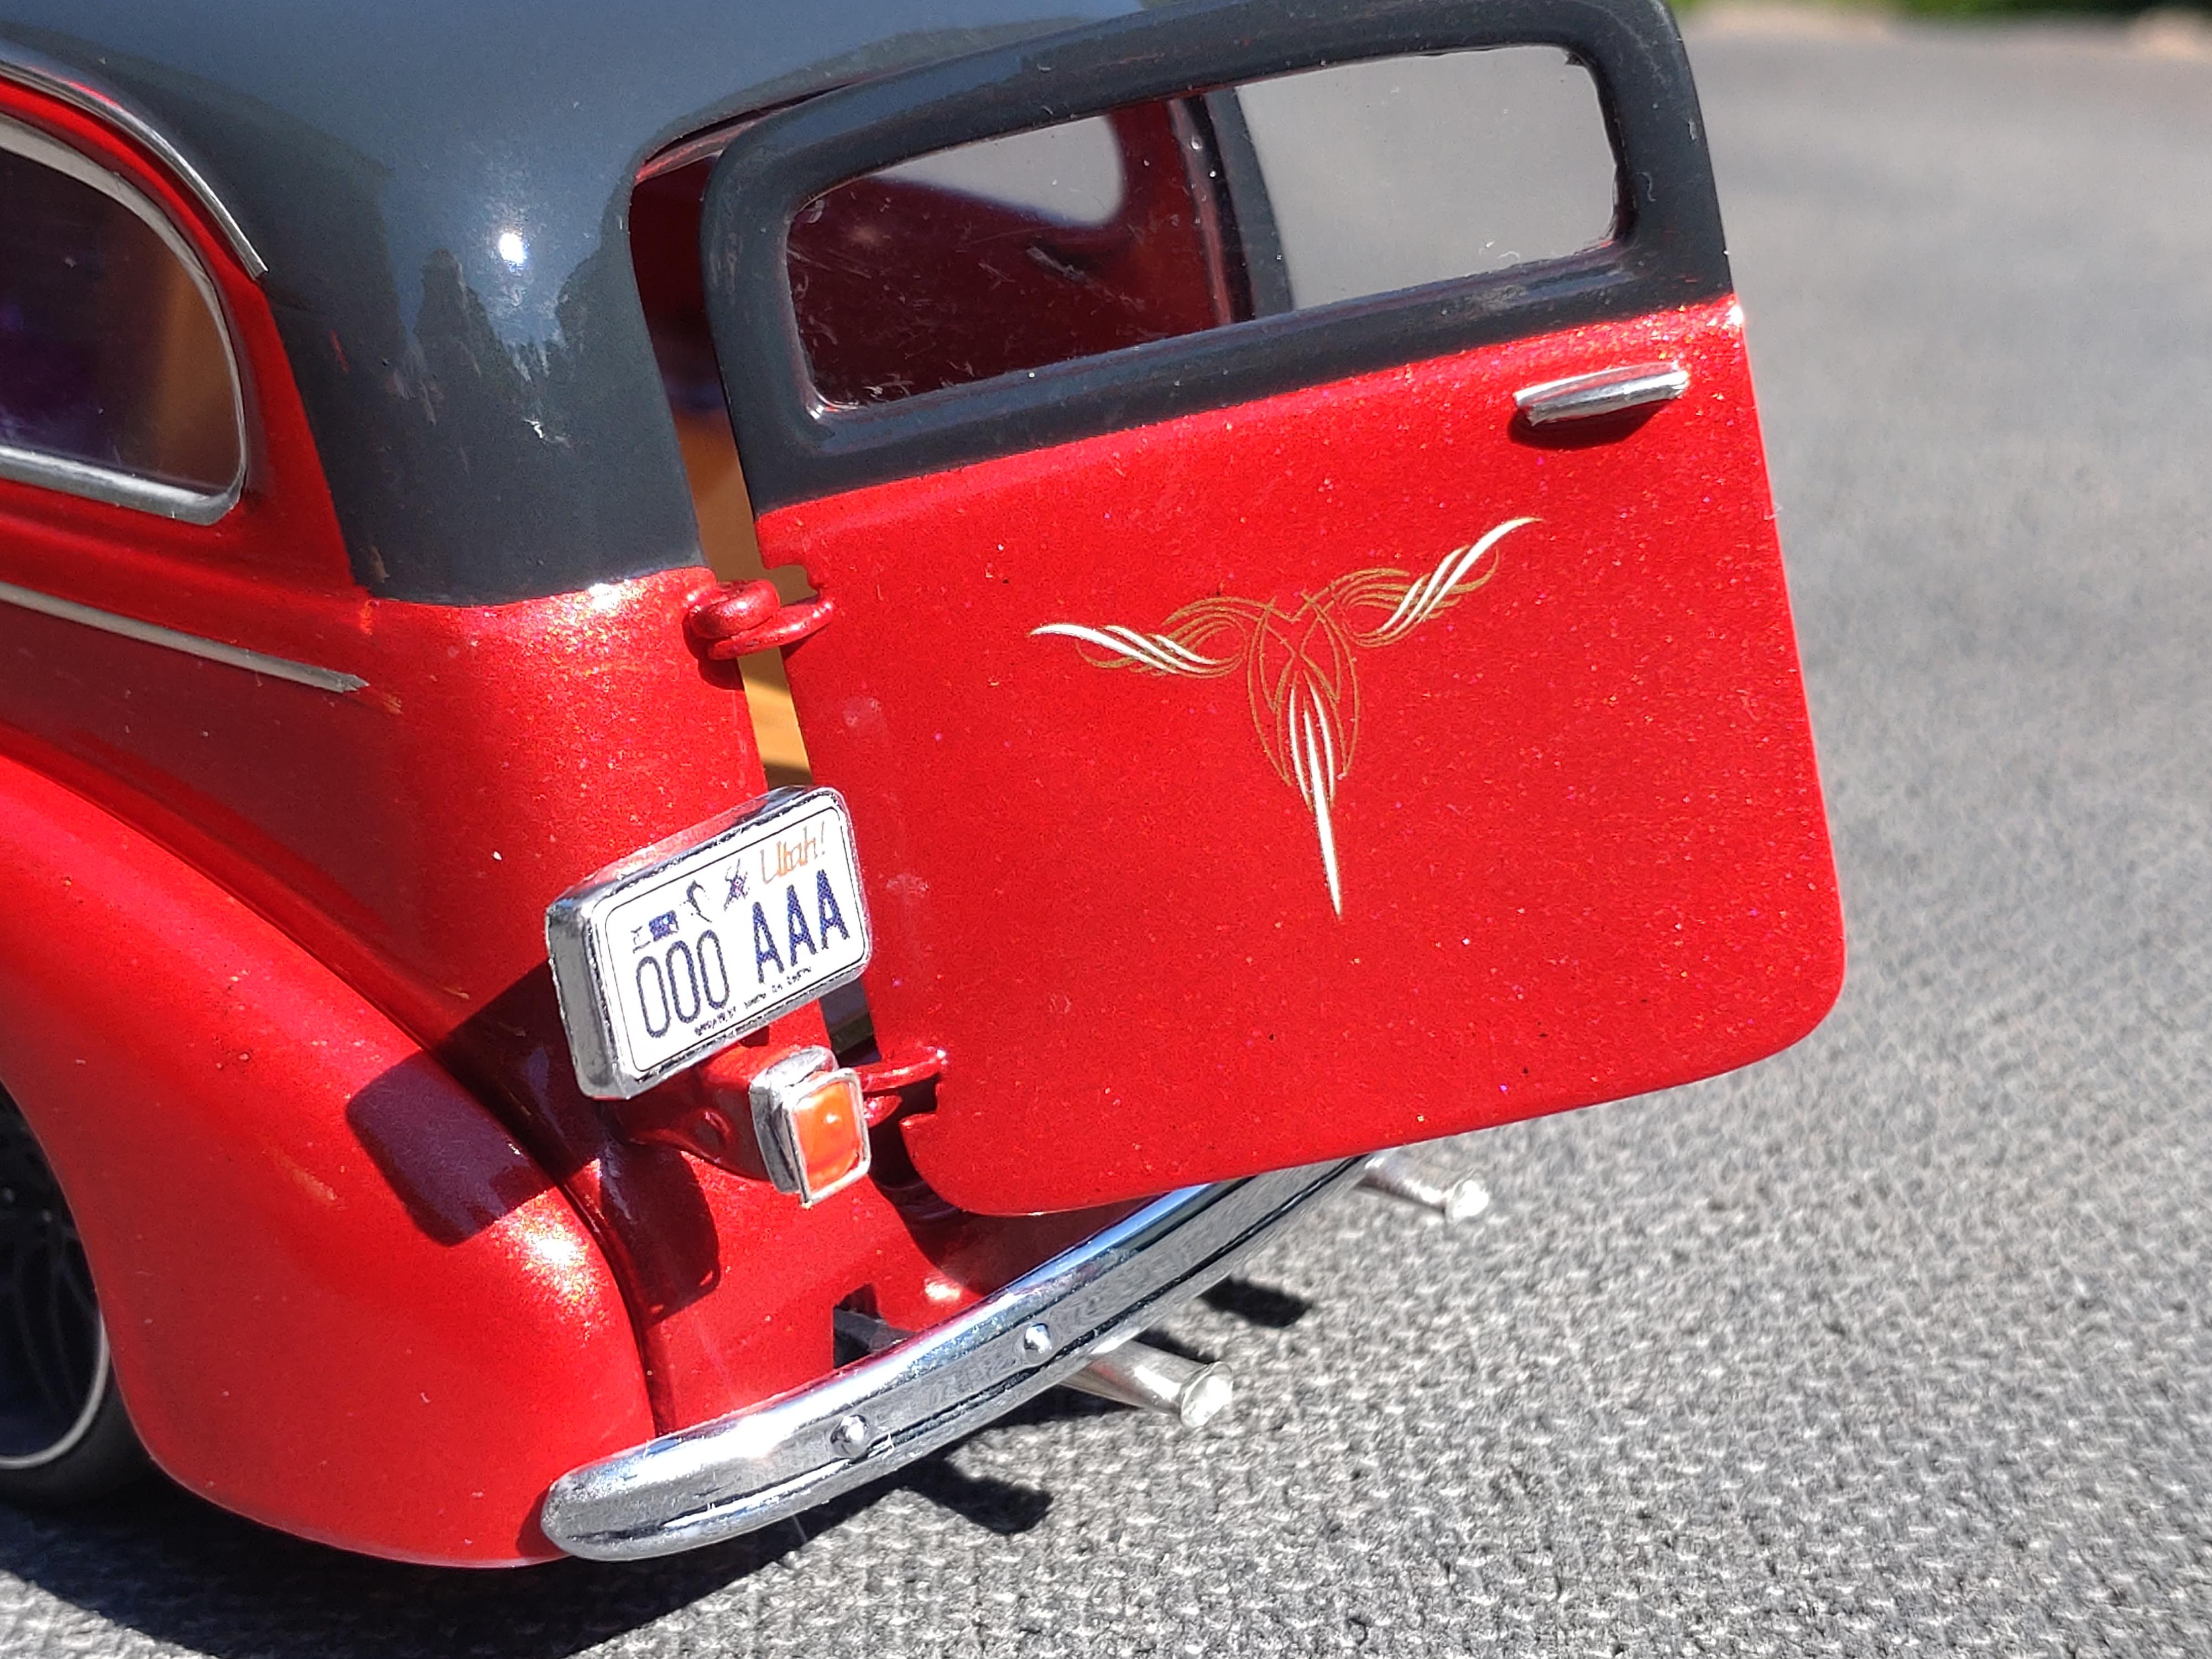
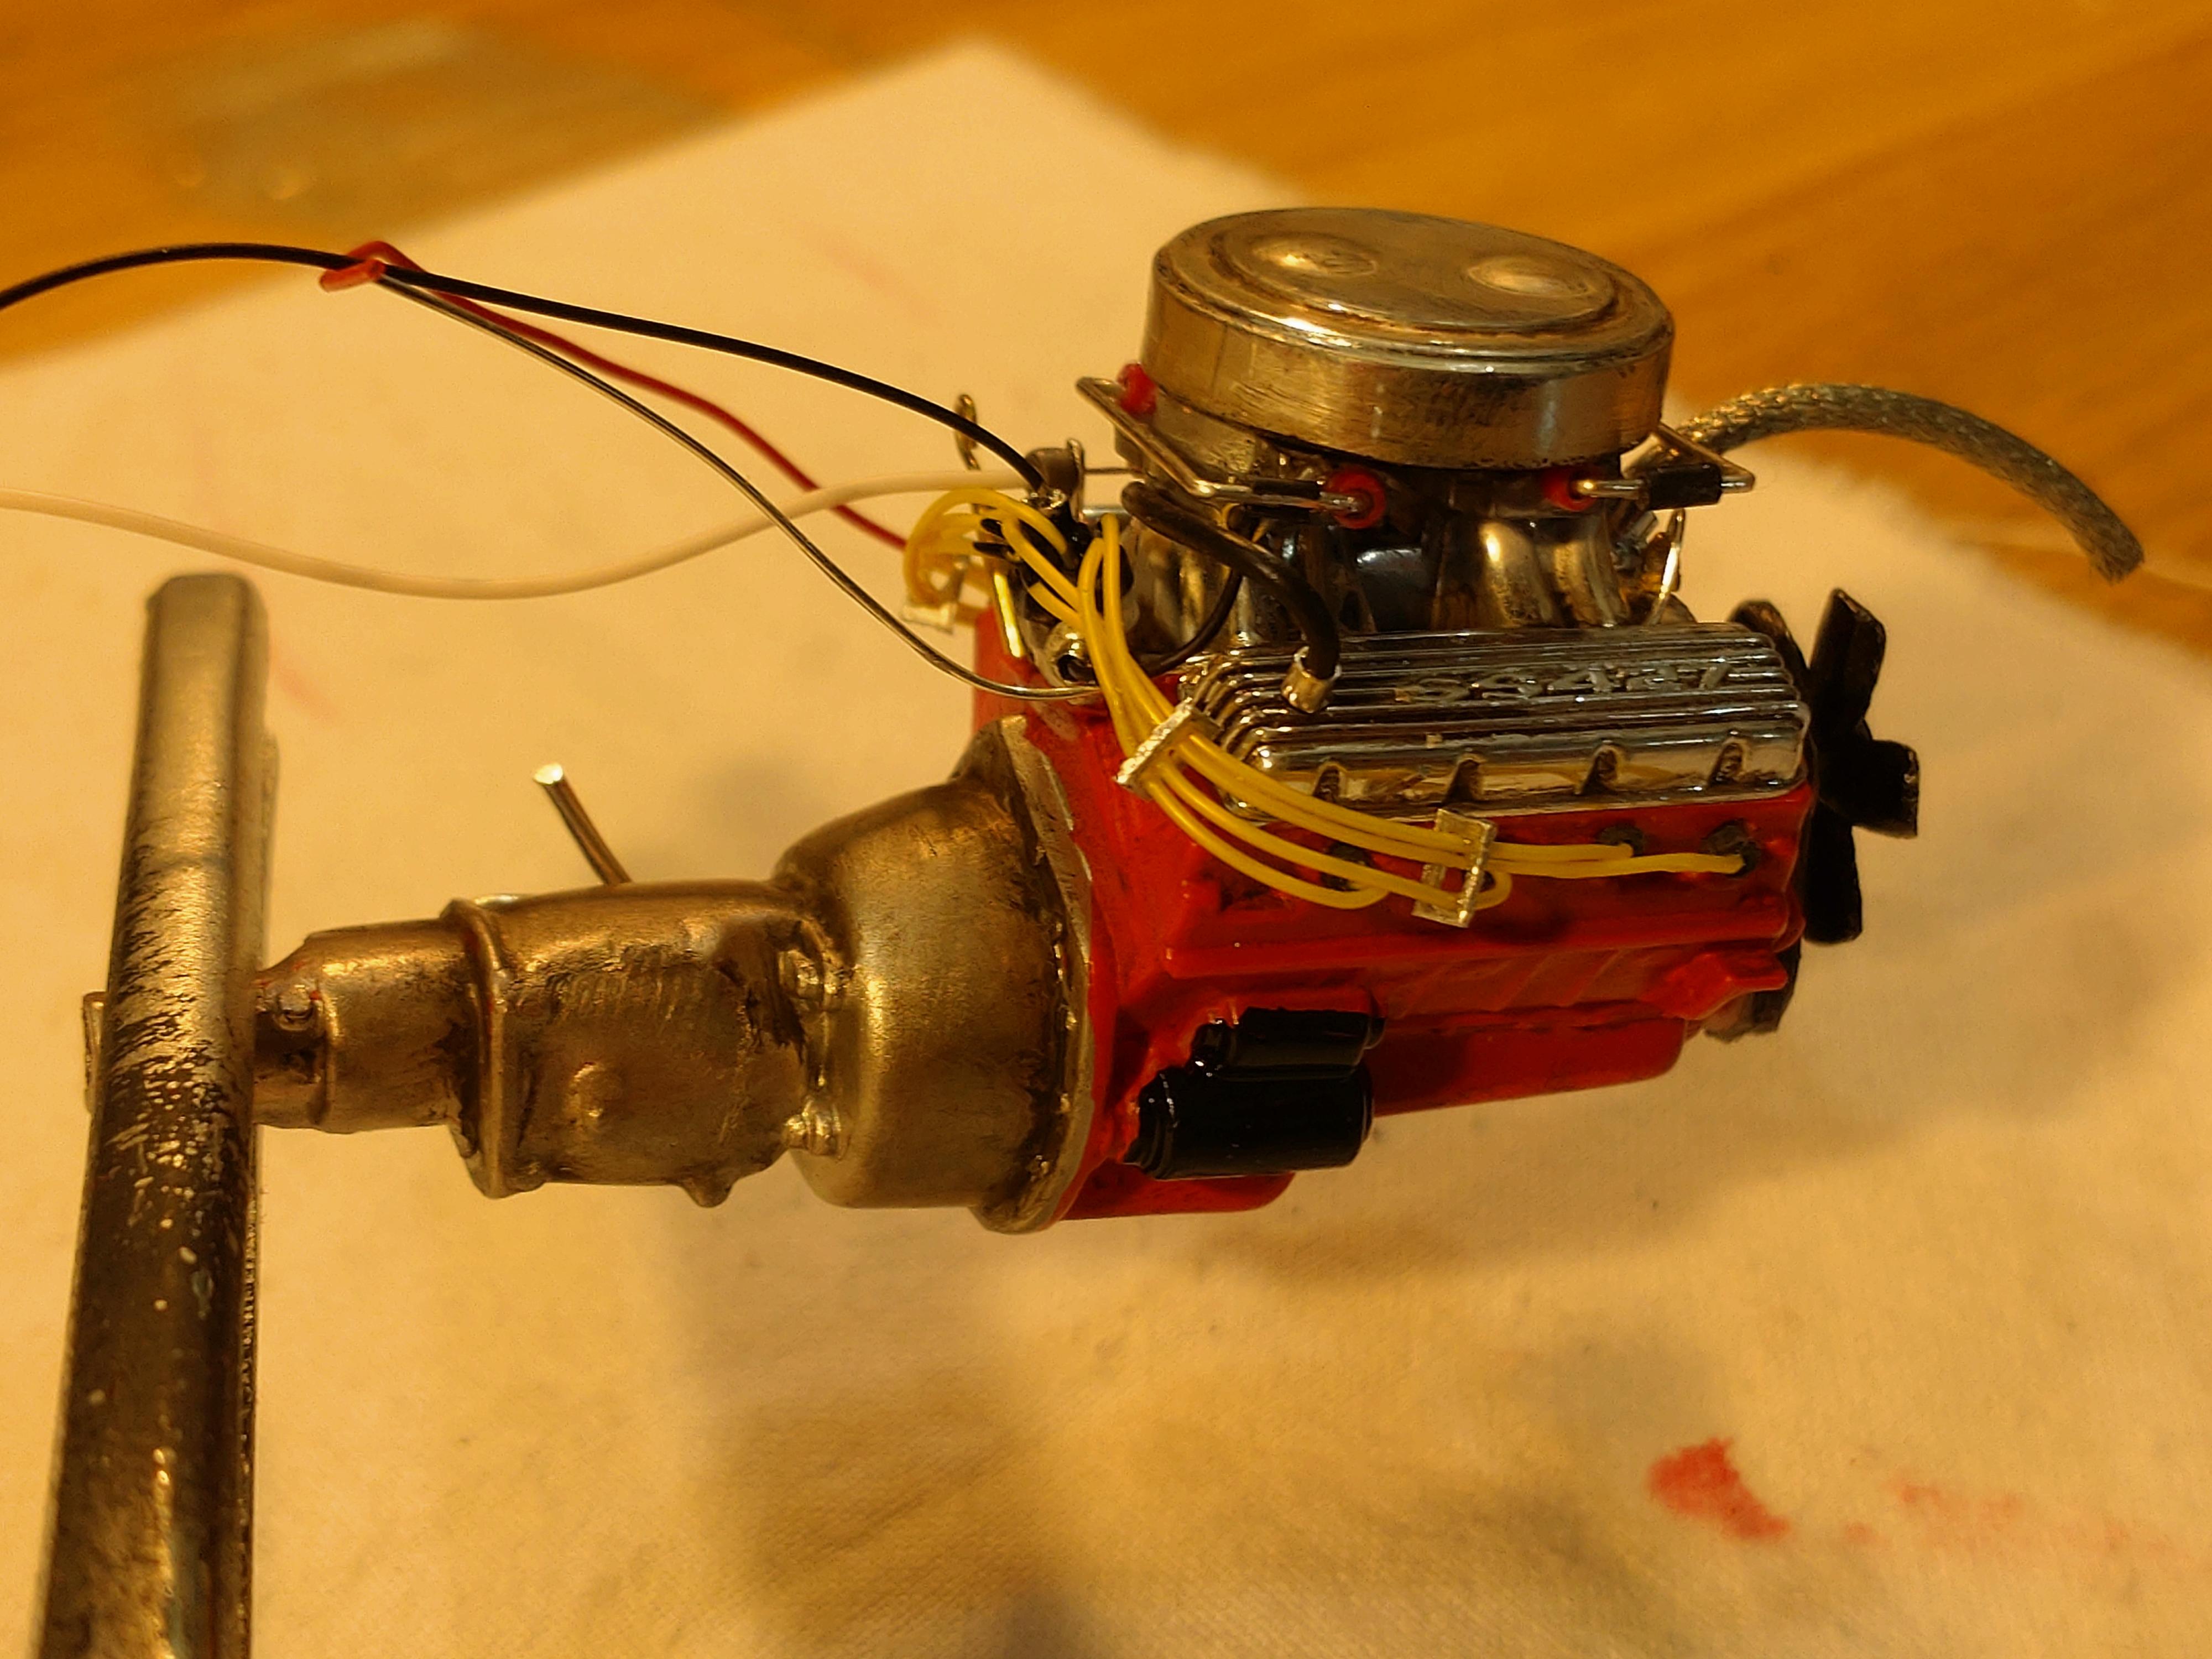
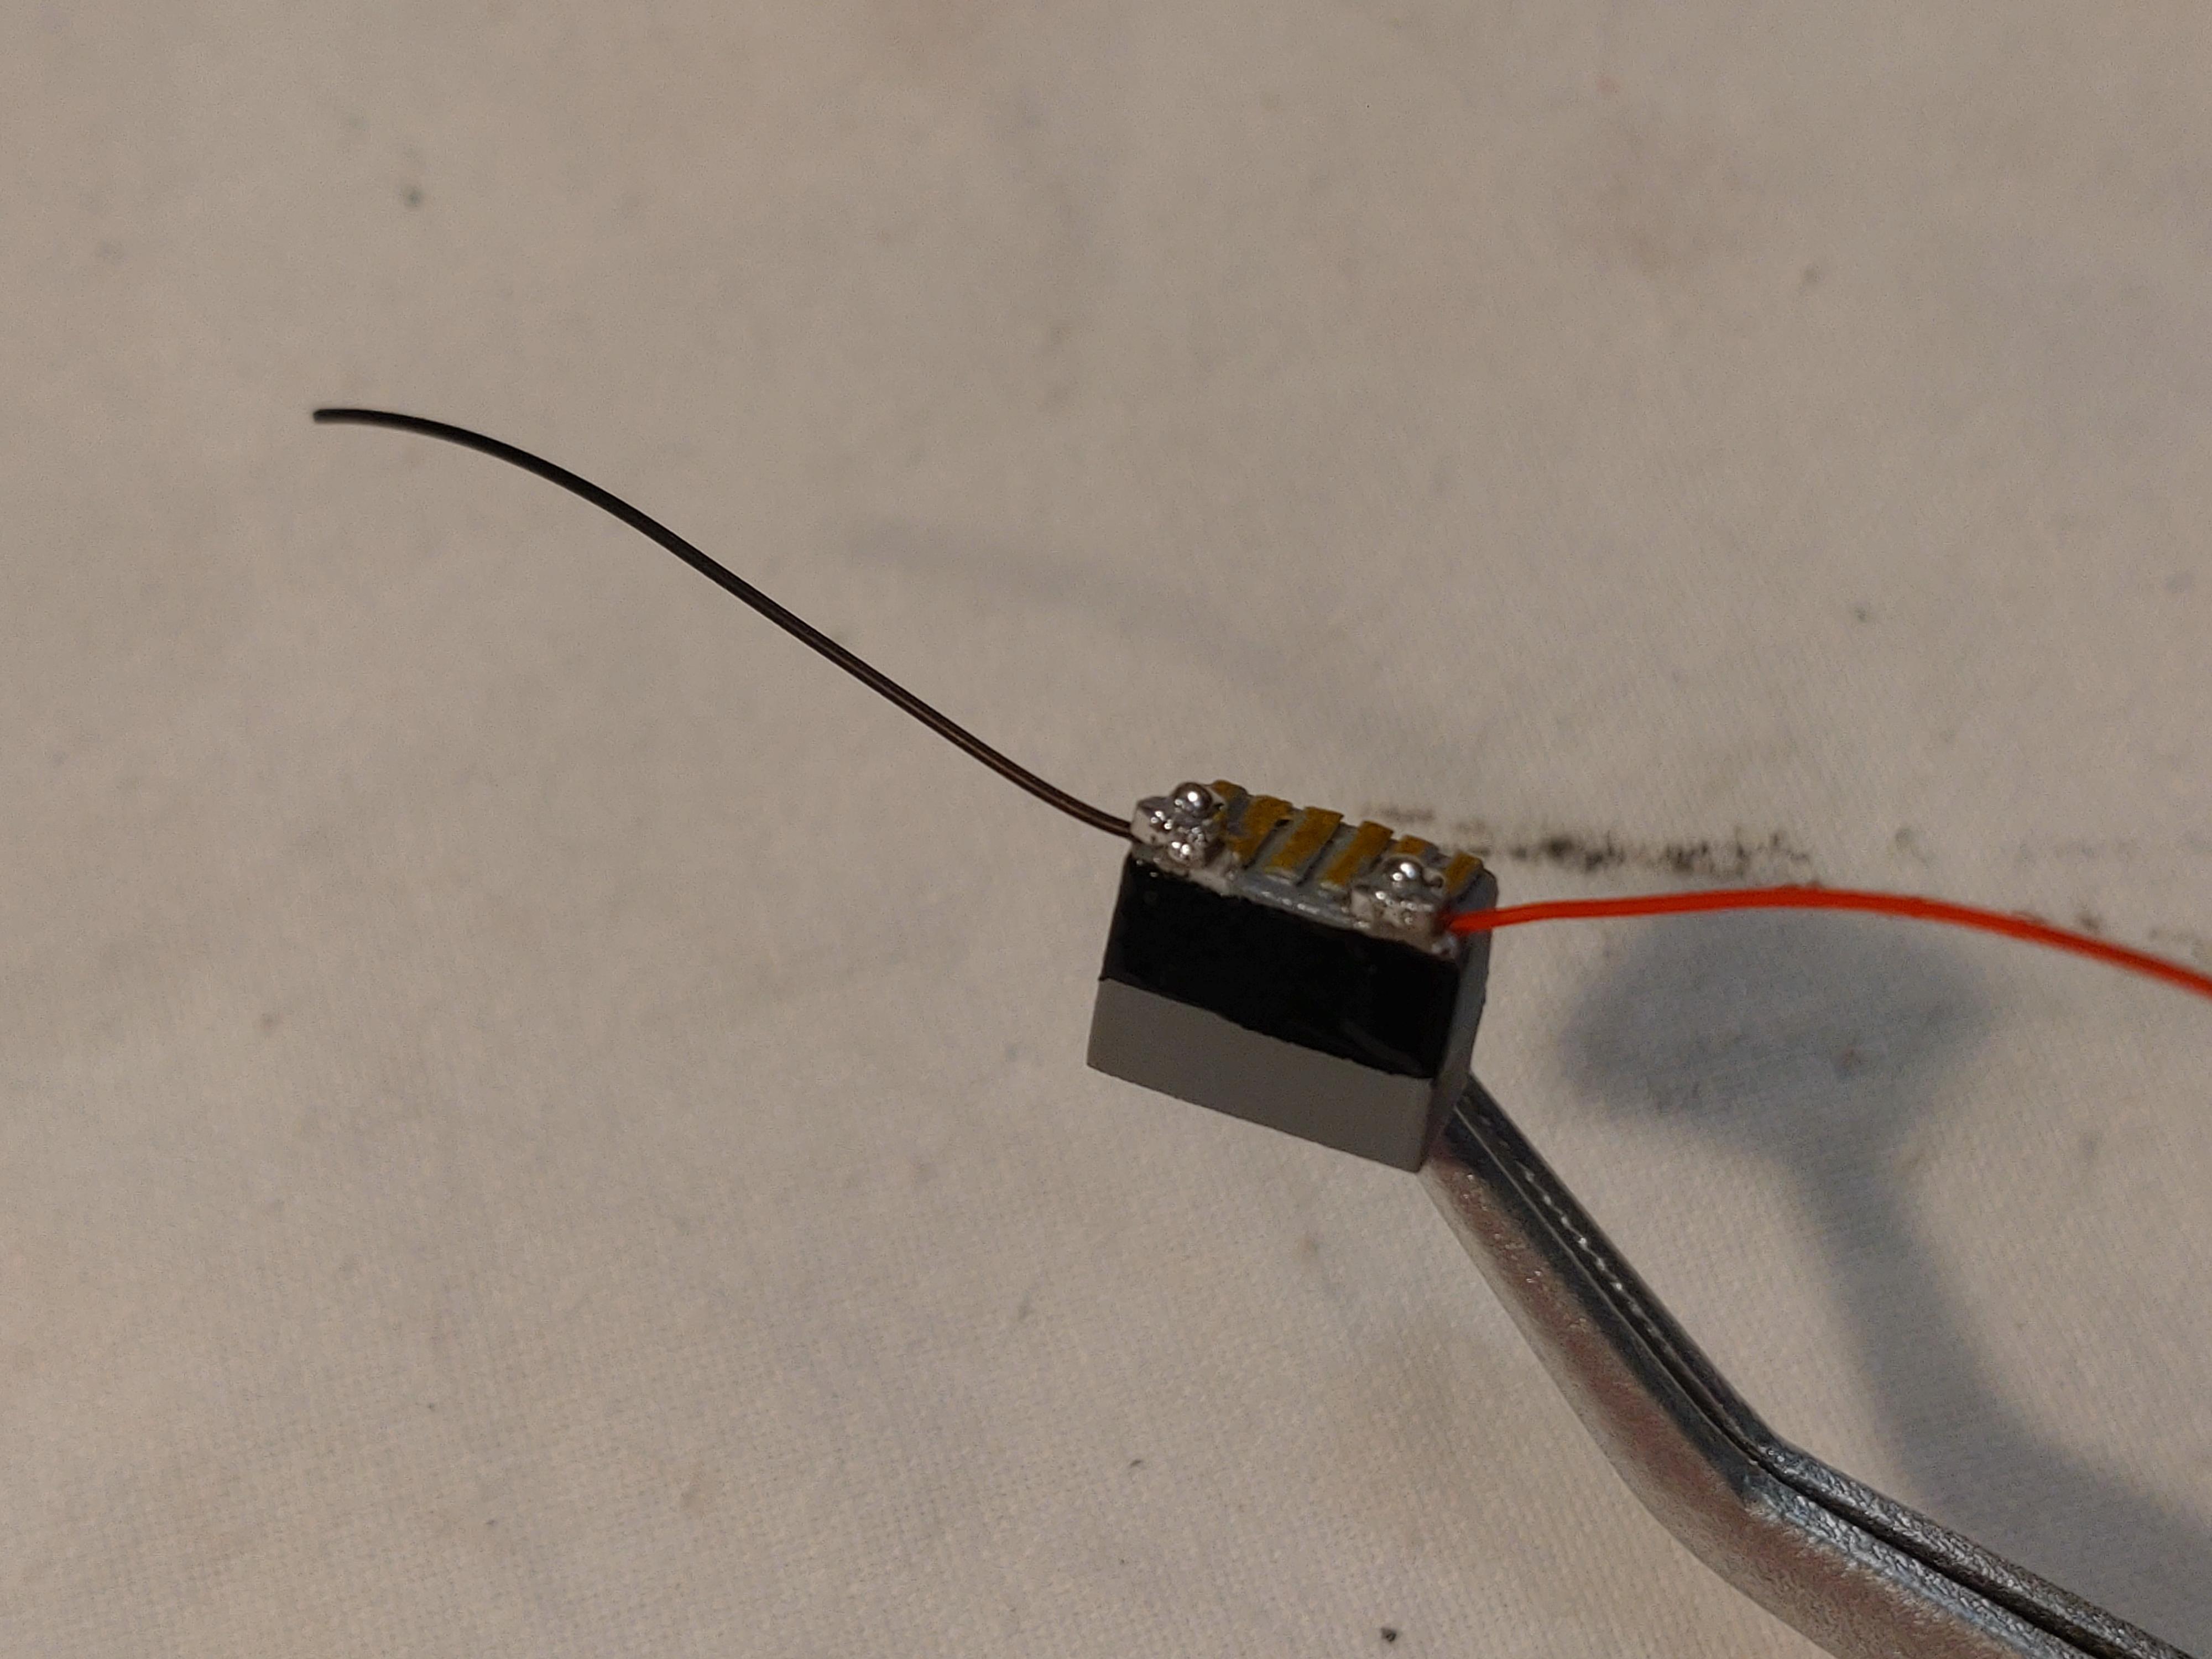
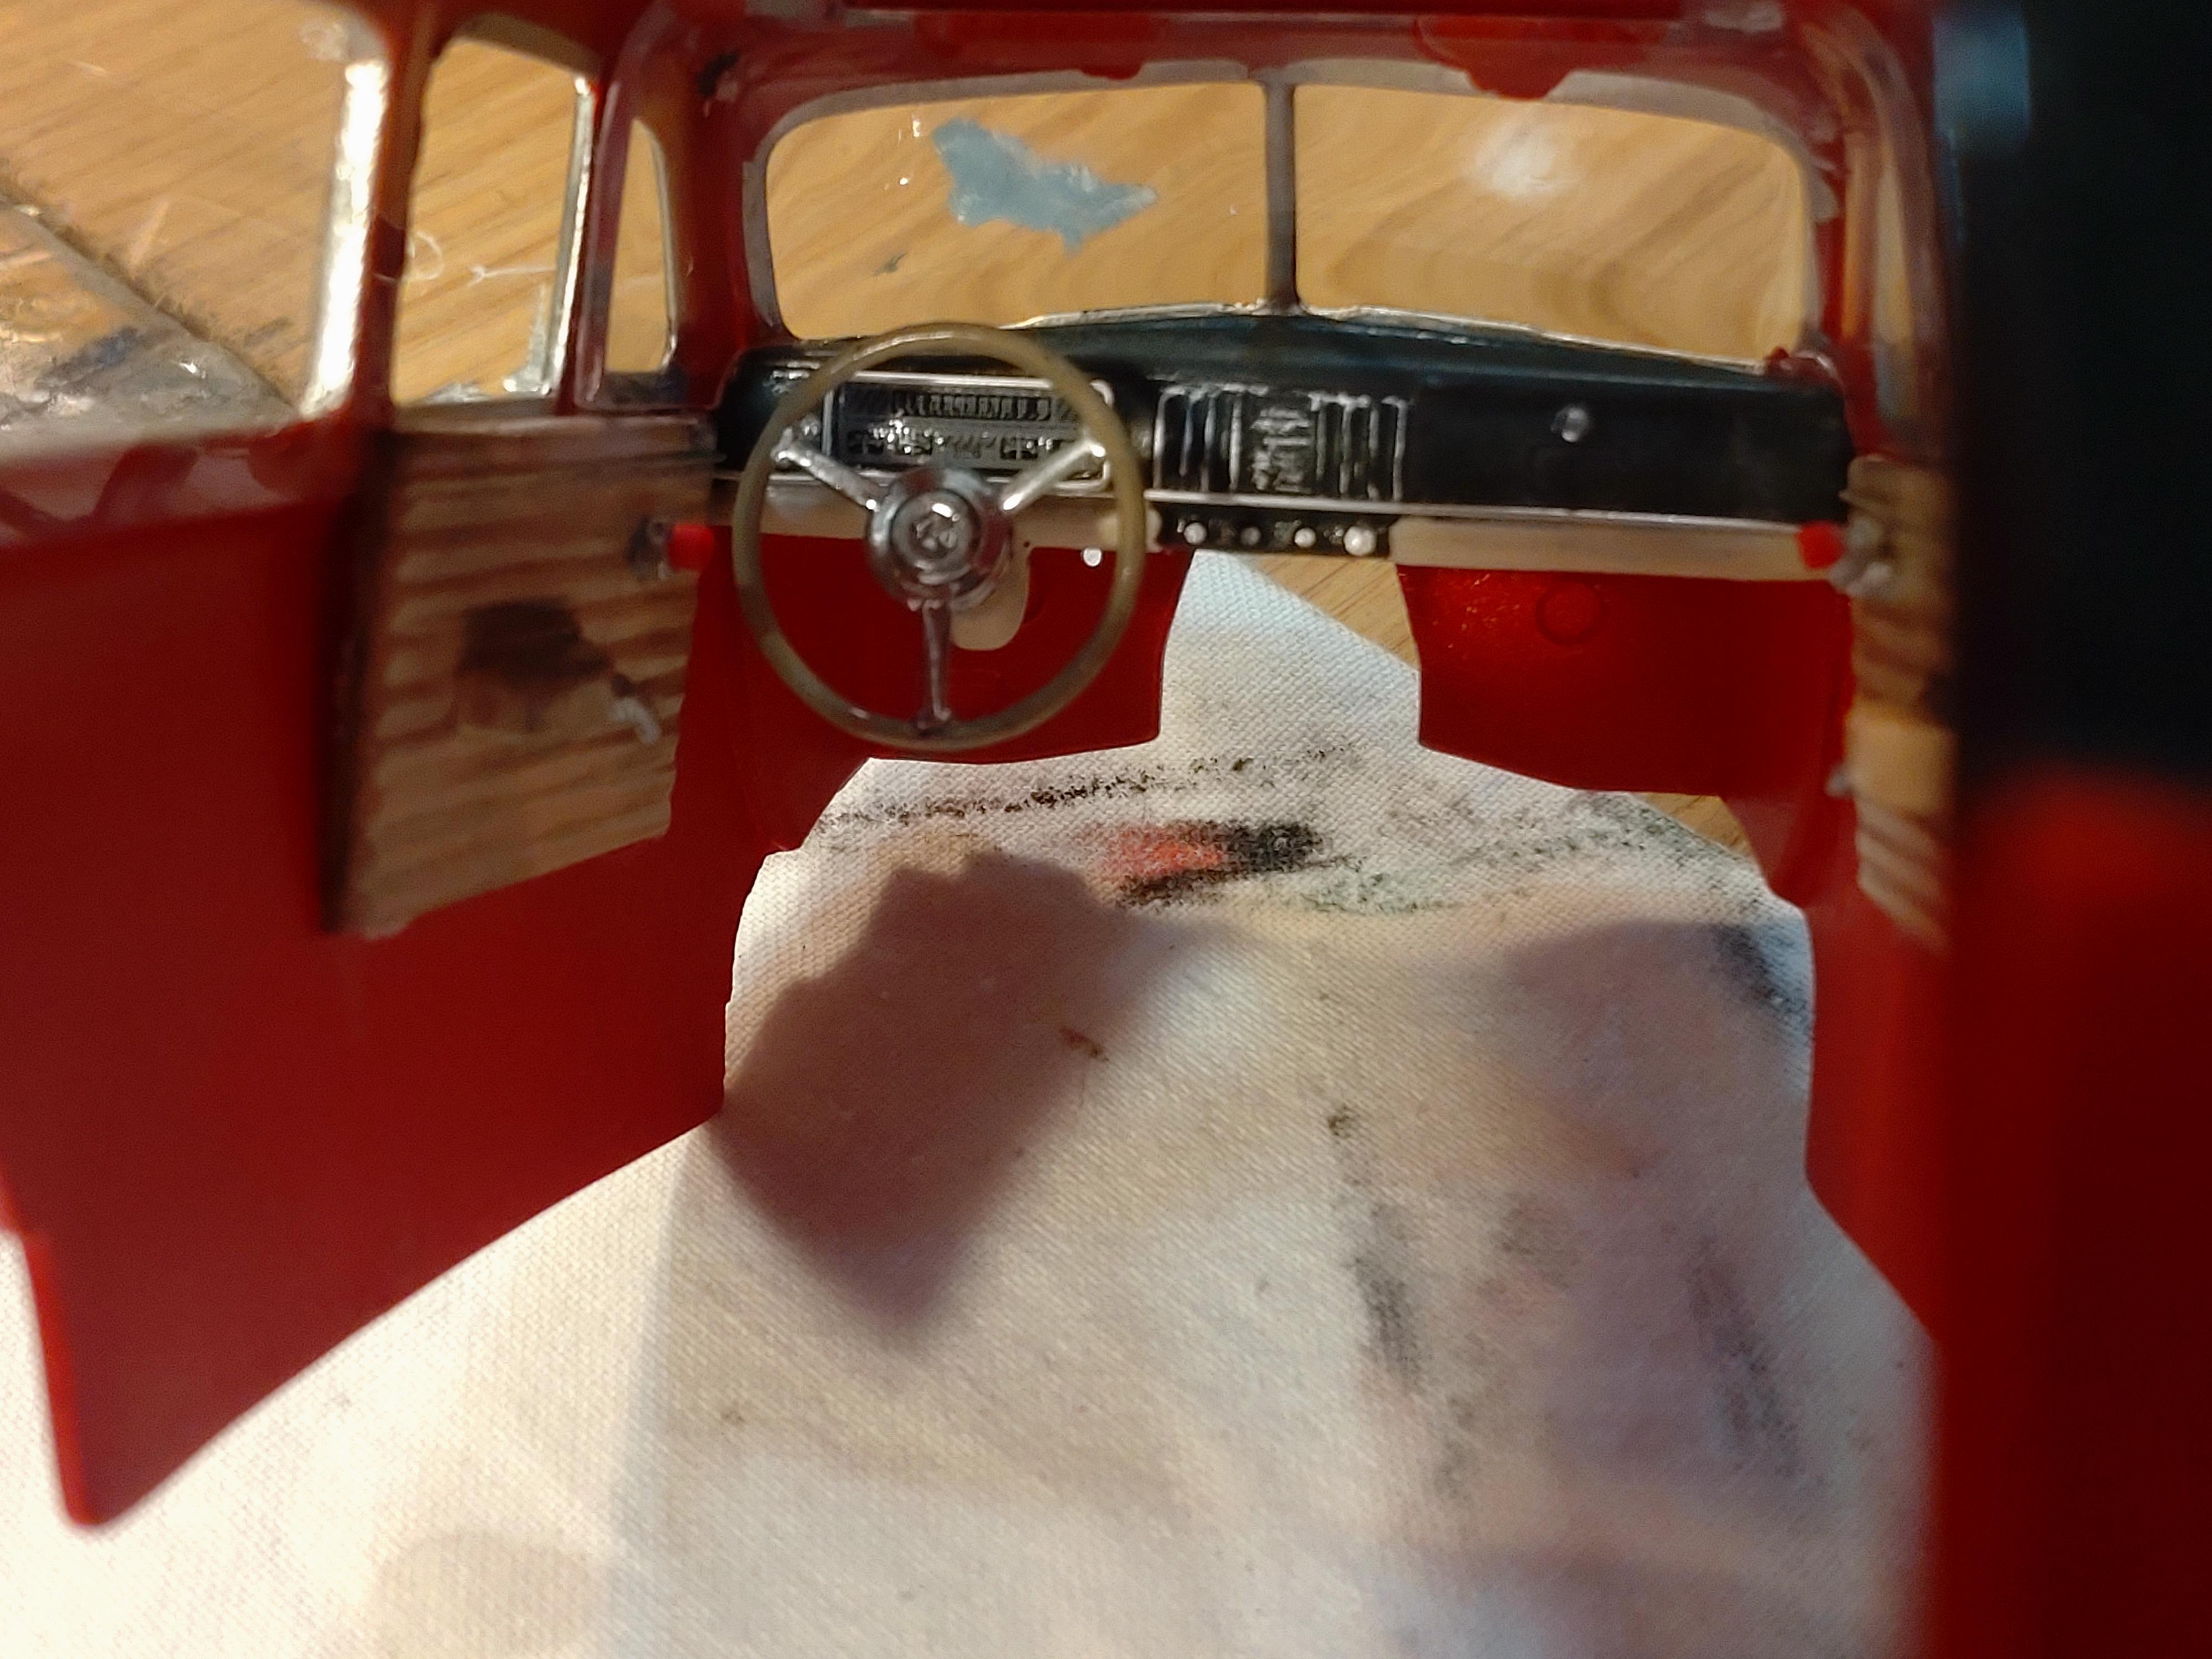
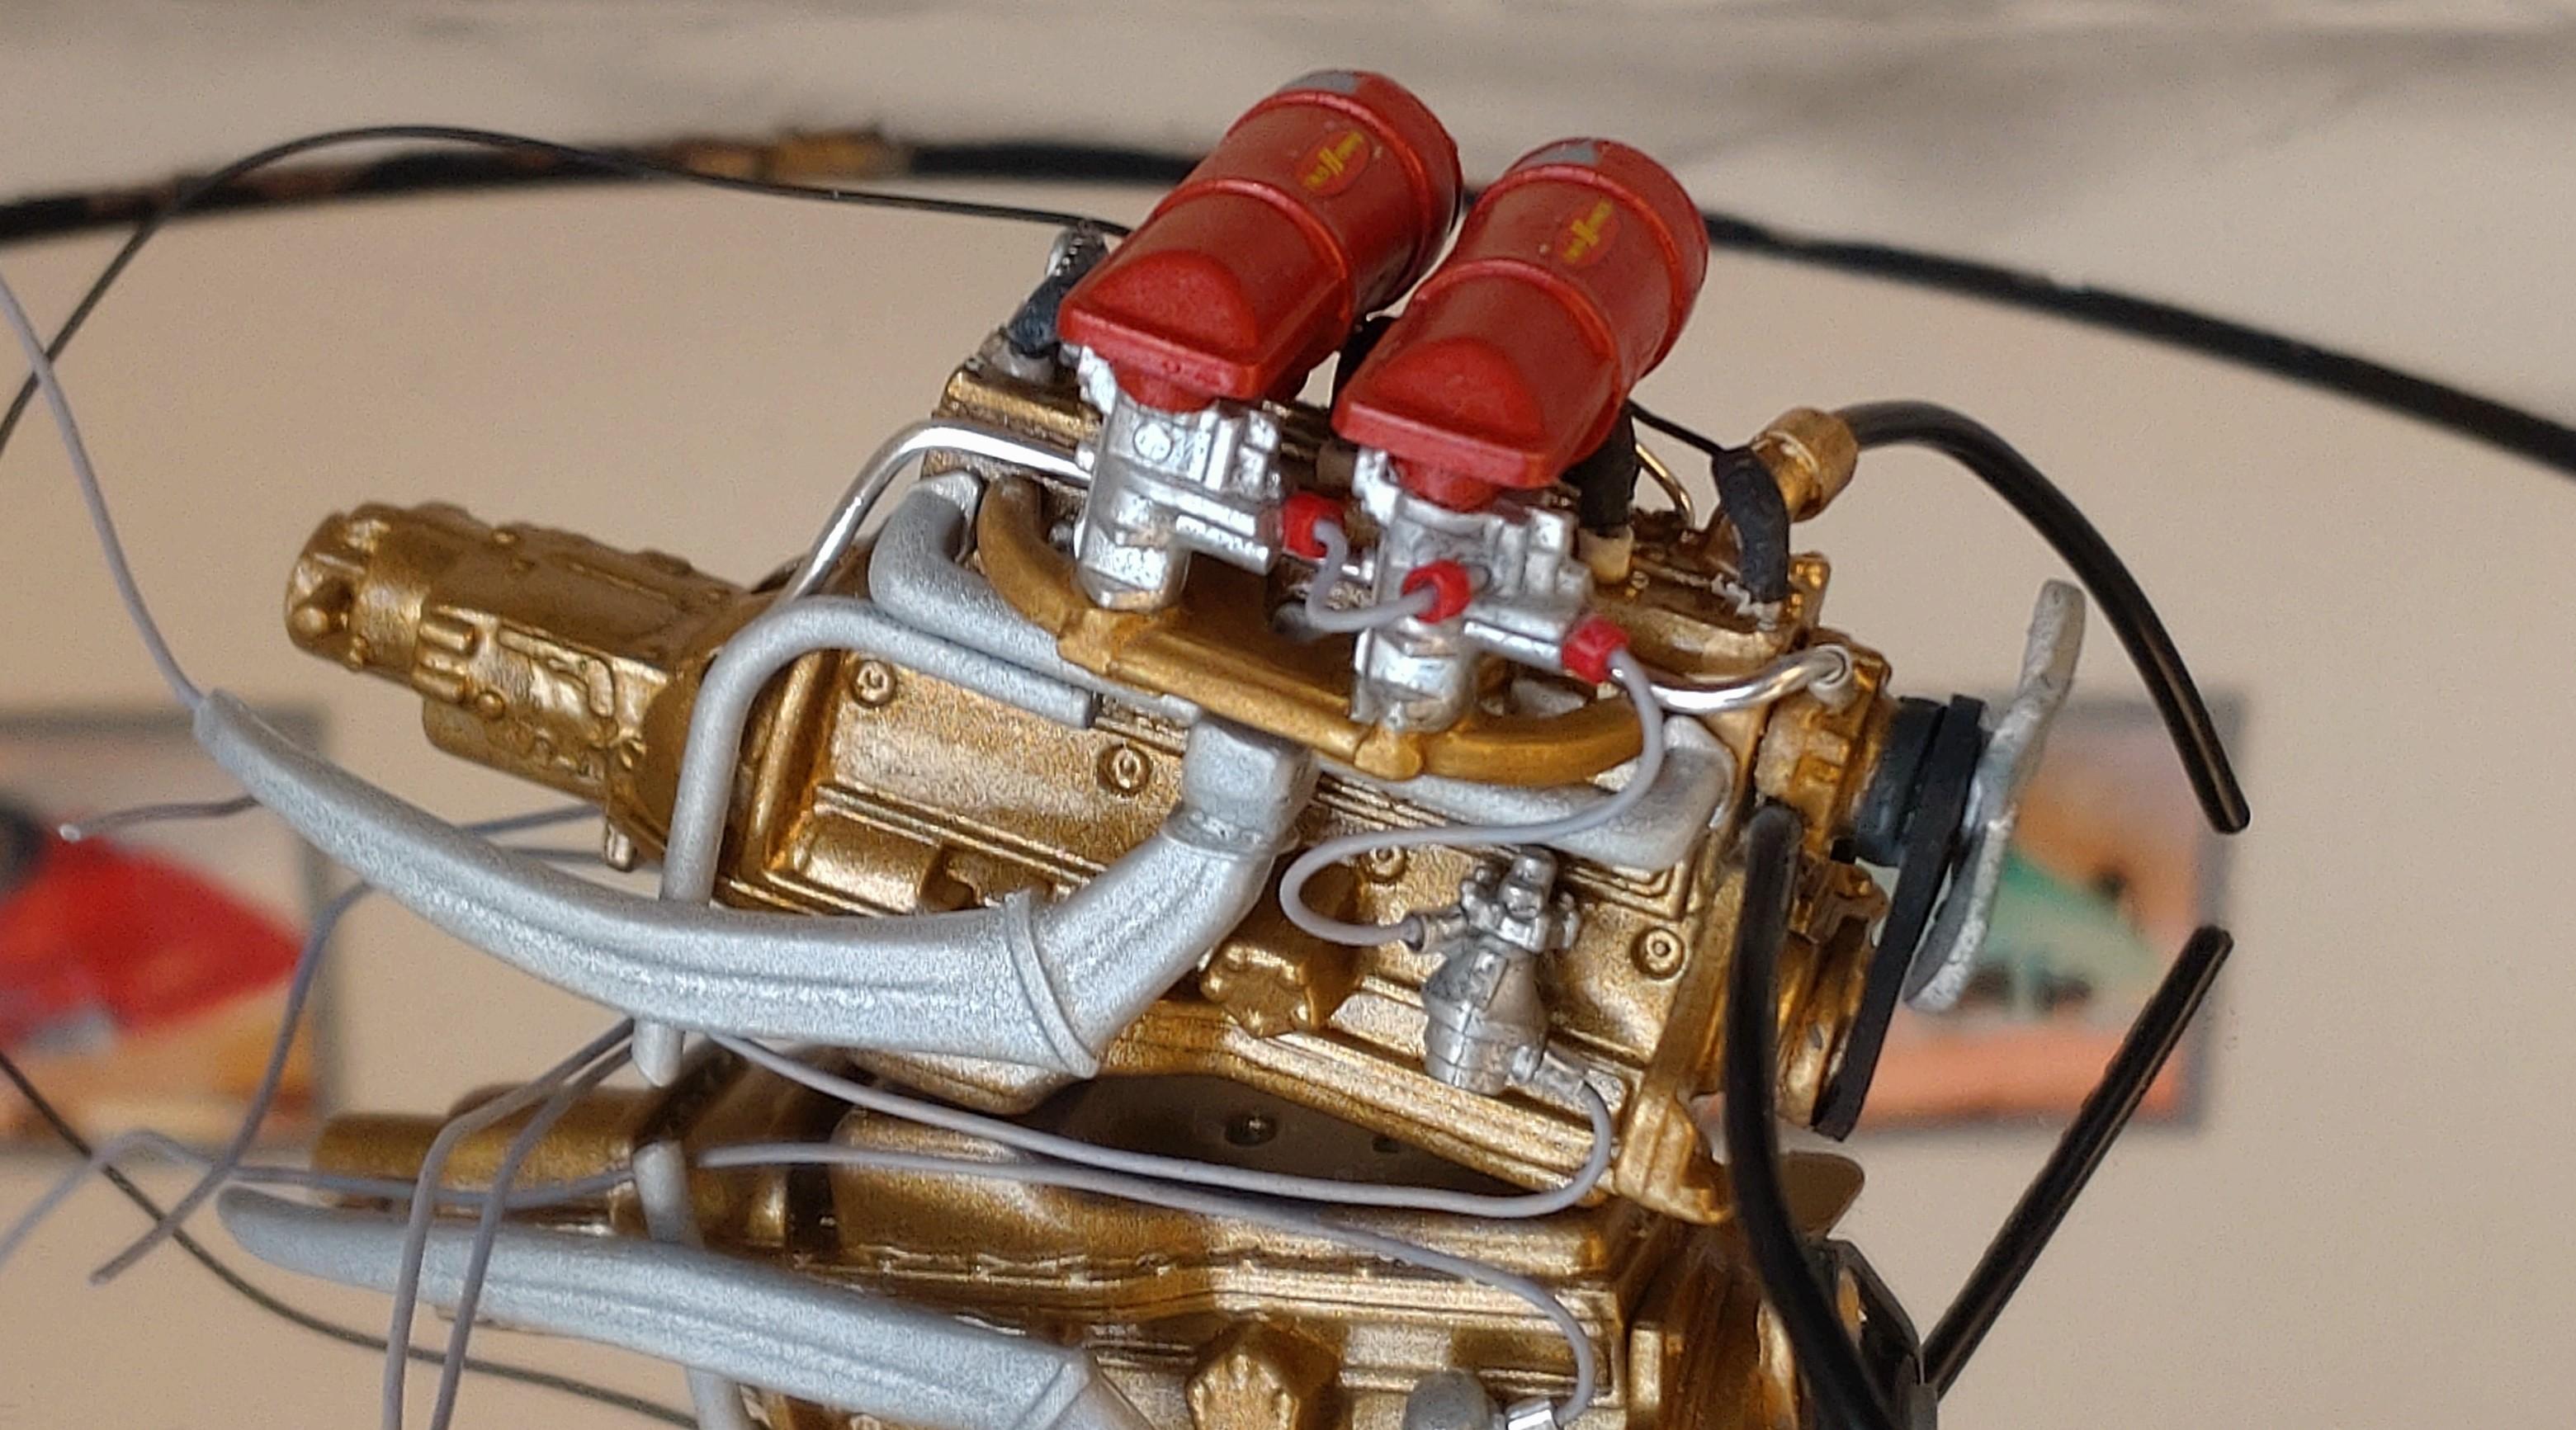
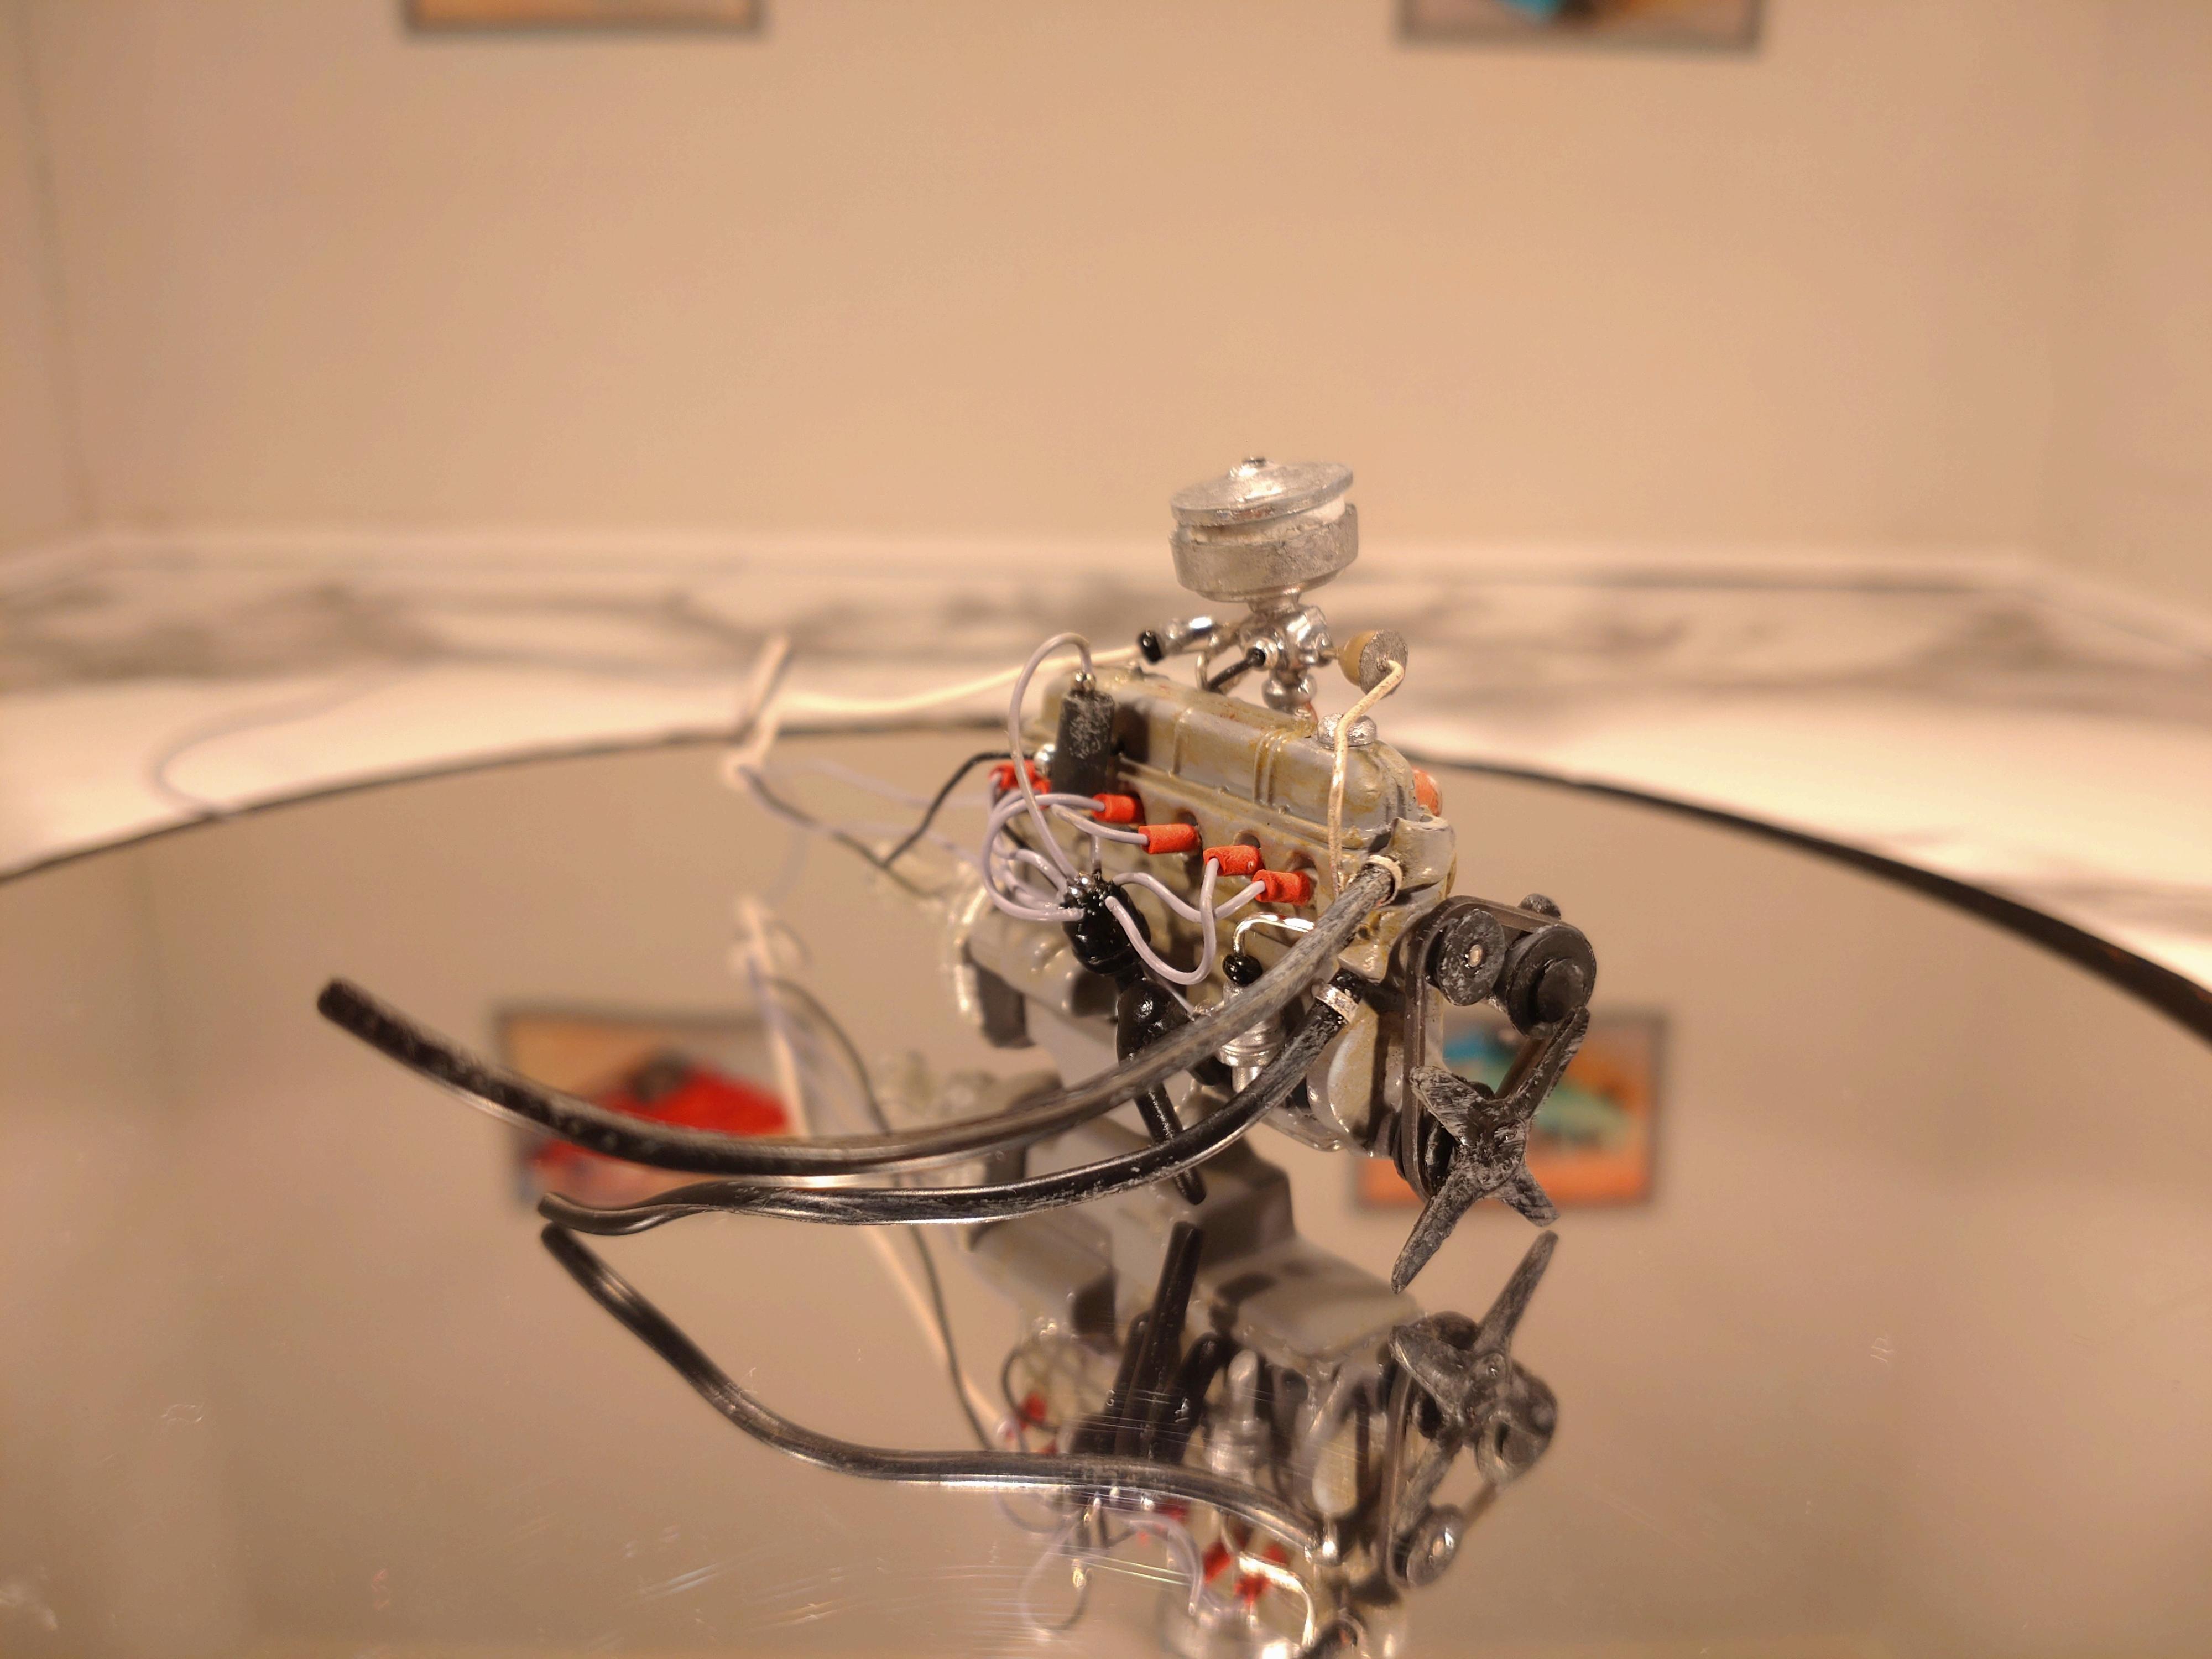
I discovered this kit at a dealer in the Netherlands and was surprised about the model. Never seen it before, so I had to have it. The kit is a delivery wagon, but I had a few ideas about the design and now I have 8 barrels left over?. I opened the side panels for windows and wanted to turn this classic into a very low prowler. The red is Tamiya TS-95 pure metallic red. The roof is a military gray by Mr. Hobby. After the bare metal work the body was sealed in AK gloss varnish. The wheels and disc brakes are by Scale Production. The bed and the back door panel are wood veneer from my craft store. Making the hood nose-tip was nerve wrecking. It took several tries until it worked out to my satisfaction. I glued the hood to the grill and the tipping area is less than 1 cm wide. I finally got it working and NOT BREAKING OFF with metal pins and super glue. Next problem was the lateral support on the sides. I started with 0.5mm brass wires but they were too stiff, ended up with 0.5mm flexible cables usually used for jewelry. They are connected to the undersides of the fenders and the front cable ends move freely through short tubes. Soft and smooth. I had to split the front bumper to make way but the result looks natural to me. The kit engine is a disappointment. They call this a level 4 kit but too man parts are just either missing or of very low quality. I ended up donating two 4-barrel Holleys and rigging the engine with a complete collection of lines and cables. The battery and the brake booster are home made from scratch, and after I saw a fuel line pressure gauge in a magazine I even found a space to cramp that in also. I wasn´t able to show the progress on the WIP forum, so I can show a few details during the building process here. I wanted the interior to look like aged leather. The kit dosn´t have any door panels so I built my own from scratch. The dash received a bit of patina as well. Plus some trim with fine silver wire. Here an image of the hood setup. It is still working so far and I hope it won´t turn bad on me. Thanks for watching! you can see the video with this link: https://youtu.be/g-alpQbRaeY
-
Well done job on this very classic kit. Seems the kit was from way back then also. Sorry for the trouble... Now handle with care!??
-
Hello Jeremy, well done on this muscle classic?? Everything fits to the movie memory!
-
Post pics of your six cylinder engines!
Andy Oldenburg replied to Lucius Molchany's topic in Model Cars
I love this thread! Cool idea? What have I got? Hudson ´54 Hornet Chevy ´51 Bel Air