Jürgen M.
-
Posts
1,675 -
Joined
-
Last visited
Content Type
Profiles
Forums
Events
Gallery
Everything posted by Jürgen M.
-

Alaskan Hauler refurbishing project
Jürgen M. replied to Jürgen M.'s topic in WIP: Model Trucks: Big Rigs and Heavy Equipment
Yes, you're right! I could have done that but since it won't be seen .... -
Alaskan Hauler refurbishing project
Jürgen M. replied to Jürgen M.'s topic in WIP: Model Trucks: Big Rigs and Heavy Equipment
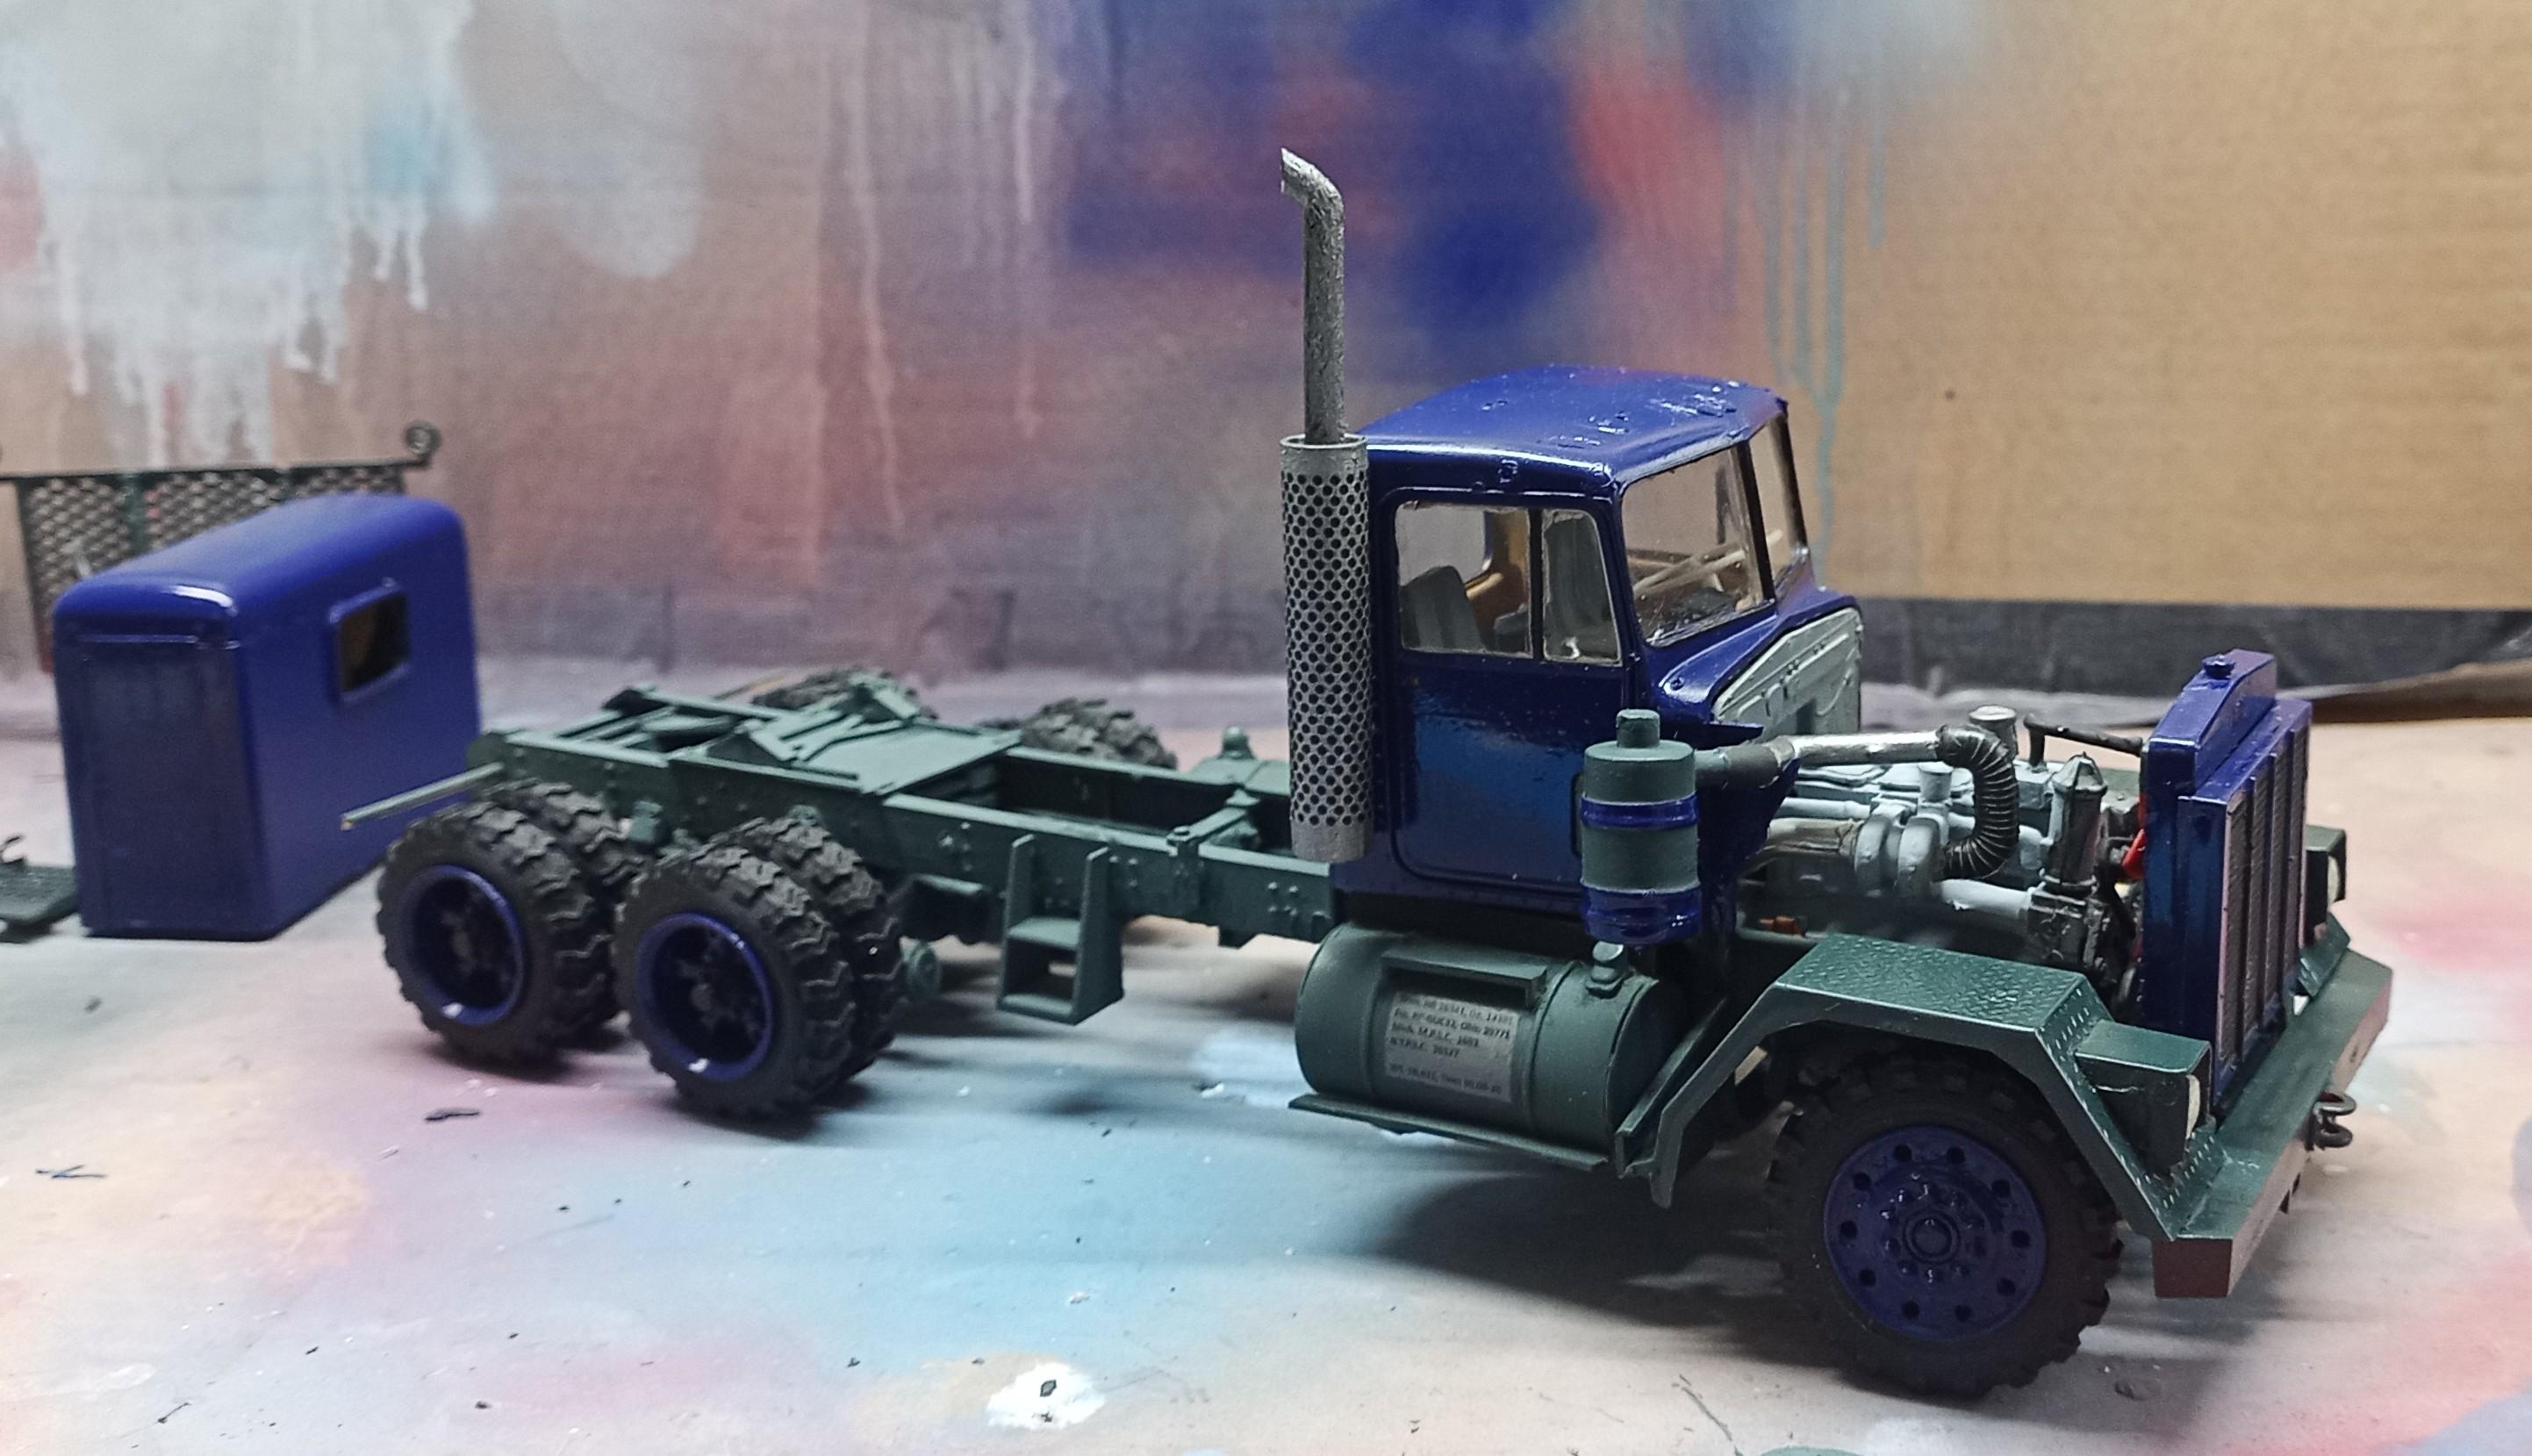
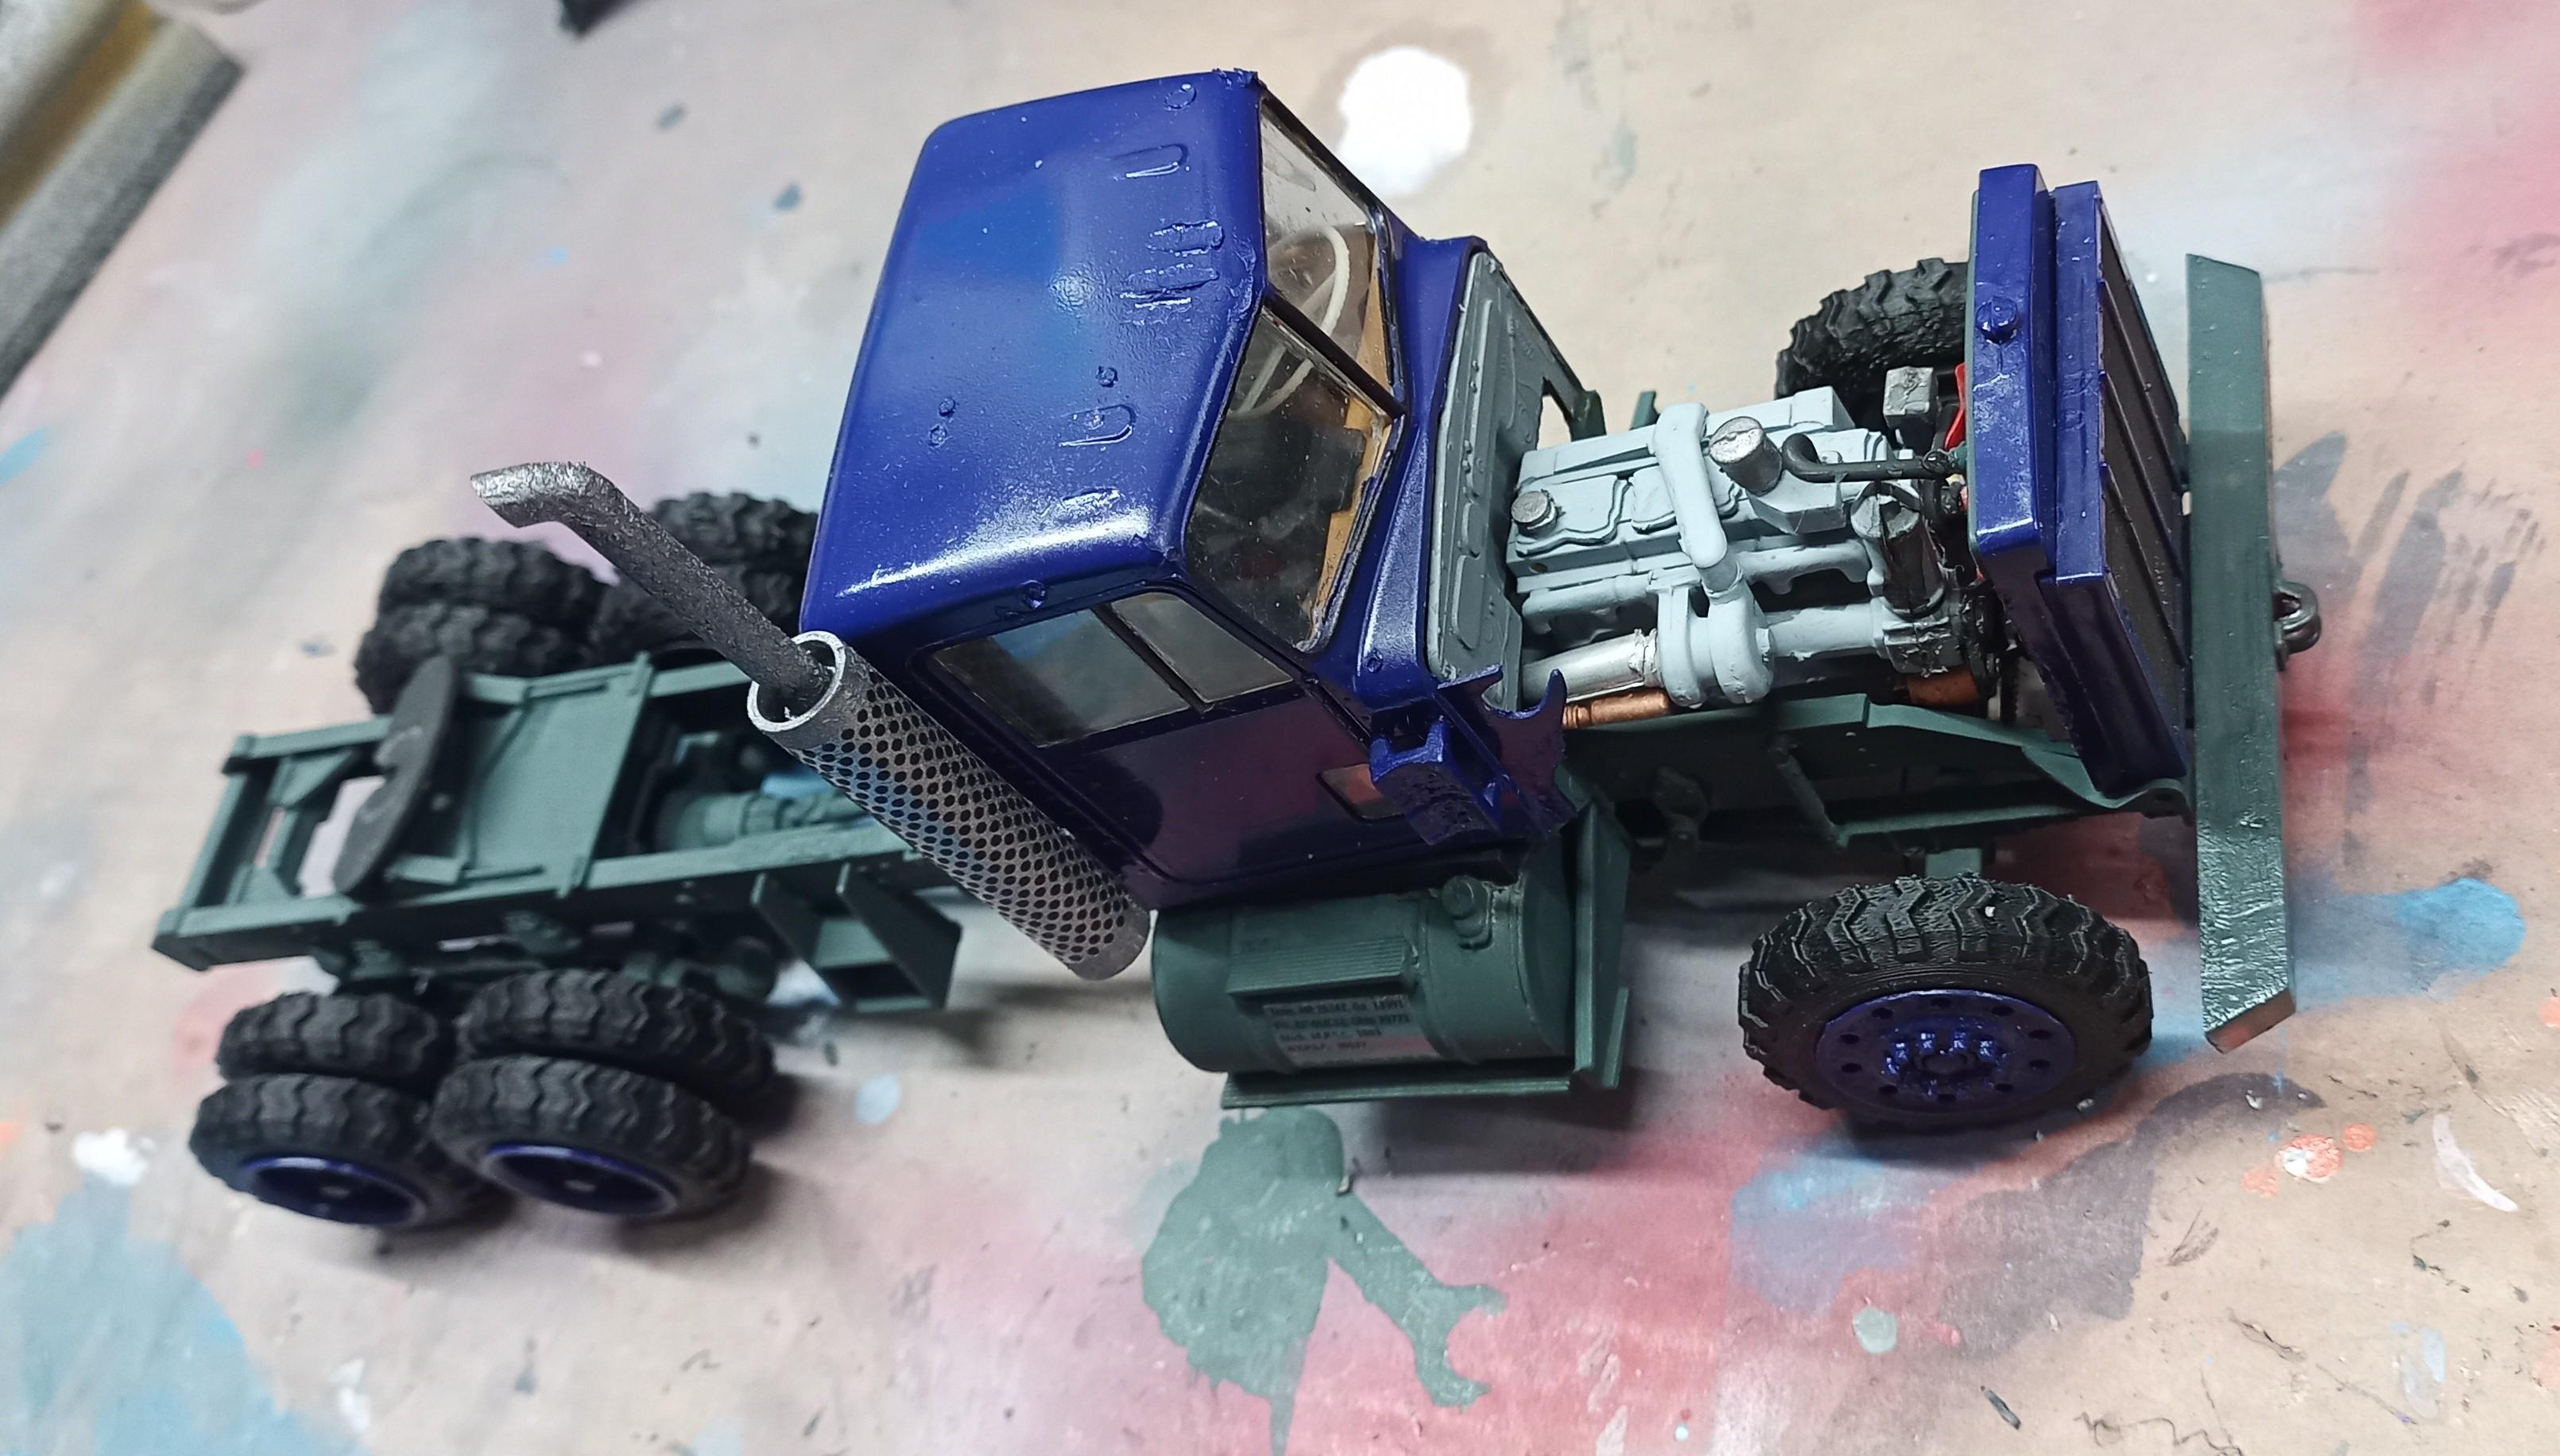
Here's some more to see: Fenders, air cleaner and some other small stuff added! Unfortunately the fan didn't go into the radiator although everything was put together correctly! I even loaded down the instructions to see if I did anything wrong but all was according to the instruction sheet. It was like that before I took it apart and no matter how I tried to fit it in, it just didn't work out. The hood will be closed anyway so it won't be seen later!
-
Alaskan Hauler refurbishing project
Jürgen M. replied to Jürgen M.'s topic in WIP: Model Trucks: Big Rigs and Heavy Equipment
Thanks David, I had designed those a bit wider for a Jeep TJ I built a year ago. Had to narrow them a bit and take off the "Cooper Discoverer" on the side! -
Alaskan Hauler refurbishing project
Jürgen M. replied to Jürgen M.'s topic in WIP: Model Trucks: Big Rigs and Heavy Equipment
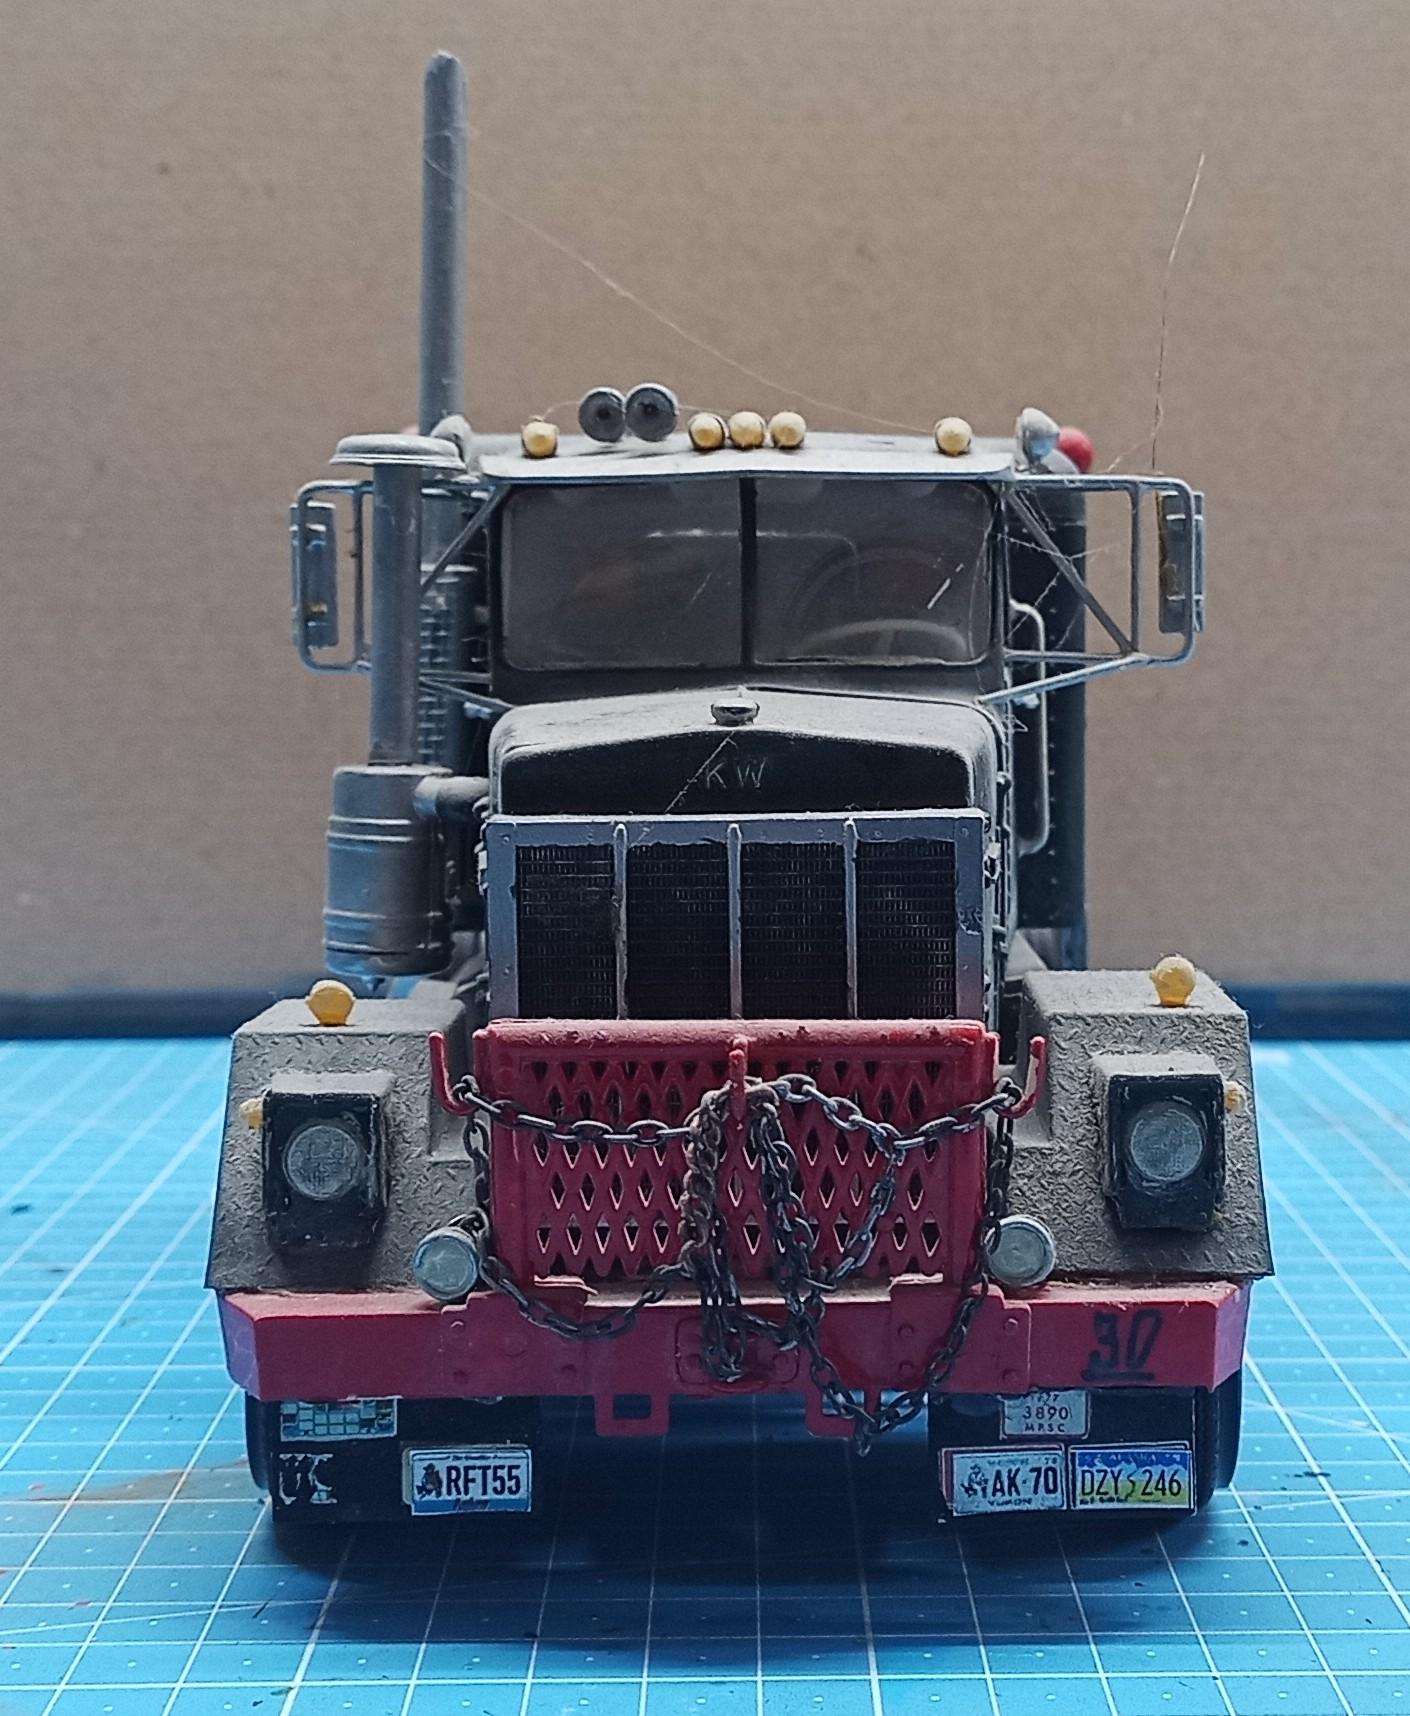
Some more progress: The grille ... and the cab: As I said, the interior wasn't changed, just touched up my miserable teenage painting skills. Put the windows and interior in and mounted the cab. The exhaust pipe and muffler are printed. Took it over from the Conco build! Thought it would look better than the skinny box pipe! Oh, Lucas, I think I won't need two weeks after all! 😉
-
Kenworth aerodyne cabover
Jürgen M. replied to Bronzekeg's topic in WIP: Model Trucks: Big Rigs and Heavy Equipment
Hinges look nice! Always a tough job integrating those! -
You're doing a fantastic job on this, Jeff! Those bolts sure make it authentic!
-
Alaskan Hauler refurbishing project
Jürgen M. replied to Jürgen M.'s topic in WIP: Model Trucks: Big Rigs and Heavy Equipment
Thanks Steve! I couldn't resist! 🙈 The tires are printed! So is the step on the side. -
Alaskan Hauler refurbishing project
Jürgen M. replied to Jürgen M.'s topic in WIP: Model Trucks: Big Rigs and Heavy Equipment
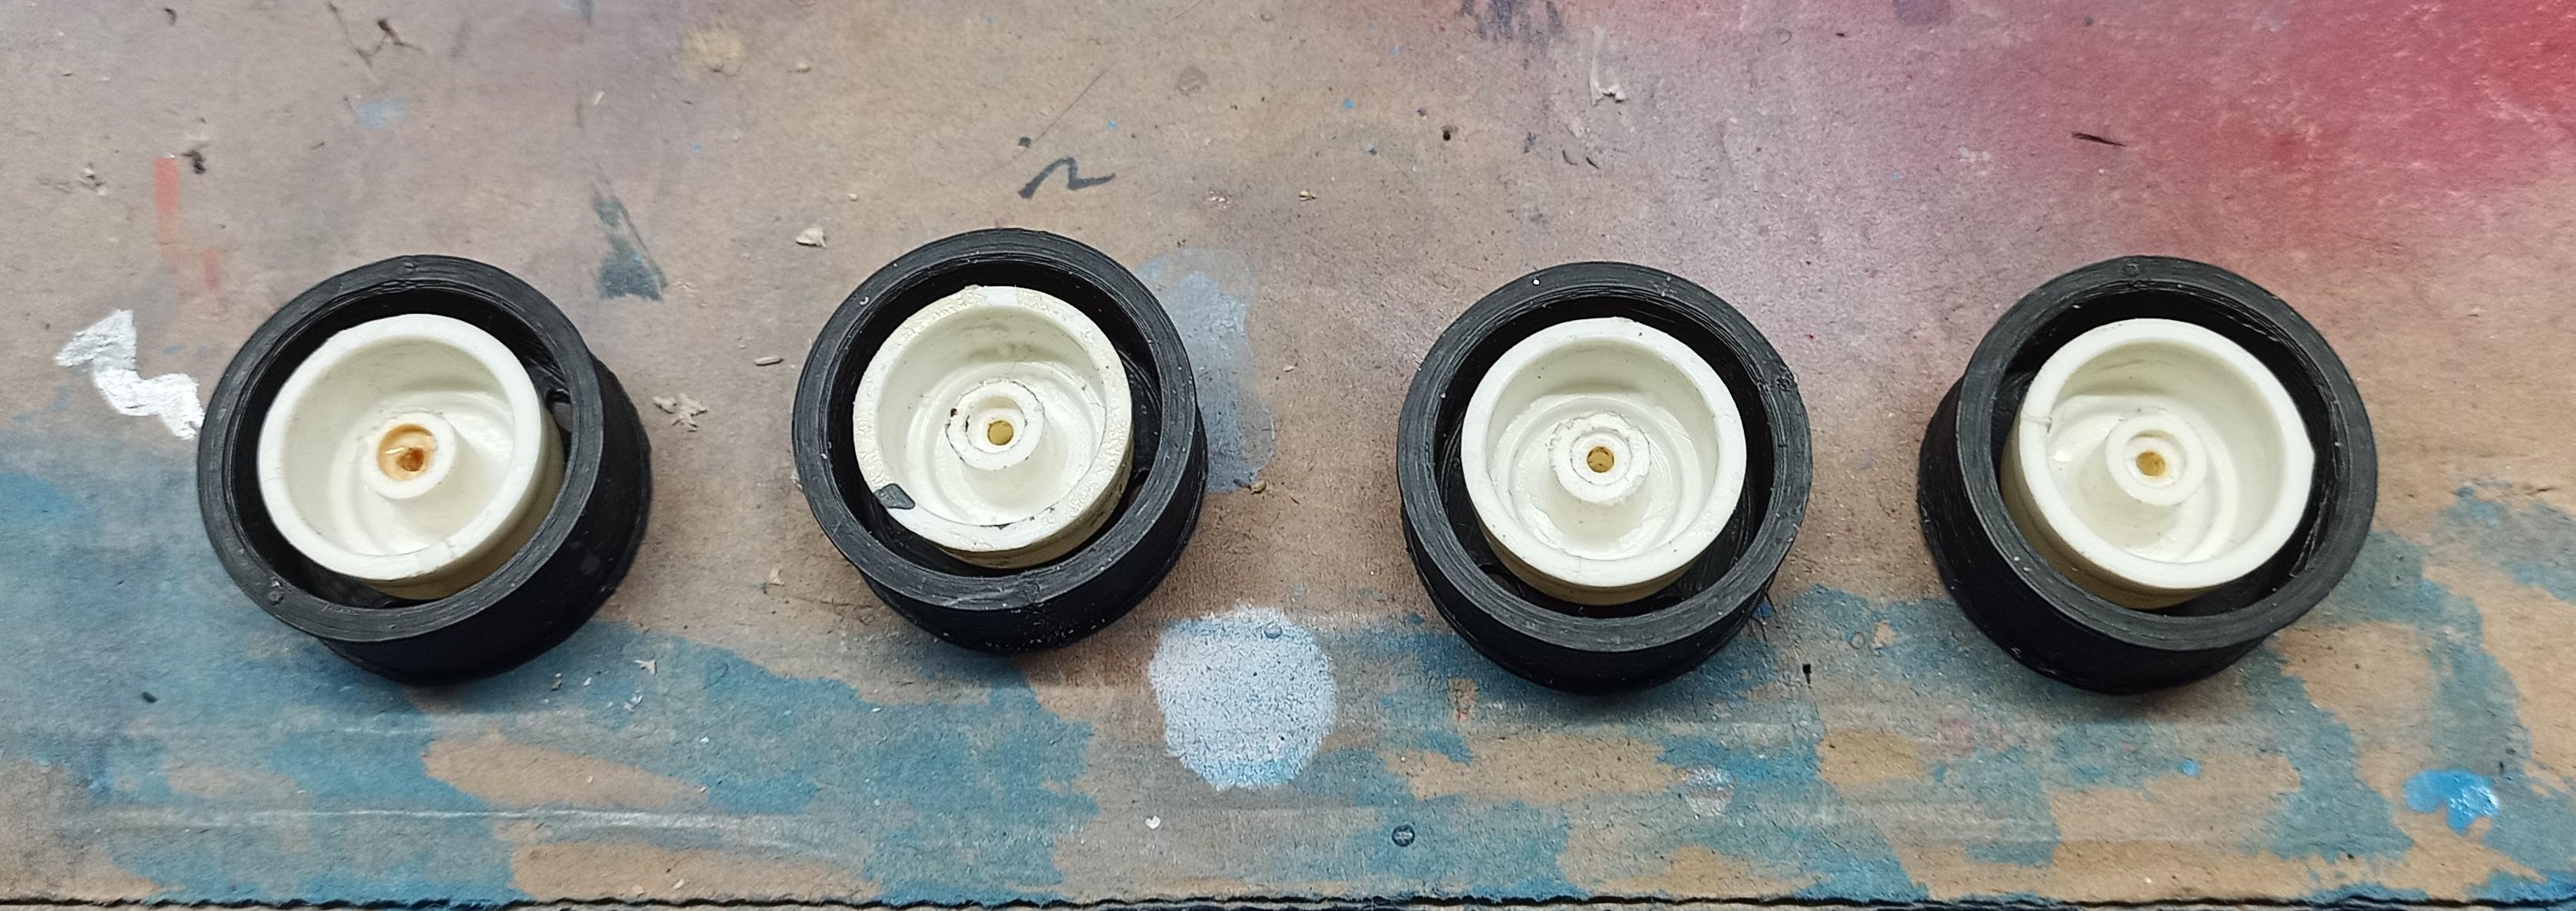
These are the rims and tires I chose! You might say they're a bit extreme but why not!
-
Alaskan Hauler refurbishing project
Jürgen M. replied to Jürgen M.'s topic in WIP: Model Trucks: Big Rigs and Heavy Equipment
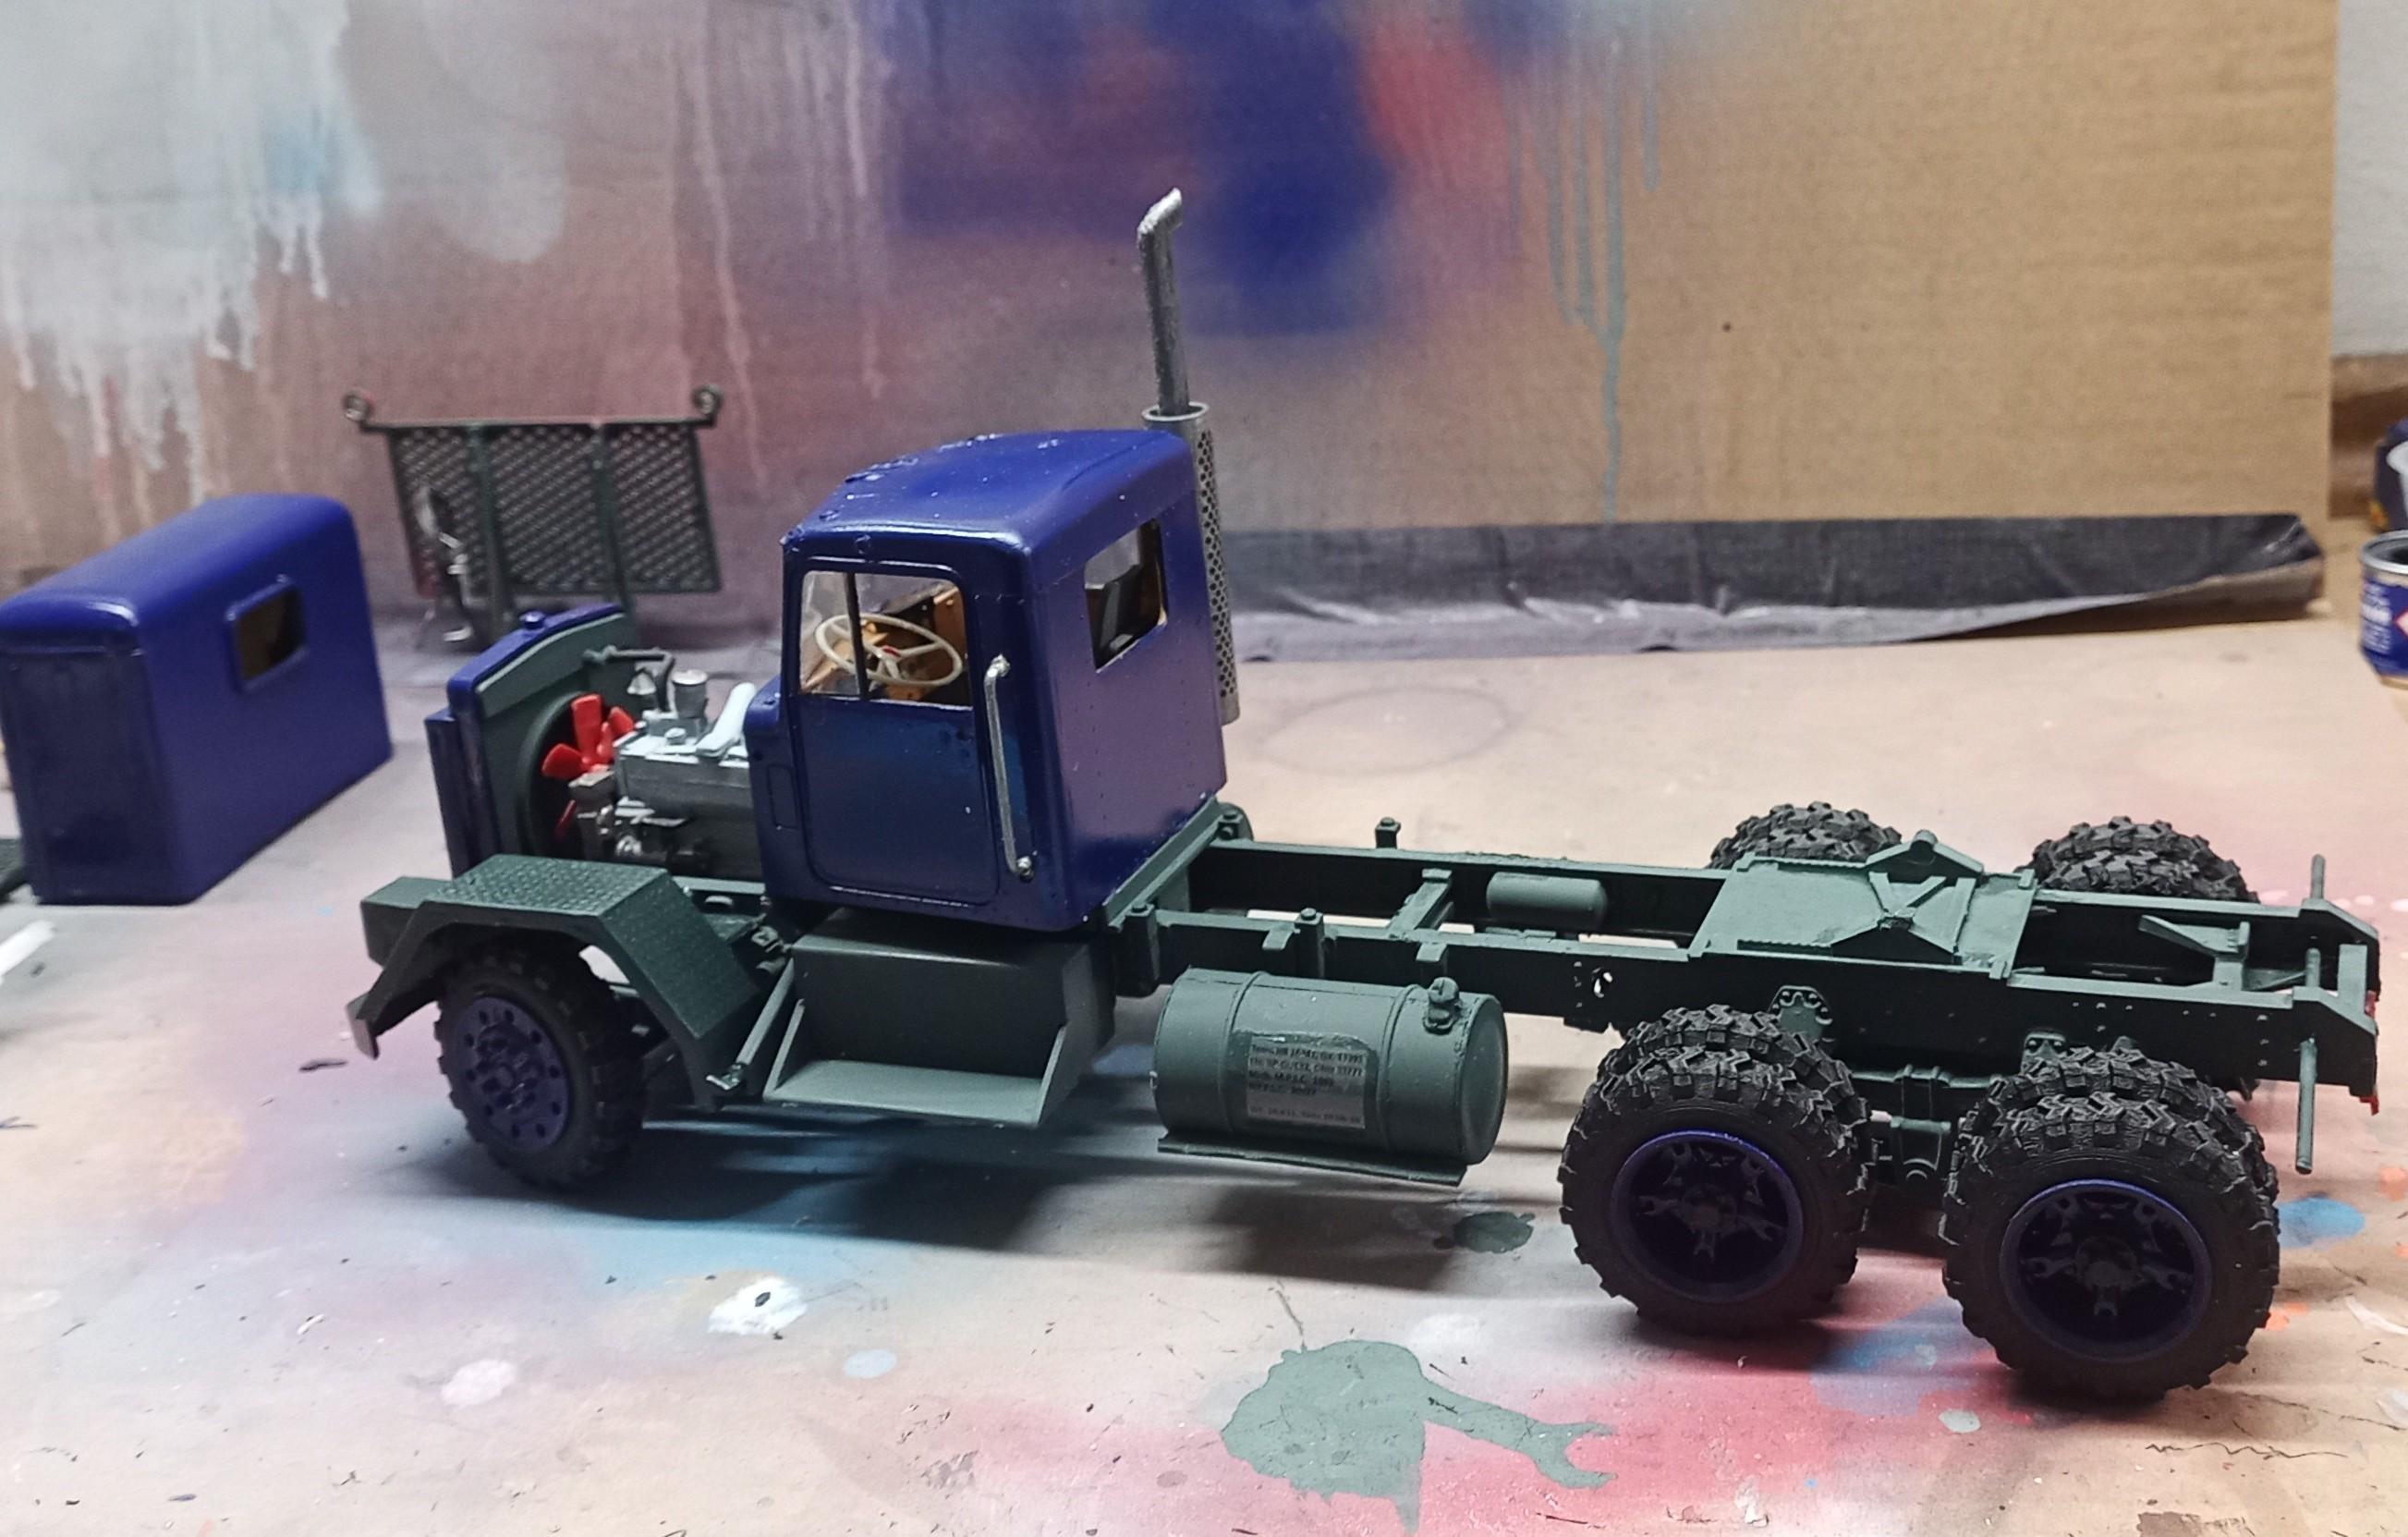
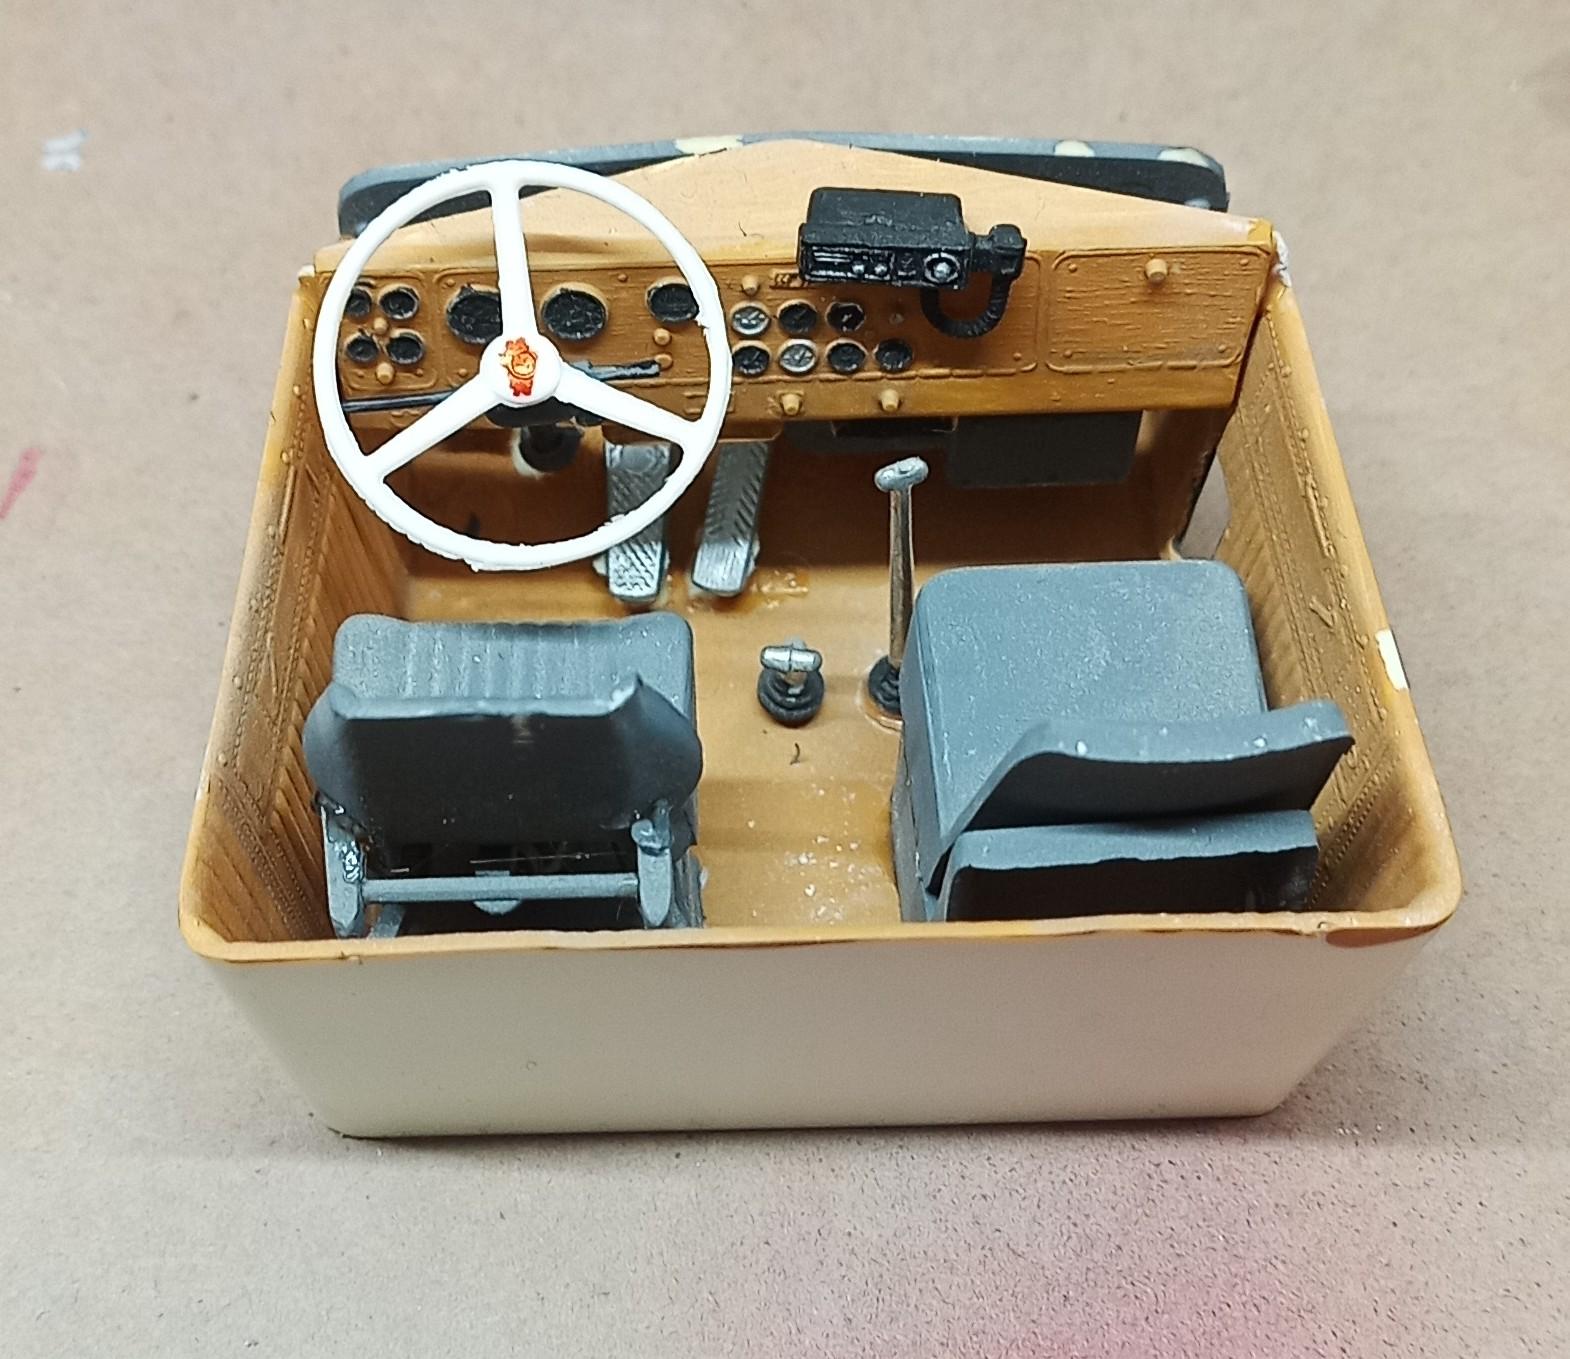
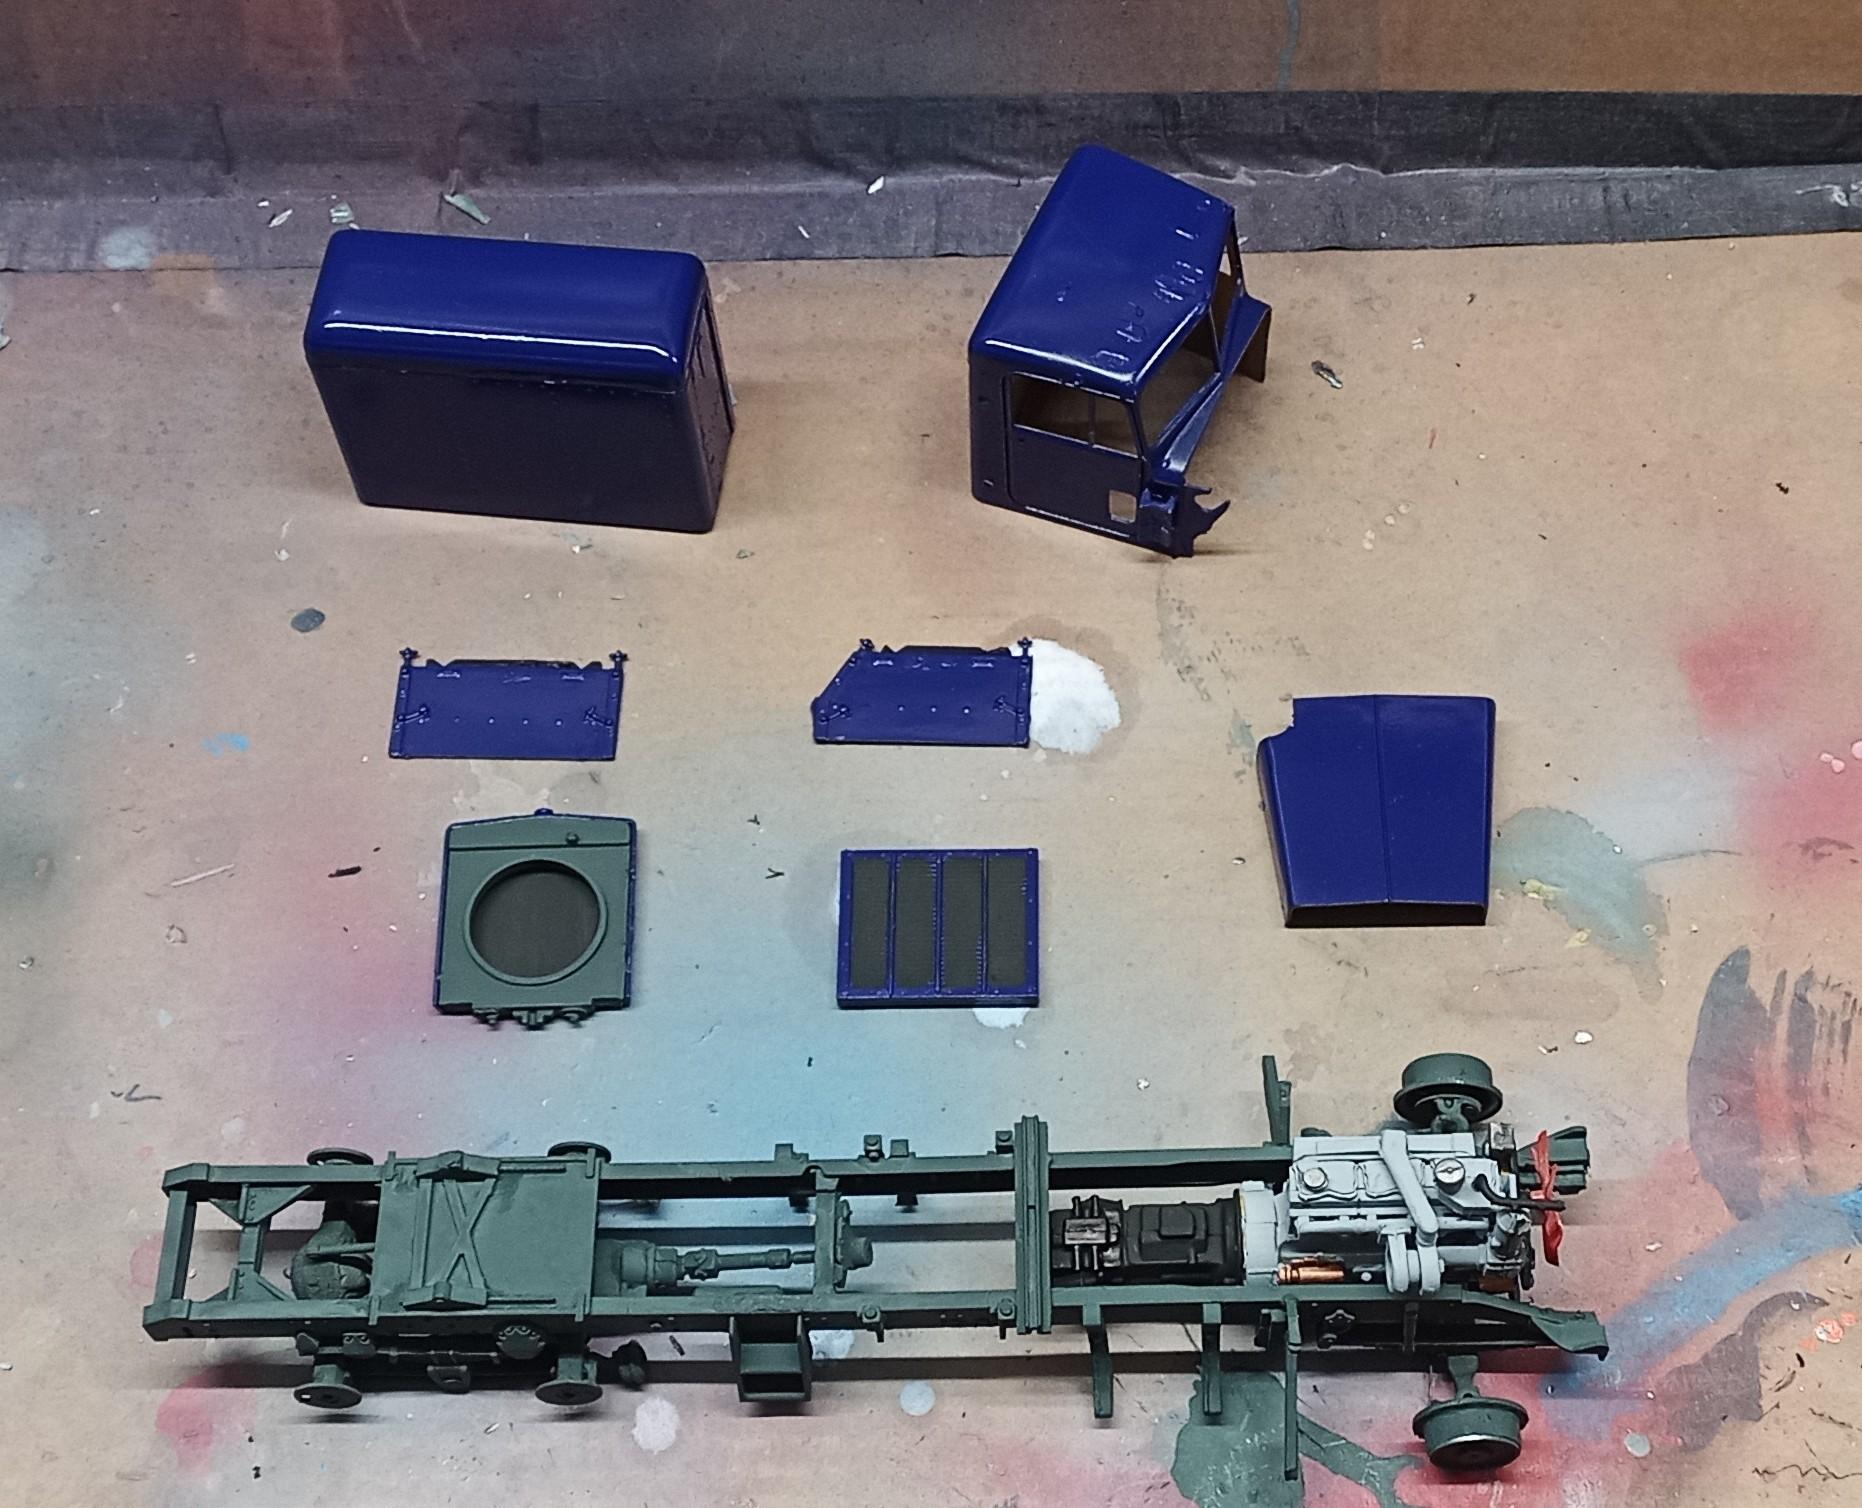
The interior will stay as it is: Just a little touch up work necessary! These are the body parts and the chassis with engine: I cut out the hood a bit more to allow space for the second air intakte.
-
Caboverdose
Jürgen M. replied to Rockford's topic in WIP: Model Trucks: Big Rigs and Heavy Equipment
Looks really cool, Steve! You really have to know lots about these engines to Scratch build them! You have my full respect! -
Alaskan Hauler refurbishing project
Jürgen M. replied to Jürgen M.'s topic in WIP: Model Trucks: Big Rigs and Heavy Equipment
Thanks guys! I Hope it turns out good! I still have a bit of a belly ache having torn it down. -
Alaskan Hauler refurbishing project
Jürgen M. replied to Jürgen M.'s topic in WIP: Model Trucks: Big Rigs and Heavy Equipment
Printed the new rims and rear hubs, side steps for the sleeper, new front mud flaps and a new cover for the air cleaner. It will have a double intakte, one for the engine and one for the cab. Original brakedrums are being reused. Hope to begin painting this weekend! I'll also print a new exhaust pipe, also a take over part from the IH Conco!
-
Nice job! A really good looking Mack!
-
Alaskan Hauler refurbishing project
Jürgen M. replied to Jürgen M.'s topic in WIP: Model Trucks: Big Rigs and Heavy Equipment
The engine I'll keep but for the tires I think I have a solution! 😉 -
Alaskan Hauler refurbishing project
Jürgen M. replied to Jürgen M.'s topic in WIP: Model Trucks: Big Rigs and Heavy Equipment
The advantage of taking apart these old kits is that the glue is almost non existant after such a long time! I built it sometime around 82! Guess two weeks should hit it! Couple of days more or less! -
Alaskan Hauler refurbishing project
Jürgen M. replied to Jürgen M.'s topic in WIP: Model Trucks: Big Rigs and Heavy Equipment
Thanks! I can really use some encouragement on this! I still have a tear in one eye taking it apart since it was one of my first truck kits after the Mack R685st and a Peterbilt California hauler which doesn't exist anymore! -
Hi Folks, since I haven't been making much progress on my show case (for several reasons) I needed something else to do! I took my old Alaskan Hauler off the shelf a few days ago, put larger tires on it and put it back! Still I wasn't satisfied so yesterday evening I again took it down and then apart! I'll give it a new paint job and again other tires. I have a Set of Italeri rubber tires which I'd like to use. Also I'll use new, larger rims. Hope this turns out as I expect! I admit it did hurt a bit to Take it apart!
-
Caboverdose
Jürgen M. replied to Rockford's topic in WIP: Model Trucks: Big Rigs and Heavy Equipment
I can imagine that it's not easy especially in an even smaller scale than 1/25. I'll be following and I'm sure you'll find a brilliant solution! -
Caboverdose
Jürgen M. replied to Rockford's topic in WIP: Model Trucks: Big Rigs and Heavy Equipment
One question Steve: How will you keep the cab from tilting all the way over? That's one thing I've always been dealing with building cabovers. Some are stopped by the bumper or you can Rest the cab on the shifter. But that's not really the best way. I admit I've been avoiding this problem. Thought of a sort of piston or something but there was never enough space! -
Very nice! Looks so real!
-
Nice work! Looks just awesome!
-
Caboverdose
Jürgen M. replied to Rockford's topic in WIP: Model Trucks: Big Rigs and Heavy Equipment
Did anyone doubt you'd make it? We all have full faith in your abilities! -
Resto Rod Autocar
Jürgen M. replied to Gary Chastain's topic in WIP: Model Trucks: Big Rigs and Heavy Equipment
Fantastic! 👍 -
Western Star Classic heavy haul
Jürgen M. replied to Biggu's topic in WIP: Model Trucks: Big Rigs and Heavy Equipment
Take your time! There shouldn't be a rush! You're a model builder, not an escaped convict! 😉 -
If I may give my opinion, I used a mix of 5 colors in total for mine! I don't believe there's one color on the market that fits it! I'd have a look which ones I used if you like!