Duddly01
-
Posts
1,048 -
Joined
-
Last visited
Content Type
Profiles
Forums
Events
Gallery
Everything posted by Duddly01
-
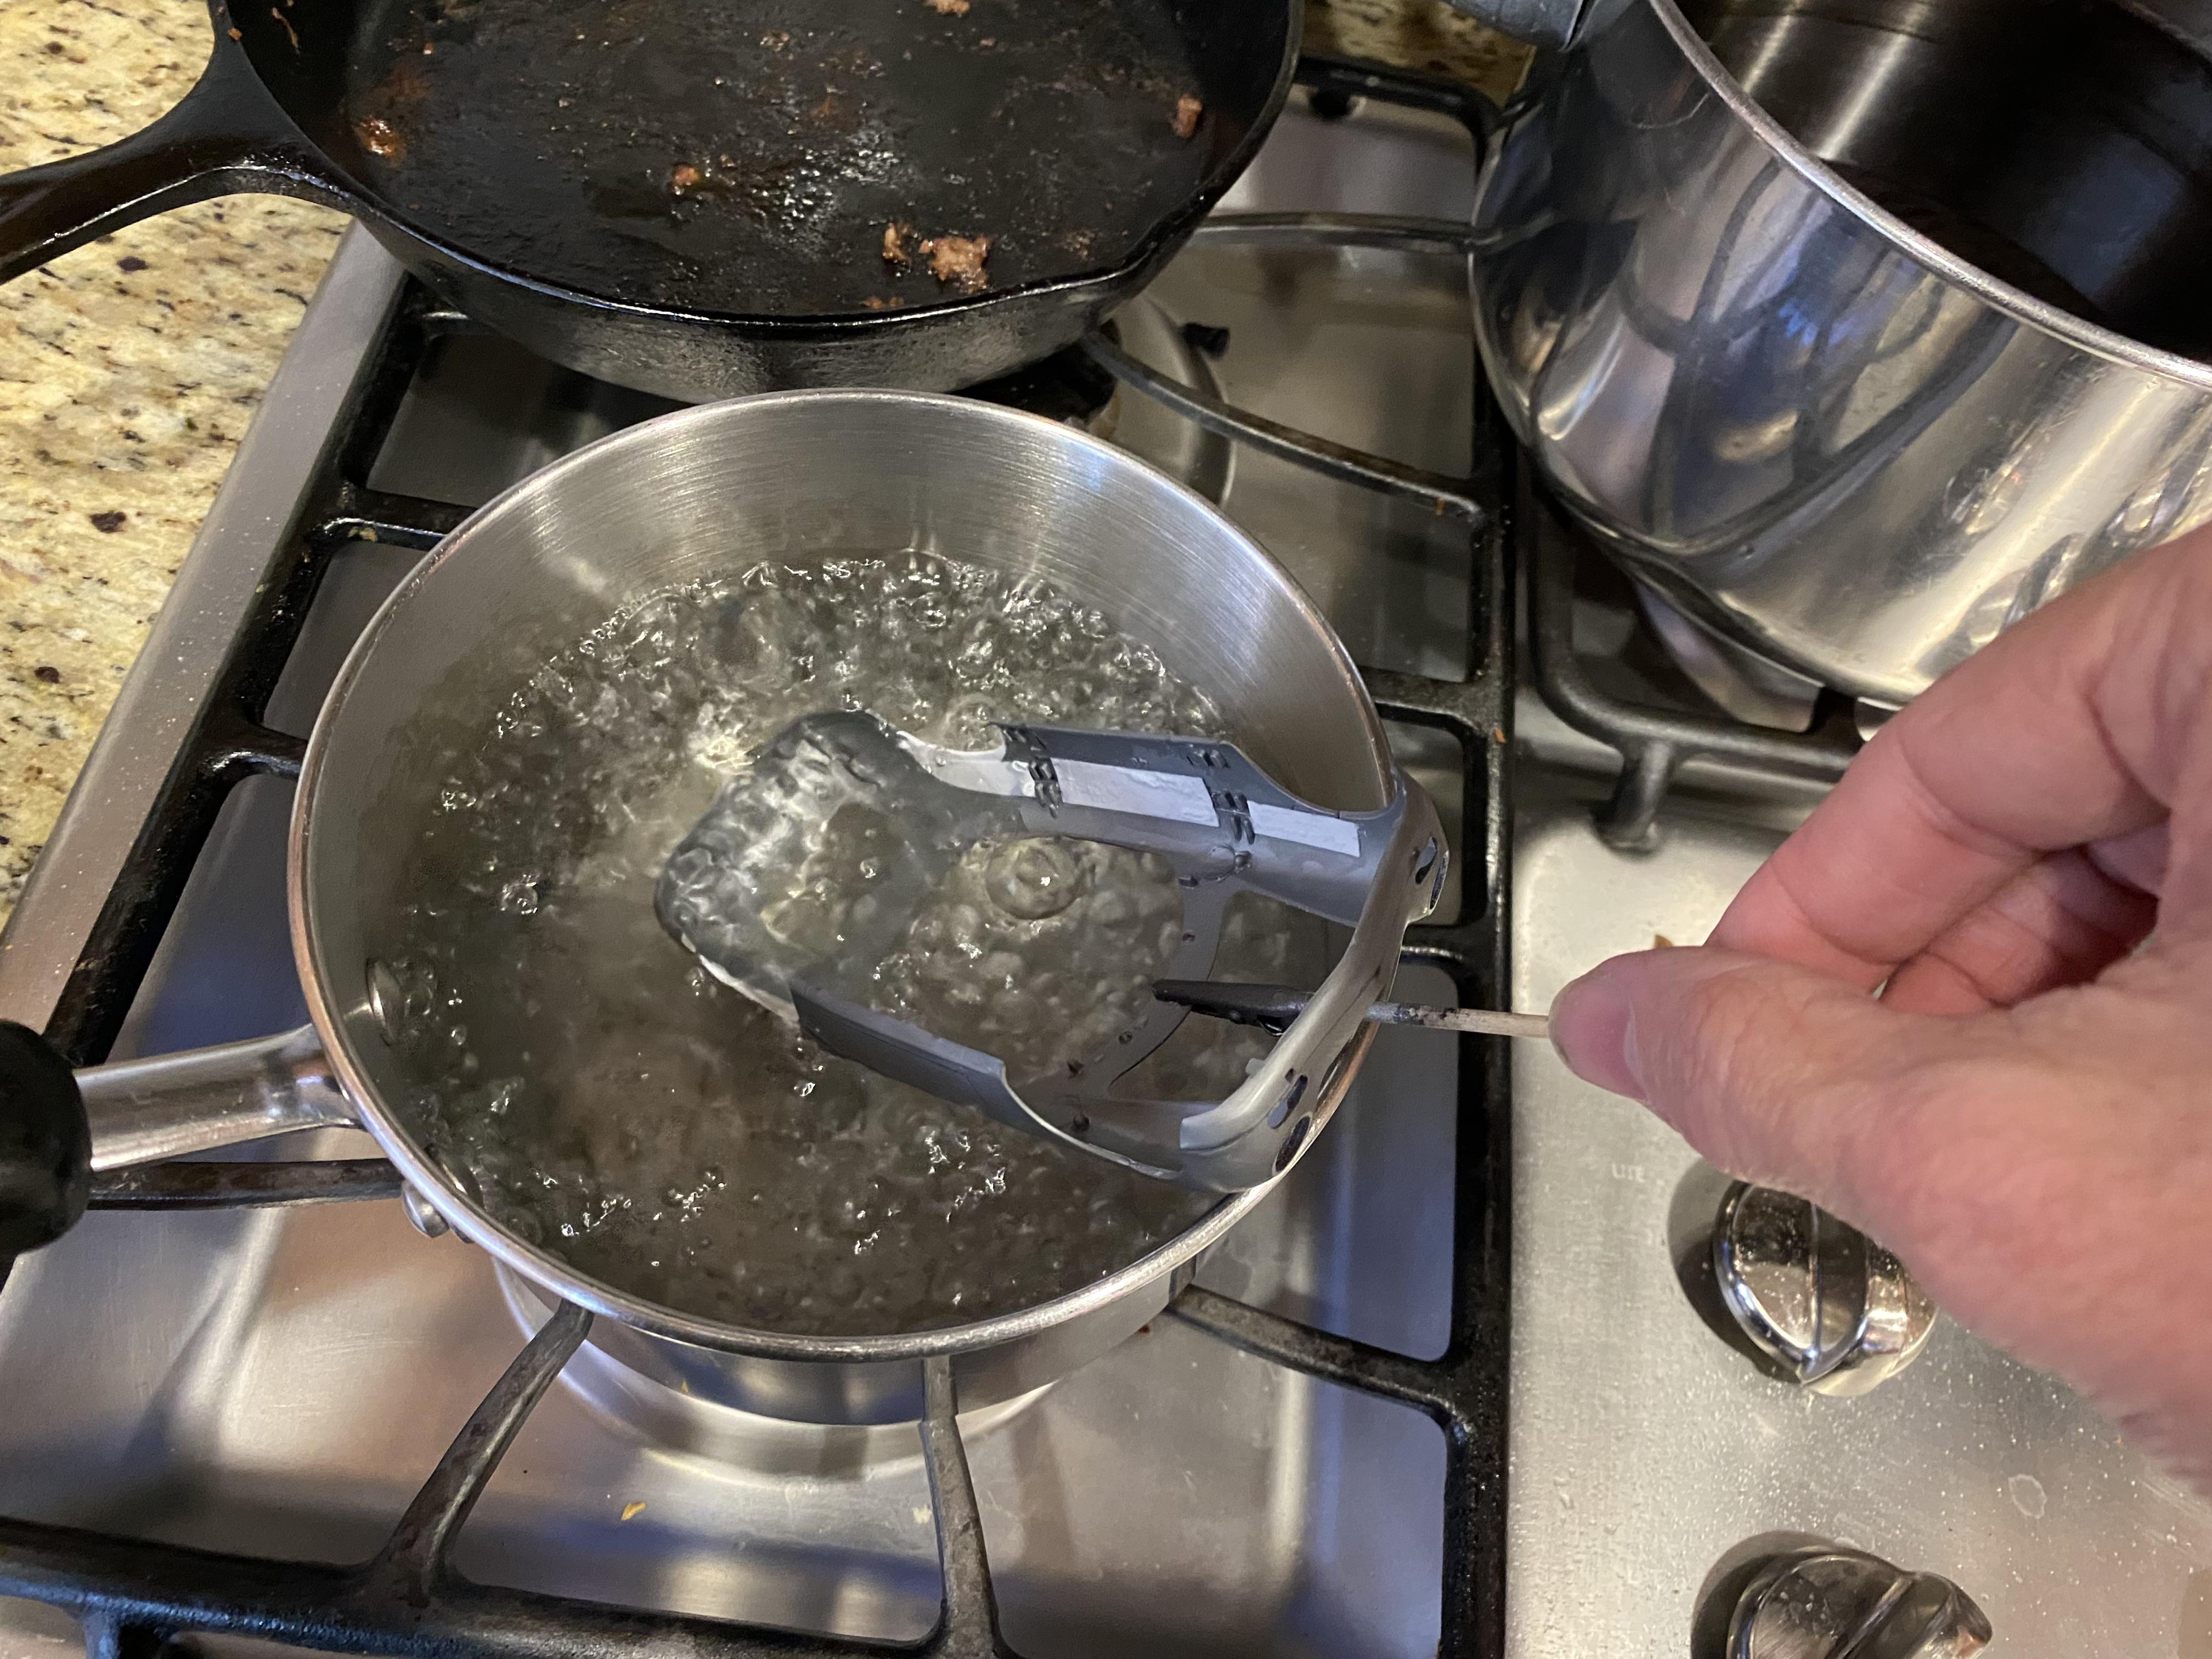
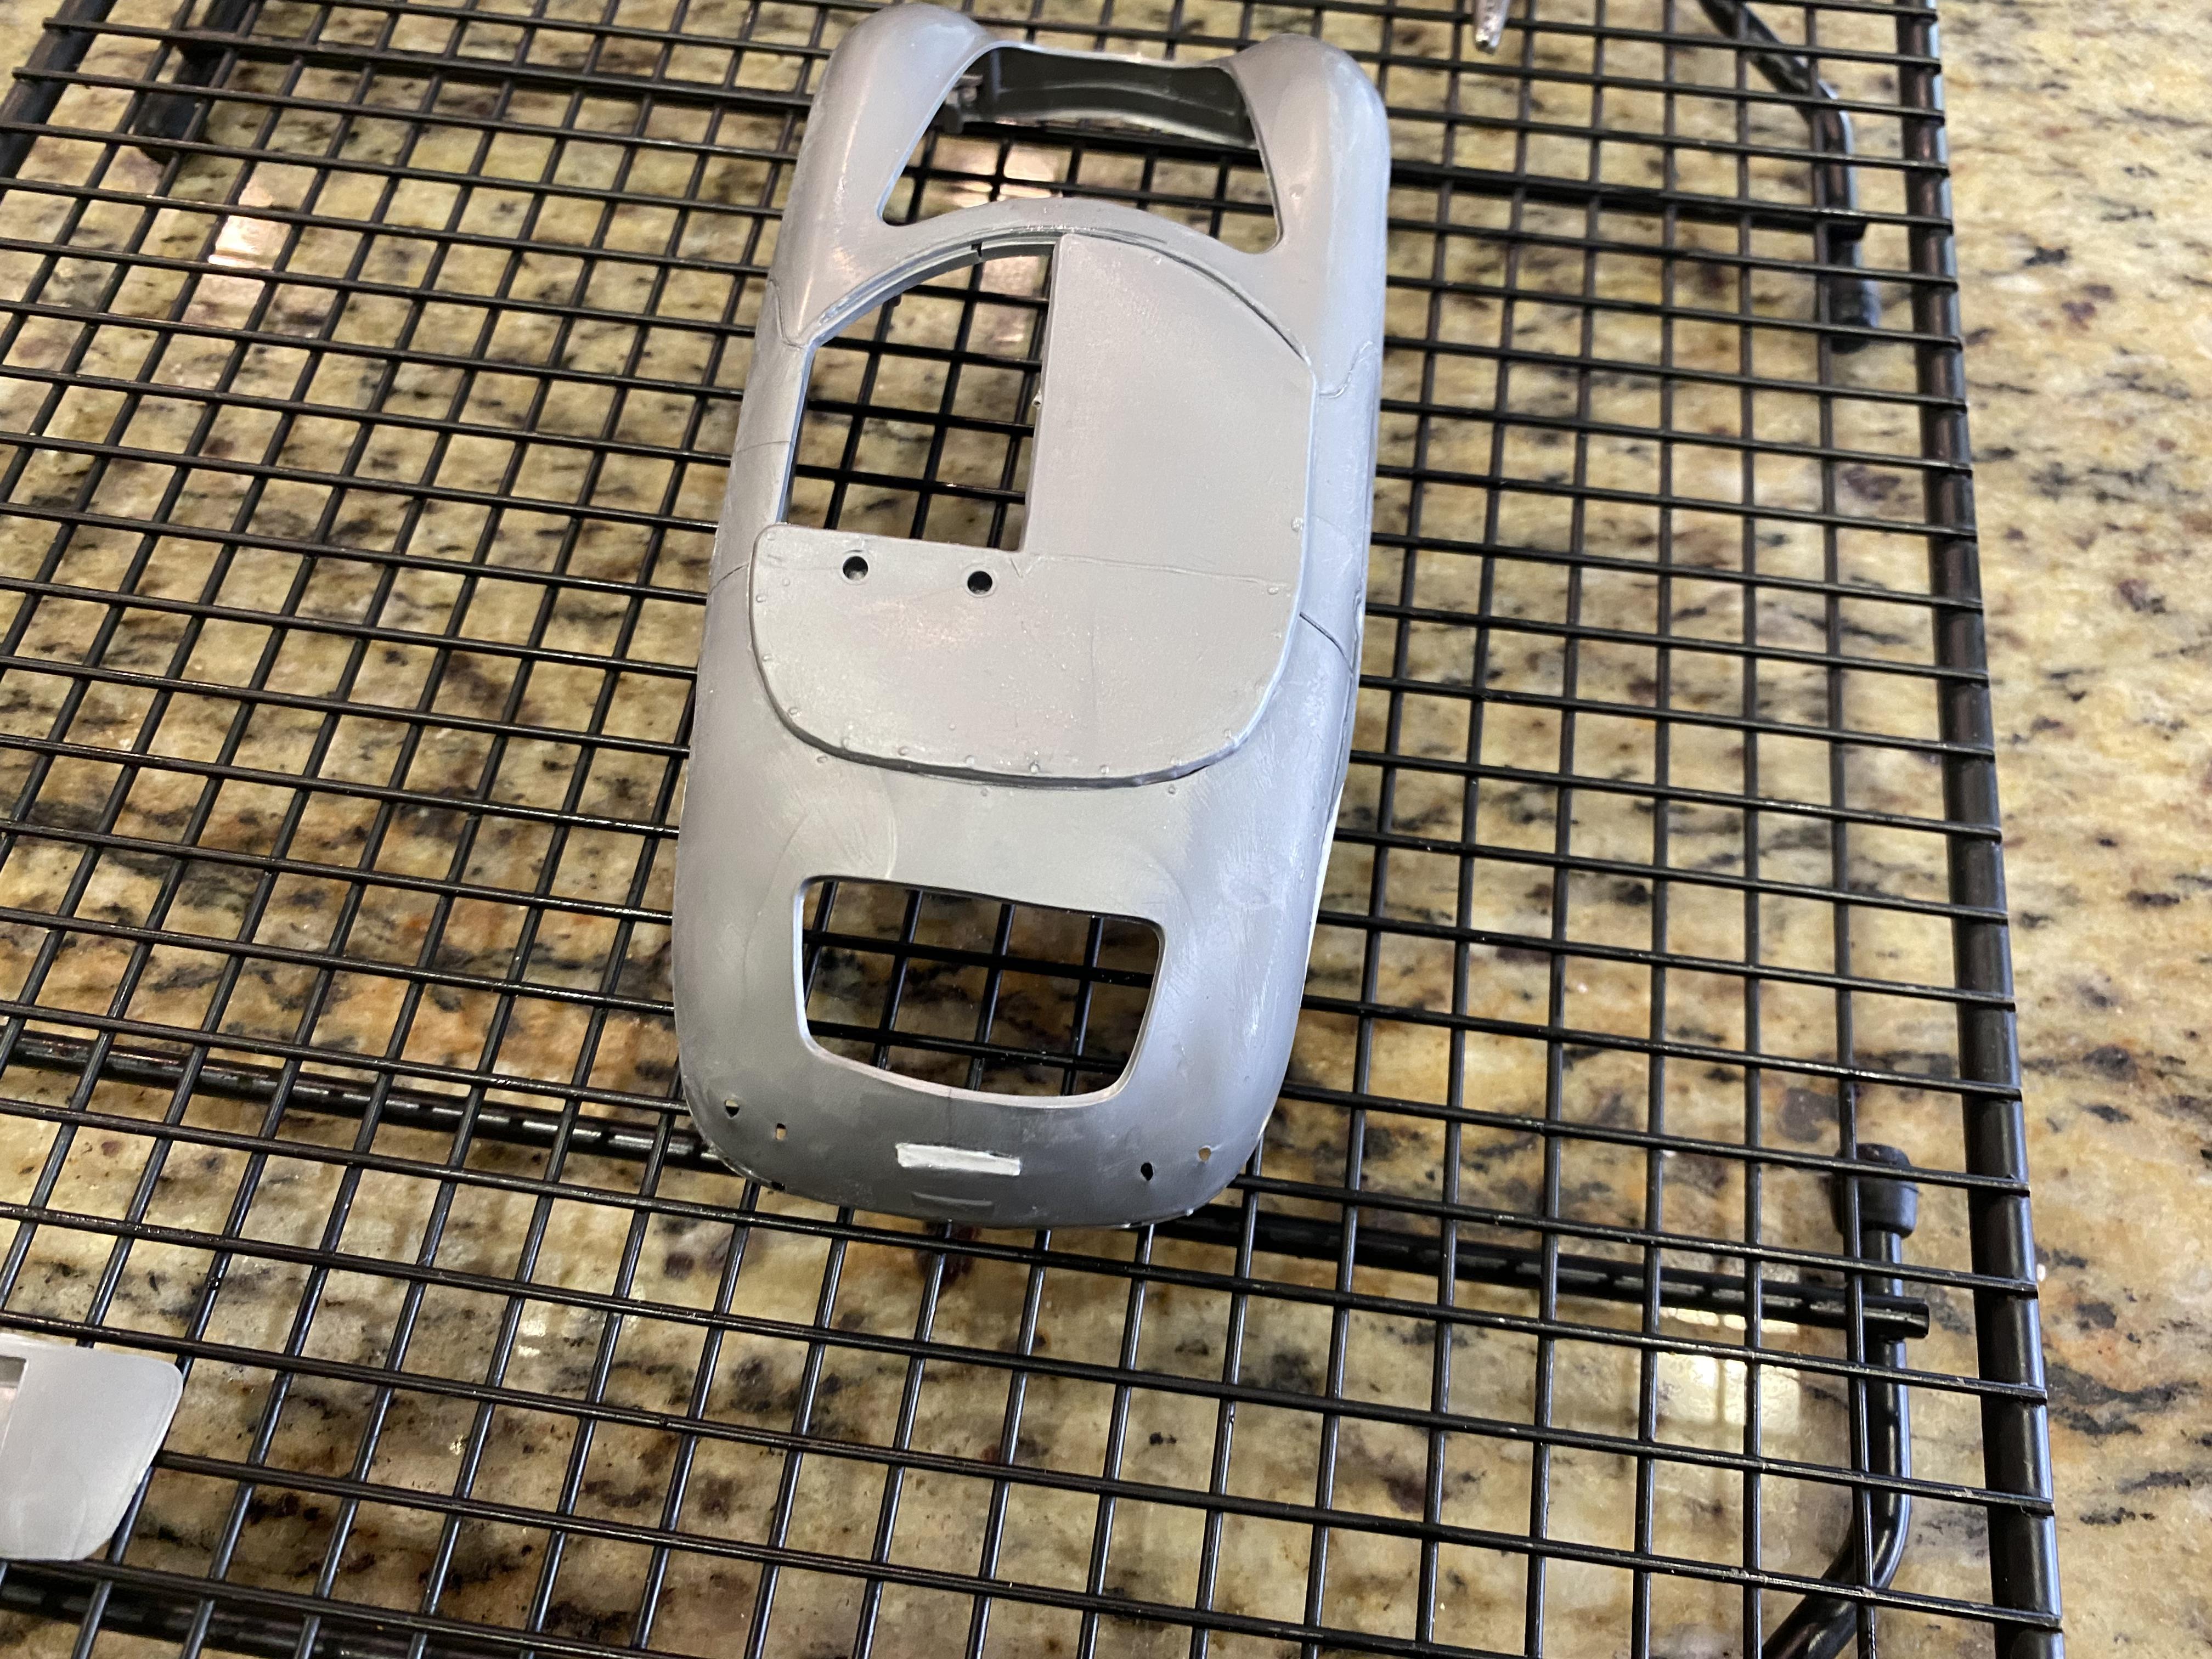
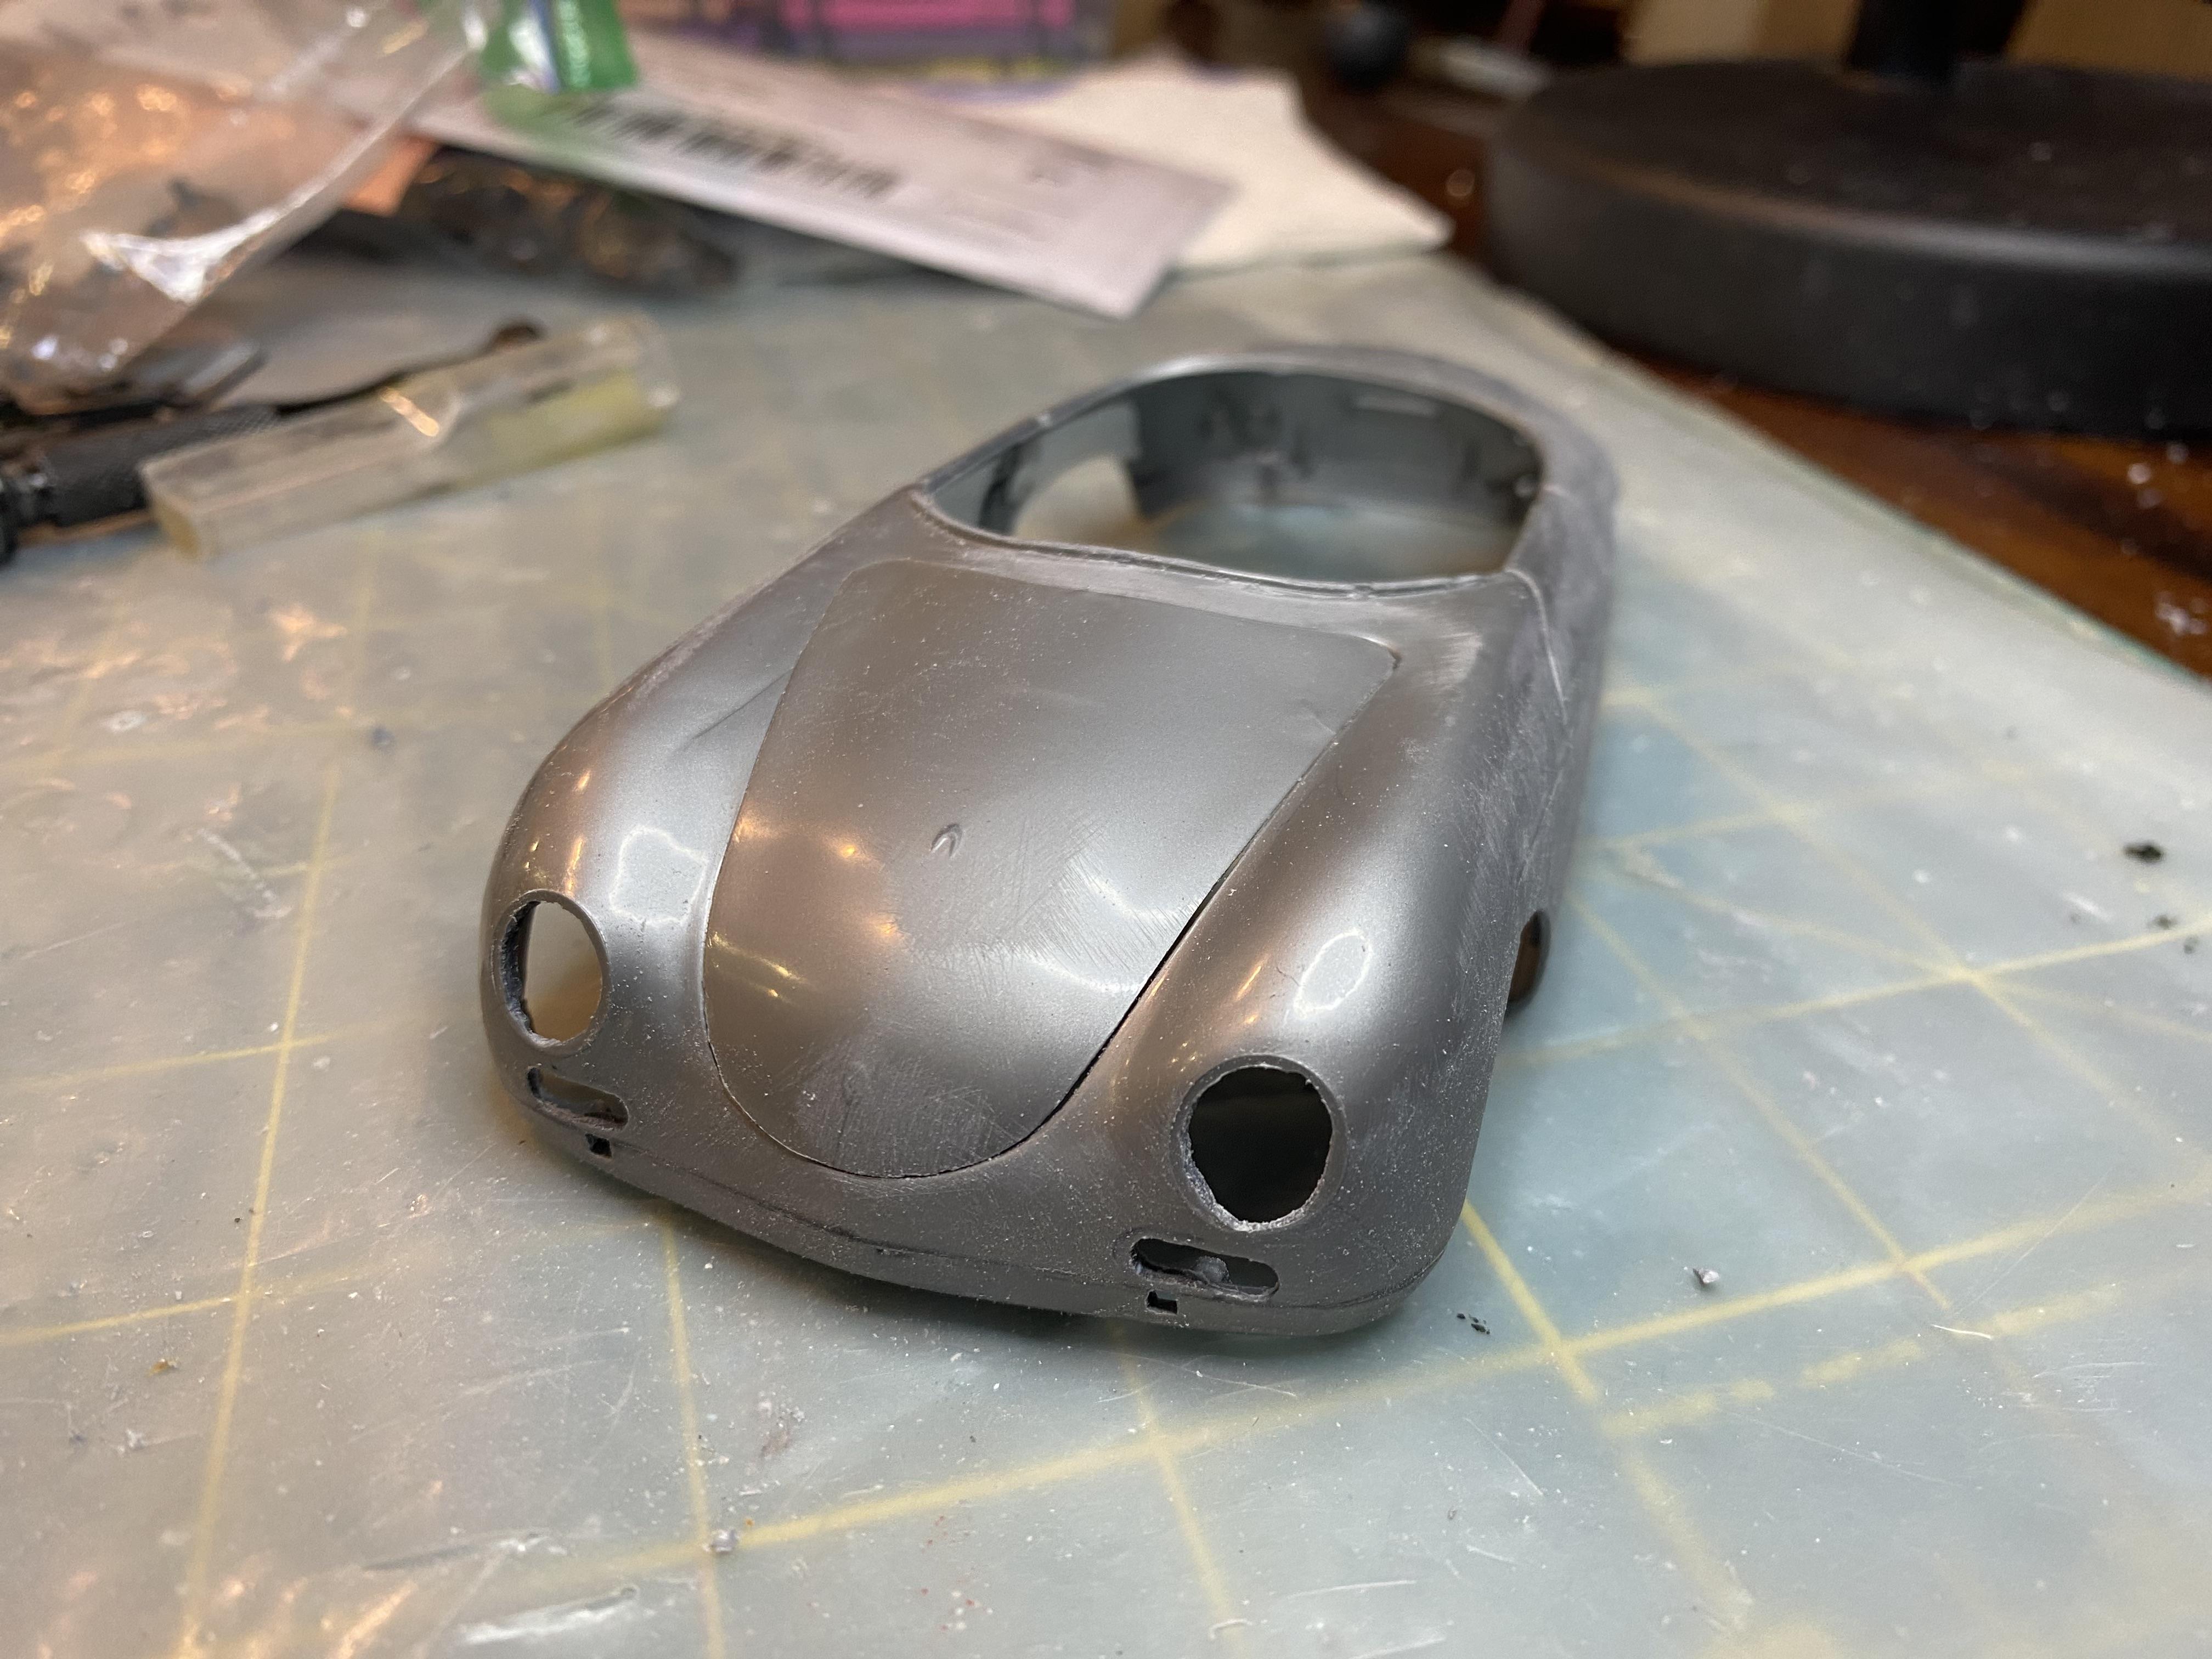
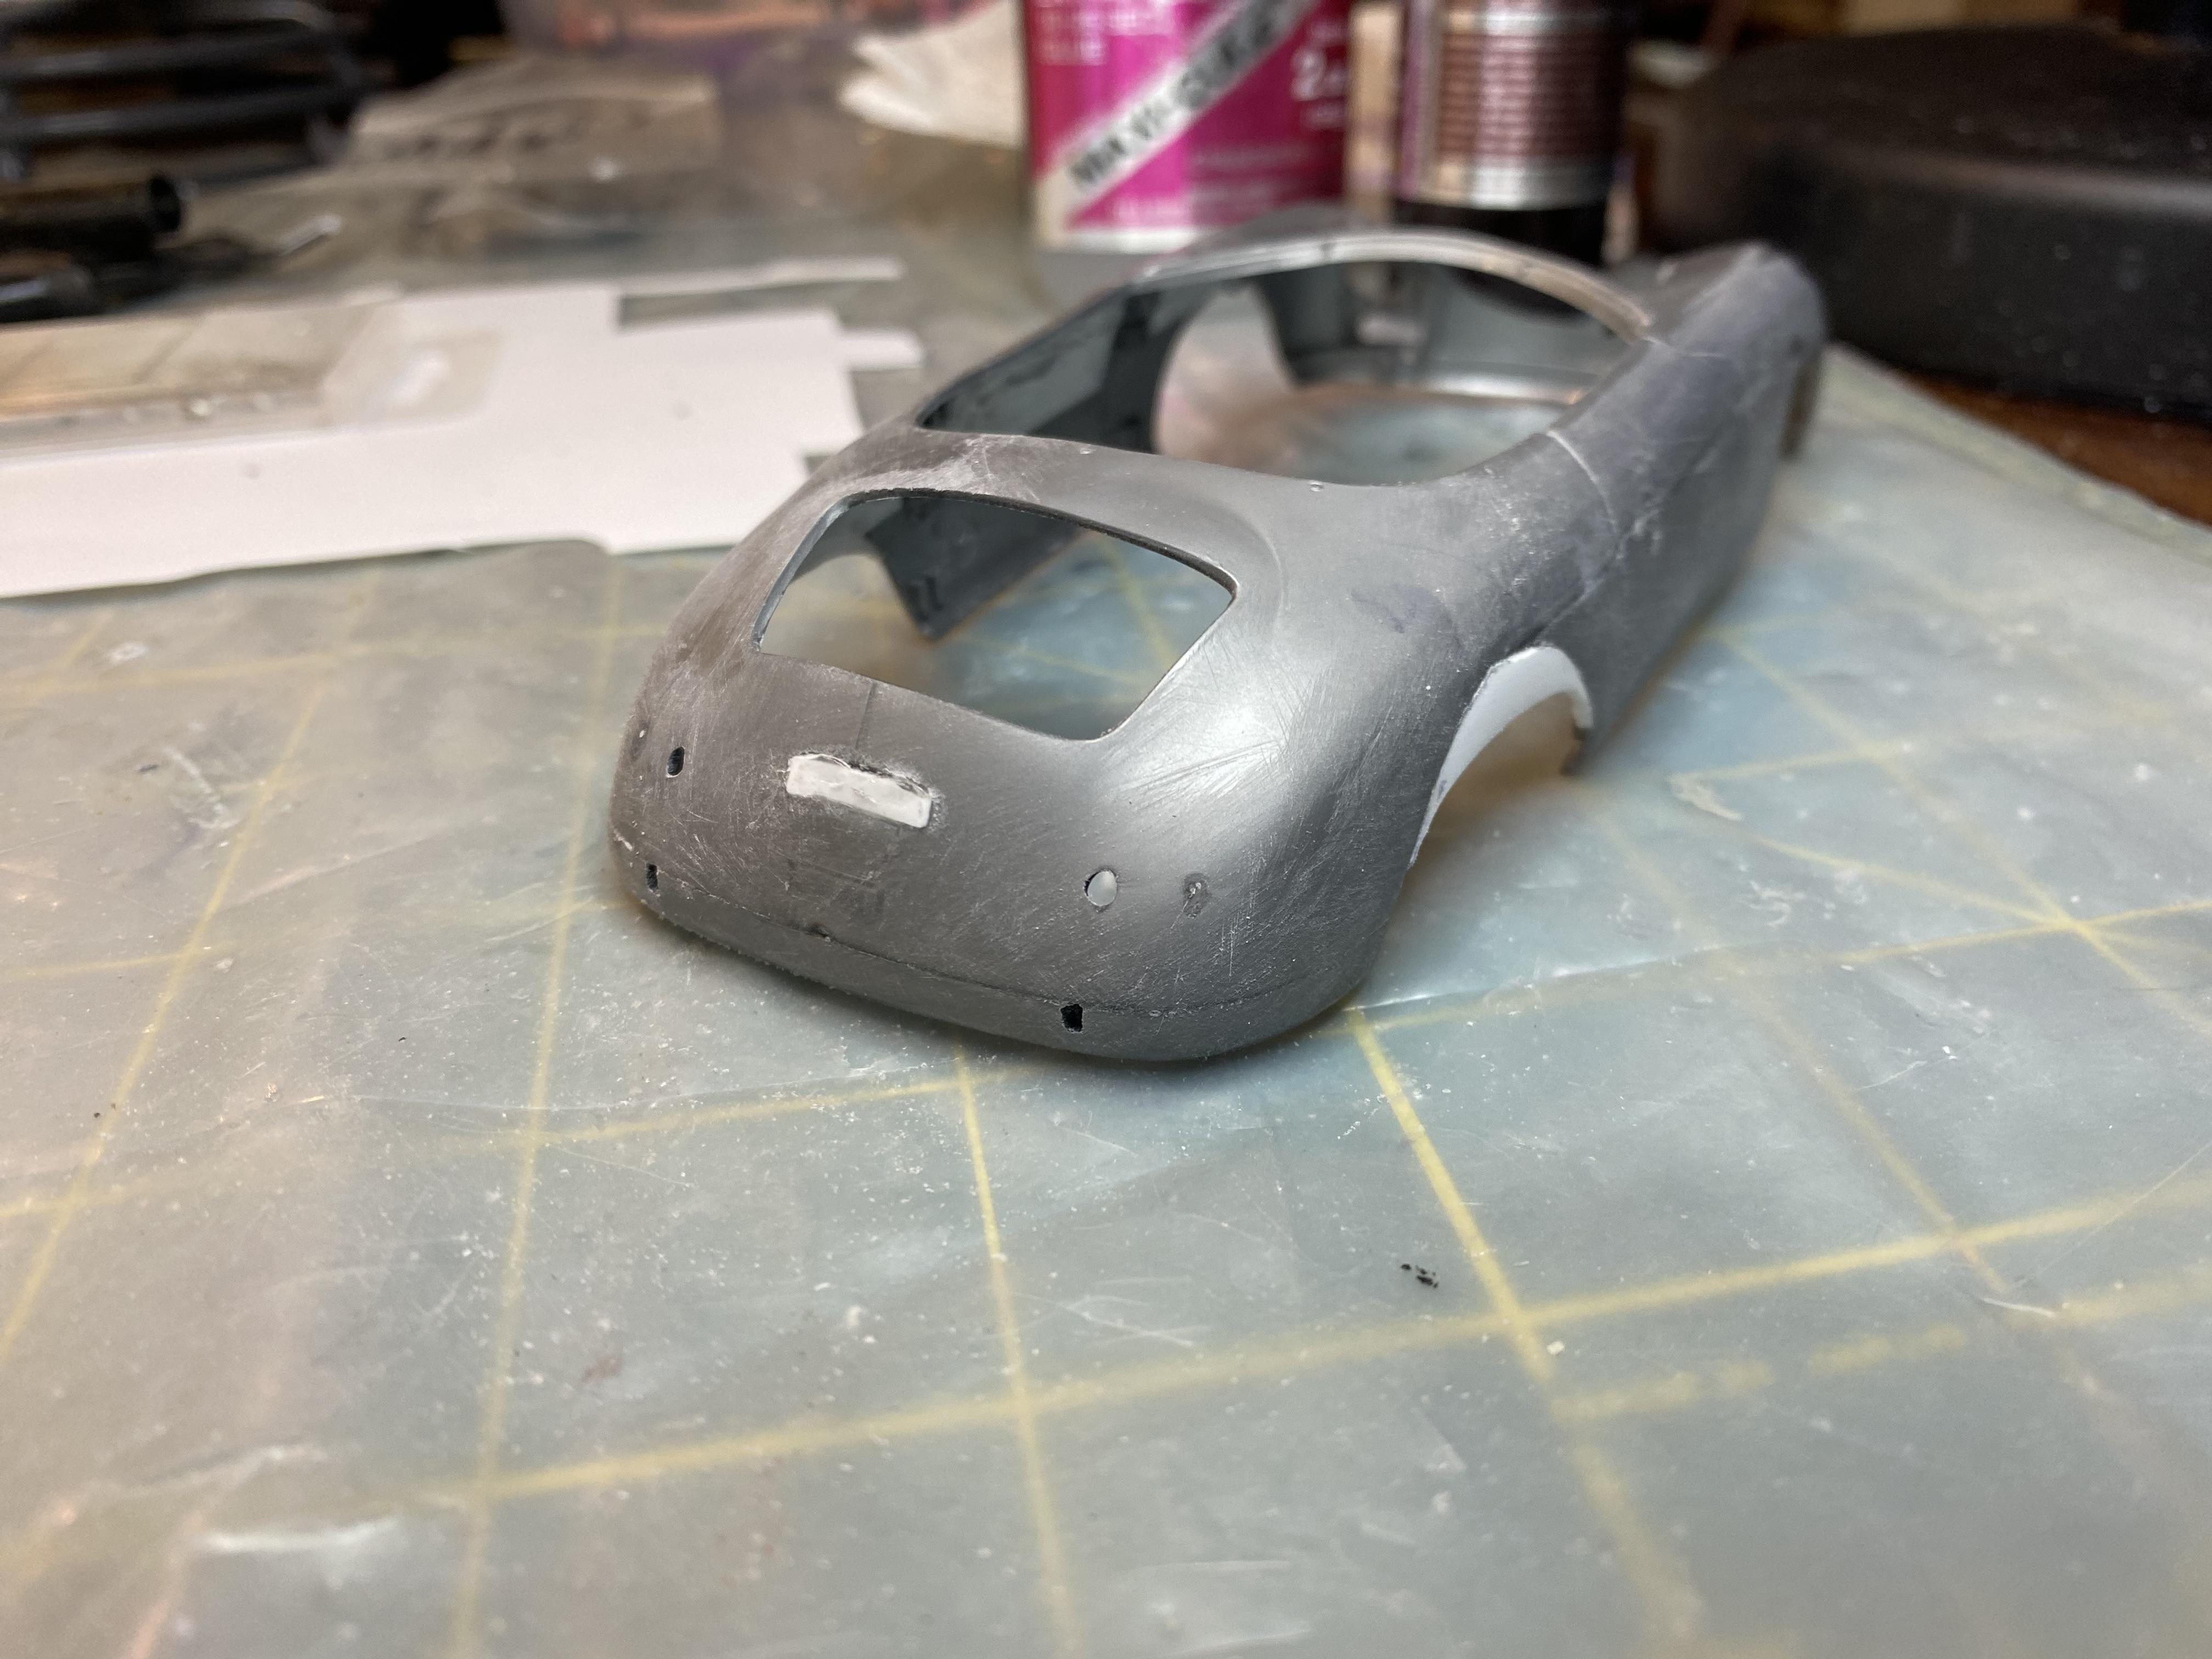
Just a little more work on the body today. The rear section of the car was way too rounded and high so I literally boiled the body to flatten it out to have the correct shape. Flattened the body and then had to flatten the back of the cover and rear hood. I am not even sure I will use the cover, at least not all of it, but I am remaining prepared. luckily the frunk (front trunk) fits better than expected. I also cut out the front vents. Created a master to mold the 1957 cats eye taillights. Will be cast in clear UV resin for LEDs. Cut the hole for the LEDs and filled the additional ones.

-
Side trim panel is going away. Was not included on the 57 Carrera GS-GT, thought it would be simple to make a correct looking one. This build will look very much like the reference image above.
-
Thank You!
-
Thank you!
-
Thank you!
-
We will see just how talented I am on this one I guess. 😊 That’s a good way to think about it. I just love a challenge and I have gotten used to scratch building a lot of the parts. I will be posting some updates soon. I literally boiled the body to fix some issues in the rear shape. 😂
-
Thank you! I did kind of make my own, I cast the master I created for the trunk lid, top boot and back seat in case I decide to make another one. I will likely use to make a coupe at some point. The top boot is from an old 1966 mustang annual kit and the back seat a cut up and modified from an old annual 1965 kit. Thank You!!
-
Thank you! Thank You! Thank You! I went through a lot a top studio rivets adding details to this build, even the lug nuts and valve stems. Nice to see they are noticed.
-
Posted to underglass:
-
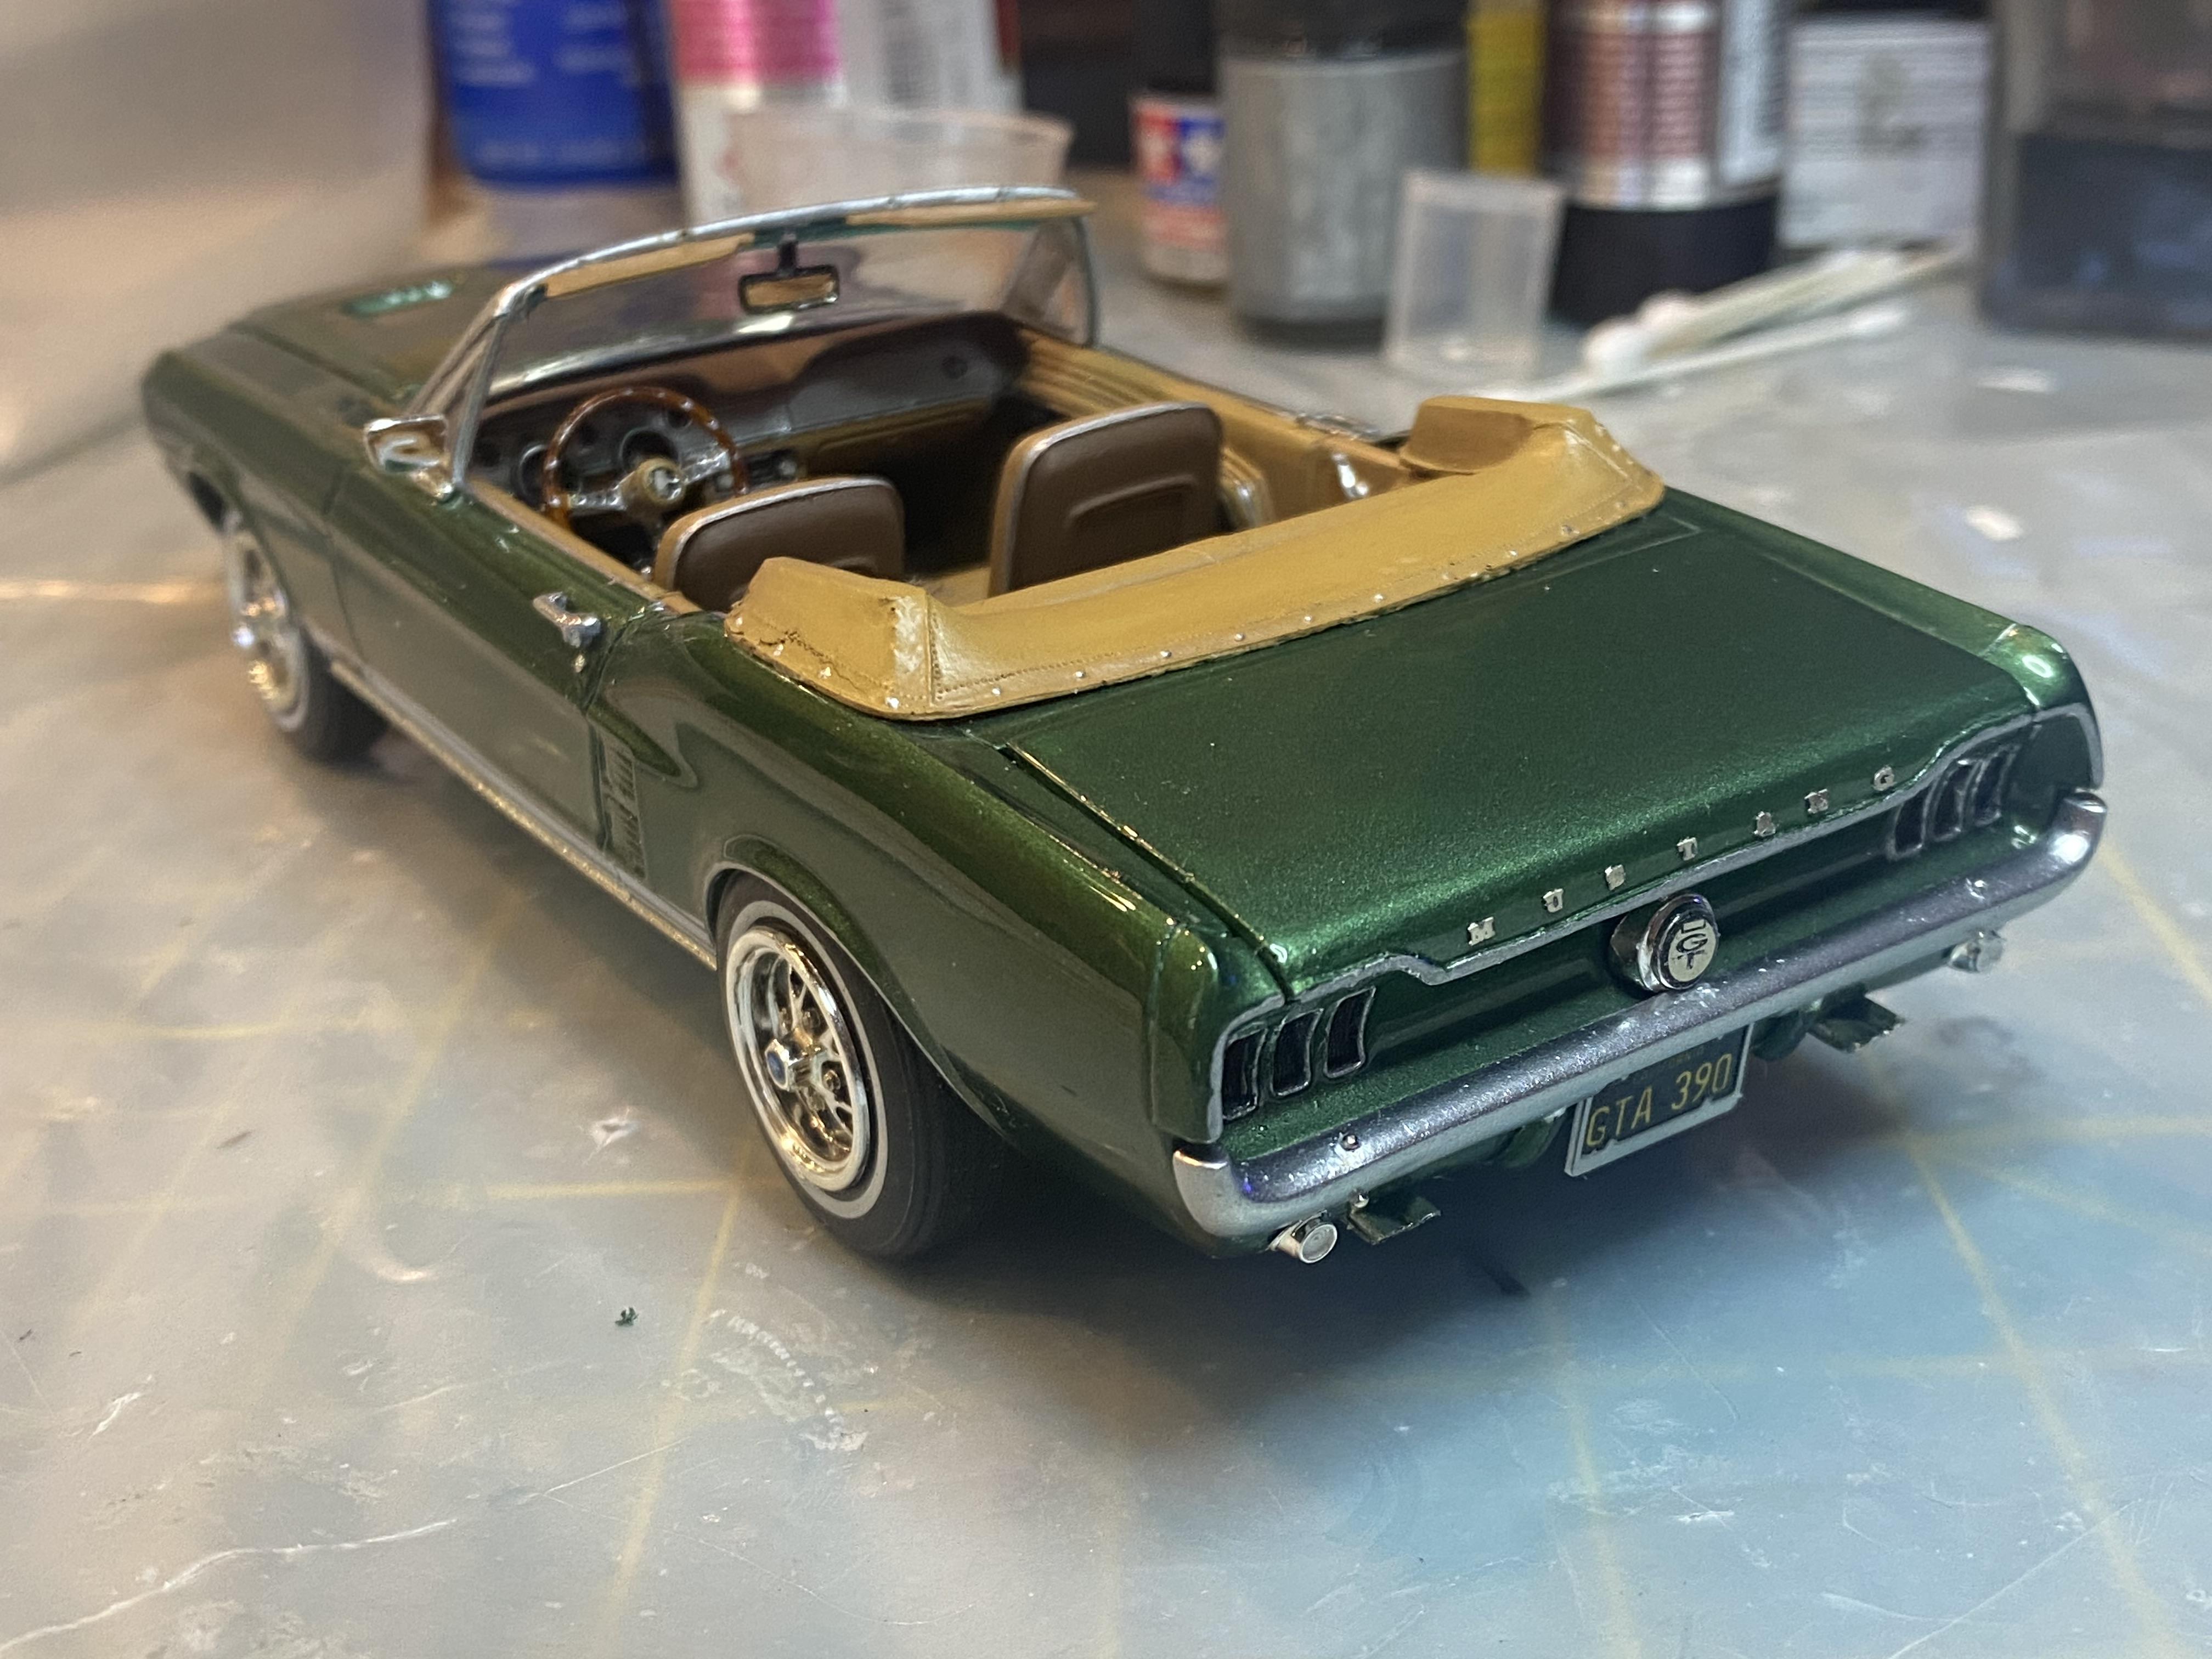
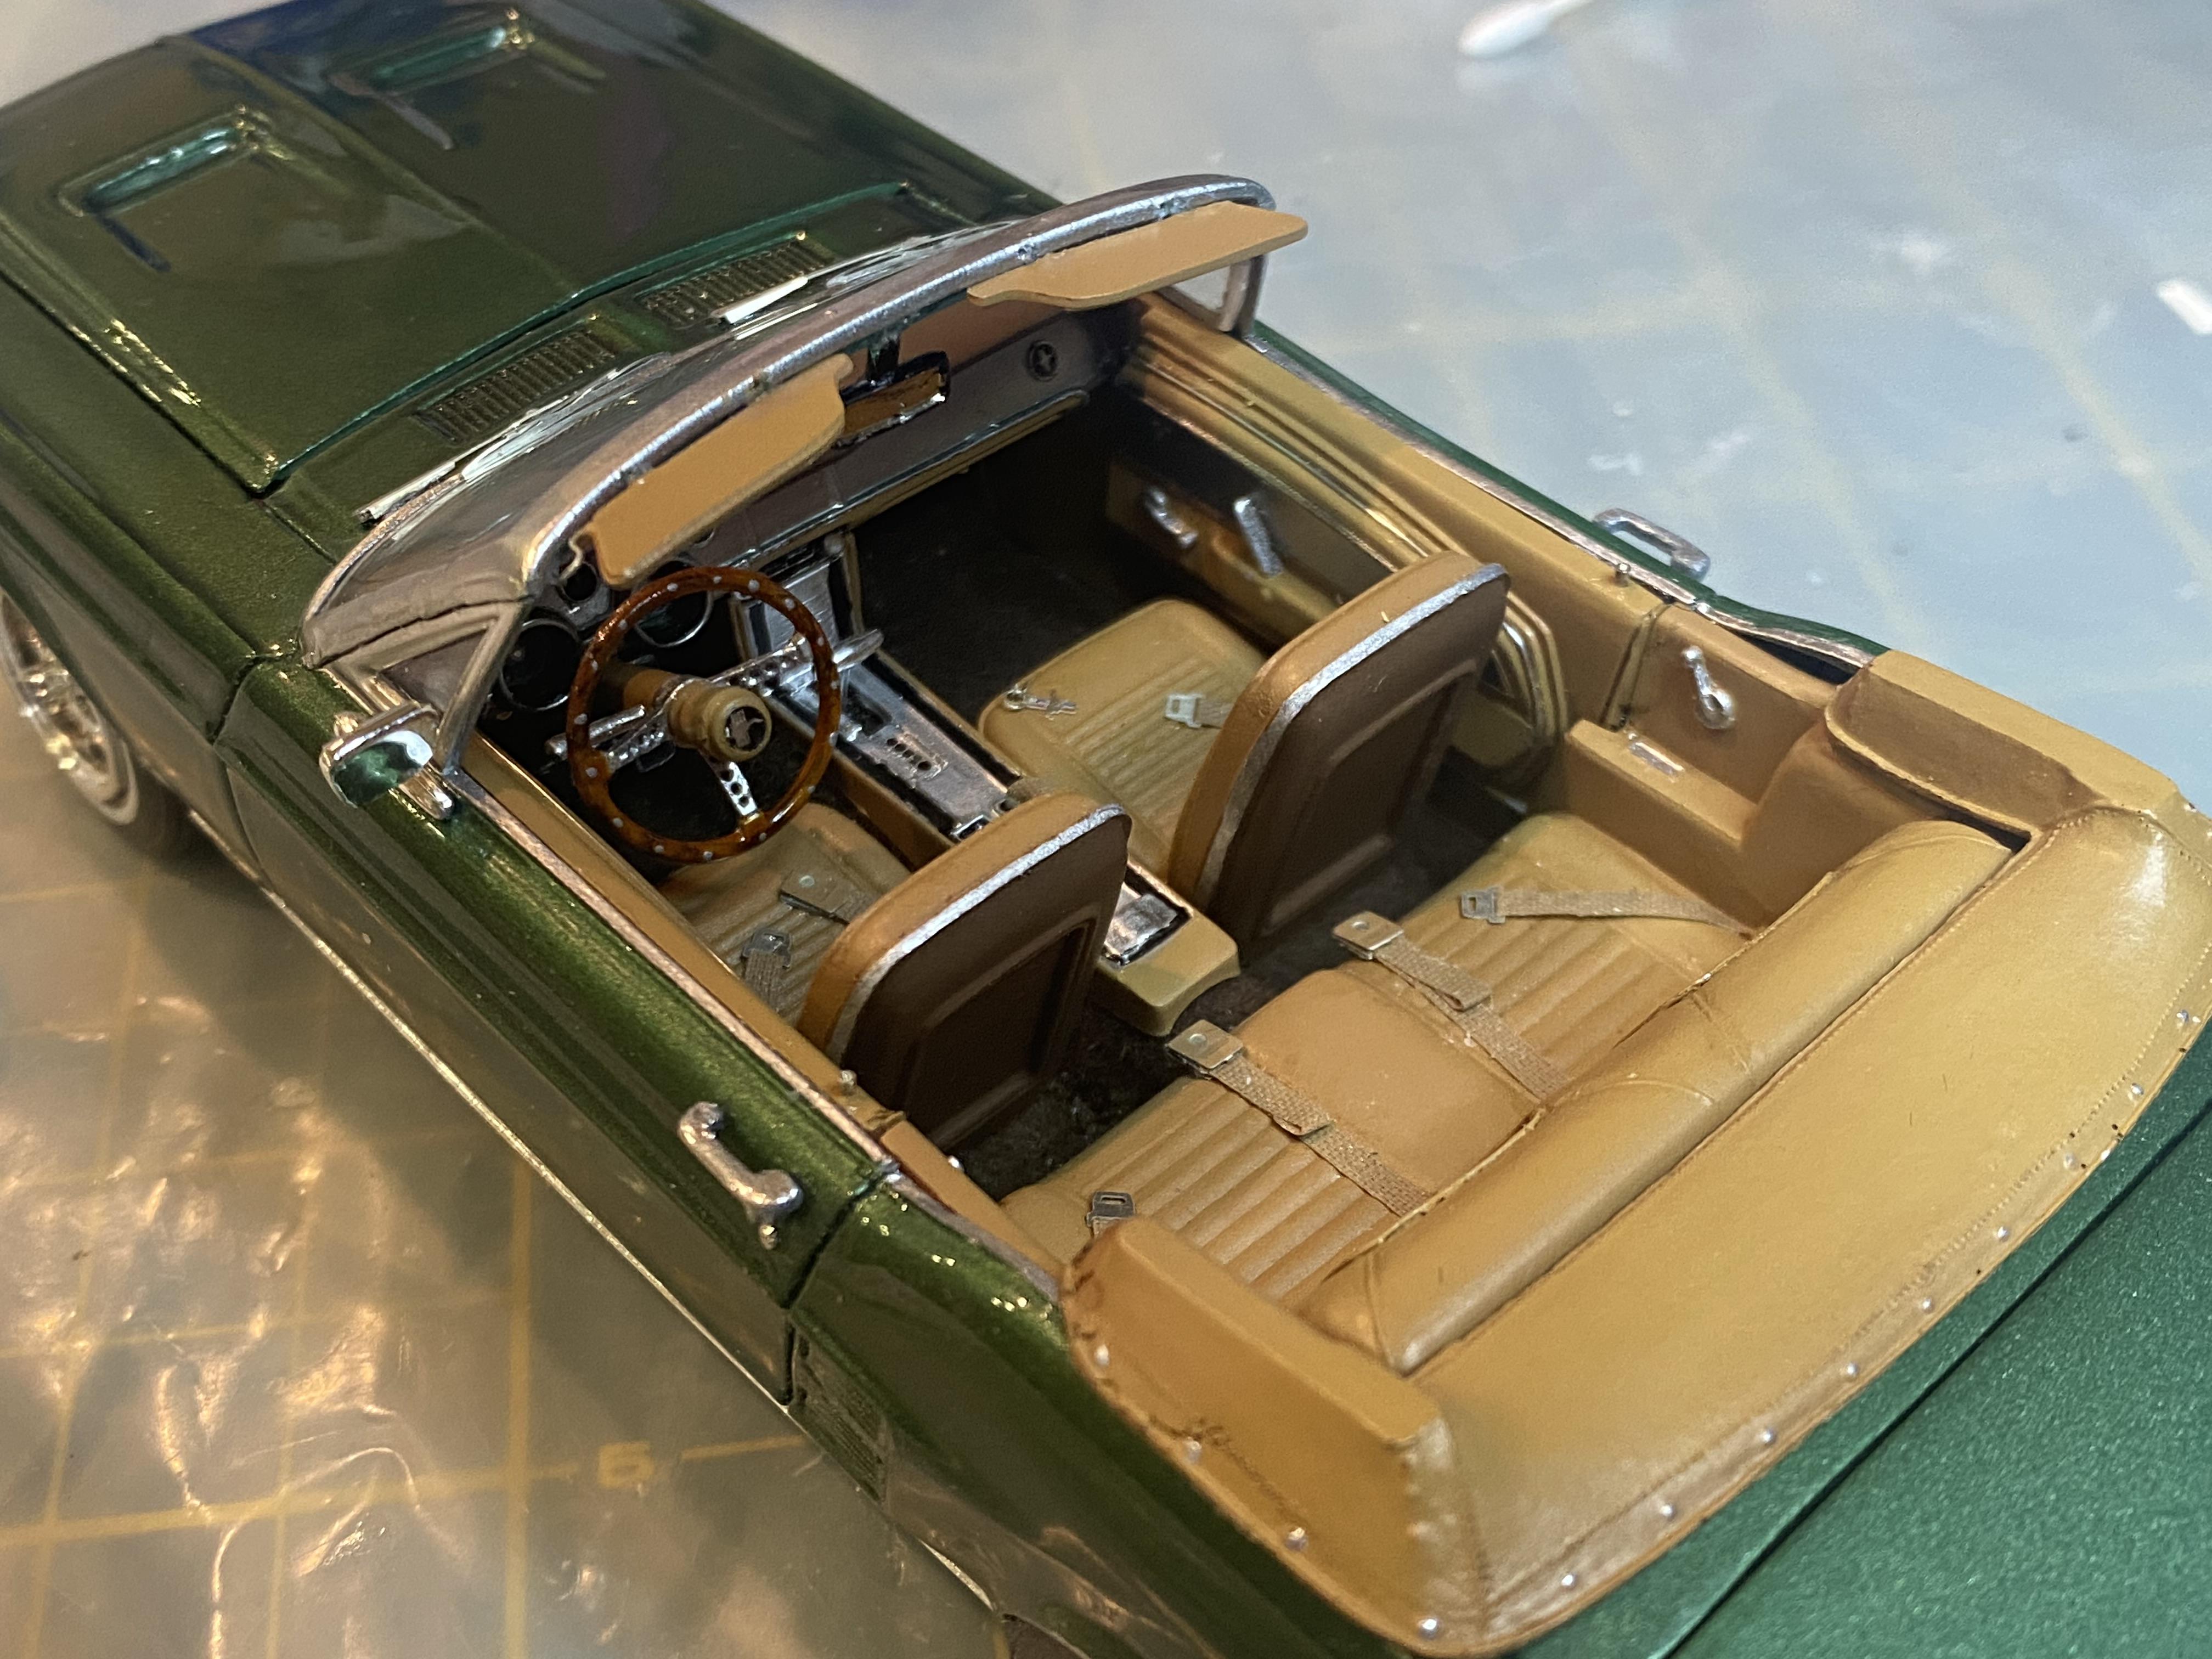
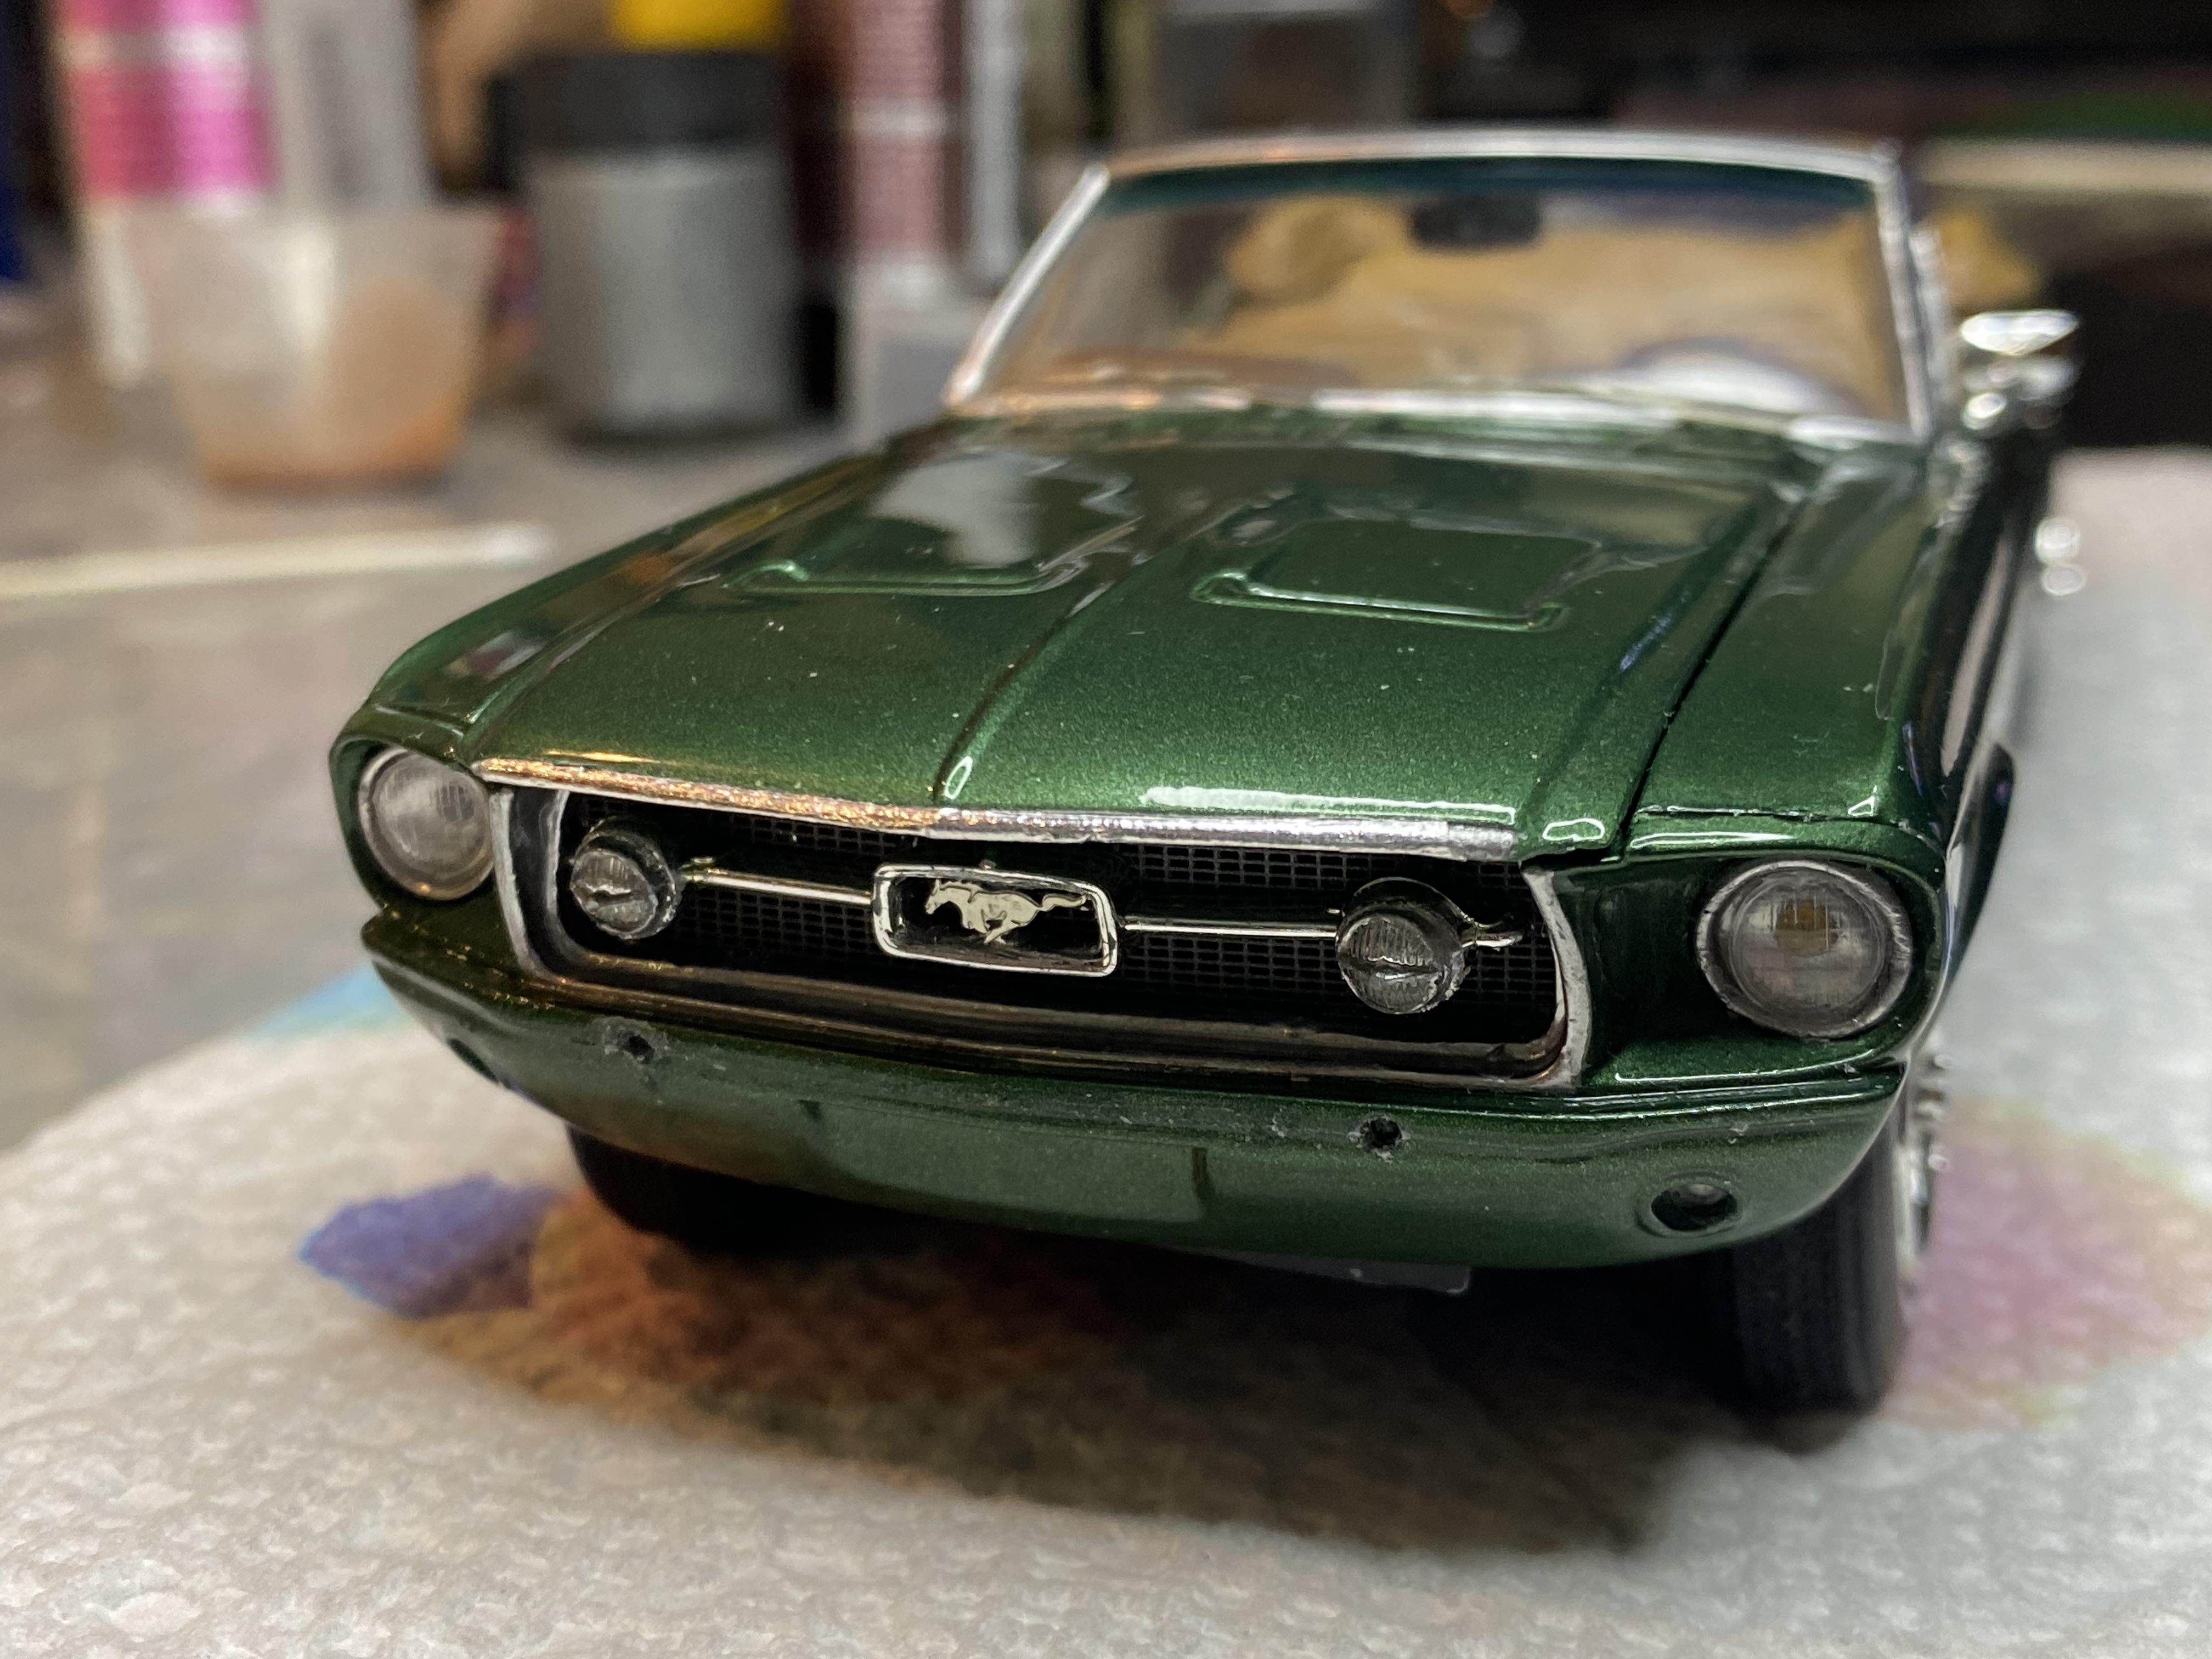
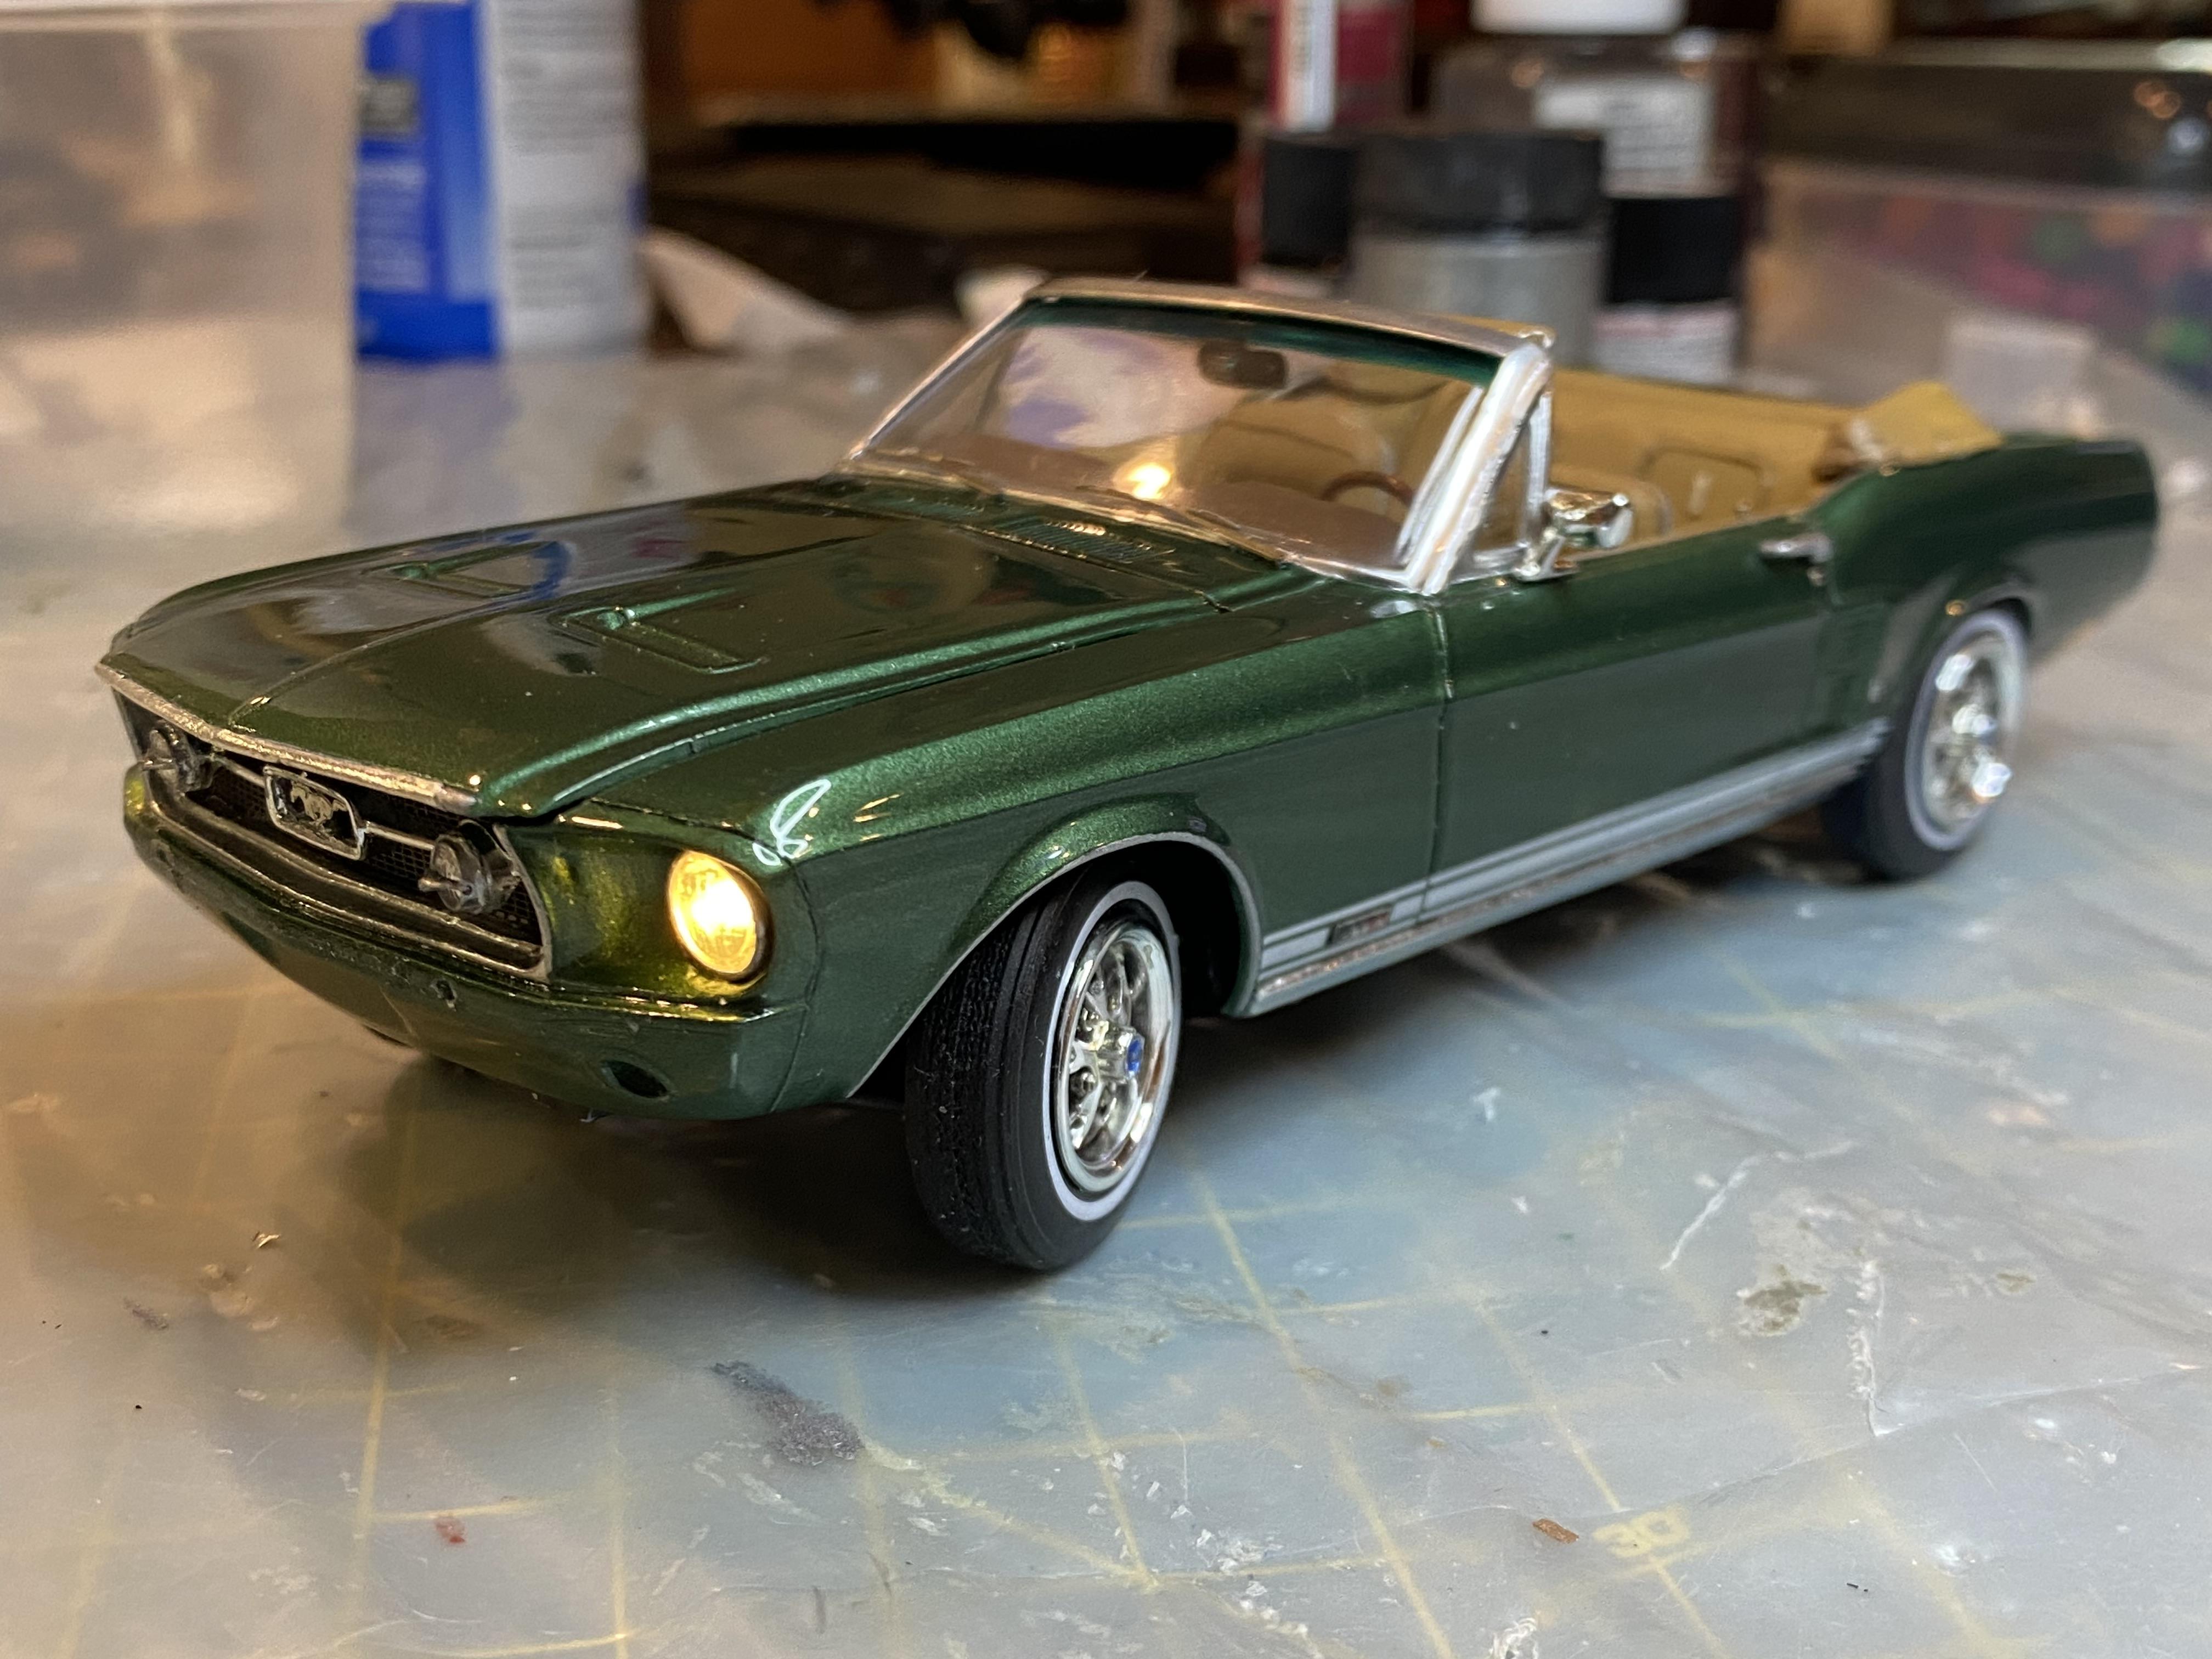
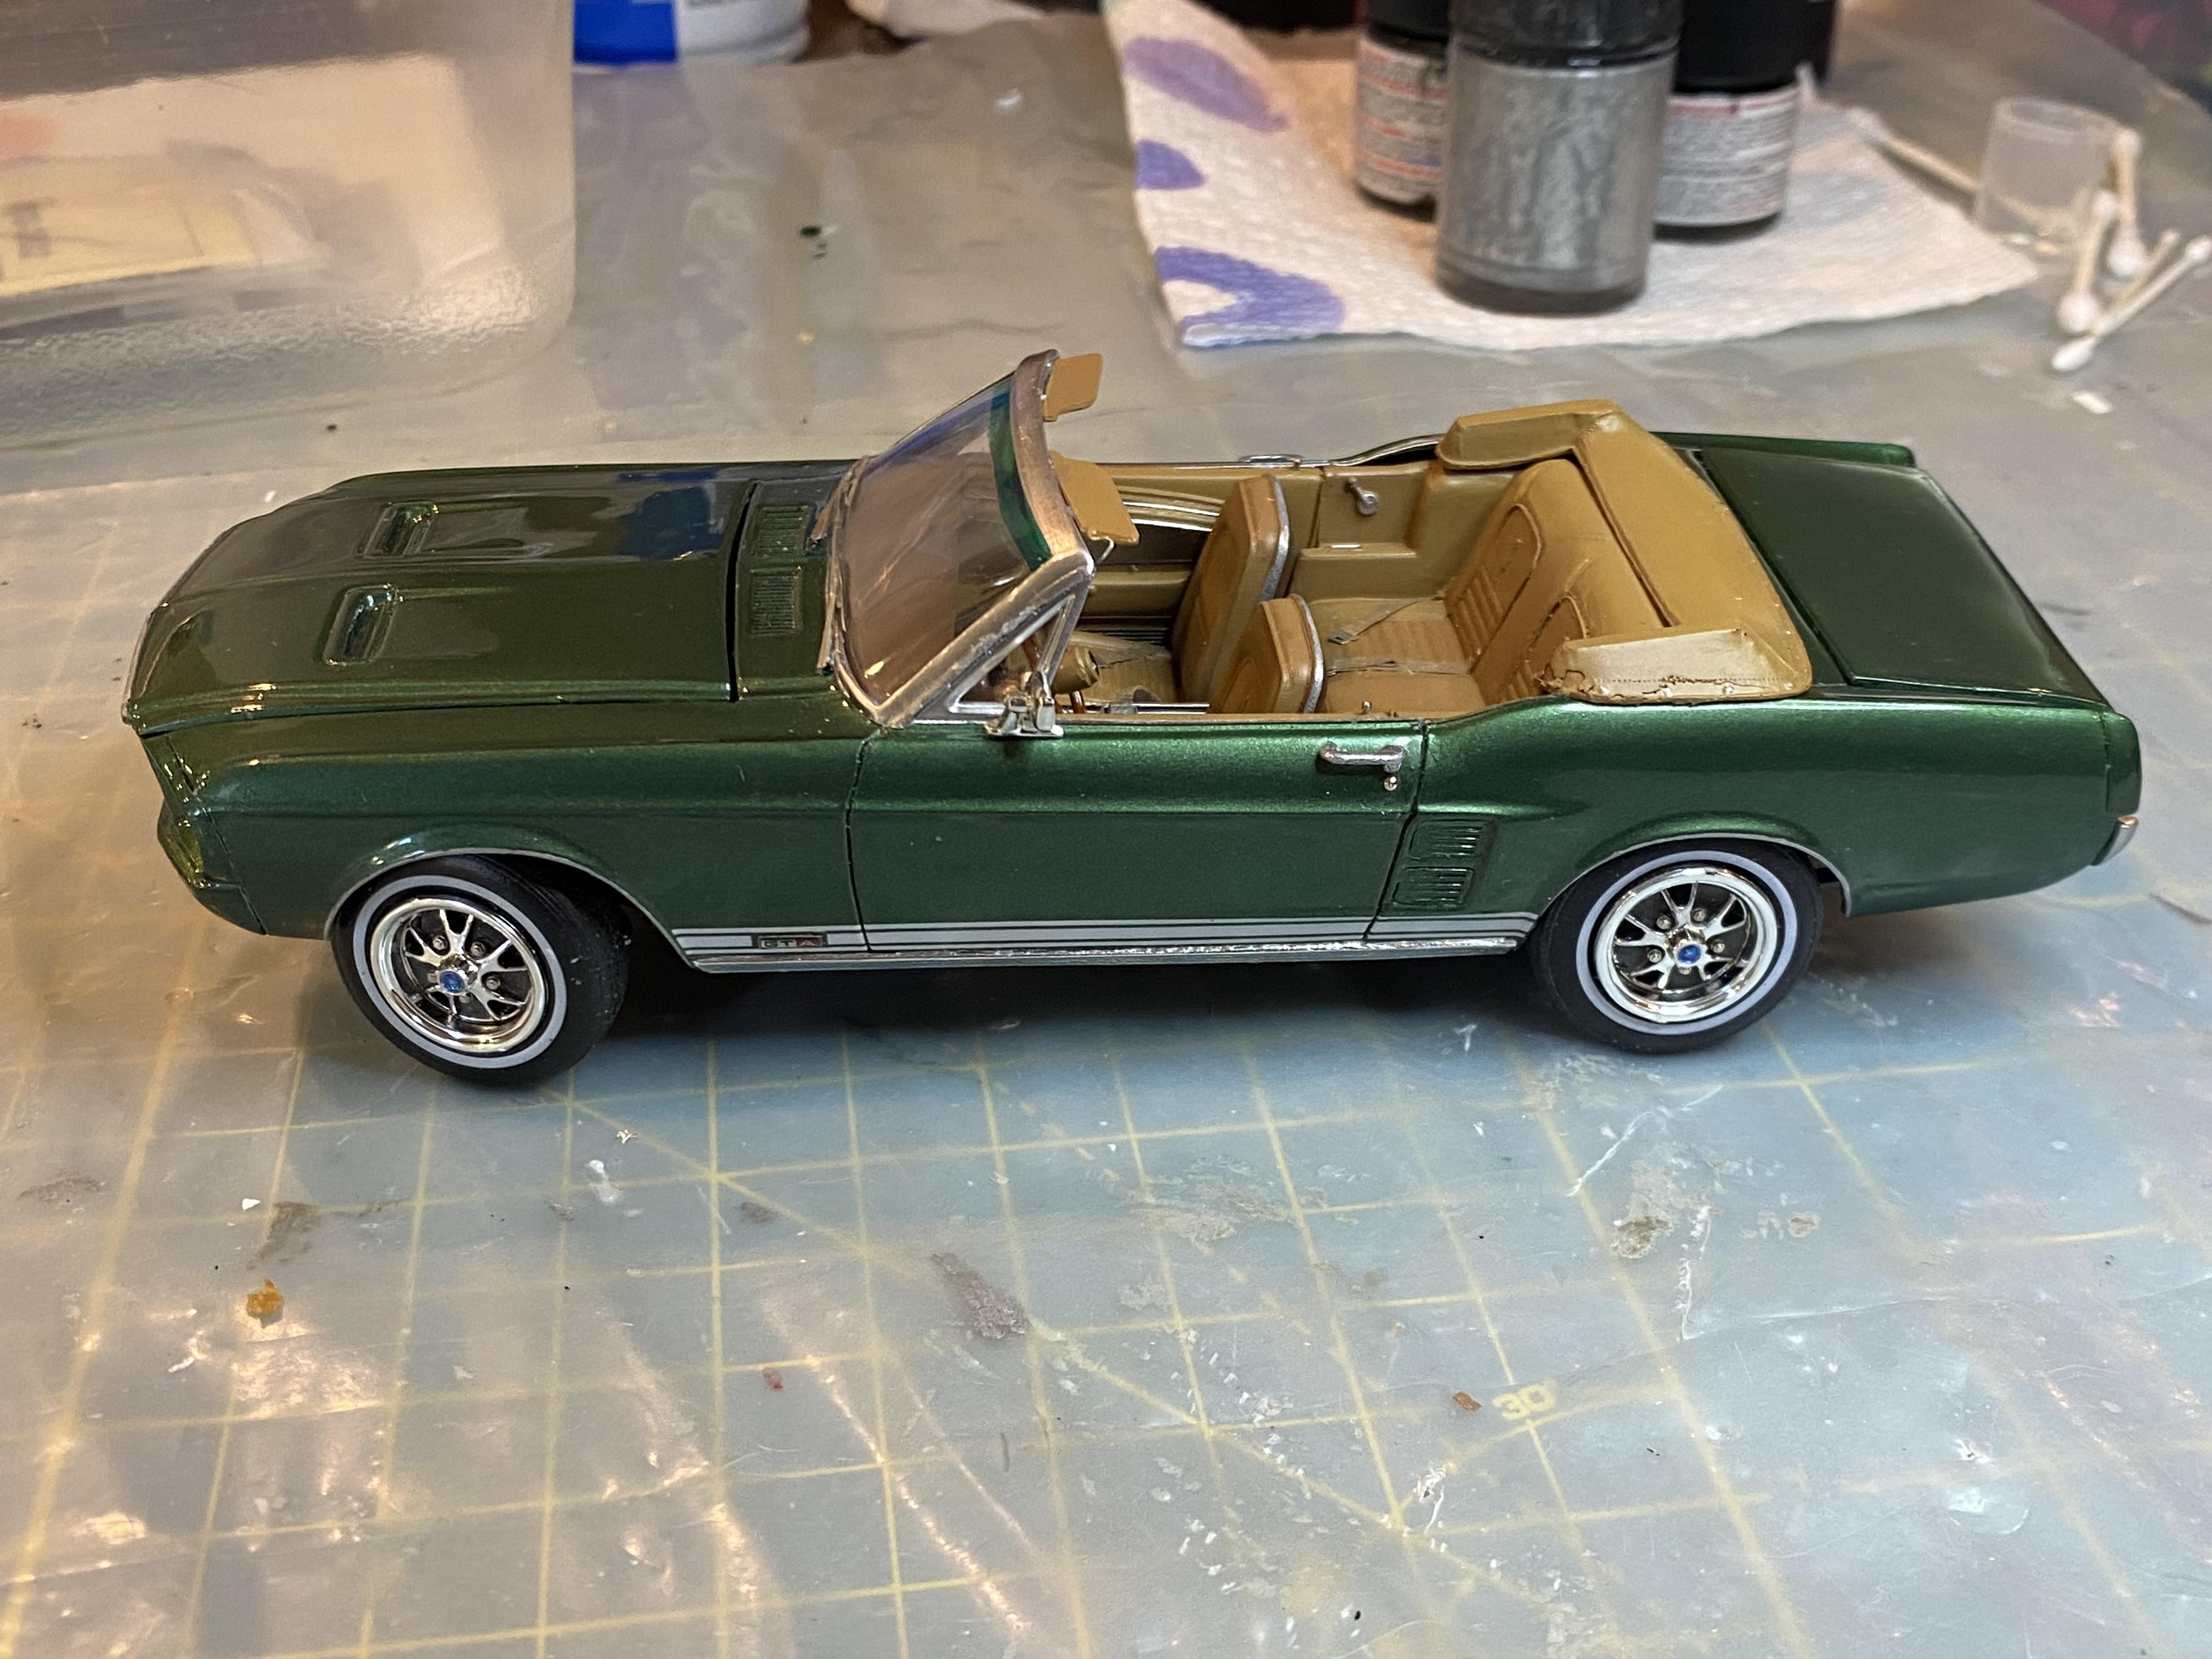
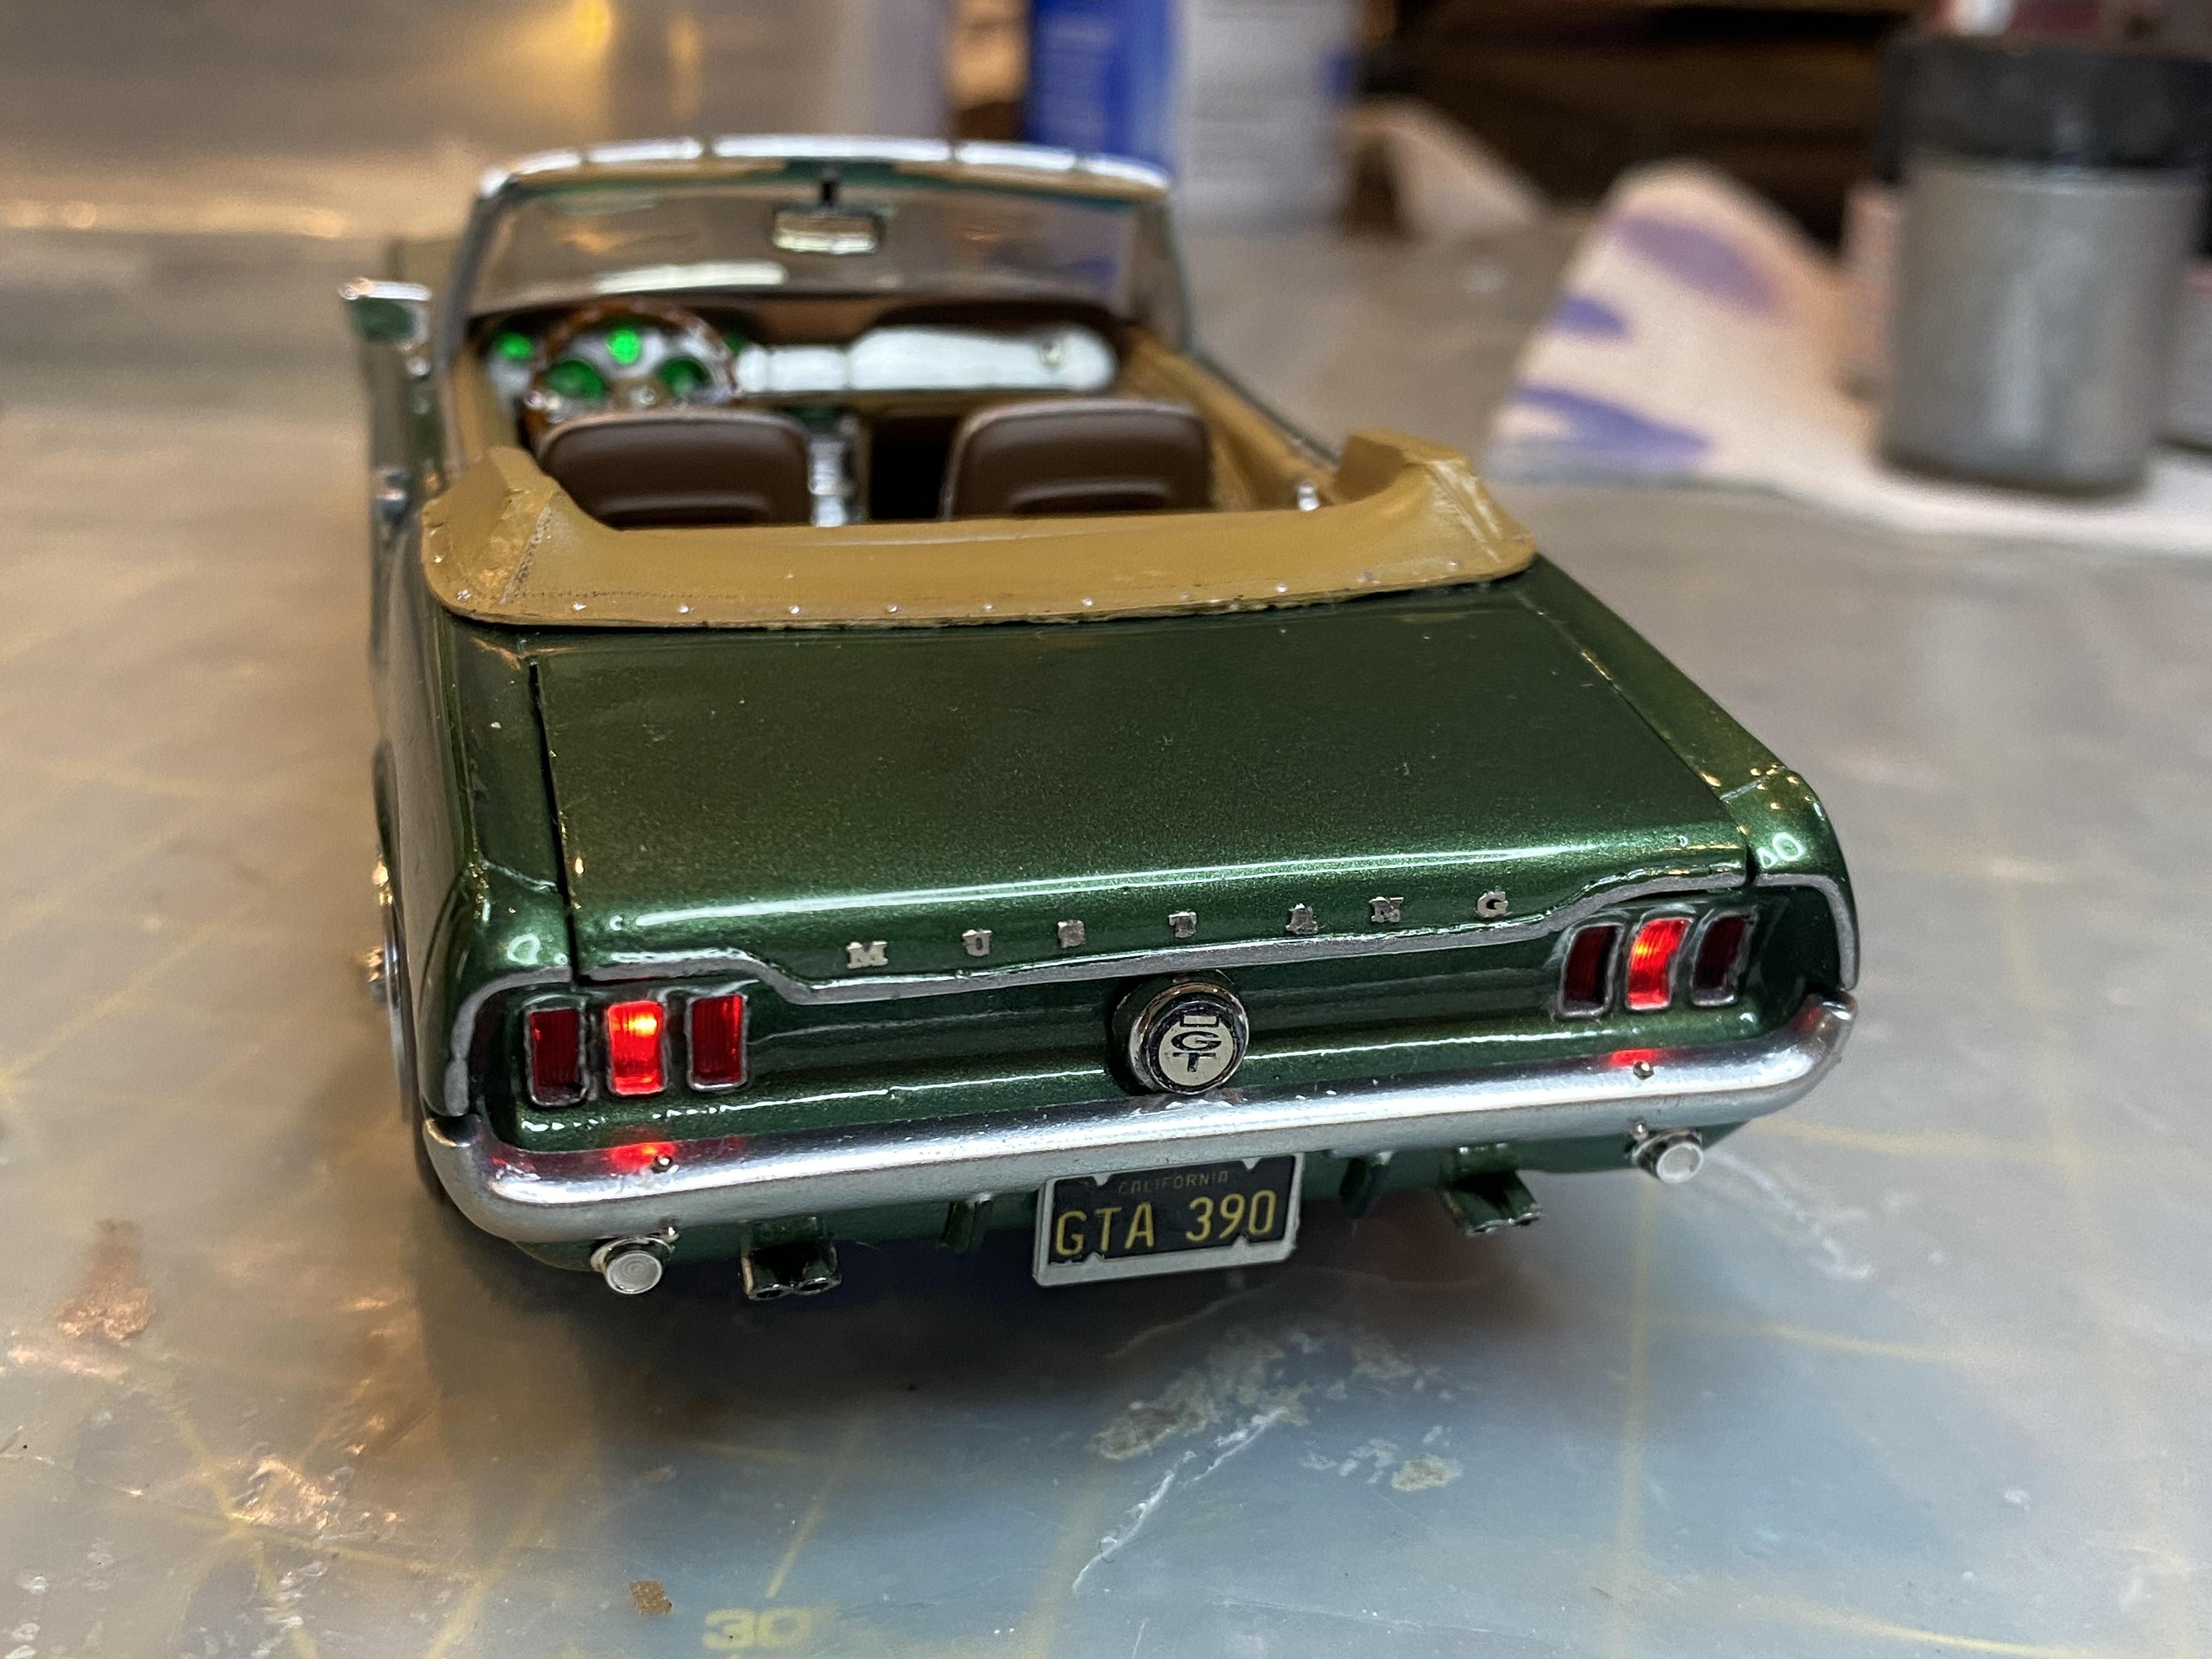
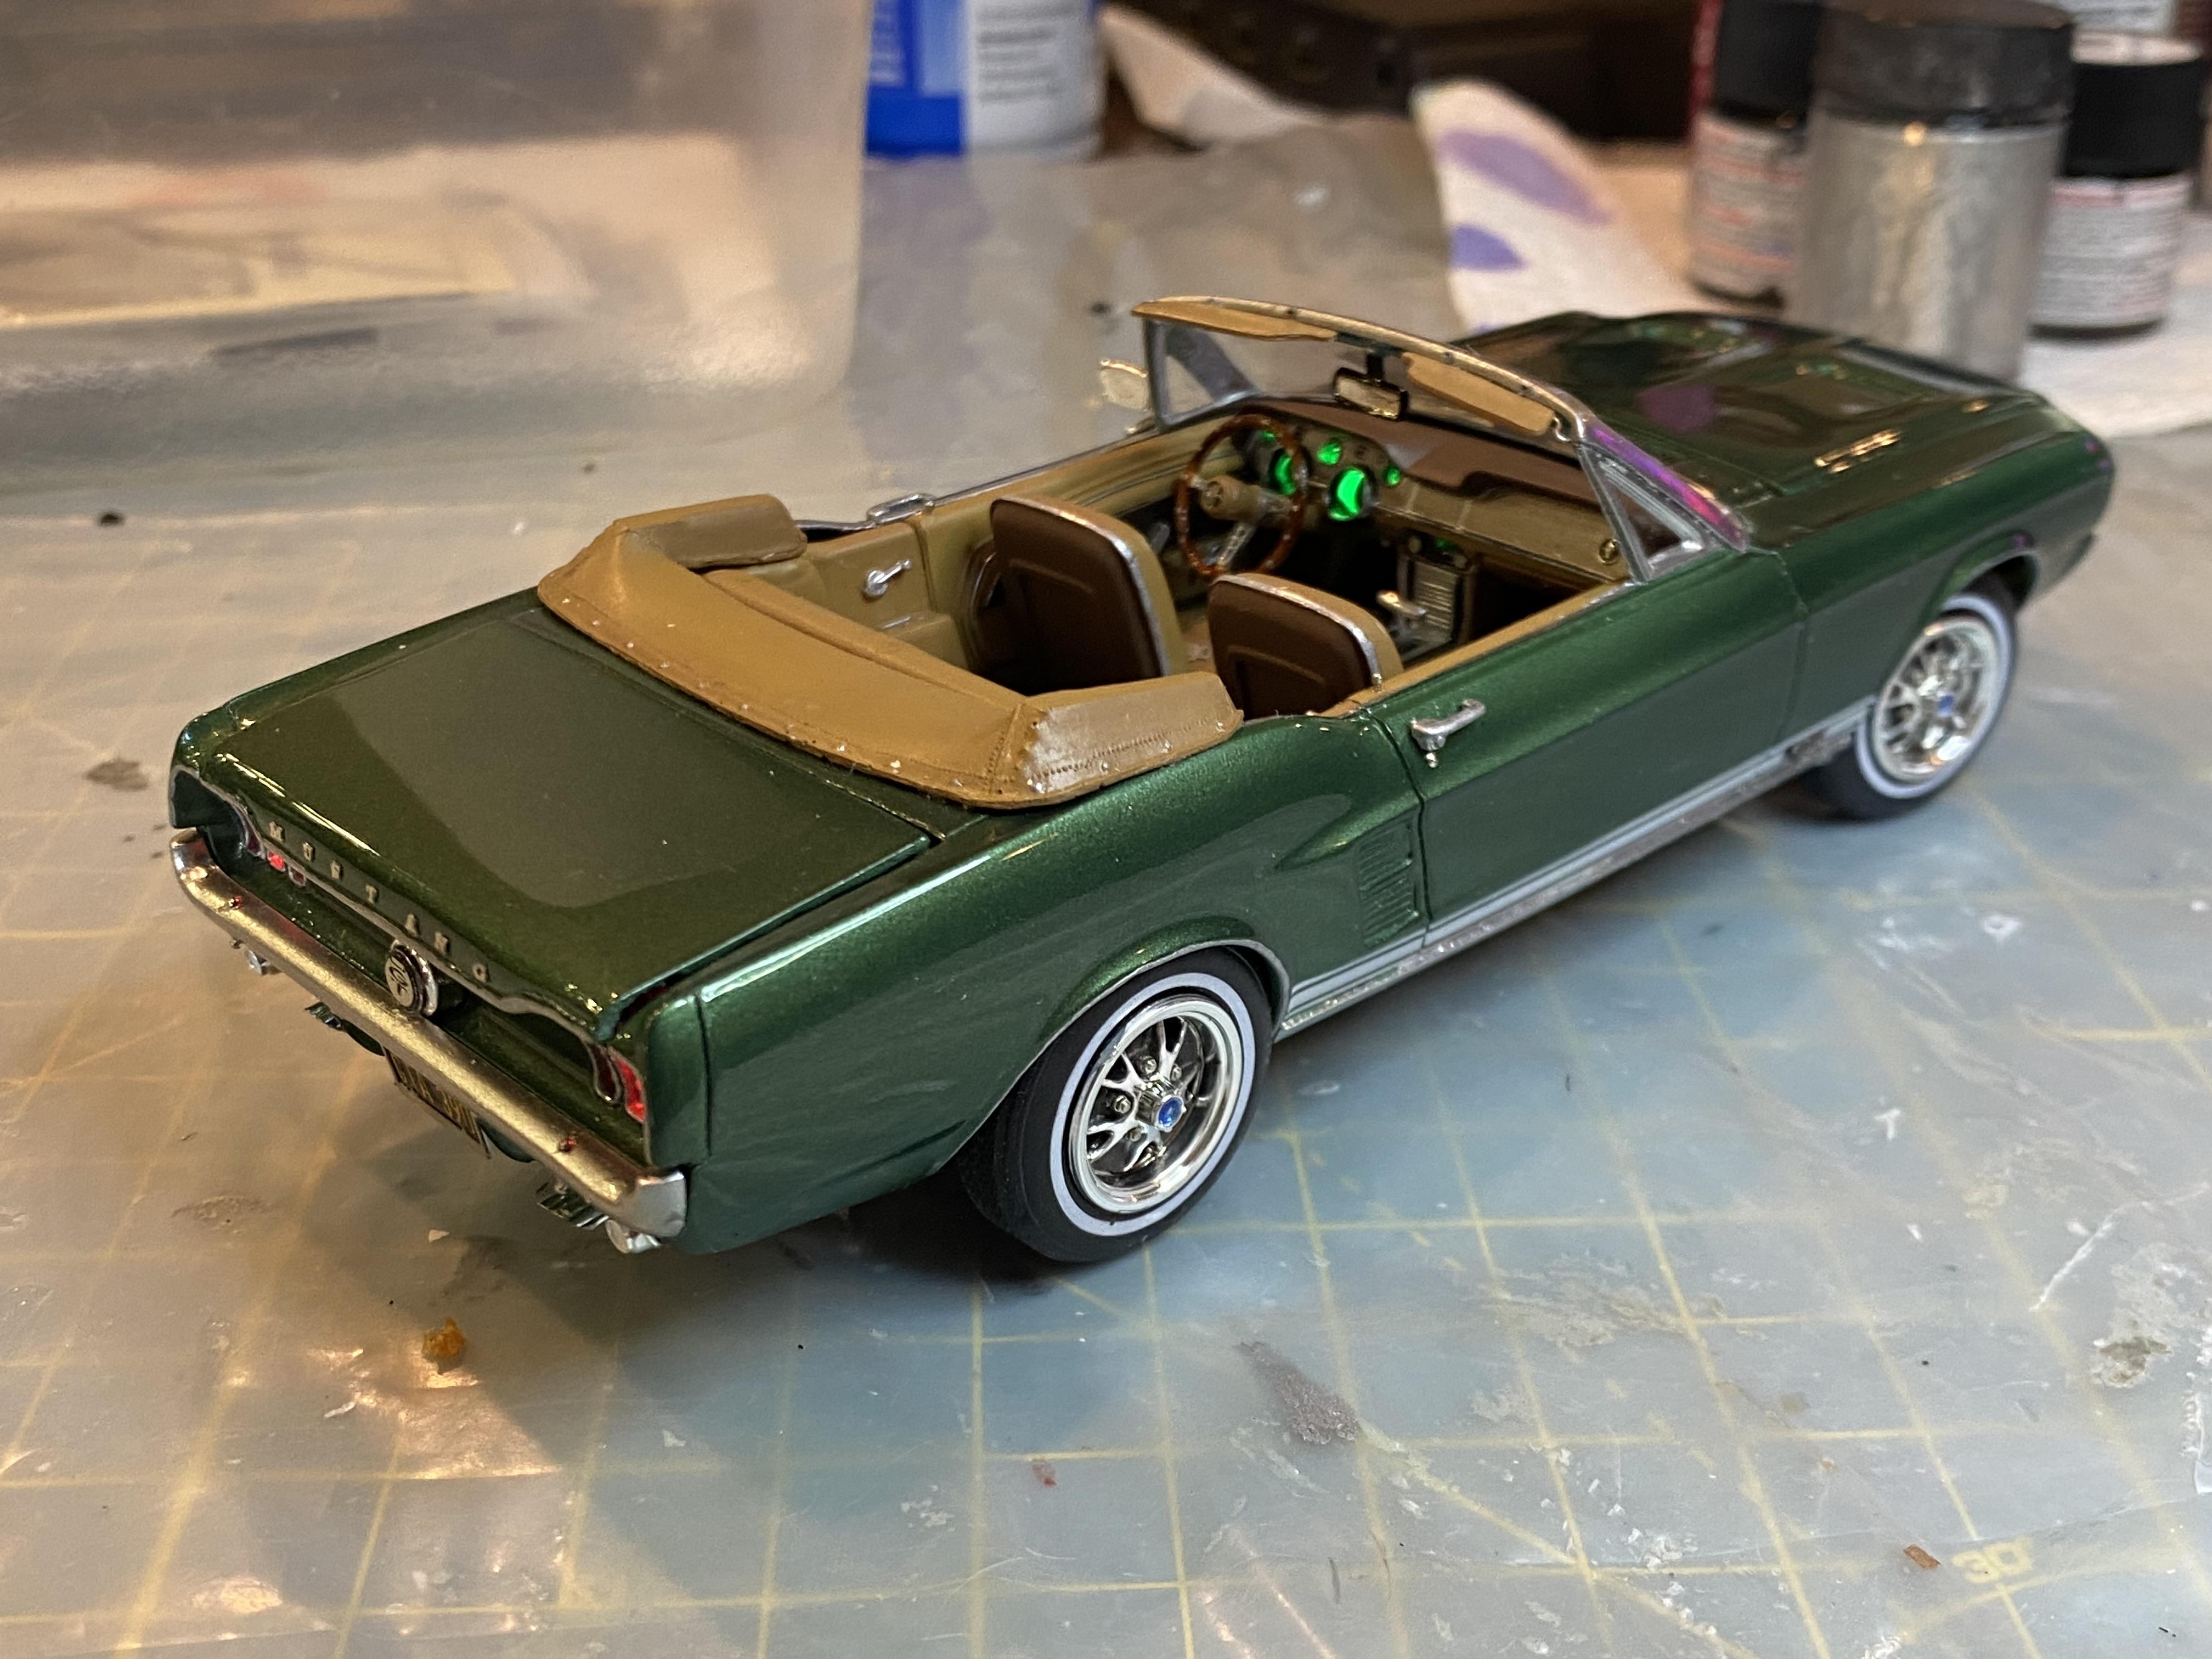
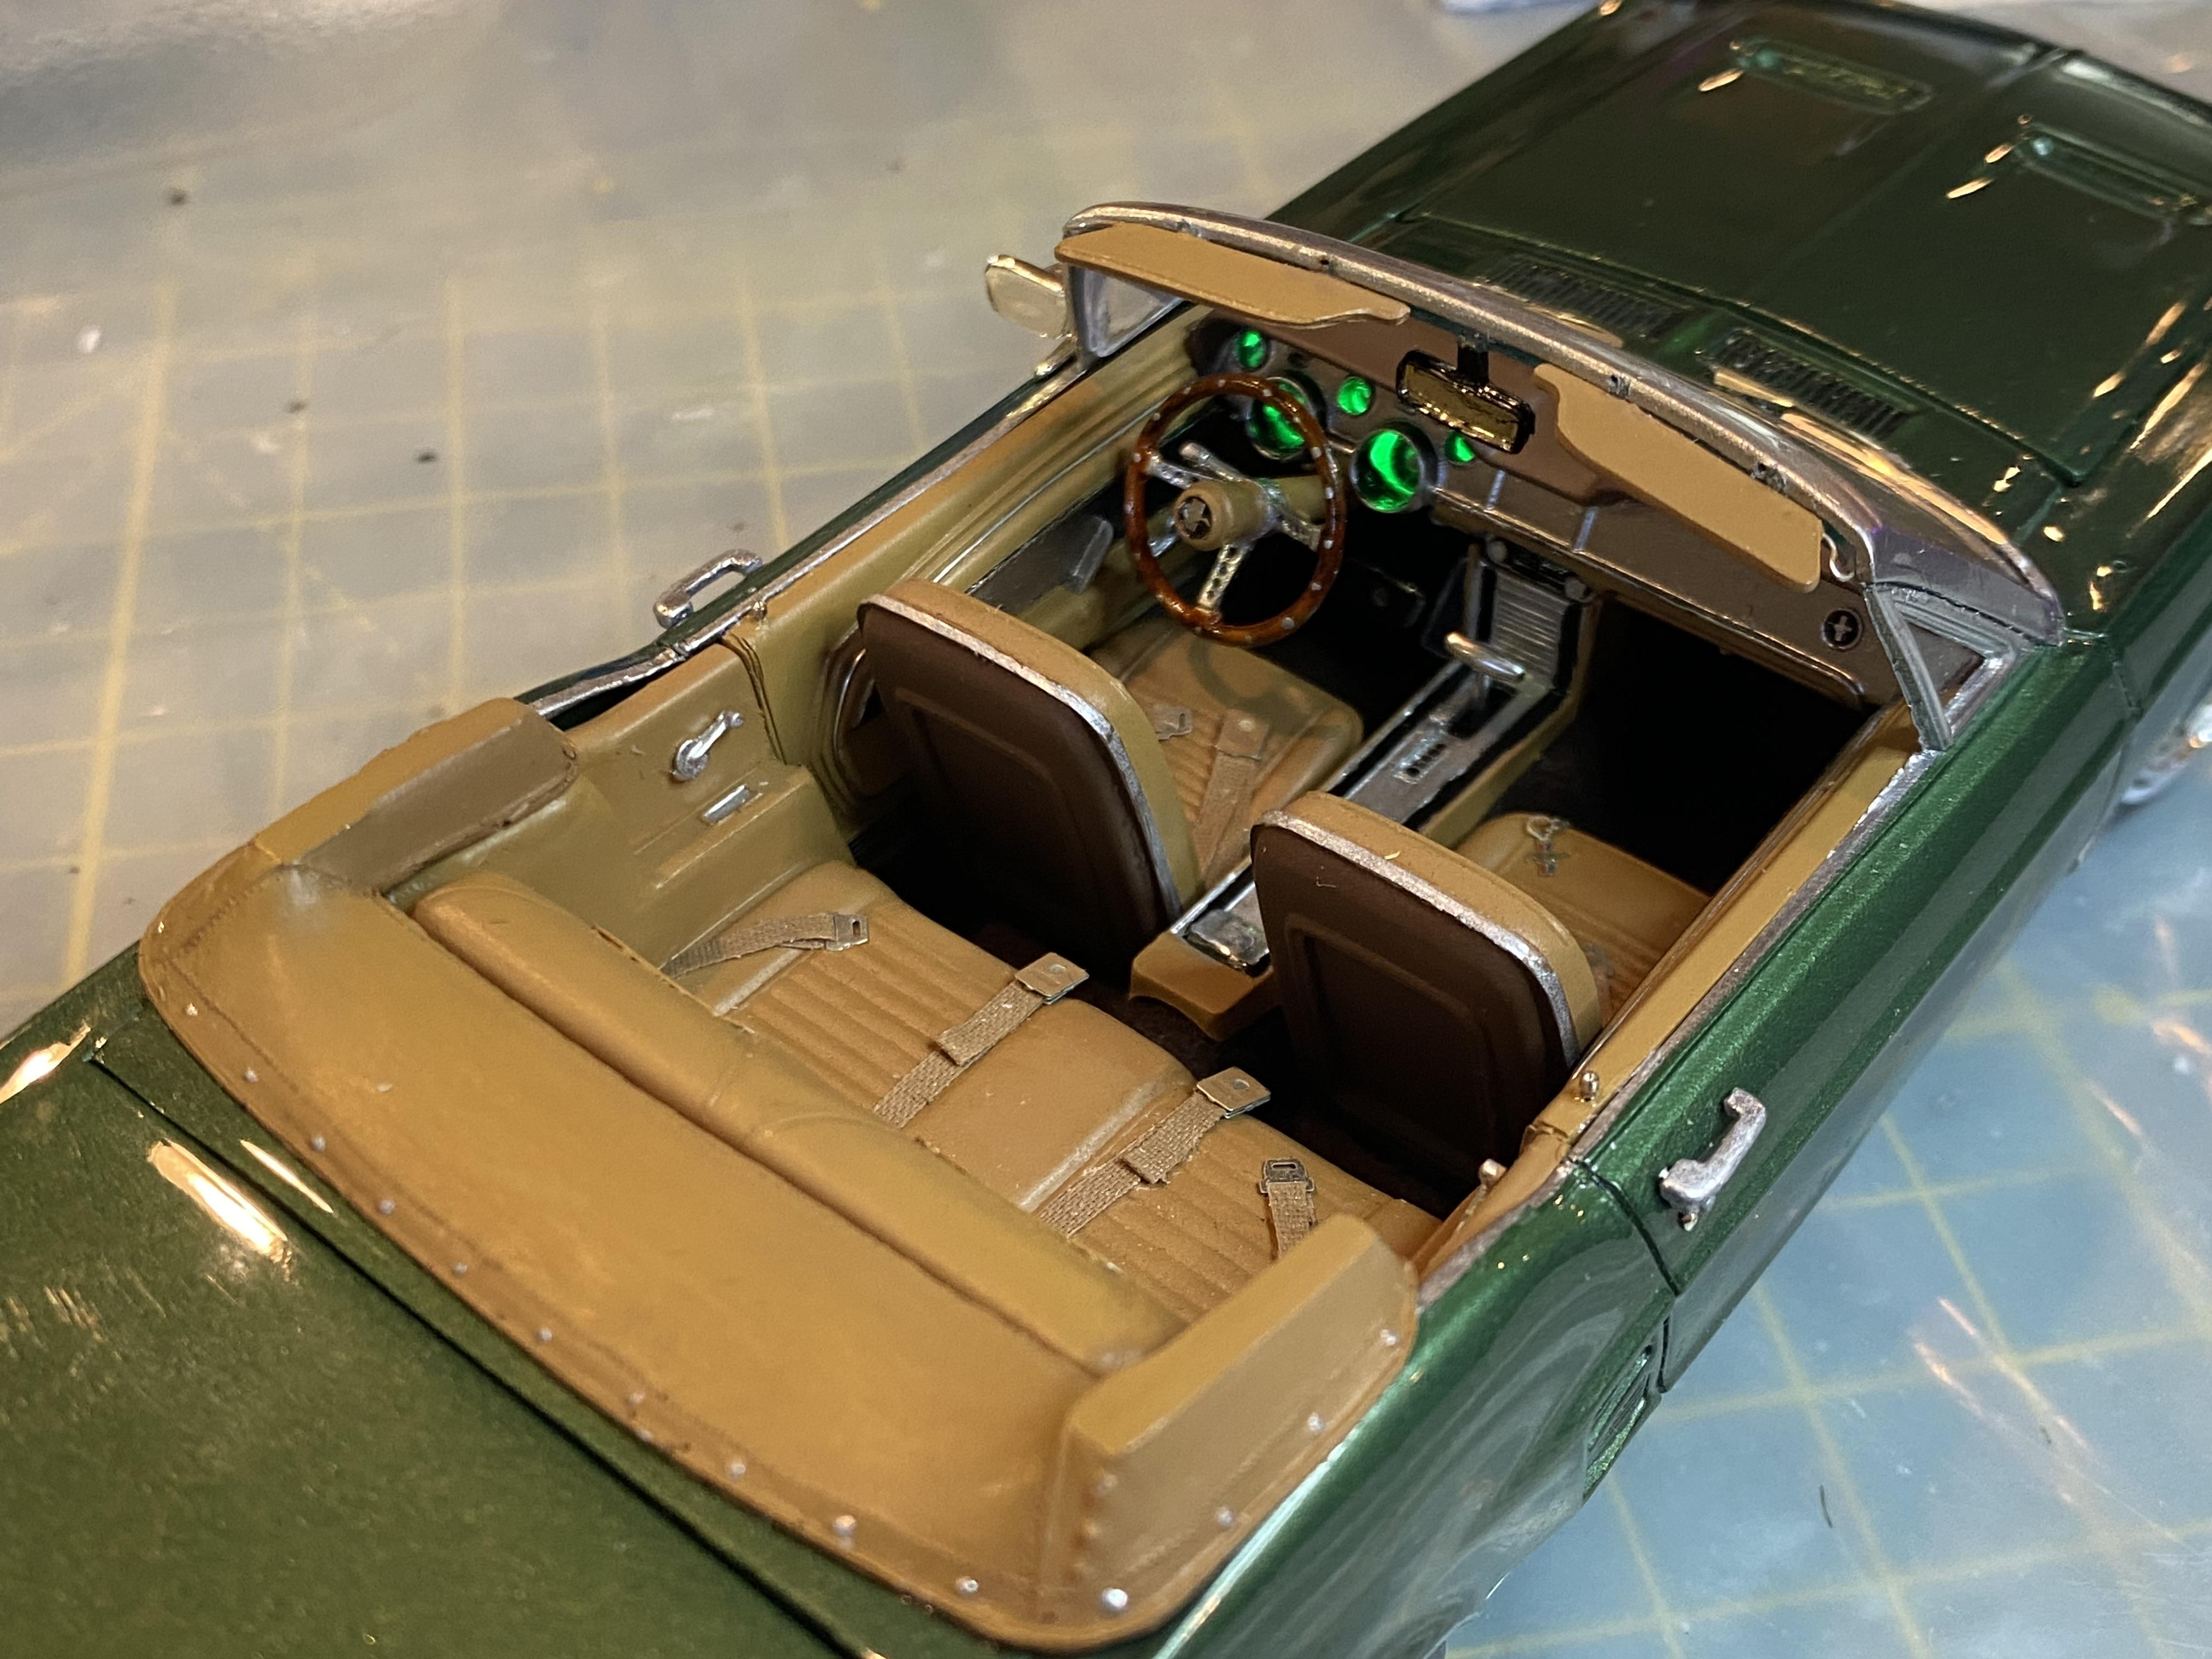
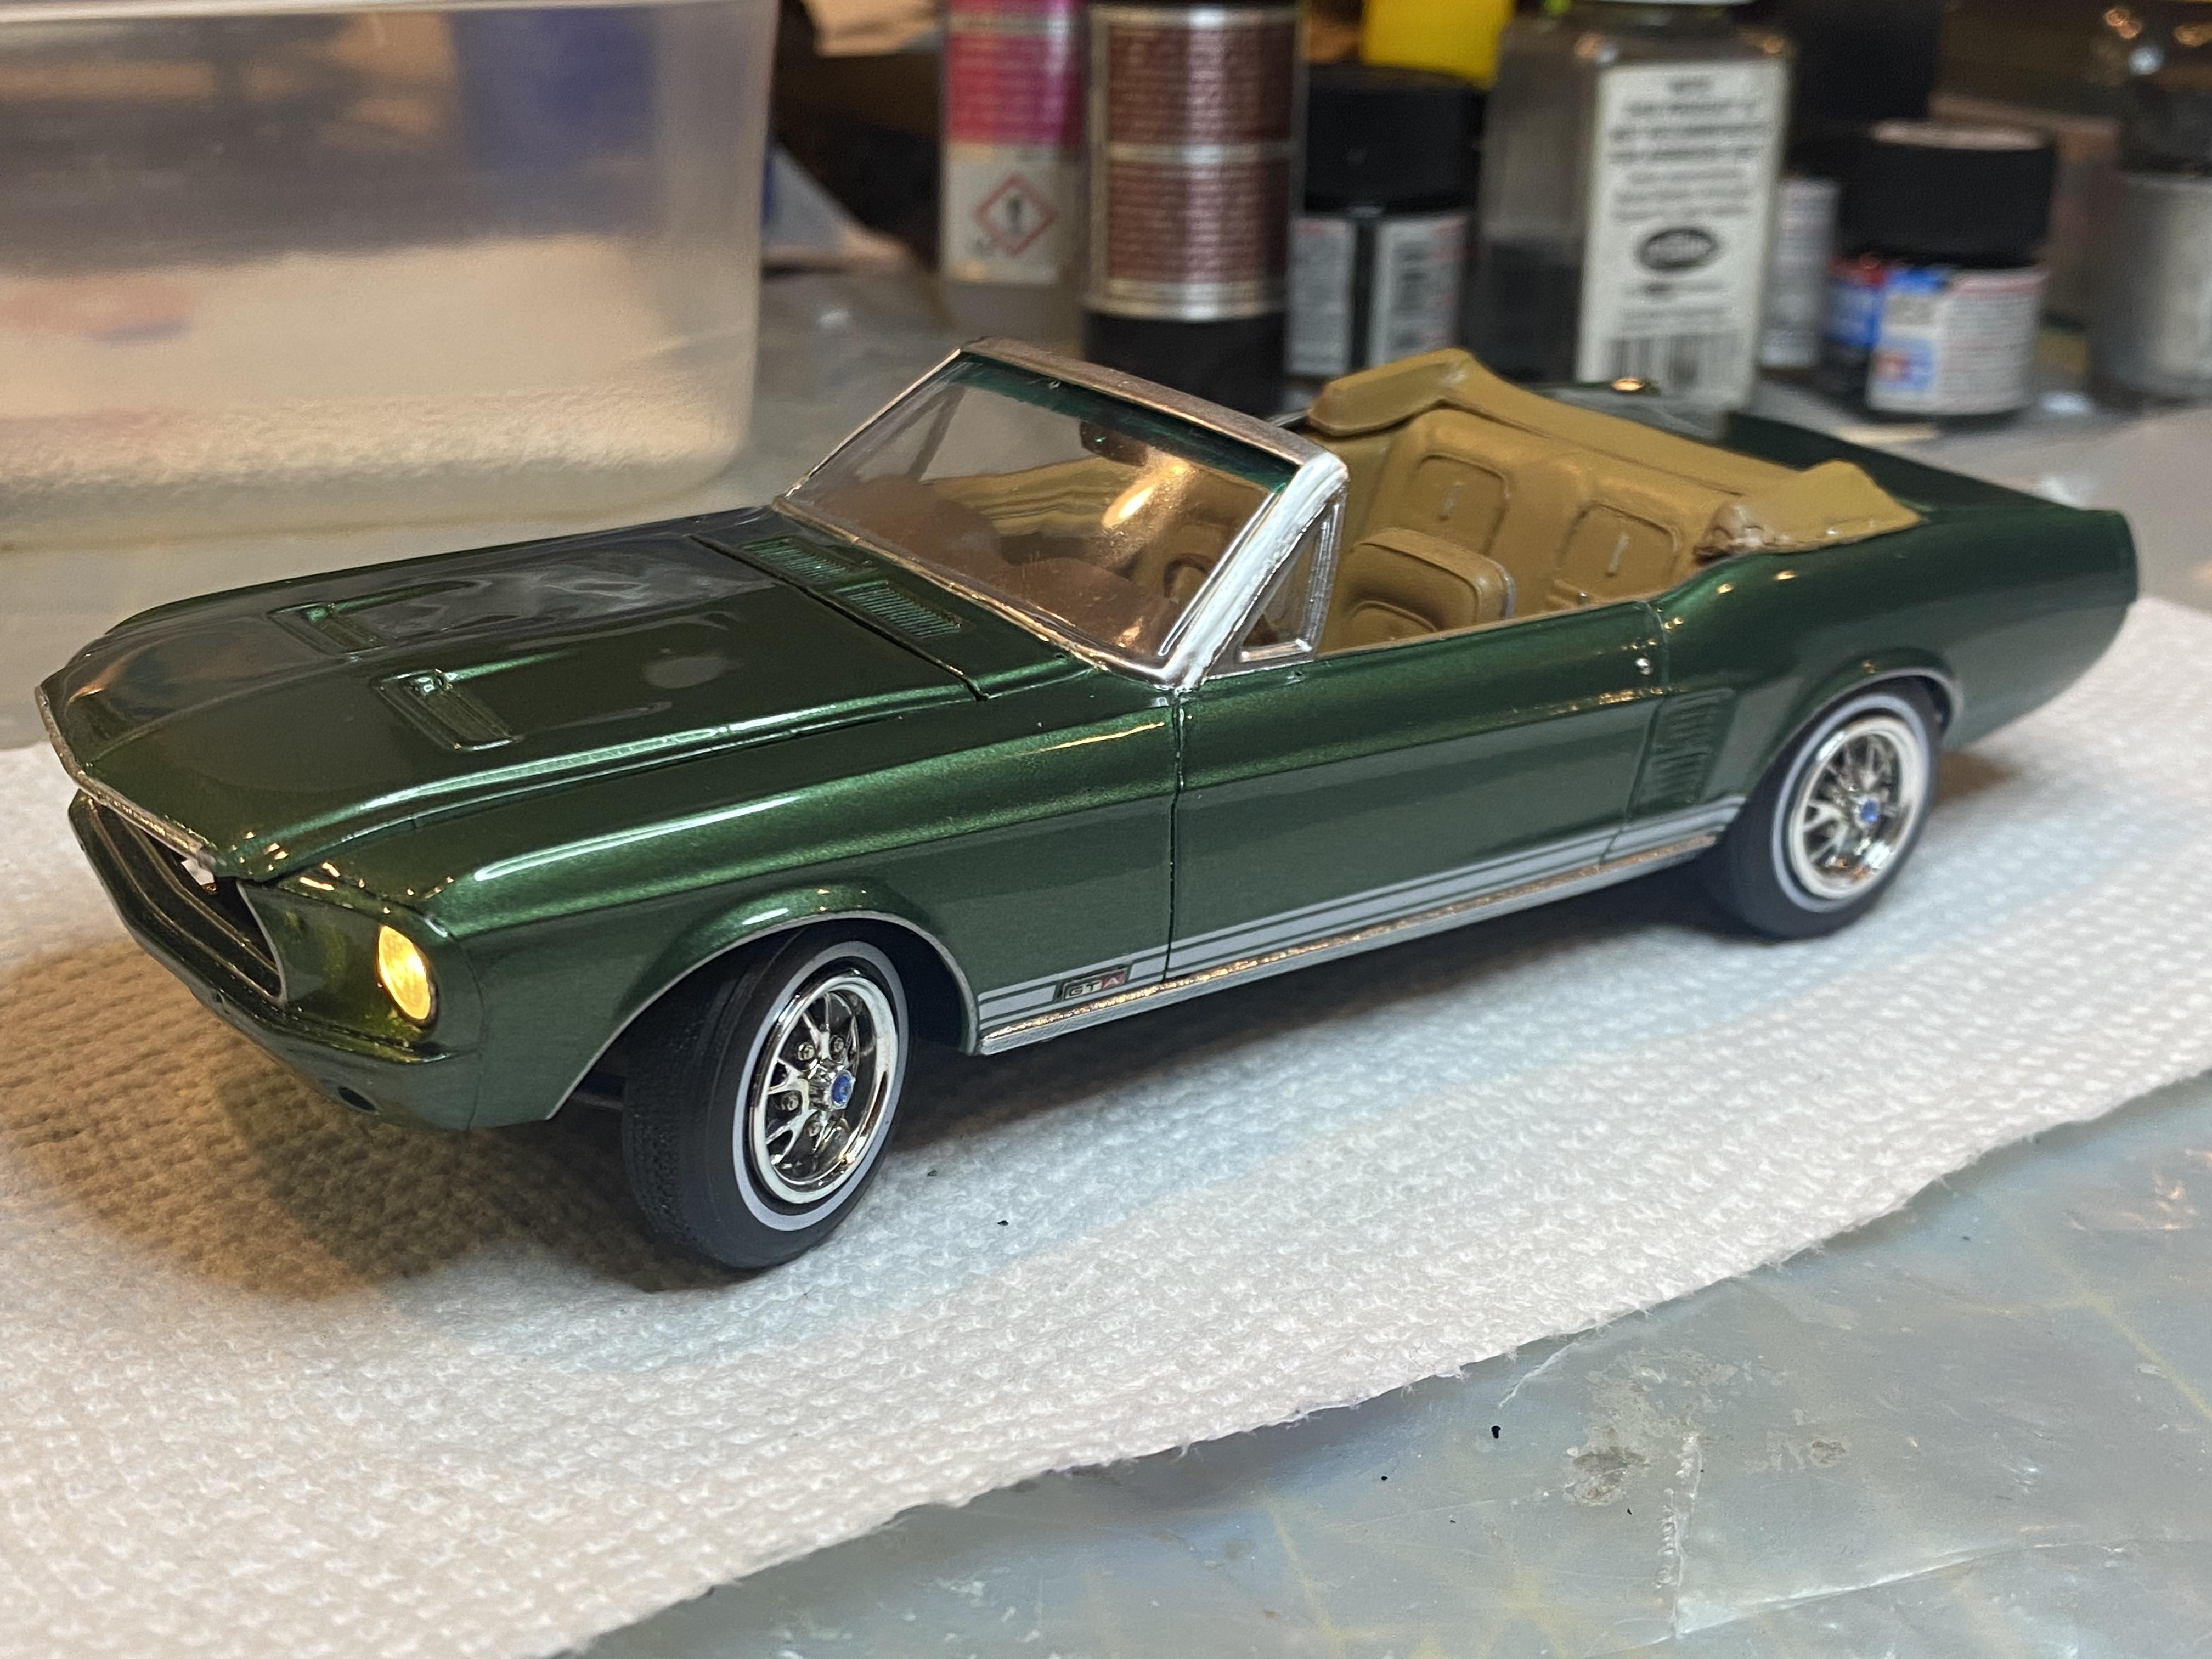
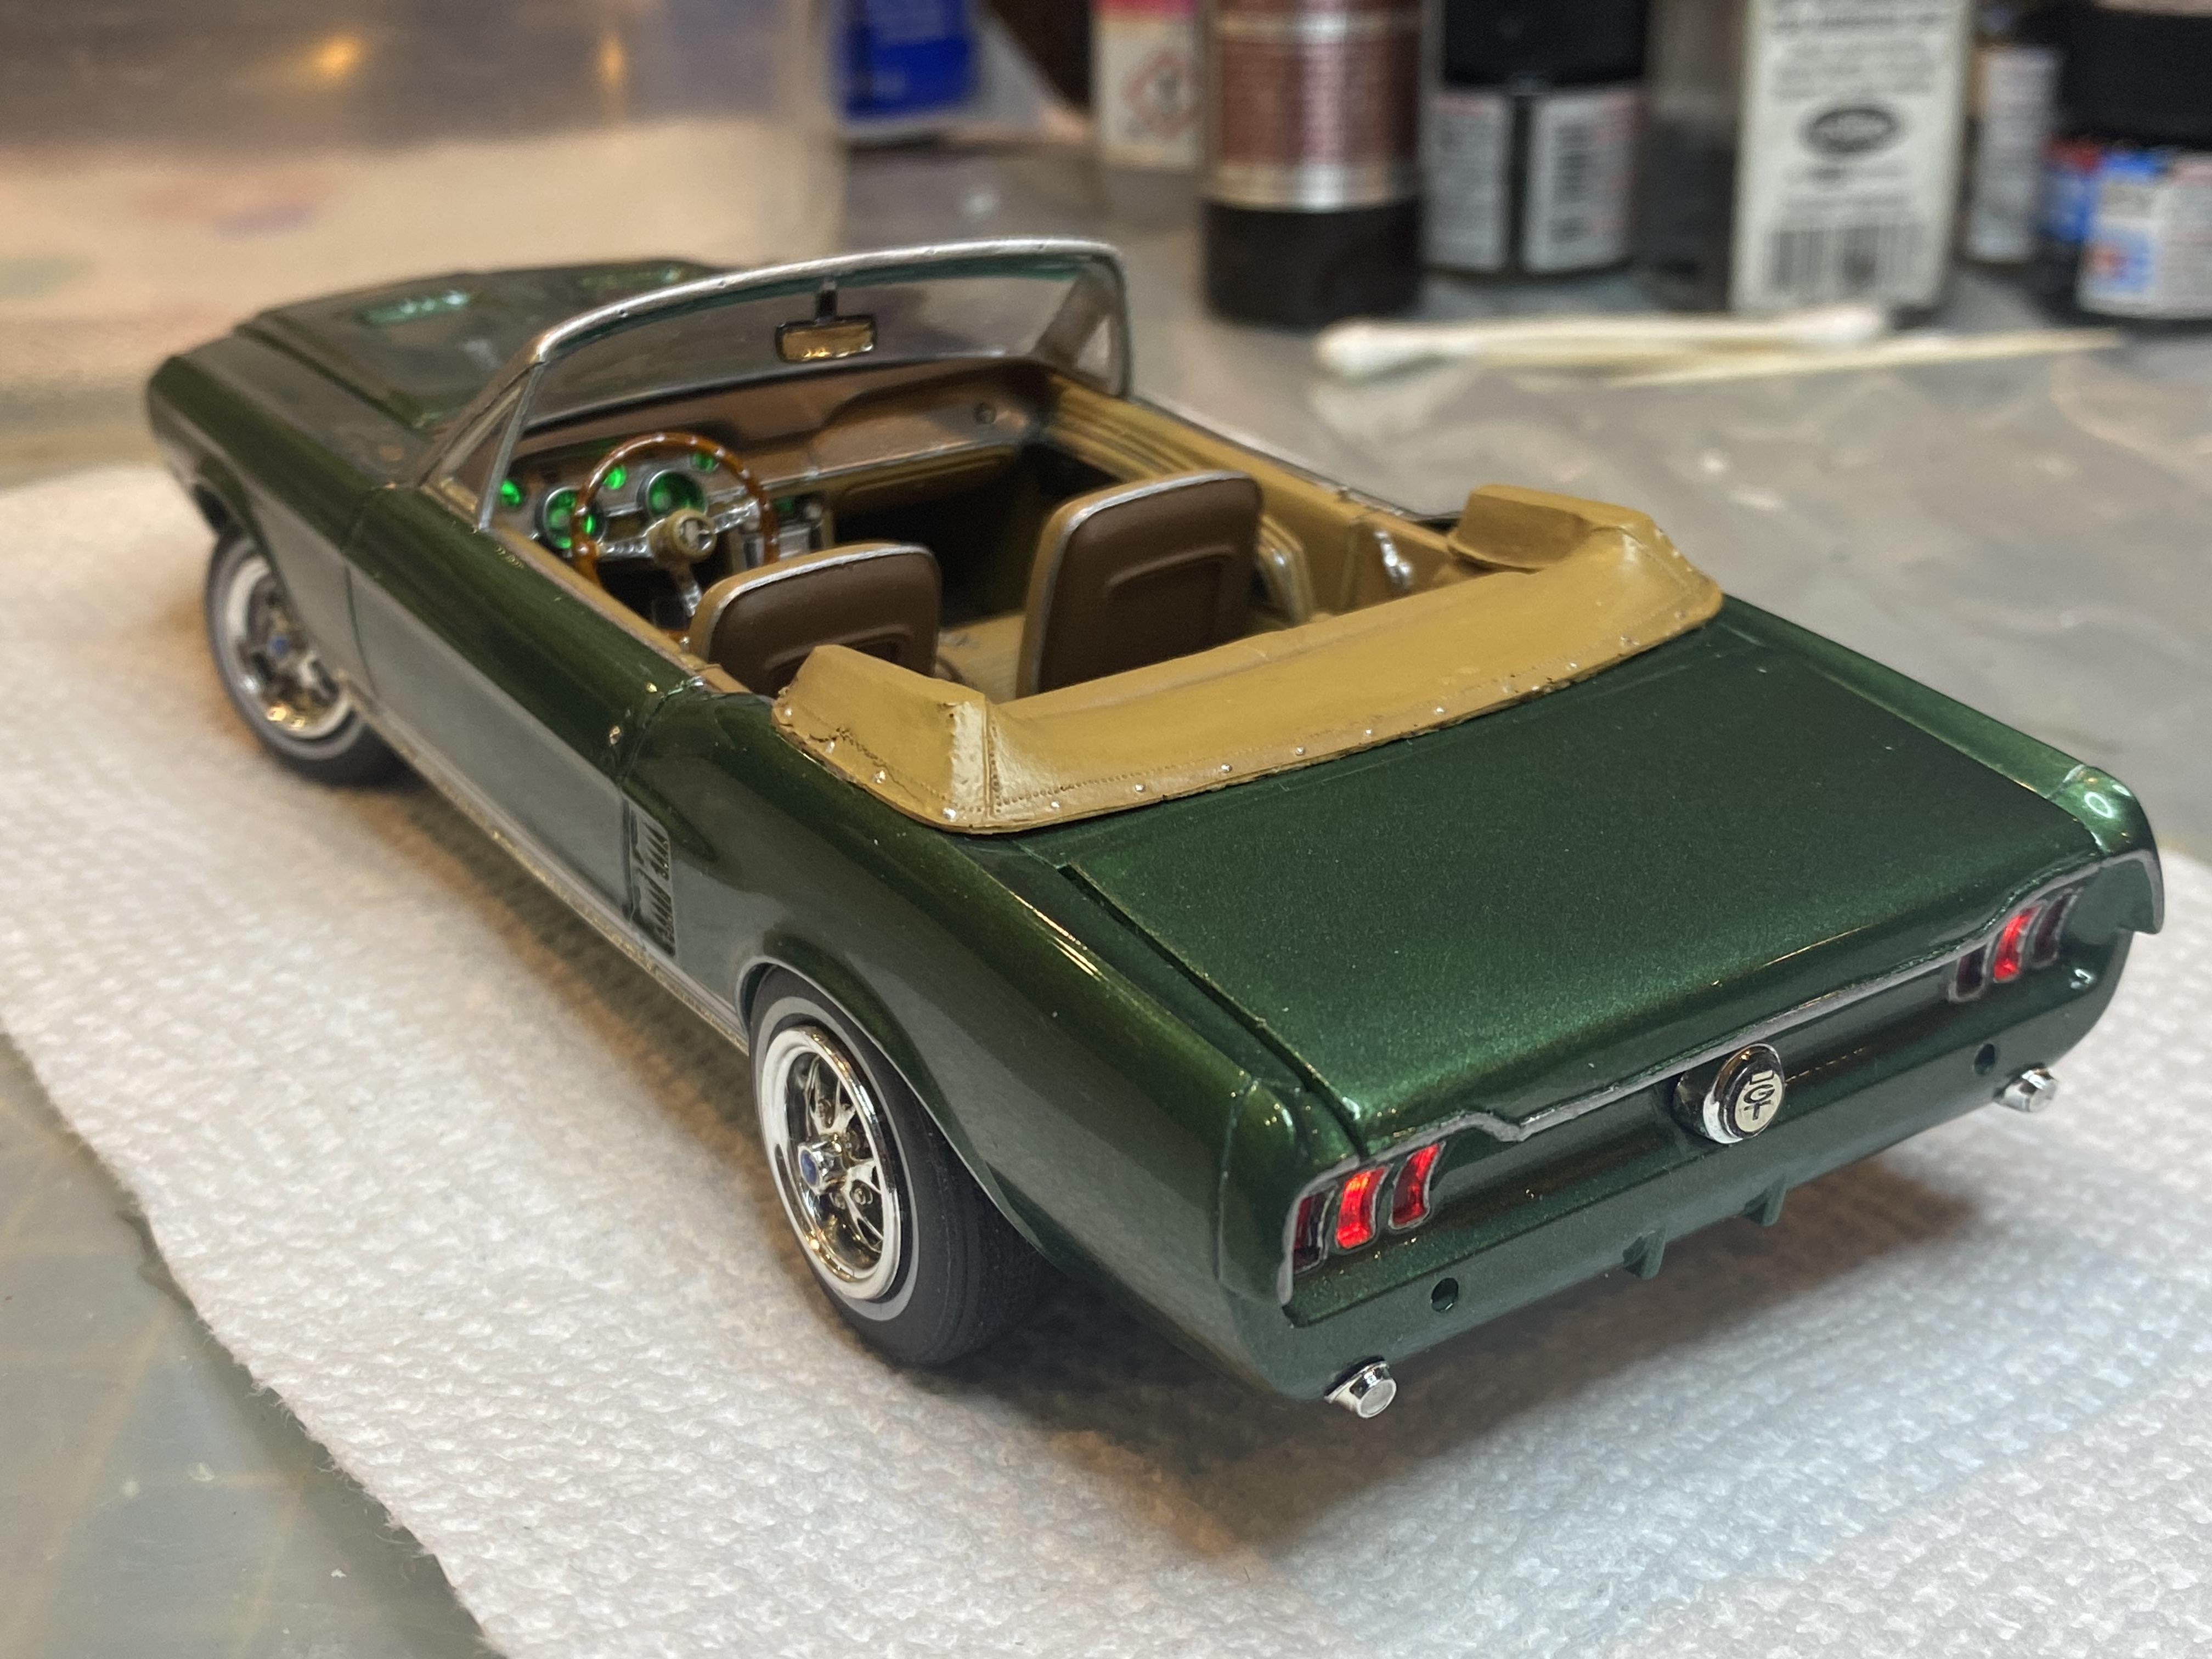
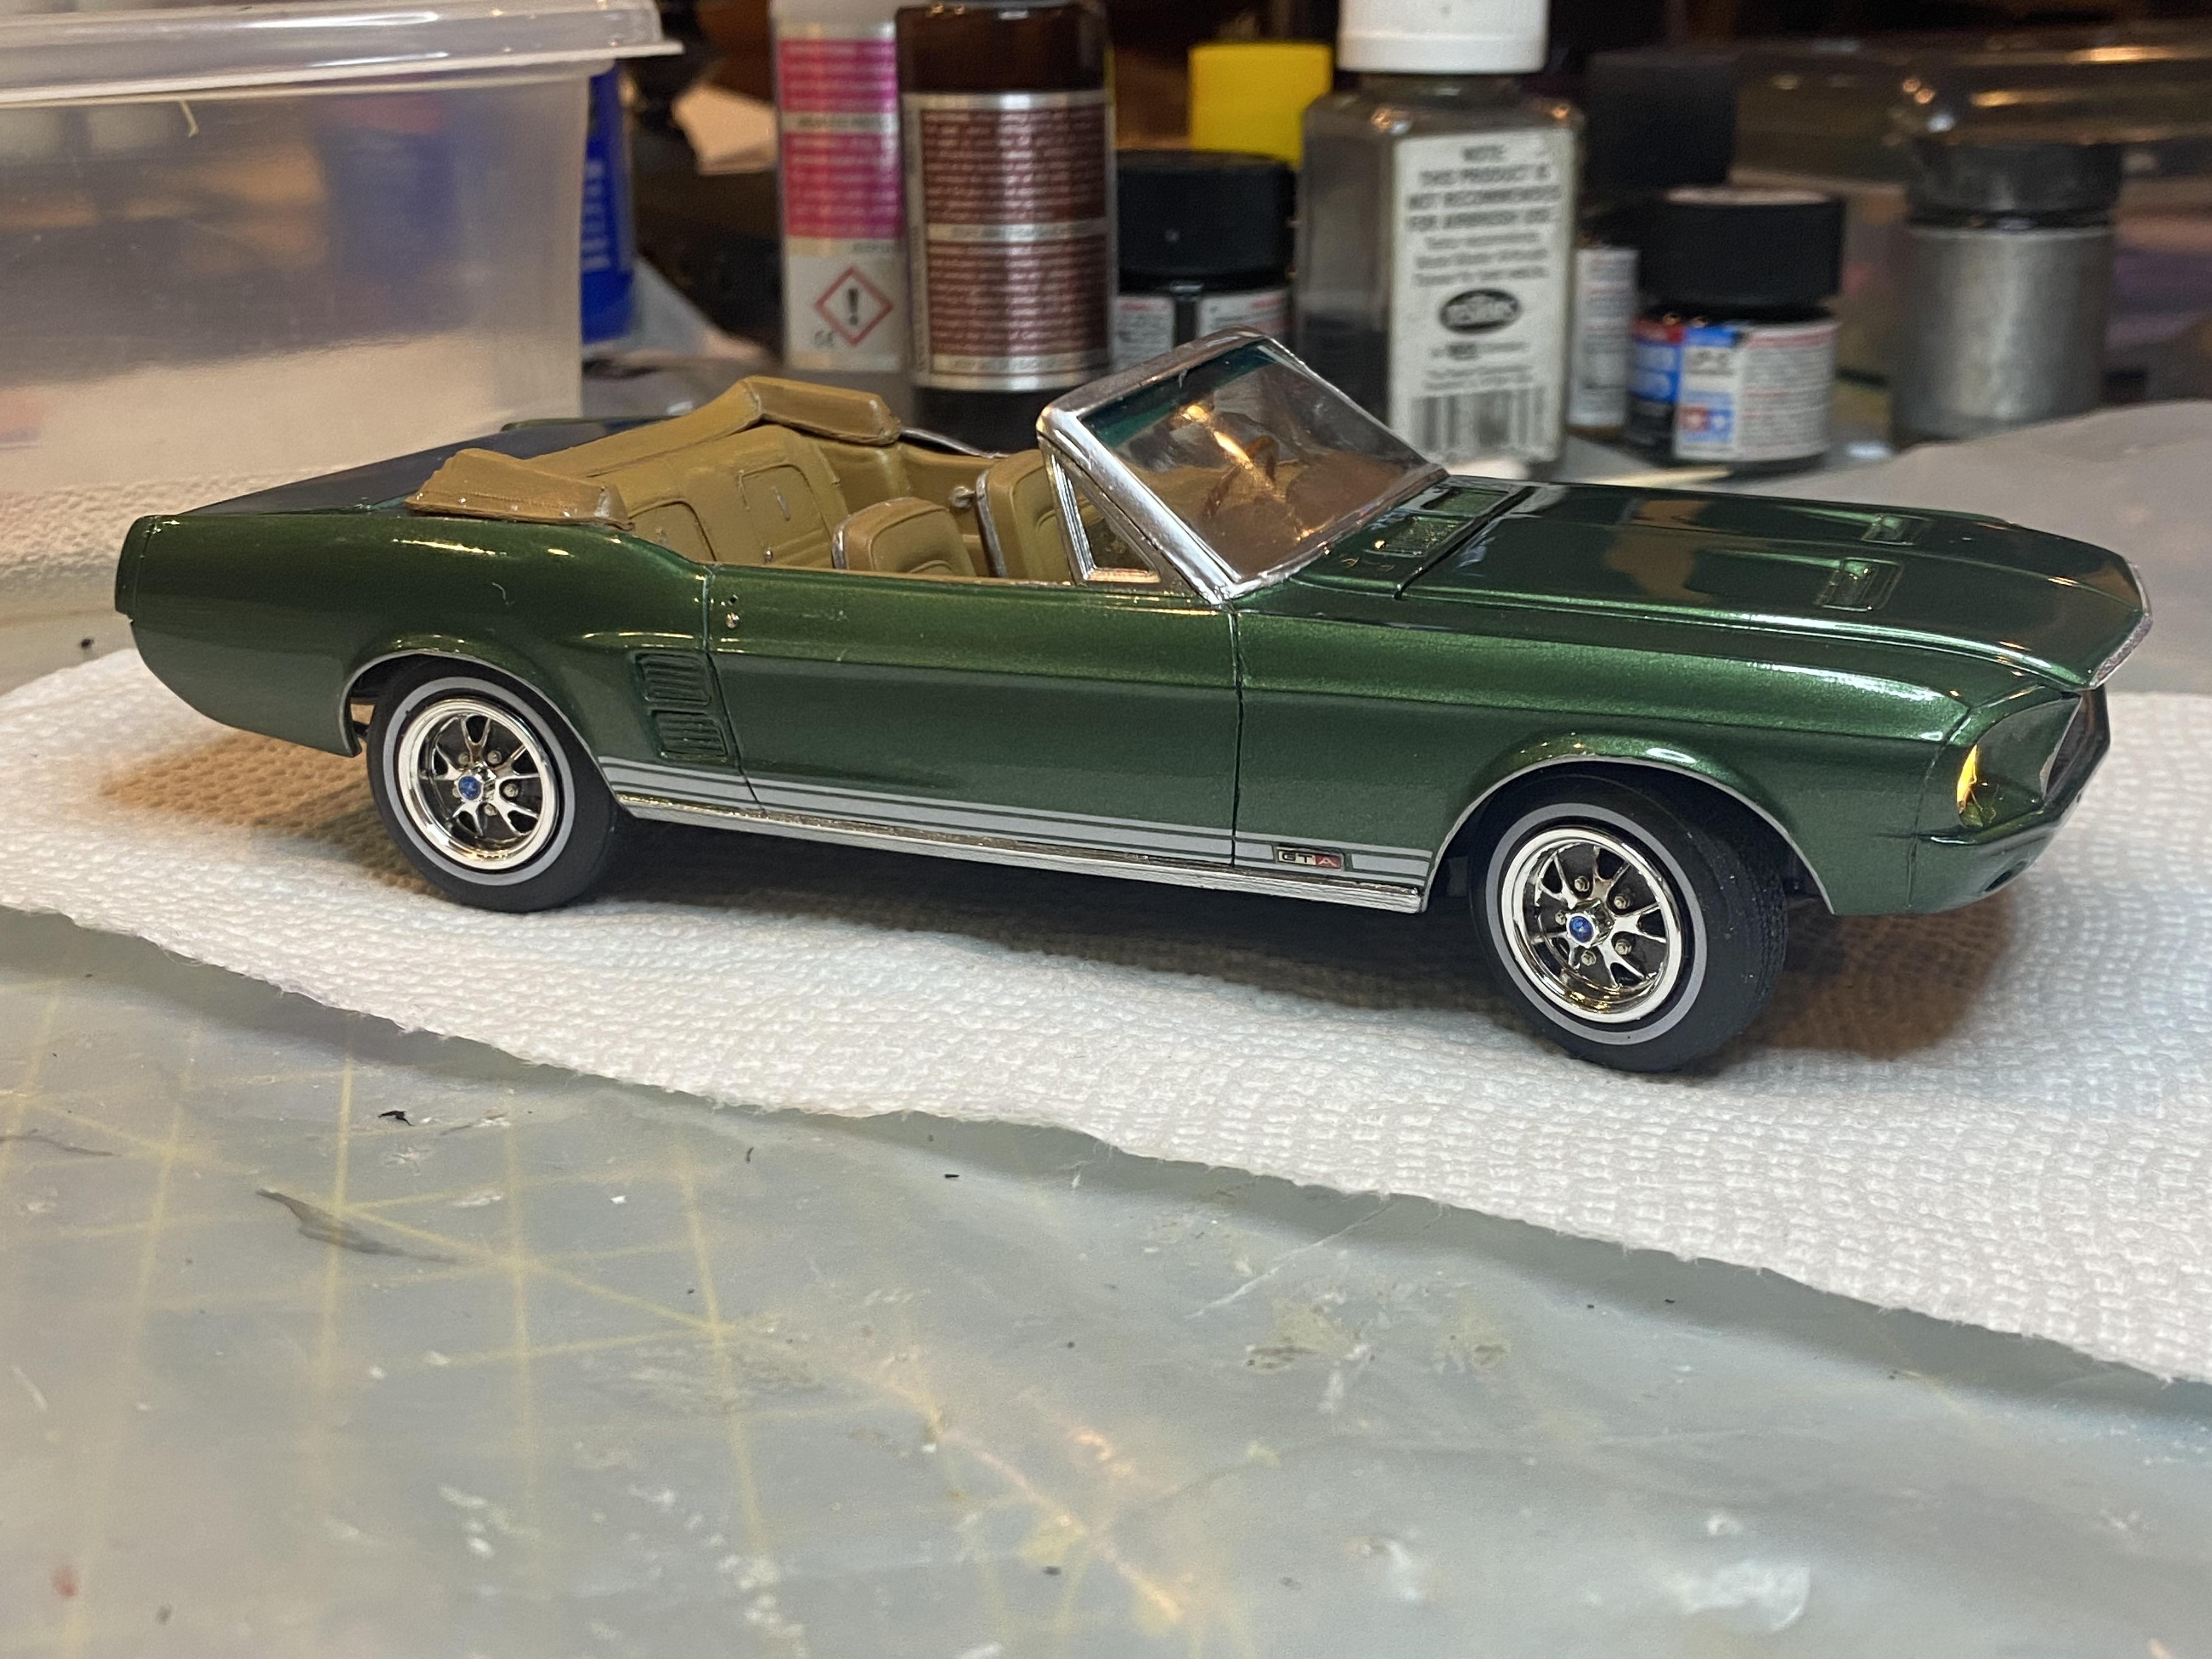
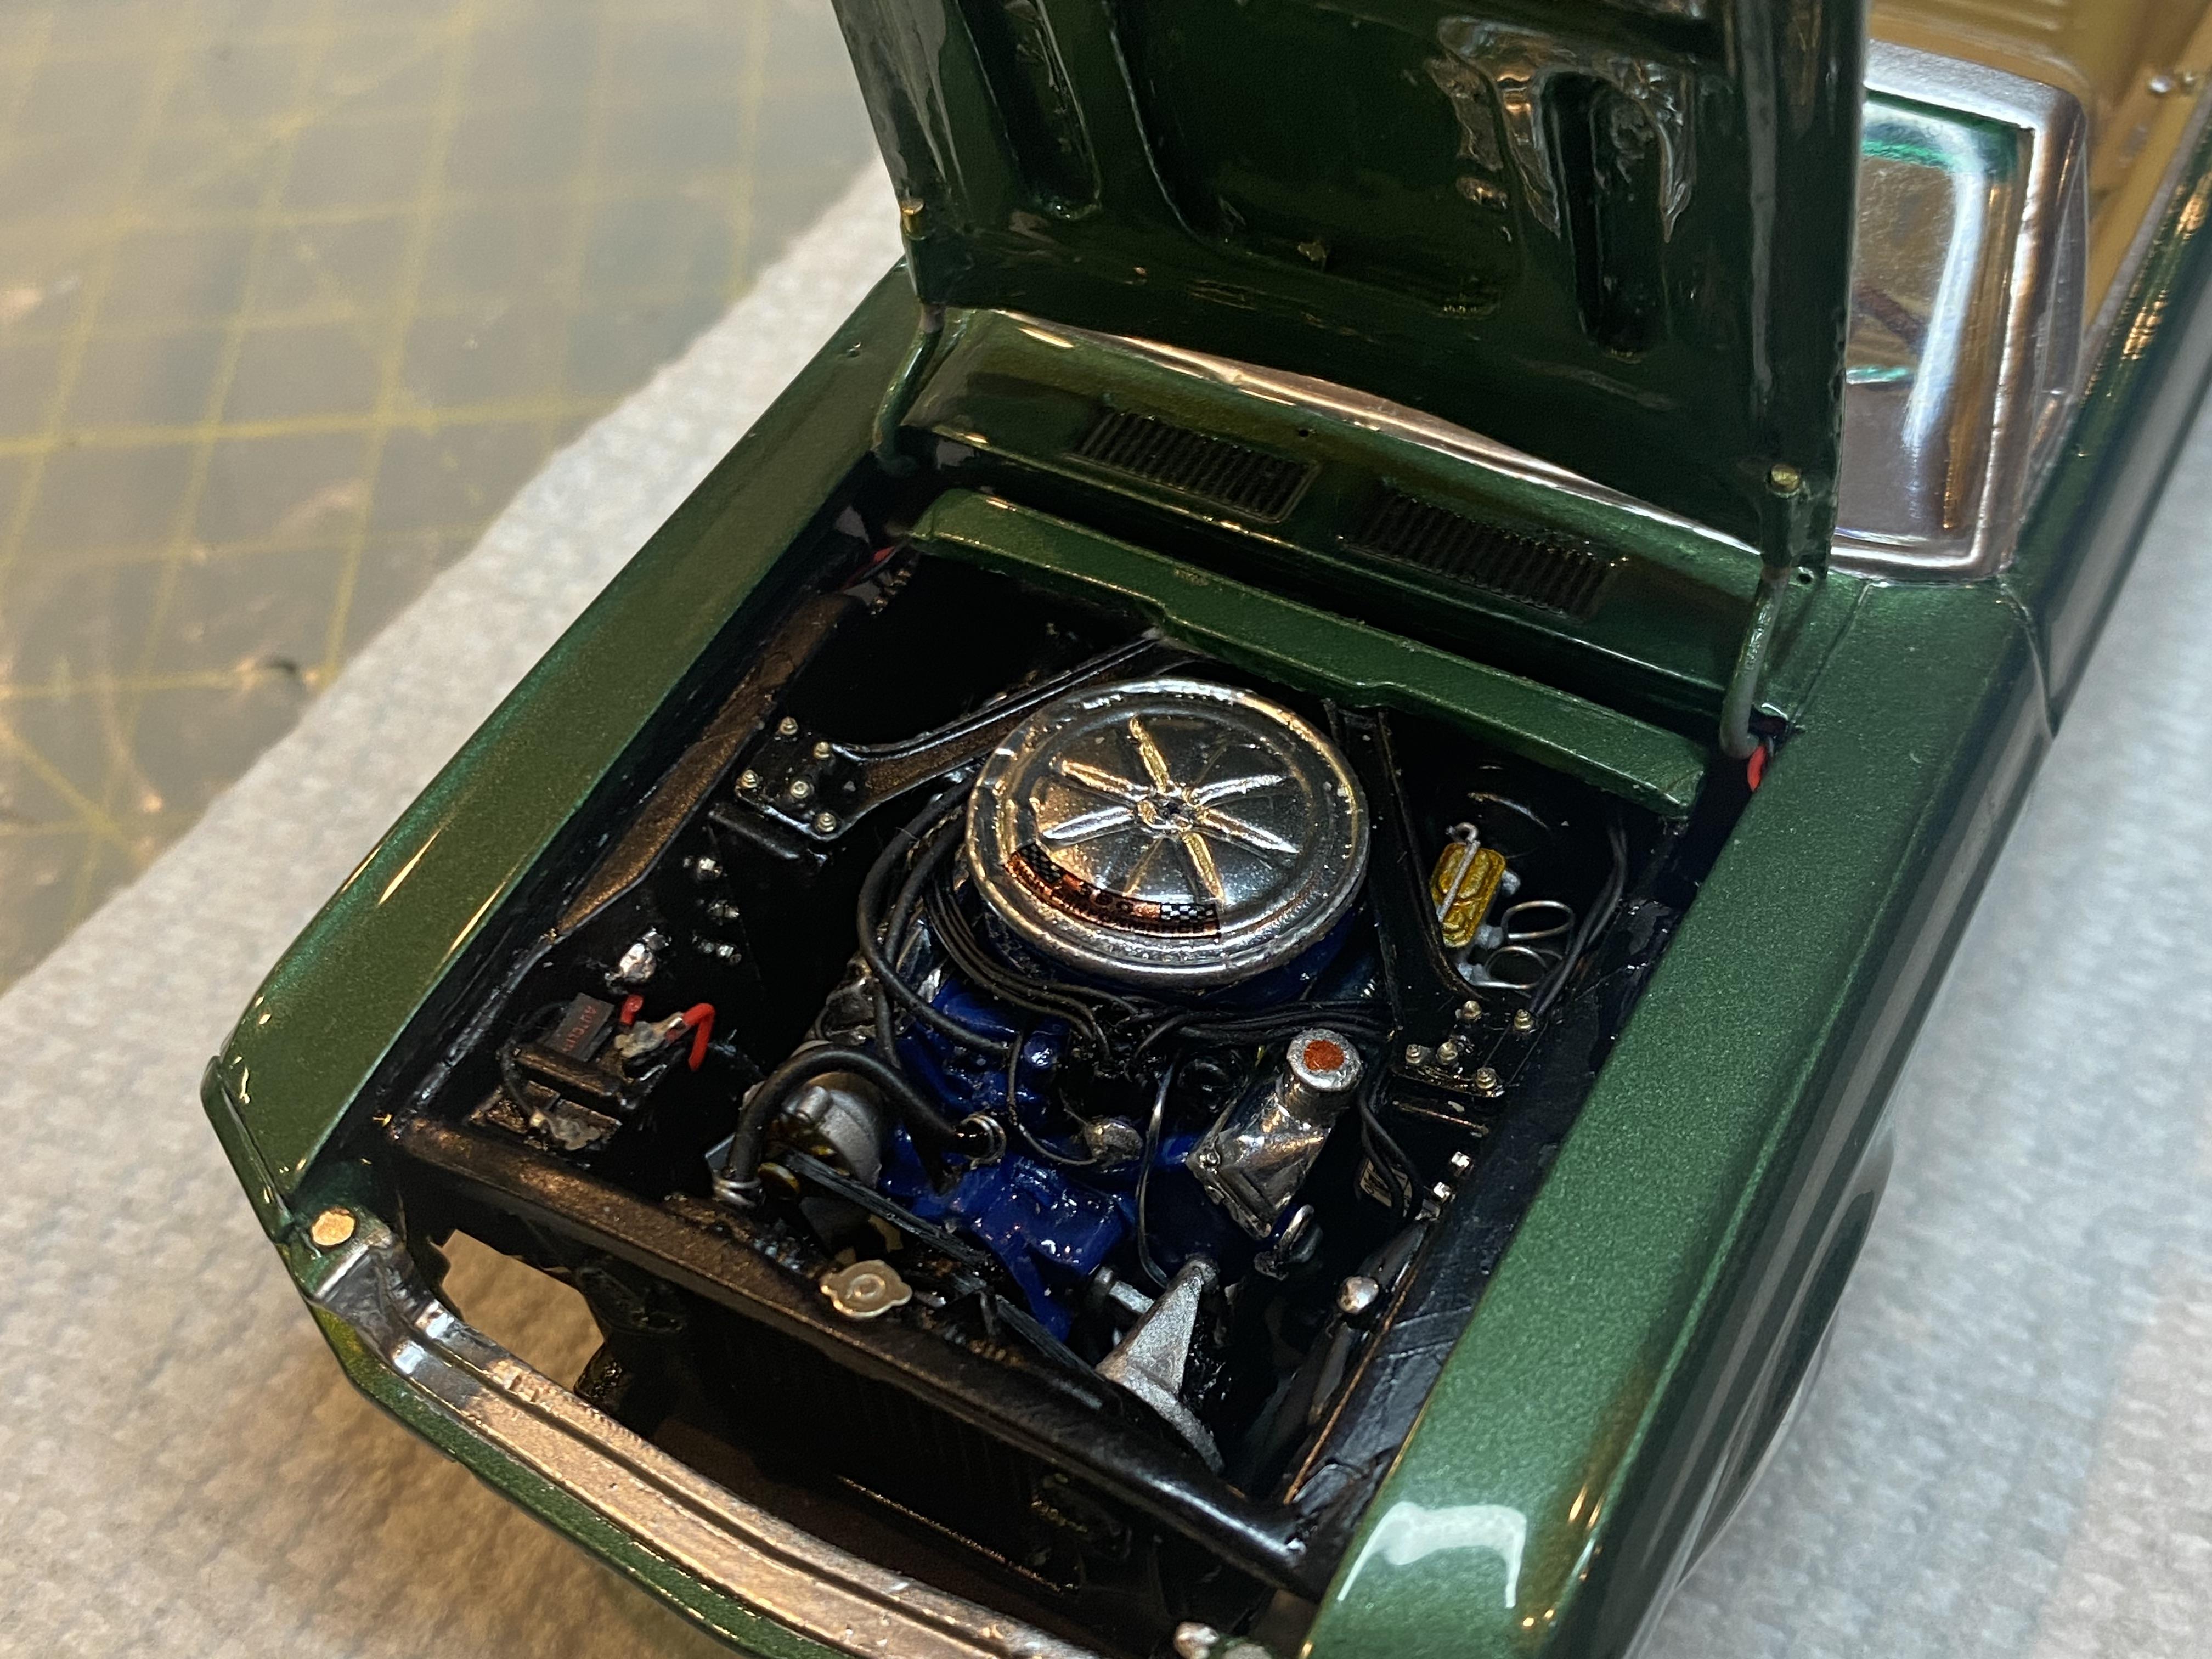
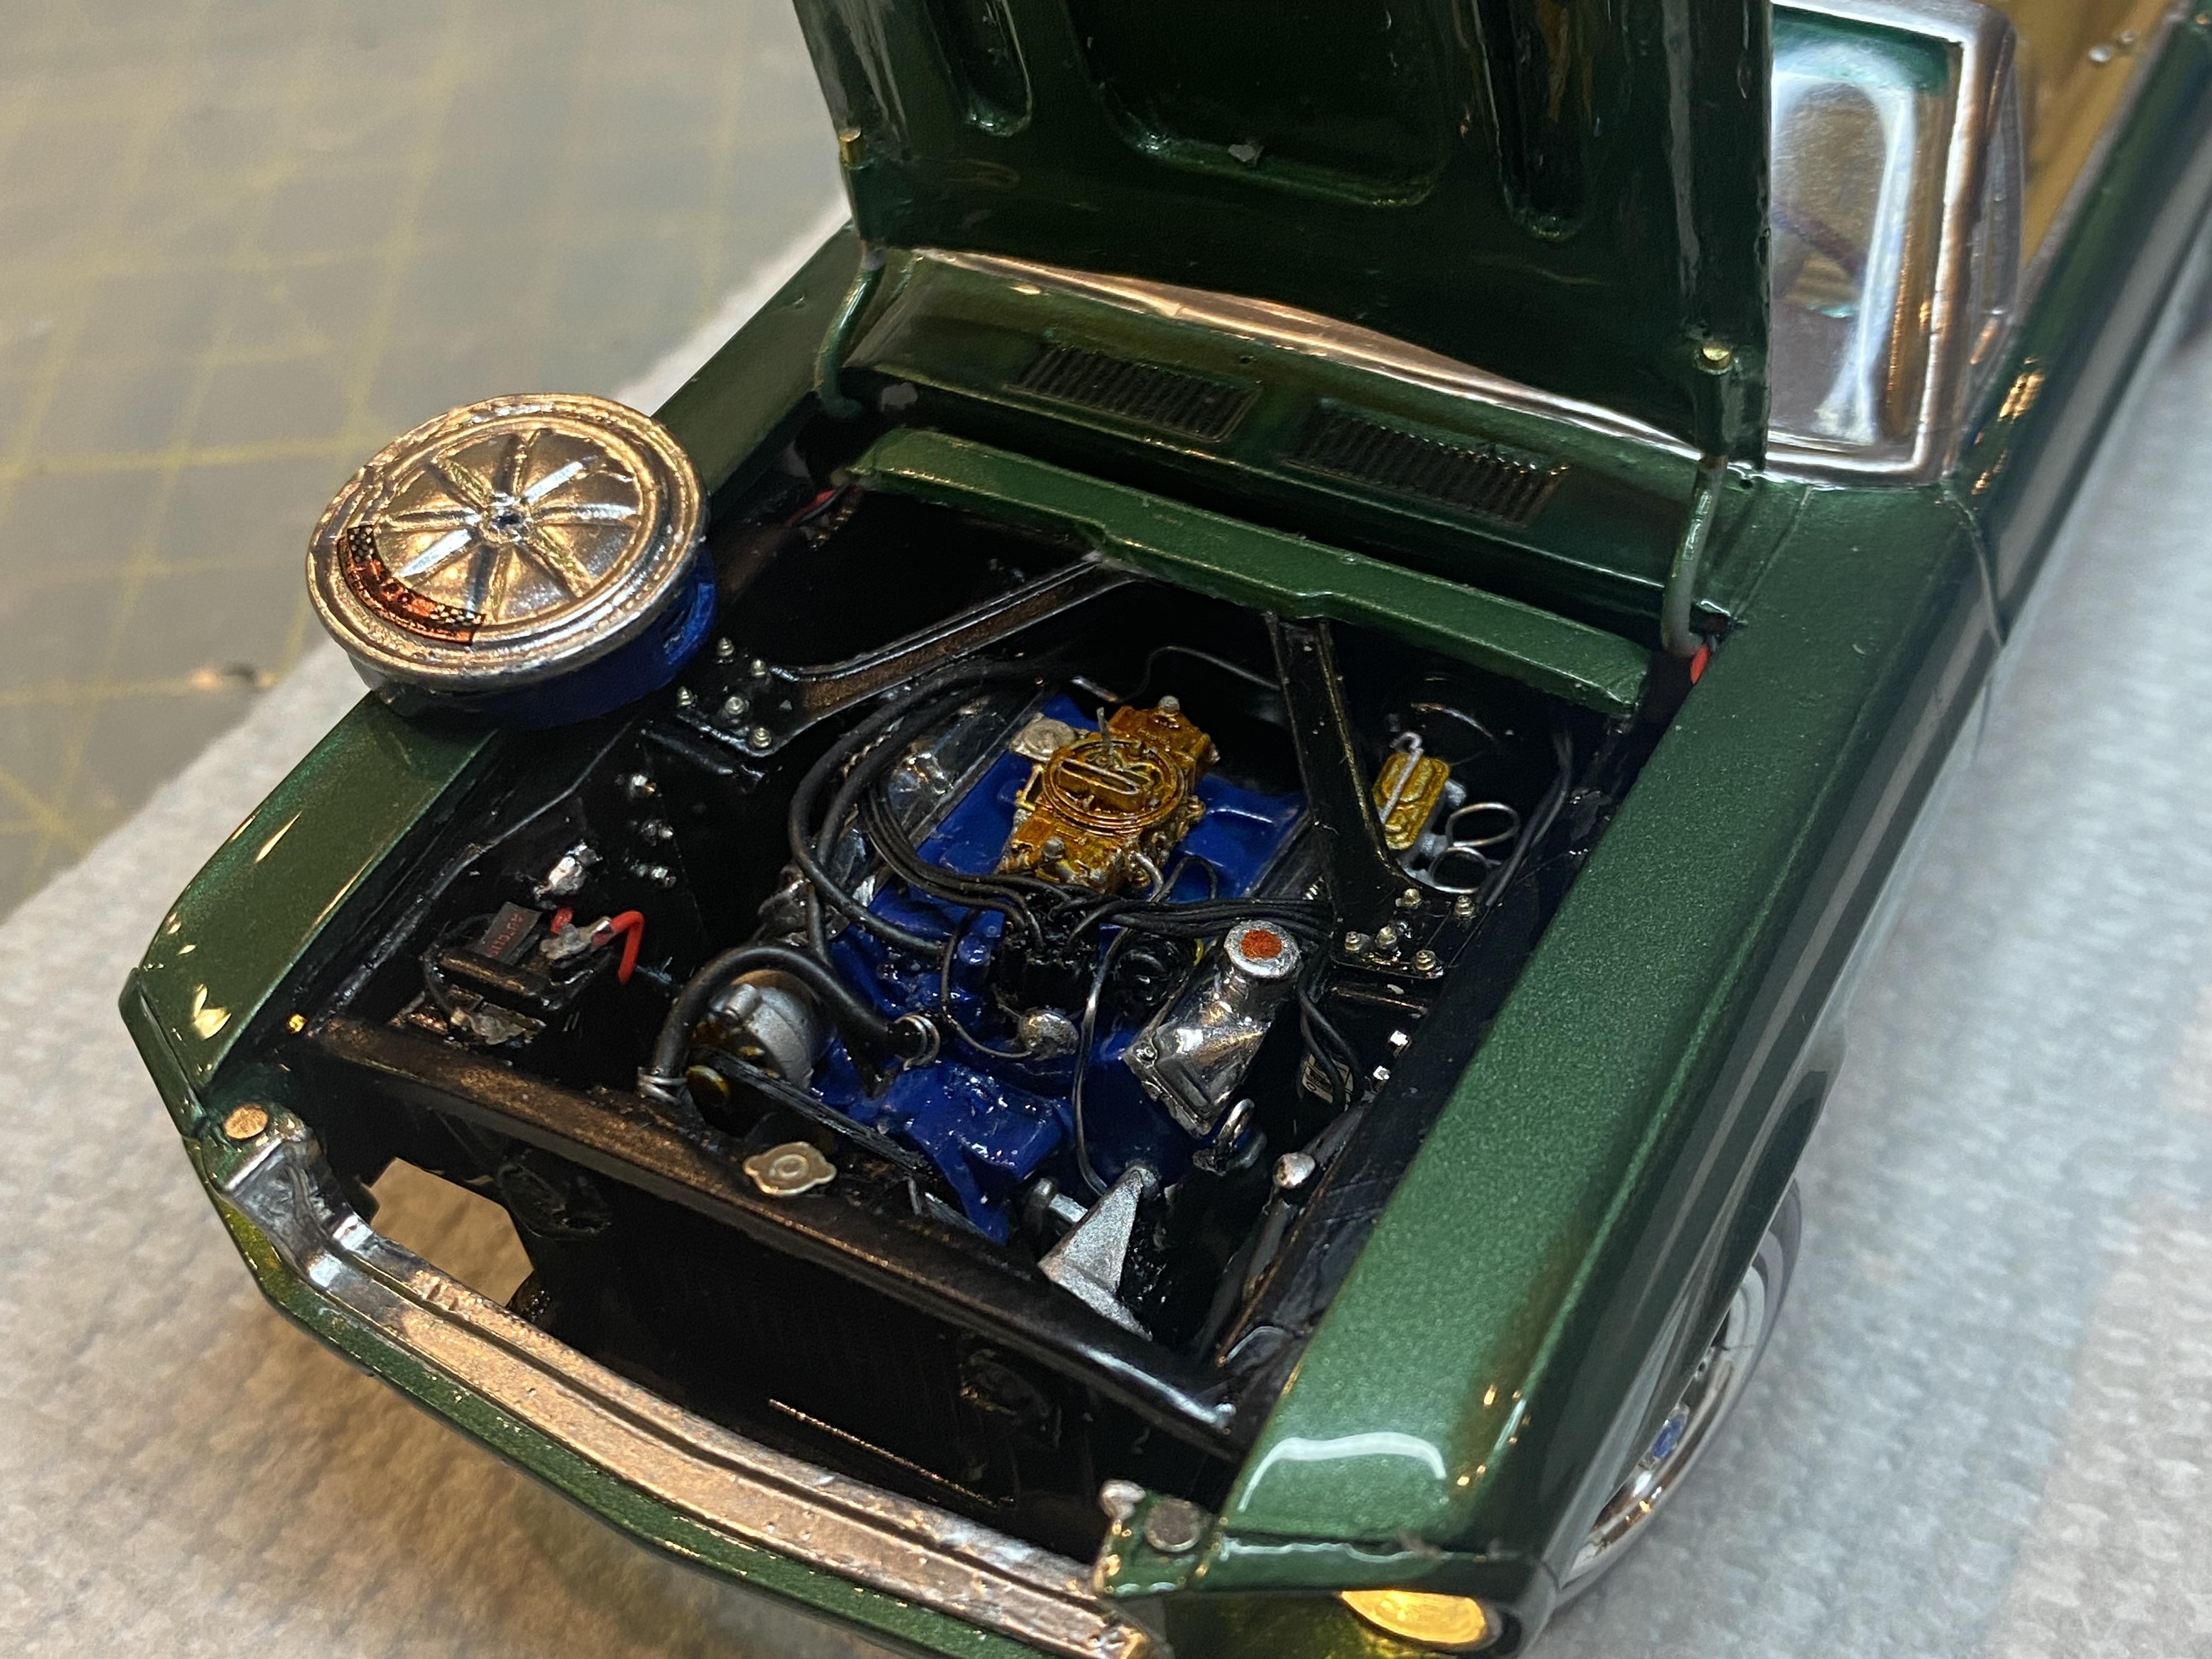
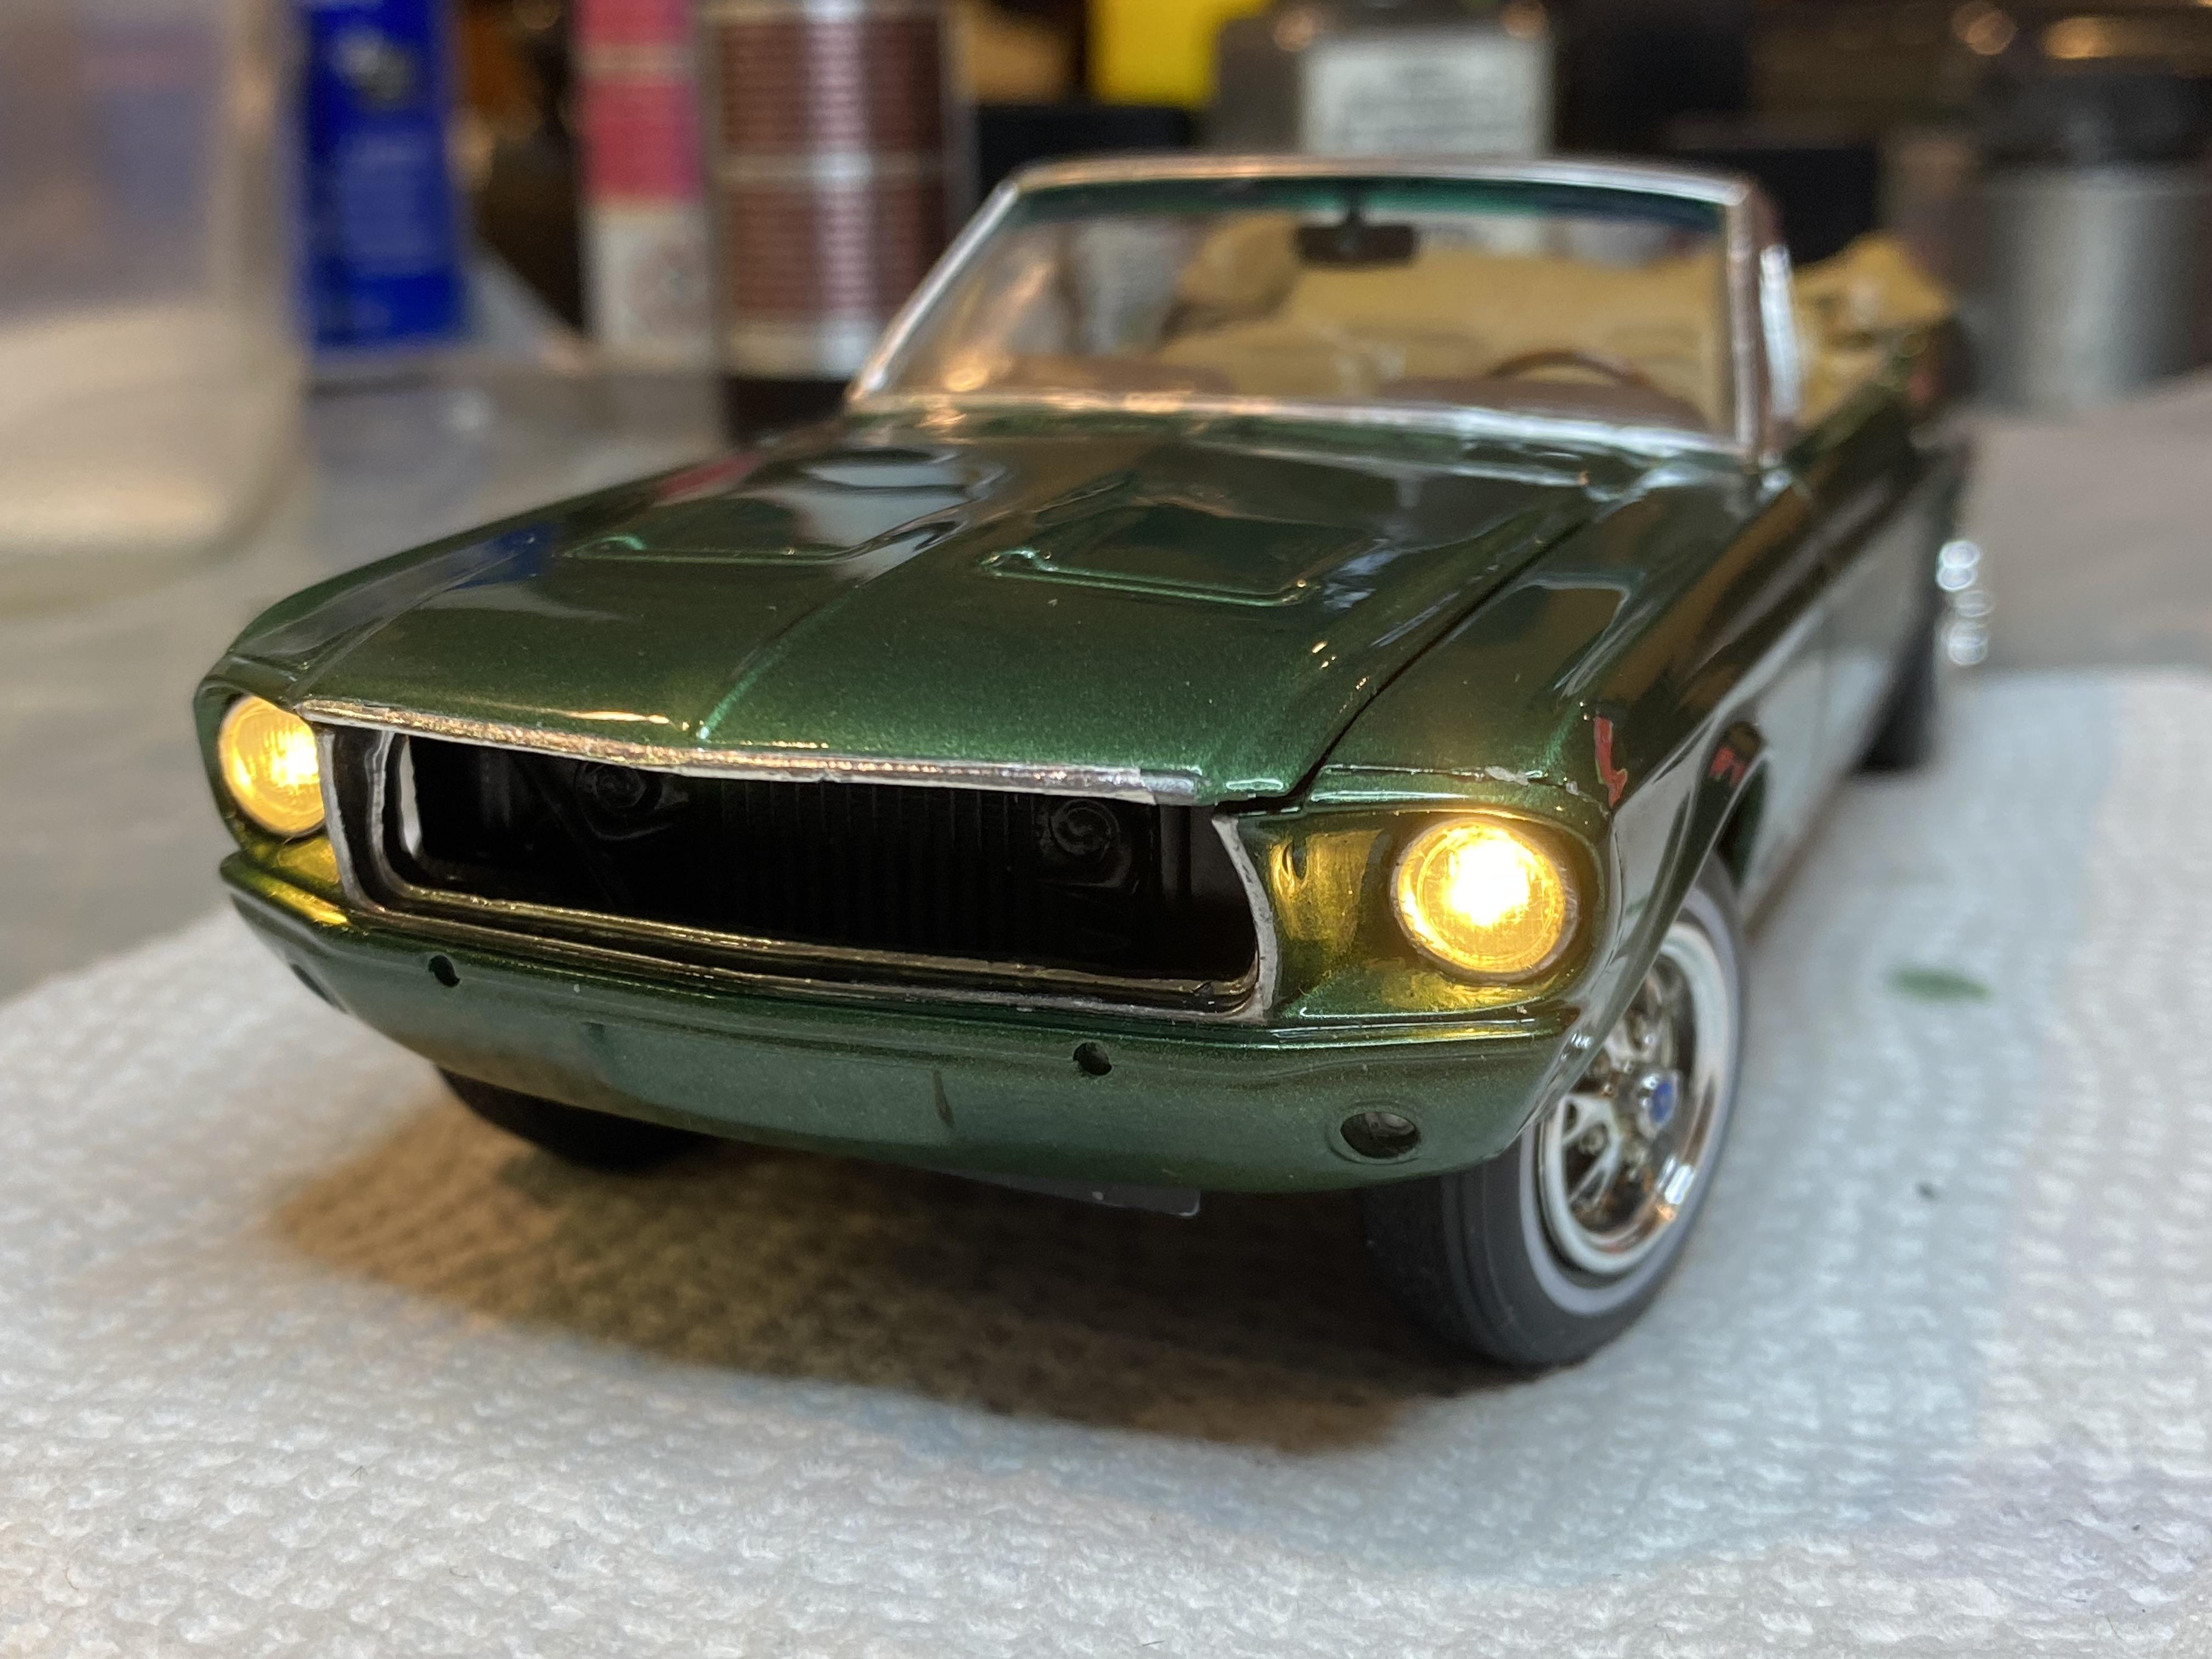
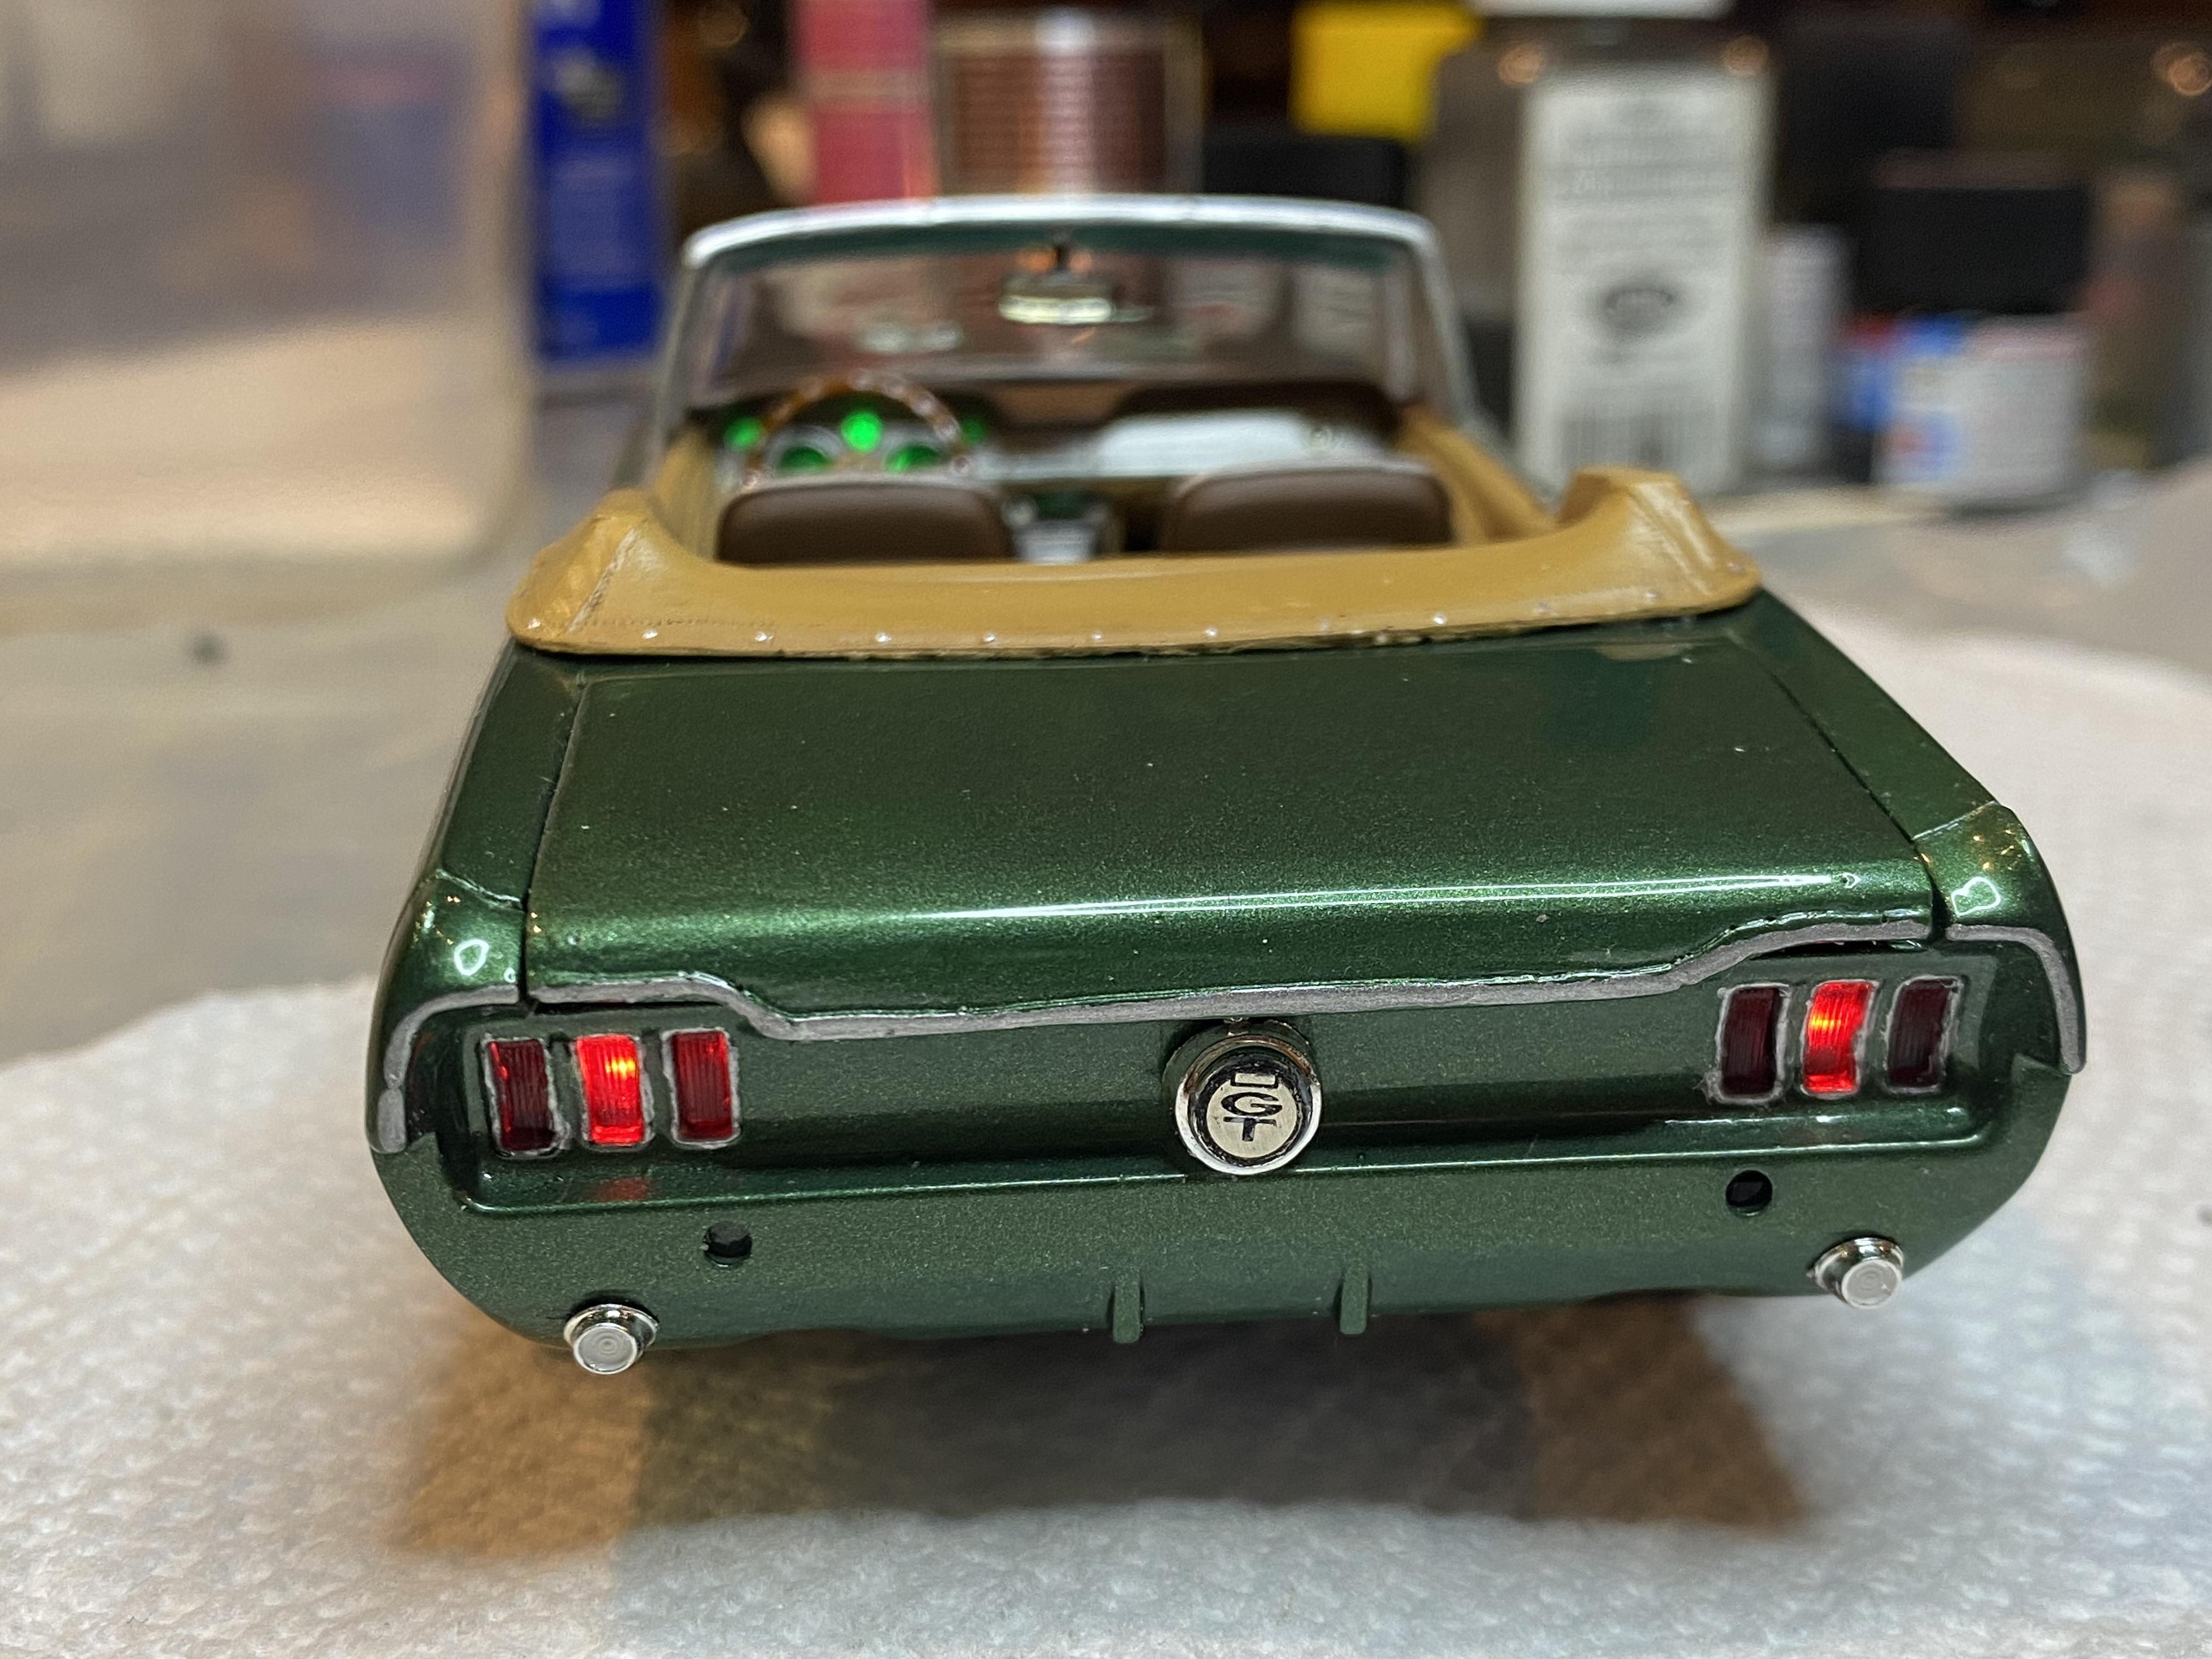
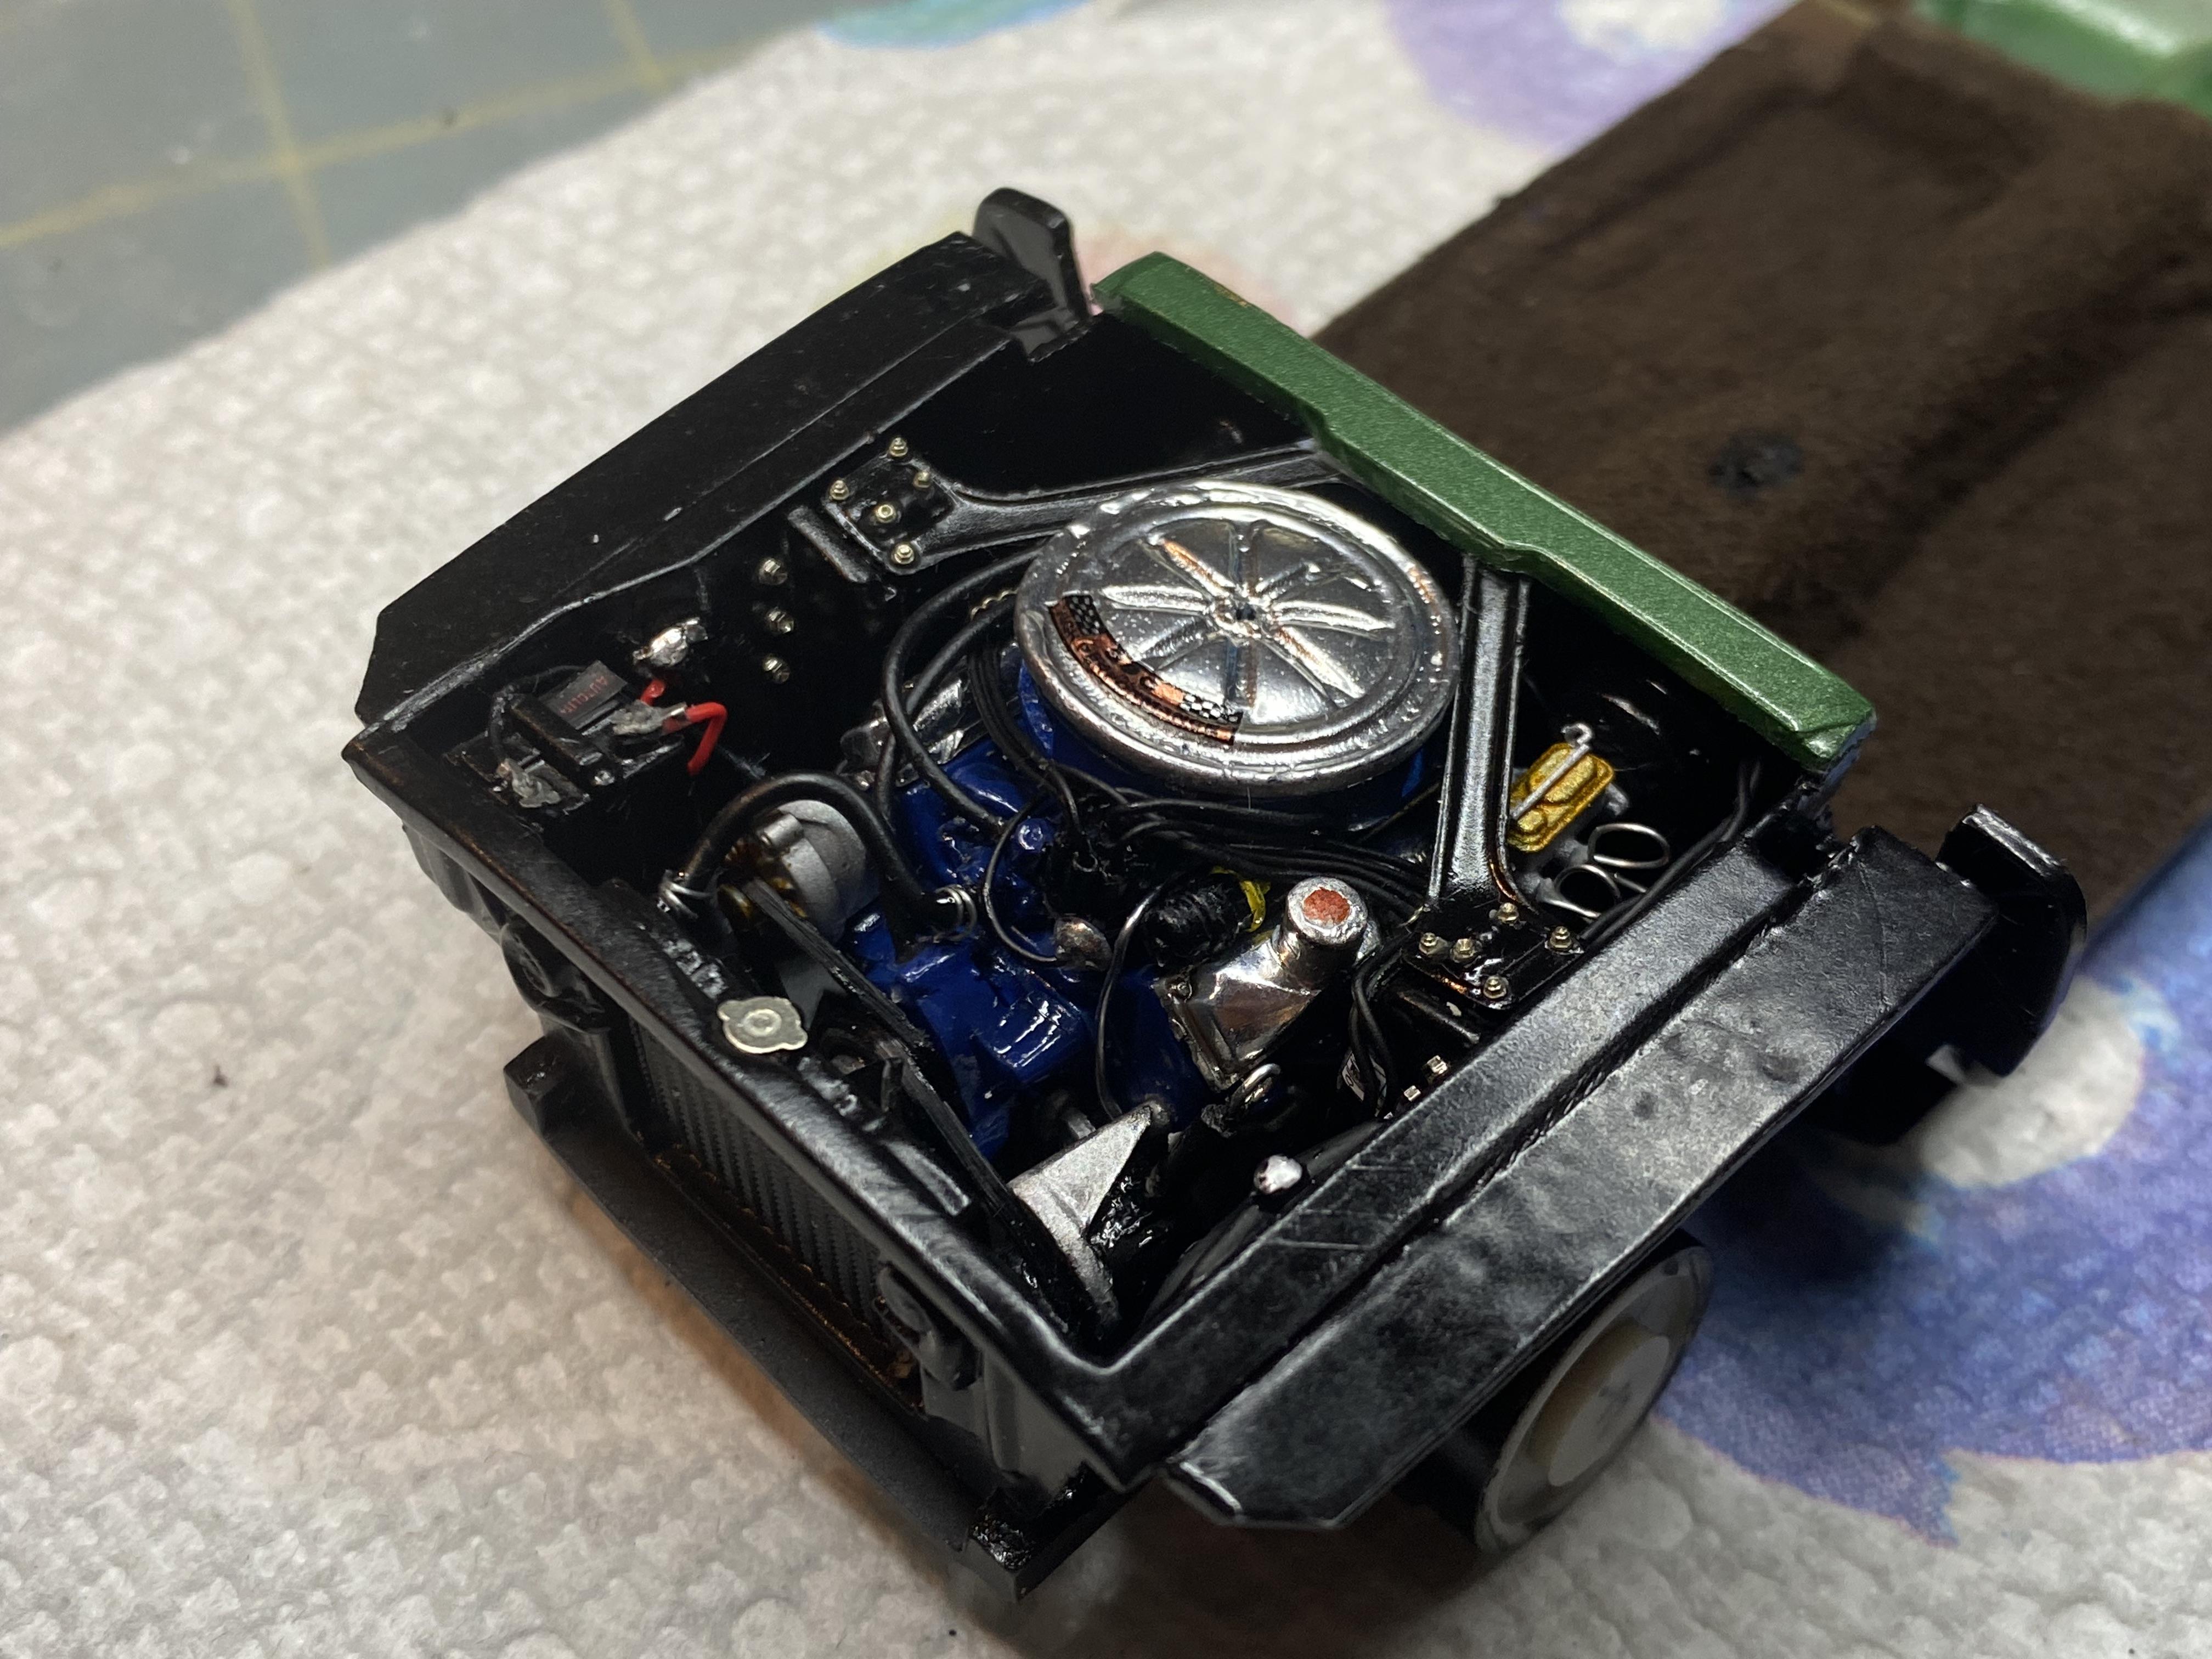
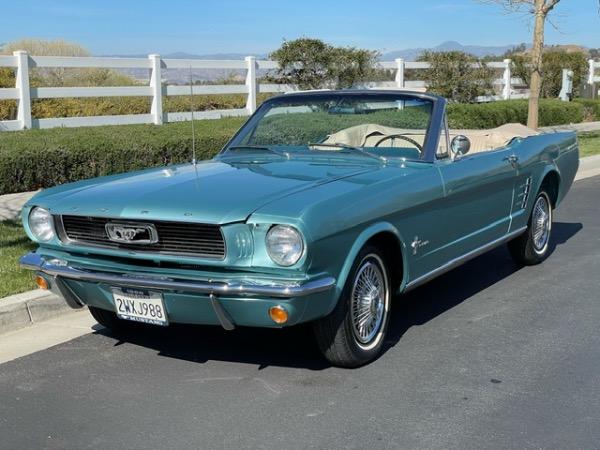
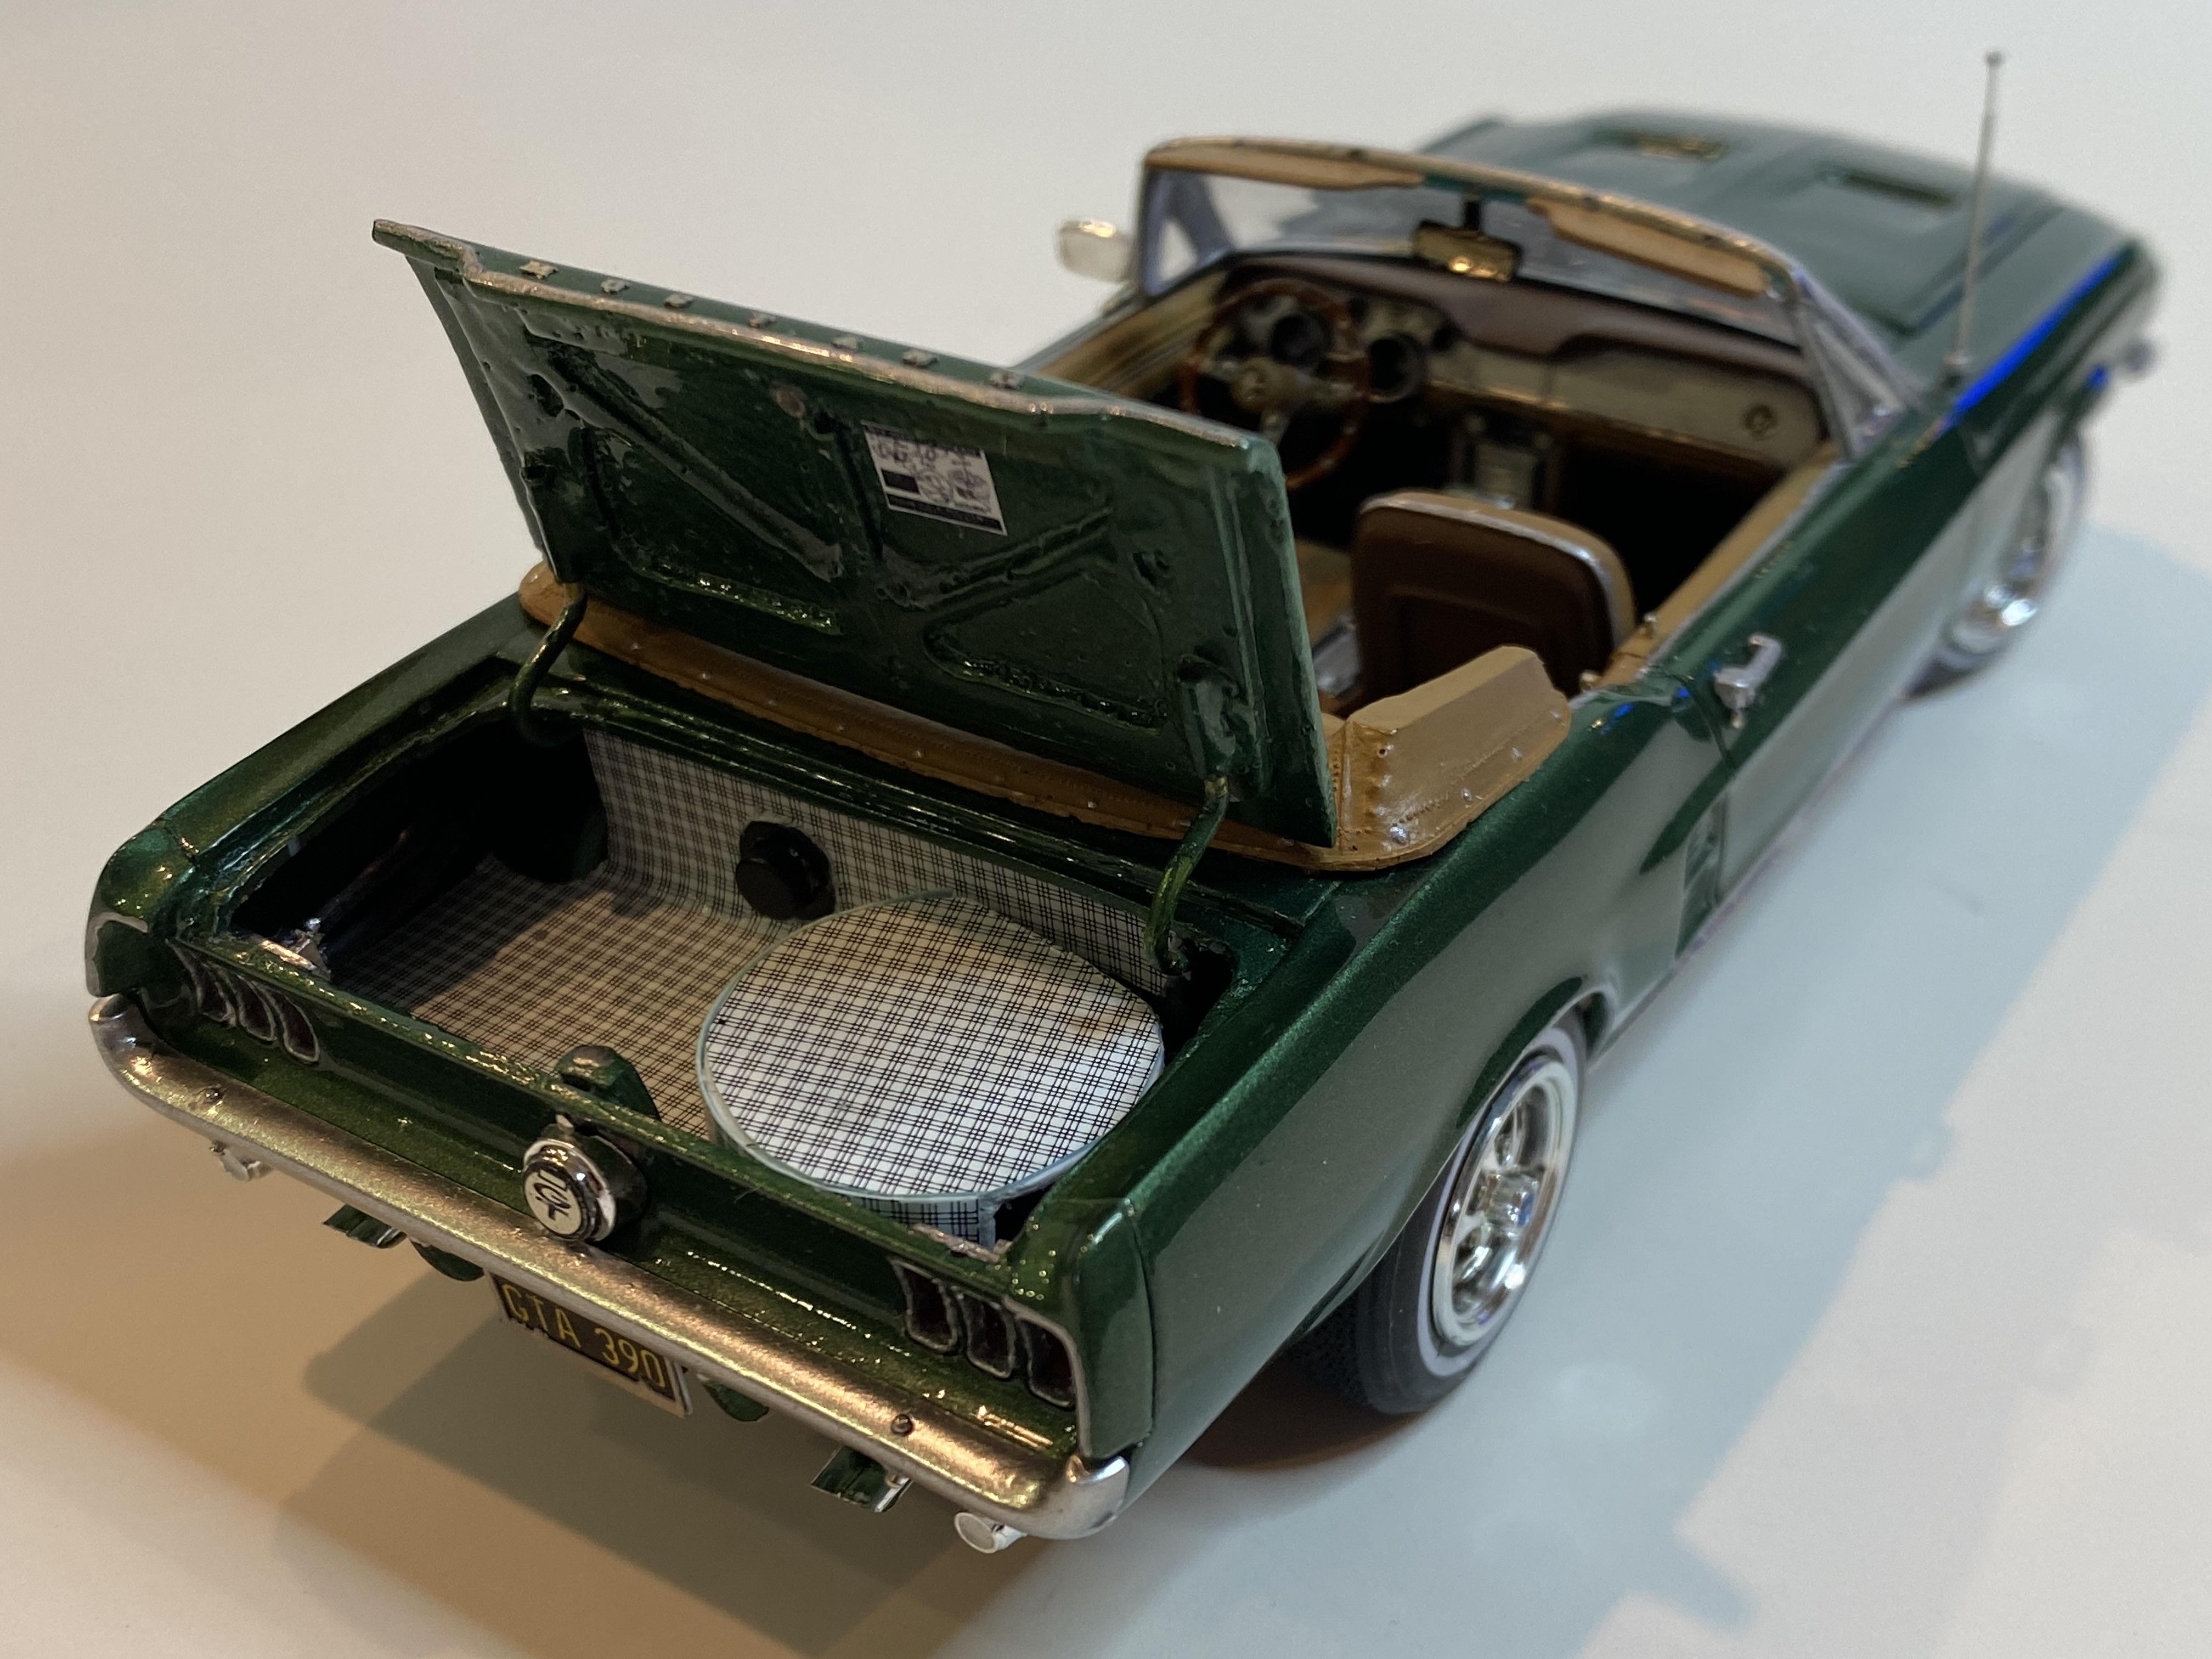
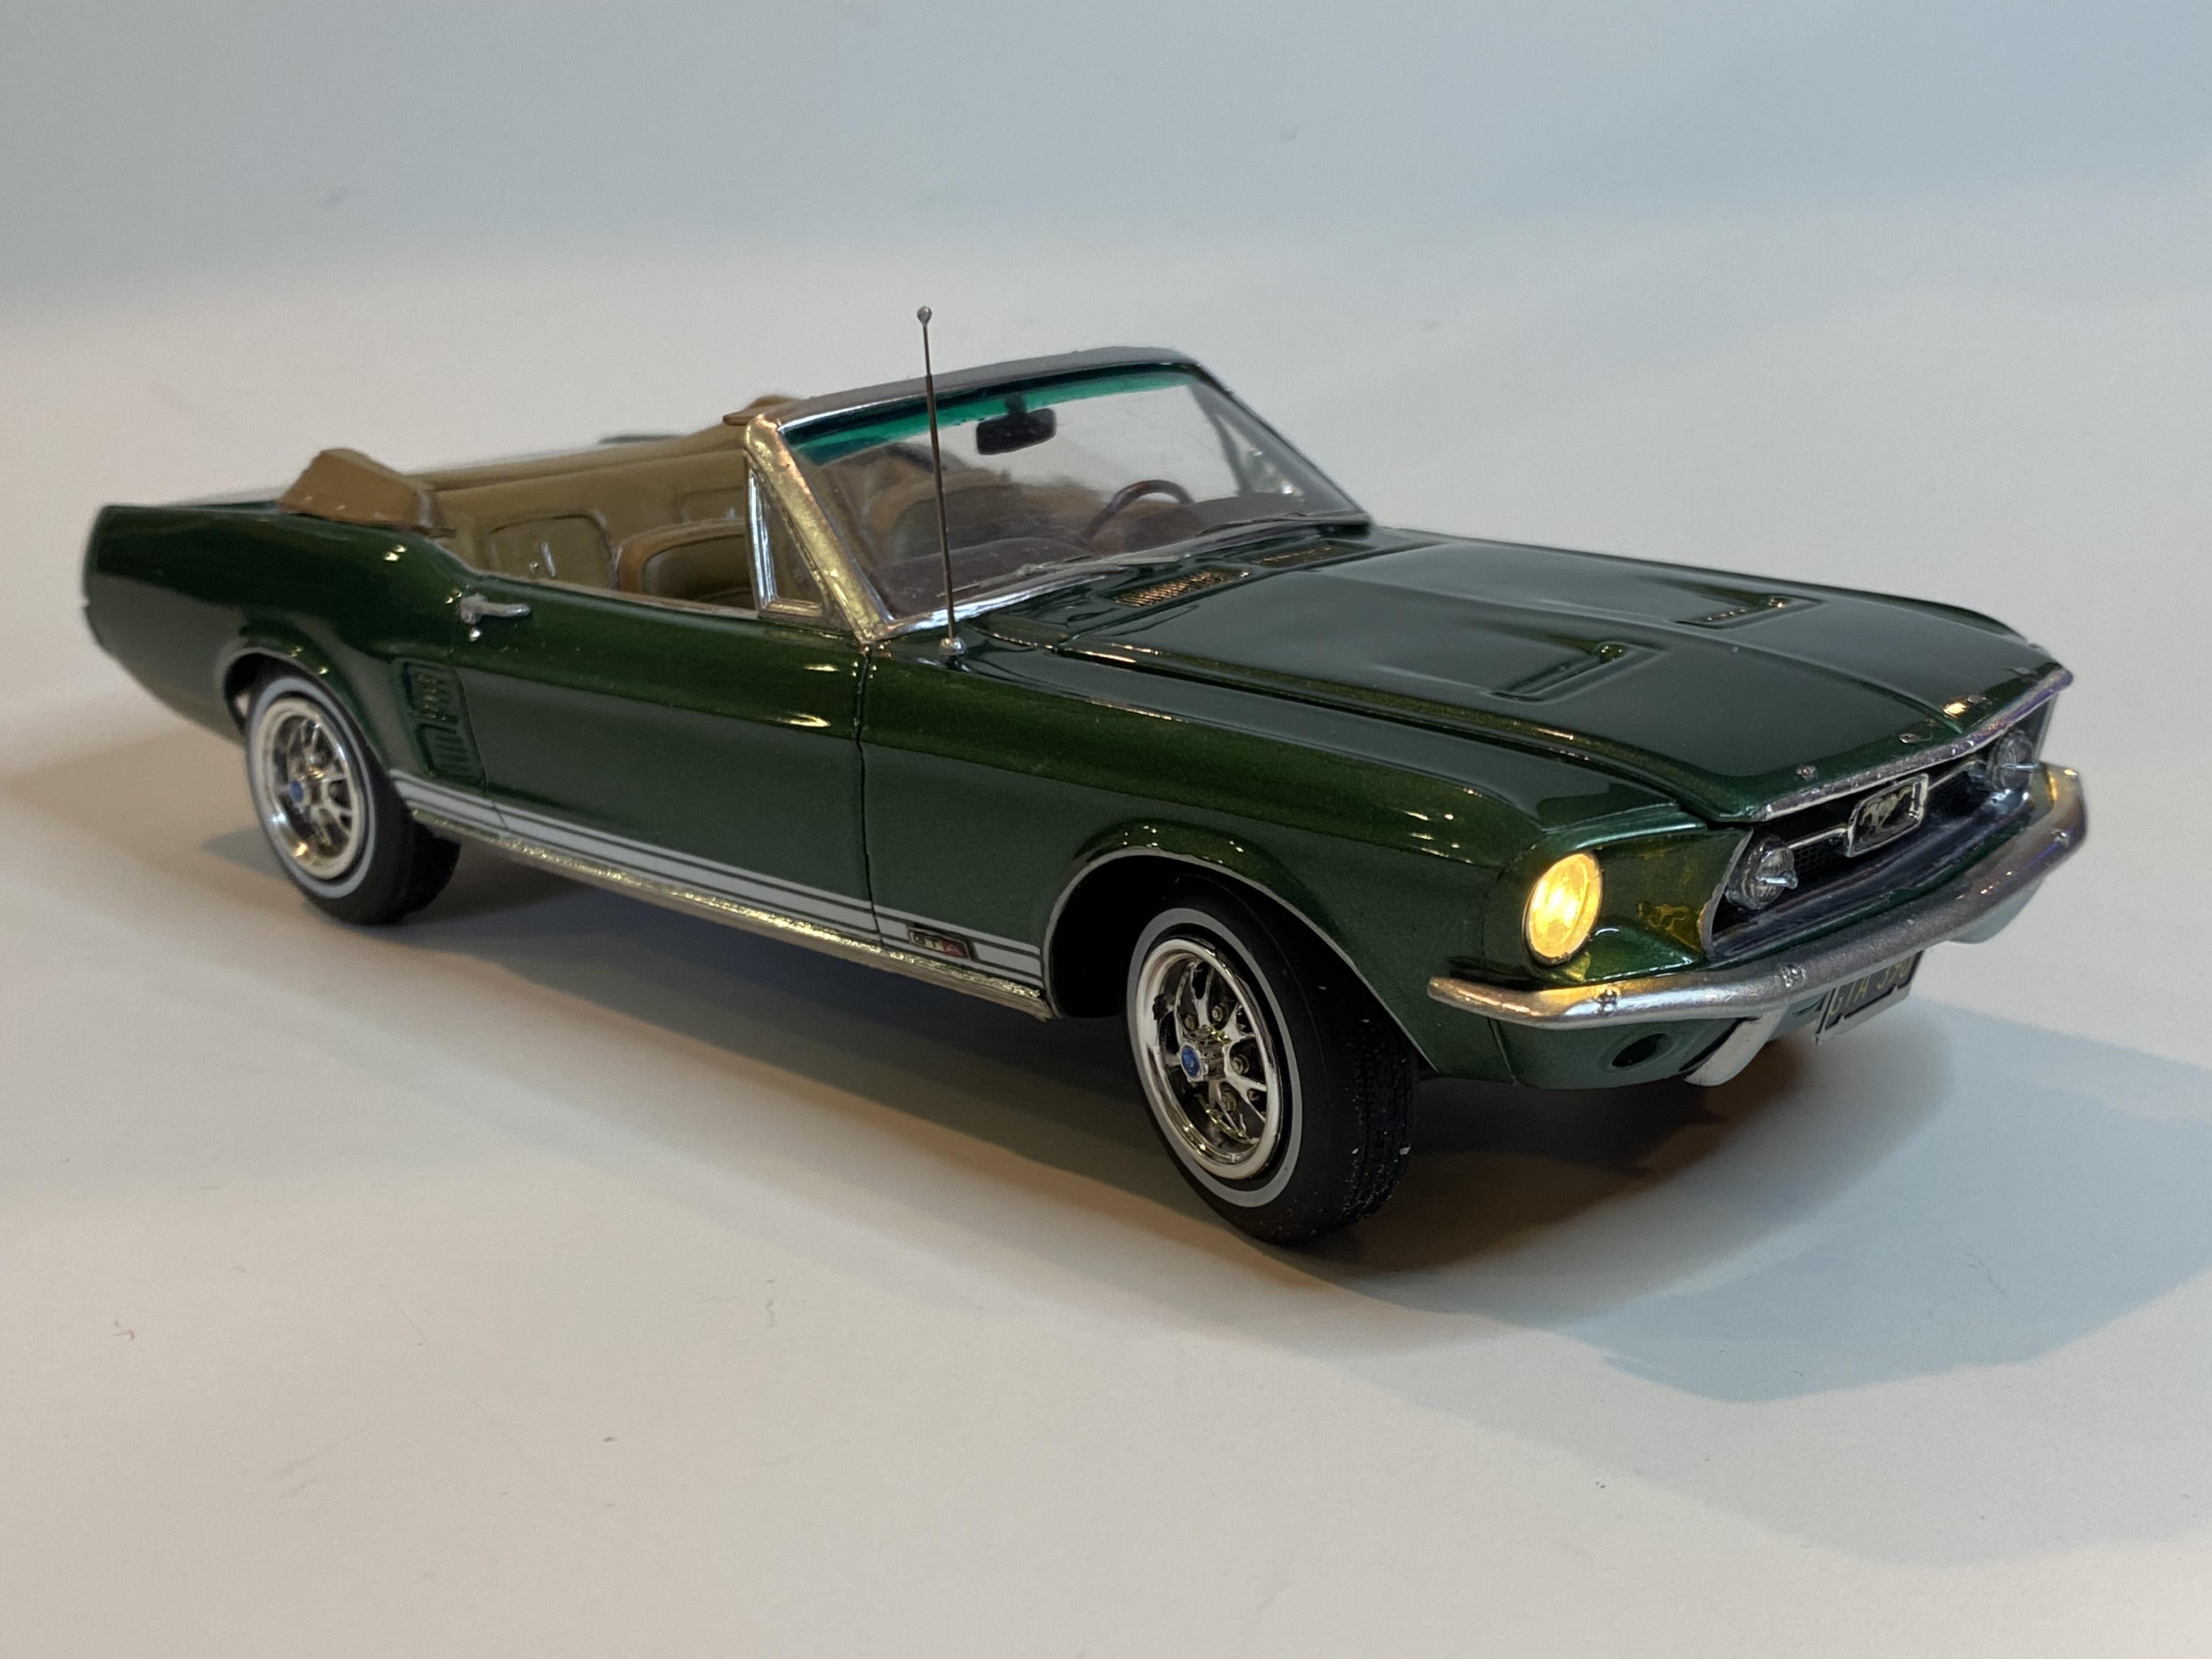
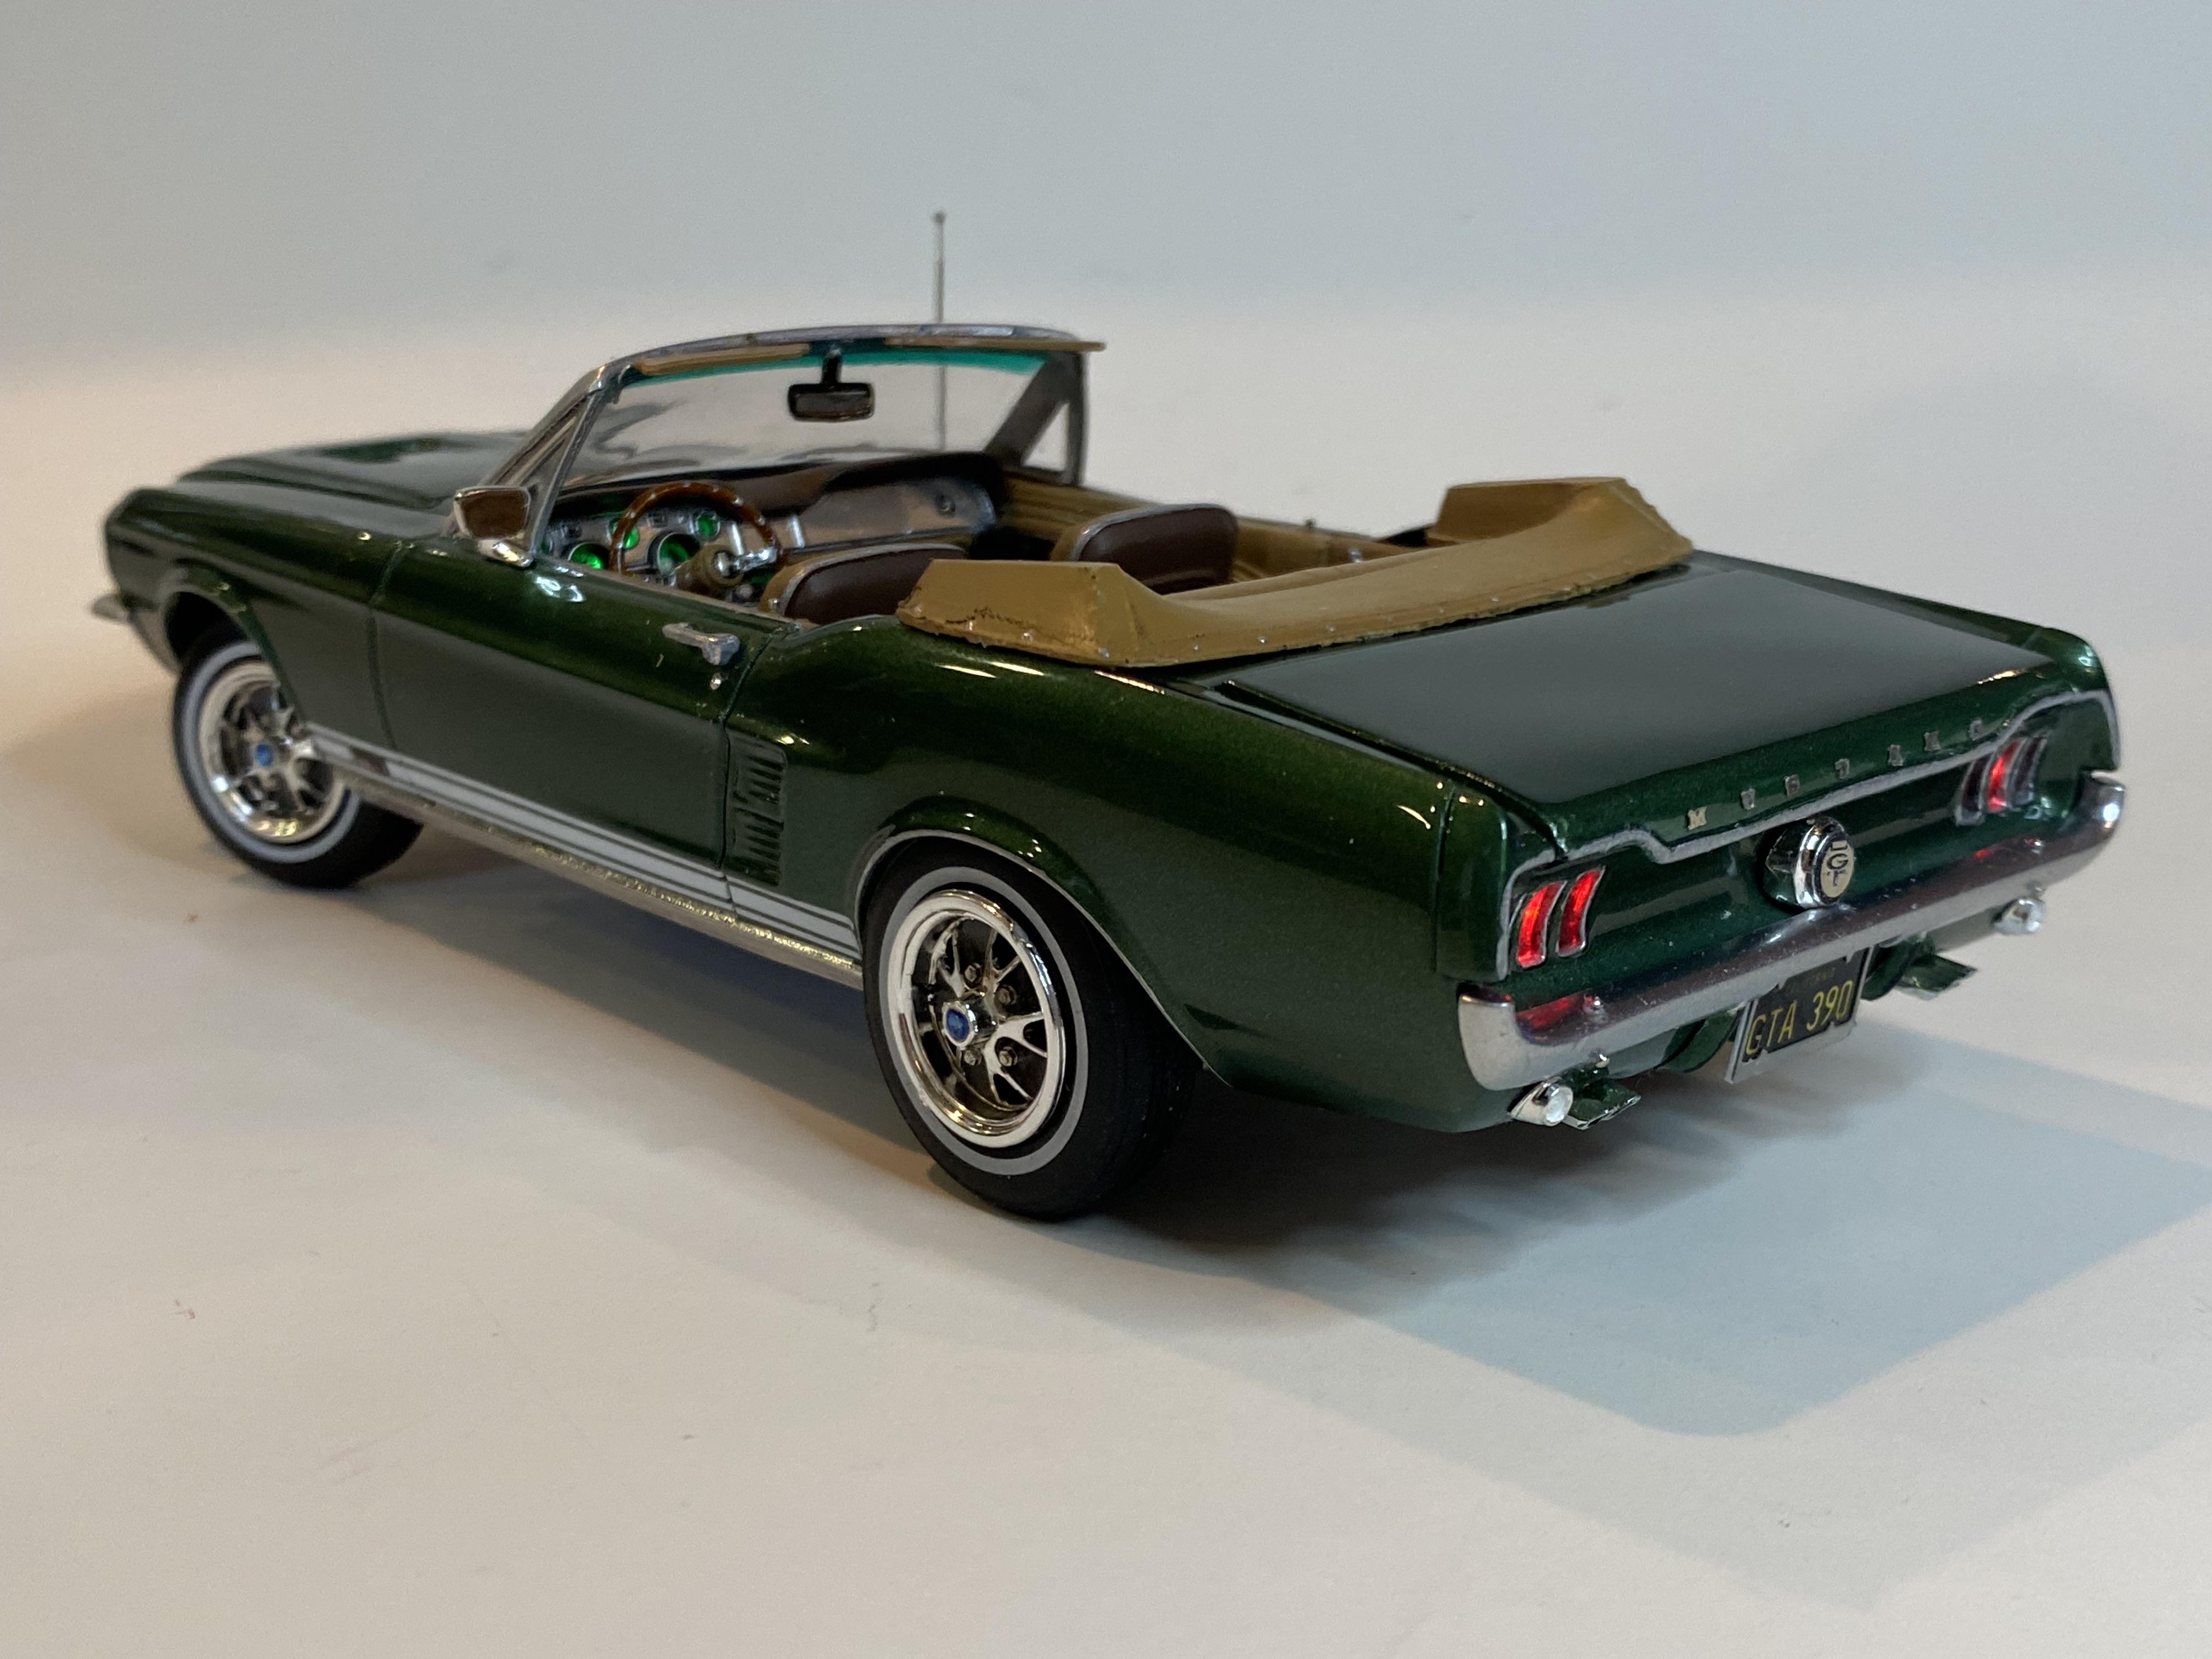
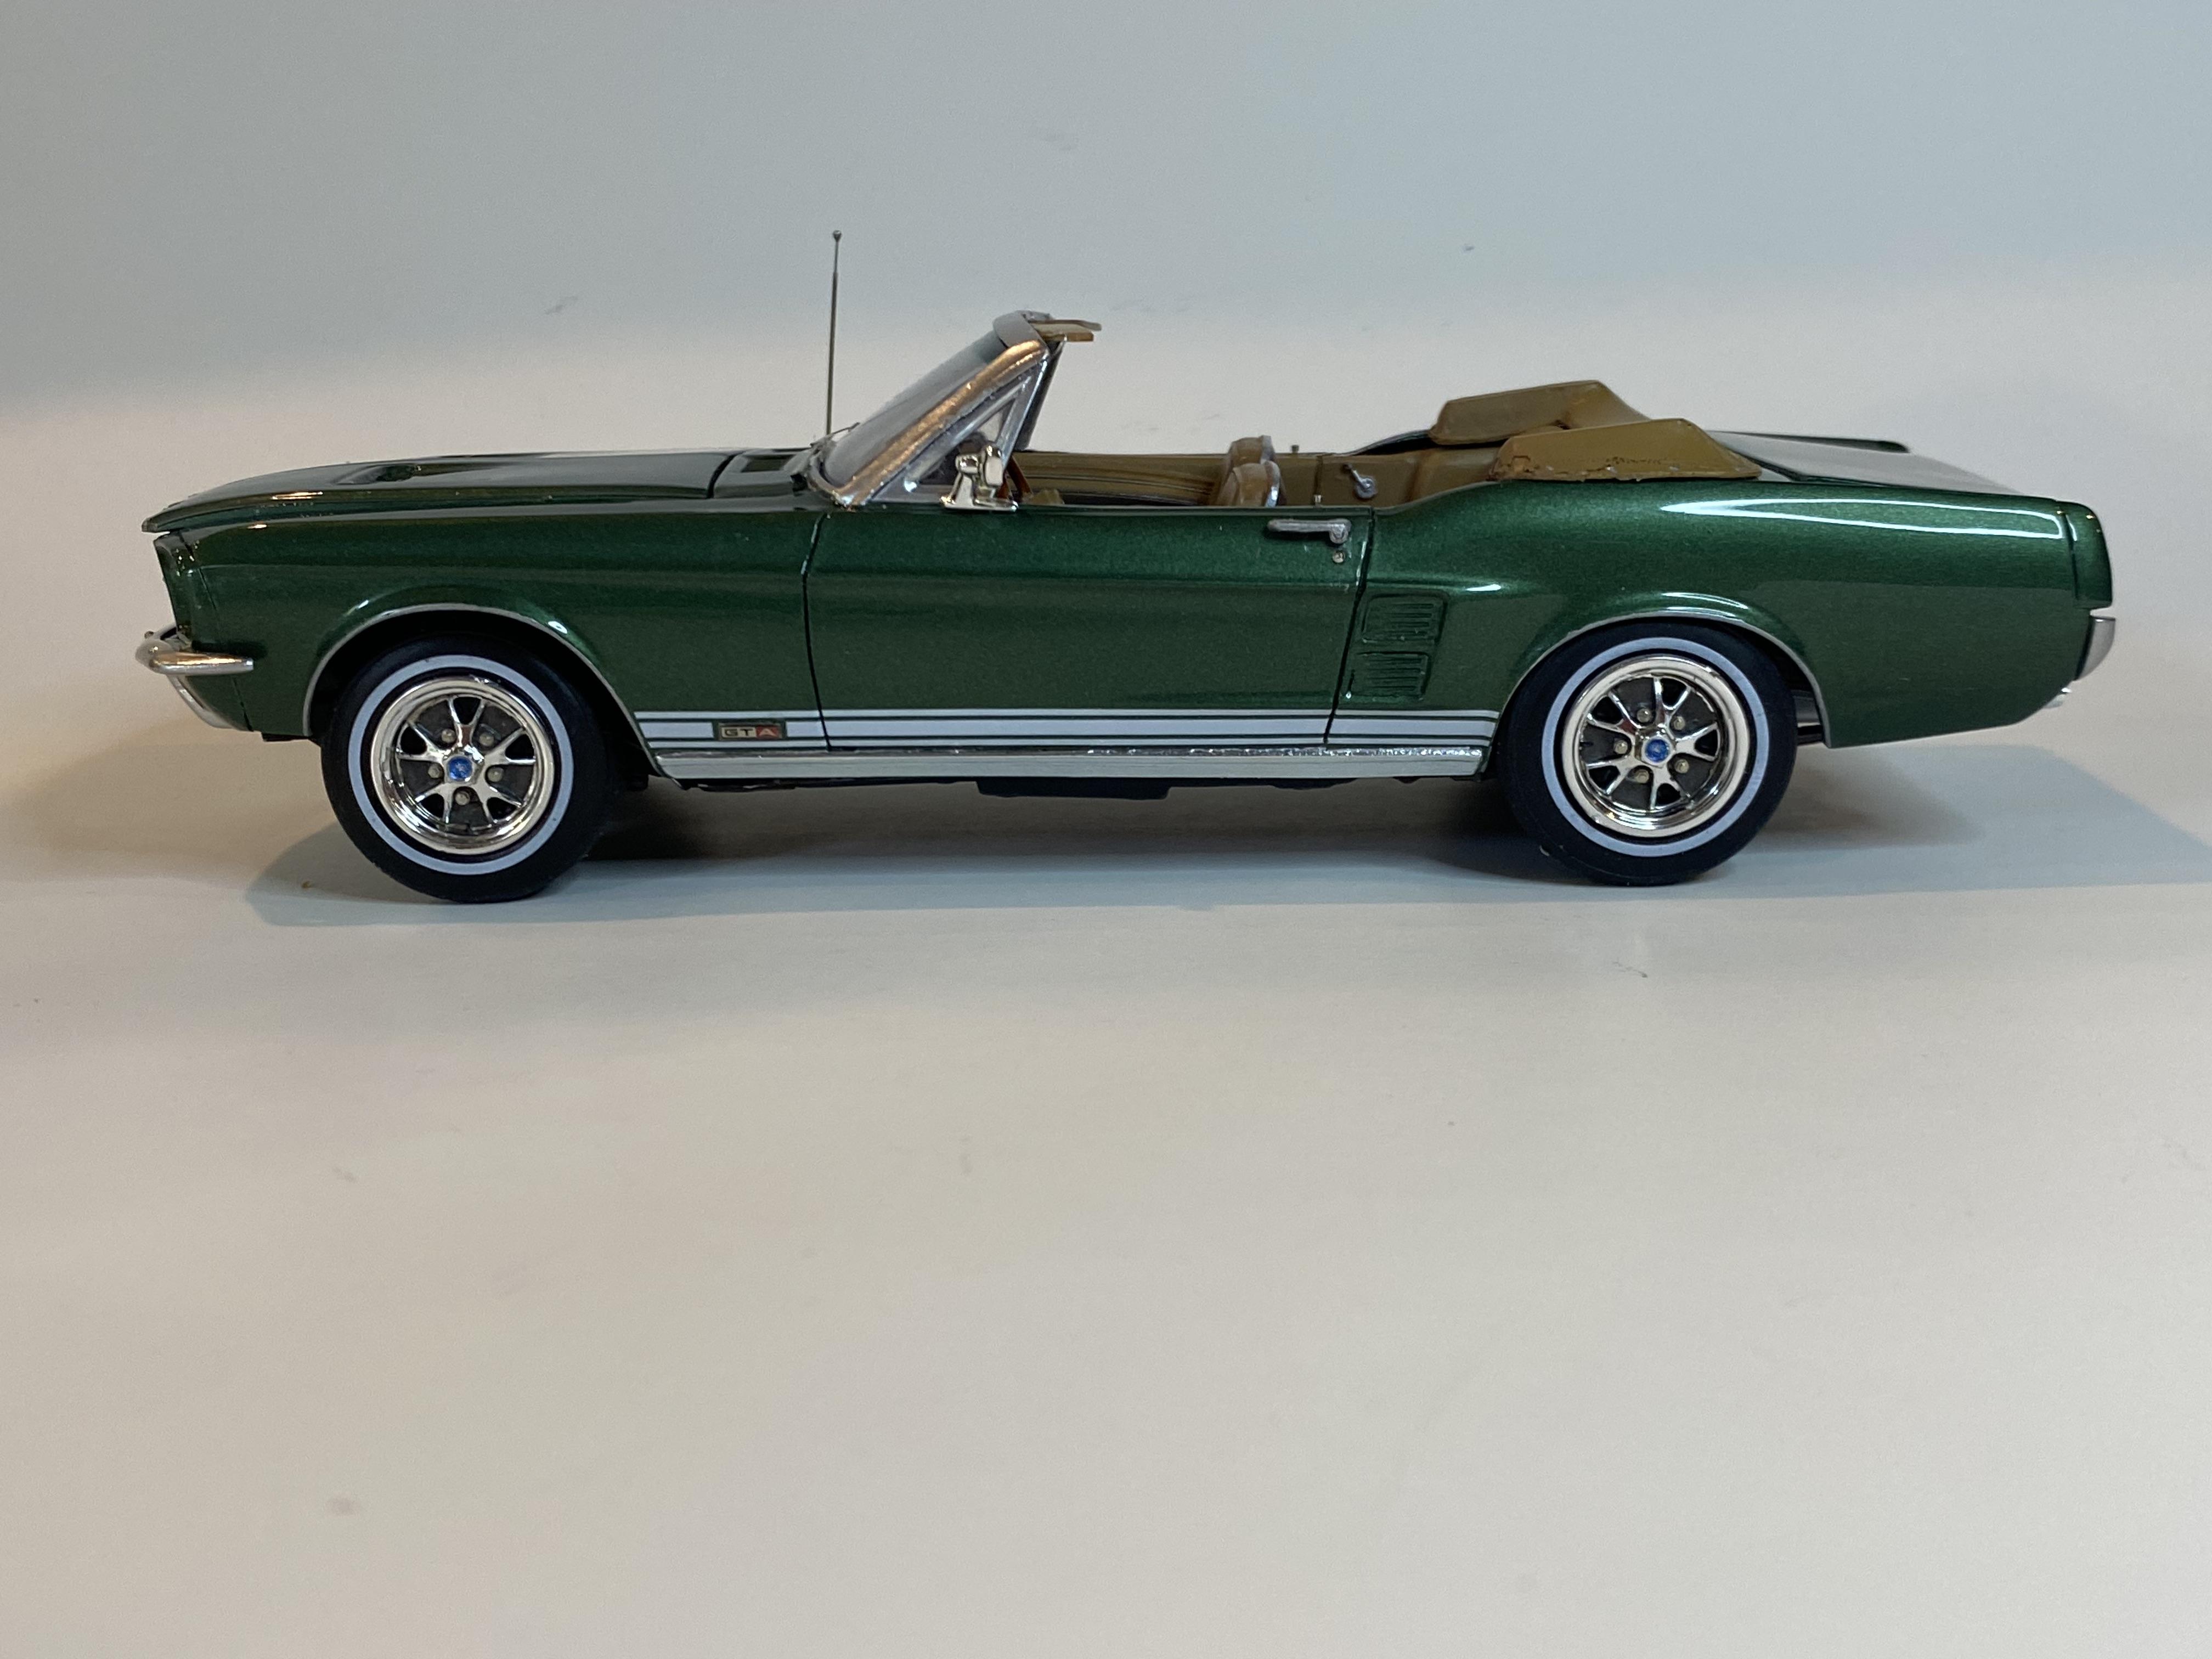
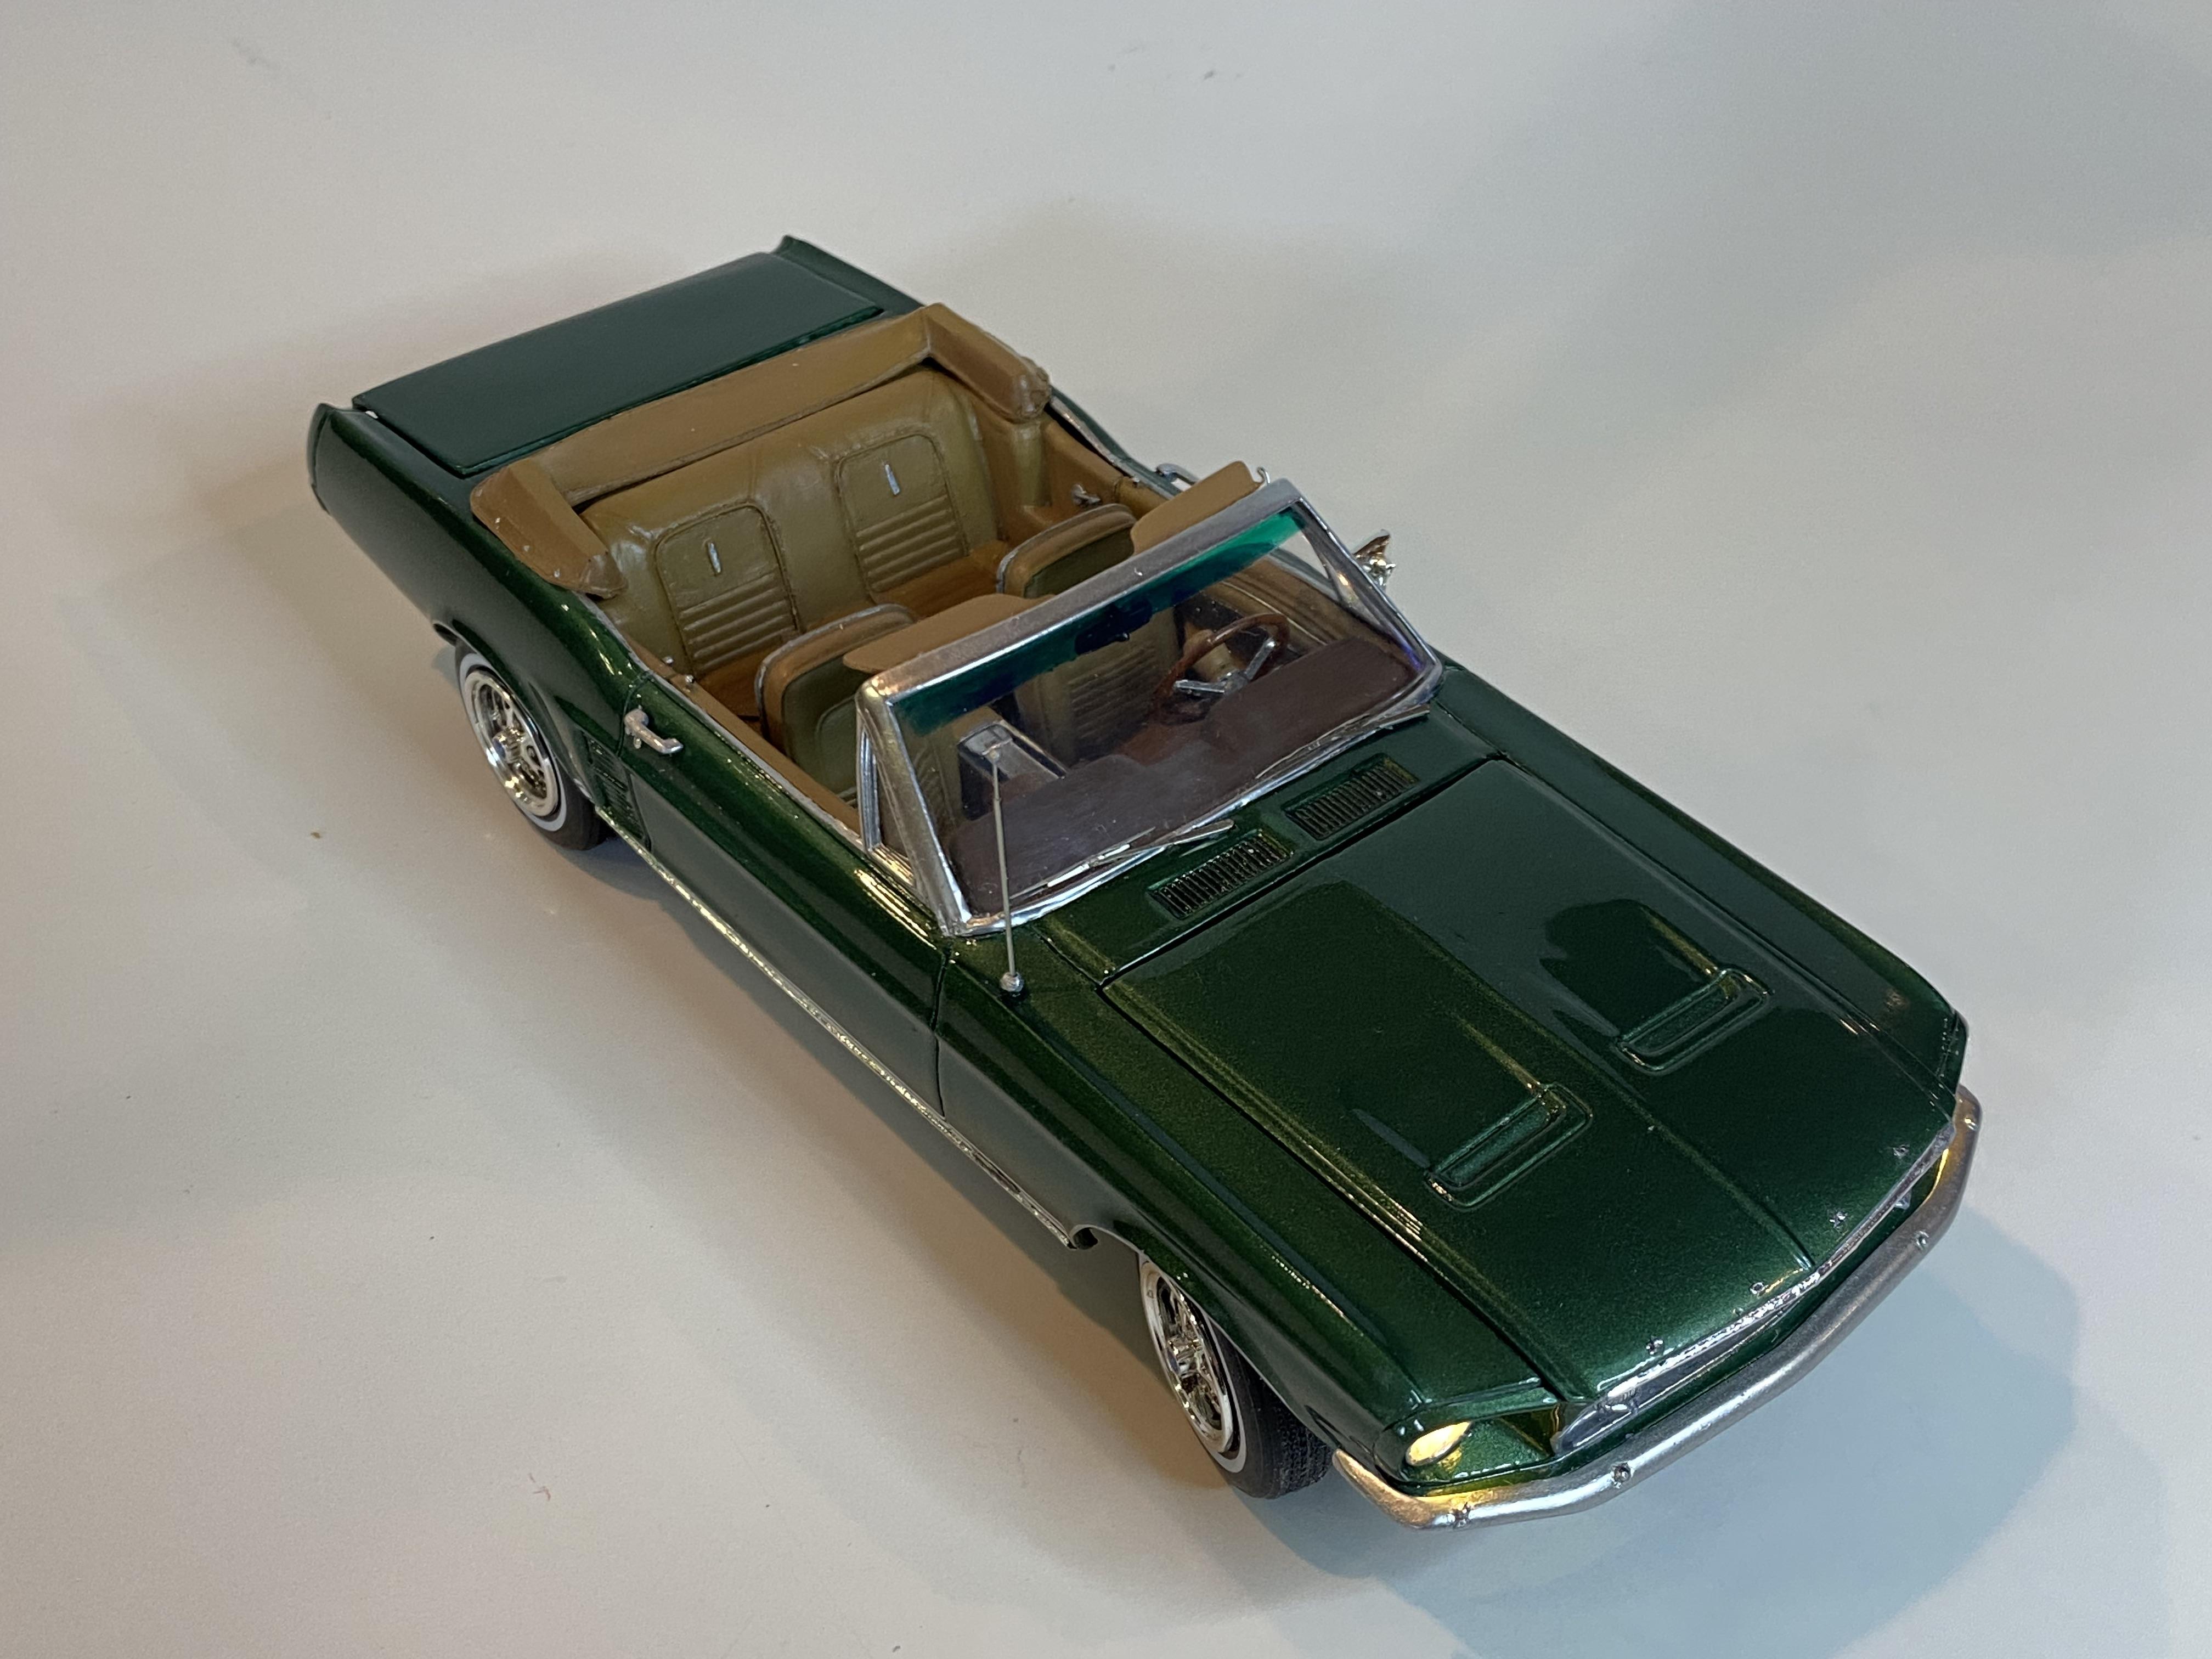
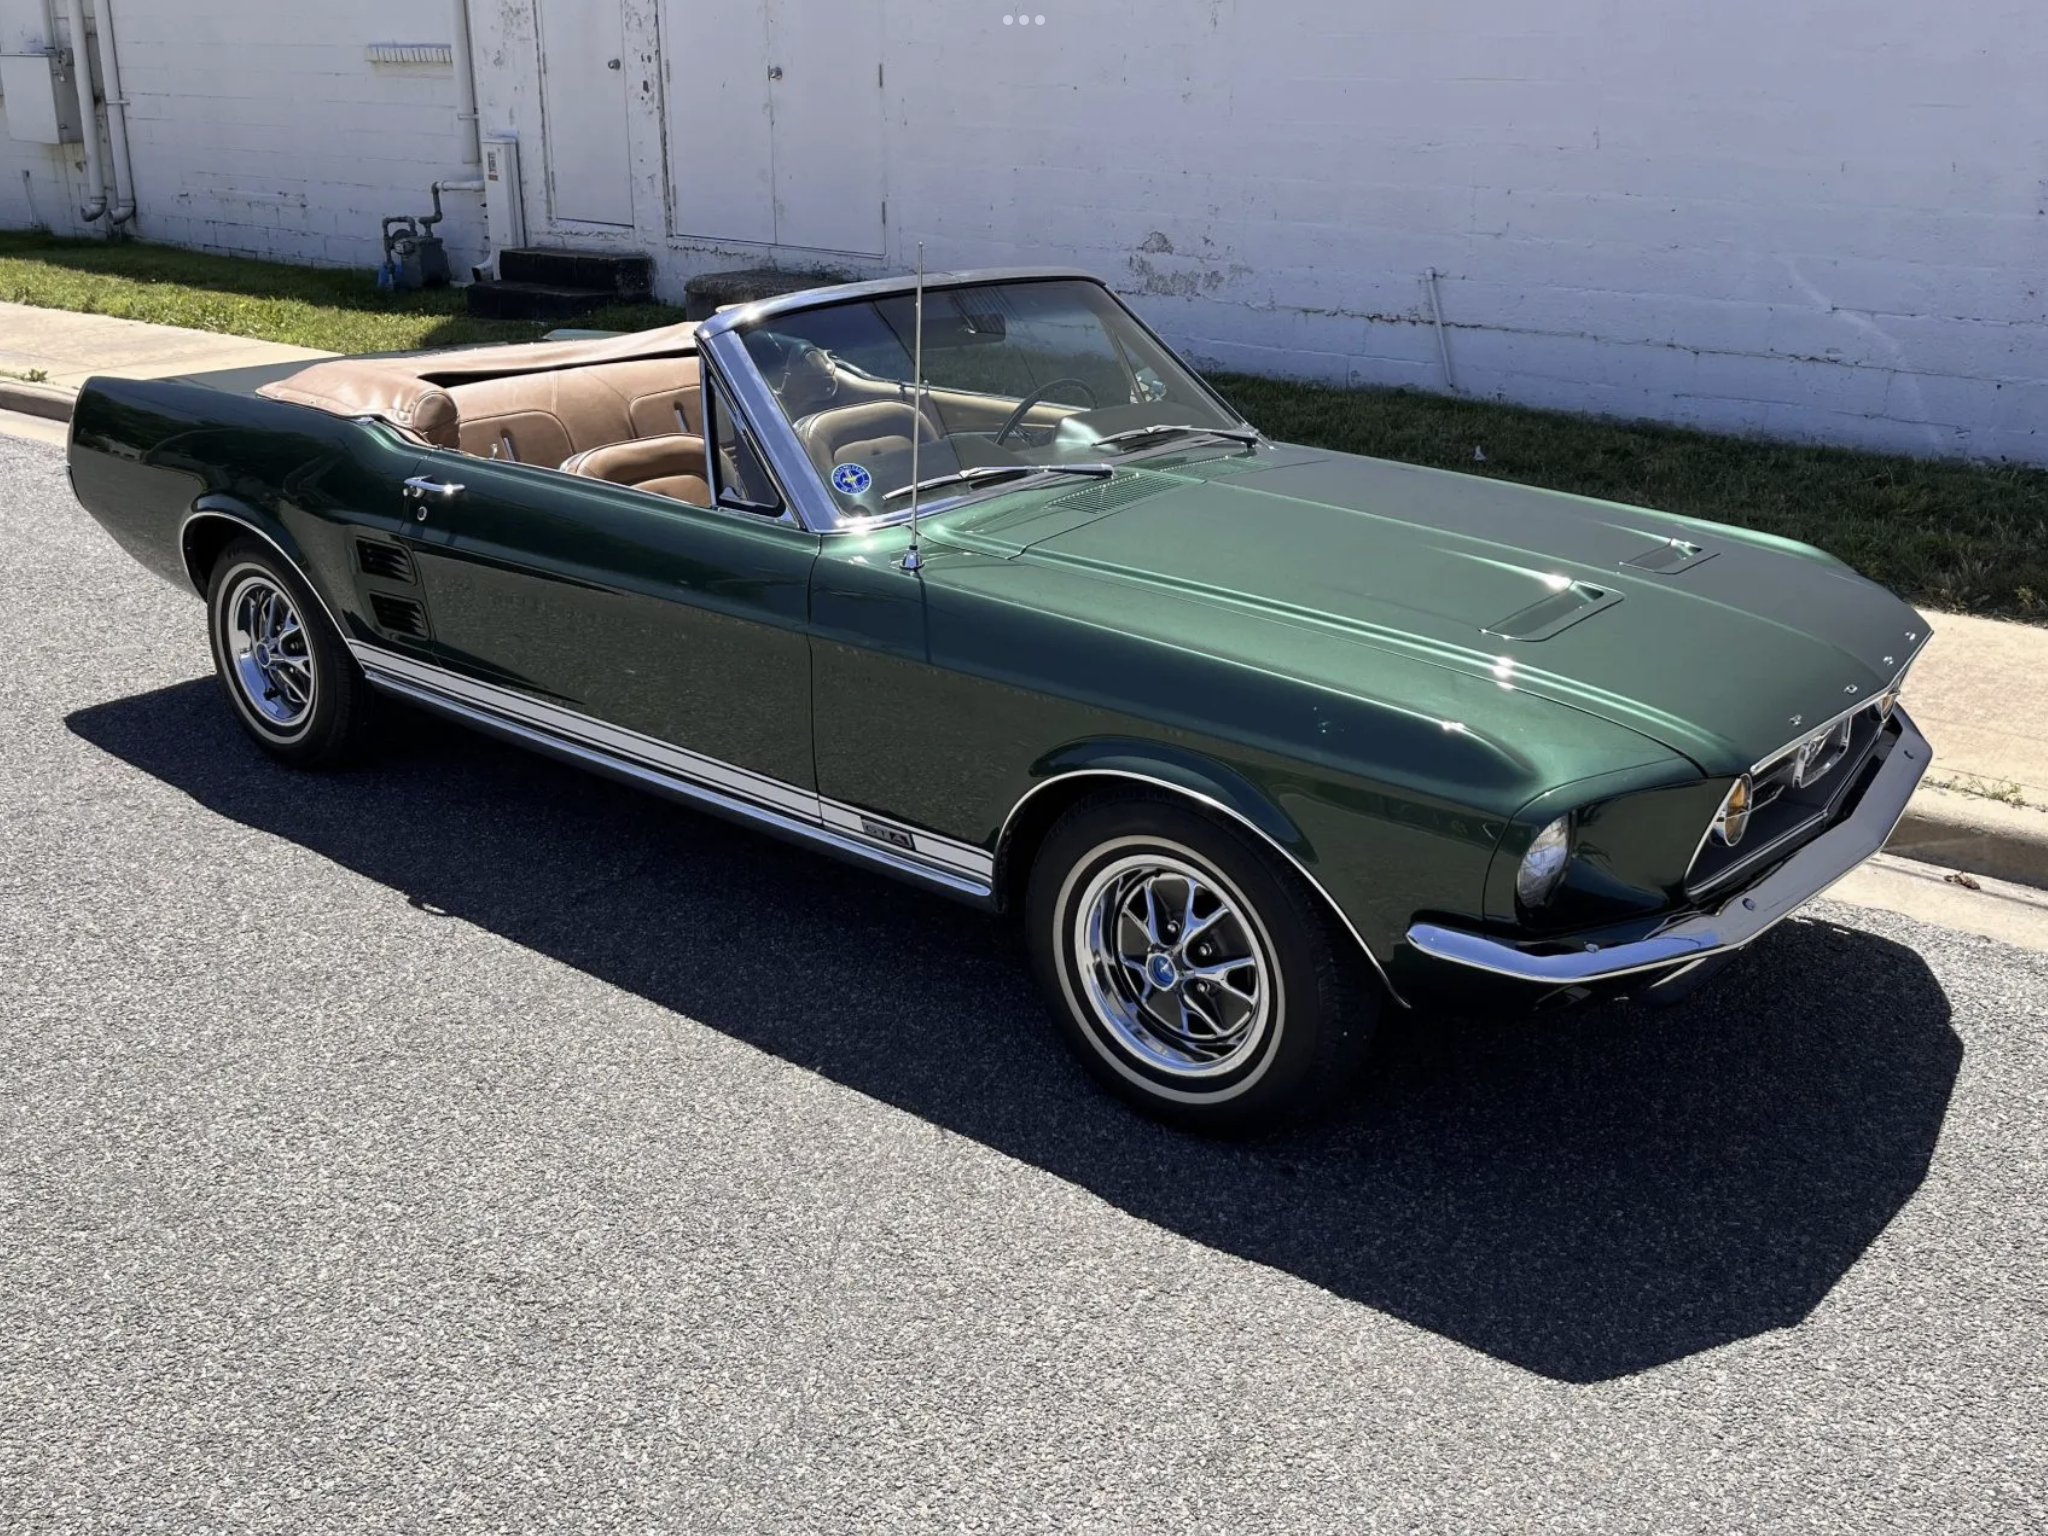
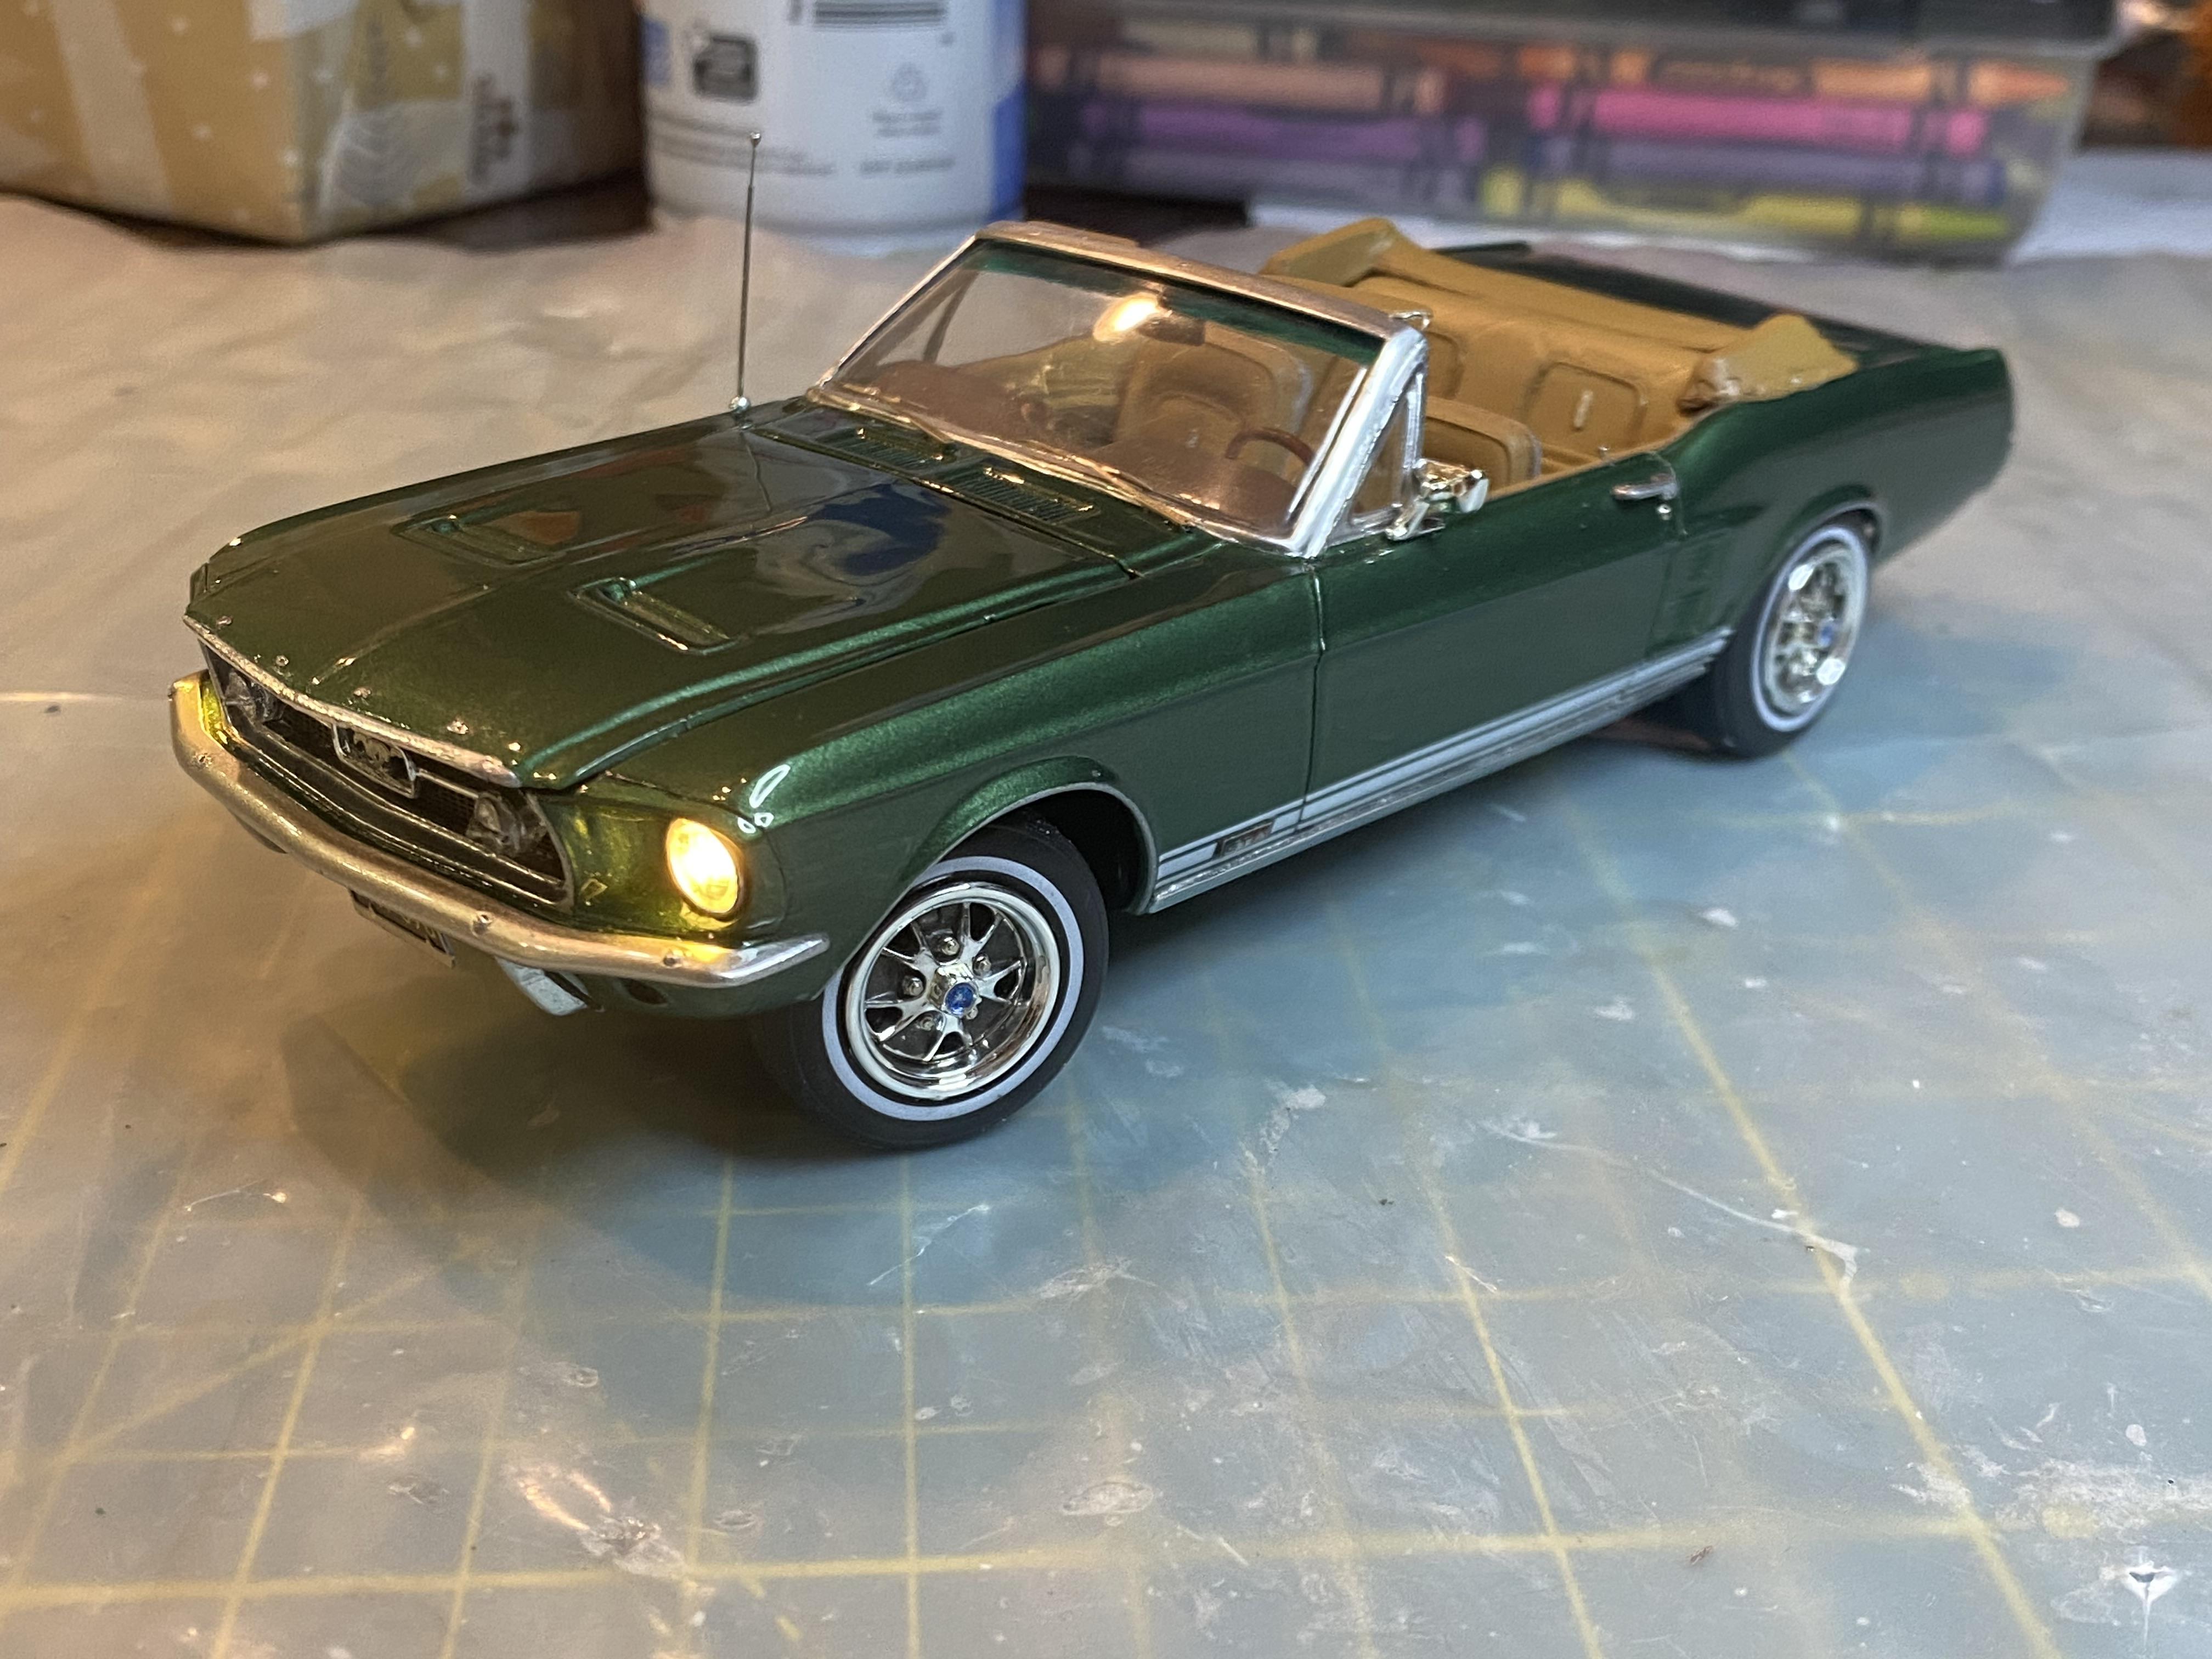
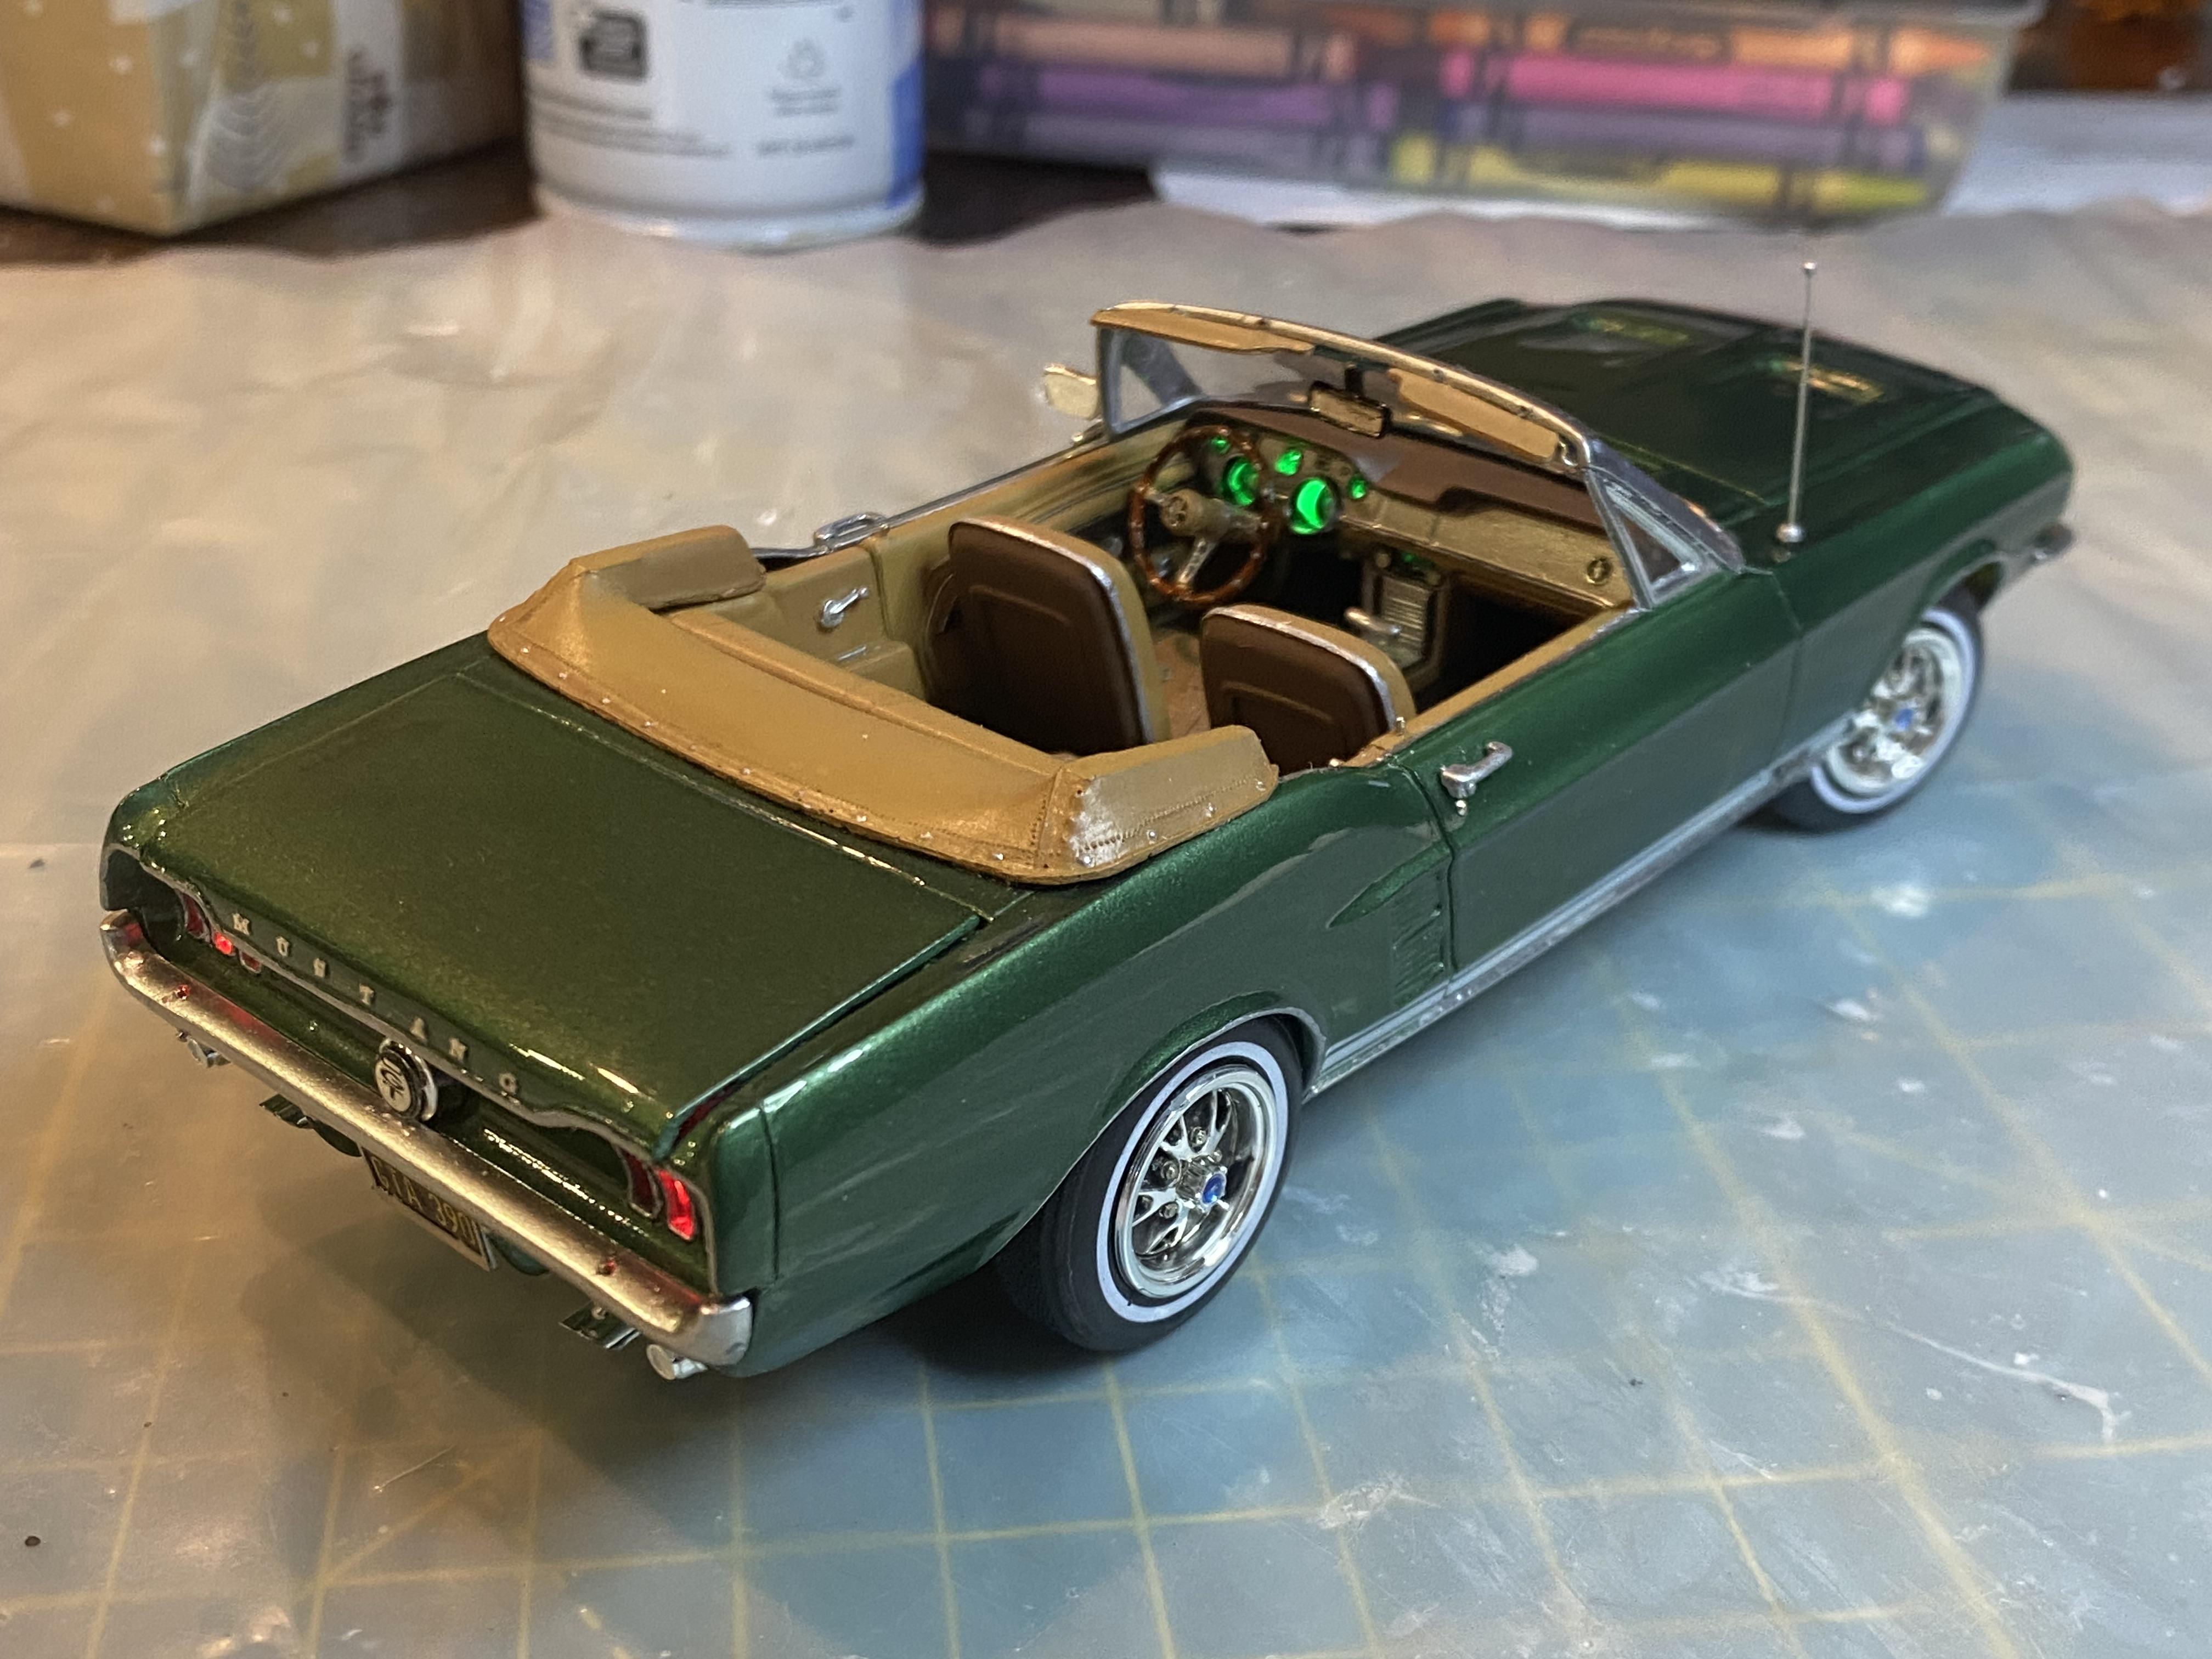
I started with an AMT 1967 Mustang GT Fastback kit and converted it to a convertible, added a big block 390, C6 automatic transmission from VCG resins and made it a GTA convertible. The paint in MCW finishes Dark Moss Green. The air cleaner is removable to reveal the correct Holley carburetor from MCV products. I add my normal complement of LED lighting and made the steering posable. in case you missed the WIP thread you can view it here: this was the actual car I was using for inspiration:
- 45 replies
-
- 16
-

-

-
I have finished the build and moving on to my next build, a 1957 Porsche 356 Carrera Speedster. I will be taking pictures and posting to under glass shortly.
-
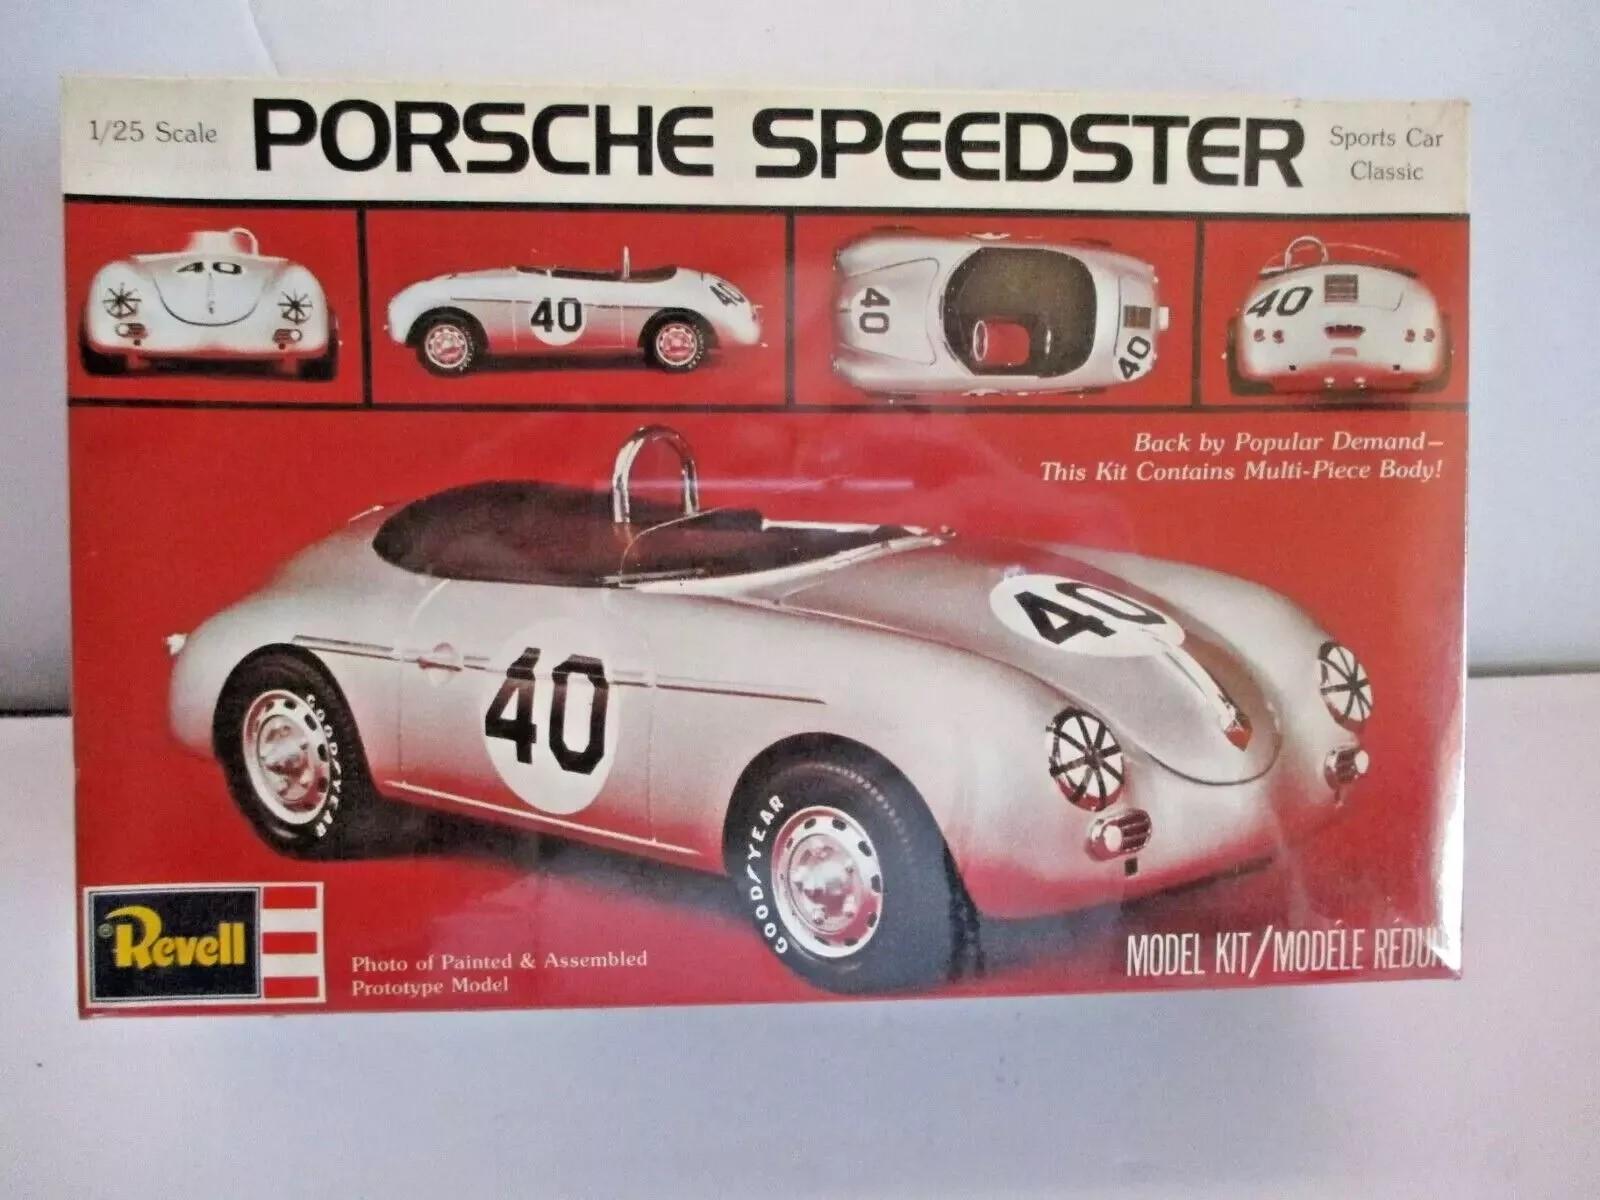
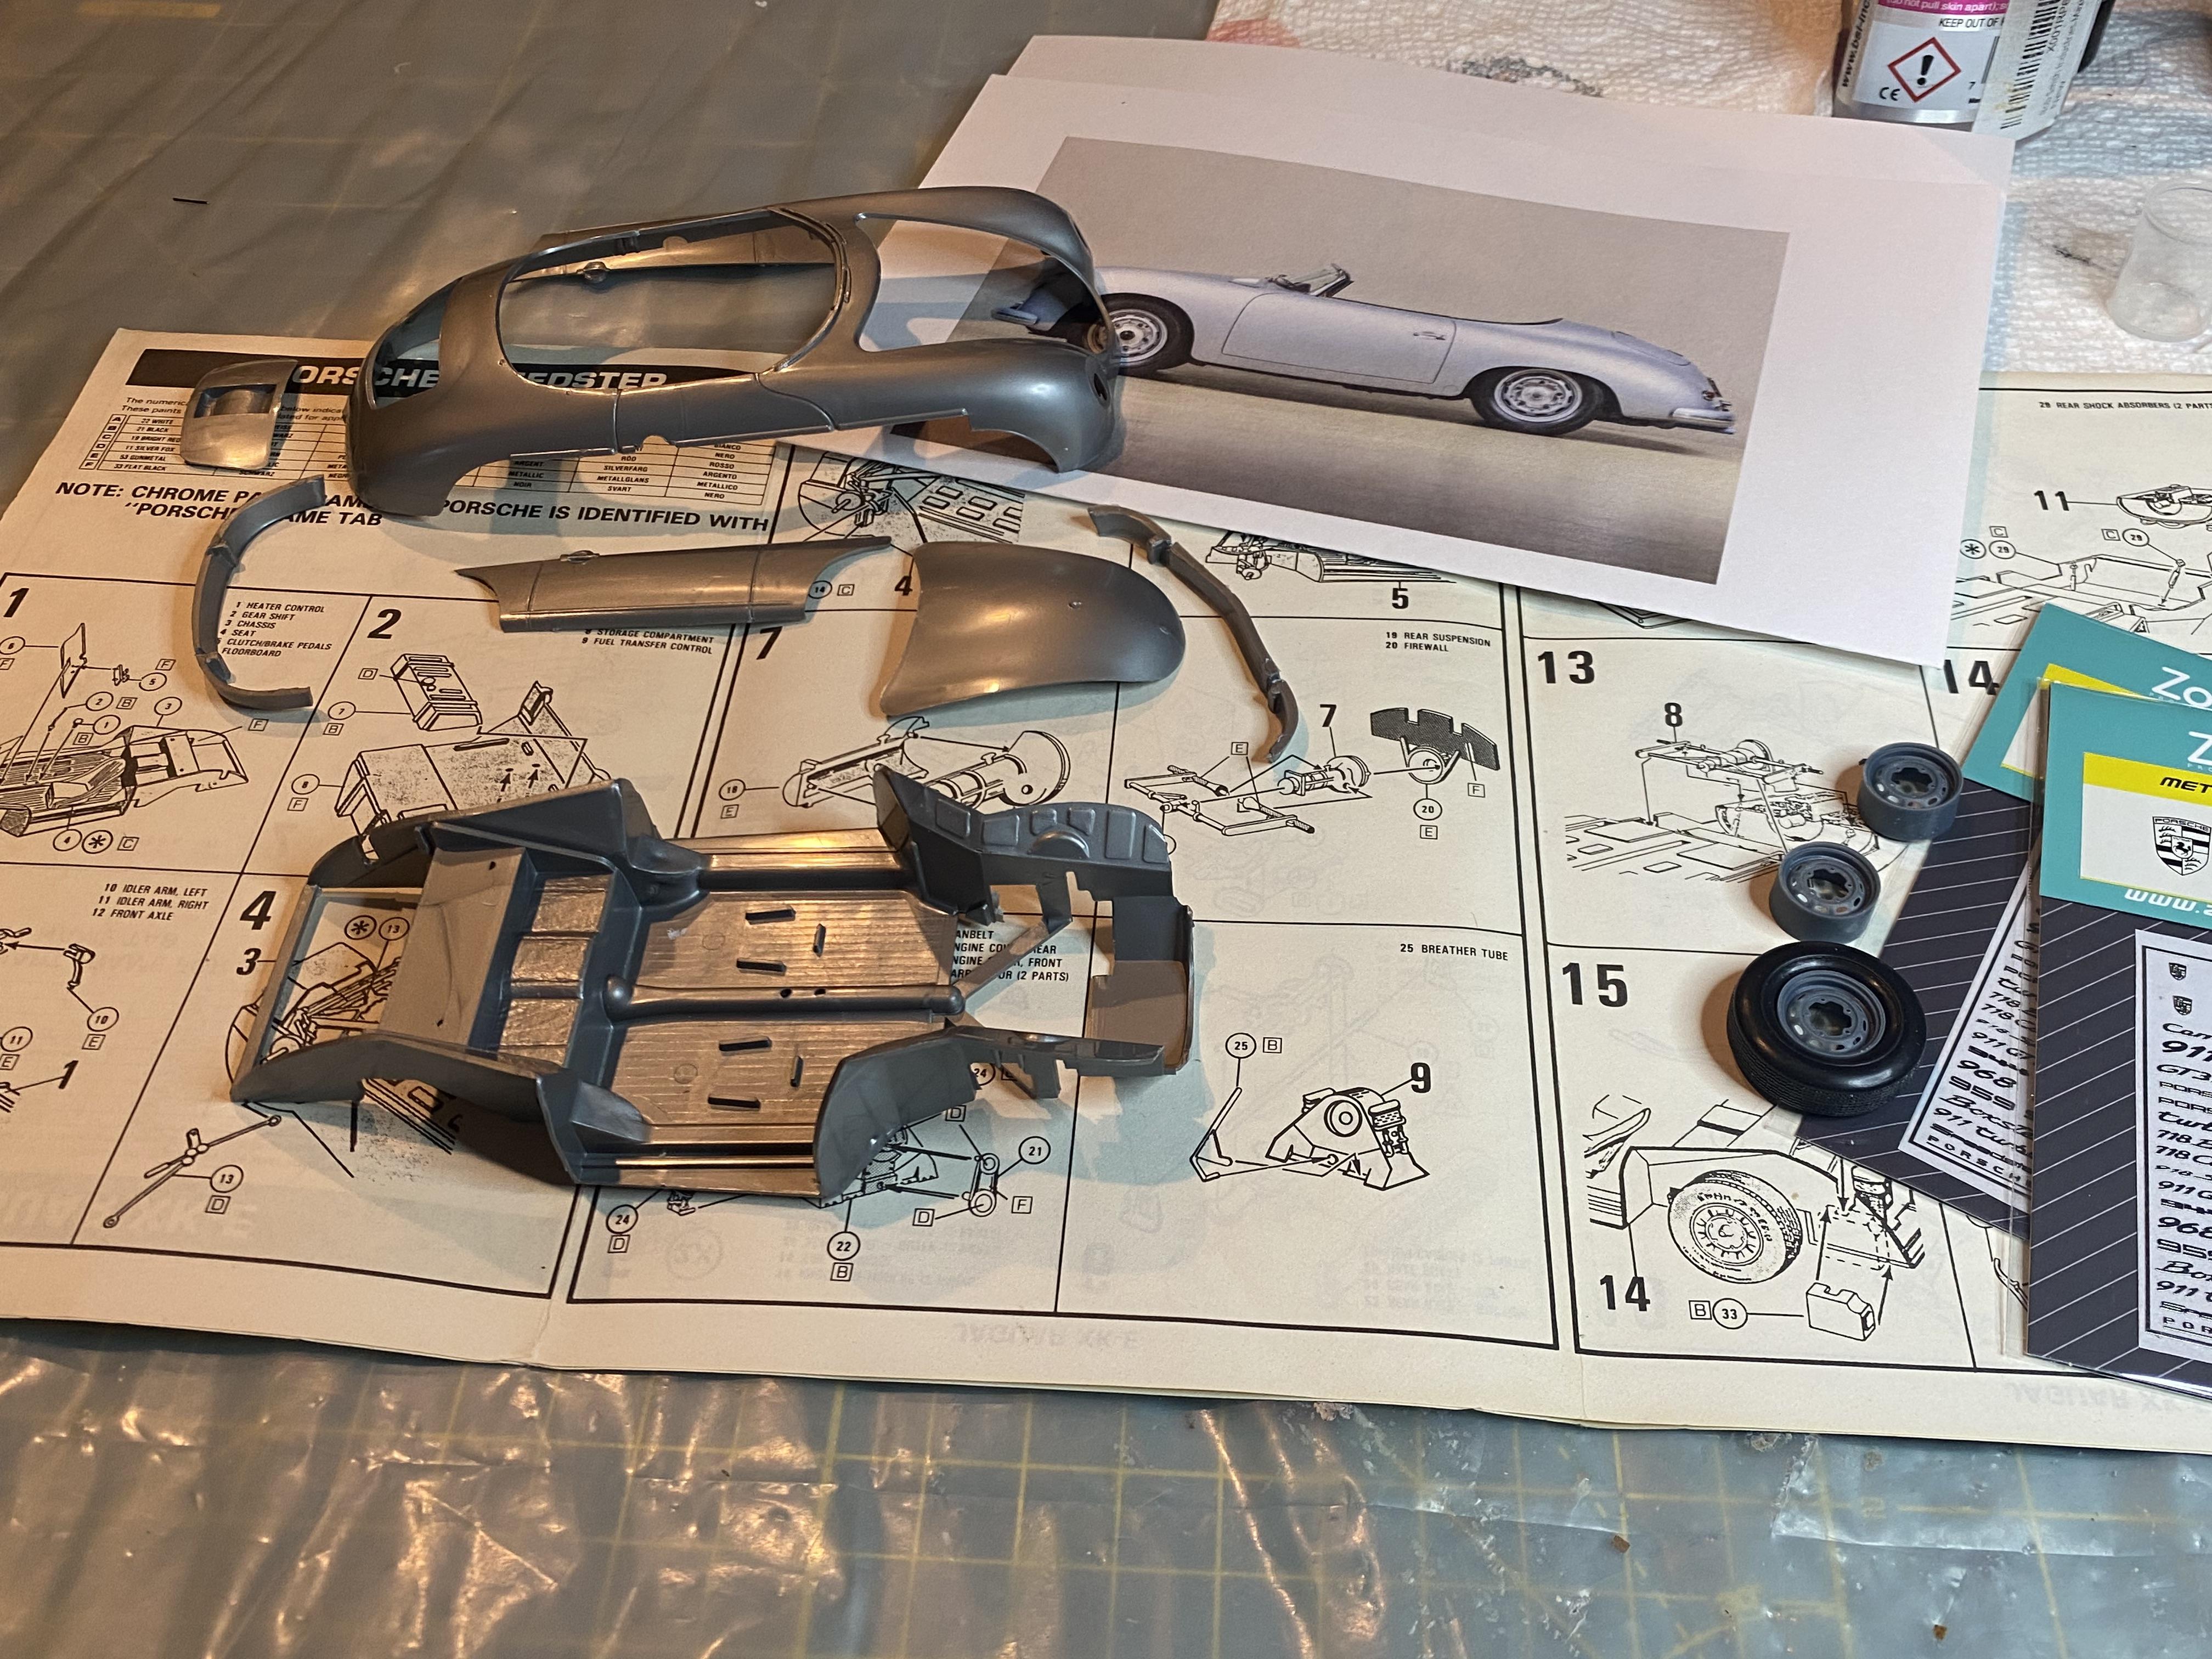
Seeing the Fujimi 356 enthusiasts kits going for well over $100 and this one I got with all three for far less I thought I would give it a try. May have been a bad idea but I am going with it. 😁 it will be a Carrera Speedster GS-GT which was a stripped down version especially lightened for racing. I do however plan on scratch building the bumpers sans overridders. I since did get a Fujimi Speedster kit and have had a 356B/C kit in my stash for awhile. I will build those and purchase more Fujimi kits at some point. They are basically my holy grails. 😁
-
The body is starting to show some promise, but it won’t look anything like out of the box when I am done. I am very stubborn, if you have seen any of my other builds. 😂 Brave or insane…fine line. 😊
-
I have a great love for early air cooled Porsches myself. I actually have a scar on my forehead from when I was 4 I believe. I was standing in the passenger seat when my mother took a sharp turn in her 1957 356A coupe, and my head got to know the shifter knob all too well.
-
I have made to scale views of a real speedster as a template, and your right, it is a big mess. Much does line up just not quite right and will require modifying heavily.
-
Thank you! I saw your post, nice work with what you had to start with. I will likely be scratch building most of this build, bumpers, windshield, etc. at the very least heavily modifying.
-
Thank you! I suspect it was necessary to get their two part wheels that stick out of the wheel openings to work. Not to mention the side pieces were easier to make with a straight edge. Remember this was early 1960s mold making tech.
-
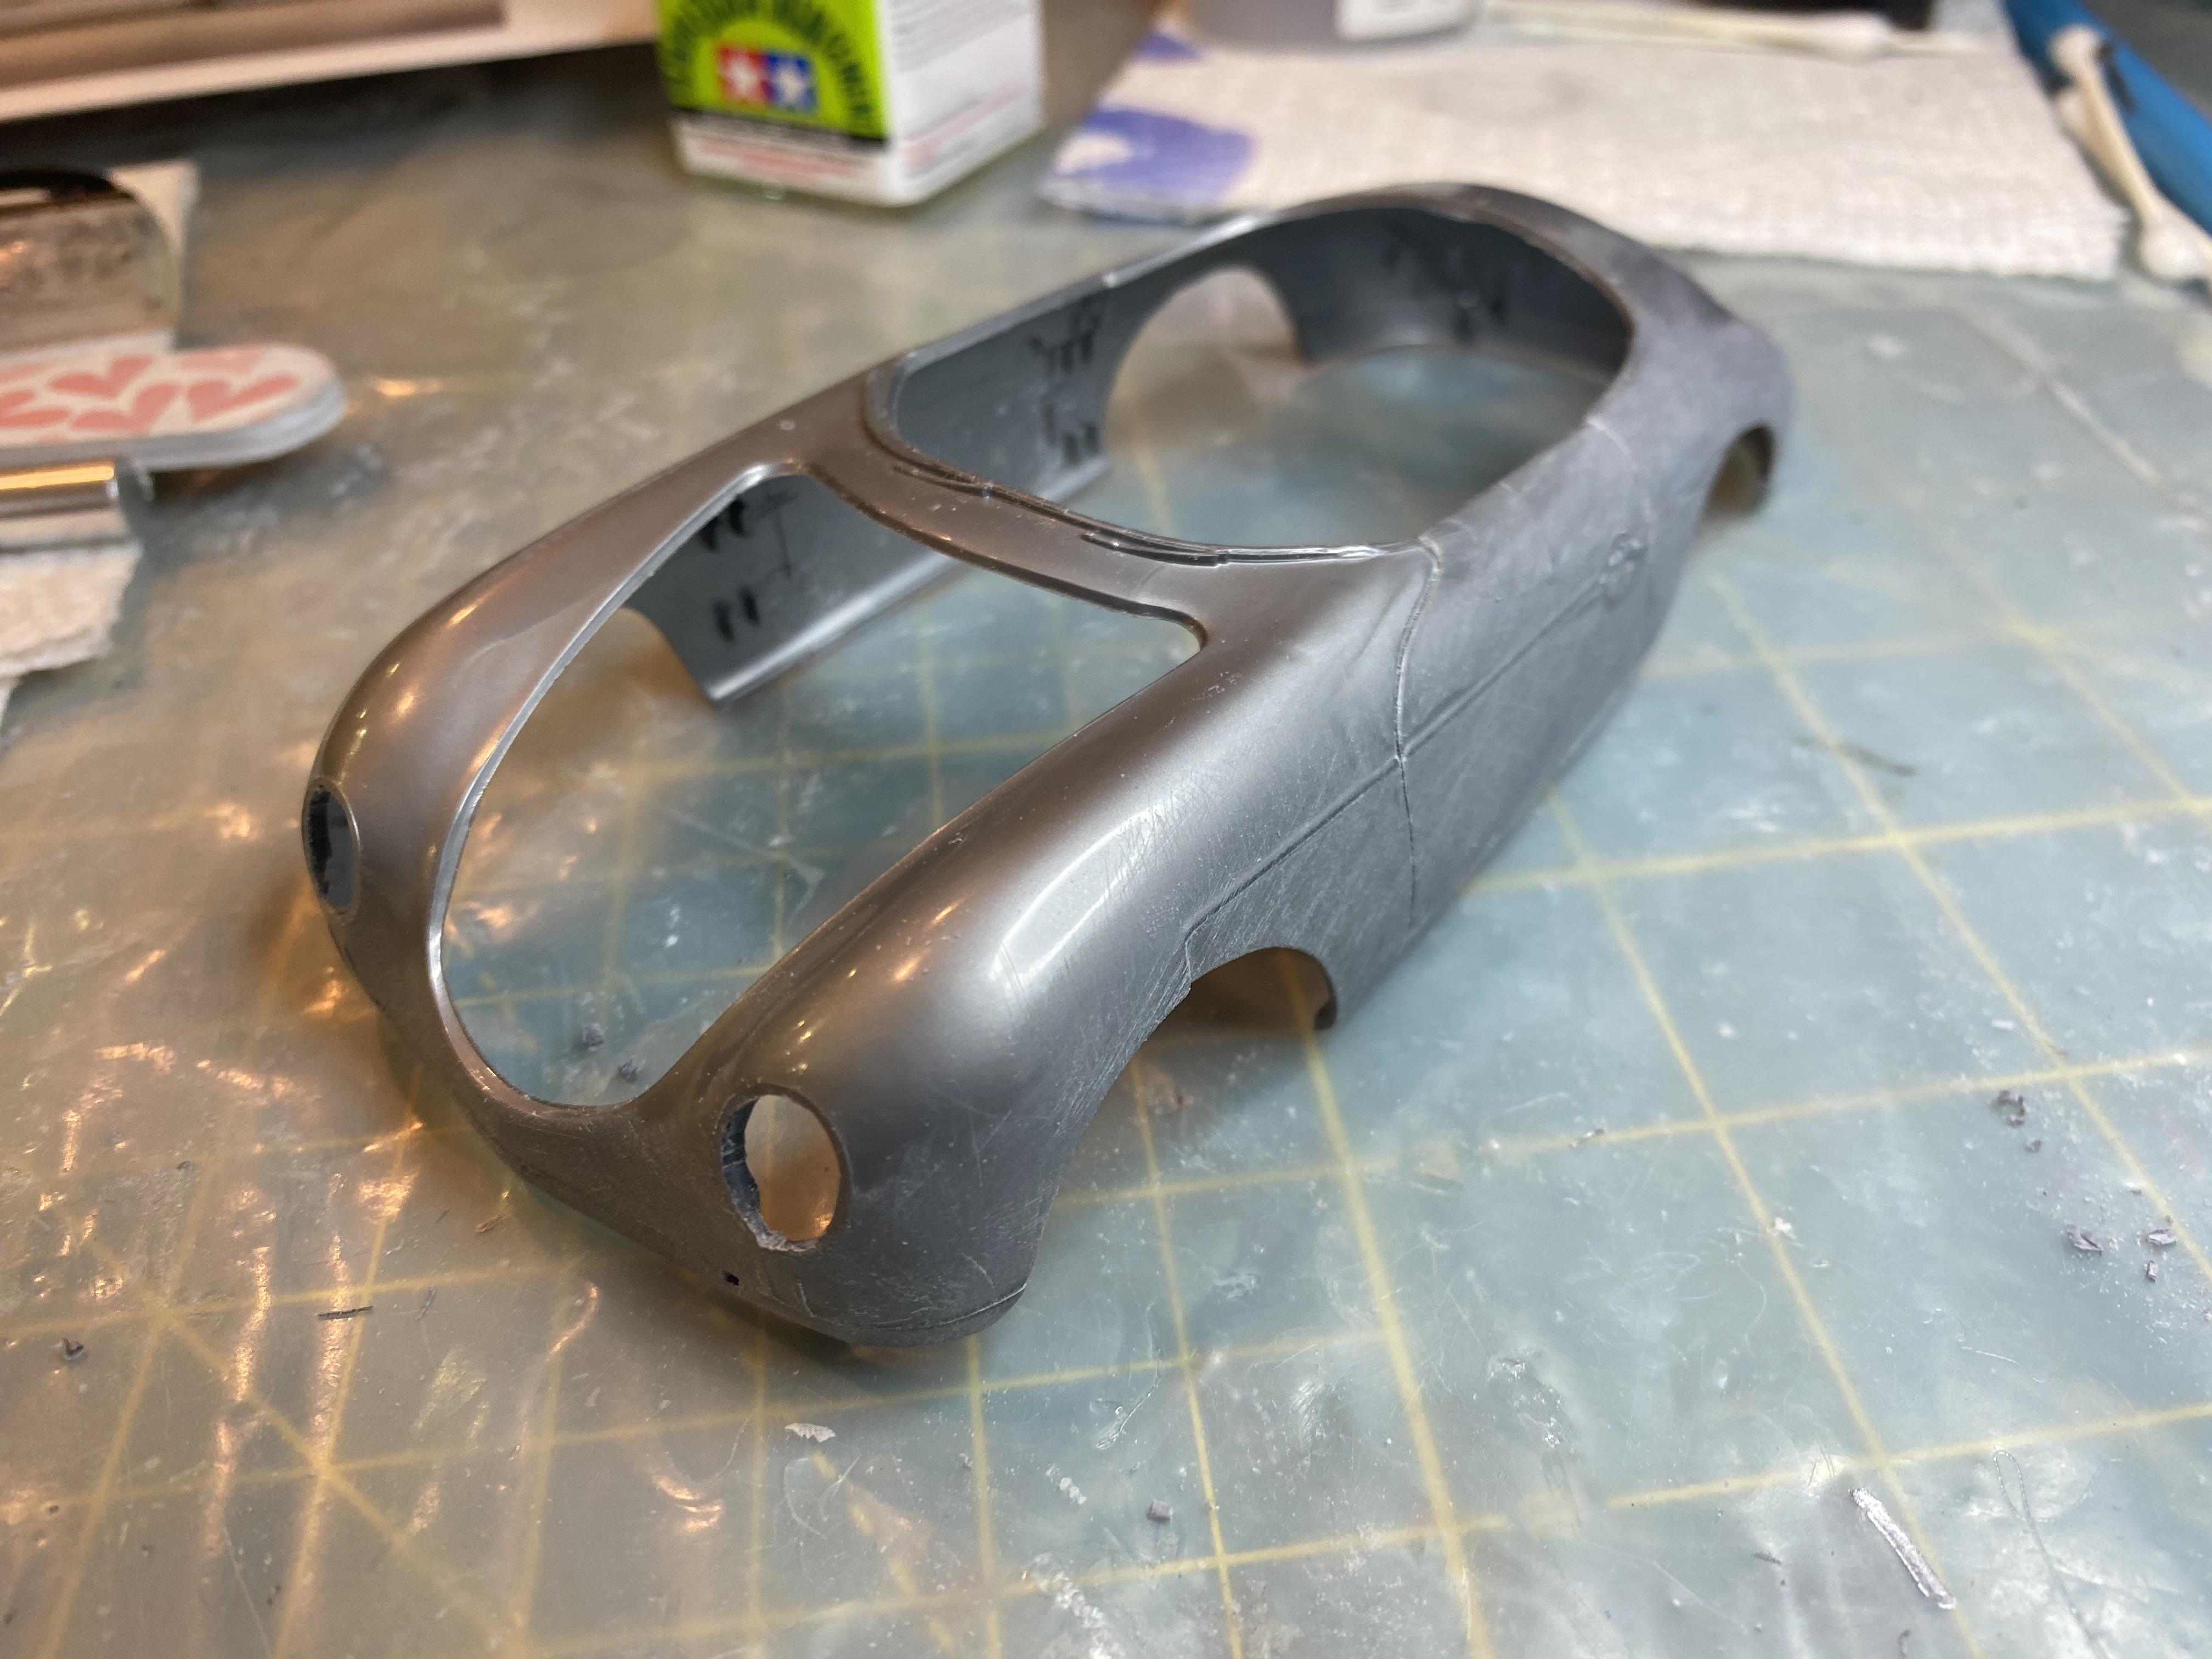
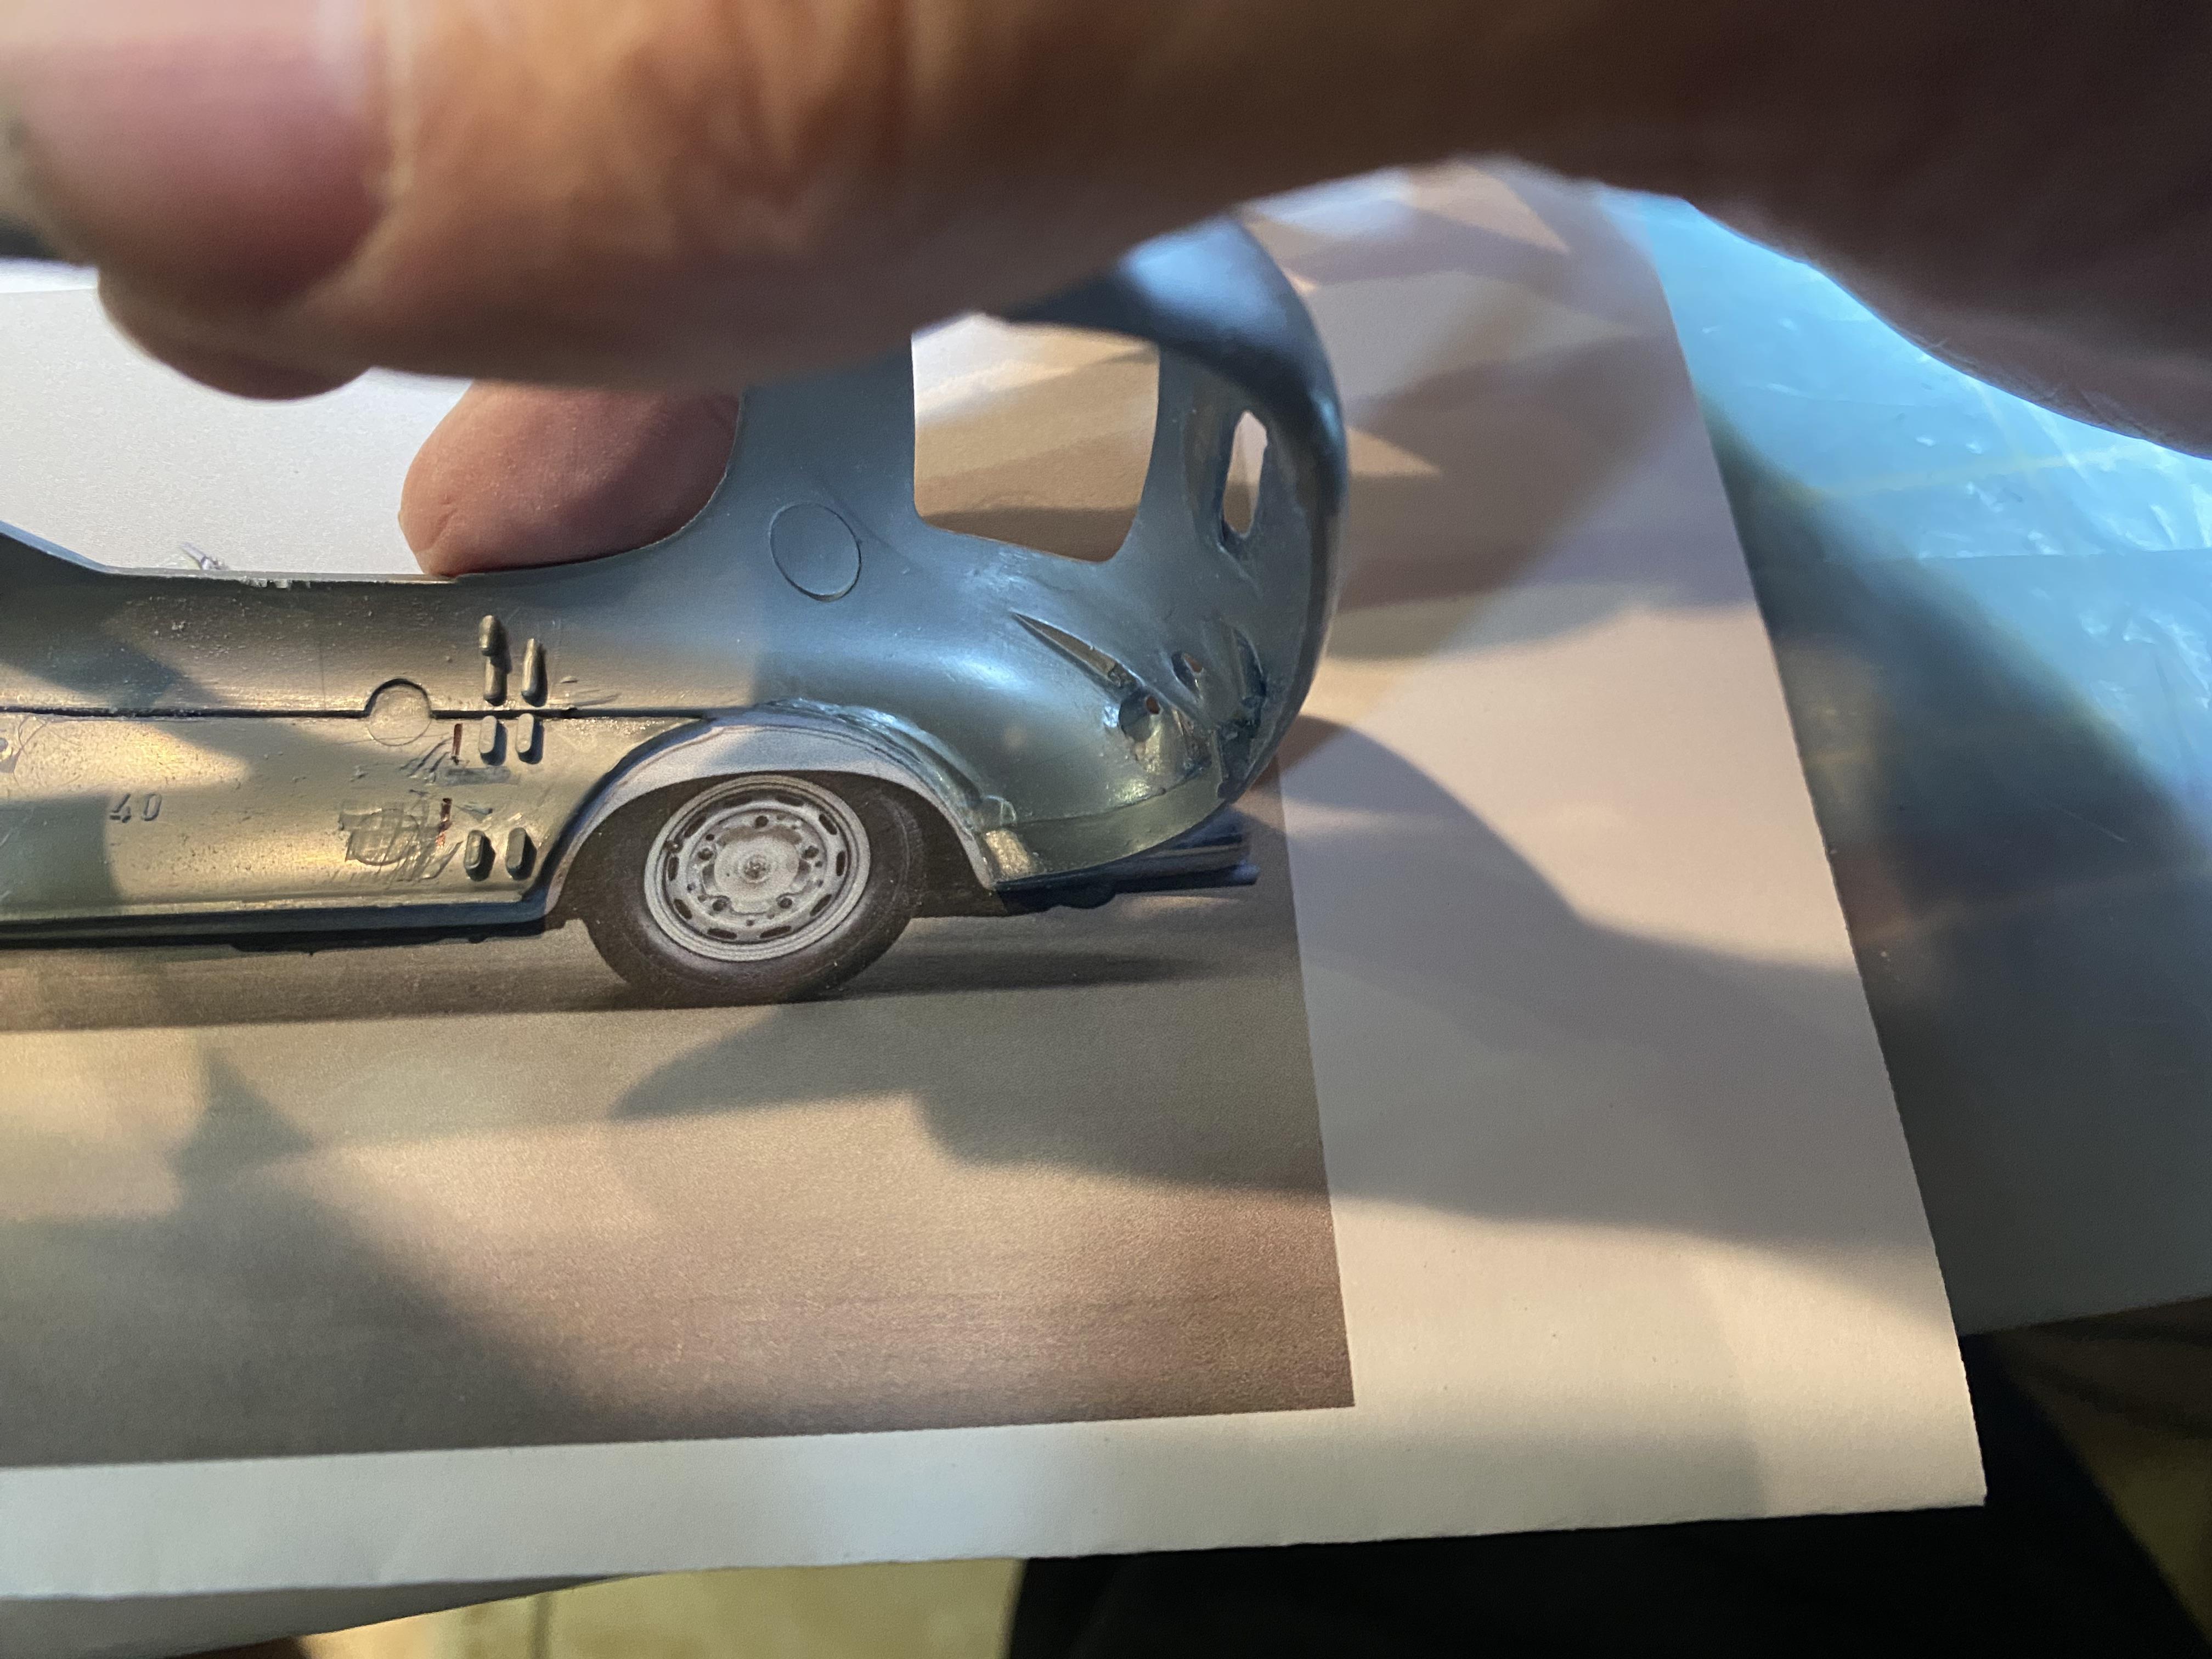
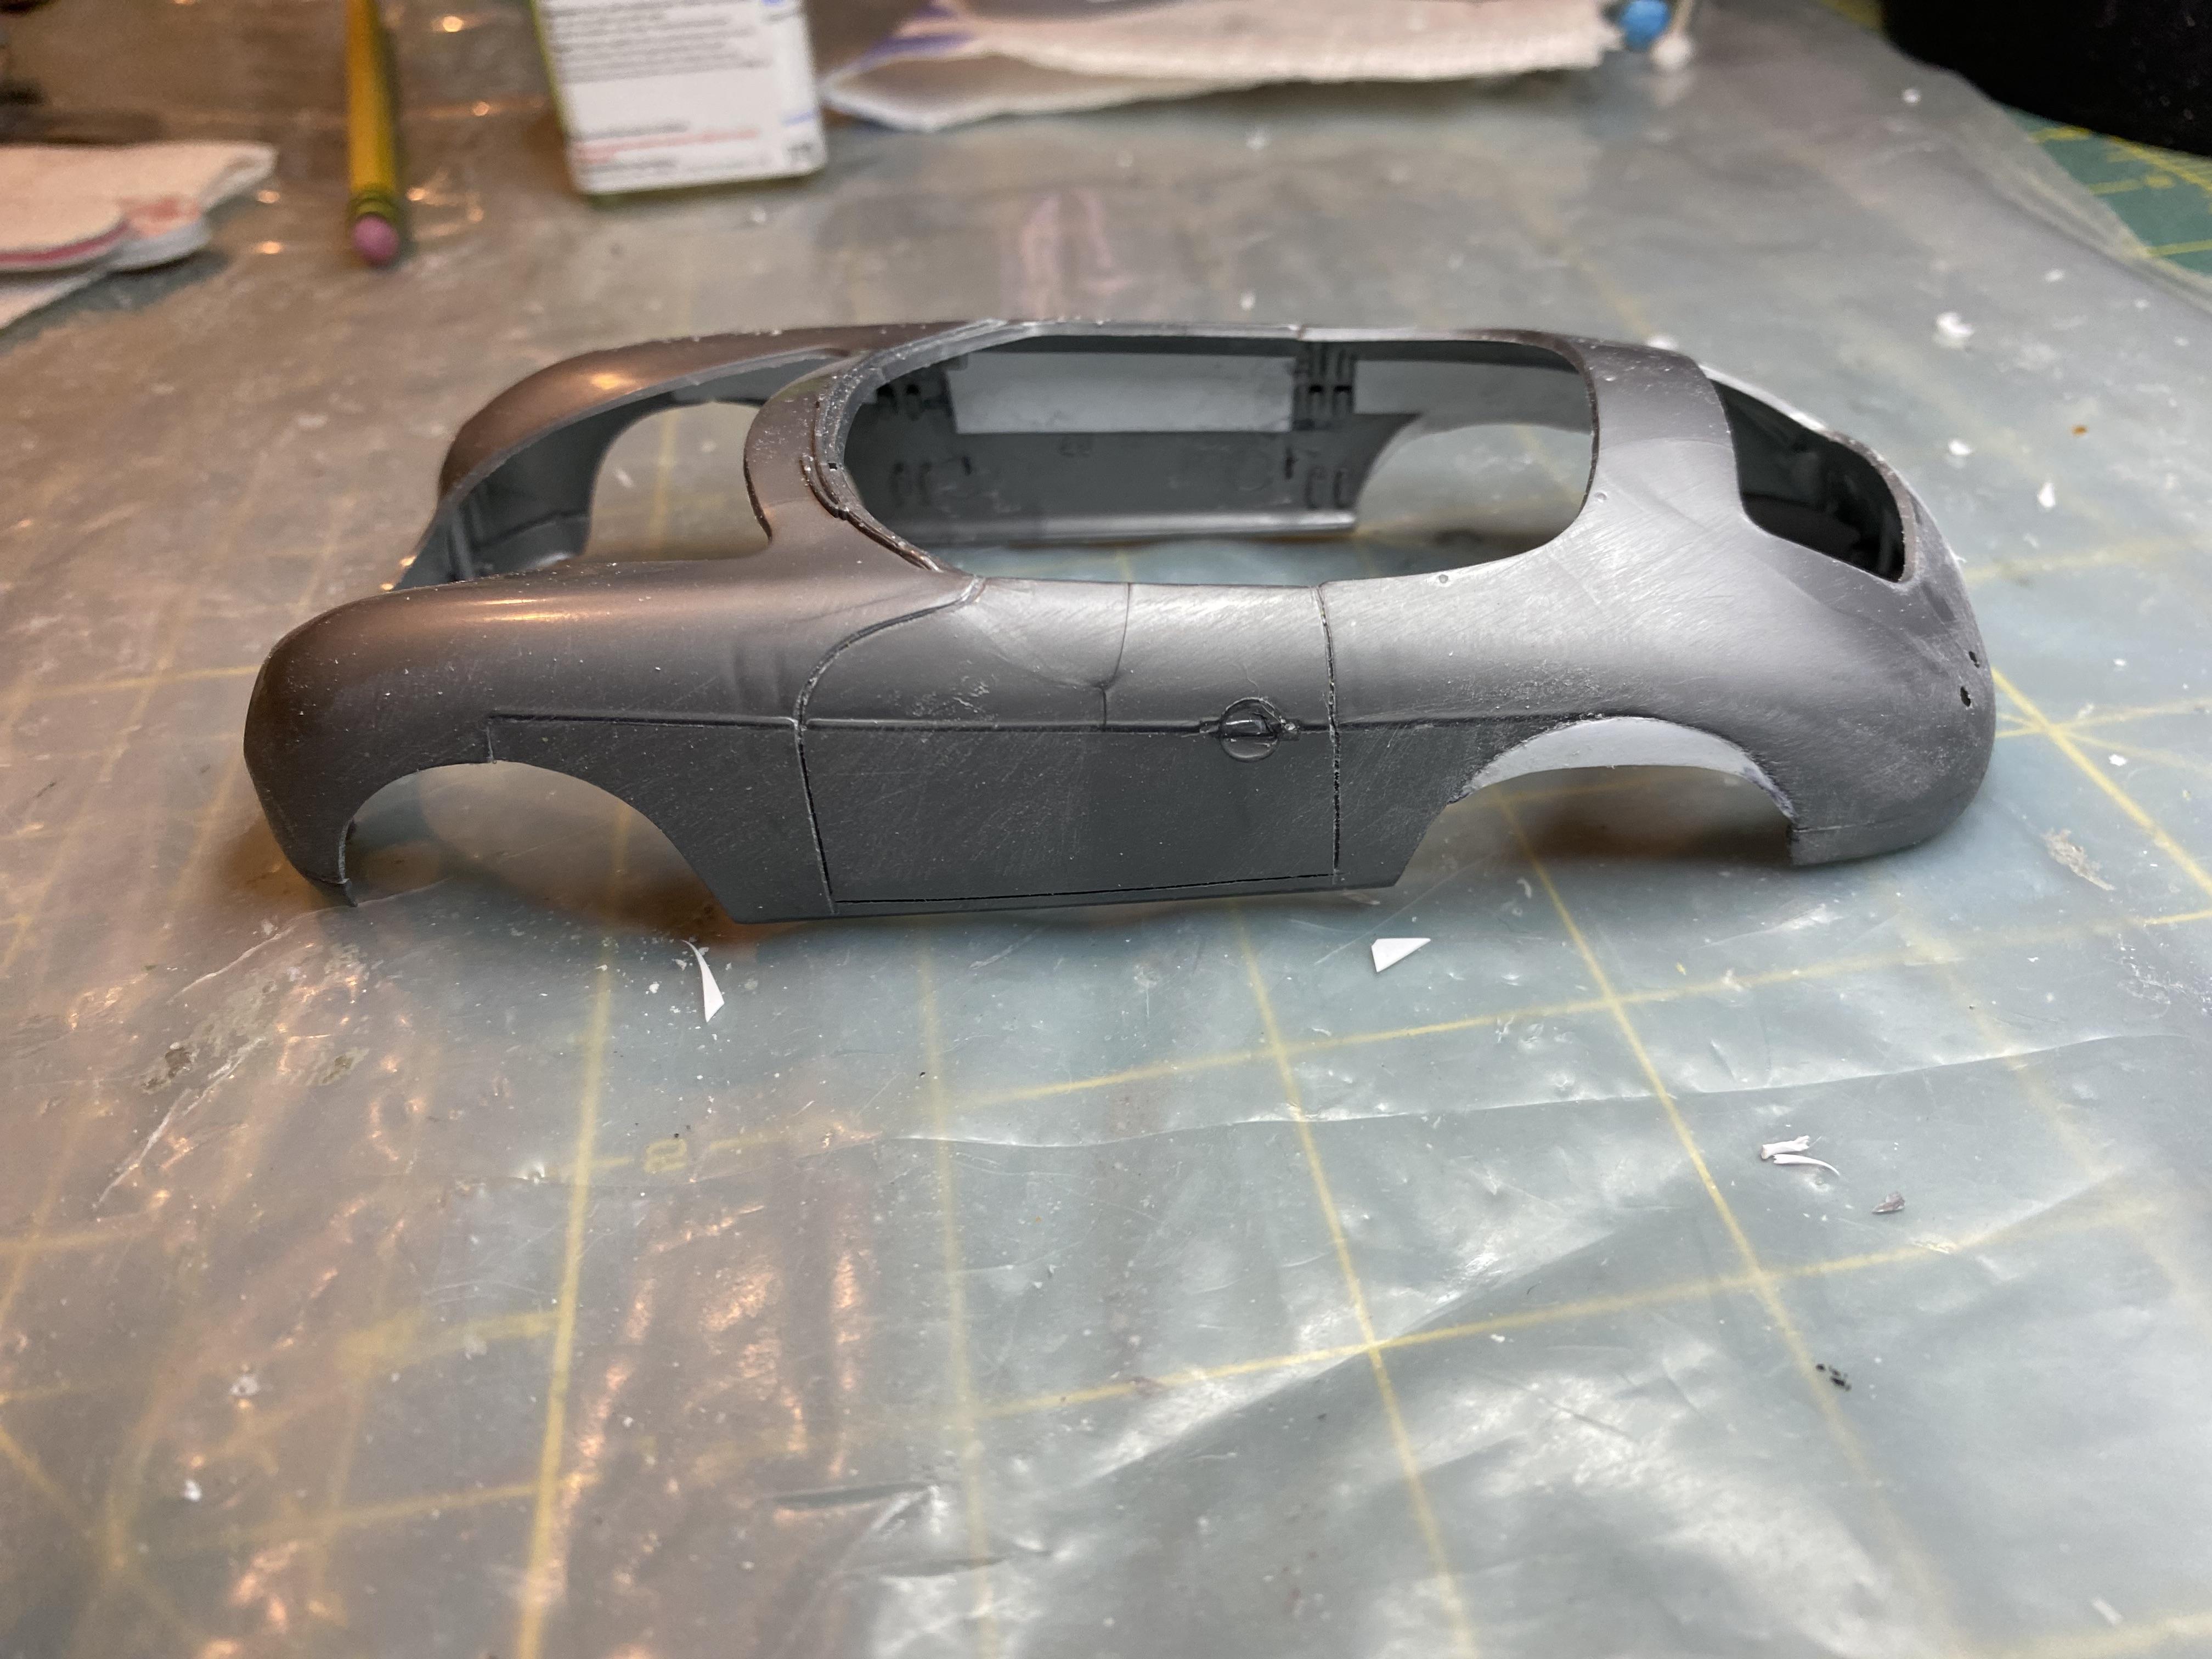
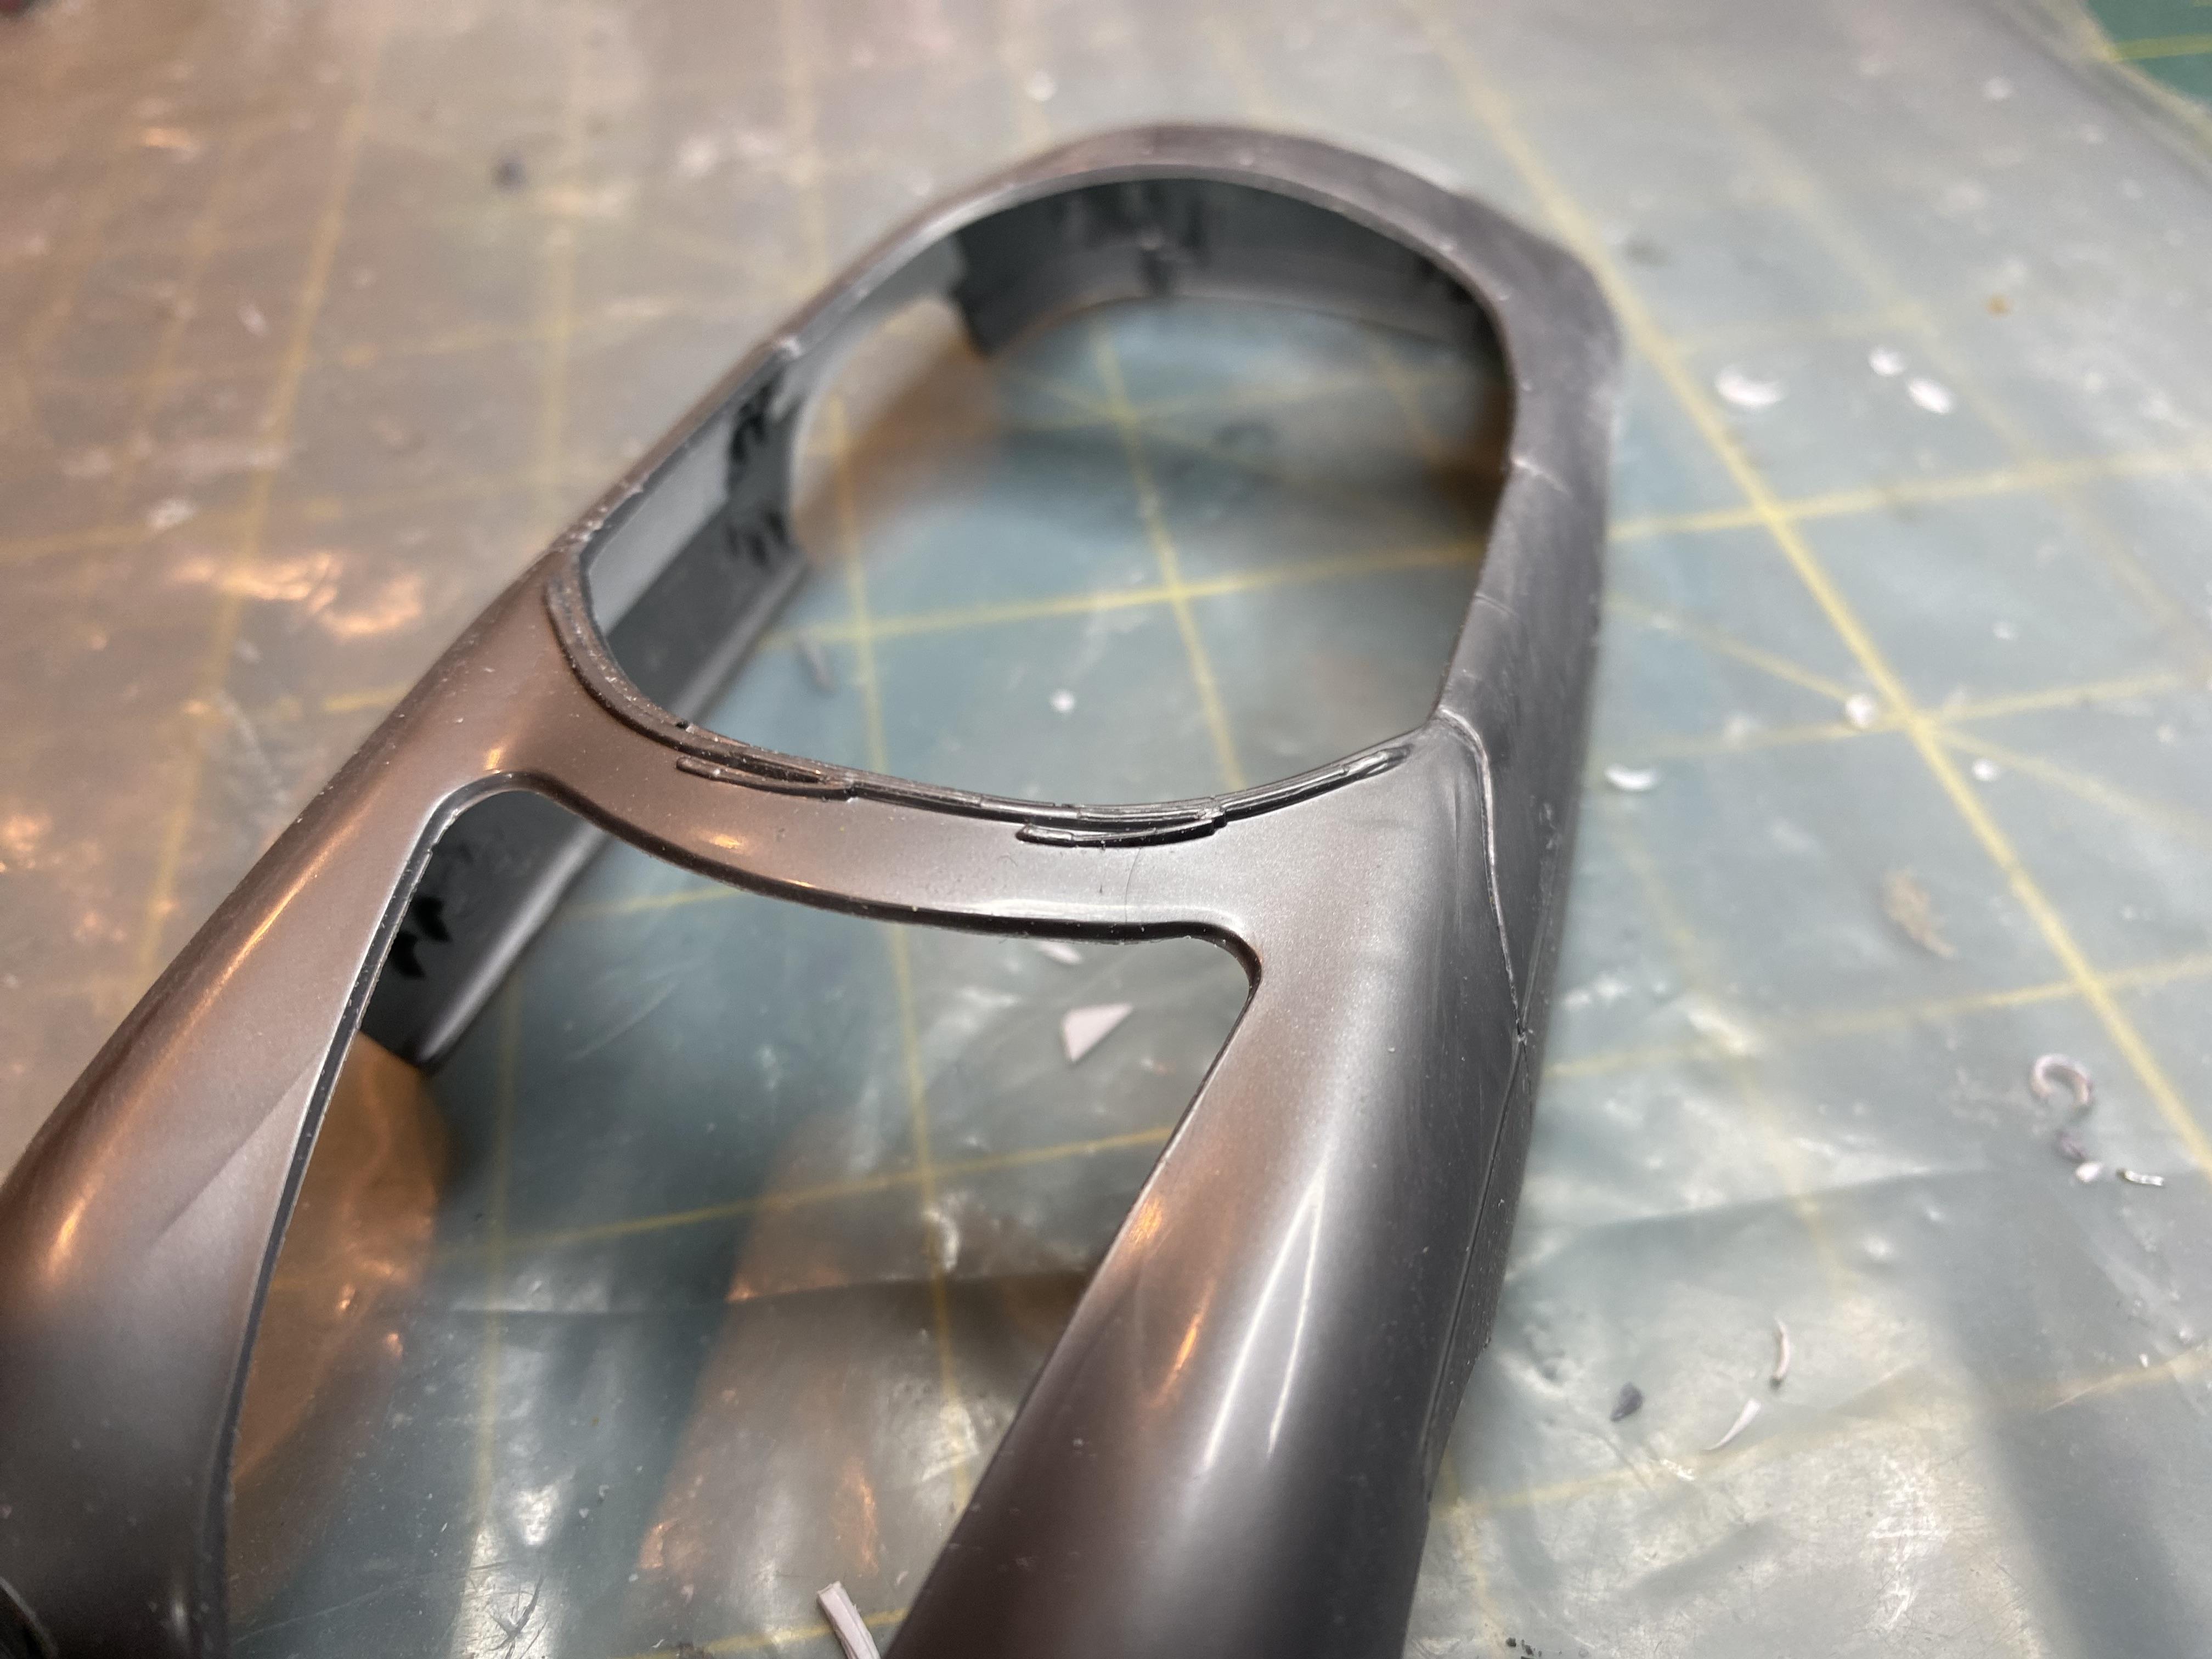
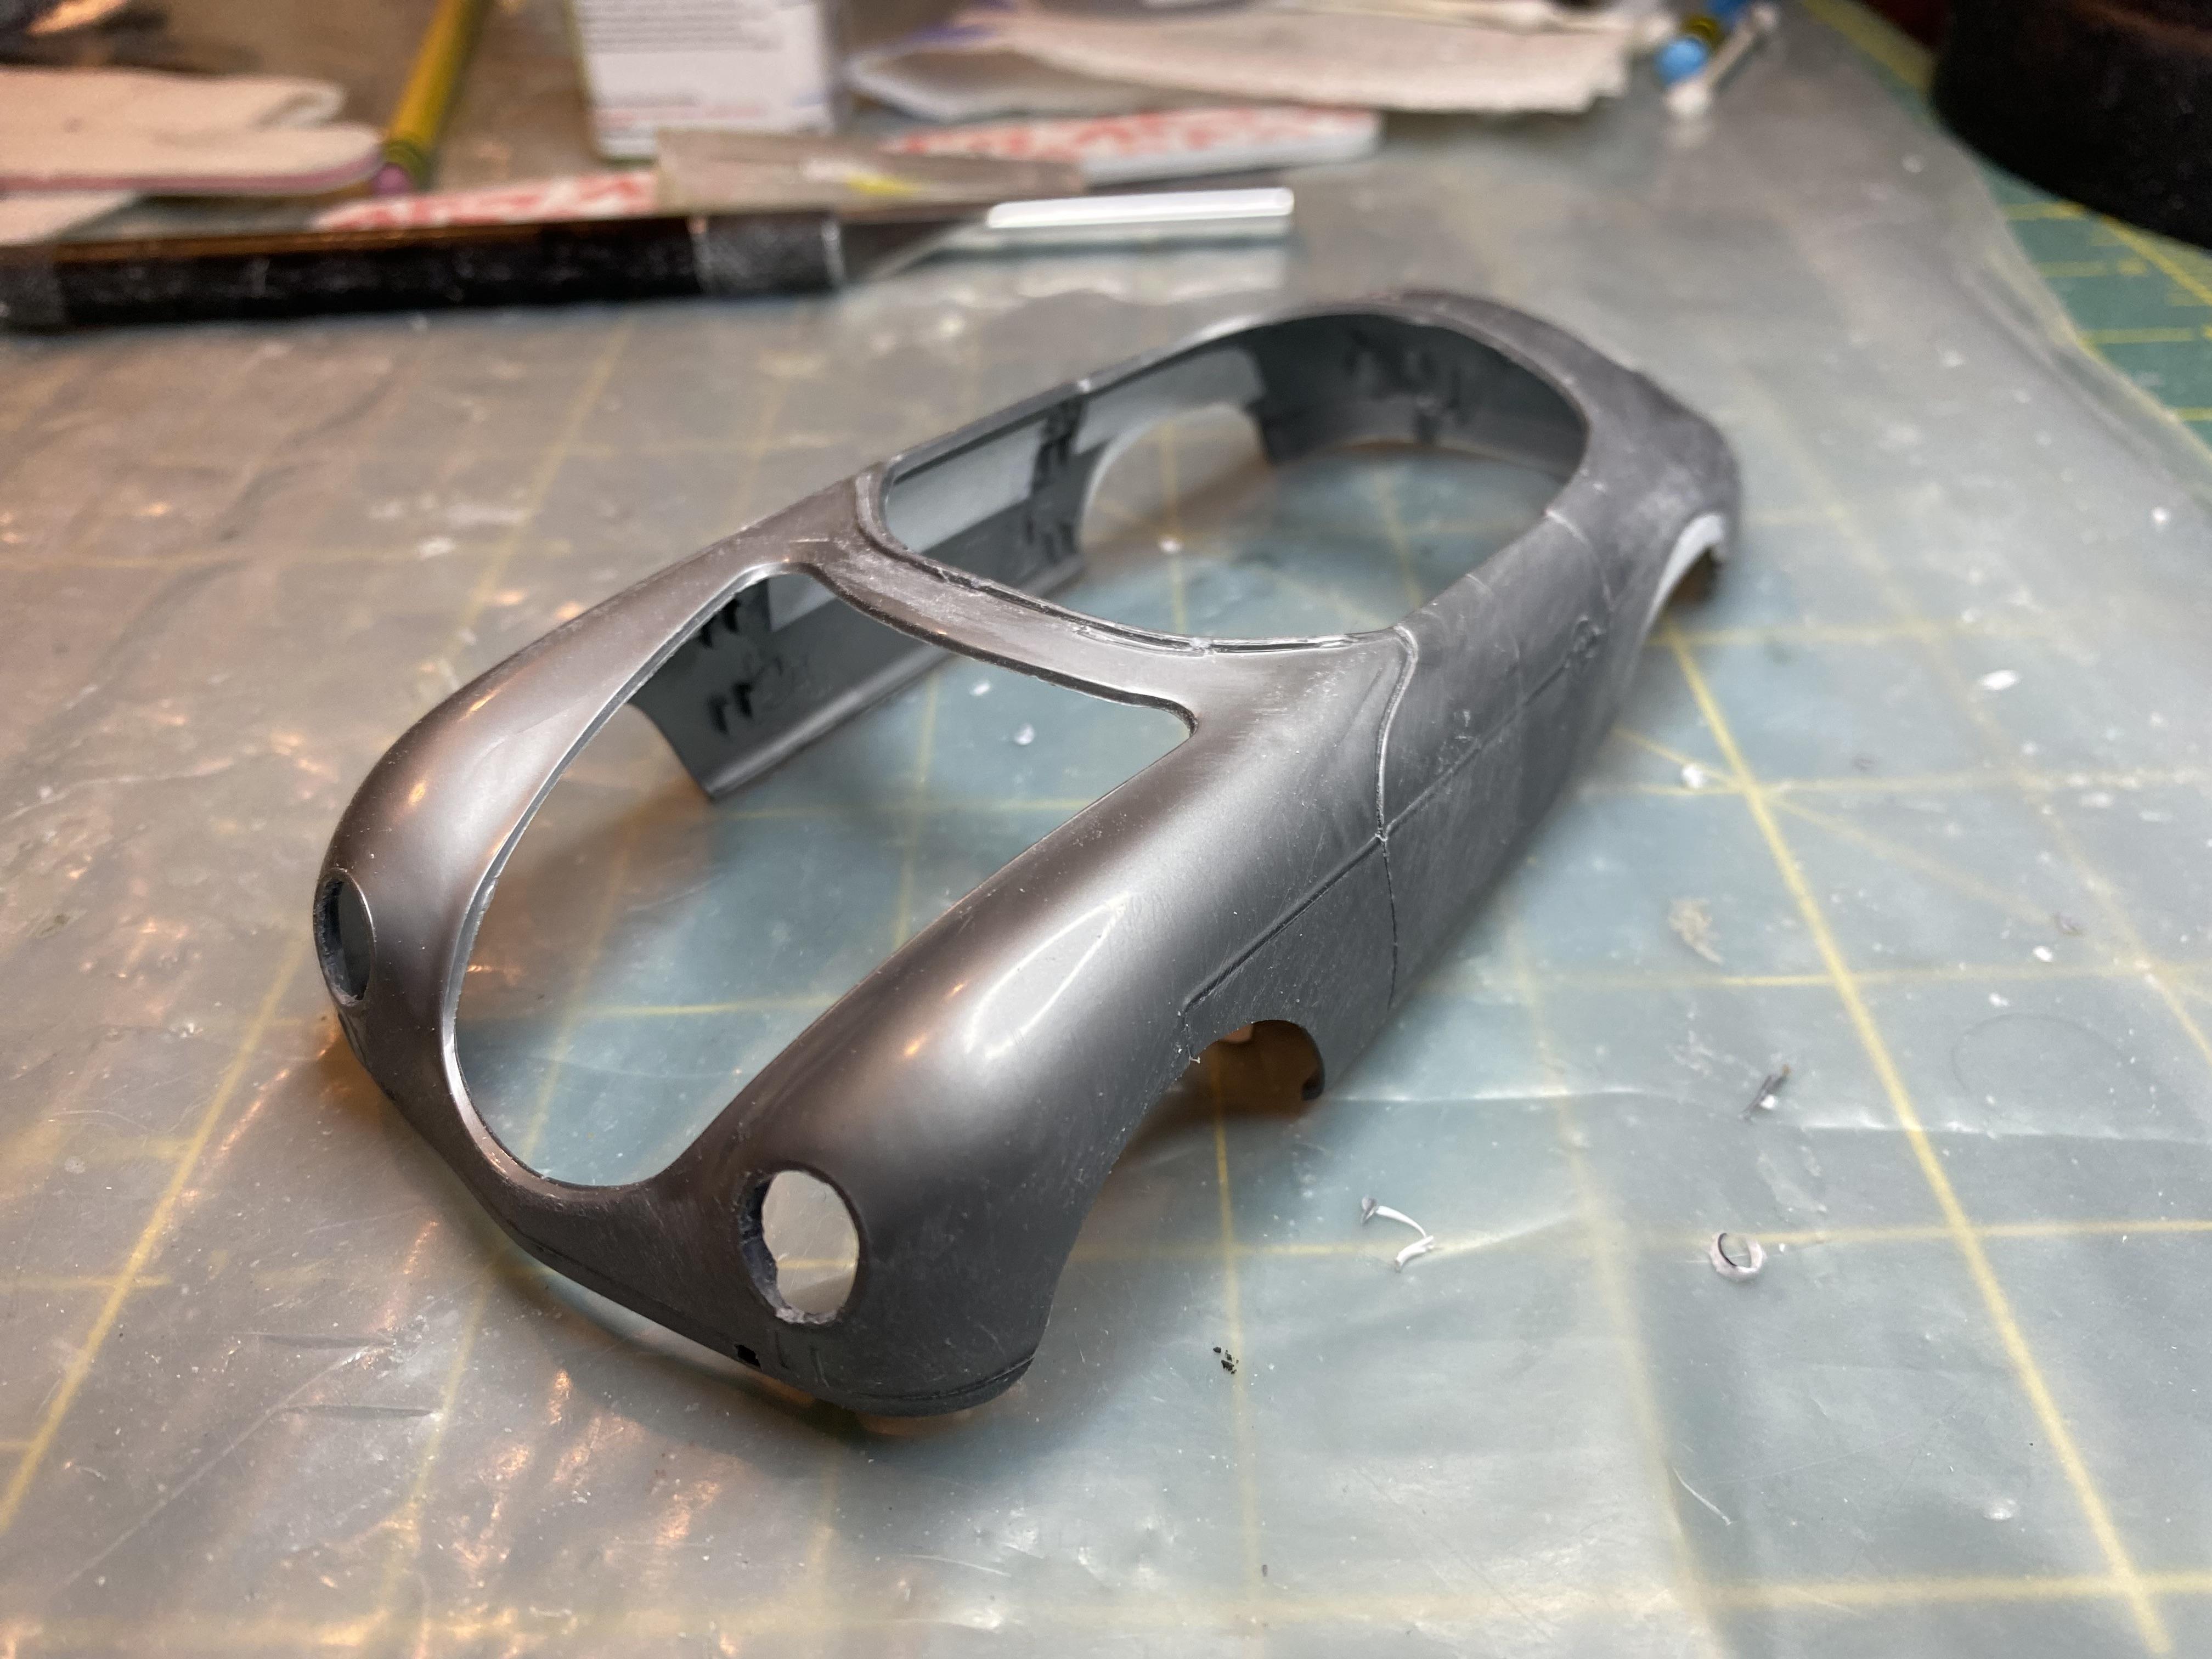
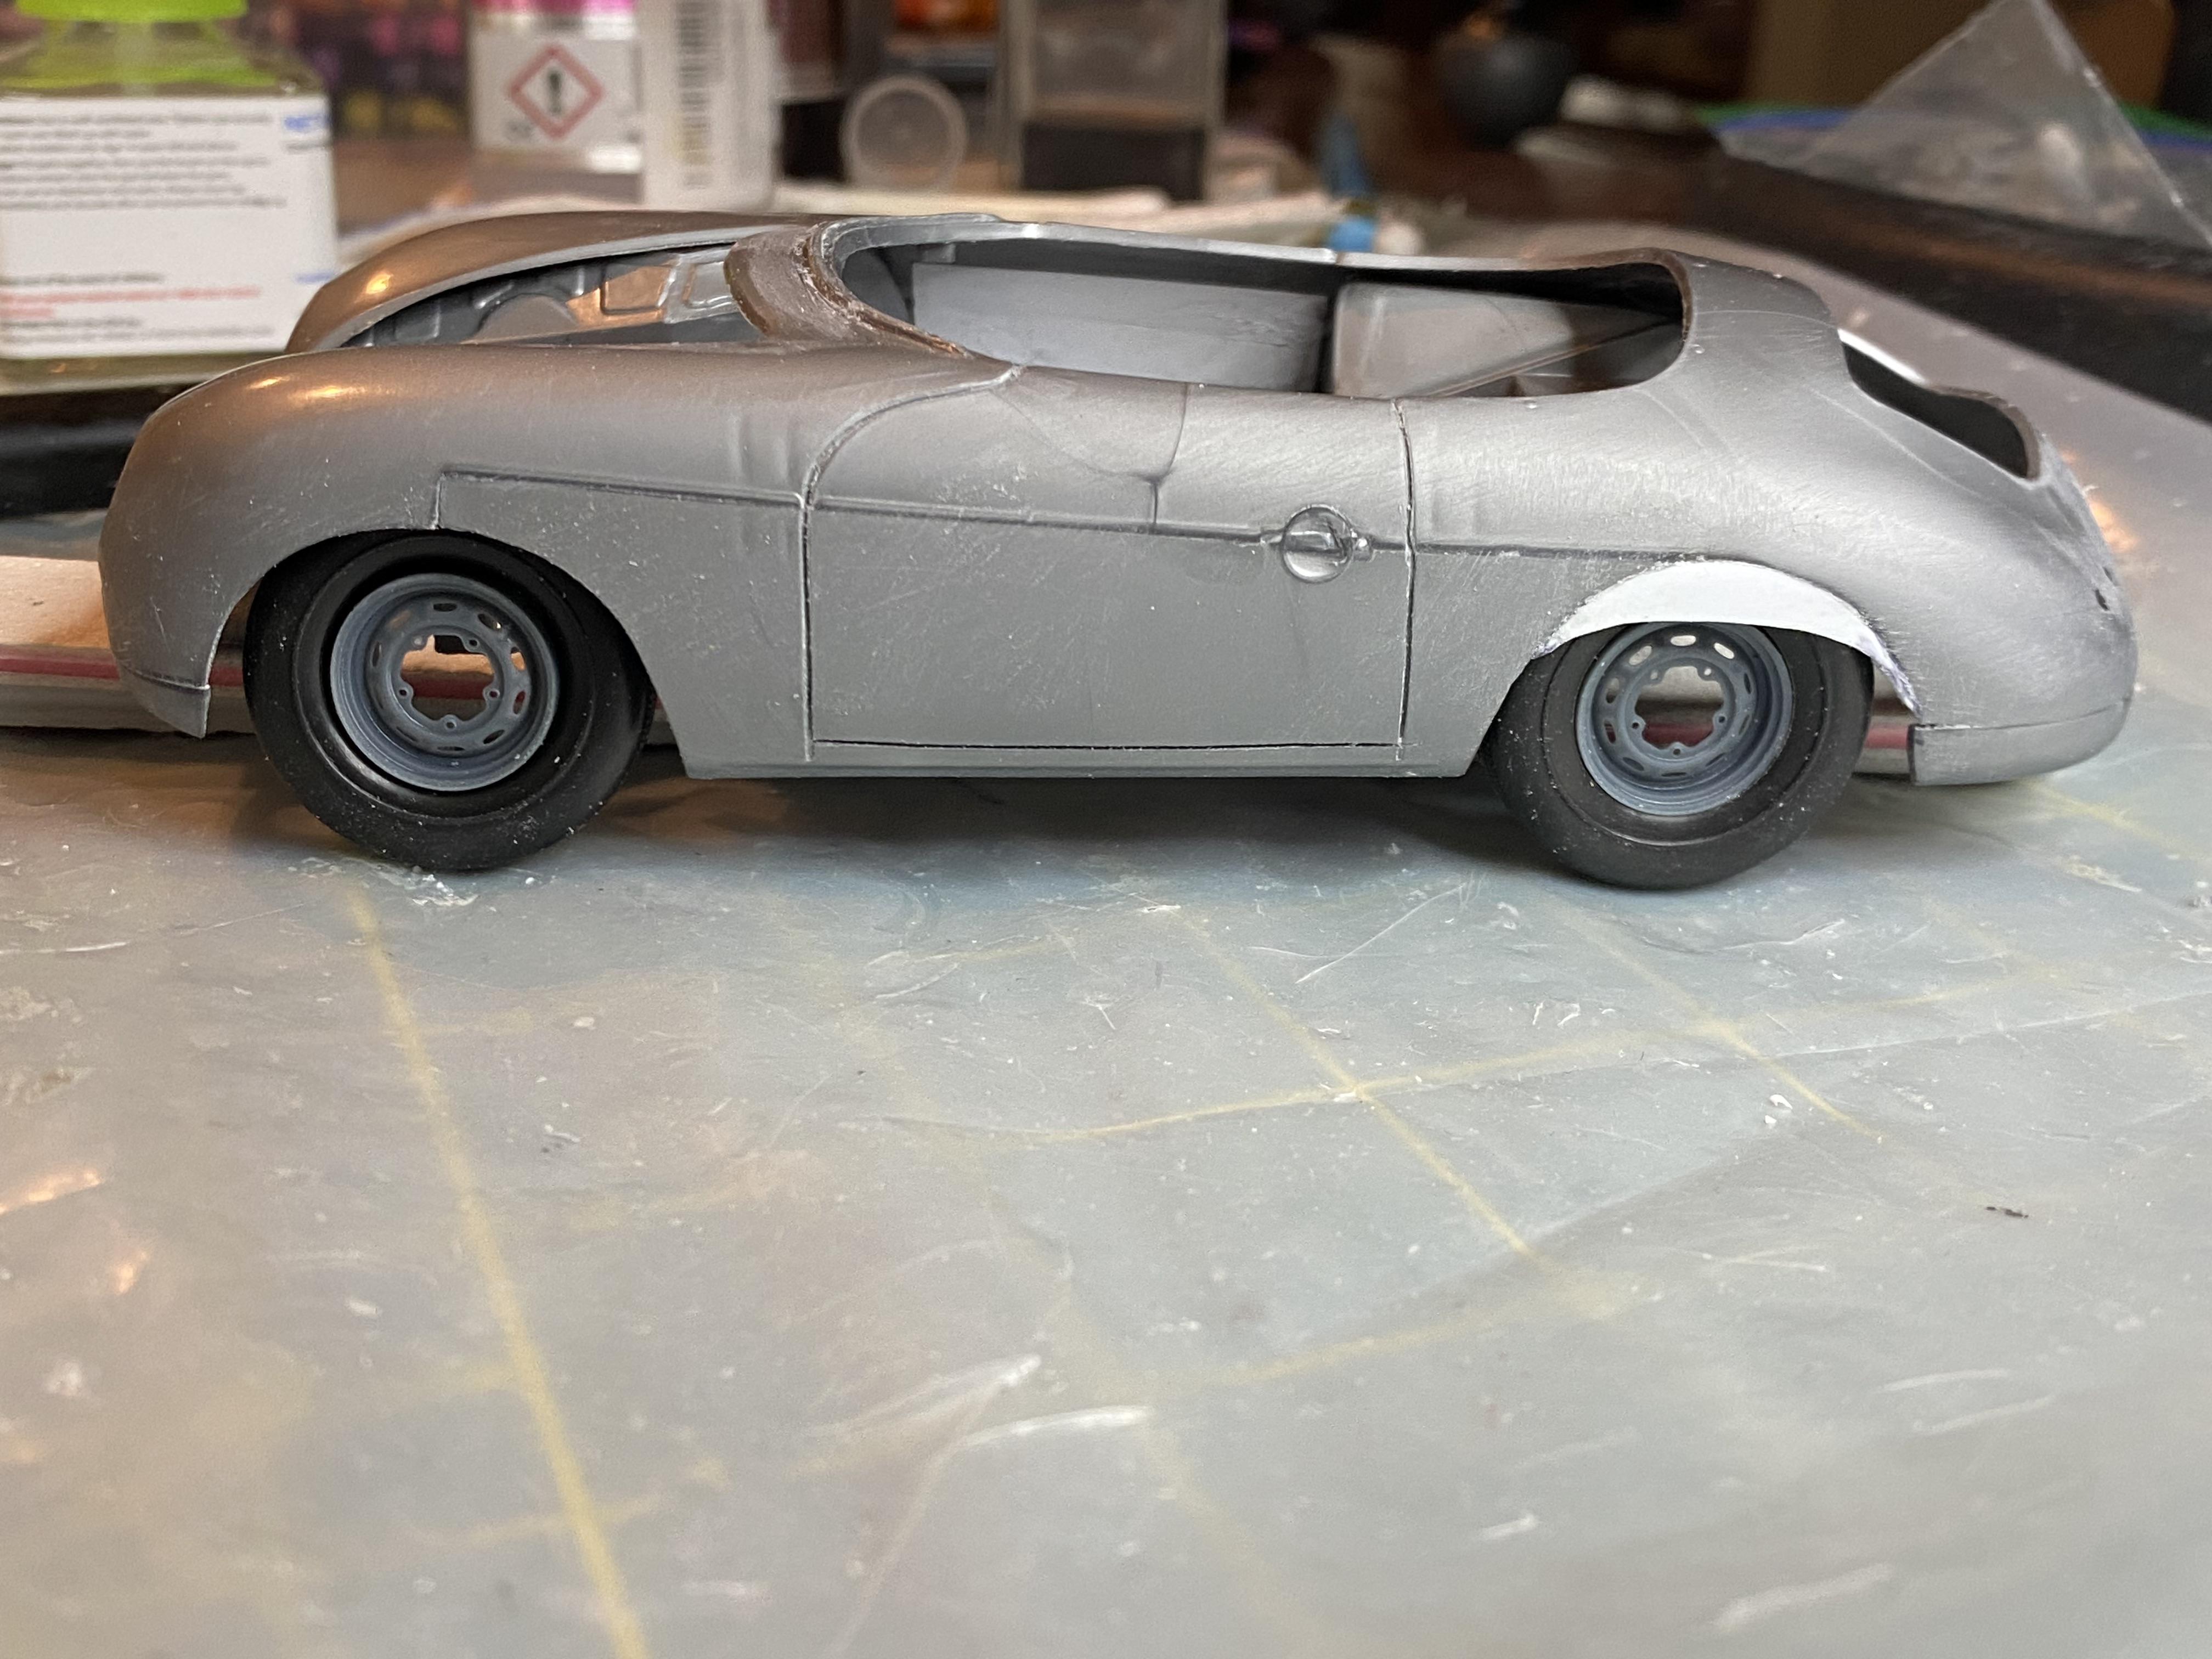
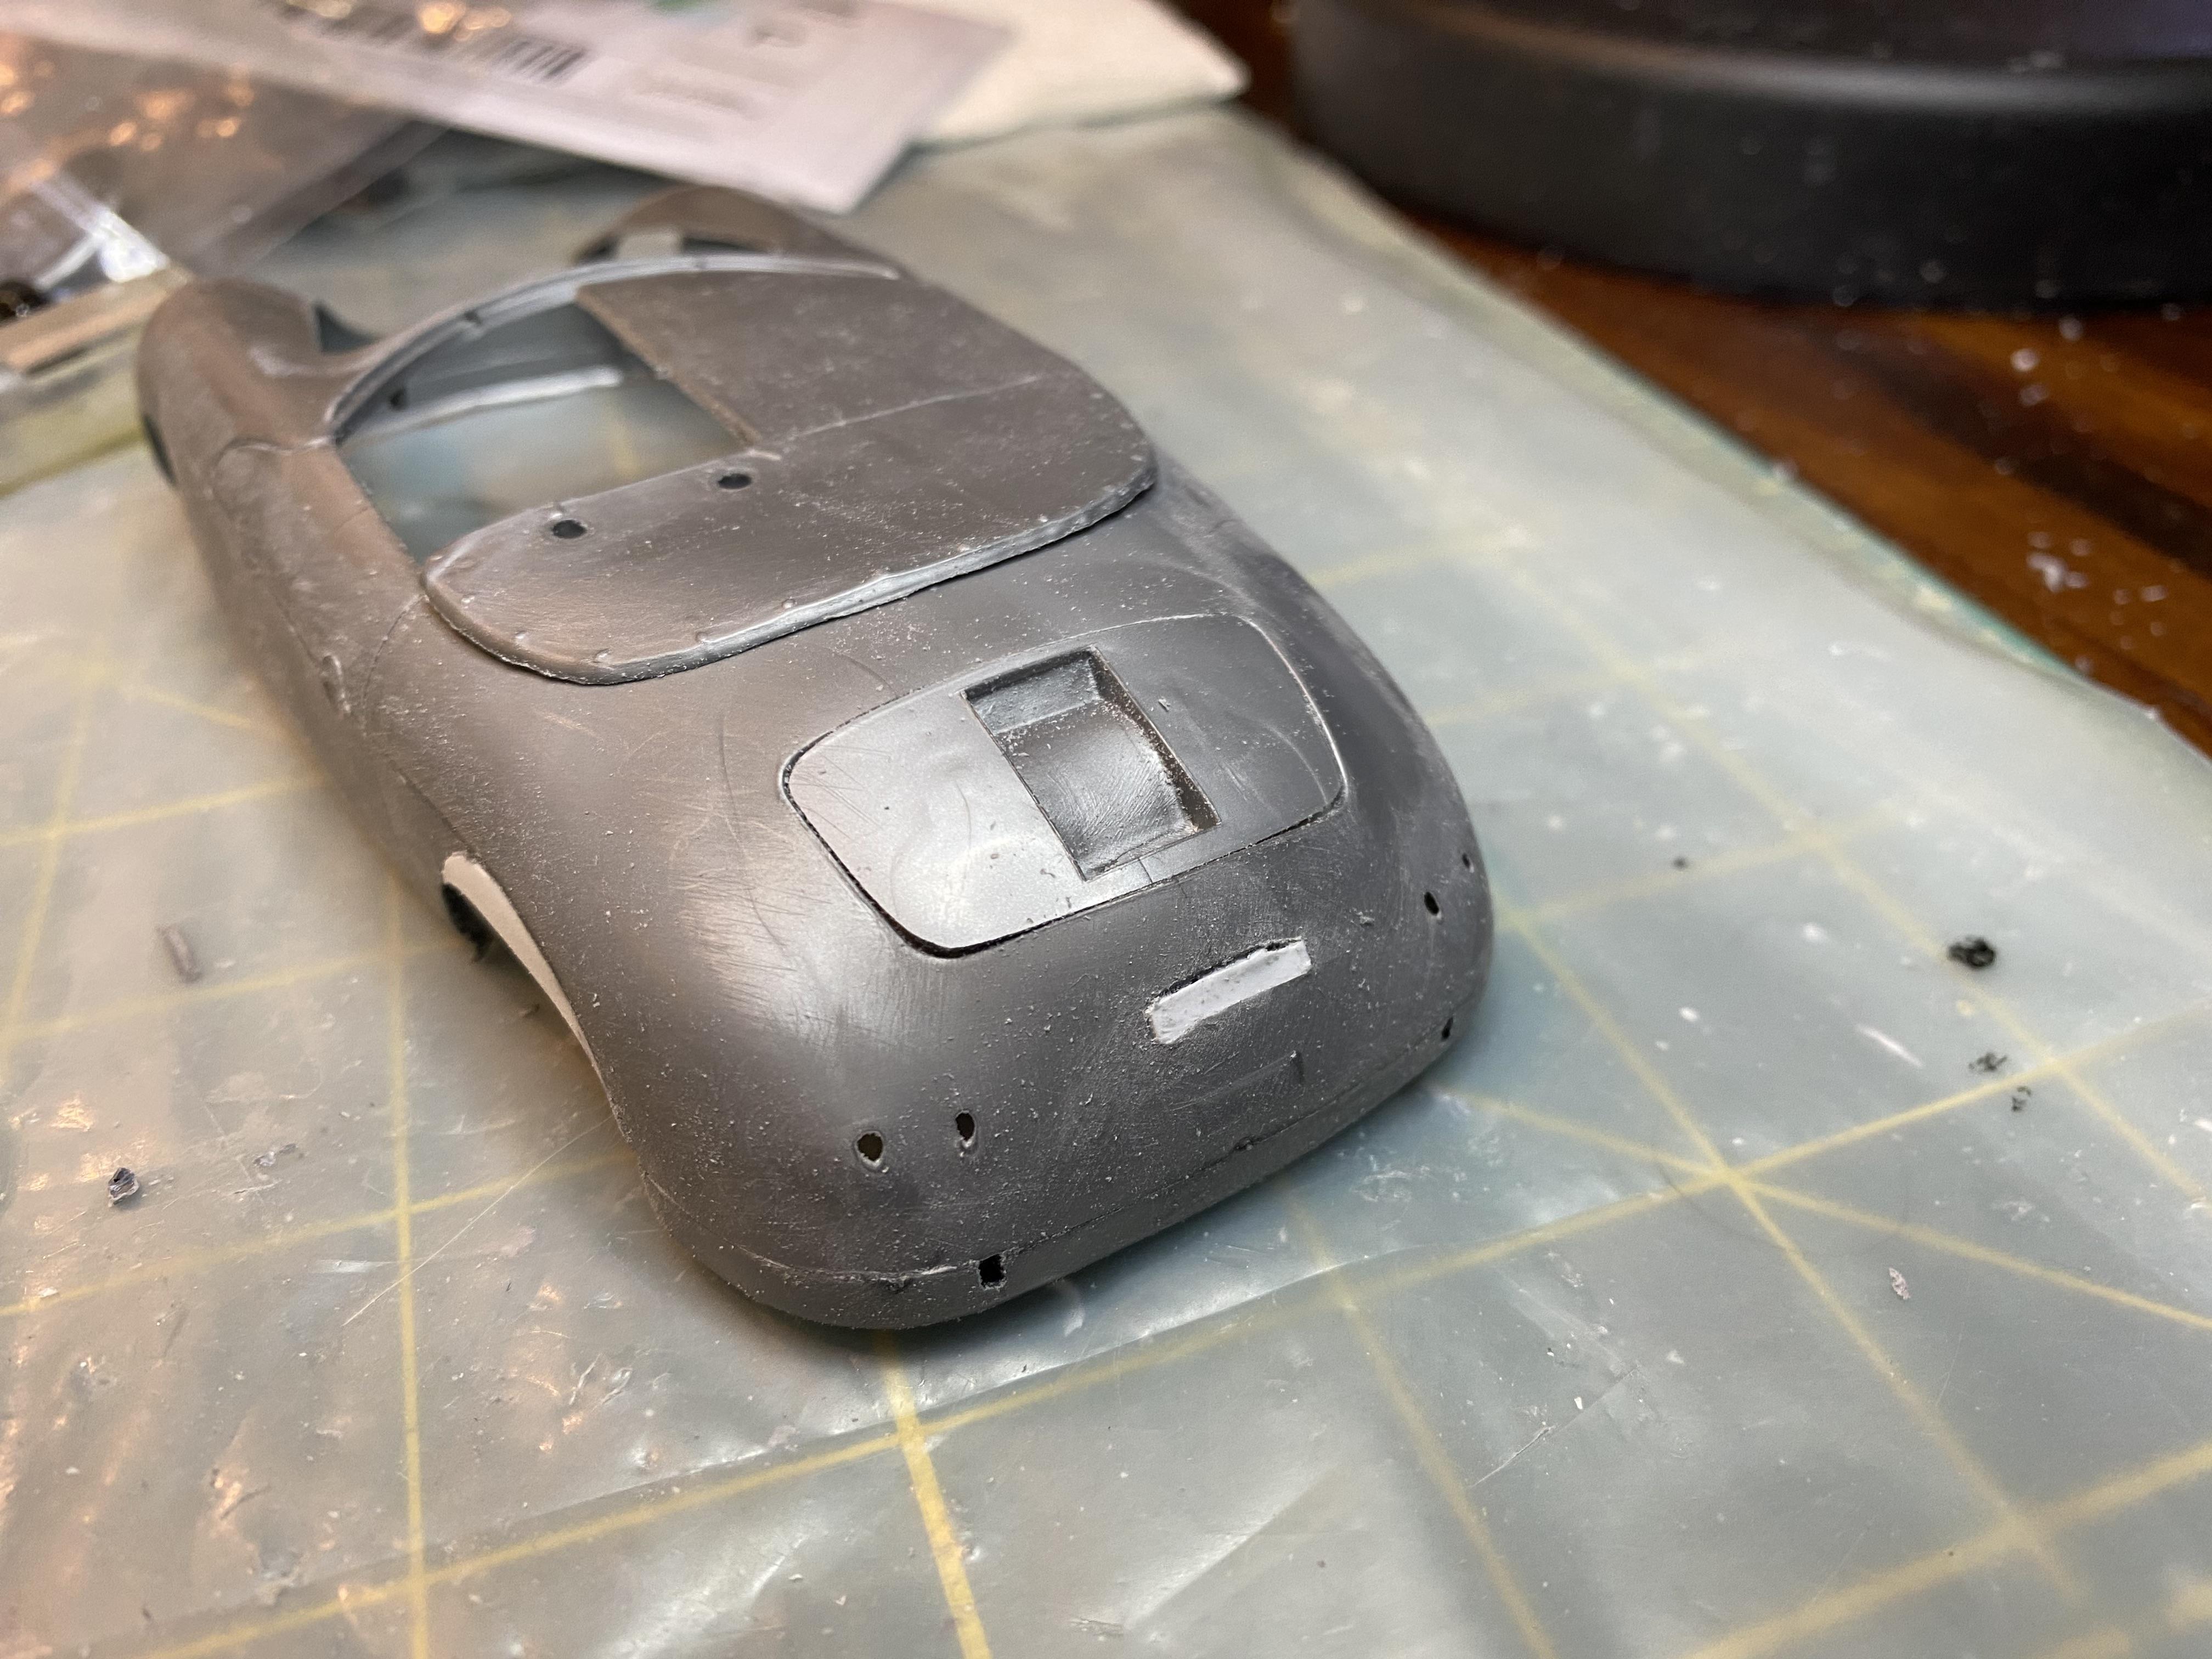
Being the glutton for punishment I appear to be I decided to start on my next project while I literally wait for paint to dry to complete my 1967 Mustang GTA convertible build. I picked up a Three Legends model set for a what I thought was a reasonable price for an early Jaguar XK-E, Datsun 240Z and a Porsche 356 Speedster. I absolutely love early Porsche air cooled cars, and especially 356s. When I was young my parents had a 1957 Porsche 356A coupe. As it turns out the Revell Porsche Speedster seems to have been originally released around 1962, and it shows it’s age. Multiple part body that has major issues. I have sense picked up an amazing Fujimi kit but for some reason I have decided to go ahead and try to make something of this really really not good kit. I will be doing a lot of fabrication, modification and scratch building on this one for sure. It will get the full LED treatment, headlights, taillights & gauge lights as well as possible steering. I assembled the body, drilled out the headlights, sanded bad seams, added reinforcements for the joined parts and added filler patches to correct the terrible rear wheel arches. I got a set of 3d printed early 356 rims, metal Porsche decals from ZoomOn, found a decent set of tires from my stash and created a template to fix the wheel arches and cut the doors more correctly. this is the box art of the set and the Porsche kit by itself. Look at how bad that looks, what was I thinking??? glued together the body cut out the headlights and checked the rear wheel arches. added the filler pieces and reinforcements. removed what I think was supposed to be wipers, they will be photo-etch later. trial fit to make sure the wheels will fit inside the fenders. I am sure the suspension will need work. This is what I am going to be going for. Scratch building the bumpers, etc. I will be going with Ivory over red interior.
-
Thank you. Just a few more details left and it will be done once the bumper chrome cures enough. As long as I don’t mess it up again.
-
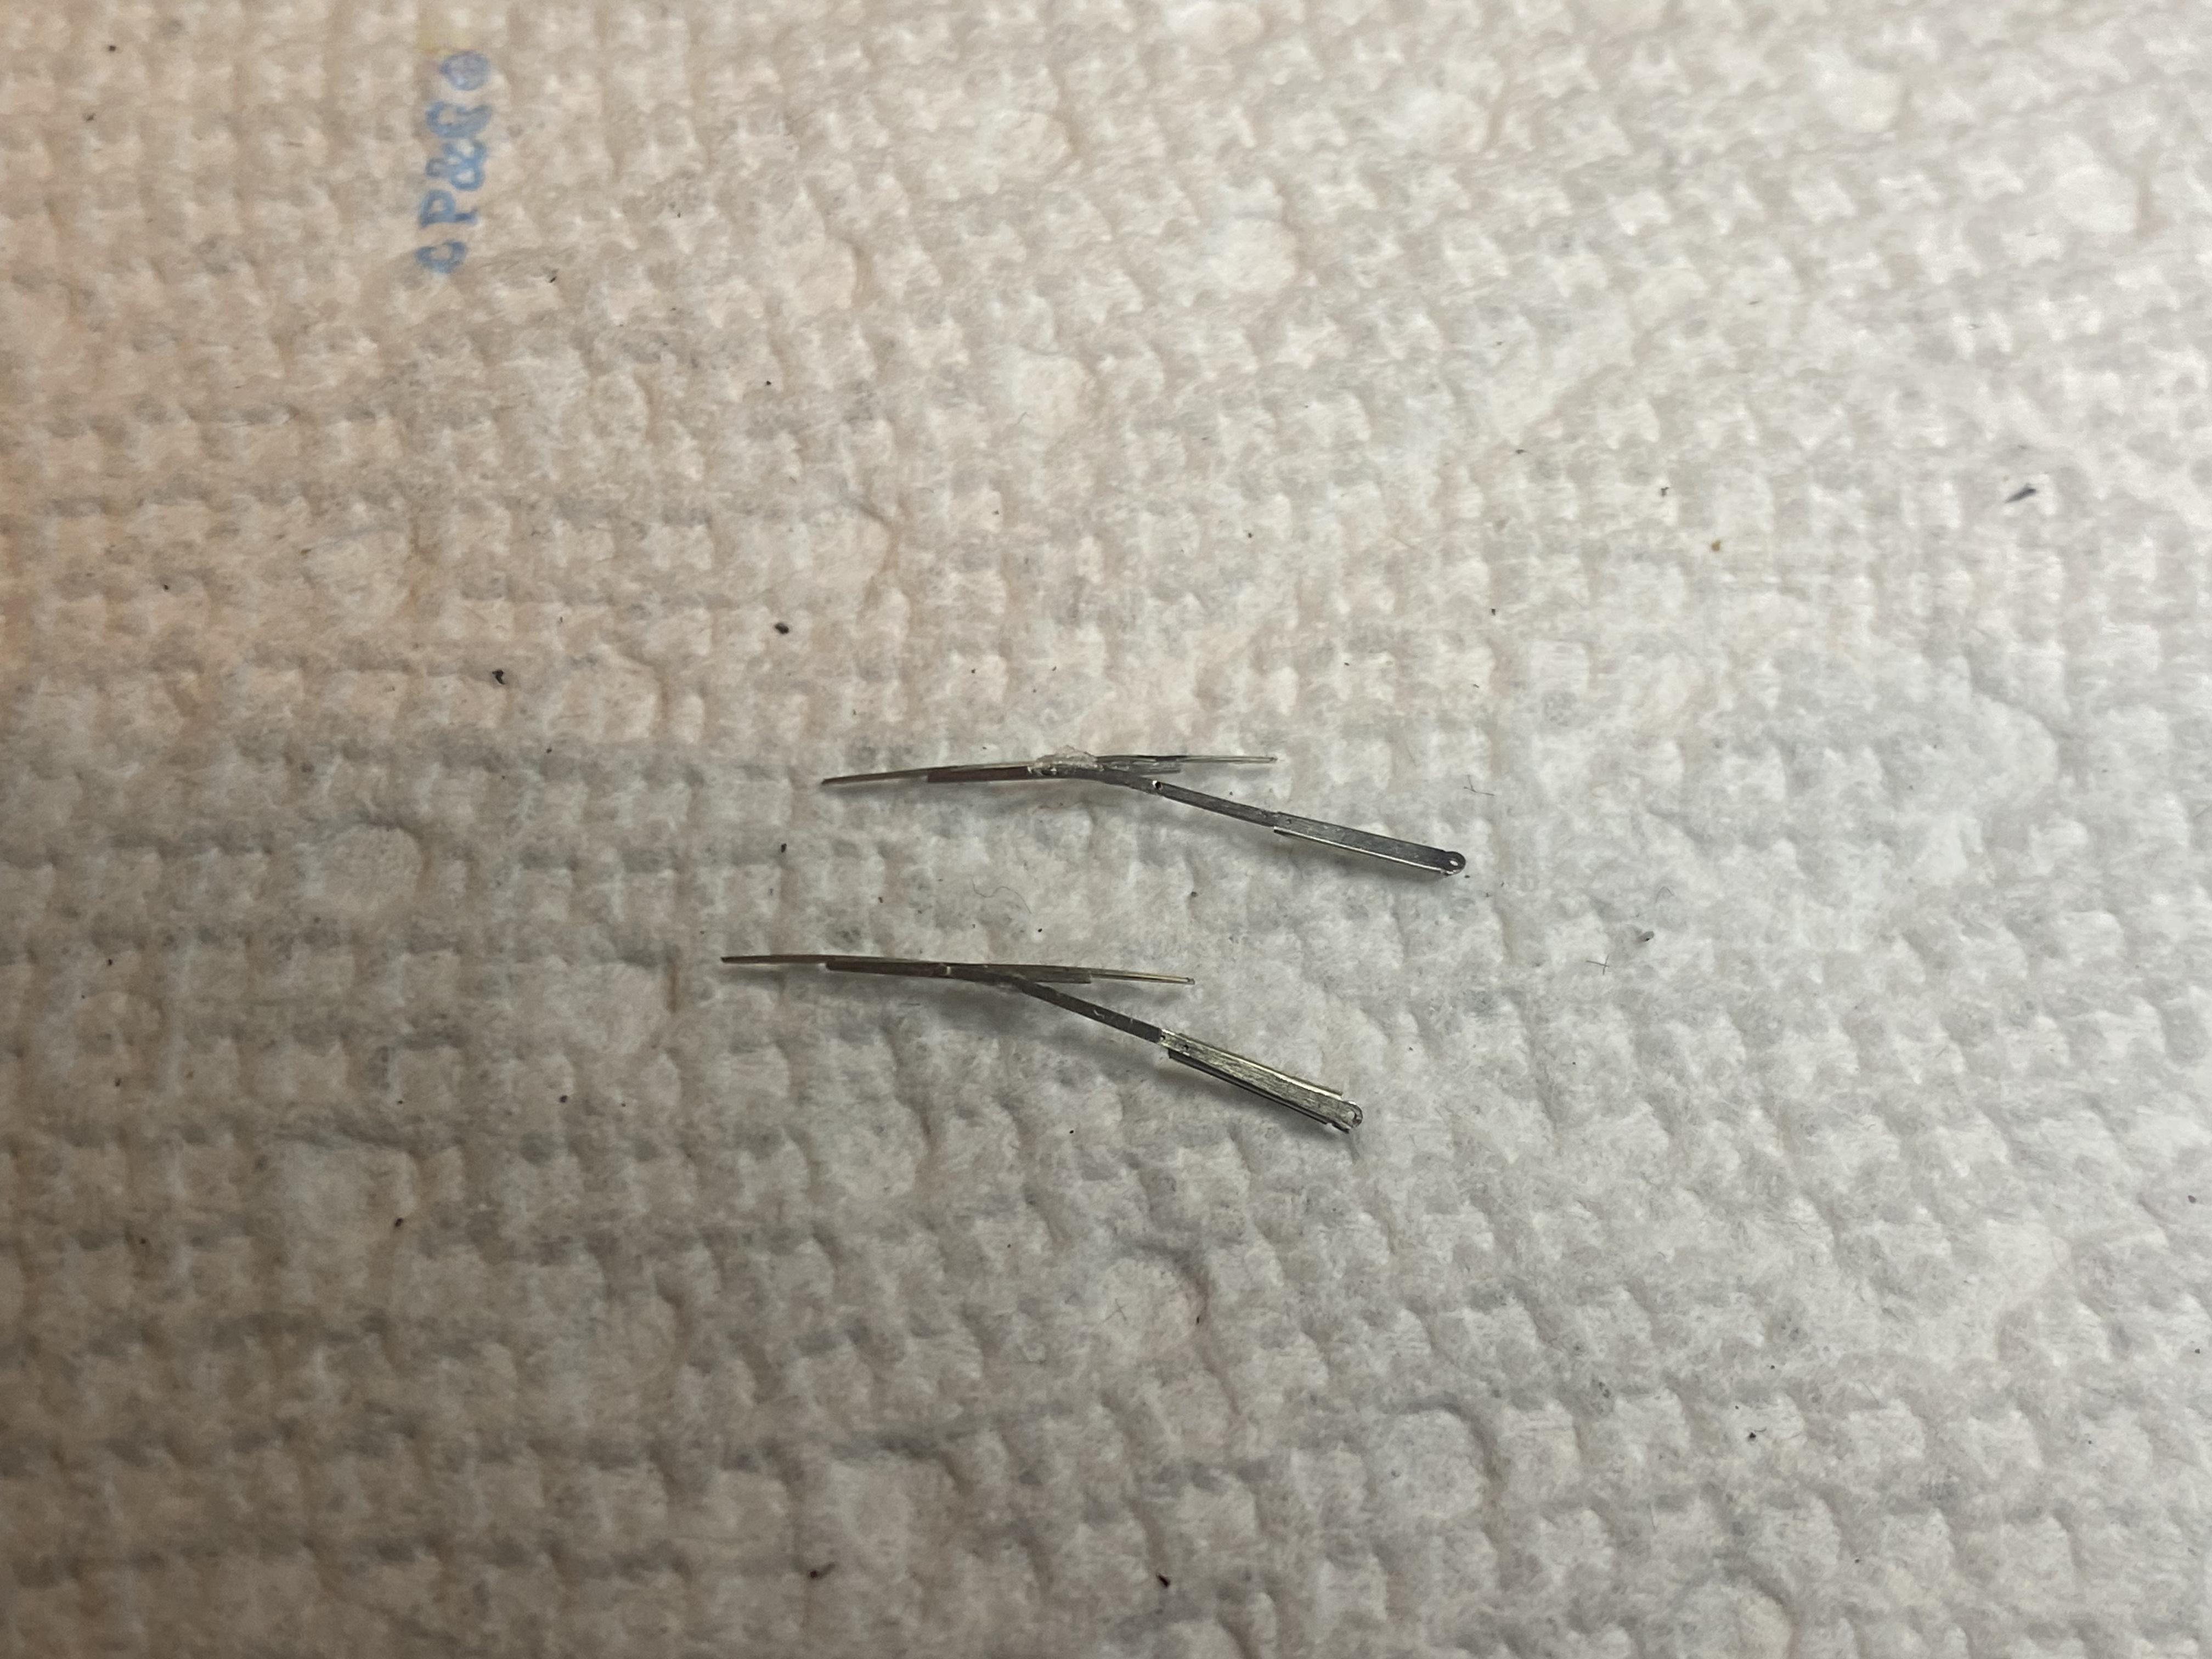
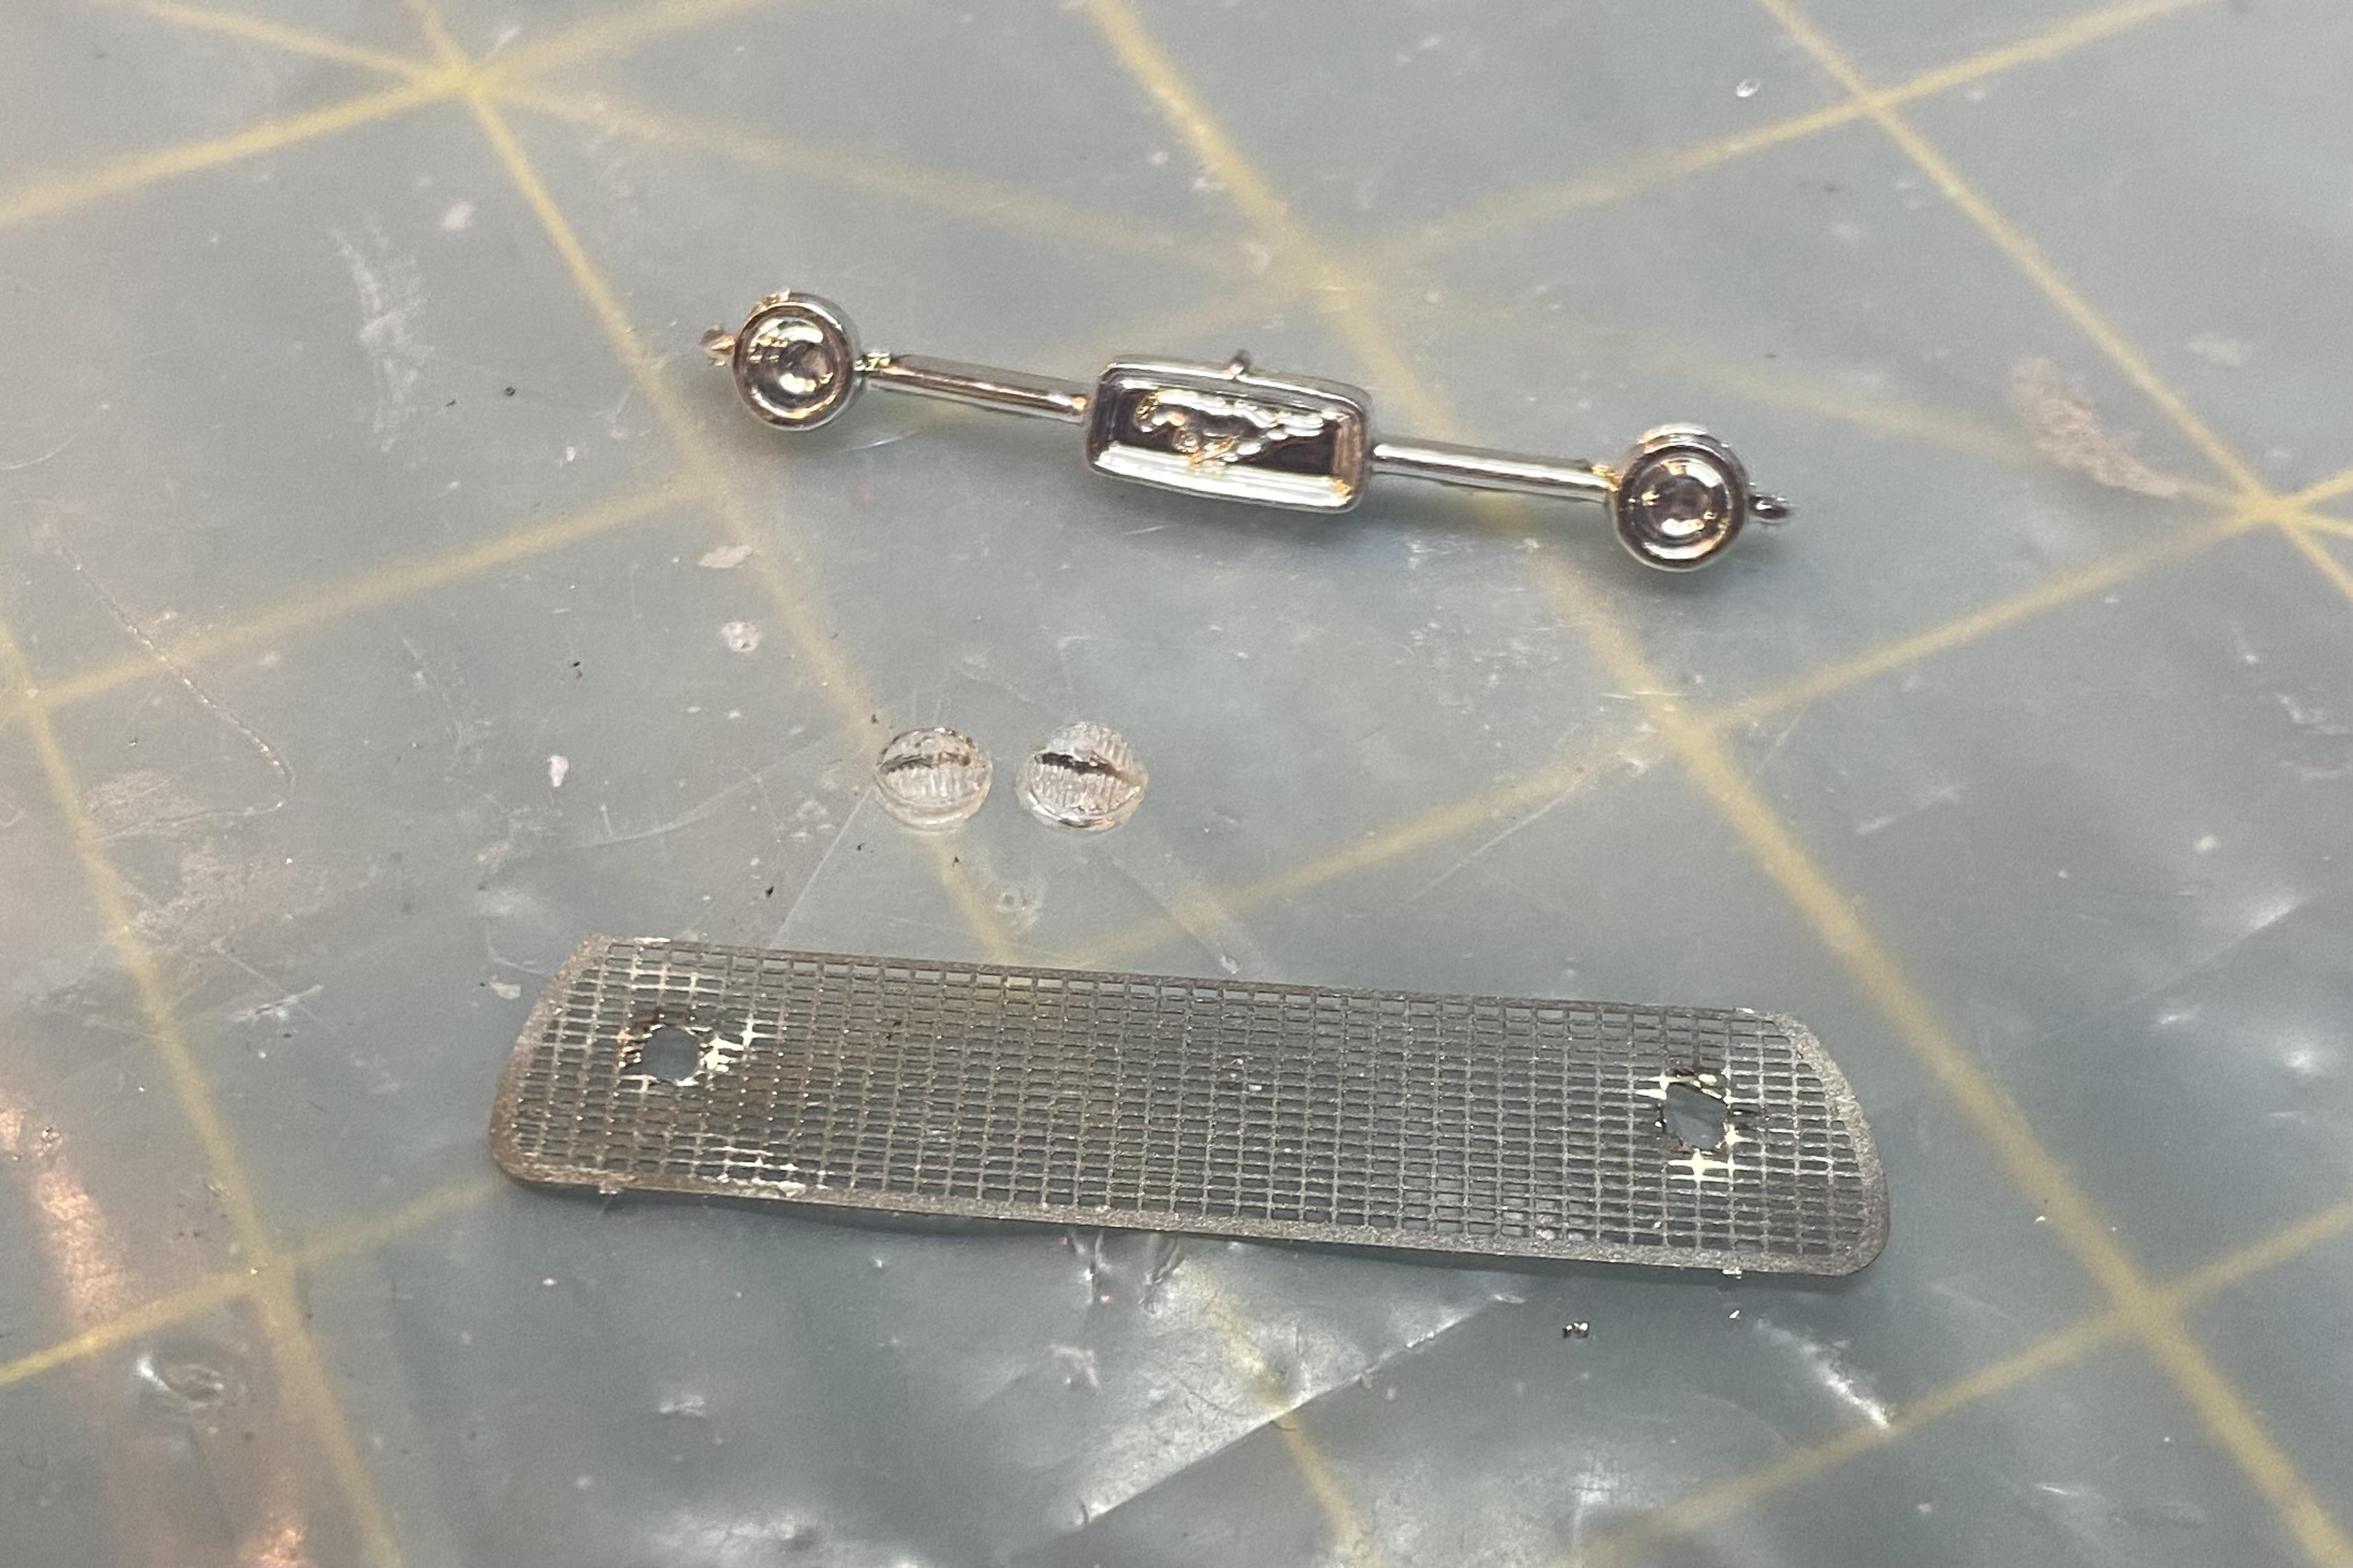
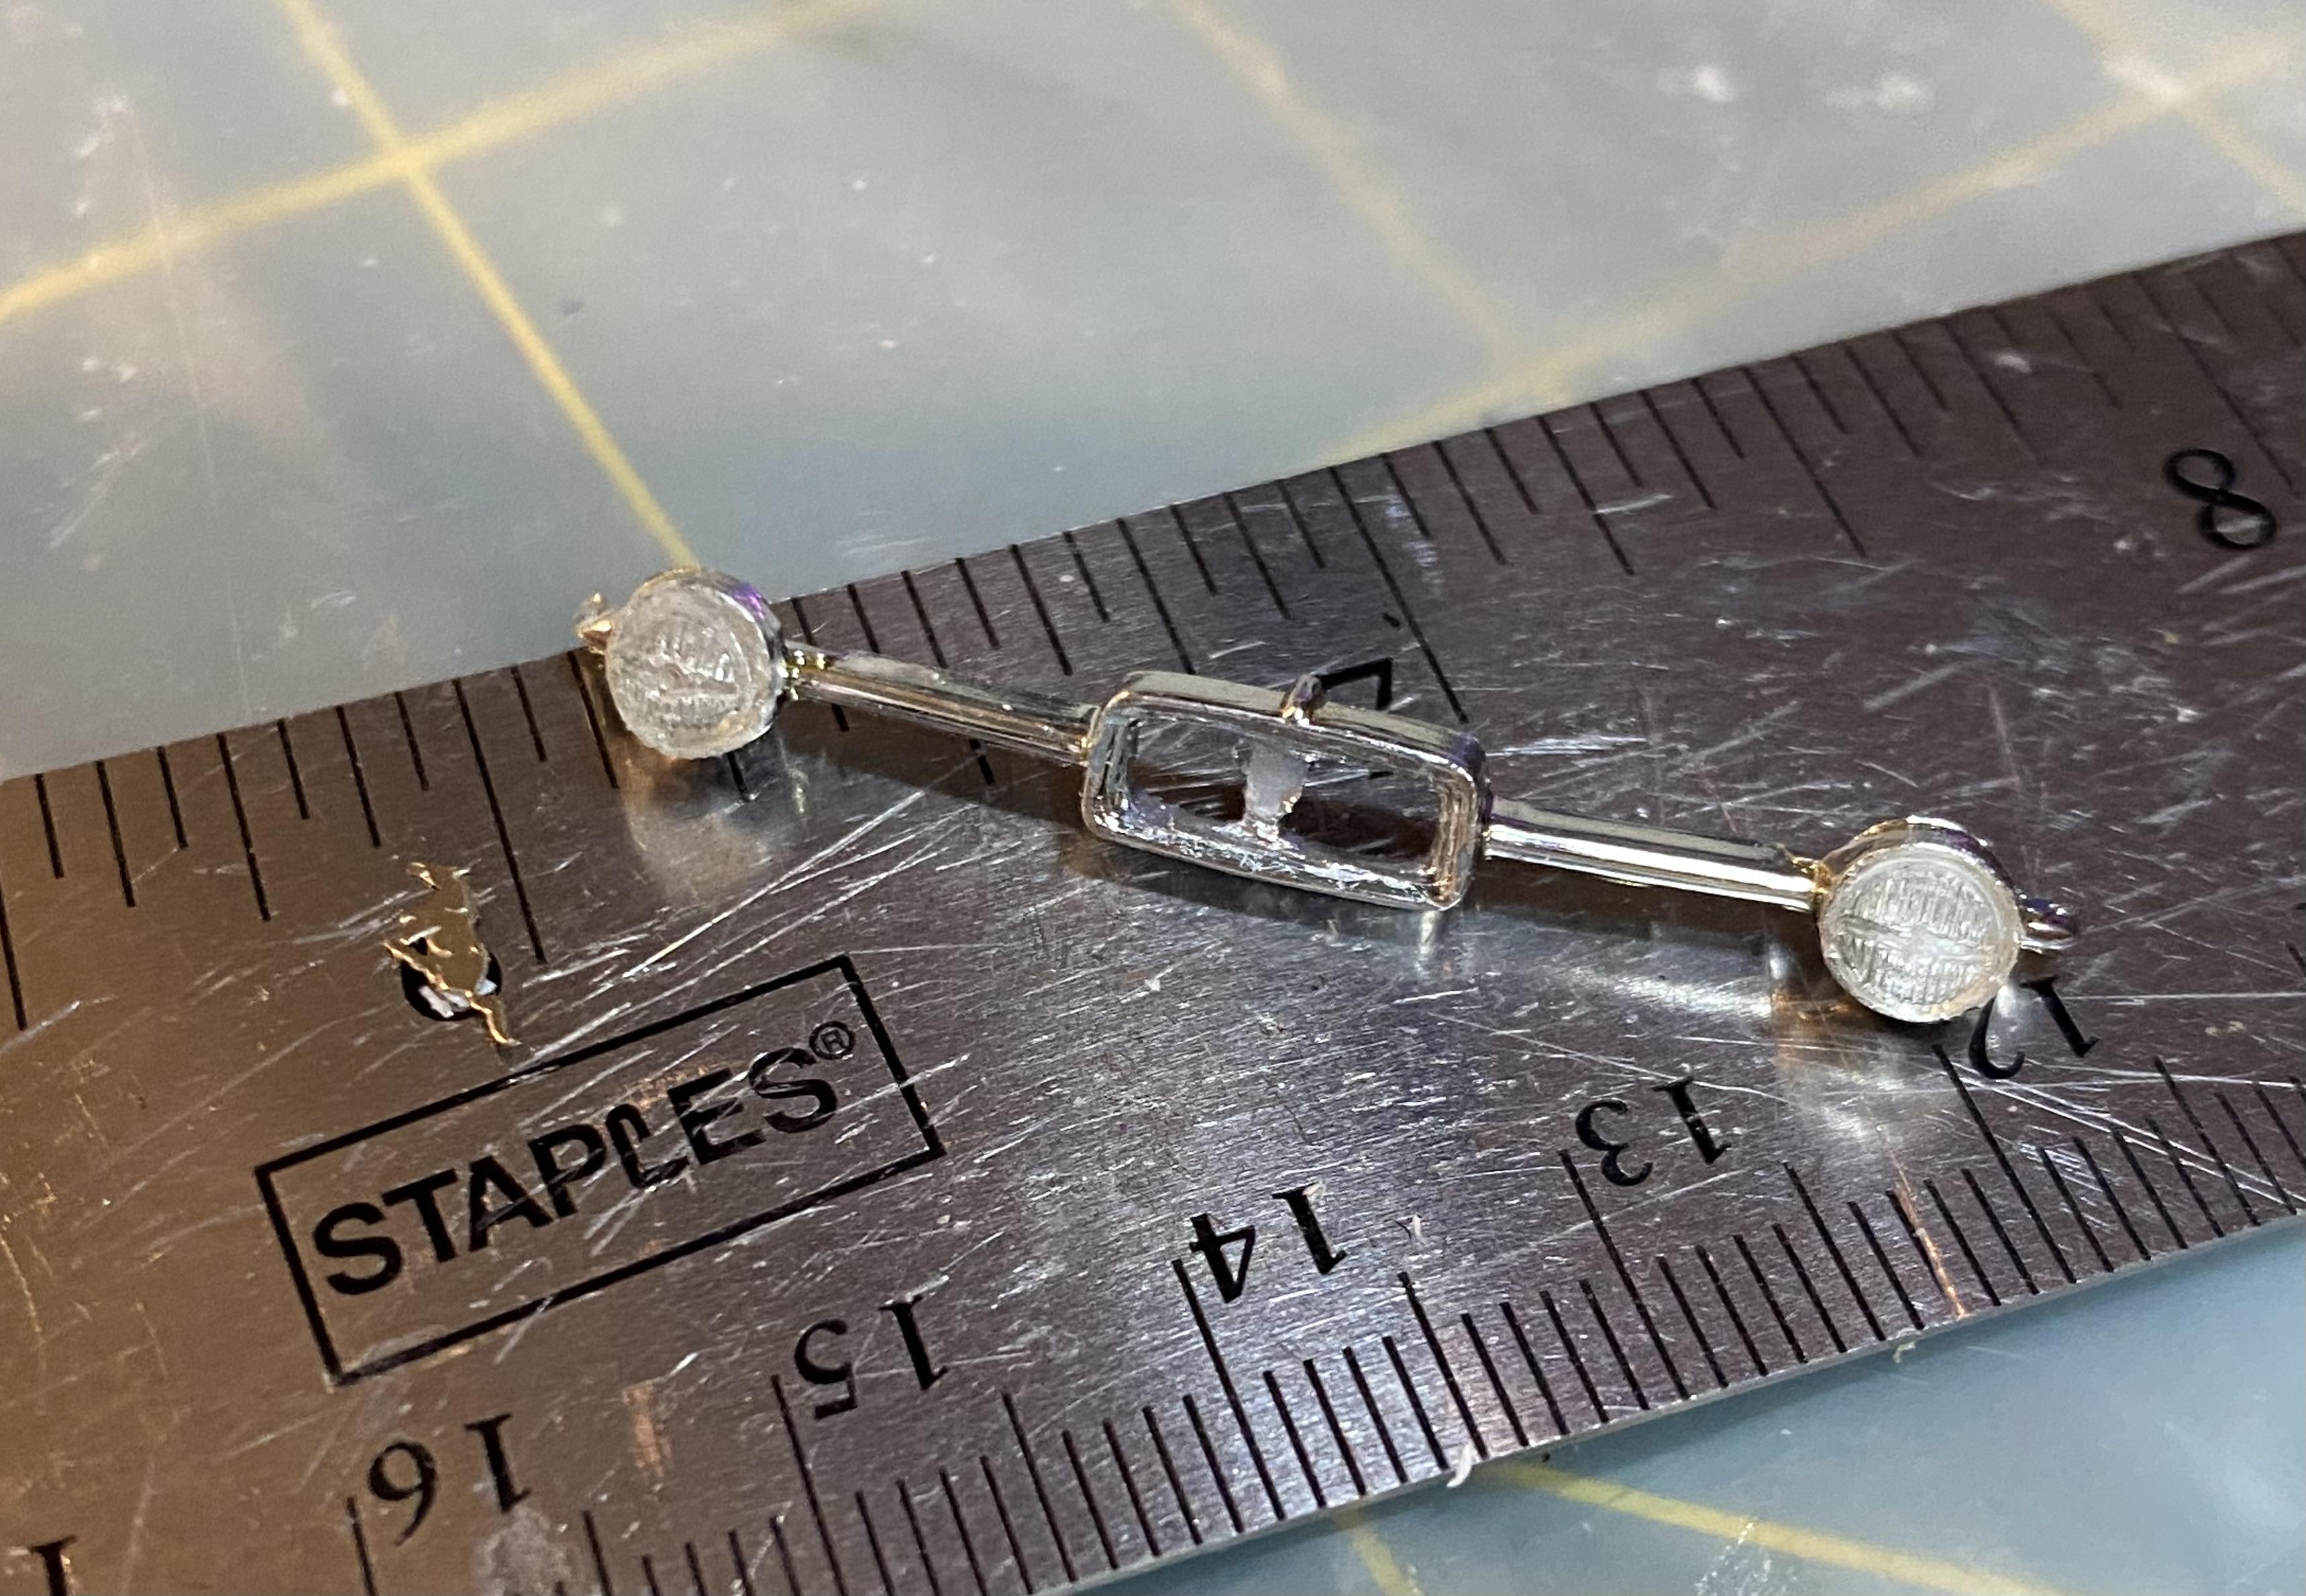
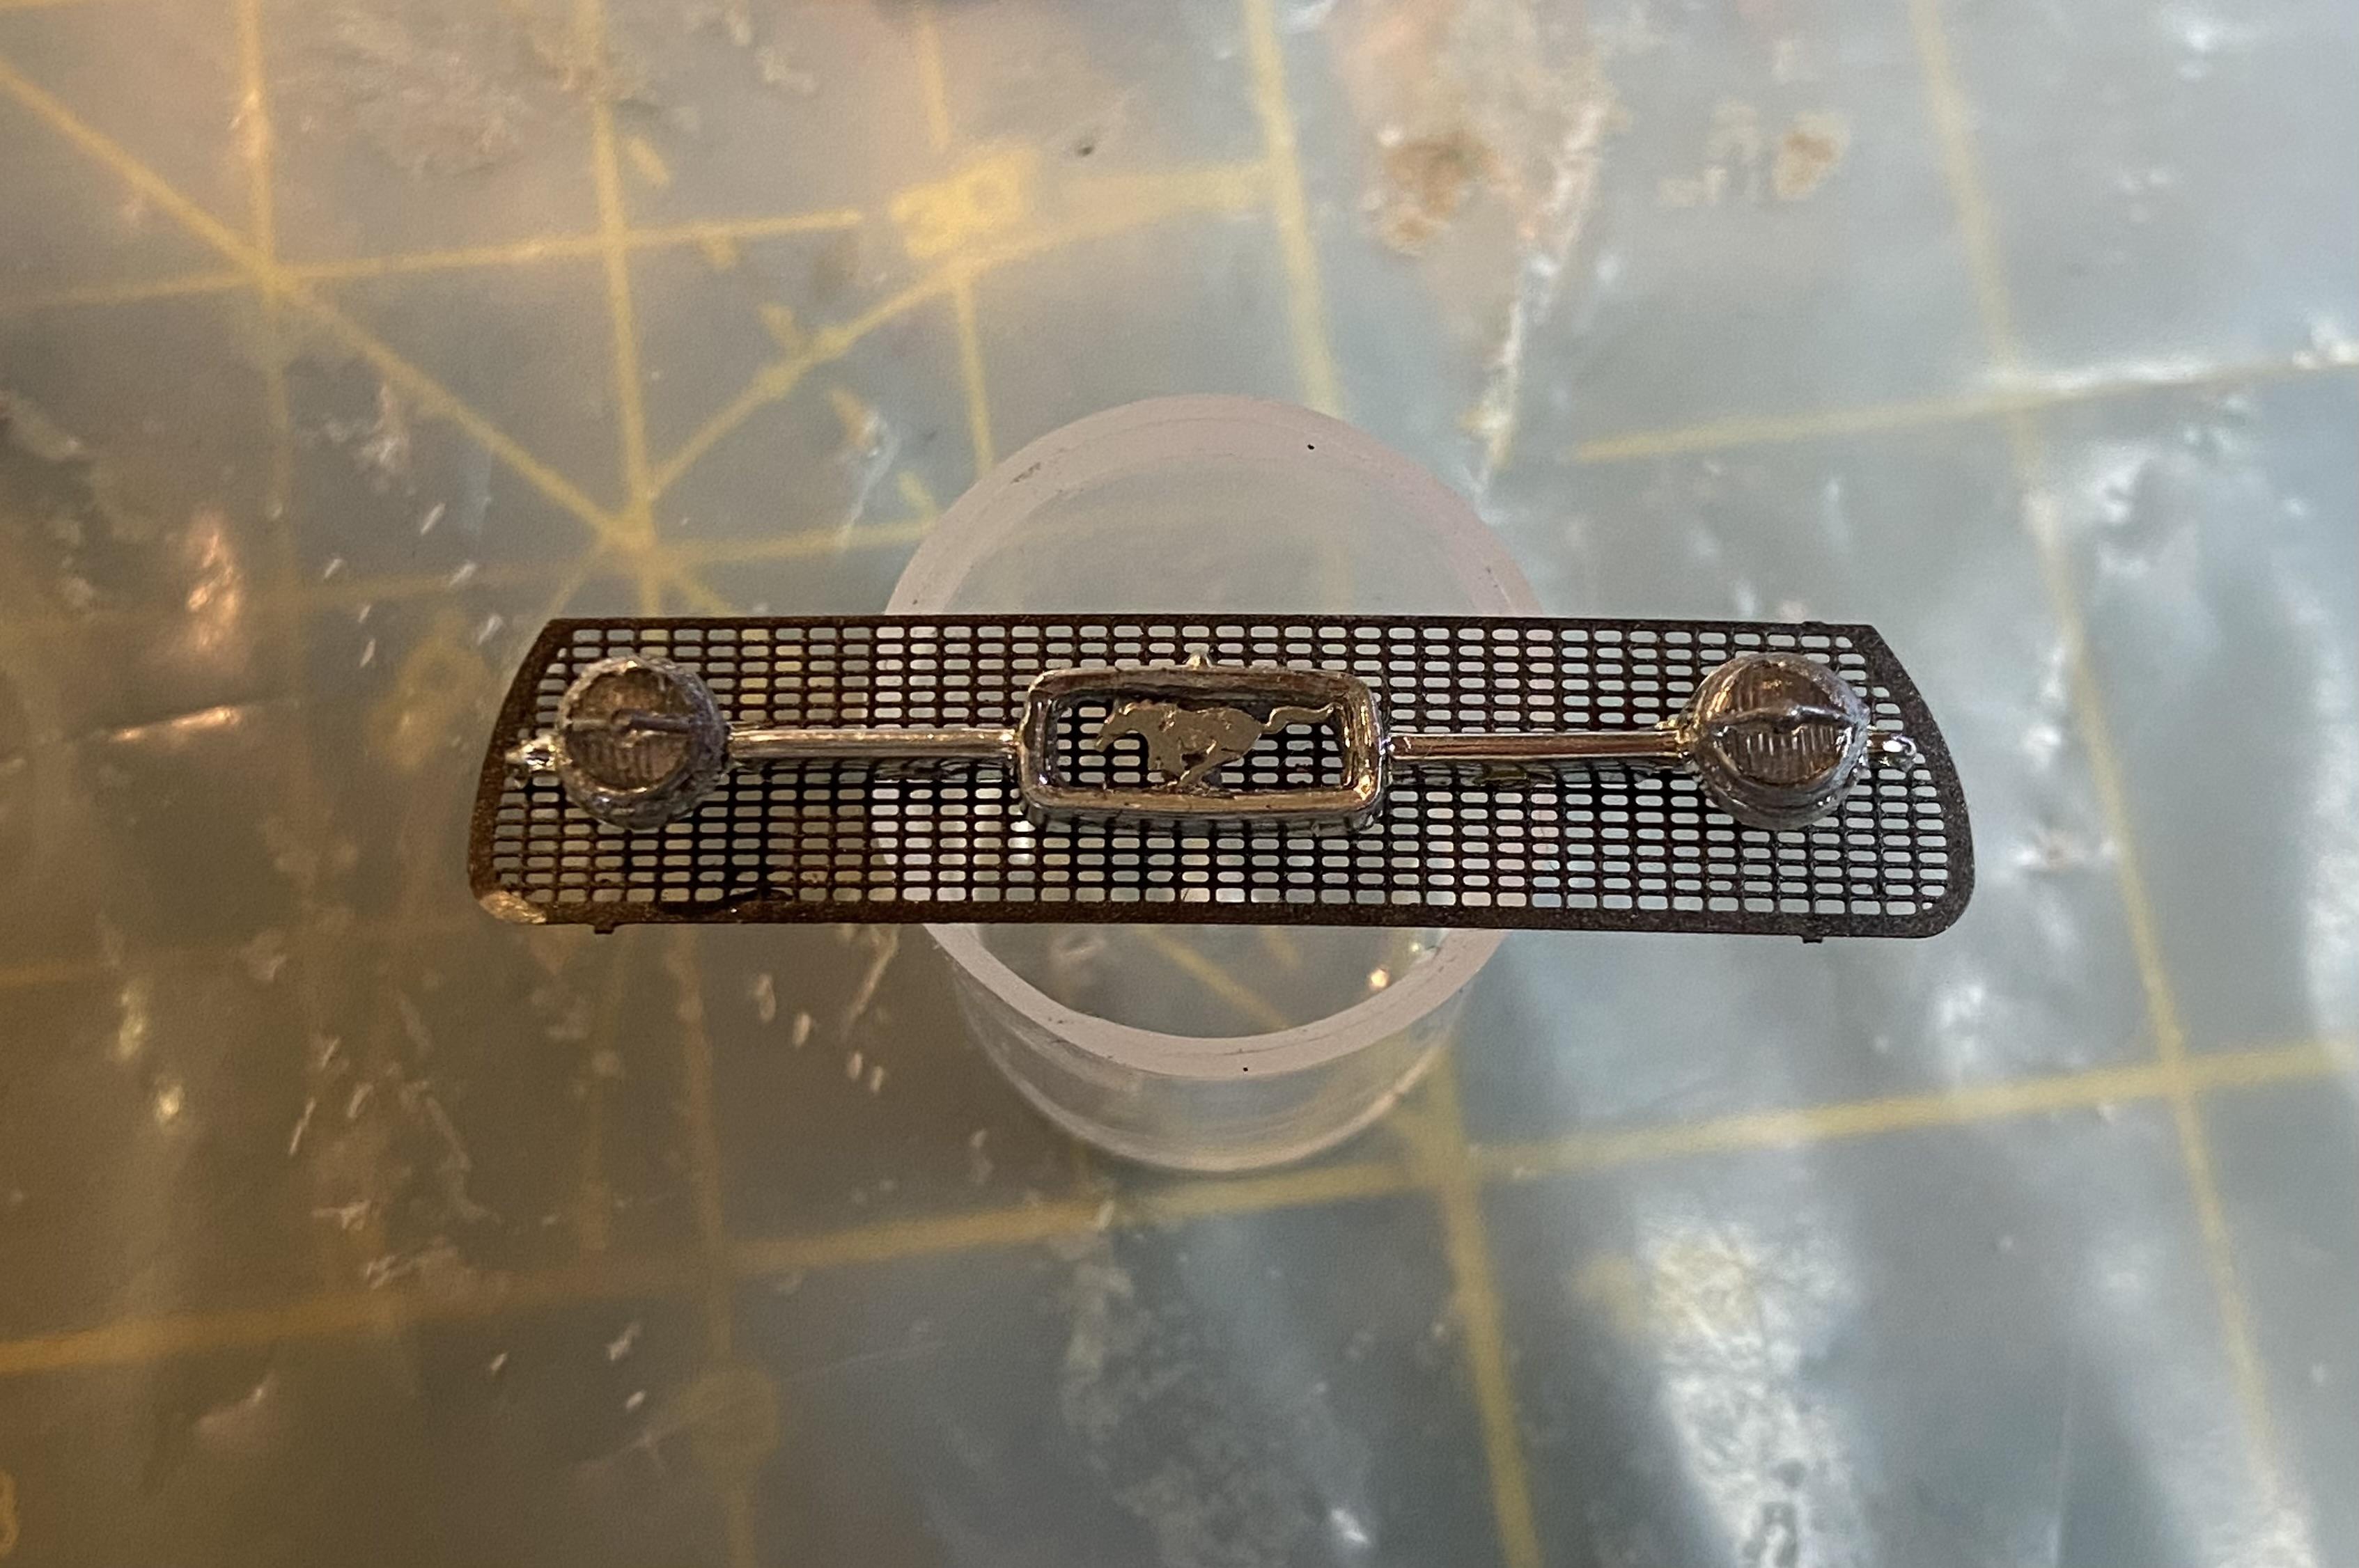
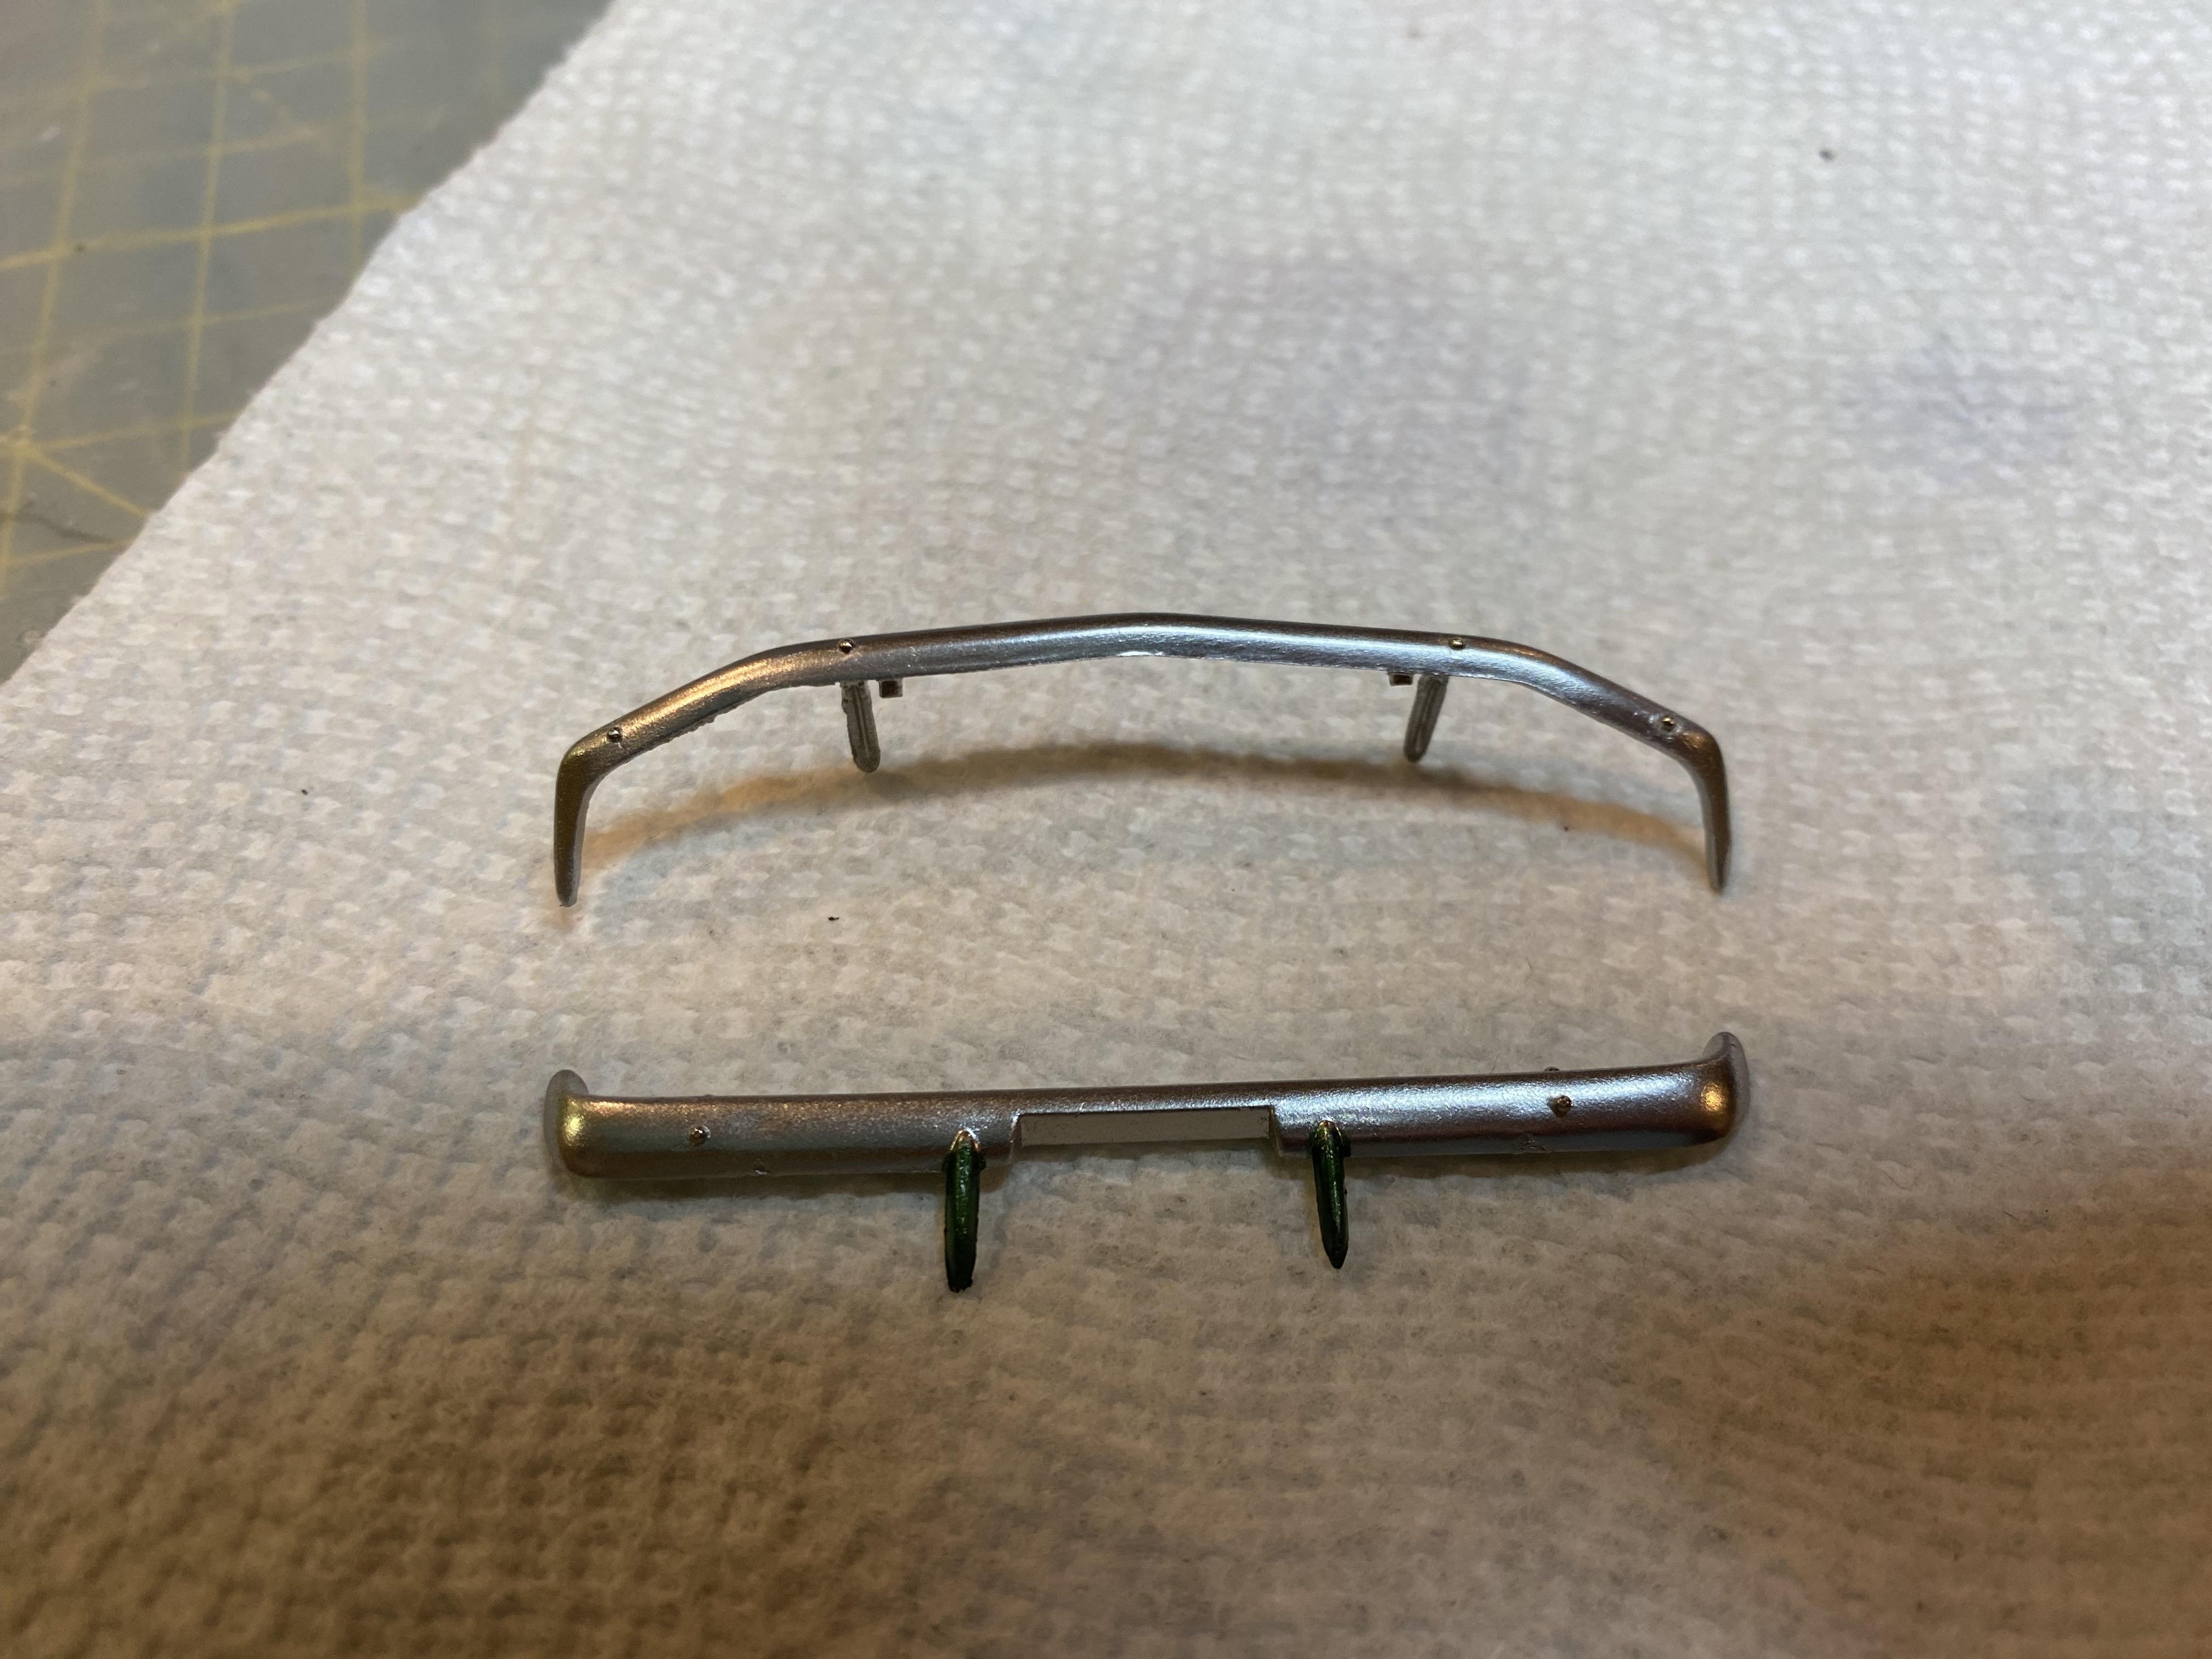
I did get some more work today but had big mistake and messed up the front bumper and had to strip it back down to bare plastic and repaint it. folded the photo-etch wipers, added the rear view mirror, door handles, Sunvisors, rear bumper, trunk lid letters and rear license plate. I Uv clear resin cast the fog light lenses and modified the grill bars and emblem. Using a photo-etch grill. I am really bummed about the bumper. Still a bit more to do.
-
I use surgical tape I paint the desired color cut into strips. Nice to have one side sticky.
-
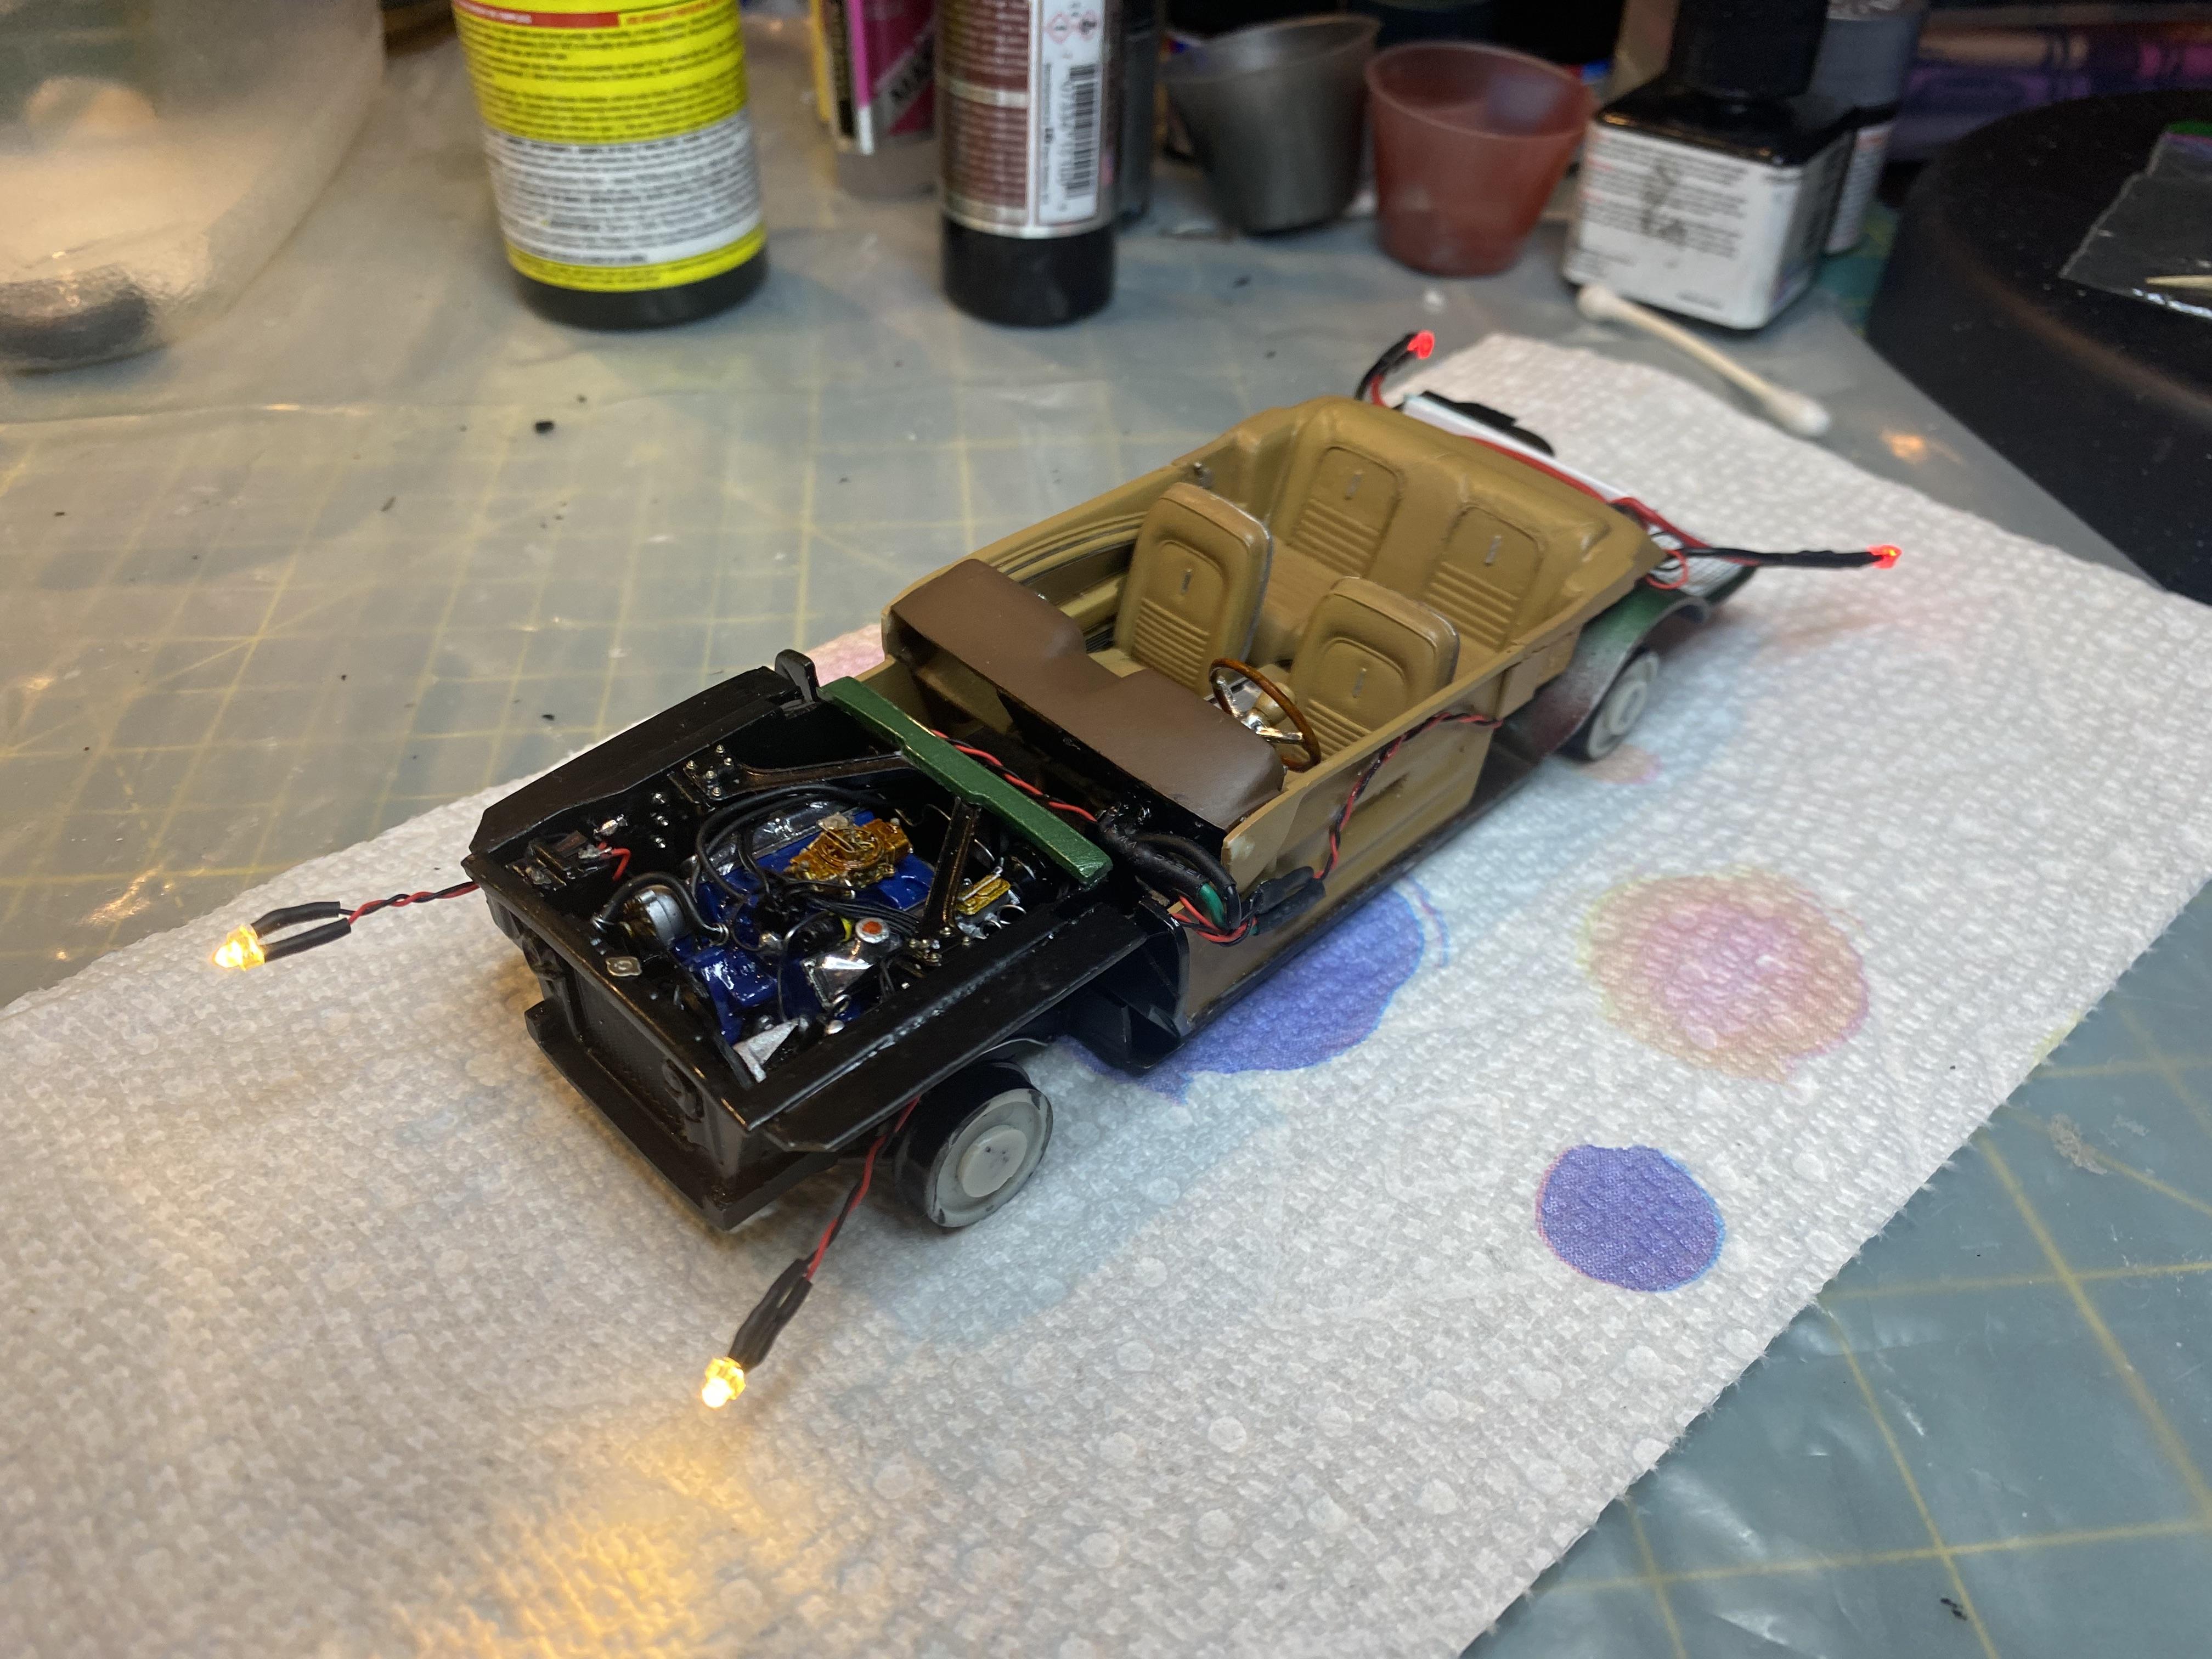
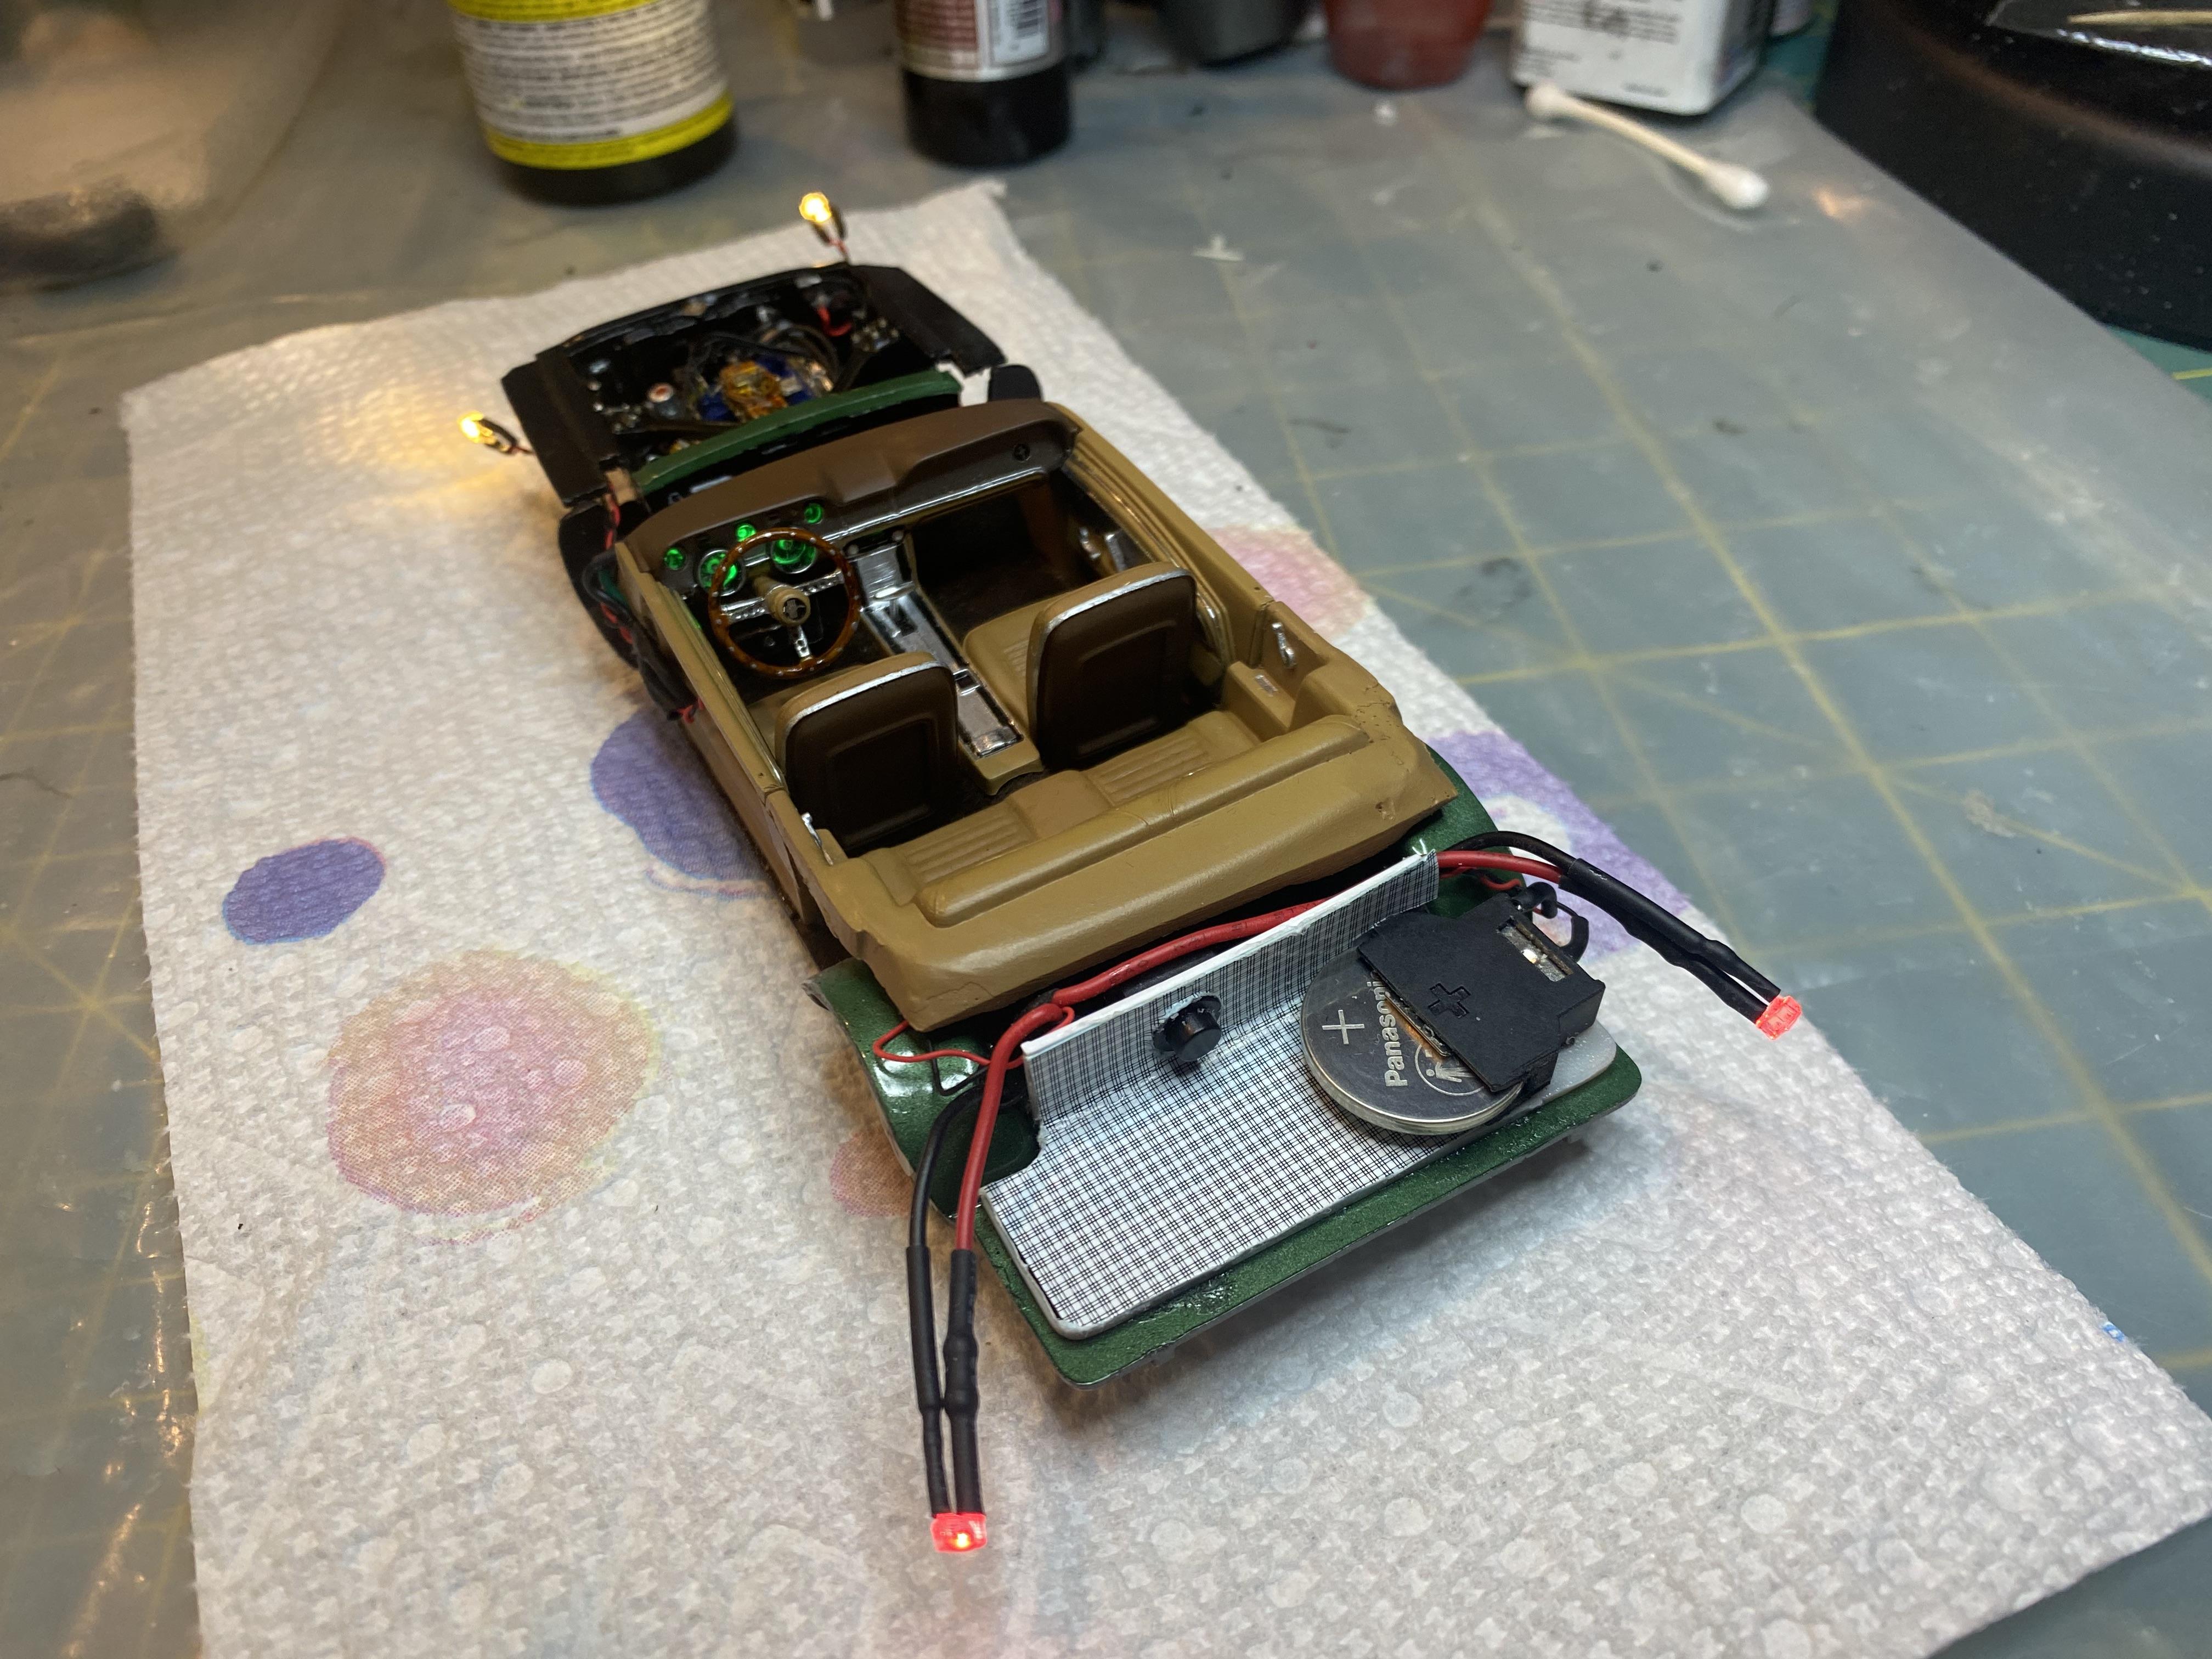
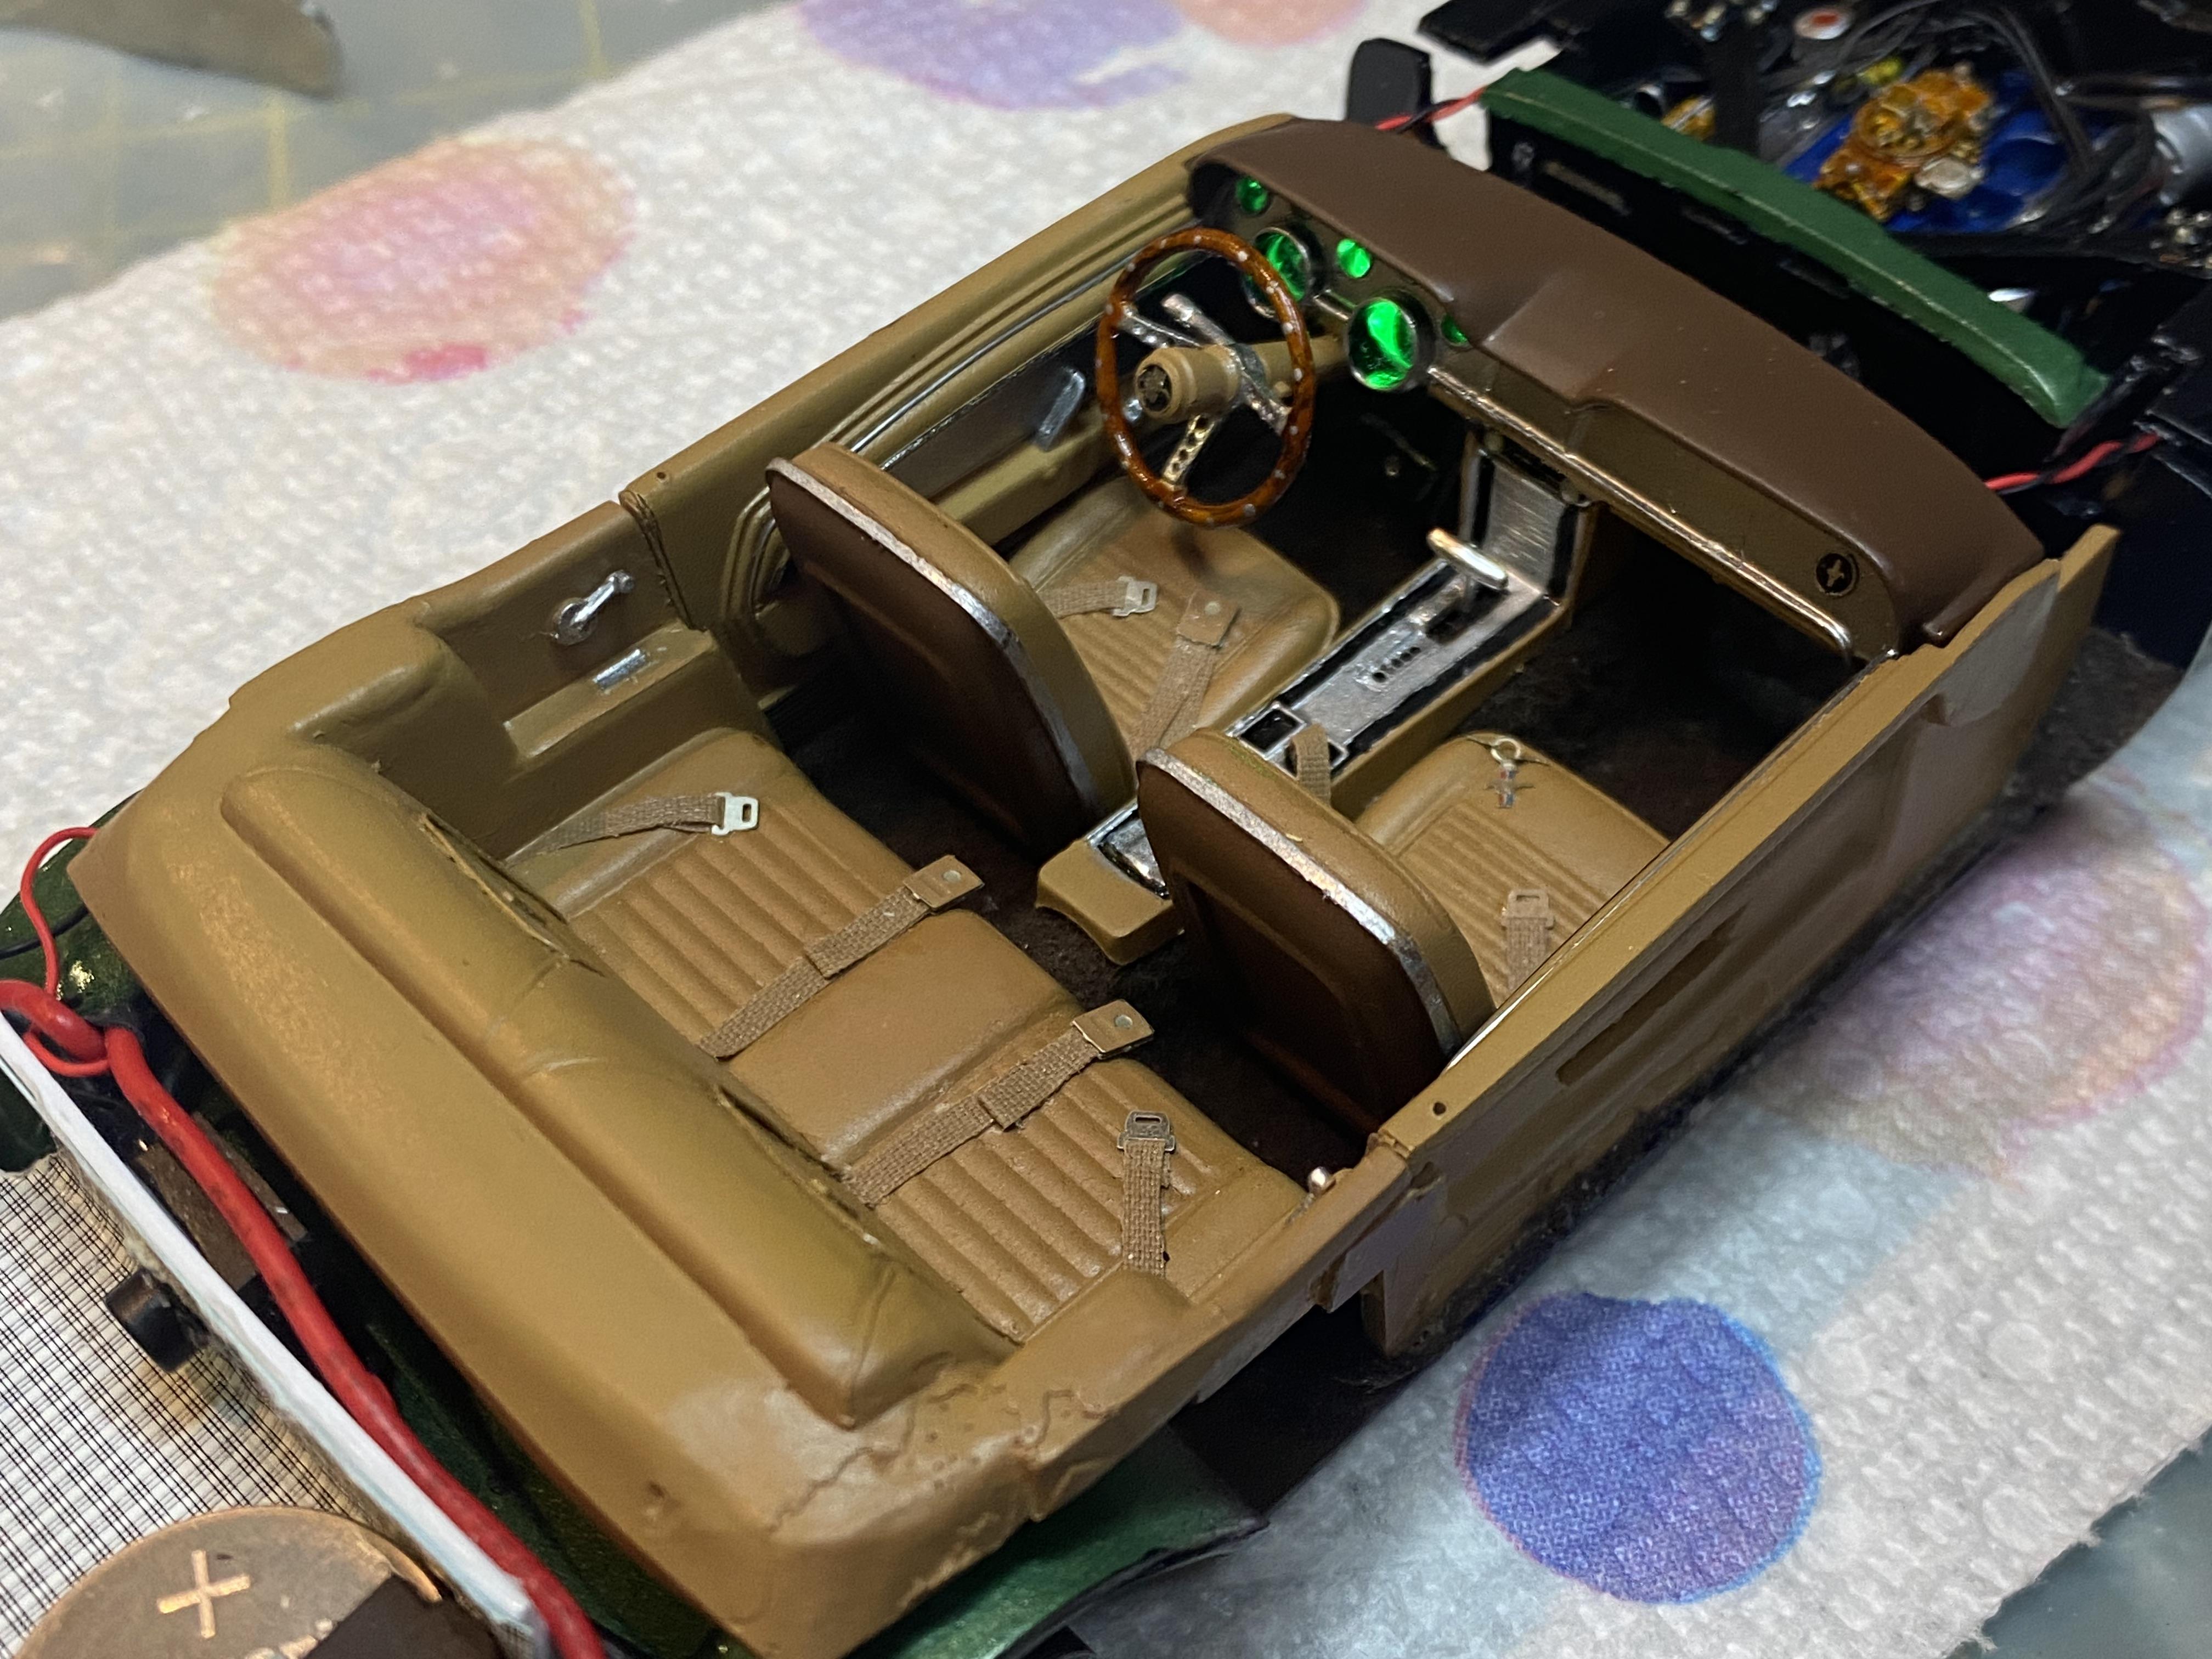
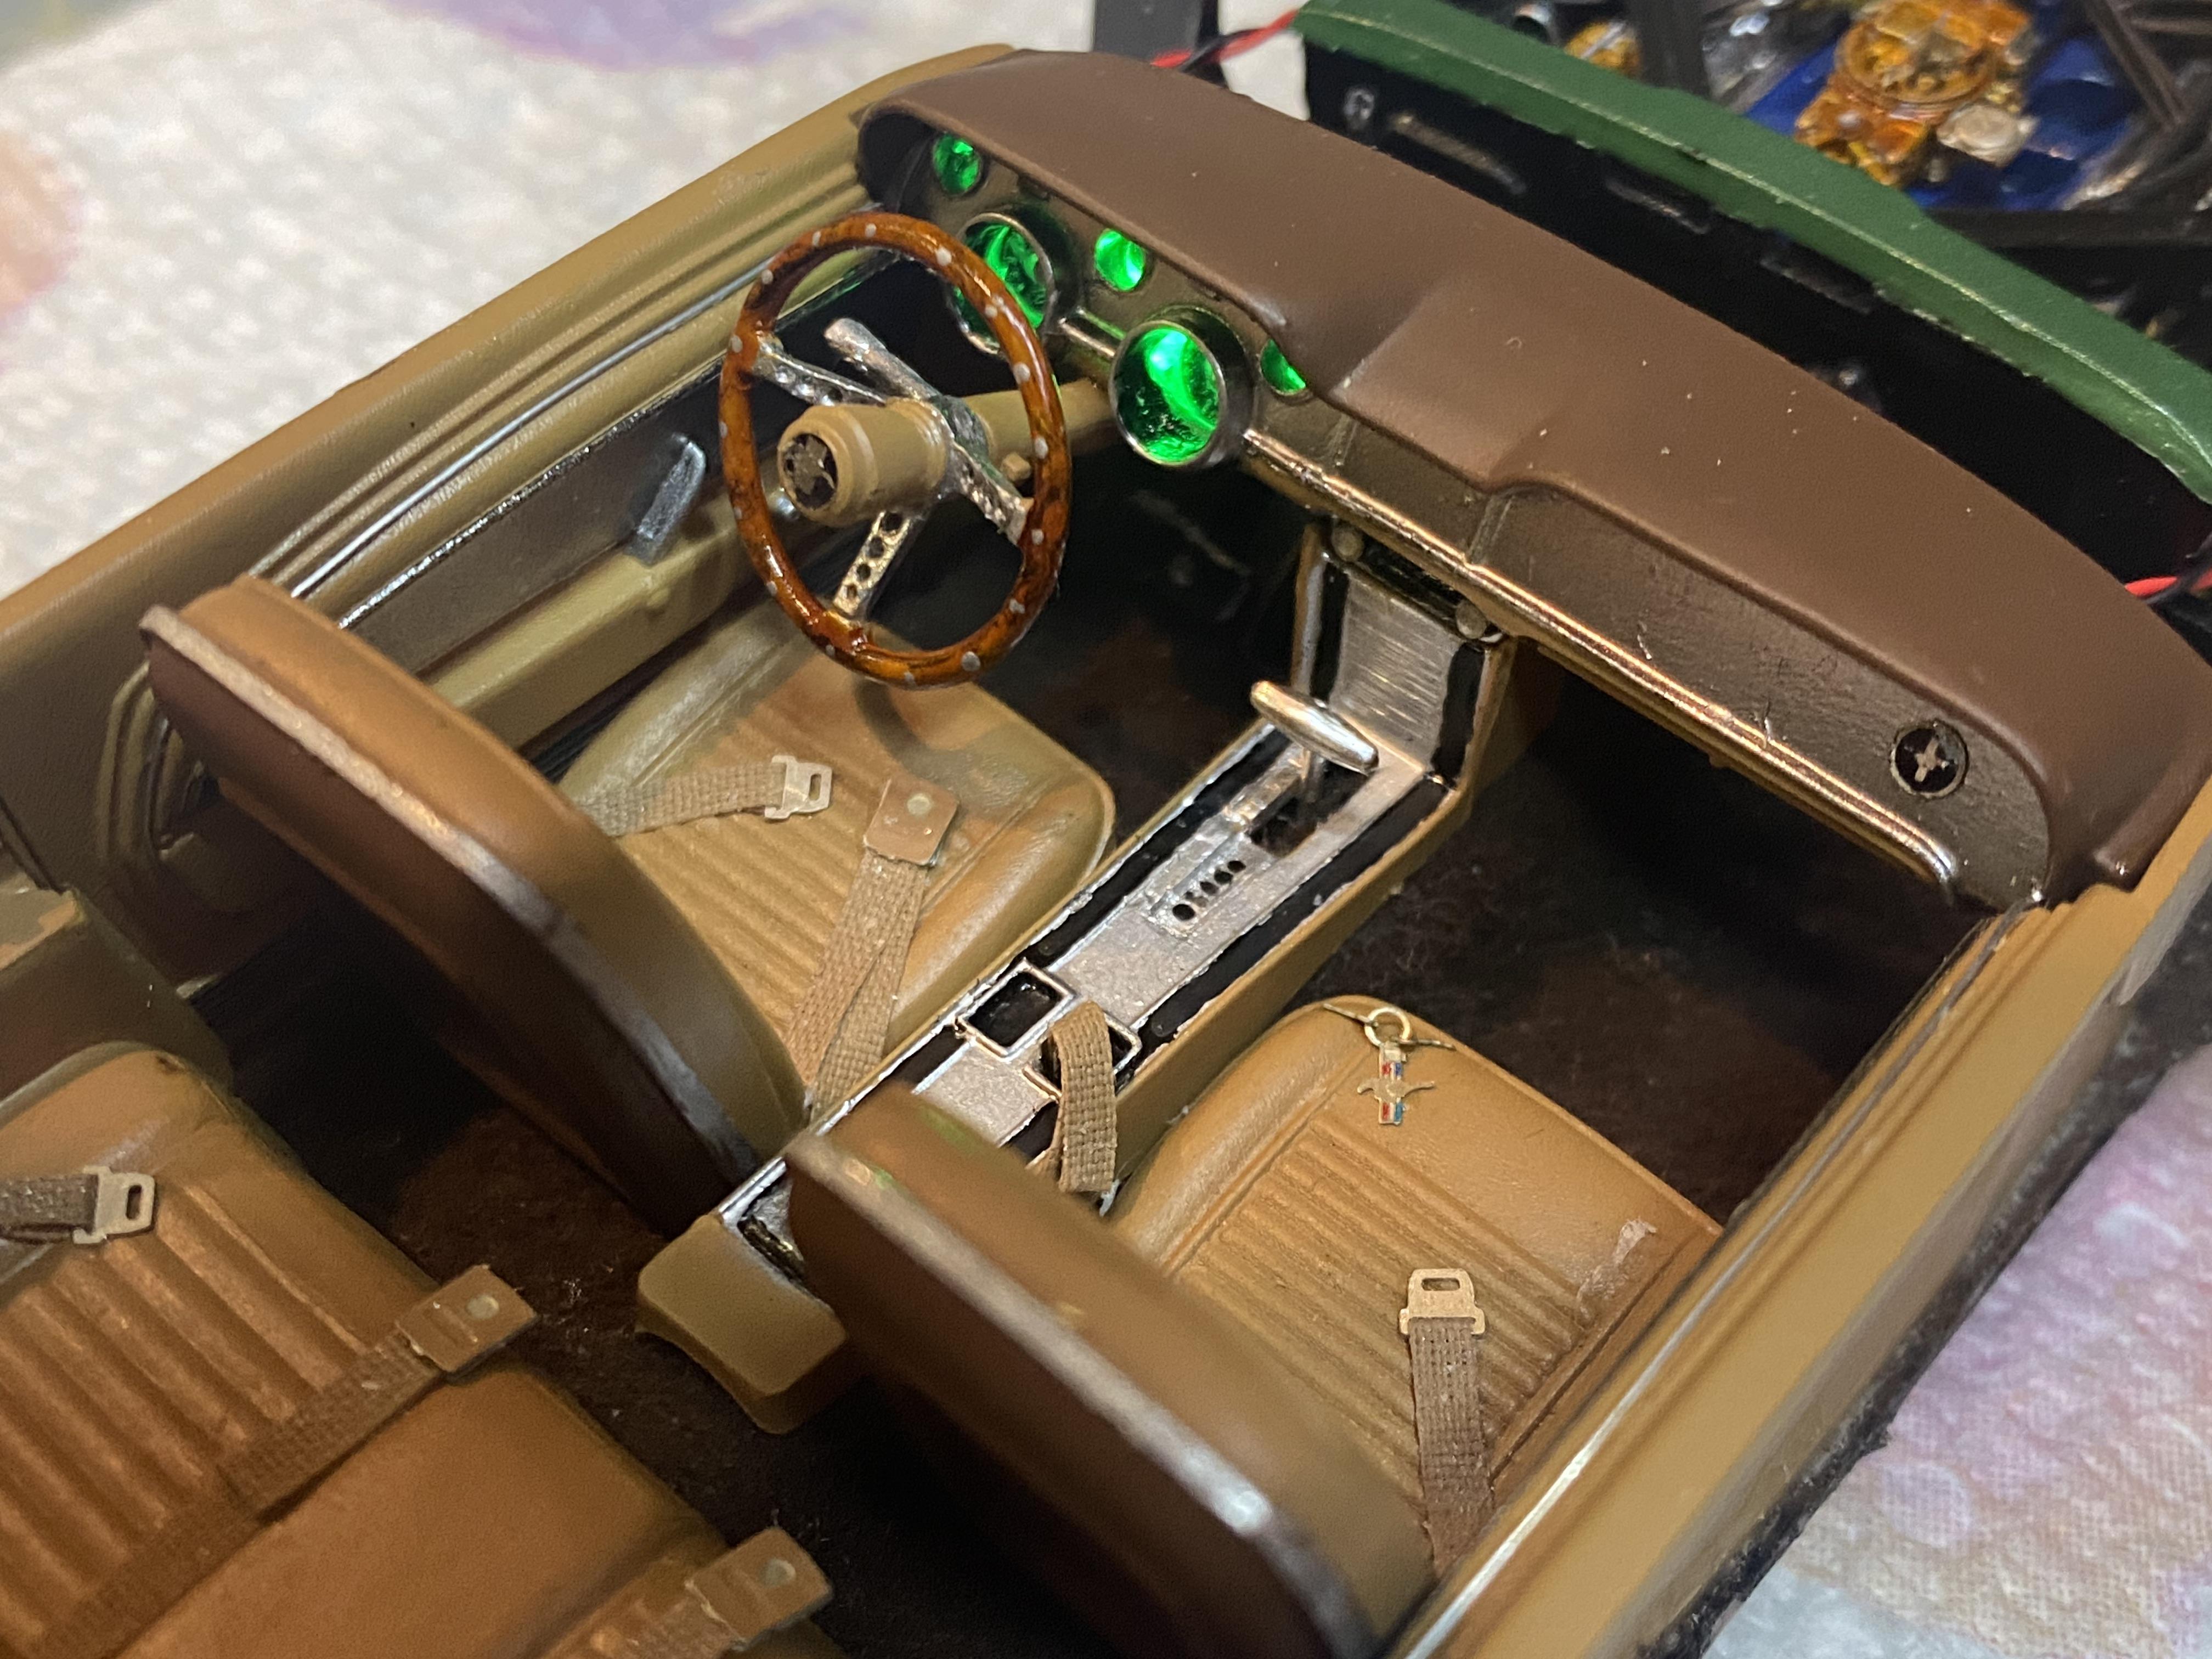
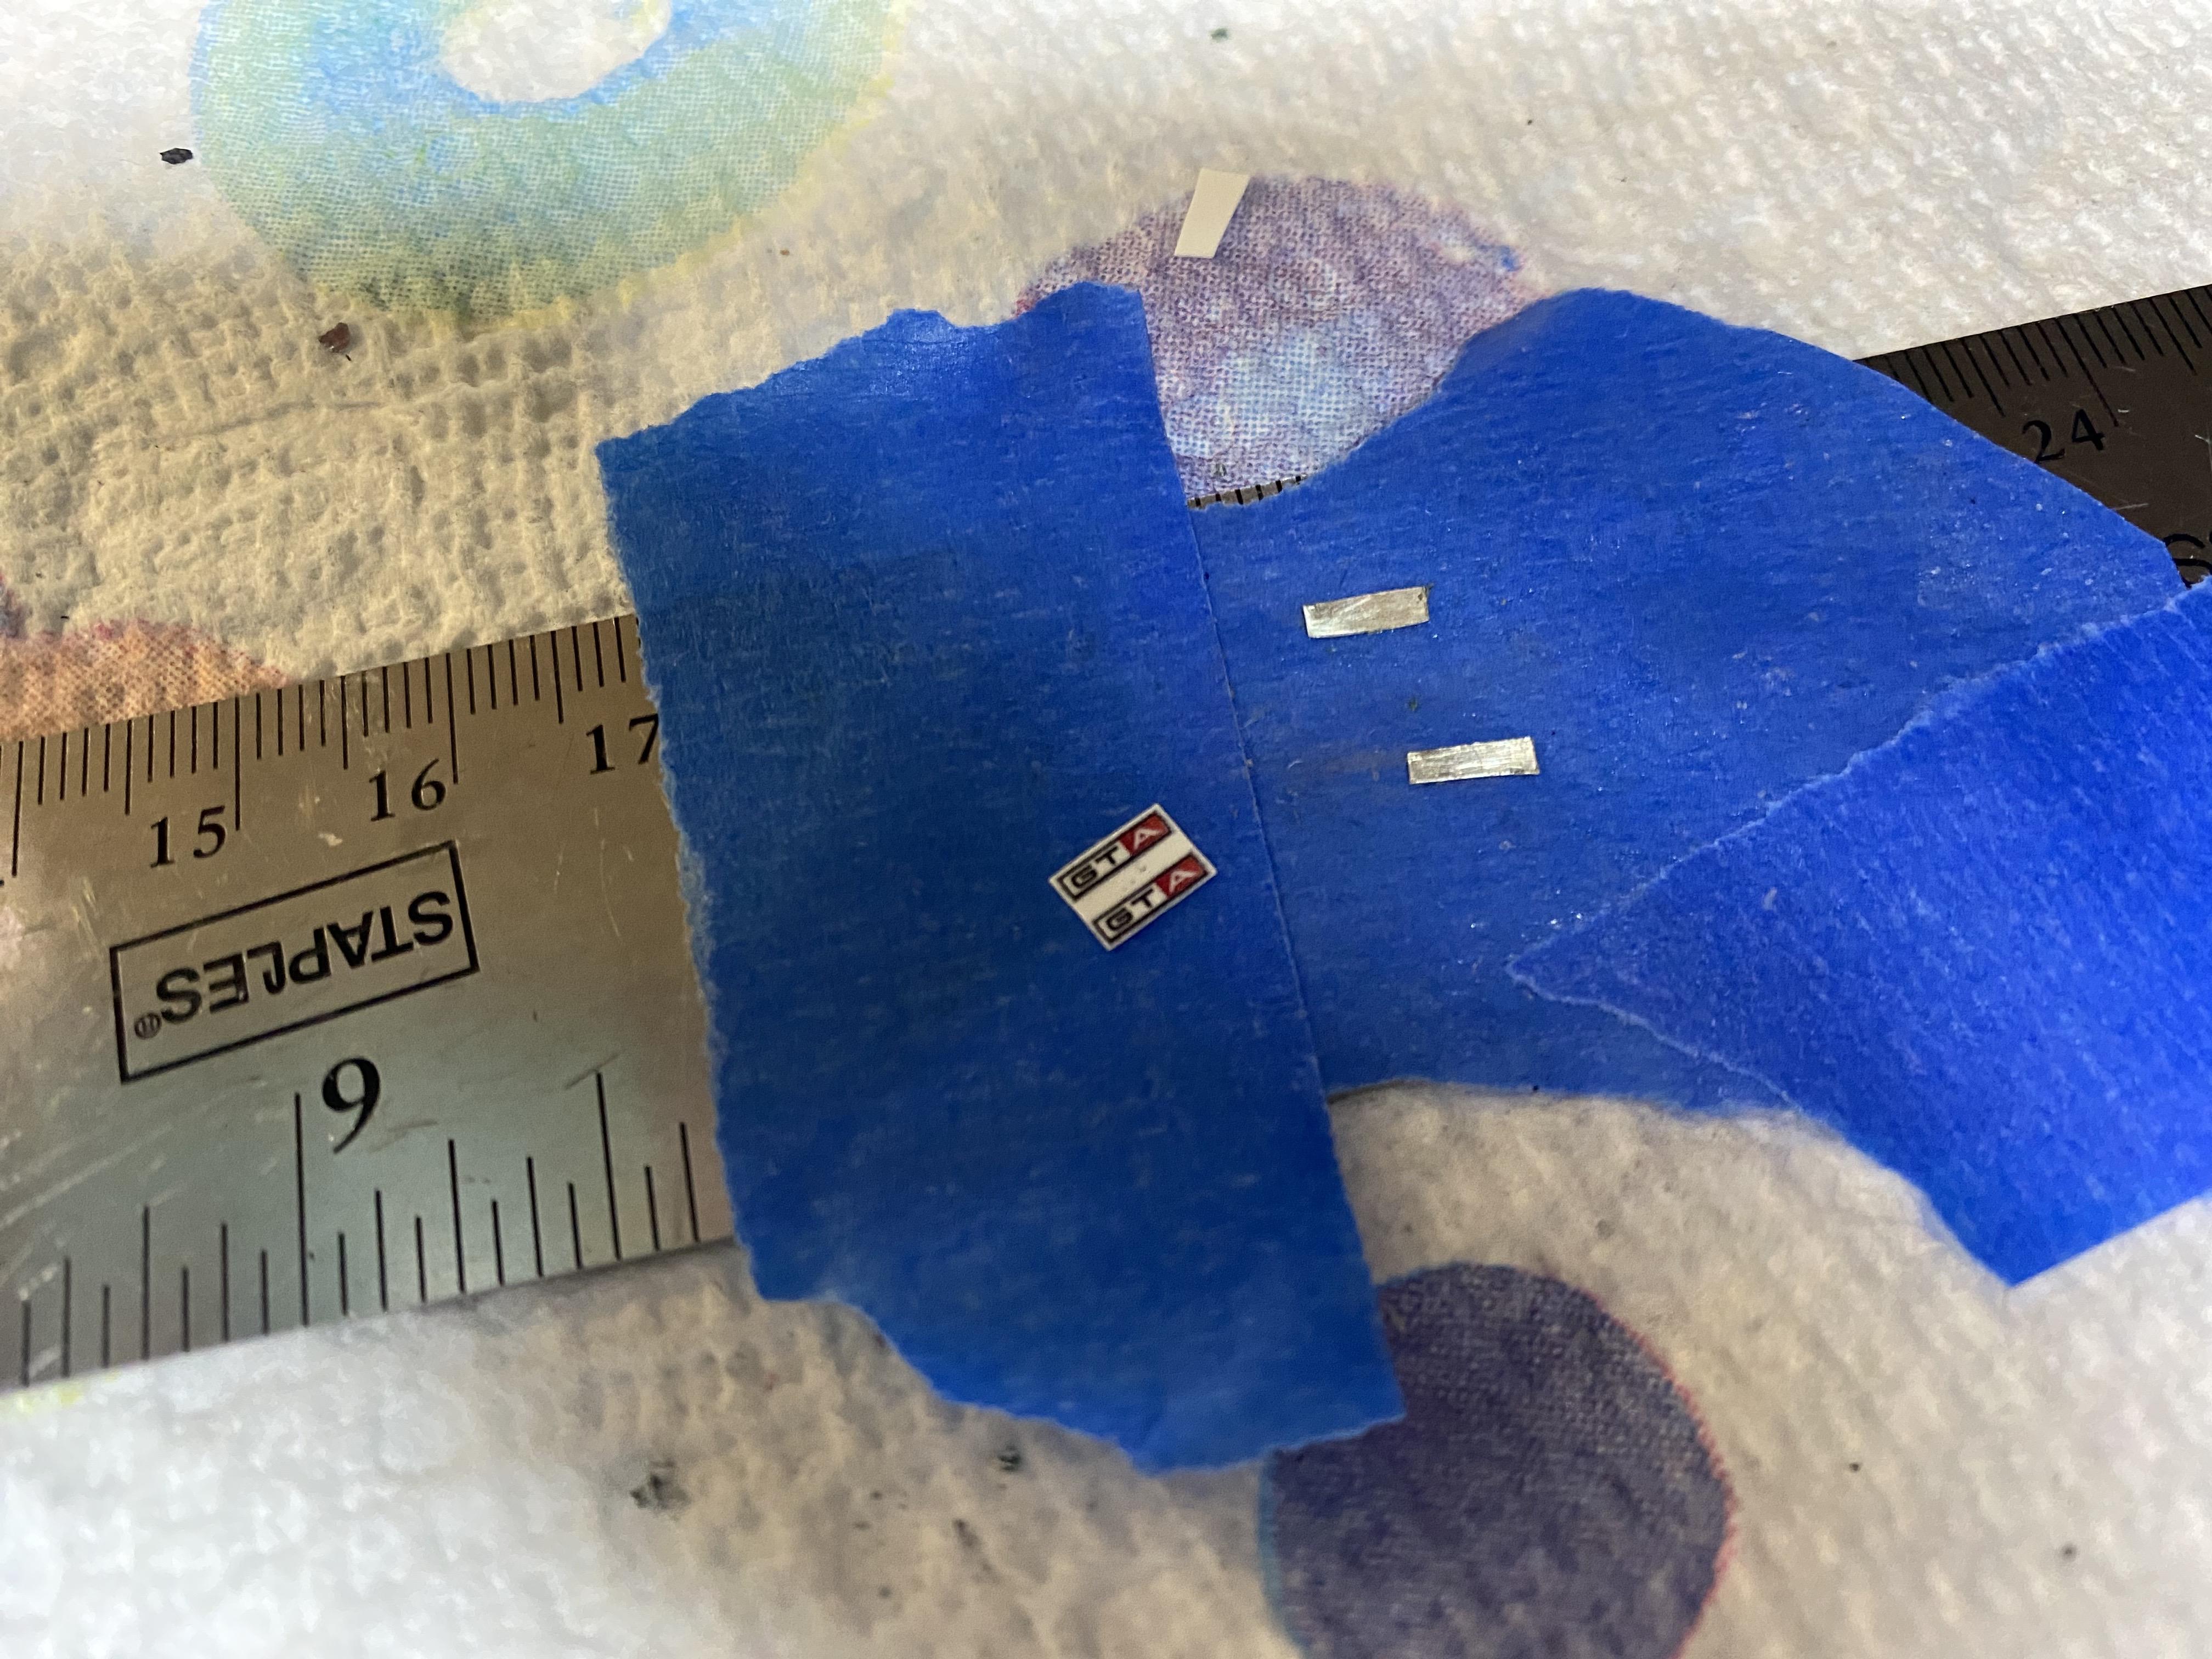
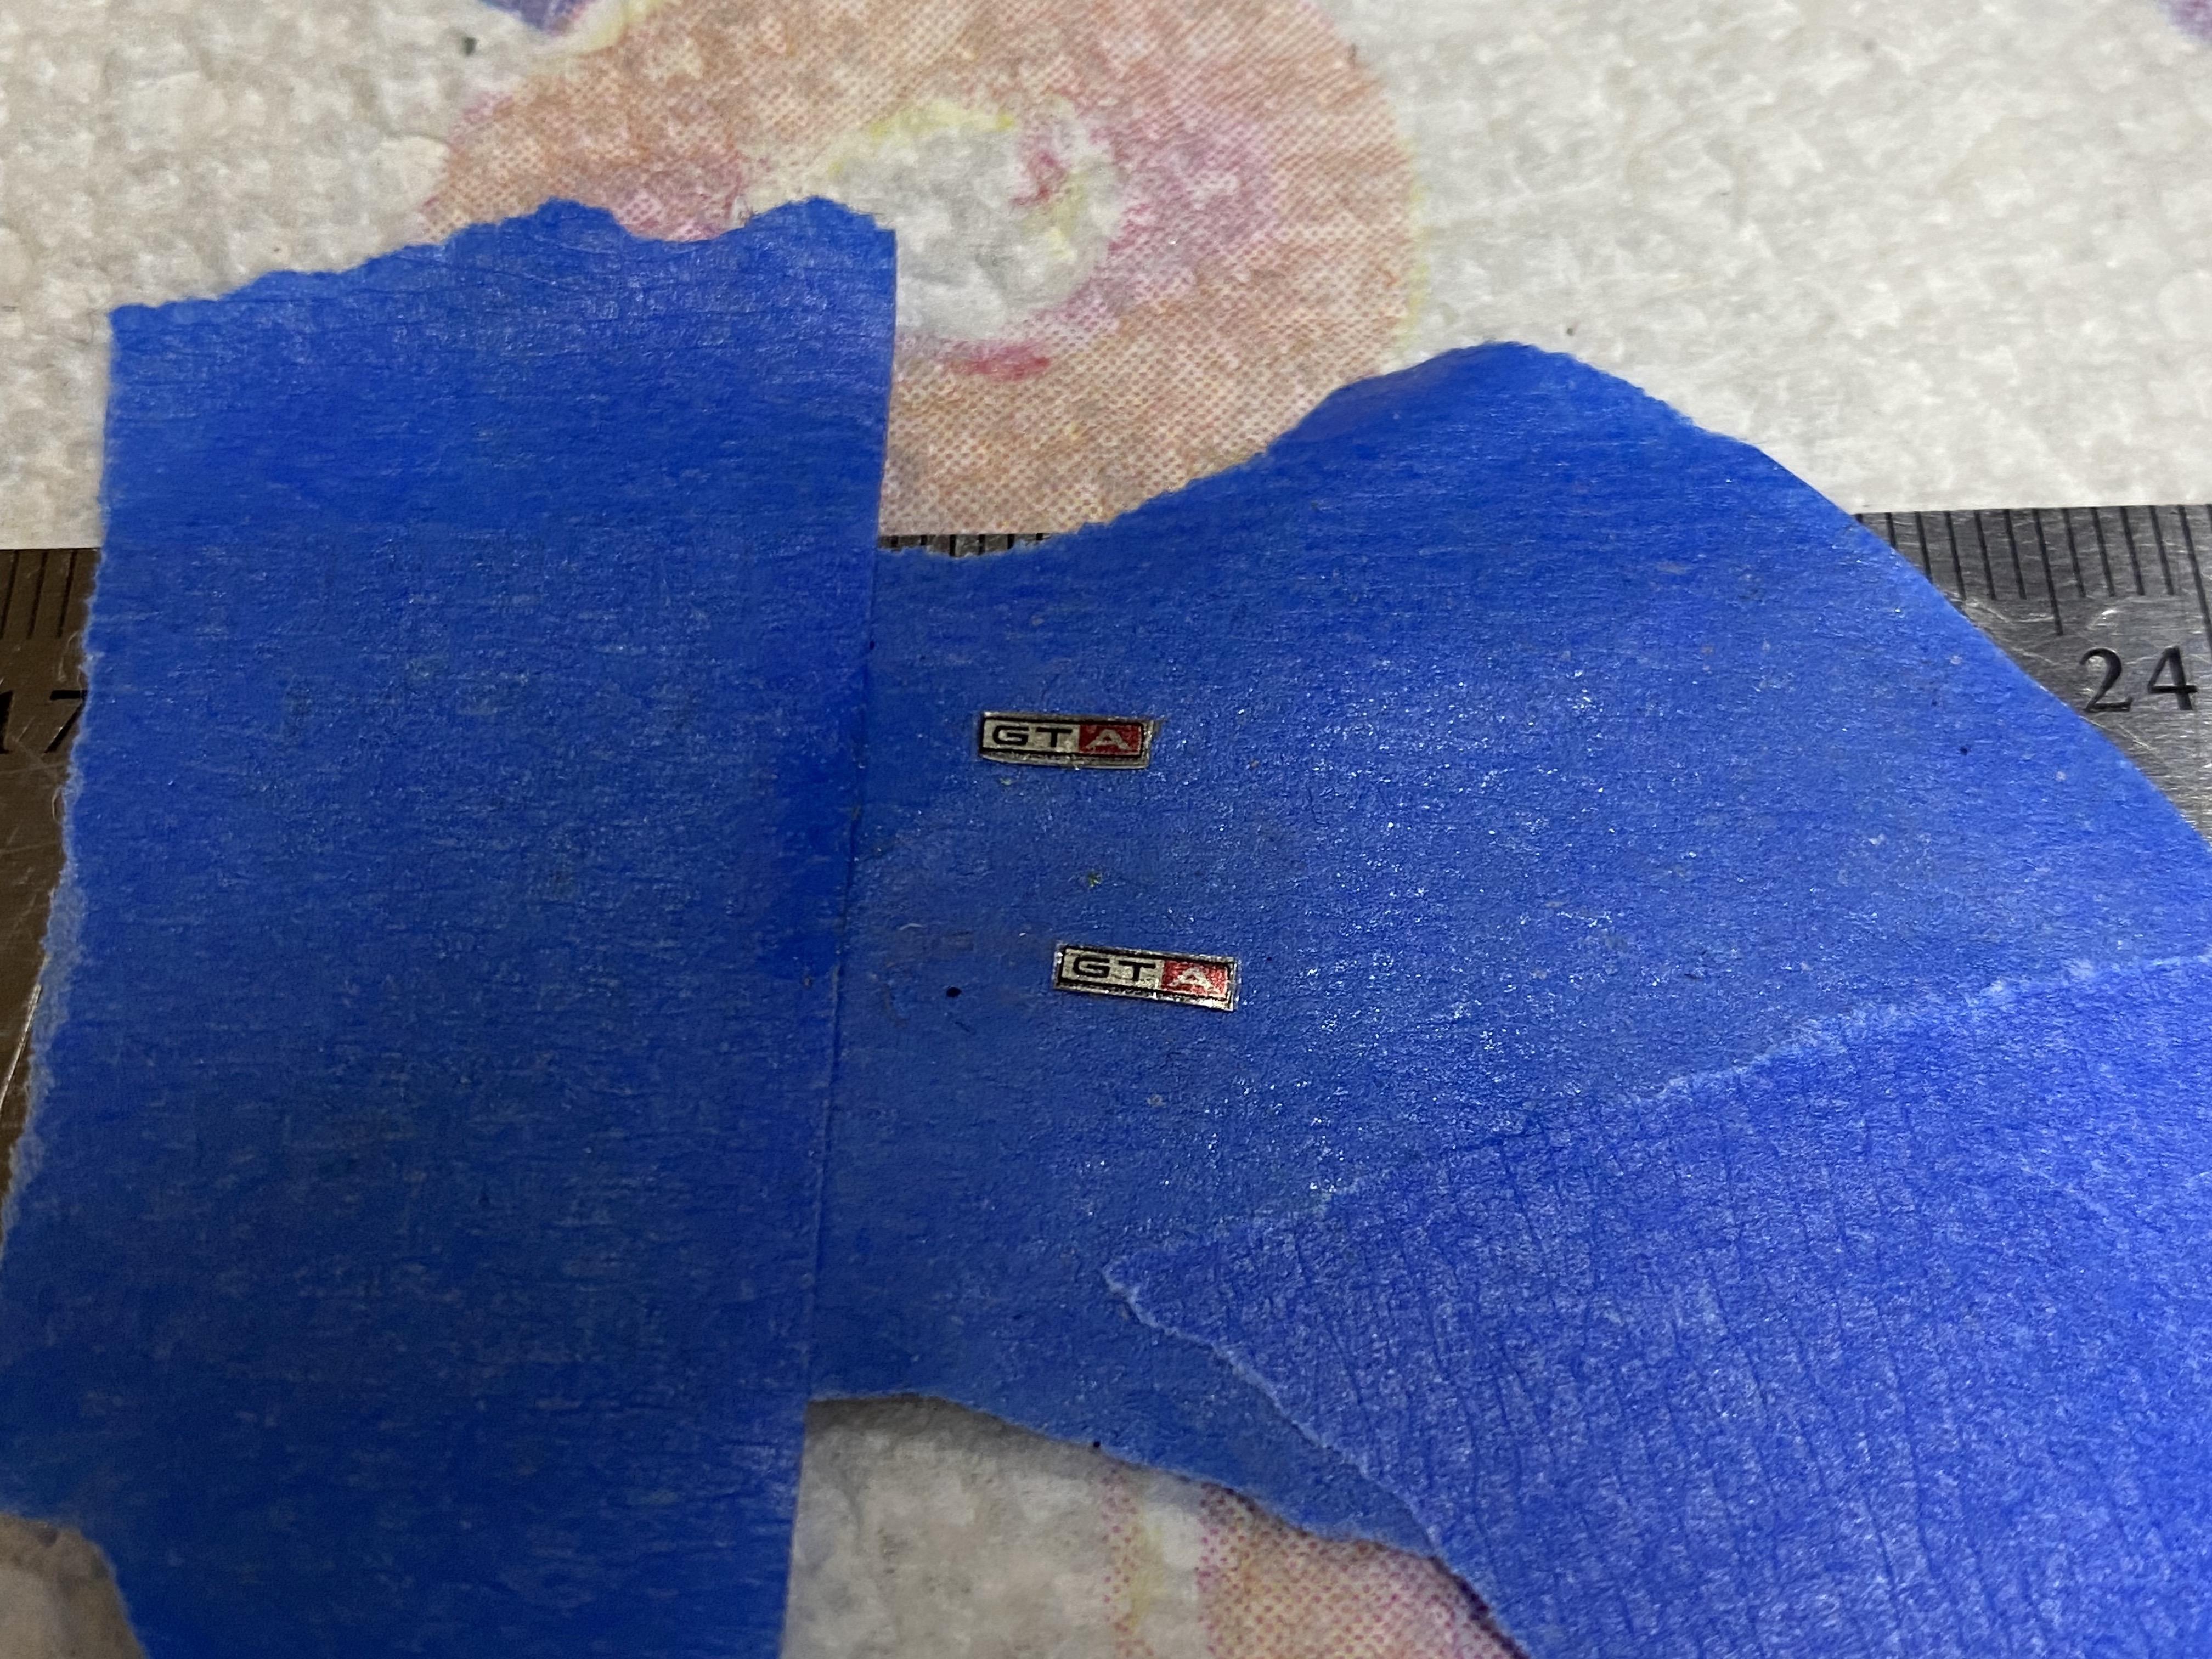
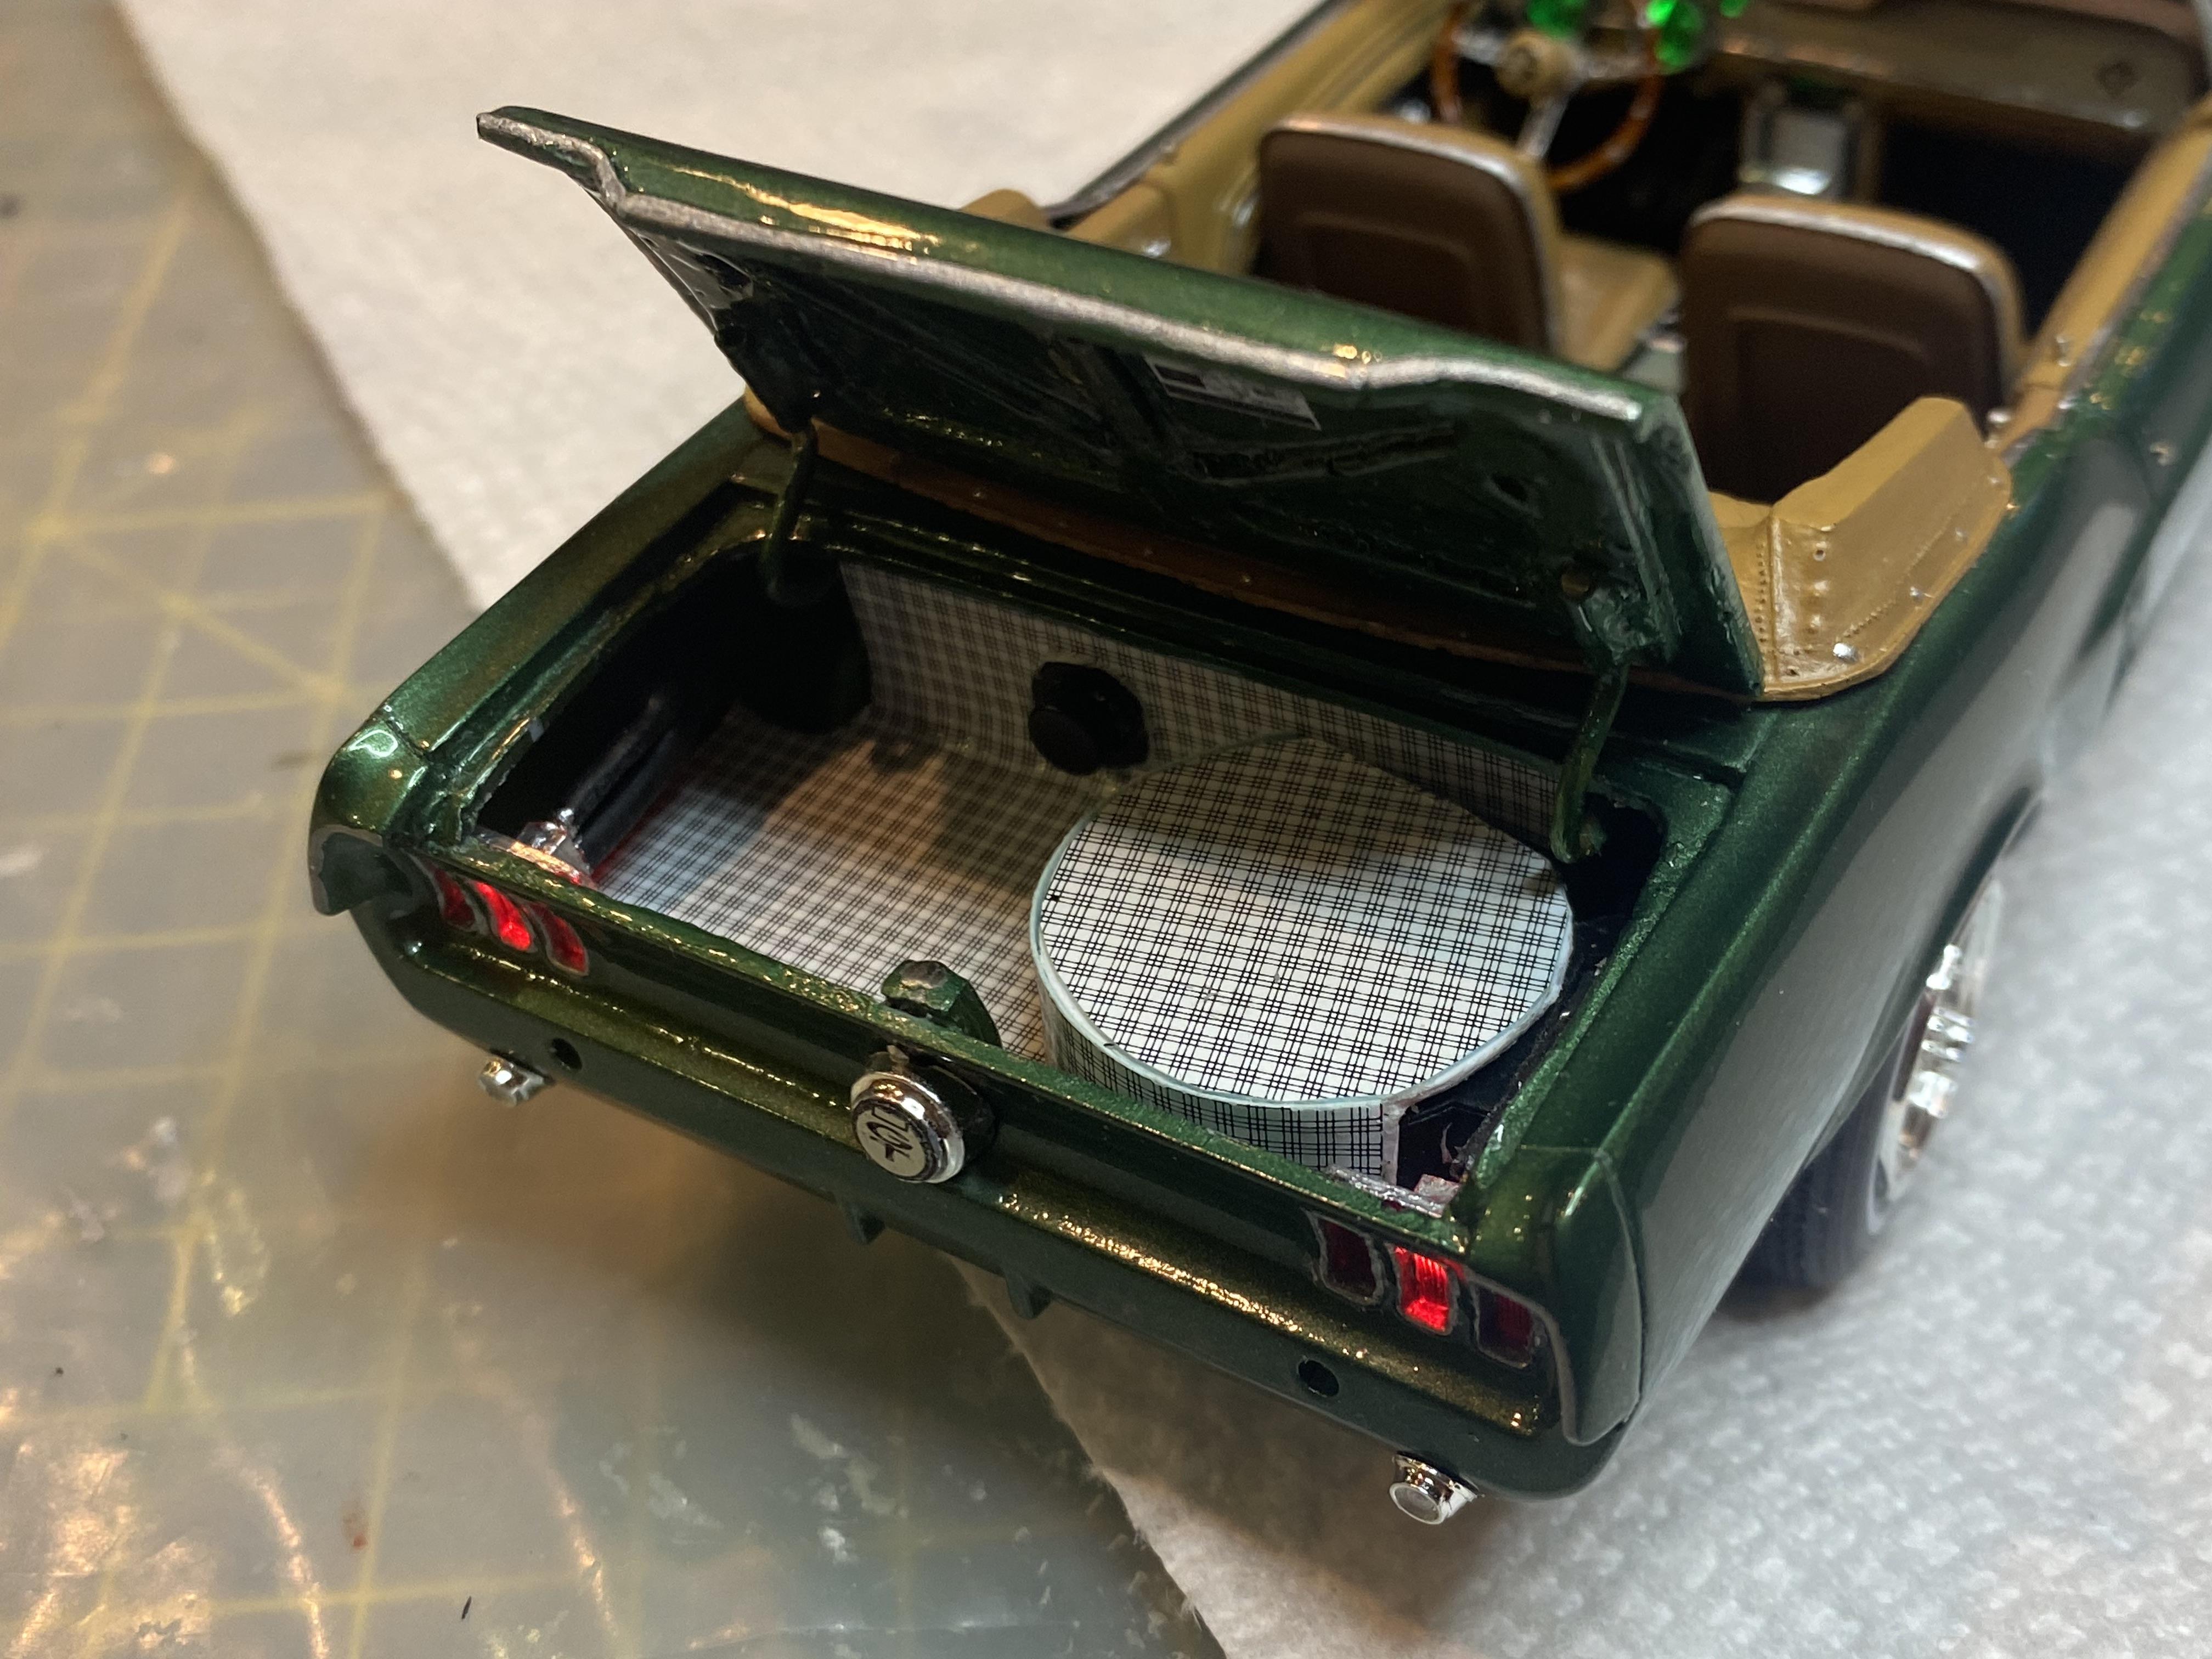
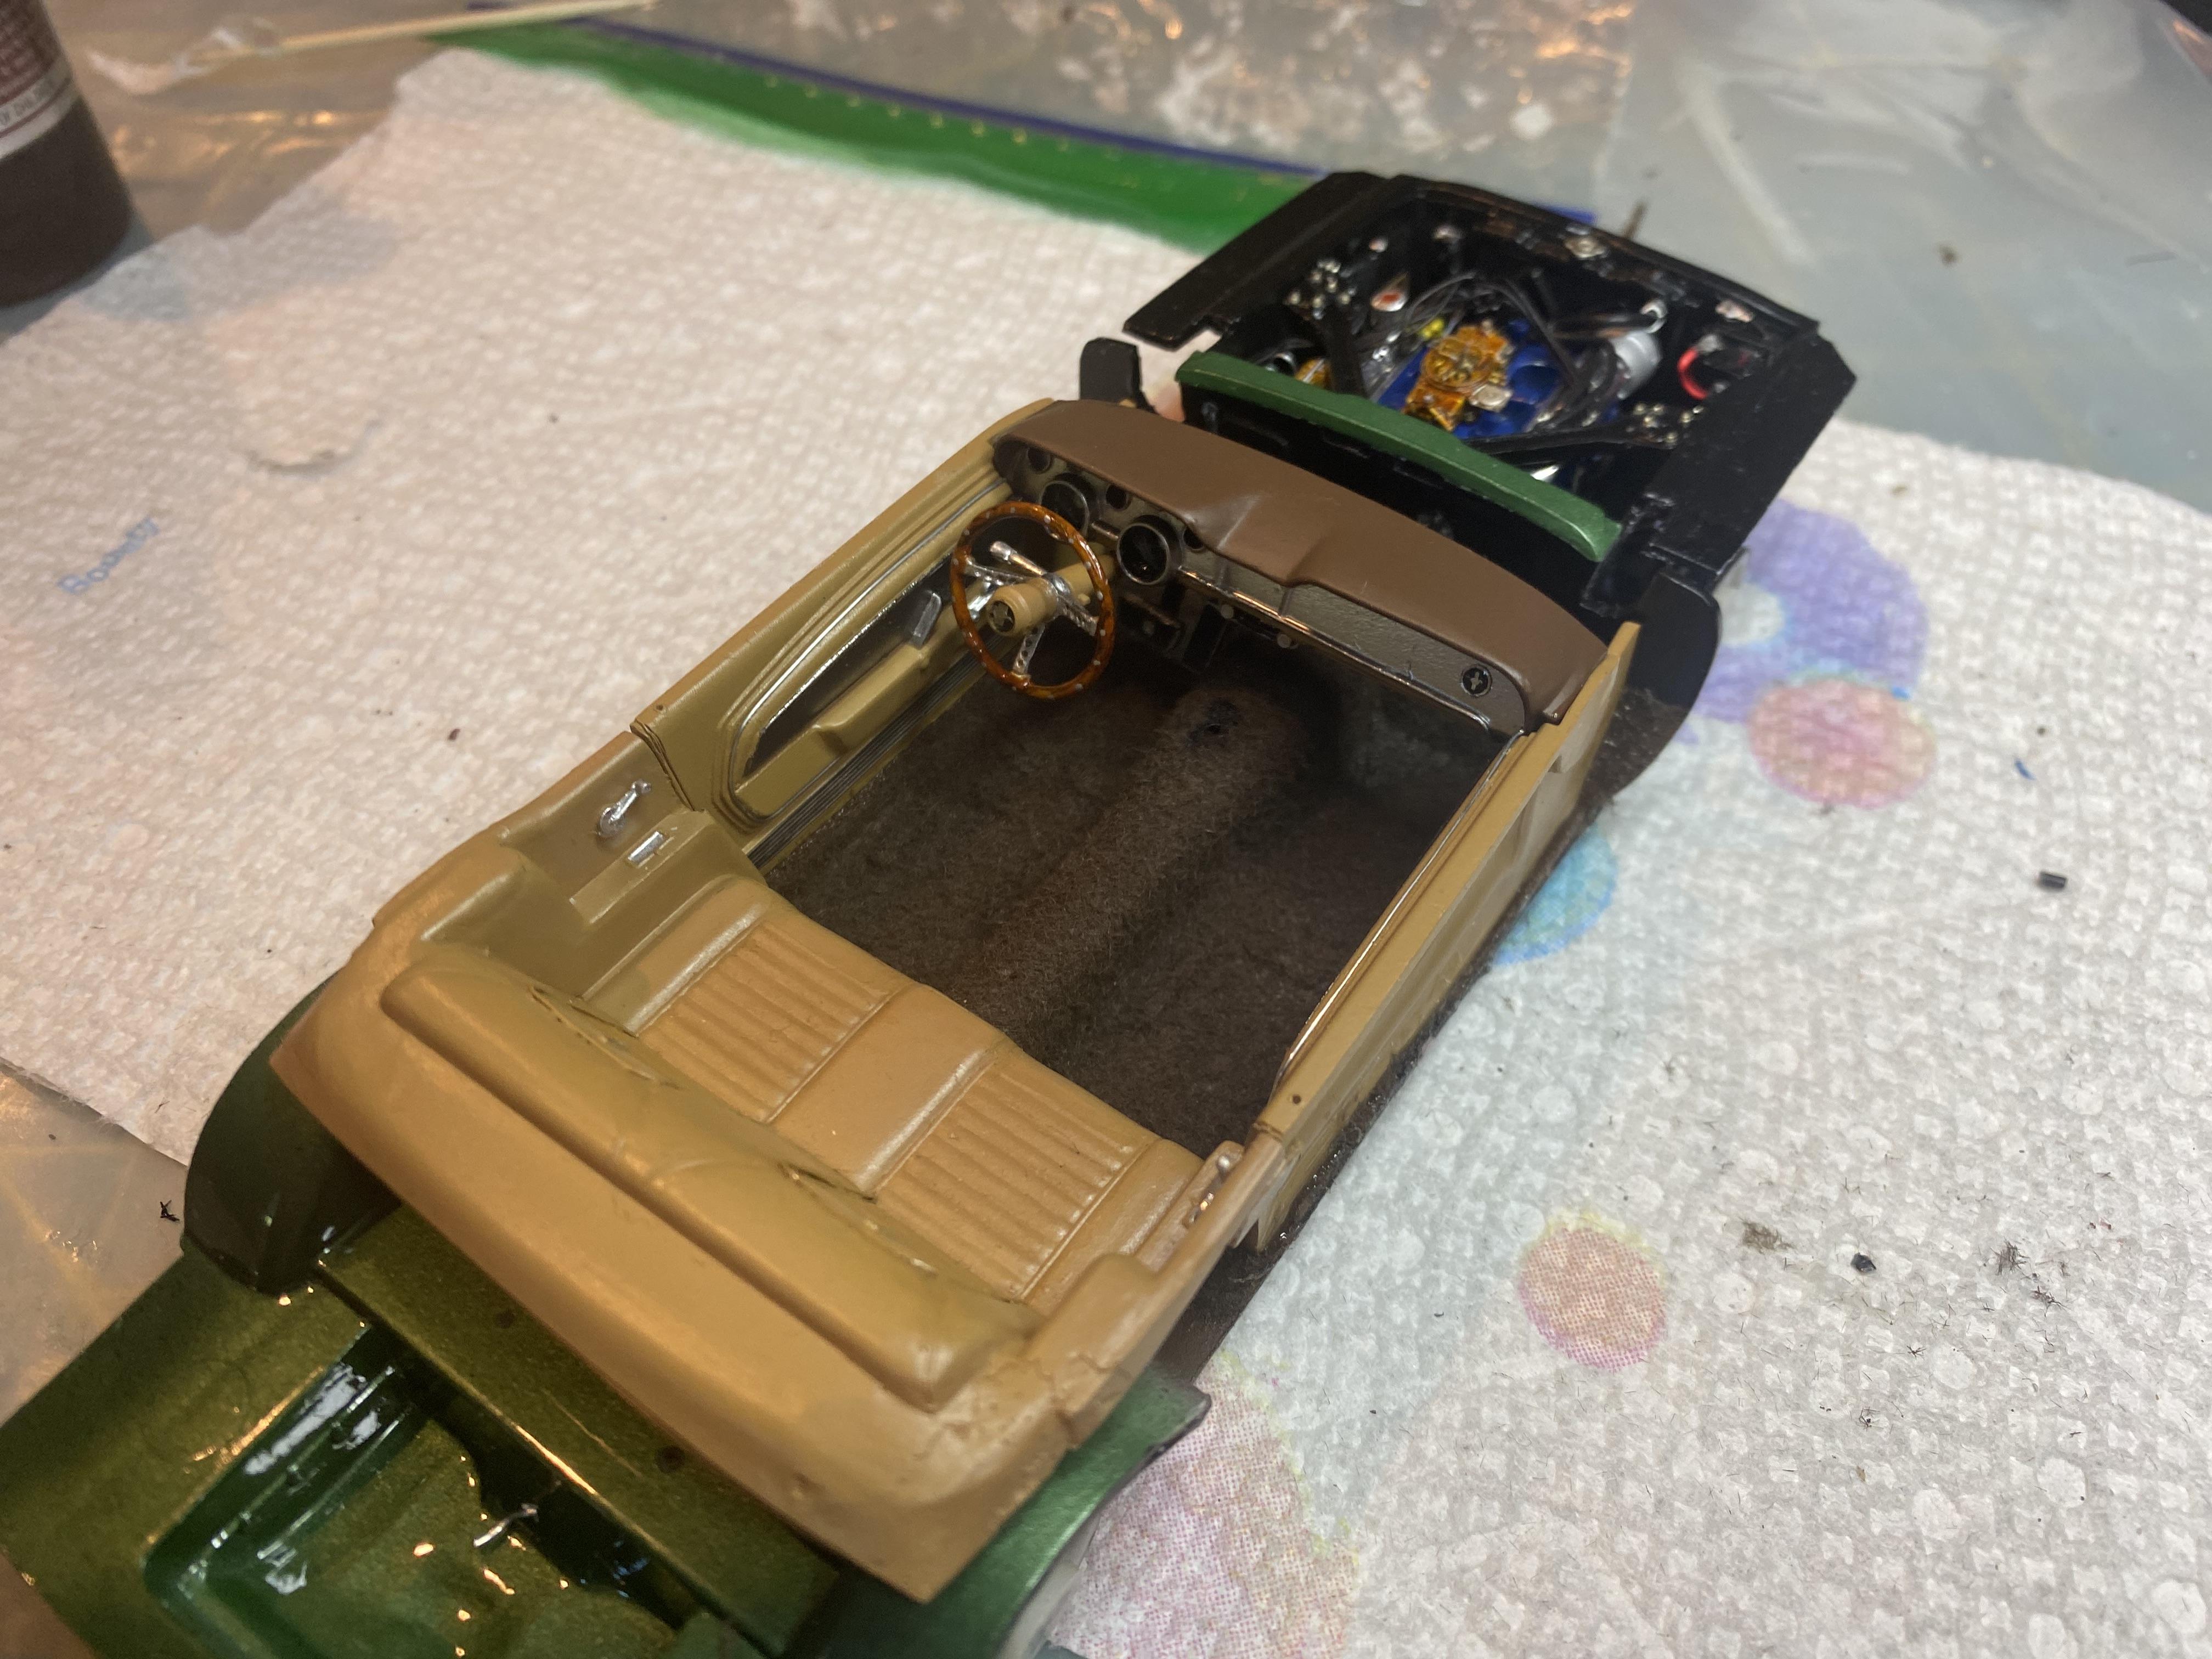
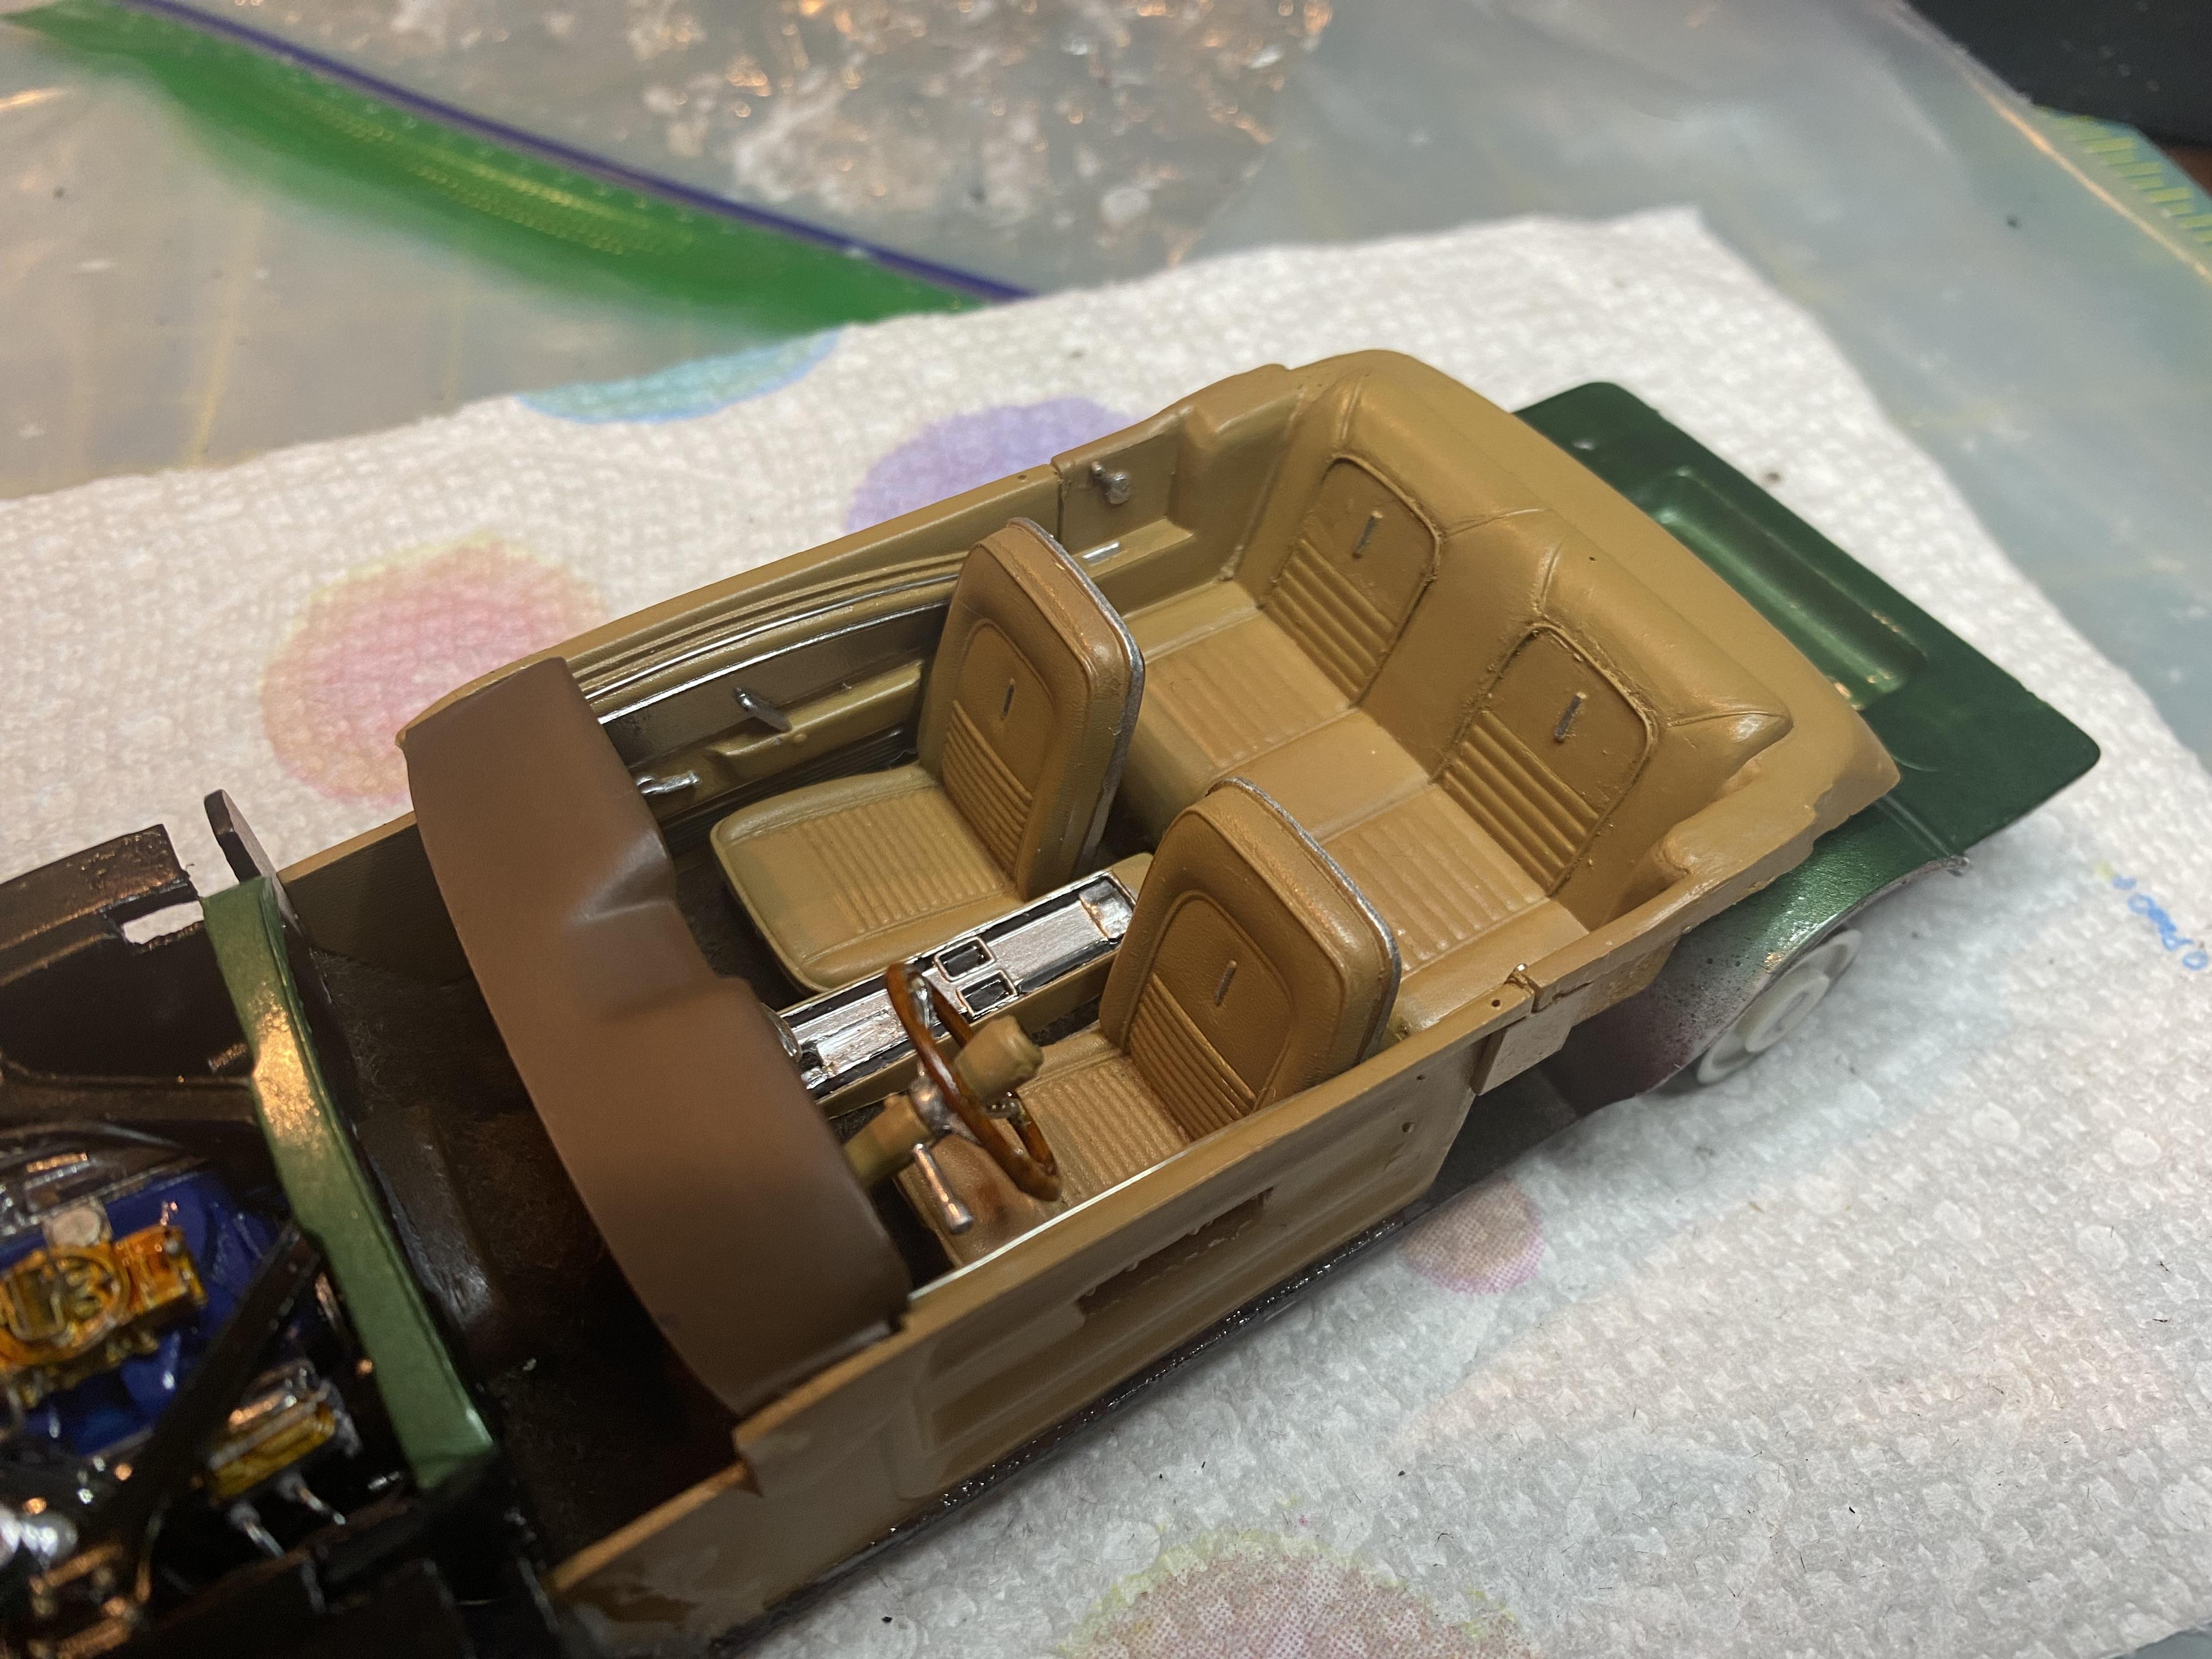
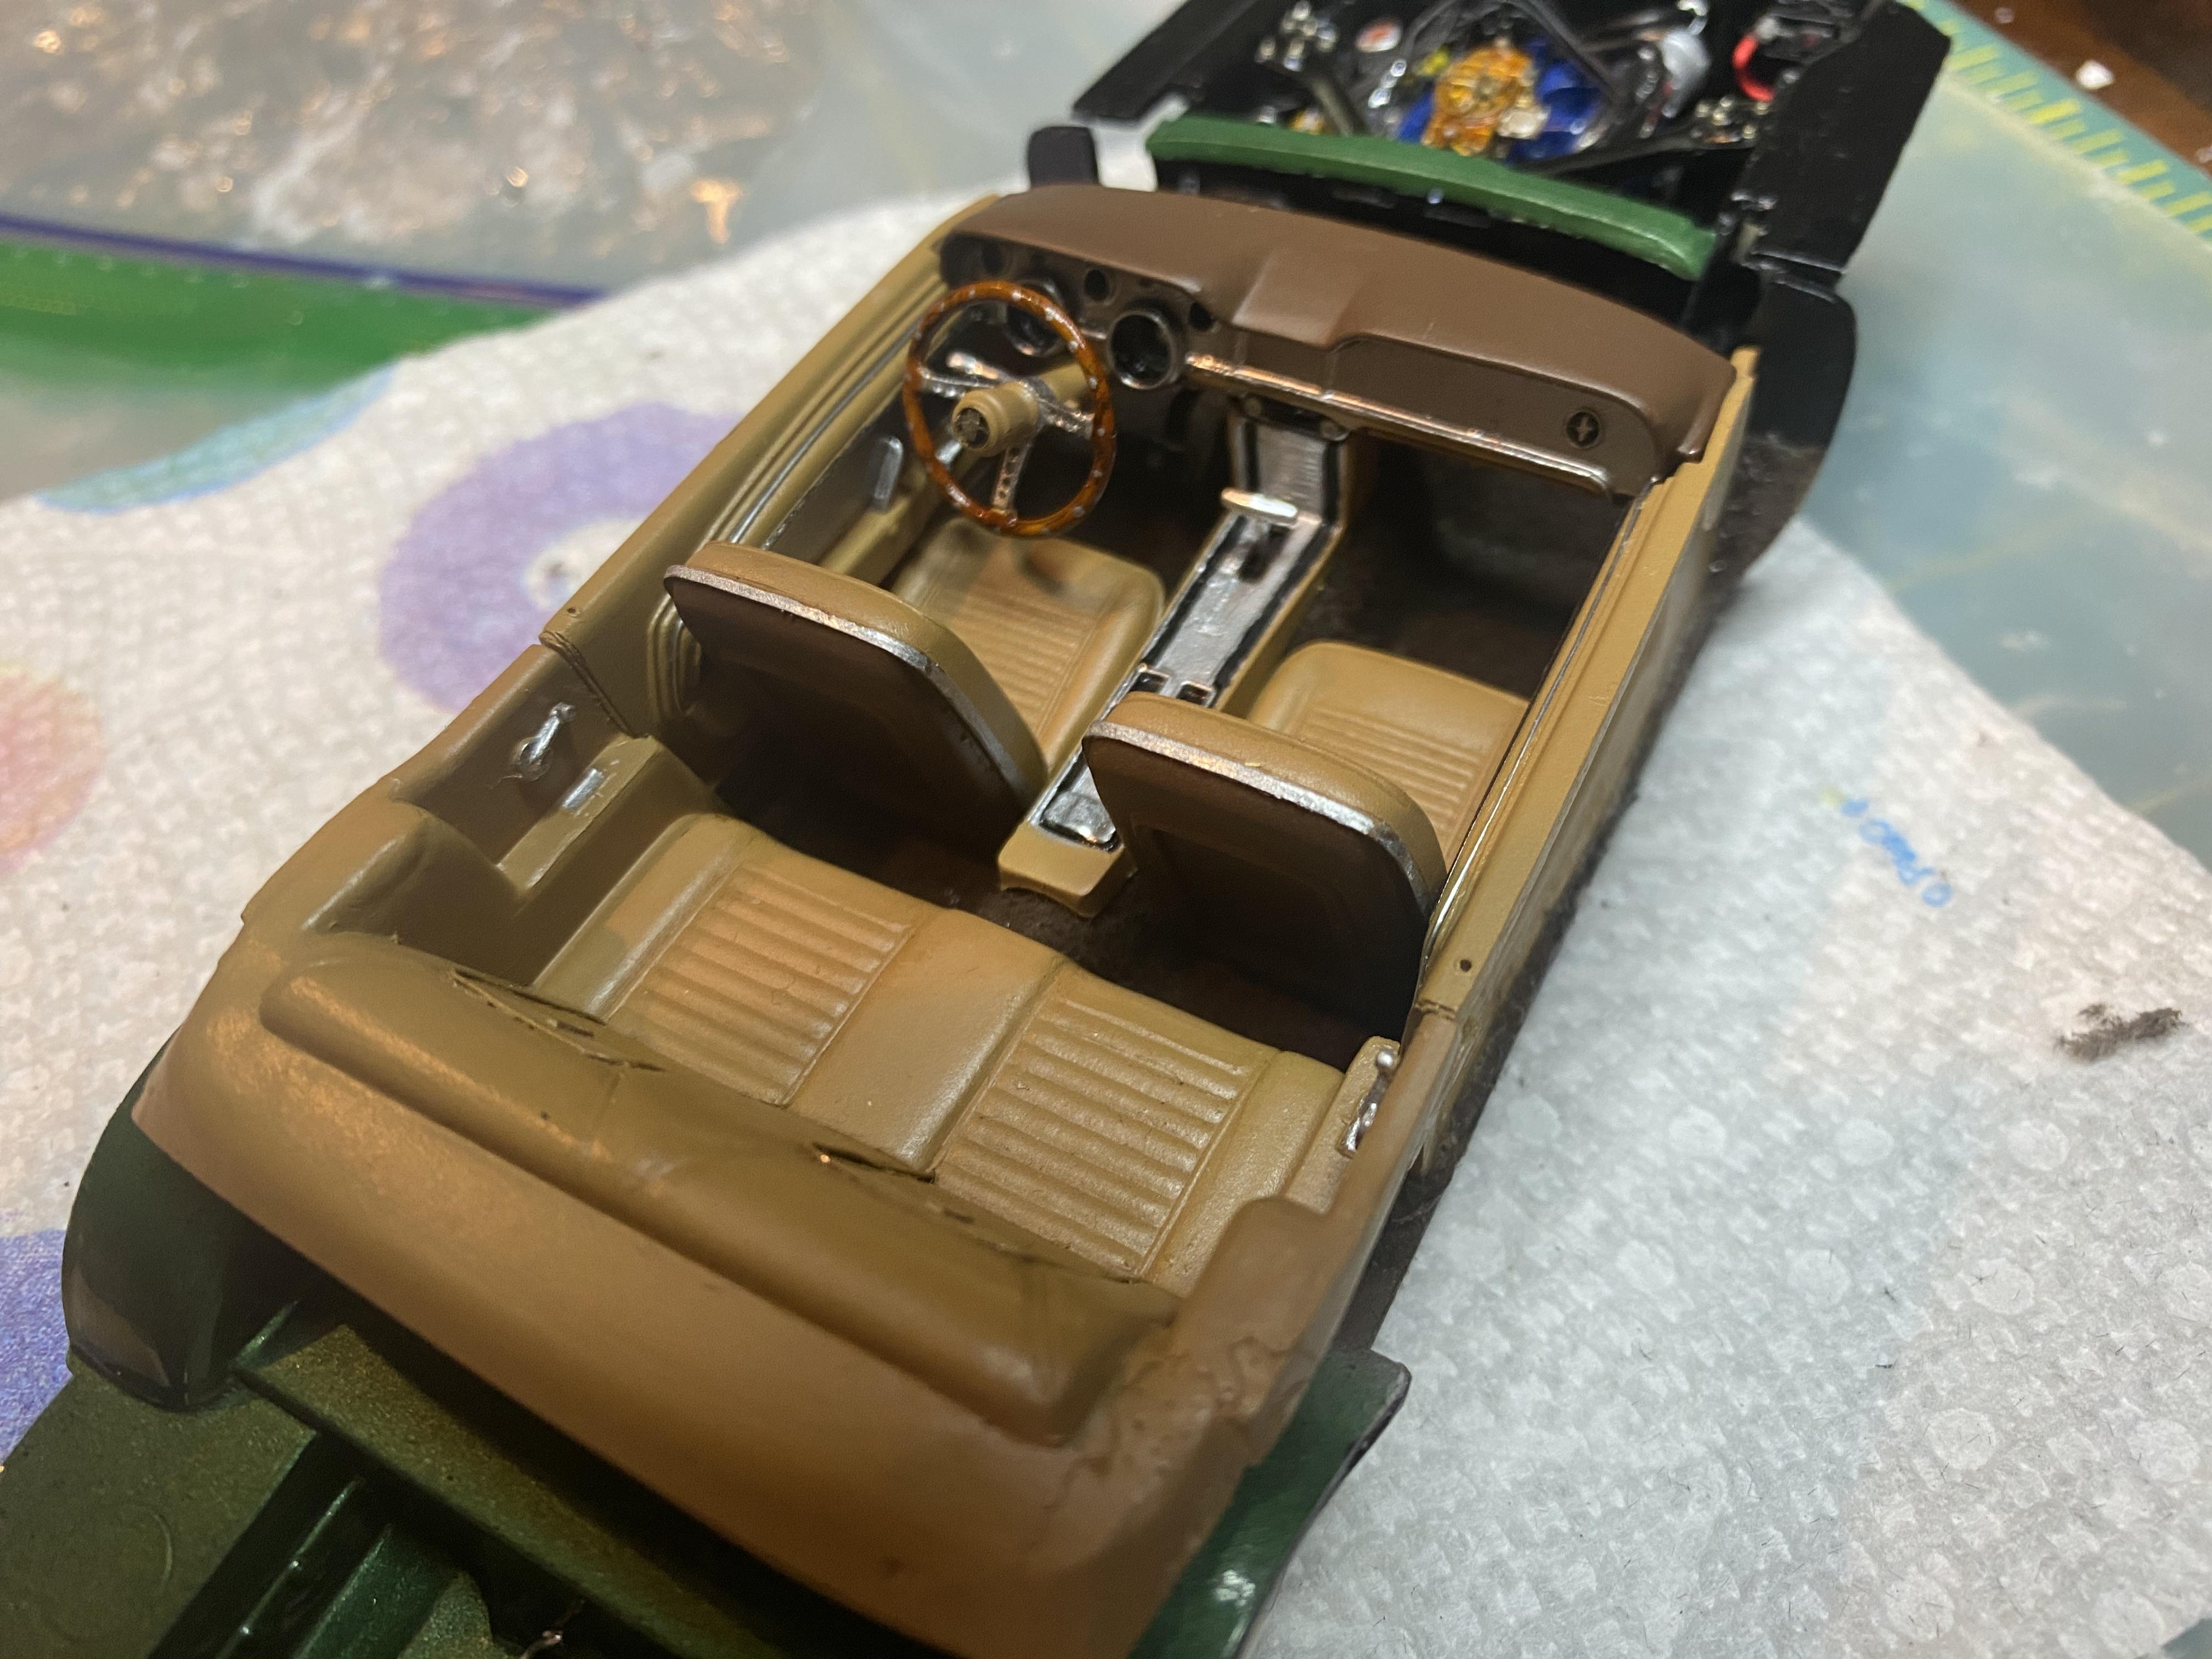
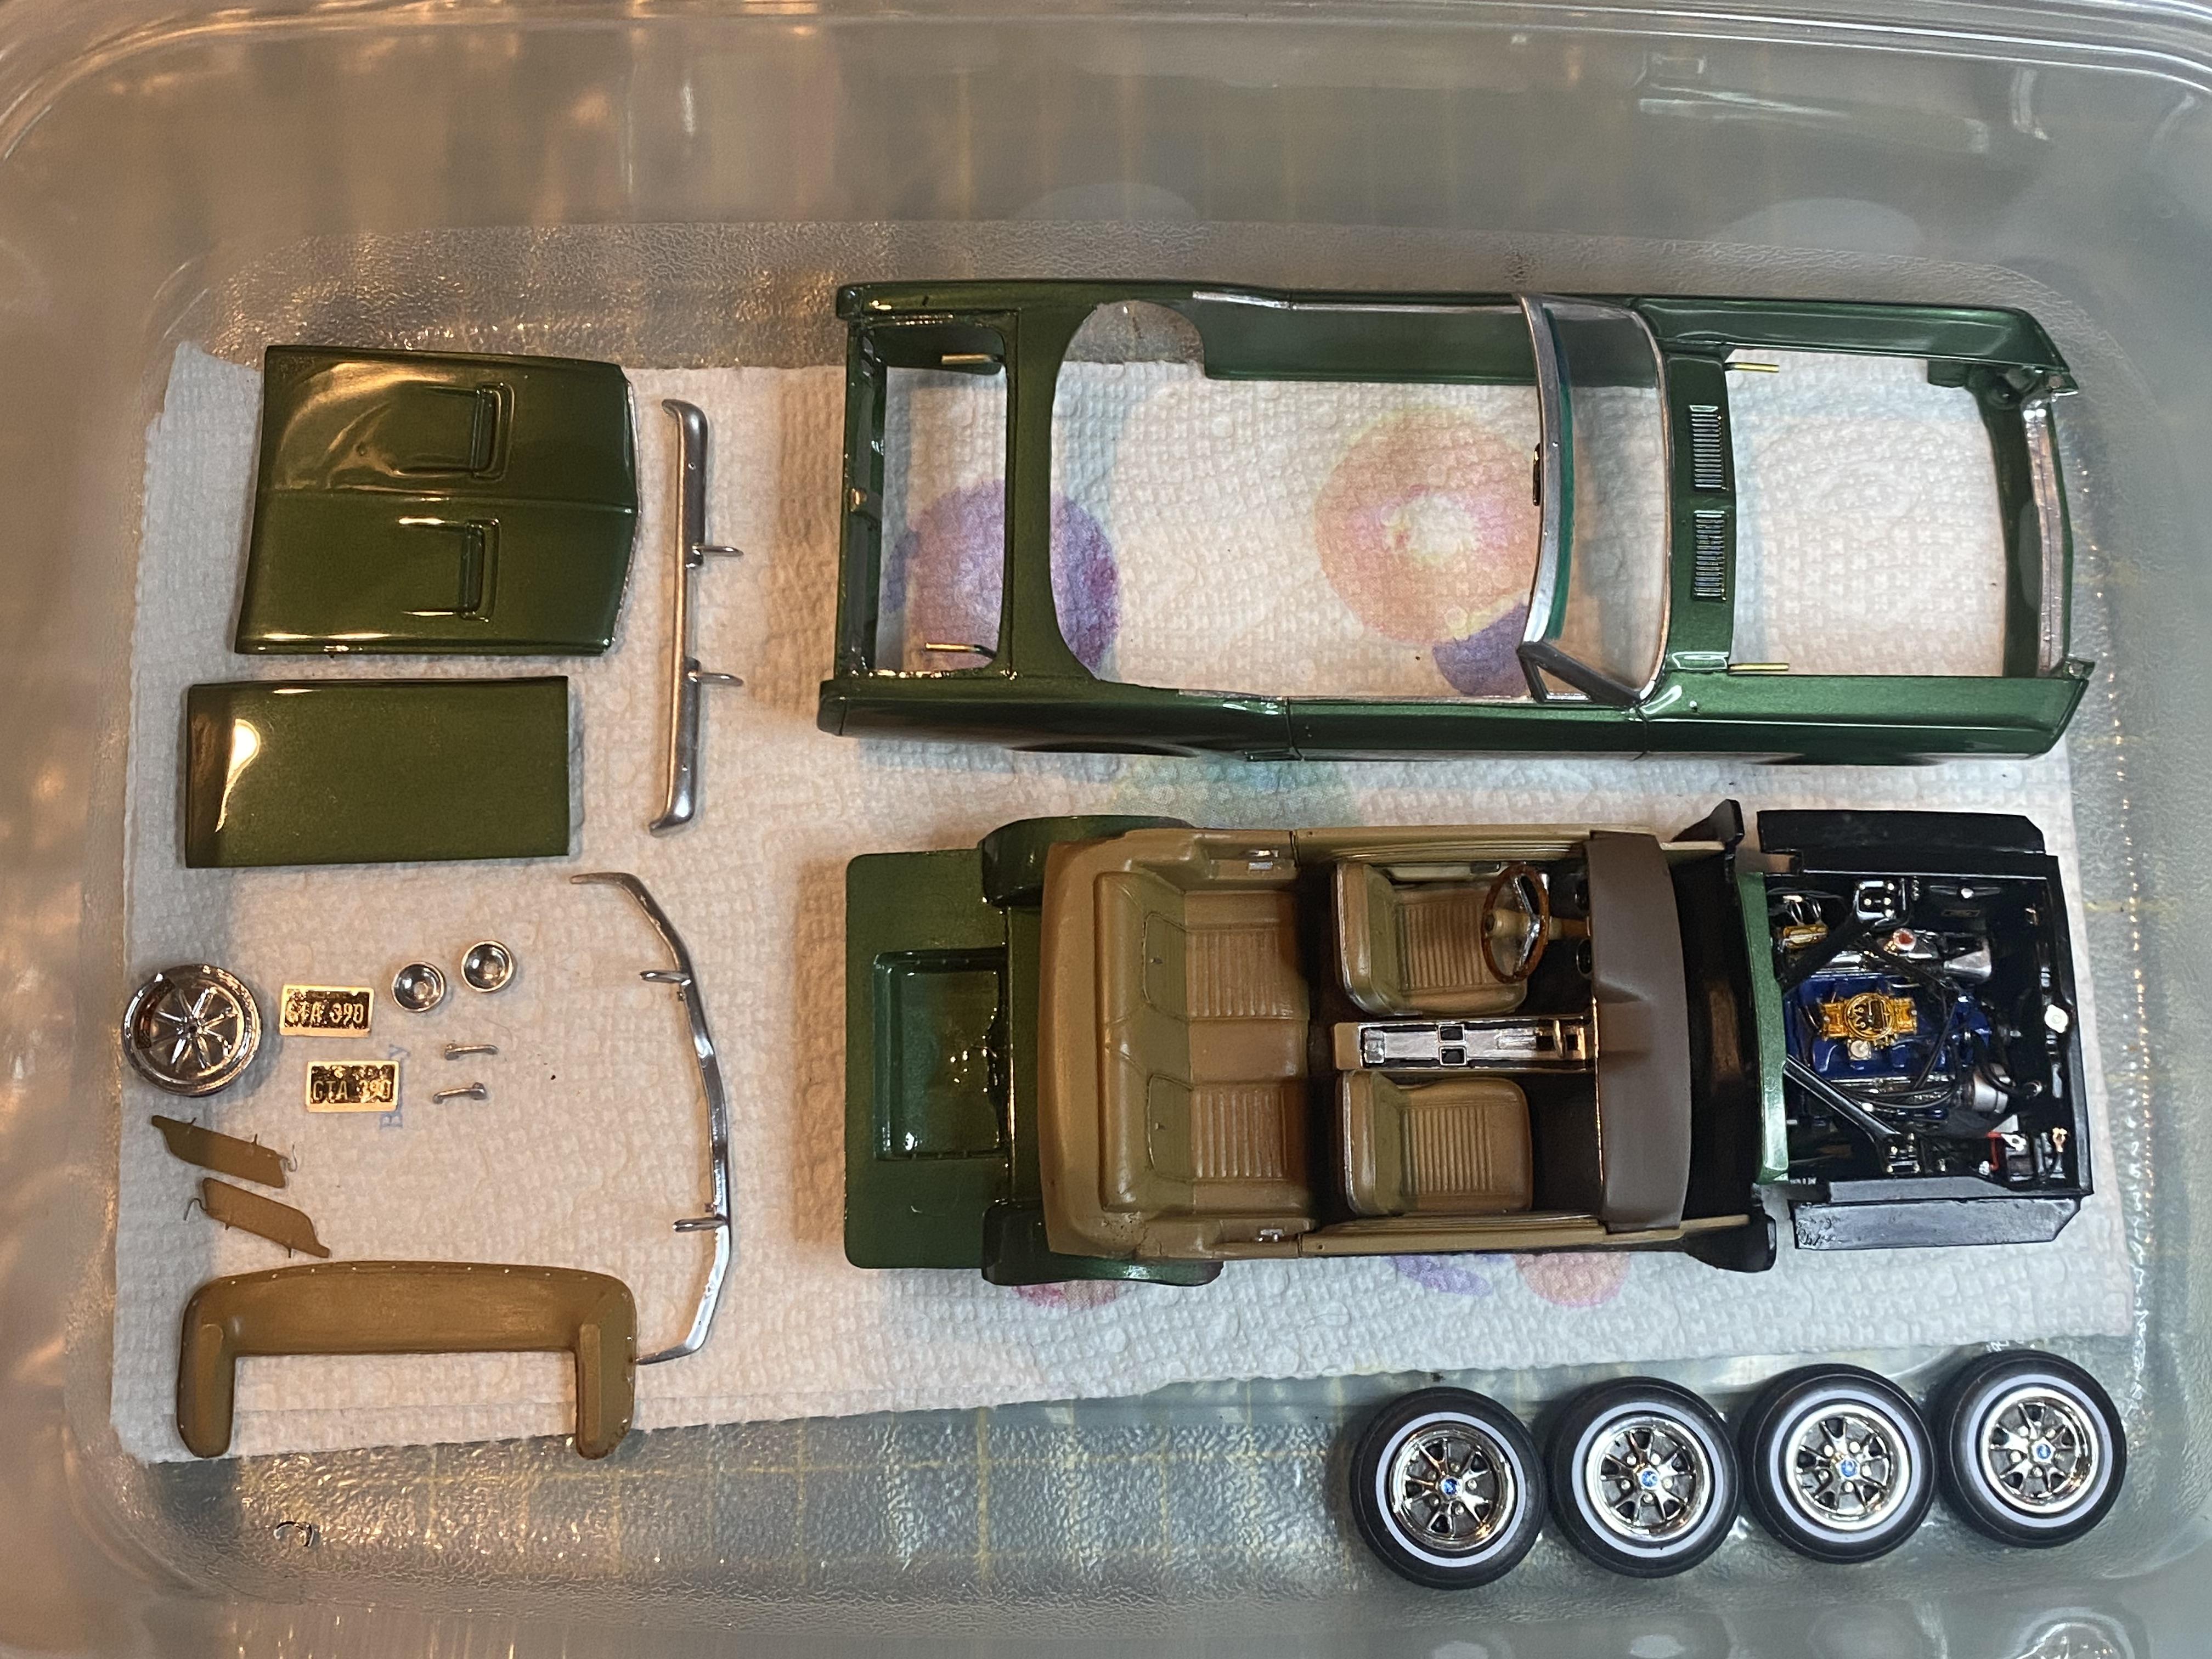
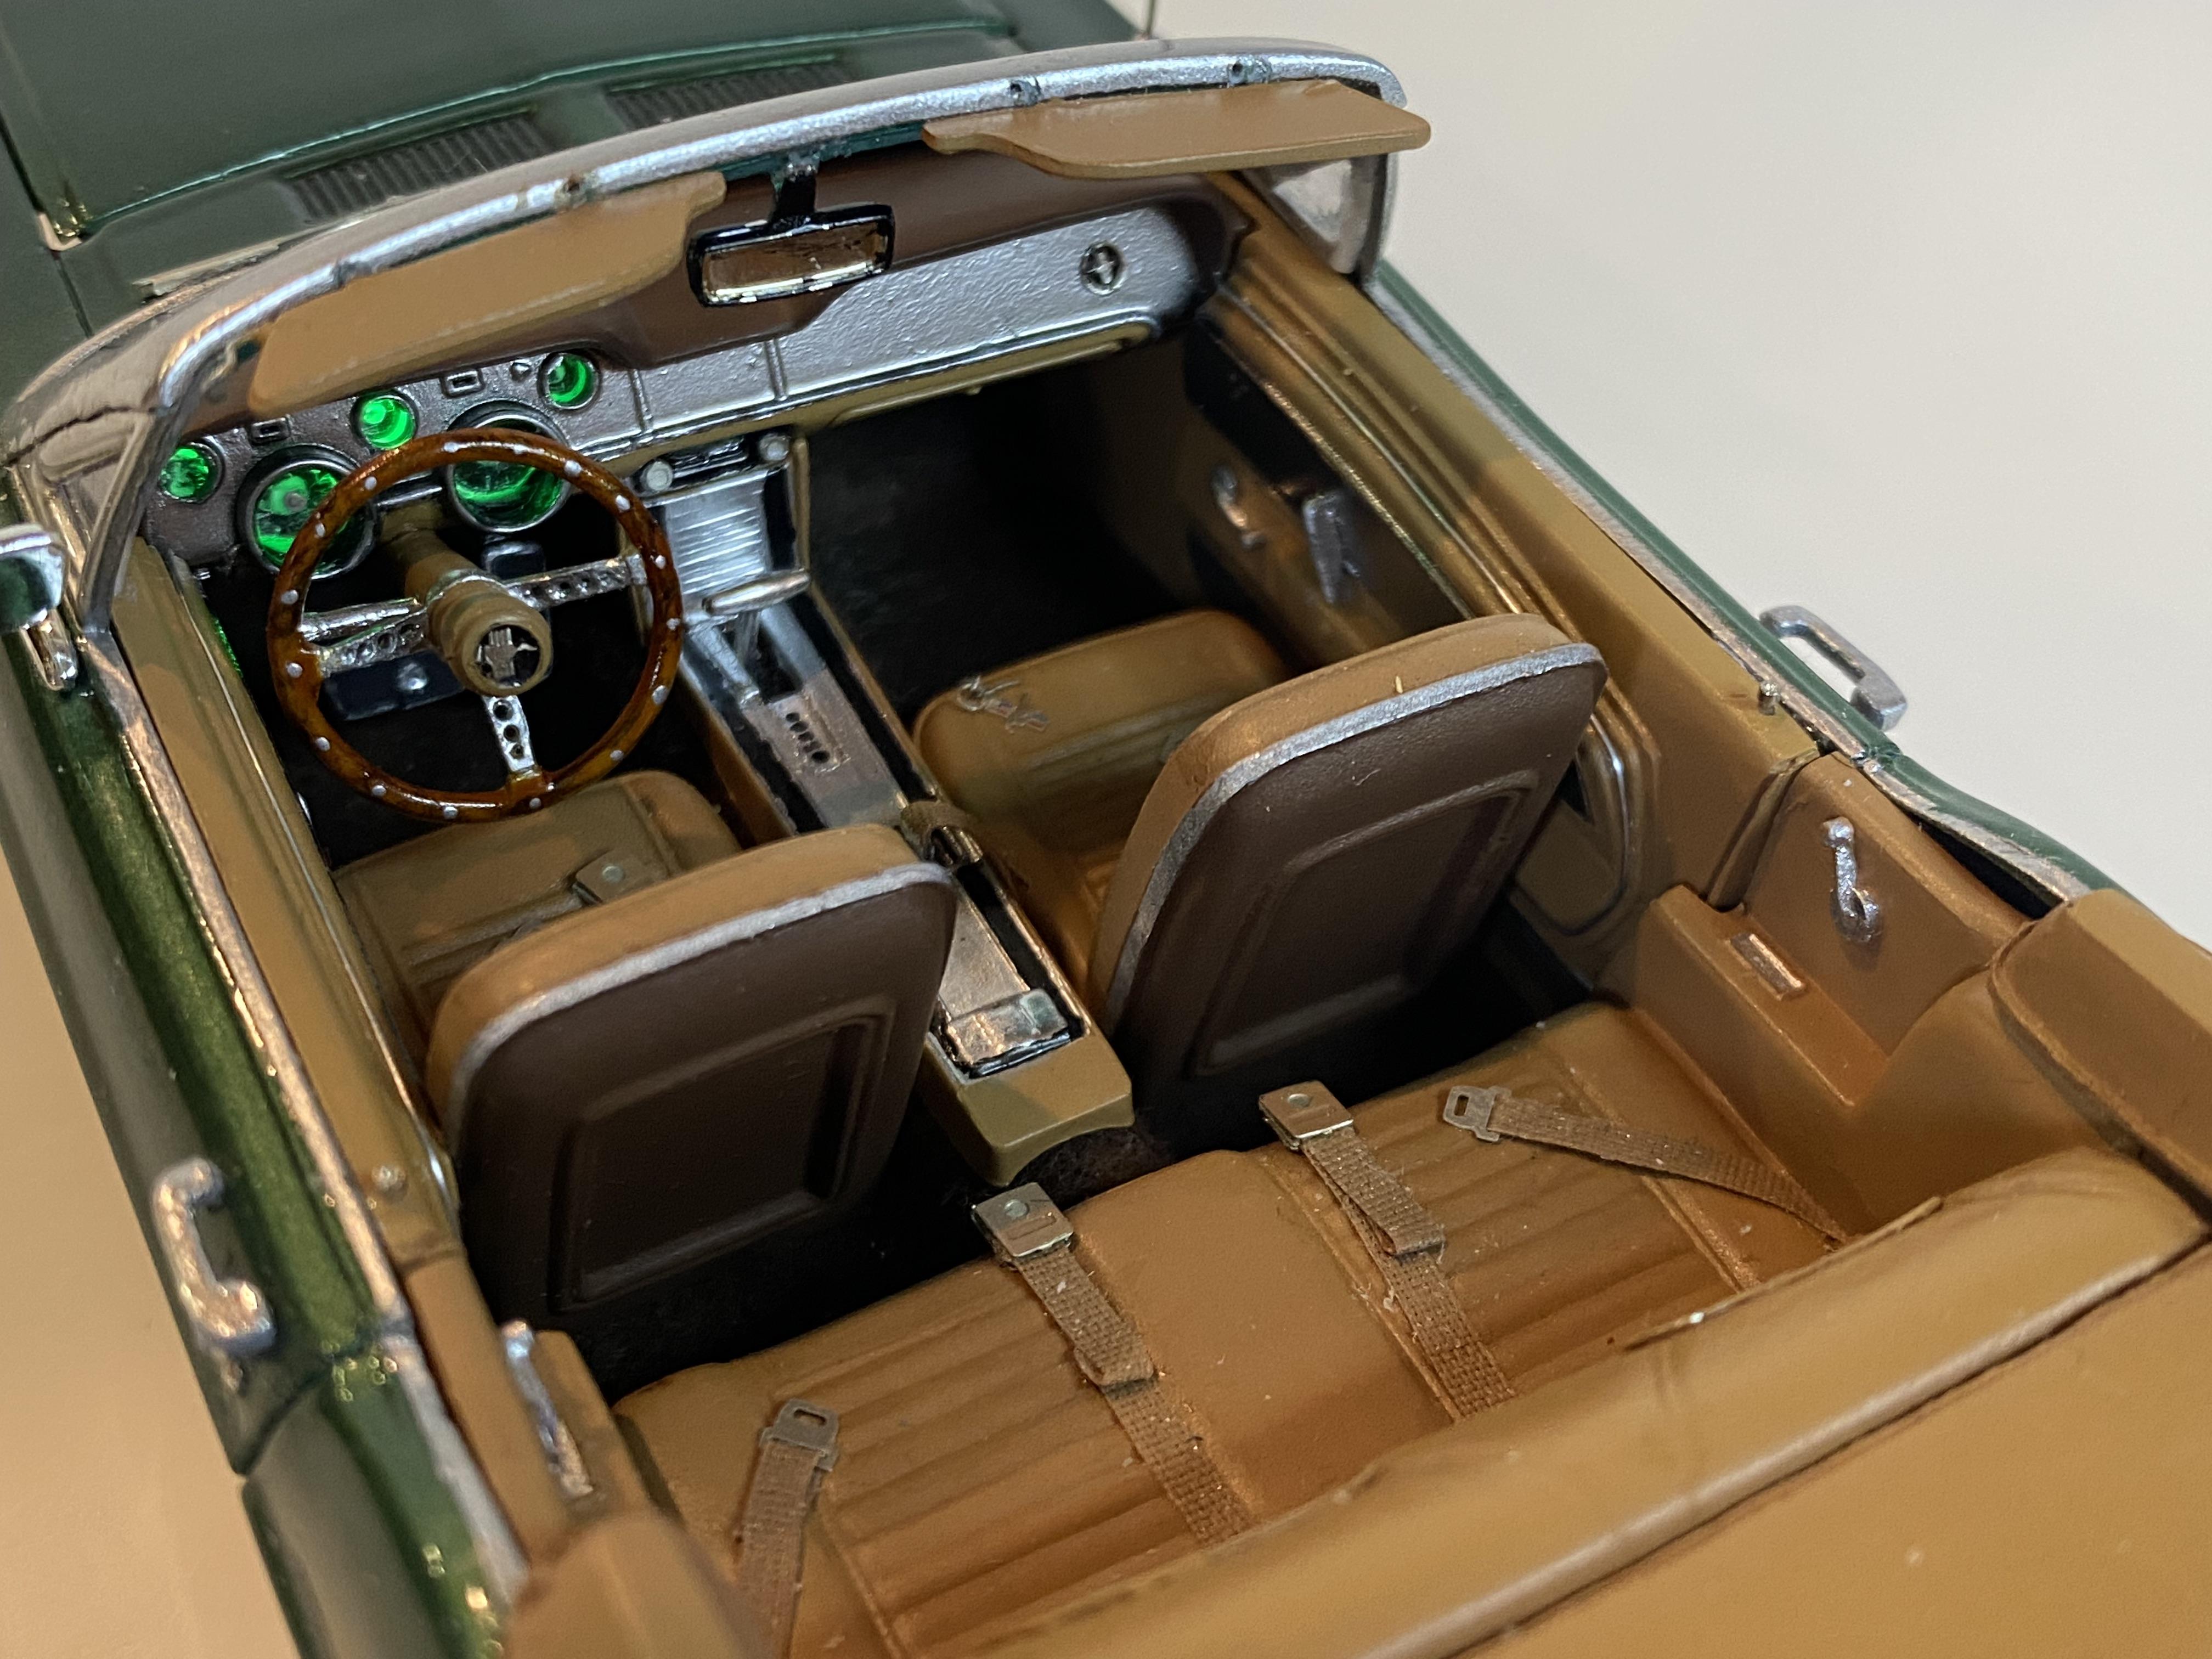
I was able to get a lot of work done today. Added the seatbelts and a set of keys to the interior. Installed the LED wiring harness to the chassis. I created the GTA emblems with decals, metal and UV clear resin. Now it is starting to look like a car. Joined the body and chassis, installed the LED headlights and taillights, installed the wheels and a few other details. I added carriage bolt rivets to the bumpers but still need to install on the car as well as so much more detailing. I am about to hit a brick wall waiting for a new photo etch kit to arrive. The one I got a little while ago oddly was not completely etched through and the letters are a solid mass joined all together.
-
Thank You! Thank you! Some shops carry them, but always seem to be out of stock. I order them from BNA model world most of the time, out of Australia. Thank You! I will have a big update tonight. 😁
-
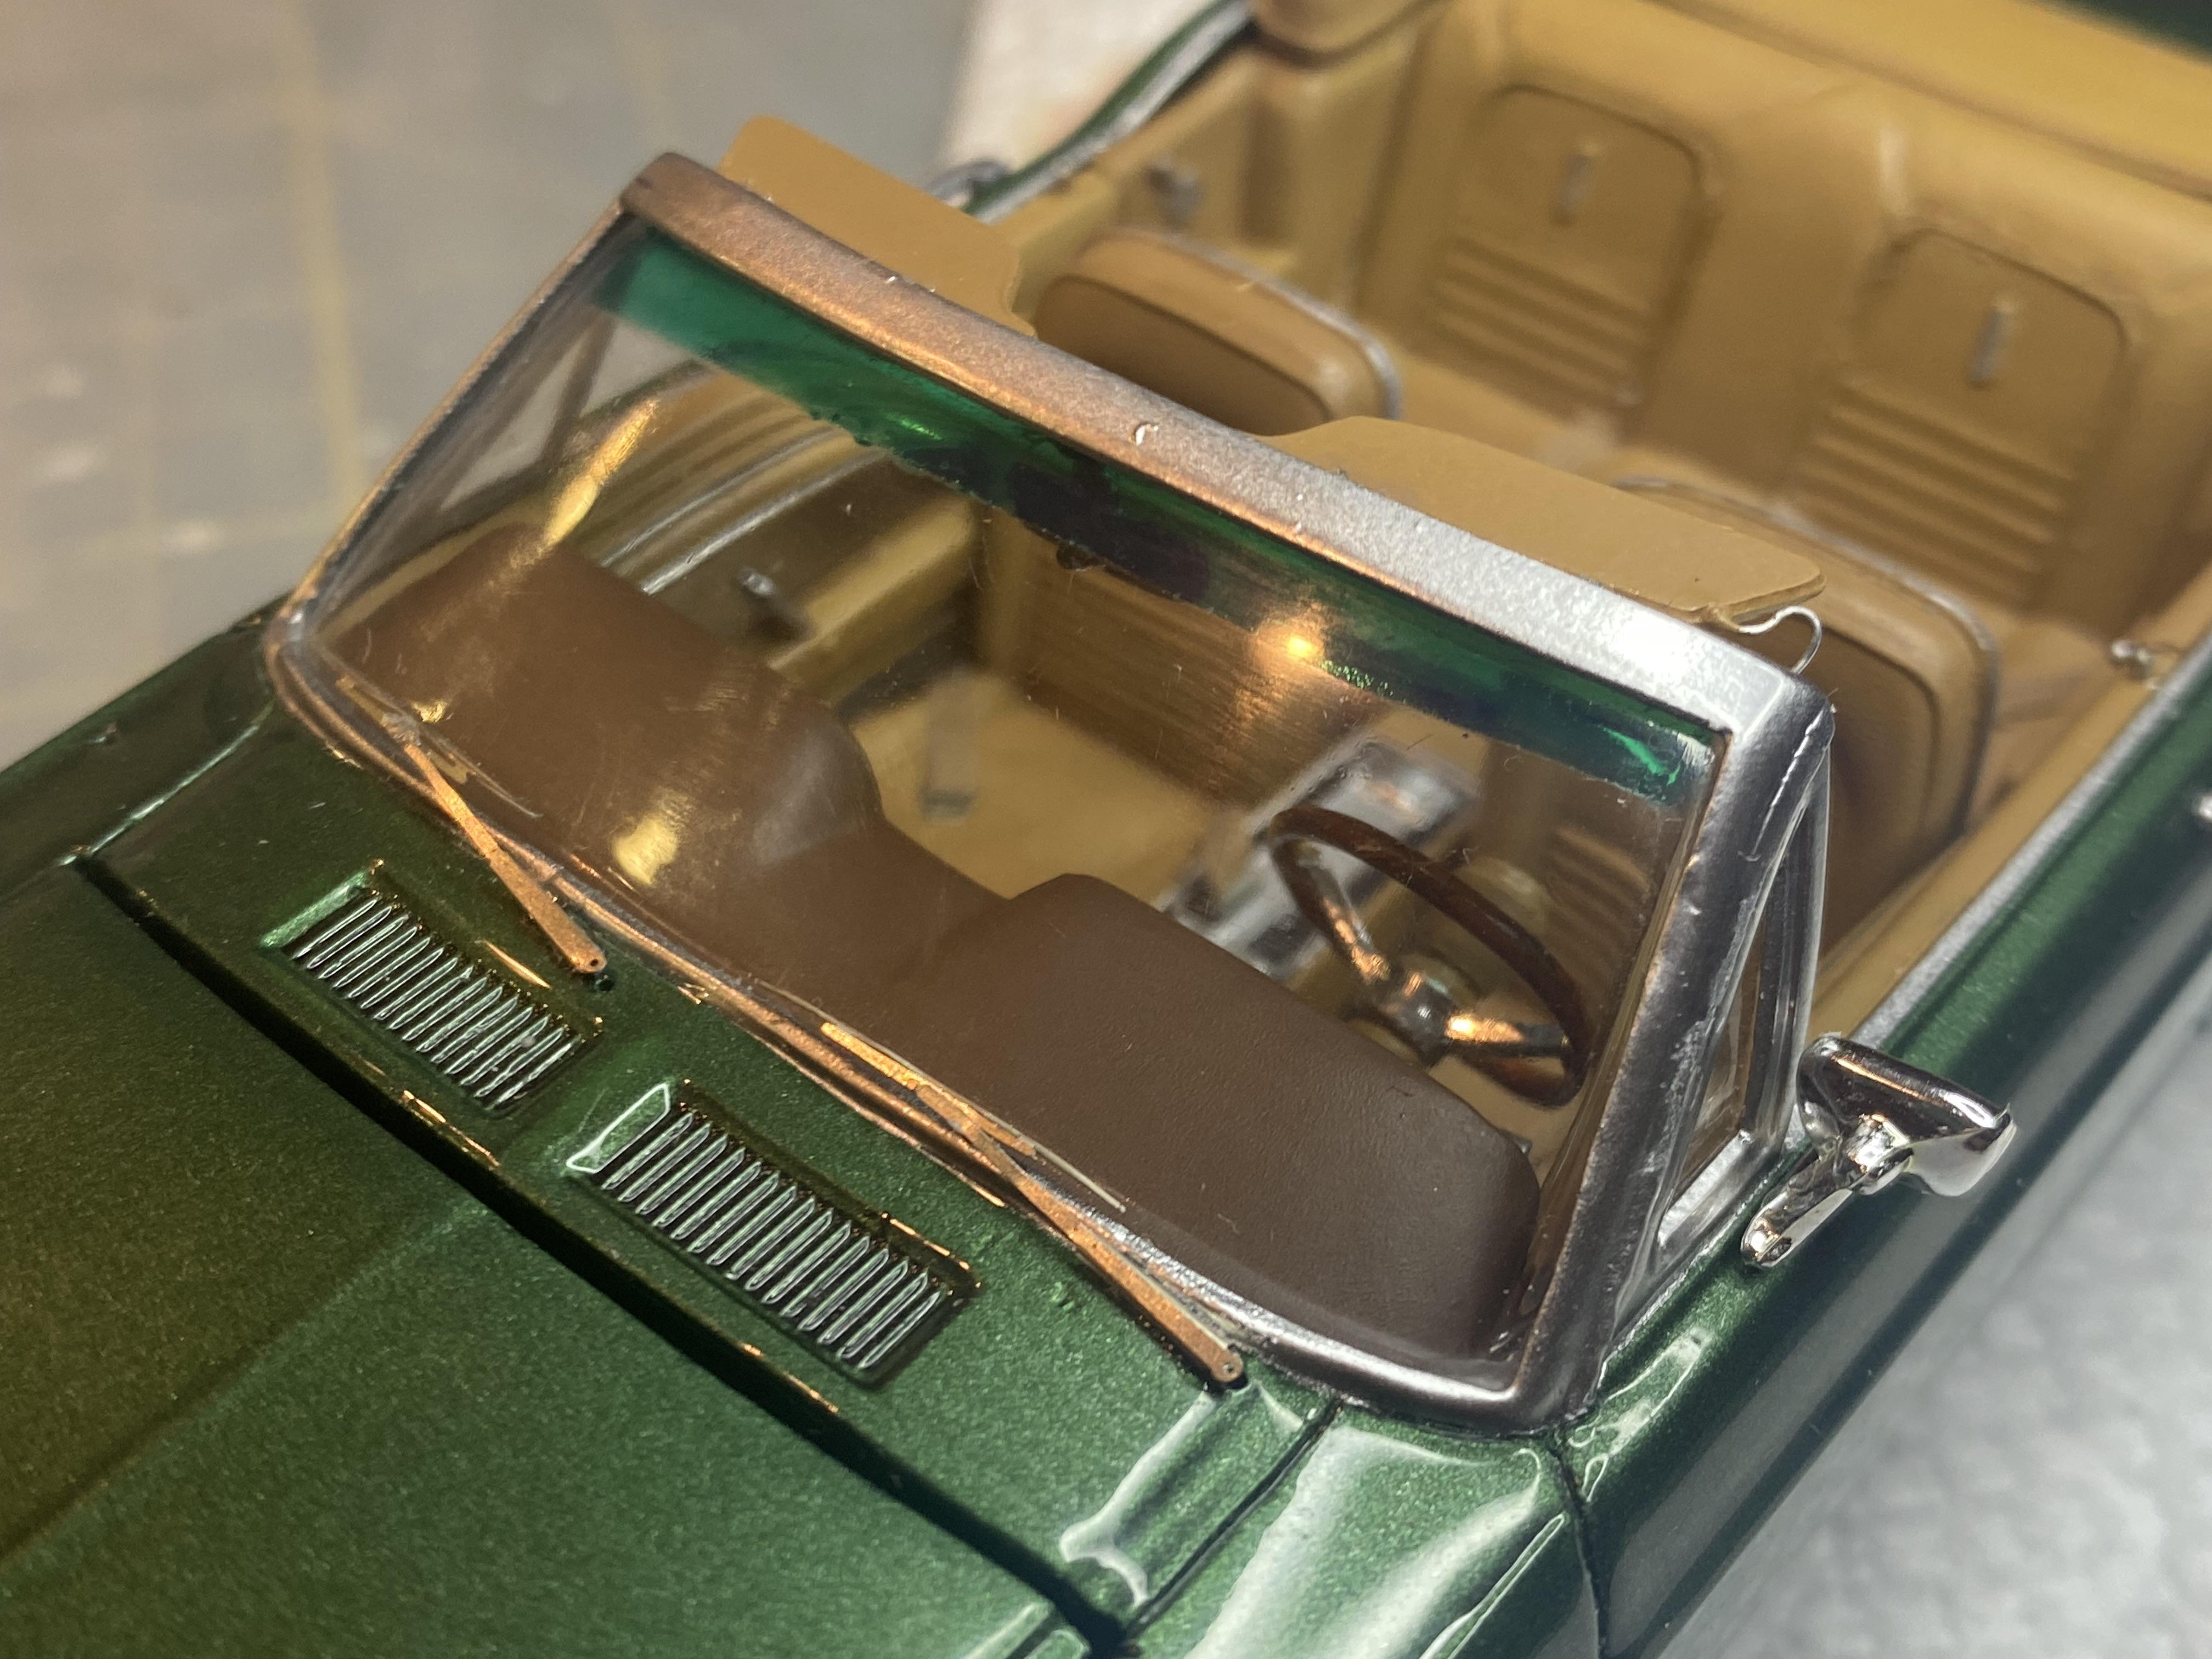
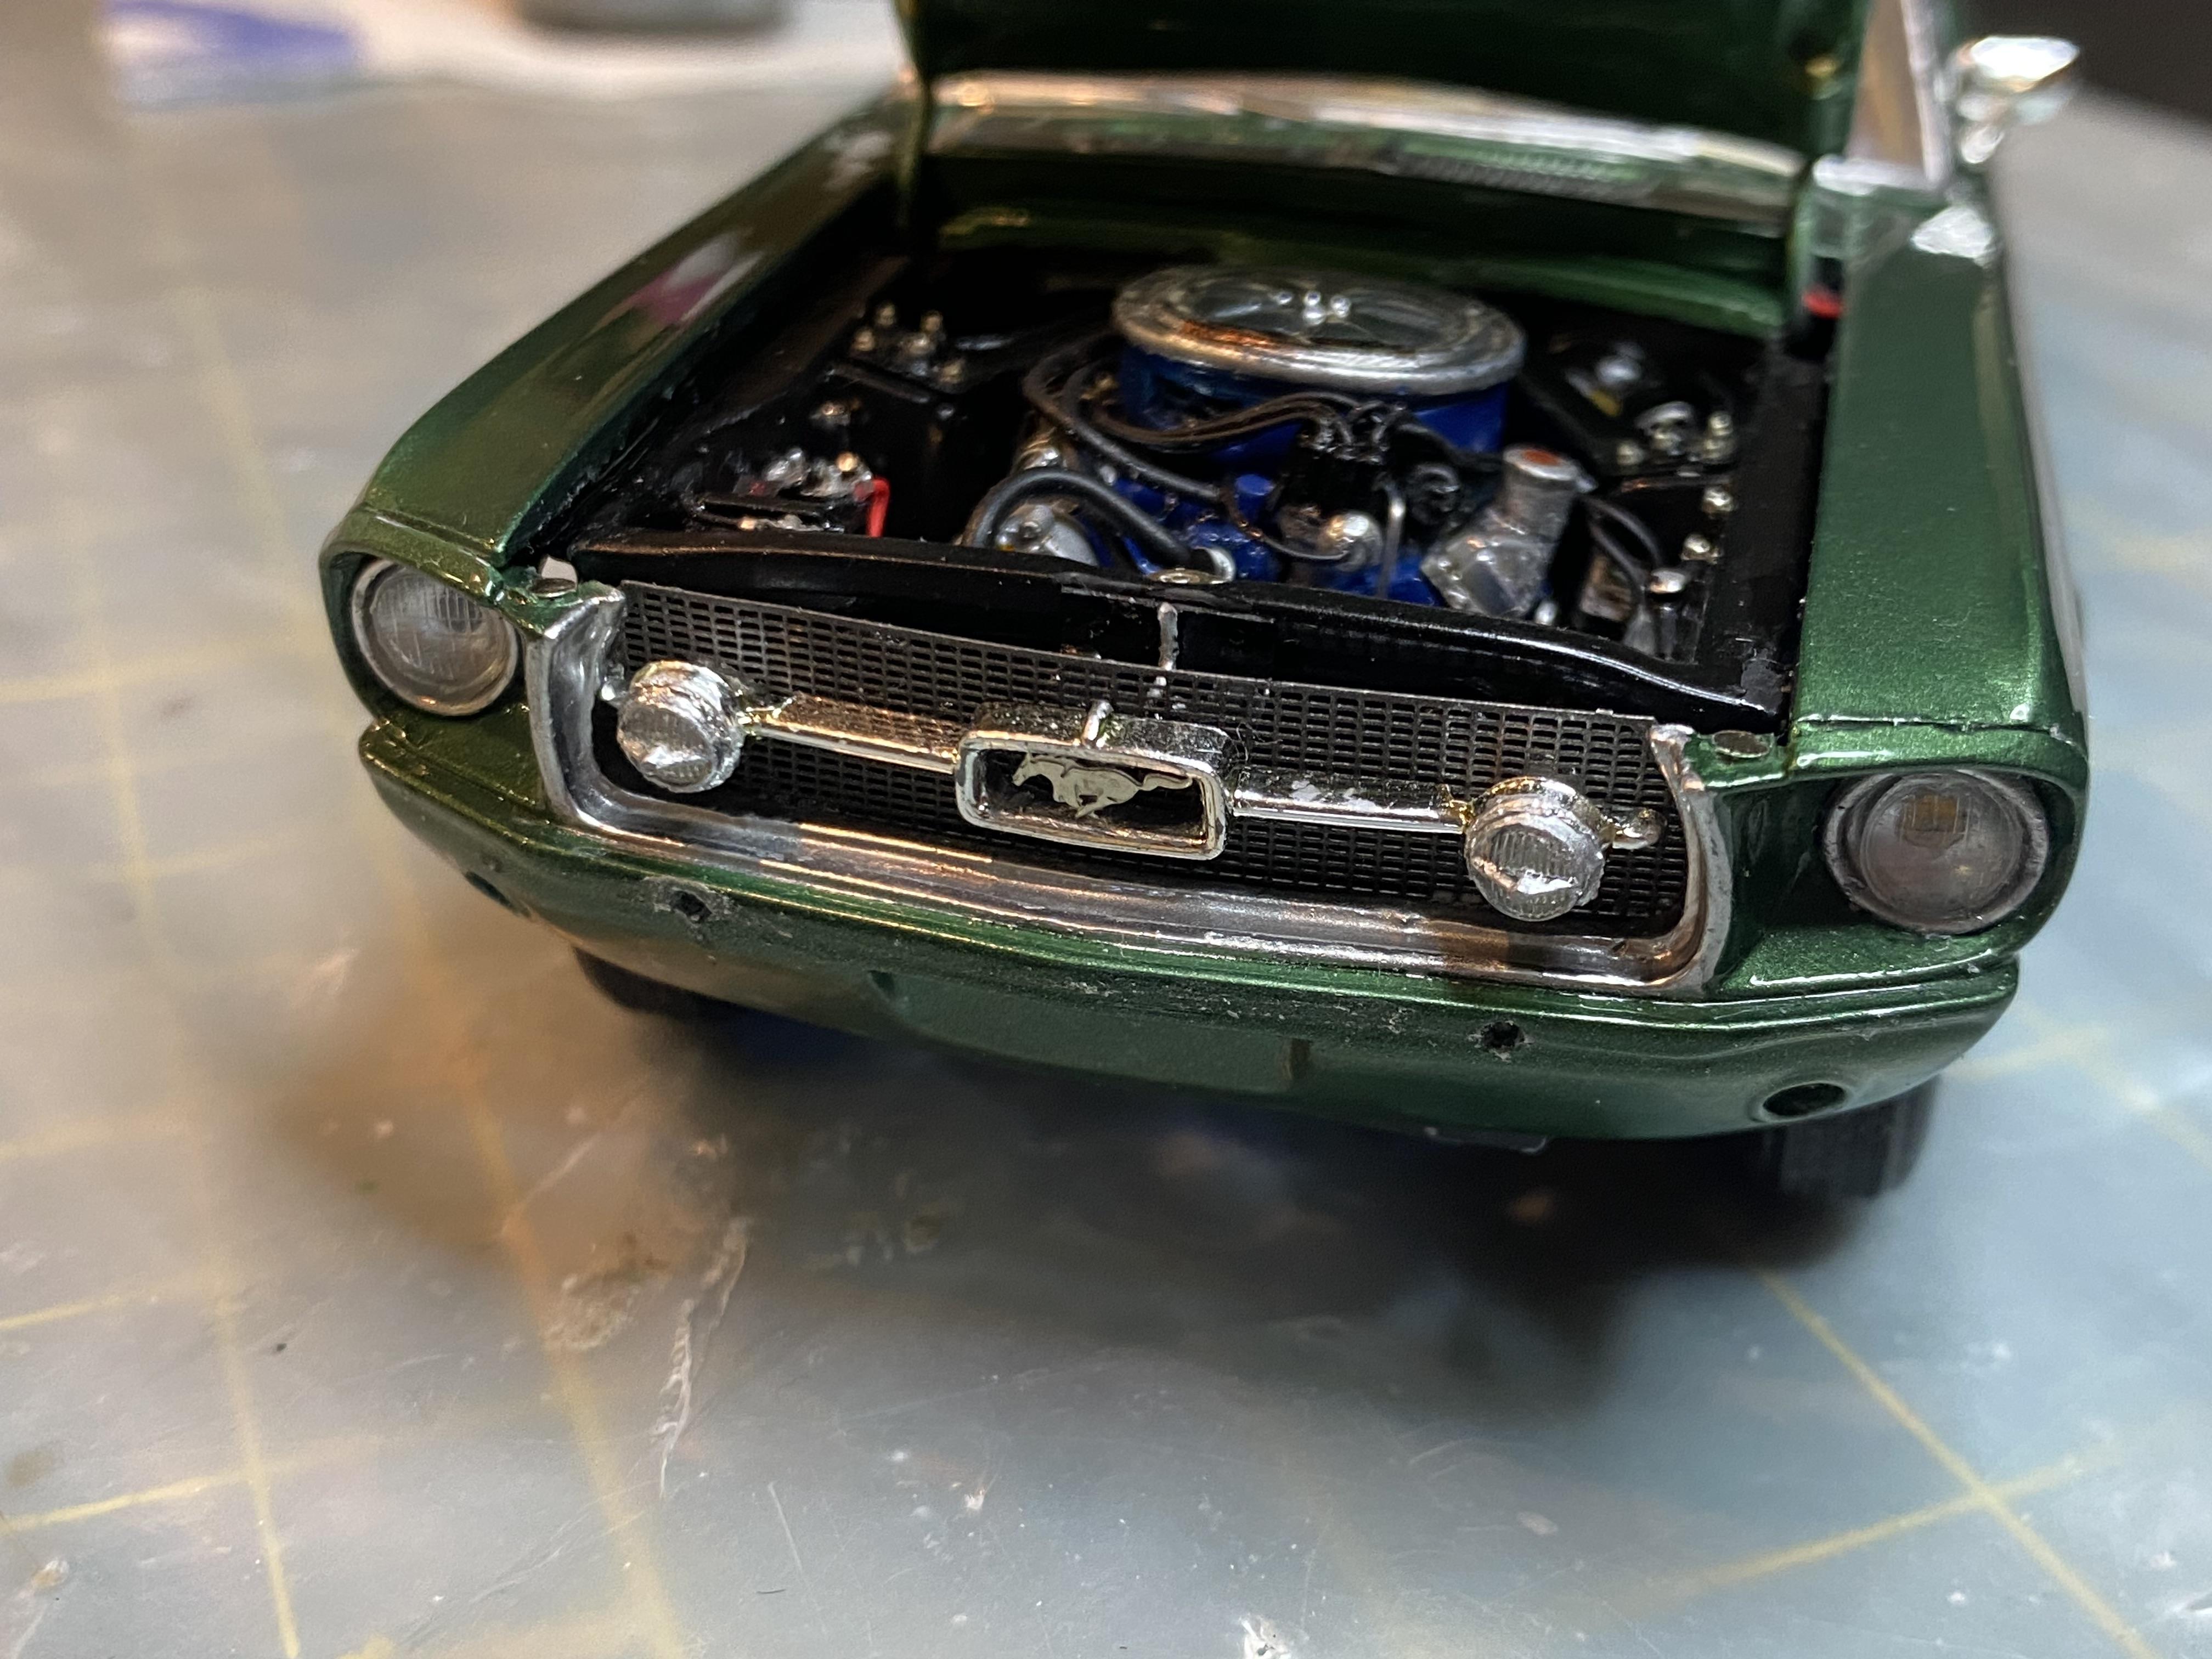
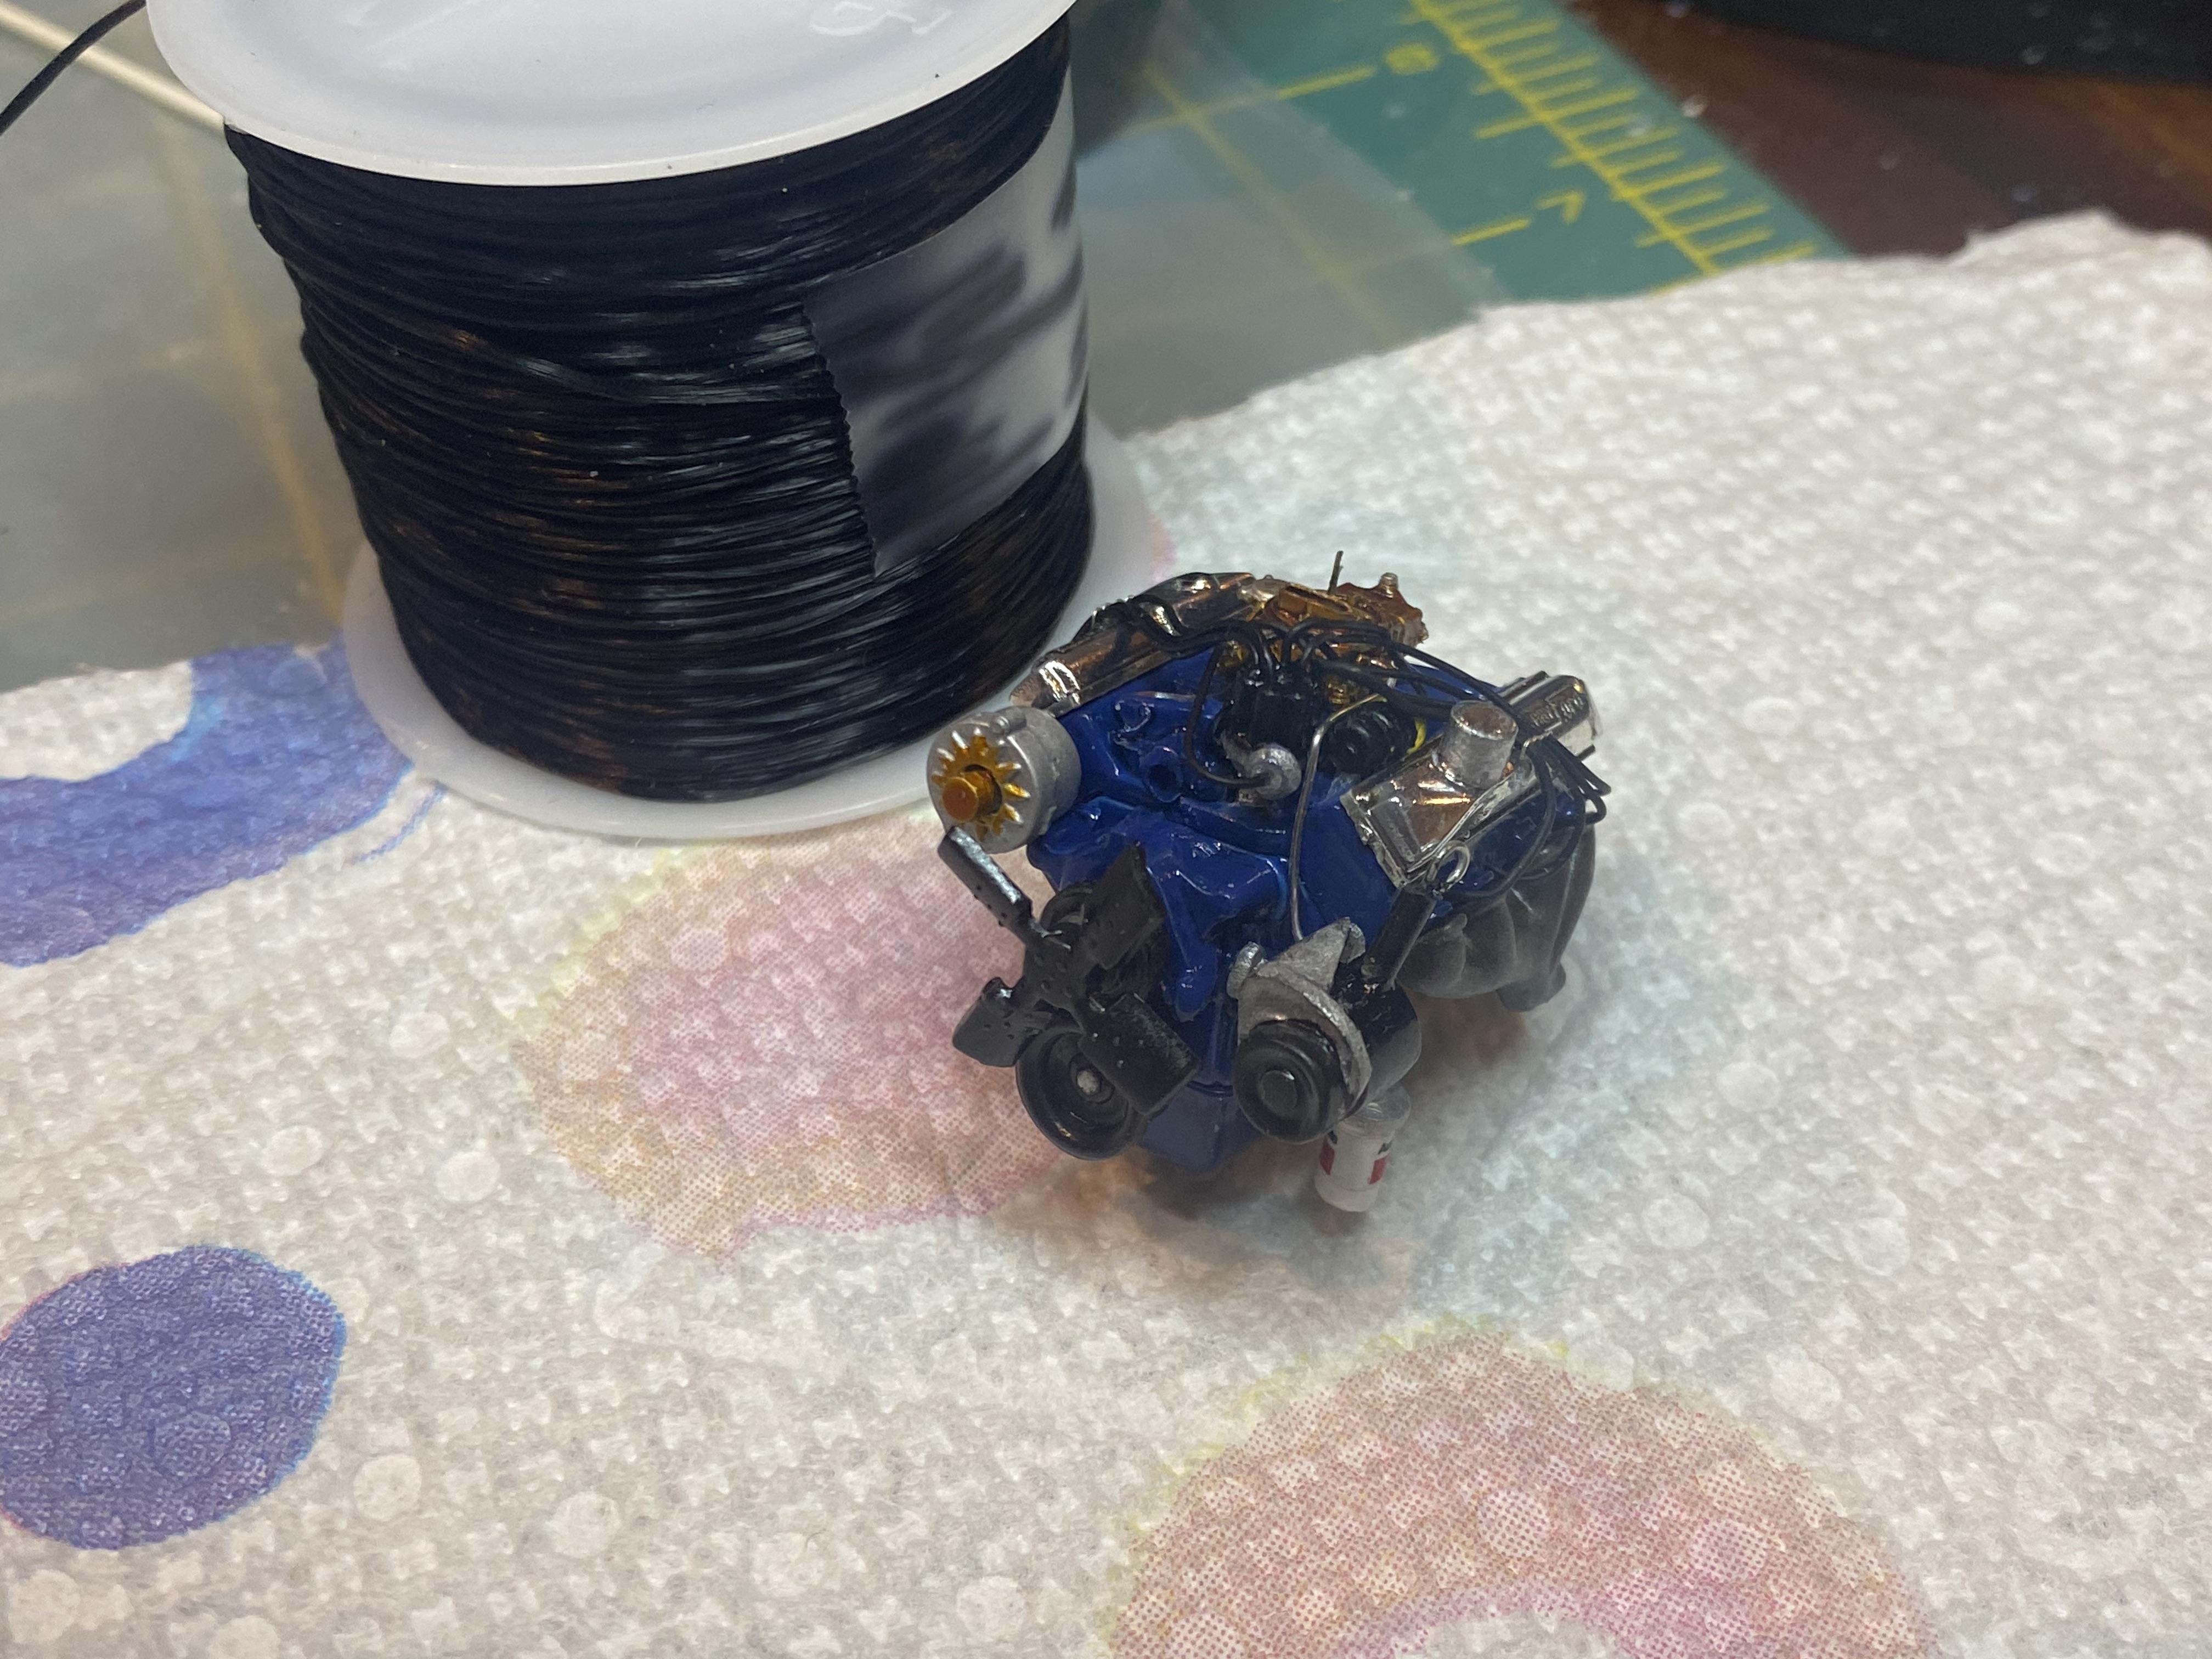
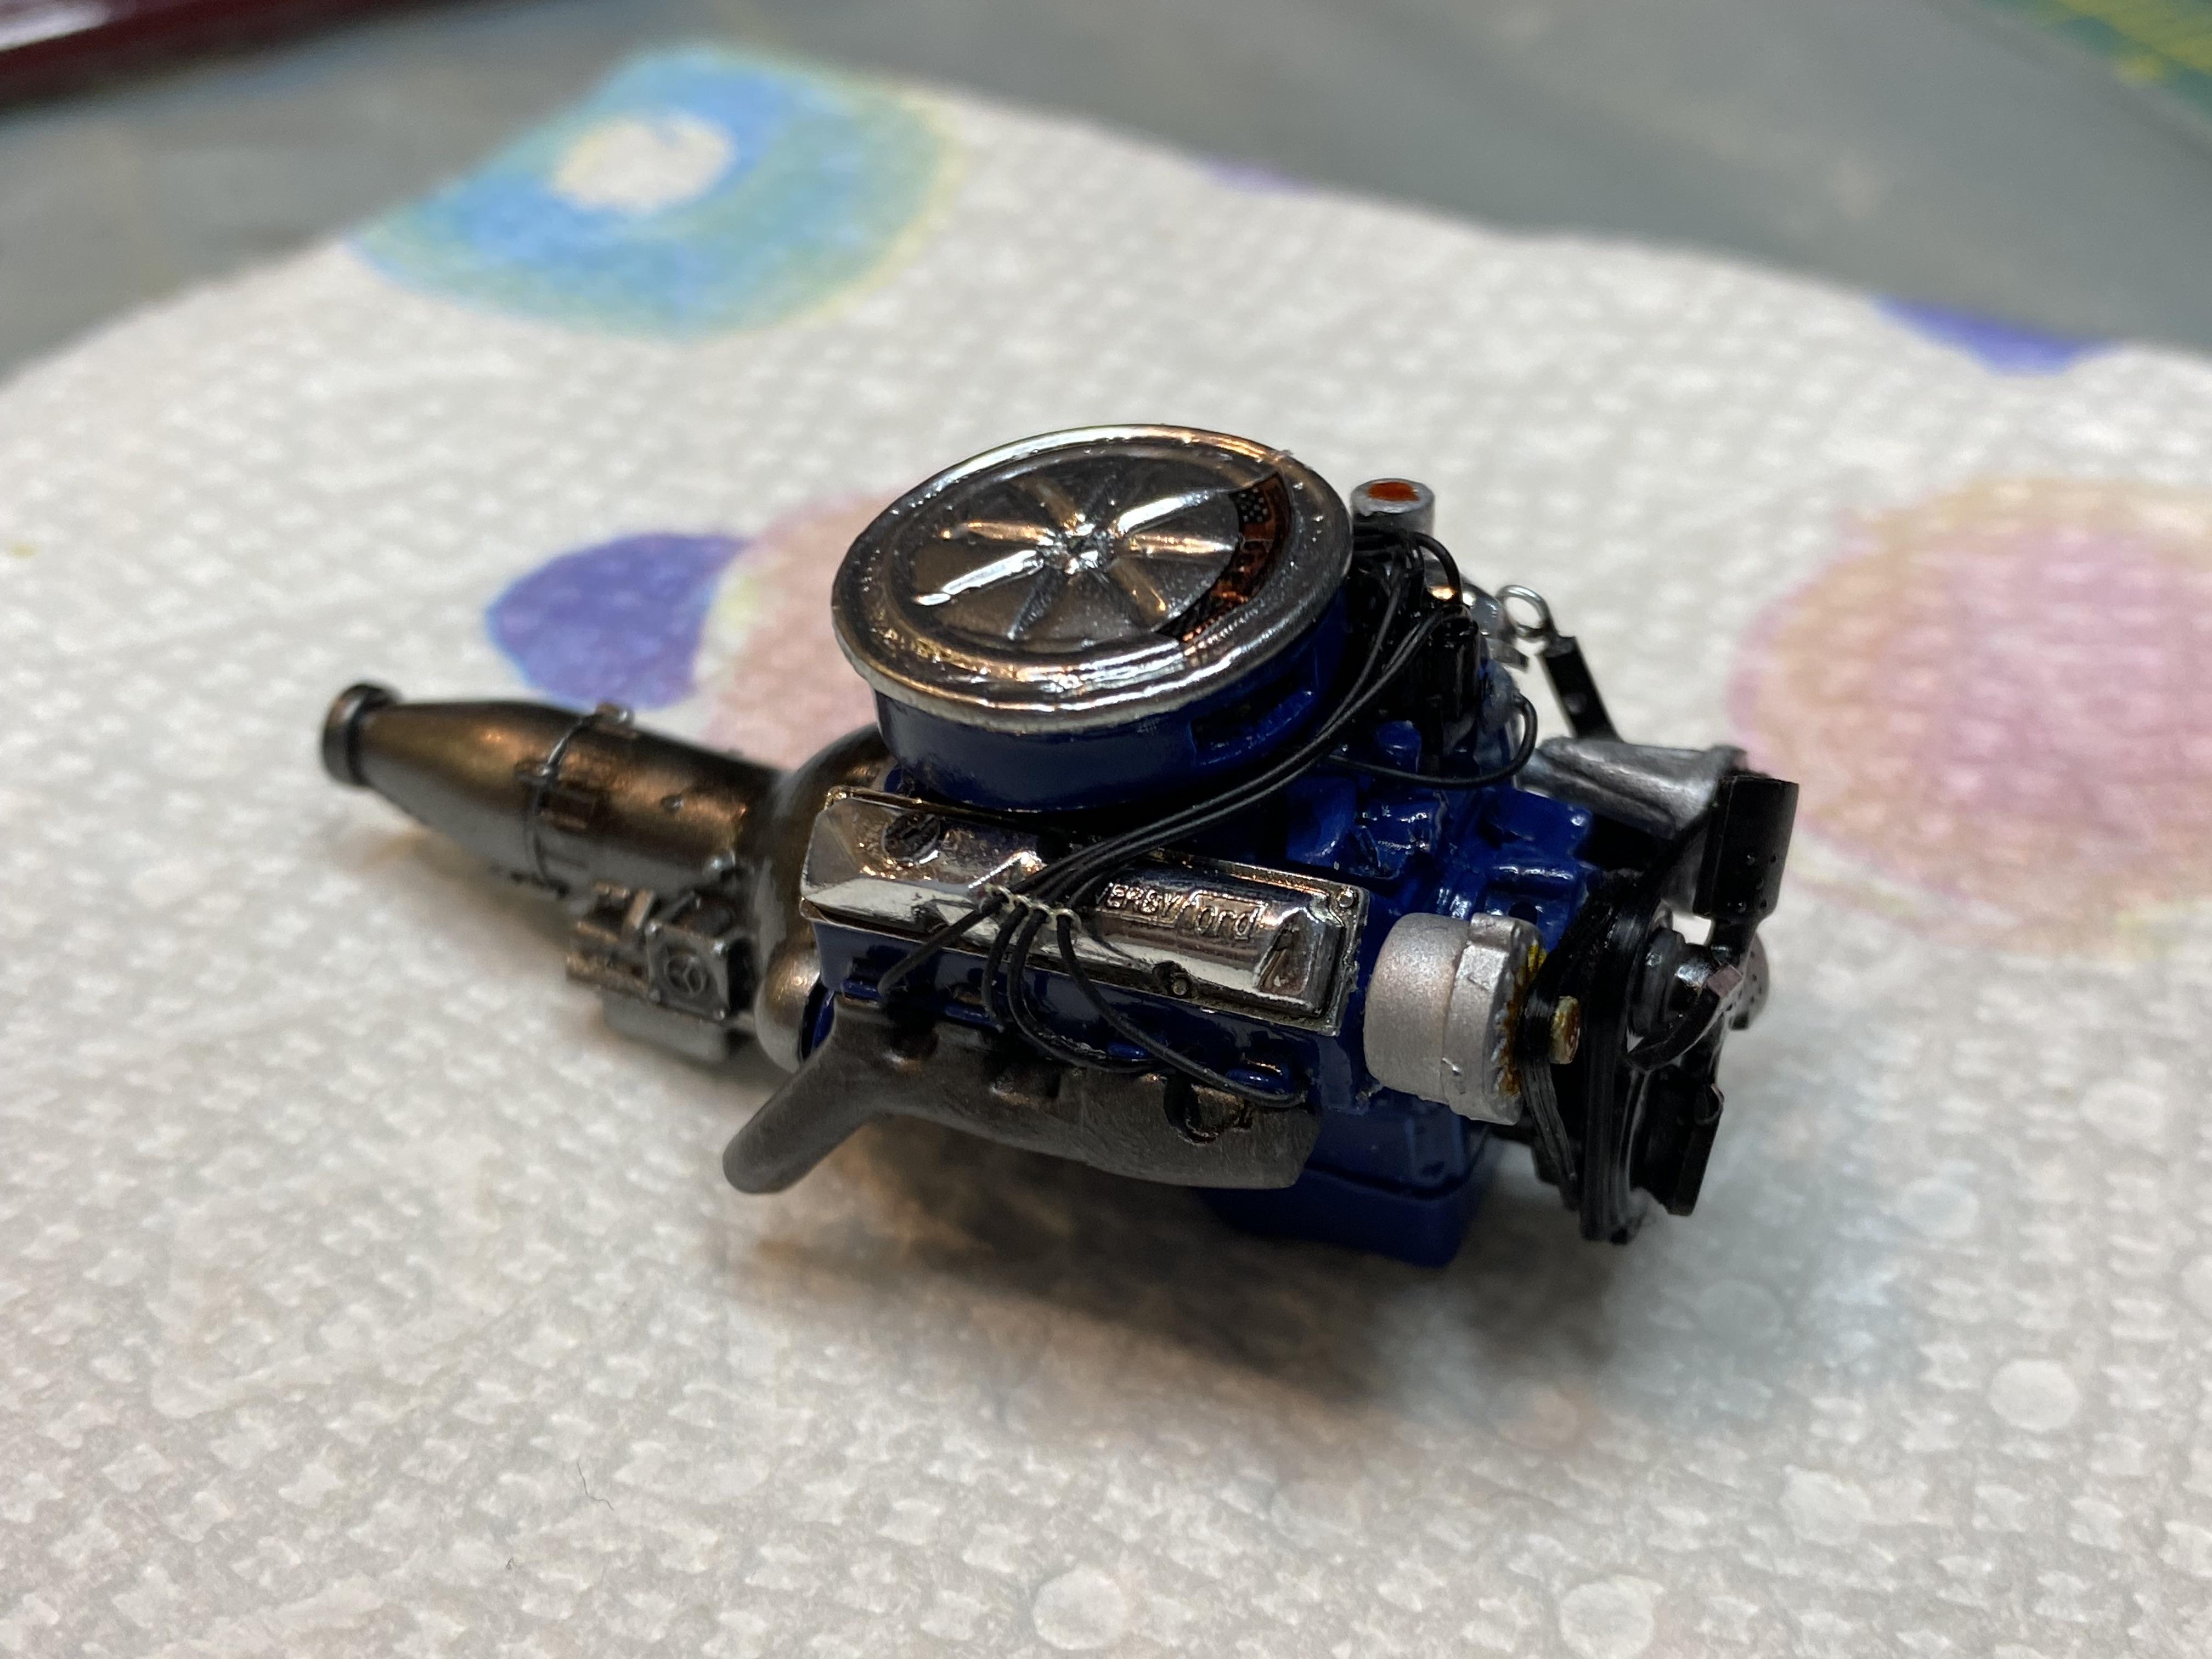
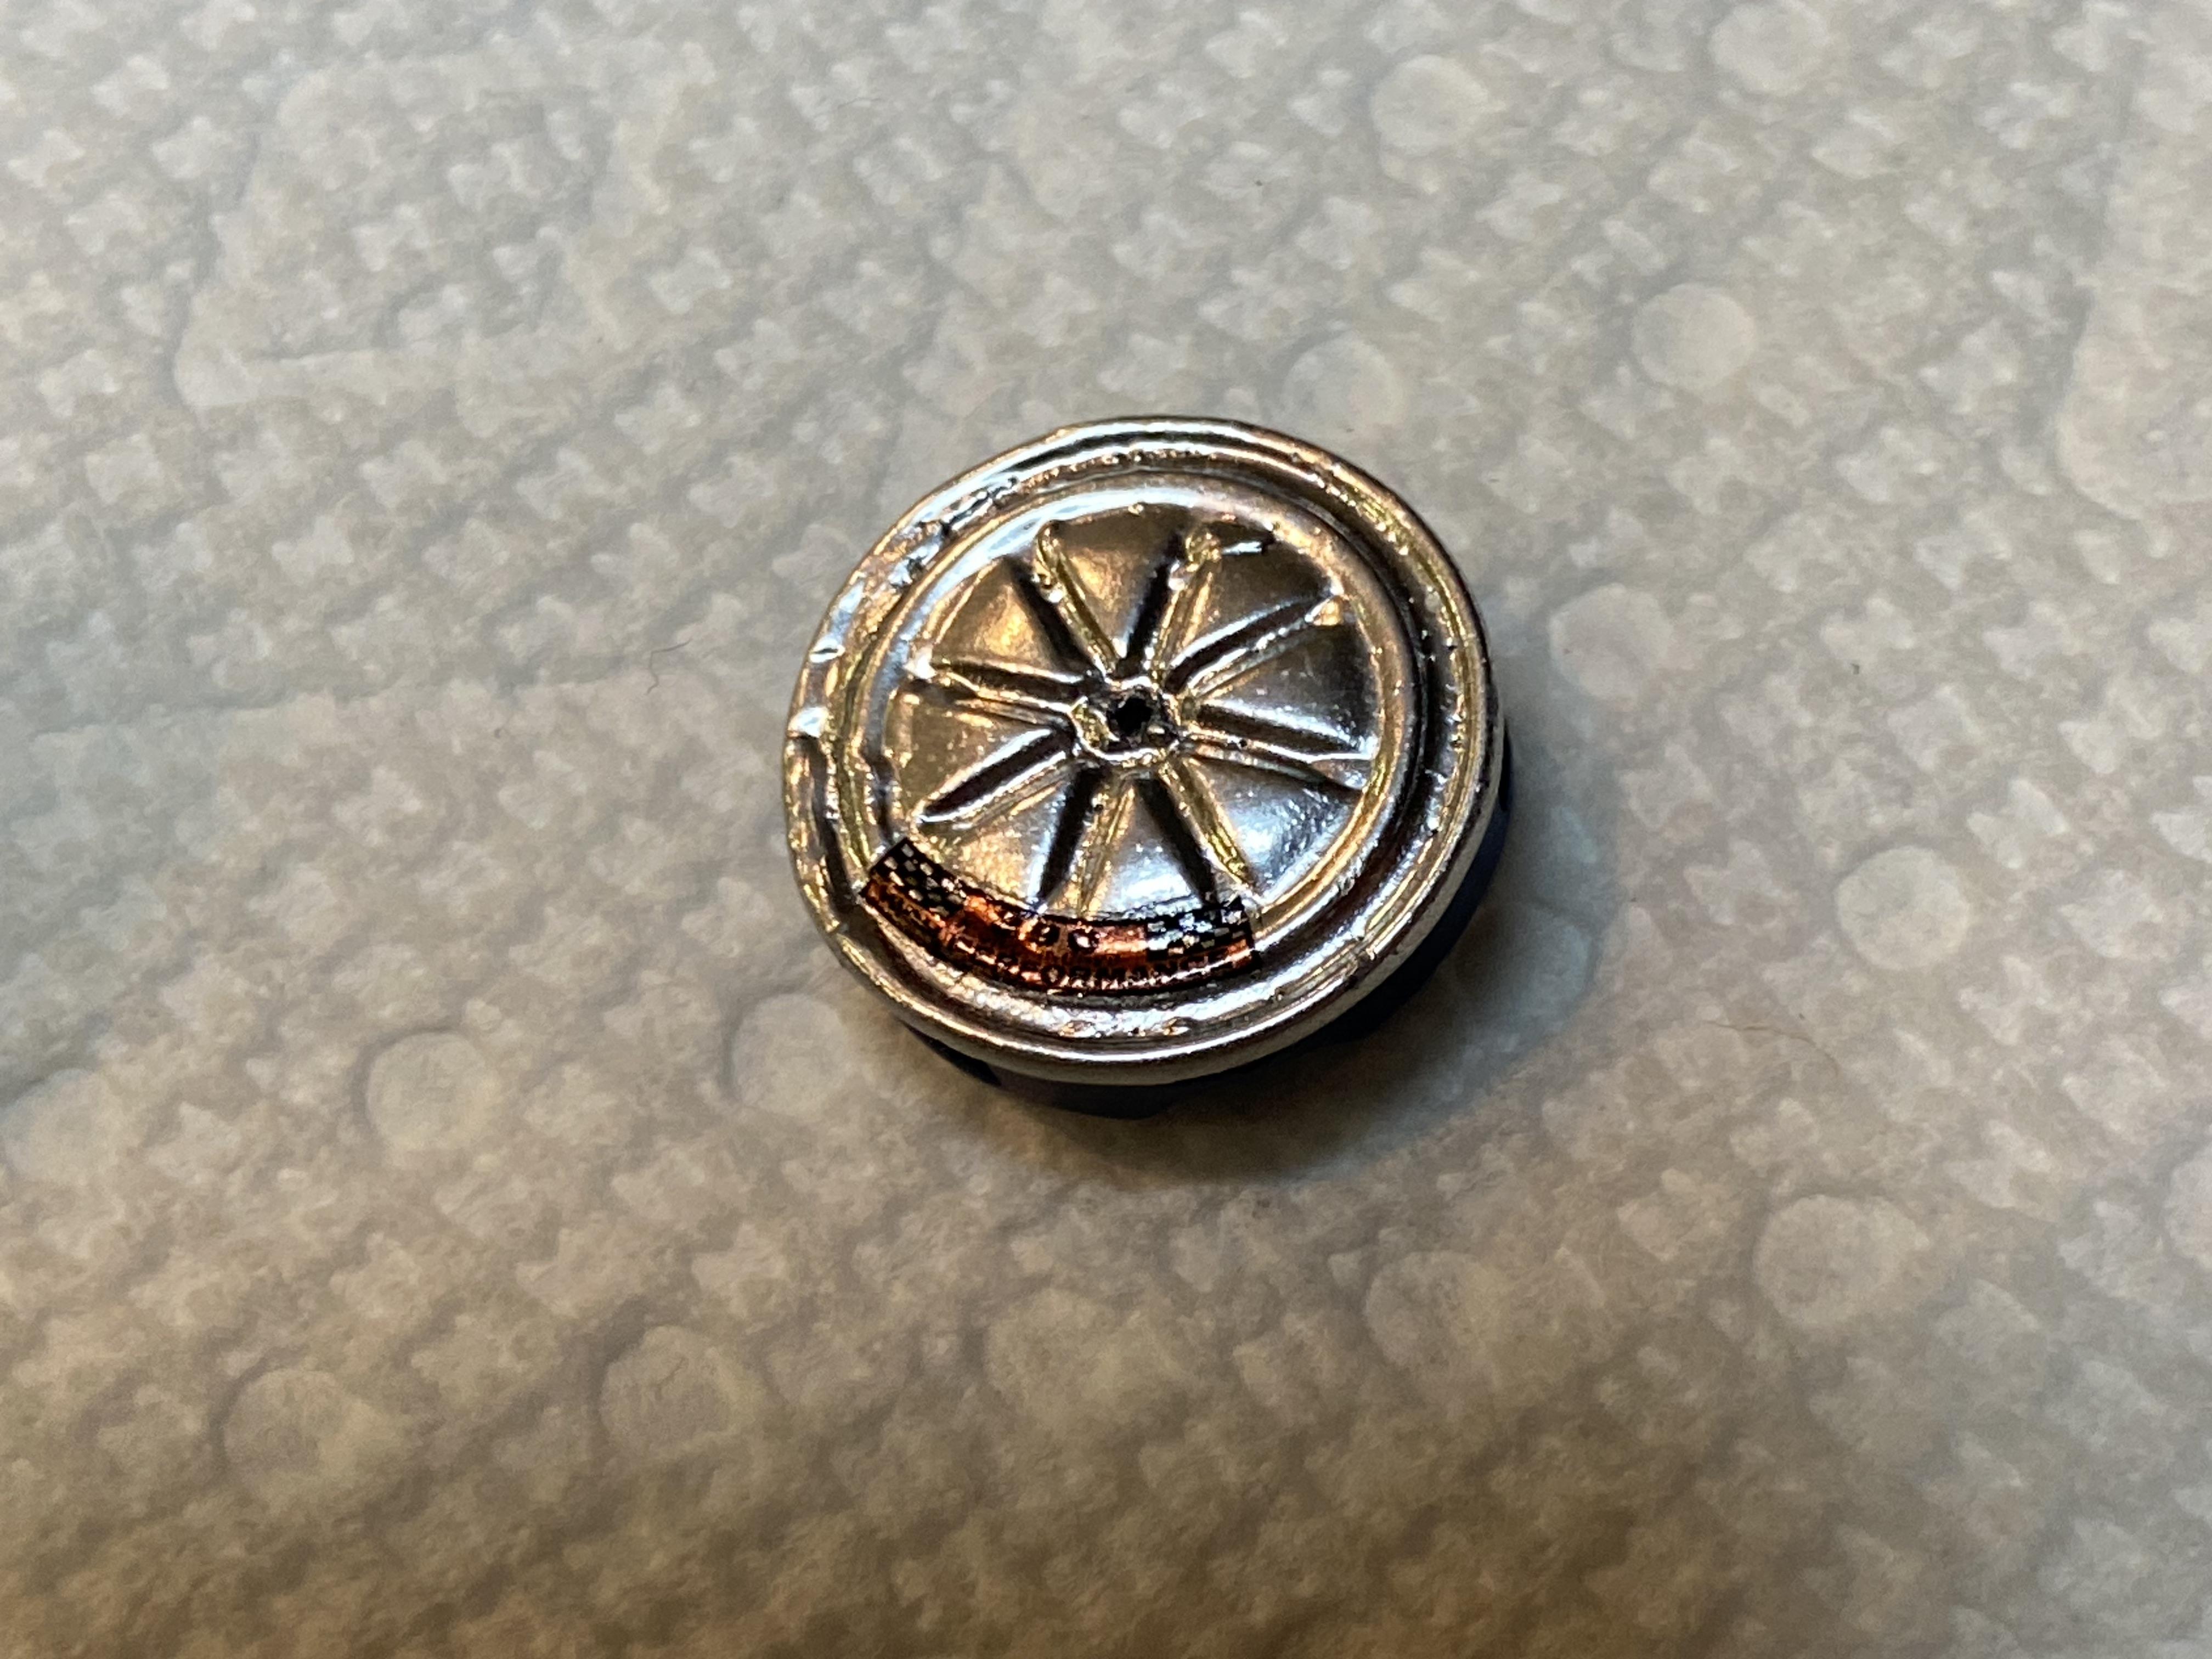
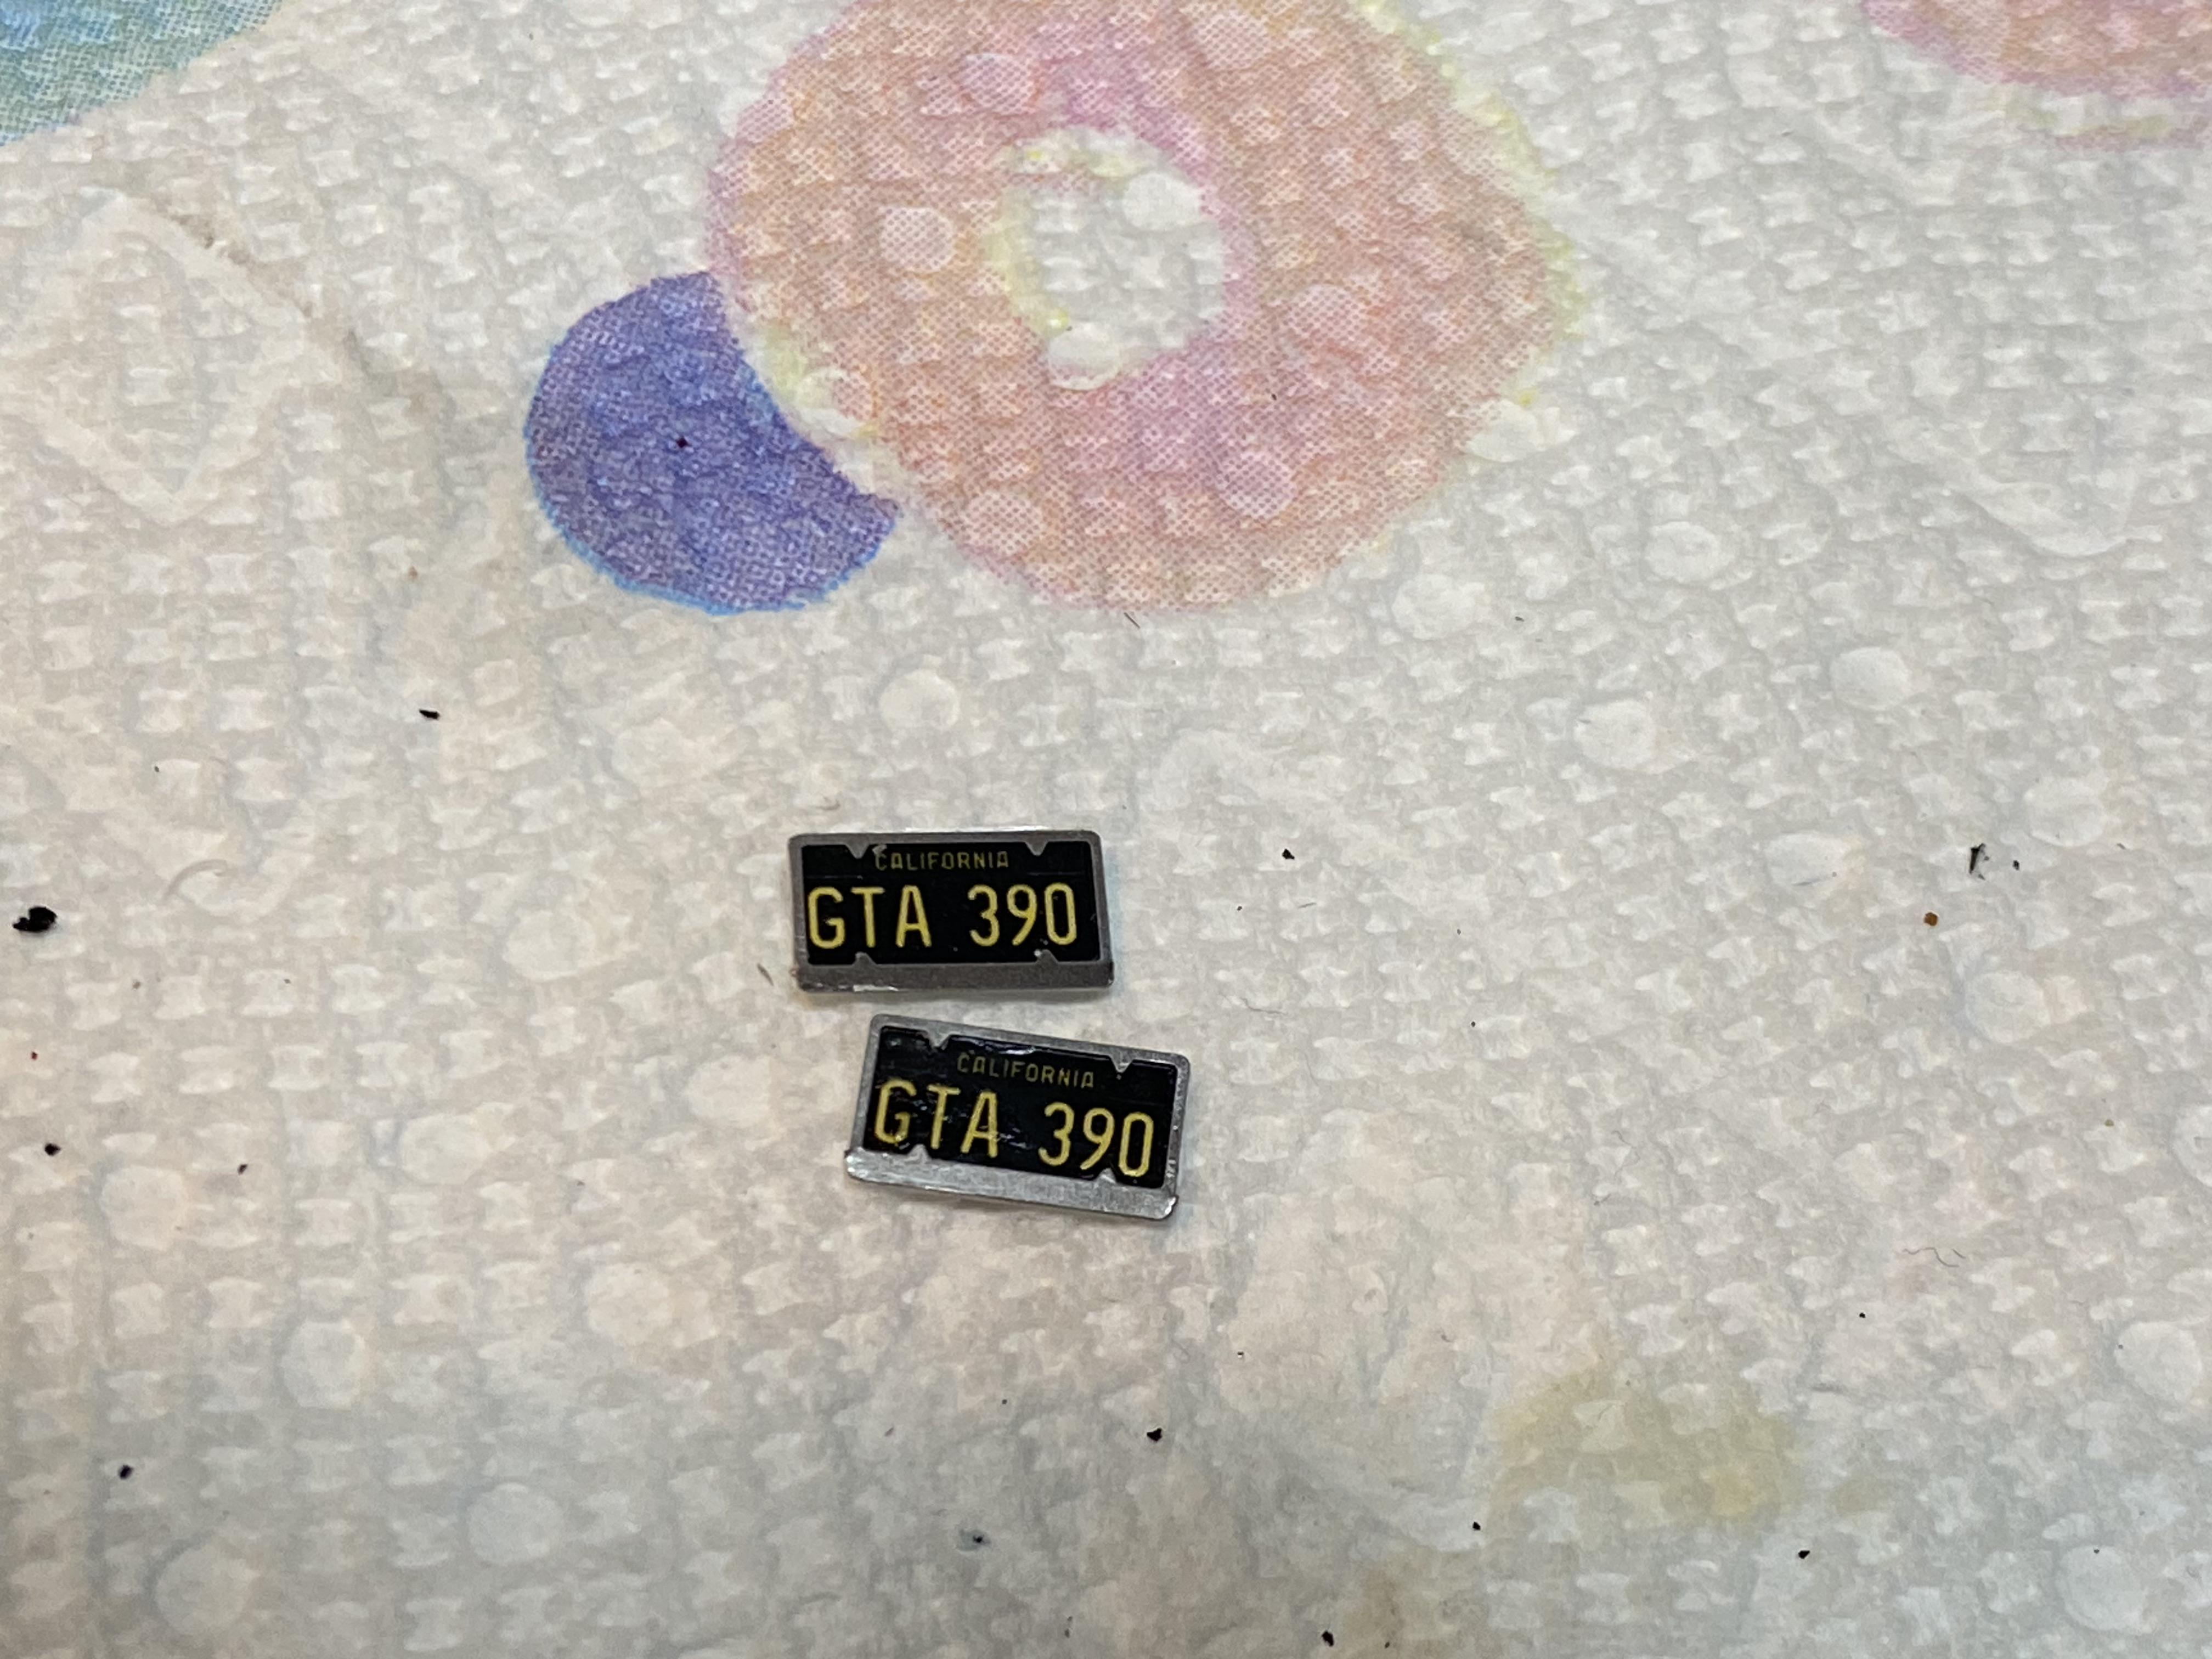
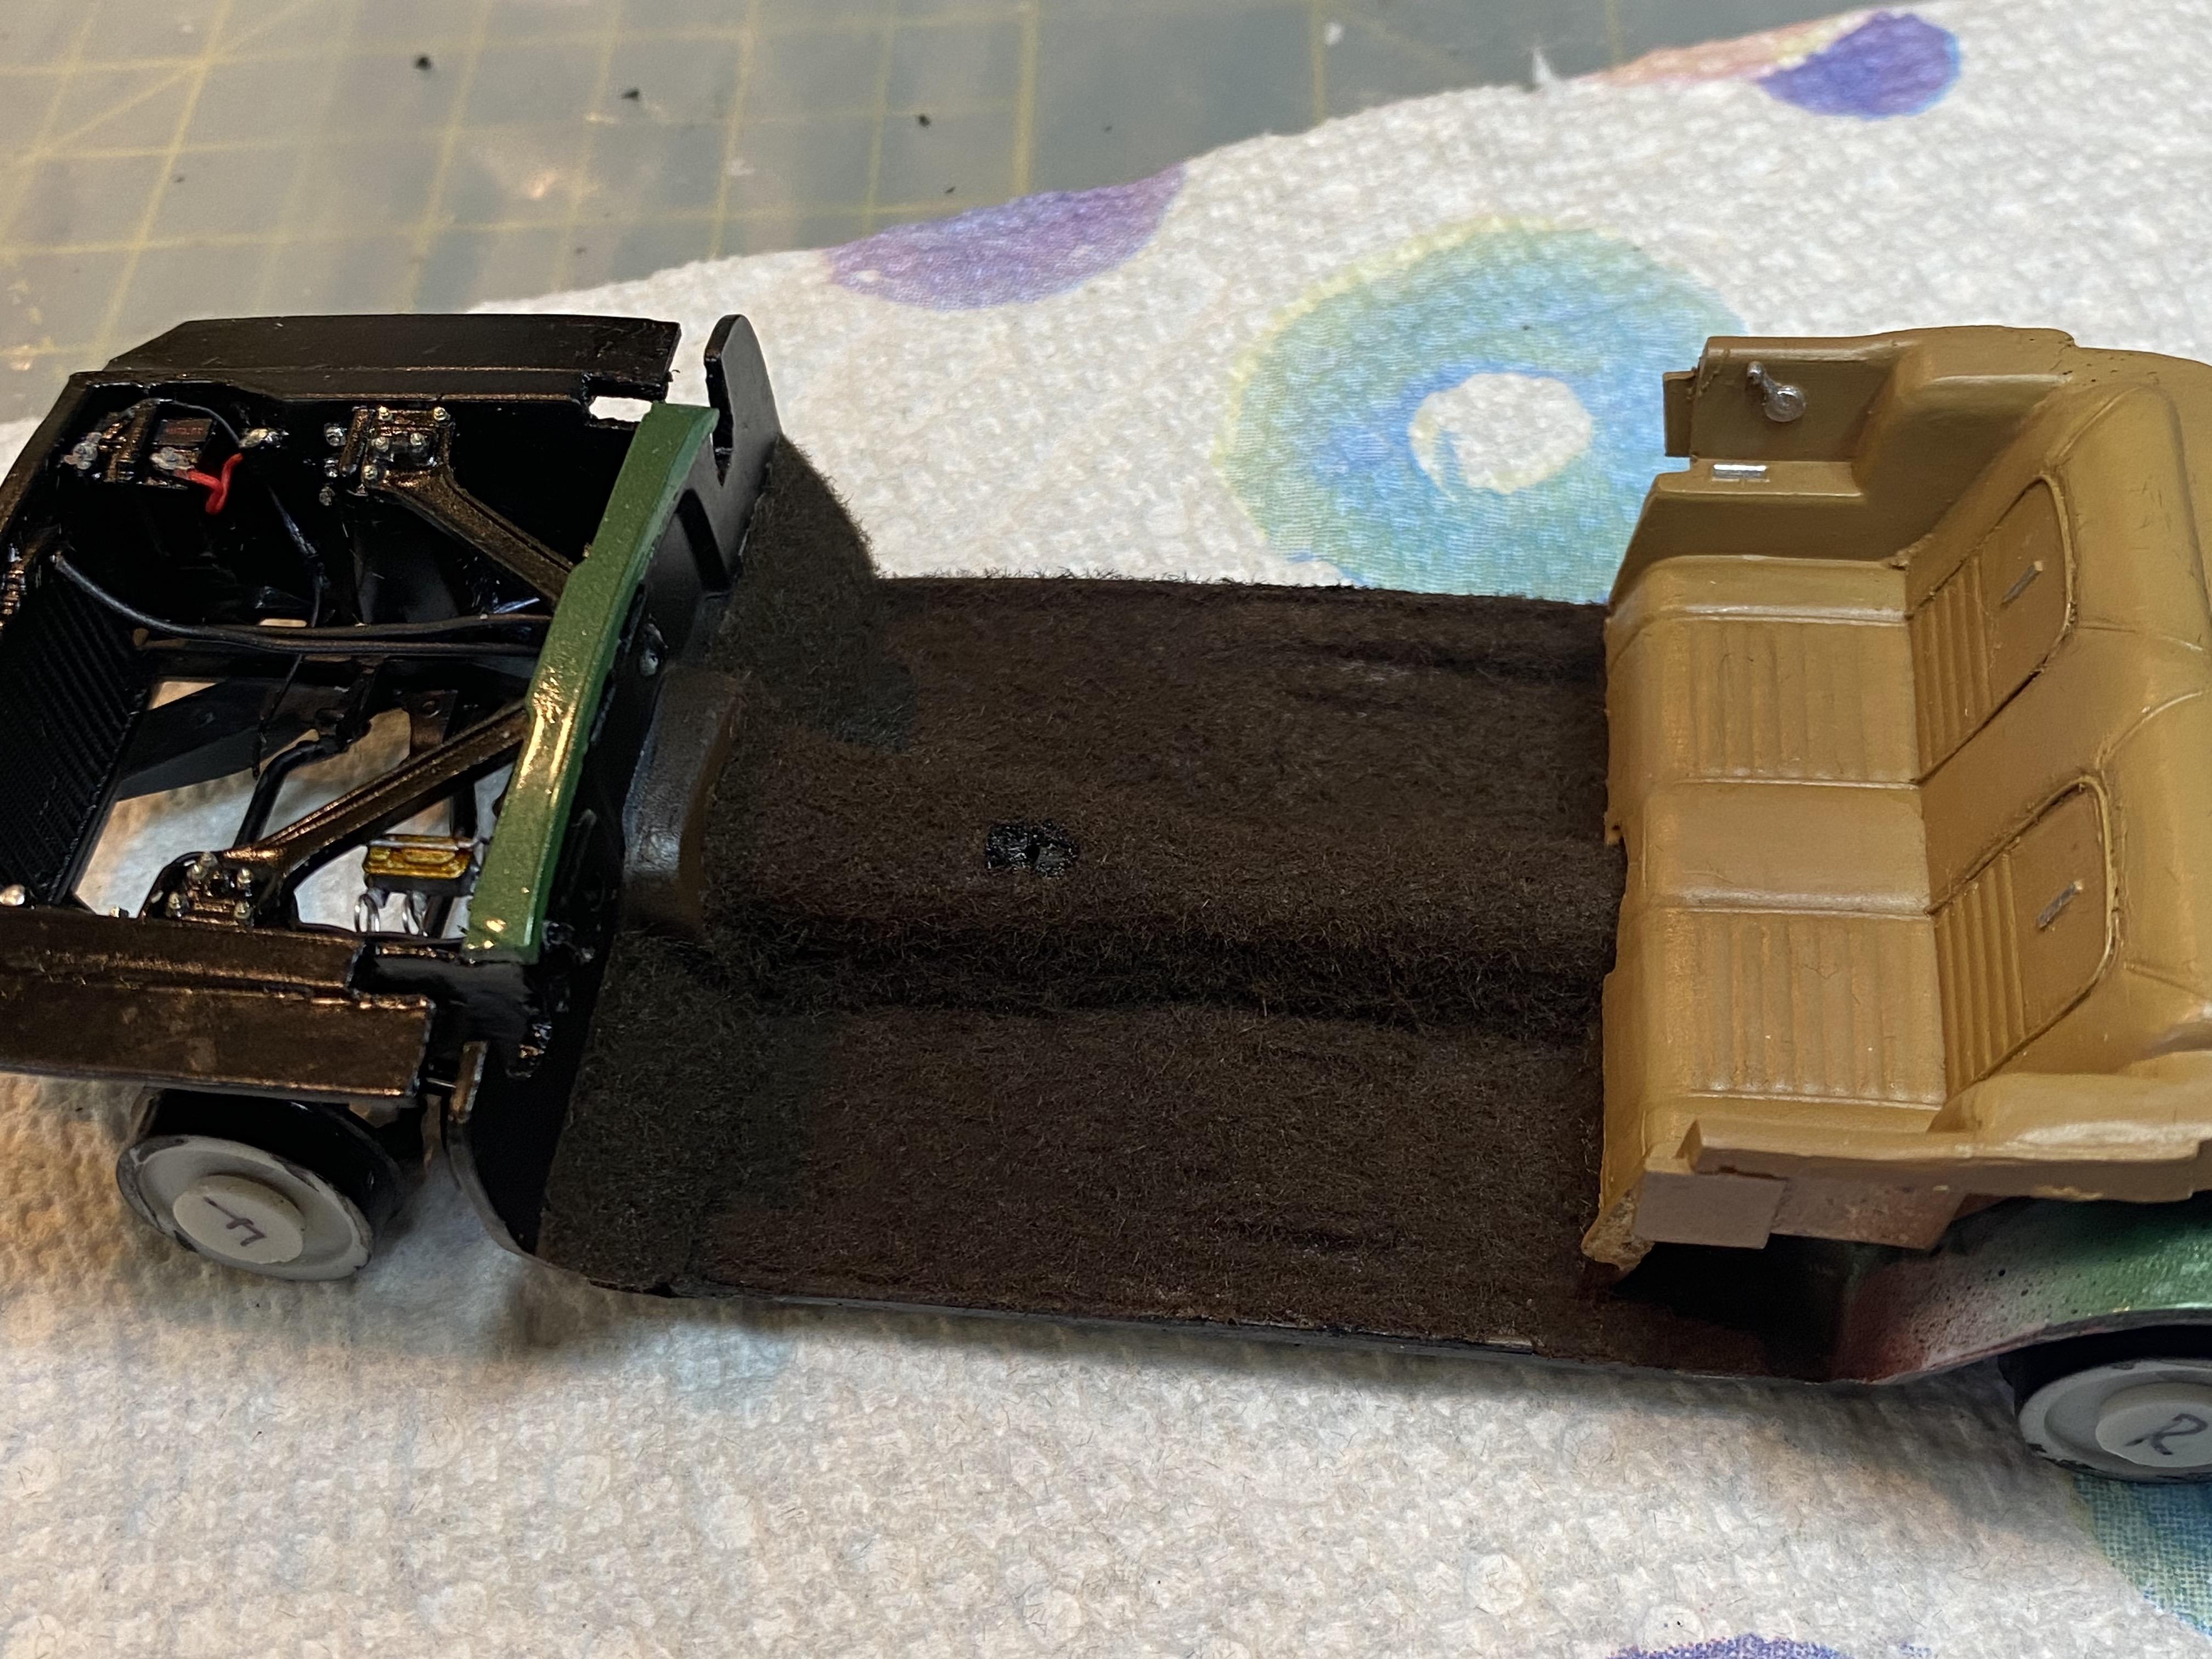
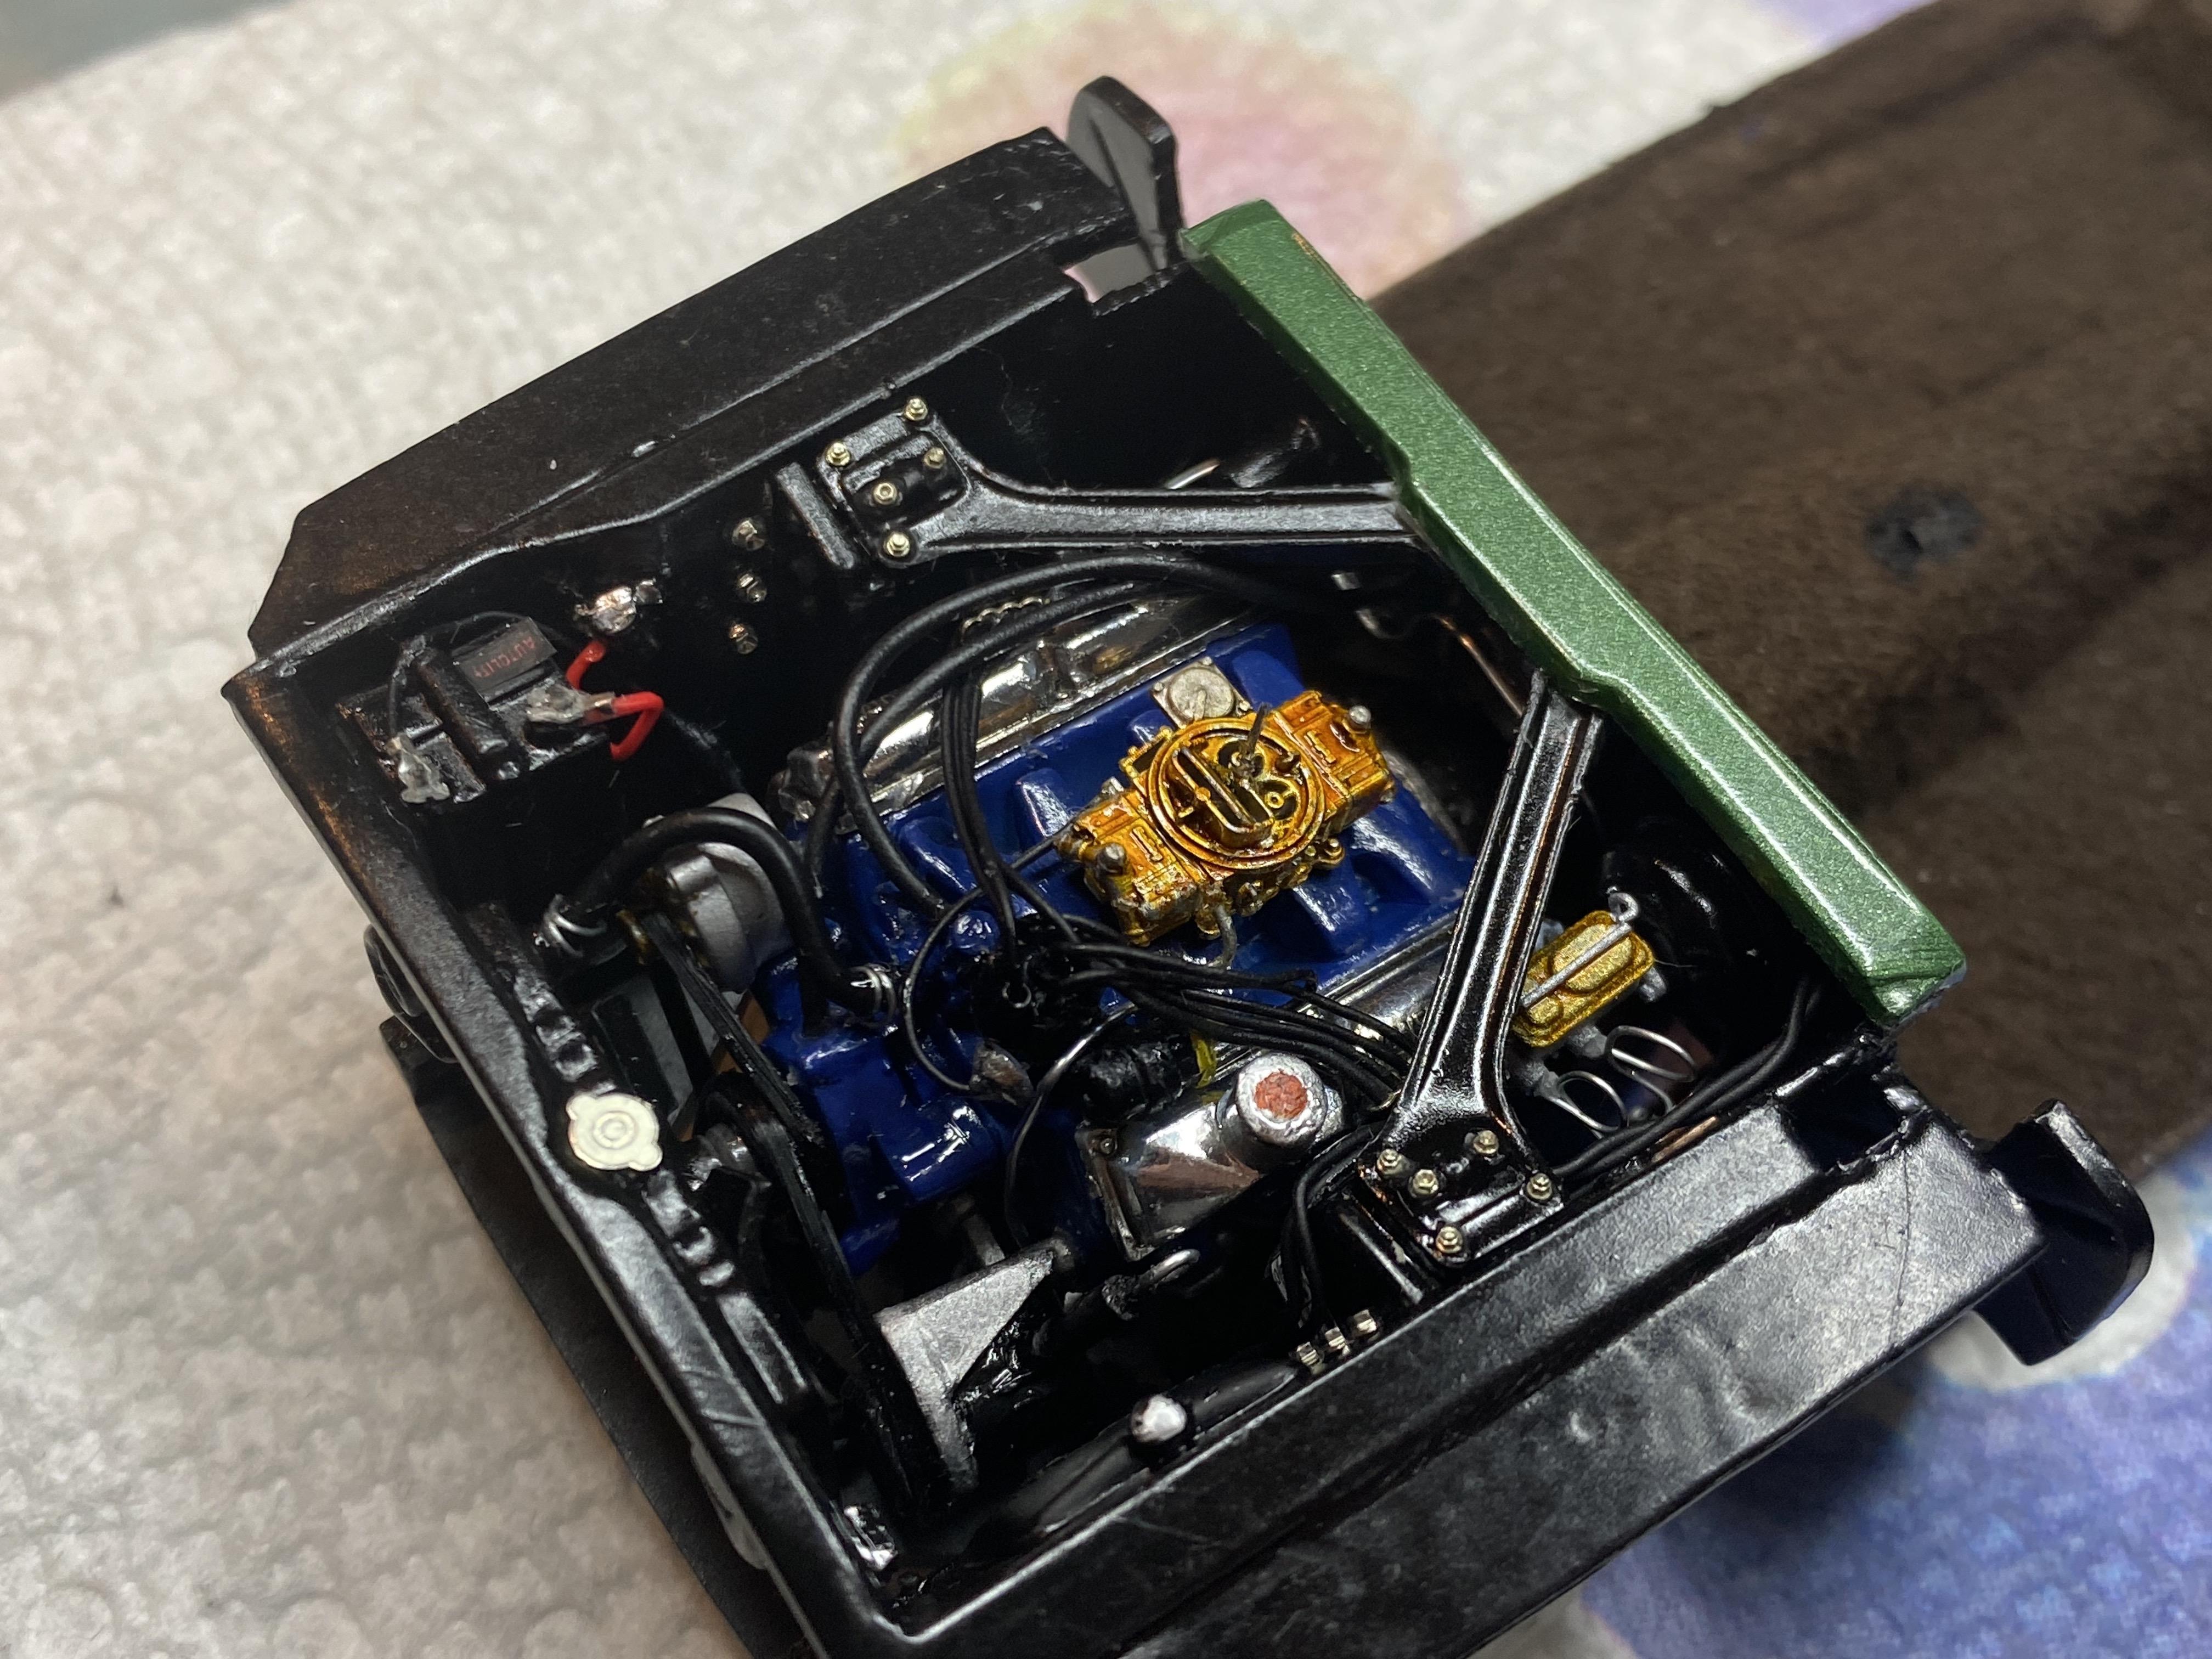
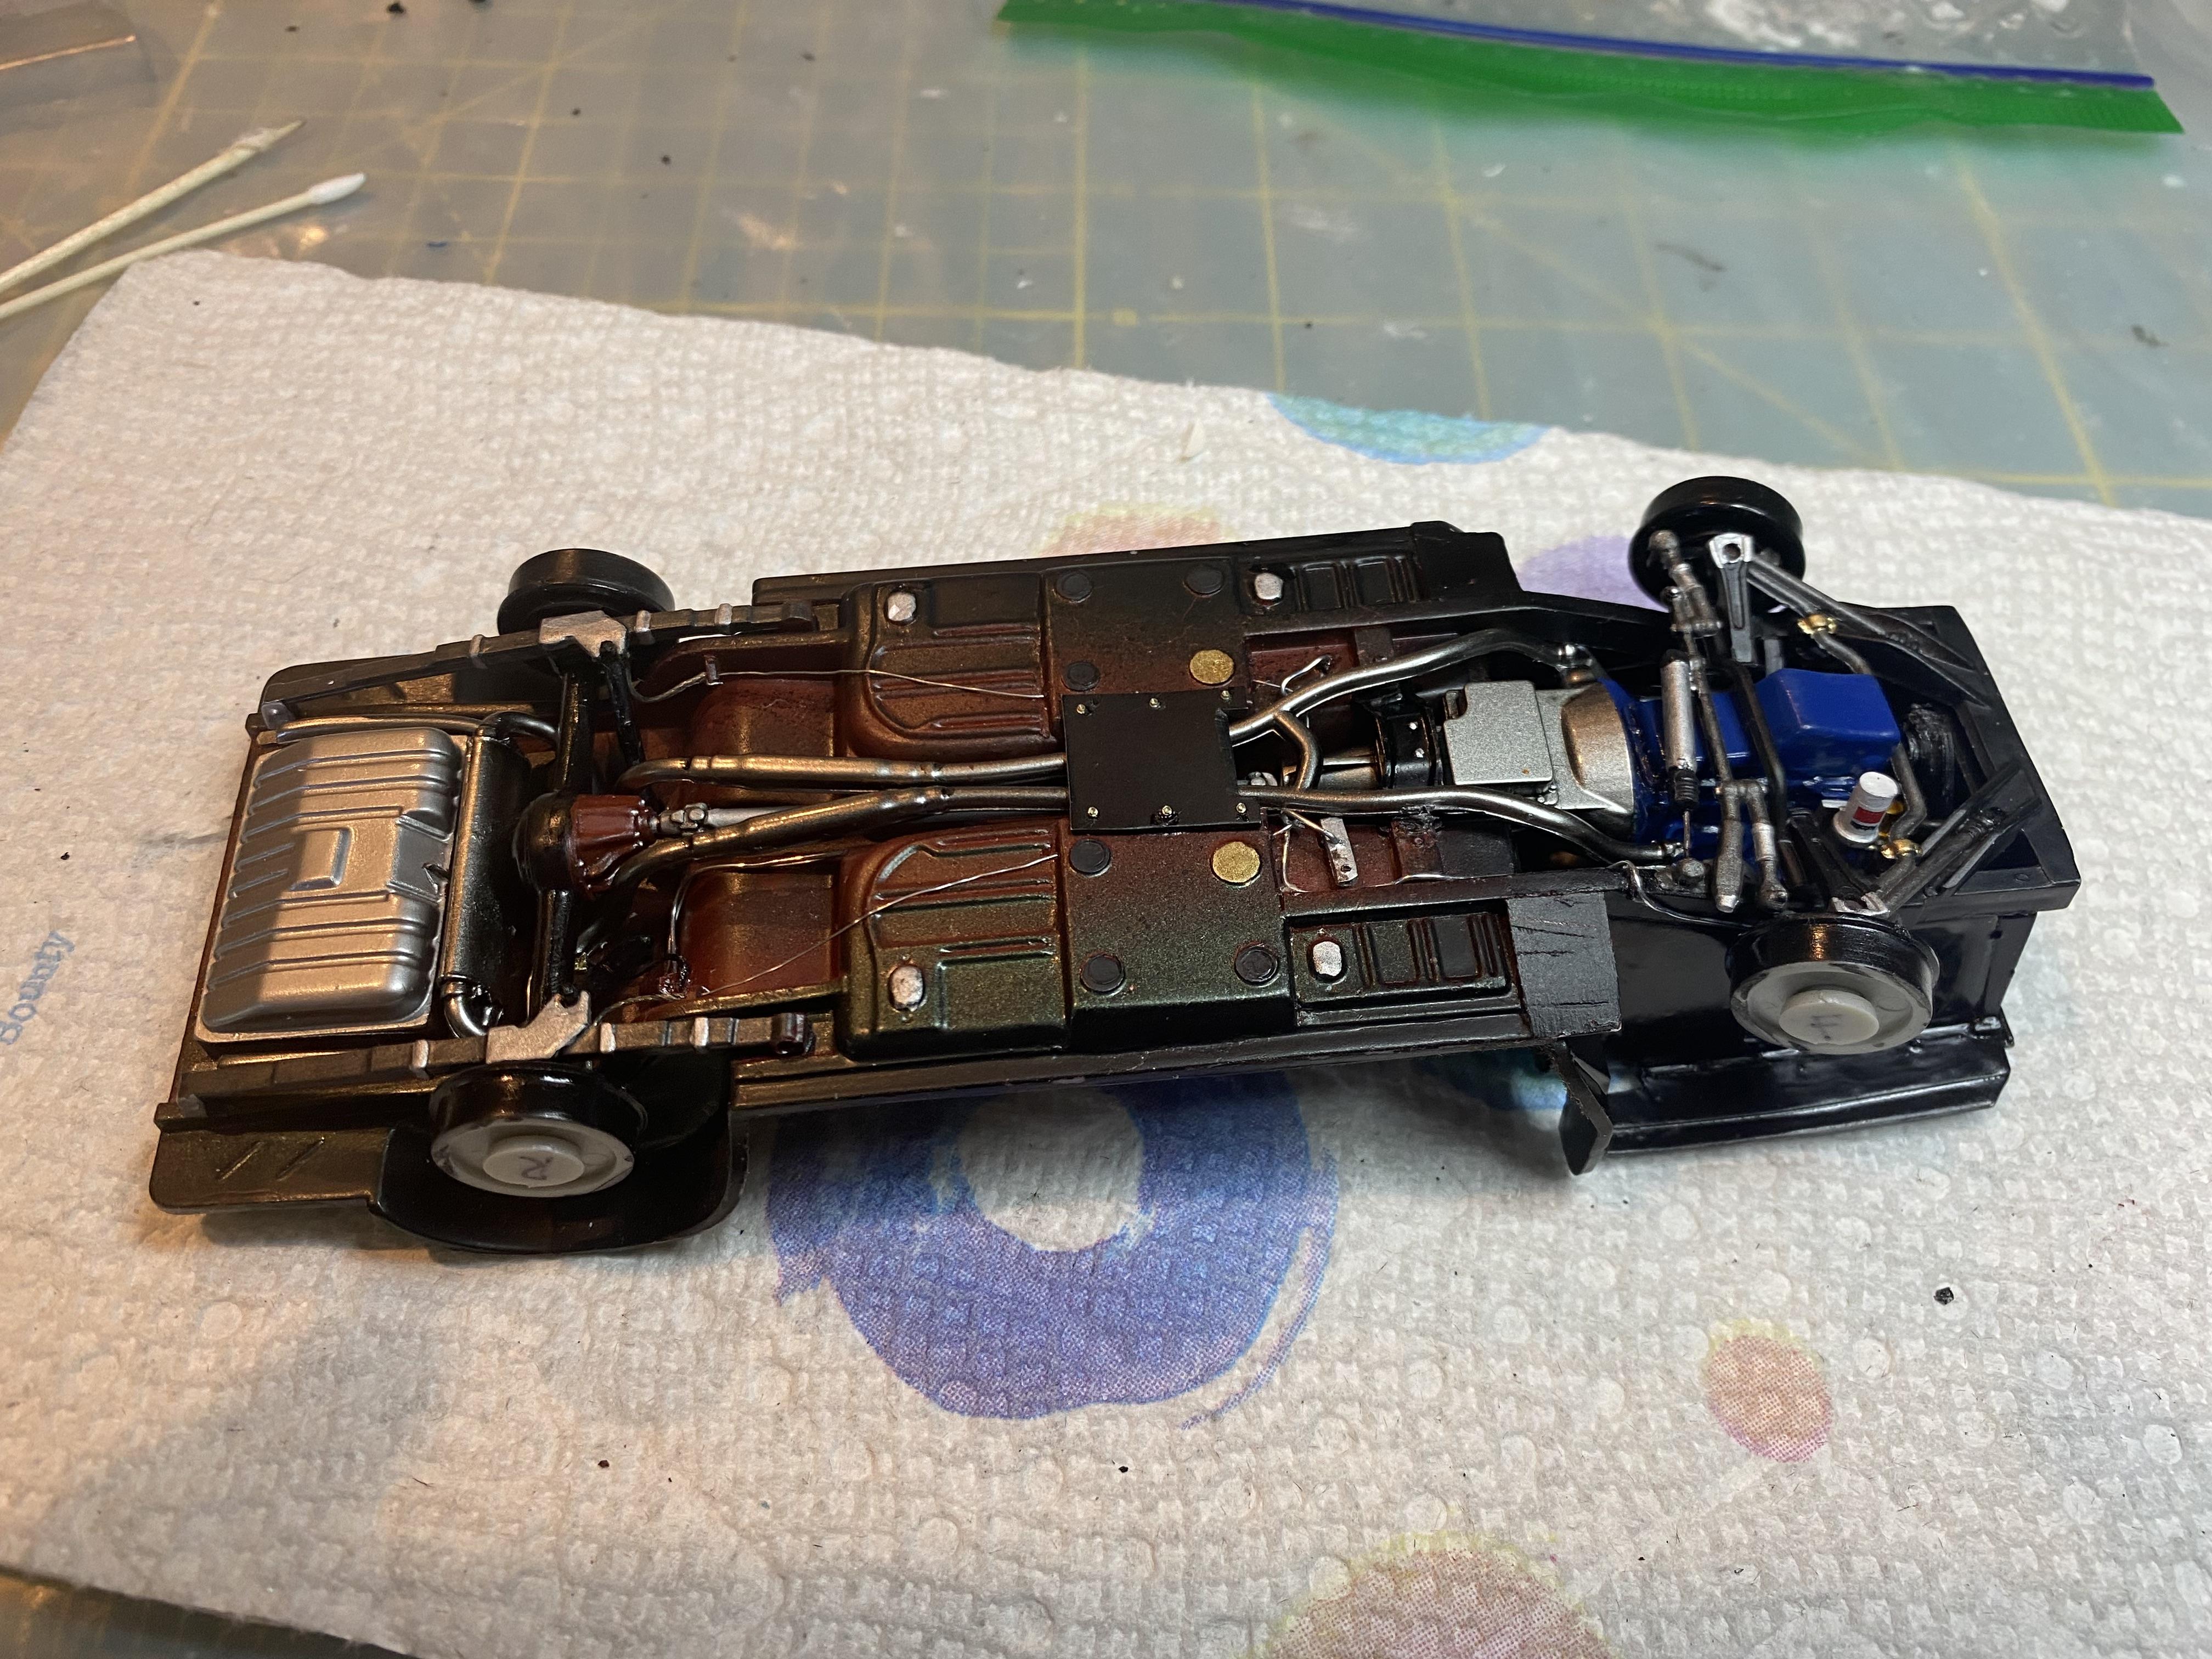
I got quite a bit done today. Added the PS, alternator and fan to the engine and created belts for 0.5mm flat elastic. I attached the transmission as well. The air cleaner is designed to be removable. created appropriate license plates and flocked the carpet areas. added the tinted windshield and rear view mirror to the body. installed the engine in the chassis and completed detailing the chassis and engine compartment. installed the interior components to the chassis. Next to create seatbelts. I will also place a set of keys with a mustang keychain in the interior for a little extra touch. Also need to install the LED wiring harness to the chassis before I drop on the body.
-
Thank you! It is getting there.


.jpeg.8833efe193d892edb322f46898cfa2a9.jpeg)