Duddly01
-
Posts
1,048 -
Joined
-
Last visited
Content Type
Profiles
Forums
Events
Gallery
Everything posted by Duddly01
-
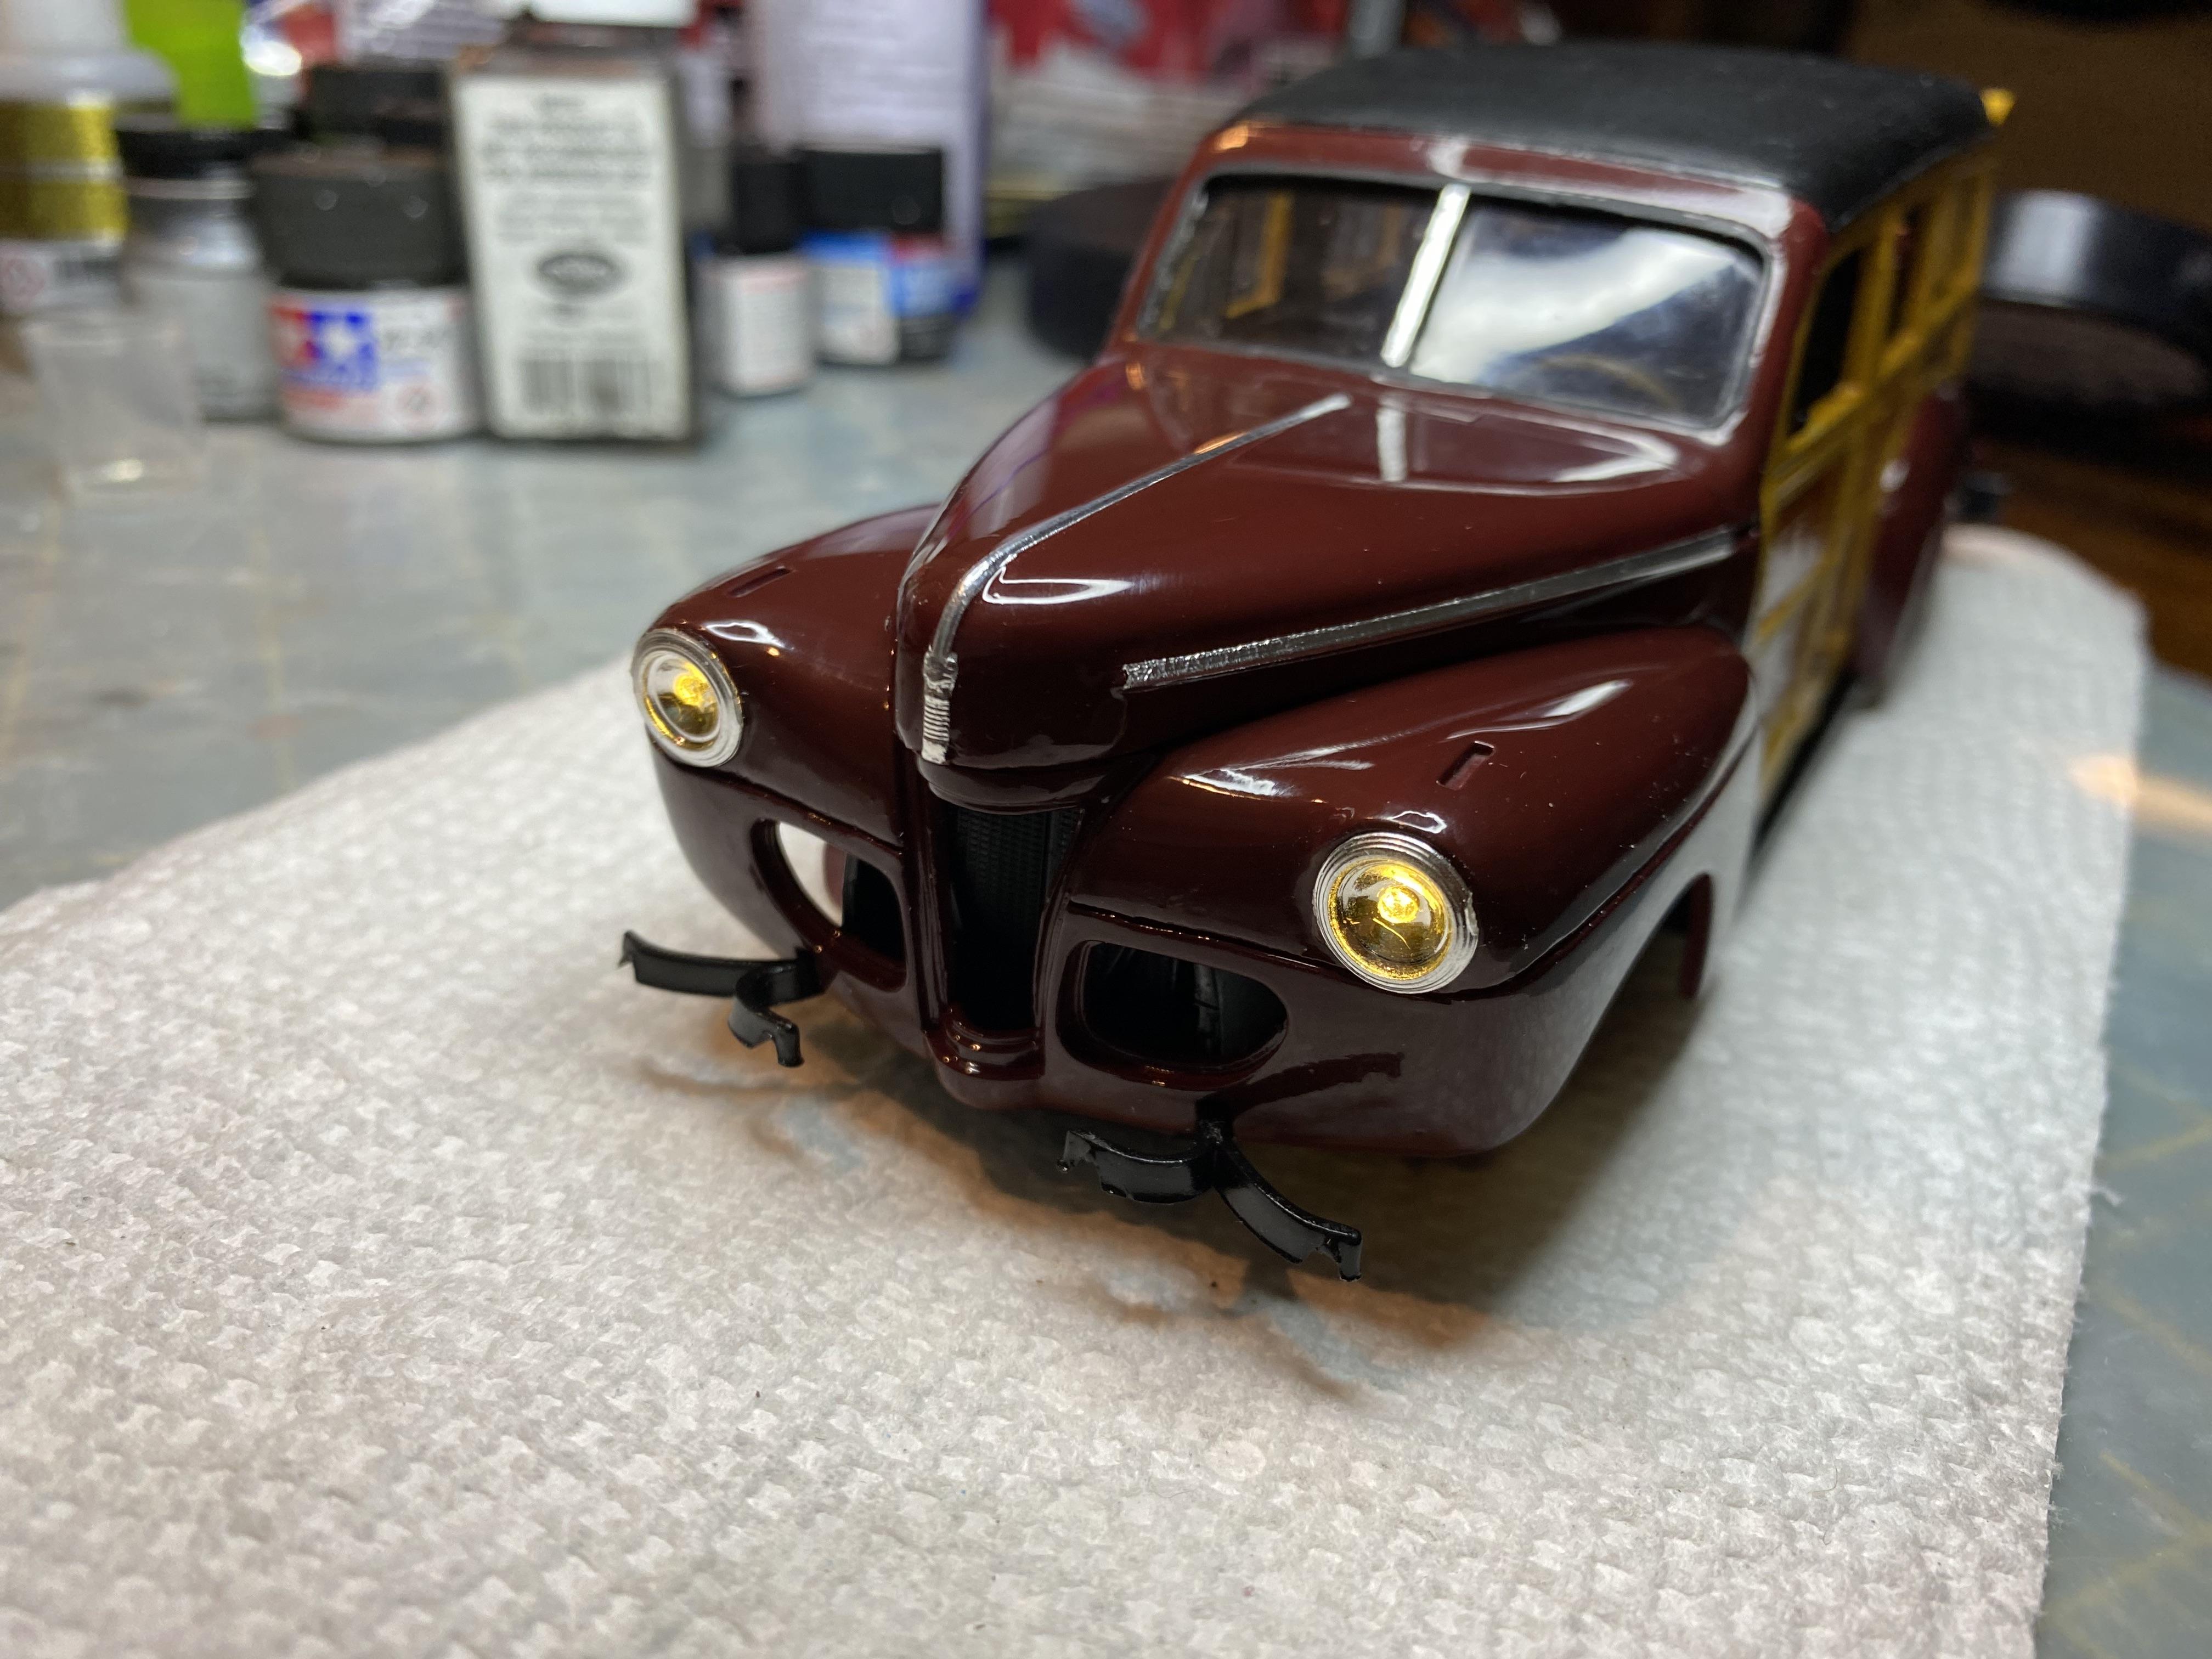
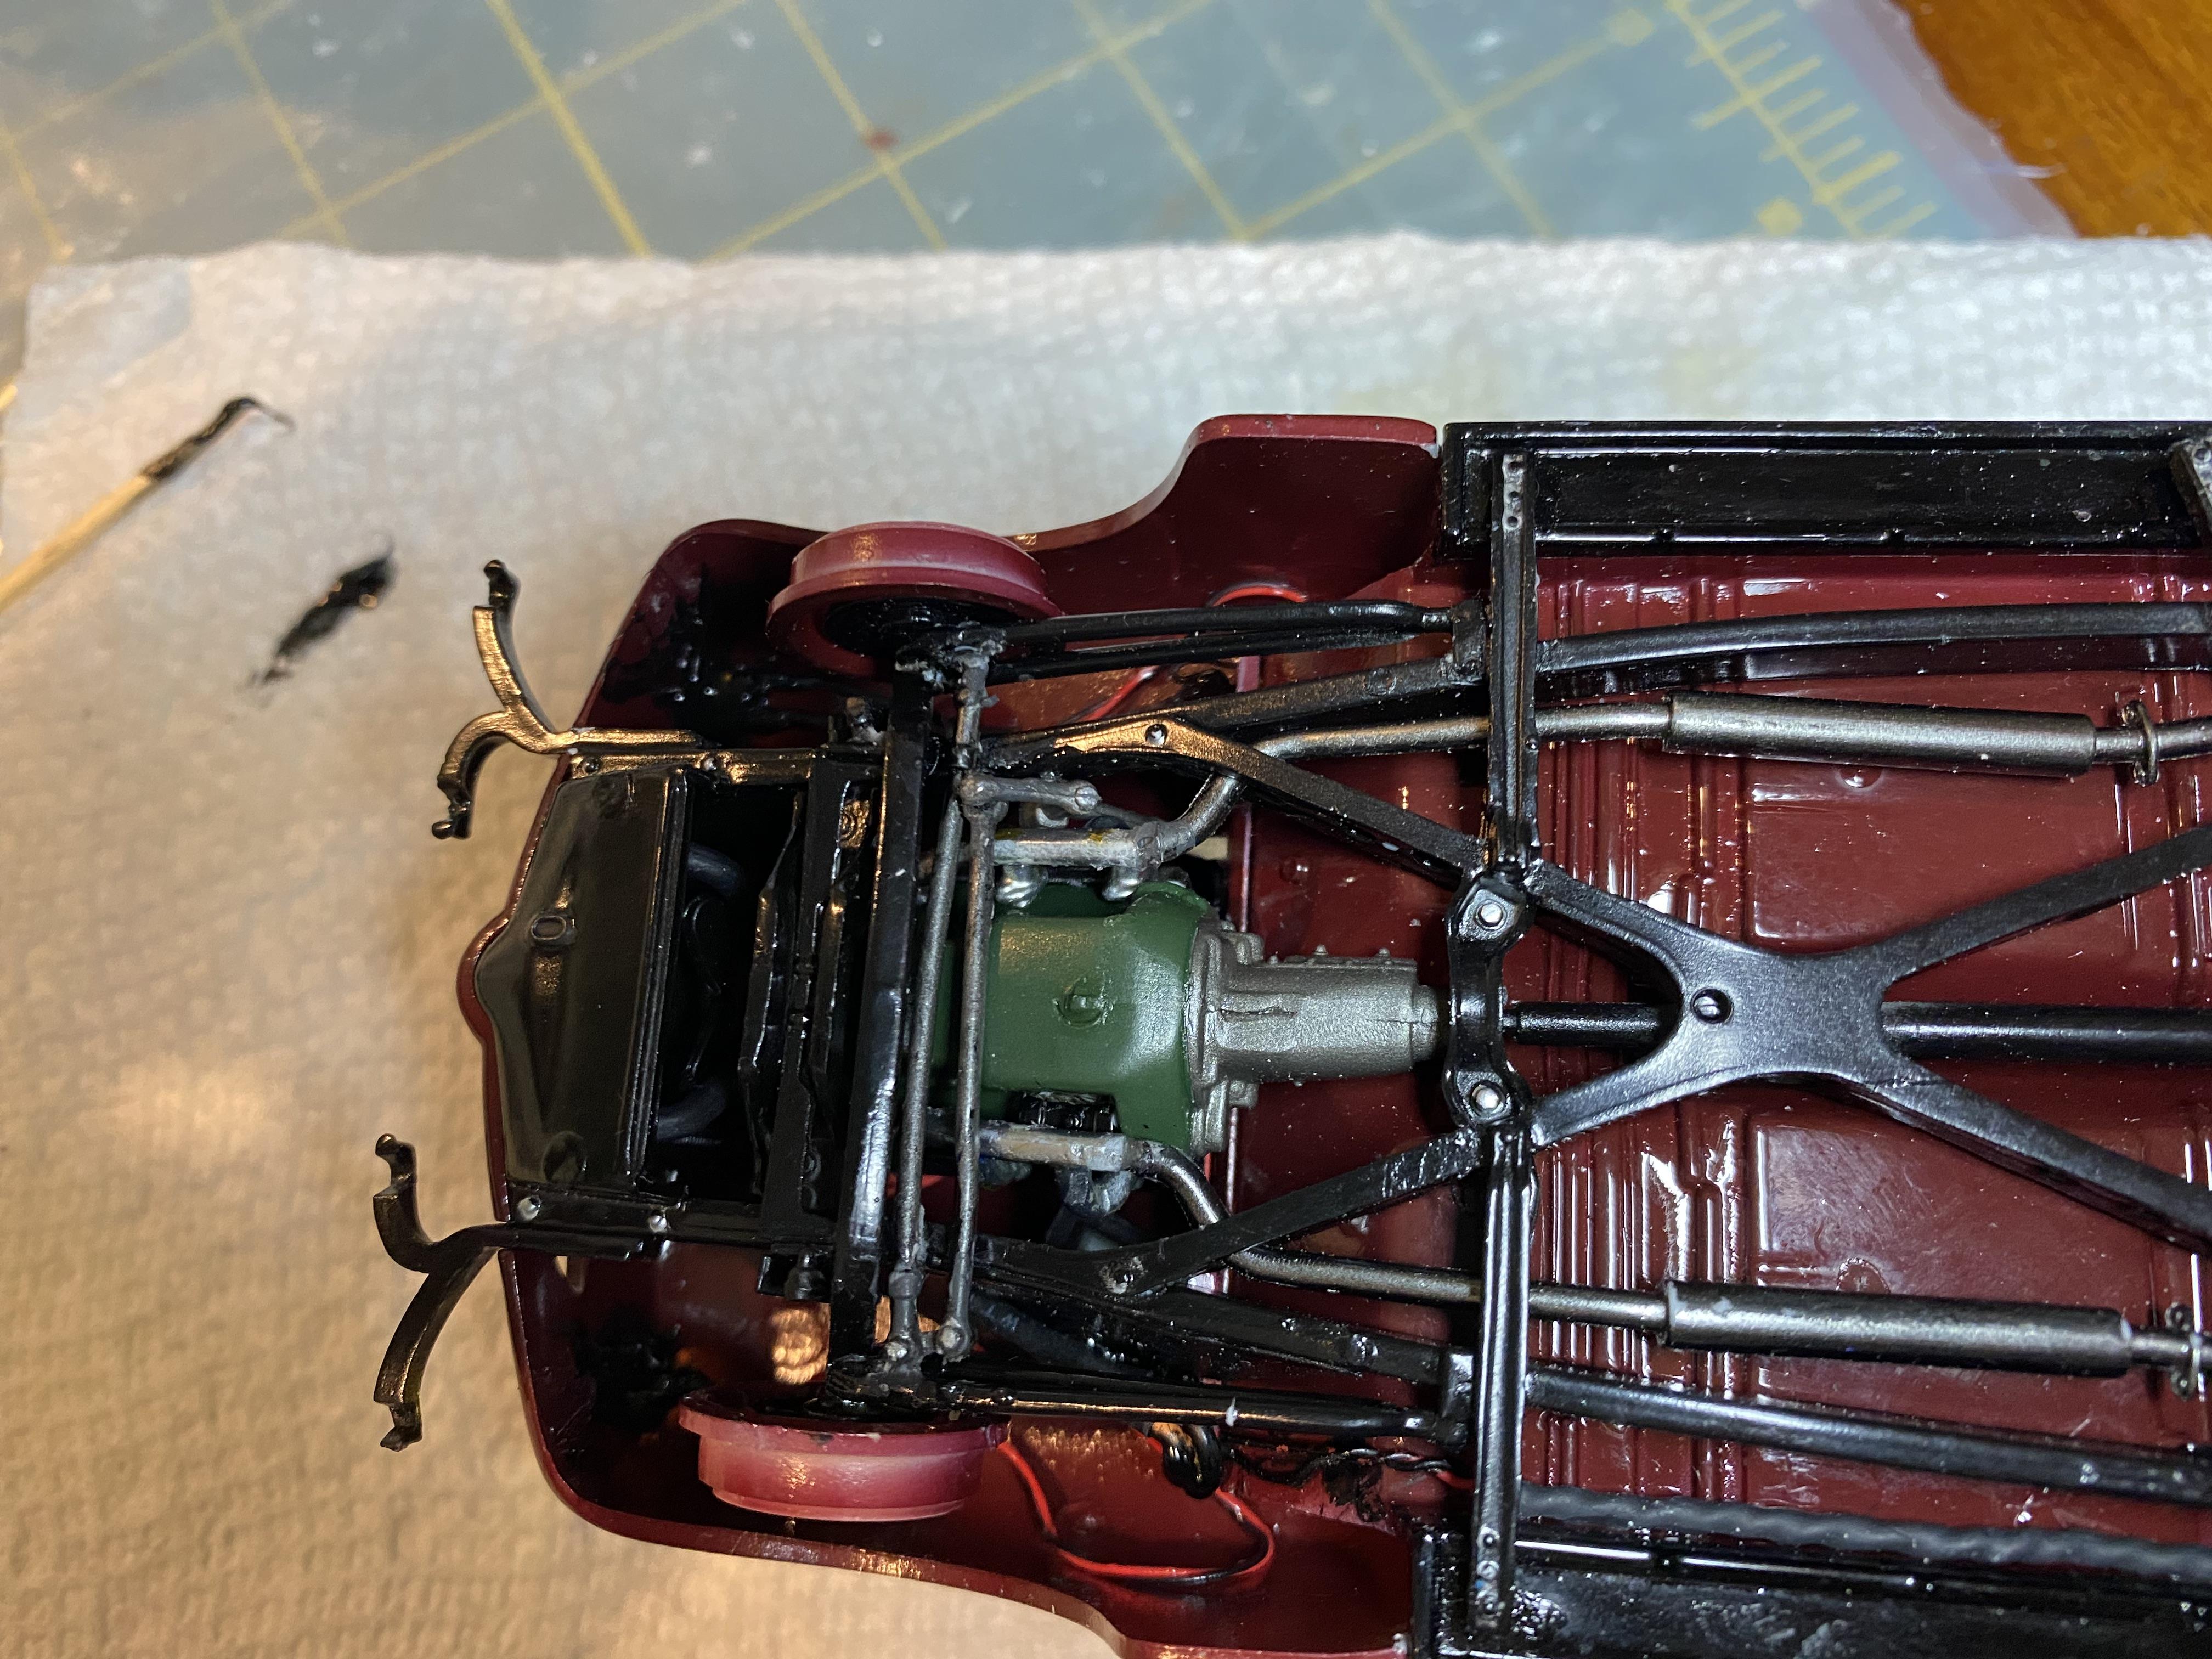
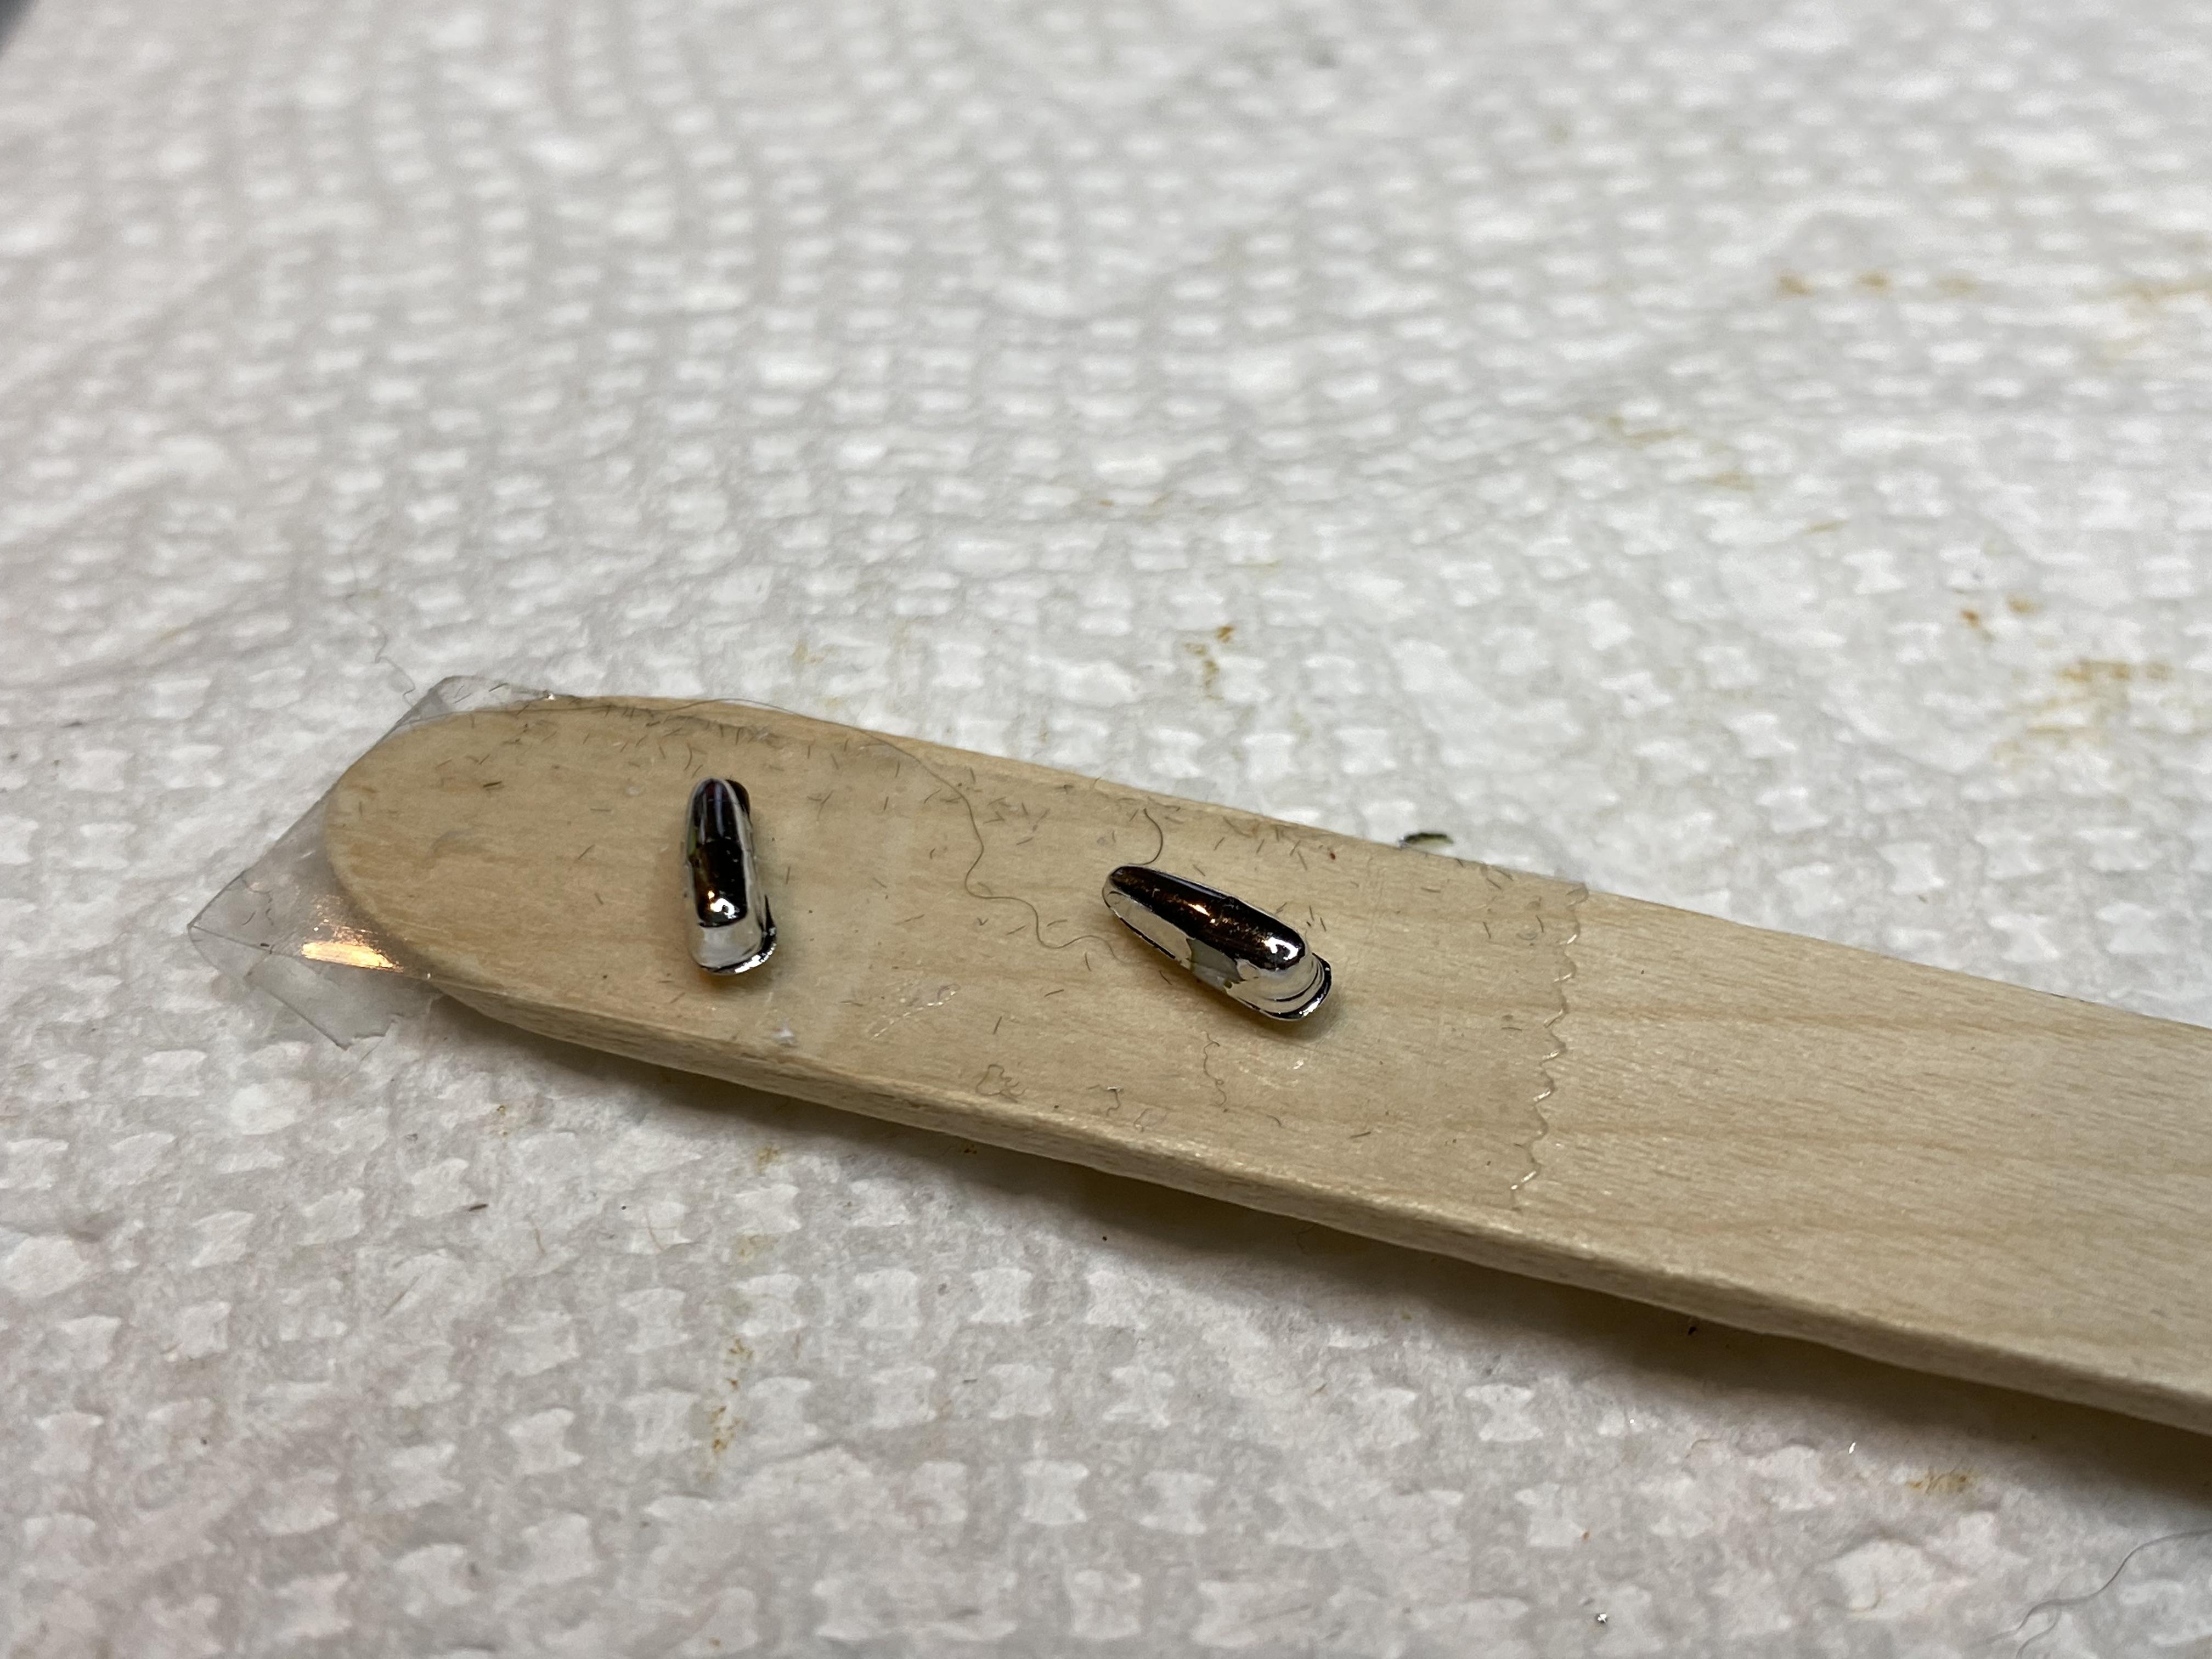
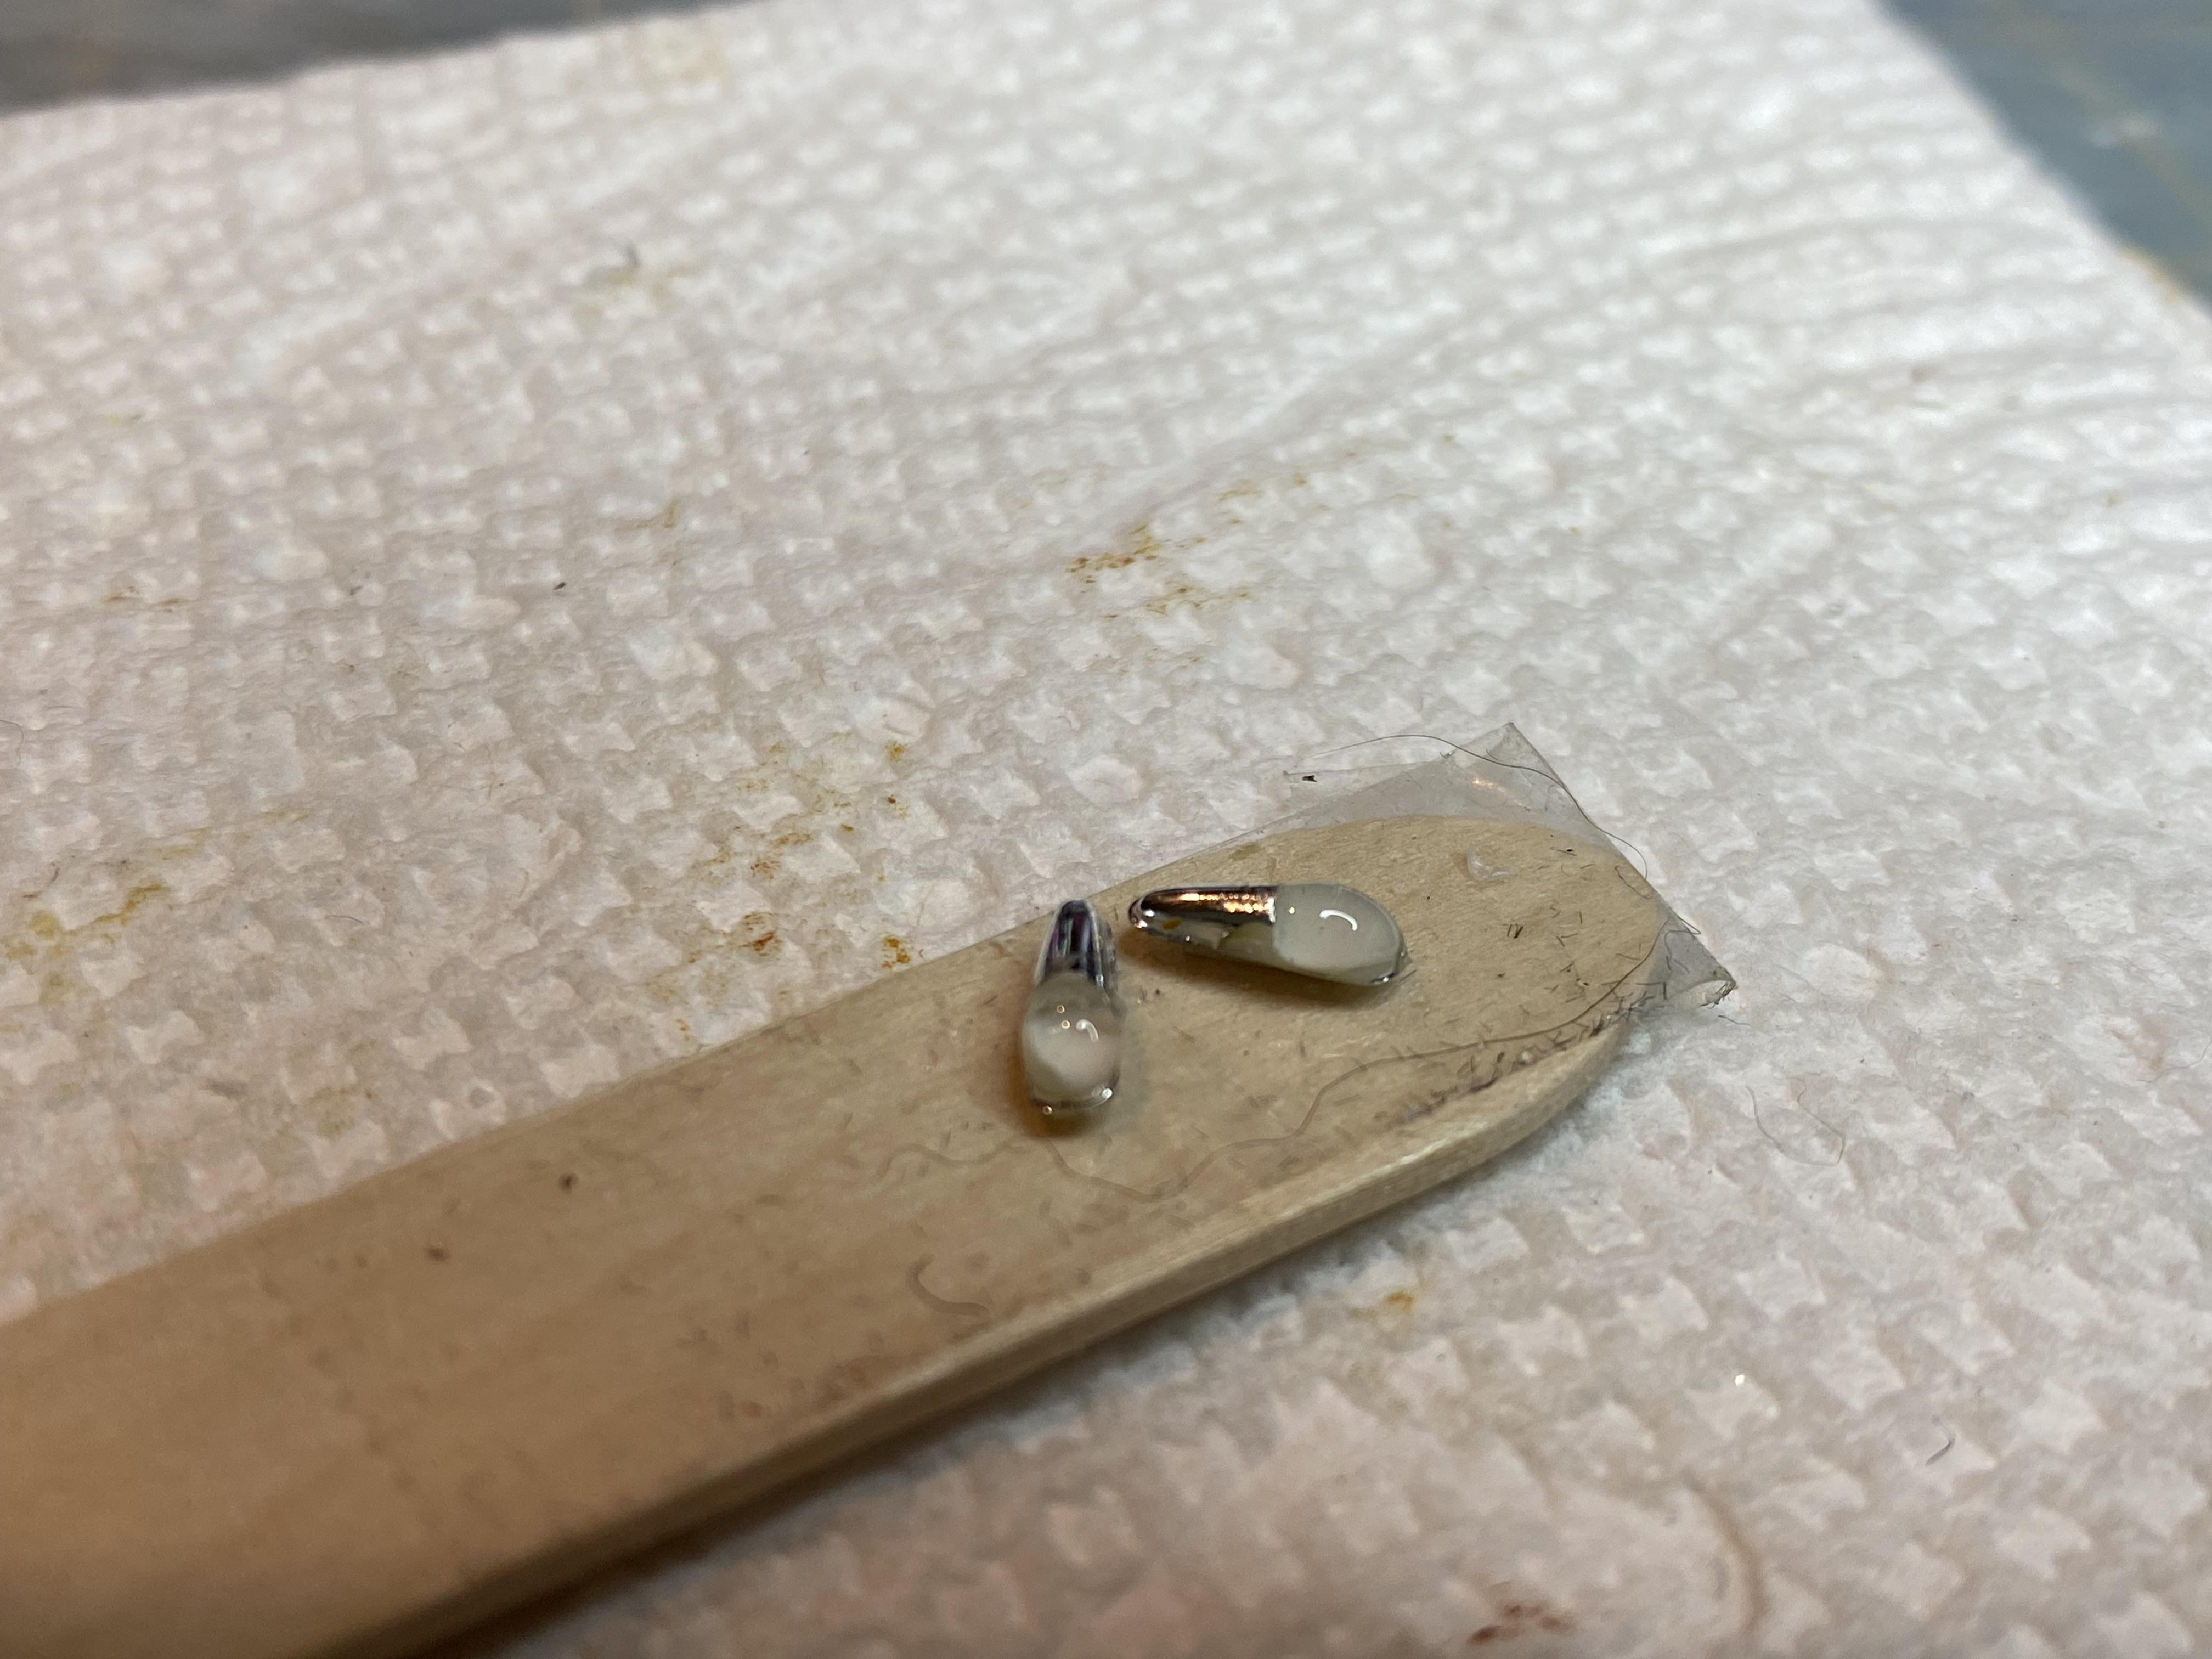
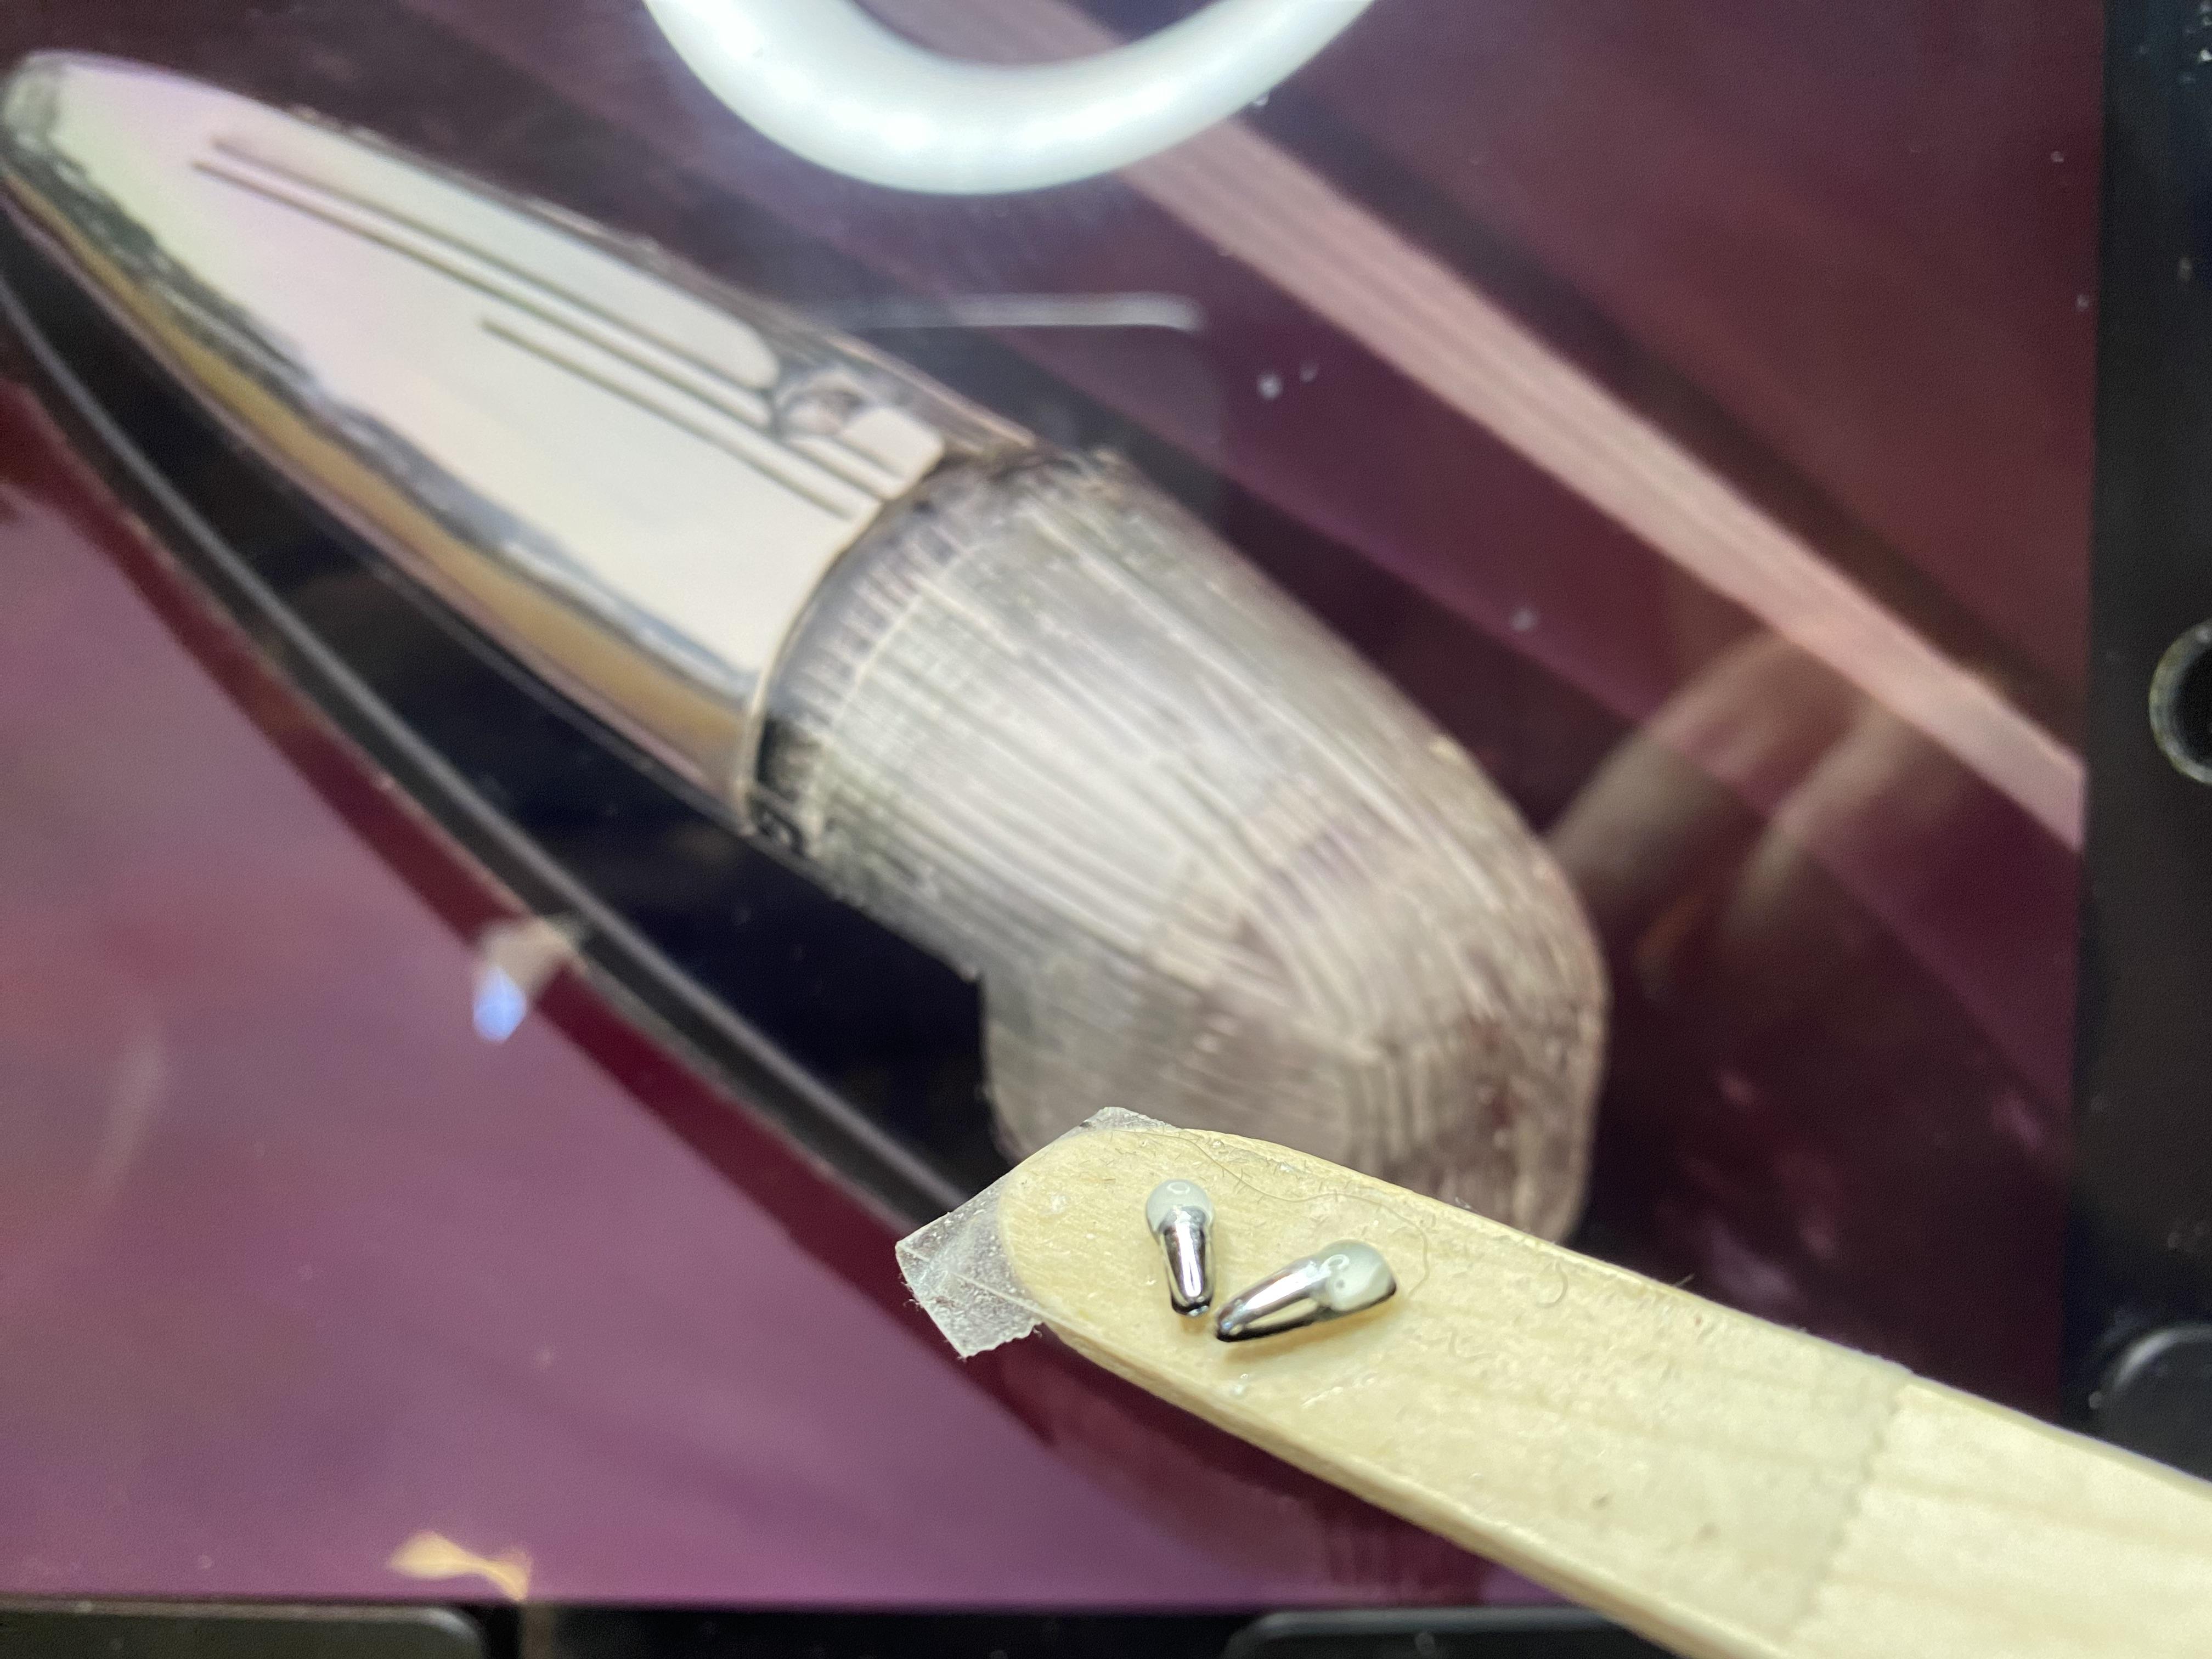
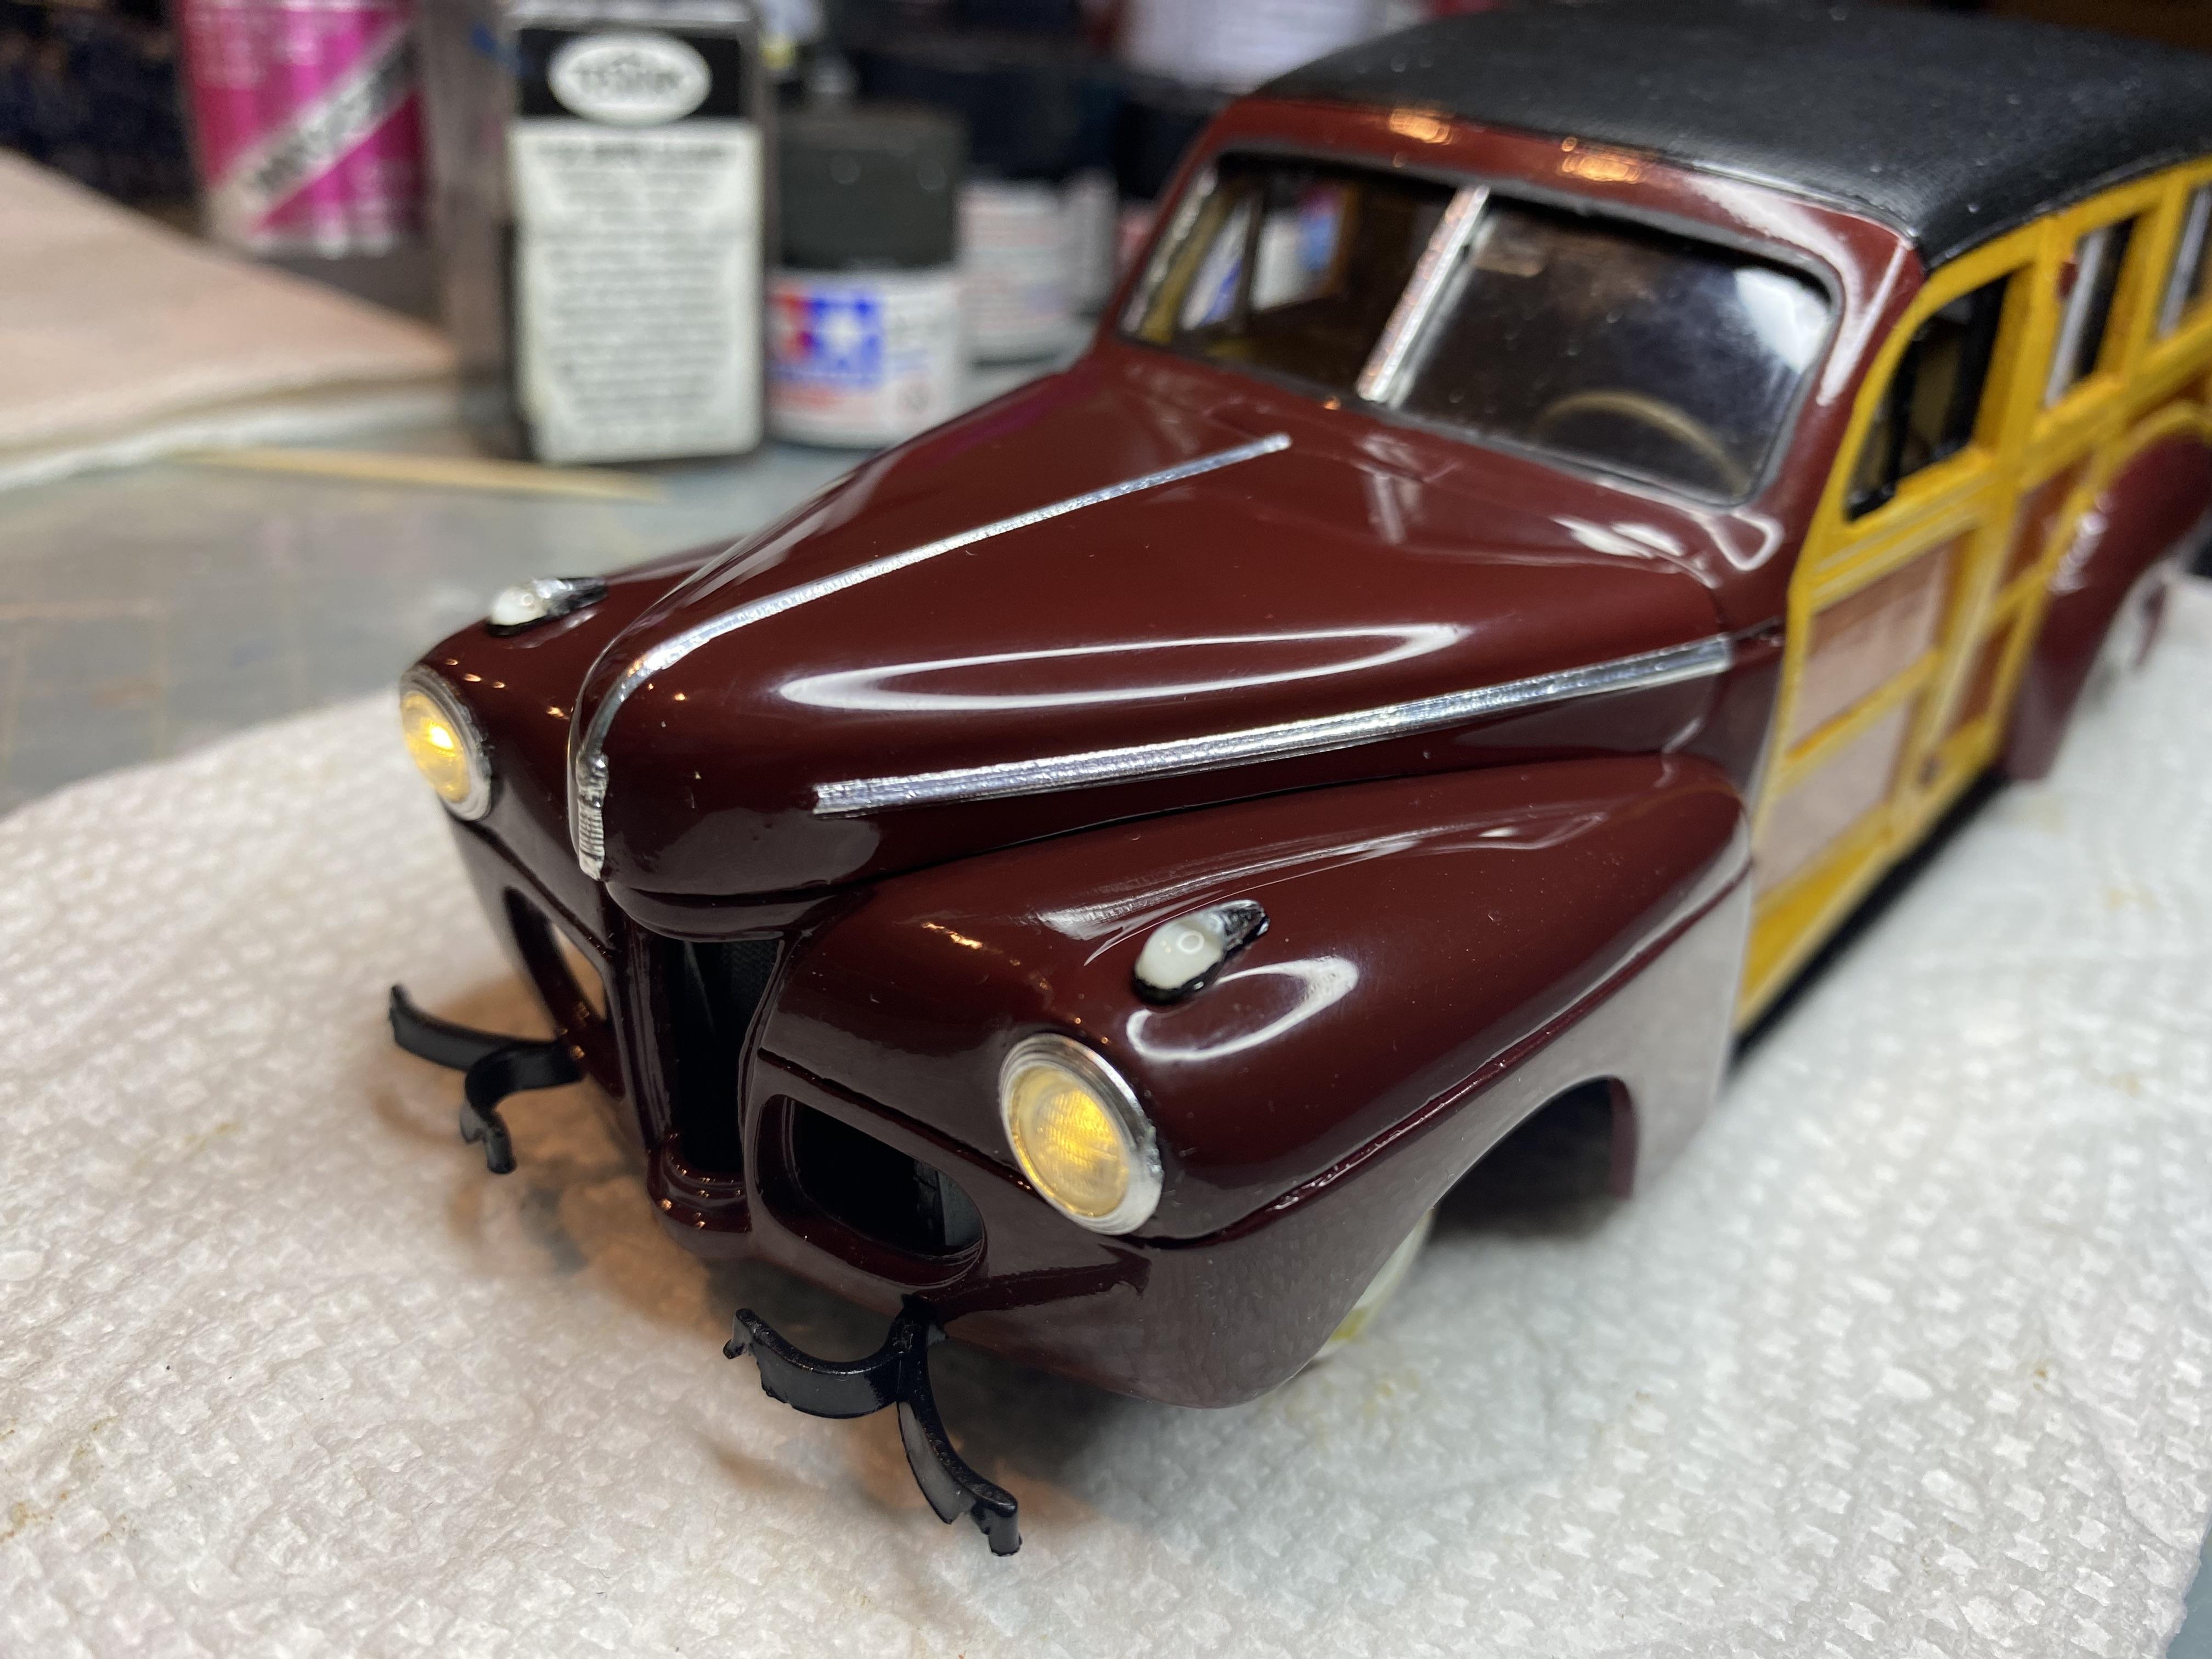
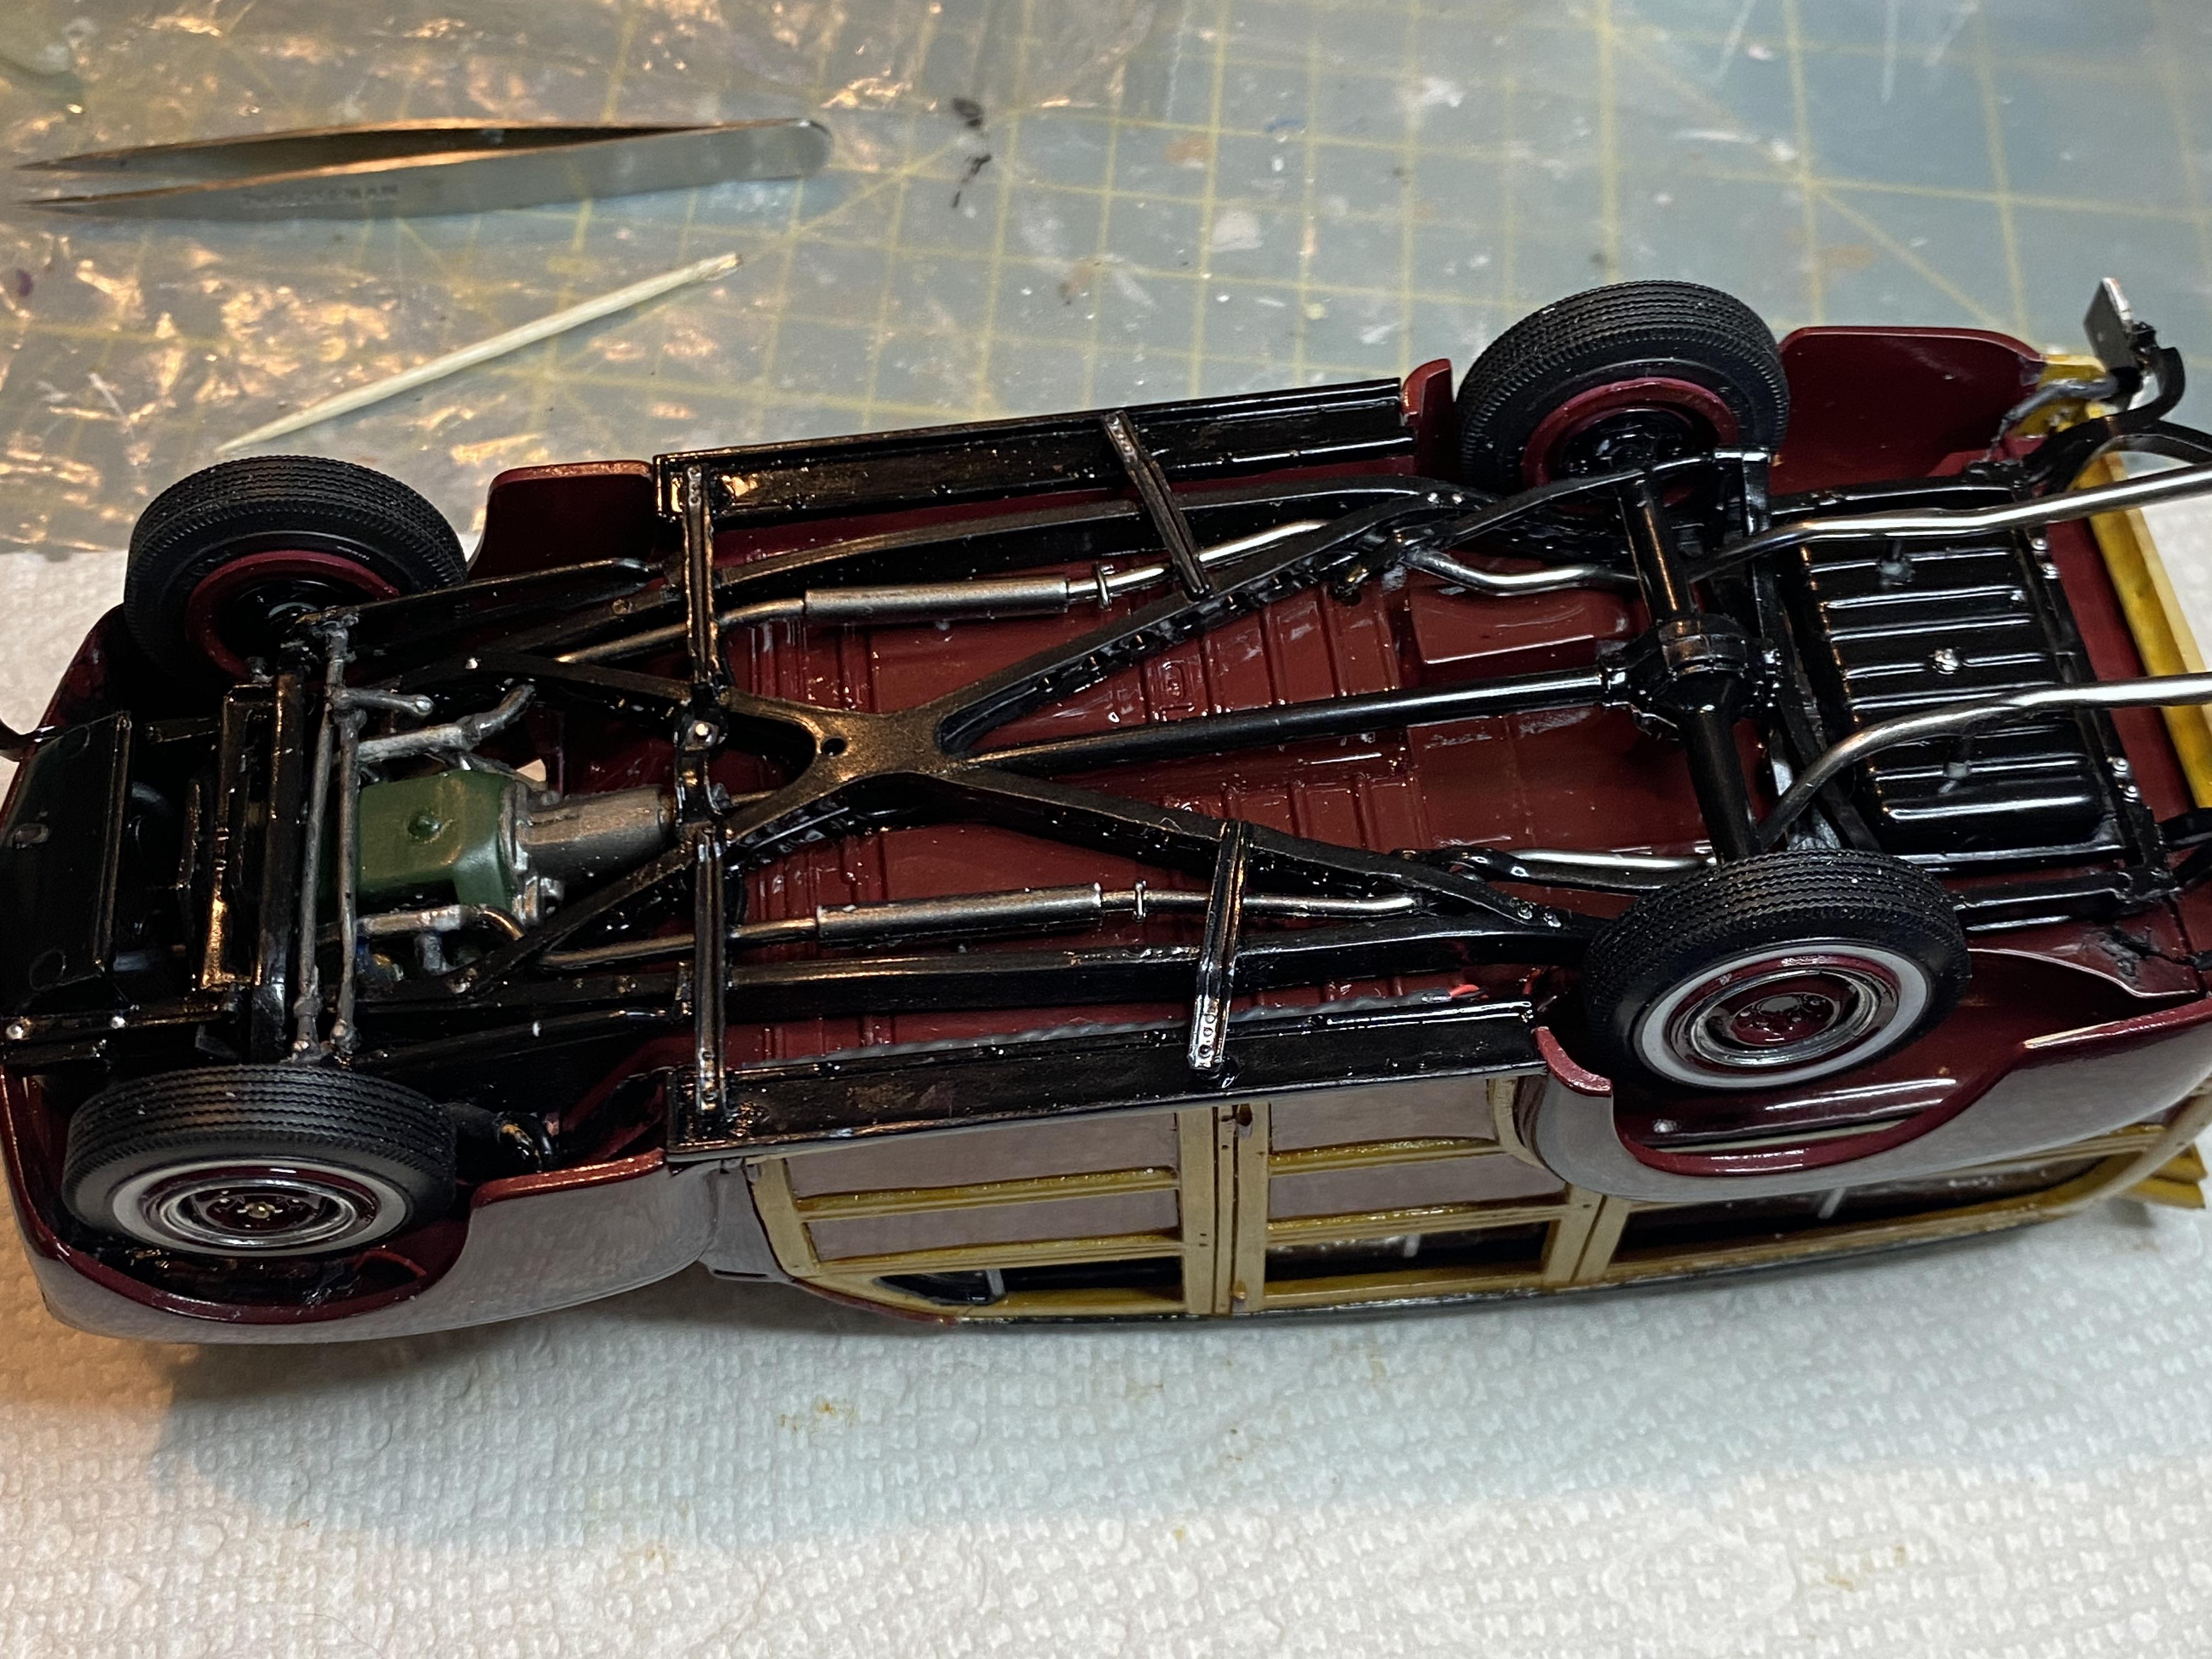
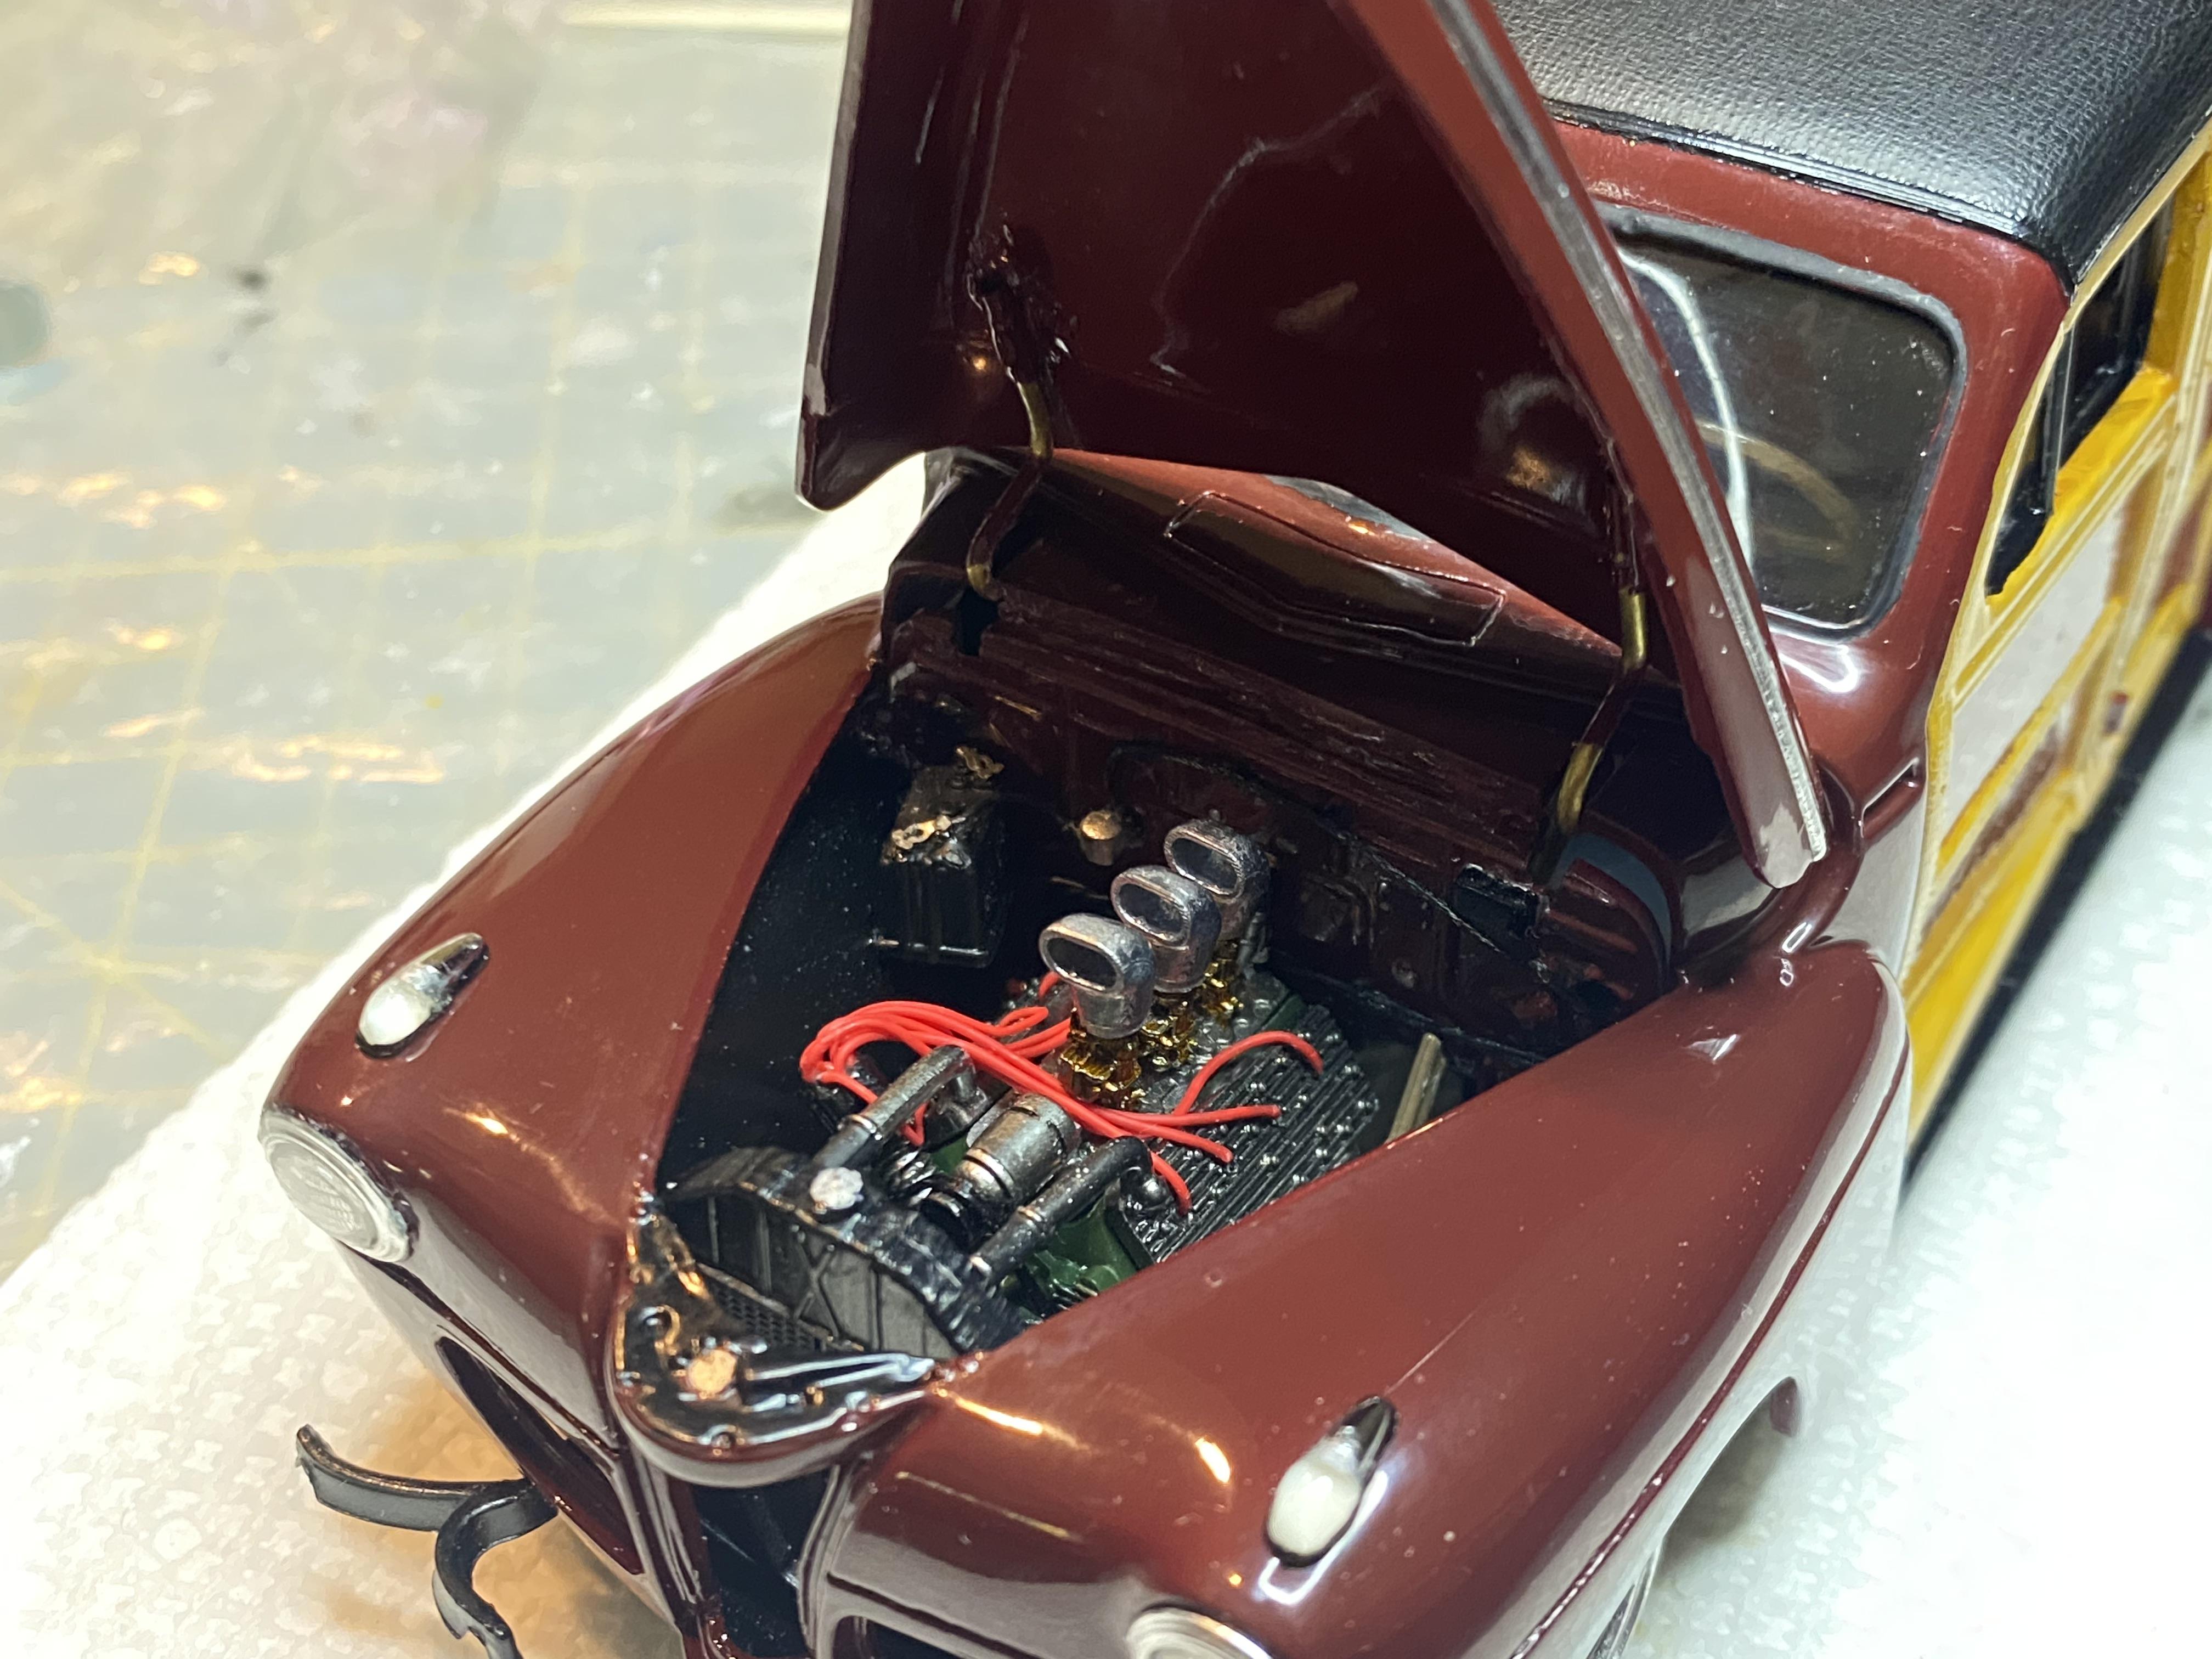
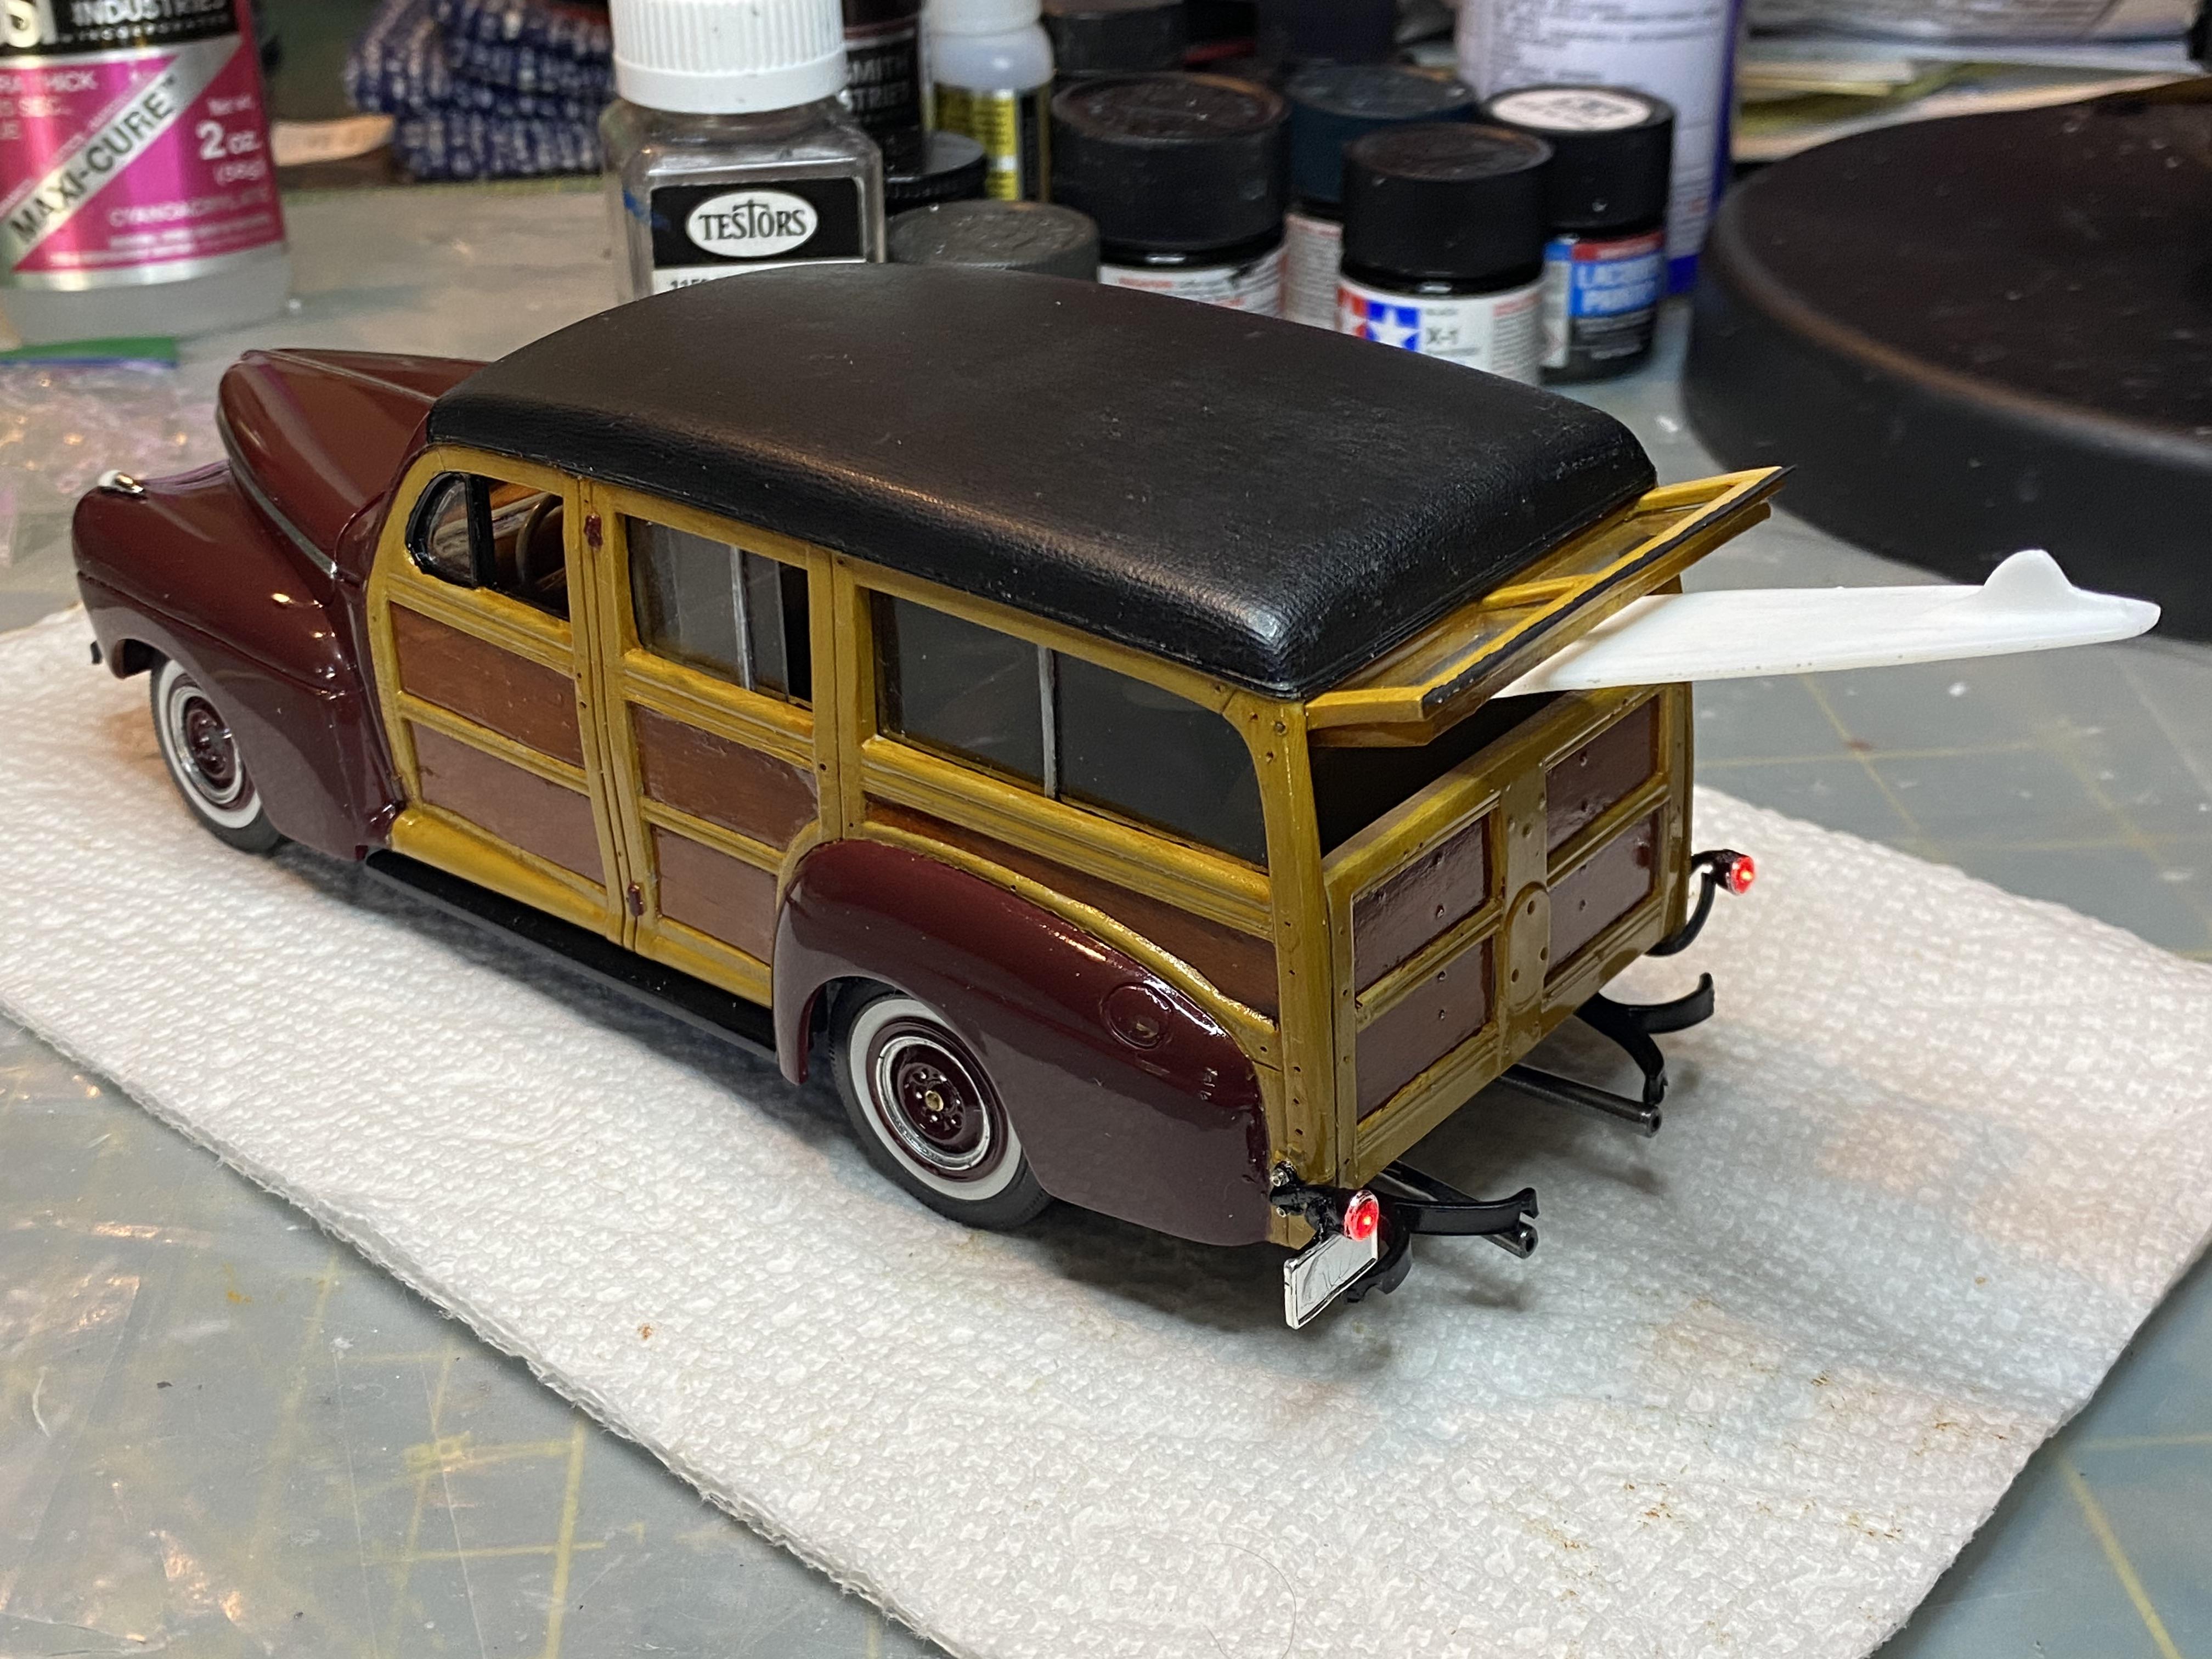
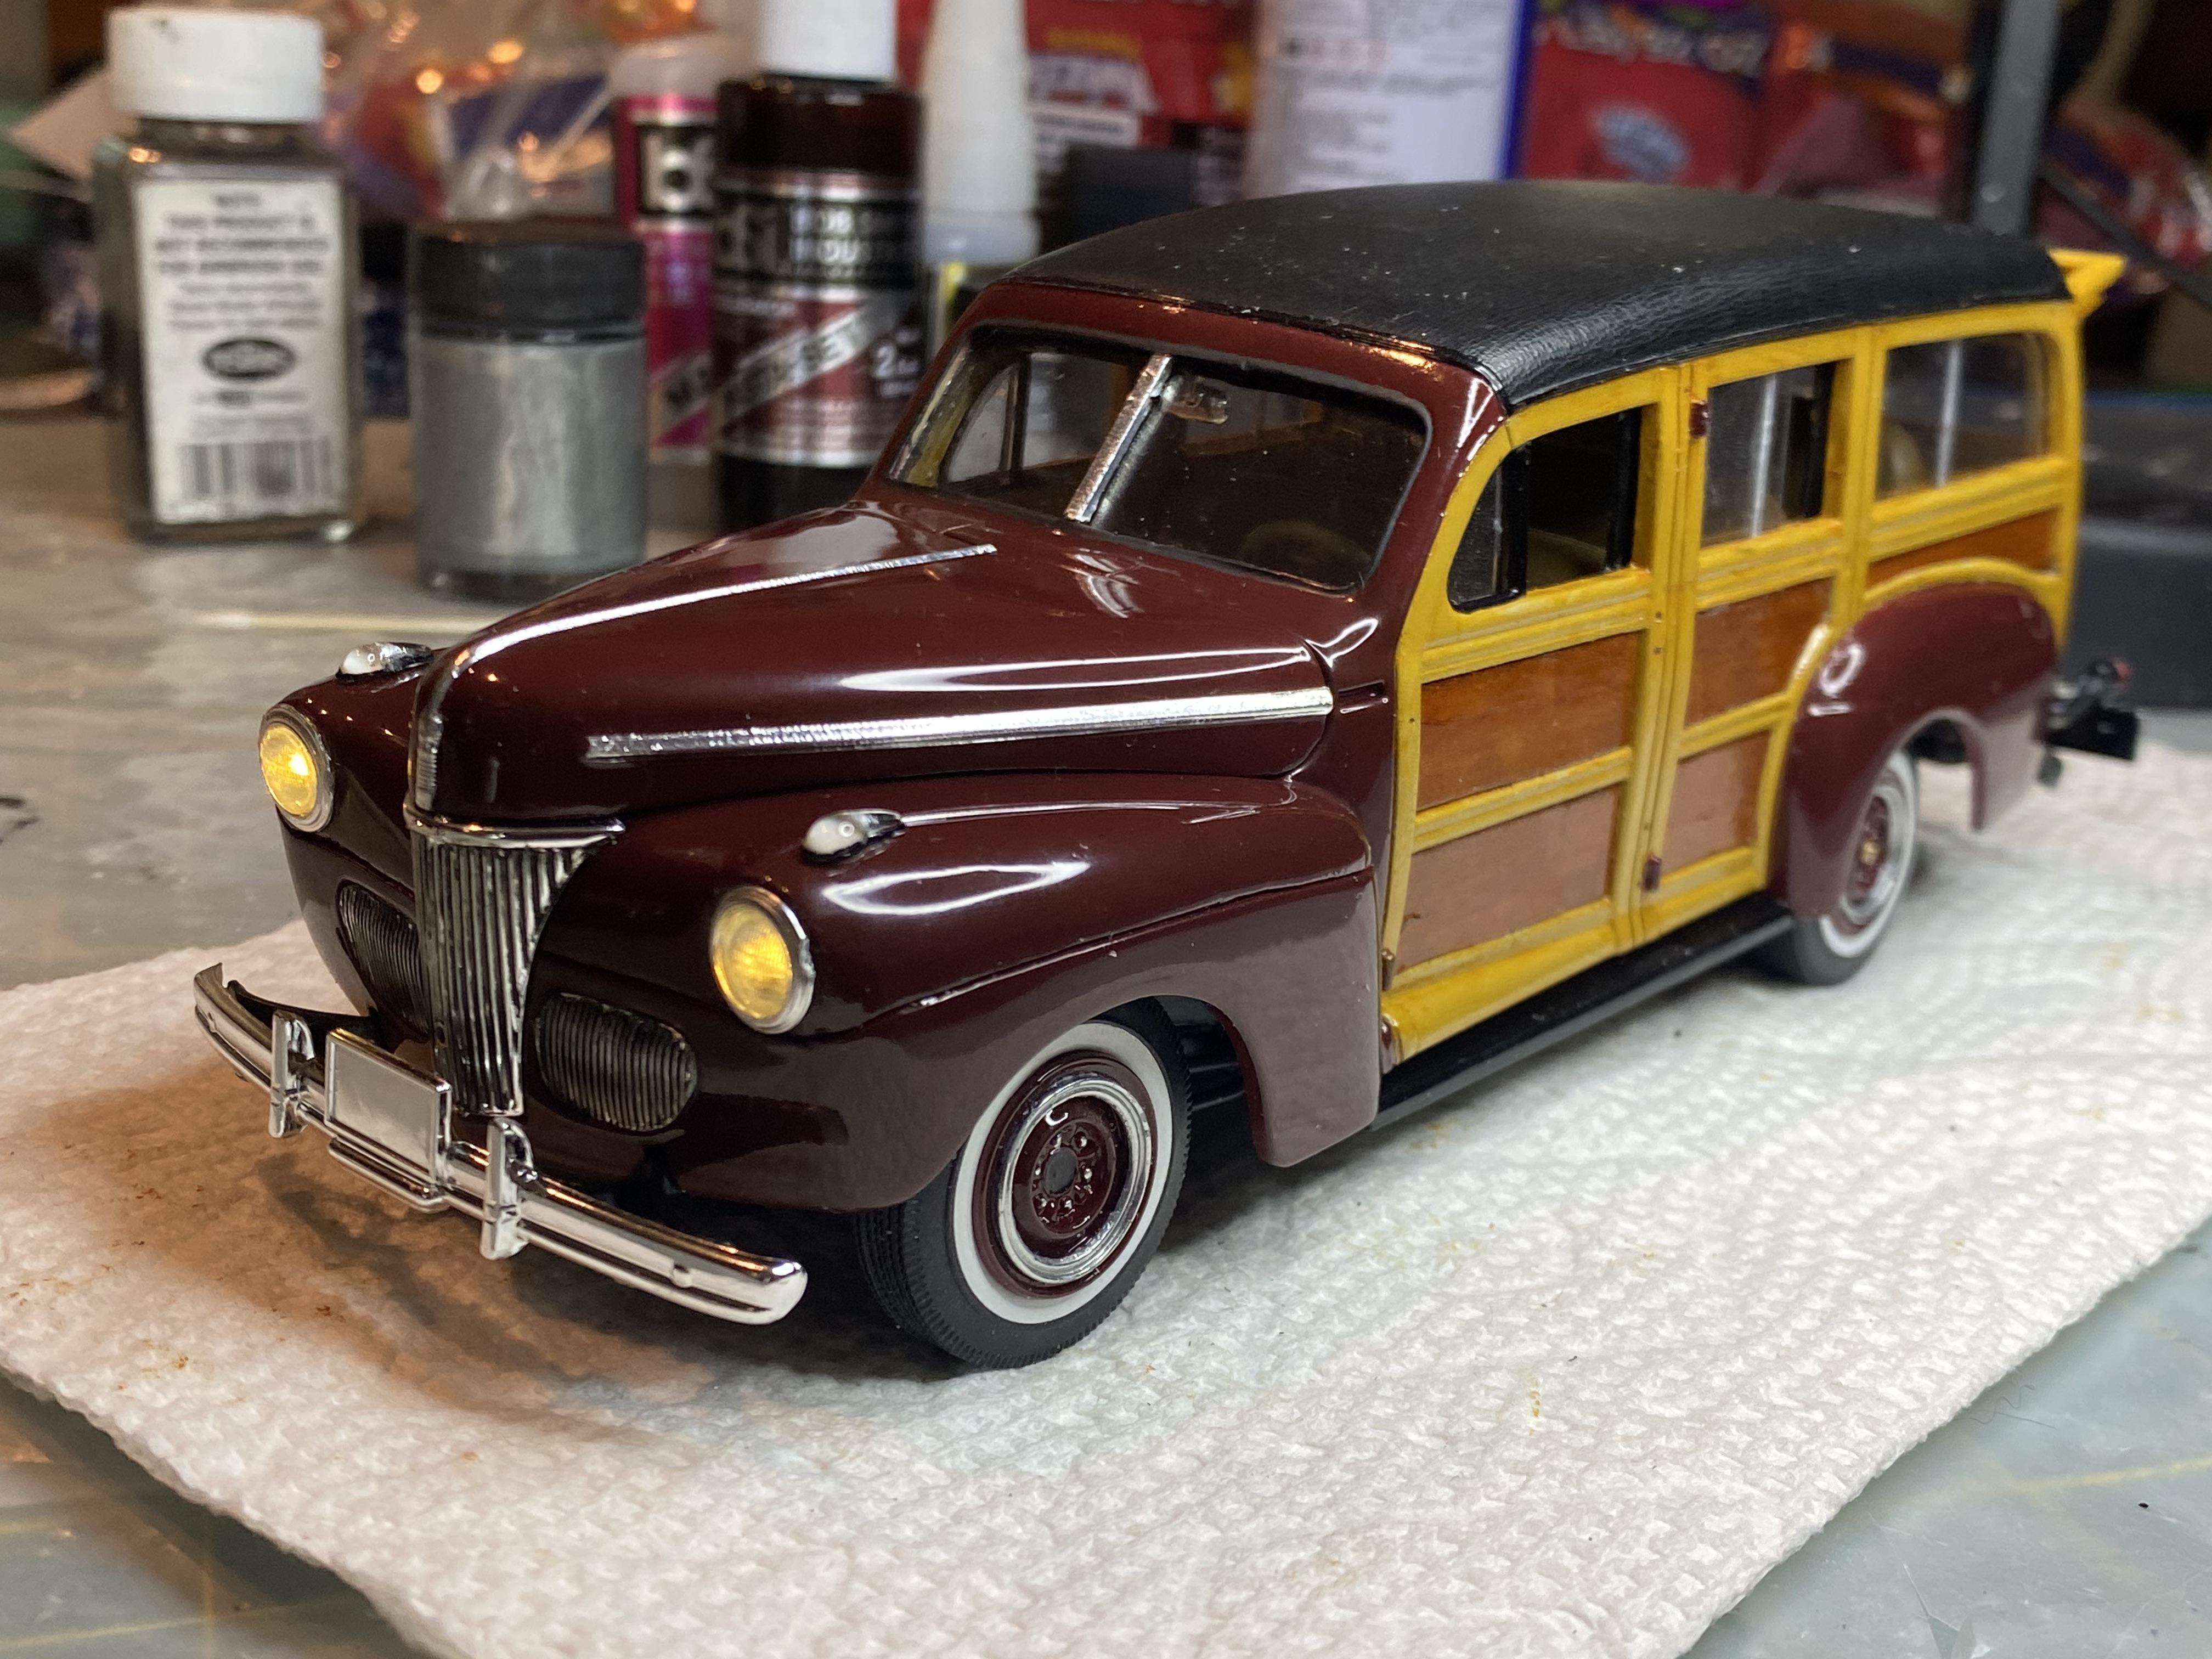
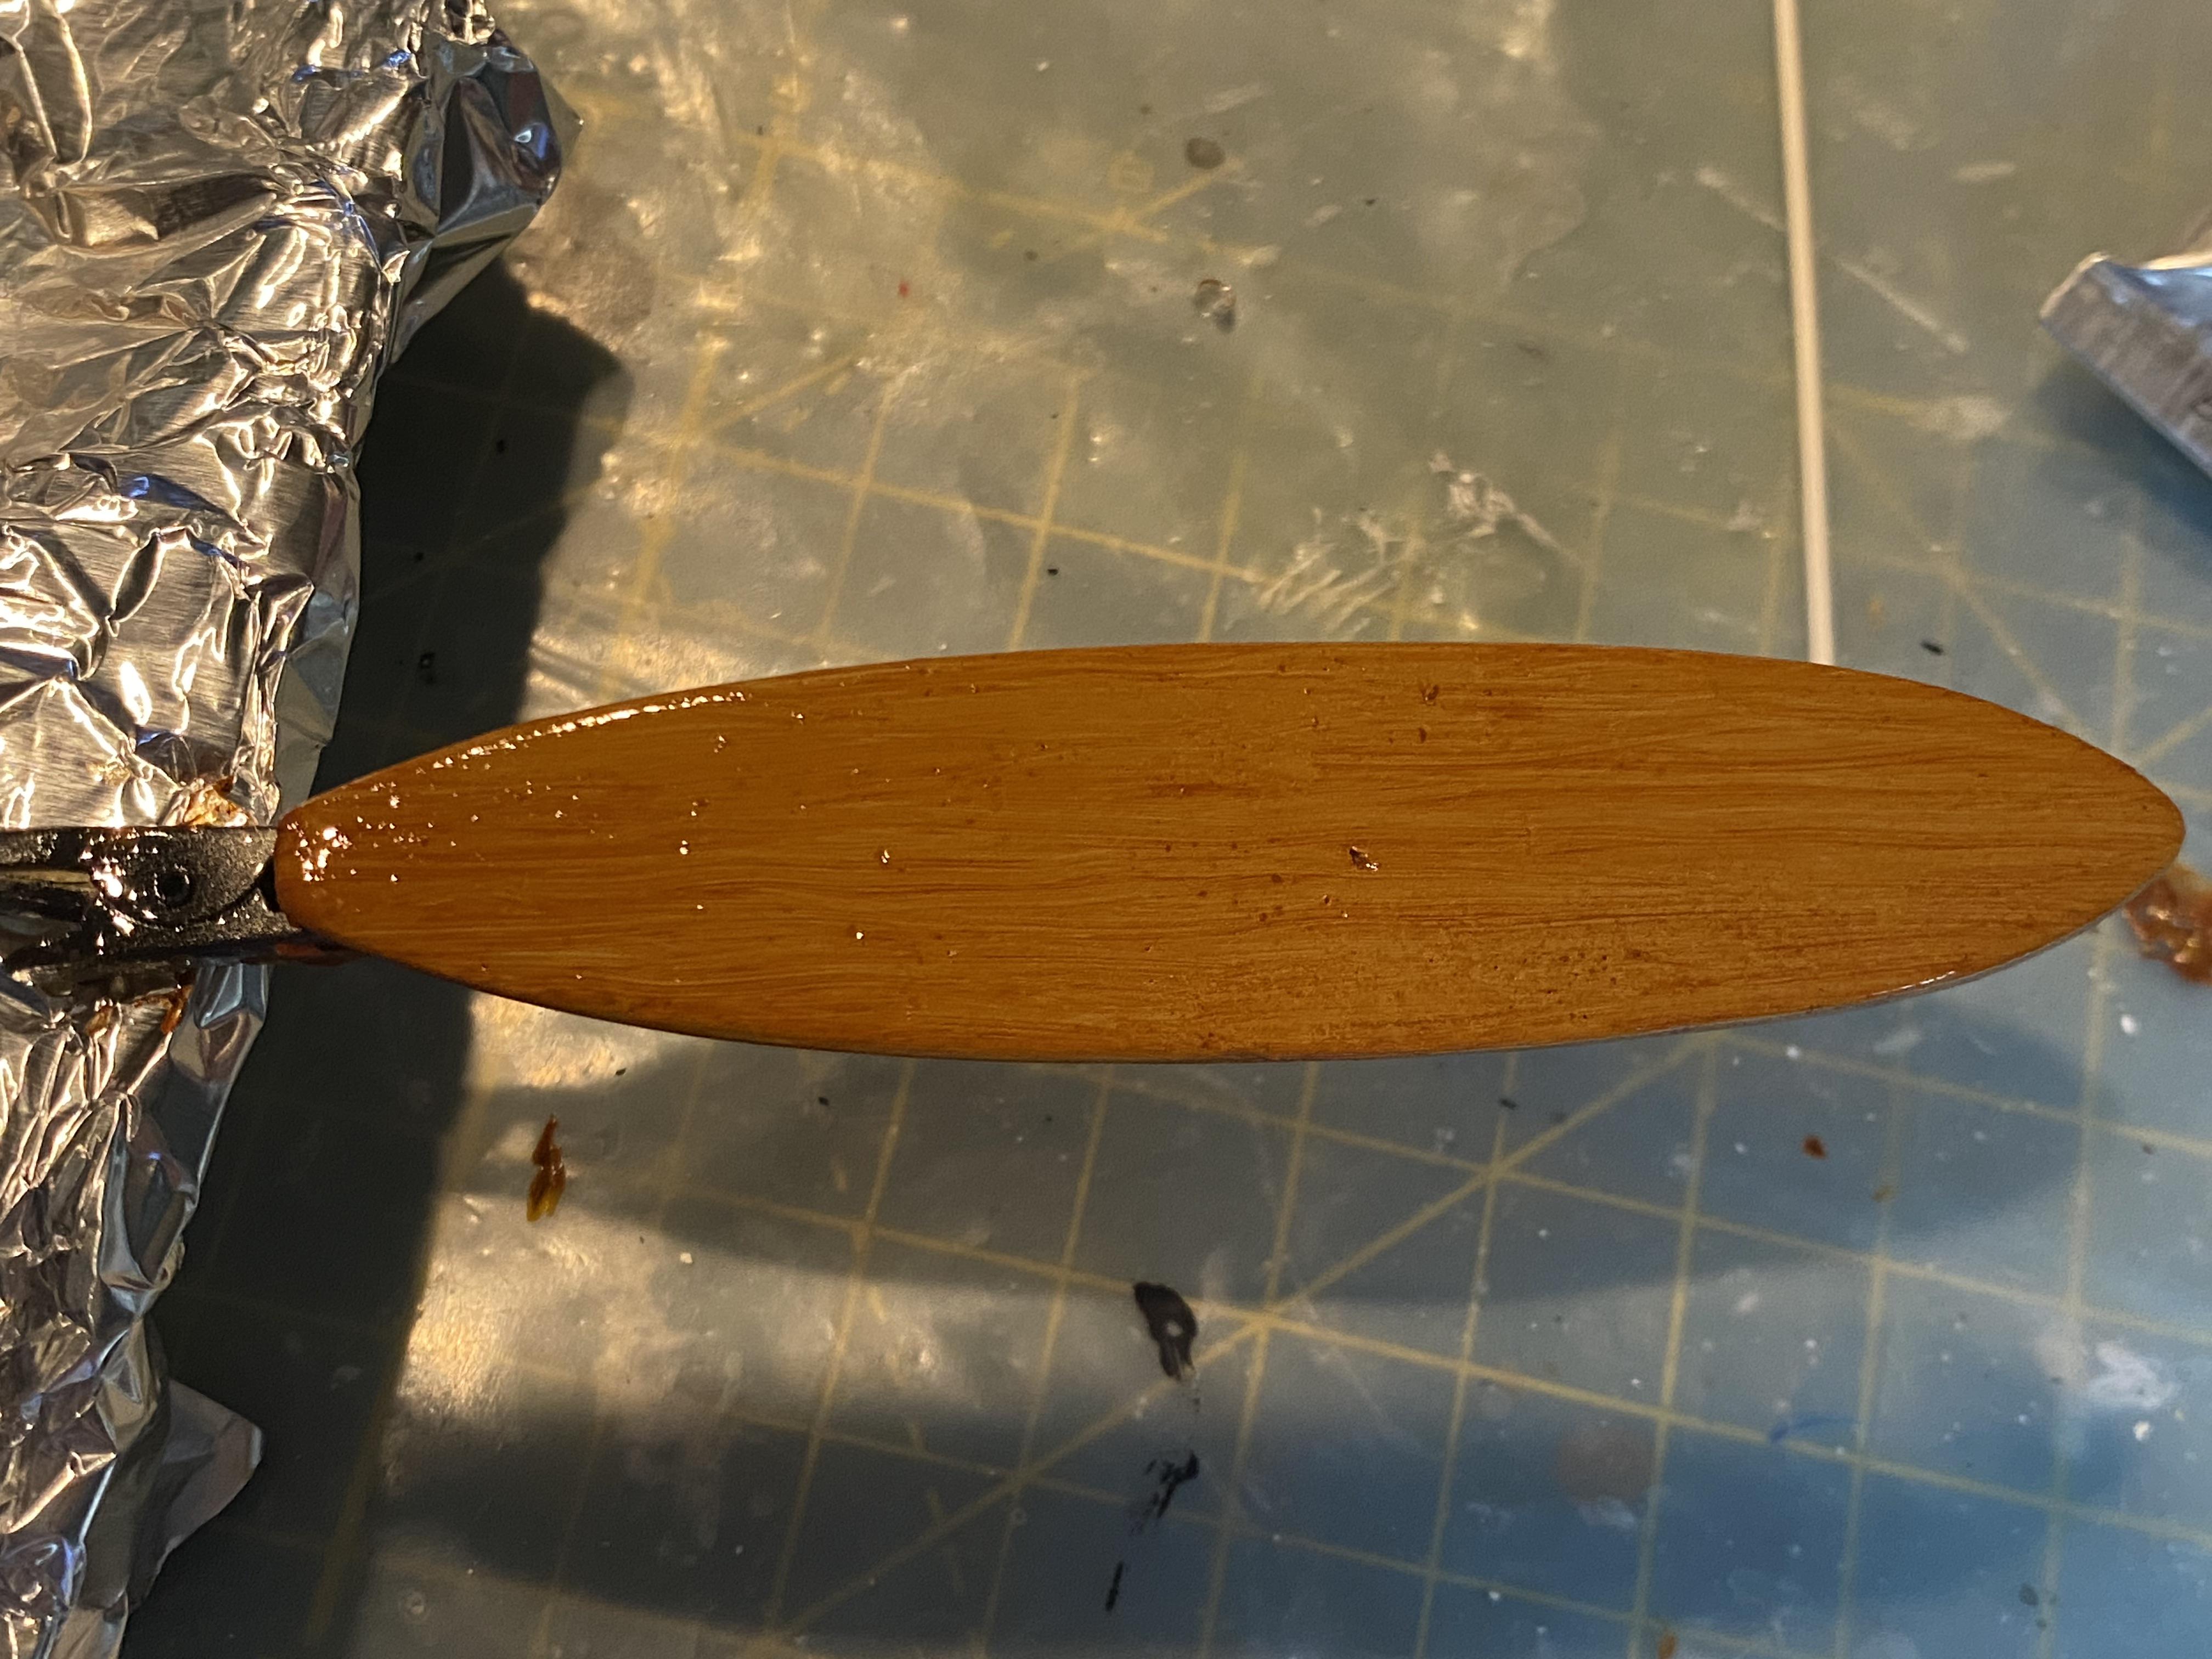
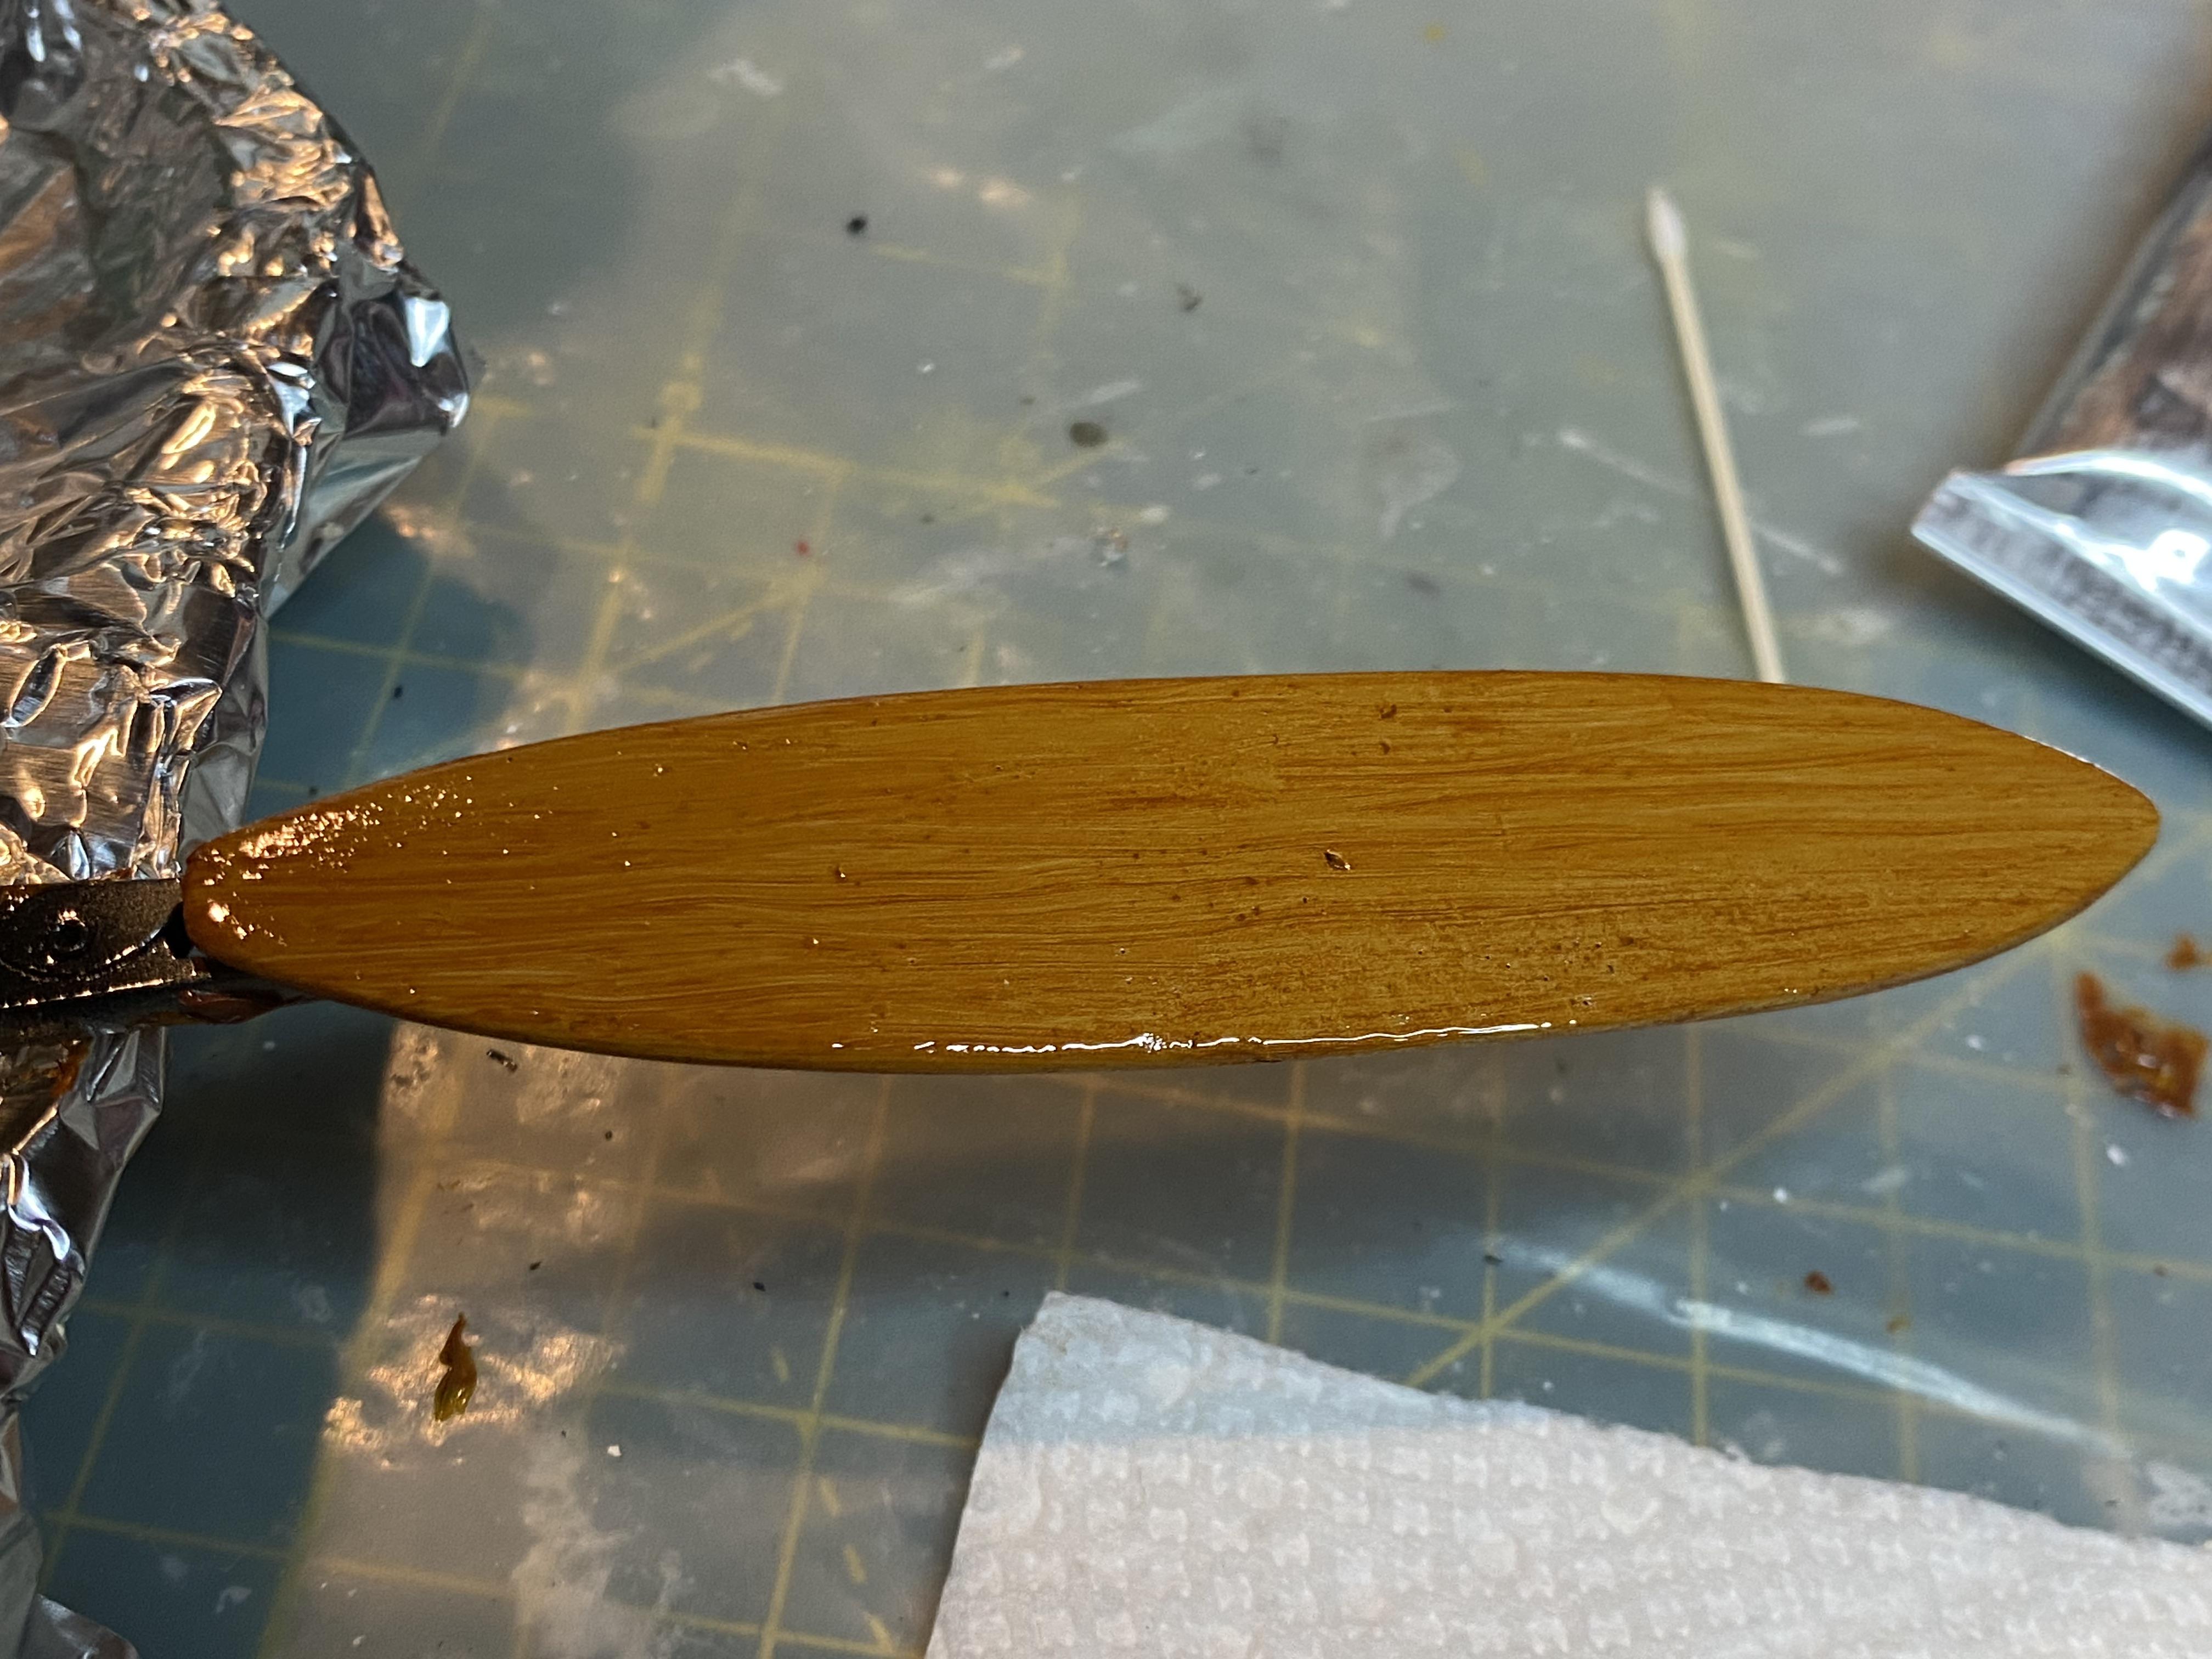
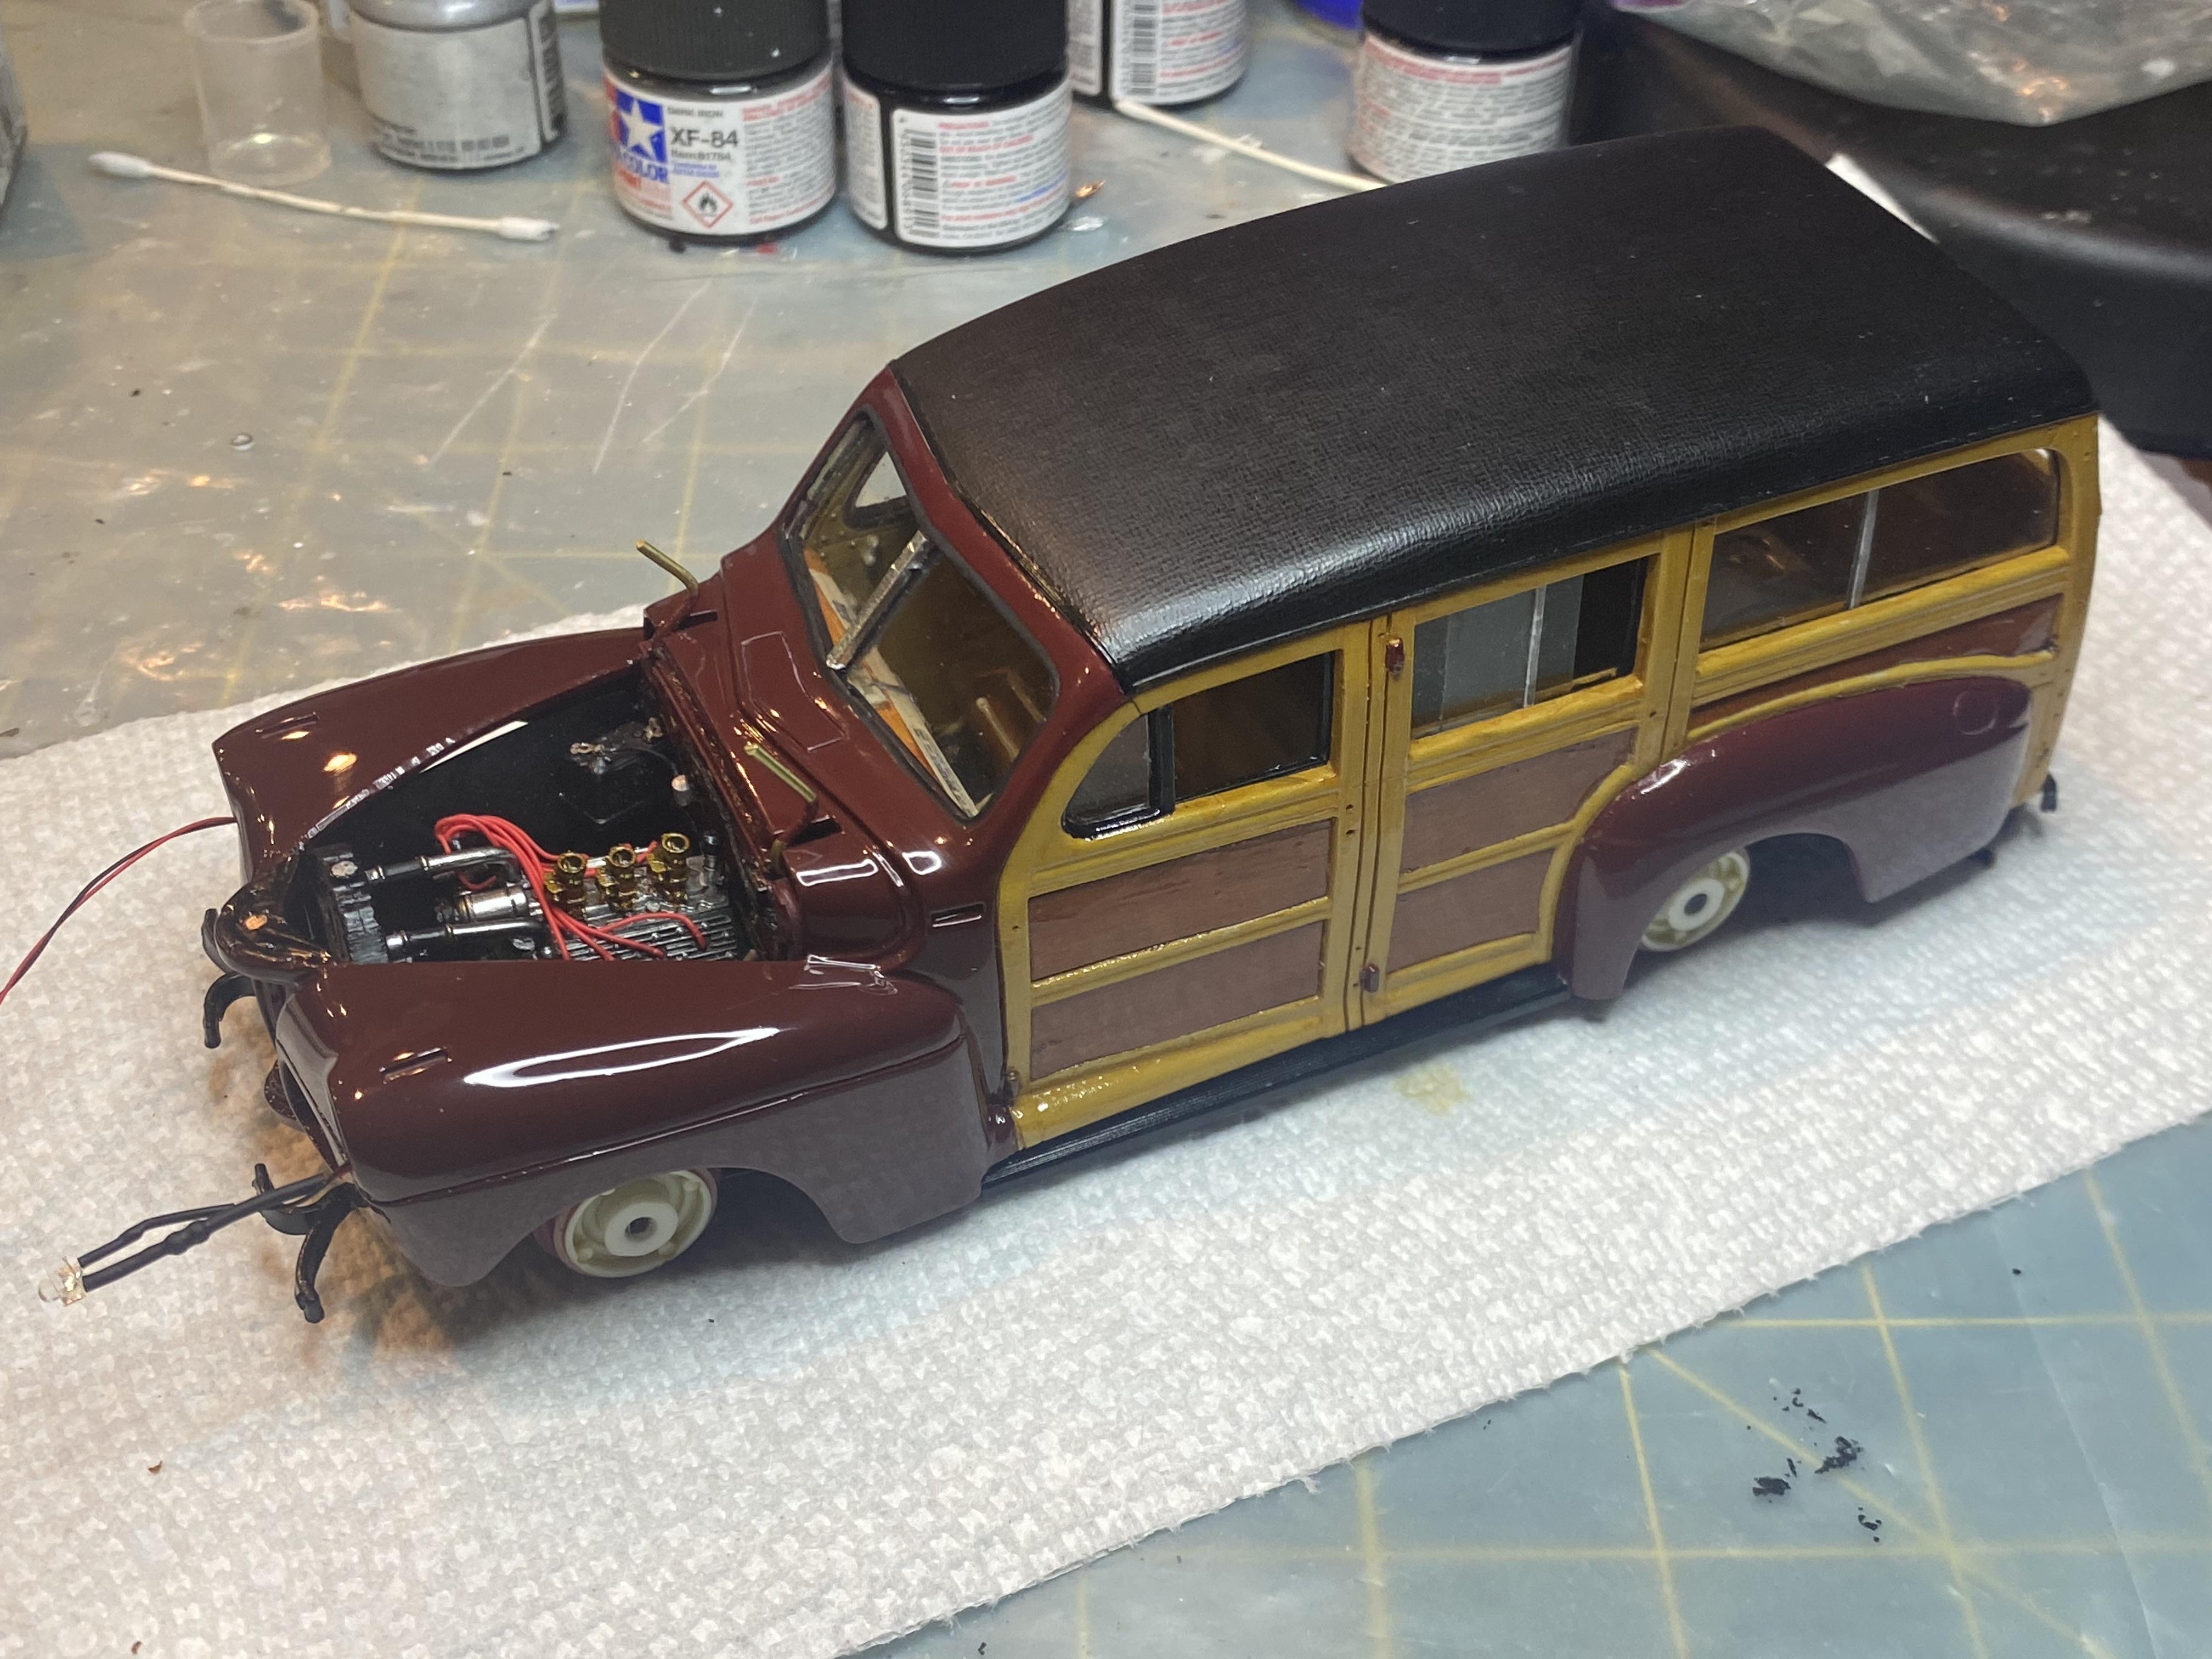
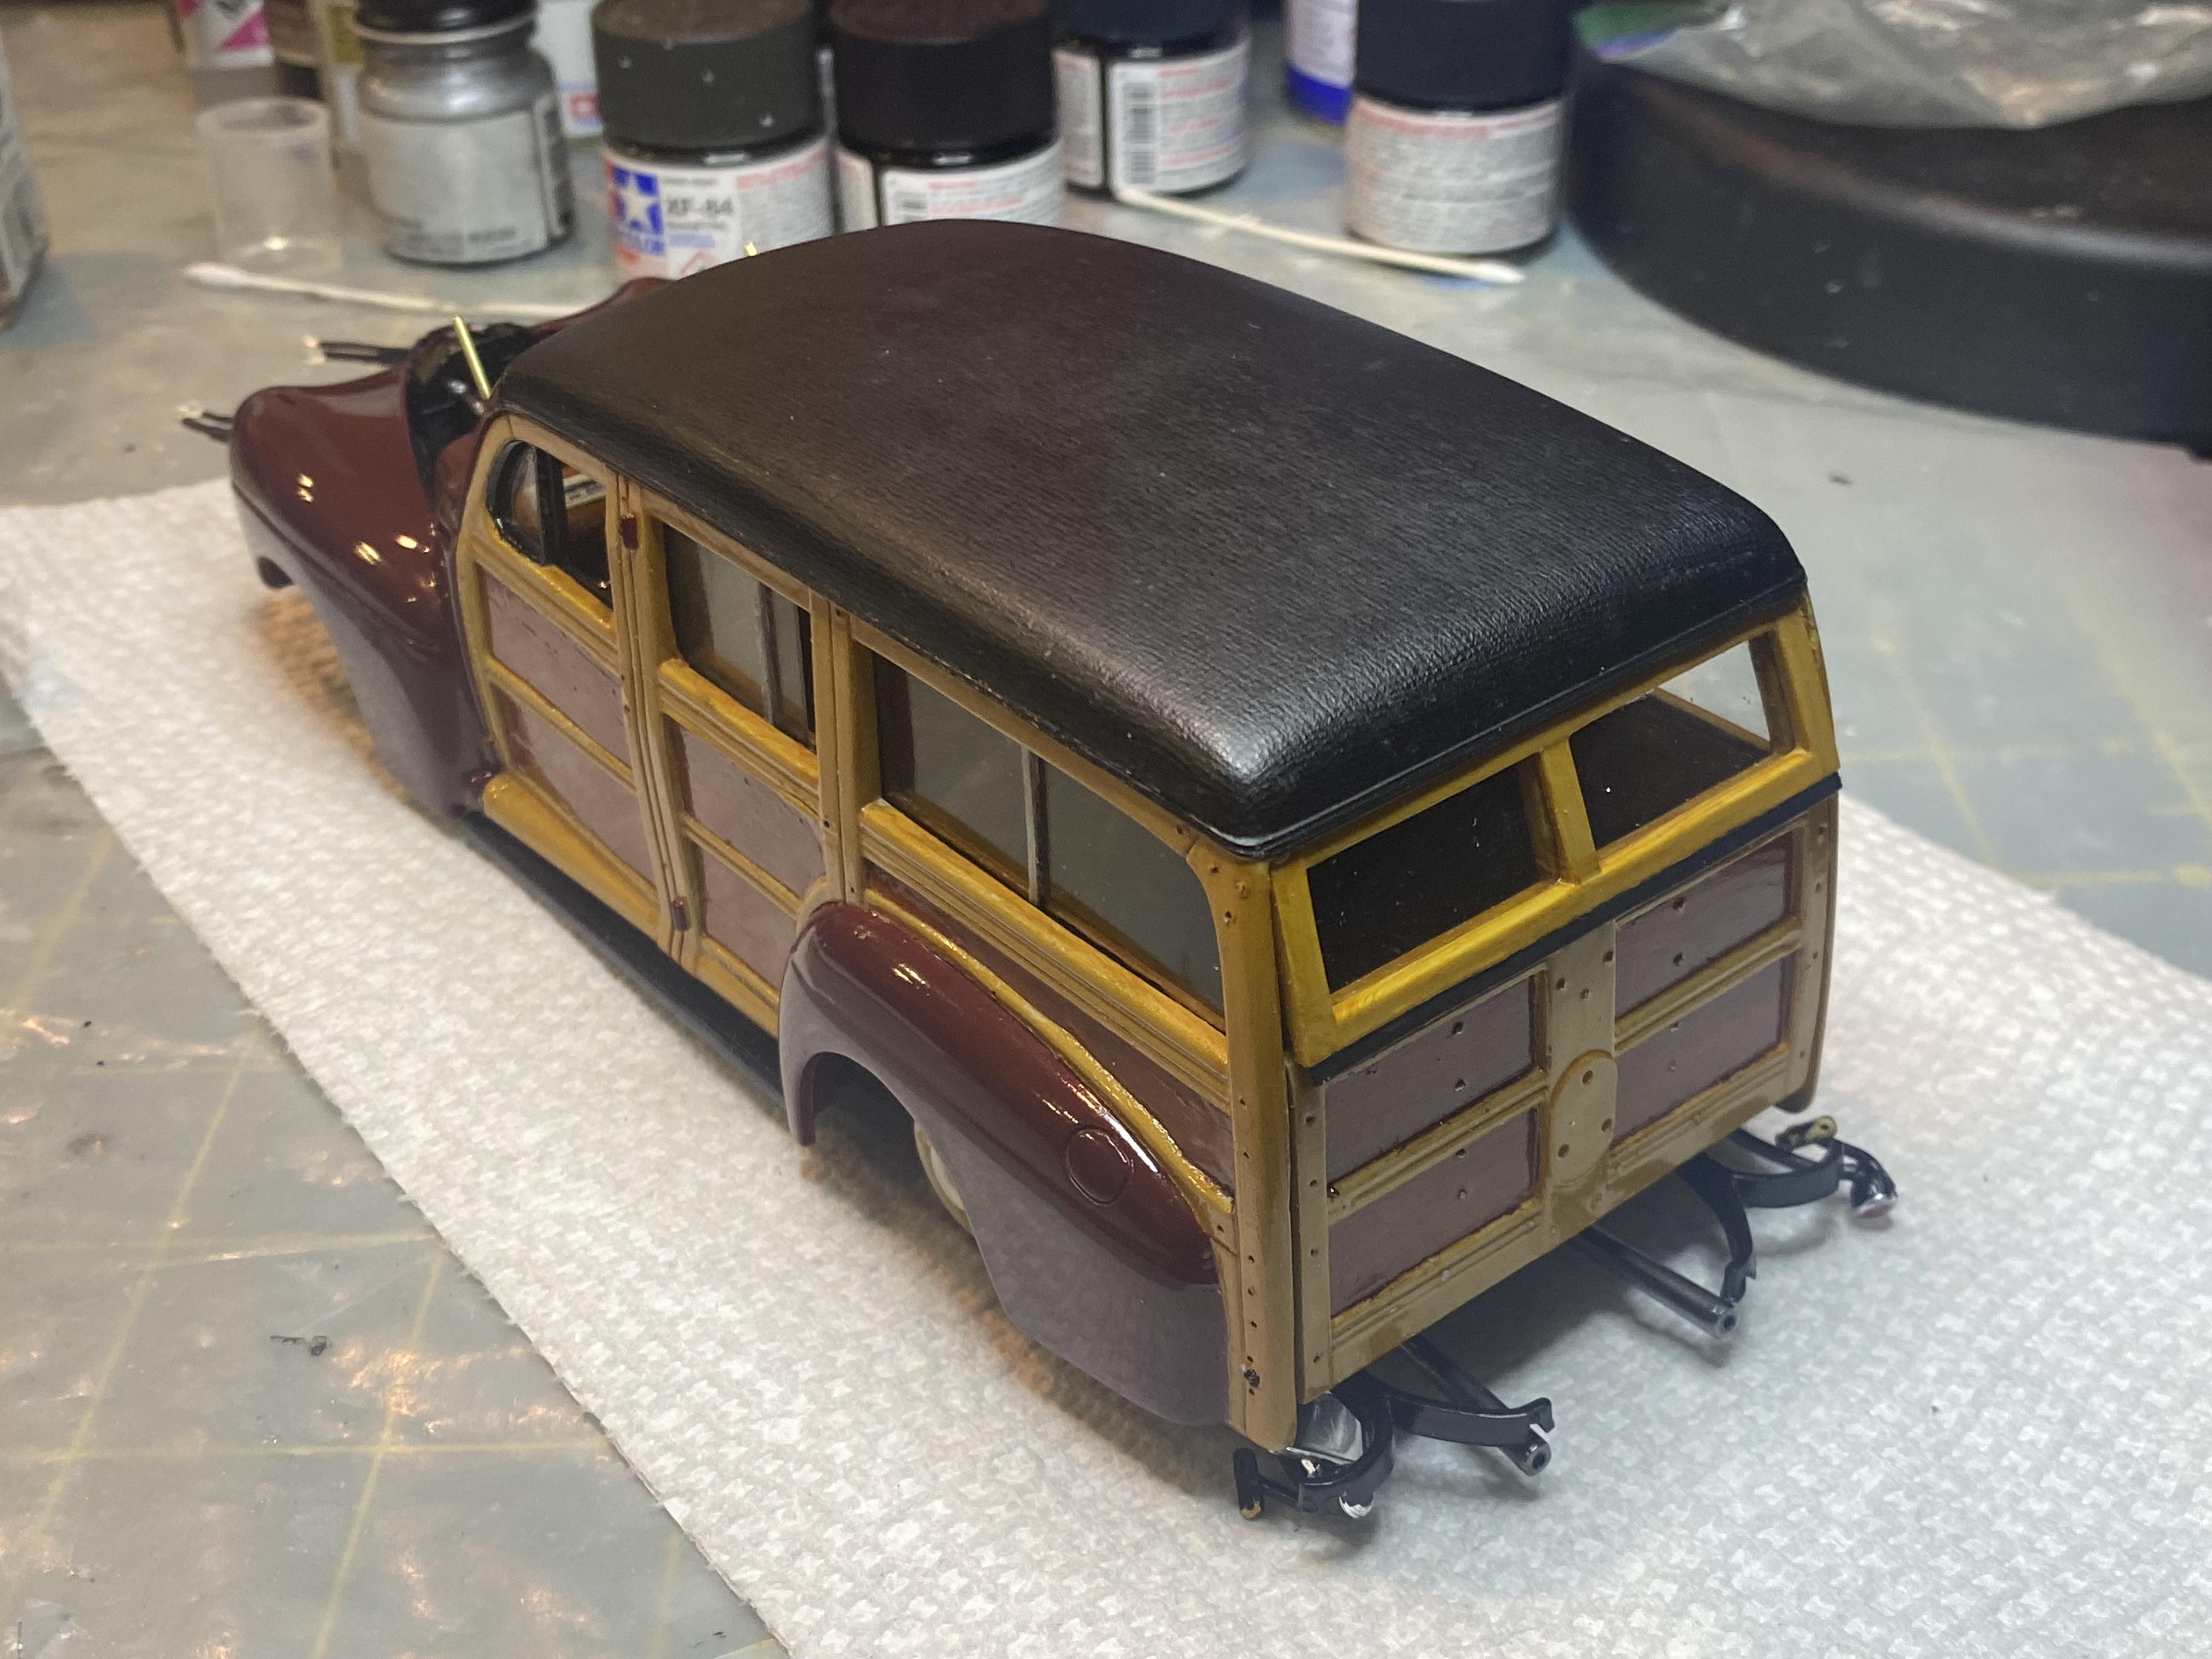
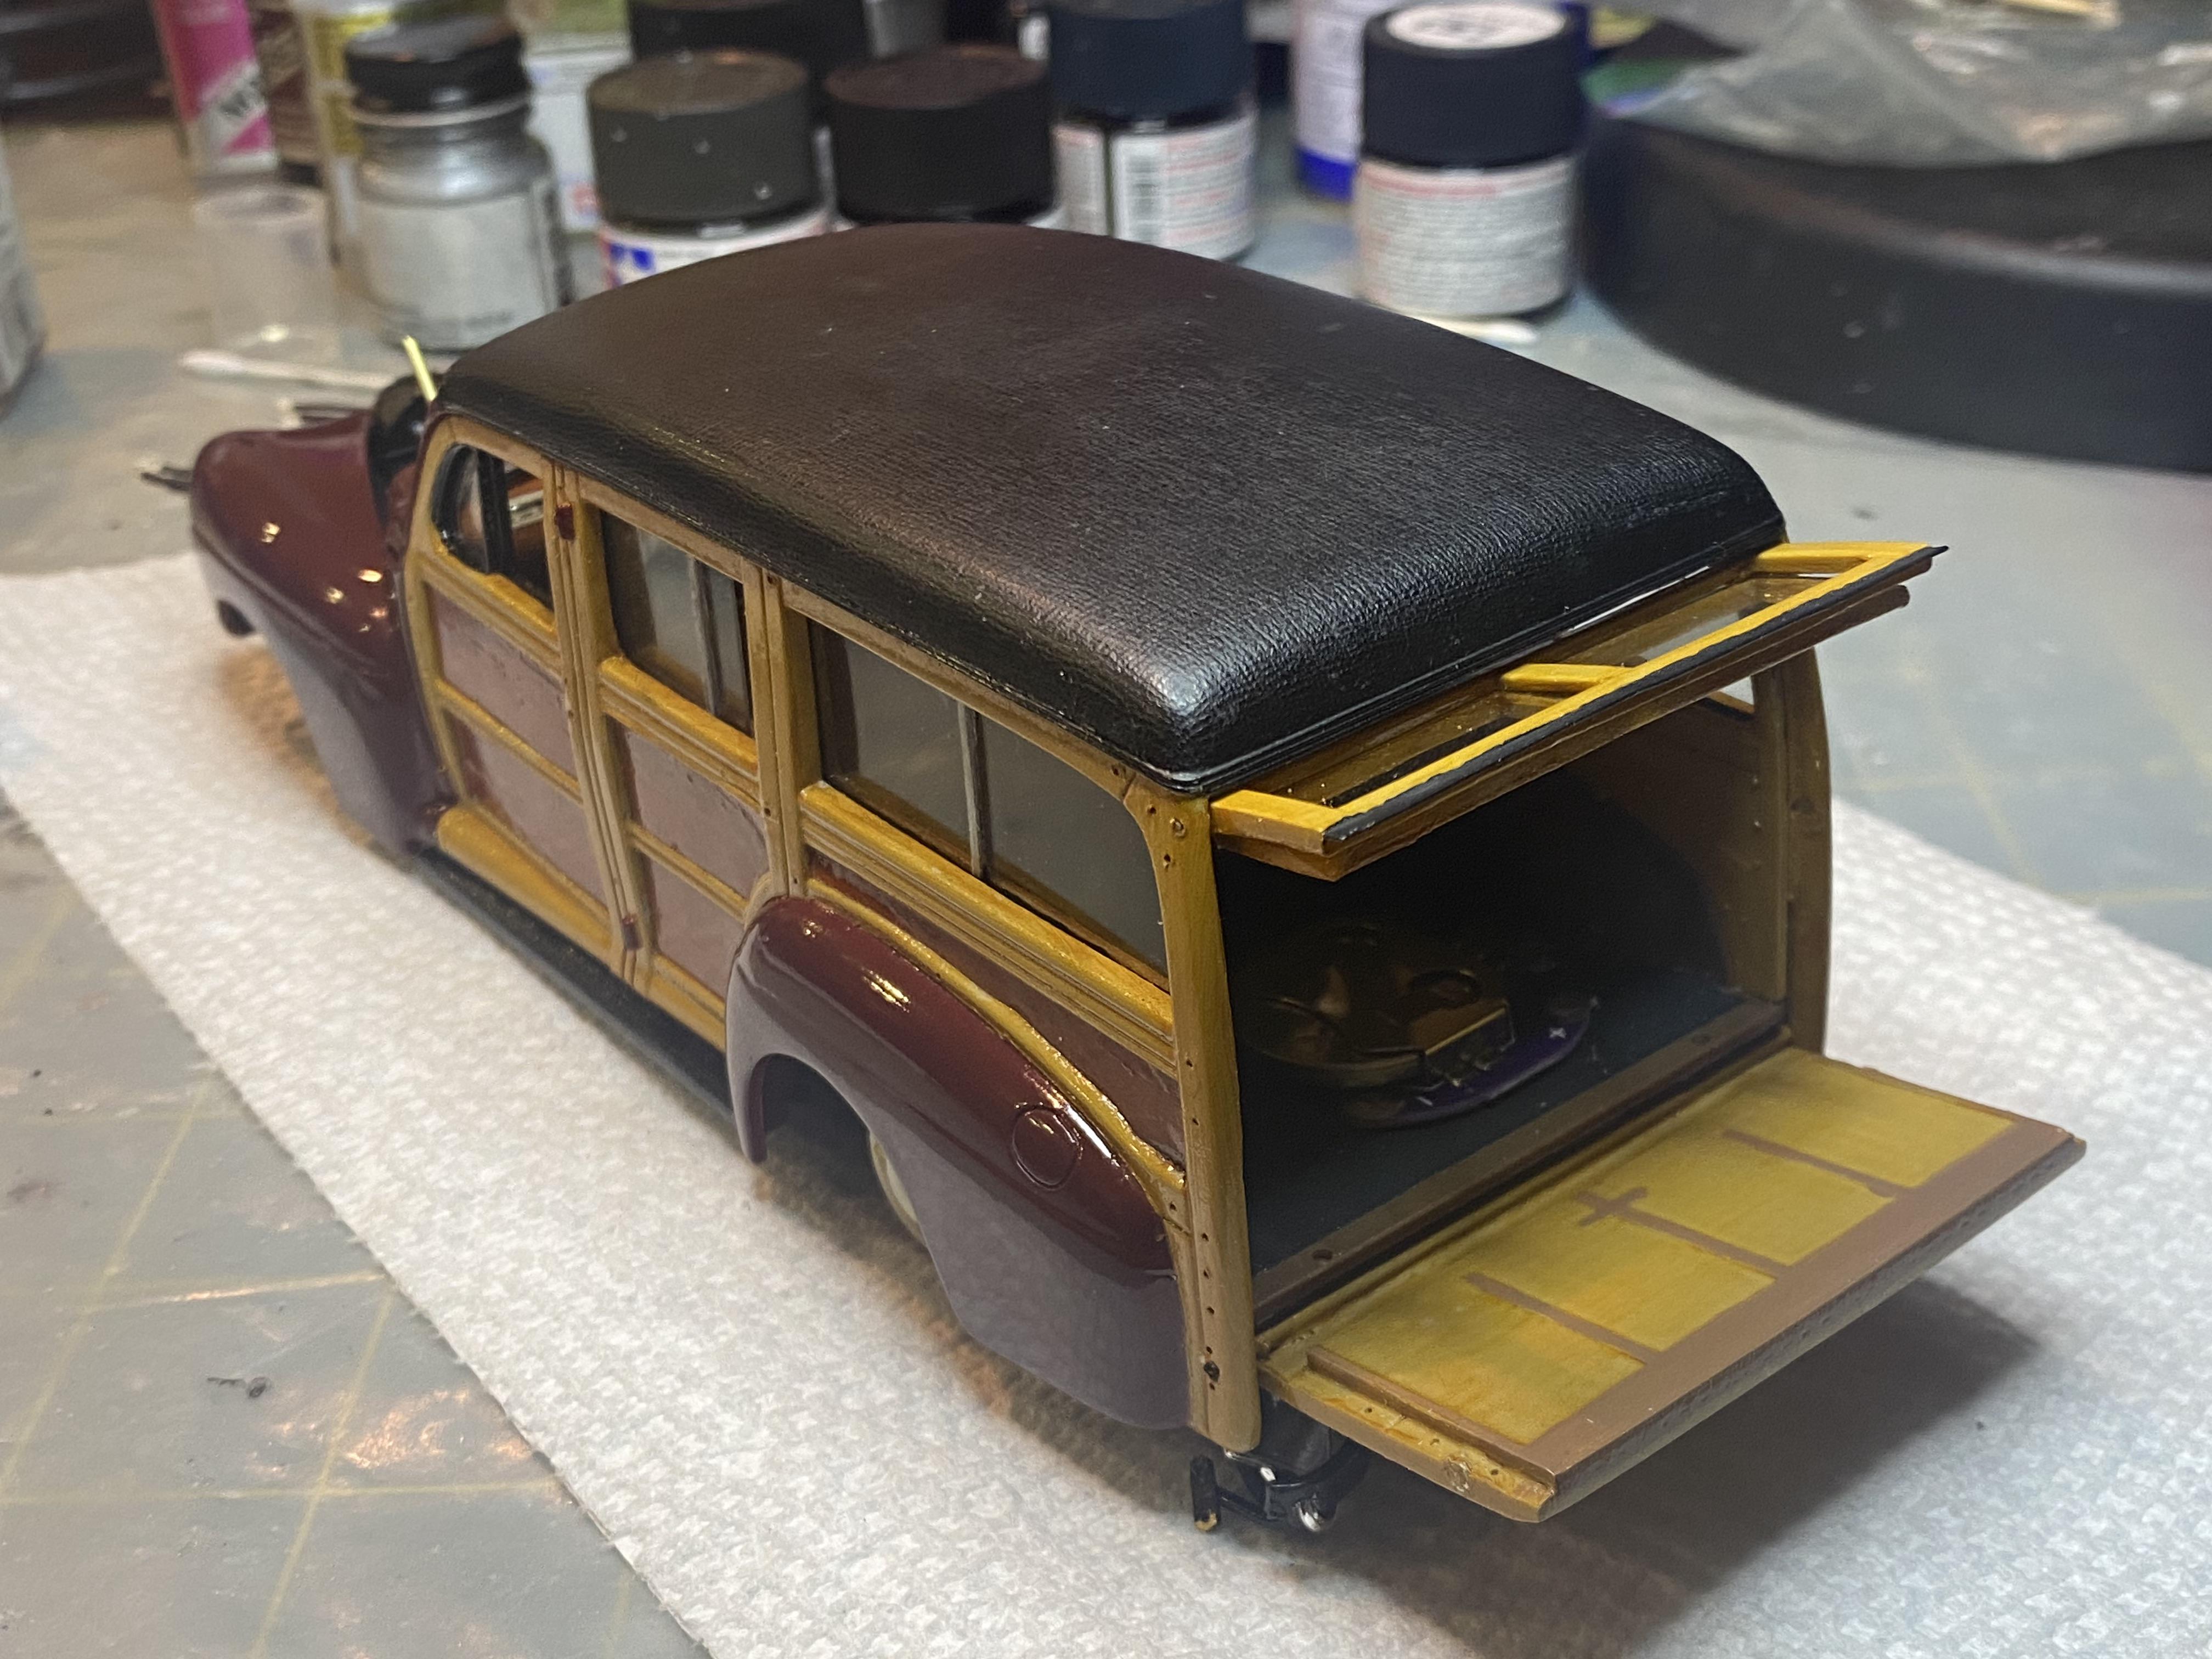
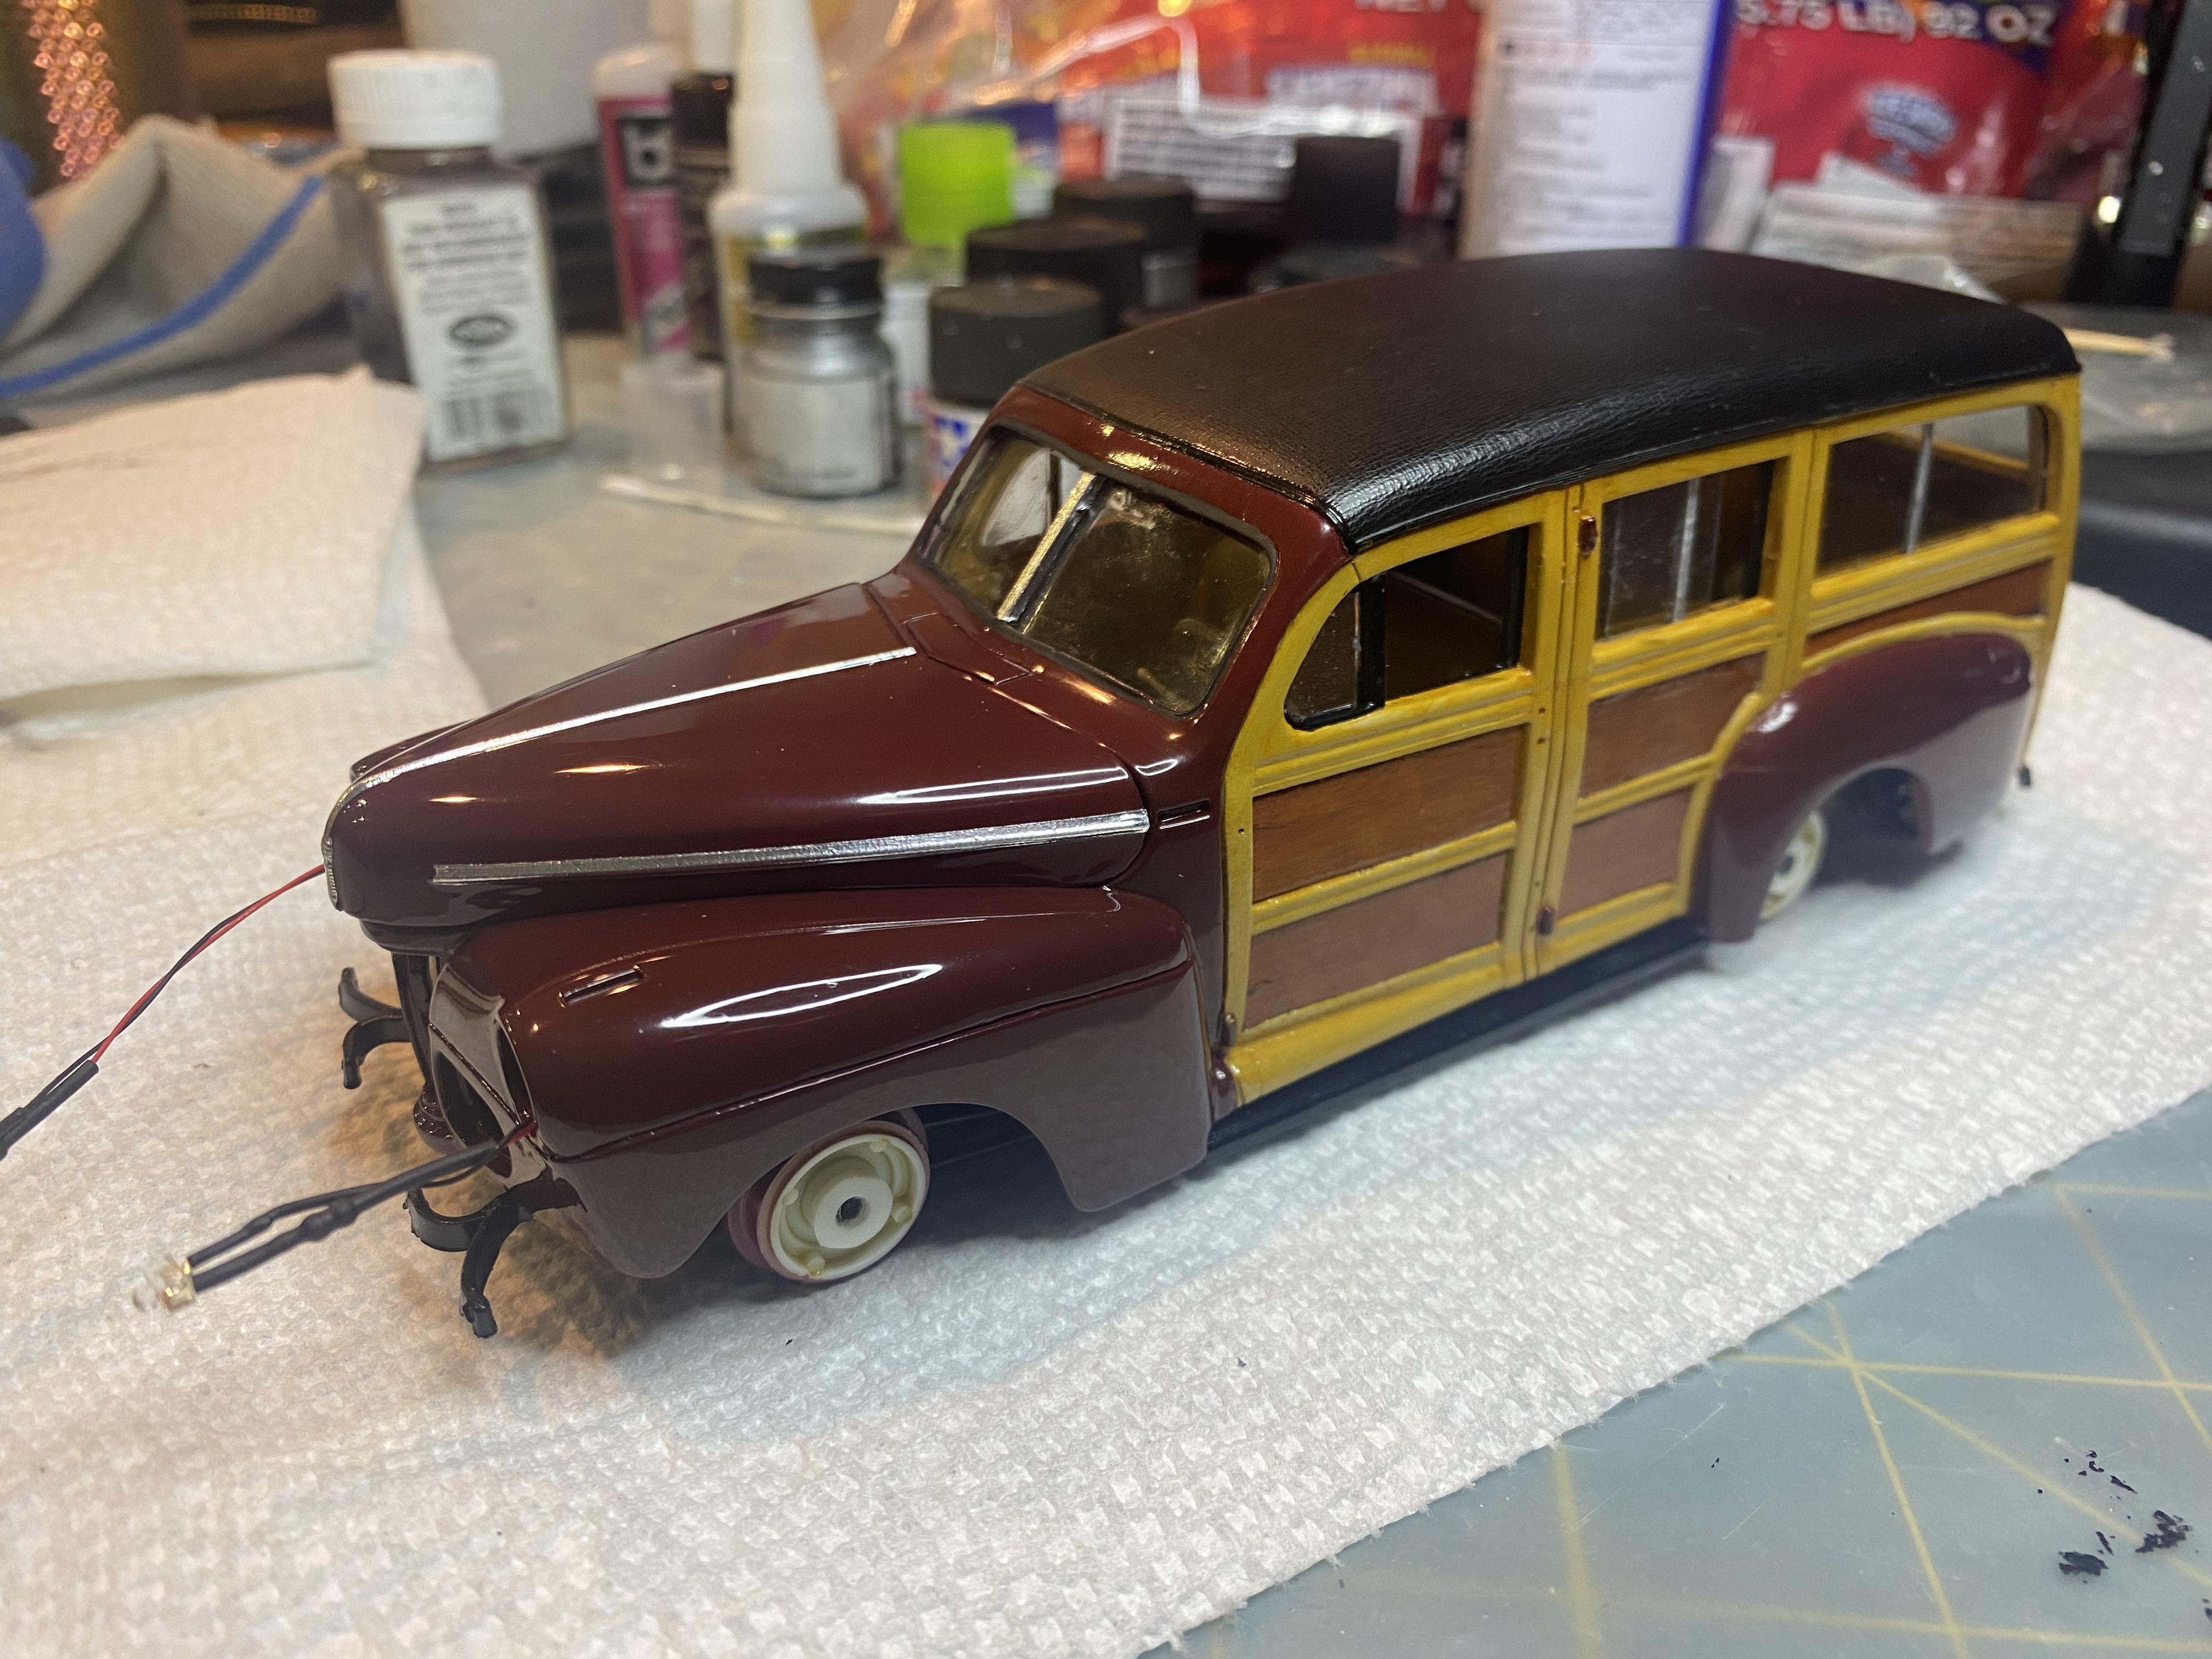
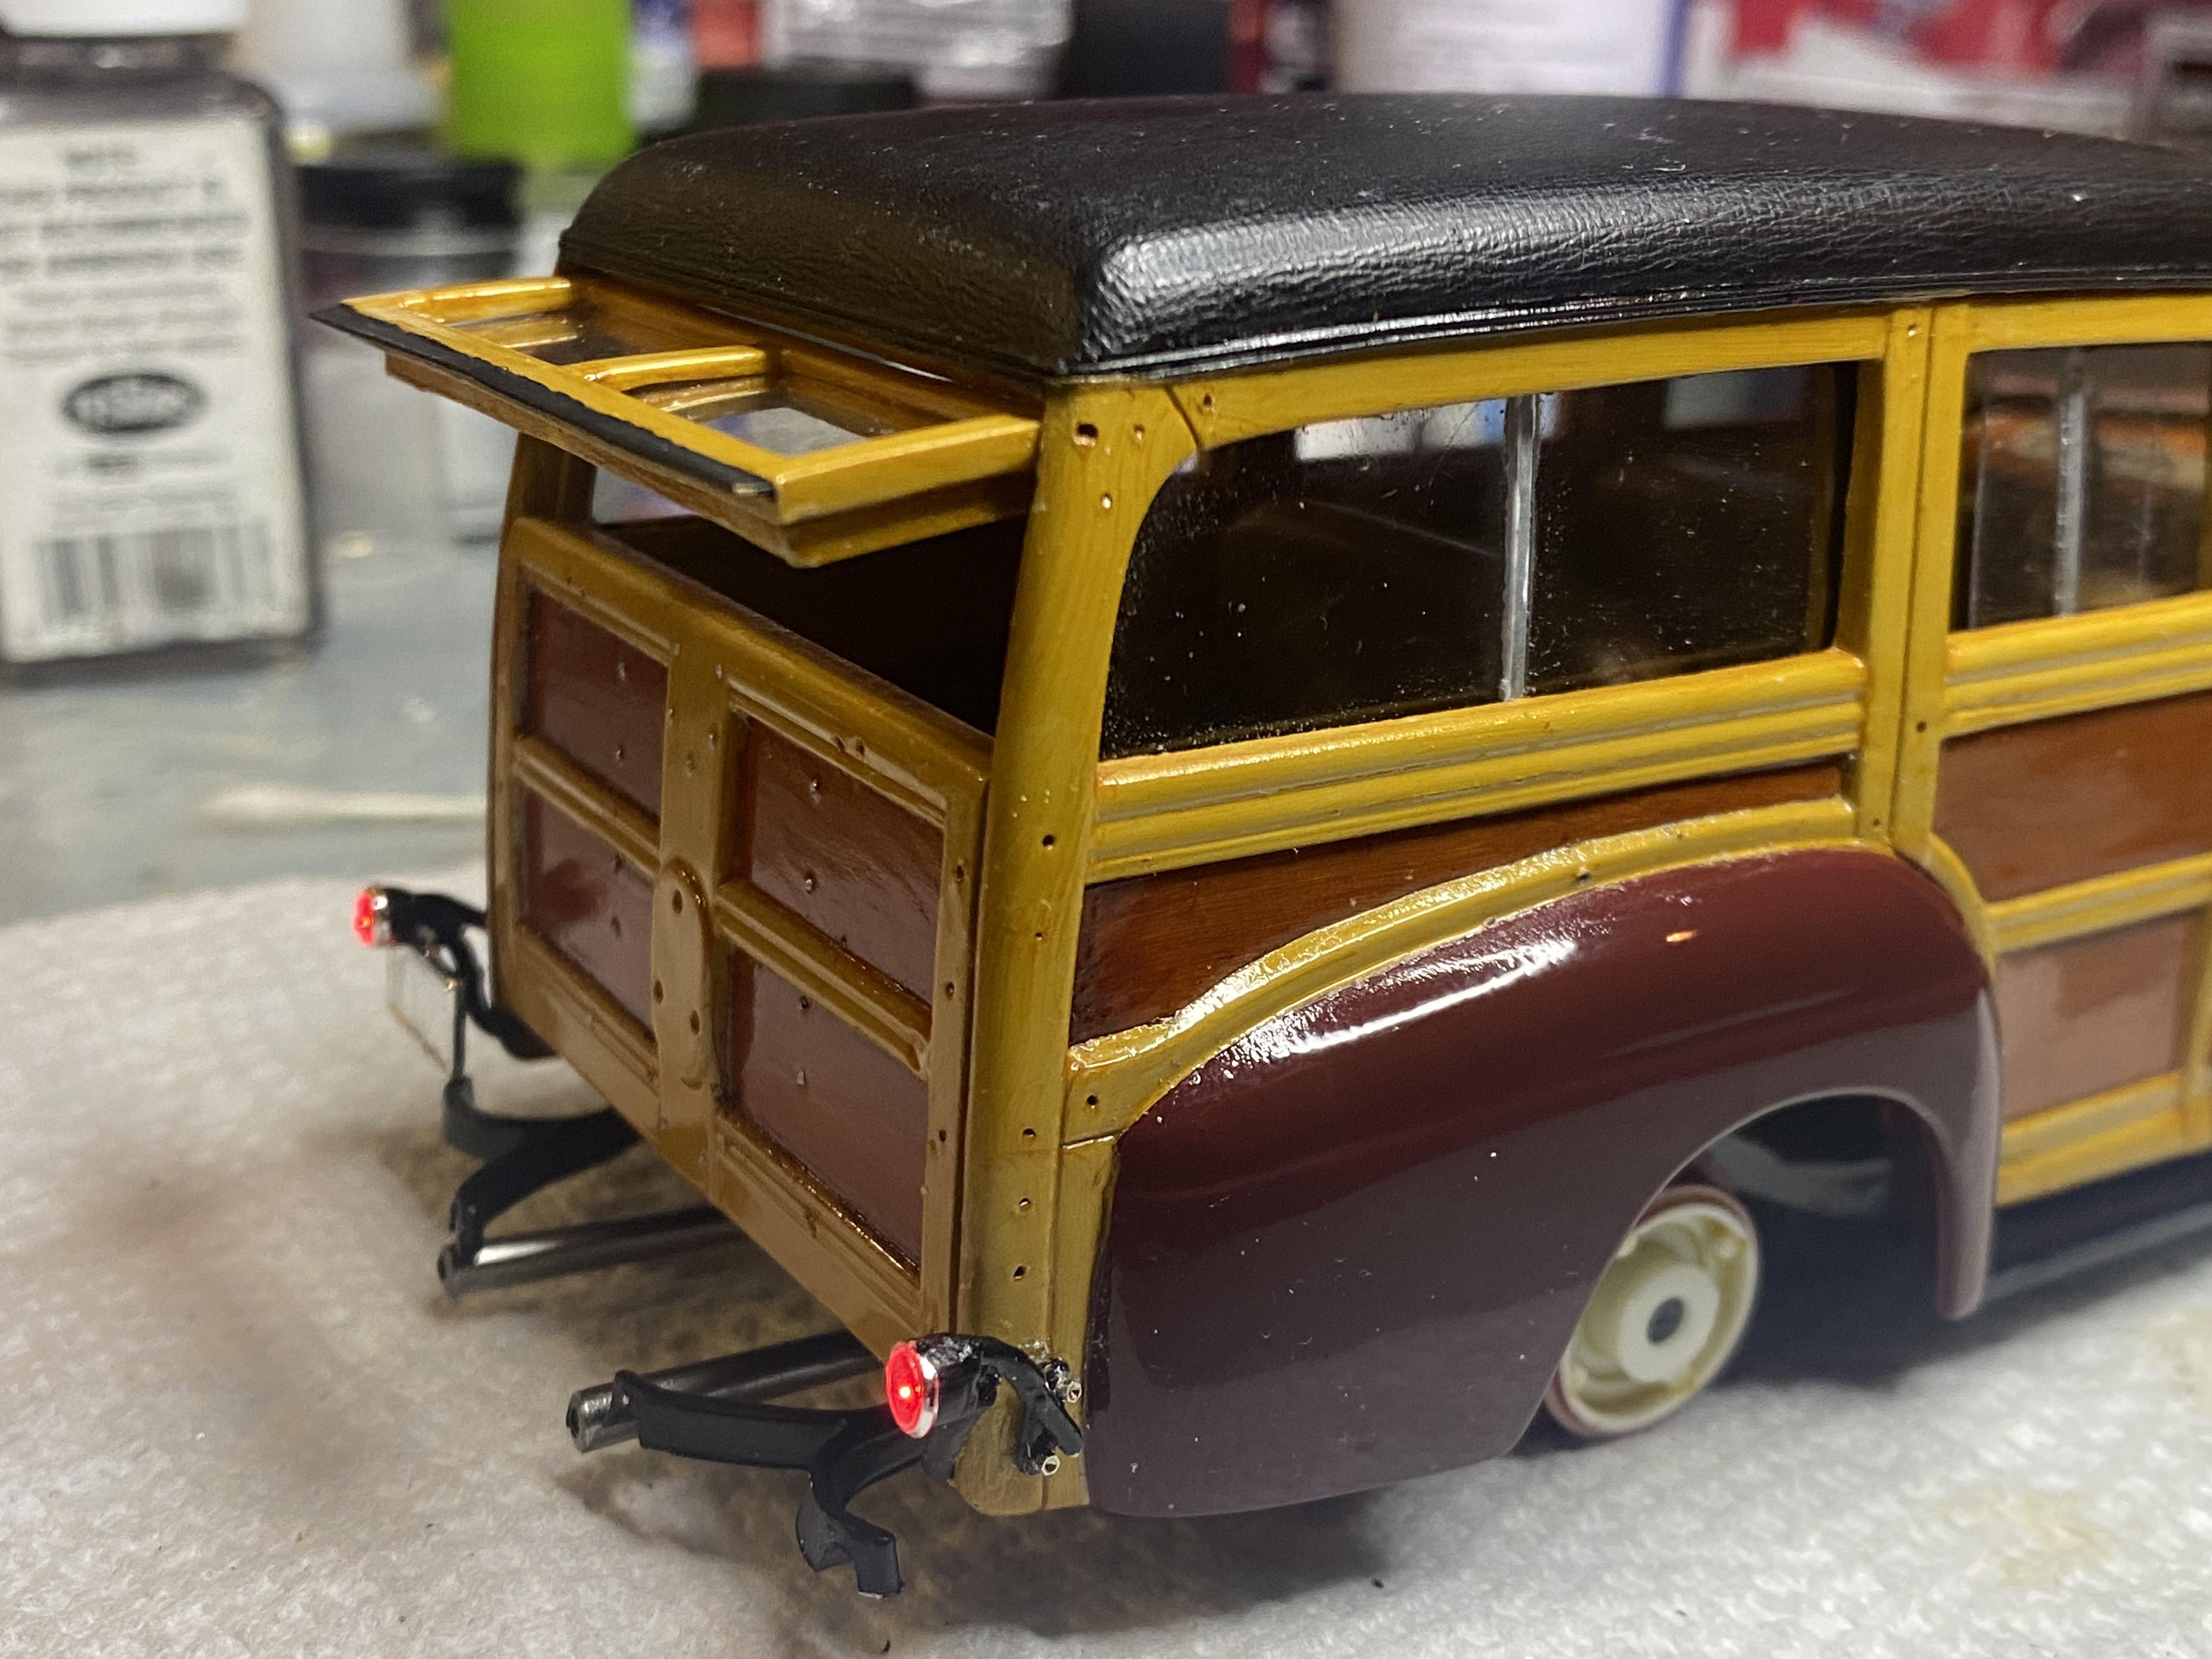
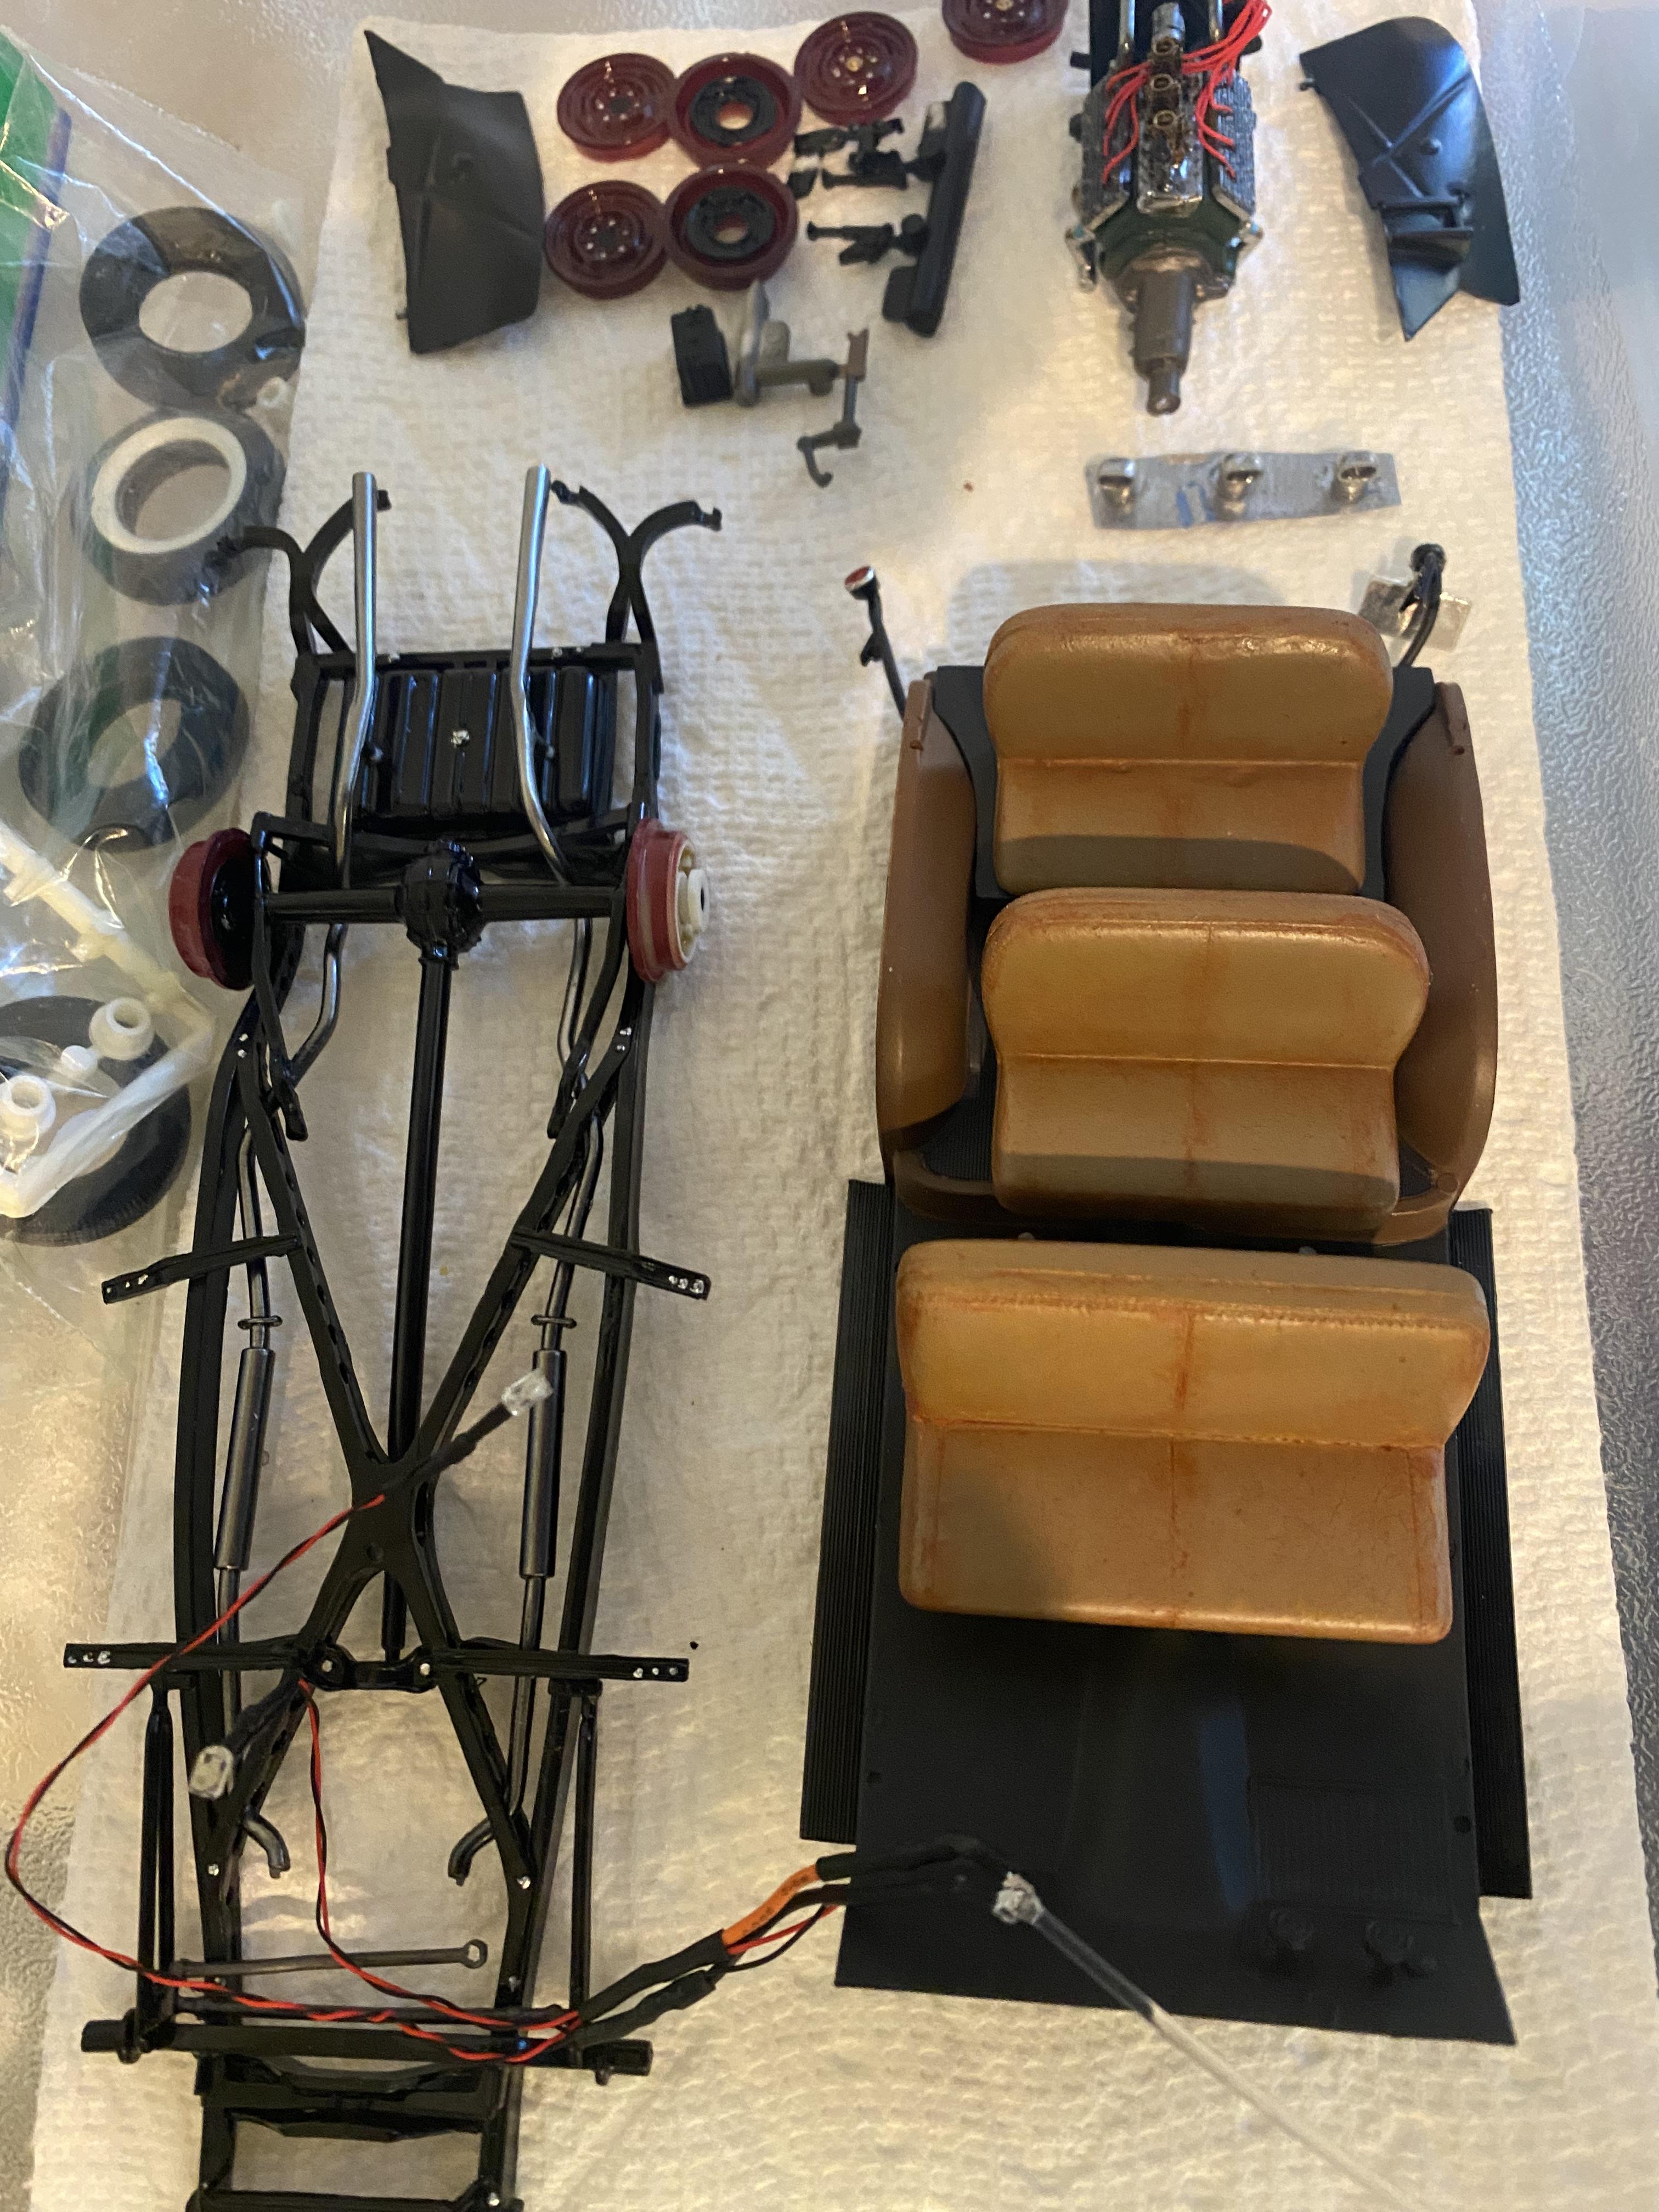
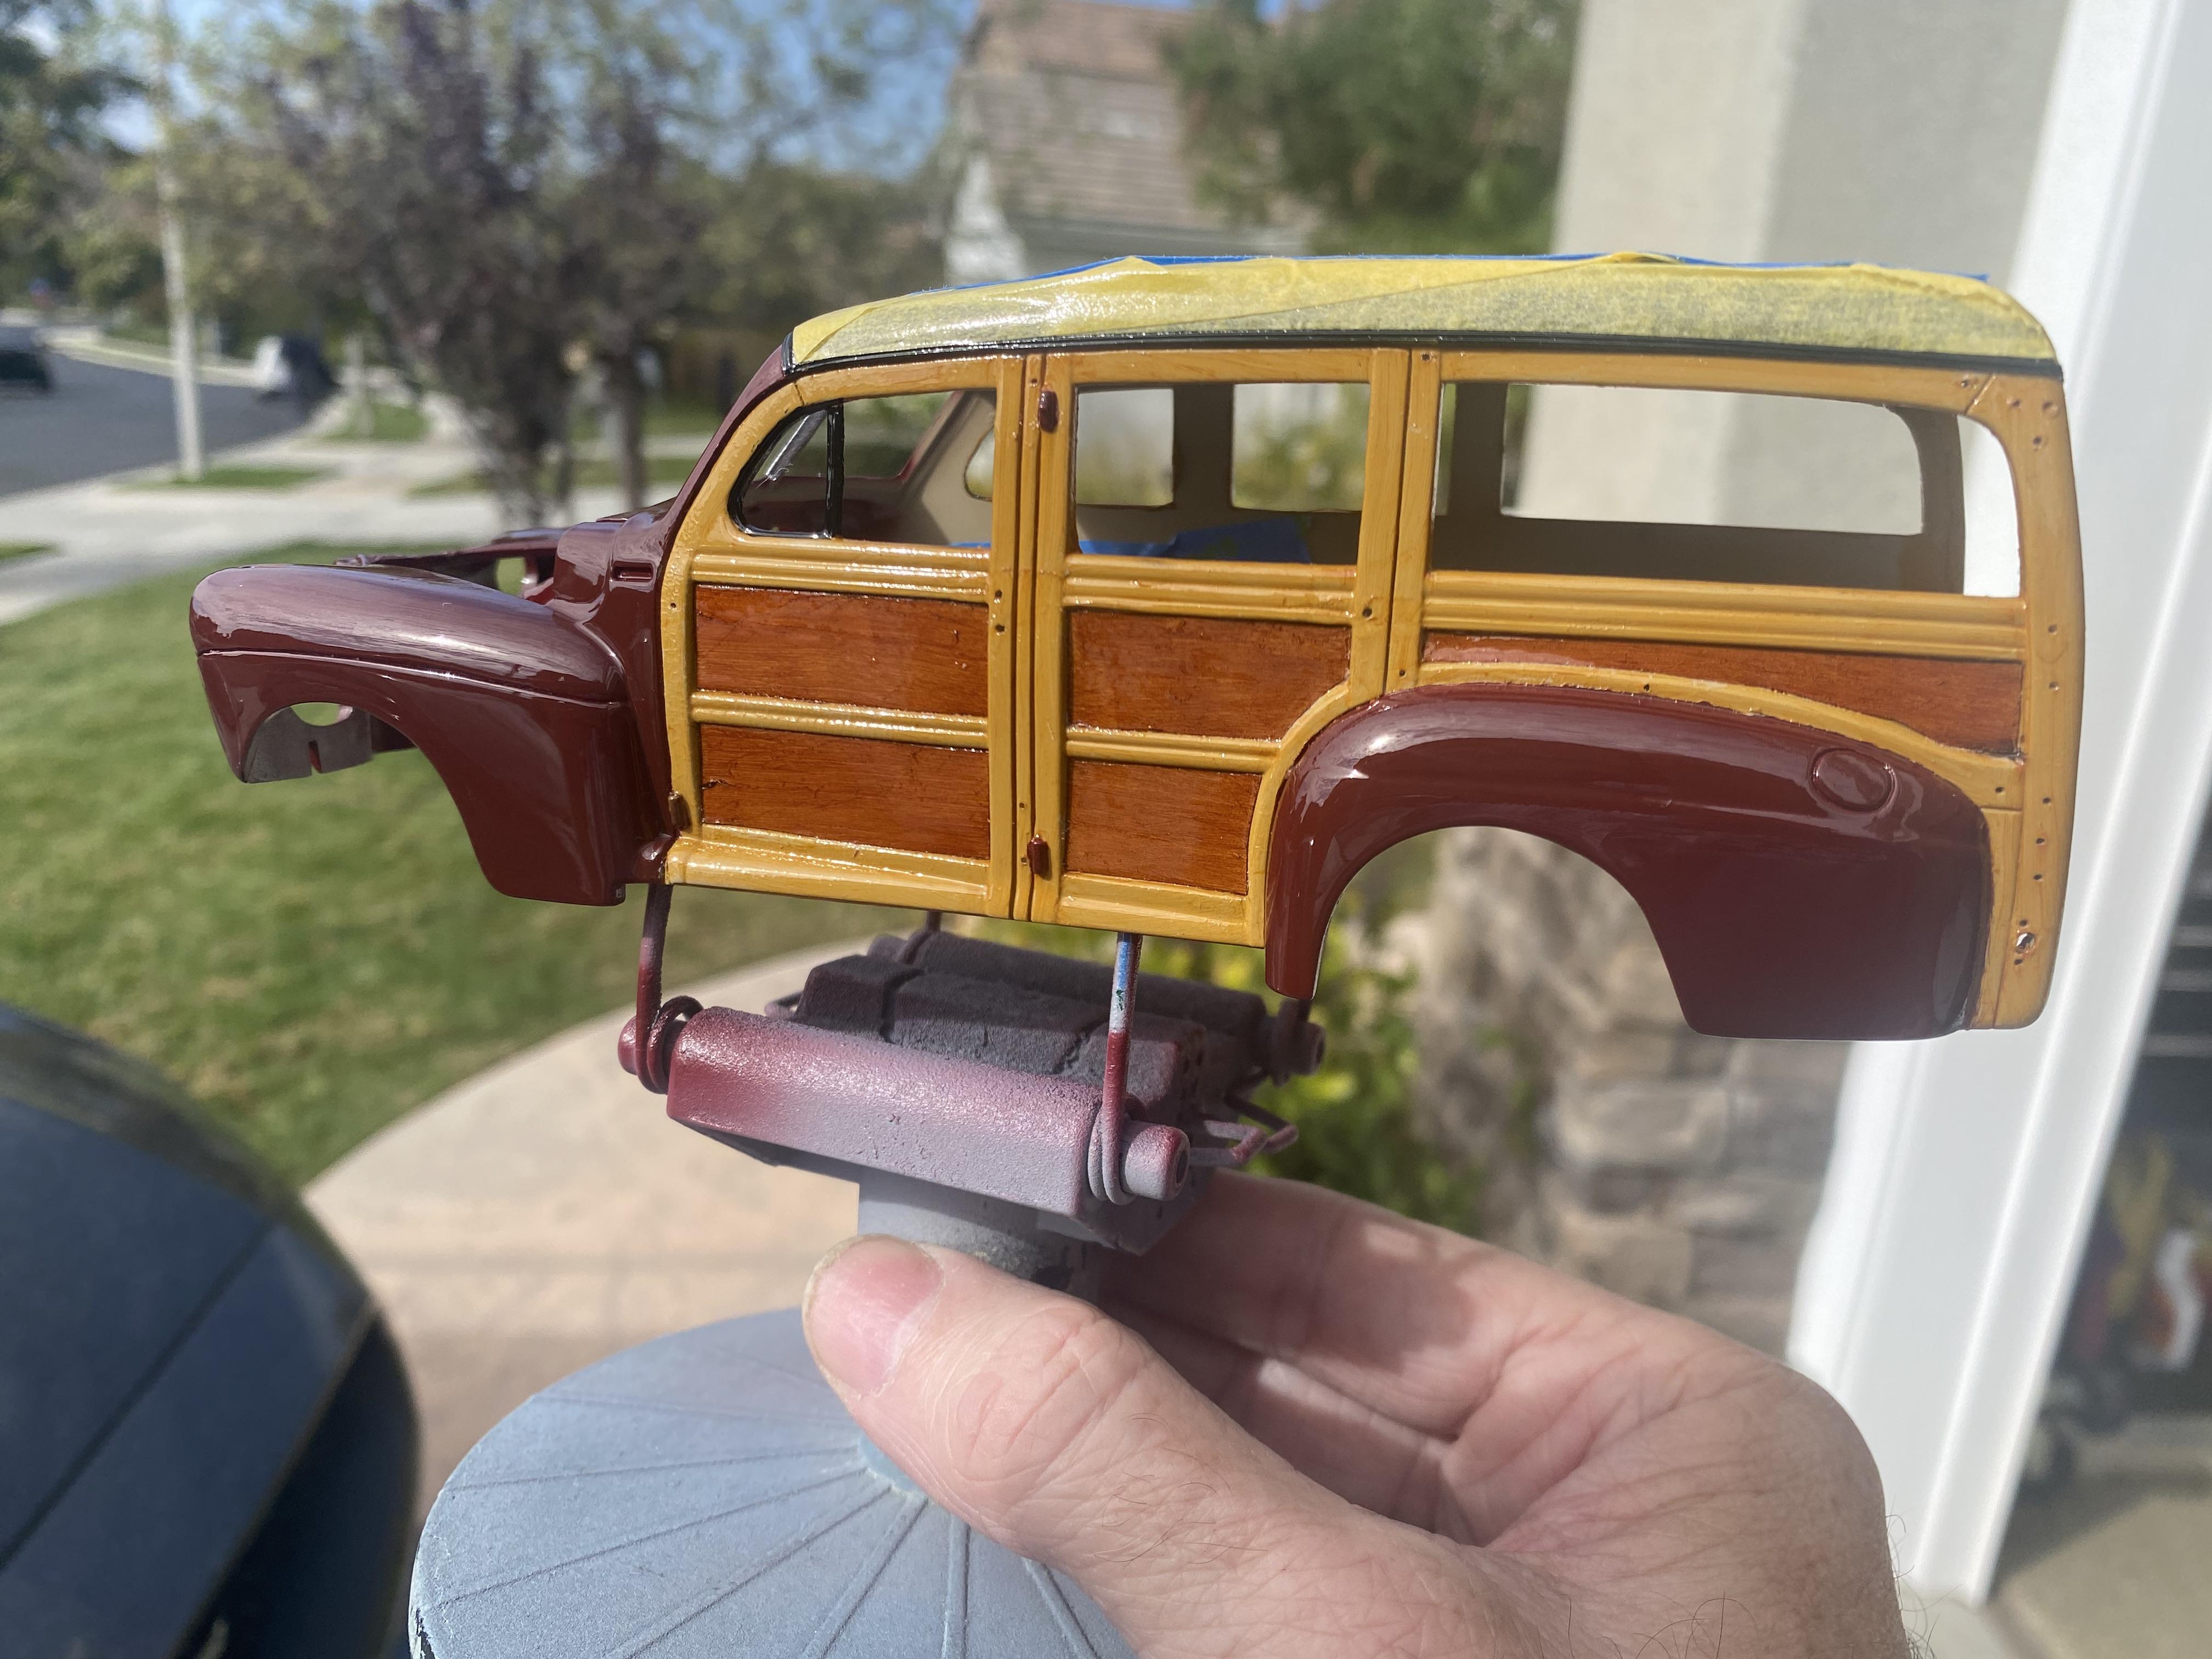
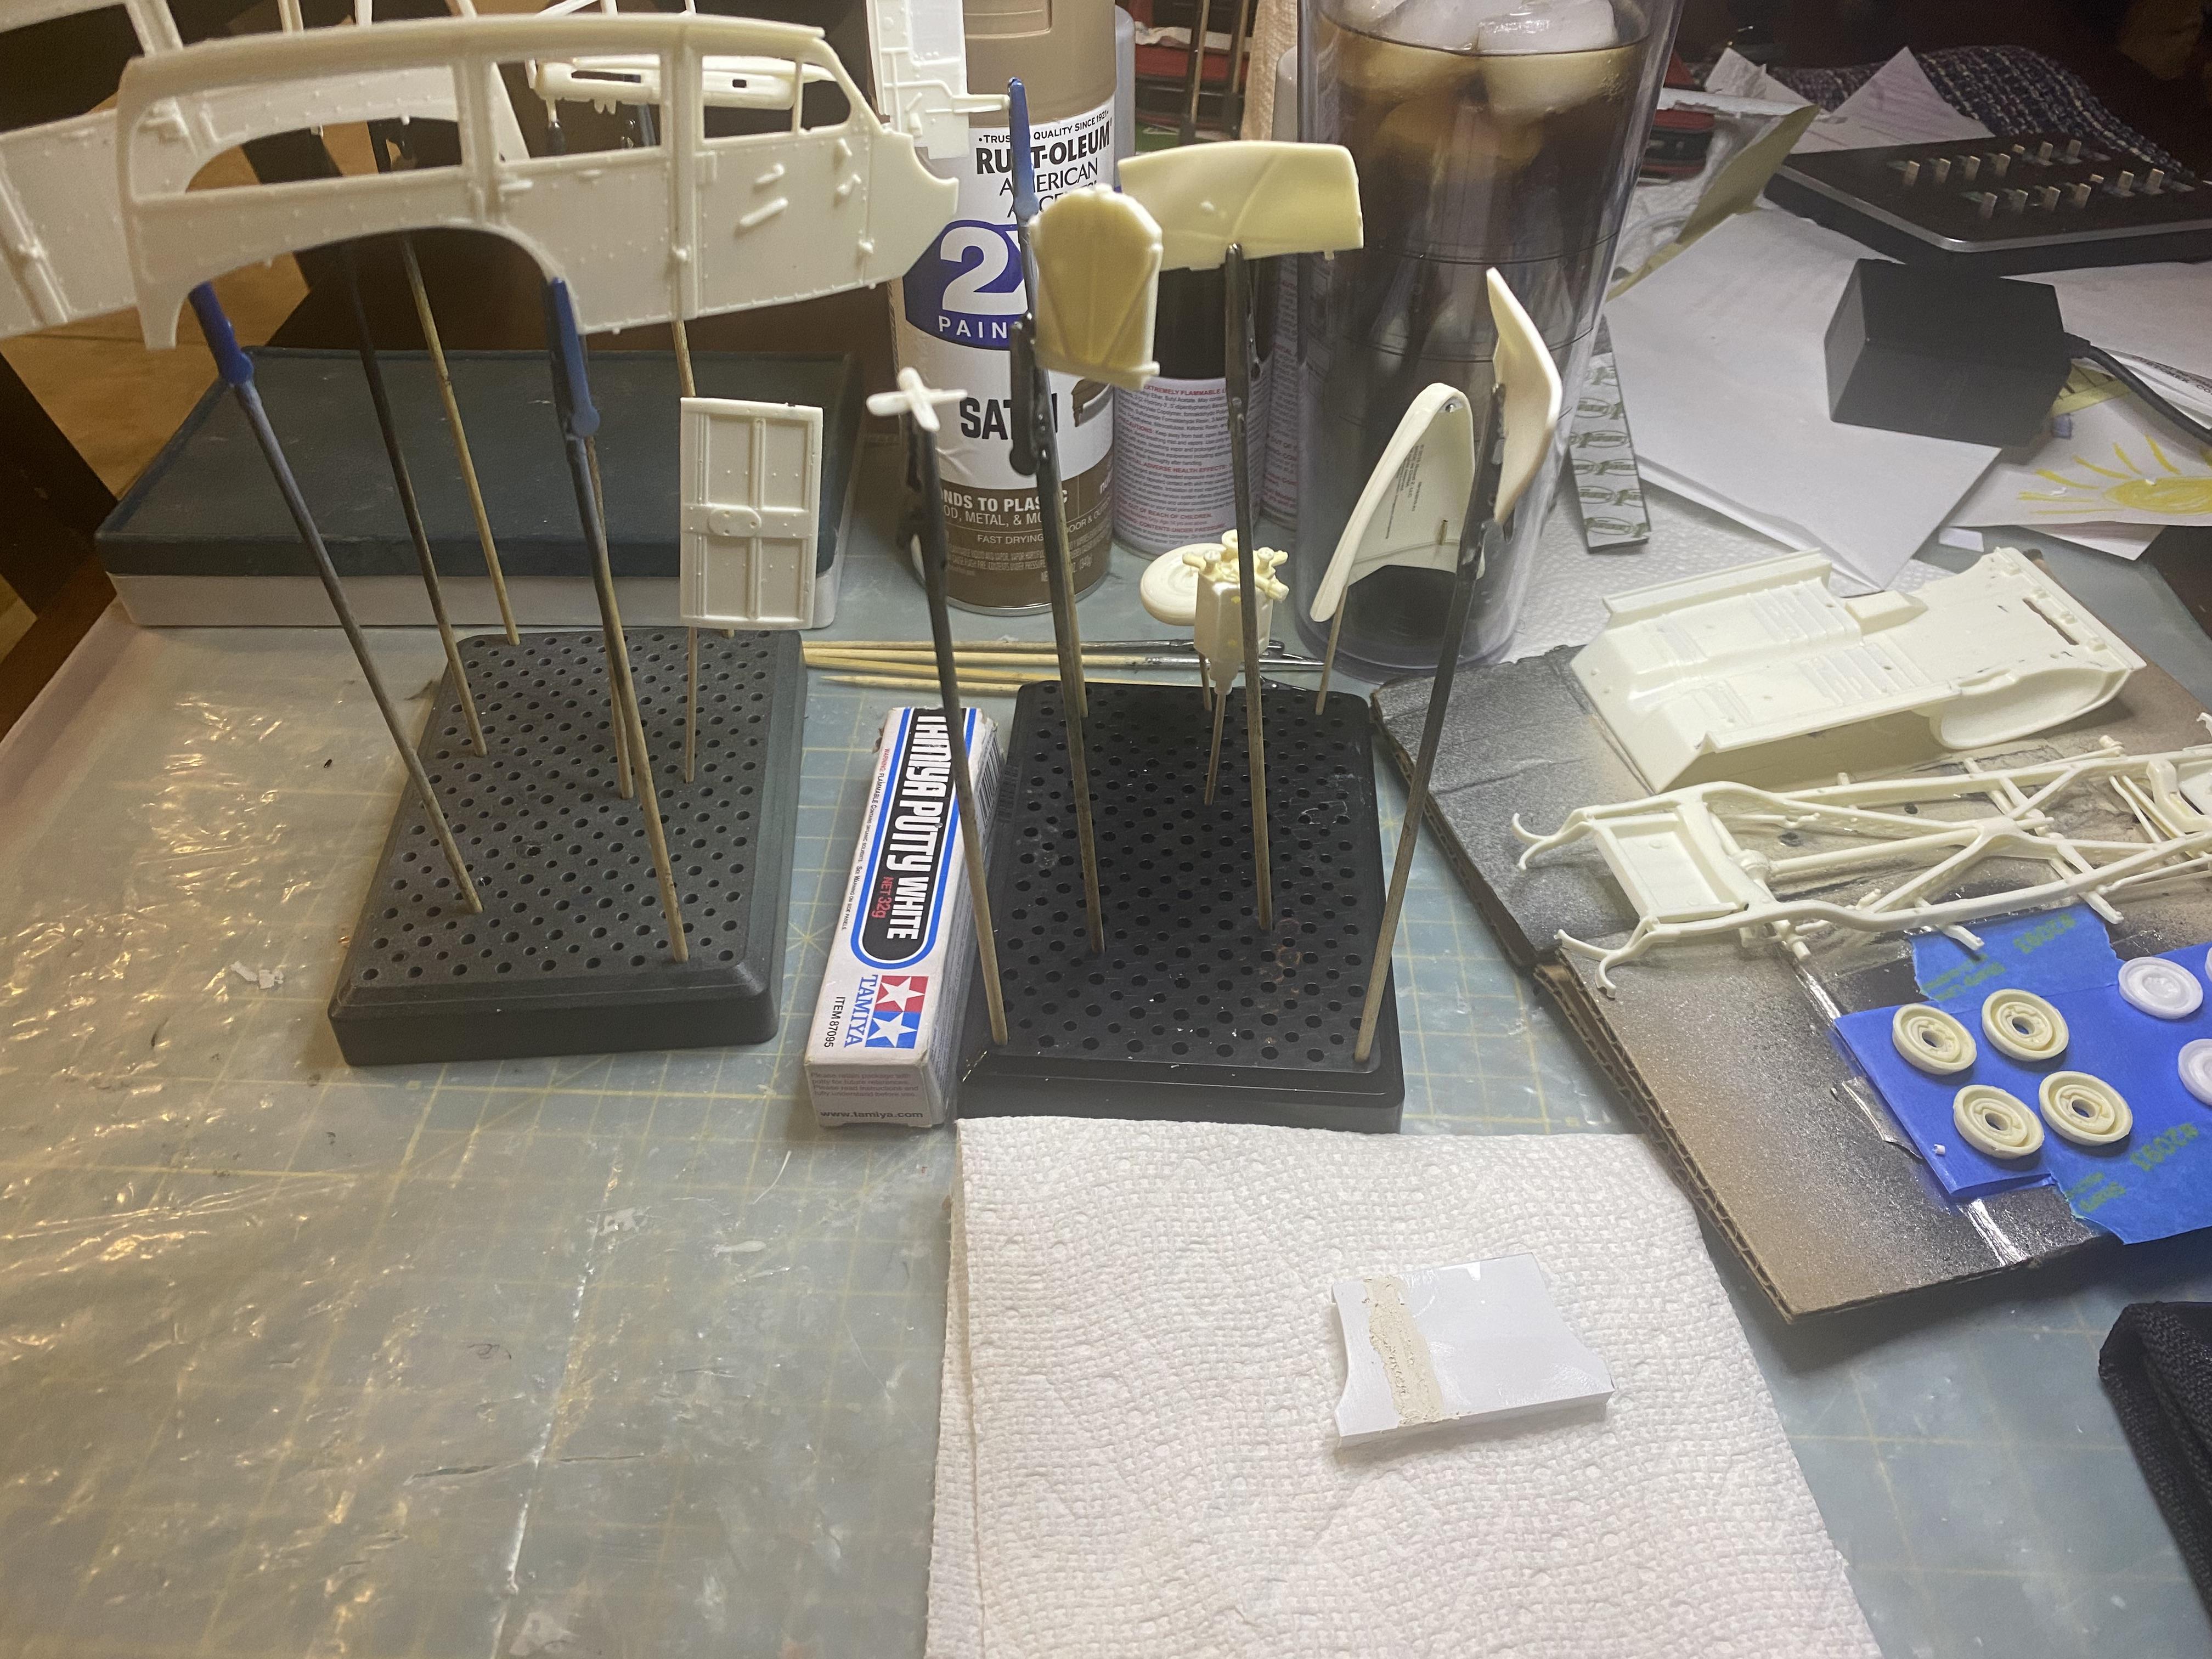
I still have a whole lot to do but made some progress today. Installed the headlight buckets and front LEDs. Sealed underneath so light doesn’t show where I don’t want. I could not stand the blobs of chrome that were meant to be front turn signals so I removed the area the lenses should be, added clear UV resin and painted. I added the frog Mouth breathers and tires finishing up the engine compartment and chassis. Much more period correct I think. The rear seat hides the battery quite well. I actually love the slightly lowered stance. Added the bumpers and grill. I decided not to do a roof rack, I just have the surfboard hanging out through the rear hatch. First pass on painting the surfboard. I need to figure out what builds I am going to take tomorrow to the Spirit of Speed Model Car at the NHRA museum. So won’t be getting any time on the Woody tomorrow. Say hi if your going to be there.

-
Thank you!
-
Thank You!
-
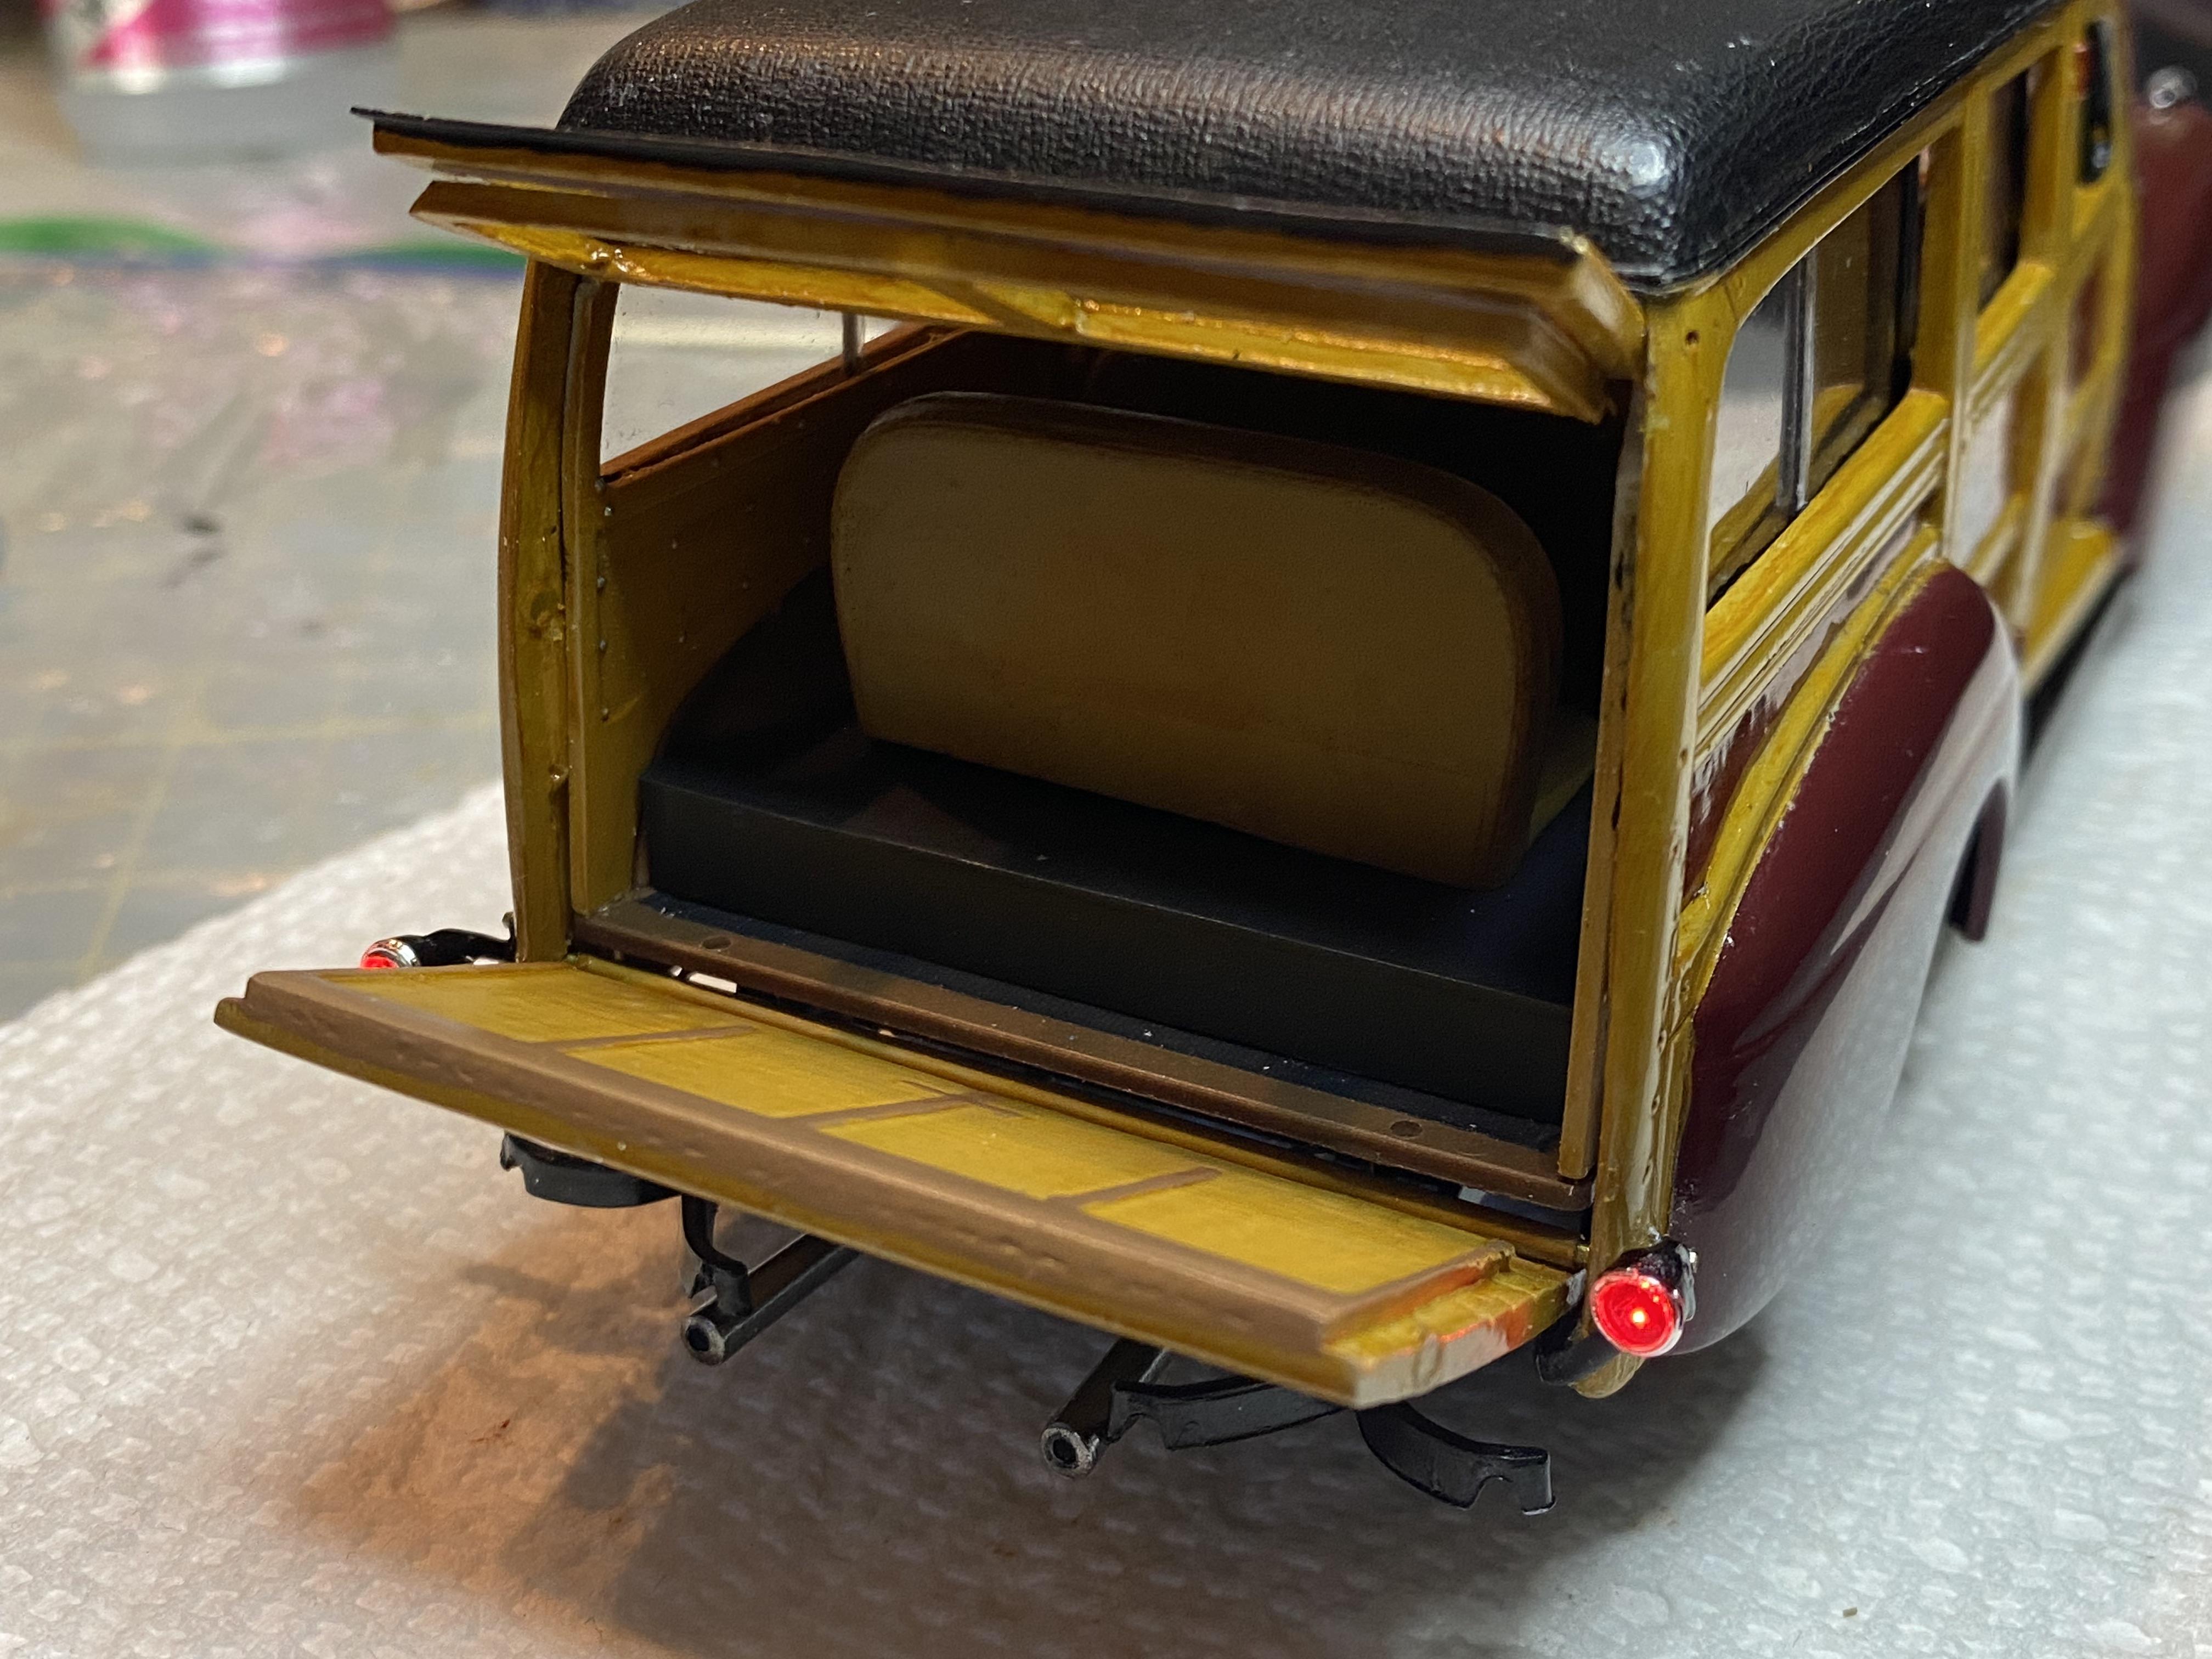
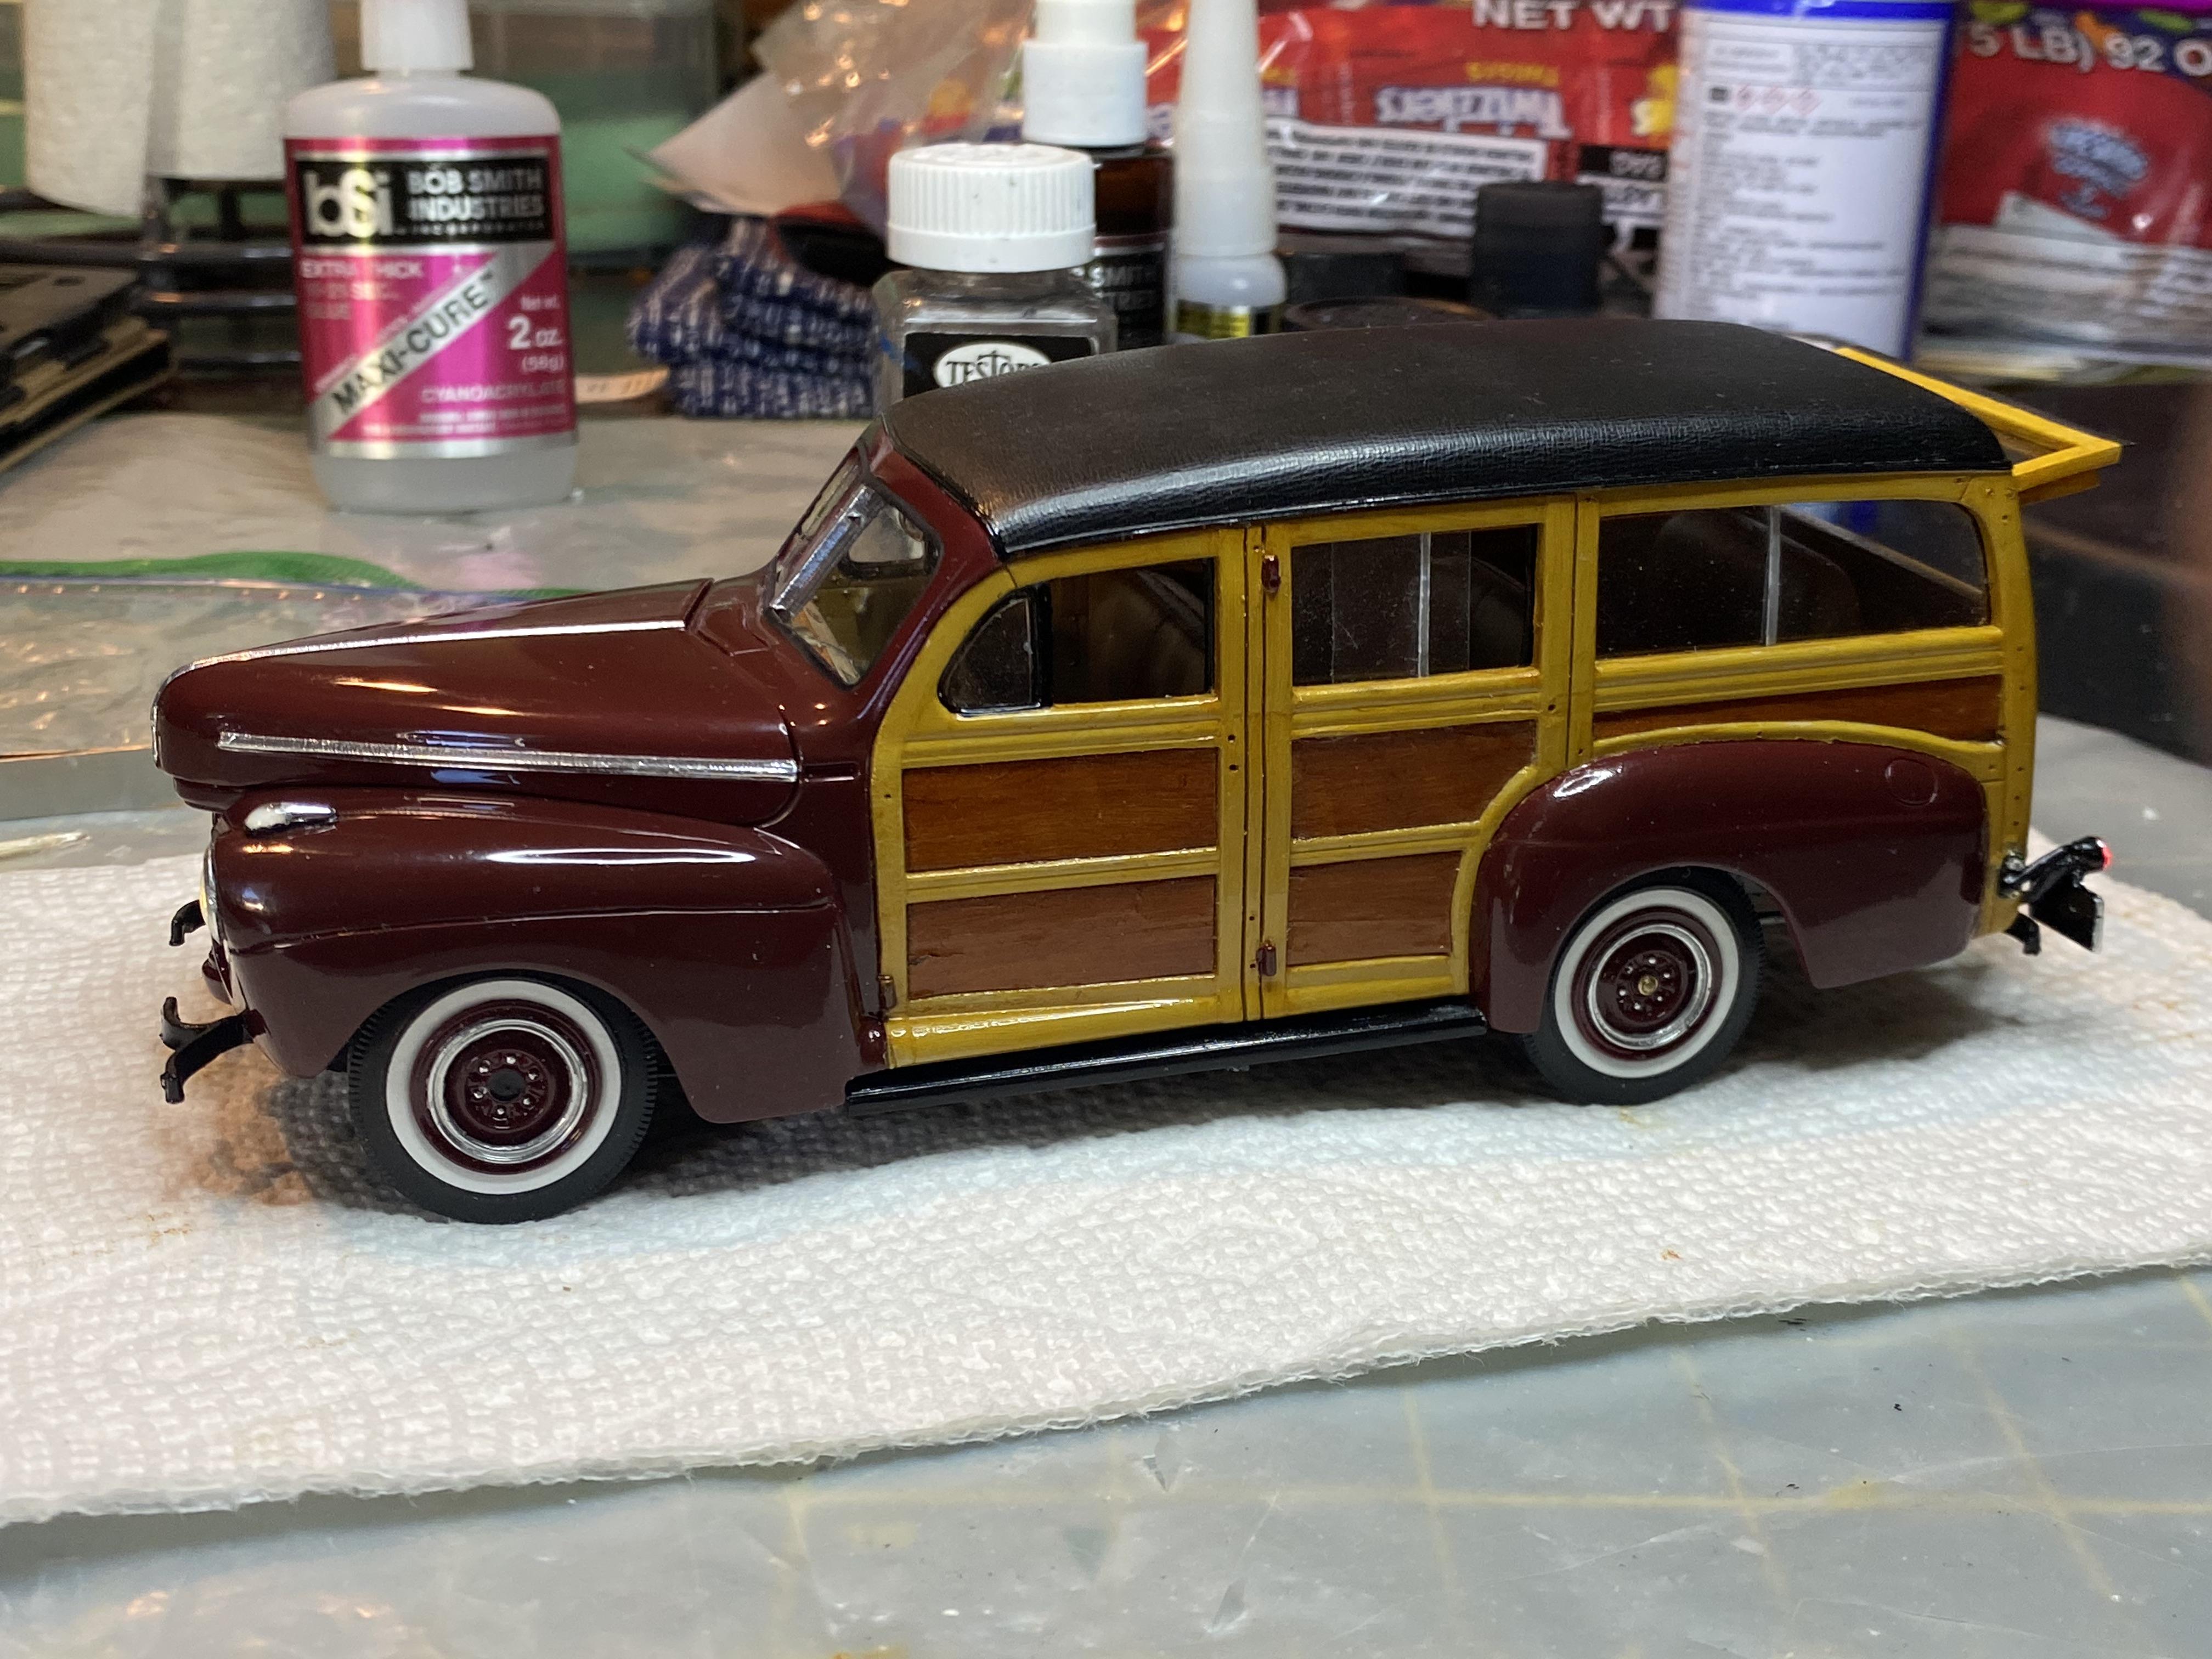
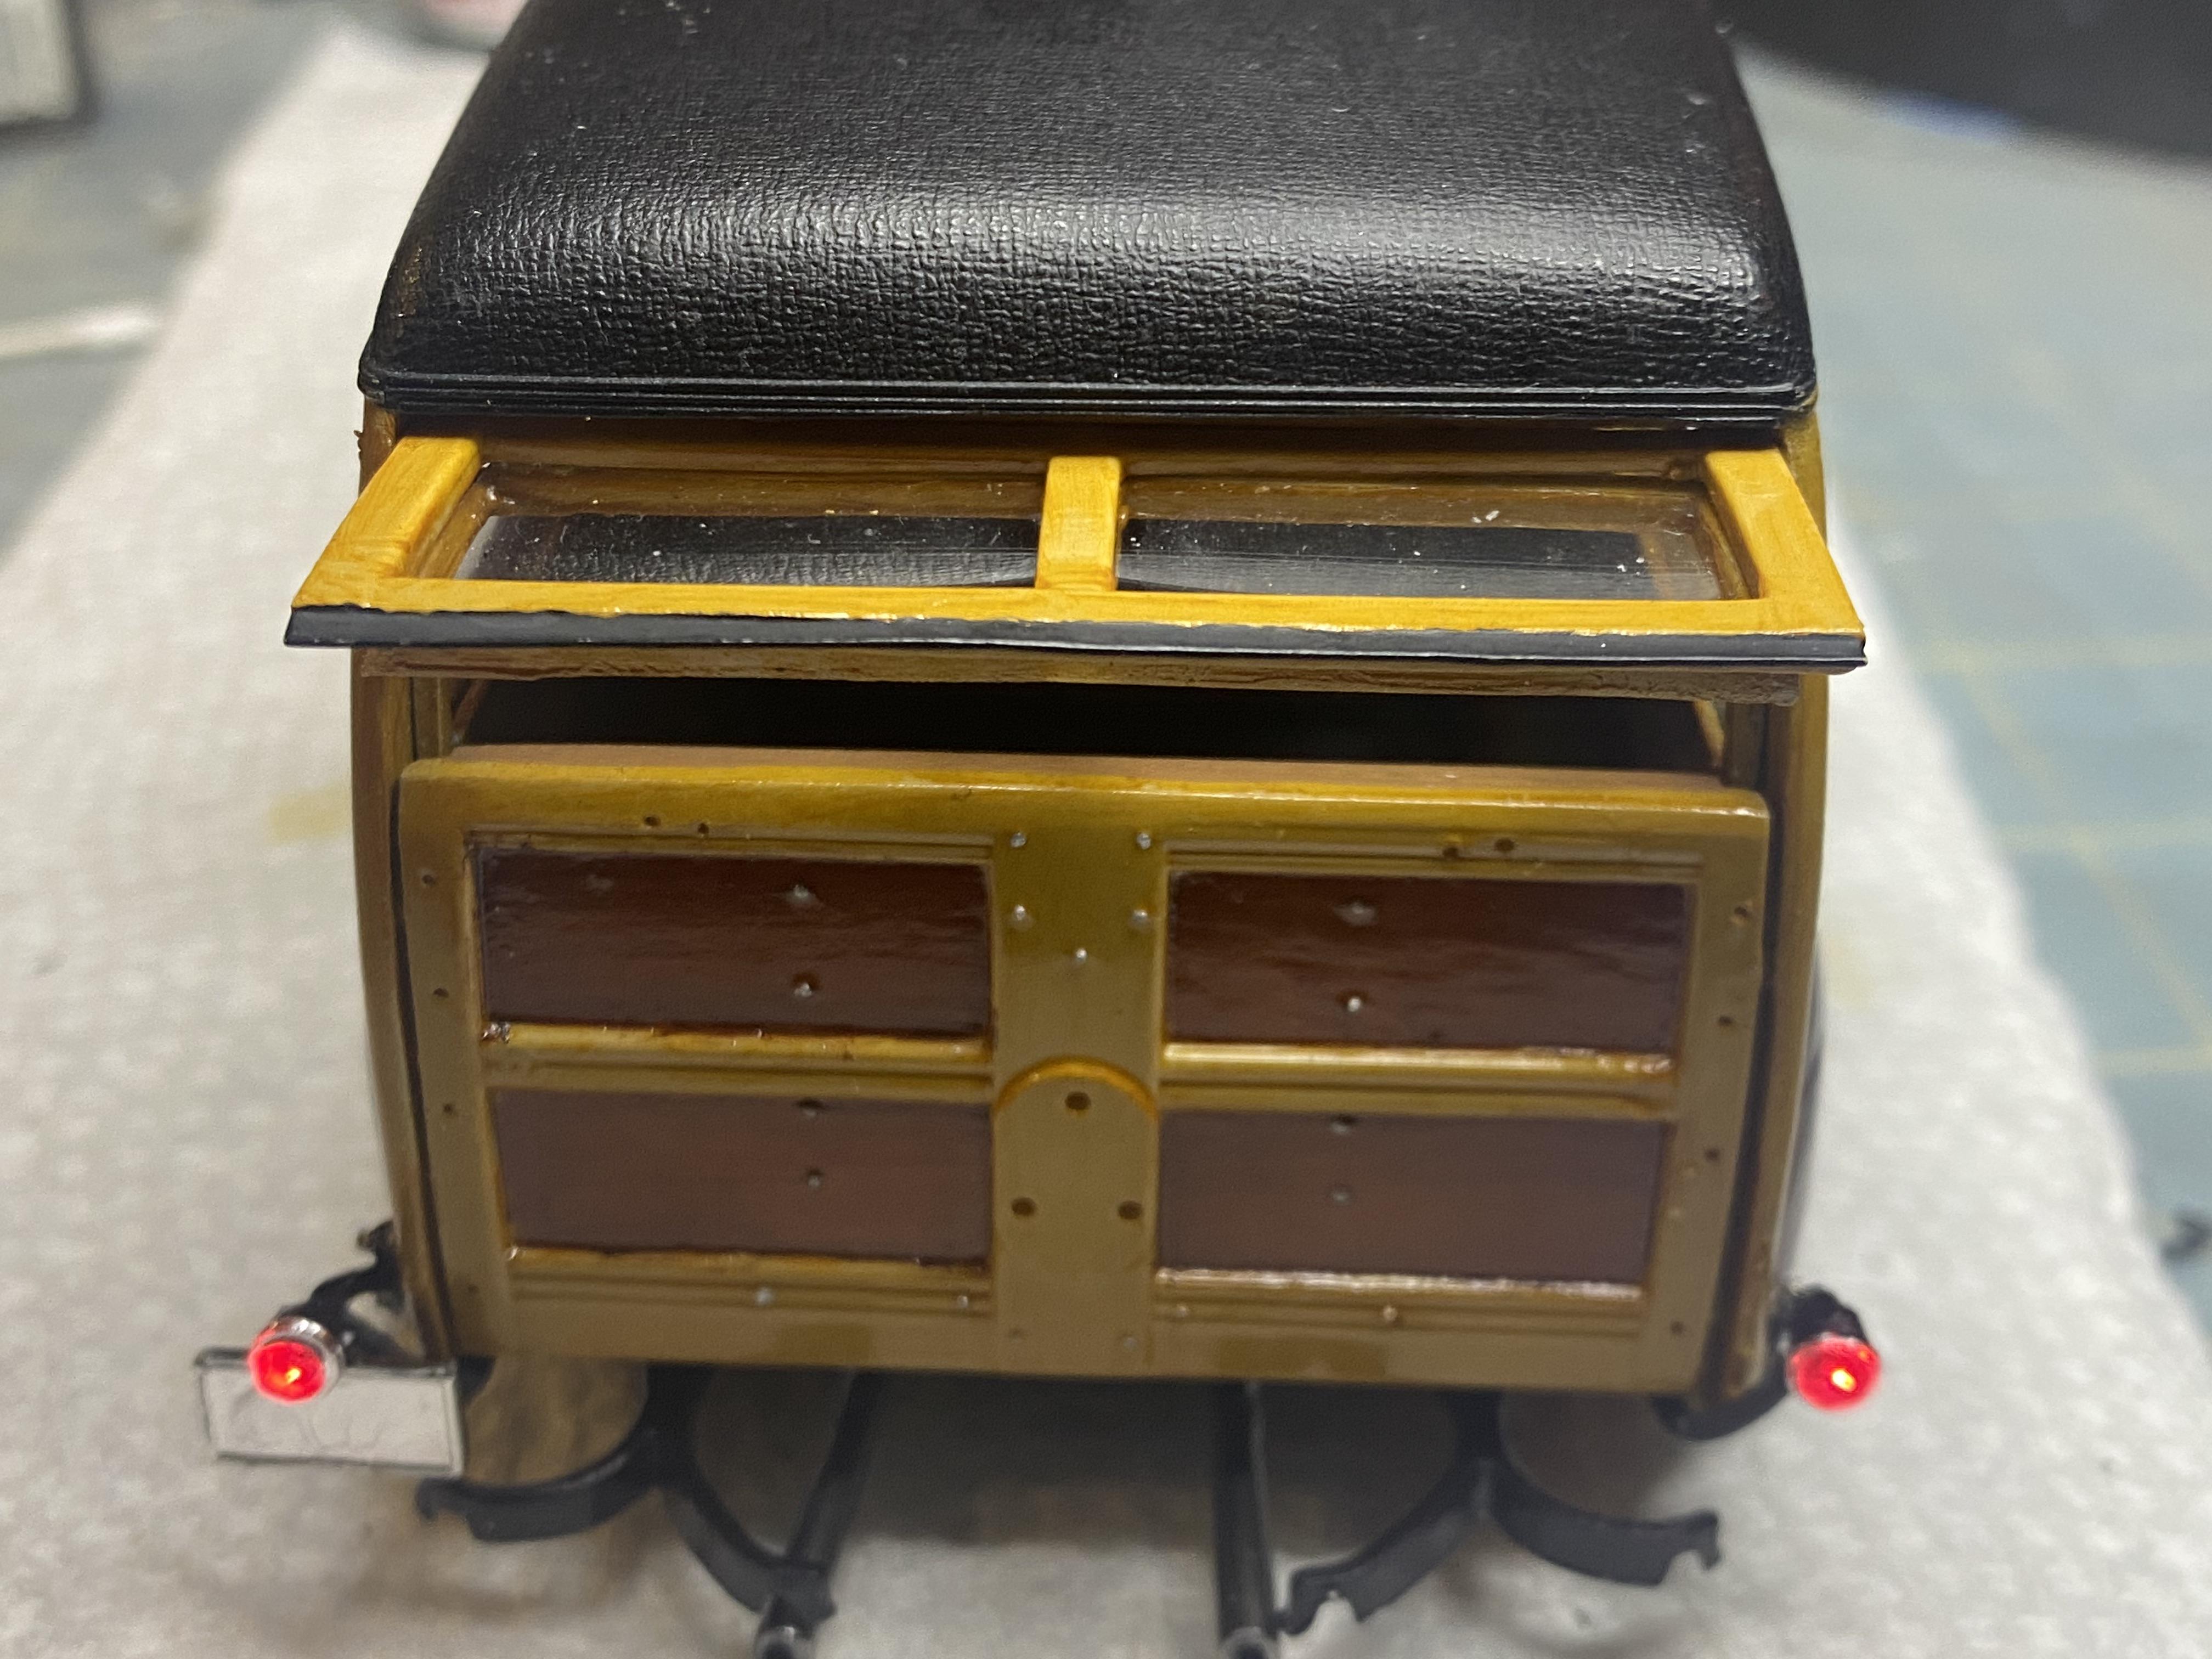
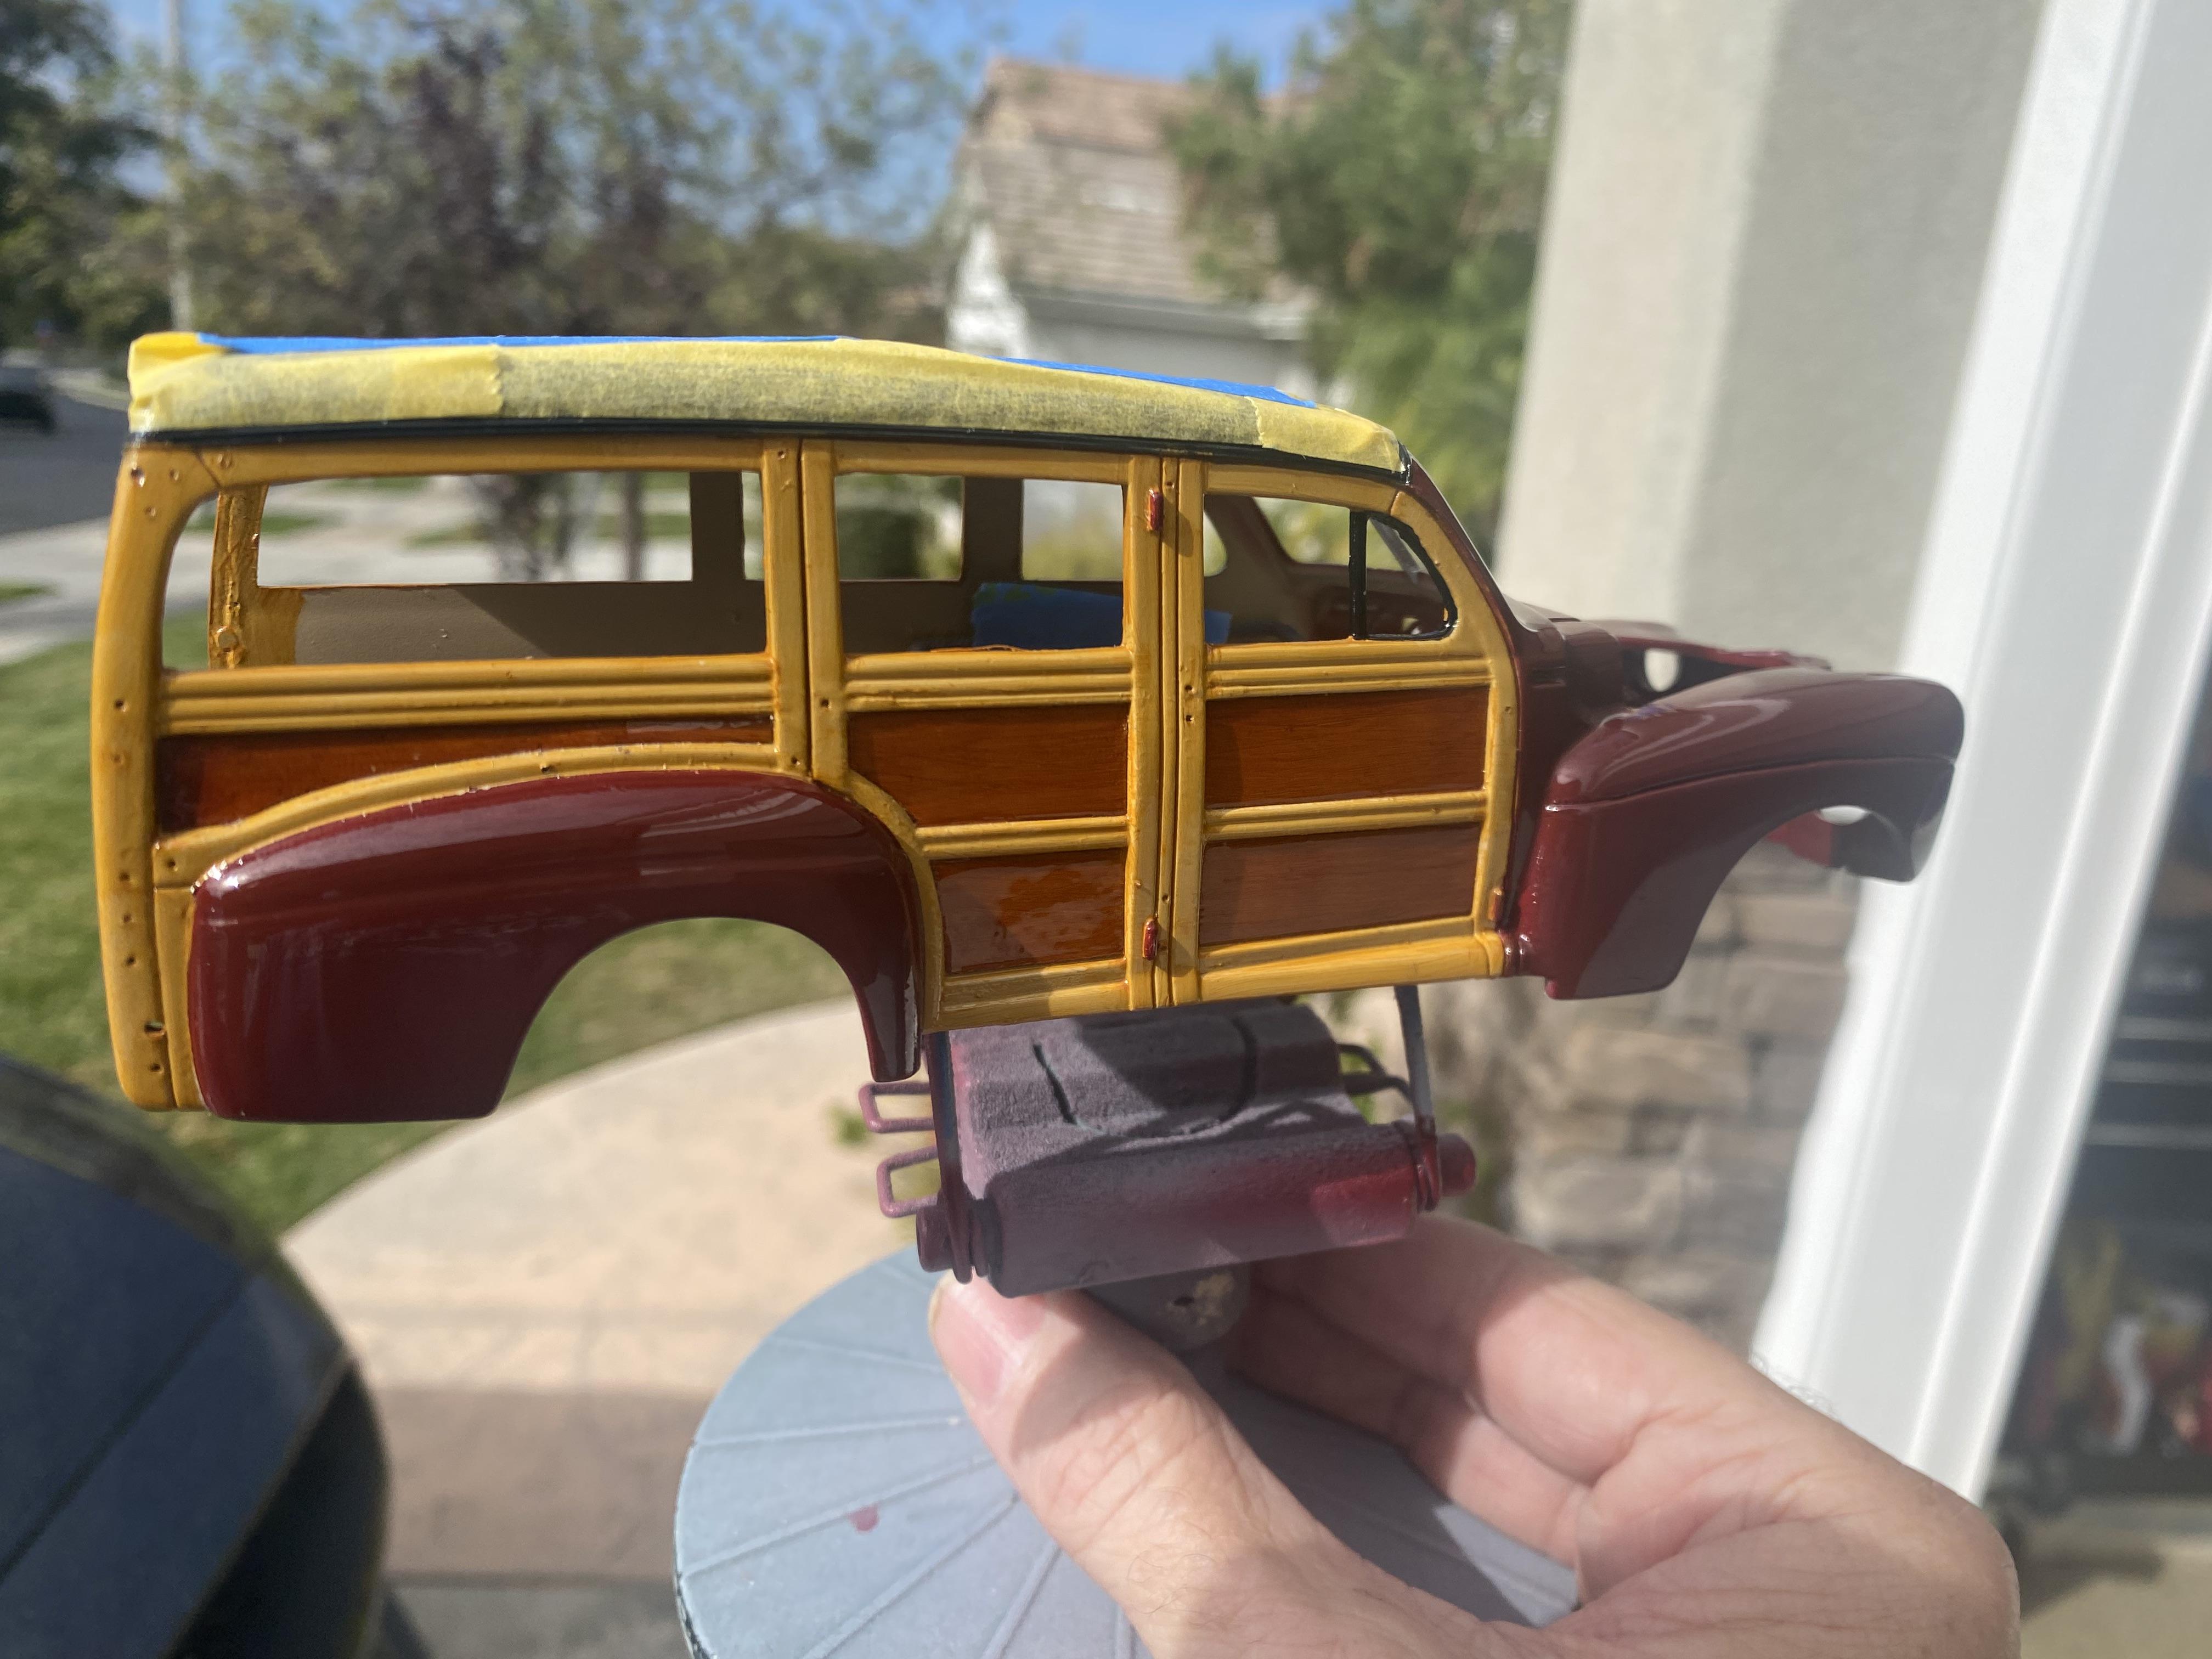
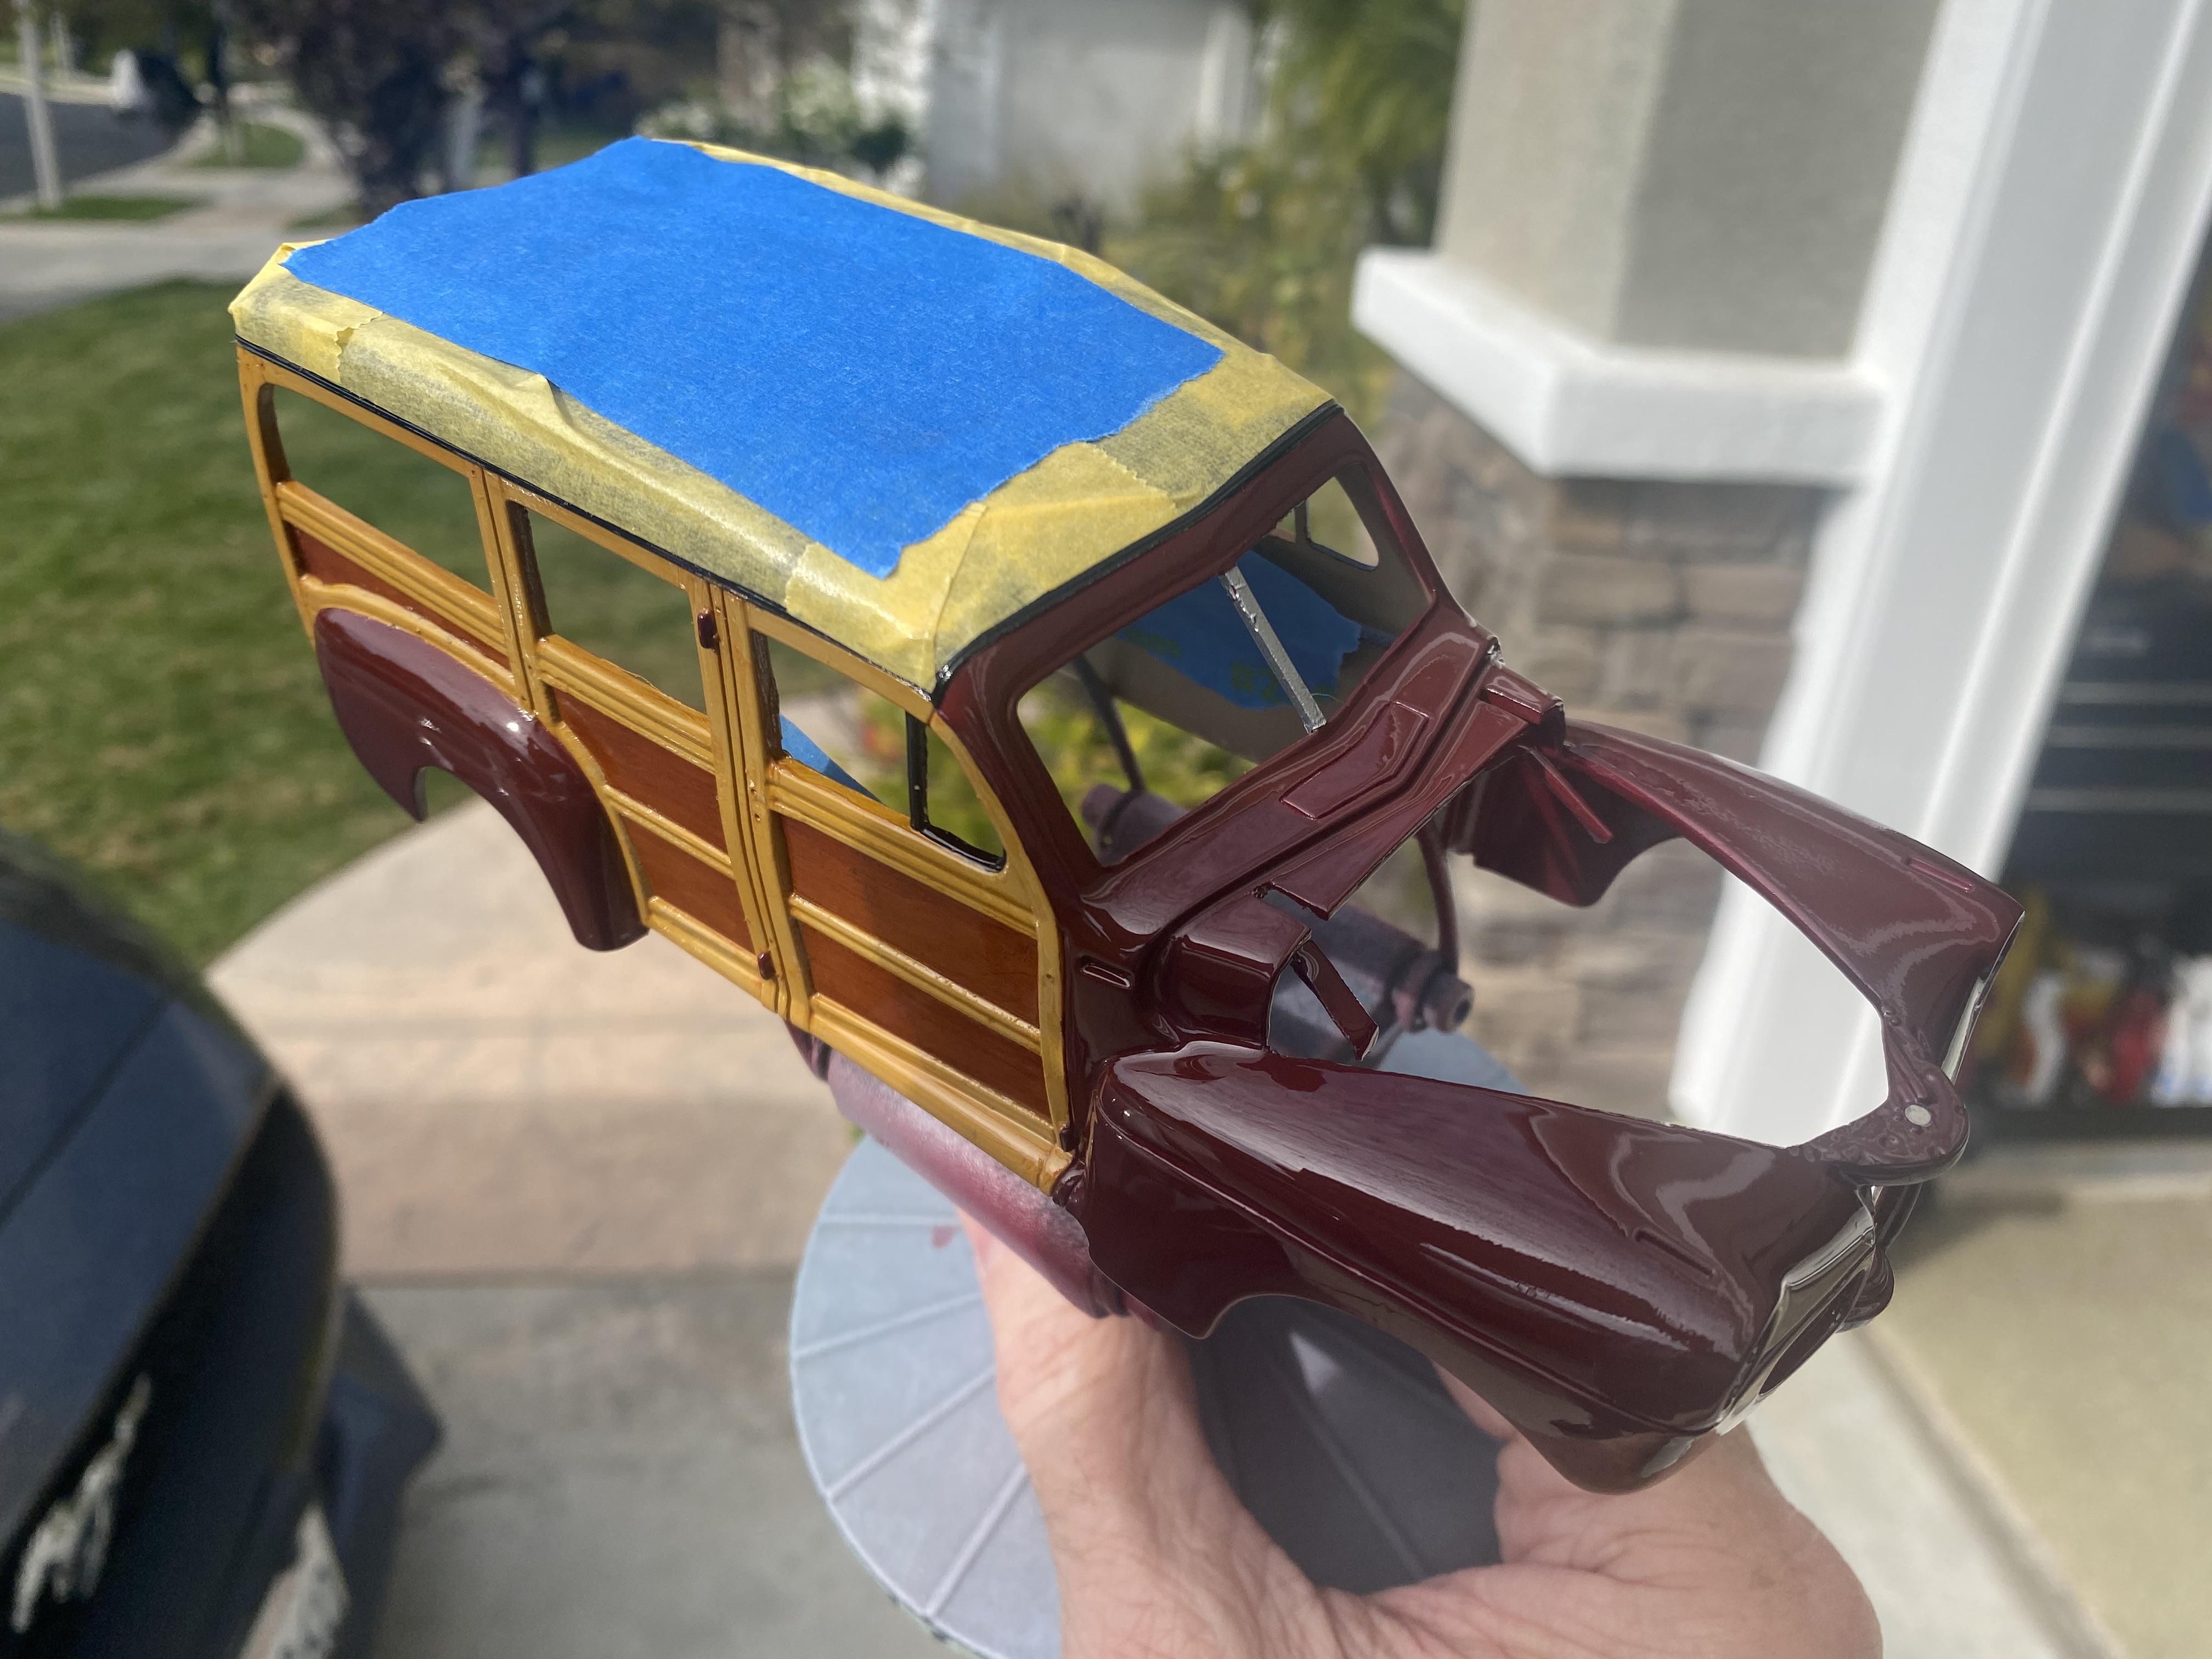
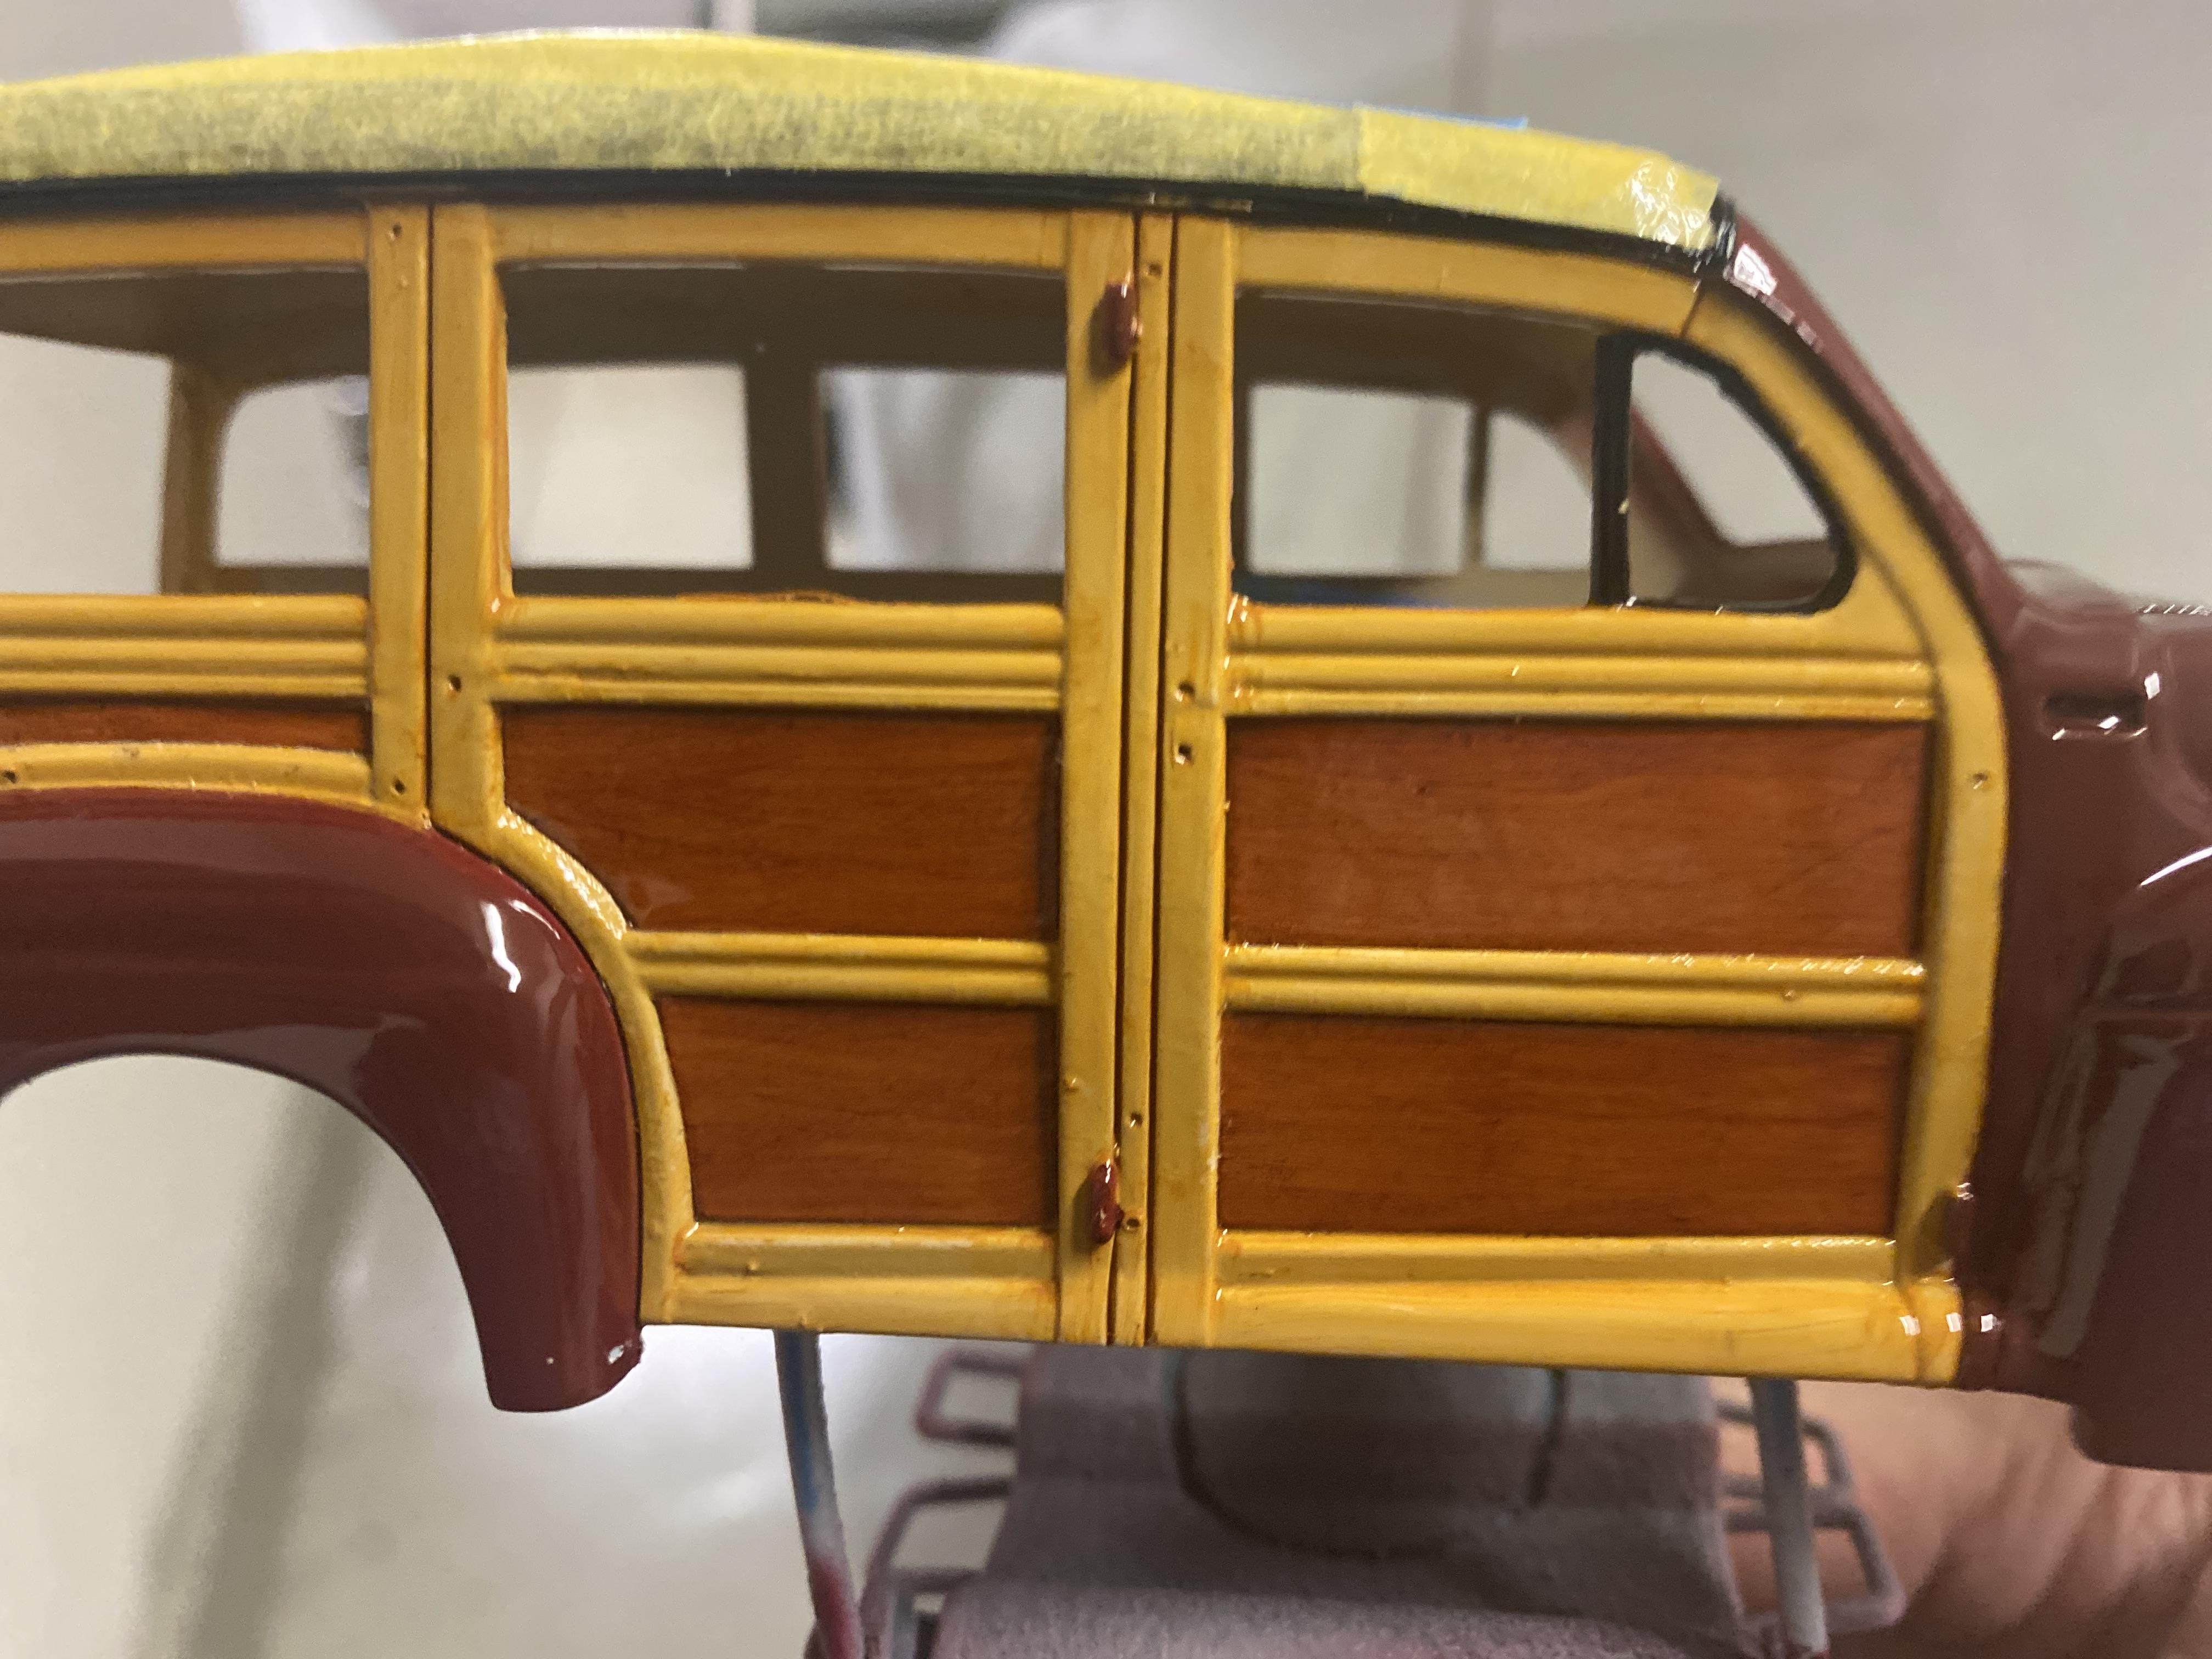
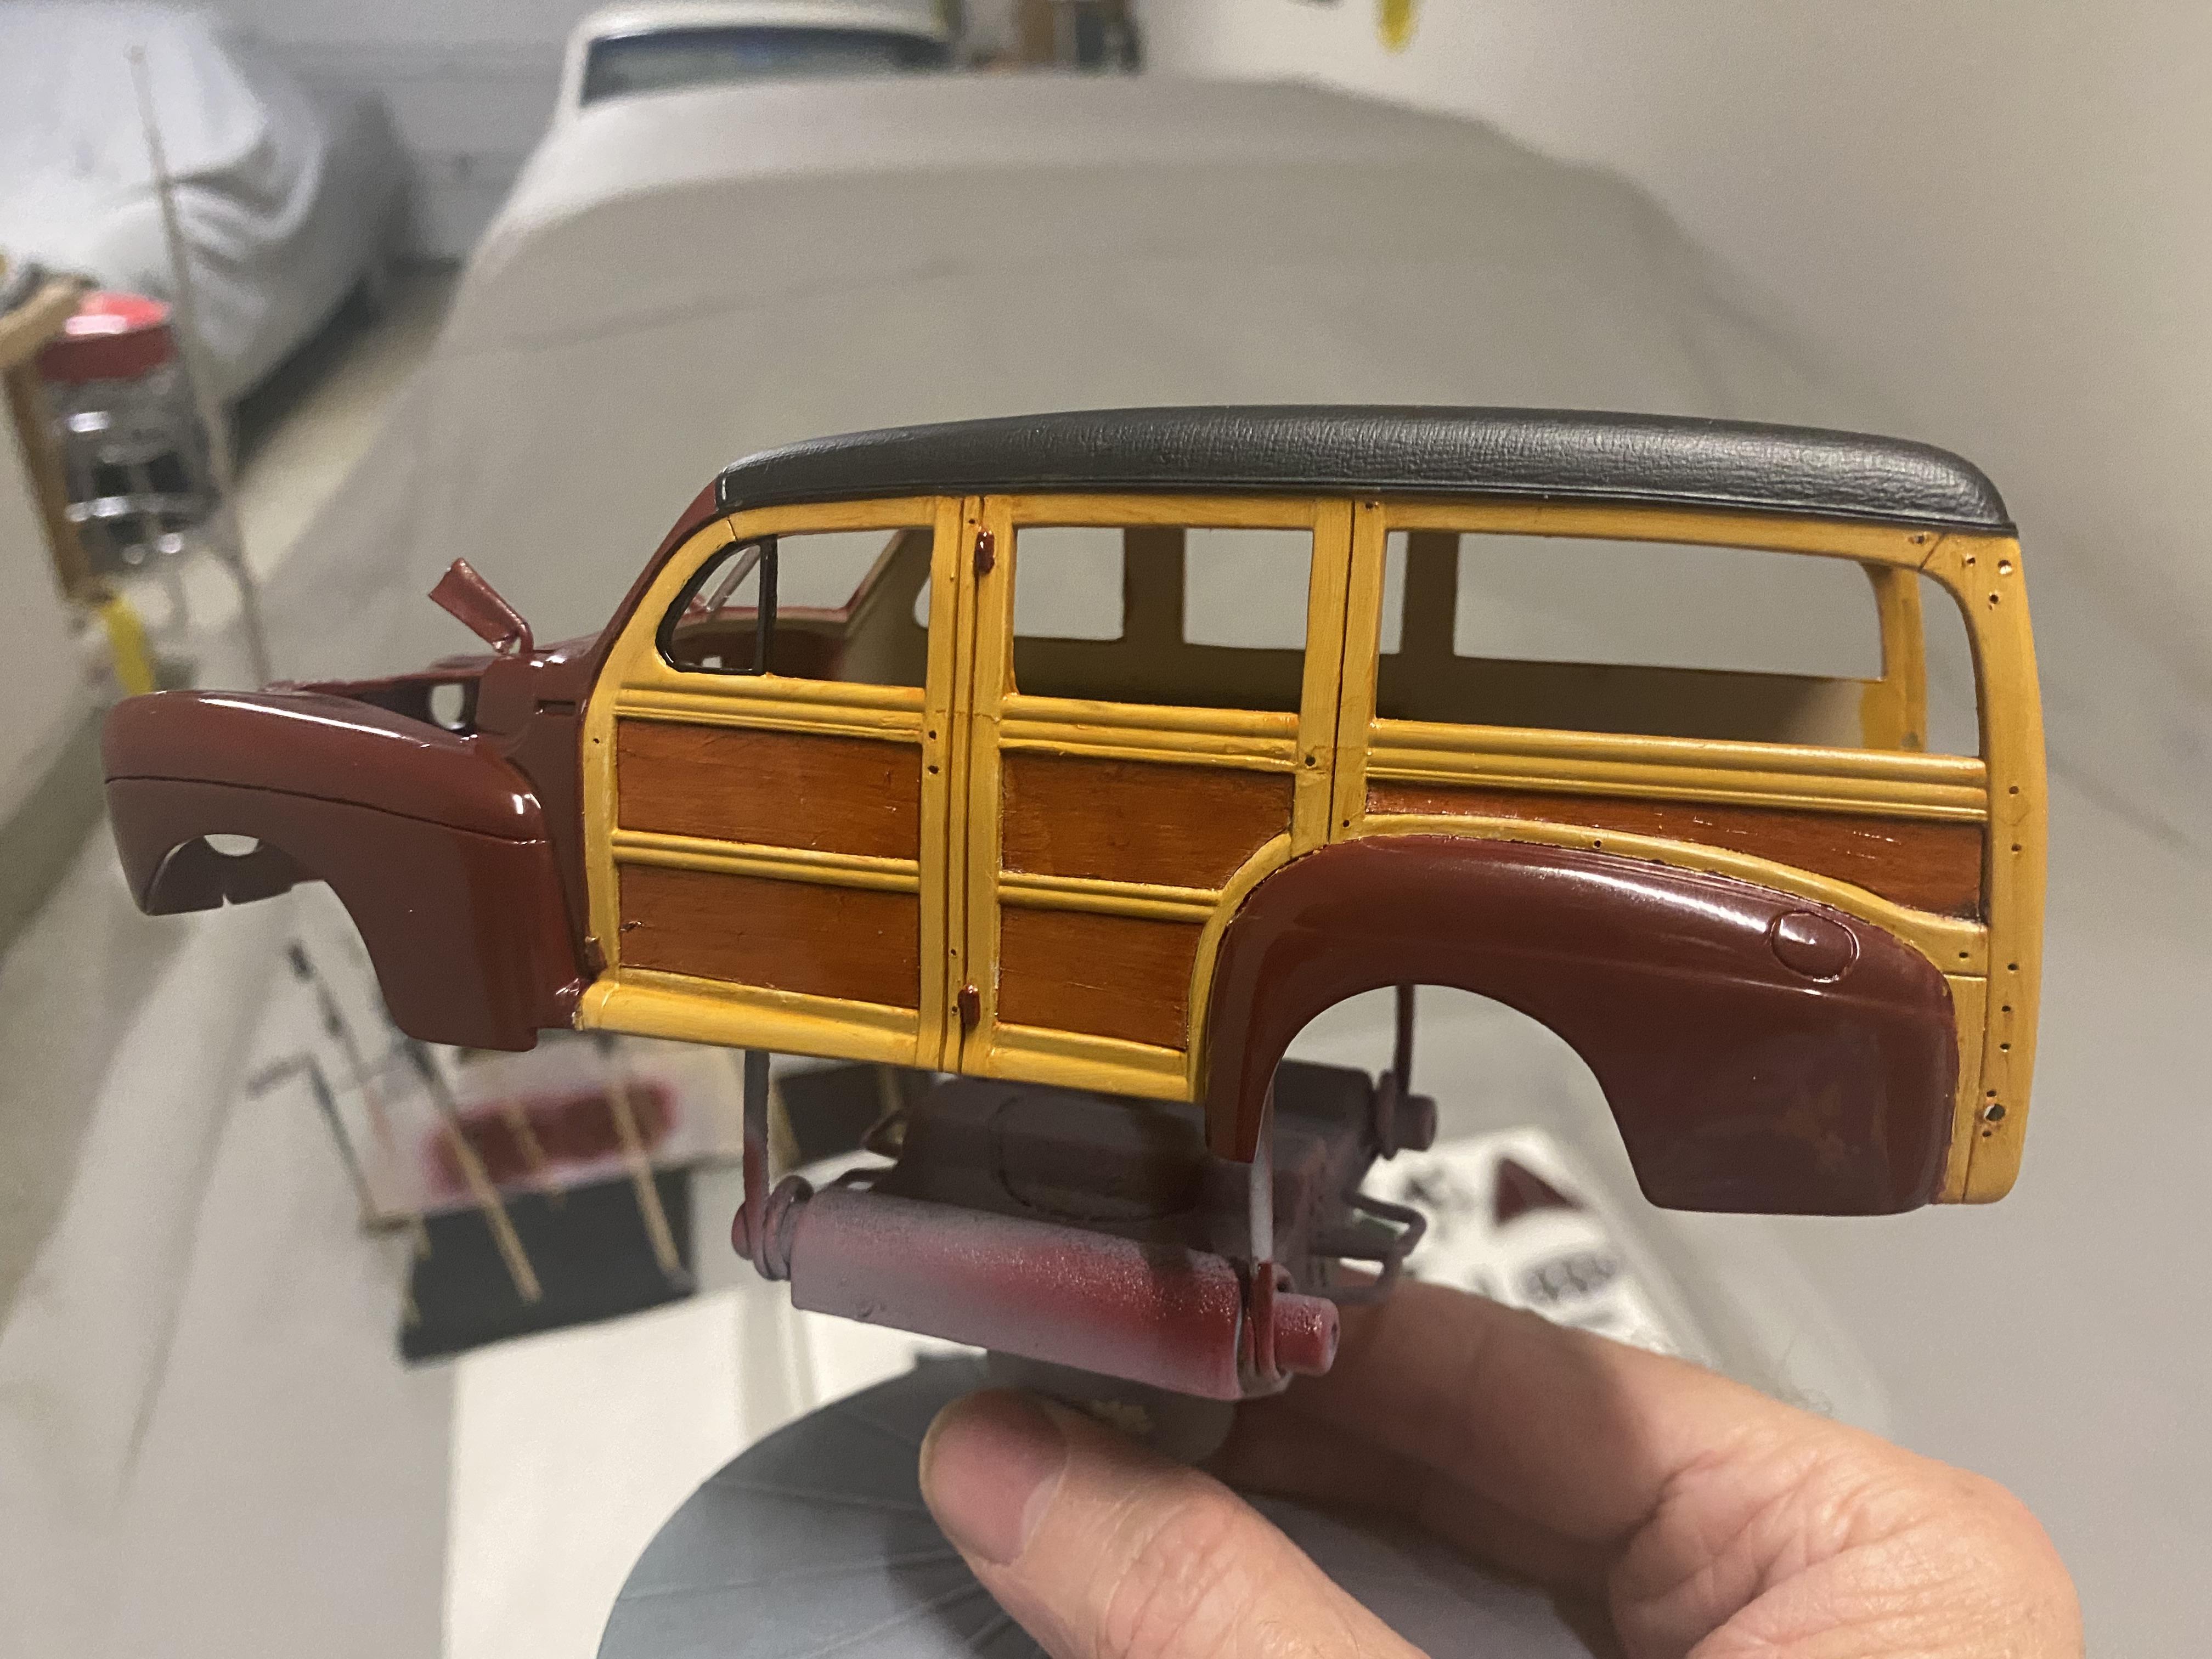
Final assembly is now well underway. The hood had quite a bit of trash but able to wet sand an polish it out. Still will need more polishing in the end but it’s looking better. assemble body and chassis/ interior. This was actually a bit of a pain. Had to trim and adjust to get them to mate up well. installed the rear door and hatch and the hood and attached the taillights. Taillights turned out pretty well I think, now to the headlights and the LEDs will be done.
-
Thank you!
-

Sprit of Speed 9 - NHRA Museum November 10, 2024
Duddly01 replied to sfhess's topic in Contests and Shows
Looking forward to it. I plan on attending with a few builds, still narrowing down what. -
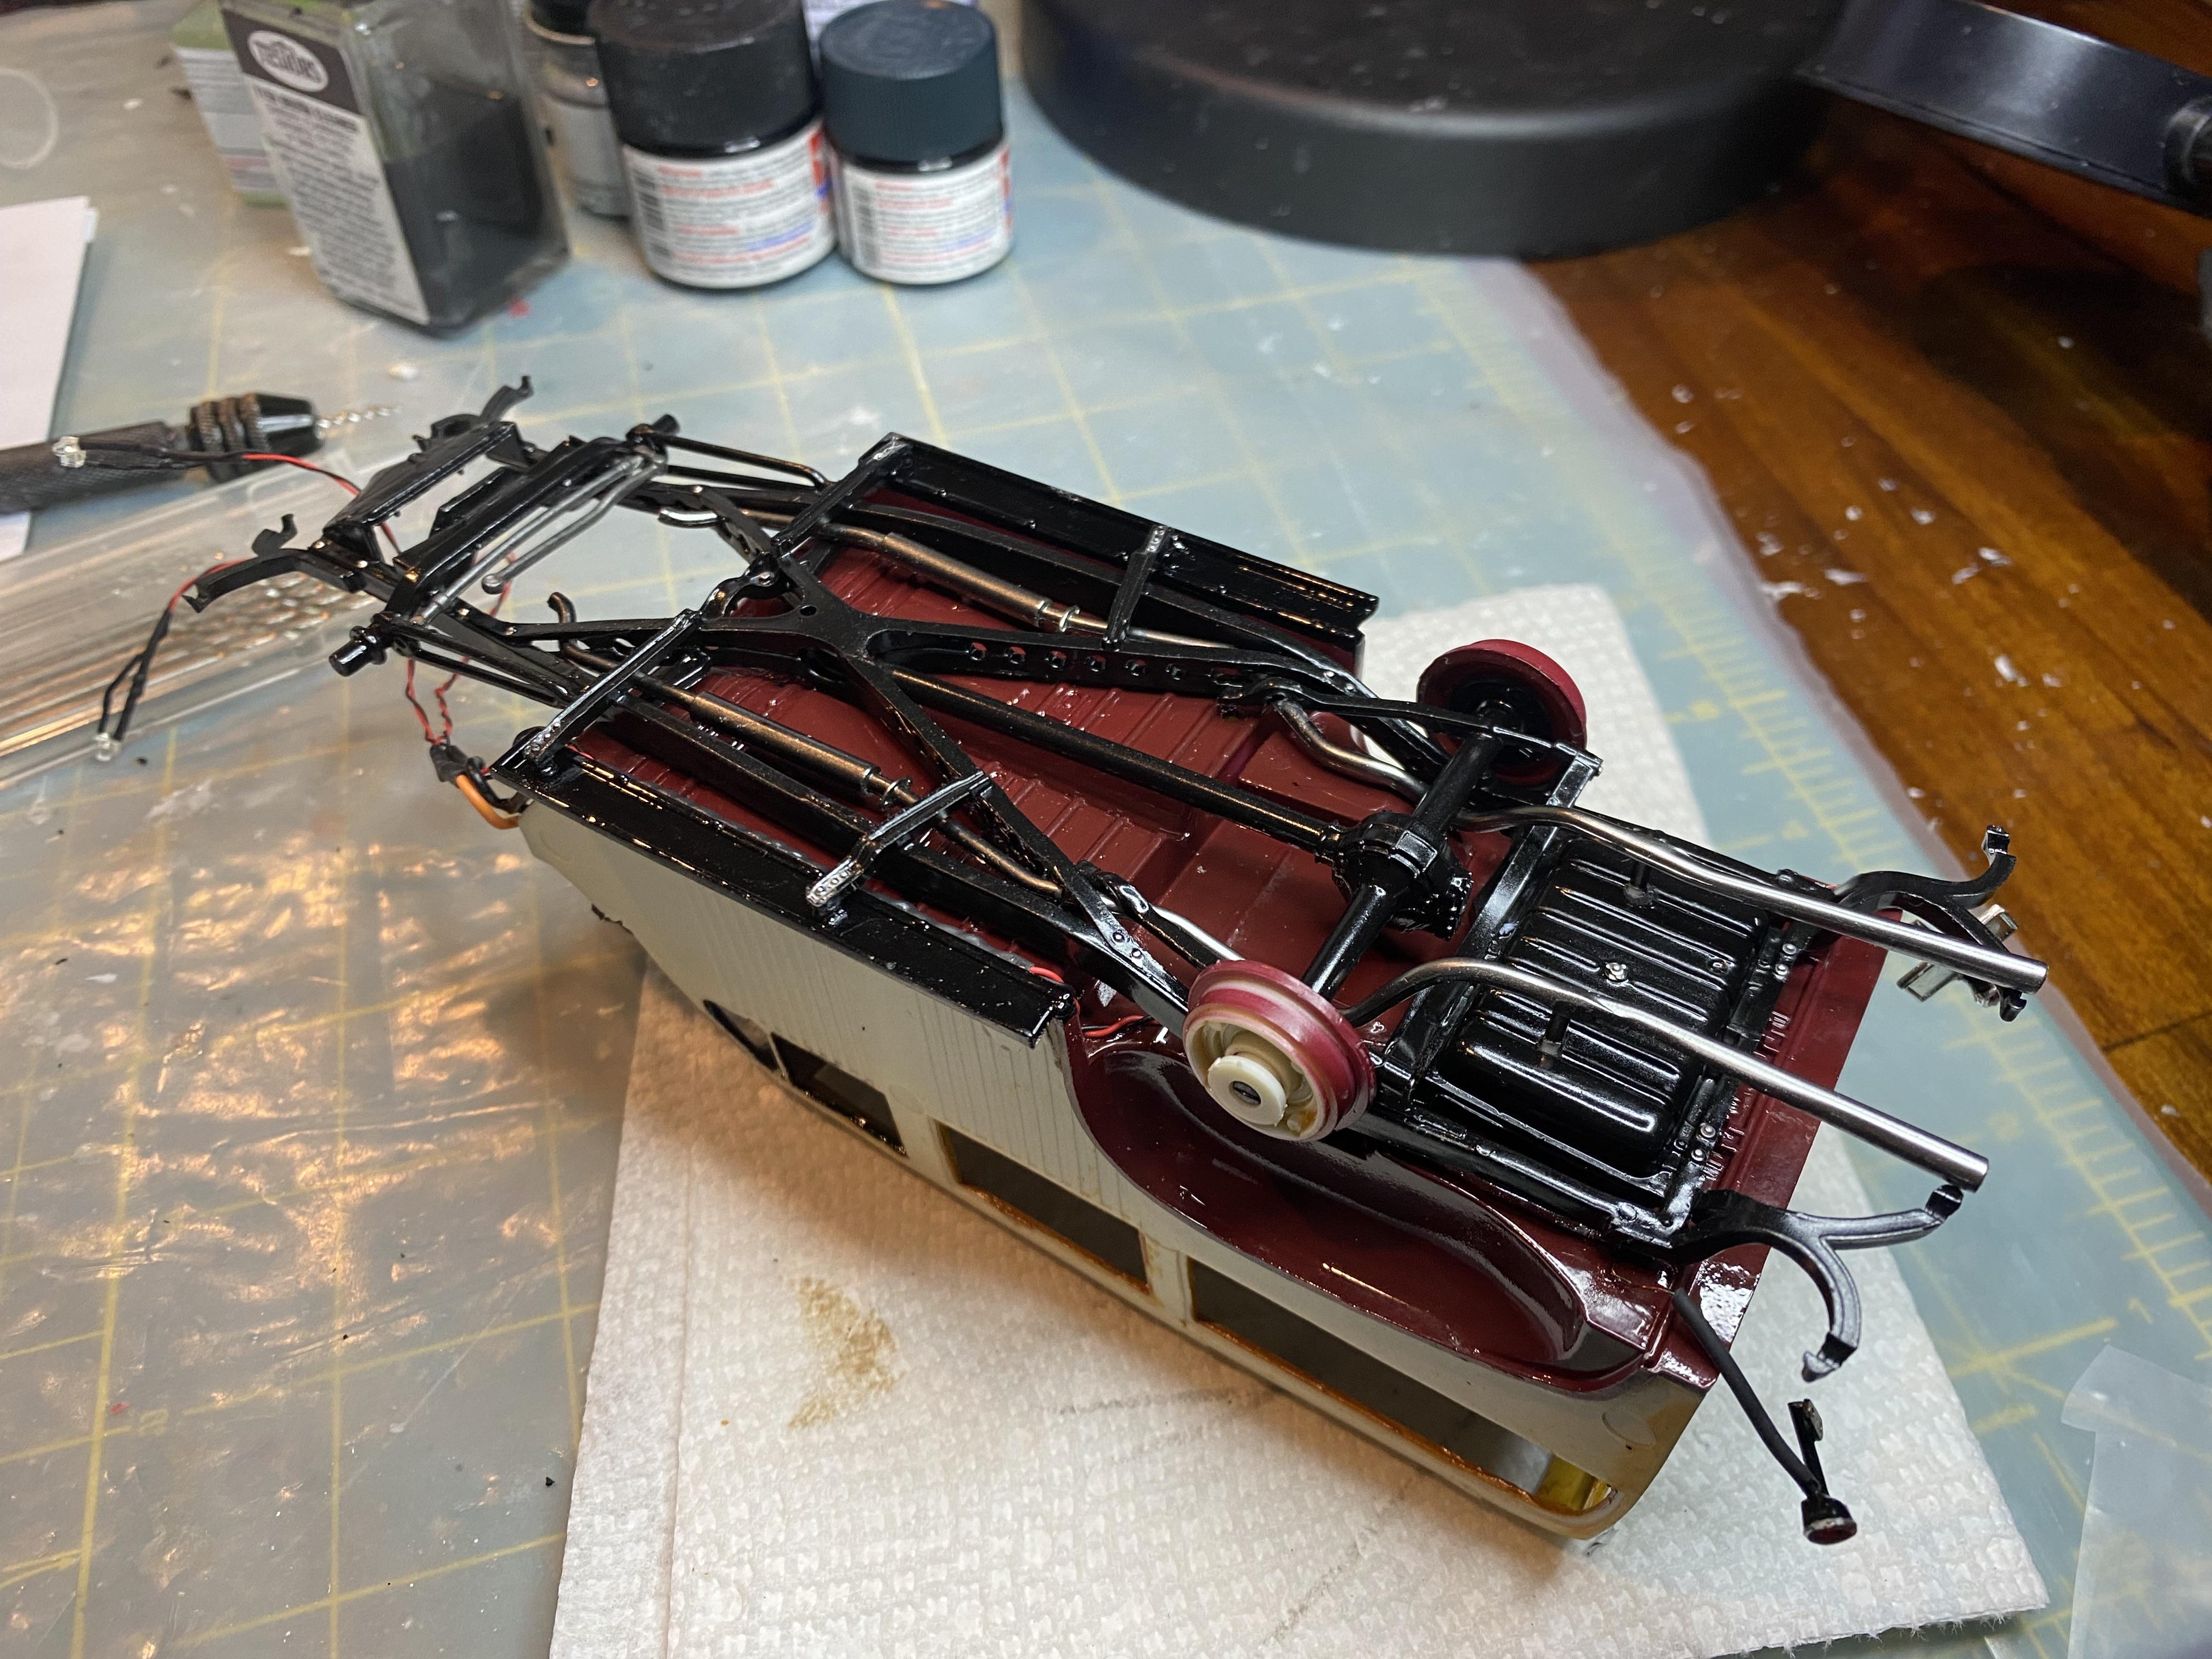
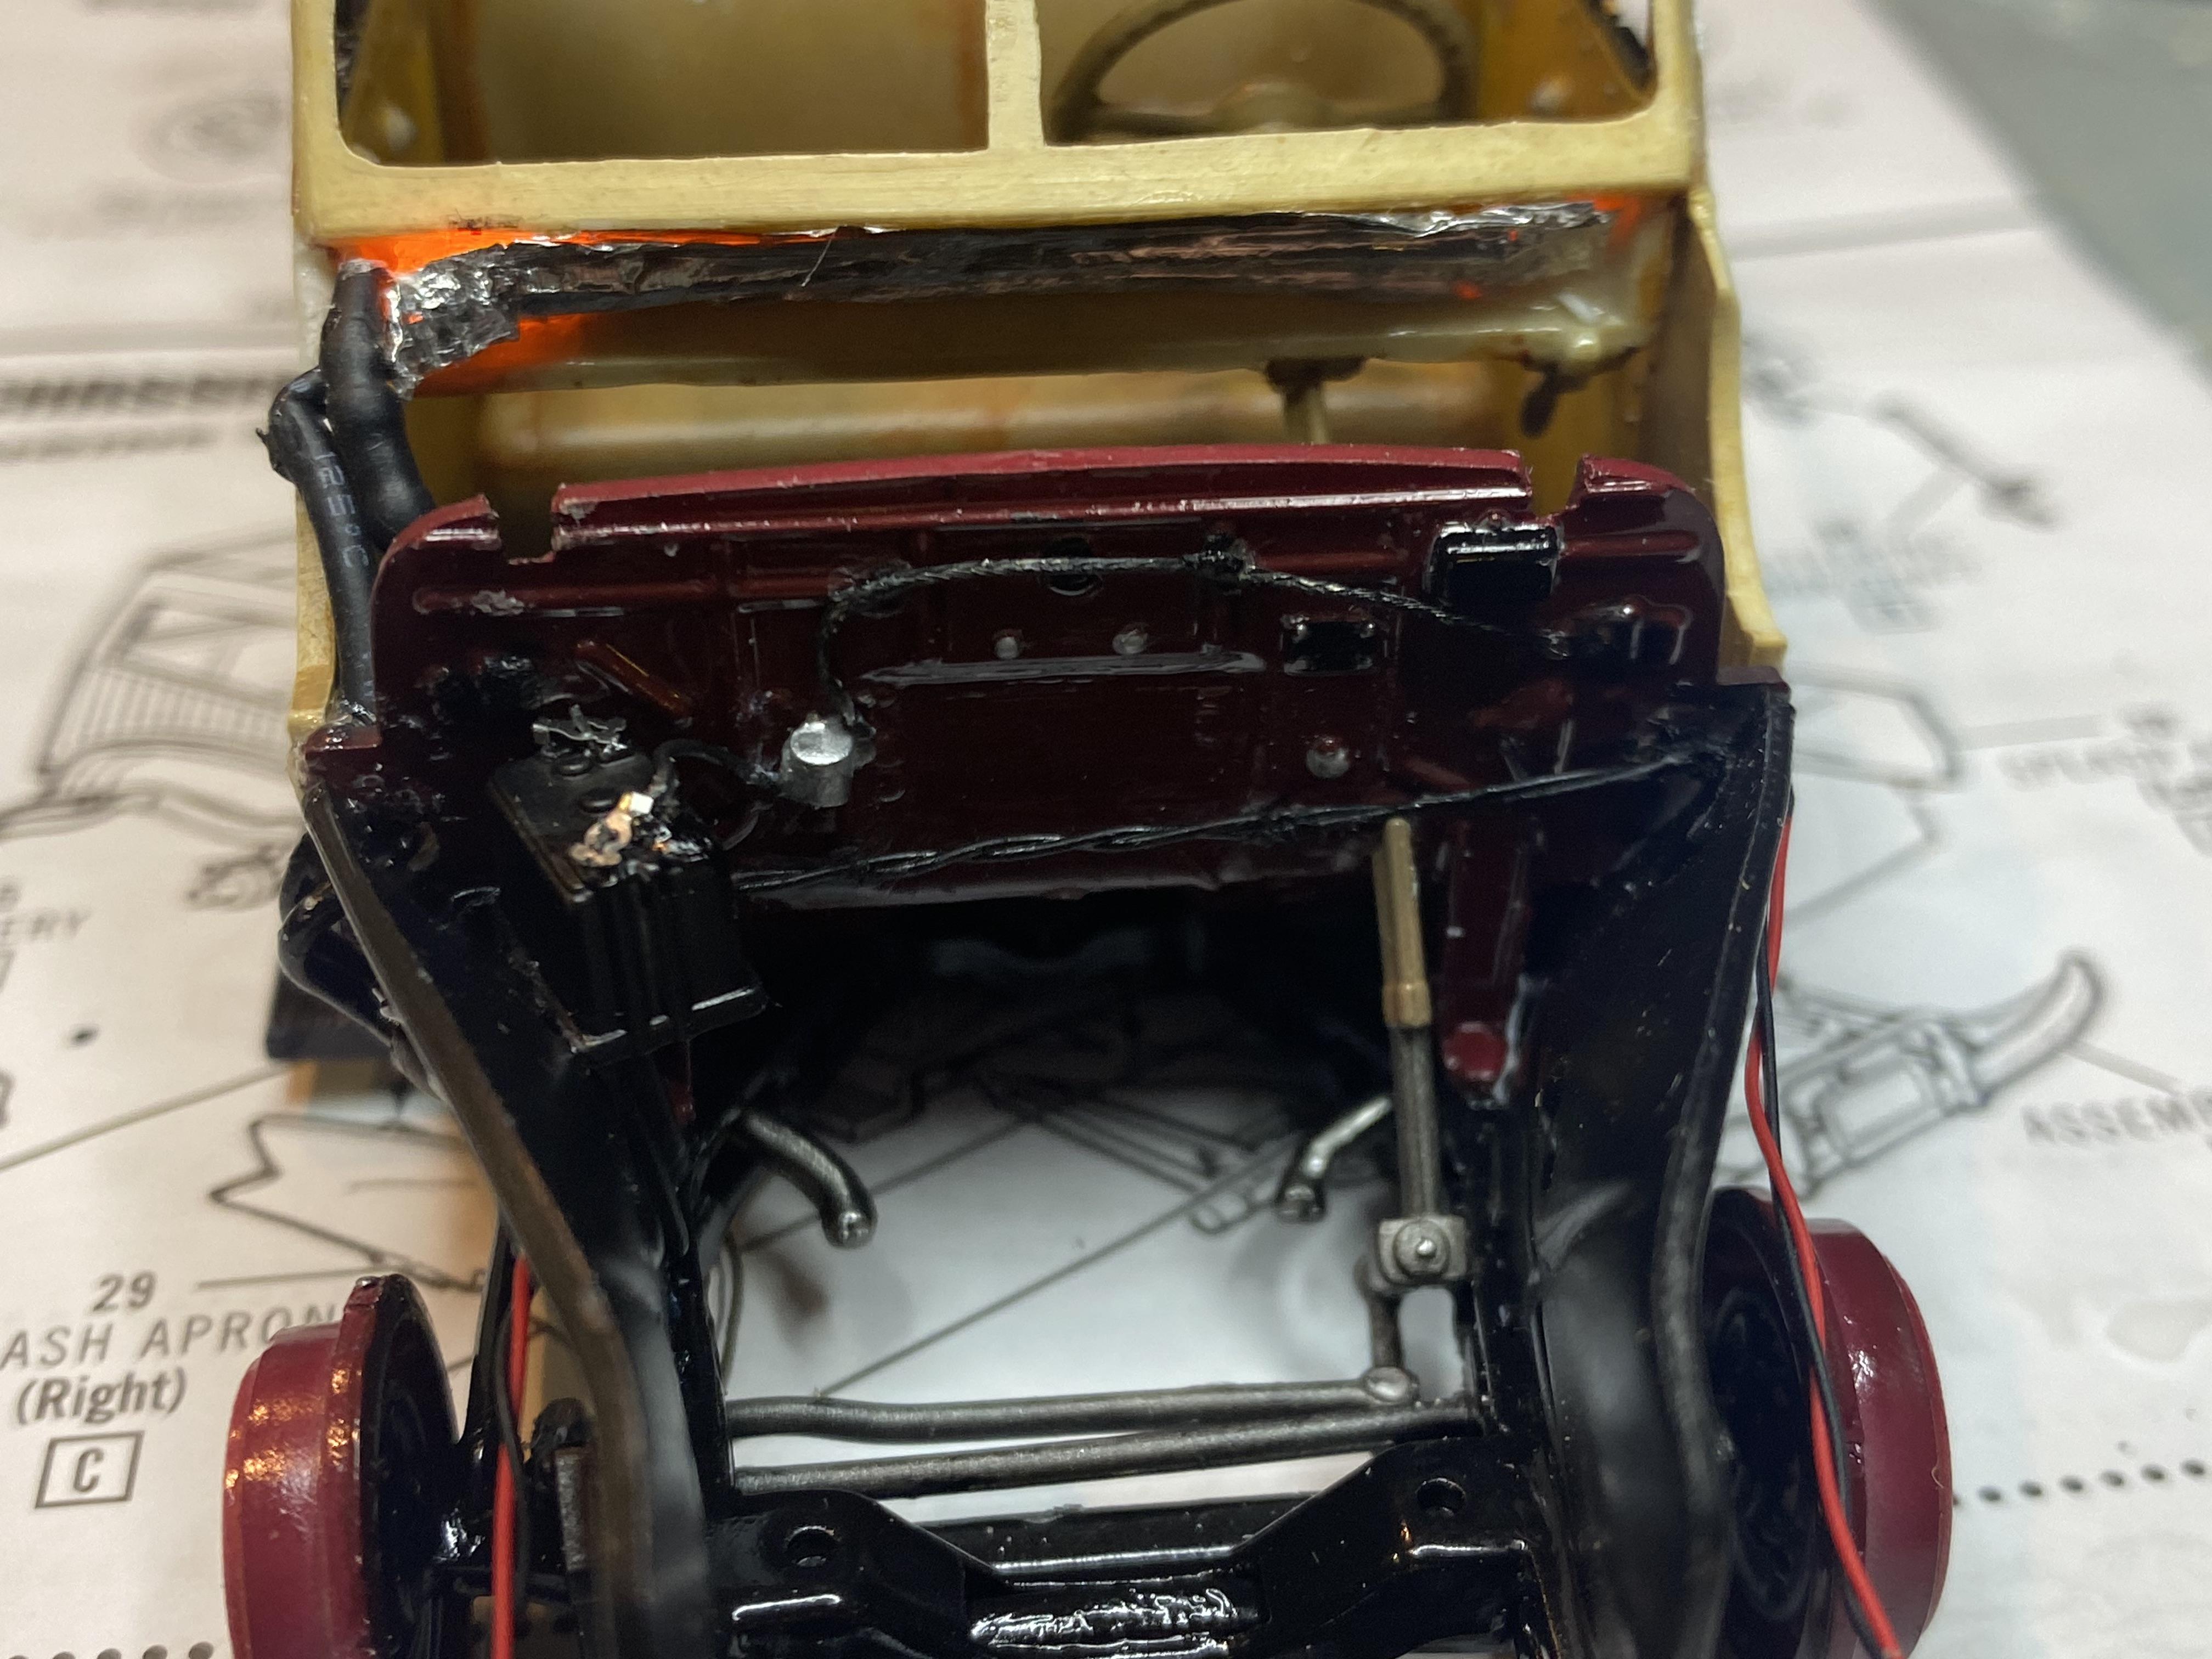
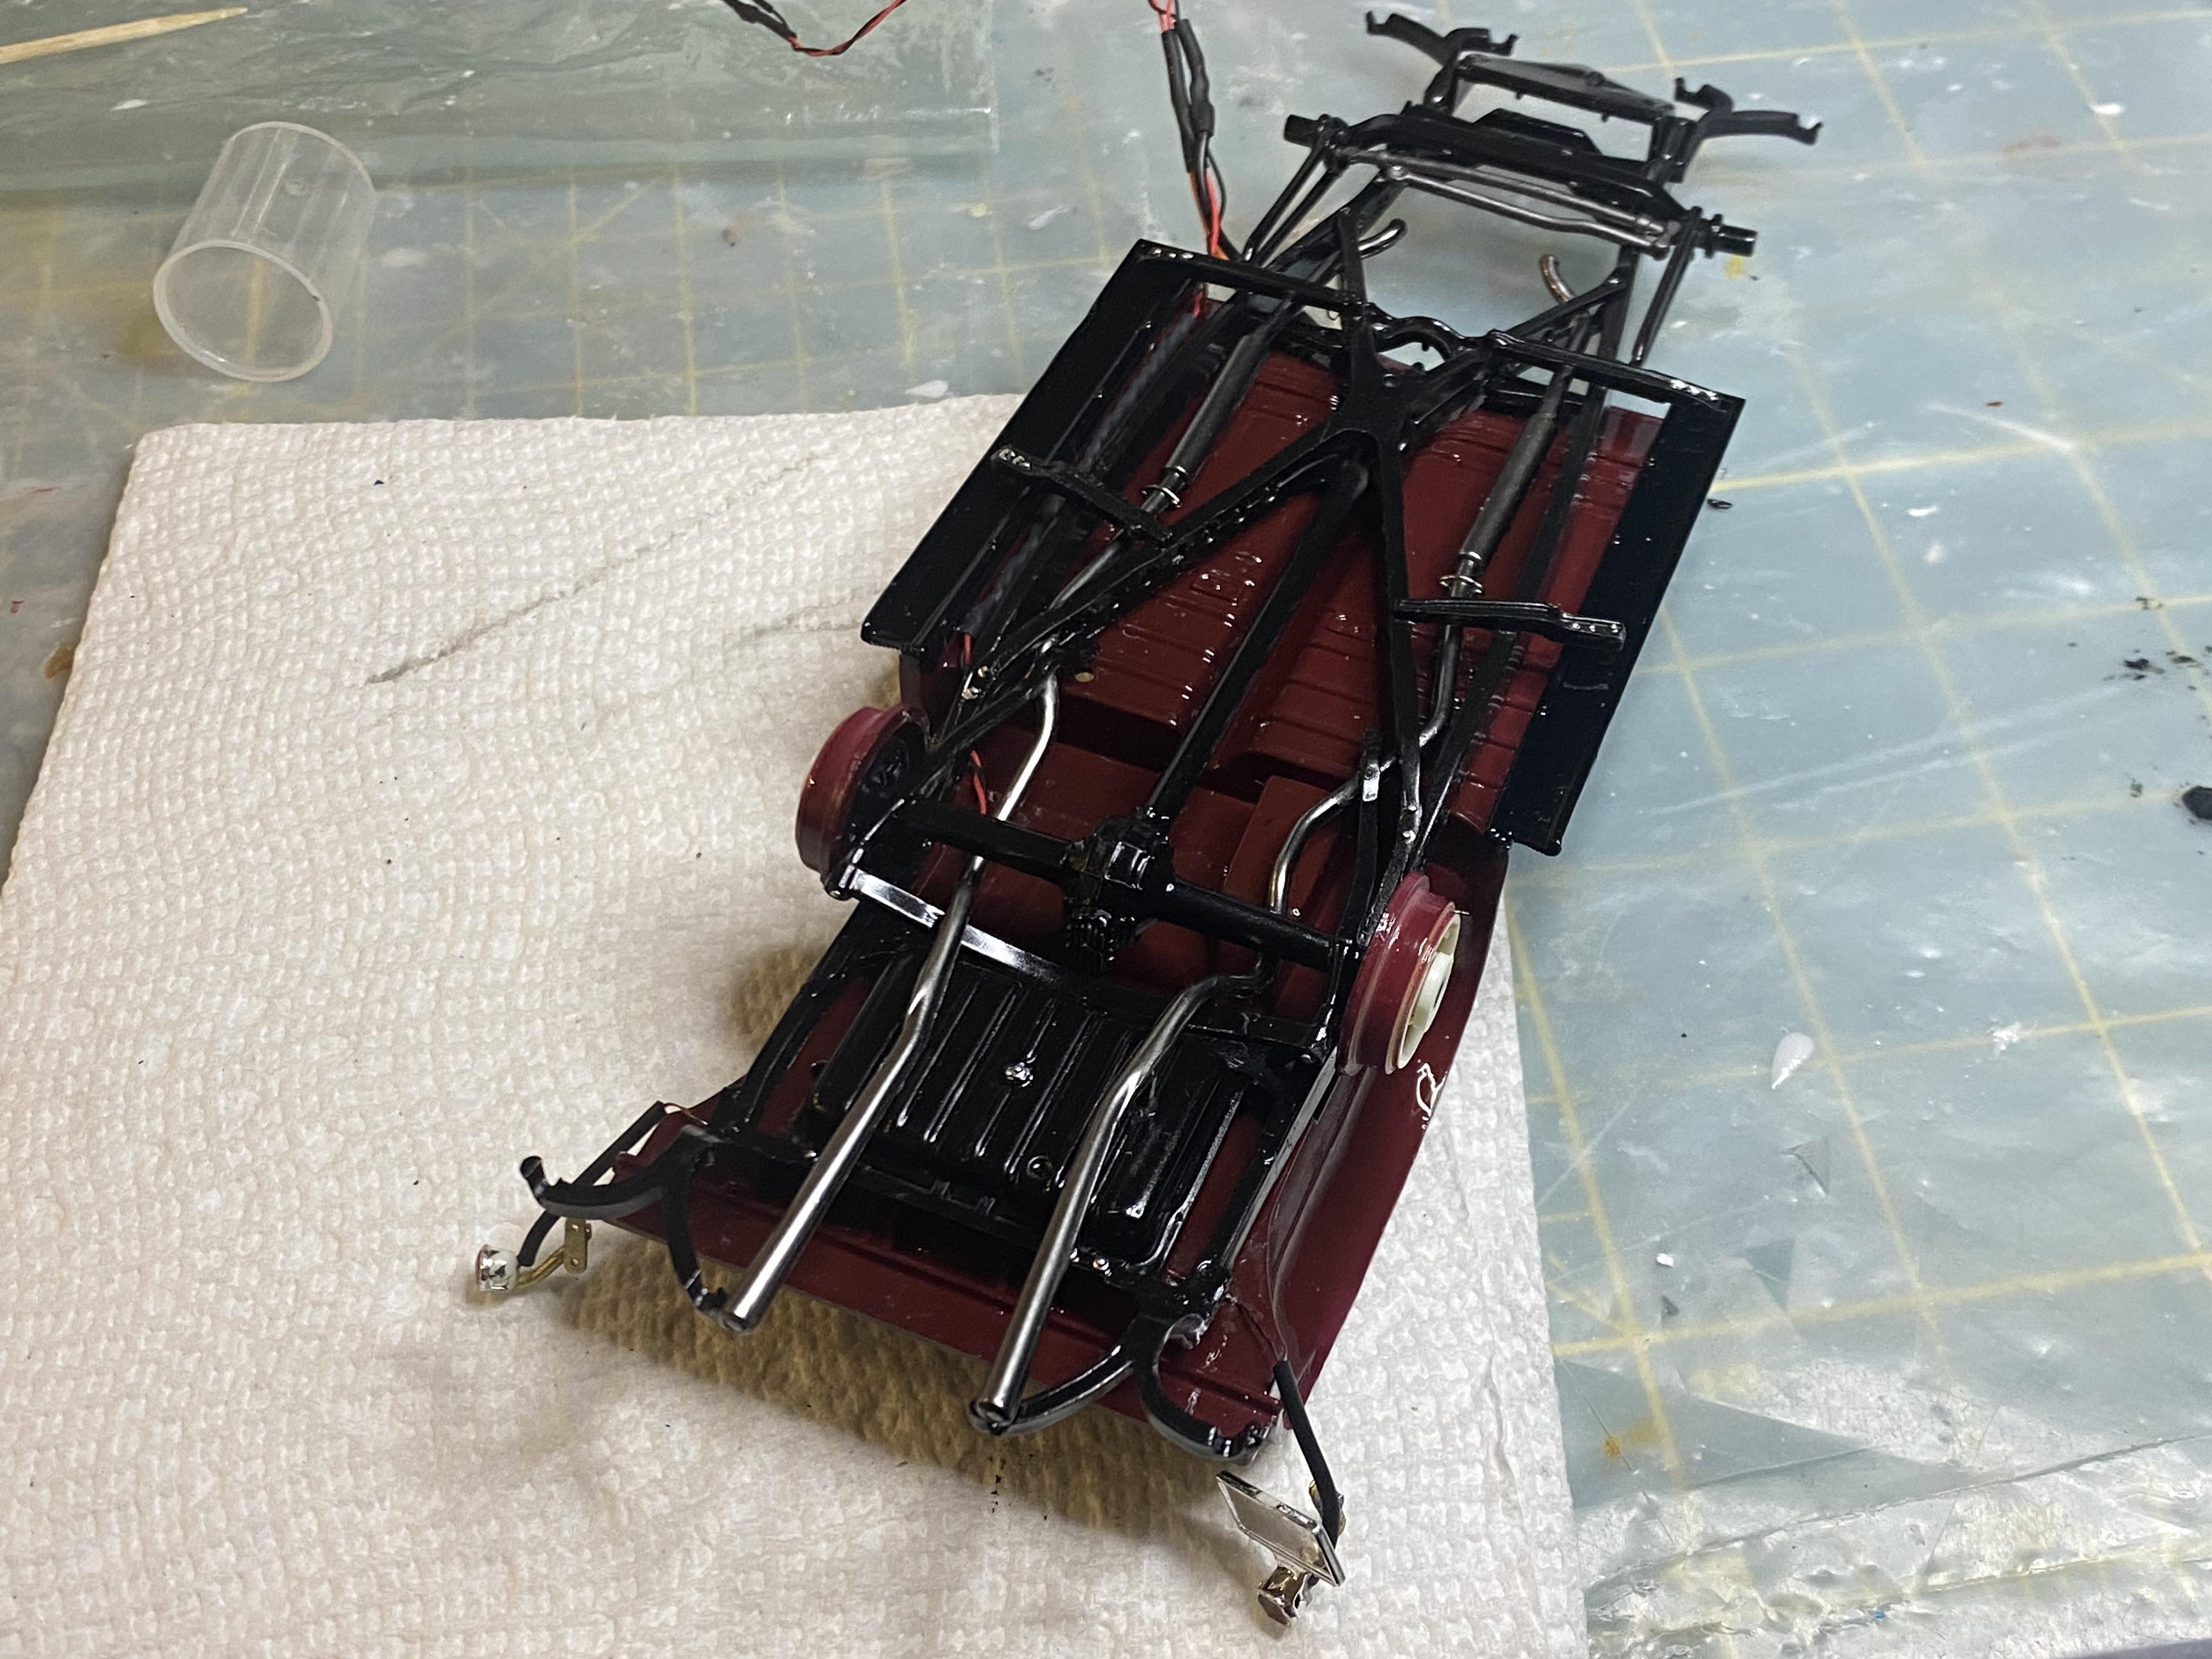
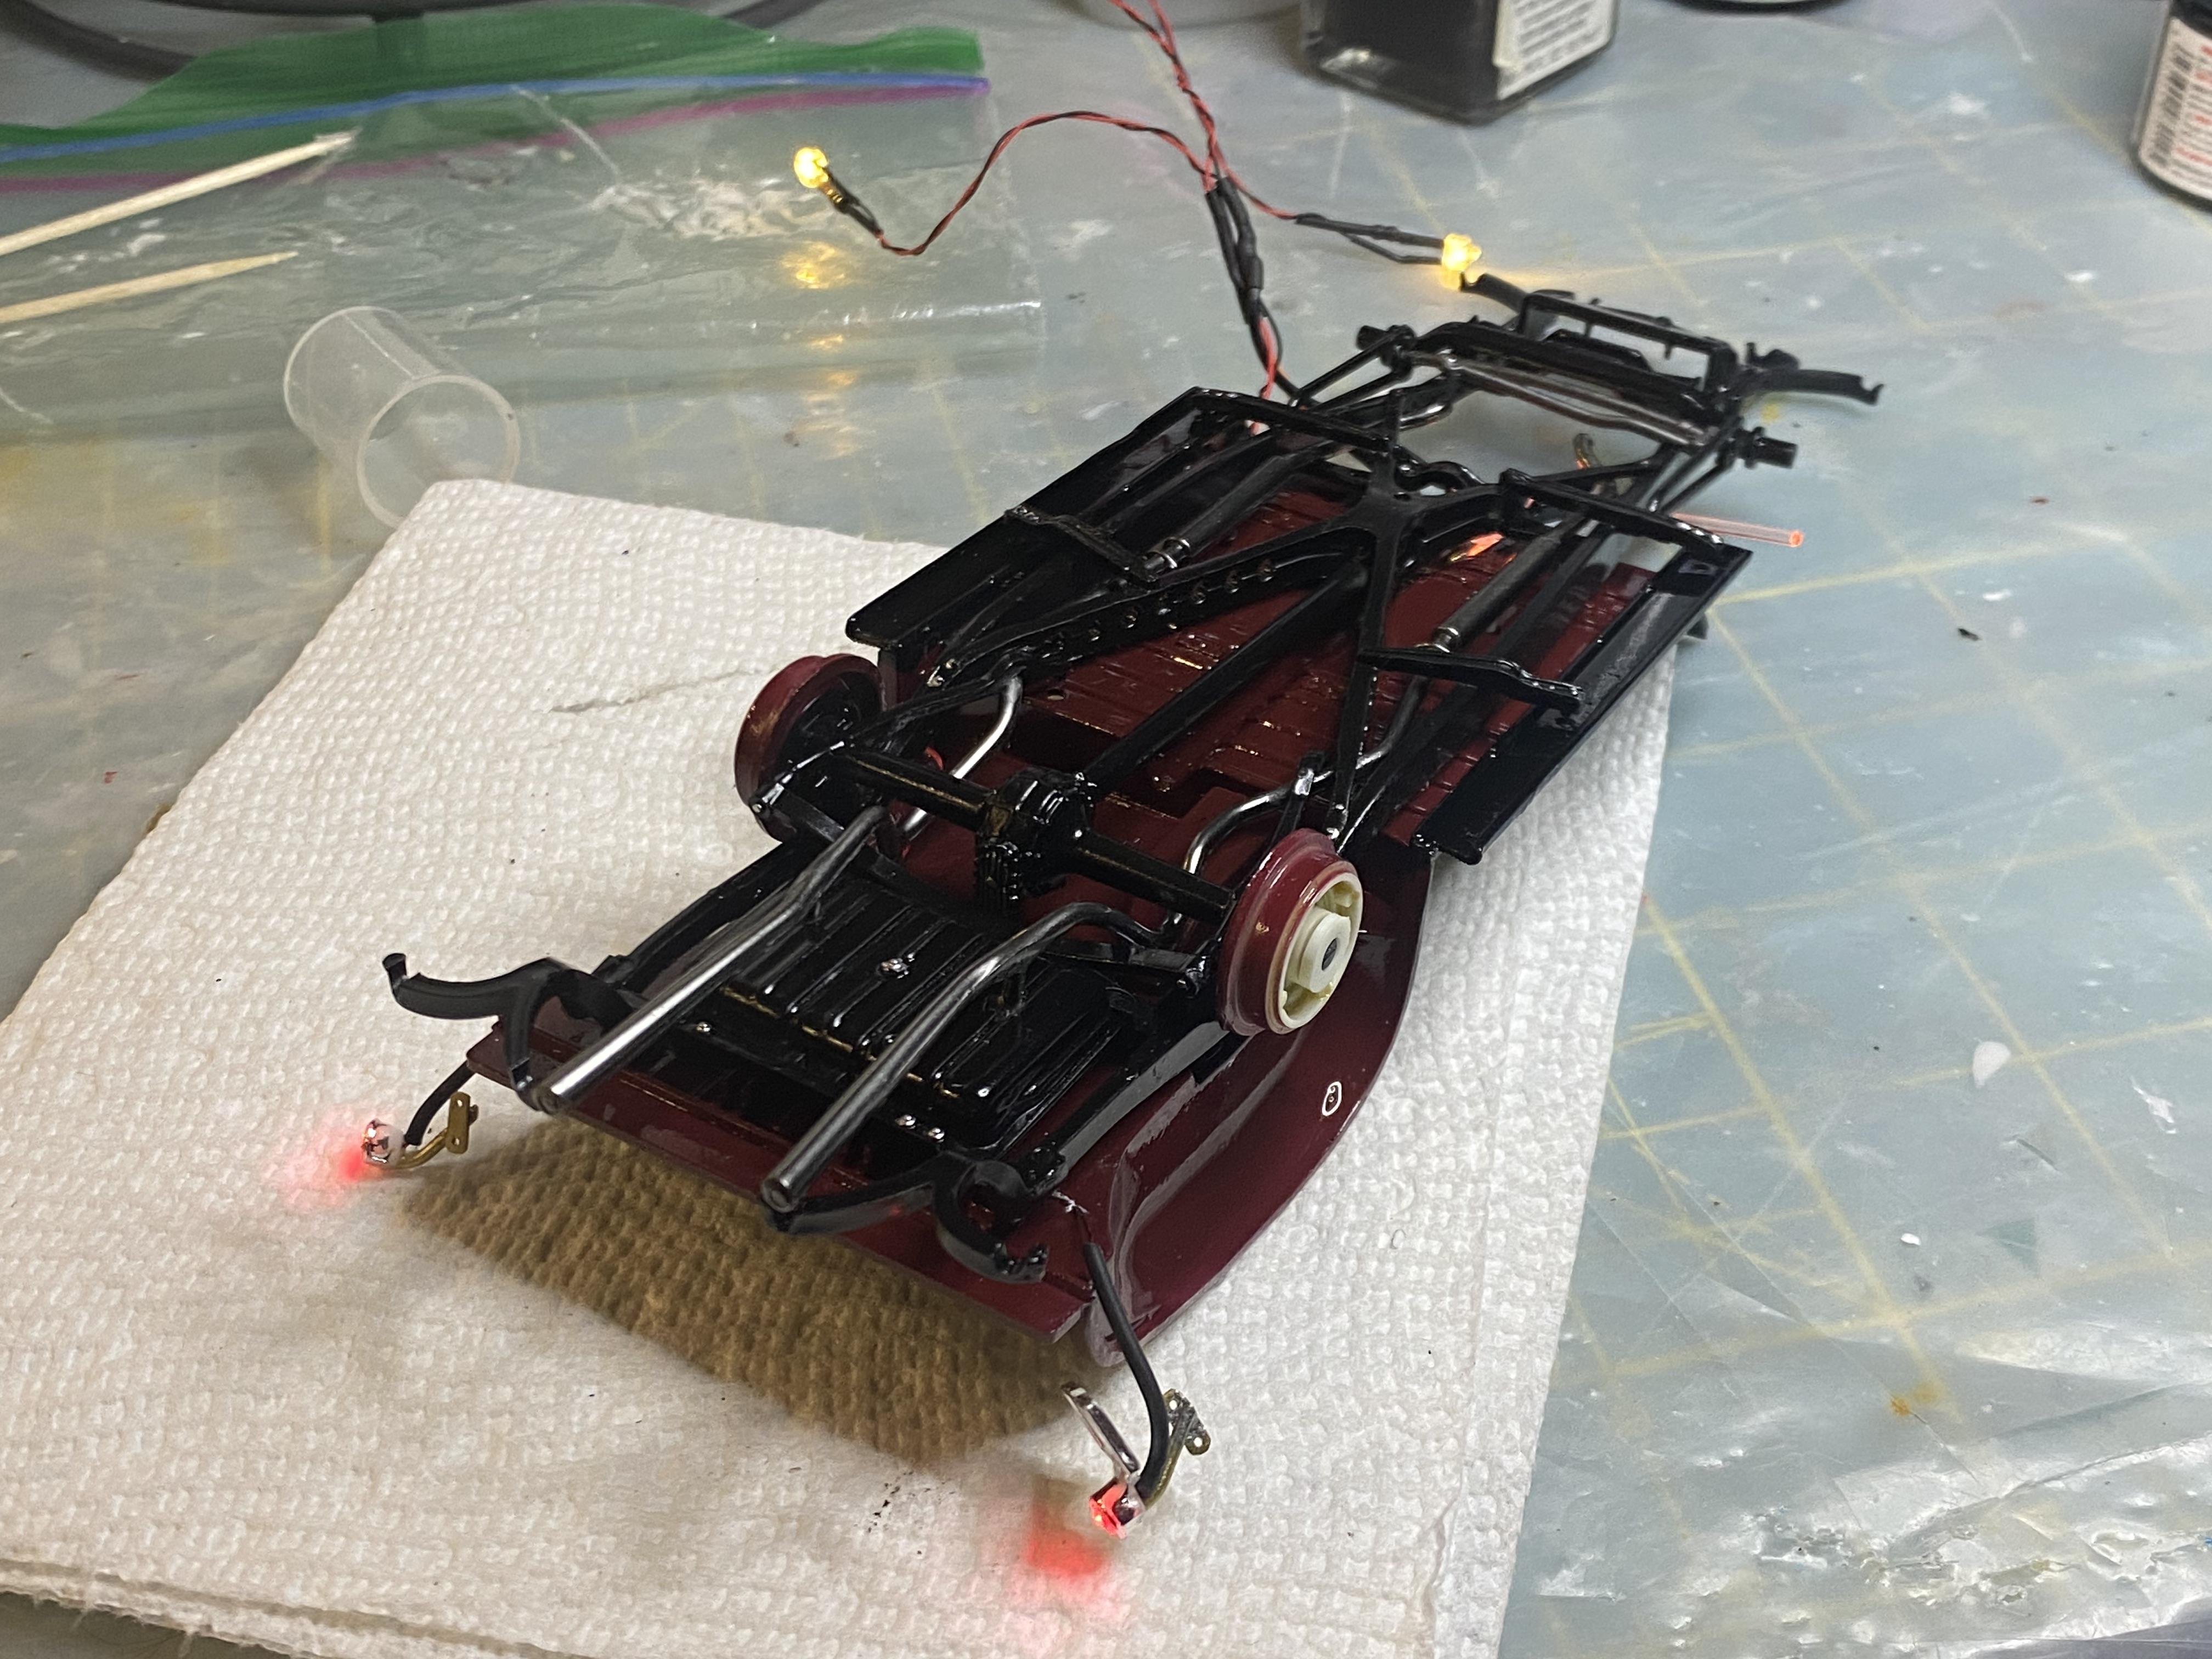
Actually, not really any at all most of them are exposed except a little area under the gas tank where it comes through from the battery, running along the right floorboard underneath and through the engine compartment. It just looks like they belong.
-
Assembly is under way. I test fit the body after installing the side windows and noticed I needed to black out the edges, there isn’t much gap but it does show if not painted. interior is coming along pretty well I think. Wiring run and hidden with chassis install. Wire through engine compartment for driver side headlight hidden in plain sight.
-
Thank You! Thank You!
-
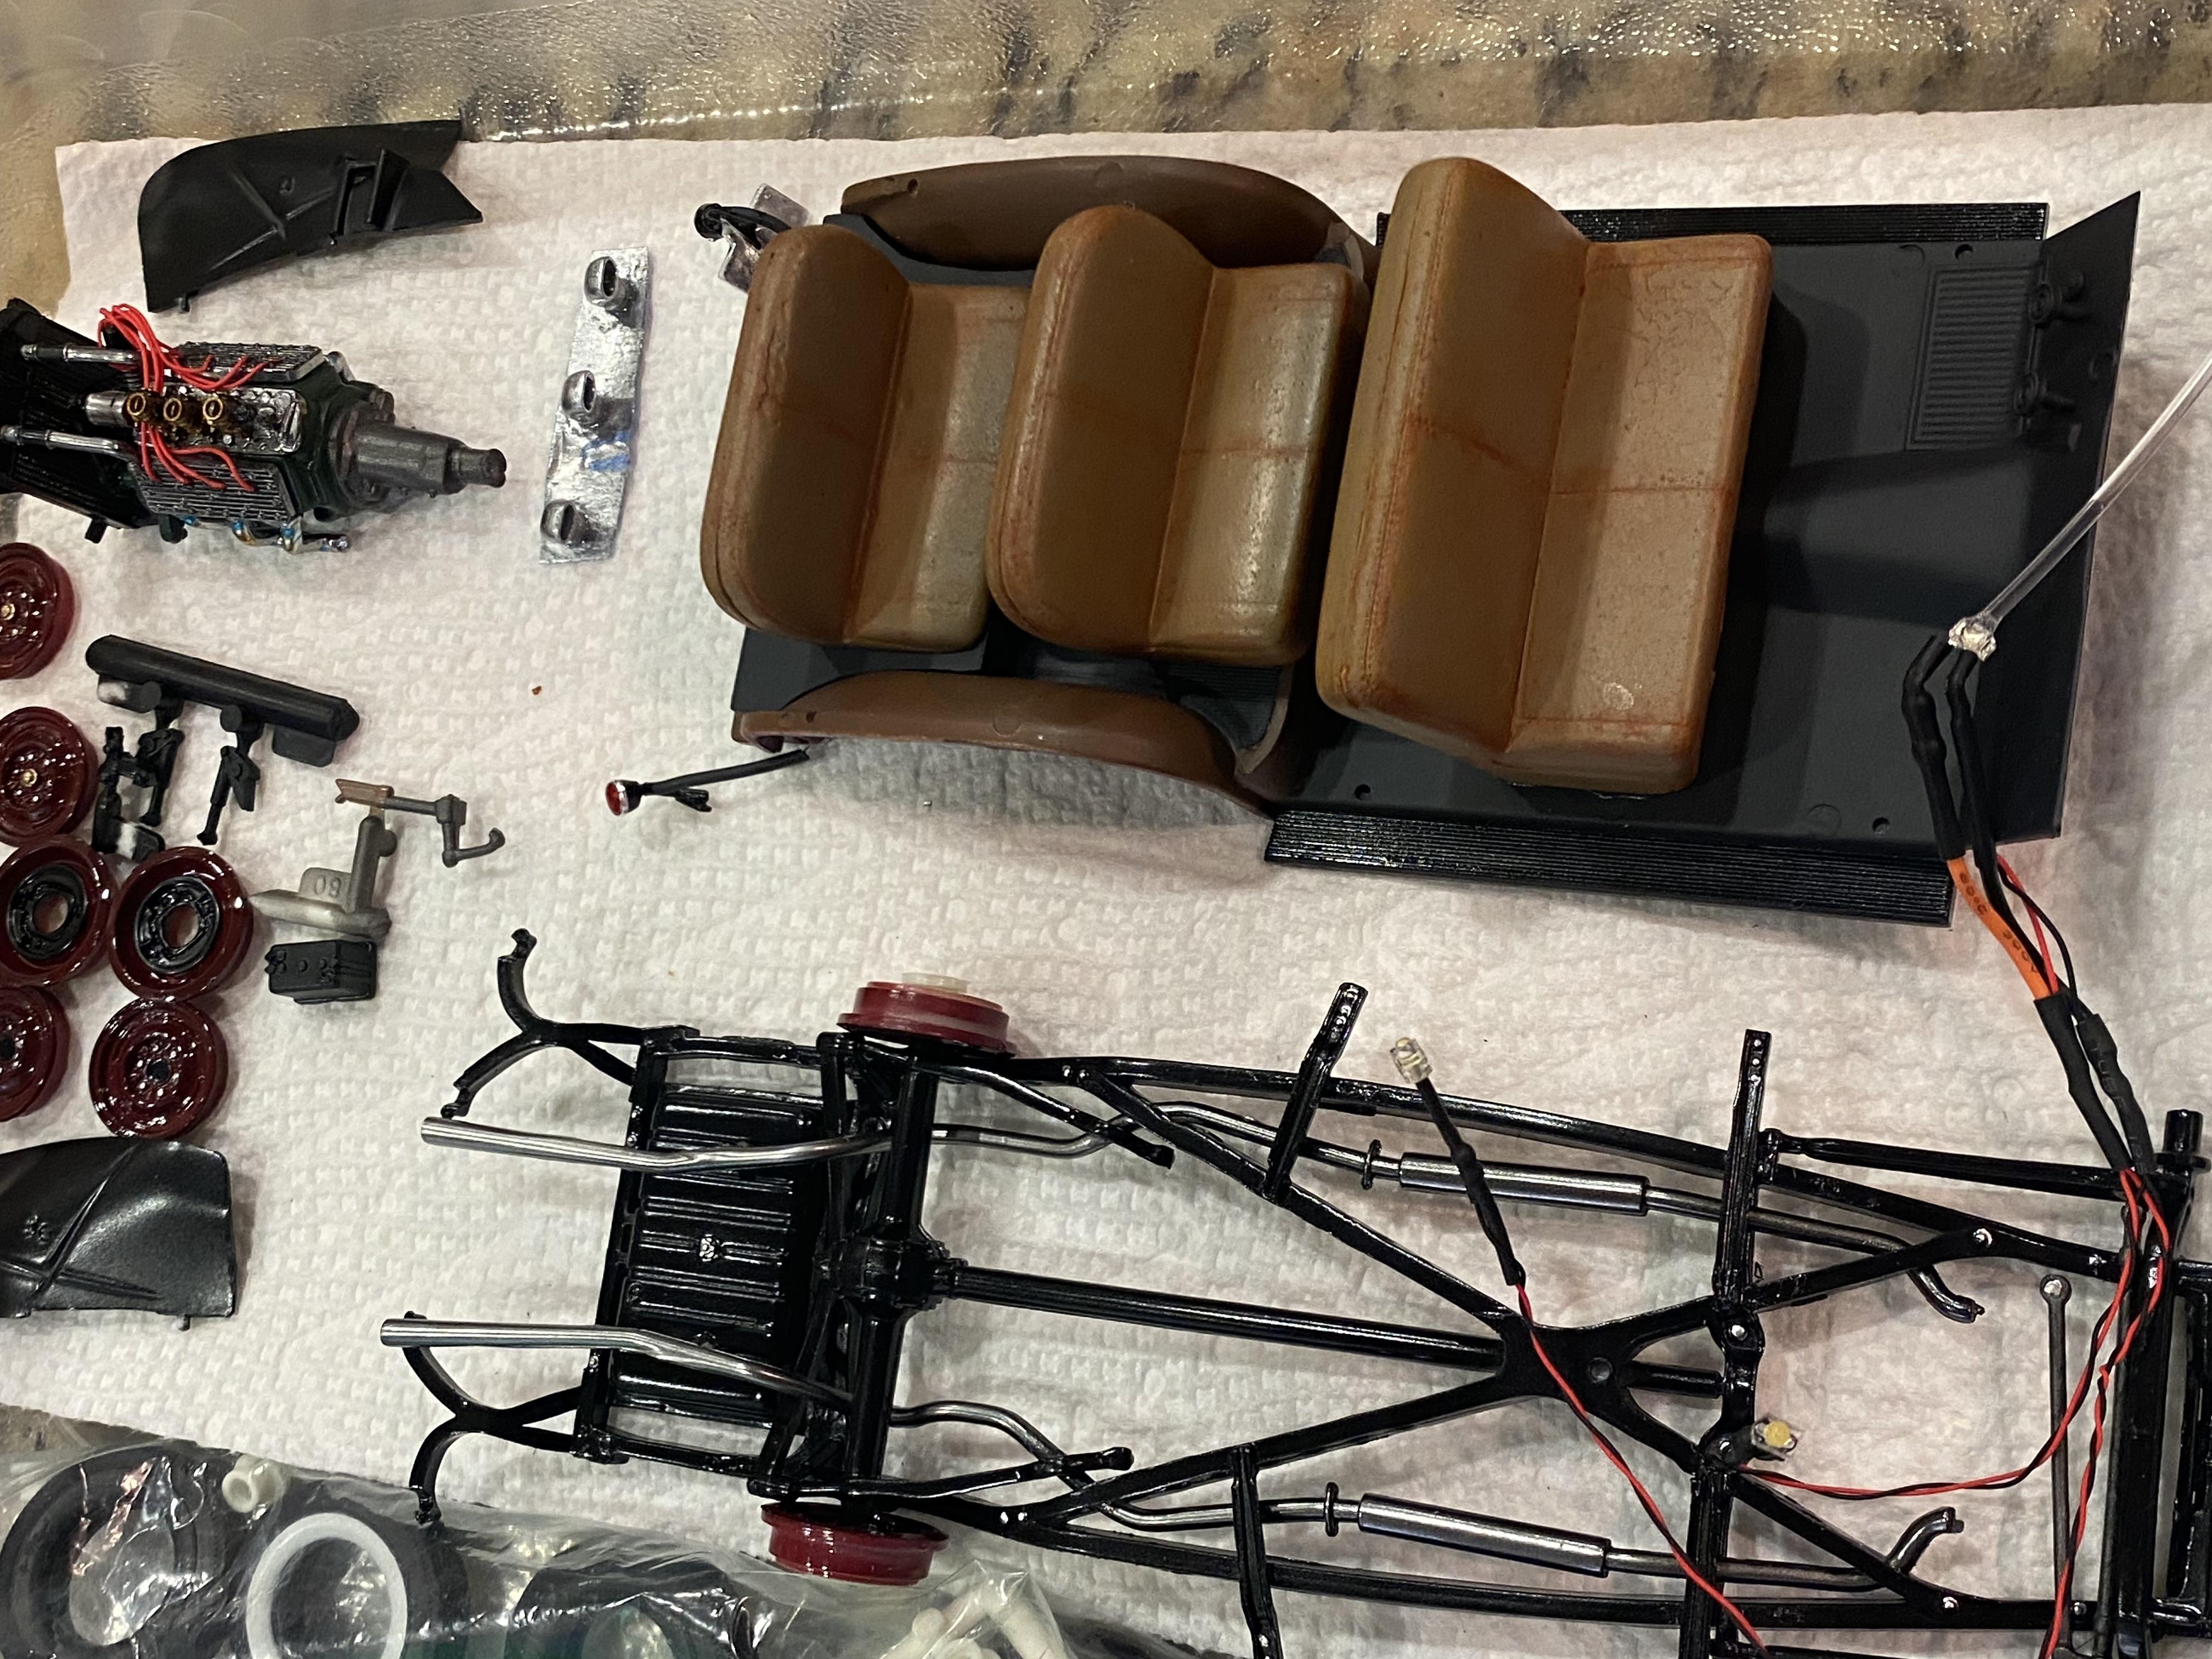
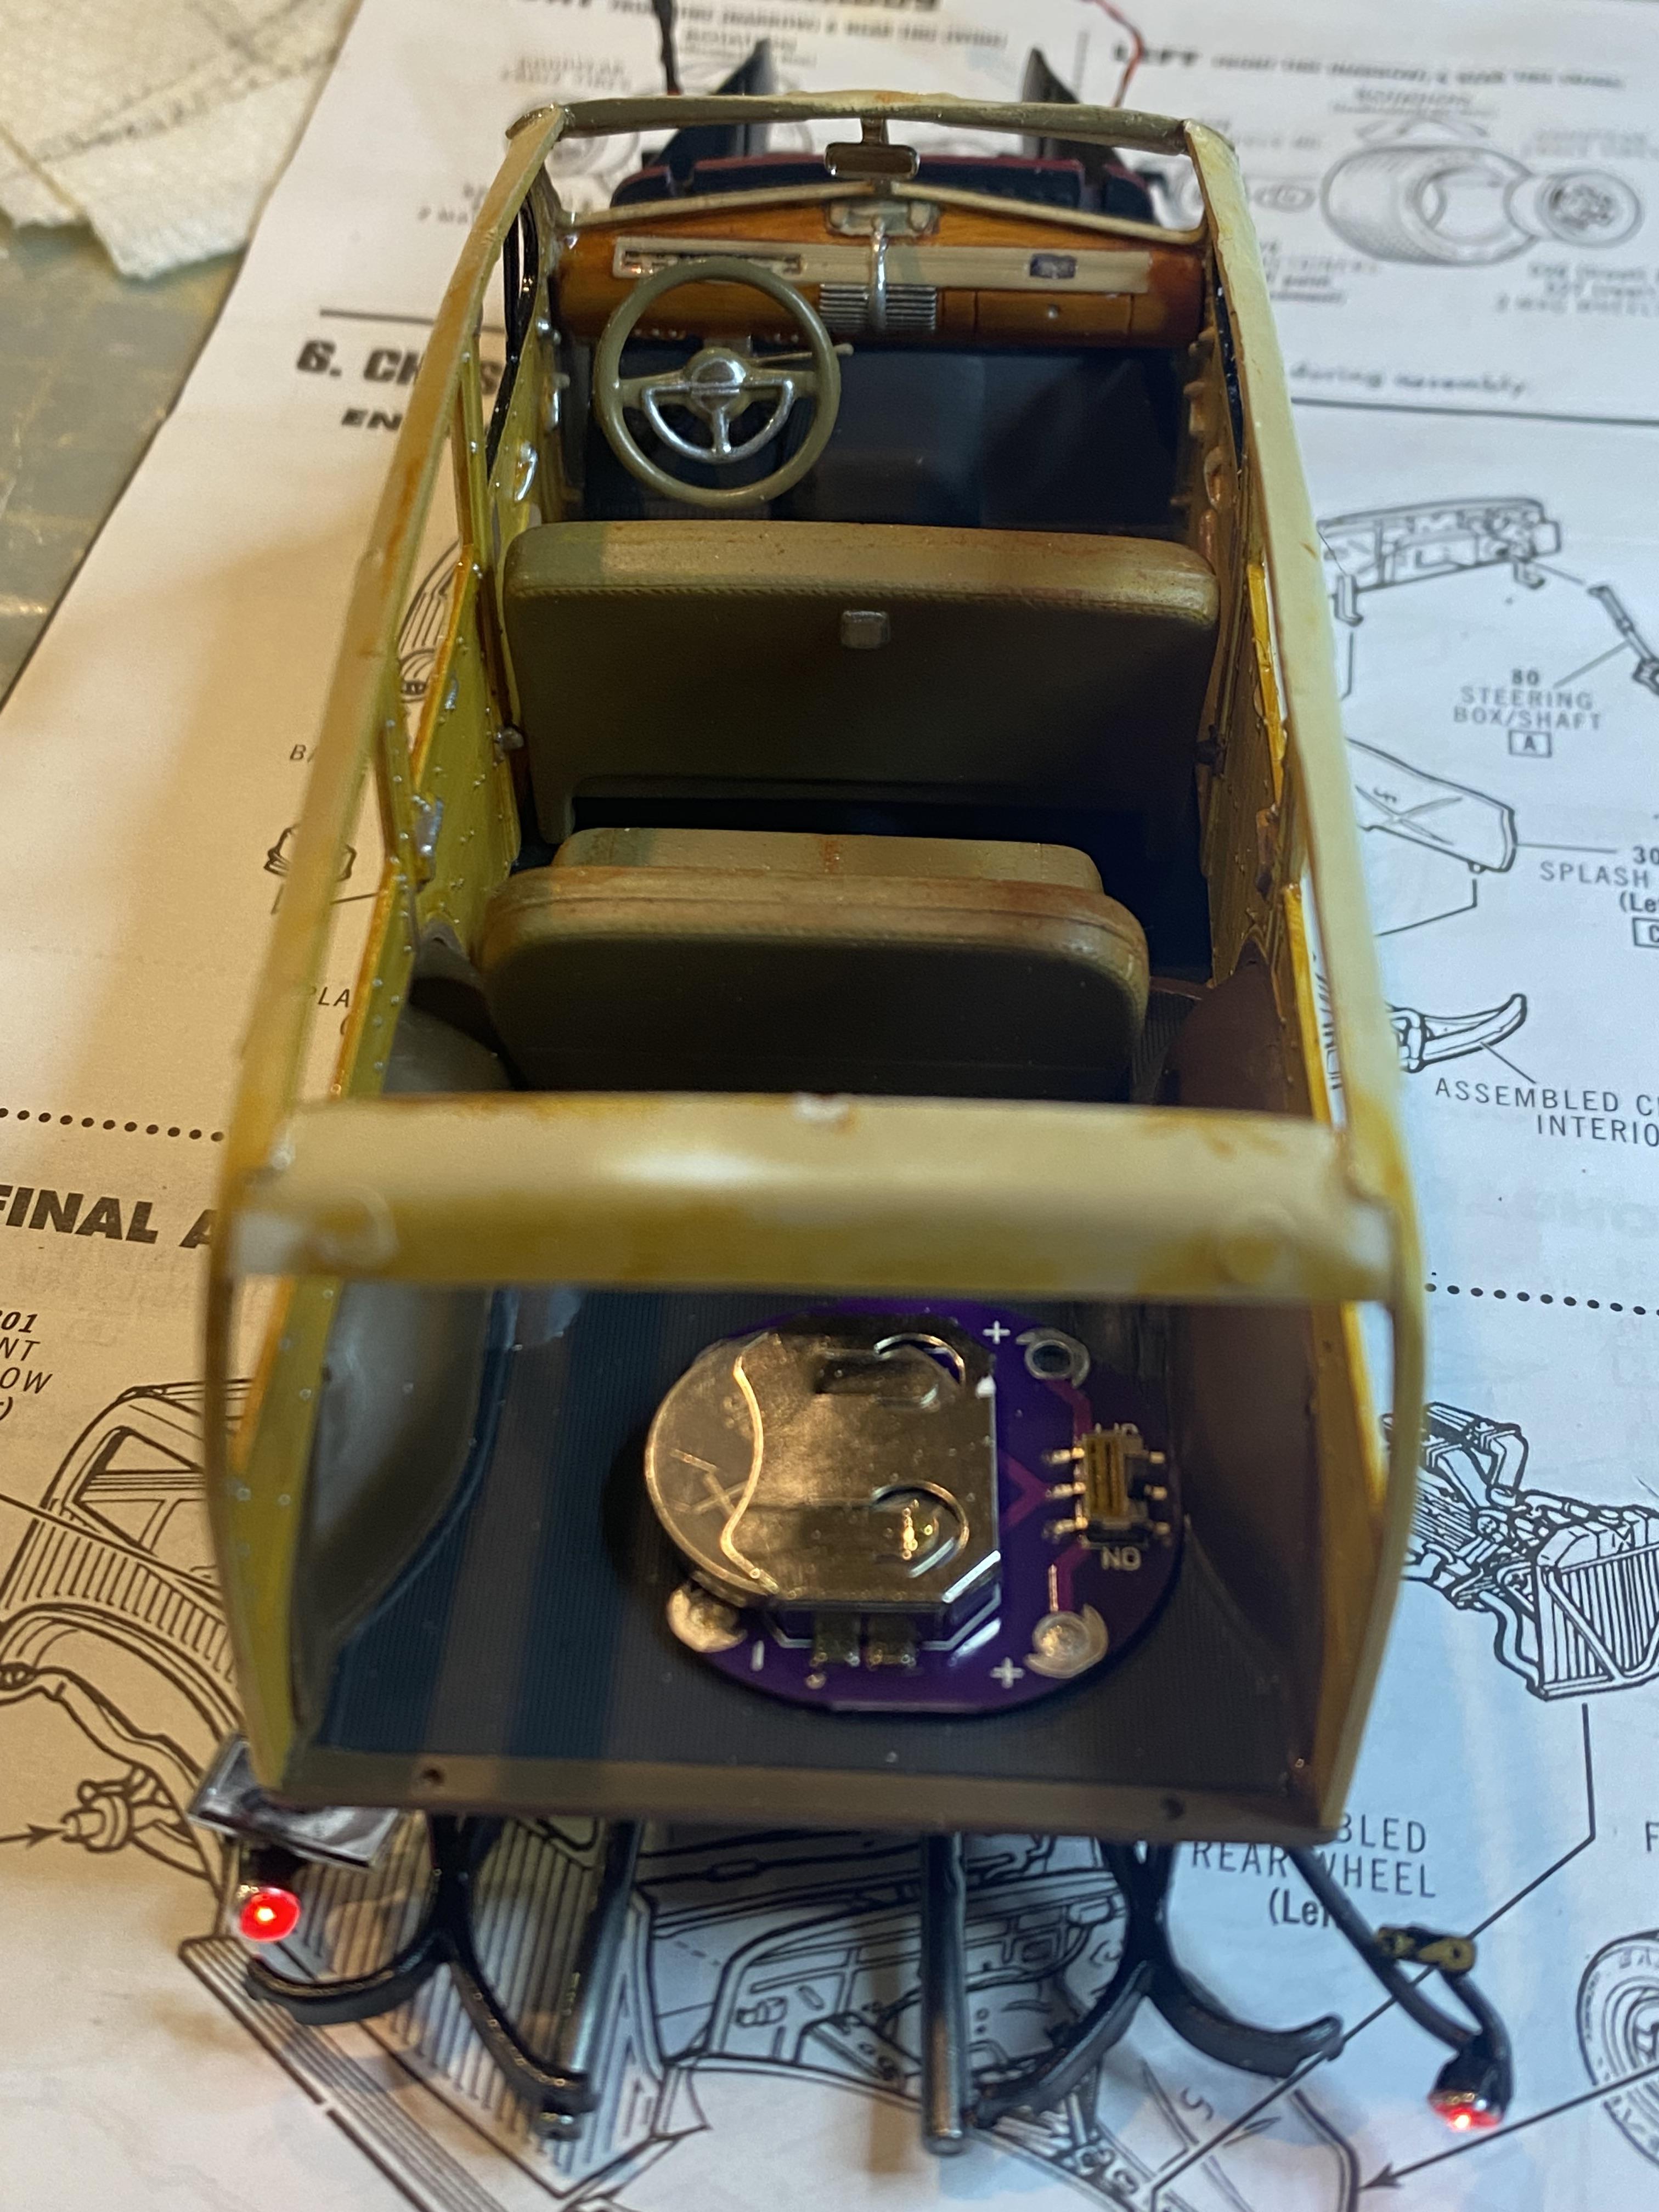
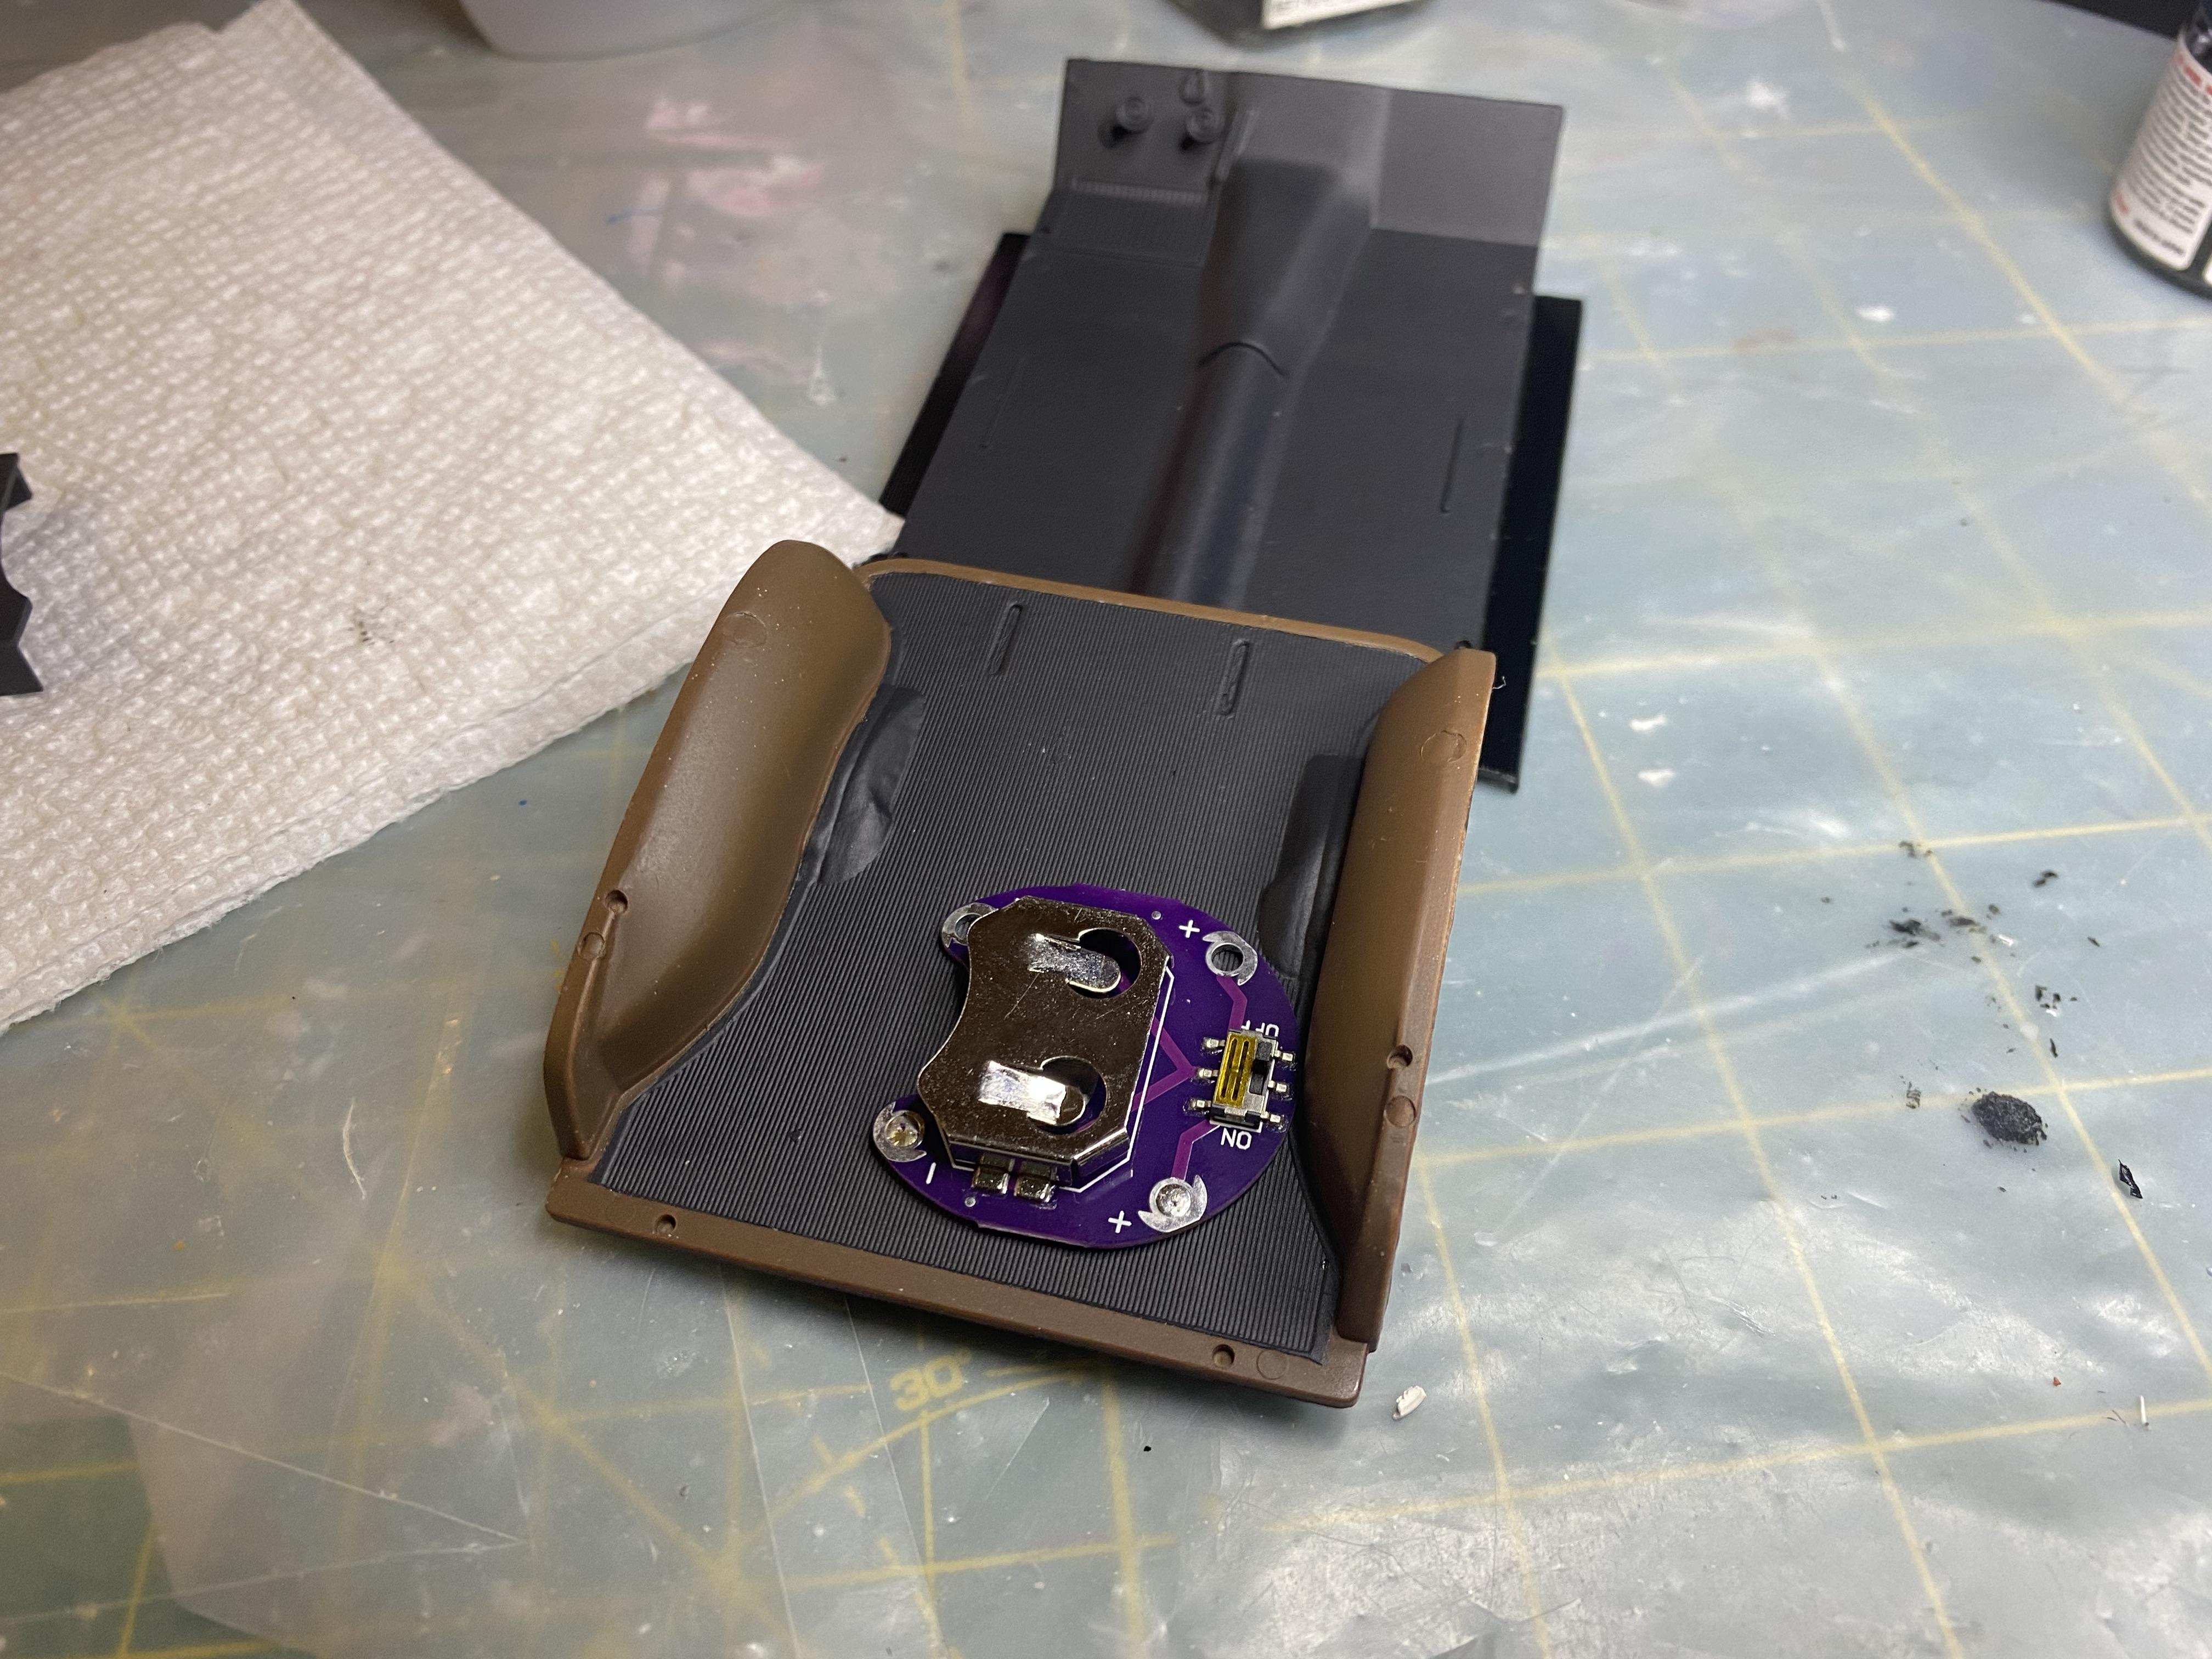
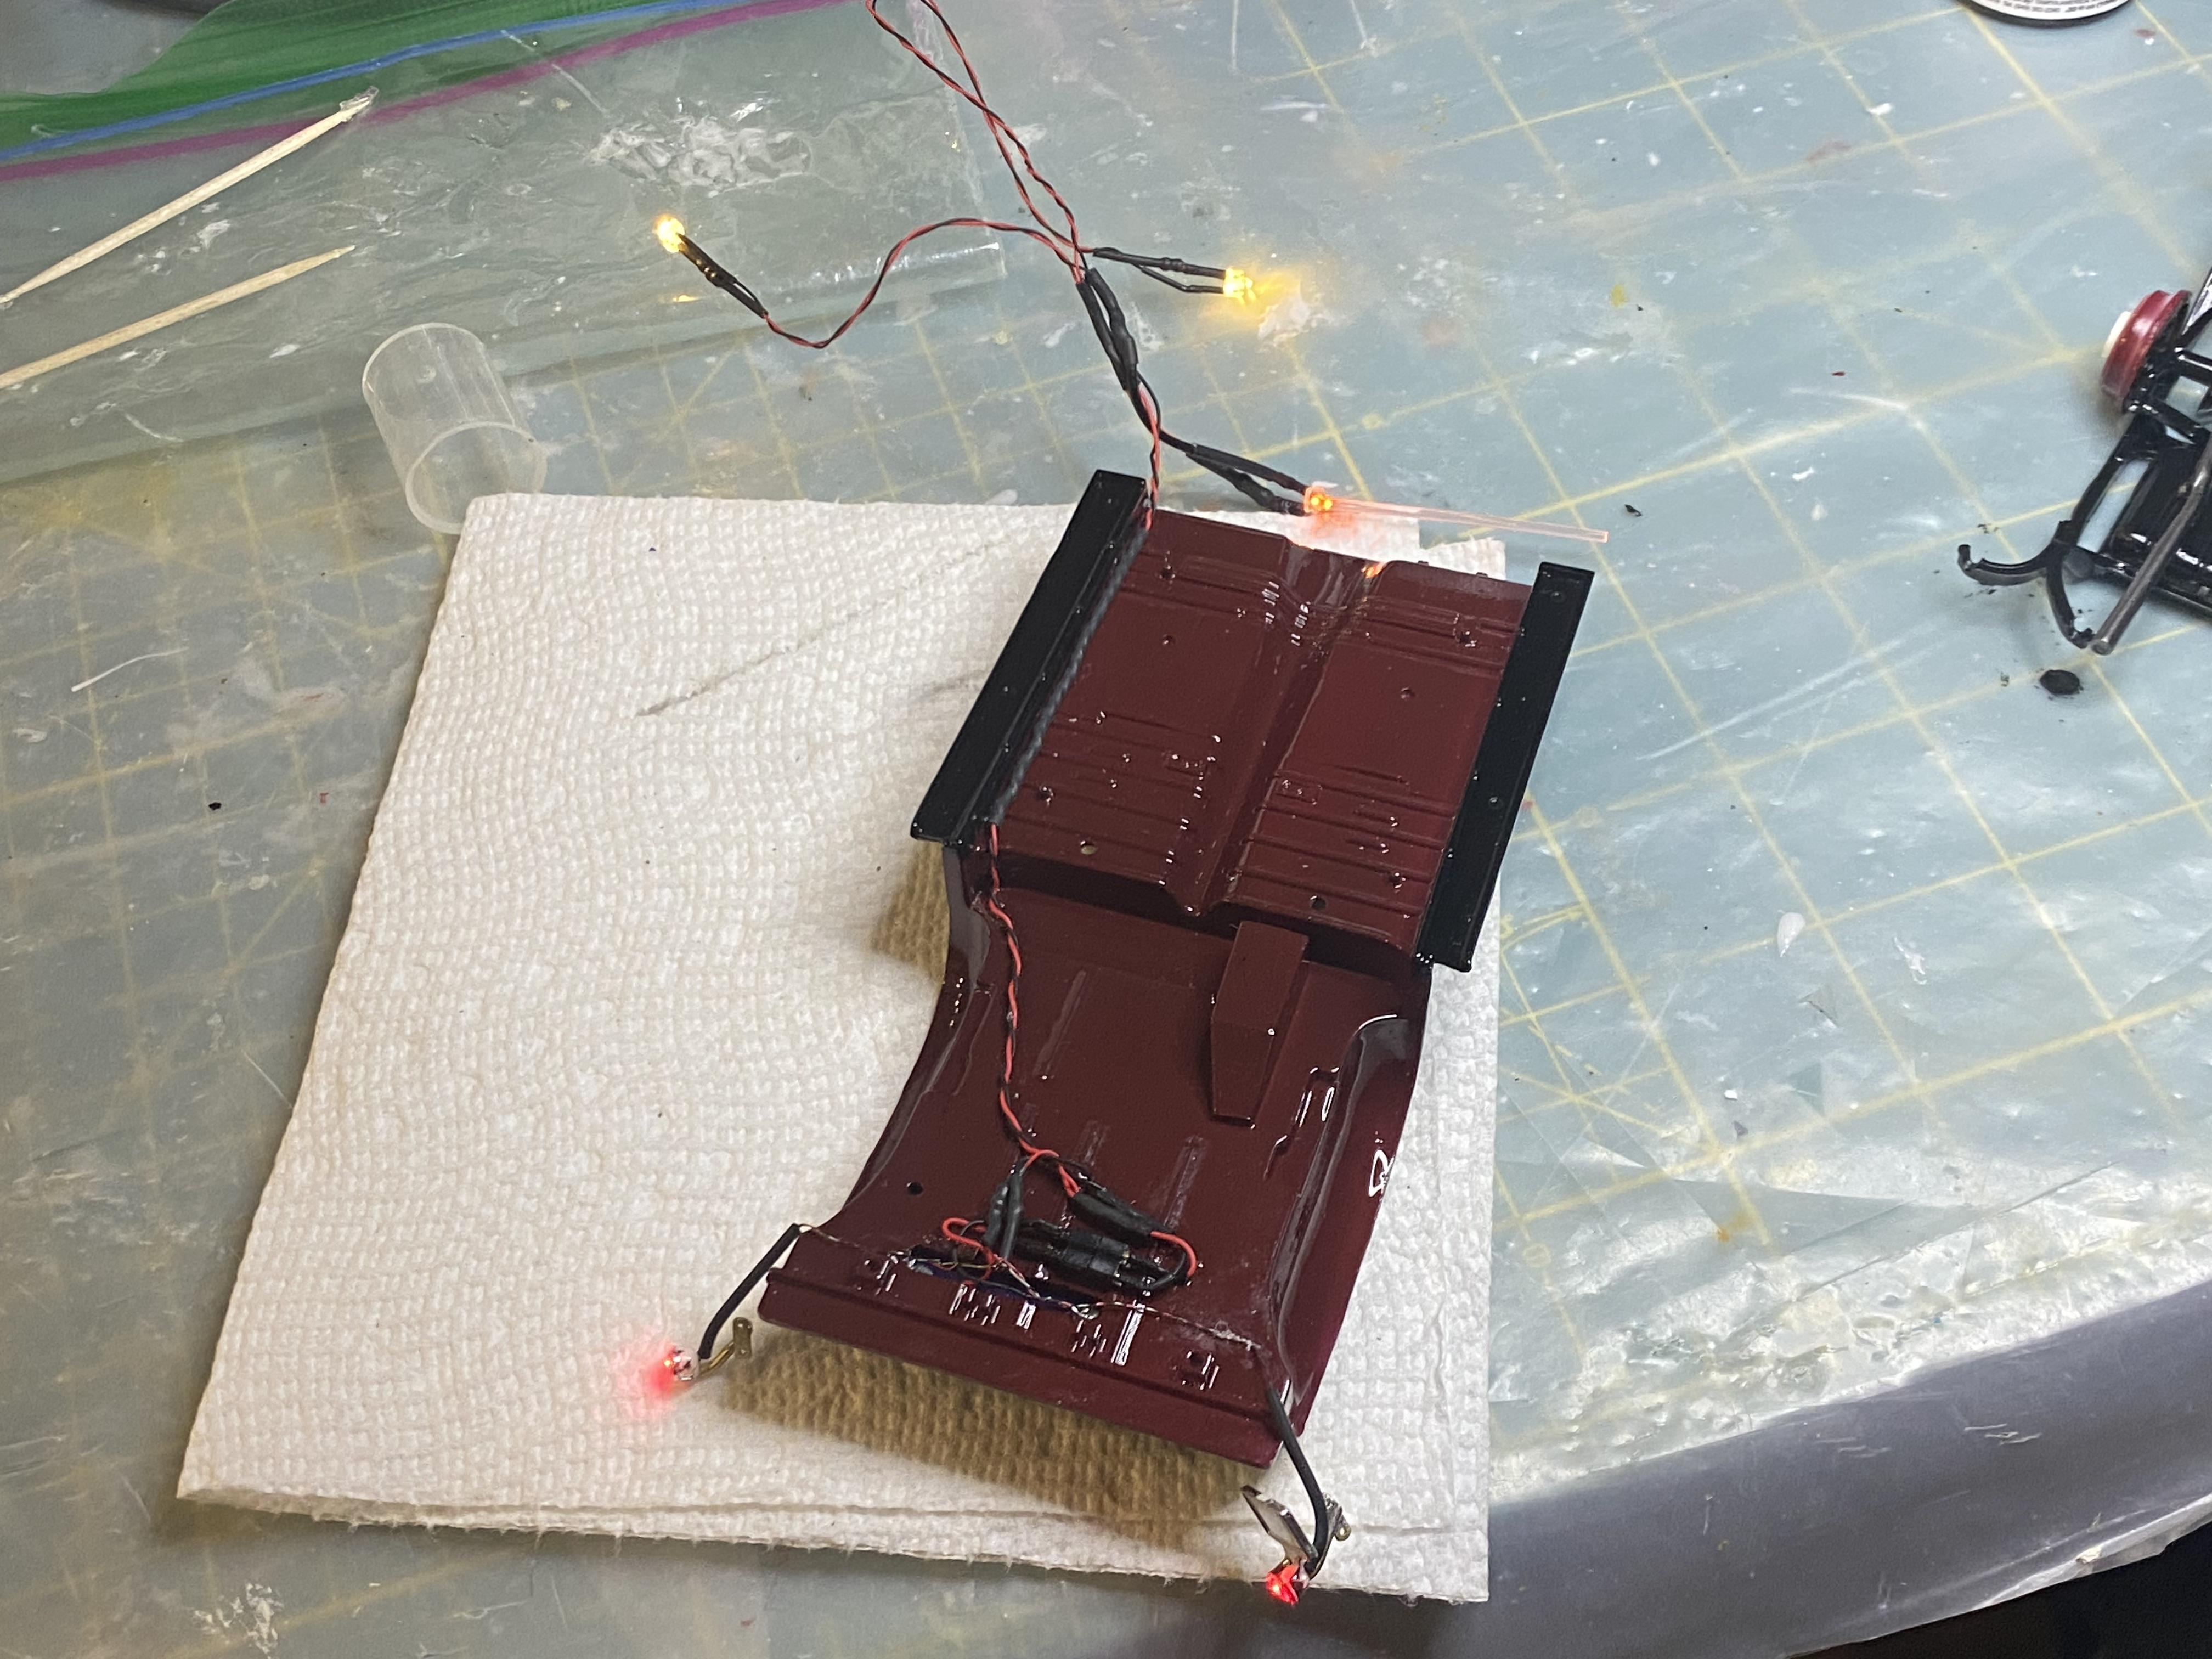
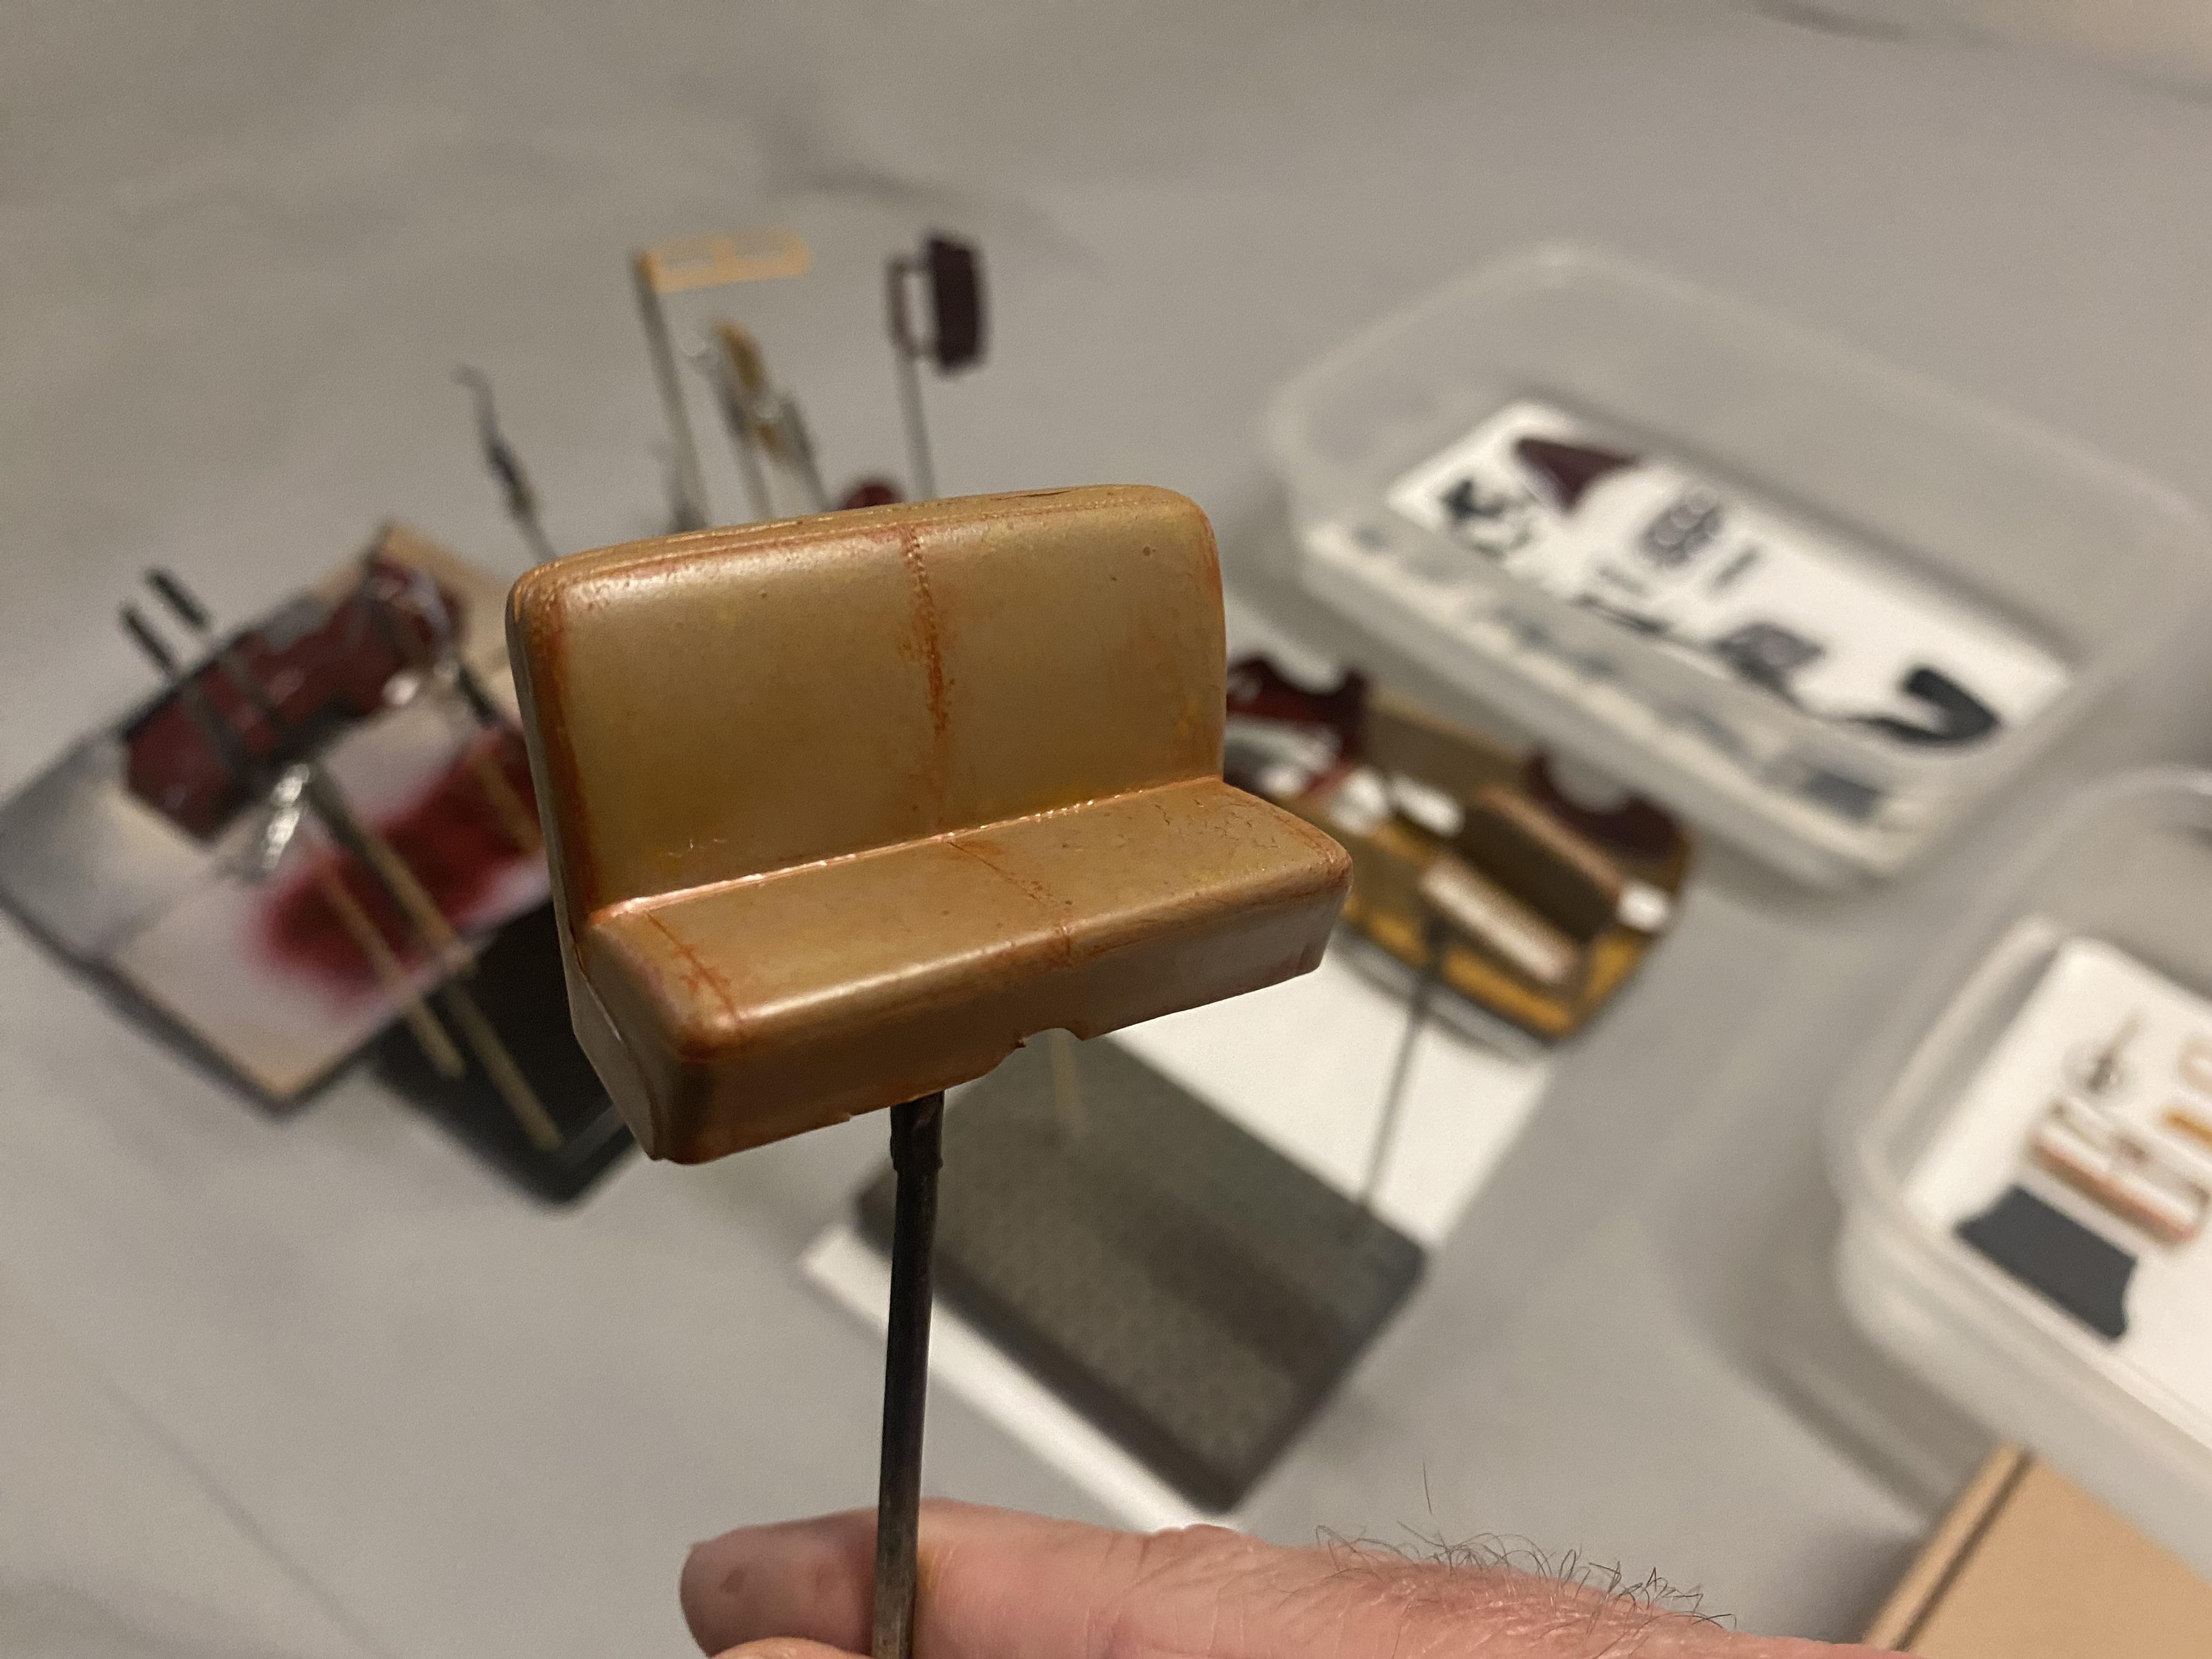
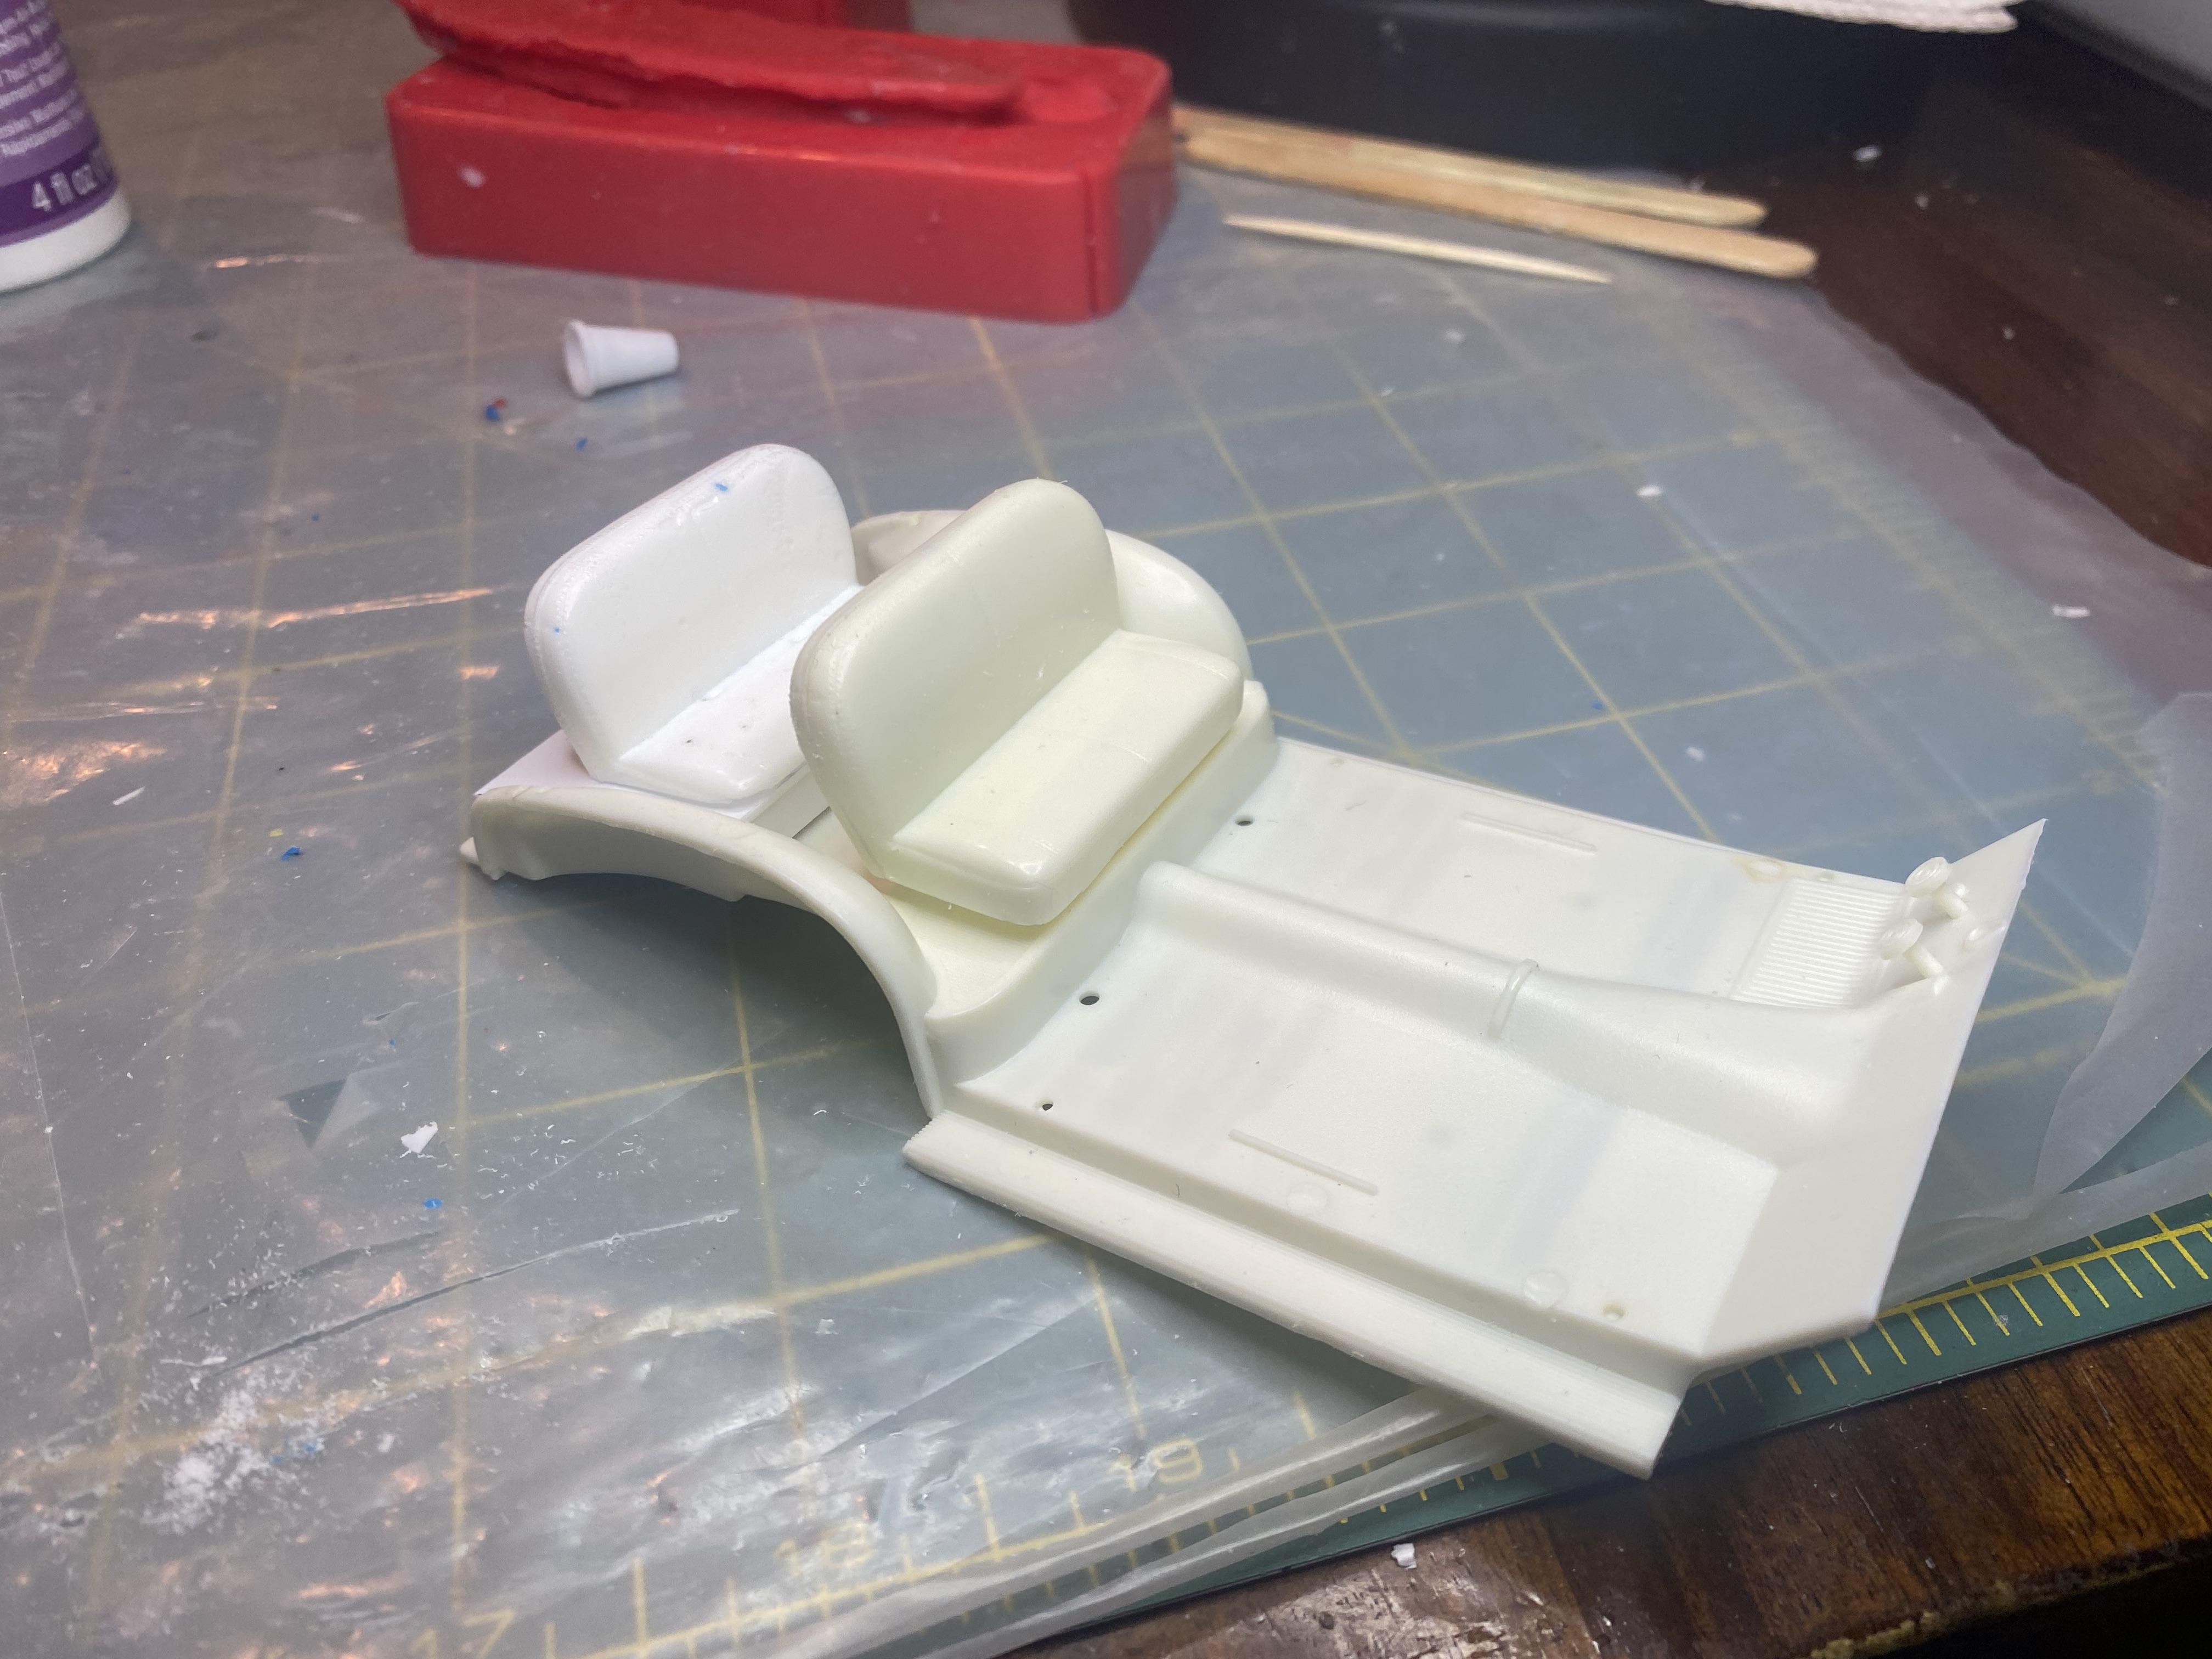
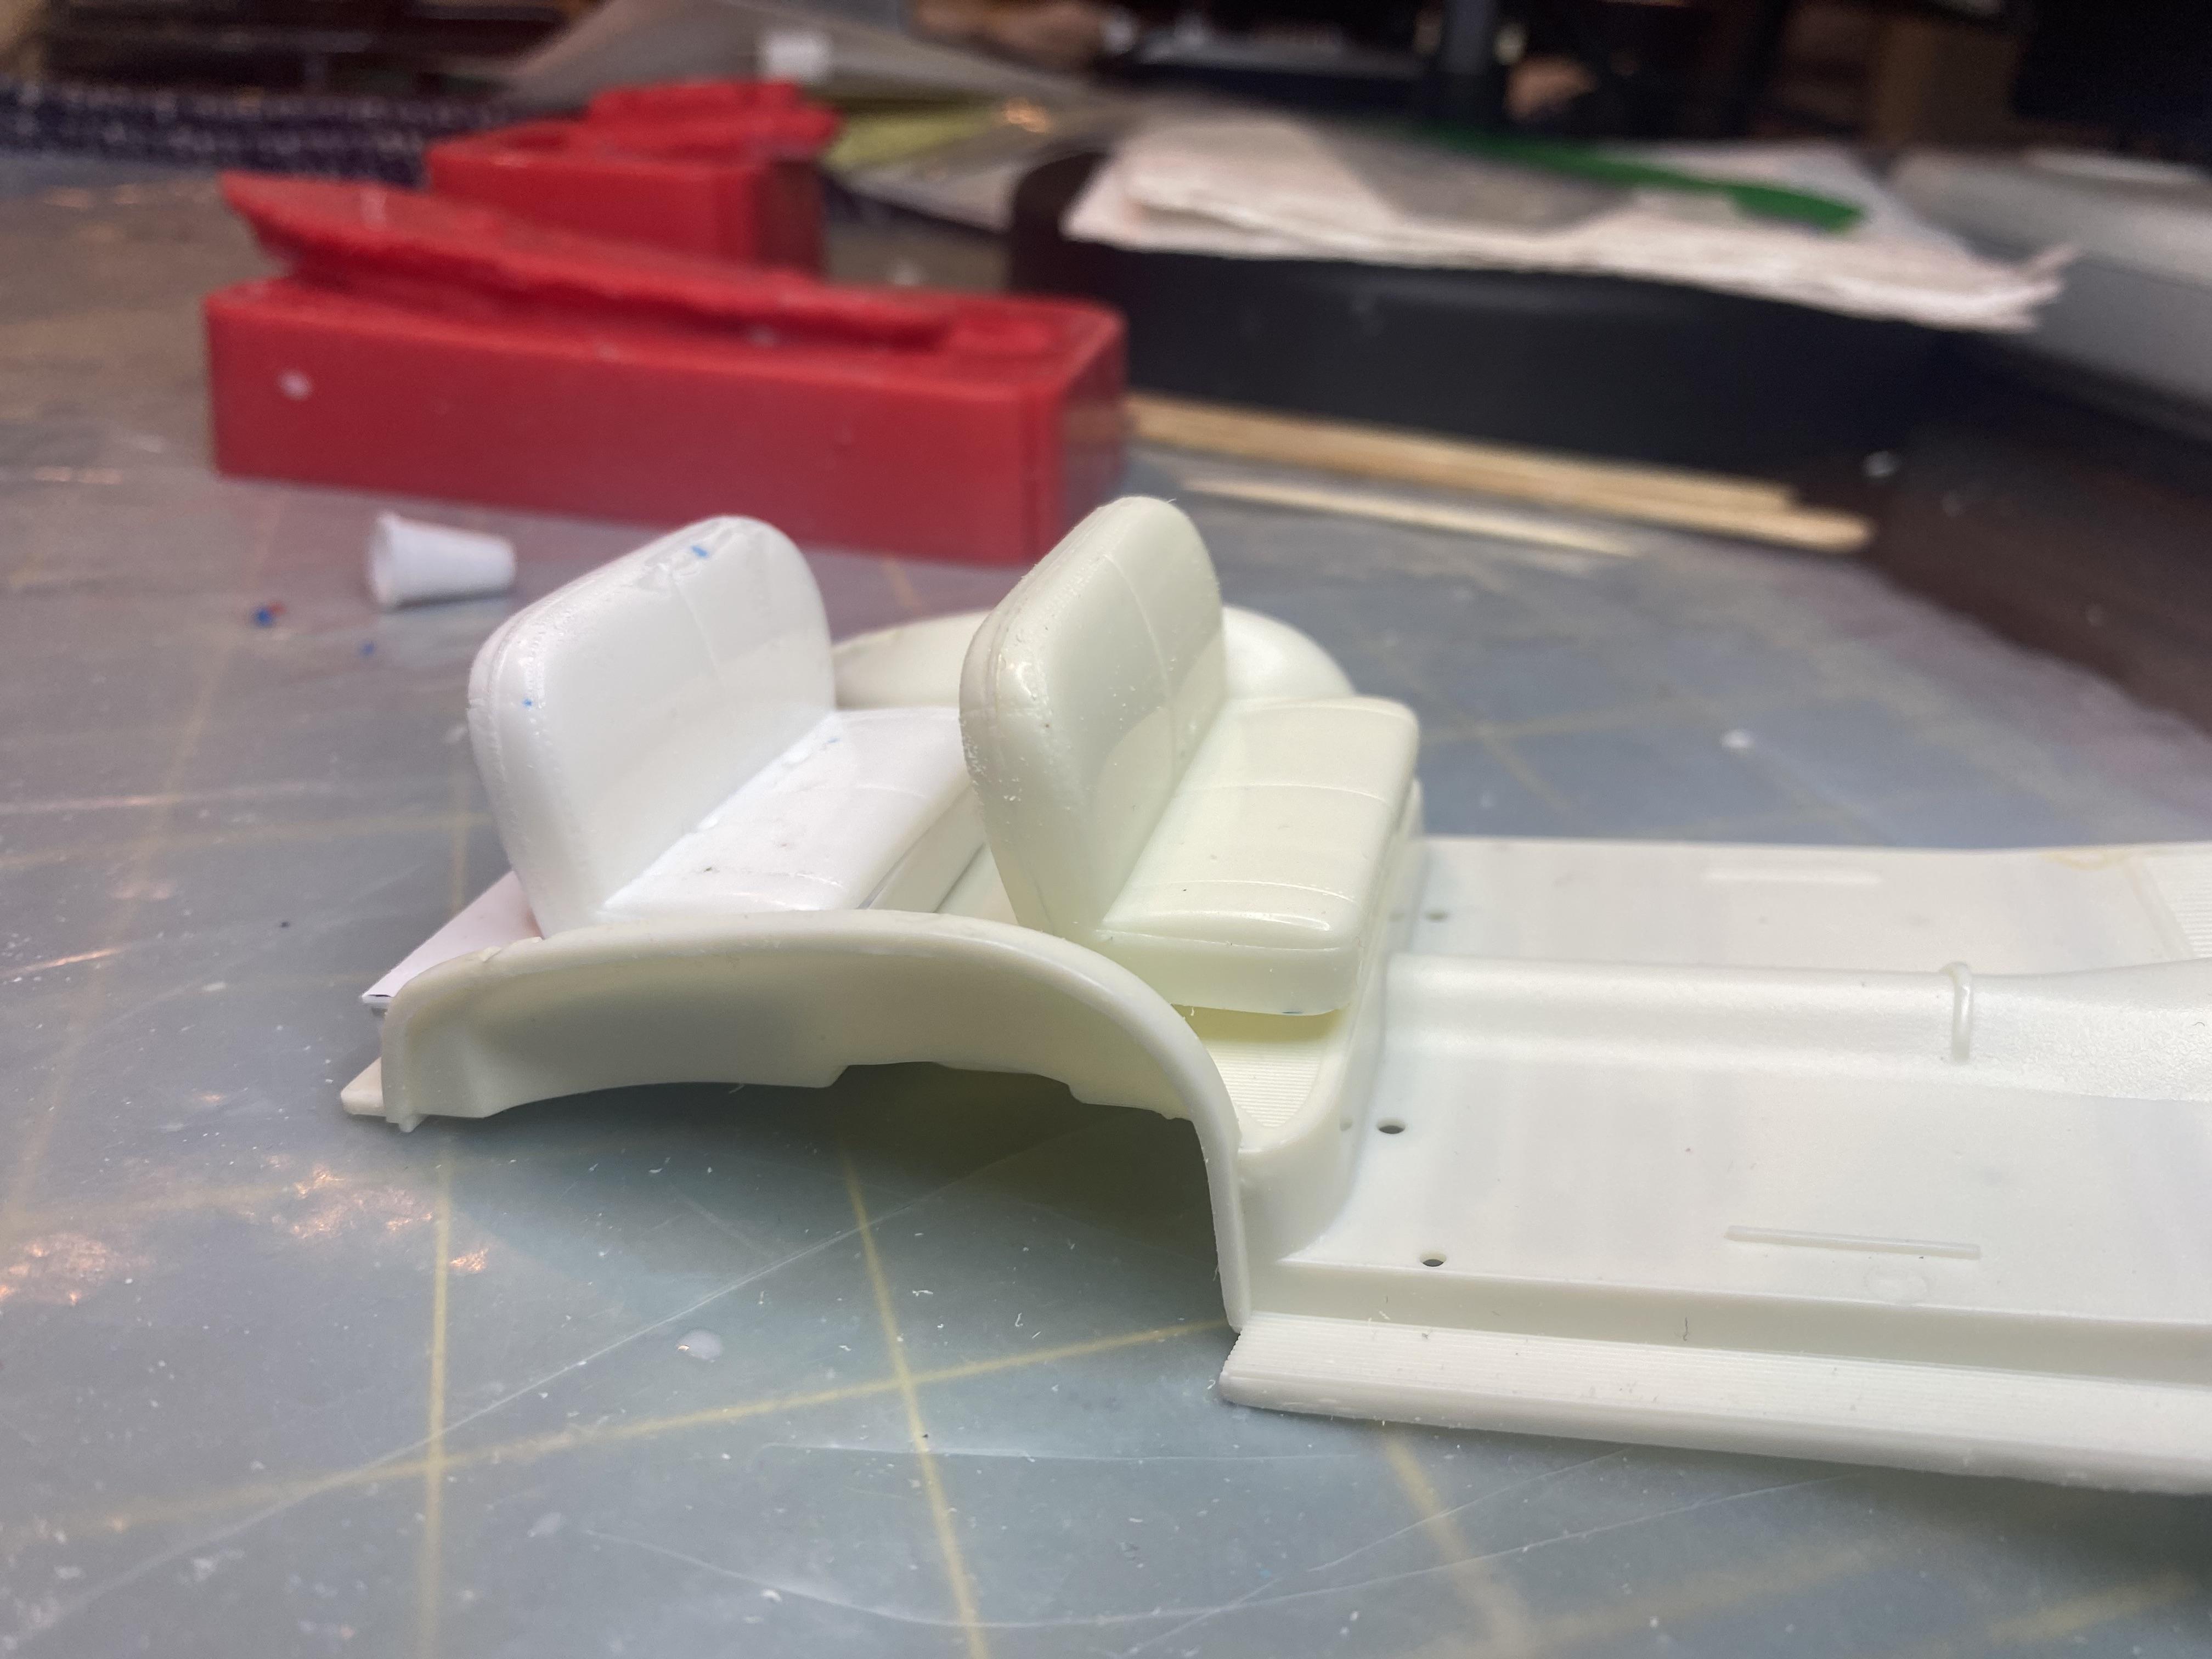
Attached the LED wiring harness to the chassis tonight. The back seat and cover test fitted.
-
Thank you! Trying to get some progress made while I wait a little while to wet sand and polish the body panels. Not really much to wet sand other than the hood and fenders really, woodgrain shouldn't get smoothed too much.
-
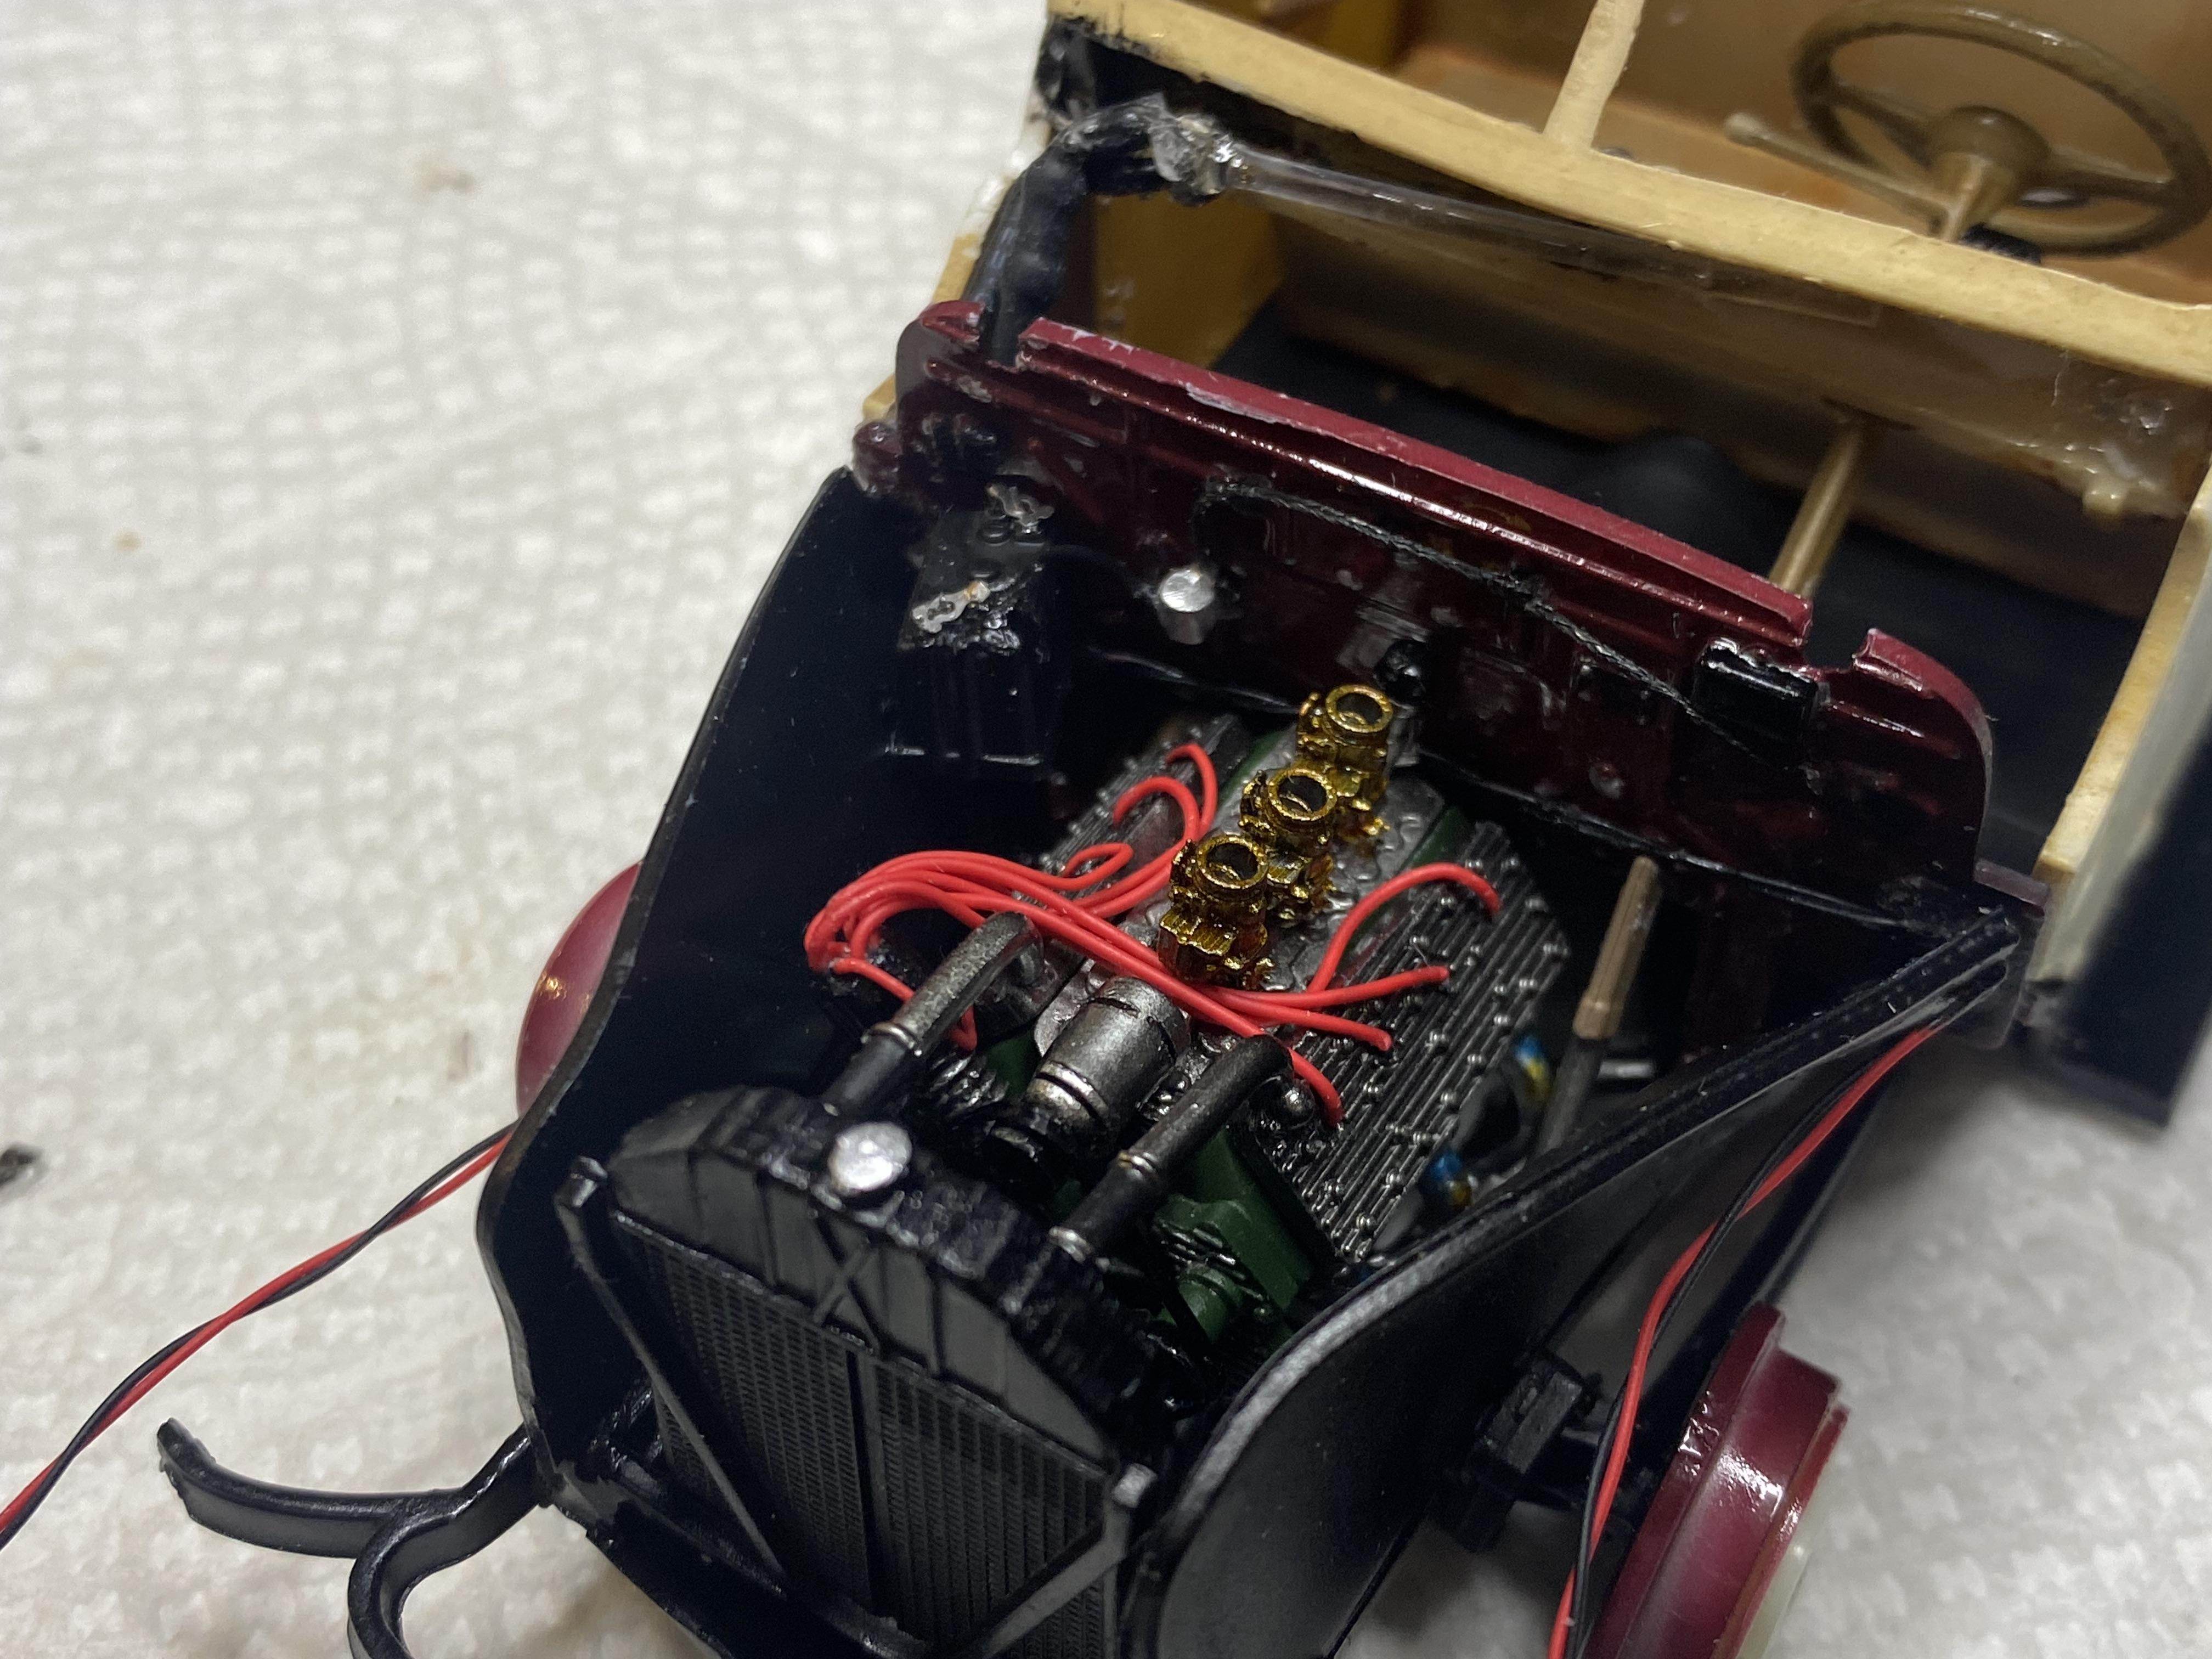
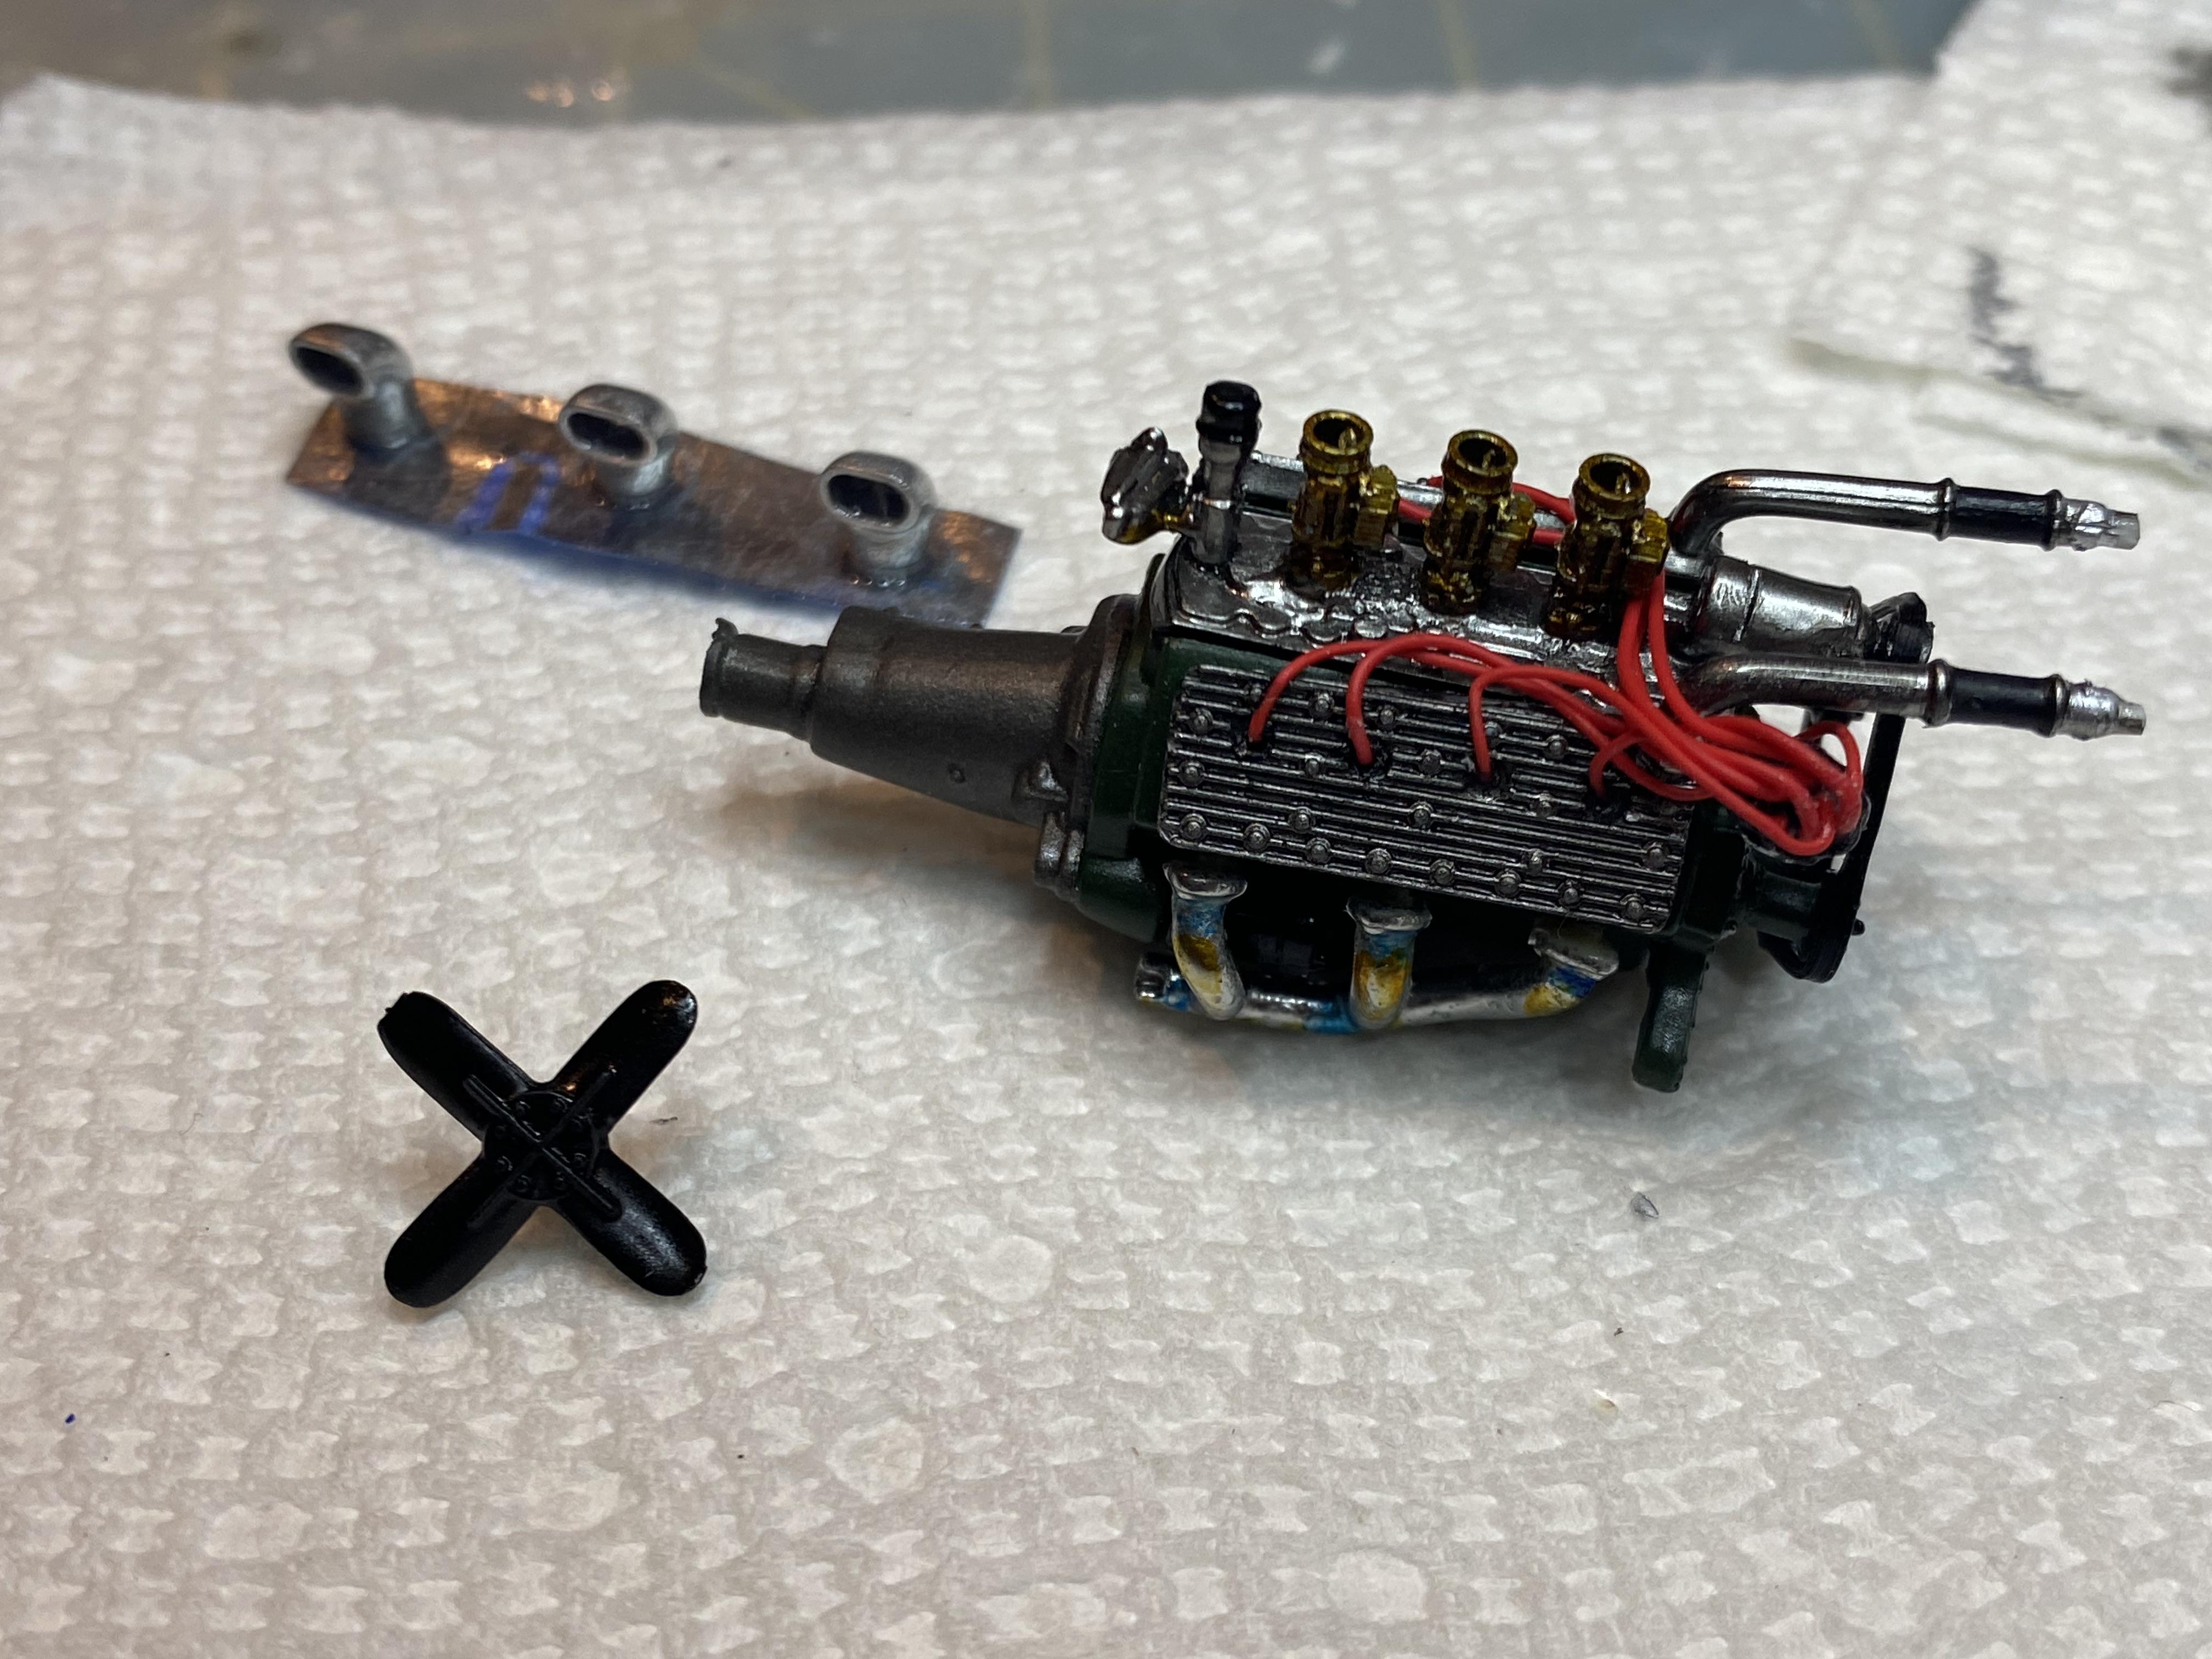
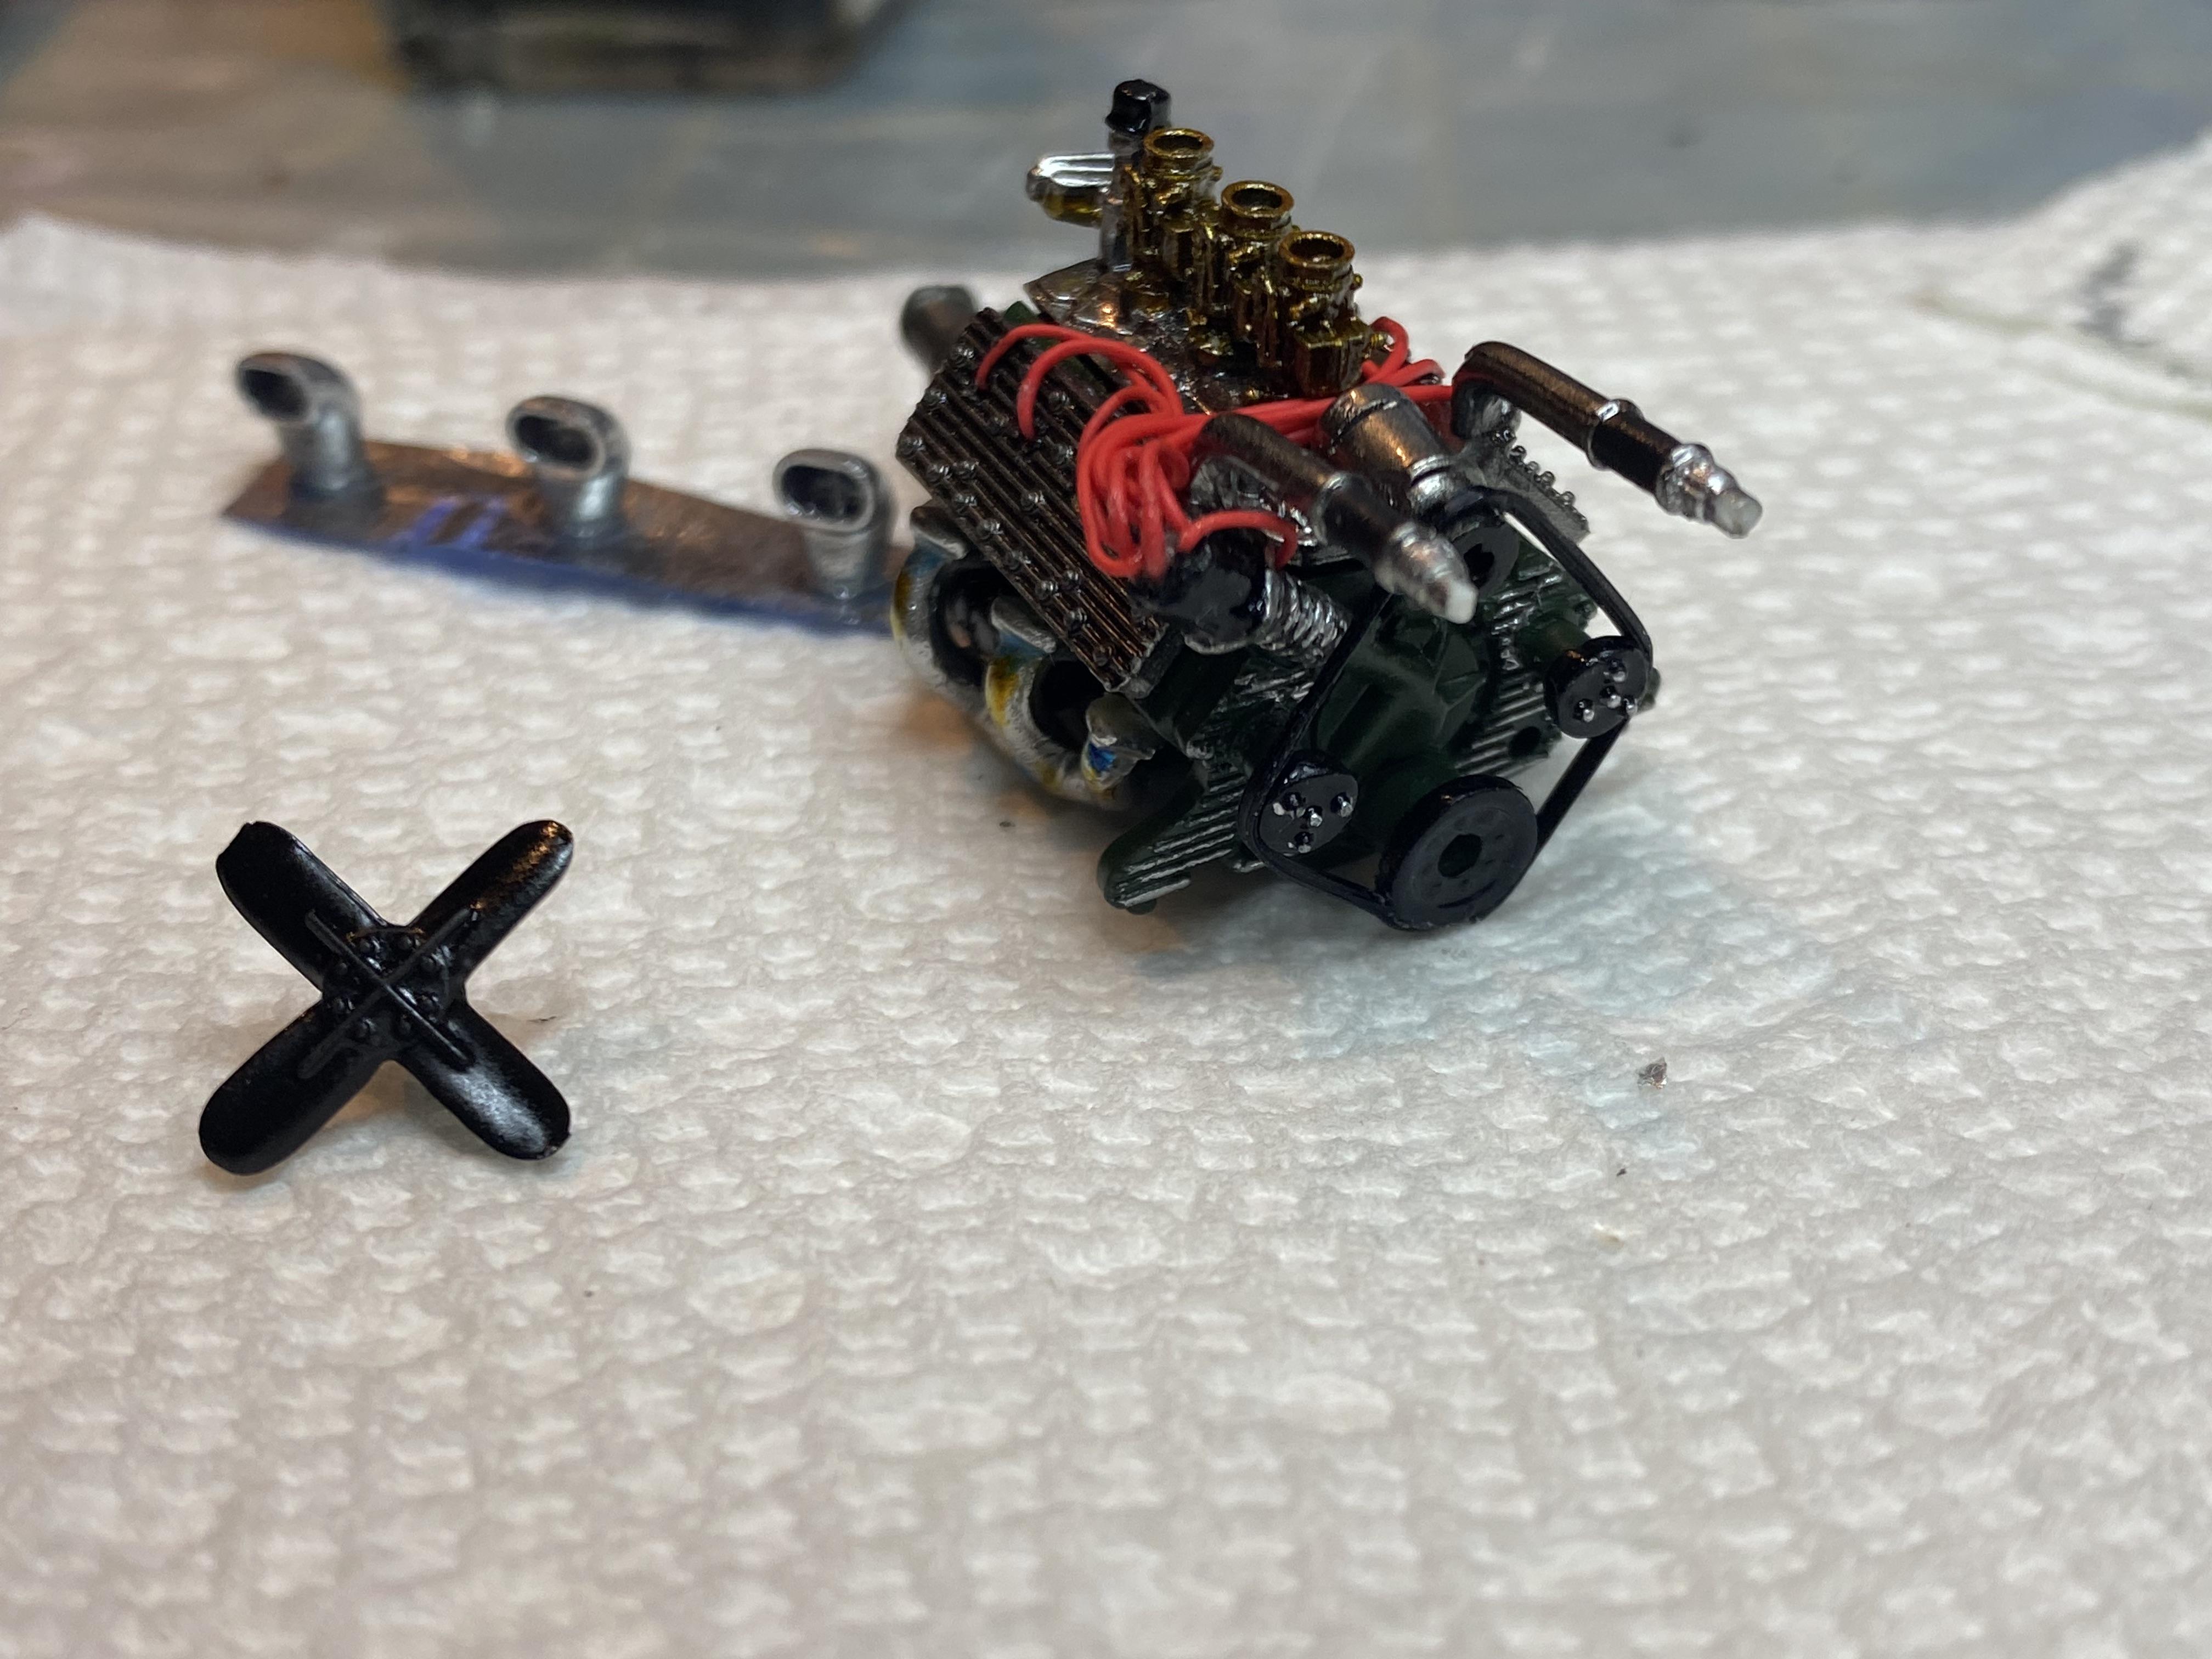
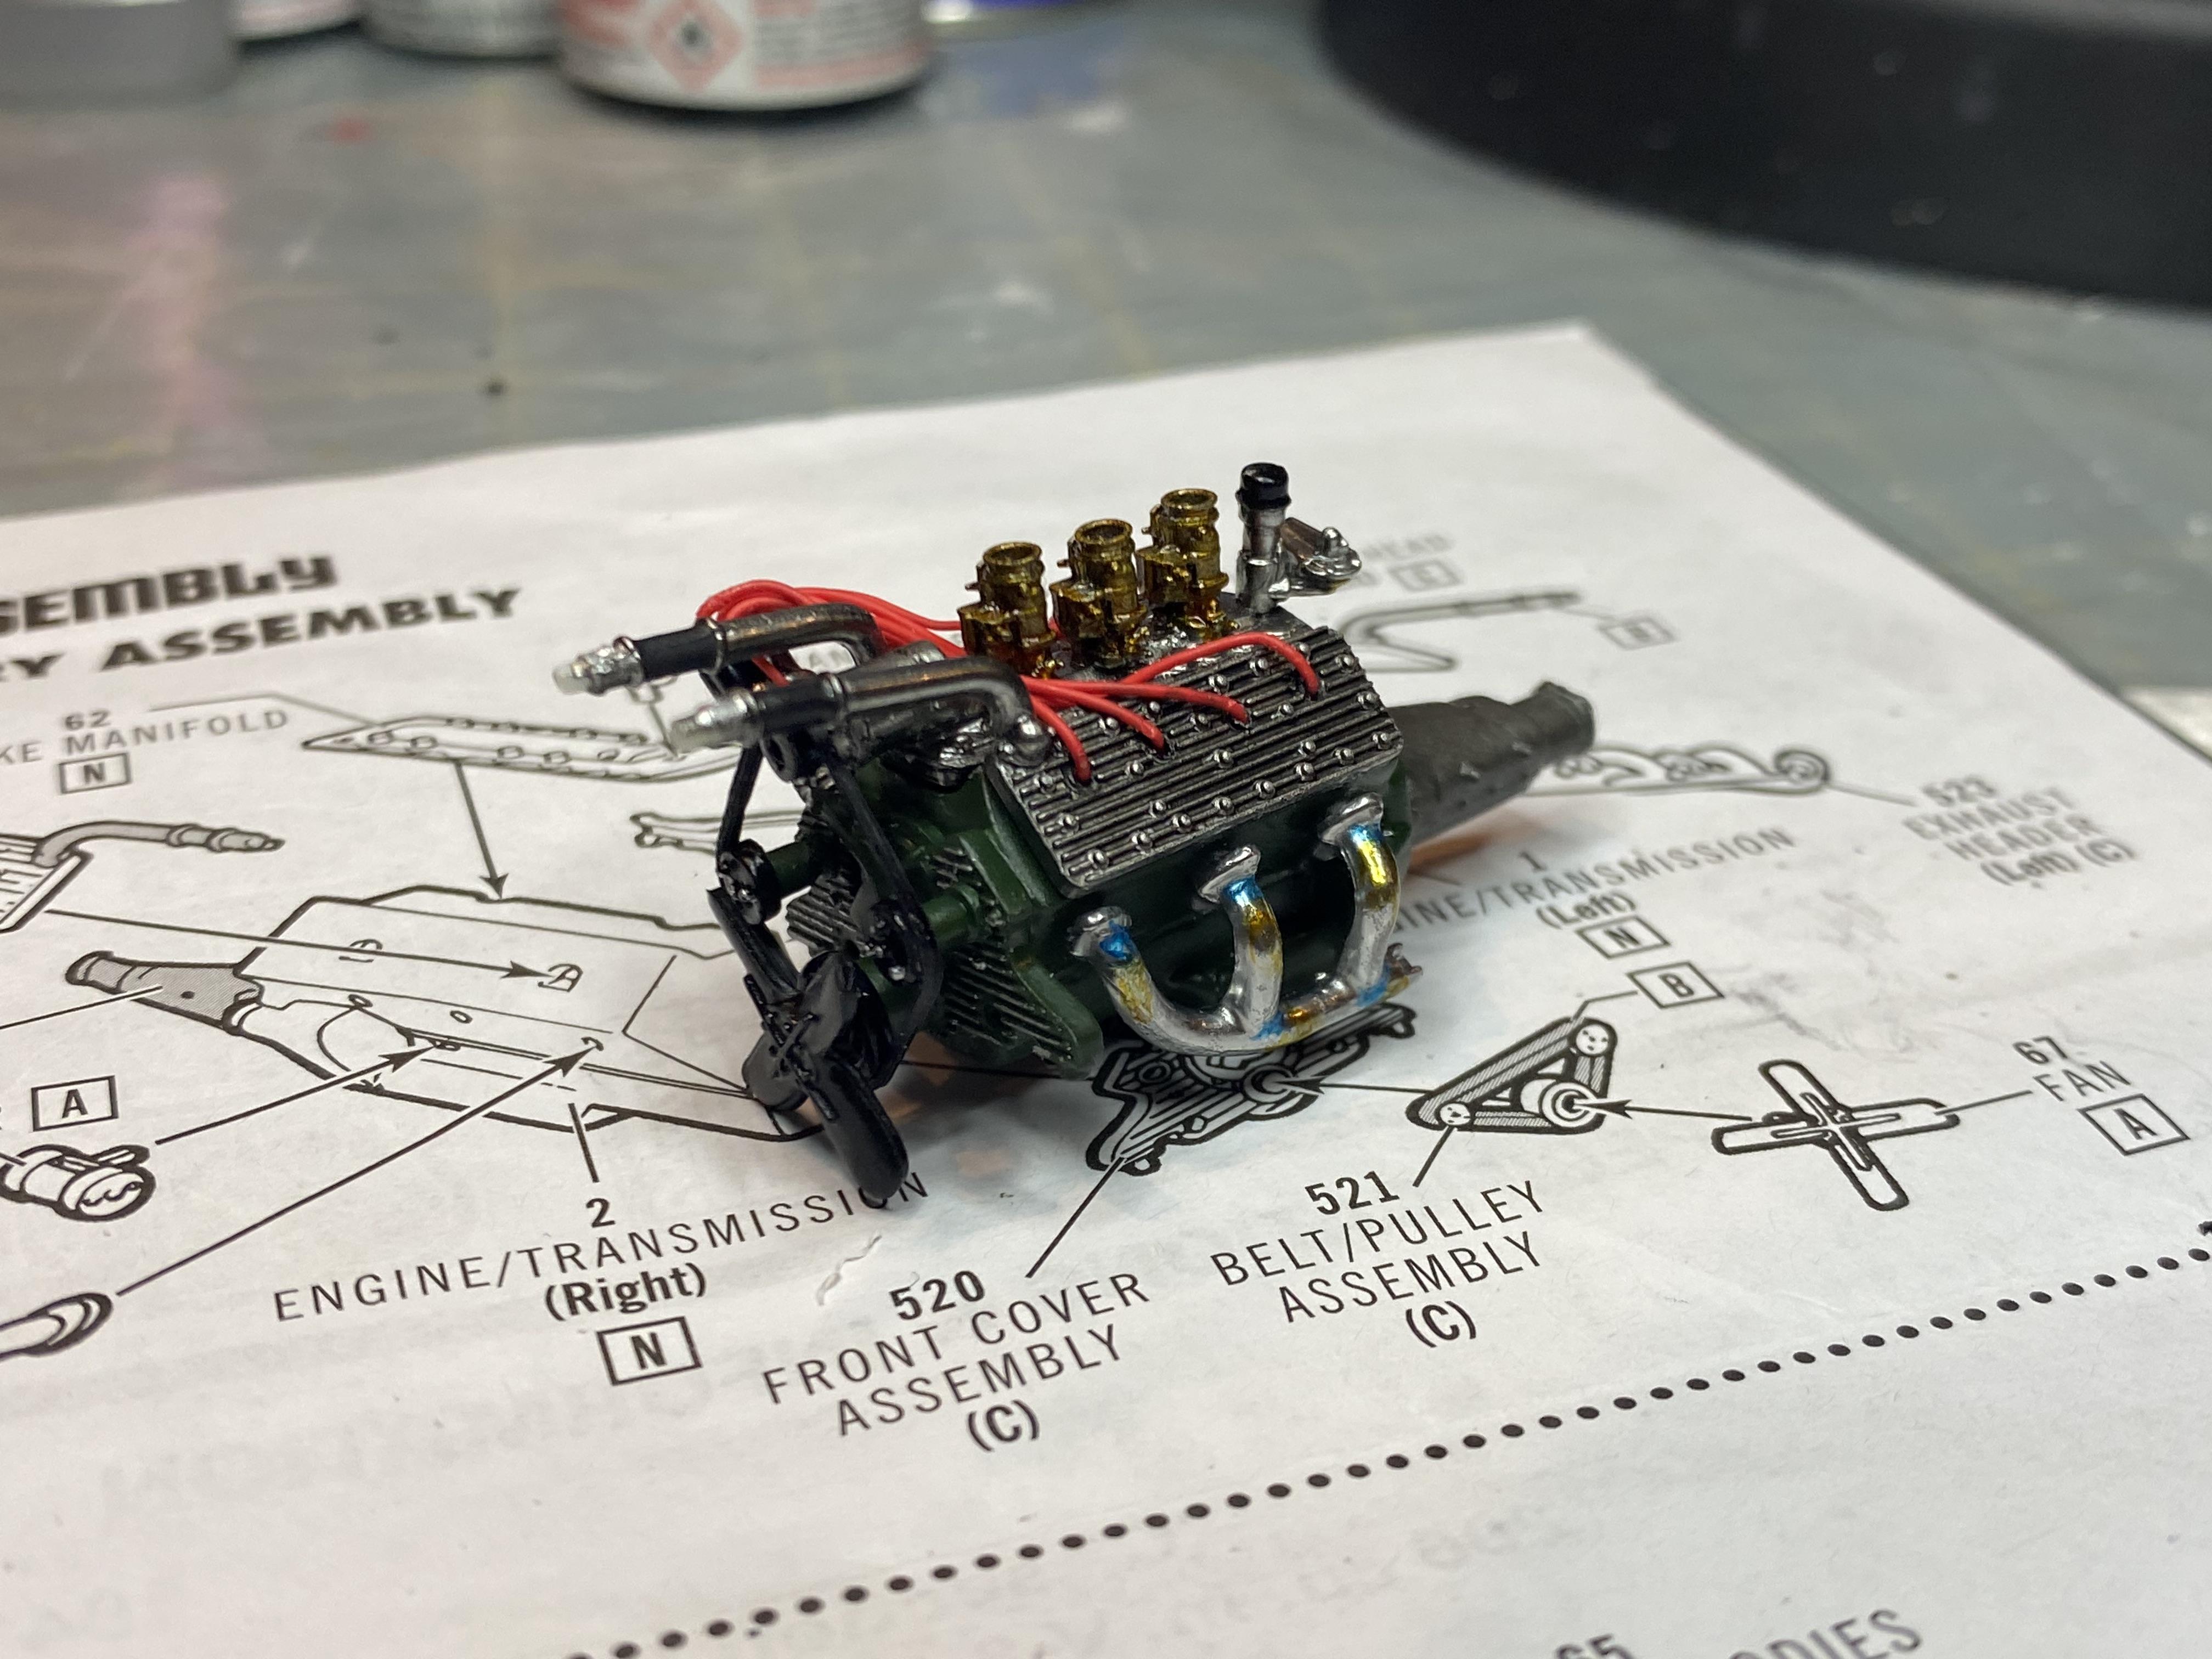
Thank you! Thank you! The stromberg carbs and frog mouth breathers are from IceMan Collection. They make a world of difference. The generator is scratch built, the plug wires are left over LED wiring and the belt is .005 flat band. The rest is out of the box.
-
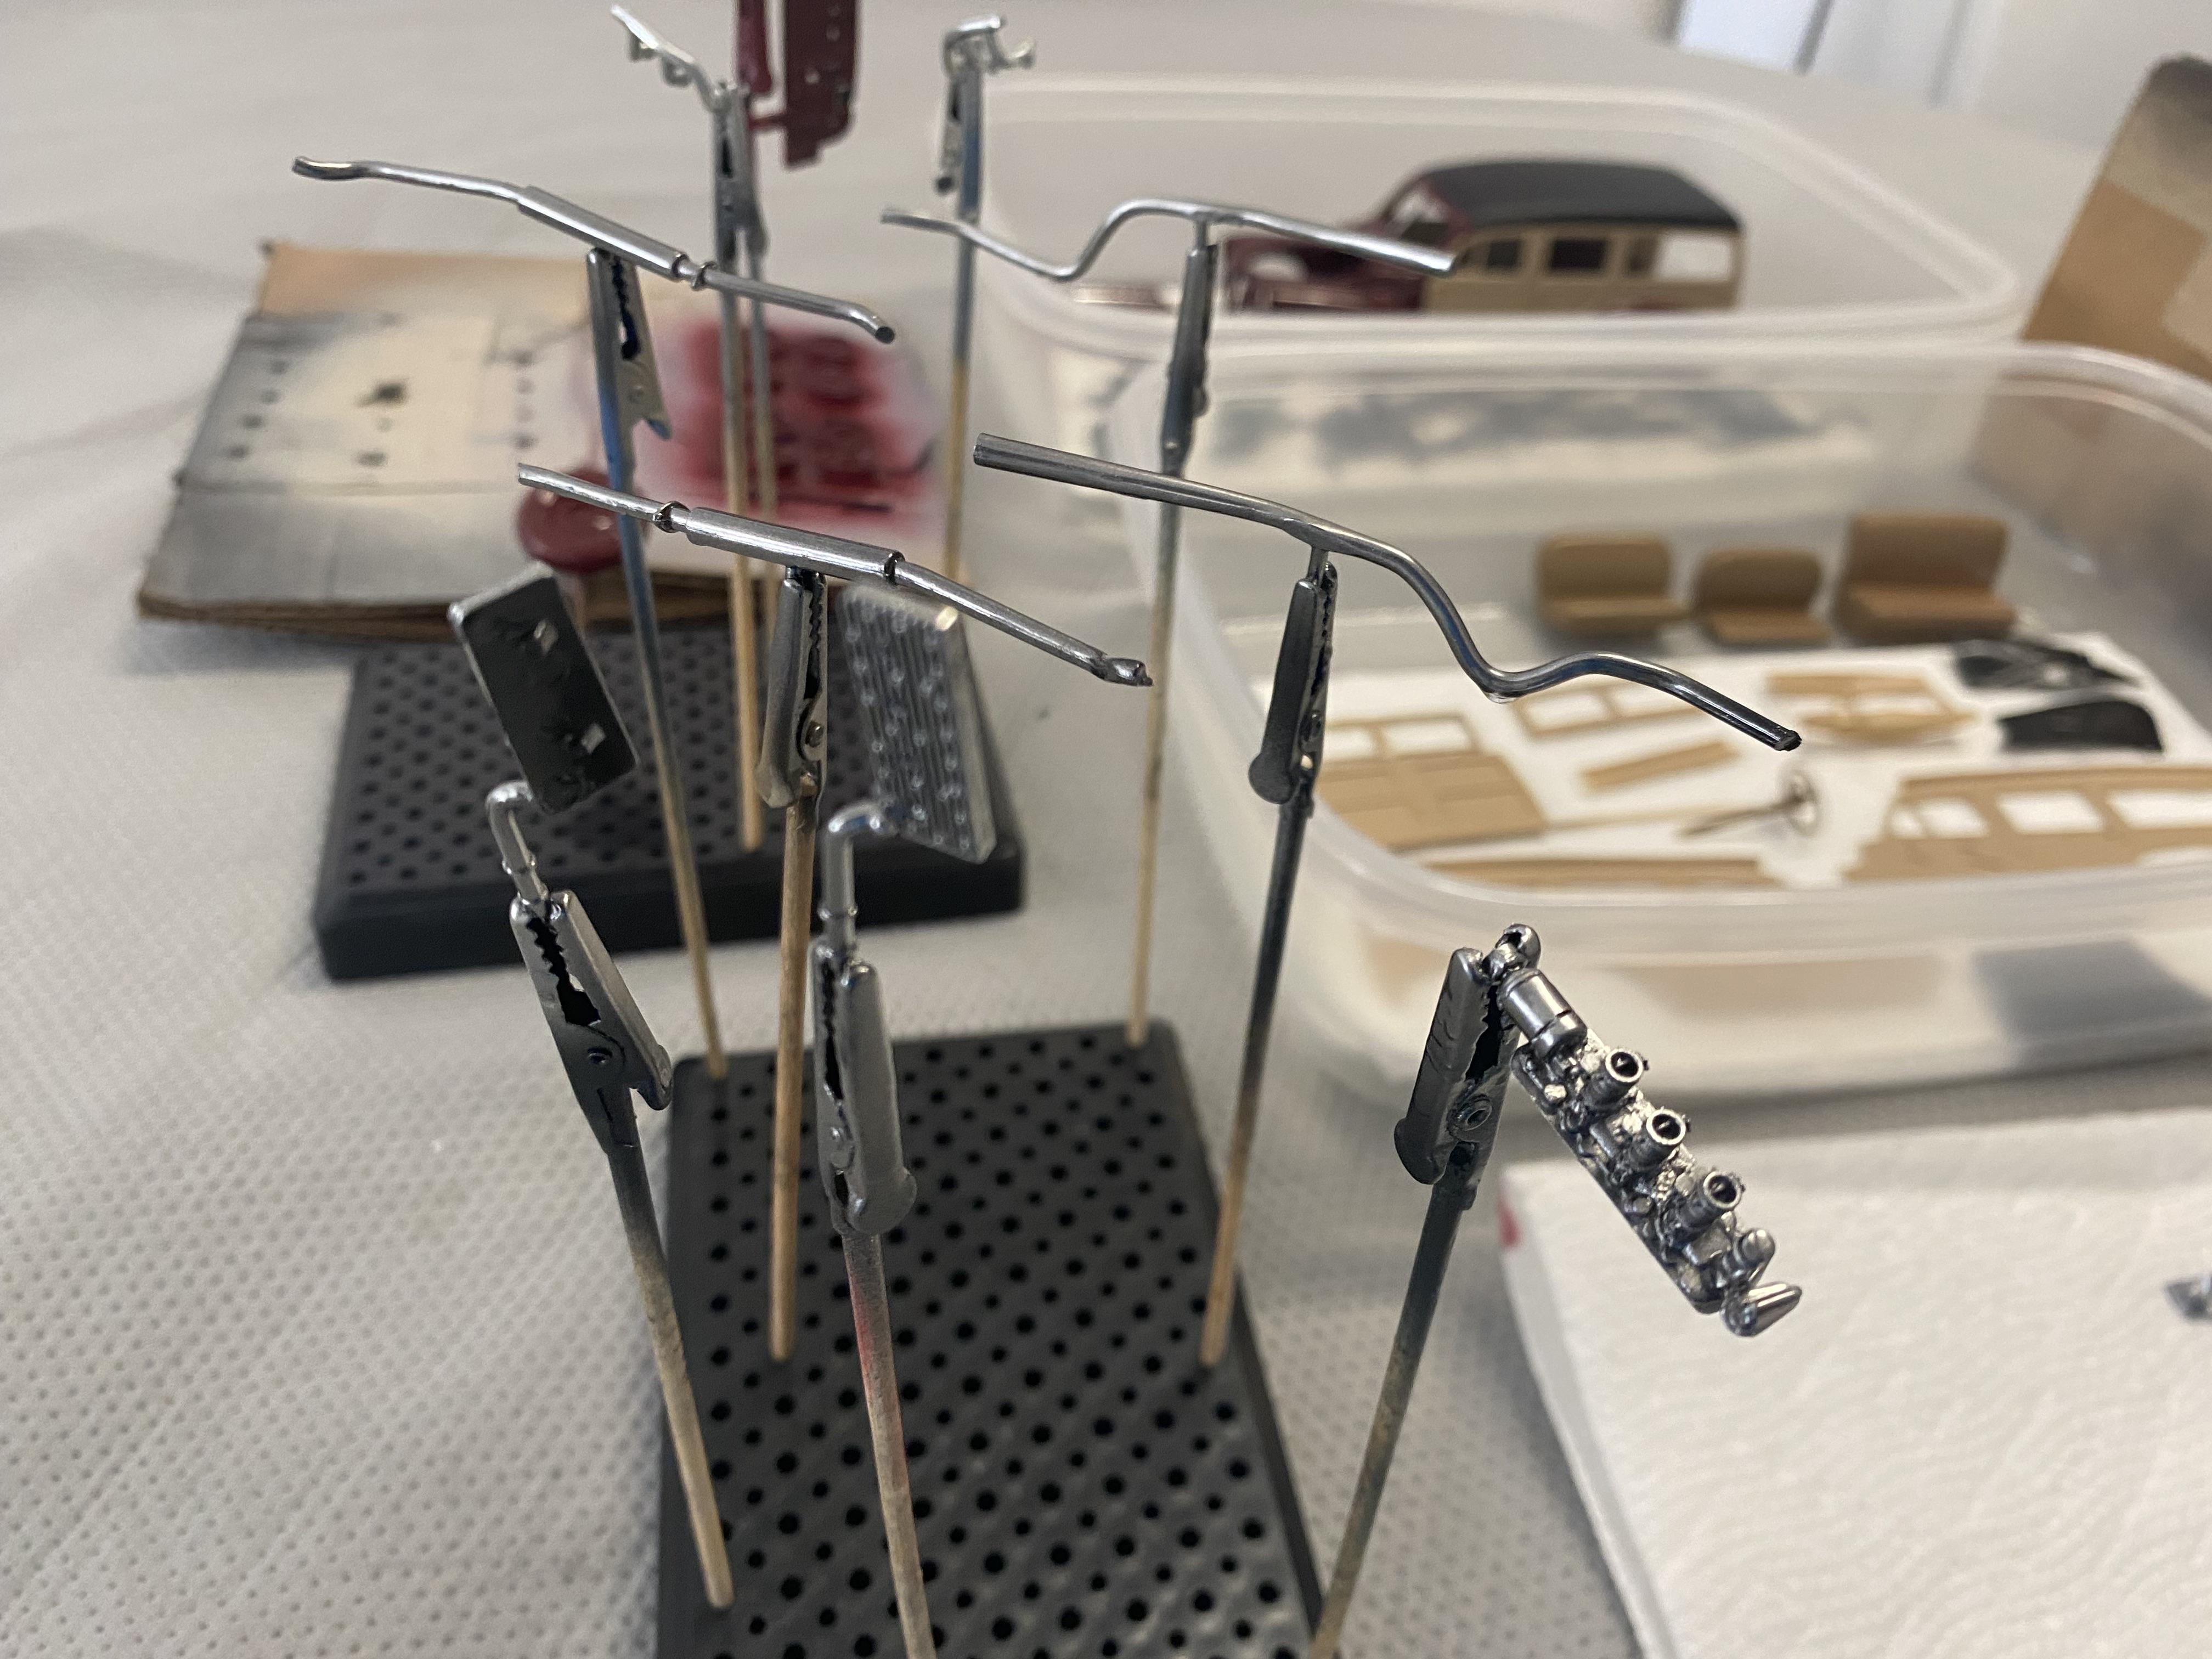
While I am semi-patiently waiting for the 2K to clear I decided to put the engine together. As this is supposed to be hot rodded a bit I decided to go with red plug wires and heat stained the headers. First time I used .005 flat band for the belt. It does look better IMHO.
-
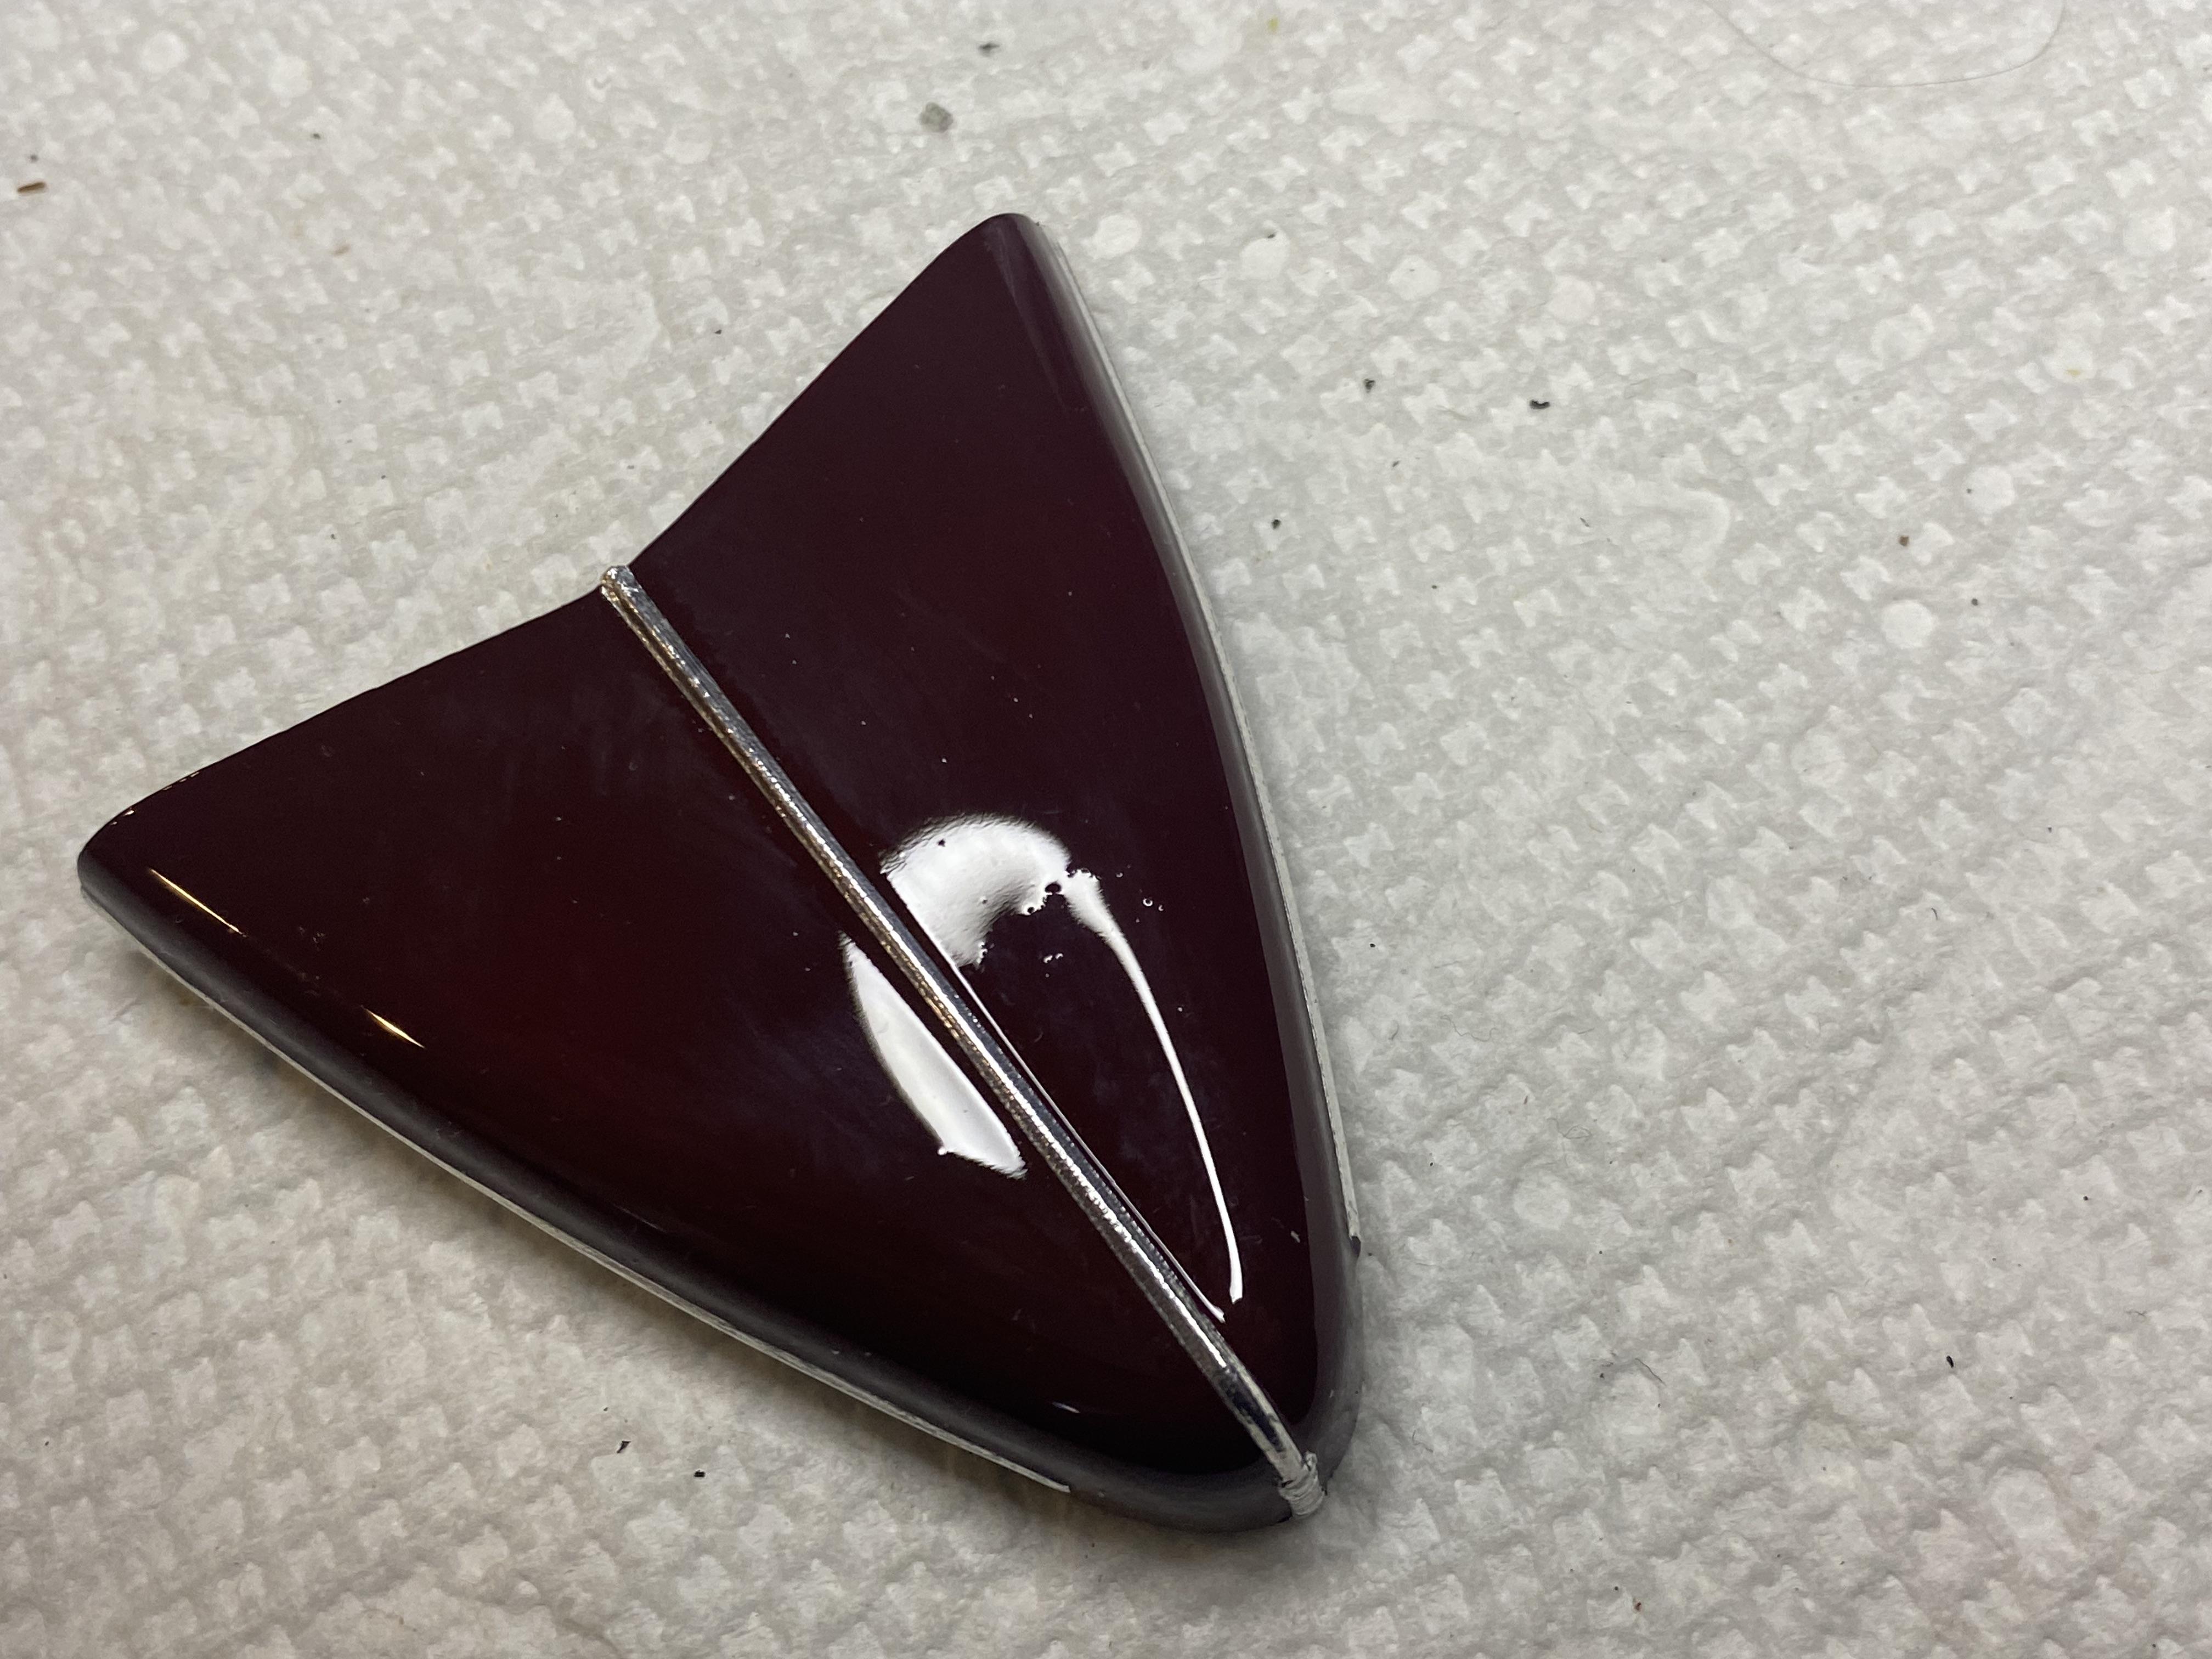
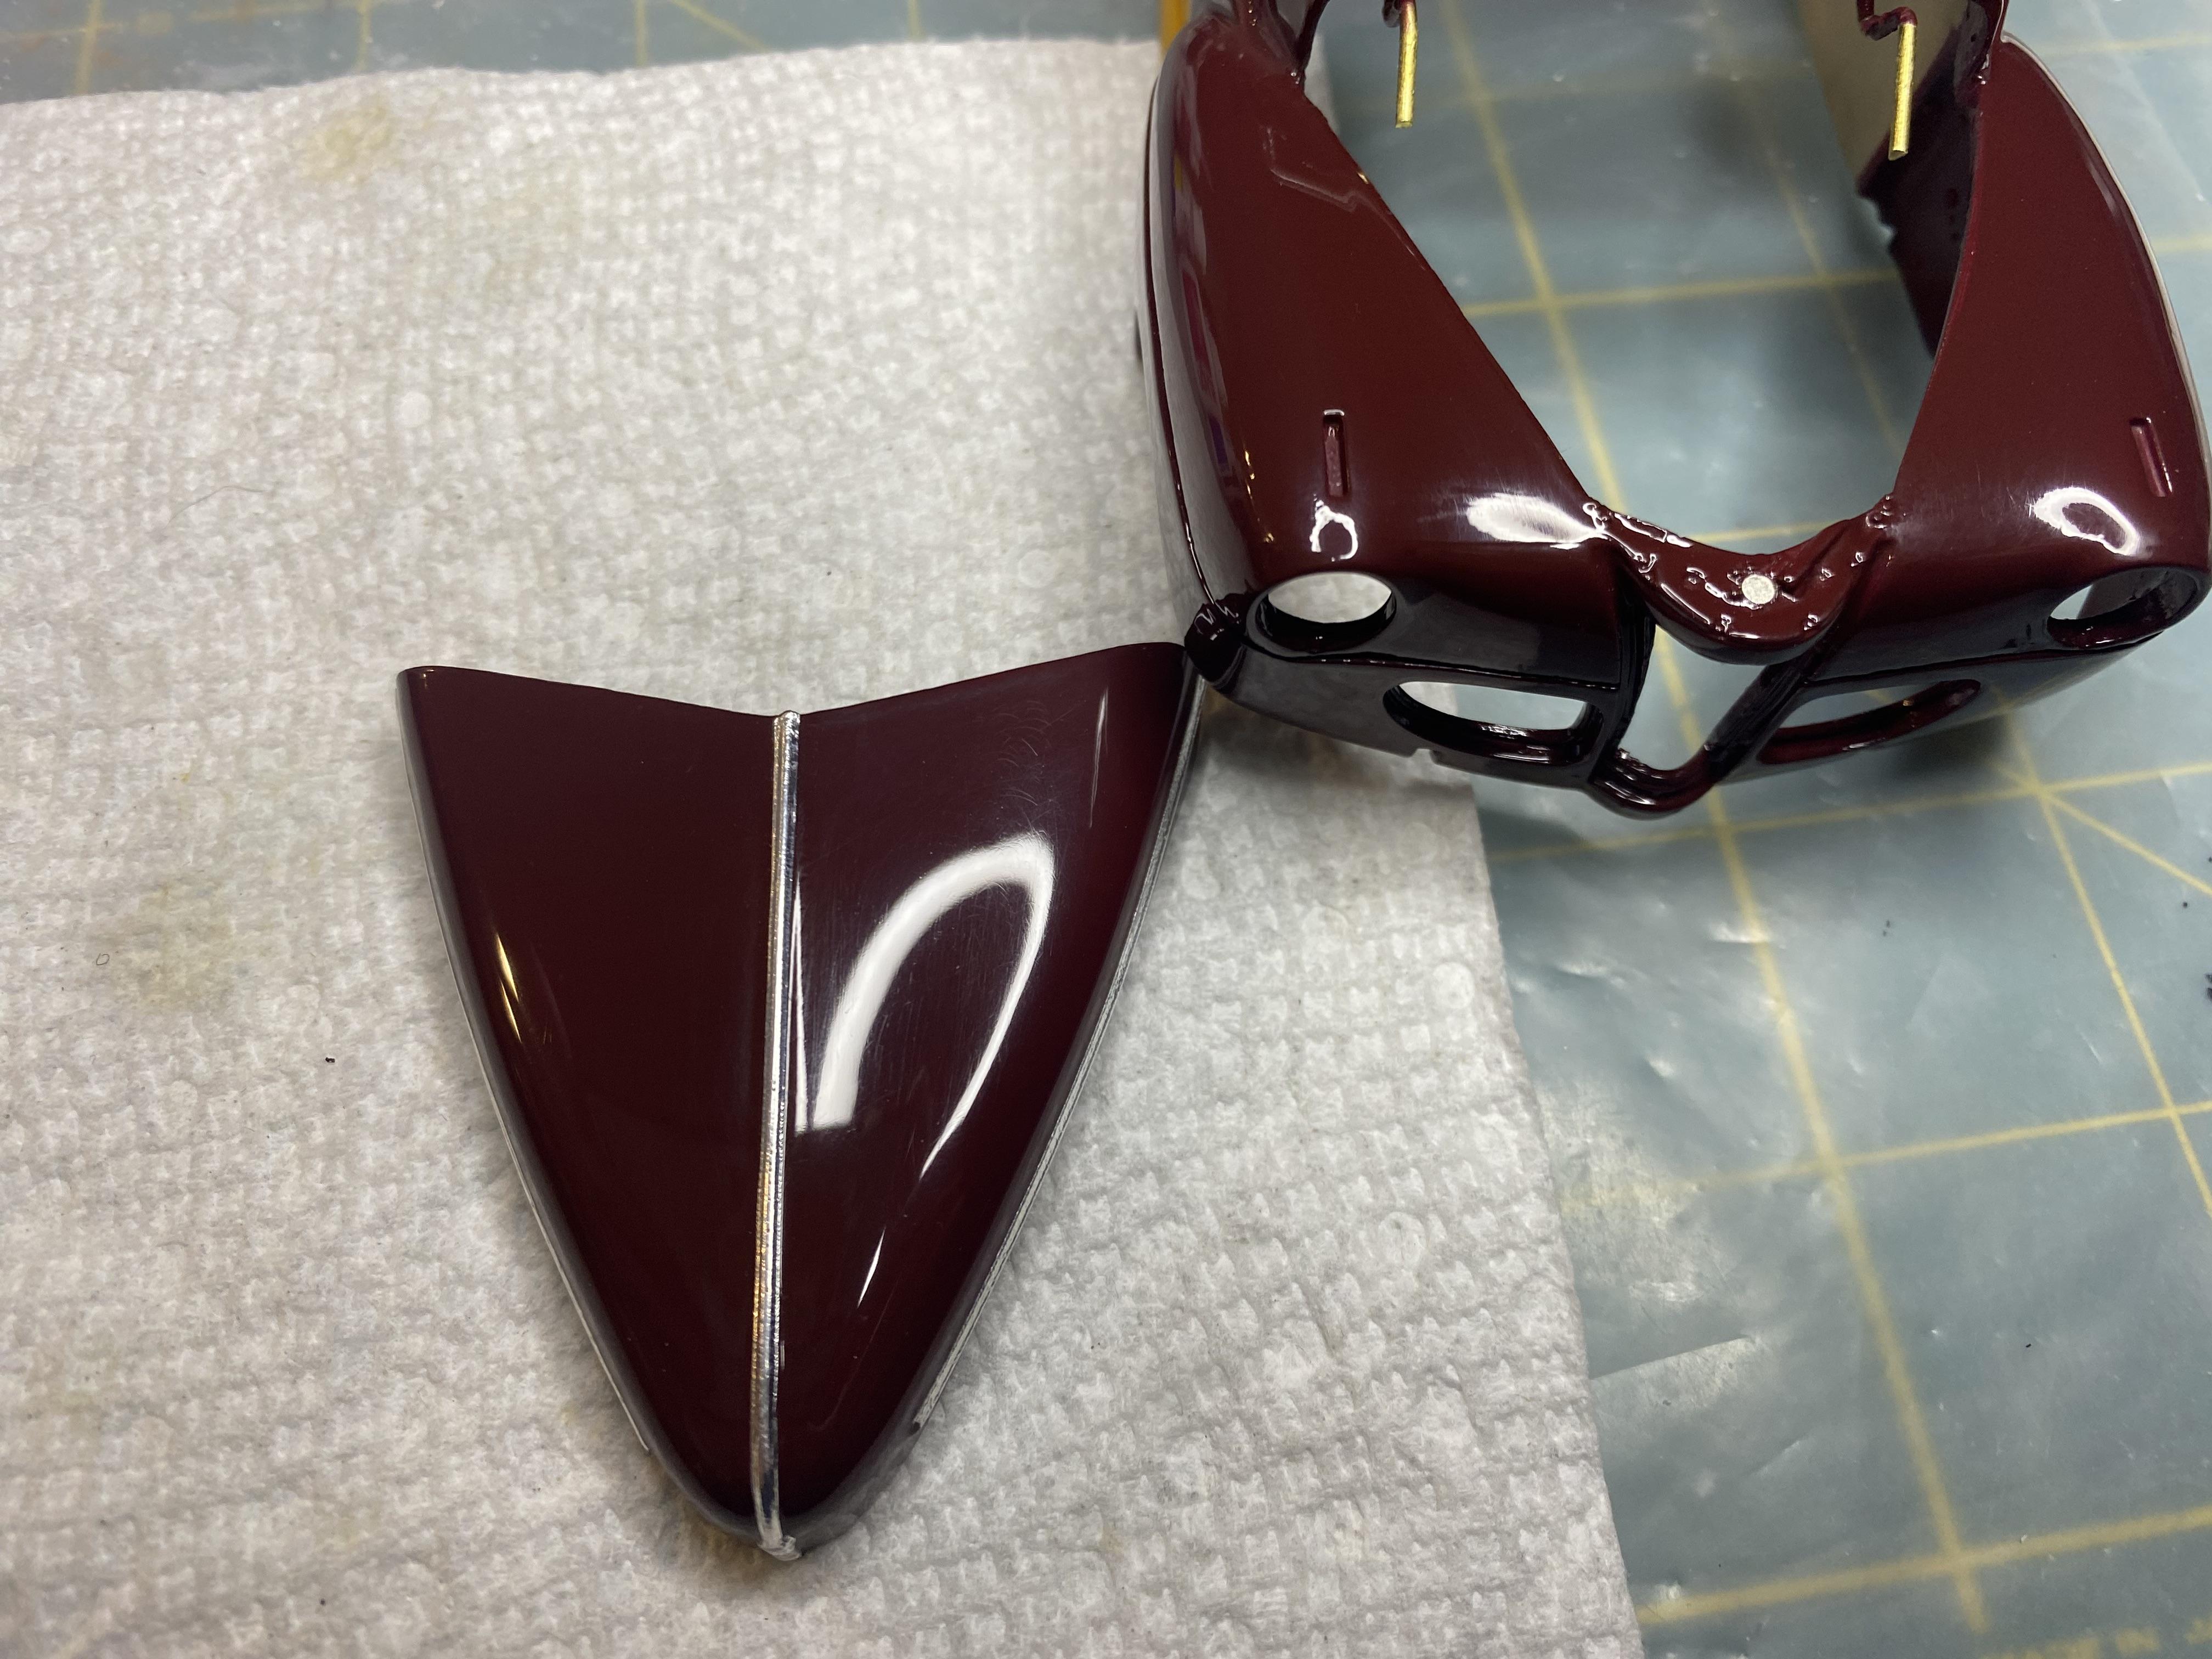
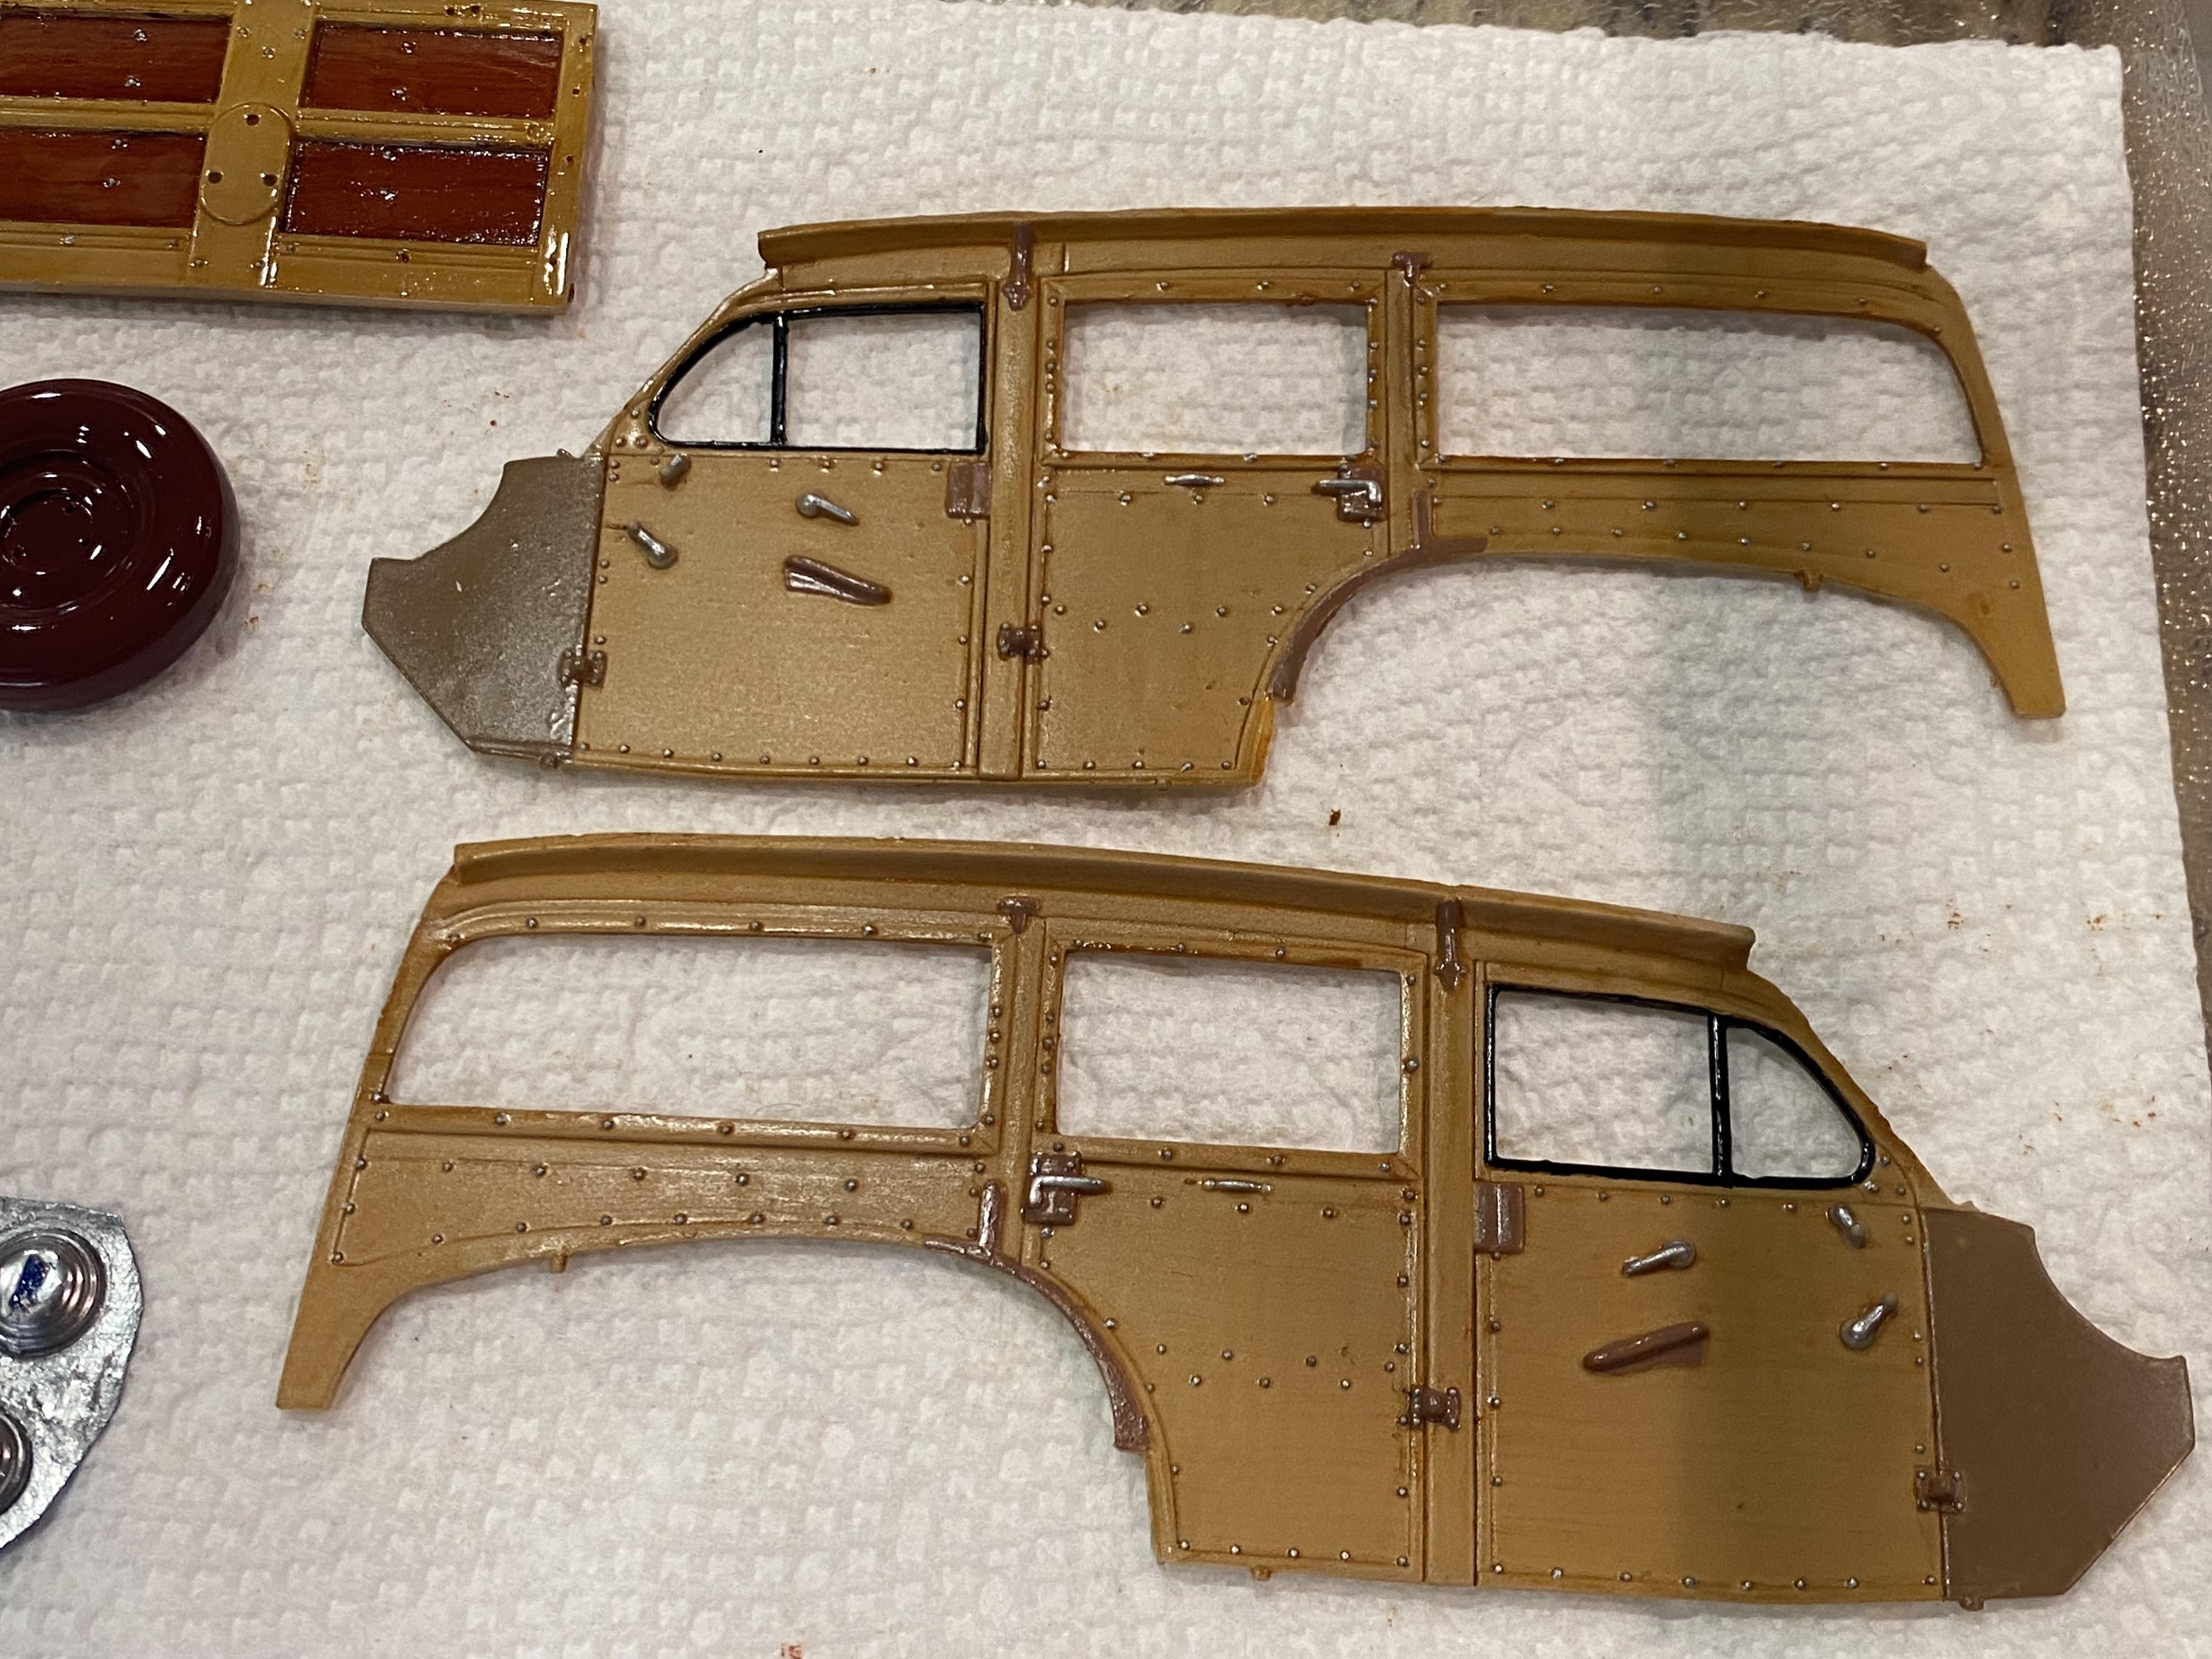
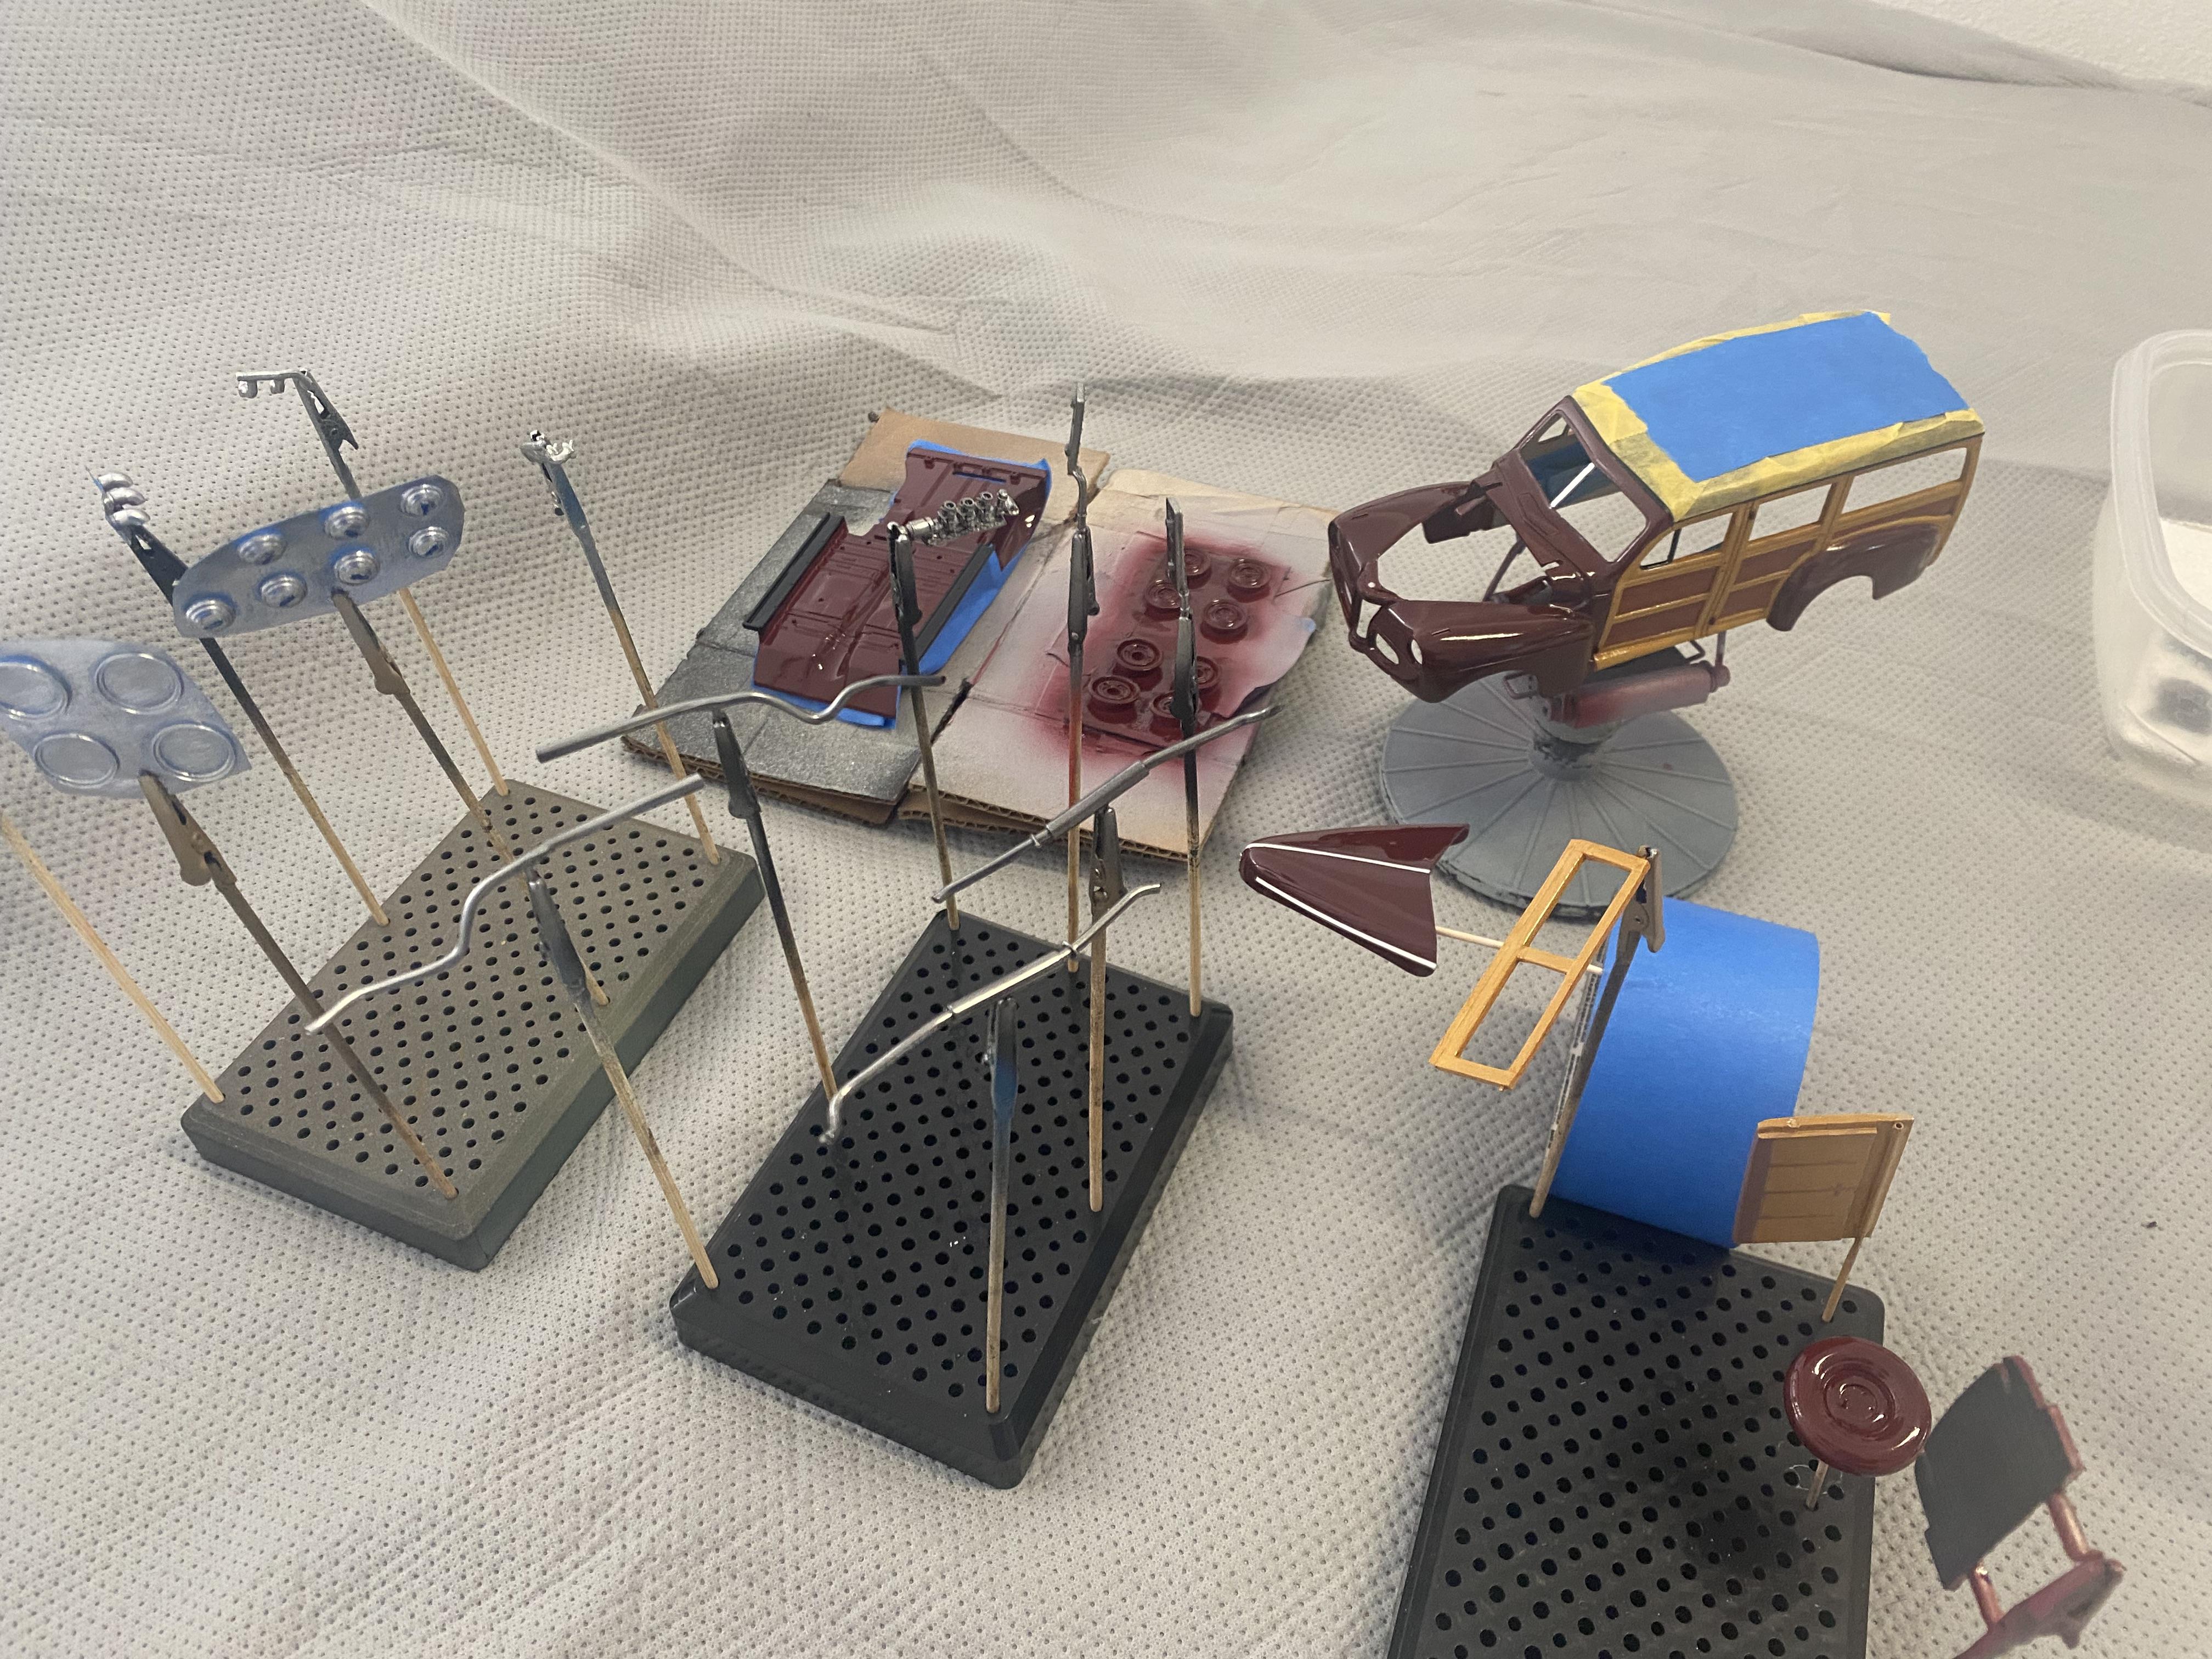
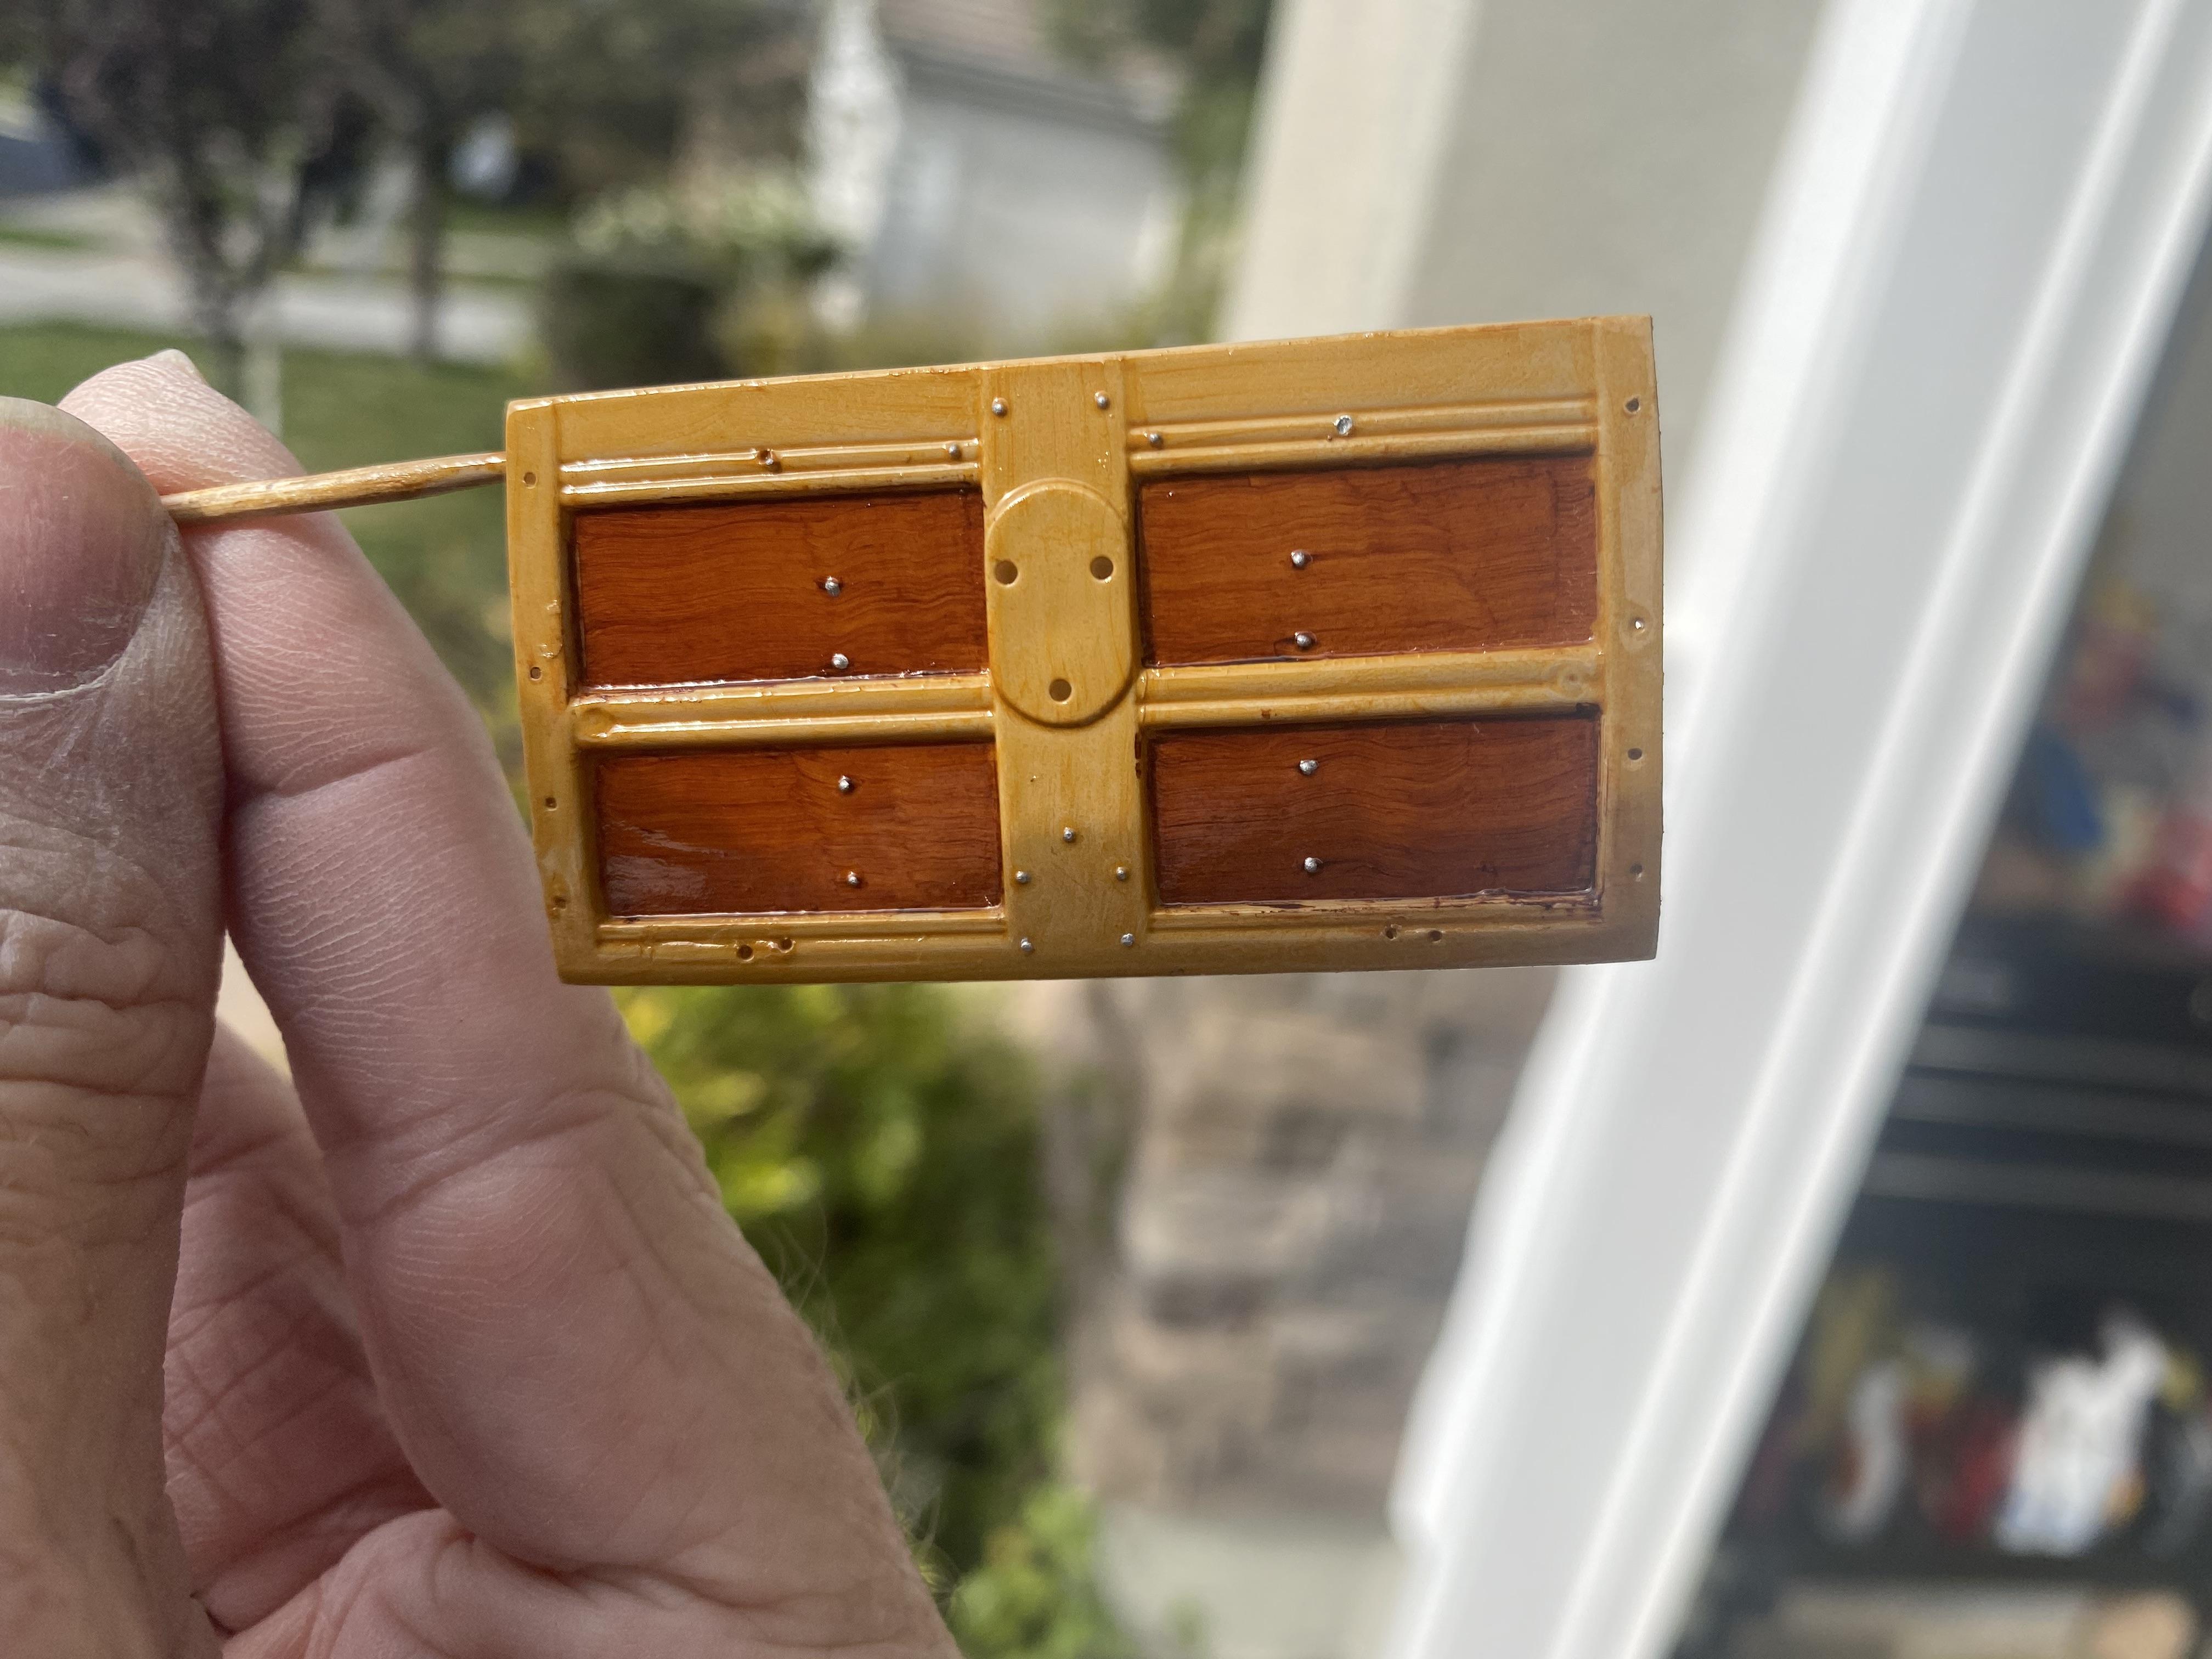
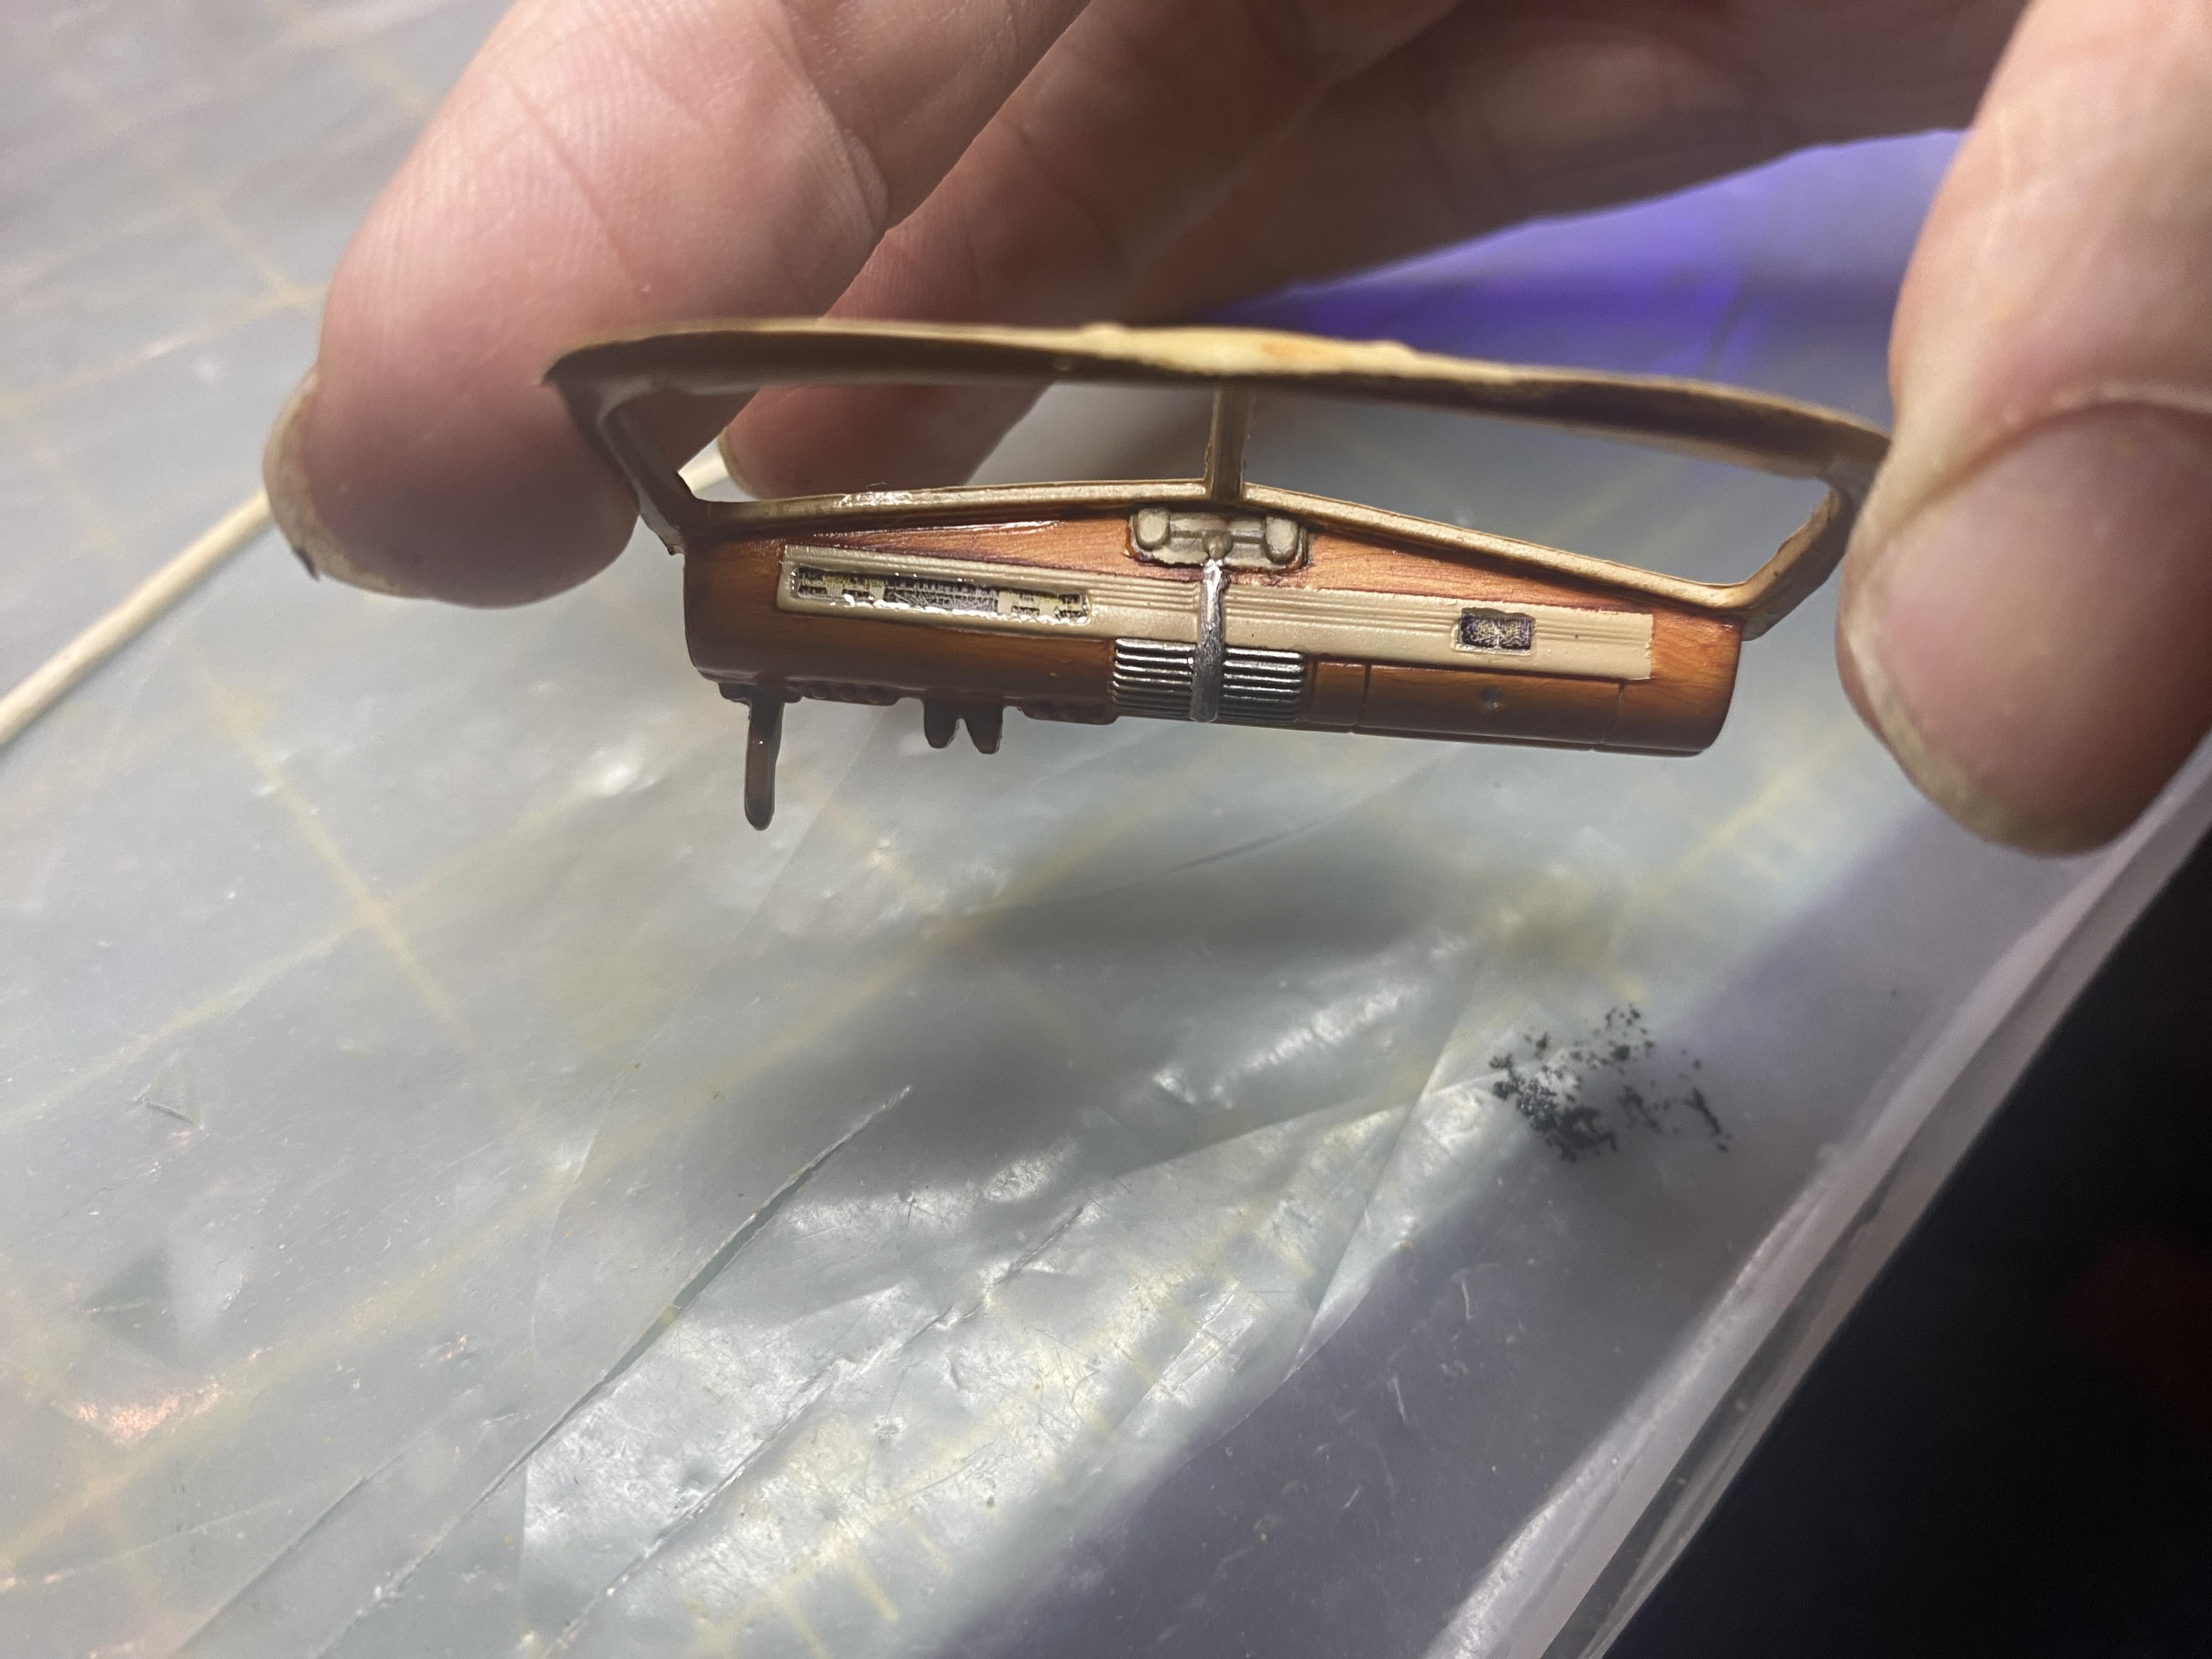
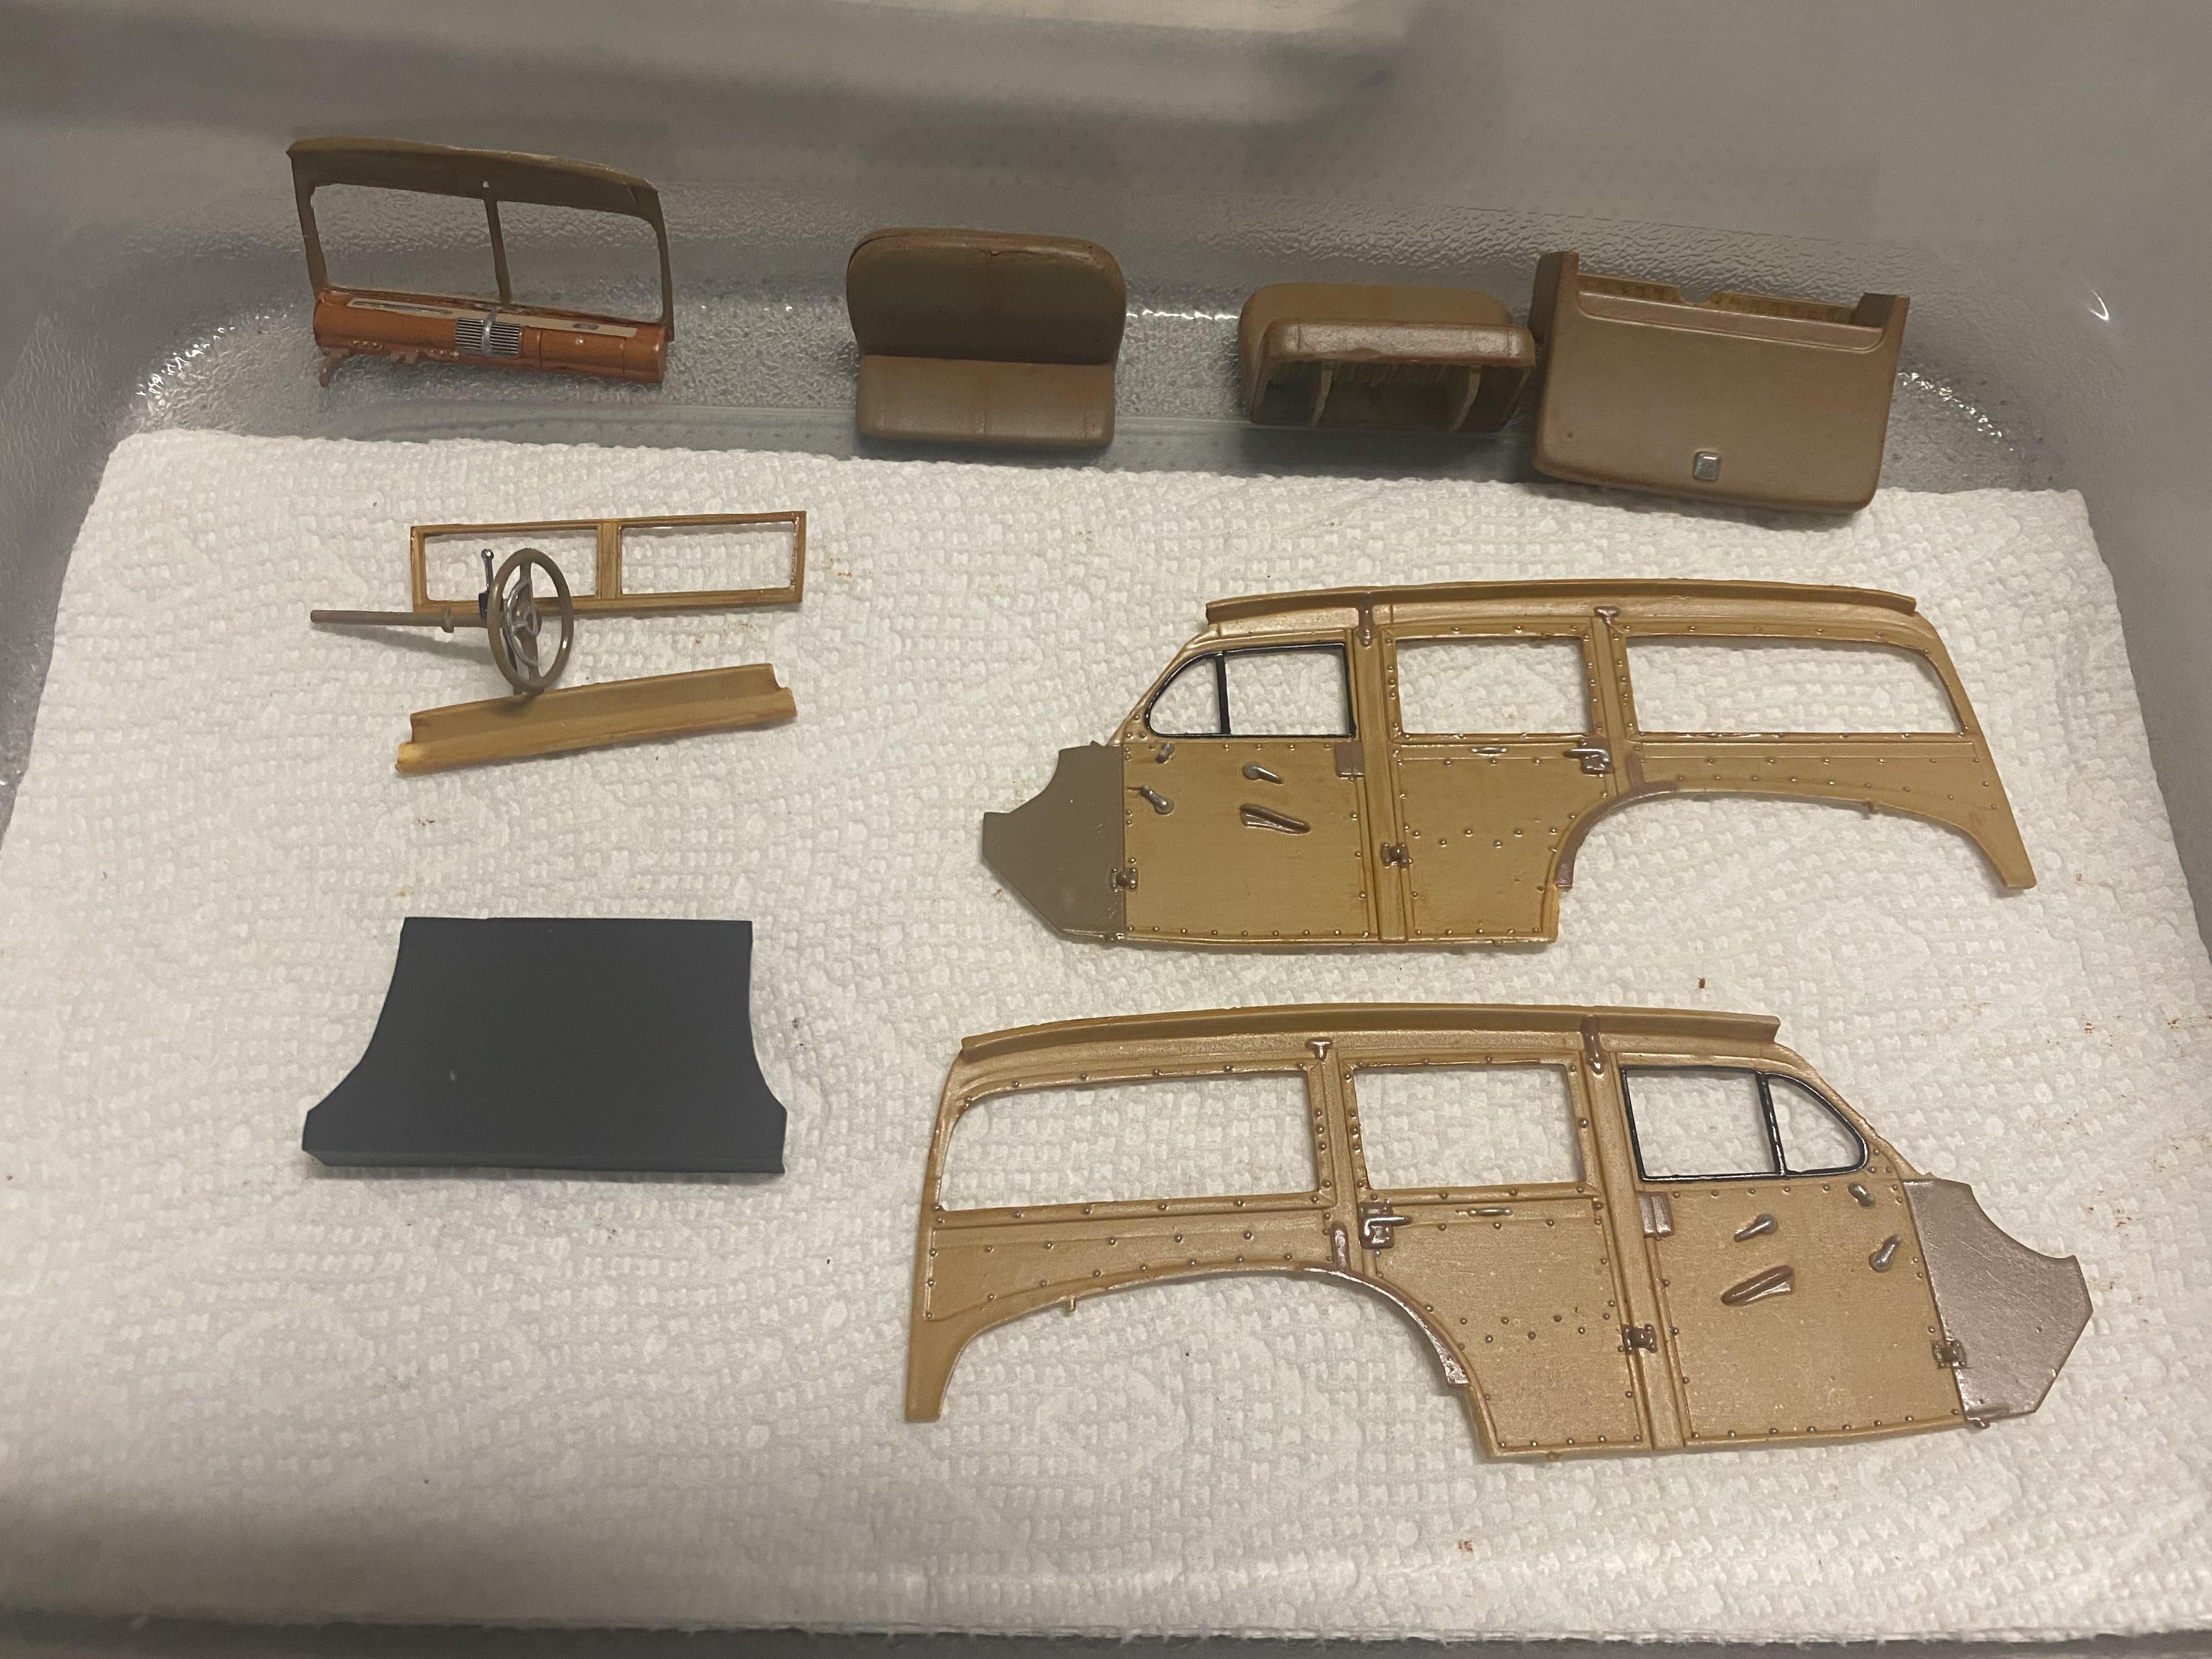
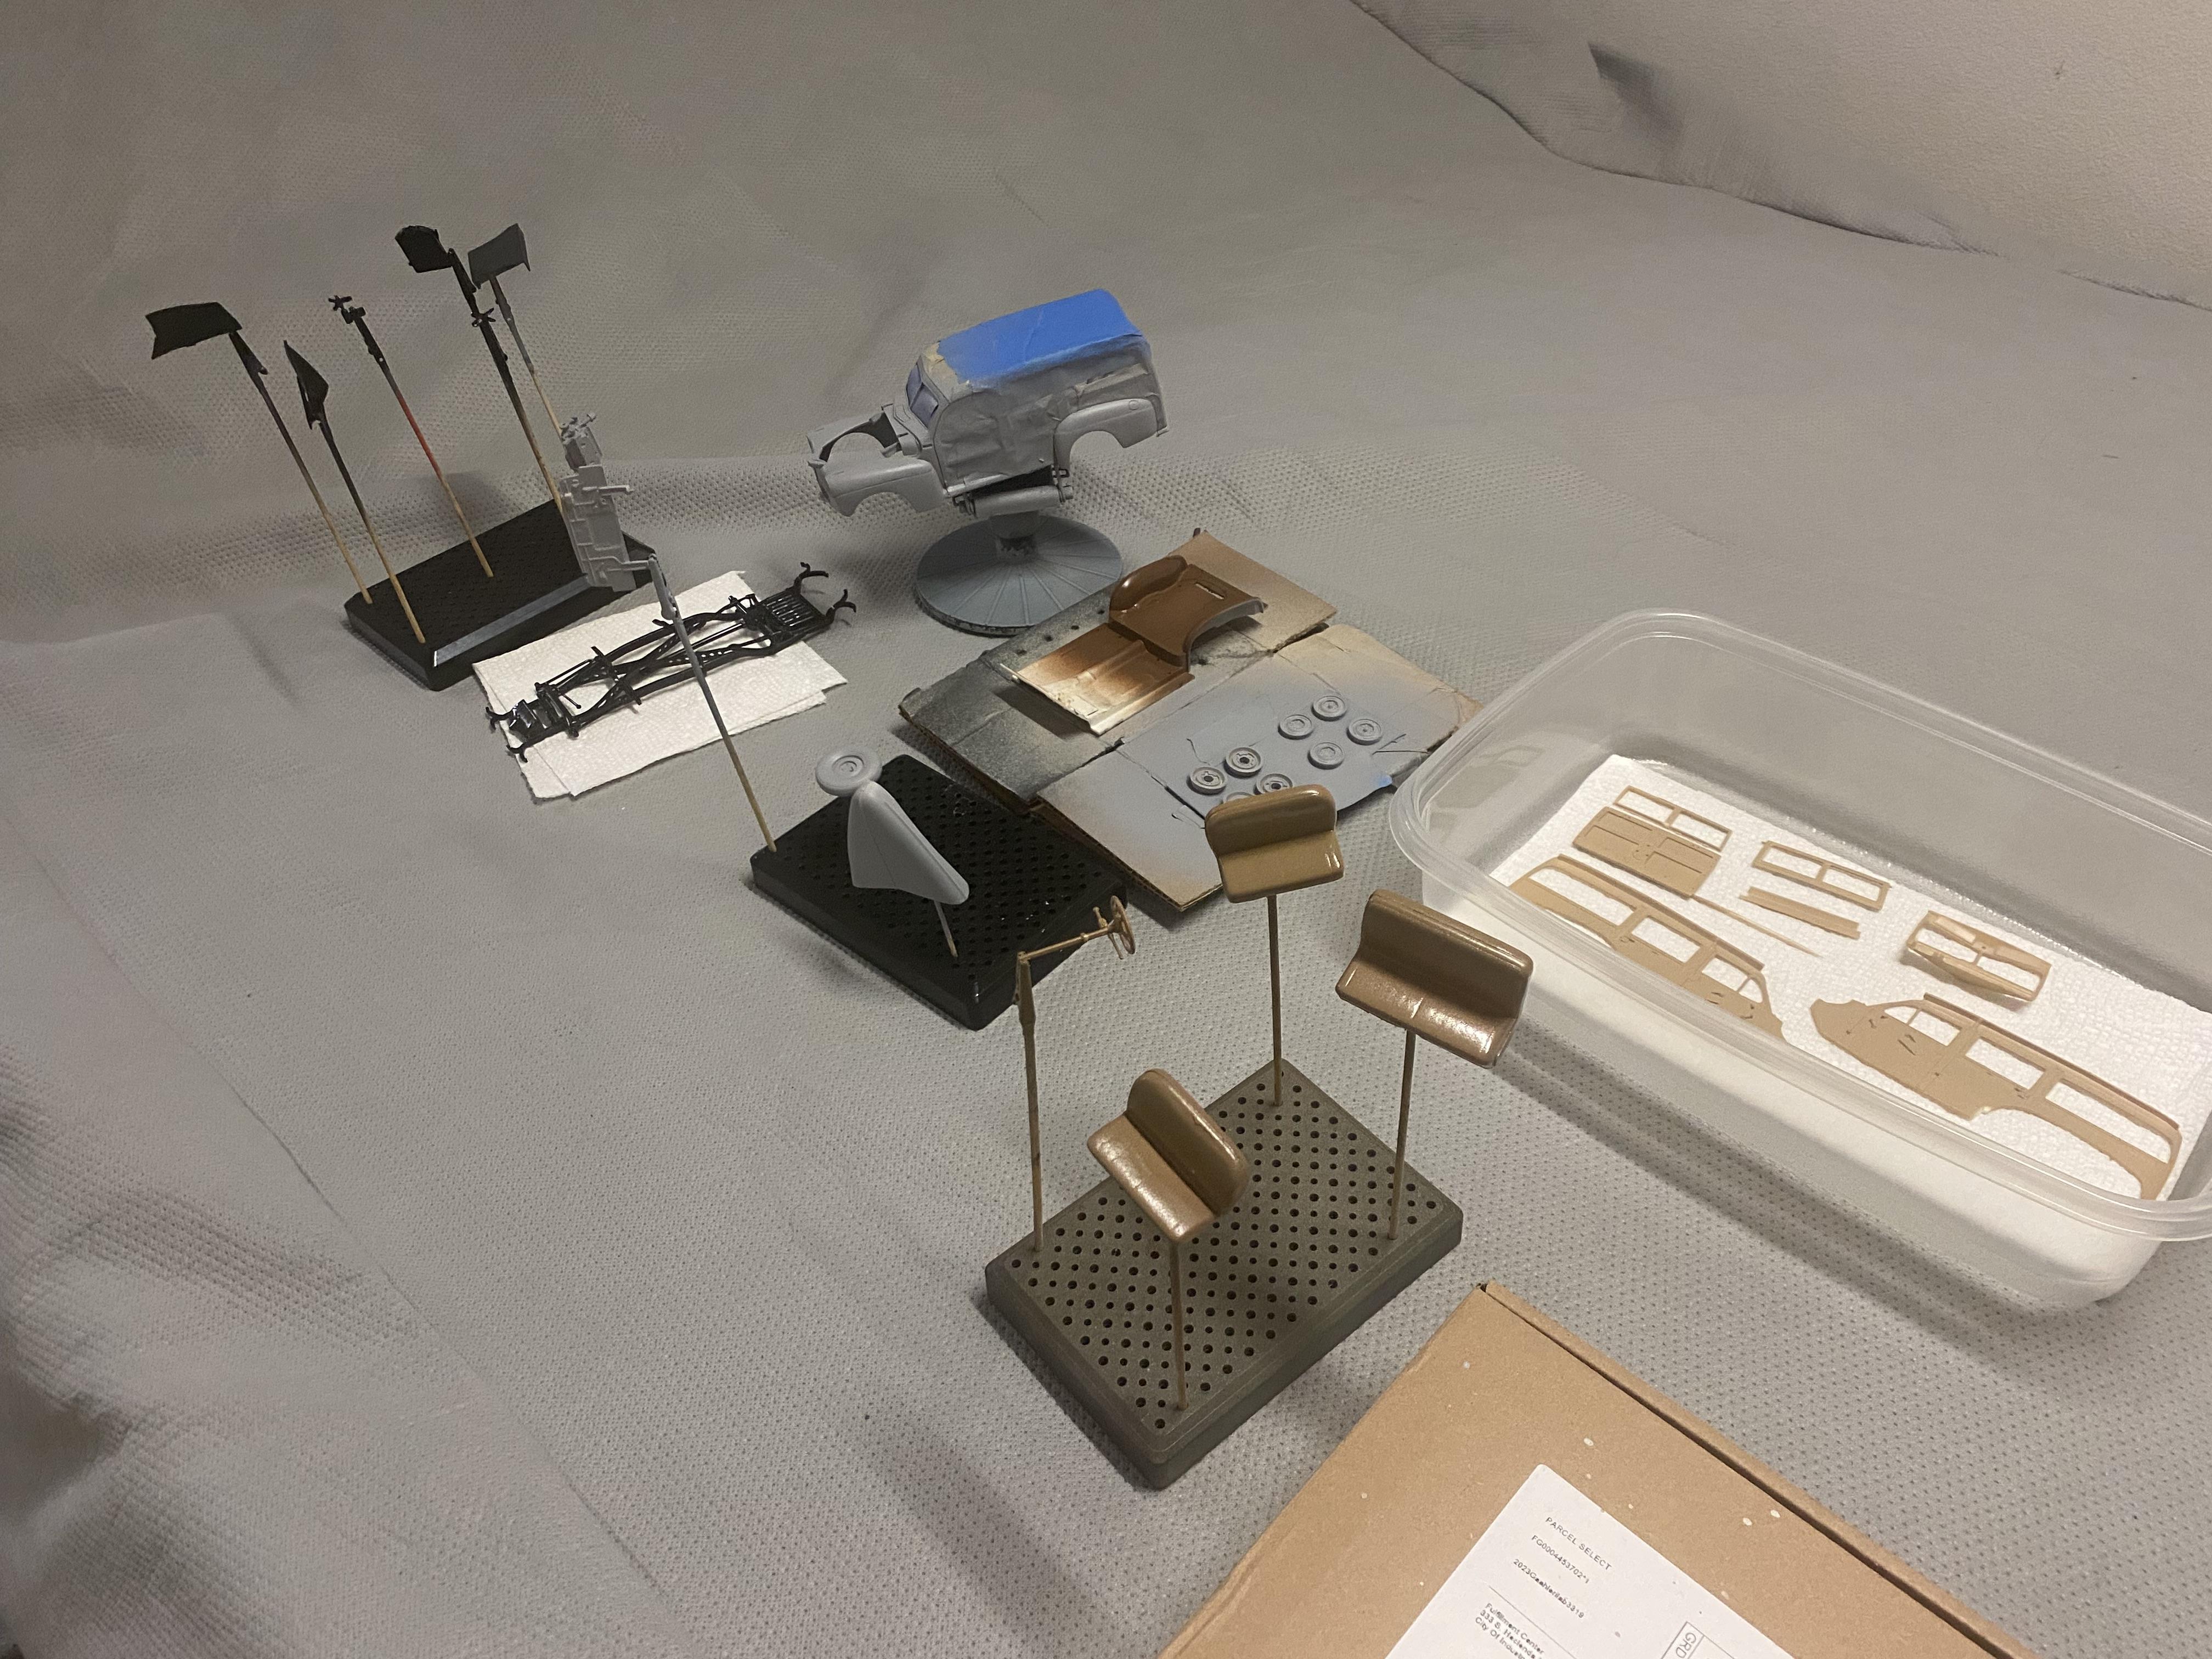
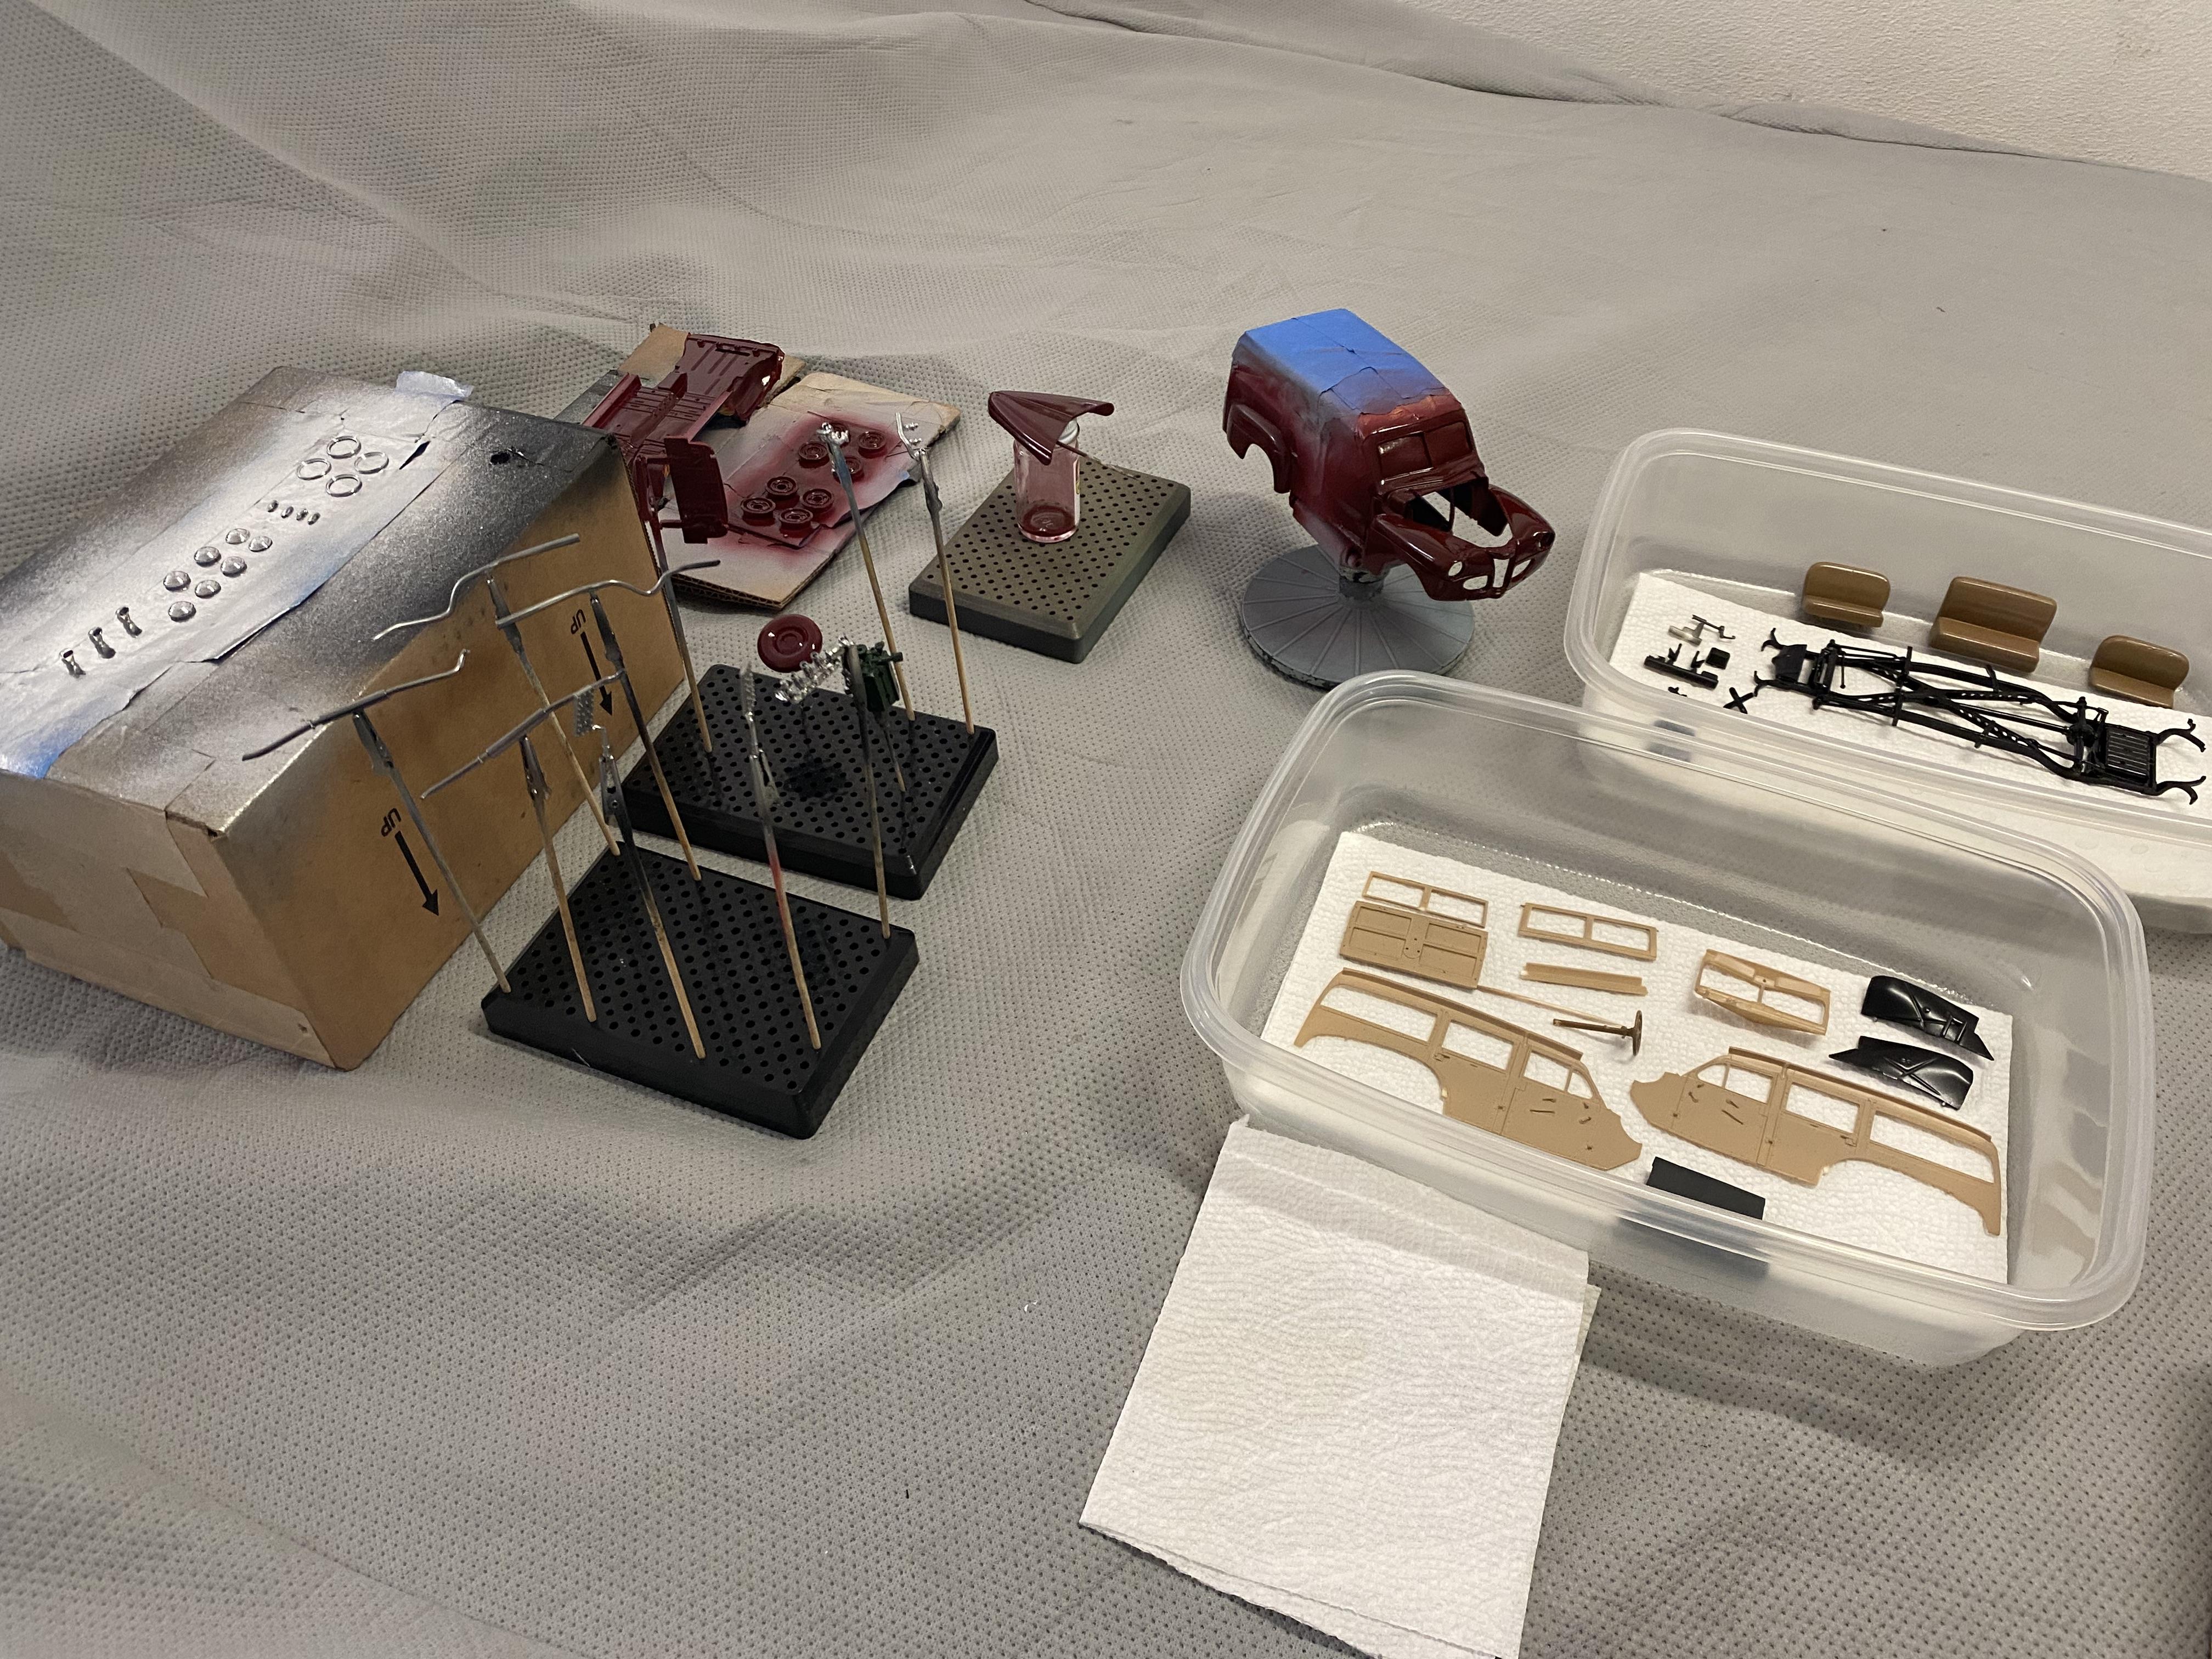
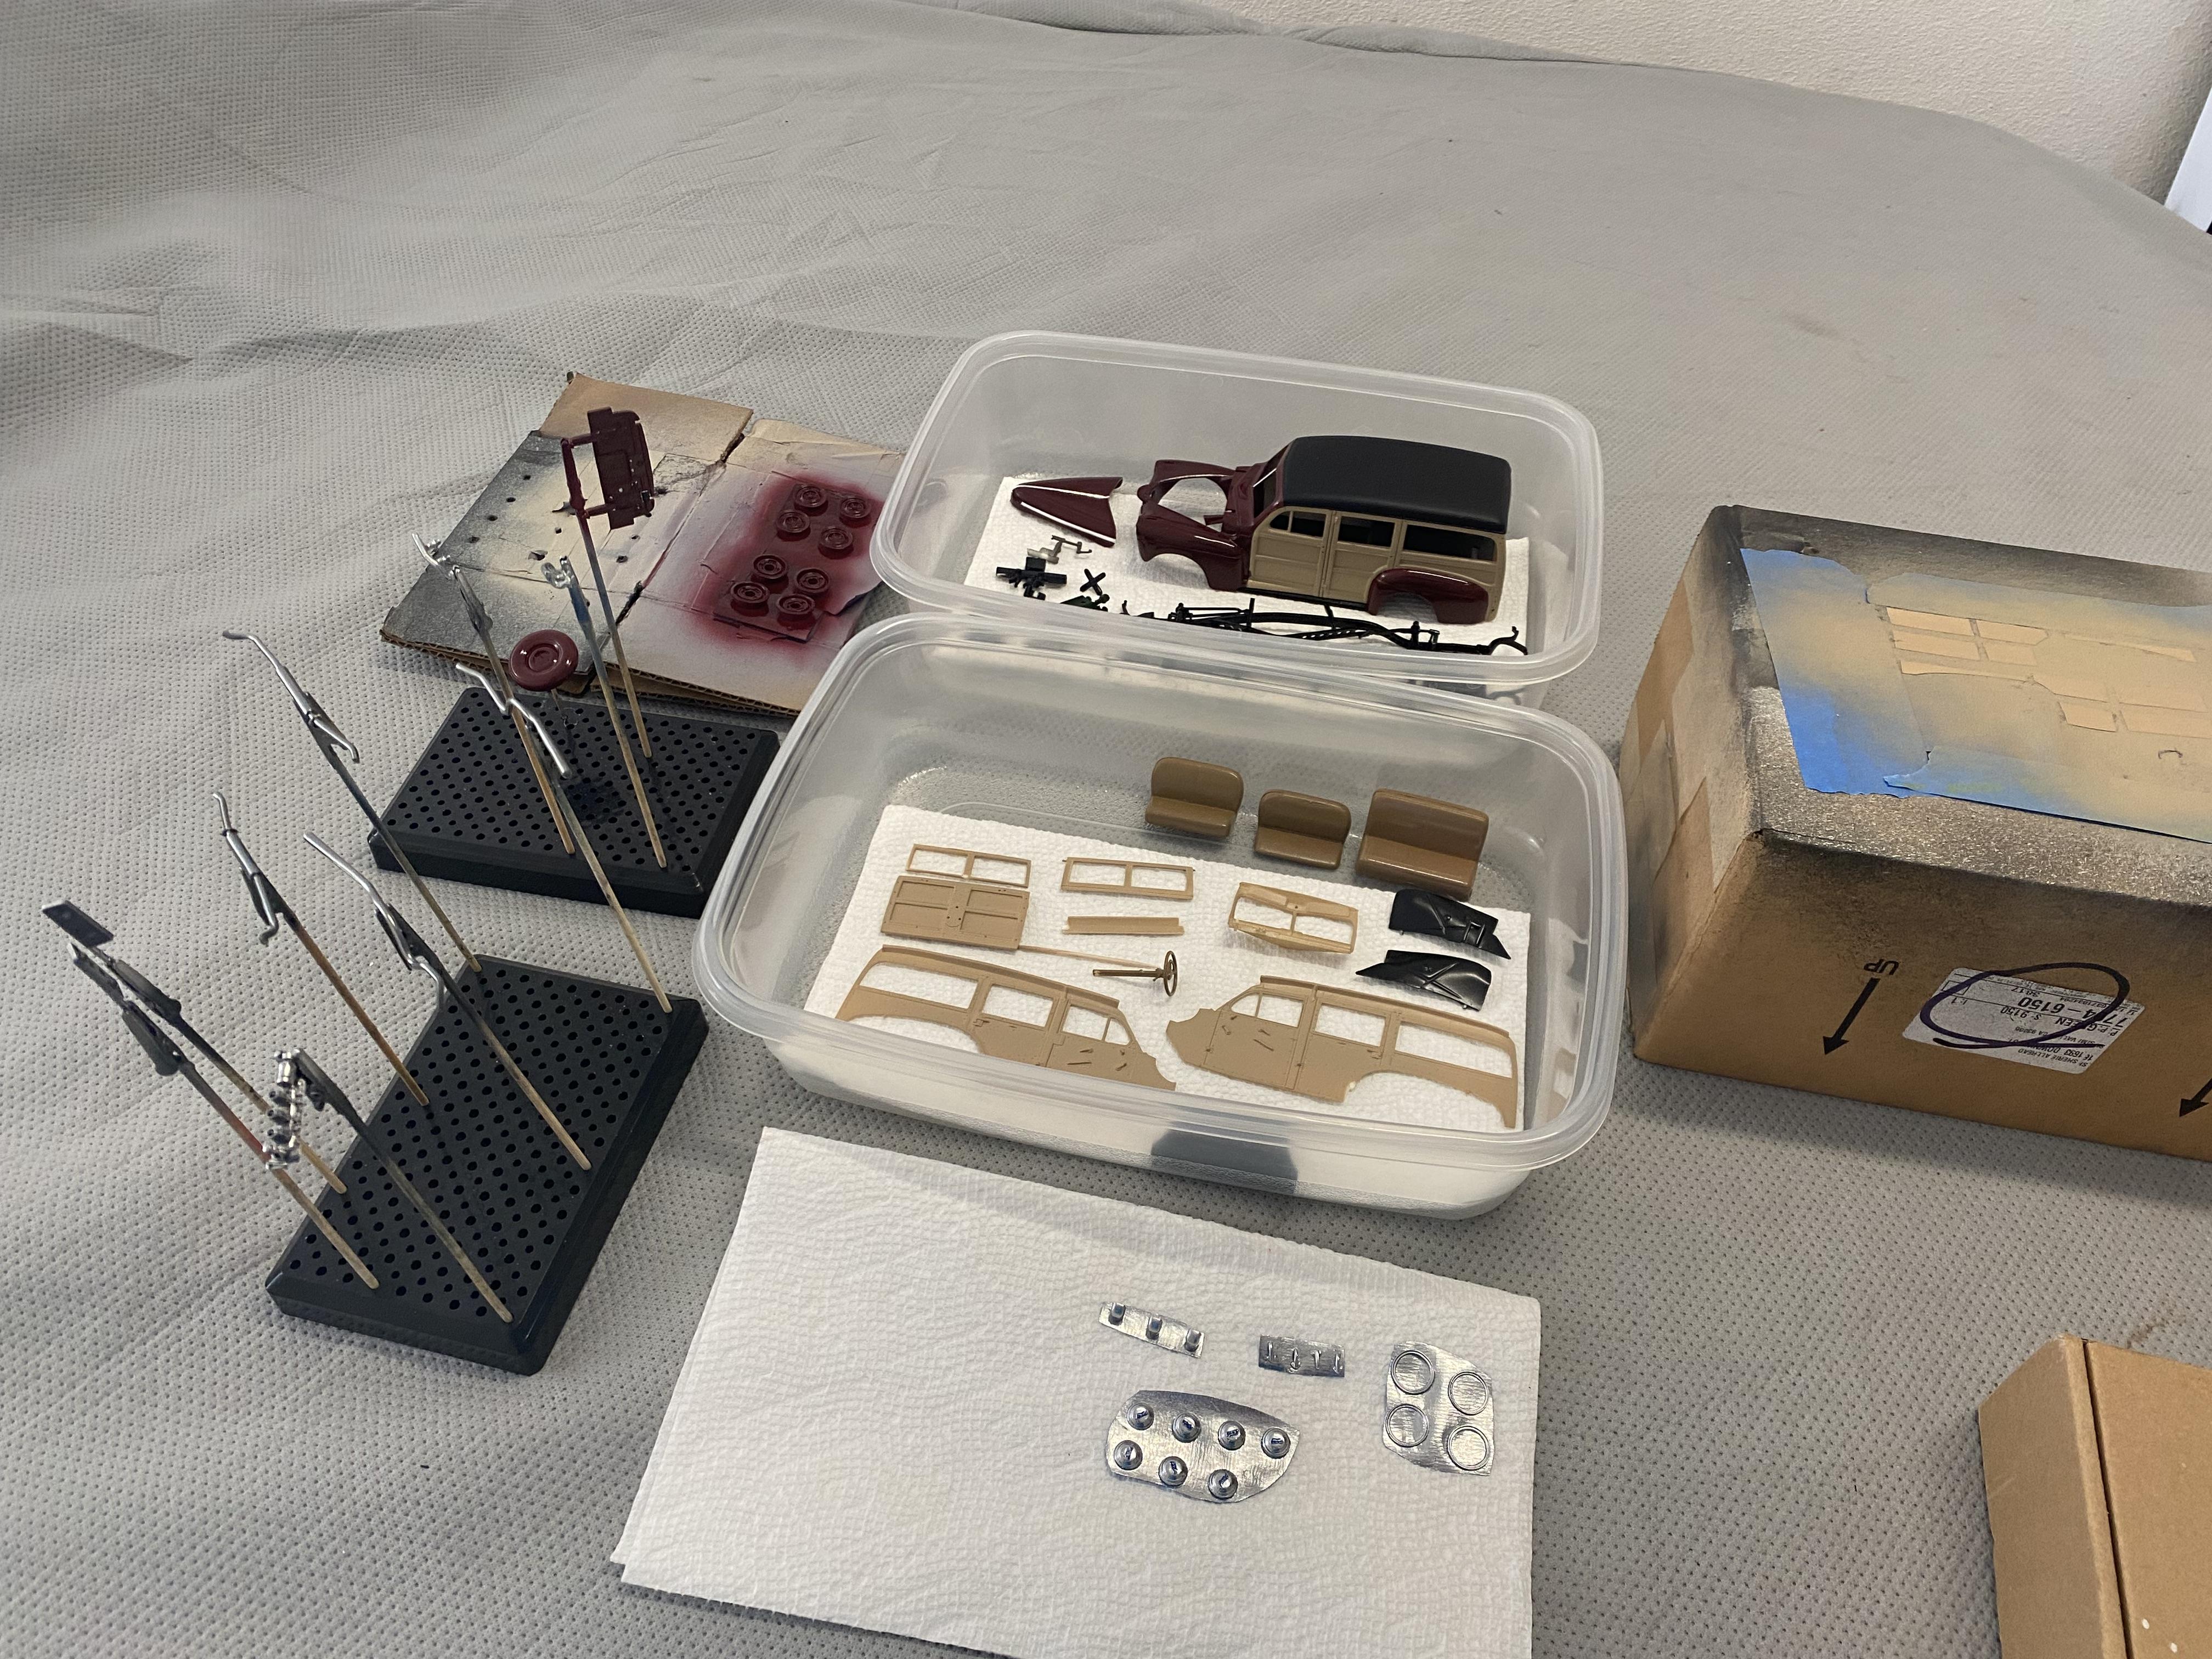
Sprayed all of these components with a coat of 2k clear this morning. I got a little trash in the hood but not bad, will disappear when I wet sand and polish. Starting to see it turning into something now. Roughest next part is going to be installing more than 40 little top studio rivets in the body for the wood frame bolts.
-
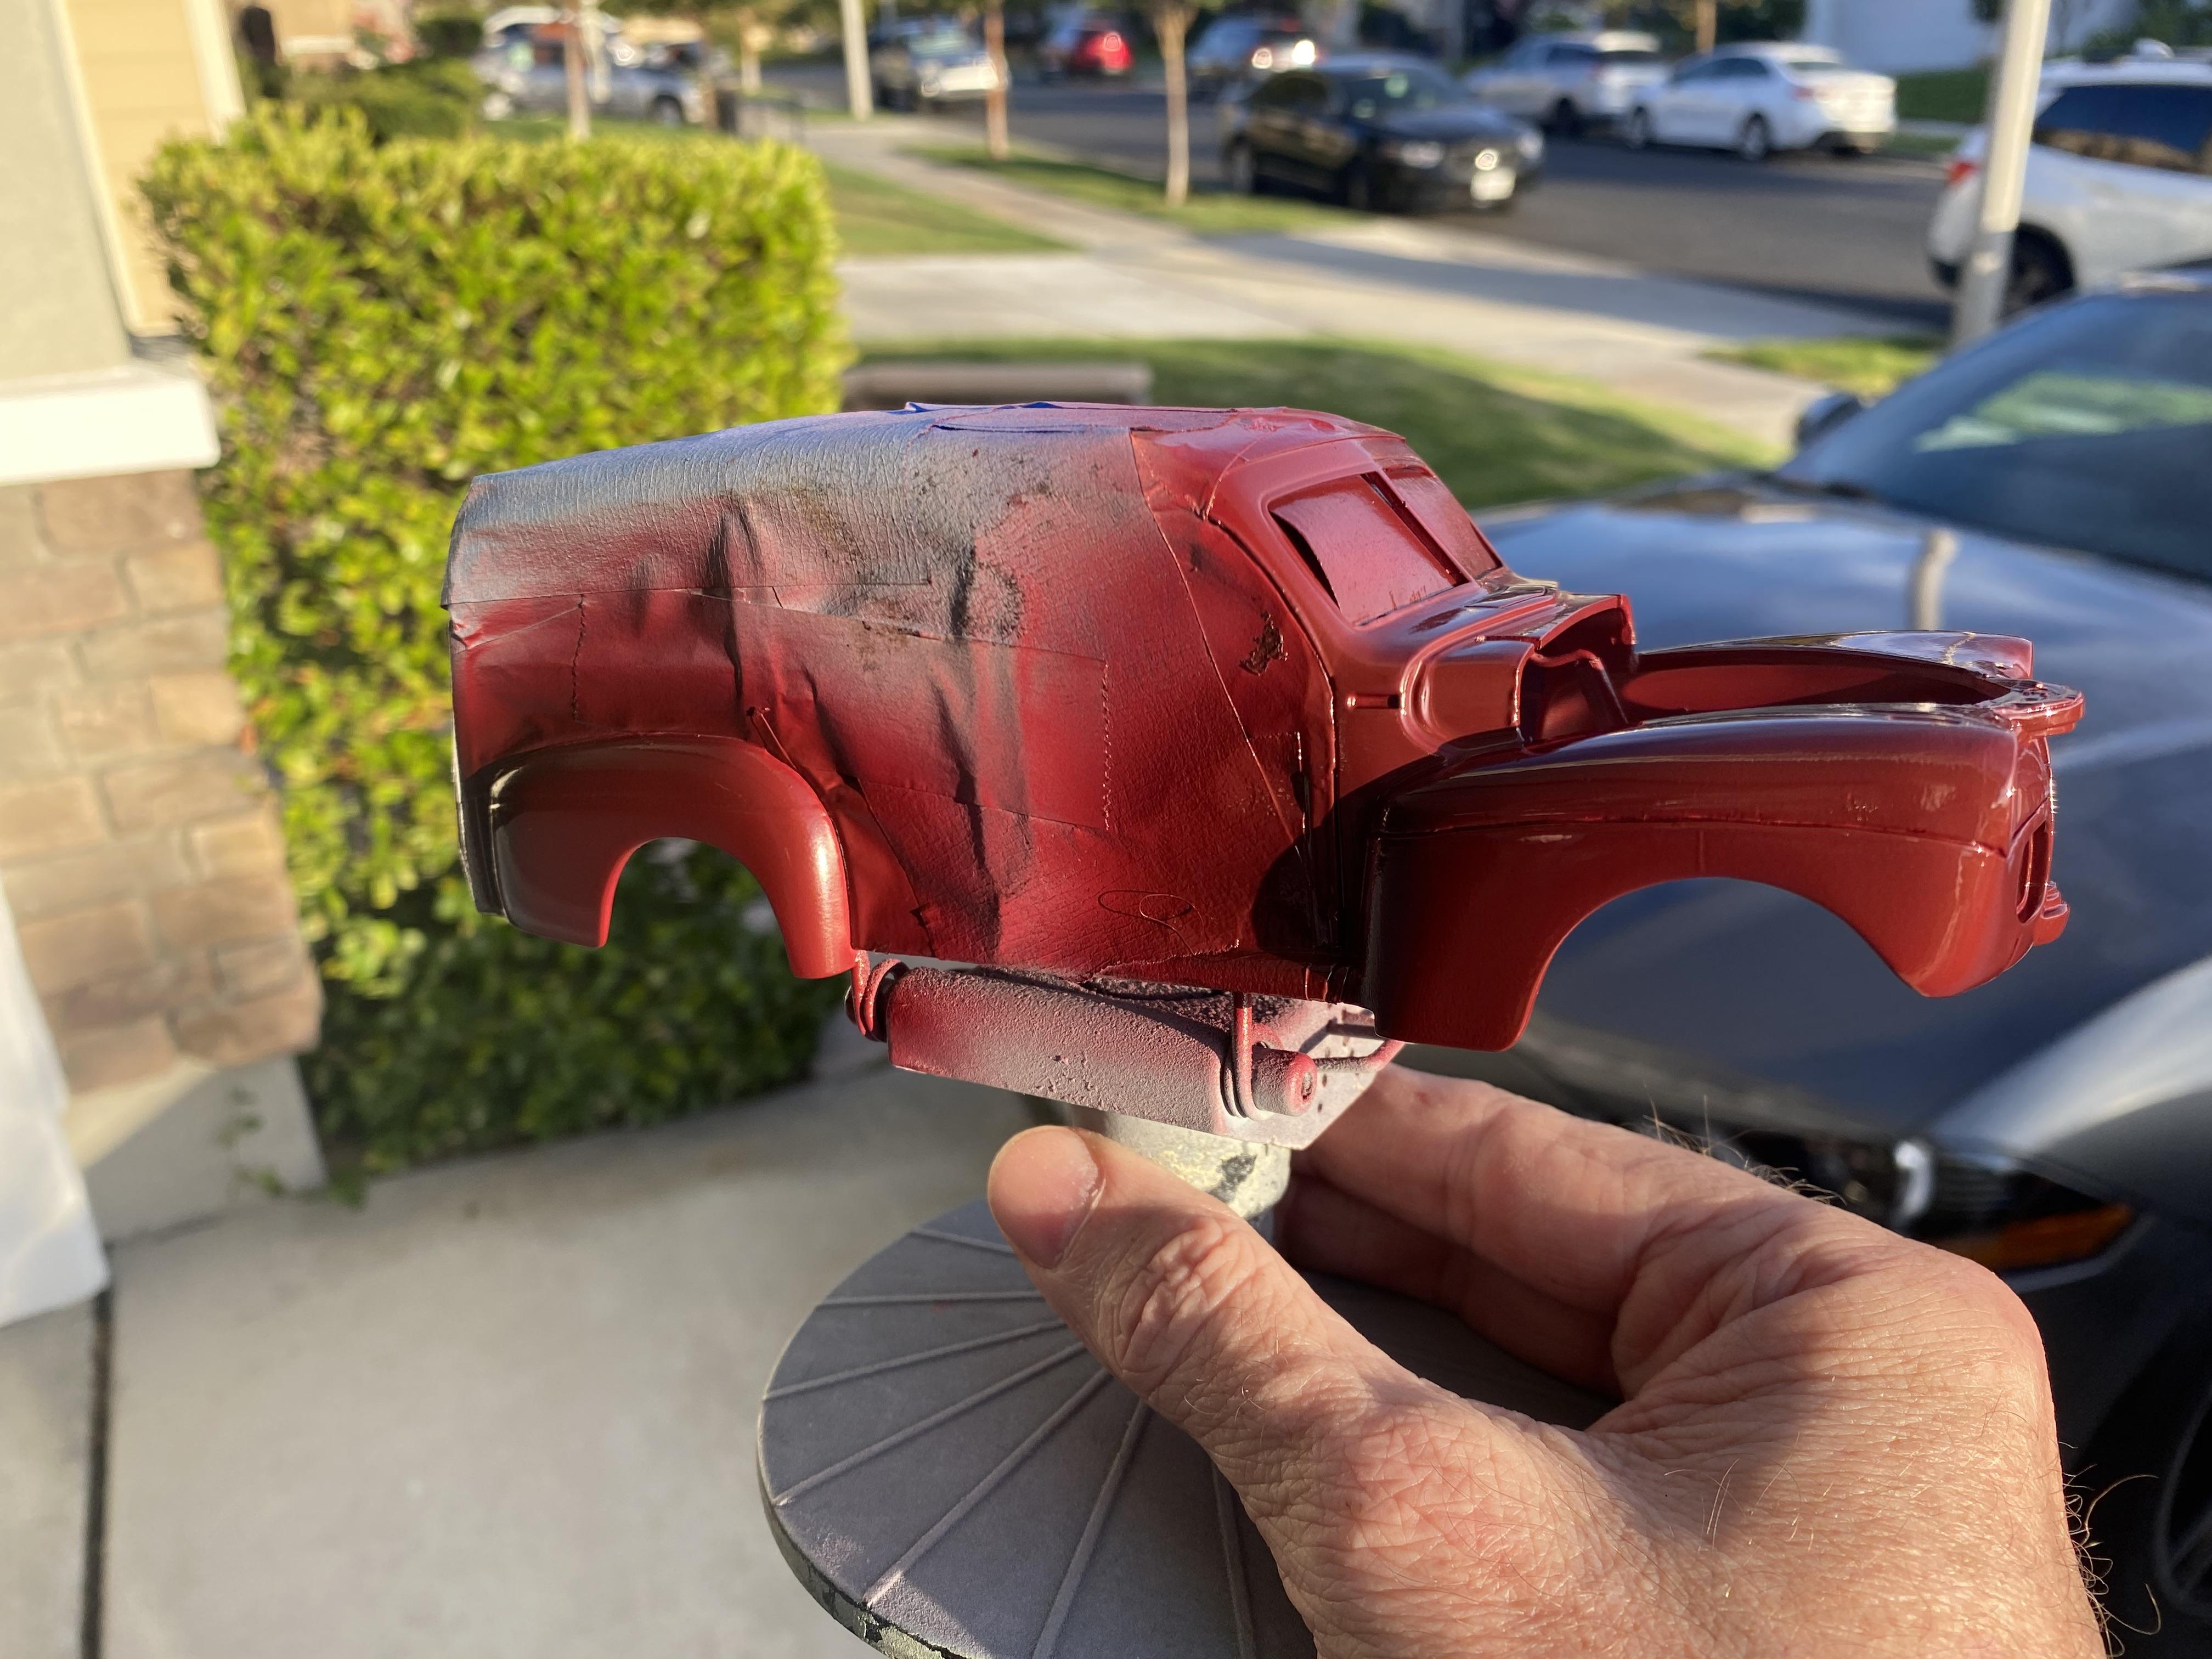
Thanks, the body color is a 1940-1941 ford maroon I got from MCW finishes. I try to keep my paint colors as accurate as possible to what would be available for the year and manufacturer.
-
Thank you! Thank You! thank you!
-
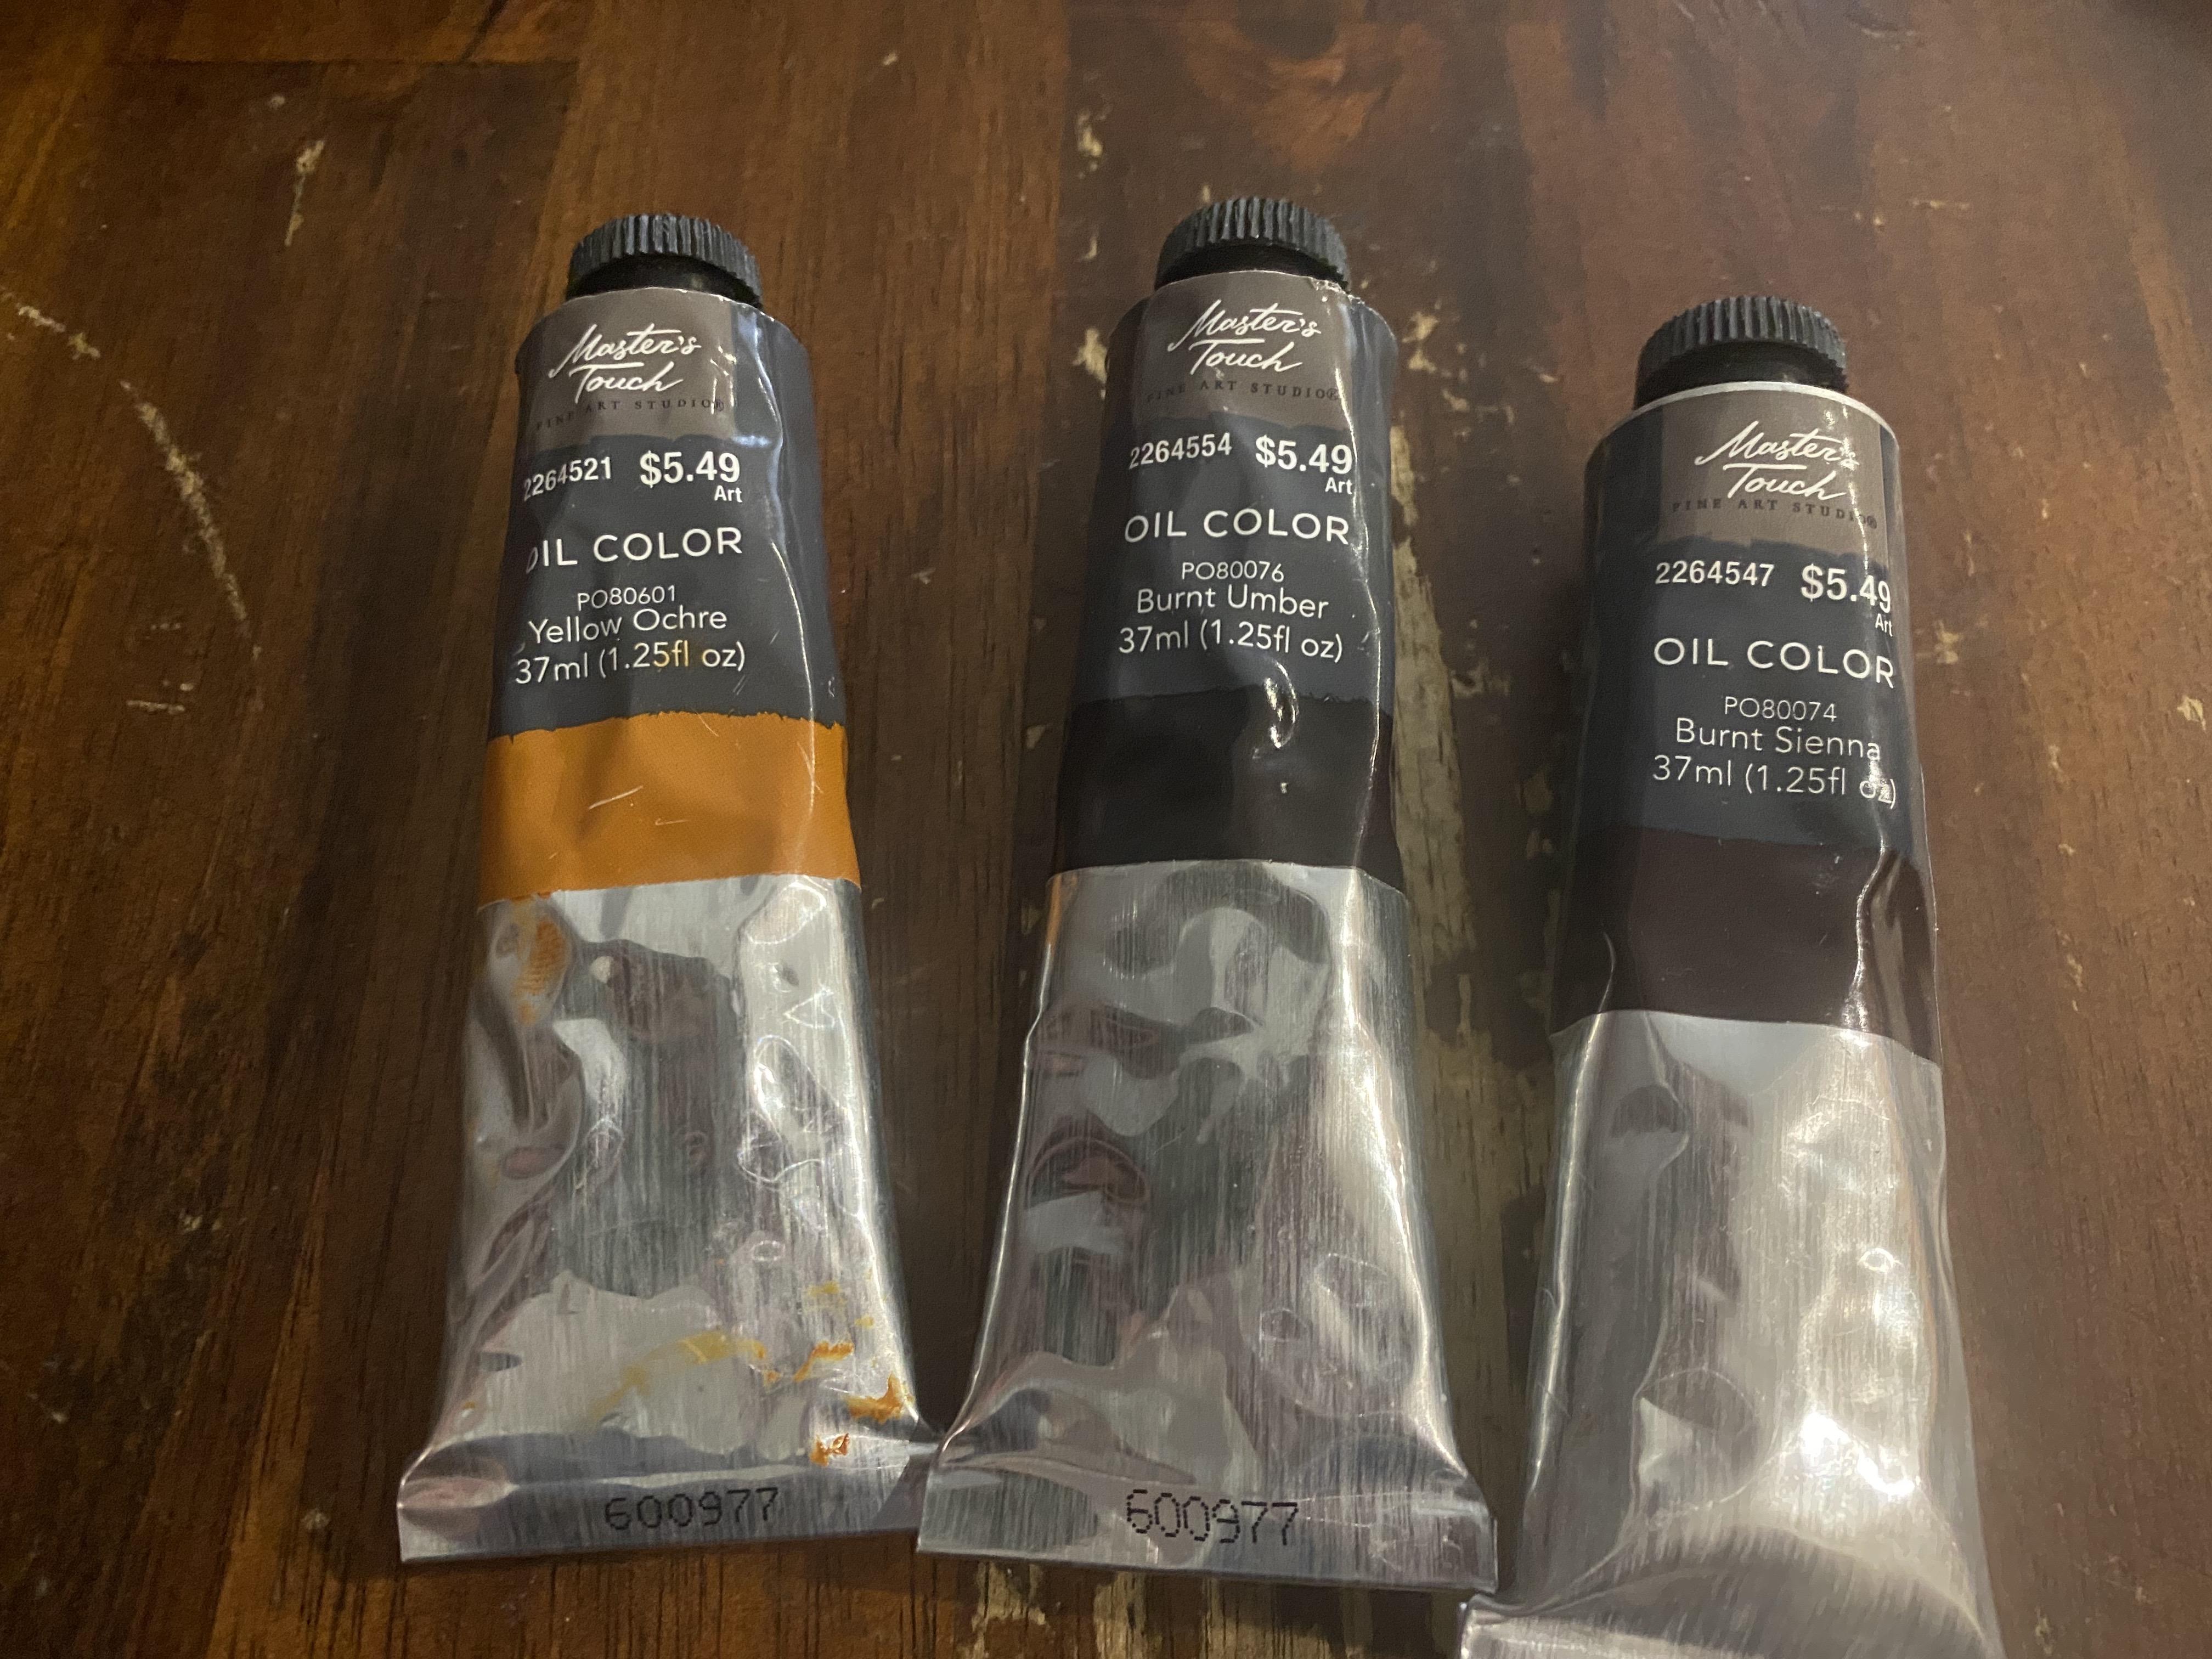
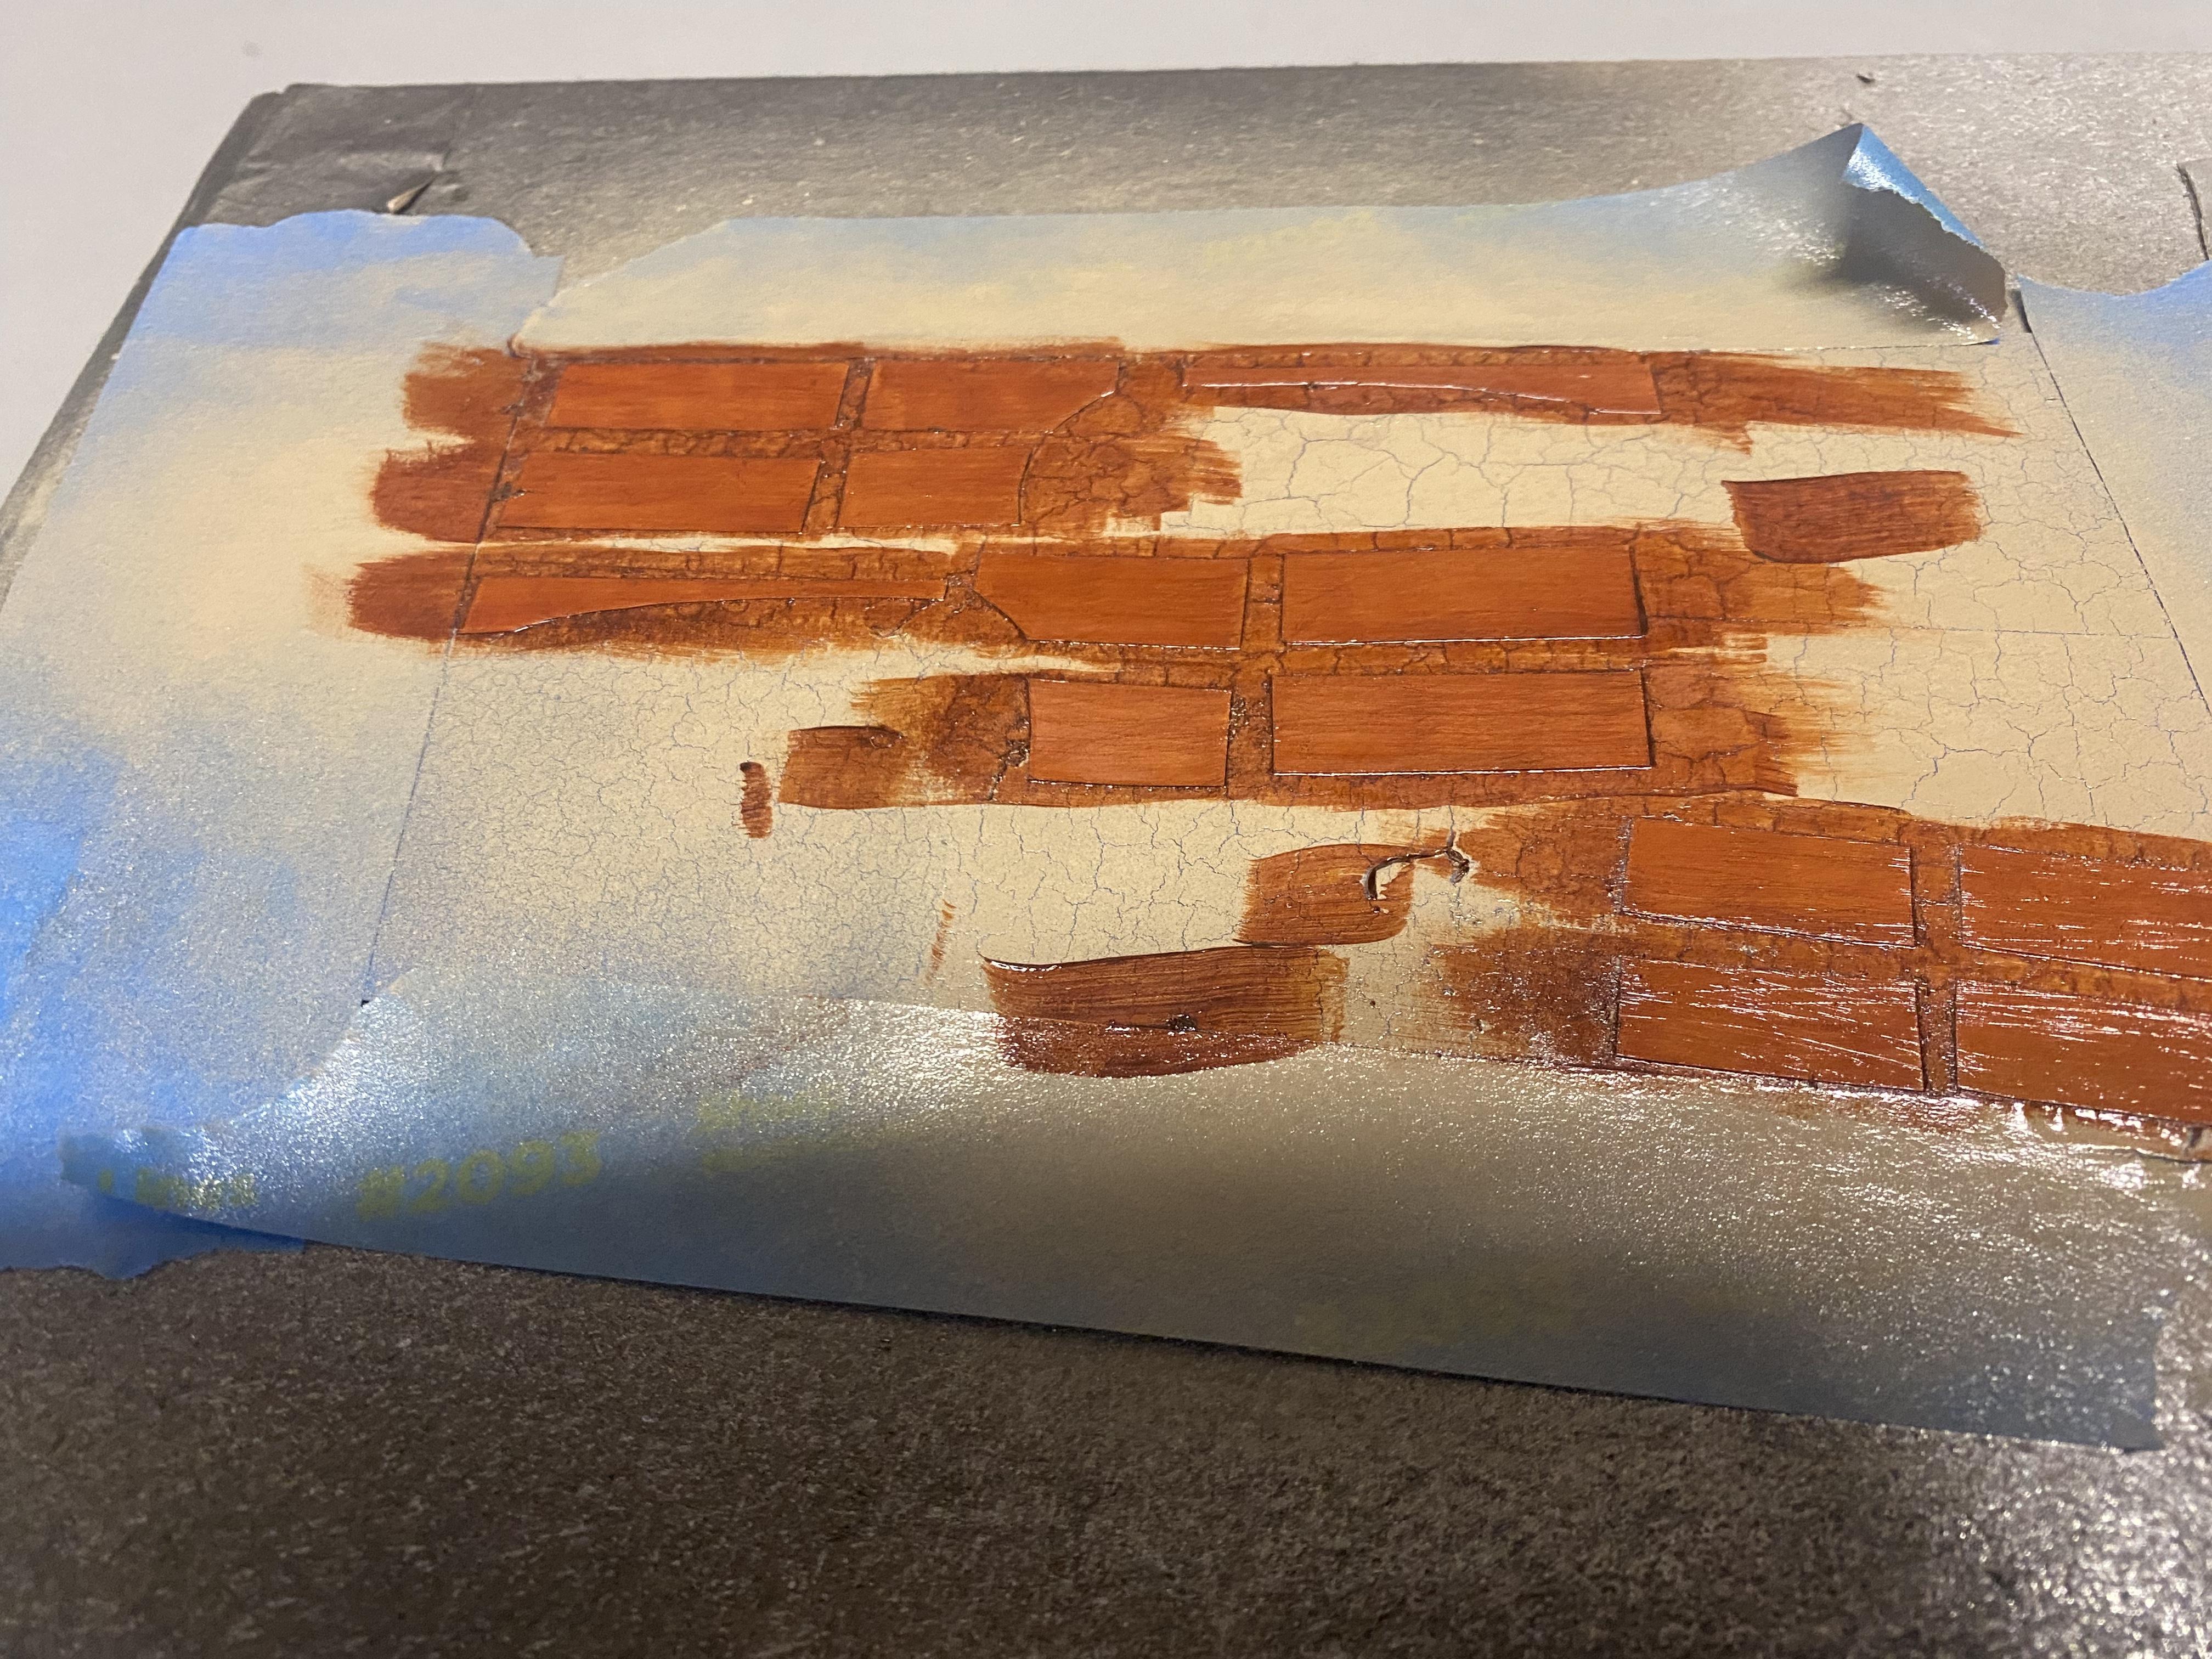
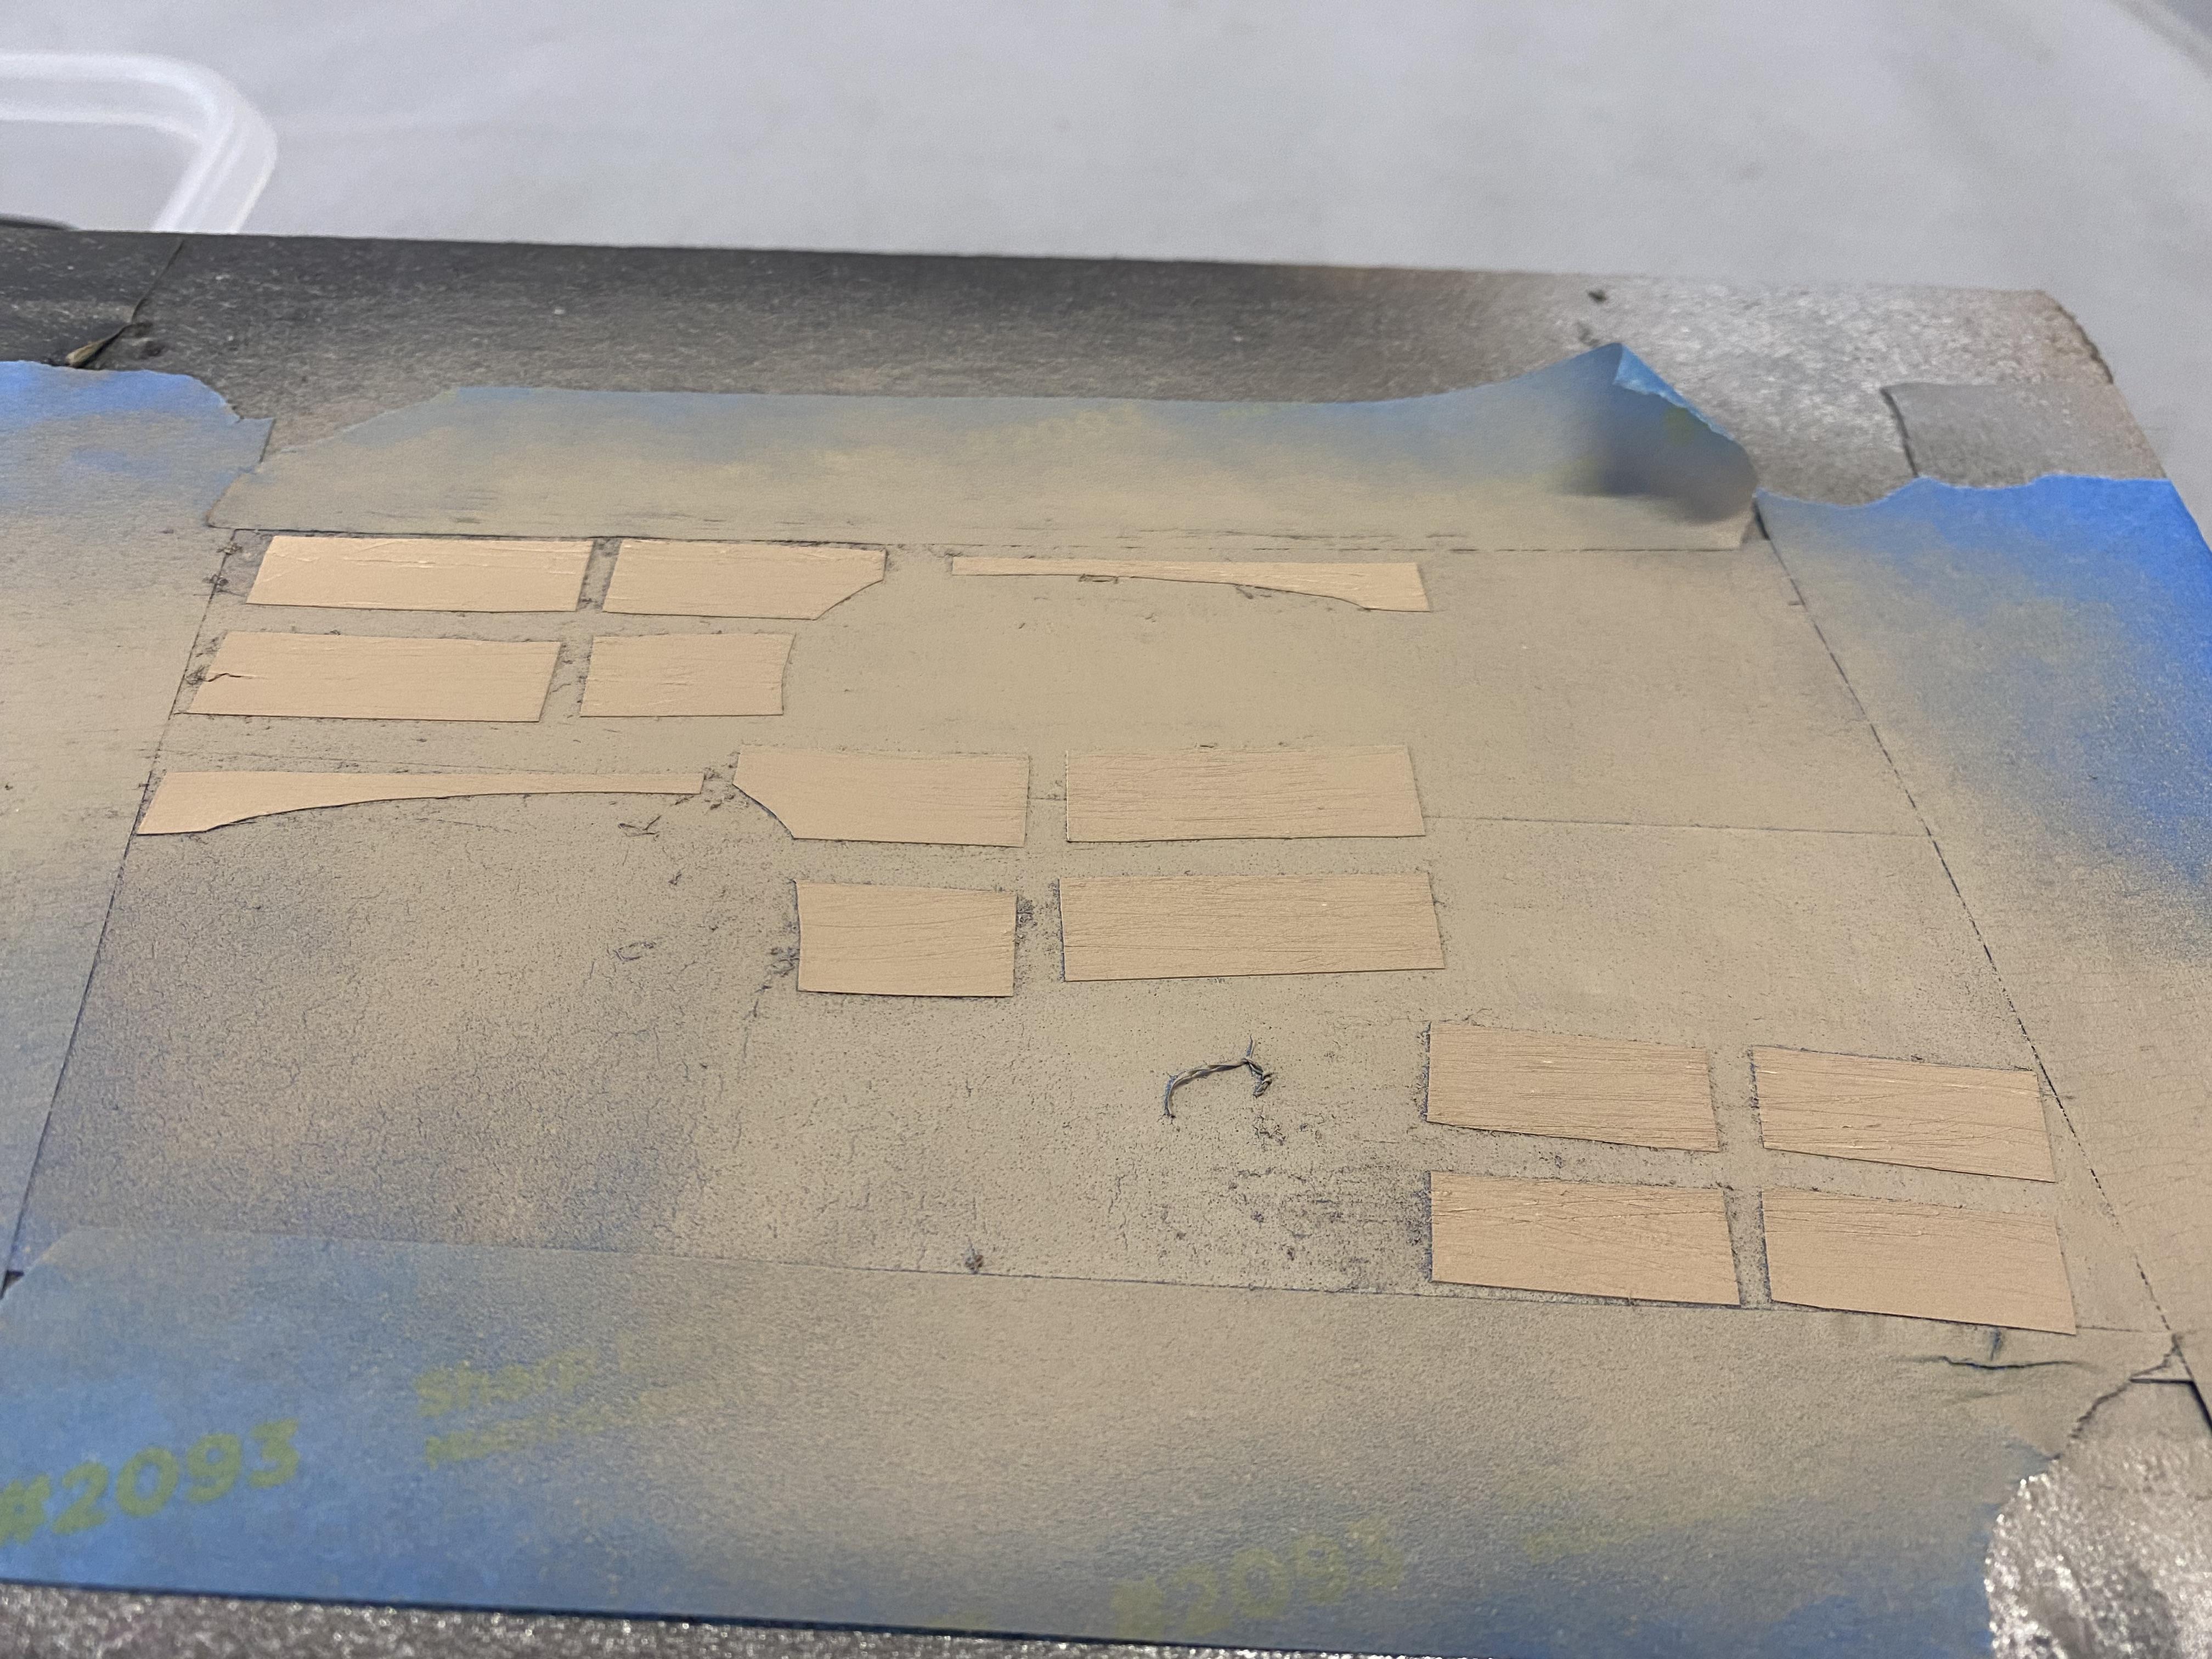
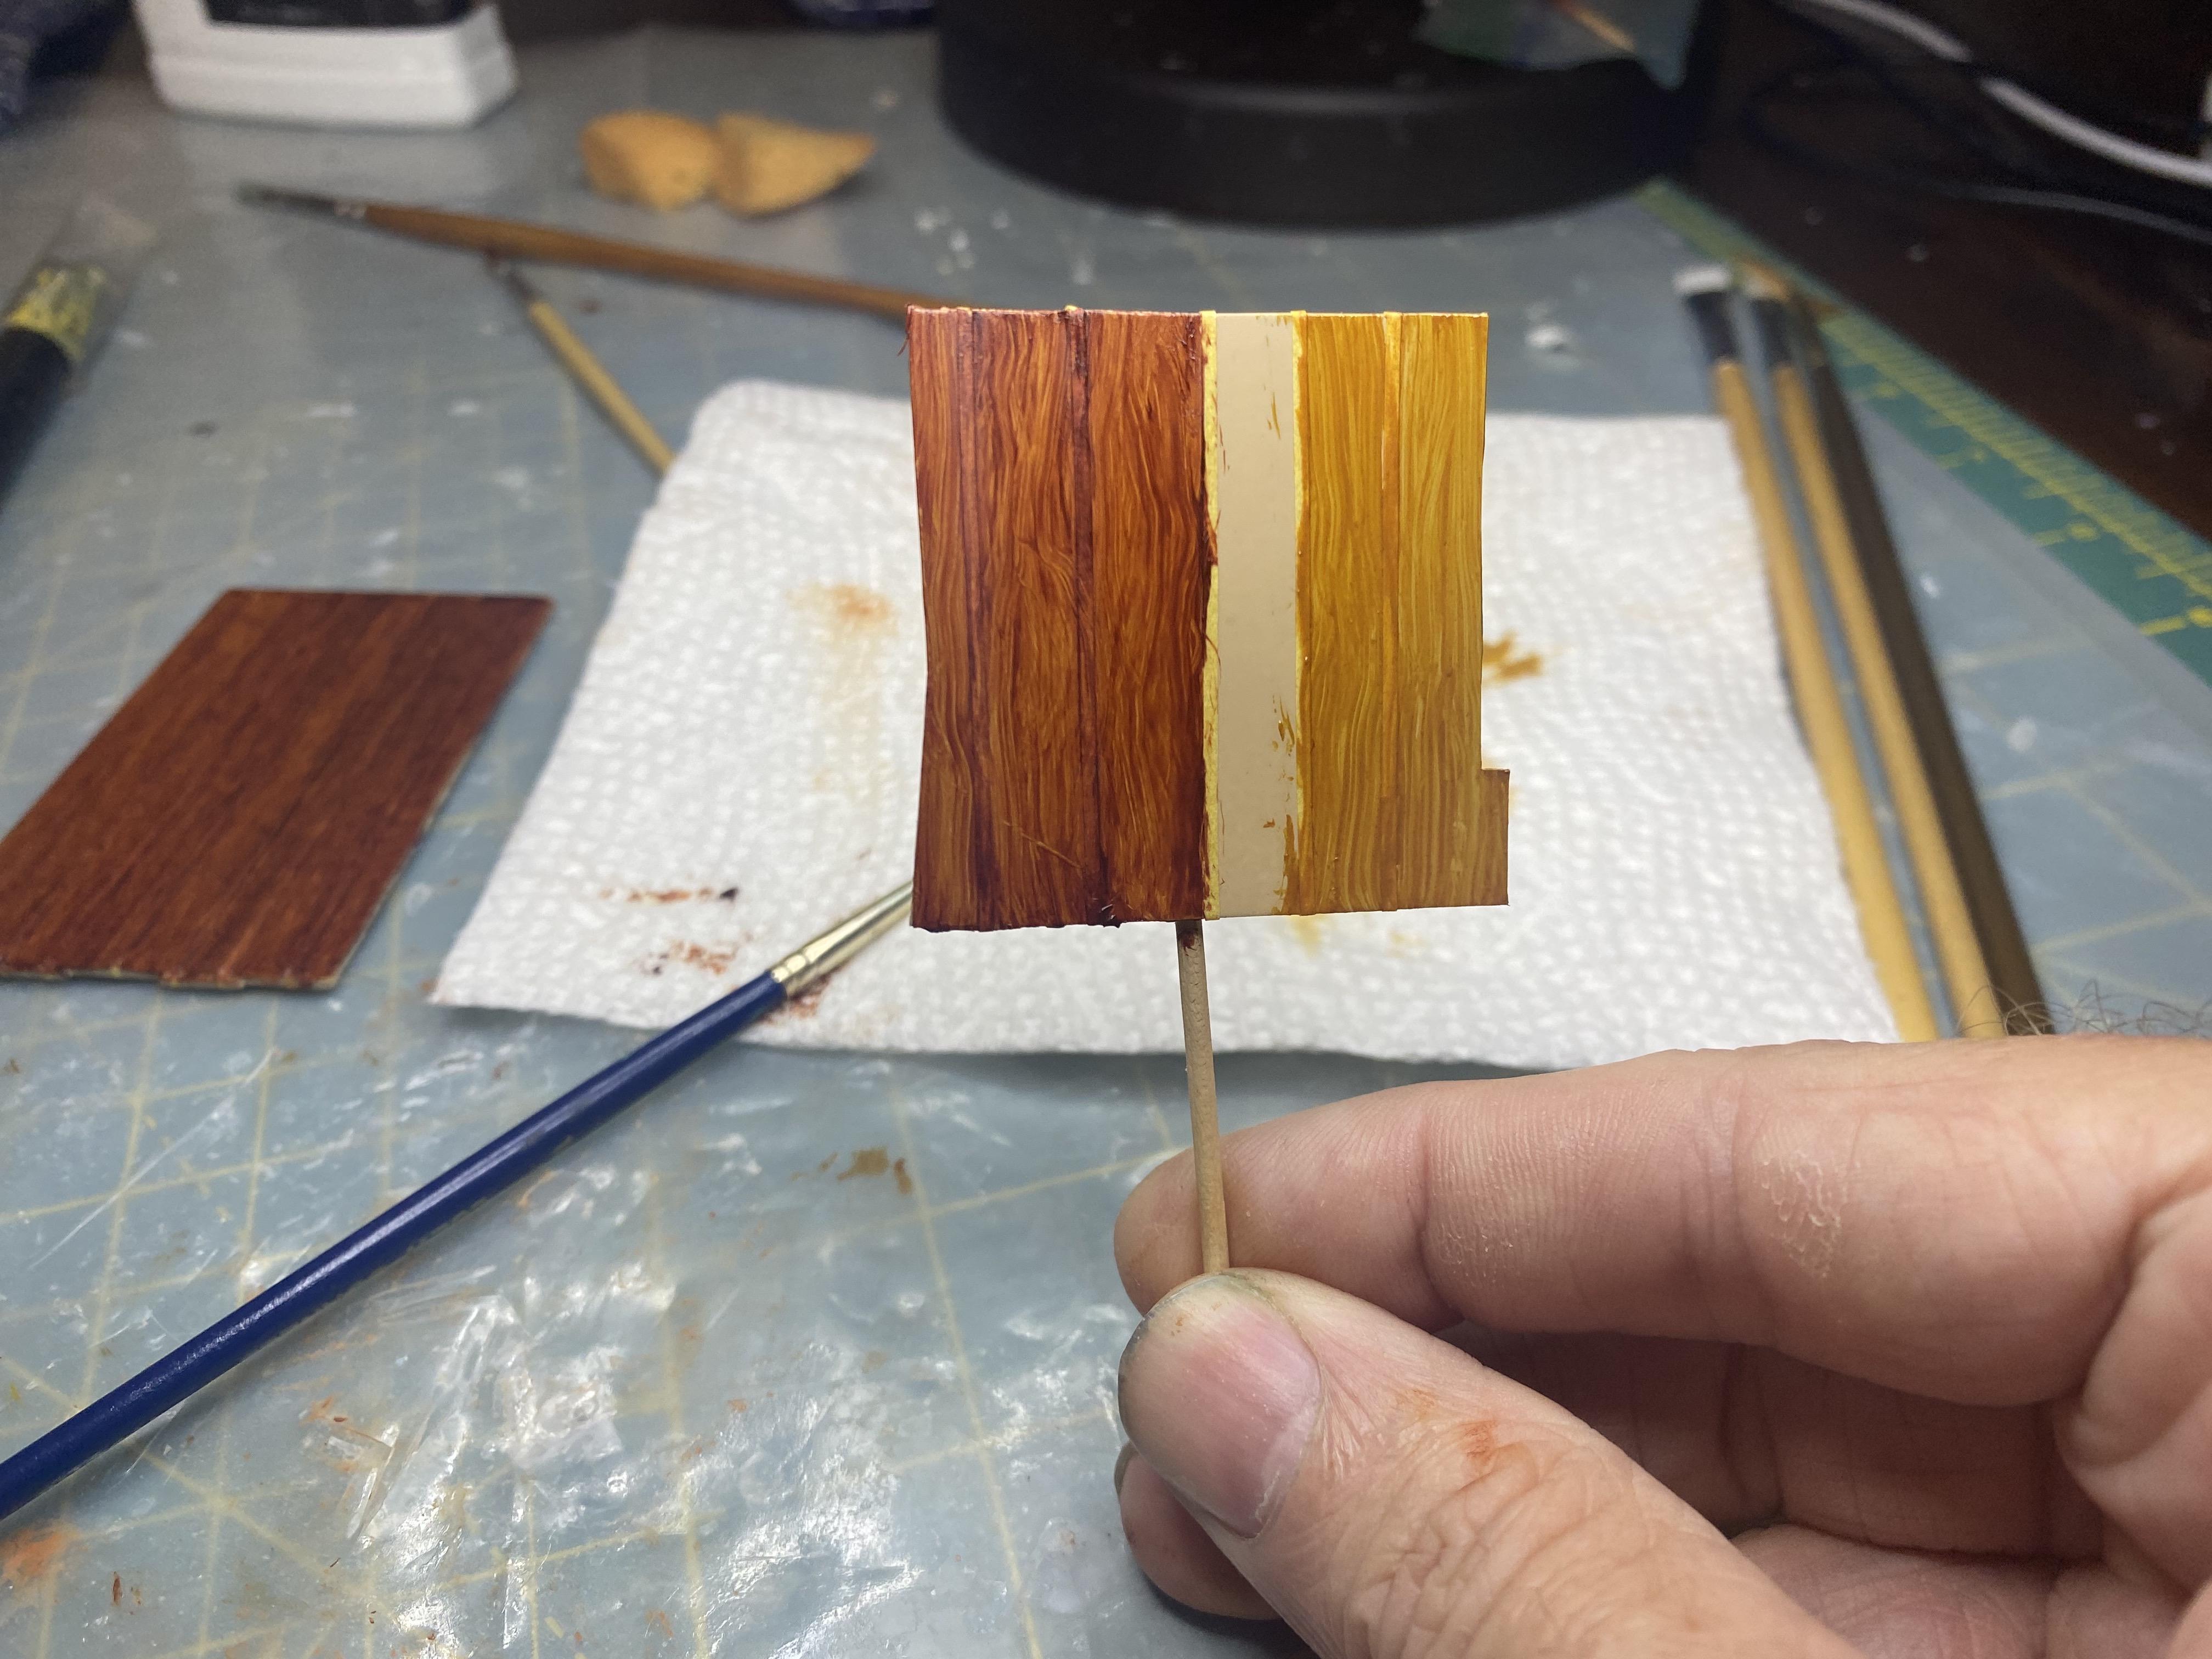
someone in DM was asking how I do the woodgrain. This is a video I found useful. The first thing do spray the wood area with Tamiya TS-68 wood deck Tan. these are the oil paints I use. darker color is about 50/50:burnt umber & burnt sienna. lighter is yellow ochre with a small amount of burnt sienna. Some old ragged paint brush and drag it across the panel. Don’t stop in the middle too much. You have plenty of working time so don’t rush it. My last post is before I clear the whole body including the woodgrain which will bring it out even more.
-
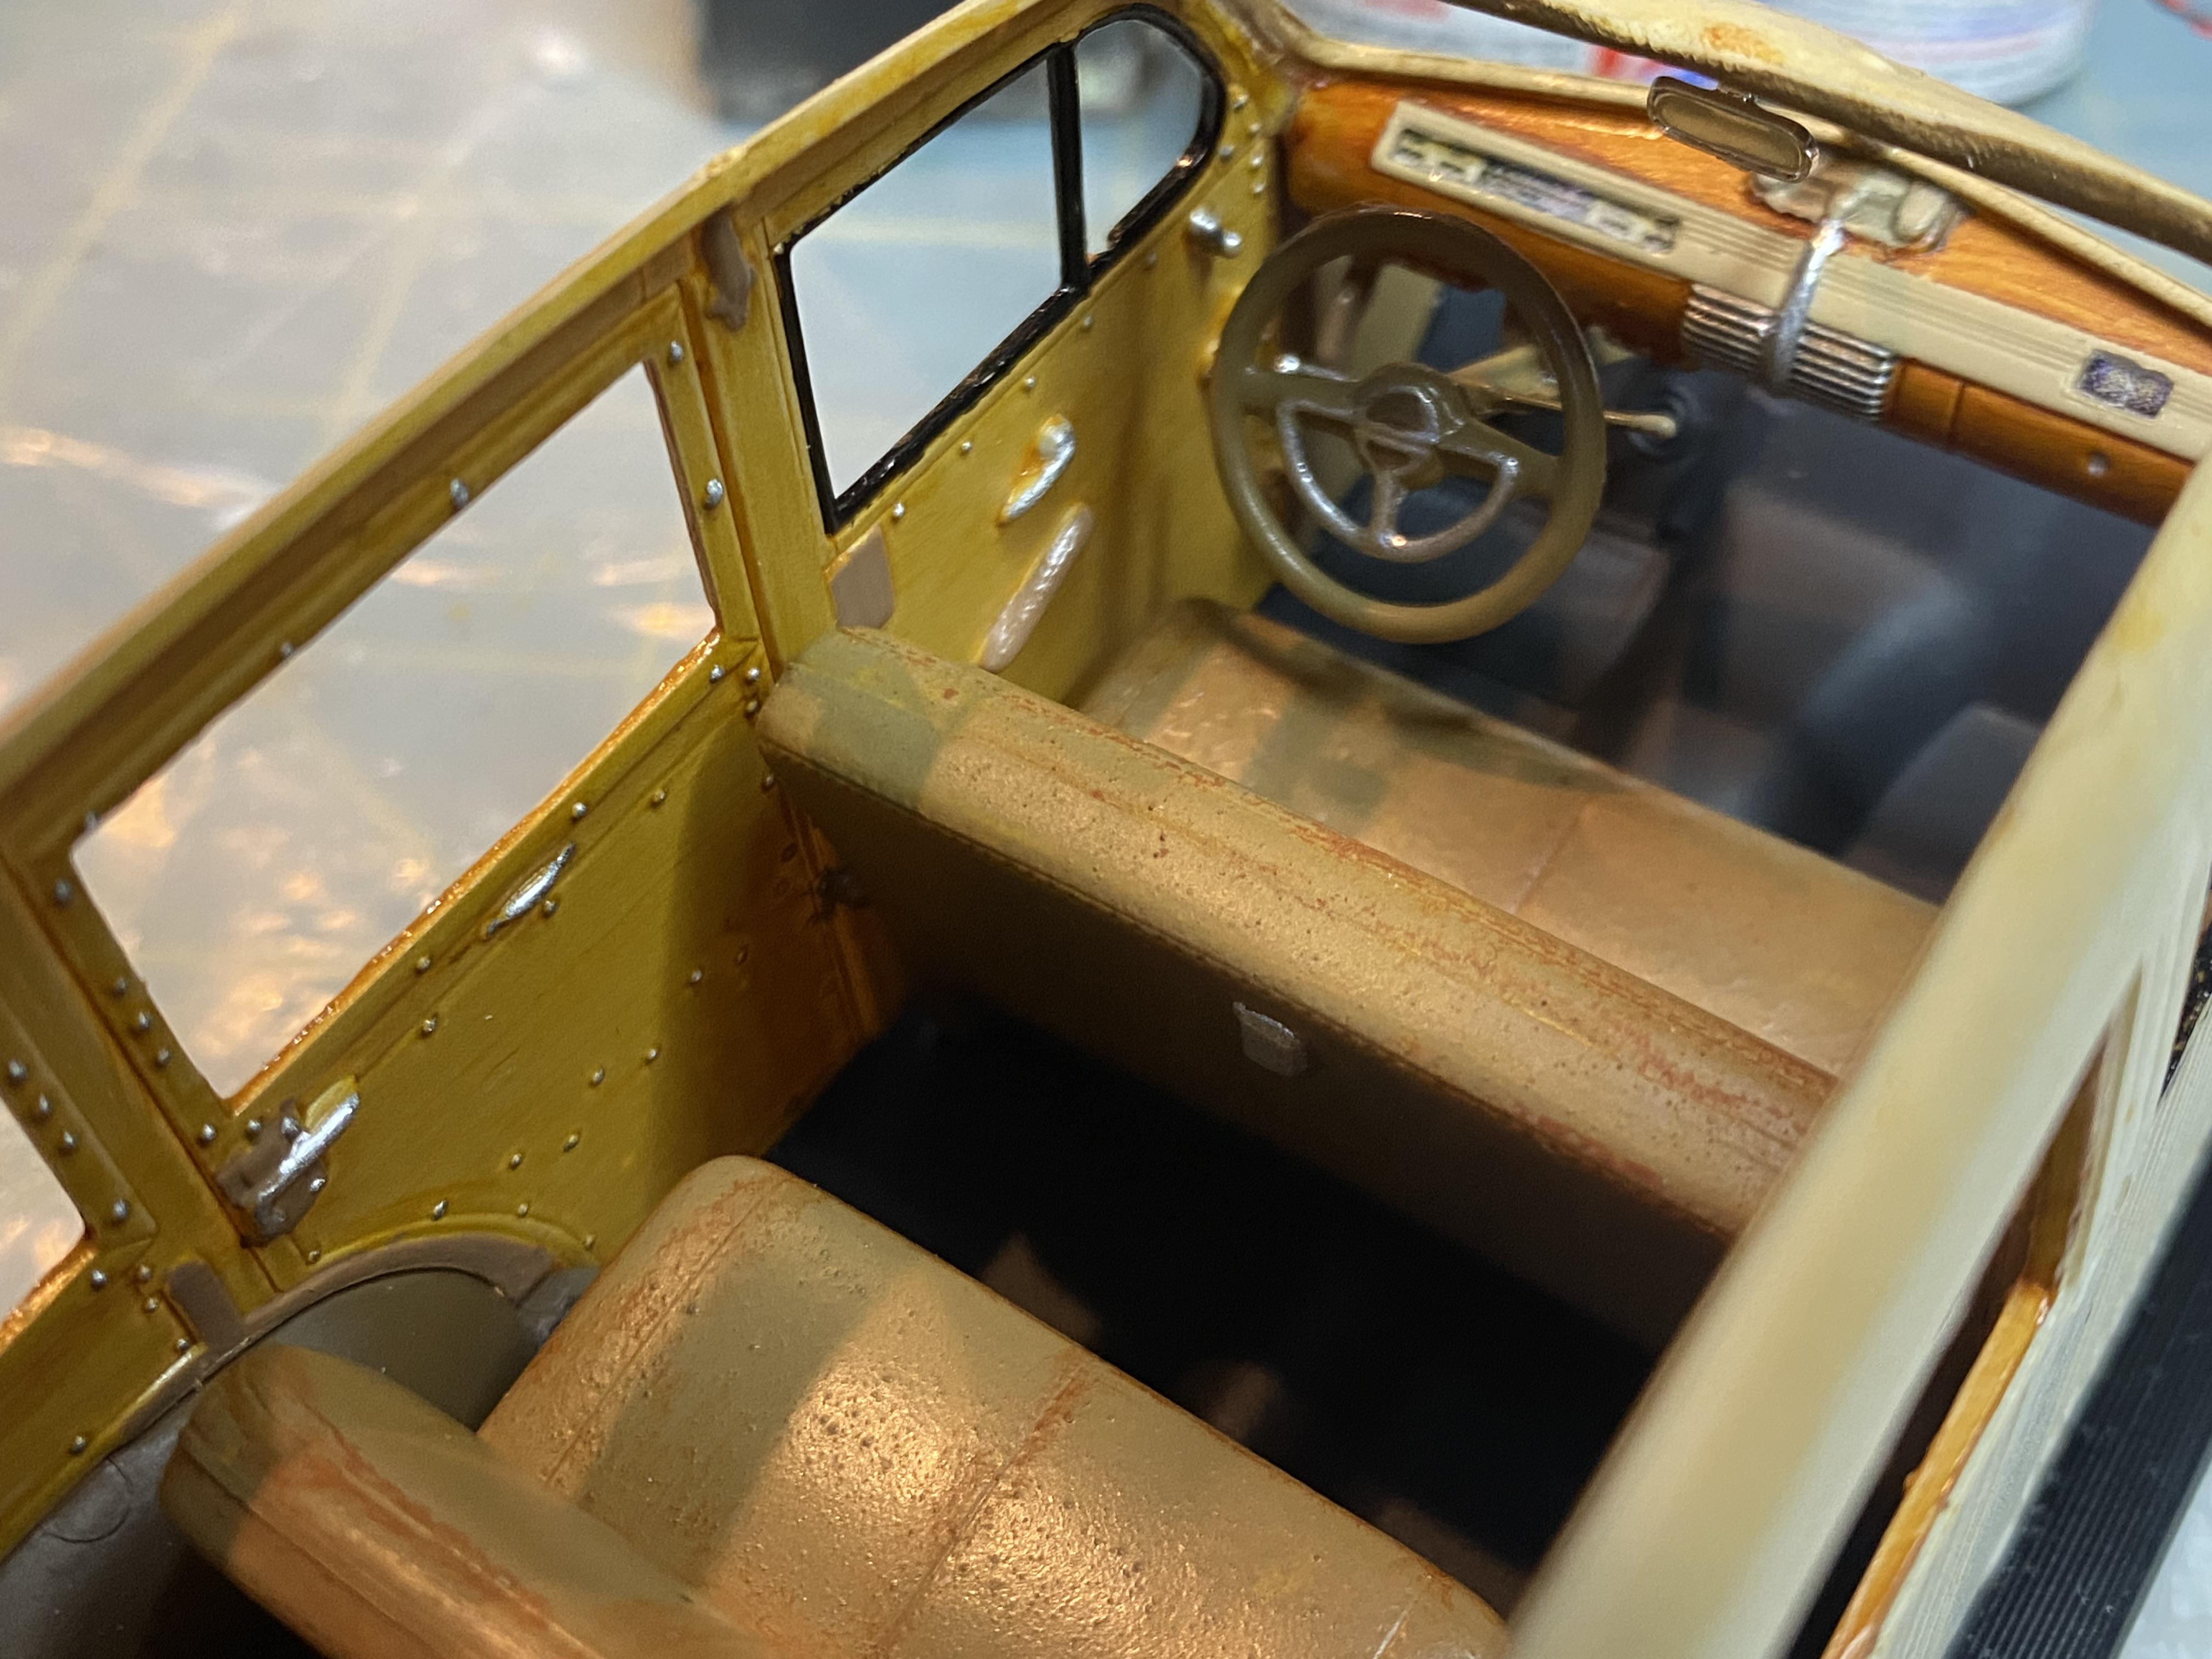
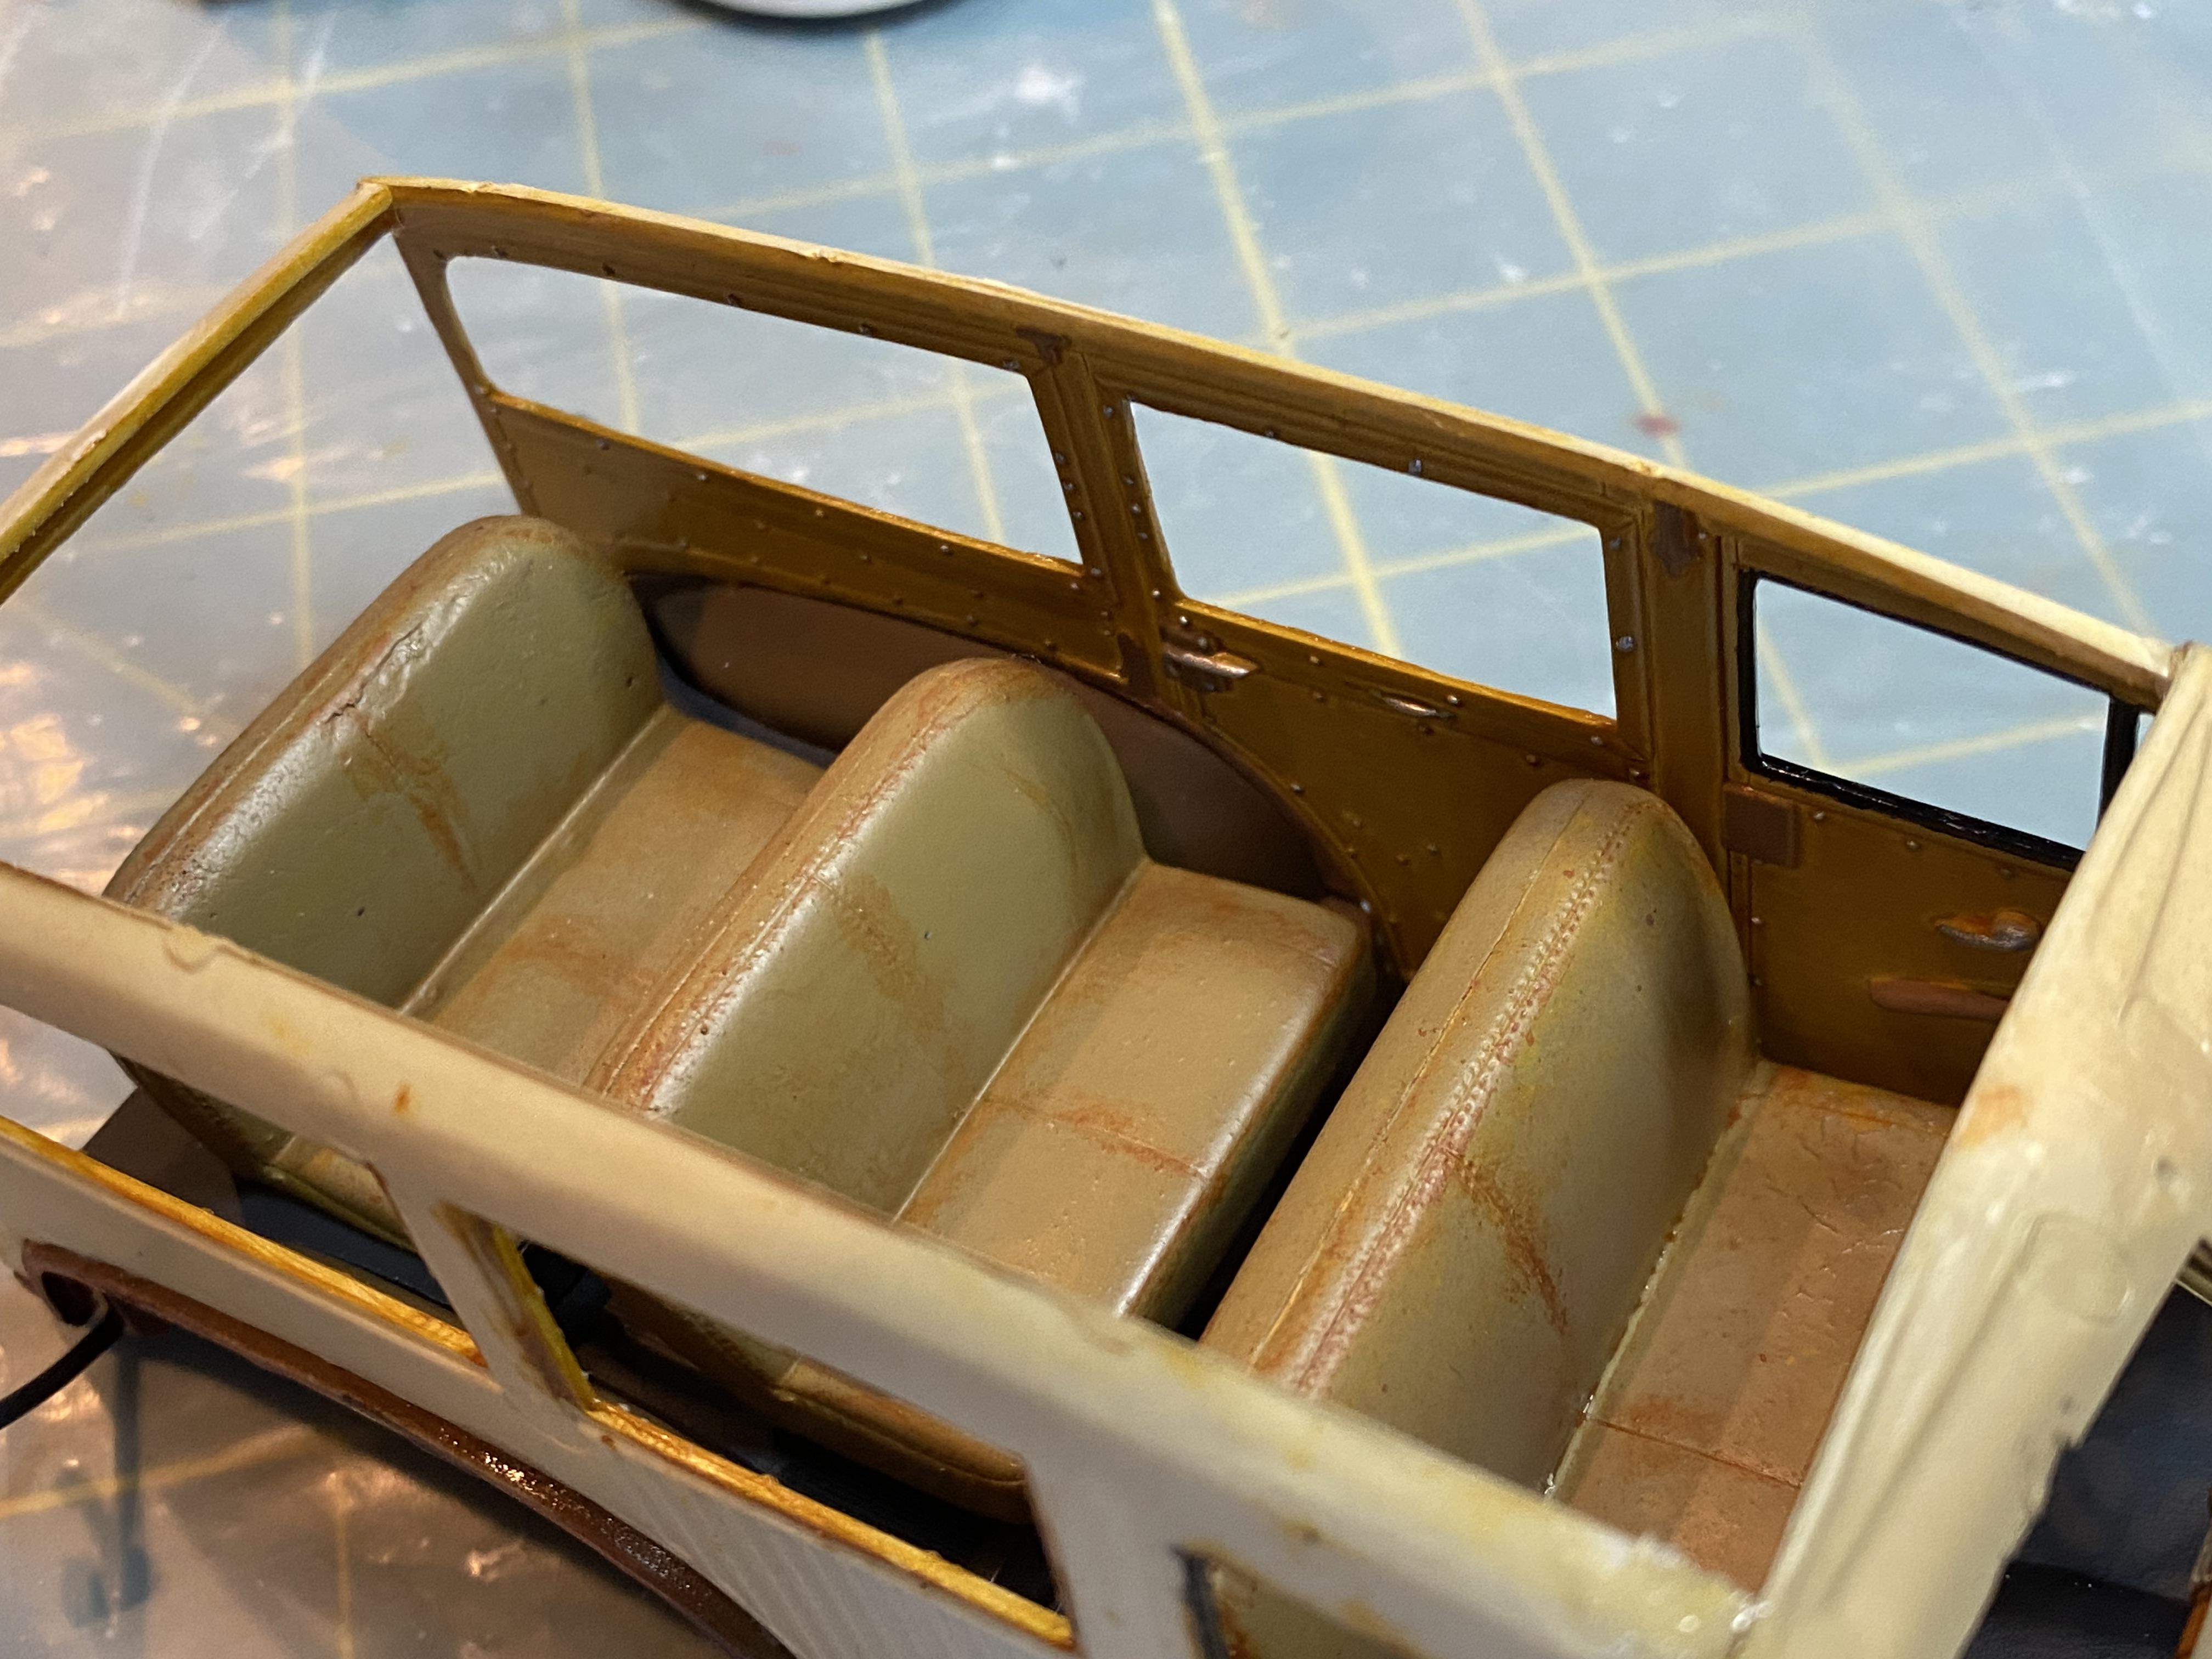
Interior detail pretty much done, very simple interior. Aged the leather just a bit.Woodgrain work pretty much done. Next to 2K clear the body and a bunch of parts.
-
Thank you!
-
Looking forward to finding the time to start on it. The most I have done before is the bed in the 1950 3100. I wasn’t about to use the decals either, rather pixelated looking IMHO. Thank You!
-
Thank you. A lot of work to still do but it is coming along. Letting what is done cure a couple days then will start creating the woodgrain effect on the body and interior panels with oil paints.
-
Finally started getting some paint on the Woody. Base coat on most components. Next step will be to create the woodgrain effect much like I did 1950 Chevy 3100 bed.
-
Thank You
-
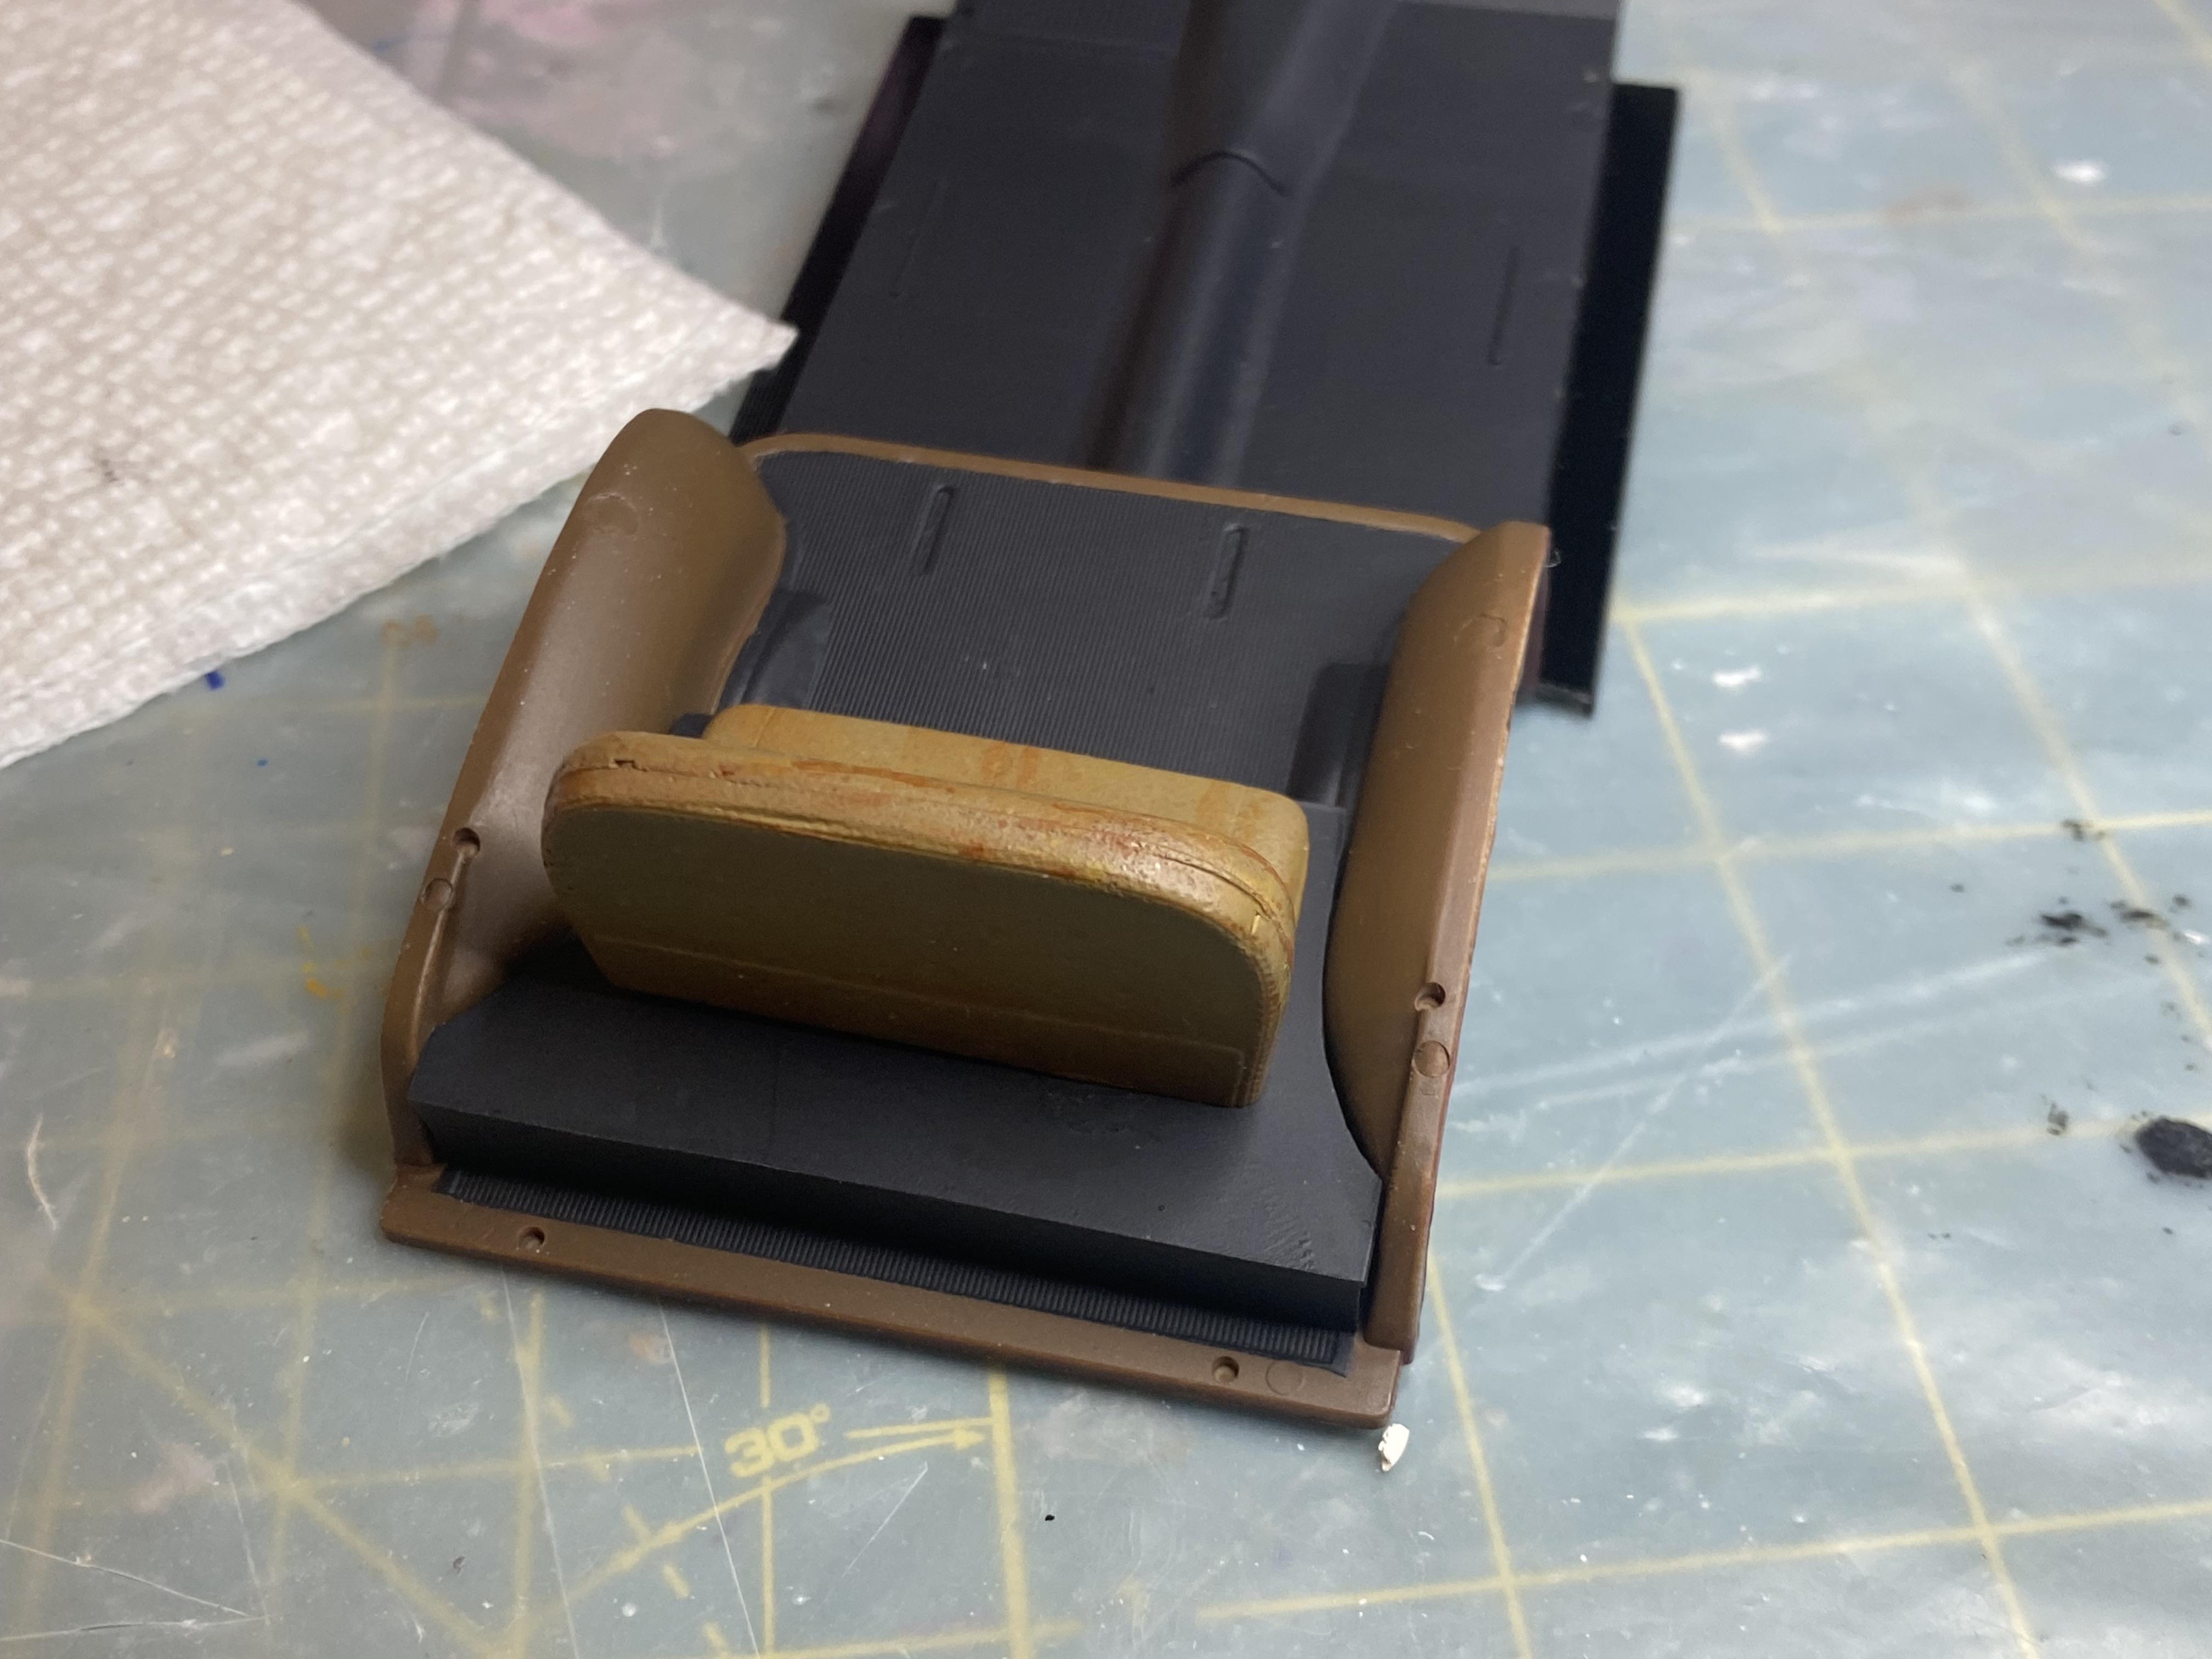
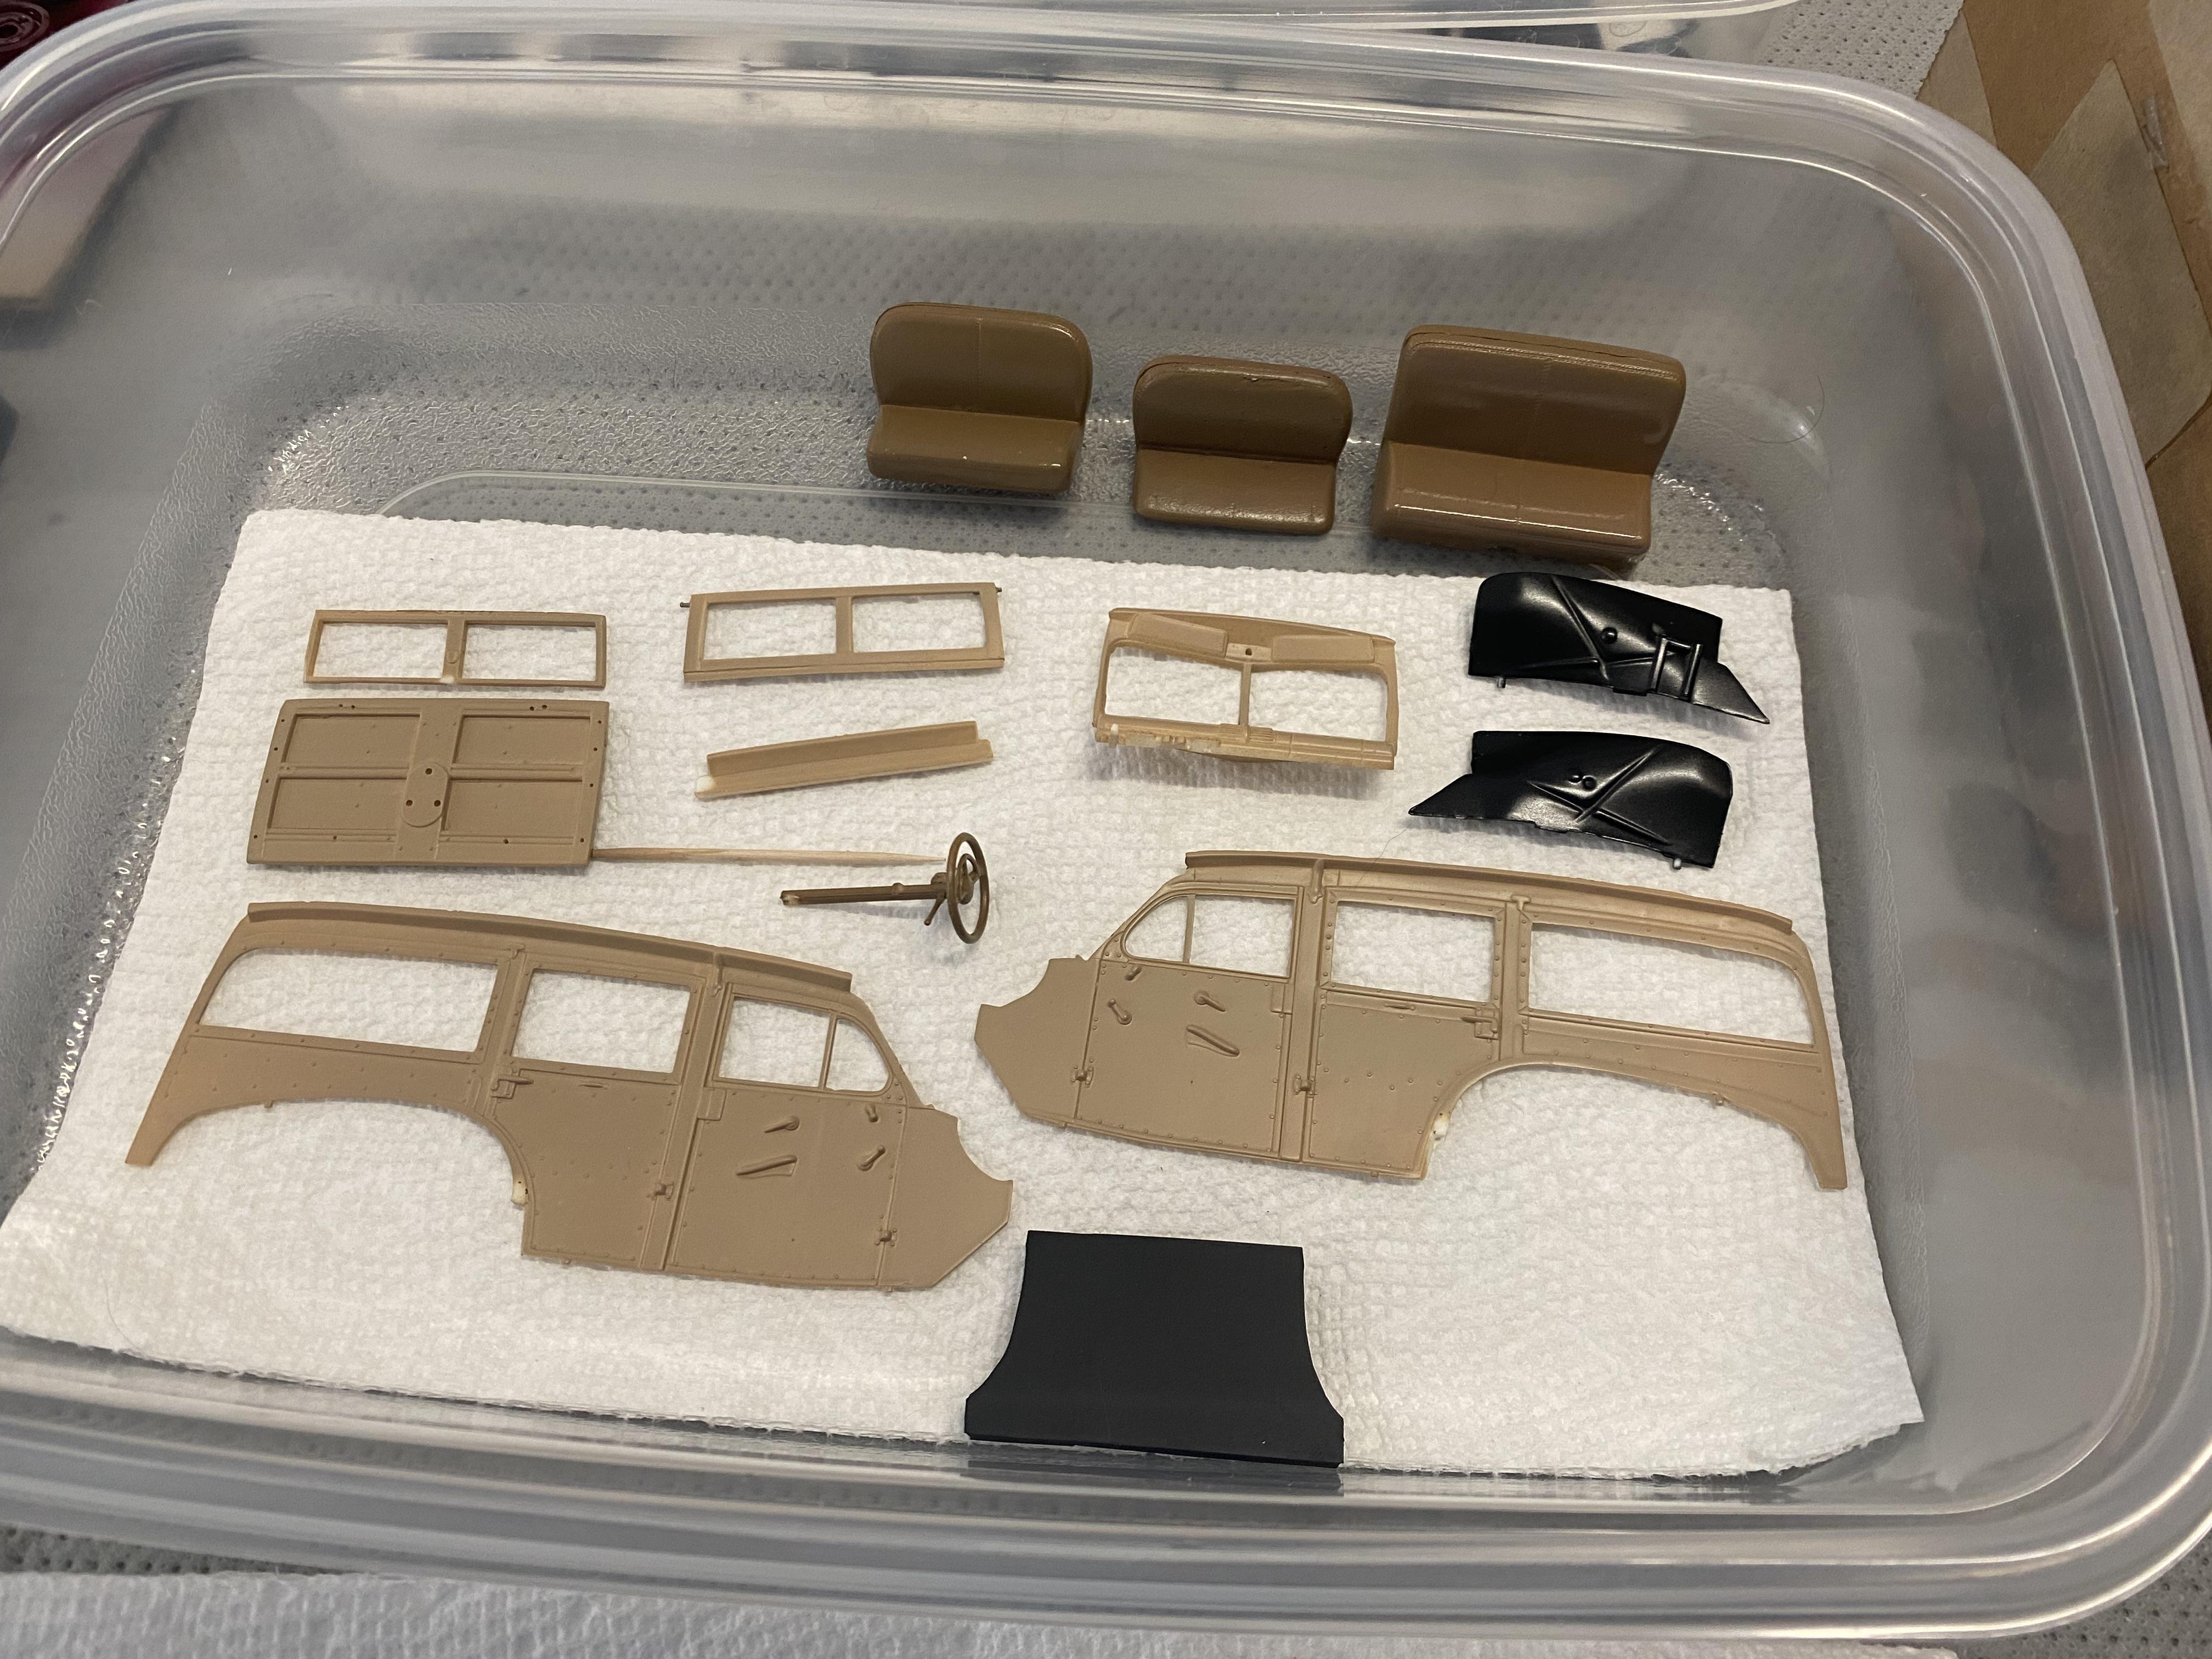
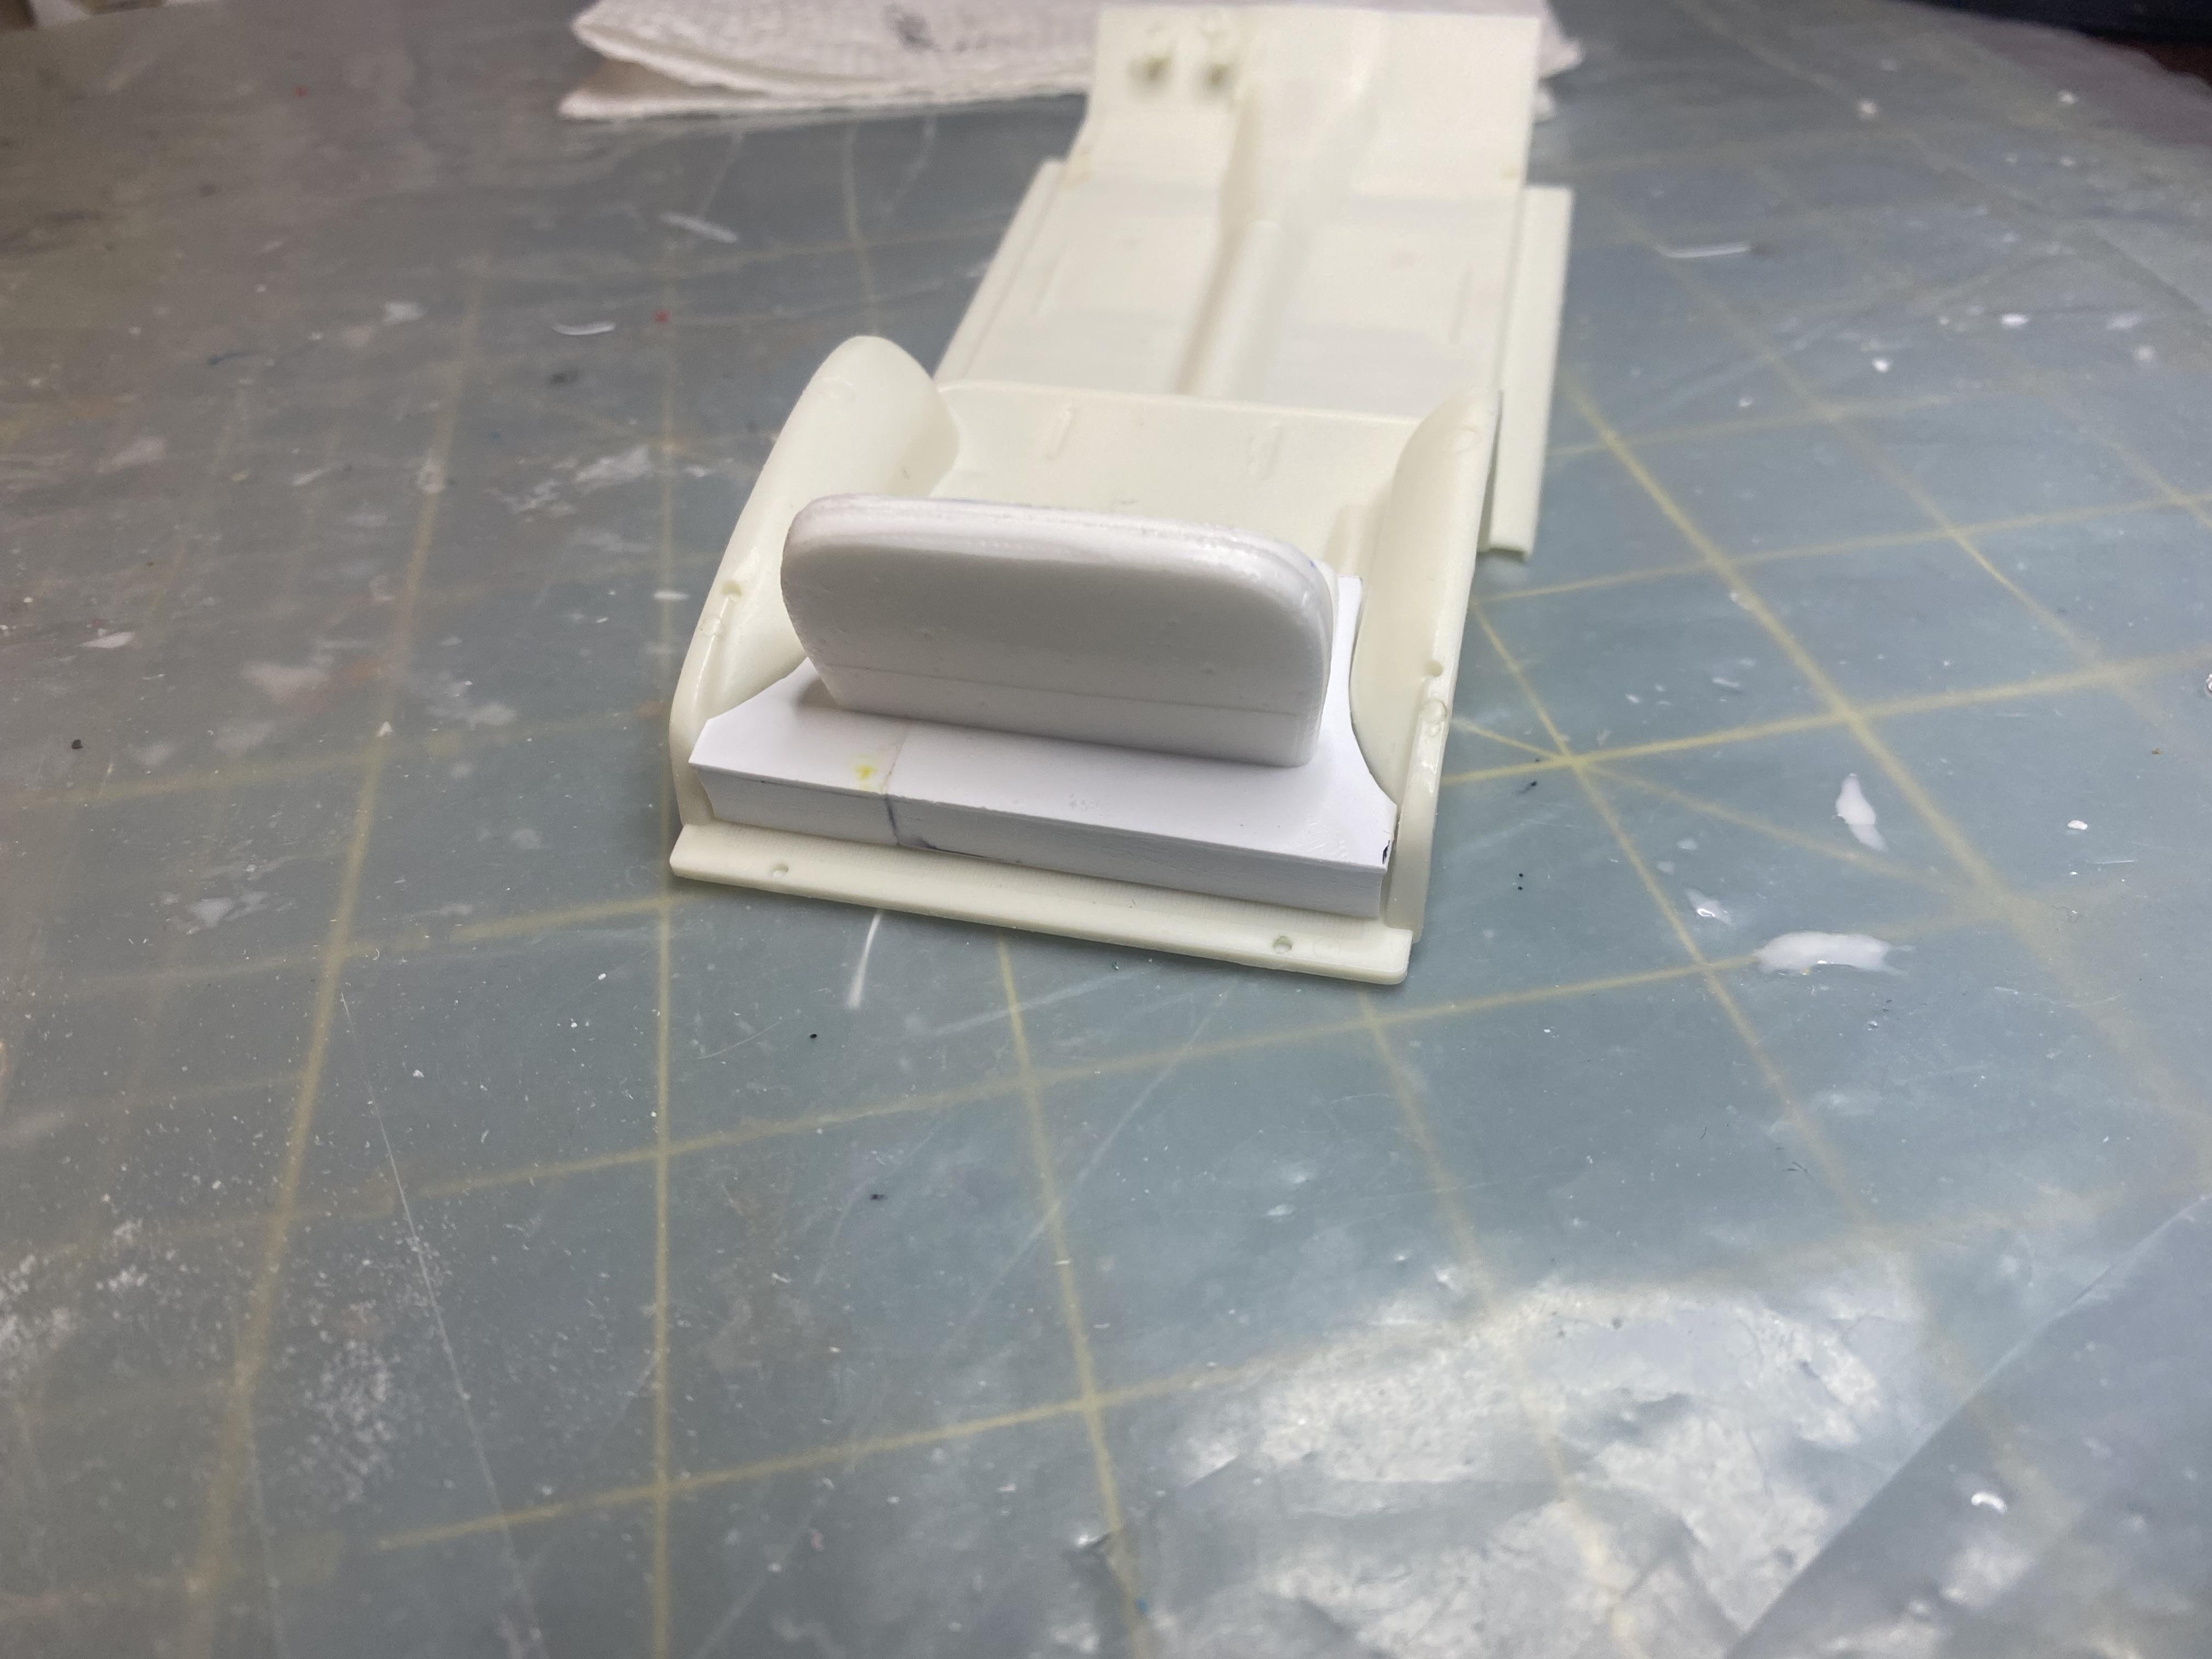
I was looking at the images above and decided it would look. Look a lot better if the battery cover was the full length of the back.
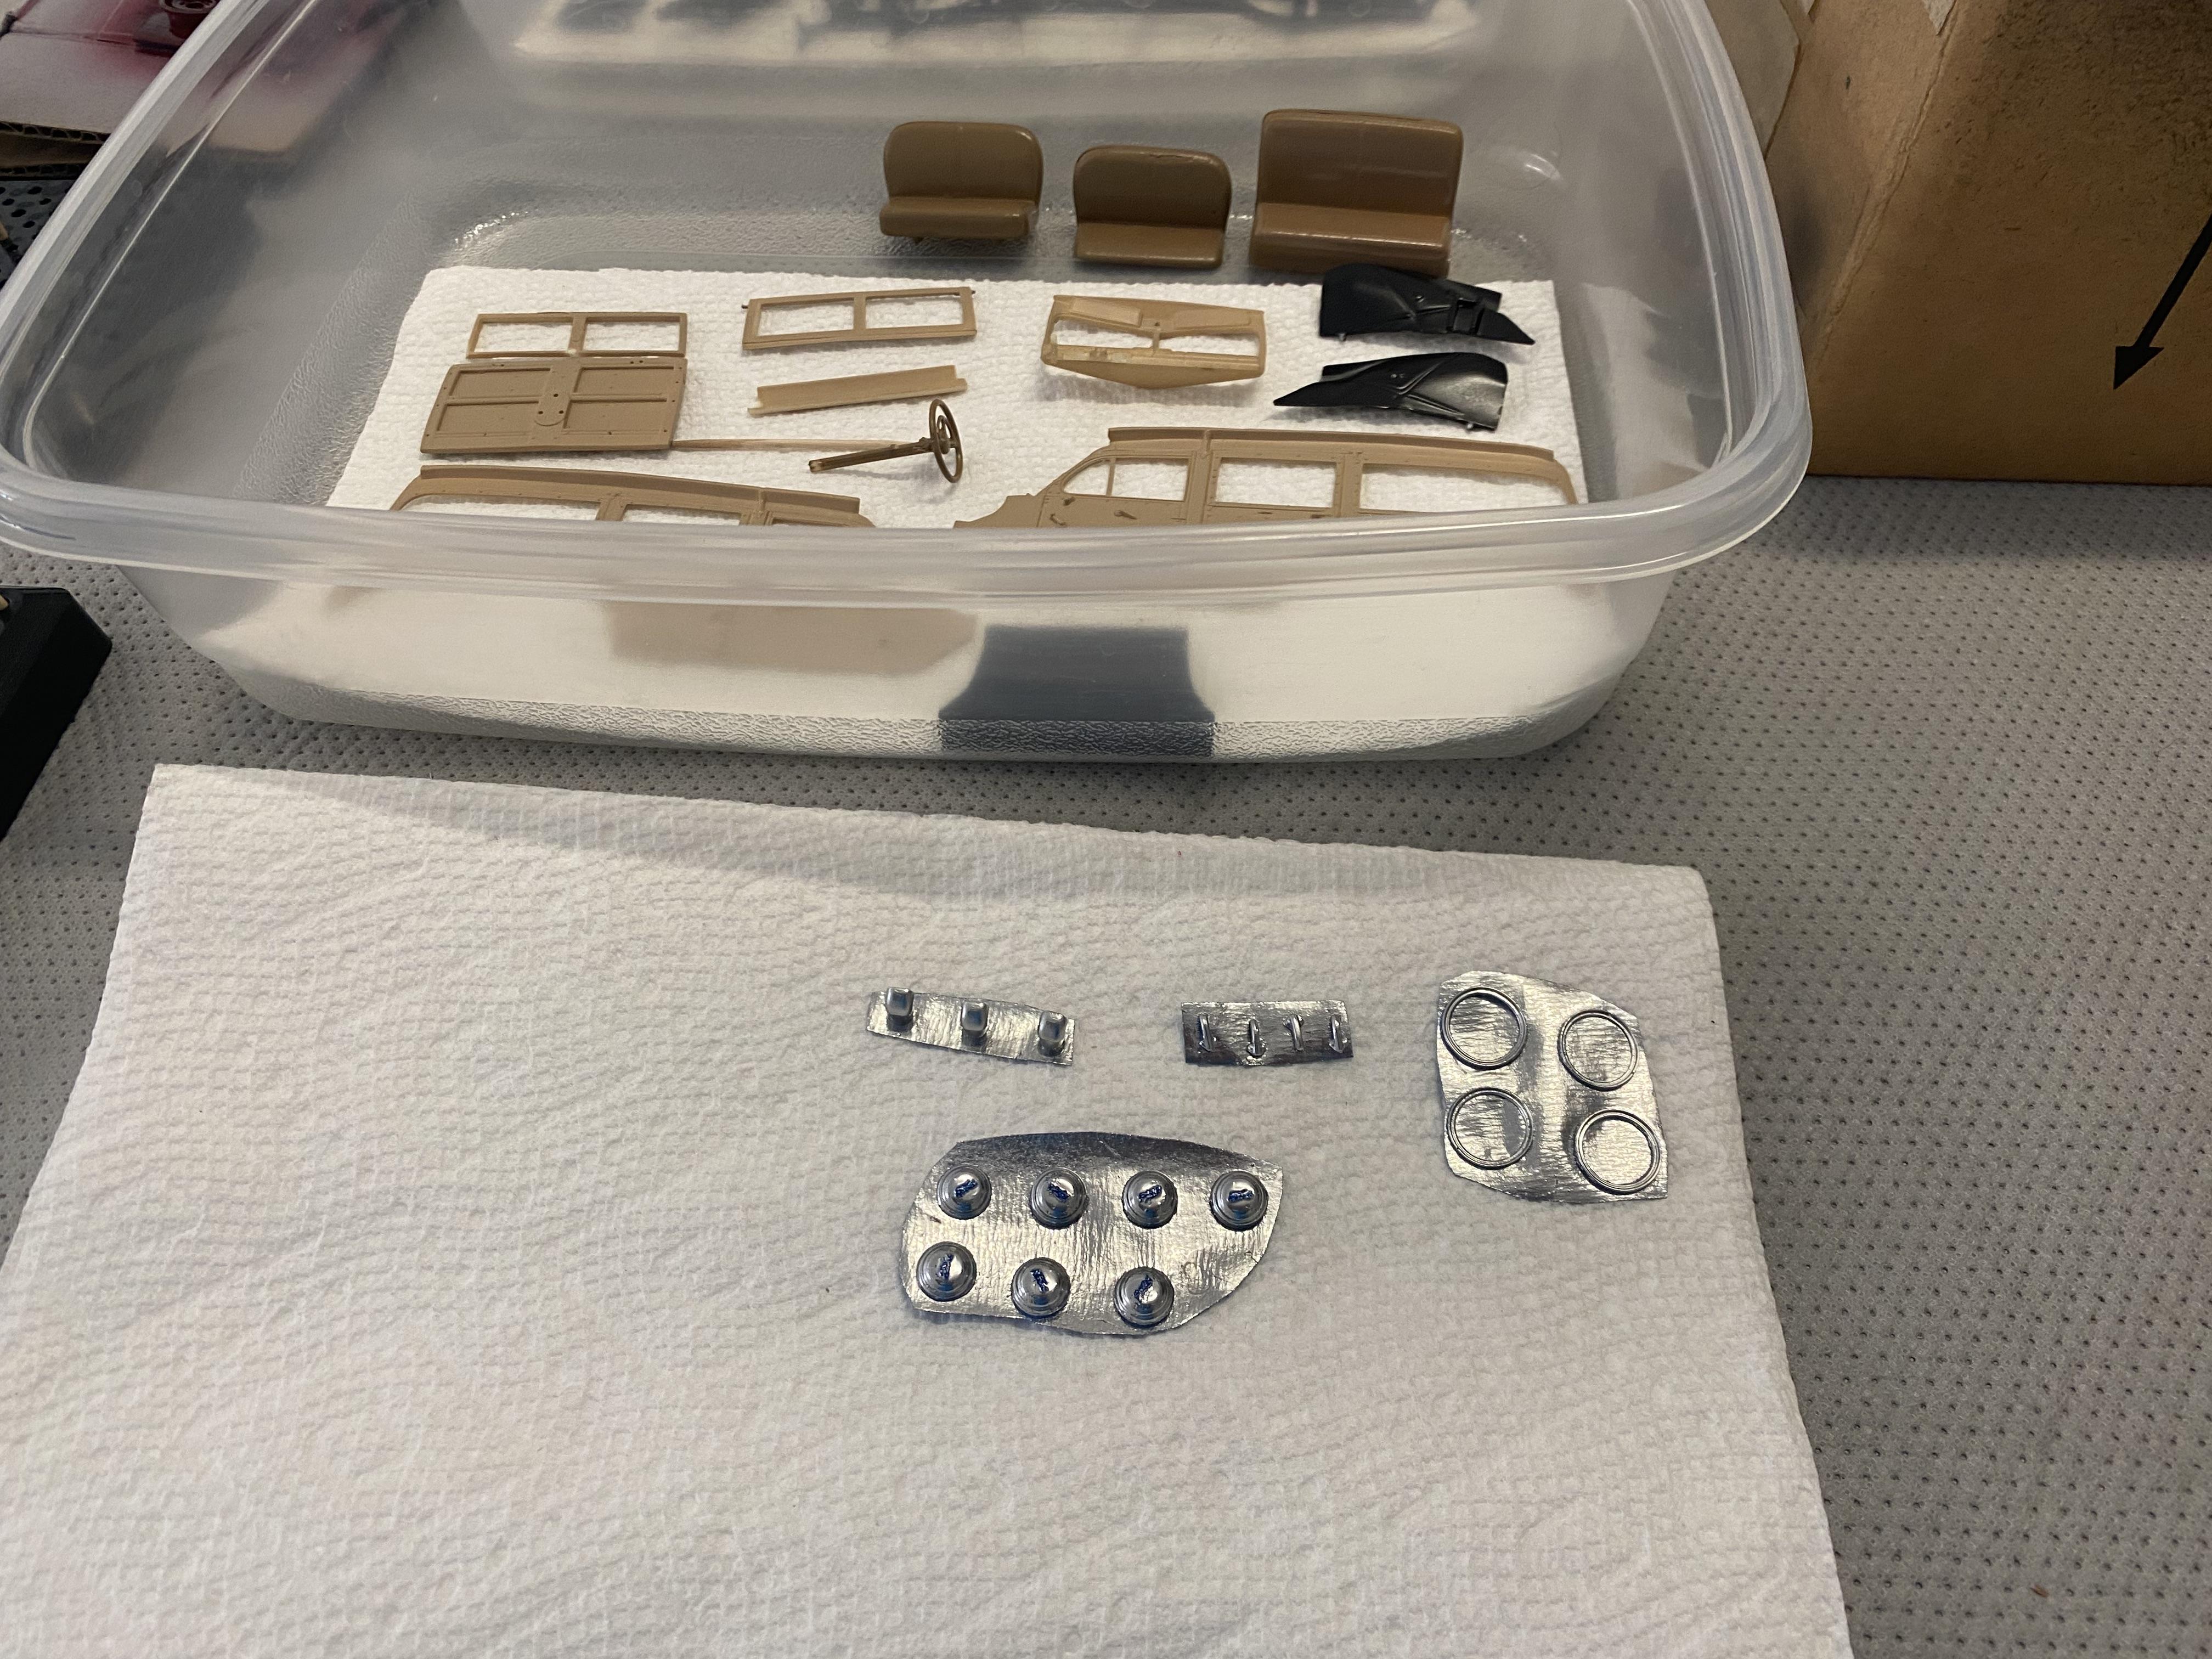
-
Every reference image I found of a 1941 Ford Woody had a third row rear seat but for some reason the kit didn’t include the very back seat. I resin cast a rear seat and trimmed it to fit on the LED battery cover camouflaging it more. I also resin cast the surfboard and created additional boards. I will be creating a roof rack for two boards at some point. I picked up so. .005 styrene sheet and cut for woodgrain inserts. The decals are far too pixelated and one was damaged. I had purchased this kit opened. Getting a good woodgrain look inside the opening wood be difficult and likely too much buildup on the edges. I am pretty much ready to move on to paint and assembly with fabrication and modification is about done. I have some supplies on order so probably next weekend.