Duddly01
-
Posts
1,048 -
Joined
-
Last visited
Content Type
Profiles
Forums
Events
Gallery
Everything posted by Duddly01
-
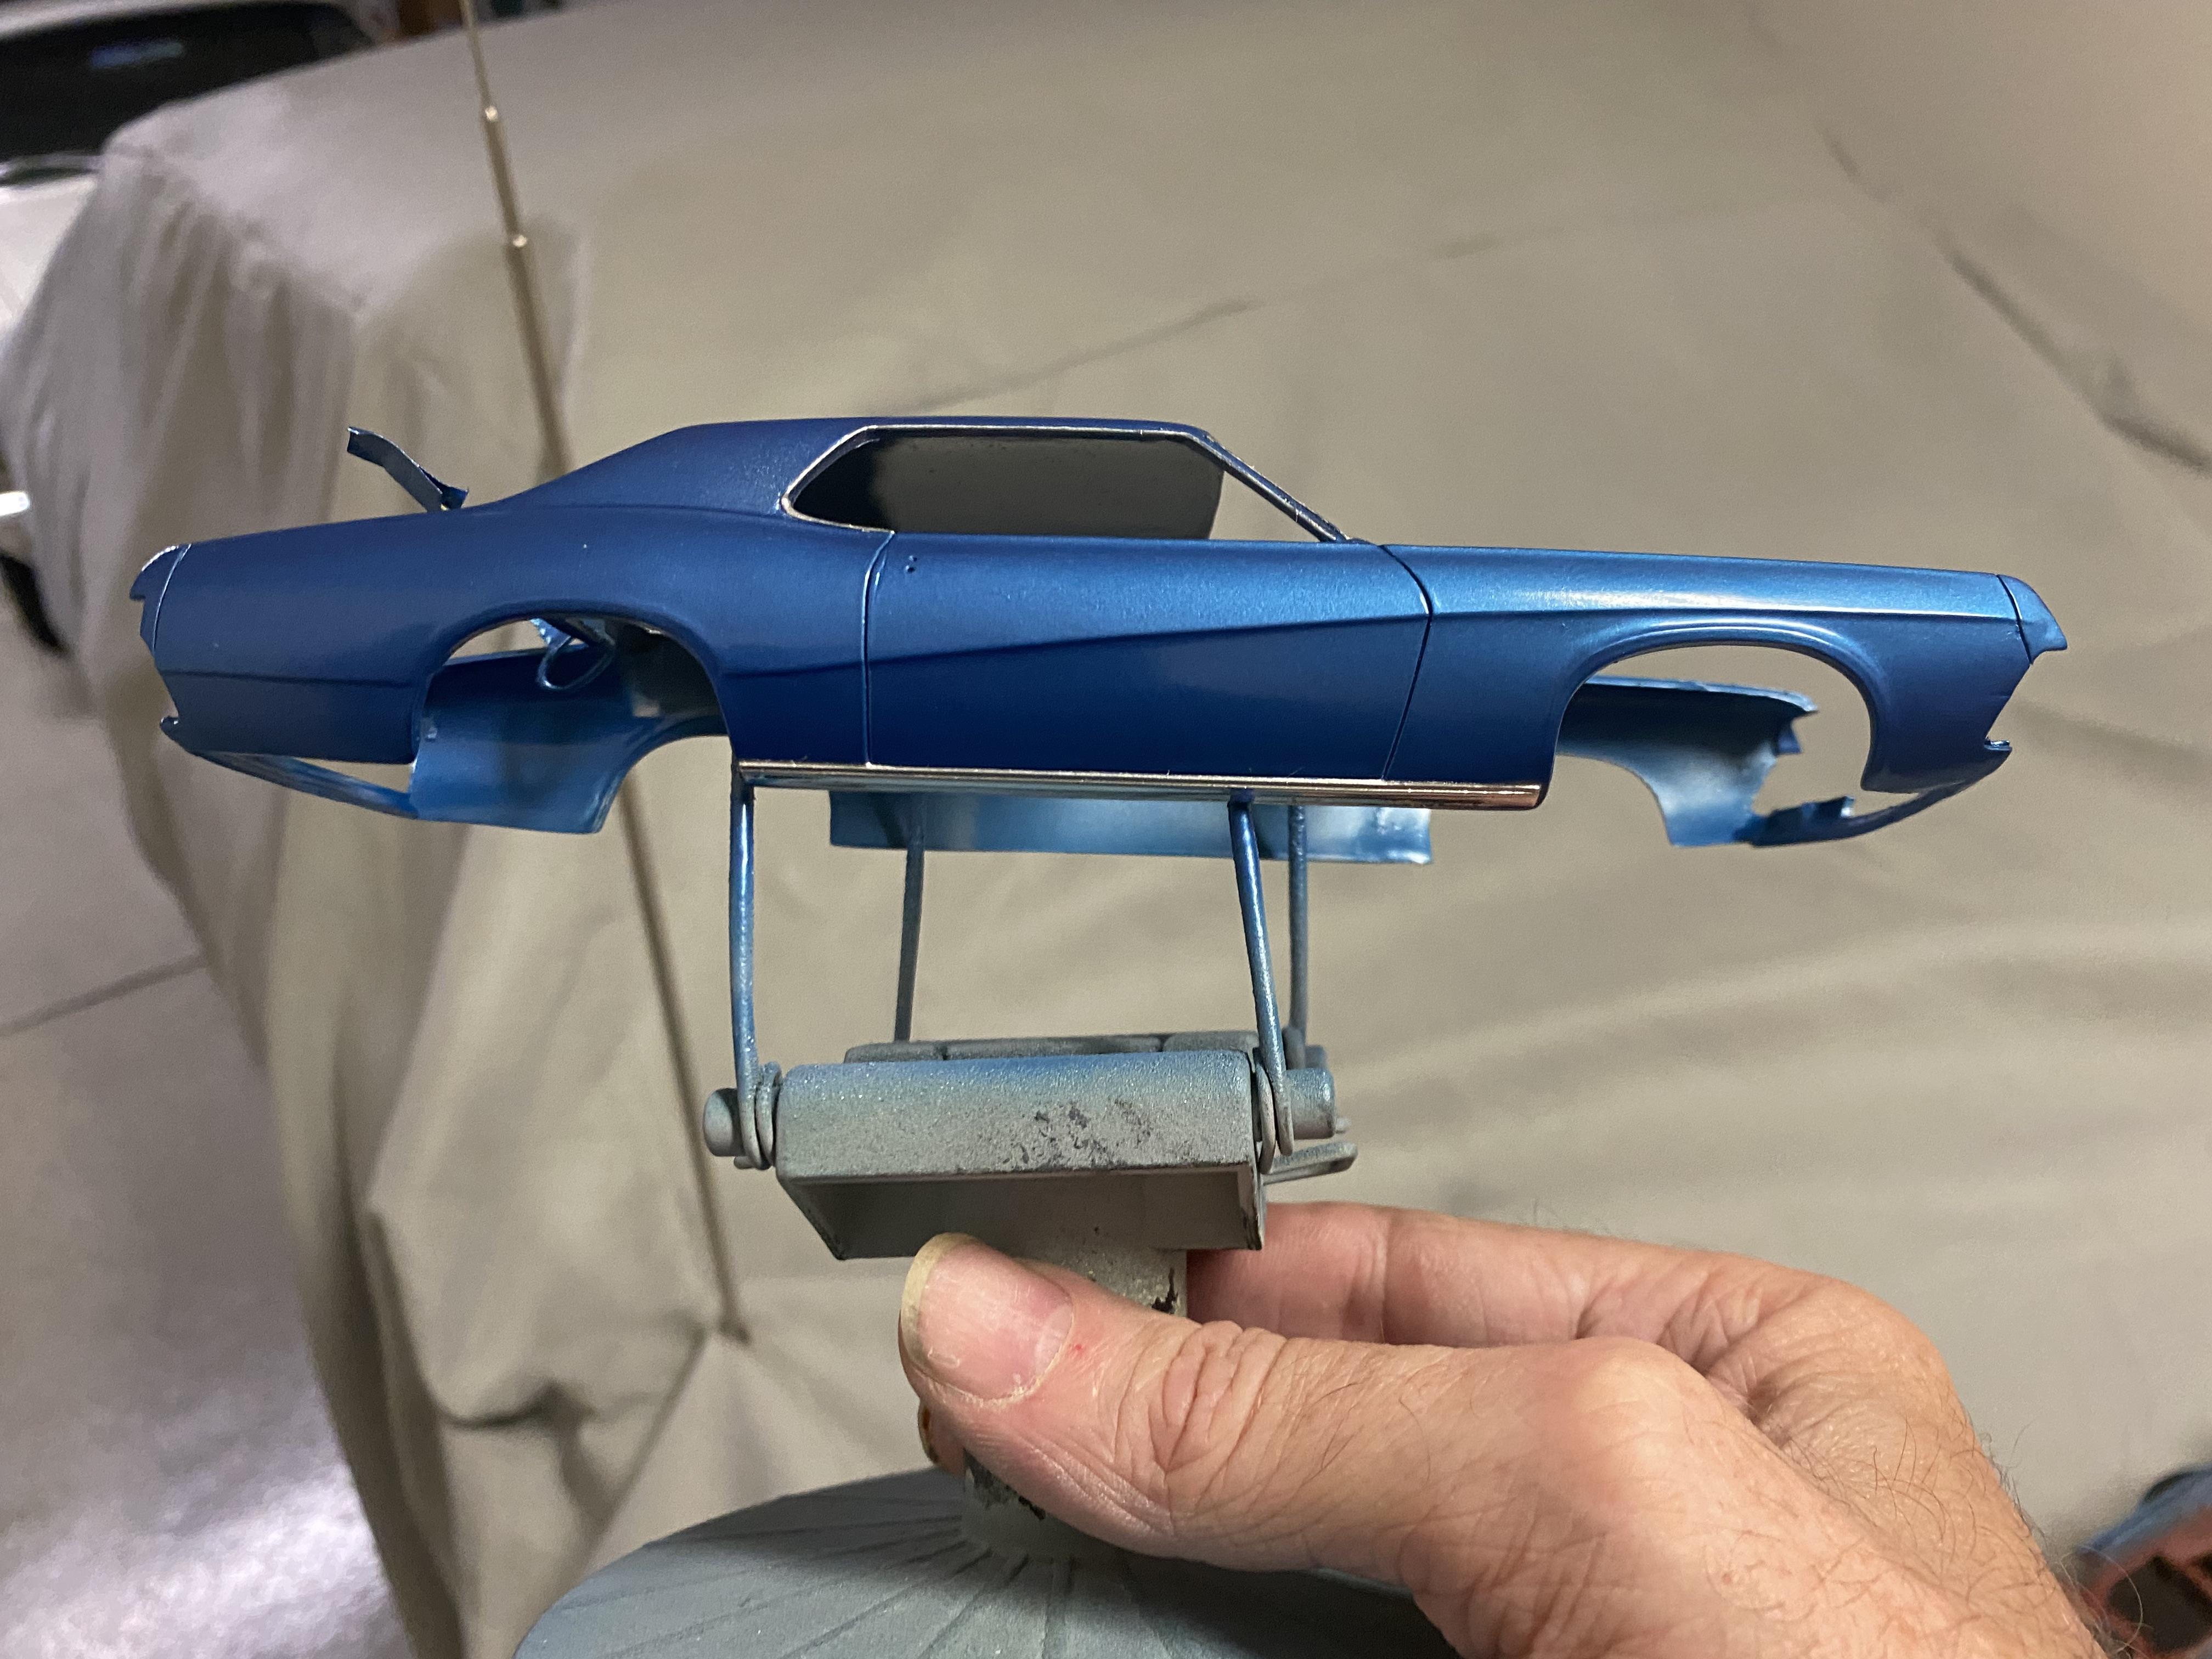
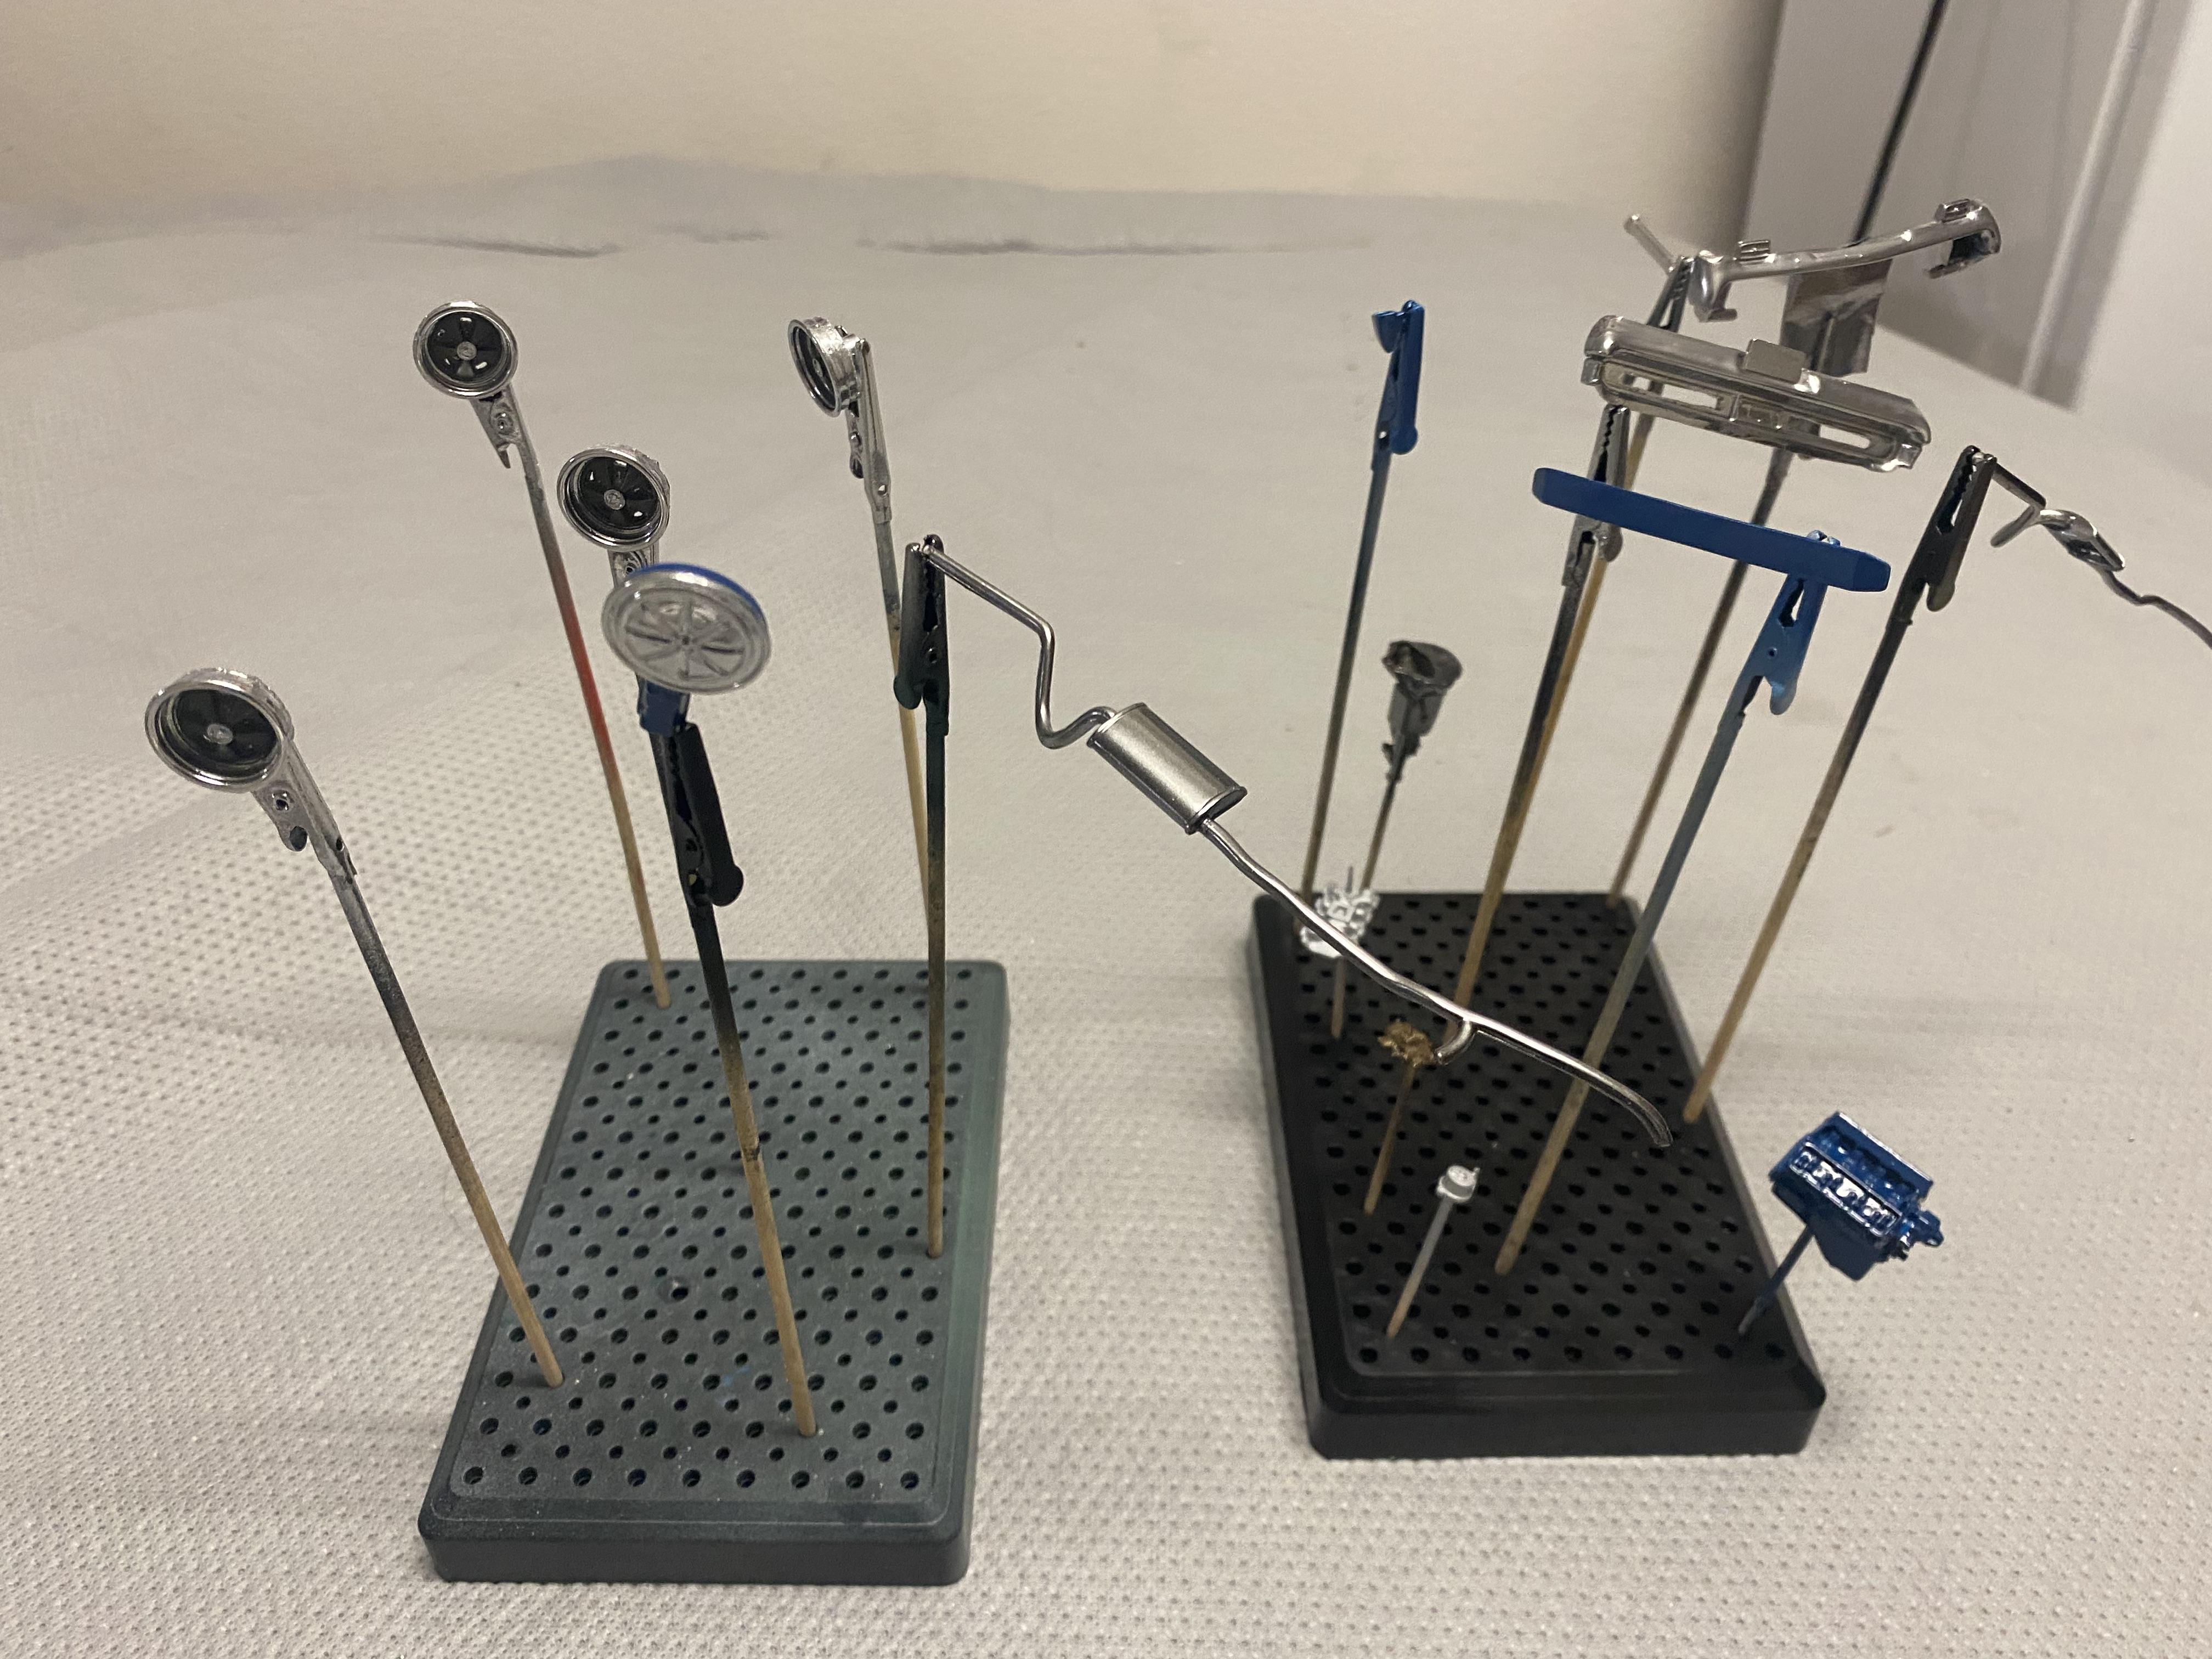
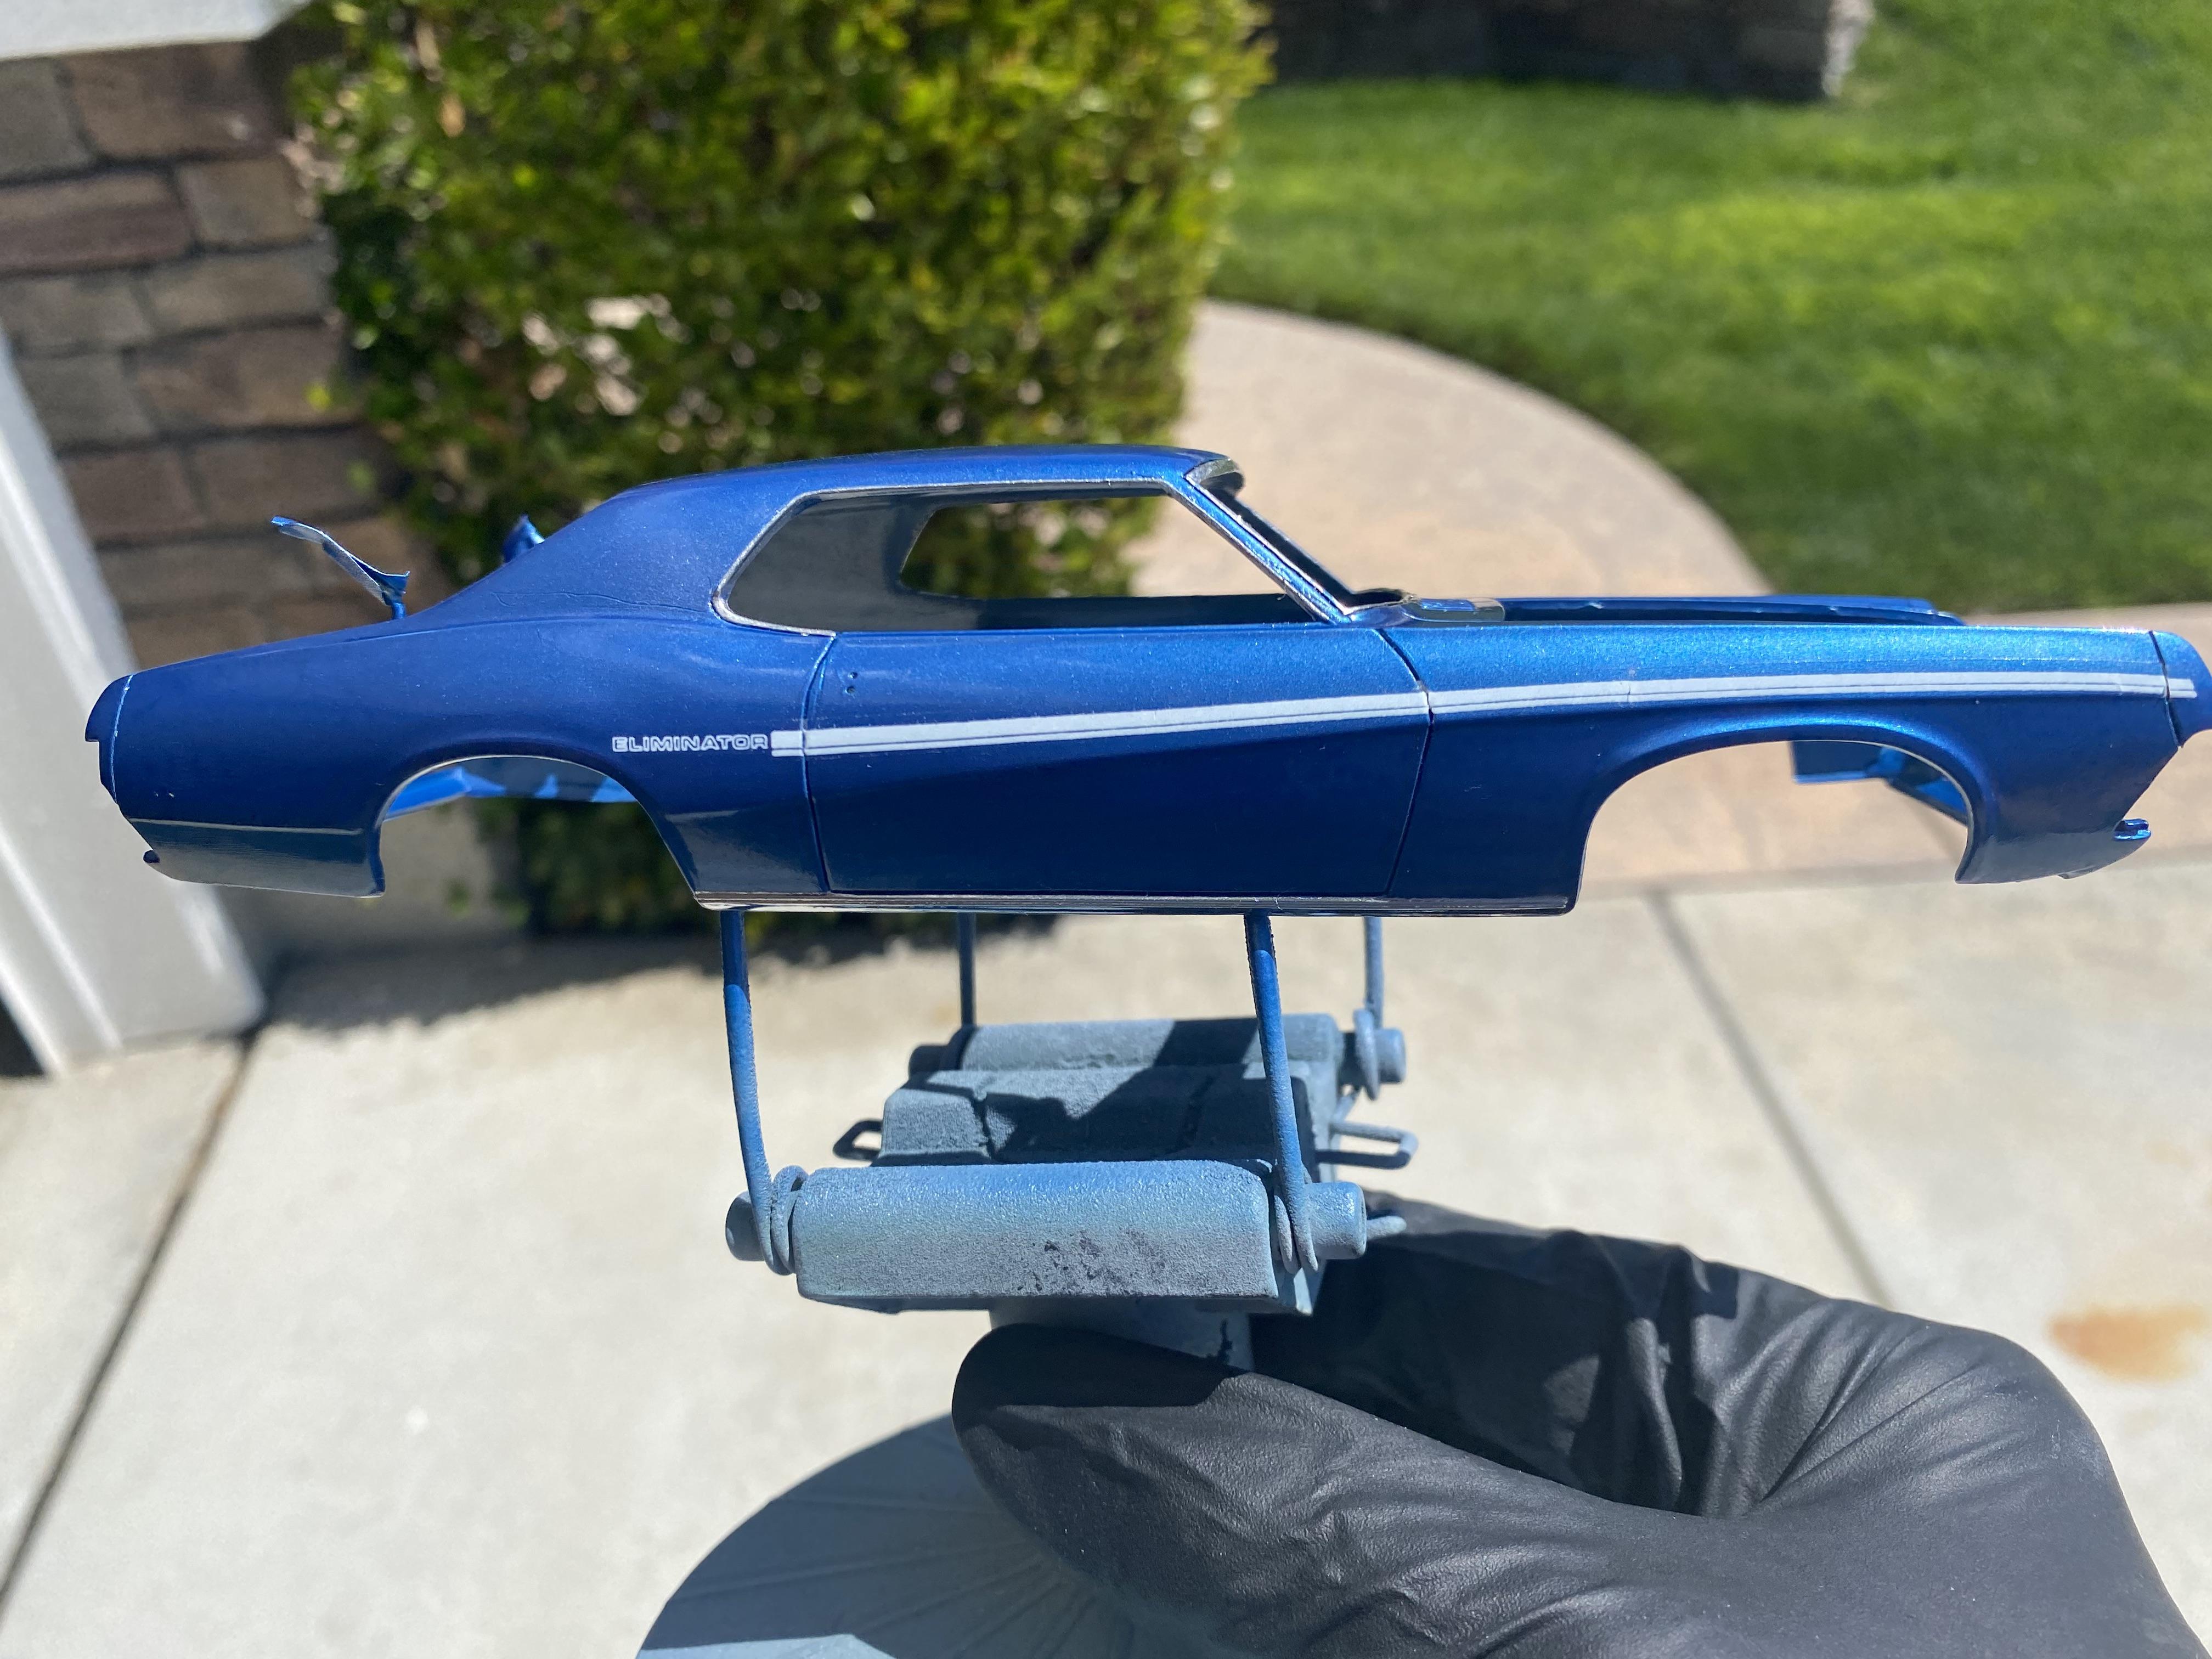
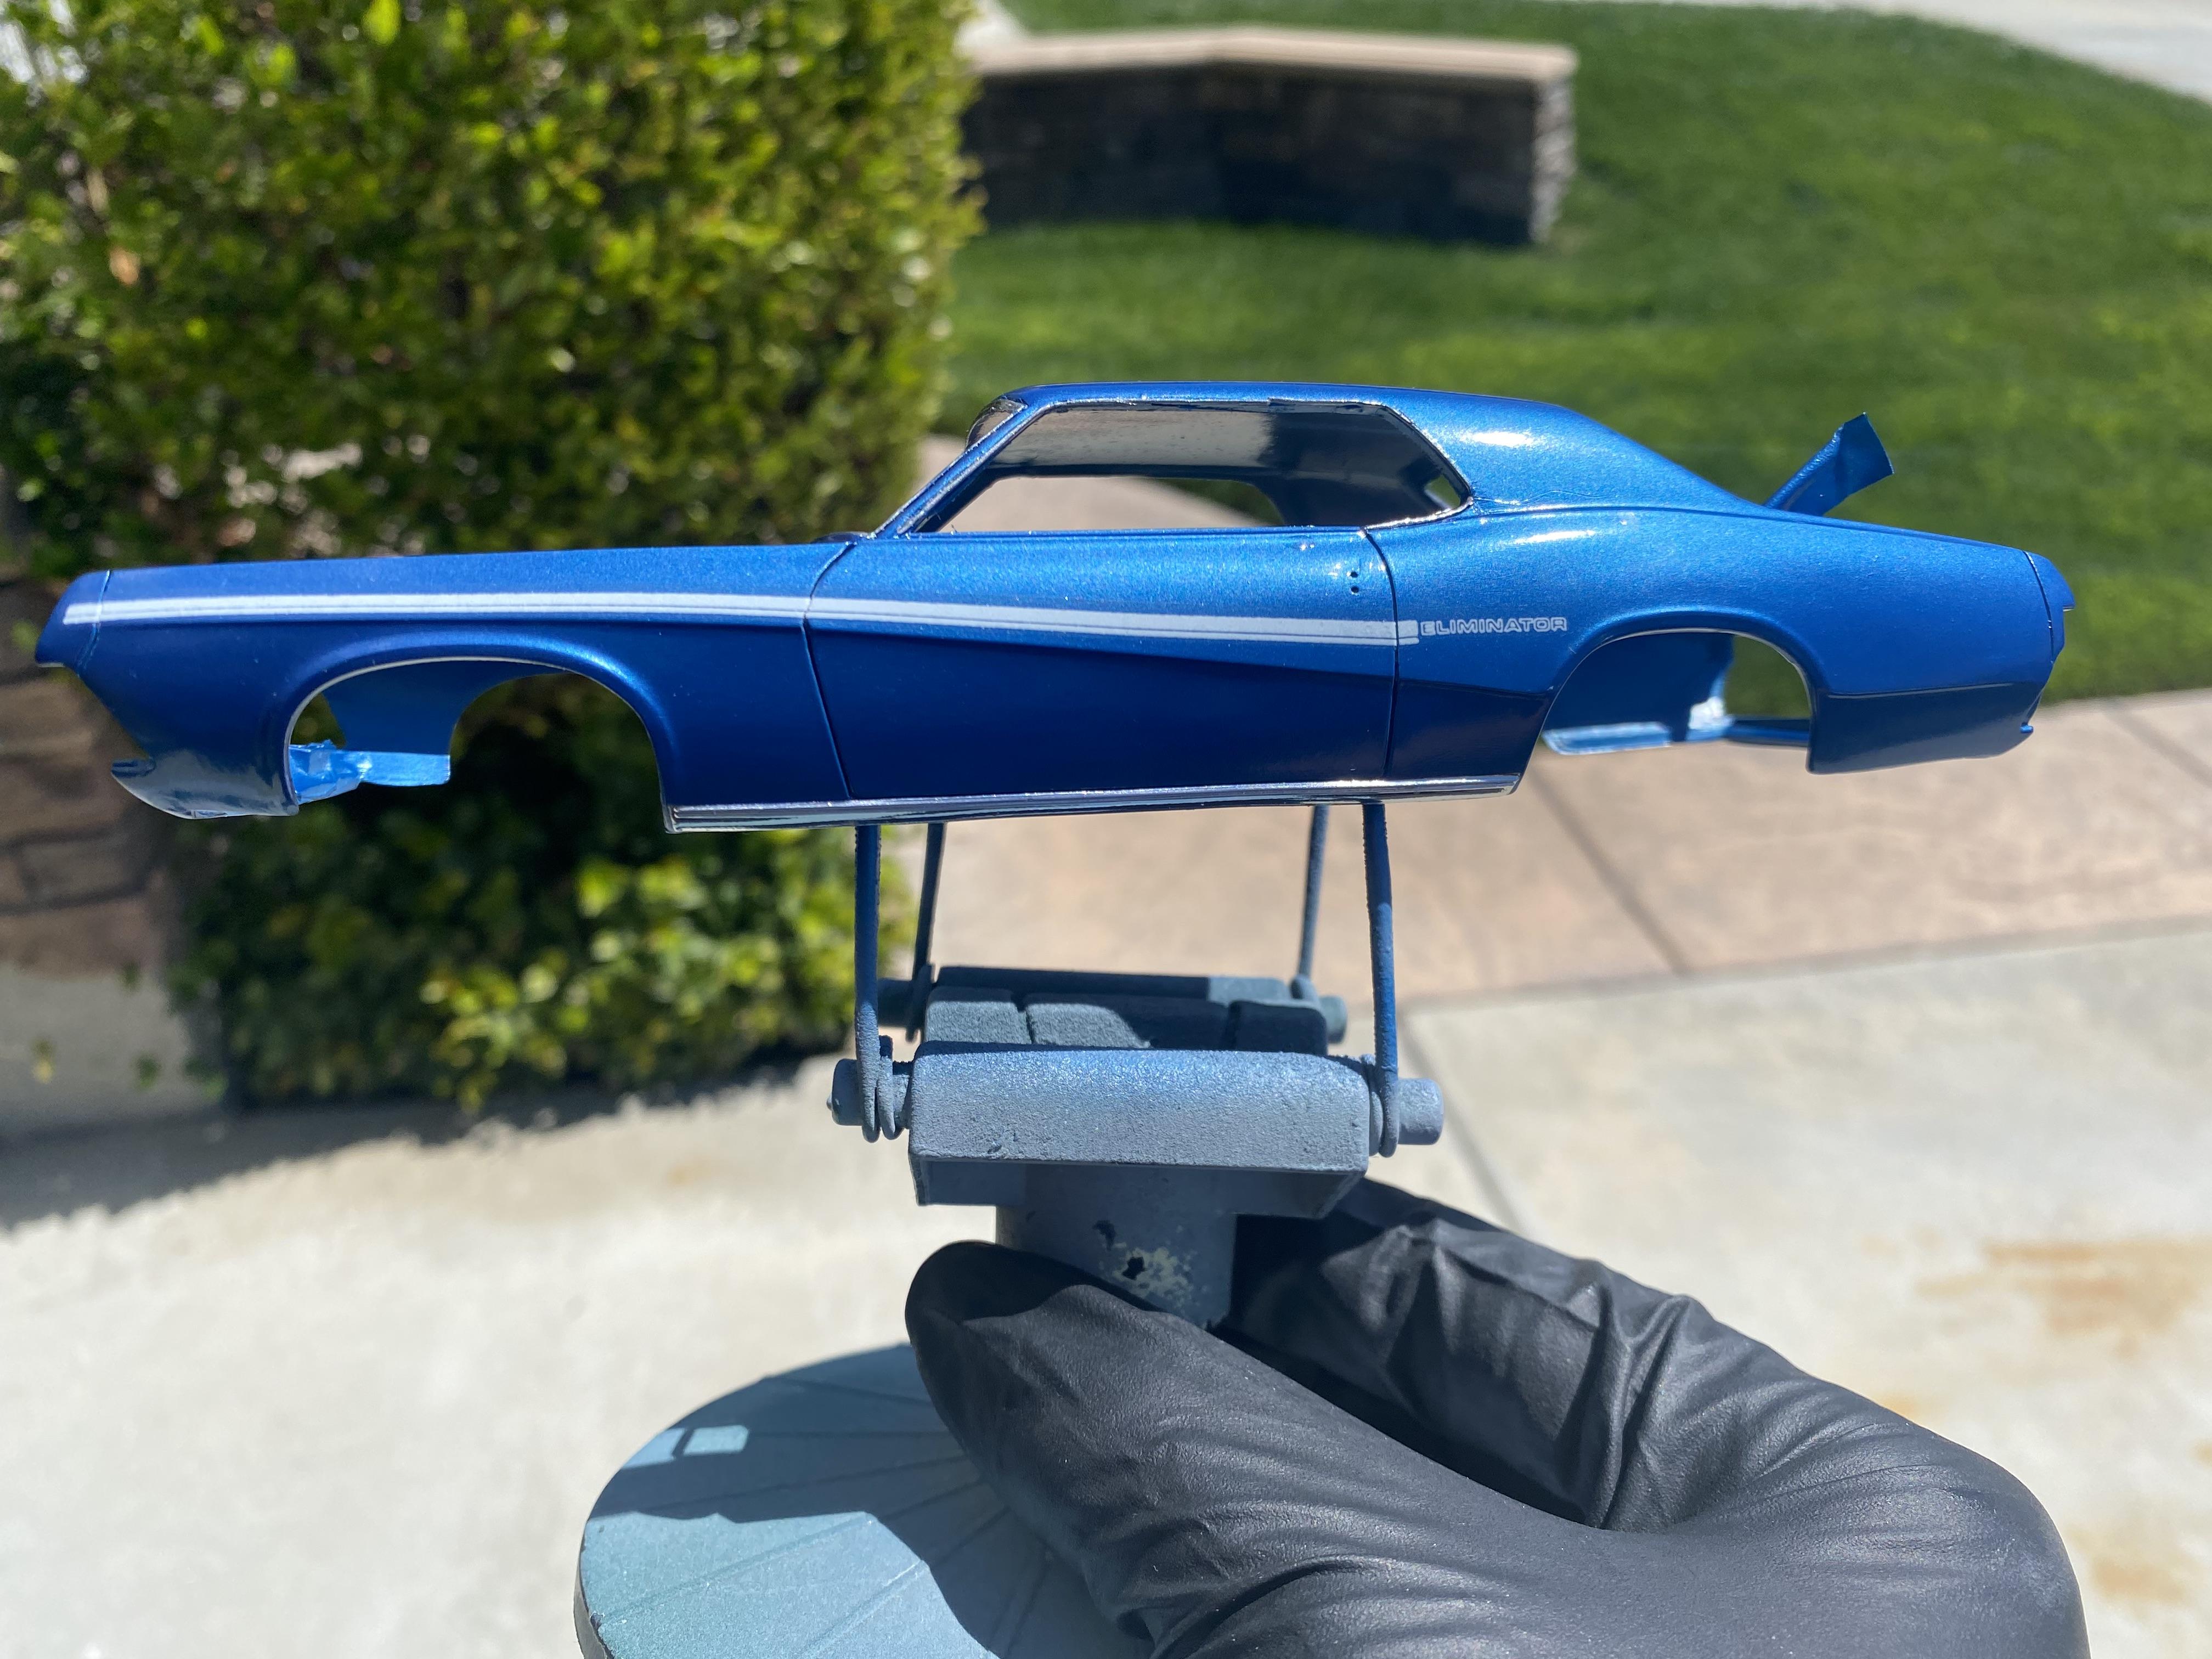
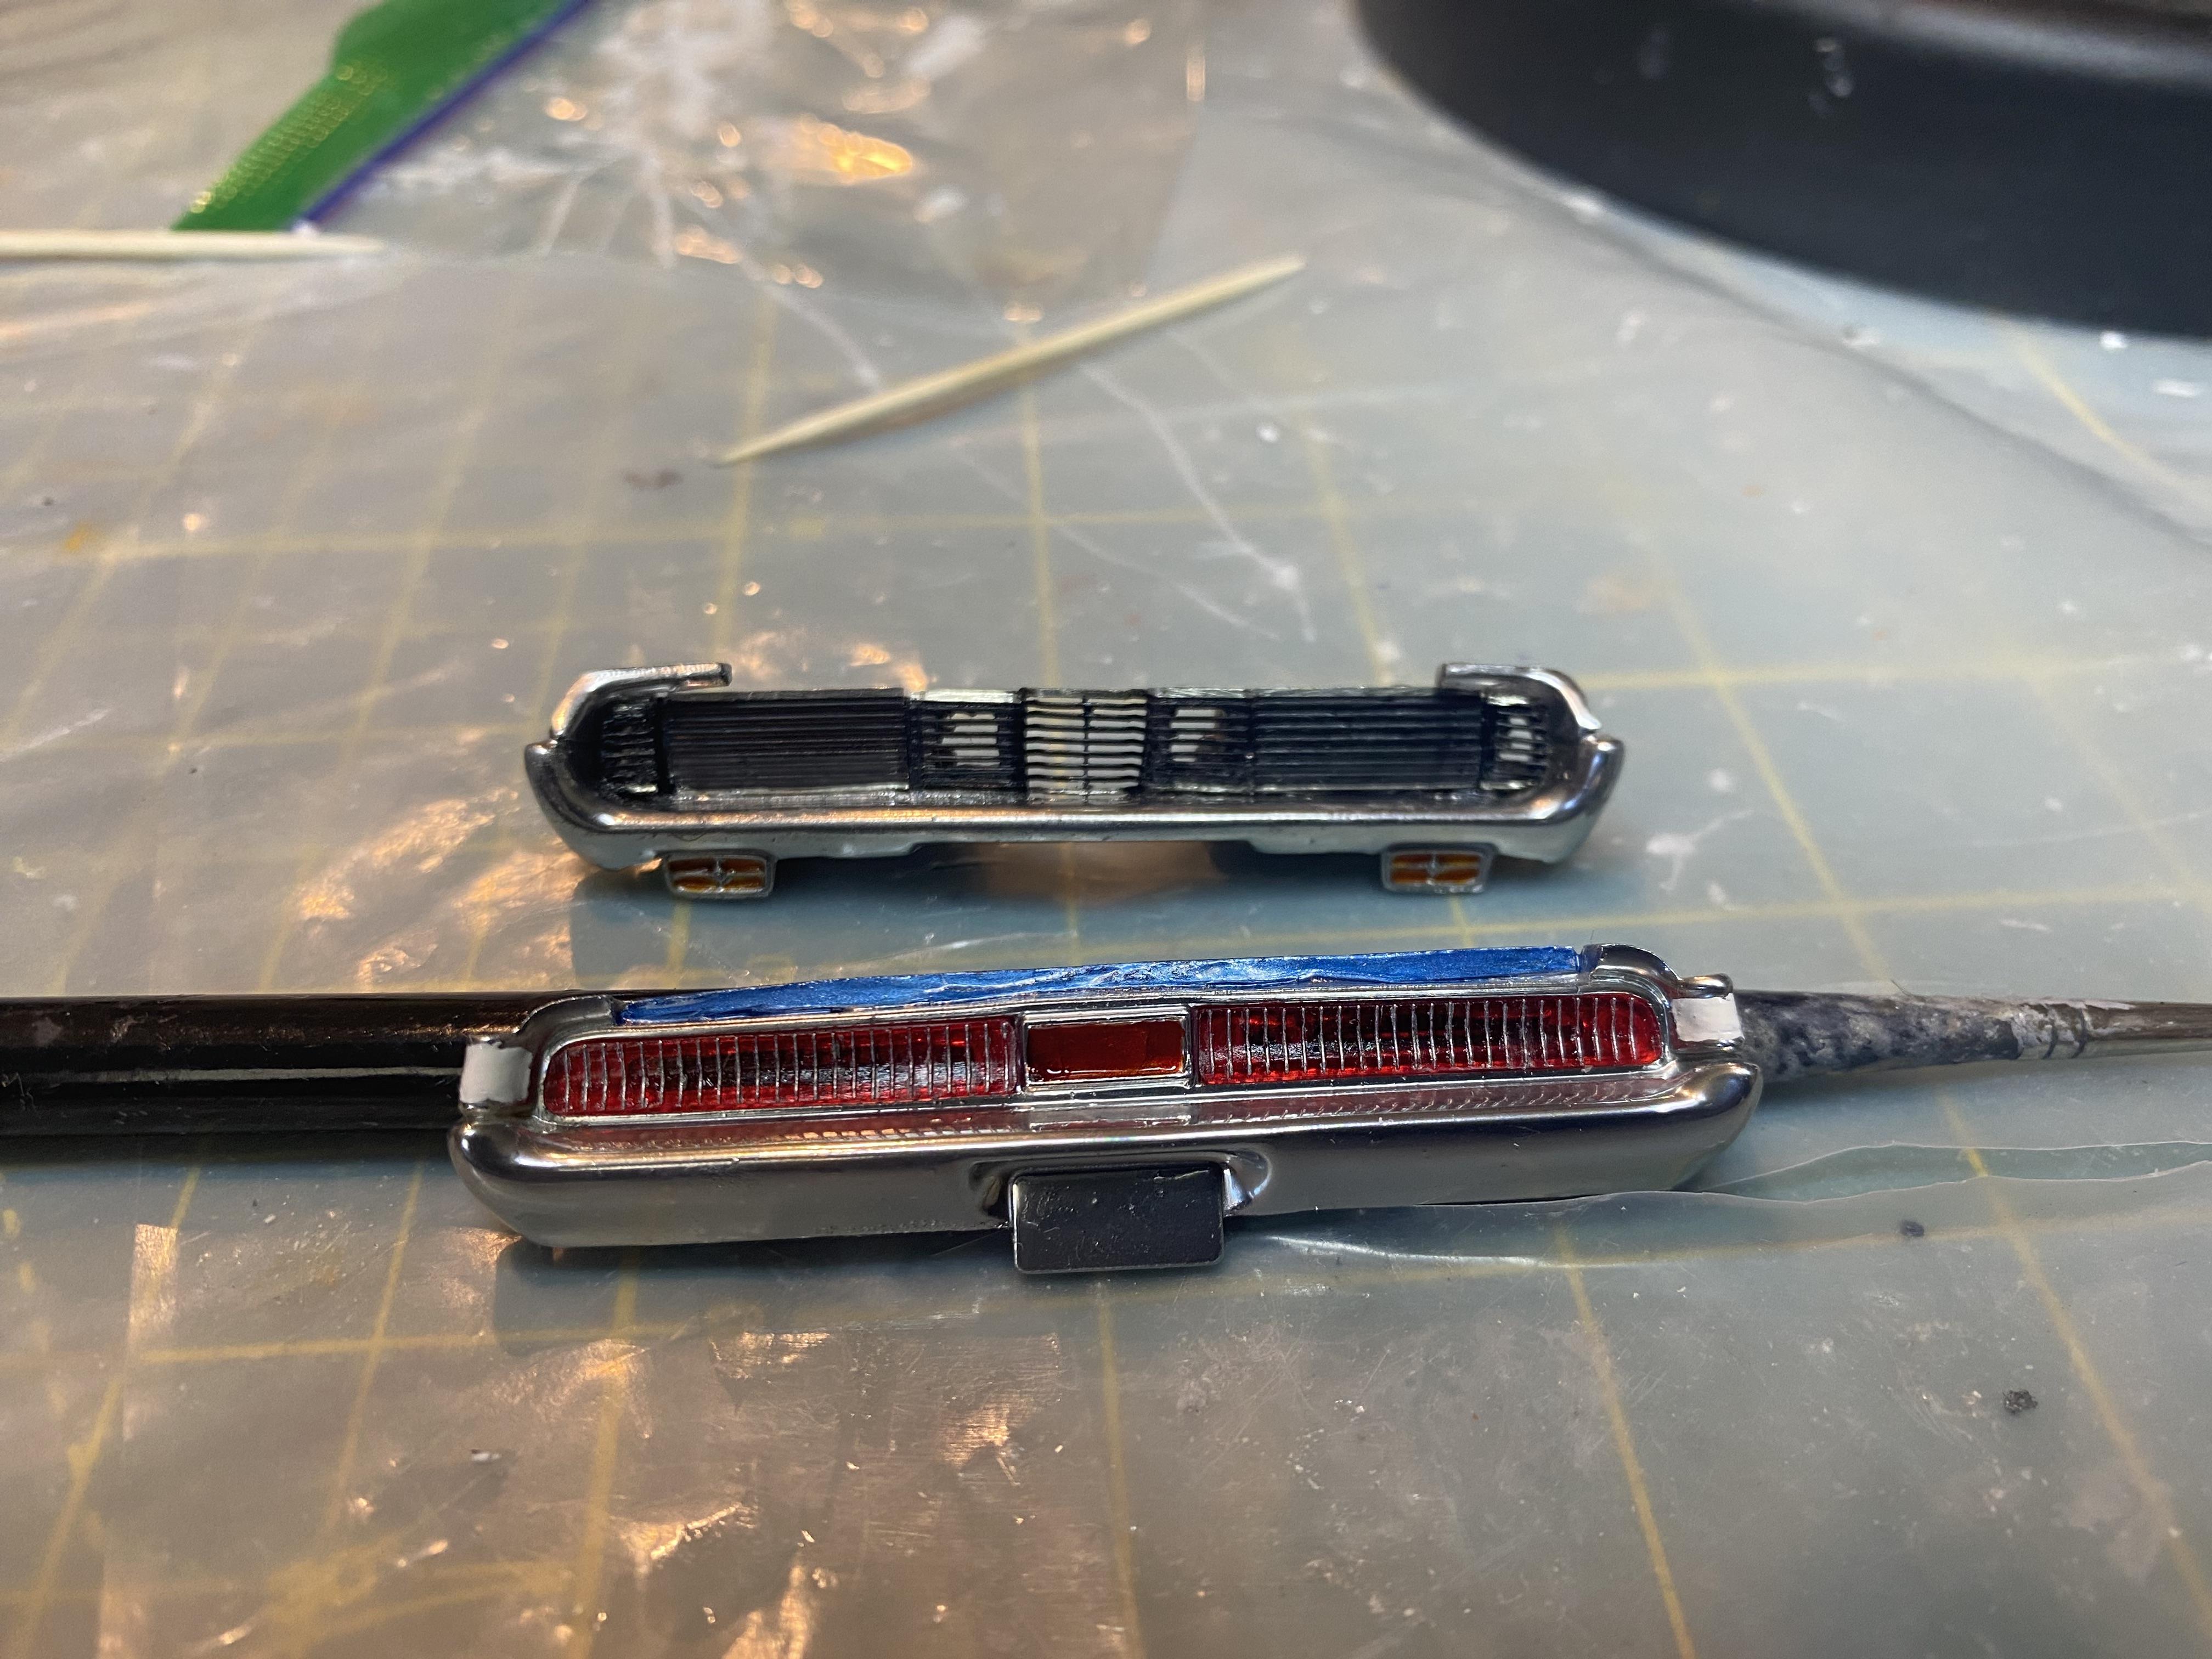
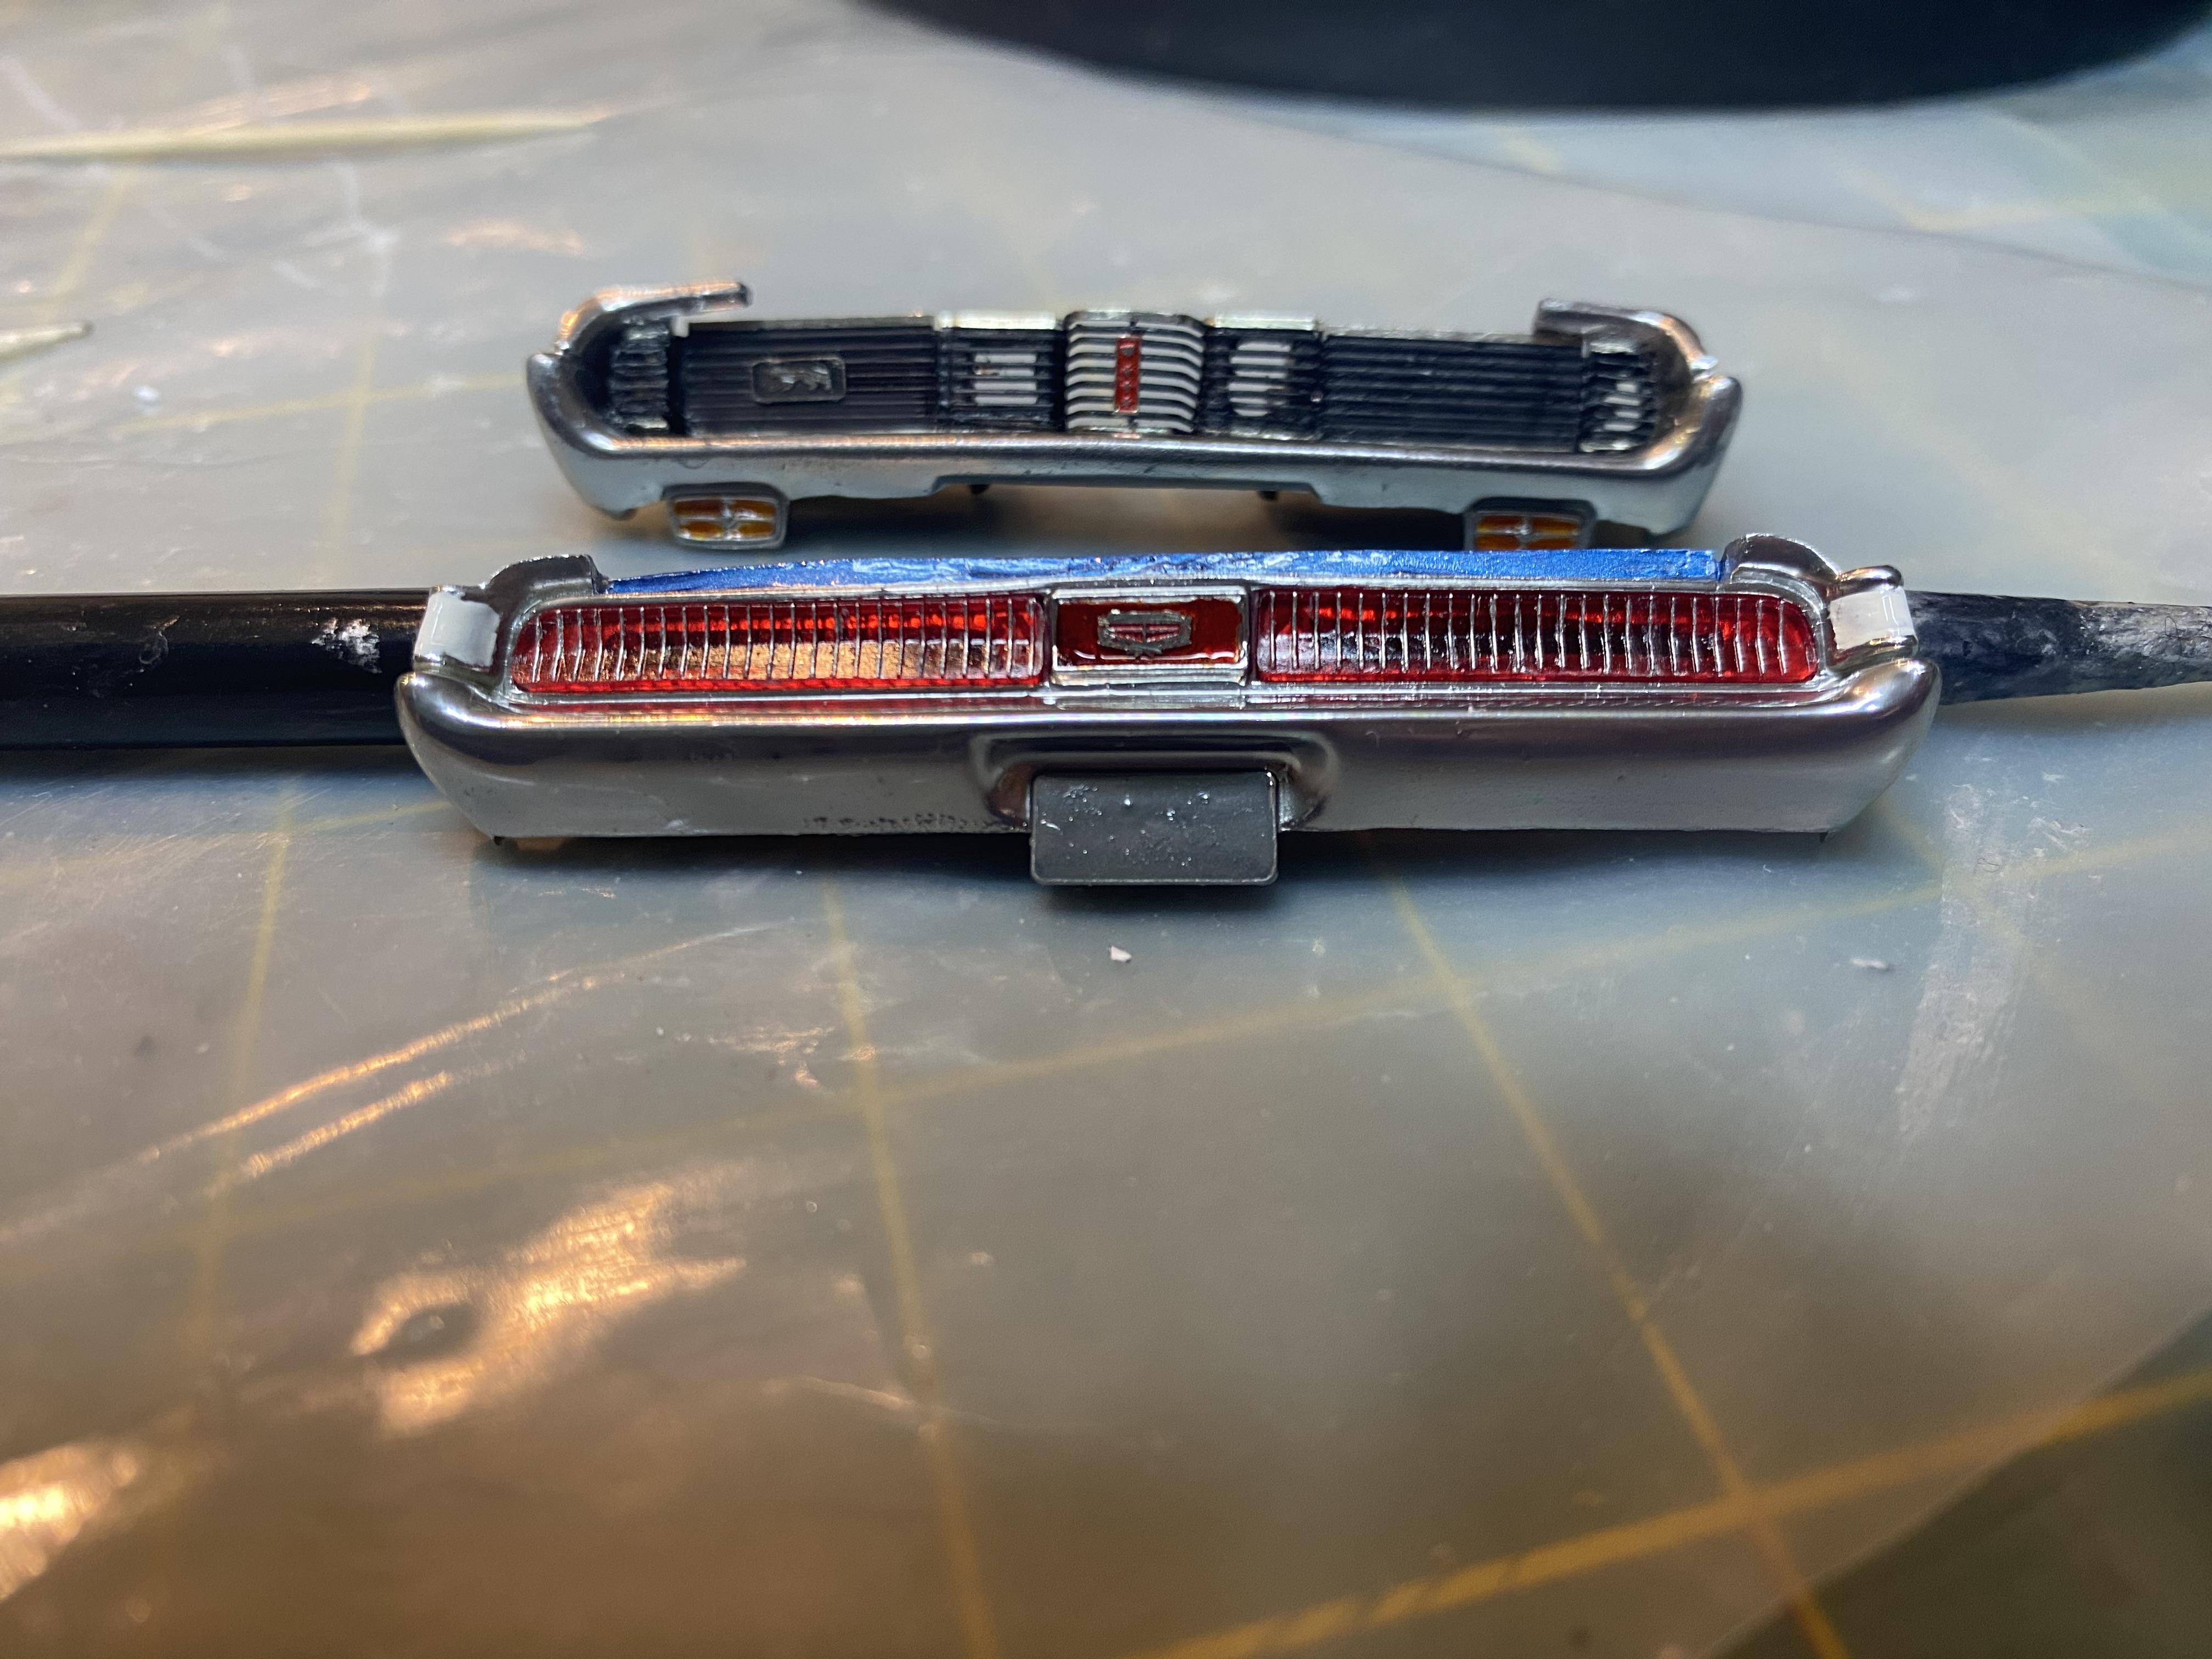
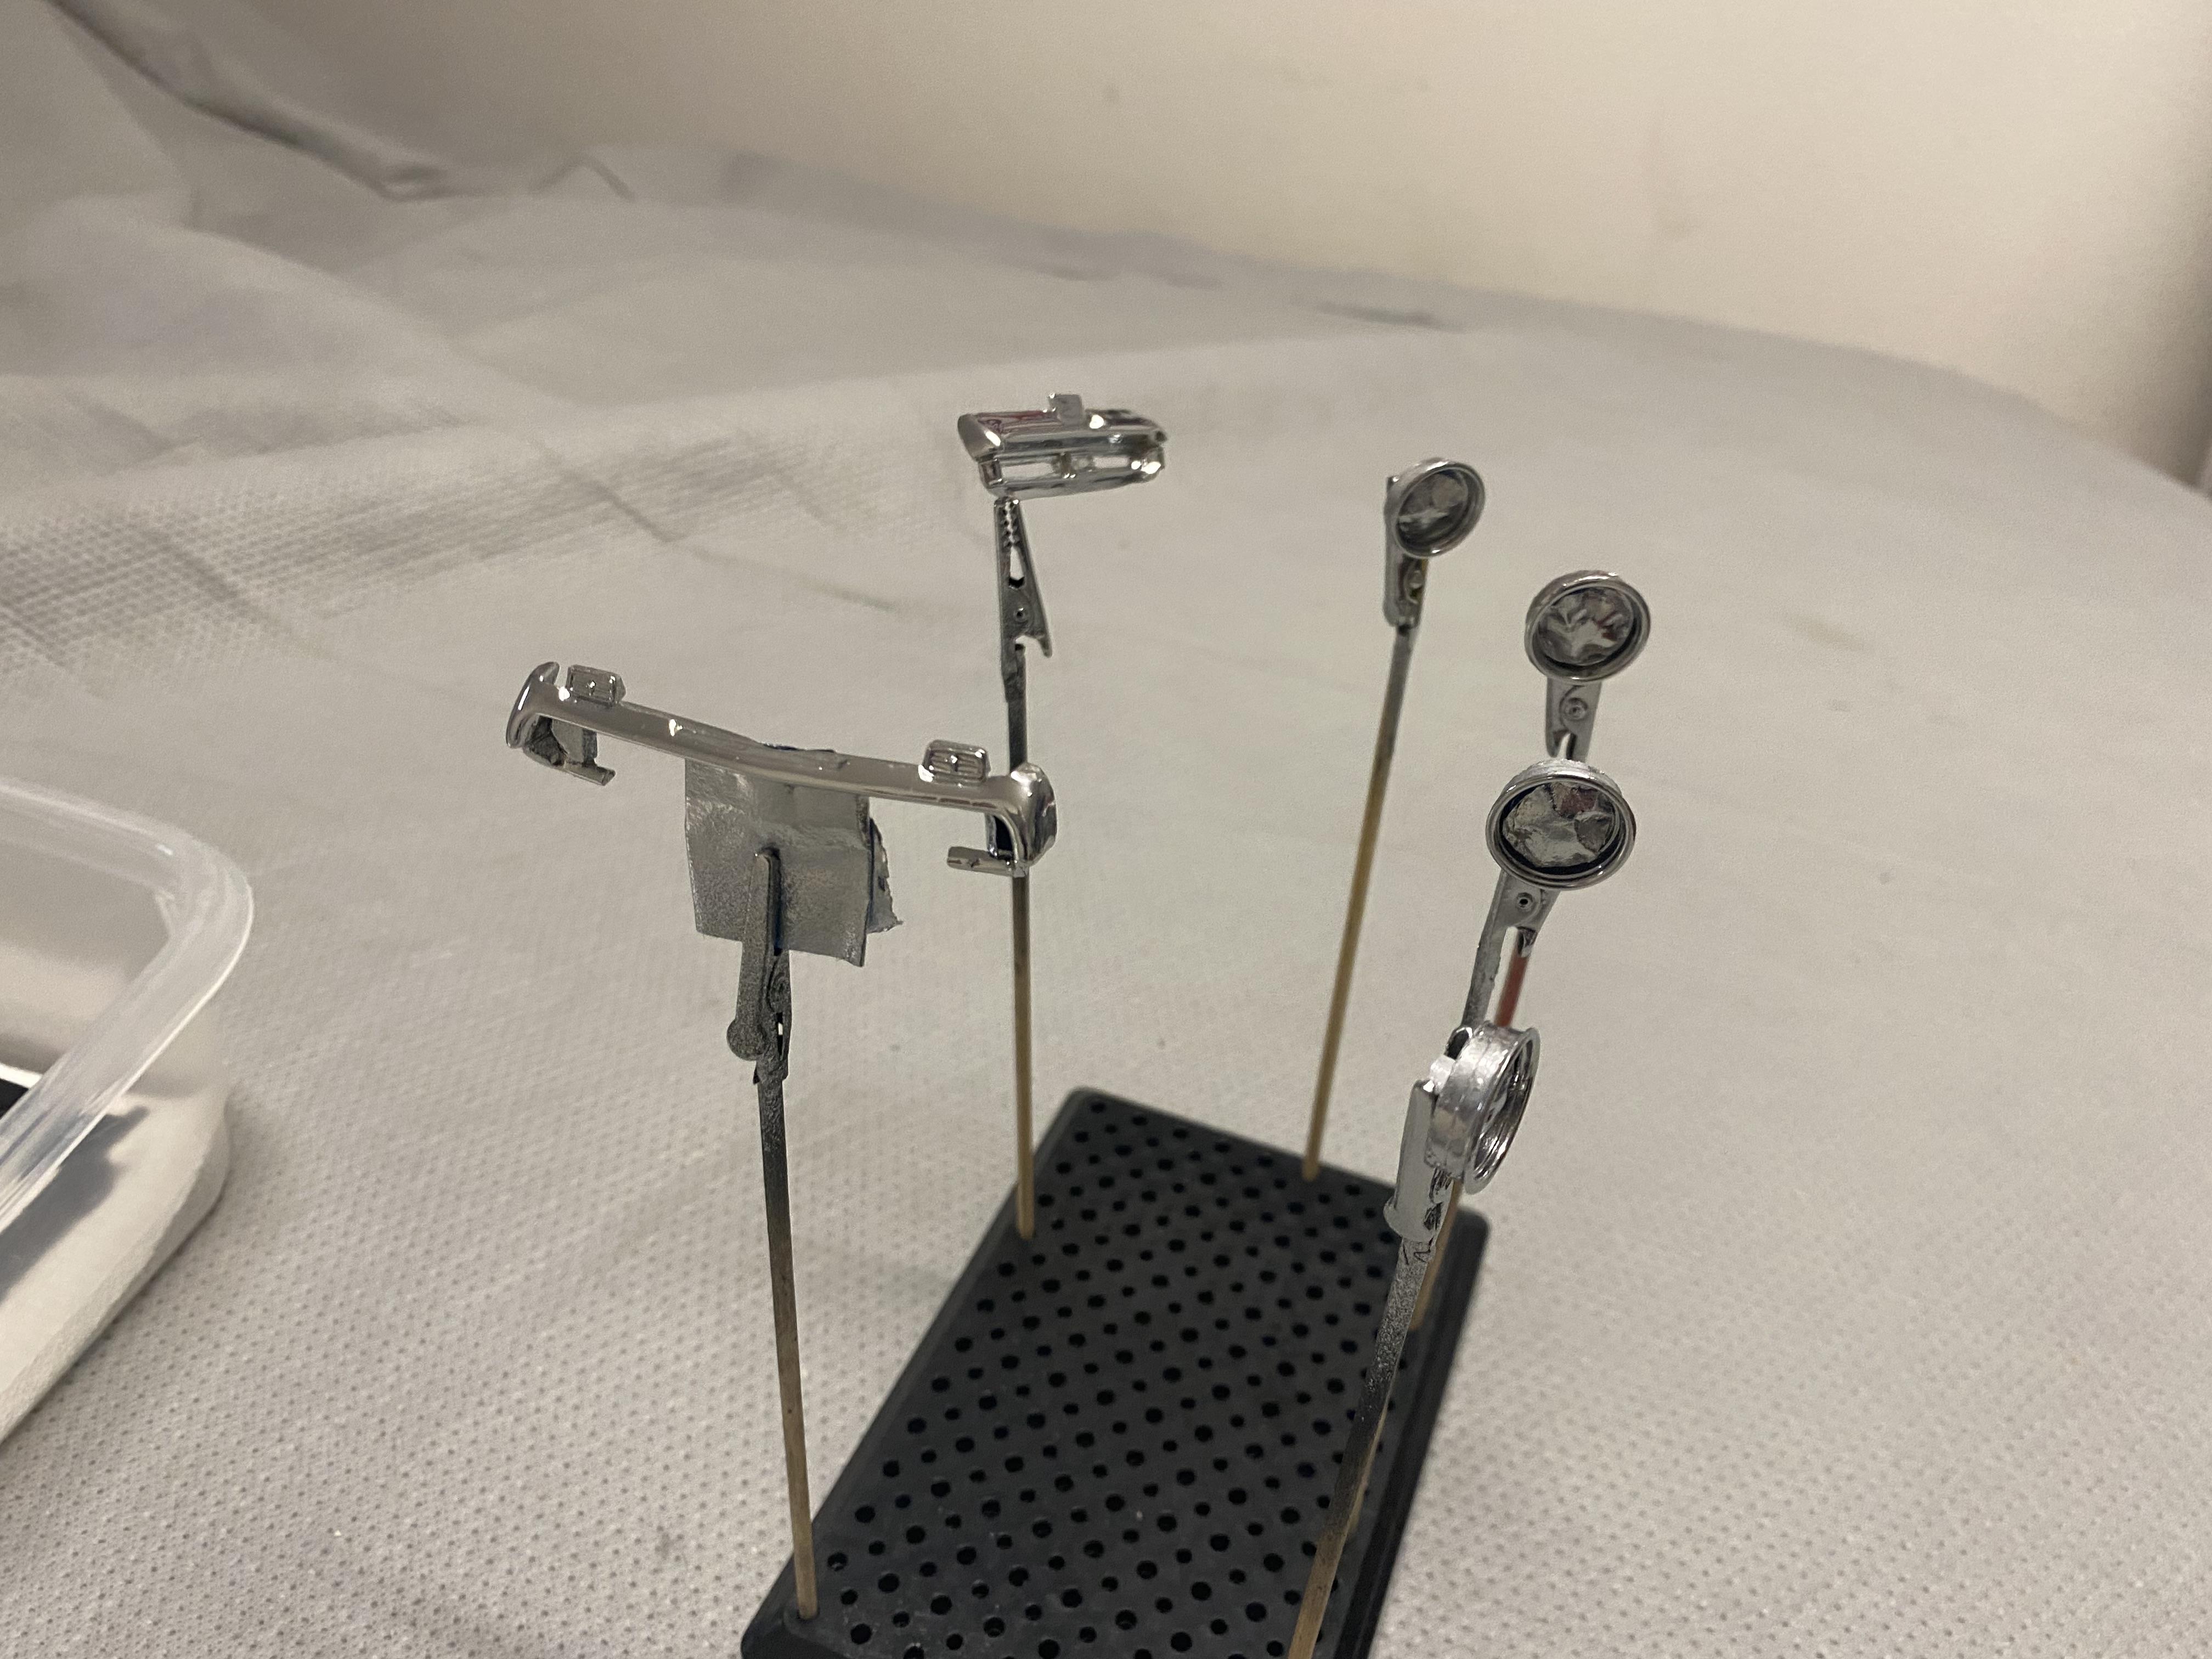
Quite a bit more paint and detail done. carpet flocking done for the interior painted the cougar styled steel wheels I resin casted from an original annual set I got on eBay. I like these much better than the kit wheels. installed the decals. Now I wait for a couple days to 2K clear the body, then wet sand and polish. painted and assembled the front and rear bumpers. installed inboard lenses that won’t get LEDs. before emblems after emblems.

-
Thanks, I think so too.
-
Thank you.
-
It can be done, with more lights and batteries. Sadly, that is not the direction I am going, no turn signals.
-
It is a nice color. Same color as my mother 67 Mustang Fastback. I built a replica of it a little while back.
-
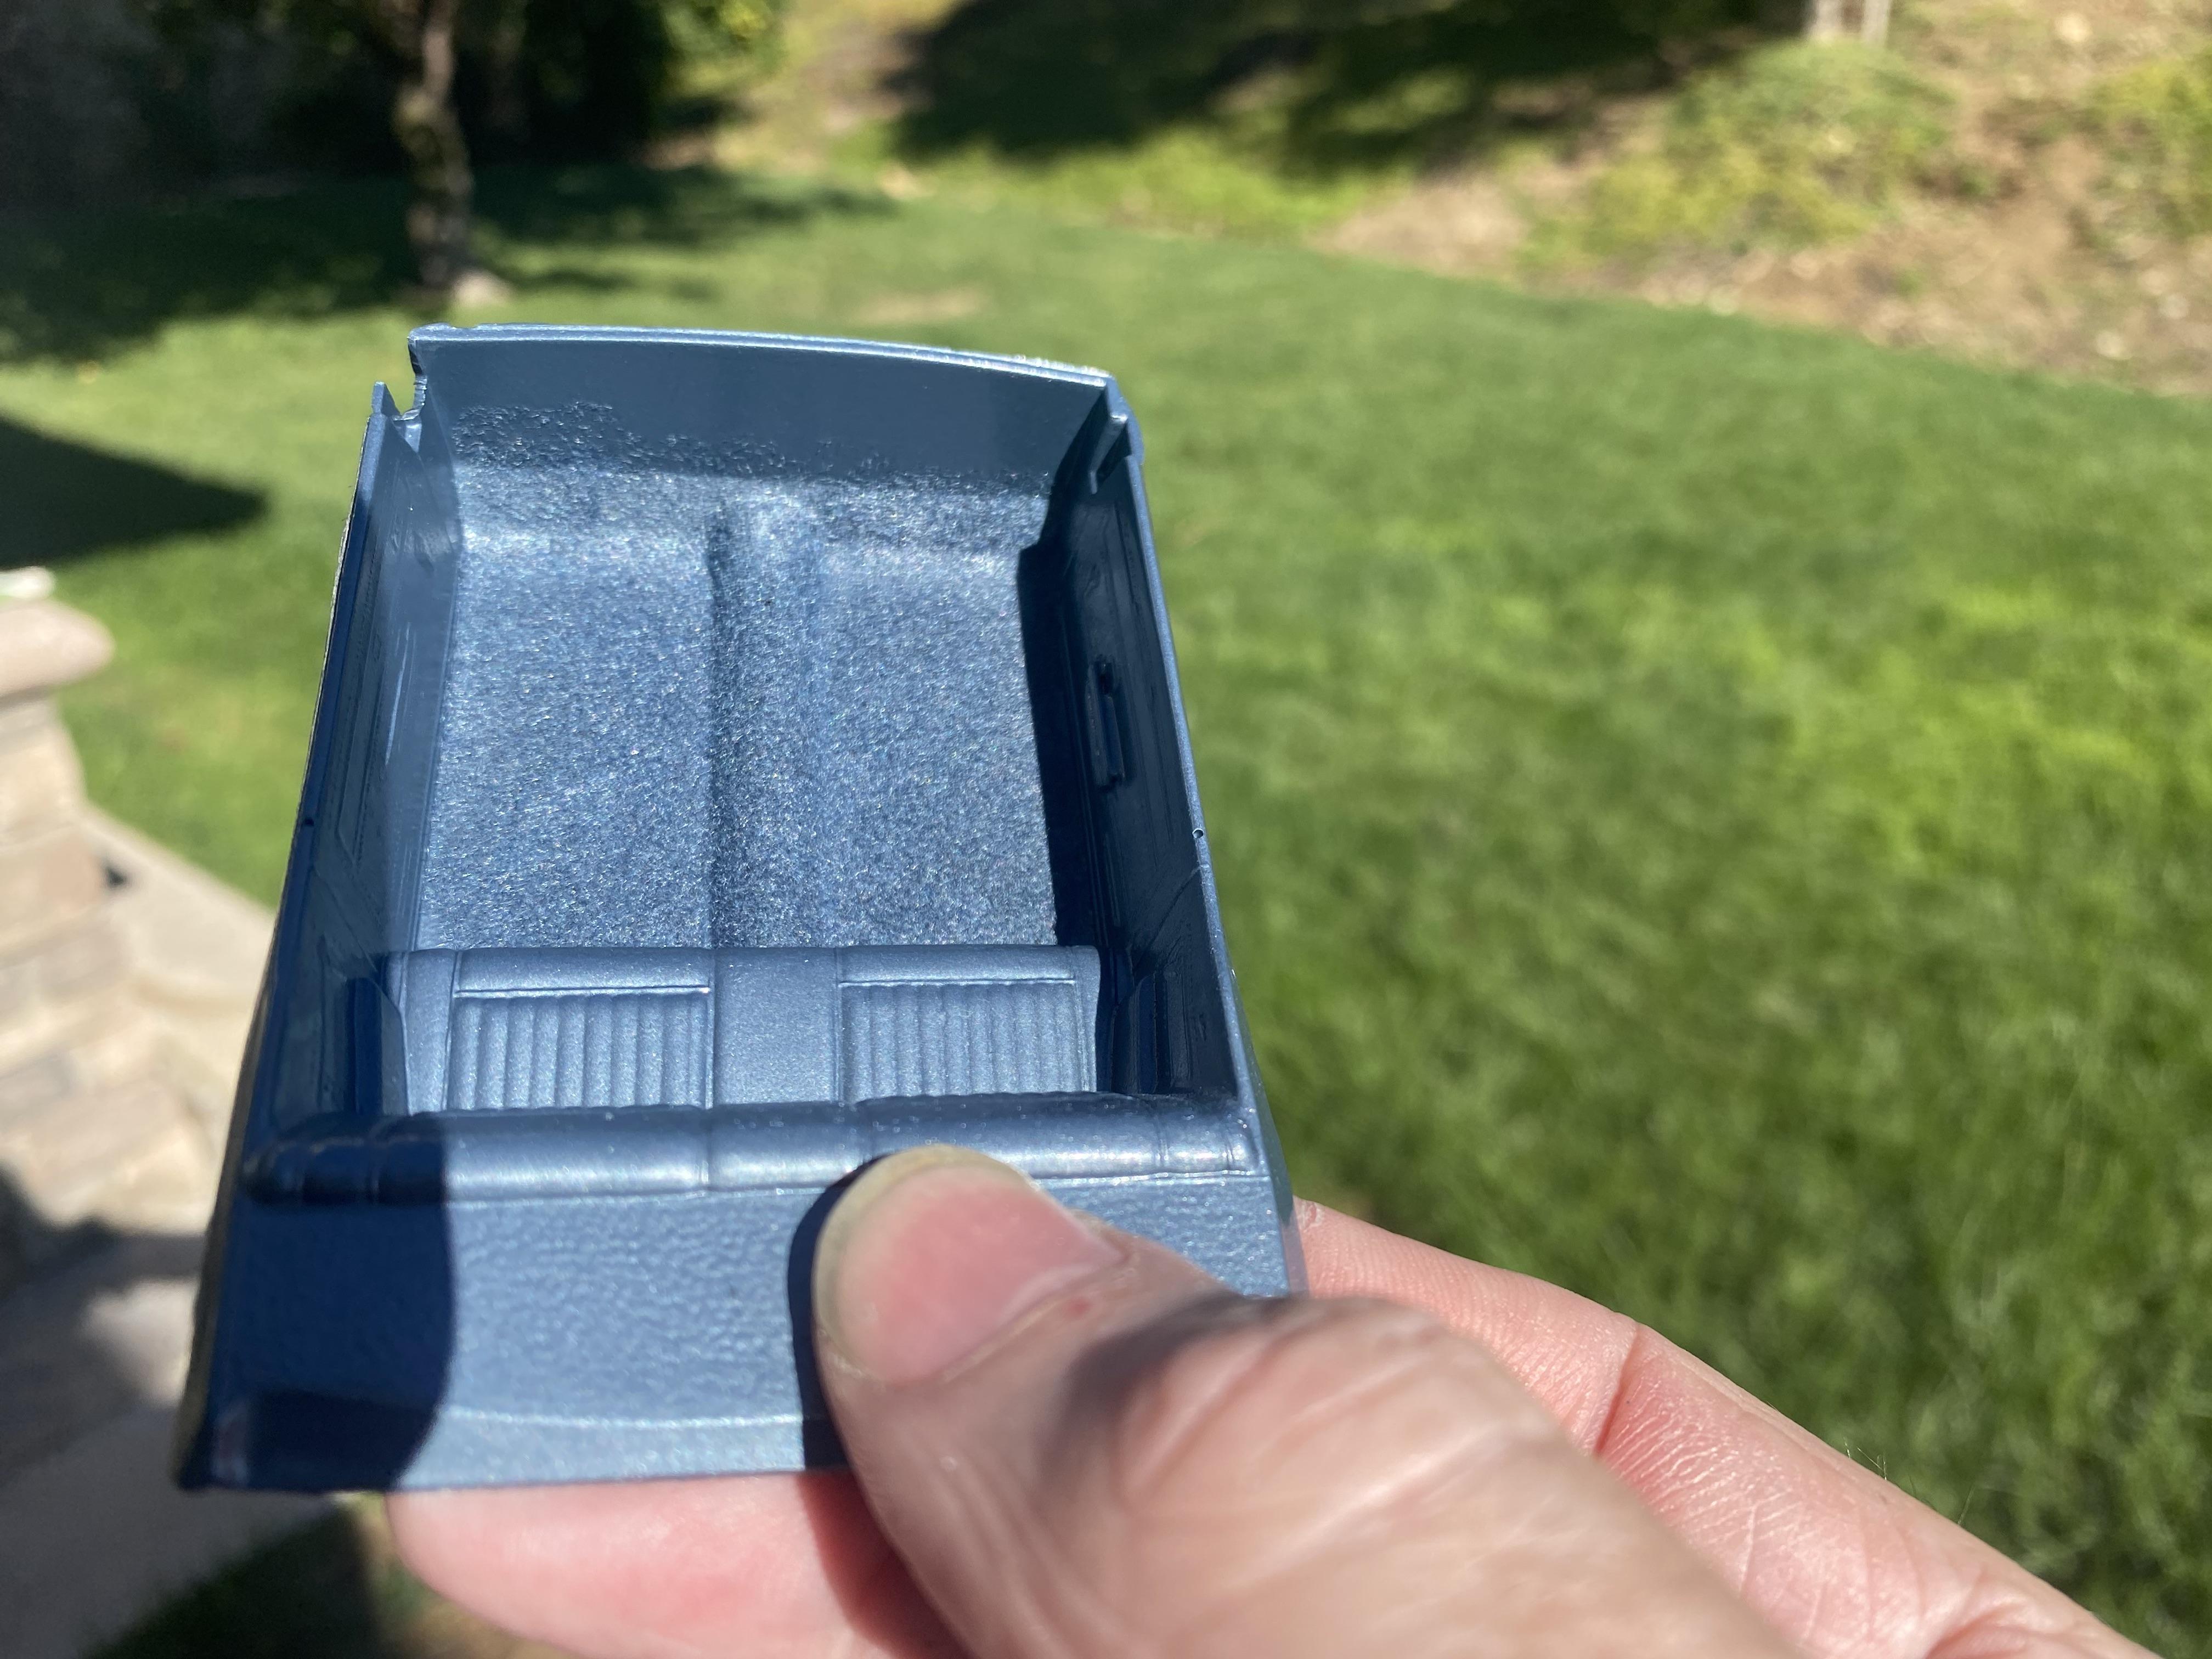
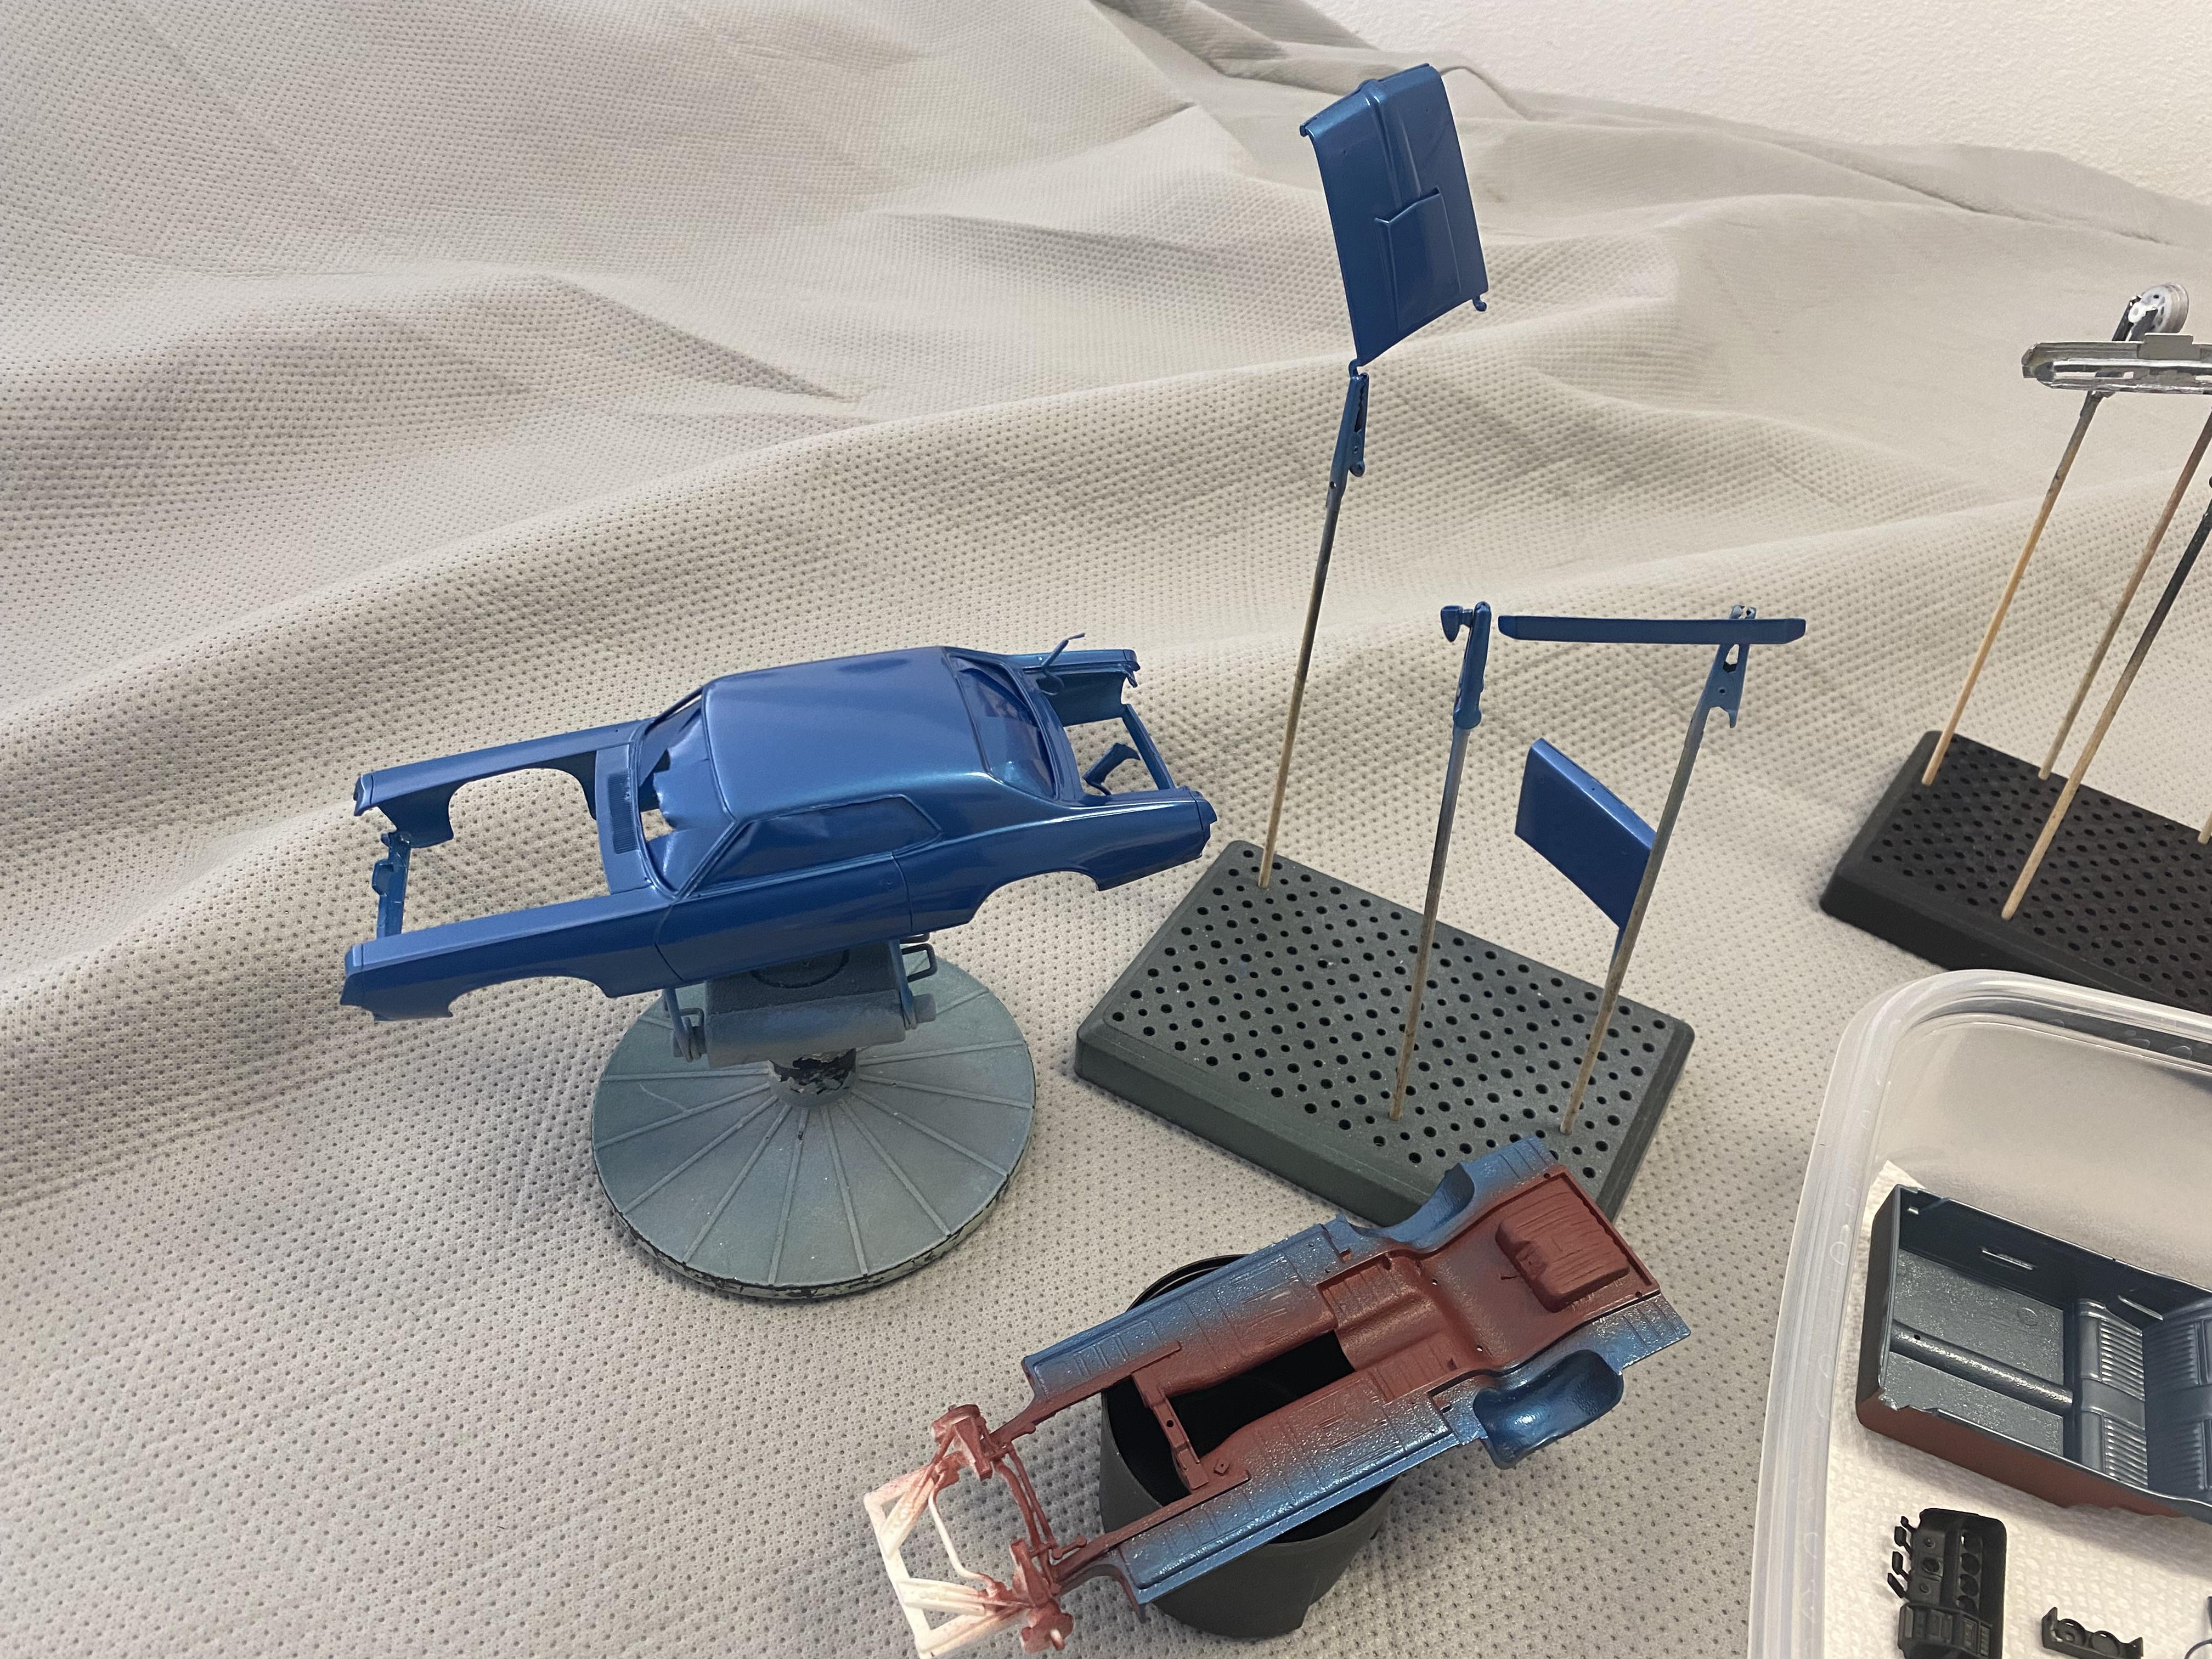
Starting to get color on most components. Got the base coat of Code 6 Bright (Acapulco) Blue on the body and parts.
-
Thank You! Thank You. I have had a few people ask so I thought I would put together something more comprehensive than in the past builds.
-
Thank you! Some kits take more work than others, but as long as the body proportions are nice, I find it worth a build. Older AMT kits I find have a great lack of detail, but their body proportions always seem pretty spot on. Newer ones have gotten much better for the most part, though a couple retools I feel have gone backwards.
-

Tutorial: Creating LED wiring harnesses for your builds.
Duddly01 replied to Duddly01's topic in Tips, Tricks, and Tutorials
Nice! Now that is taking it to the next level. -
Tutorial: Creating LED wiring harnesses for your builds.
Duddly01 replied to Duddly01's topic in Tips, Tricks, and Tutorials
No, I do use resistors. I often use. 6v battery case, just not this build. And I stand corrected, my red ones always have resistors even when I don’t for the headlights. -
Tutorial: Creating LED wiring harnesses for your builds.
Duddly01 replied to Duddly01's topic in Tips, Tricks, and Tutorials
I am actually not sure what you are getting at. I use pretwisted wire much of the time. Only have to unravel a bit for heat shrink. -
Tutorial: Creating LED wiring harnesses for your builds.
Duddly01 replied to Duddly01's topic in Tips, Tricks, and Tutorials
This is only necessary if greater than 3v. I haven’t tried to use dollar tree LEDs, but I do get many from Amazon but they are generally not as bright from what I have found. The big plus though is you can get packets of a whole bunch, with resistors prewired for quite cheap. The switches and battery cases the same. -
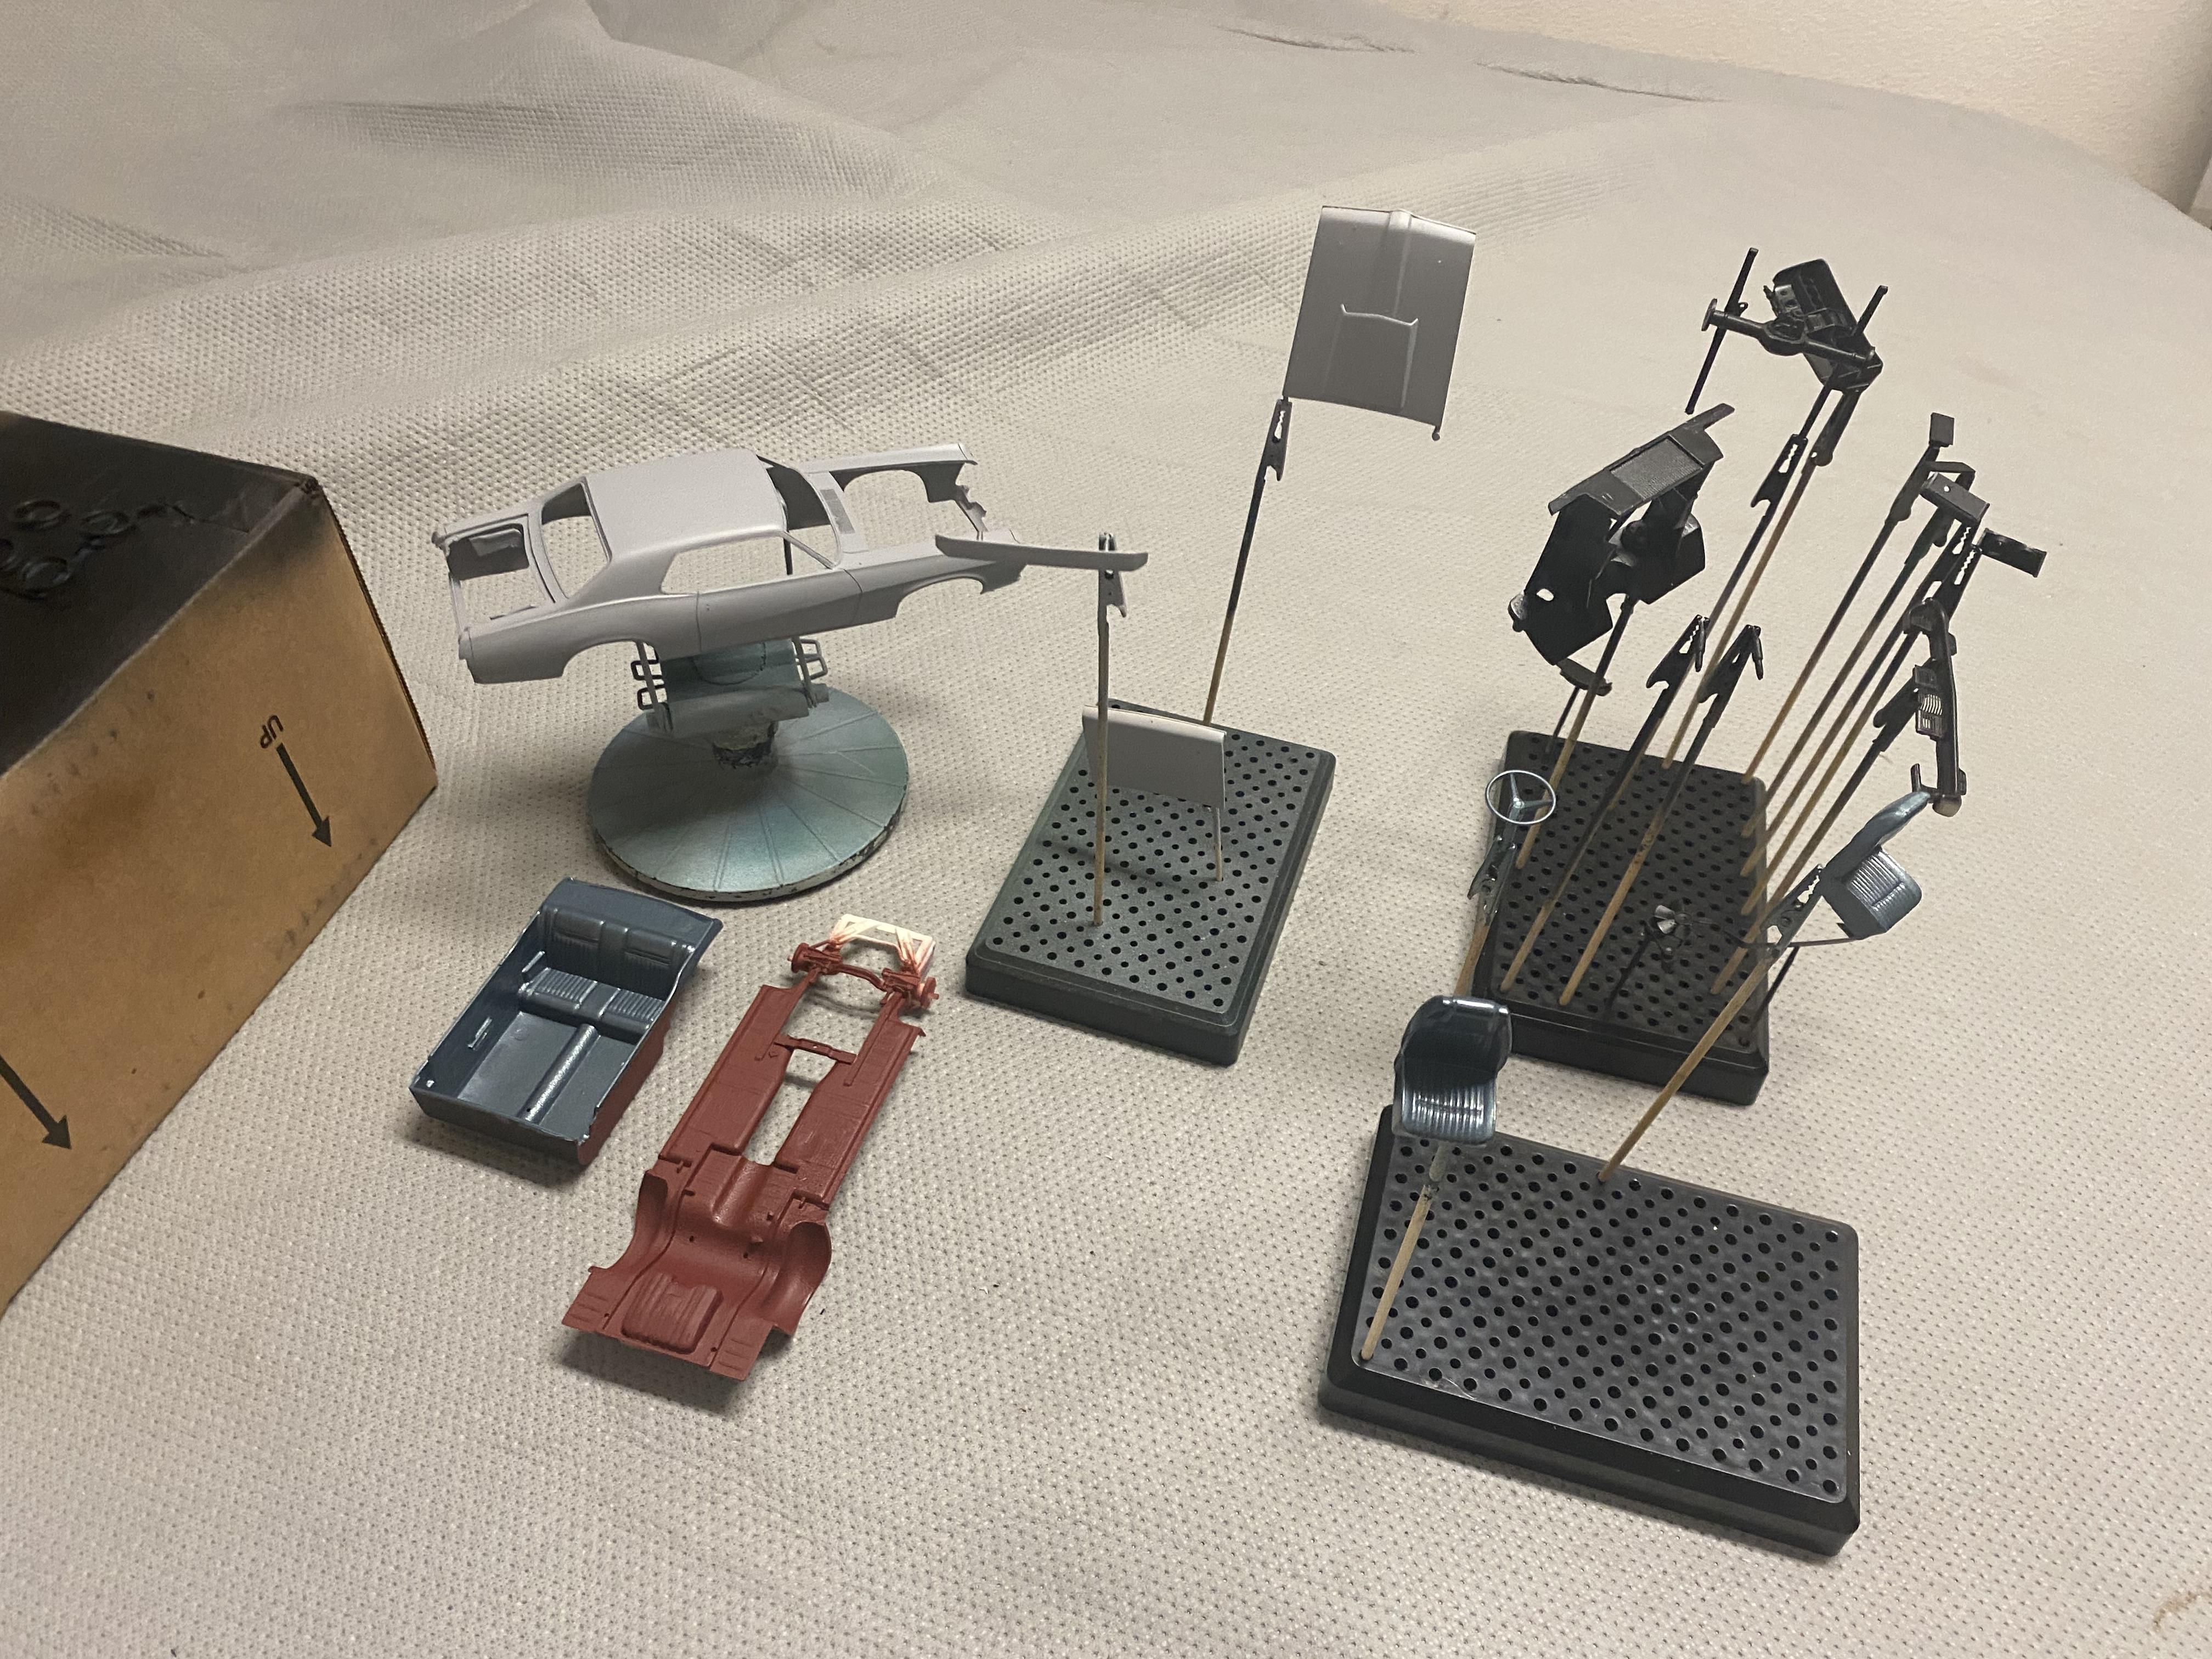
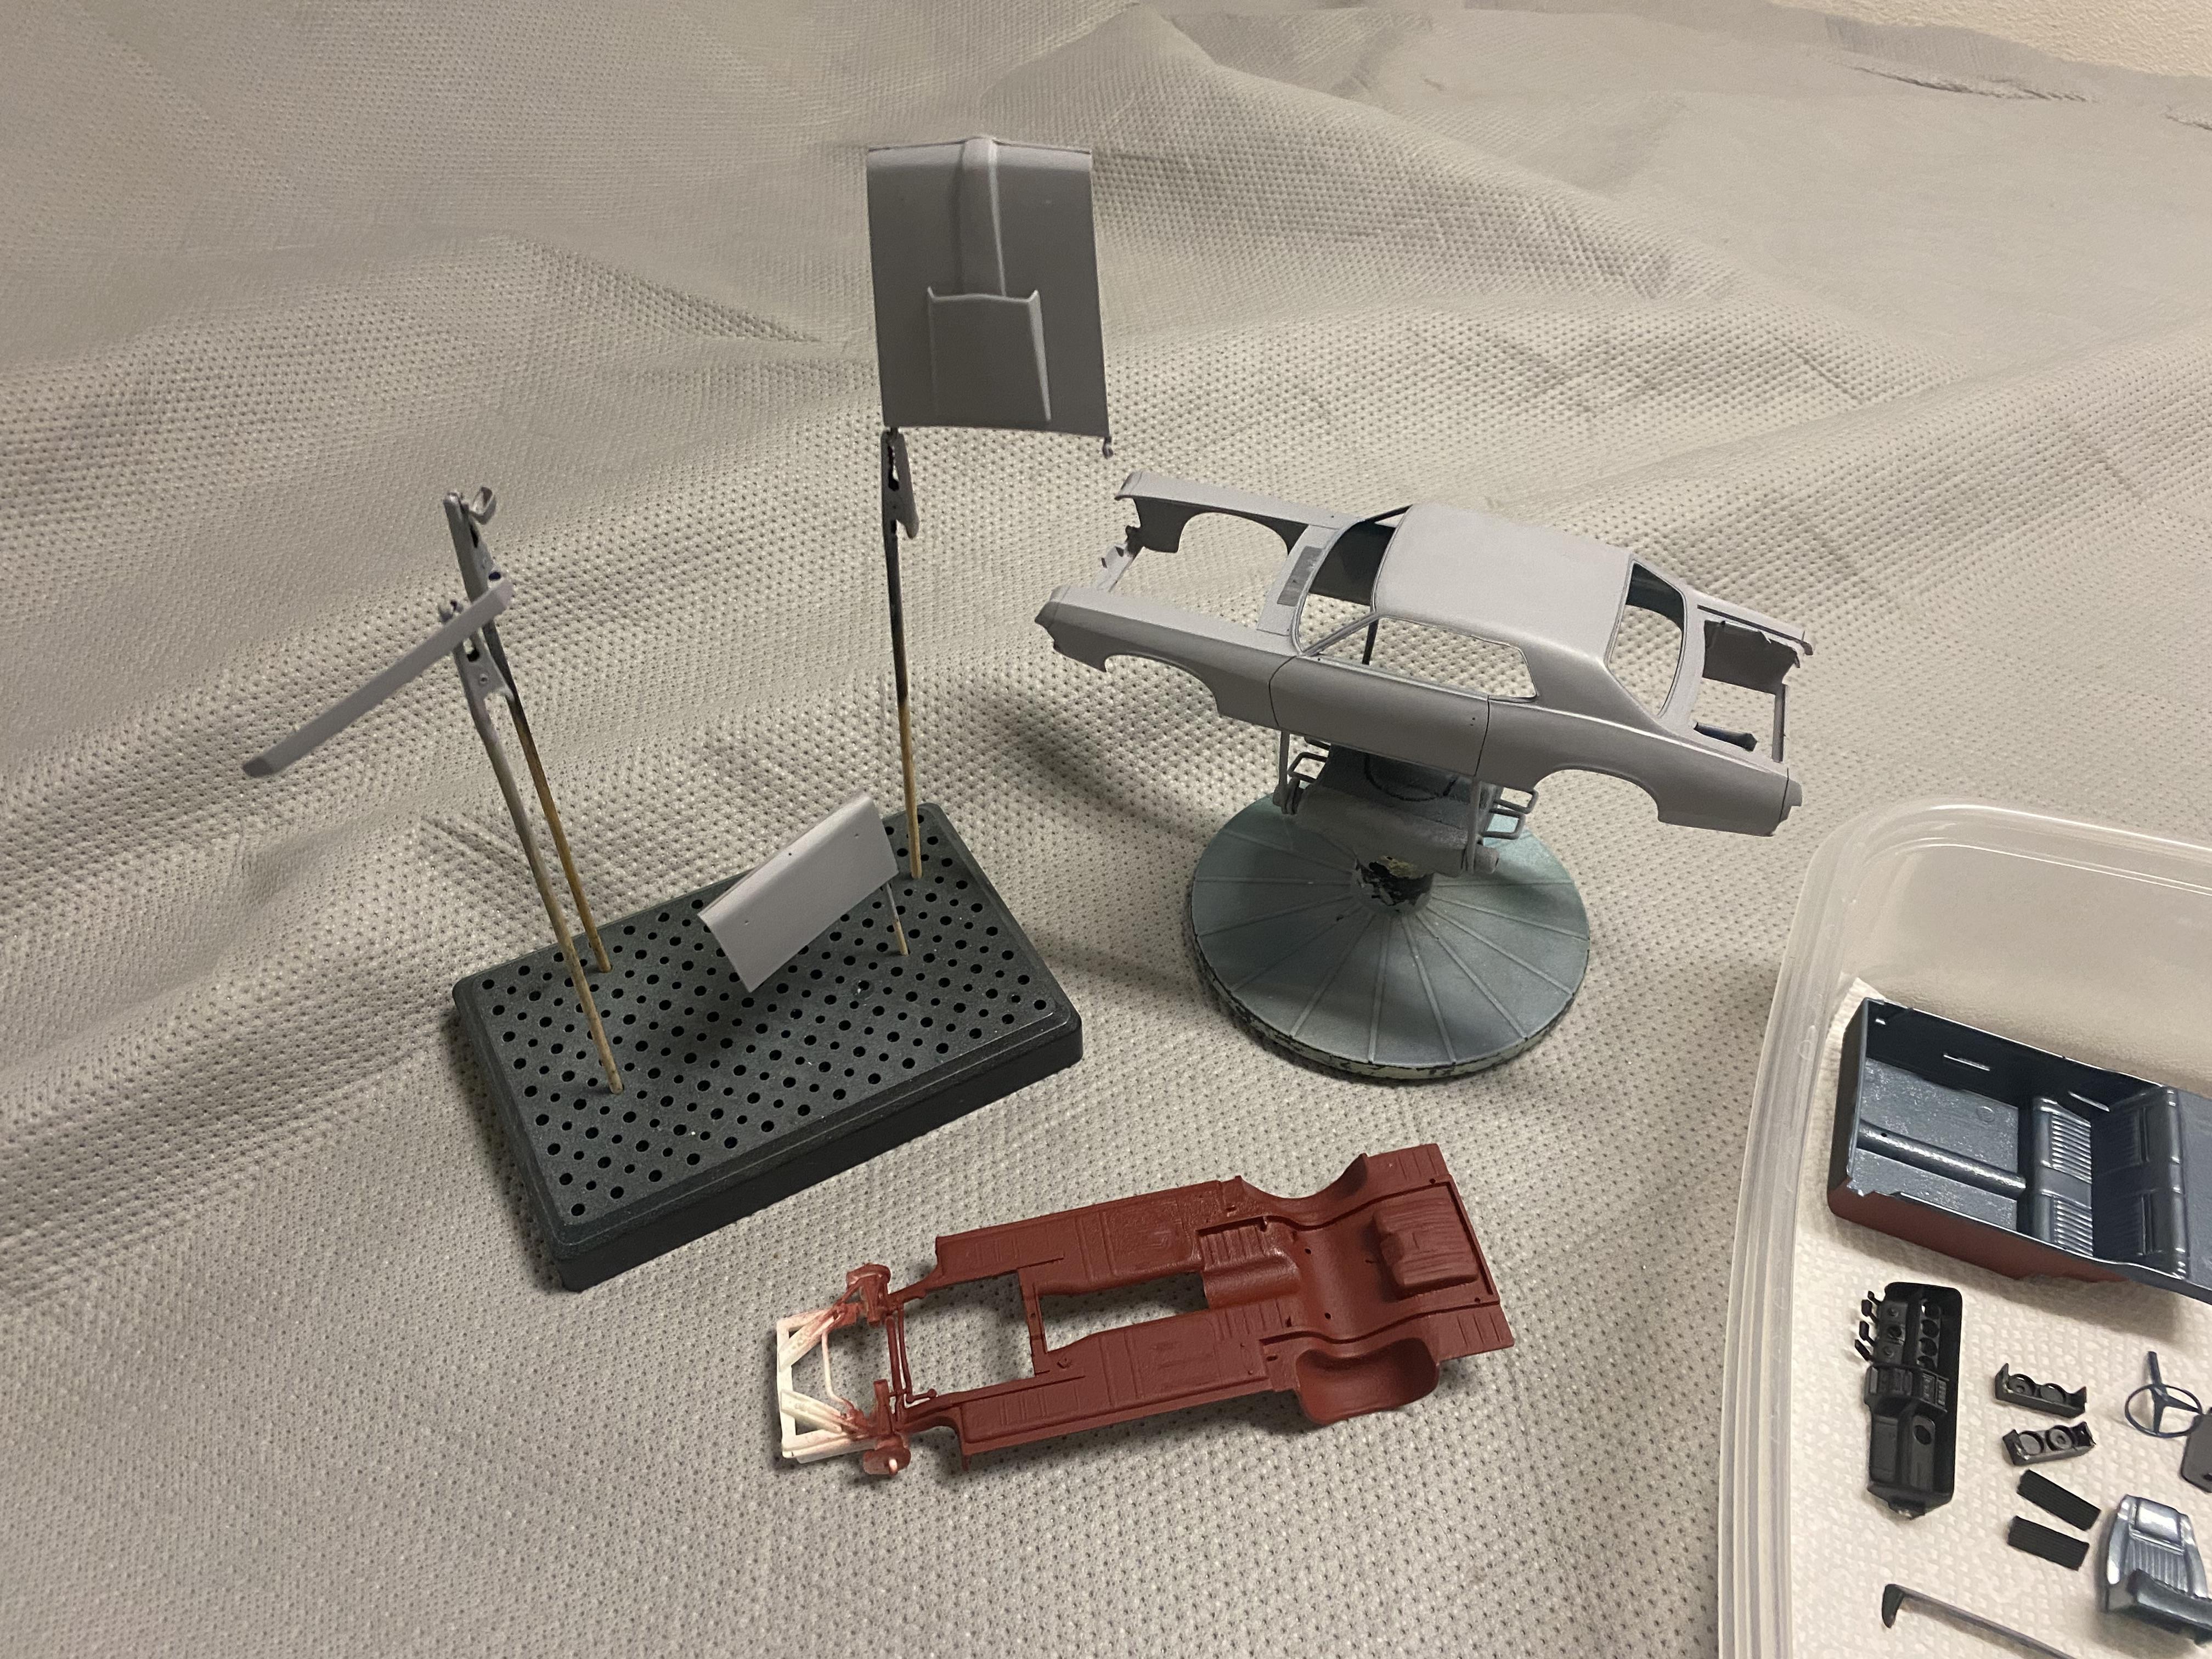
Thank you. The Boss 302 engine that came in the kit is actually really pretty nice. Can tell it was a newer add on. The chassis and lack of any real resemblance of an engine compartment is terrible. The one thing it has going for it is the body is nicely proportioned and with a little detail can look nice. About to start the priming, body and paint work next. ?
-
Can always hope. ?
-
Tutorial: Creating LED wiring harnesses for your builds.
Duddly01 replied to Duddly01's topic in Tips, Tricks, and Tutorials
I just make clear lenses and apply printed decals of actual gauges
-
Tutorial: Creating LED wiring harnesses for your builds.
Duddly01 replied to Duddly01's topic in Tips, Tricks, and Tutorials
Good point, I make an enclosure for the gauge lights and bare metal foil. I should have mentioned that. I have made the enclosure but I foil after paint. For where I plug into the headlights etc. I often use liquid electrical tape at time too. -
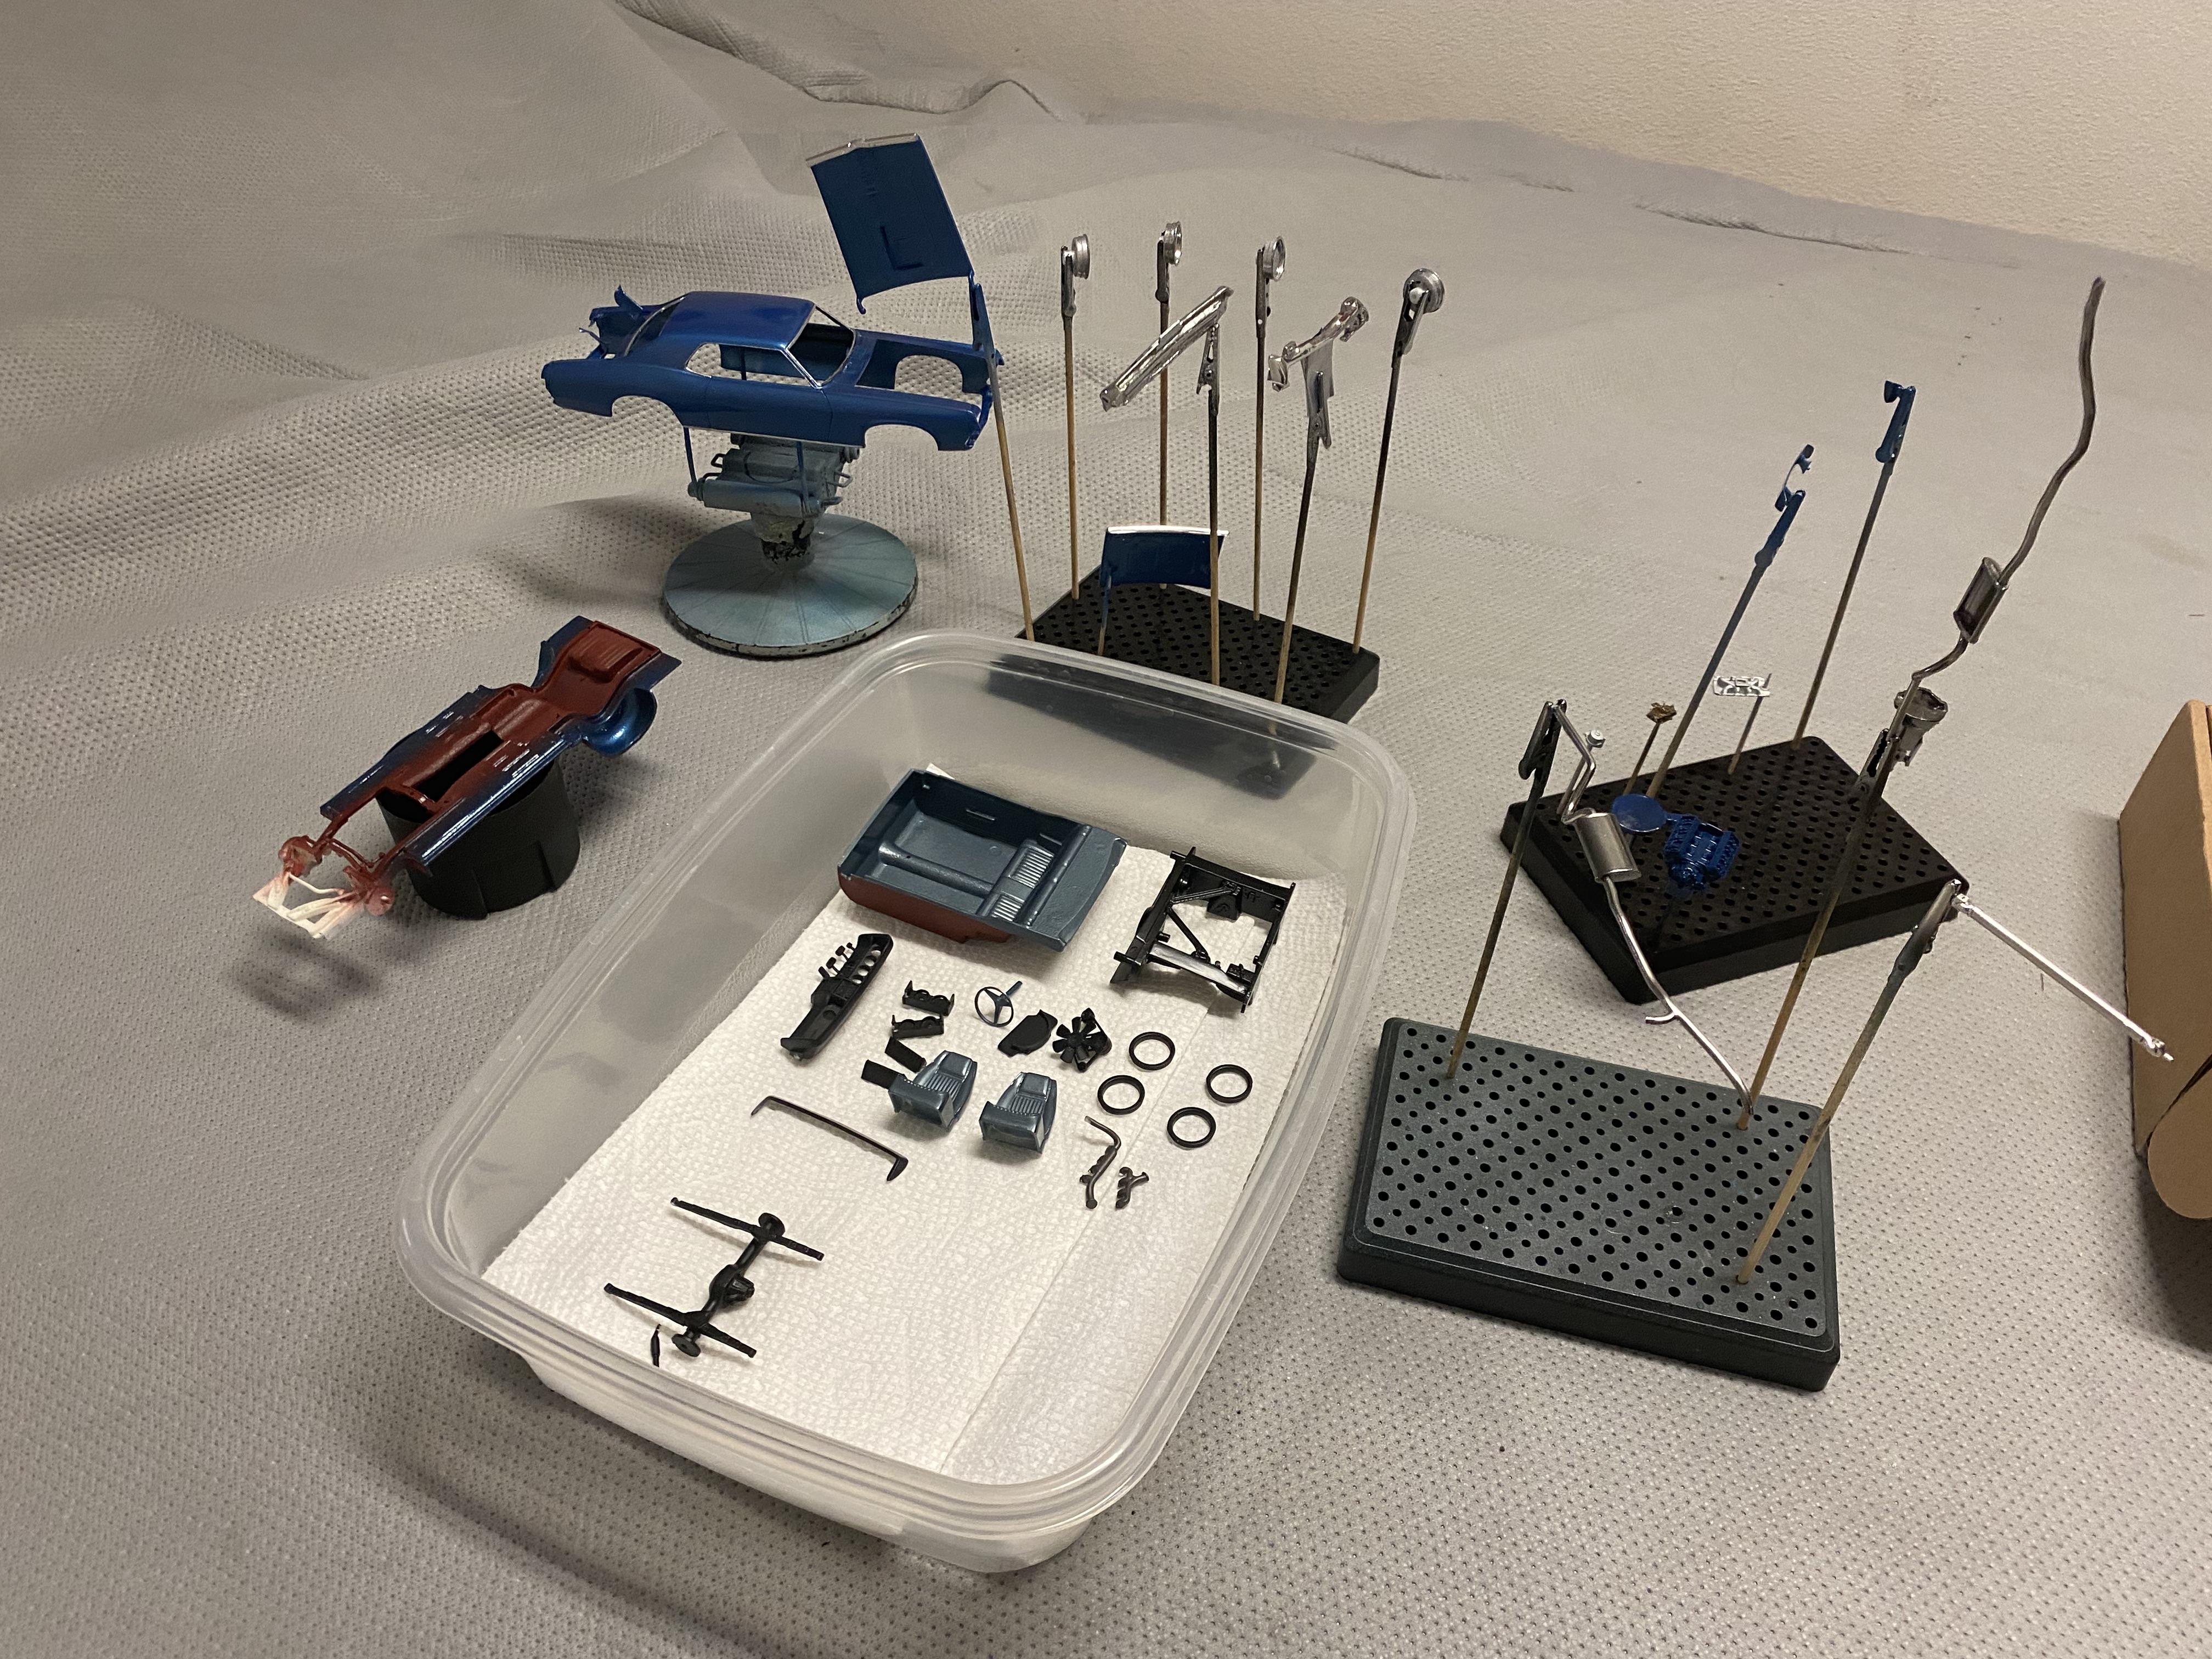
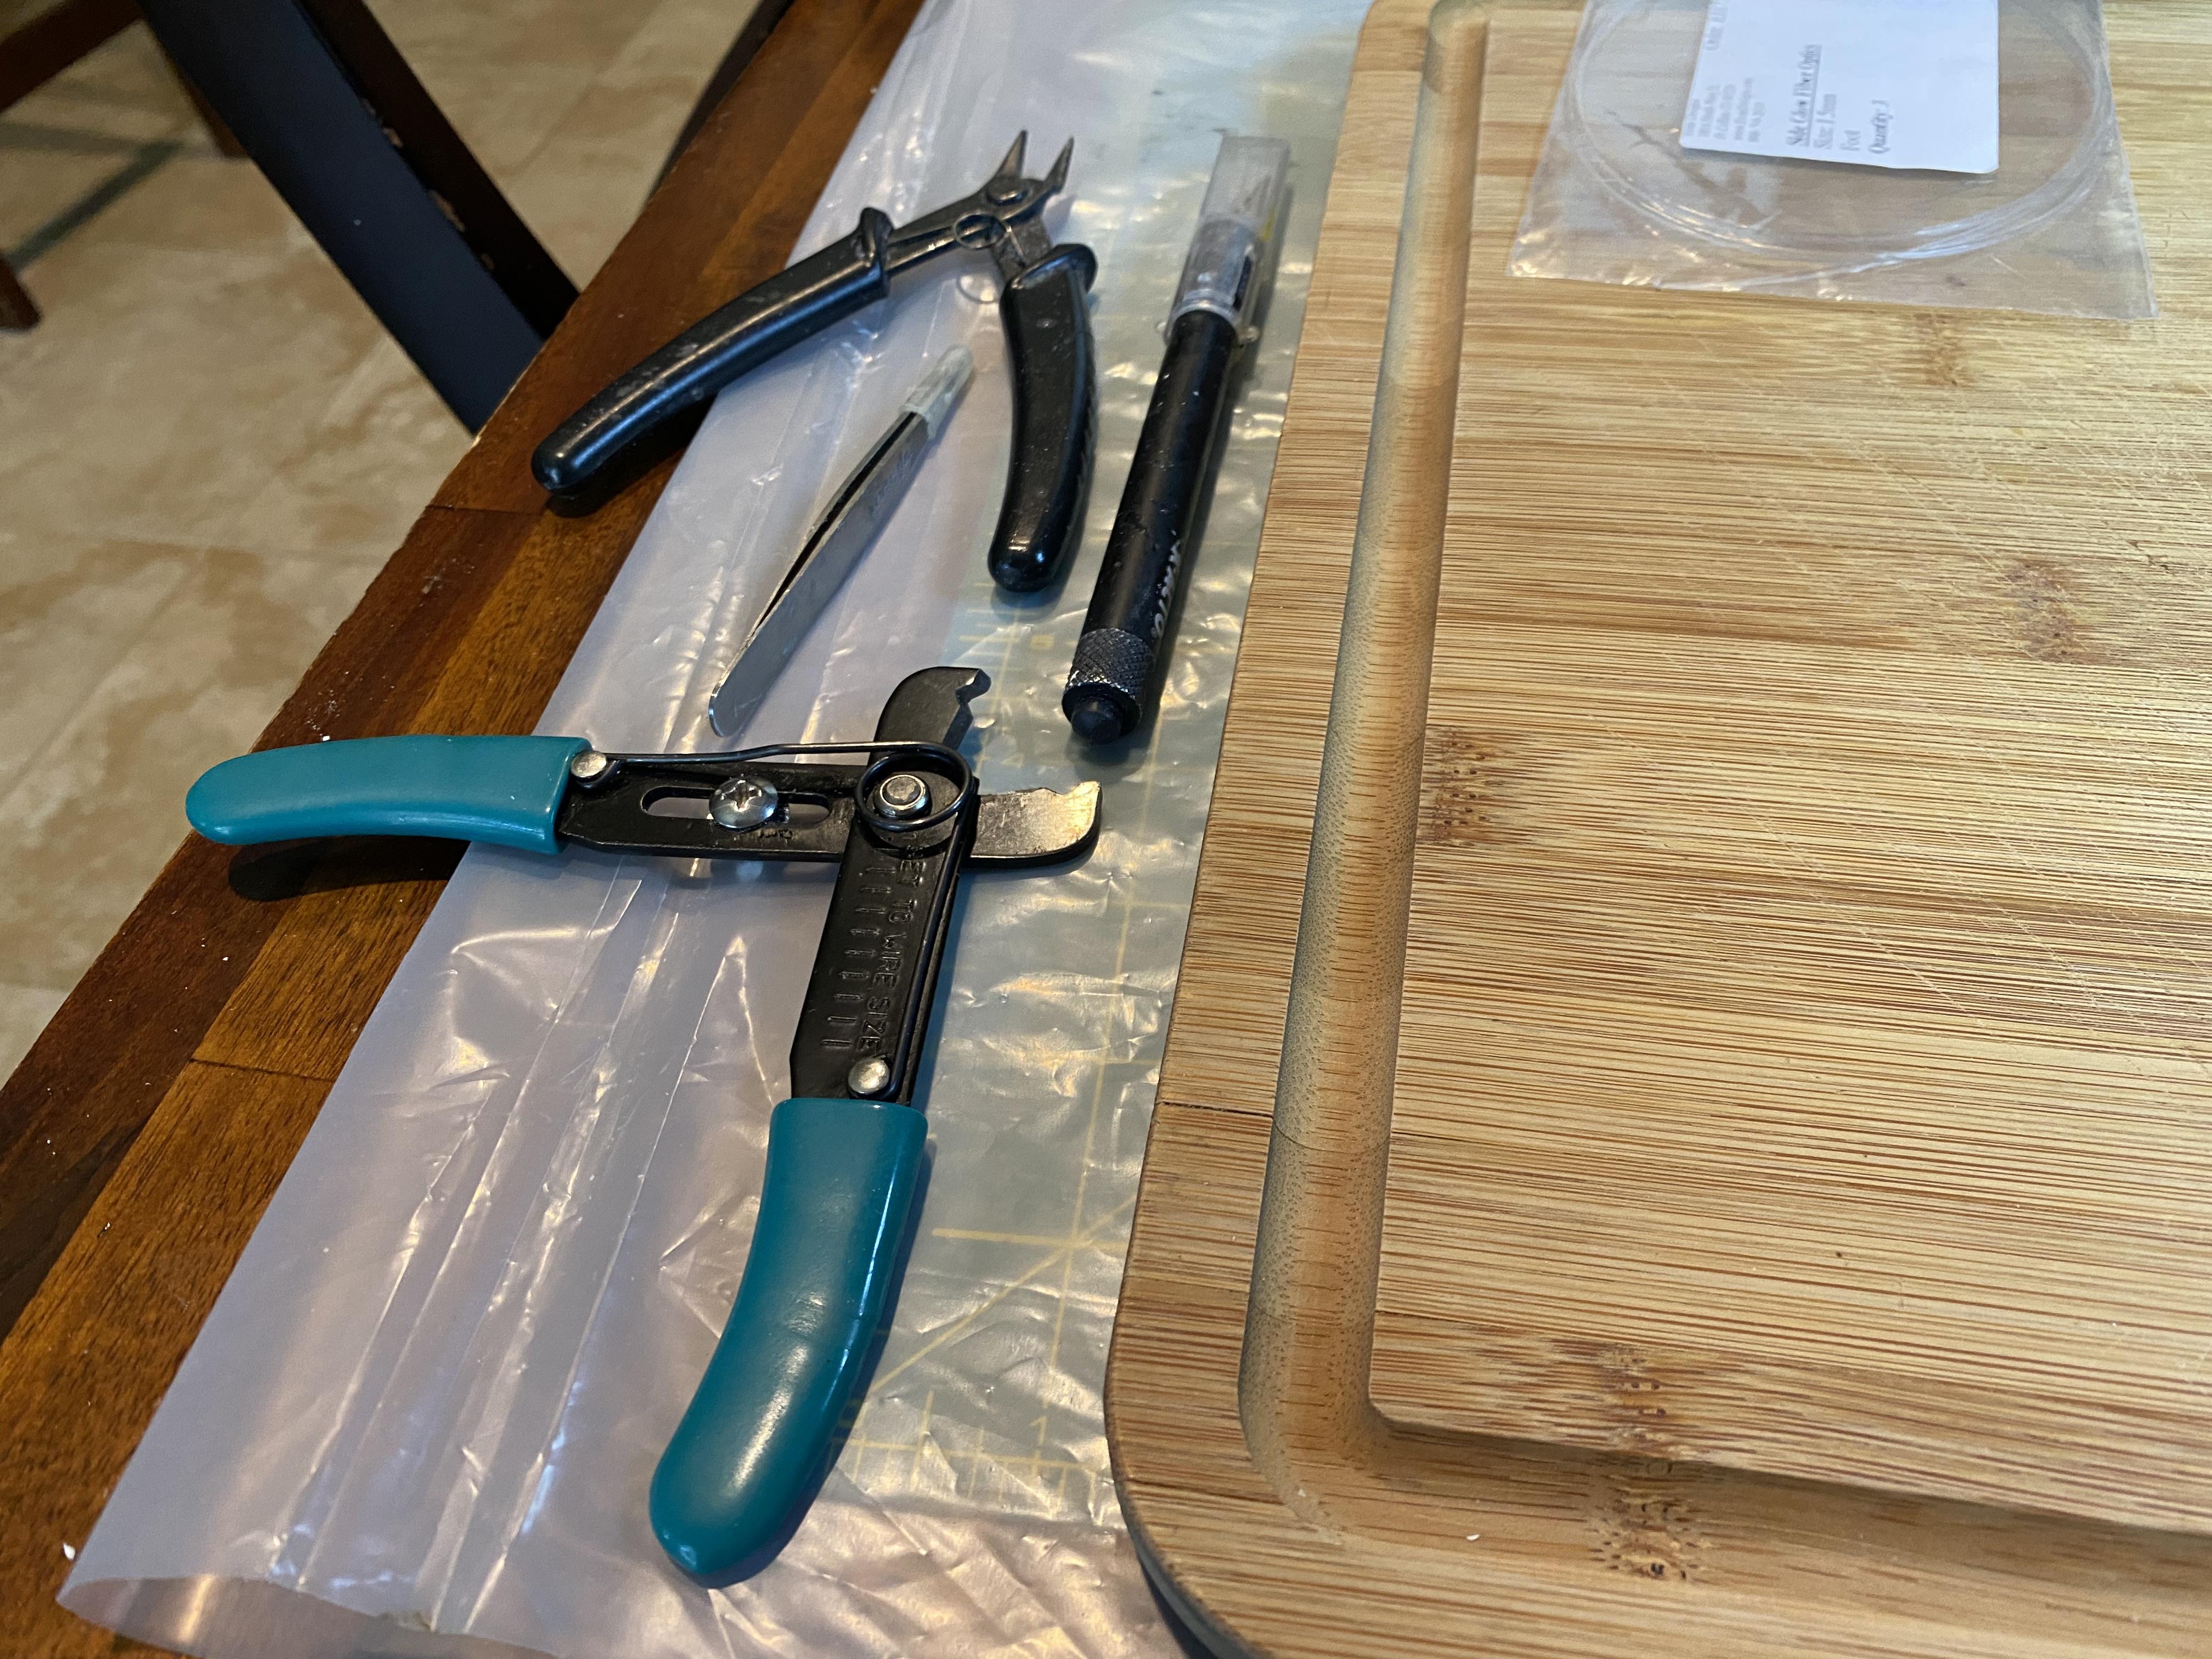
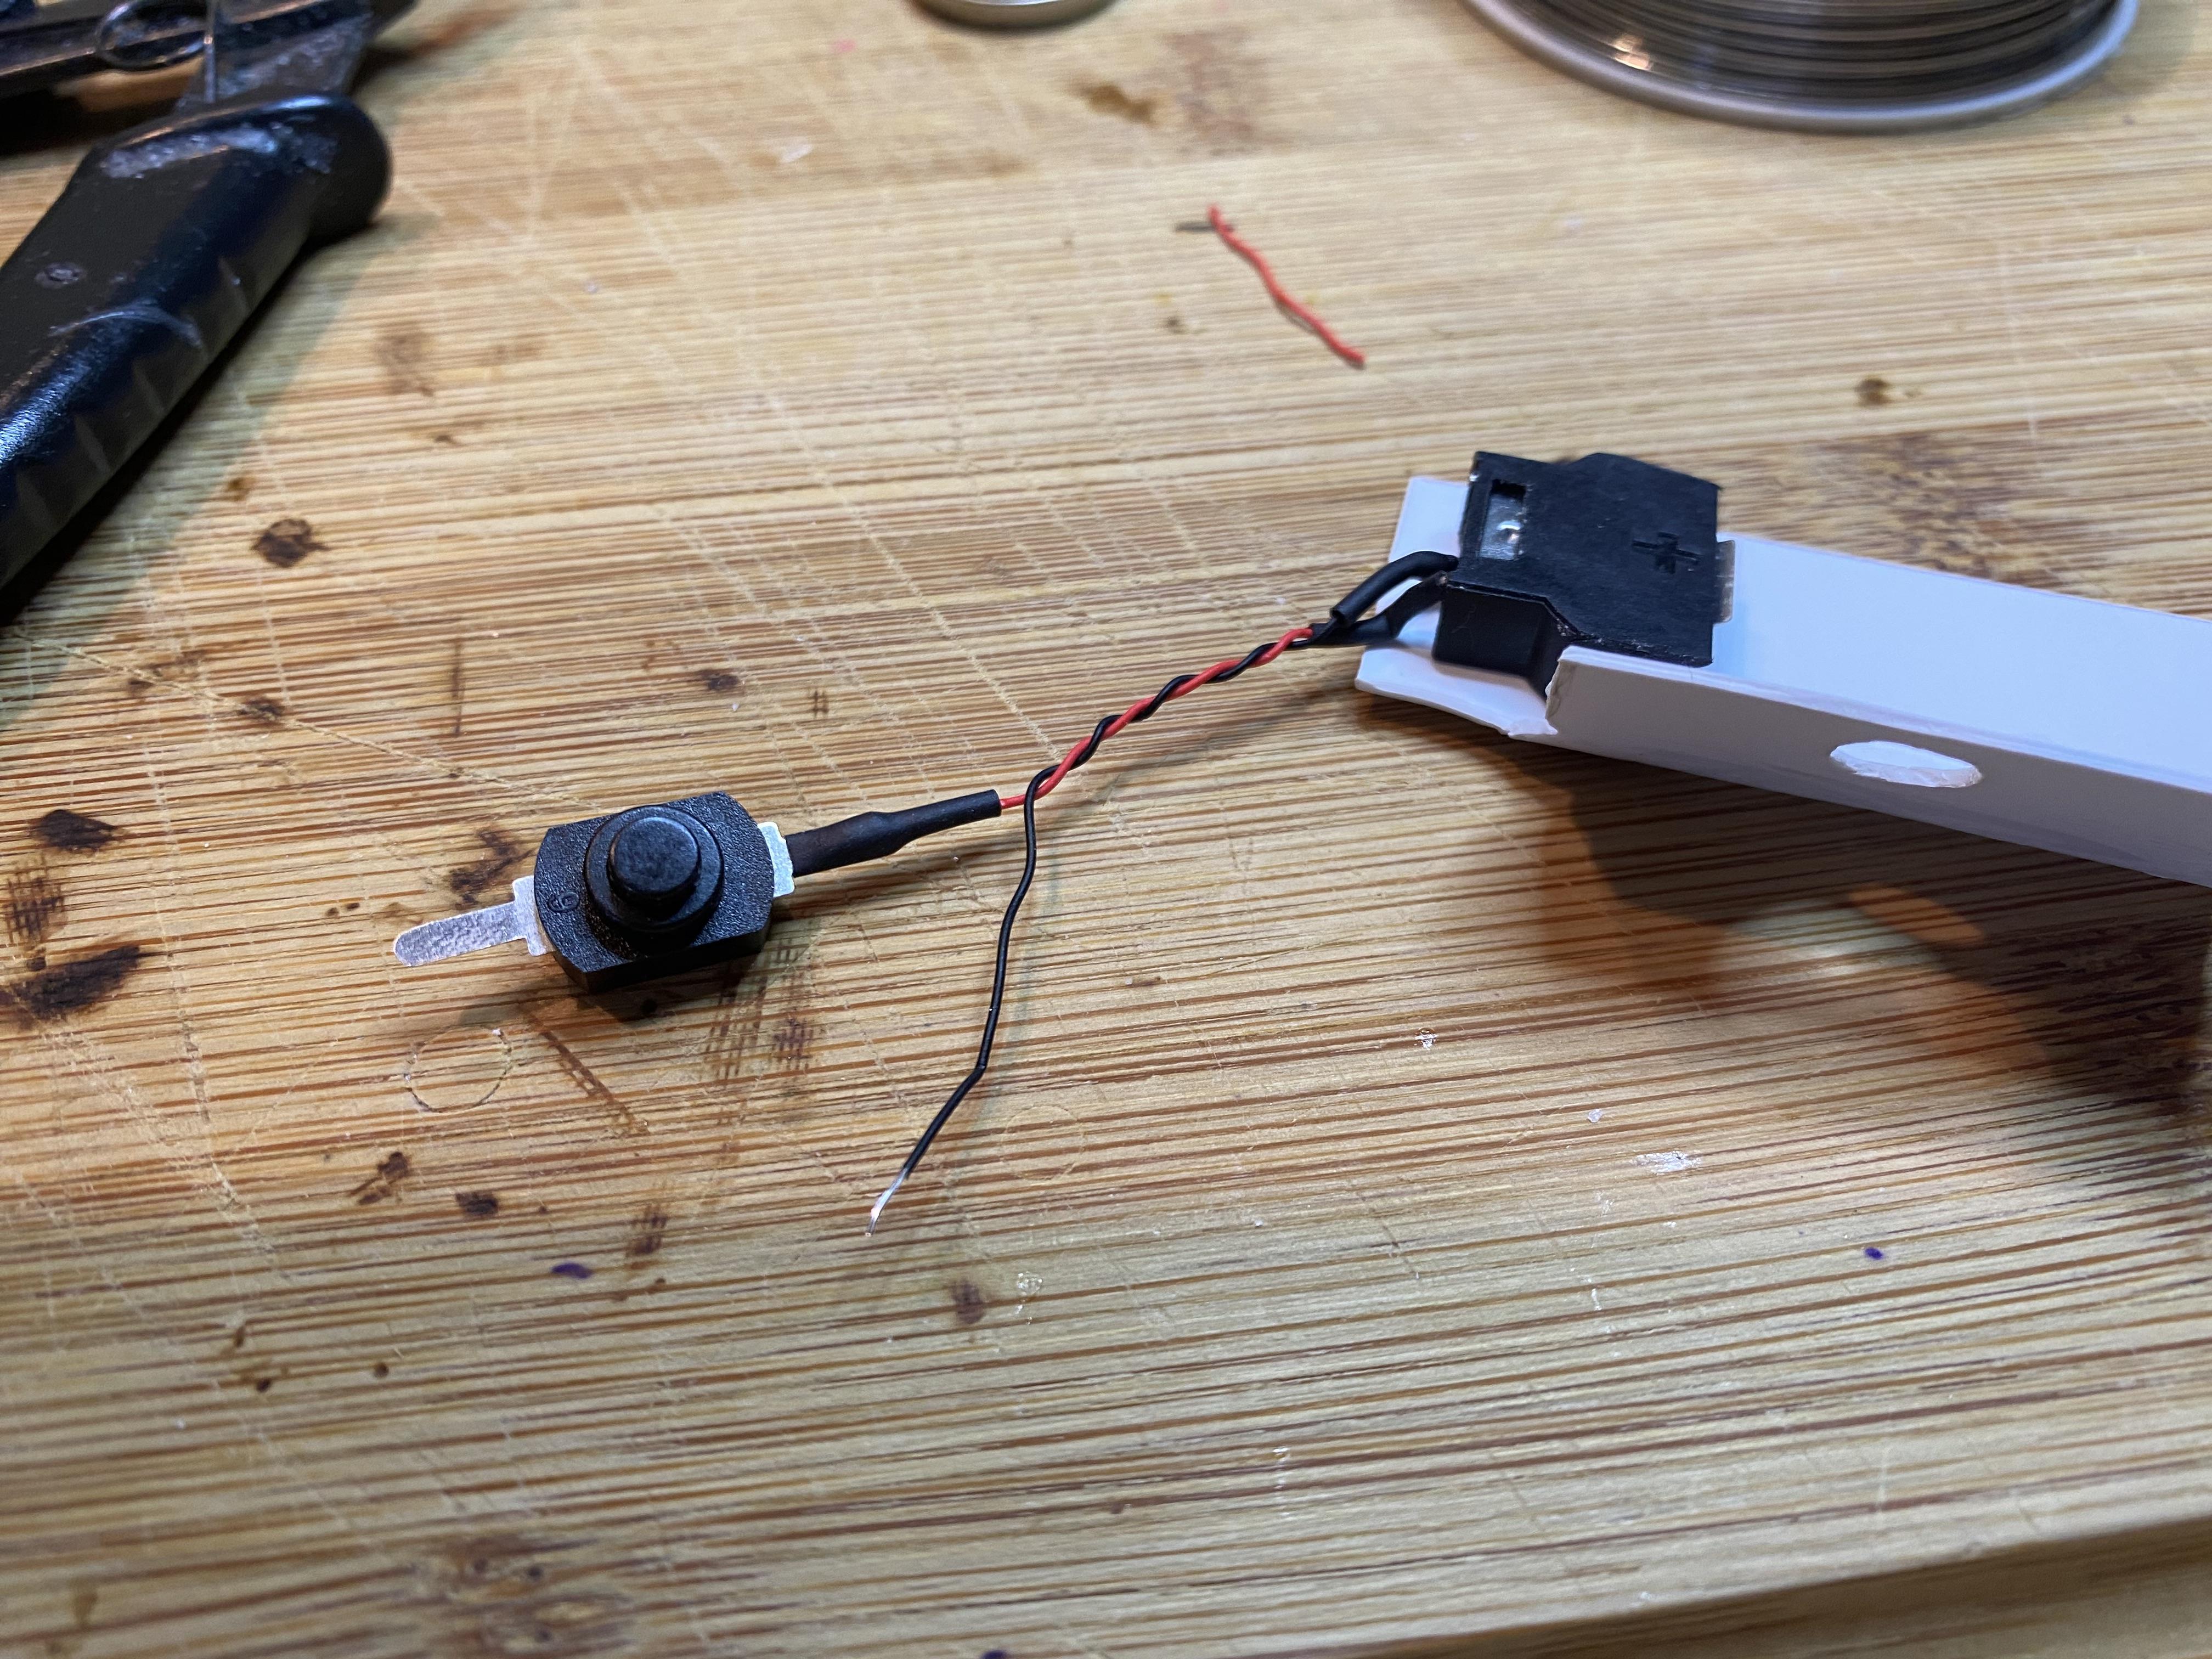
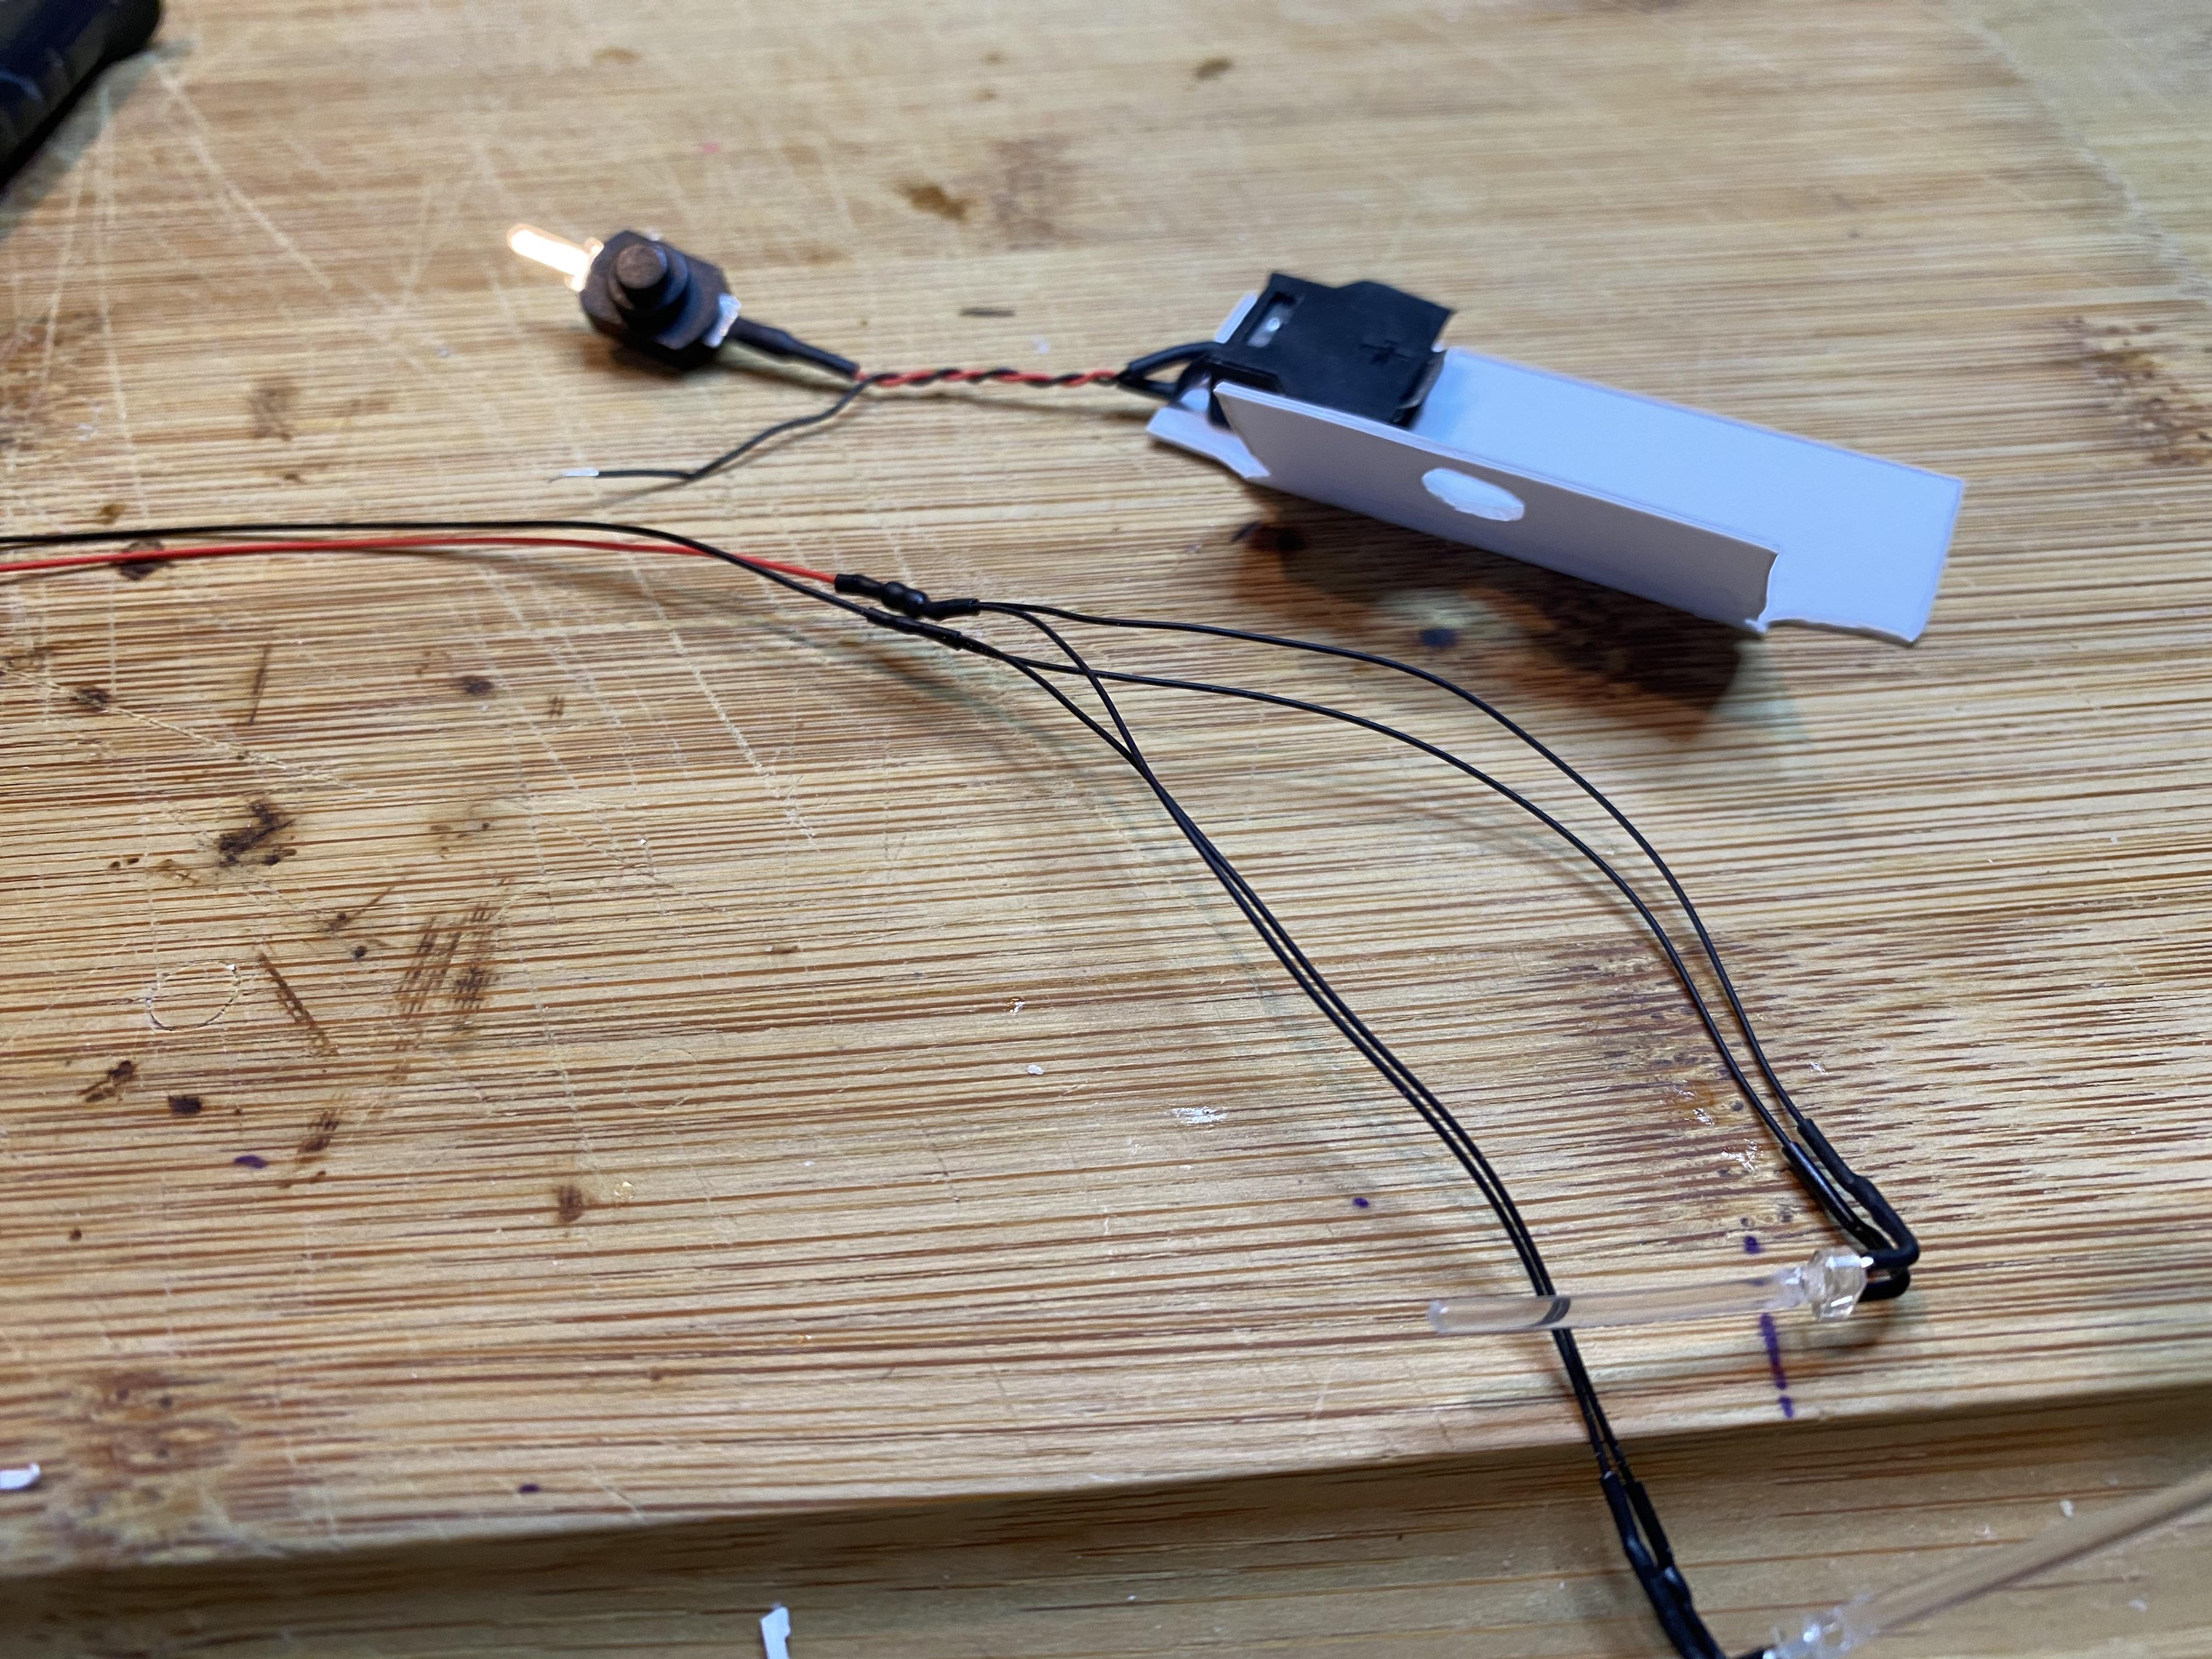
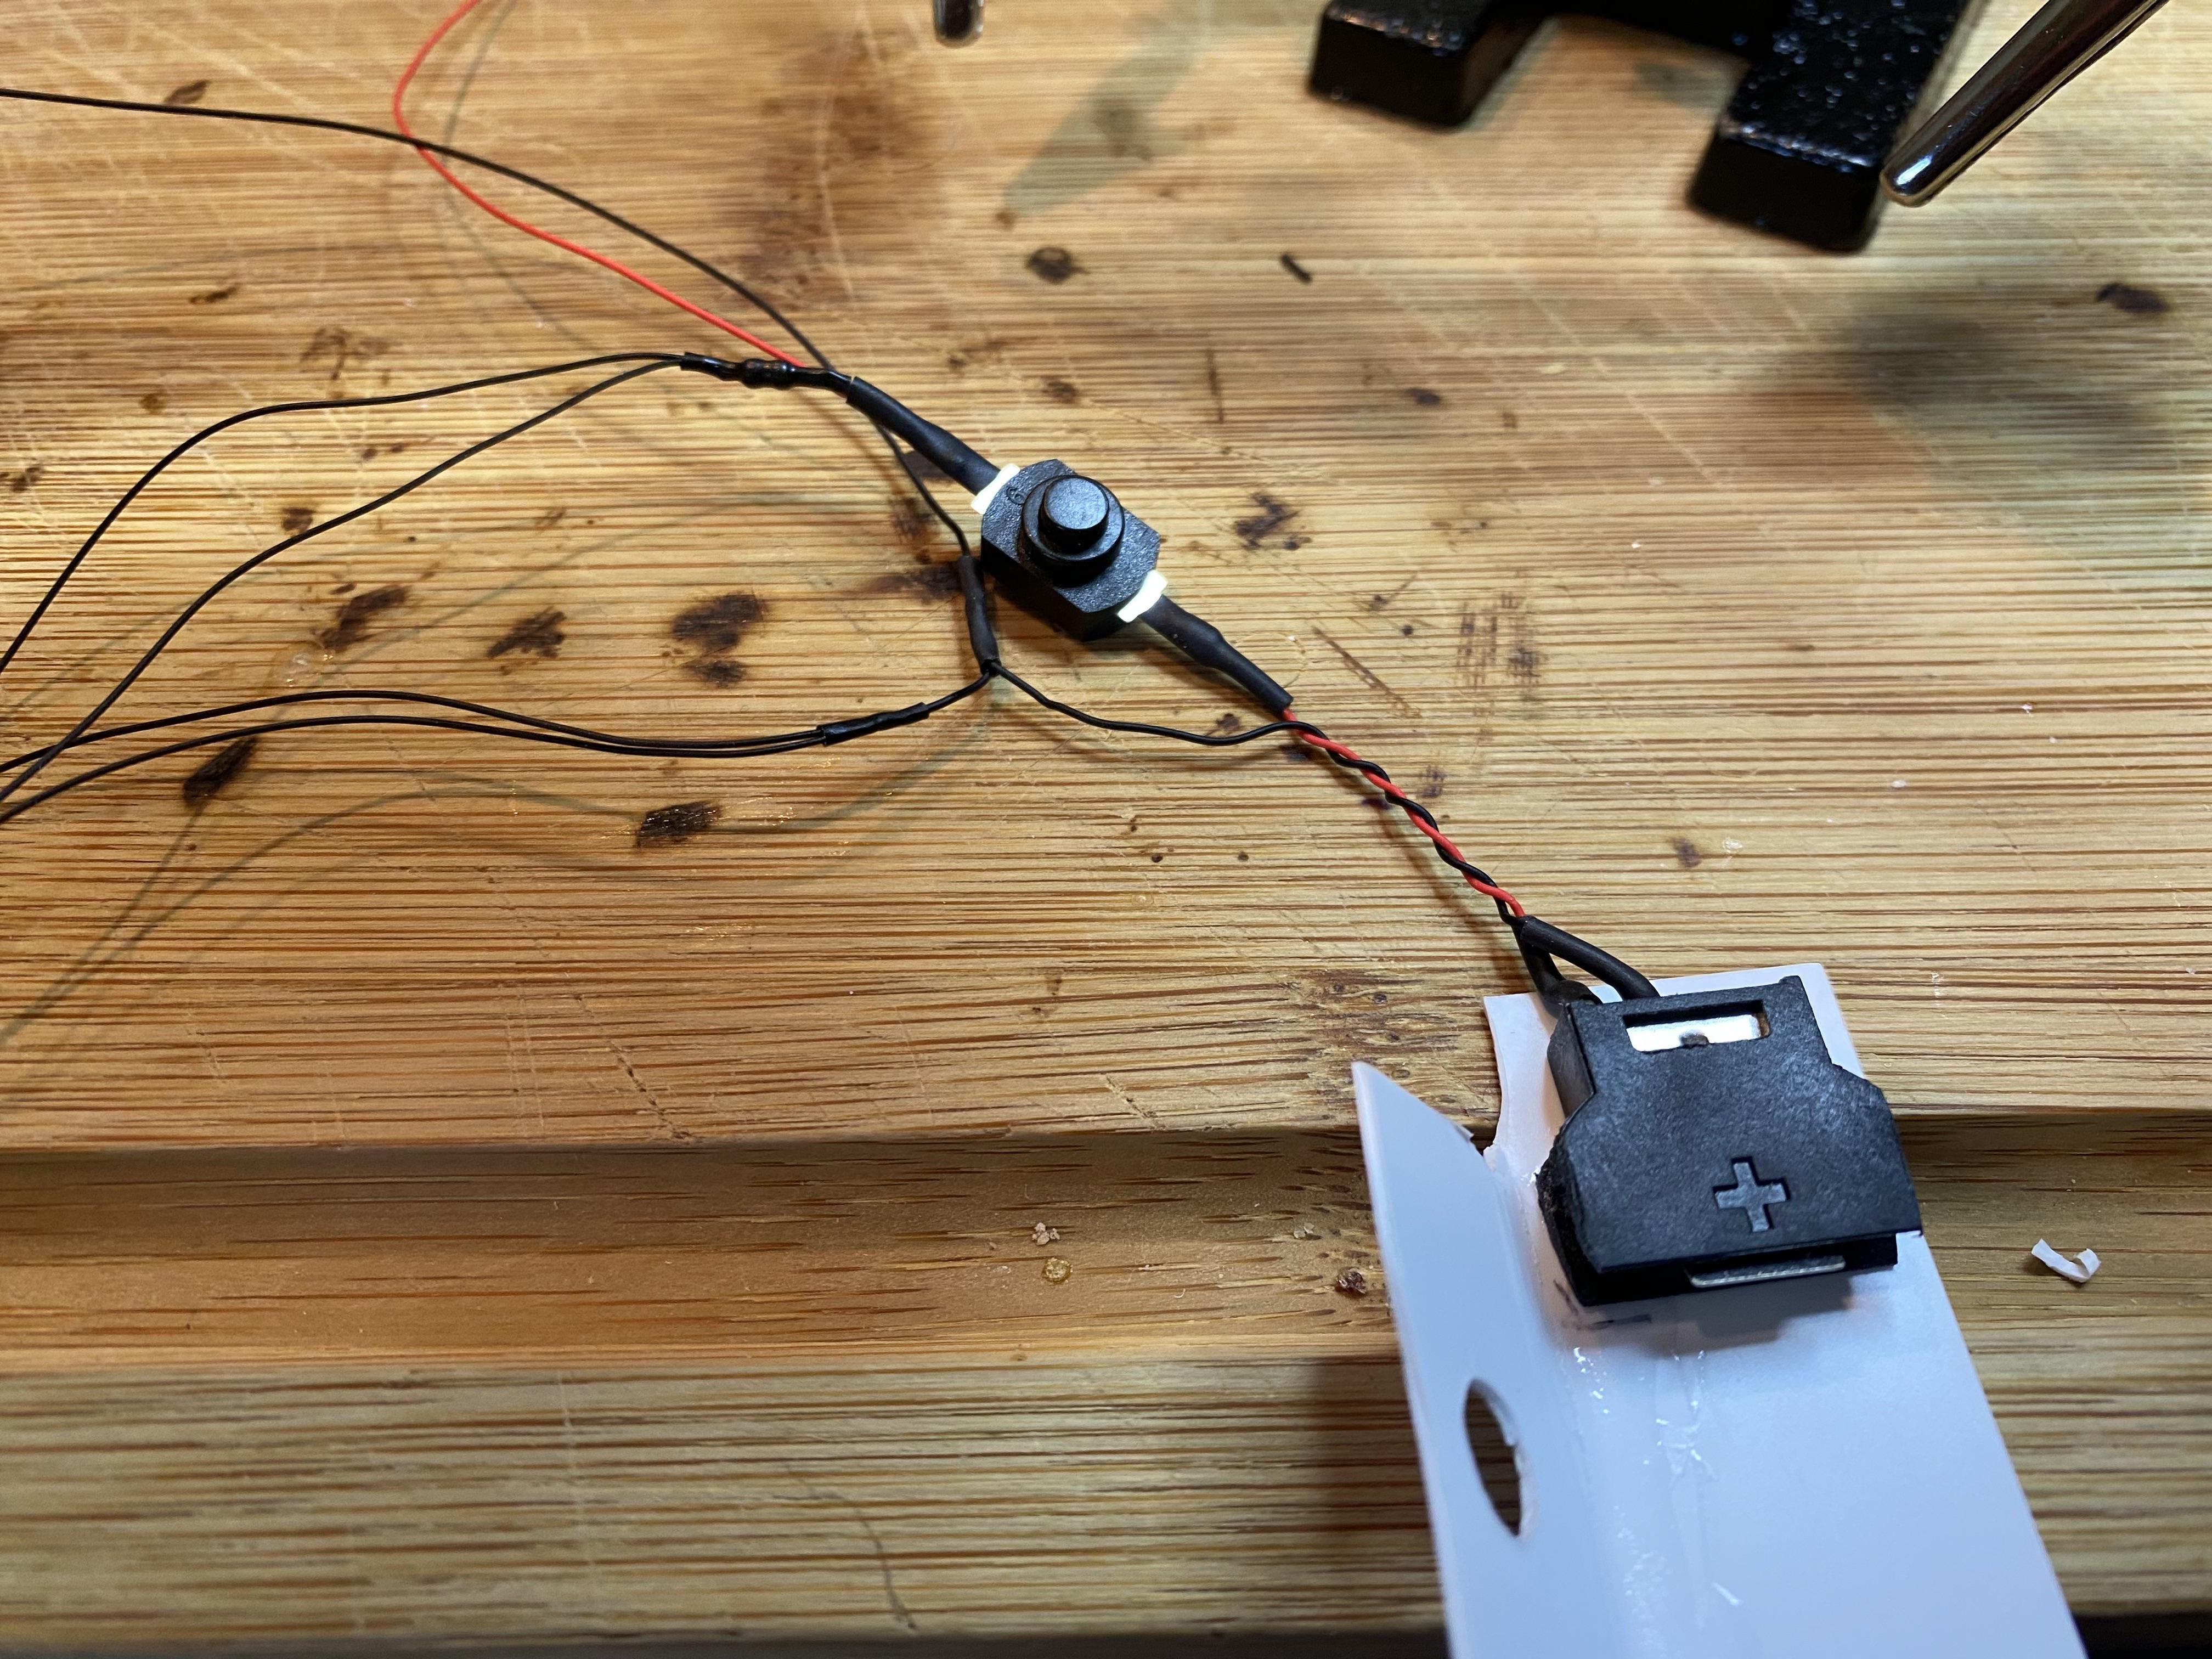
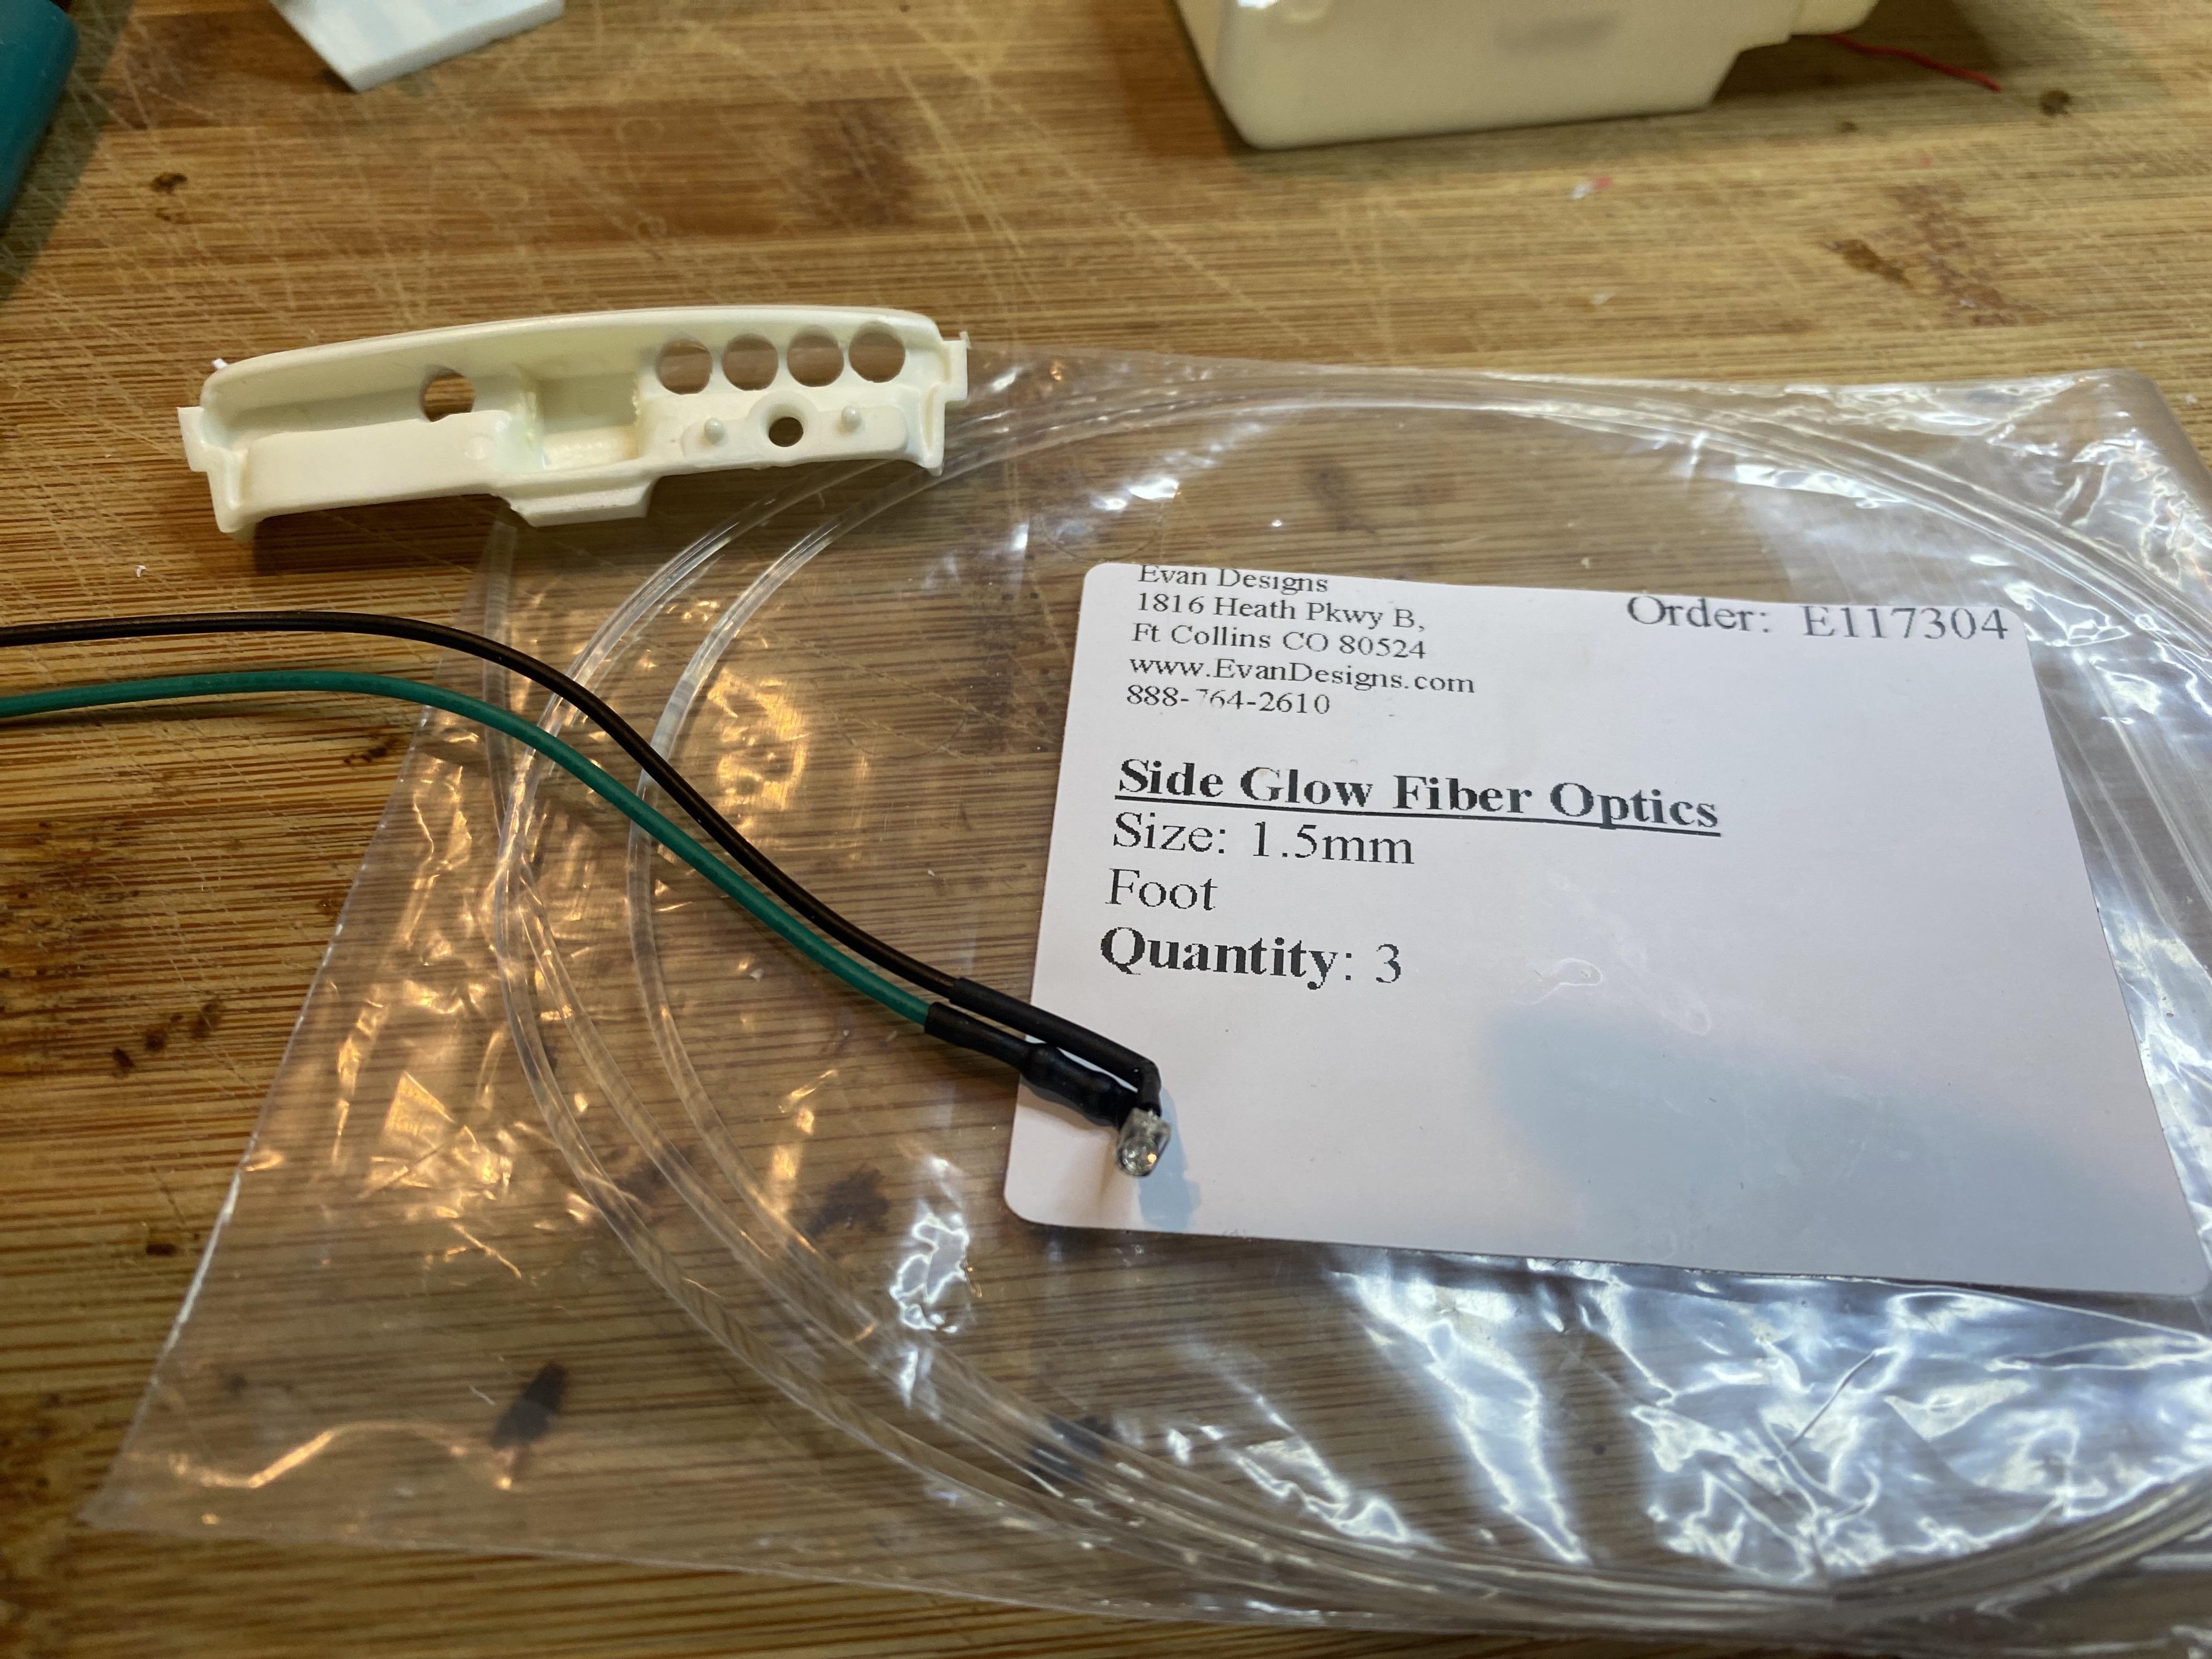
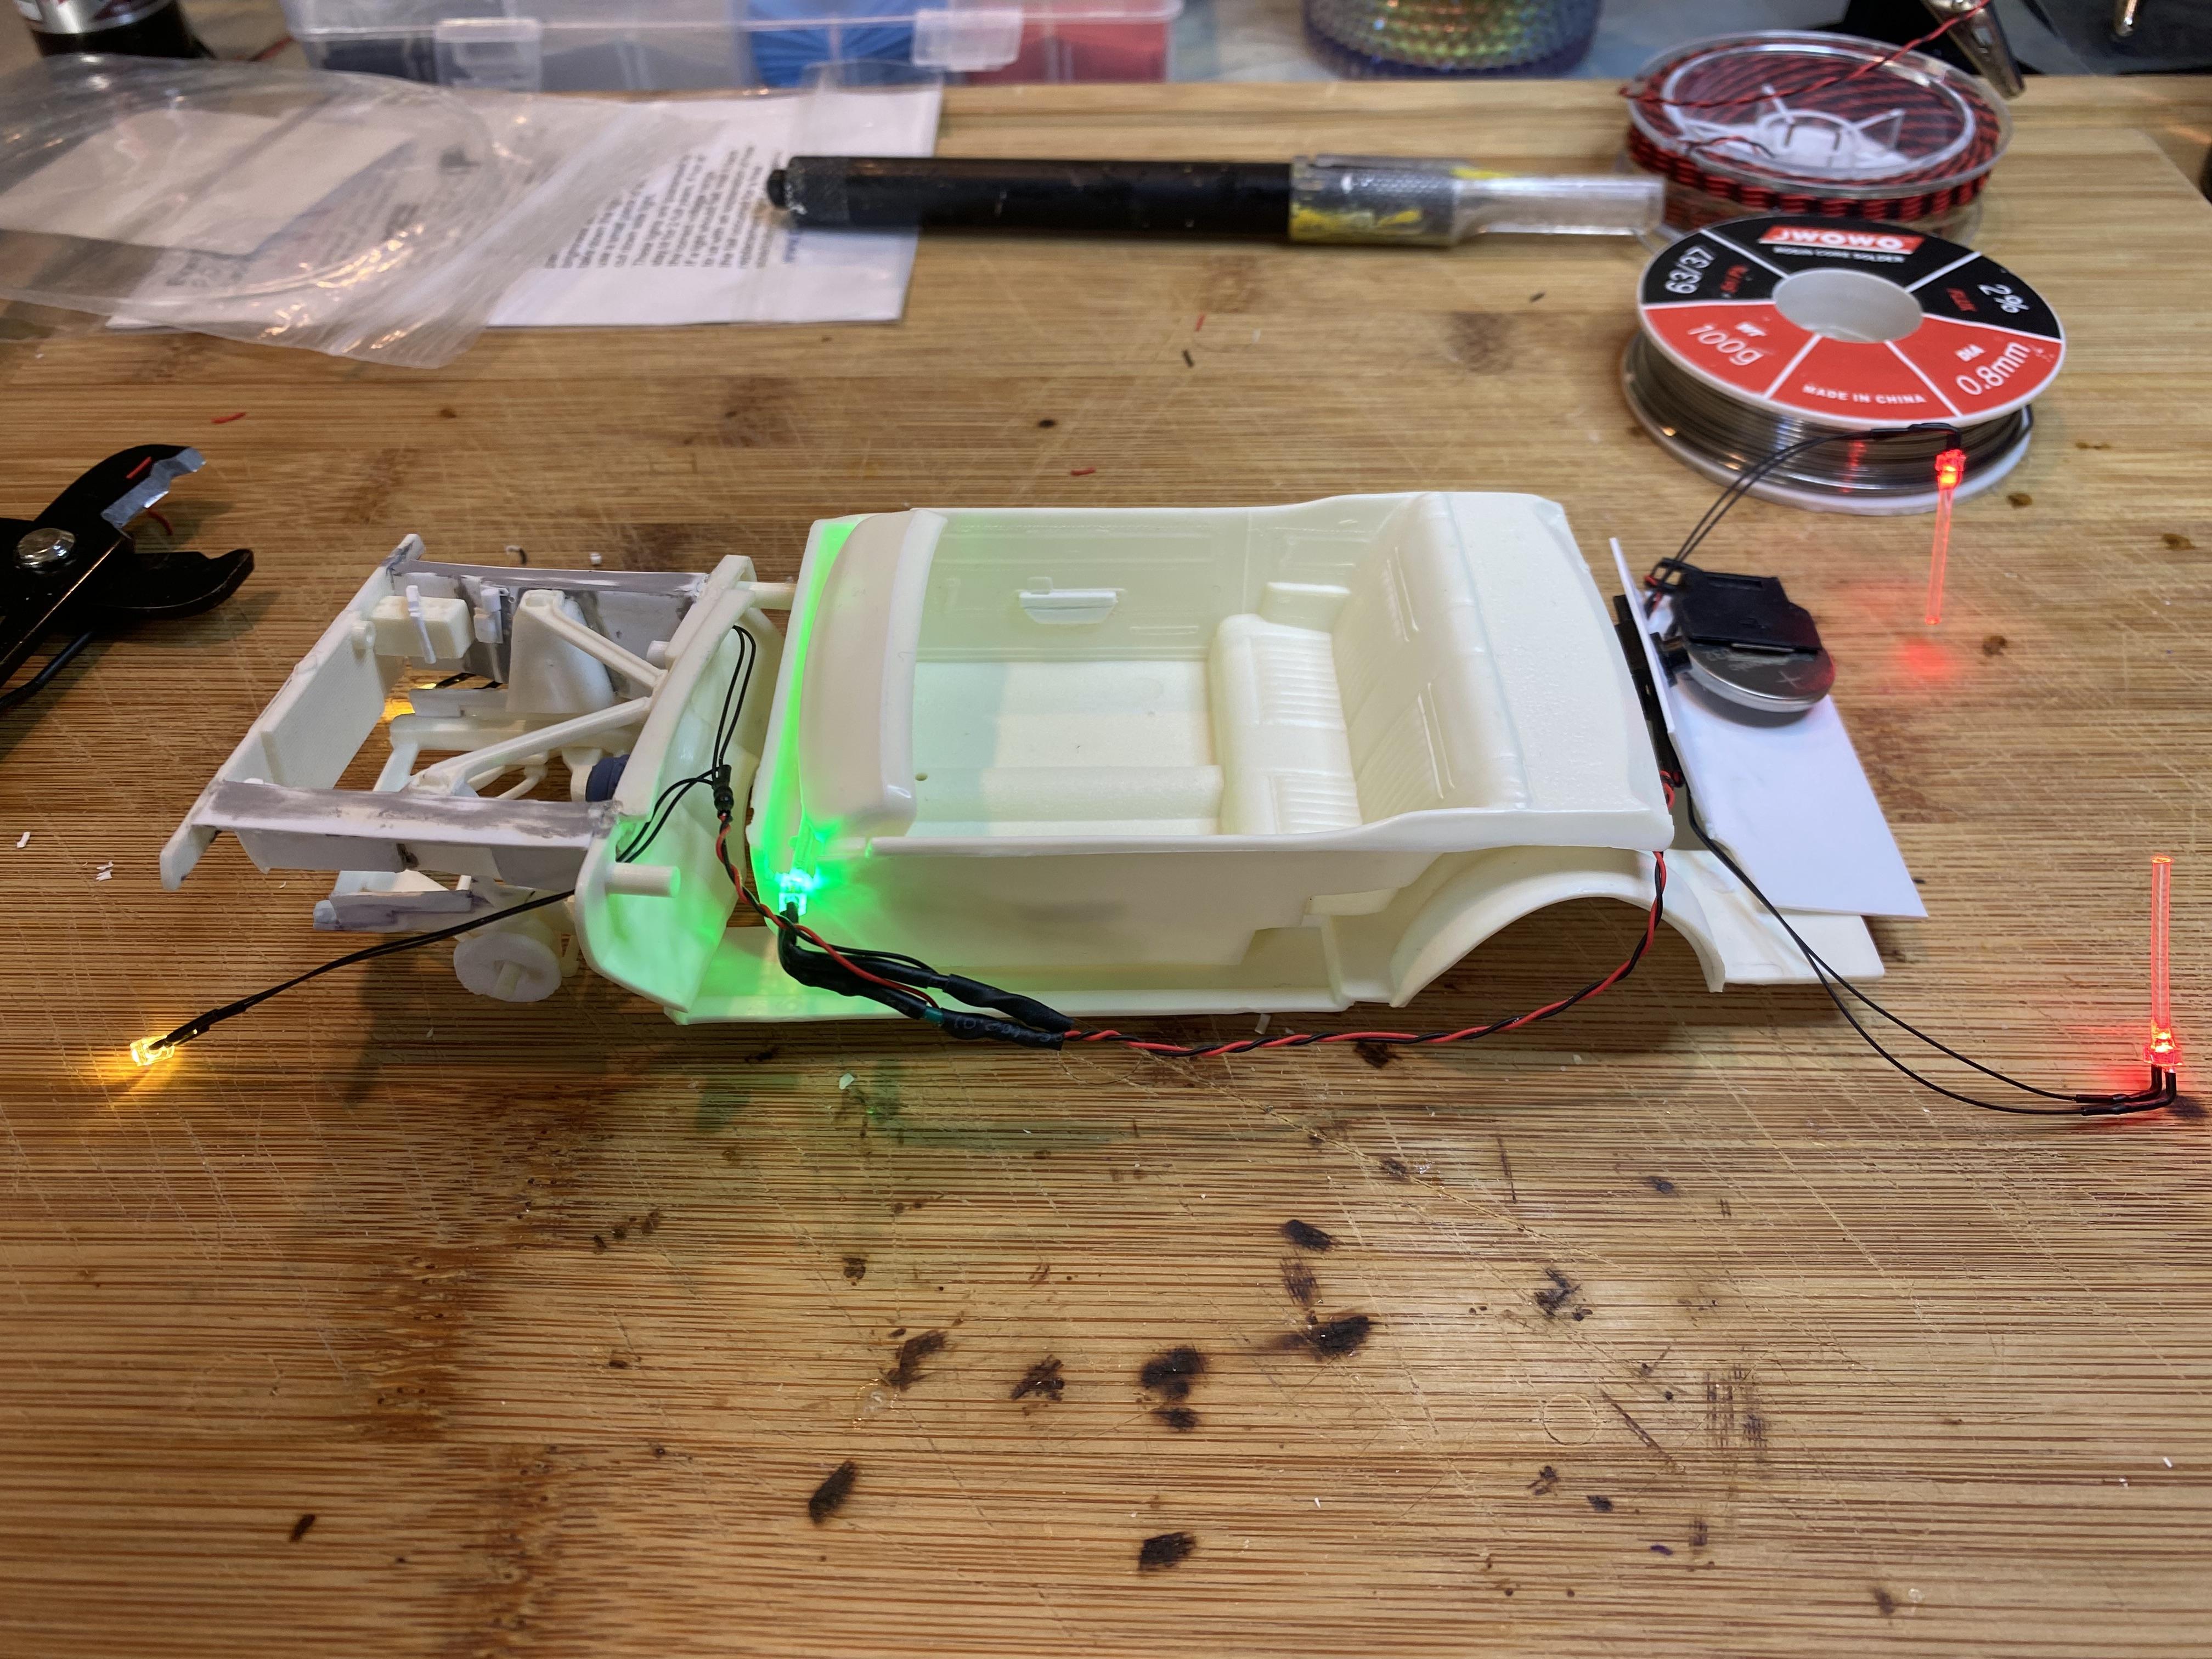
I have had quite a few people ask me how I create my LED wiring harnesses for my builds so I decided to do a more in depth step by step of how I am creating the harness for my 1969 Cougar build. Setting up my work space and all the tools and supplies laid out. set the soldering iron to 250c trimmed the battery compartment and soldering a small section of wire to the switch. The heat shrink and wire twisting to keep it clean. I had created the trunk floor and trial fit with the chassis and body and drilled the hole for the switch. Now with the battery holder wired I glued it to the trunk floor panel. Then soldered the switch, taillight wiring and leads to front. trial fit in chassis, test fit battery cover and glued in switch and wires to back of floor. I already glued the side glow fiber to to taillight LEDs so it will light up the length of the taillights. twisted front leads to keep clean and test fit with chassis and interior. Dash was drilled earlier for gauges. Added side glow fiber optic for the gauge lights and cut interior tub and test fit. drilled firewall for headlight leads and test fit. Soldered headlights, gauge lights to rear leads. finished wiring harness, test fit to build components and check gauge lighting. Once the gauge faces are in I think it will look good. now that’s it, easy peasy. Now get out there and light up your builds! ?
-
I have had quite a few people ask me how I create my LED wiring harnesses for my builds so I decided to do a more in depth step by step of how I am creating the harness for the cougar. Setting up my work space and all the tools and supplies laid out. set the soldering iron to 250c trimmed the battery compartment and soldering a small section of wire to the switch. The heat shrink and wire twisting to keep it clean. I had created the trunk floor and trial fit with the chassis and body and drilled the hole for the switch. Now with the battery holder wired I glued it to the trunk floor panel. Then soldered the switch, taillight wiring and leads to front. trial fit in chassis, test fit battery cover and glued in switch and wires to back of floor. I already glued the side glow fiber to to taillight LEDs so it will light up the length of the taillights. twisted front leads to keep clean and test fit with chassis and interior. Dash was drilled earlier for gauges. Added side glow fiber optic for the gauge lights and cut interior tub and test fit. drilled firewall for headlight leads and test fit. Soldered headlights, gauge lights to rear leads. finished wiring harness, test fit to build components and check gauge lighting. Once the gauge faces are in I think it will look good. now that’s it, easy peasy. Now get out there and light up your builds! ?
-
I would love to build an earlier cougar, hopefully they will re-release one some day. I know right? ?
-
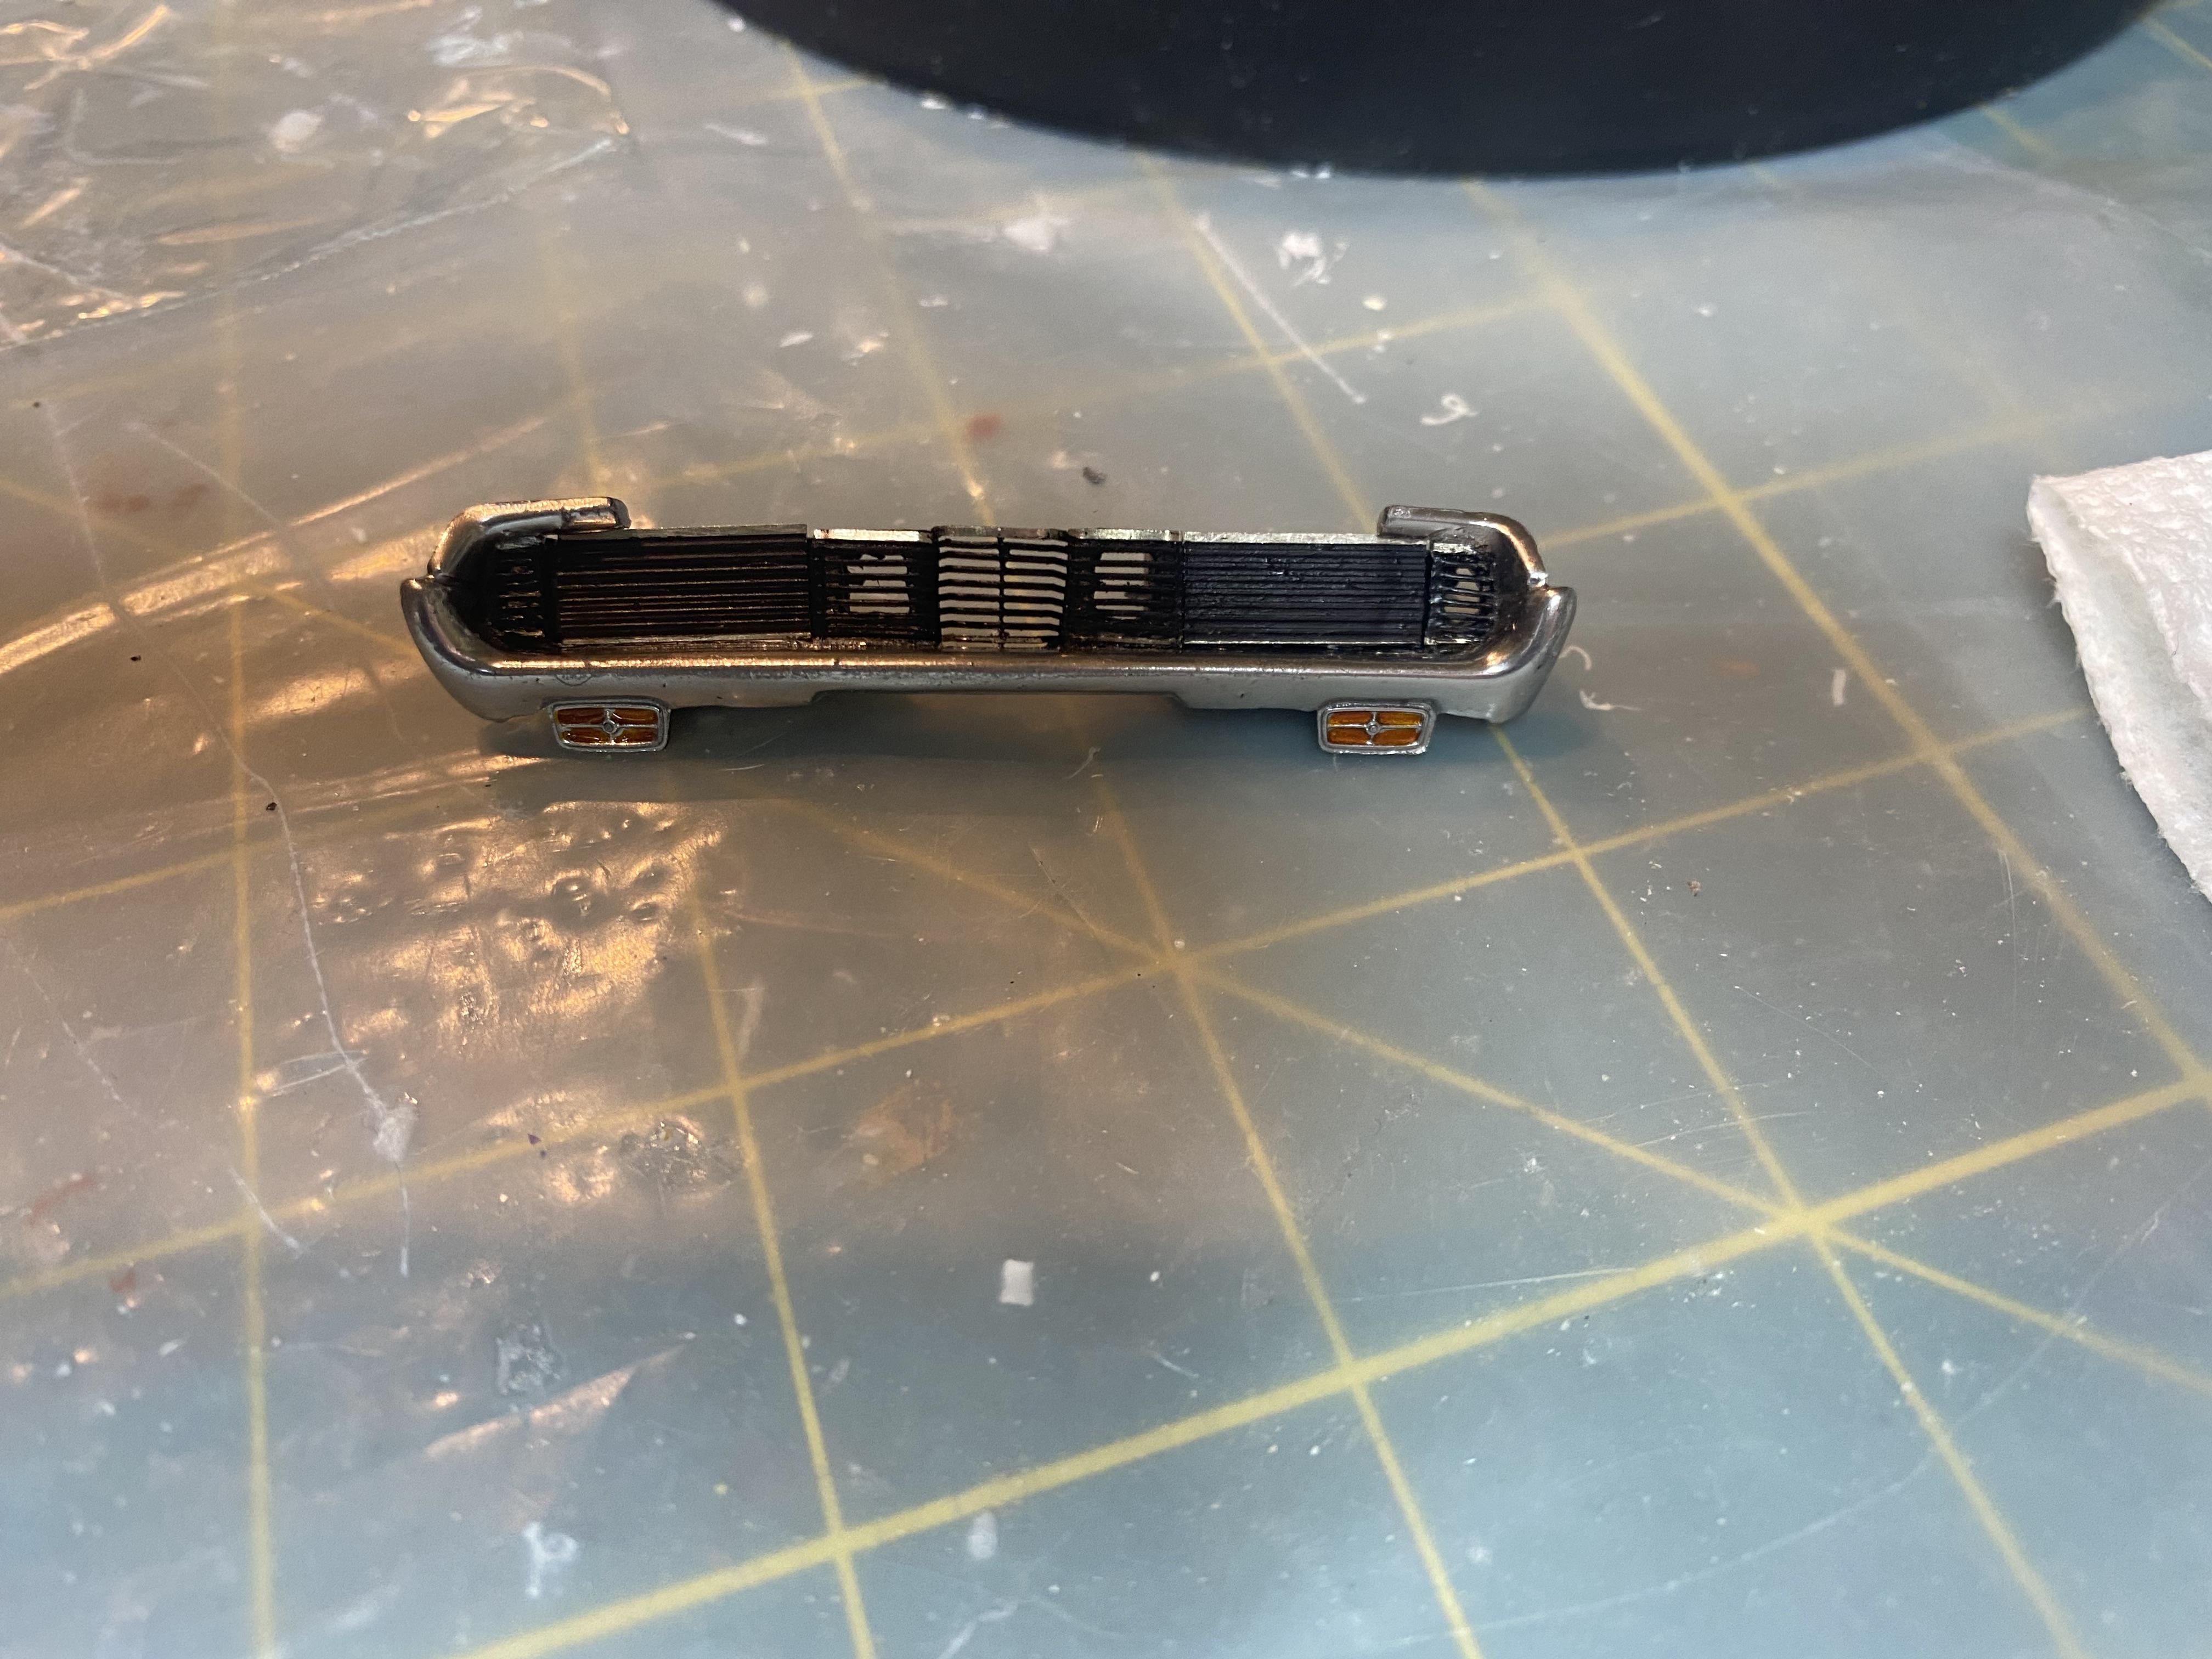
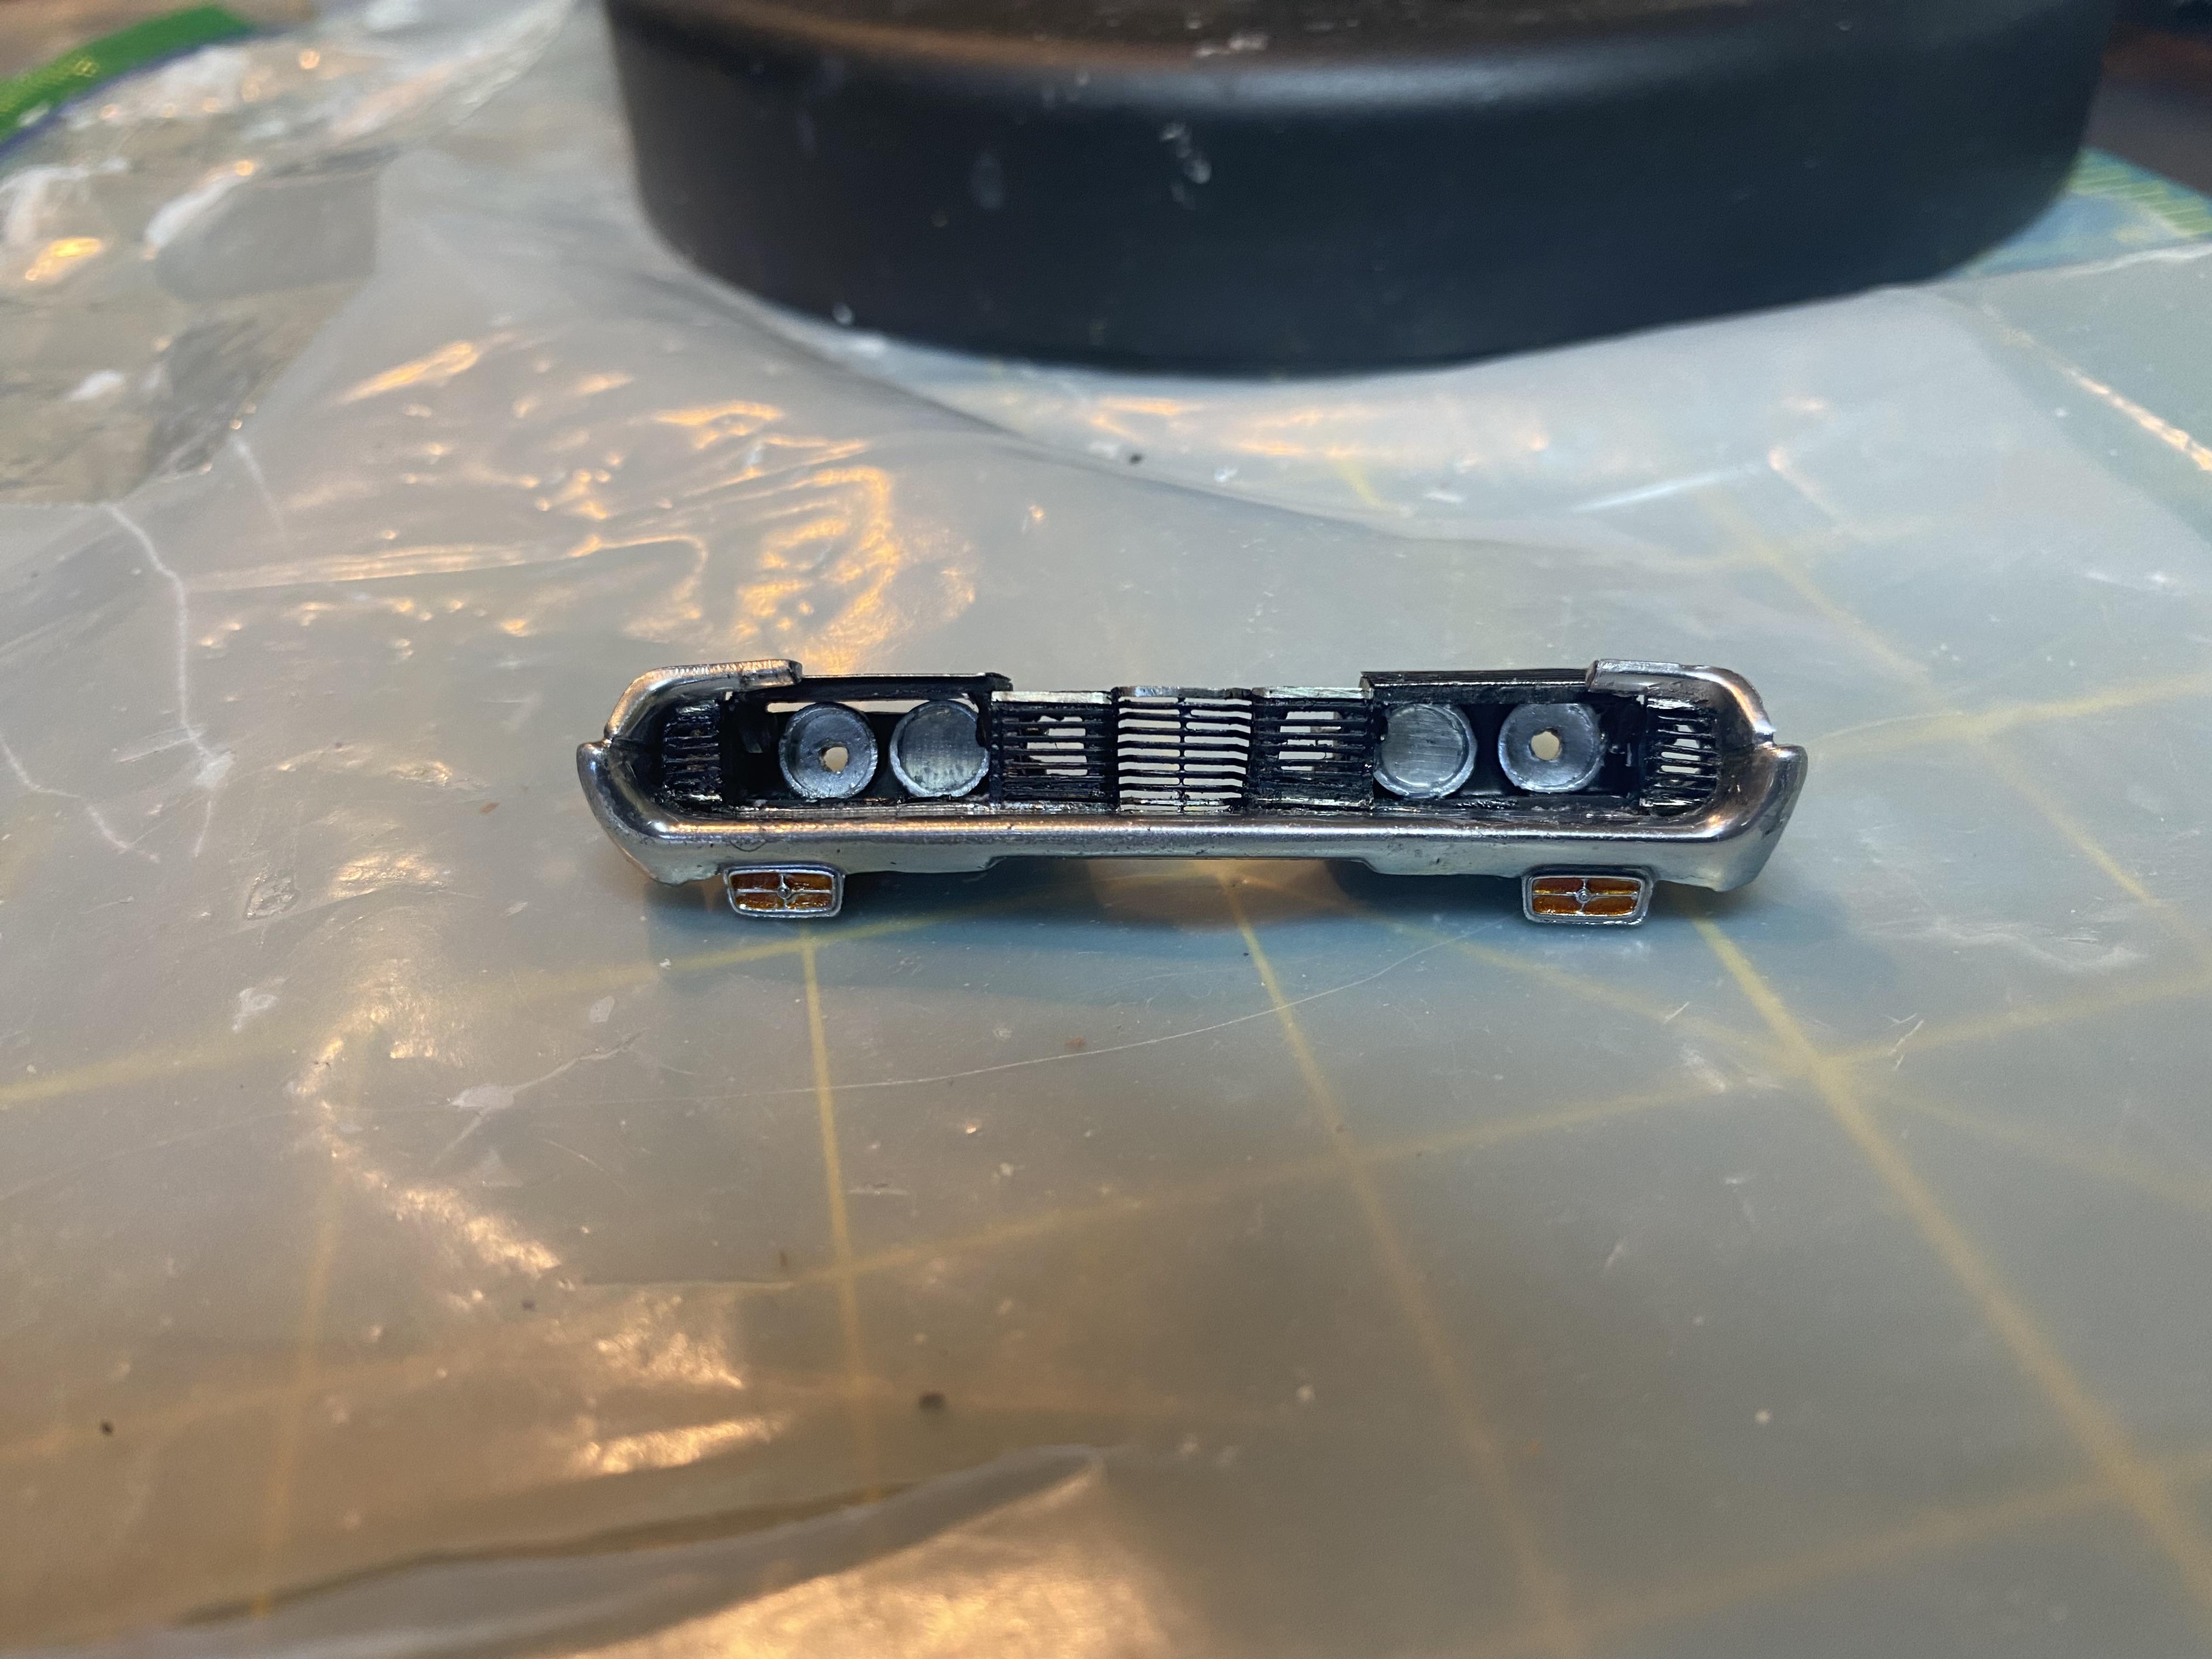
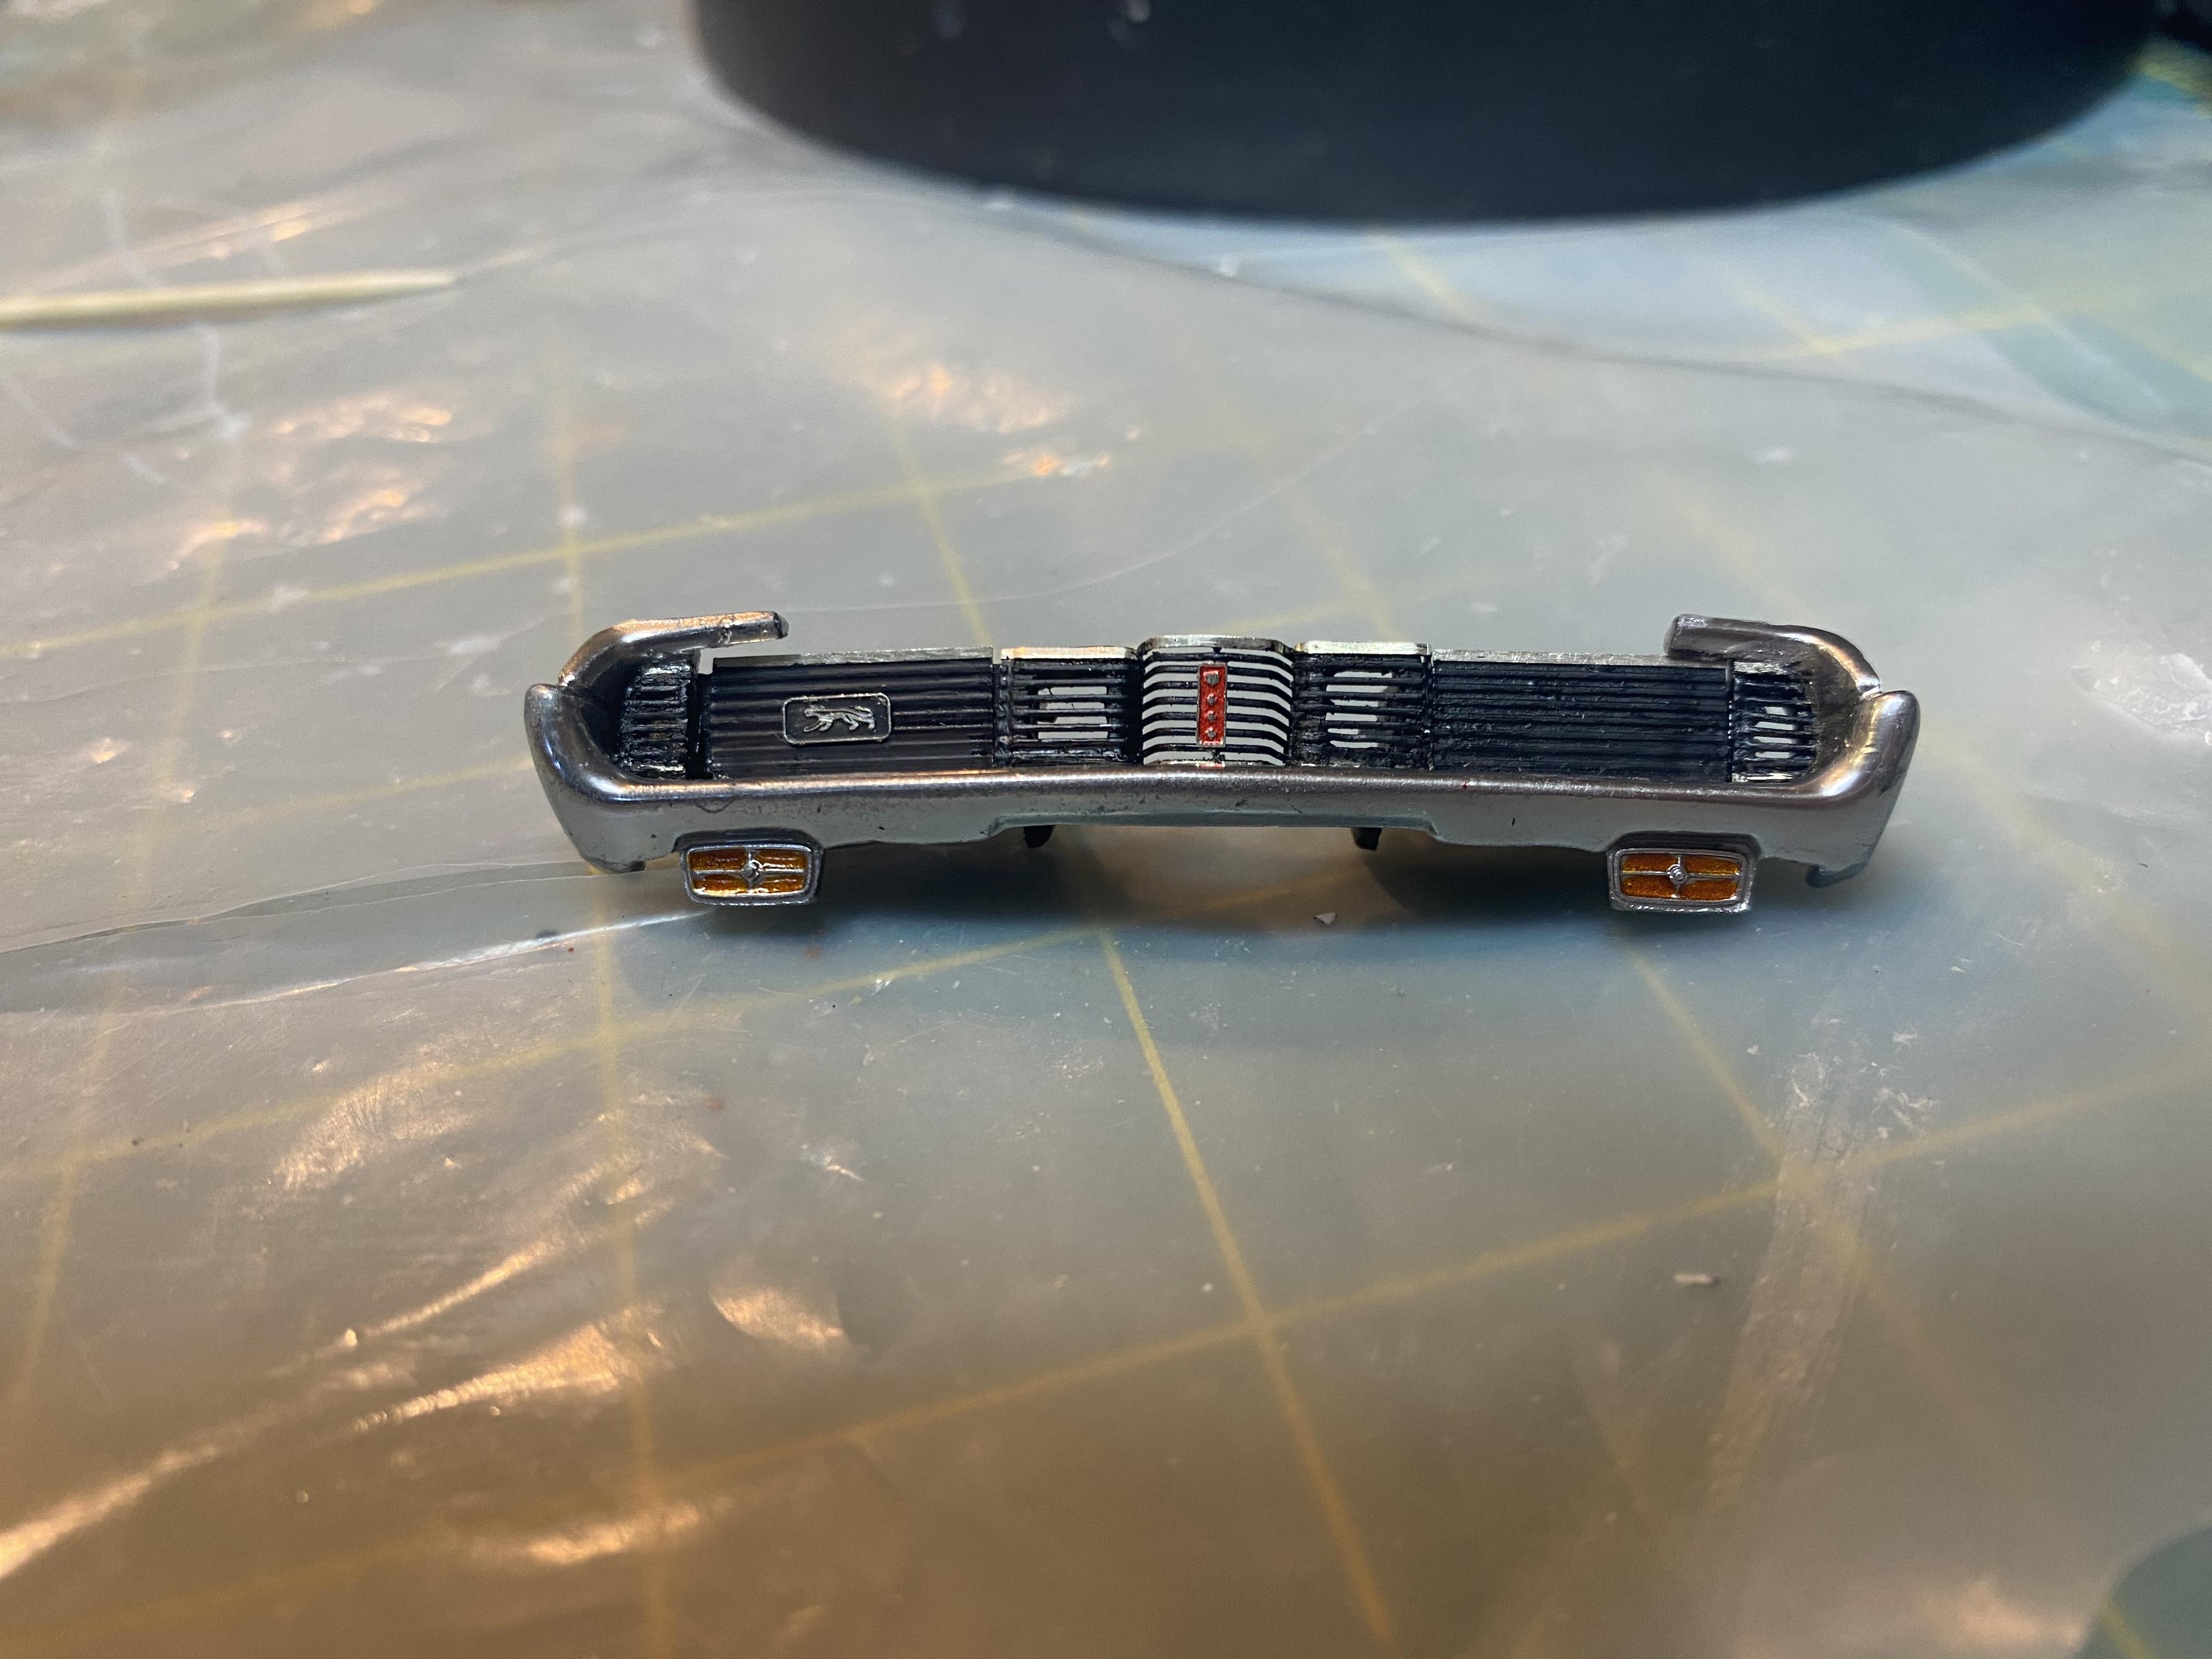
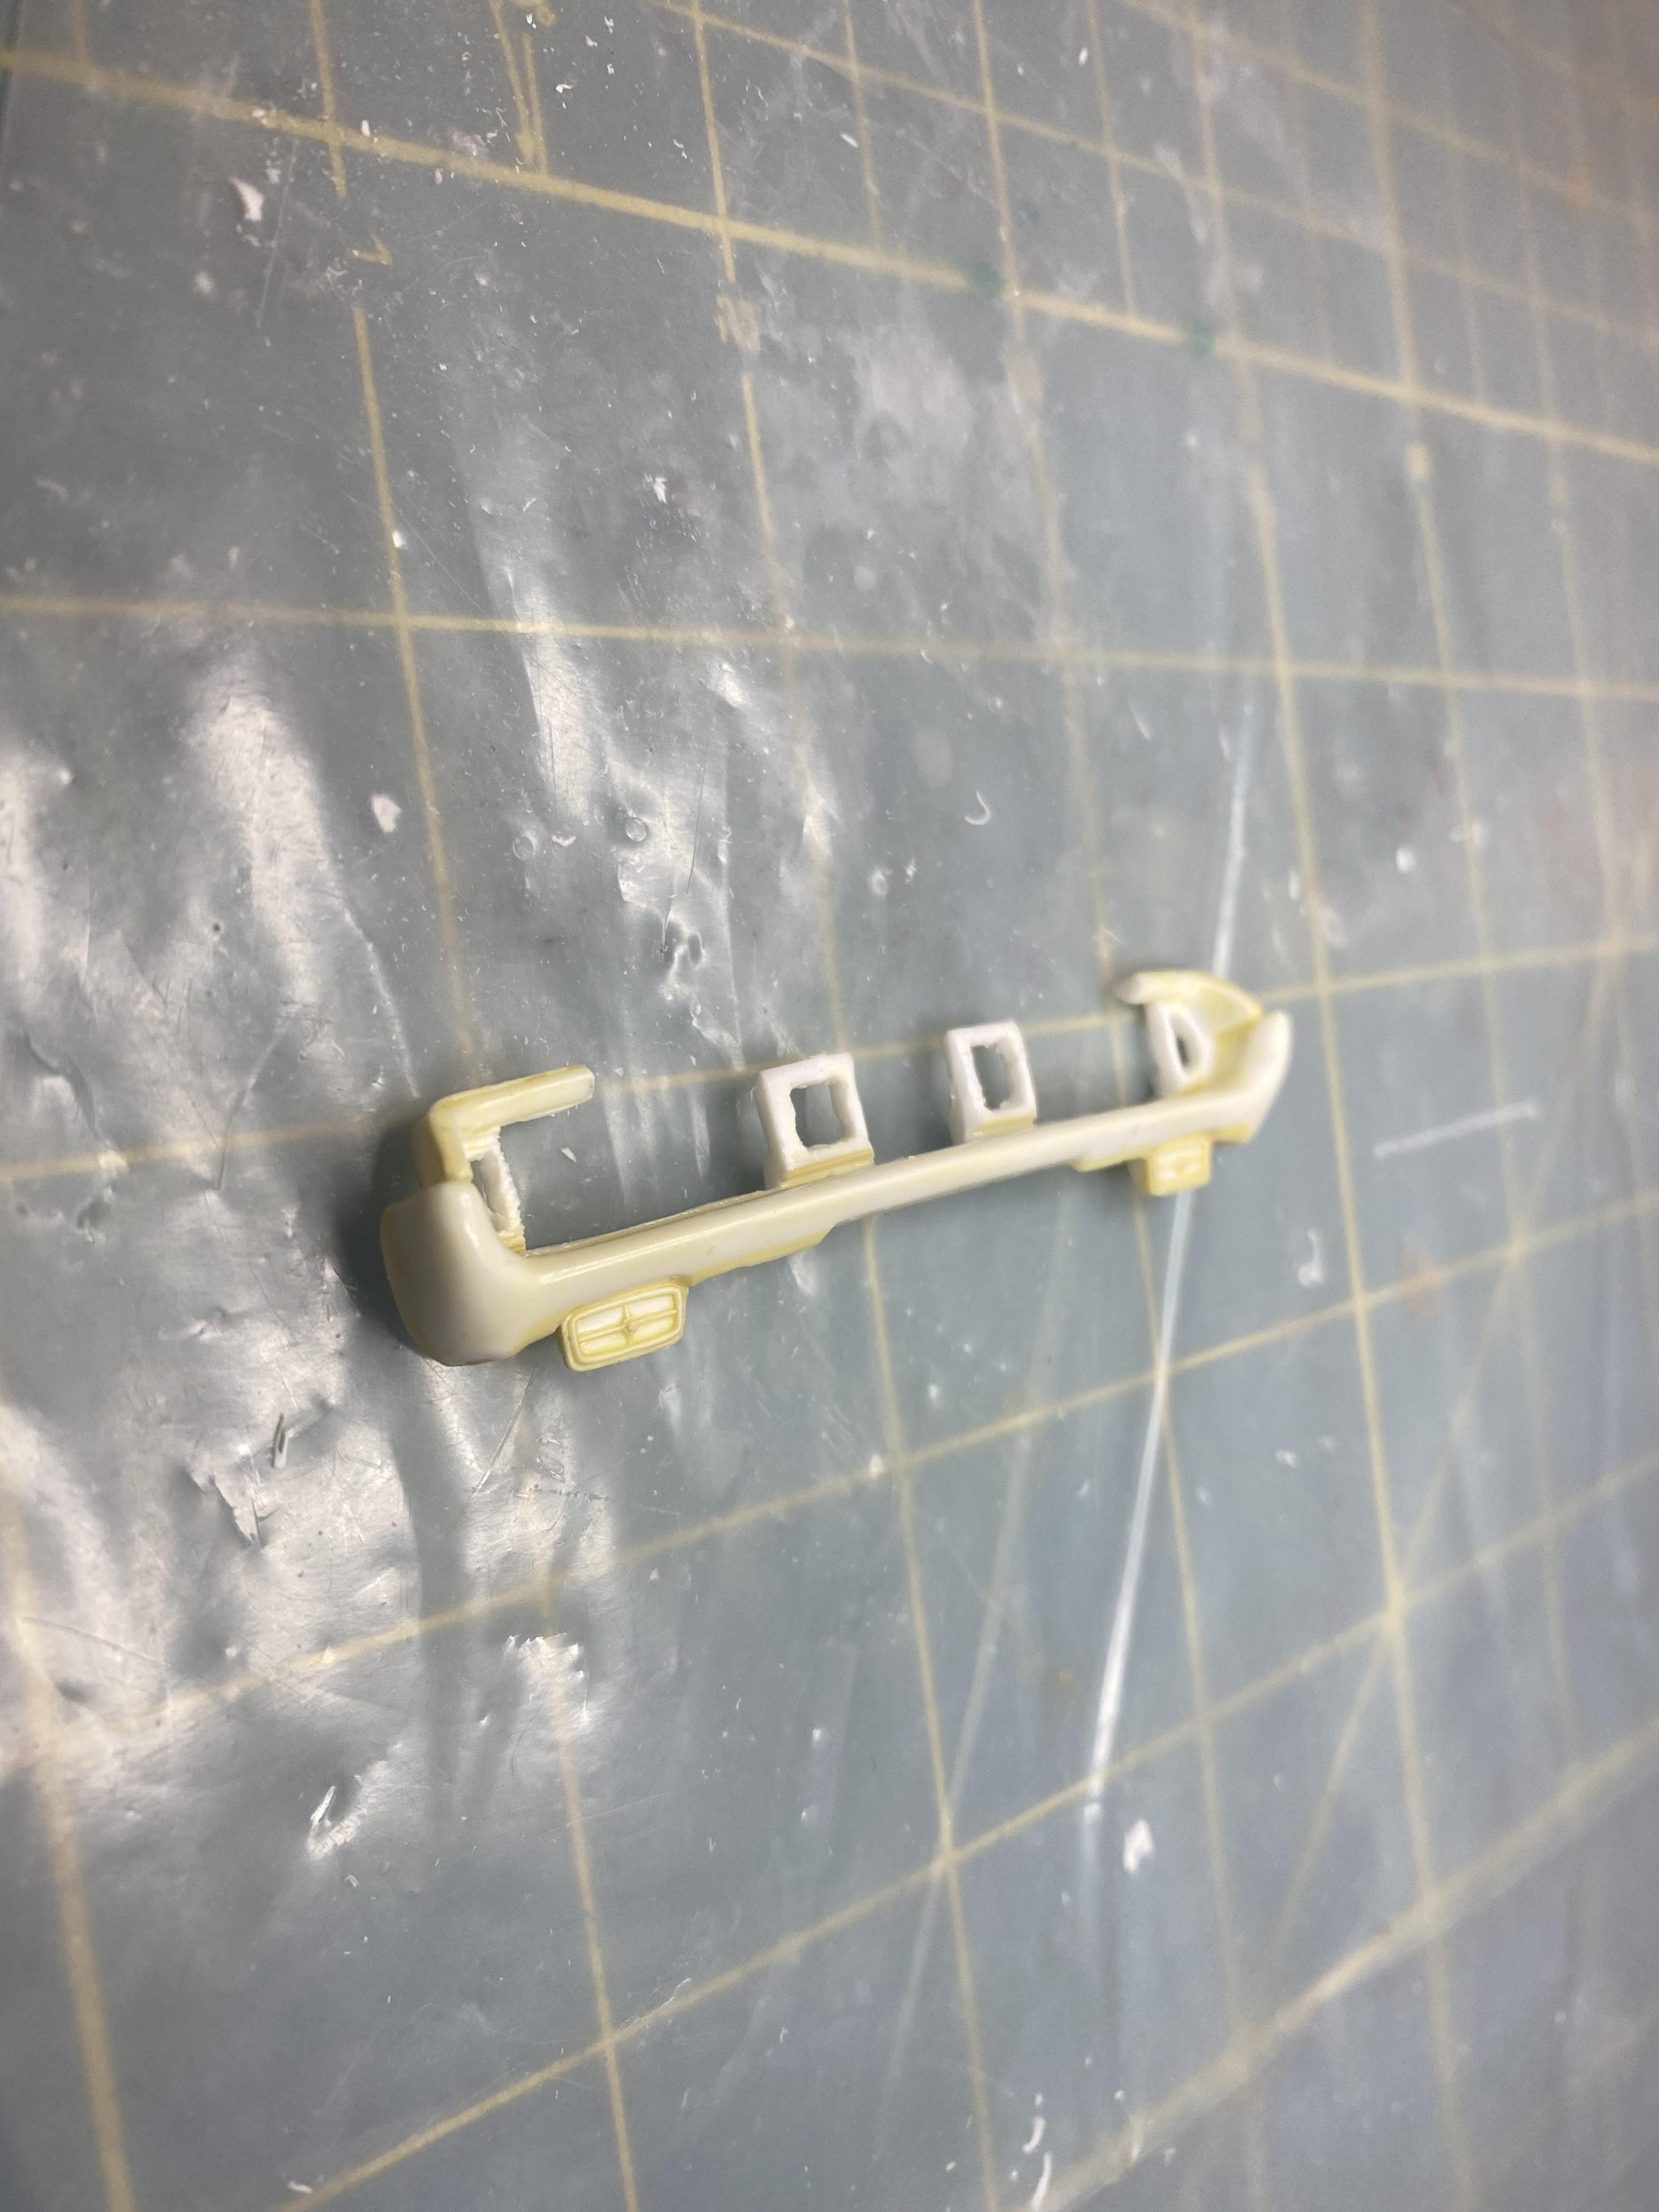
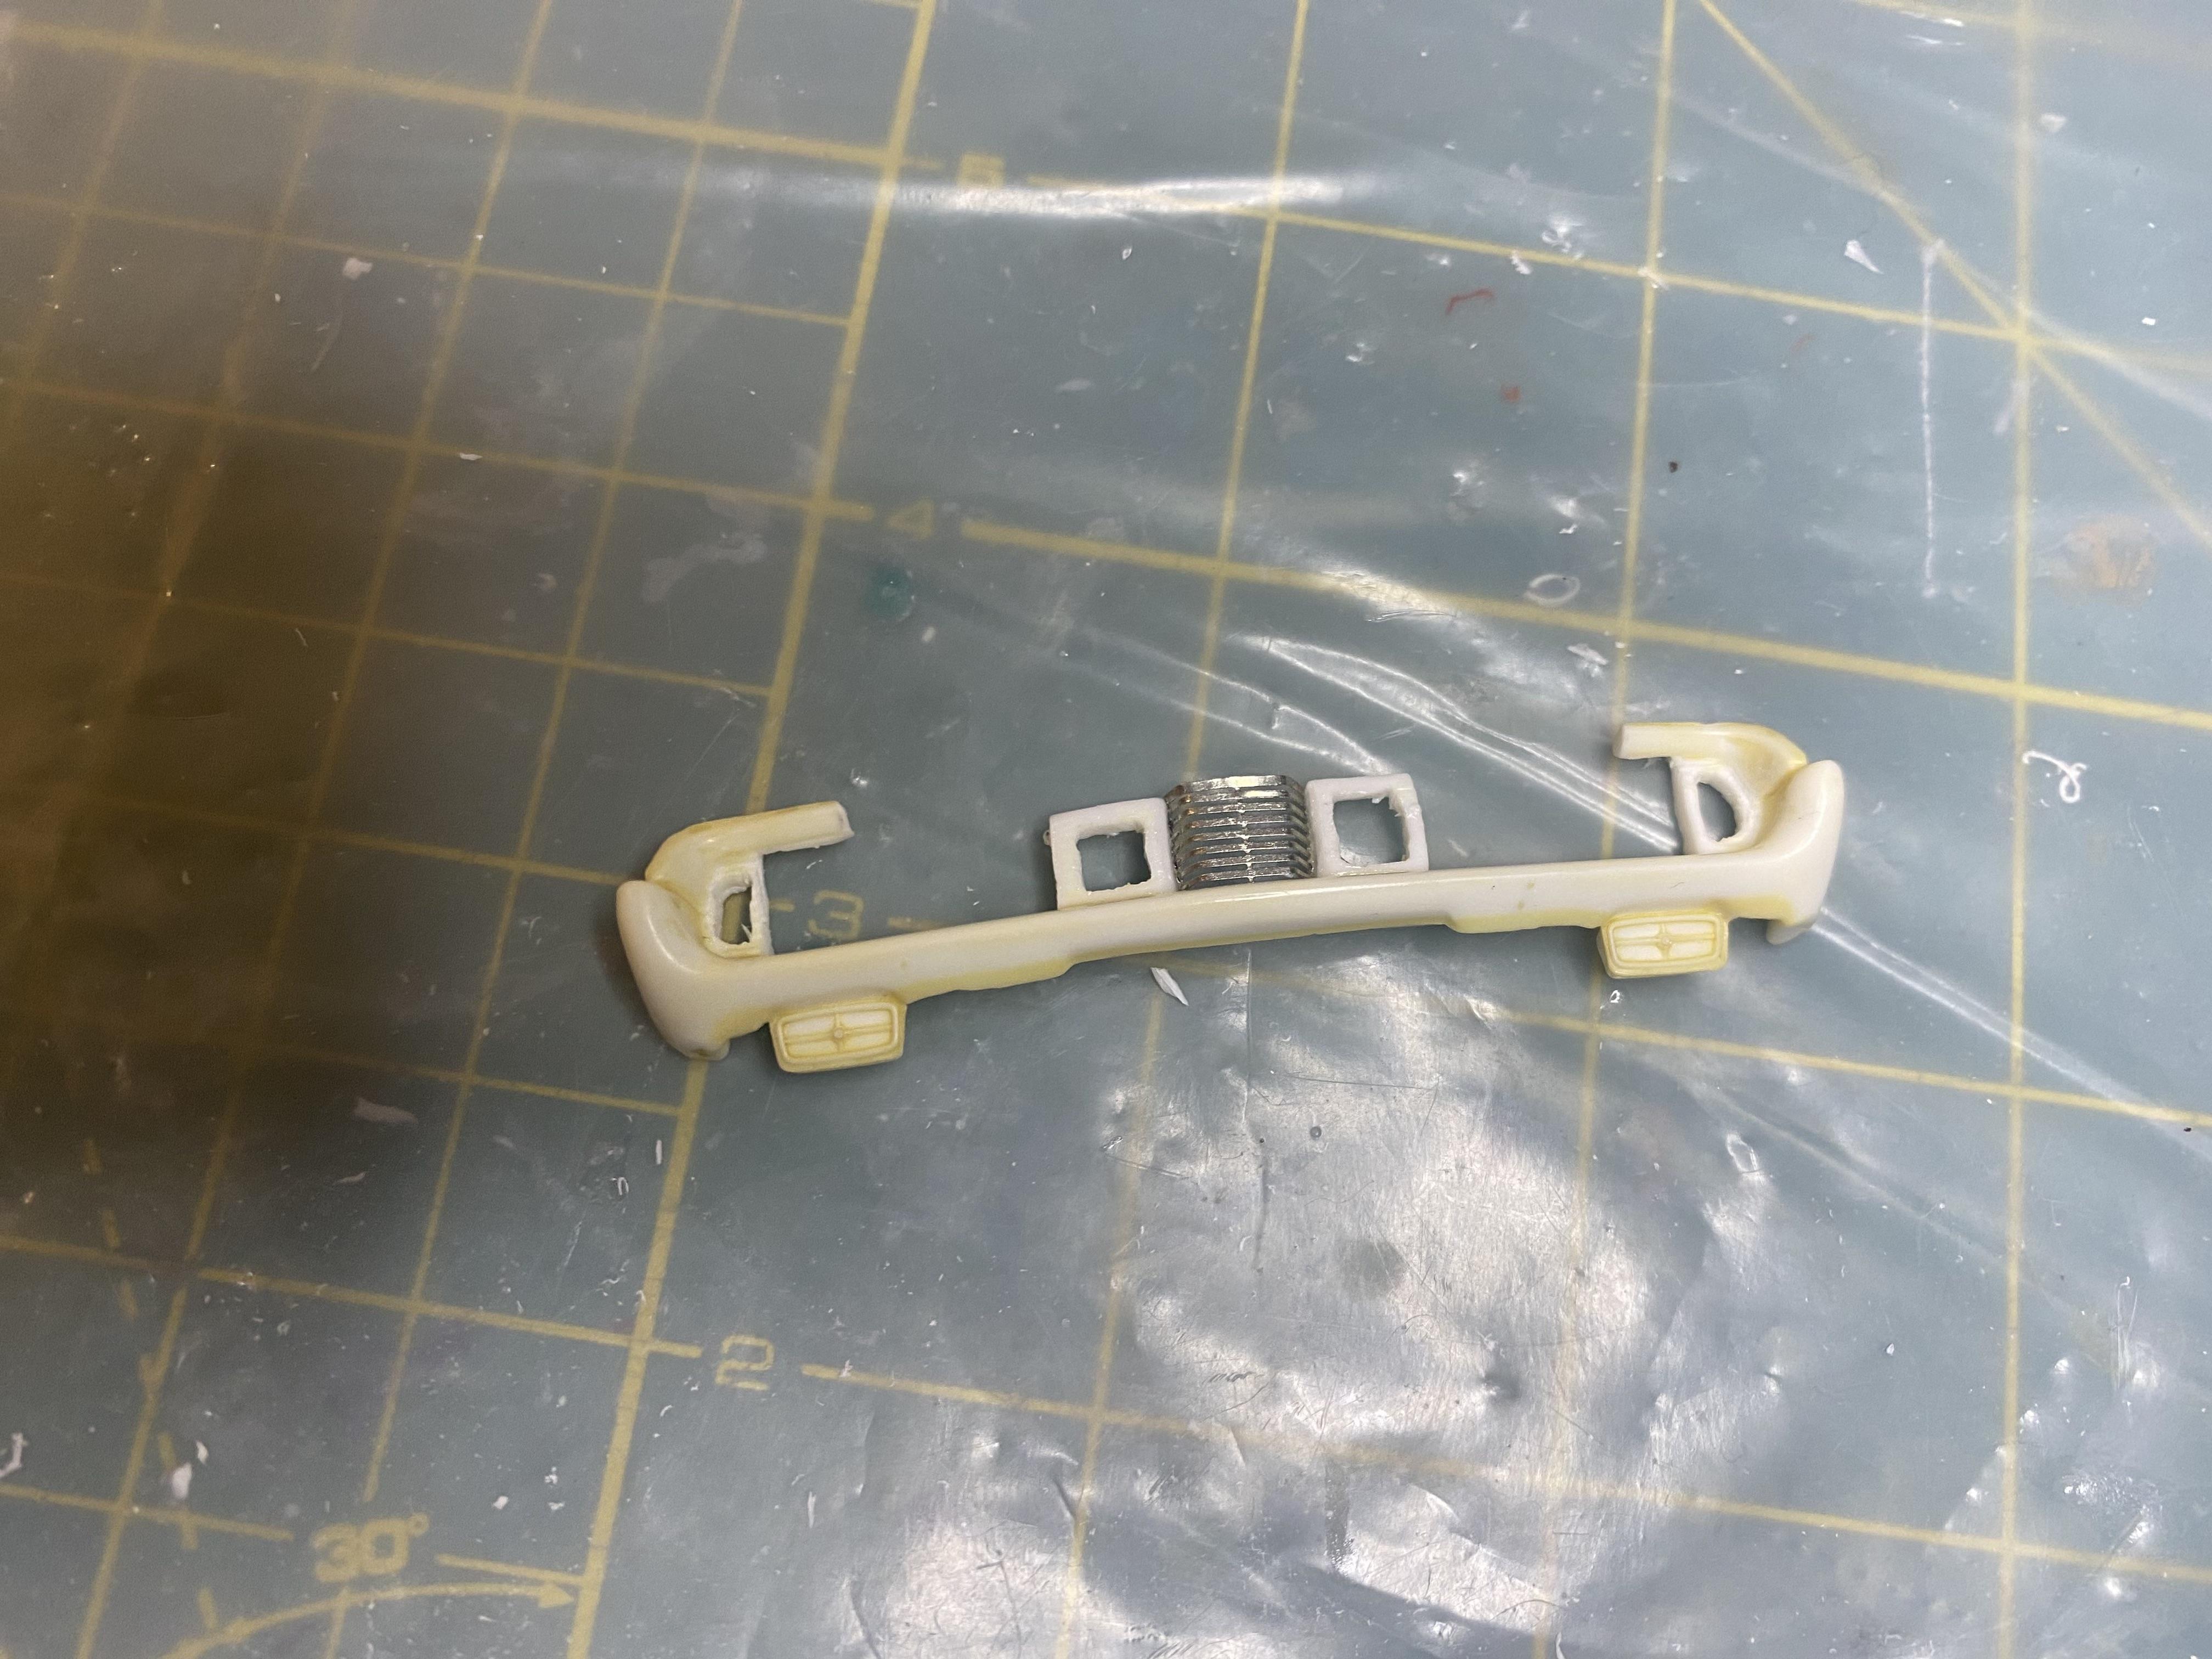
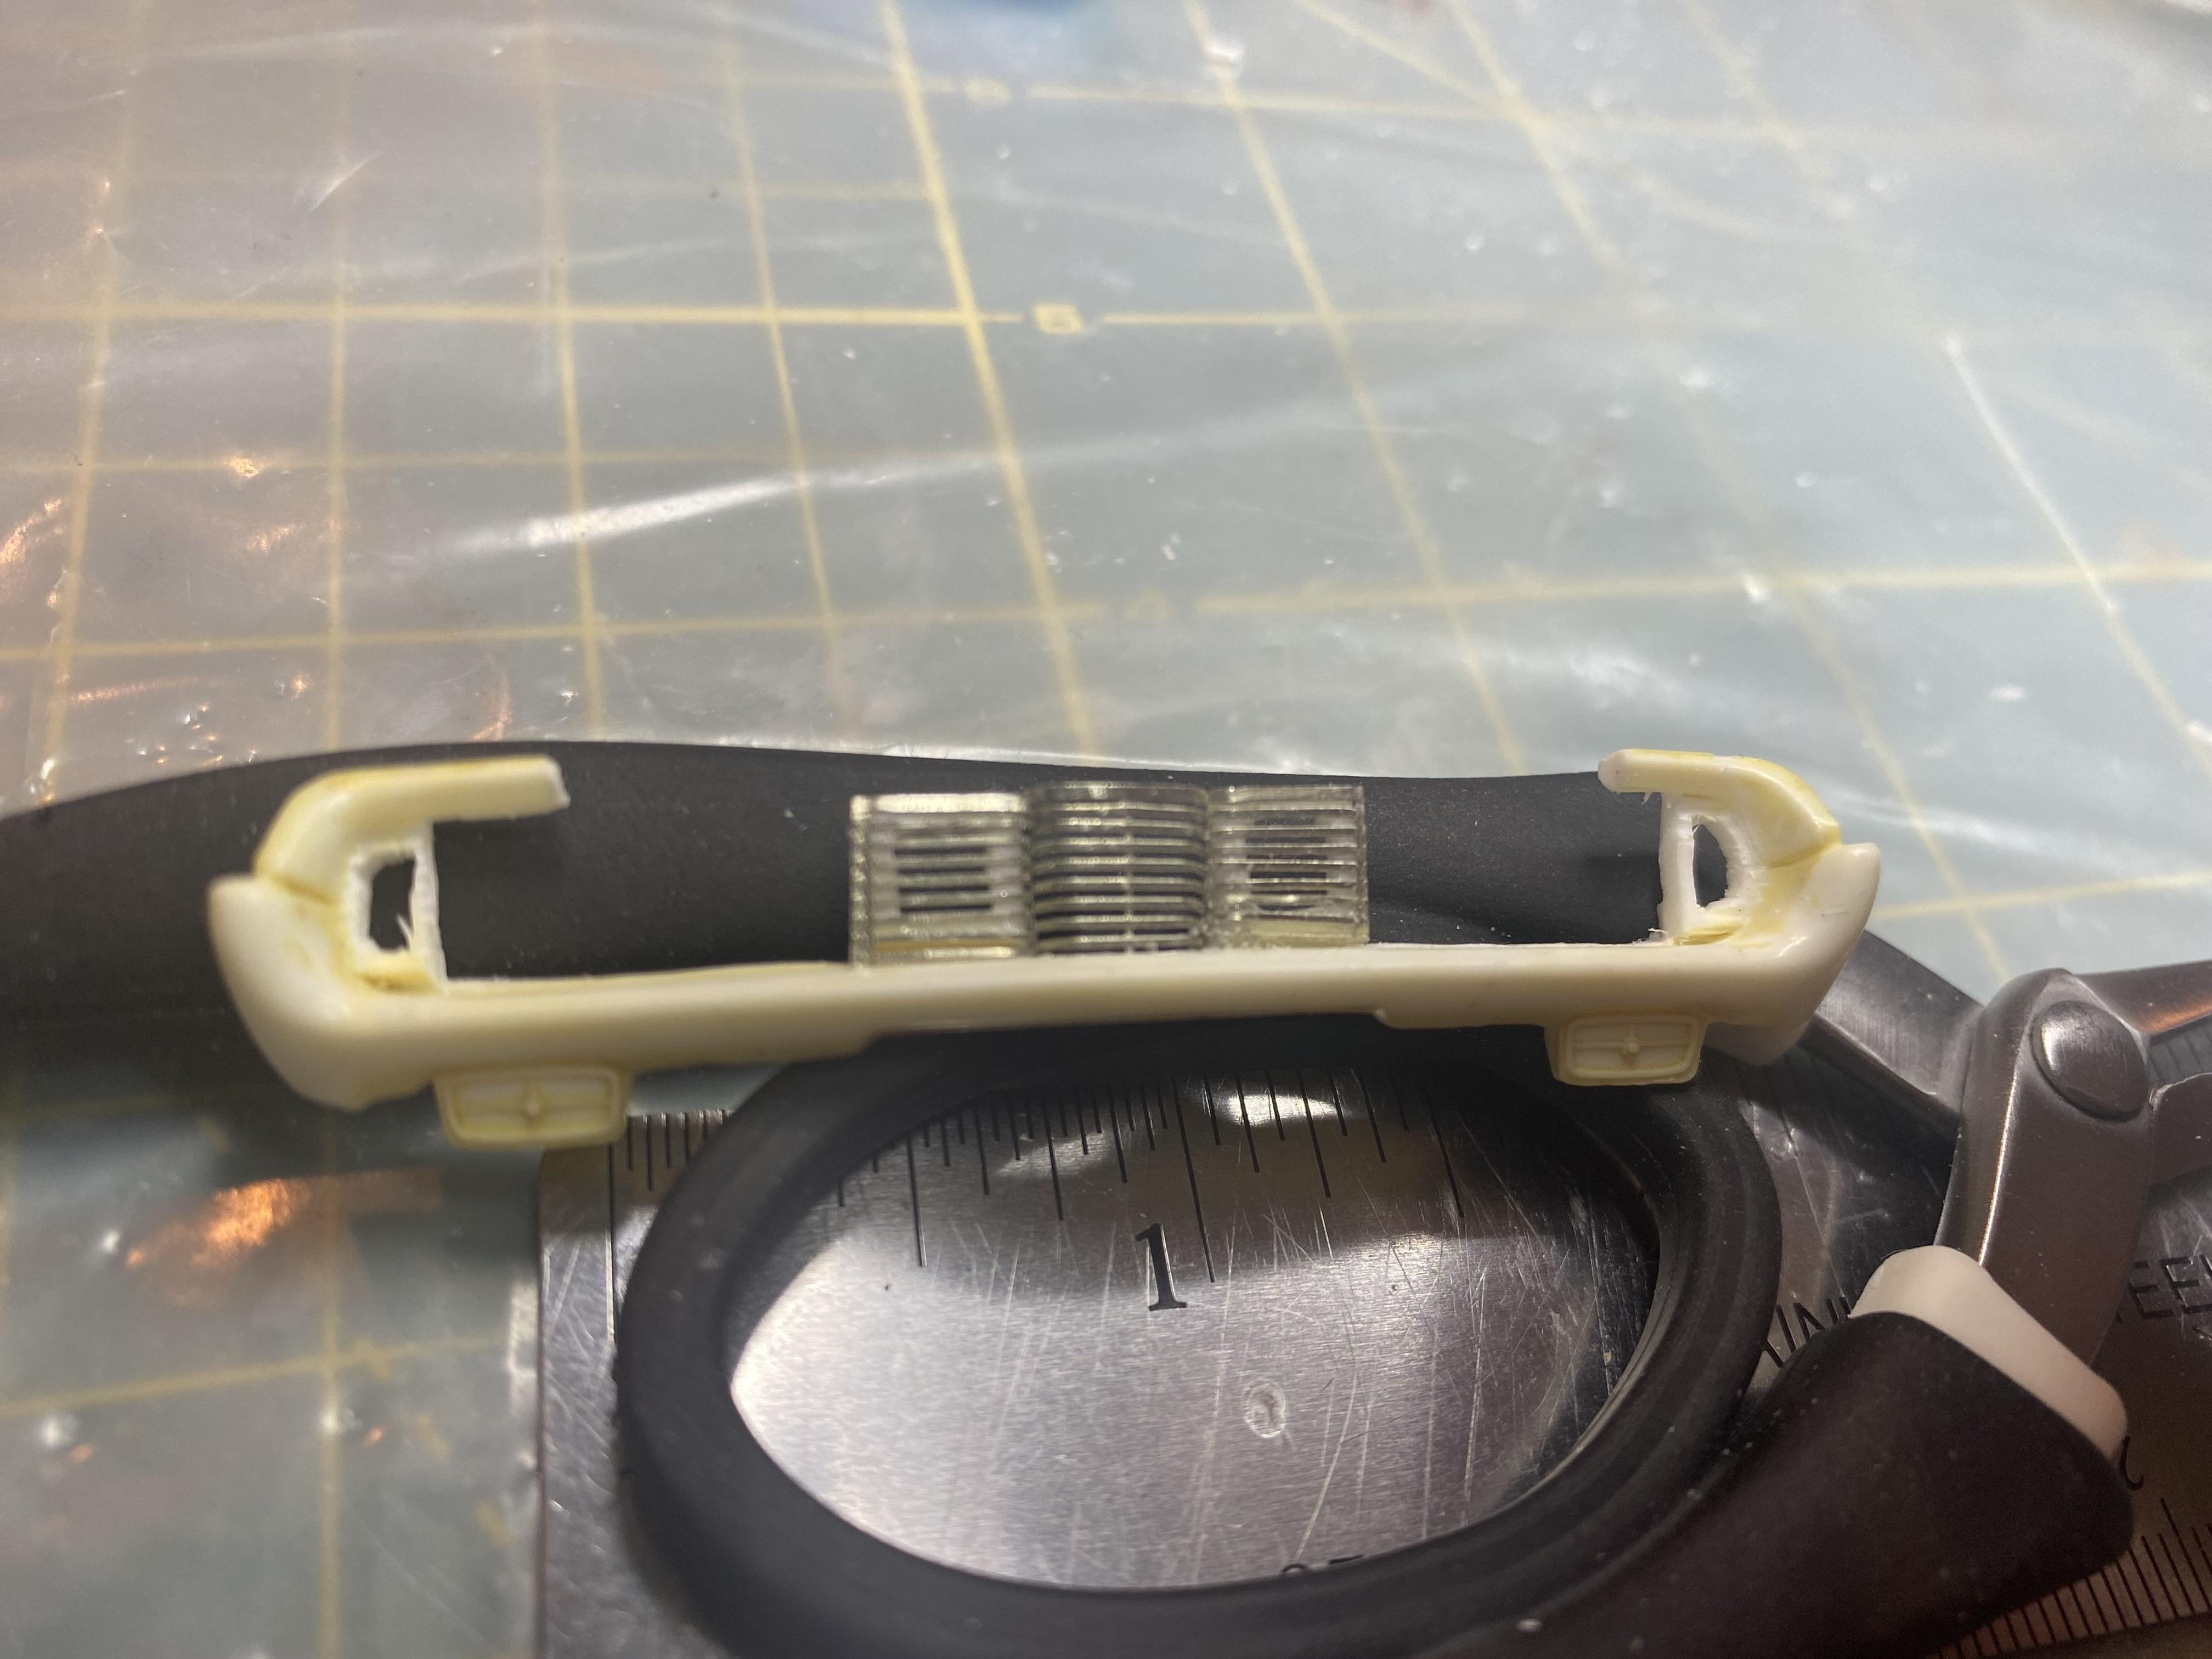
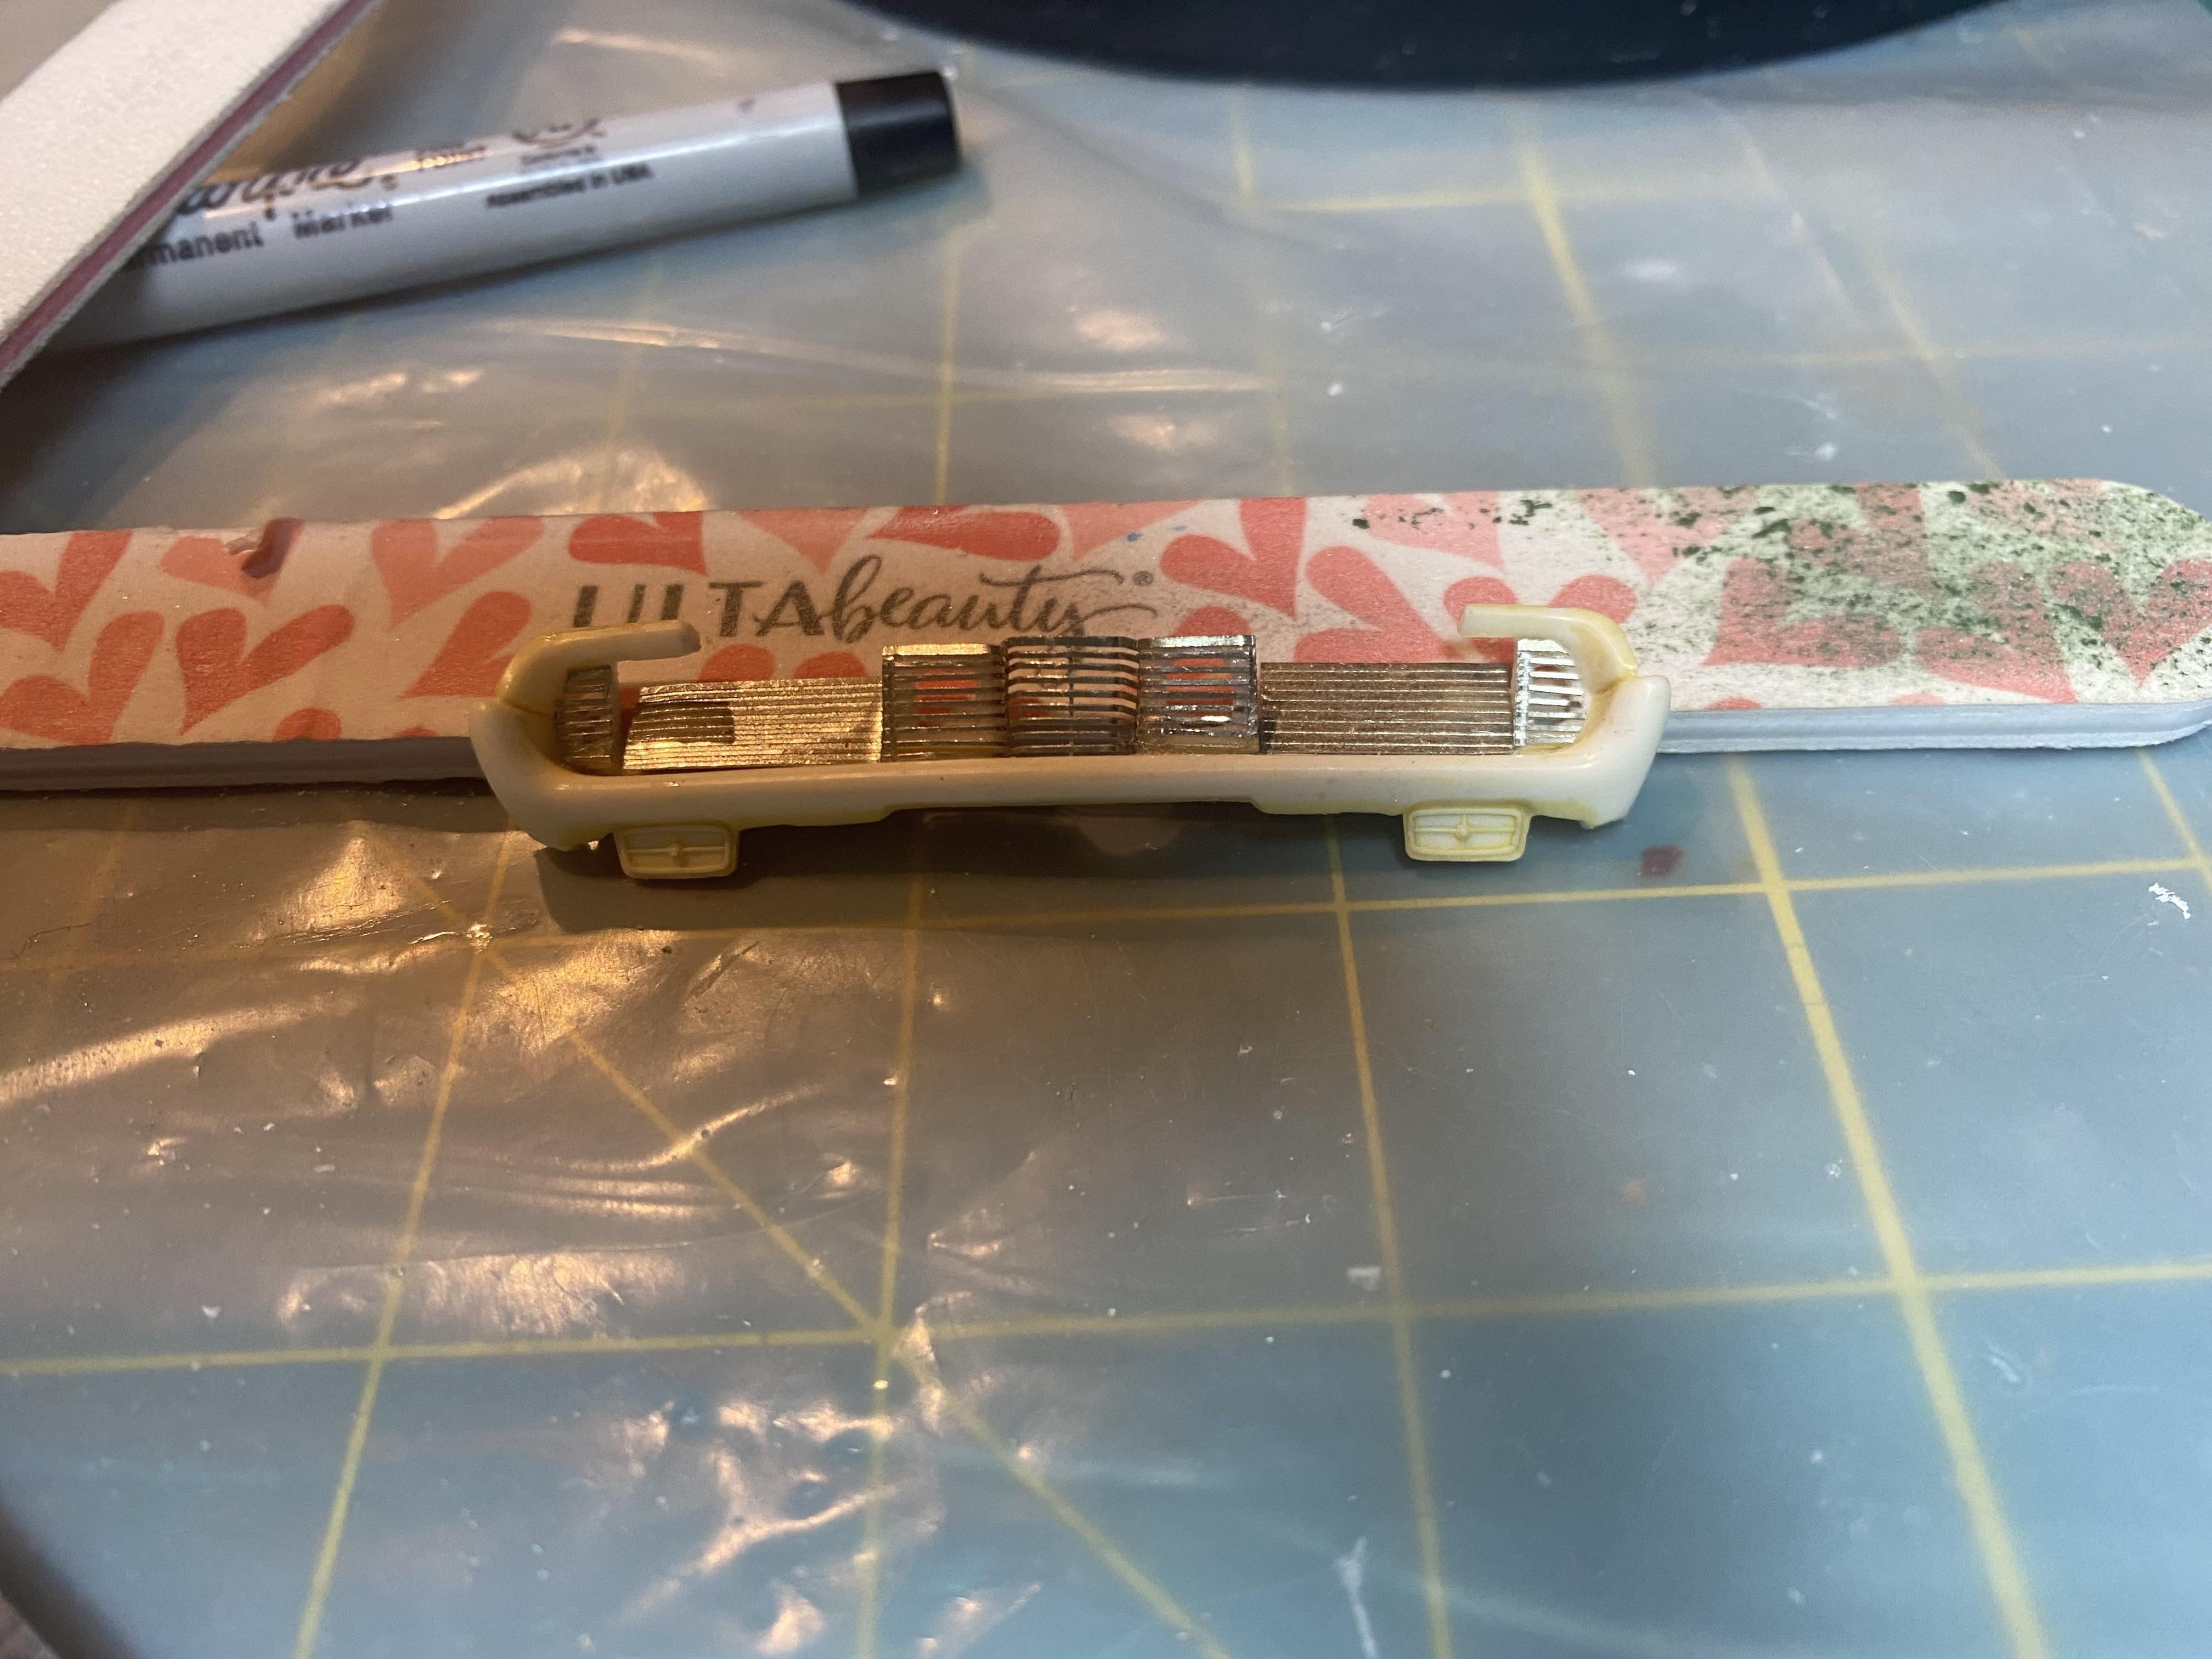
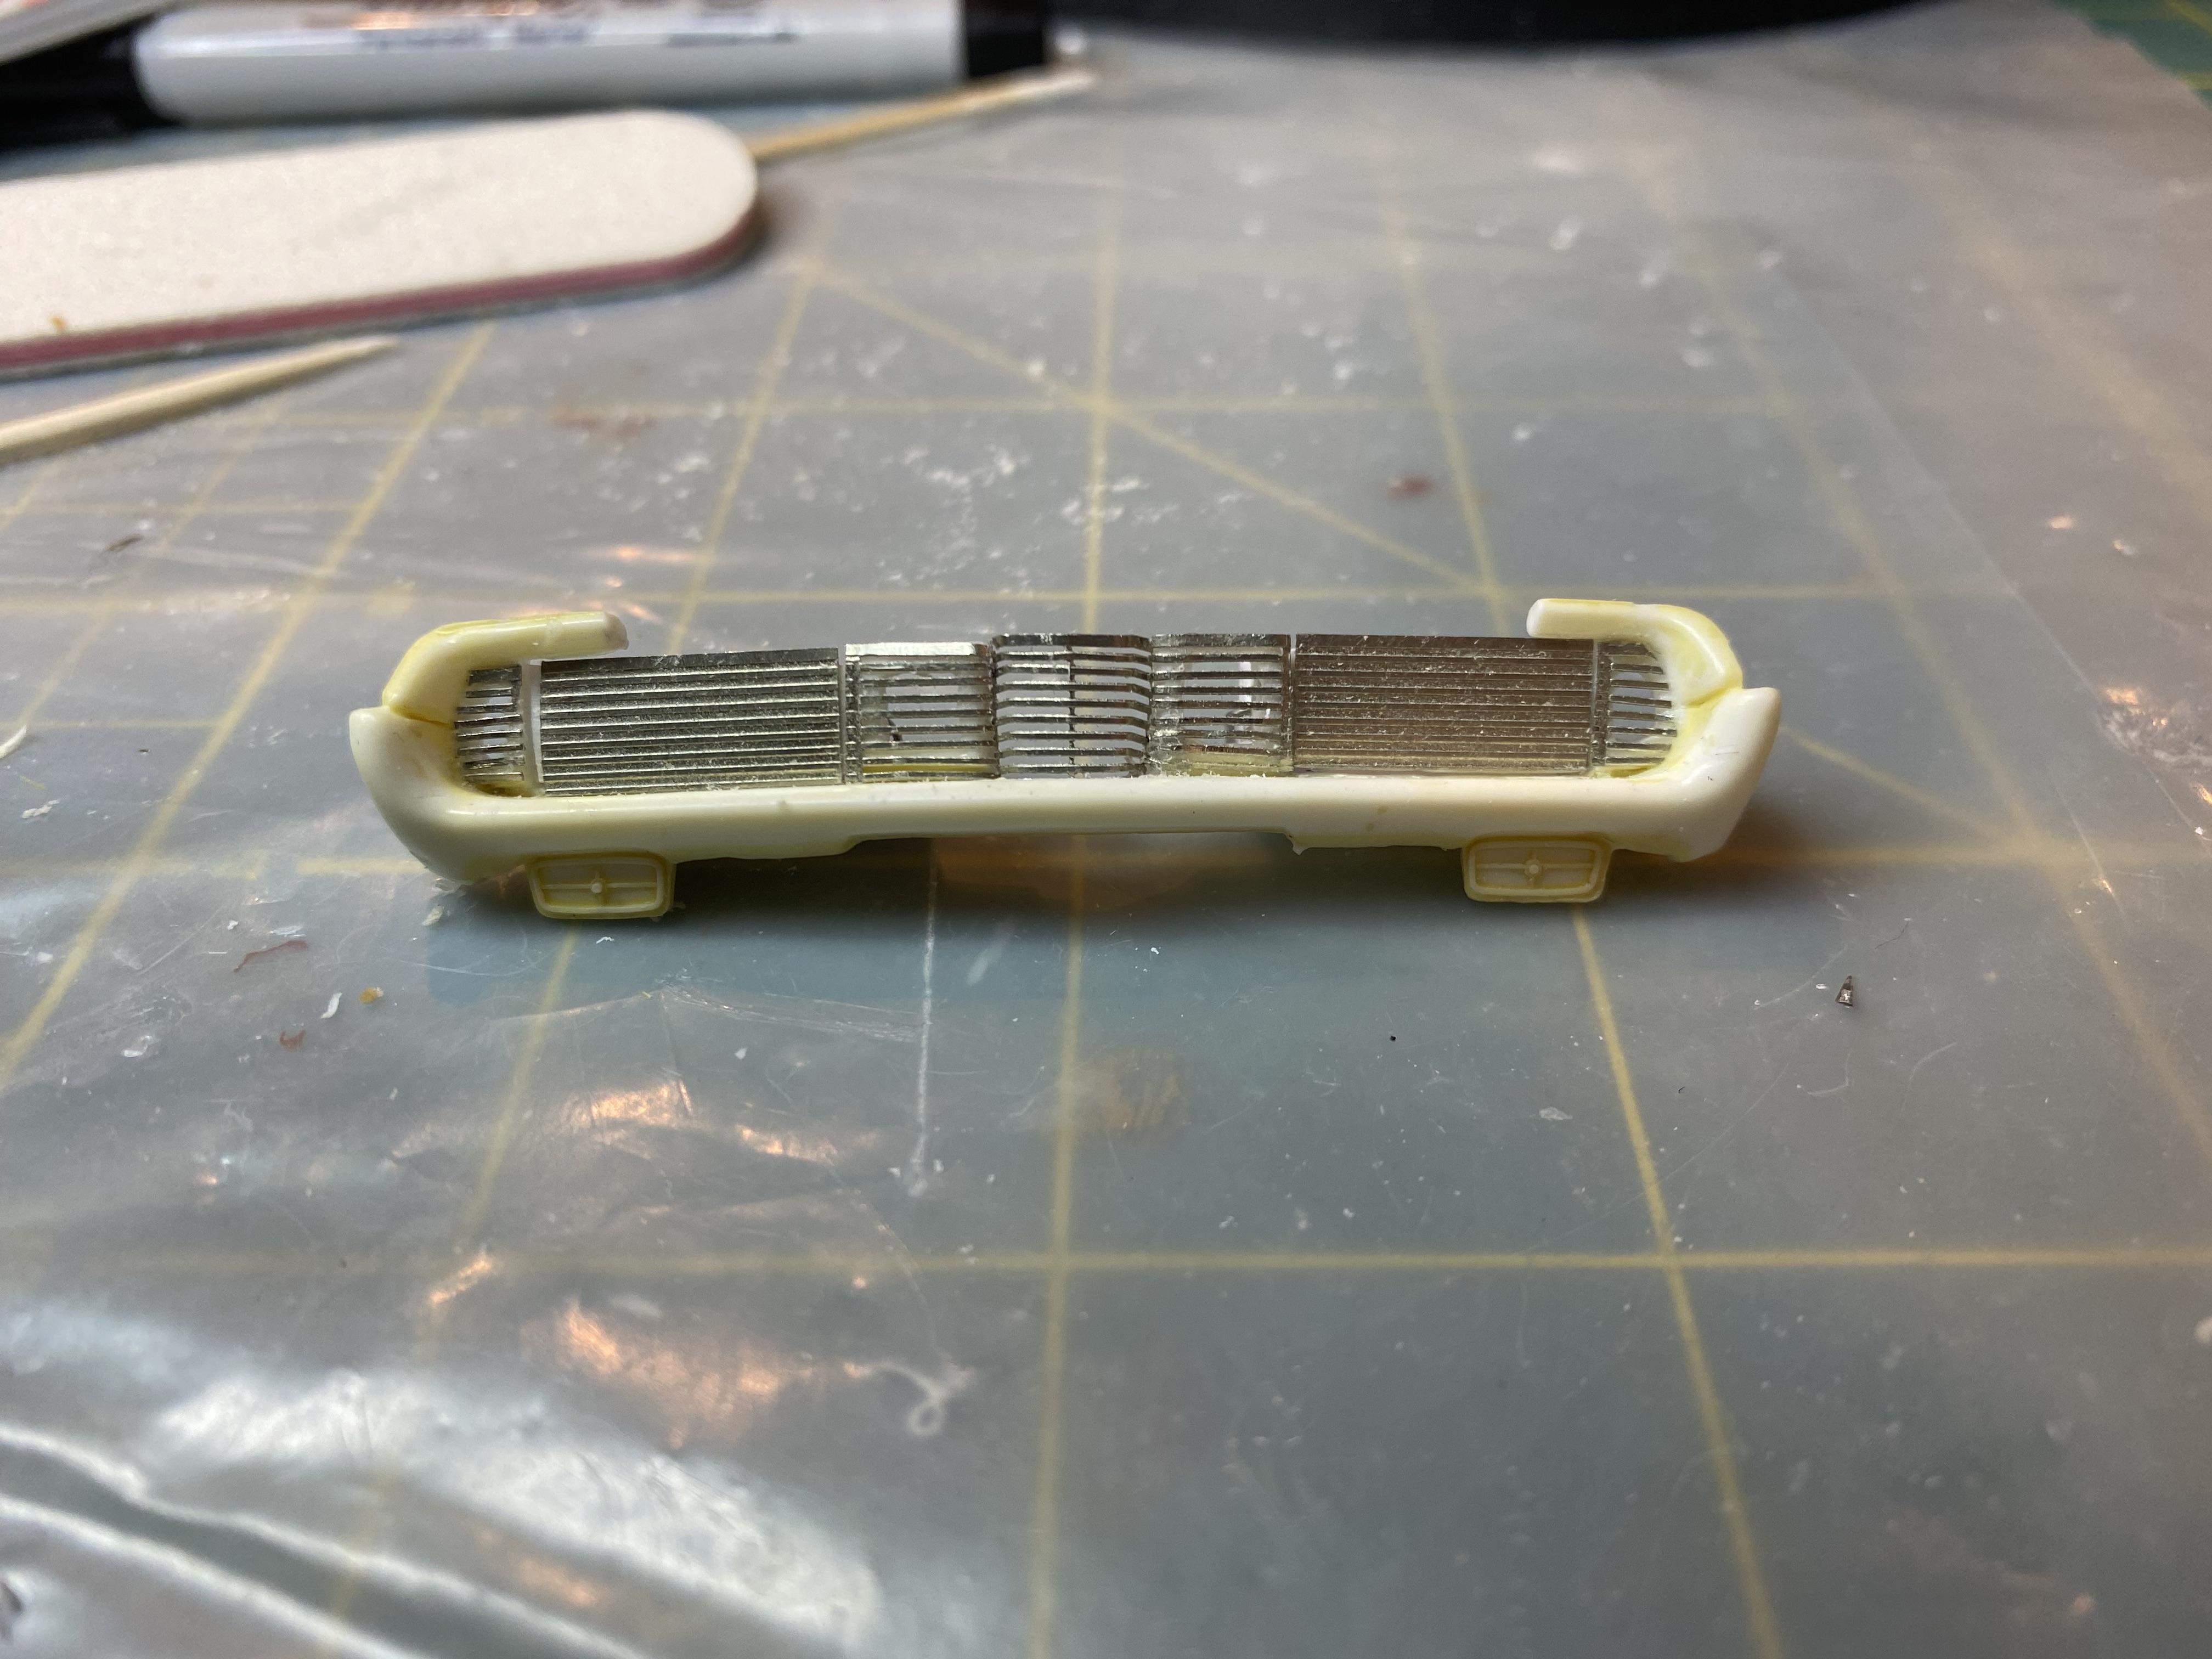
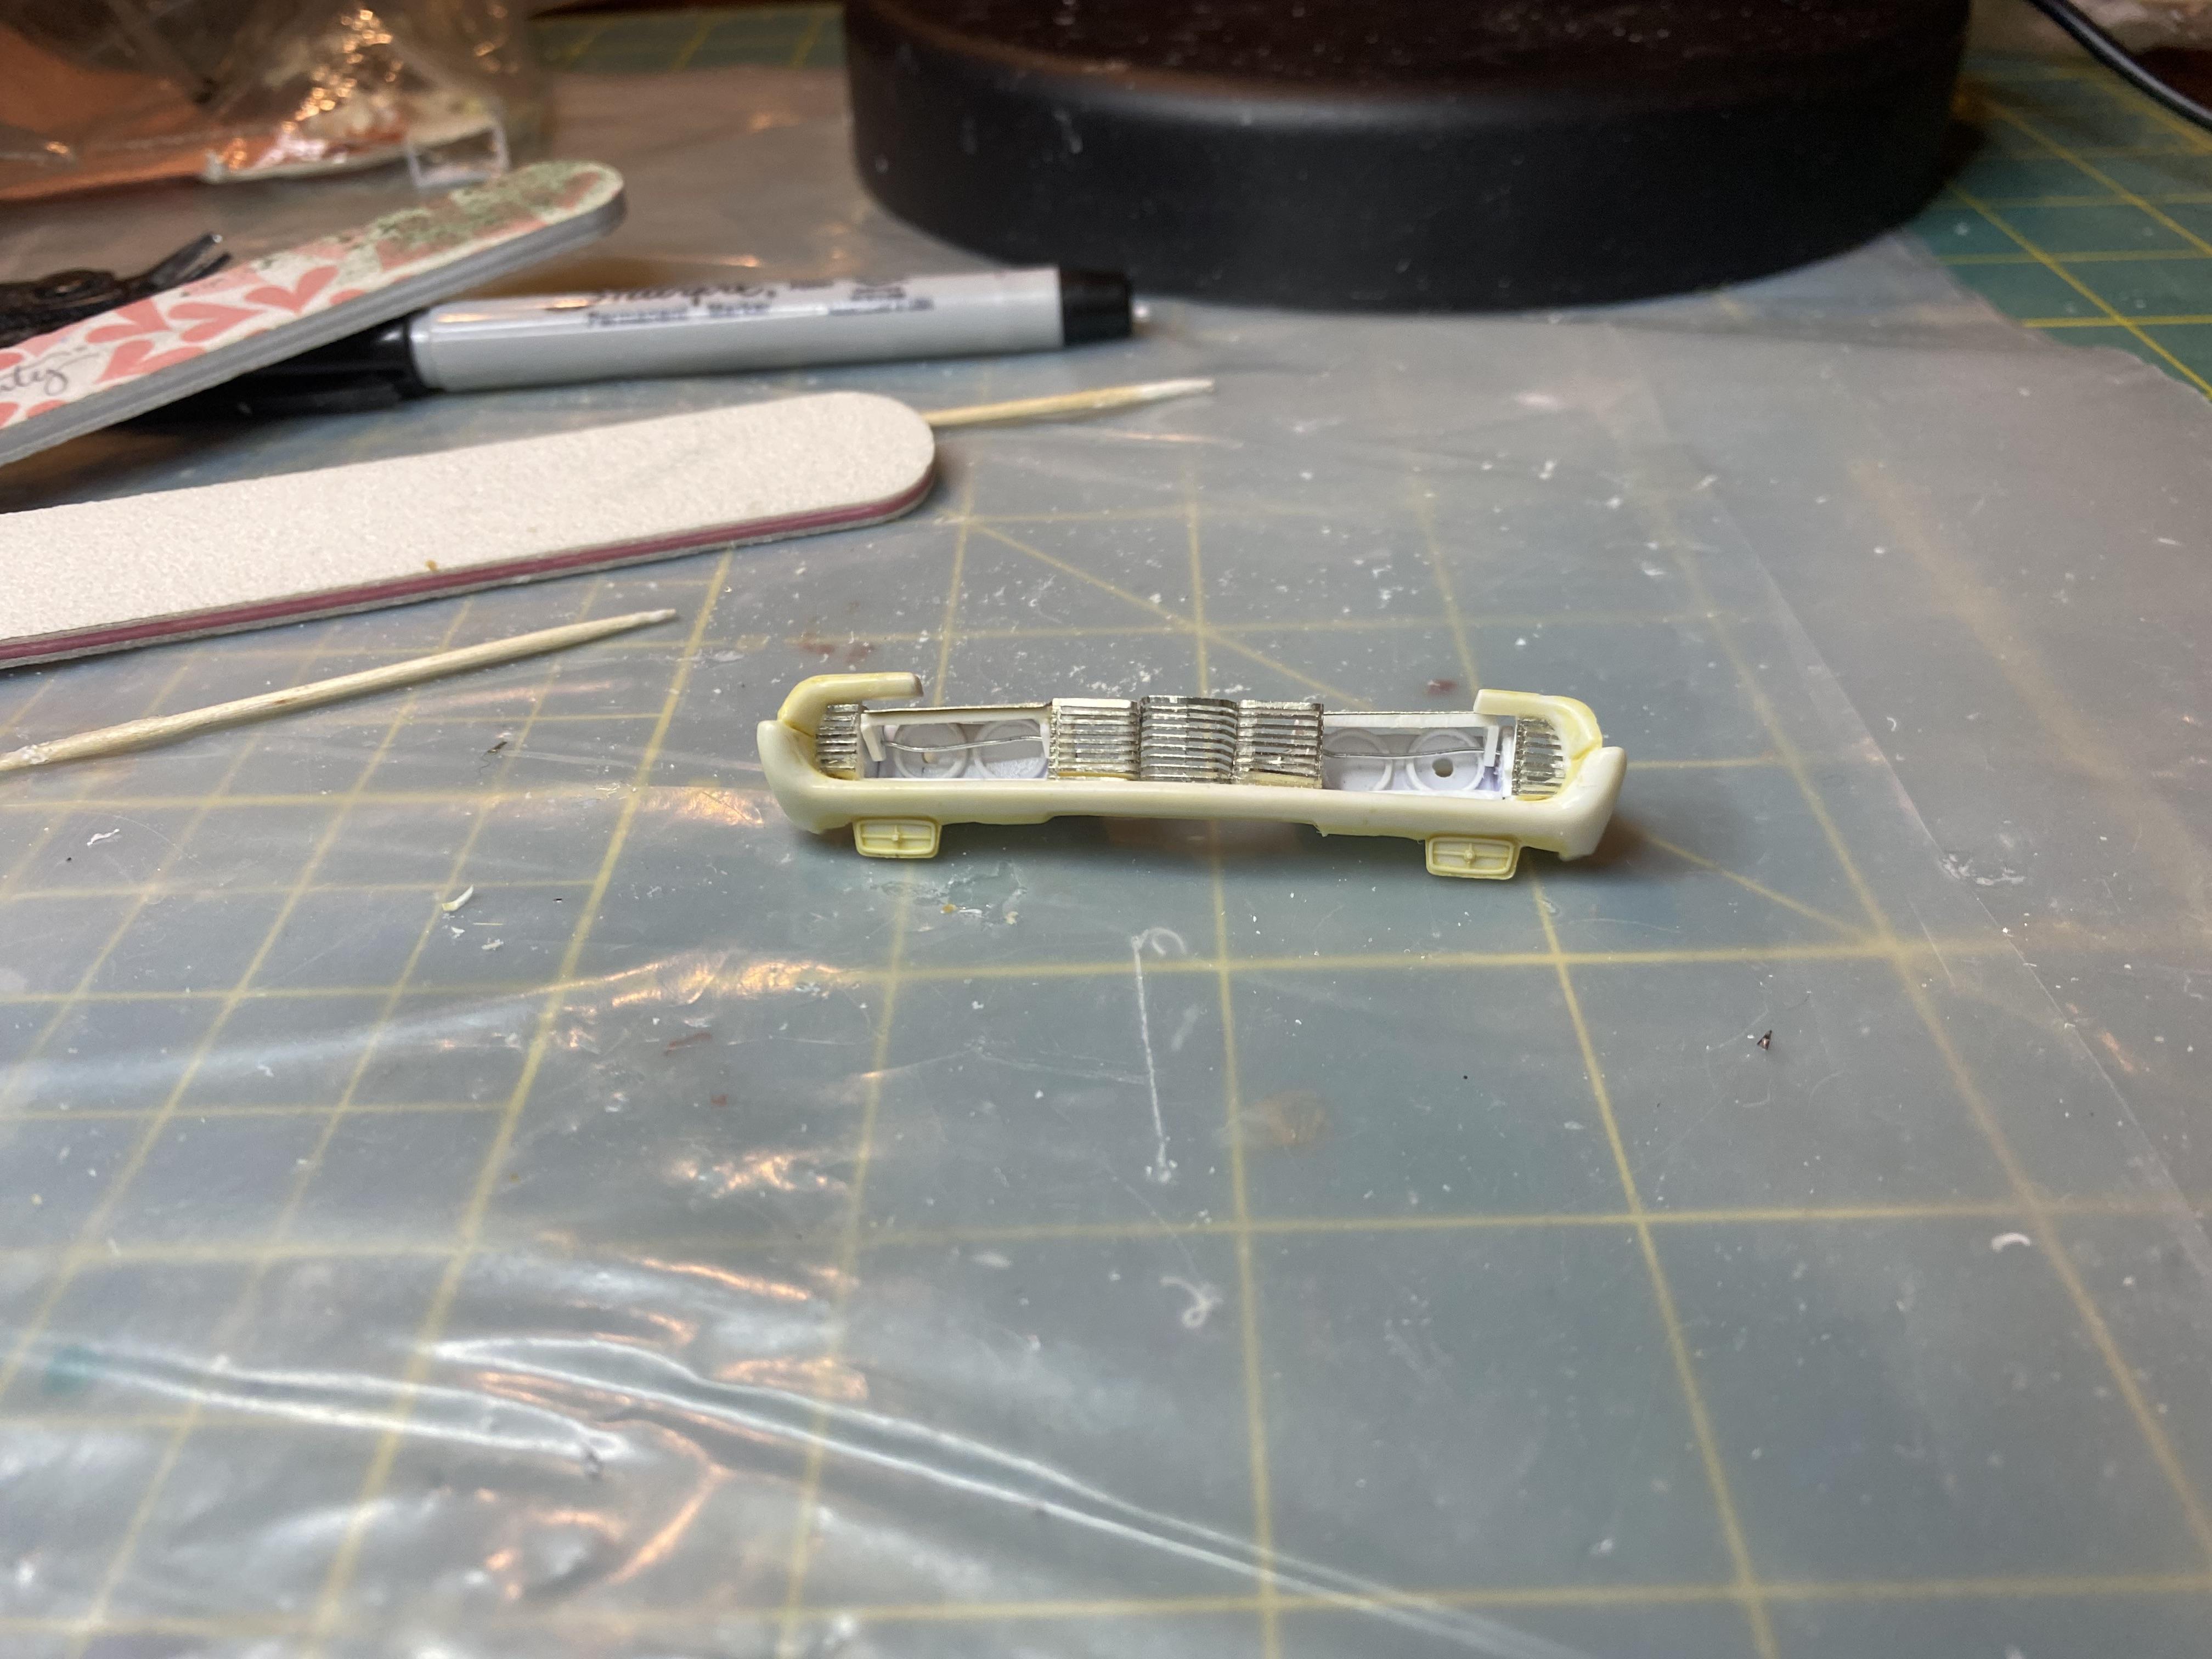
Modified the front bumper / grill to accept the photo-etch grill. I think it looks much better than the kit grill. In the last image the headlight buckets are set and not glued and pivots using wire to mock up not final.
-
1955 Ford F-100 Street Rod
Duddly01 replied to Zippi's topic in WIP: Model Trucks: Pickups, Vans, SUVs, Light Commercial
Third times the charm. I had a similar experience with painting a Corvette. I thought it was because it was molded in color, and it caused a reaction. After several tries it finally came out ok and I called it. Seems sometime with no rhyme or reason this sort of thing happens. ?♂️ -
Thank You! Thanks, I just added the brackets for the brake and fuel lines that will get added after painting. Thanks, will try not to let you down. One of these days I will learn to pick builds with simple lighting. No Pop open headlights or tiny taillights. Nah, who am I kidding...
-
That looks really cool. They Should have made a fastback Cougar!! Sorry to hear about your dads car.
-
Thank You!
-
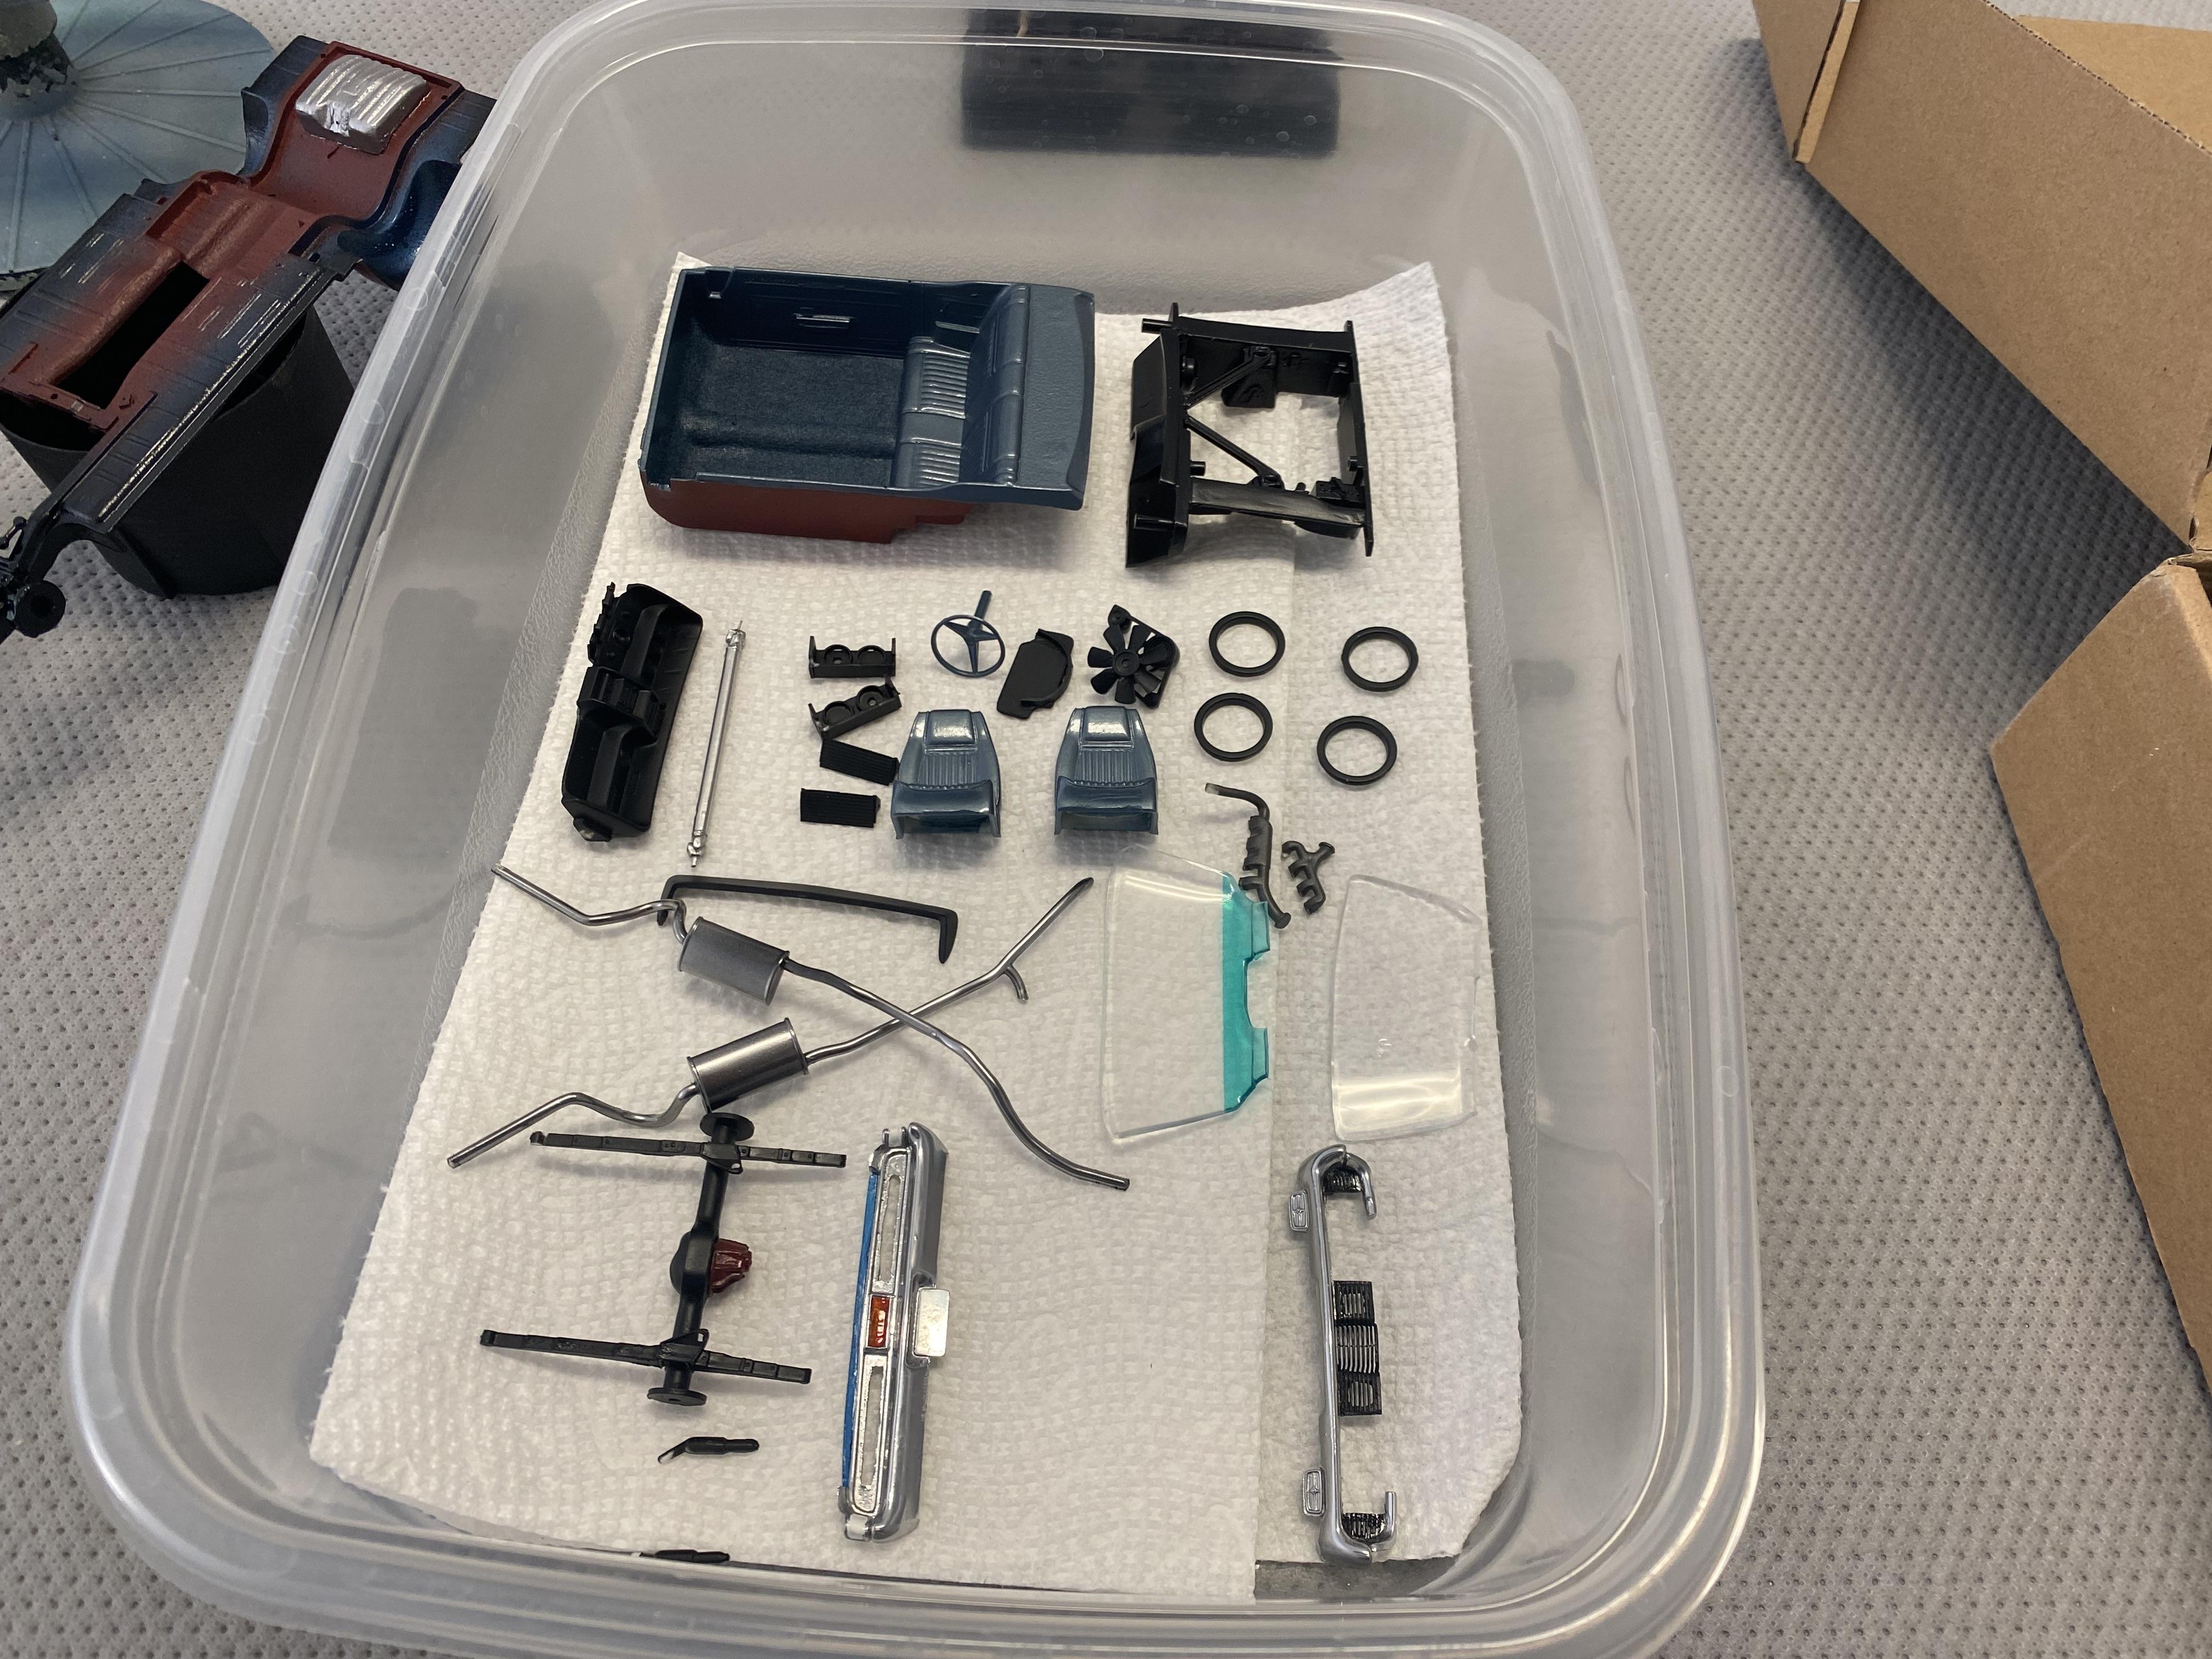
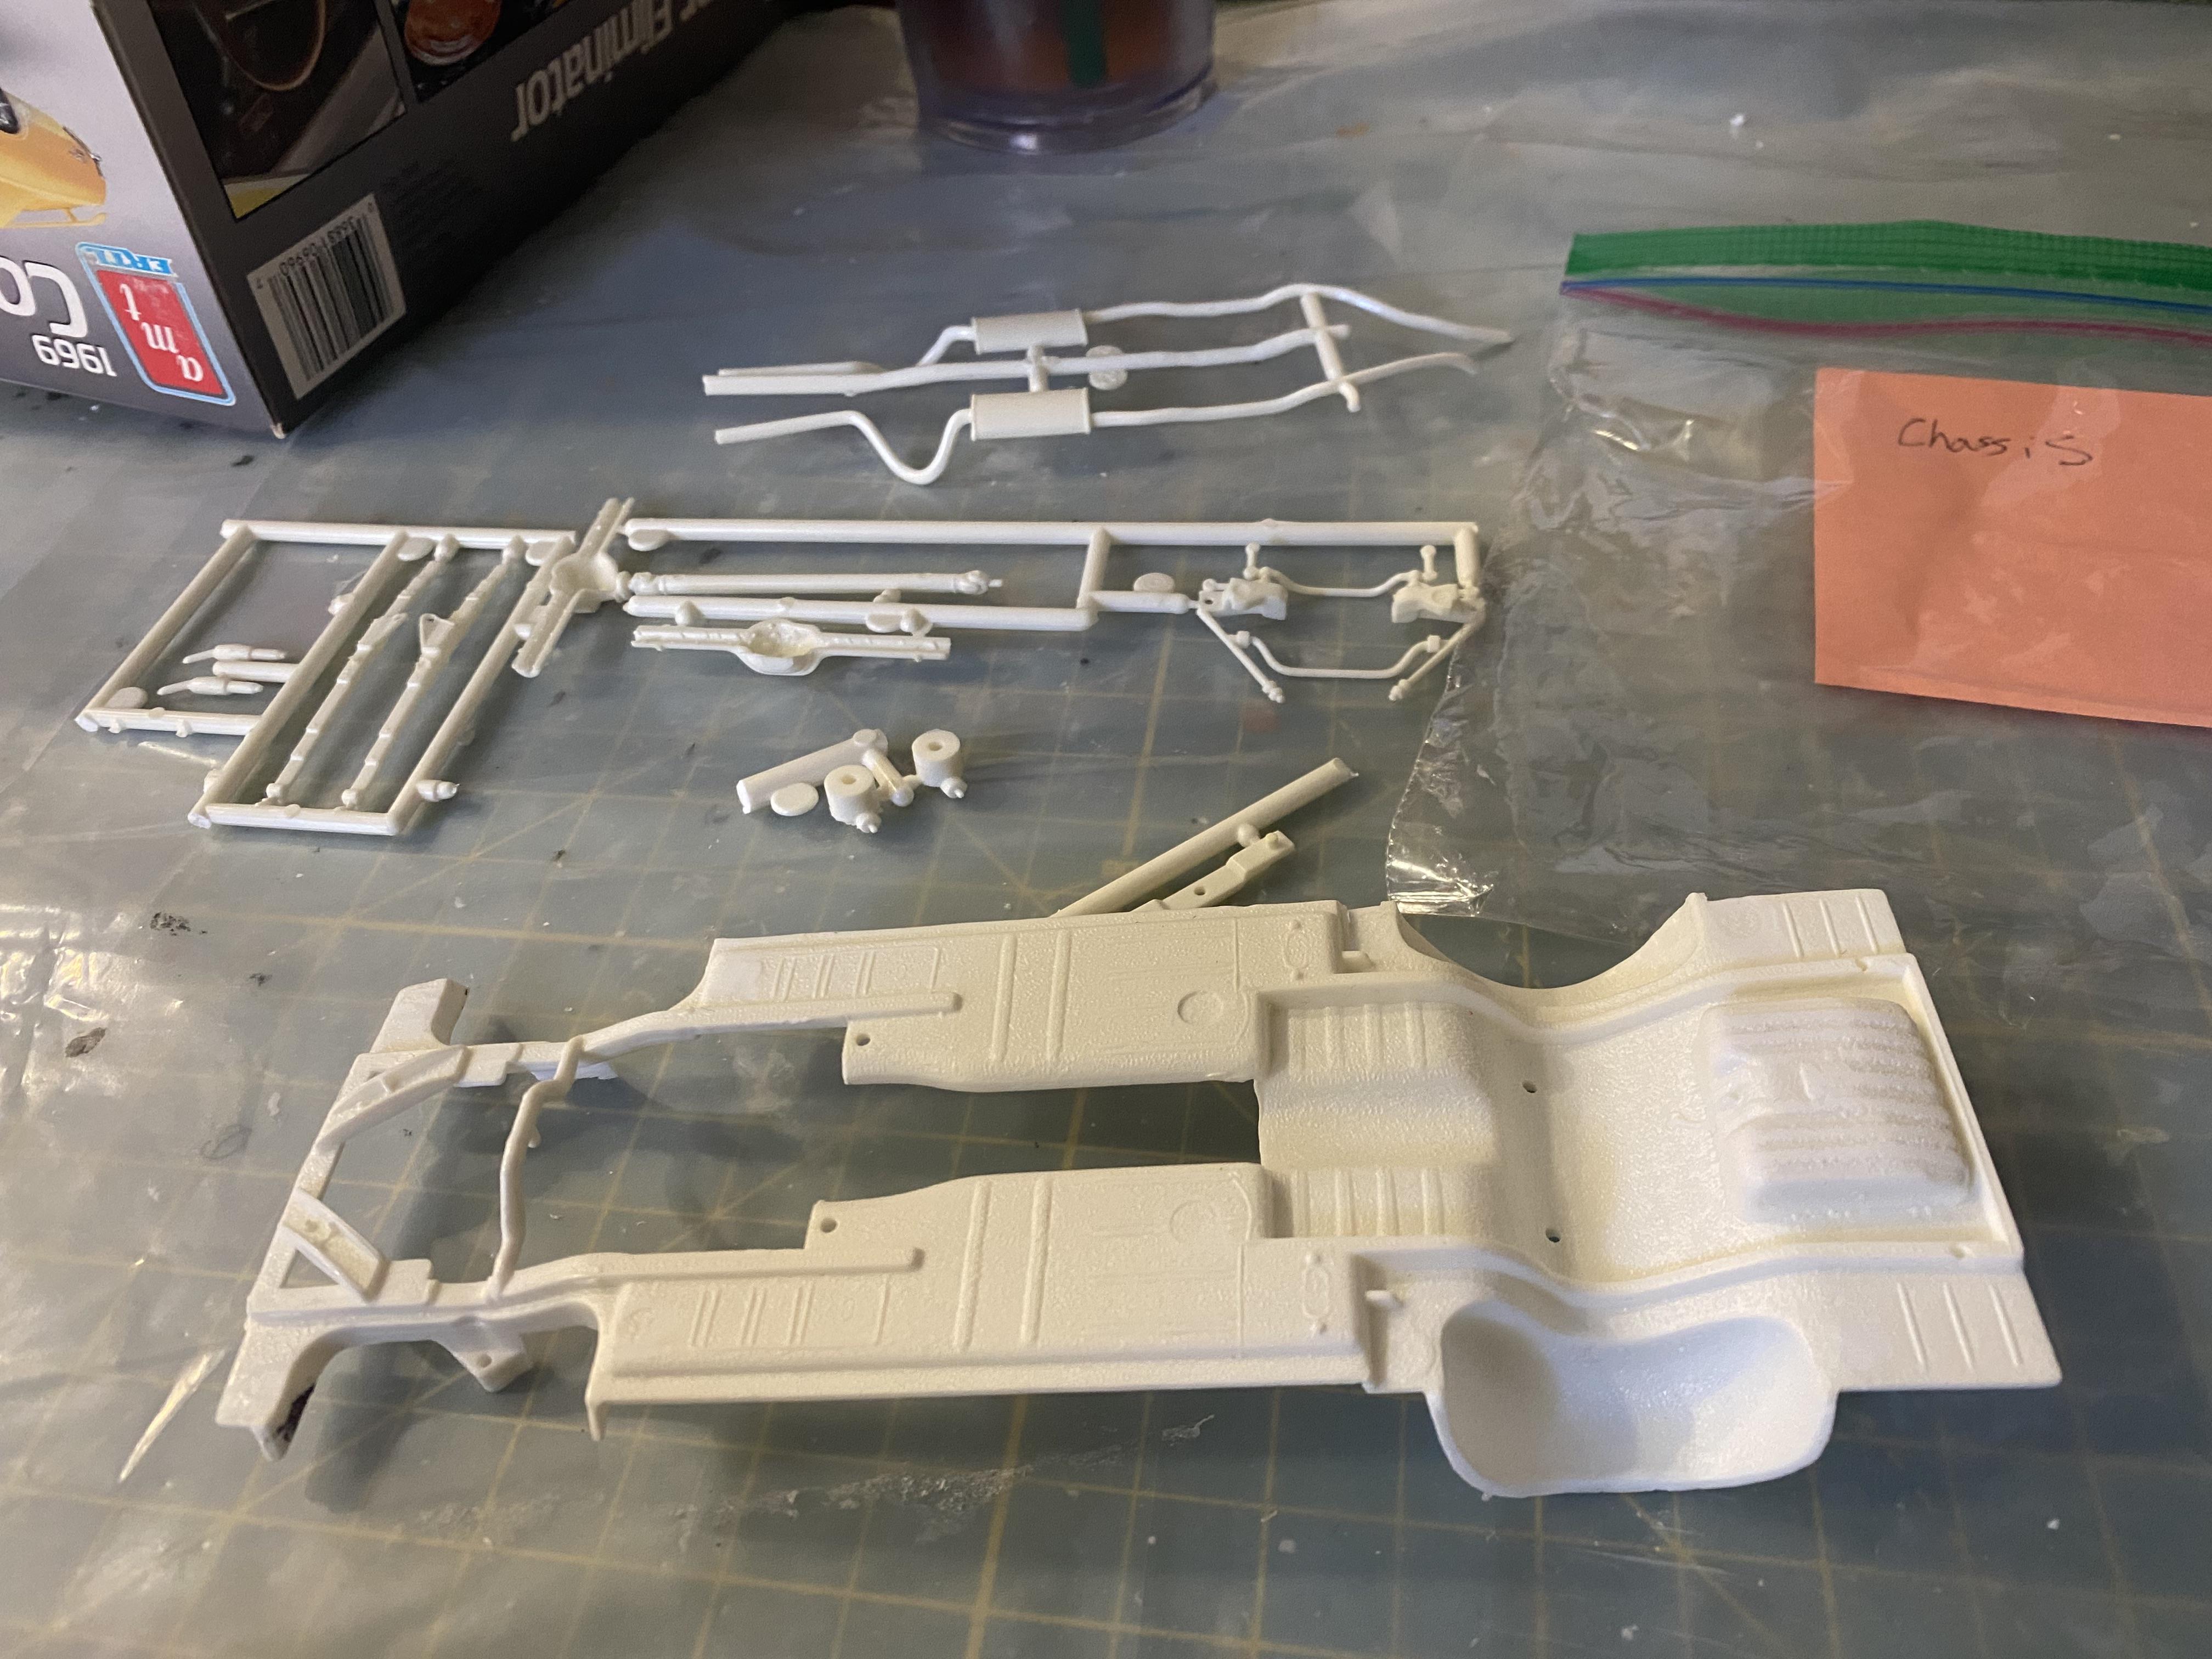
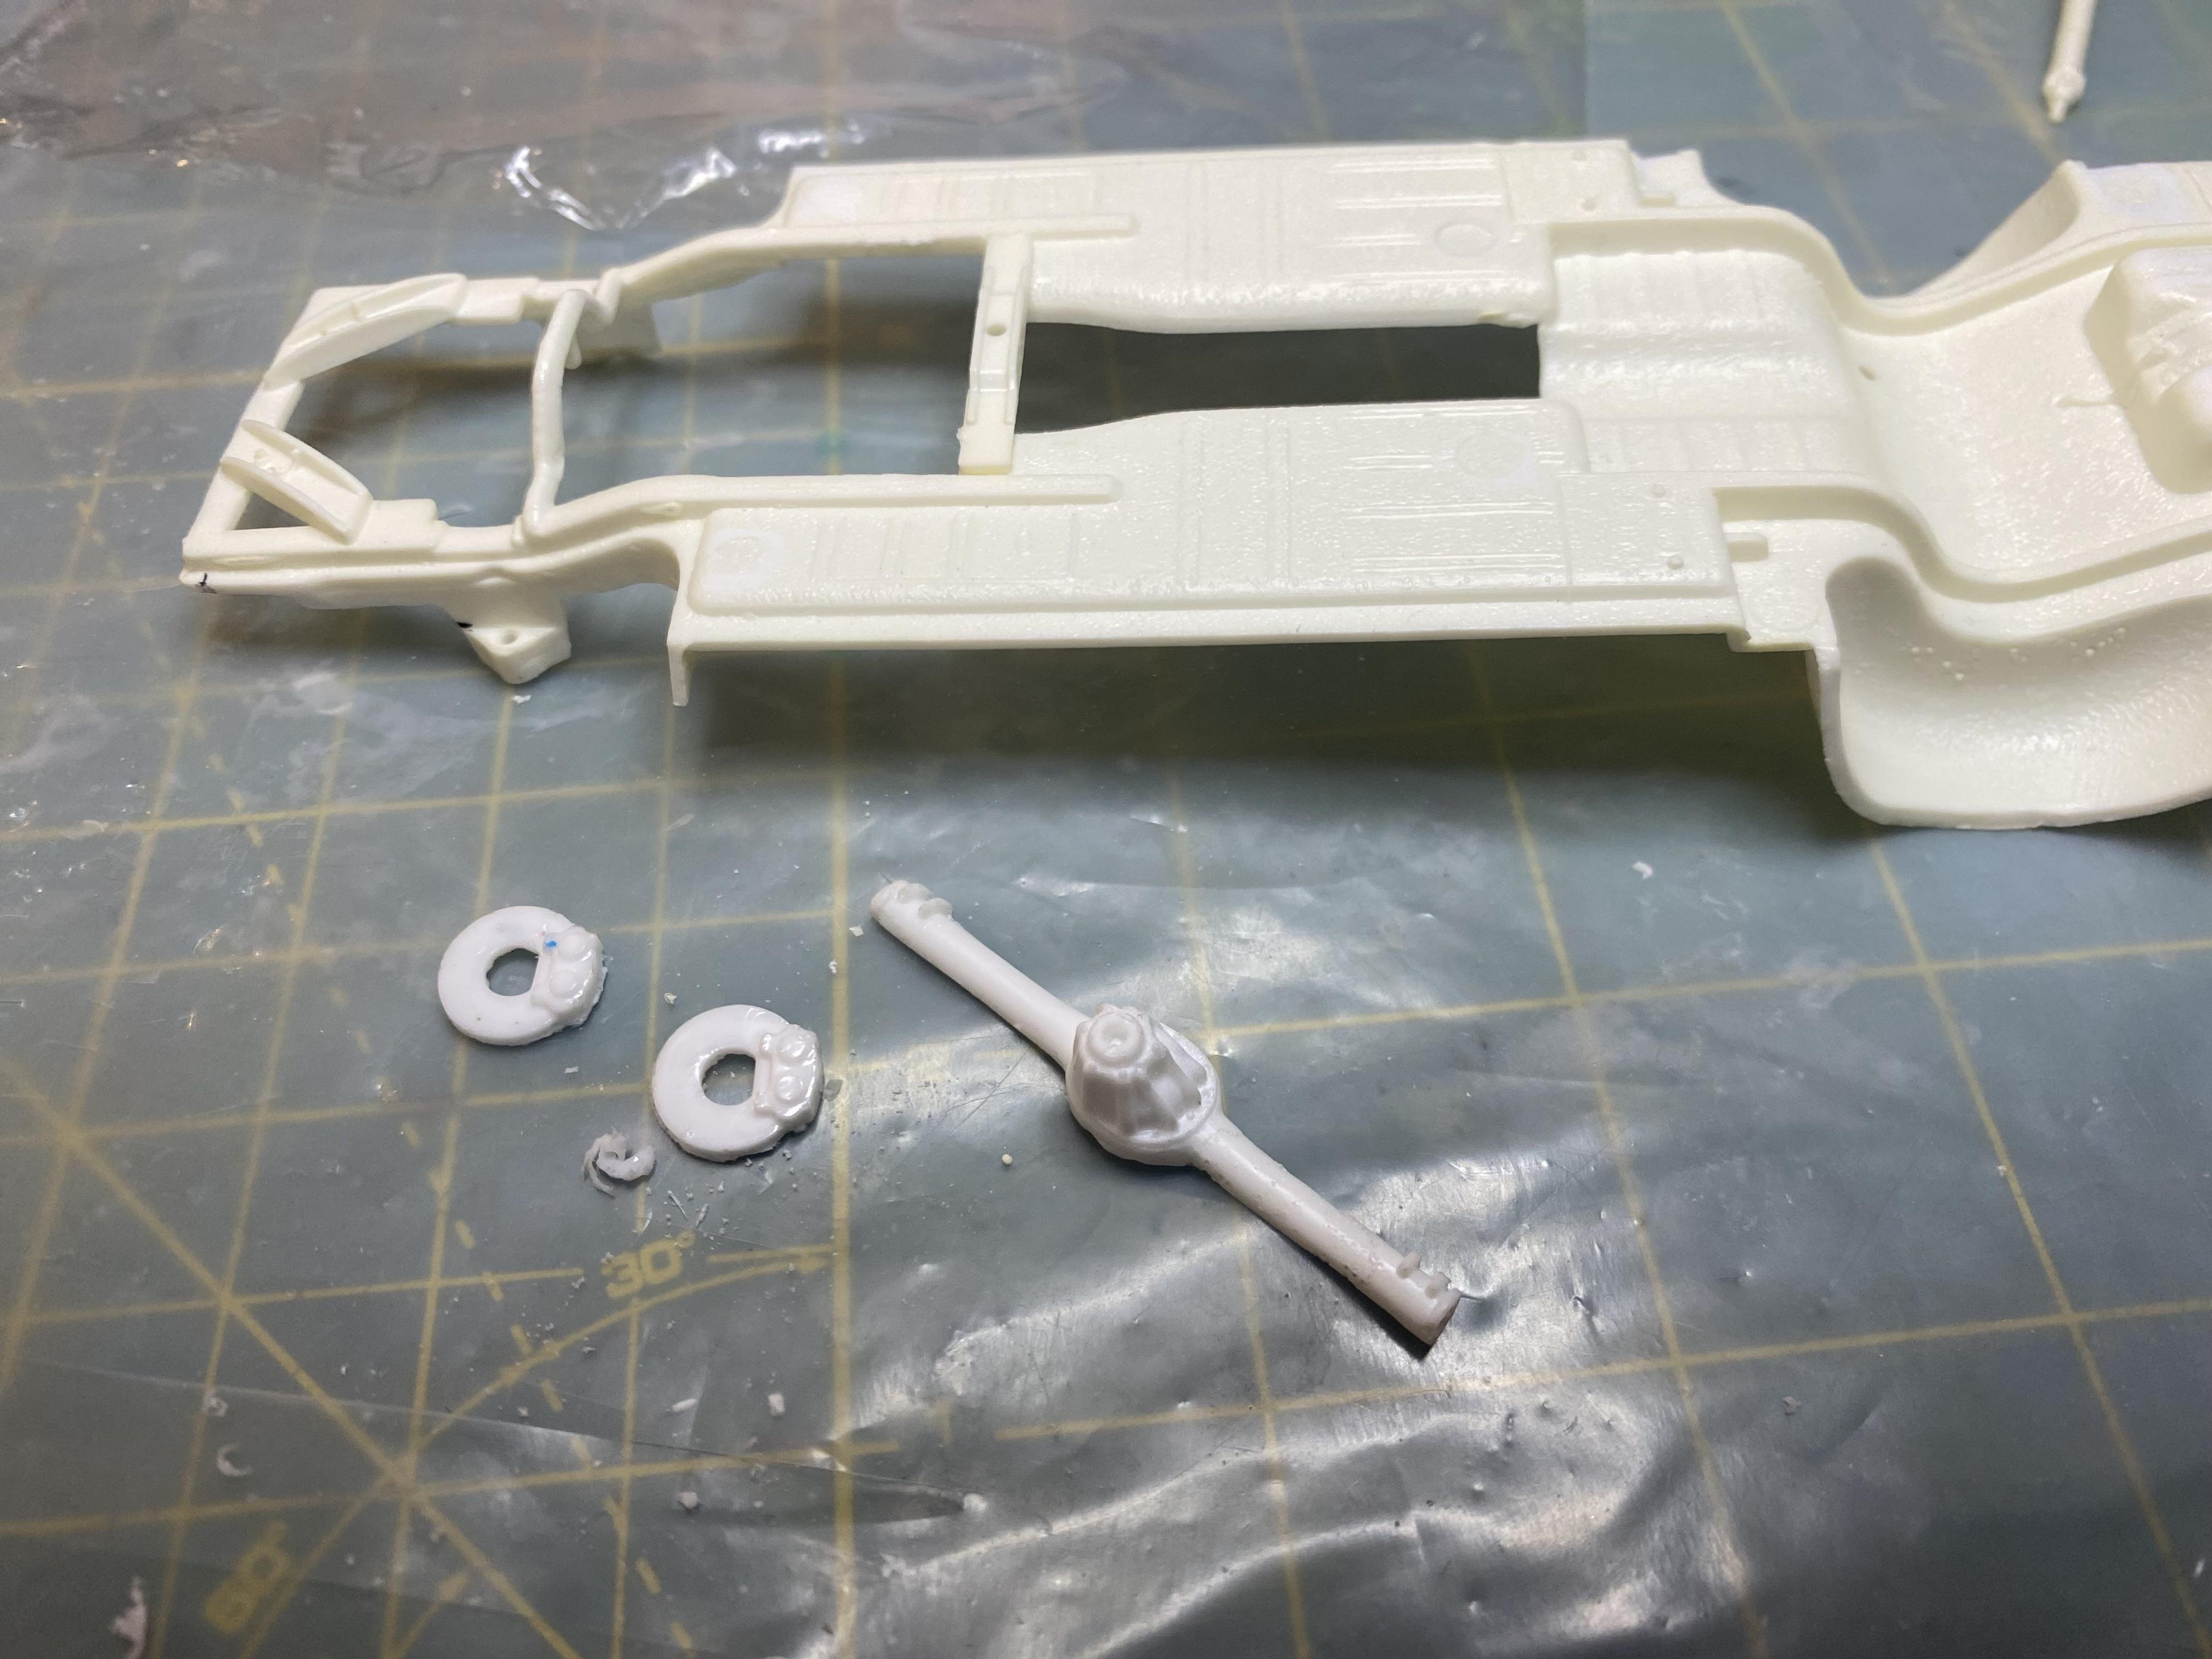
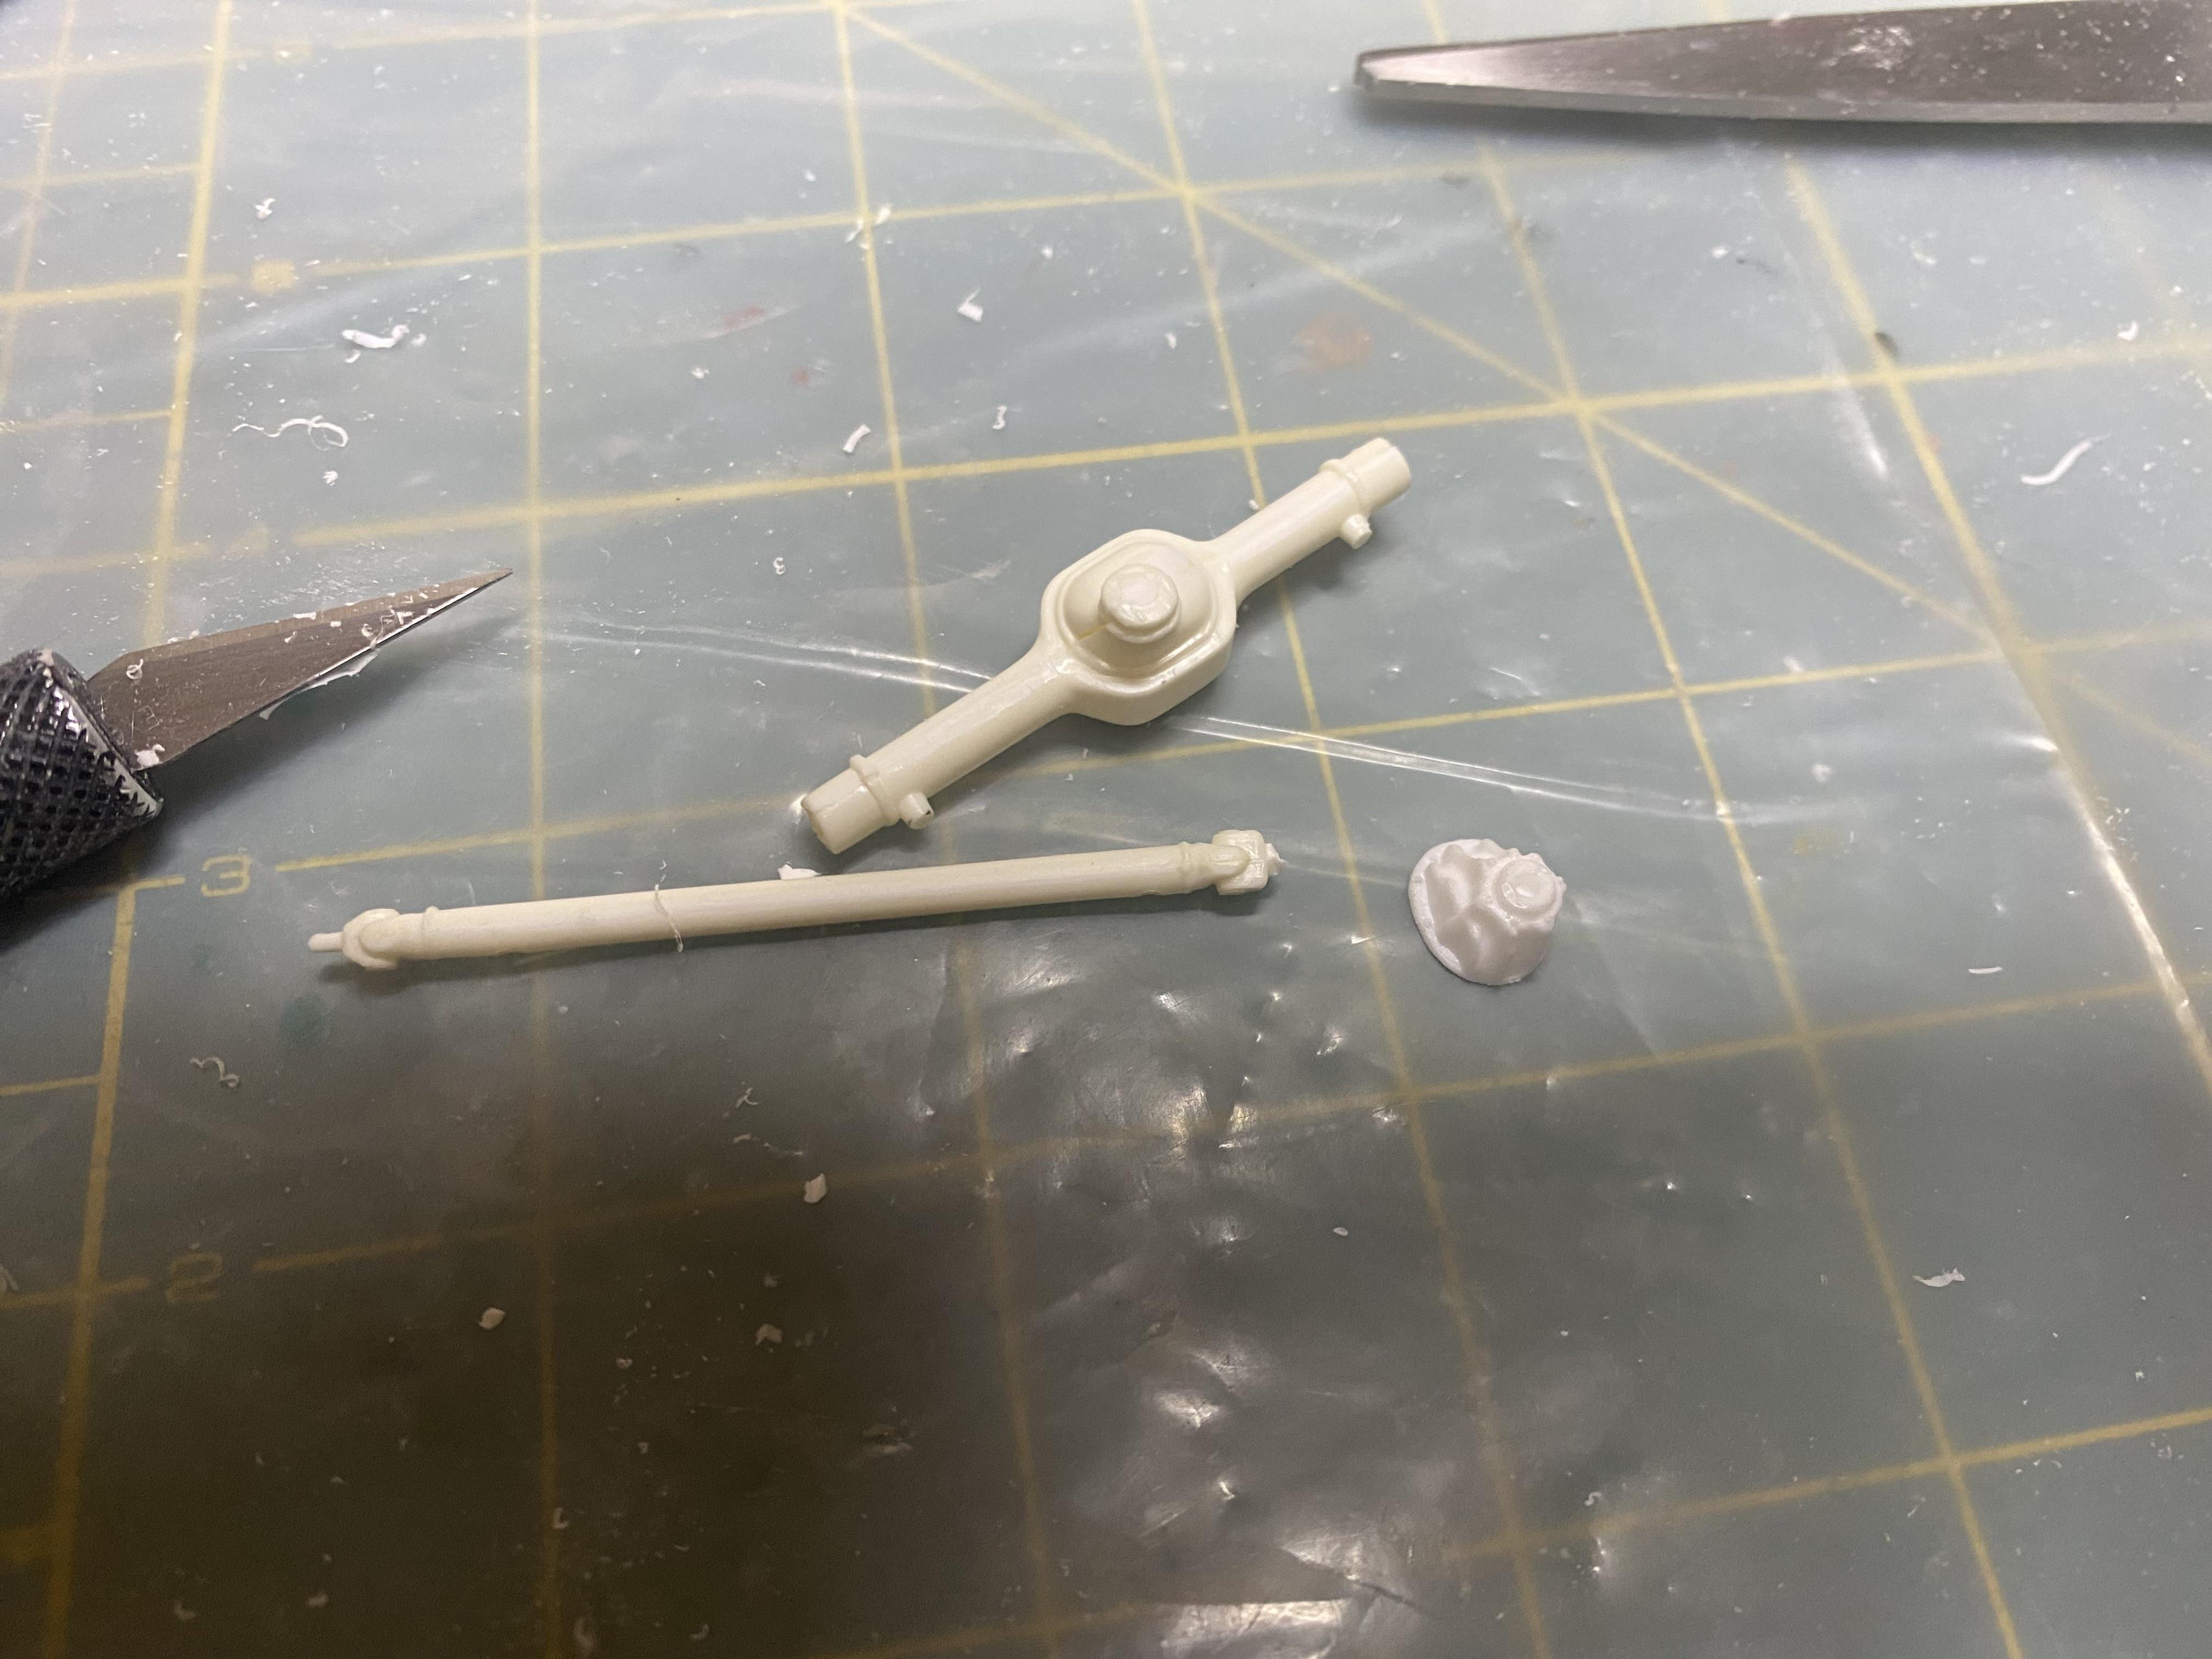
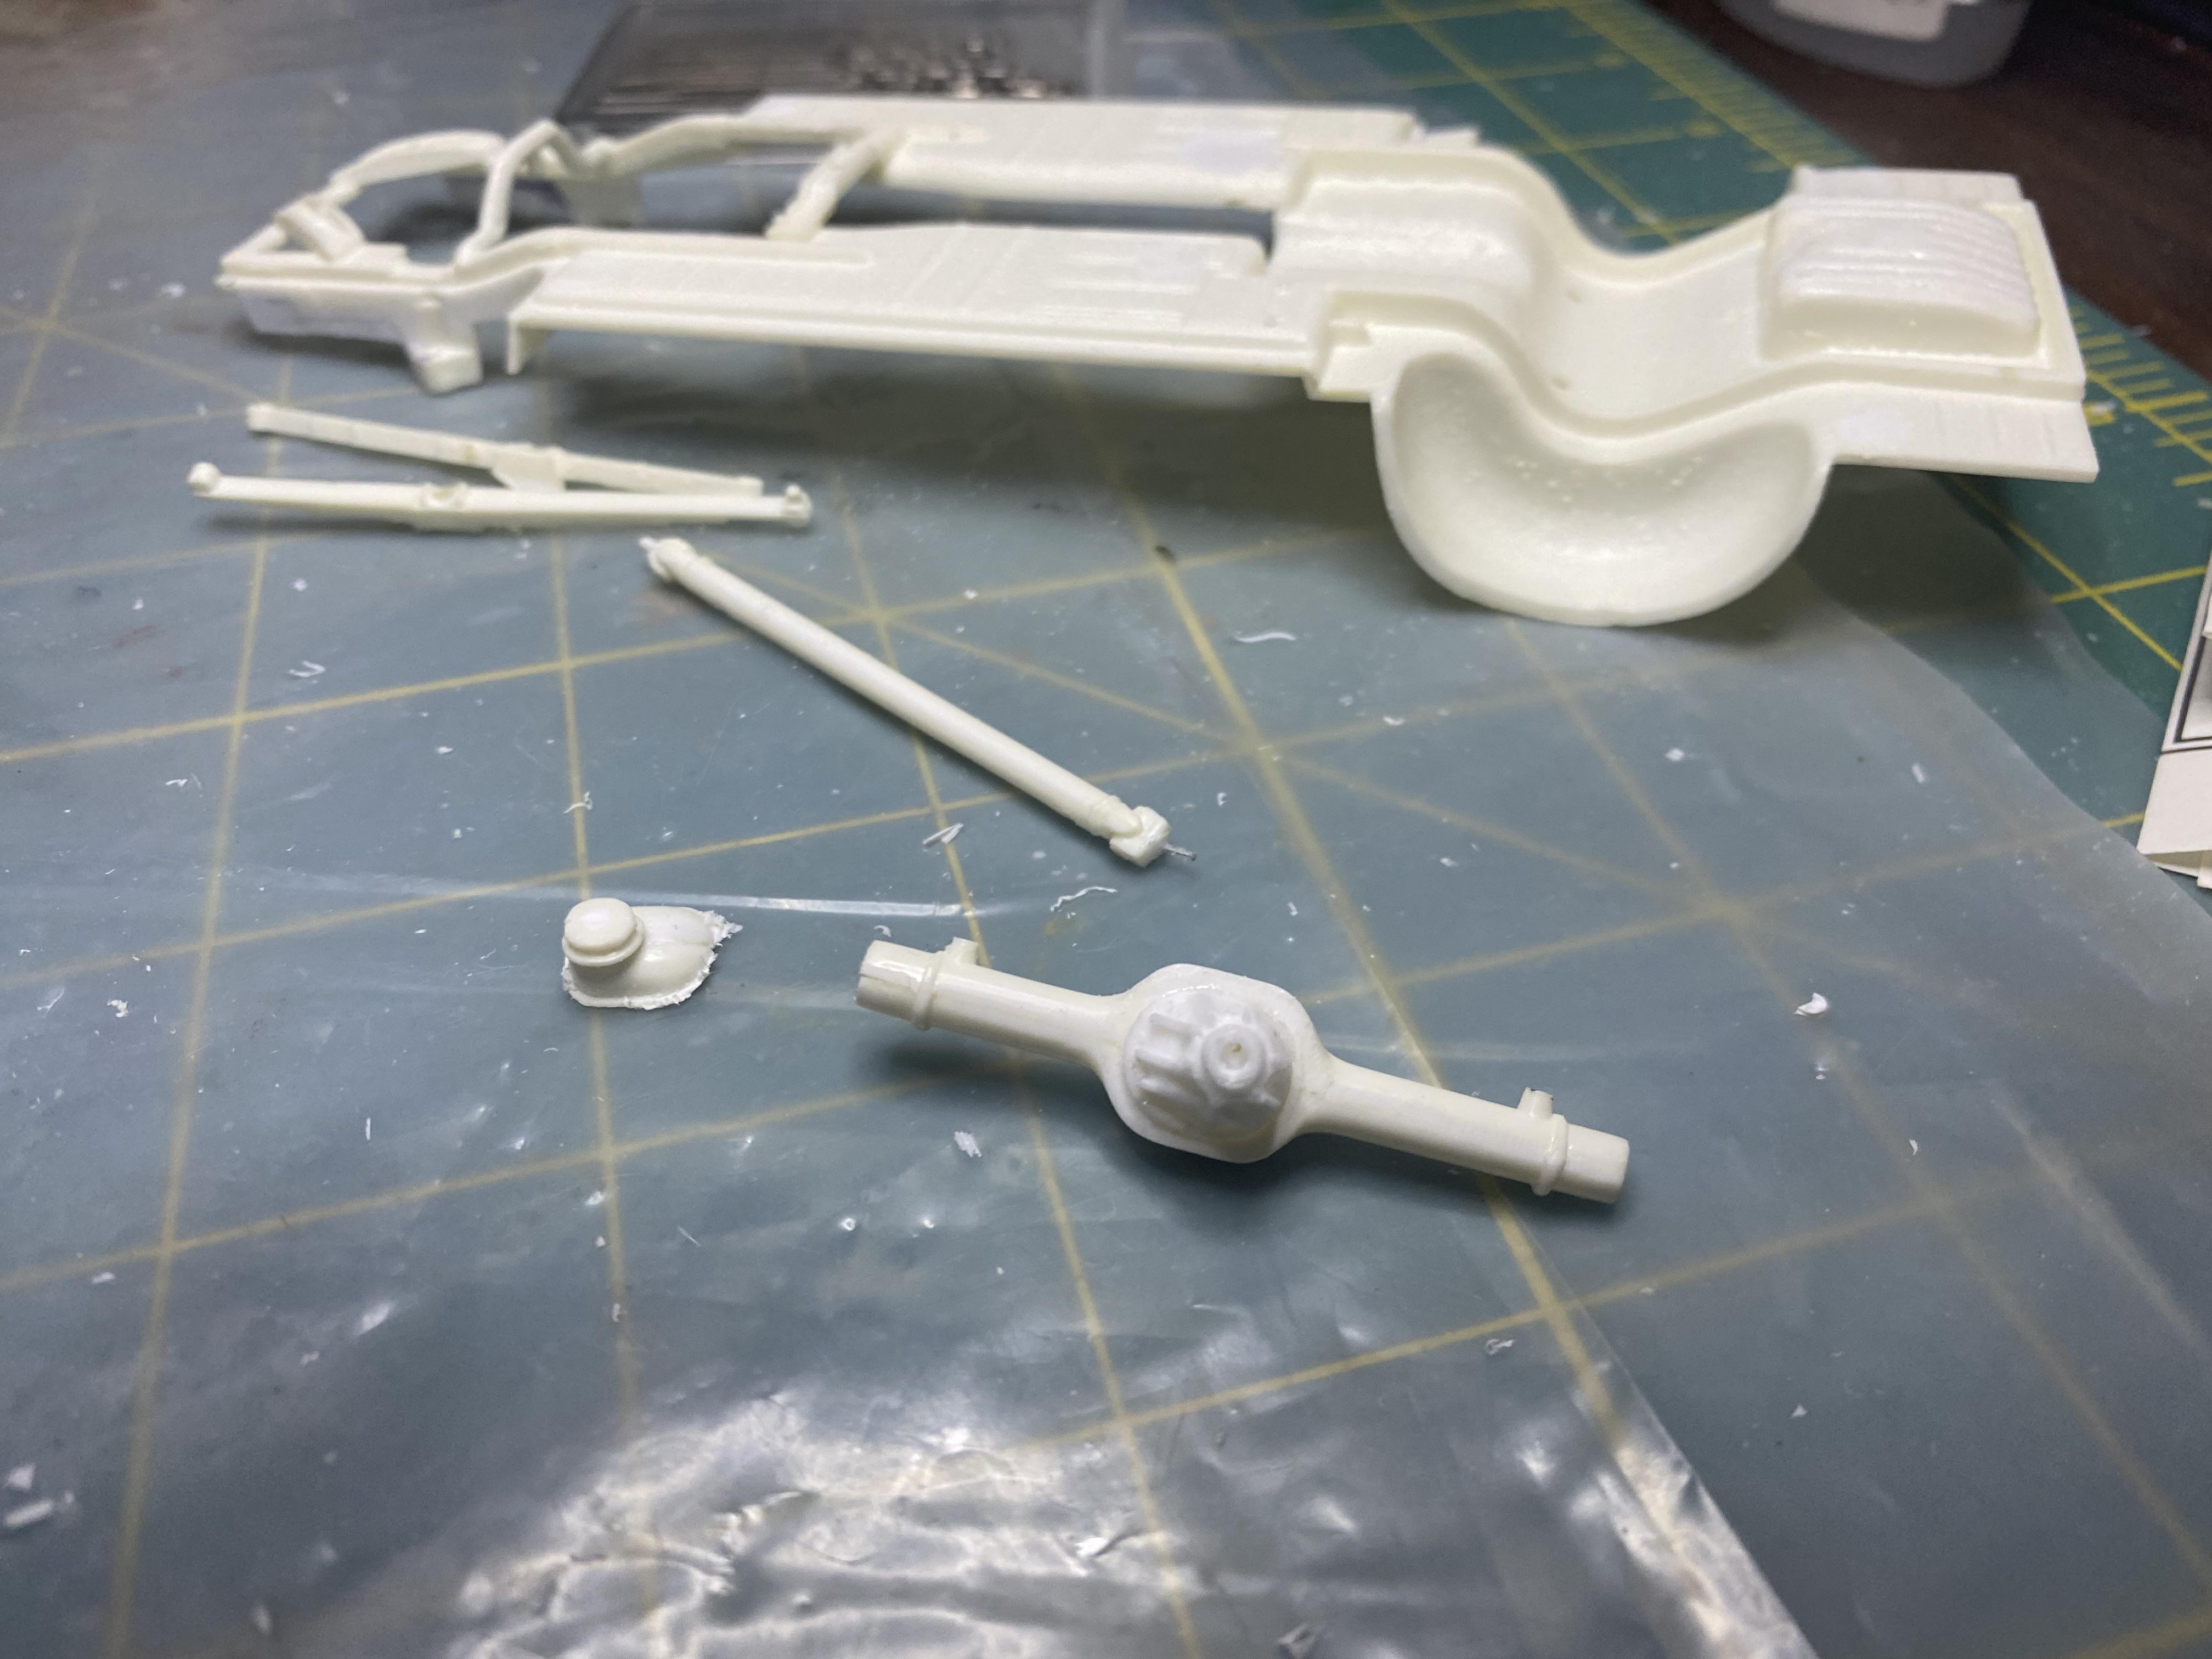
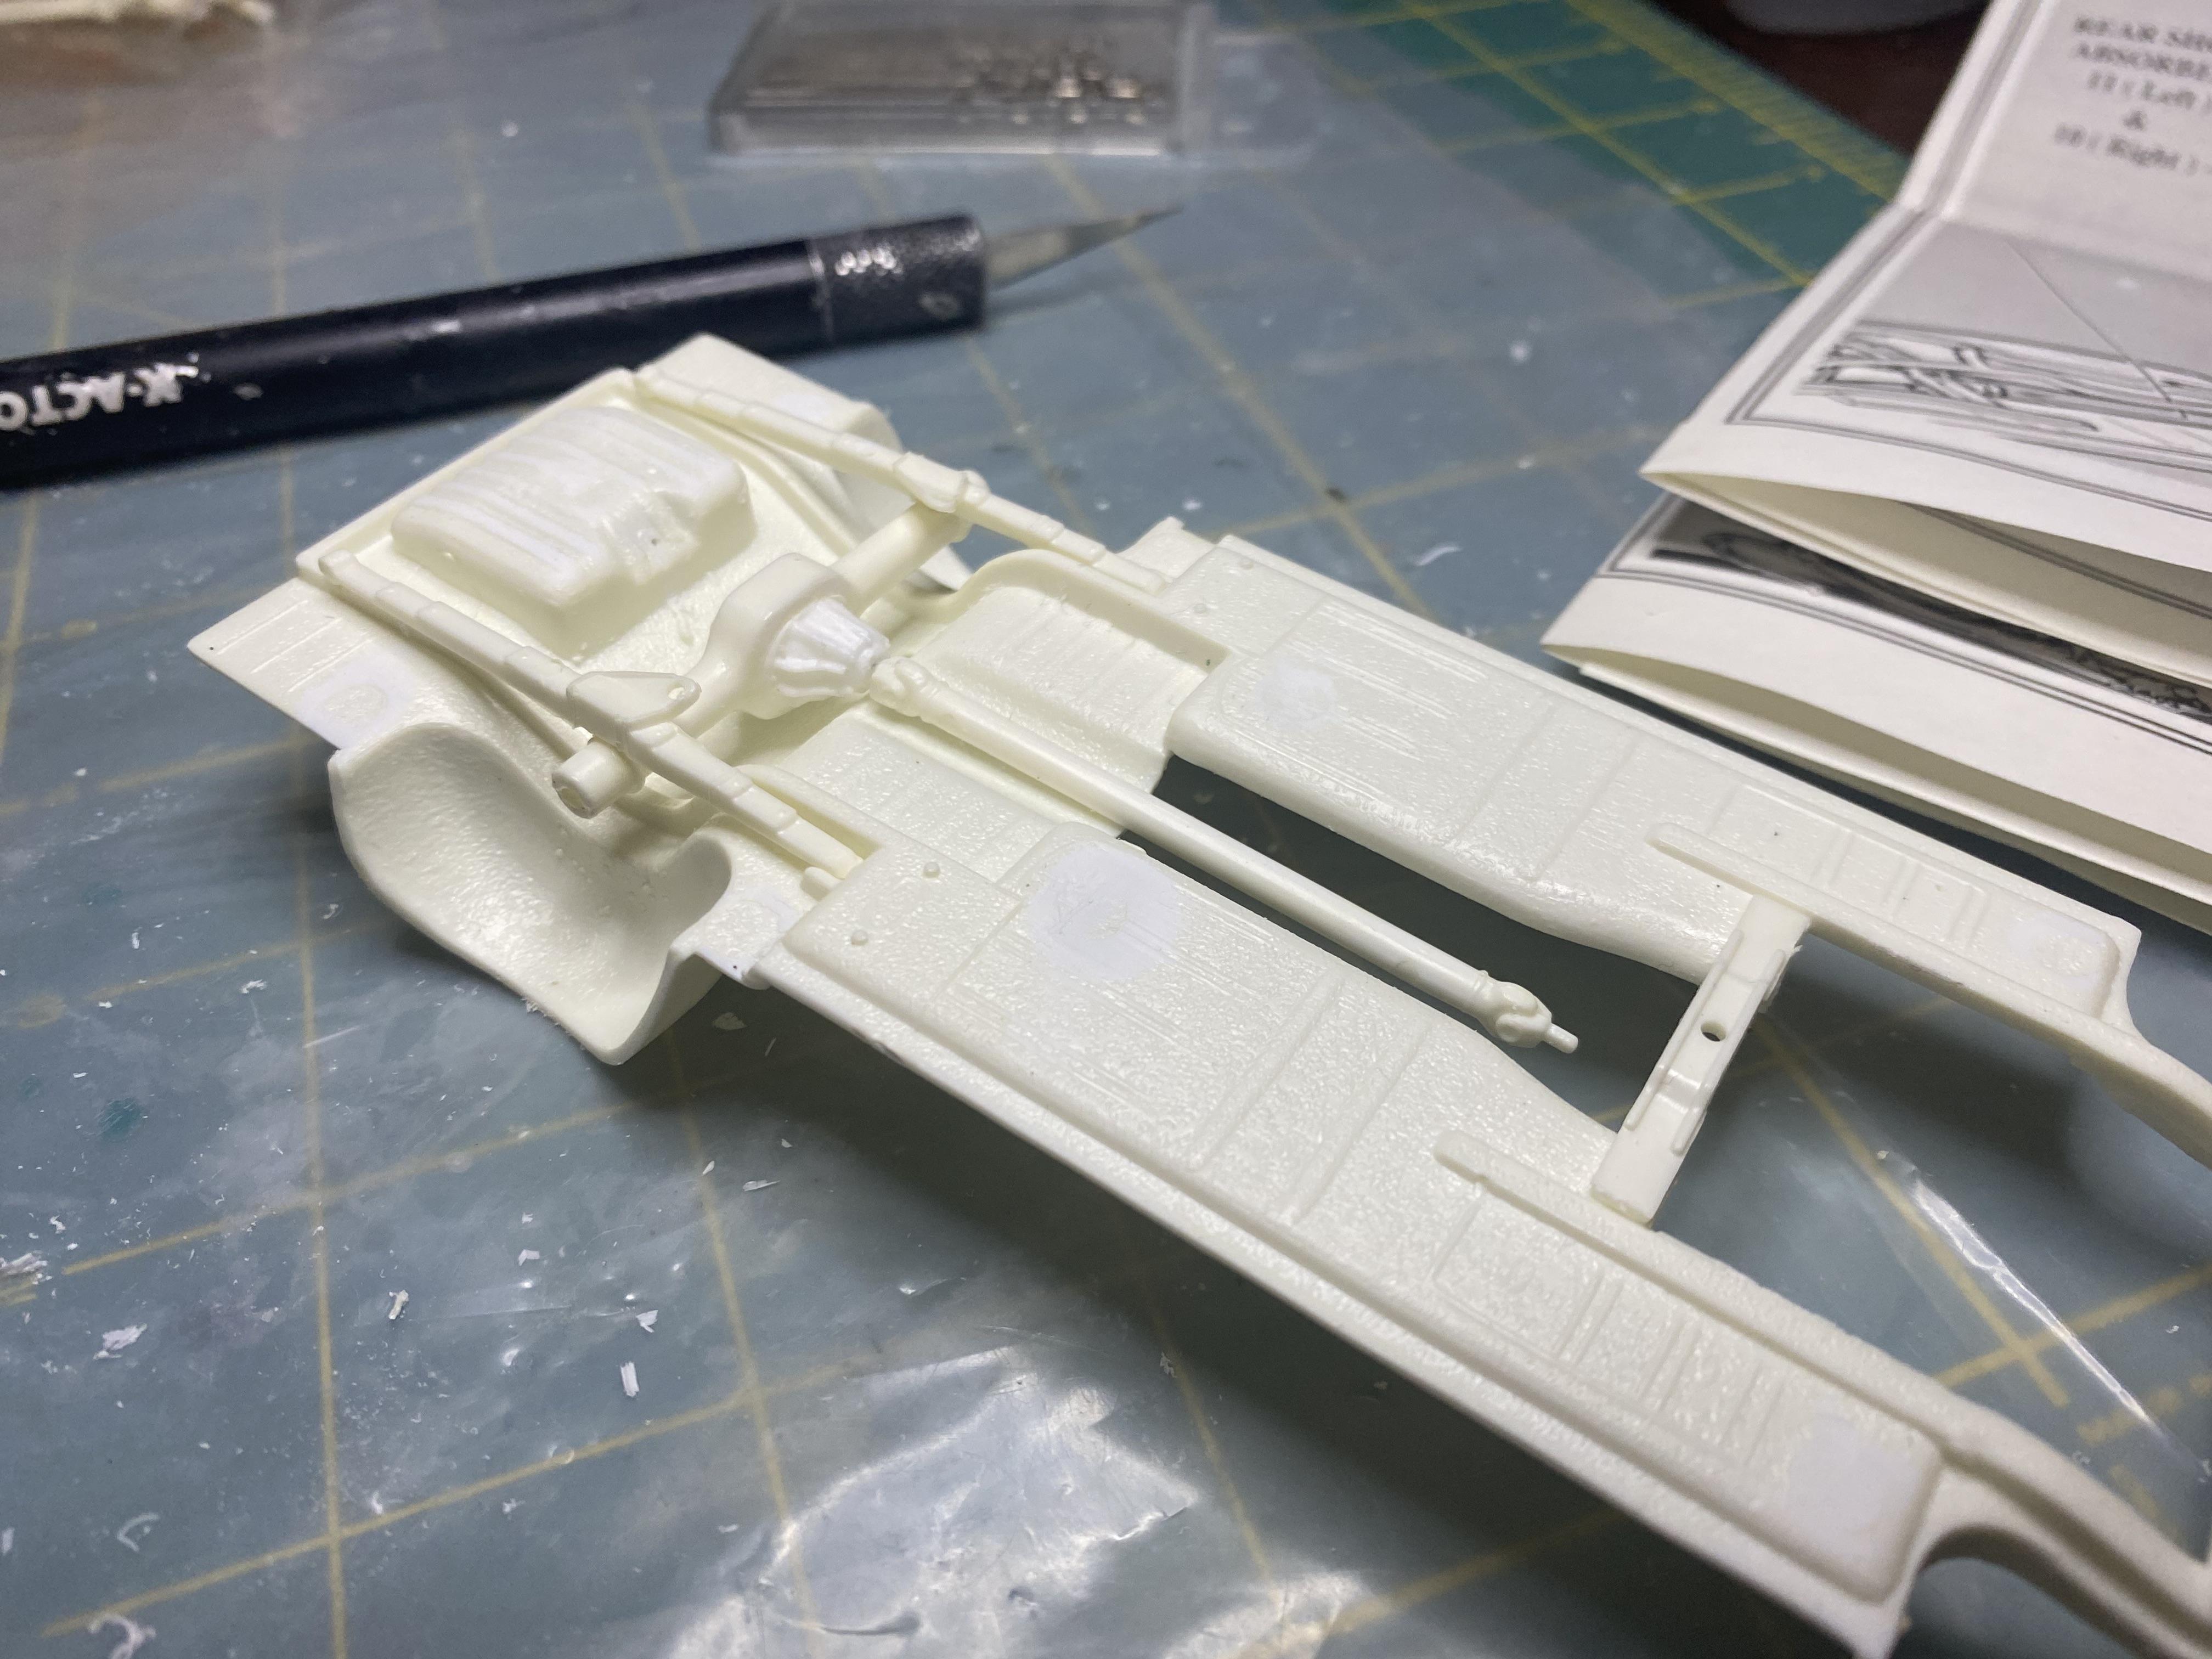
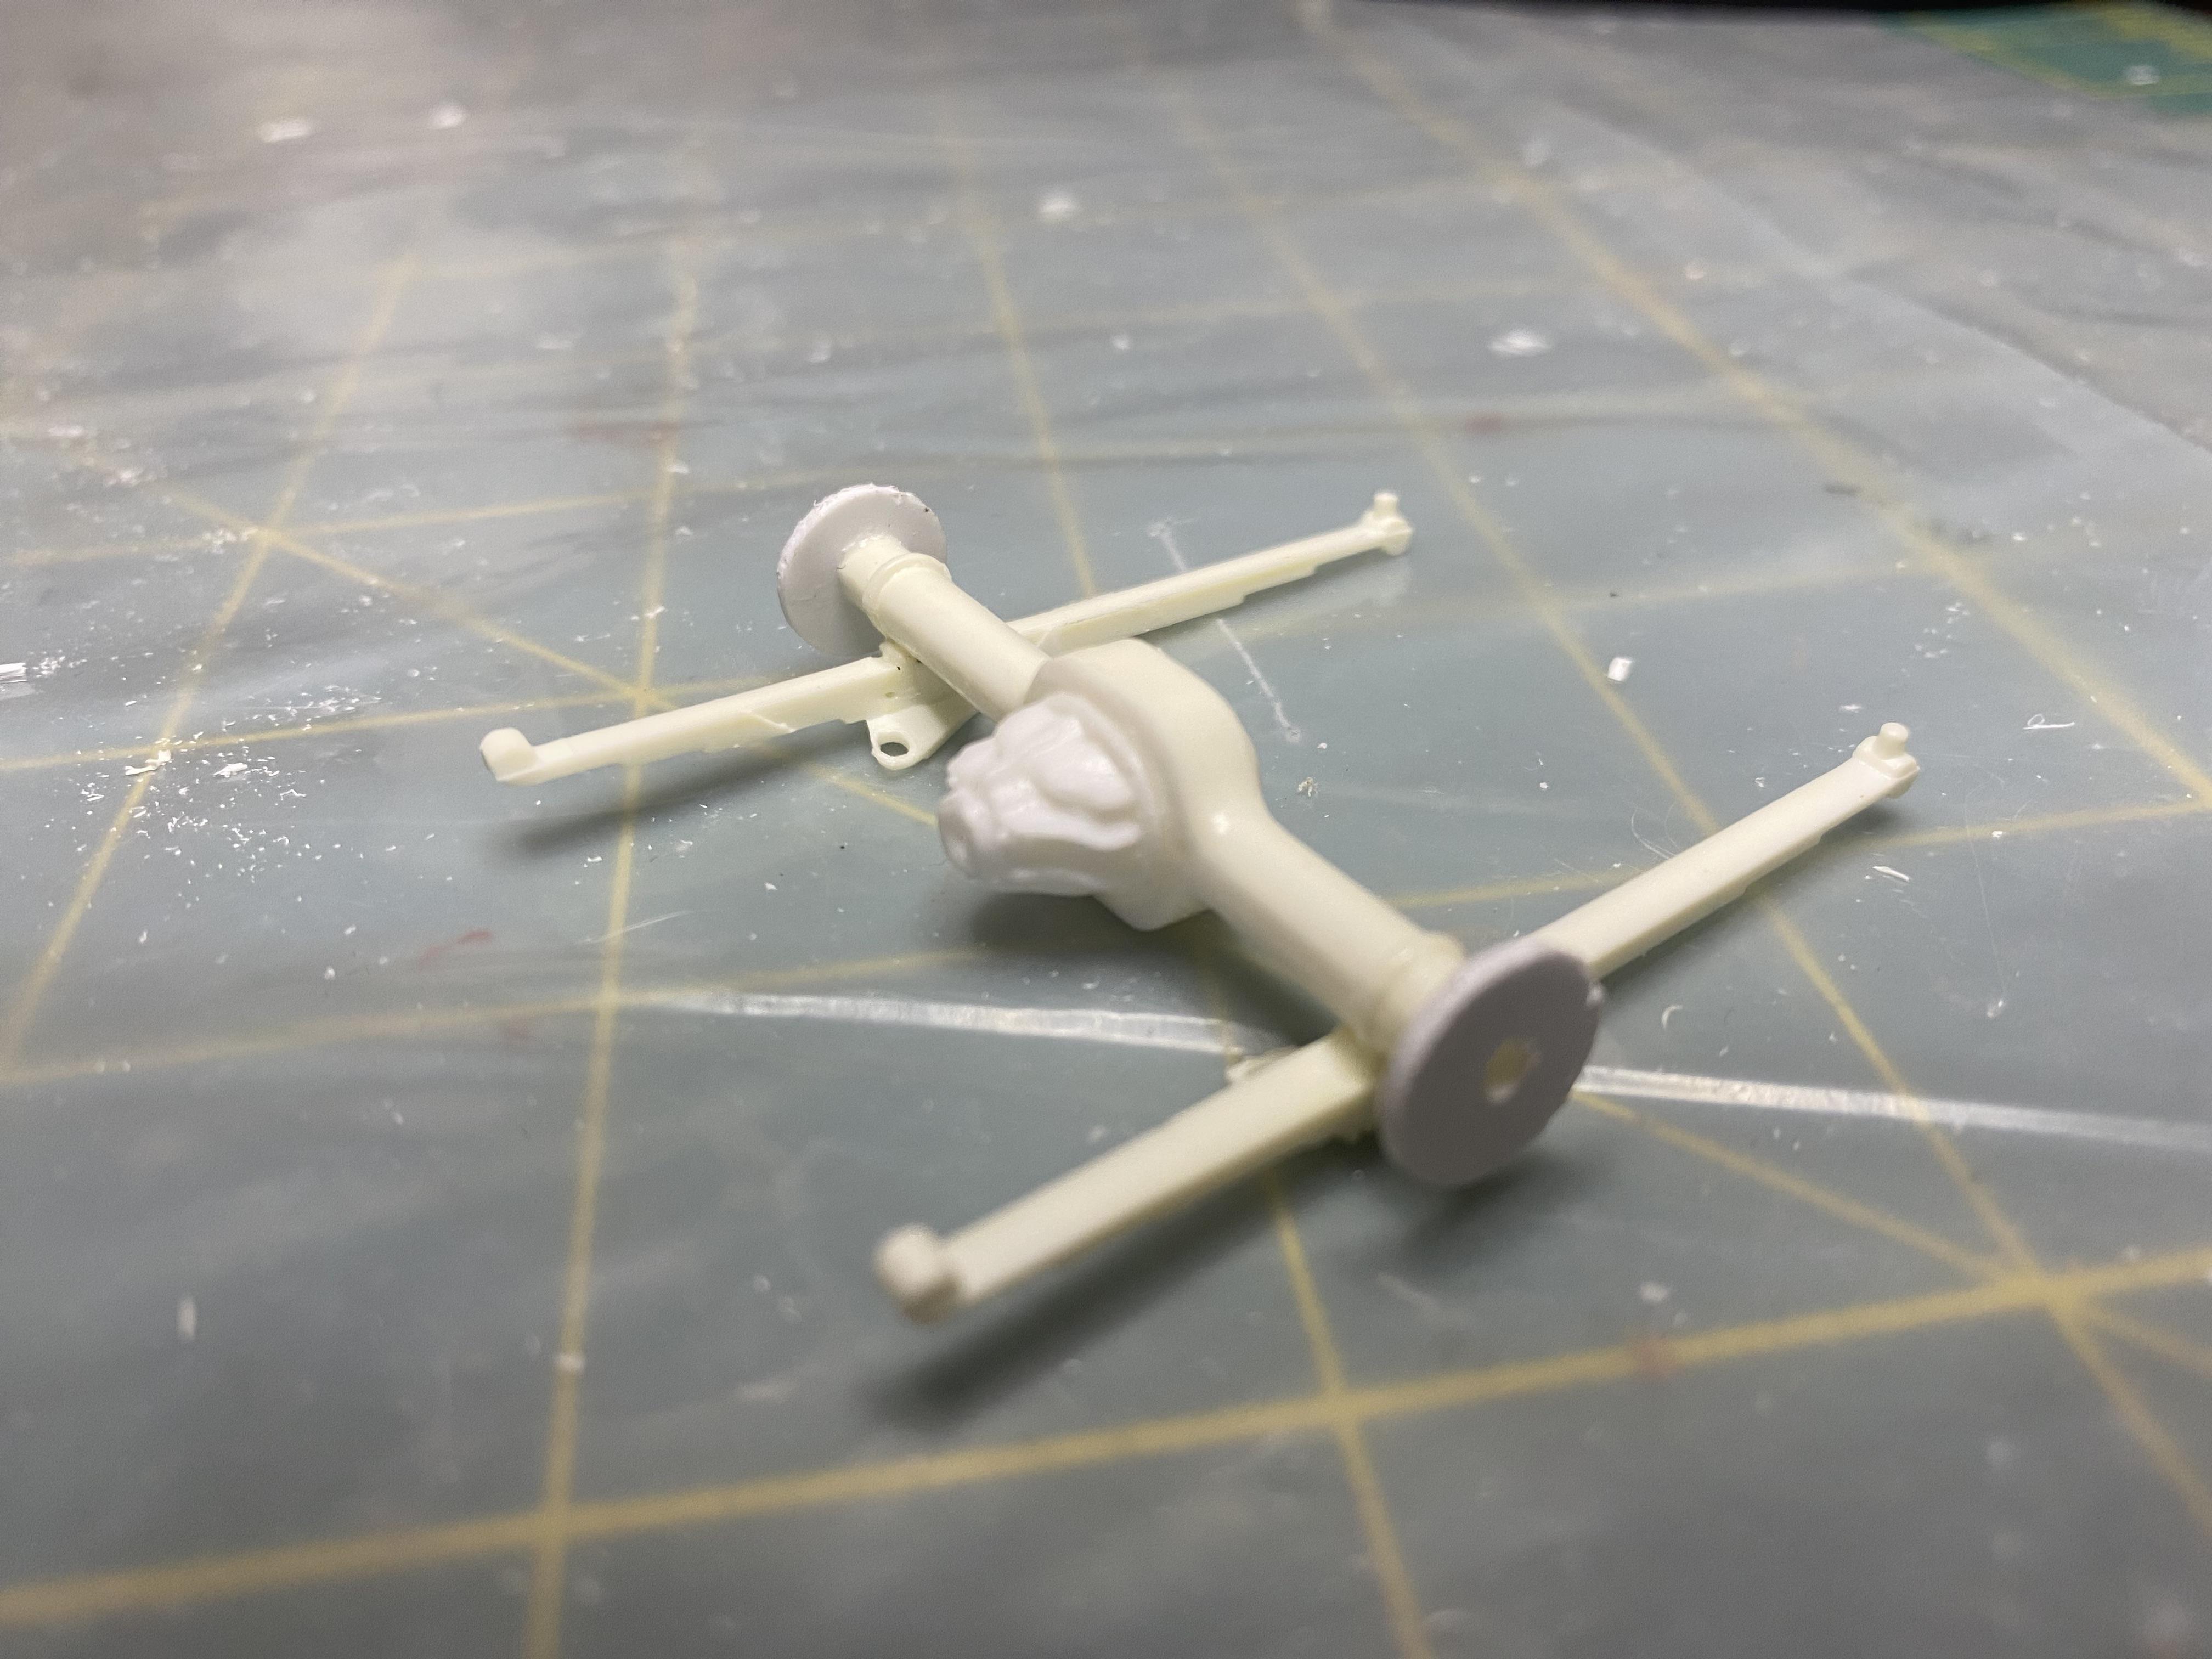
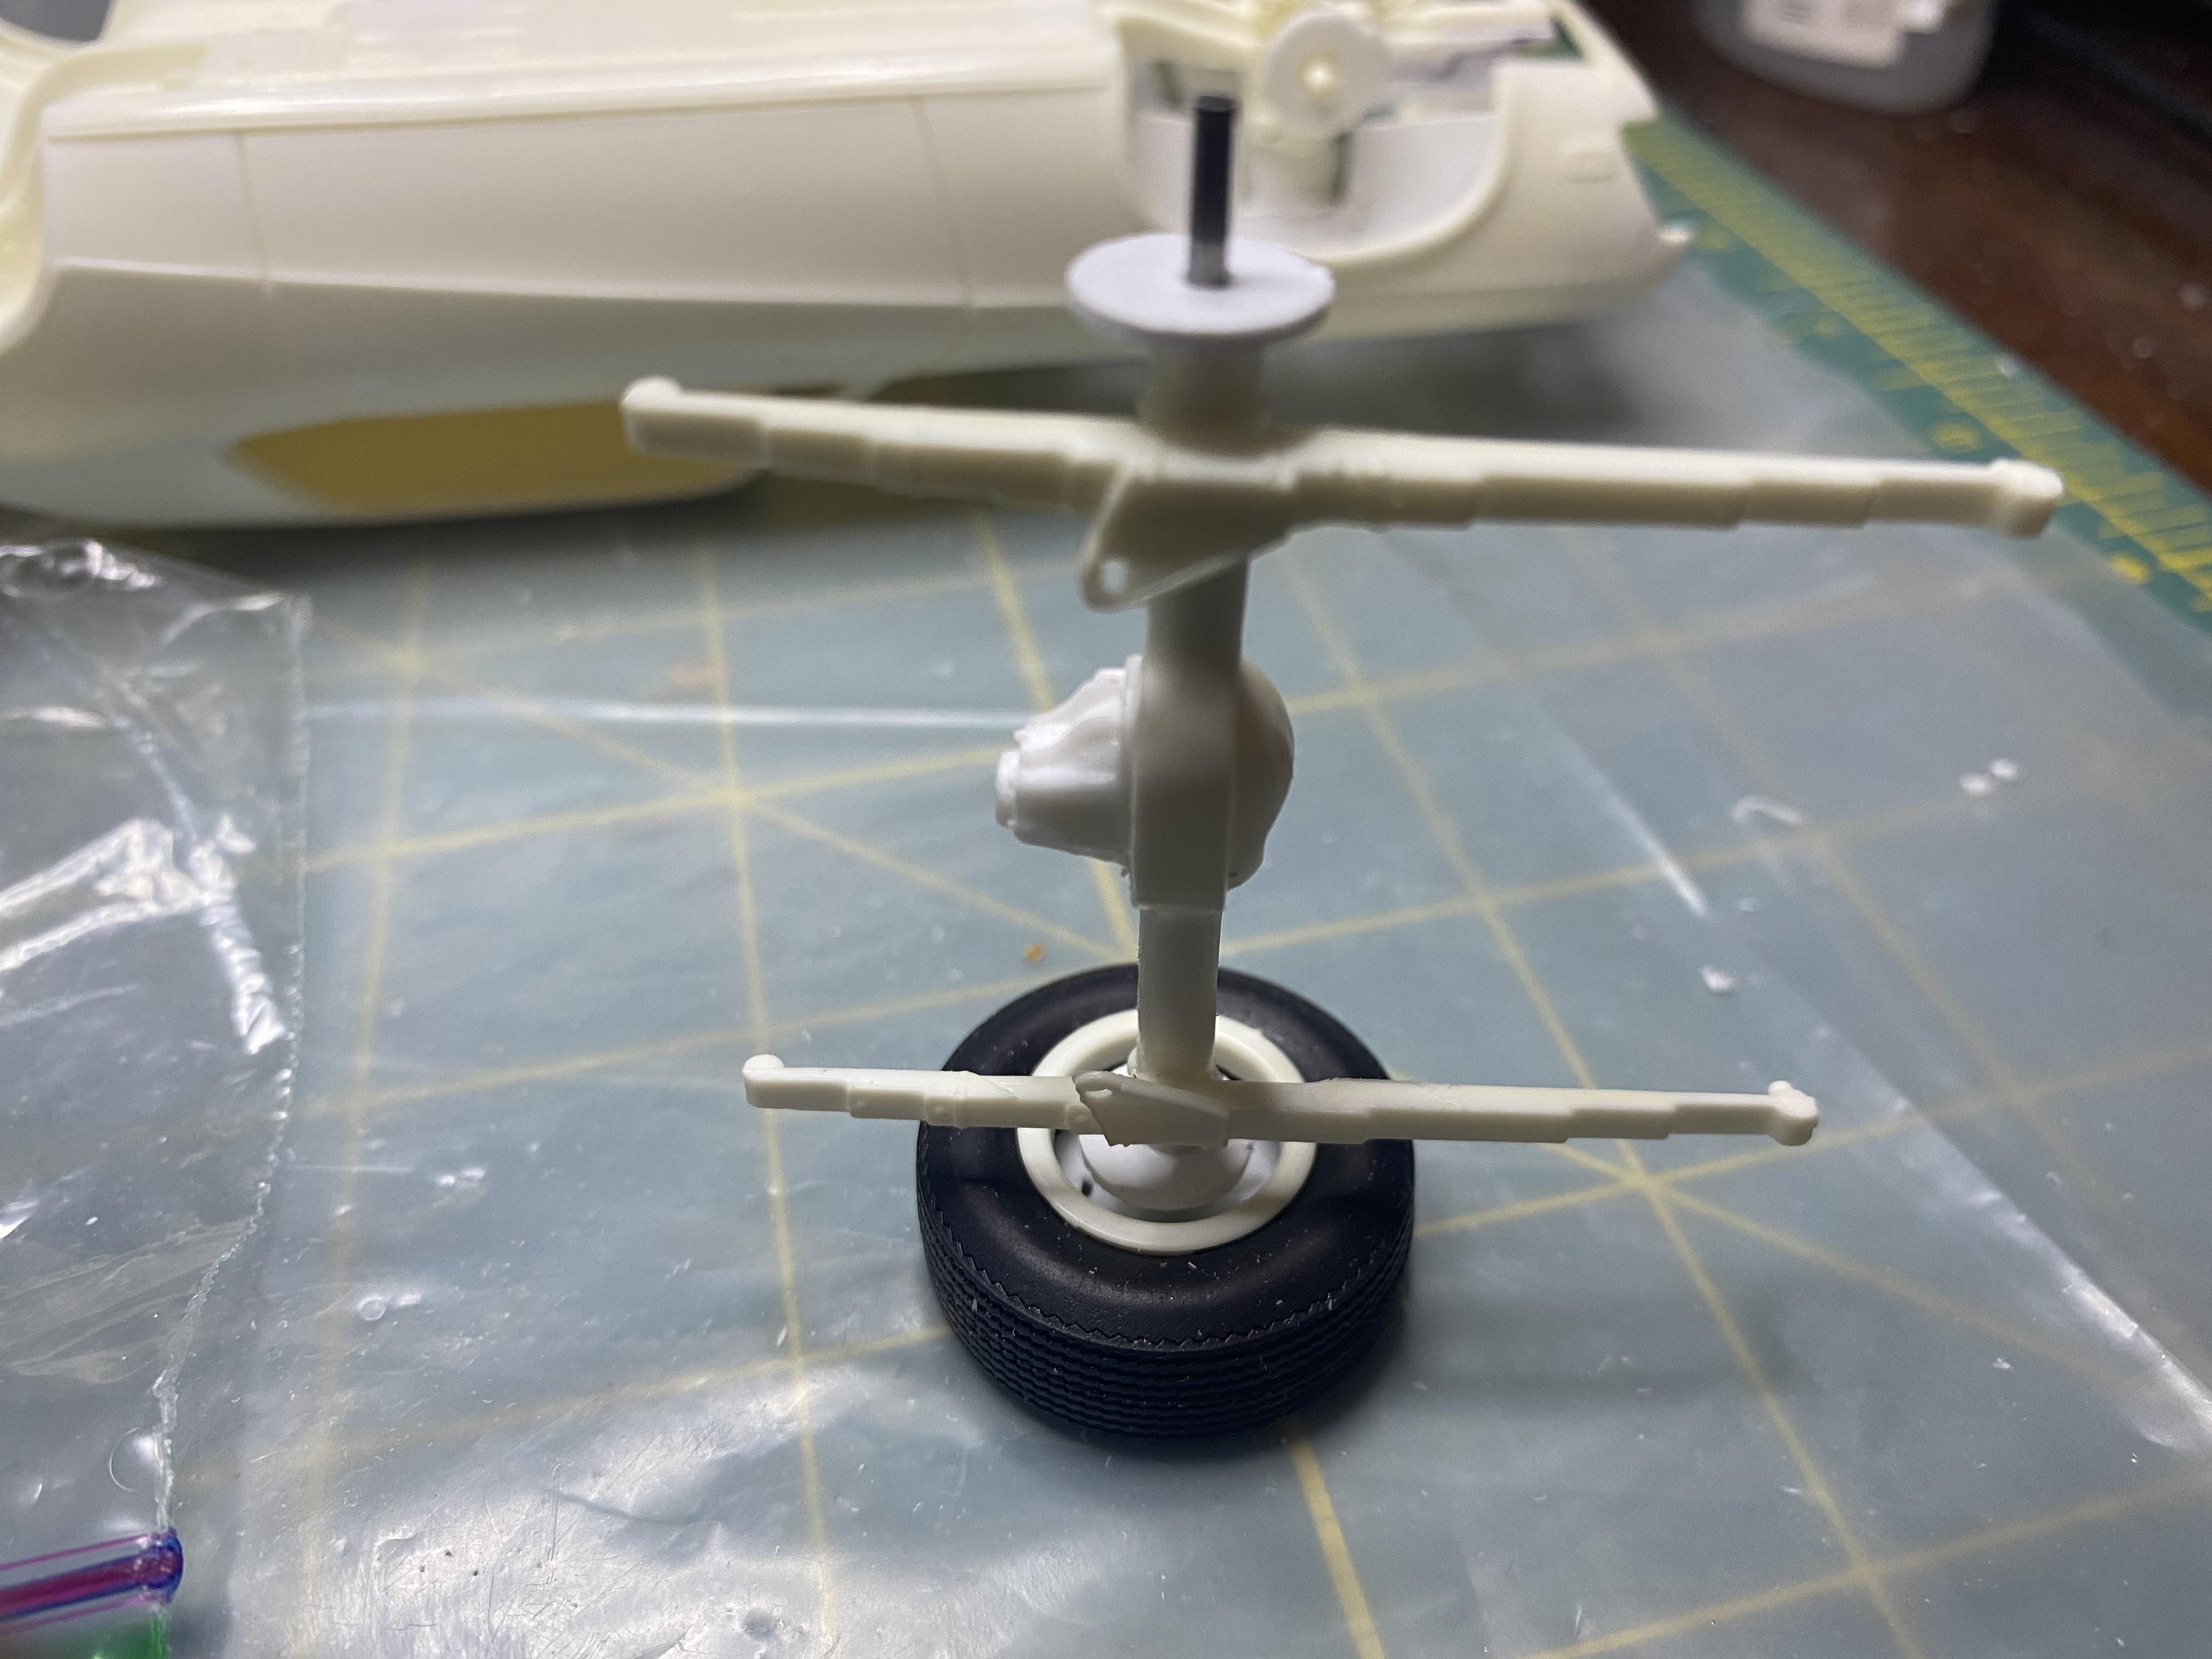
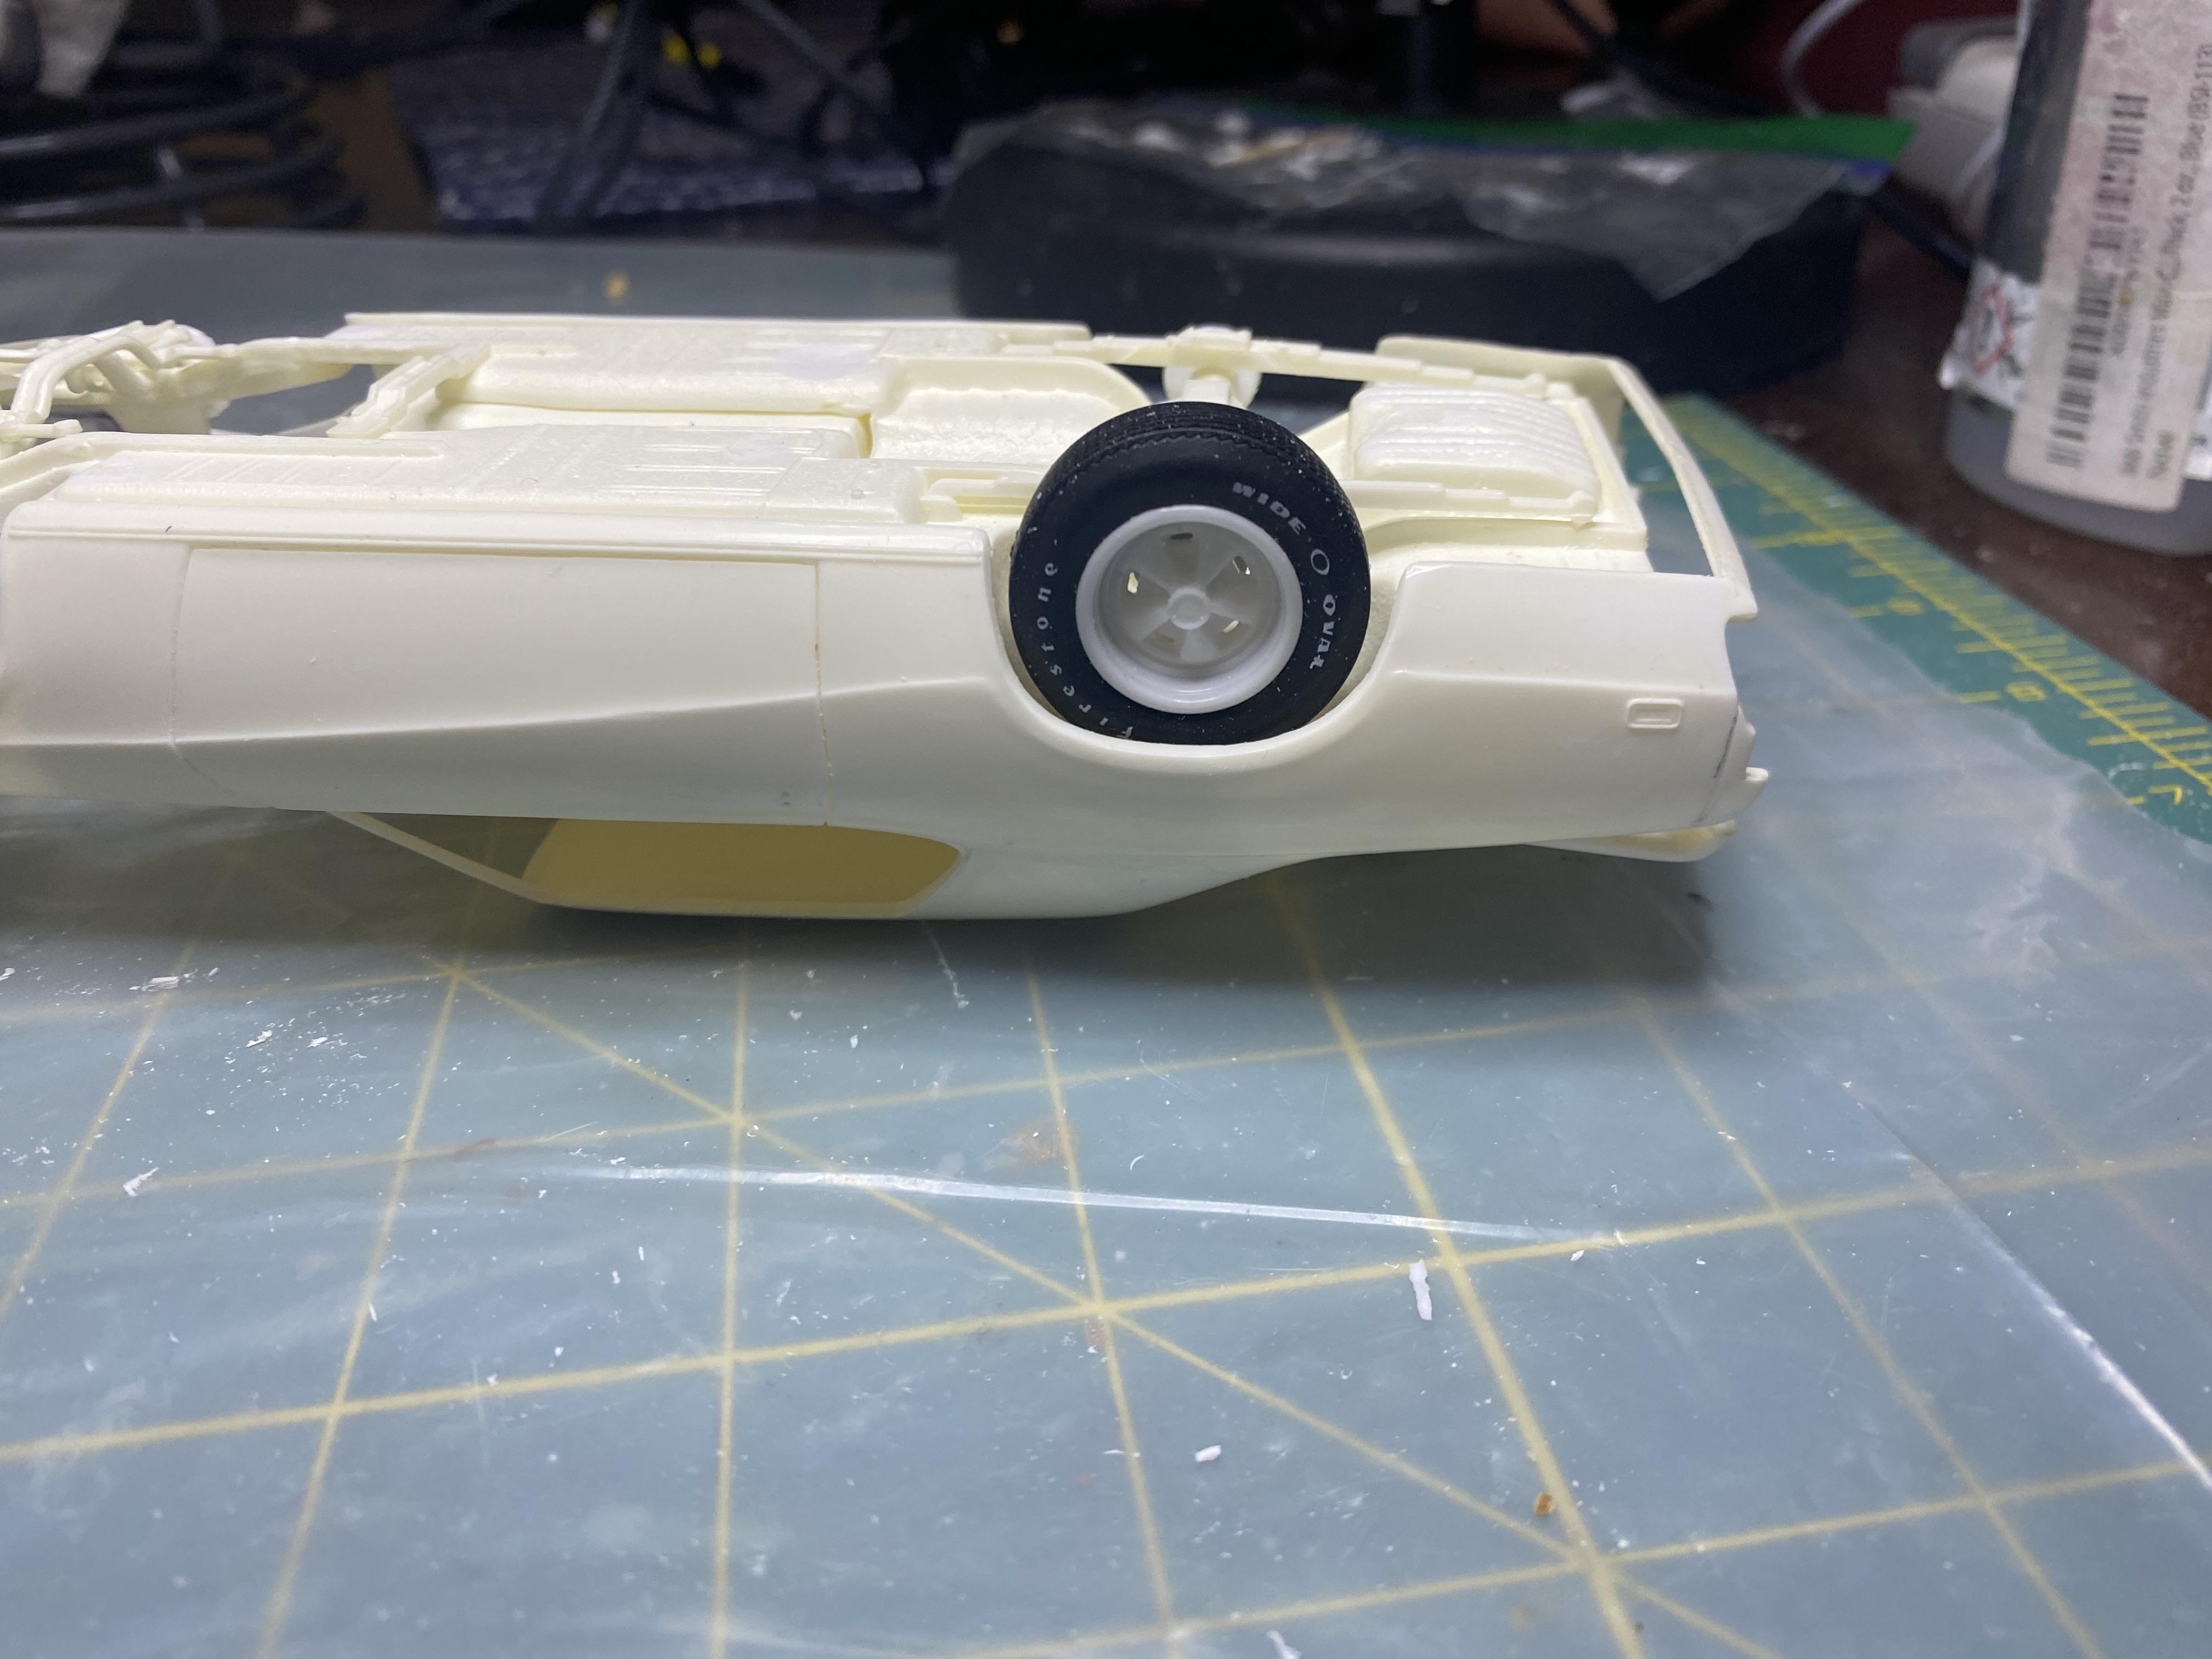
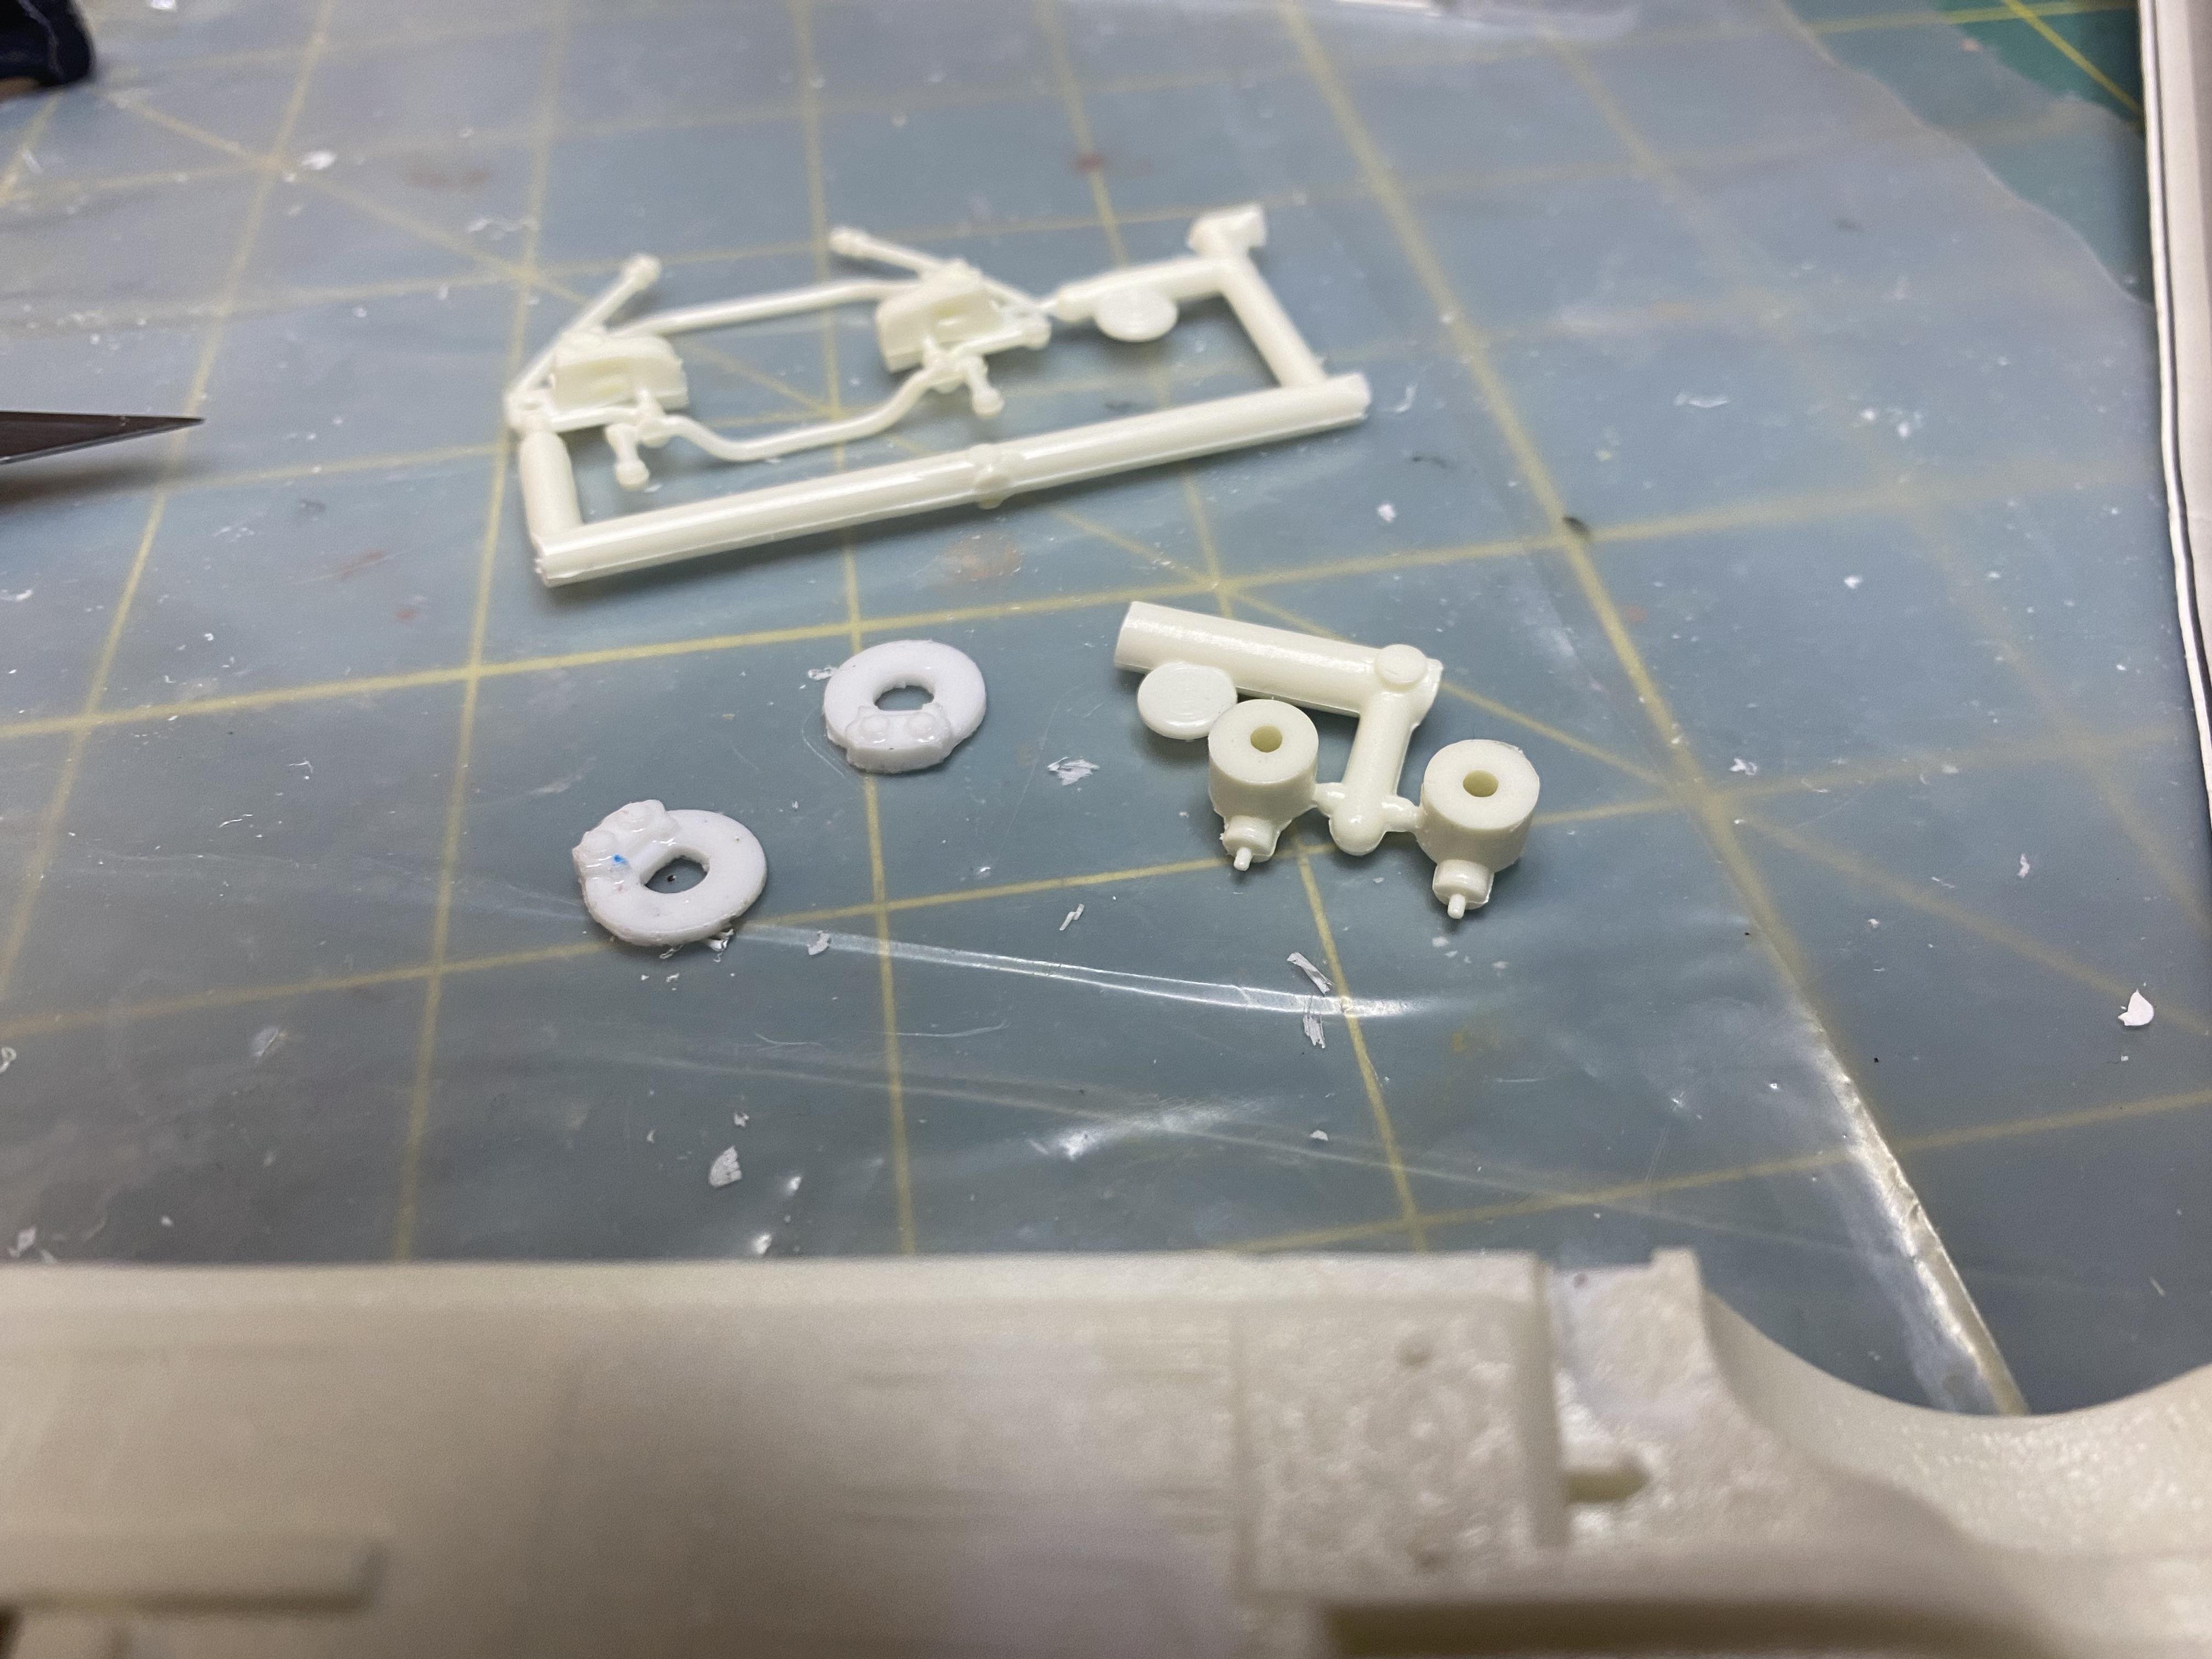
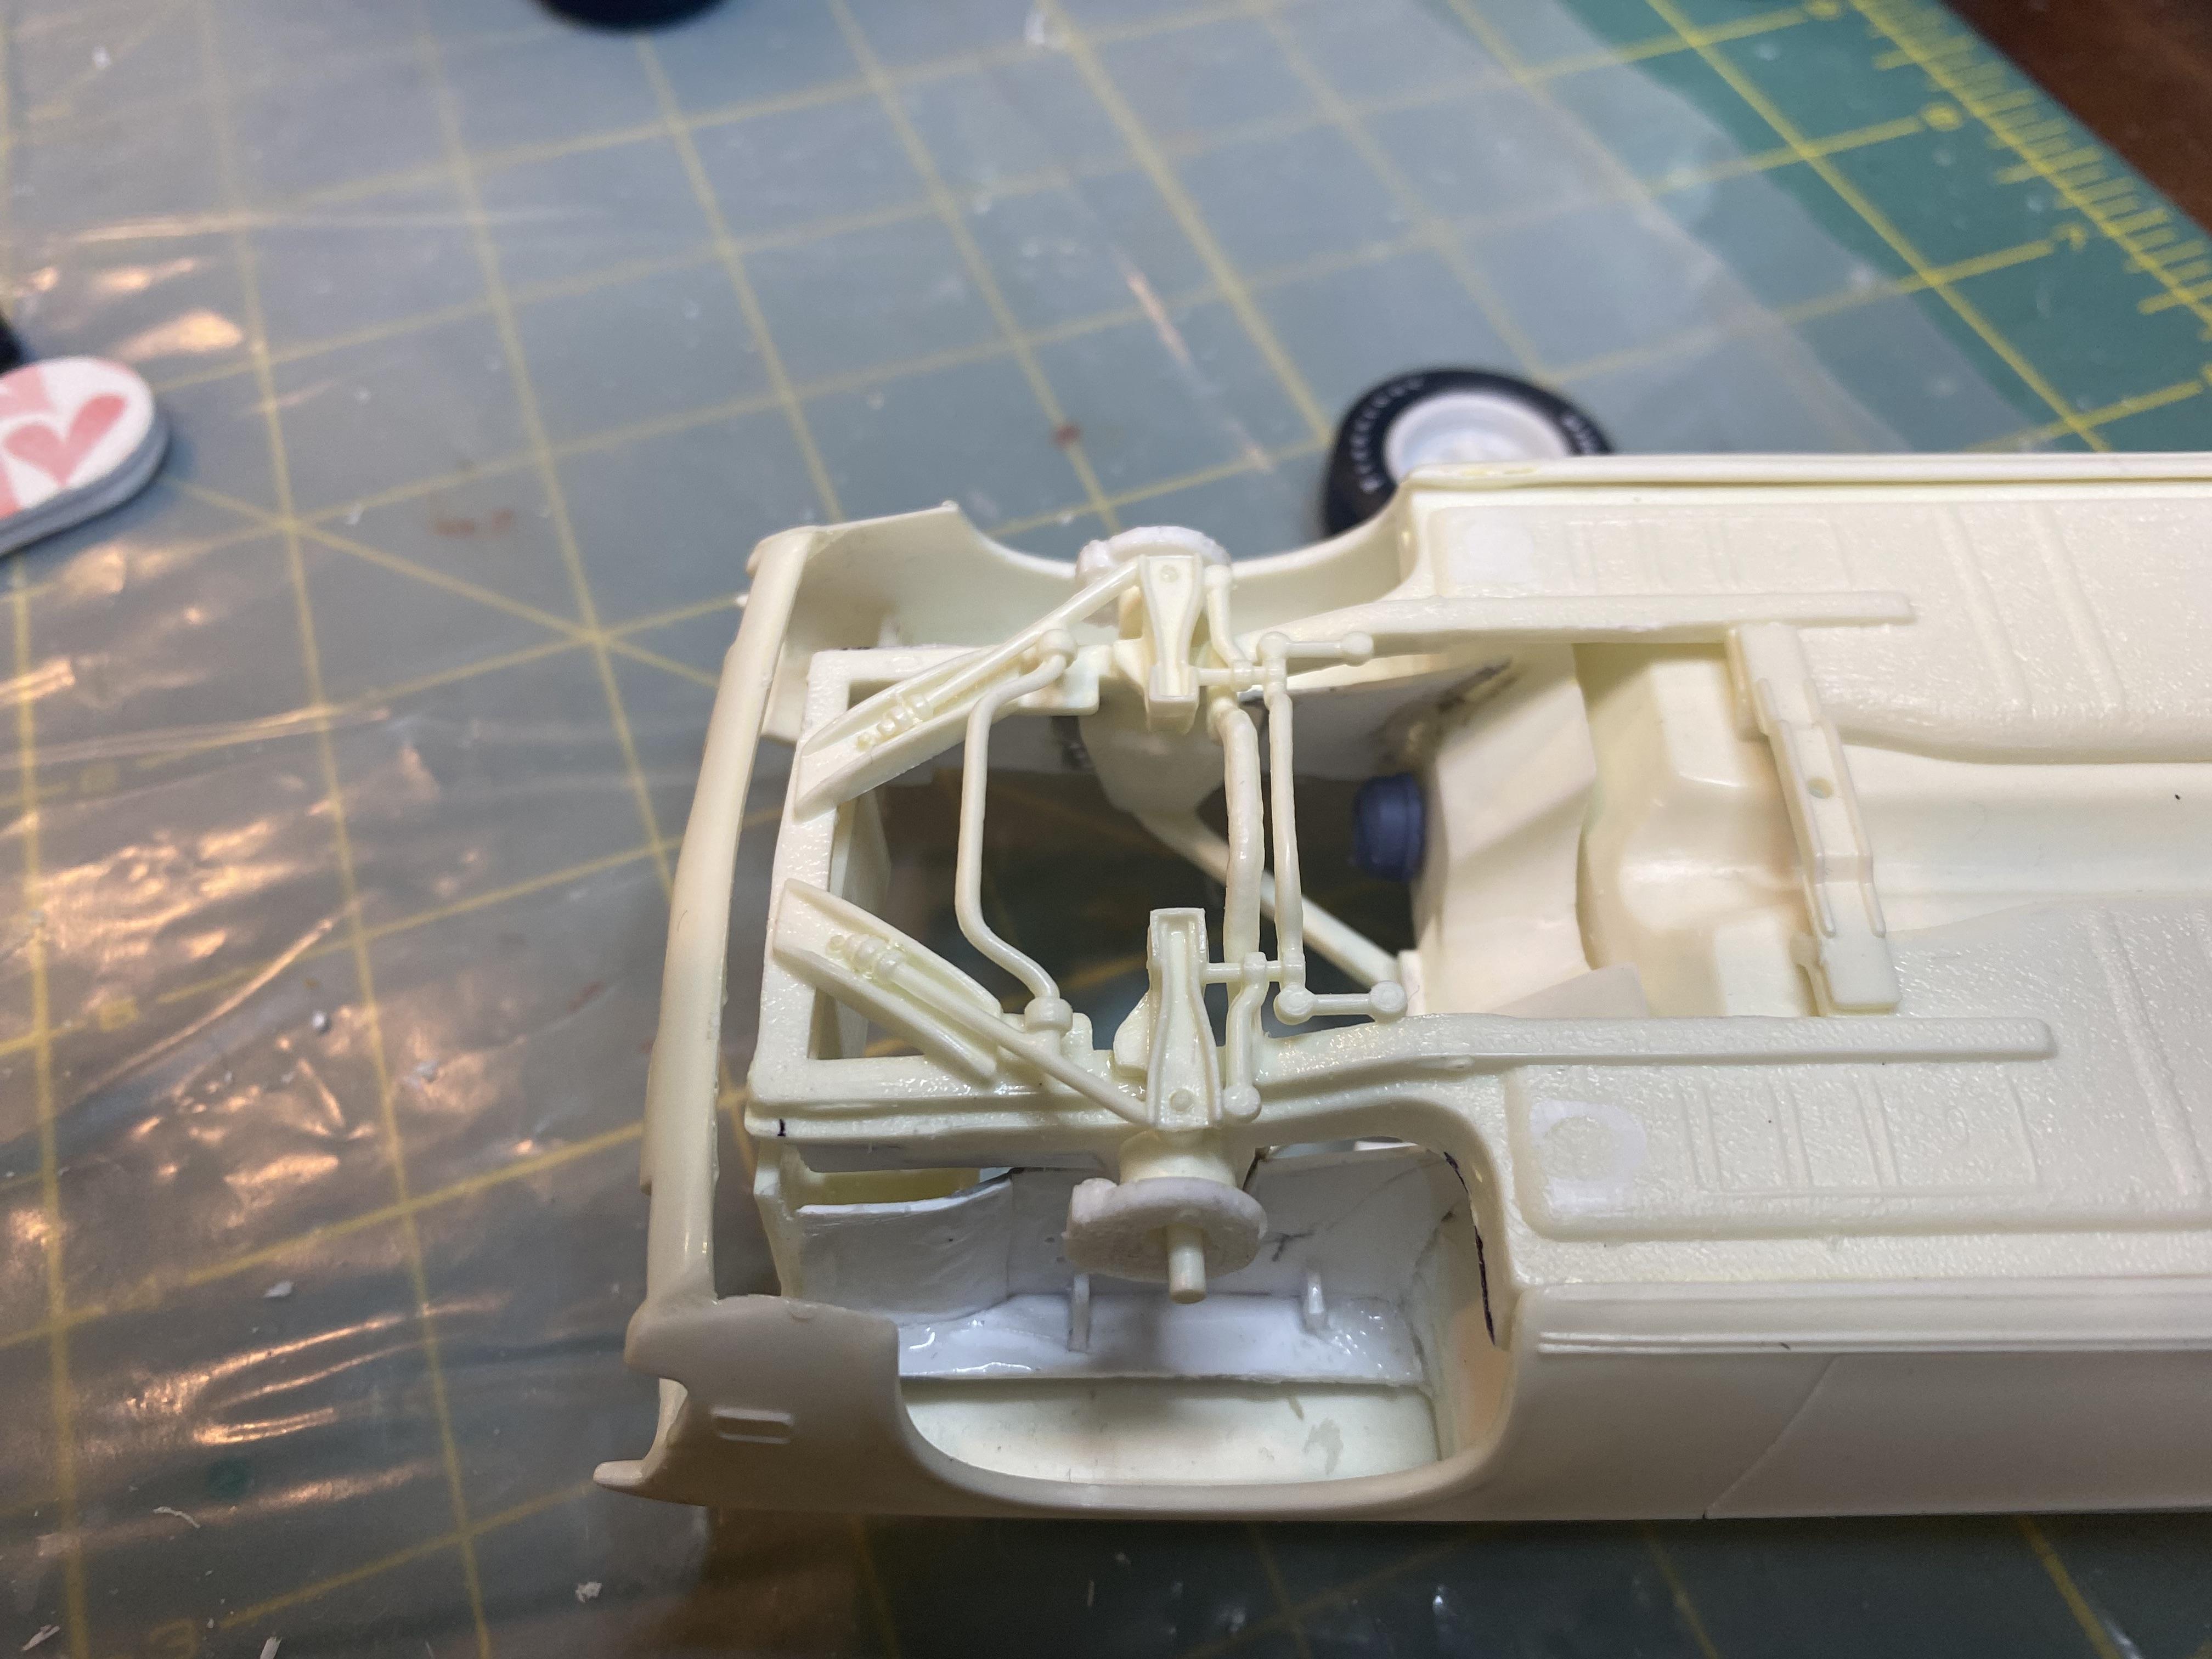
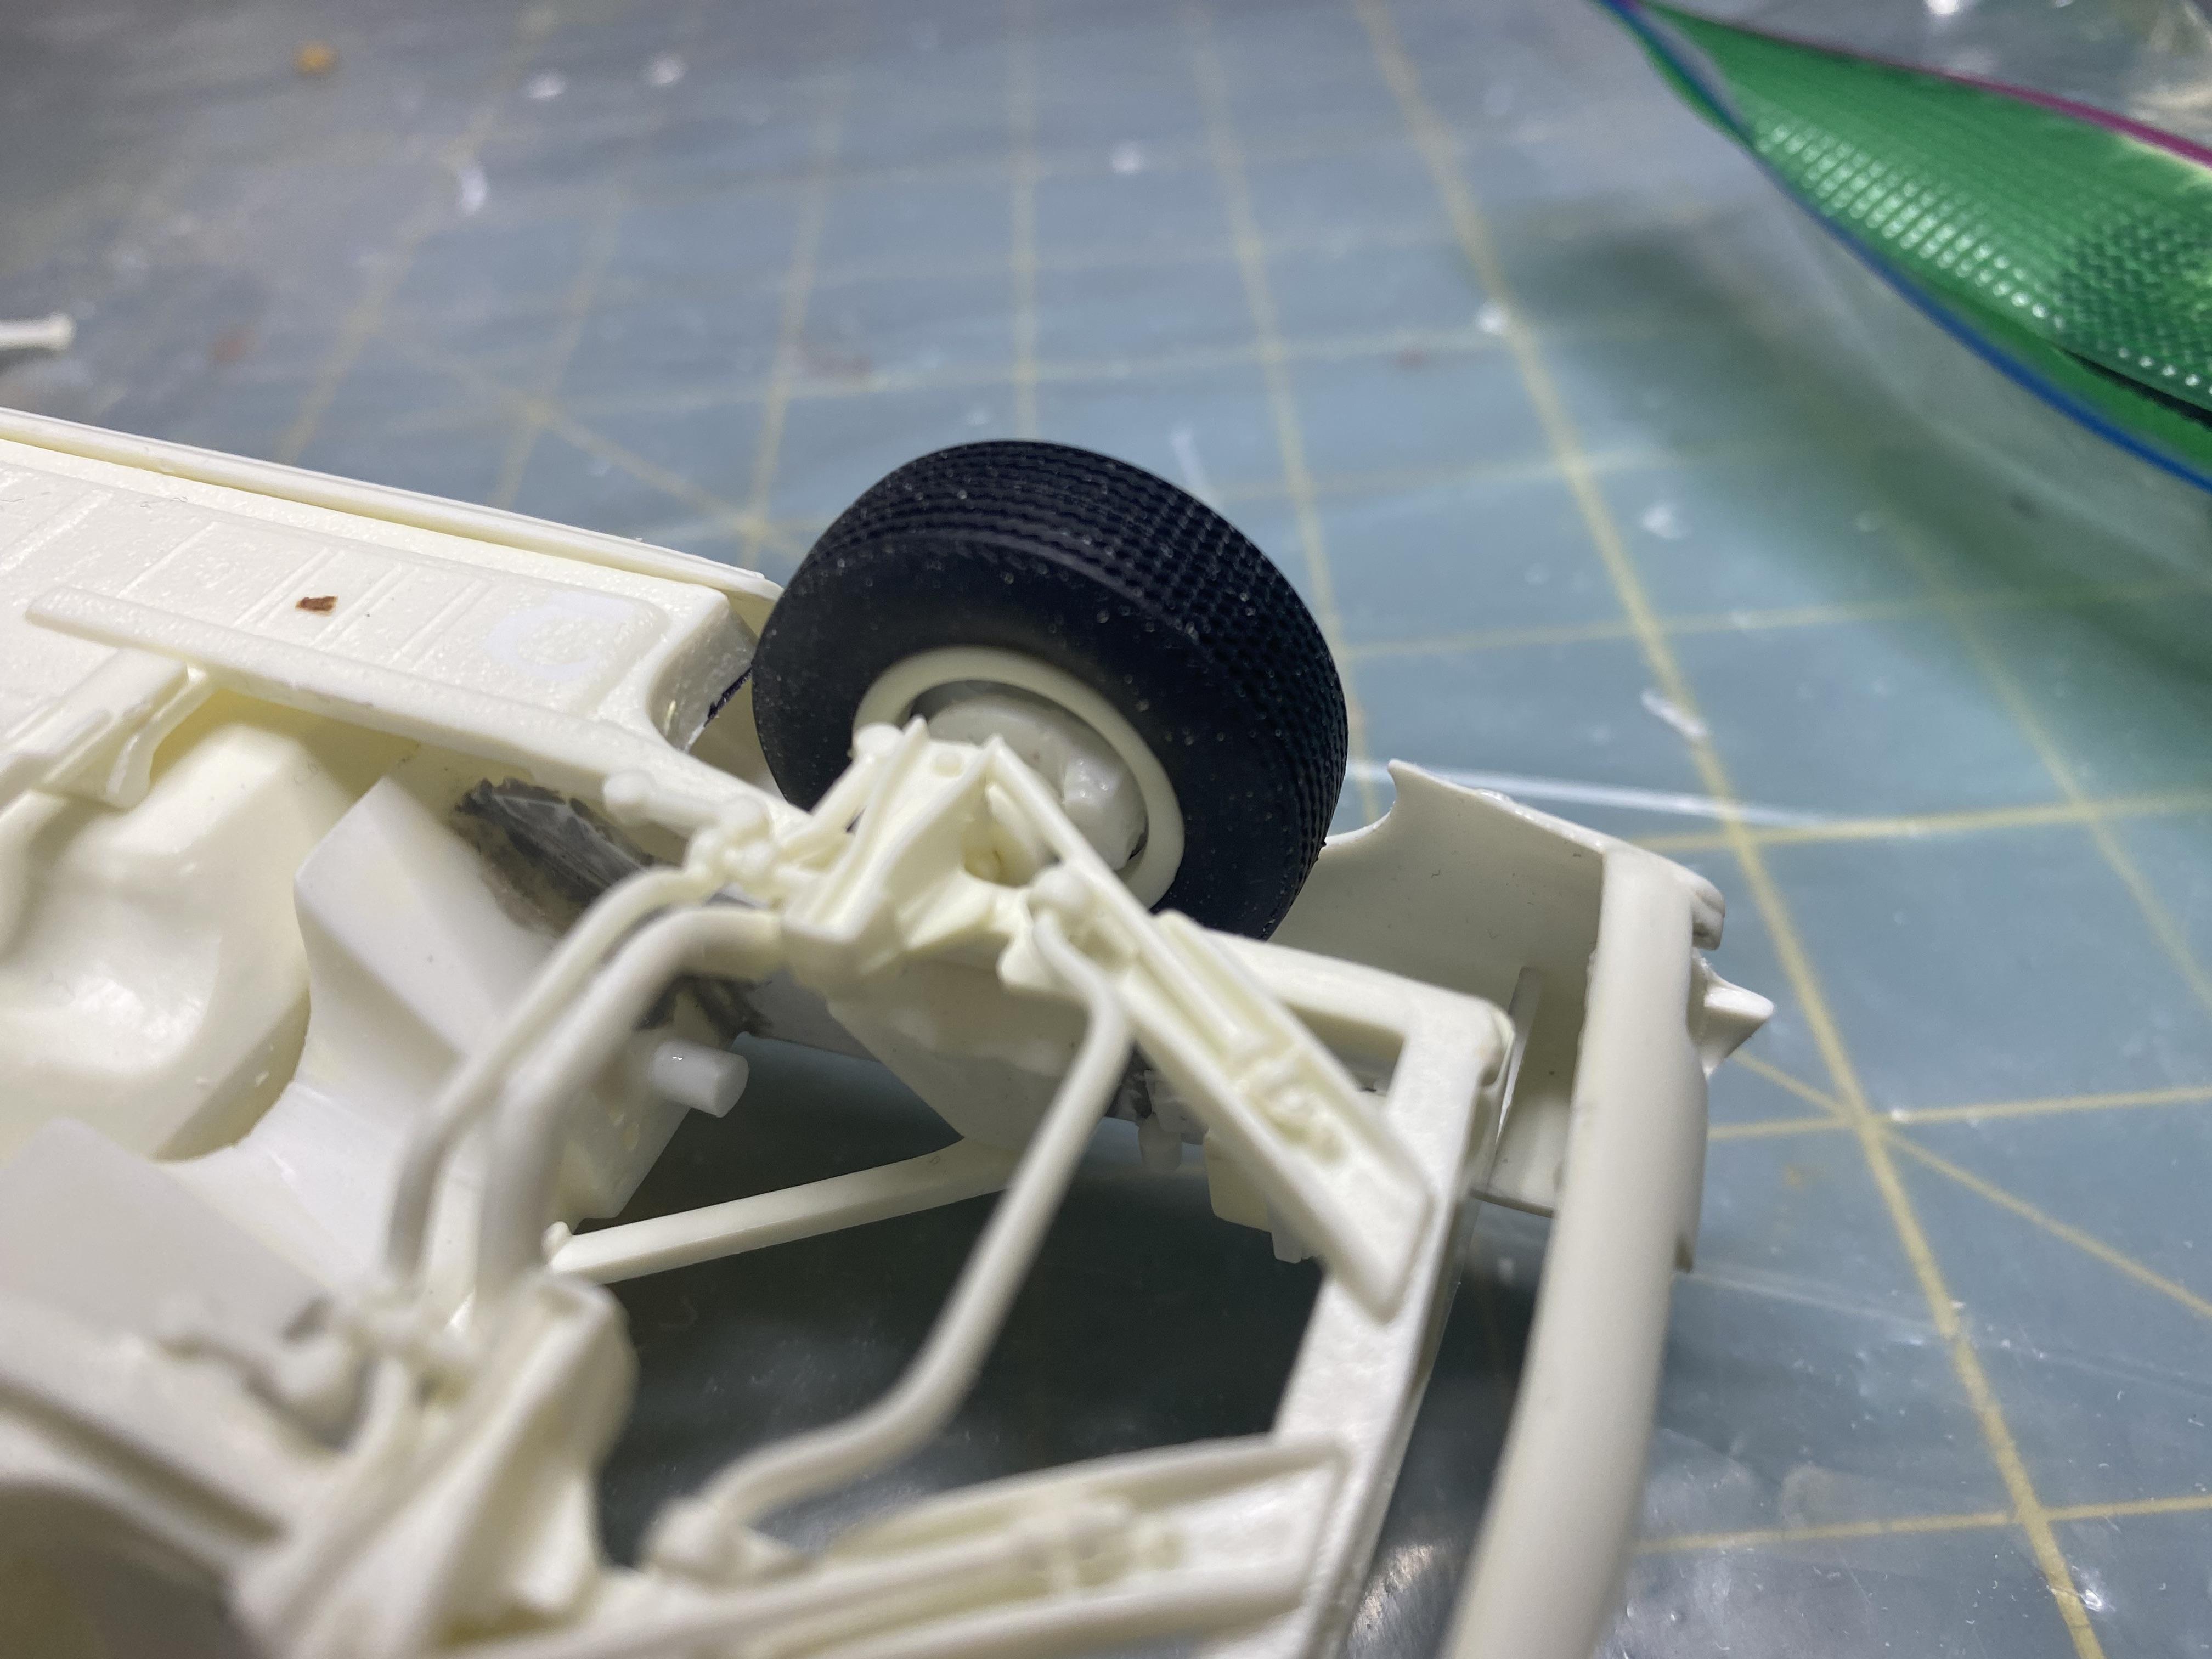
Got a little fab work on the chassis done. Dug up a resin cast differential and front disk brake disks from the AMT 1967 Mustang kit. Pinned the differential and changed out the pumpkin. Added disks to the back to represent drums. Cut the front frame rails filler panels and added filler panels to the engine compartment firewalls. added the disk brake disks and assembled the front suspension.