Duddly01
-
Posts
1,048 -
Joined
-
Last visited
Content Type
Profiles
Forums
Events
Gallery
Everything posted by Duddly01
-
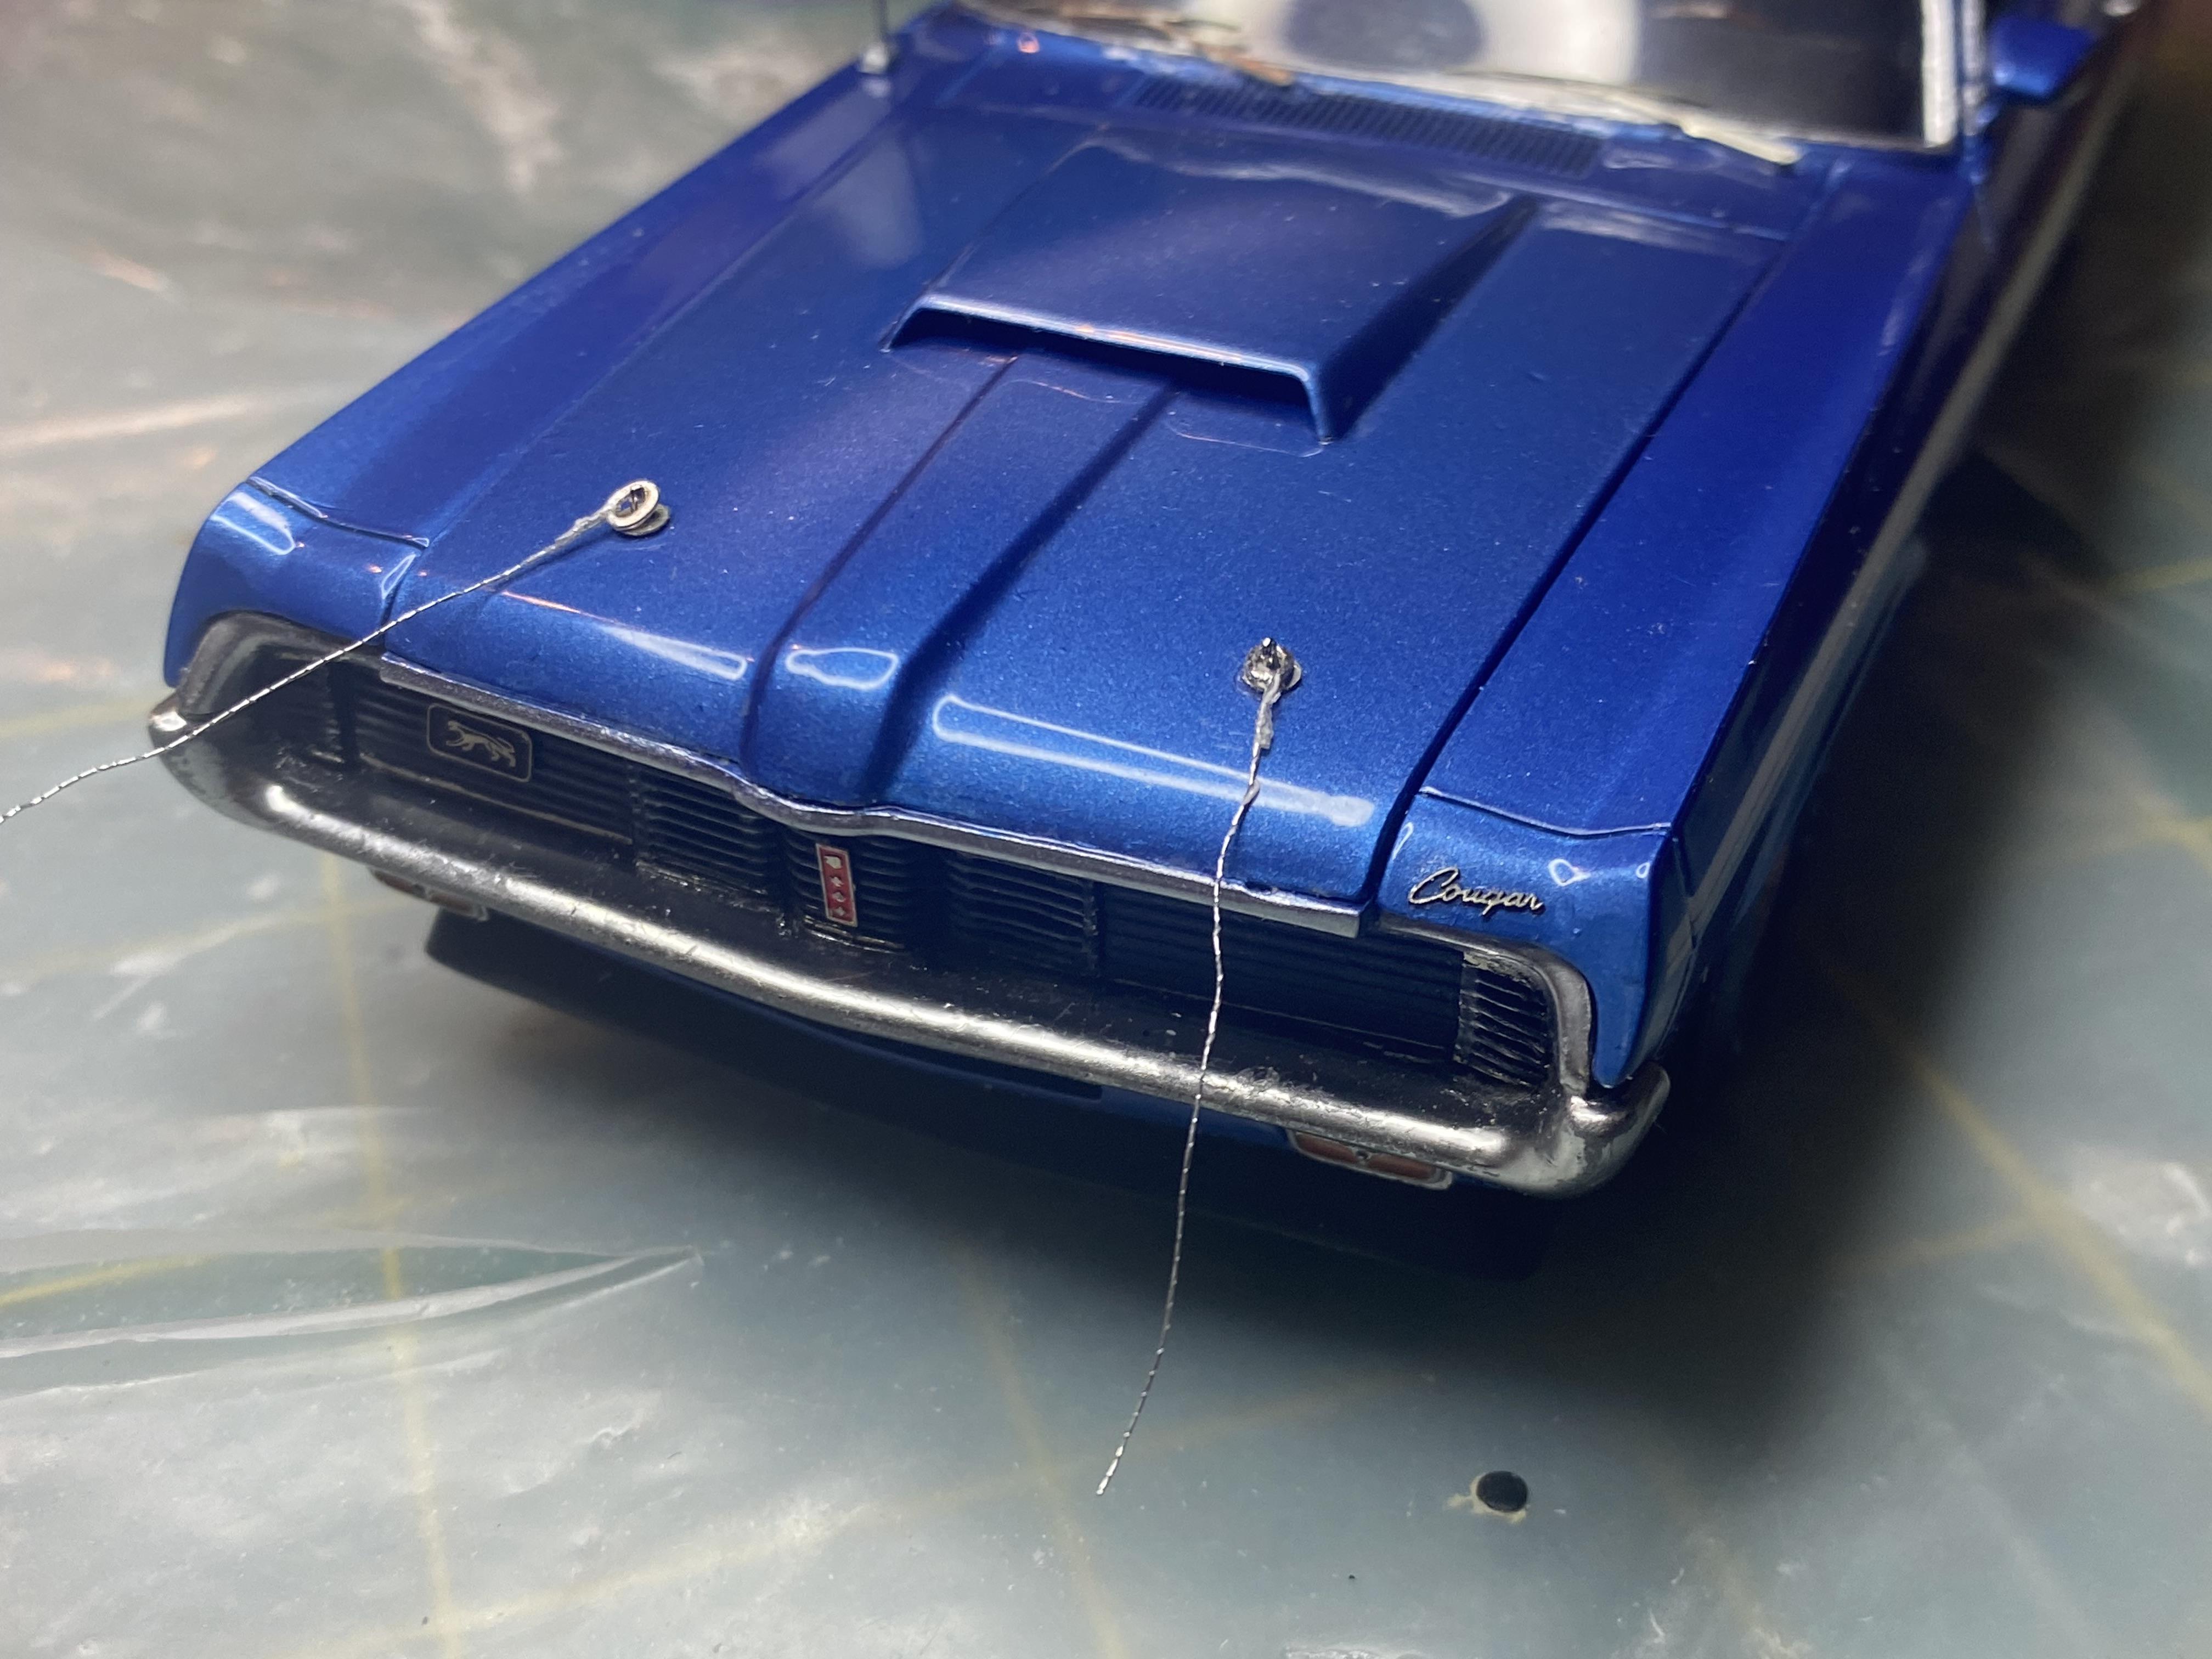
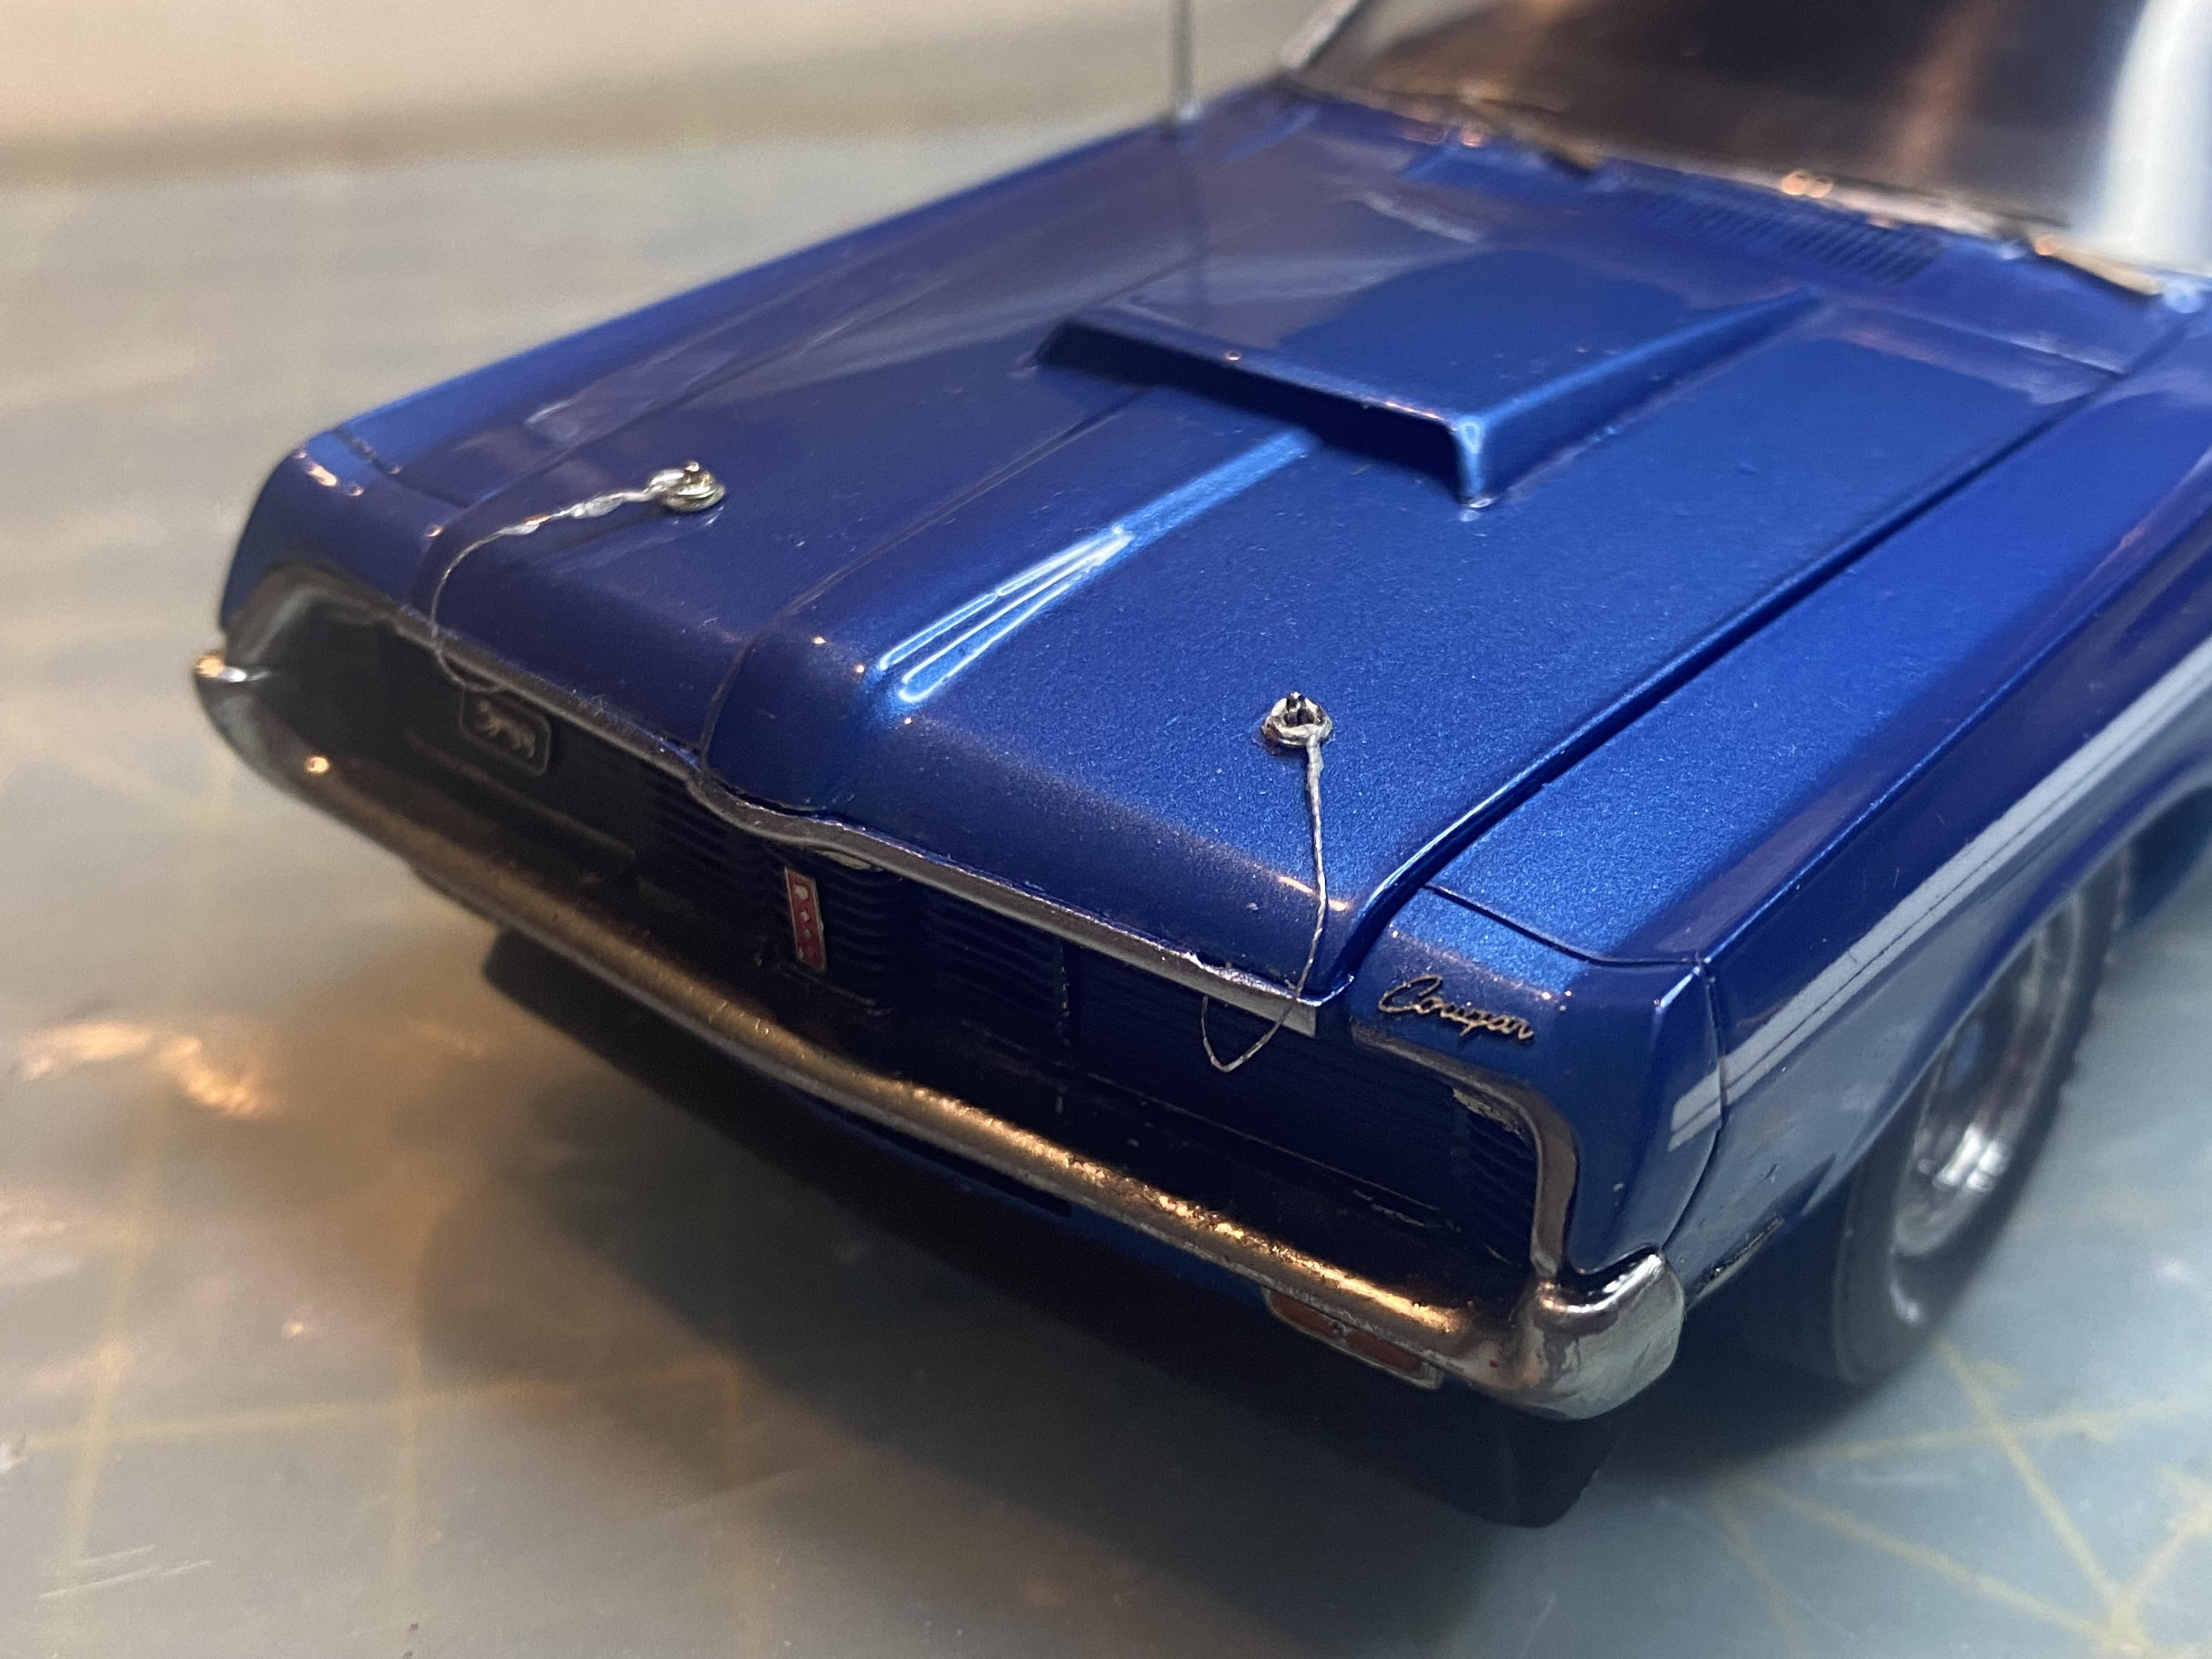
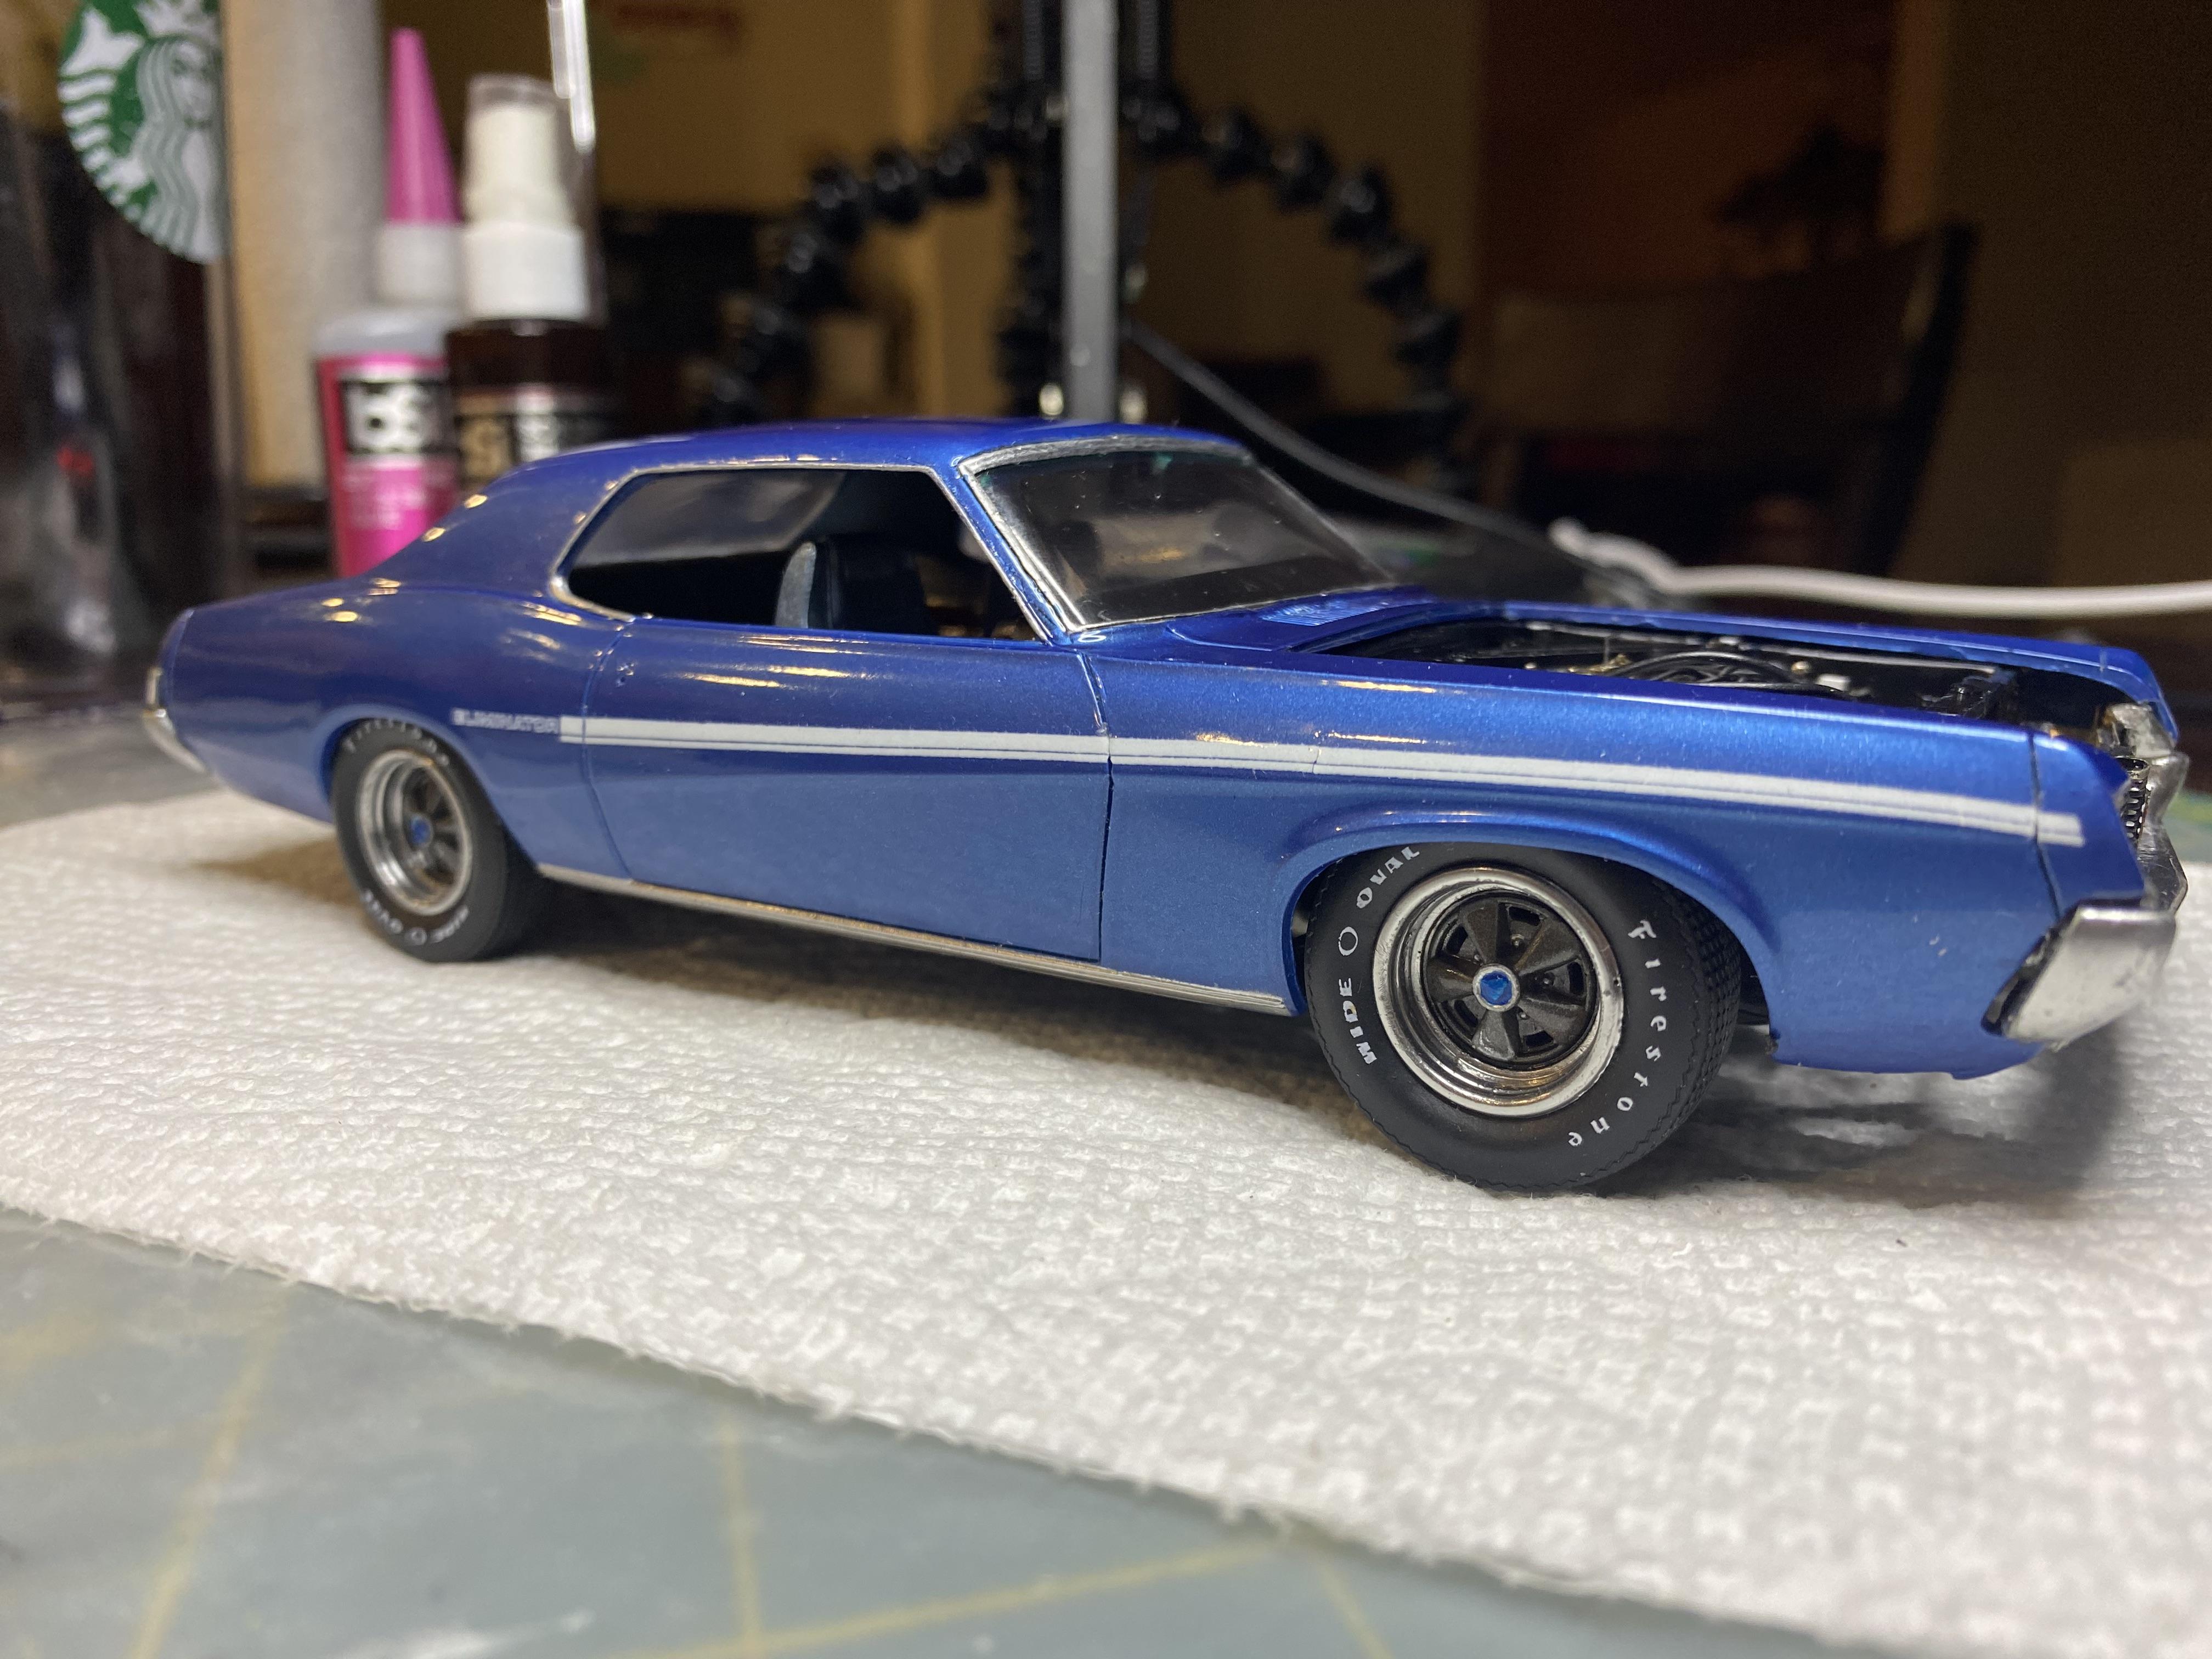
I installed the door handles, antenna and created the Hood pin stands and wires.

-
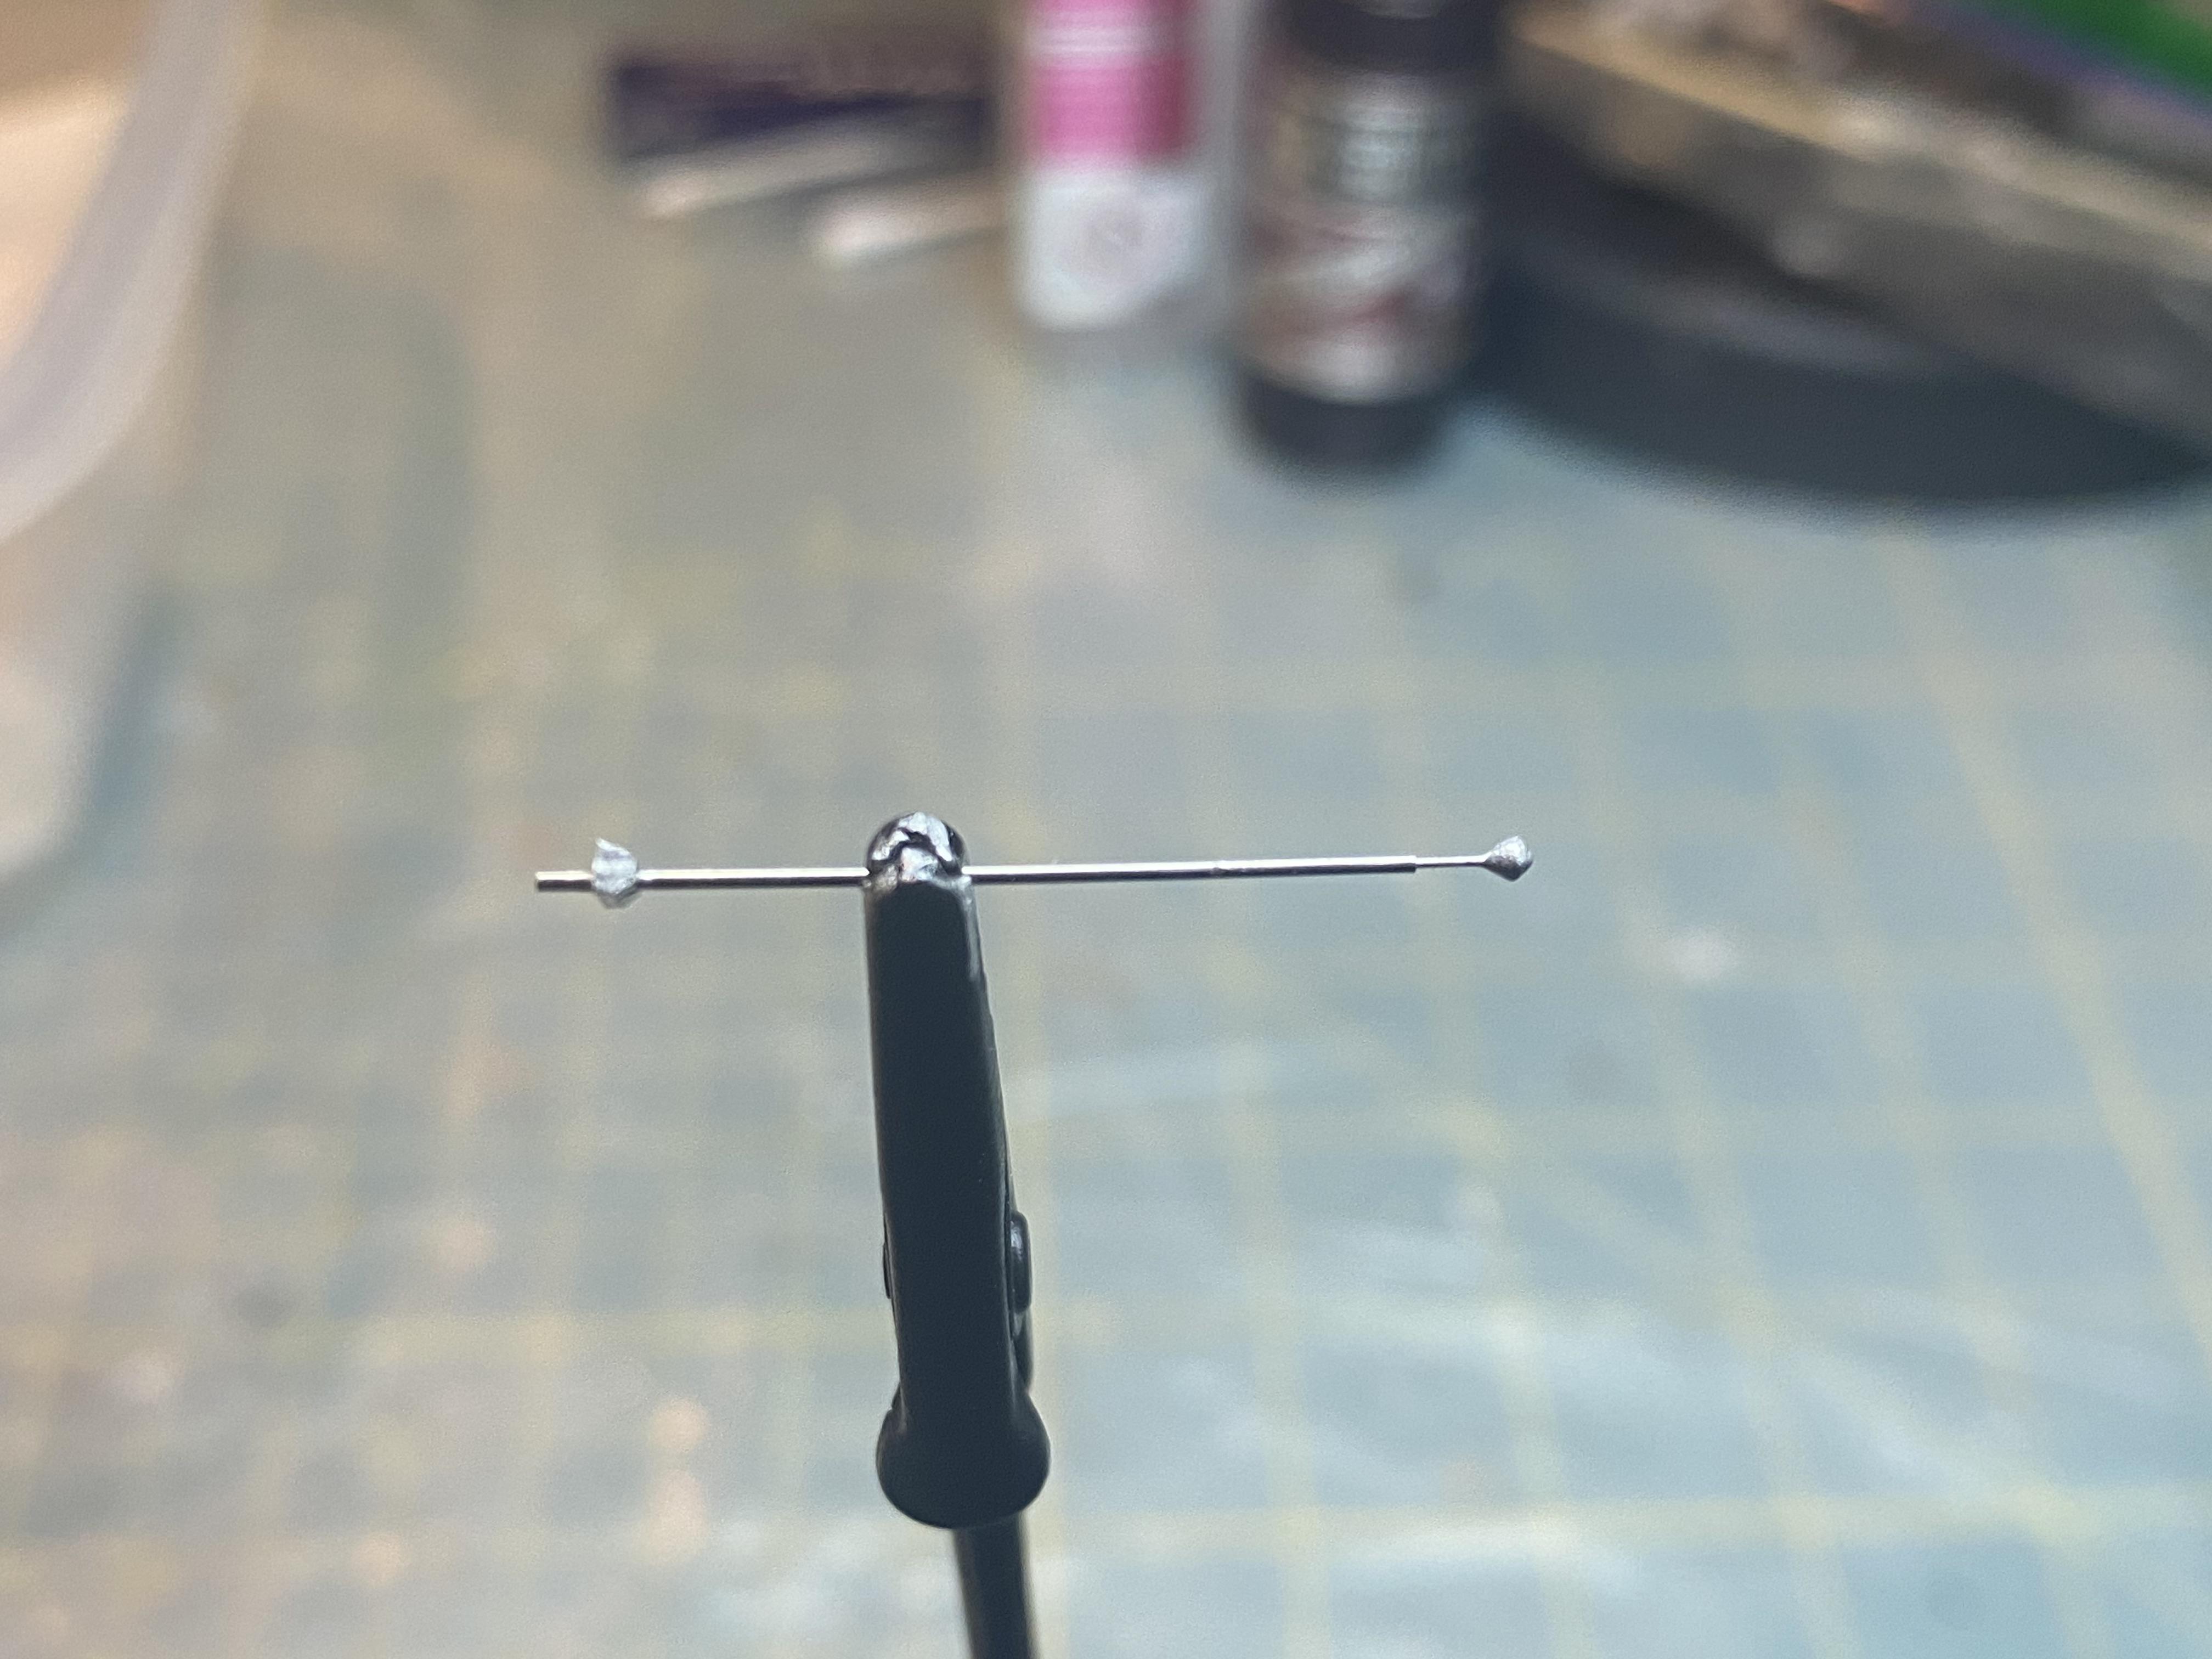
Both the bug pins and catheter tubing I got on Amazon Look for 0.5mm stainless steel capillary tube & insect pin #00
-
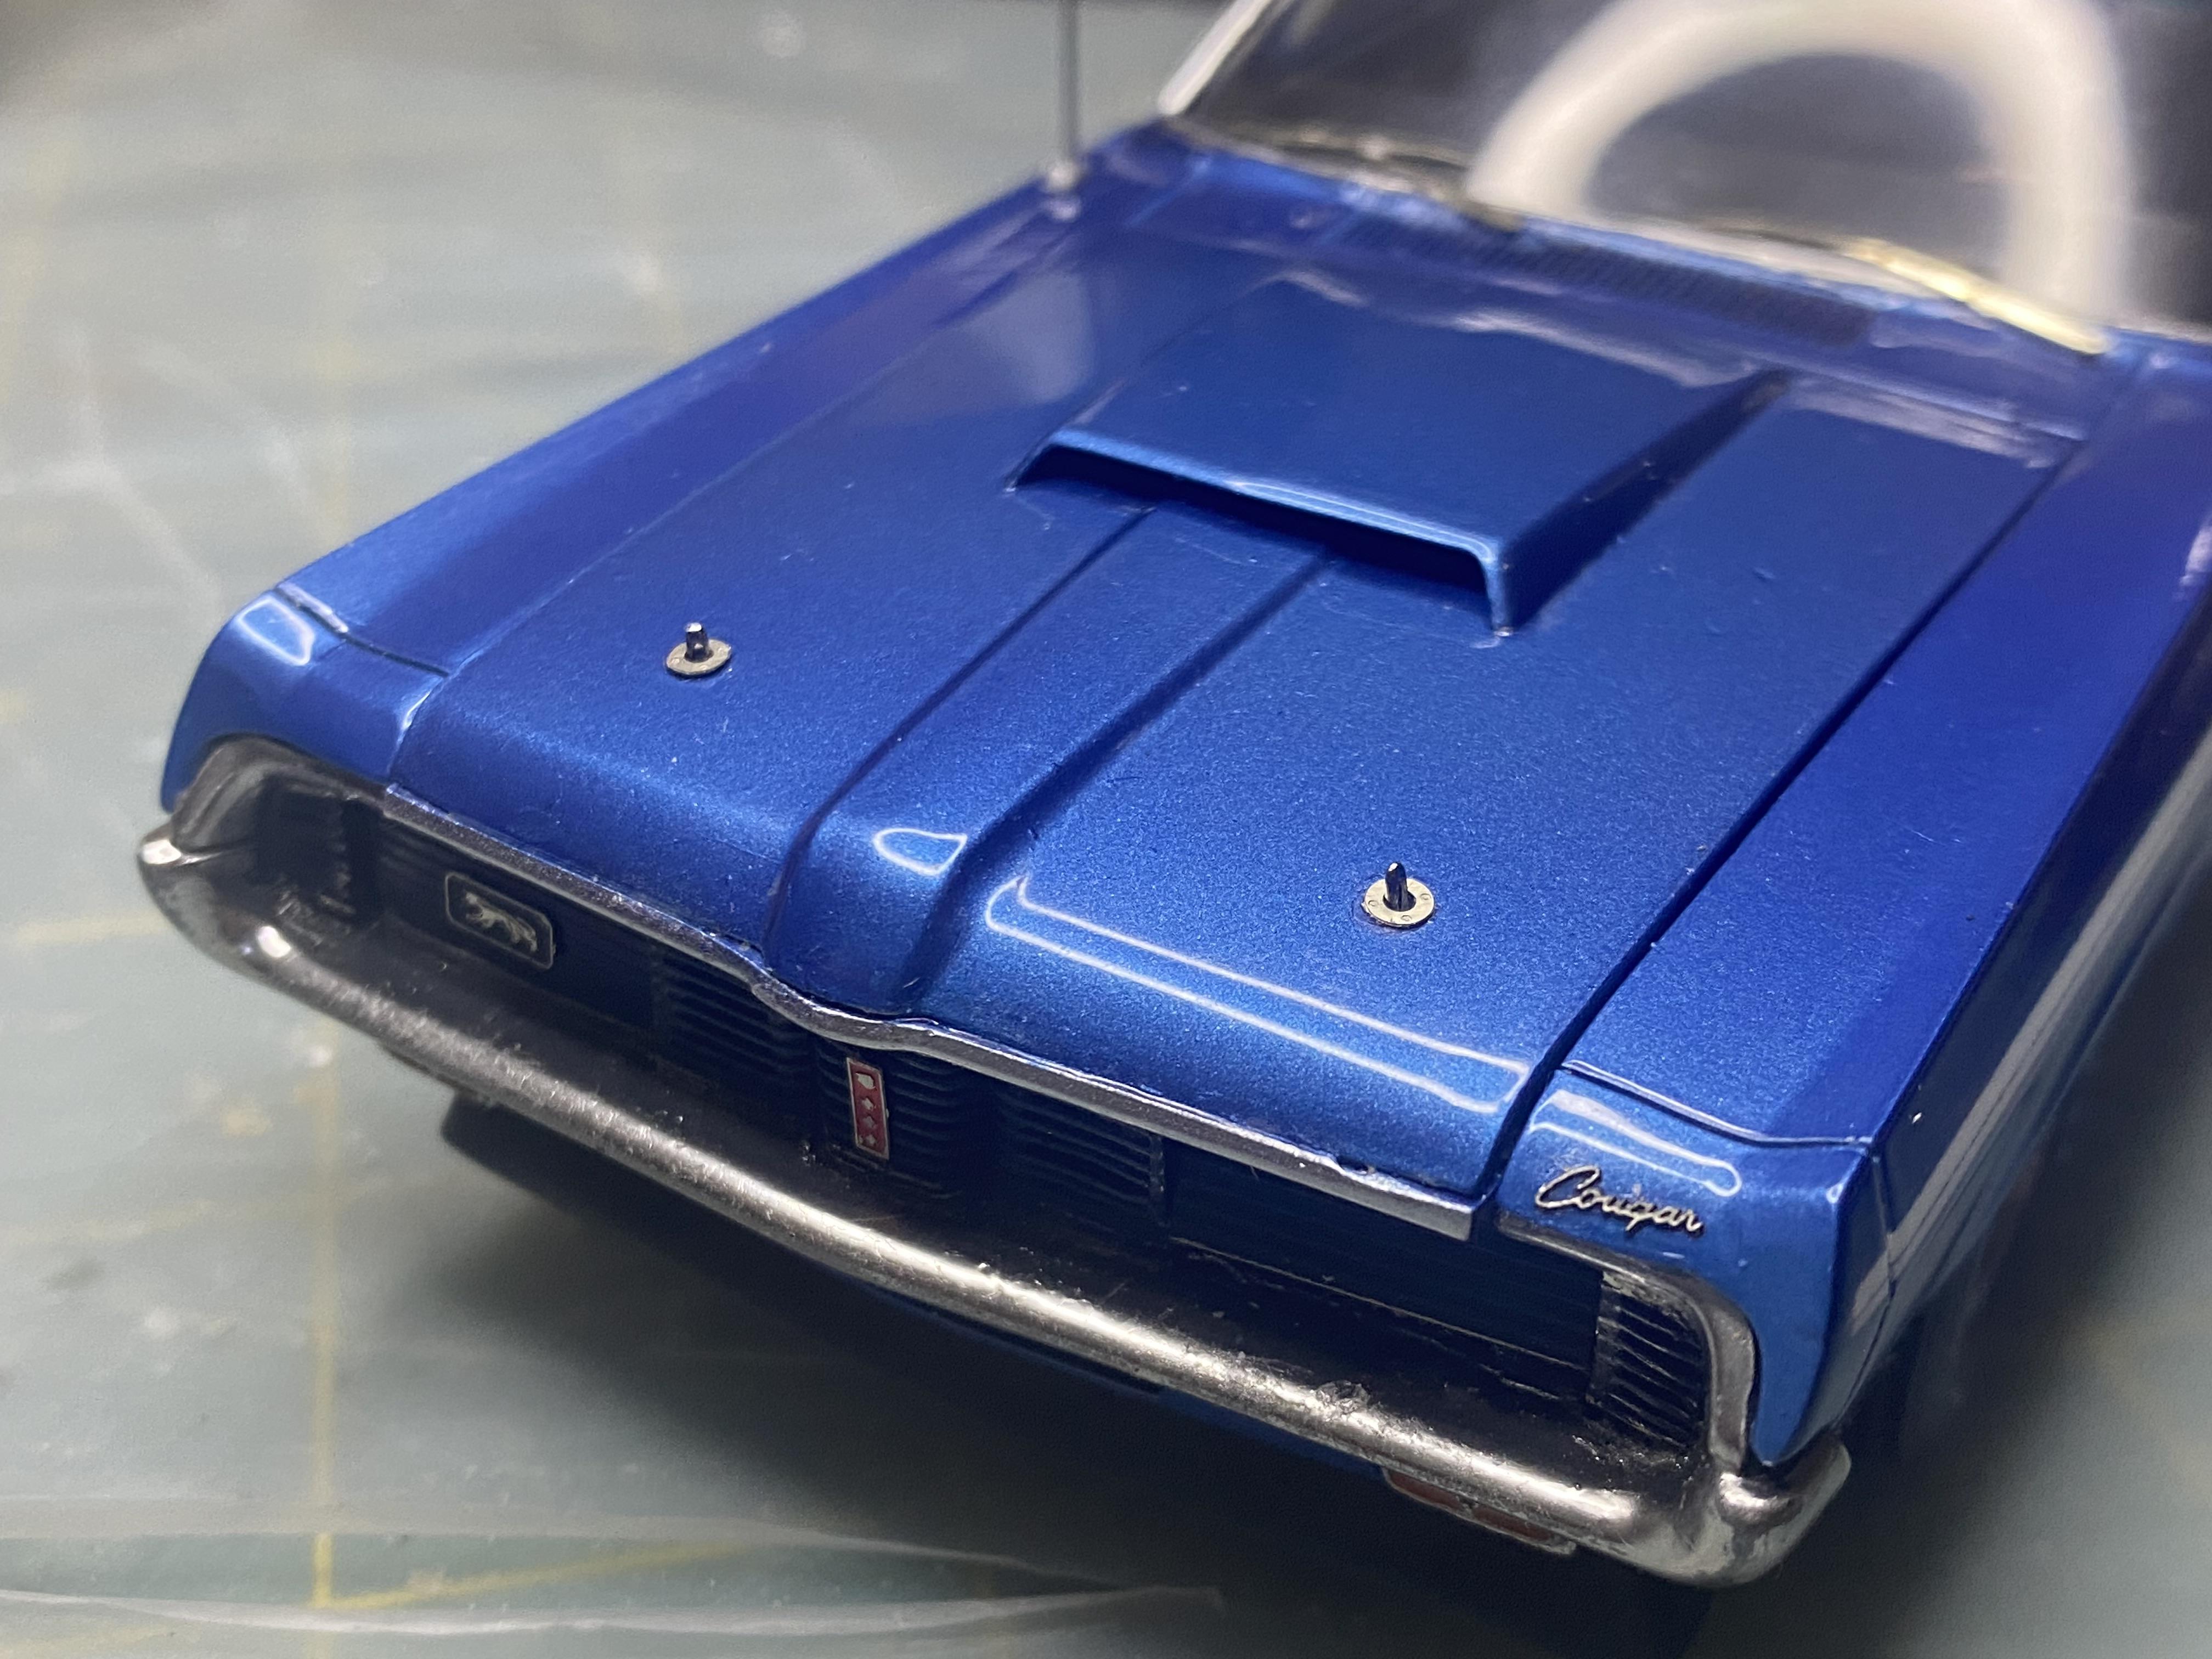
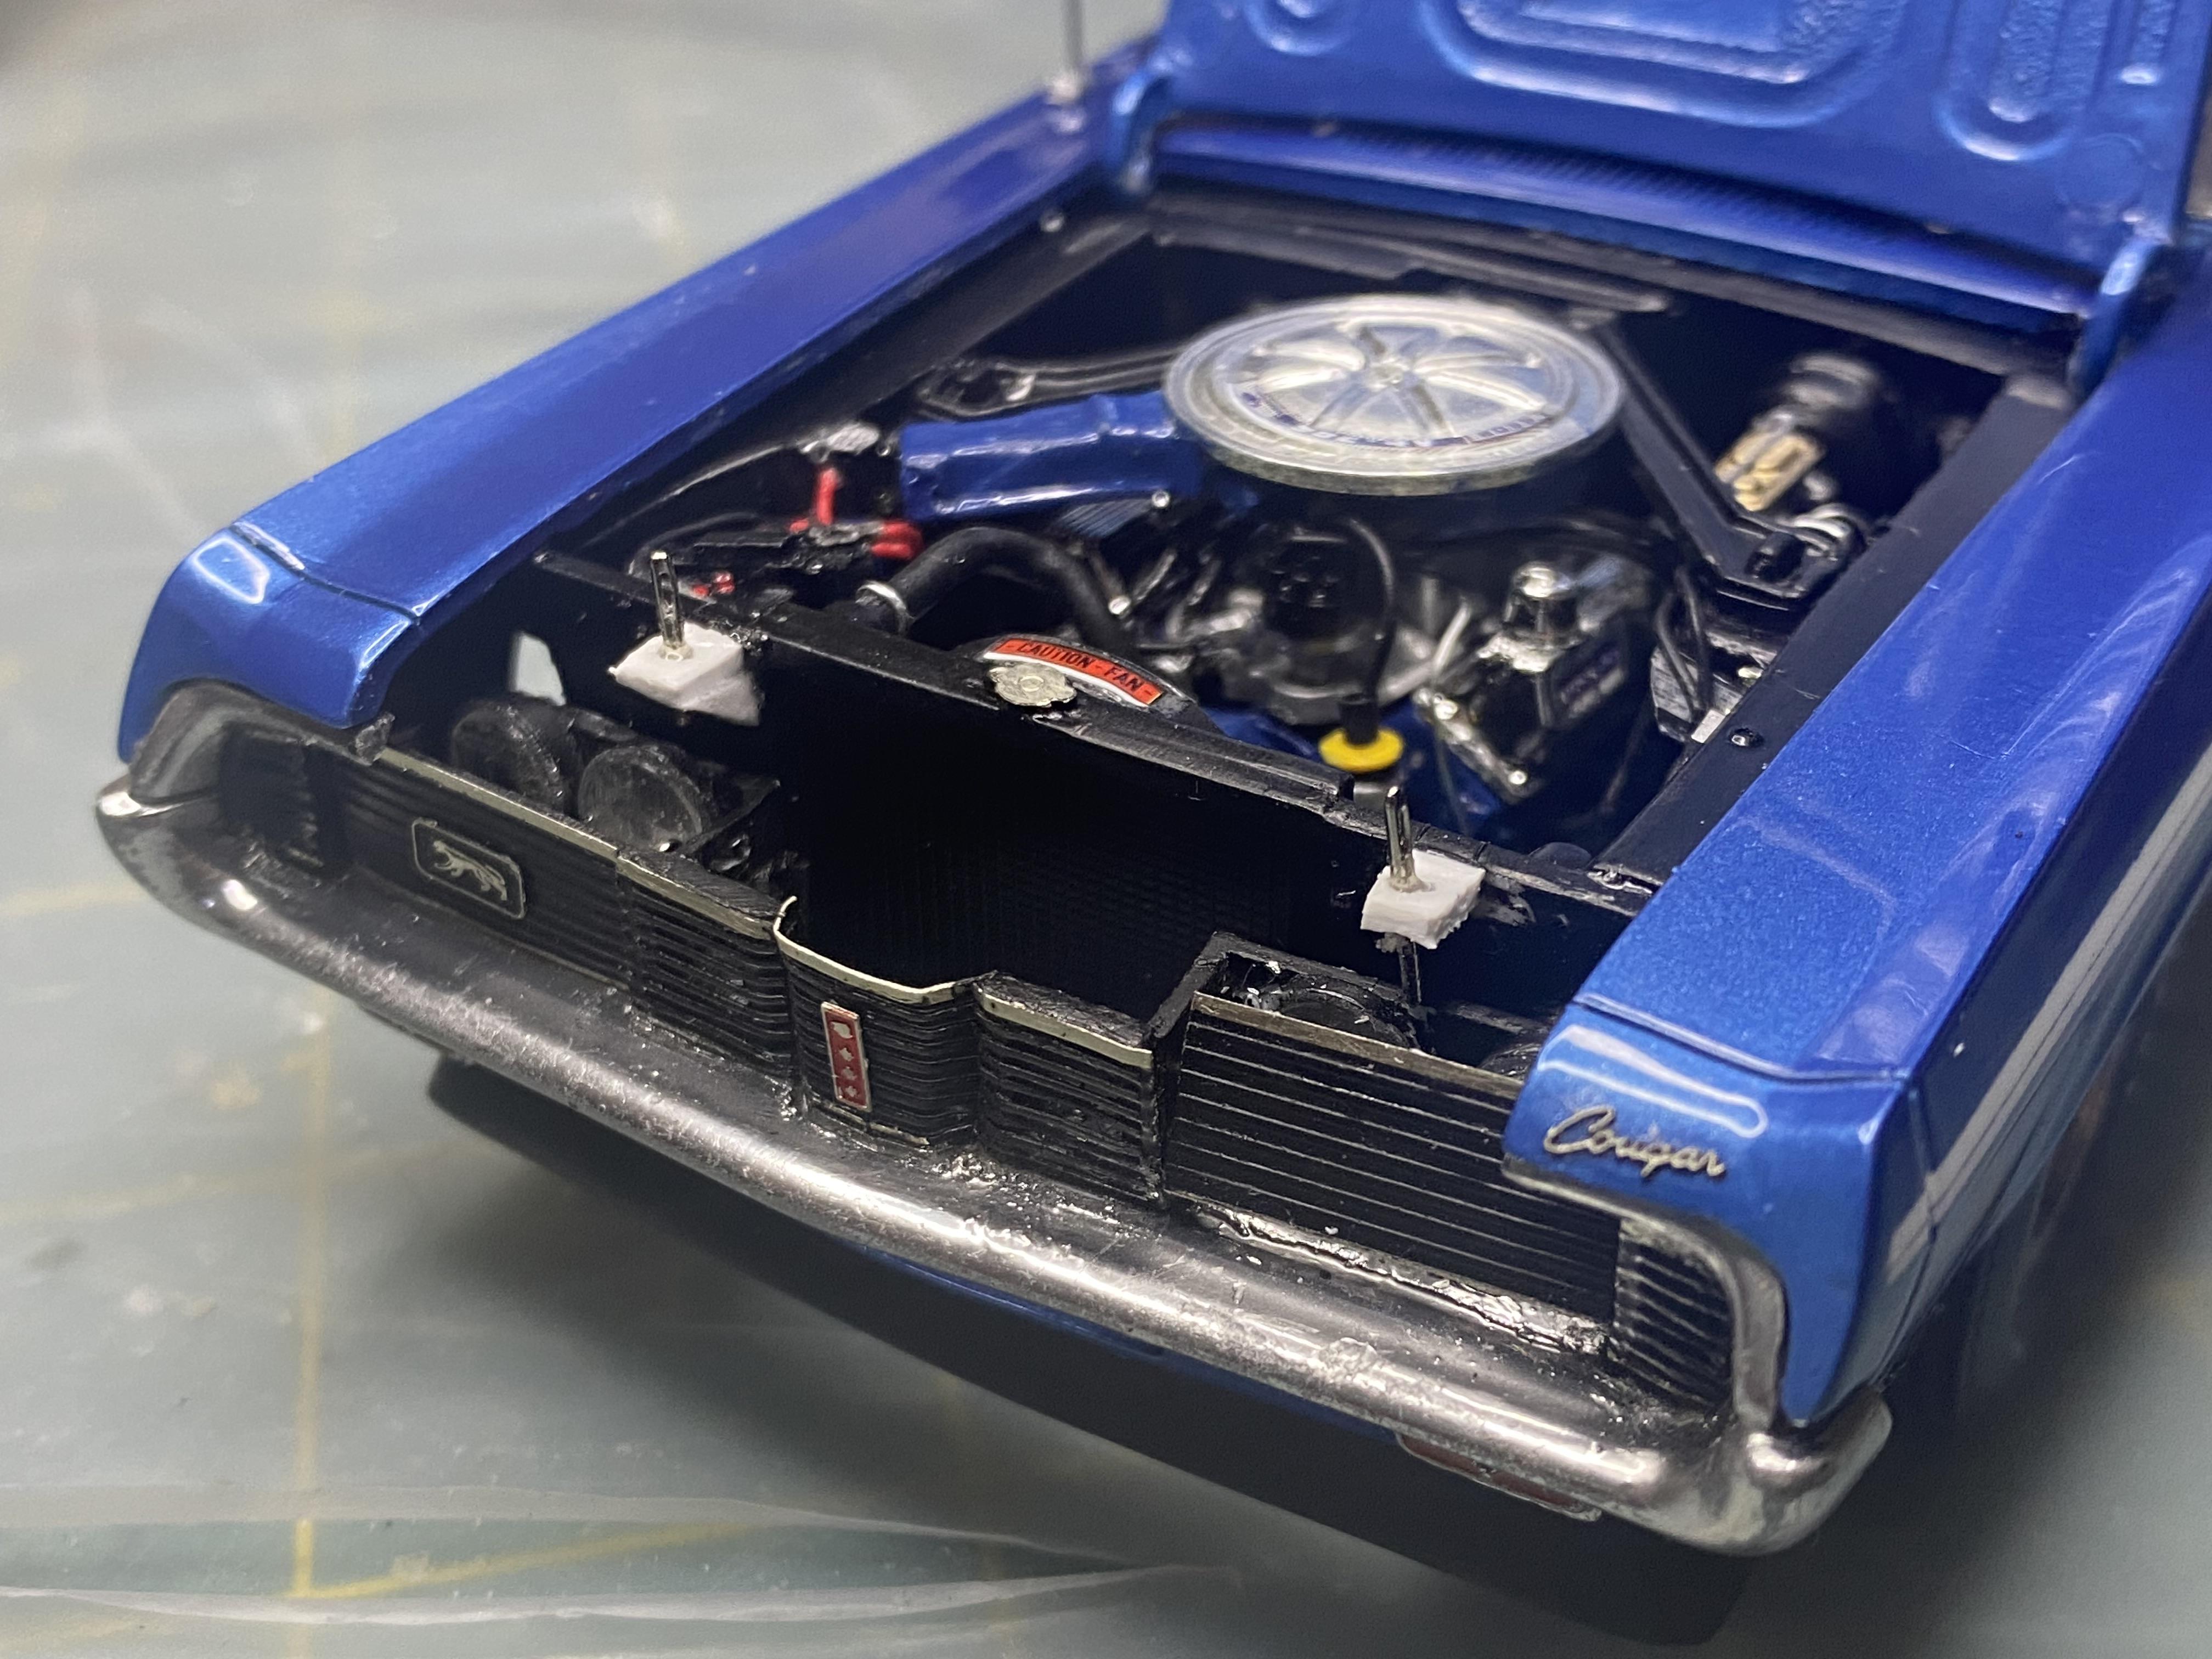
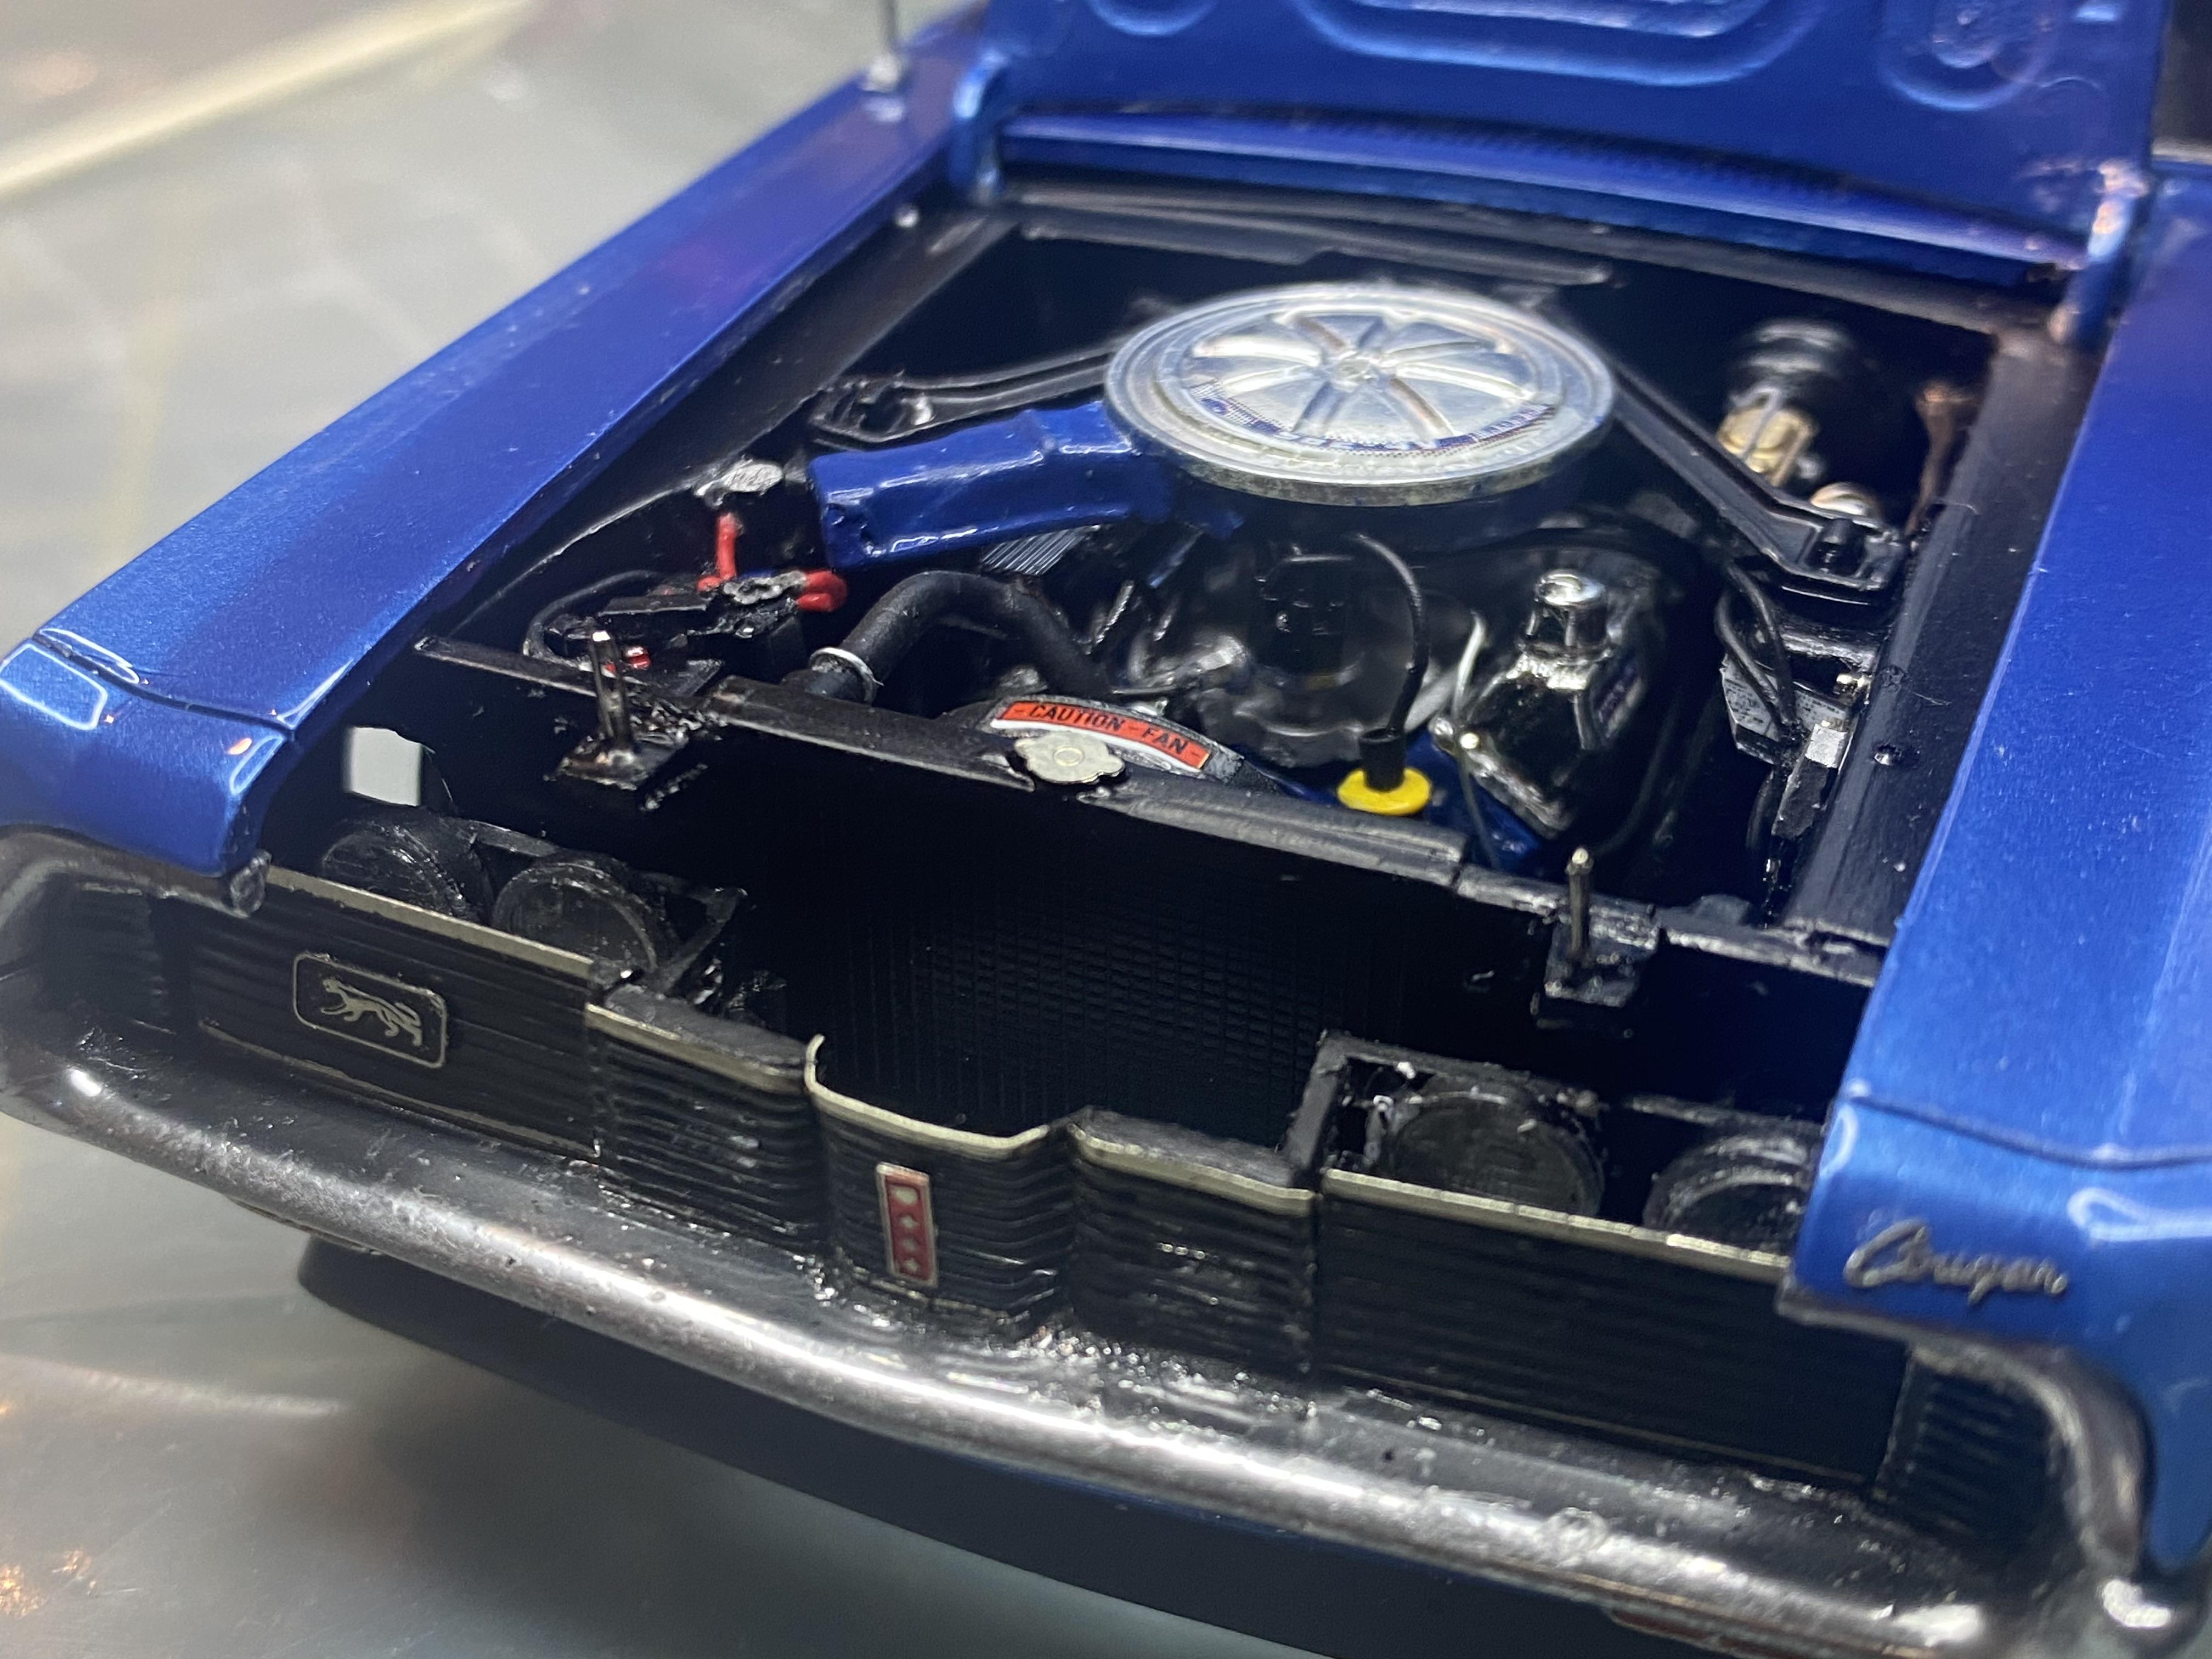
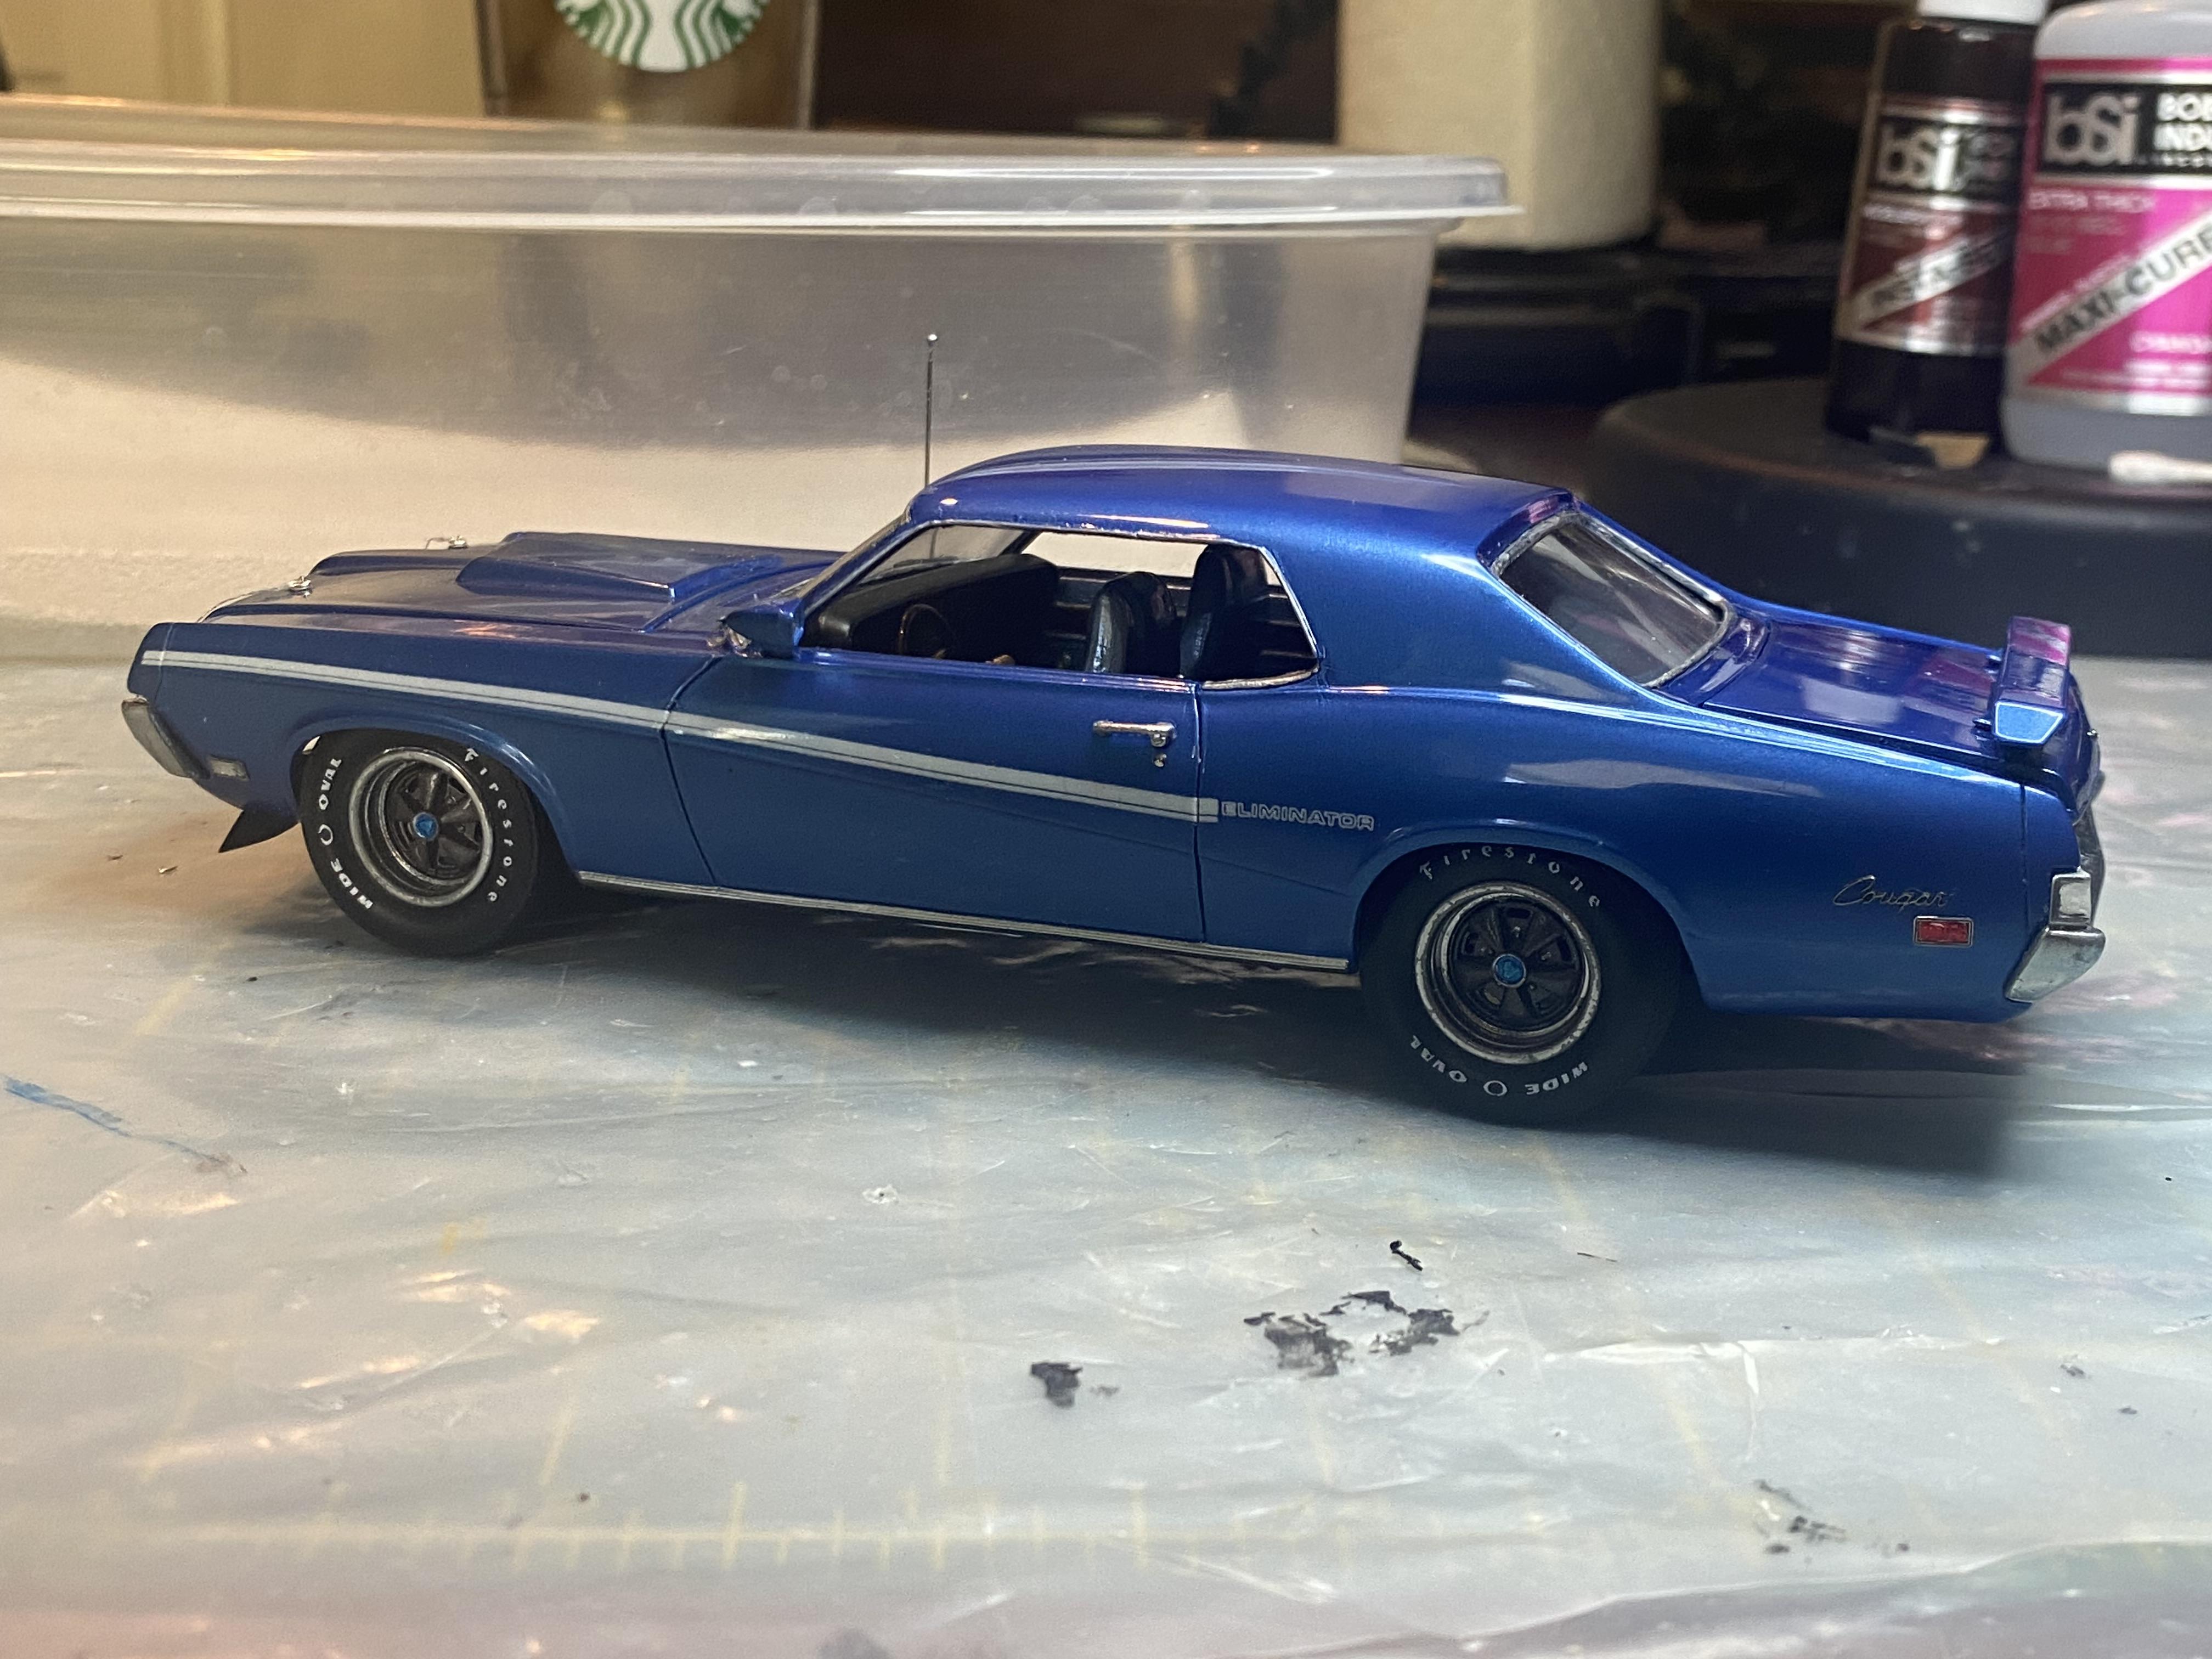
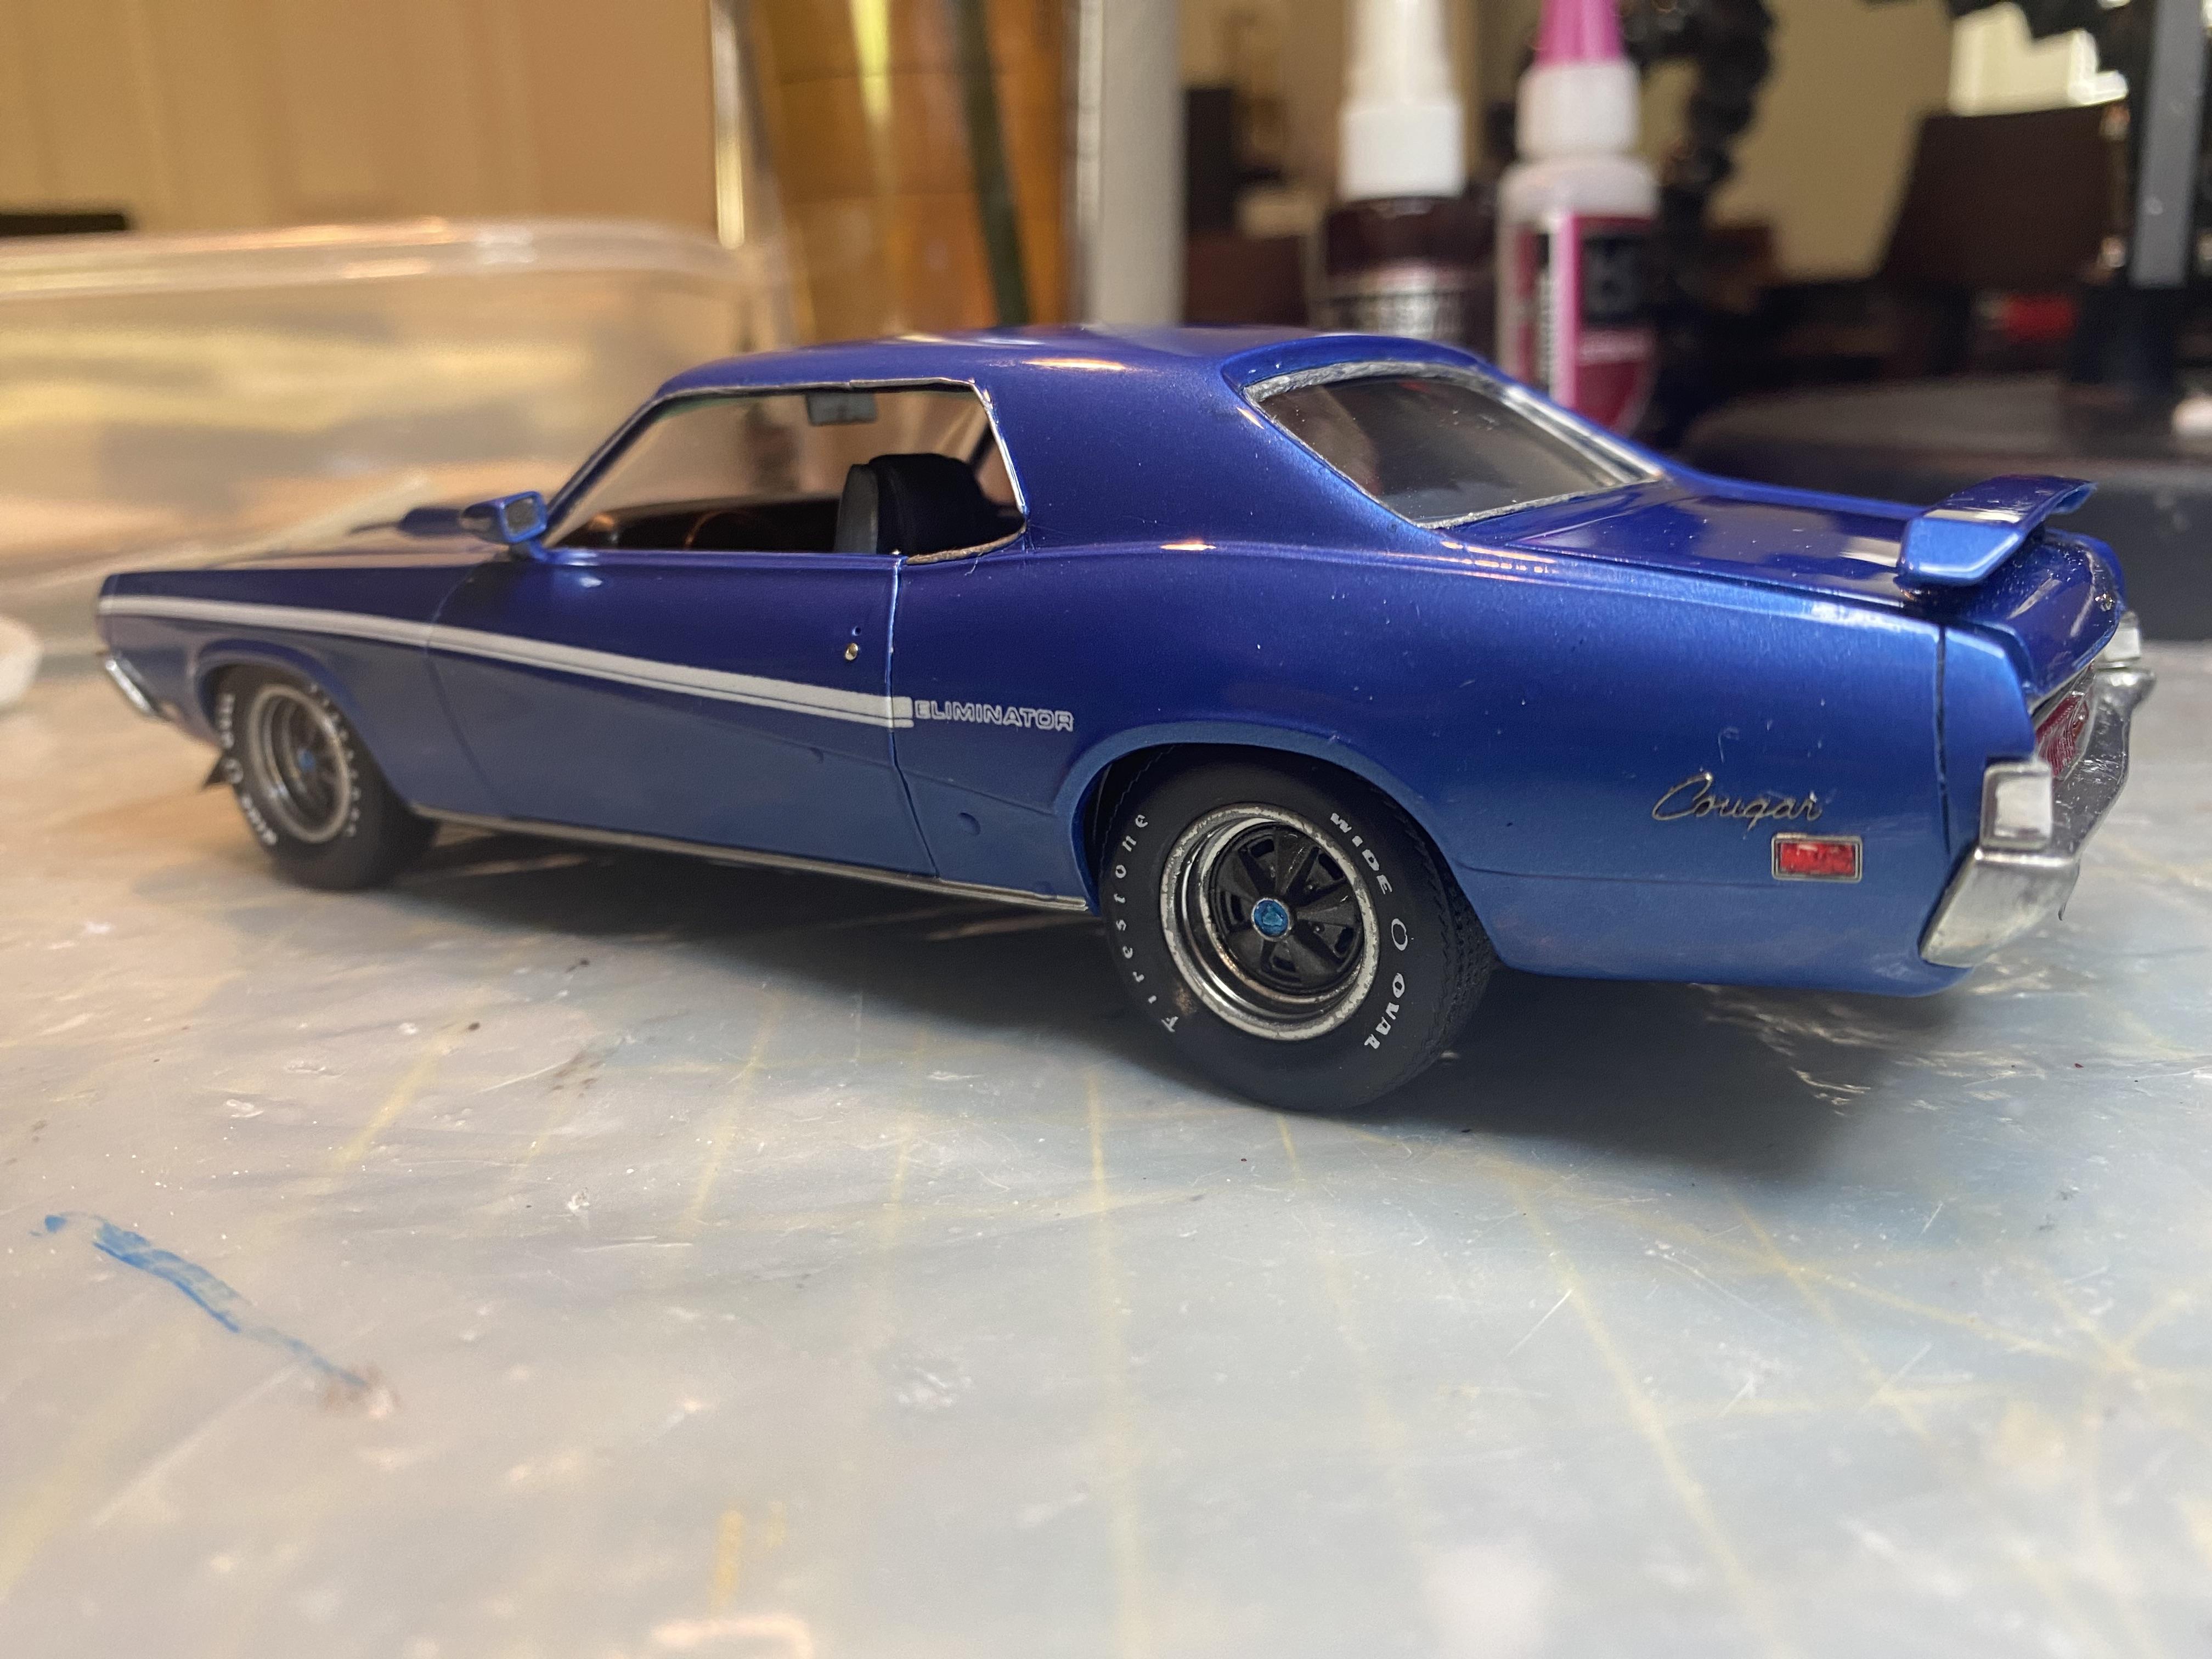
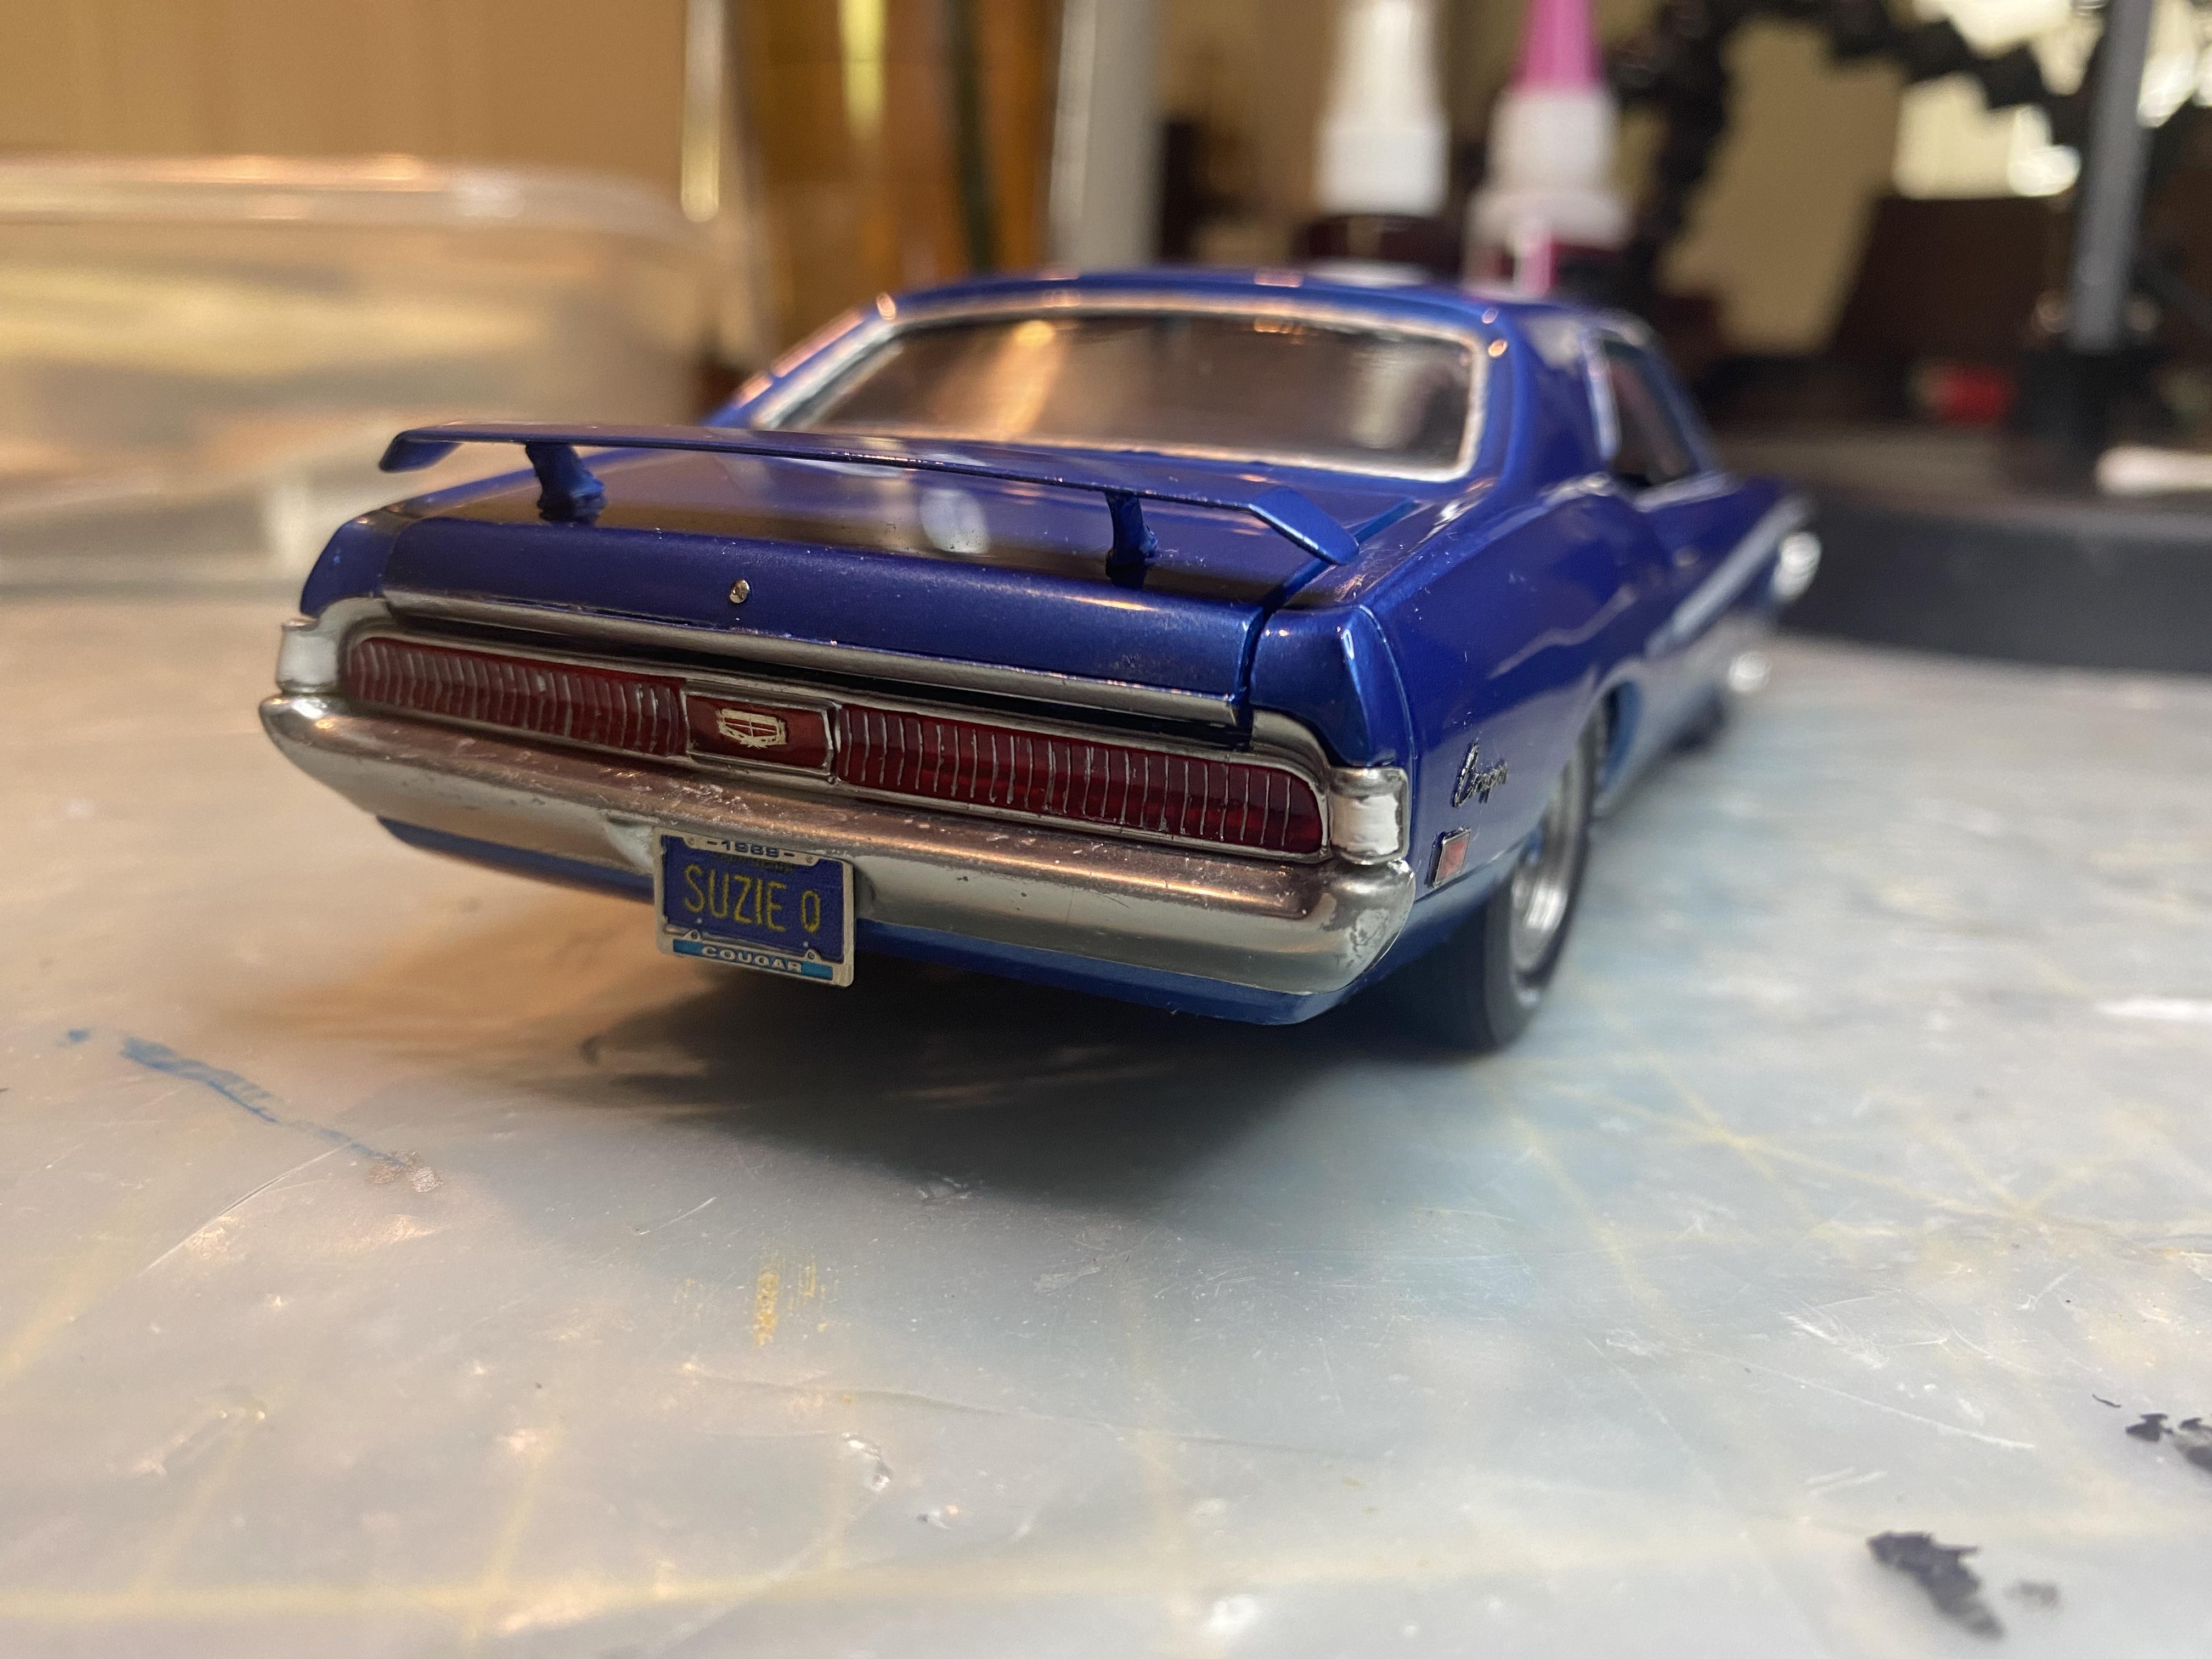
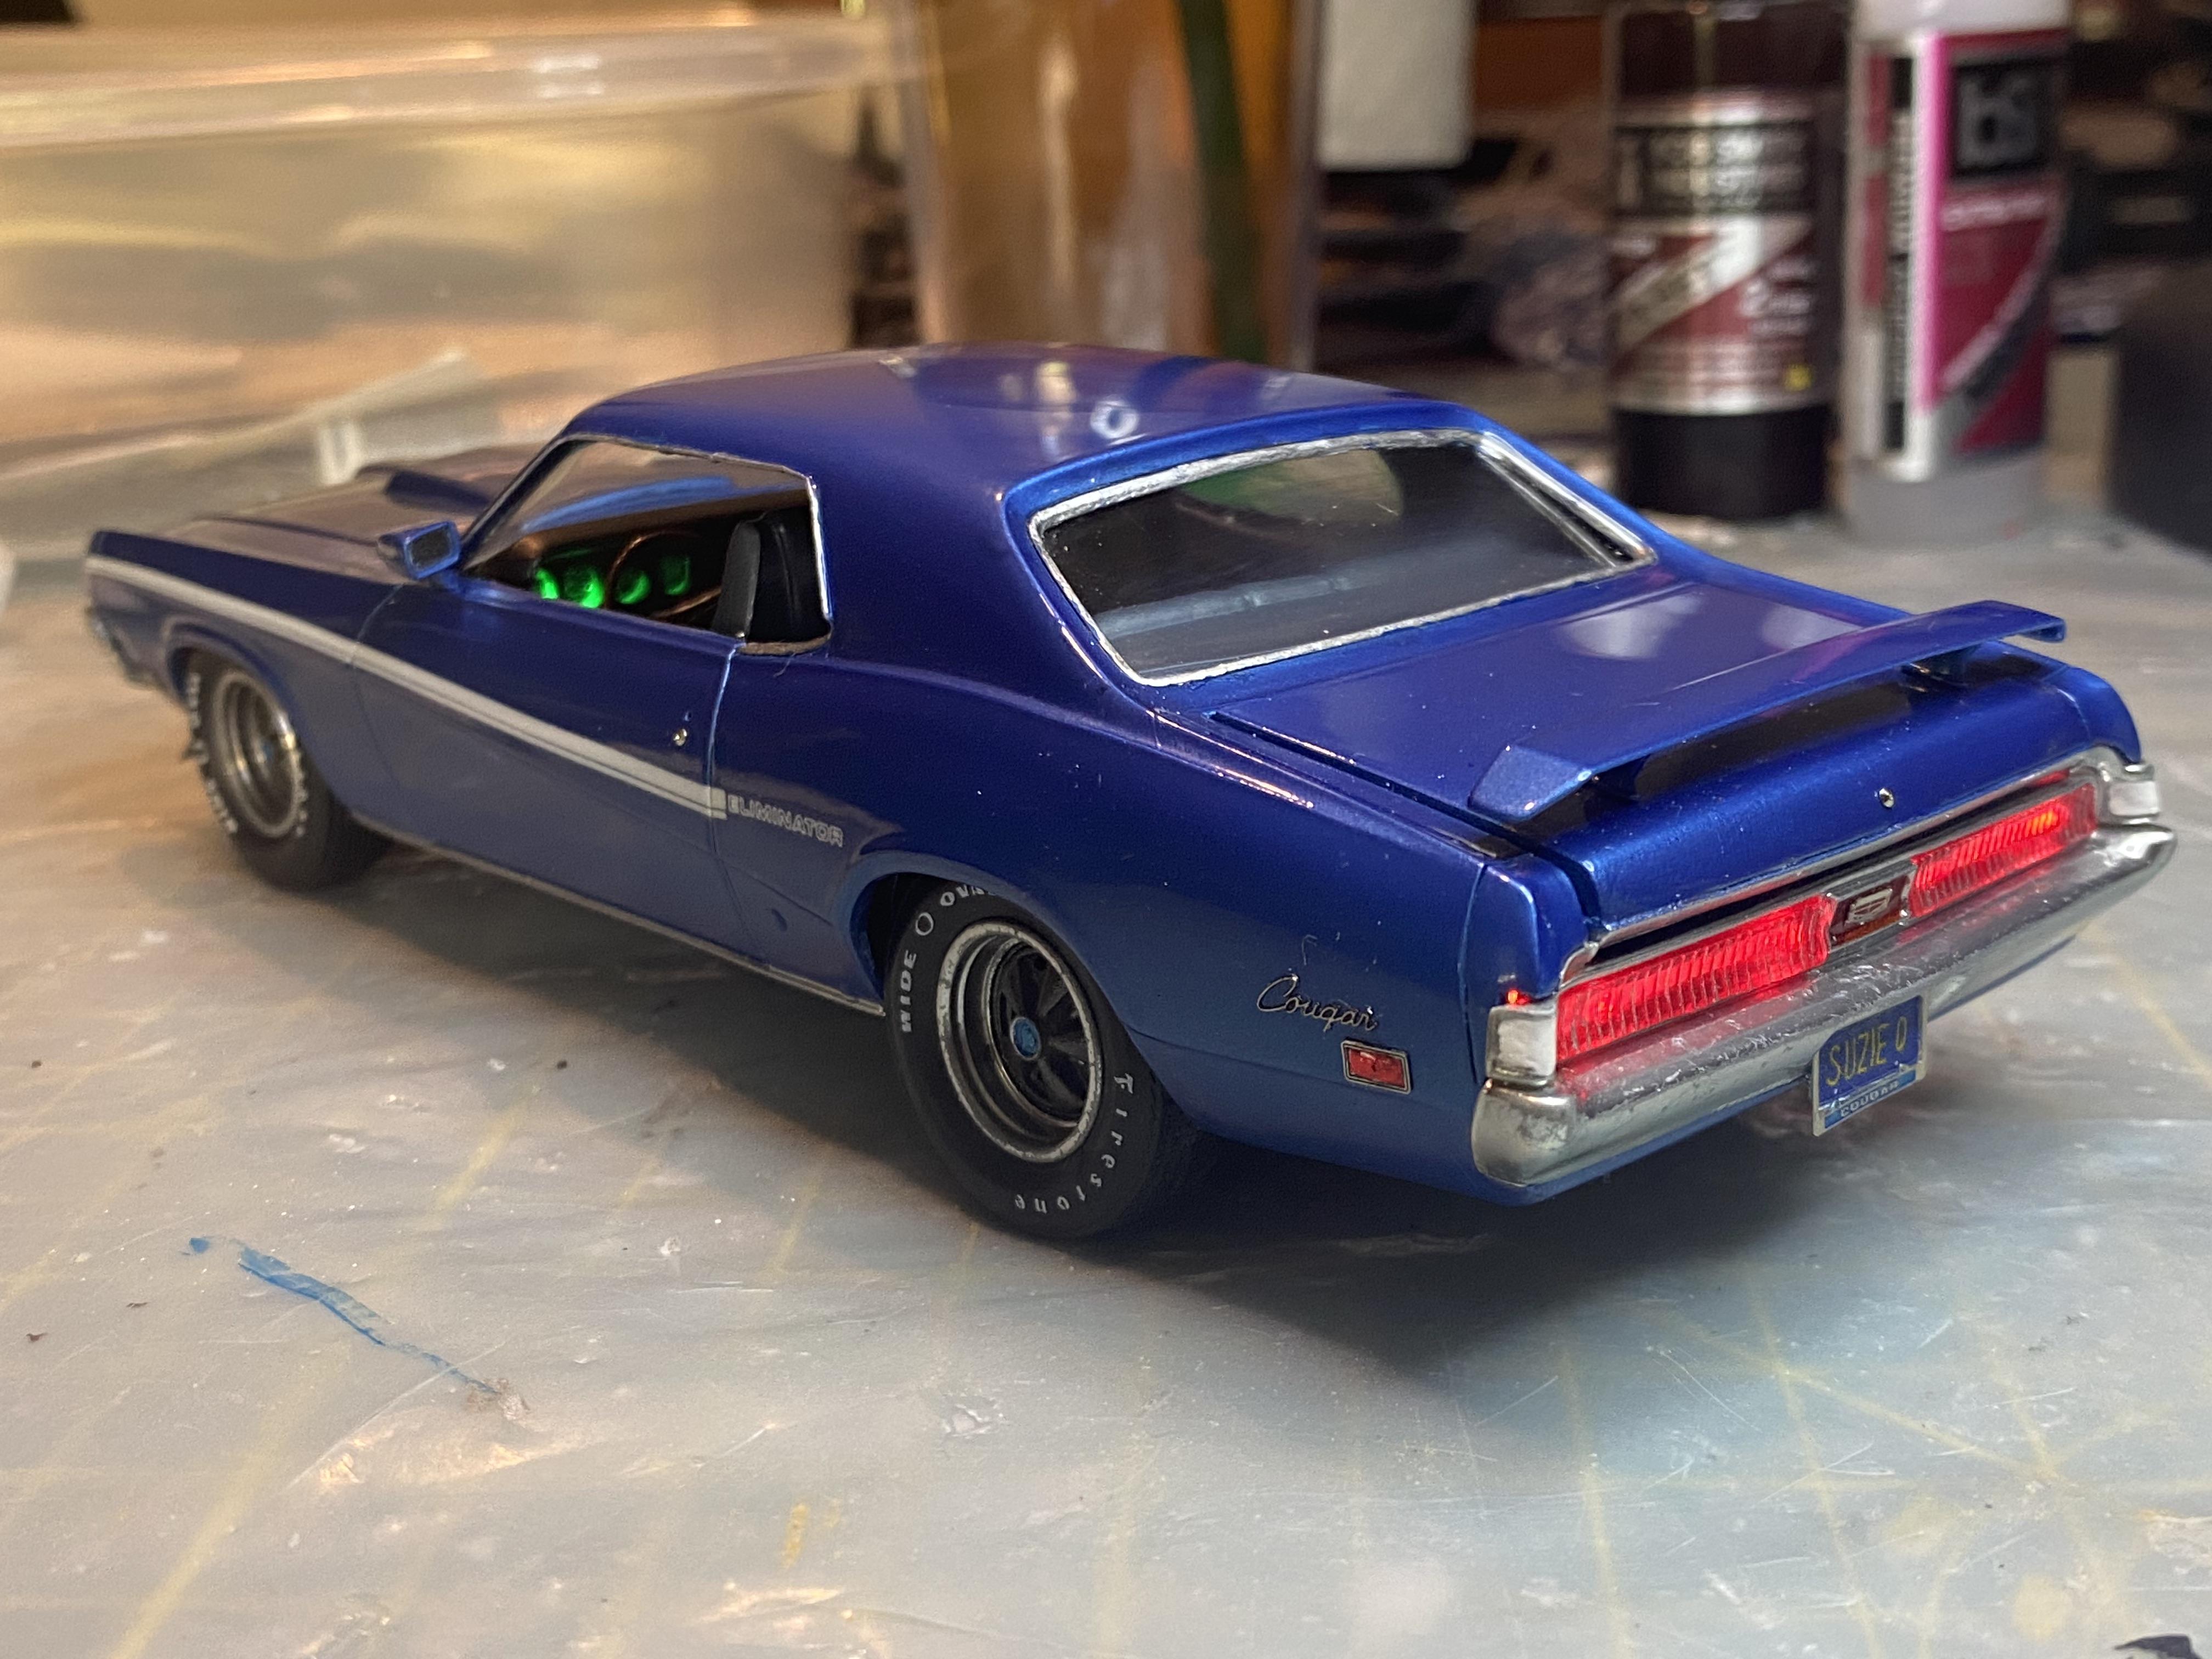
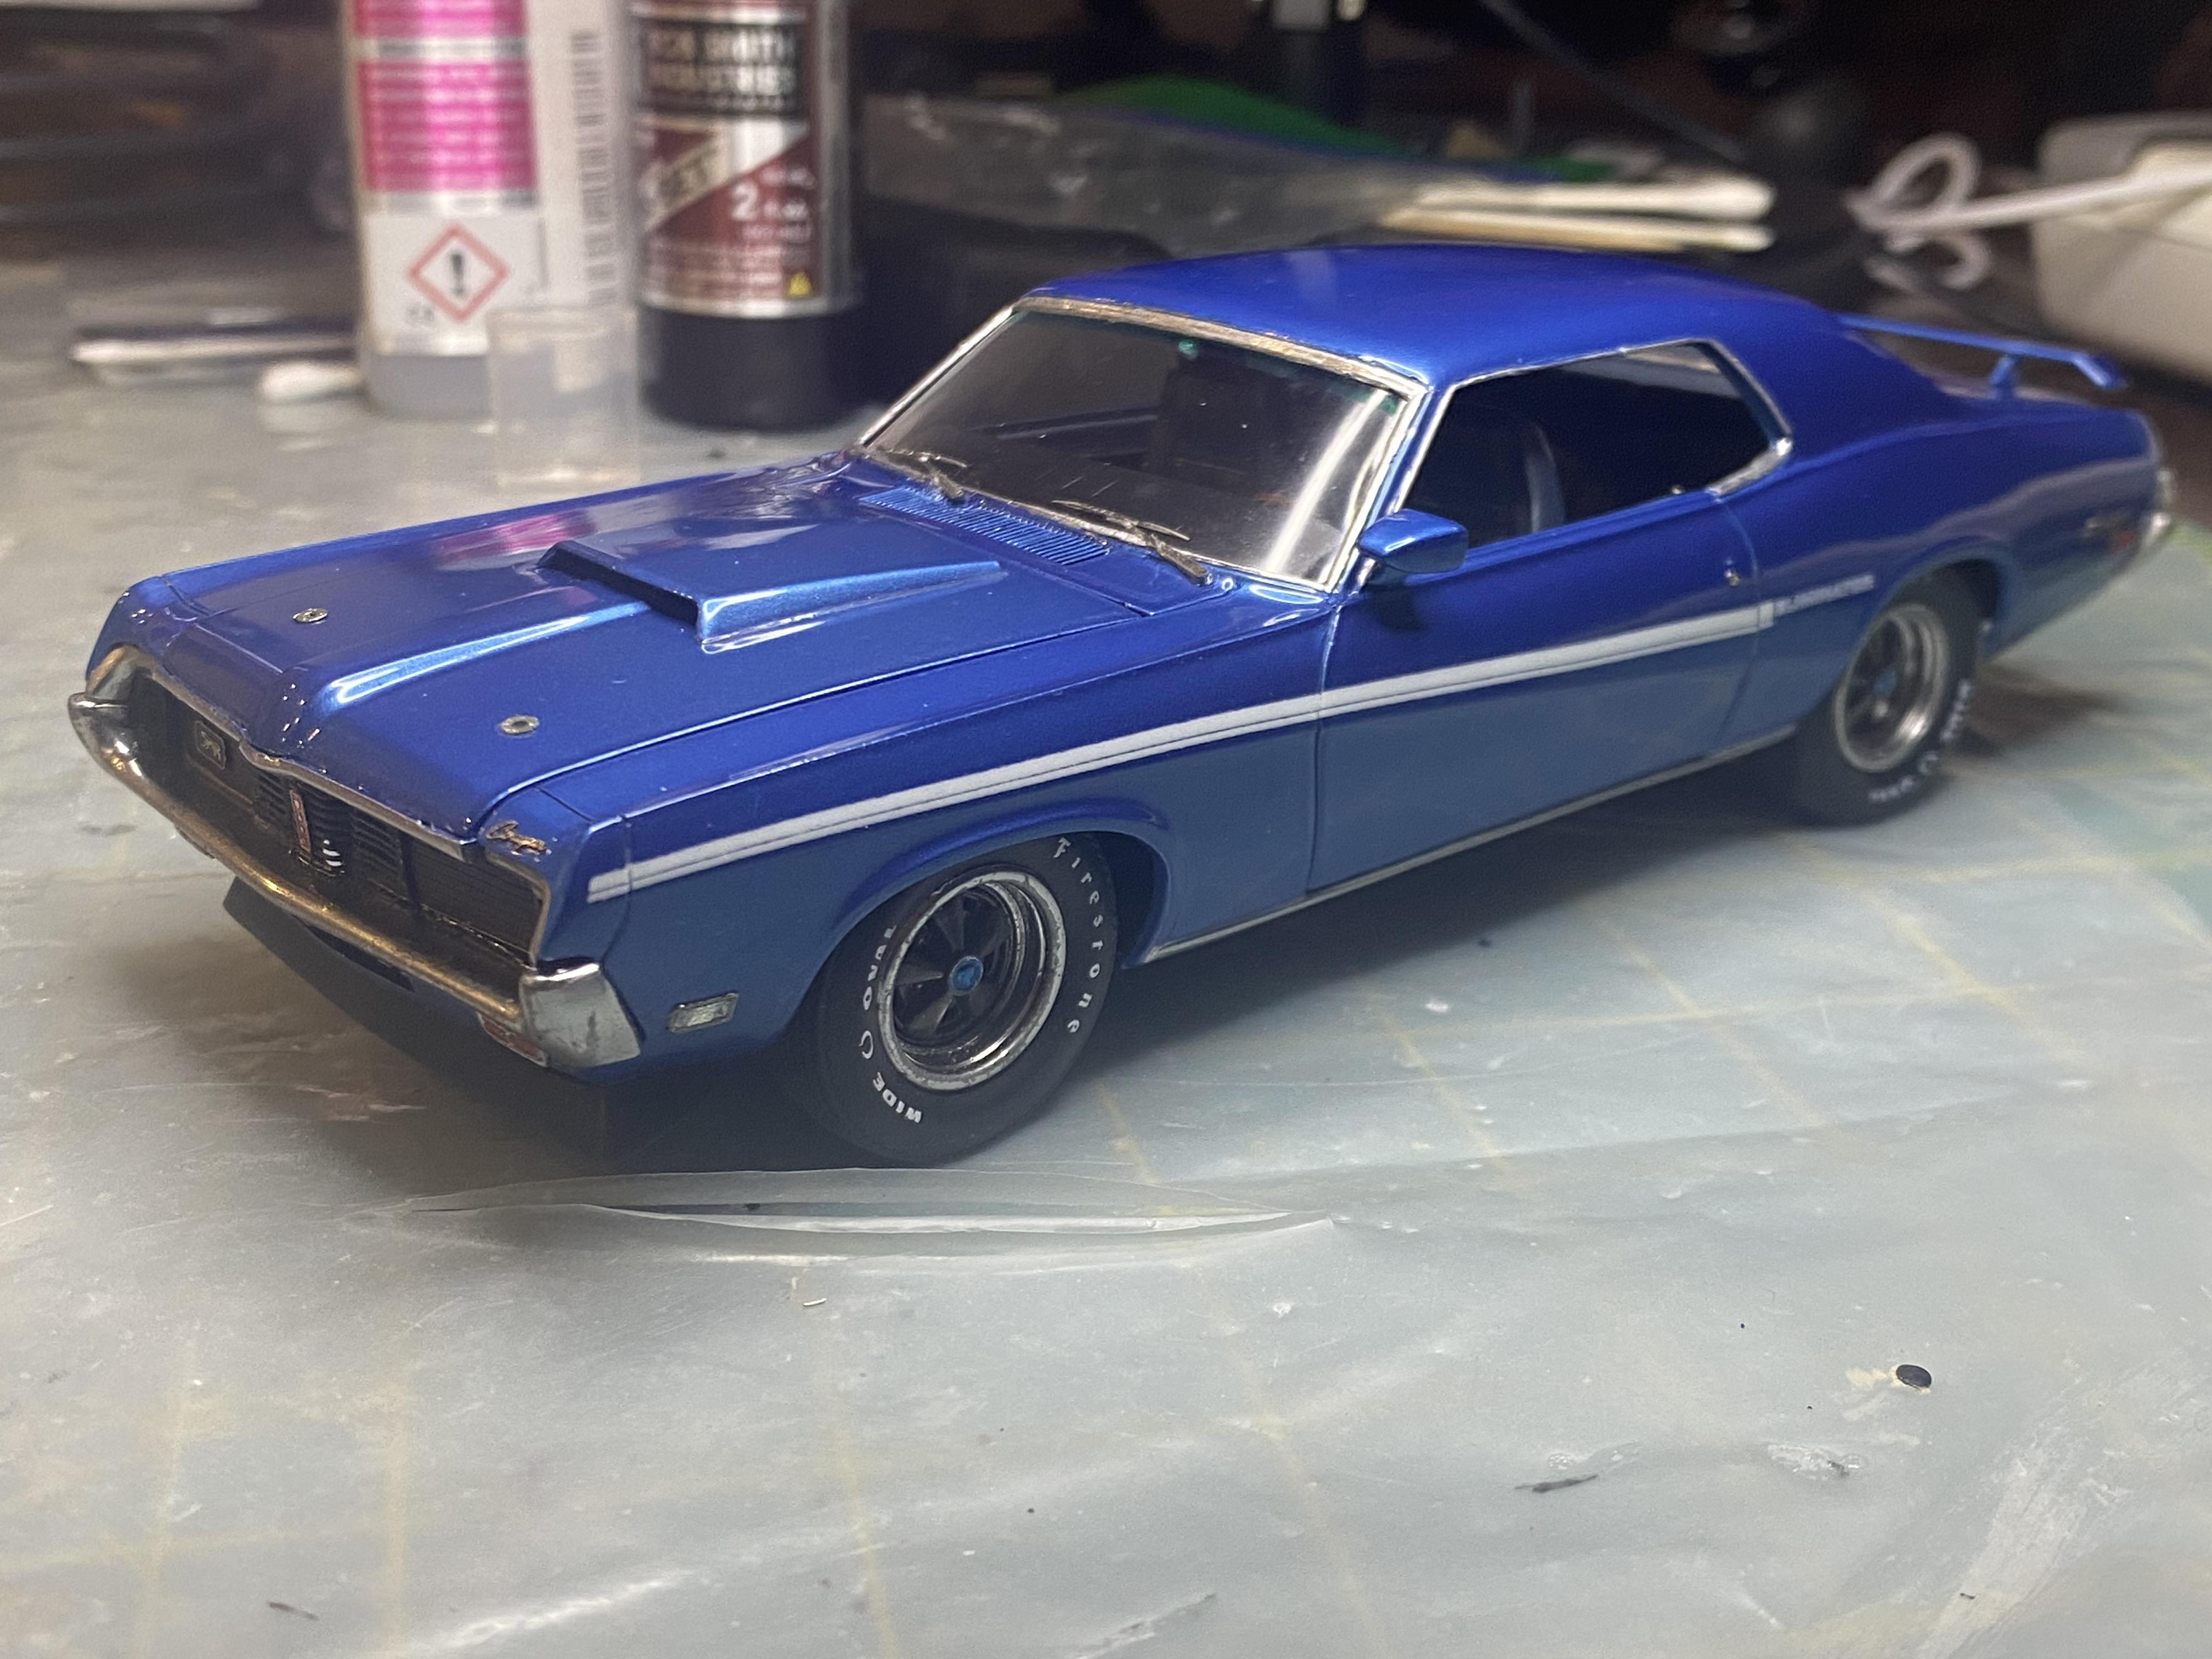
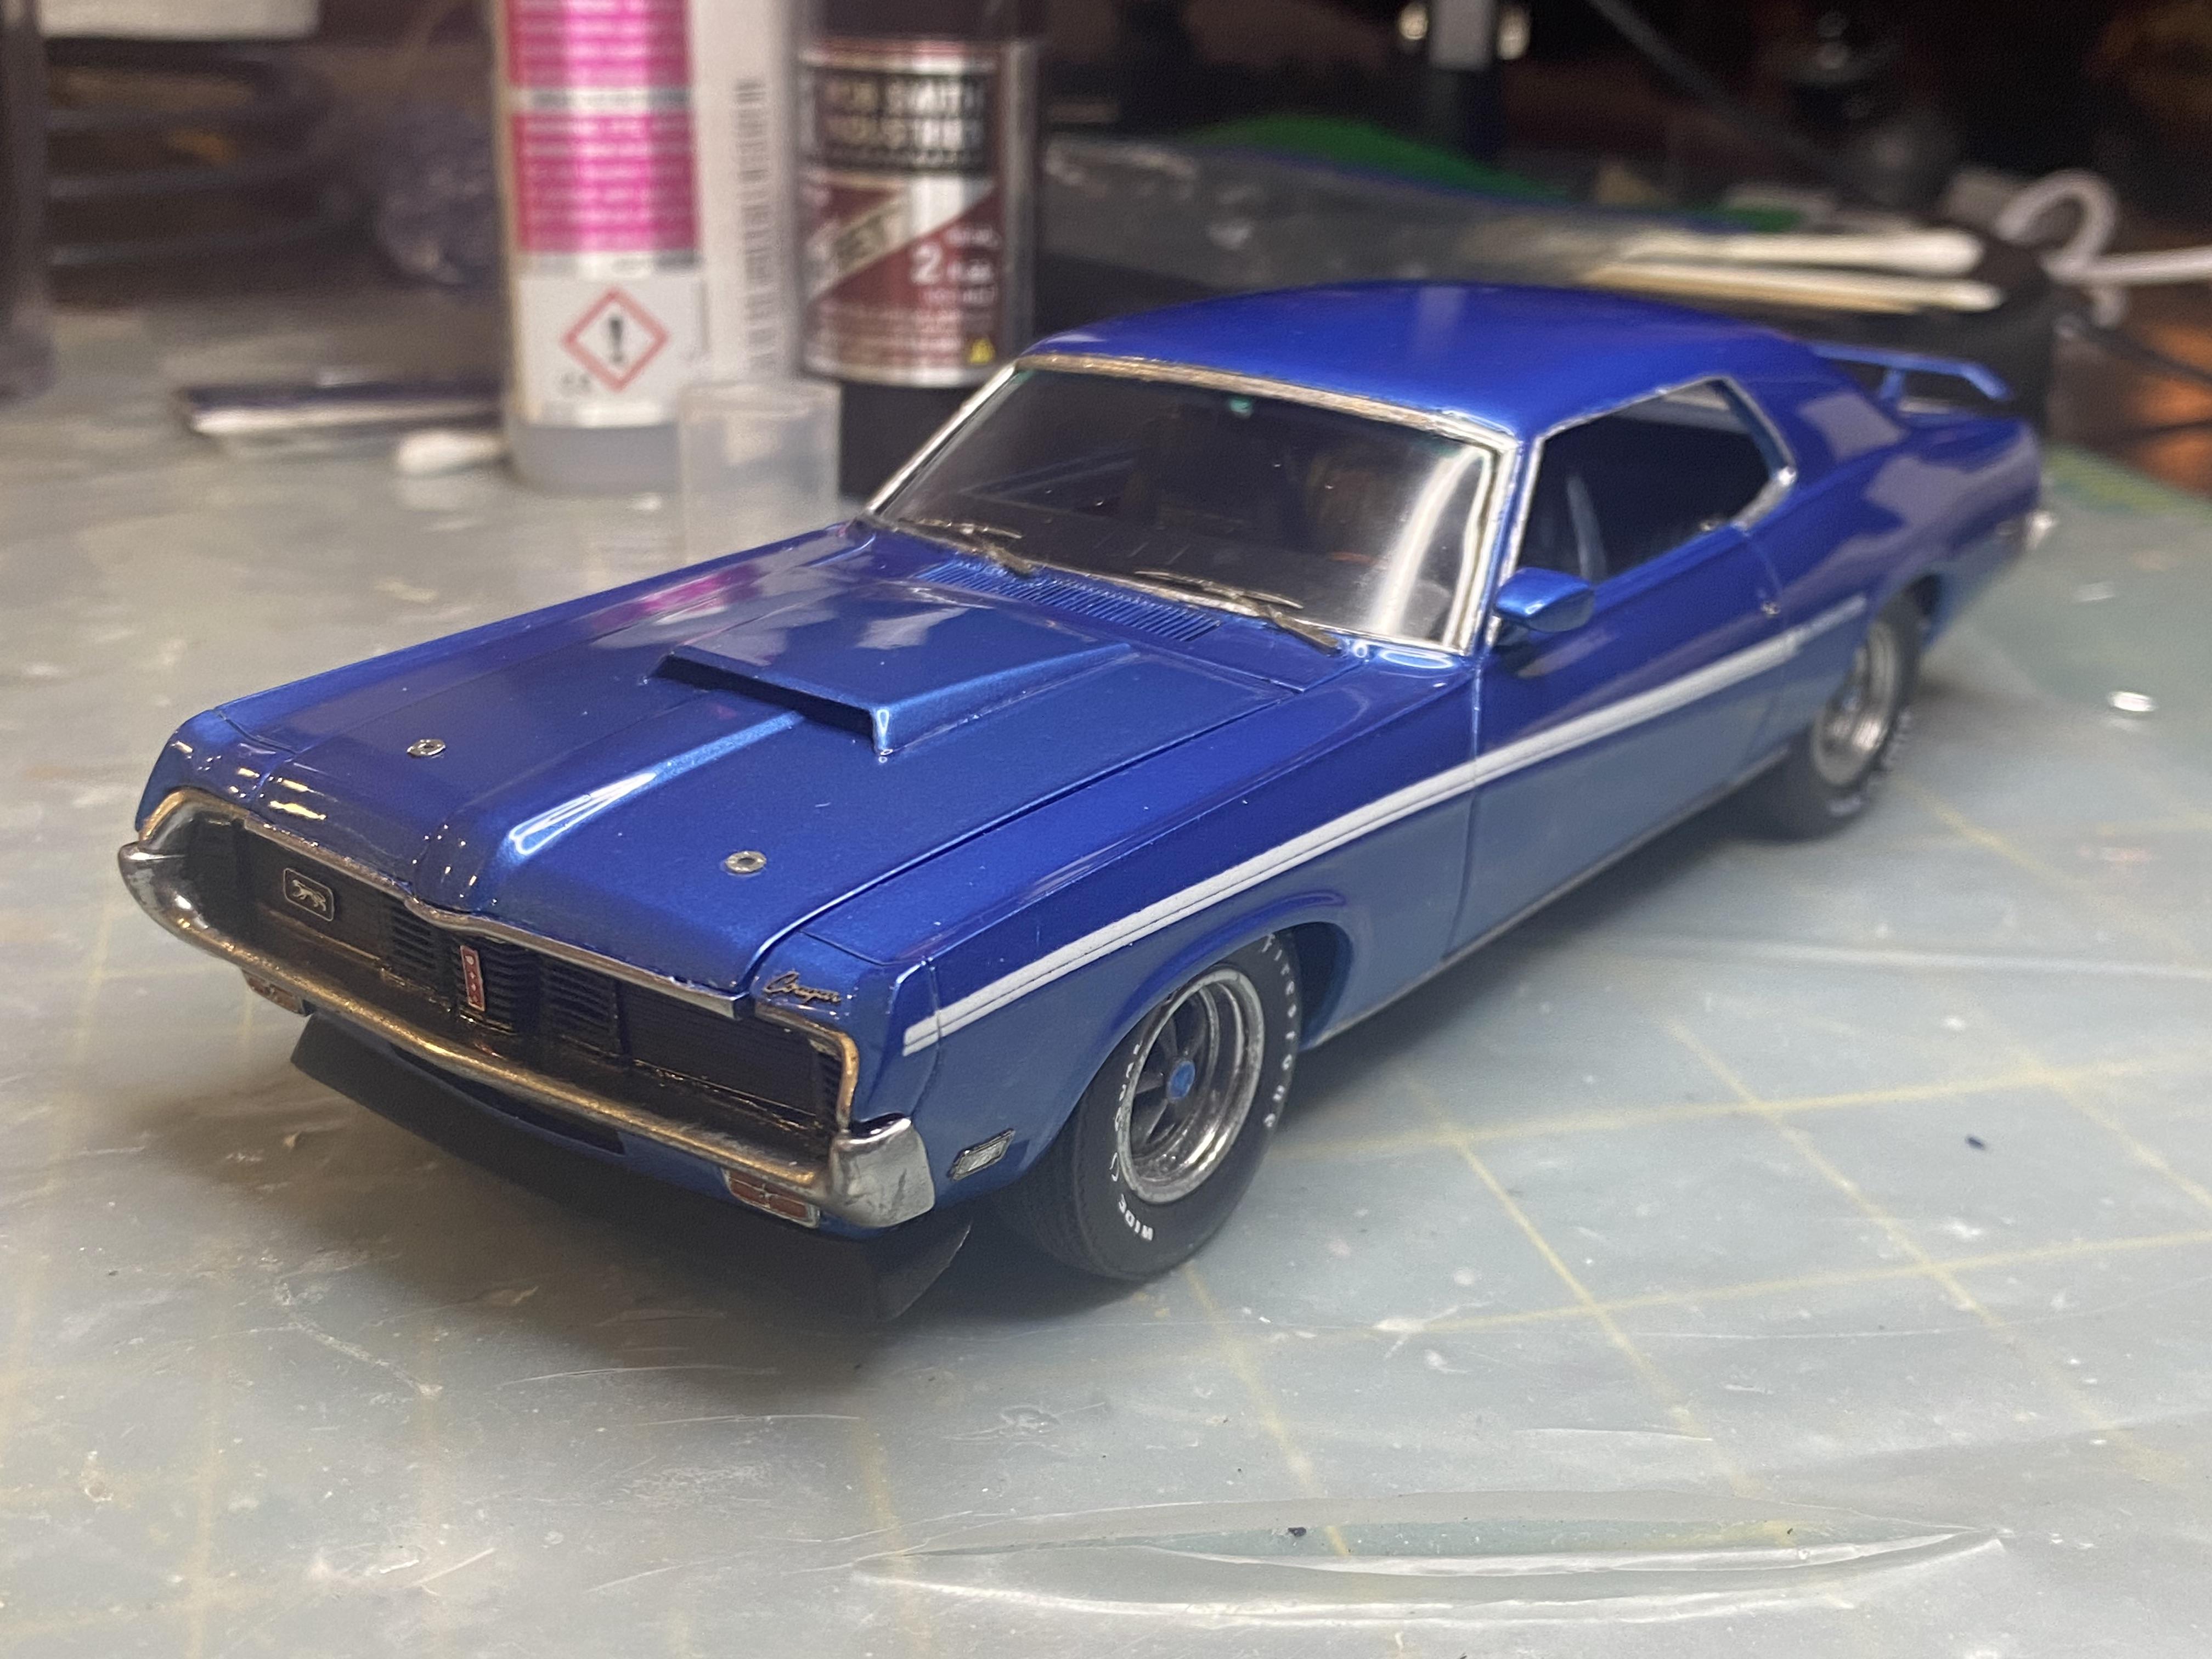
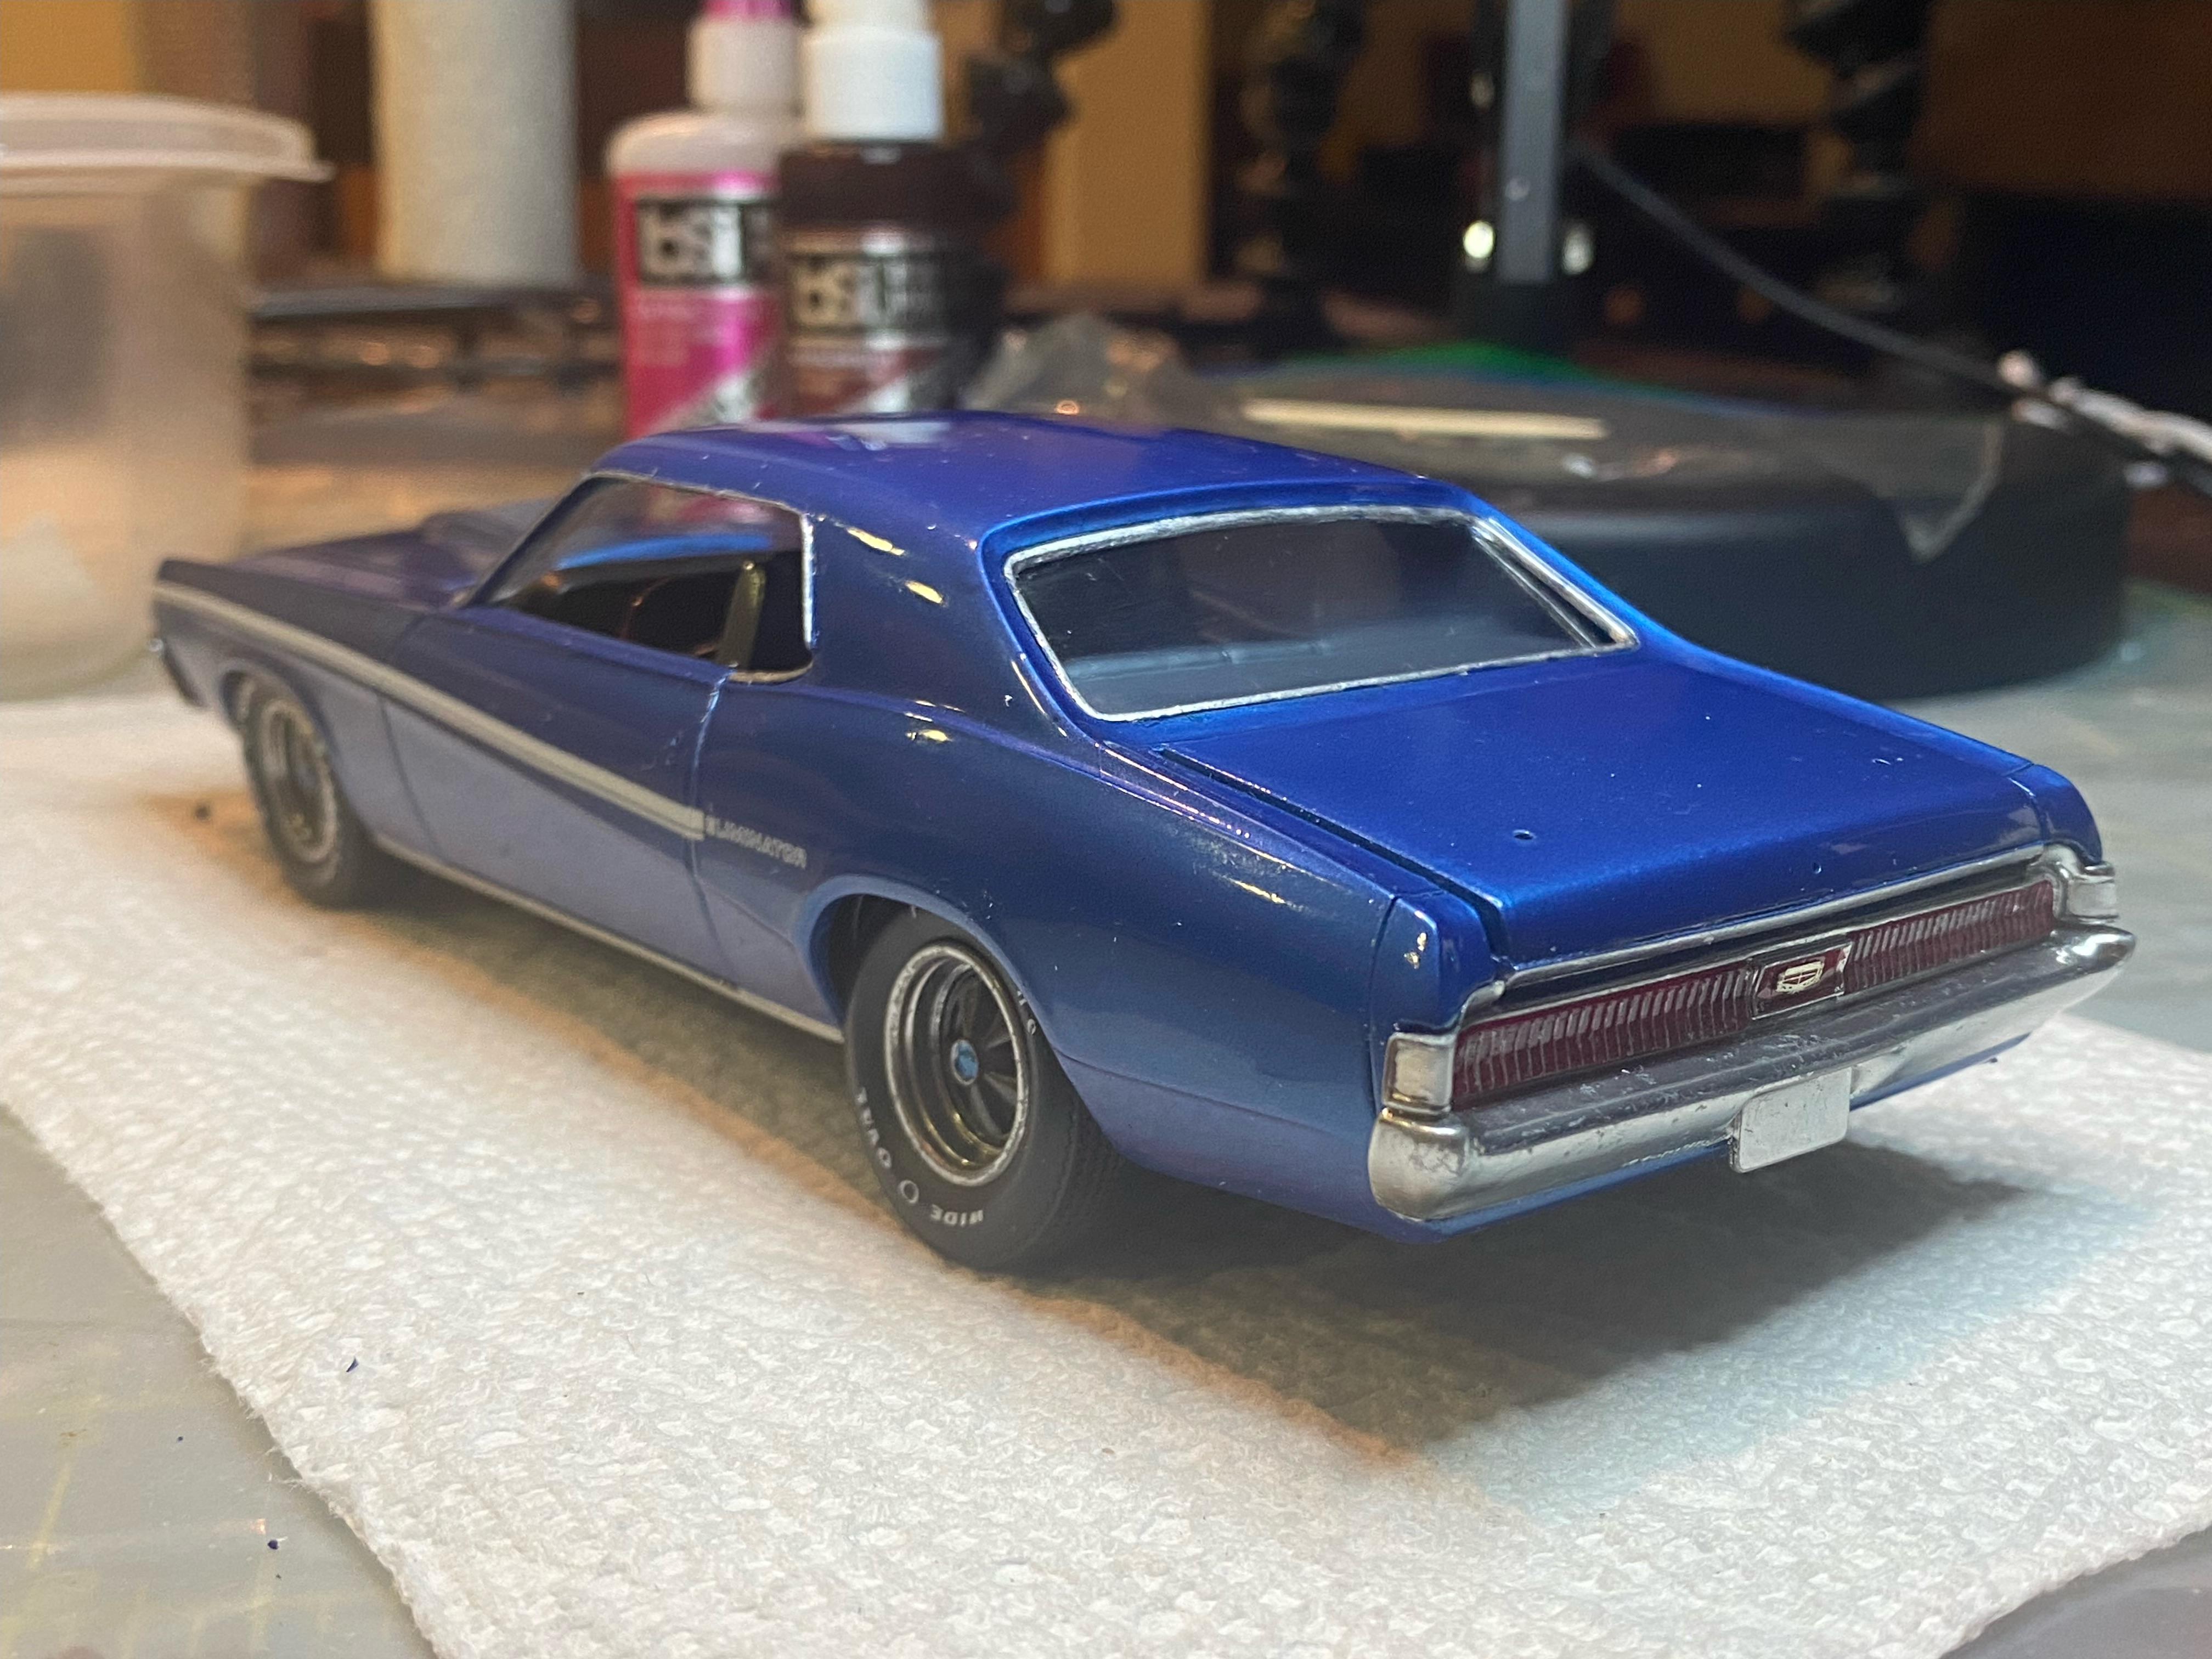
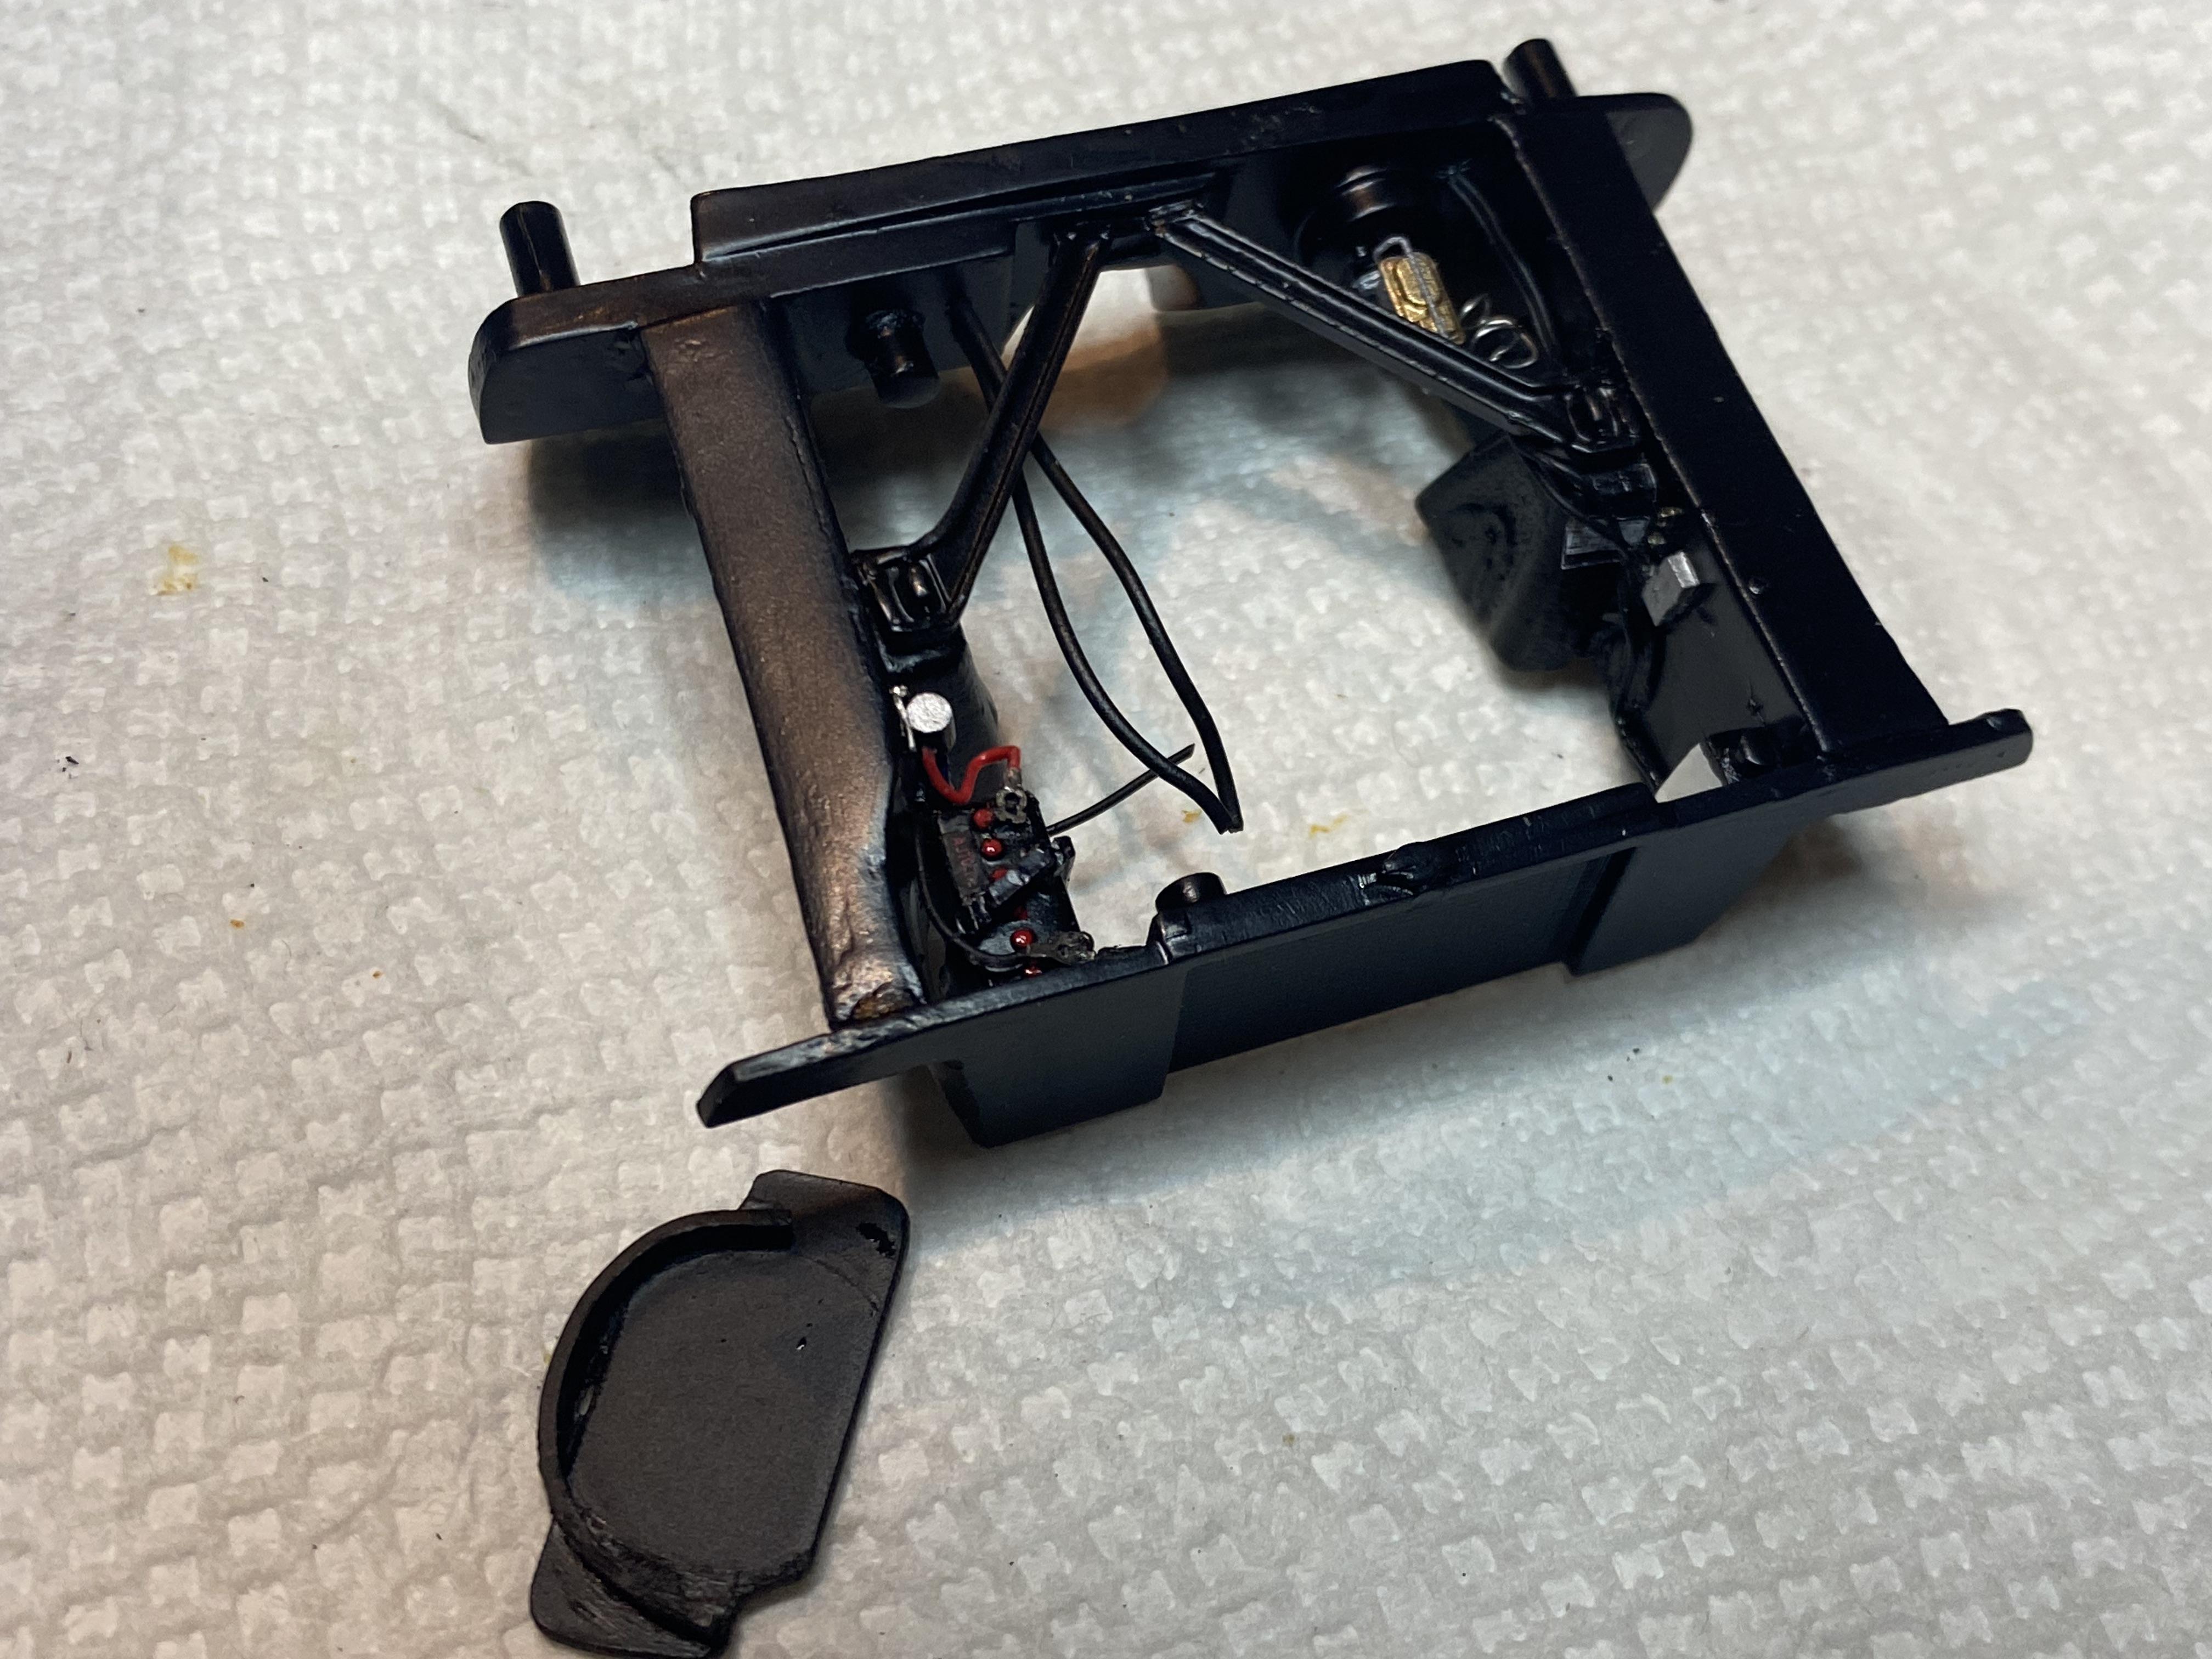
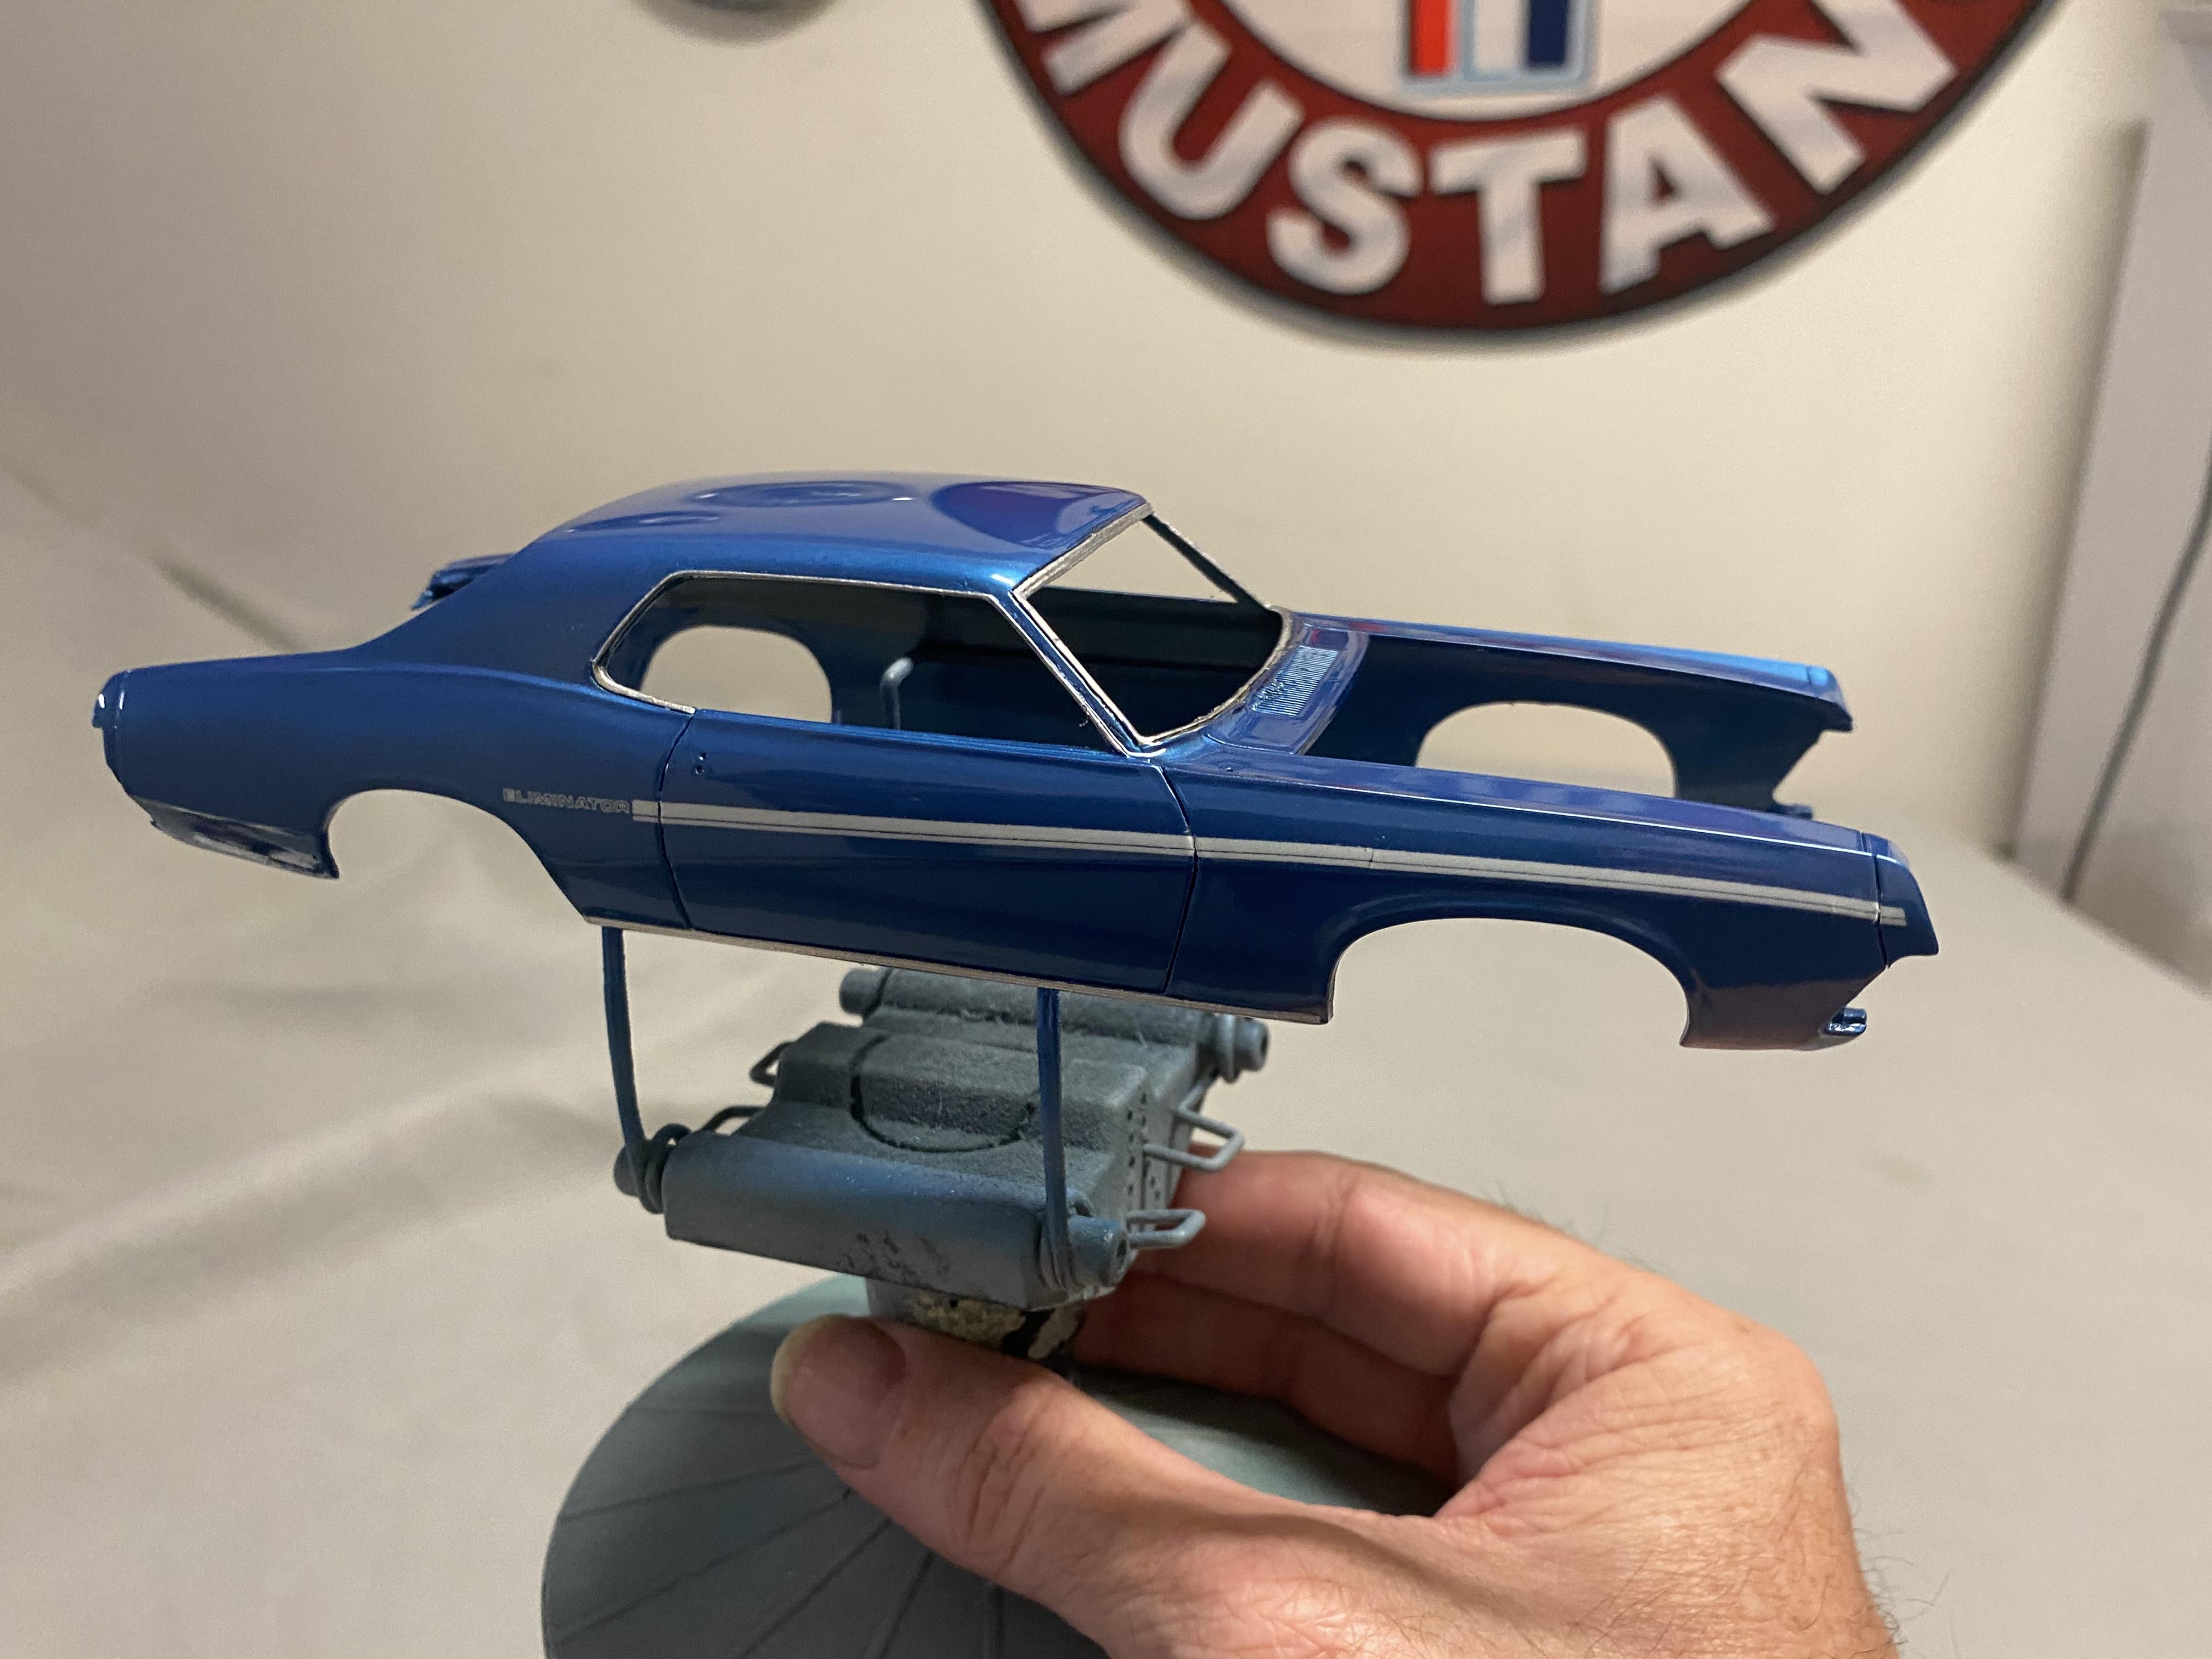
Got a lot more detailing done today, just a bit more to go. Pretty much finished up the engine compartment detailing with removable air cleaner. added the hood pin plates that came with the photo-etch kit. Picked up some bright silver thread and small needles from Hobby Lobby to make the pins and cables. Need to figure out the holding pins and rings. added the trunk jacking instruction decal added a lot of photo-detail parts and the rear spoiler. Water spots on side from having to polish out the roof, got a drop of glue I had to sand out and polish, ? Decided to name this one SuzieQ just like the truck build for her. This time because she is 1 1/2 years older than me, and this is a Cougar. She didn’t find it too funny. We’ve been married for 40 years so she will get over it. ? added photo-etch wipers. in case anyone is curious, I make my antennas from a bug pin and some catheter tubing, that way it can function up and down like the real ones. still a little more to do, but Almost There! next at the table is going to be a 1941 Ford Woody Wagon I think…
-
Thank you!
-
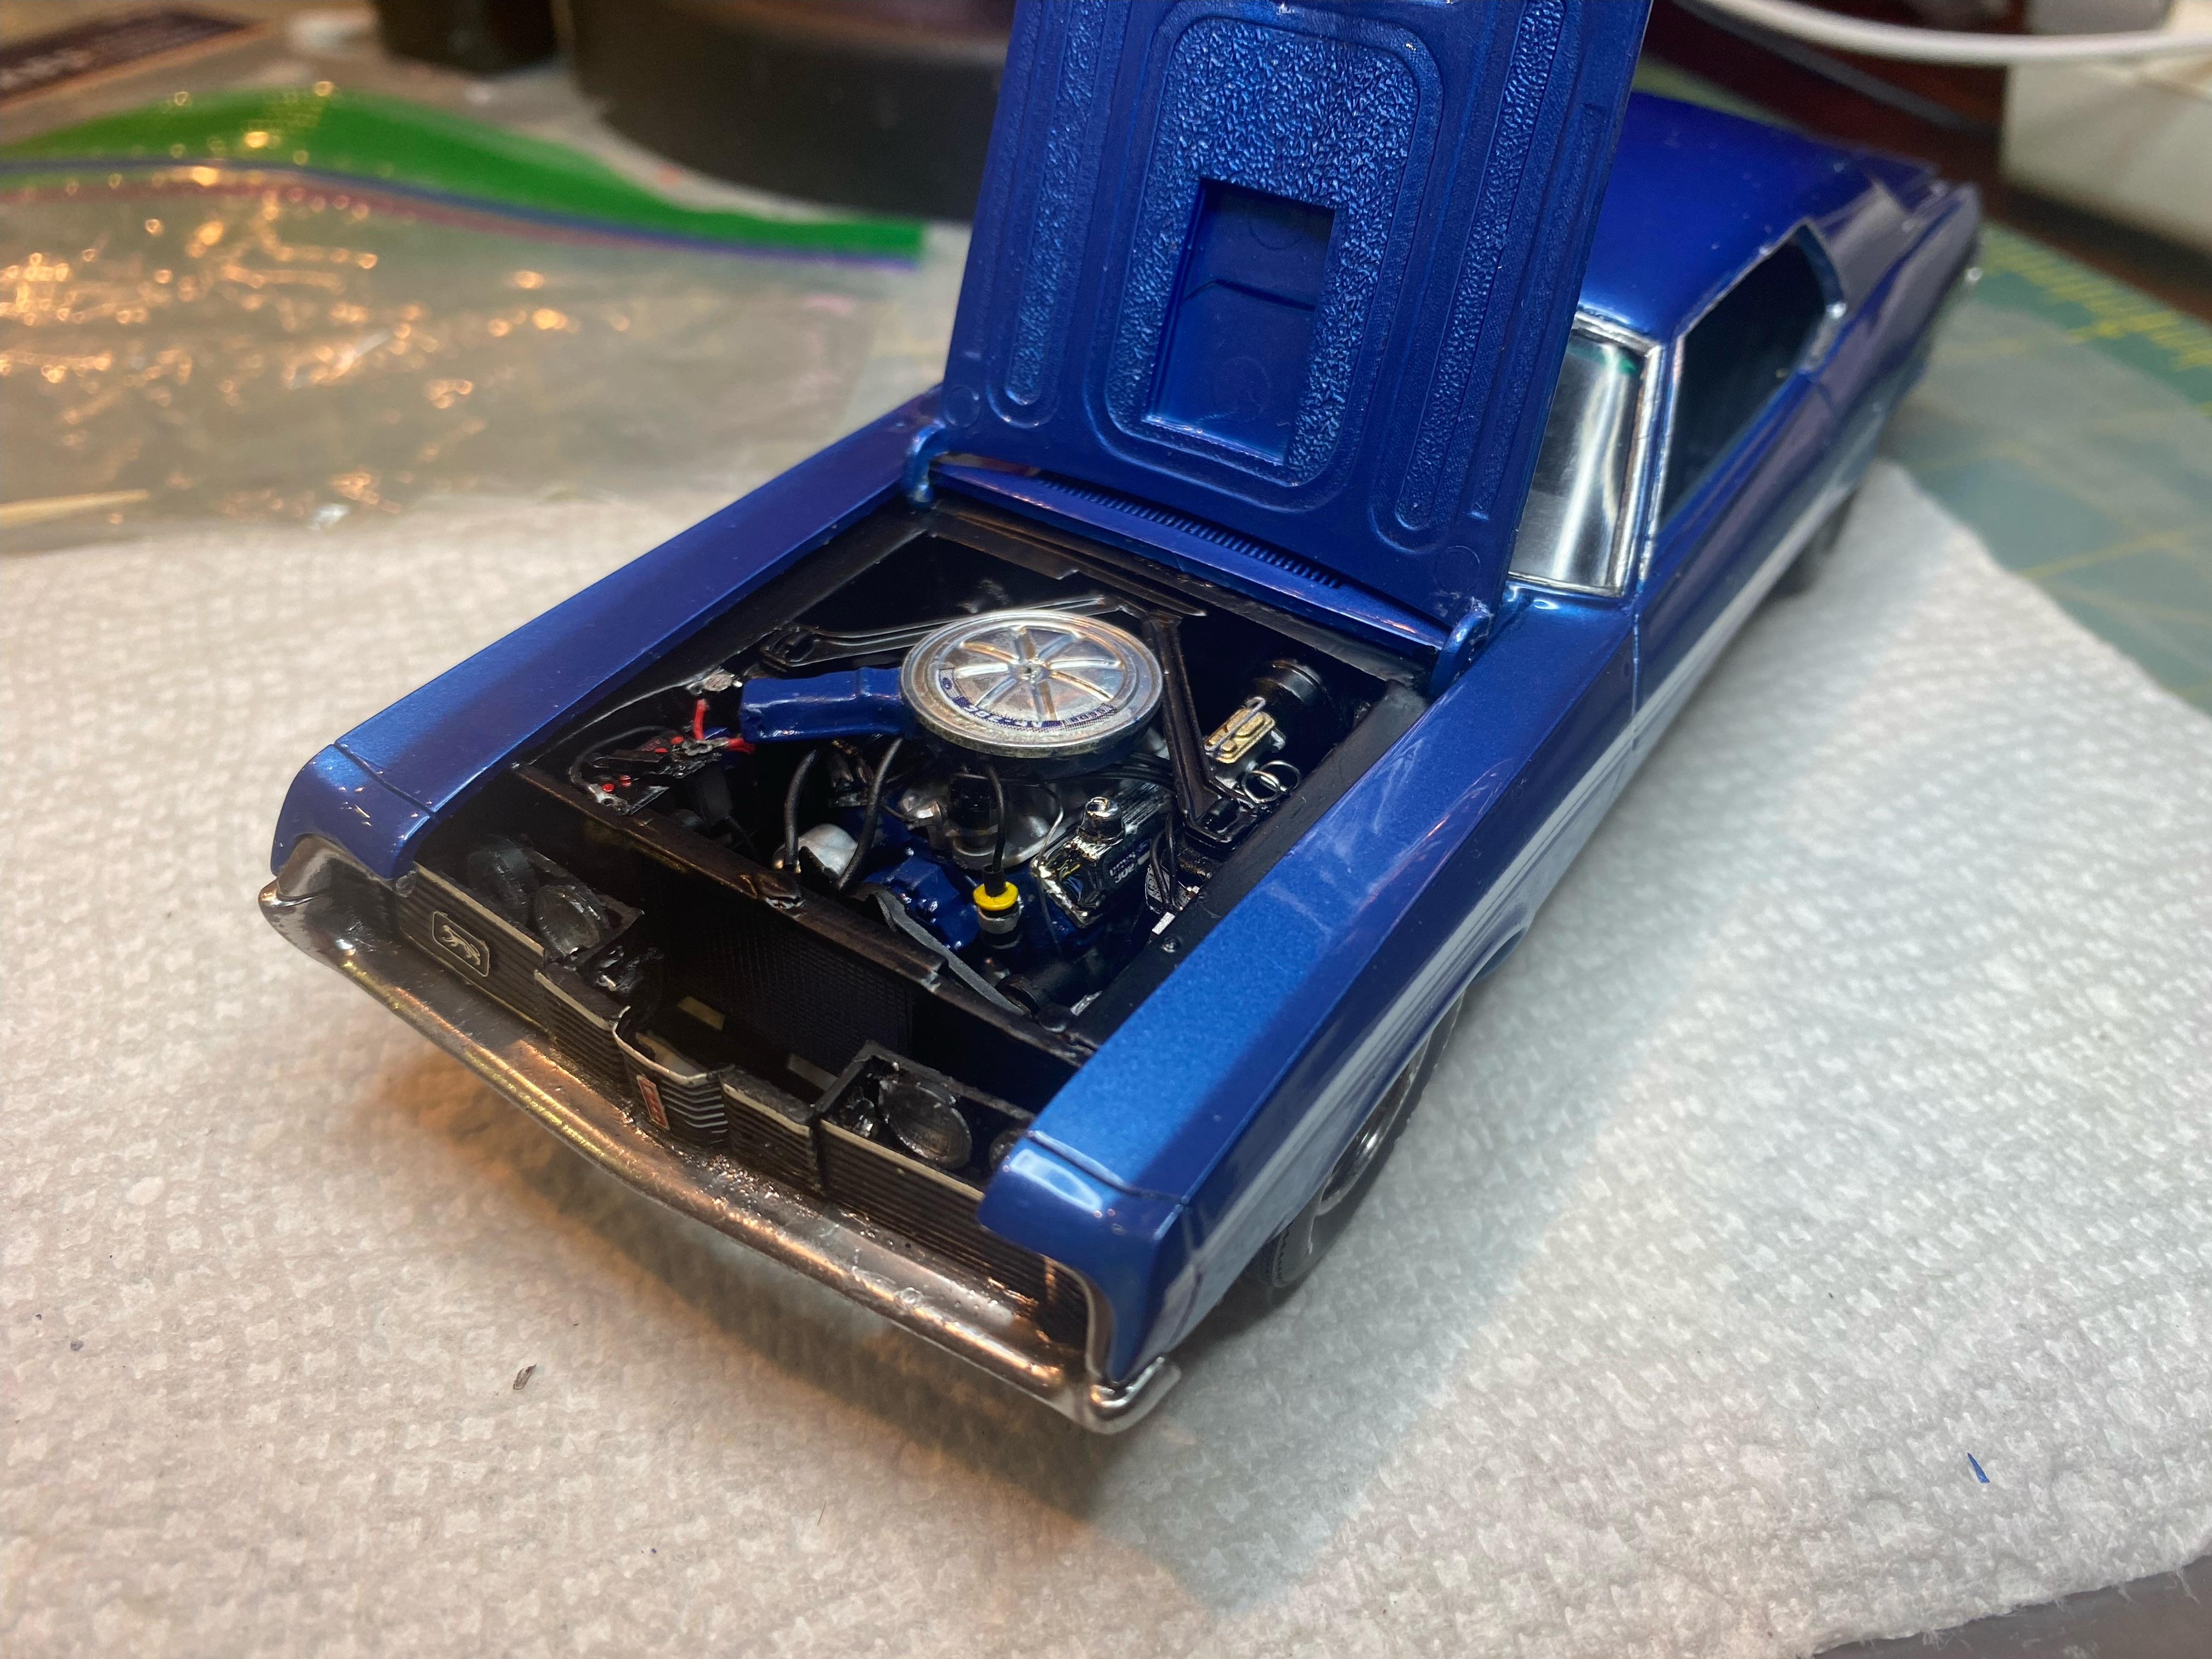
Thank you, I am pretty happy with how the engine compartment is coming out, considering the kit basically didn’t have one and it had to be scratch built.
-
Thank you.
-
Thank you. The engine bay detailing isn’t done yet btw. I have a lot of detailing work to do all over.
-
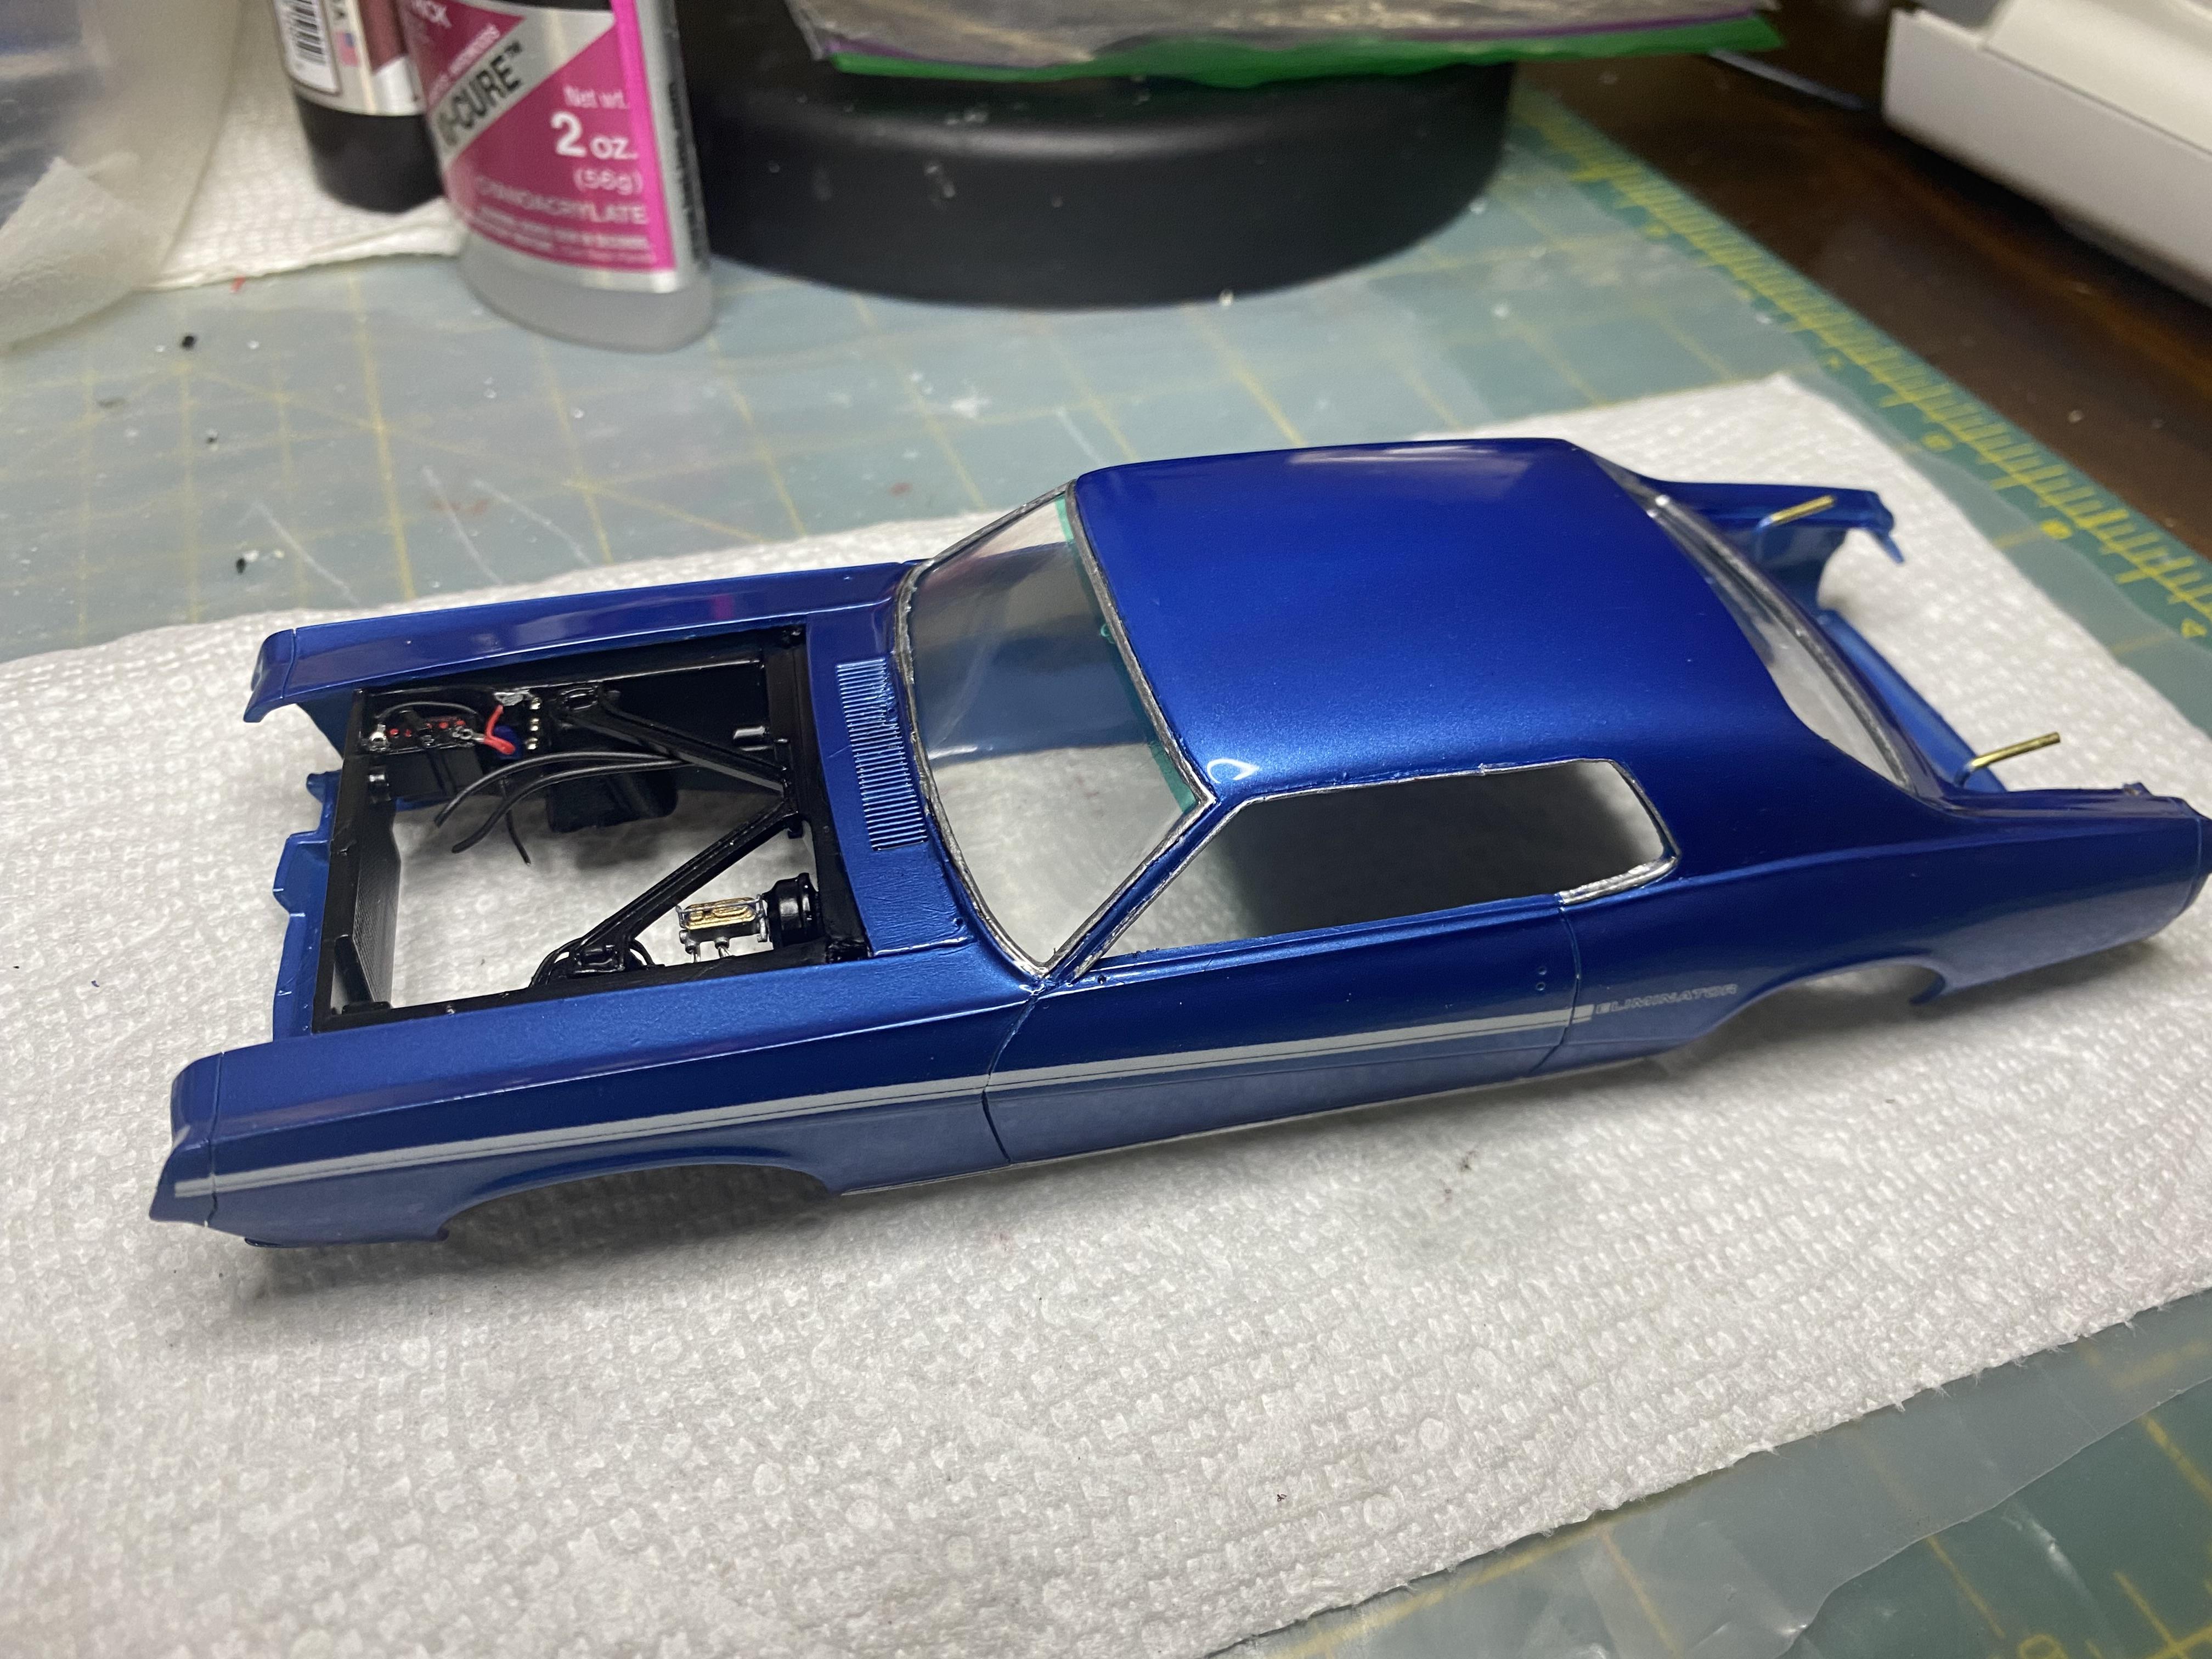
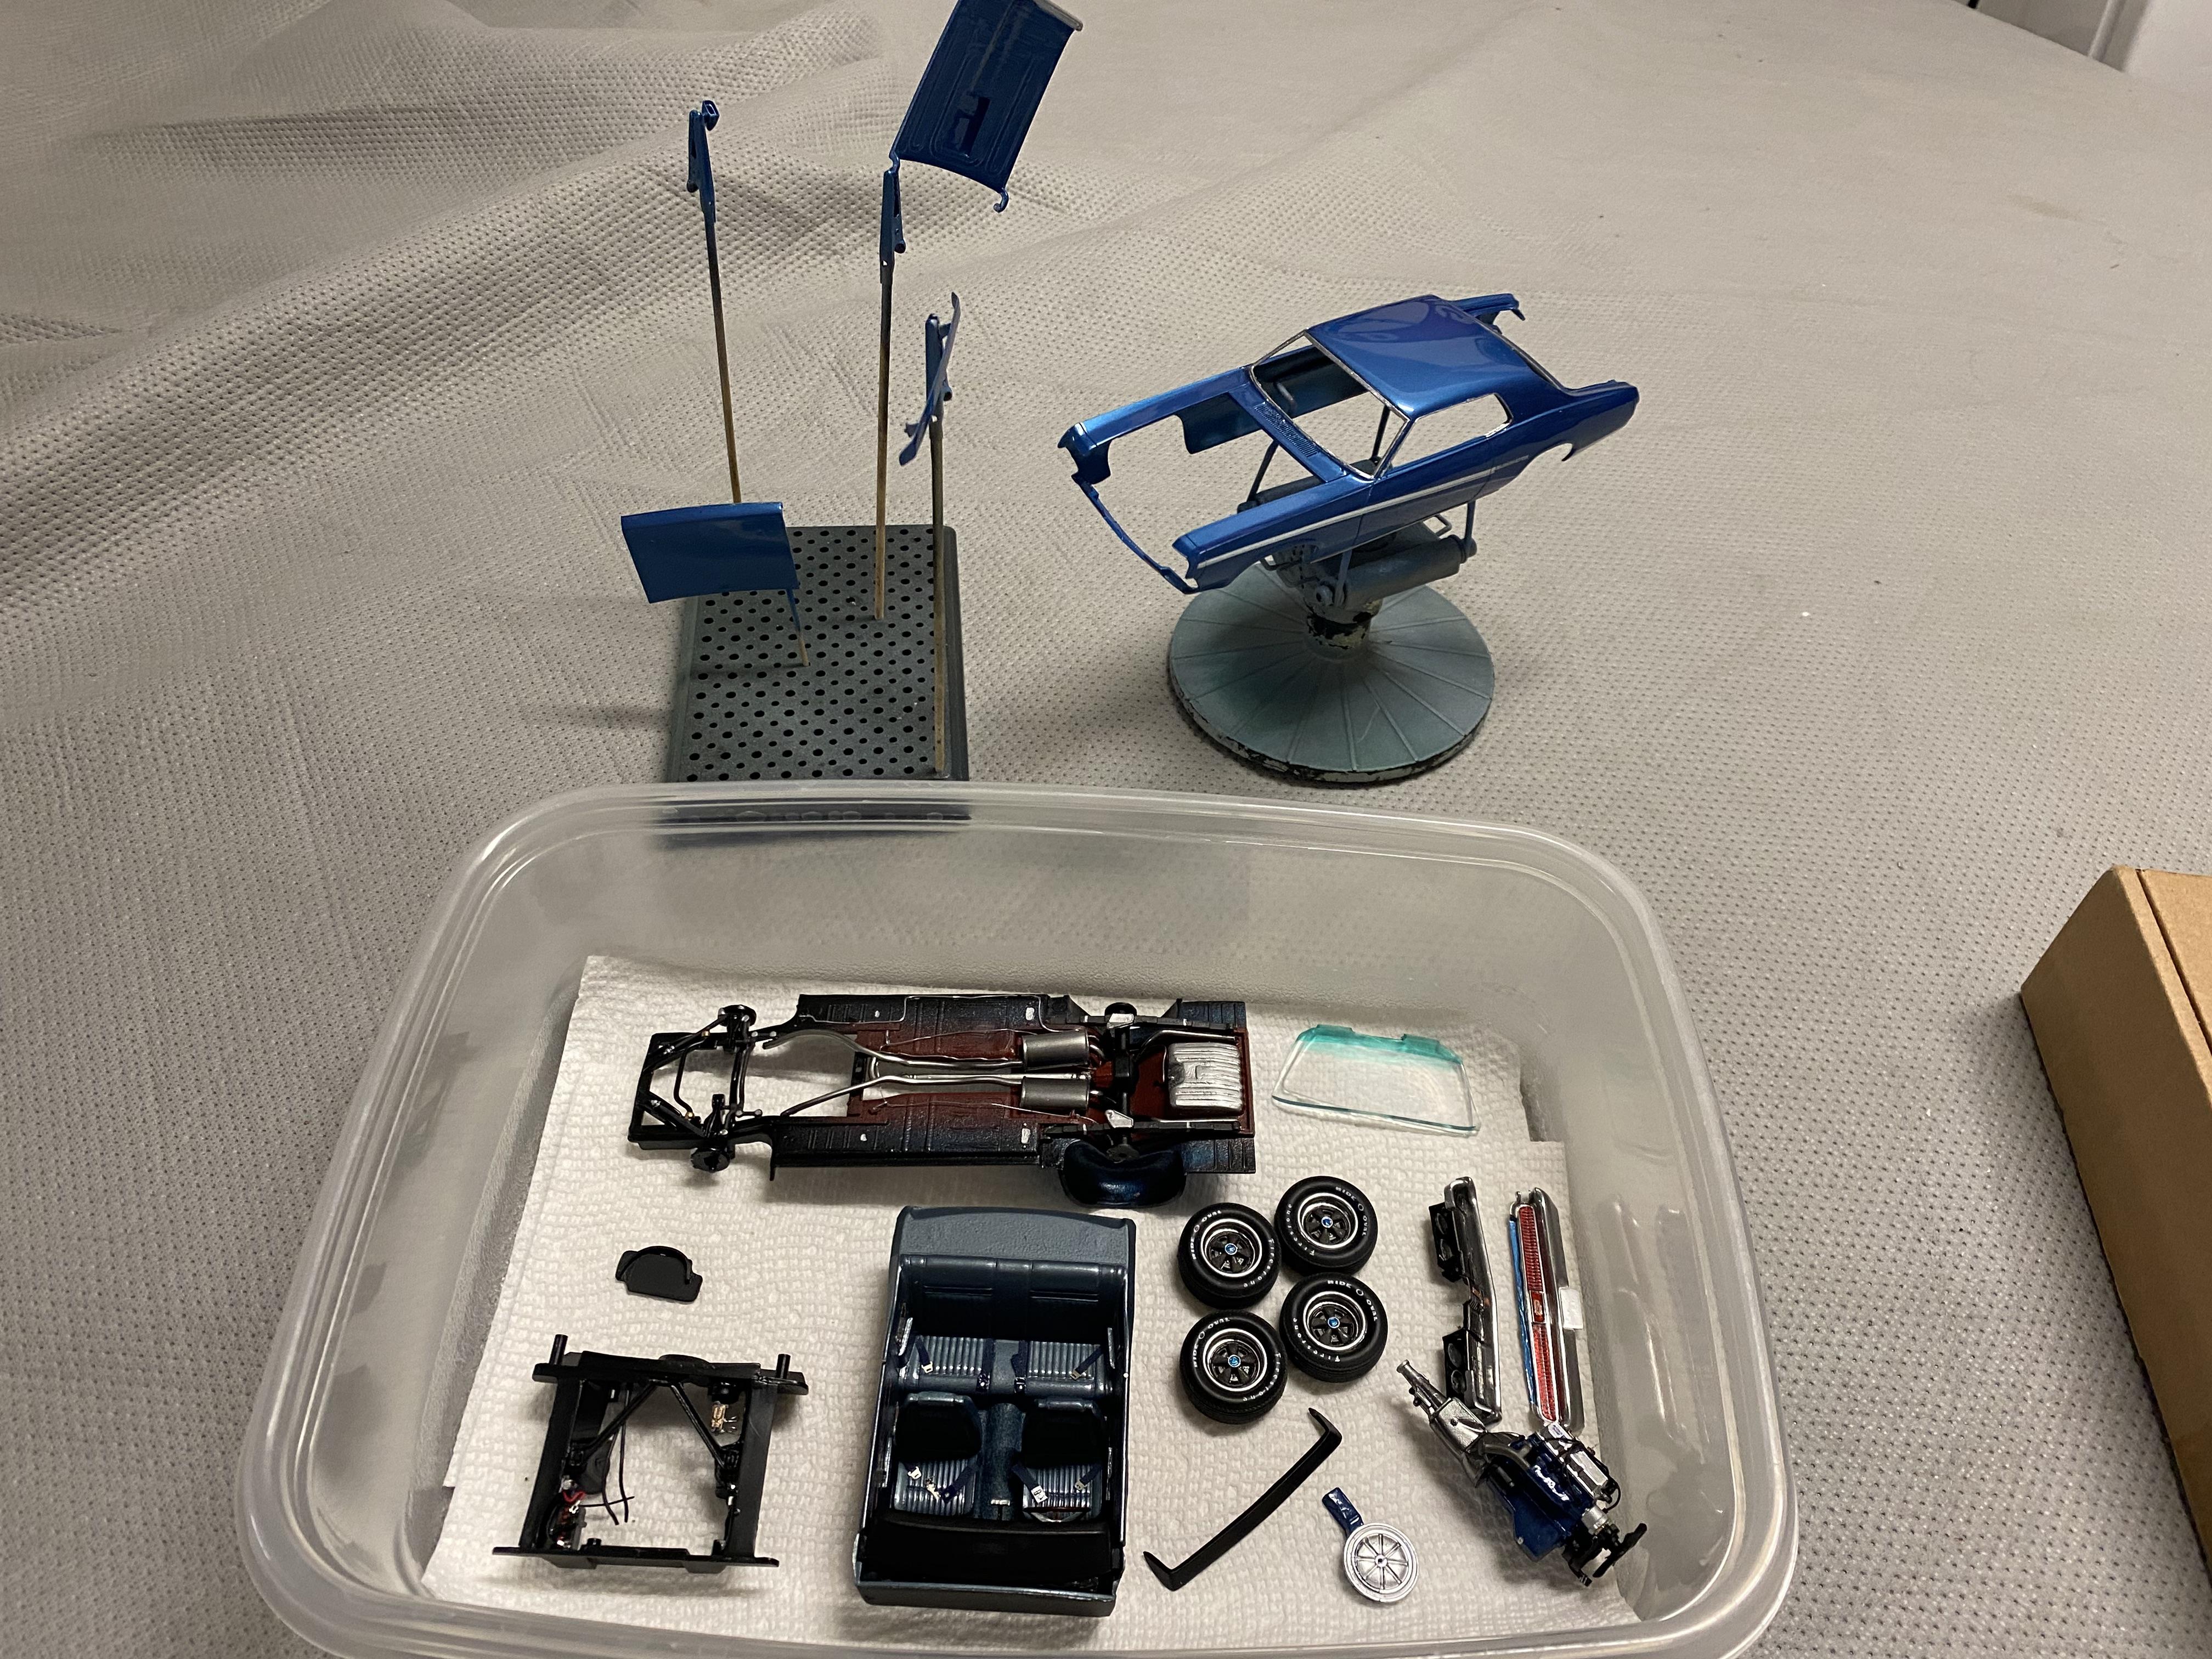
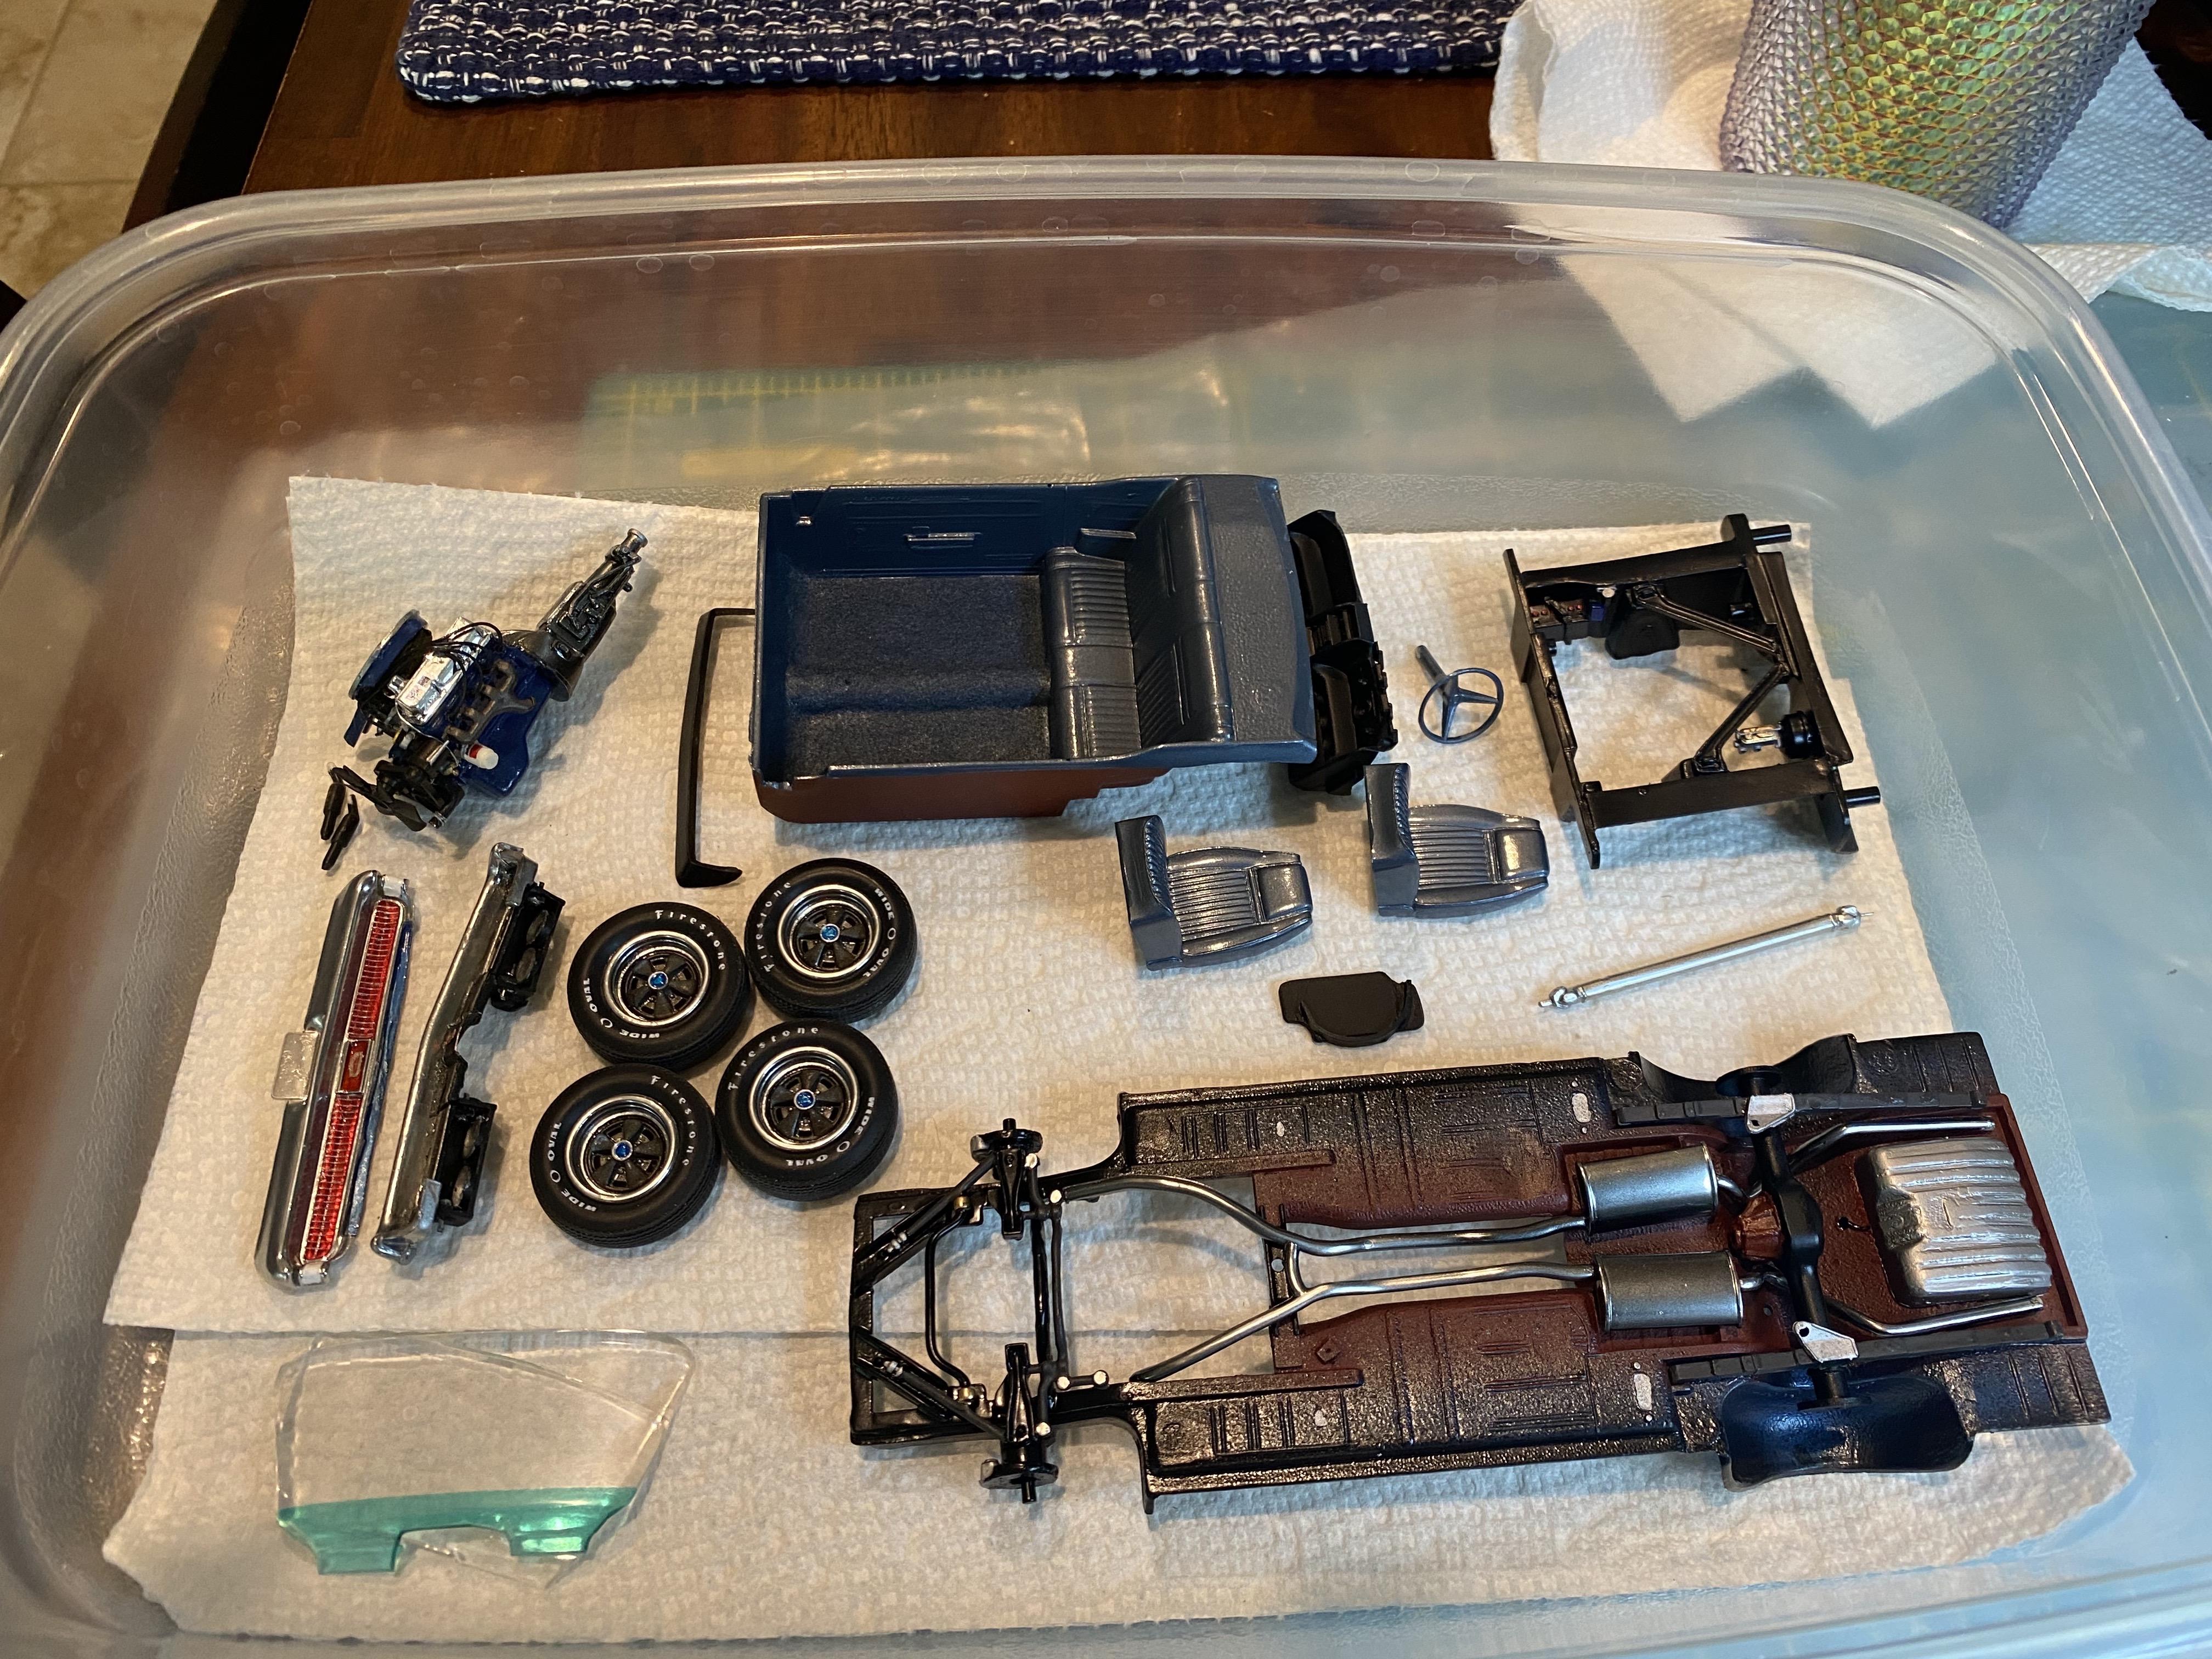
Mated the chassis and body this evening. A lot of detailing and fixing to go bipartisan starting to see the light at the end of the tunnel.
-
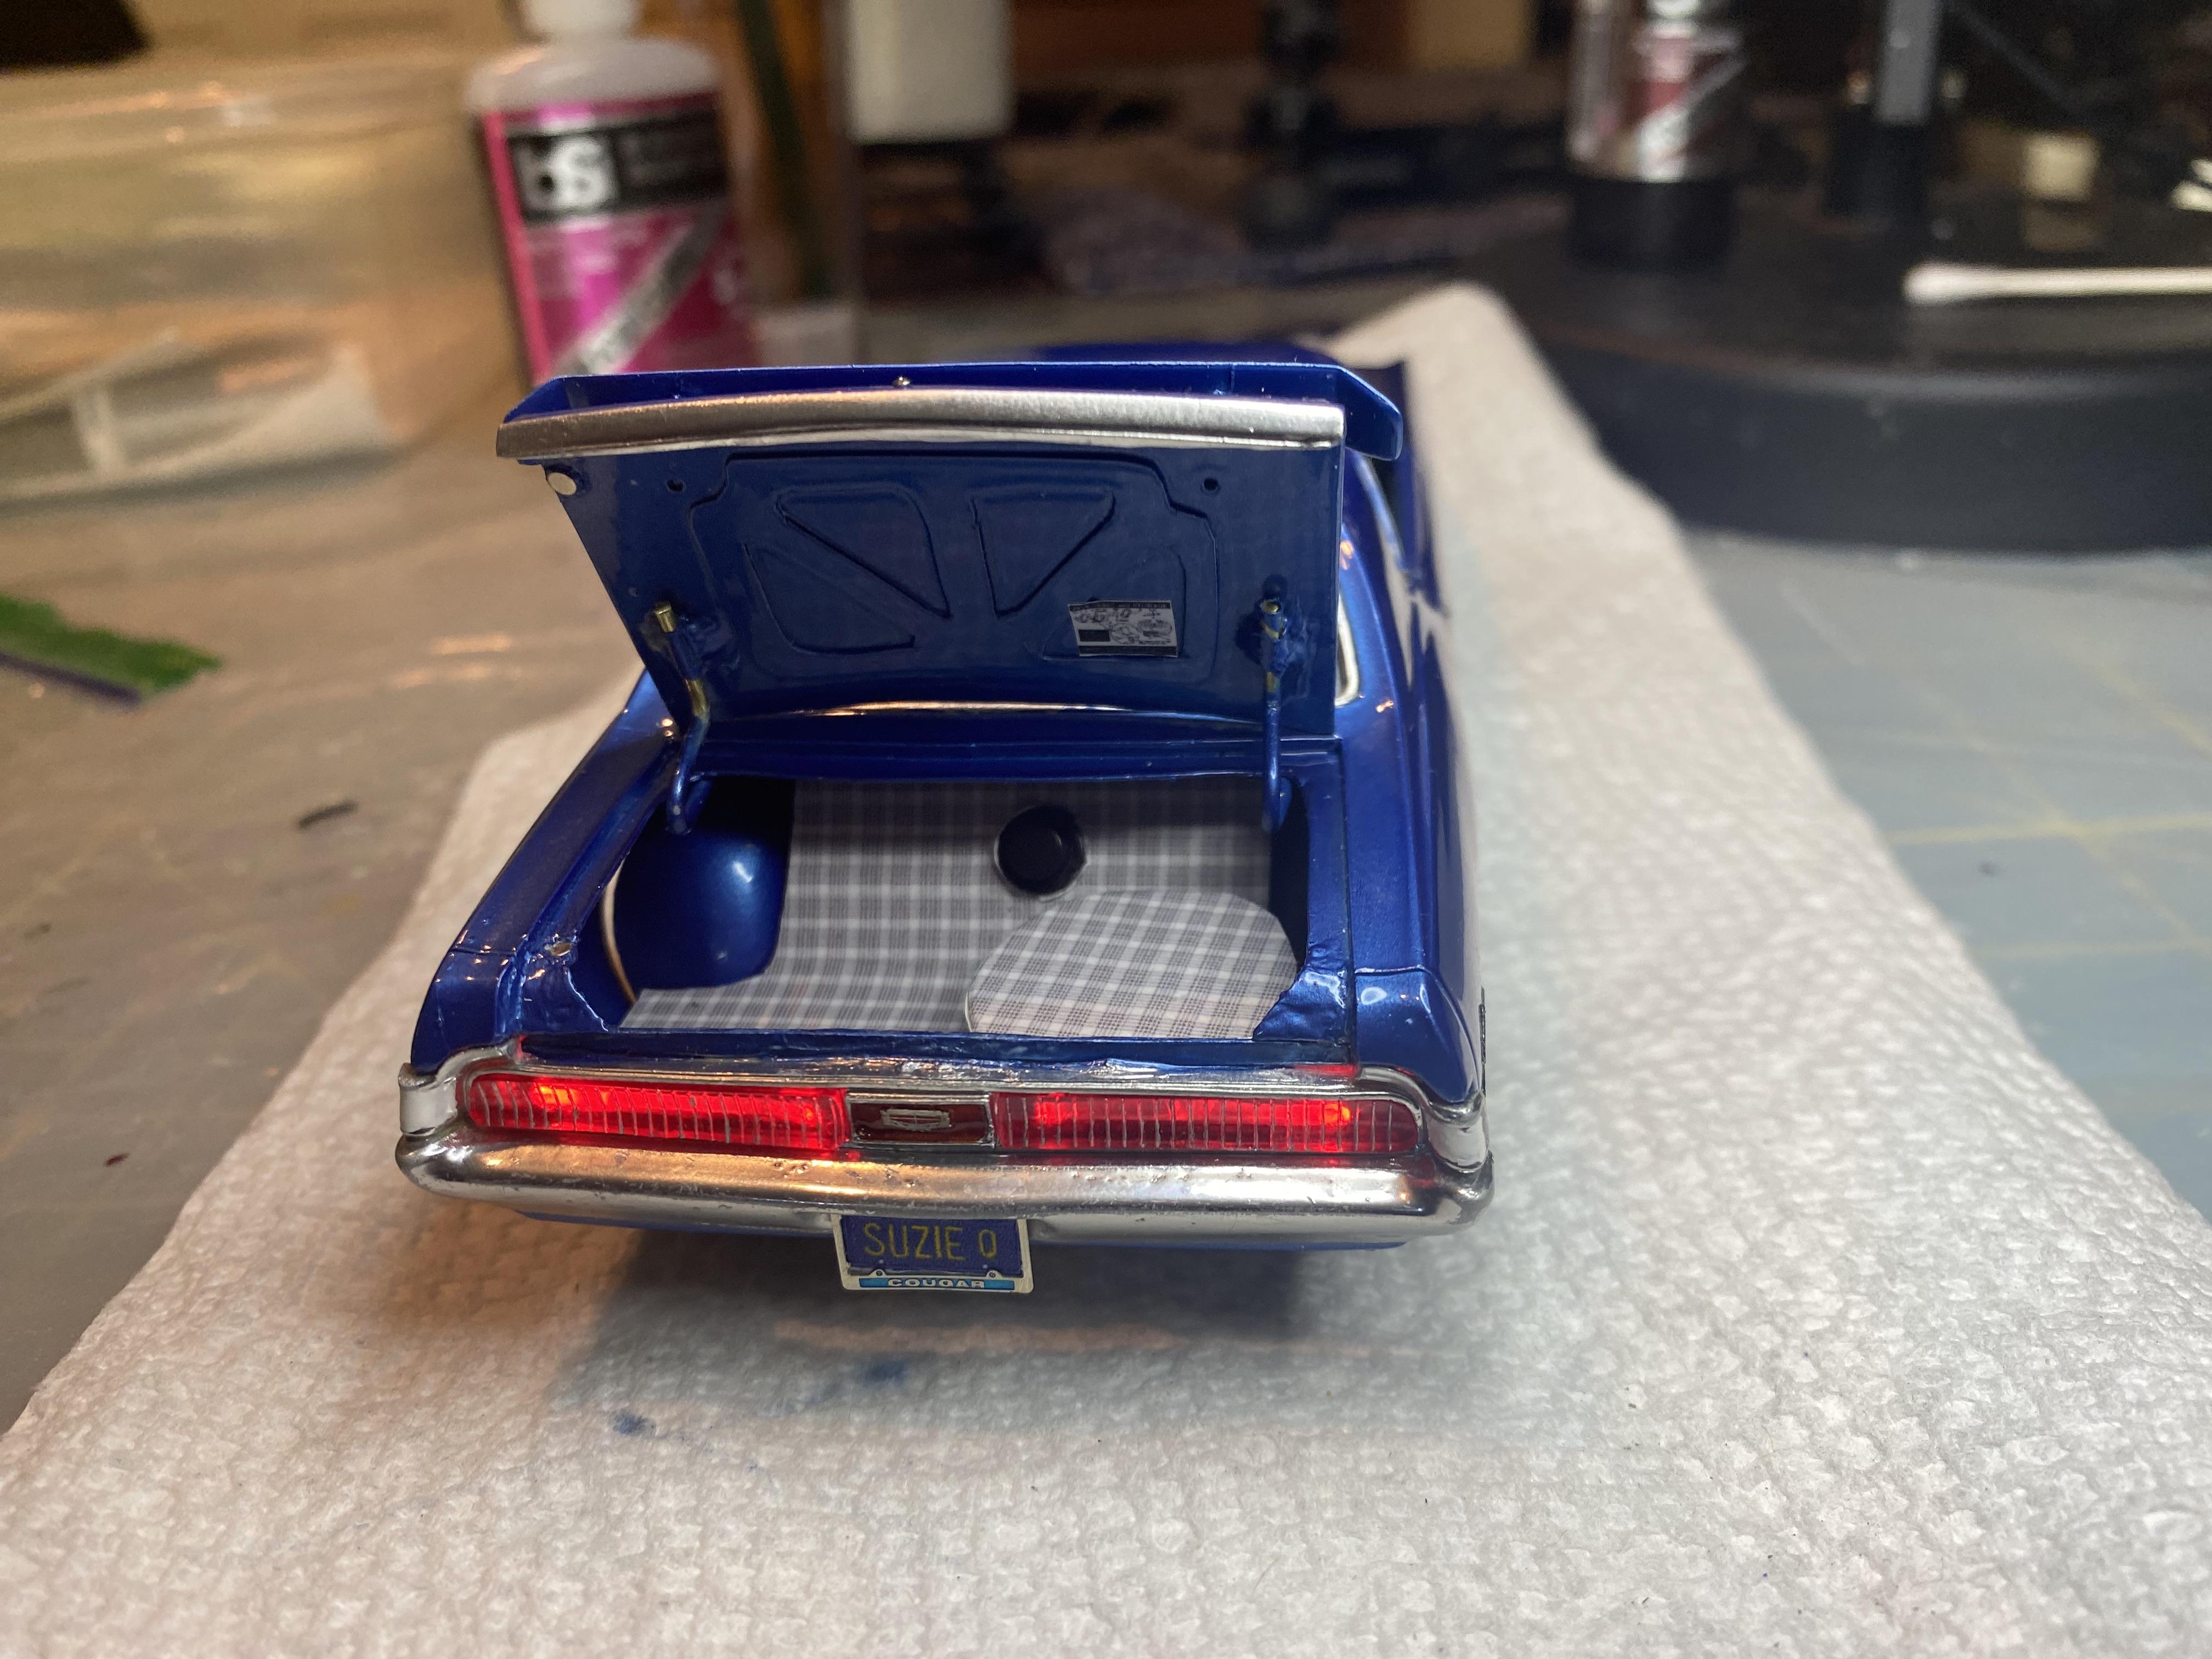
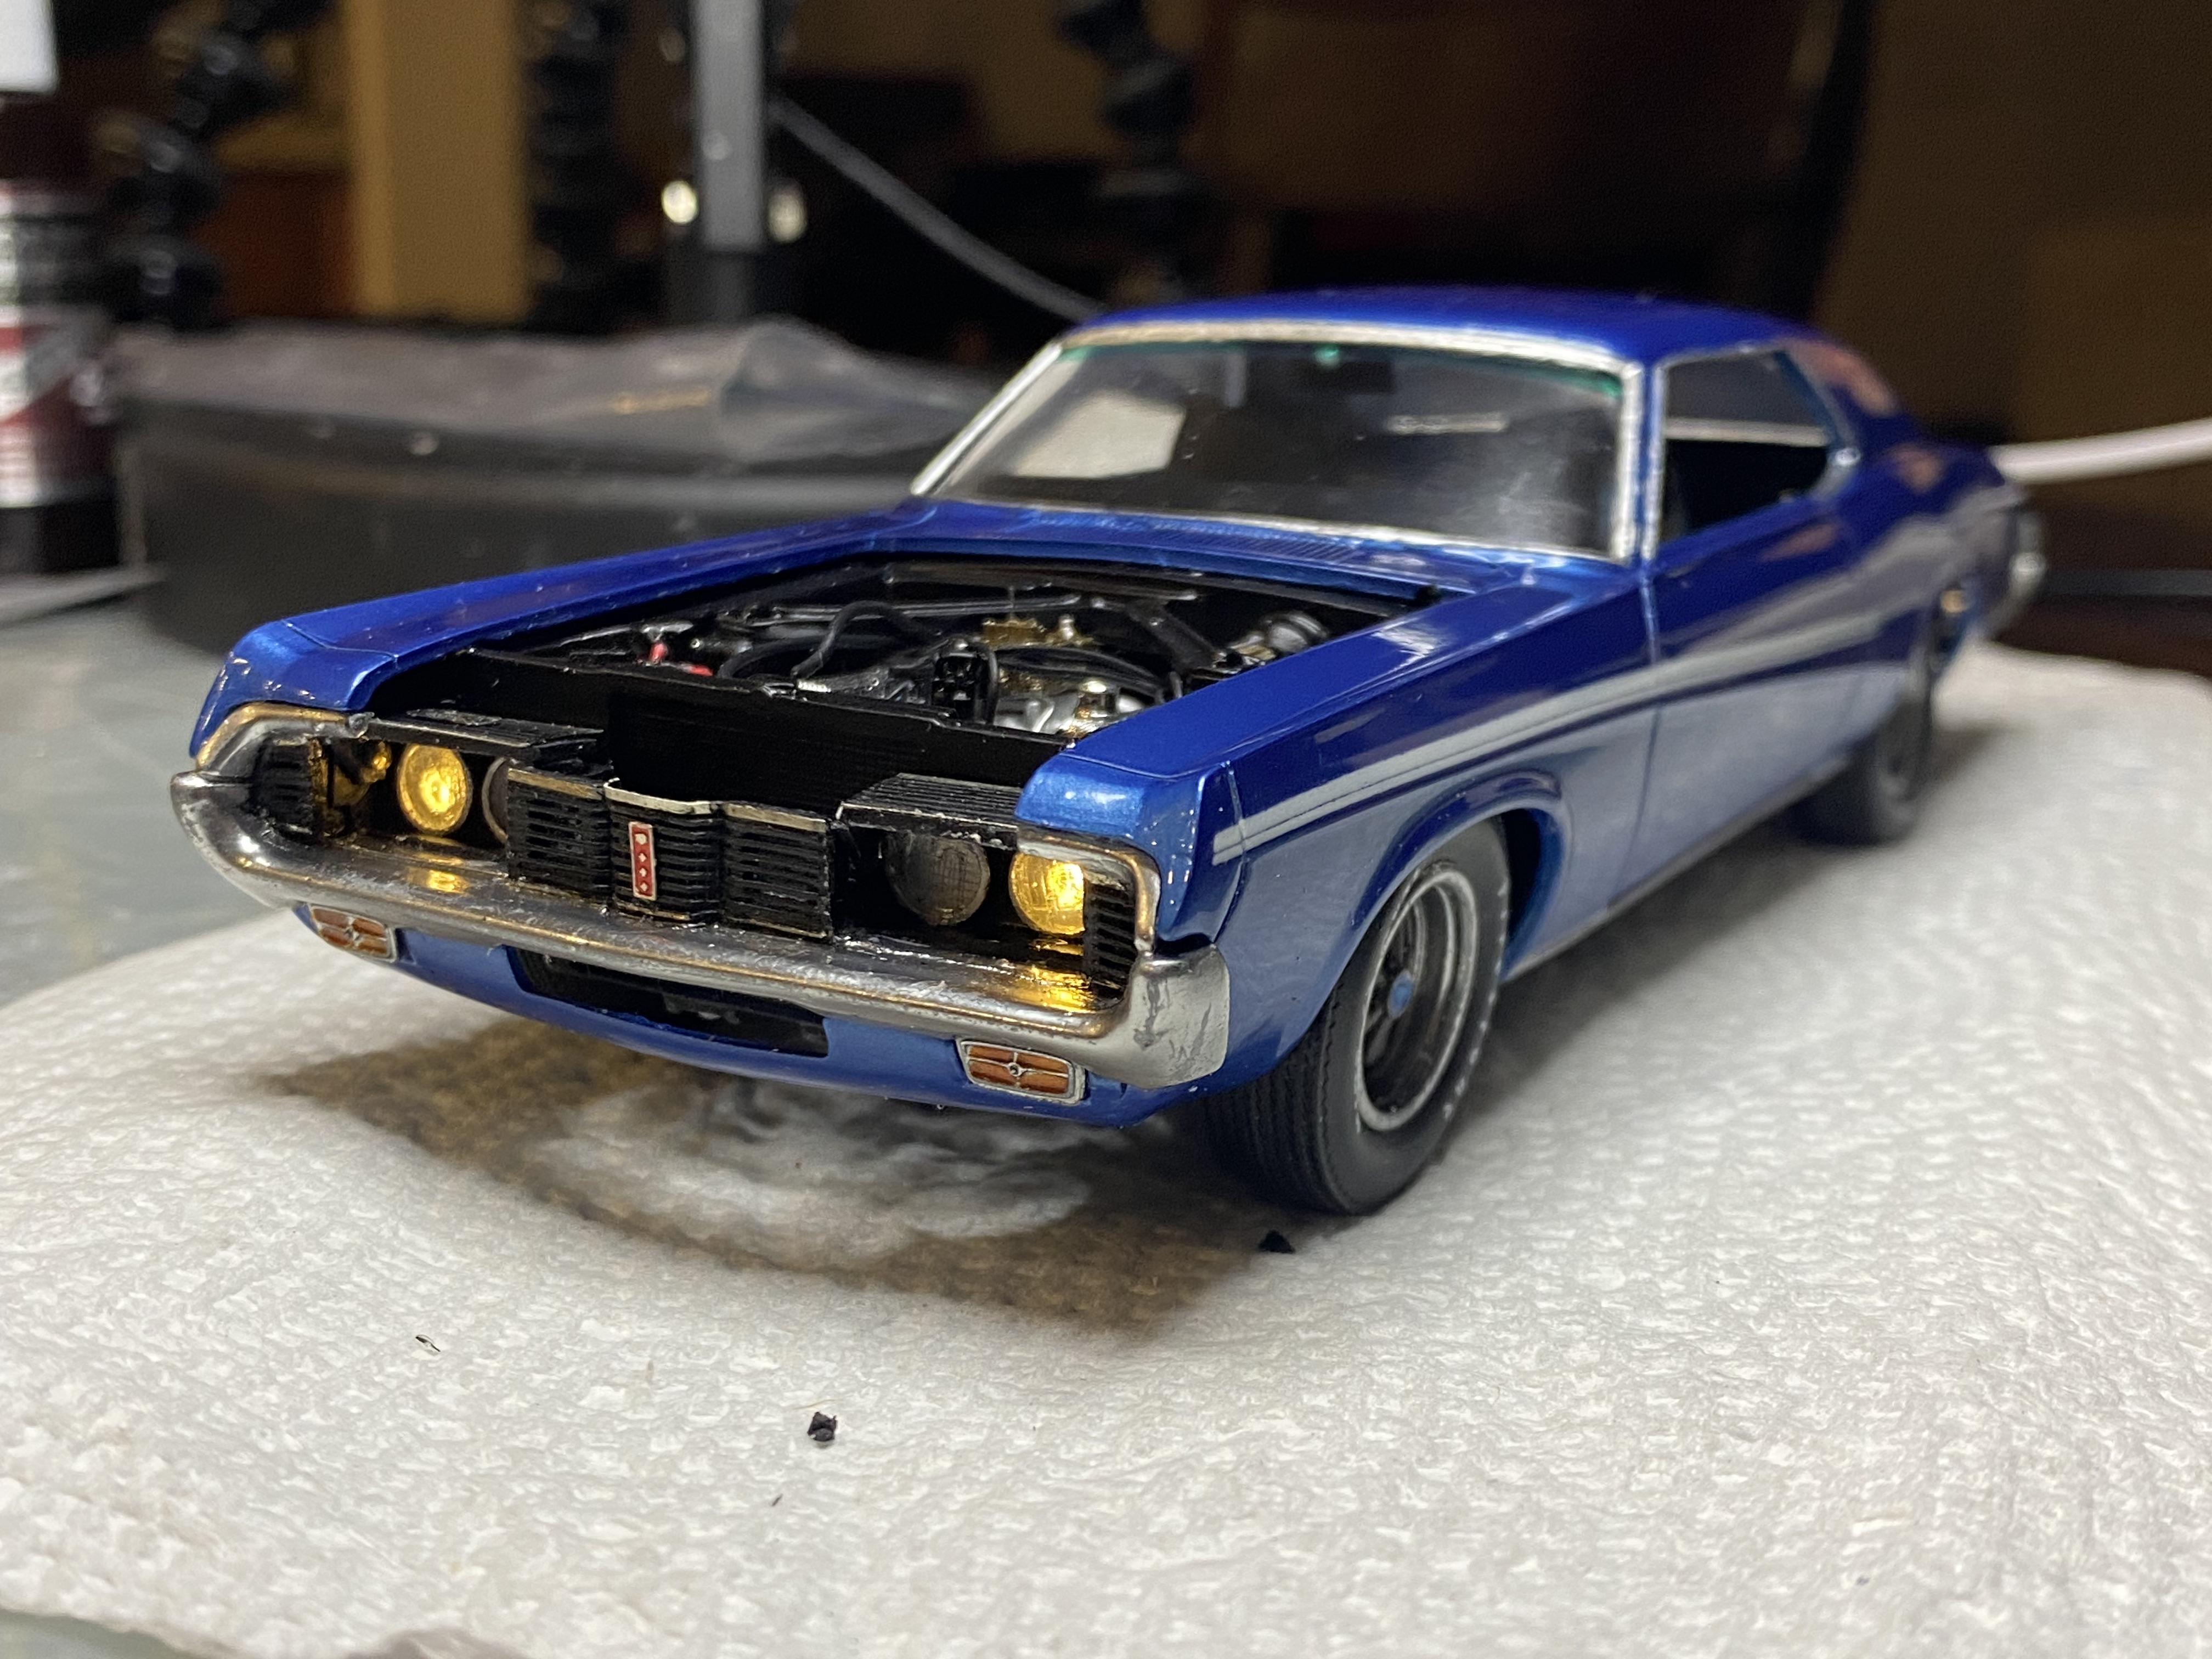
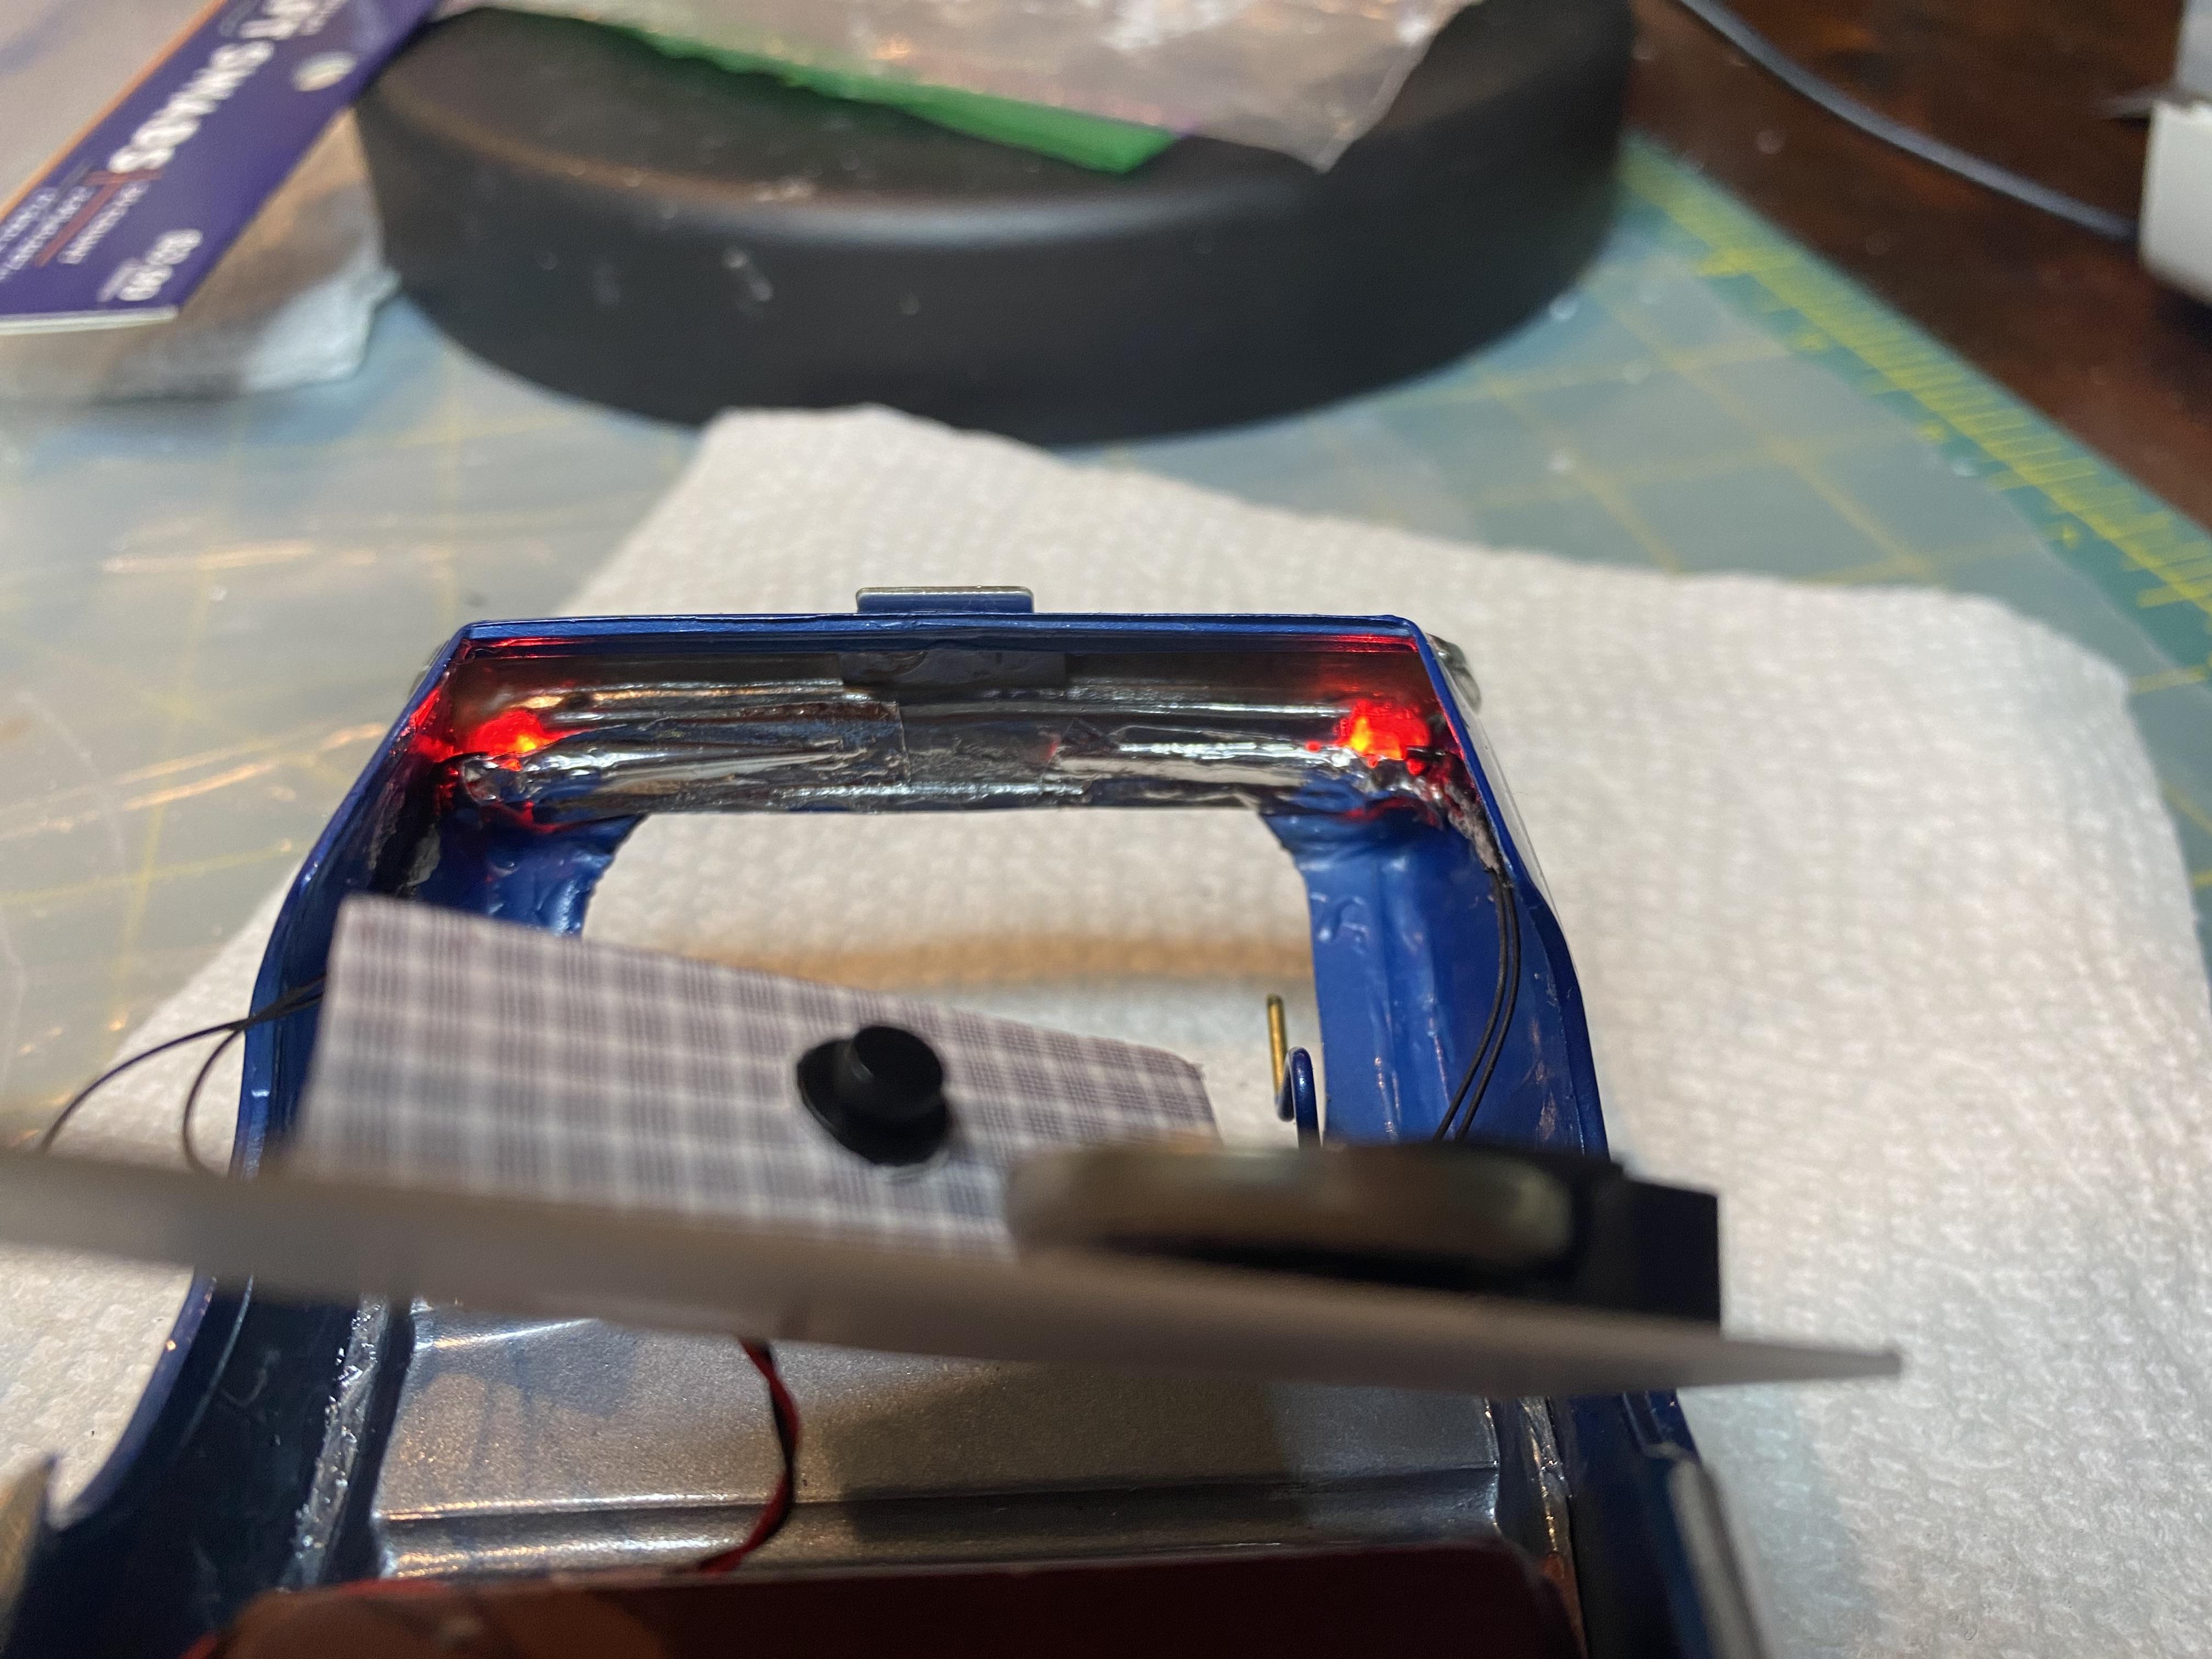
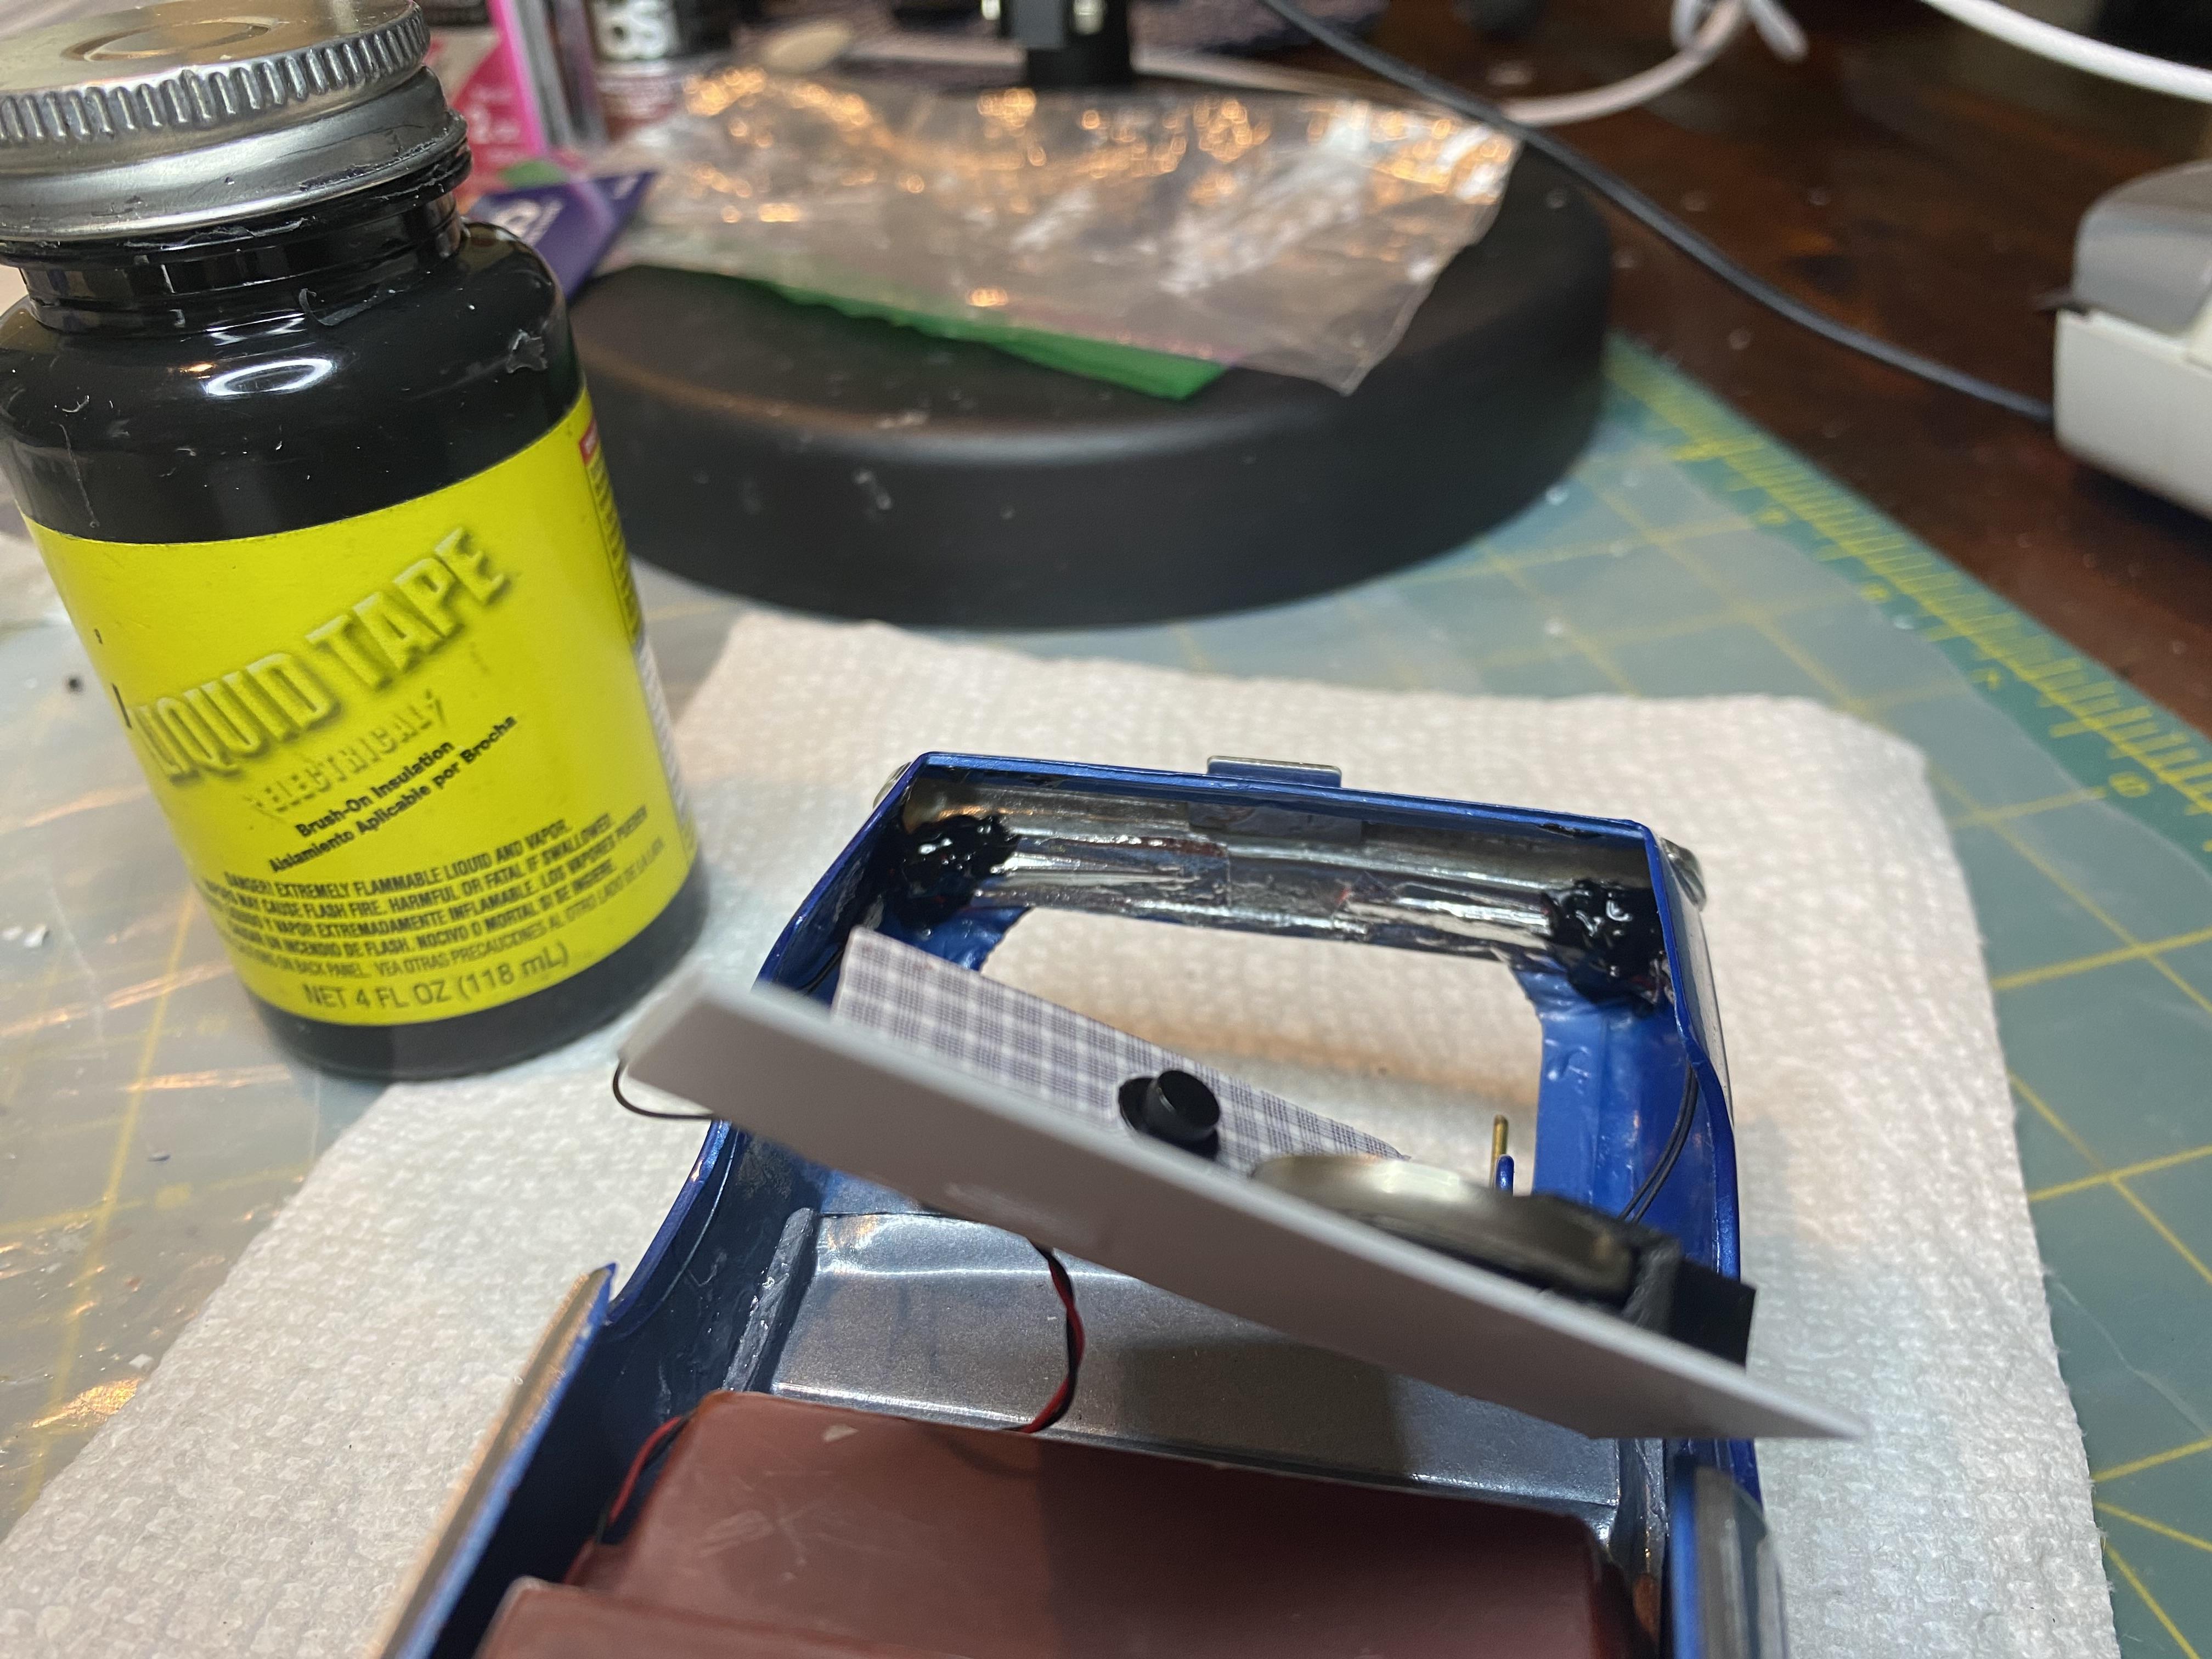
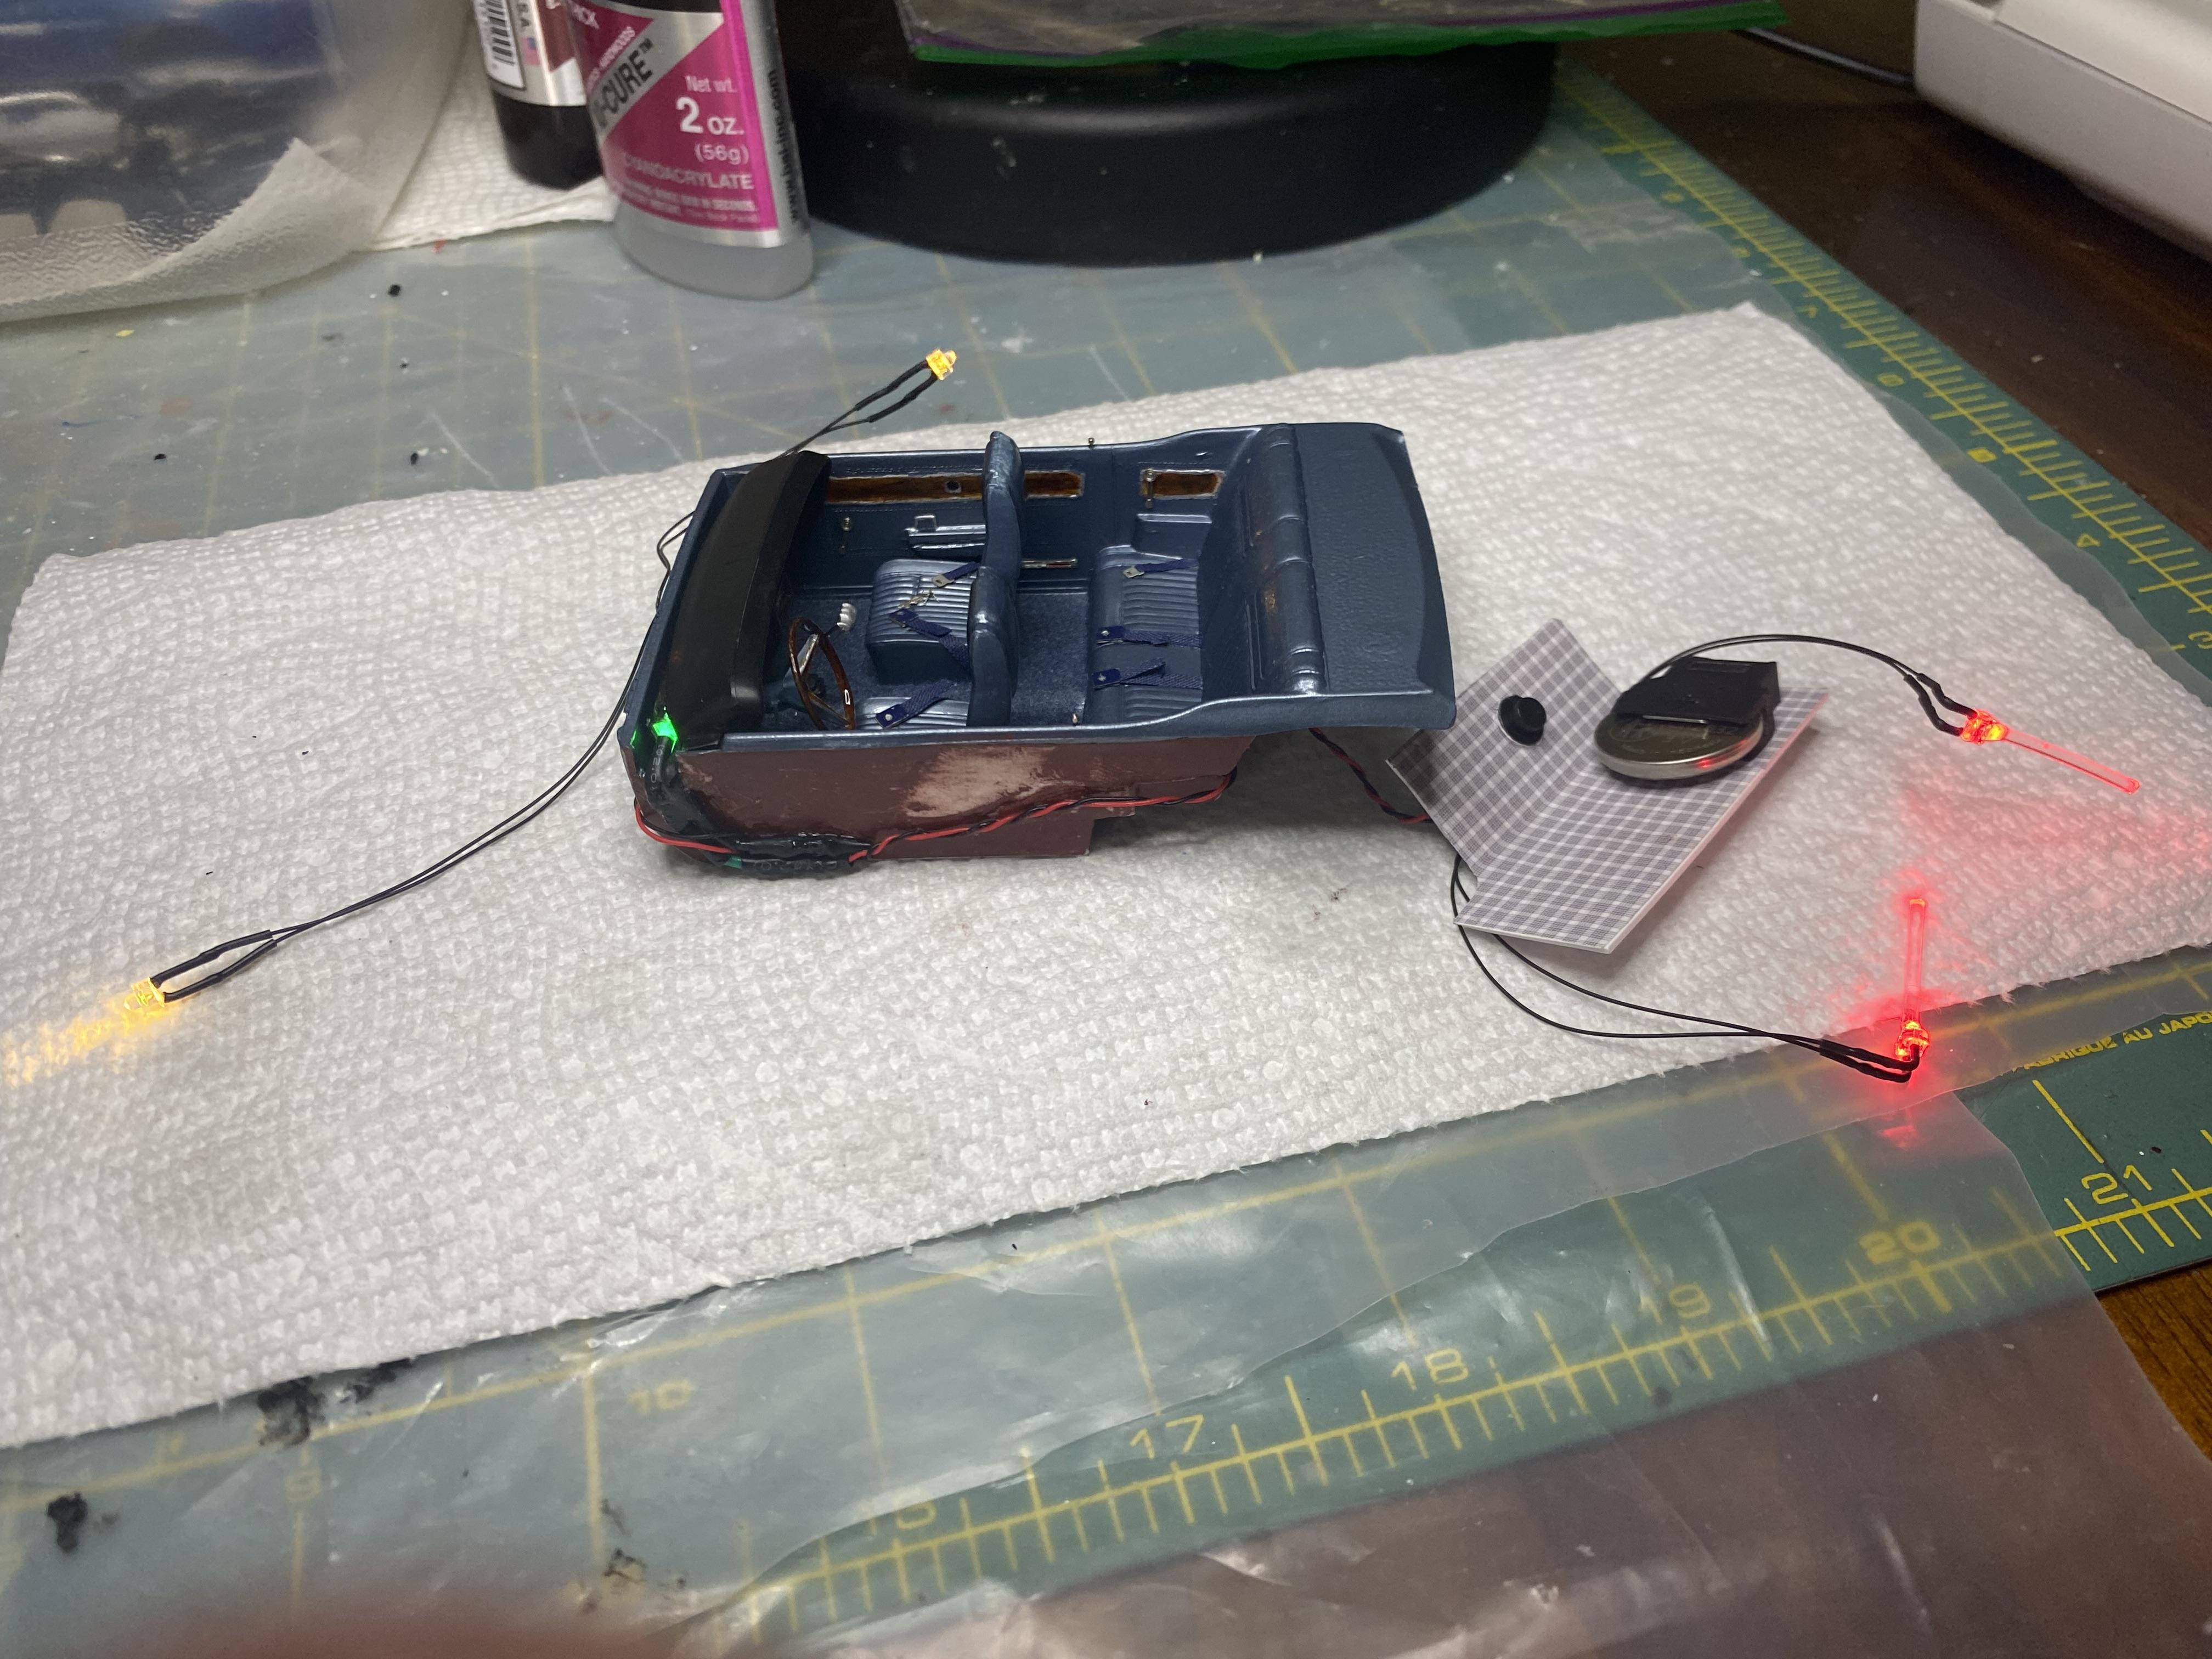
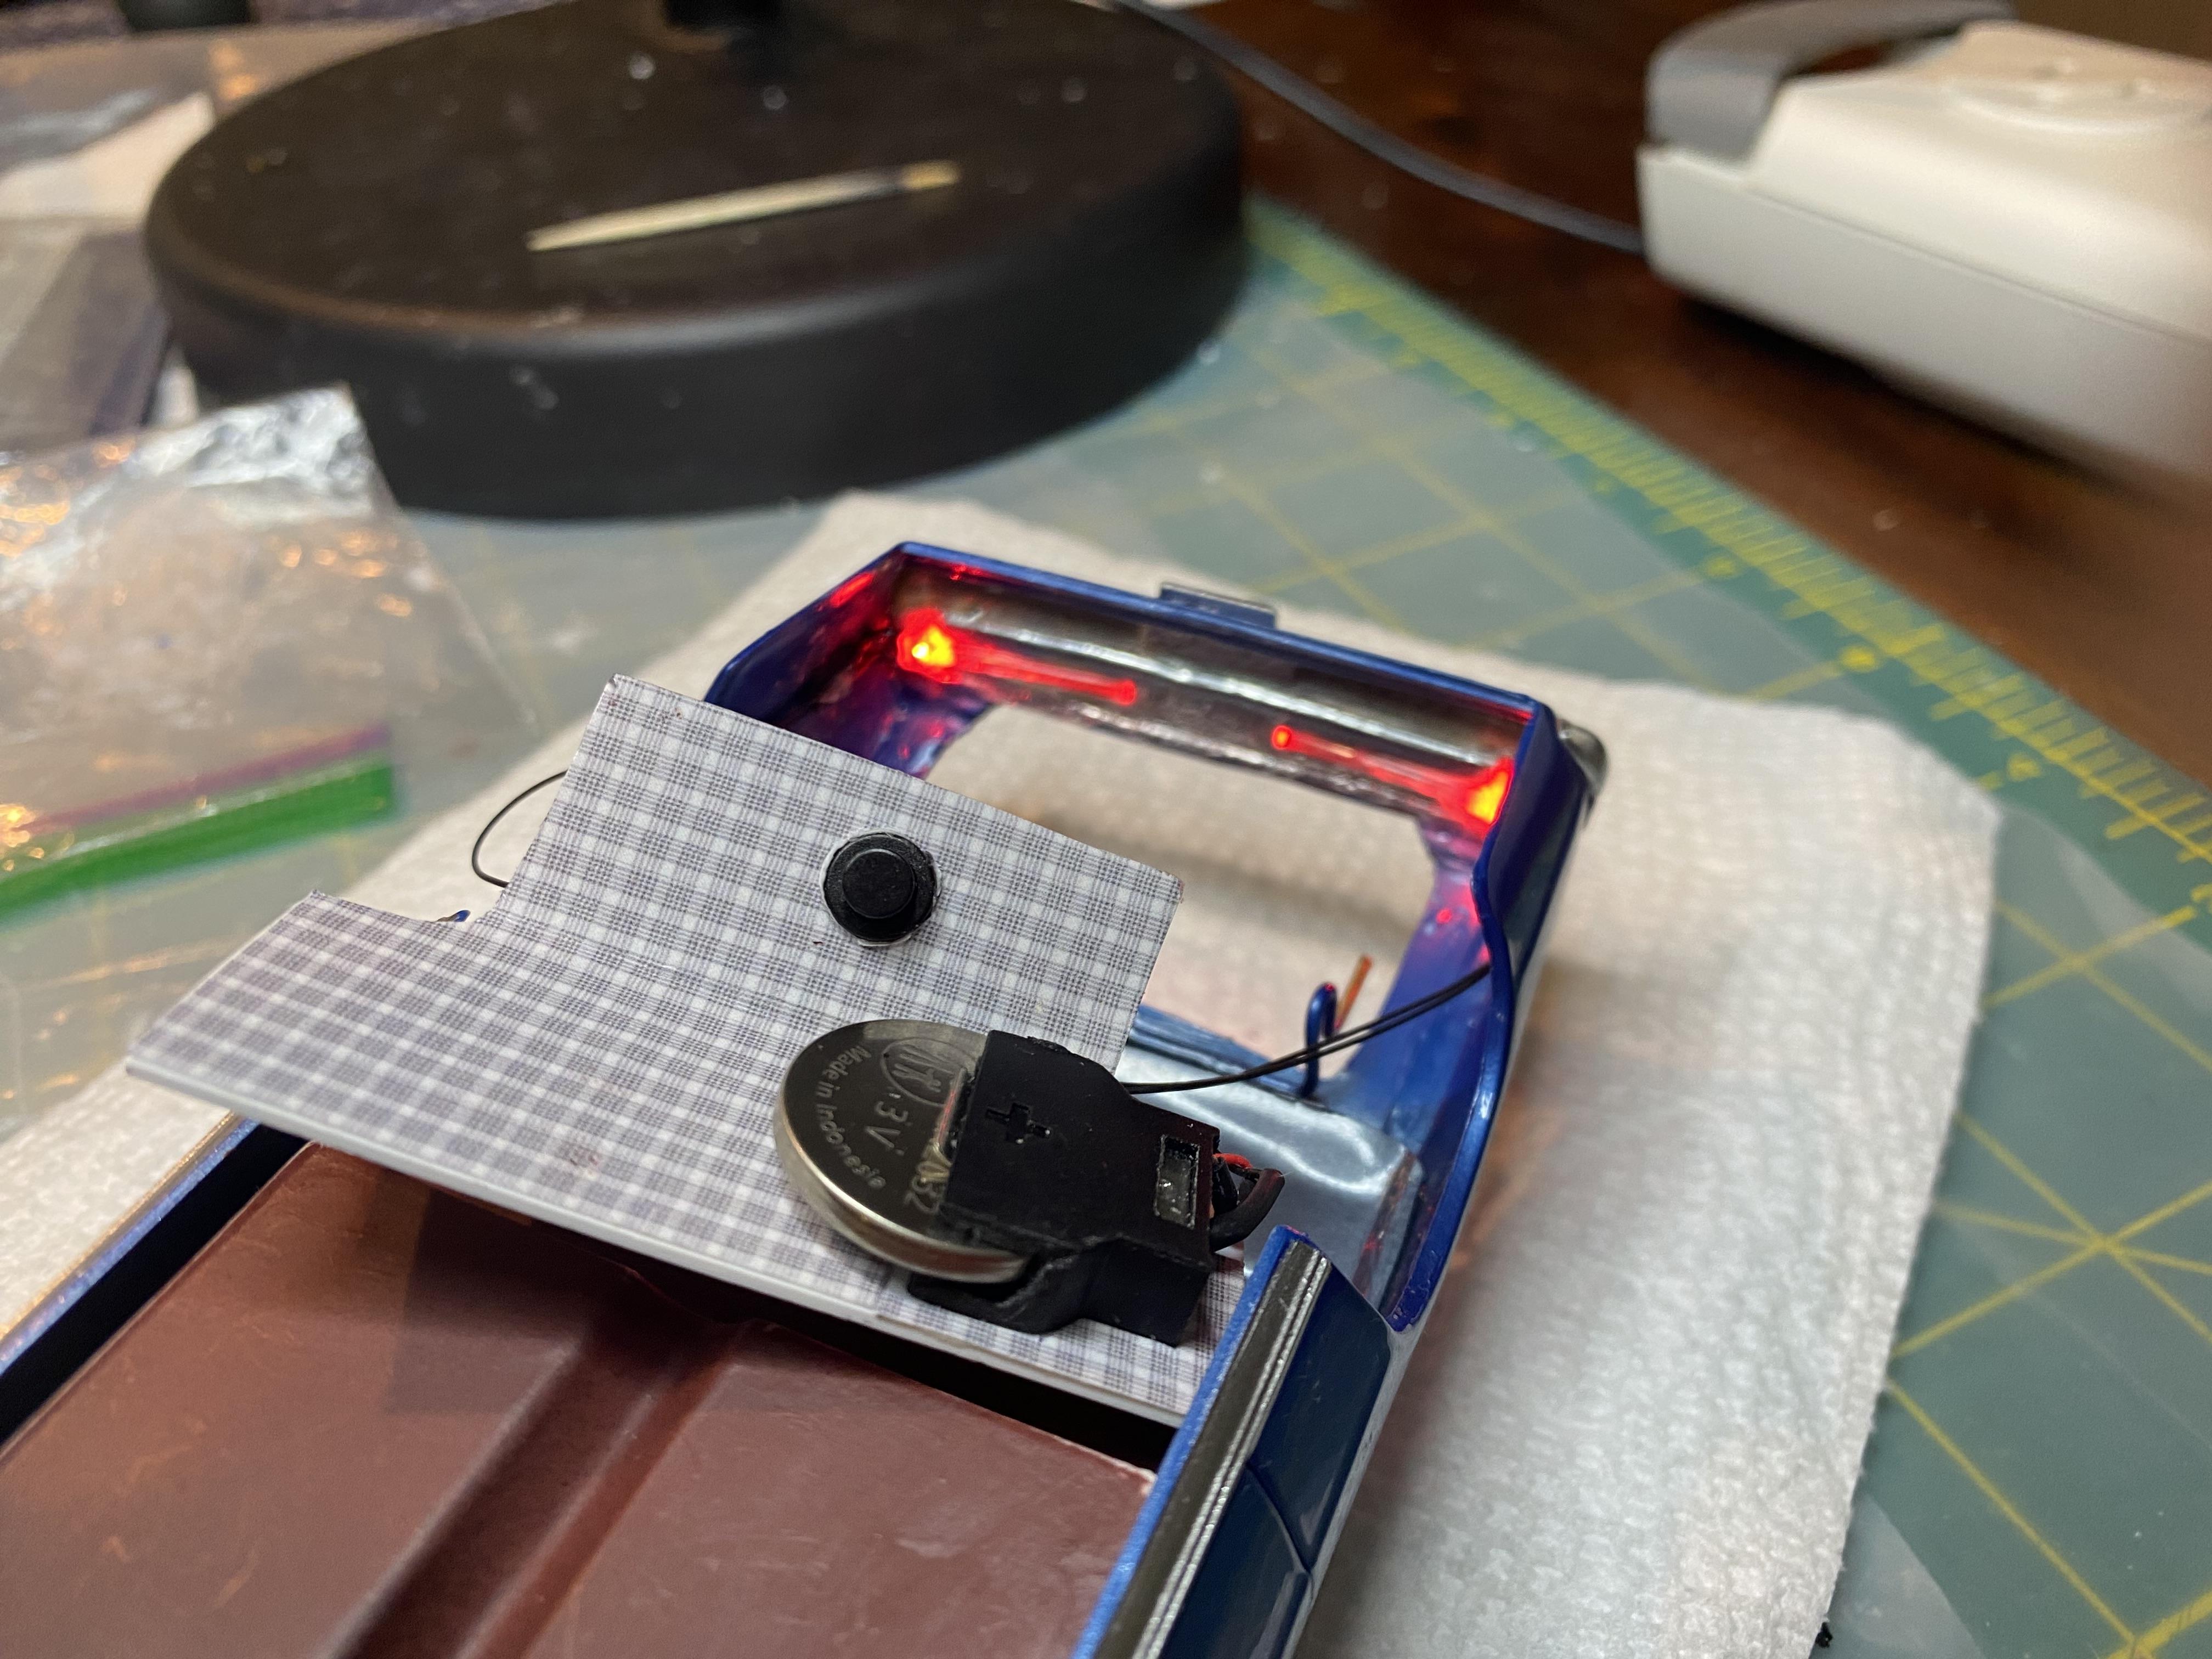
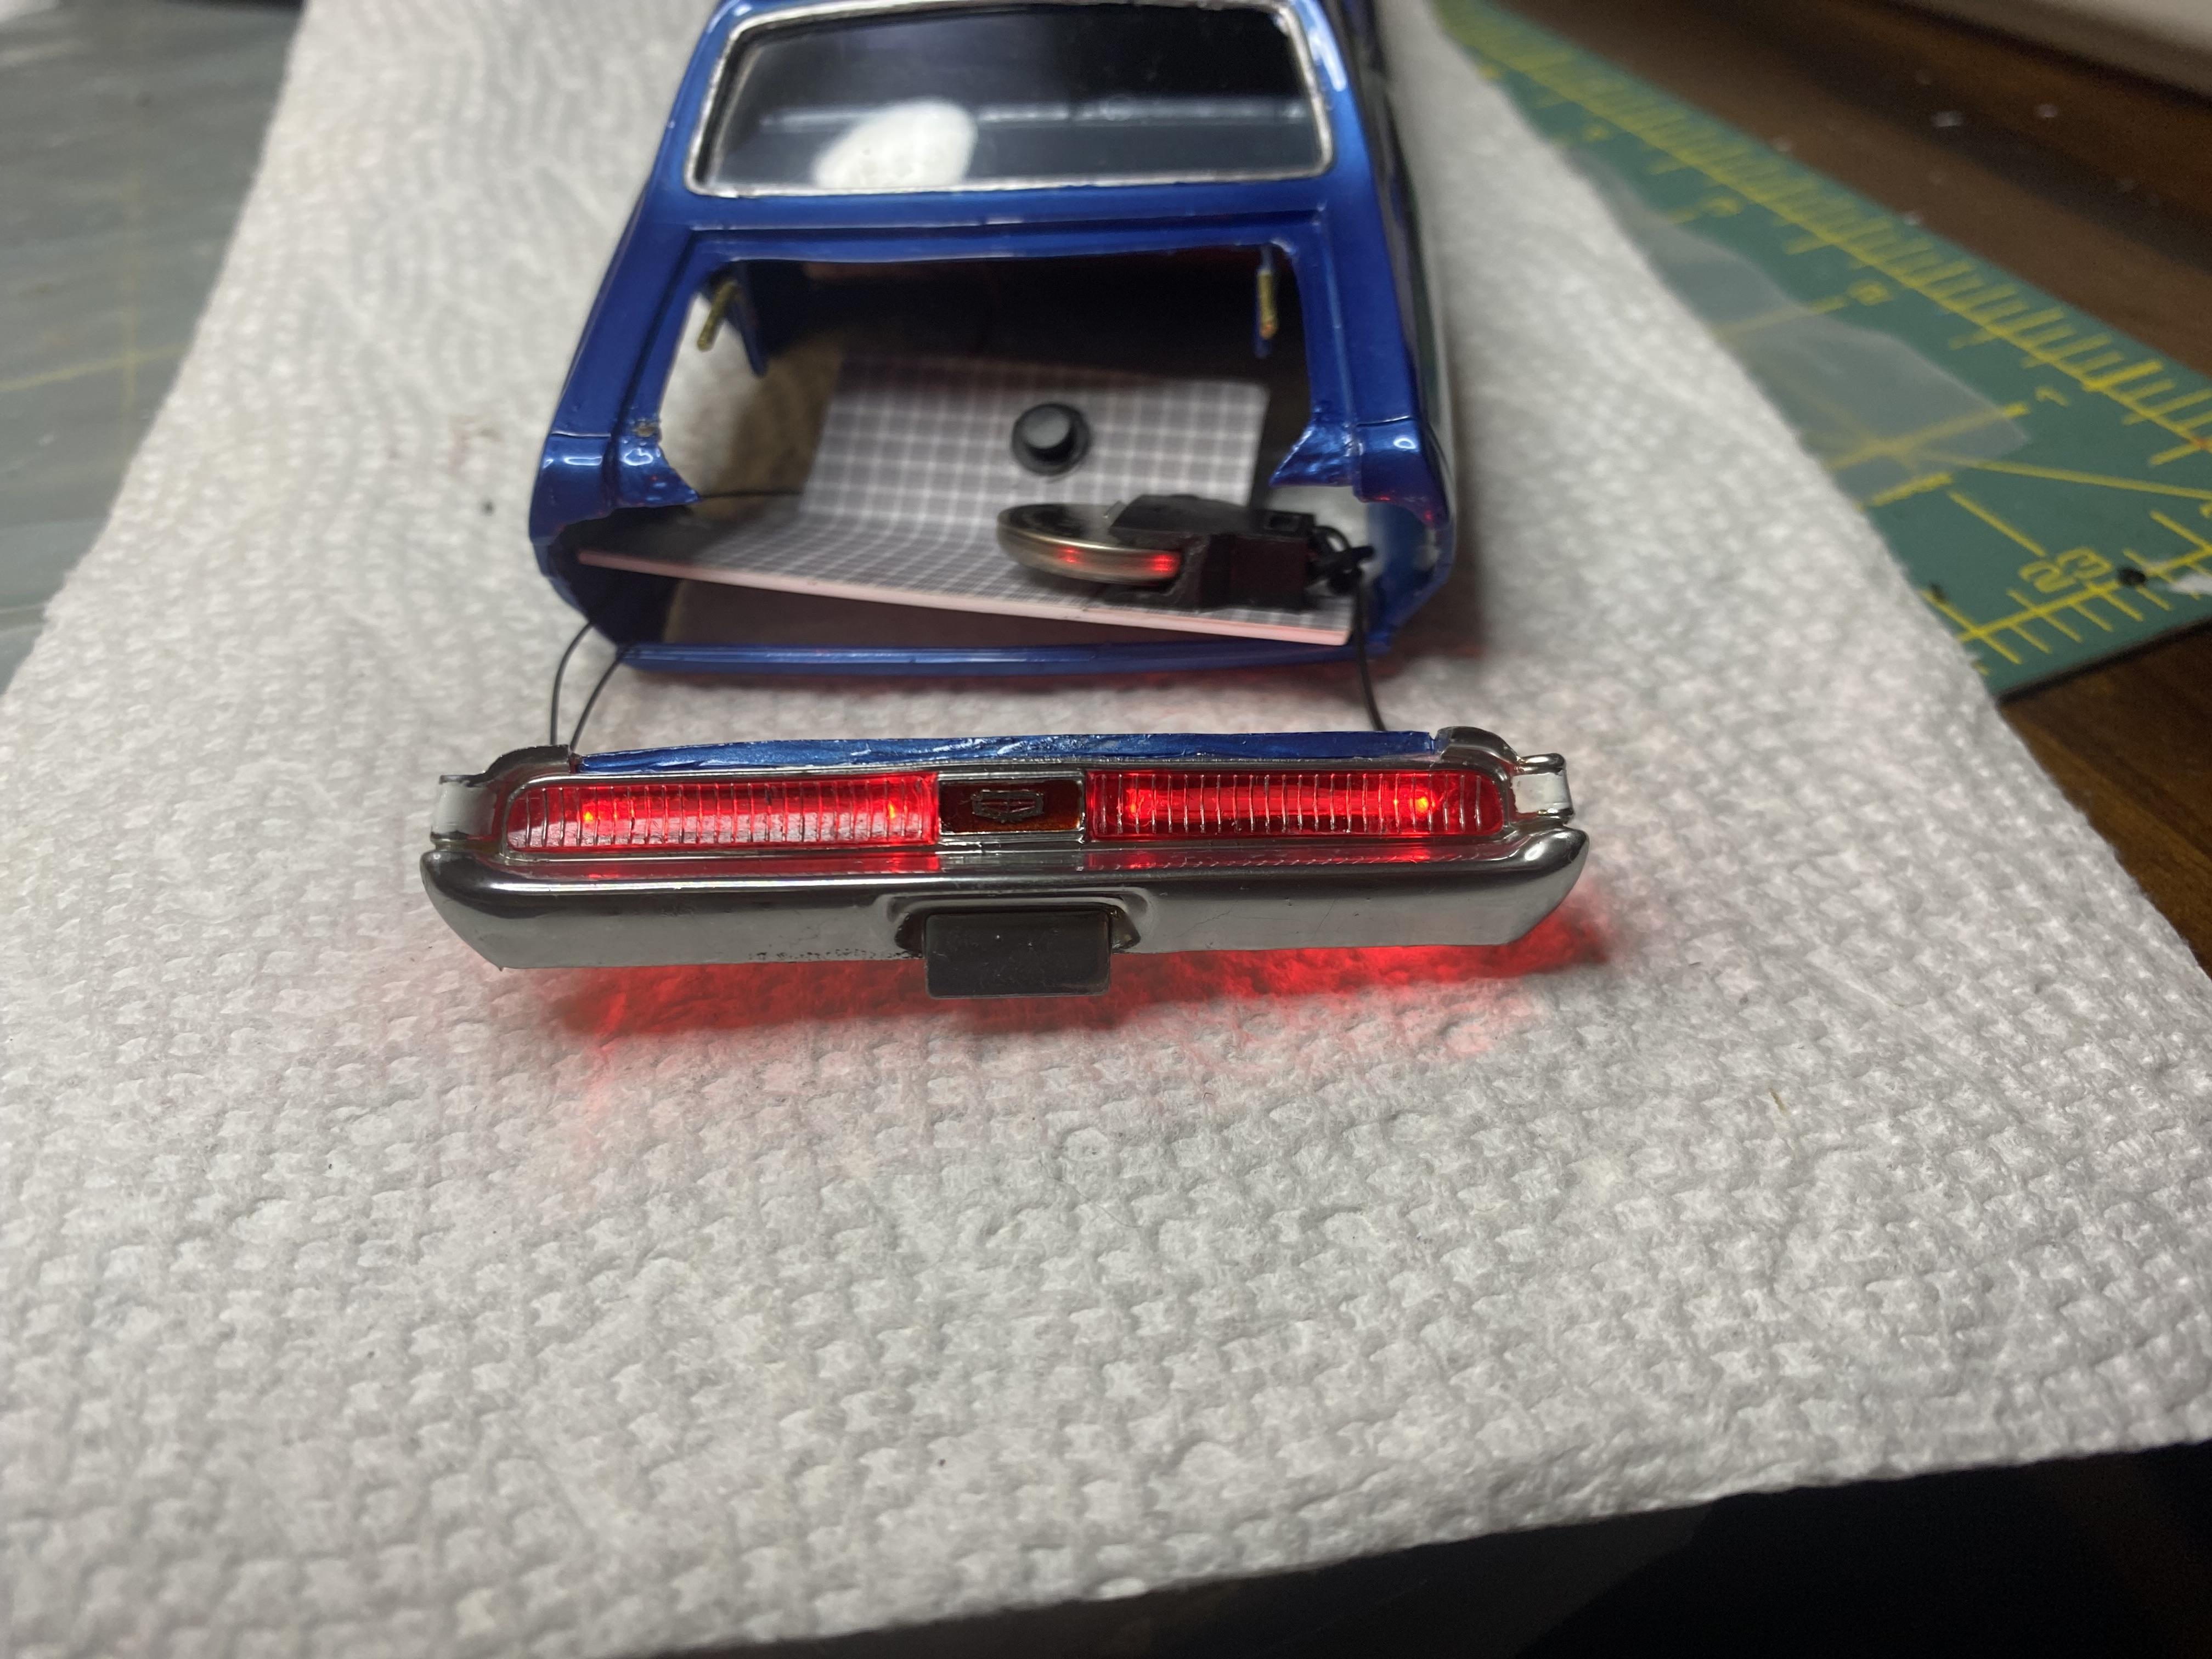
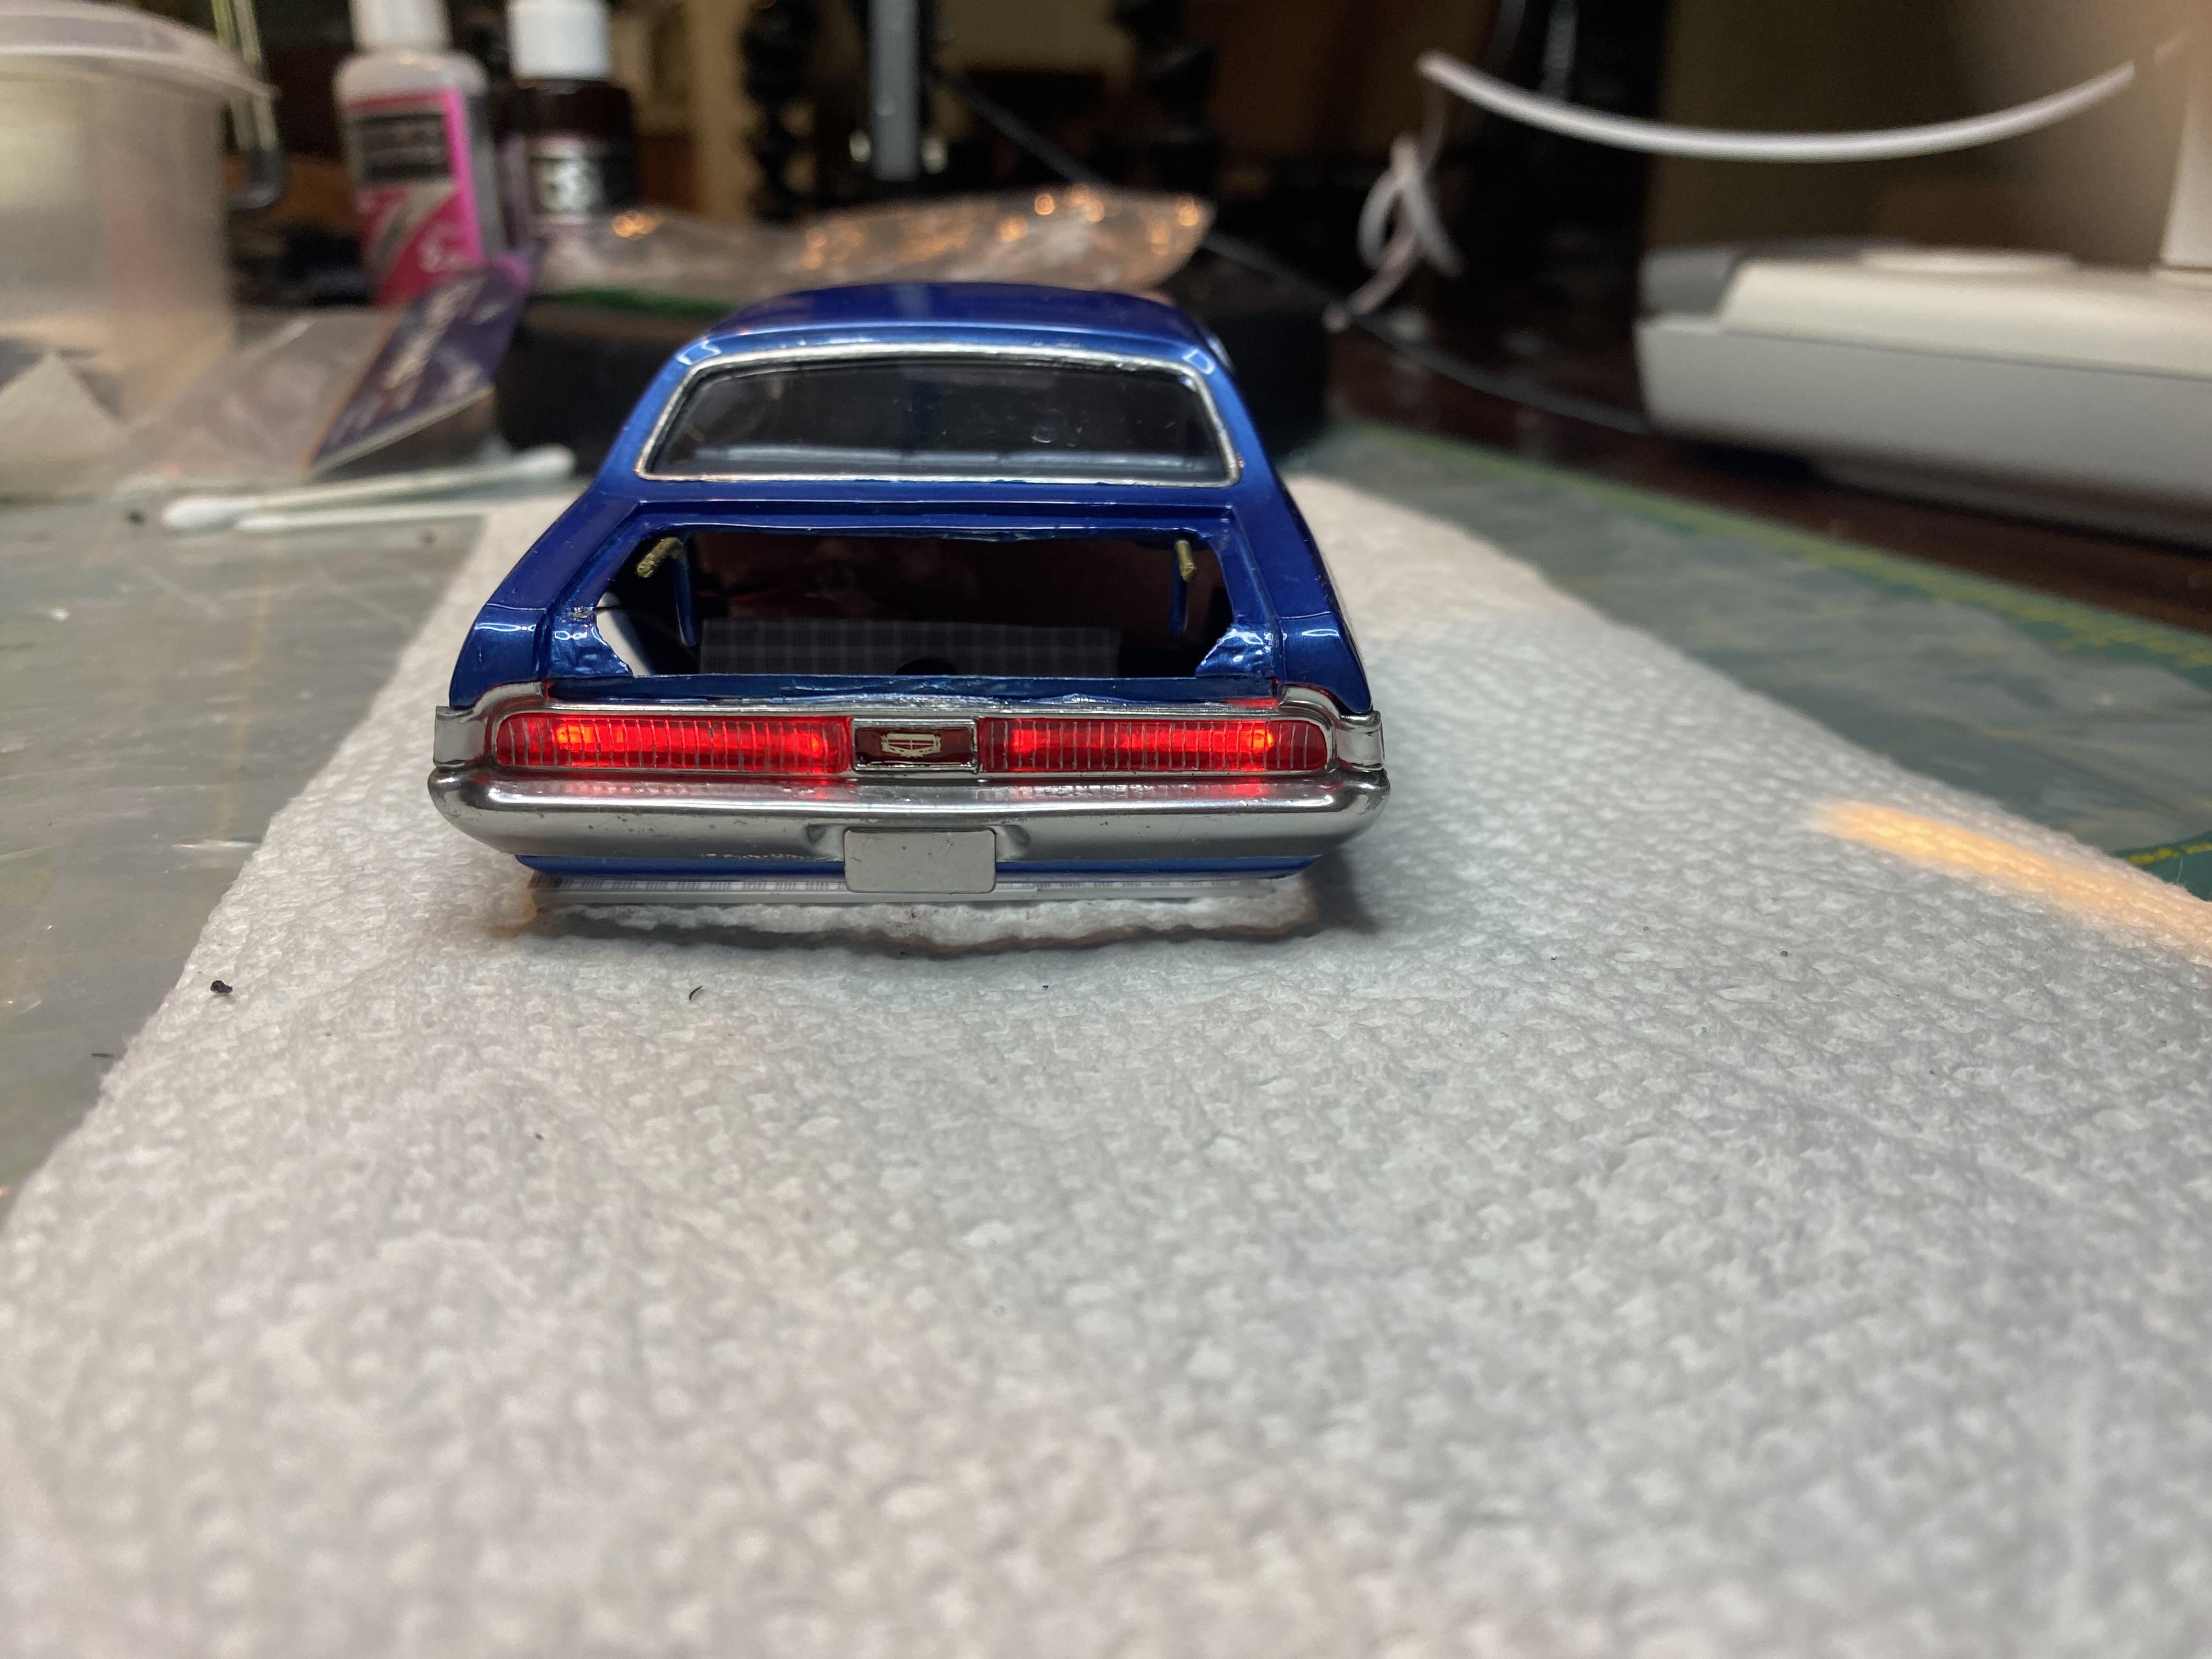
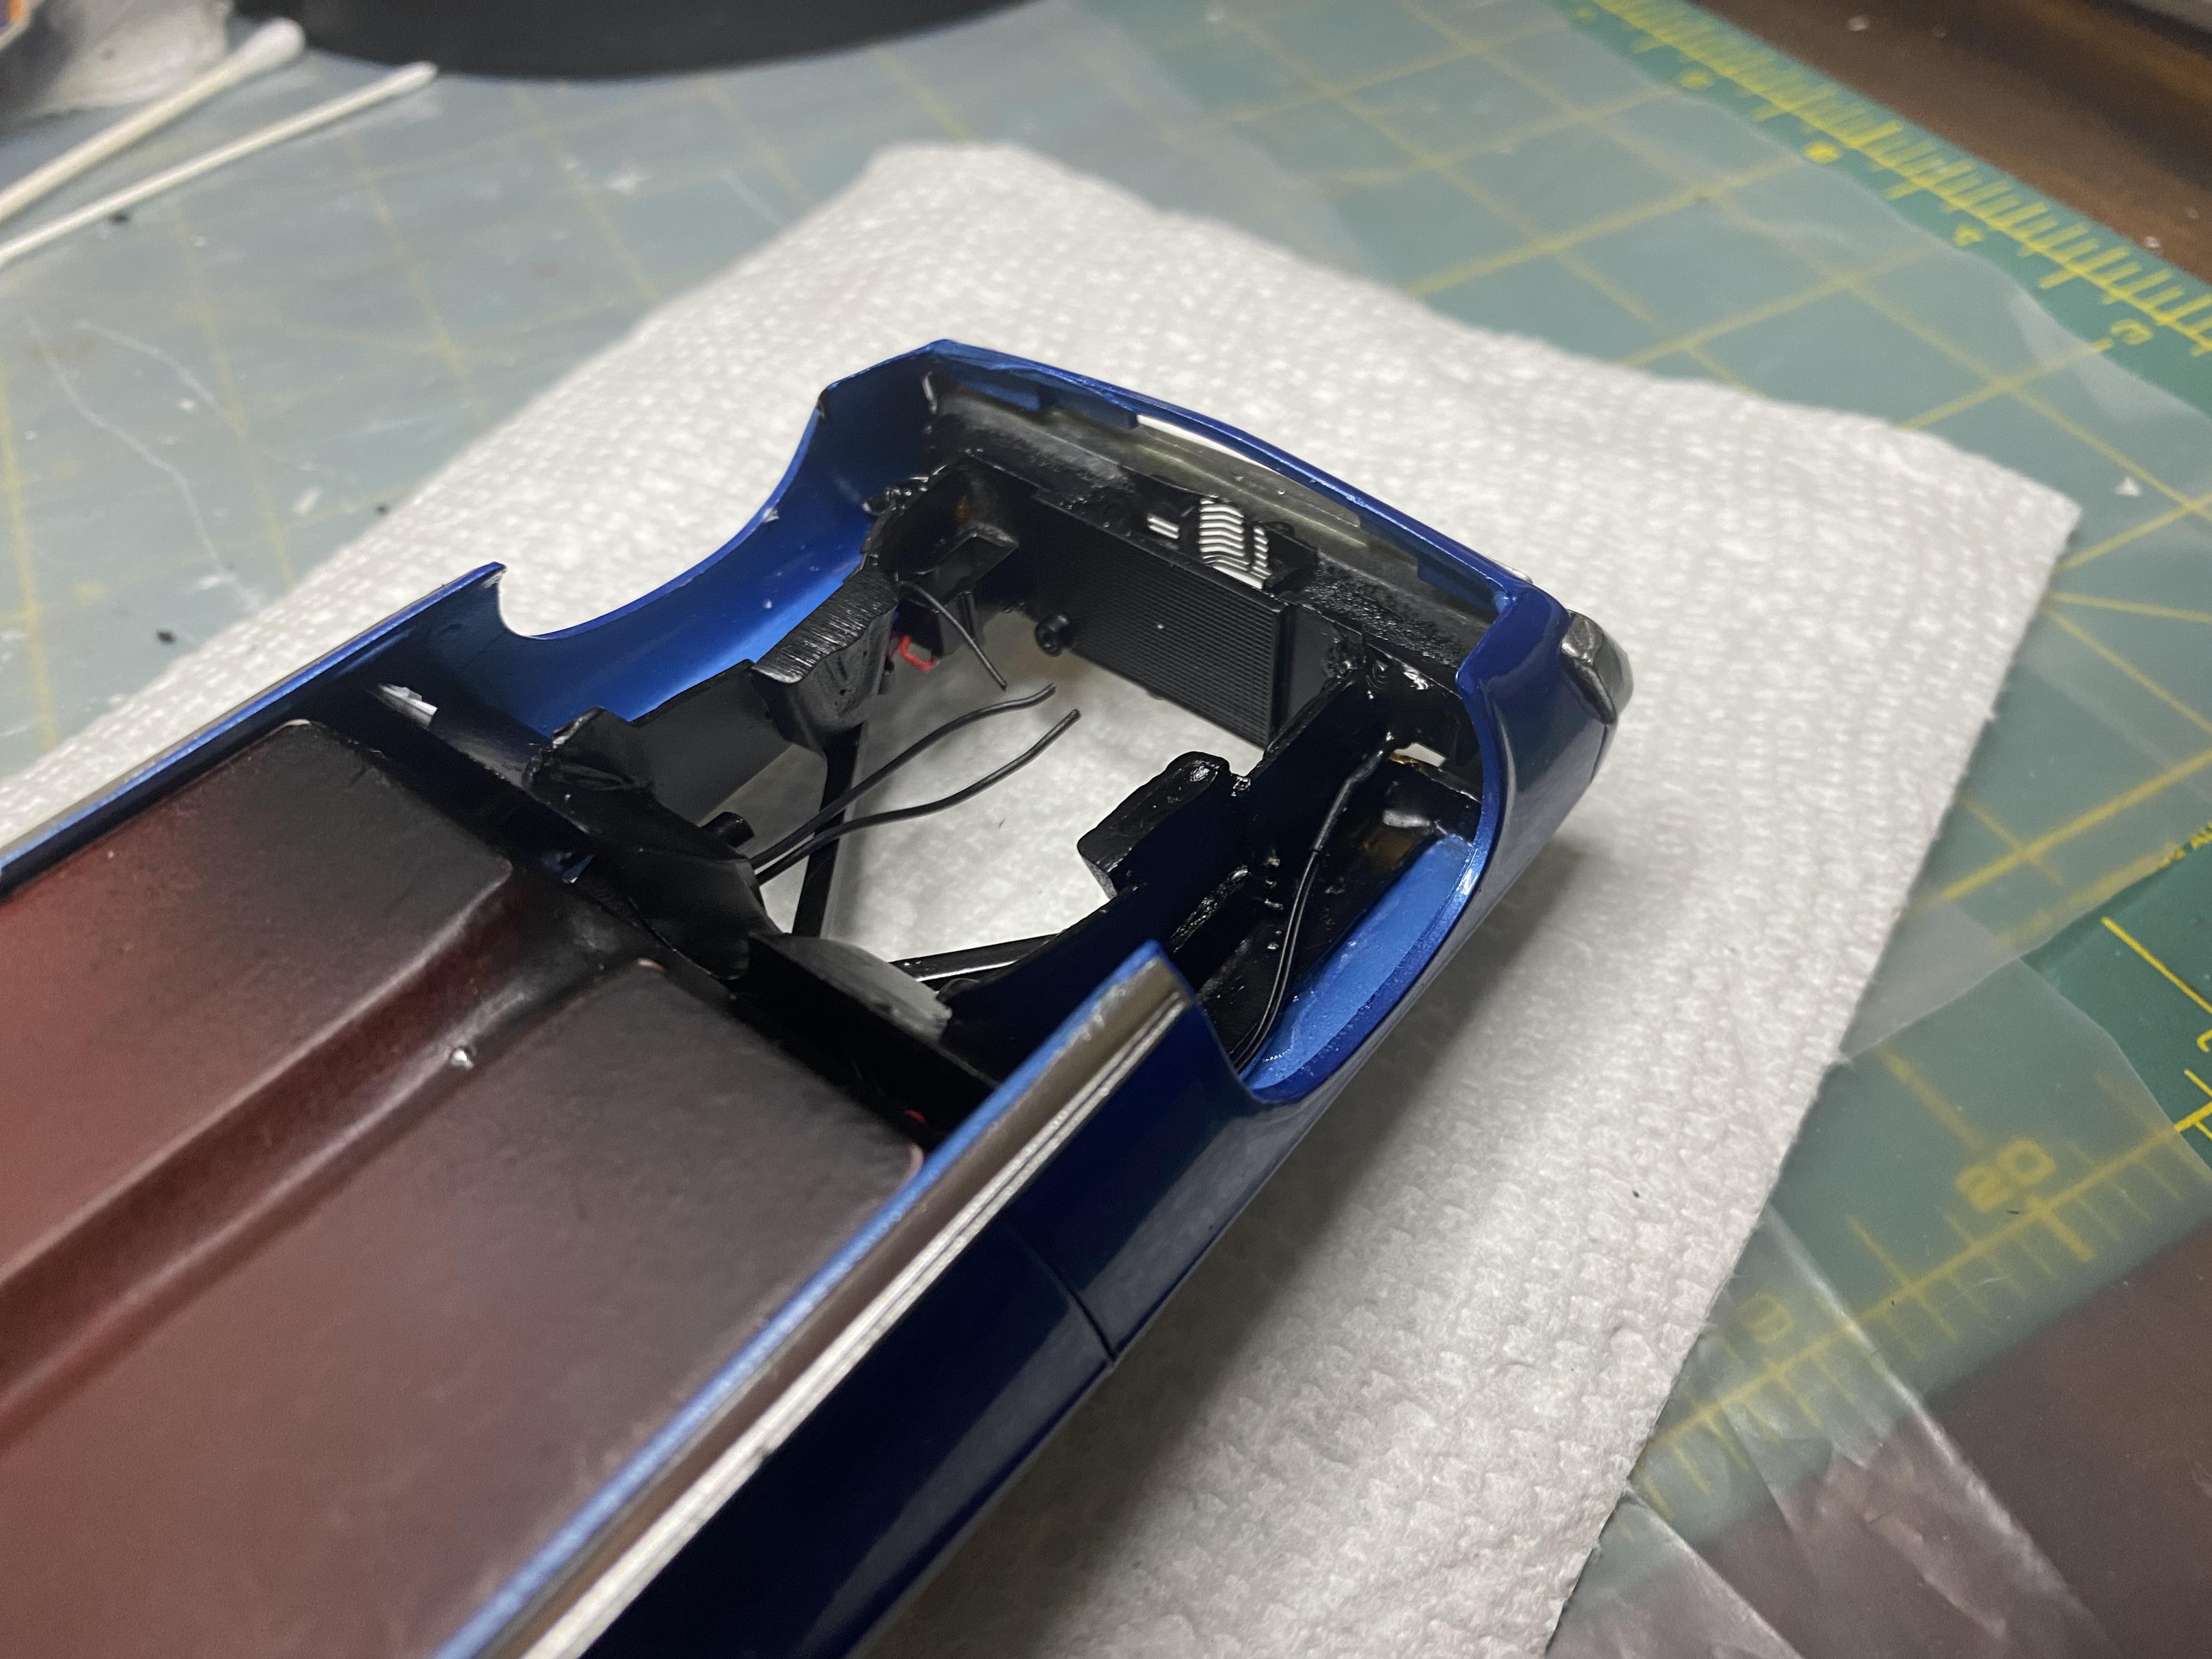
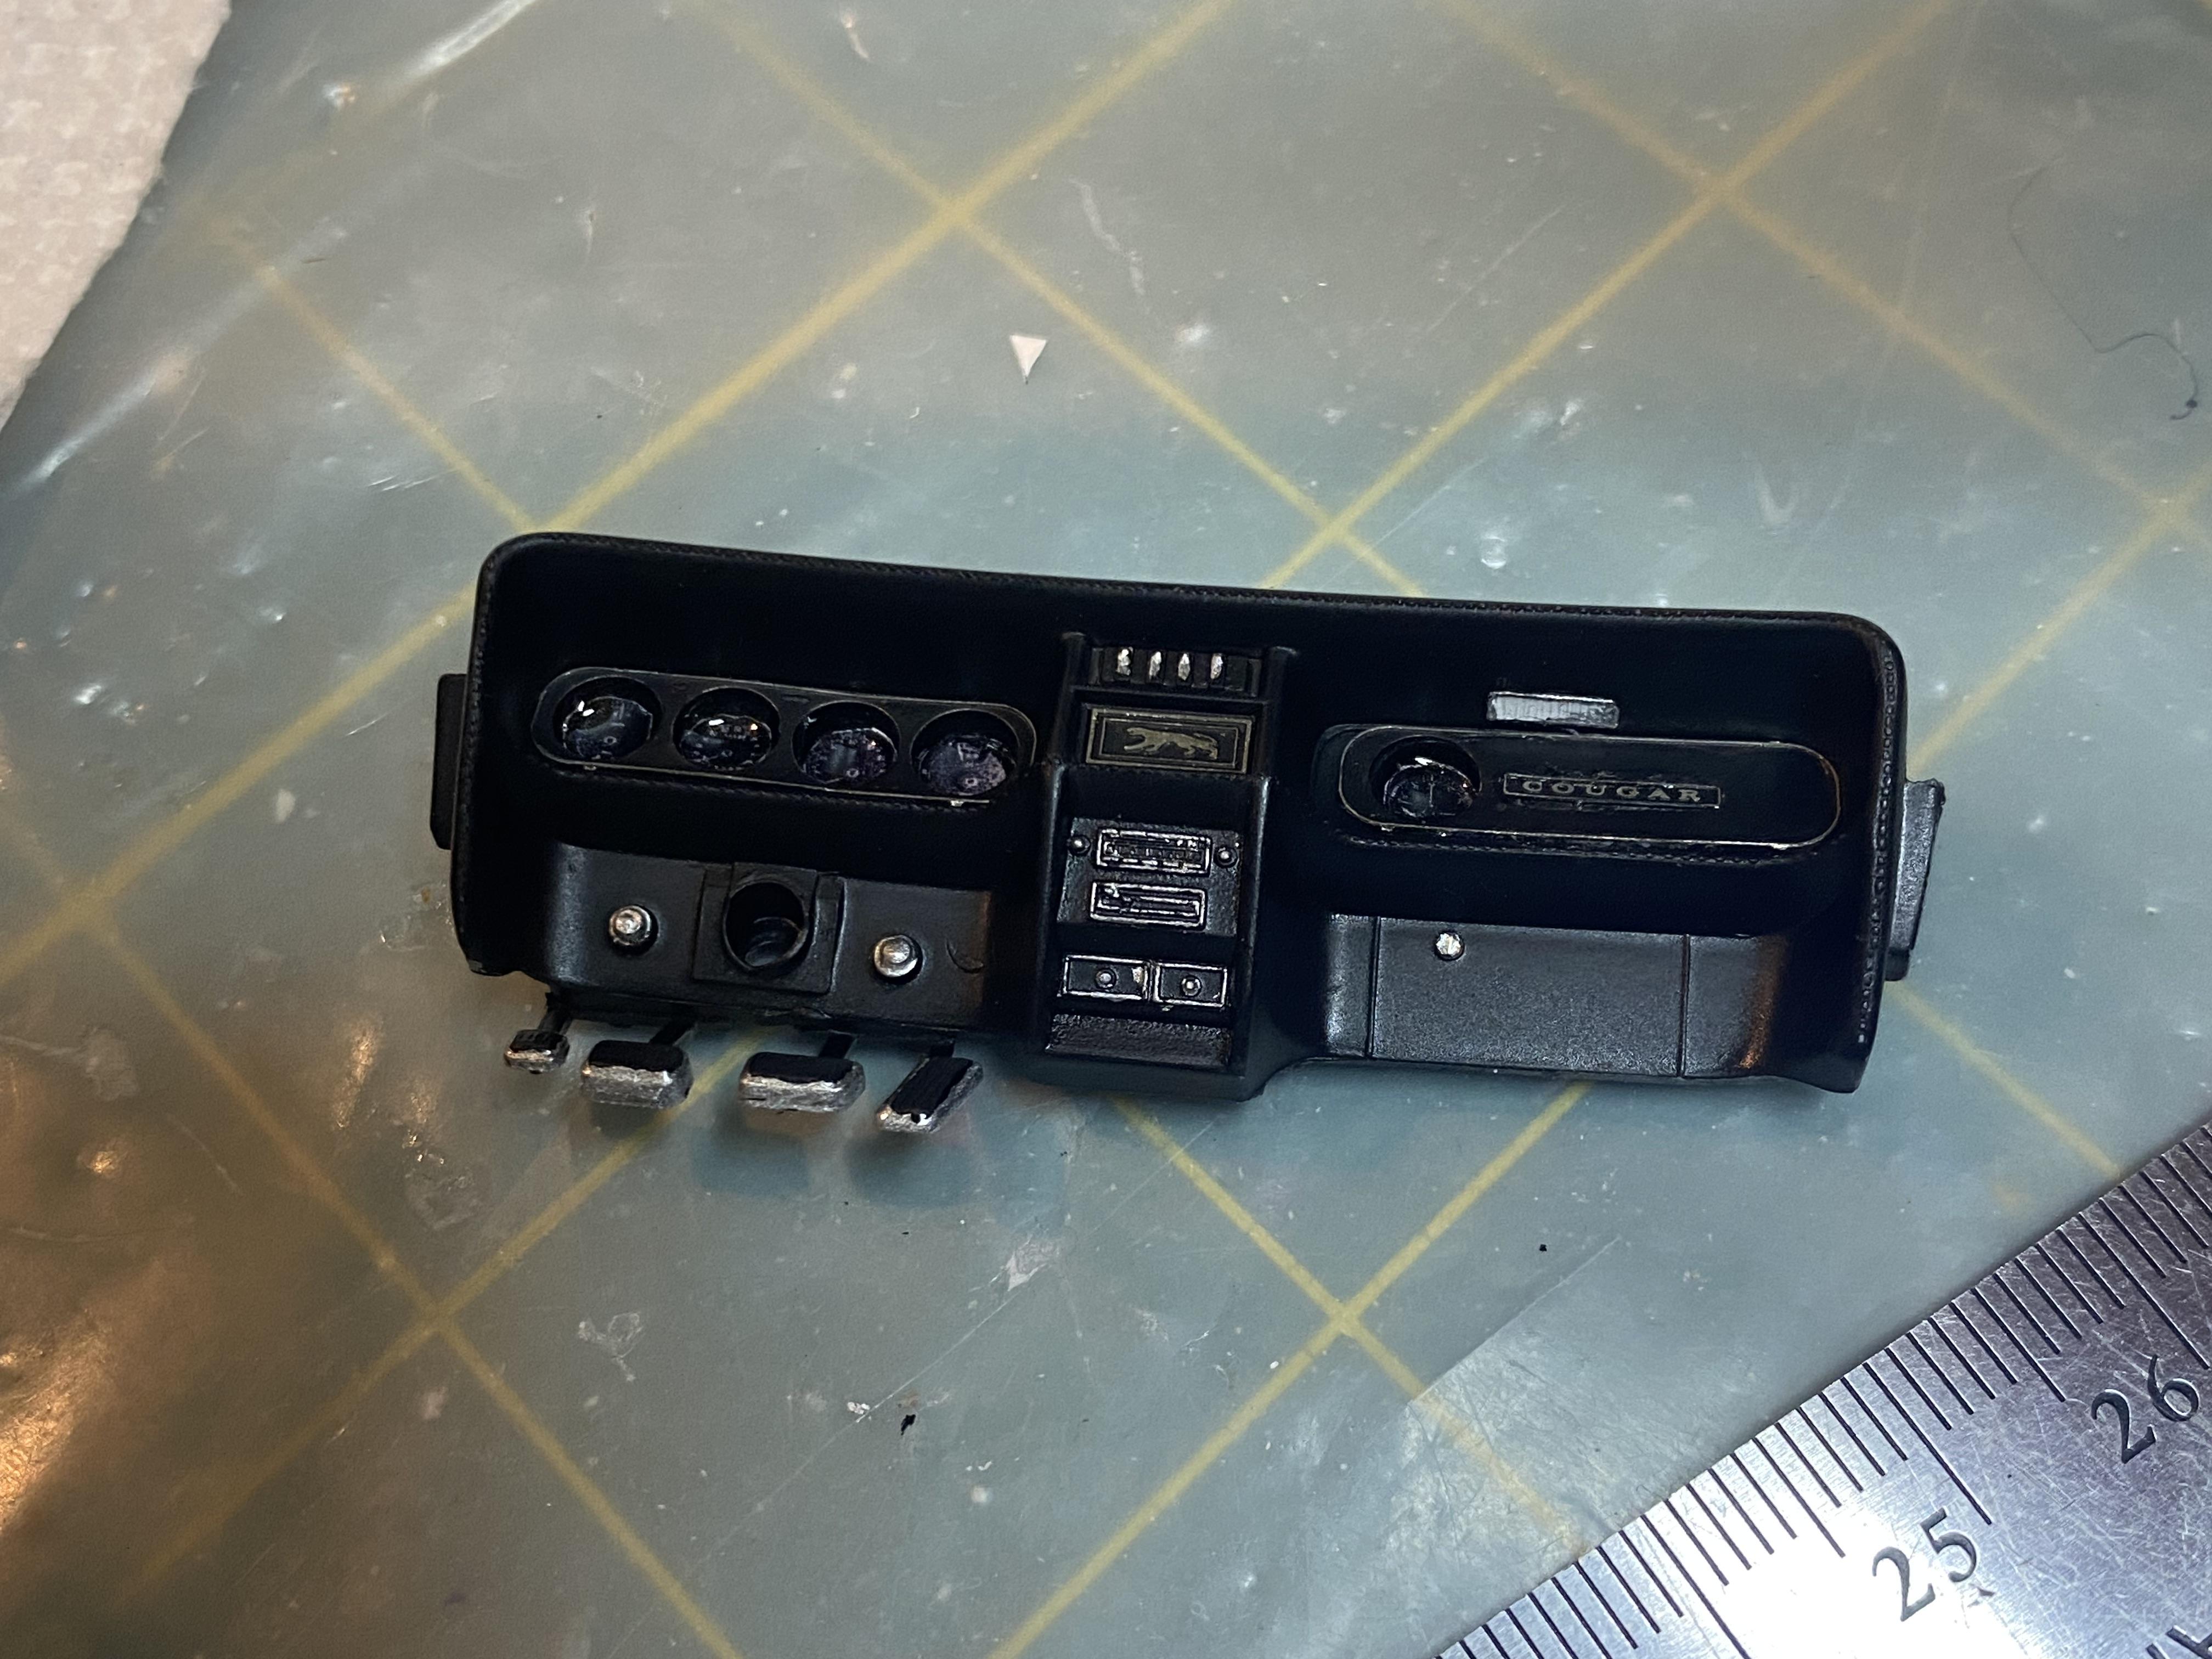
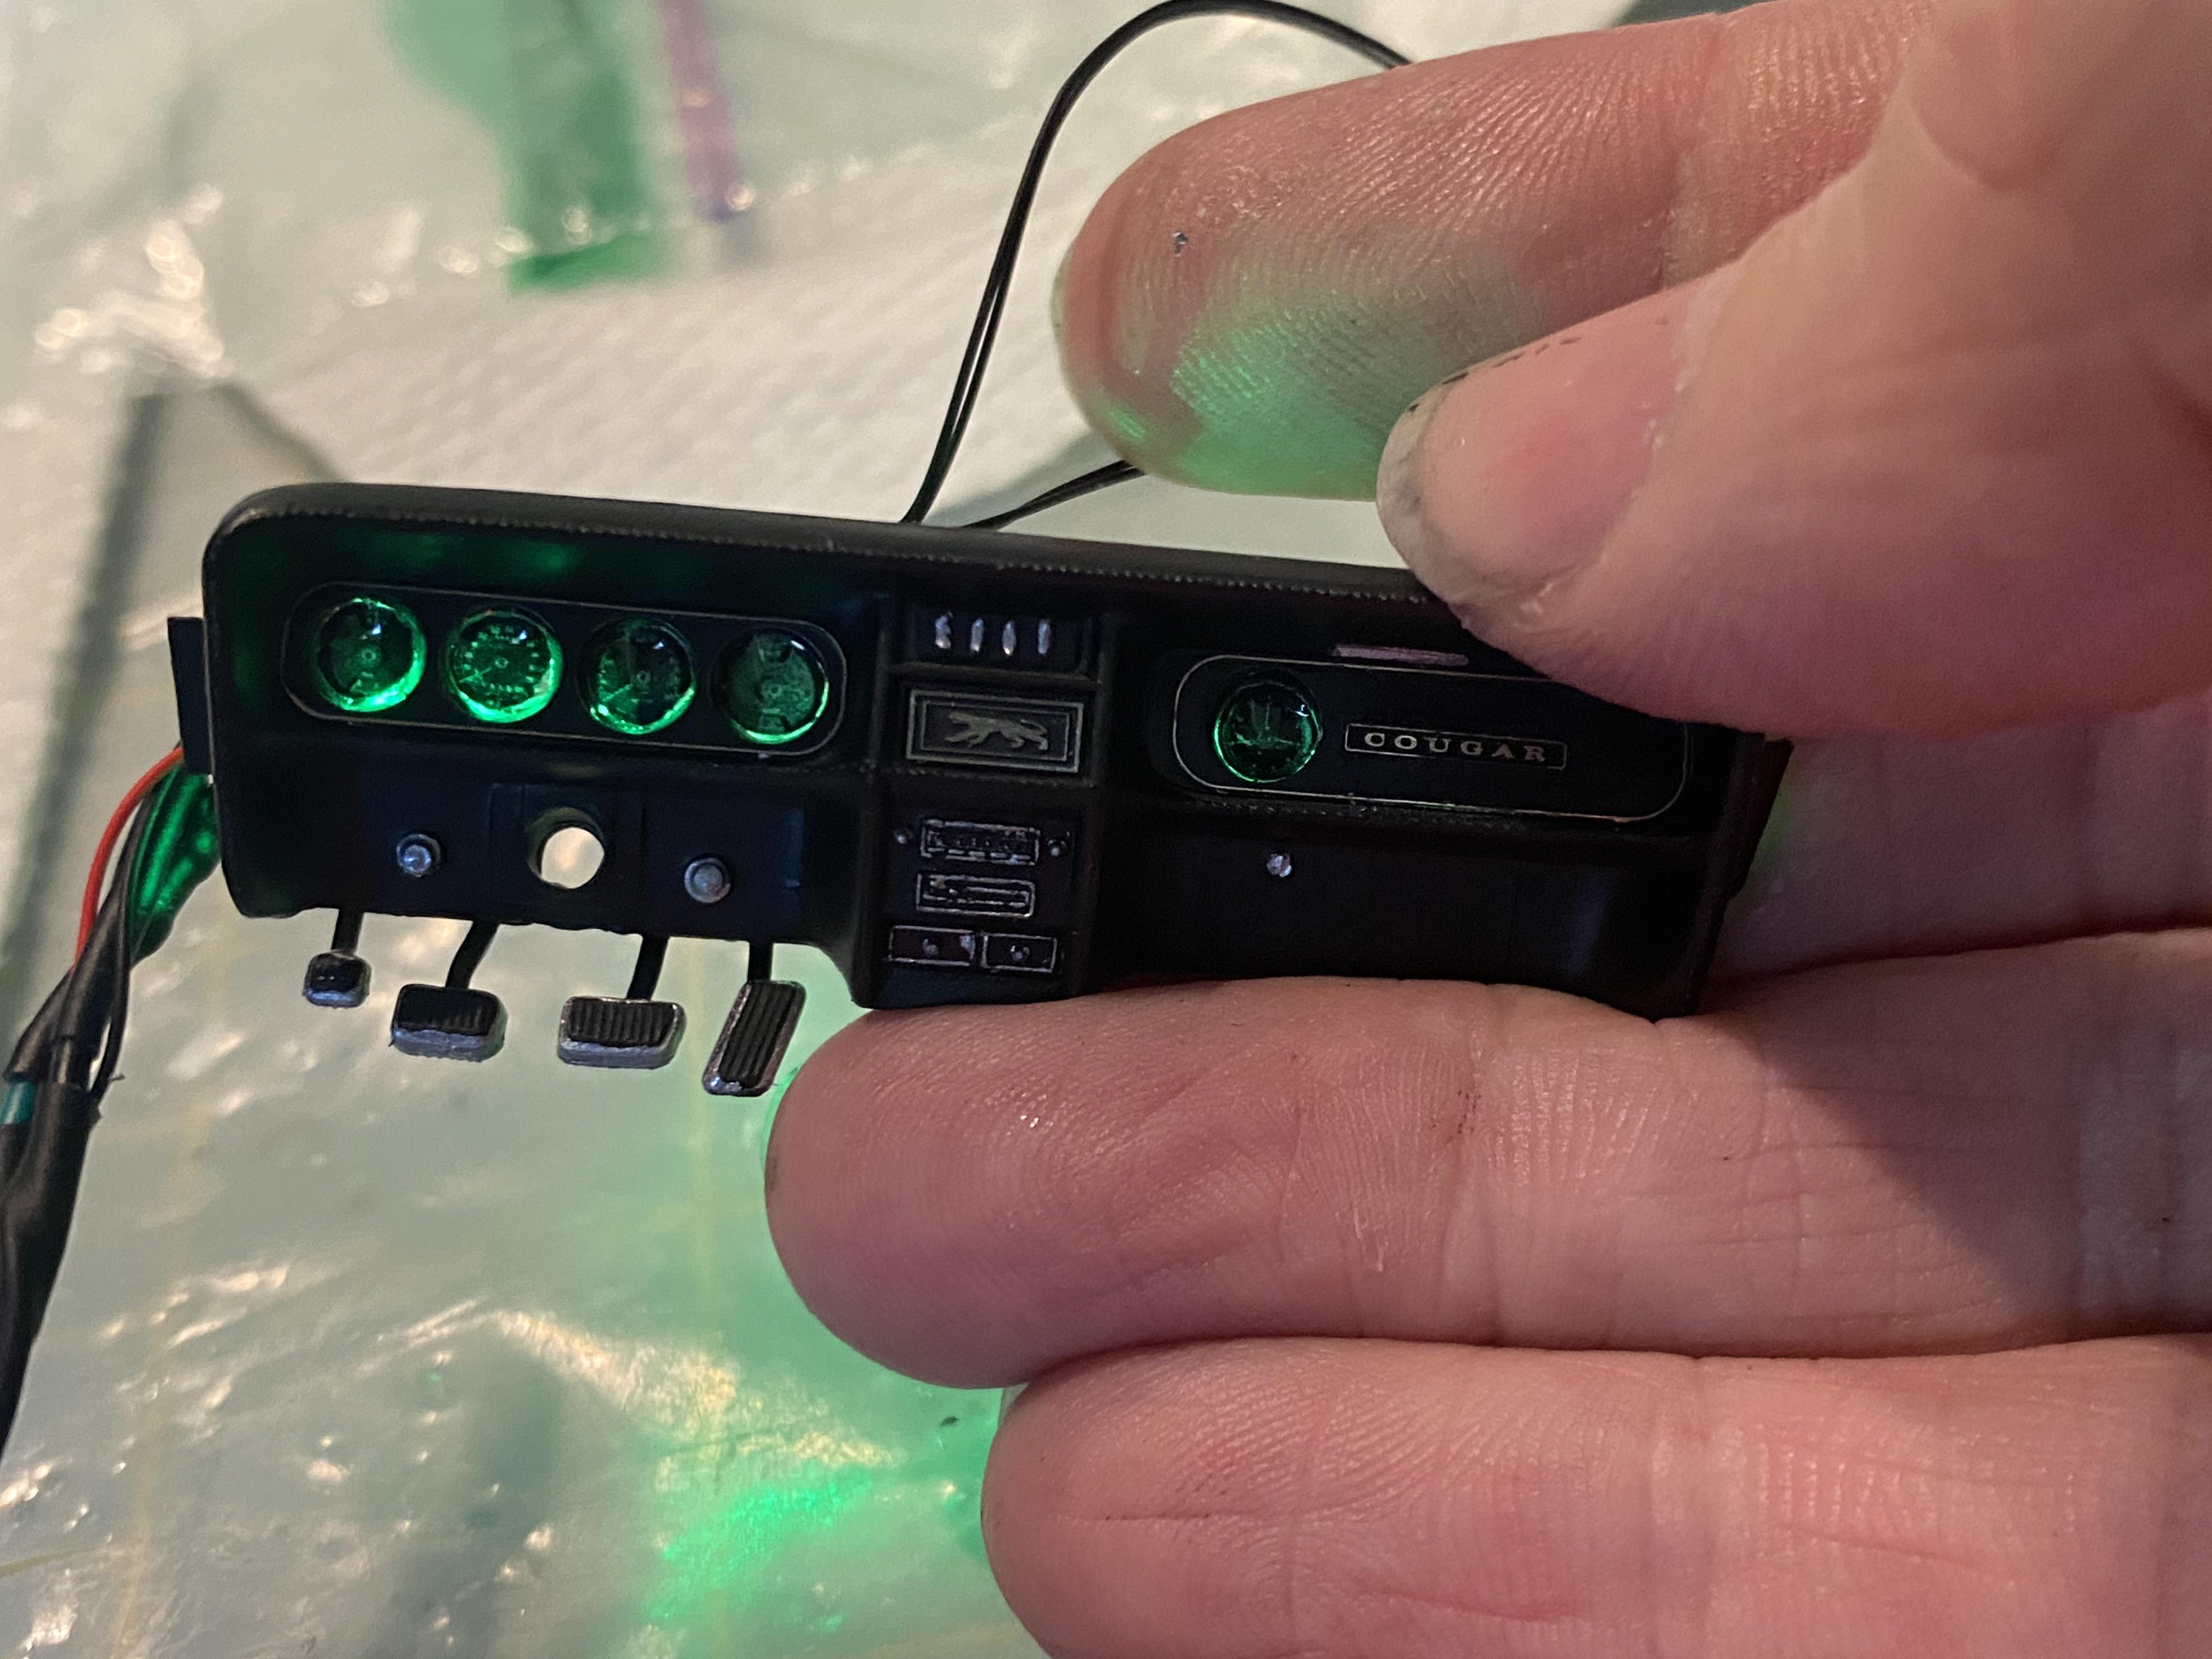
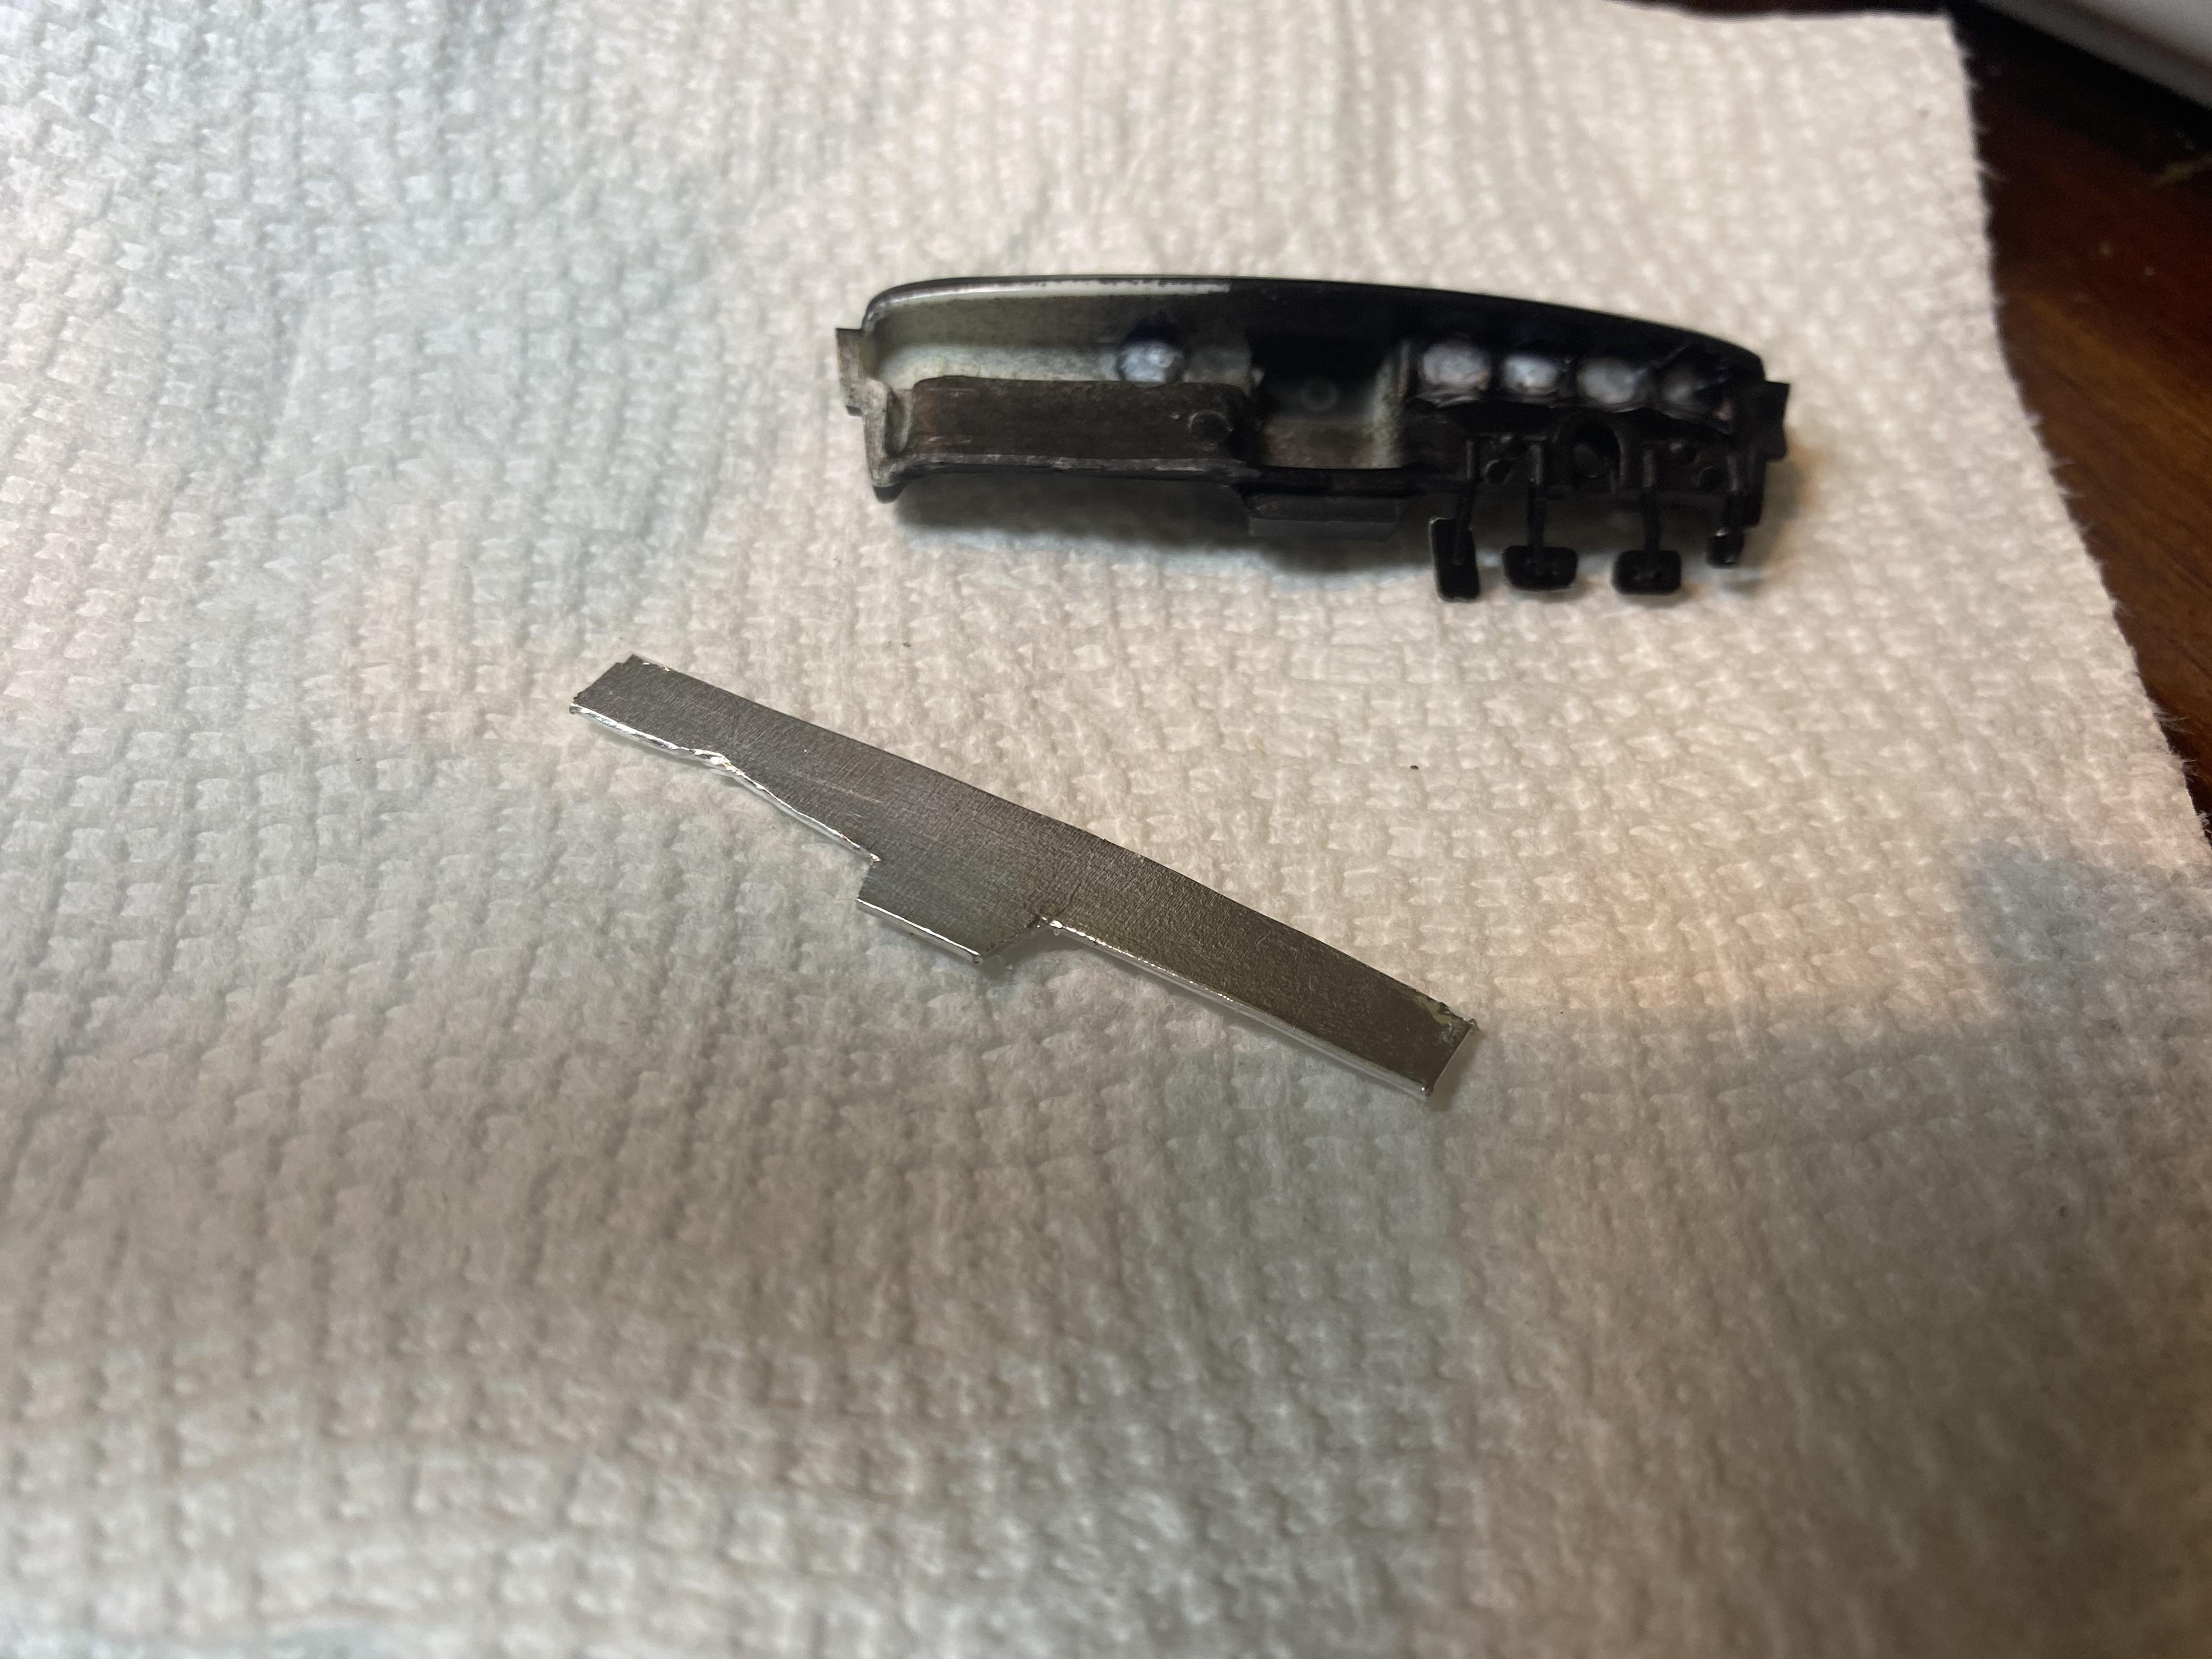
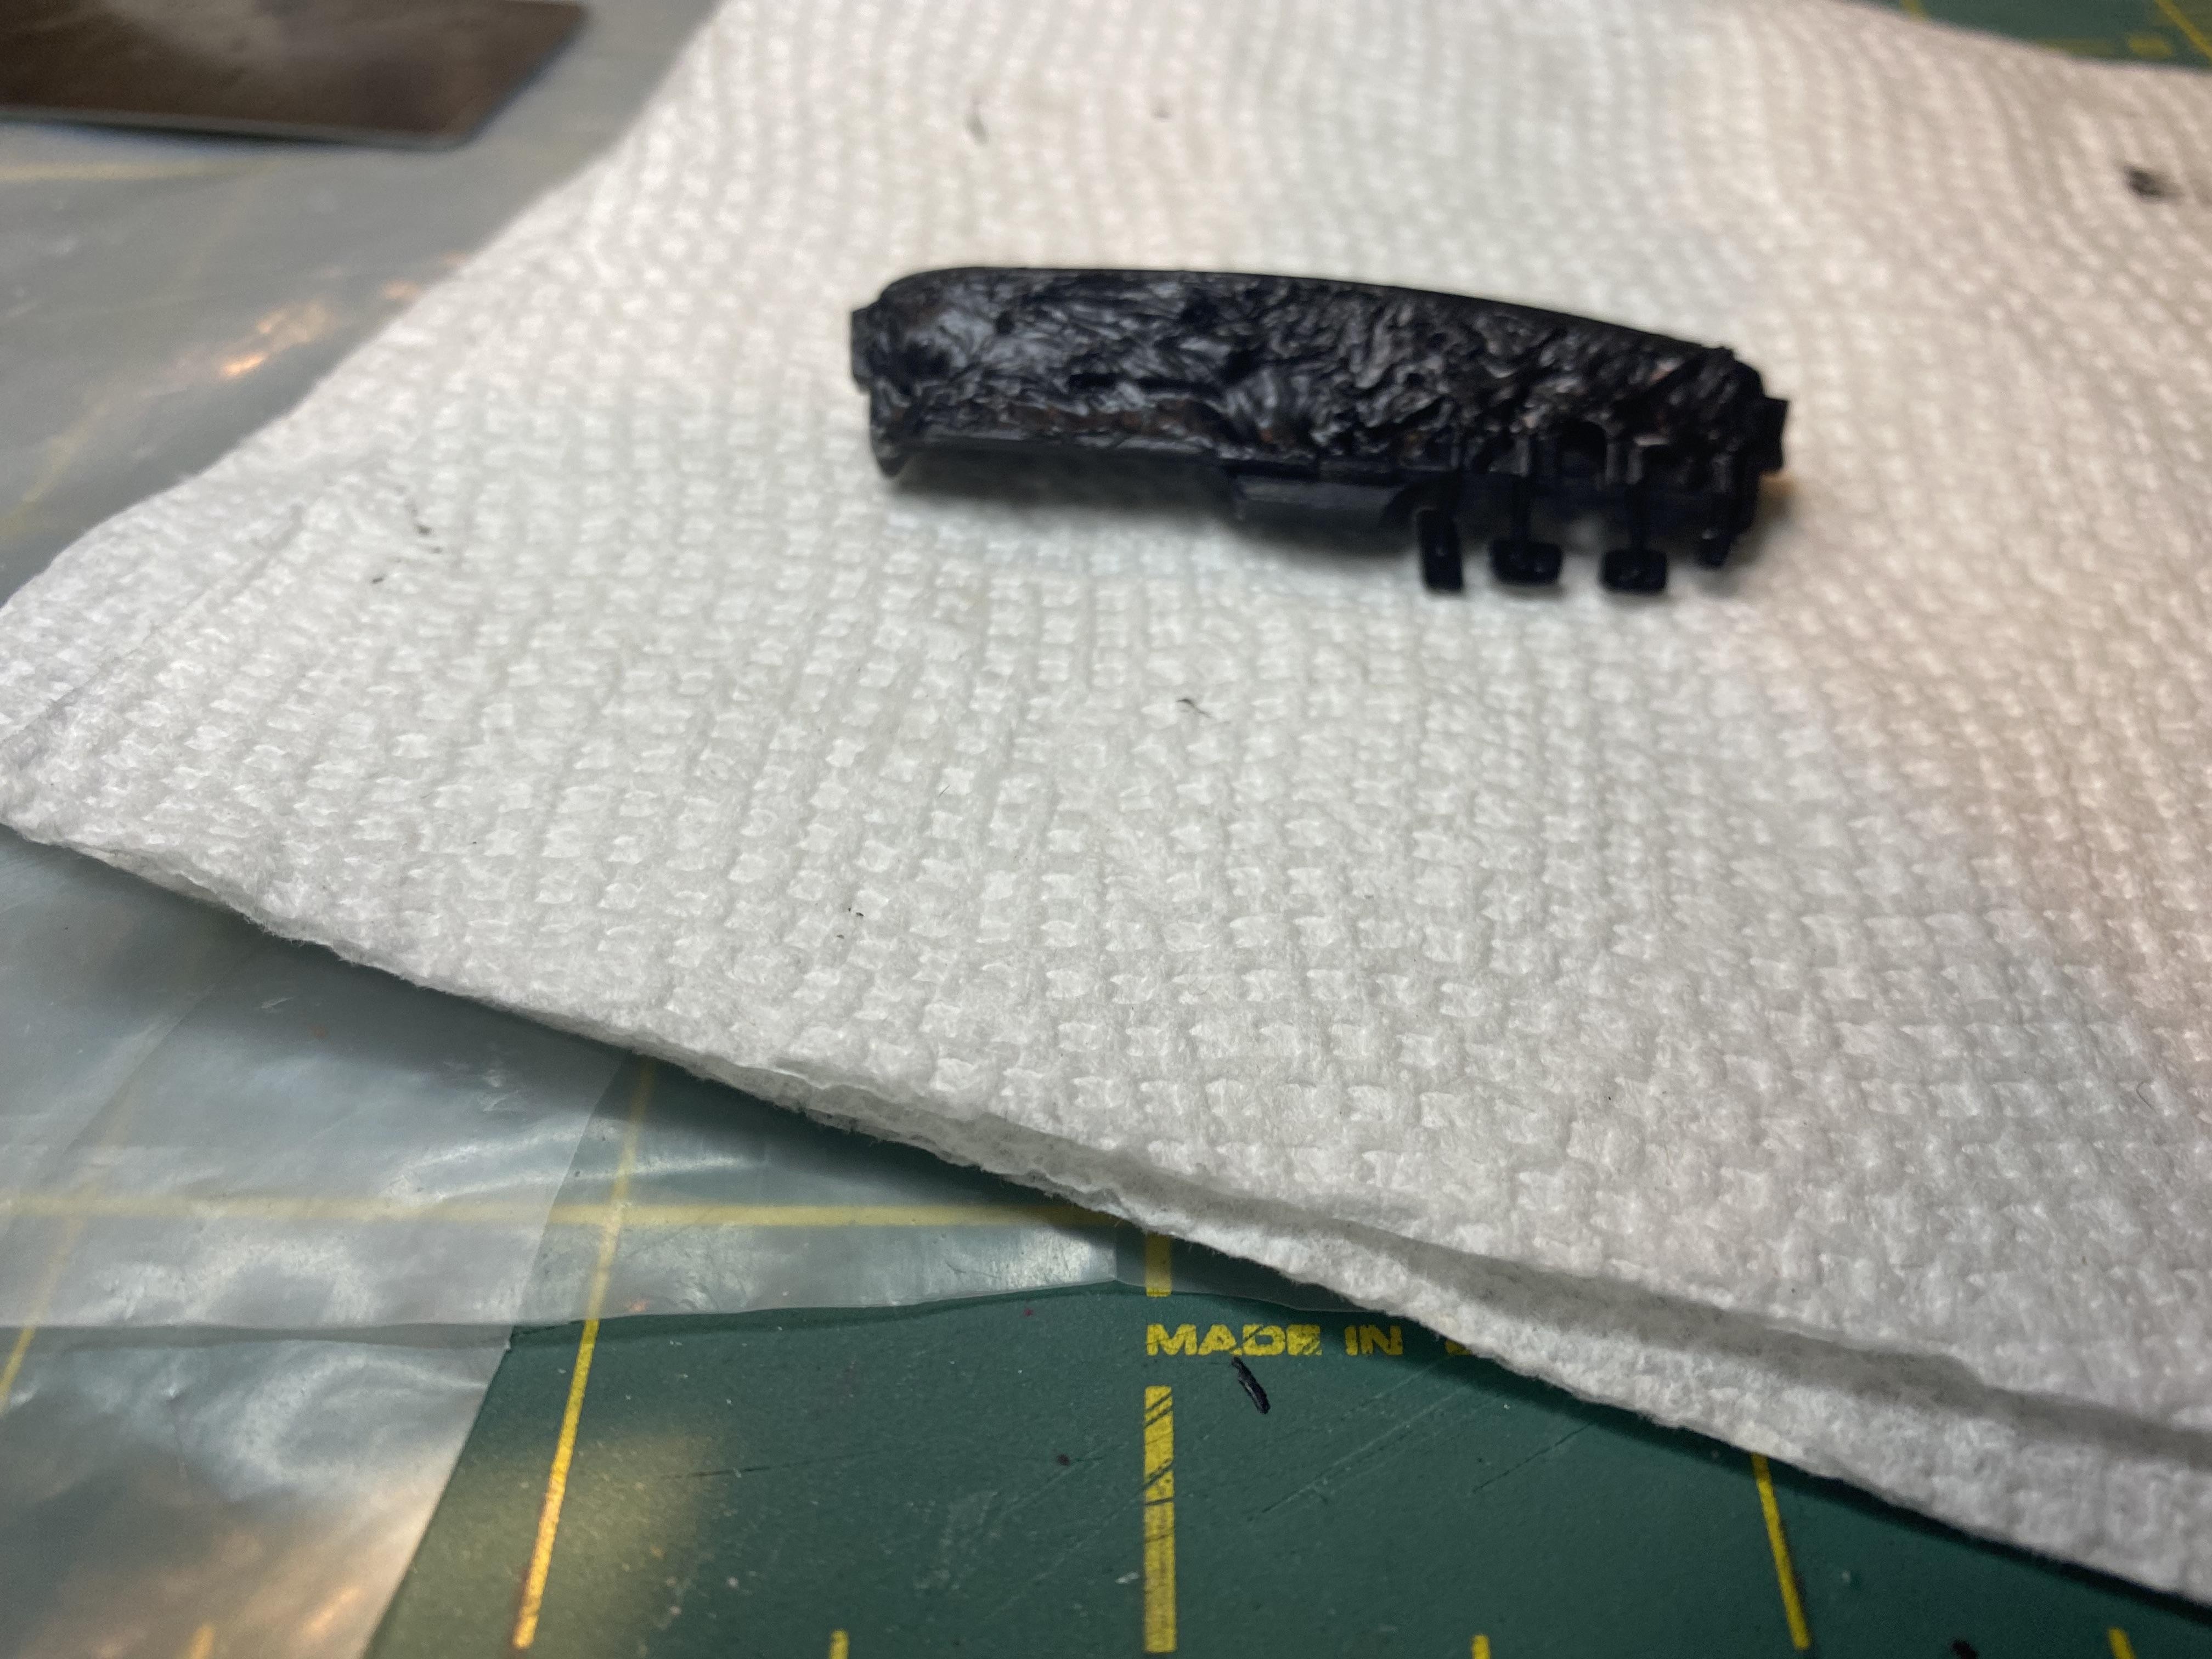
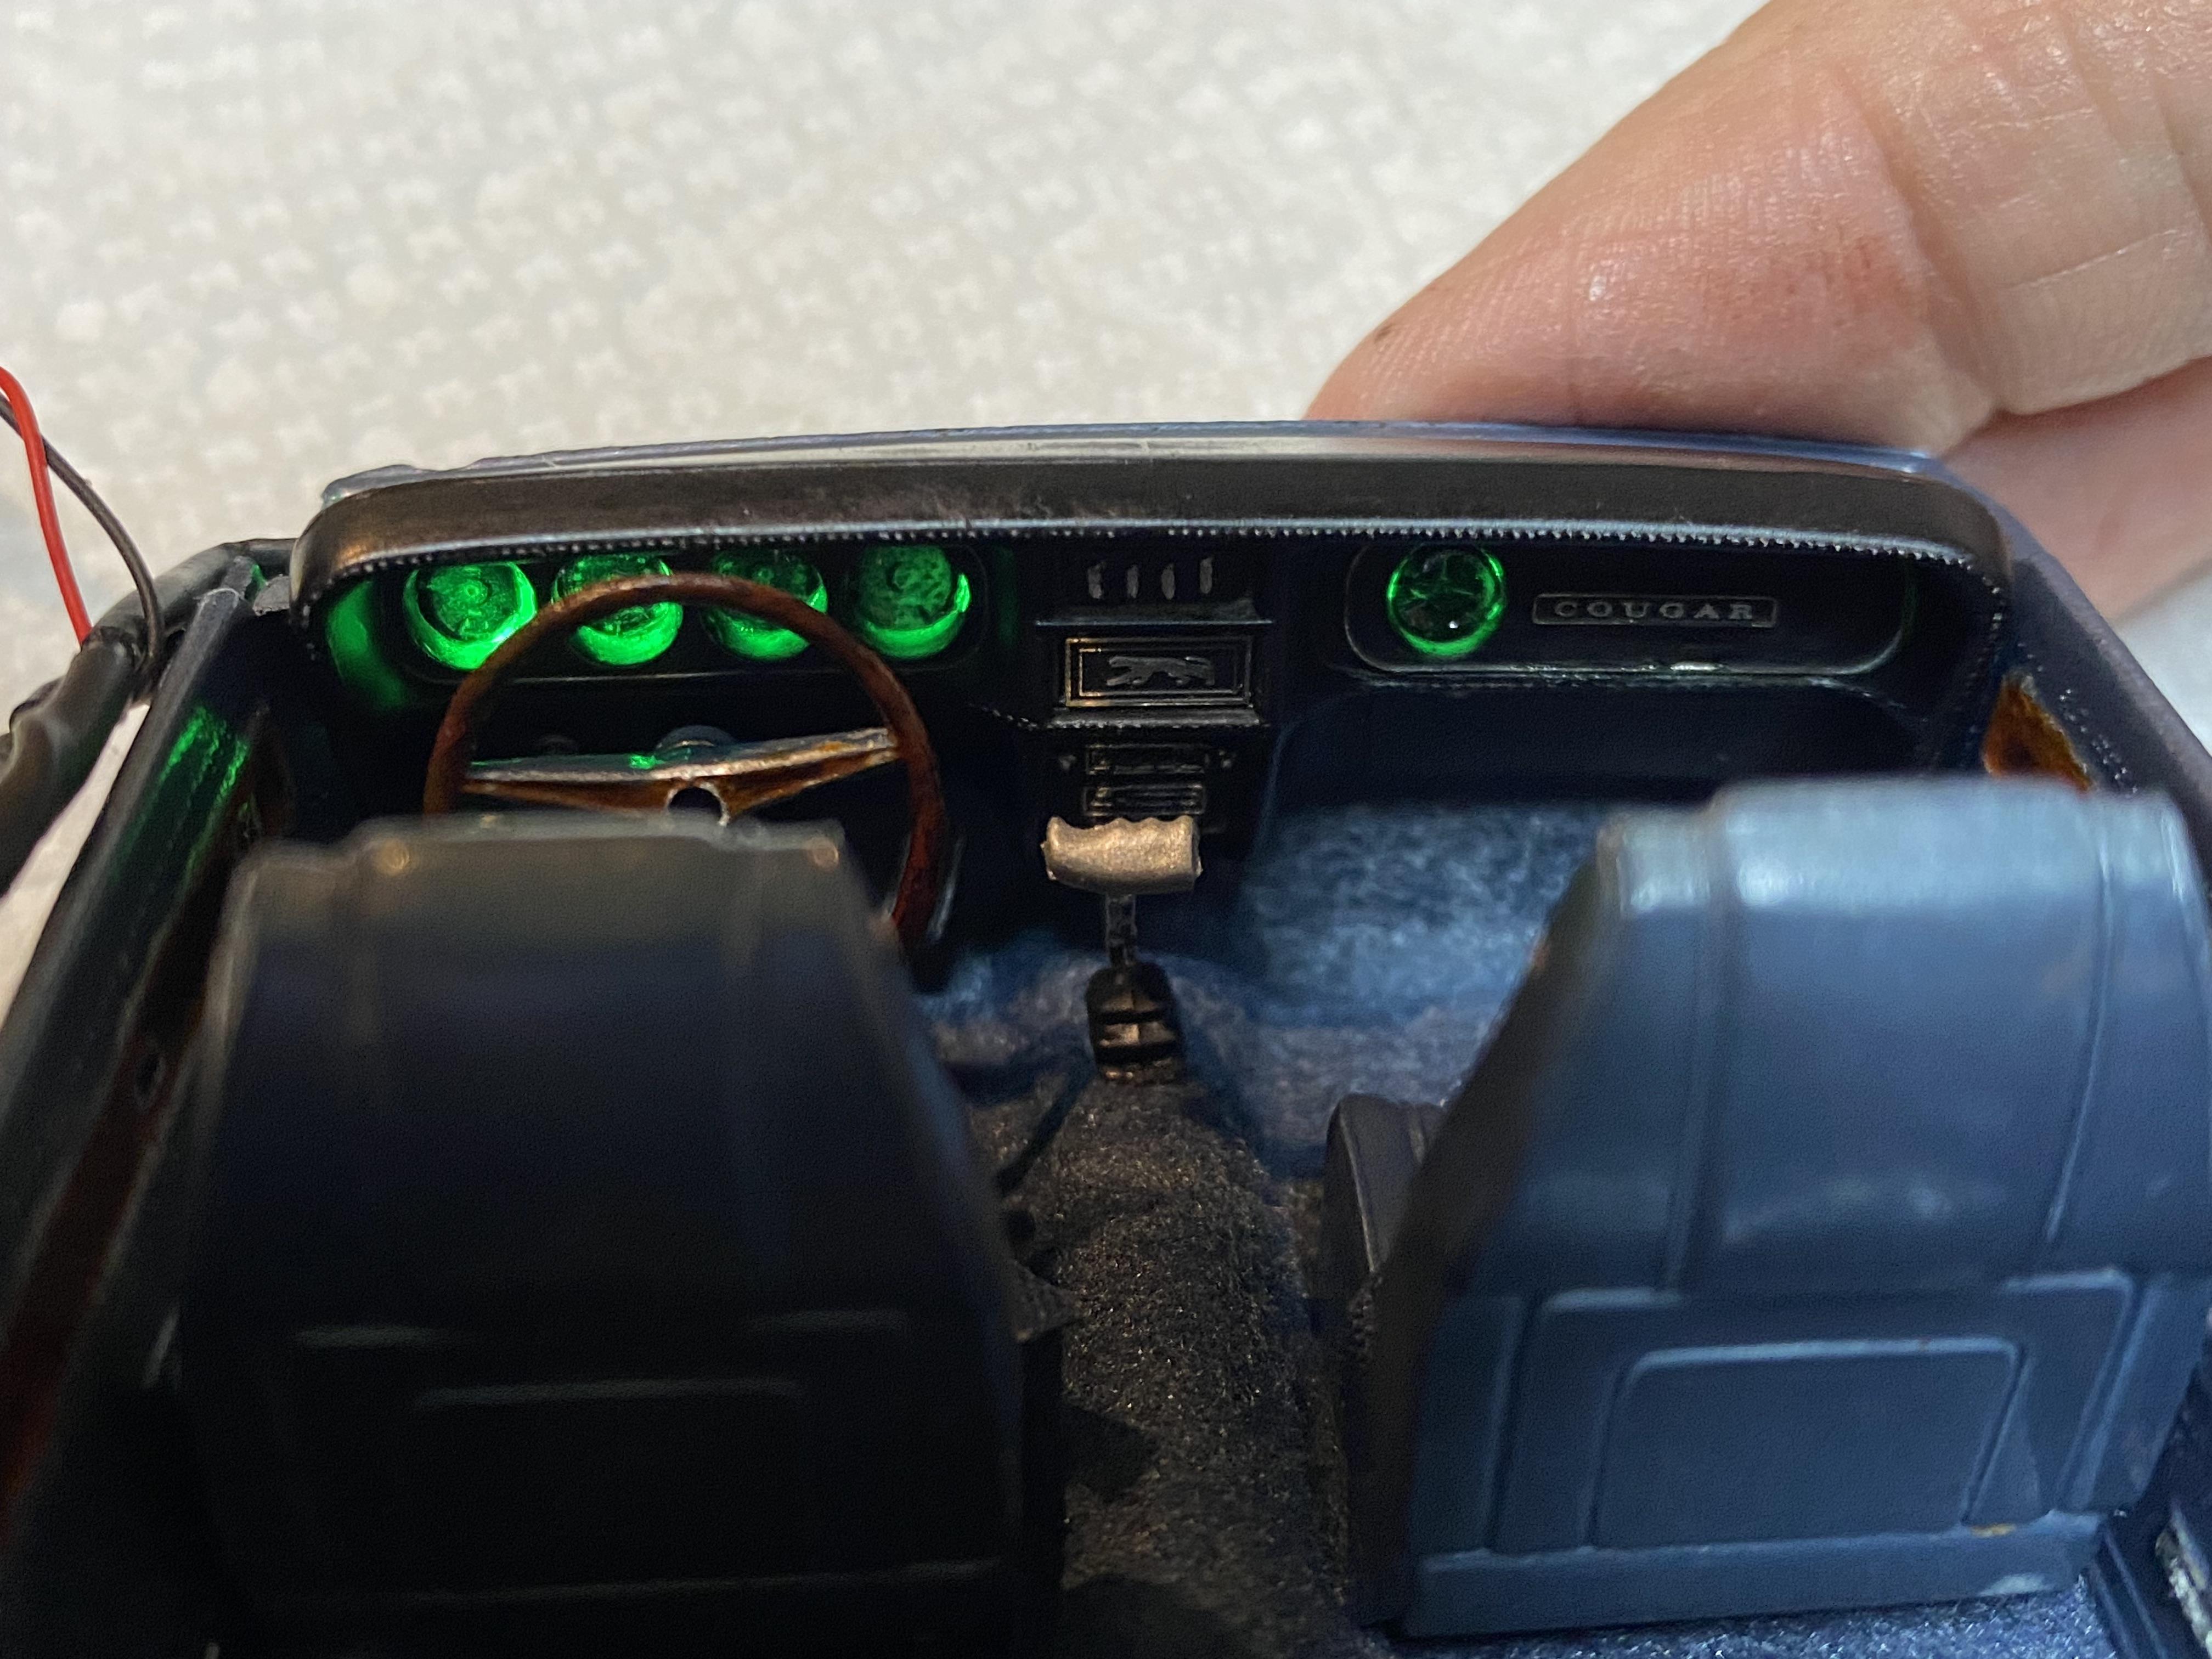
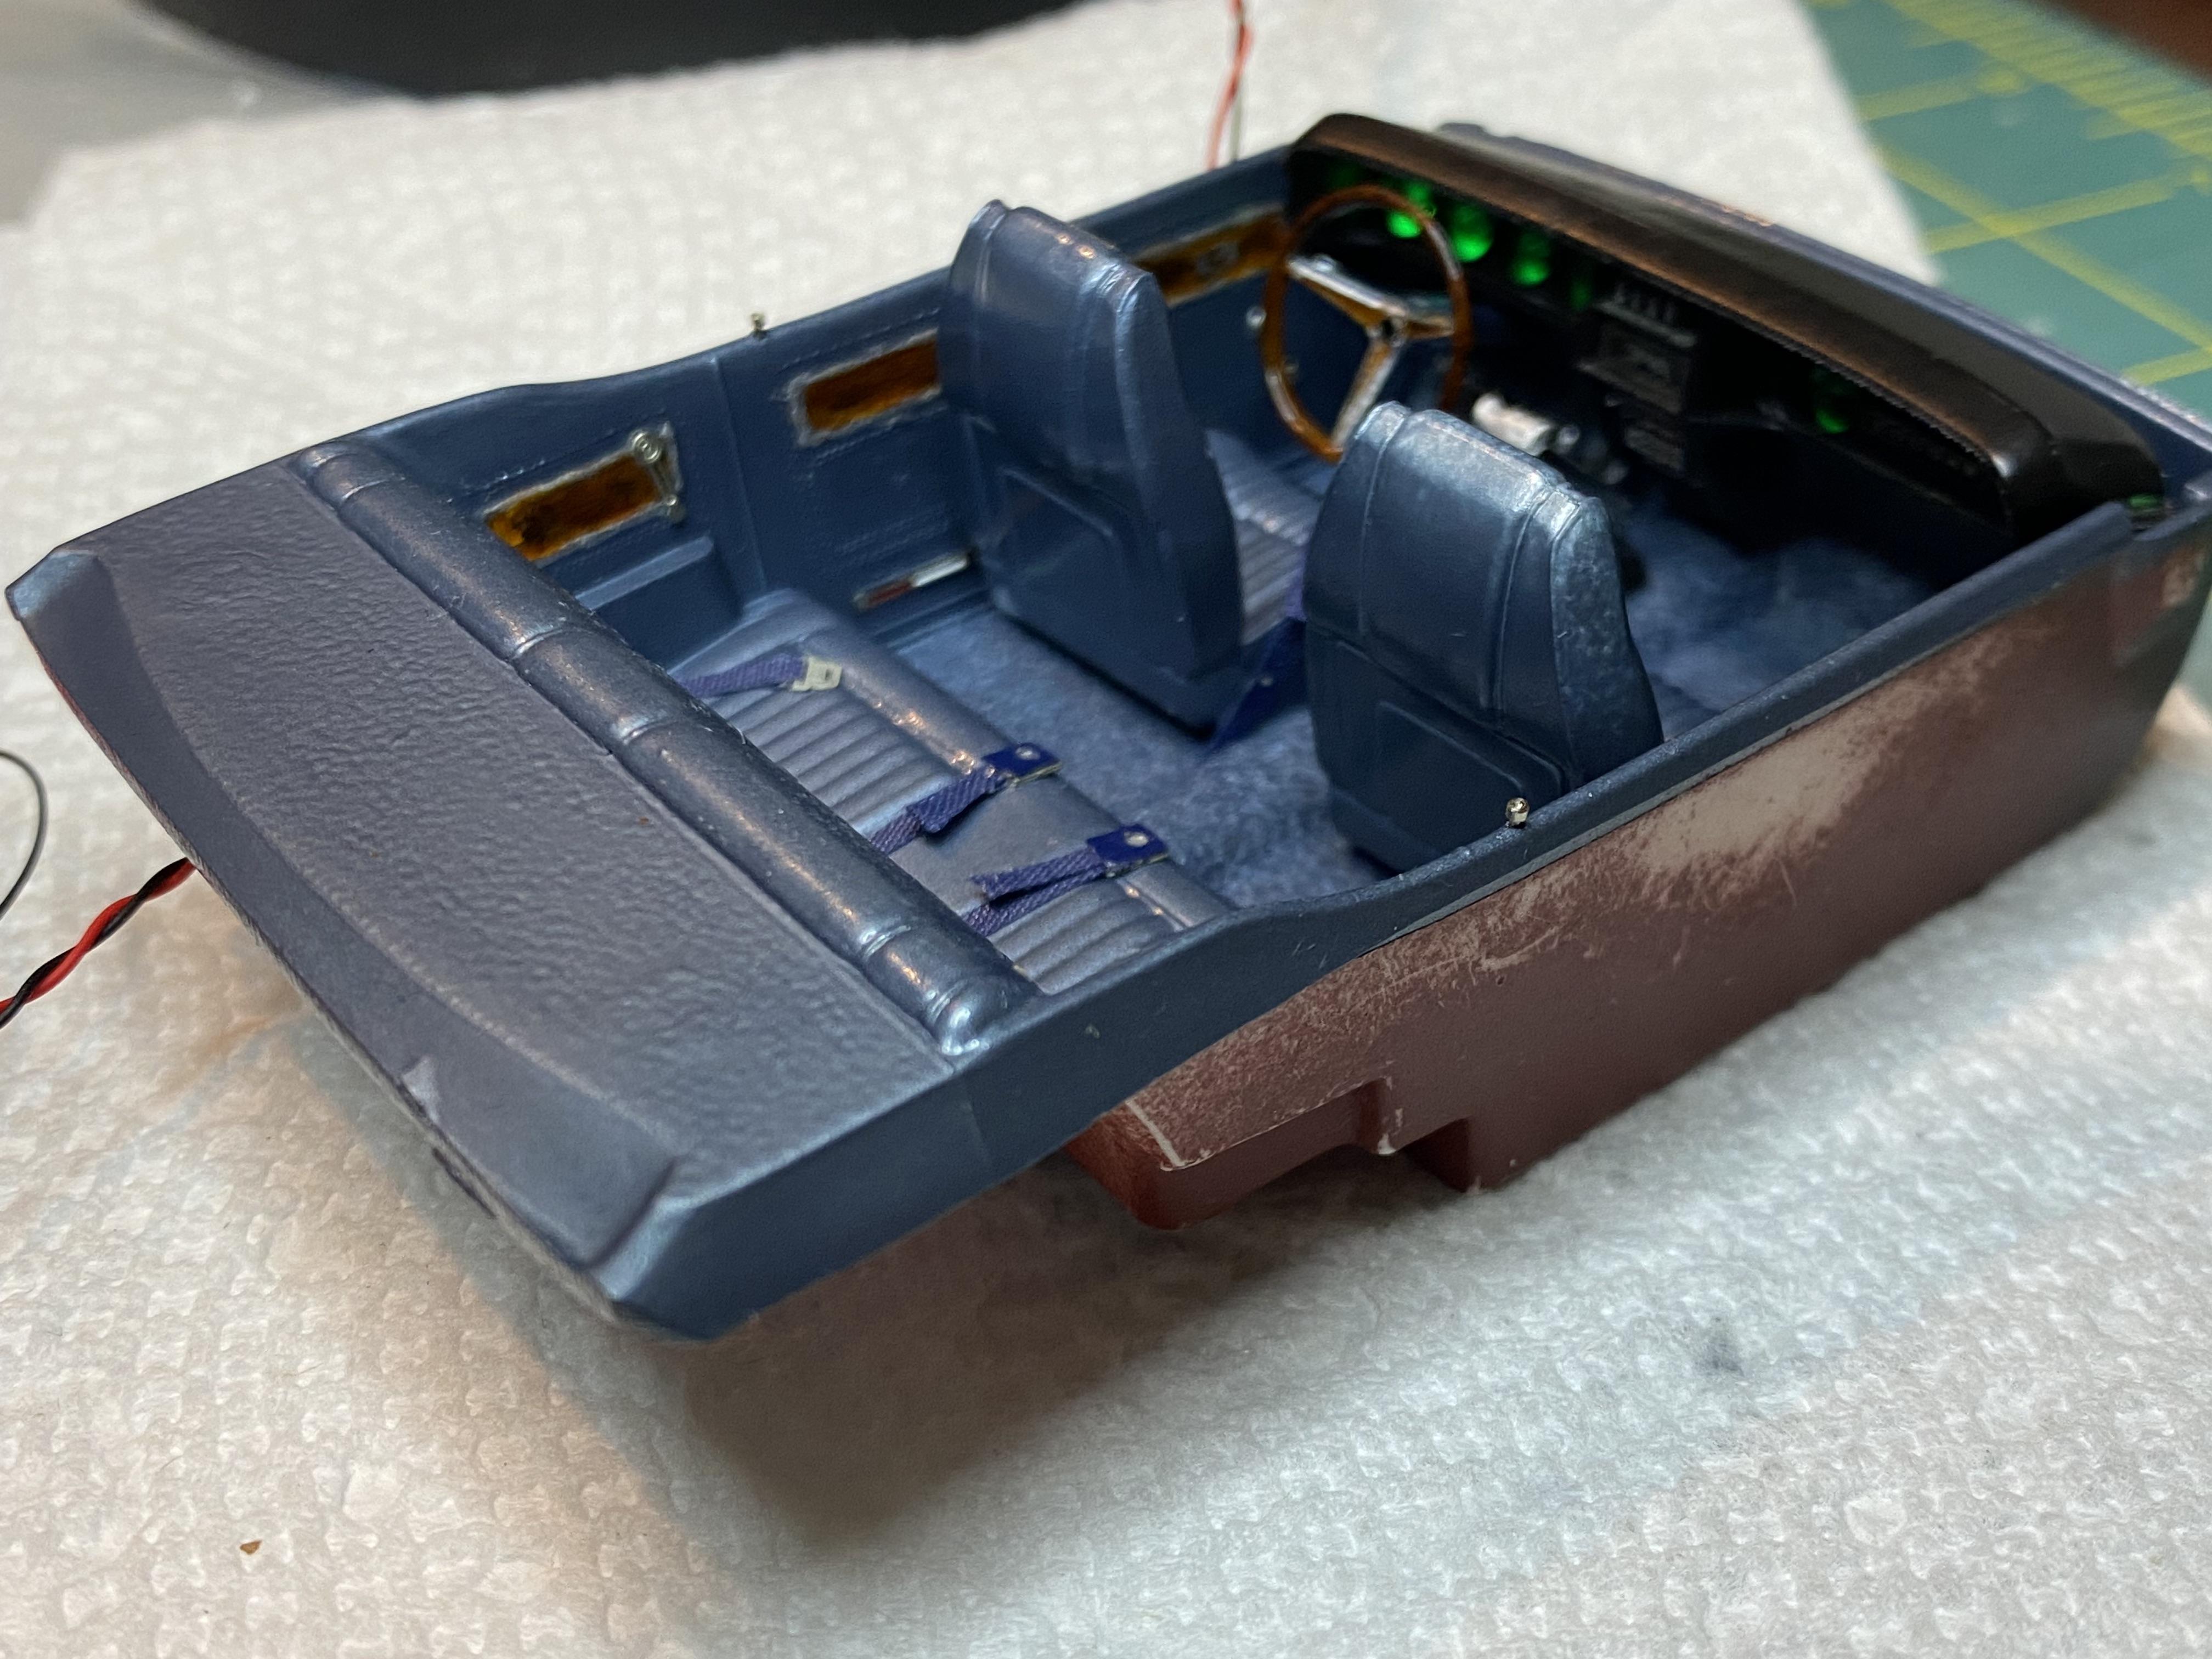
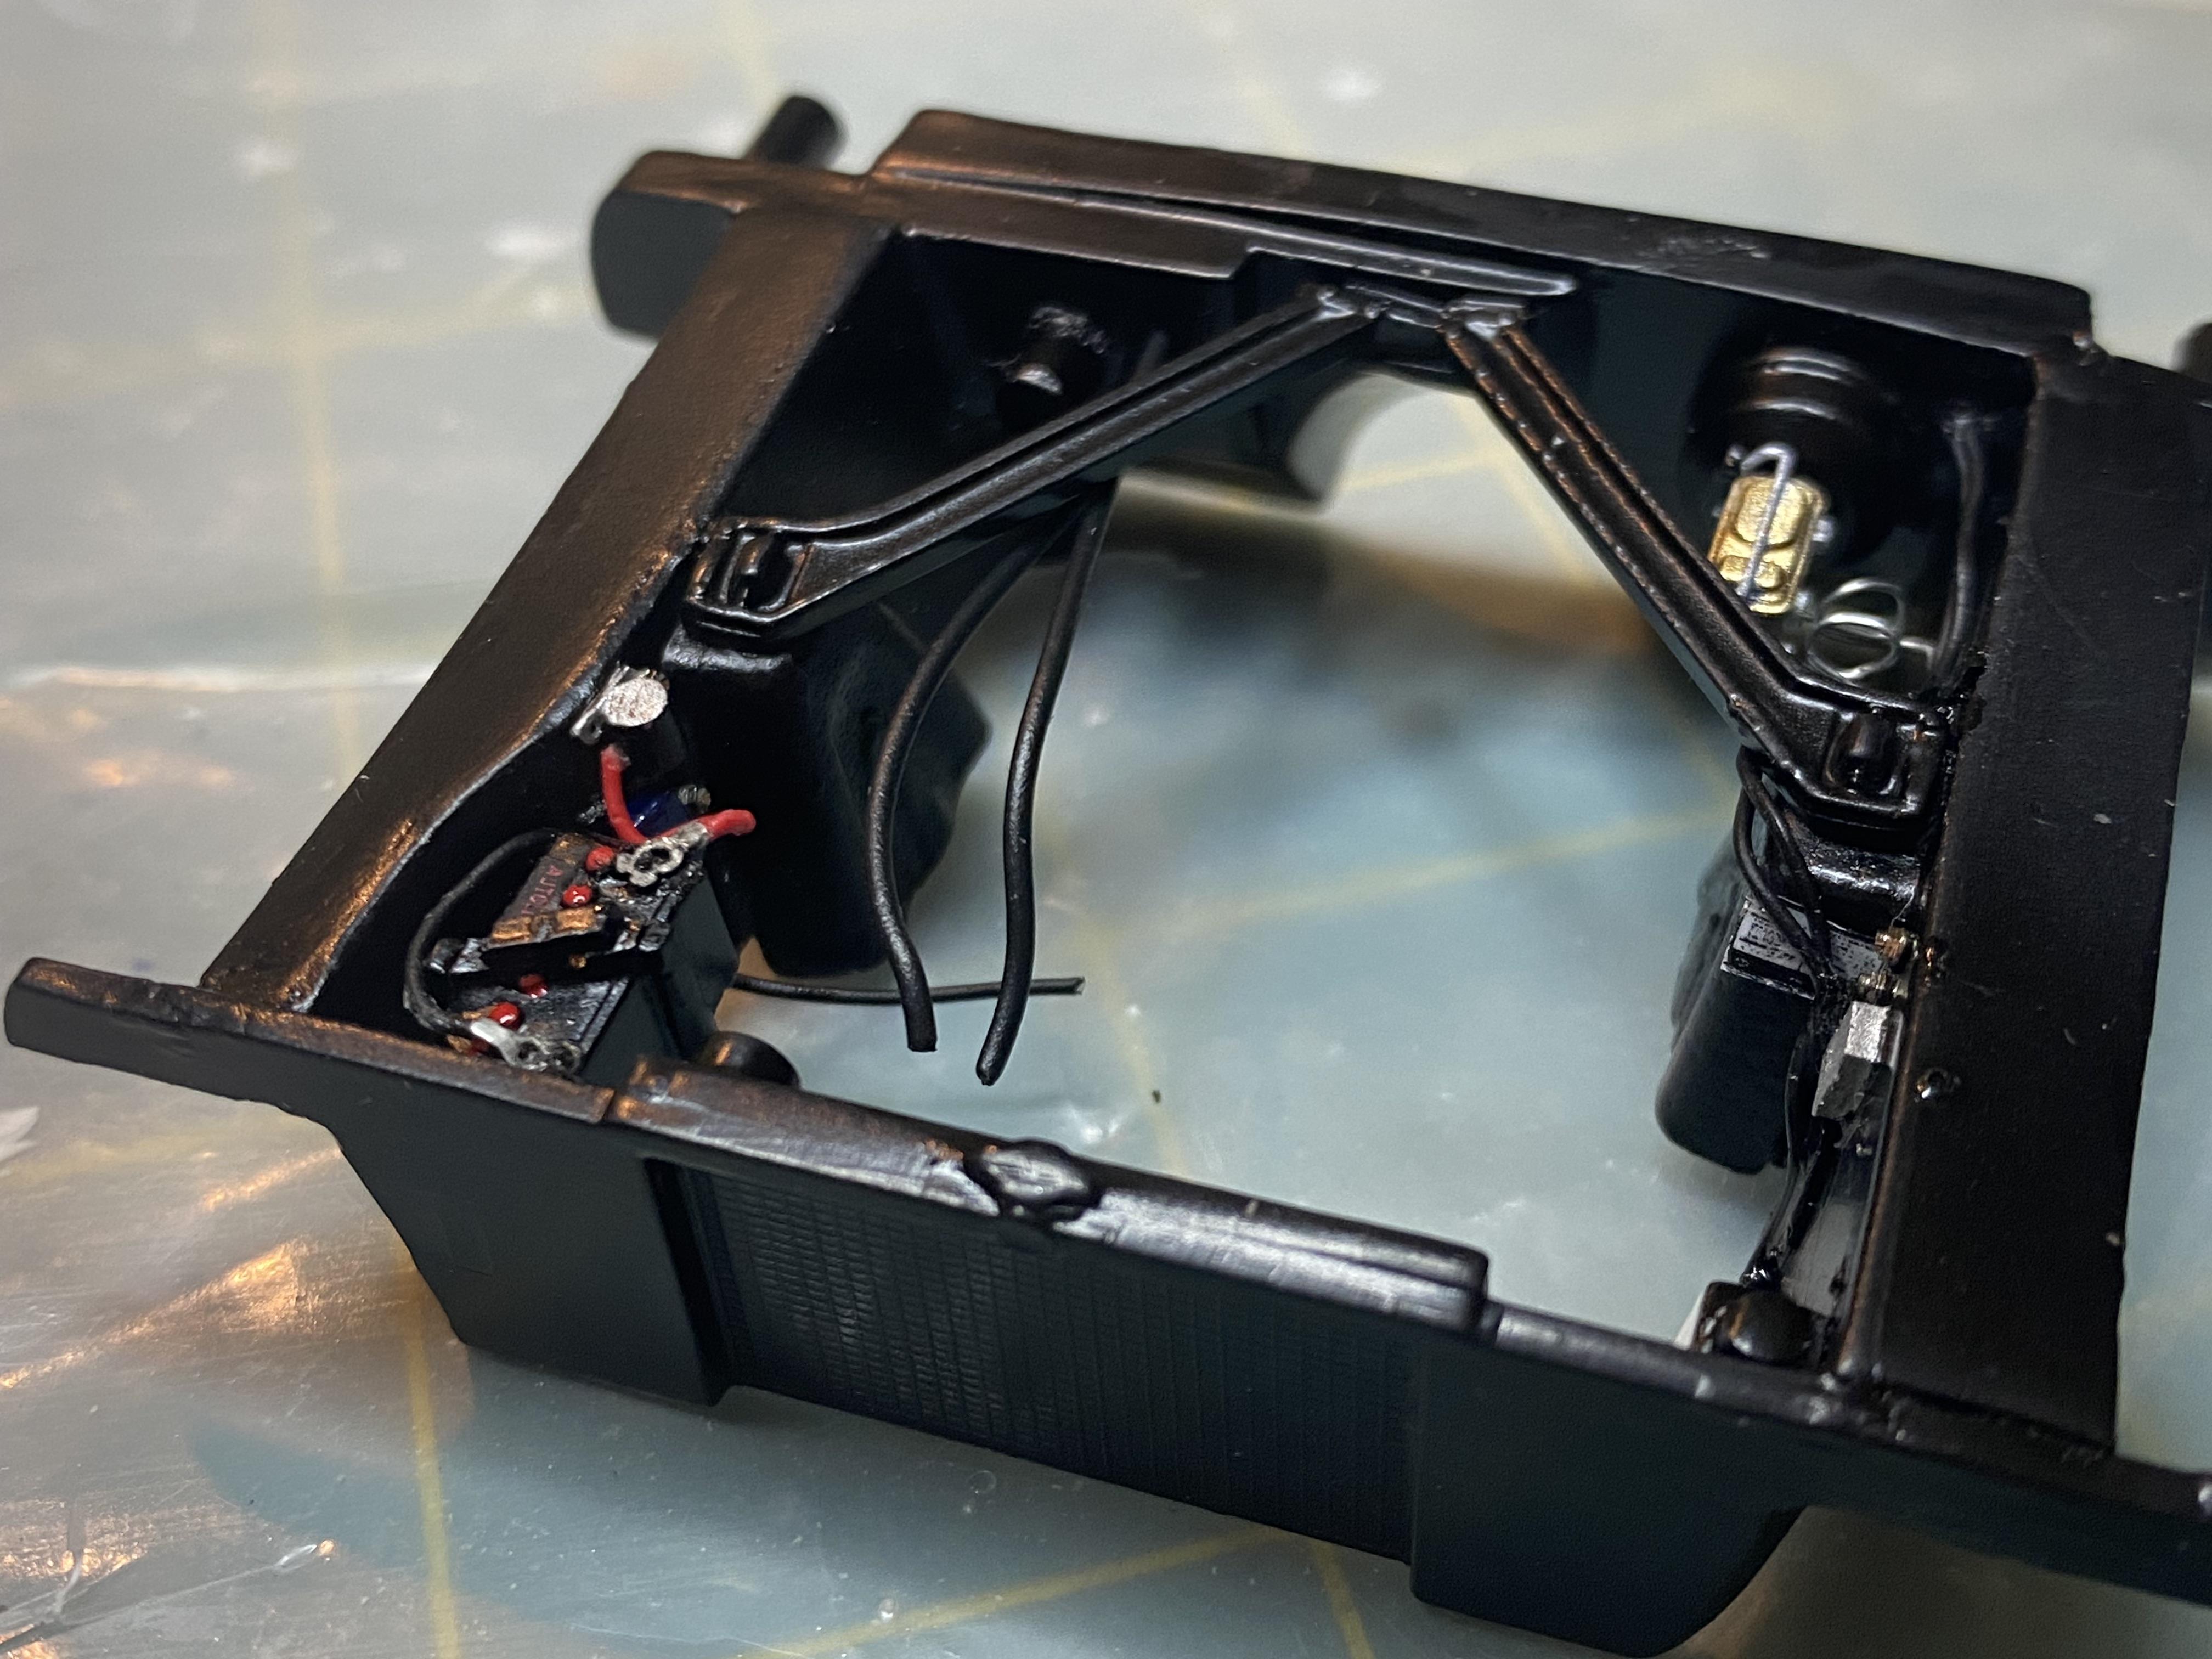
Final assembly is under way! Windows, inside rear view and engine compartment installed. attached Wiring harness to interior tub and sealed dash. installed interior and tested gauge lights. installed taillight side glow fiber optics to rear, installed, added bare metal foil as light blocker and liquid taped the ends. Added LEDs to front and sealed with liquid tape. Added headlight lenses.
-

1955 Ford F-100 Street Rod
Duddly01 replied to Zippi's topic in Model Trucks: Pickups, Vans, SUVs, Light Commercial
Very Nice! Quite the save after all of your Painting "Fun". -
Nice, Very Classic HotWheels vibe starting.
-
Thanks, I think it is too.
-
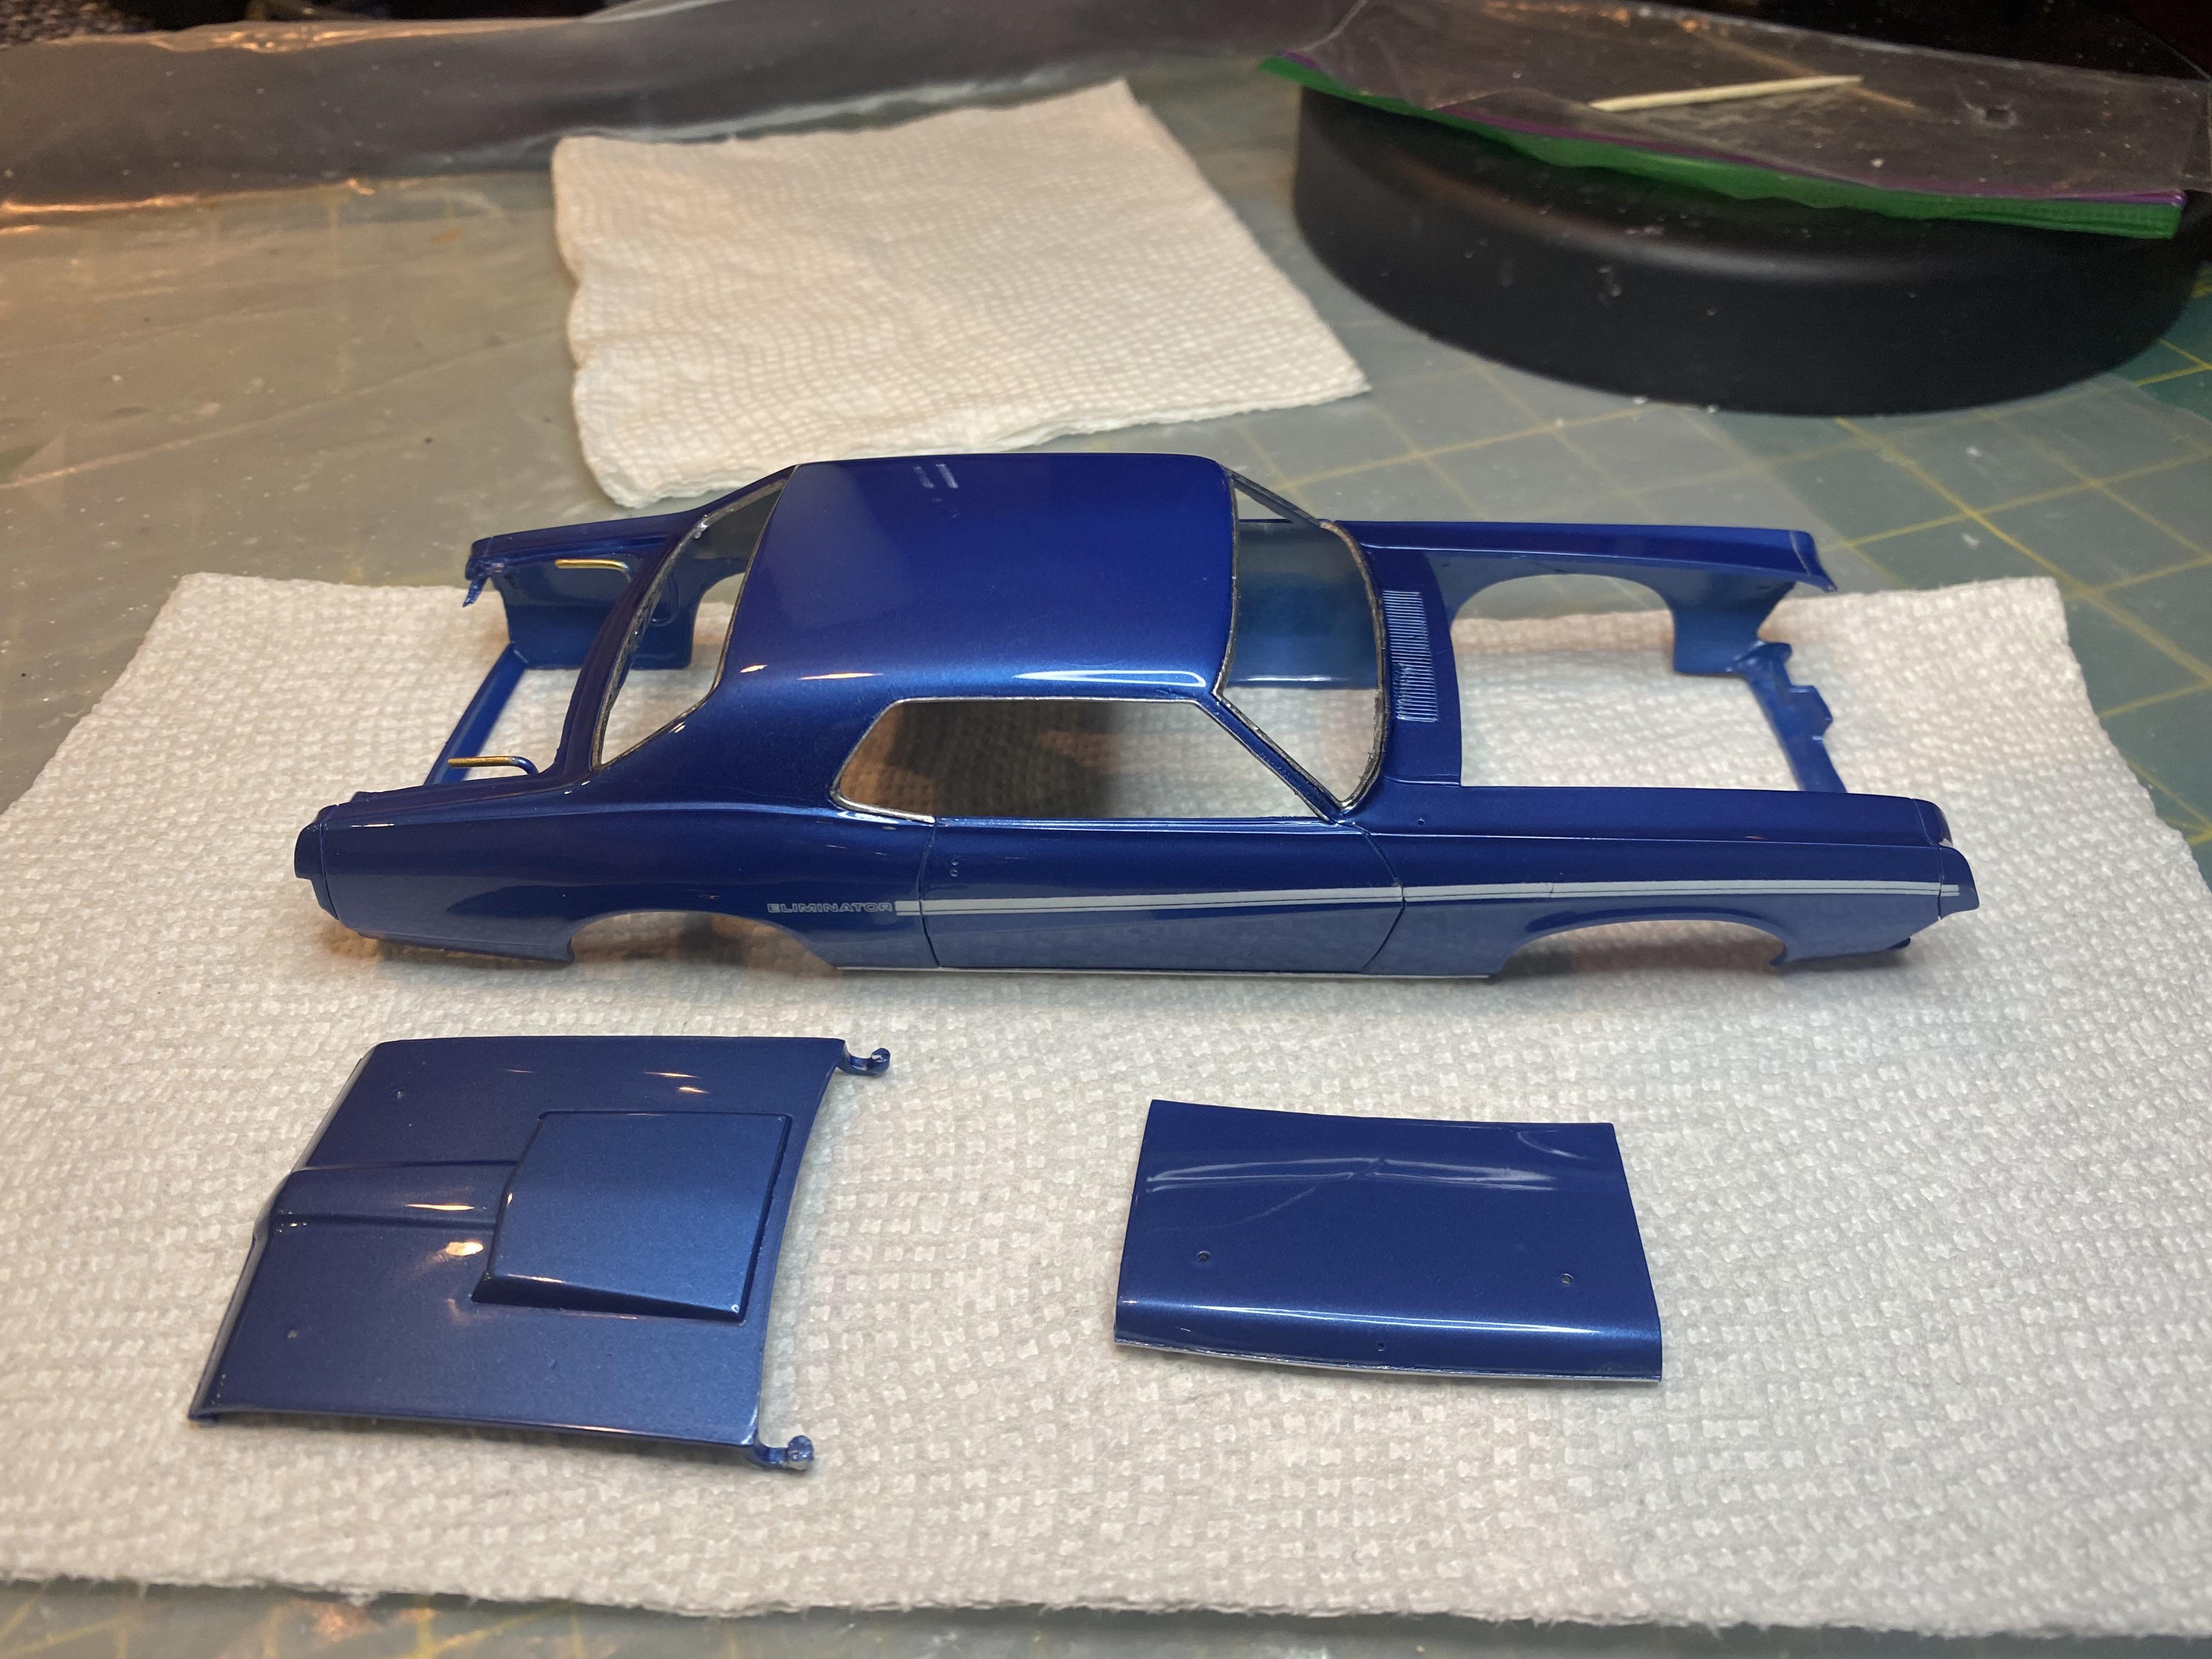
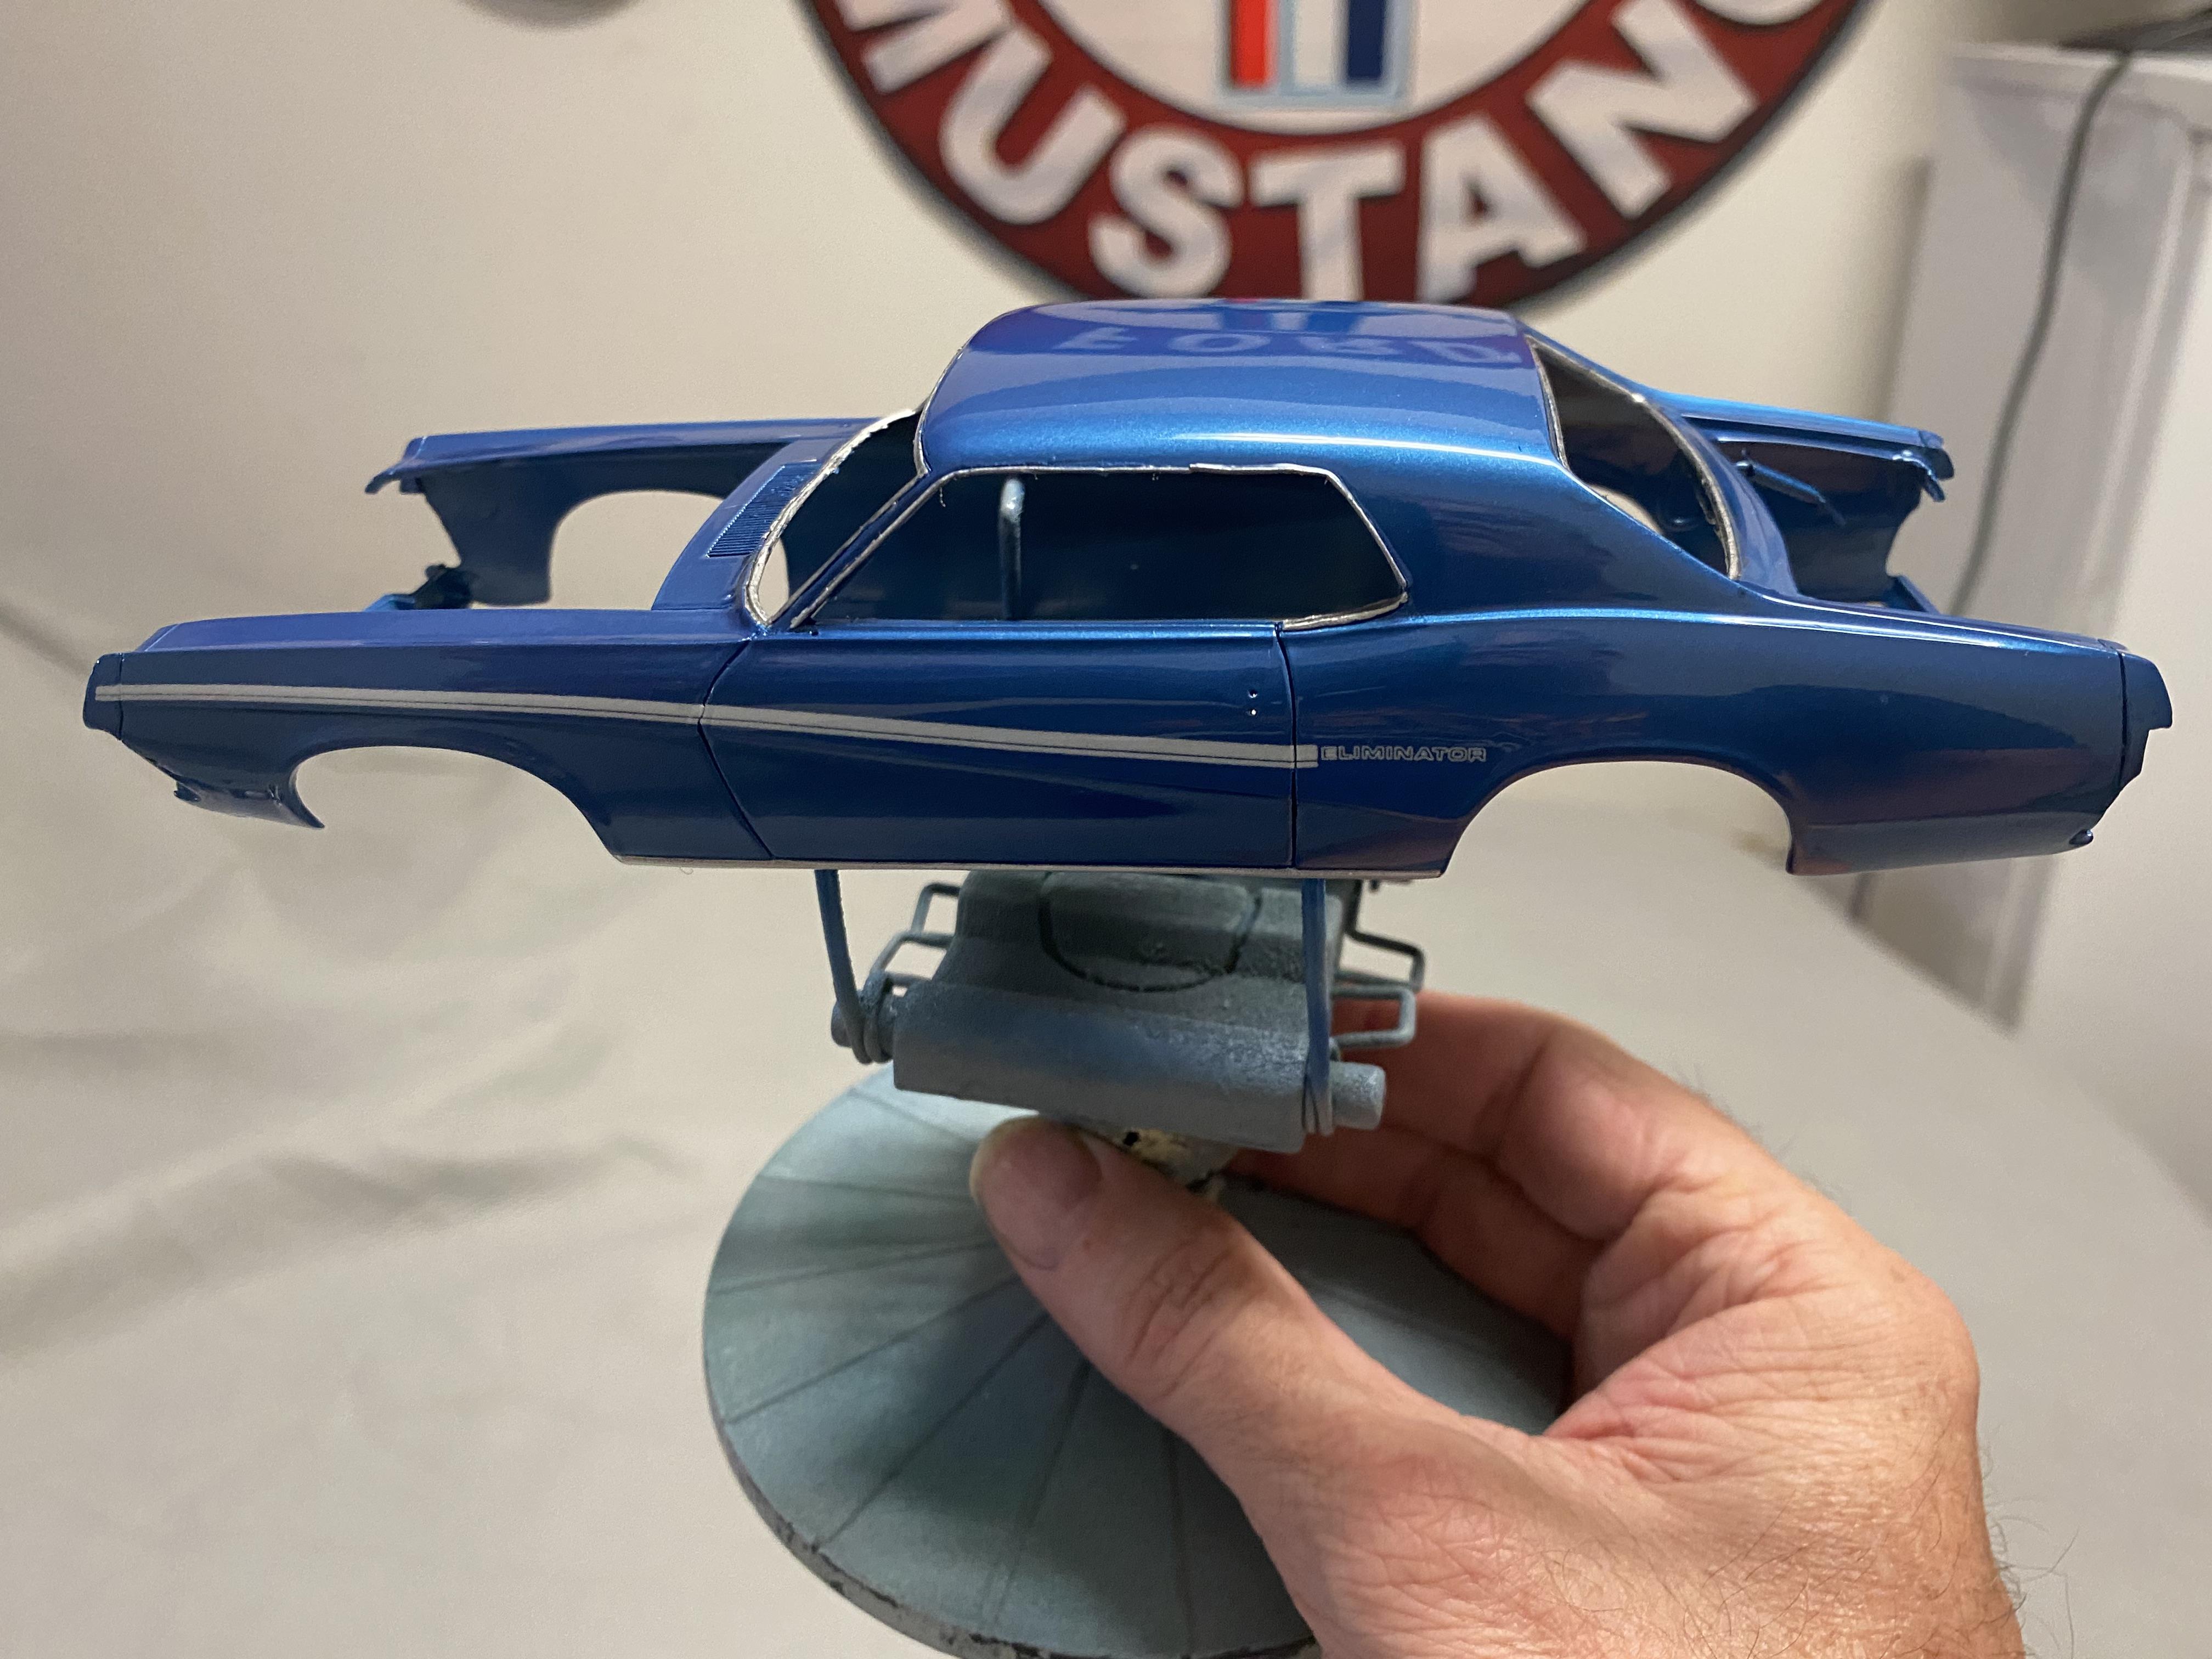
Wet sanded and polished the body, just about ready for assembly.
-
I’ll try to remember to do that. Thank You!
-
Thank You! Thank You! Hoping to get to wet sanding and polishing this week. Giving the 2K plenty of time to cure.
-
Thank You!
-
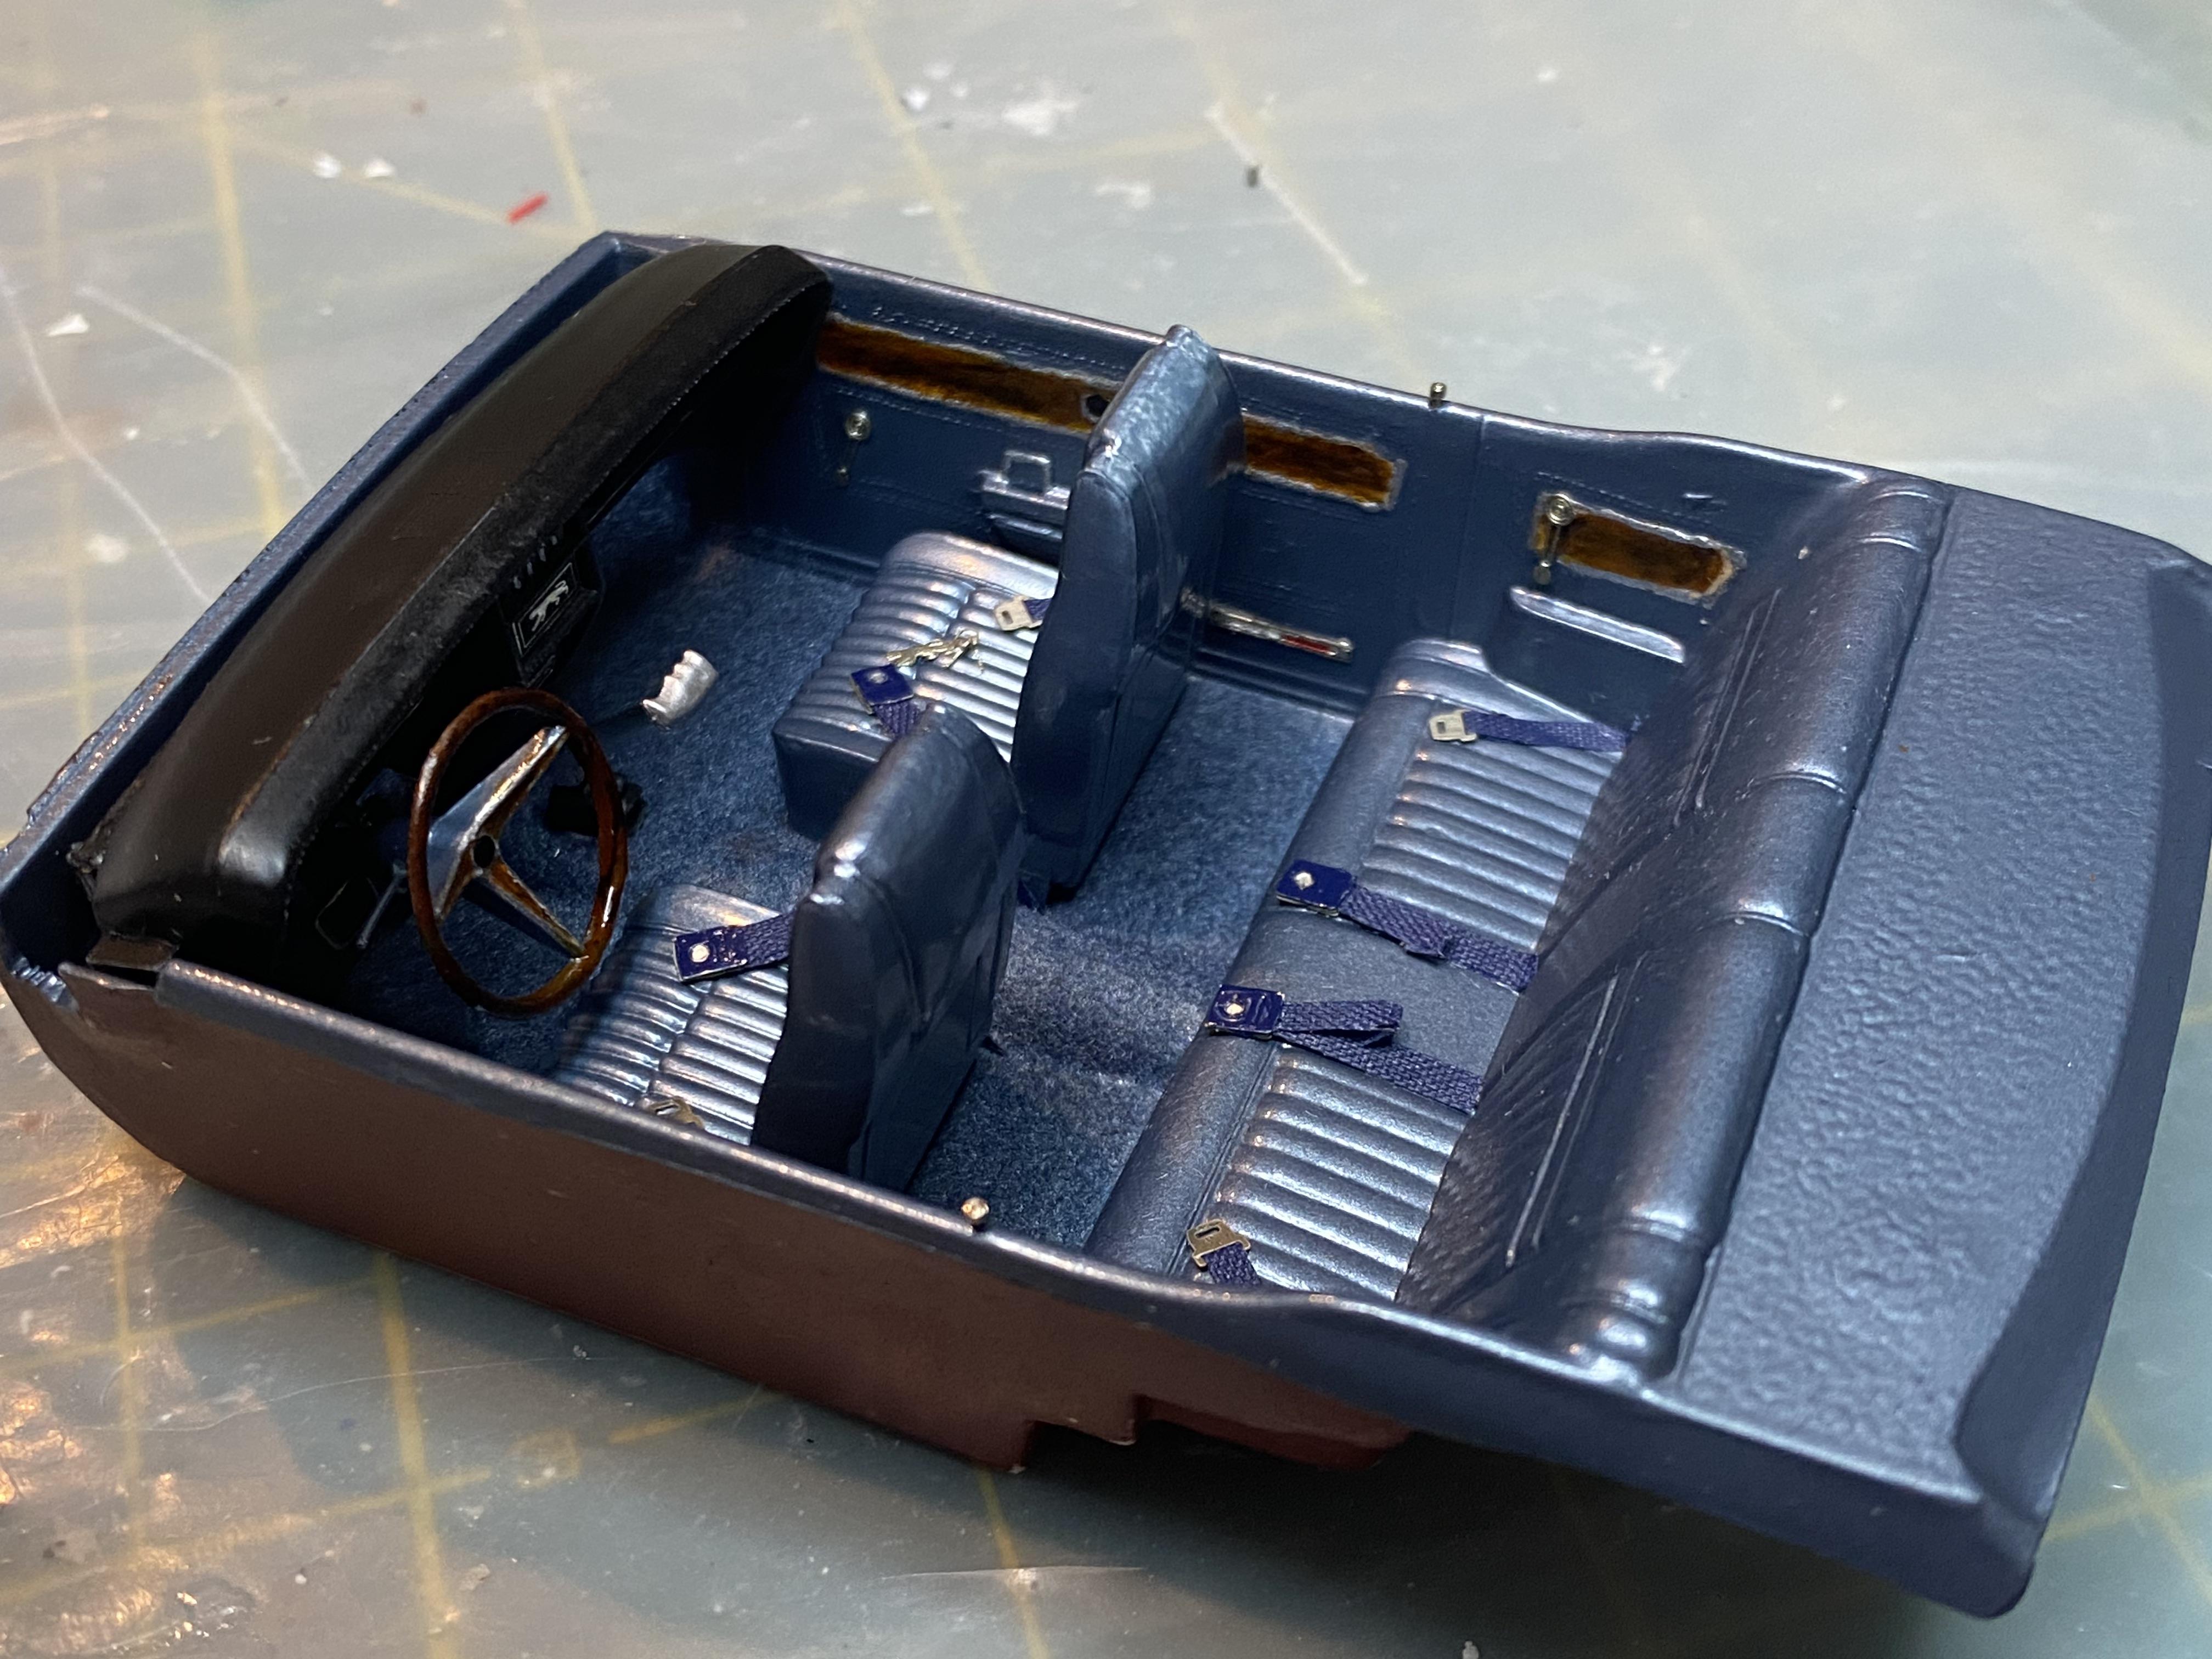
Detailed interior, added seatbelts, gauge decals, etc. Lots of photo-etch. bare metal foil on the light enclosure, liquid electrical tape to seal. detail and paint basically complete. Once I wet sand and polish the body it will be time for assembly.
-
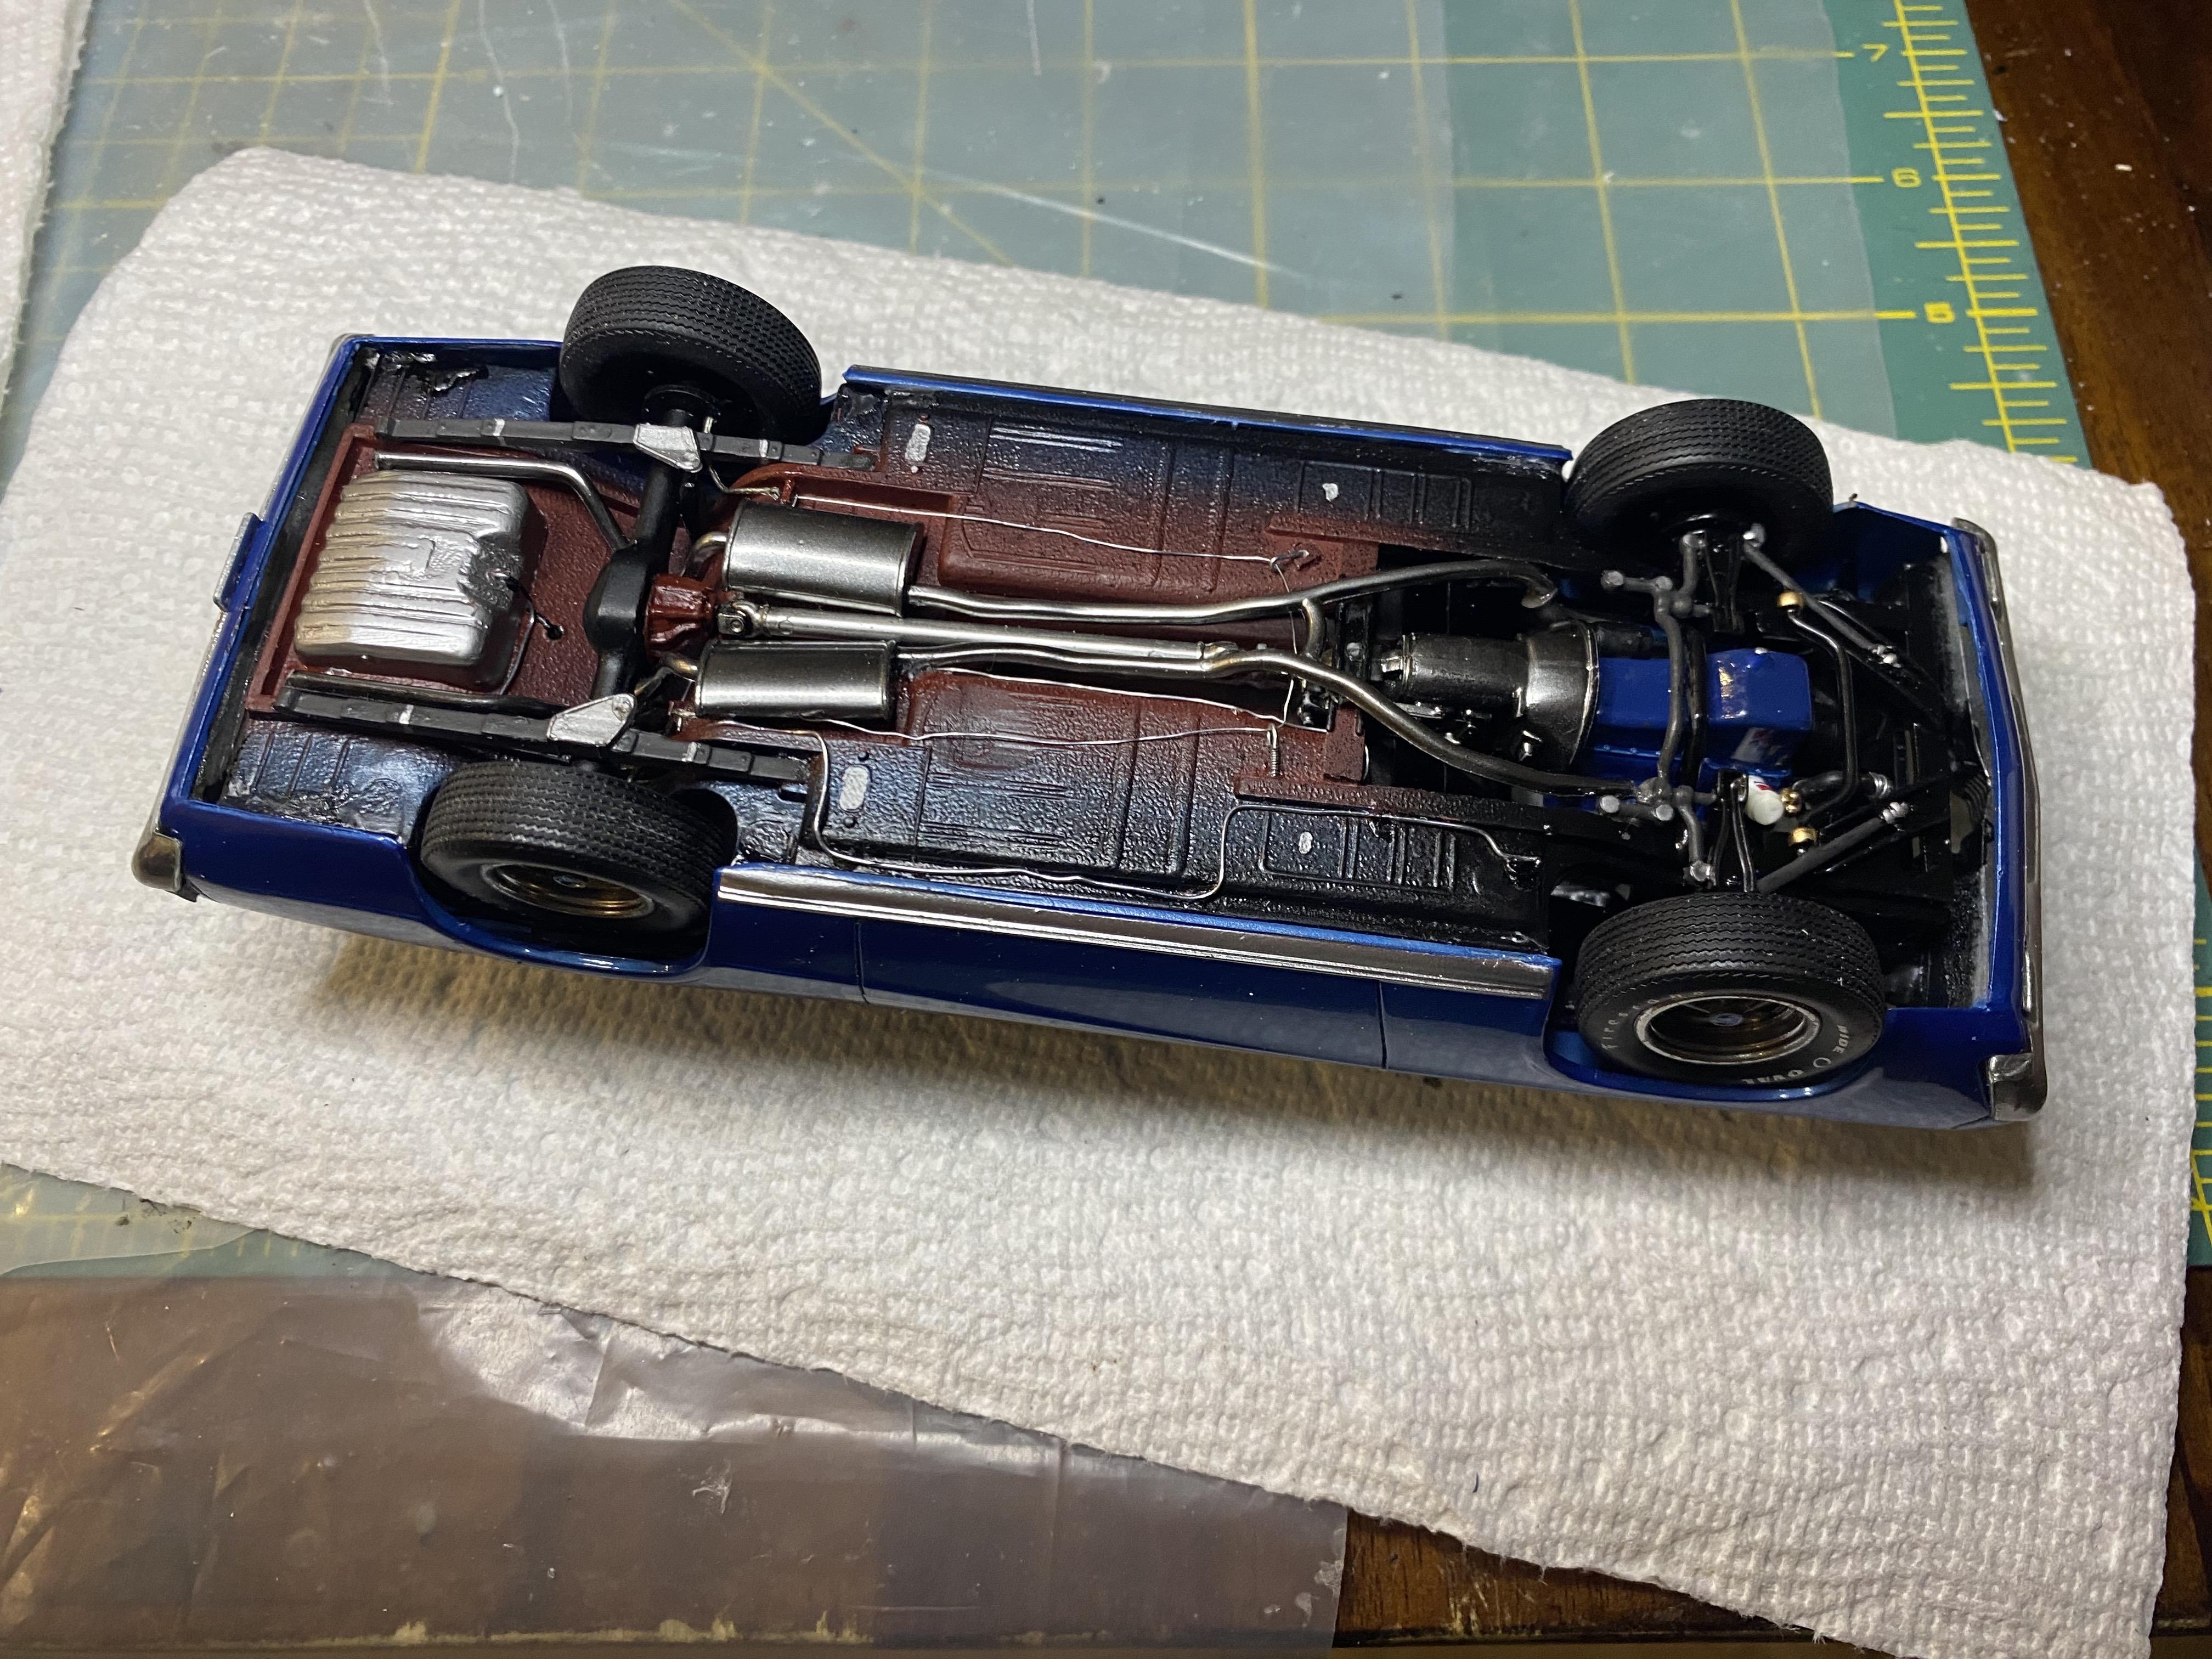
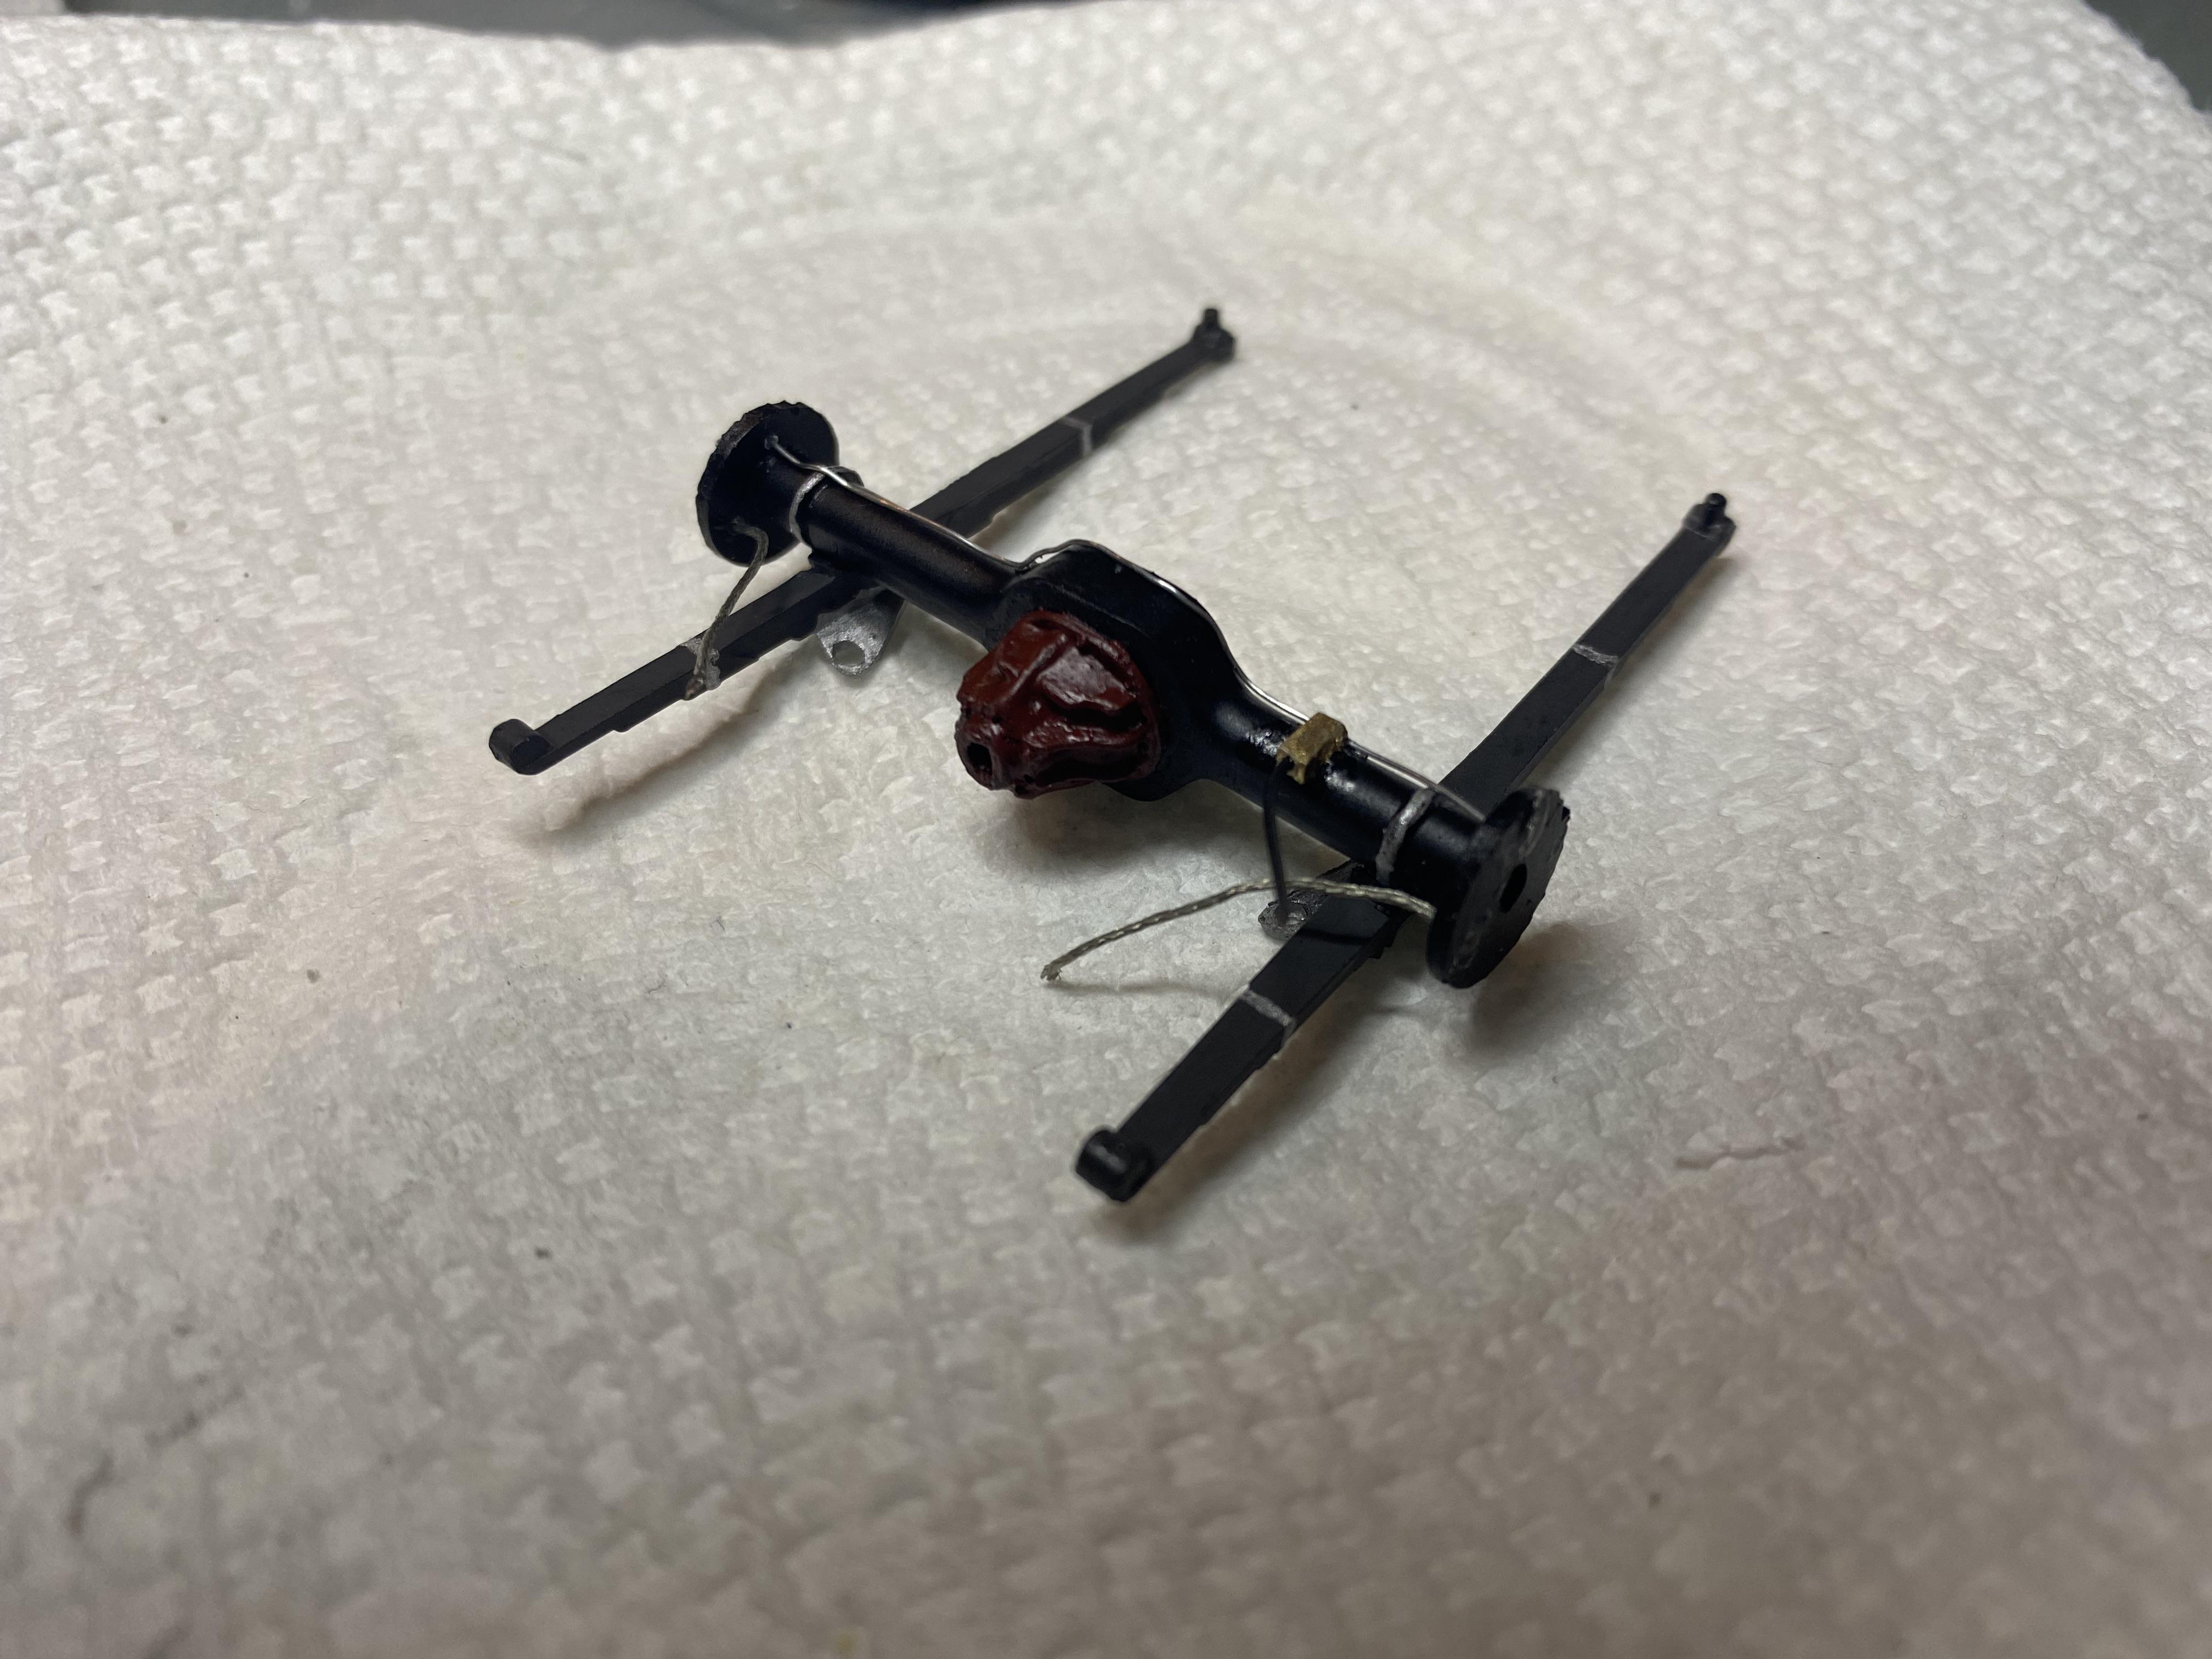
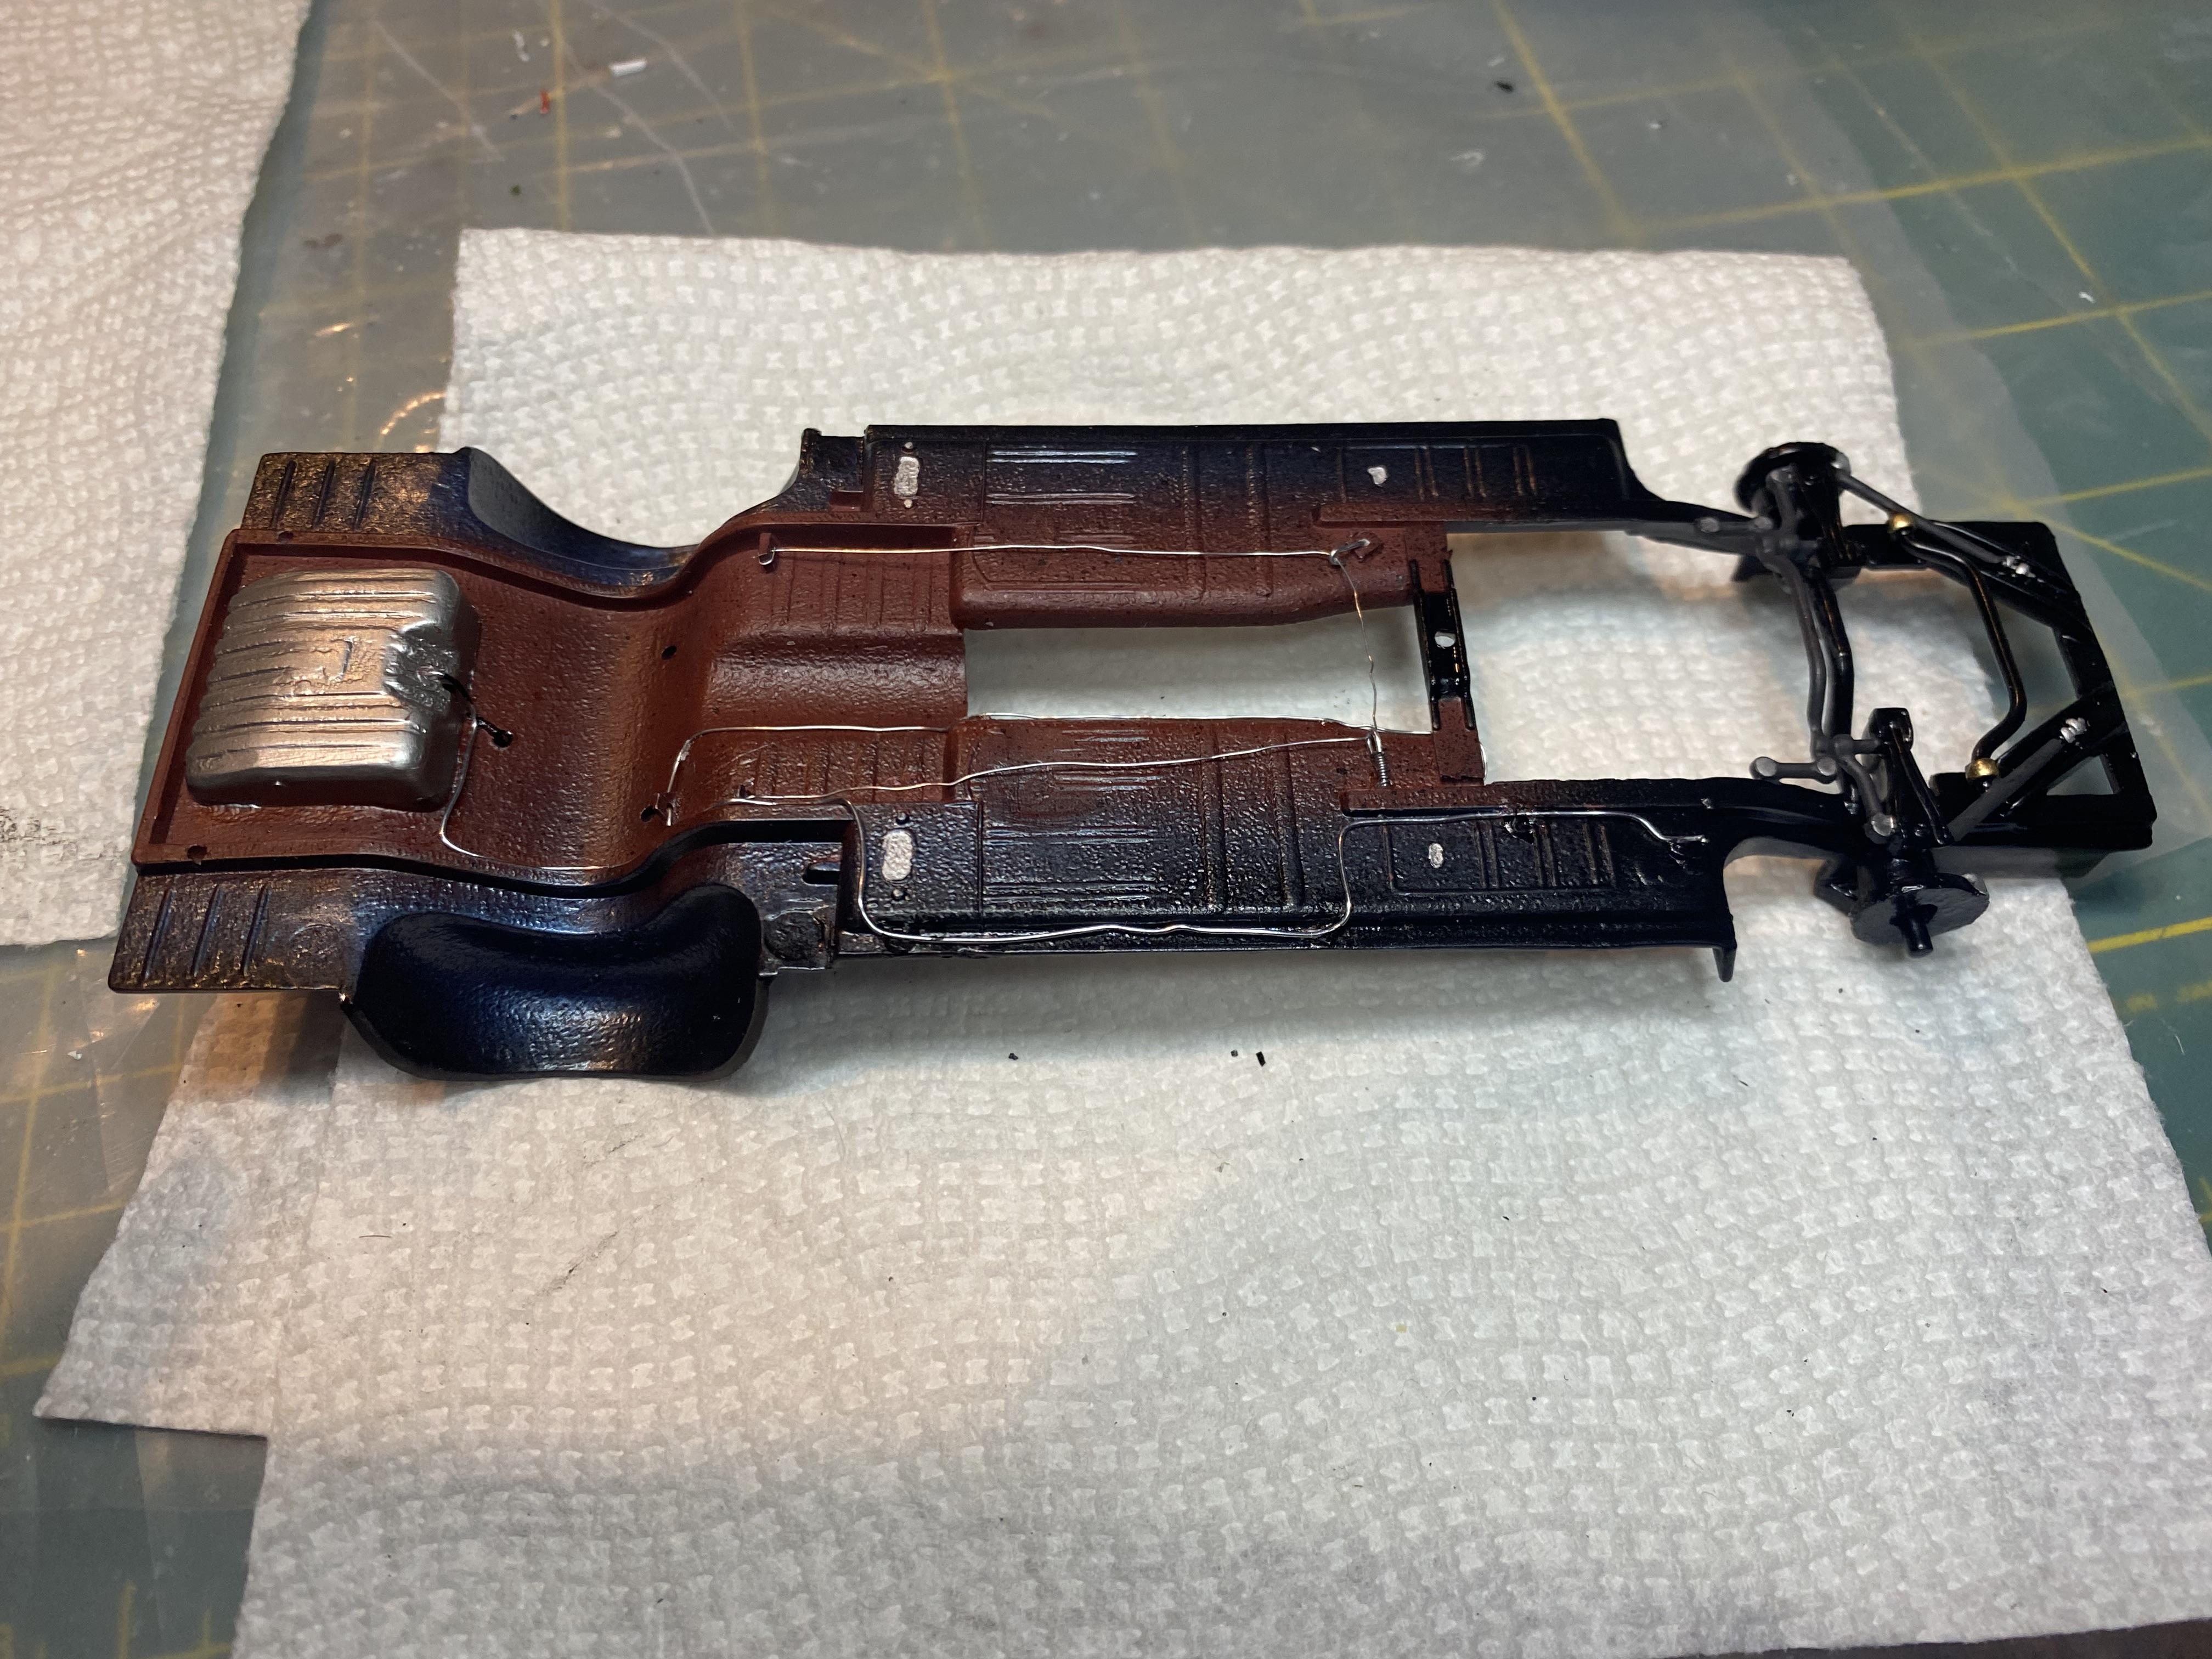
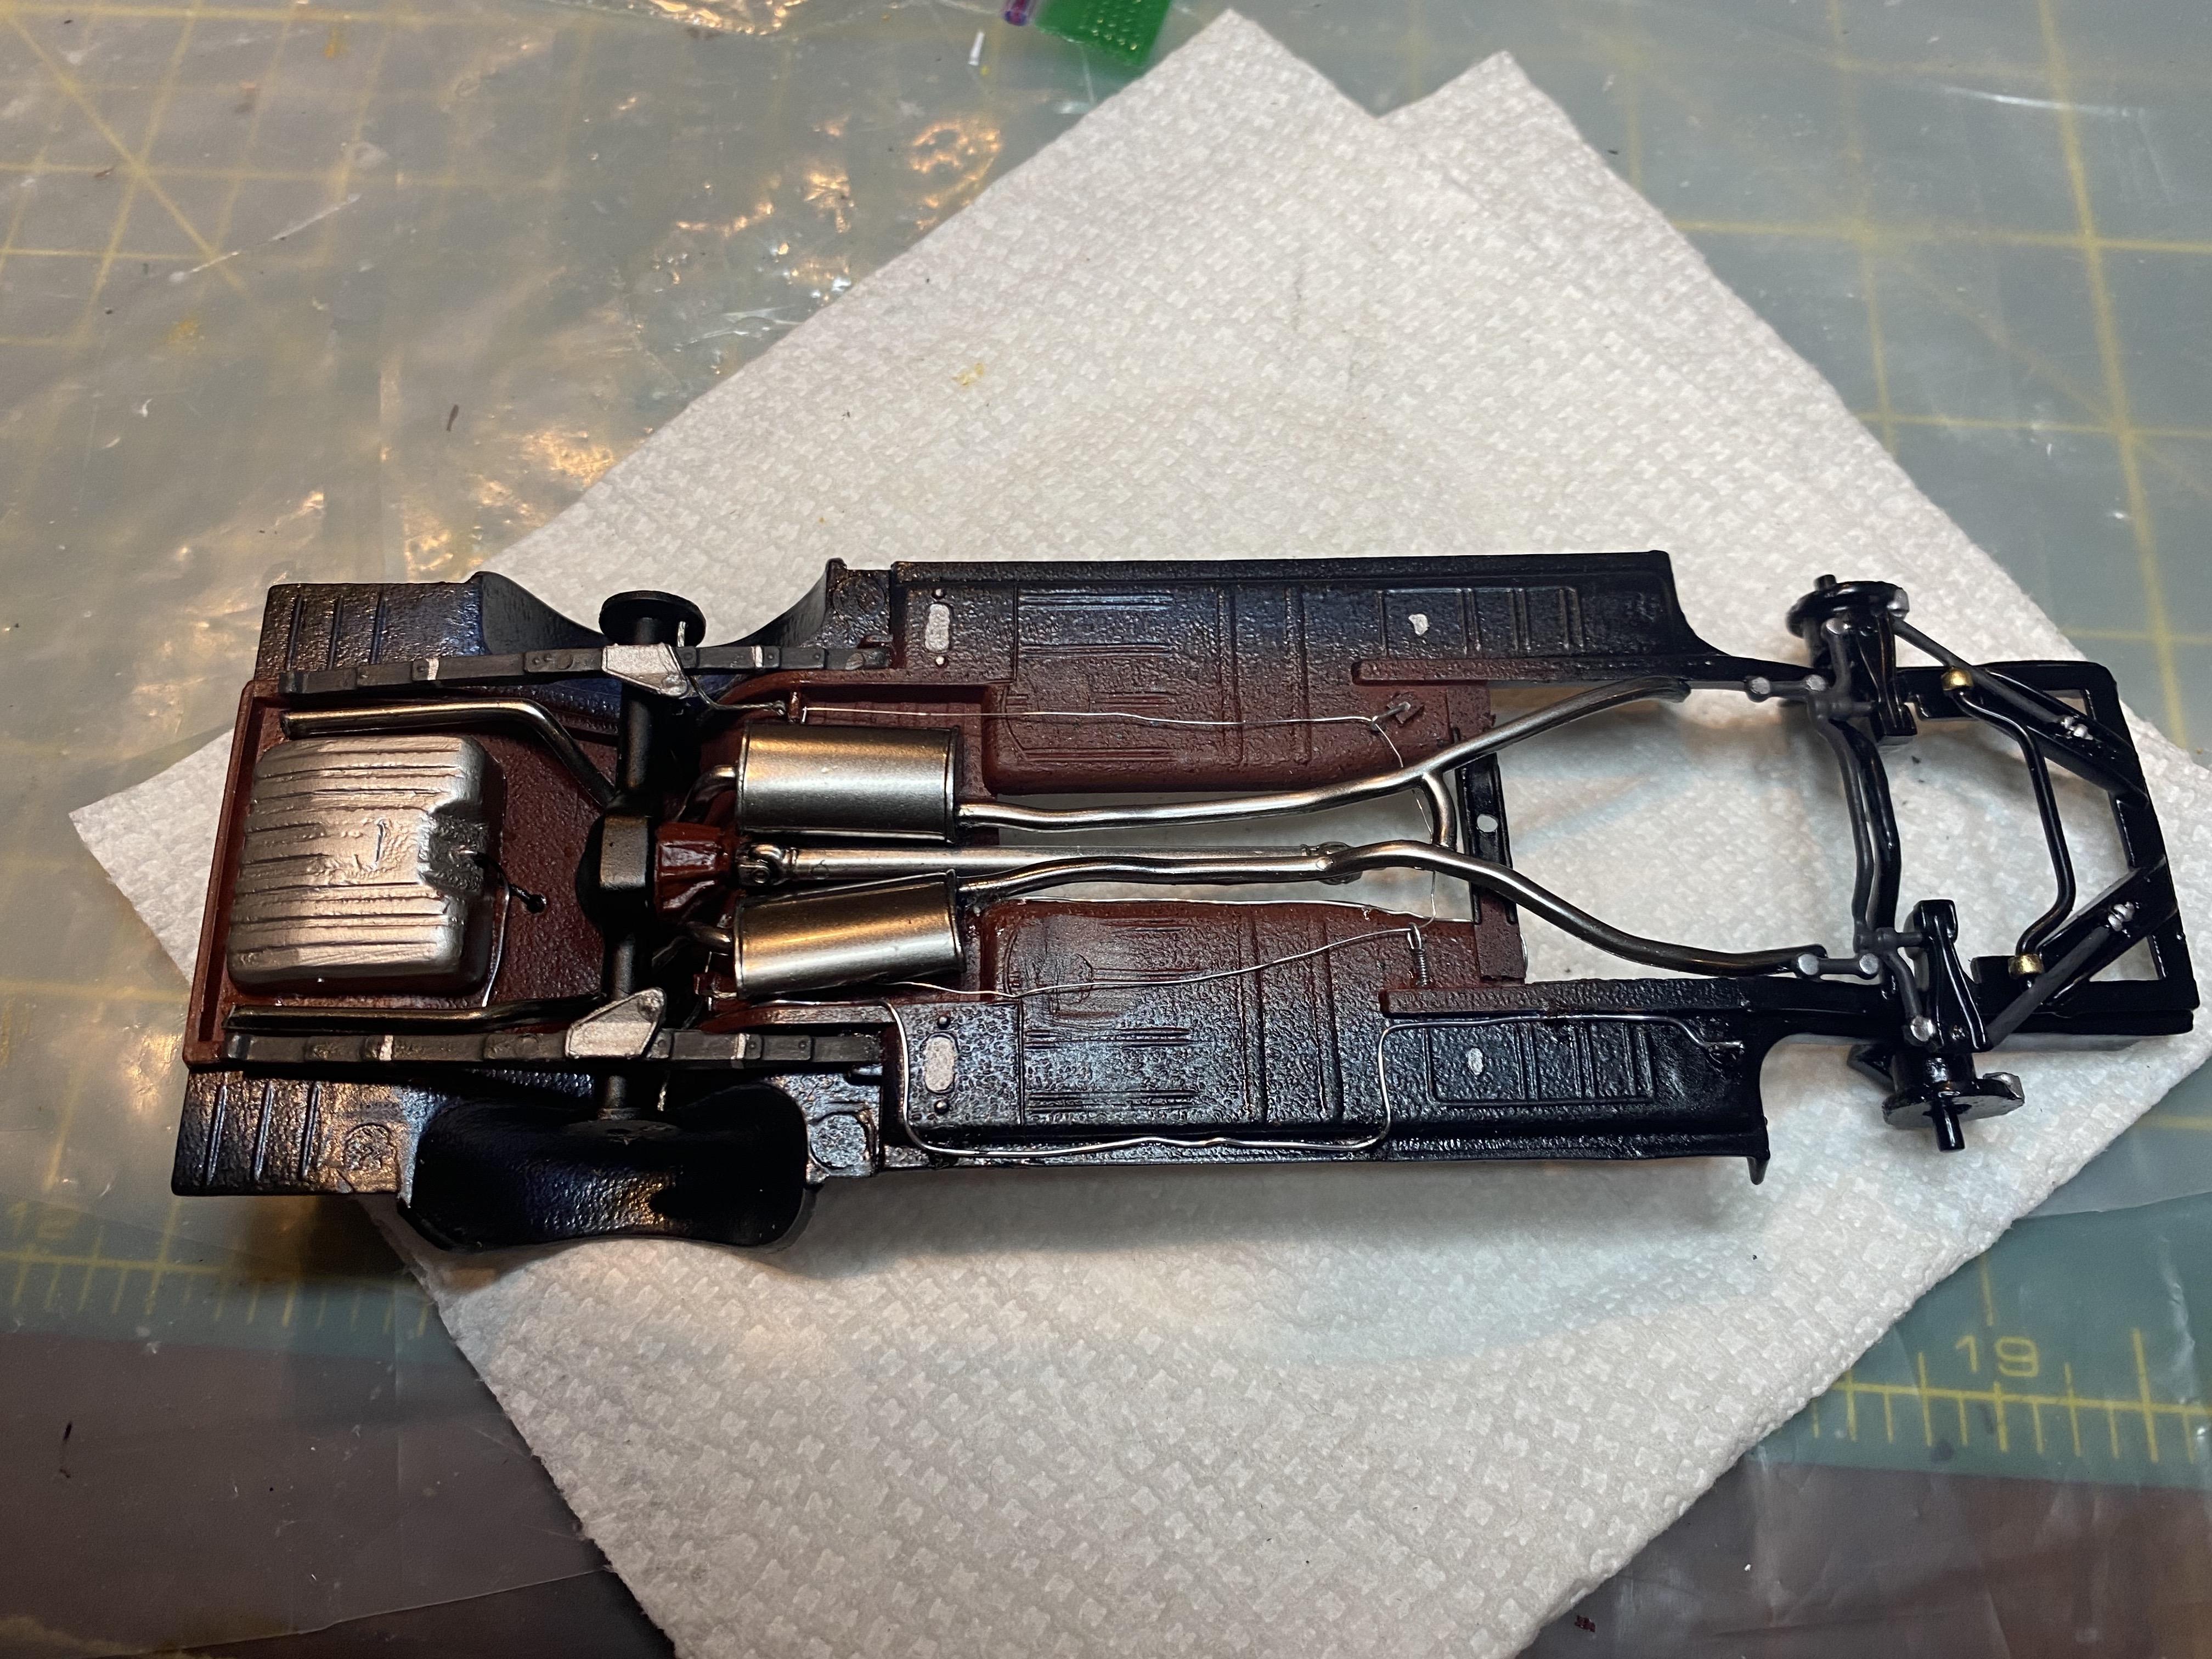
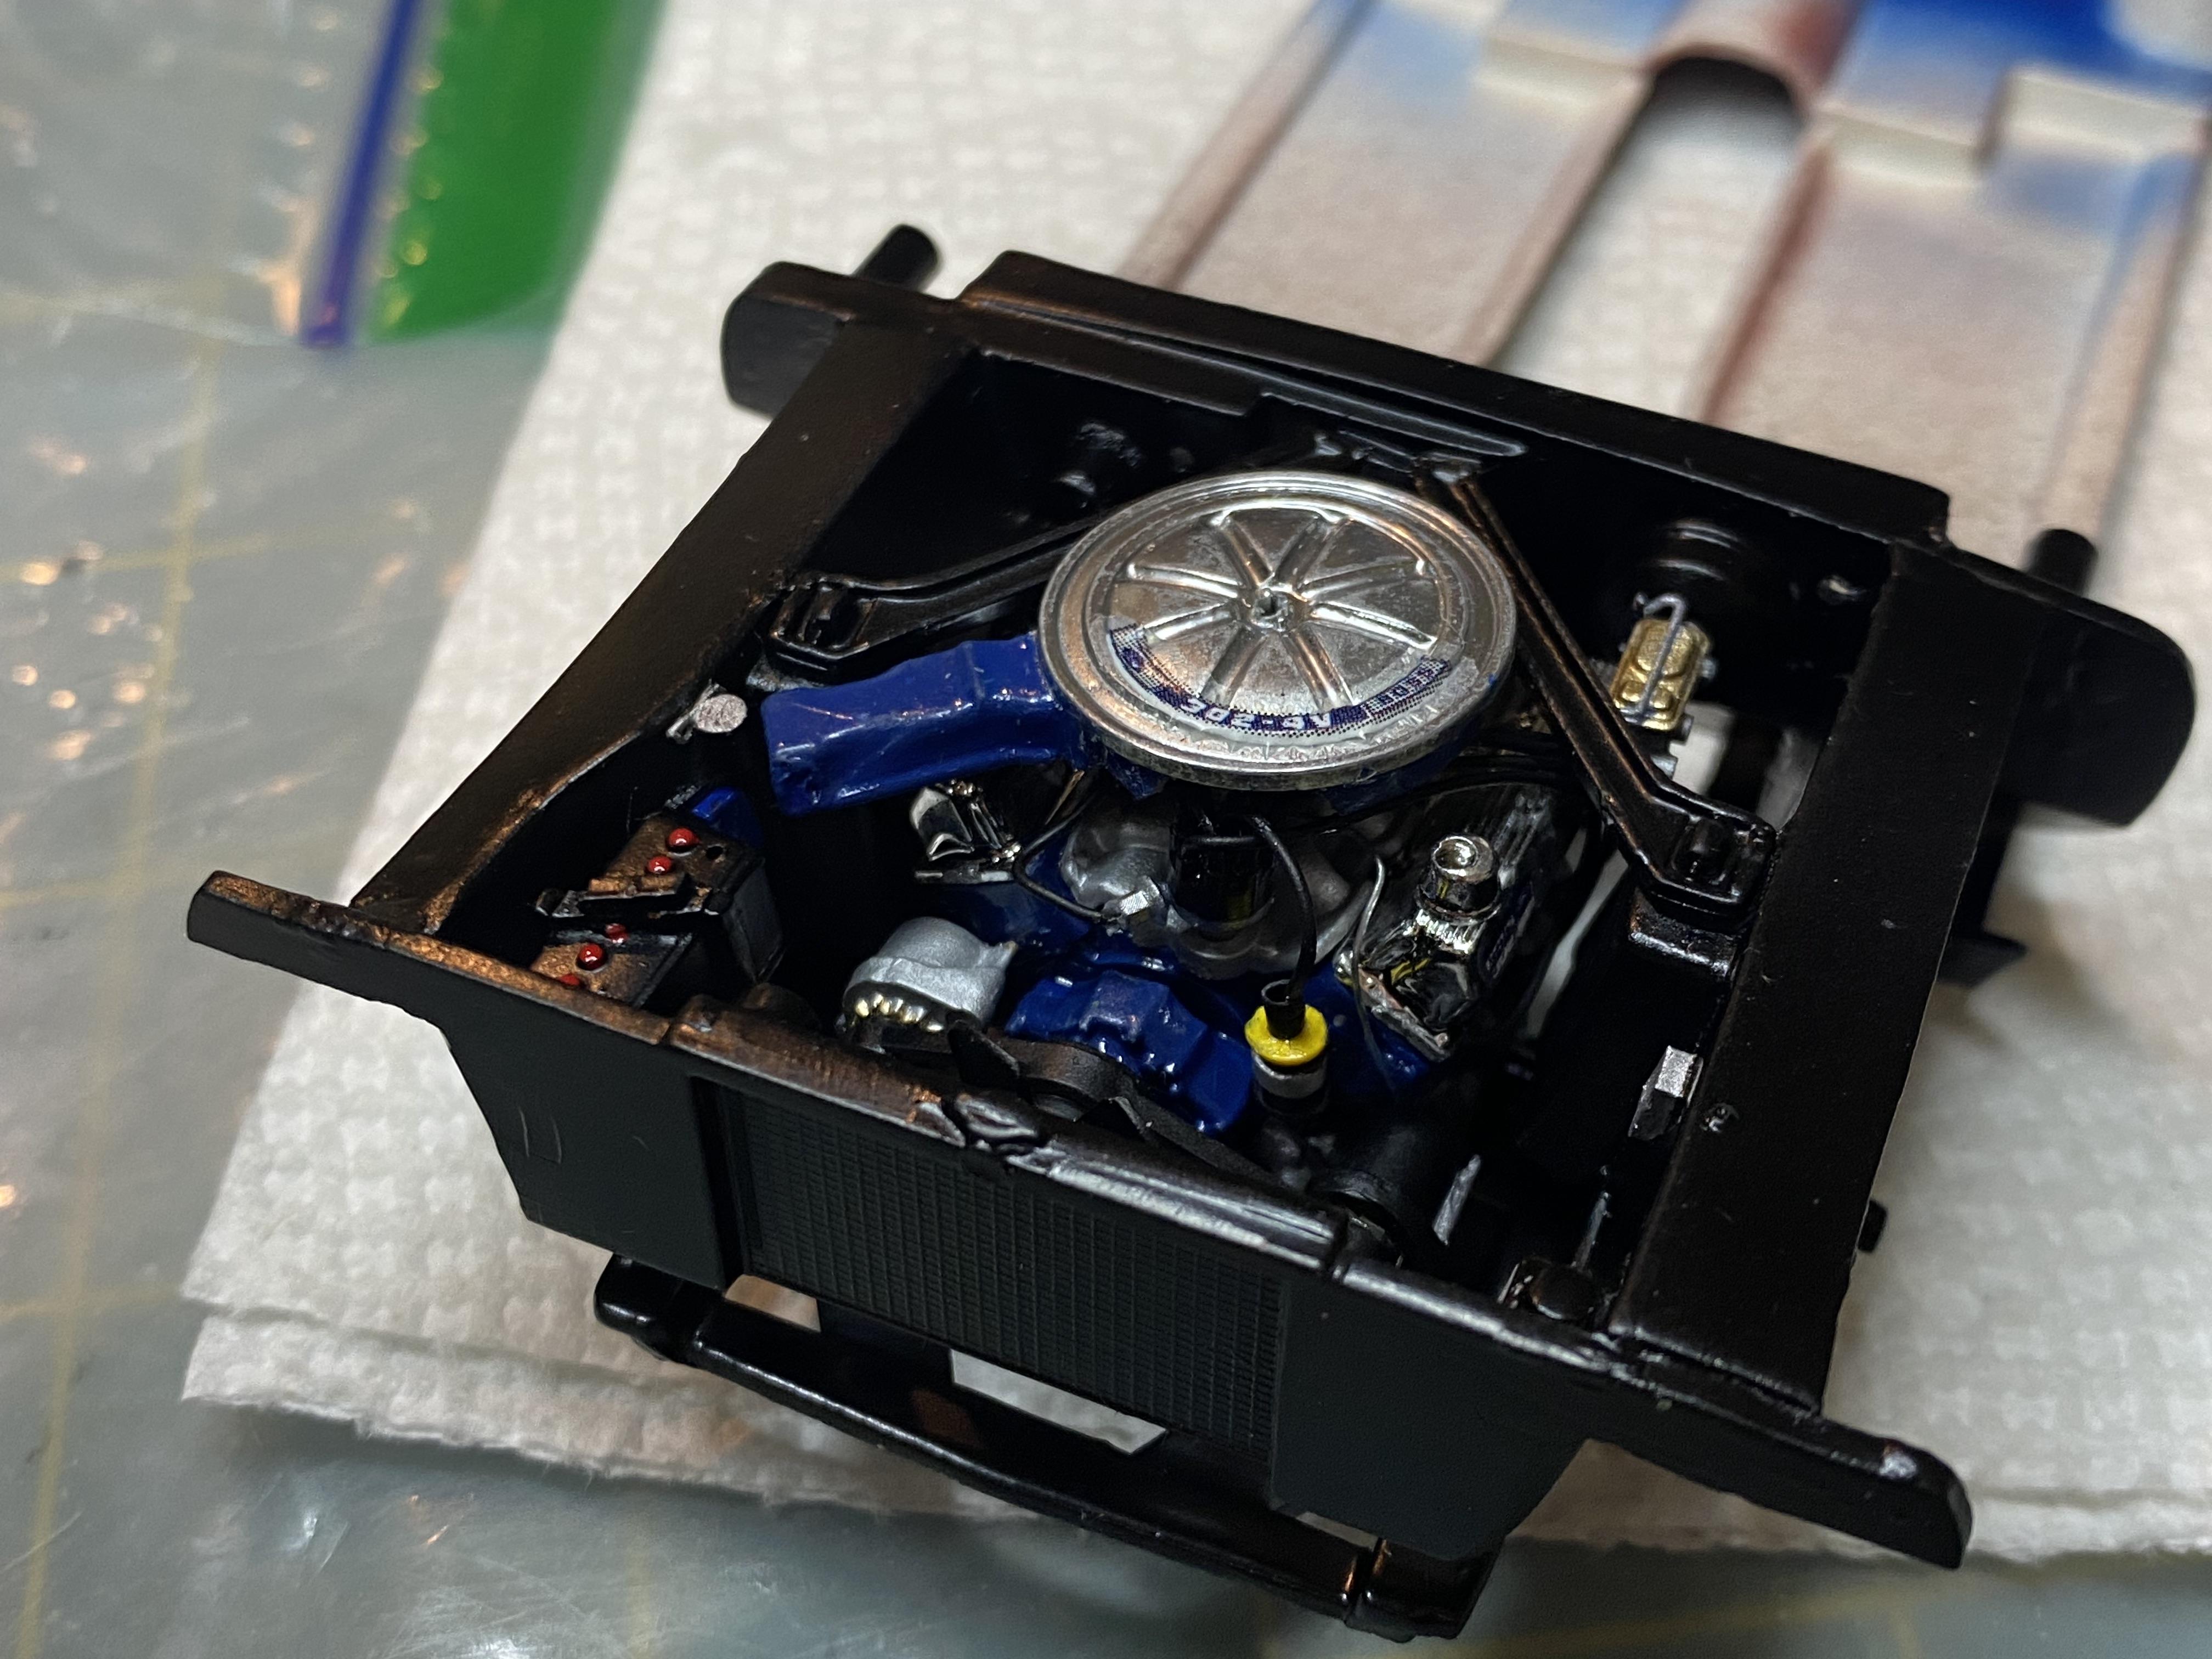
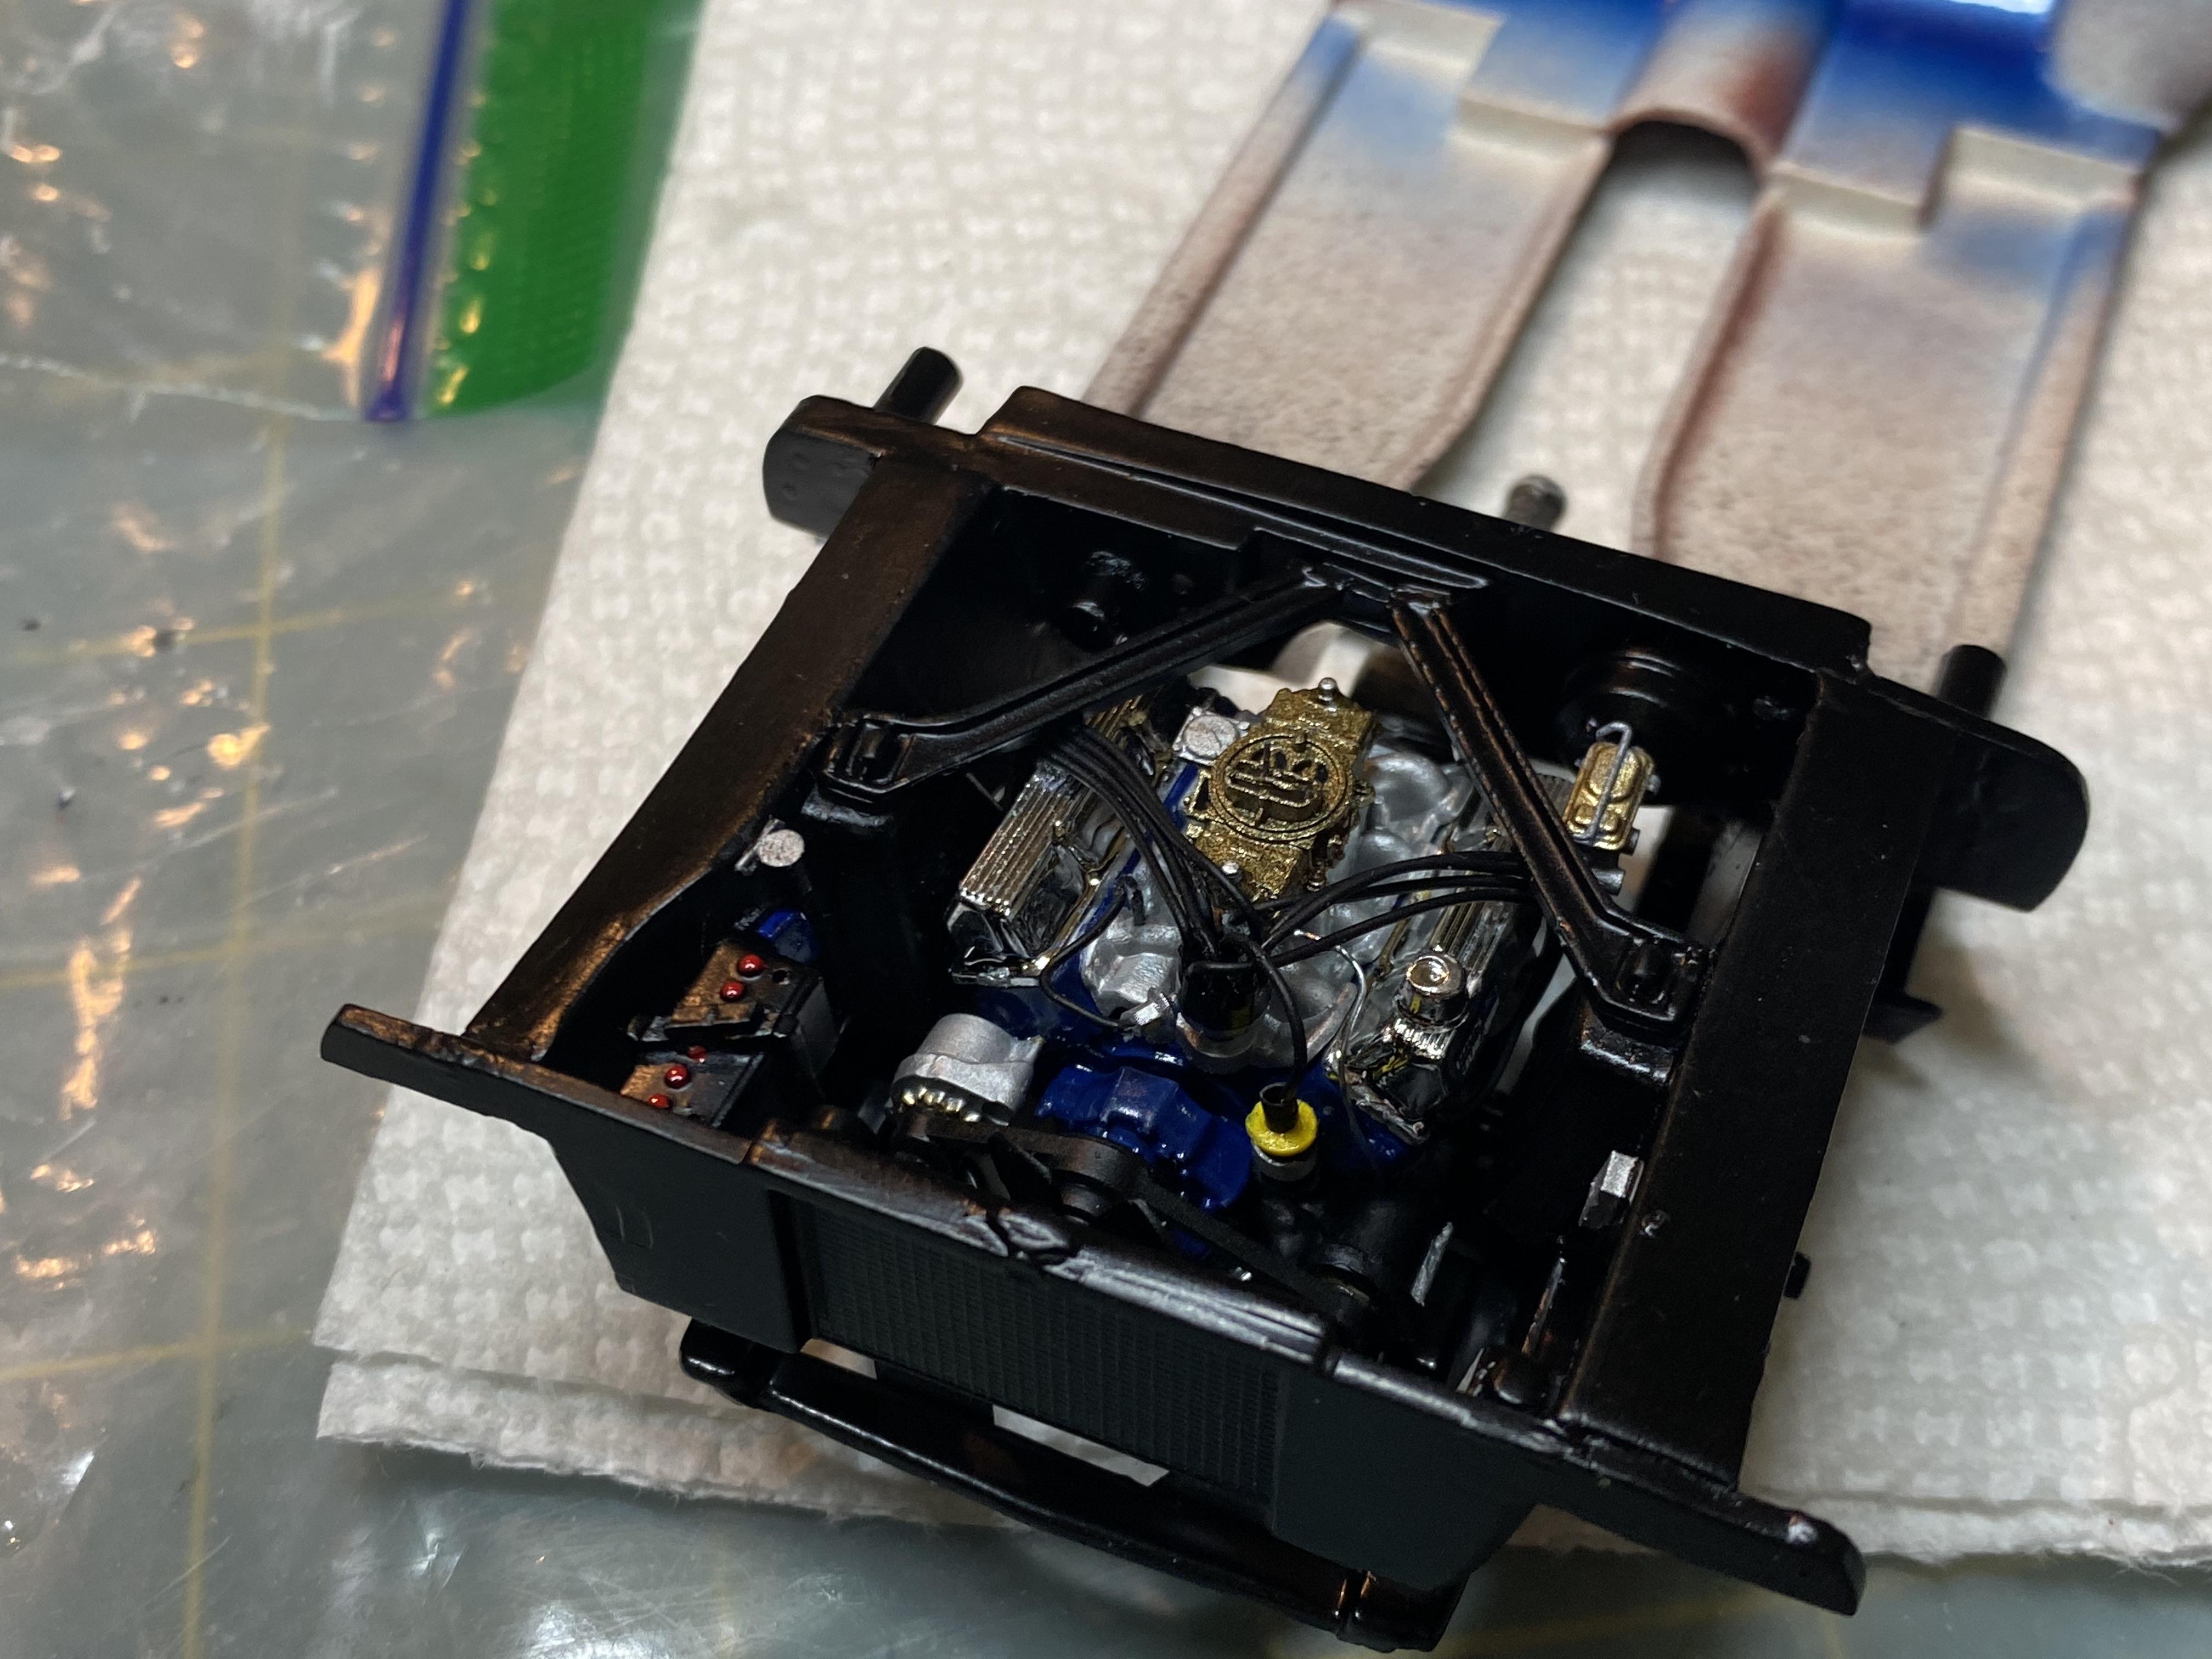
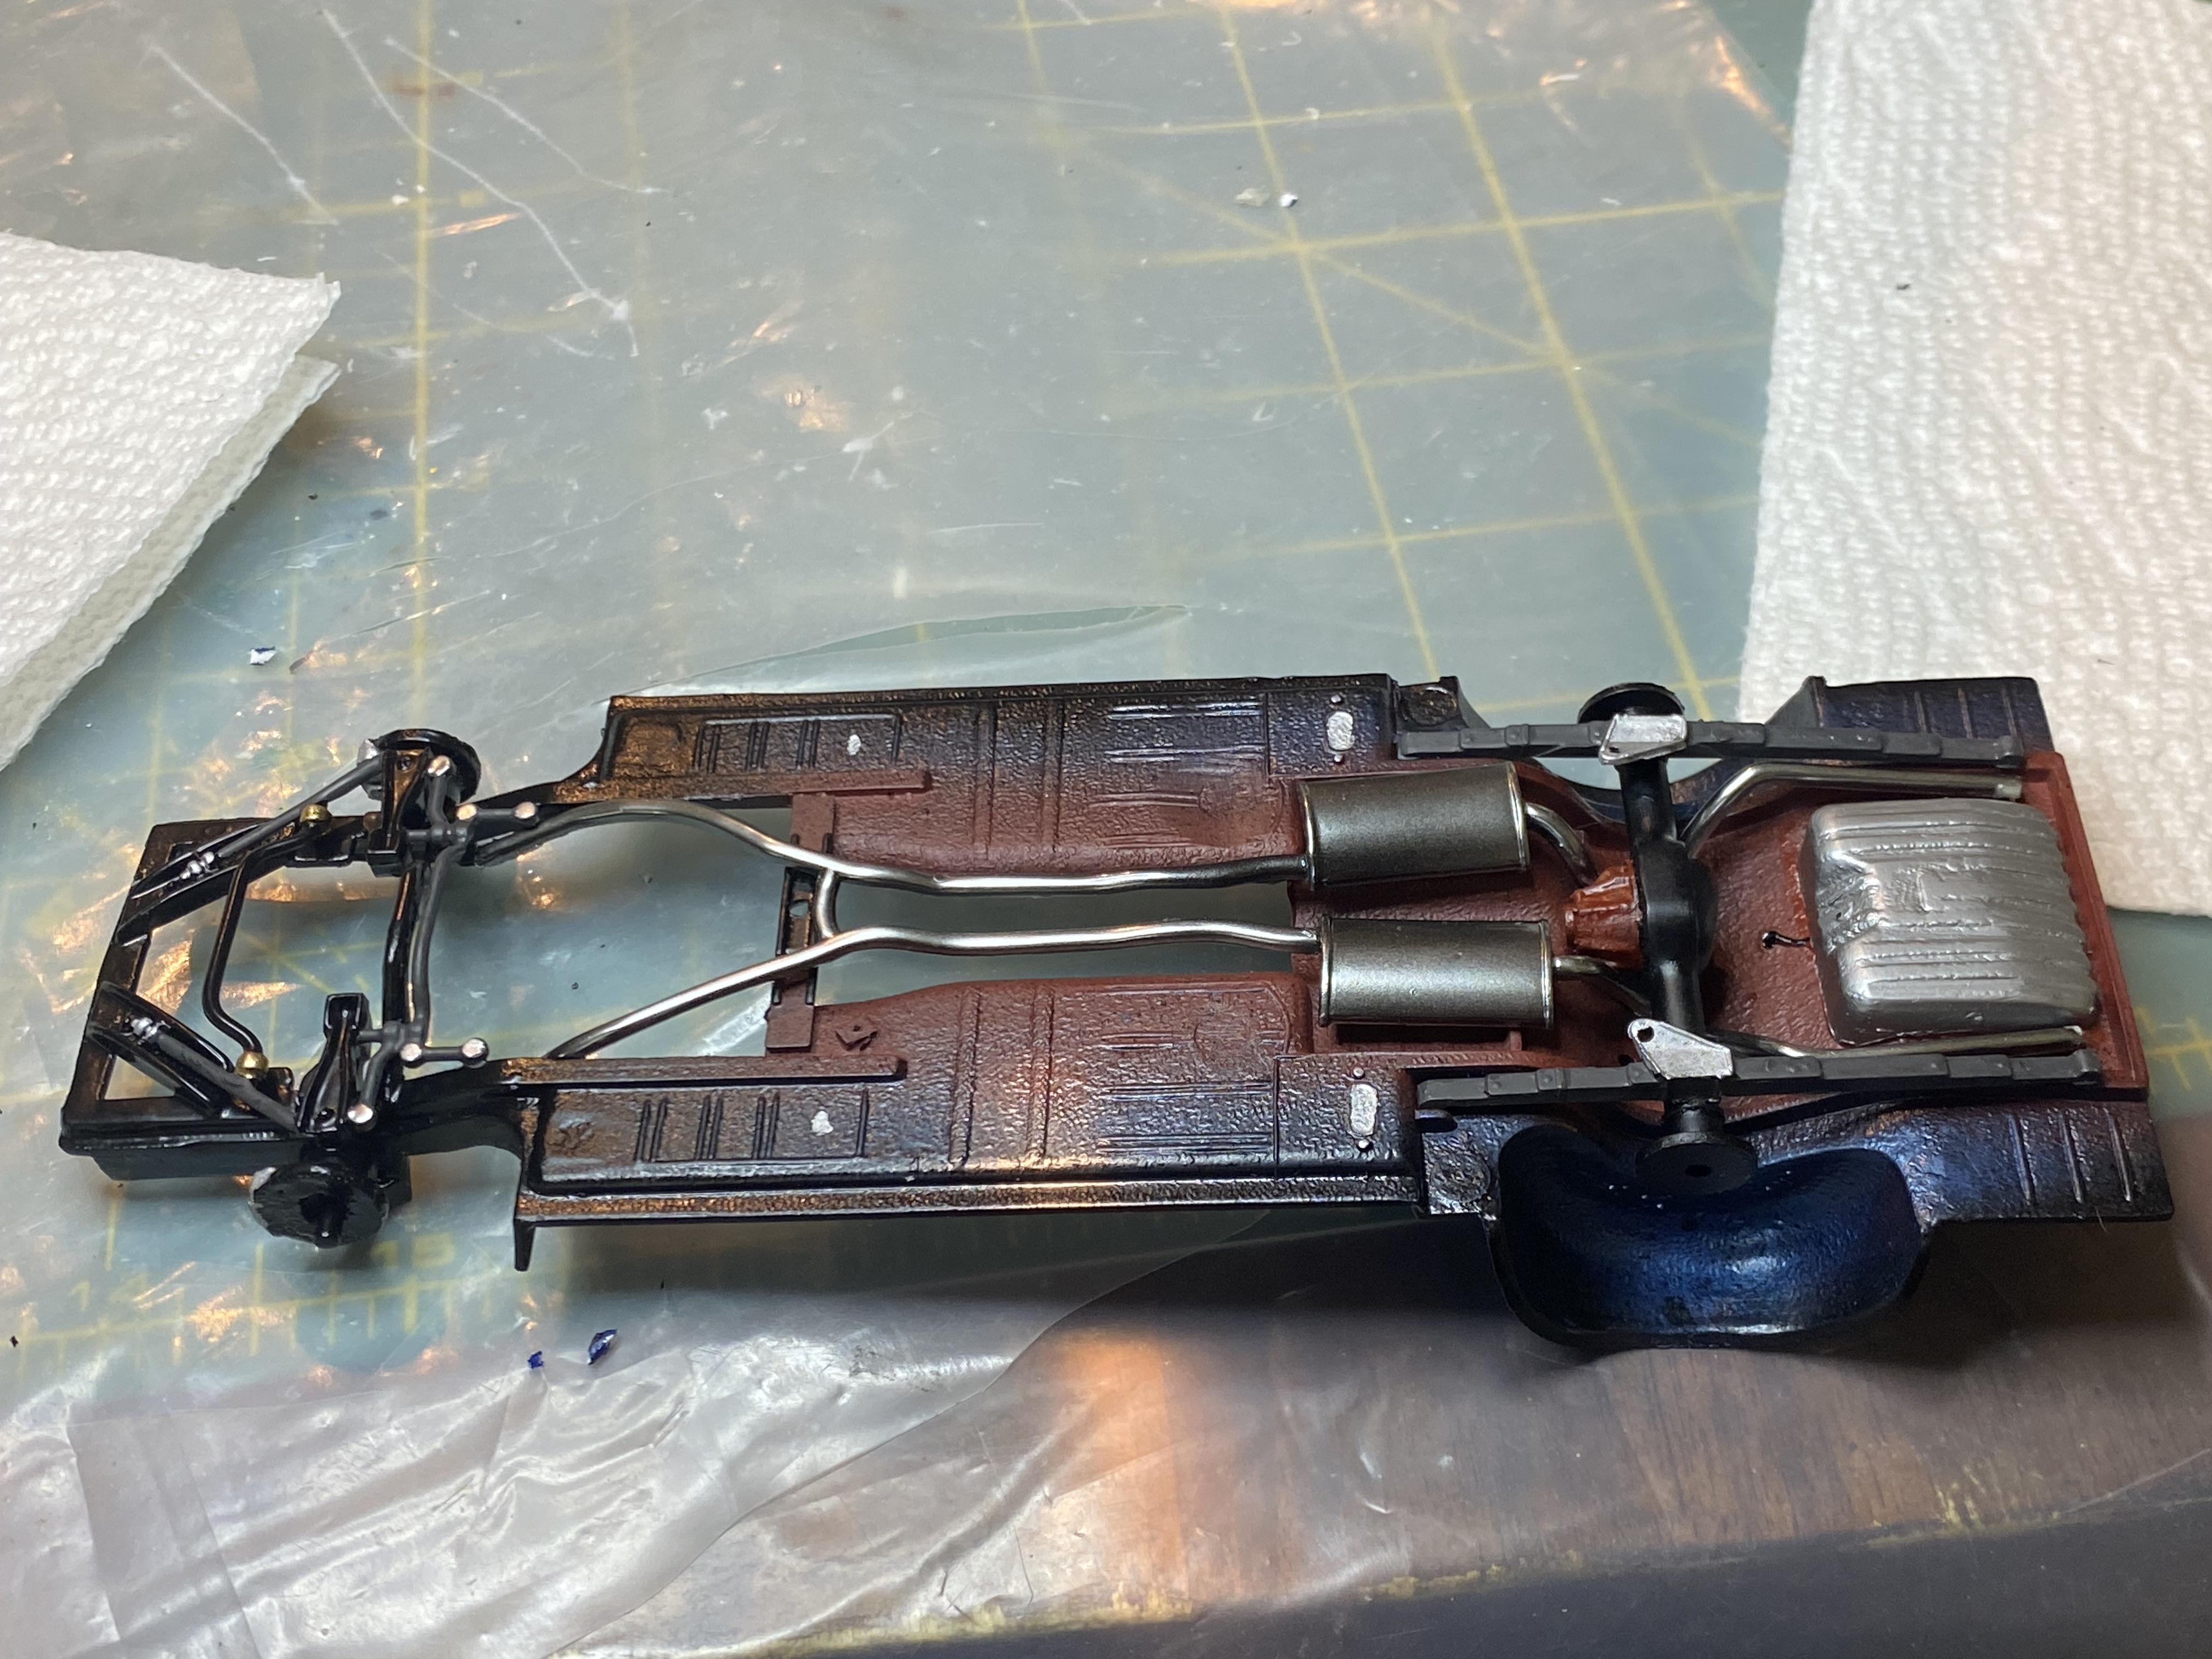
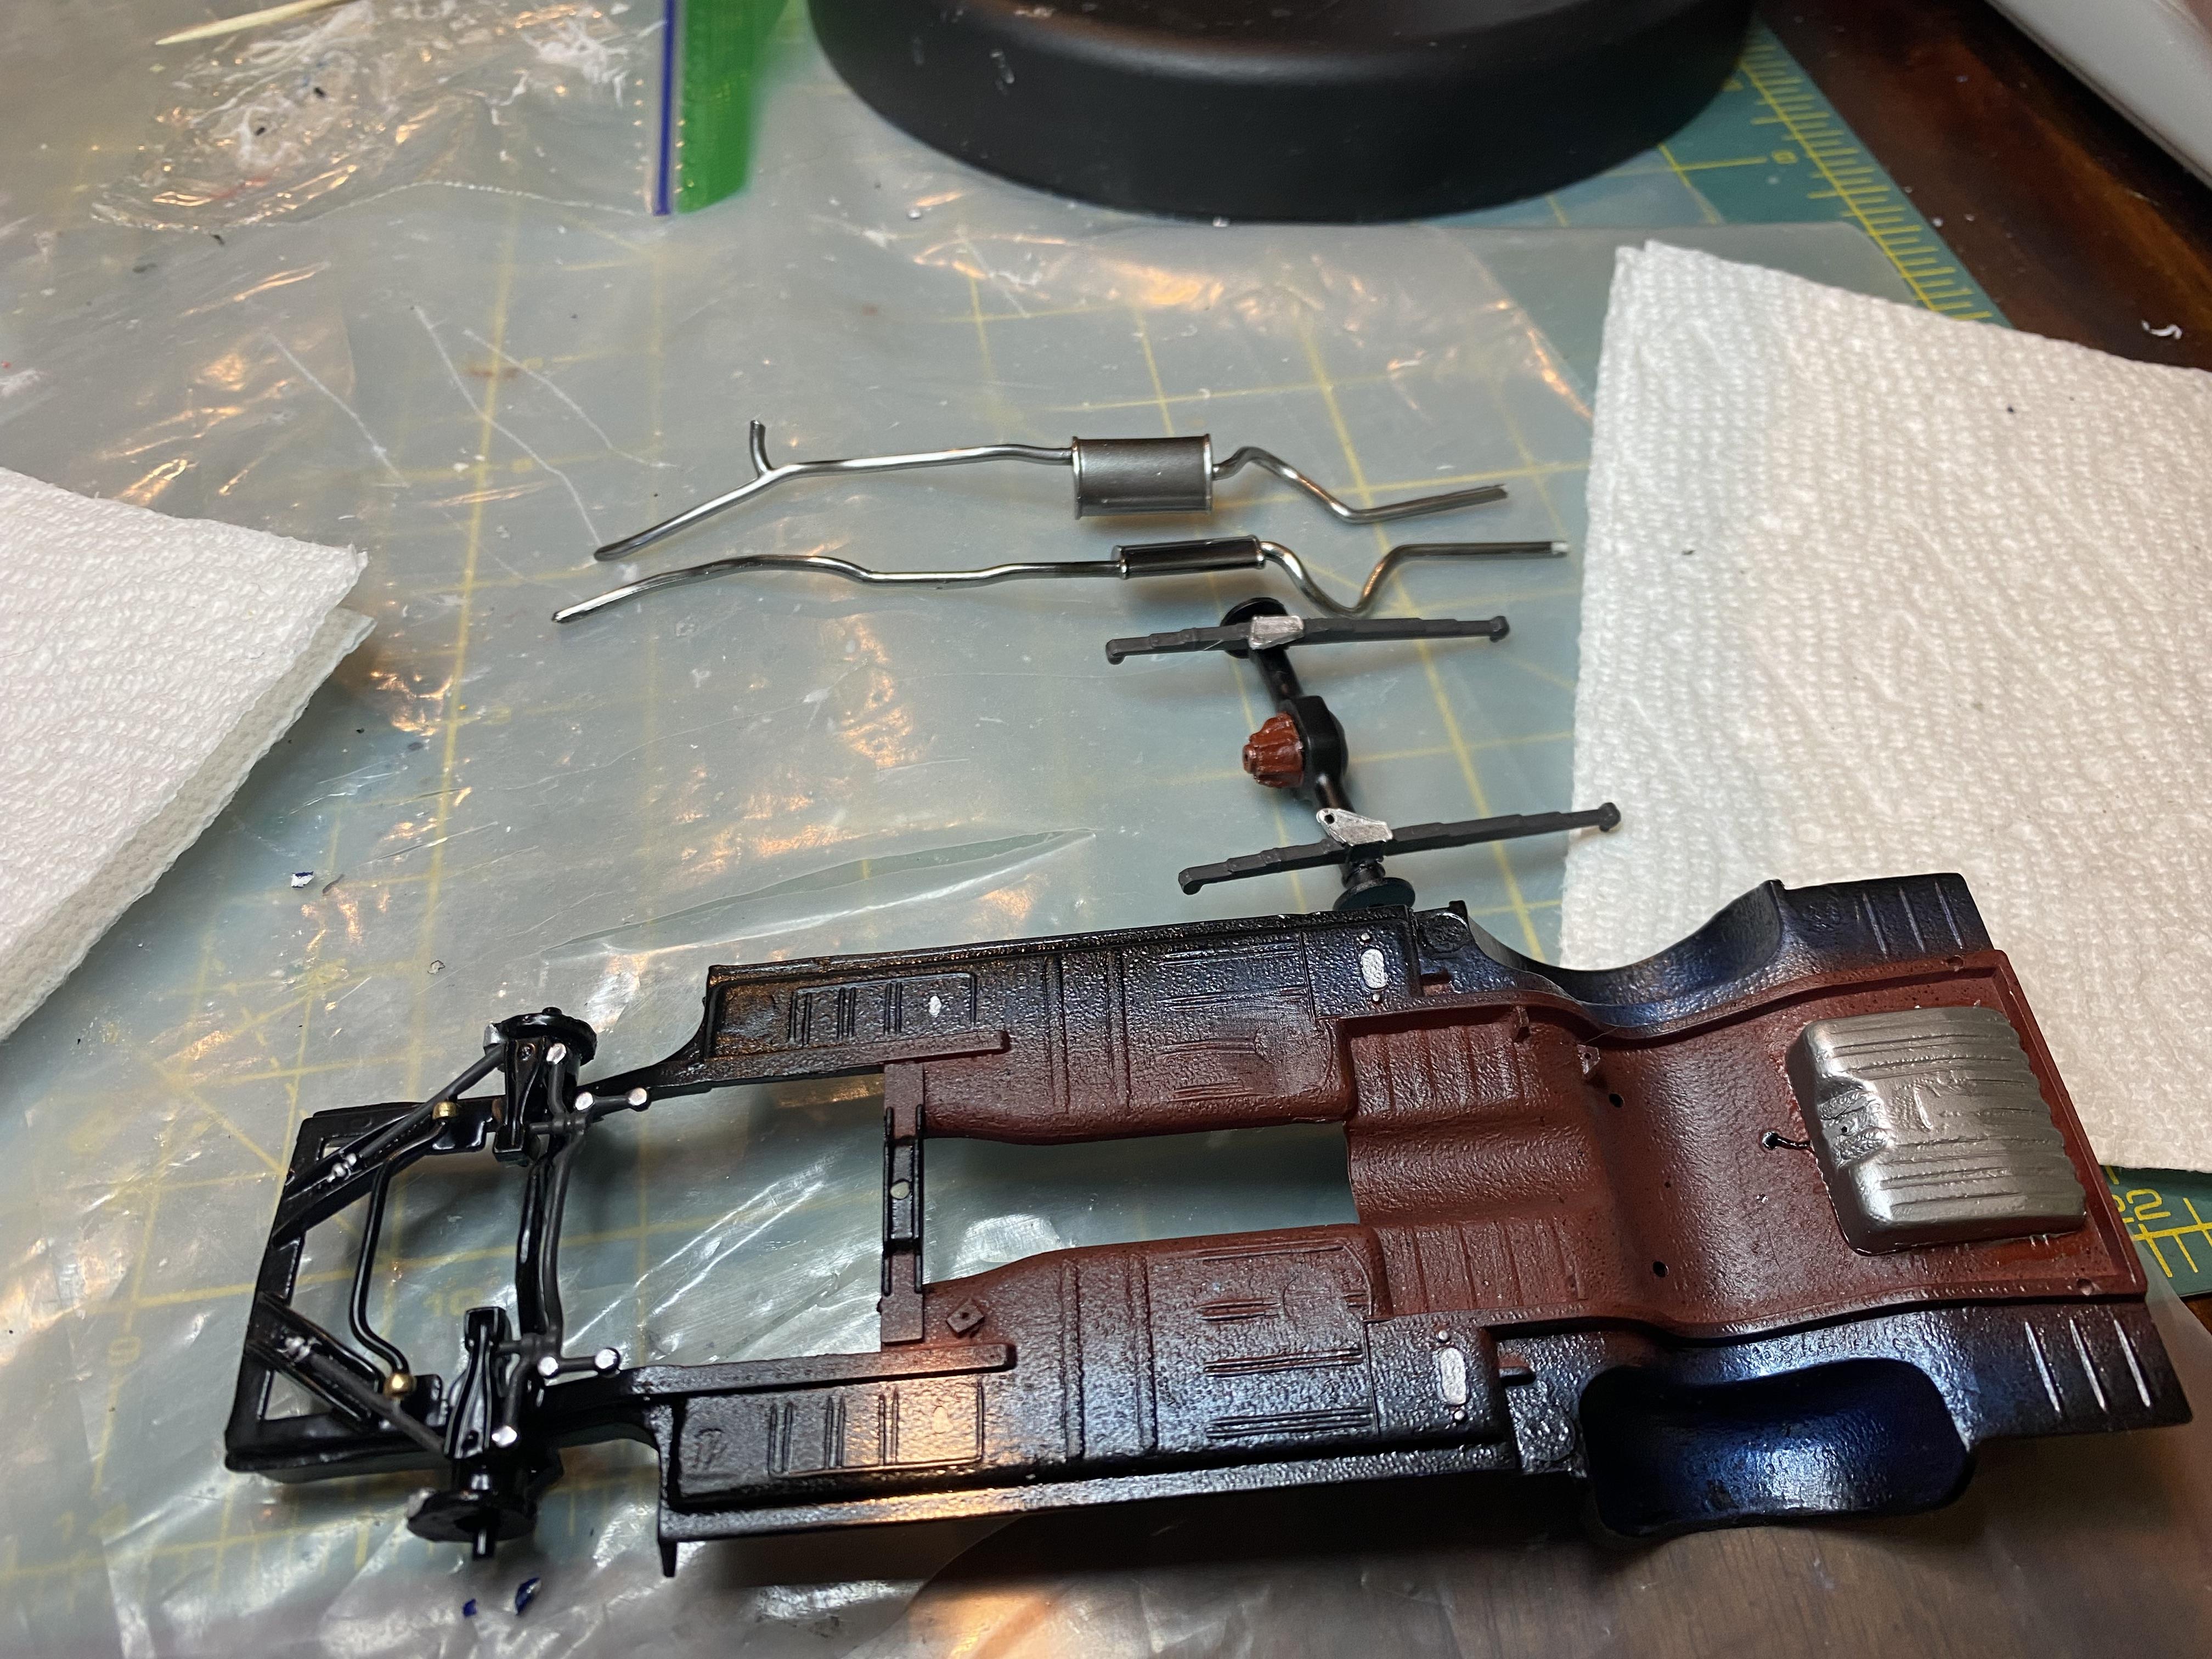
Got a little more detailing done today. Added heater hoses, wiring and decals to the engine compartment. Added trunk mat material to the trunk floor and spare tire/battery cover. added fuel, brake lines and emergency brake cables to the chassis. Permanently attached the exhaust and differential.
-
Thank you!
-
Thanks. That is a 3d printed master cylinder and booster I got from VCG resins. Amazing detail I must agree.
-
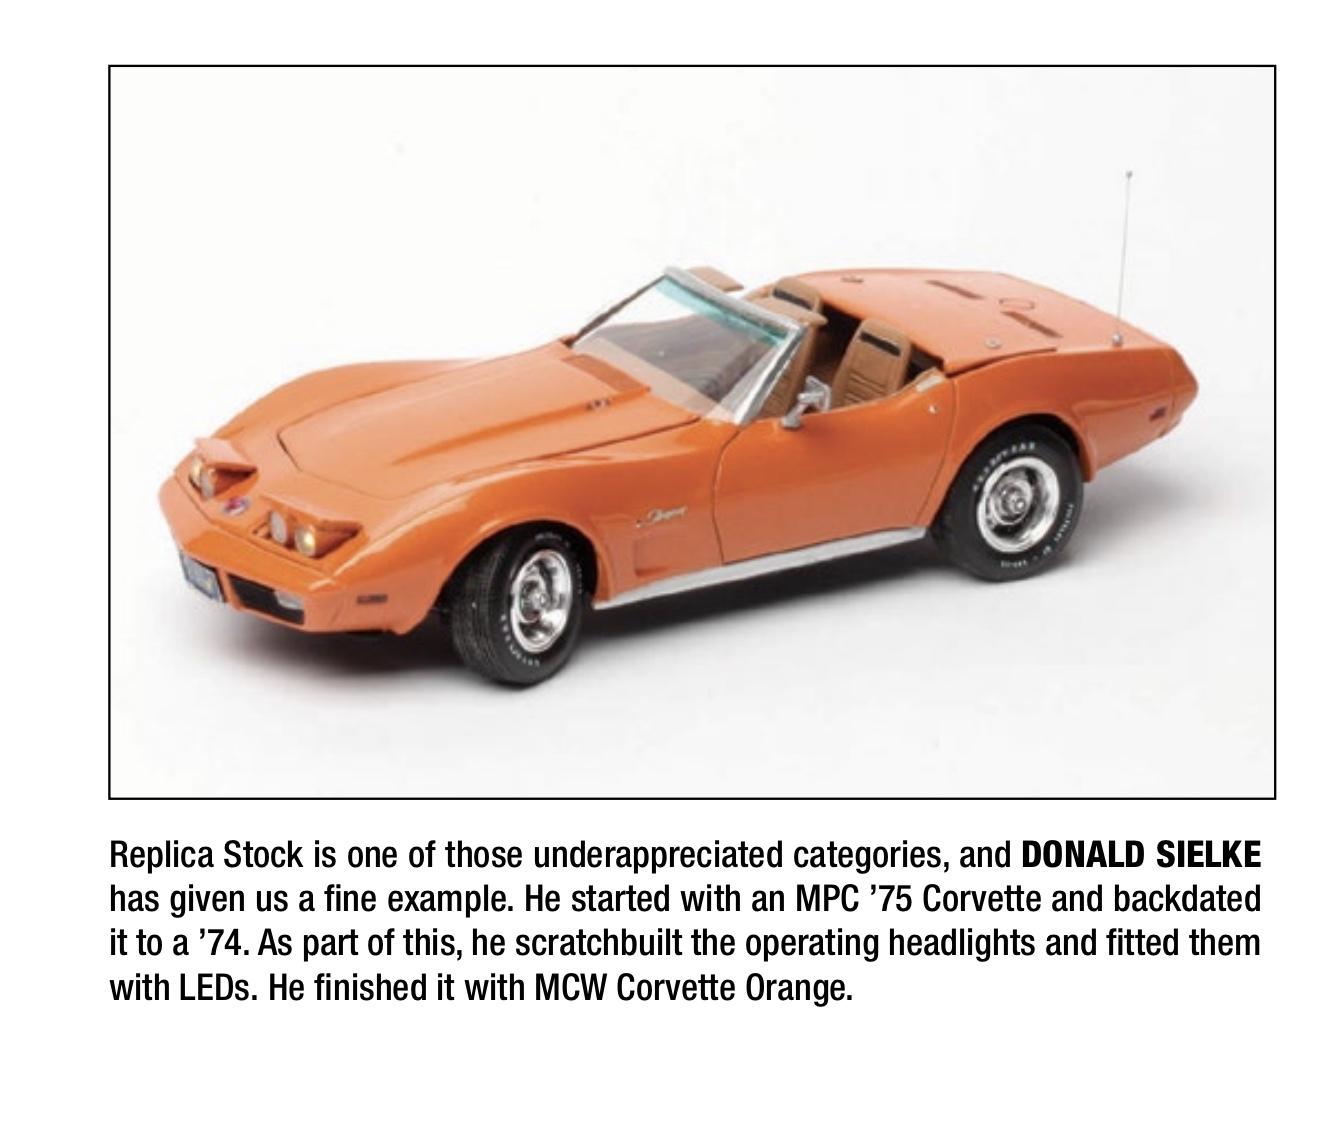
It was great seeing my 1974 Corvette included in the SoCal Open coverage in issue 225. This was the first Model Car show I ever participated in.Thank you very much!
-
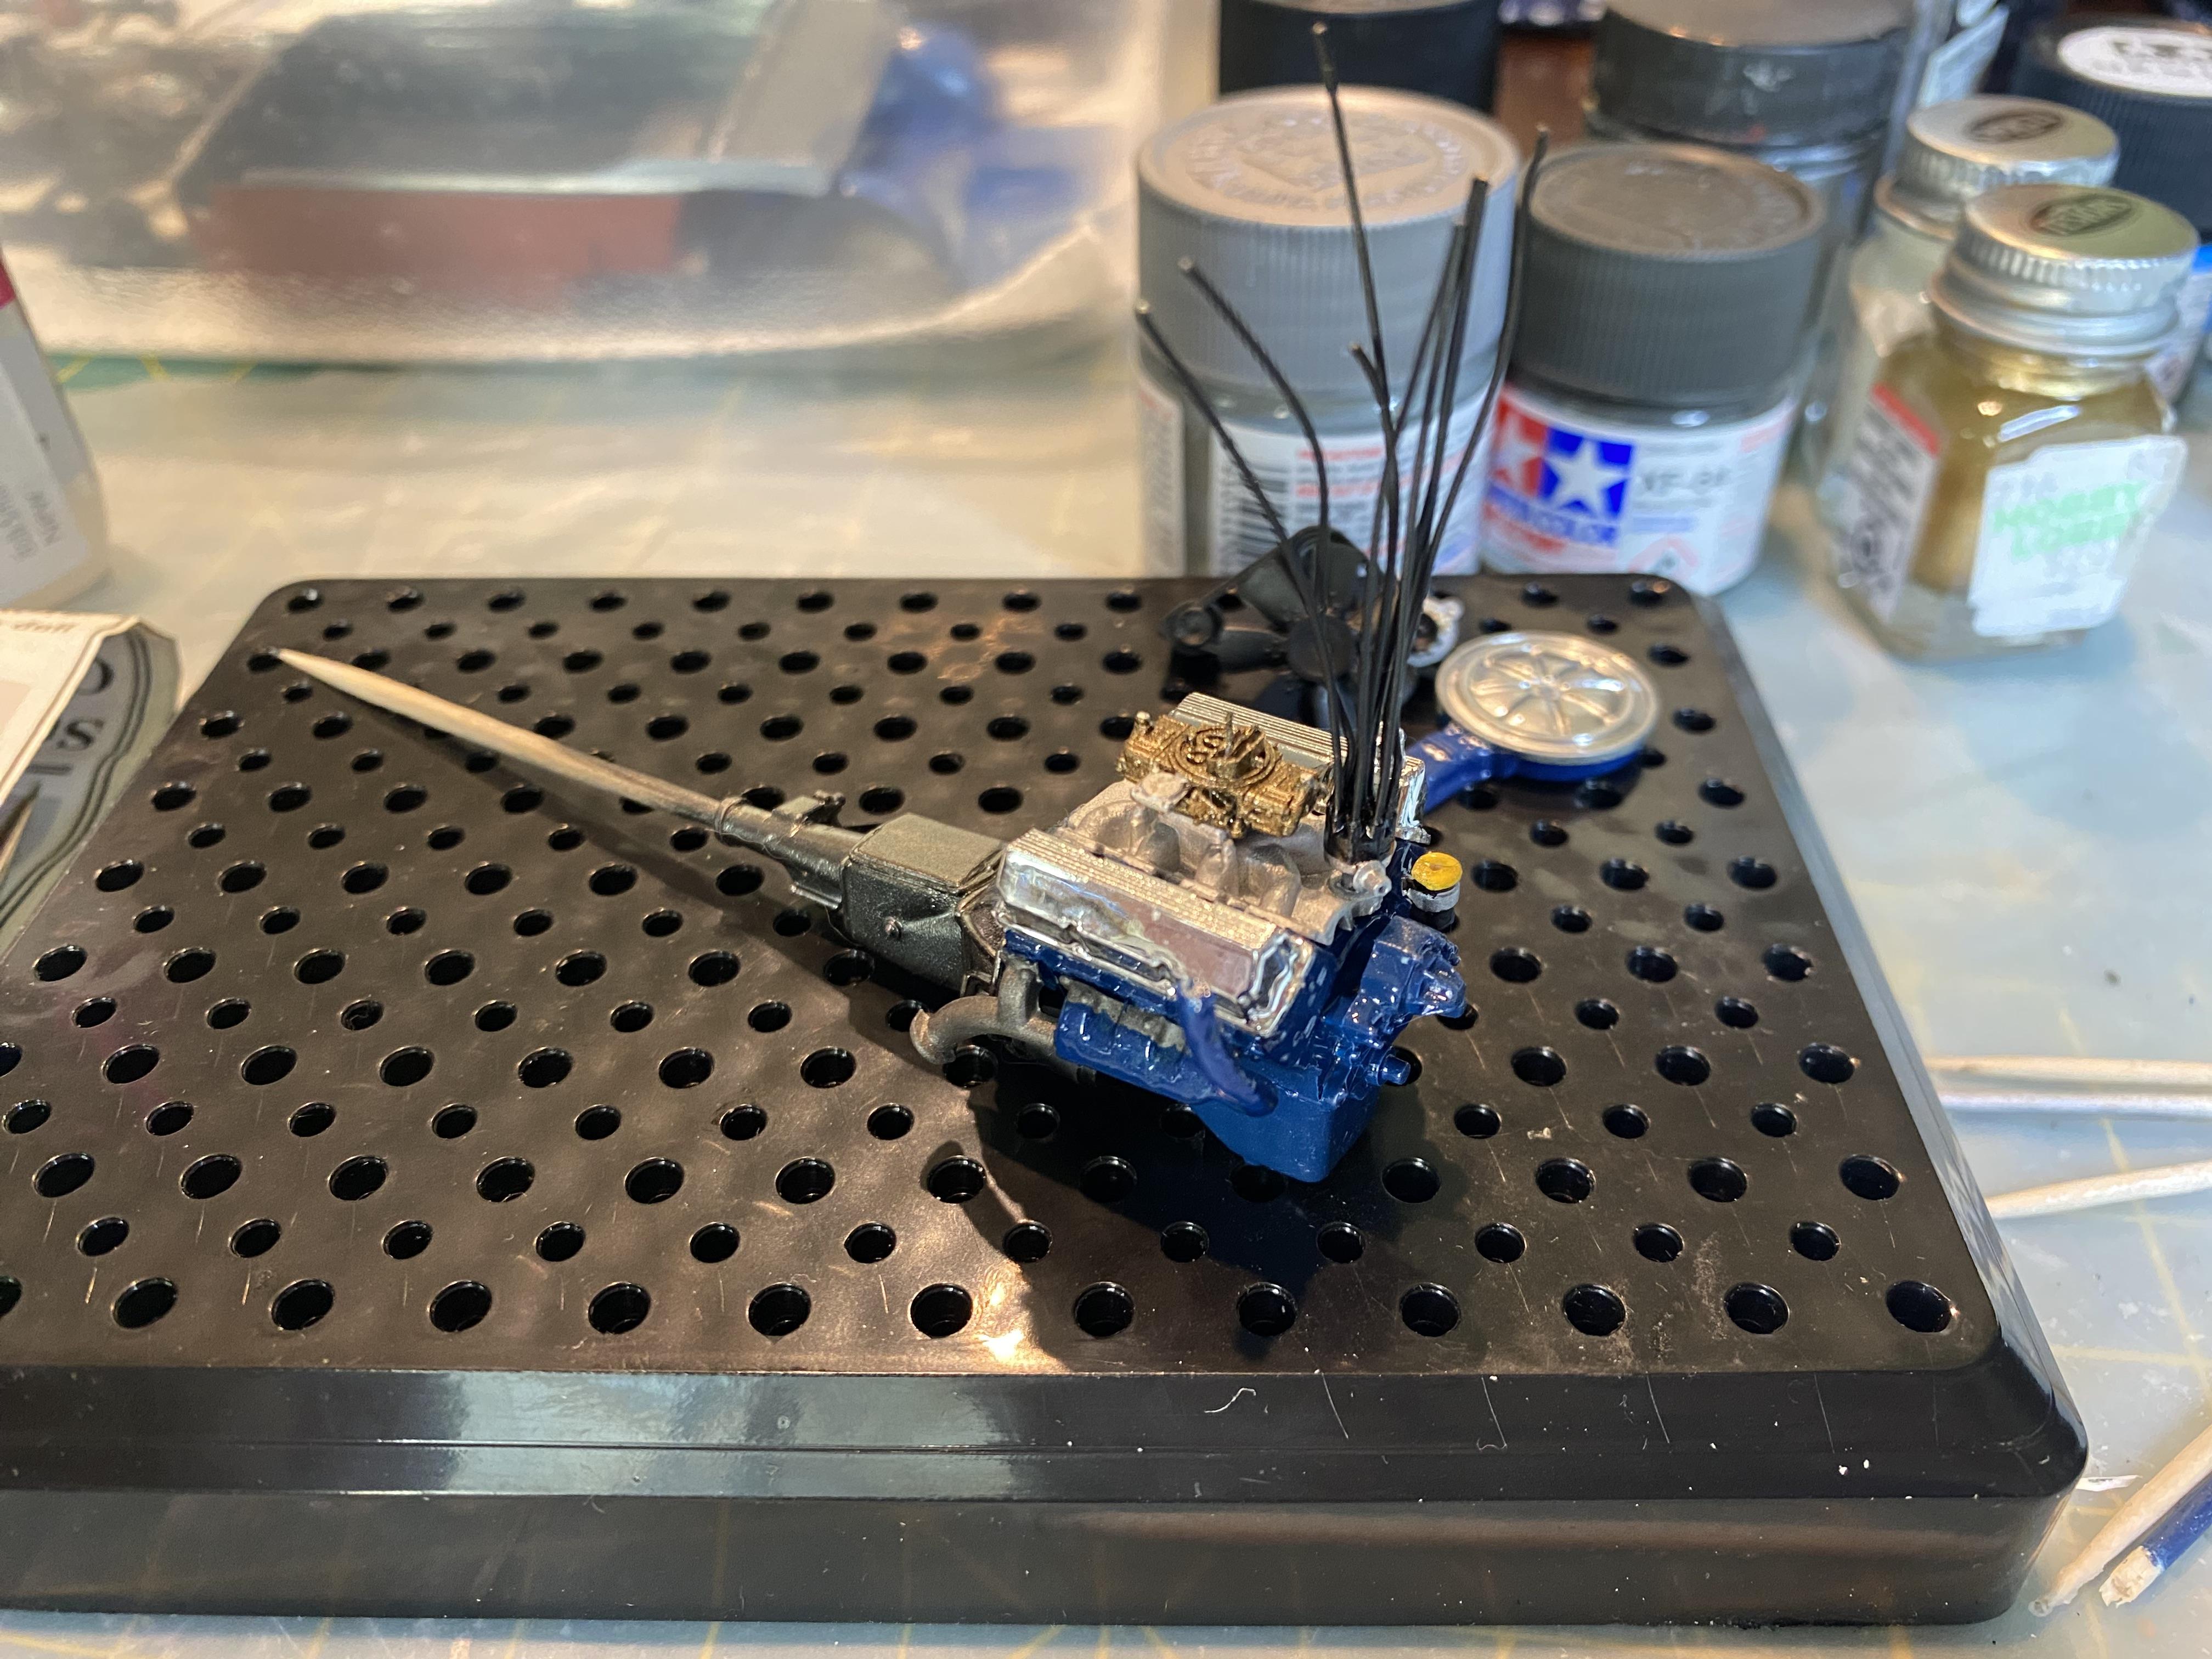
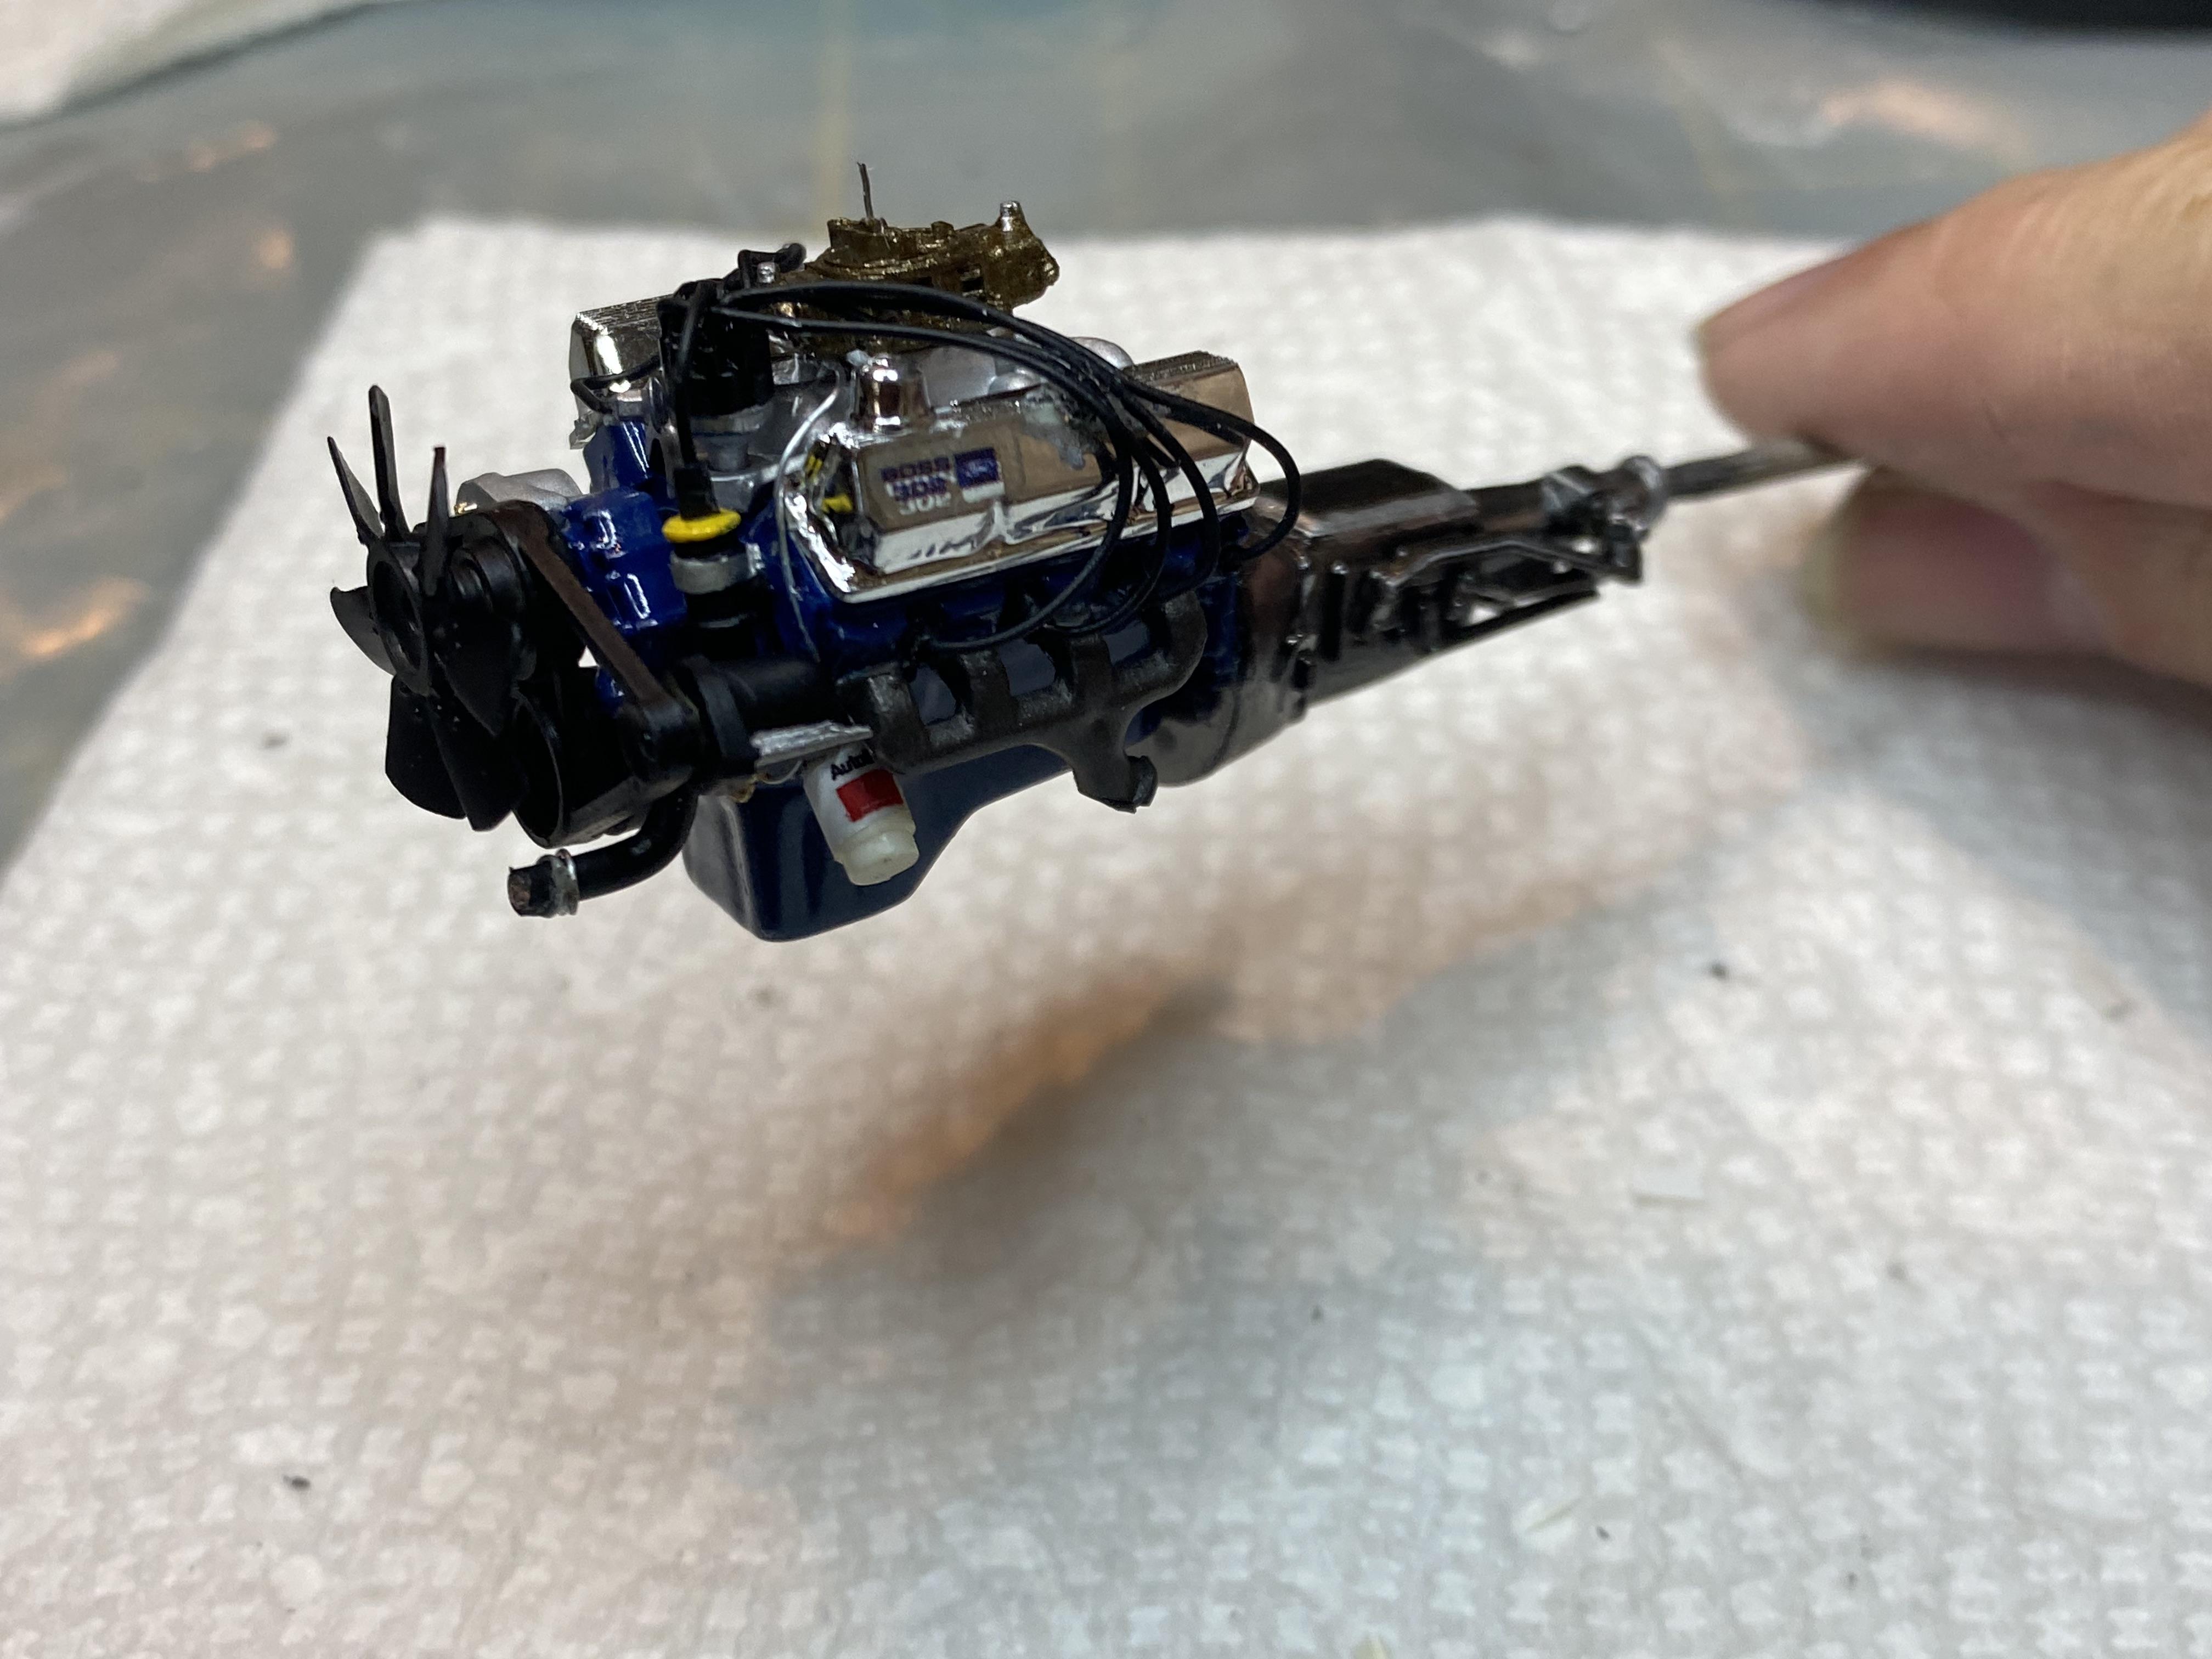
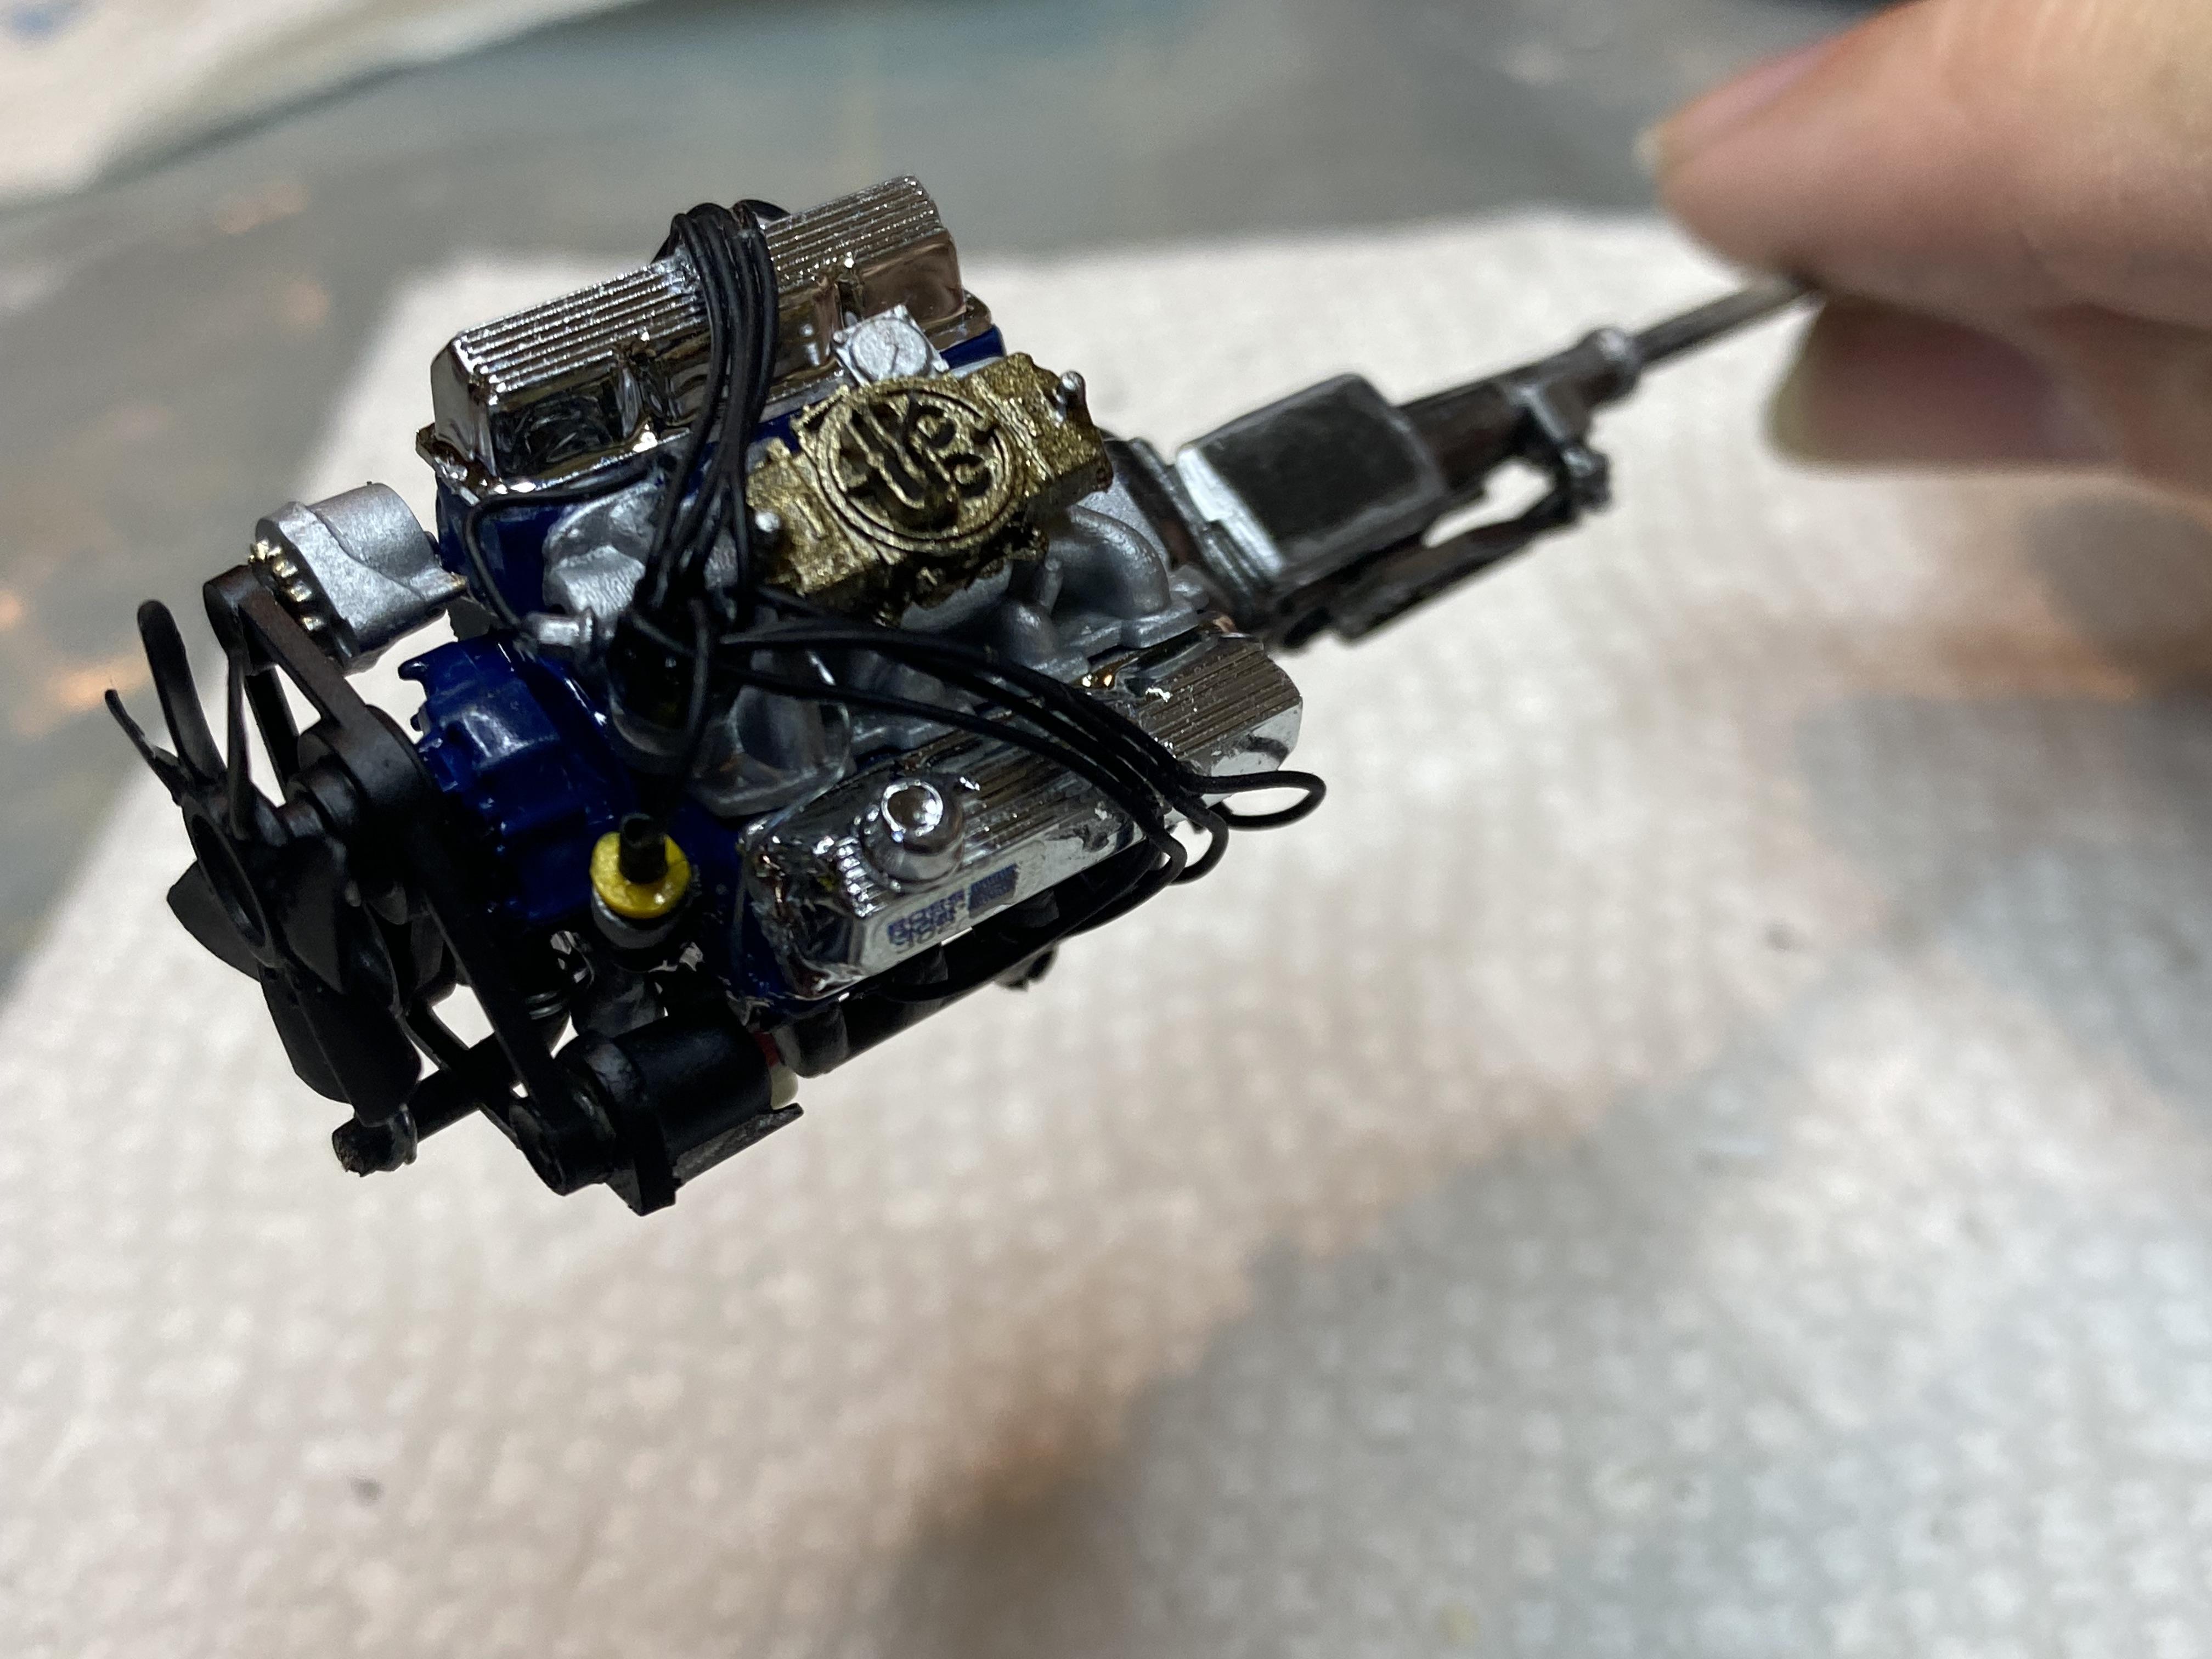
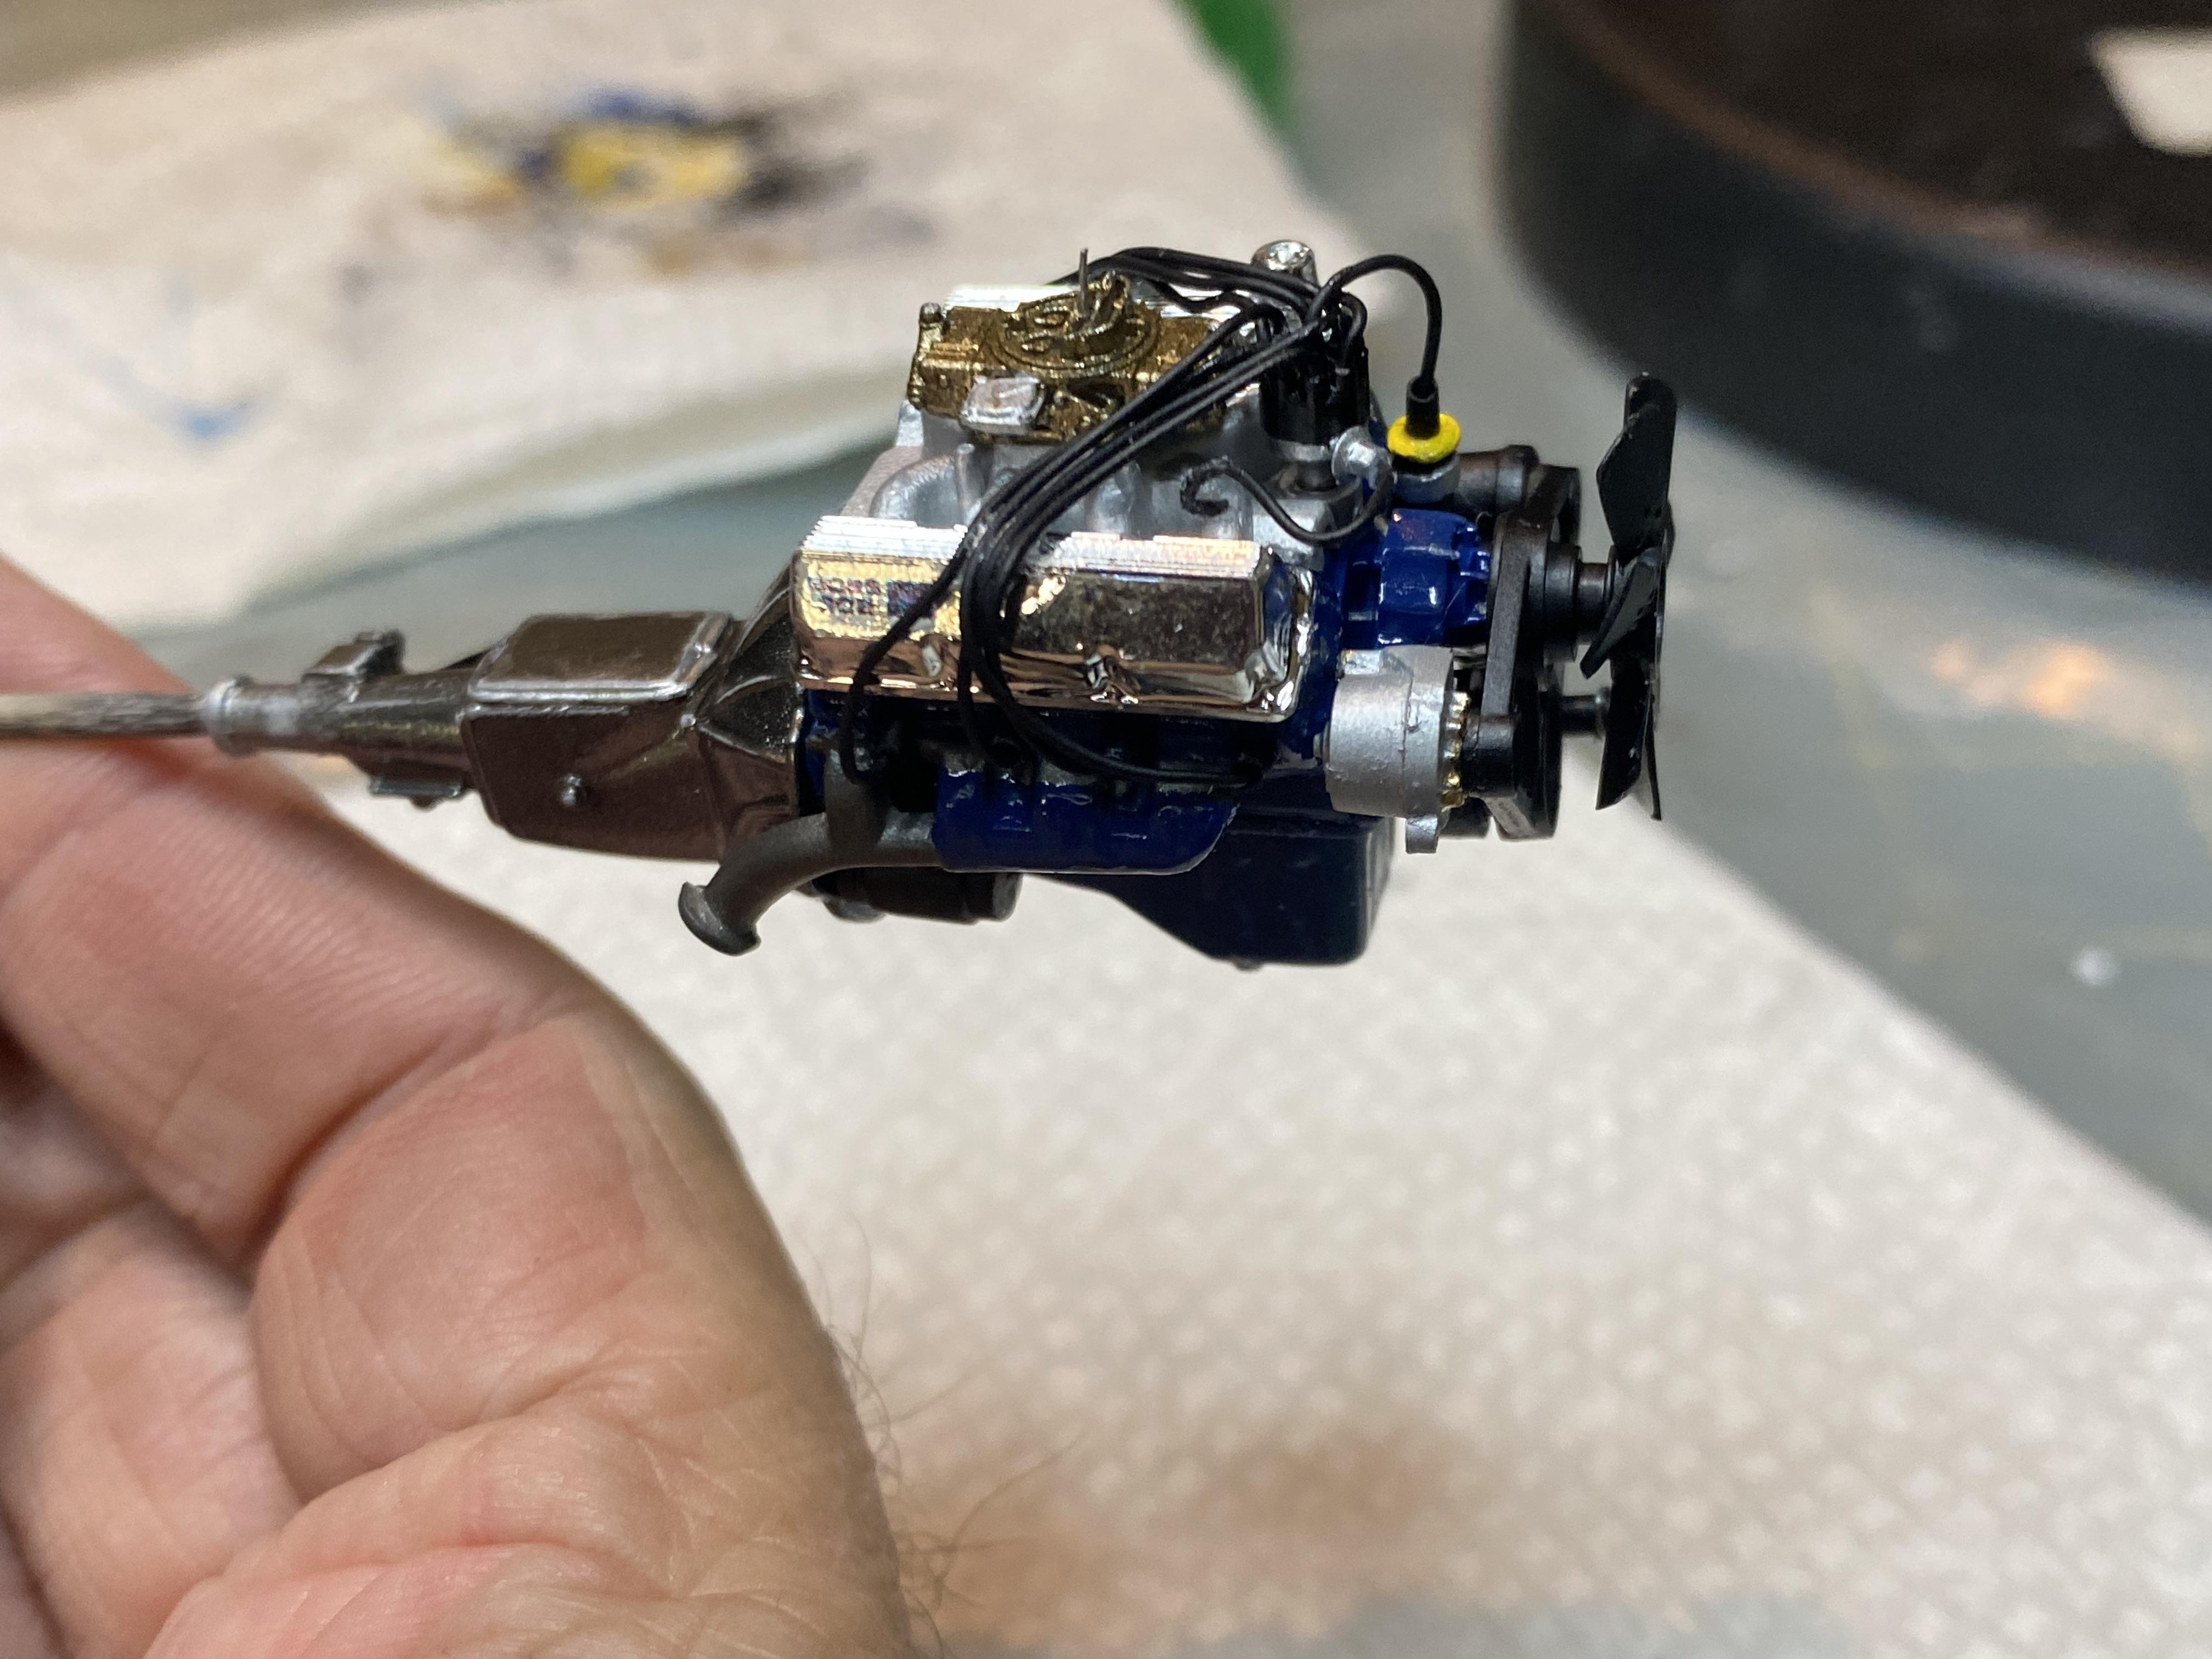
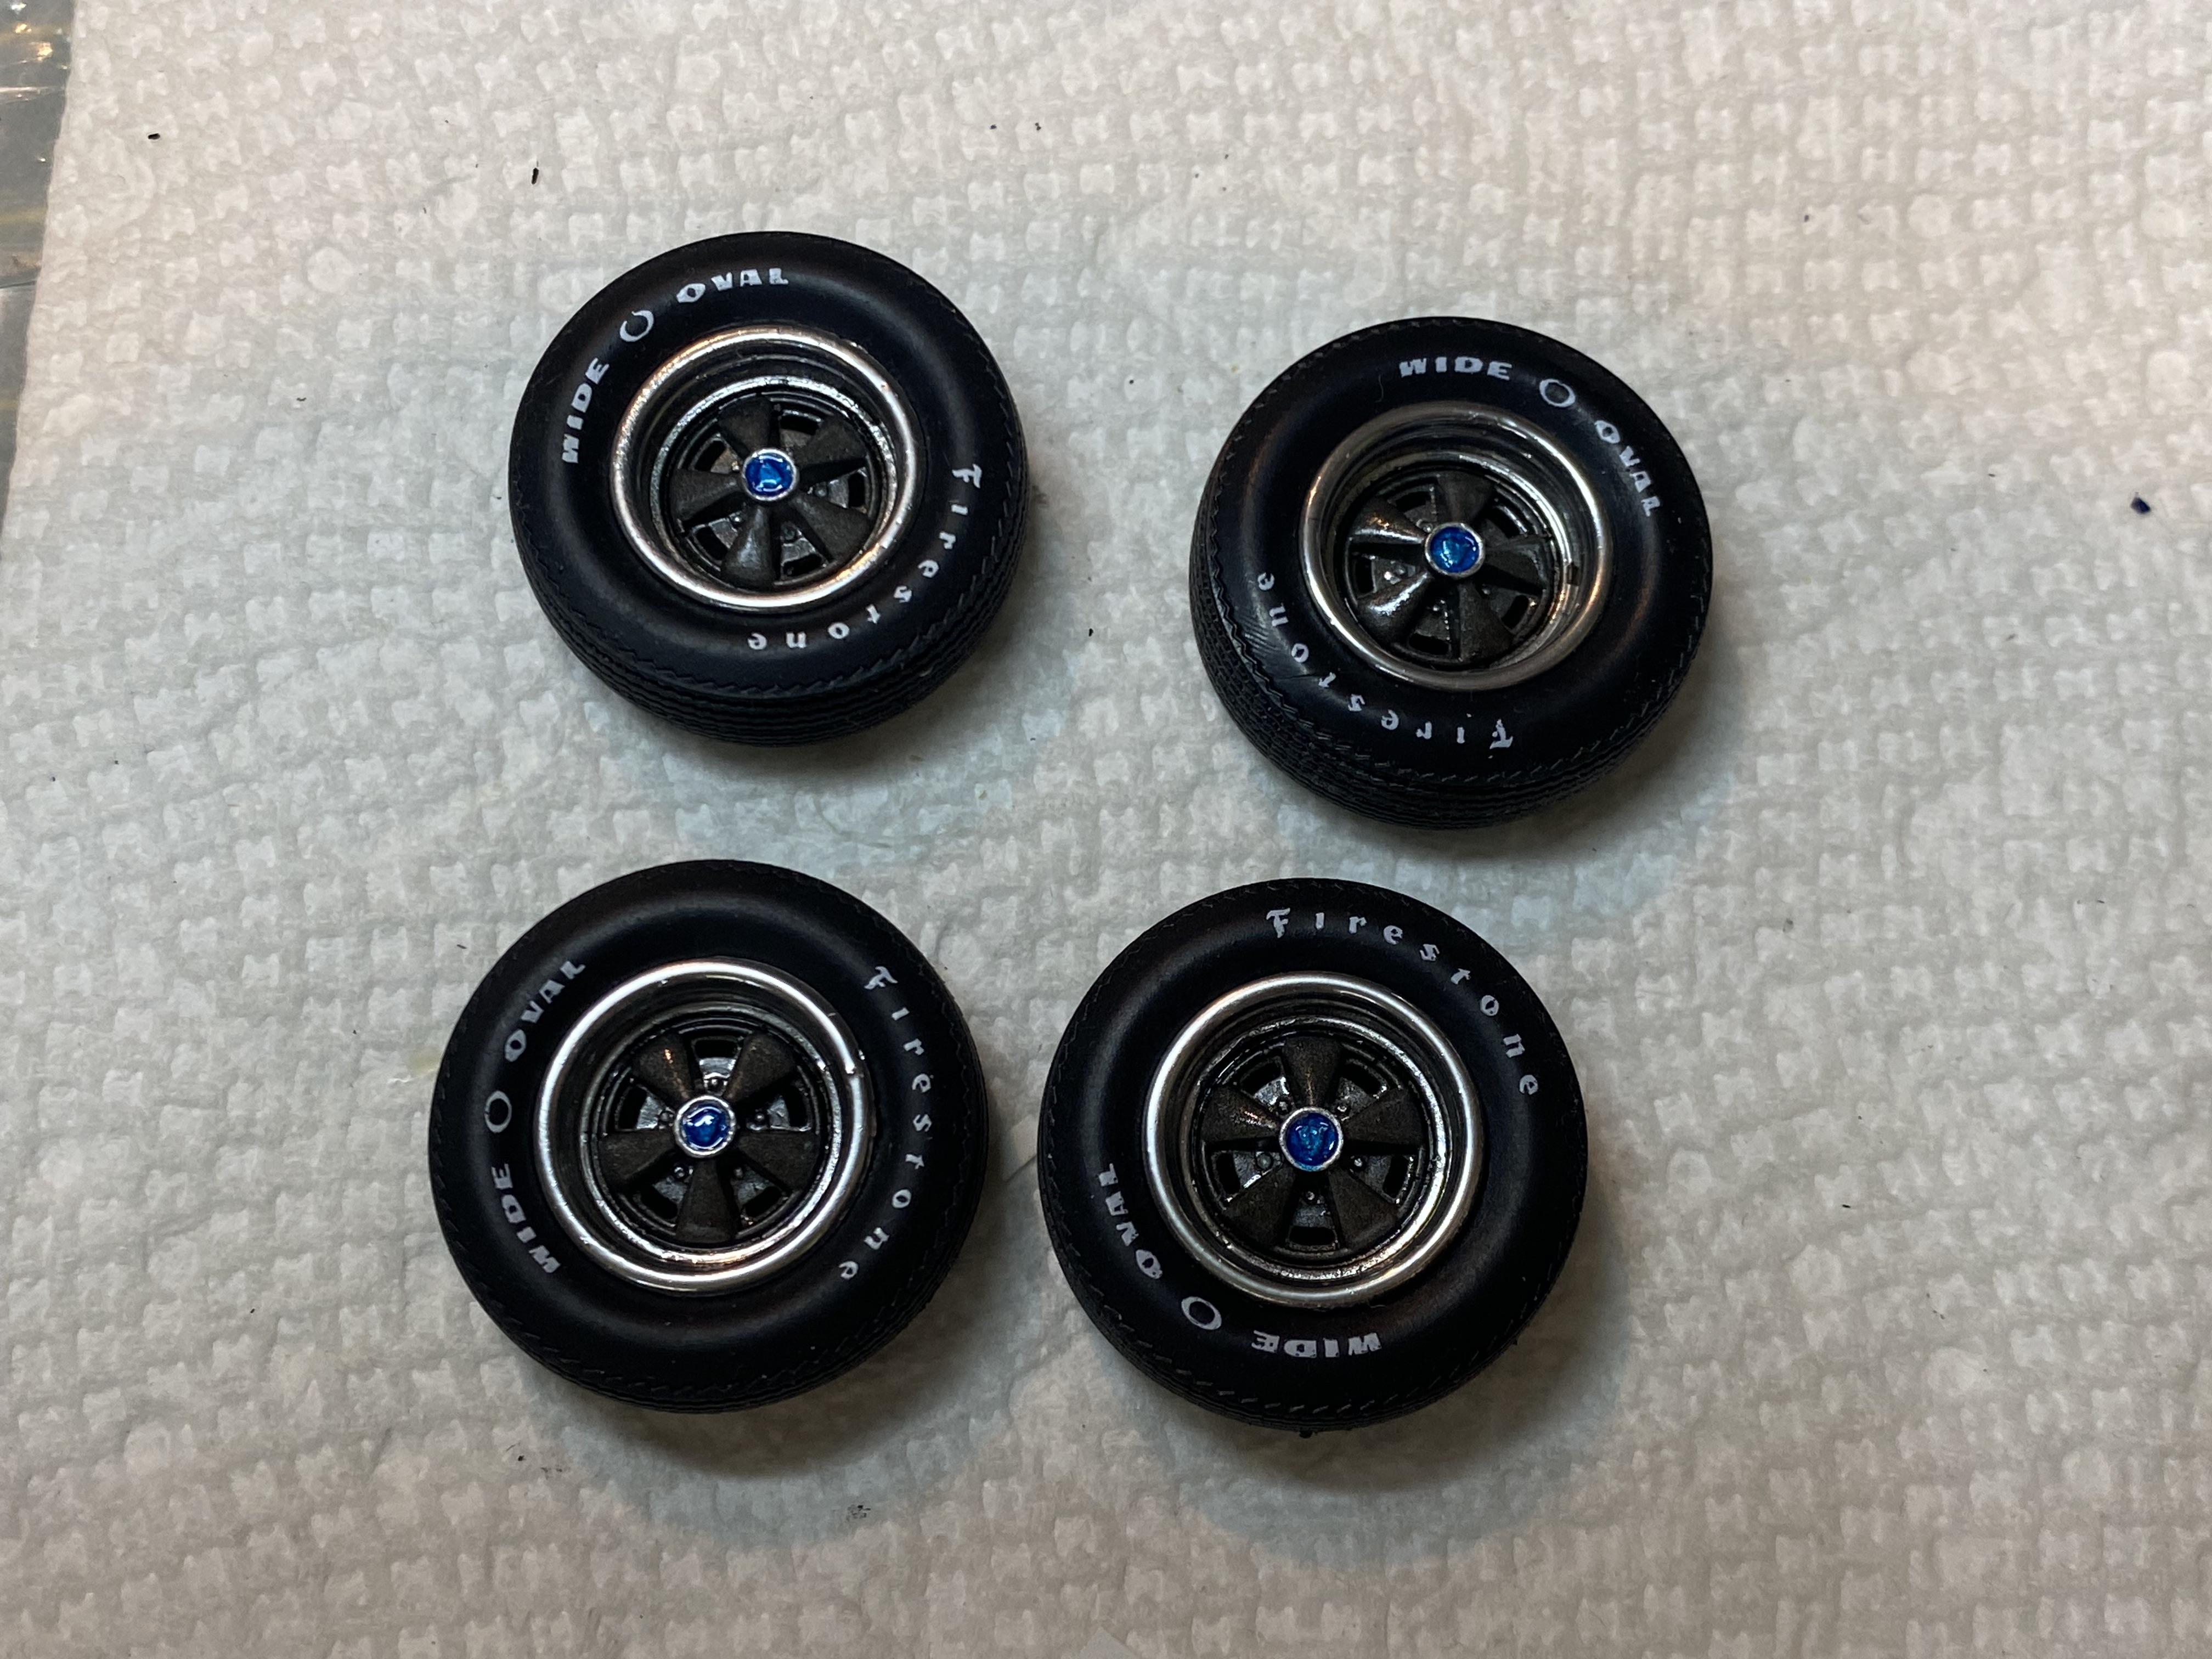
Today I got the engine put together. The Boss 302 that came with the kit was actually quite nice but I did add a 3d printed Holley Carb from MCV products. Added plug wires, vacuum and fuel line. The carb was pinned so the air cleaner could be taken on and off. I detail painted the chassis but still need to add fuel and brake lines. Just trial fit. I also did a trial fit of the scratch made engine compartment with the engine and chassis. I did have to make some additional mods to make it all fit together. I really like how the resin cast wheels turned out. I also 2K cleared the body this evening. Tiny bit of trash in the hood but I think it will come out during the wet sand and polish phase.
-
Thank You.
-
Mine arrived in So Cal. Gotten much faster!
-
Thank you, me neither. ? Thank You.