Duddly01
-
Posts
1,048 -
Joined
-
Last visited
Content Type
Profiles
Forums
Events
Gallery
Everything posted by Duddly01
-
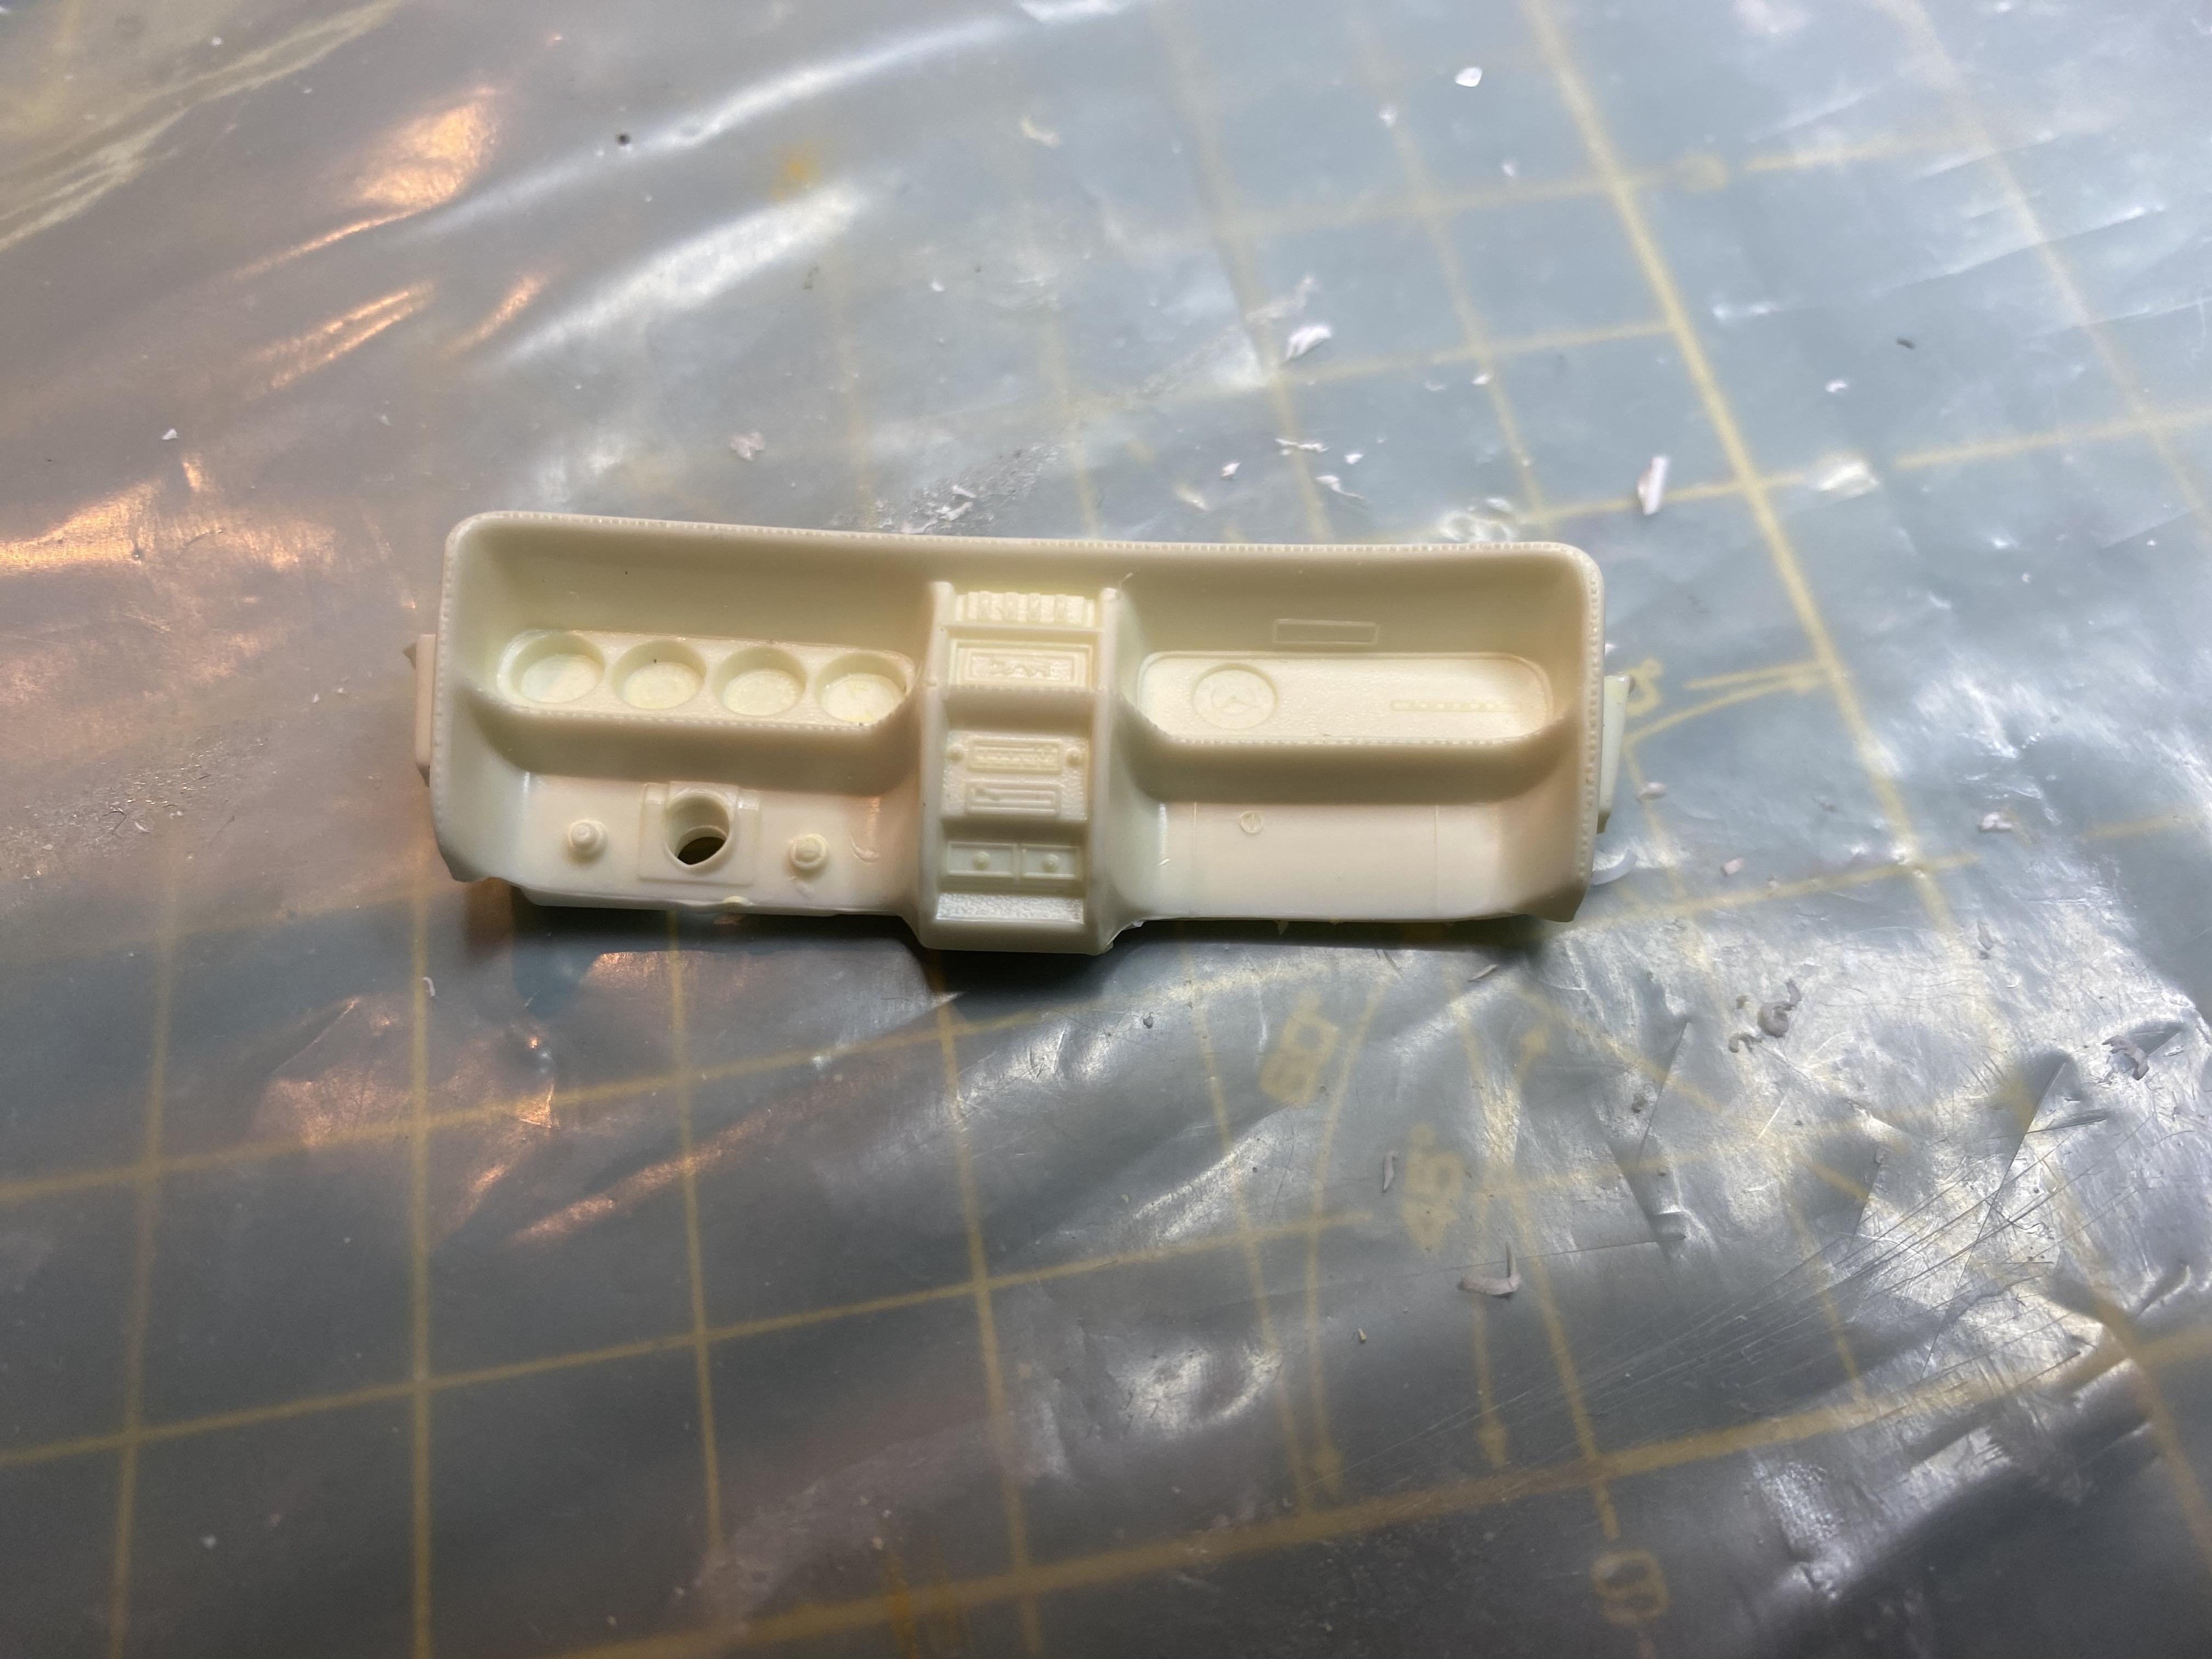
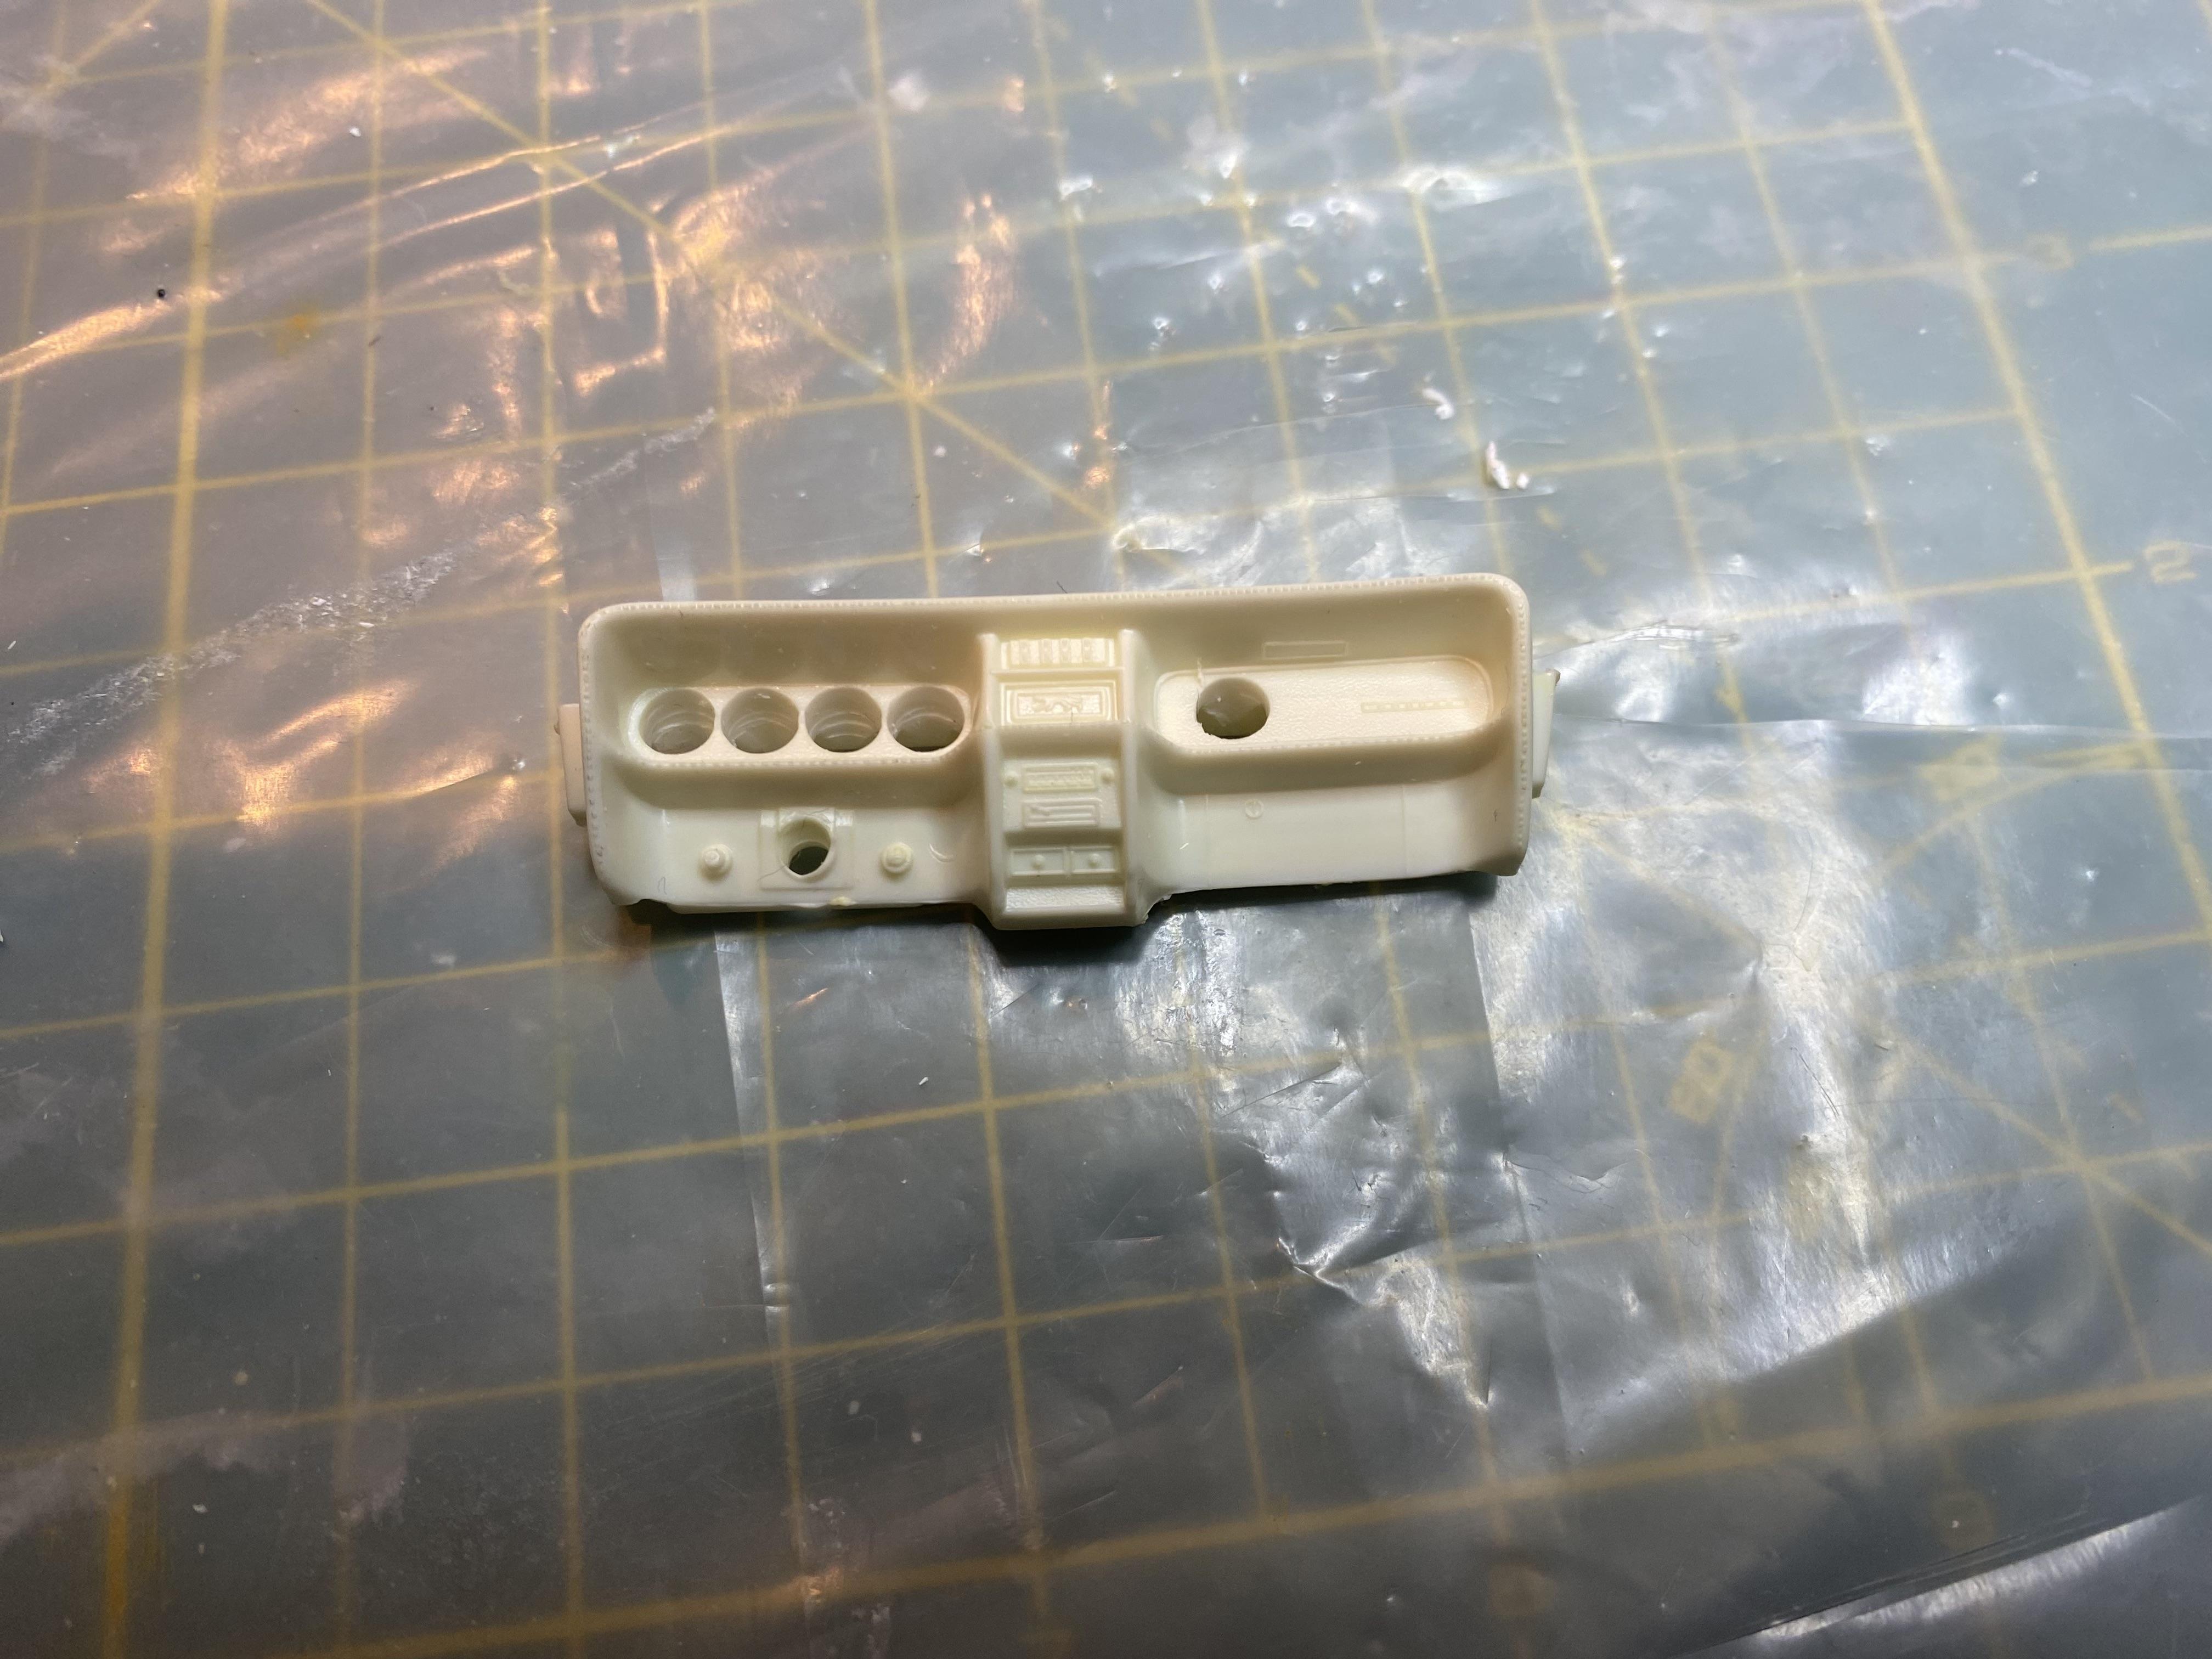
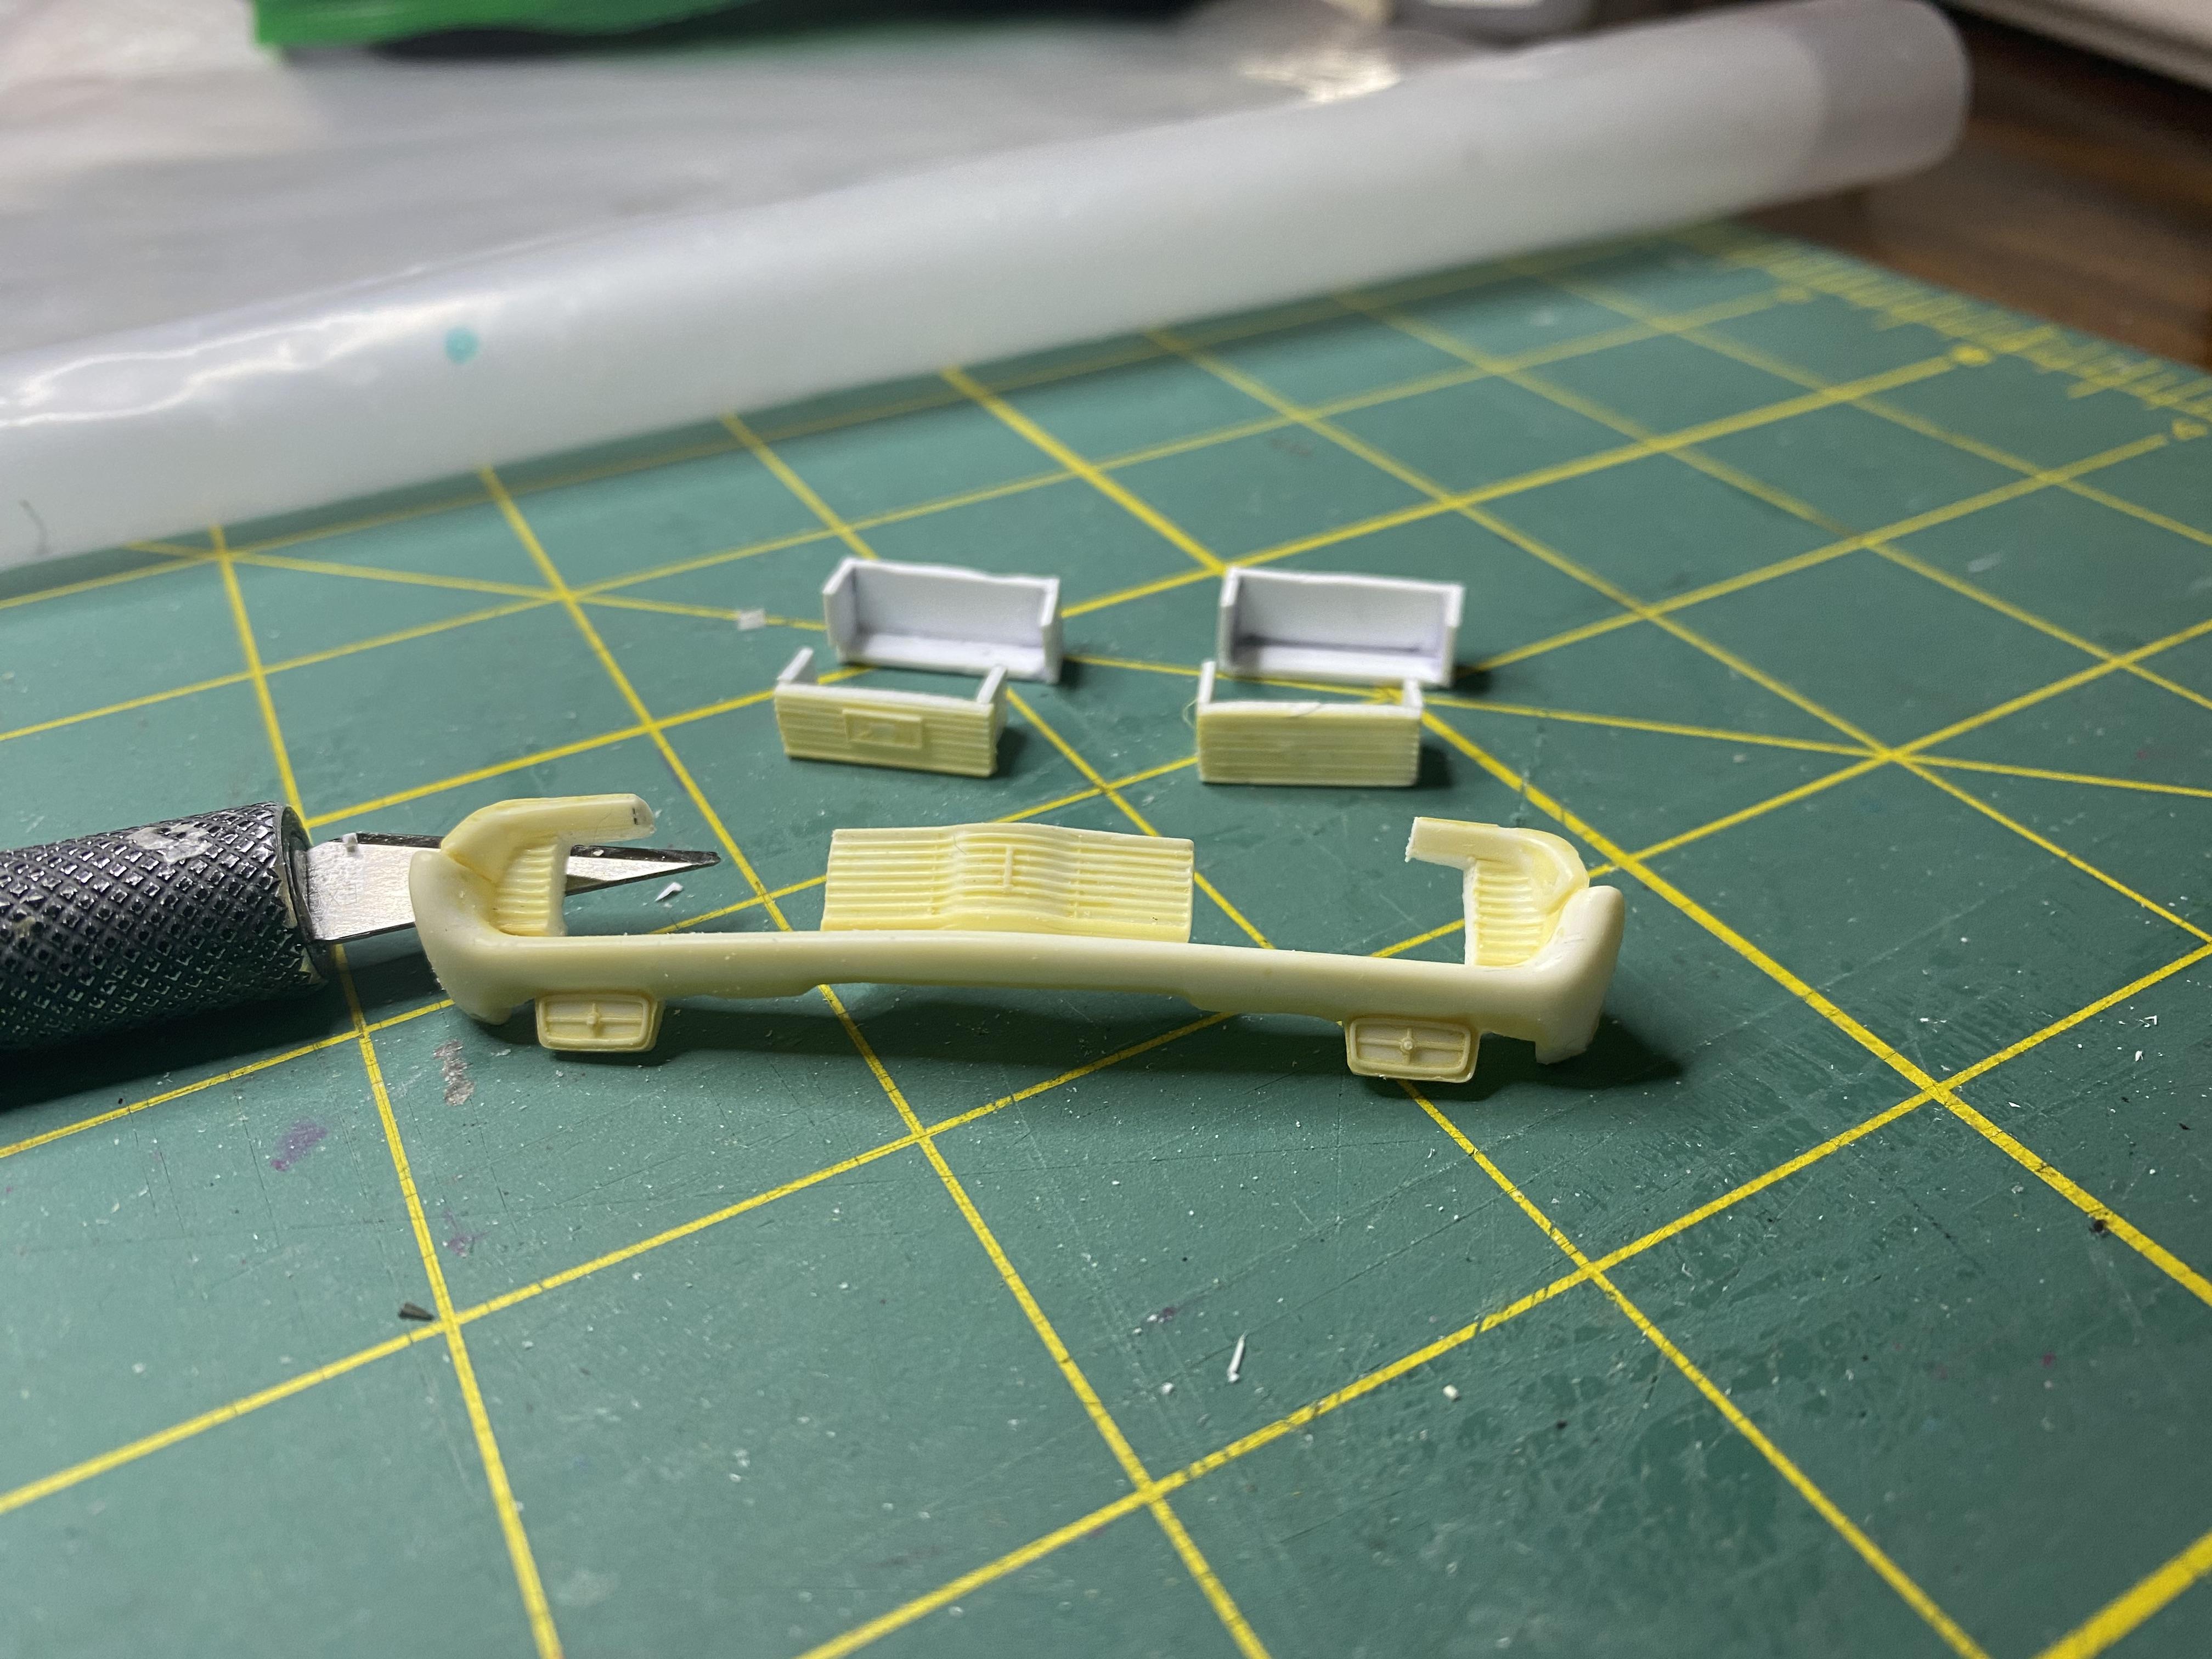
Got a little more work done. Added detailing to the engine compartment, added interior arm rest depth and drilled out the gauges in preparation for lenses and LEDs

-
Thank you! This is taking a lot of fabrication and modification, but that is pretty common with these older amt molds. It really does show its 60s roots.
-
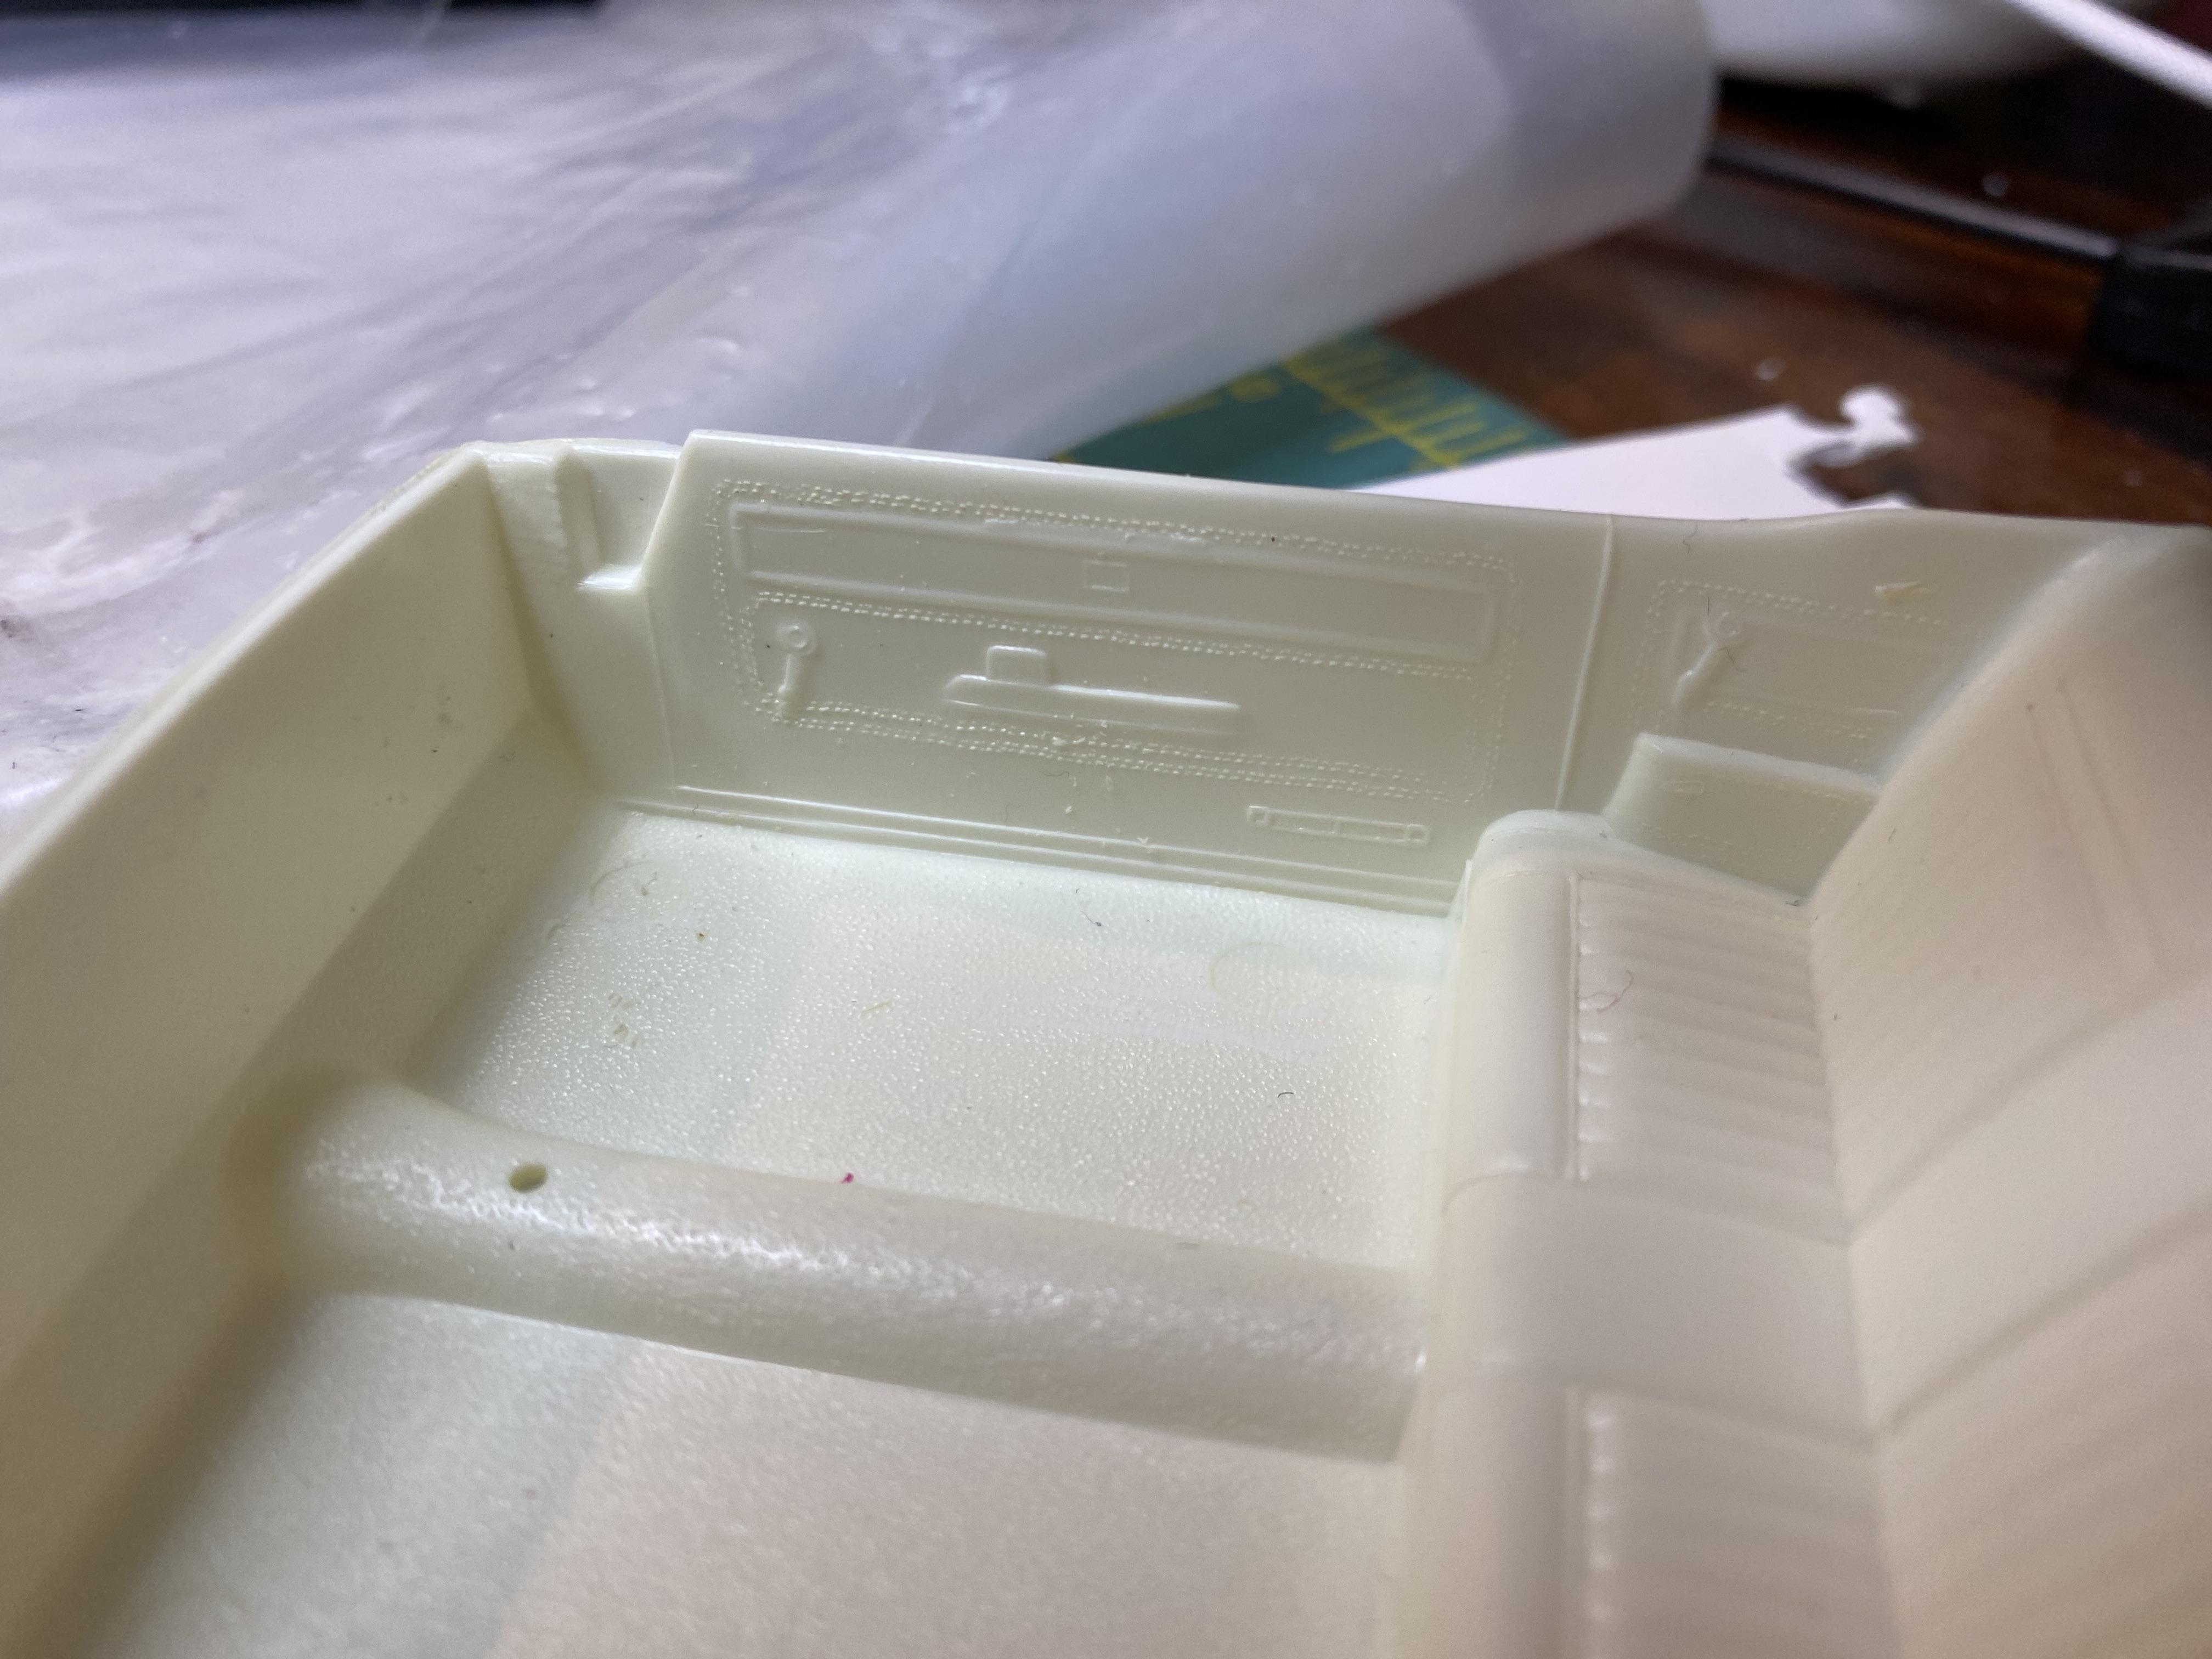
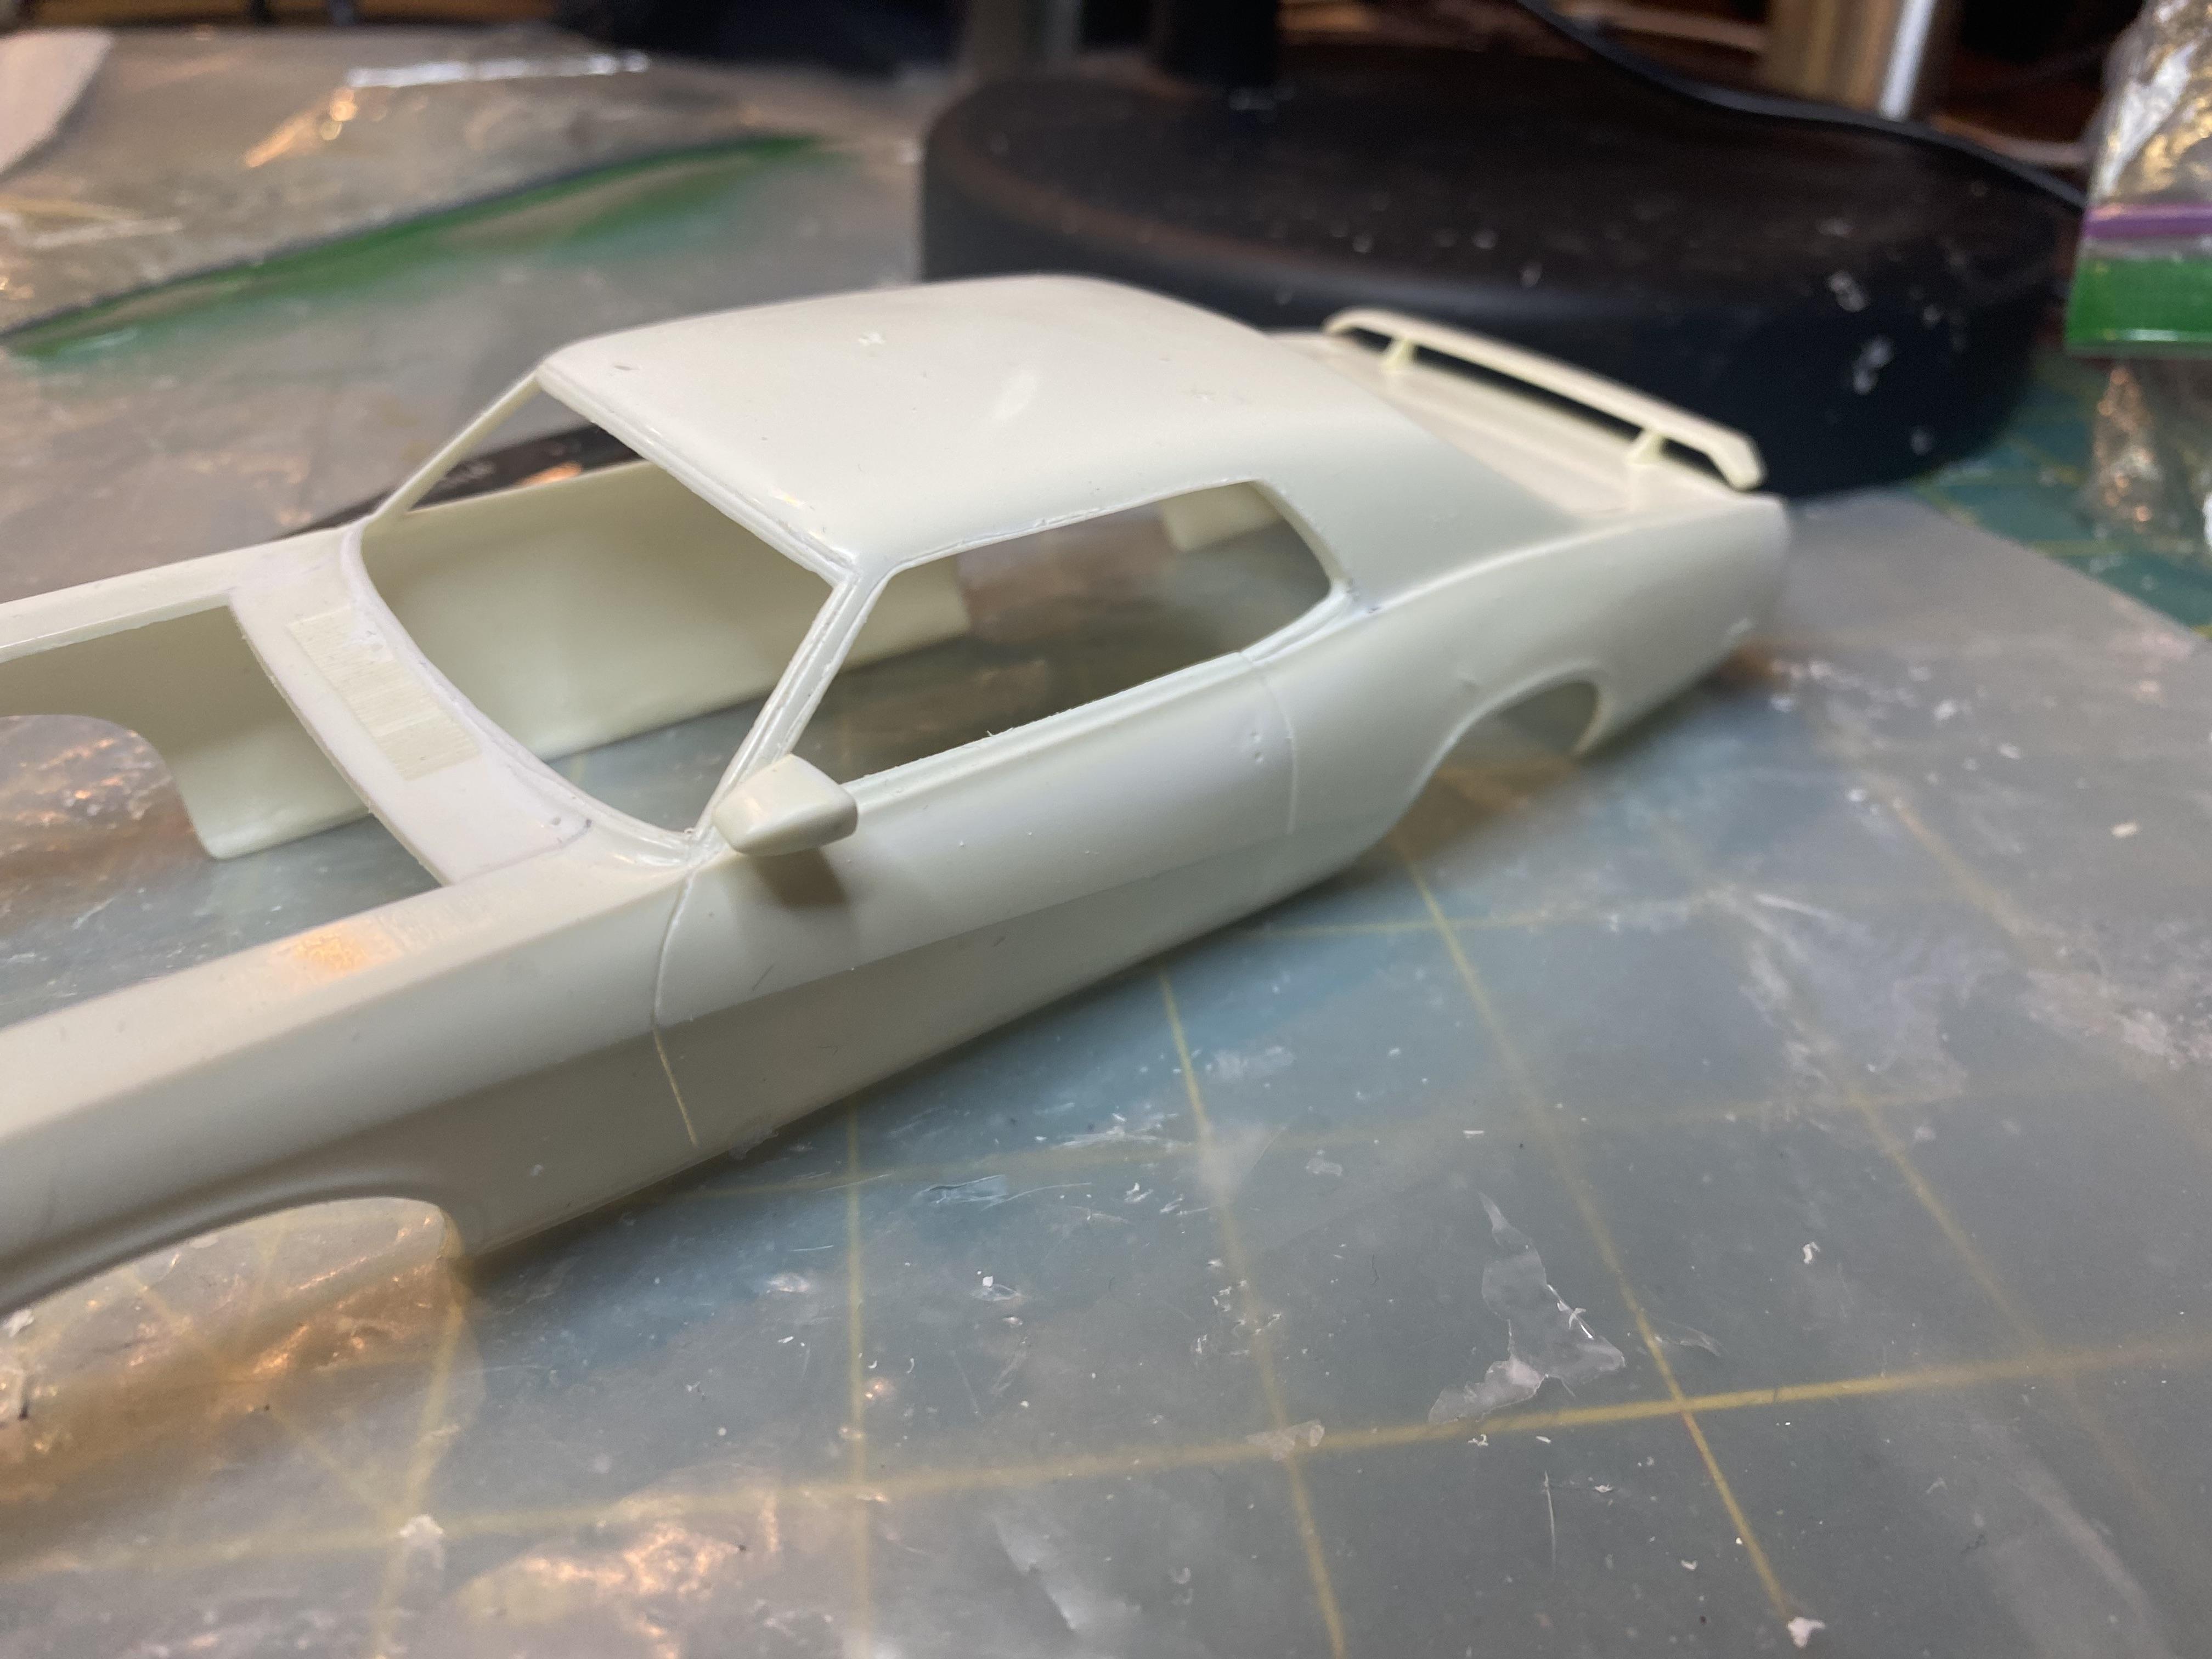
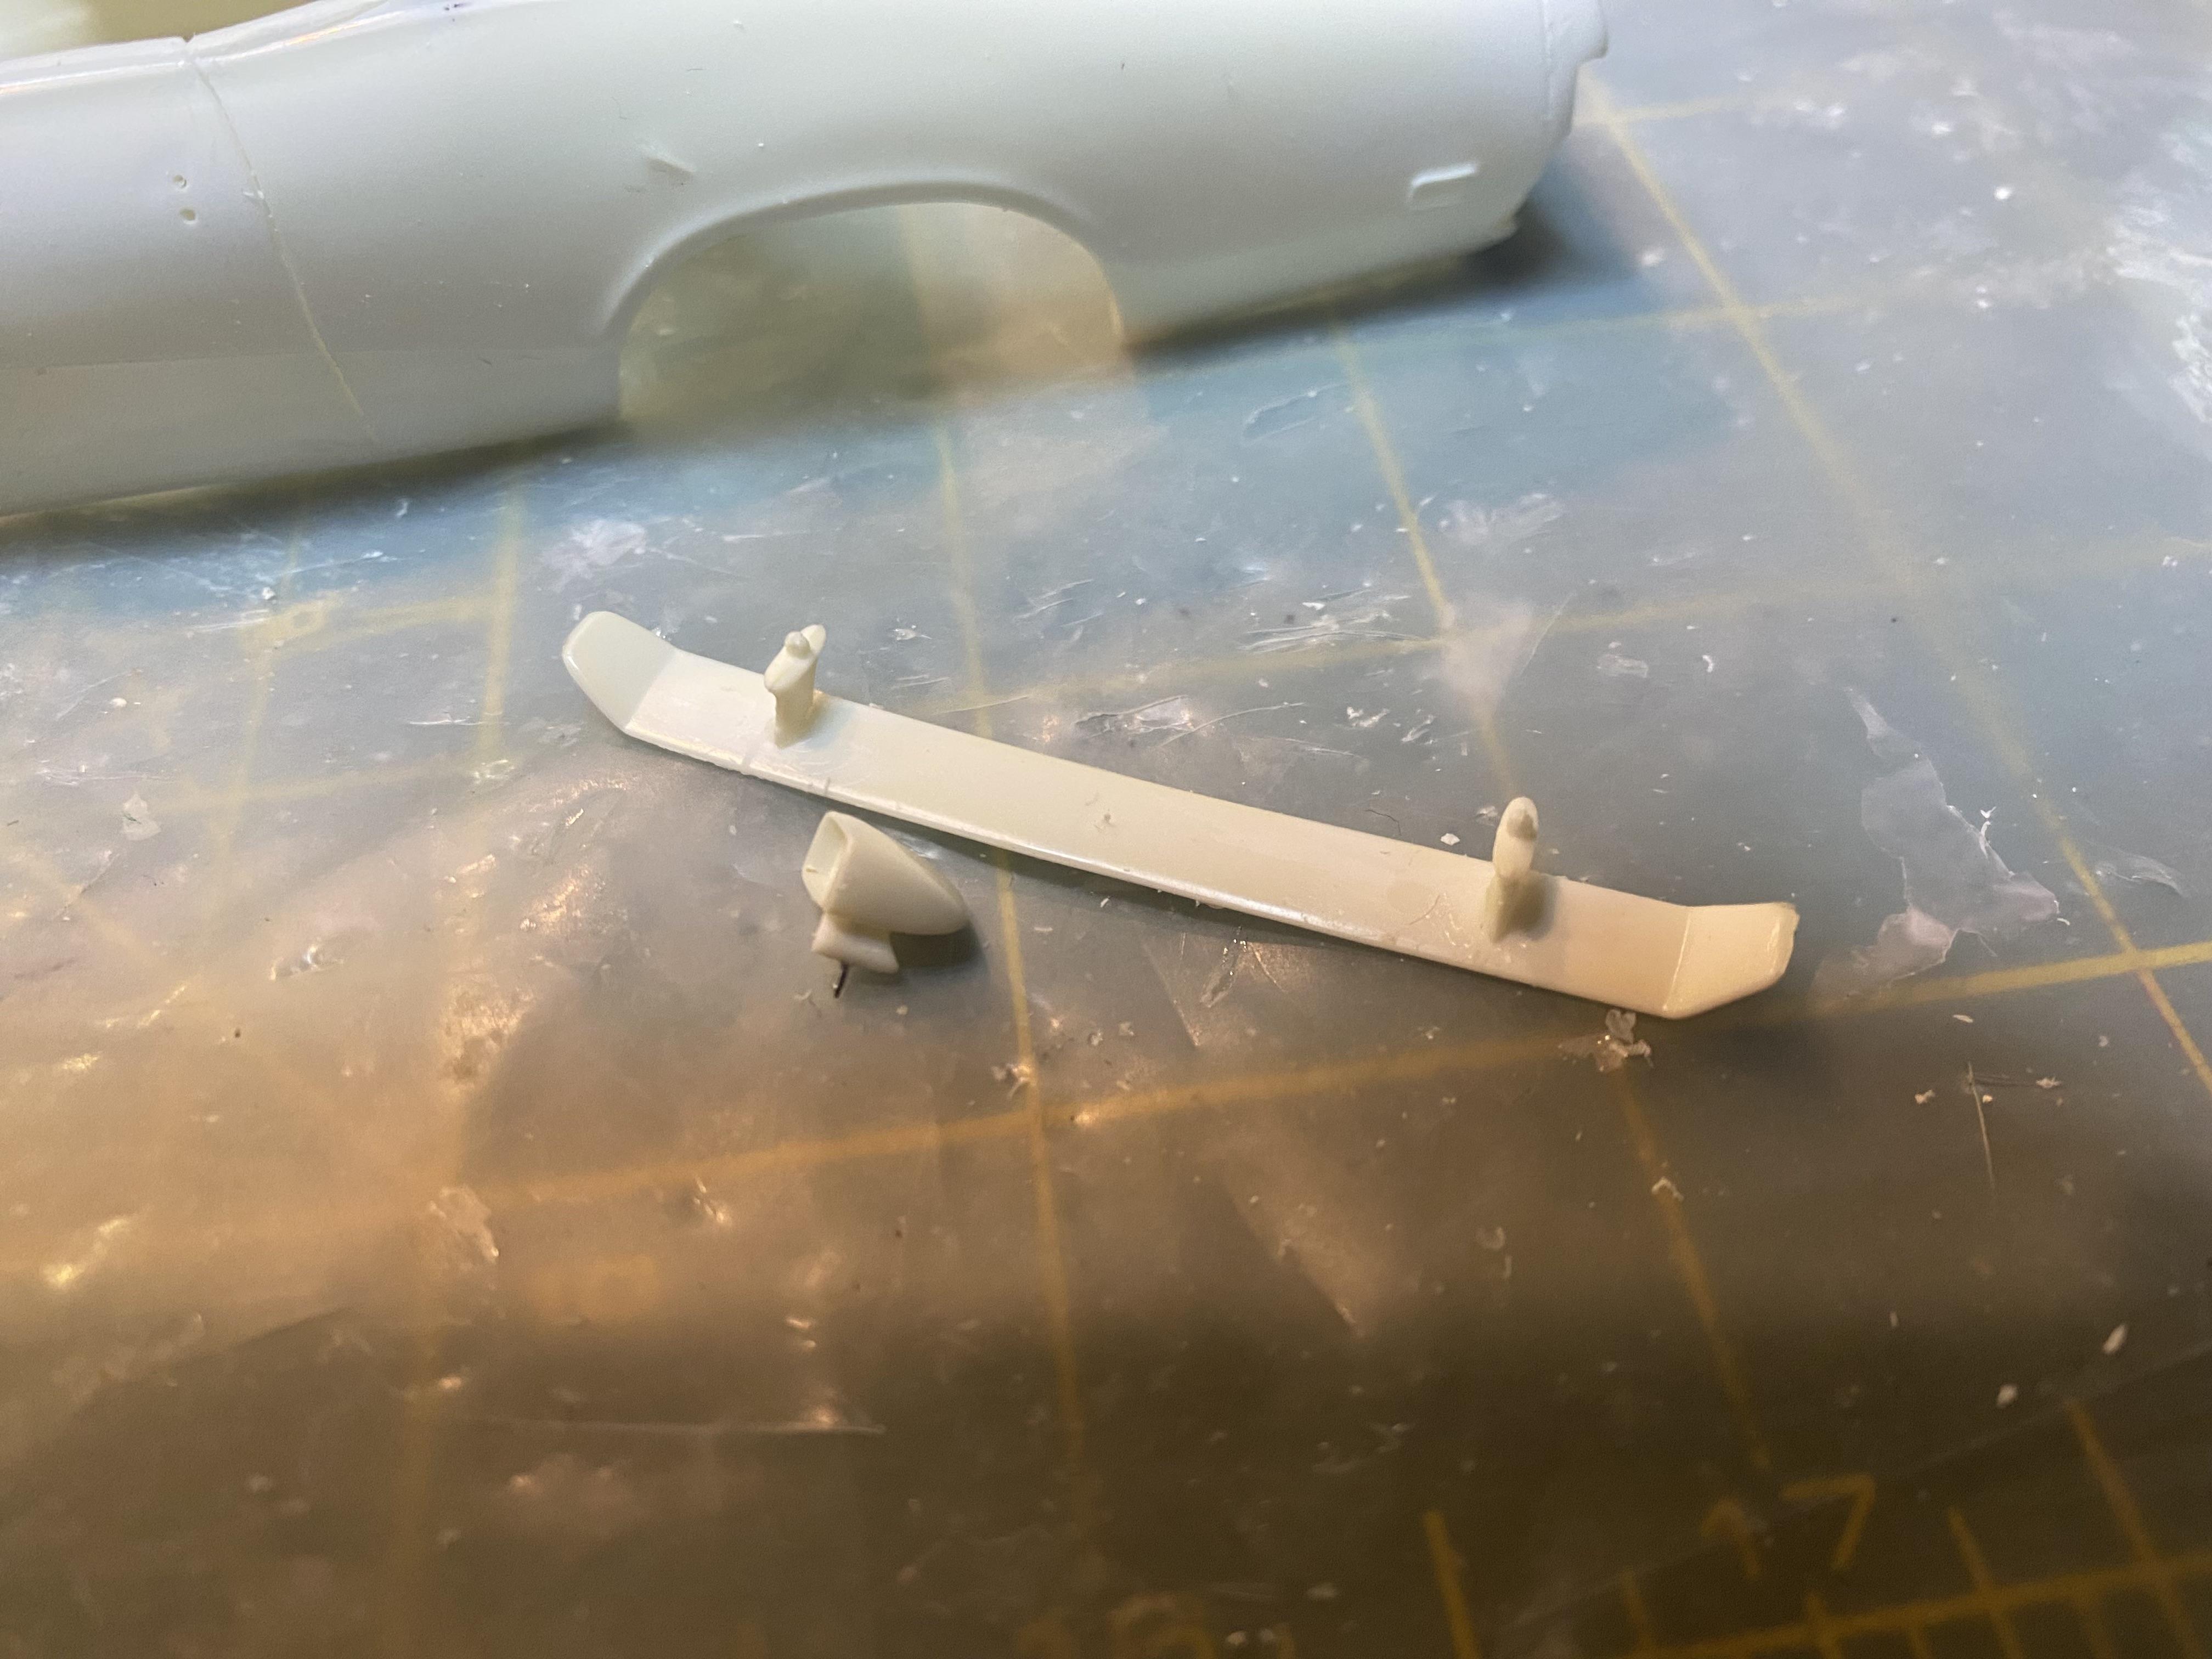
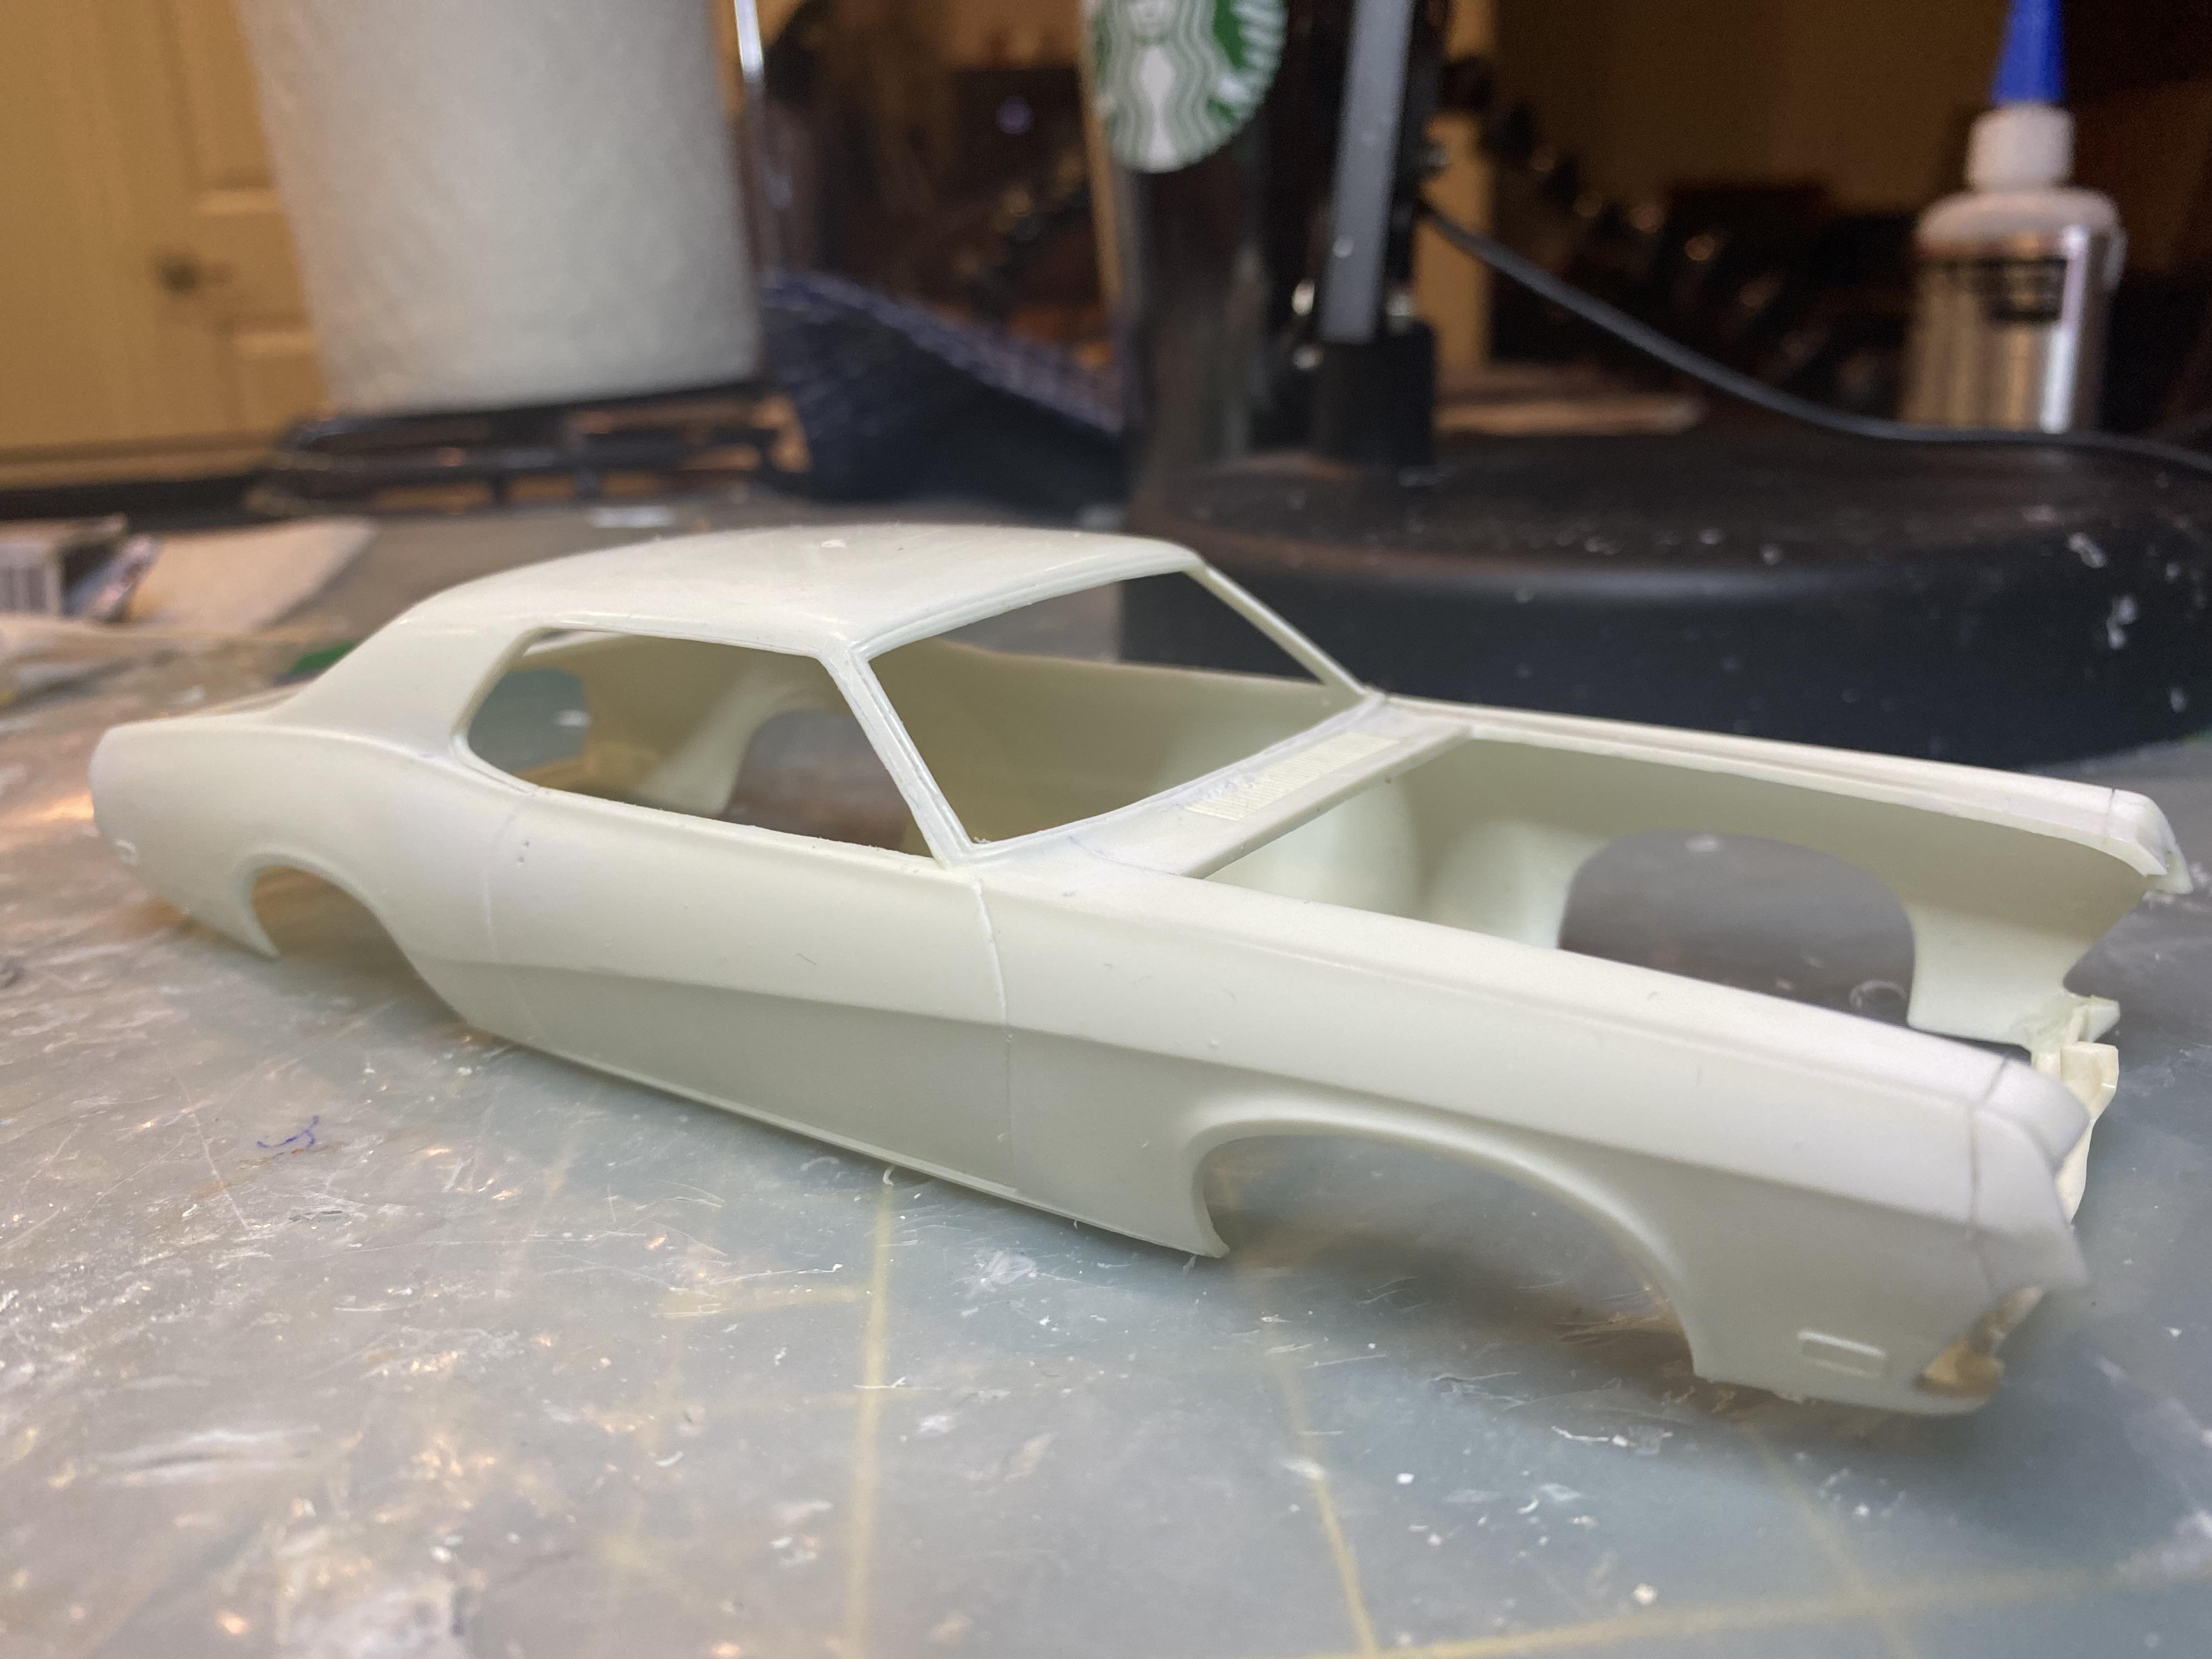
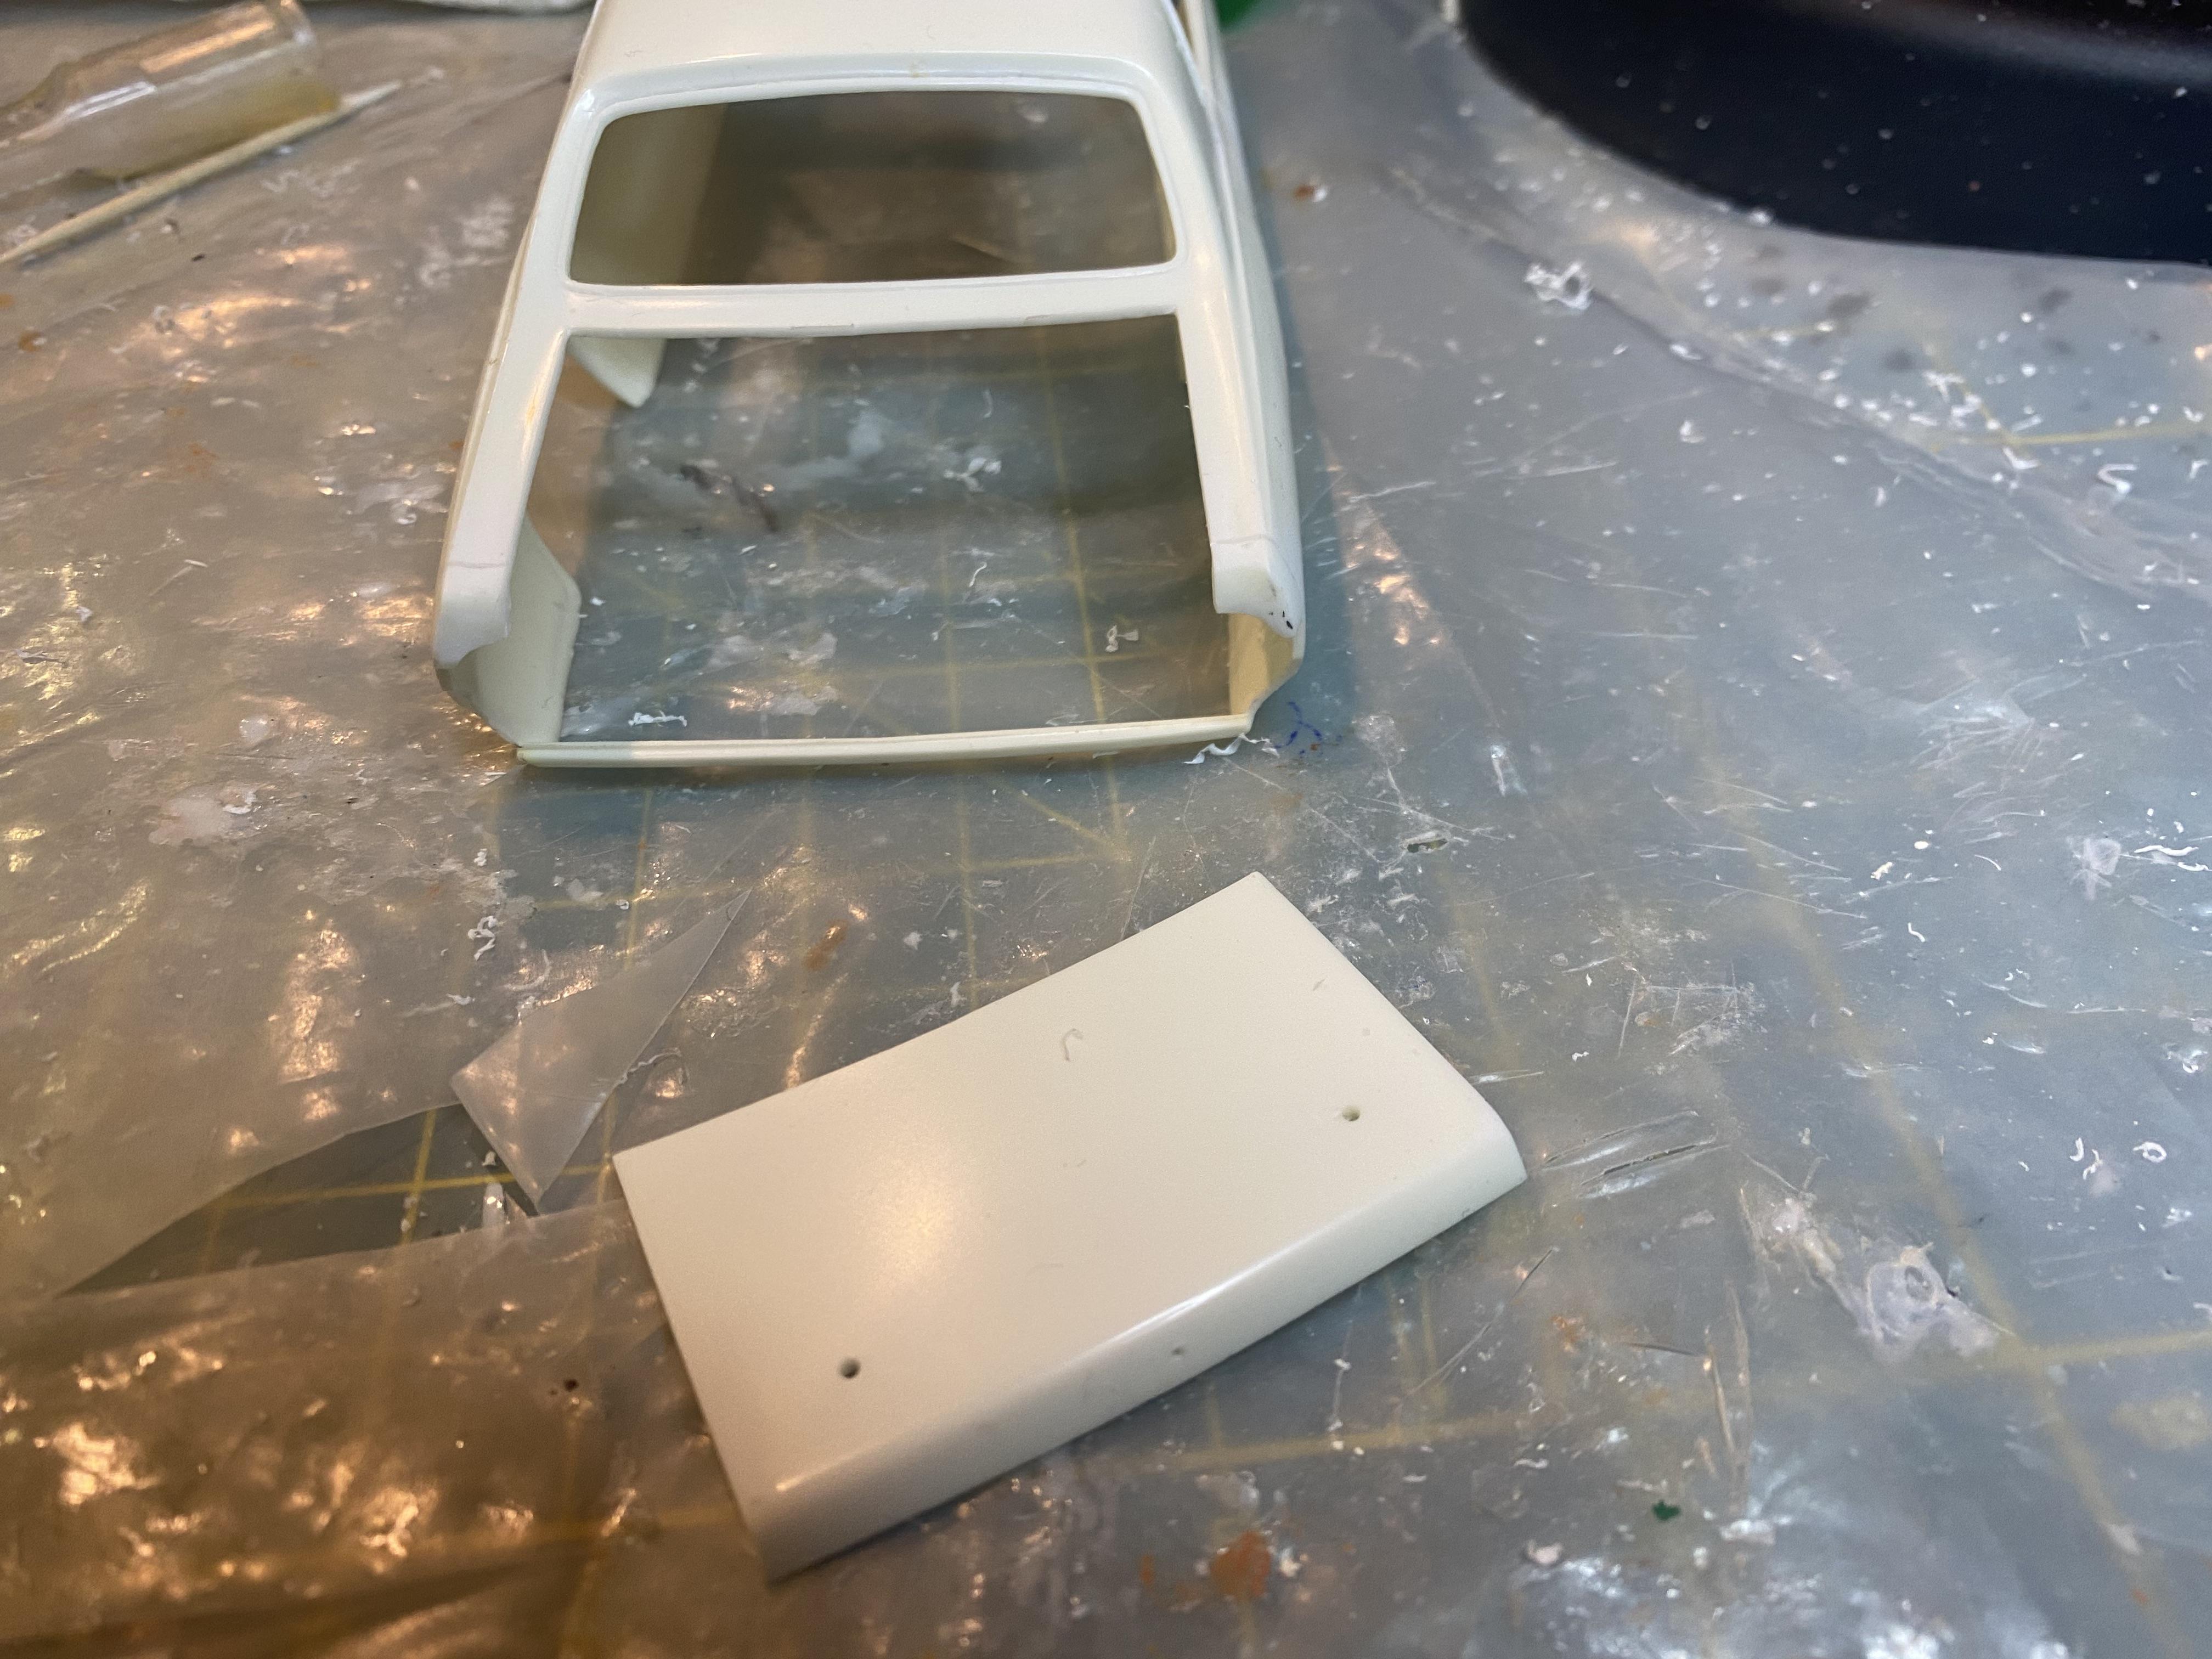
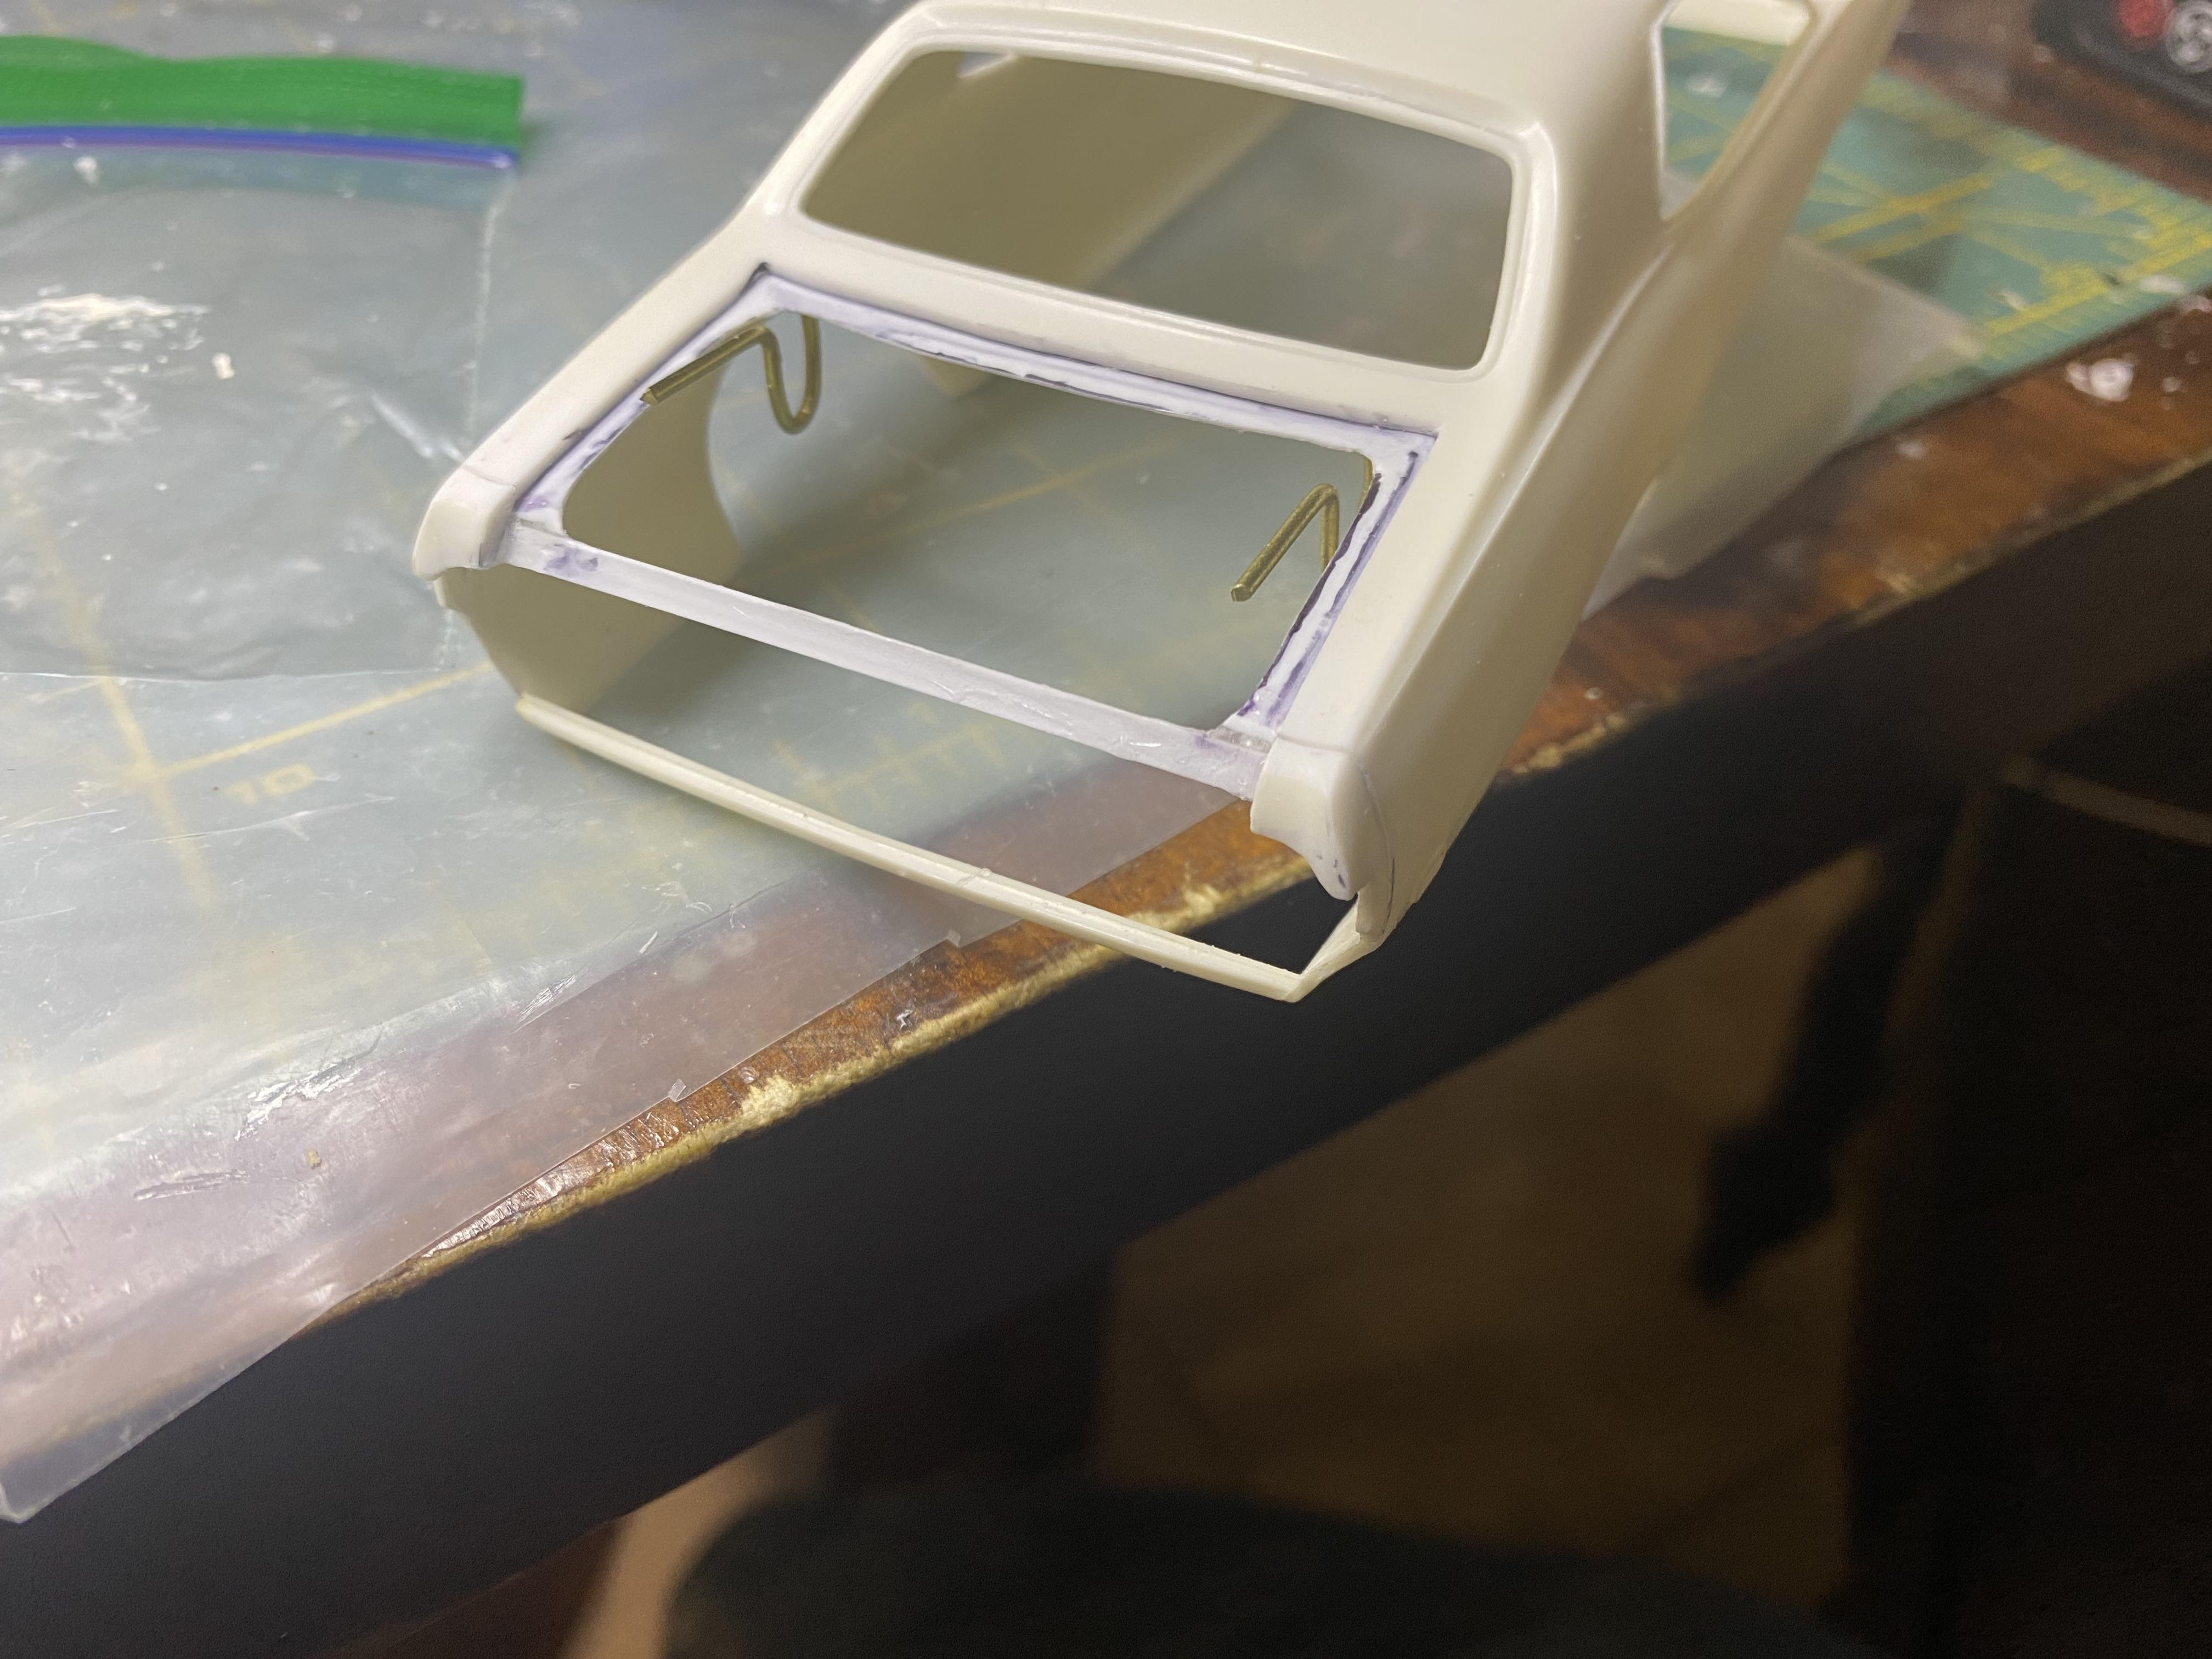
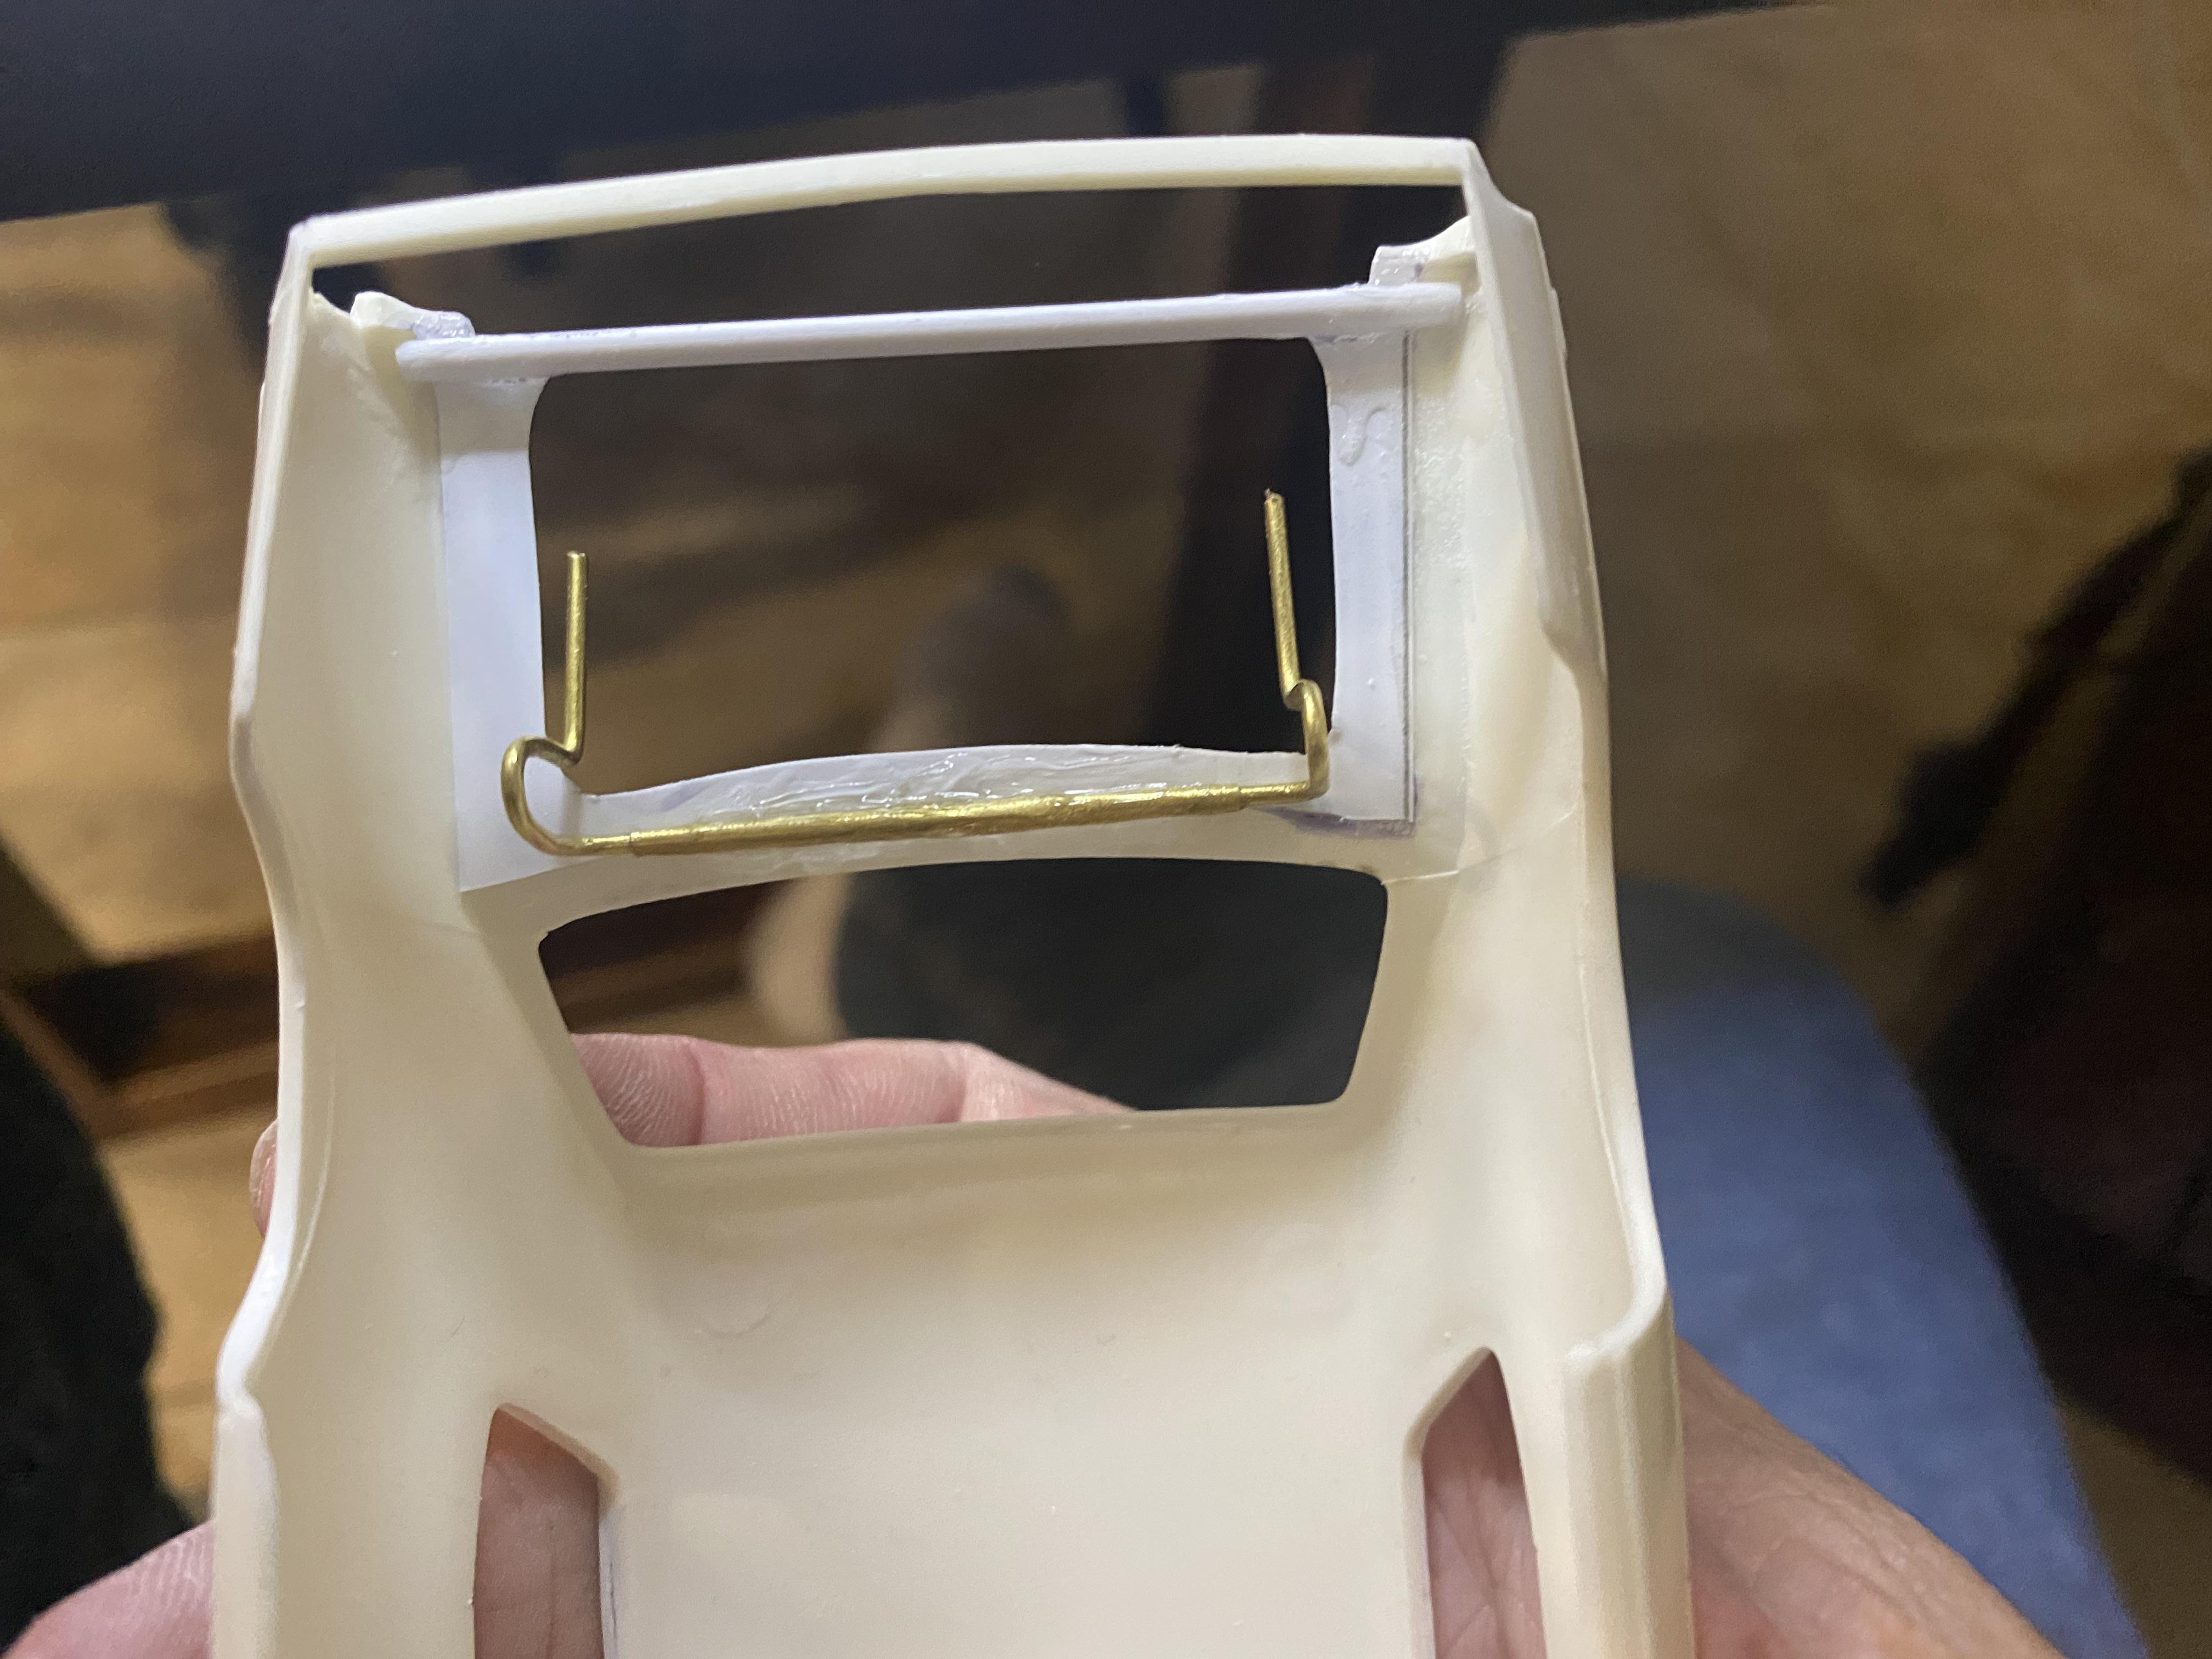
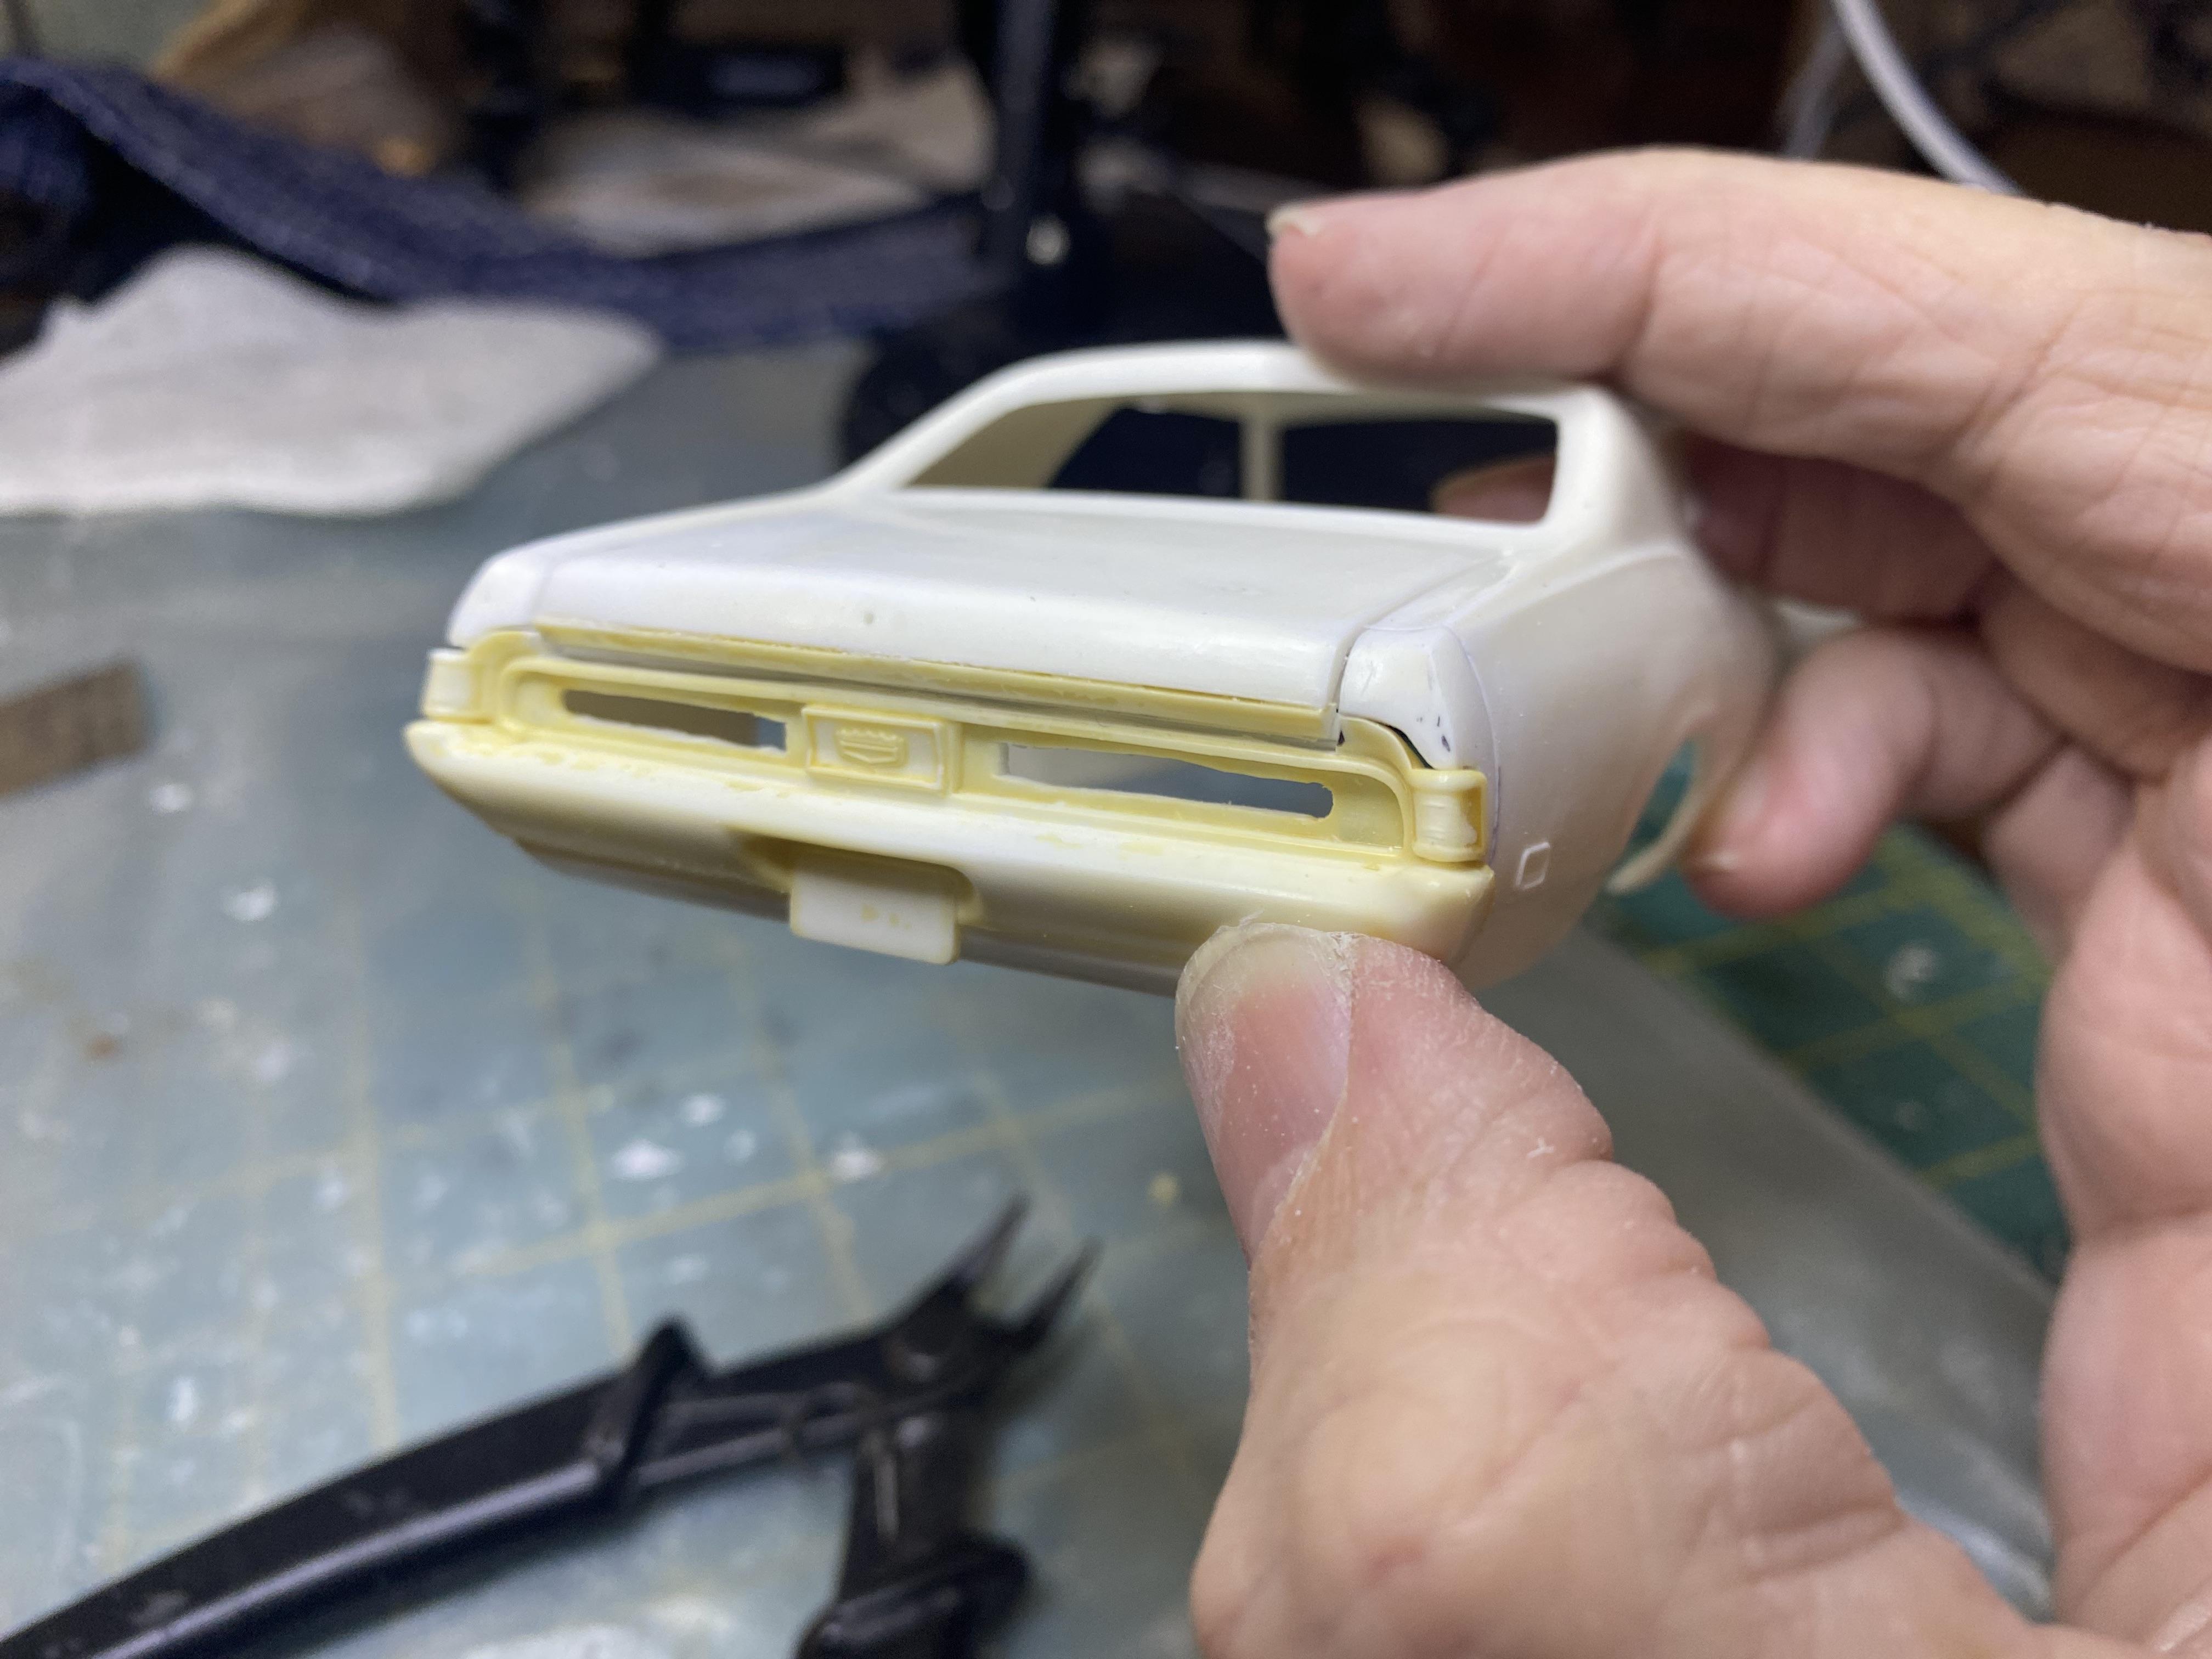
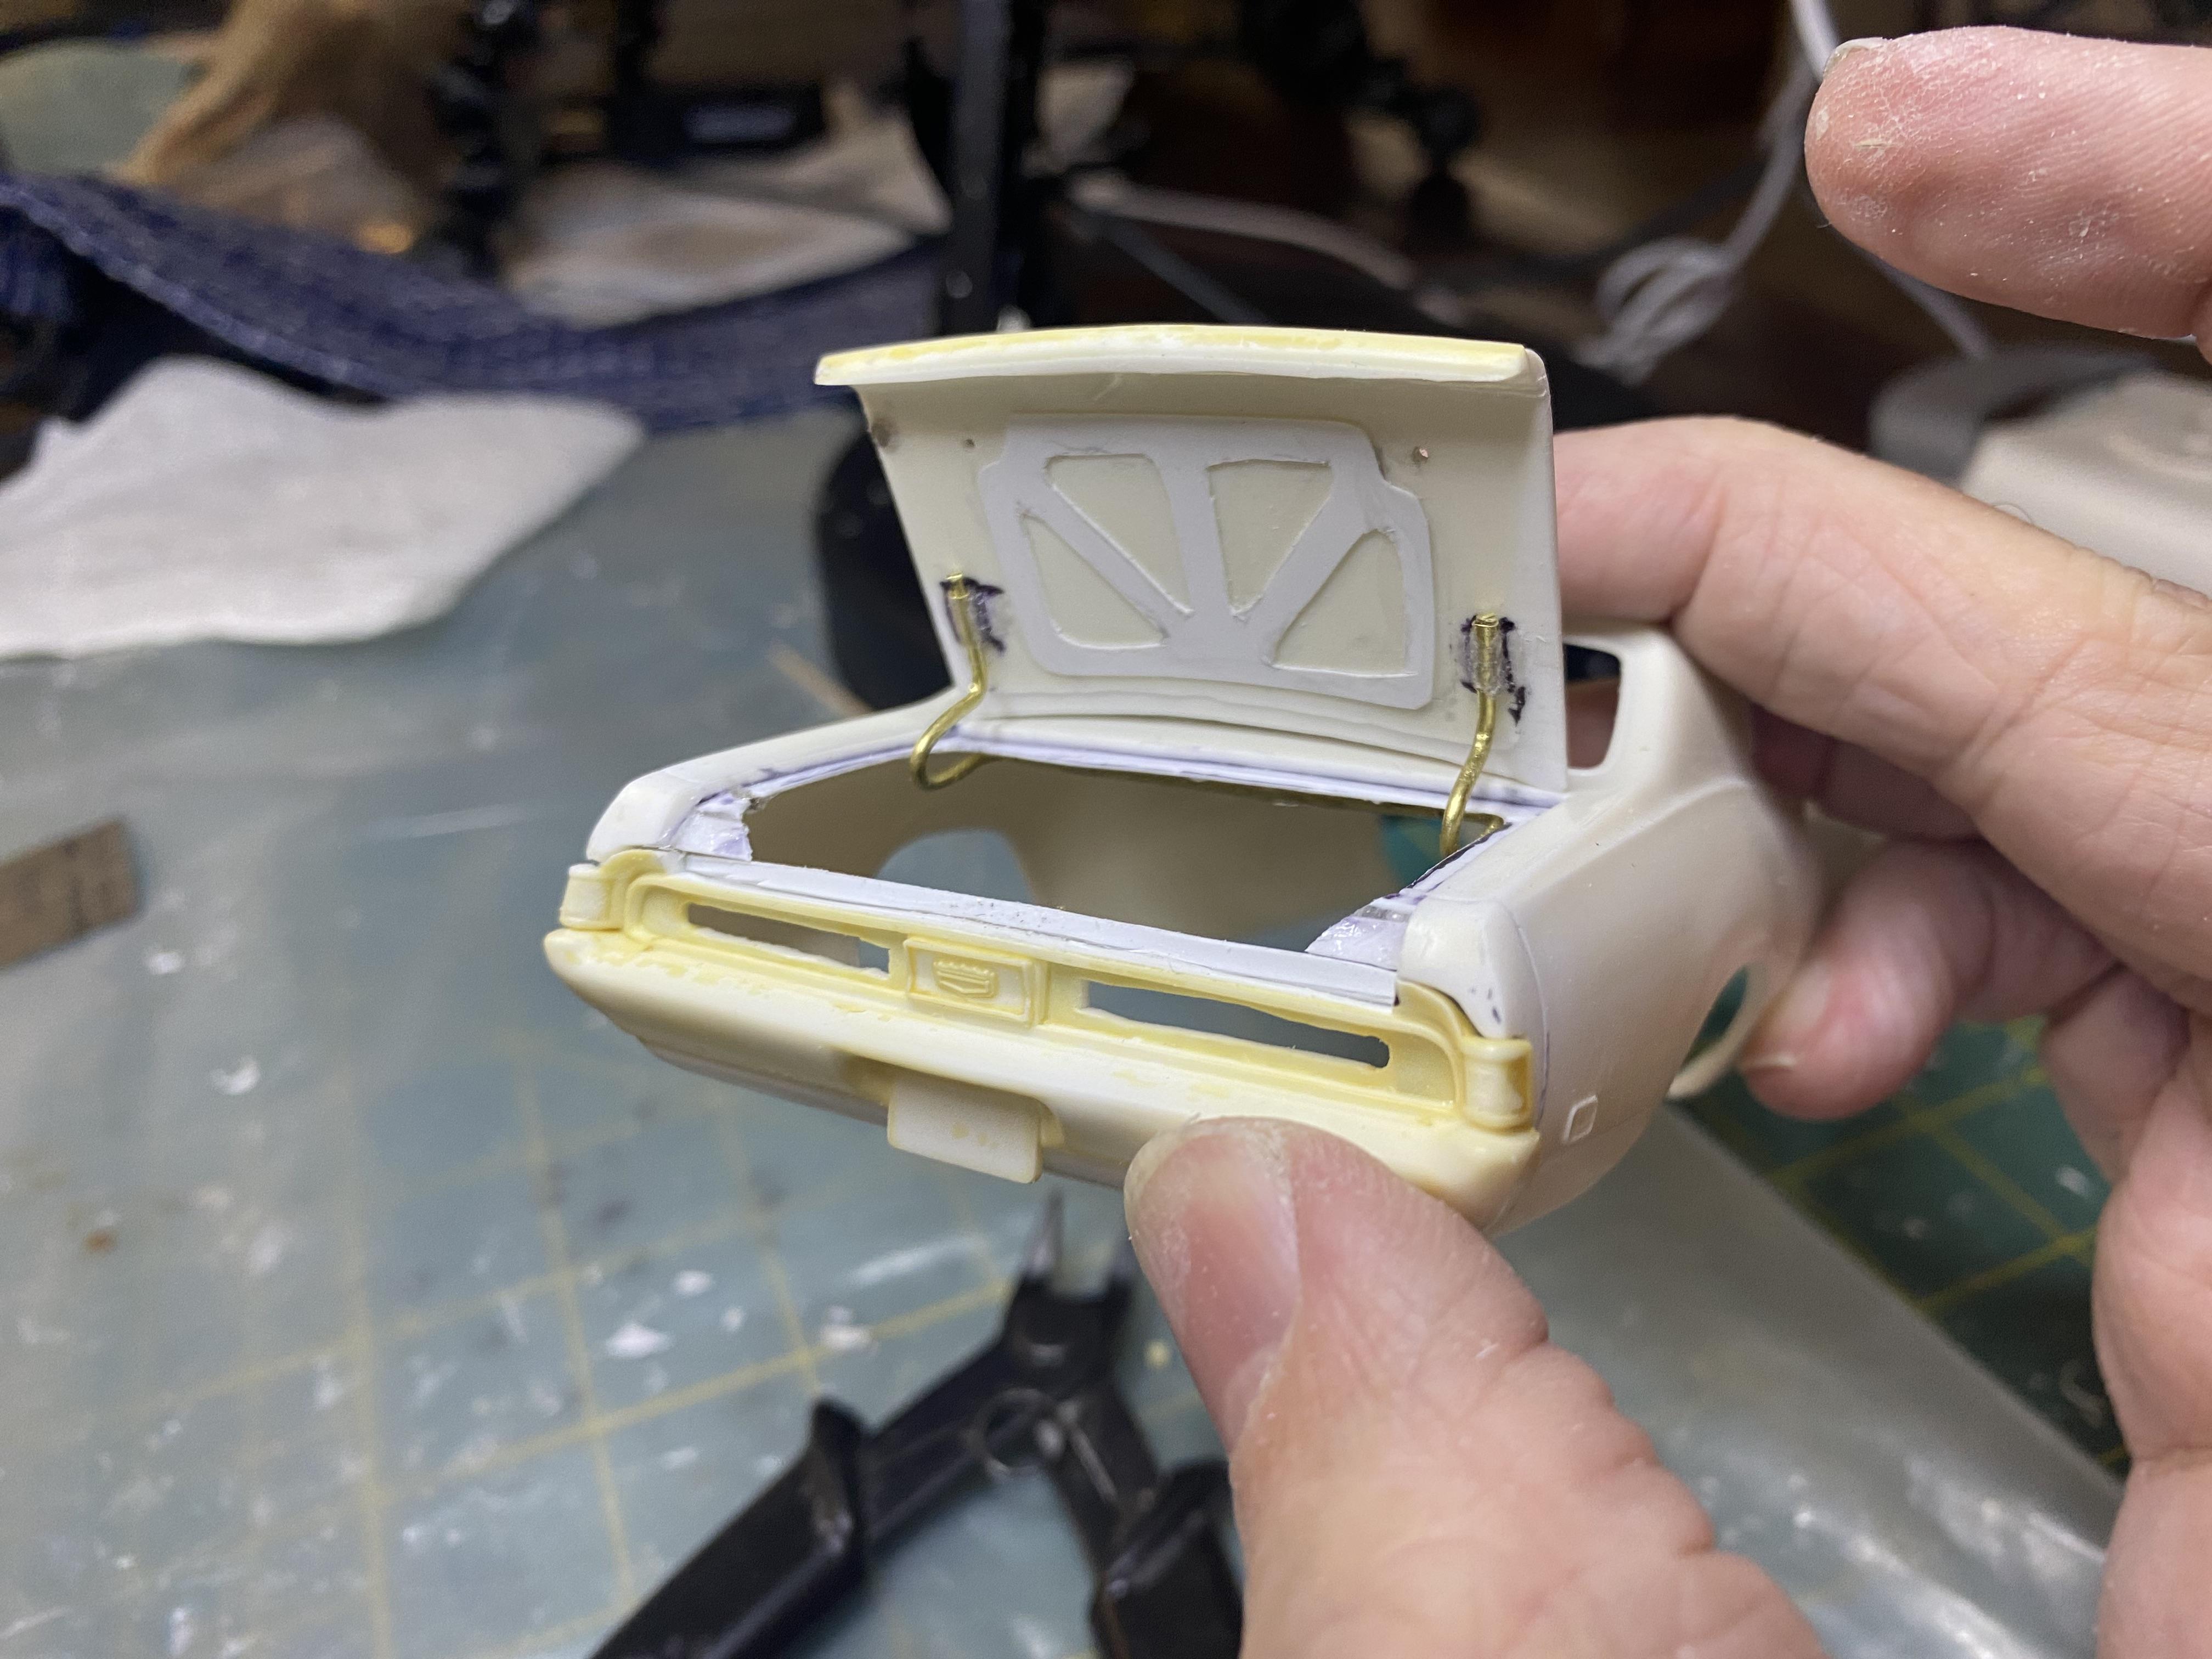
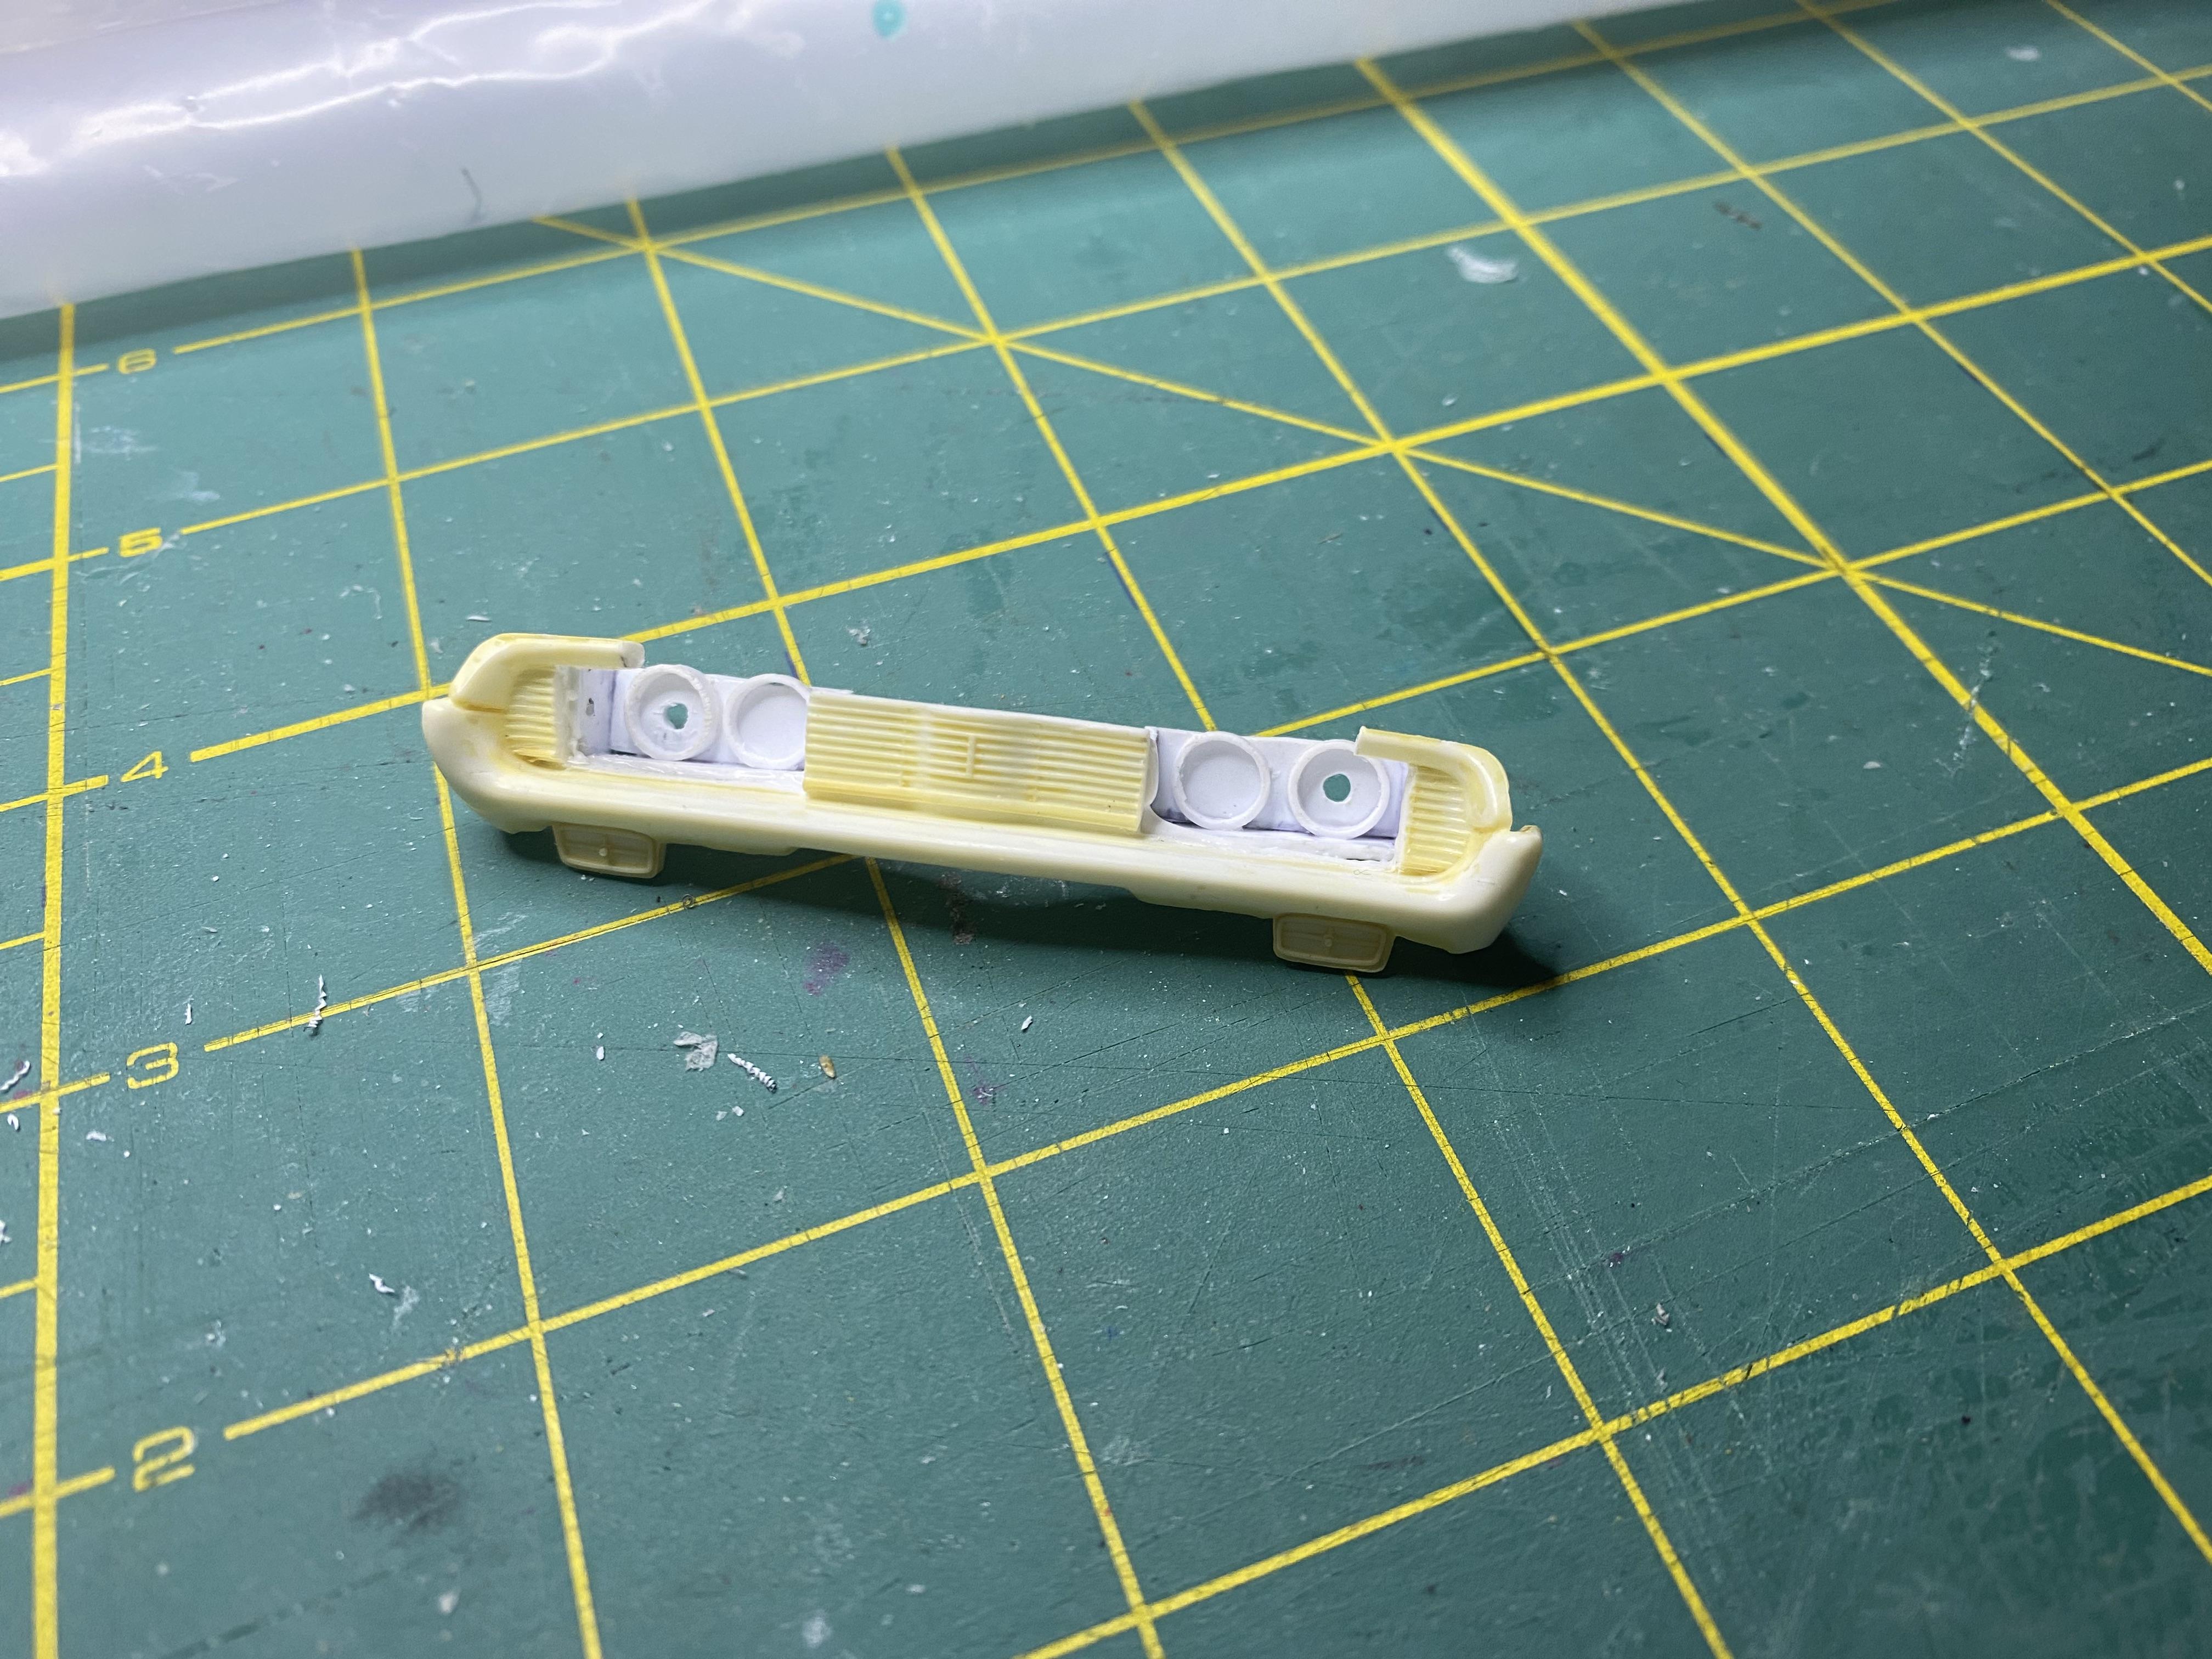
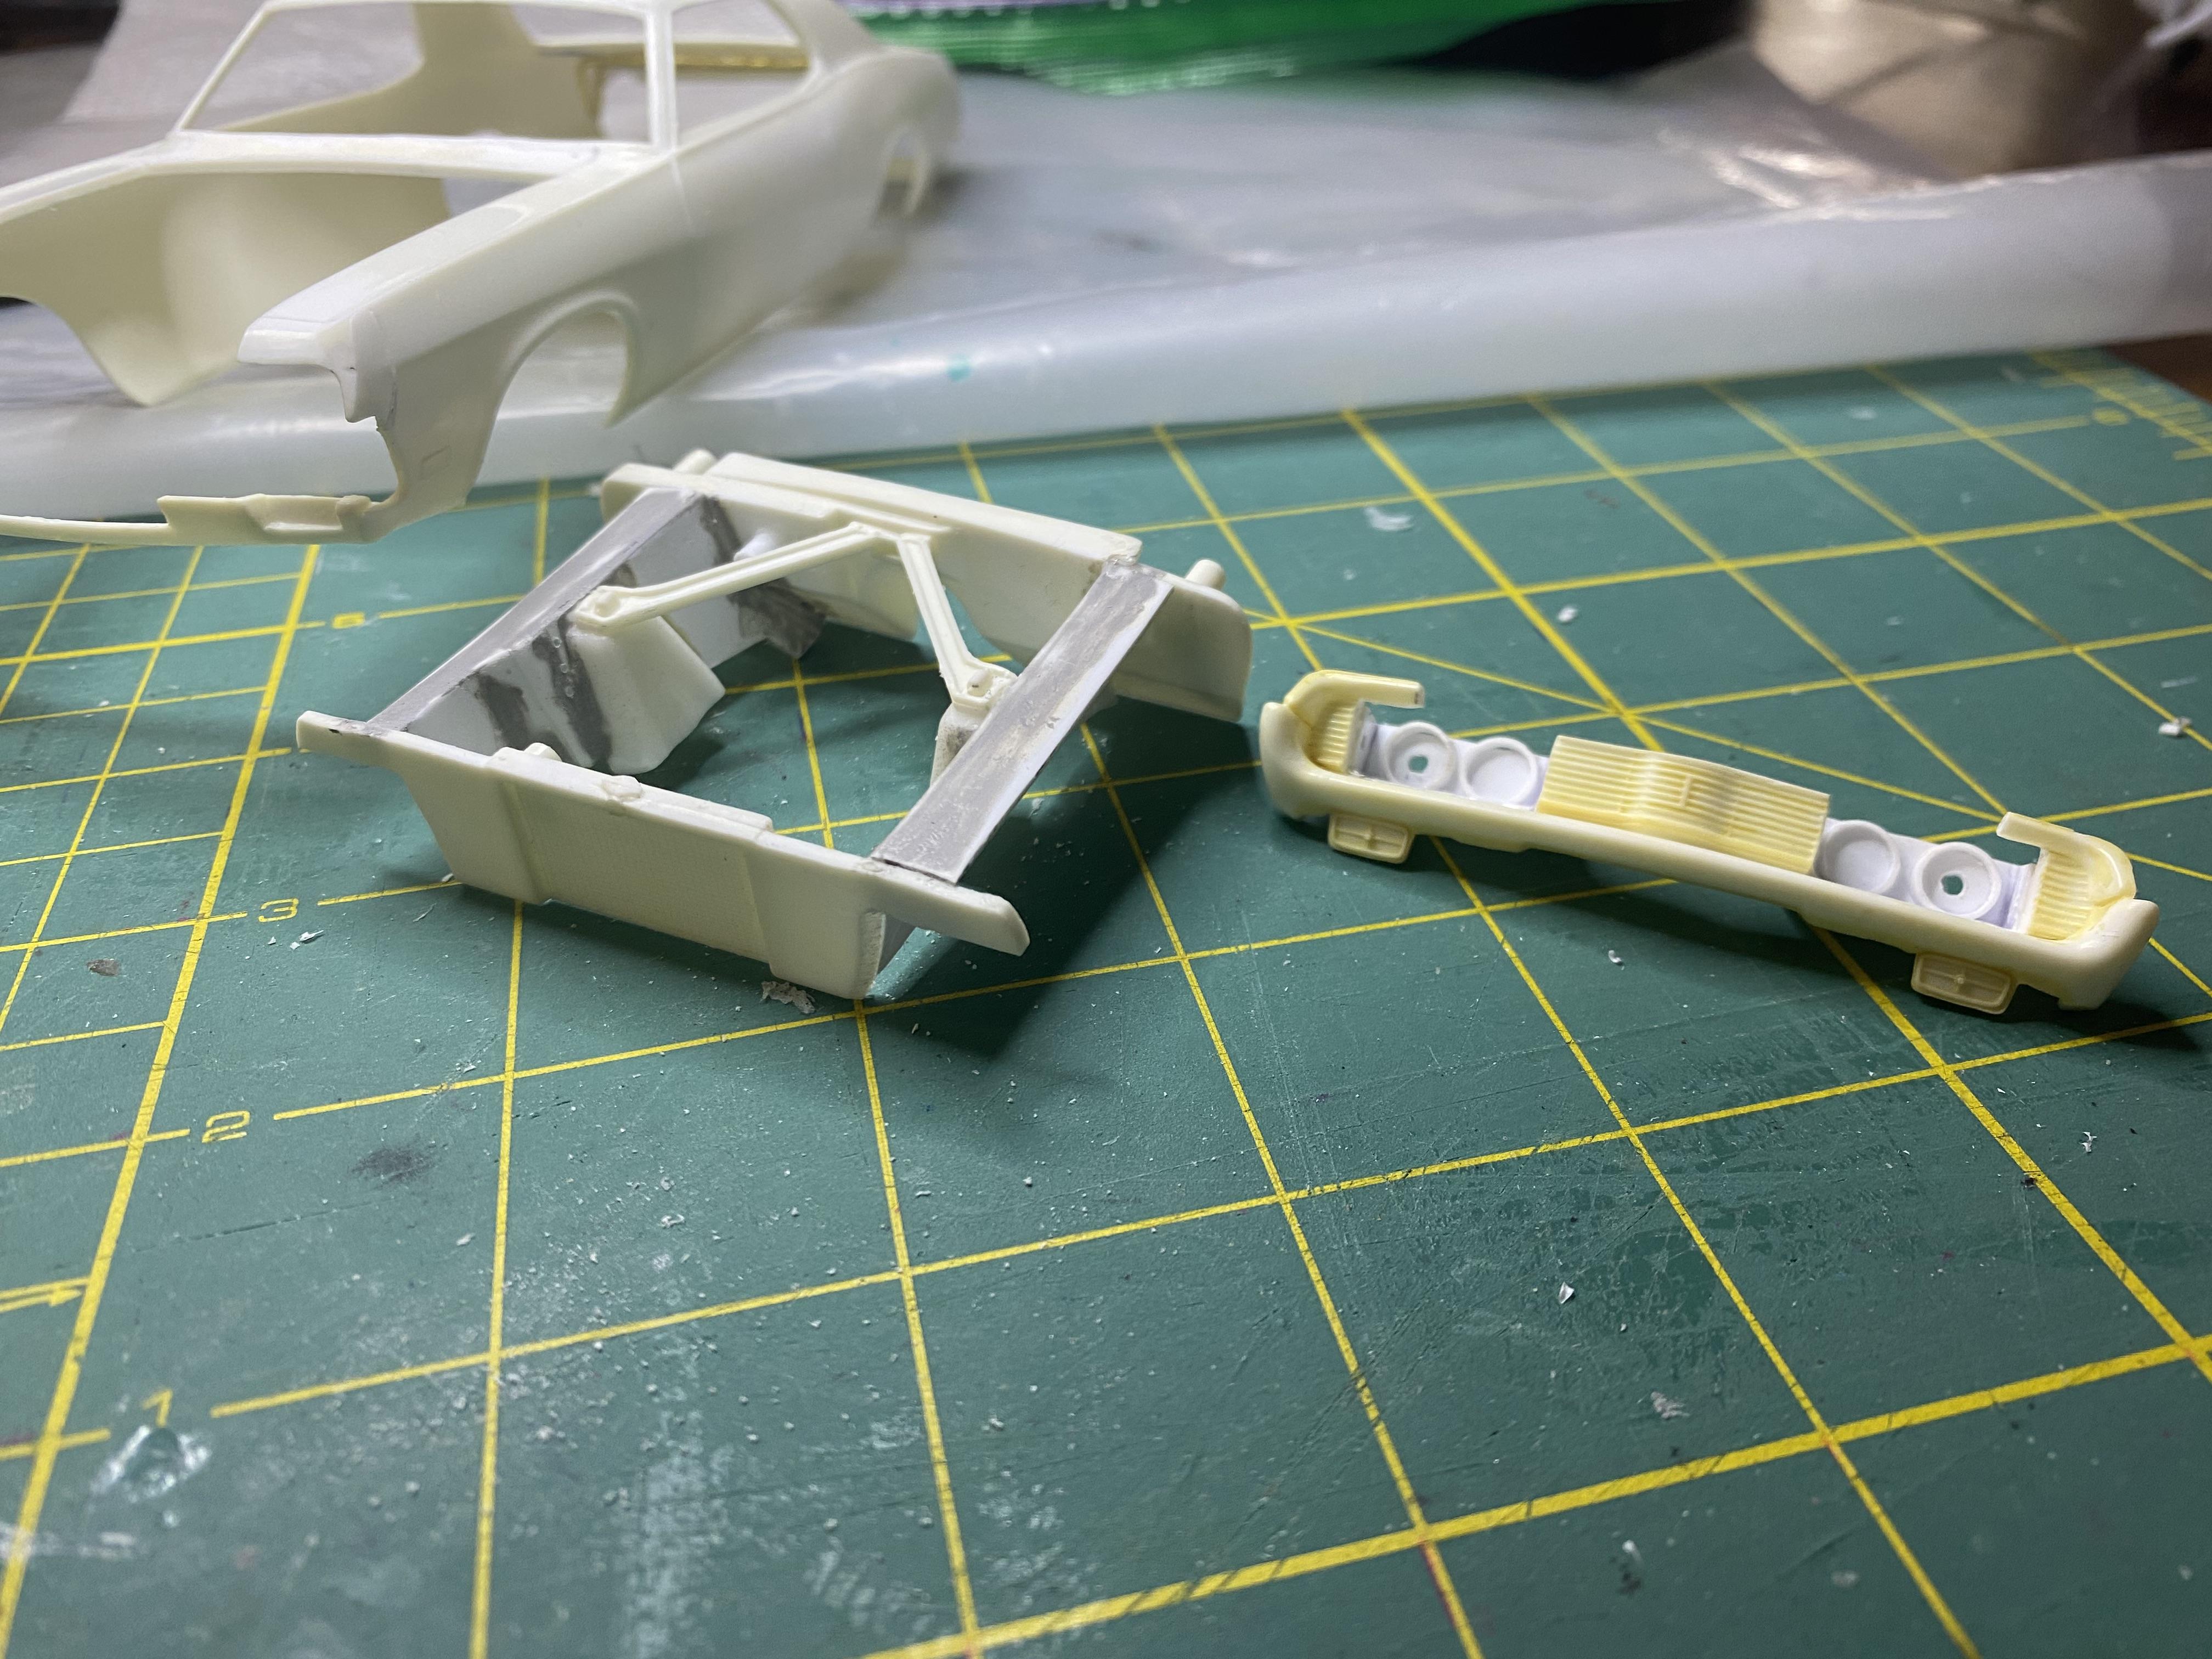
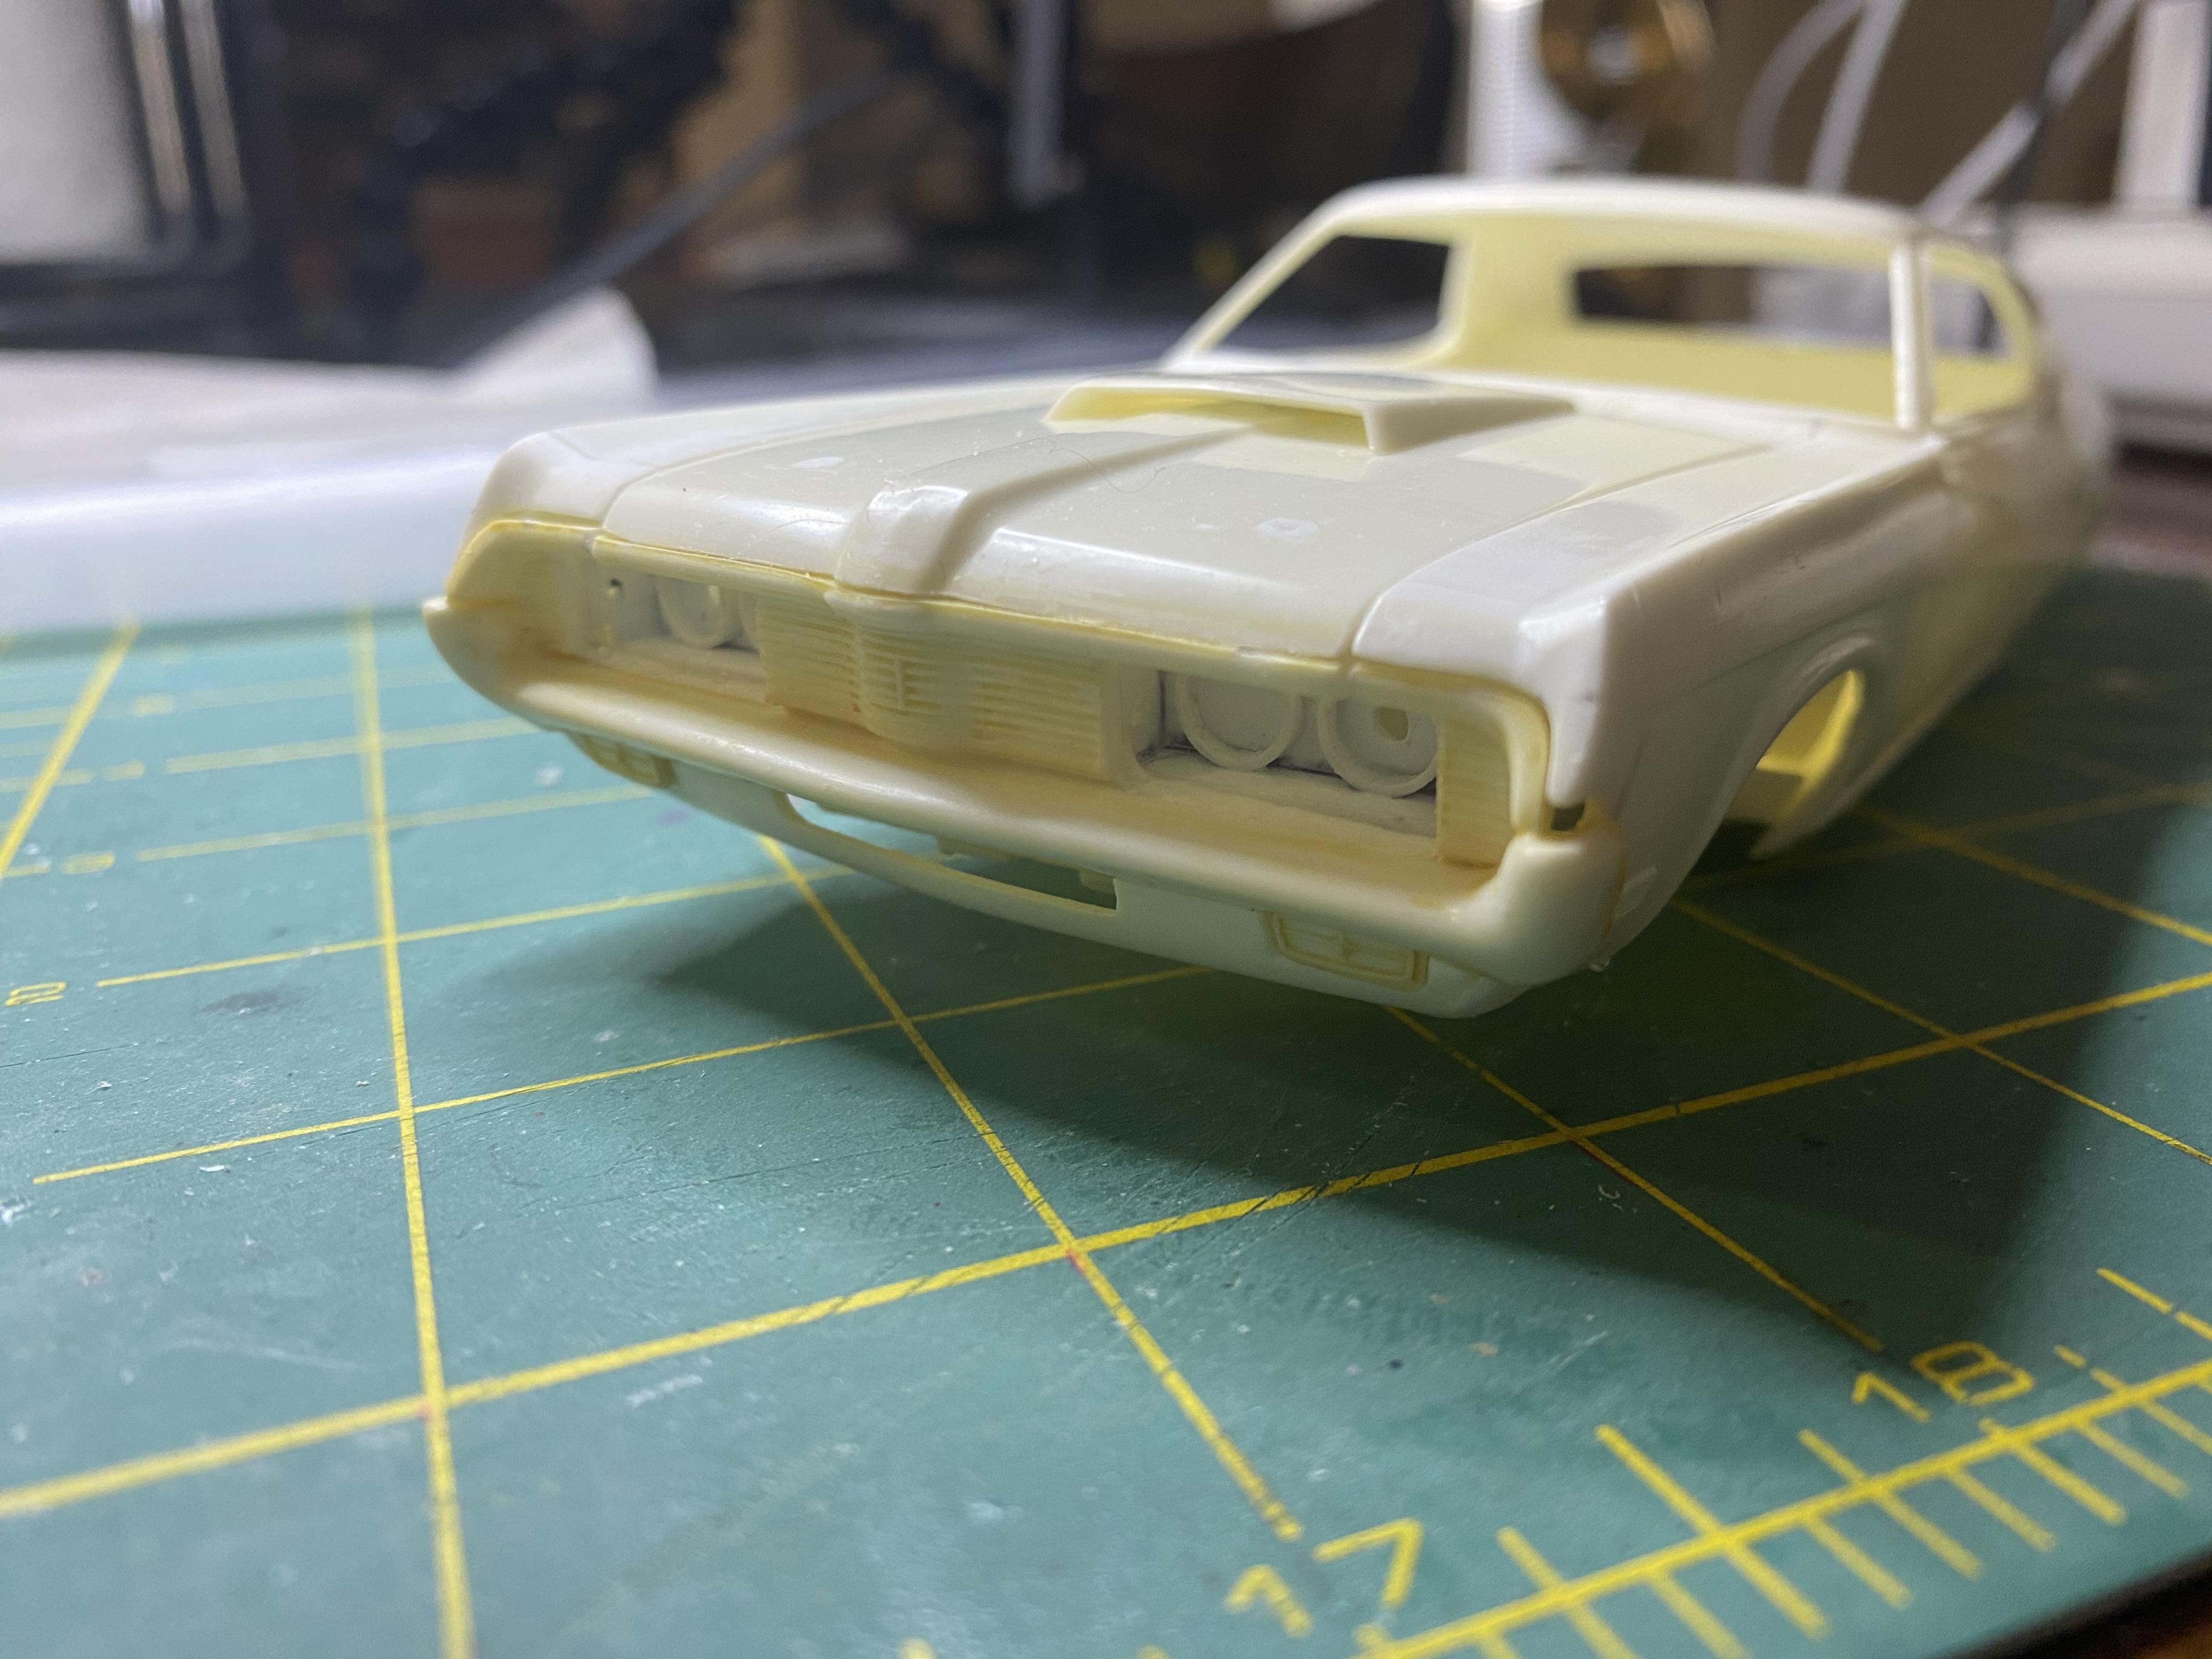
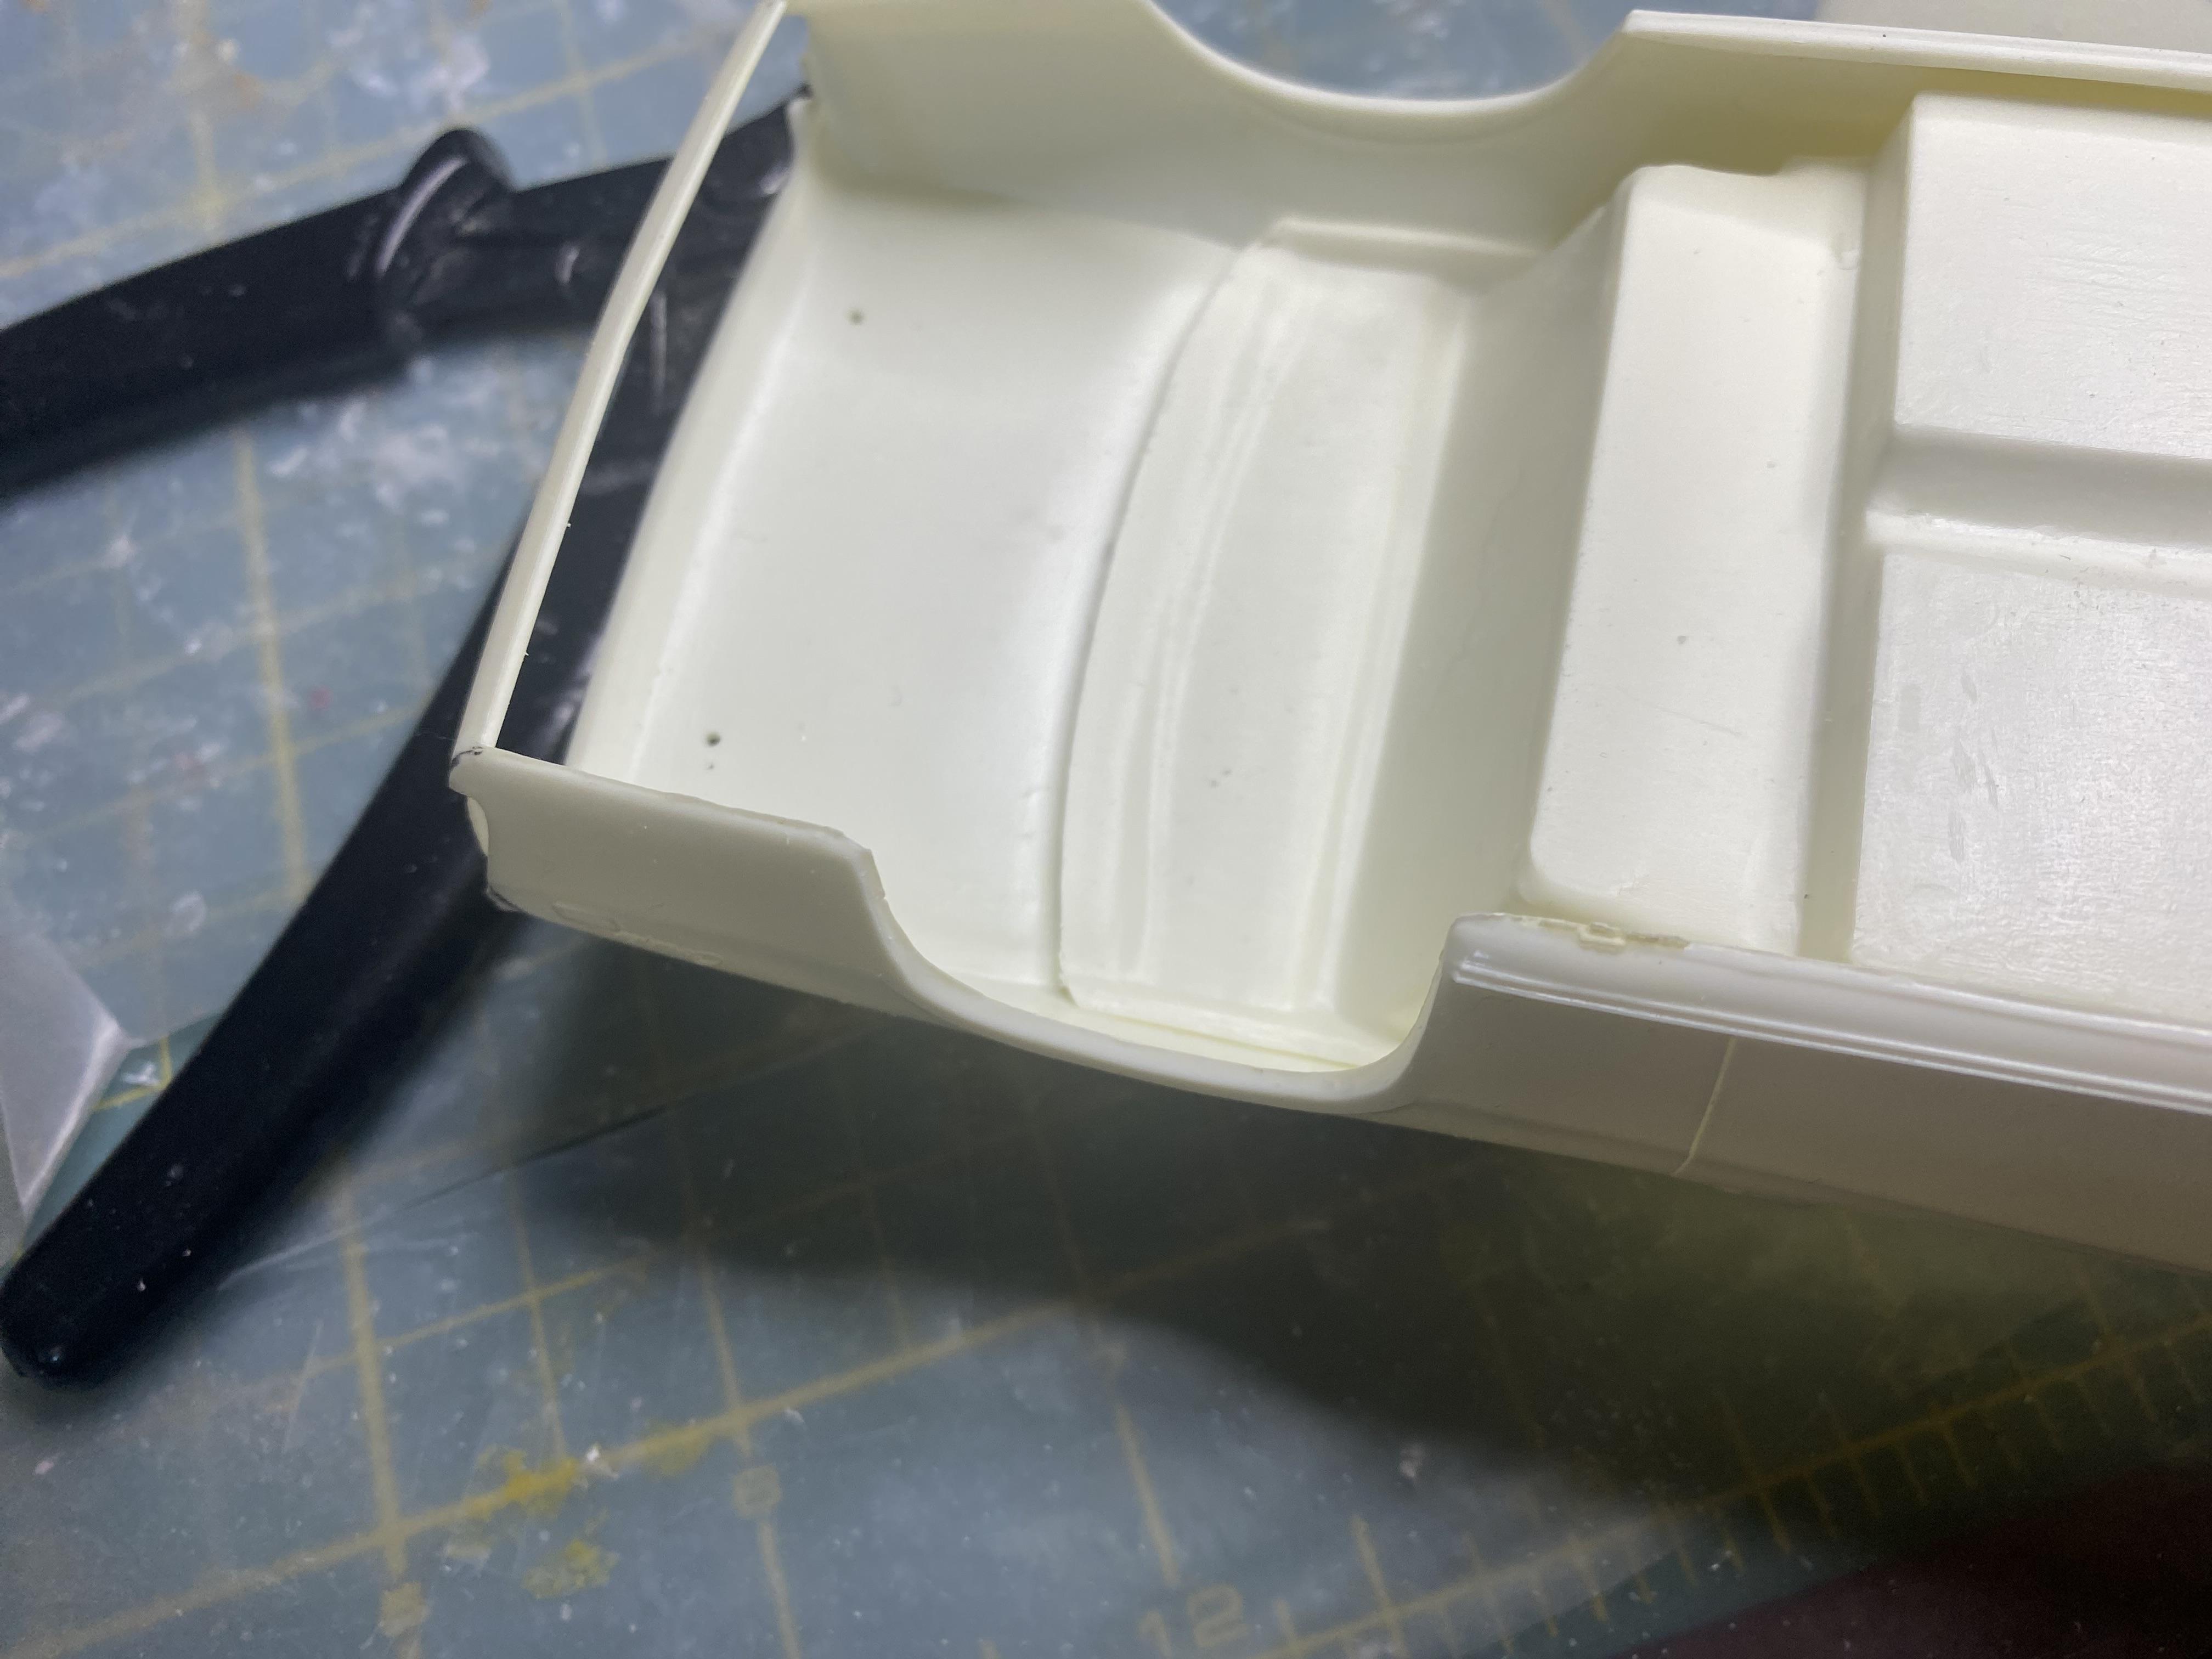
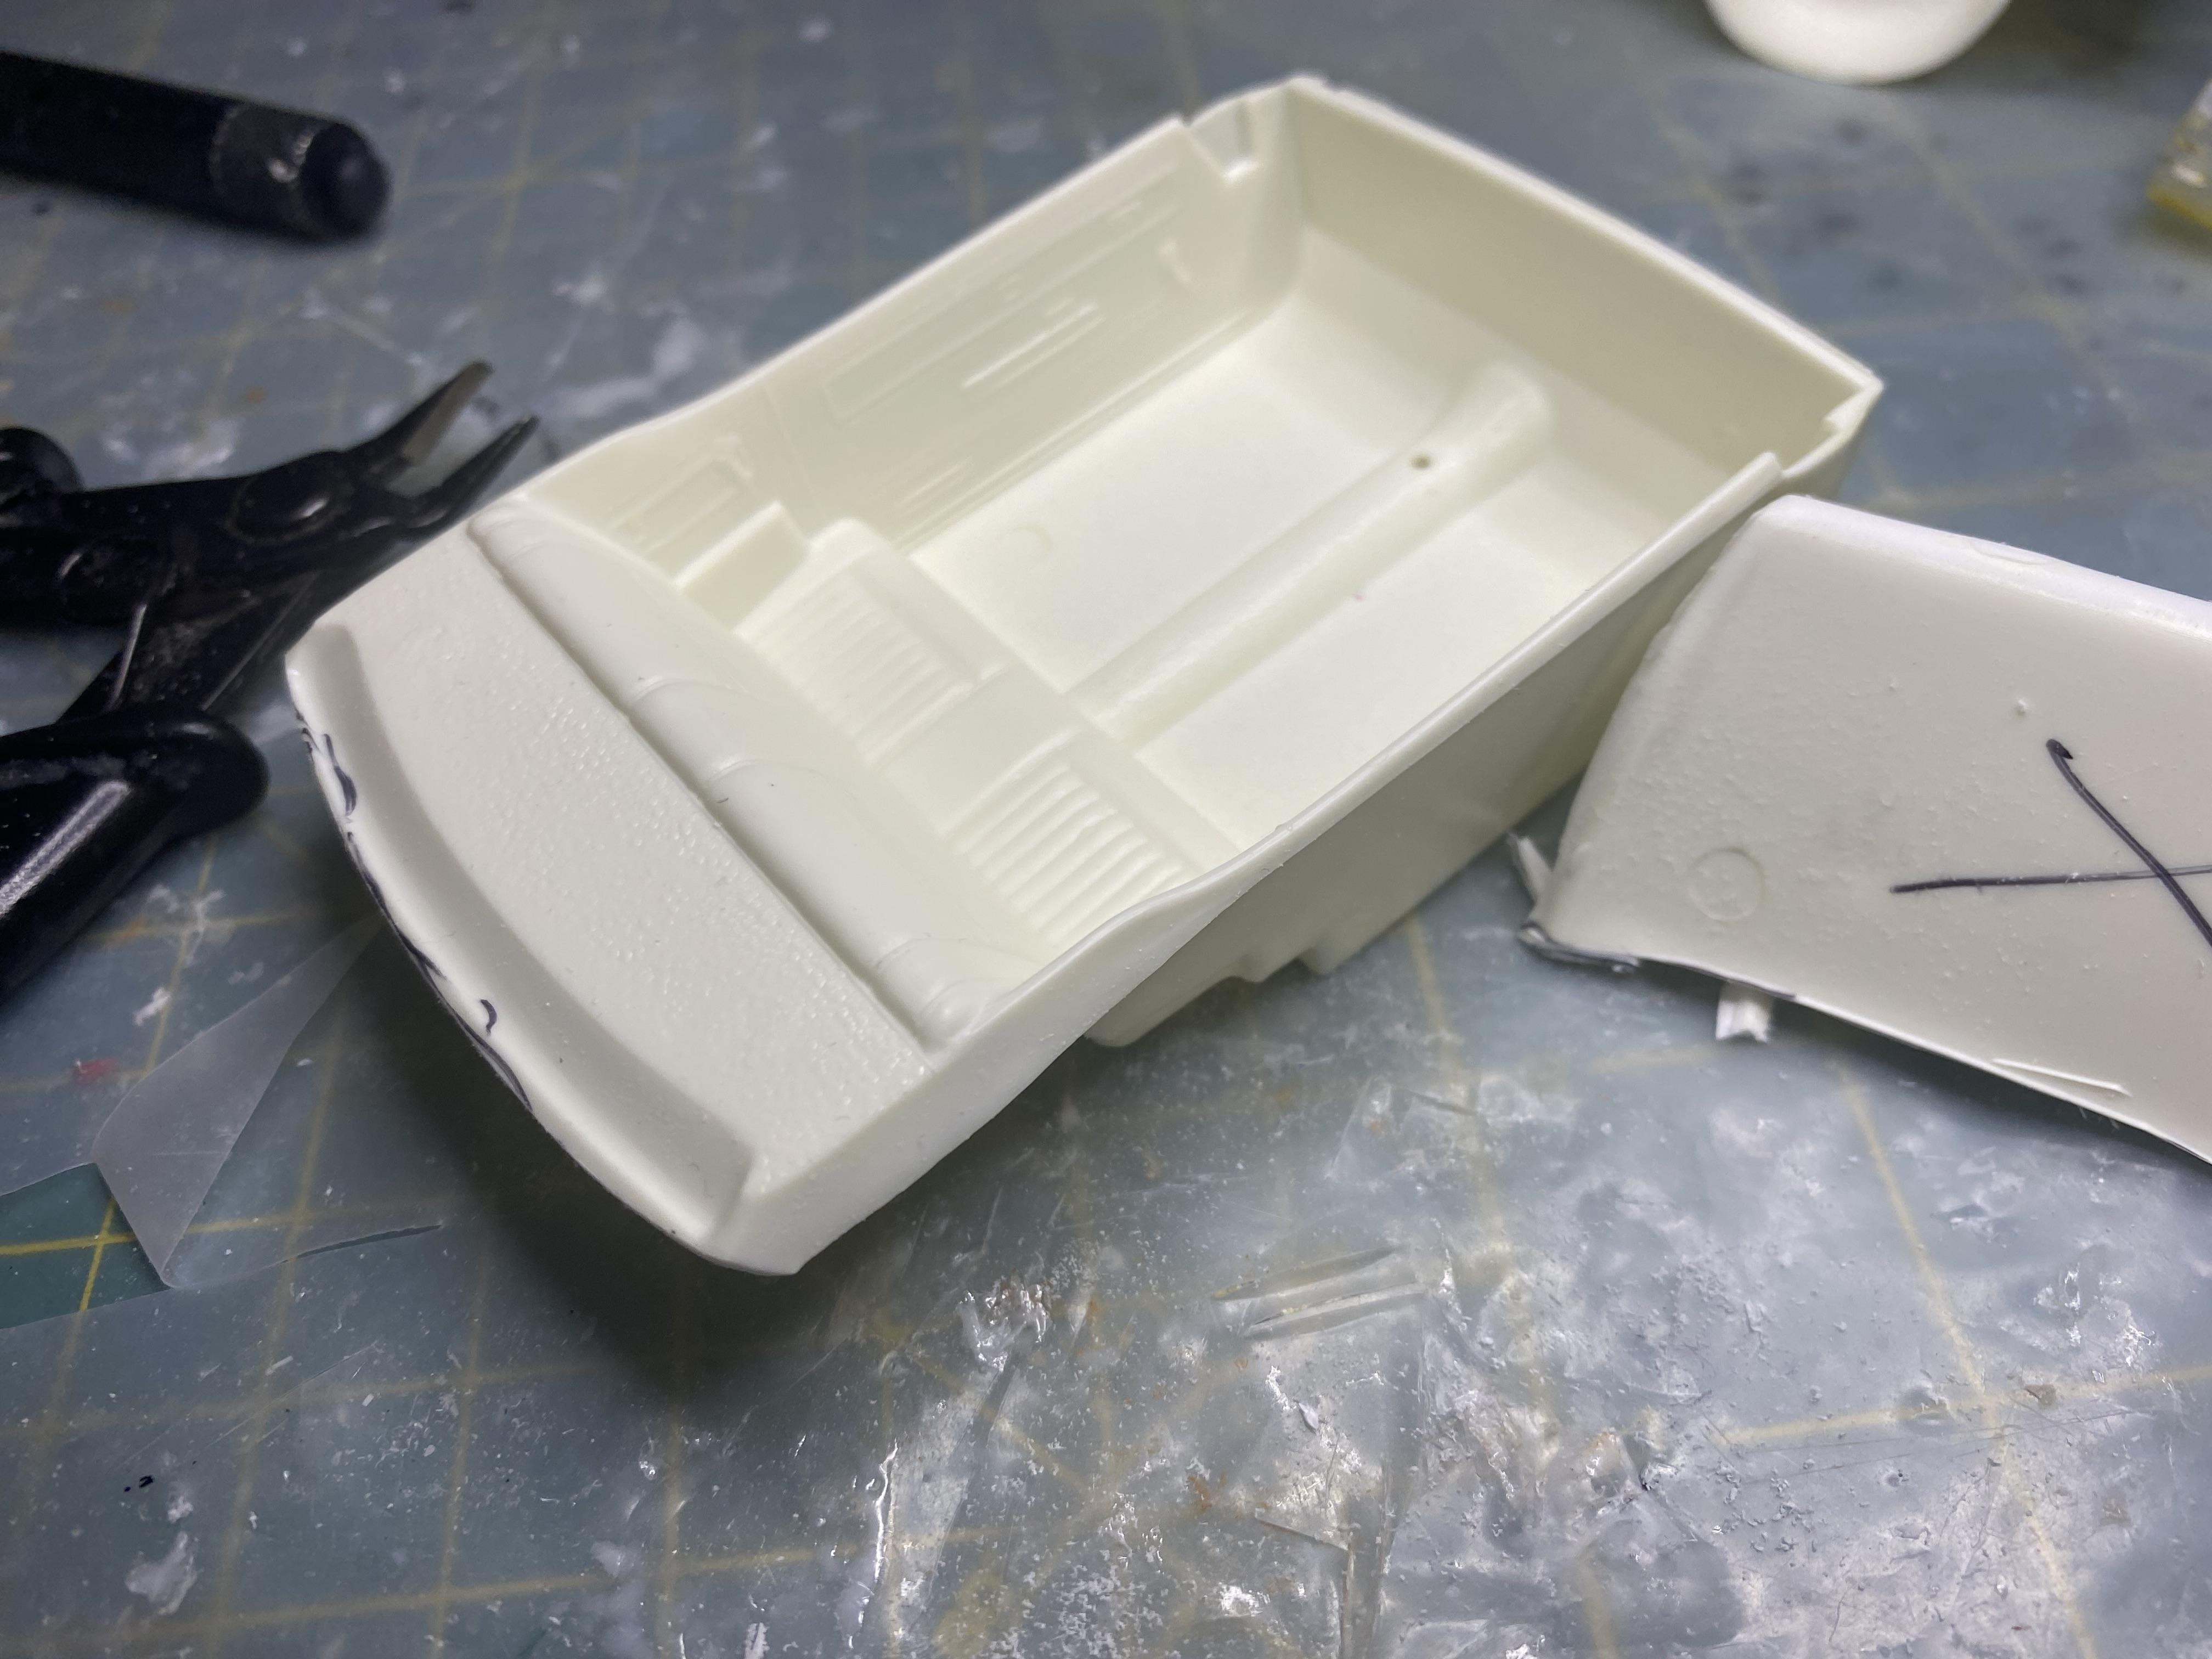
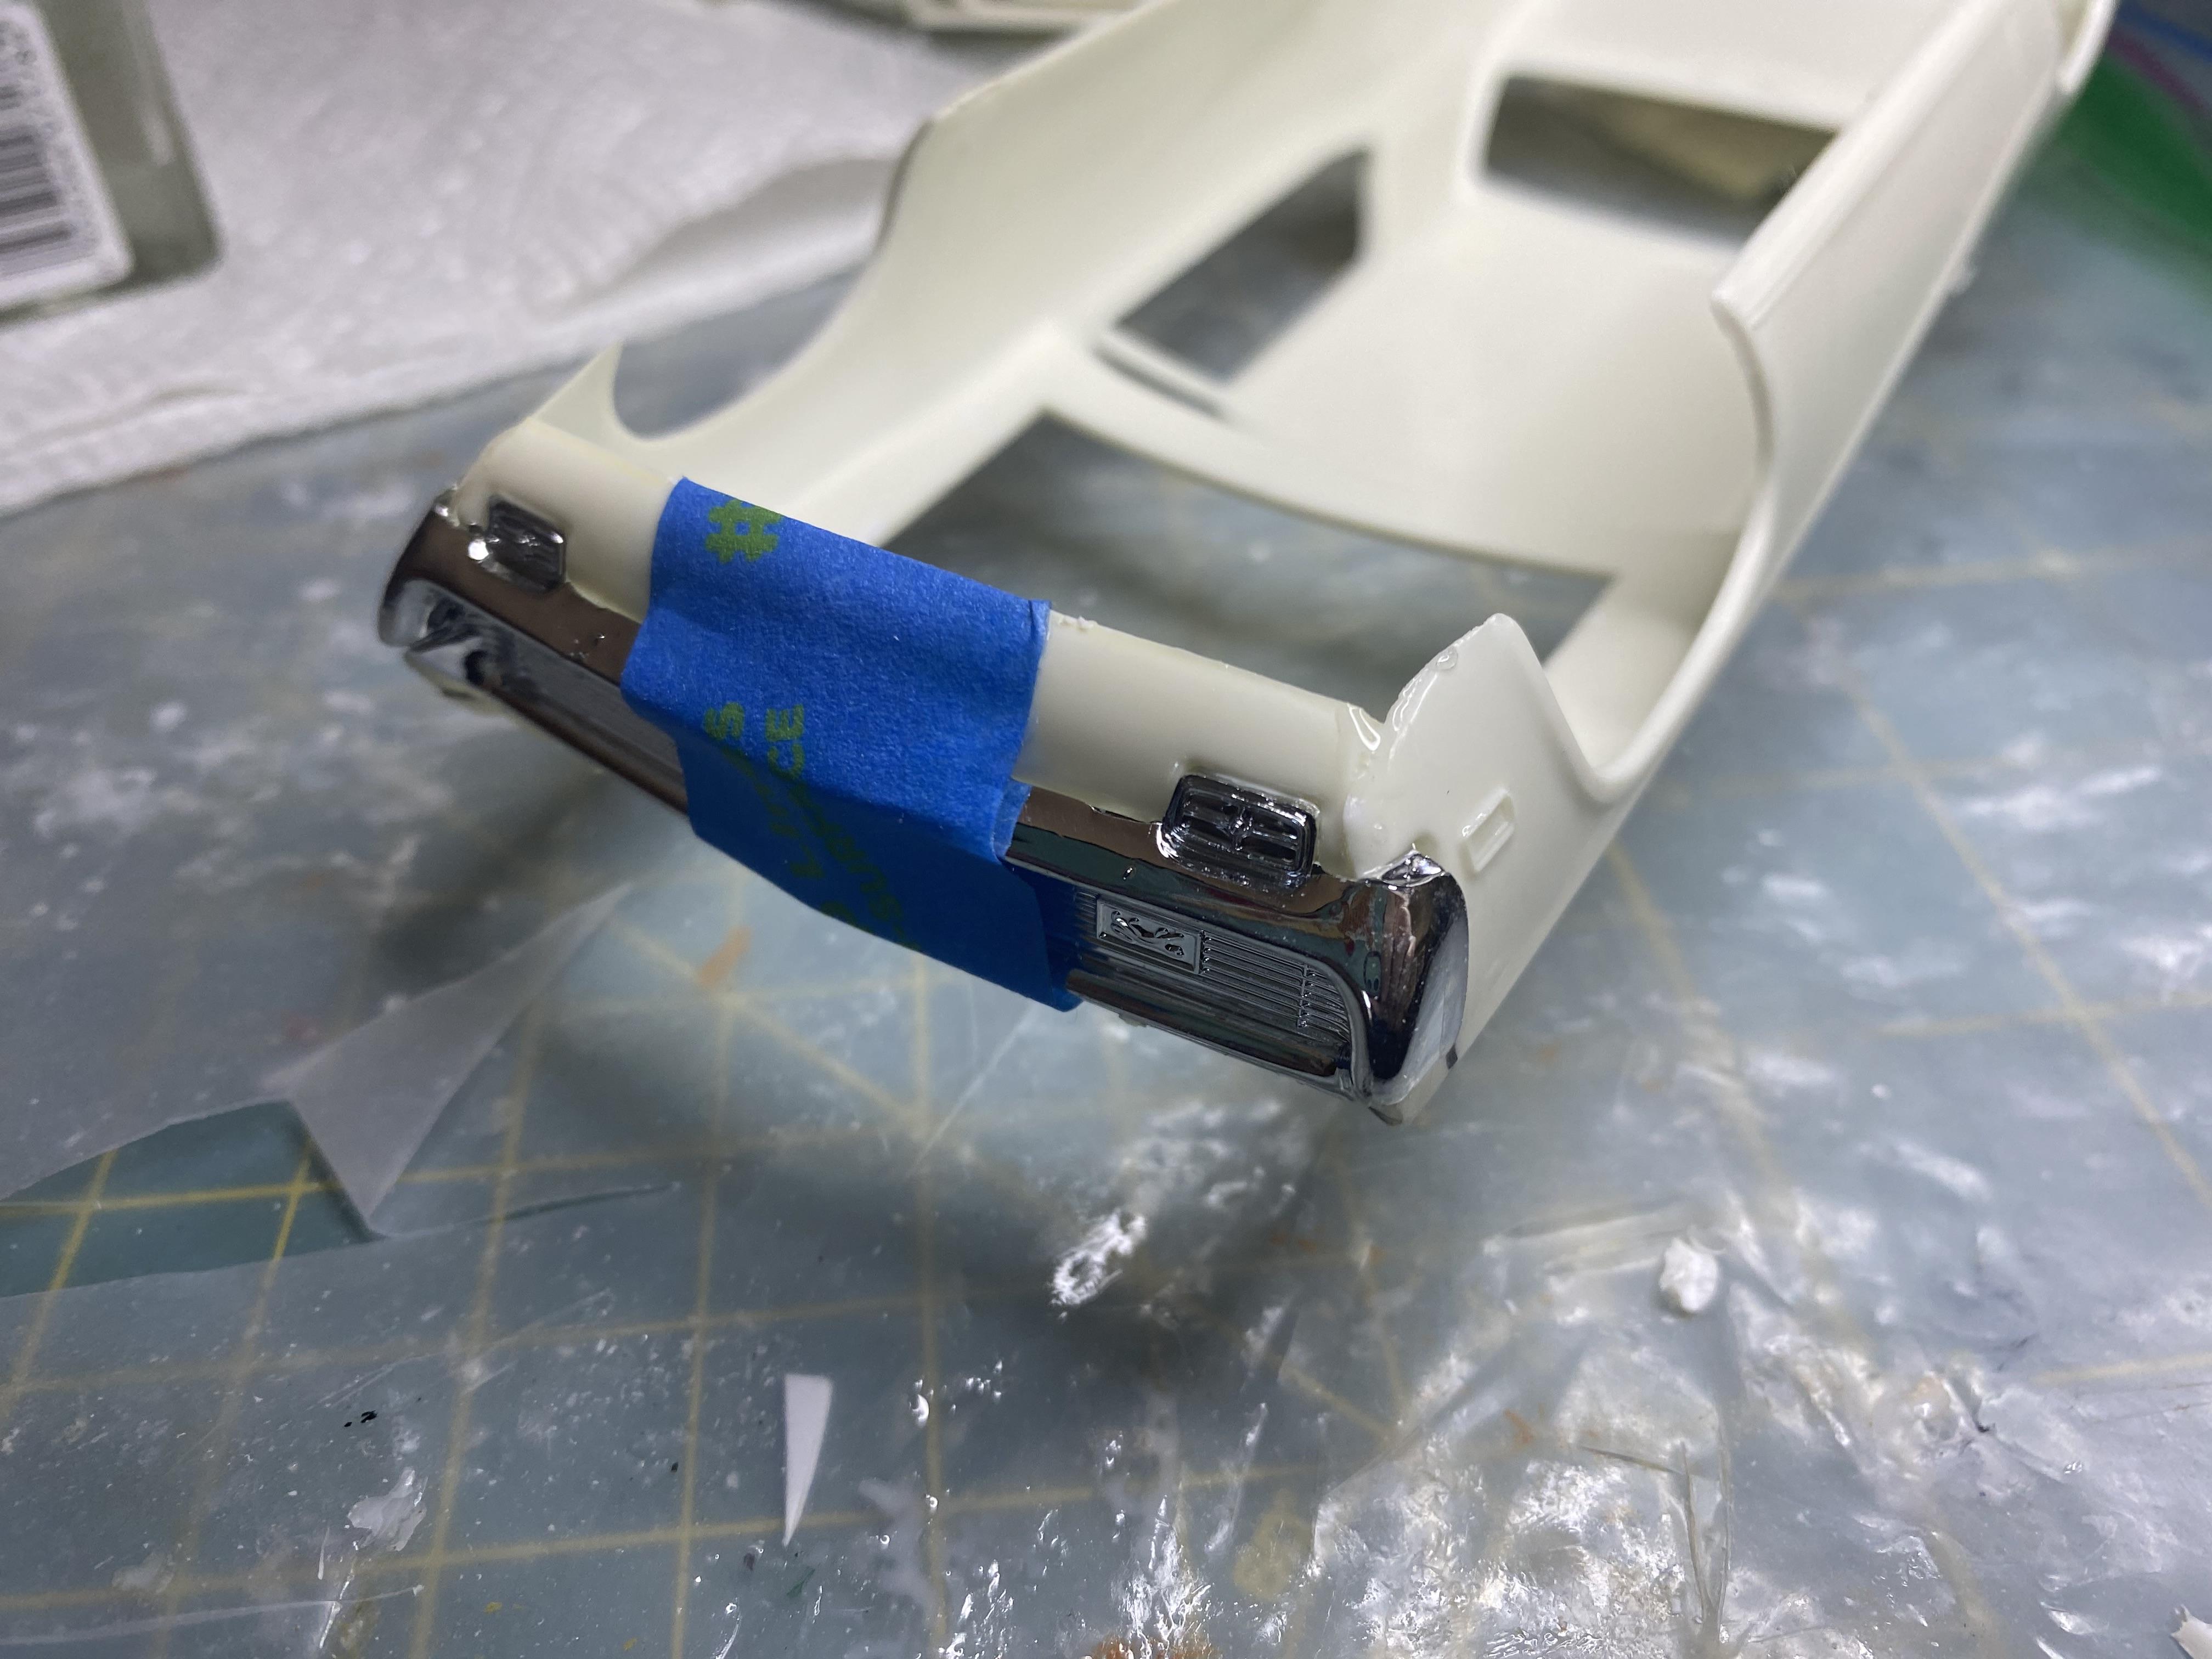
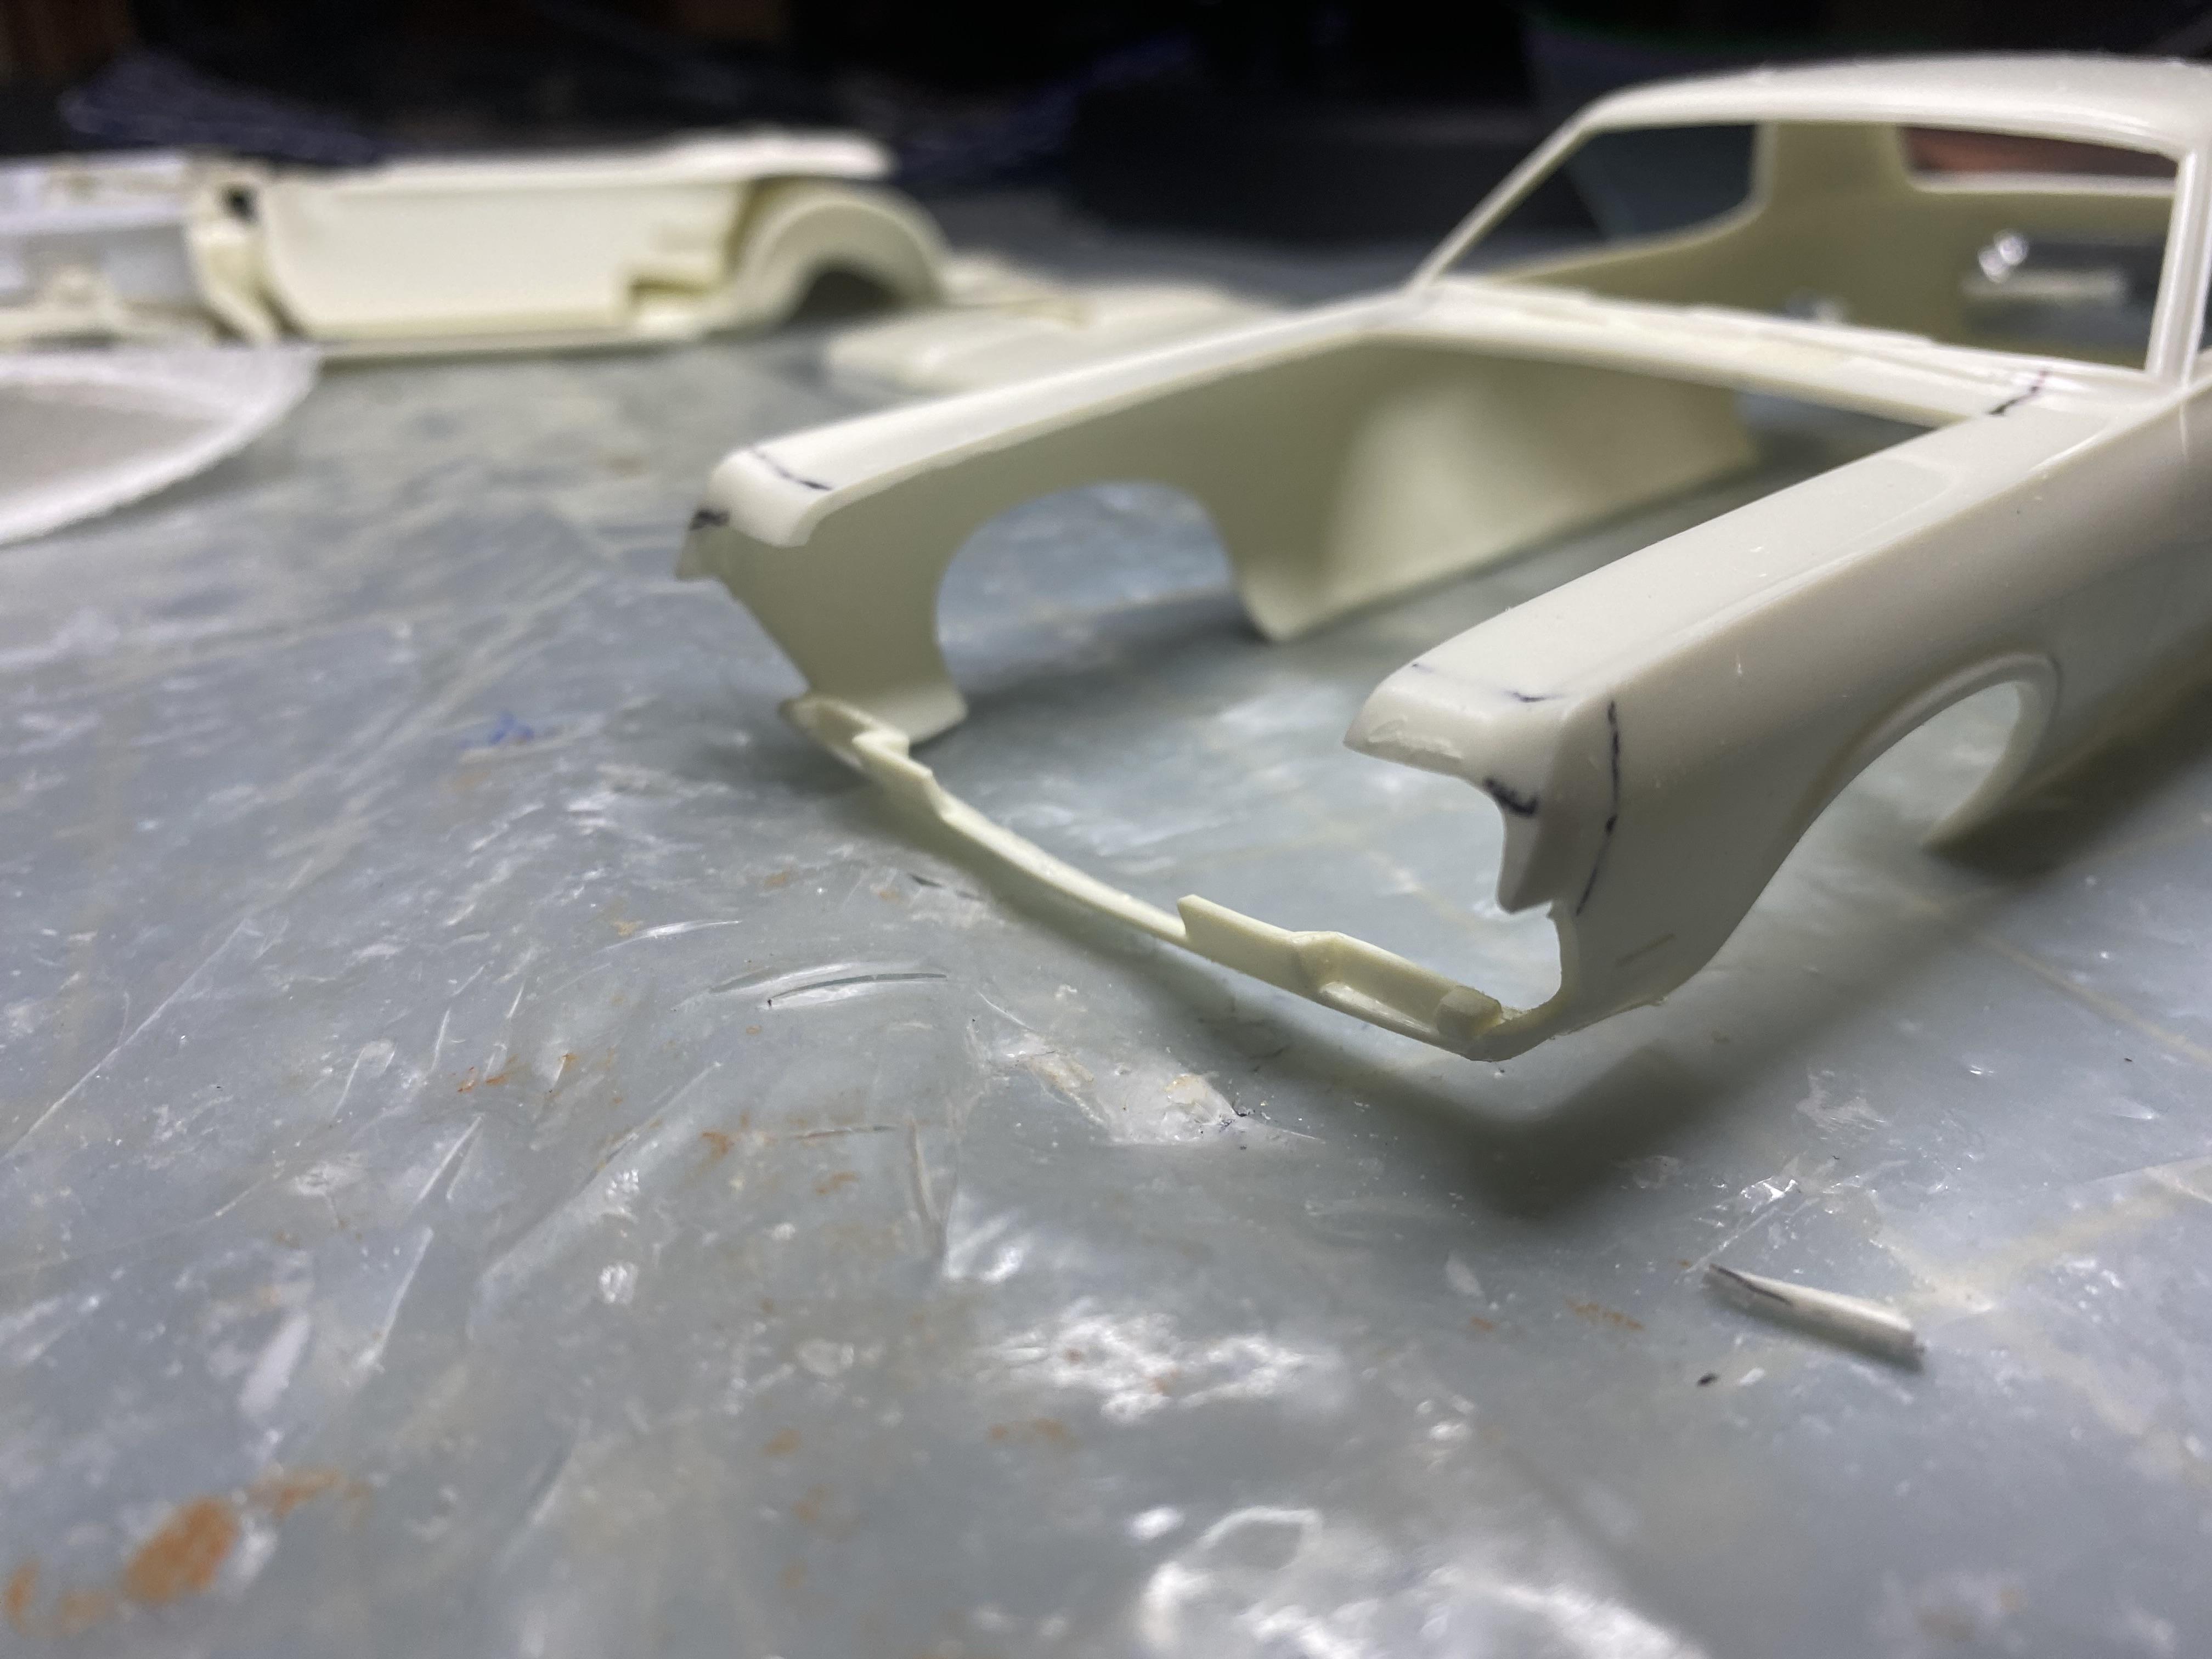
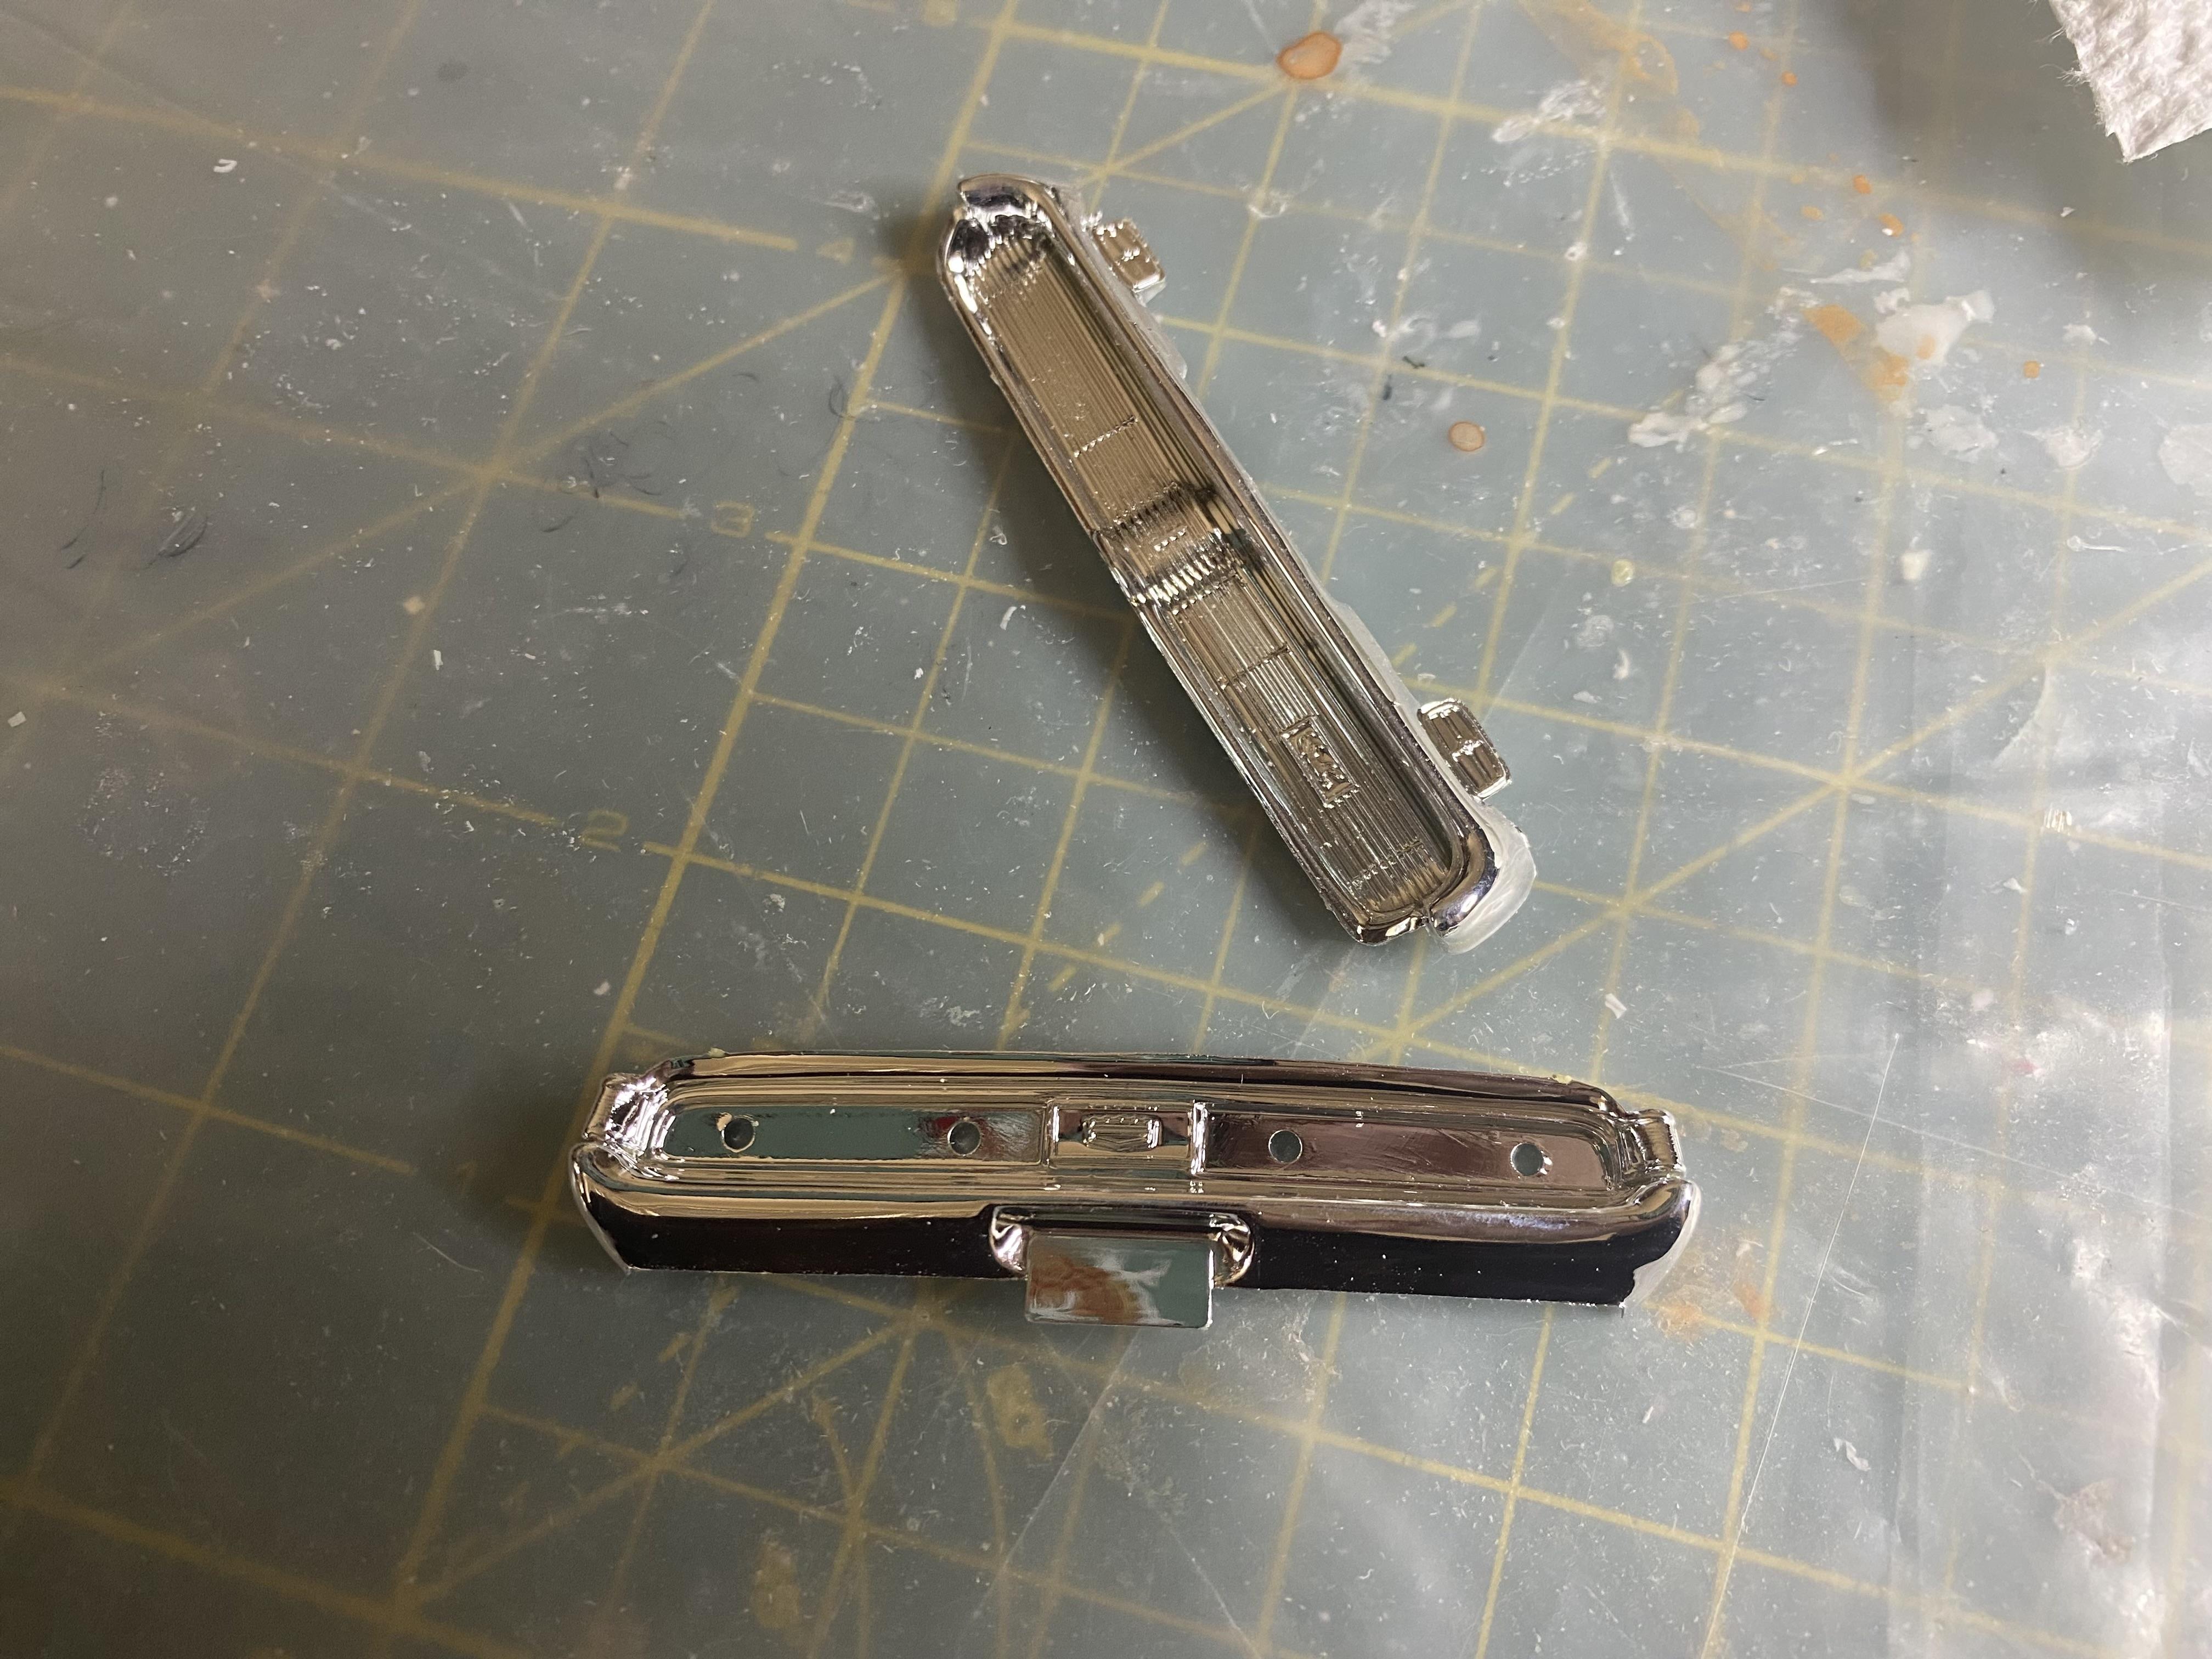
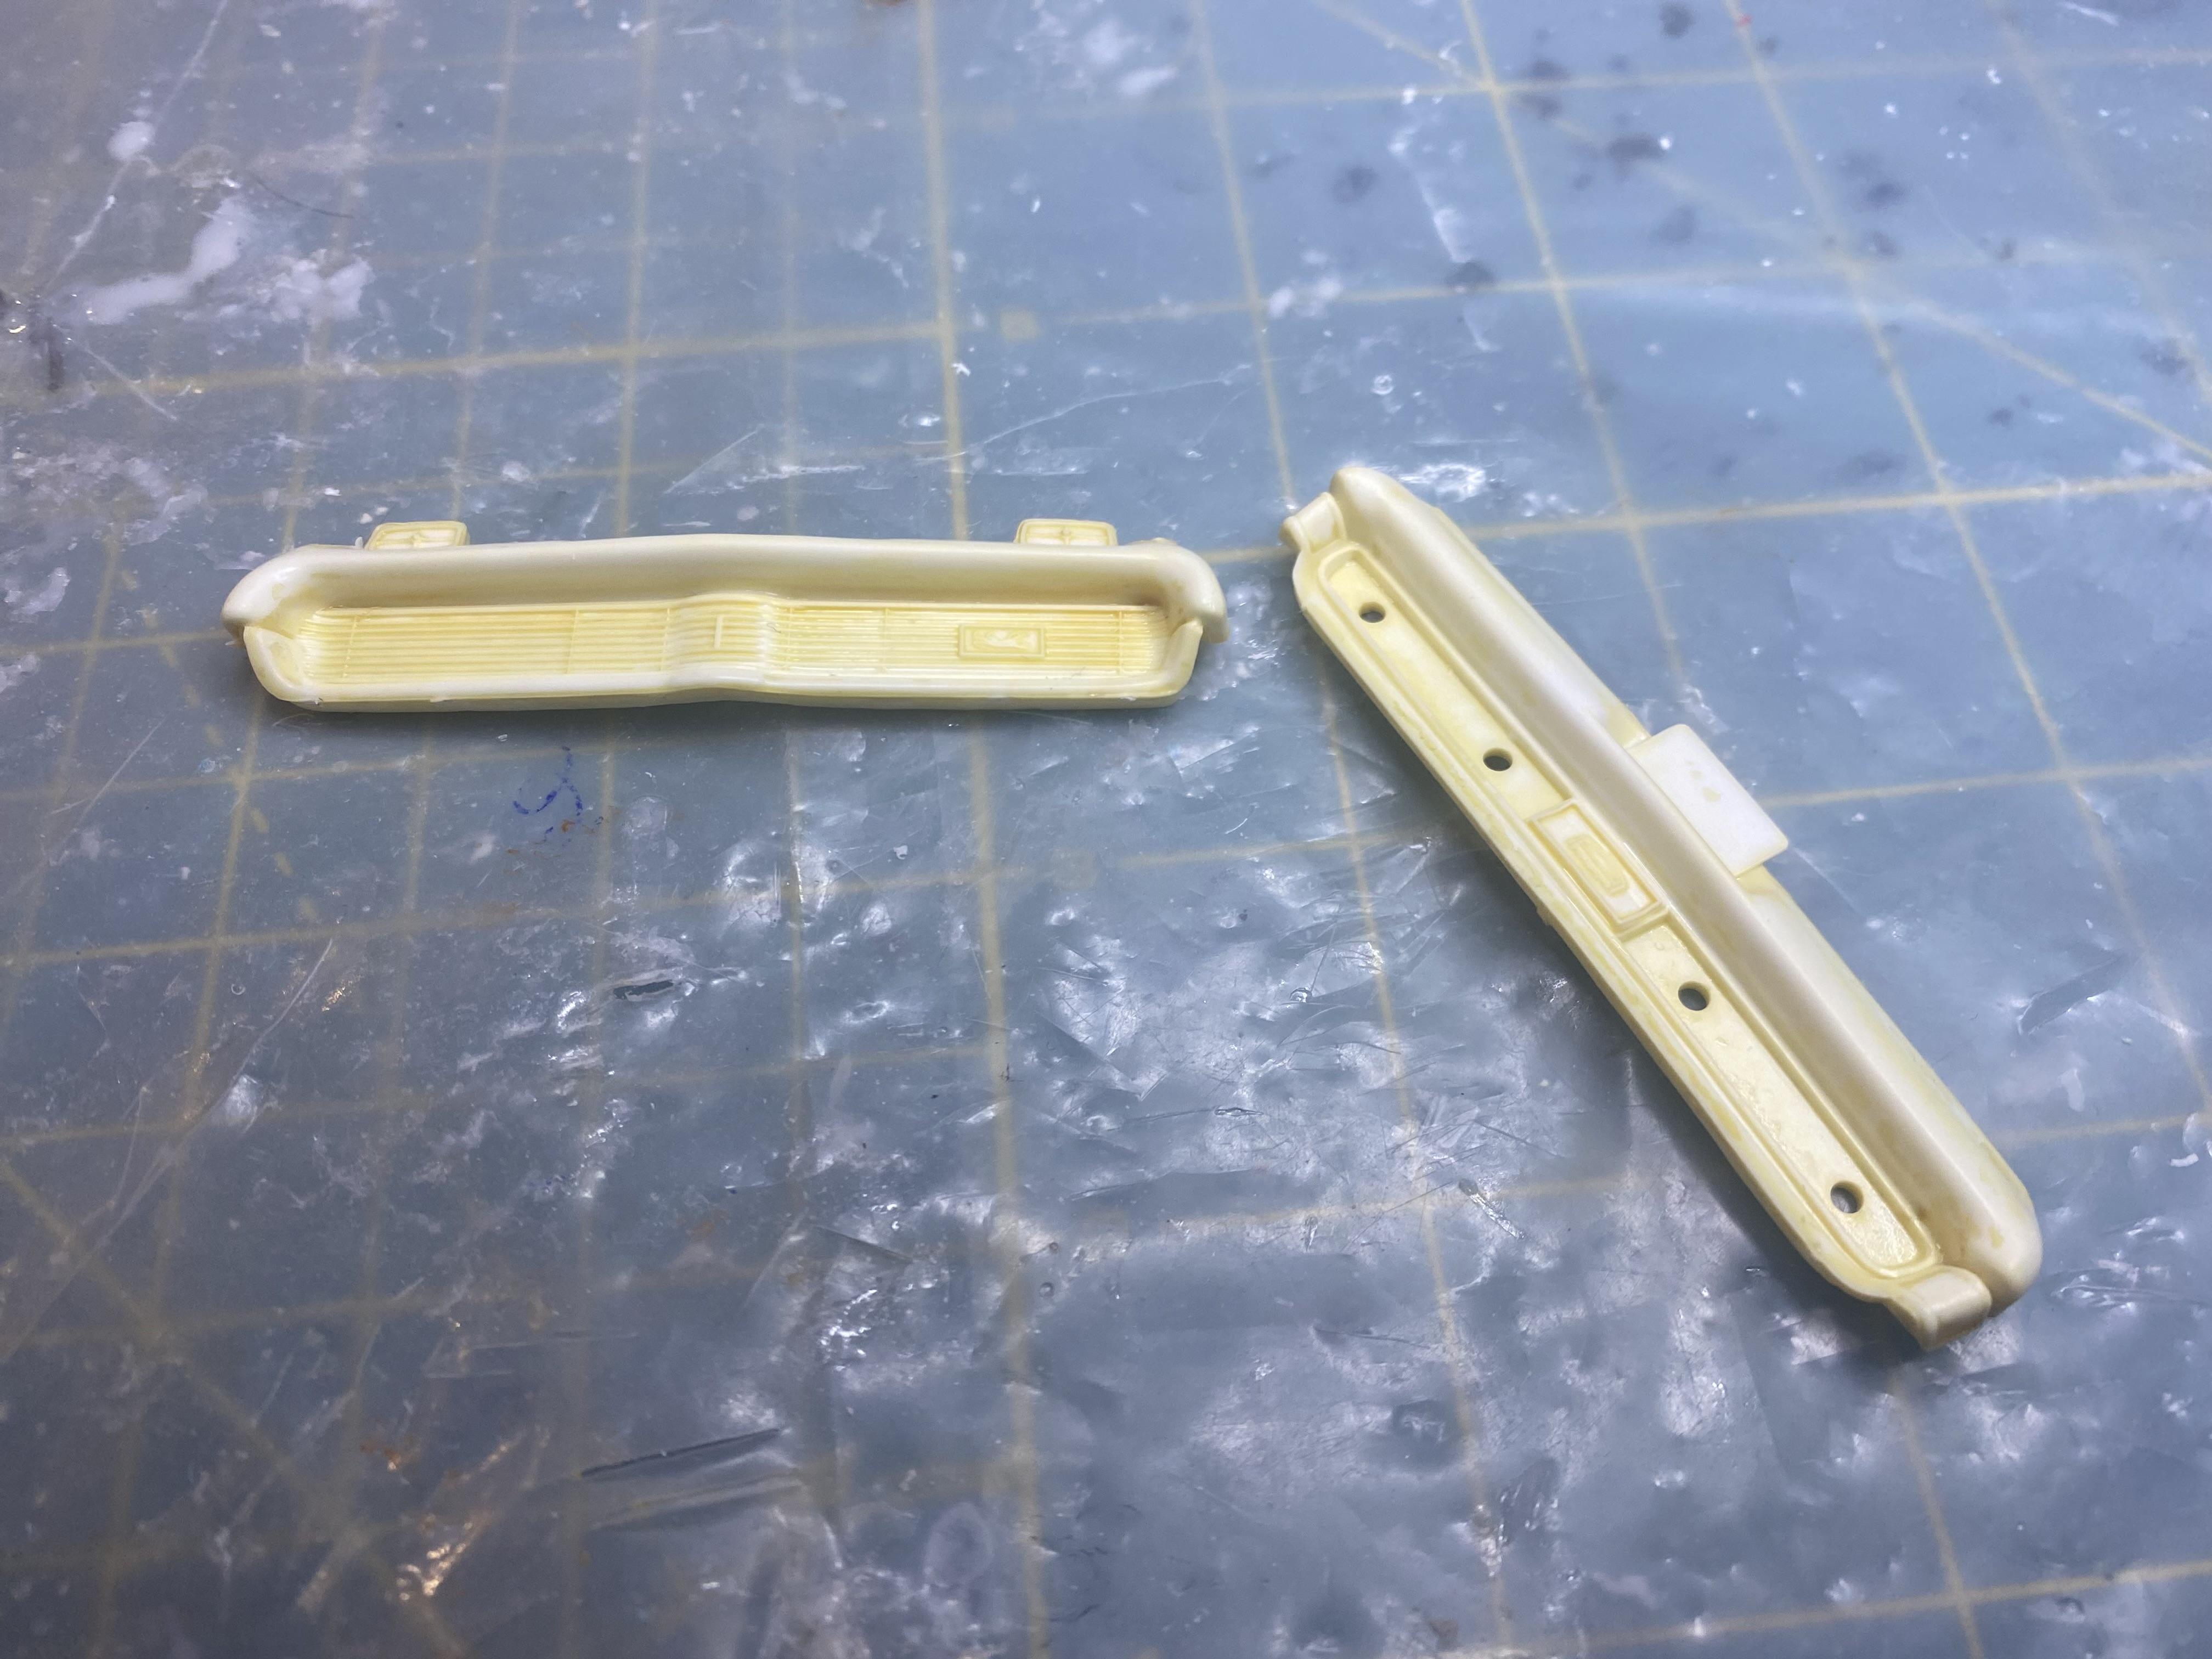
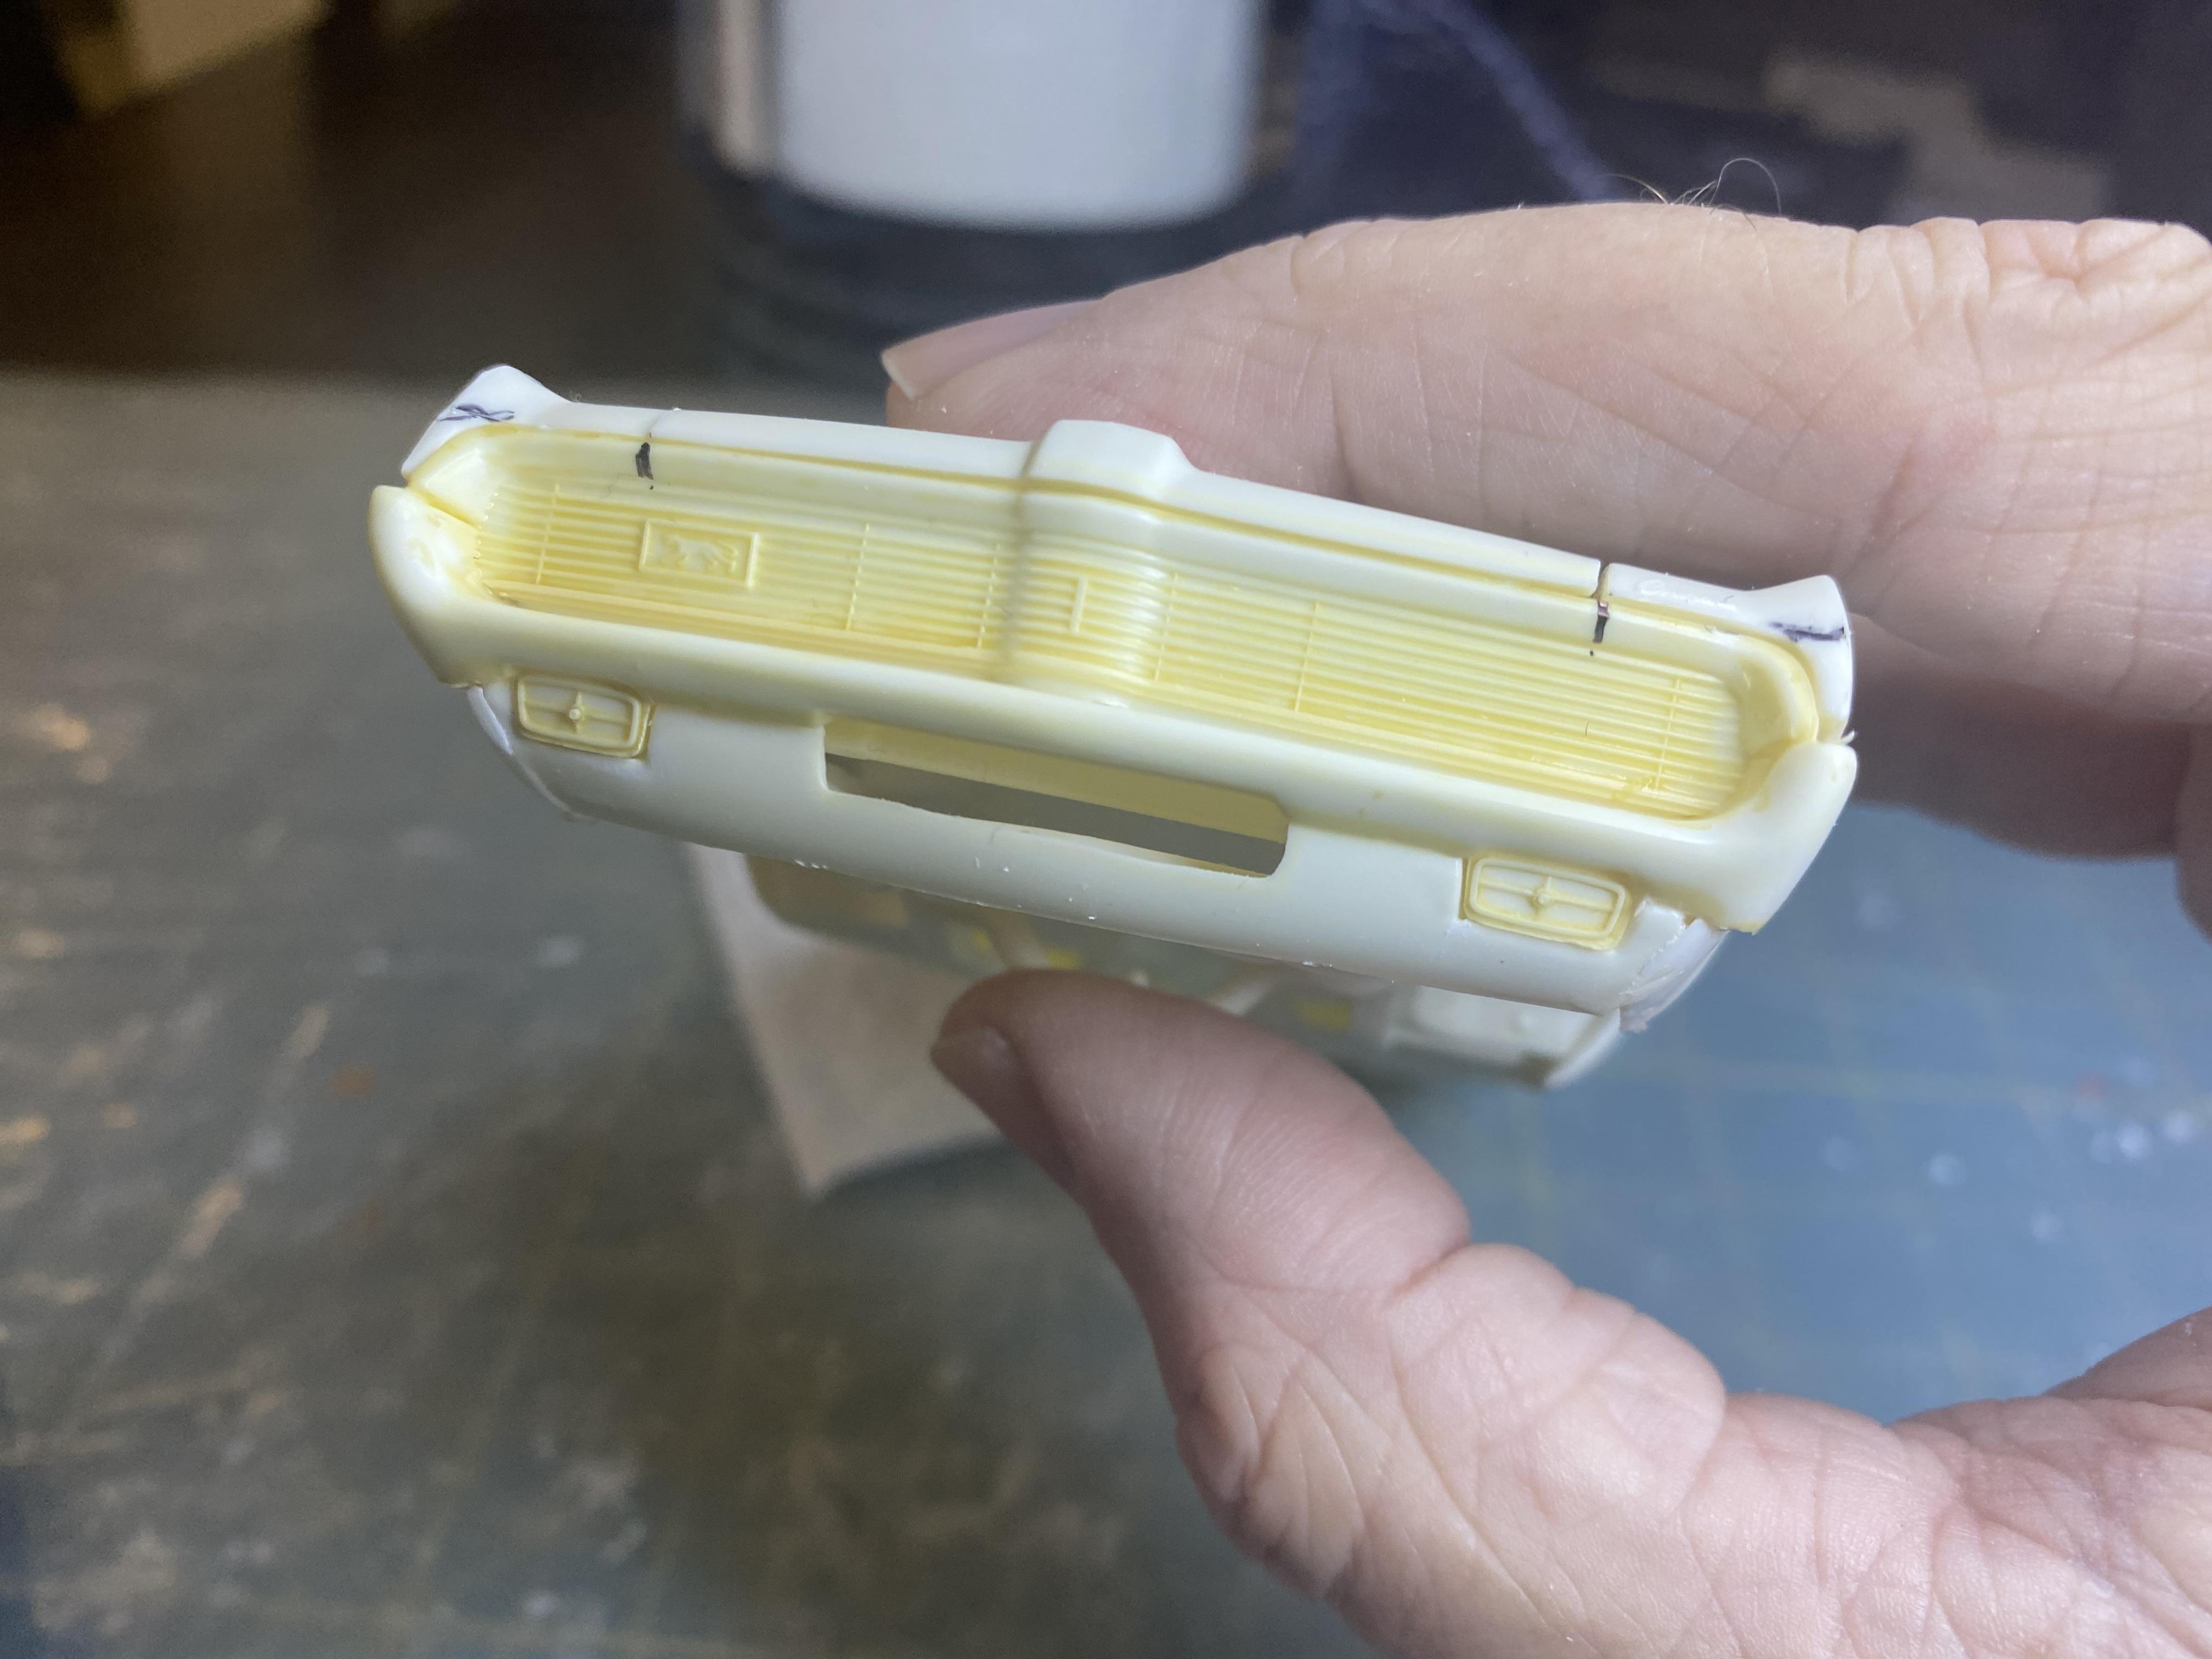
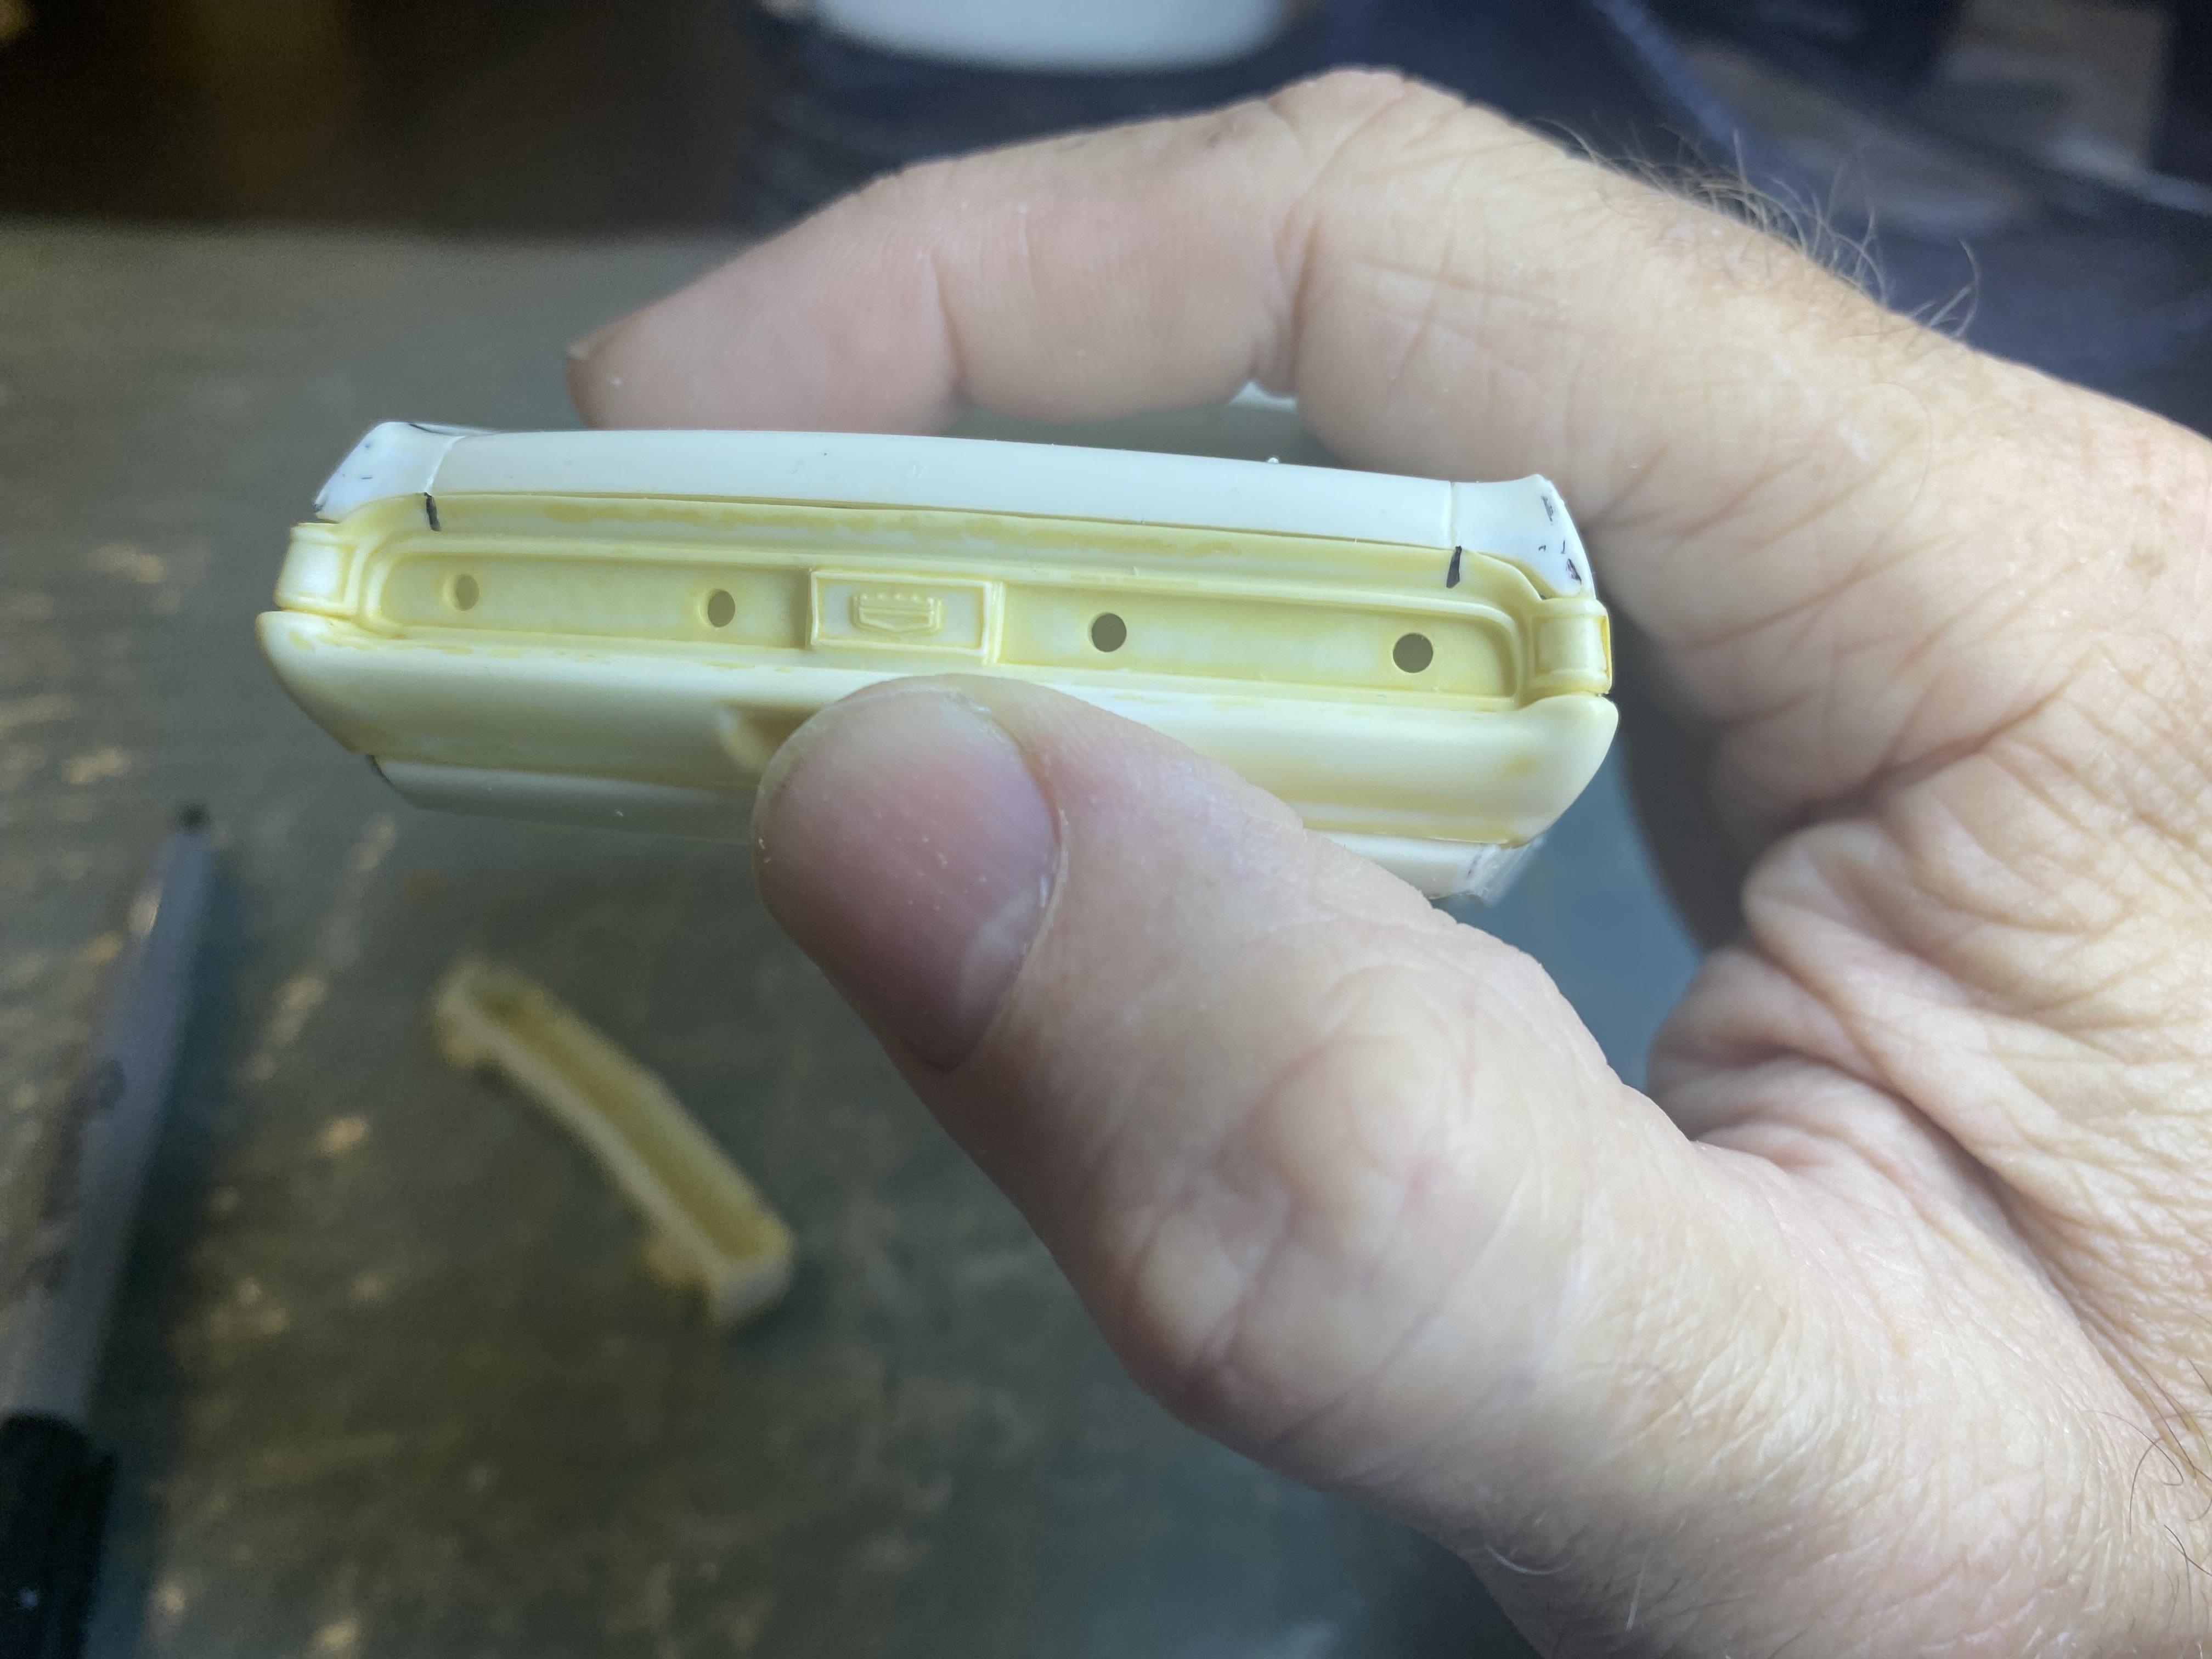
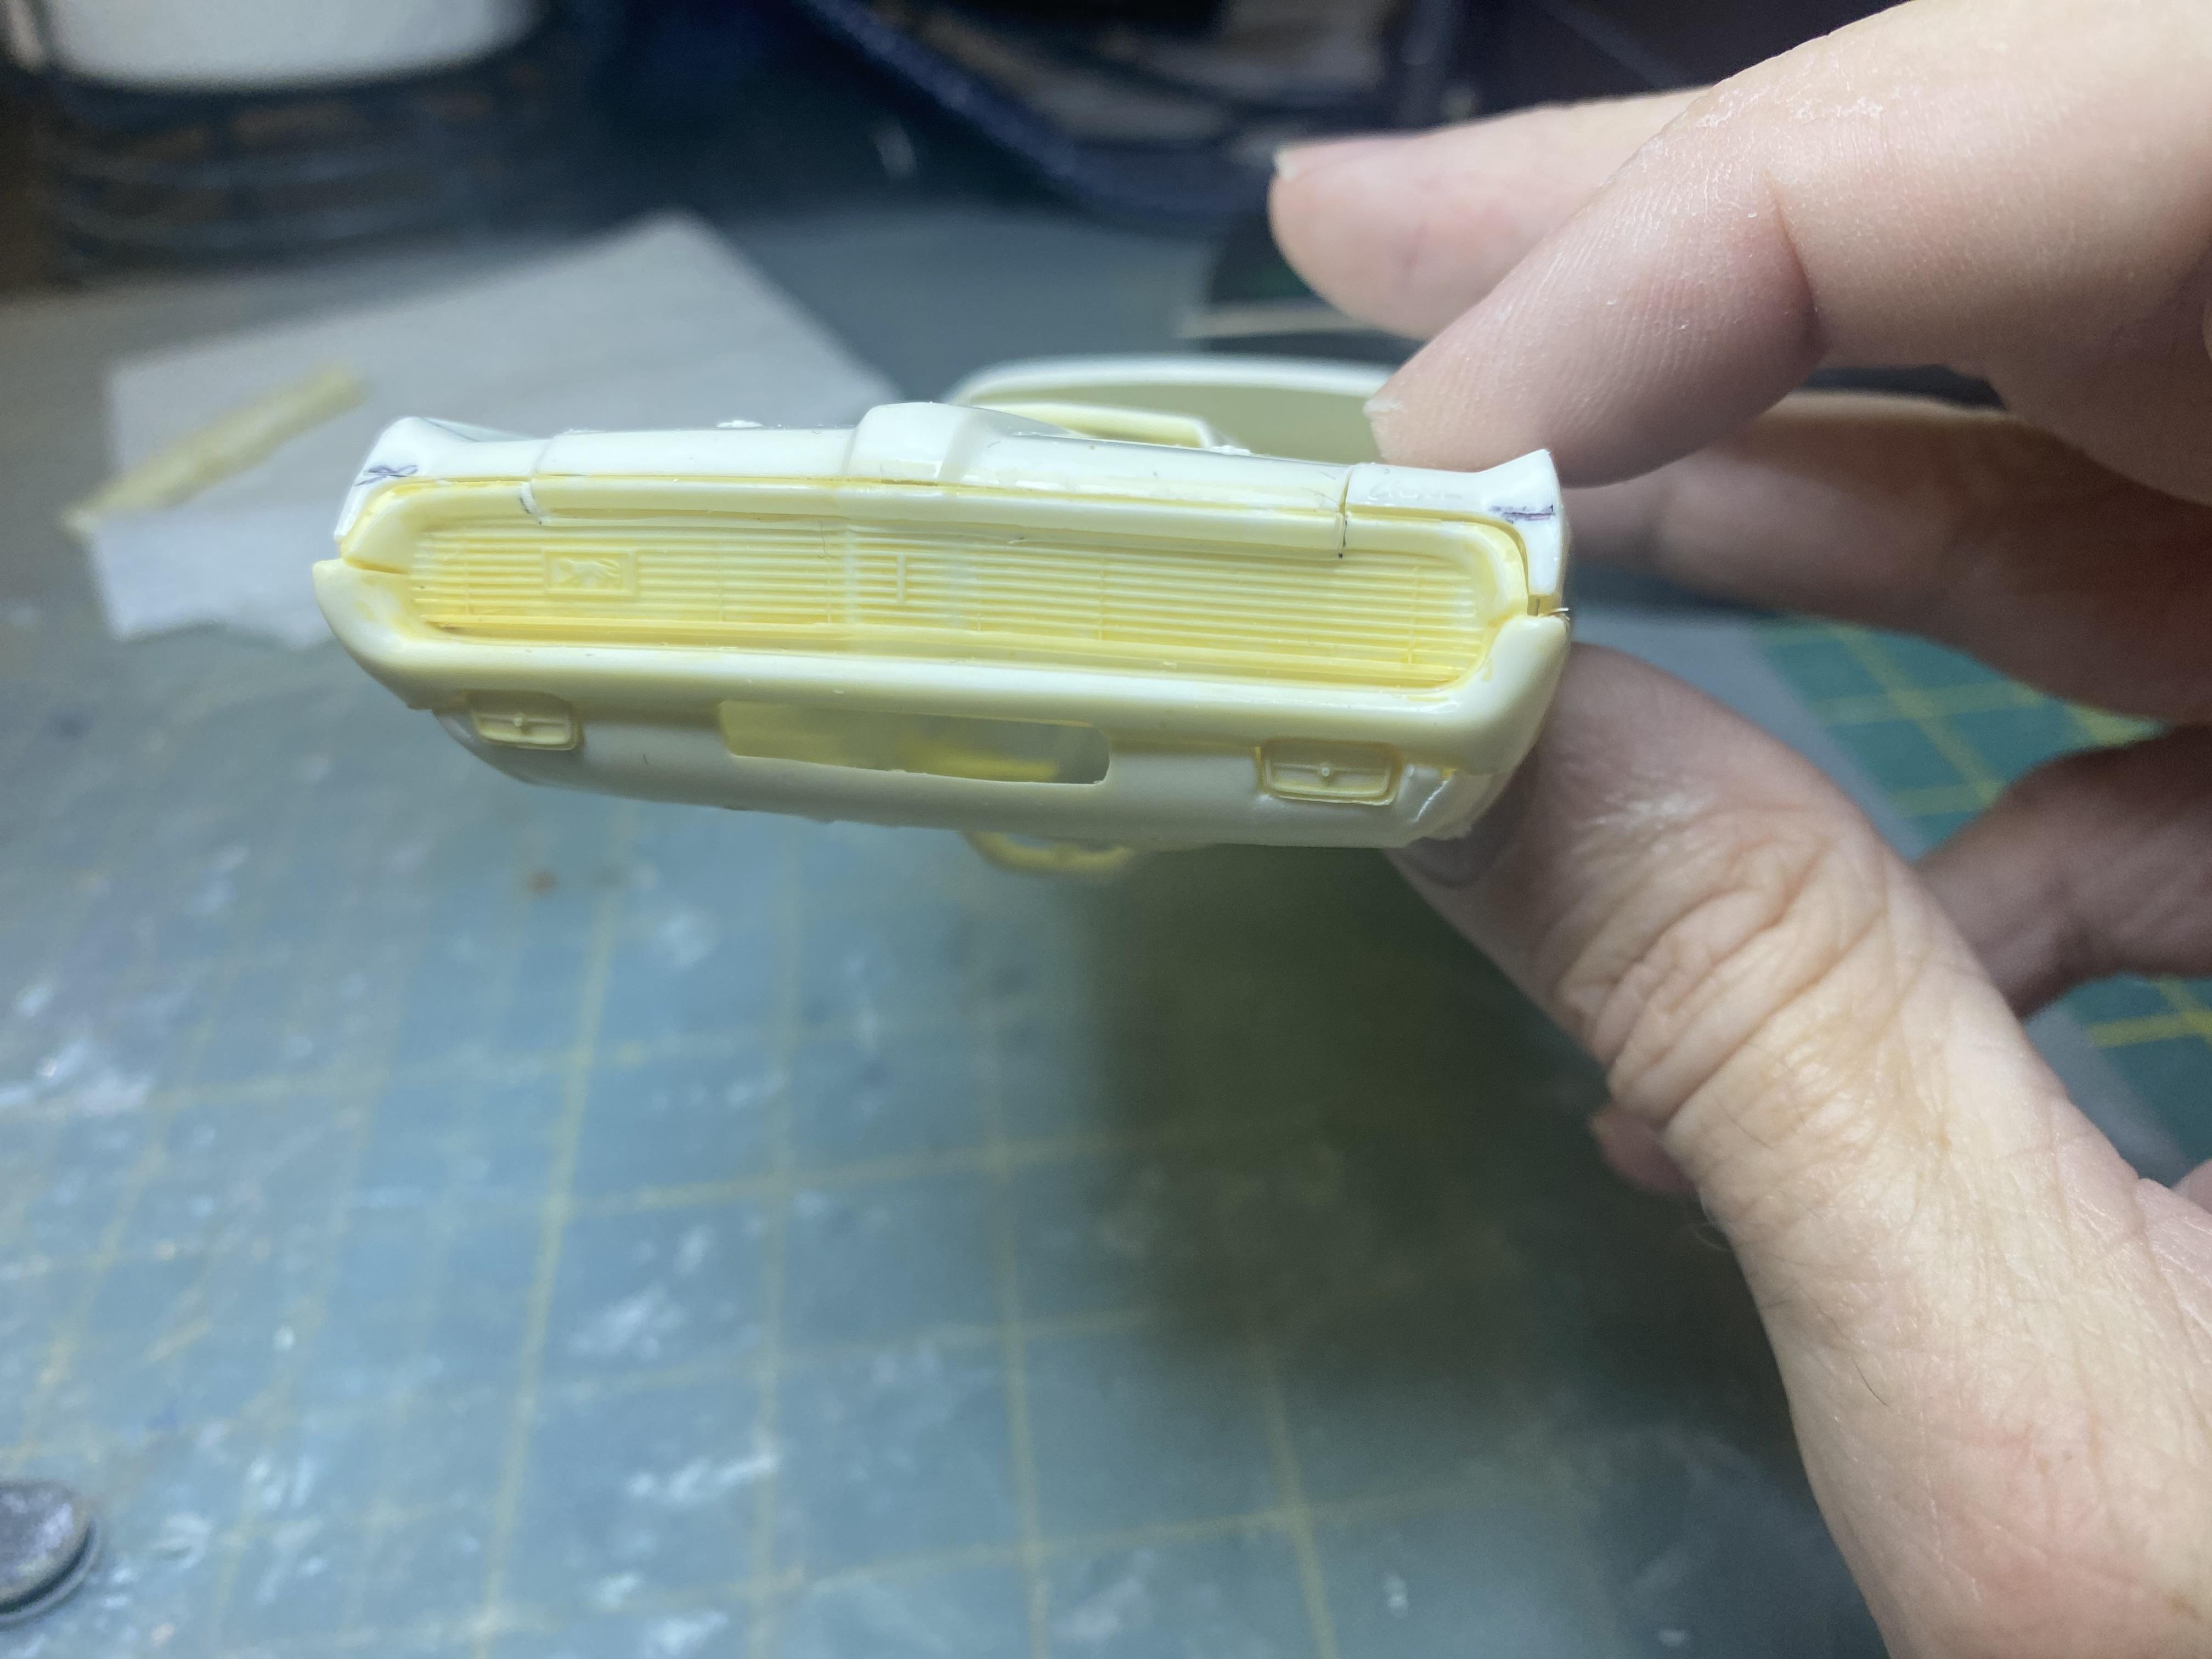
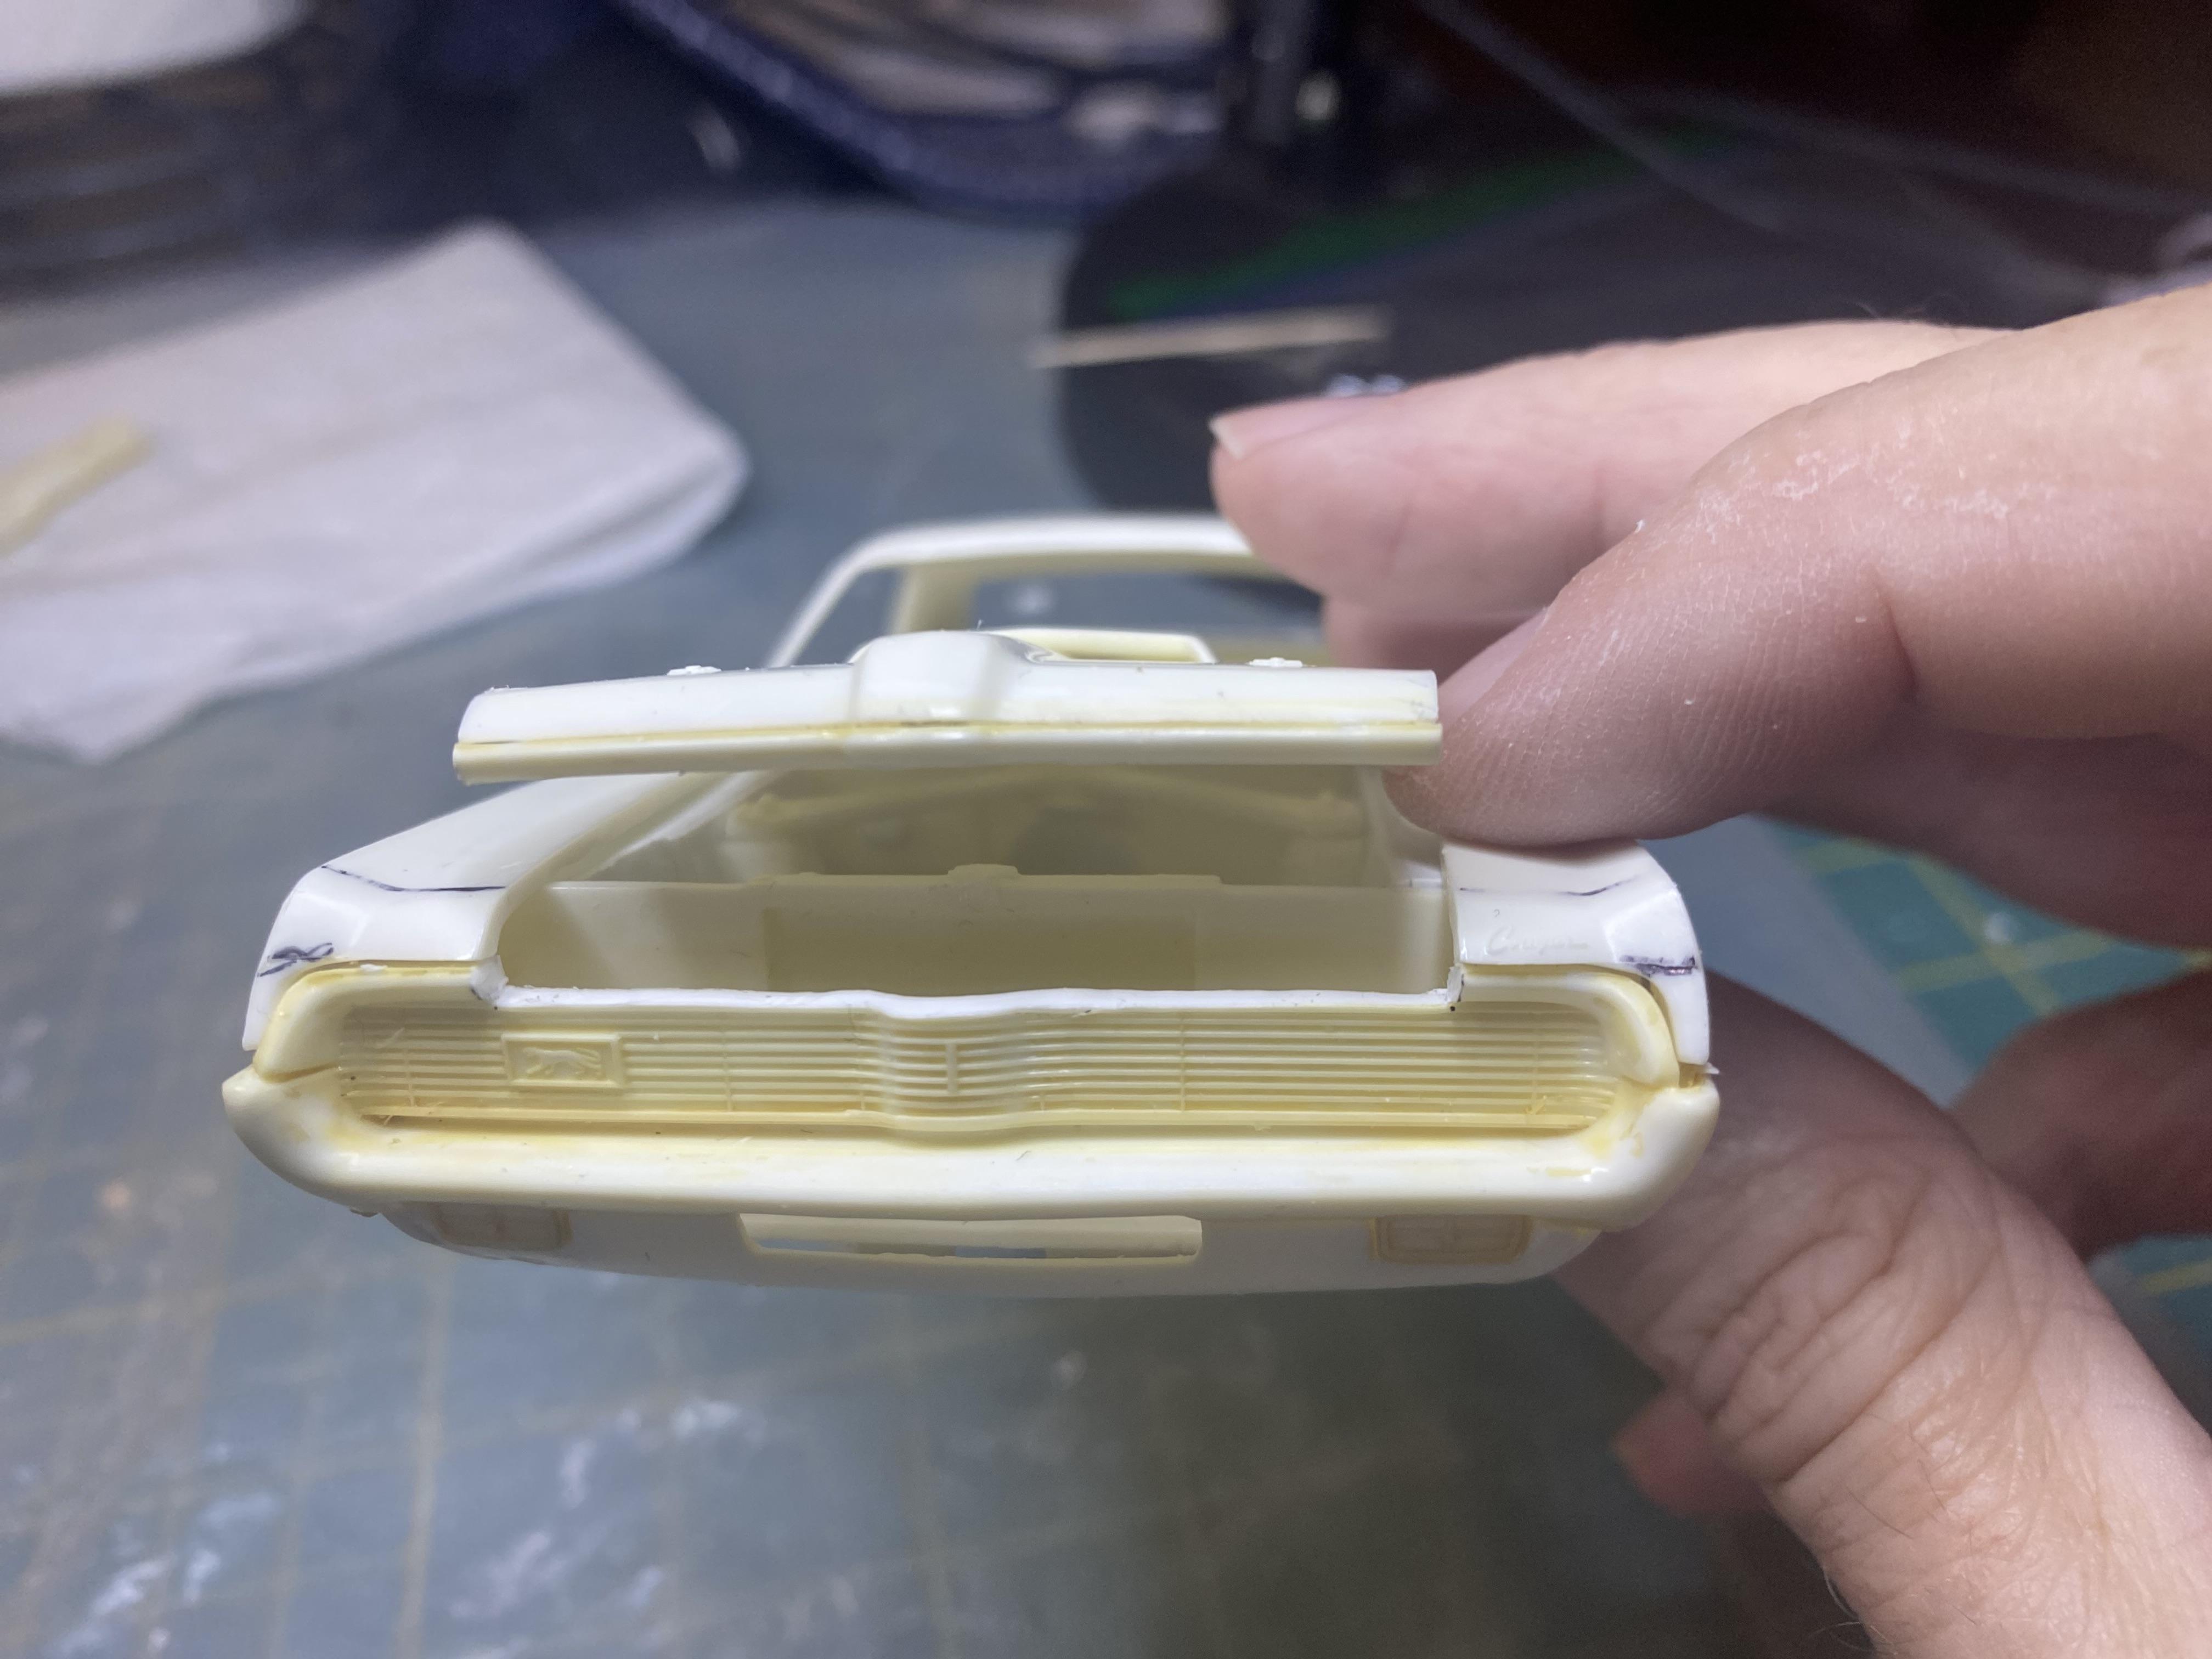
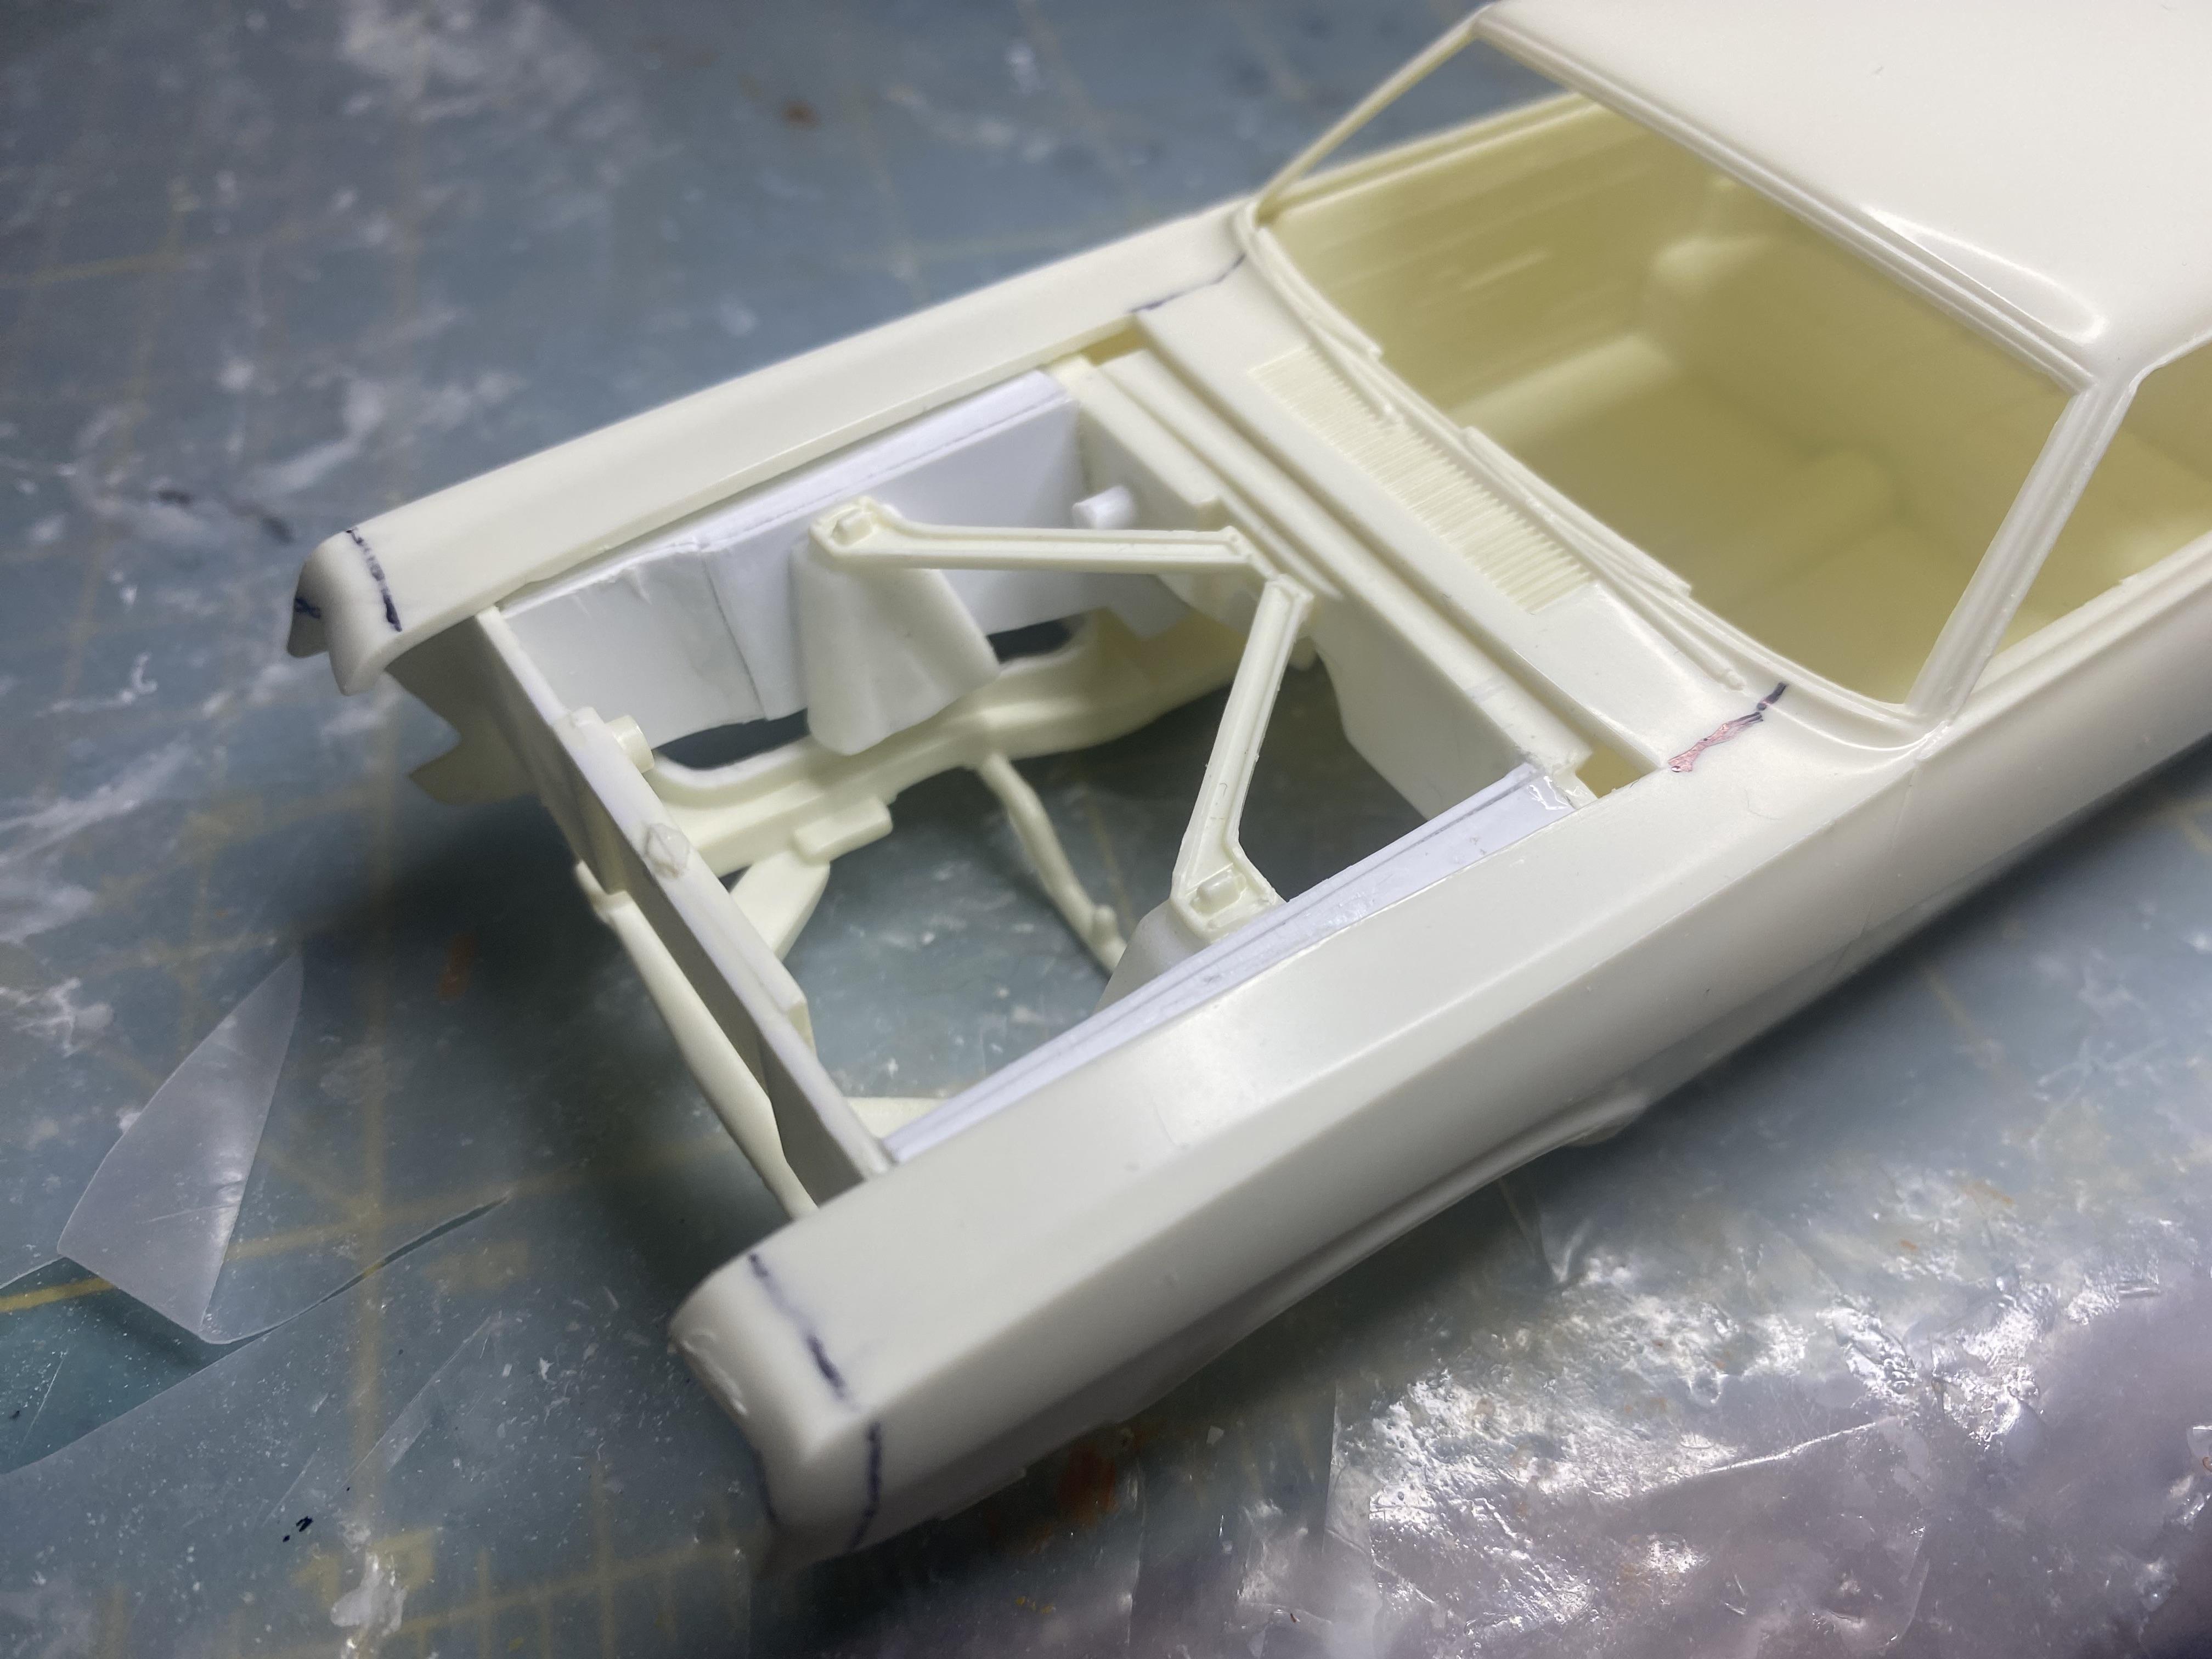
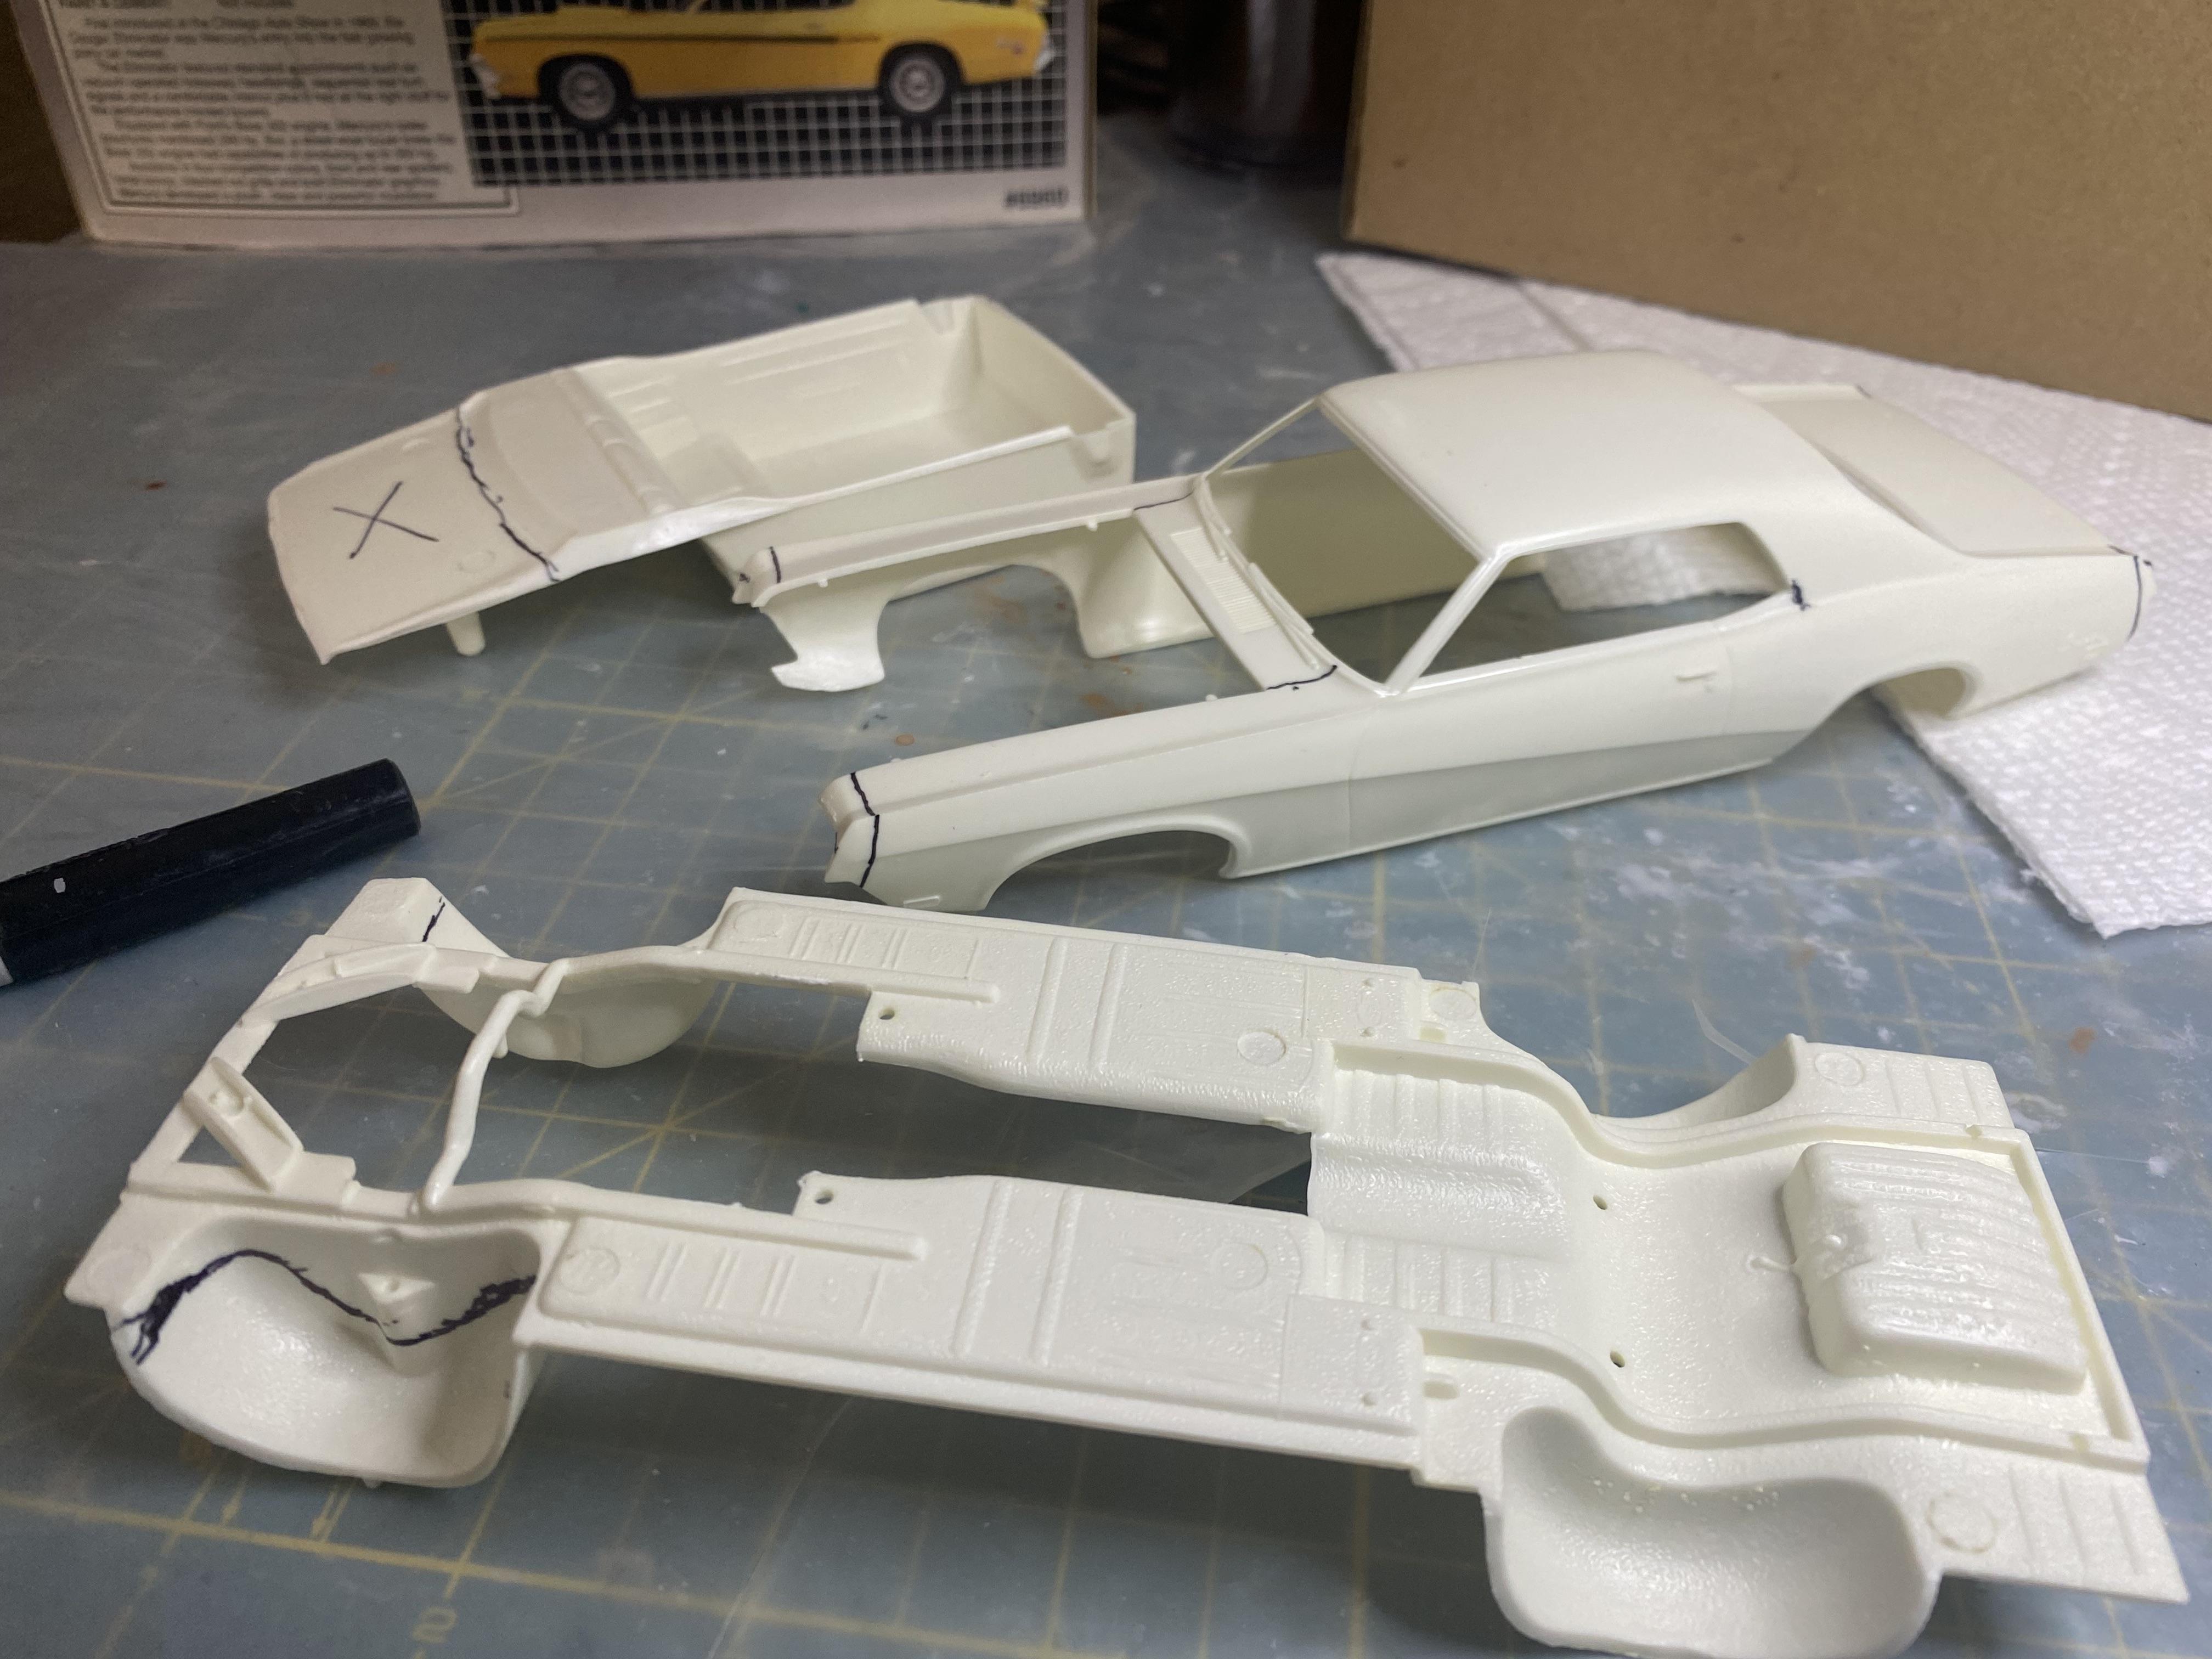
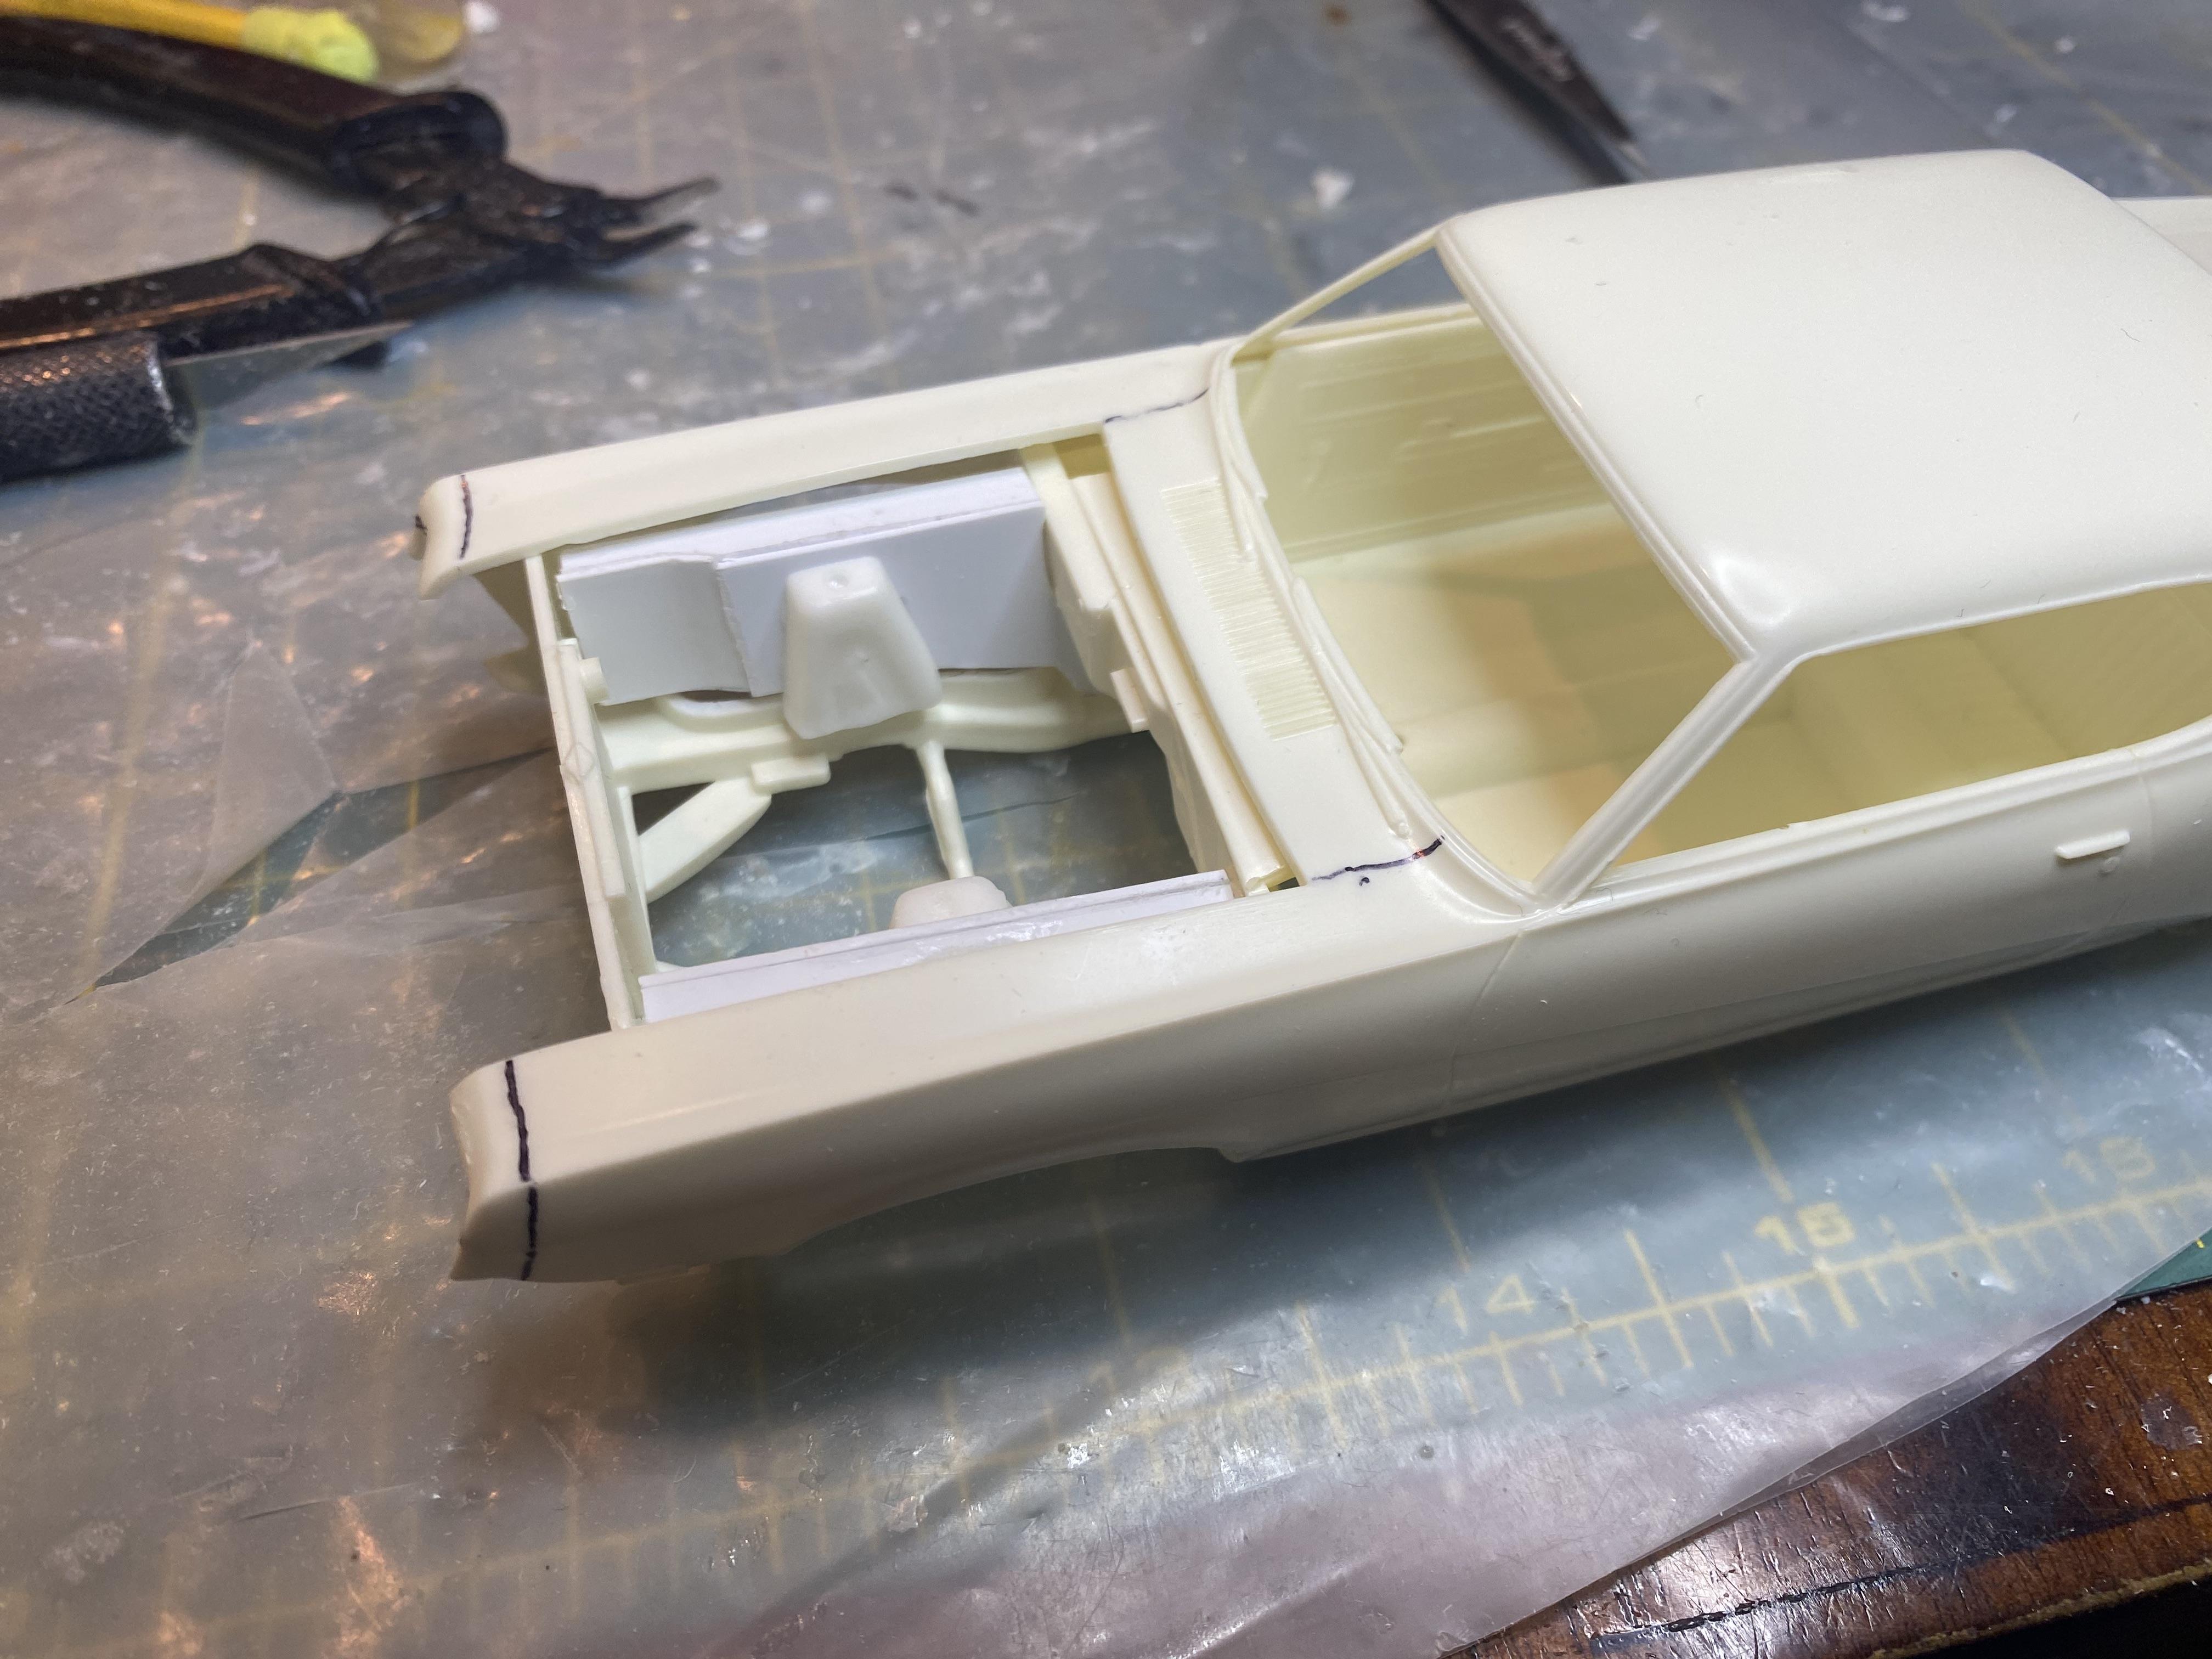
I got quite a bit of work done on the fabrication and modification on the body. I cut out the missing body line, removed the door handles, removed the wires and drilled for locks. Also removed the emblems that will be replaced with photo-etch. Pined the drivers side mirror and added the stand to the rear spoiler. I cut open the trunk lid. Added a lip, made a trunk hinge. Also modified the rear bumper by removing the part that should be on the trunk lid and attached it to the trunk lid. Made modification for the LED taillights. modified the front bumper, cut out the headlight doors, created the headlight buckets. Made where the buckets could open. Modified the radiator support to be more accurate as well as allow access to the headlights for LEDs.
-
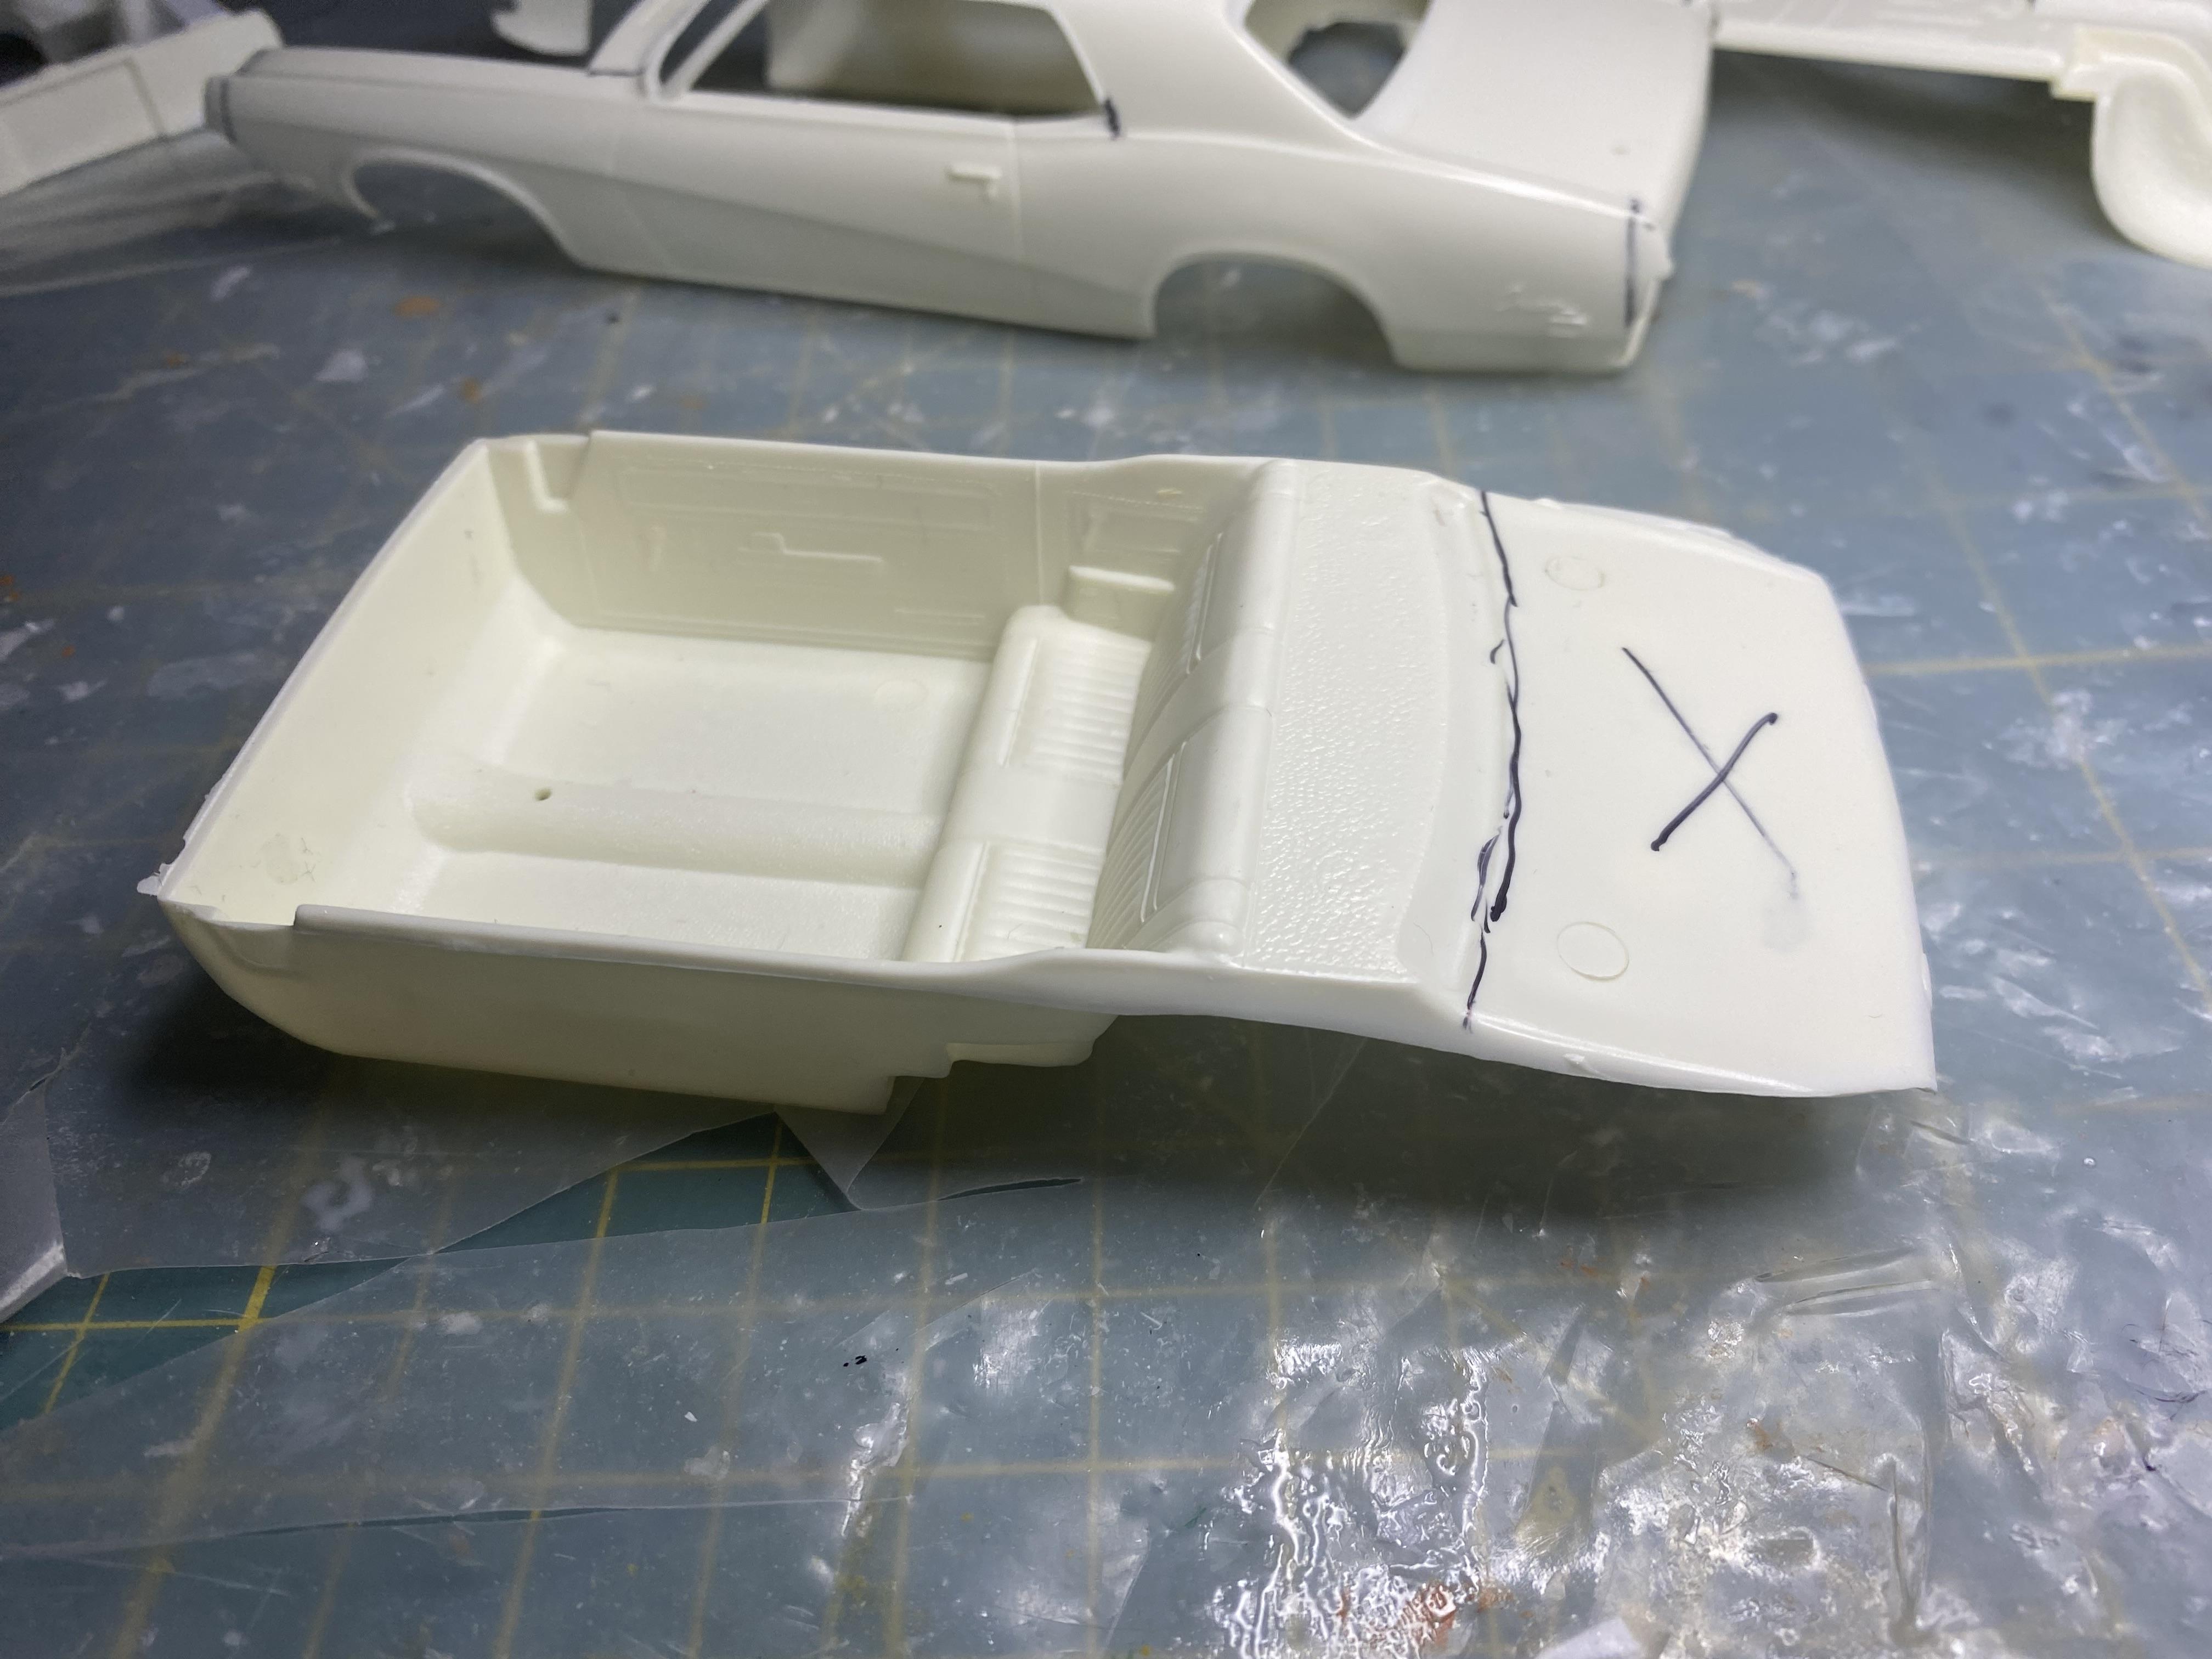
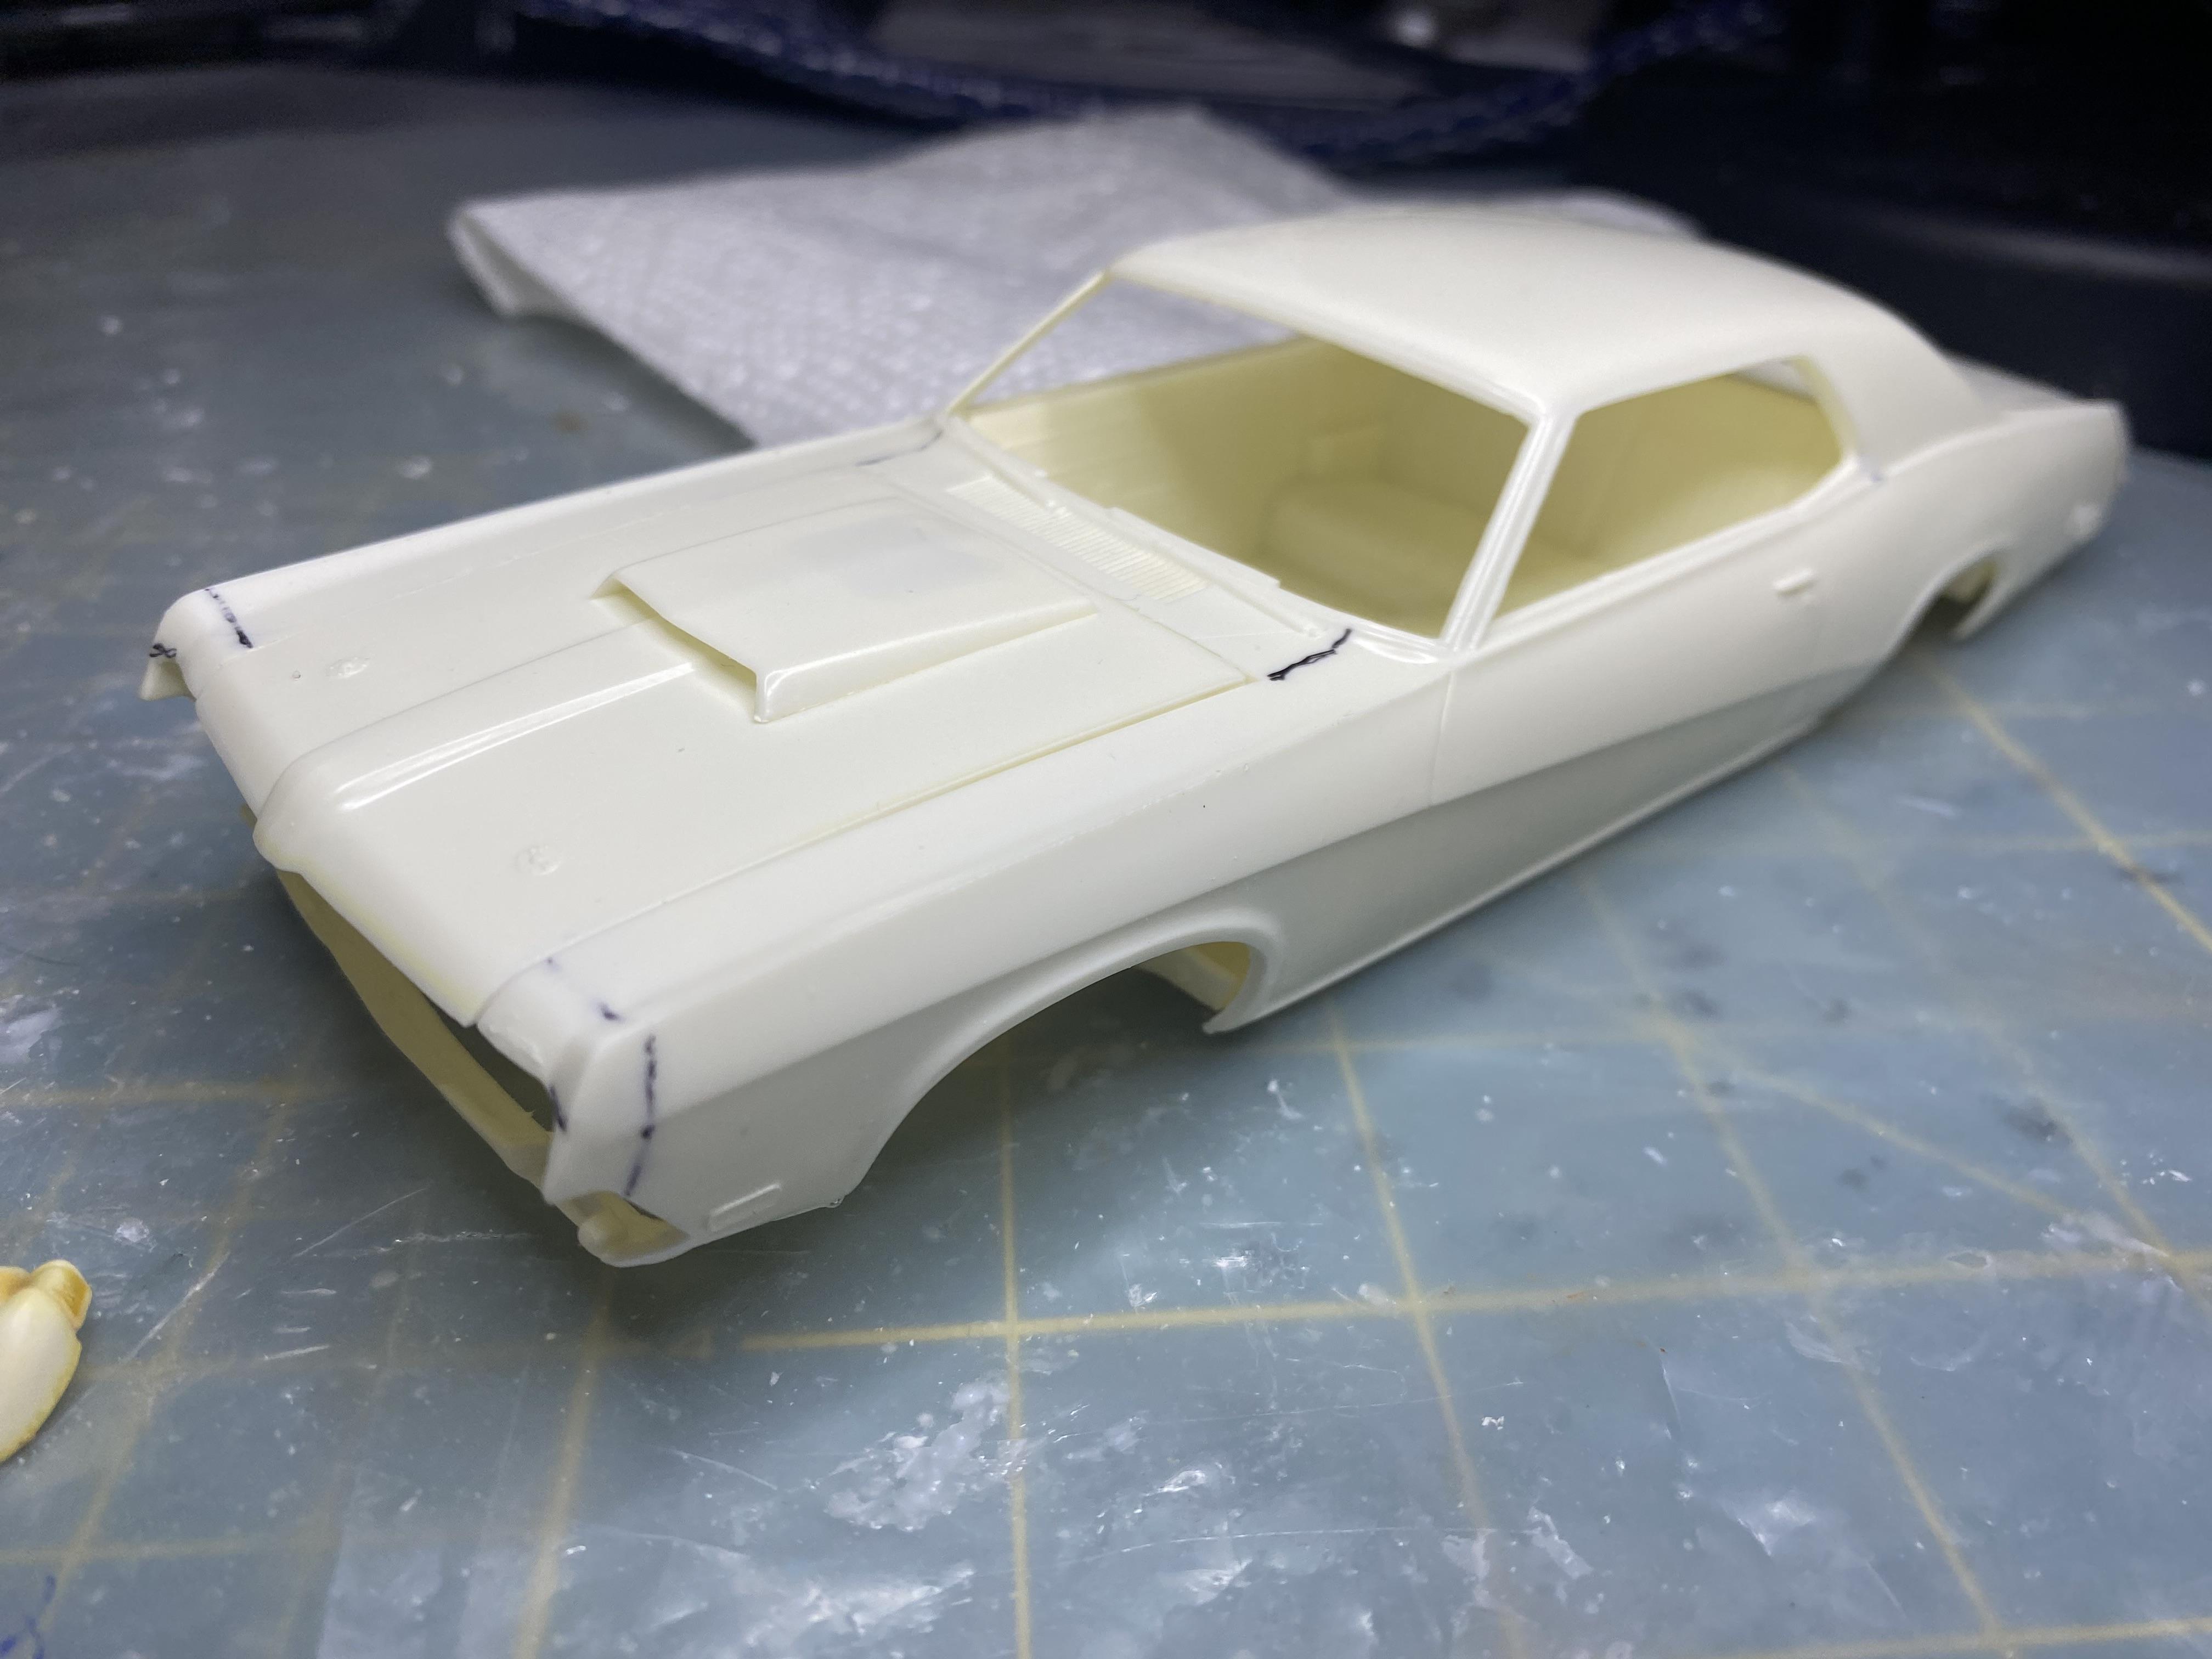
A little more work done. I removed the trunk section from the body tub since I will be making the trunk open to hide the battery as a spare. Added the front valance to the body and hood scoop to the hood. stripped the chrome from the bumpers since they will be getting a lot of work done to remove the parts that should be on the hood or trunk lid, to add headlight buckets and modify for LED headlights and taillights. I will be making the headlight doors able to be opened and closed. The grill will also be photo-etch where it is see through where it should be.
-
Thank You! I still have a long way to go with this one
-
 Thank You!
 -
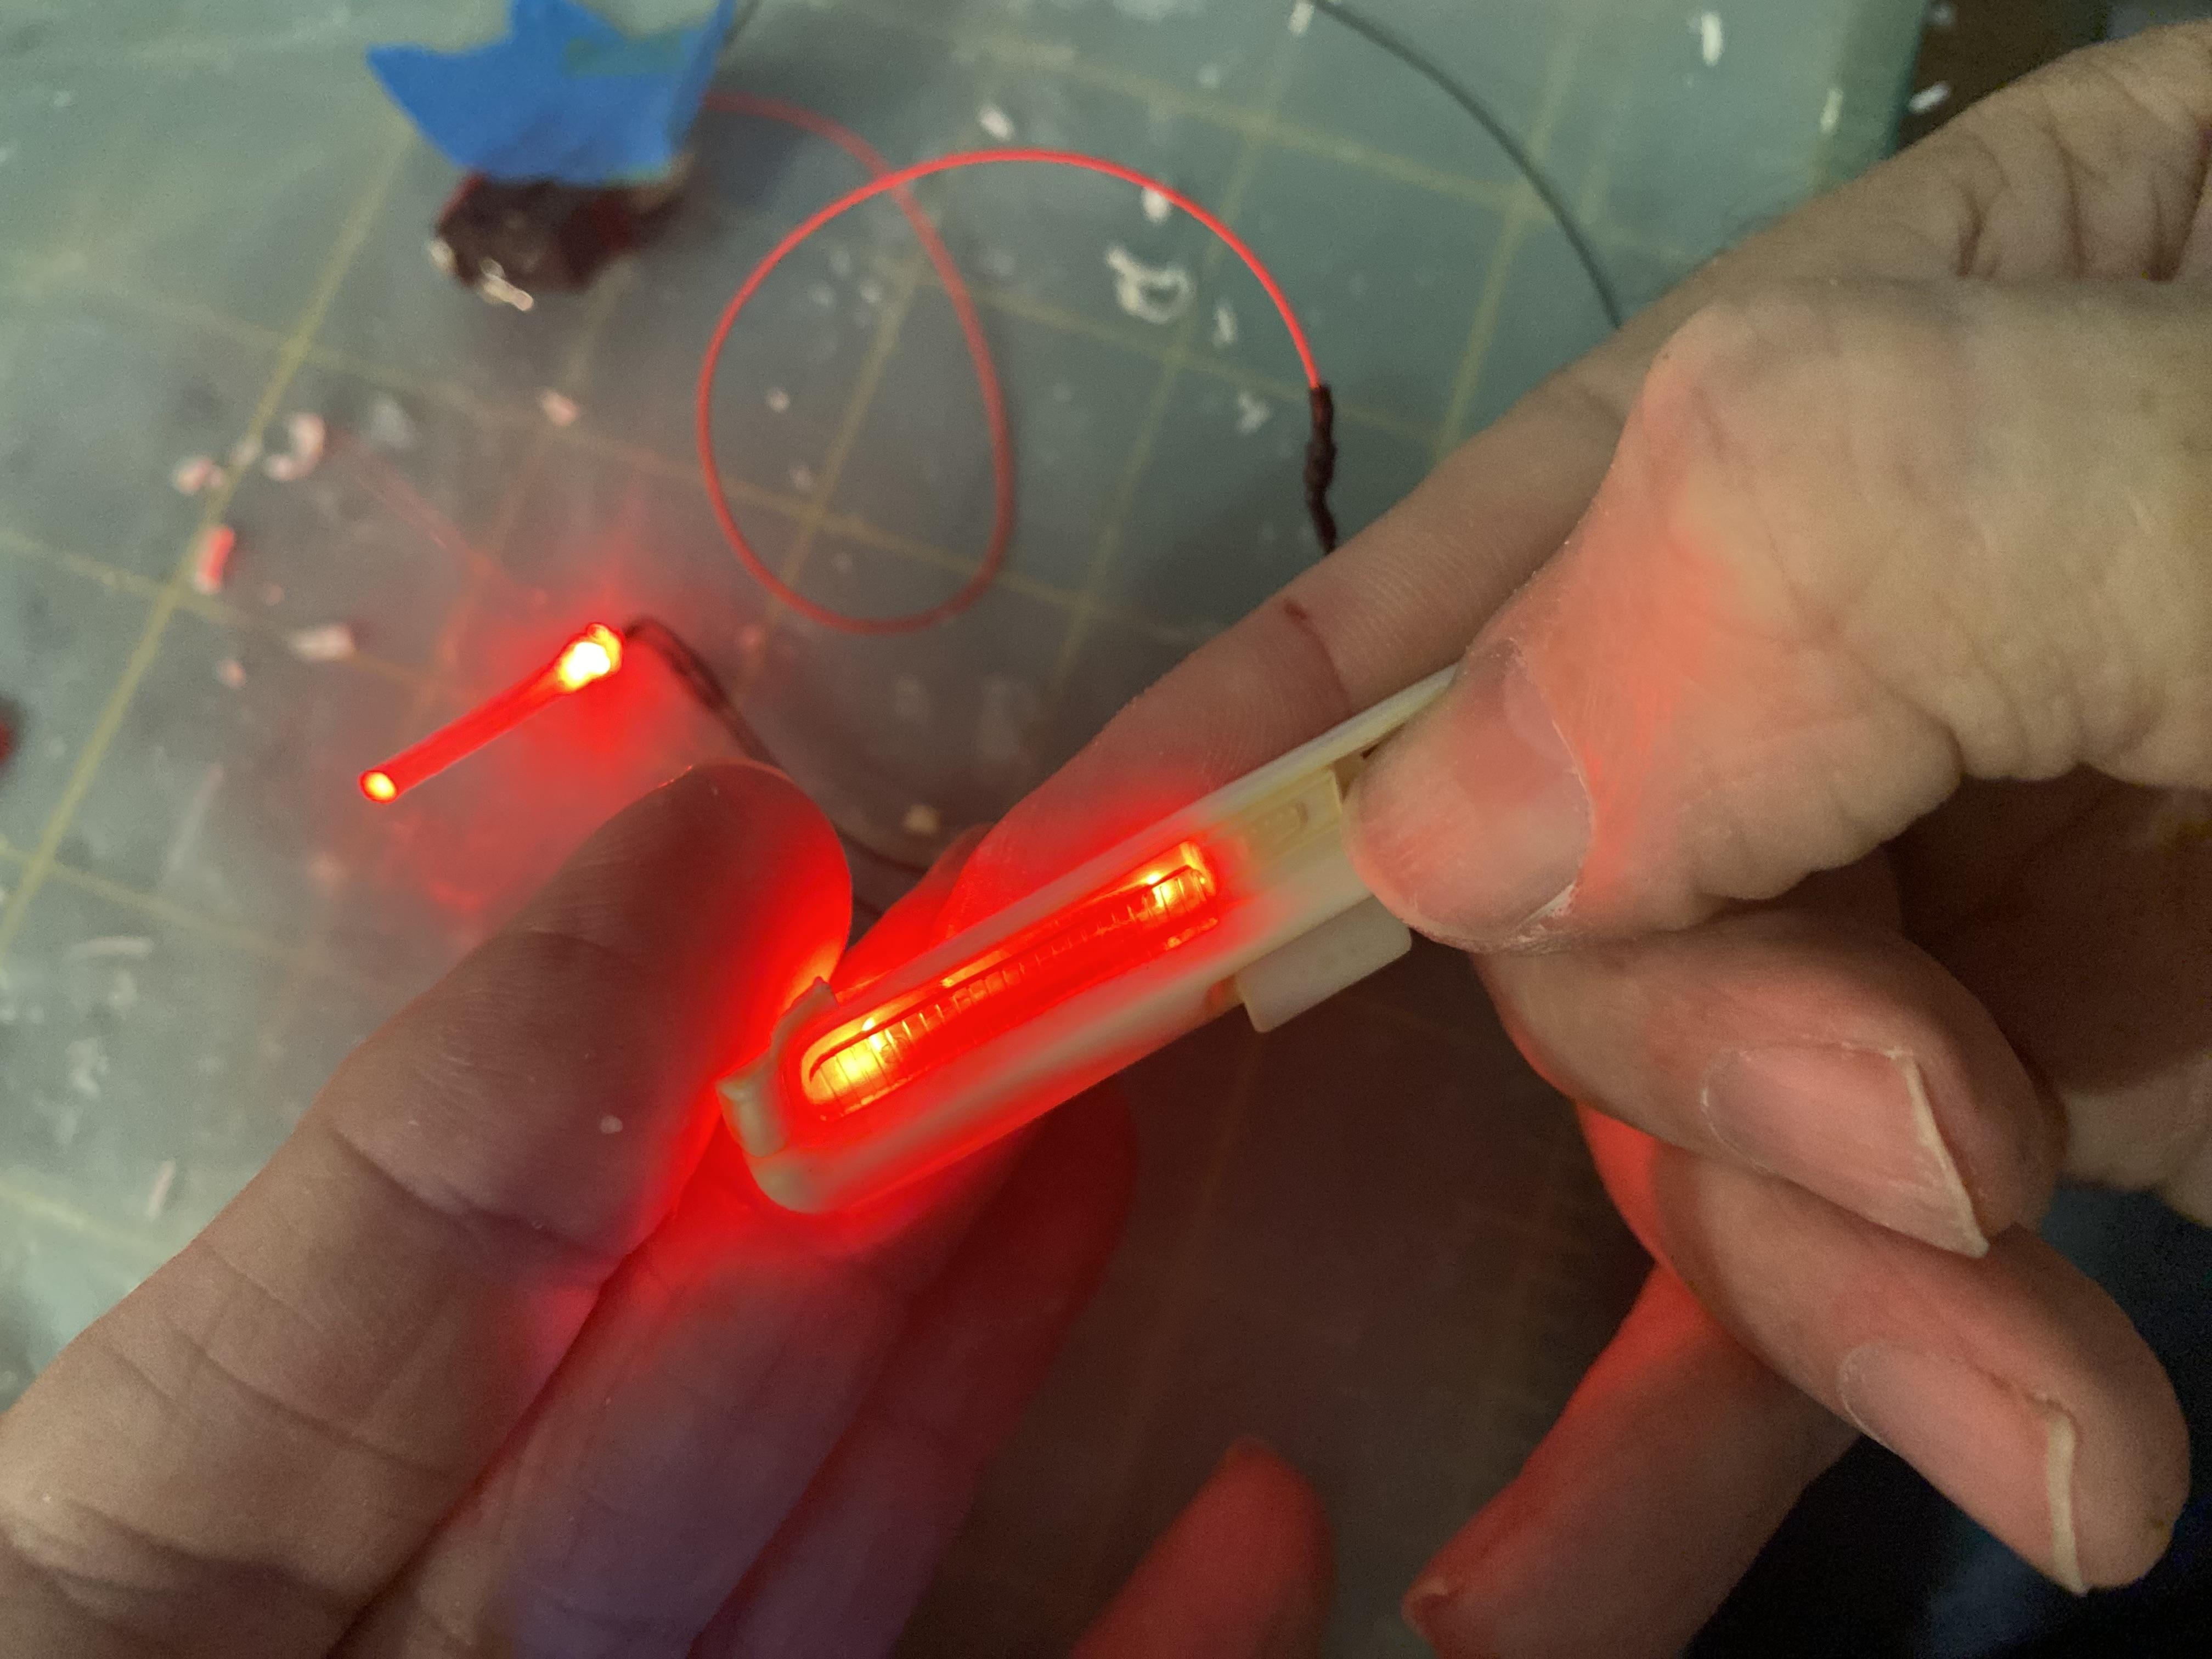
Thank You! The taillights were the hardest part of the lighting. Had to use tiny pico lights and broke when creating the wiring harness and had to order a replacement.
-
Thank you! Sounds like. Beautiful car. Thank You! I will do my best.
-
Thanks, barley getting started.
-
Thank You! Thank You! Thank You!
-
Thank you! Thank you!
-
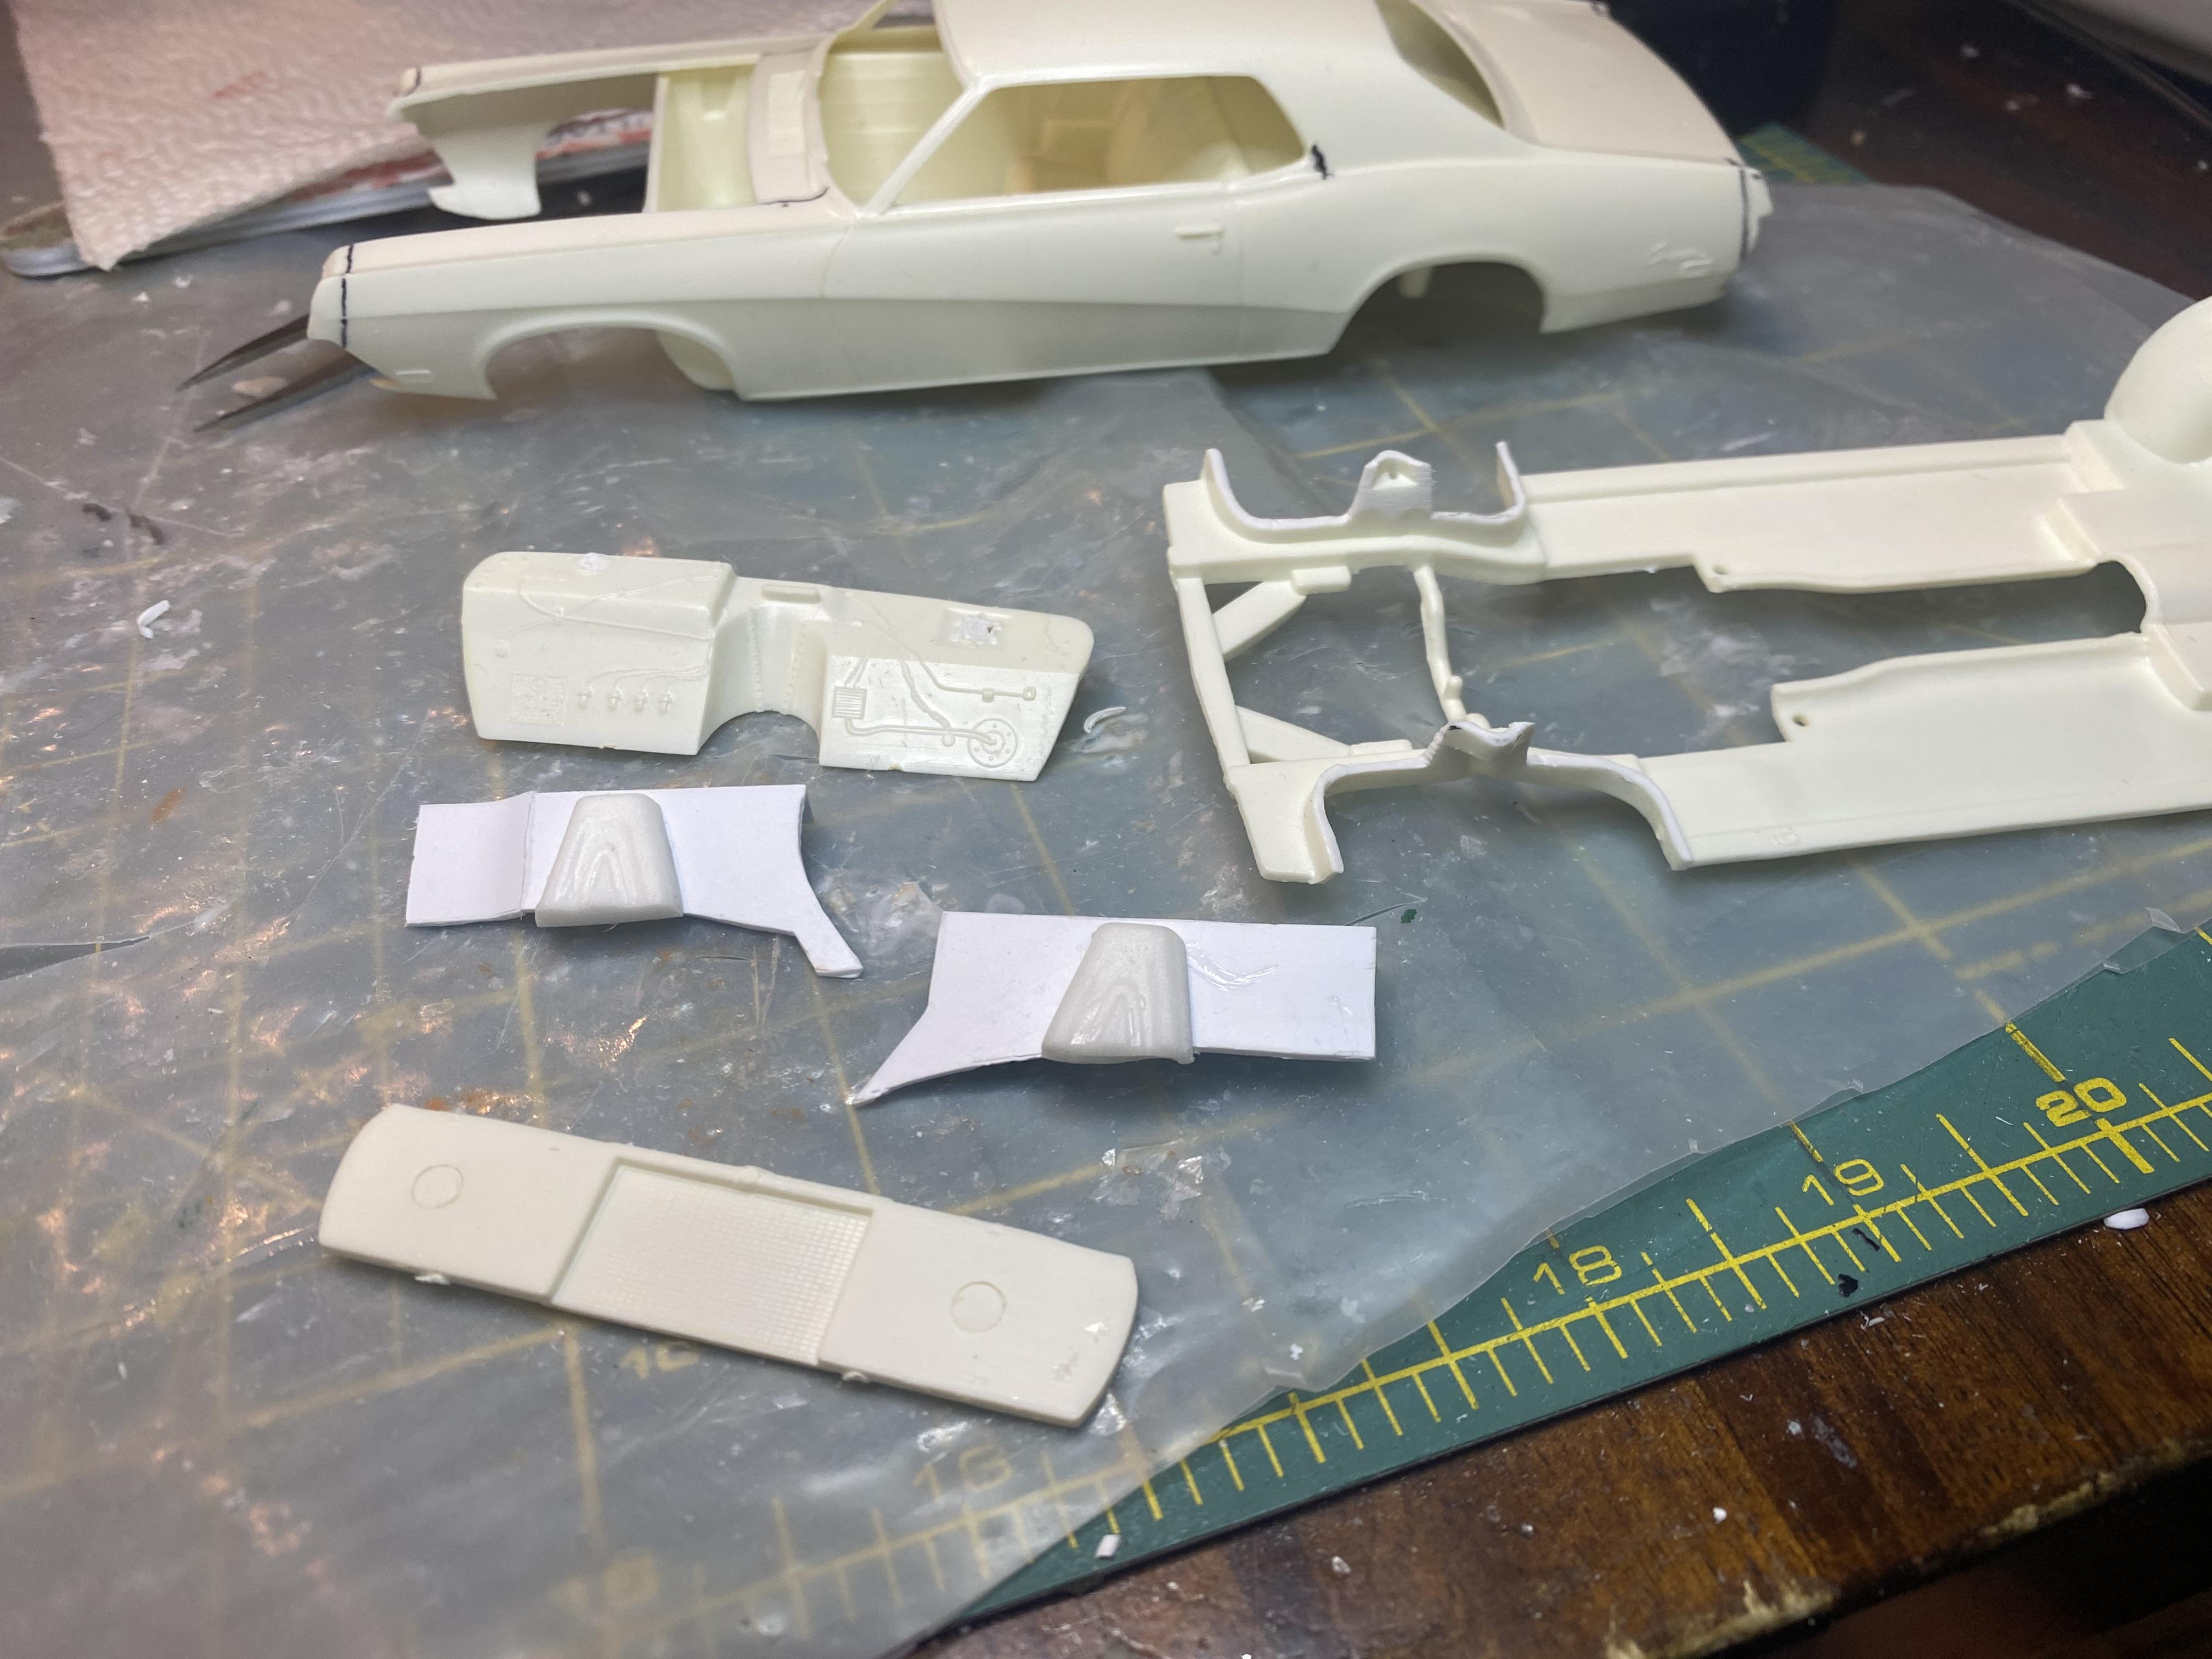
Much more correct engine compartment created and trial fit.
-
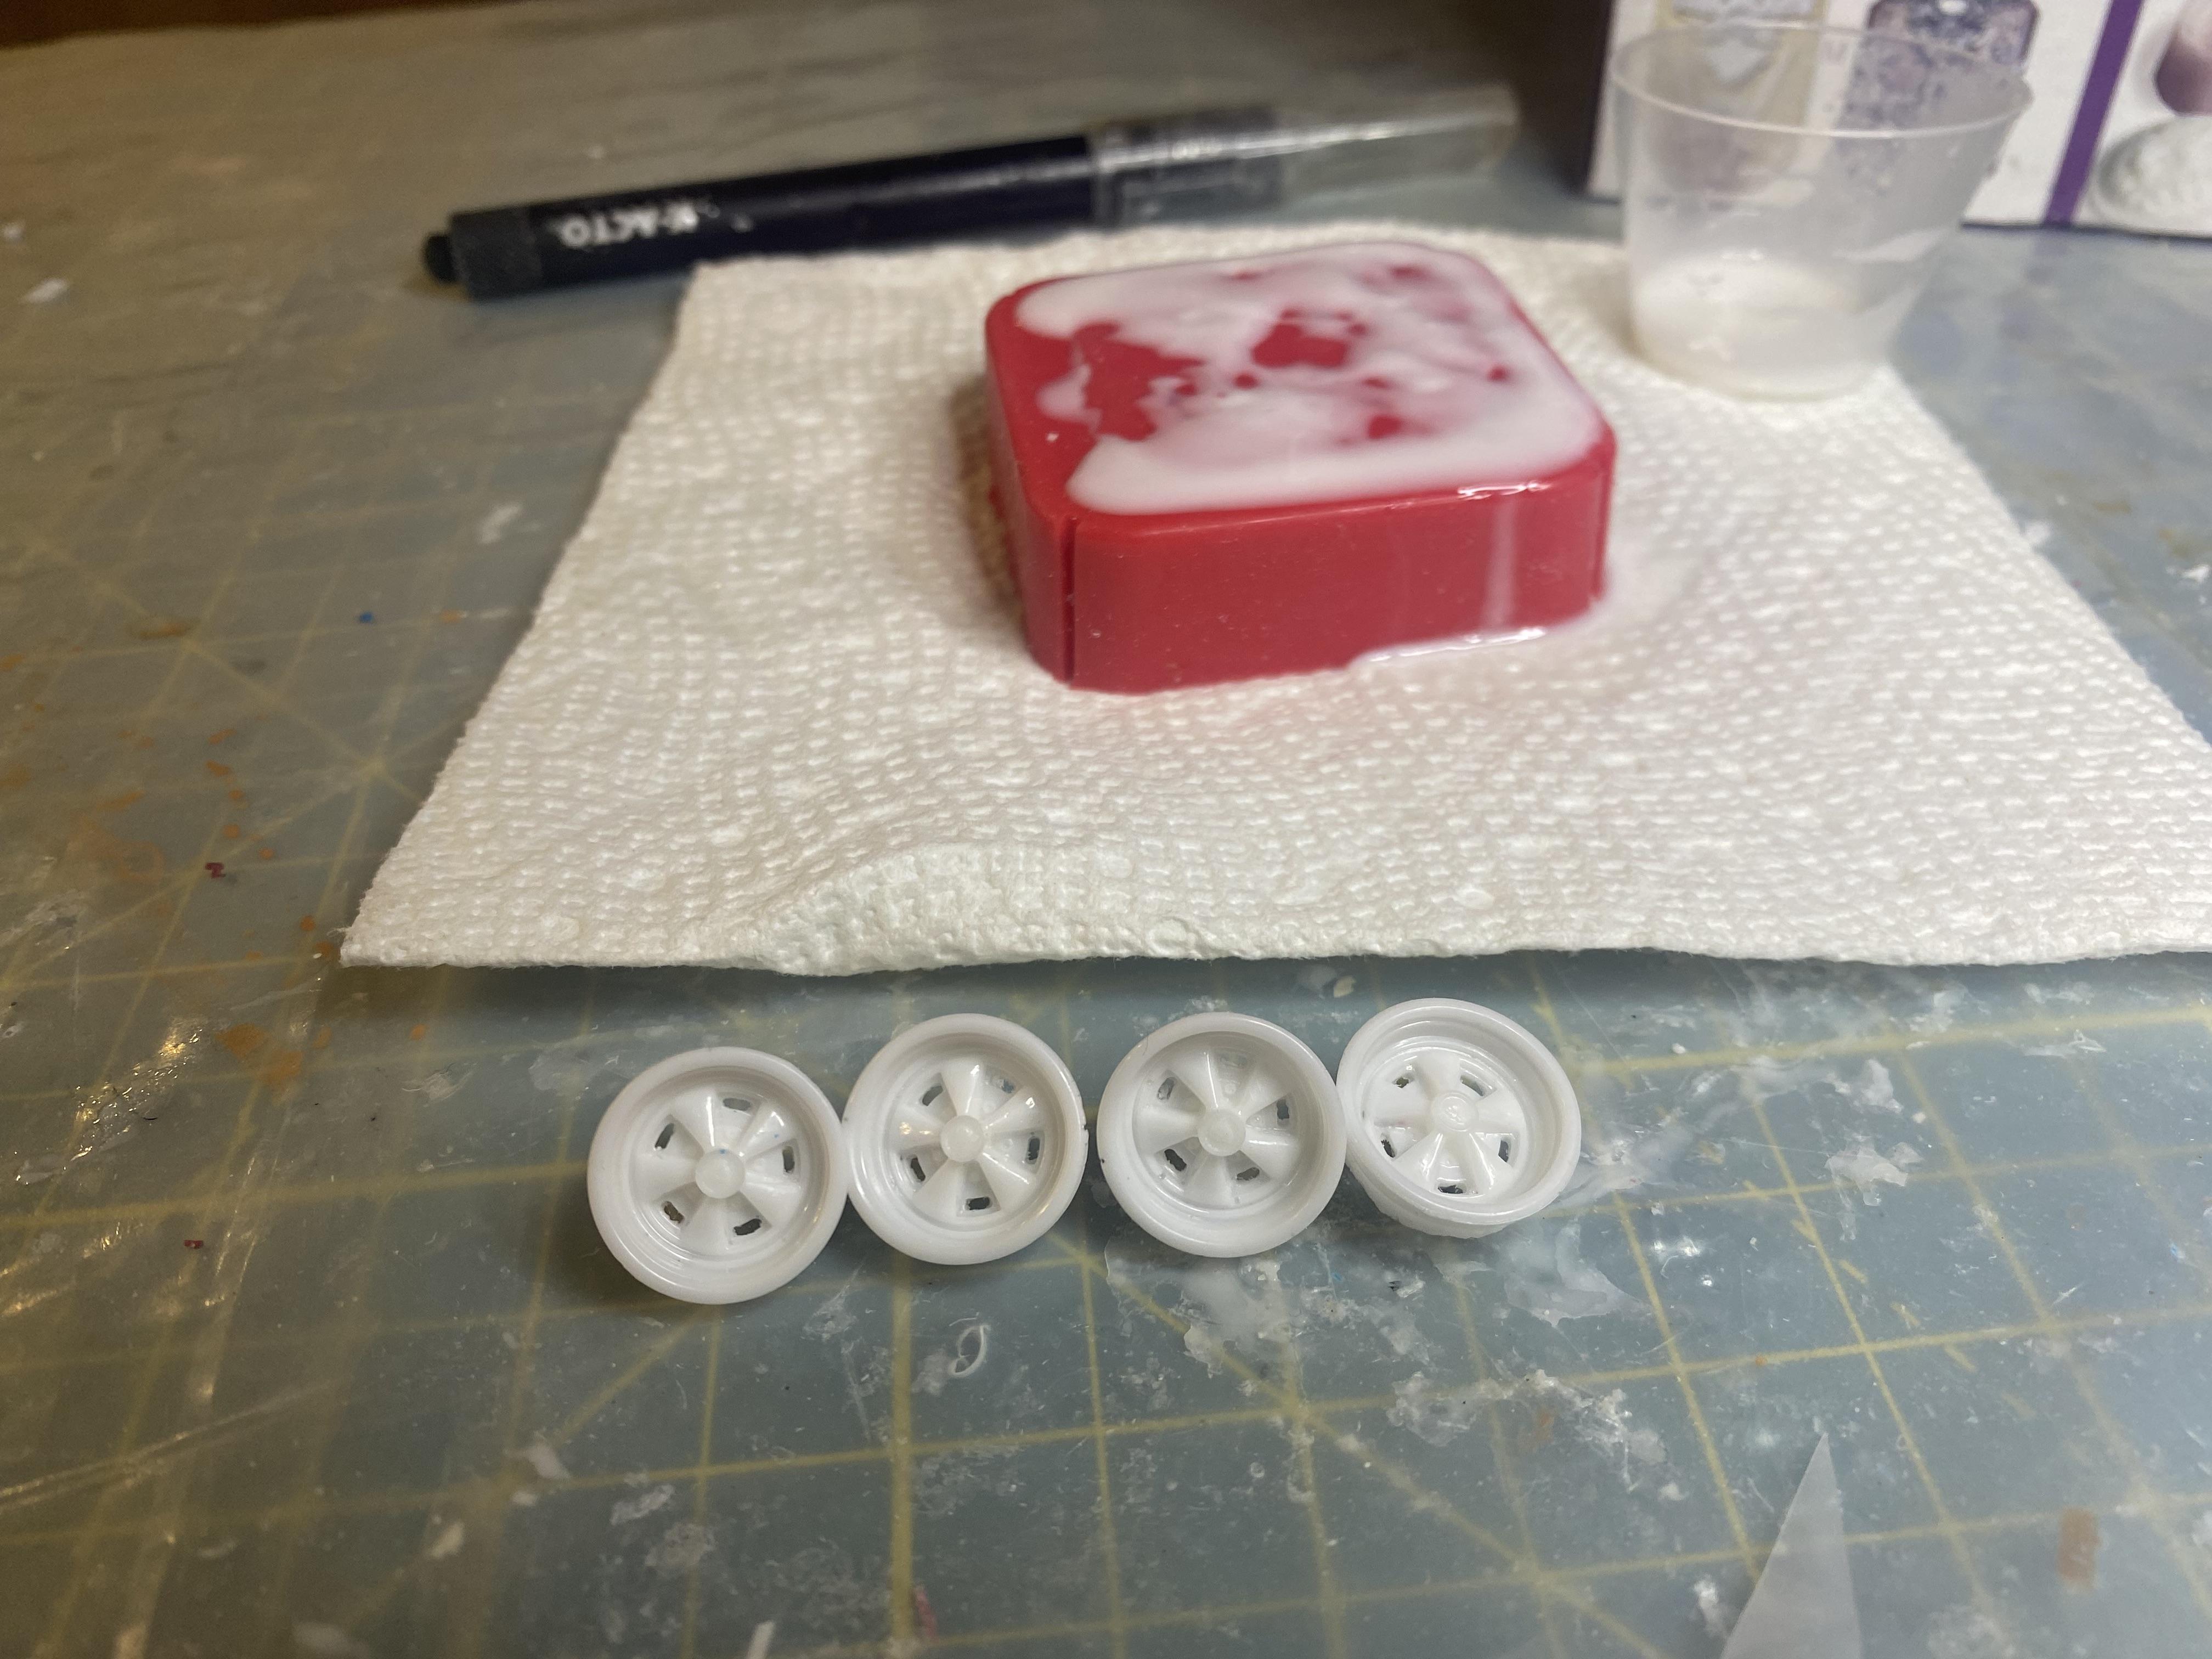
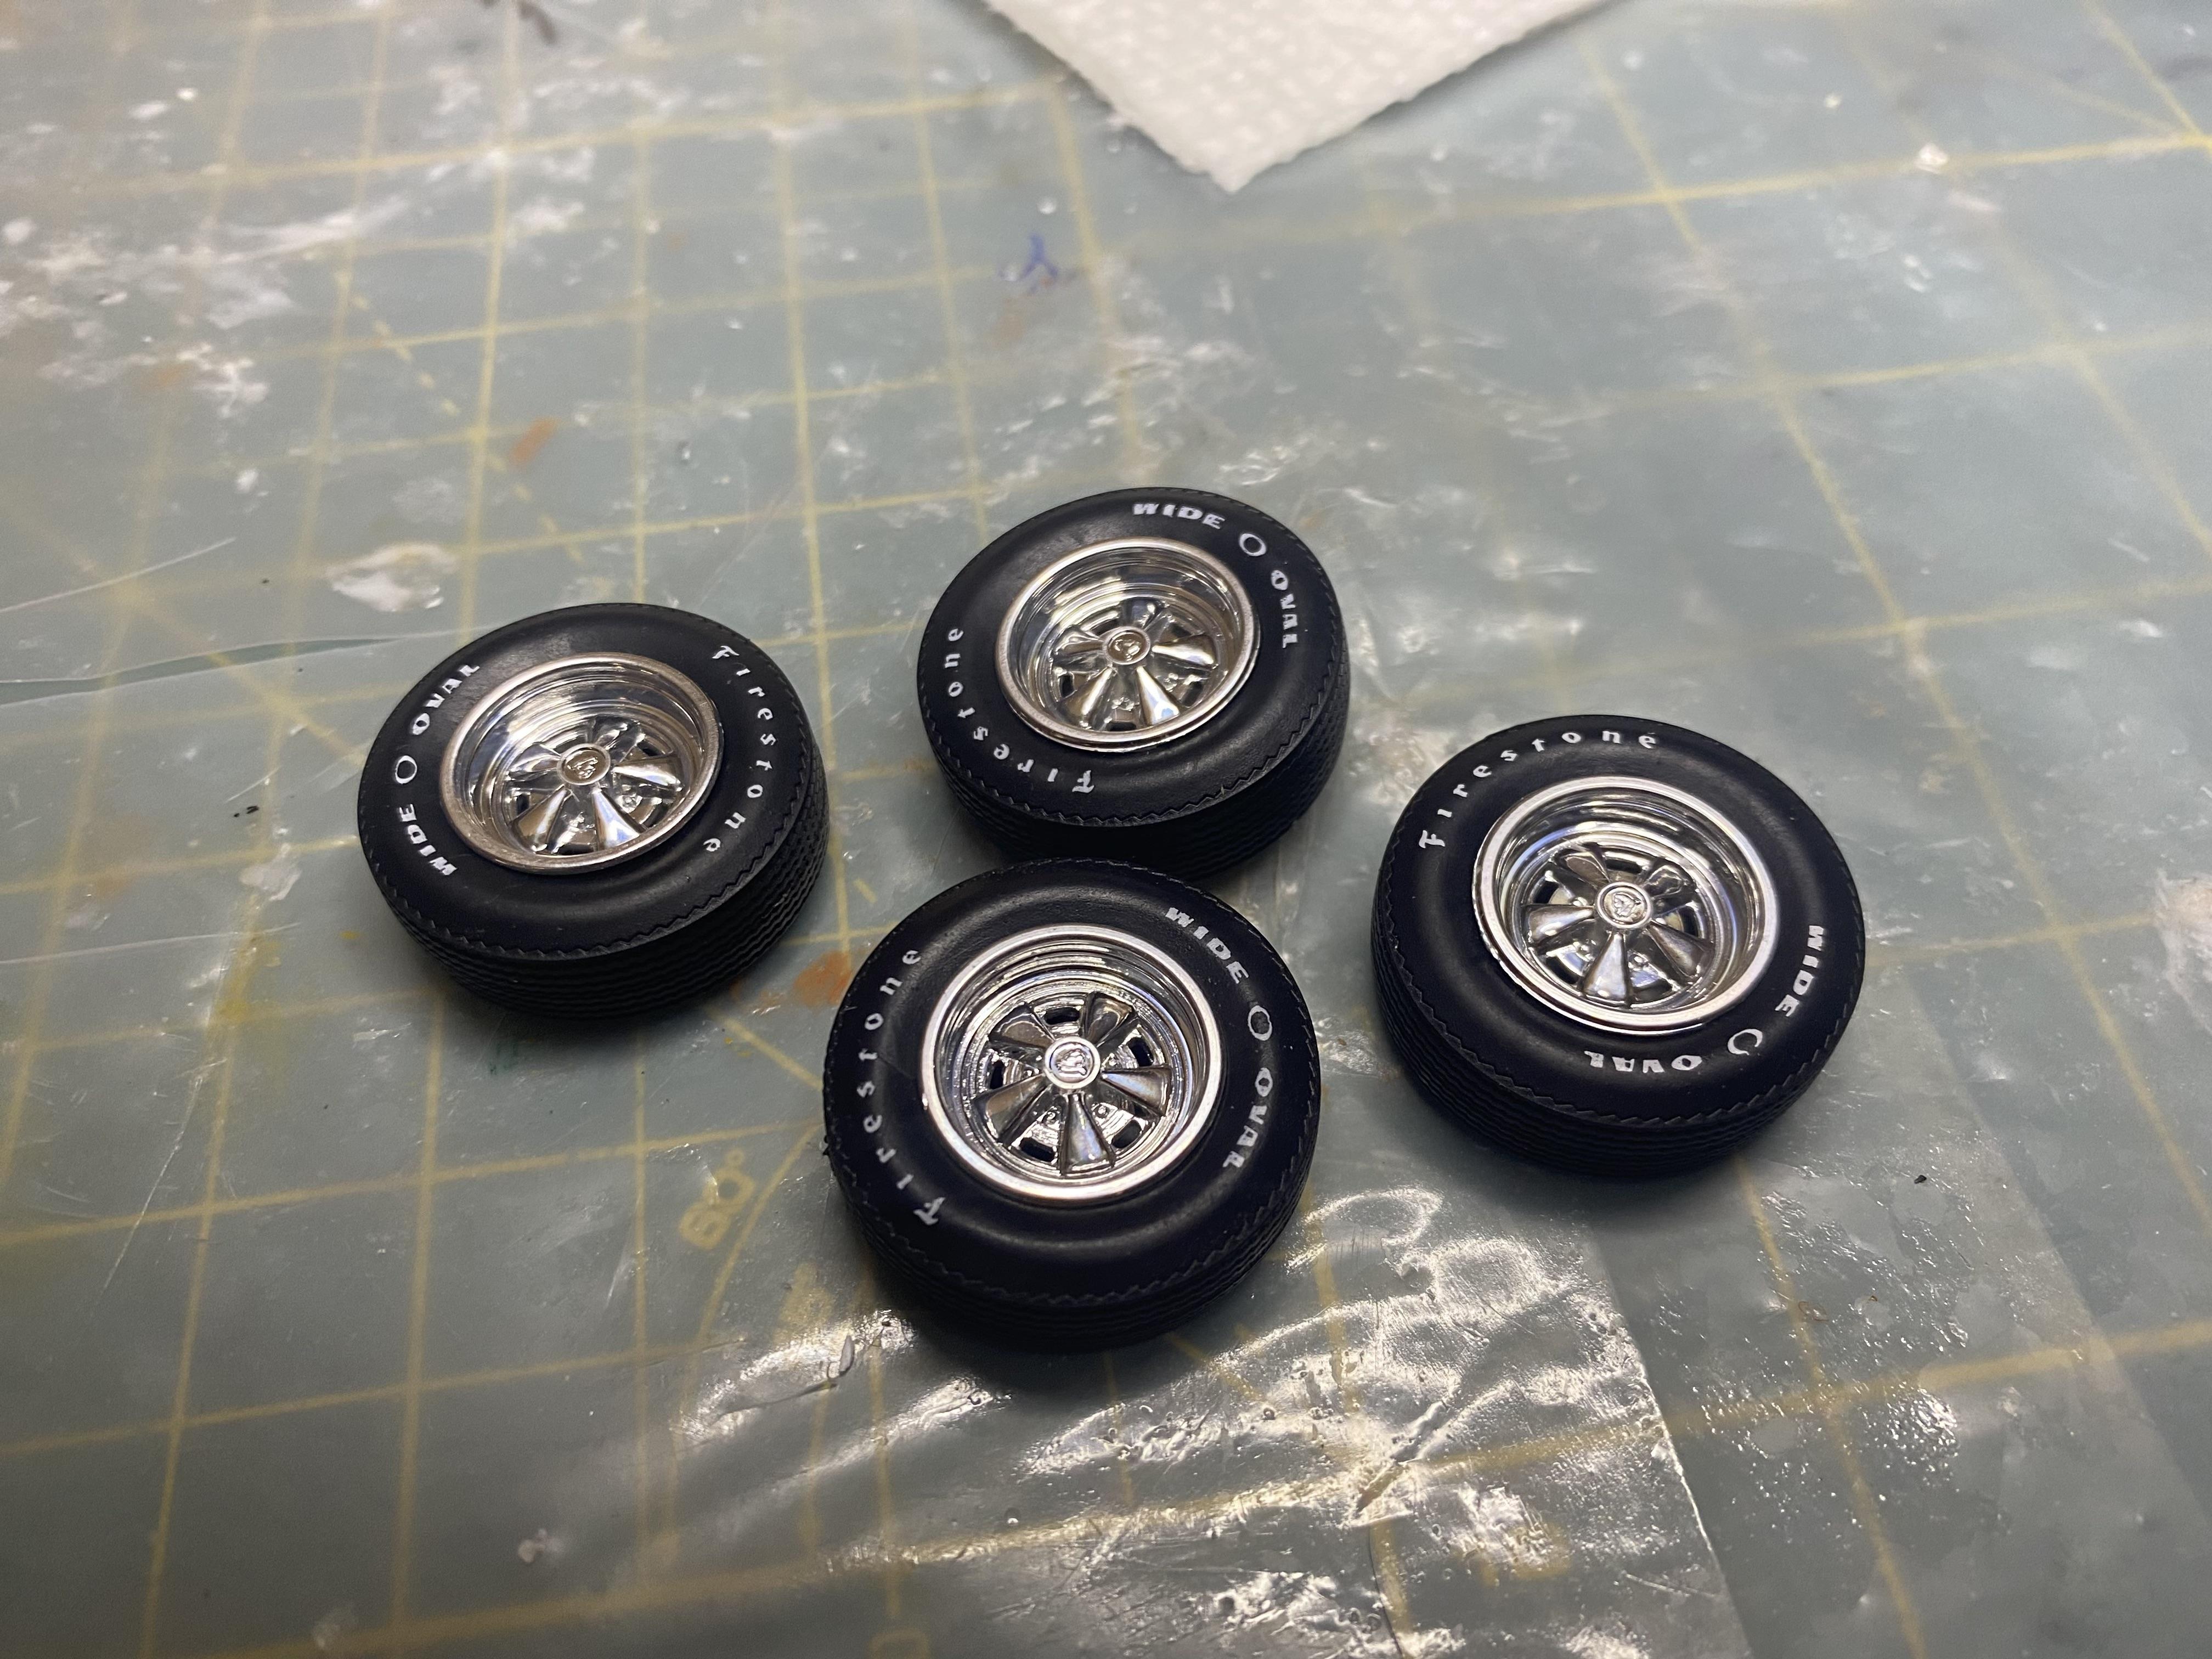
I decided to make a silicon mold of the original issue cougar wheels and so far printed one good set. I made it so the post on the back doesn’t have a hole, The axle holes in the original set were much larger than this kits so now I can drill for the size I need as well as paint the dark argent without needing to strip the chrome off the originals.
-
Thank you!
-
Yeah, happy wife…
-
This is the look I am going for.
-
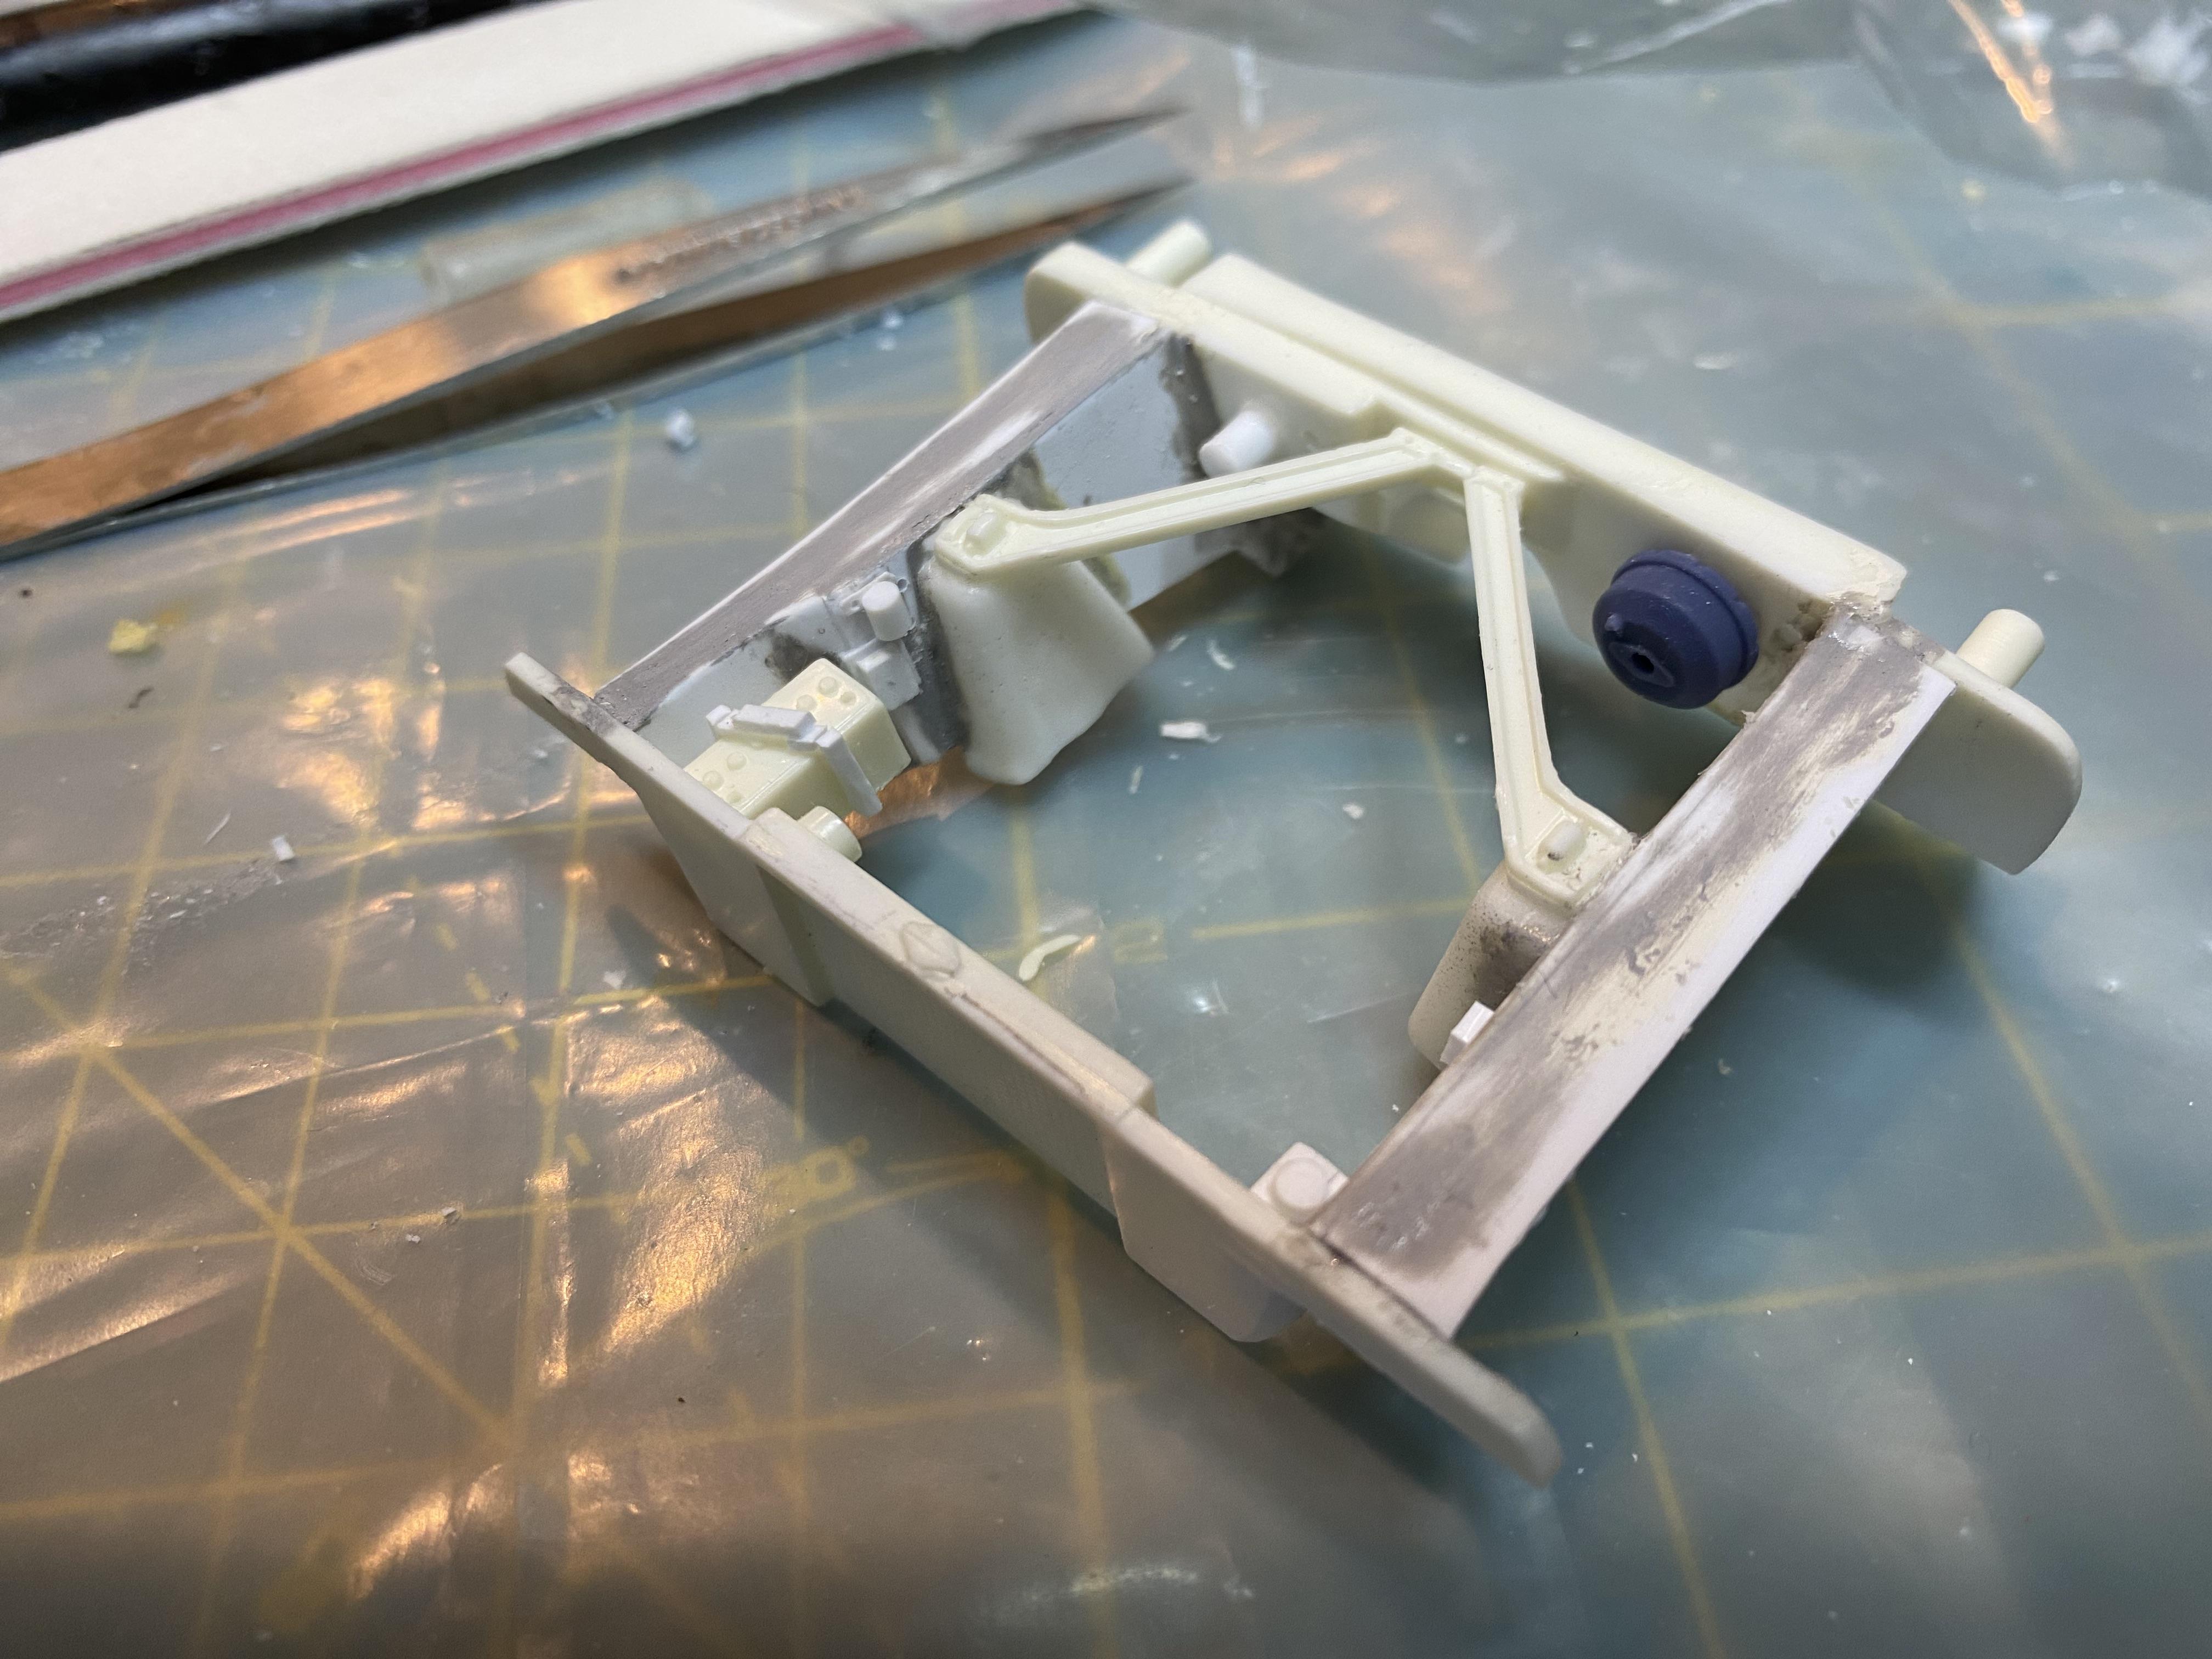
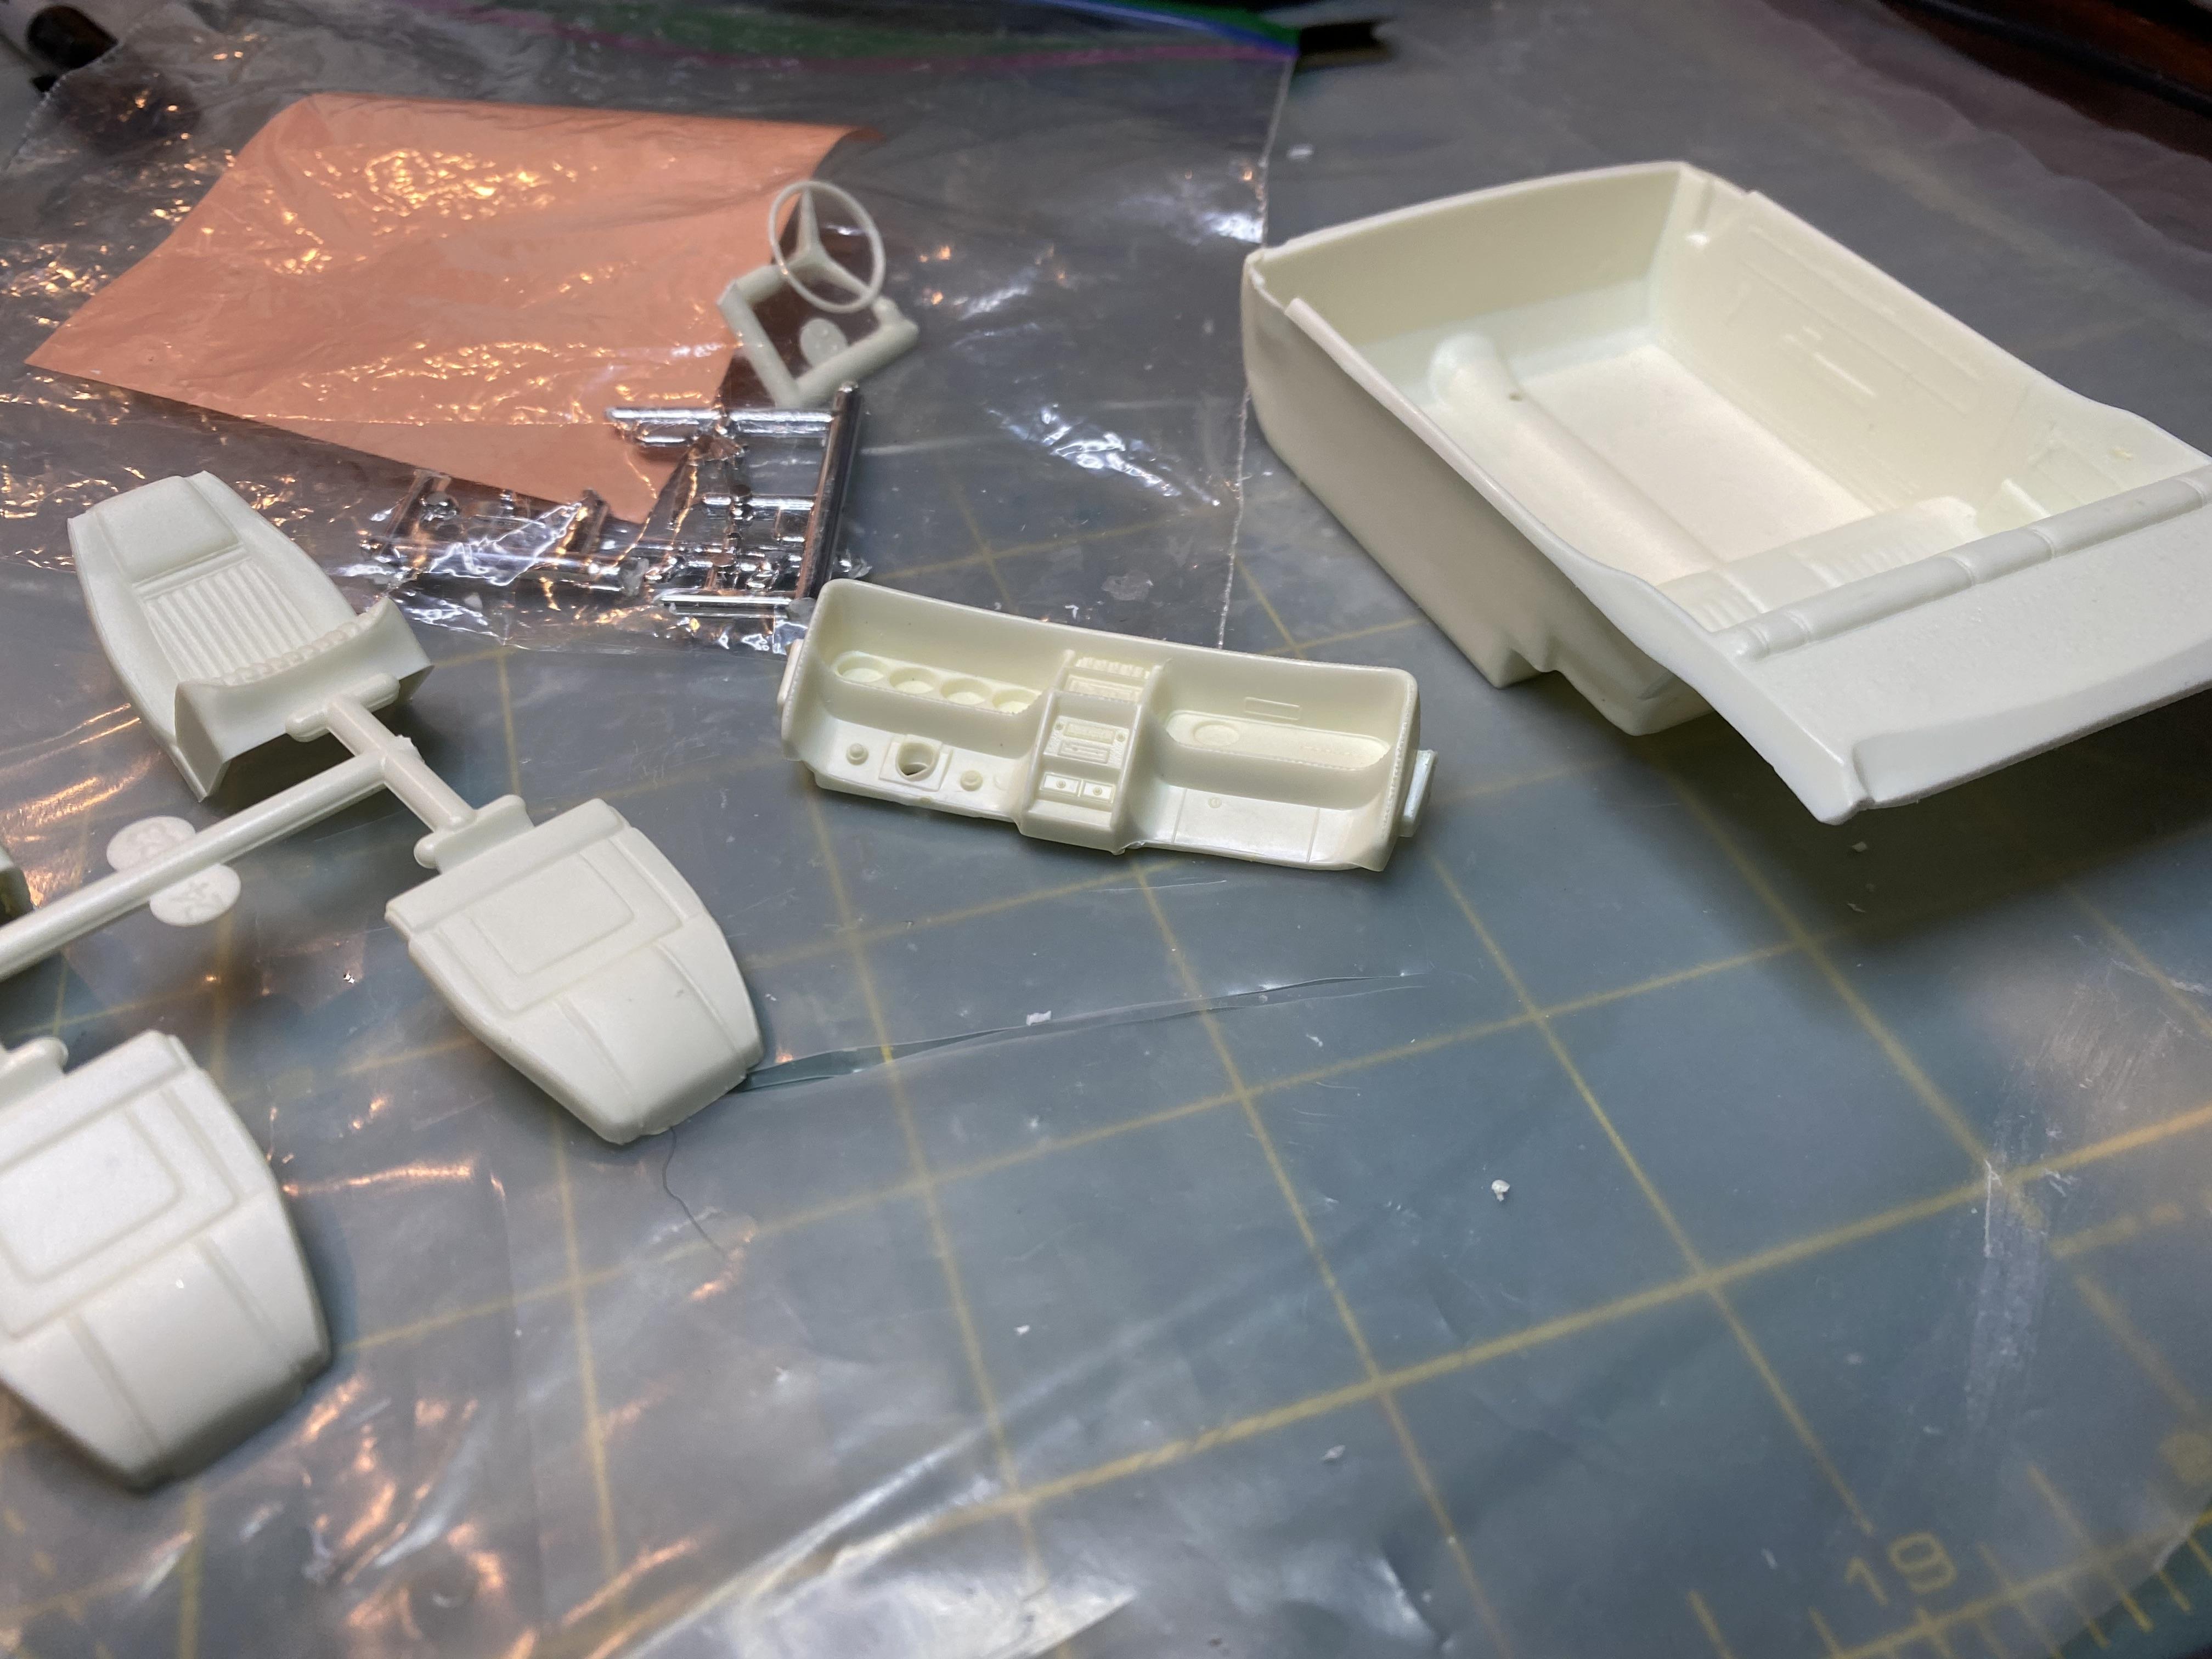
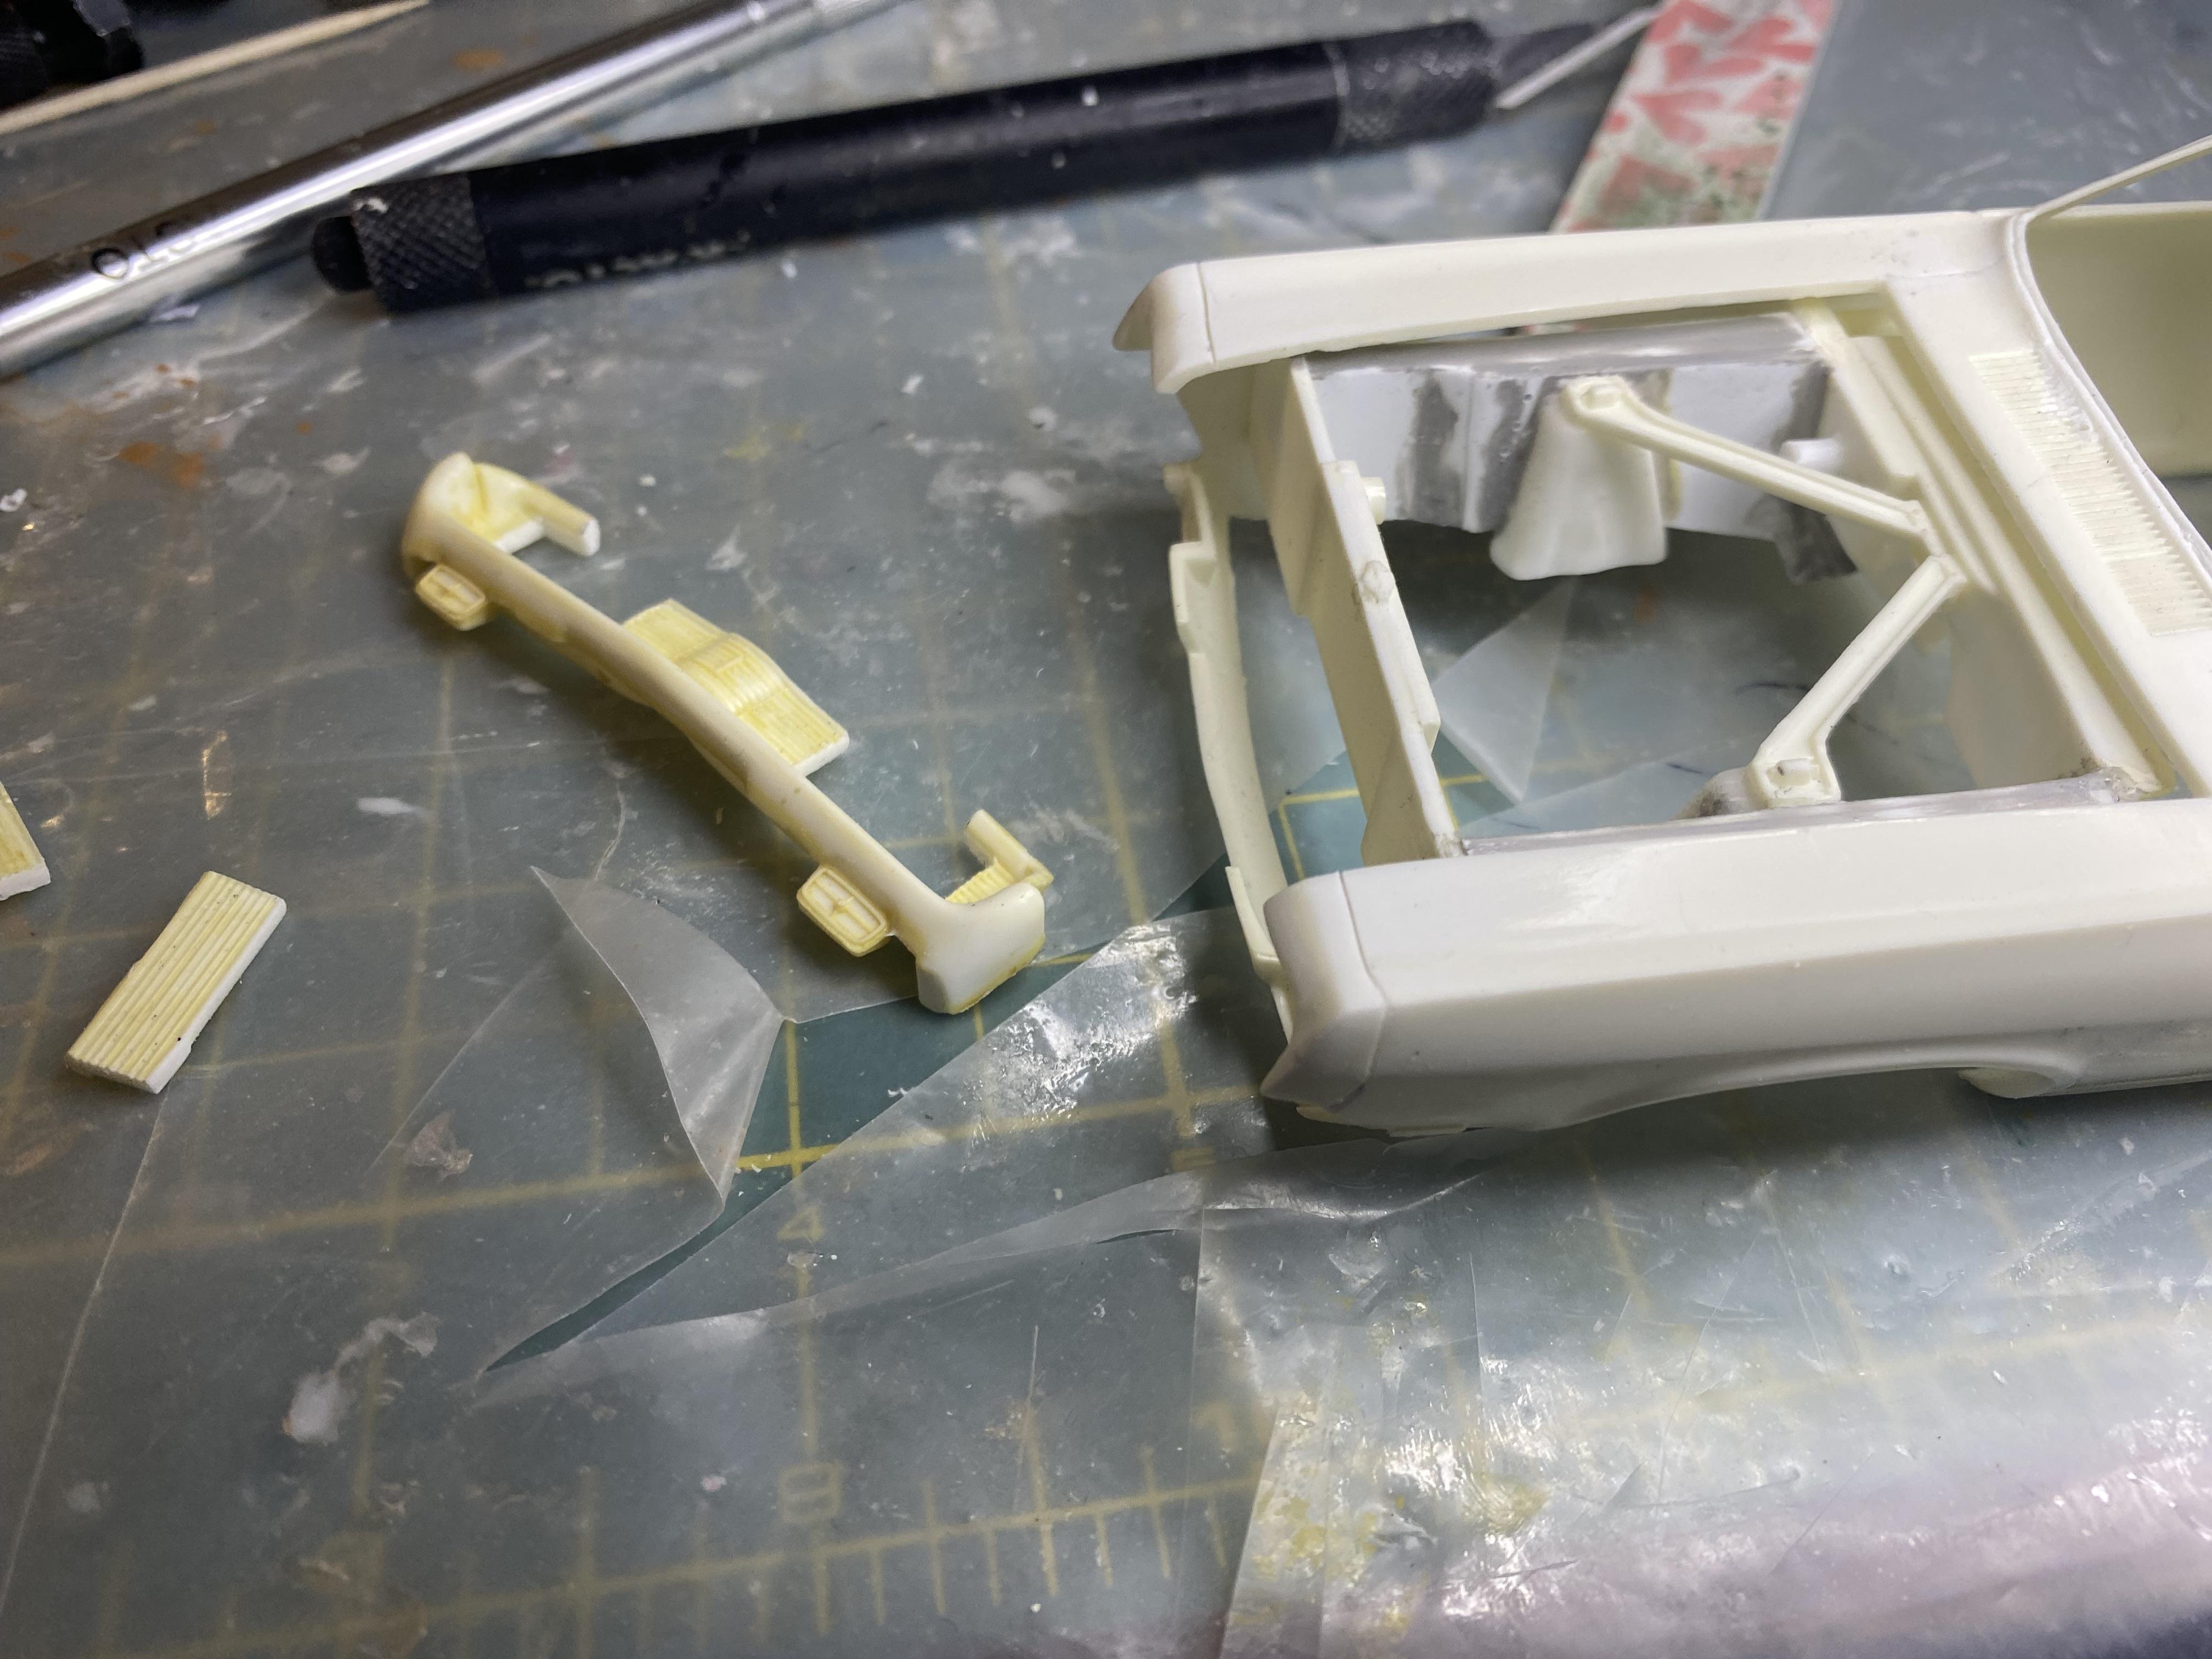
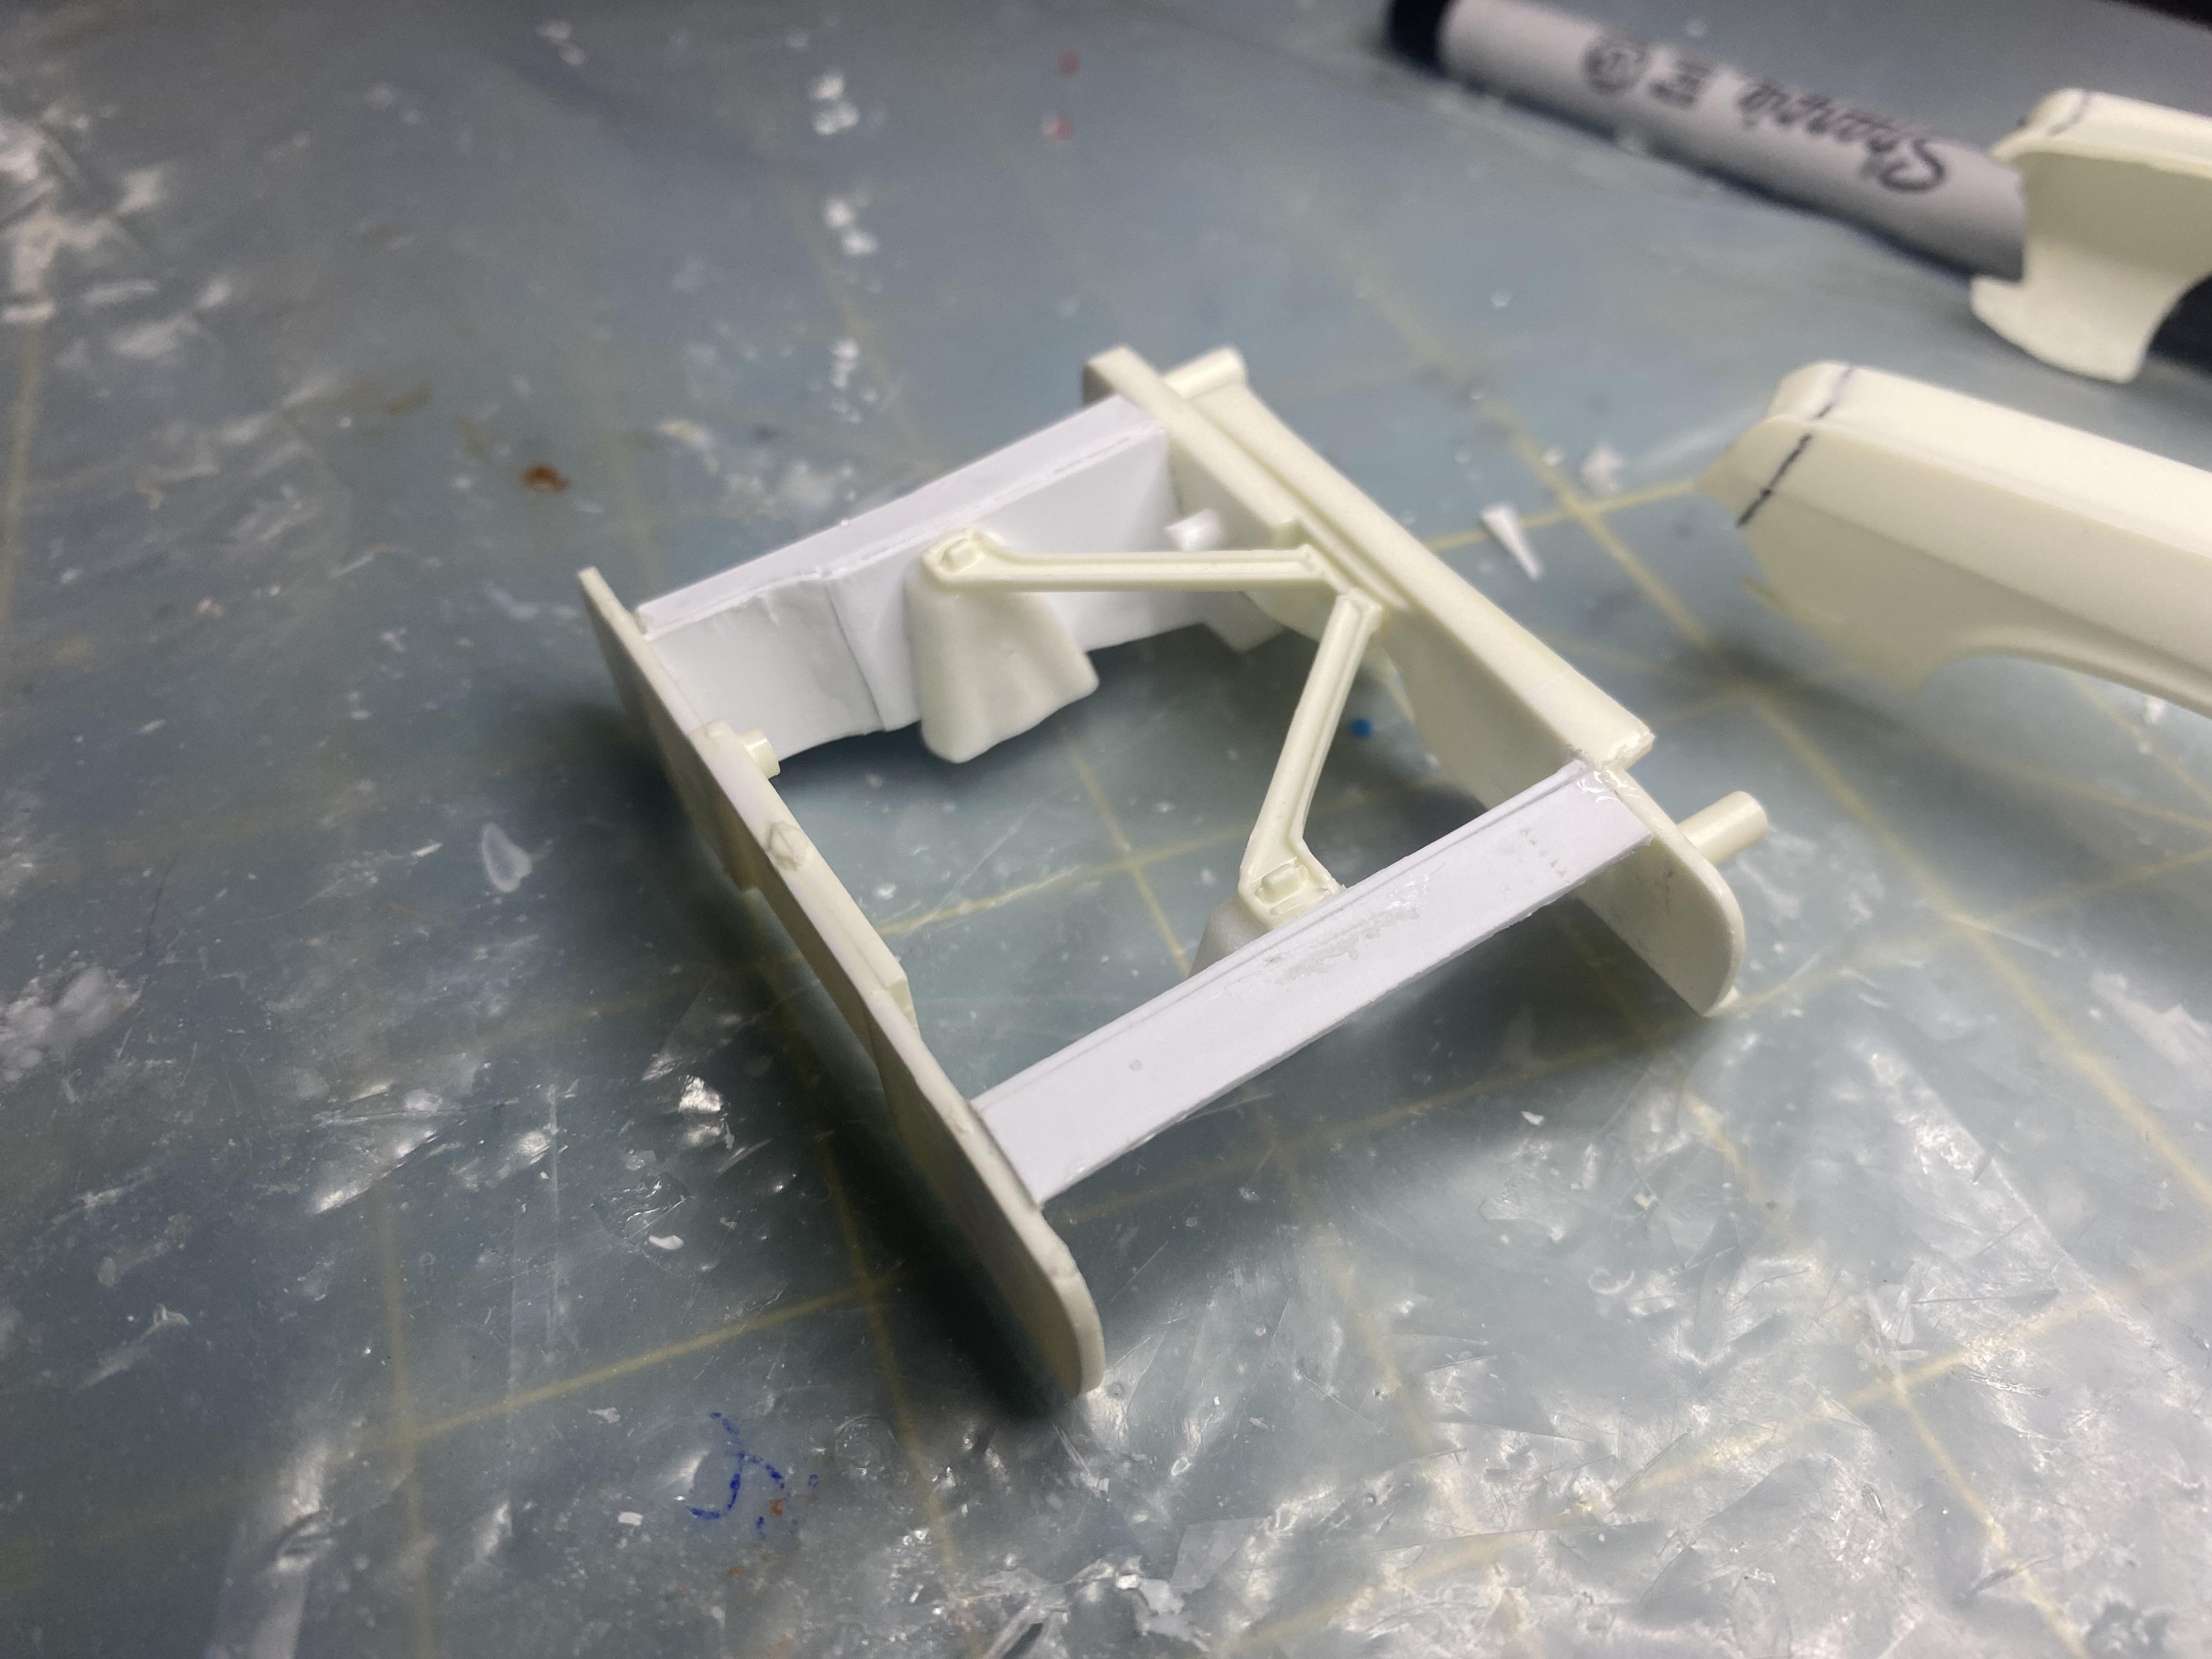
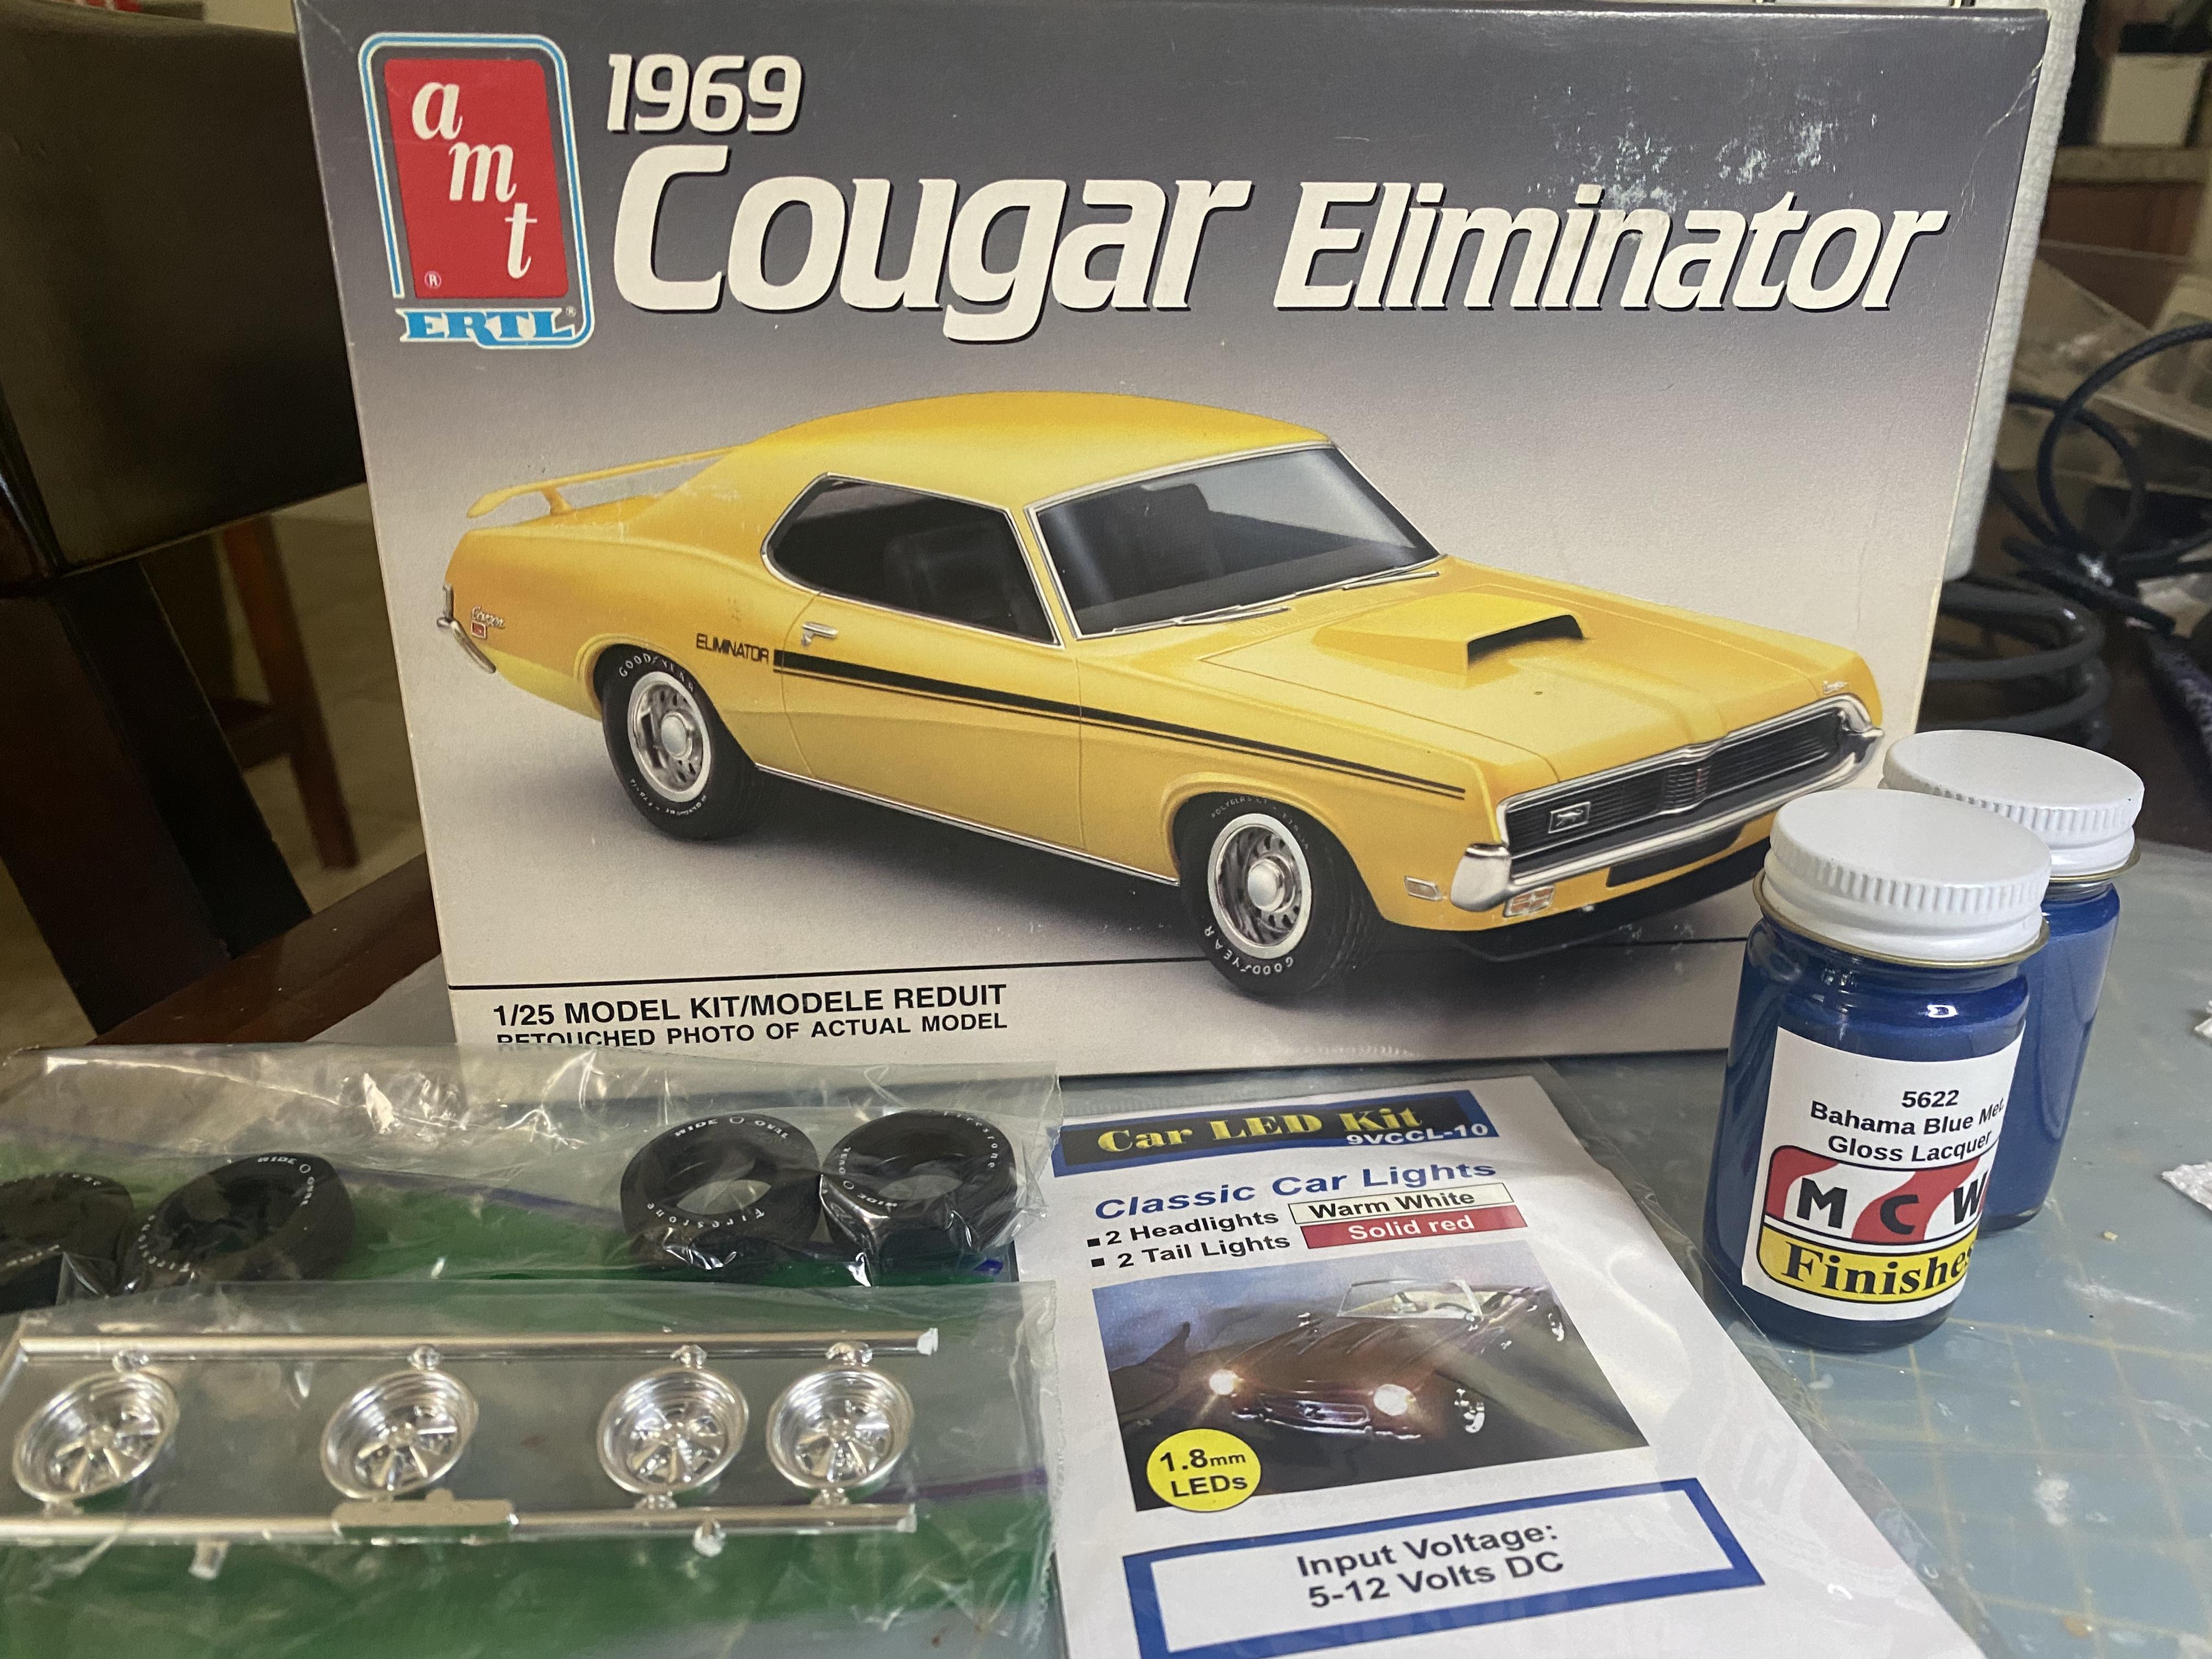
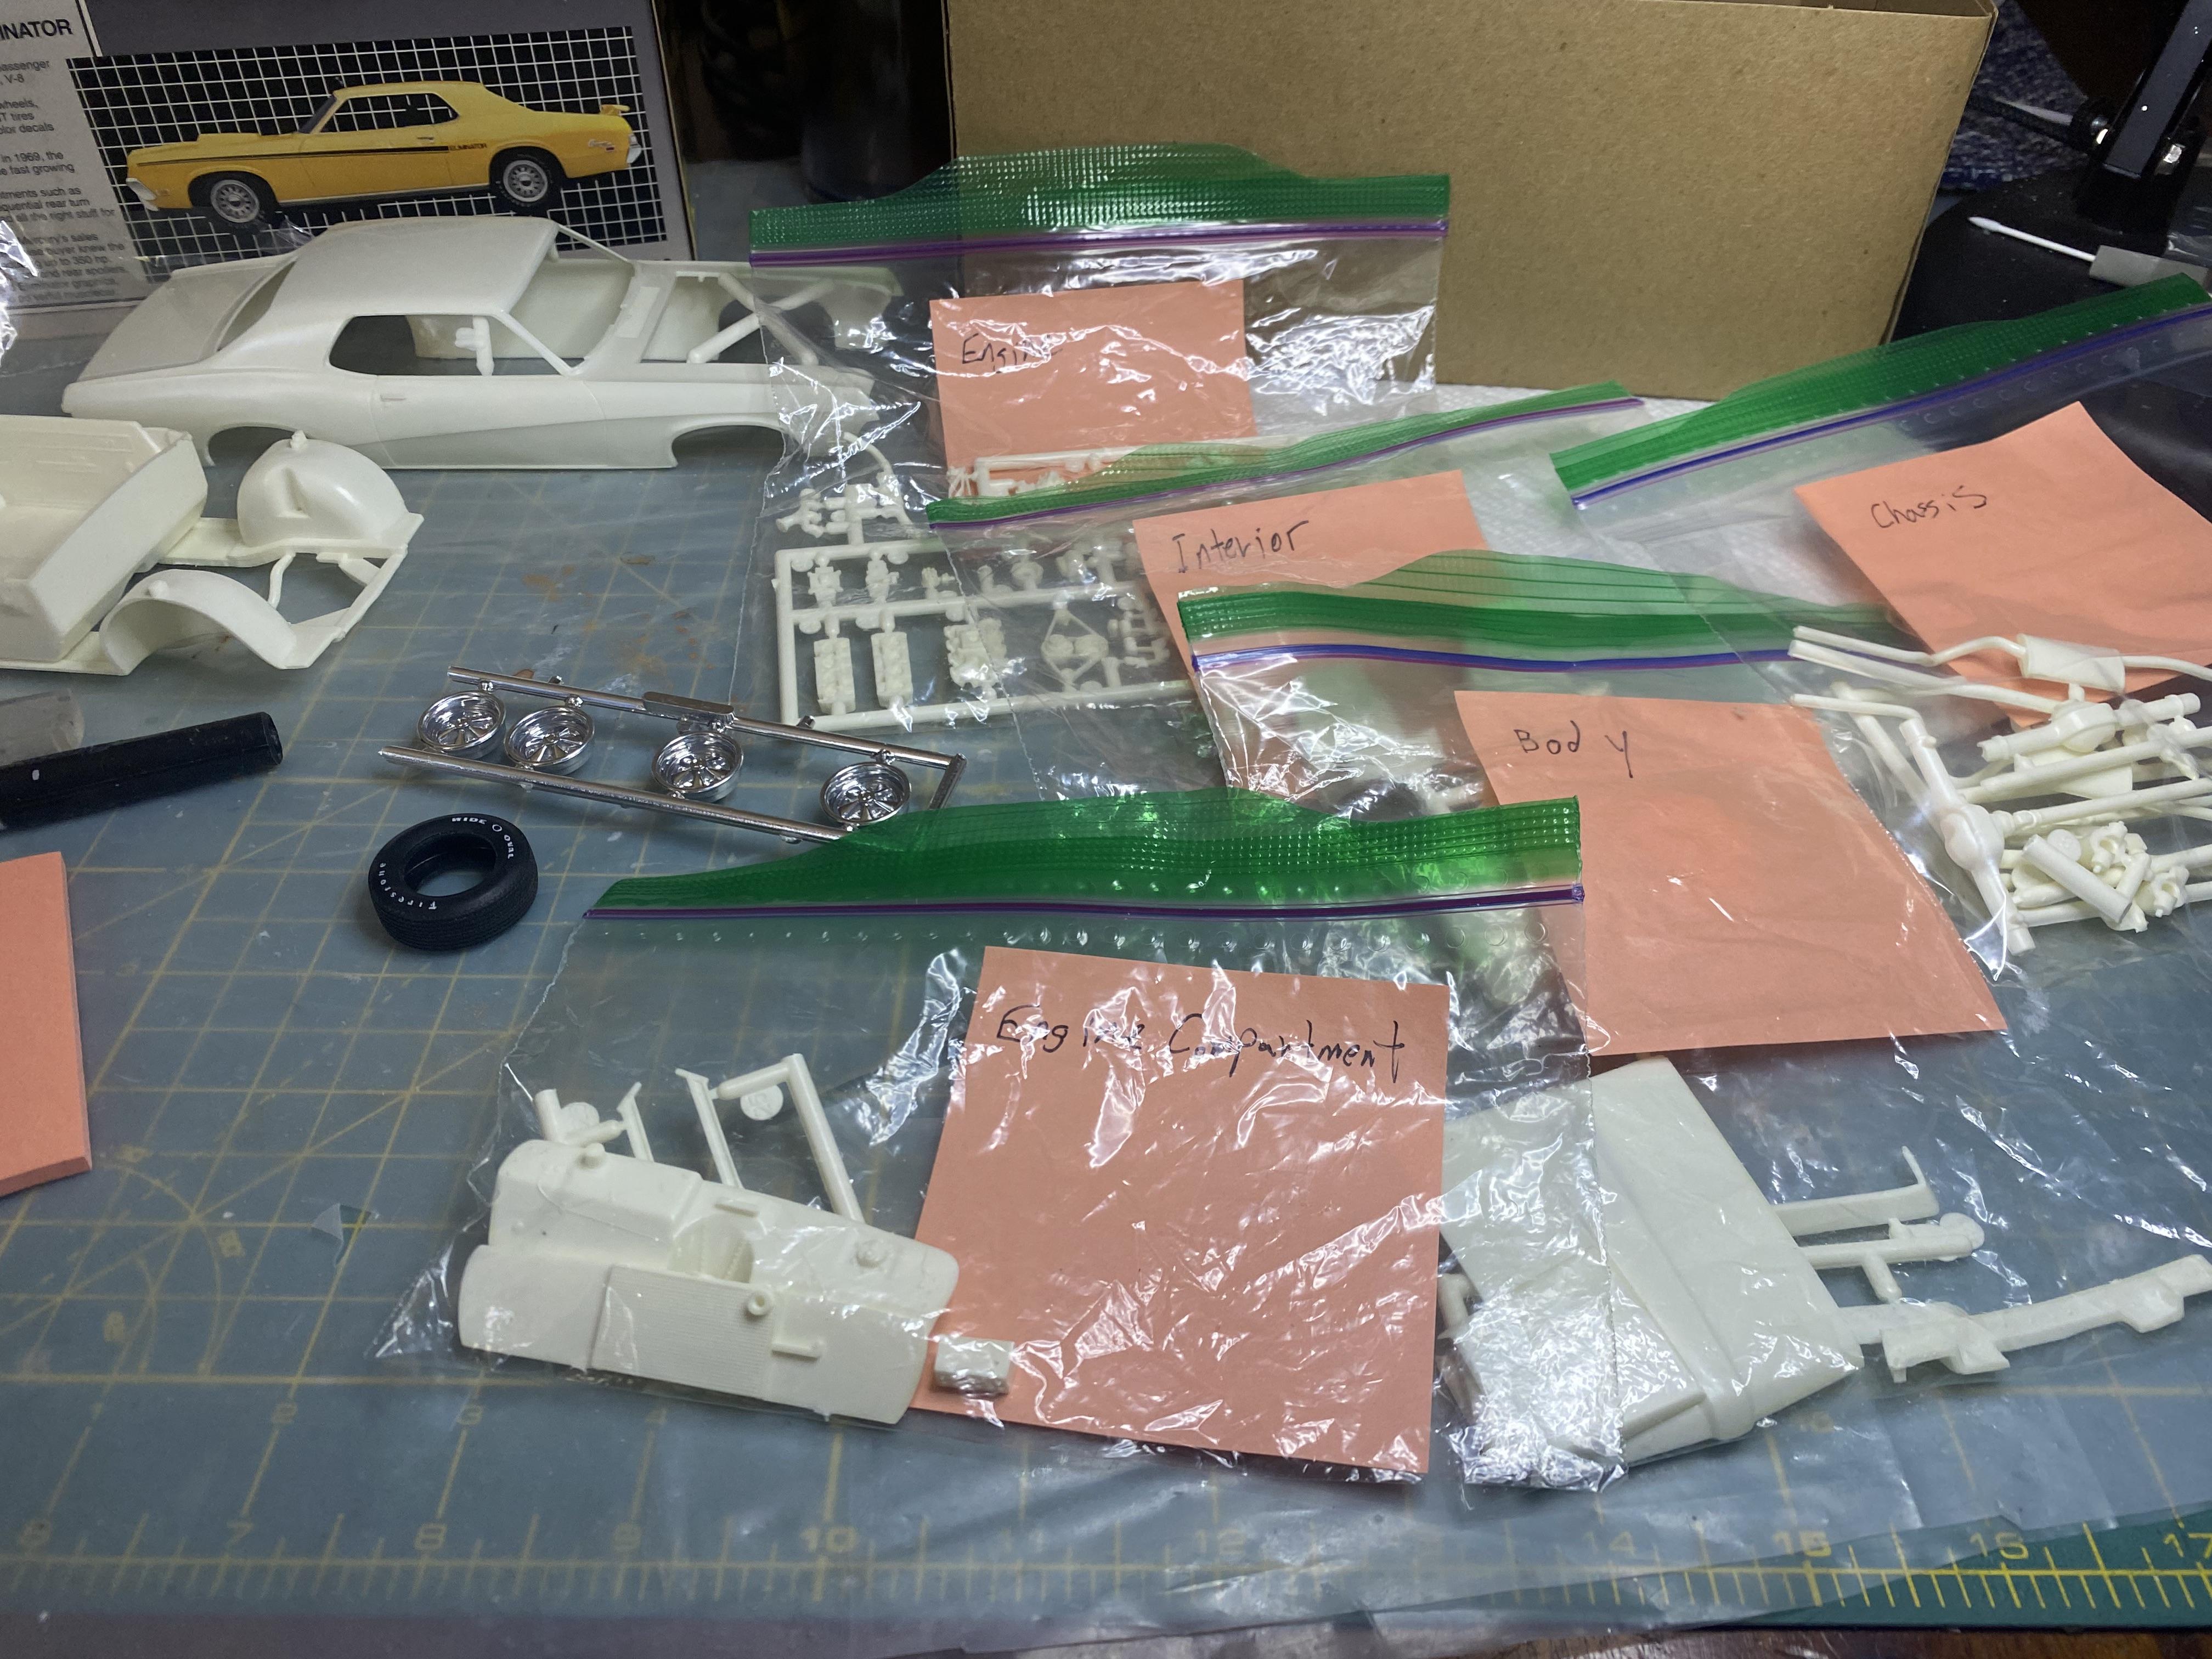
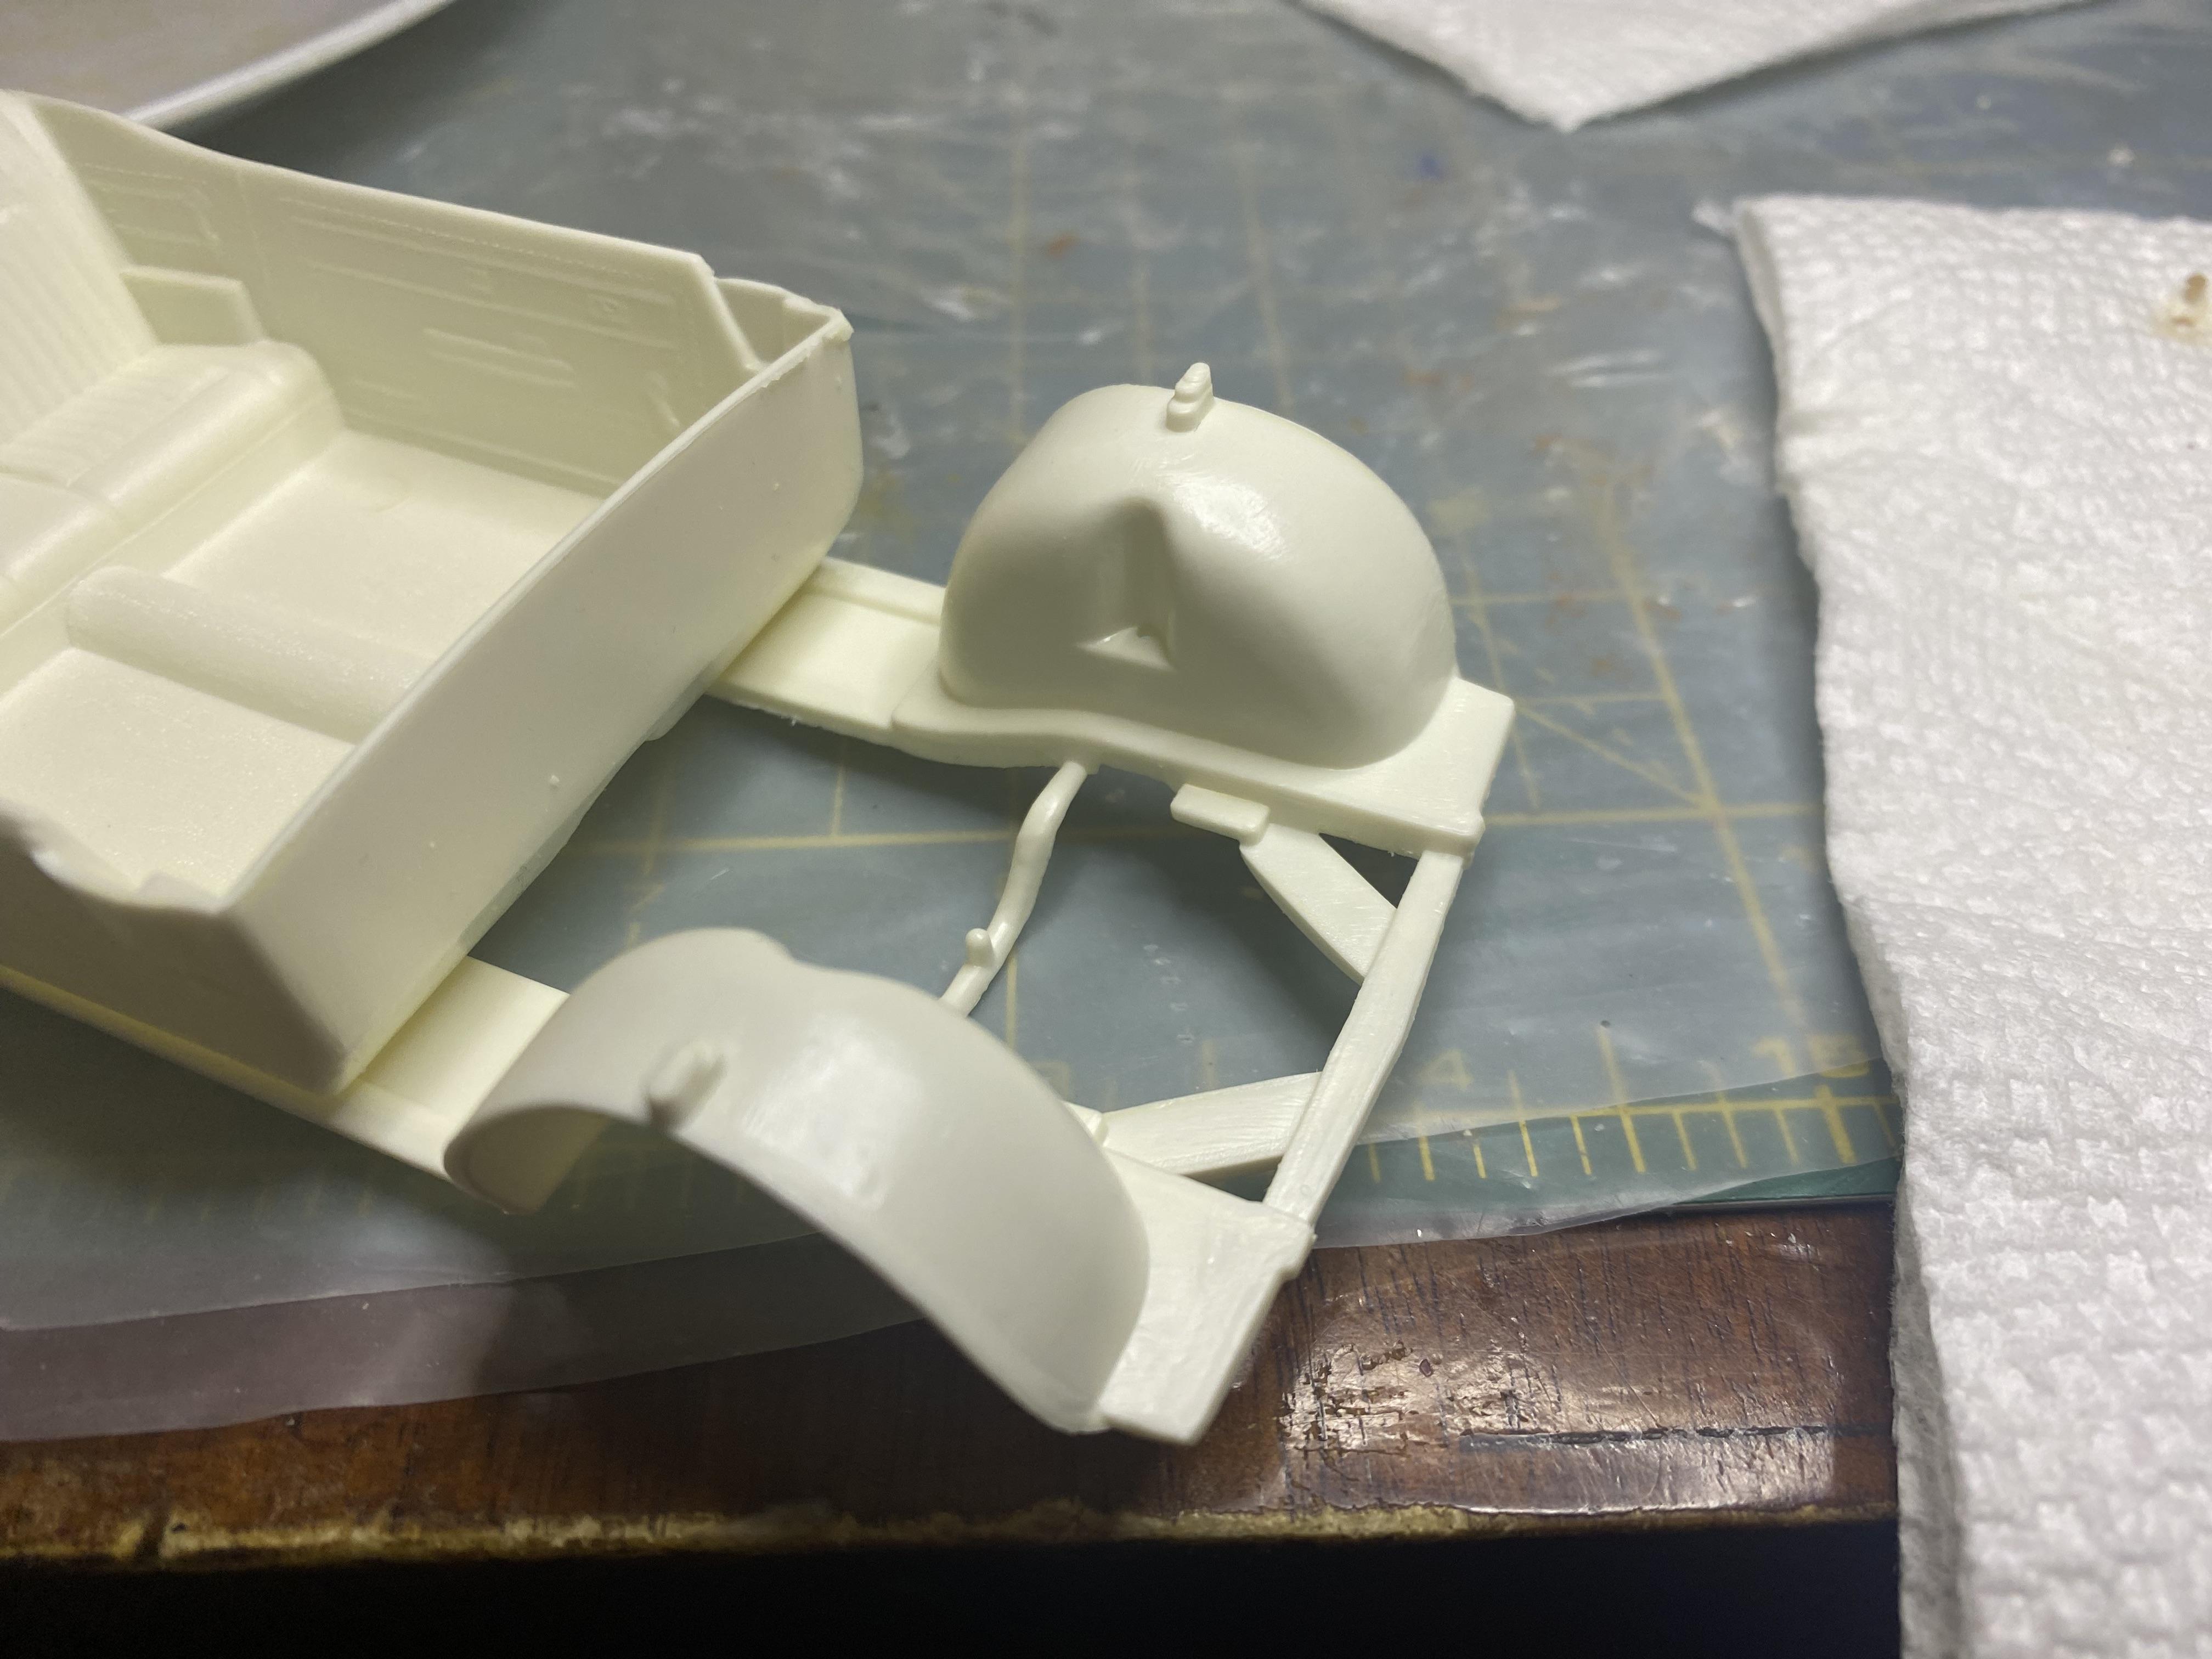
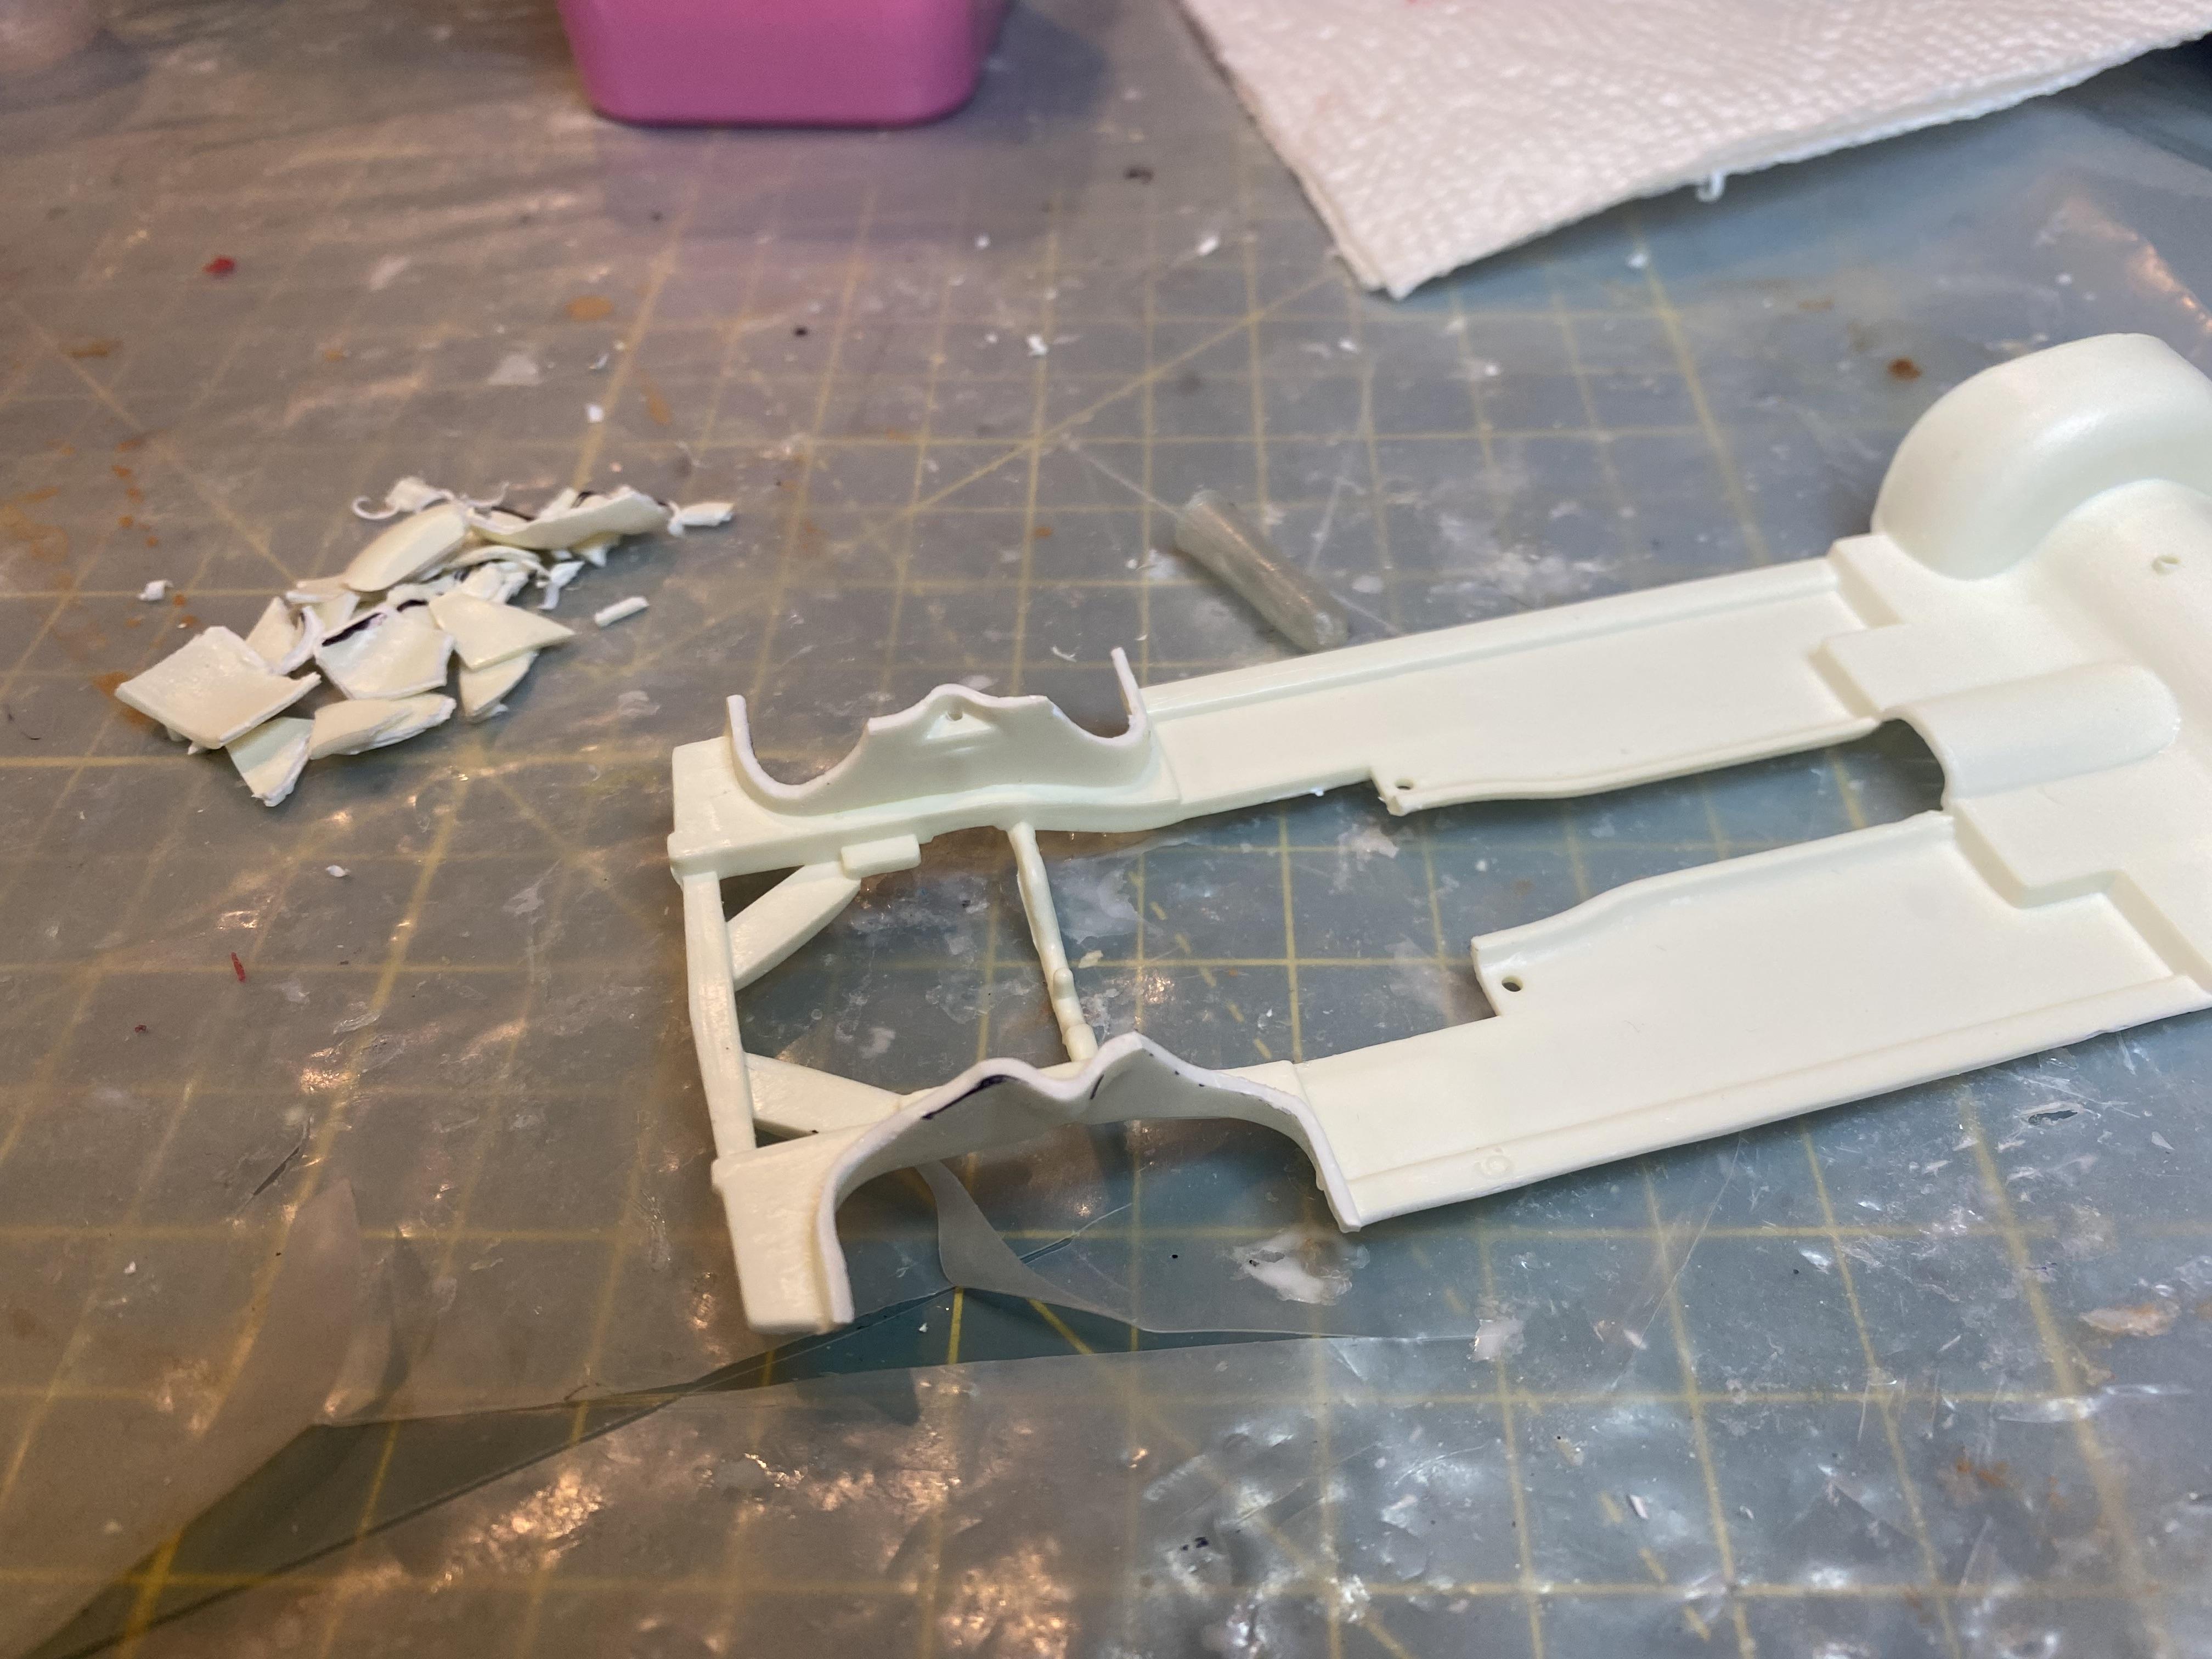
After just completing the 1950 Chevrolet 3100 build I am starting on a Cougar Eliminator build. It will of course have my standard LED lighting which will require making the headlight doors able to be opened. My wife and son decided I have to paint it bright blue, I was going to go with competition Orange but one again I get vetoed. I purchased some Bahama blue I thought would be close to find out after looking for a cross reference I found out that Ford Acapulco Blue is the same exact code as Mercury Bright blue. I still have some left from the 1967 Mustang Fastback build, but I will order some more to play it safe. I separated the parts into their specific sections. I purchased a set of old issue styled steel wheel I like much better than the kit ones, and had a set of Firestone wide oval left. The body is pretty nice but missing some panel gaps and will need just a little work. The chassis and interior on the other hand are super weak. The engine compartment really shows its promo heritage and has absolutely no inner firewalls and shock towers. I have cut out the front wheel tubs and created inner firewalls that will fit.
-
Thank you!
-
Thank You! Thank You! My family won’t let me do a build without LEDs anymore.
-
Thank You! Thank You!
-
Thank you! My wife really wants one but we really don’t have the space for it. Thank you!
-
Thank You! Thank You!
-
Thank you! Thank you!
-
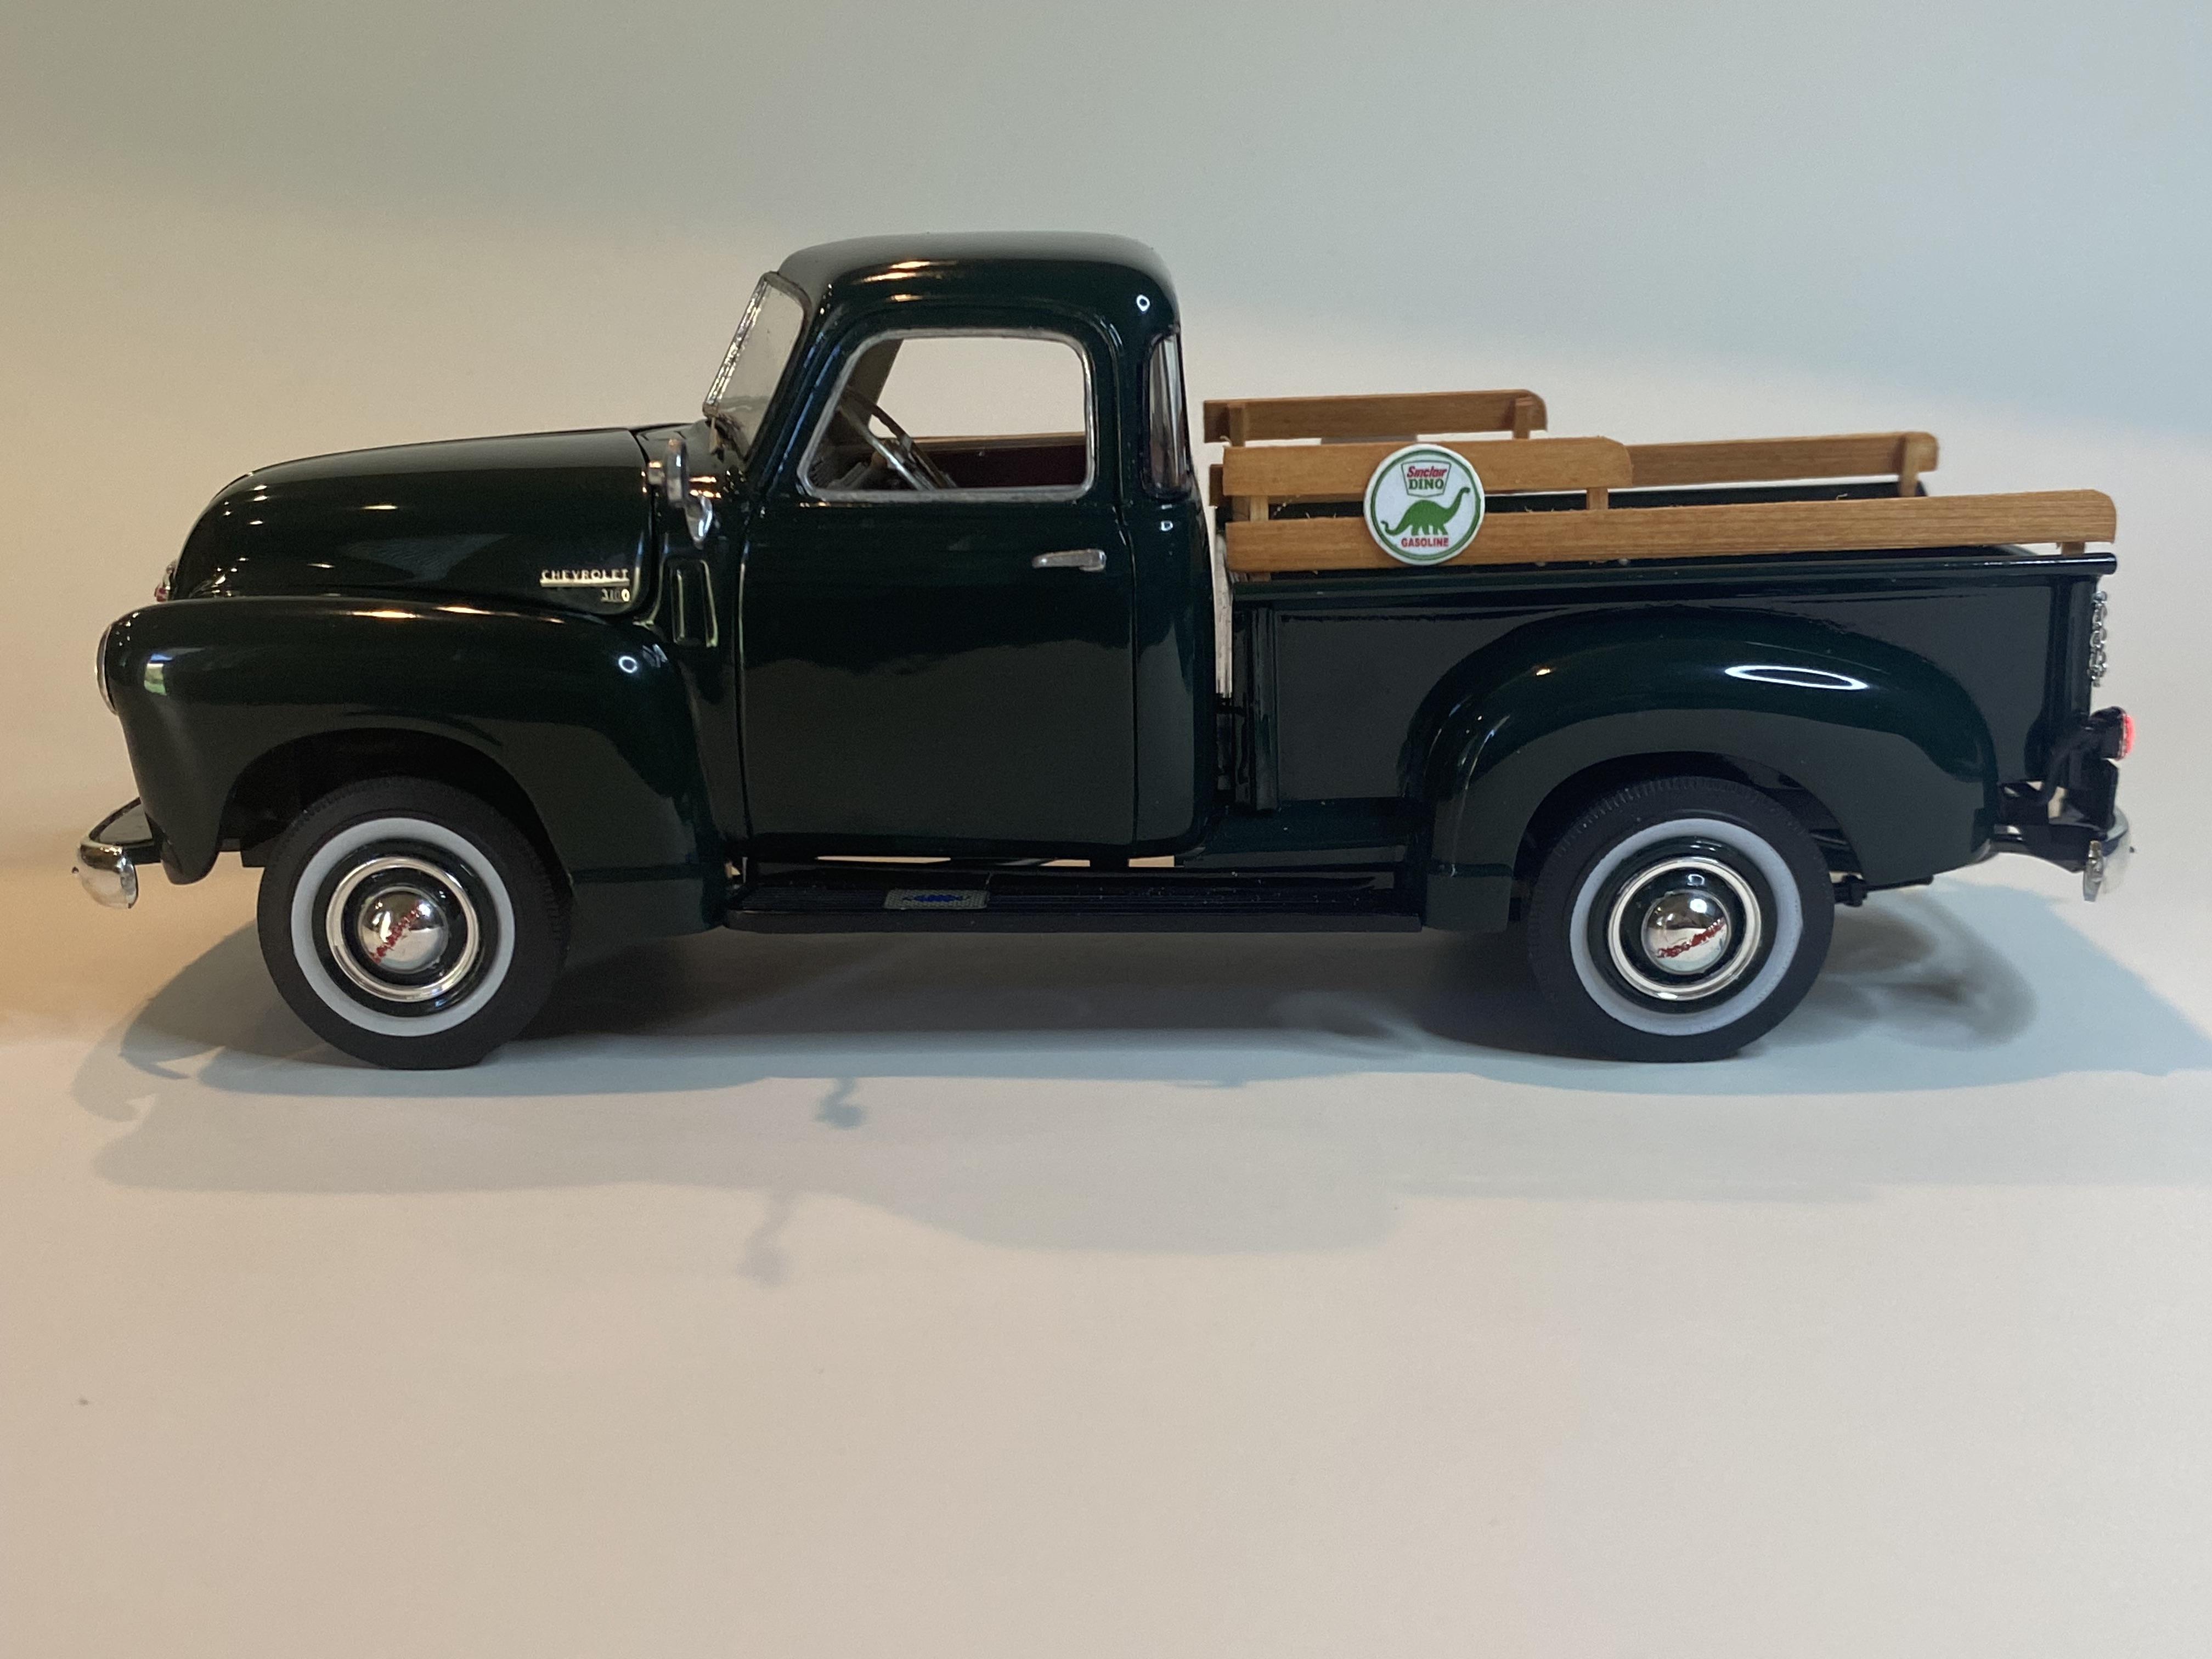
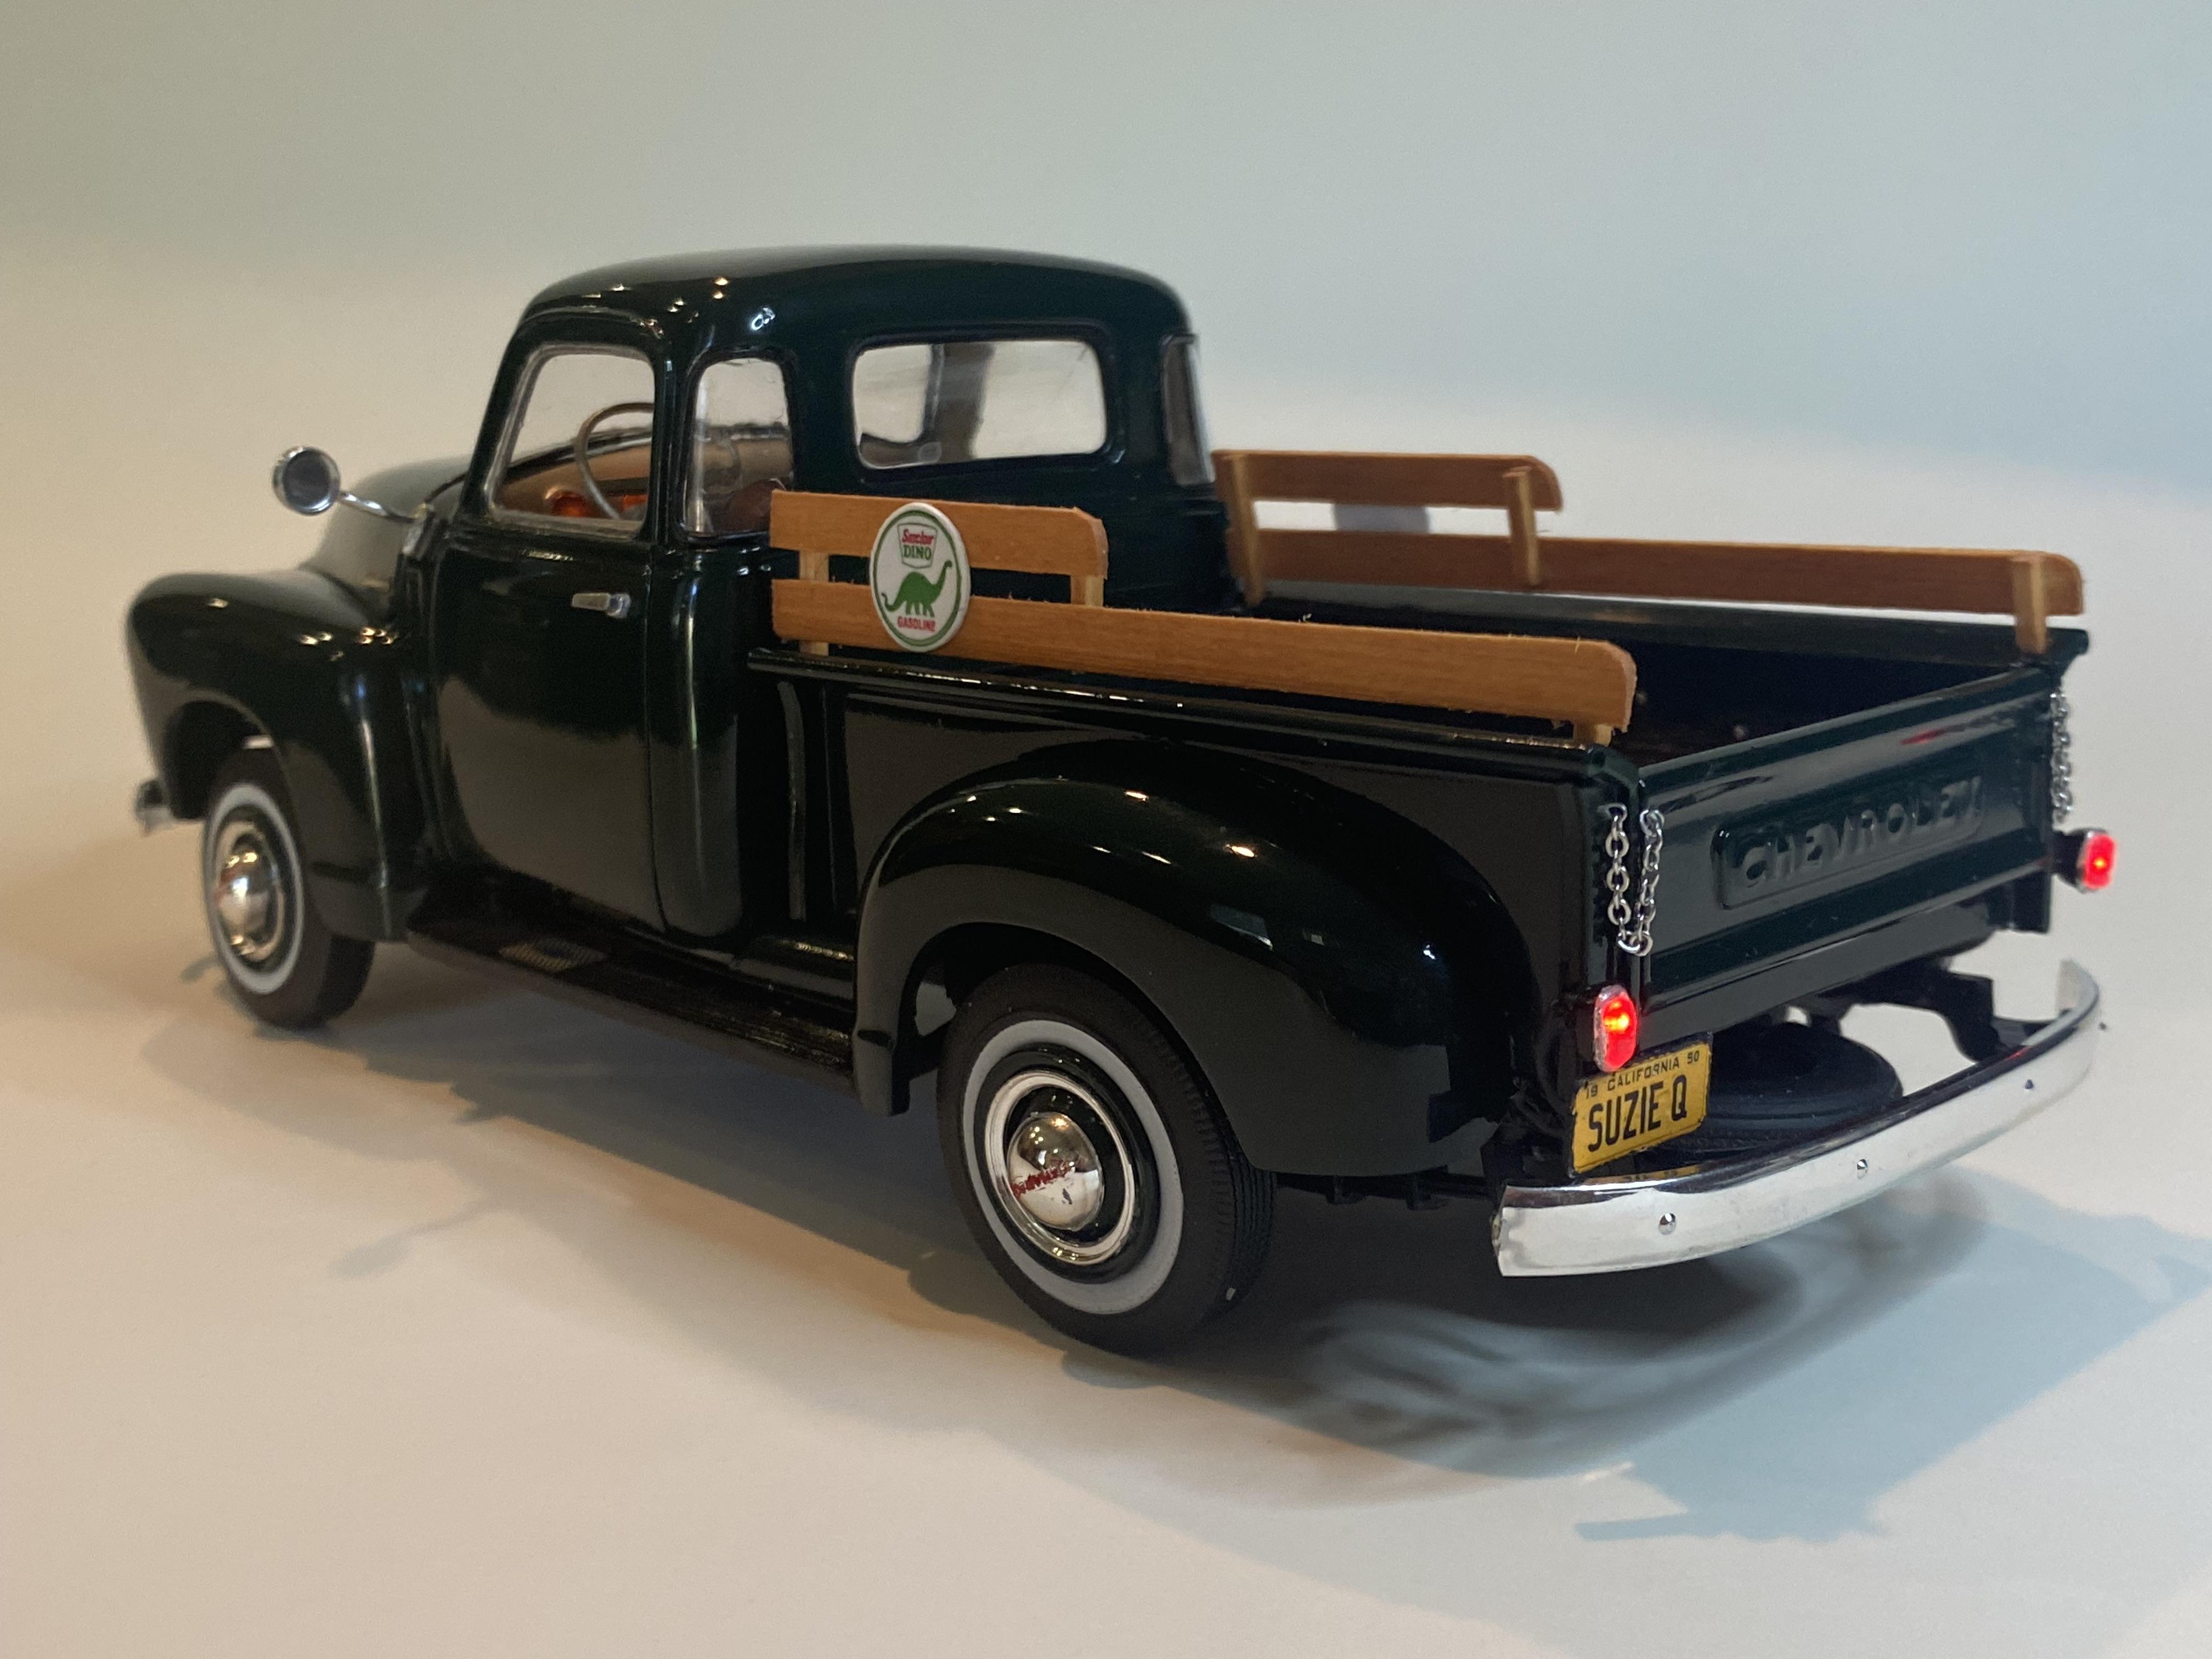
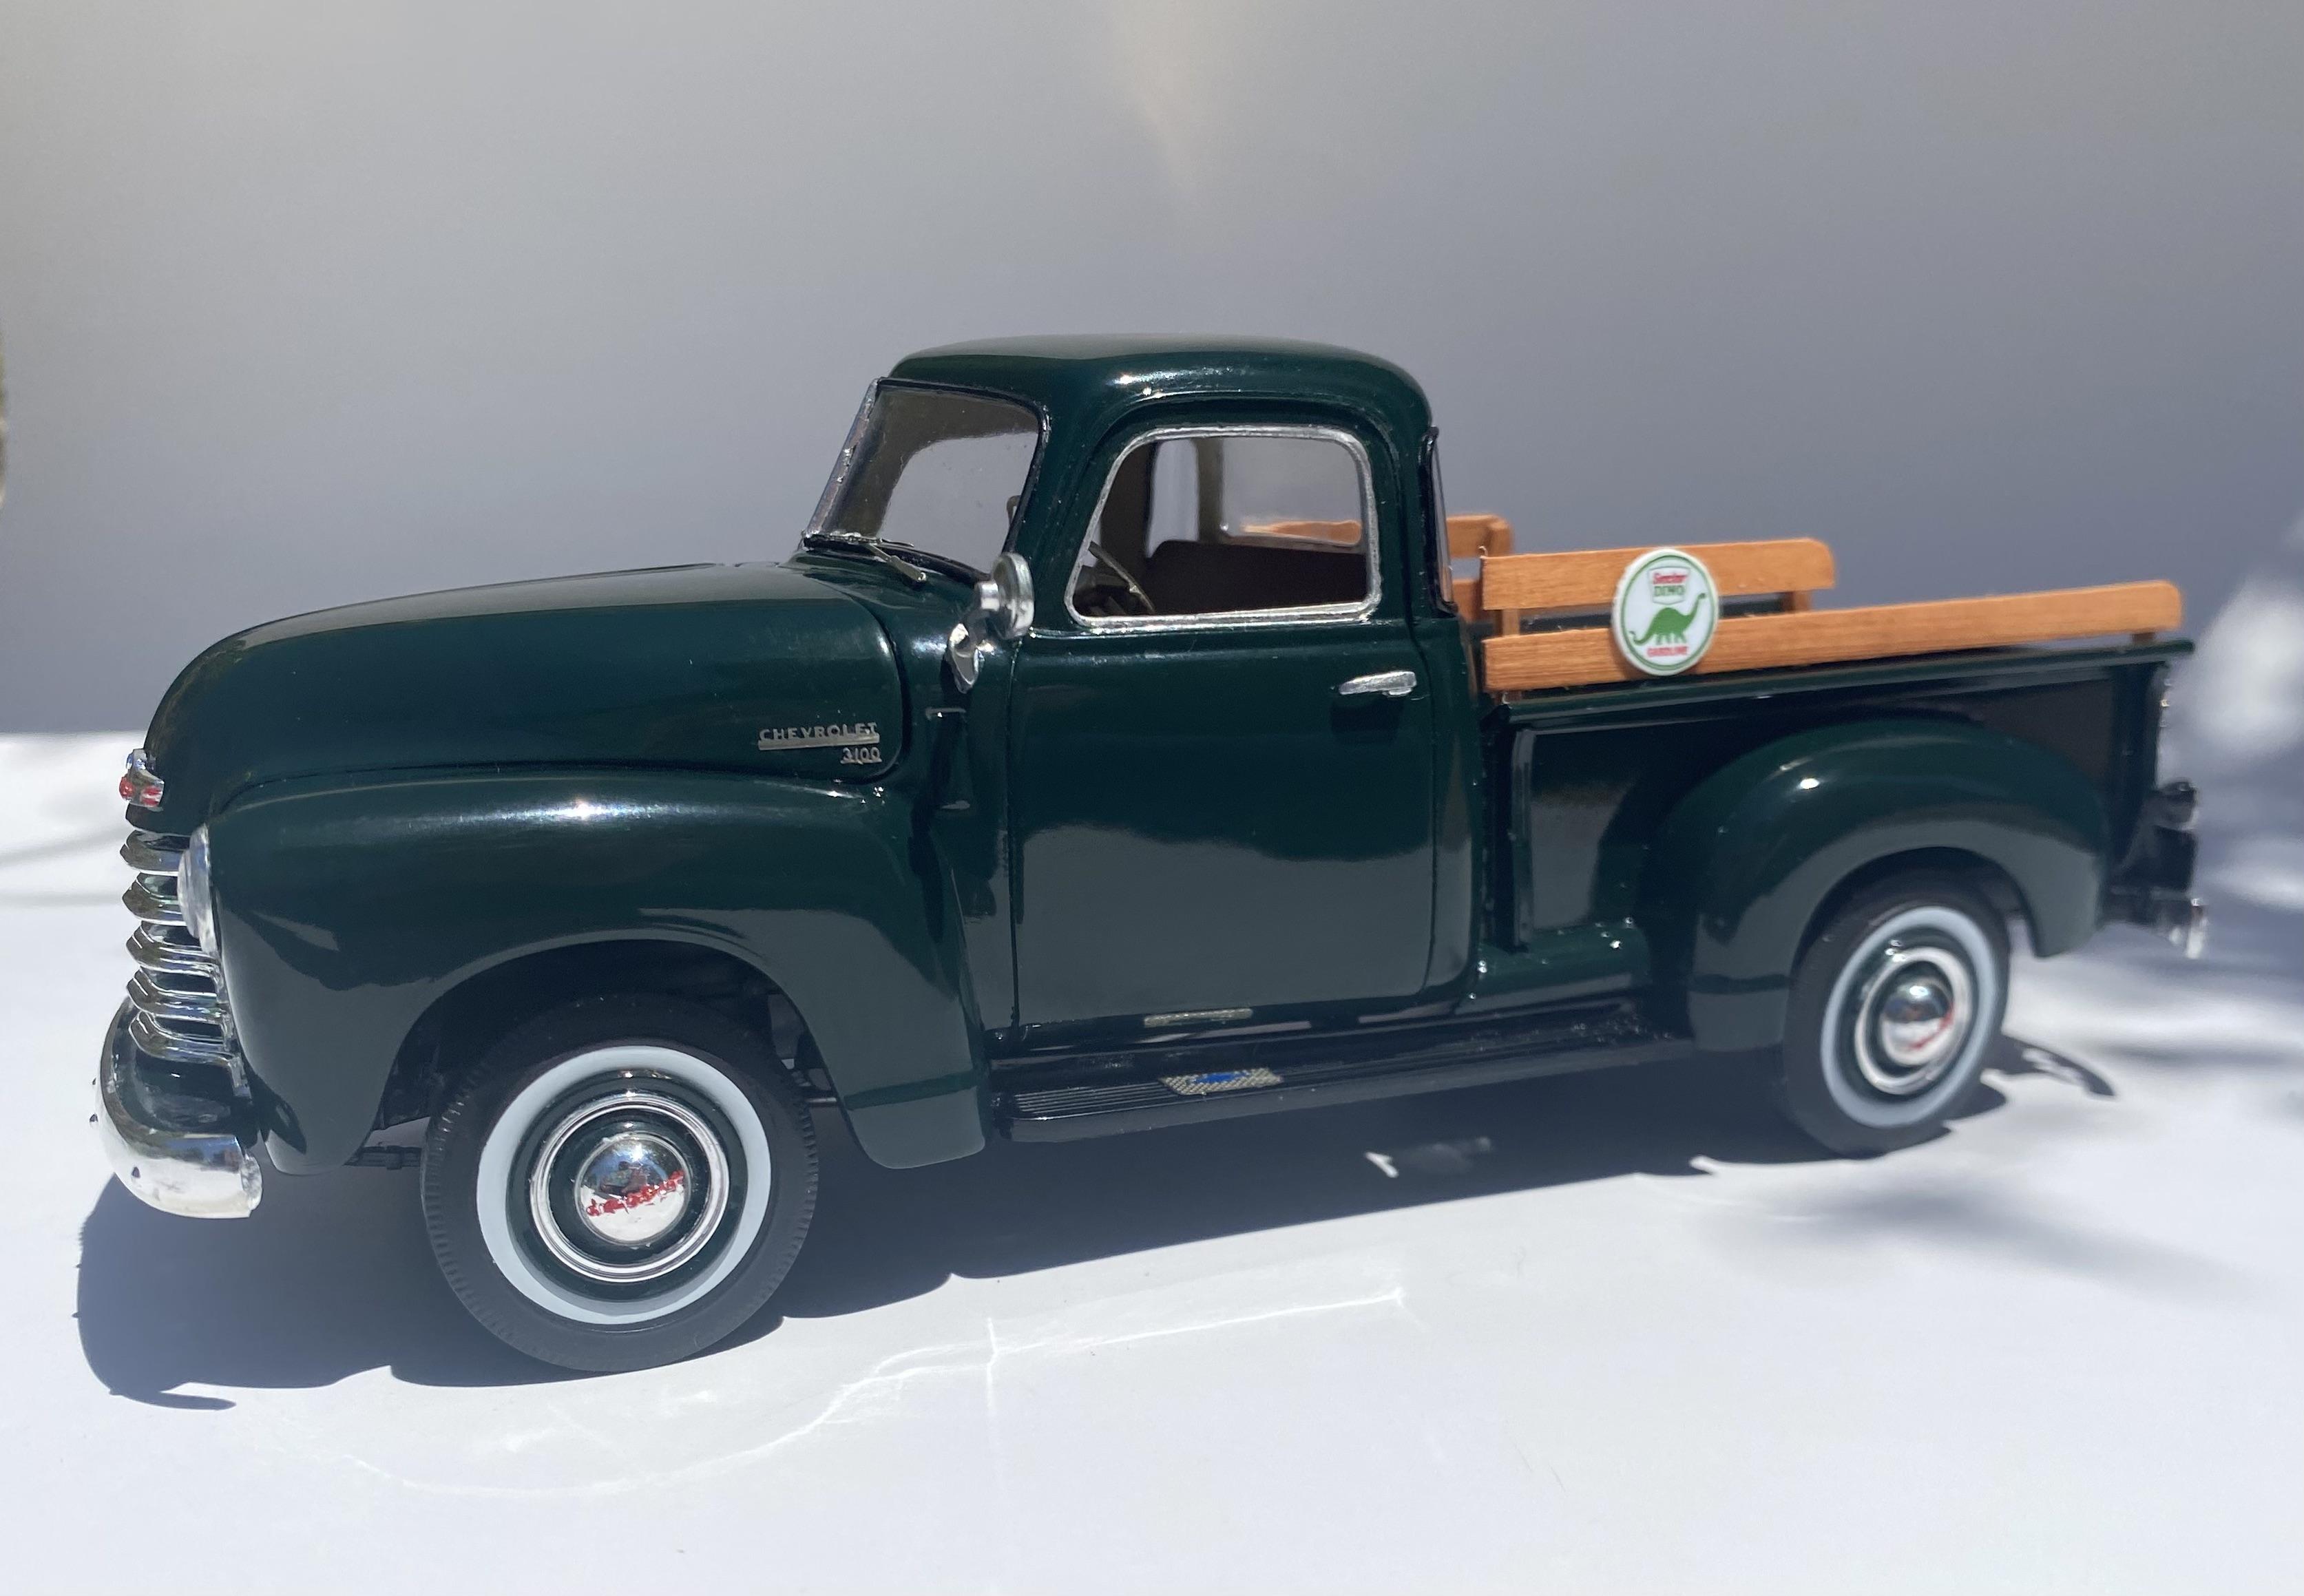
1950 Chevy 3100 Pickup WIP
Duddly01 replied to Duddly01's topic in WIP: Model Trucks: Pickups, Vans, SUVs, Light Commercial
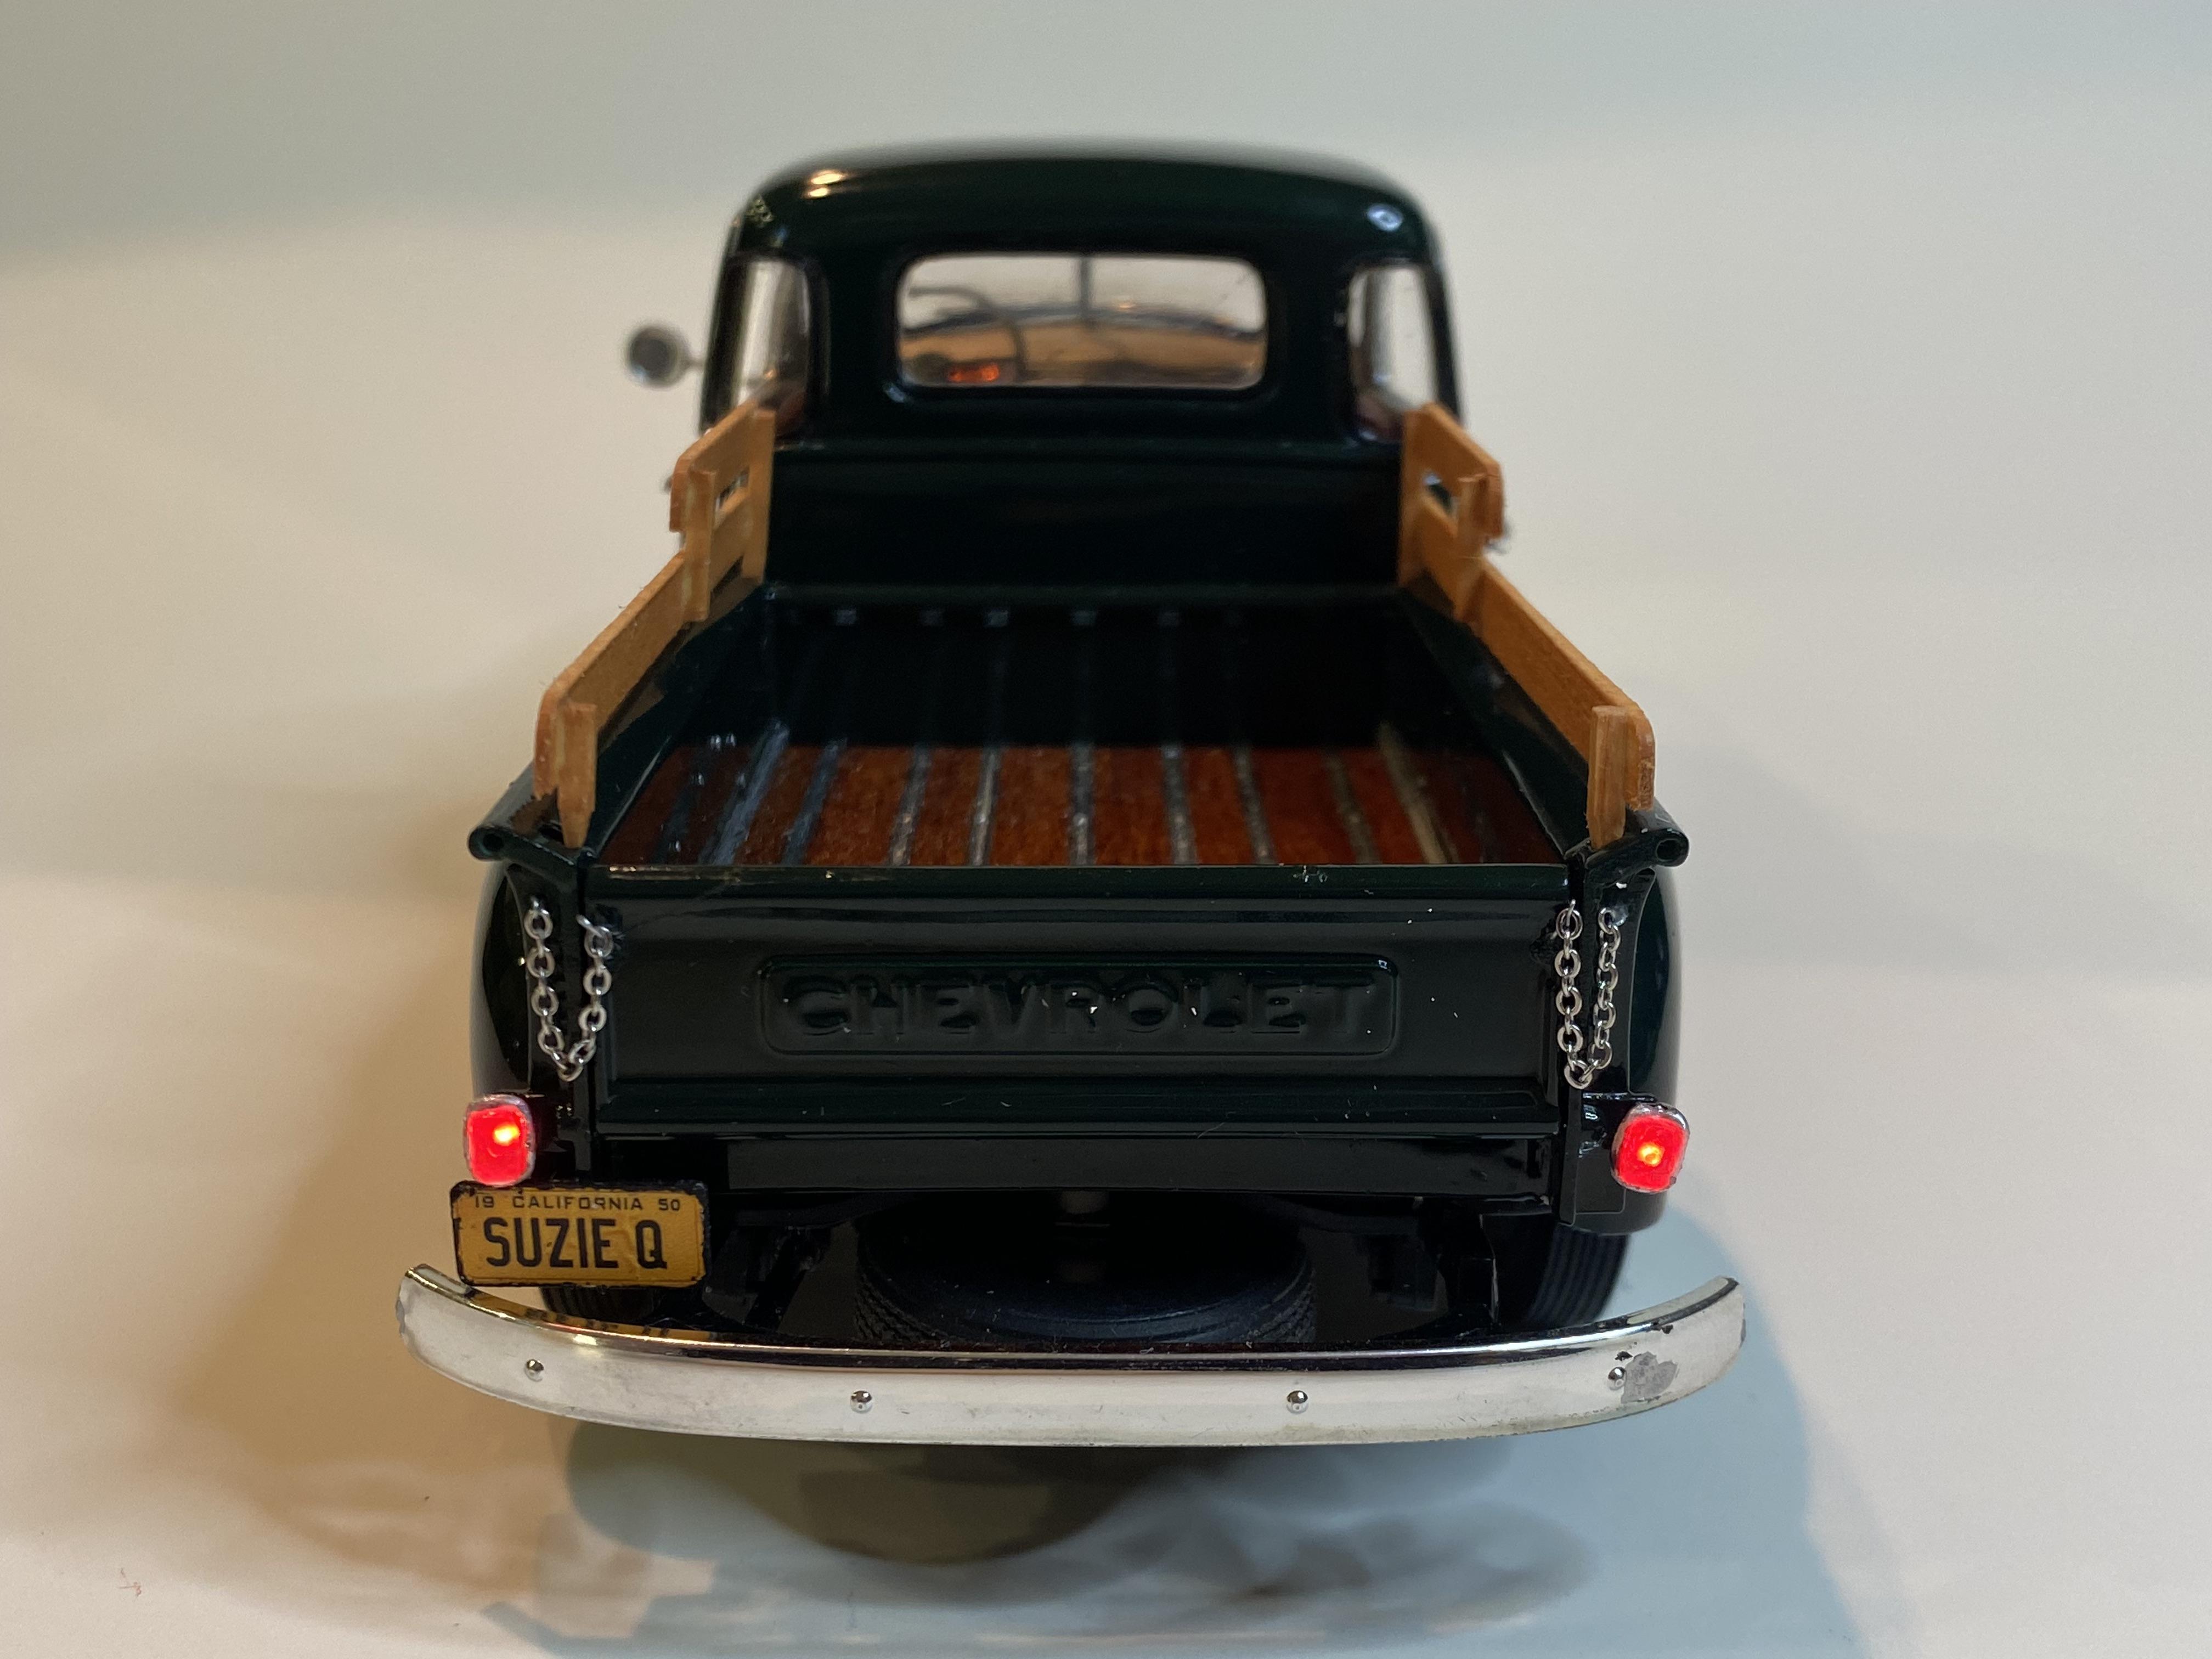
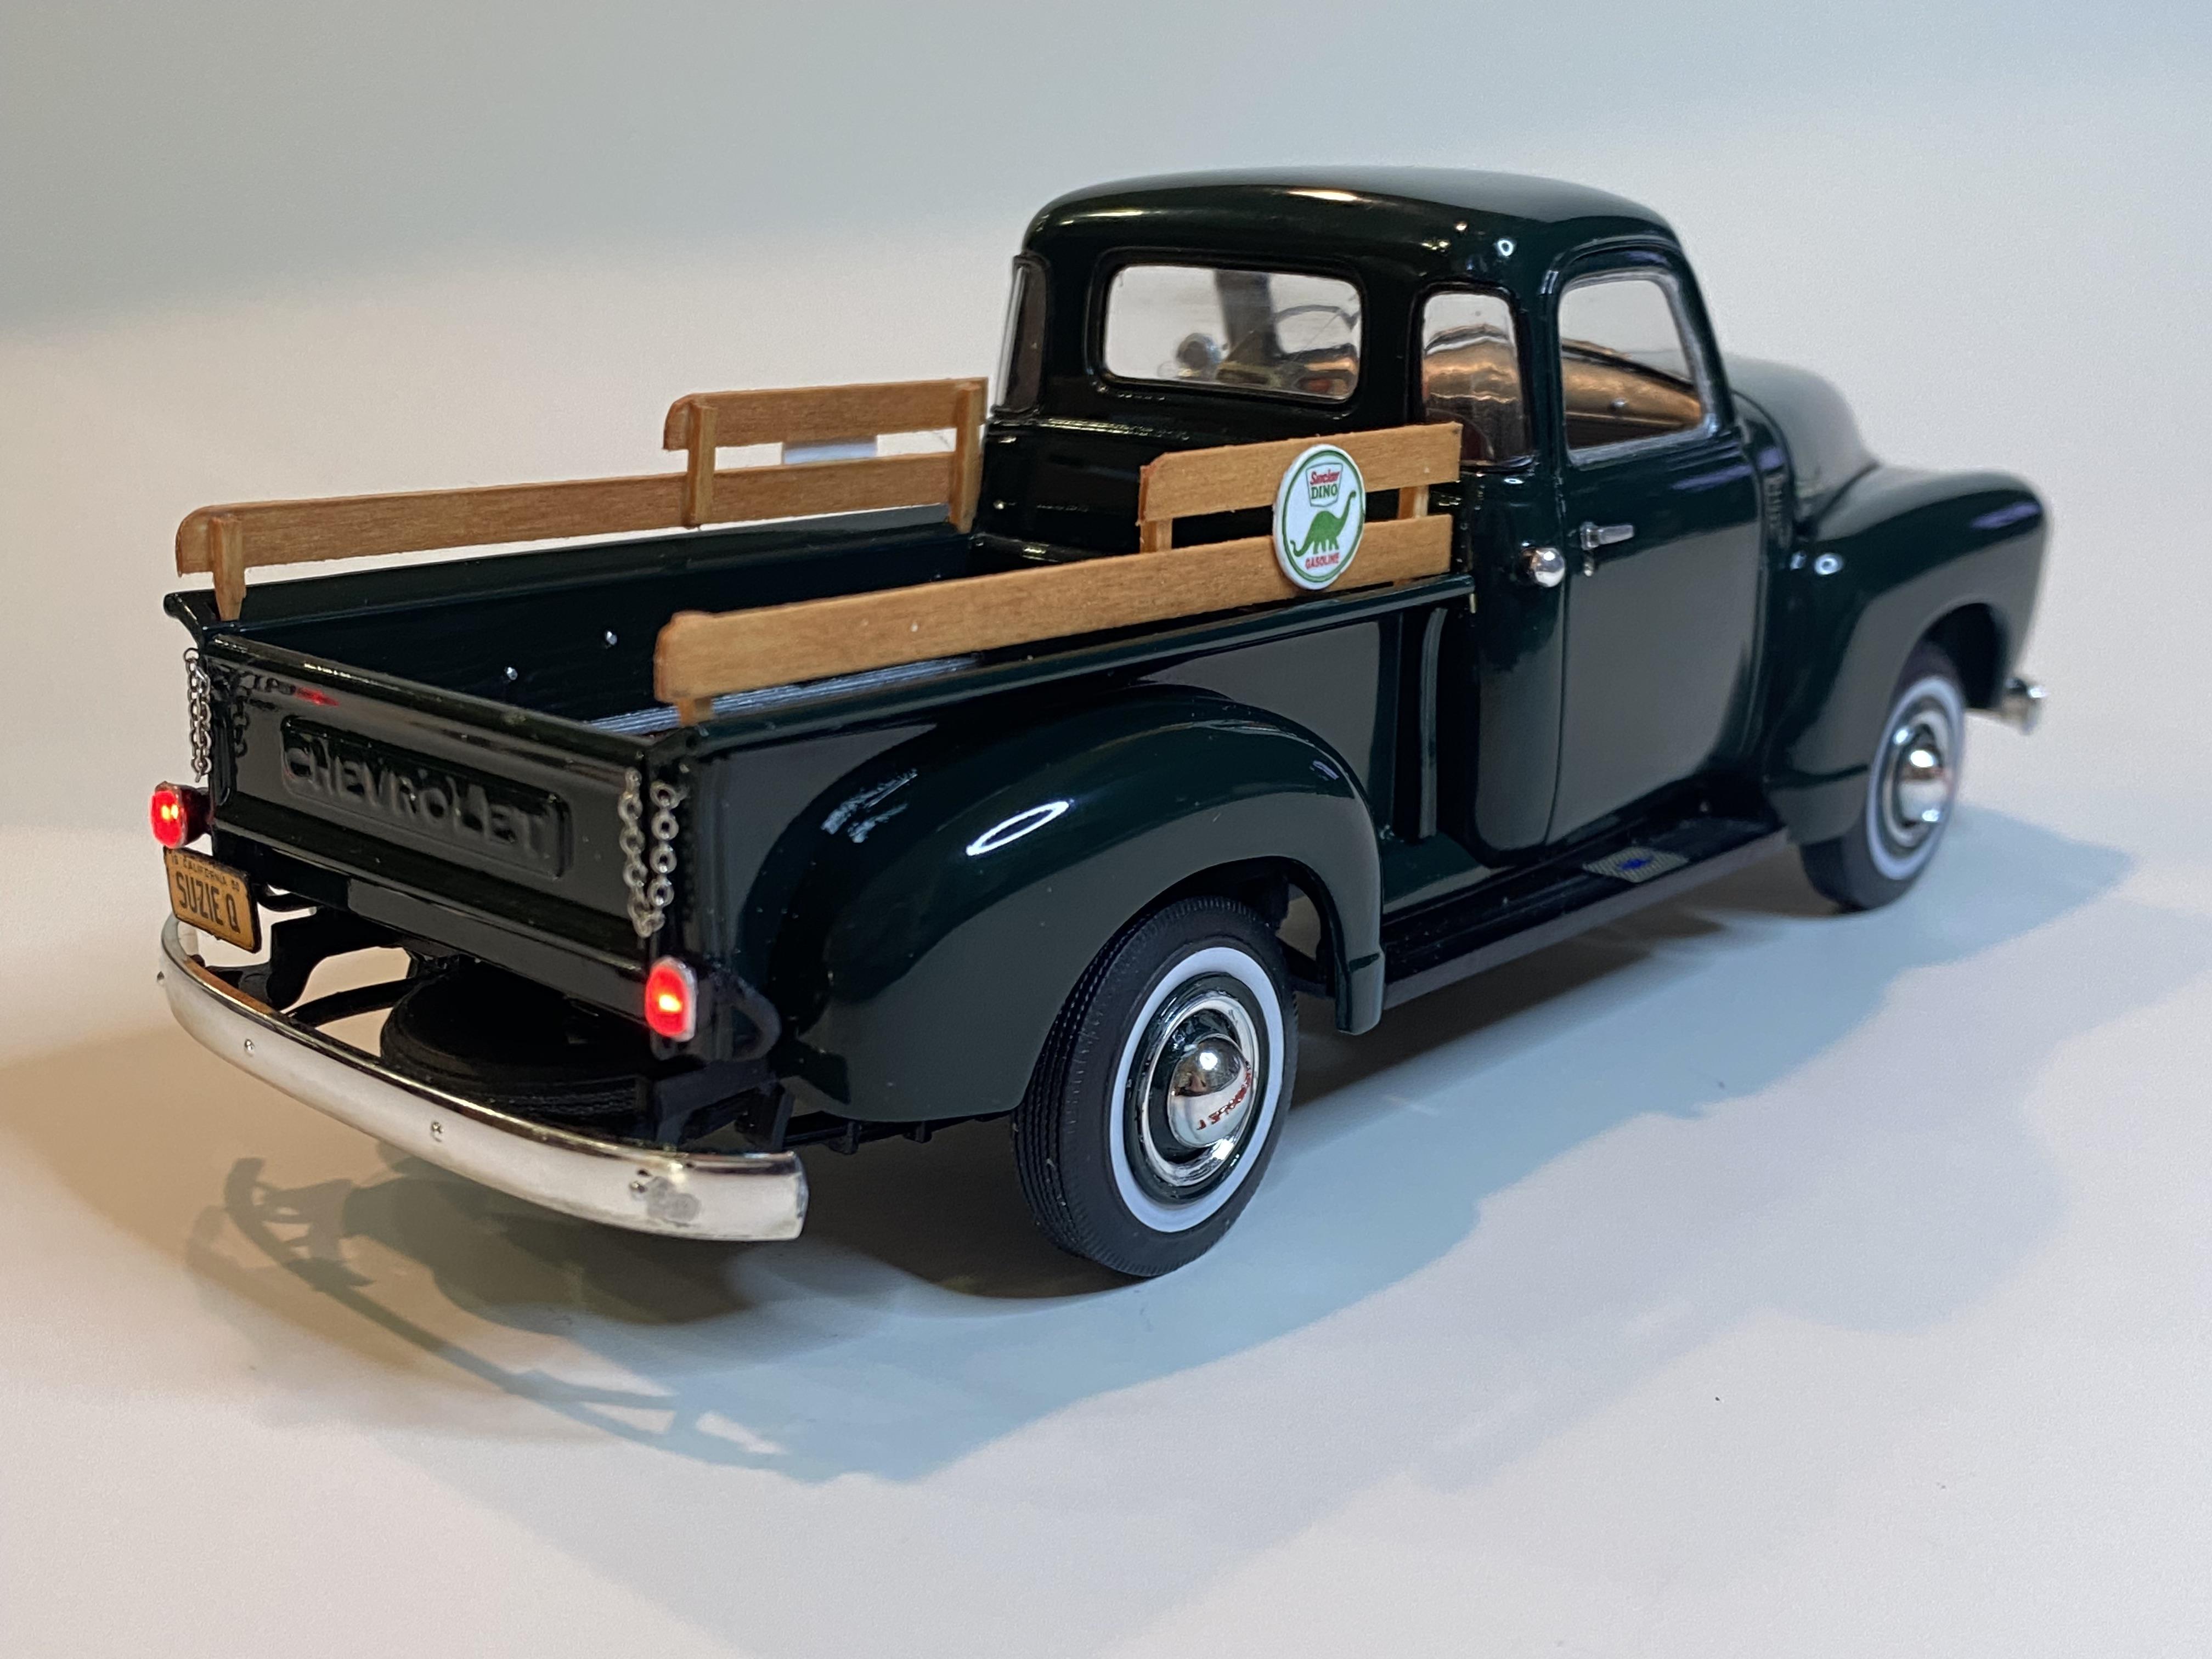
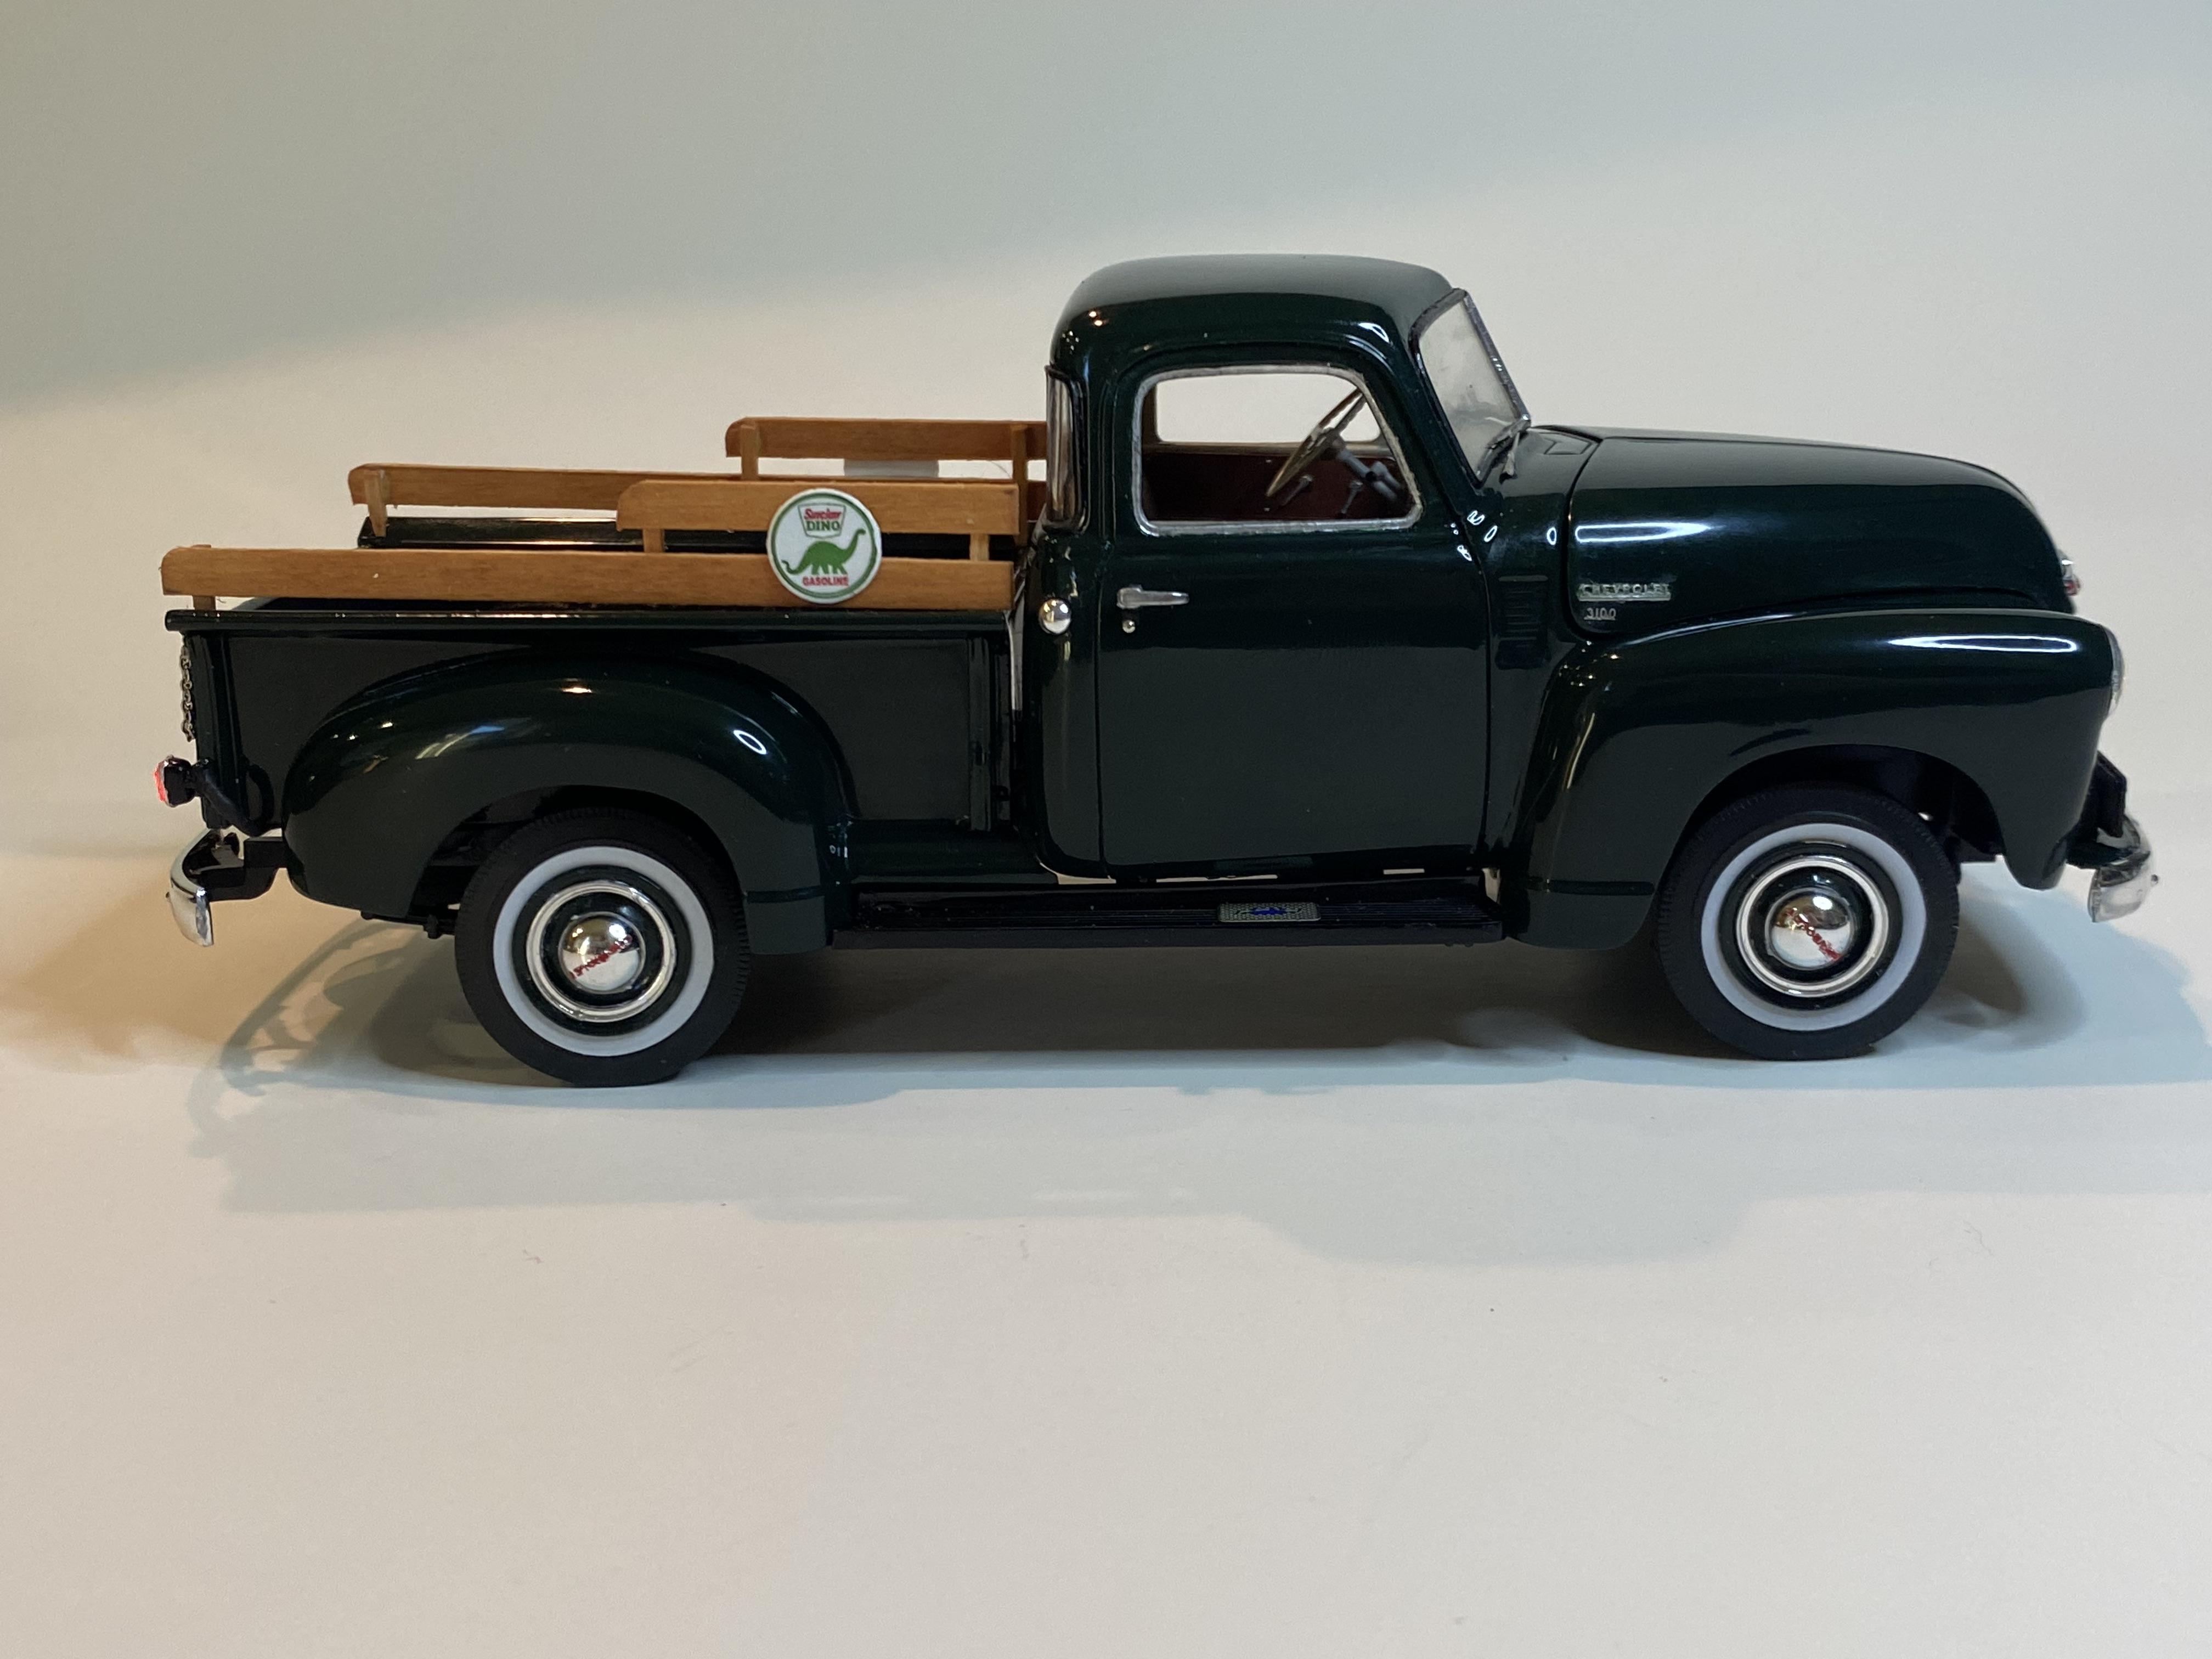
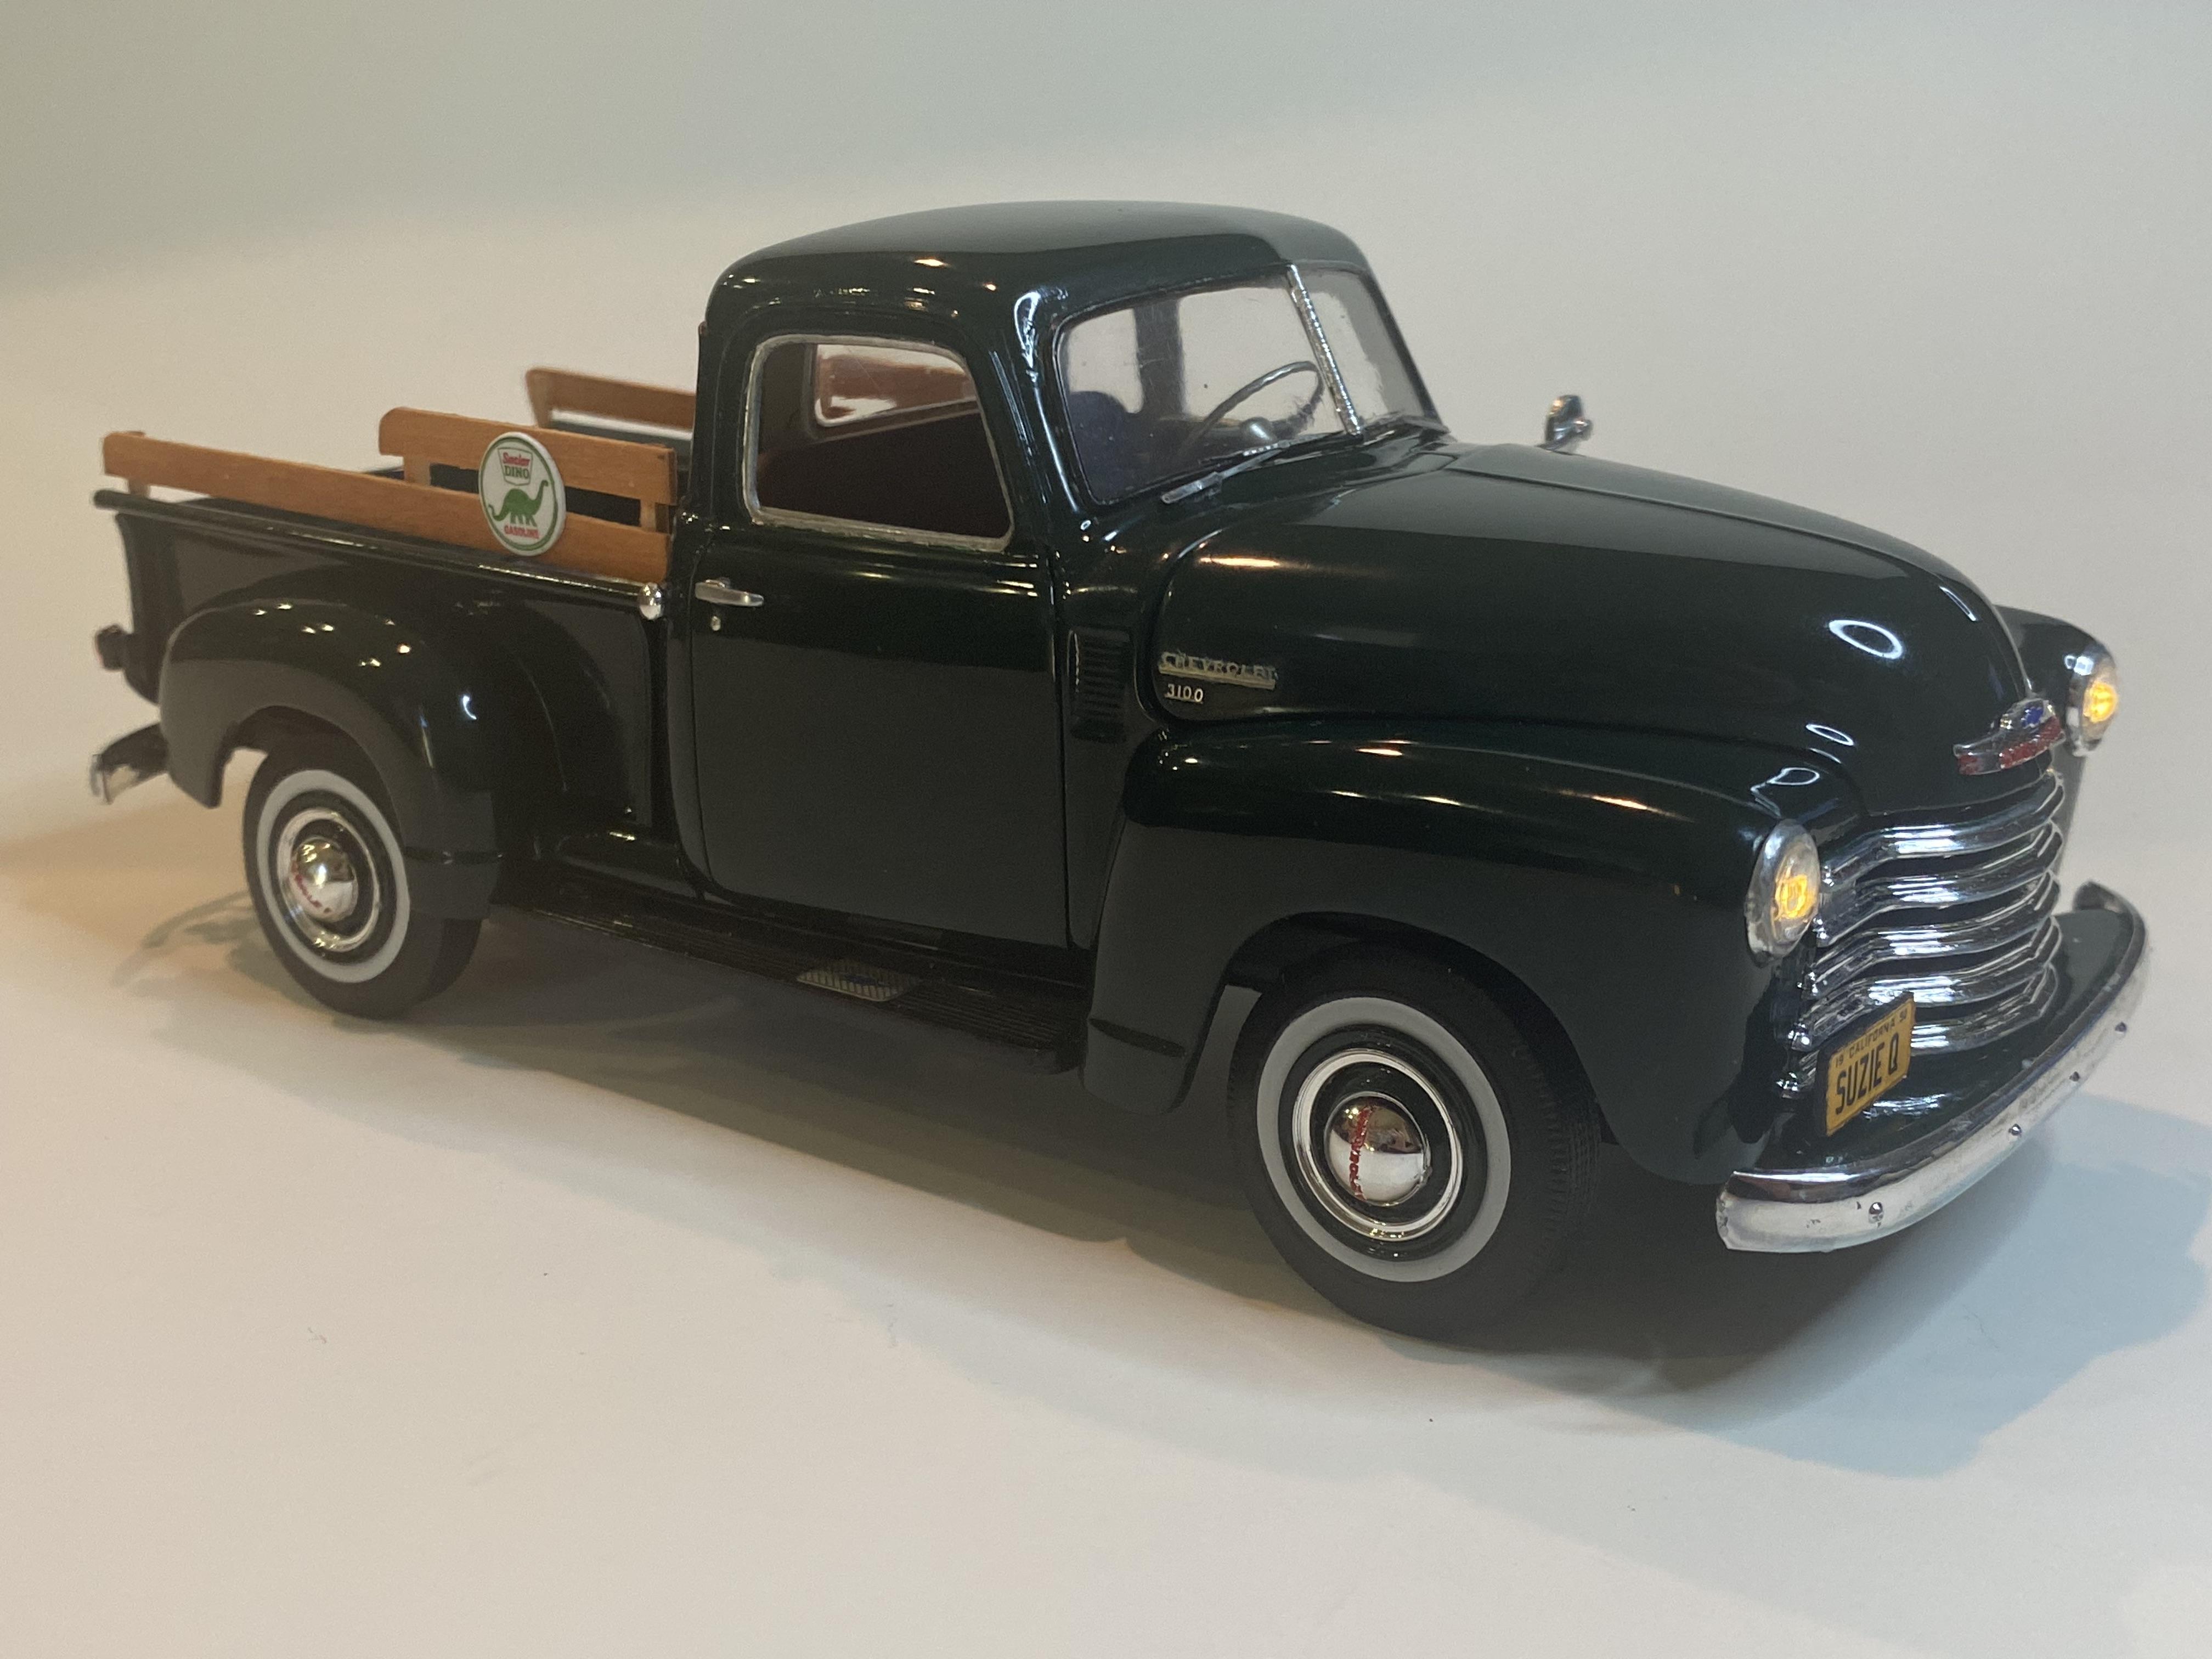
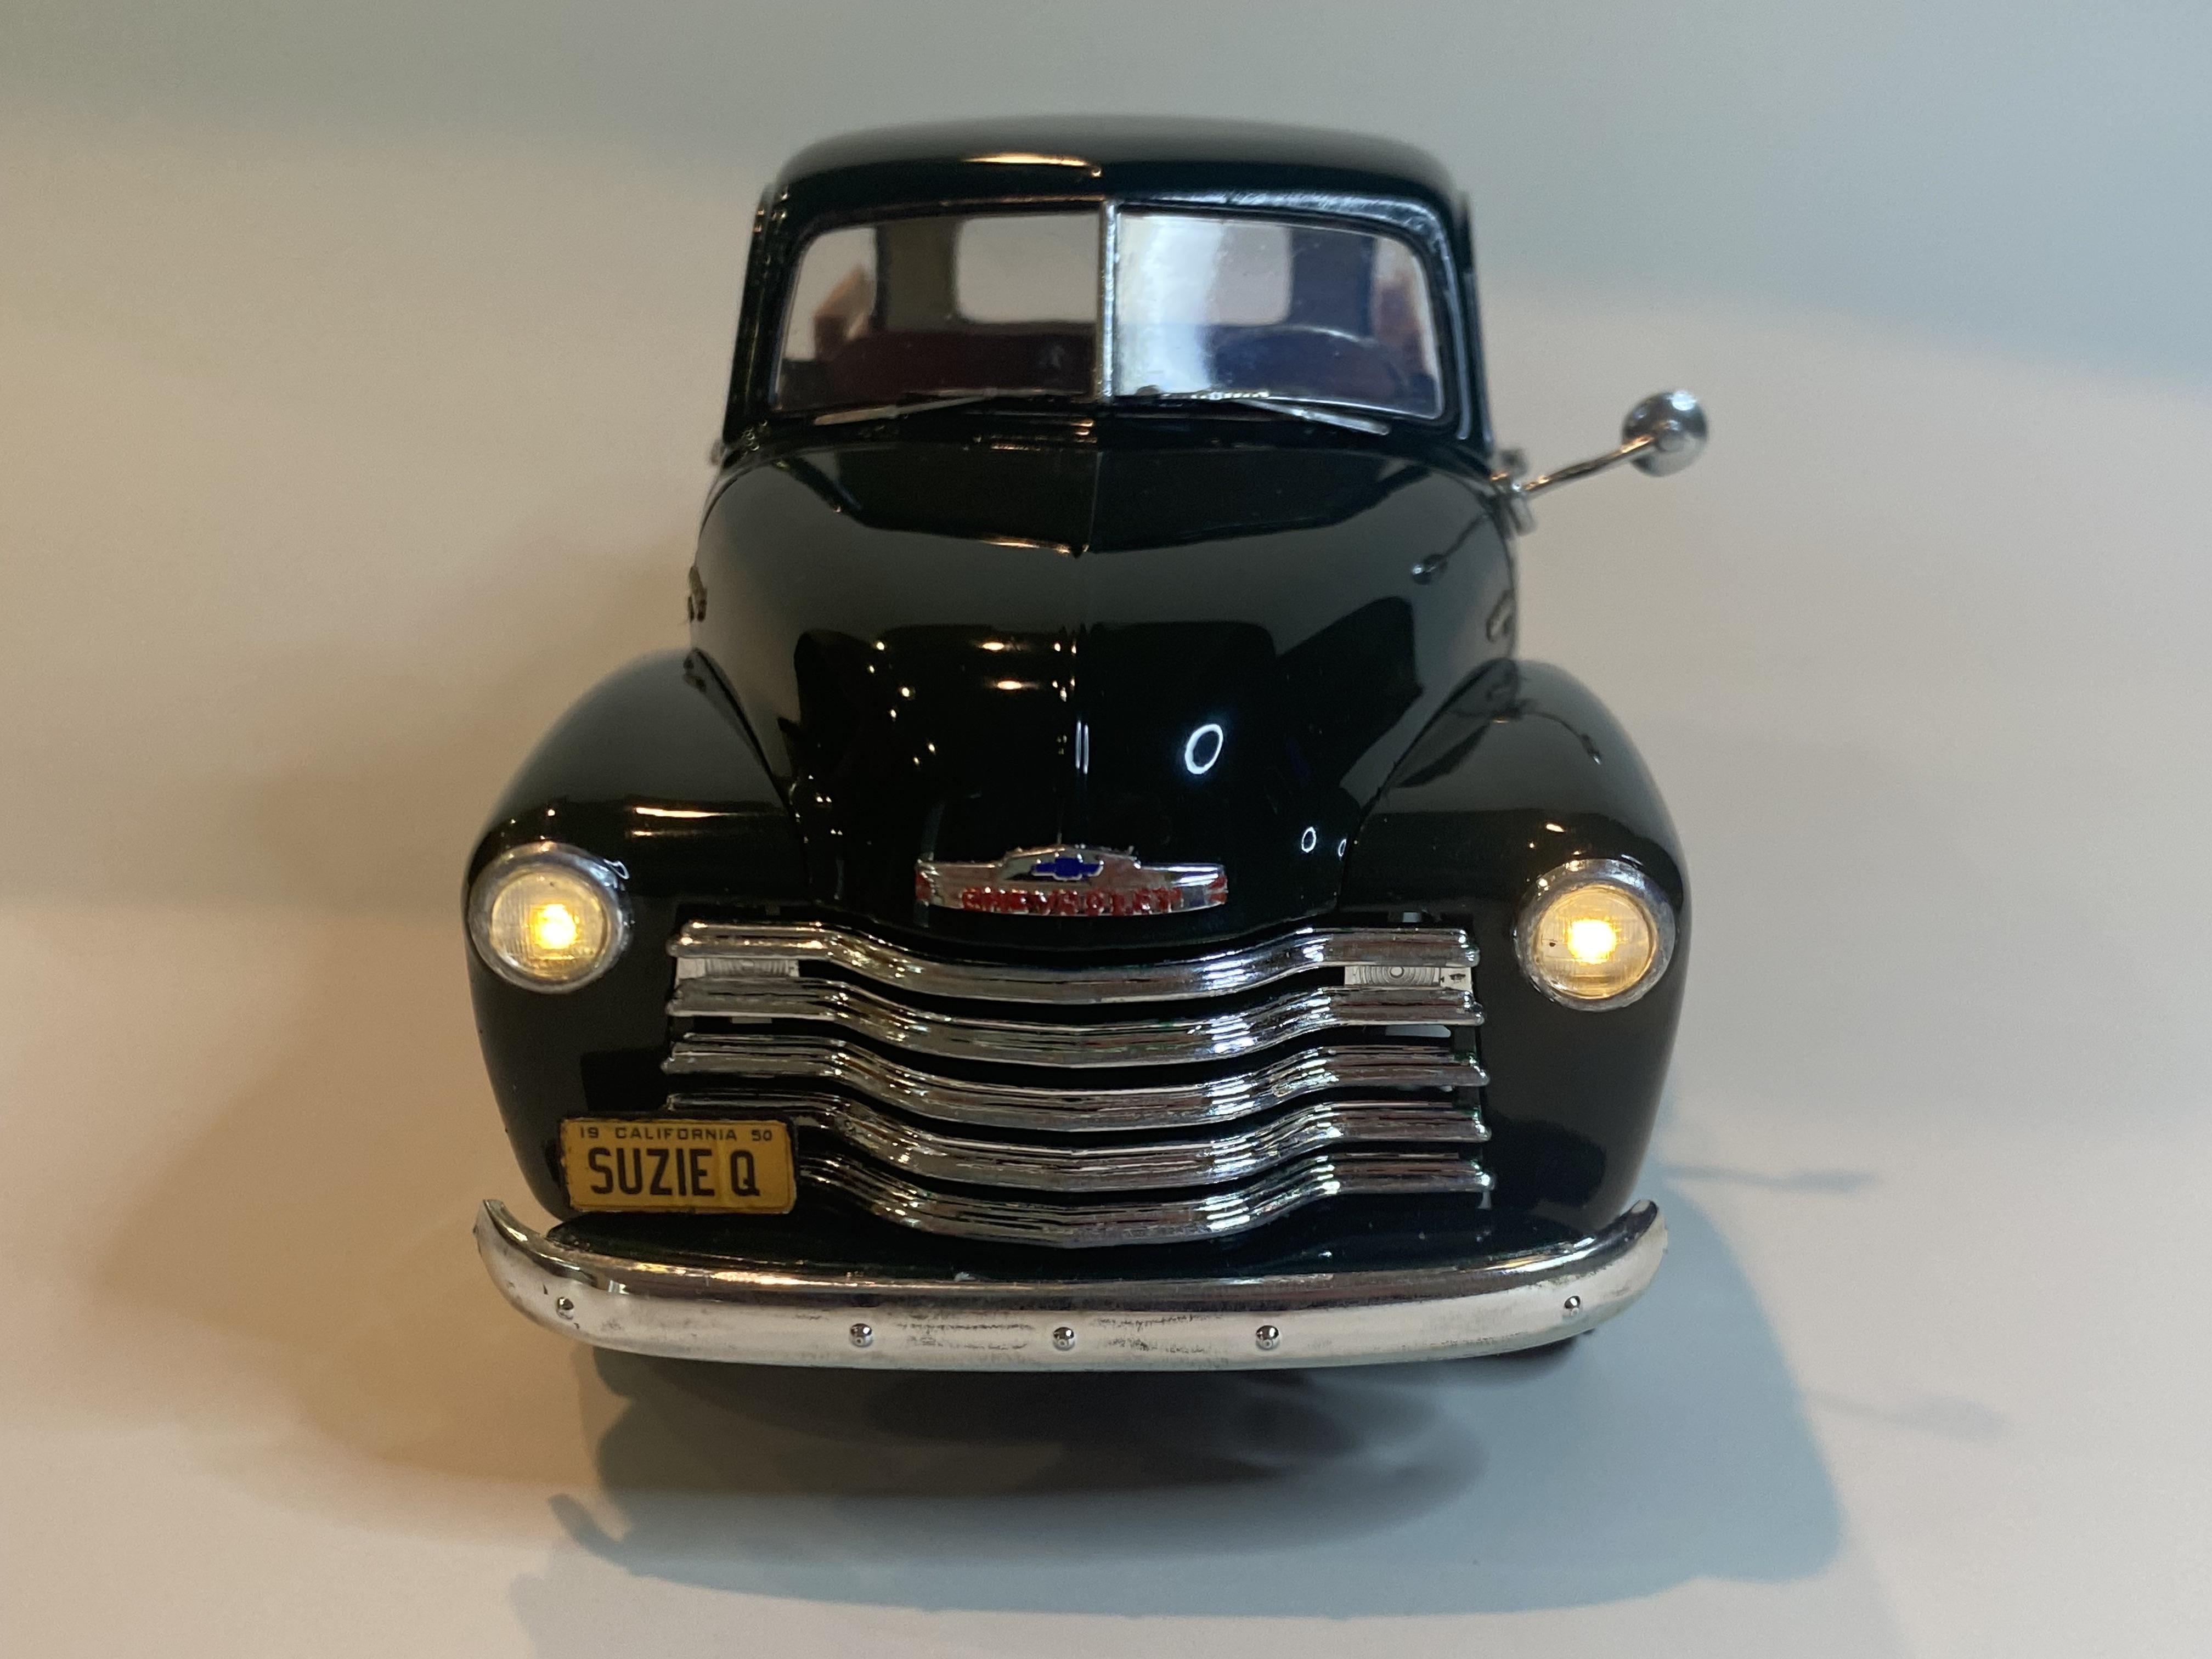
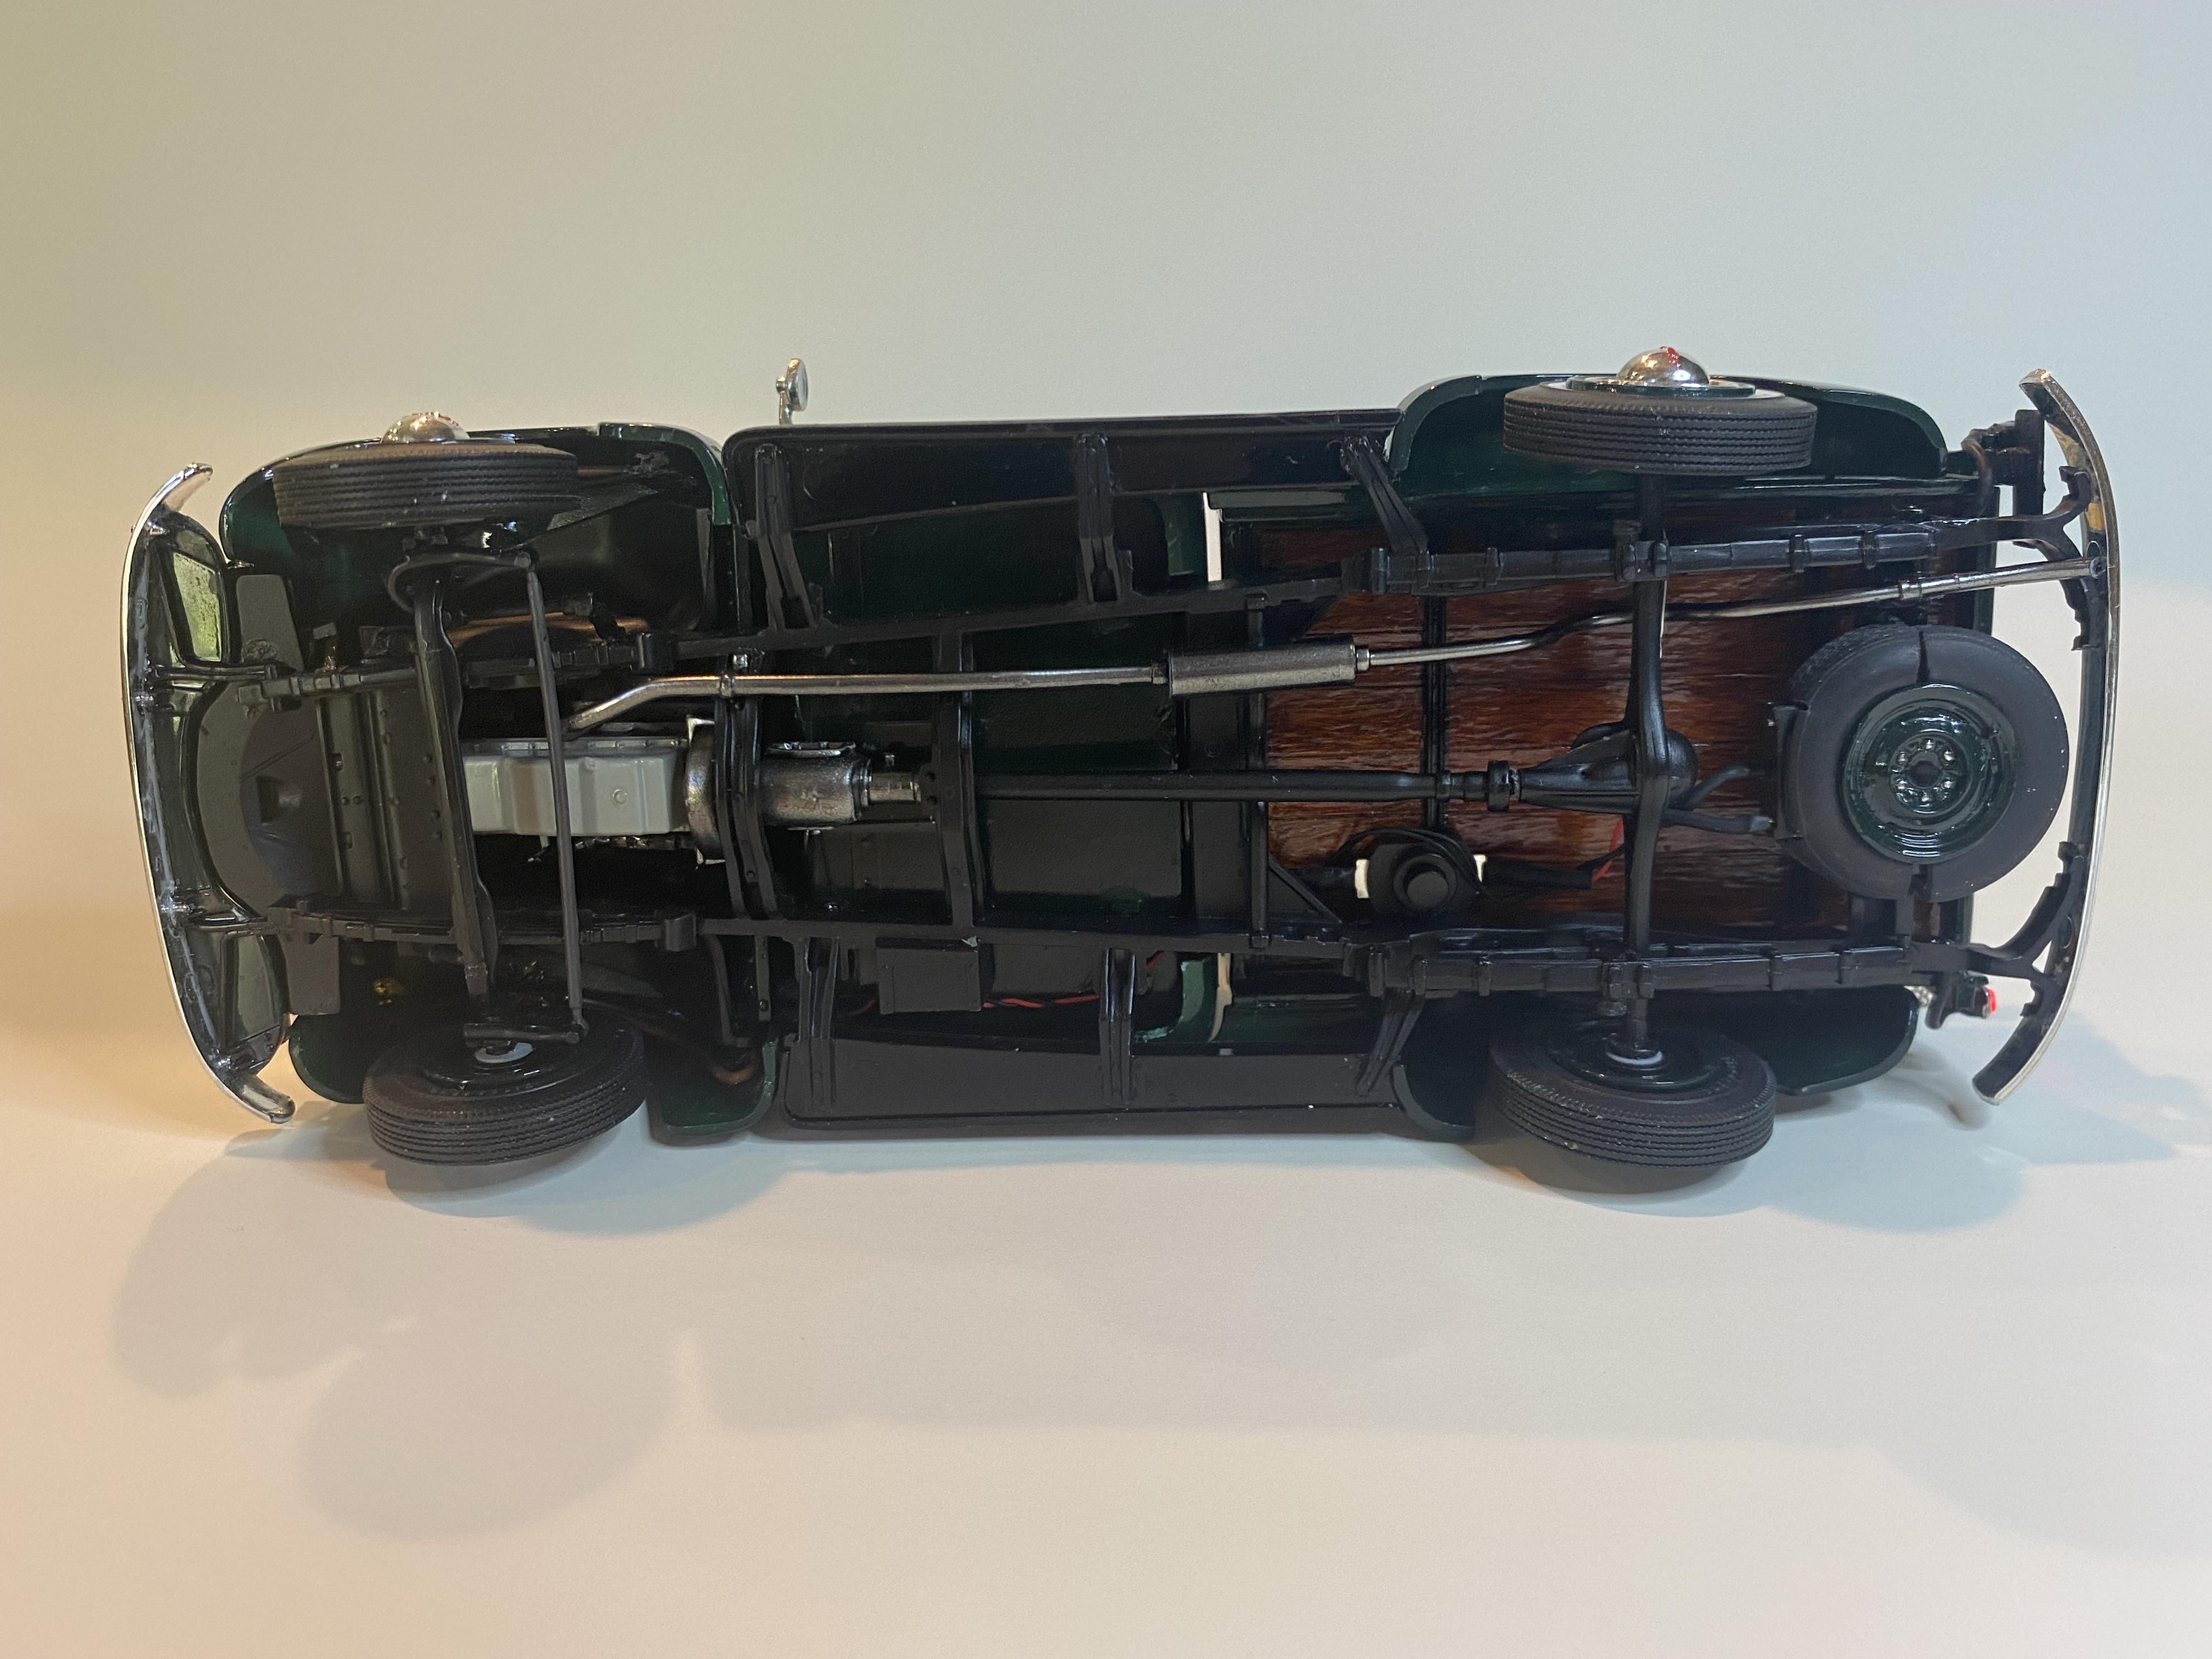
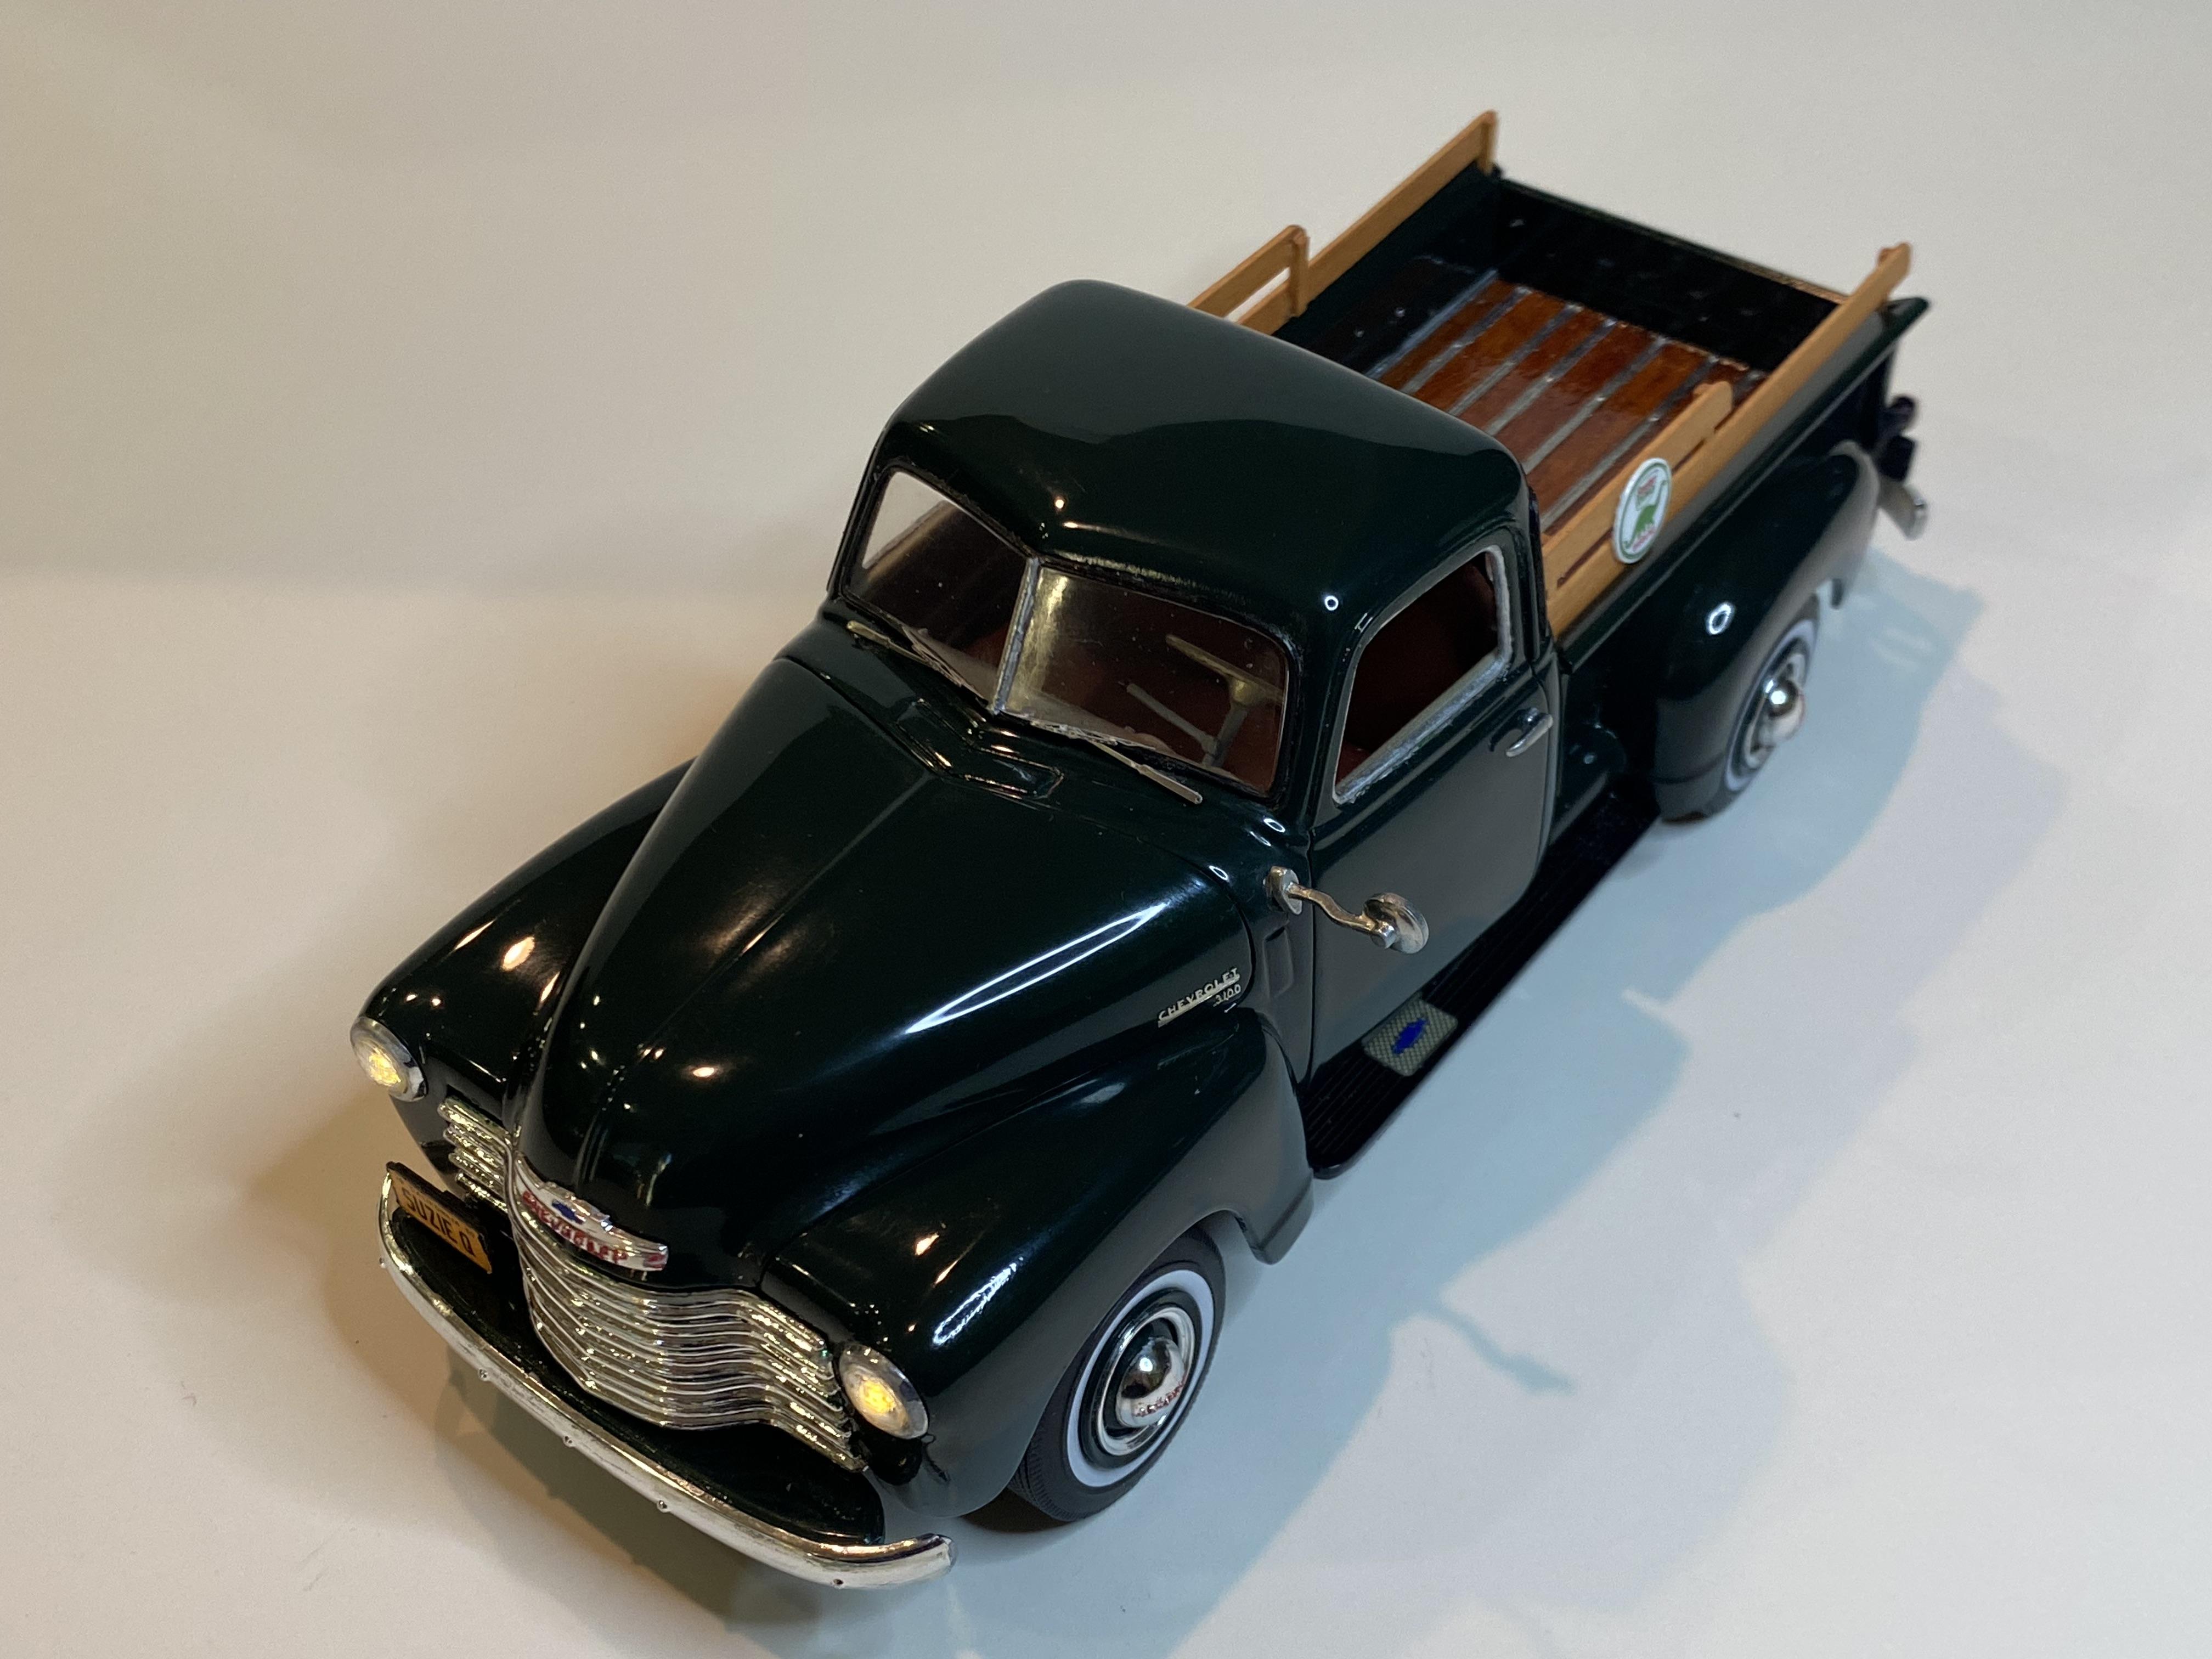
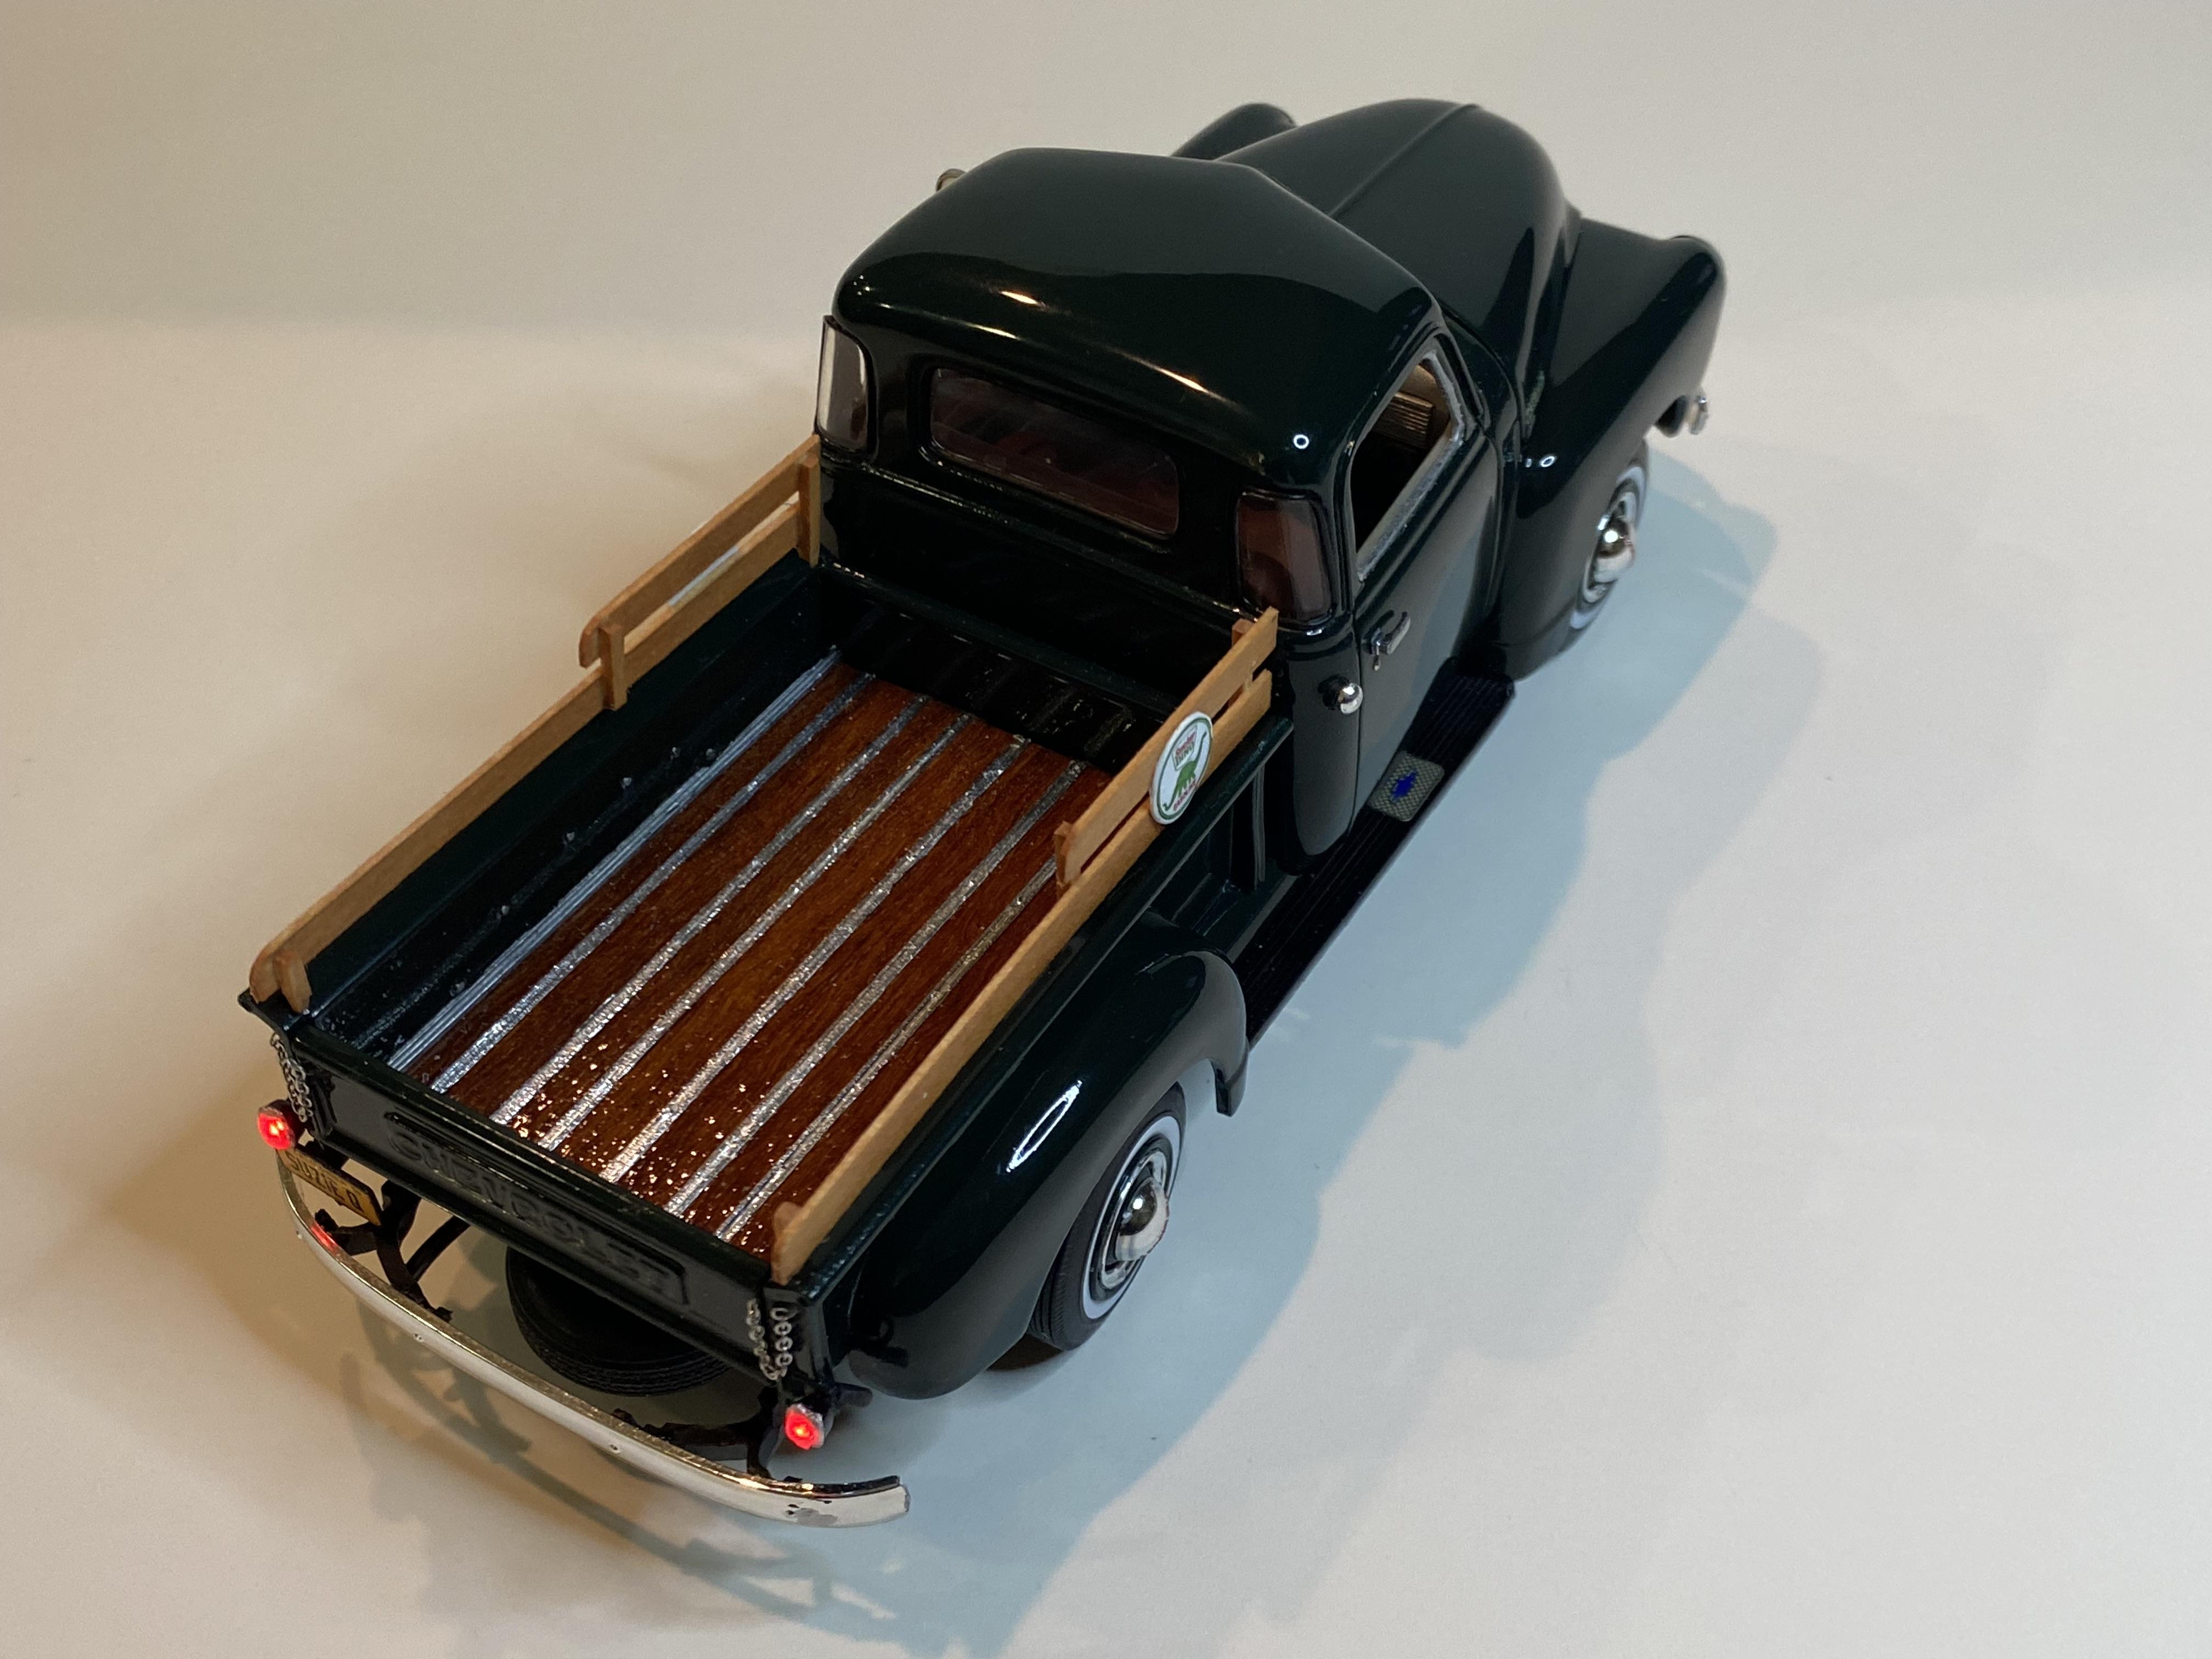
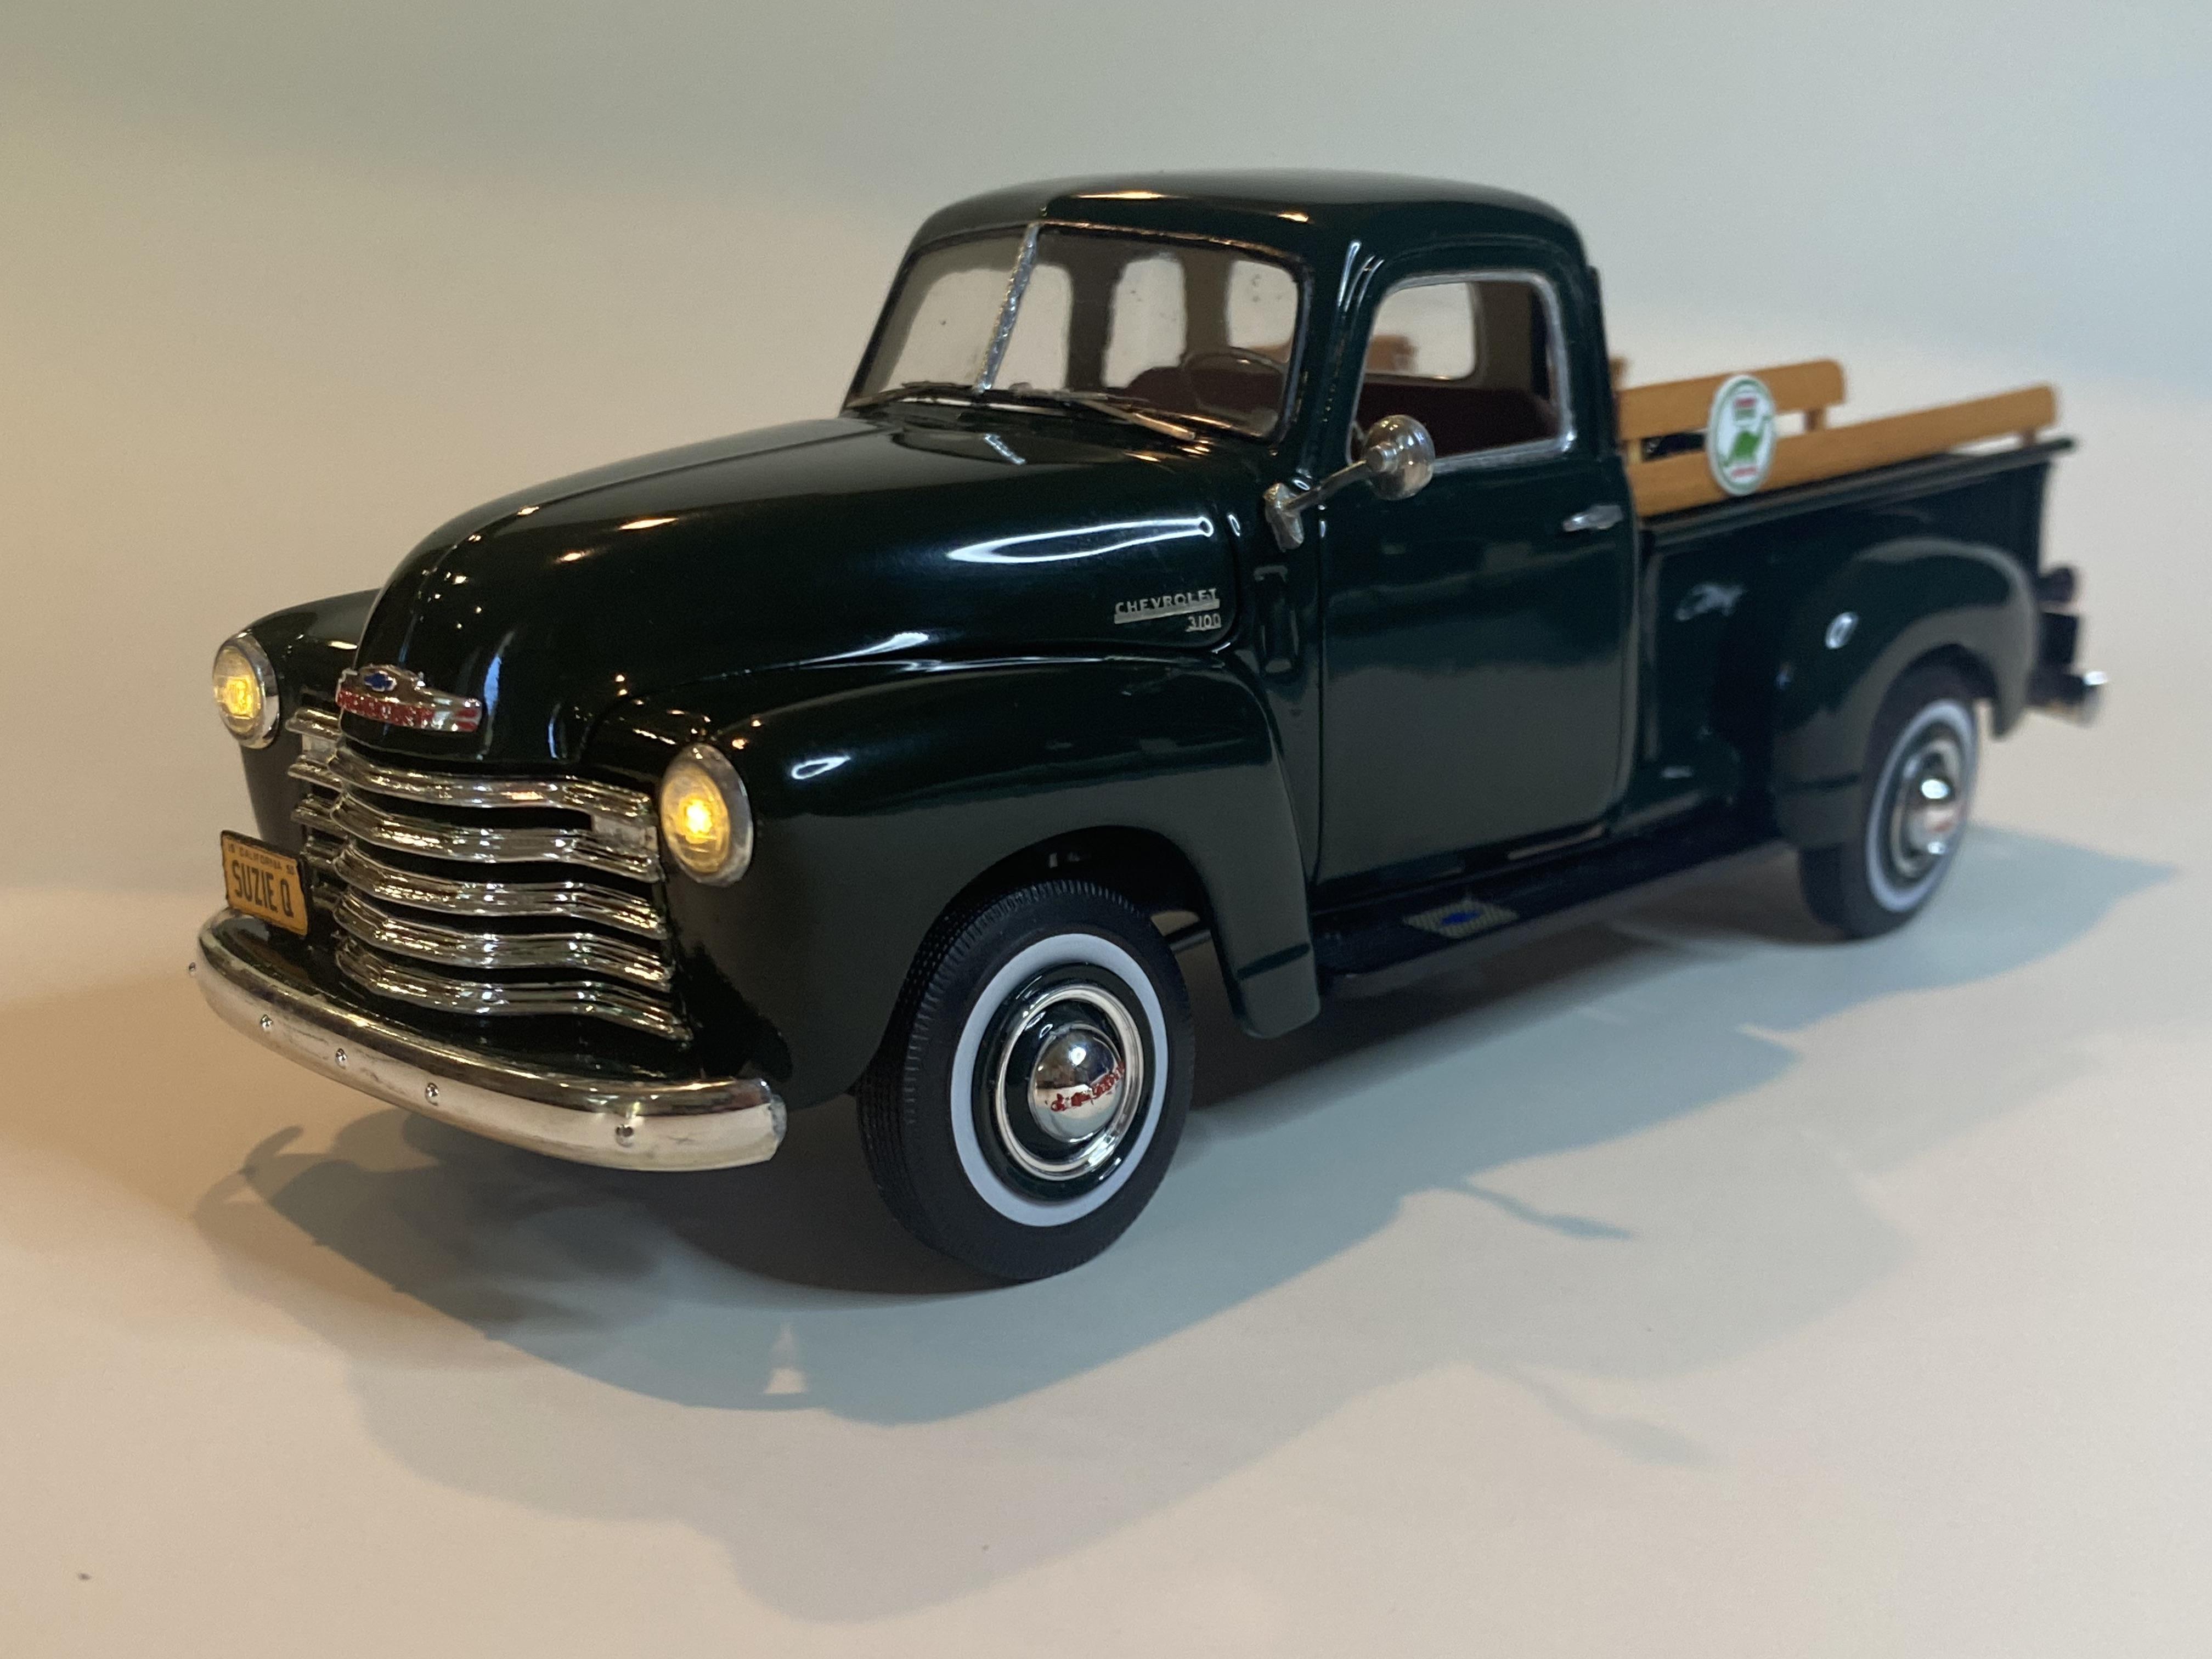
Posted the under glass pictures, this build is now done… until I decide I am not happy with something. ? you can see it here: -
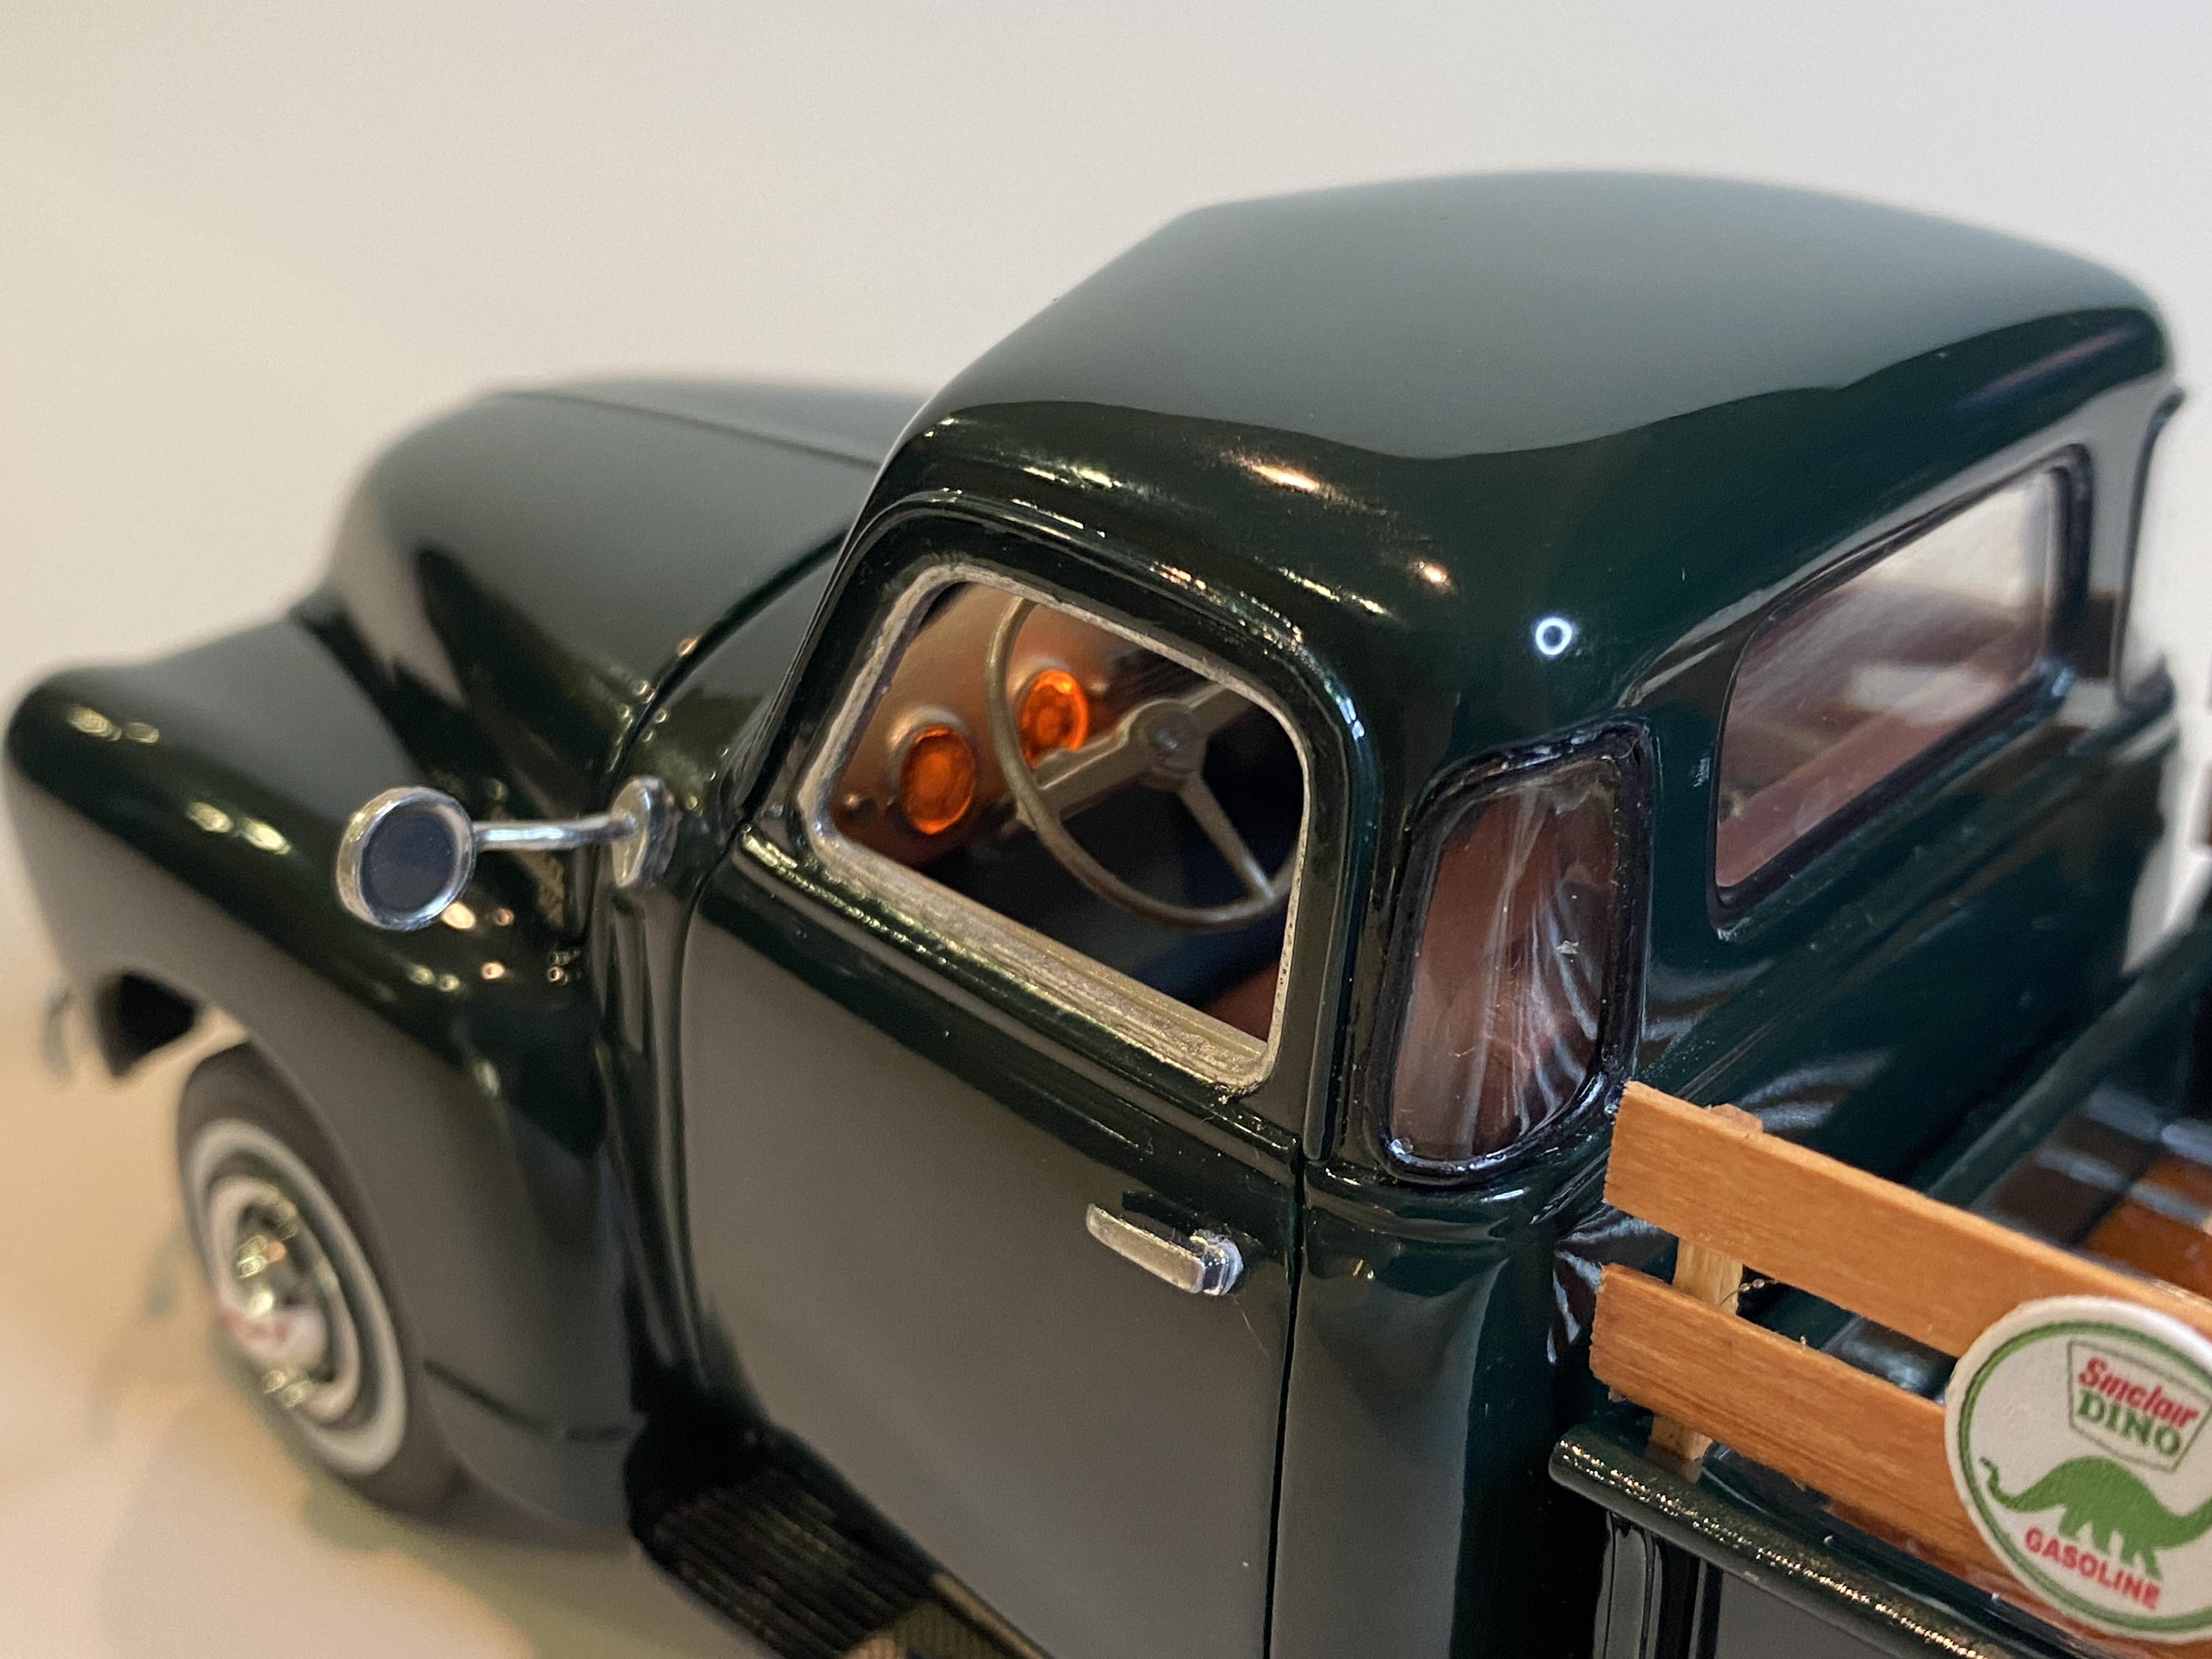
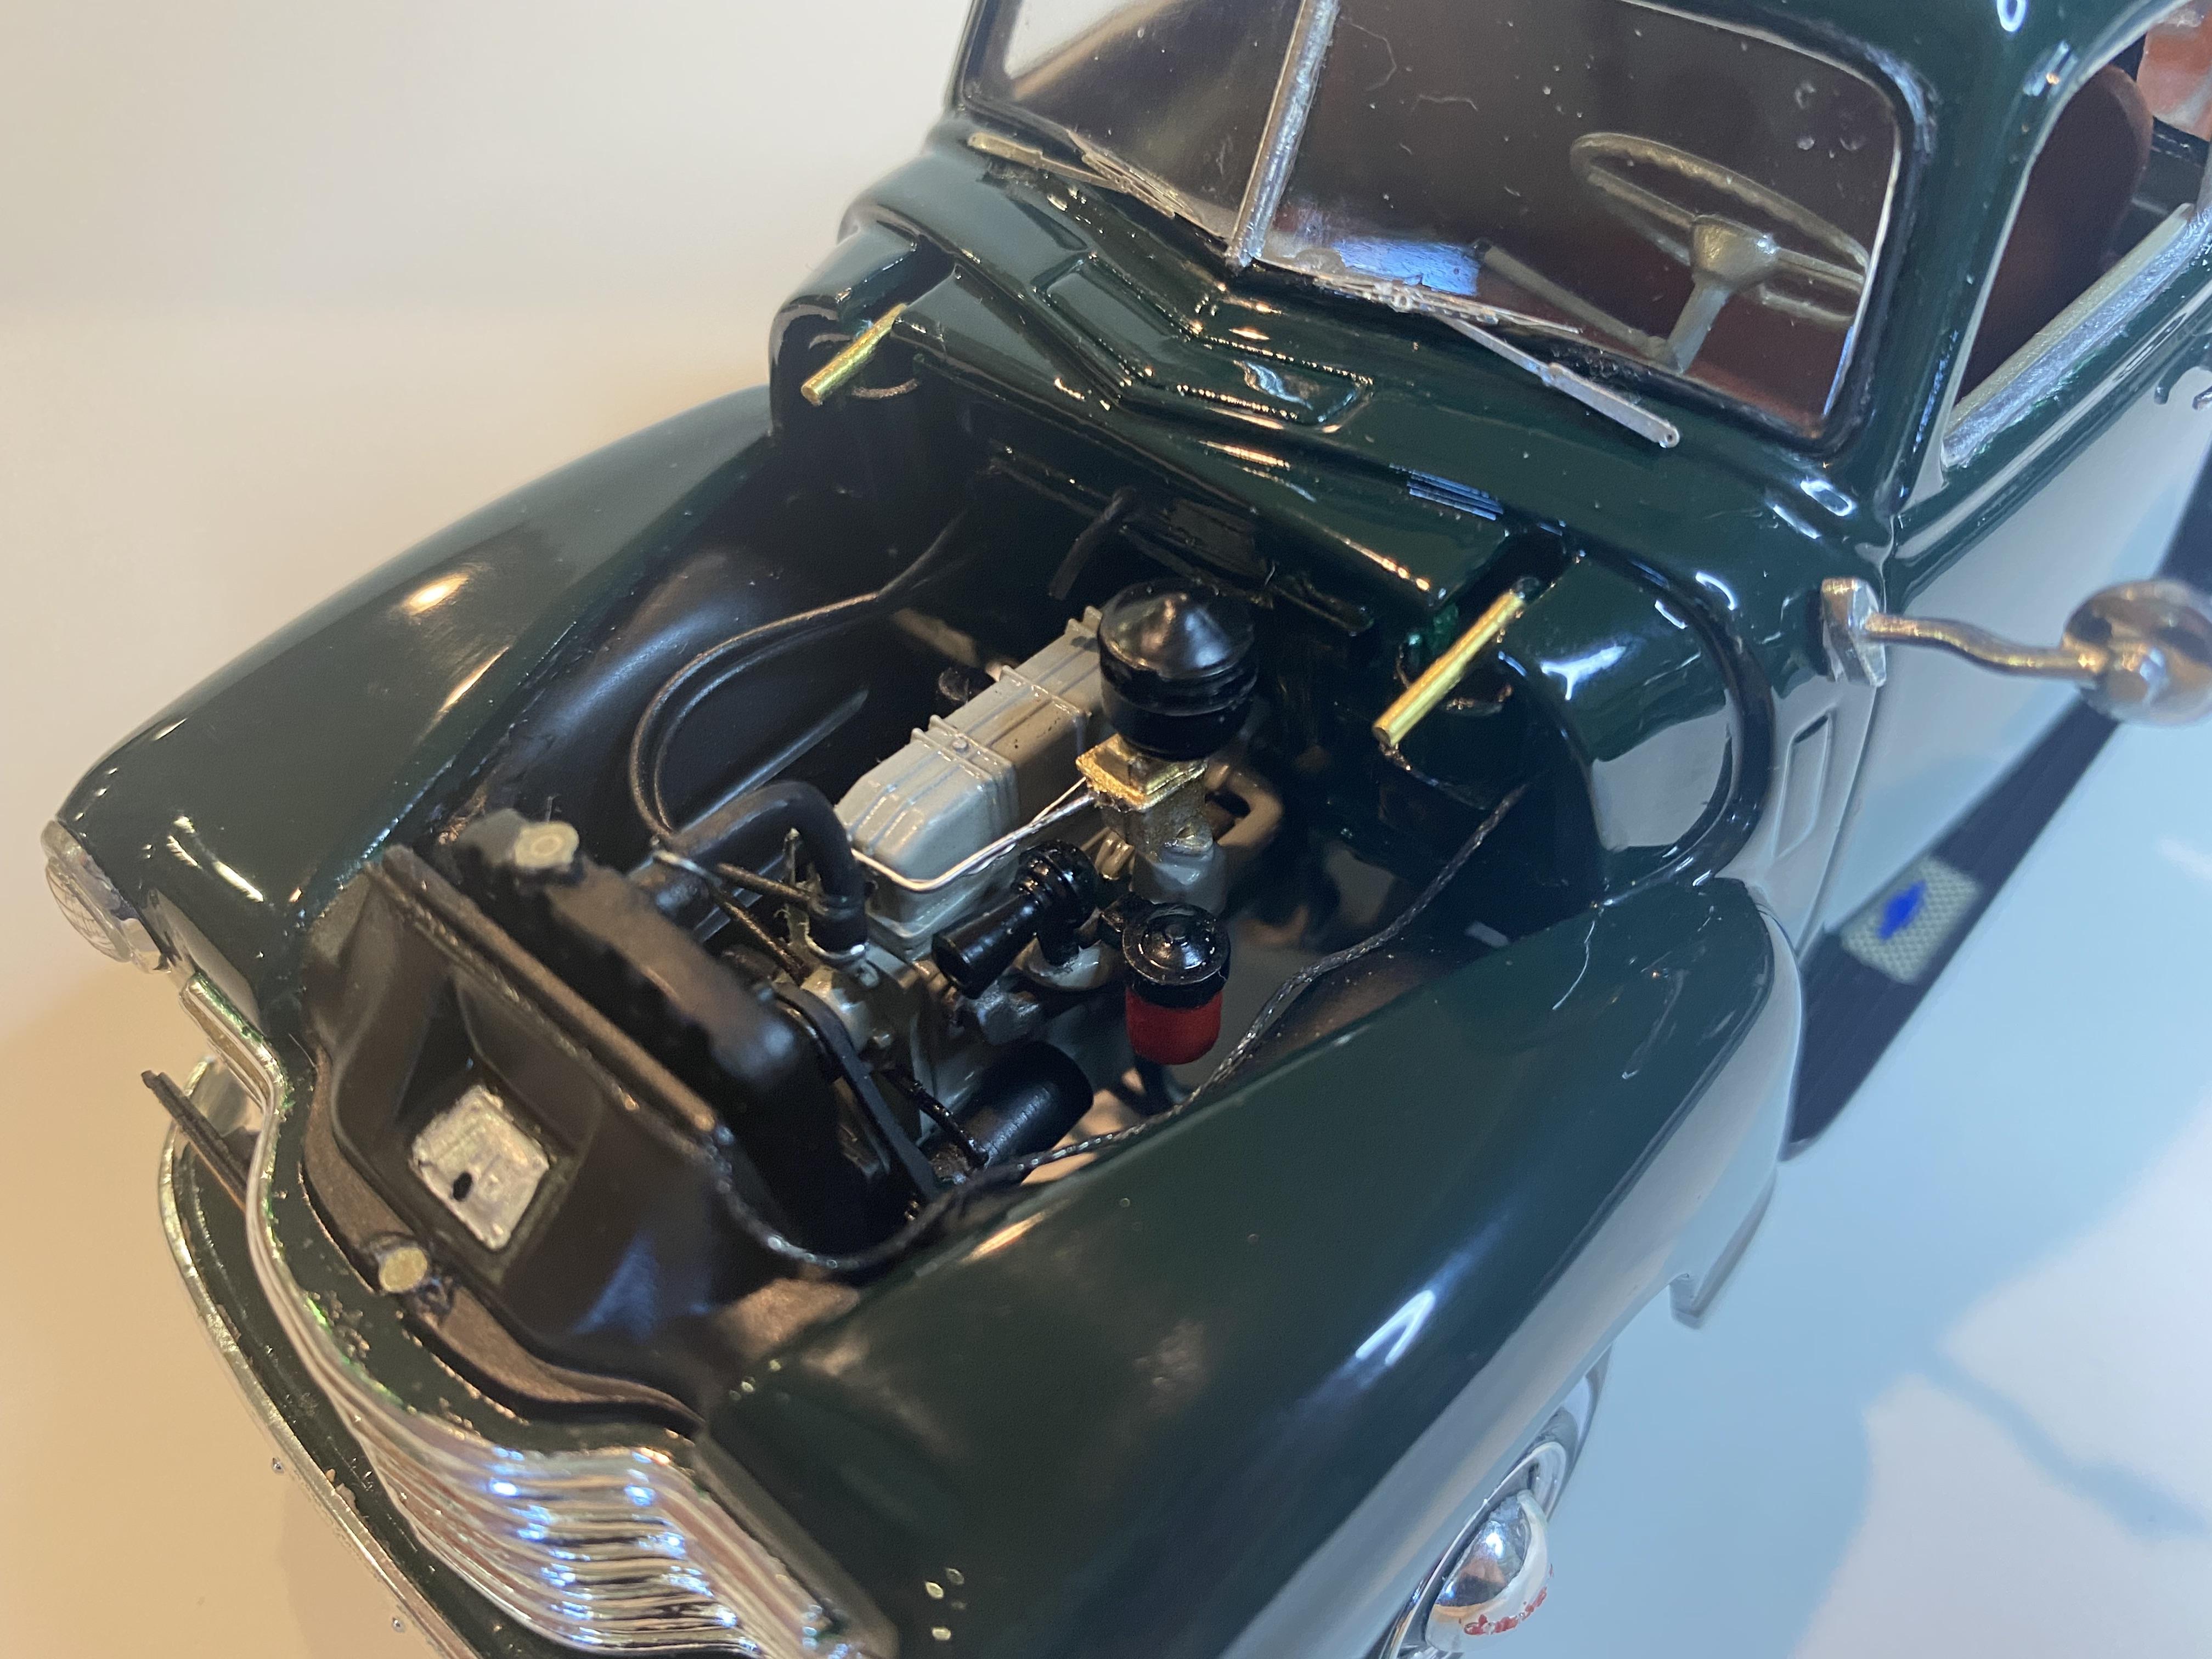
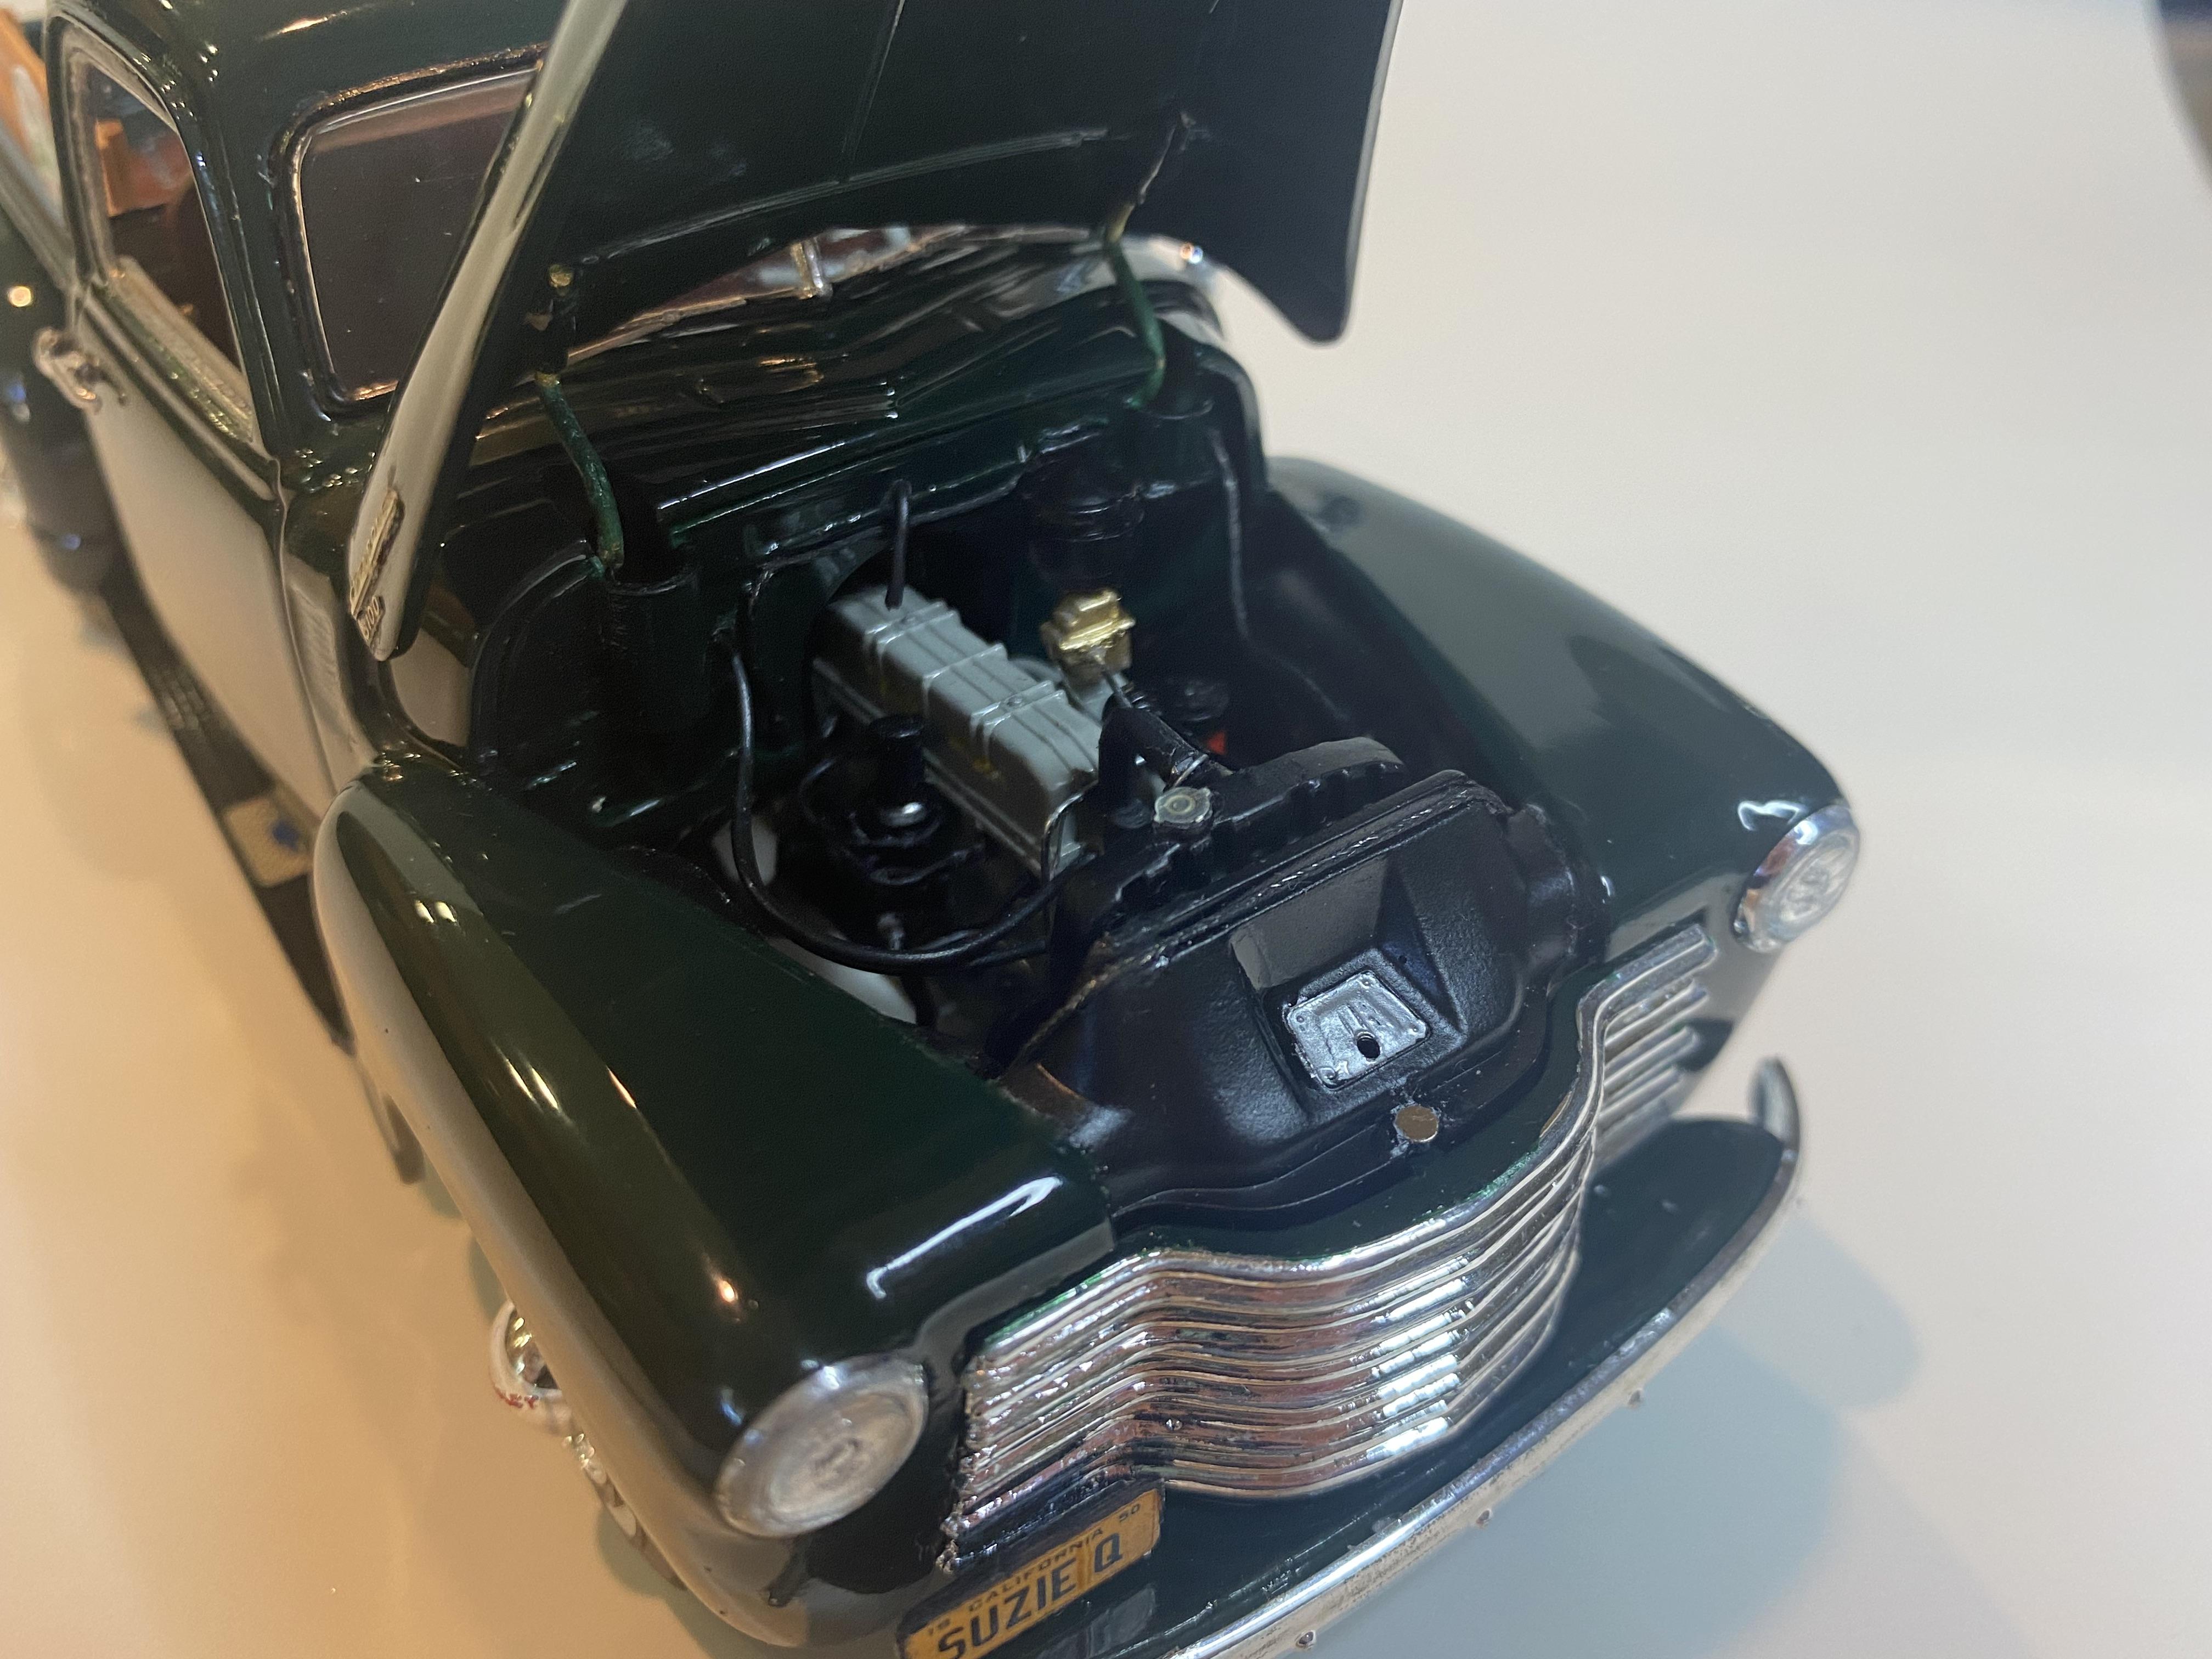
I finally finished the build of a 1950 Chevy 3100 under my wife’s specs so I of course had to name it Suzie Q. As with all my builds working LEDs for headlights, tail lights and gauge lights. The LED coin cell battery is hidden as the spare under the truck bed. My son has a Sinclair gas pump globe as a light in his room that is the same design as the bed slat sign to tie it to him as well. Detailed engine compartment with plug wires in correct firing order, heater lines and wiring. And one shot in the sun if you missed the WIP thread check it out here: