LennyB
-
Posts
3,214 -
Joined
-
Last visited
Content Type
Profiles
Forums
Events
Gallery
Everything posted by LennyB
-
I guess it's a bit tough to do the interior as there isn't a way inside without those door handles. ?
-

AMT 1939 Ford tudor sedan chopped and sectioned
LennyB replied to Paul Payne's topic in WIP: Model Cars
Coming along nice. Sort of reminds me of a Lincoln Zephyr. Just my personal preference but I would square off the bottom of the 'c' pillar to match the 'b' pillar. Or put a little curve in the bottom of the 'b' pillar. Keeps them in harmony so to speak. -
That color looks sweet, I might have to swipe it myself.?
-
That should give it a cool vibe. Are you going to lay the windshield back?
-
Scott, thanks for doing all this research. I now see where you shortened the chassis to move the rear wheels forward while I made up the difference but shortening the leaf springs to move the axle up. More then one way to skin a cat.? I took out a 64 Dodge kit last night and compared the chassis to the Plymouth and found there is no difference between the two. What I did find different is the Dodge has a bench seat, so I'm taking the Dodge seats for my build. ?
-
Good progress Greg, these Plymouth's really put up a fight. ?
-
OK, maybe I misunderstood. Did you cut the chassis to shorten it? I took it to mean you cut some off the back edge.
-
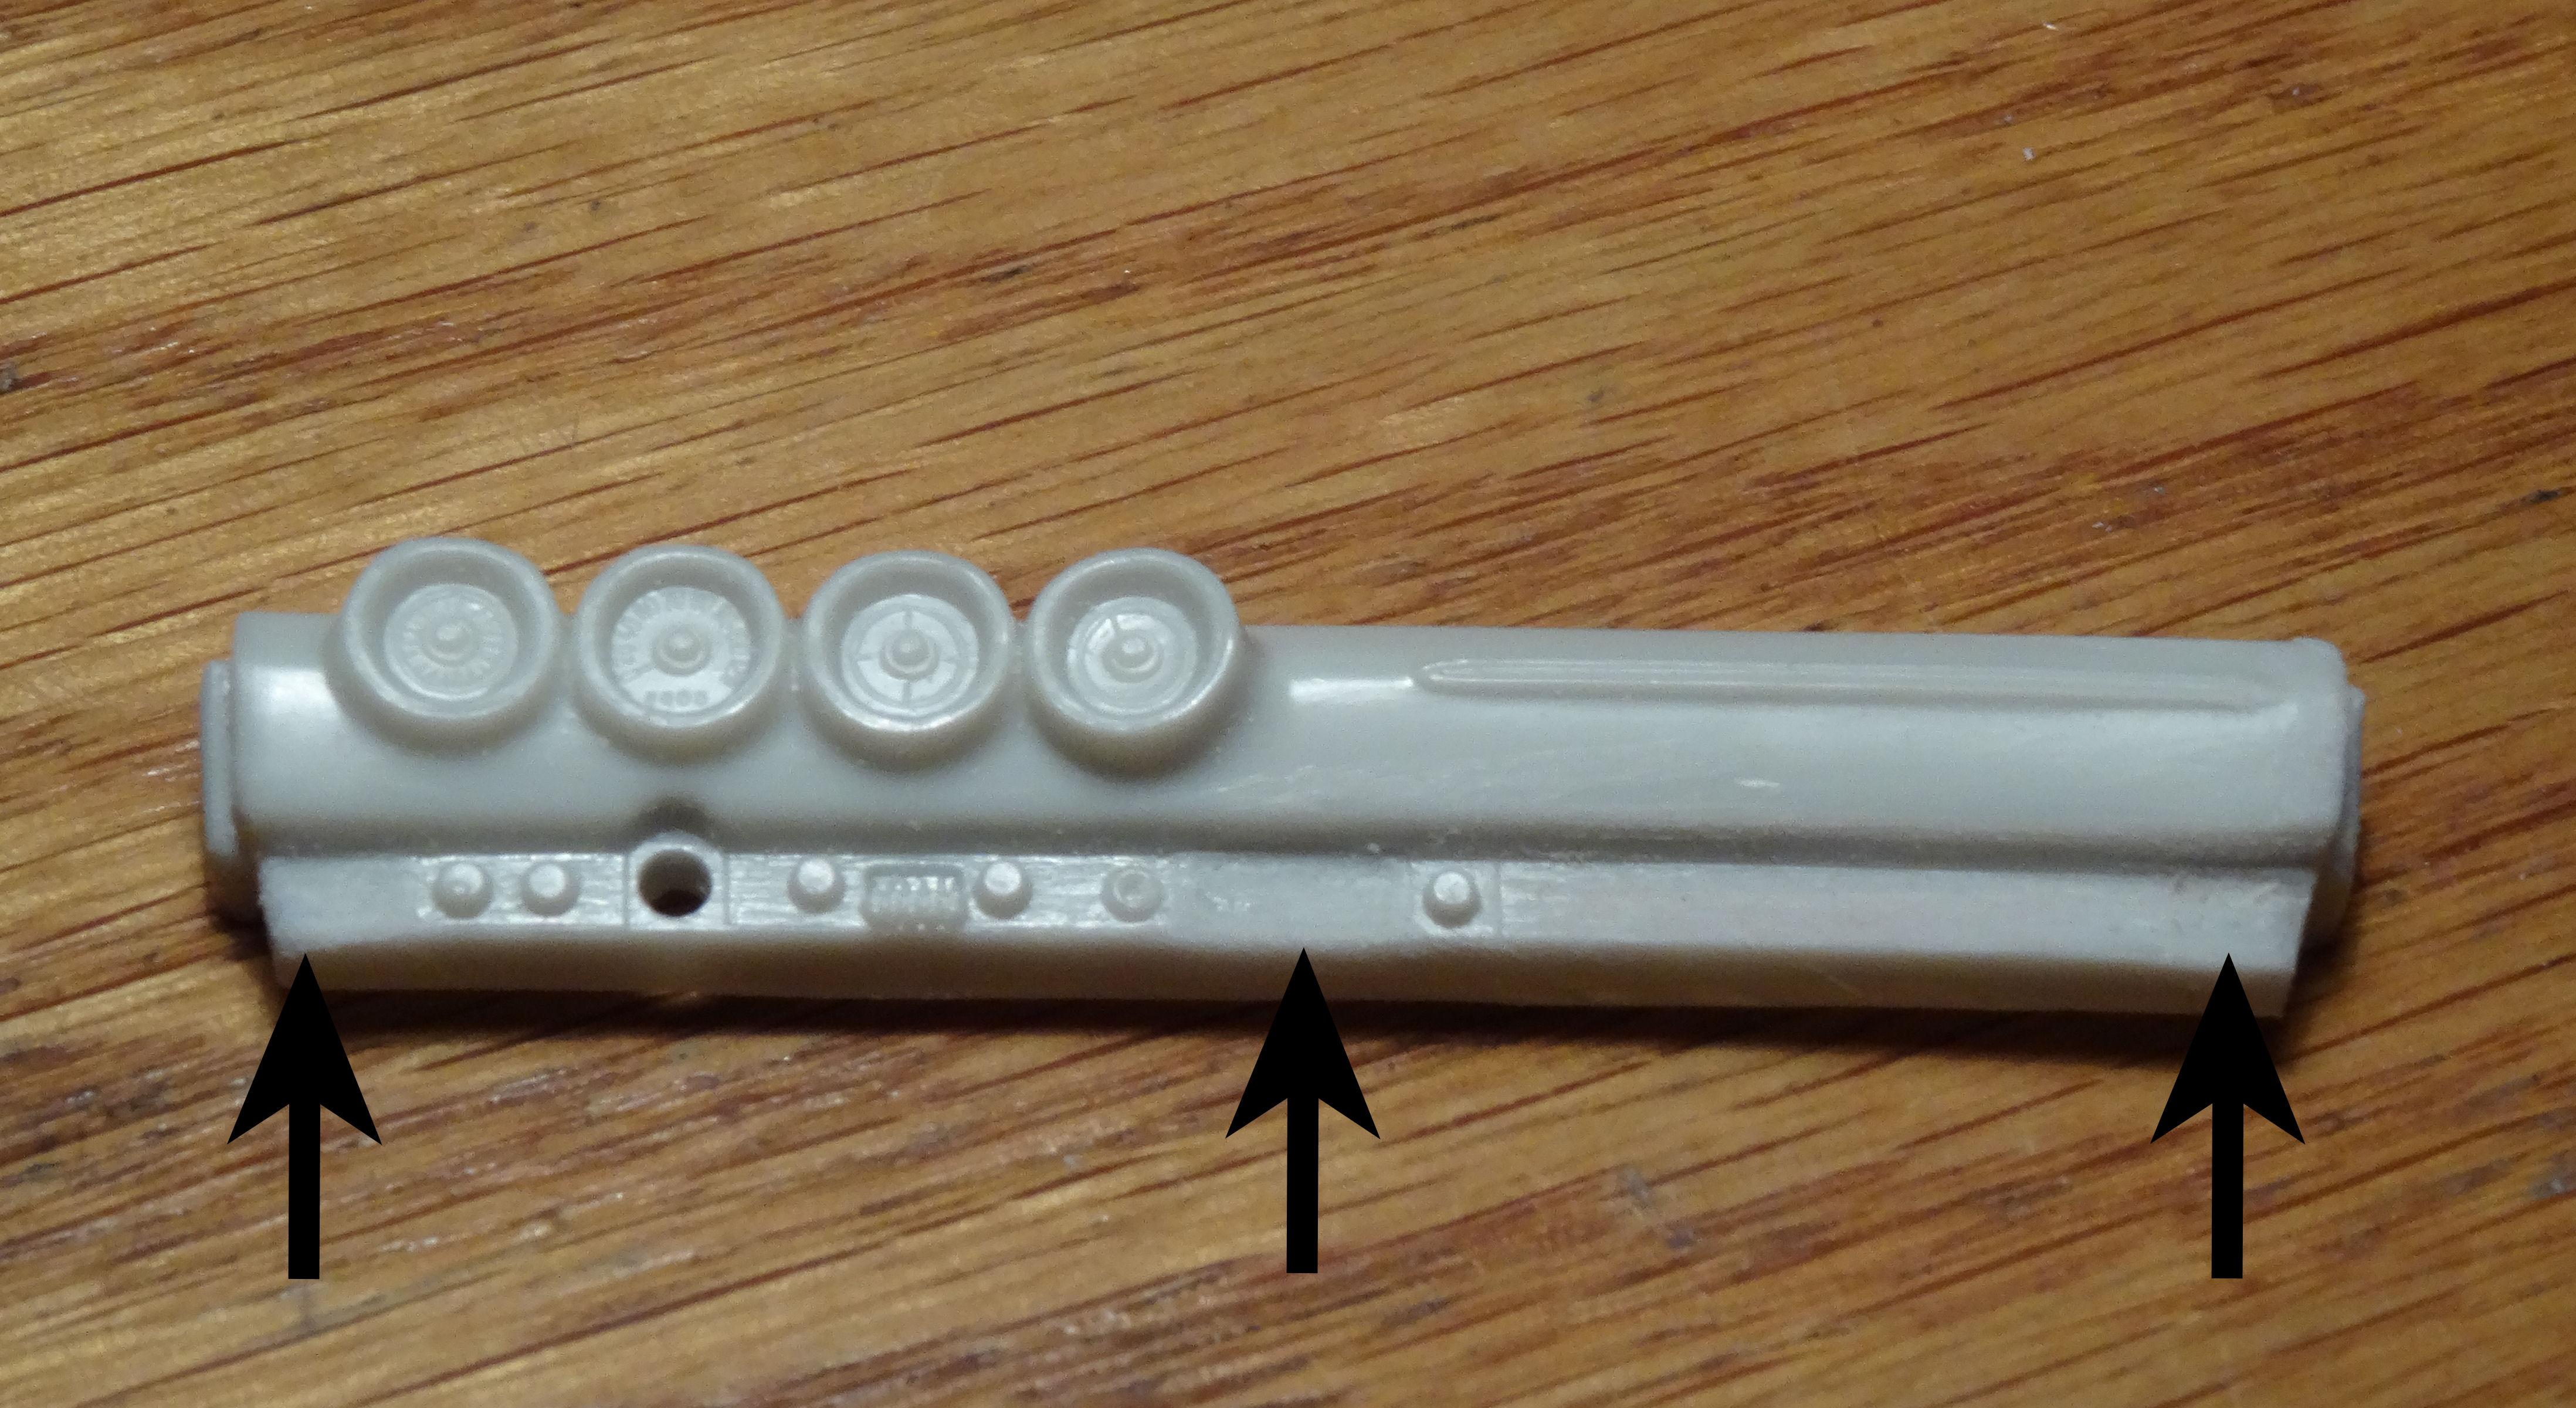
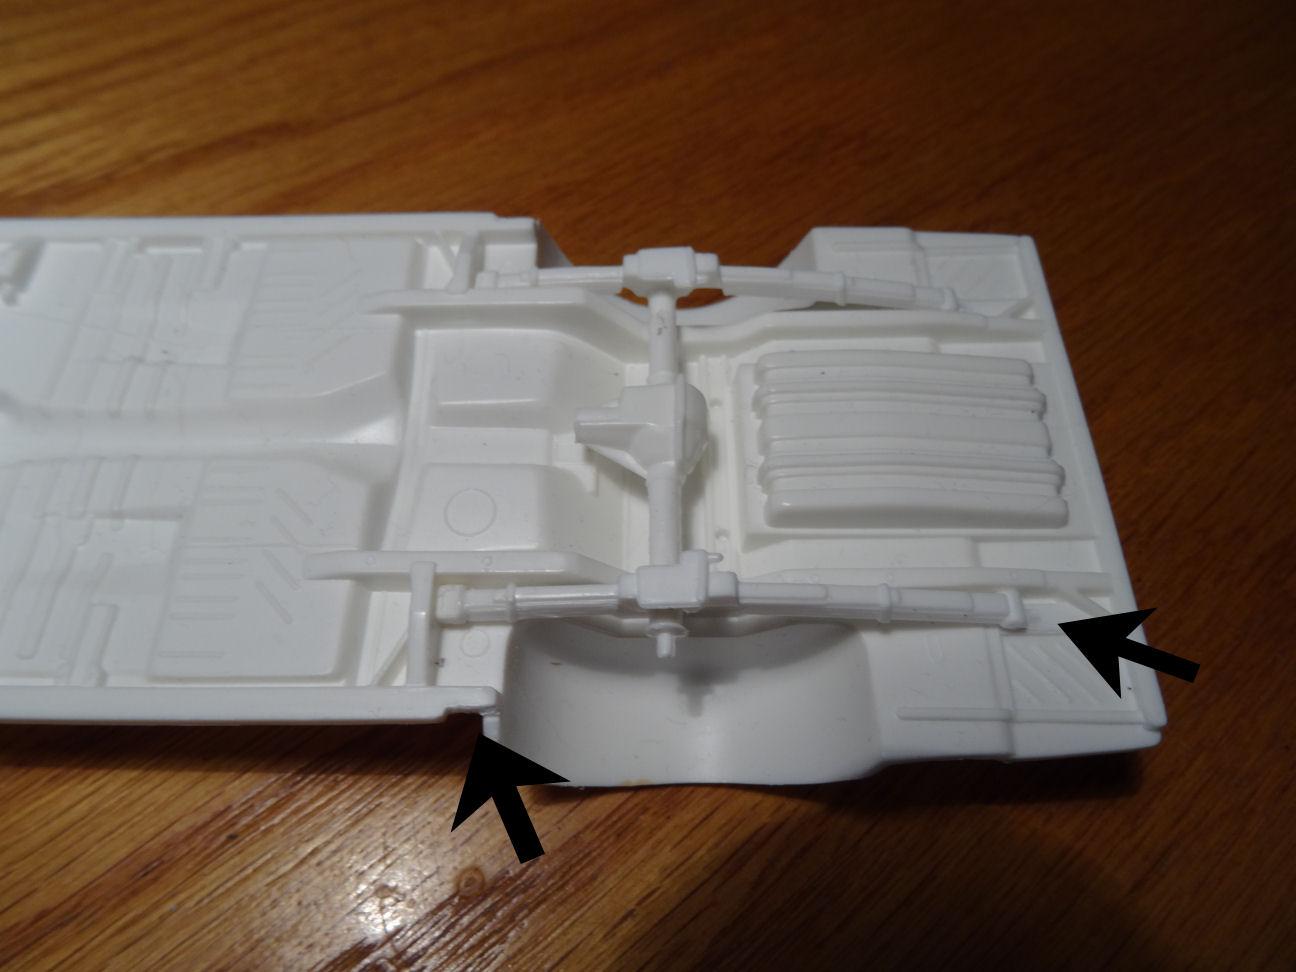
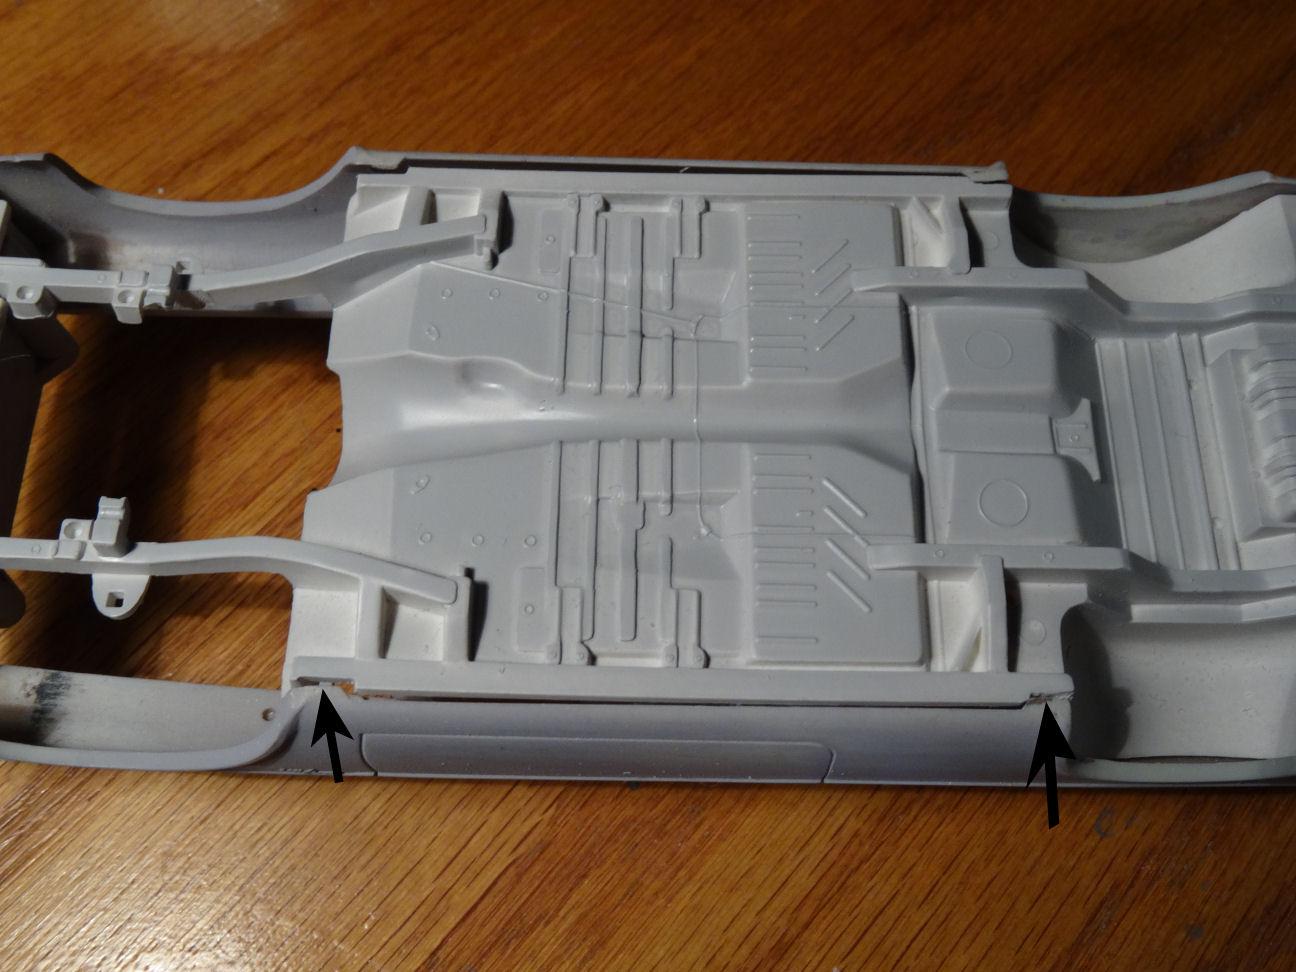
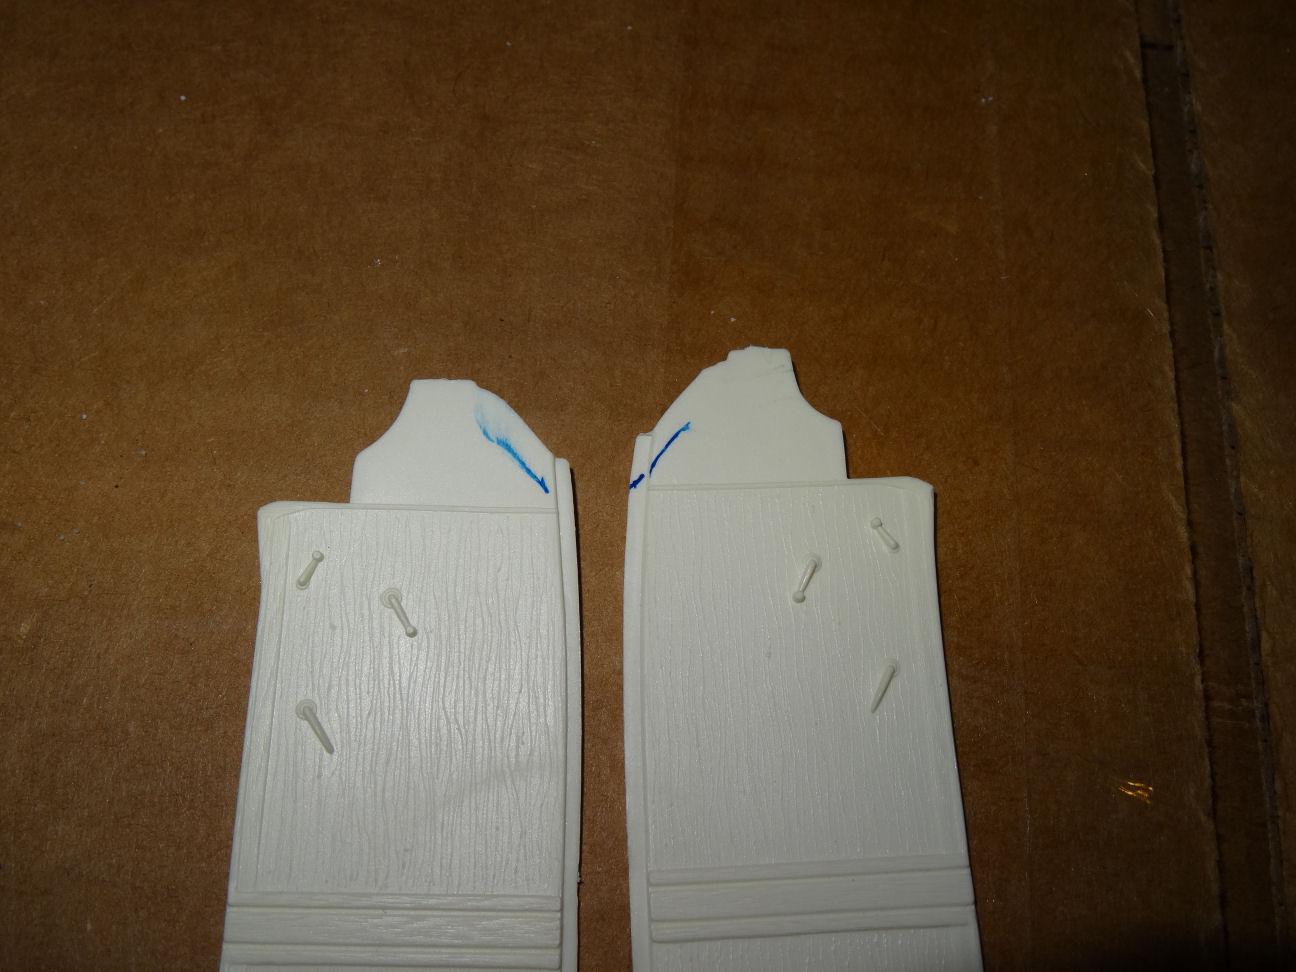
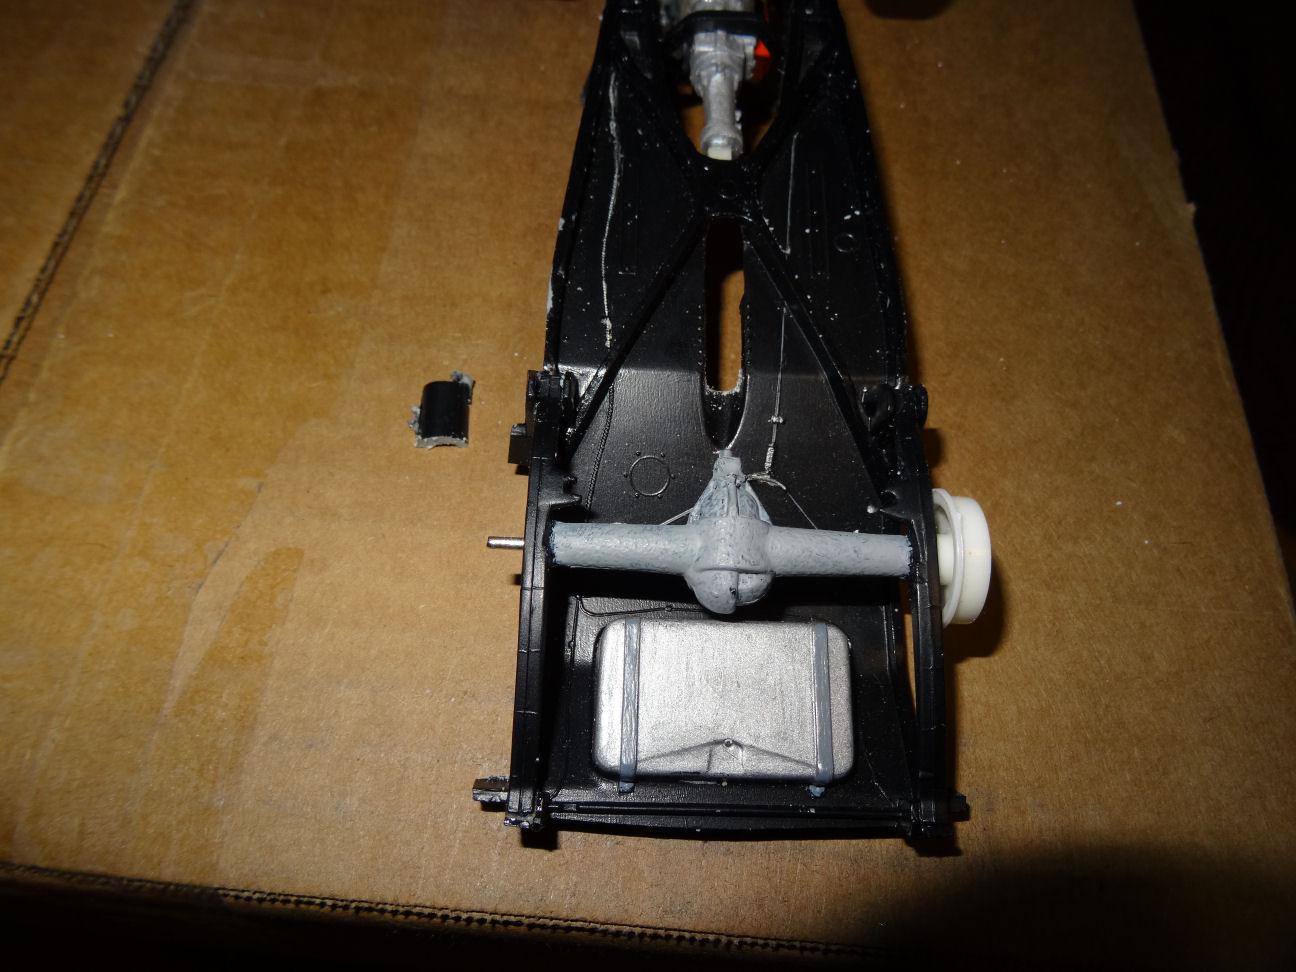
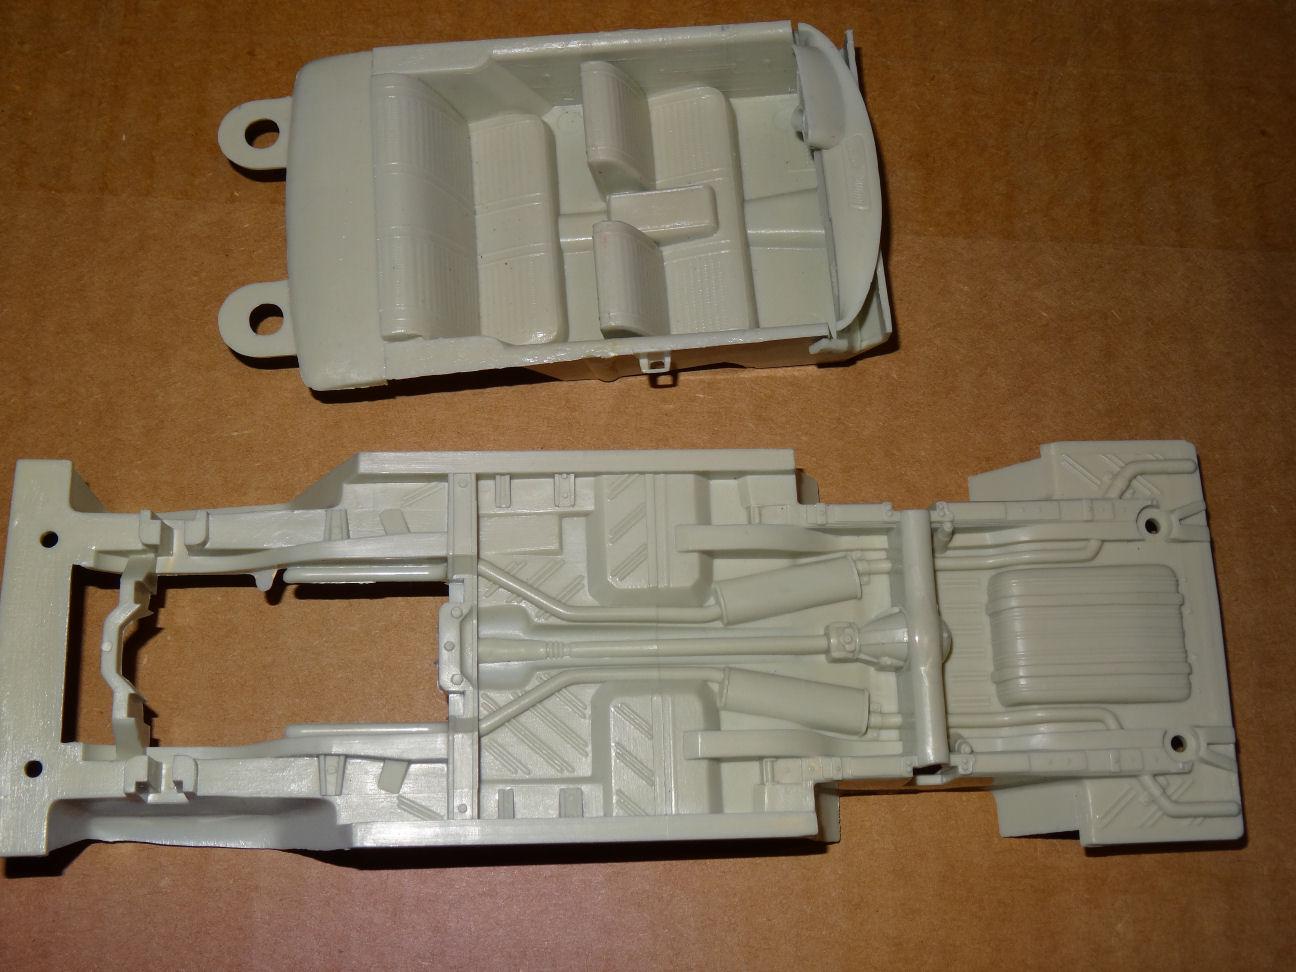
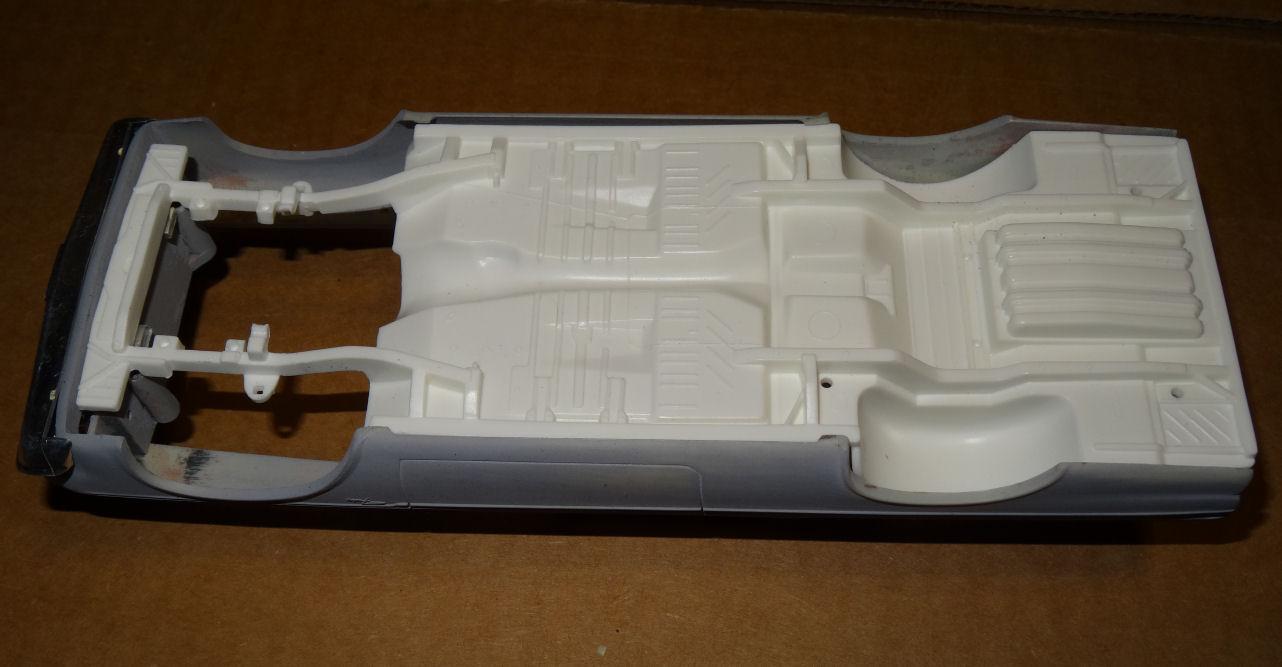
I've come to the conclusion that I have really gone down the rabbit hole with this one. Trying to make something presentable with this chassis when using the 66 Fairlane chassis would be so much easier just brings out my stubbornness. But I'm gonna stick it out and stay with the original plan of just using parts from the junk box. The reason this chassis is so flawed, aside from being a promo style chassis, is the fact that it is the evolution of the 1962 Fairlane chassis. The 62 shown here on the top and the 69 Cobra on the bottom. Among all the weird things going on with this chassis is why AMT put those two ears on the front corners. Other then maybe strengthening the chassis for the promo, they don't belong as the real car doesn't have anything in this location. Unless you count the splash shields on the bottom of the grill. So I removed the ears, 1962 style cross-member and simulated lower control arms. Right now I'm waiting for an order of plastruct to build the front end back up. That front cross-member was recycled from my 1963 Fury project. Waste not, want not. Also want to address the front radiator and support. The radiator AMT provides is for small block applications. I found this front core support in my parts box. Not sure of it's origins, might be from the MPC 1971-73 Cougar. With a bit of trimming it fits right in place. Also now gives me something to mount the front grill to as I want to separate it from the bumper and have it hang off the core support like it should. What also needs to be done is the ridge on the inner right fender needs to go as the battery in a big block car is mounted perpendicular to the core support. It also needs to be a larger group 26 battery. Time to do a little interior work. As this is a Fairlane and it could be ordered with bucket seats, I'm going to go with a bench. Which by the way is what the Cobra had more often then not, one bench weighs less then two buckets. Starting with a second back seat I removed the two filler panels on the side. Then I found a seat rear in the parts bin that I have no idea of it's origins. It is a bit big but we can cut it down to size. Have to clean up the ends of the seat when things dry and add the side trim and a release handle. Final bit of business for today is the dash. For all versions of the 68-69 dash AMT depicts a car with A/C. More added weight so we are going to exile the A/C to the parts bin. Even though the dash is more accurate in the original 68-69 releases, I'm going to use the Cobra dash as I have more of them available. For this dash we have to sand off the simulated wood-grain and fill in the A/C vents. Also removed the front section of the console as that is going in the trash next. As the glue dries...on to the next.

-
You know you've gone down the rabbit hole when you start mixing up your own threads.? Scott, for some reason I didn't need to remove anything from the rear of the chassis, just the front. I'm using the Lindbergh Plymouth chassis, could you have been using the Dodge and there is a difference? What I found is I needed to remove about 1/4" from the front and that brought the front wheels into alignment. The 14" piece got donated to my 1968 Fairlane 500 project, waste not want not. But it still left the rears too far aft. I contemplated my options and finally decided to take a small section out of the front of the rear springs, which made them a tad shorter. This necessitated the relocation of the holes for the rear of the springs. But after this everything lined up. The original JoHan body also had some tabs at the end of the rocker panels. While I could have just filed them away I chose to make notches in the chassis and thus they became alignment points. I can now start building the chassis as per the kit instructions. Meanwhile back at the ranch work starts on modifying the interior. Tune in next time, same bat time same bat channel...
-
The Galaxie XL also has hidden headlights.
-
Nice, I can almost hear it purrr.
-
Yup. DOn't think it came in any other flavor.
-
So far found just one of those.
-
Jim, did you steal that Fairlane trim from my attic???? That's OK, I think it works quite well.? I have actually been on the hunt for a full size one of these for a weekend ride. Everyone I find wither has rust issues or too many miles. Or someone put a Chrysler 300 nose on it. Anyway I like your nose better, the one on the car too.?
-
Jim, the attic is turning into a double edged sword. If my head wouldn't explode I could have like 20 projects going right now. I started doing an inventory because I have been finding stuff I don't remember buying. One example is I've wanted to replicate a 1967 Galaxie someone I knew once owned. Thought I had one Galaxie stashed away, so far I have found four. And I am still not done with inventory.?
-
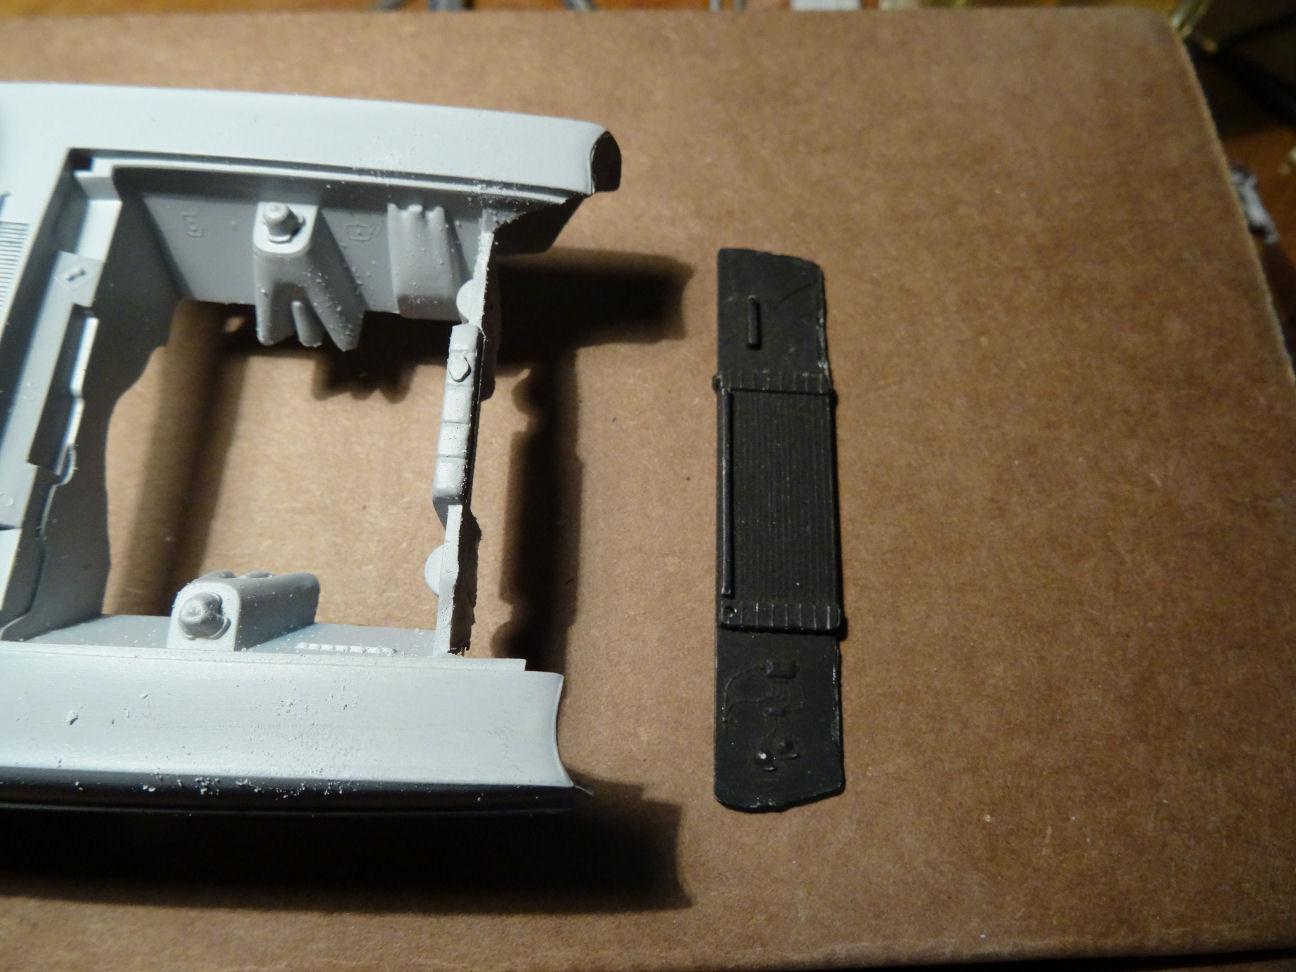
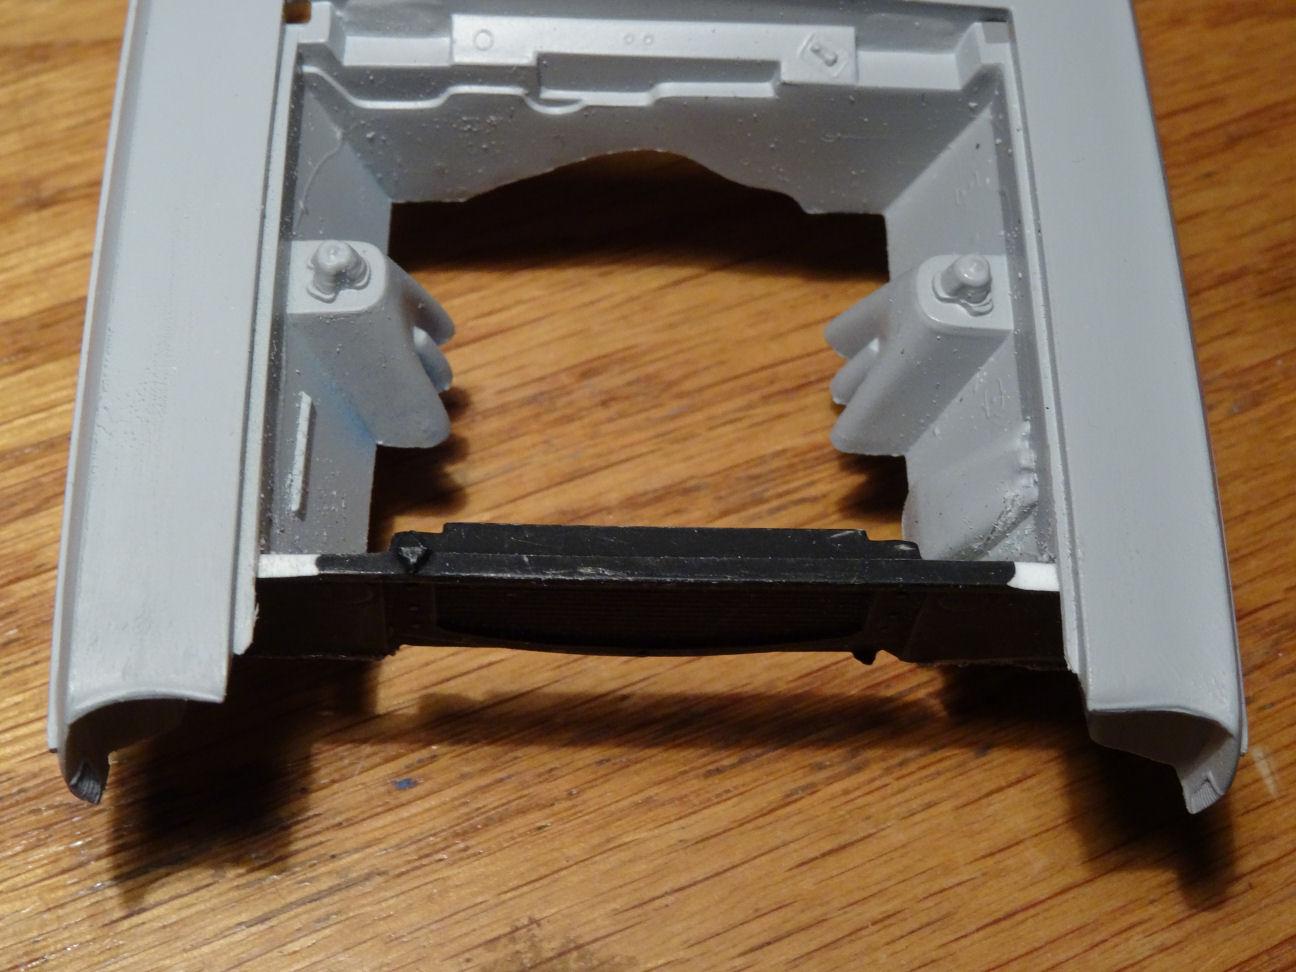
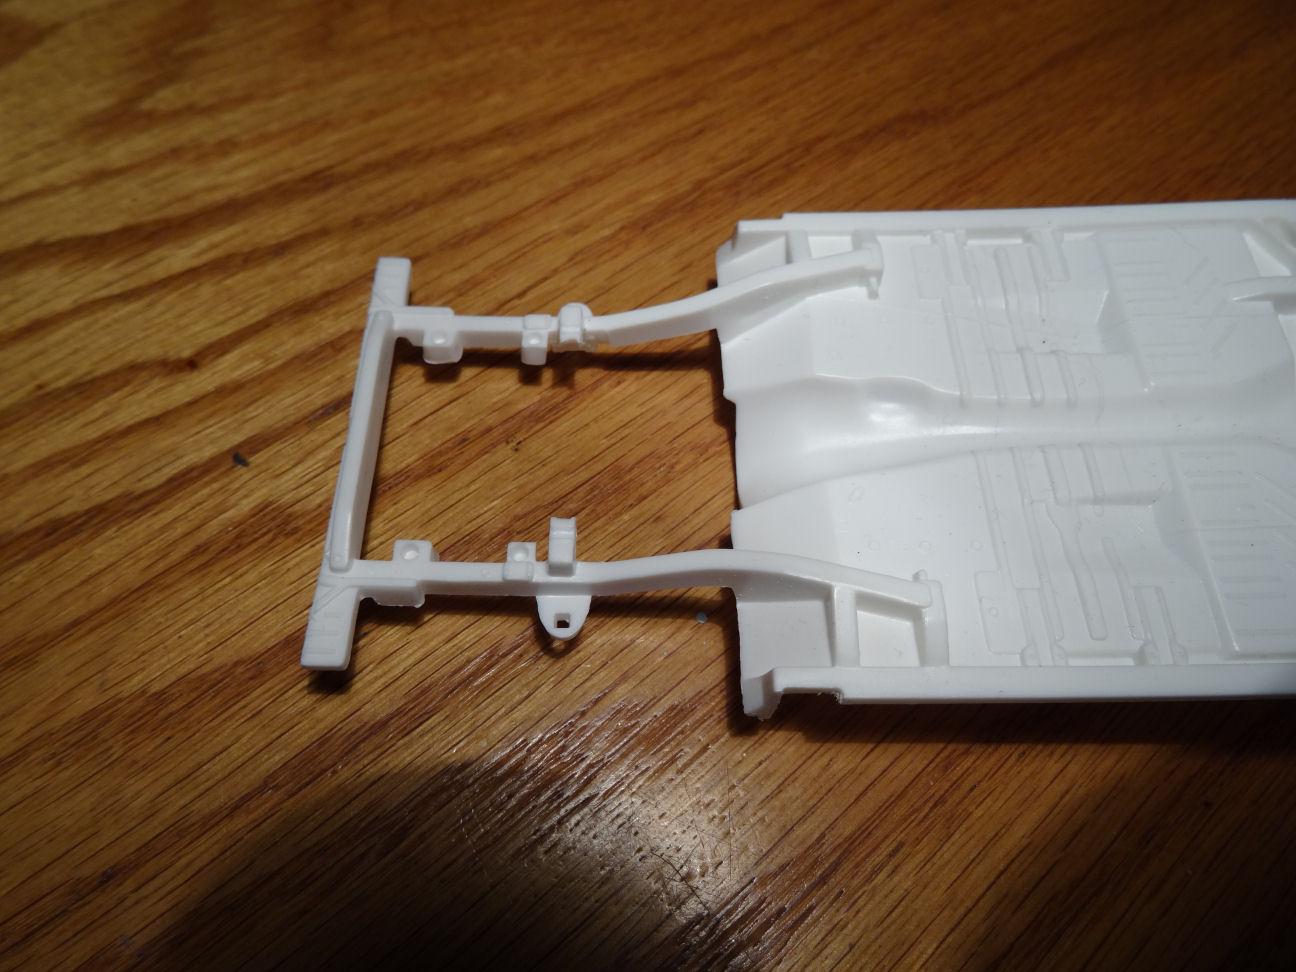
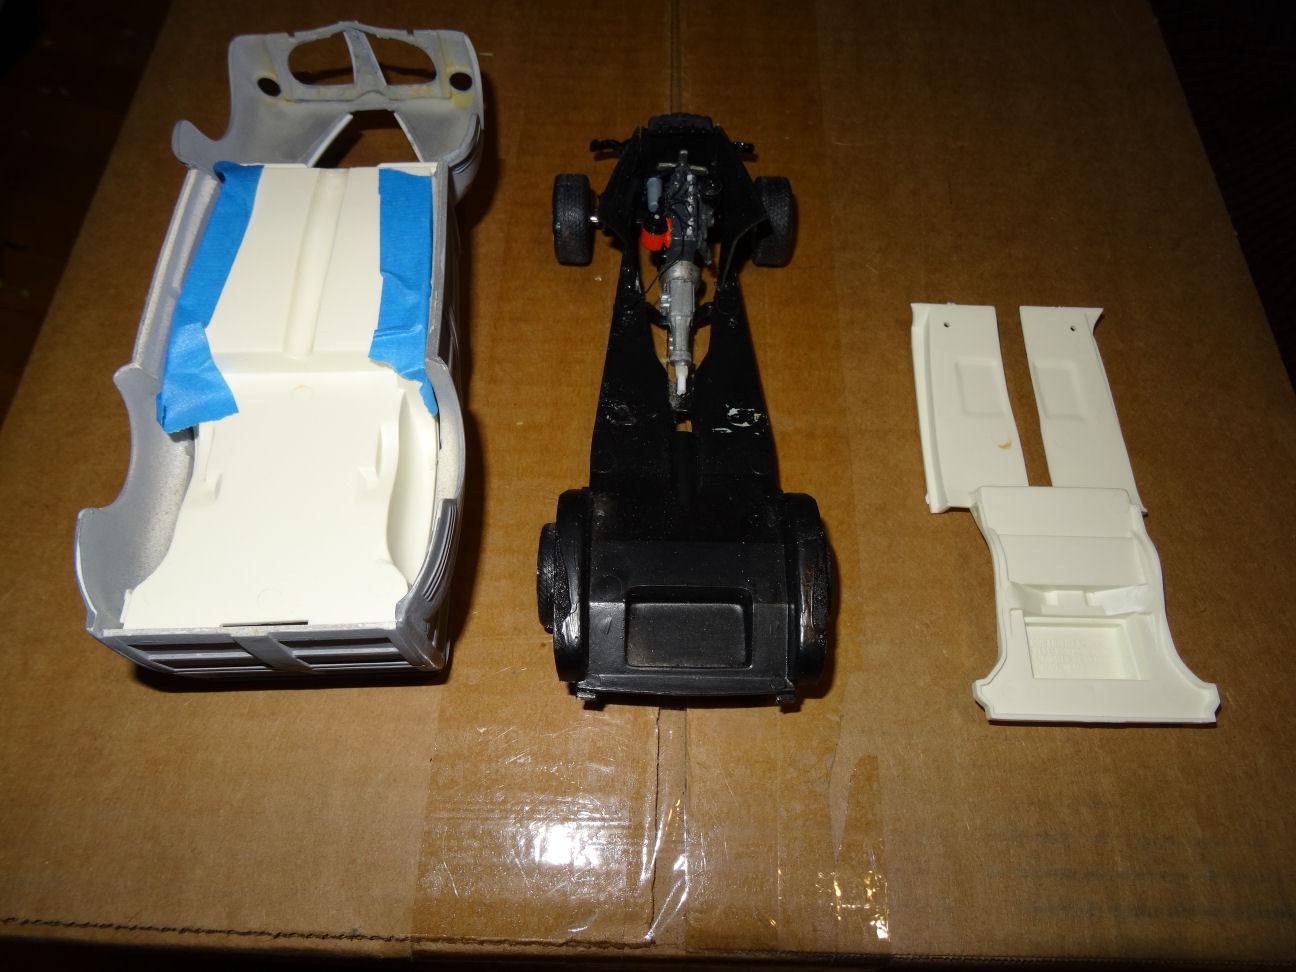
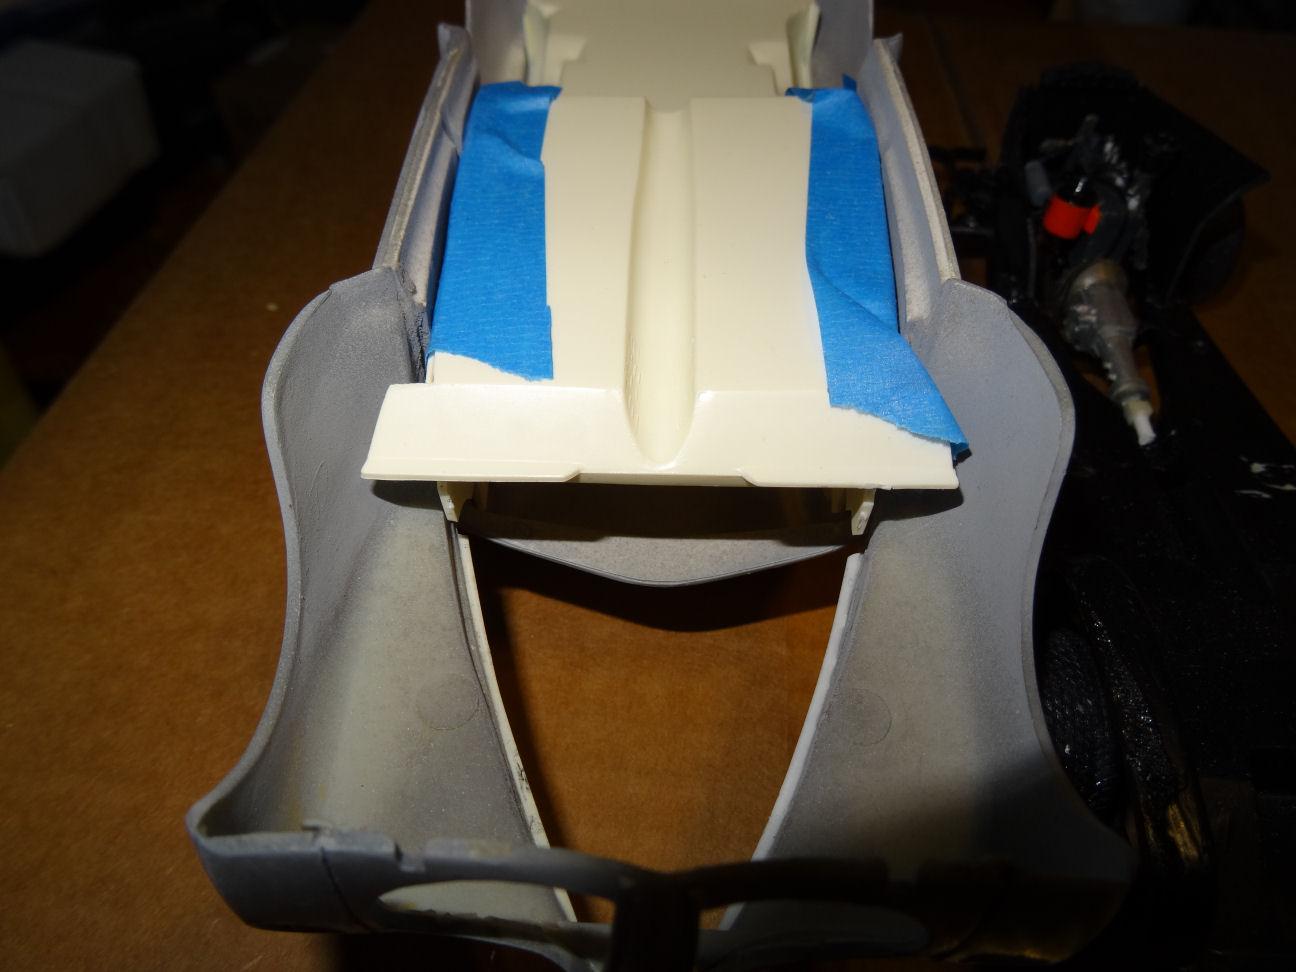
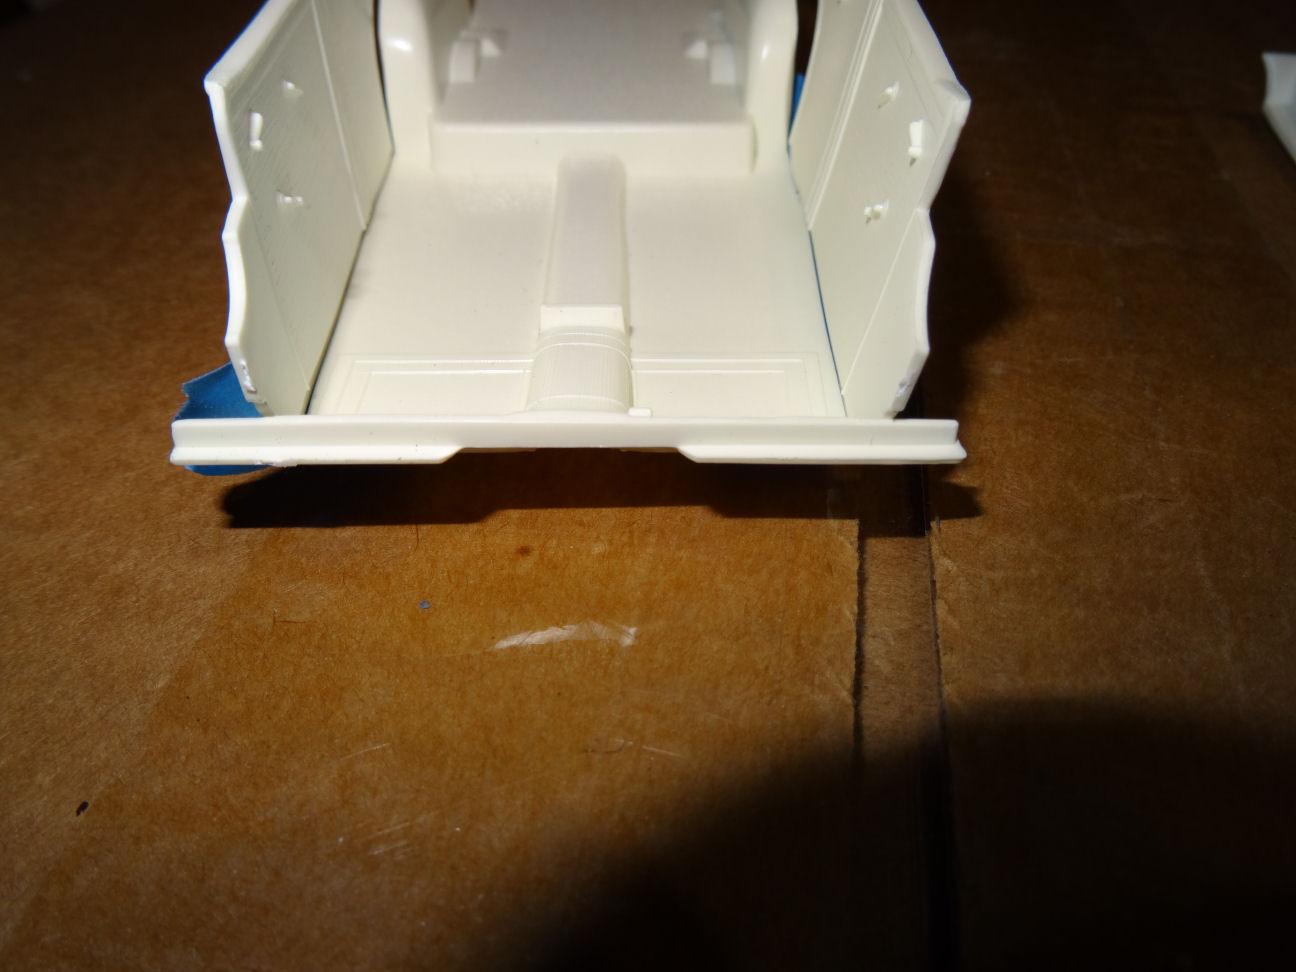
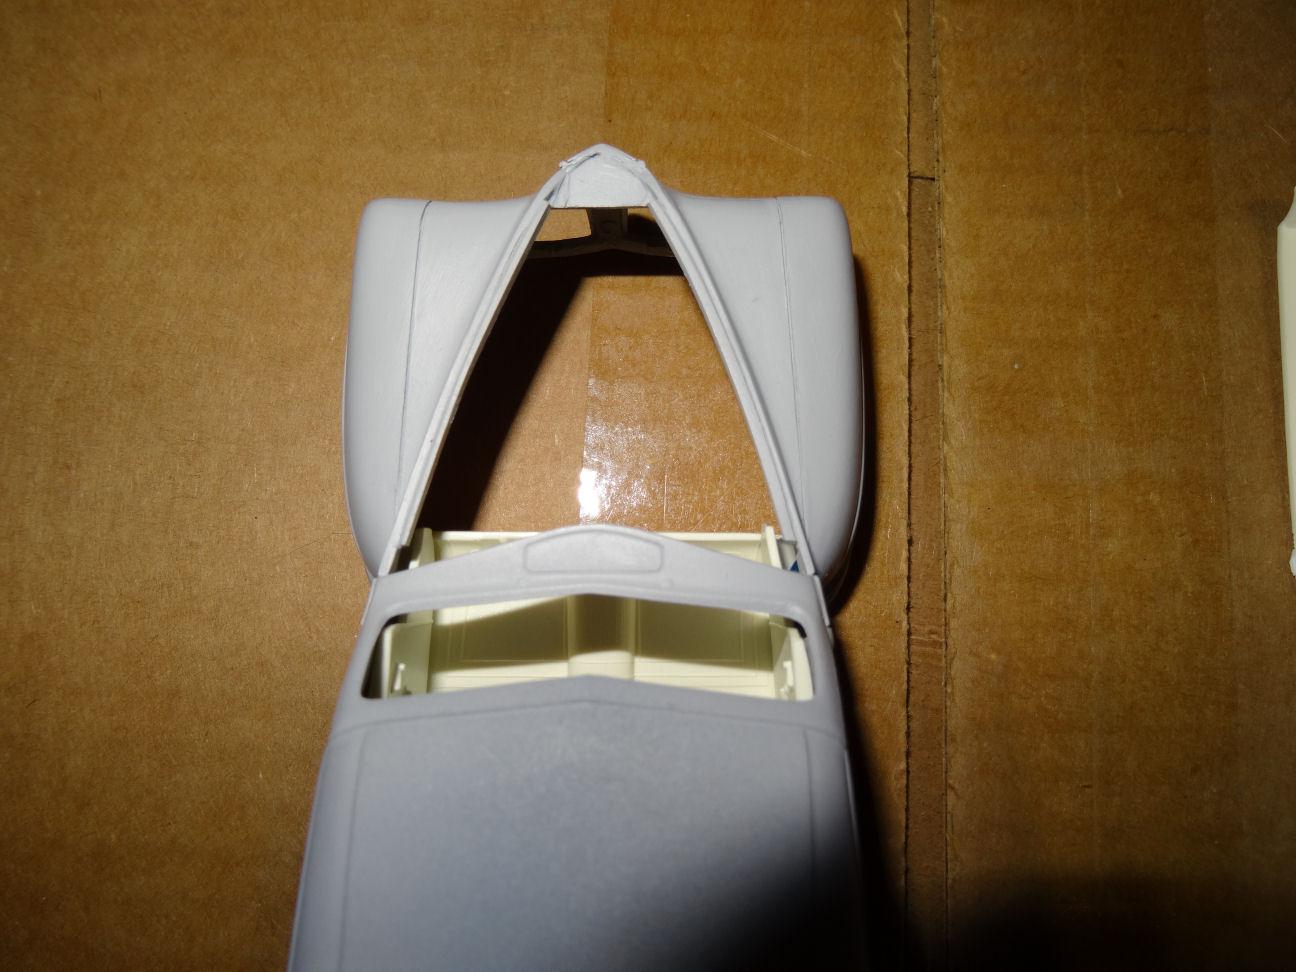
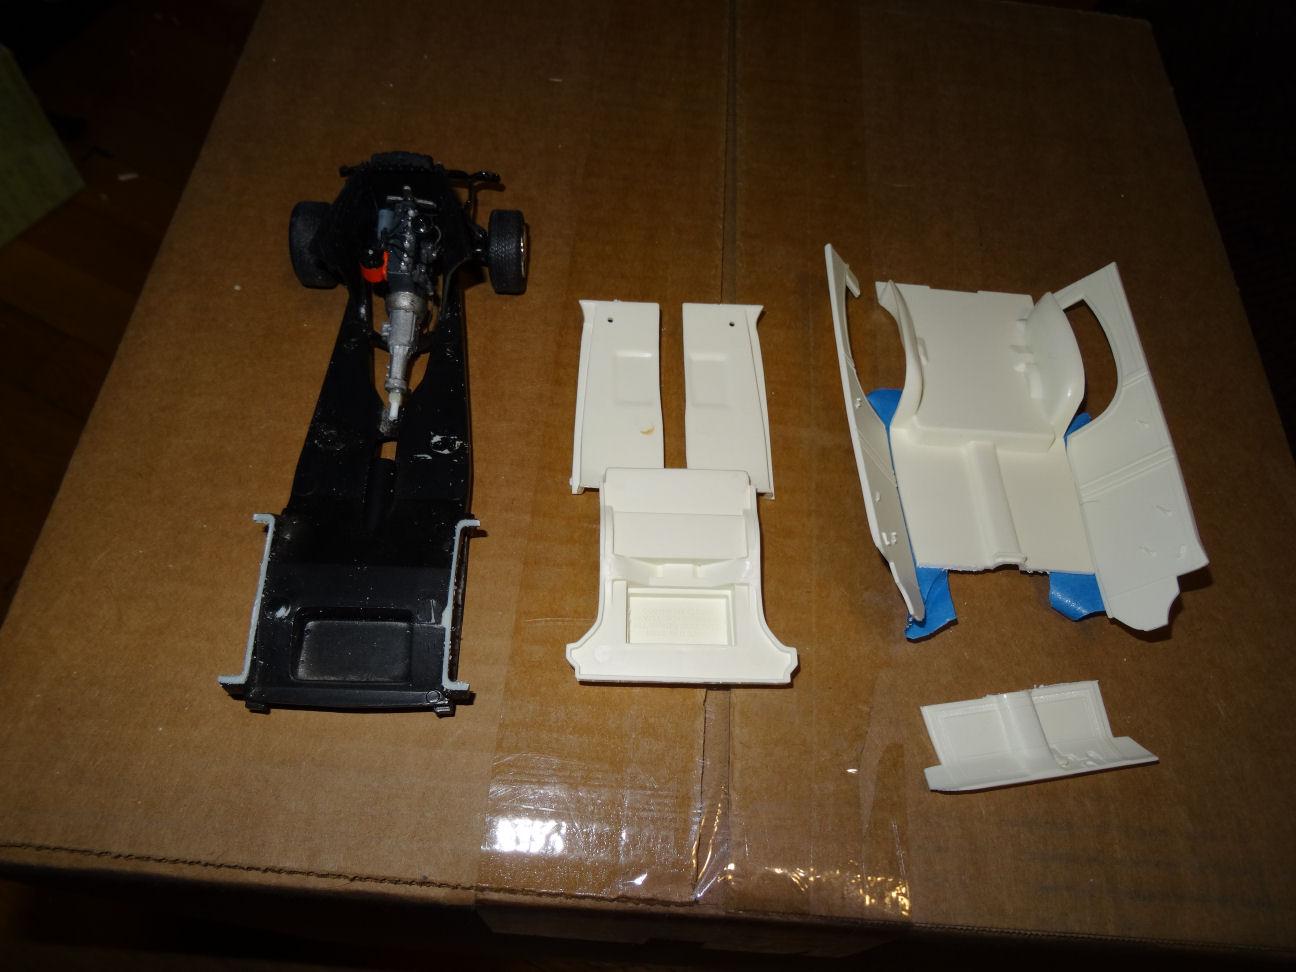
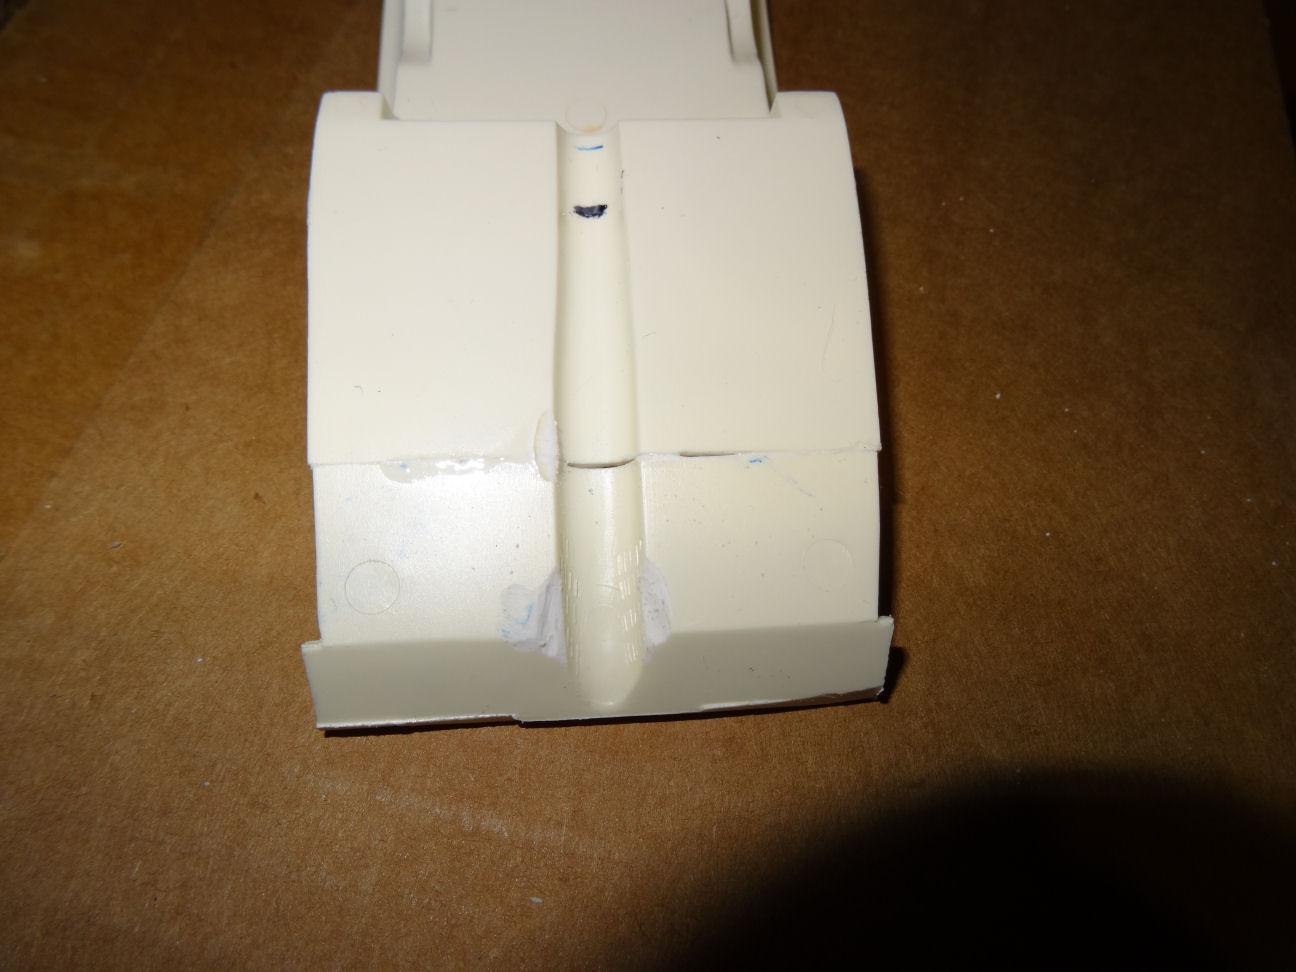
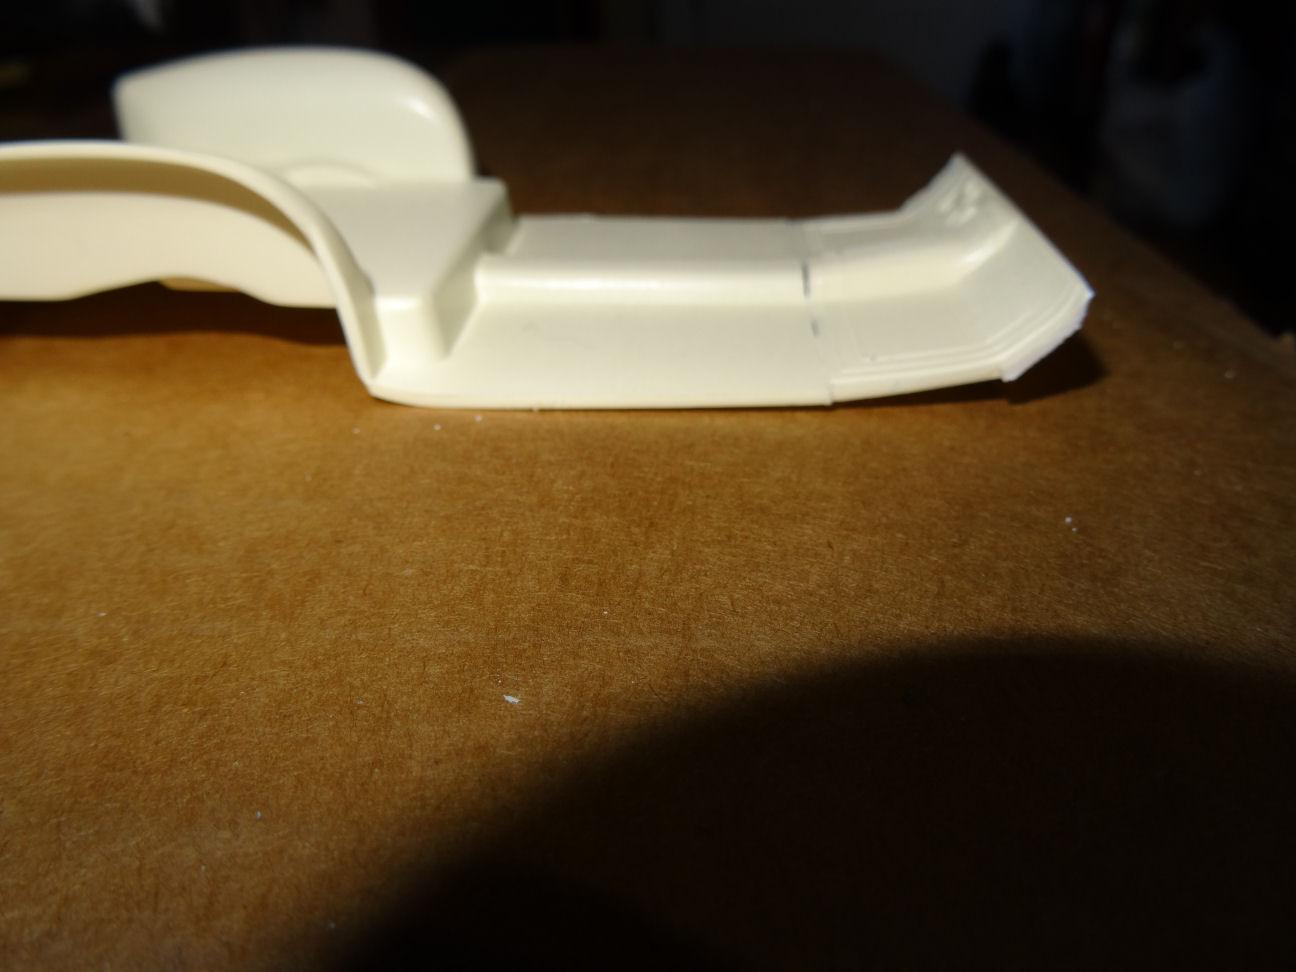
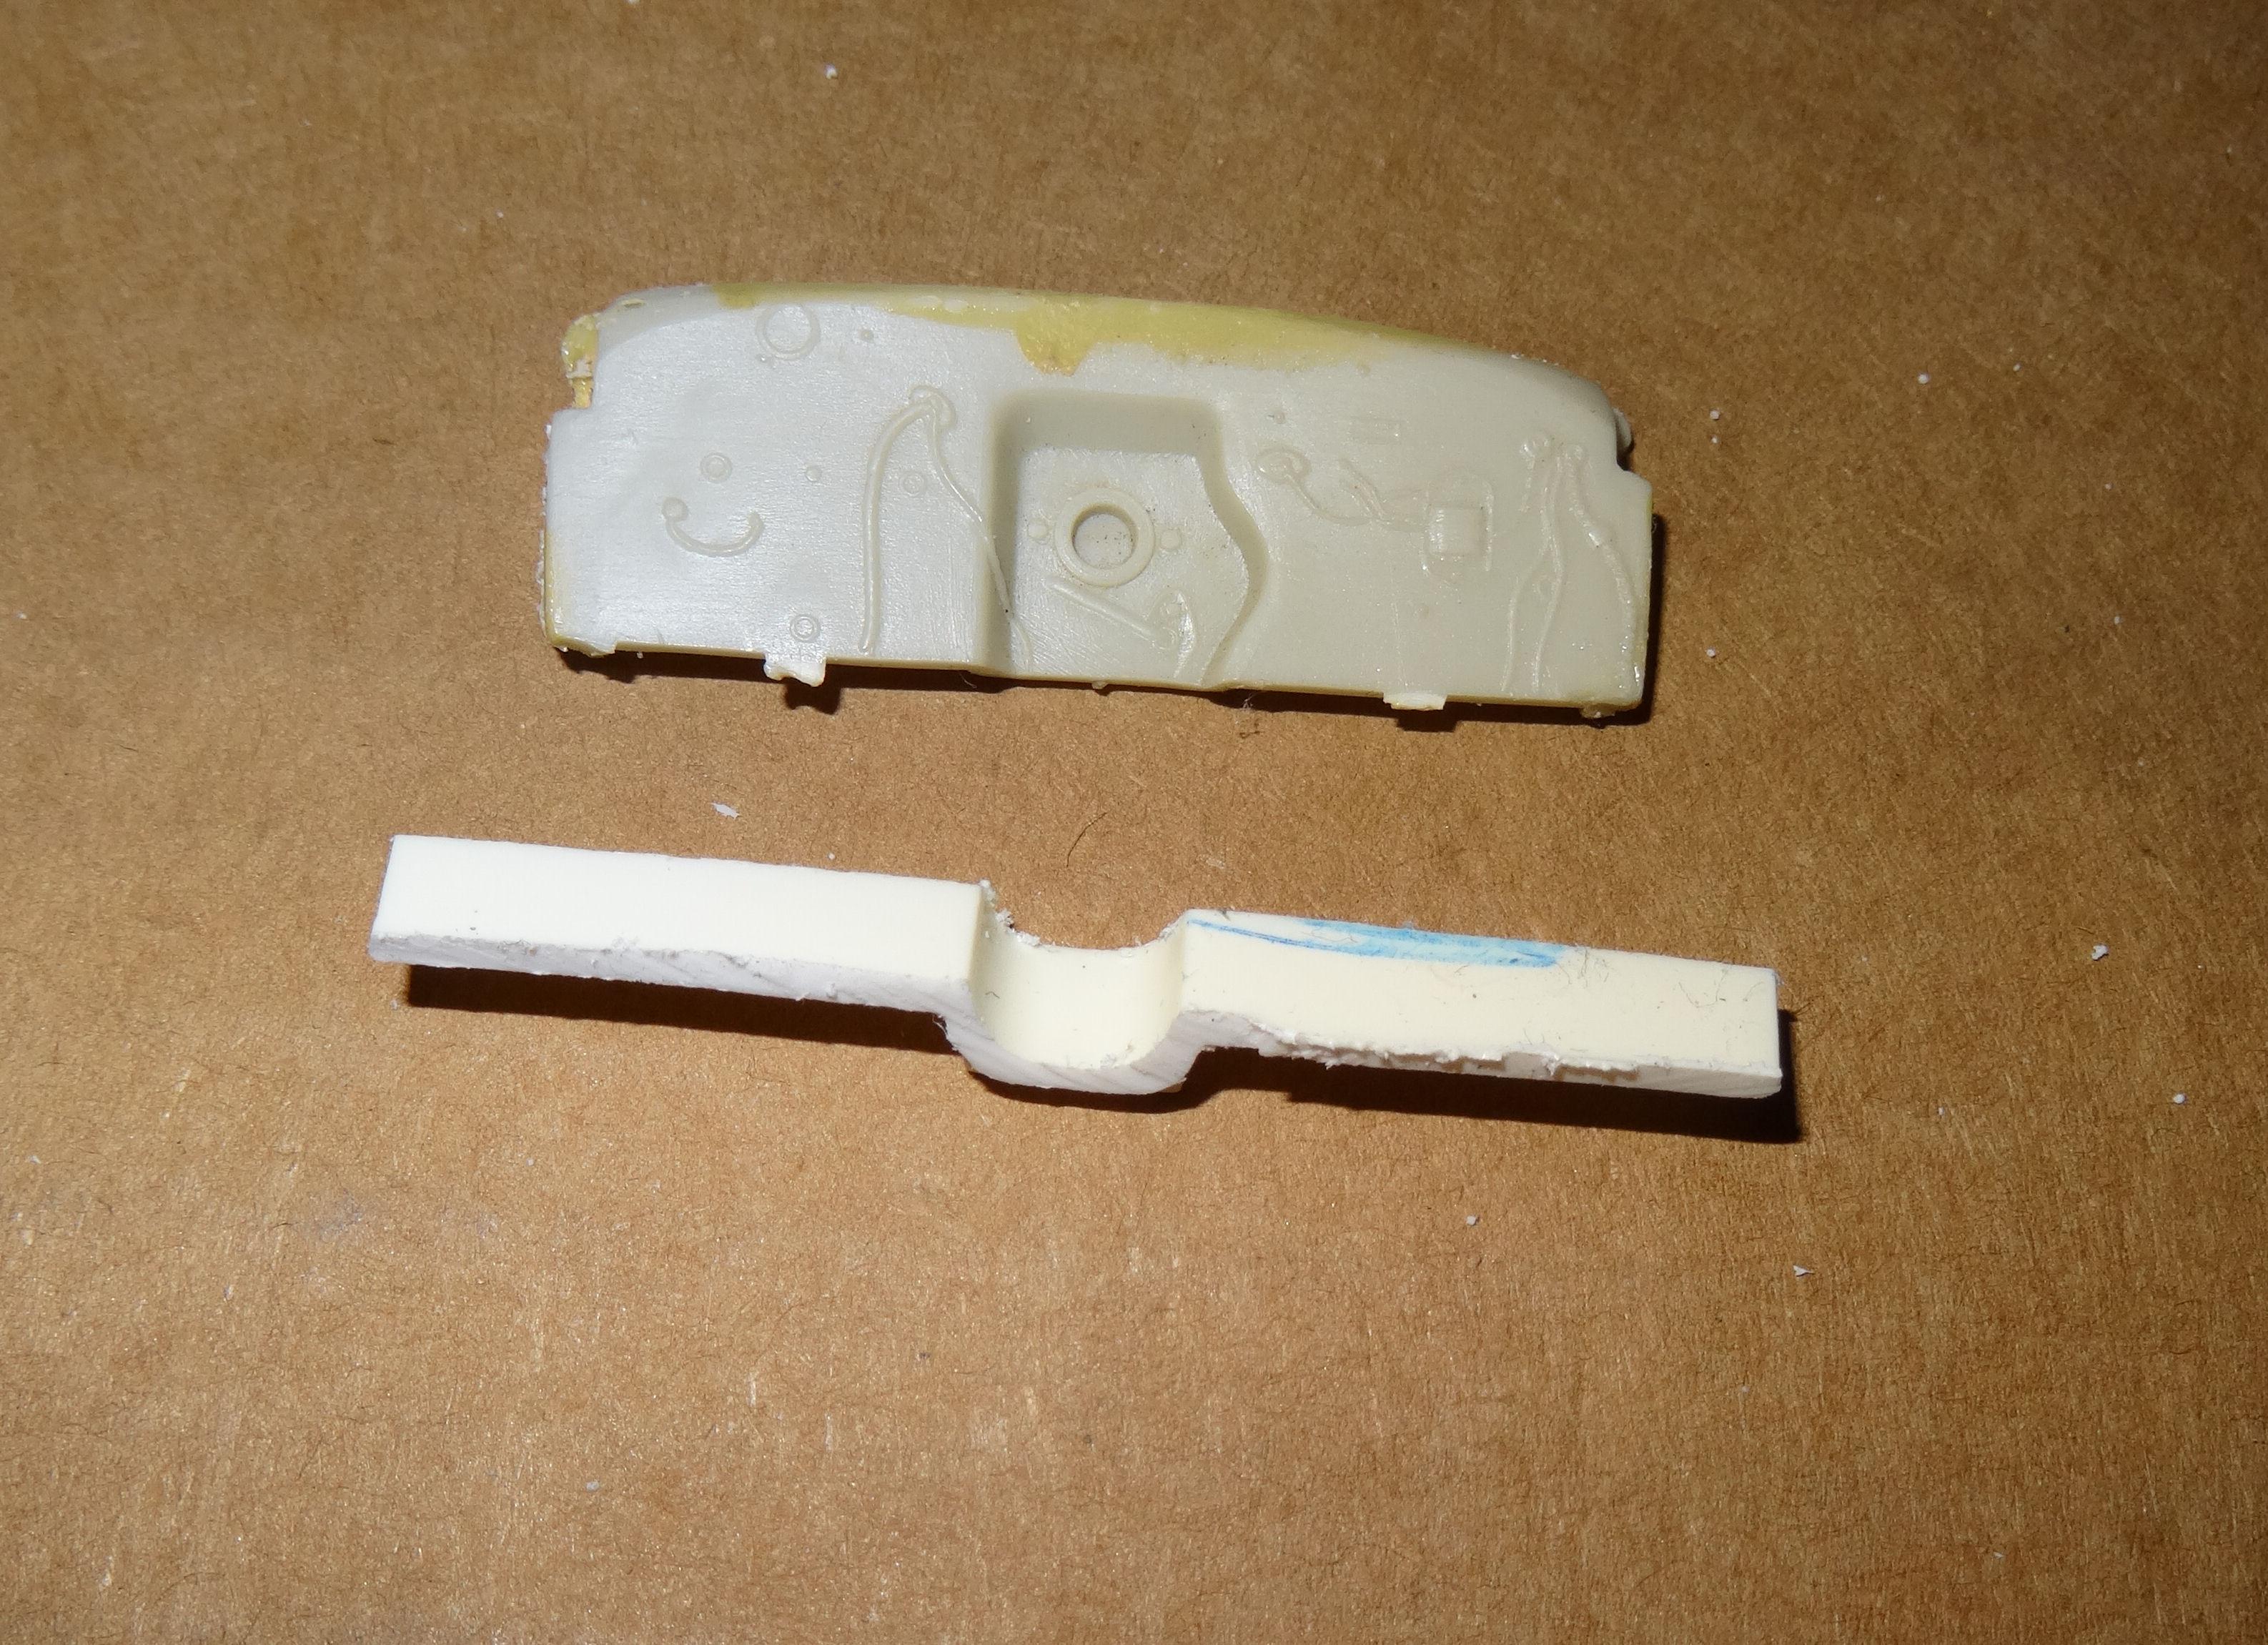
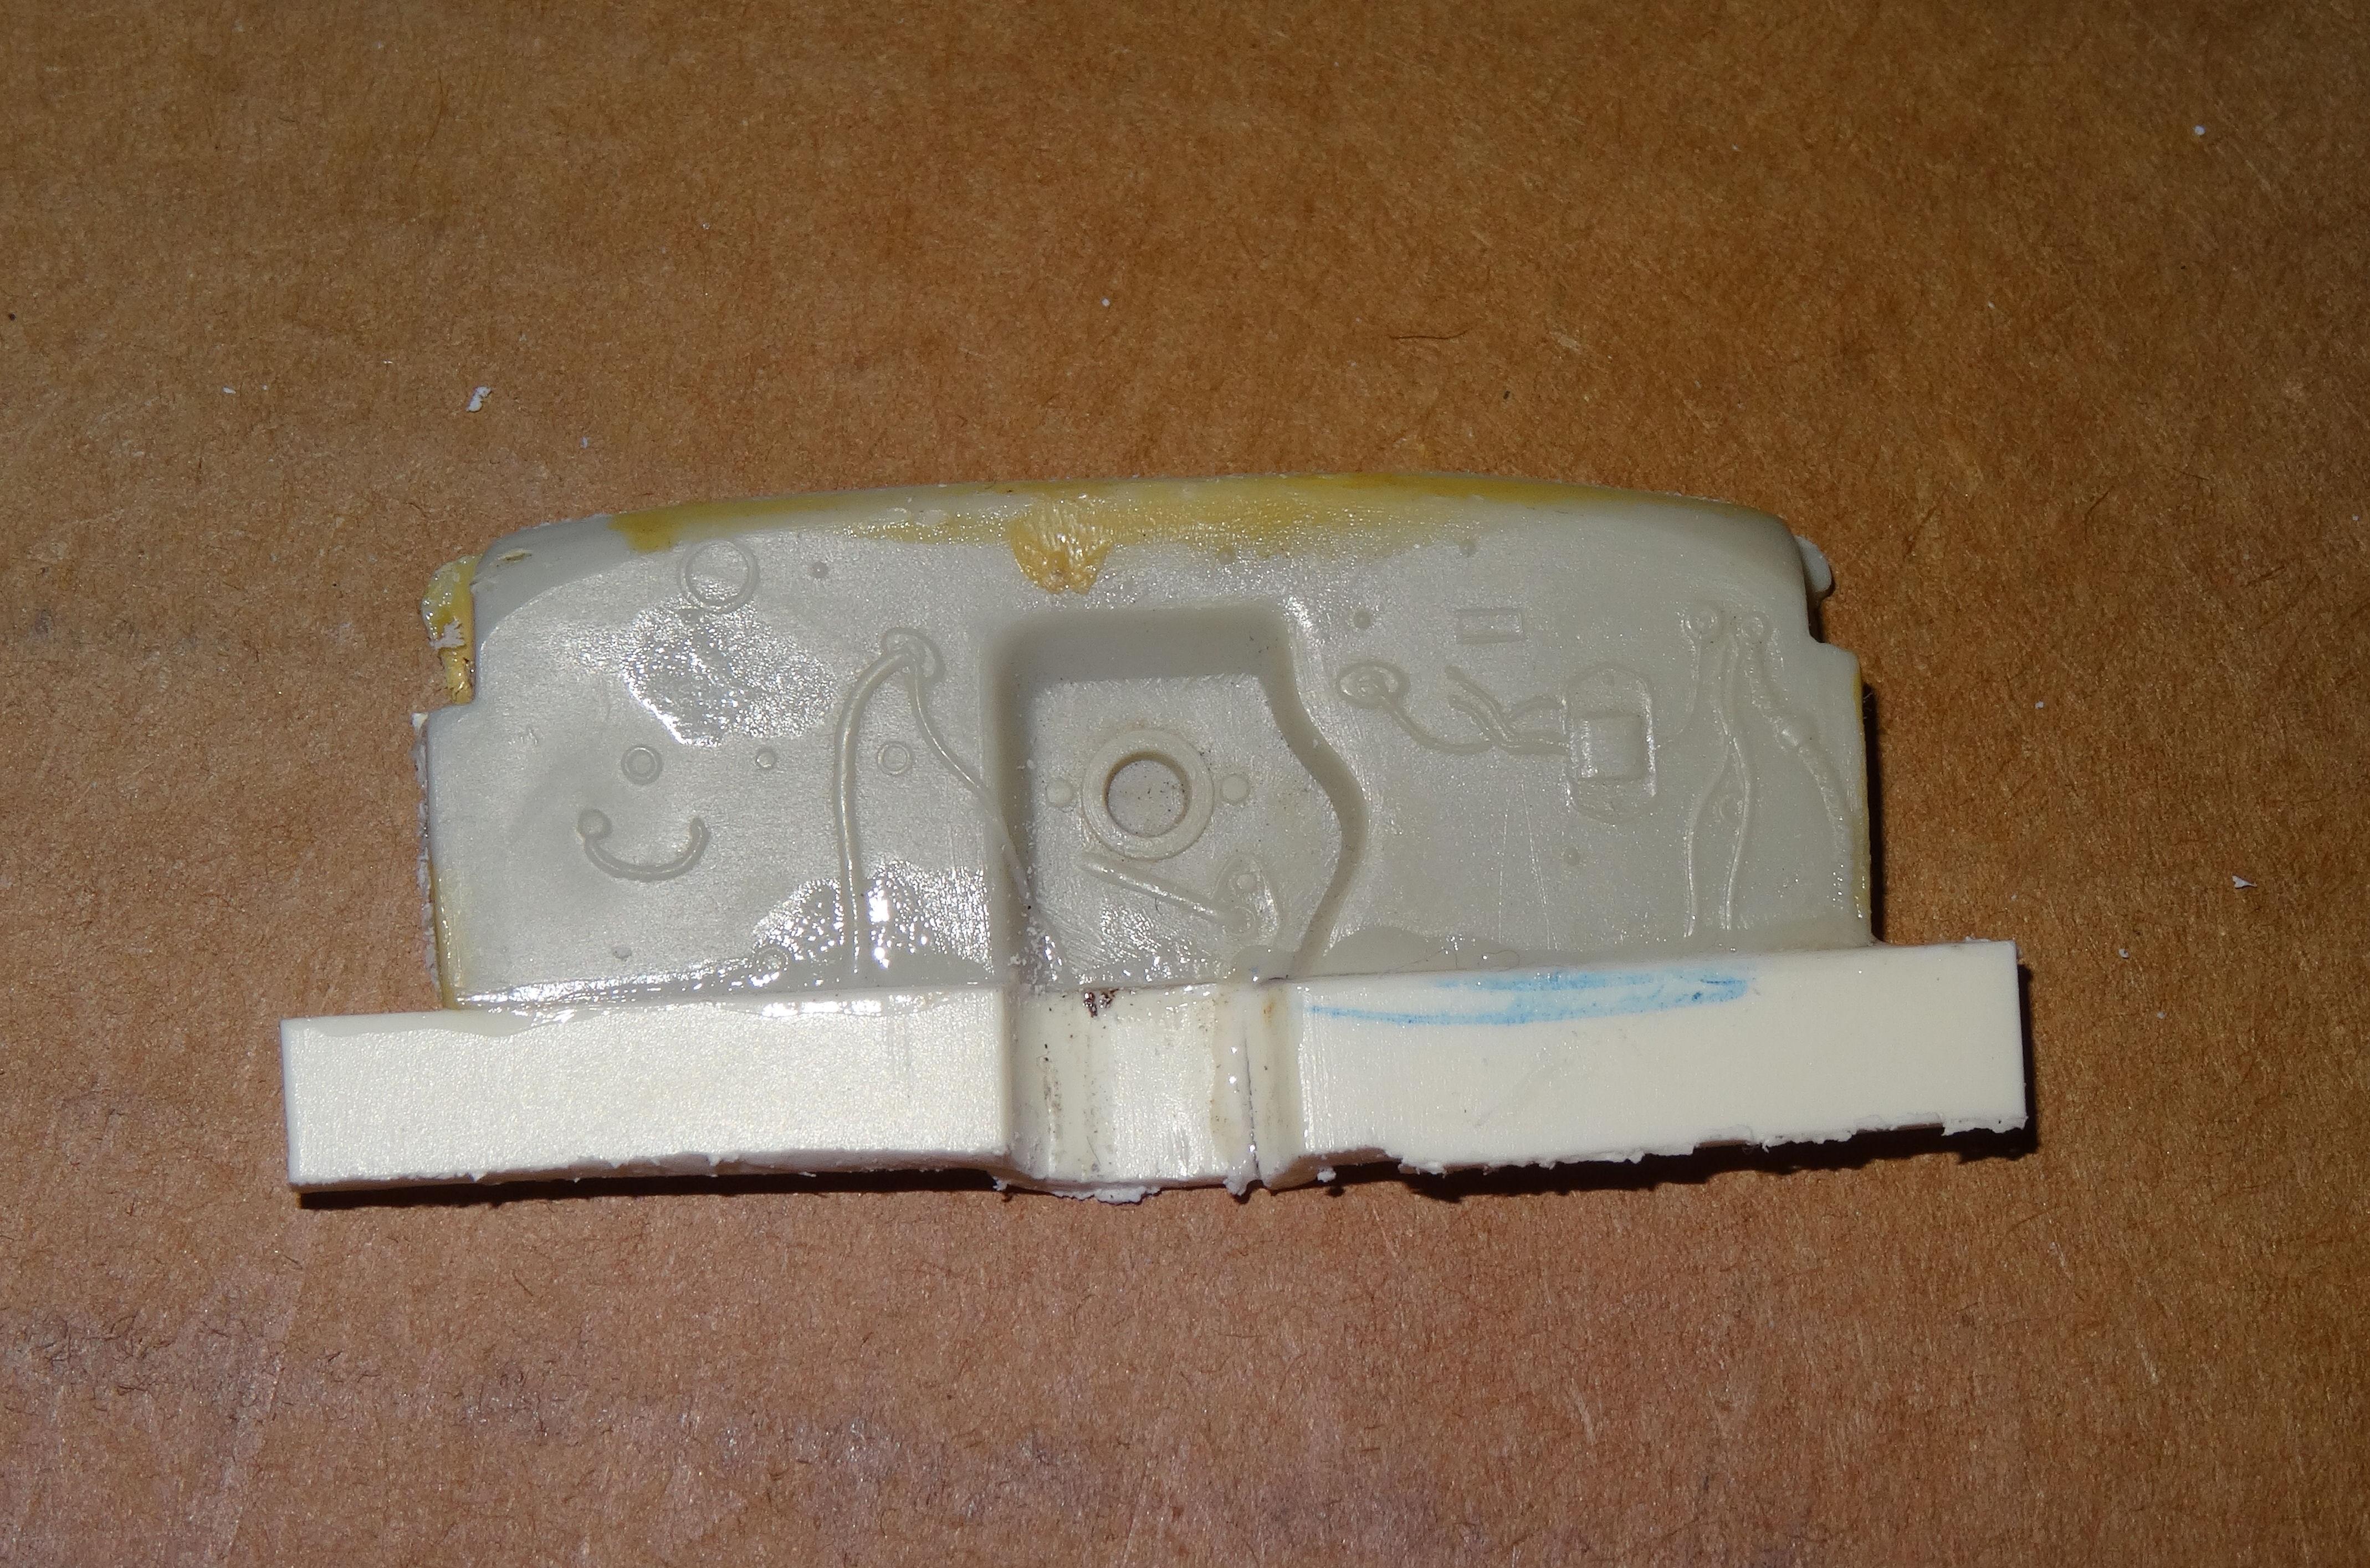
The Woody The Woody has been getting a bit neglected lately so I started working on fitting the interior. I suppose I got a little ahead of myself by assembling the chassis as now I had to adjust things to fit. Here I've laid out the components. That's the Ford chassis floor on the right. The interior from the 48 Ford Woody is a bit too long and extends into the engine compartment. The foot-board extends forward and will interfere with that powerful flathead six. First thing I needed to do was remove the top of the wheel tubs from the Plymouth as the Ford interior had it's own. And cut off the front of the floorboard. I remove a 5.75 MM section off the back of the removed section of floorboard and reattached it. Then had to trim the side panels to match. Also needed to remove part of the tunnel from the Plymouth chassis to clear the Ford floor as well. Still had interference issues with the transmission hitting the interior floor. Sound familiar Jim? I solved this two-fold. First by trimming a bit on the inside of the tunnel and second by tipping the front of the floor-board up slightly. No-one will ever know unless they have big feet. After this I decided to check the fit of the firewall and the dashboard. Turns out the firewall was too short to cover the gap from the cowl to the floor-board and I needed a spacer to take up the slack. As they say, waste not want not, the piece I cut out of the floor earlier will work fine to bridge the gap. So now we wait for the glue to dry. Guess that means it's time for another nap...after cake, it's the wife's Birthday?
-
Now if you had a Hemi James you could replicate their "Blasphemi" gasser. Yeah, I know theirs is a 55, but close enough. Jim, yeas ago I bought both the 56 and the 57 Nomad. Guess what, I have a half made 56 Nomad up in the attic.
-
Great work here and I’ve always been a fan of Pace Cars?
-
Not familiar with the kit but the real ones are certainly head turners.
-
I like the concept of the fade. Not sure why but it reminds me of a Hank Borger build.
-
Nice color Jeff. Are you going for a stock build on this?
-
The Coupe OK, time to wake up and see if the glue dried.? Threw some primer on it and I guess it's an improvement.
-
Thanks Scott, much appreciated ?
-
Jim, I agree with the wife, I like the gray rims better.. and with the chrome done I think it looks fantastic. You won the war this time what kit are you going to battle with next?
-
Thanks guys. When I first pulled this out of storage I was just going to do a basic OOB build. That is until I took a good look at the chassis and interior. Interior is very shallow and the chassis is promo style, everything molded on. I have better things to do with my time they try to fix all this. Pulling the rest of the bits from a Lindberg 64 Petty Plymouth. I may not use anything other then the body from the JoHan kit. Funny thing I noticed. On the original JoHan '64 kits, the chassis from the Dodge and the Plymouth were different lengths, don't remember which was longer. On the Lindberg kits they are the same length. Not sure, but I think JoHan is right.? The Lindberg chassis is snug but it fits right in place. Appears to be a tad too far back. Have to mock up the suspension before I do any cutting.