DJMar
-
Posts
867 -
Joined
-
Last visited
Content Type
Profiles
Forums
Events
Gallery
Everything posted by DJMar
-
Great work on that old classic kit. Very clean build. Looks fantastic!
-
Fox Body Mustang Kits. 1979 to 1982
DJMar replied to stavanzer's topic in Model Building Questions and Answers
Totally forgot about that one! -
Fox Body Mustang Kits. 1979 to 1982
DJMar replied to stavanzer's topic in Model Building Questions and Answers
I'm assuming you mean notchback. I think the first notch they kitted was the Revell 1990 LX, which has some body shape/dimension issues. Every other kit was a hatch or convertible, unless I missed something. -
Fox Body Mustang Kits. 1979 to 1982
DJMar replied to stavanzer's topic in Model Building Questions and Answers
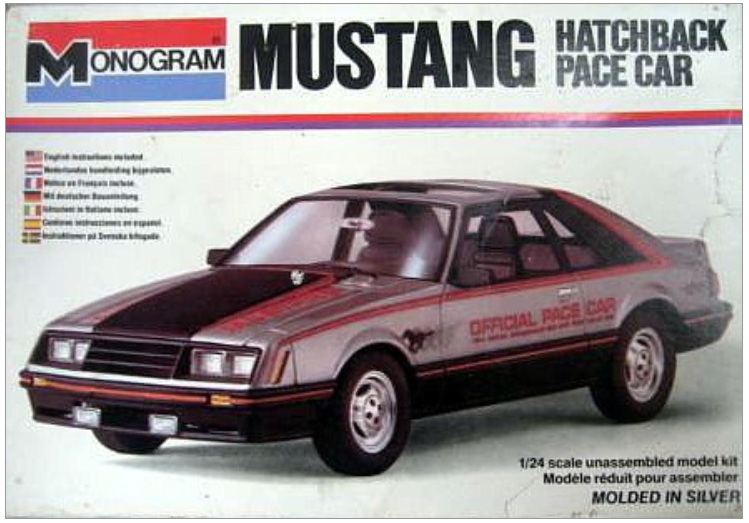
This is one of the kits I have on constant eBay search. I've yet to find a factory sealed original Monogram Pace Car issue for under $50. But I'll keep looking! -
1950 Chevy 3100 Pickup WIP
DJMar replied to Duddly01's topic in WIP: Model Trucks: Pickups, Vans, SUVs, Light Commercial
Looks amazing! I didn't notice this until just now, but did you use photo-etch for the hood side emblems? -
AMT 1971 Mustang Mach 1 - Diamonds are Forever!
DJMar replied to ModelcarJR's topic in WIP: Model Cars
Wow, those are some serious ejector pin marks on the inside of that interior bucket! Watching this one with interest. -
Revell RM Chopper
DJMar replied to TonyR's topic in All The Rest: Motorcycles, Aviation, Military, Sci-Fi, Figures
Nicely done! It looks great in orange. -
Fox Body Mustang Kits. 1979 to 1982
DJMar replied to stavanzer's topic in Model Building Questions and Answers
IMHO, the 4-eyed Mustangs are one of those cars that deserve an updated, newly tooled kit. But I'm weird about Mustangs. Personally, I like the Monogram (Pace Car issue) the best of the bunch. It is simplified, but has the front air dam, rear spoiler and the 3 spoke wheels. The MPC kits are a good second choice, and they released a number of different versions - Indy Pace Car, Snakebite, Turbo Cobra, etc.. The MPCs are also 1:25 vs the Monogram 1:24, if that matters to you. I think your biggest challenge is going to be finding any of these for a reasonable price.
-
I don't heat up the whole tire, just the part I'm going to flatten. This works best on solid vinyl tires, although I have done it on hollow vinyl as well. I actually use an old iron for this. Low heat, gentle pressure, until the tire is where you want it. If you're worried about using the household iron, you can cover the heating surface with some tinfoil.
-
IMHO, you can never have too many AMT 40 Fords...
-
I'm glad to see this kit is going to be back on the shelves. Time for me to add one to the stash.
-
Ummm, I'll take that 1960 Olds, please & thank you.
-
Those are not easy kits to build, but you did an amazing job with this one. It's an absolute beauty!
-
I think we have the sluggish forum problems solved
DJMar replied to Dave Ambrose's topic in How To Use This Board
Like the others, I appreciate the hard work. The forum loads much faster now. Thank ya'll for getting this sorted. ⭐ -
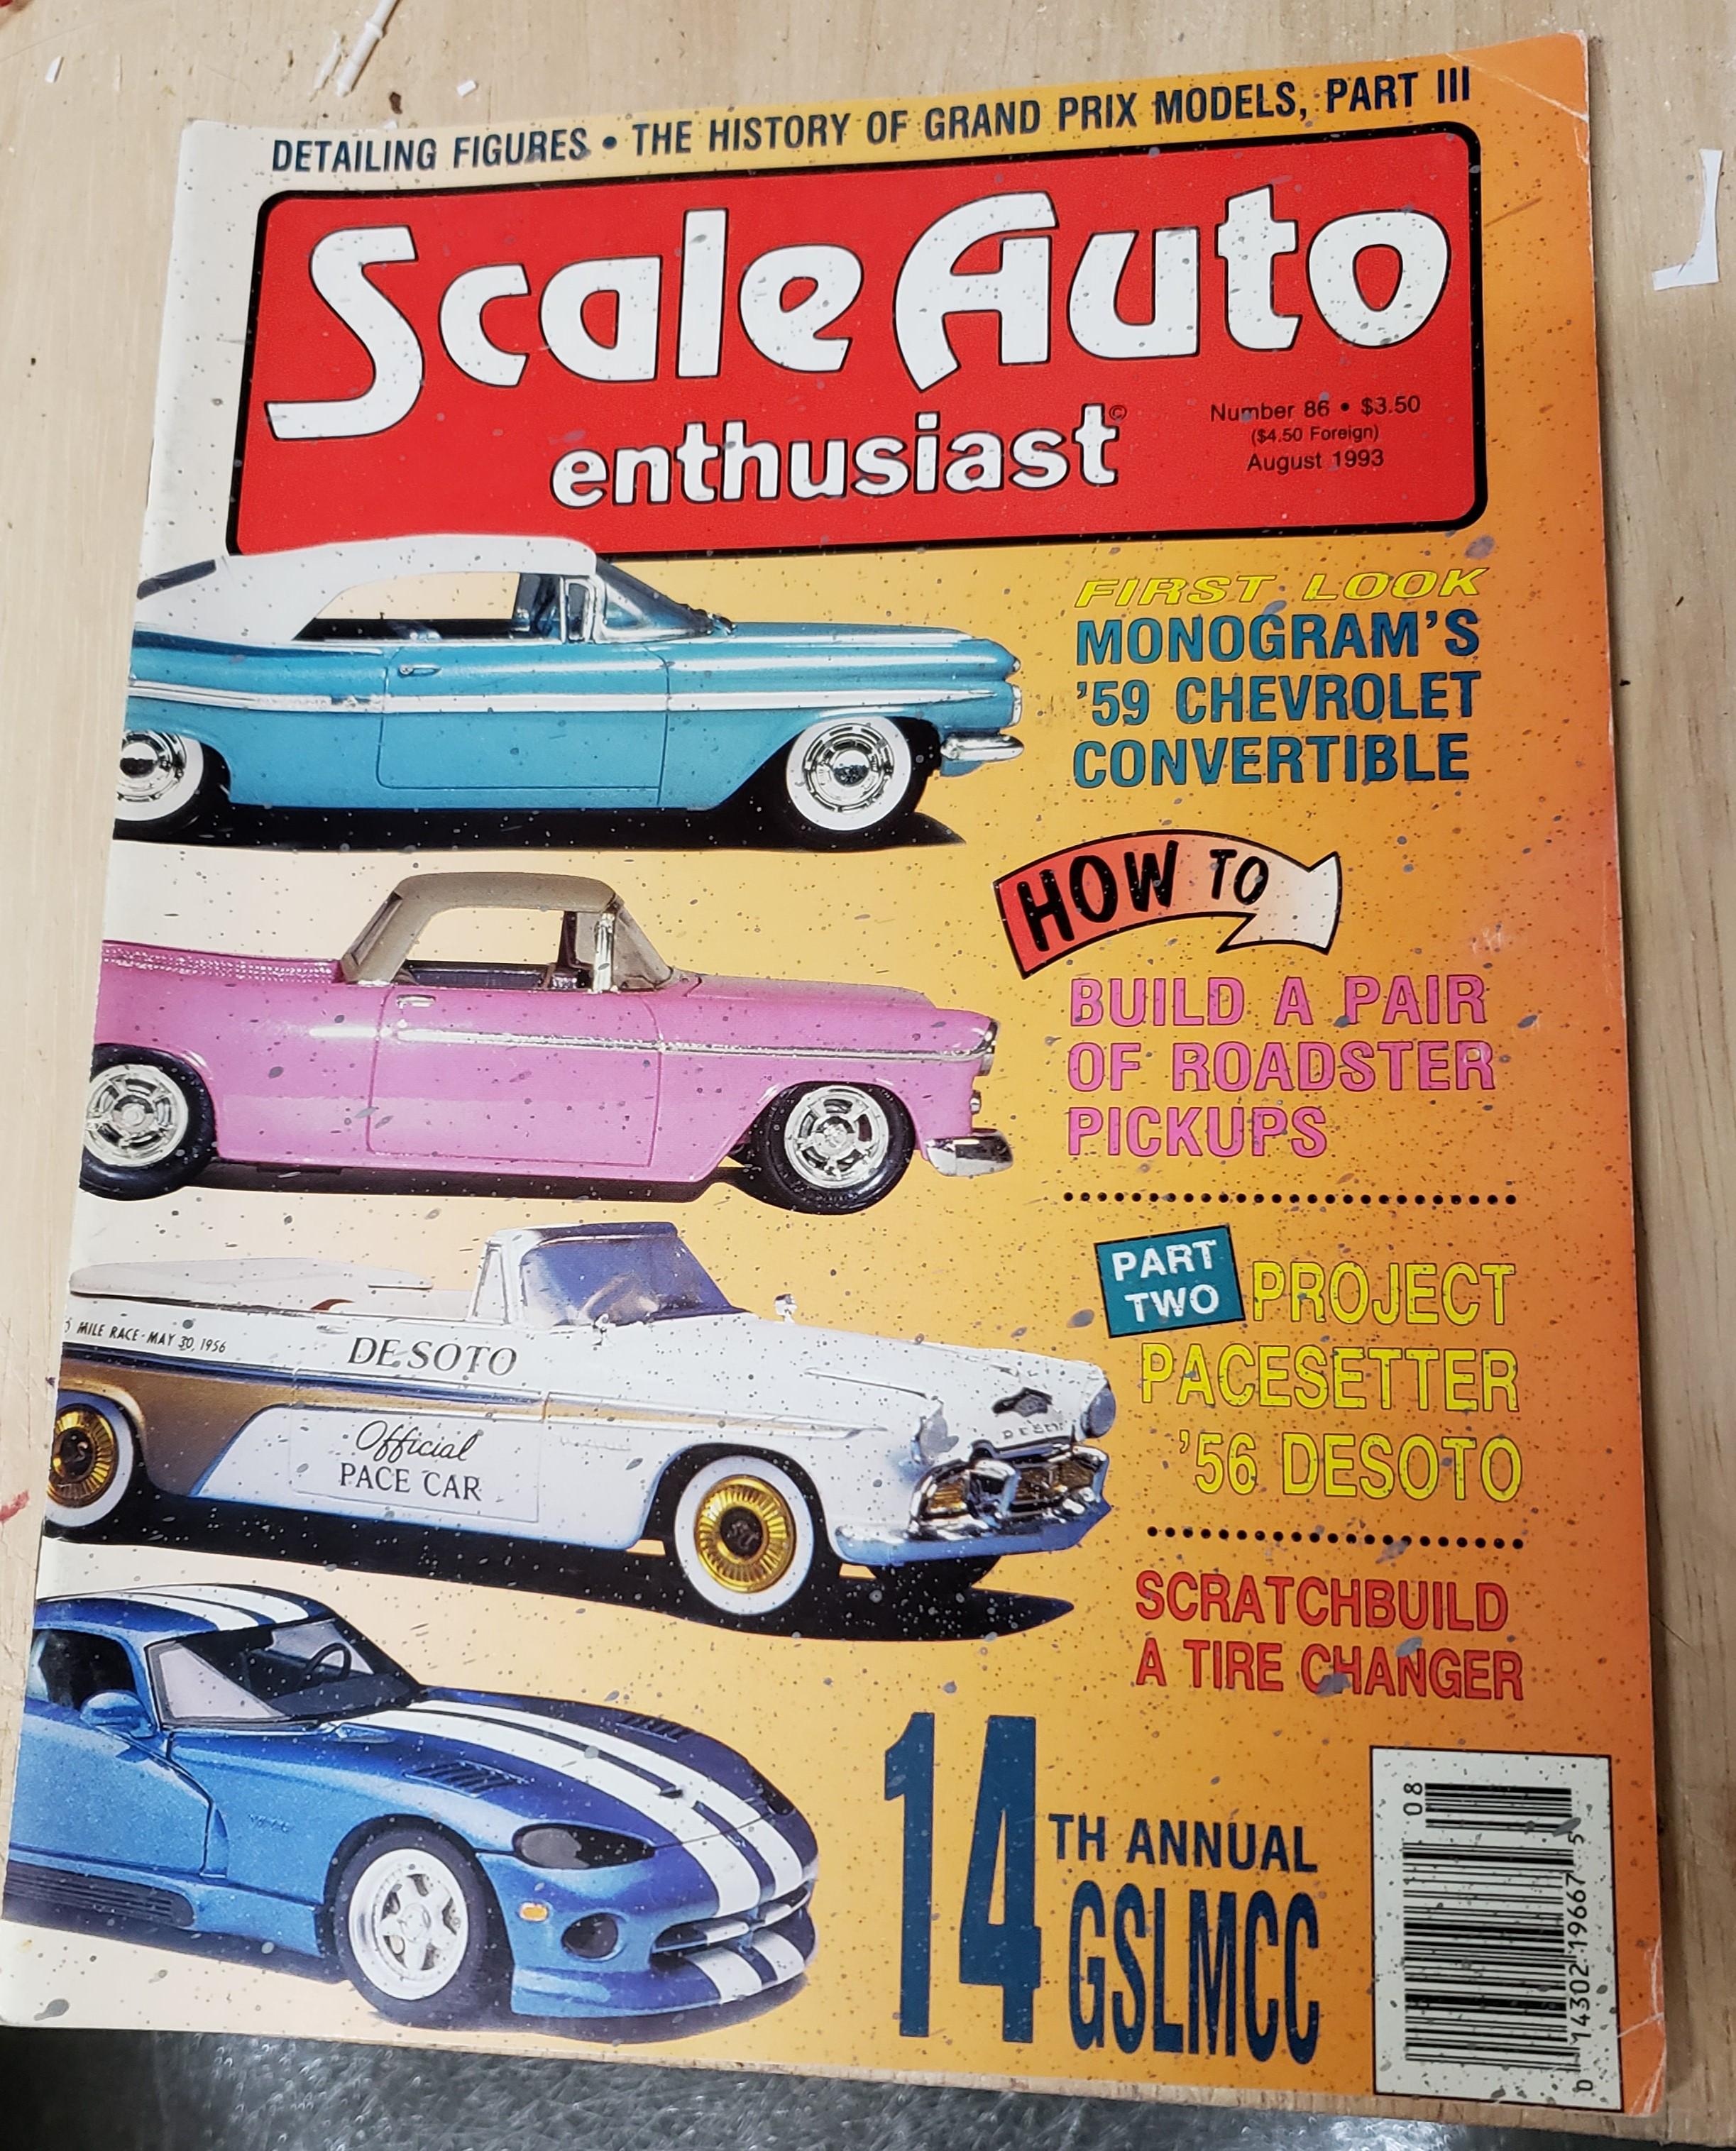
I really like 1:24 scale. Of course, most of the kits I have in my stash are 1:25, but I have so many good memories of building all those 1:24 Monogram kits in the 1980s. If I find any of them online at a decent price, I snatch them right up. It will be our secret.
-
1950 Chevy 3100 Pickup WIP
DJMar replied to Duddly01's topic in WIP: Model Trucks: Pickups, Vans, SUVs, Light Commercial
That looks absolutely amazing. Very nice work polishing out that paint! -
That's a great technique, thanks for showing it! A cutter ball in rotary tool also works for making worn out upholstery too. It's the same idea, basically, and looks really convincing.
-
I really dig the color. It looks awesome! I know this is a pretty basic kit, and also 1:24, but it's one of my favorite Monogram models.
-
Looks MUCH better! Now I can see why you couldn't just file/sand away that hood bulge. Nice work.
-
I find that giving the wheels a little black wash for contrast makes detail painting a LOT easier. I still use thinner and enamels for this step, but I know that we all have fancy panel liner solutions now. This makes it easier on my eyes when trying to get paint where it should go.
-
‘55 El Camino
DJMar replied to NOBLNG's topic in WIP: Model Trucks: Pickups, Vans, SUVs, Light Commercial
Awesome idea, and it's not just because I was just looking through this and thinking, "Wouldn't a '55 Nomad pickup be sweet? I think I have that kit in my stash somewhere..." Great minds think alike. ? But seriously, you've got this one off to a great start.
-
1950 Chevy 3100 Pickup WIP
DJMar replied to Duddly01's topic in WIP: Model Trucks: Pickups, Vans, SUVs, Light Commercial
BMF can be a pain to work with but I think it still has it's uses. It looks good on the bed strips. The LEDs really add some pop to the interior! ?? -
AMT/ Model King 1972 Blazer
DJMar replied to DJMar's topic in WIP: Model Trucks: Pickups, Vans, SUVs, Light Commercial
I'm pretty sure the Model King release and the more current (2015?) Crew Chief reissue are the same basic kit. IIRC, AMT also released the kit under the Boondocker and Bandit names in the late 70s-early 80s, and I'm pretty sure there was a 1969 version released sometime in the 90s. It's not a great kit, but I certainly like the look of it mocked up, height issues aside. -
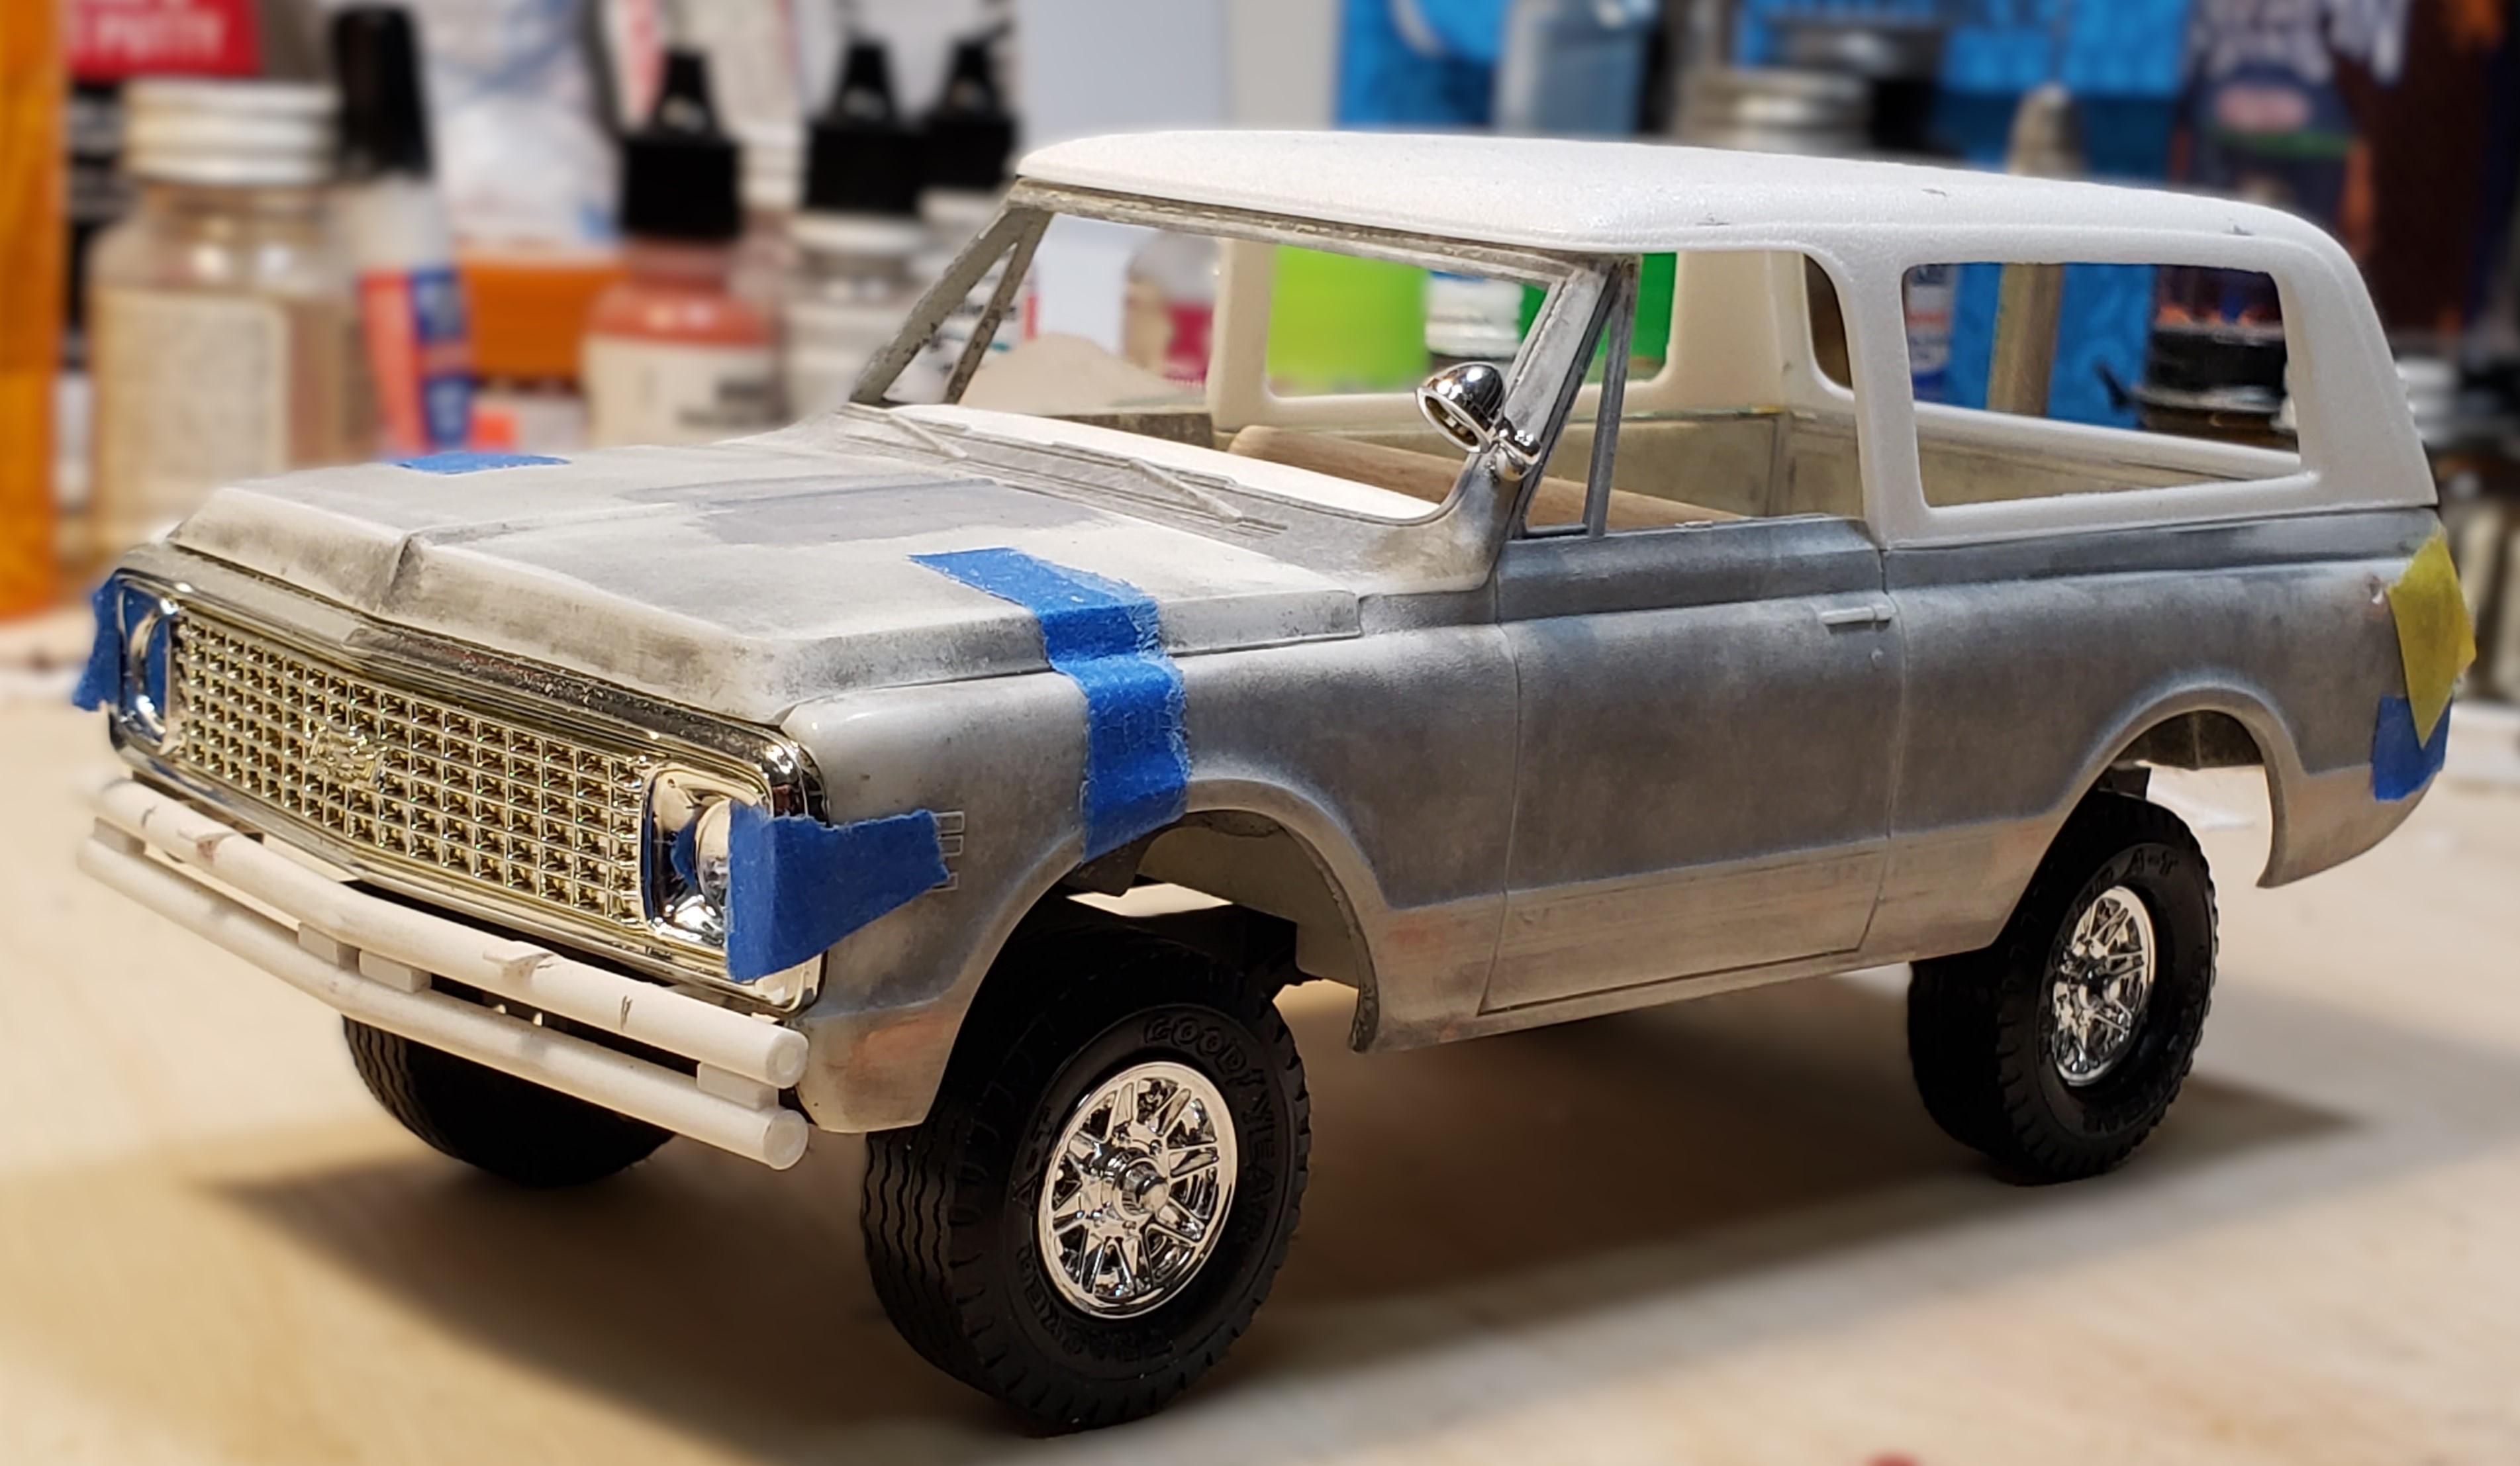
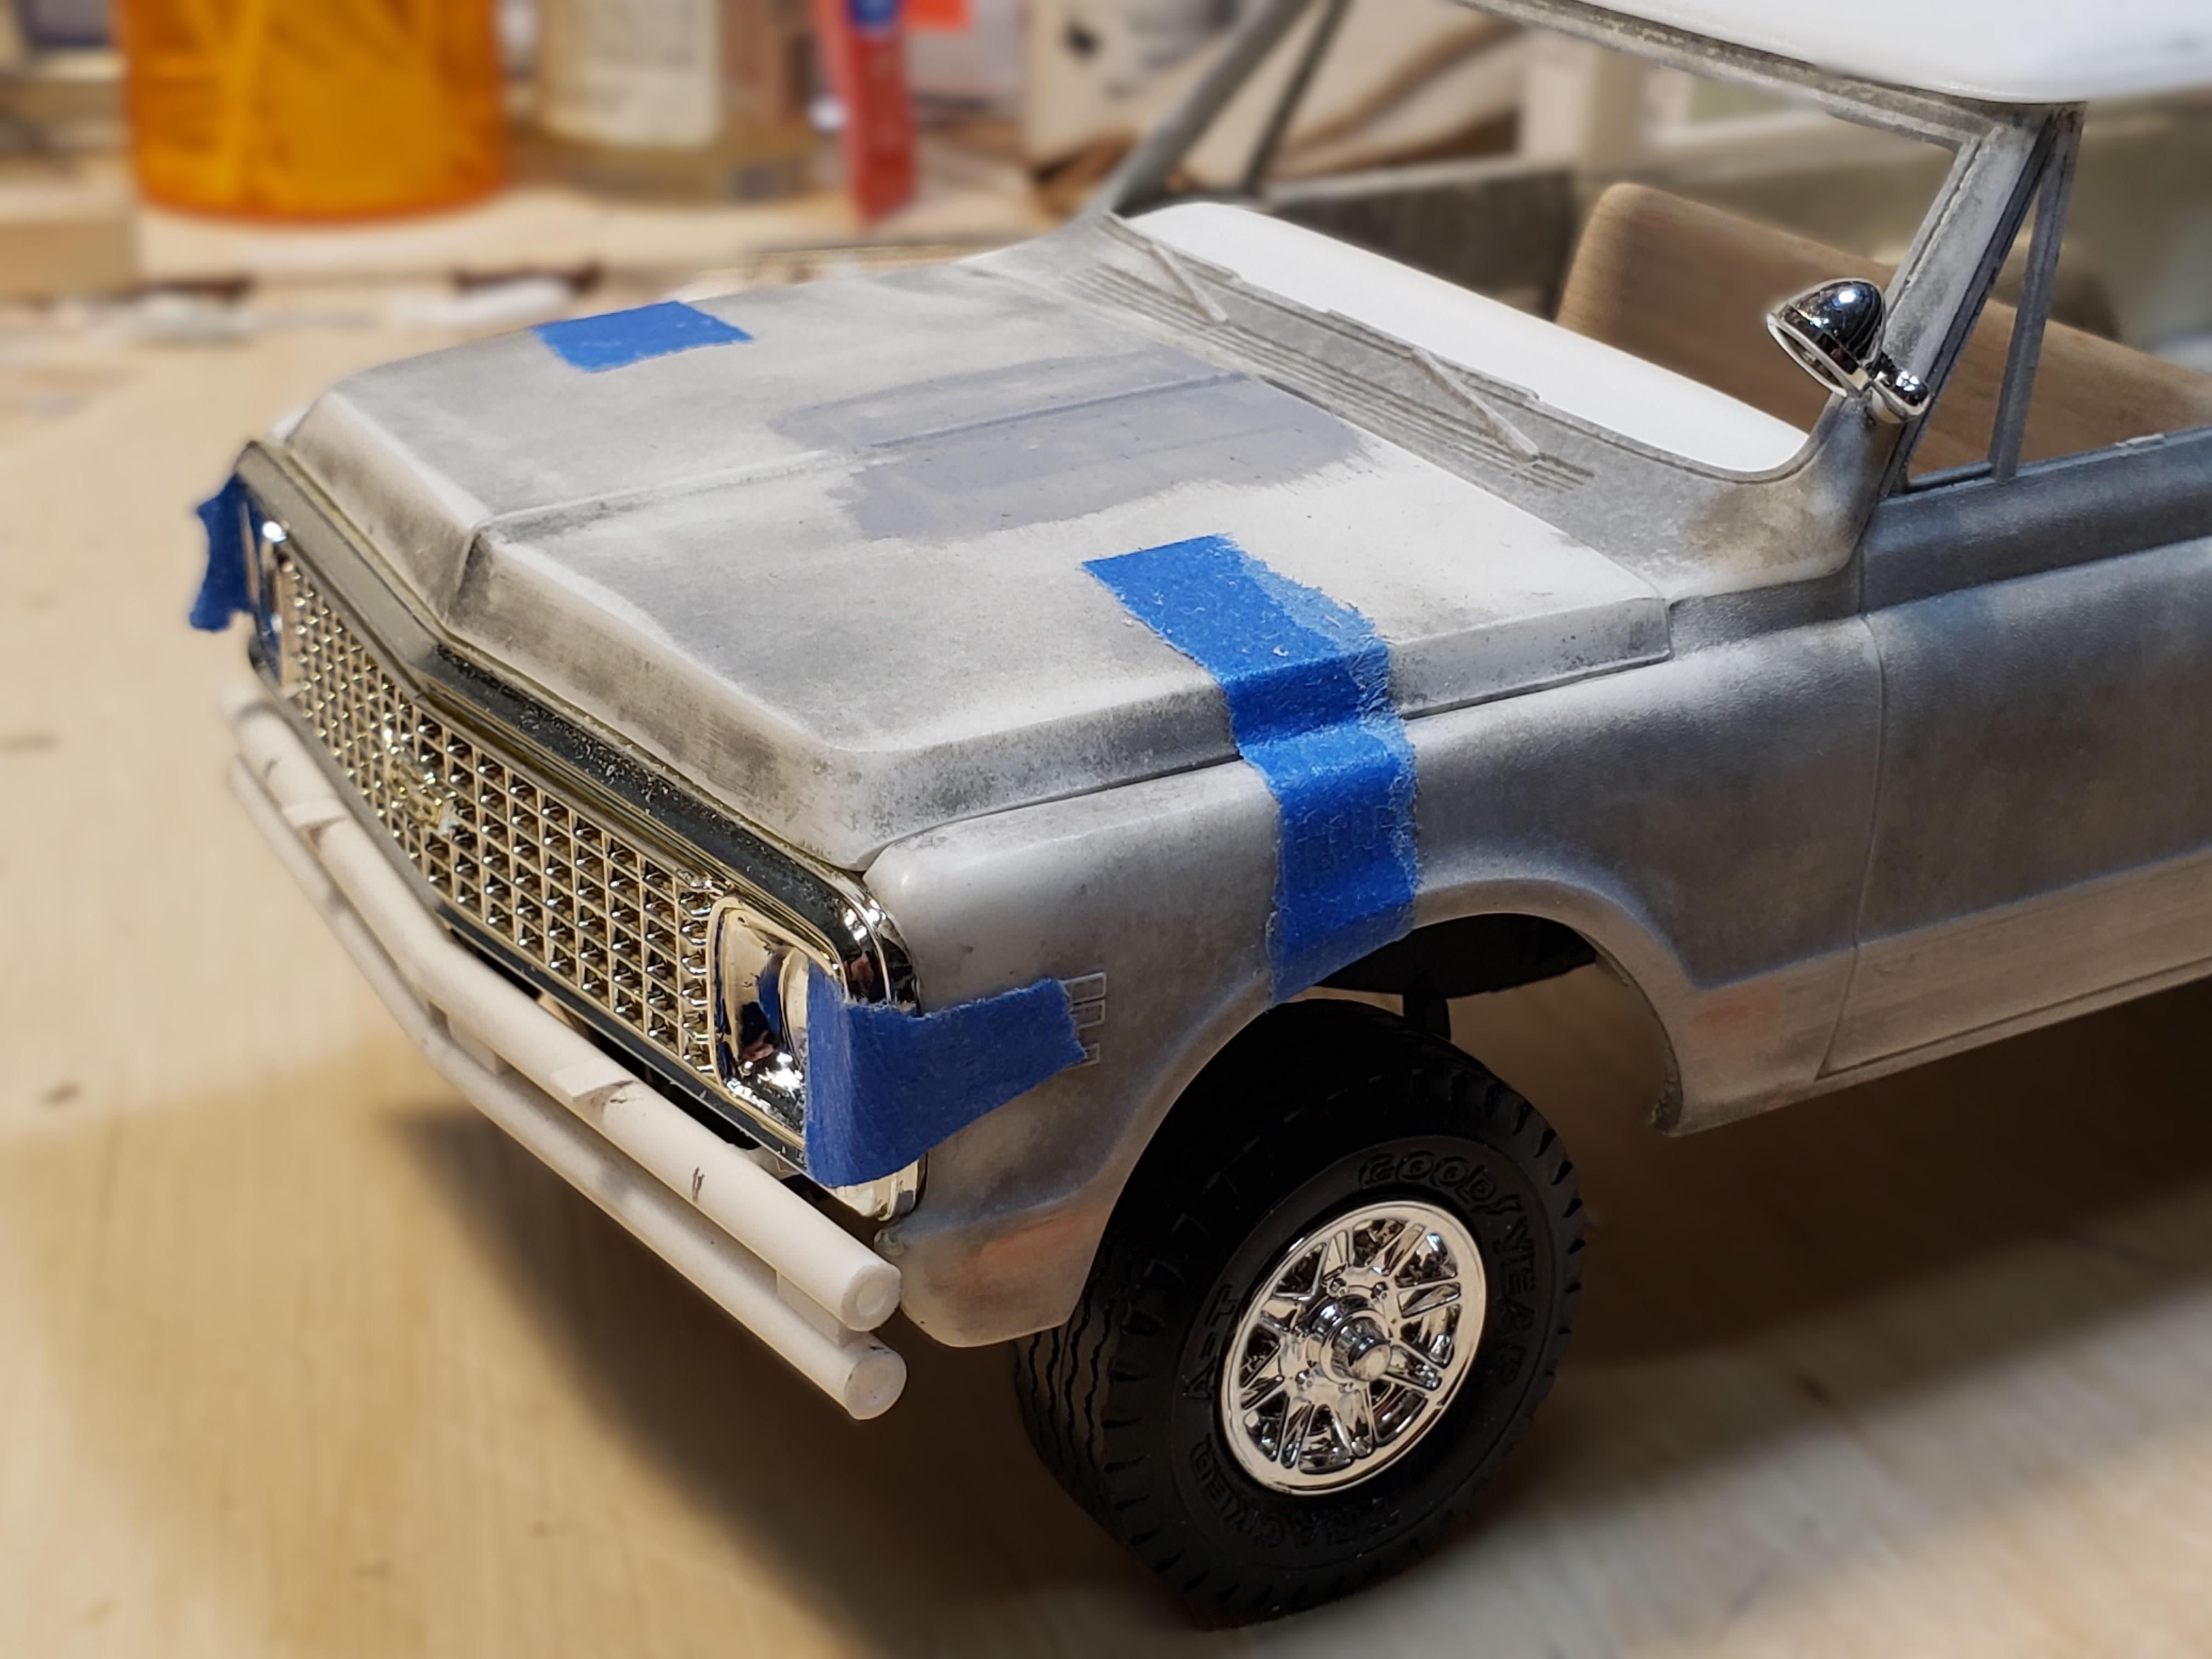
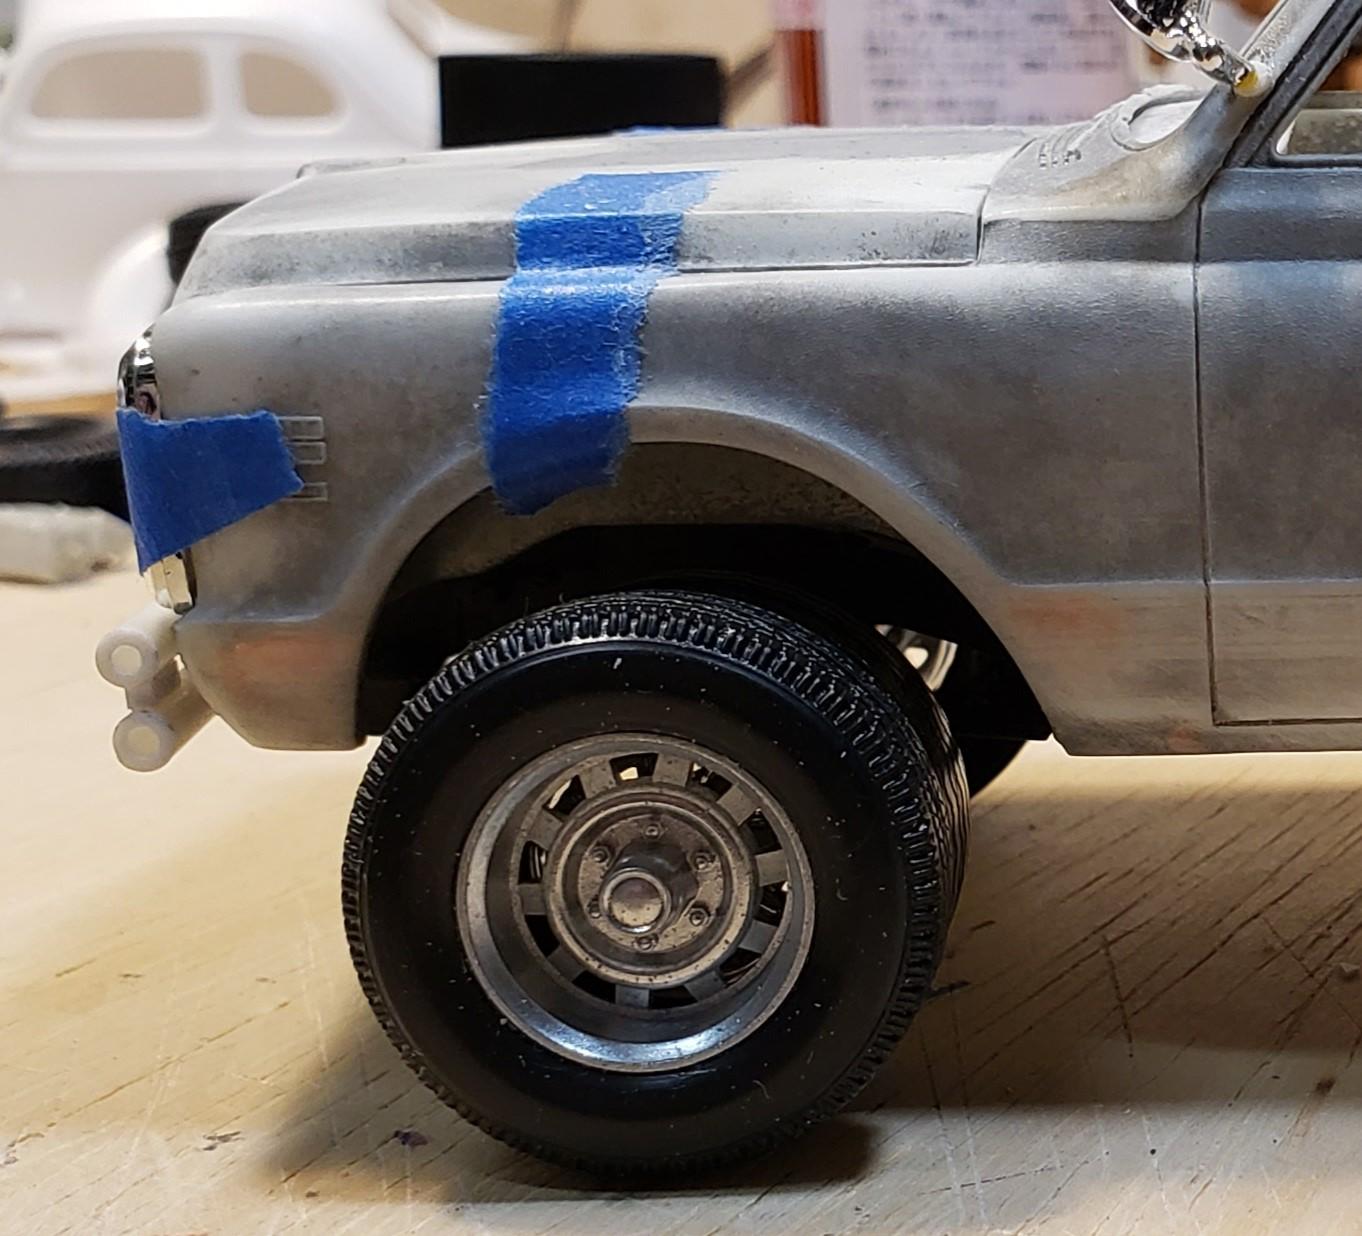
Here's another one that I found in the box while looking for tires for another project. It's the Model King version, circa 2006. At some point in the past, the body & interior were painted, then stripped. I mocked it up (taped it together) with some of the parts I found in the box with it, things I had built probably 15+ years ago. The front bumper is Evergreen tube, the interior has a front bench seat made from balsa wood (!), and there's a A-pillar mounted spotlight from the Revell Caprice kit. It's up on the stock suspension with kit tires, with wheels from the AMT Ford Courier kit. I think it sits too high, so it either needs a little lowering or bigger tires. I think I was planning on doing some sort of fire/rescue vehicle back then, since lower body trim is sanded off. Who knows what direction it will go now. I think I might want to replace the grille with the Iceman piece for the '69/70 Chevy & GMC trucks. I also had this set of resin Chevy/GMC 4x4 rally wheels, which scale out to be about 18". I'm not sure if I like the look.