DJMar
-
Posts
866 -
Joined
-
Last visited
Content Type
Profiles
Forums
Events
Gallery
Everything posted by DJMar
-
Oh, that's tasty! As a BOP fan, it's always nice to see a finished Firebird. Did you use the kit hood and modify it yourself, or is that an aftermarket piece?
-
Talk about making a silk purse out of a sow's ear! You made this kit shine, and you nailed the look.
-
I'm a big Fiat fan, so admittedly I am a bit biased, but I really love this display idea. The snow, in particular, looks very realistic.
-
I love the color. She's a beauty! I can see you swapped out Revell's custom rear tail light panel for the stock piece.
-
Another 1953 Ford F100
DJMar replied to Chuck Most's topic in Model Trucks: Pickups, Vans, SUVs, Light Commercial
That 4.6L under the hood is just wild. I'm digging it. -
1953 Ford F100
DJMar replied to Chuck Most's topic in Model Trucks: Pickups, Vans, SUVs, Light Commercial
Nicely done! The inside of the bed looks especially convincing. Believe it or not, I actually remember that movie. -
That 4x4 Buick sums up the "sad but true" chapter of the car scene in the late 70s-early 80s. Also, I wonder how much the owner wanted to sell the '37 for at the time!
-
1950 Chevy 3100 Pickup WIP
DJMar replied to Duddly01's topic in WIP: Model Trucks: Pickups, Vans, SUVs, Light Commercial
Not going to lie...watching you move on this build makes me want to pull this kit out of the stash. Too many kits, not enough days in the week, eh? -
Now THAT is an awesome color combo. What a tasty Mopar!
-
1950 Chevy 3100 Pickup WIP
DJMar replied to Duddly01's topic in WIP: Model Trucks: Pickups, Vans, SUVs, Light Commercial
Once upon a time, I found some very small, very delicate jewelry chain that seemed perfect for tailgate chains. It was a bear to work with, even when I had younger eyes and more nimble fingers. You can find 1mm jewelry chain online, I'd bet Amazon has it. That's as close as you're going to get, I think, unless you want to find some .8mm stuff. I generally use coated telephone wire now, to replicate the rubber covers you can put on chains. -
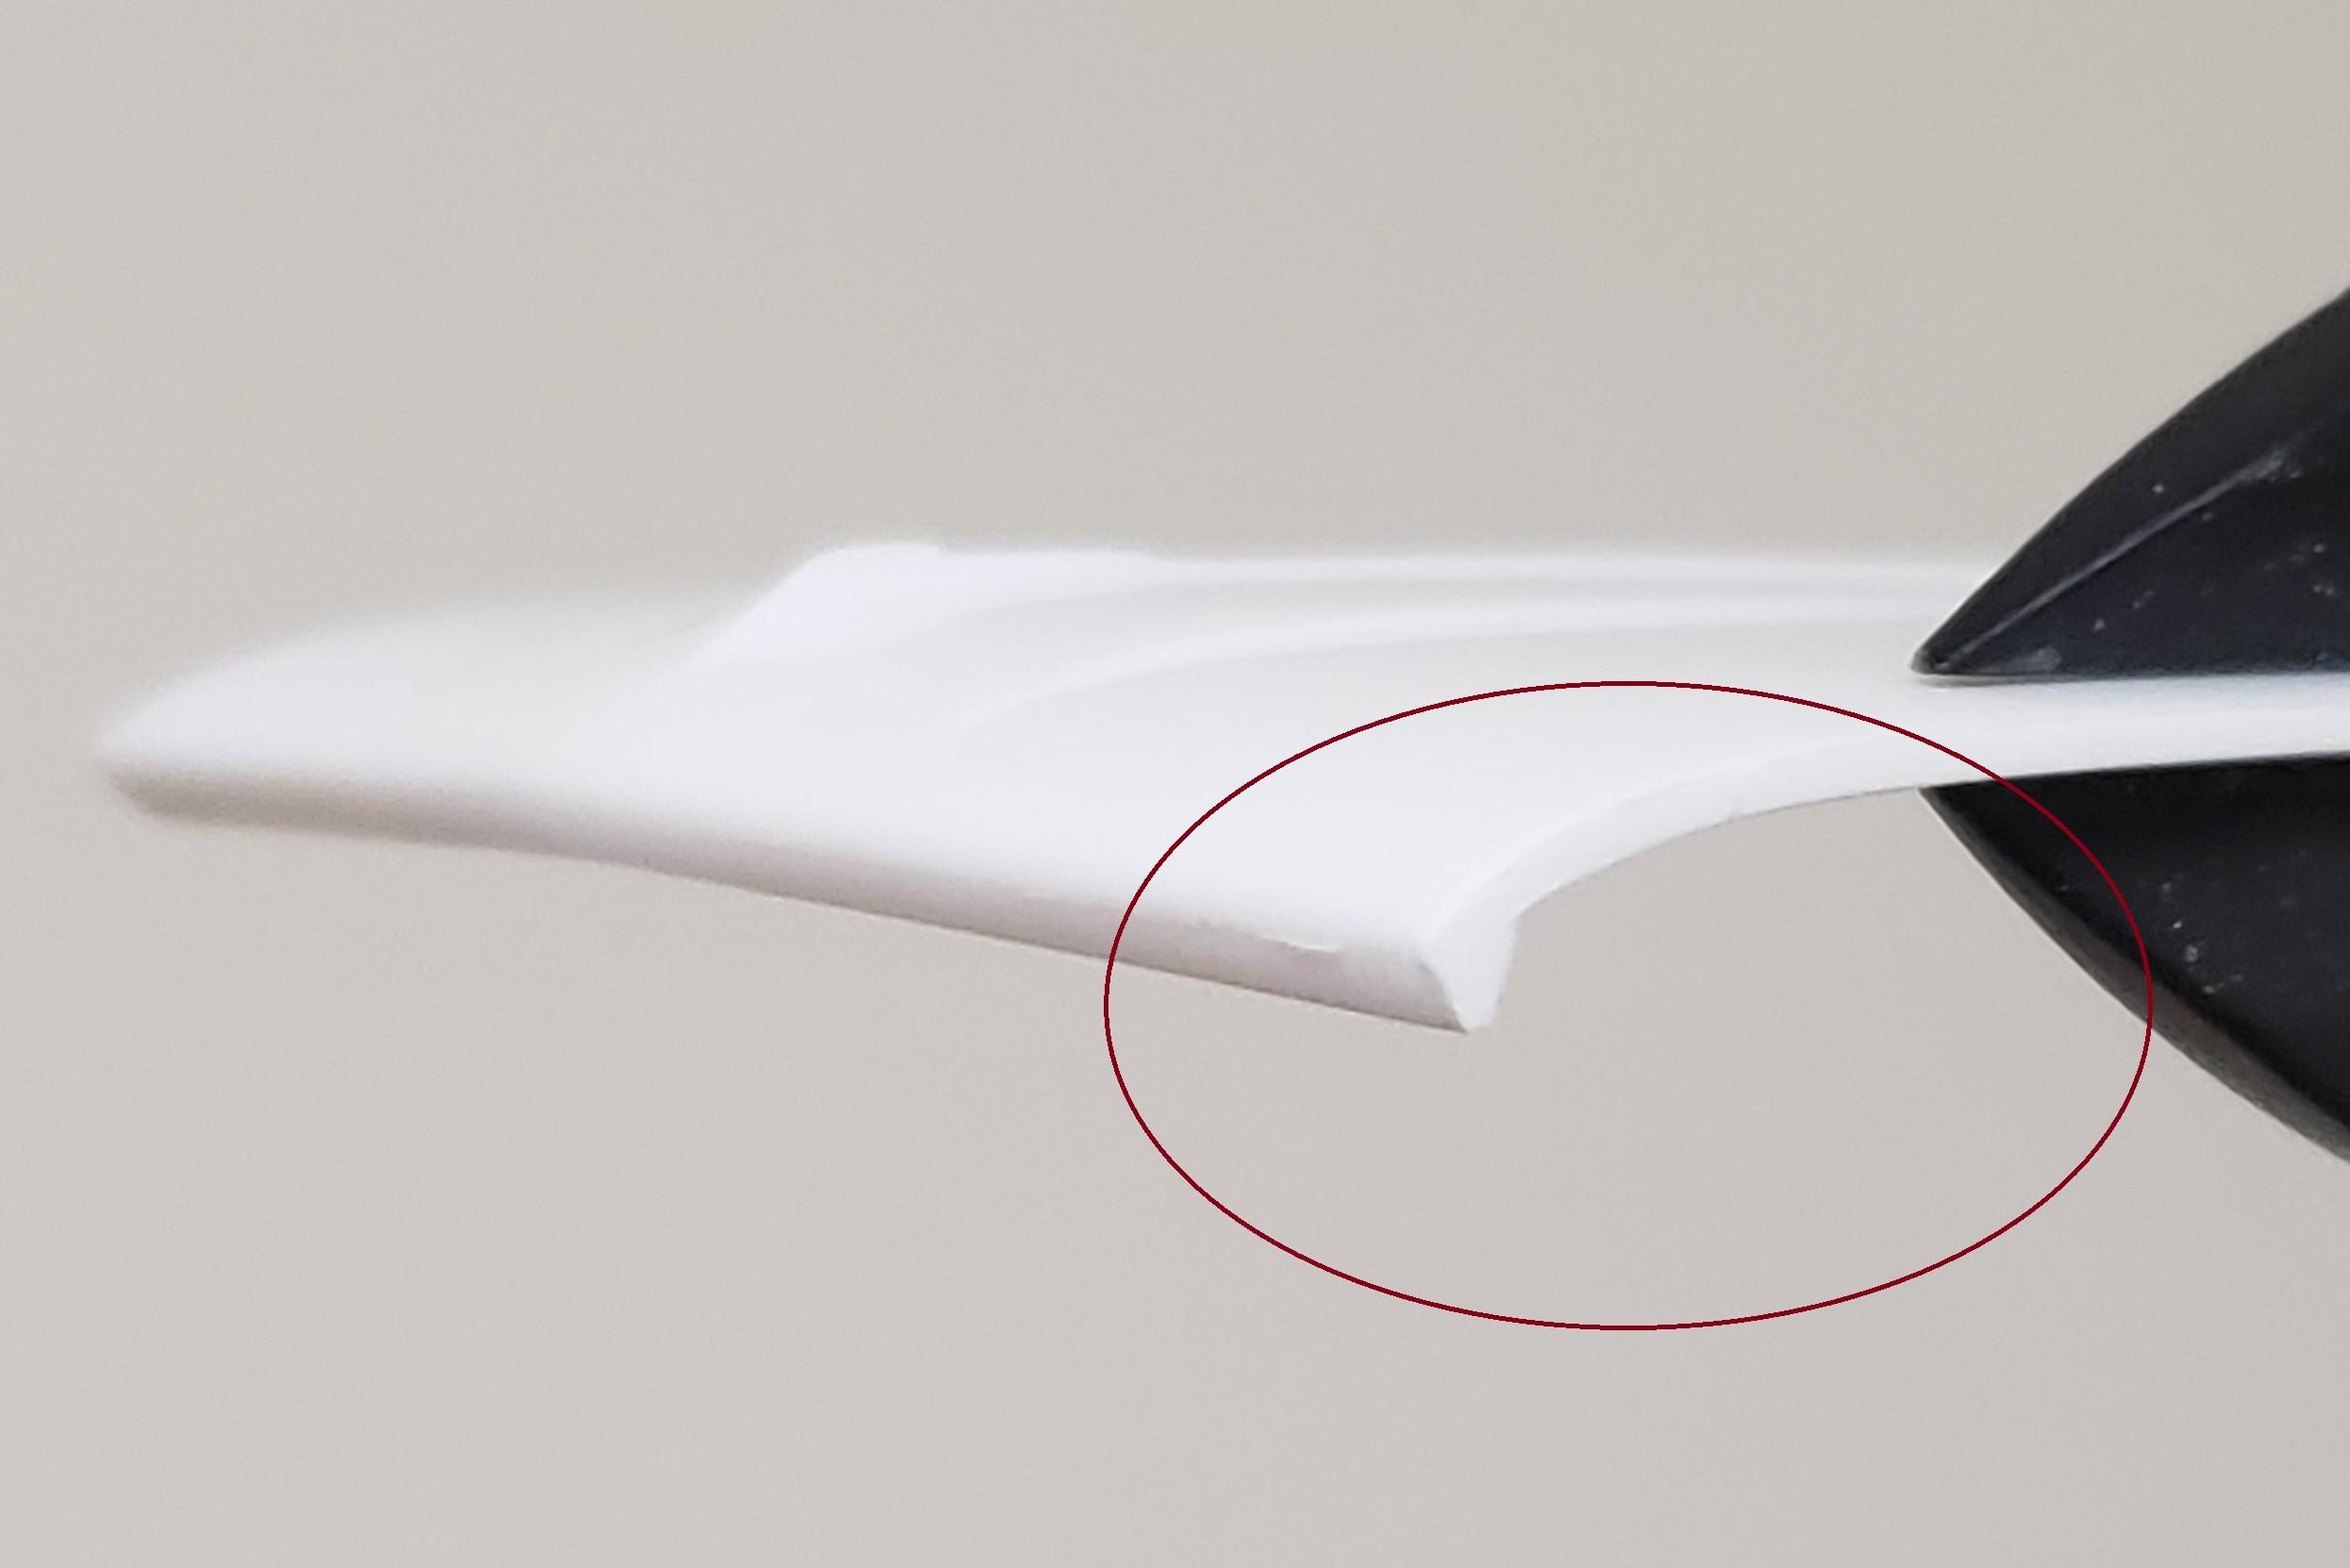
I see what you mean. Here are two possible ways to deal with that curve: 1) Use a piece of styrene that is wider then you need, and then cut and sand to match that curve, or 2) Use a dimensionally thinner piece of strip (.015 vs .020 for example) and liquid glue and bend the filler piece to match the curve. You may have to laminate thinner pieces to get the width you need to fill the hood/fender gap. But thin styrene bends pretty easily, even along its length. Option #1 is how I worked the El Camino hood. There is a dogleg at the front of the hood, and there was no way to bend a piece of styrene into that exact shape without a lot of hair pulling. I used a wider piece of plastic (the hood is 1.5mm thick, IIRC I used a 4mm strip), glued it in place, and then cut the excess and sanded it to shape. You can see it still needs some work, but the idea is the same. Bonus - since Evergreen styrene is softer than kit plastic, you can use the kit piece as a sanding guide, if you don't get carried away with an aggressive grit.

-
Too many squirrels running around in my head.
DJMar replied to Terry Jessee's topic in WIP: Model Cars
Jesse Valadez Sr. finished the 3rd (and final) version of the "Gypsy Rose" in 1974, and the "Love Machine" for Up In Smoke was slammed together by the movie's production crew in April/May of 1977. They are not the same car. Unless there is something I'm missing, those are two different vehicles. -
1950 Chevy 3100 Pickup WIP
DJMar replied to Duddly01's topic in WIP: Model Trucks: Pickups, Vans, SUVs, Light Commercial
I love any '47-'53 Chevy truck. I also love that AMT kit, even though it seems to require a LOT of cleanup and prep work. I've got one in the stash that probably has 3 oz of putty in the frame sinkholes! Following this with interest. -
Too many squirrels running around in my head.
DJMar replied to Terry Jessee's topic in WIP: Model Cars
Ahhh, the "Up In Smoke" lowrider! ???? Also, I'm digging the "Longmire" pickup. BTW...is that a short bed, non-stepside 70's Dodge sitting in the background in the 2nd pic? -
Agreed. I did this when adapting the stock, plain hood from the Revellogram '66 El Camino to their '66 Chevelle wagon. The ElCo hood was short in both length & width, so it was strip styrene to the rescue. The back edge was a shade over 1 mm, the 2 sides were about .5 mm. And as DW said, you have to do both sides equally in order to get the hood to sit centered. I left the pics large so you can see where the strips are glued. It's a little tough because it's white on white but you can see it. It still needs a bit of final tweaking, but it's mostly there after 15 or 20 minutes of work, spread out over a couple of days (had to wait for the glue to dry). Patience, a good liquid adhesive and a selection of sanding sticks are your best friends here. Go slowly & test fit often. I think the gap you showed on that hood would be a pretty easy fix. Hope this helps.
-
Great work on fitting new "glass", which is a much needed improvement. Also, I love the black & green color combo. Looking sharp!
-
Aoshima 2024 New Tool Back to the Future DeLorean Time Machine
DJMar replied to spencer1984's topic in WIP: Model Cars
I'm digging it! -
I don't think you have enough Mustangs!
-
That paint is TASTY! Of course, the whole build is amazingly smooth and clean but you really nailed that paint.
-
Really well done. Clean, clean and CLEAN. Thanks for posting the review. I usually don't build police car kits, but I've been considering picking this one up for a fire marshal's car.
-
That looks fantastic. I really love the gold. I'm not a fan of gold (usually) but it looks great on this Z. Also, having built two of these kits over the years, you're not alone in your frustration. It is not an easy kit to get together.
-
Ditto on this. Their Comet was a letdown, and their Nova gasser was the last kit of theirs I'll buy. It's a shame, too, because they pick great subject matter. I had high hopes for that gasser kit. Sorry to hear about that. FWIW, I really liked the paint color you picked for that Nova! ?
-
I know this build had its challenges, but all your hard work paid off. She's a looker. Love the stance, the colors, the everything. And the exhaust; with one glasspack under each door, you would definitely hear that!
-
Now that is spot on! This is a great build idea that I NEVER would have thought about. It looks great.
- 25 replies
-
- 1
-

-
- dumbanddumber
- shagginwagon
- (and 2 more)
-
I'm always down for red interiors, especially on black cars. This one is a beauty...super sharp!