
sak
-
Posts
671 -
Joined
-
Last visited
Content Type
Profiles
Forums
Events
Gallery
Everything posted by sak
-
-
Badass
-
Badass. One piece of advice. Drill a small hole in the handle and glue a thin piece of wire in. Drill a small hole in the door. Then just glue the wire later and dont risk glue oozing out on to your paint
-
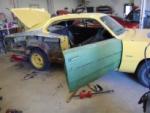
Badass but where axactly is the positive battery going? This is the second time I've seen it routed that way. The first time I thought it was incorrect but now that I've seen you do it also I know I am wrong. On my '73 plymouth, the battery cable loops around a little fuse box by the battery then follows the inner fender then drops to starter selenoid. This fusebox is located on the bulkhead on barracuda/challengers?
-
Badass color. Wish I could find one of these.
-
pretty badass
-
Is it just me or is it becoming a trend to remove chrome from vintage cars out in the real world? I like the trend to install brand new engines in older cars, as it appears has been done here. We have superior technology now, why not use it.However, I wish customizing shops would leave everything else. Honda accord seats belong in...well a honda accord. Just saying.
-
Is it just me or is it becoming a trend to remove chrome from vintage cars out in the real world? I like the trend to install brand new engines in older cars. We have superior technology now, why not use it.However, I wish customizing shops would leave everything else. Honda accord seats belong in...well a honda accord. Just saying.
-
Badass. SO..like which company made this originally? Cannot find no info on this.
-
Badass. BUT..that piece of red wire that is meant to be a battery cable...it terminates at a relay built into the starter motor on drivers side. If its already glued...you can make a bend about 3/4 on the way to the bulkhead and just tuck it under the manifold somewhere. The black is a grounding wire. It bolts to the engine head on a small blick. Not sure about big block. So perhaps this one is correct.
-
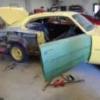
Badass. Ya know..it wouldnt be hard to build a booster. Maybe even reshape a brake drum even. Looking at the pictures again. This kit looks identical to the 1965 chevelle. There should be a booster included.
-
'67 Plymouth GTX build Update 7-28-14 (Under glass)
sak replied to TFchronos's topic in WIP: Model Cars
Badass. You are not going to paint the bonnet? -
One more I guess. You now know what direction I am going and some of you will not approve.
-
getting closer.
-
Badass! Not my favorite color but looks applied correctly
-
Most peculiar thing. Applied dupont clearcoat over testors lacqour and almost suddenly strange blotches and blemishes appear randomly. Never seen this before. I guess the two are not compatible. Nobig deal. Will let it gas out completely and hit it with another color coat. But next time try dupli-color clear instead.
-
Never thought of that one
-
You planning to wetsand the paint on the emblems? Revealing the bare metal foil underneath? If so put two layers of foil. Doesn't take much to burn thru the foil back down to bare plastic
-
Looking badass
-
-
-
Good color
-
Looks badass but I would carve that master cylinder out of the firewall.It looks like half of it is embedded inside. With your skill, you should easily be able to scratchbuild one.
-
-
Thanks. Its so easy. I just stripped some speaker wire and removed strands until it looked like the right thickness then twist it back up, bend it to the shape you want then just glob some black paint on it to make it look like its wrapped in electrical tape. Where they terminate at bulkheads and other things..I only sliced square or round styrene rods, drilled a tiny hole thru it and slide the wire thru it. I do that before I paint it. The hooks are only just pop can aluminum cut thin, glued at one end to the firewall, then just bend it over the wires after