OldNYJim
-
Posts
252 -
Joined
-
Last visited
Content Type
Profiles
Forums
Events
Gallery
Everything posted by OldNYJim
-
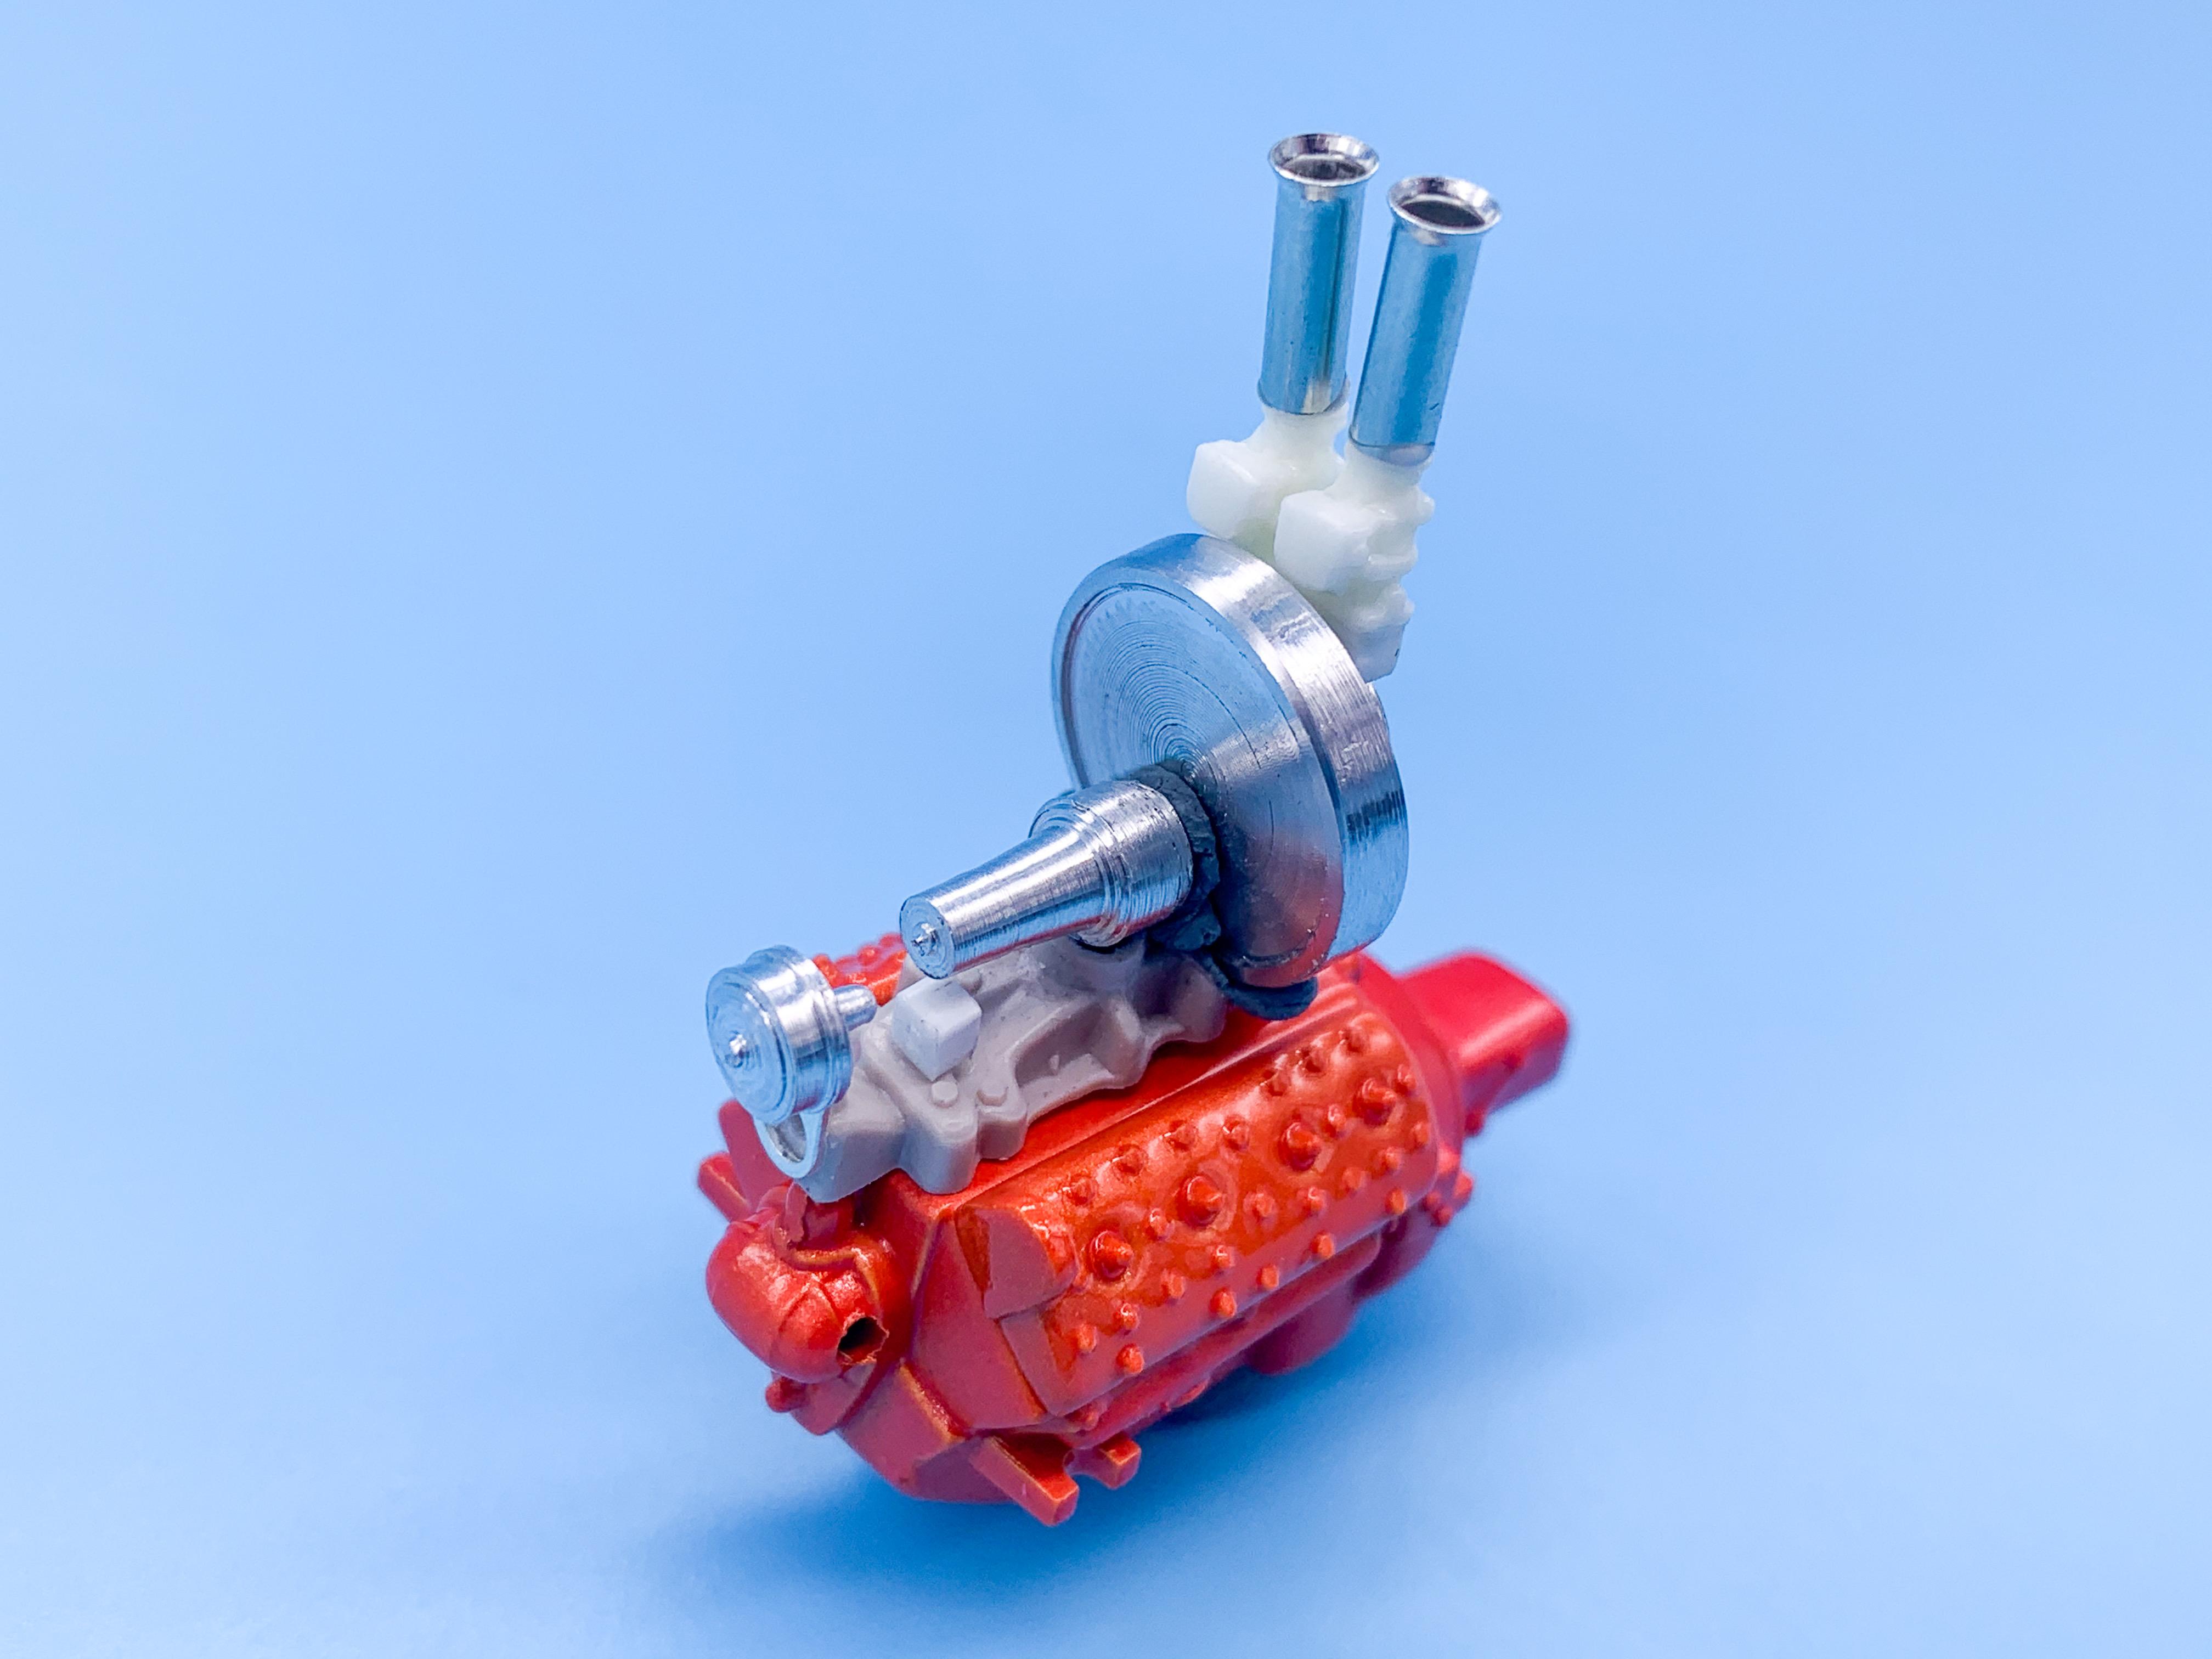
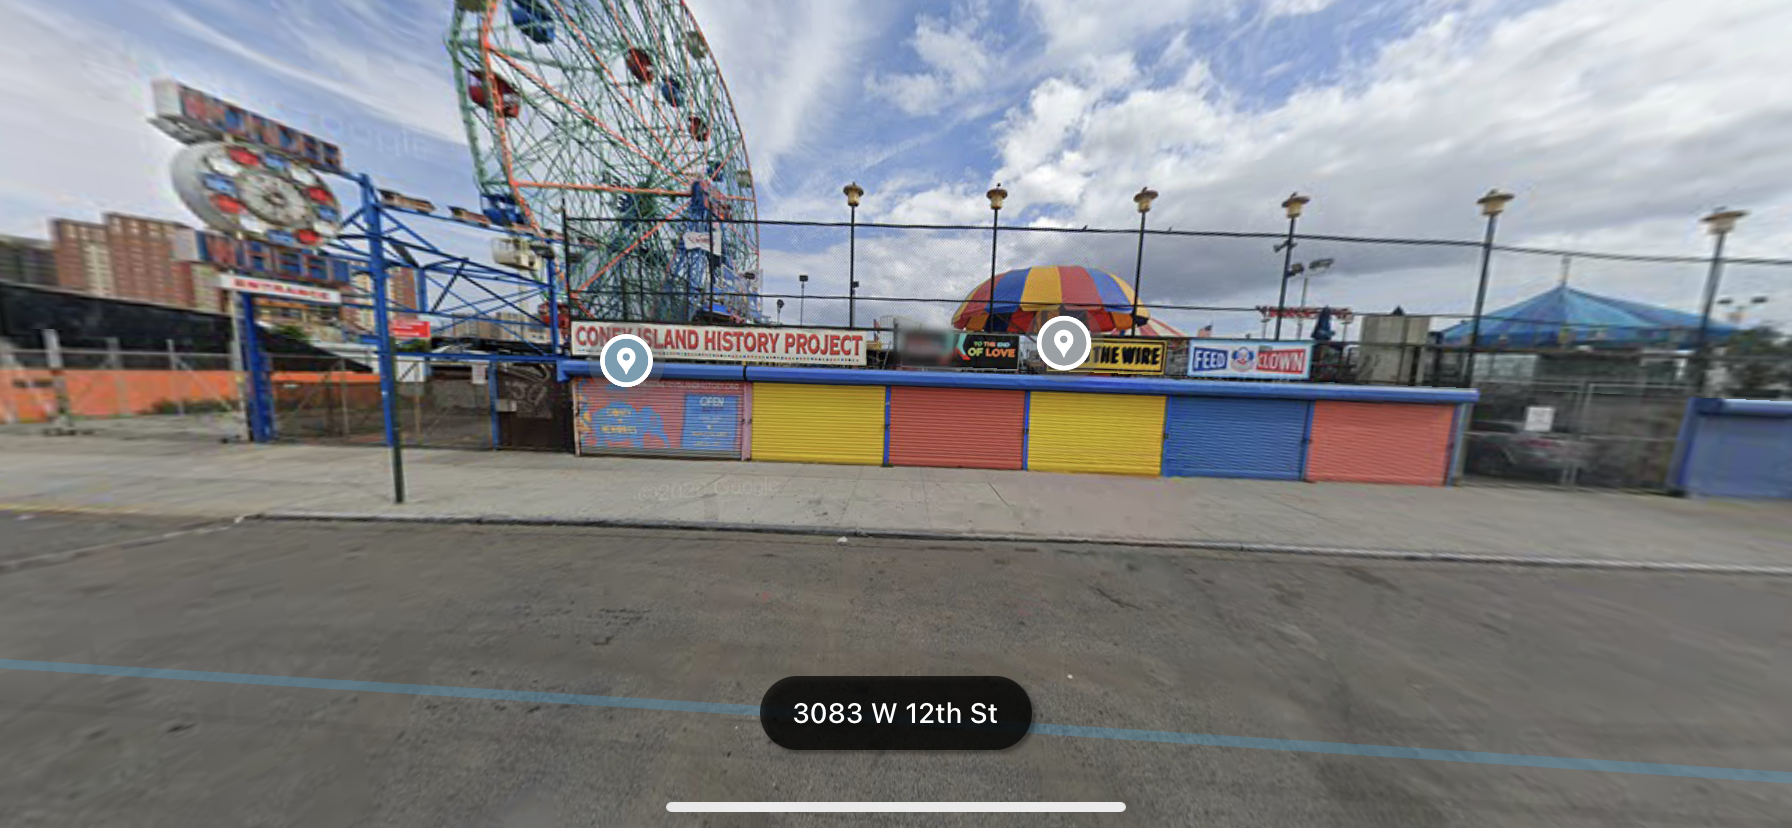
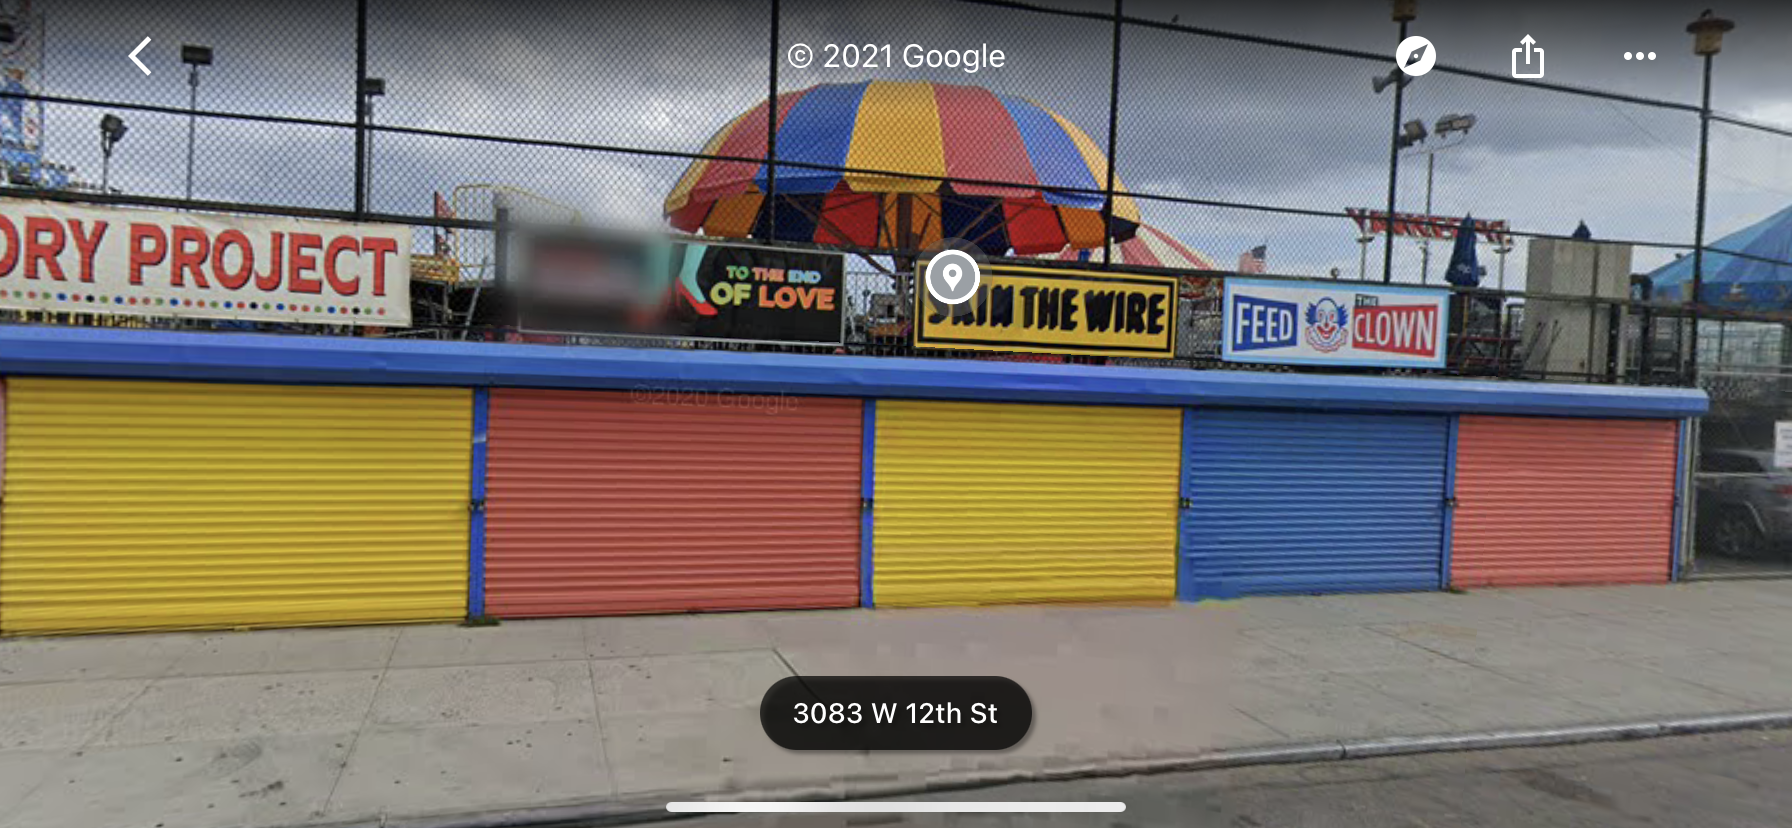
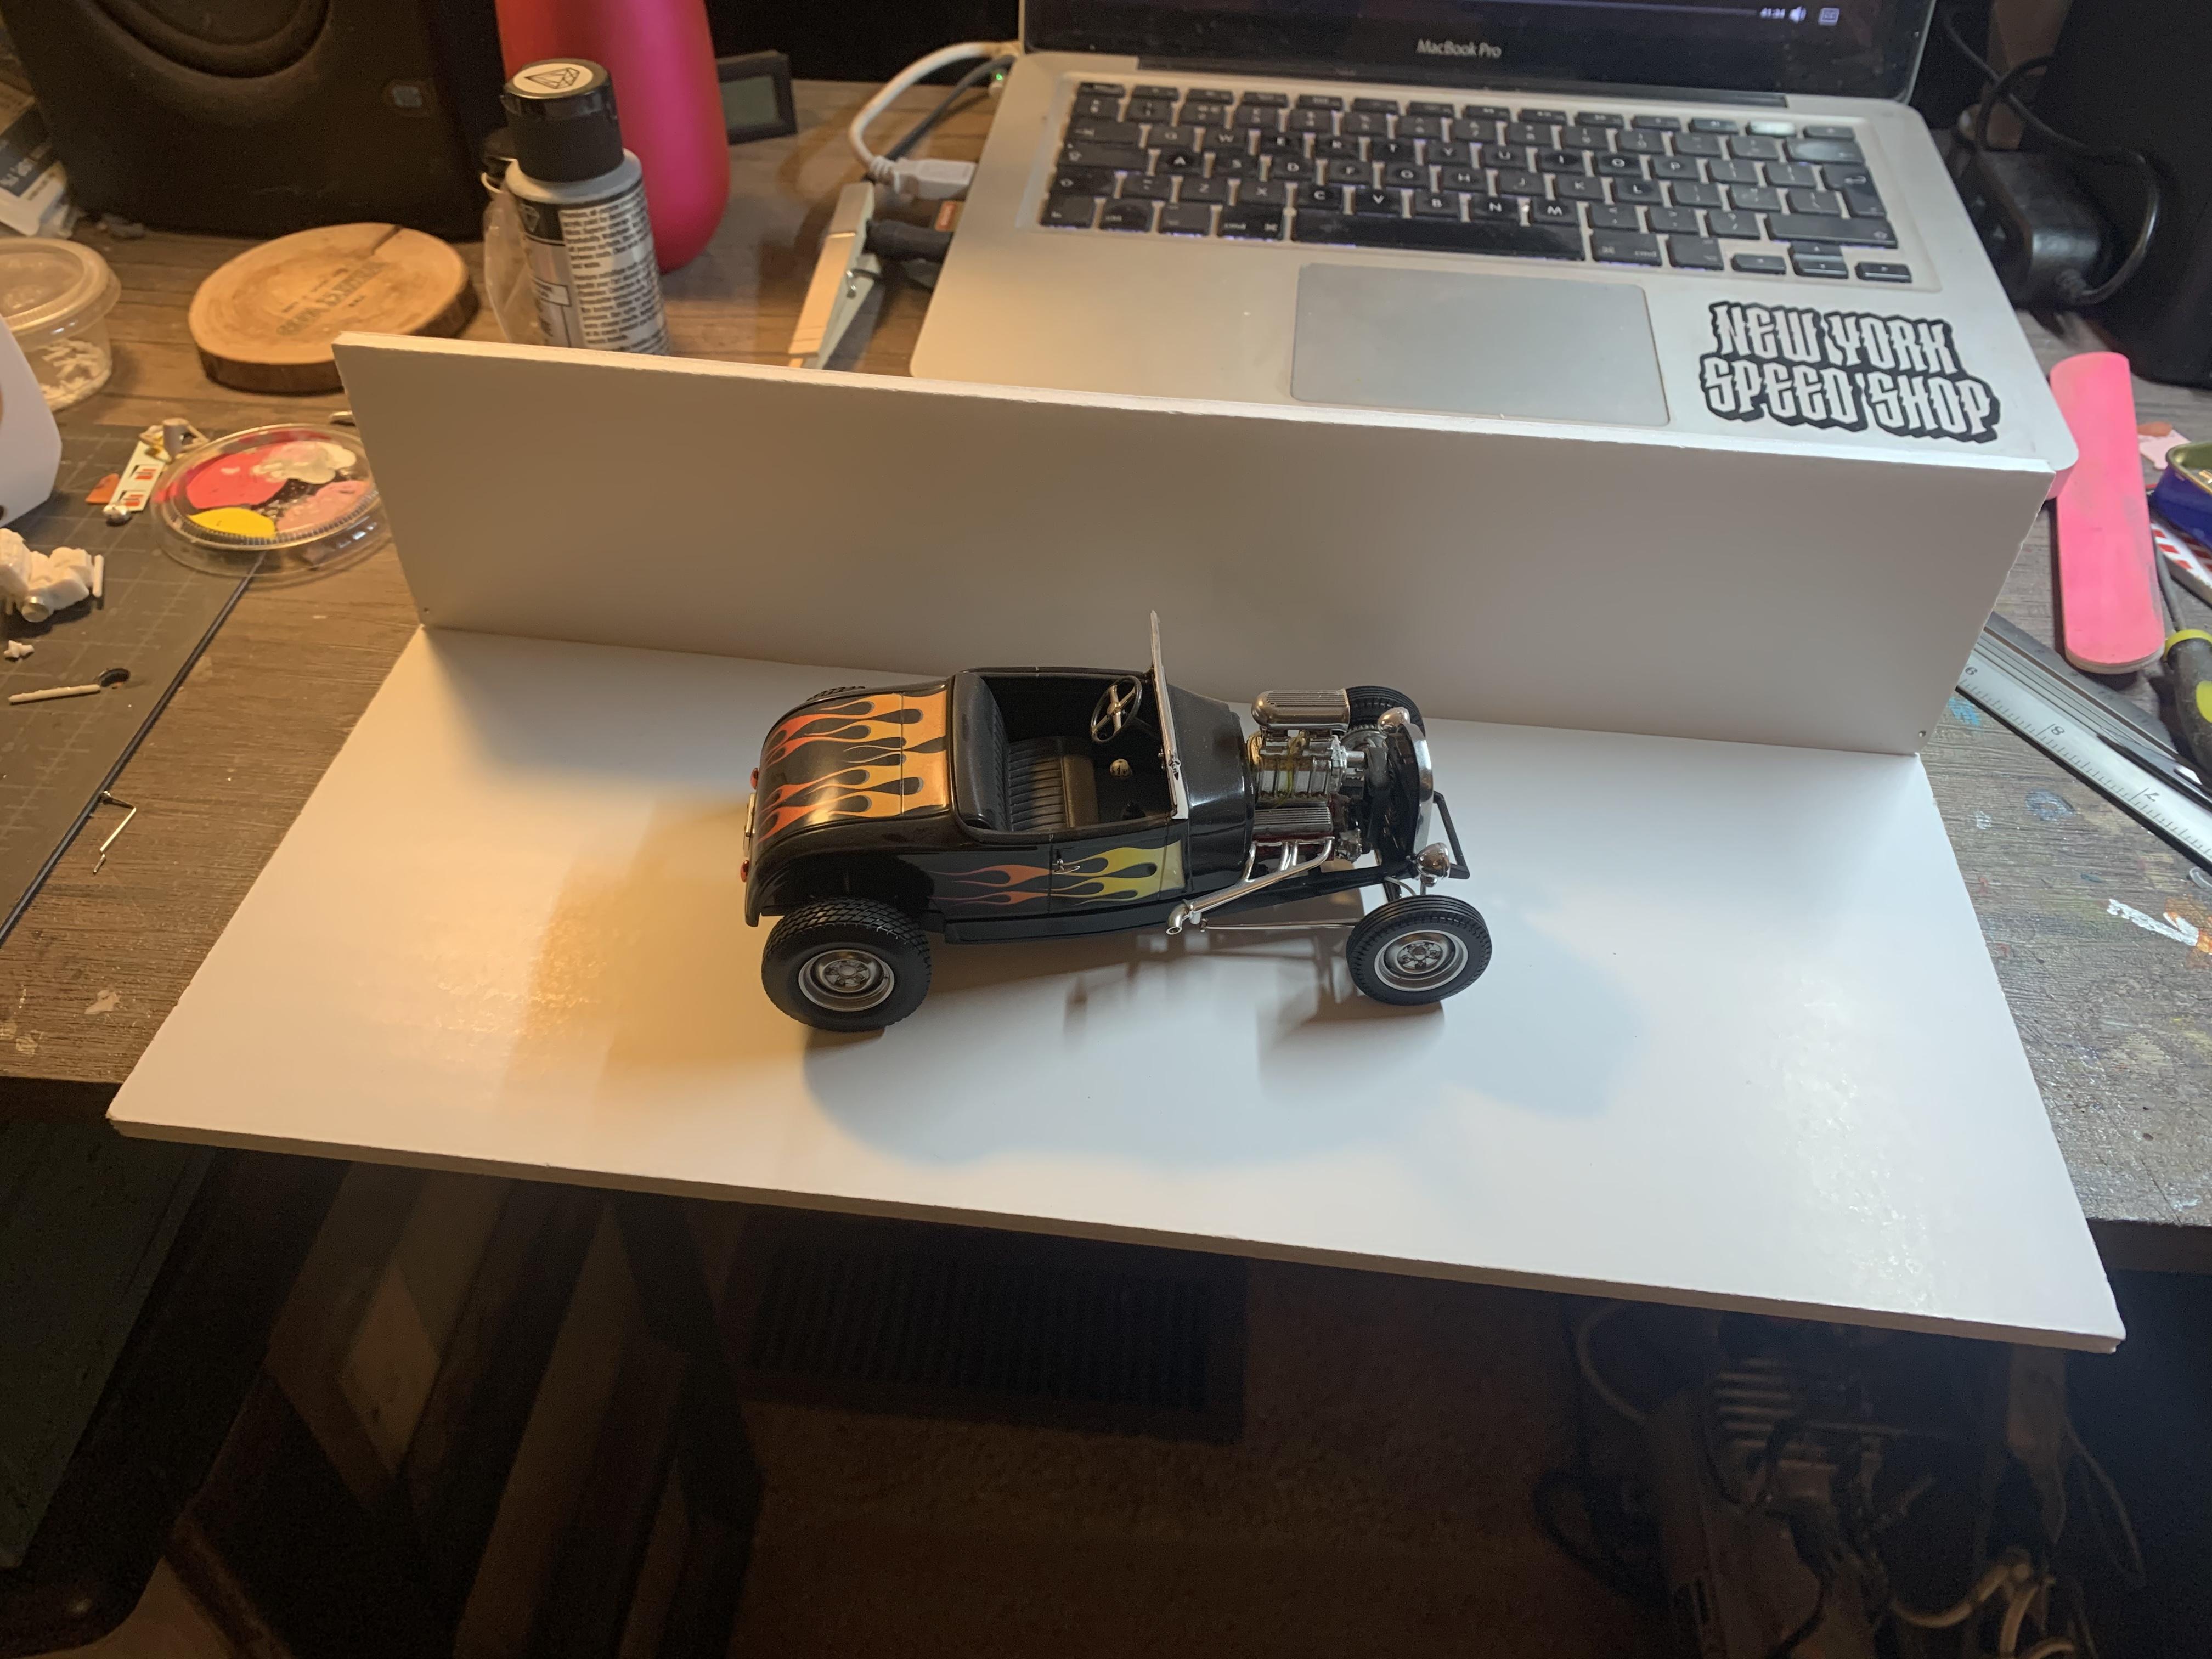
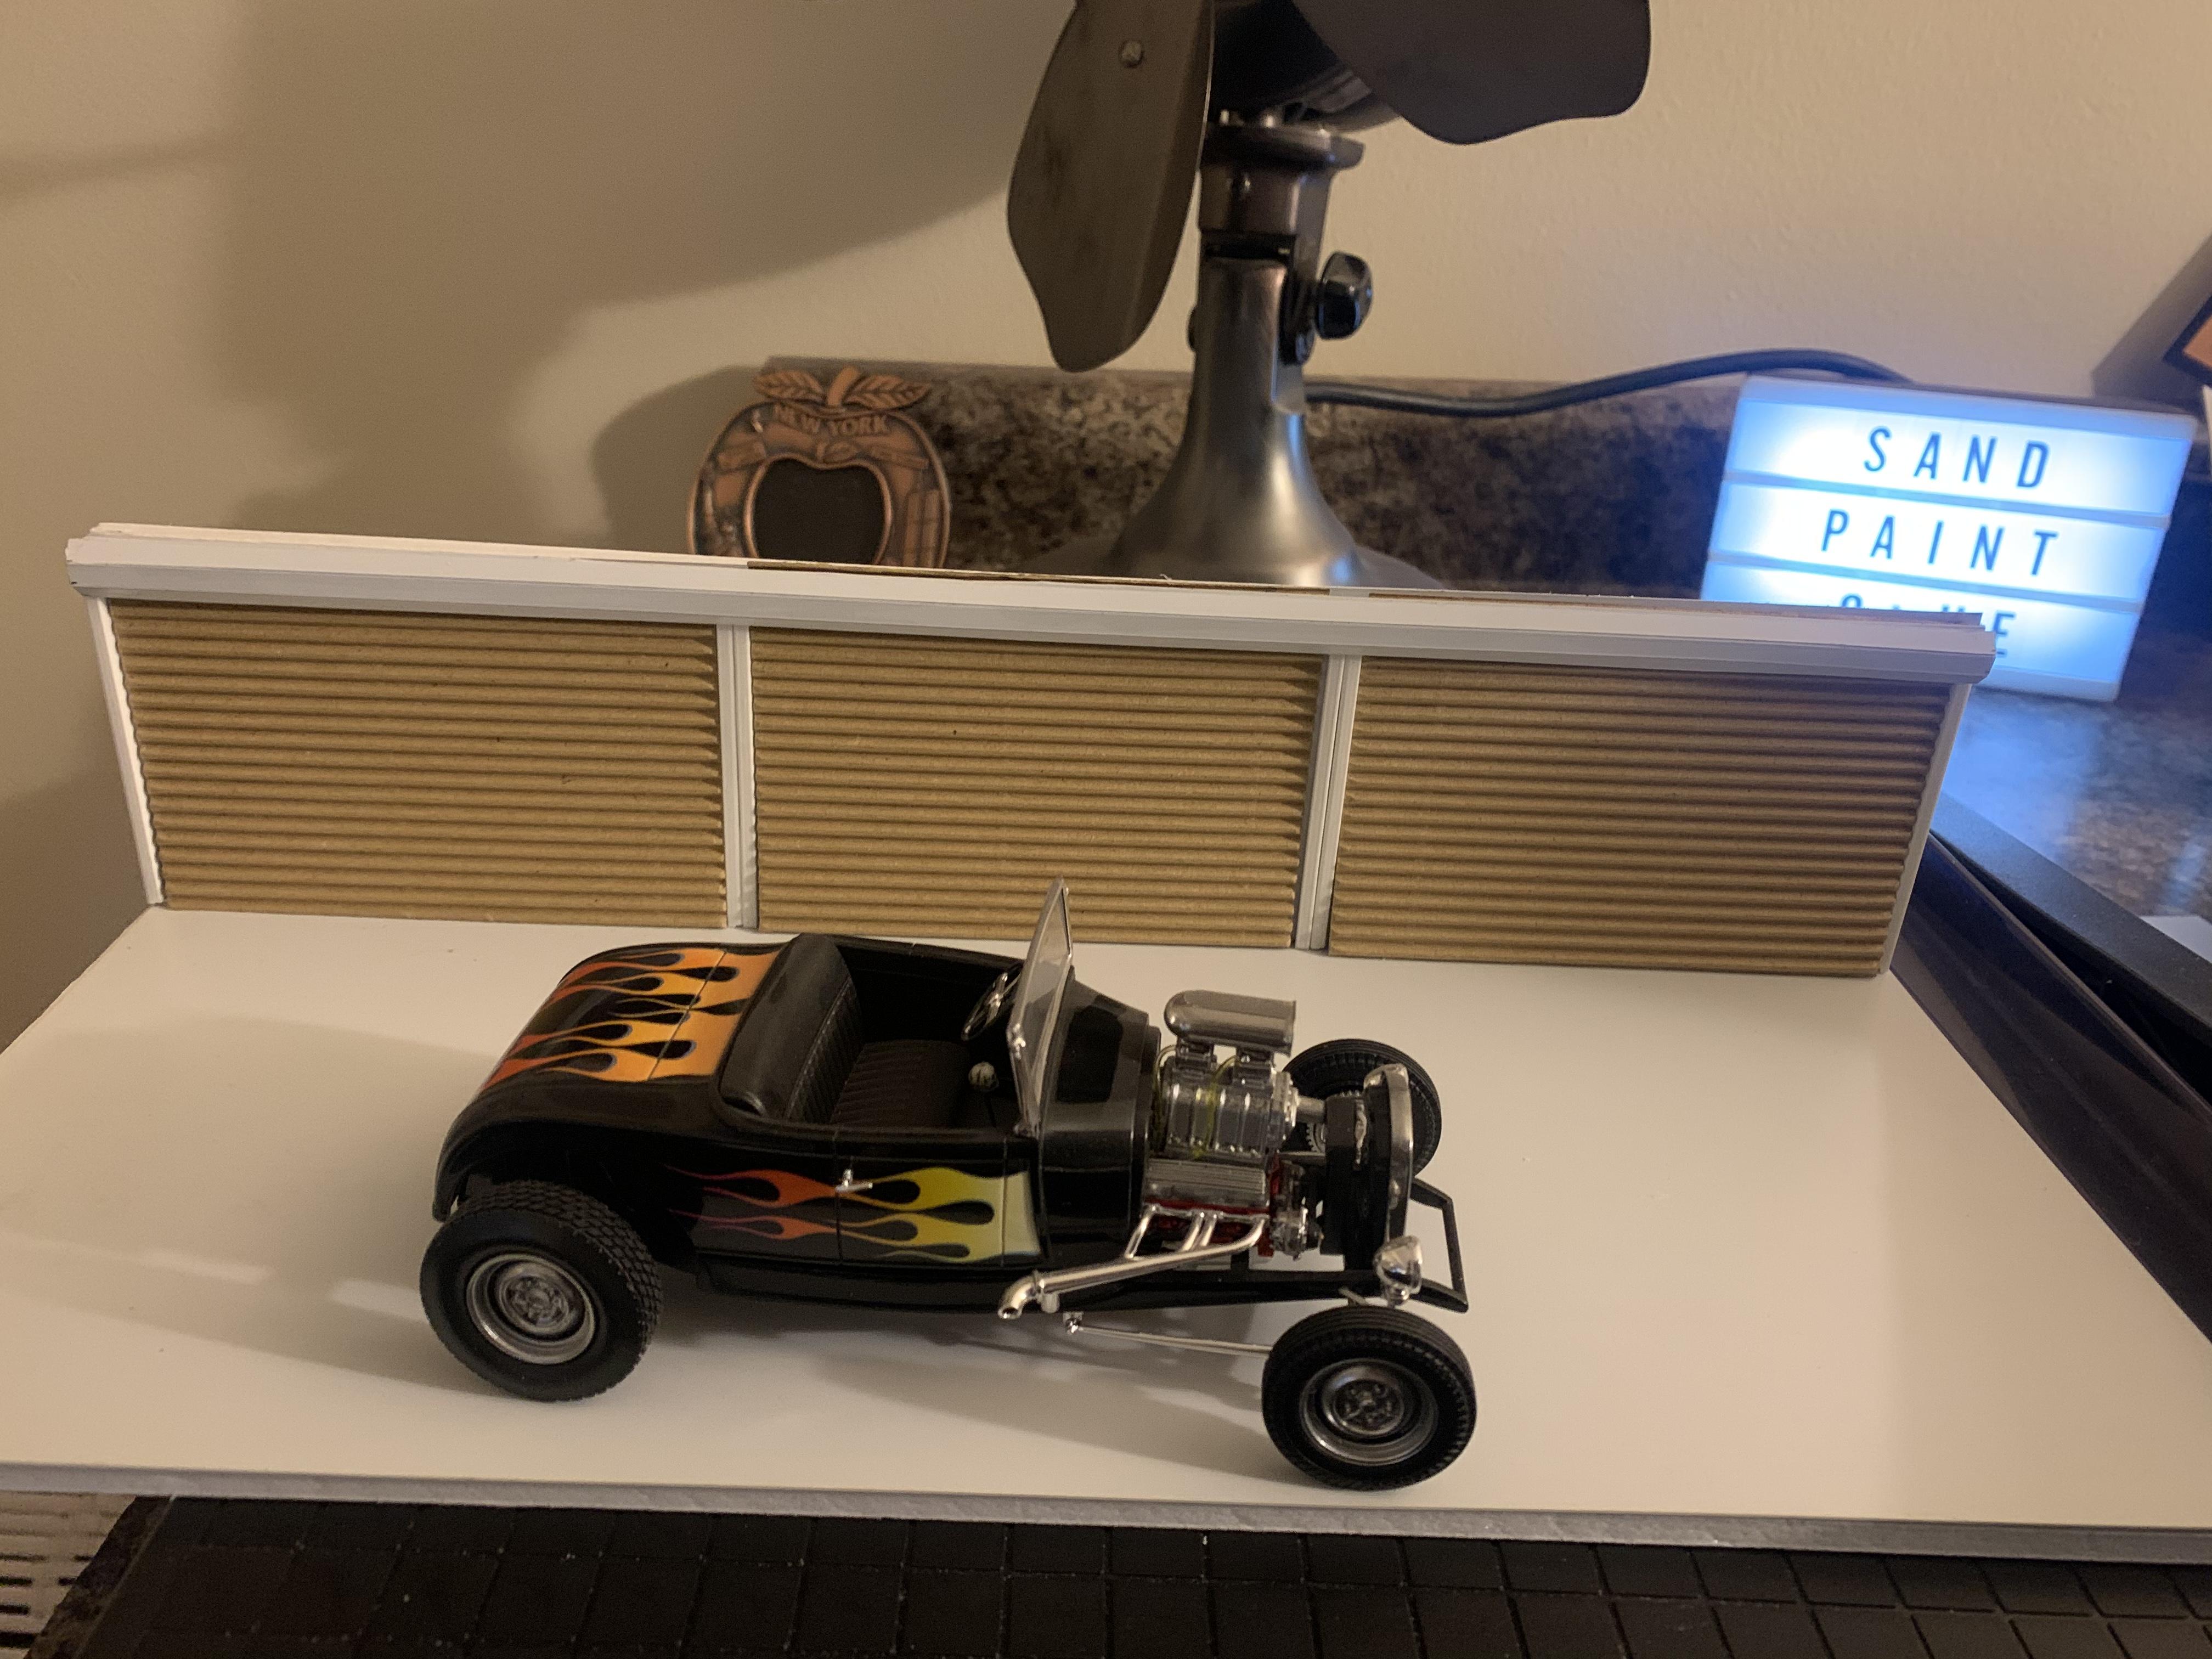
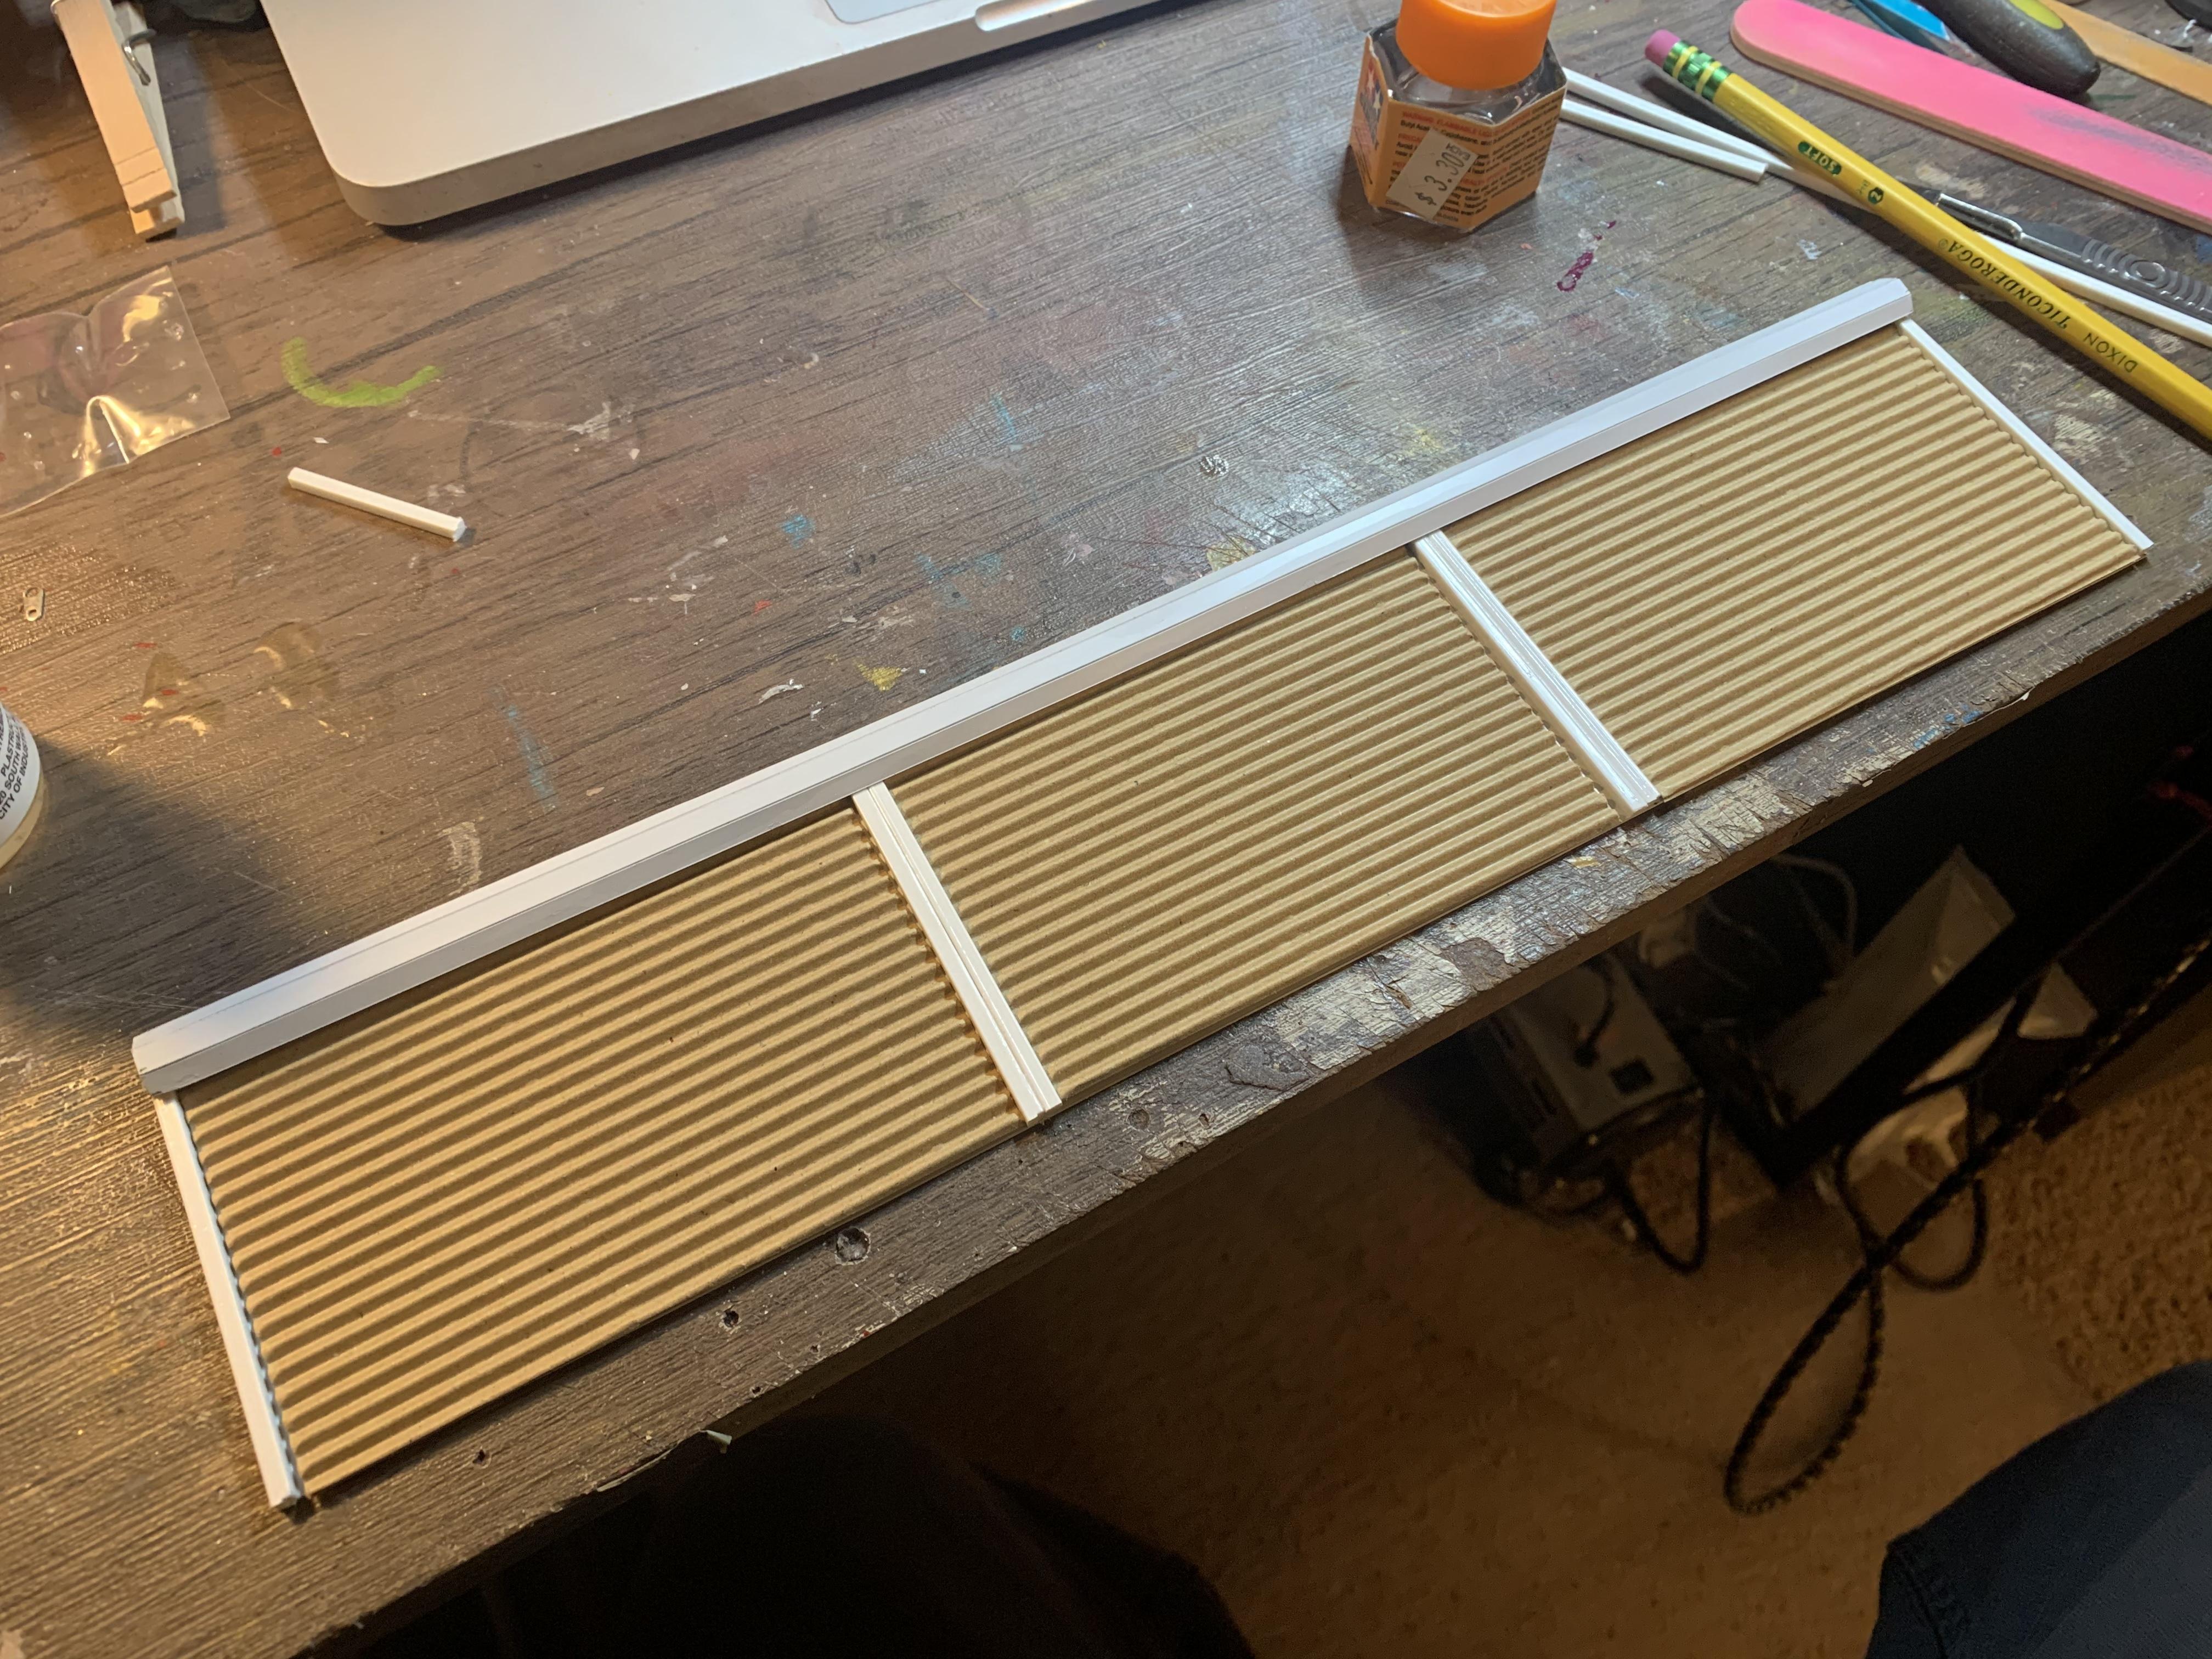
Haha! She had a convenient crook in her arm that was perfect for airbrushing purposes! ? A little more progress today - made a start on a centrifugal blower system...not quite as cool as a Frenzel but I wanted to try some more machining. Kinda my take on the same idea: All just tacked together here so it’s not lined up right, but an idea of how it’ll look. Need to make the connecting shaft to link the pulley to the rest of it, but it’ll look pretty wild on the engine I think: Might need to trim those trumpets down a little (or might not ??) I wanted to have this thing on a little display base of one of Coney Island’s little side-streets, and I picked out this one, which sits in the shadow of the famous Wonder Wheel: I’m not going to make anything too huge, just a little scene of the car sitting on the sidewalk outside those brightly colored shutter doors. I picked up some foamboard from Hobby Lobby and made a simple base (with an older 29 build here for demonstration purposes): And started roughing in the doors and that little half-hex shaped whatever-that-is: Excited to make a cool little display stand for this one - I’ll need to take a little artistic license (I’m not building a 1:25 Ferris wheel behind it, for example) but it’ll be fun to do some new stuff! More soon!

-
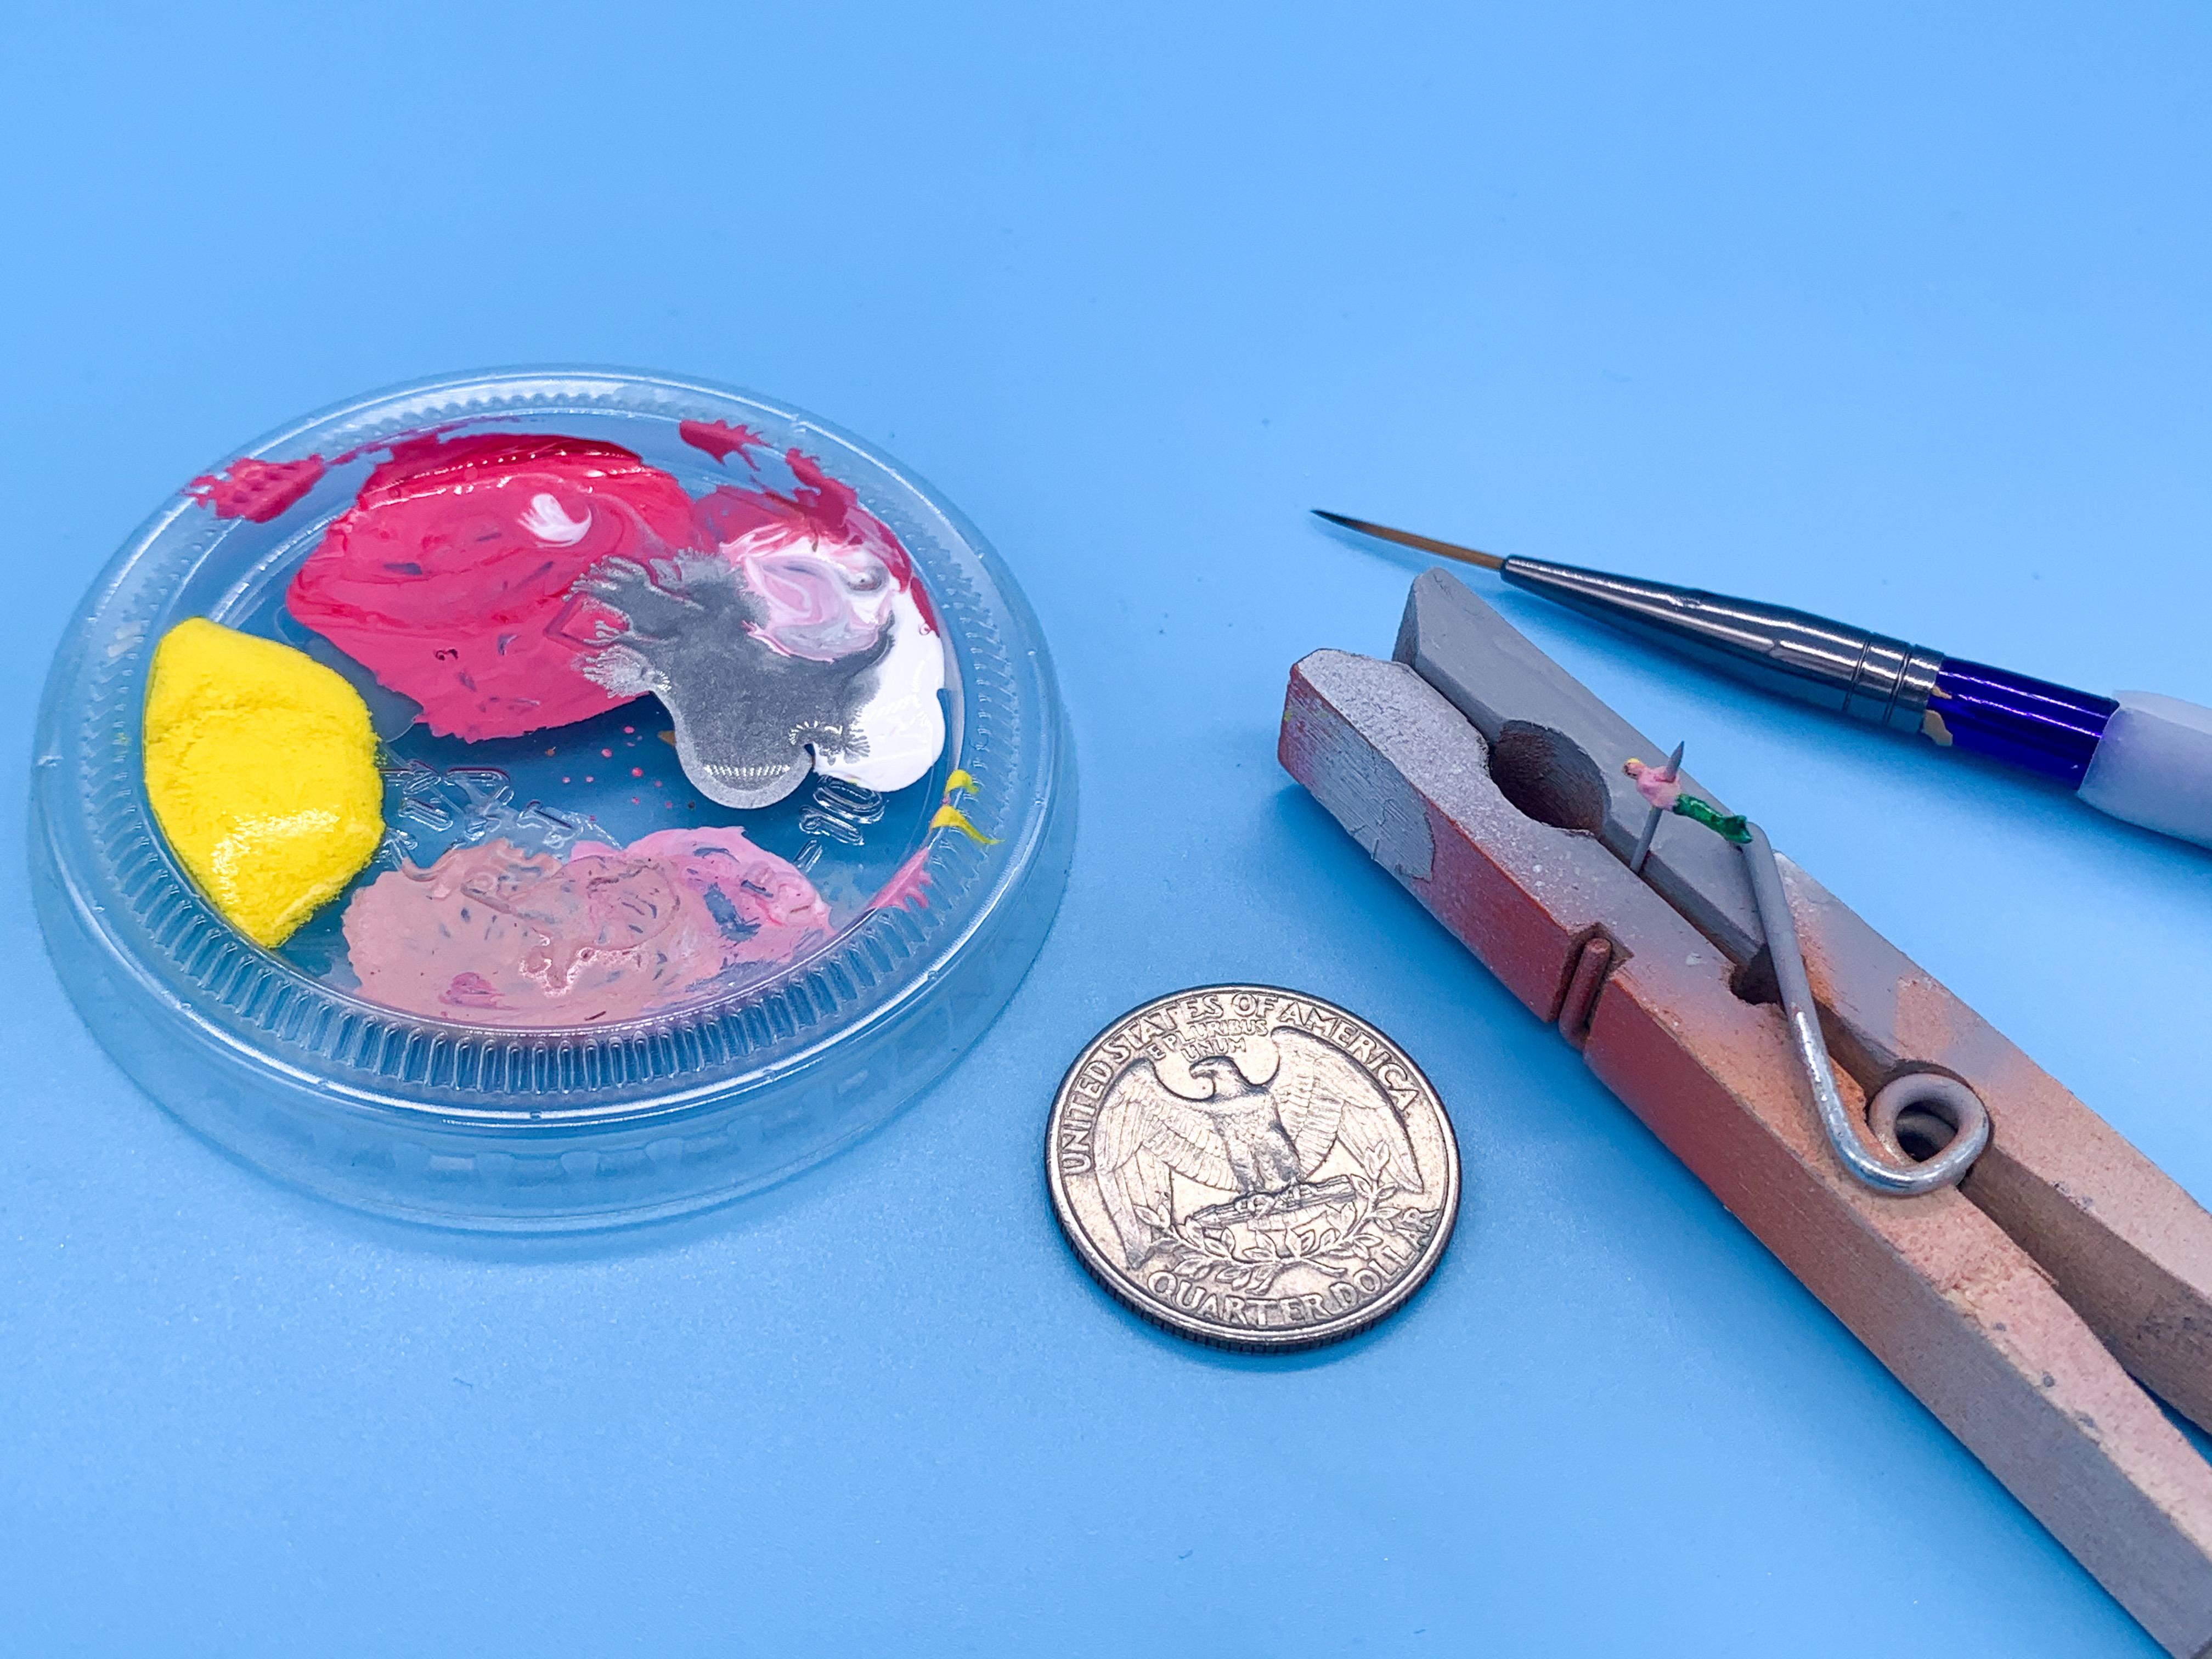
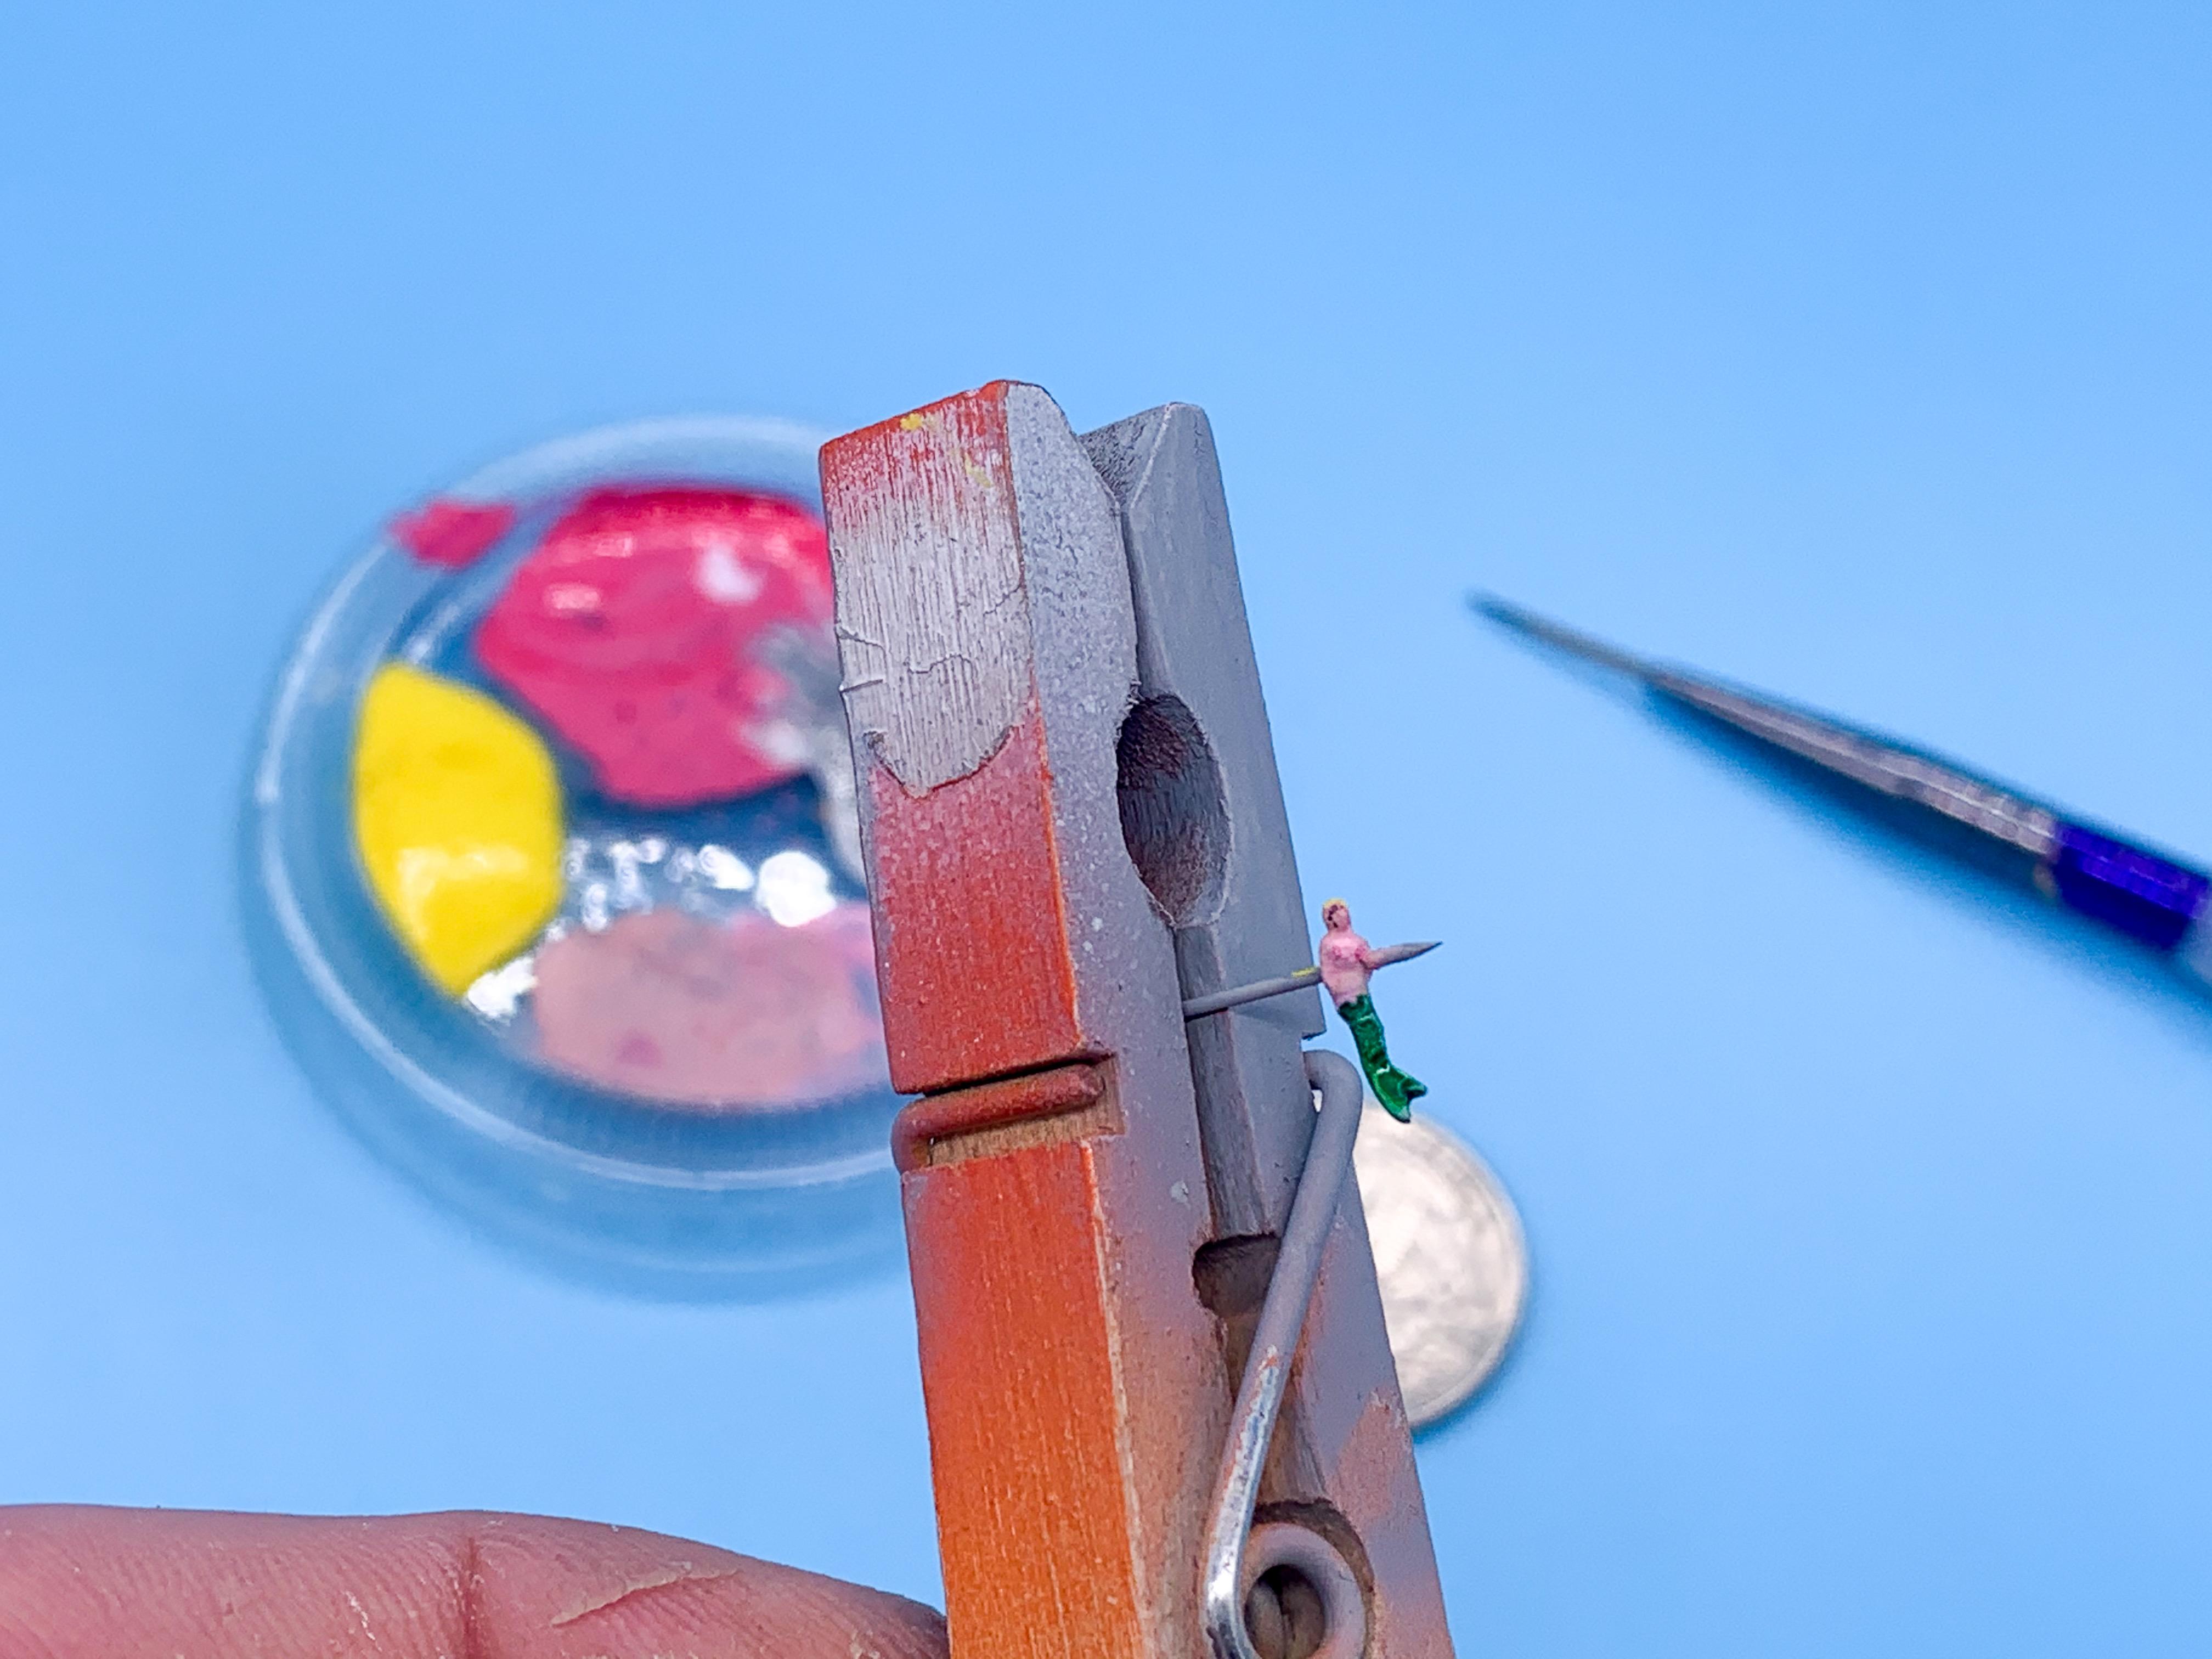
Thanks fellas! Appreciate the kind words! Hey Steve! I did not...the Kind Mr Karson was going to send me one but I felt kinda bad when I found out what that one little part cost - and then I wondered if I could make that entire thing myself, as a challenge. Guess we’ll see when I get that far - could likely turn MOST of it on my lathe, but getting those bolt details right would be hard. Maybe a simpler version of the same thing, somewhat stylised and made into my own could work? That should be tomorrow’s project! A tiny update (literally) before bed - I had the idea of having one of those little hula girl figures on the dash. Coney Island is famous for it’s annual Mermaid Parade though, so I kept the theme going somewhat and made a tiny mermaid: Need to keep messing with the paint, but laid down some silver first, then some candy green for the tail and then brush painted a kinda skin tone, followed by some opaque yellow for her hair. I don’t think you often see stuff this small painted to where it looks good in photos, but I’ll keep messing with it tomorrow and see if I can get where I’m somewhat satisfied anyway... More soon!
-
 Those shocks look SO MUCH better! Nice work! Today, at my bench, I made a tiny mermaid figure to put on the dash of one of my builds: Not done yet, but started getting some base colors of paint on her - she’s meant to be like one of those dashboard hula girls, but a mermaid!
-
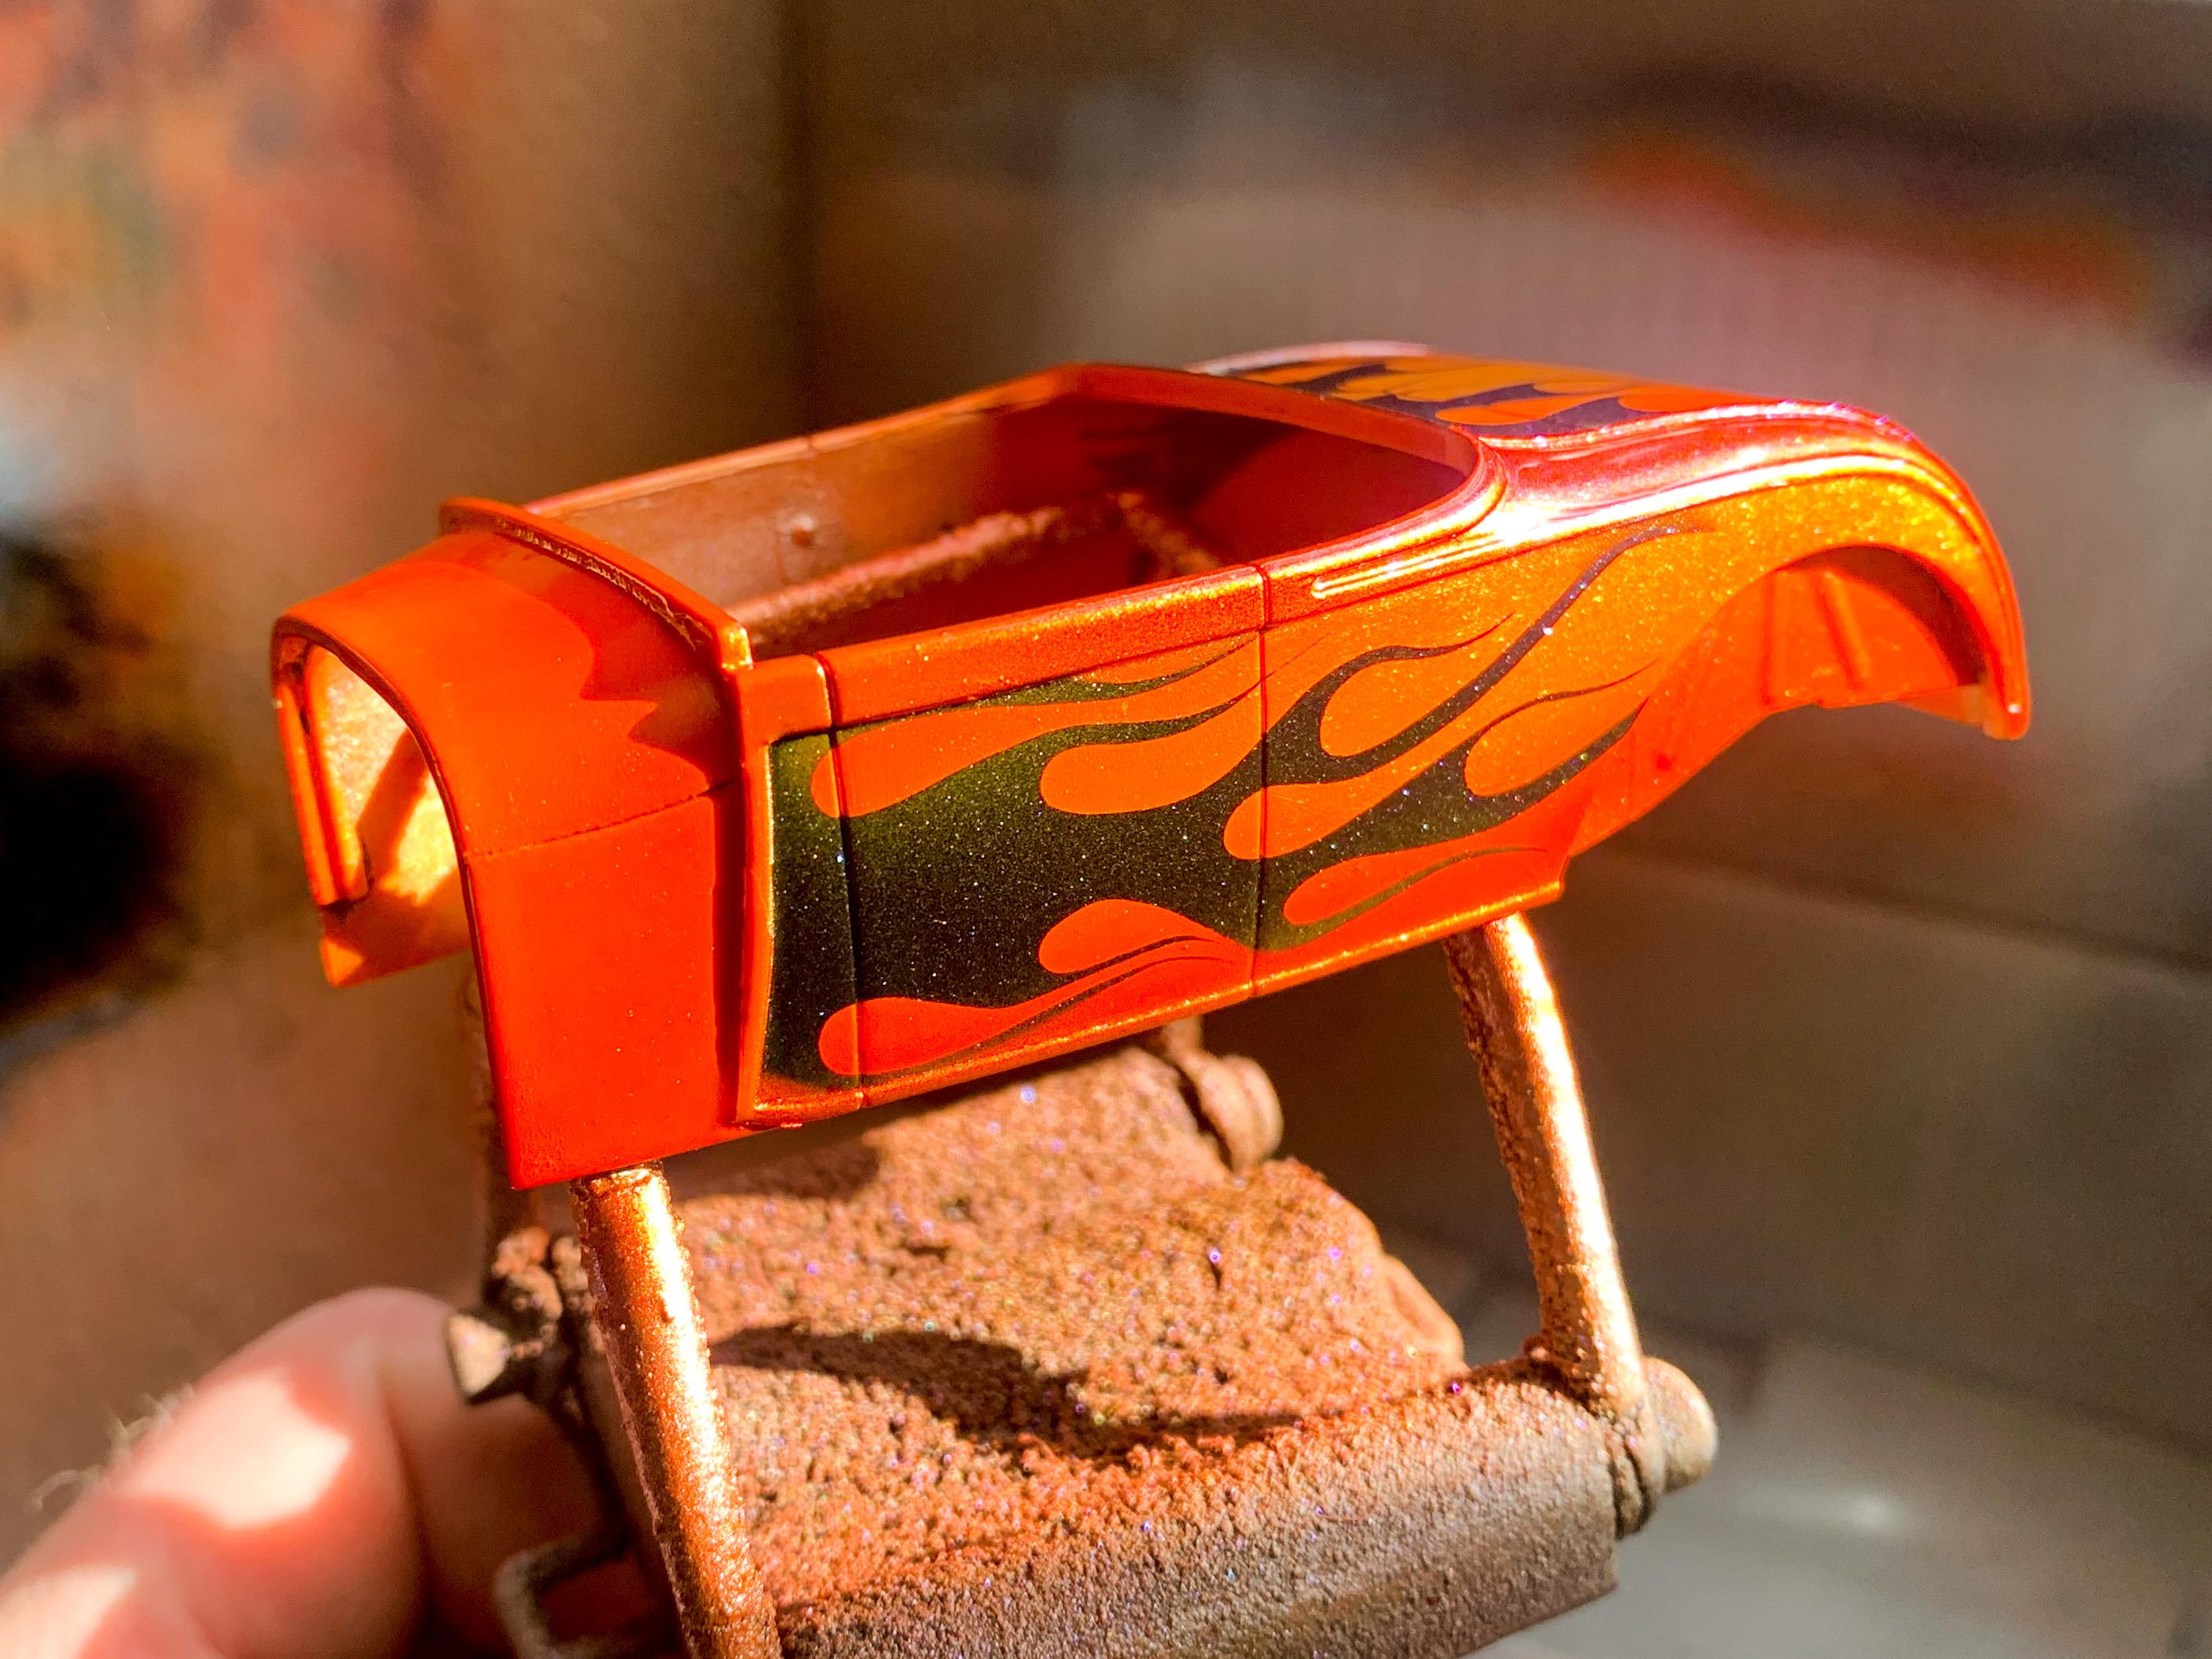
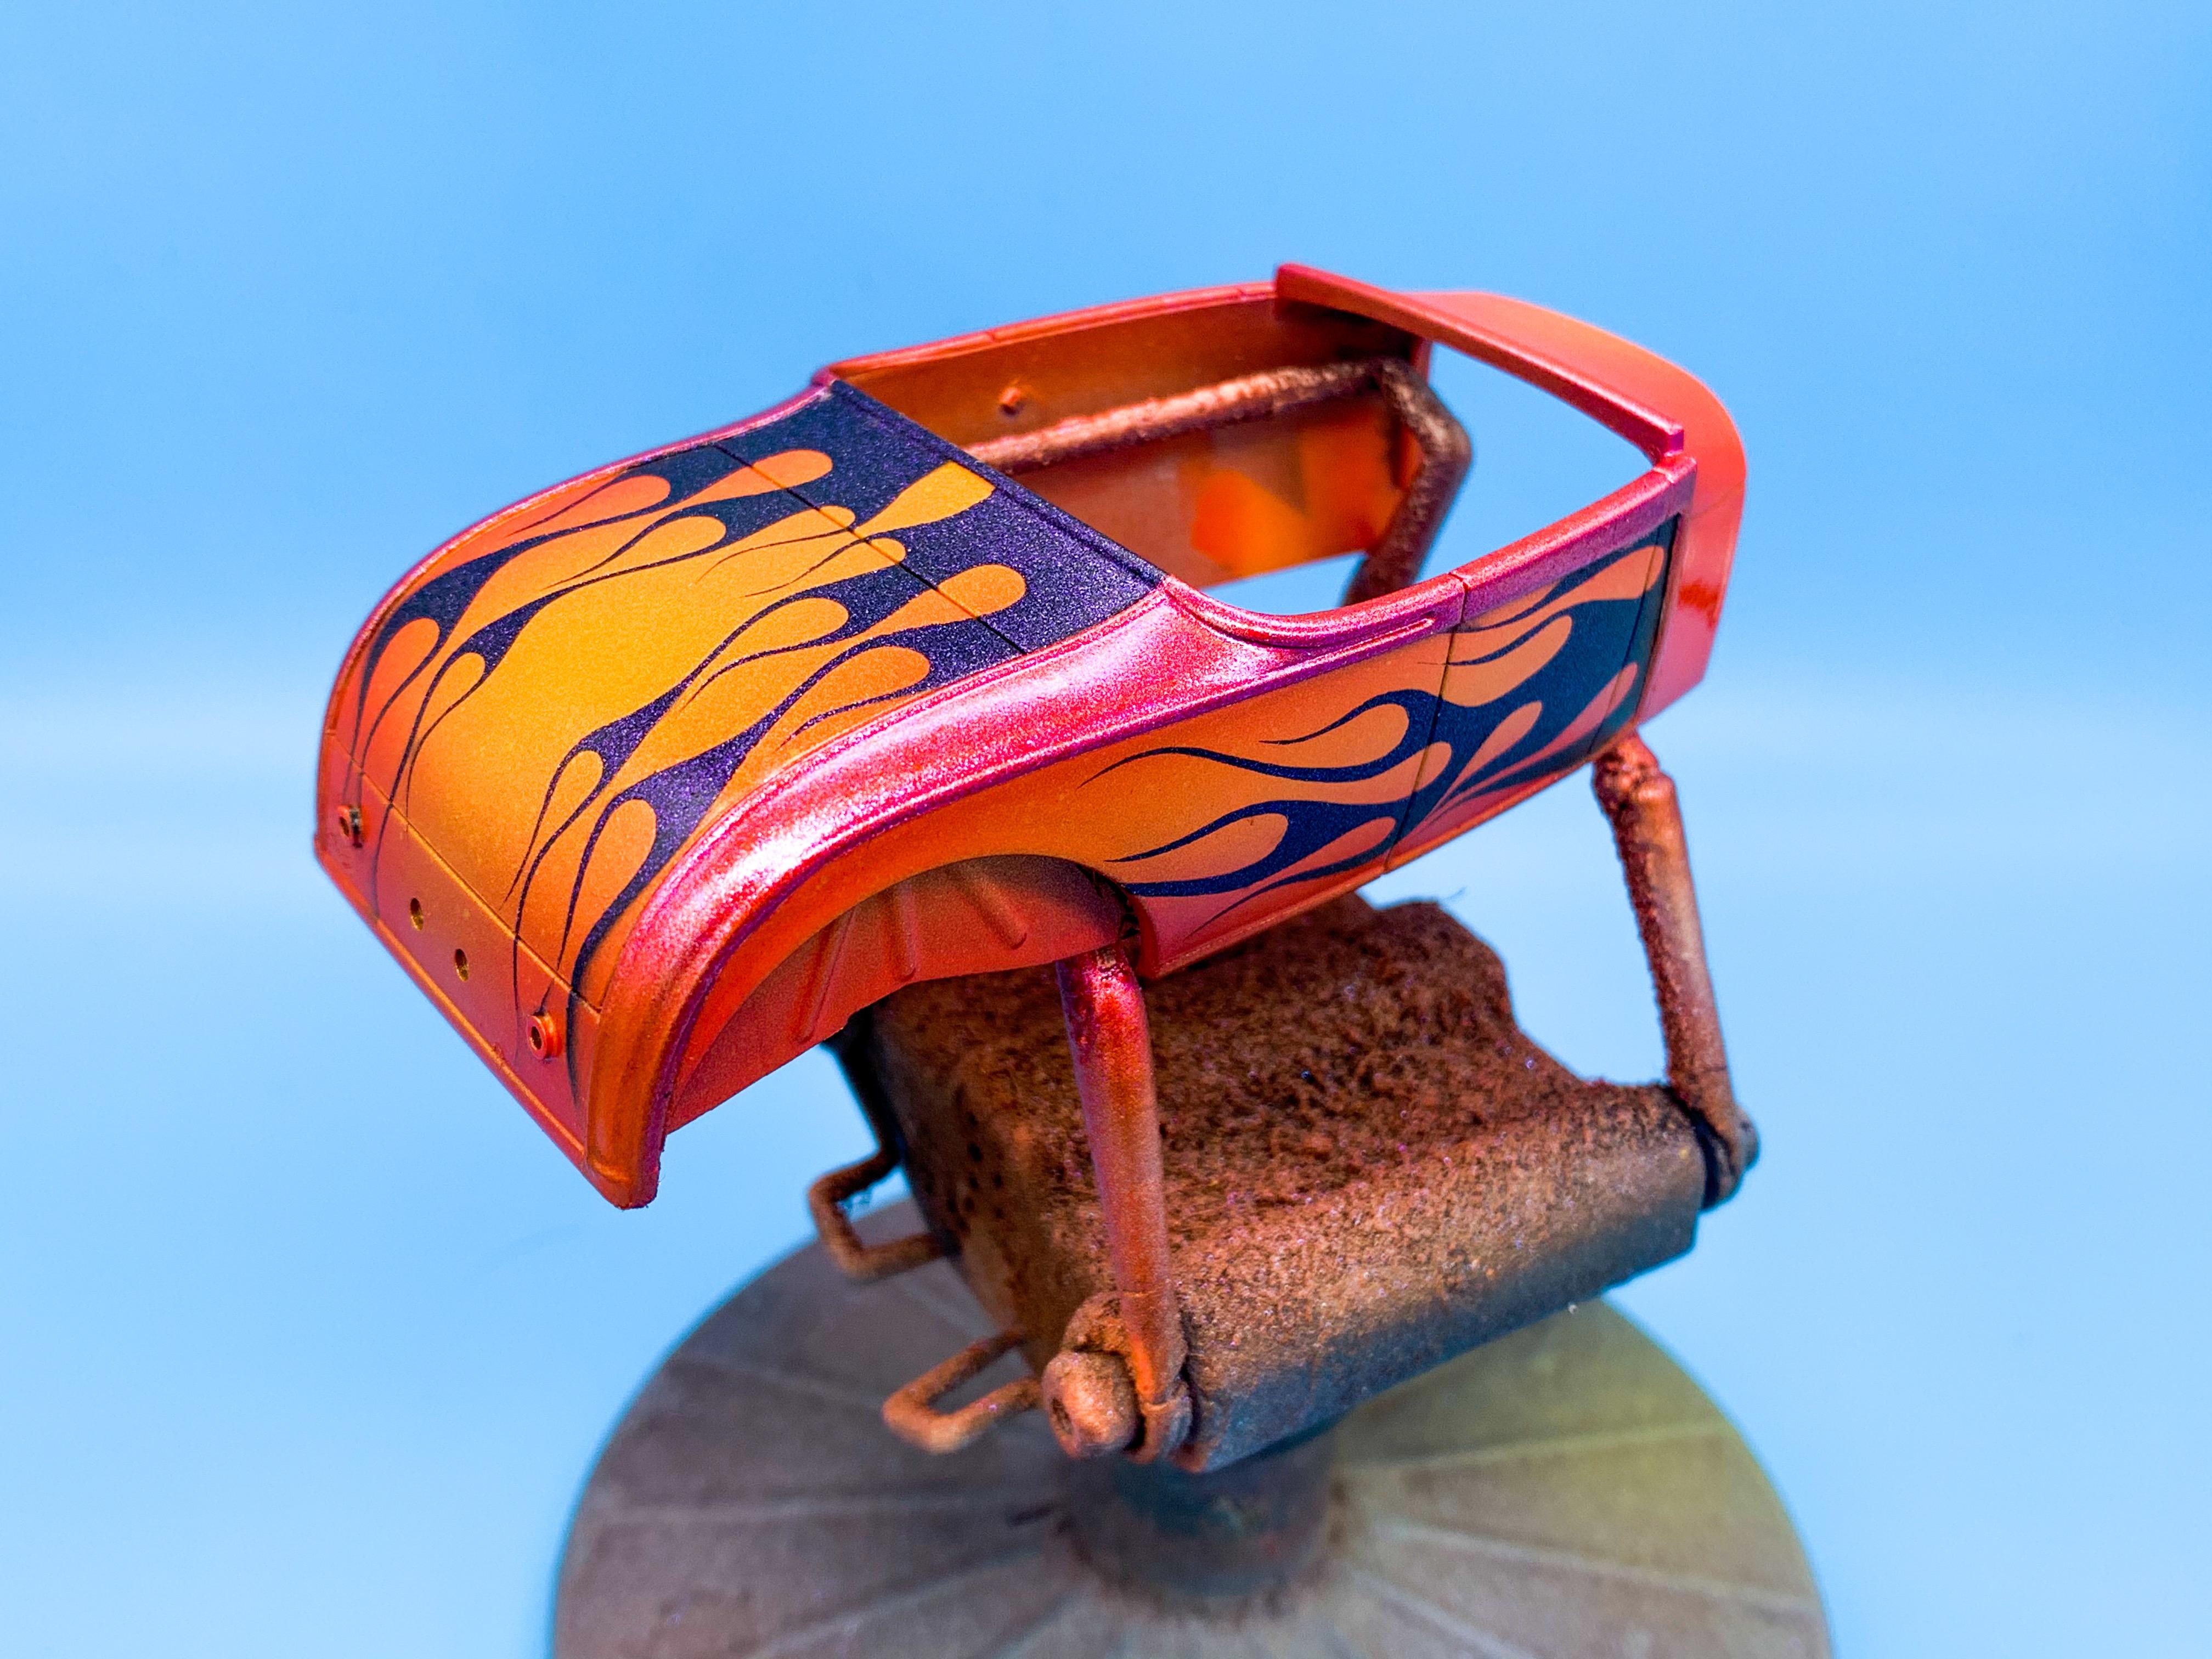
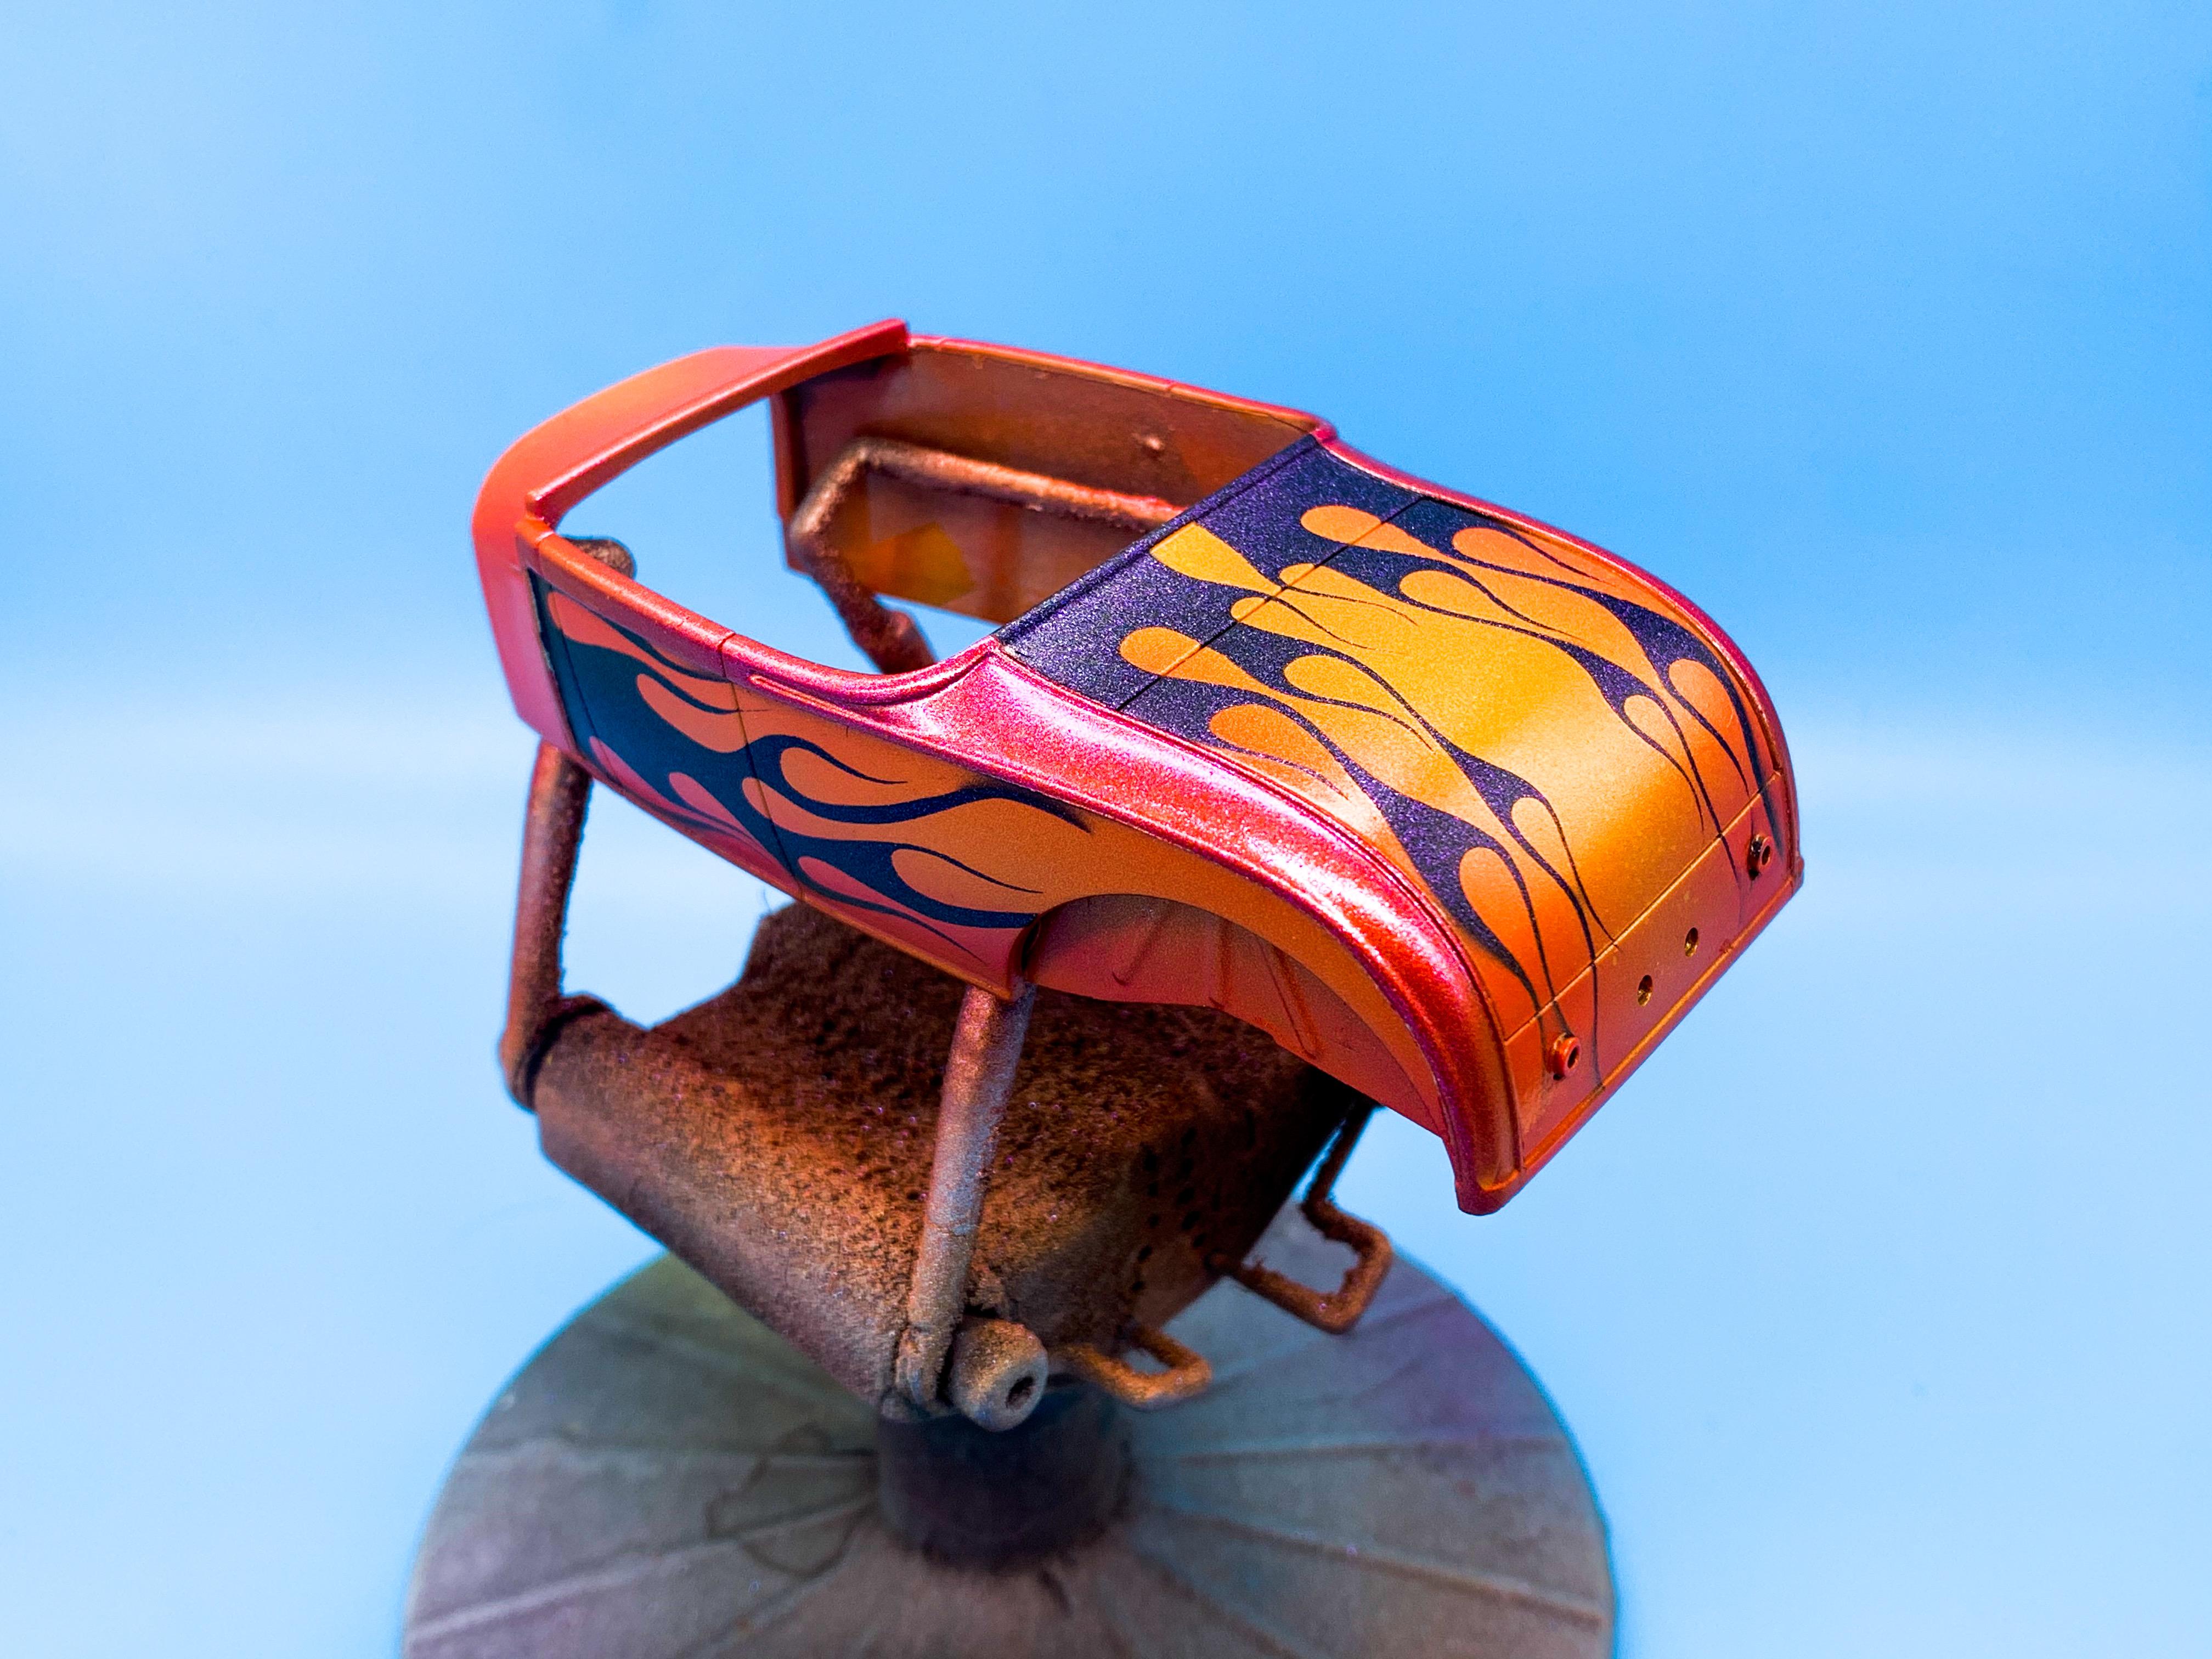
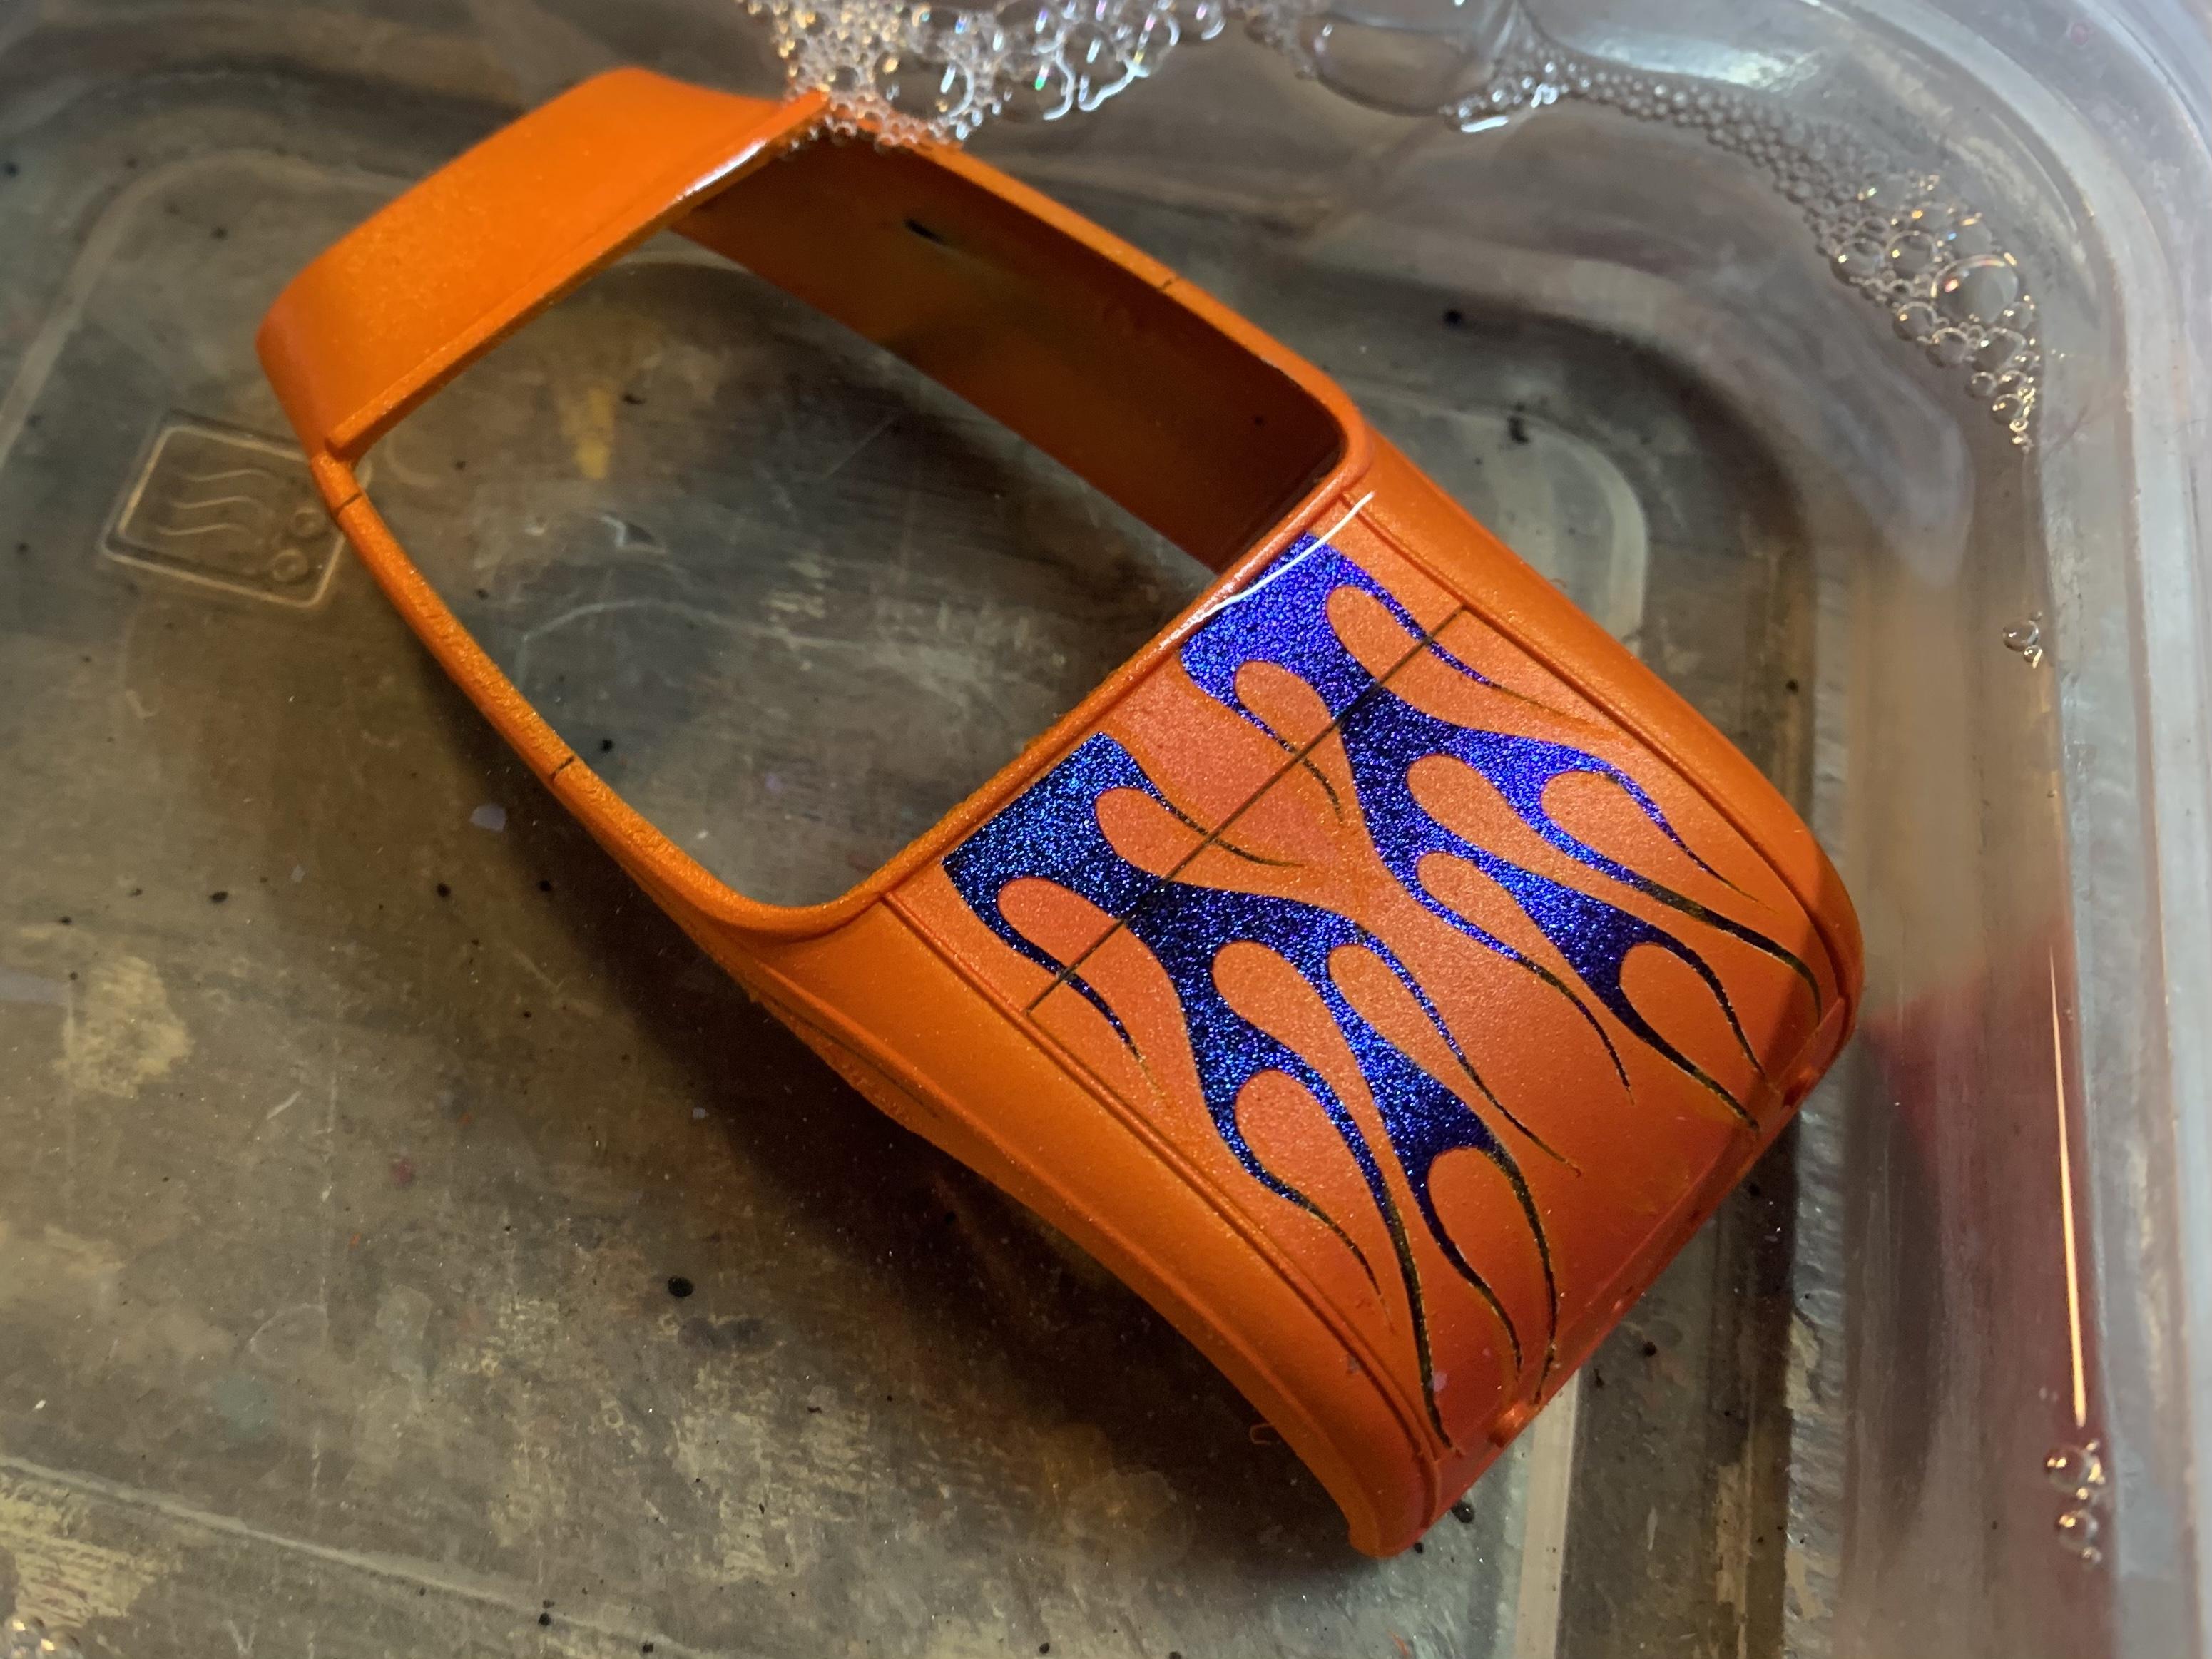
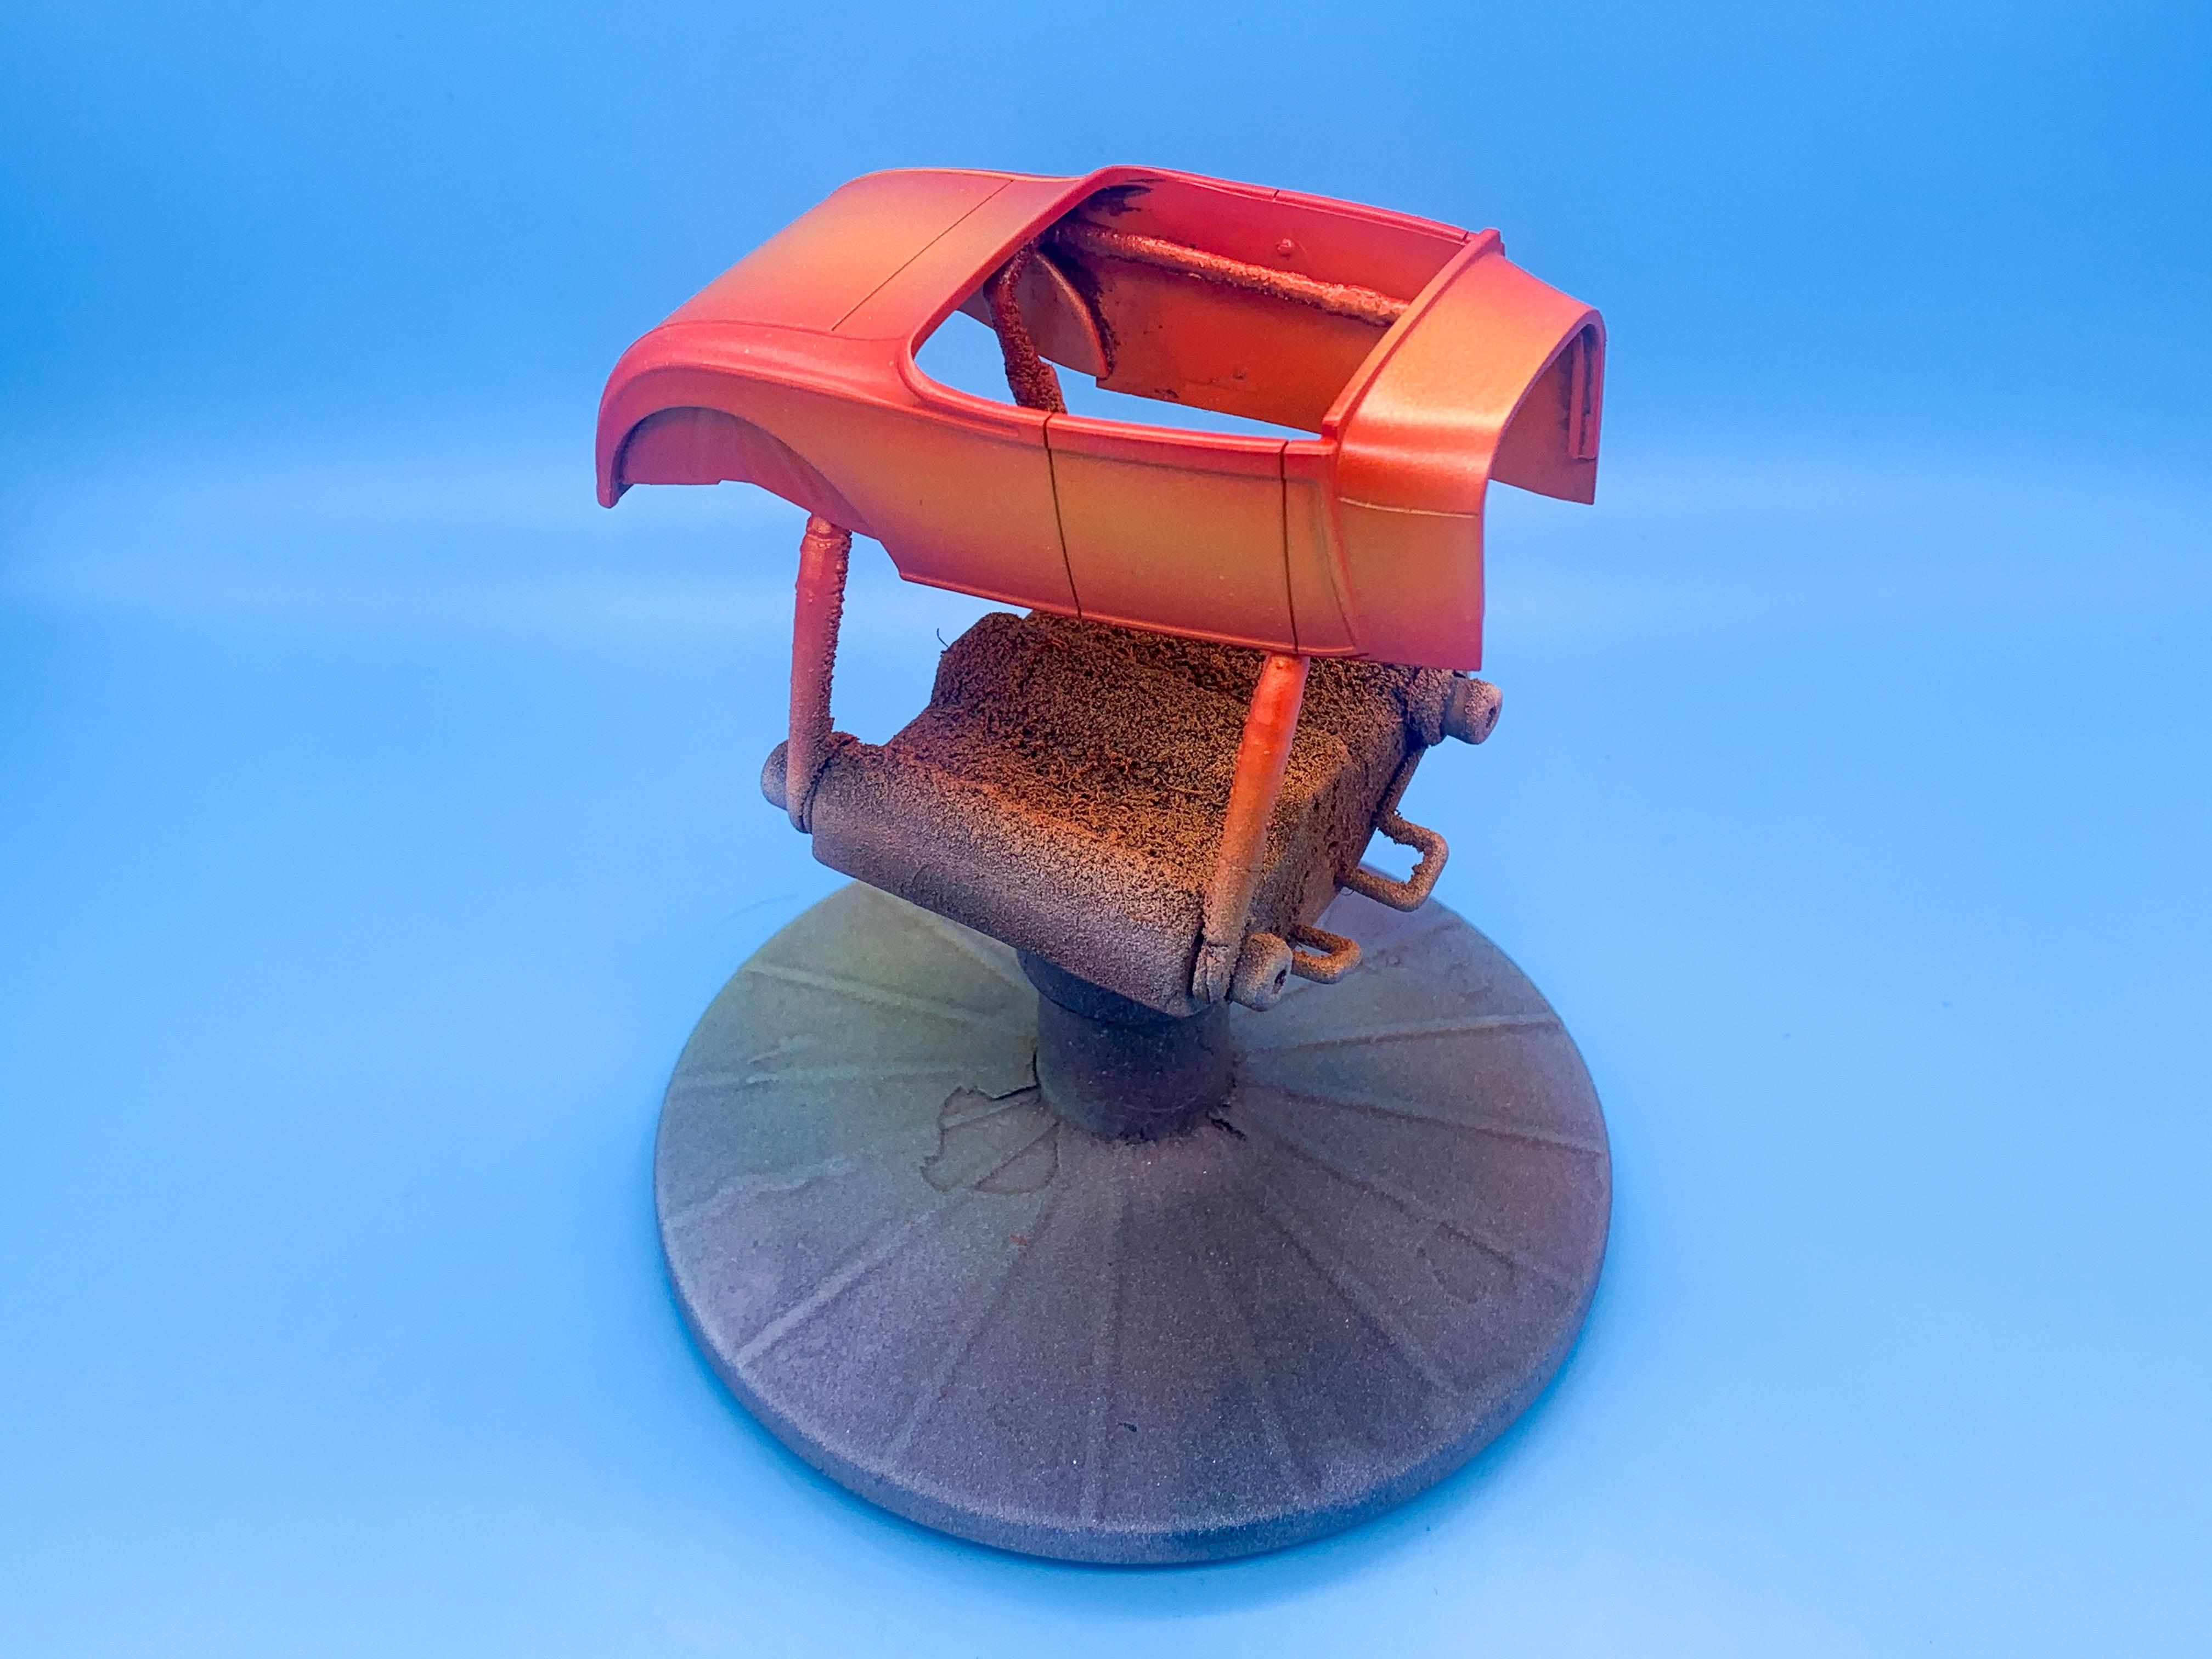
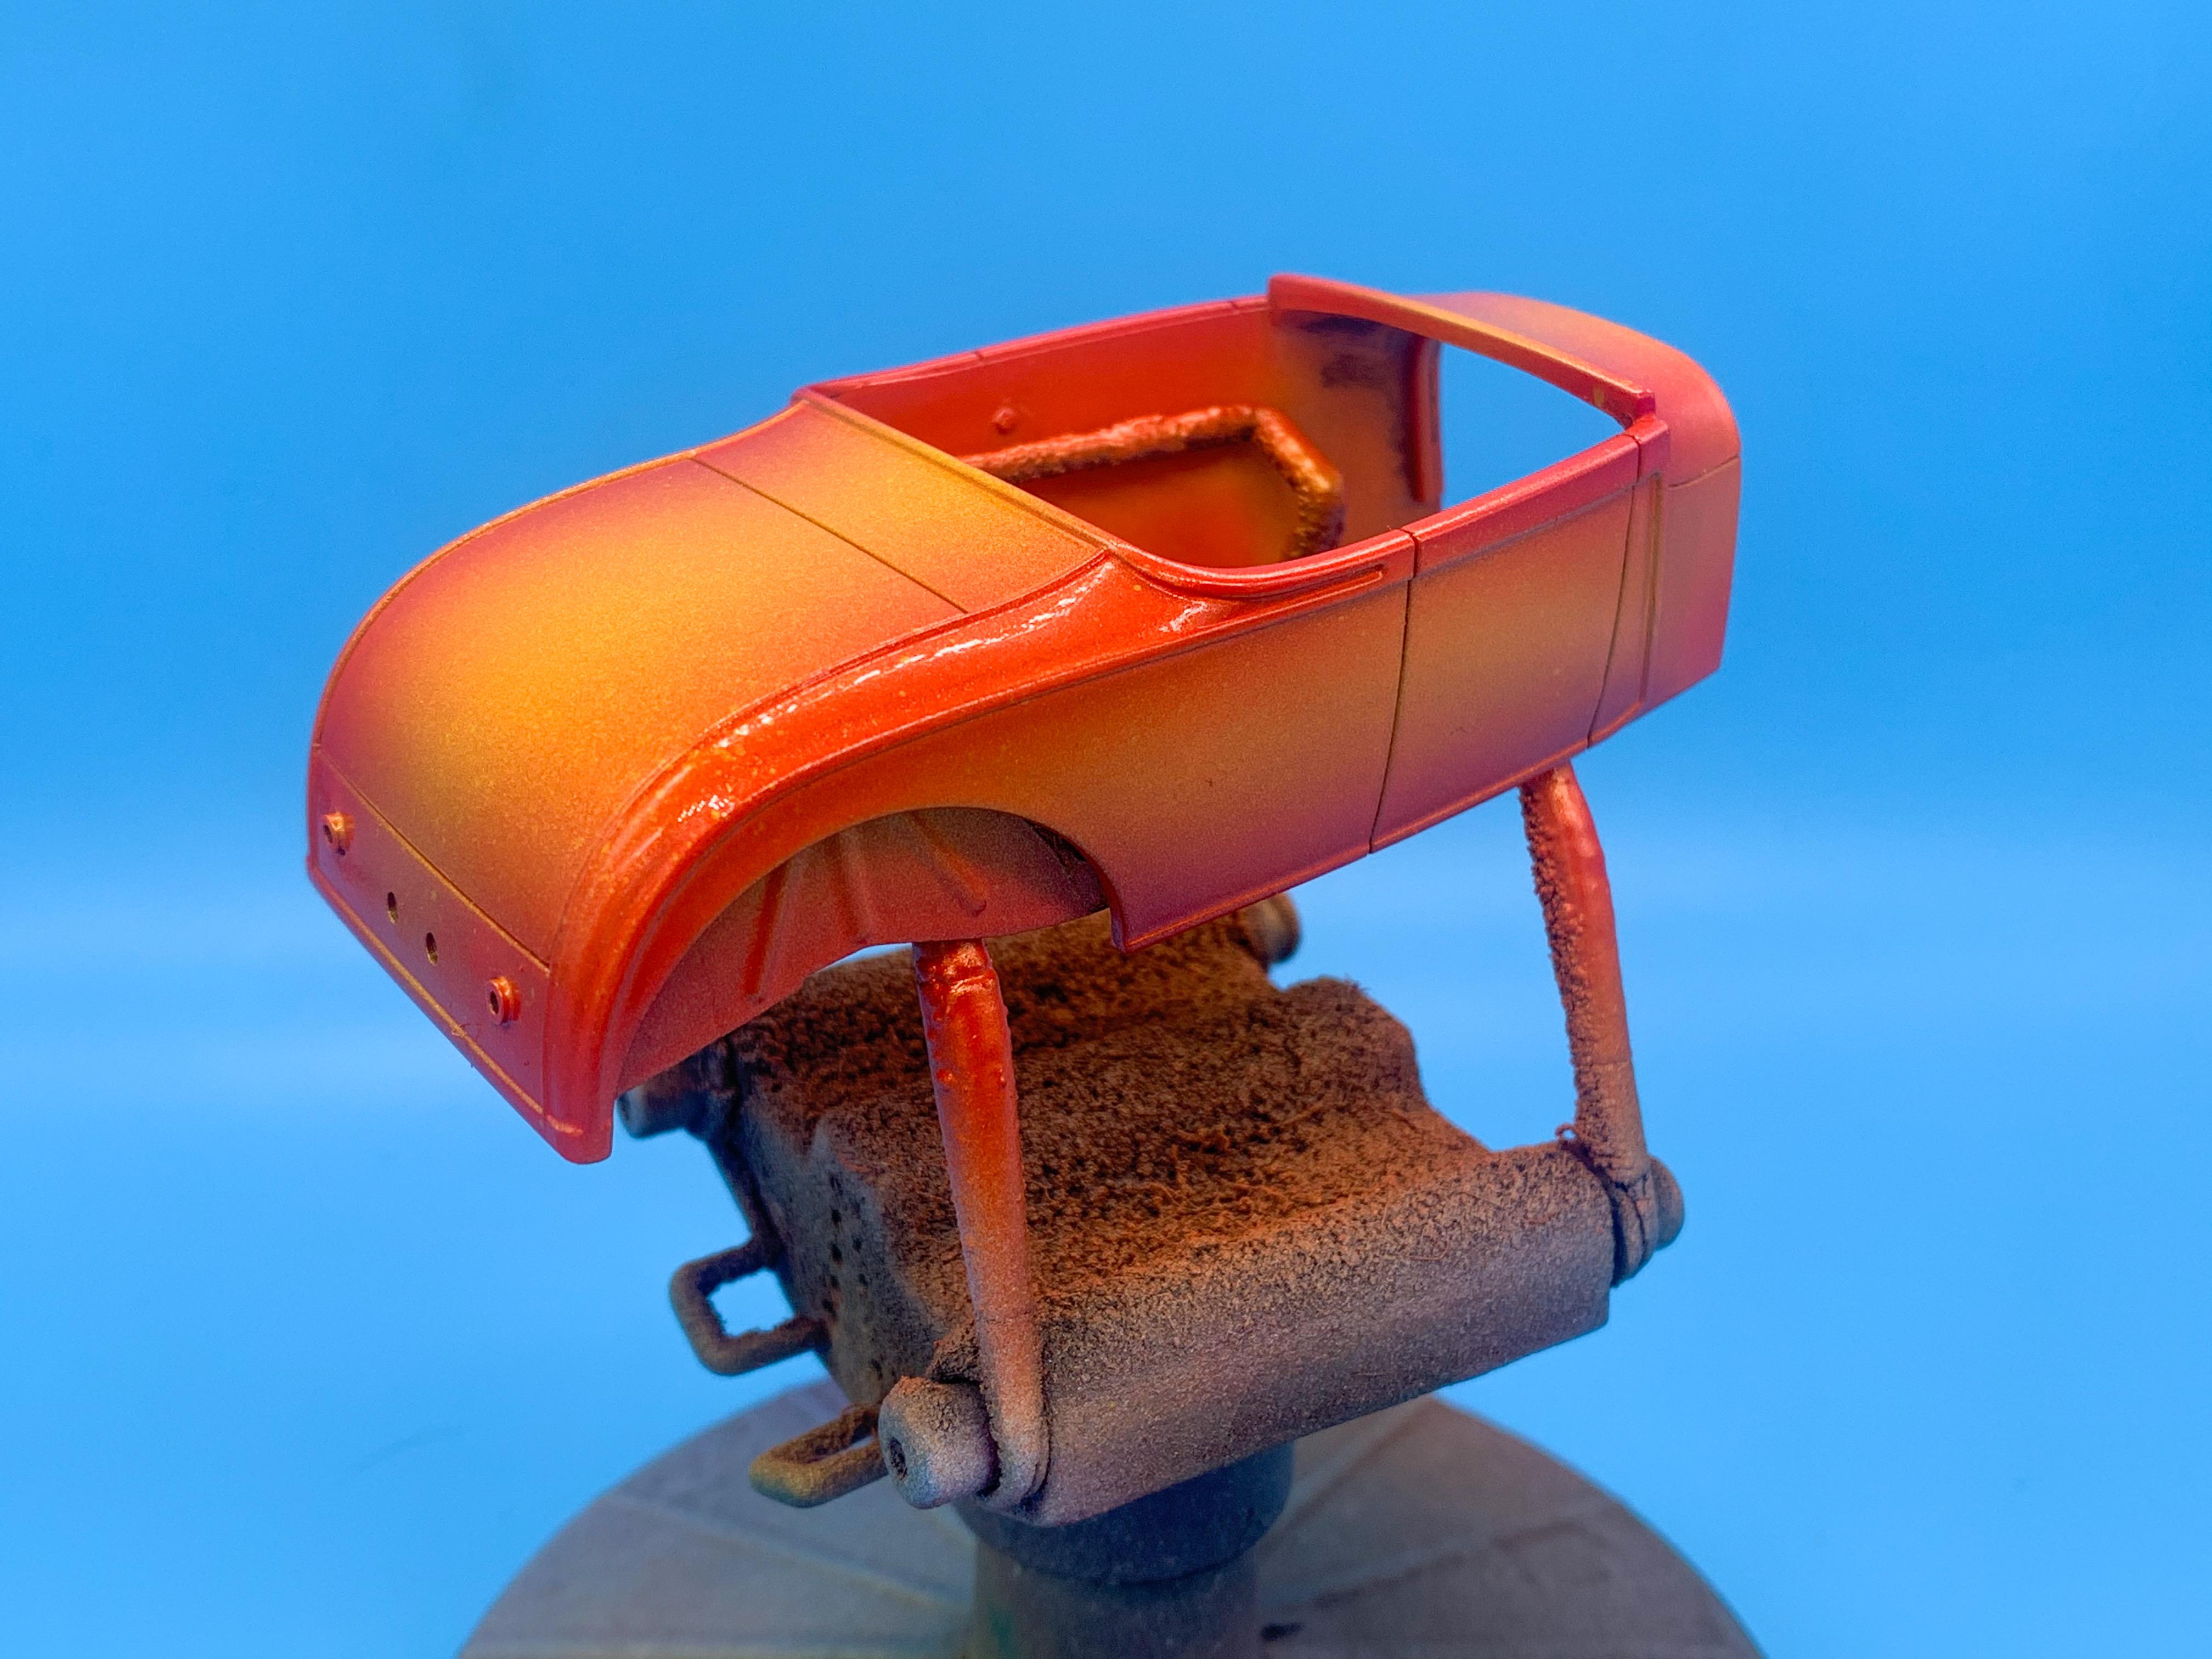
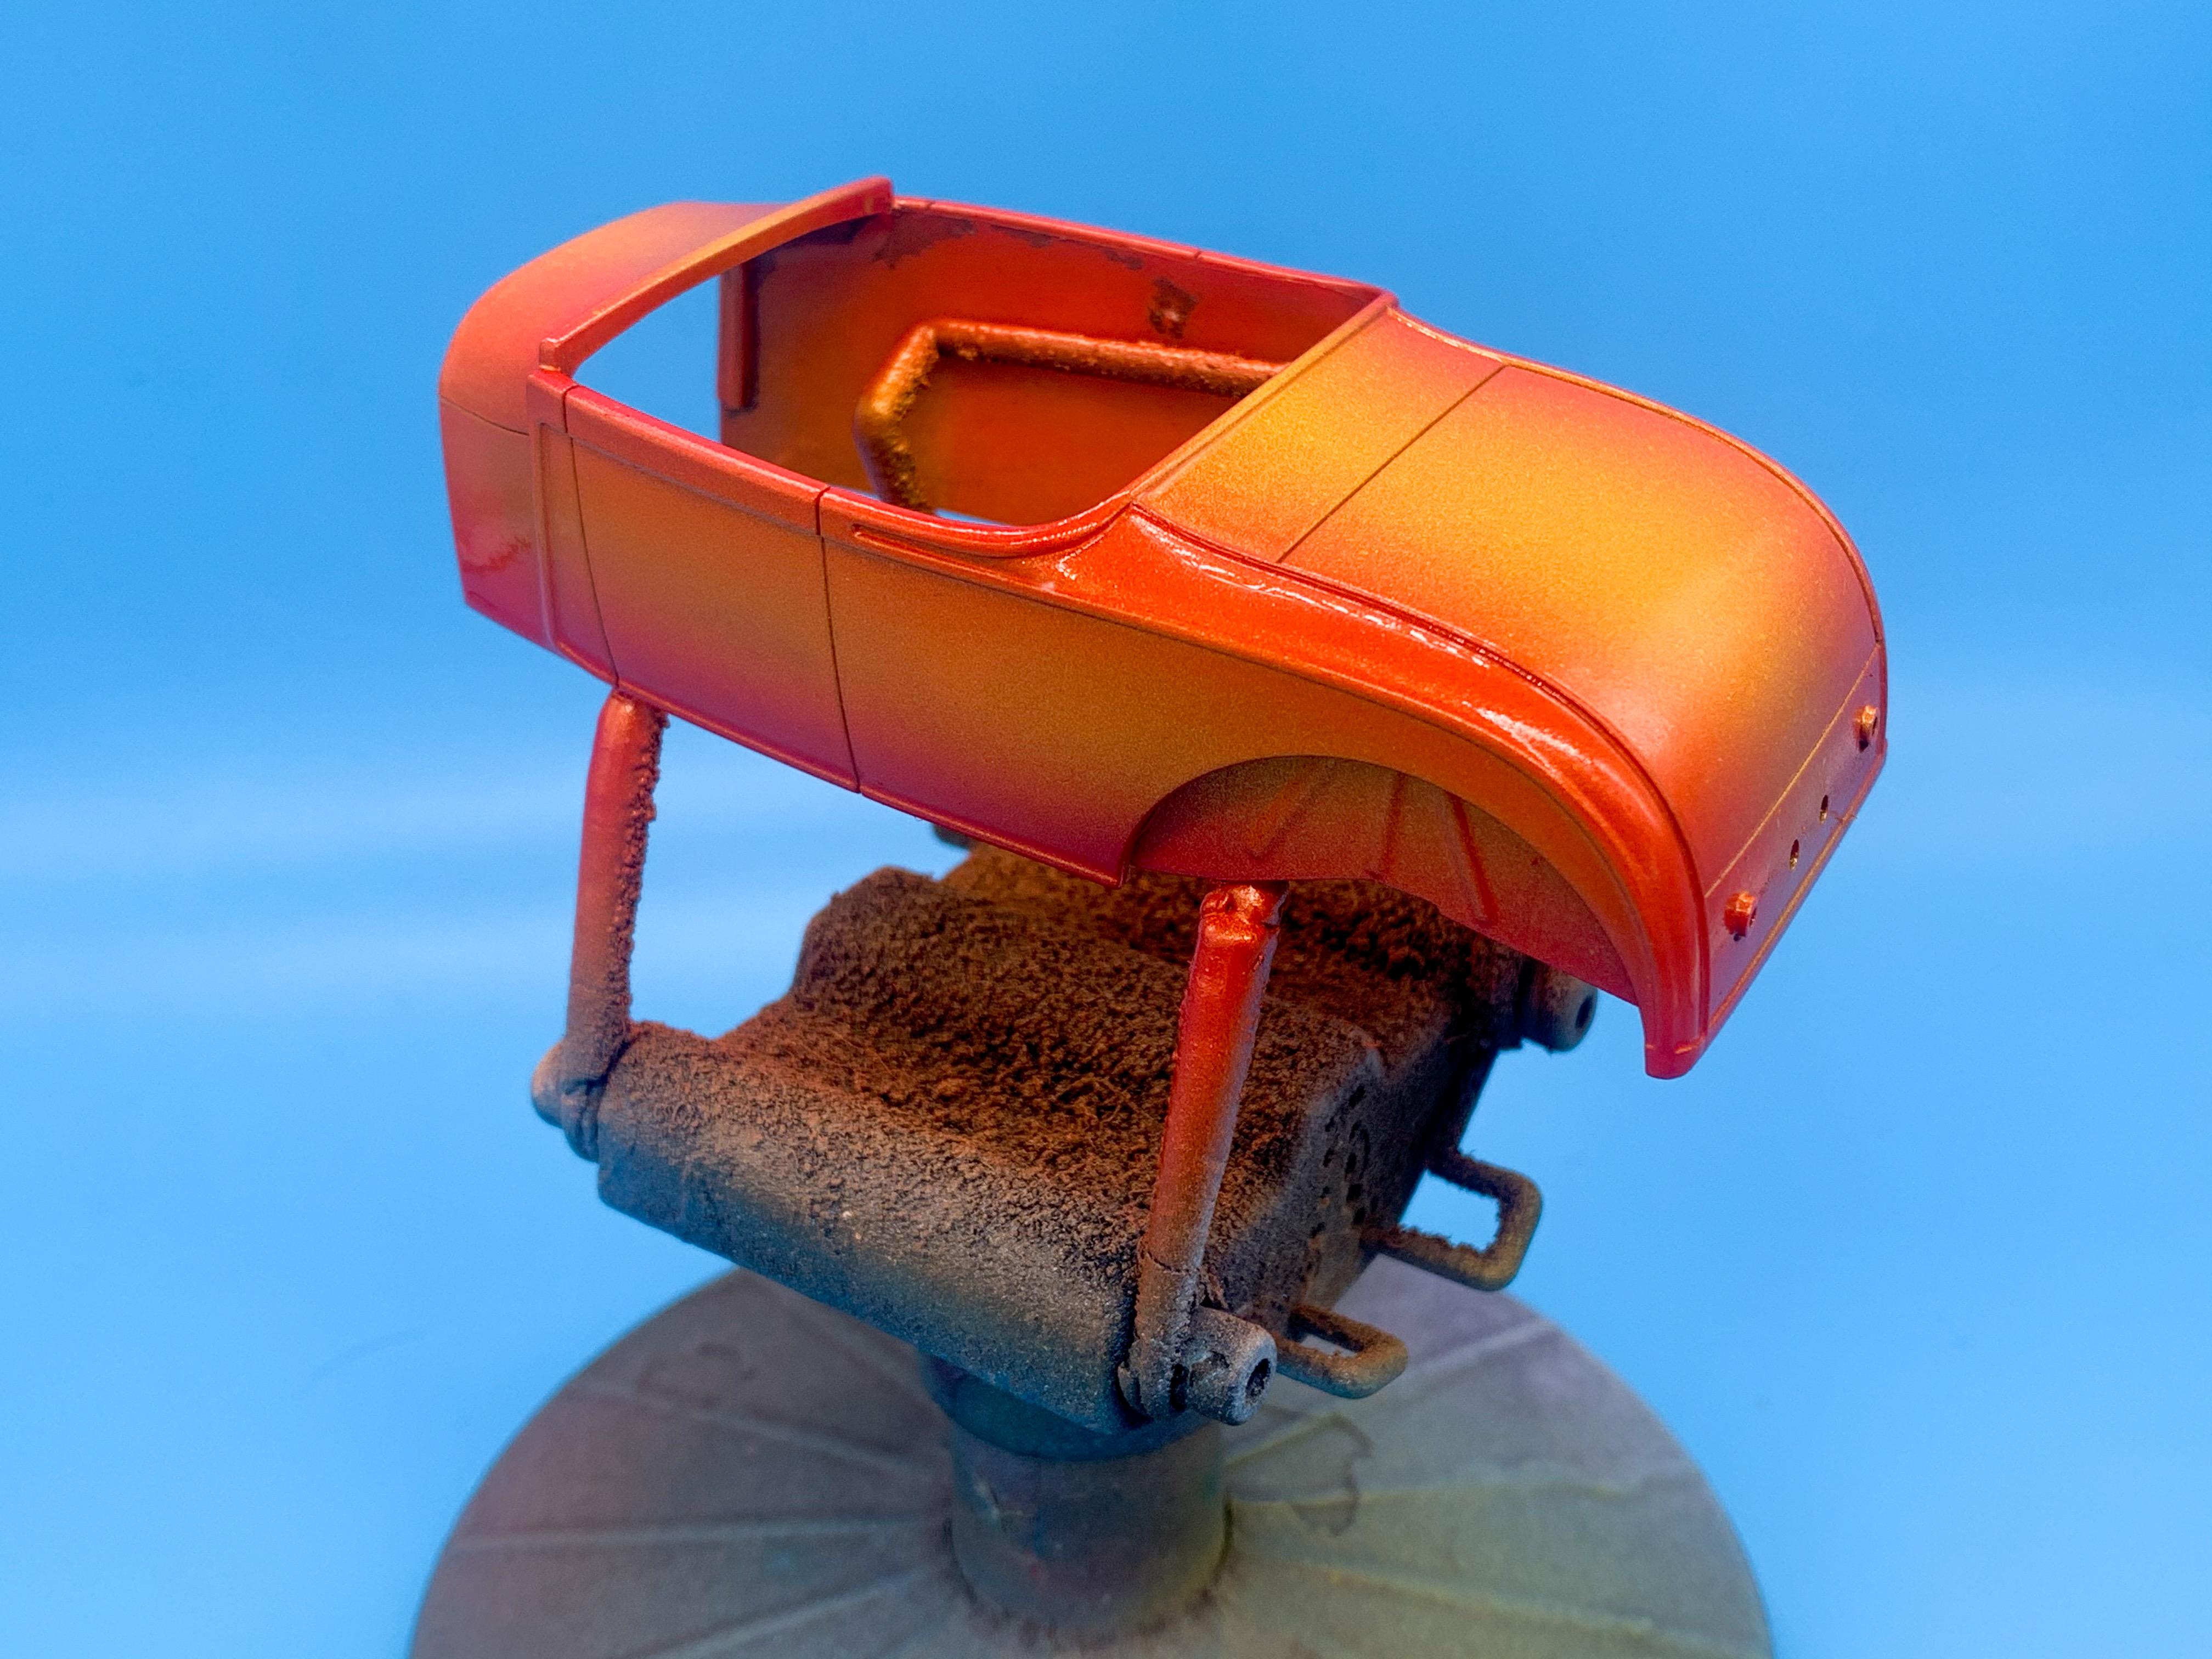
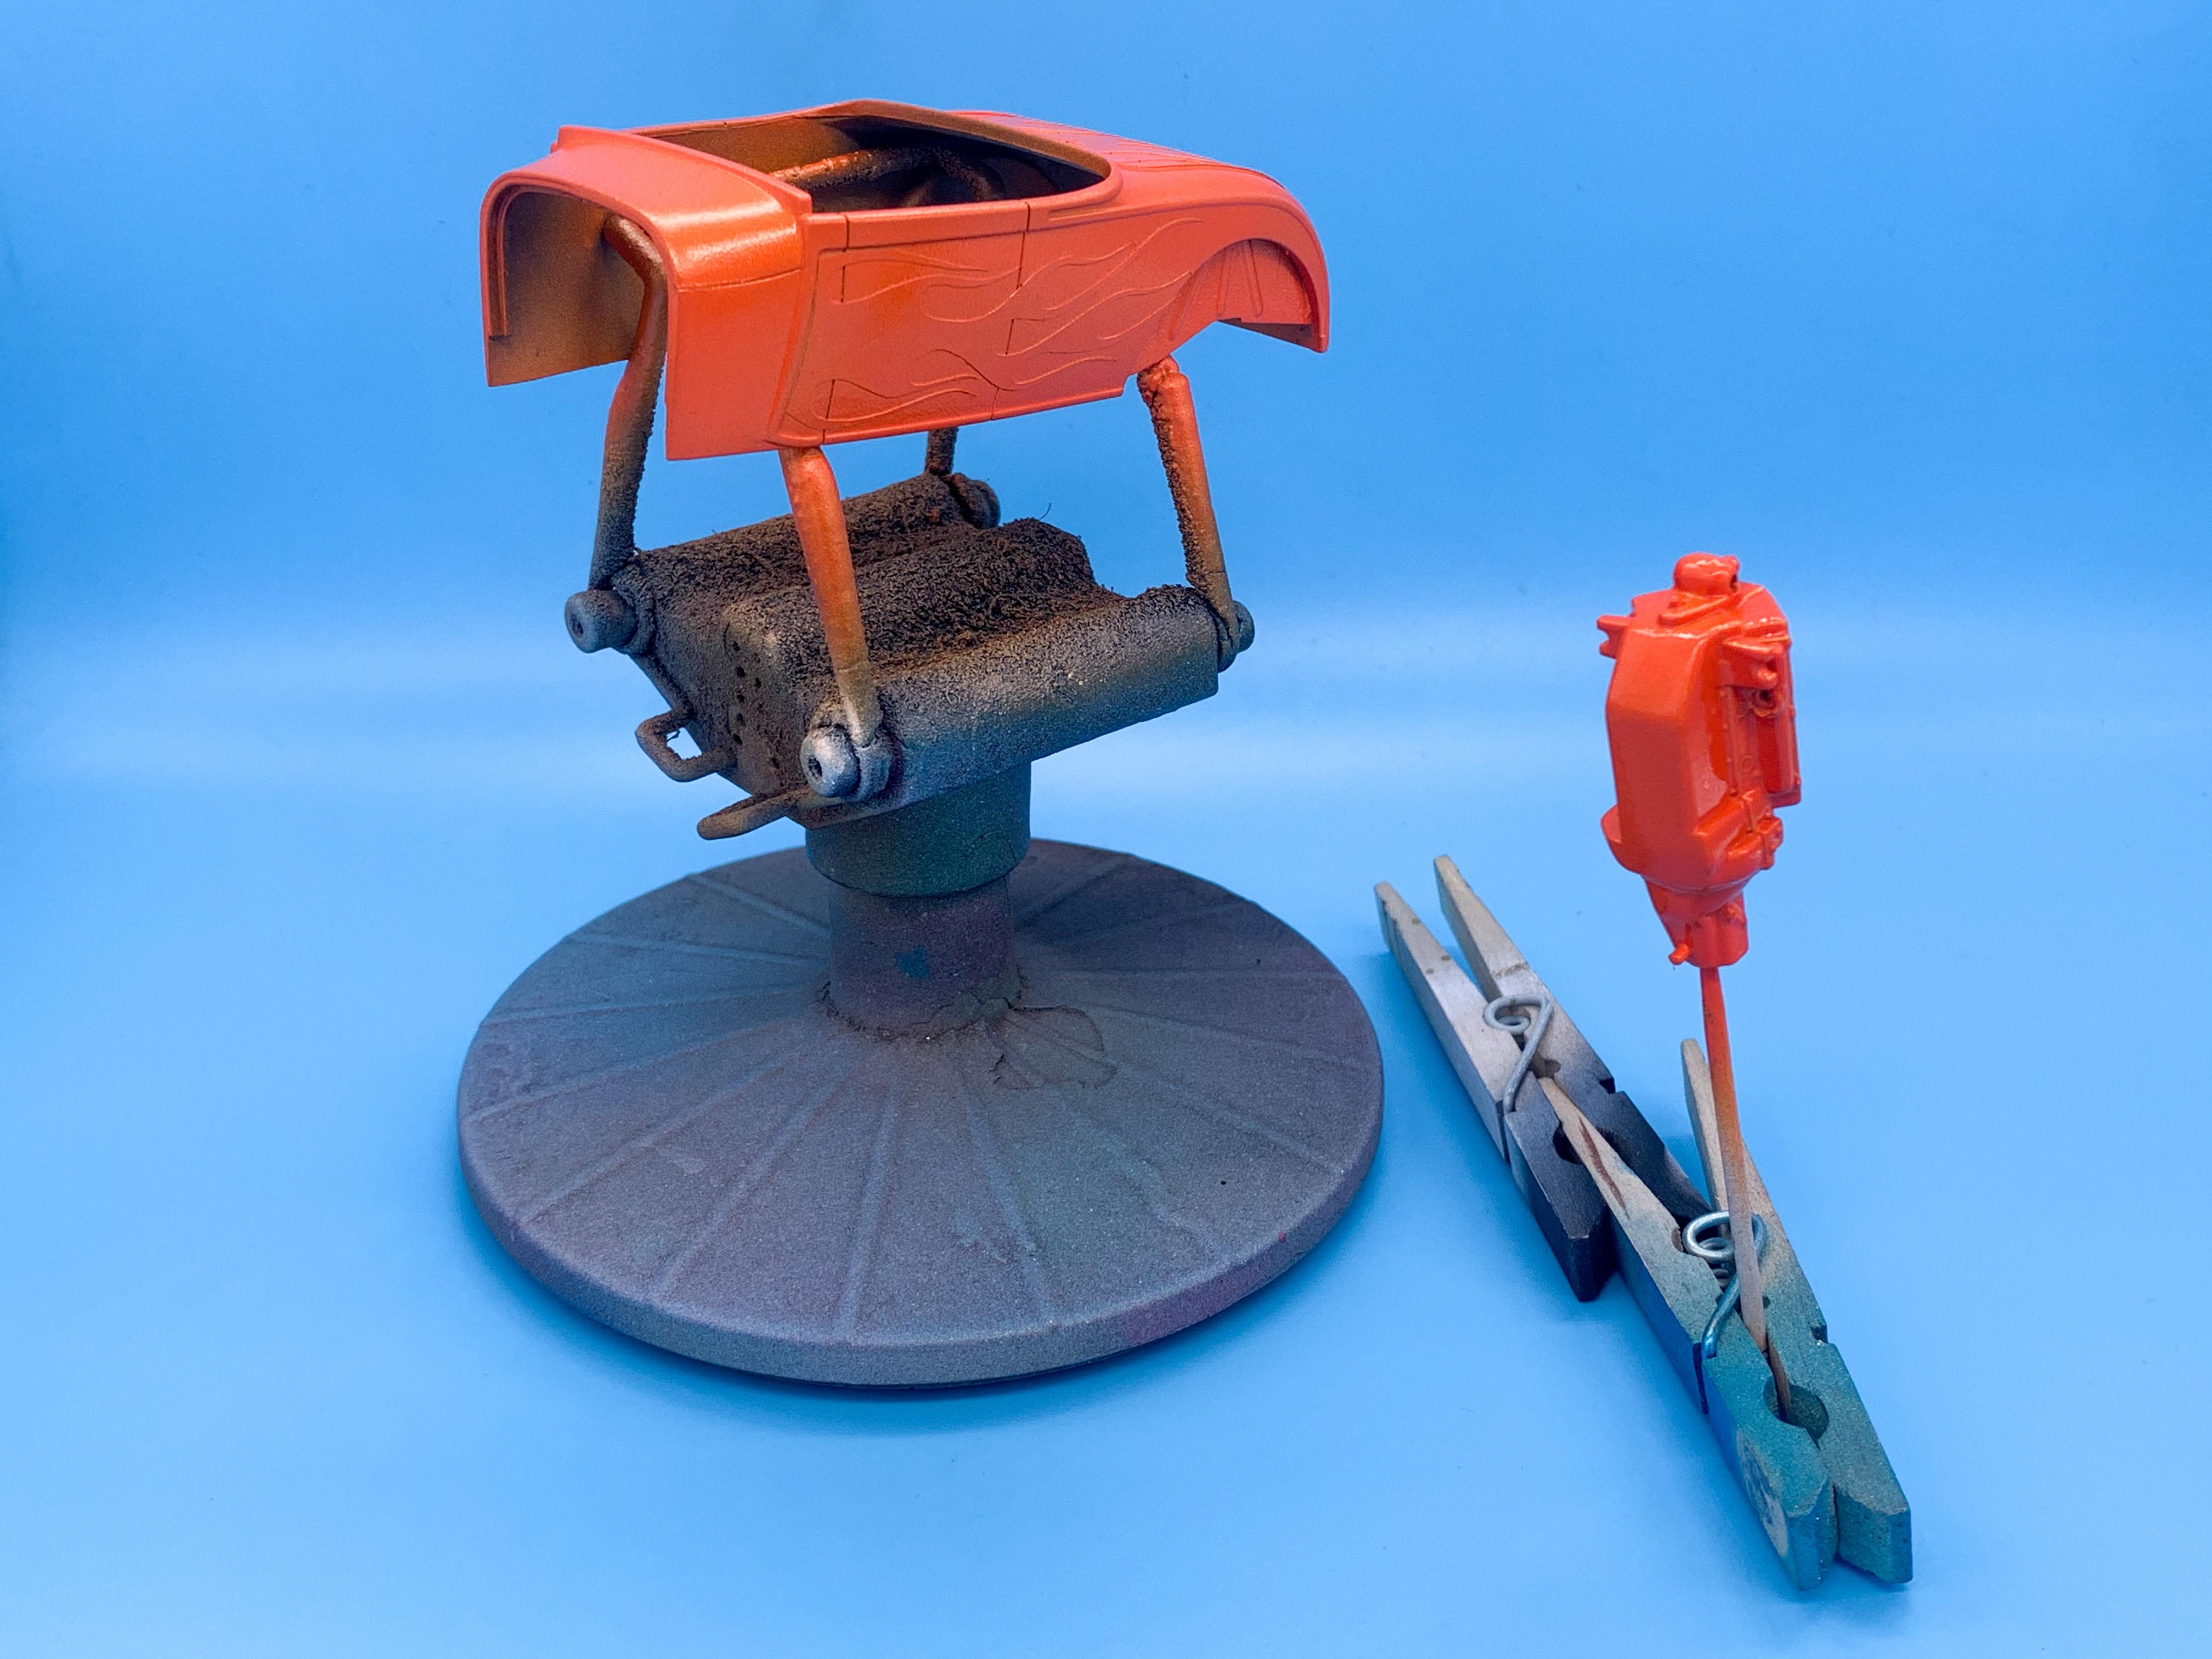
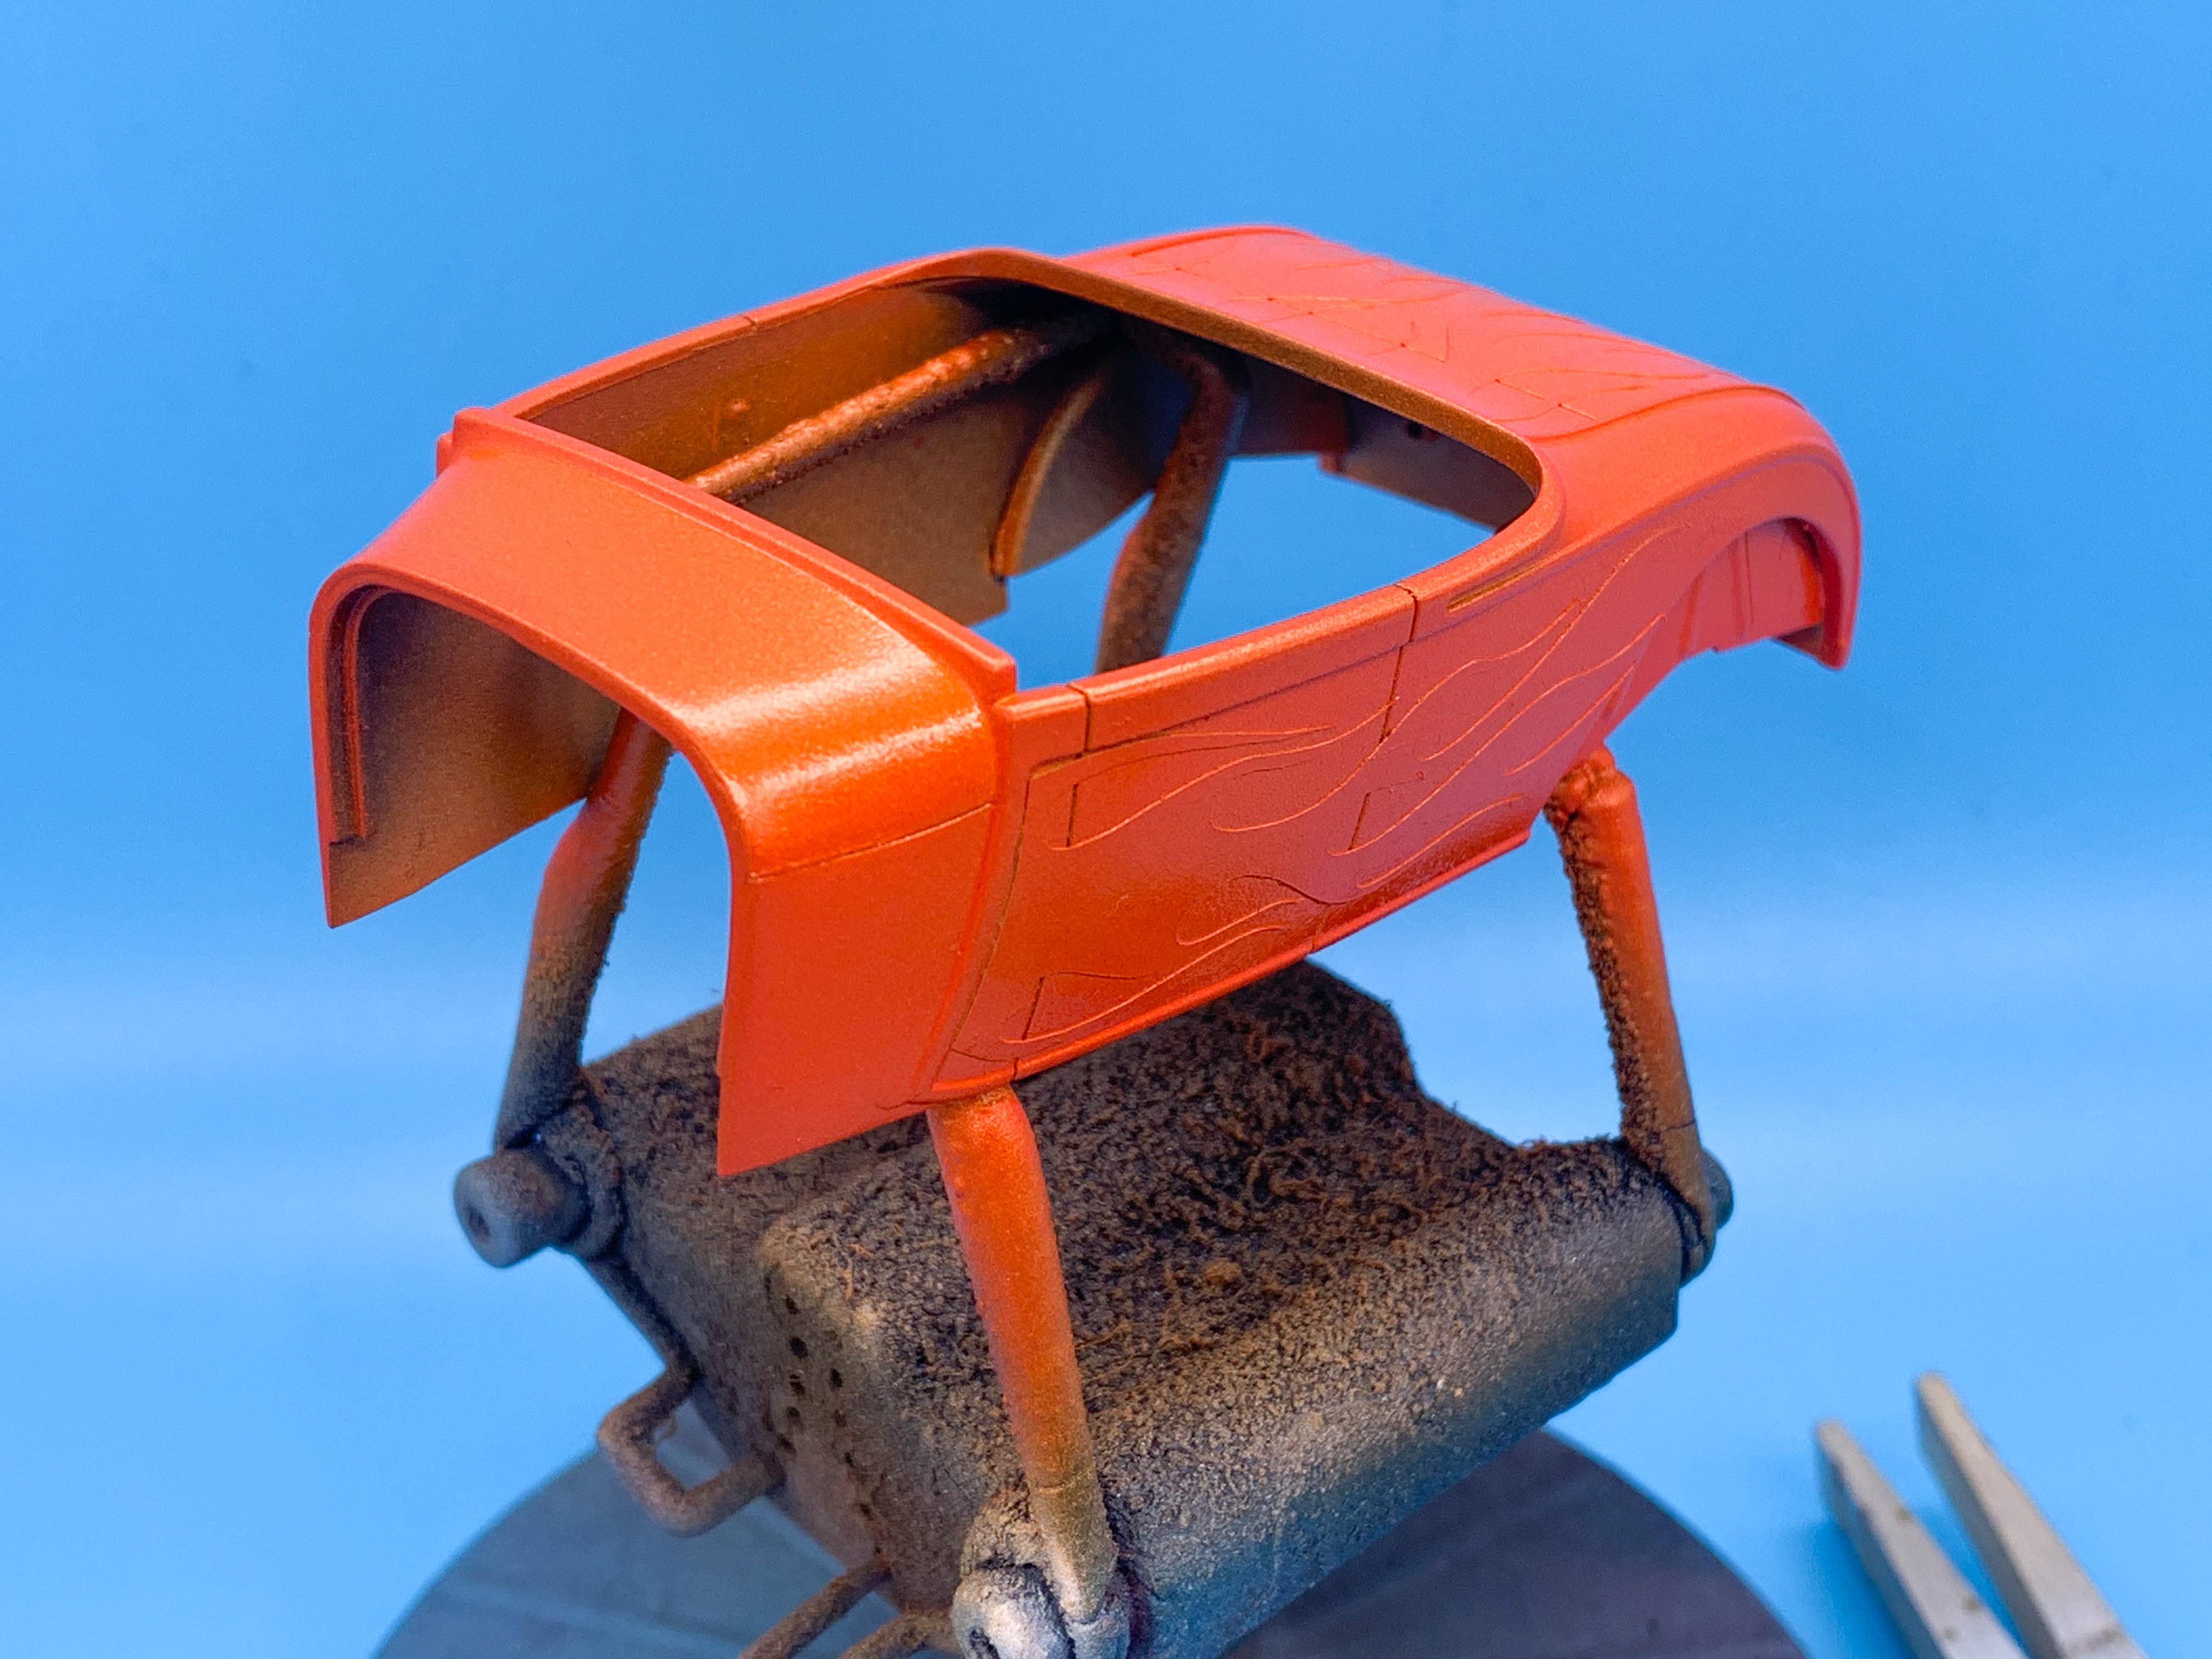
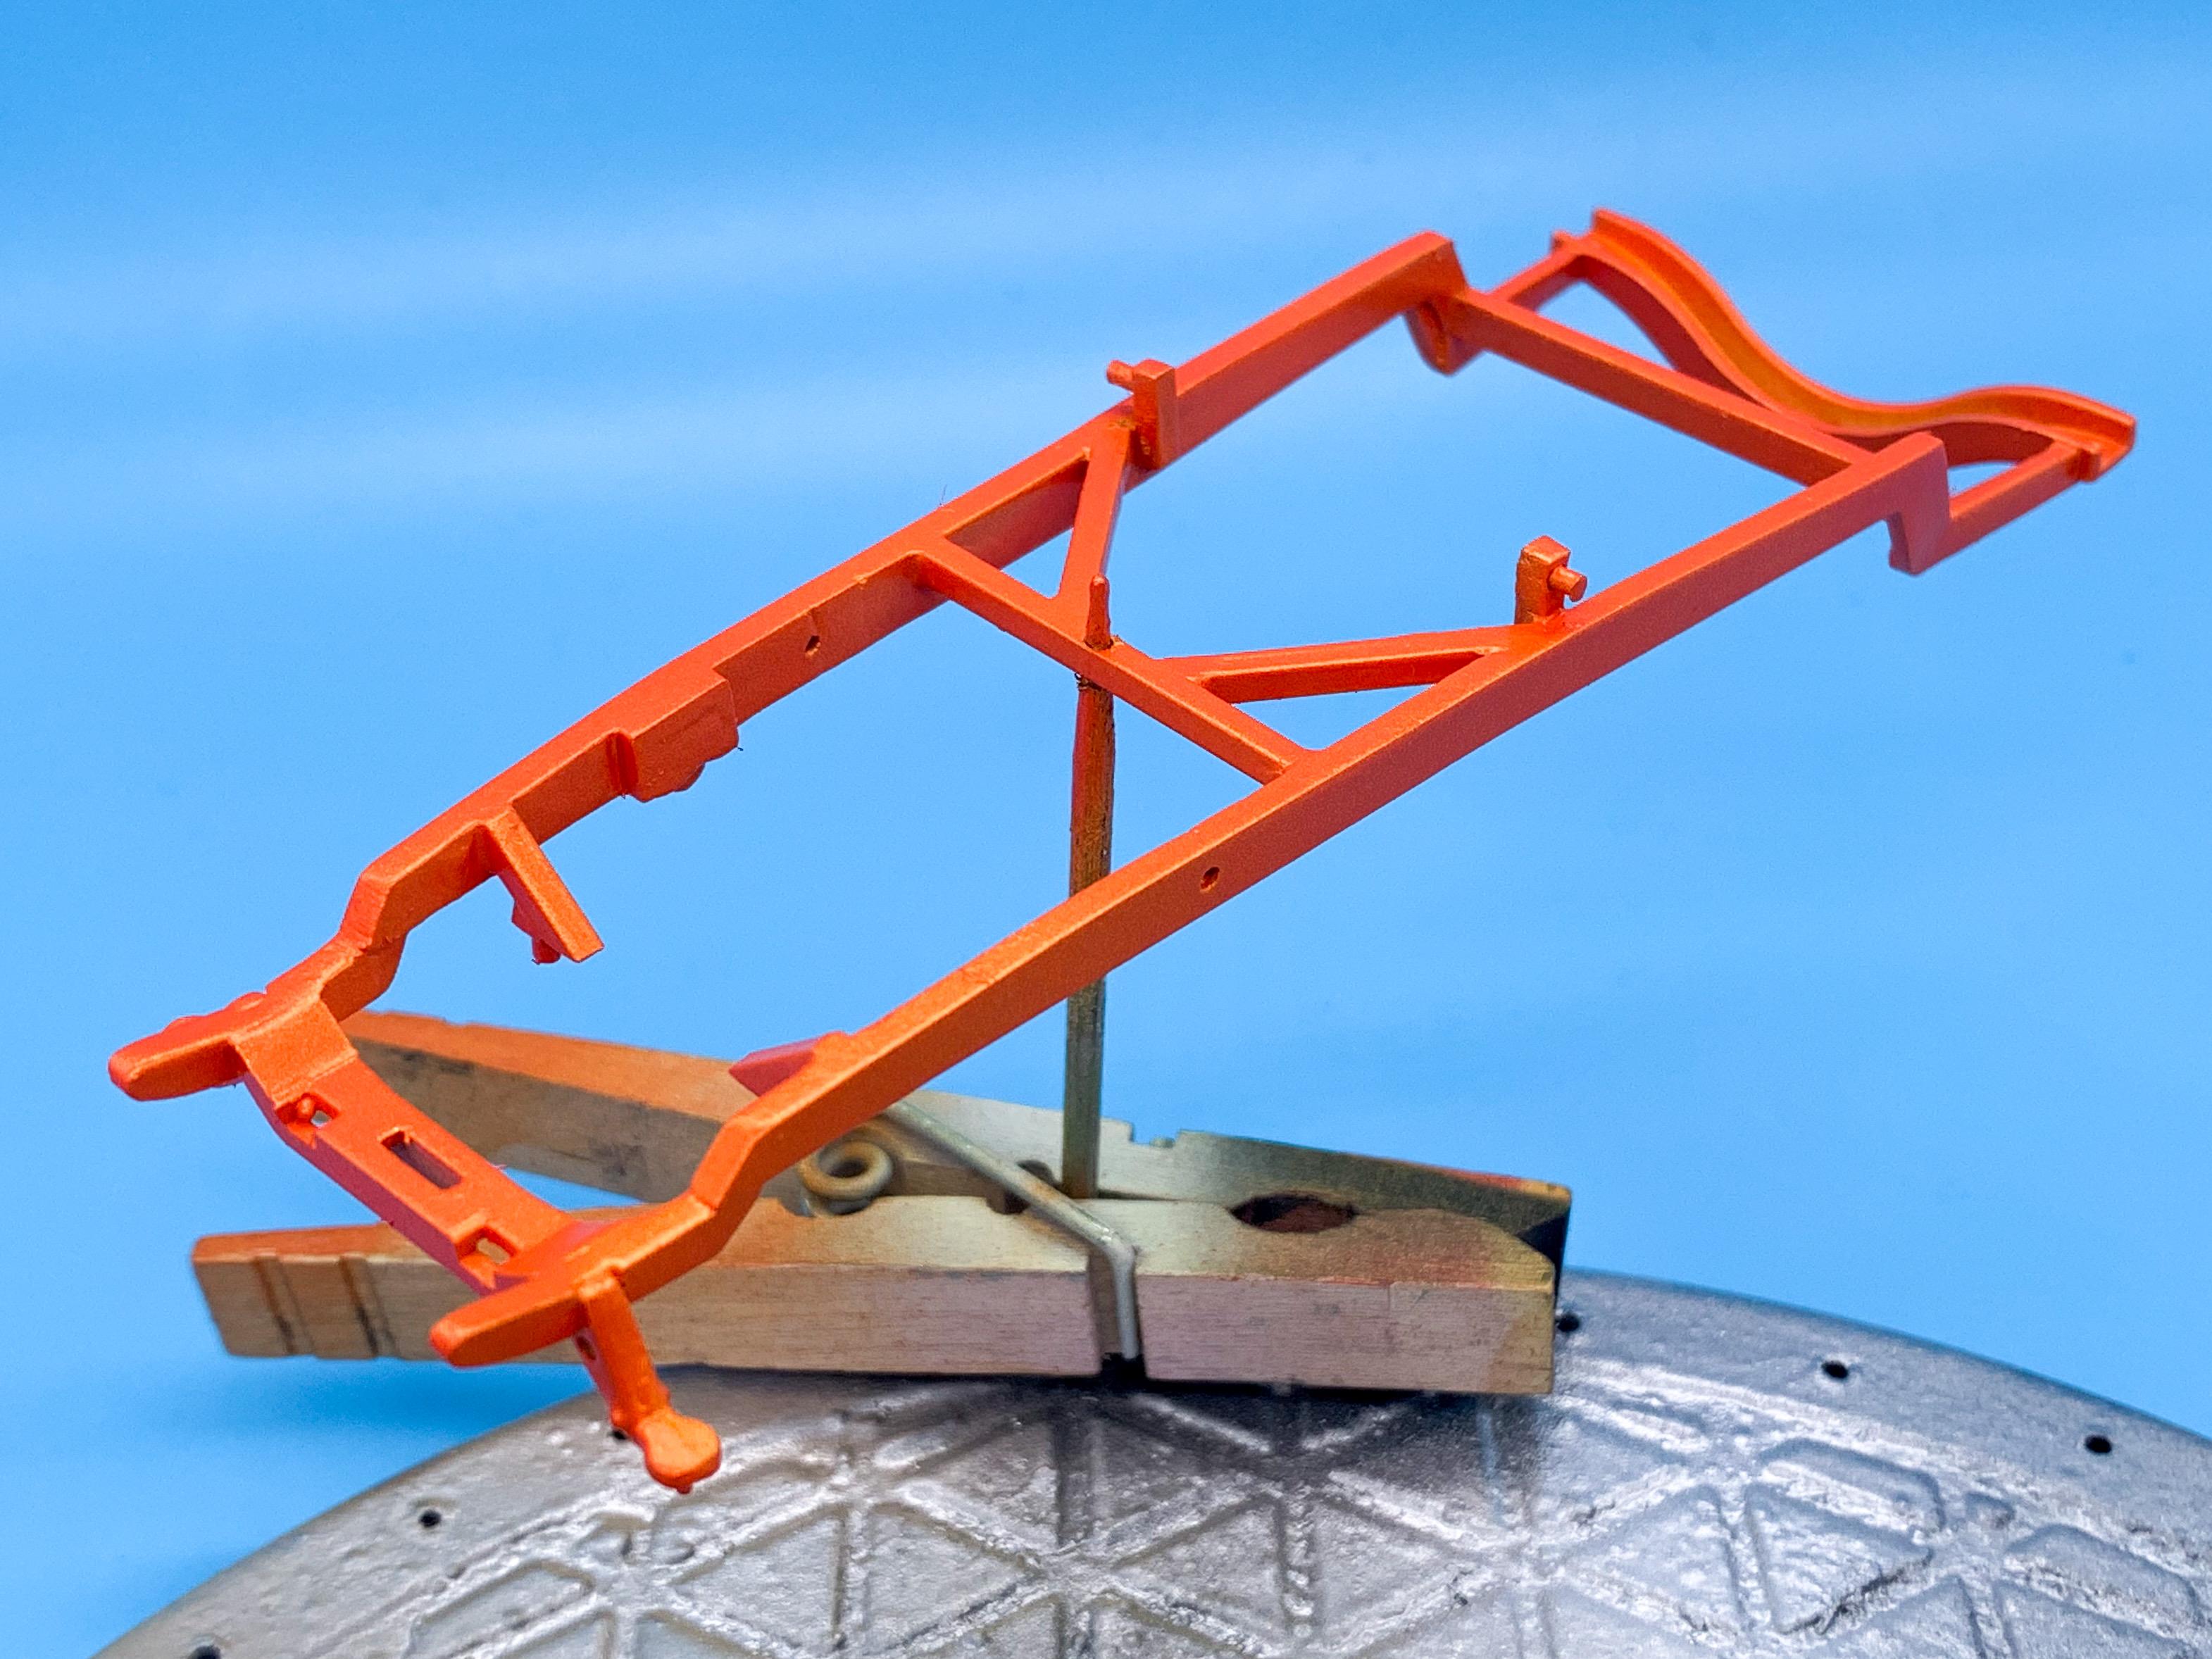
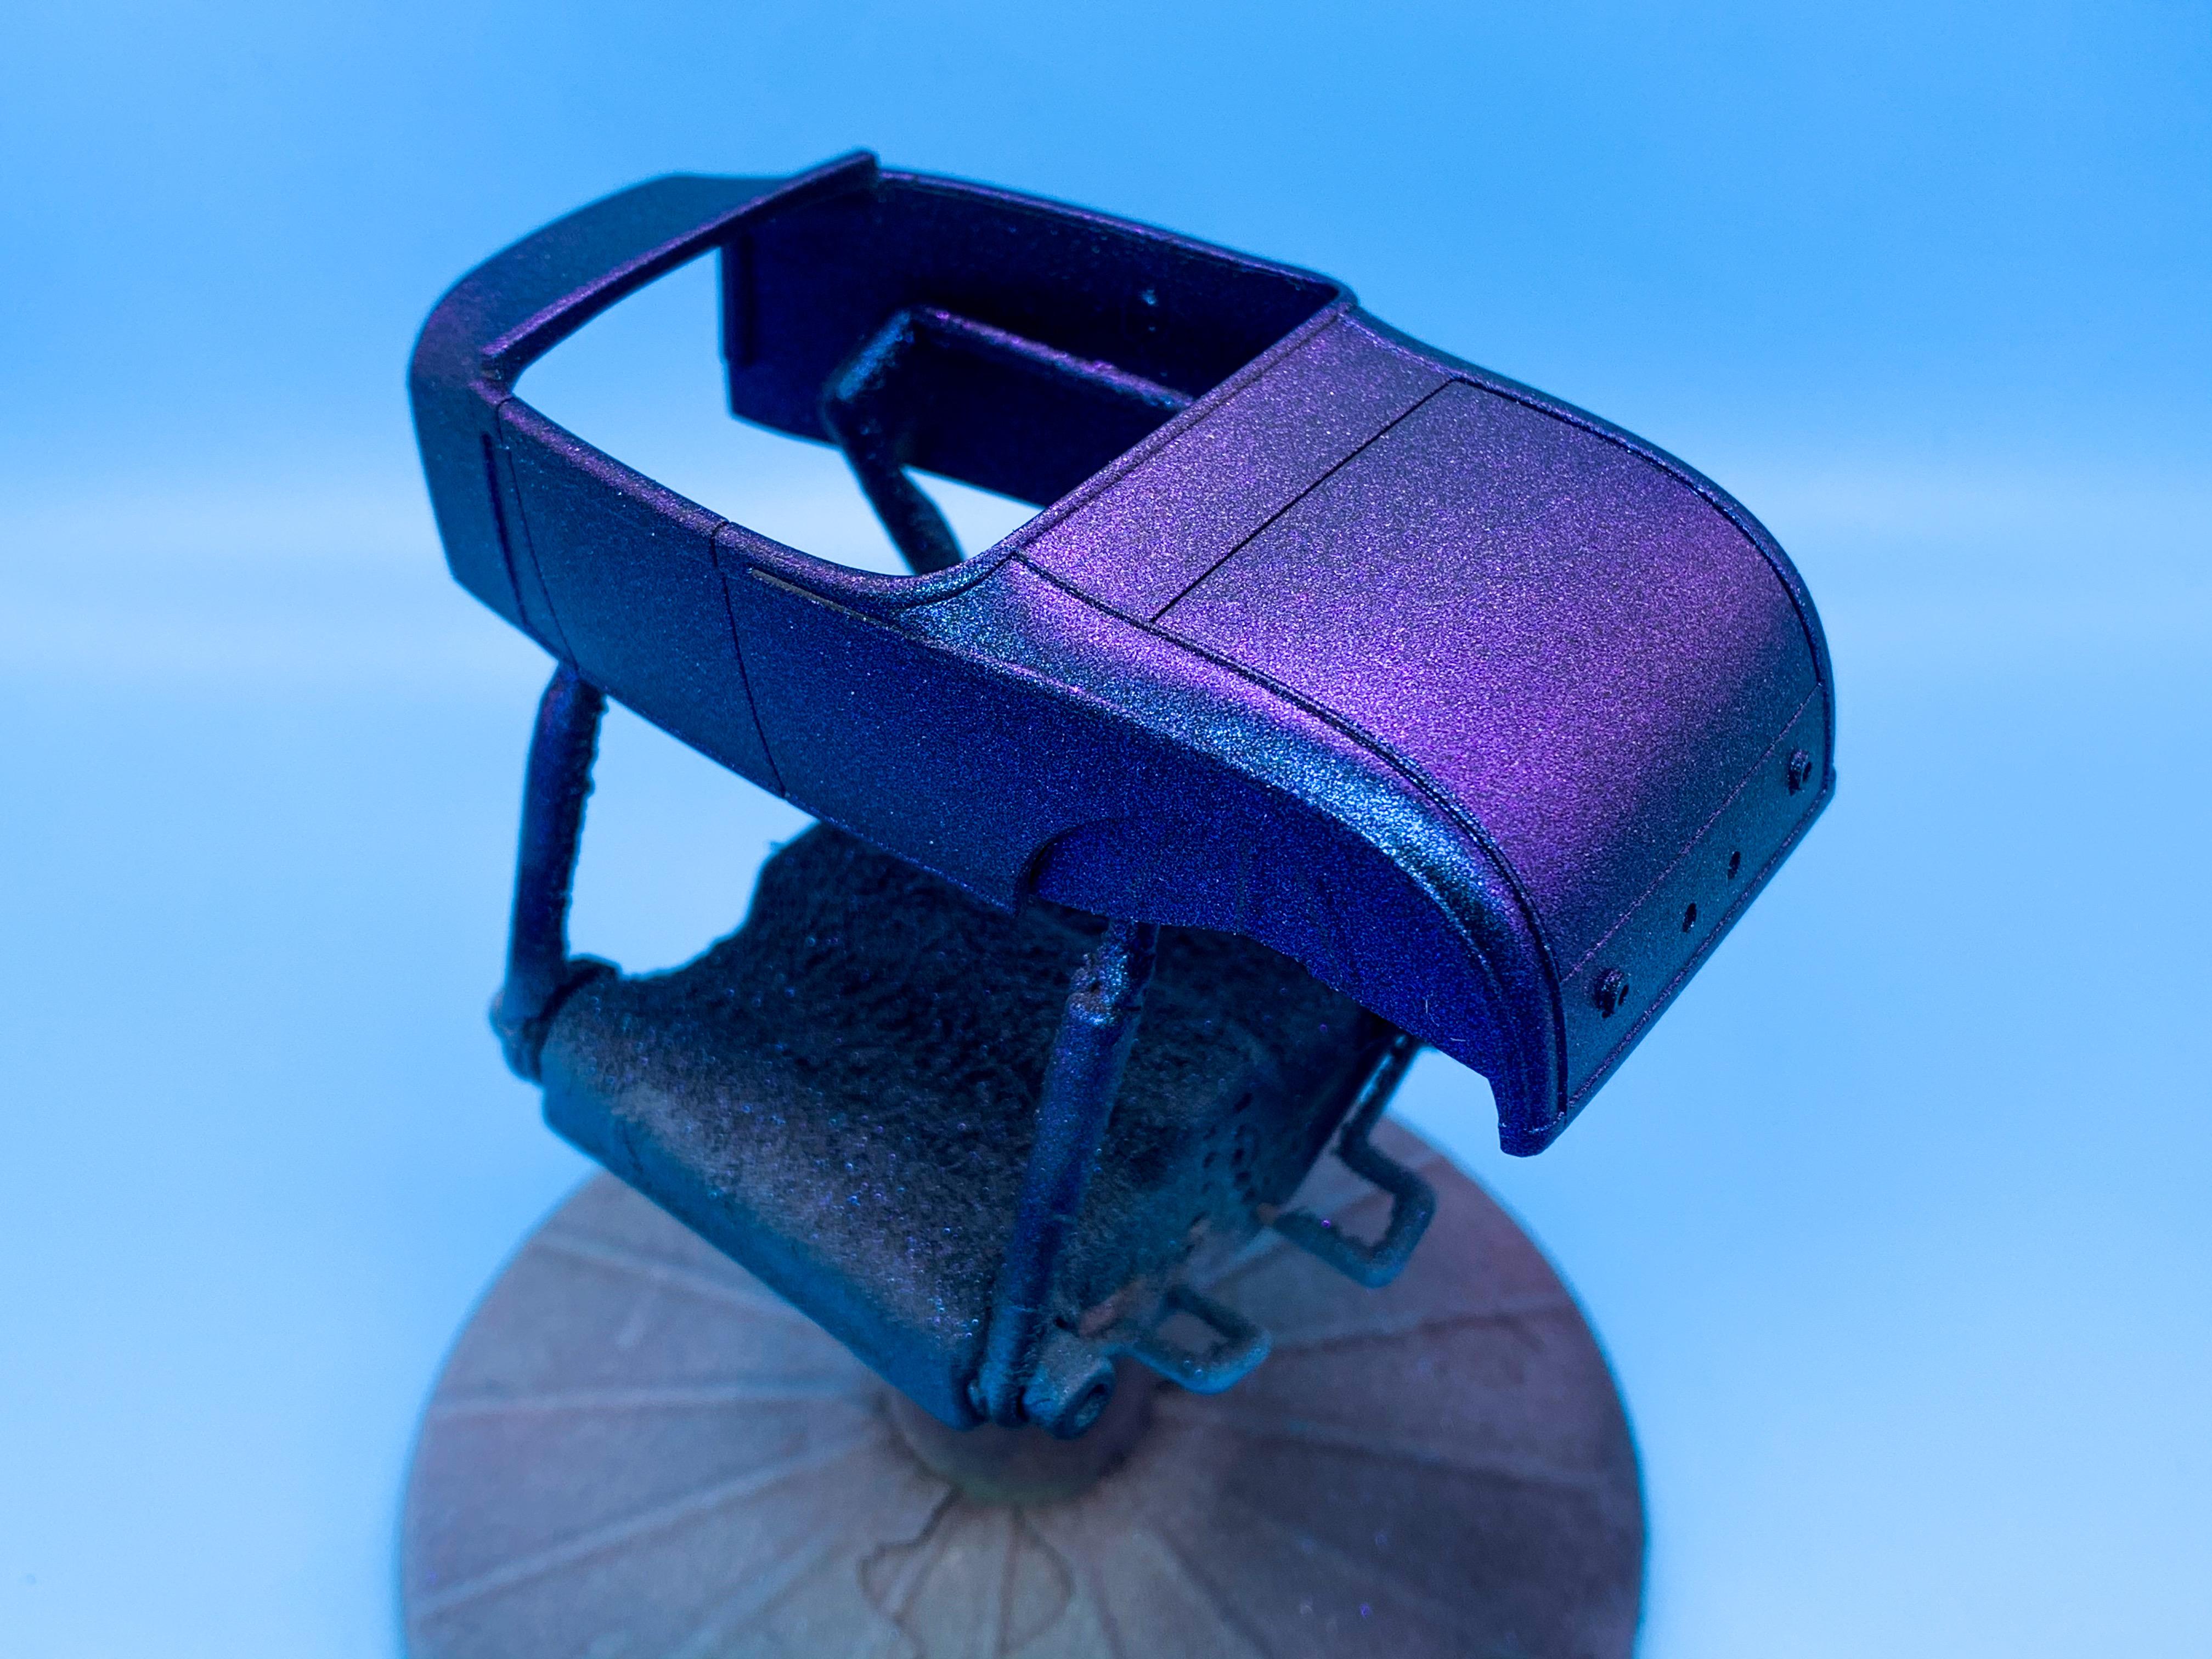
Thanks fellas! Had a few more orange parts to prep, so got those done - I wanted this build to have a kinda Coney Island glitter’n’candy’n’pearl freakshow kinda vibe, so I named it accordingly: Had to do some delicate touch ups on that hand painted bit, but it looks ok for a little detail I think...and with that done, onto some clearcoat! Had a sunny day today, so I really got to see how much those colors will flipflop in daylight! Love it! Now for those, and the frame, engine, firewall and a bunch of other parts, to bake in the dehydrator for a day or so and I can start building some stuff! More soon!
-
Squadron Putty Formula Change?
OldNYJim replied to crowe-t's topic in Model Building Questions and Answers
Me too! For 'light' jobs anyway. I figure if the gap I'm filling is big enough to put some styrene in it (be it rod, a little piece of sheet, whatever) I'll do that, and then use this stuff just to blend it all together. Our local Menards had it for $2 a tube, so I grabbed a few... -
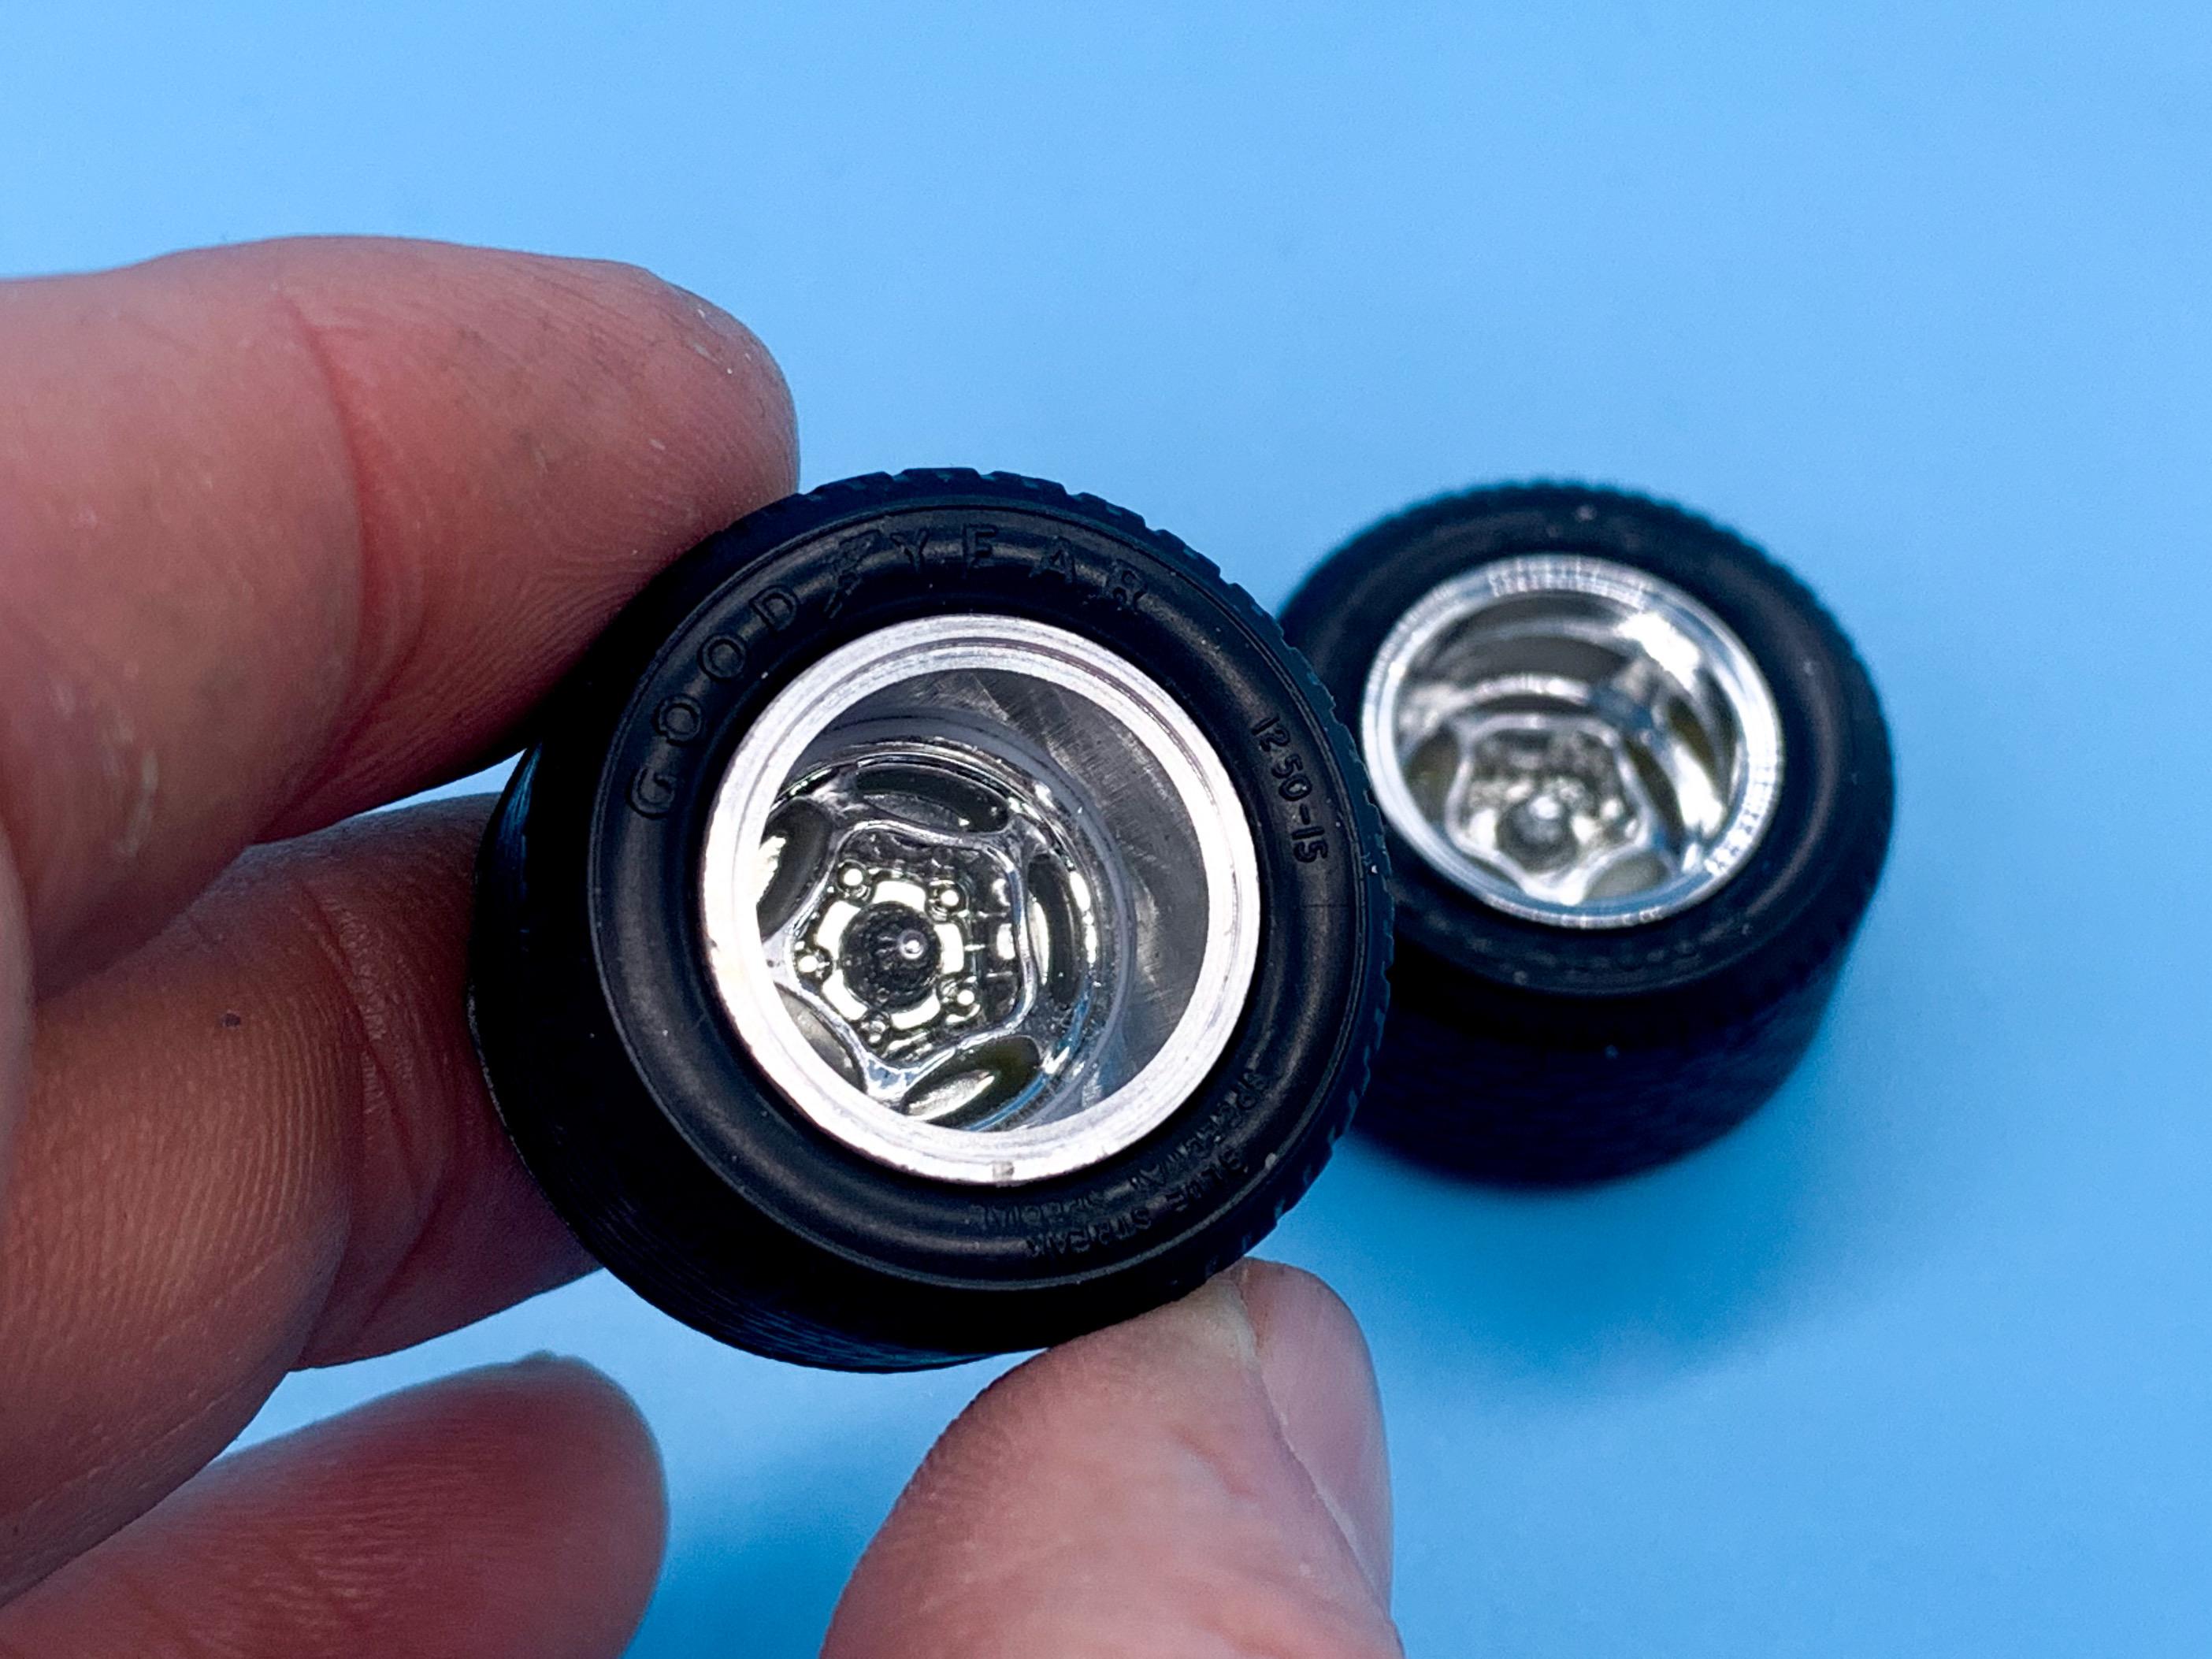
That hood latch is amazing! I like the Jeep too, @Tom Geiger! I’ve been learning some new stuff with my lathe - just taking every chance to experiment and try and learn some new stuff (although I’m still on the basics here, really). This week’s new thing - making wheels! I wanted to swap out the plastic rims on the MPC trike I’m building for some metal ones...I’m pretty pleased with them, for a first effort! Need to clean them up a little and then give them a polish next
-
Kitbashing,,,
OldNYJim replied to thomascoffey1959@gmail.com's topic in General Automotive Talk (Trucks and Cars)
Someone kitbashed them onto another kit and now they have an incomplete parts-kit Bernie that they can never finish -
Love it! What a cool project! I’ll be following Also, I never heard the term “bread sled” until tonight - that’s really funny!
-
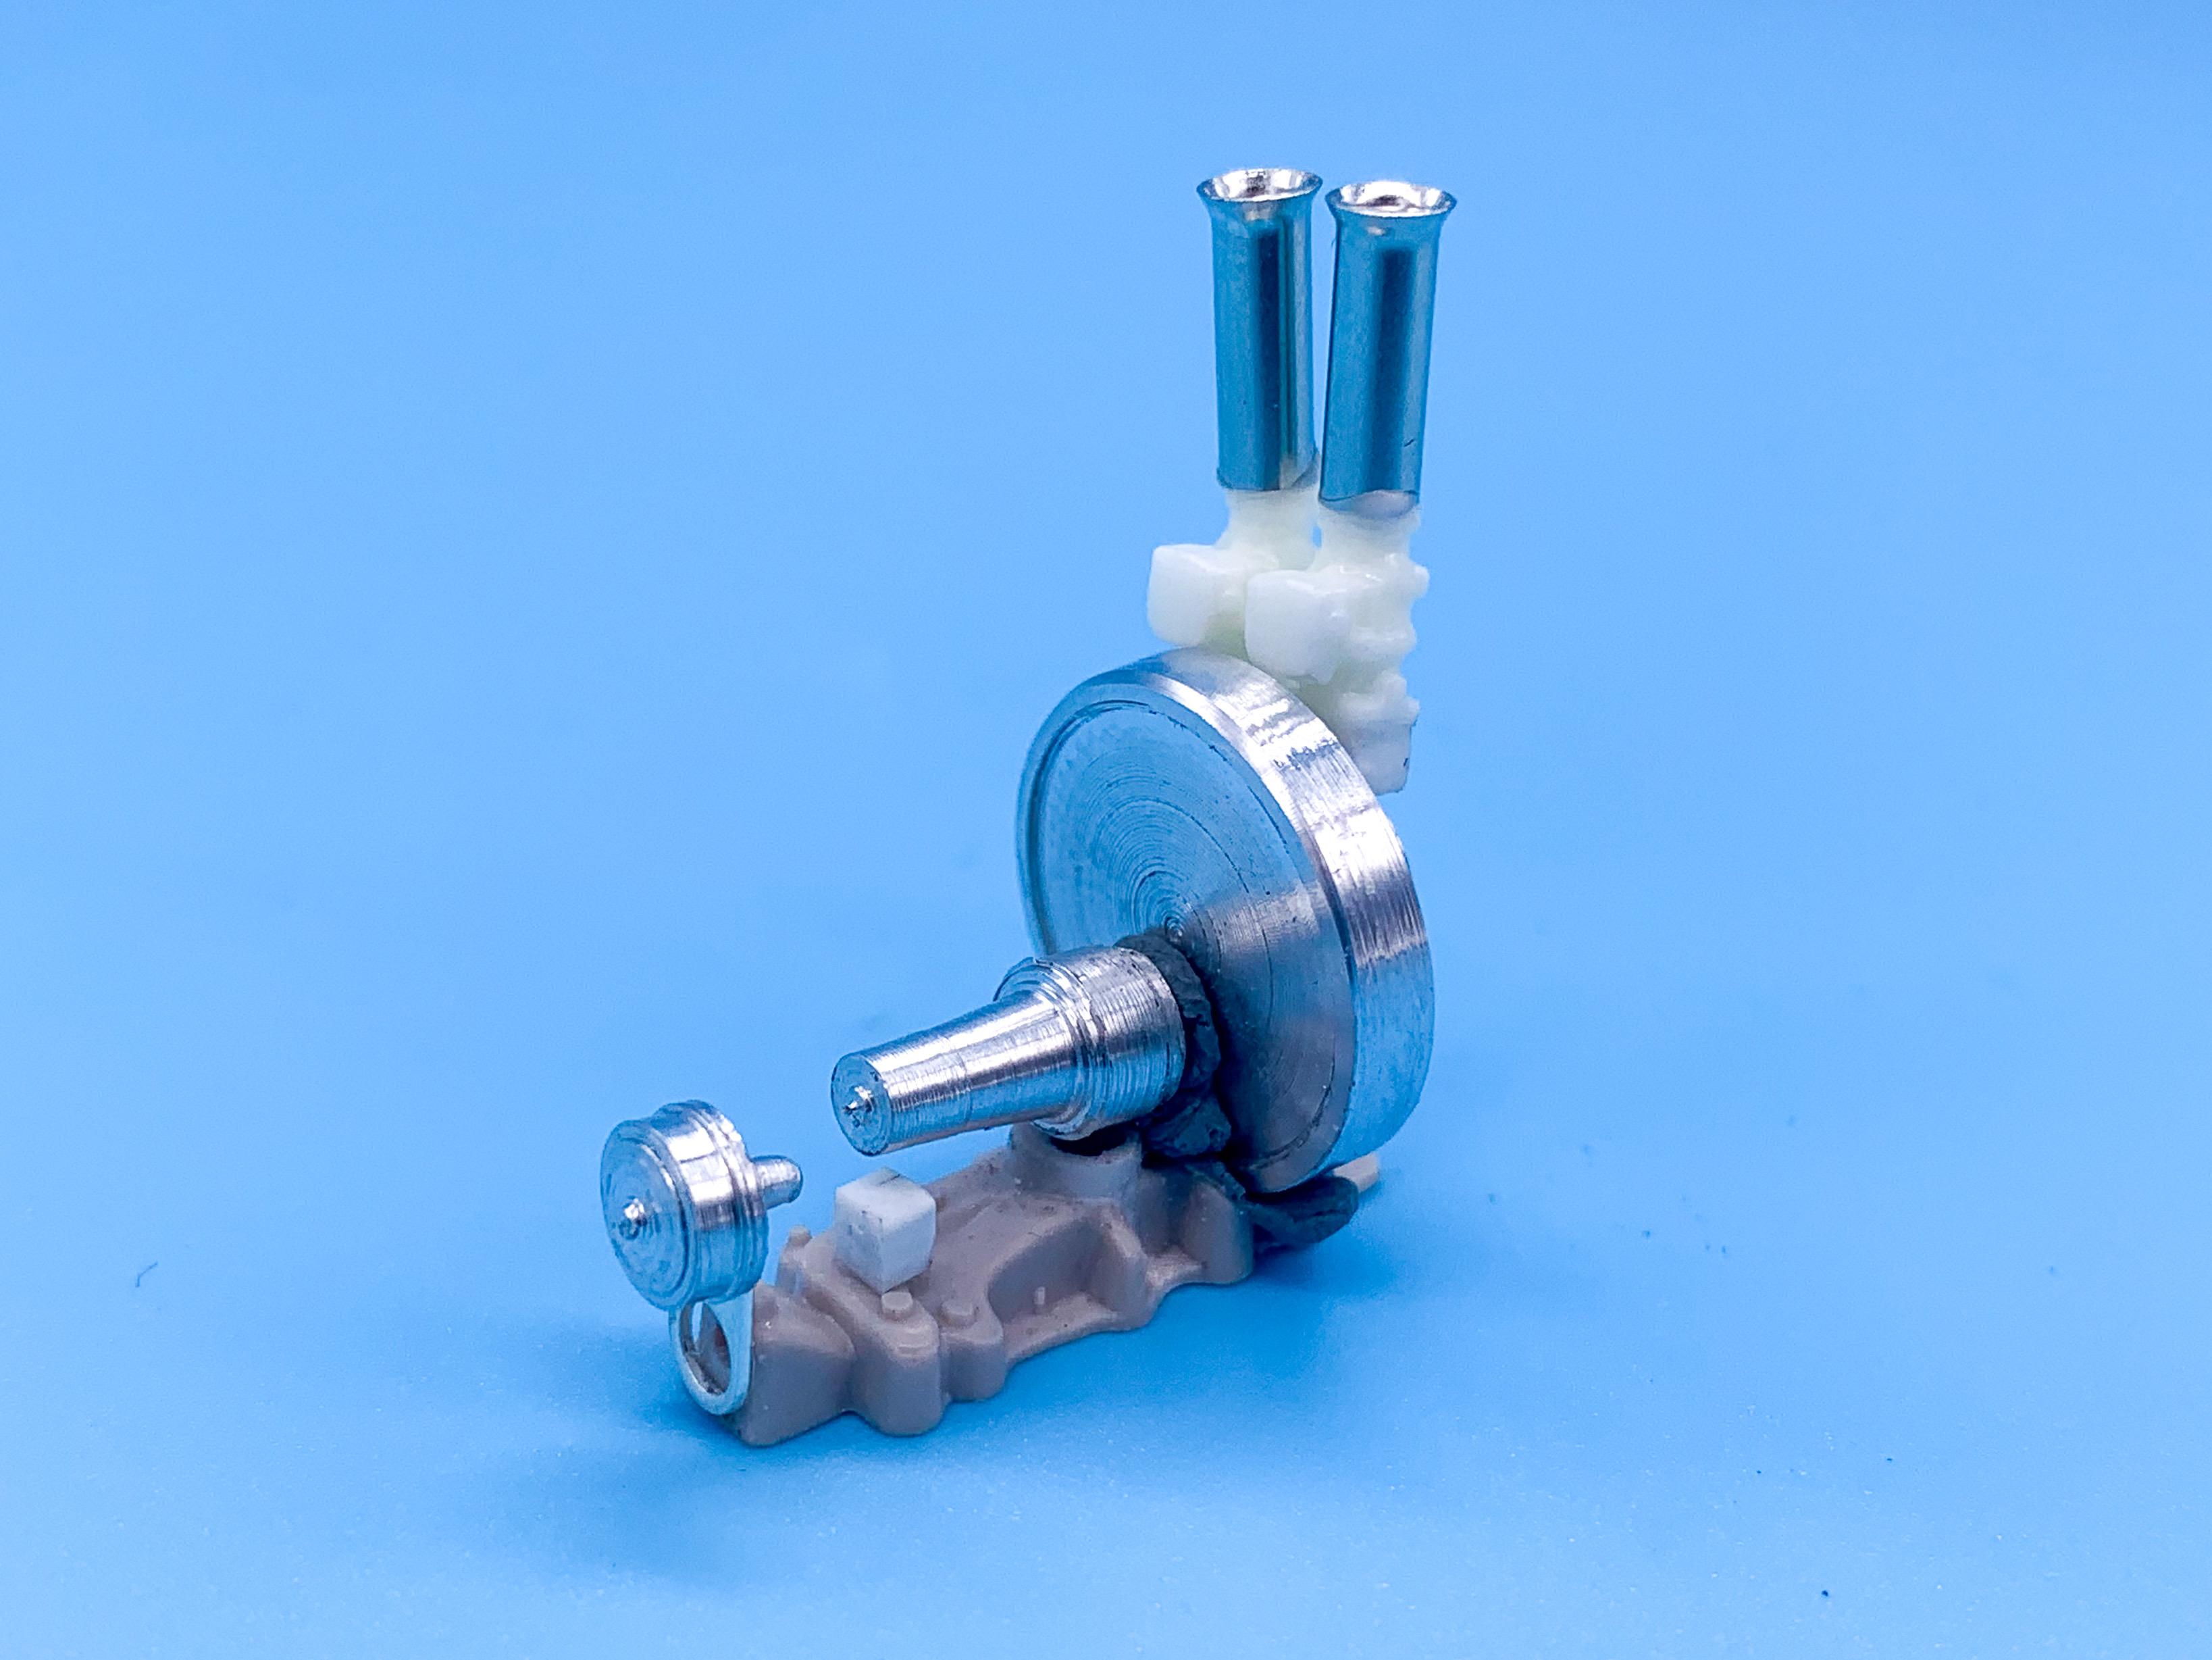
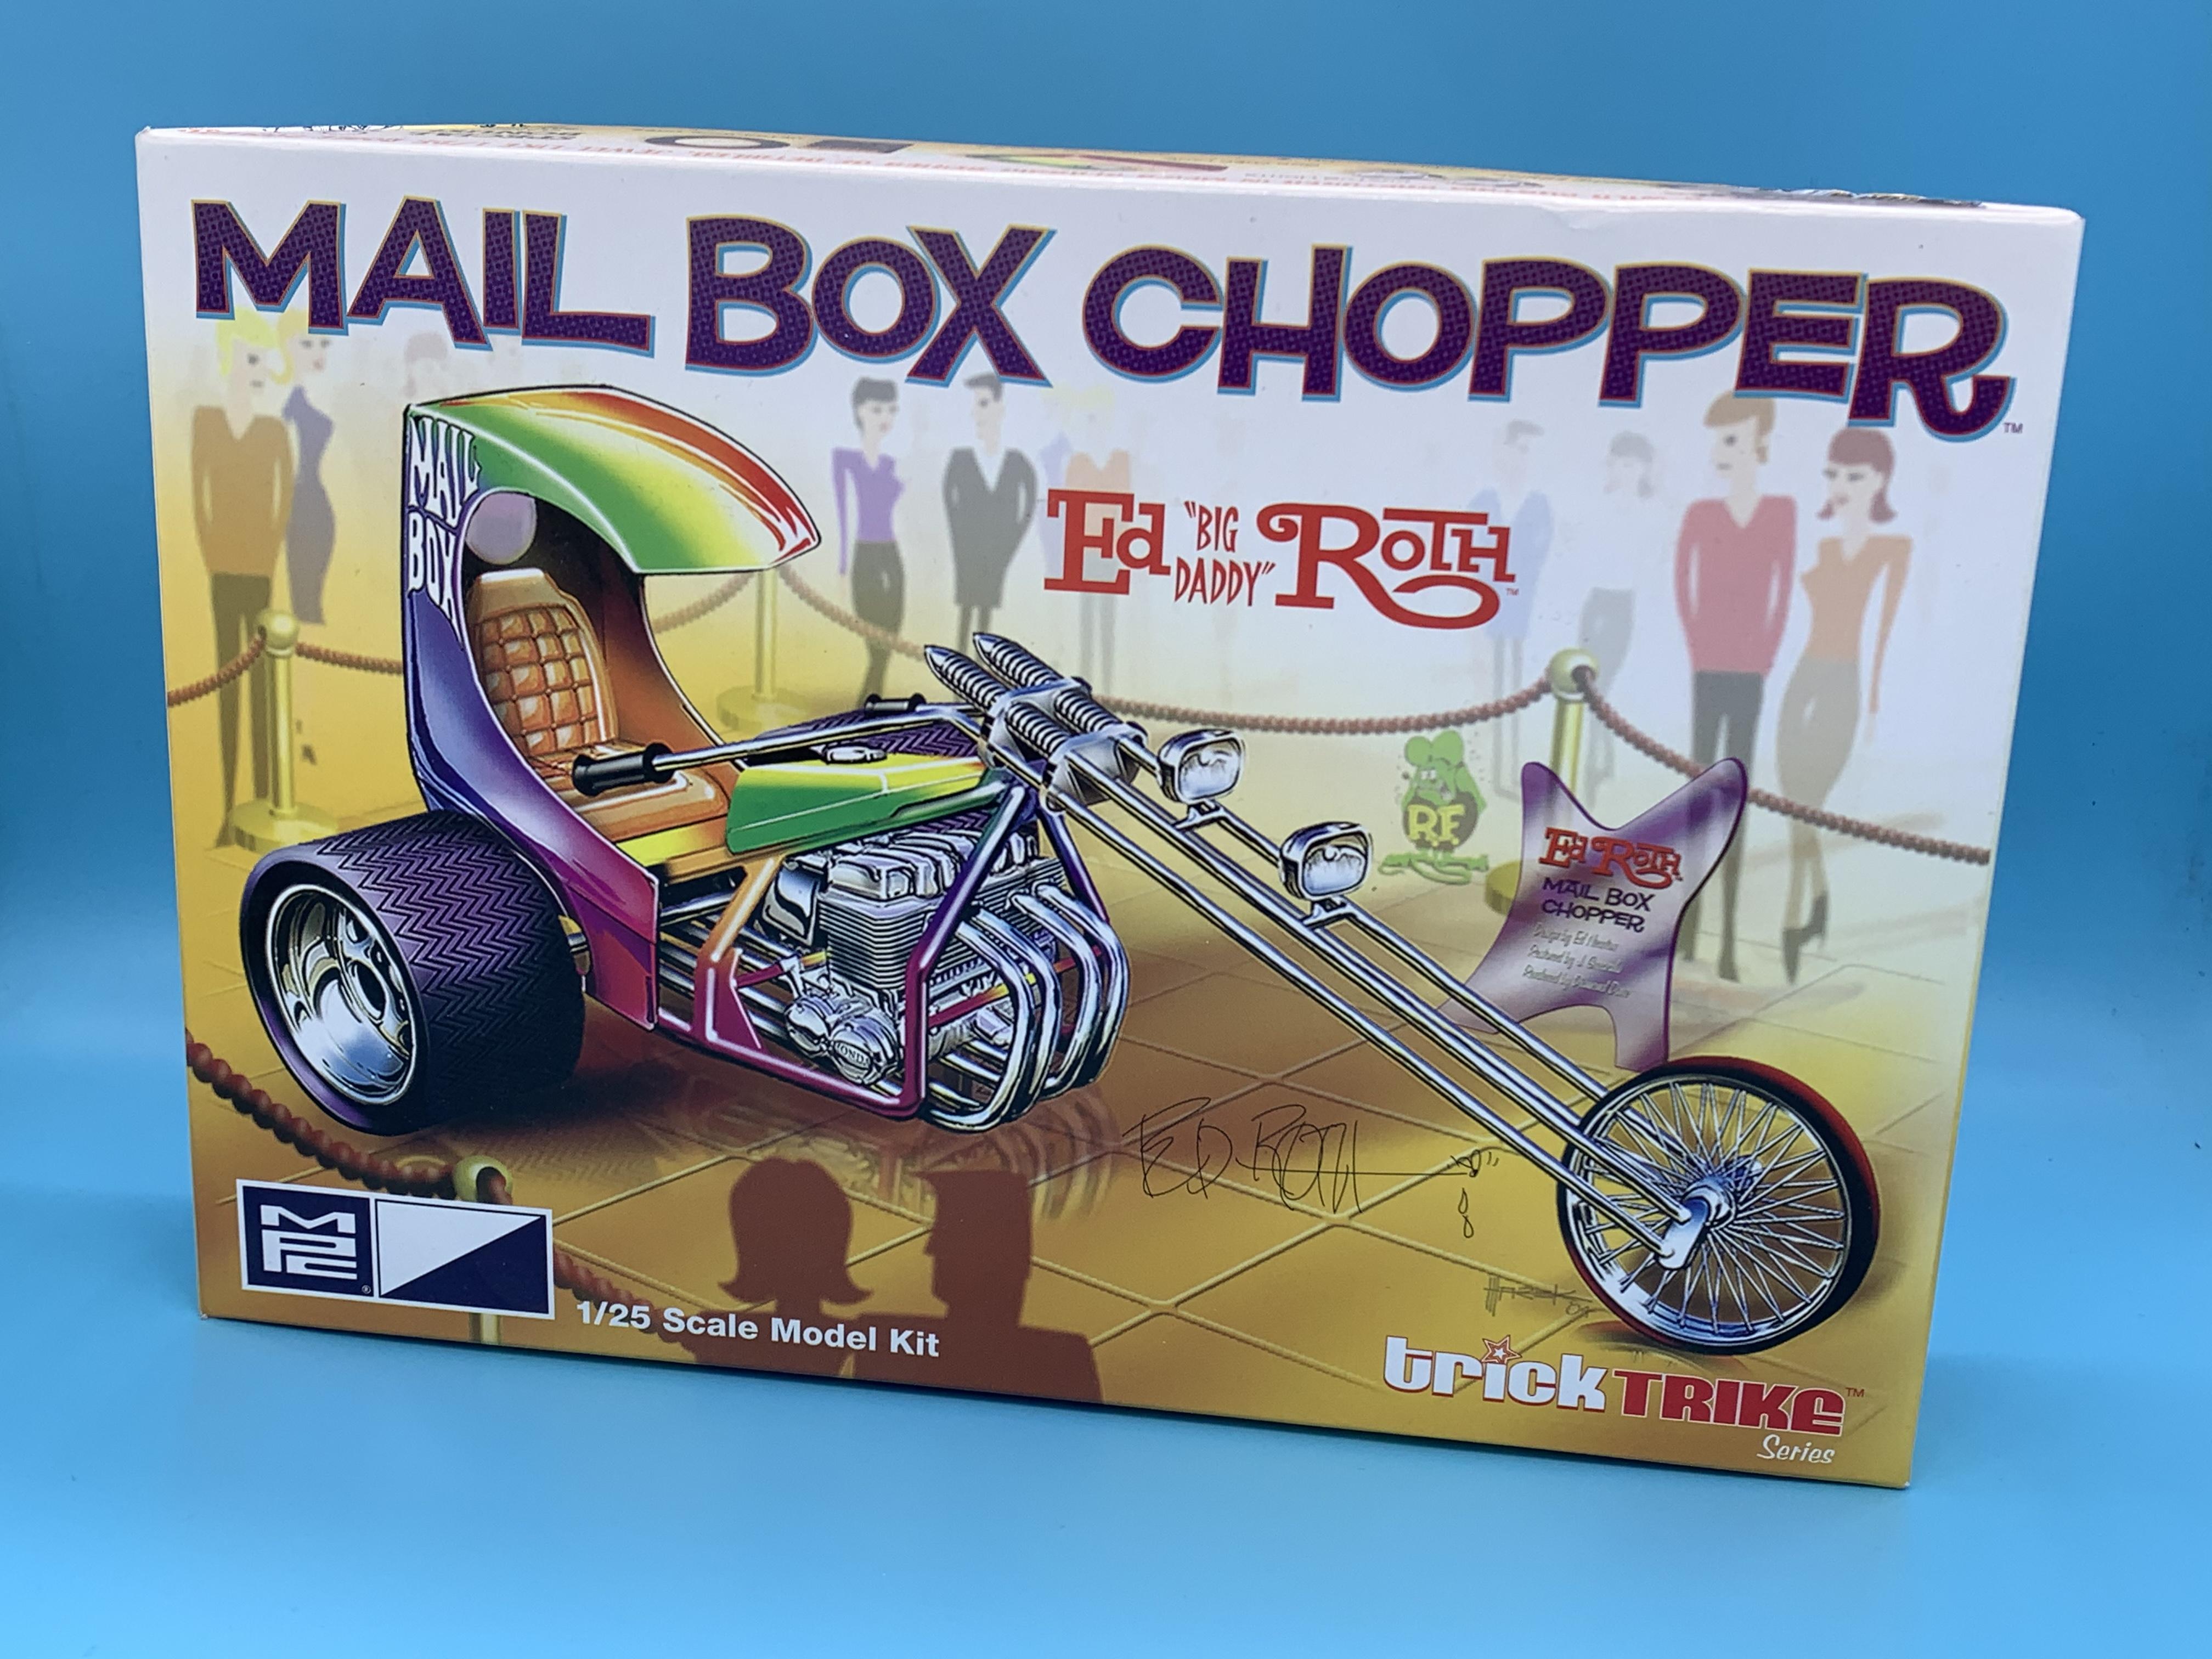
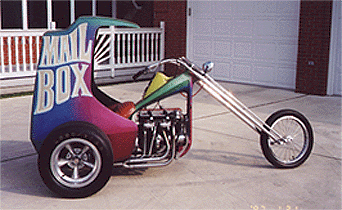
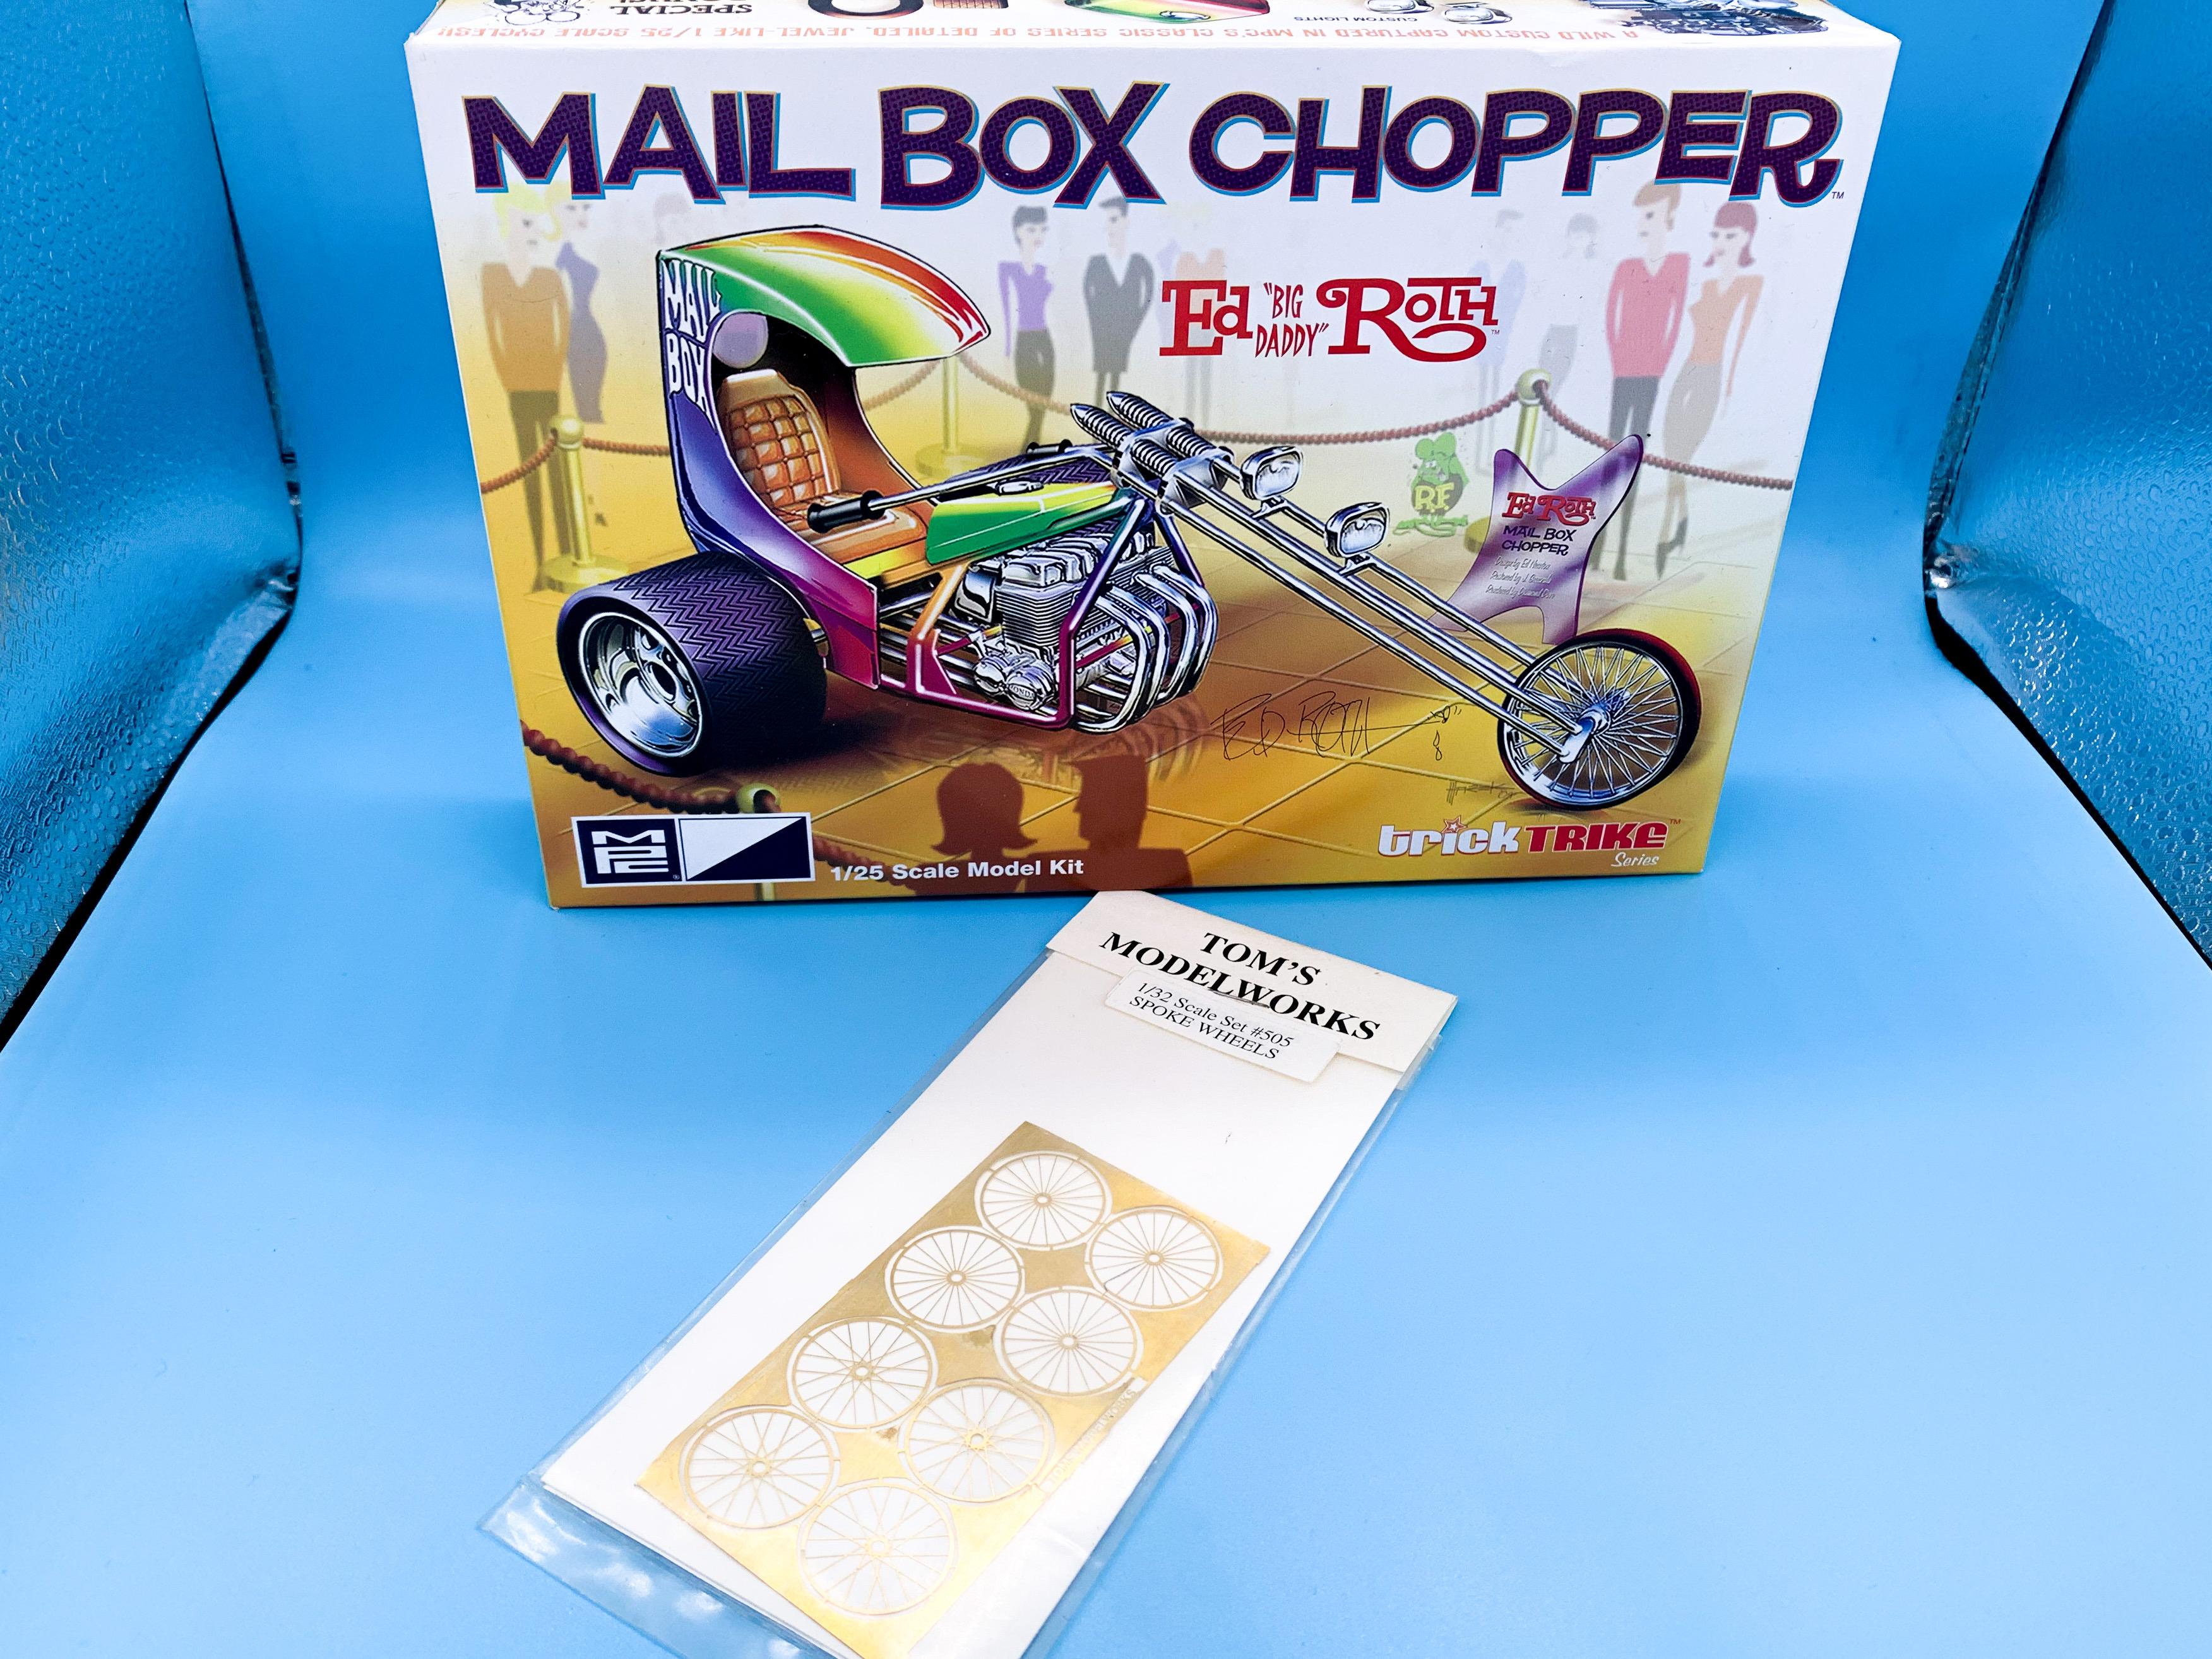
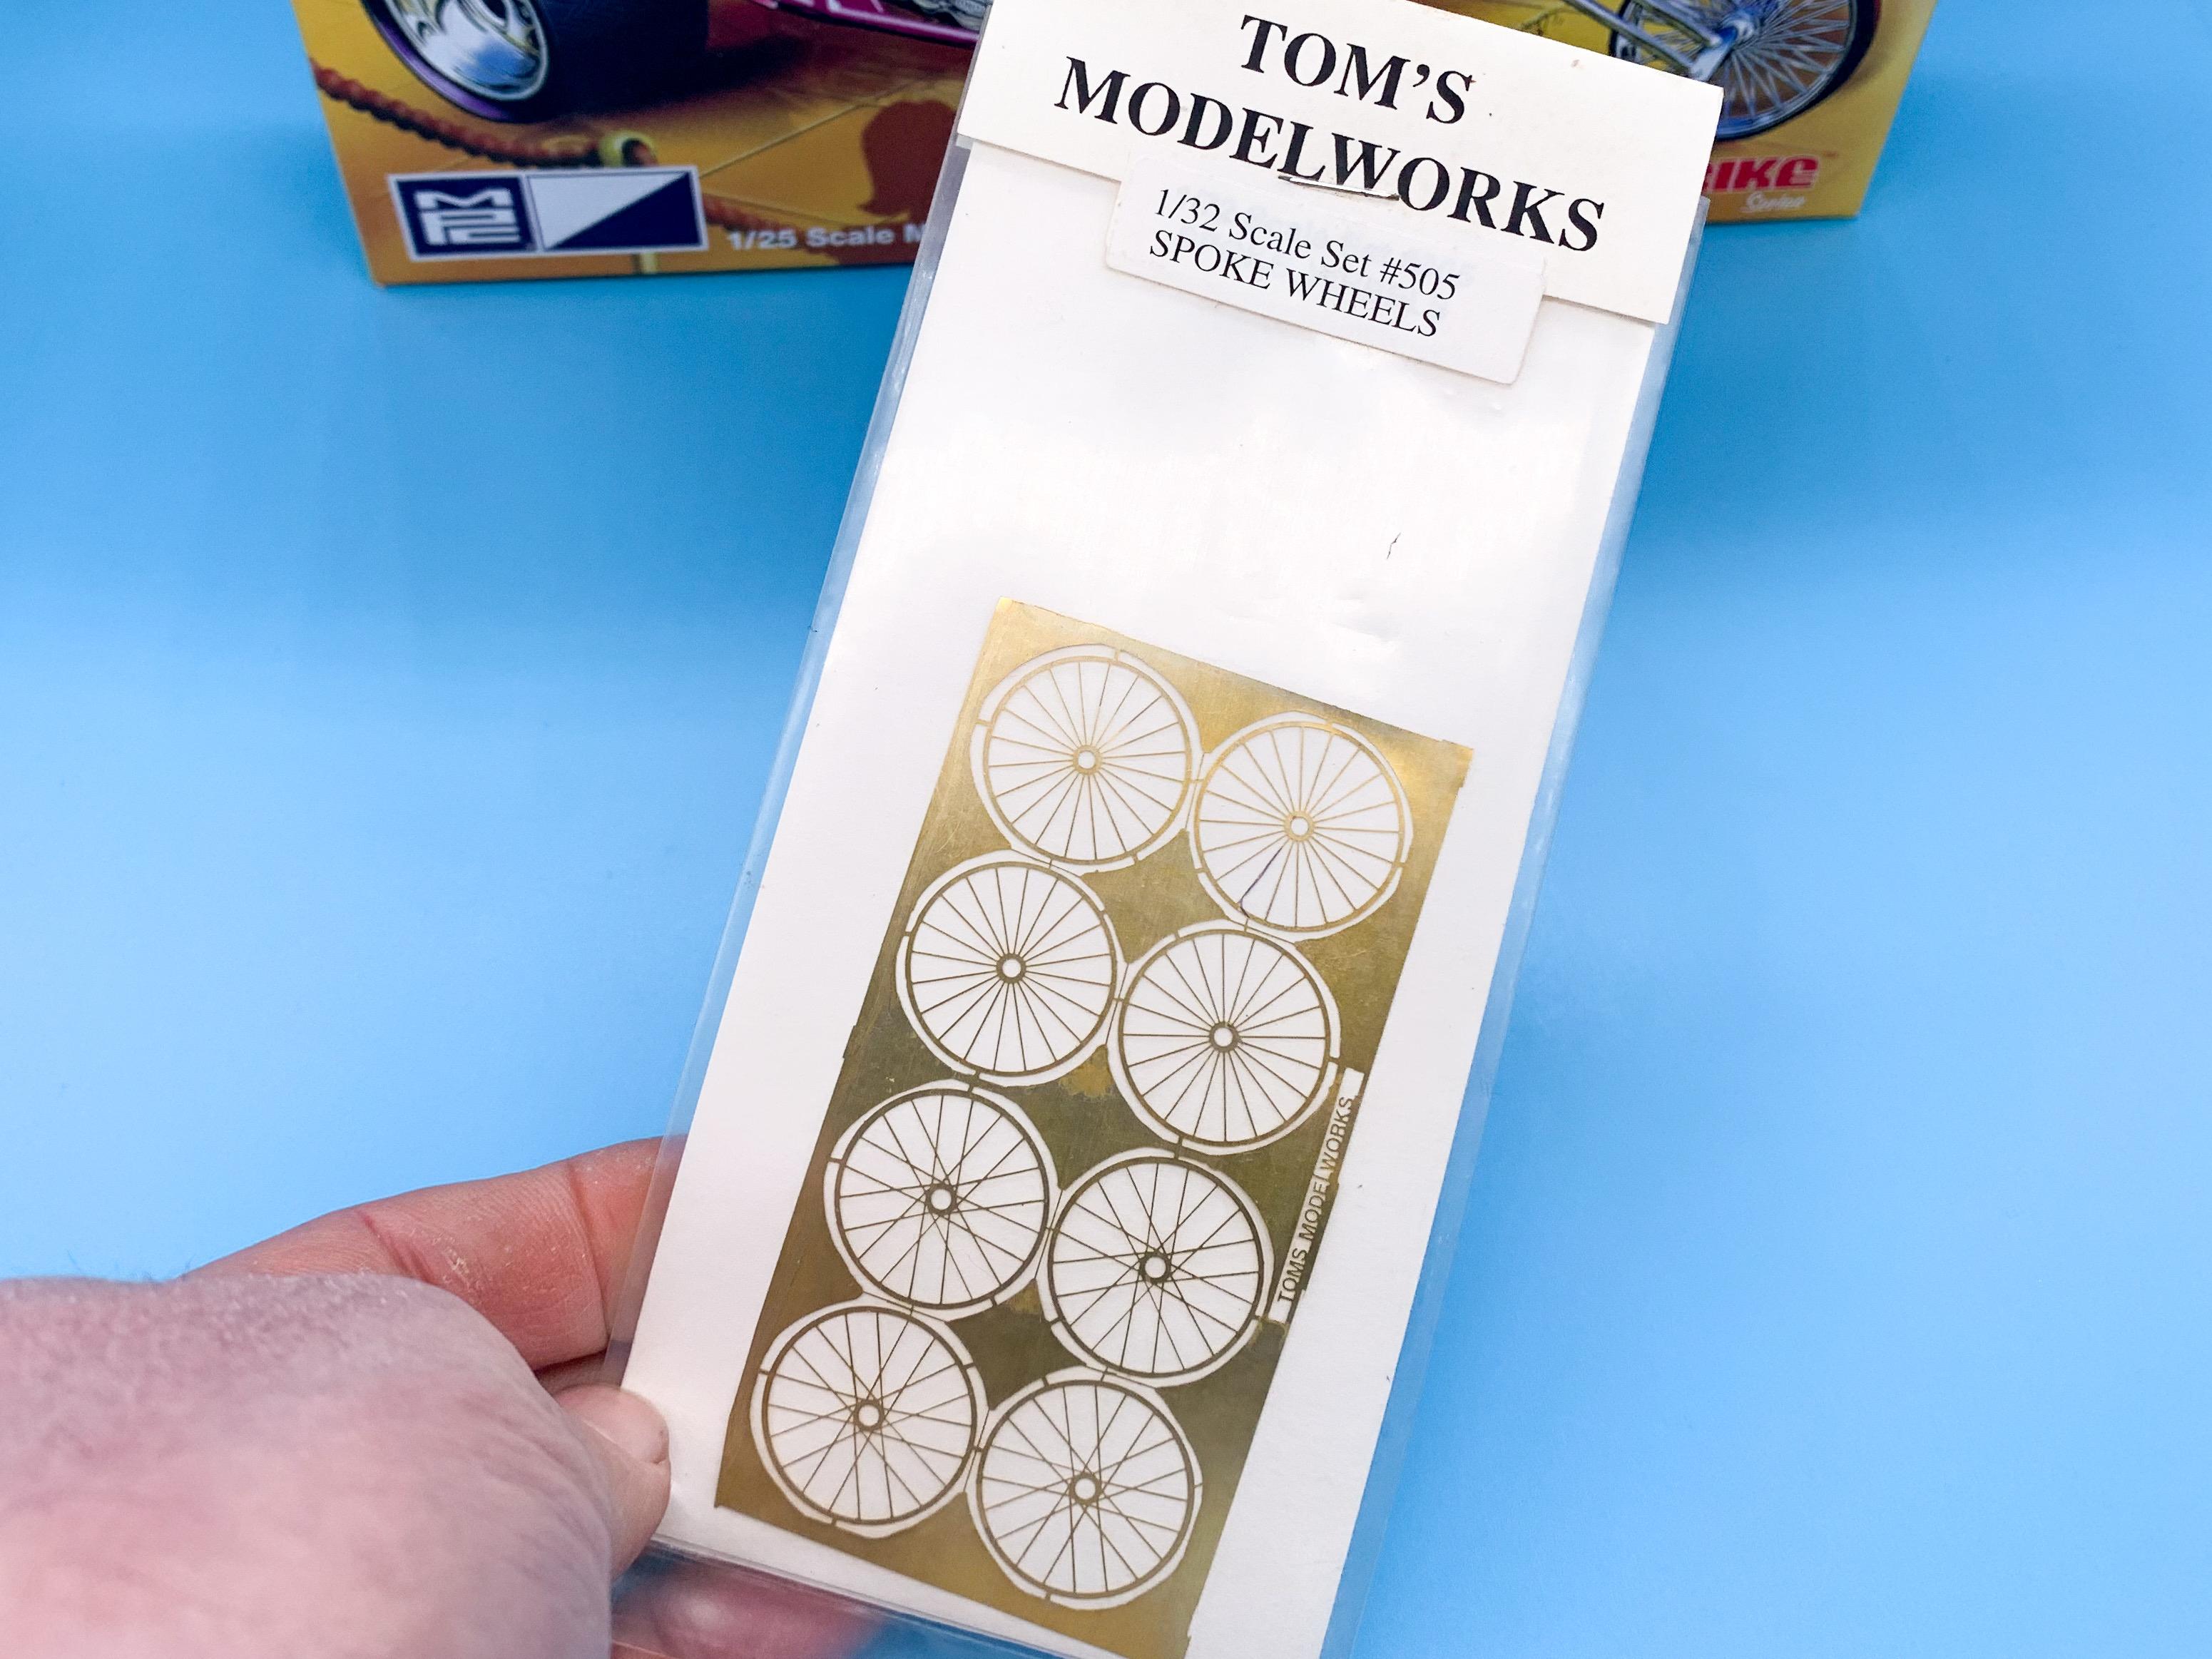
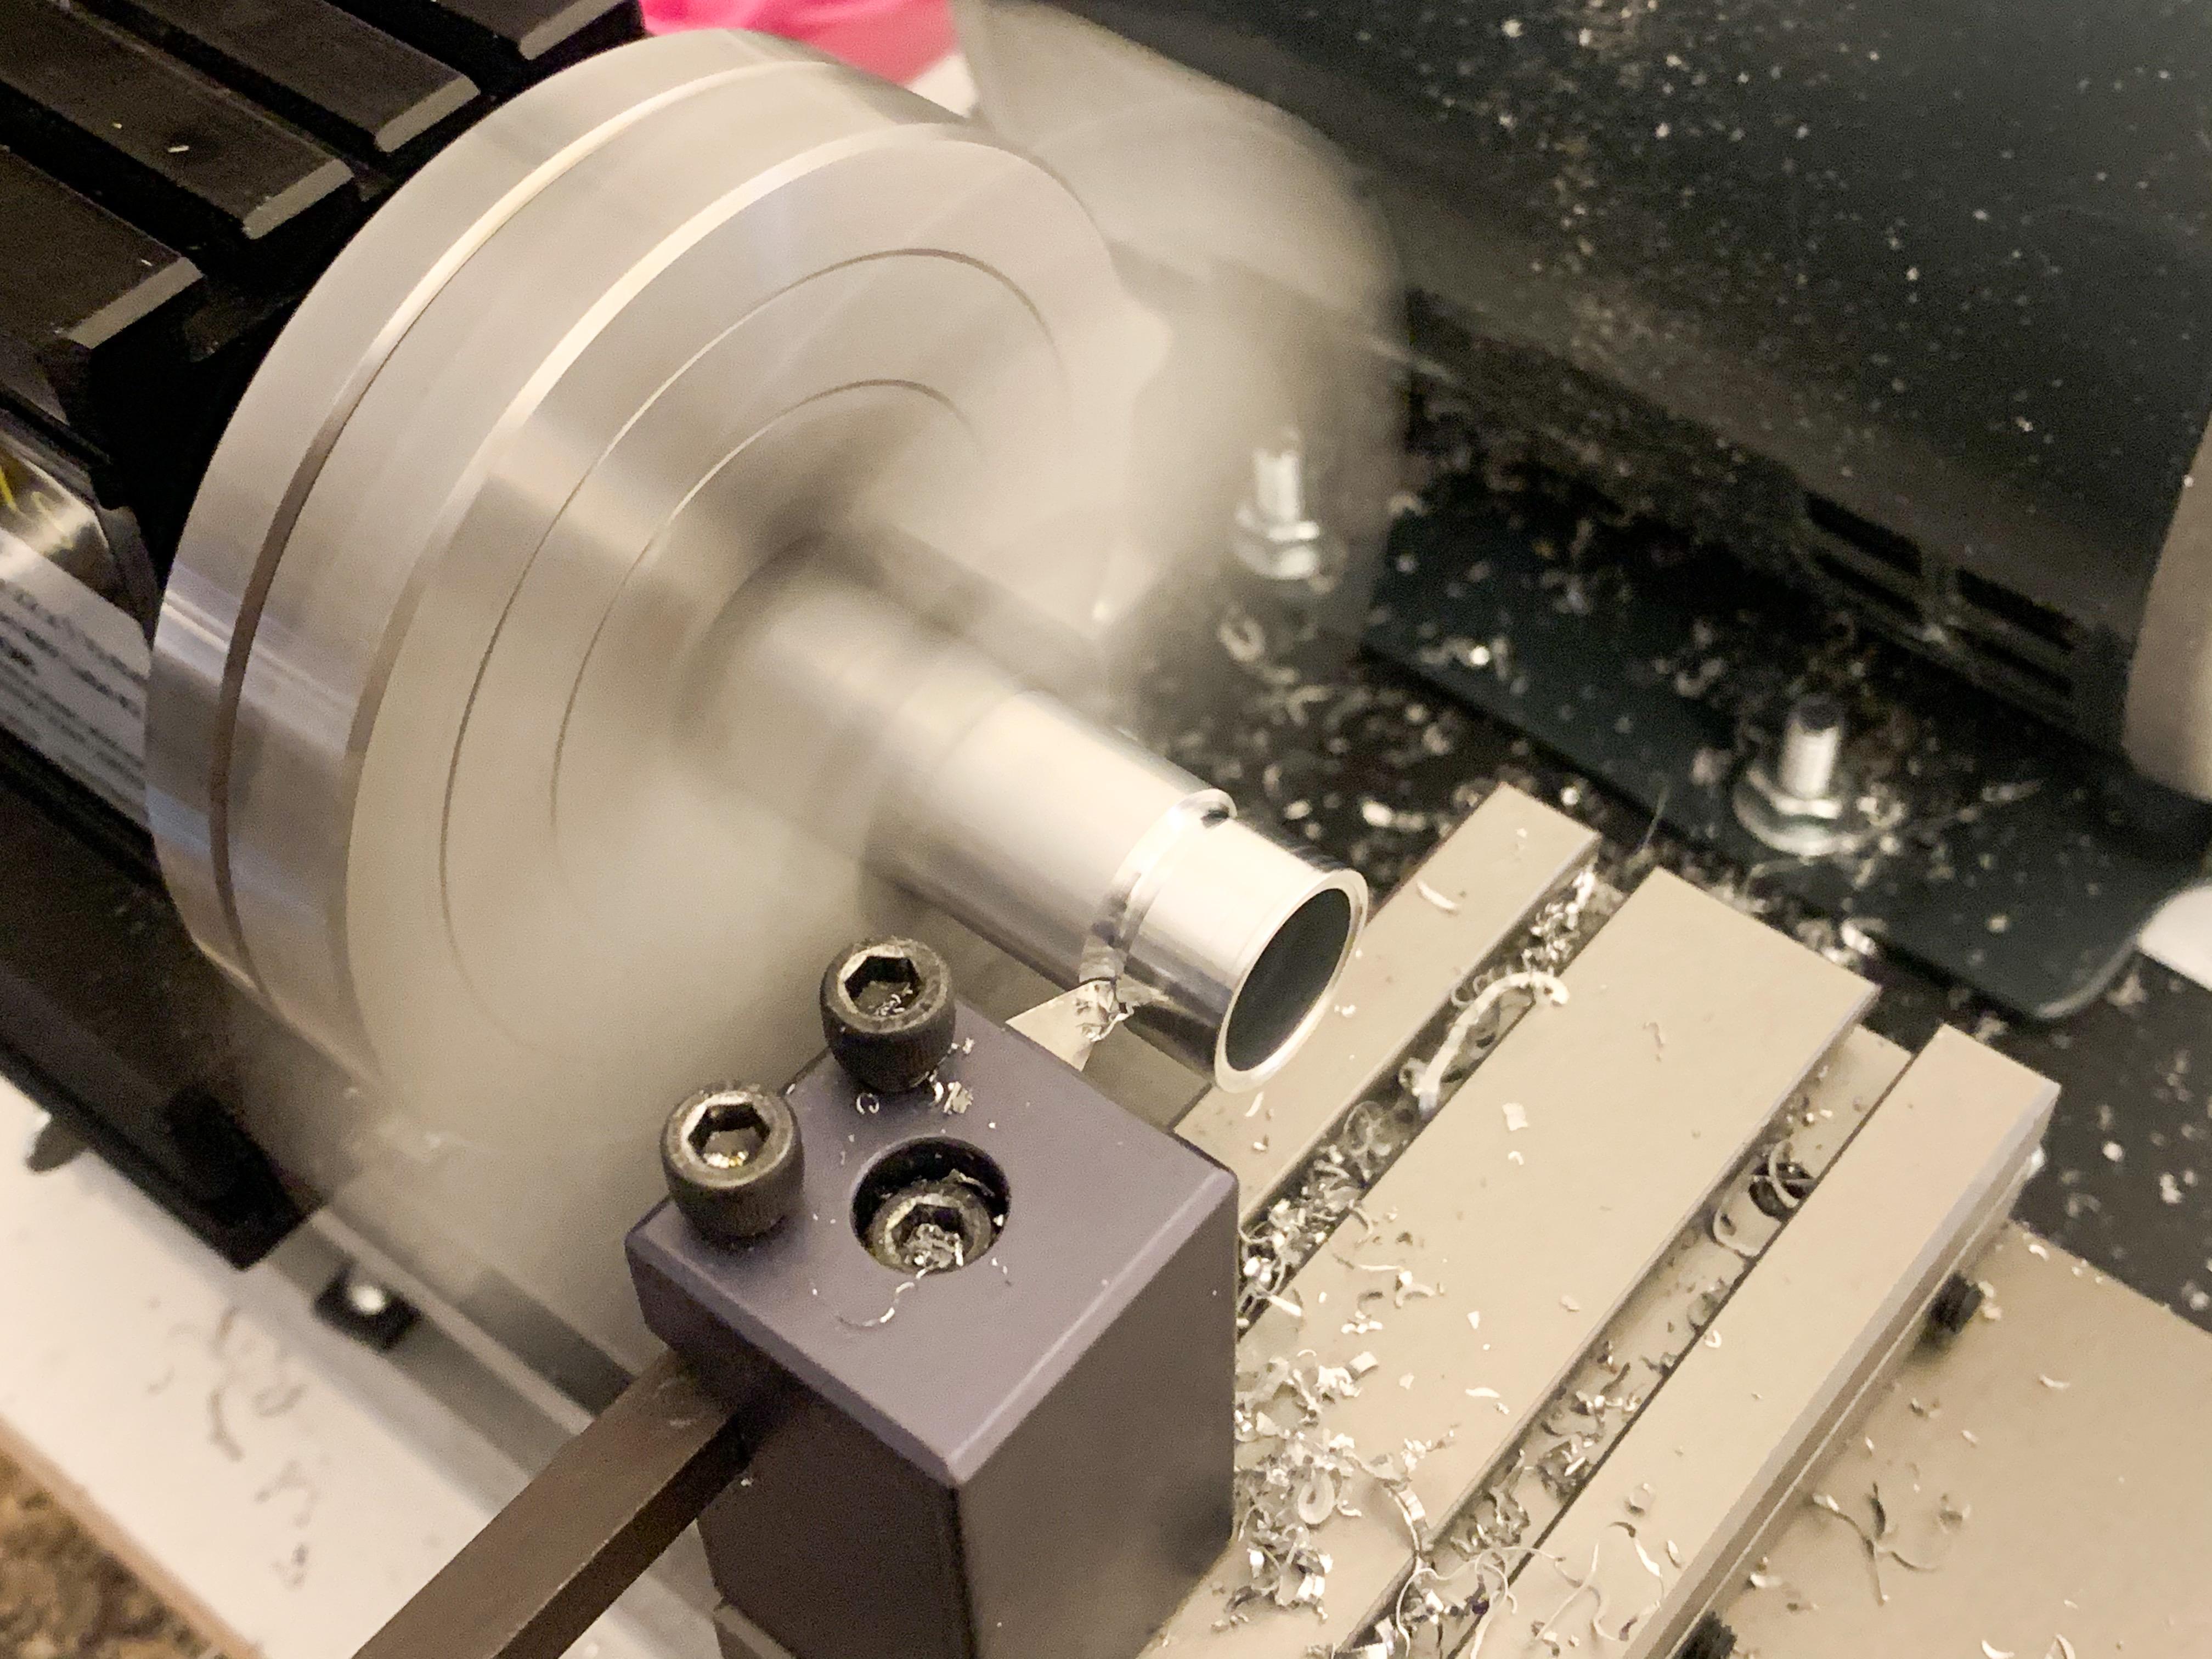
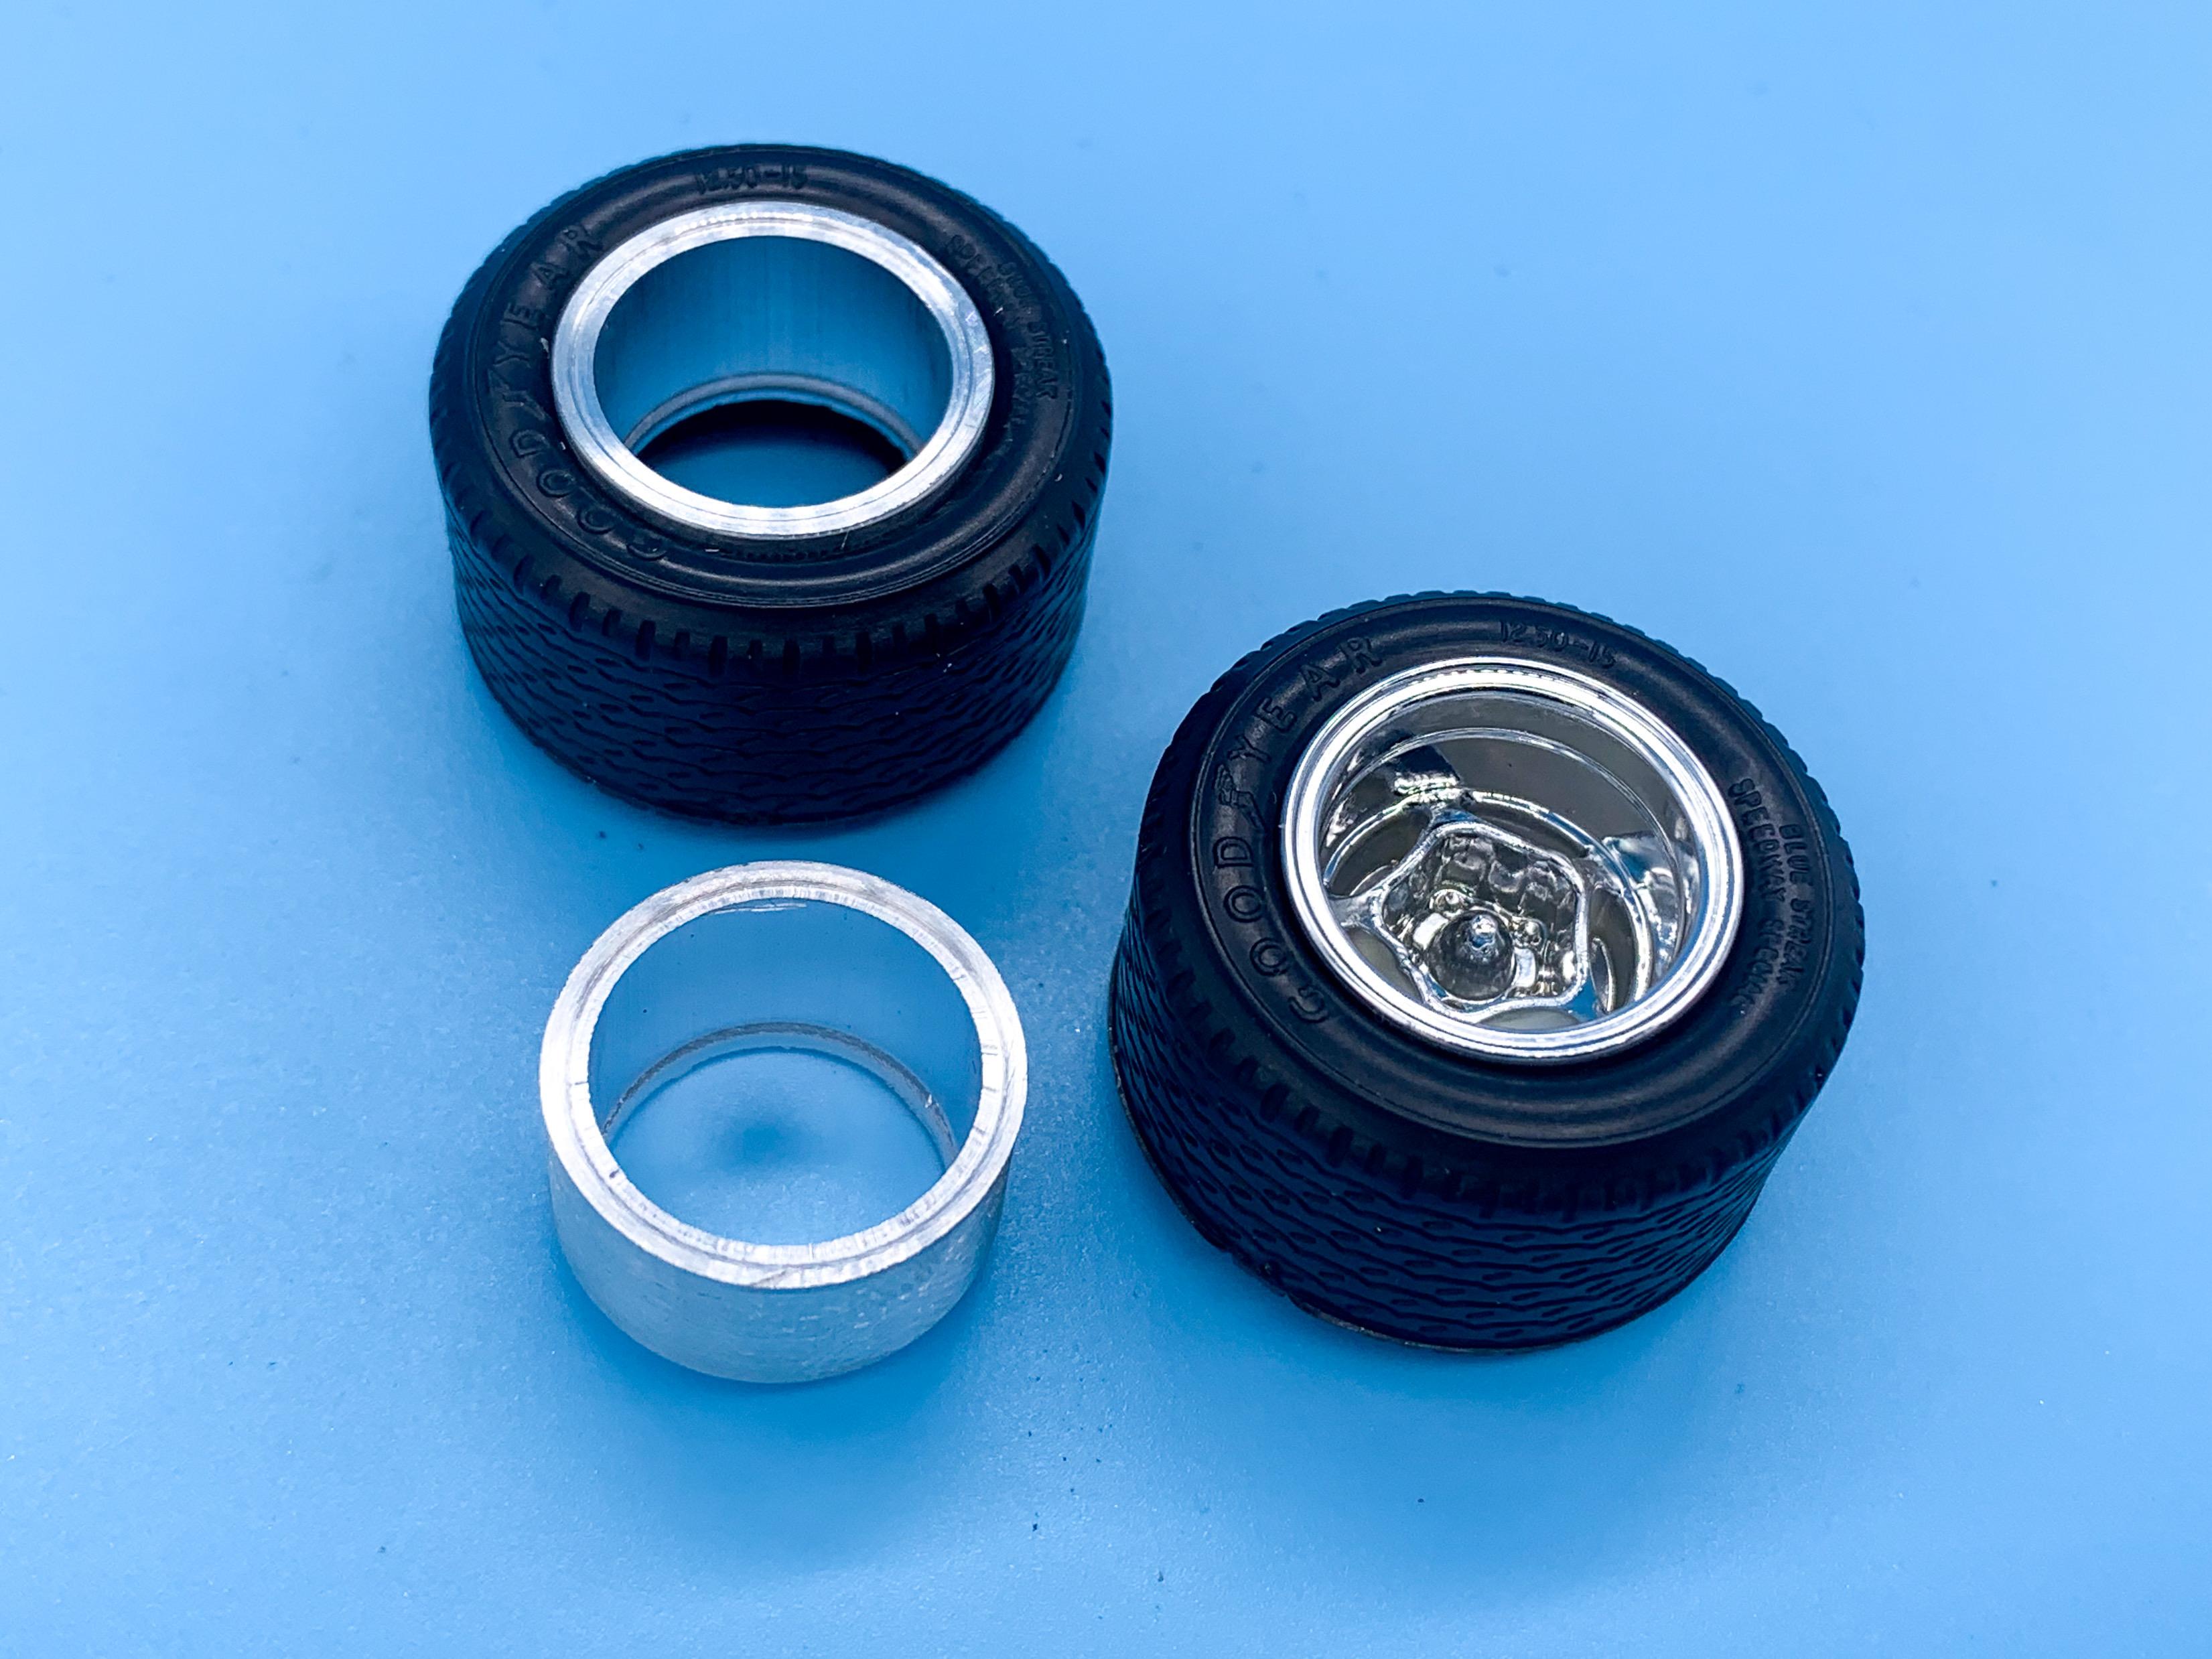
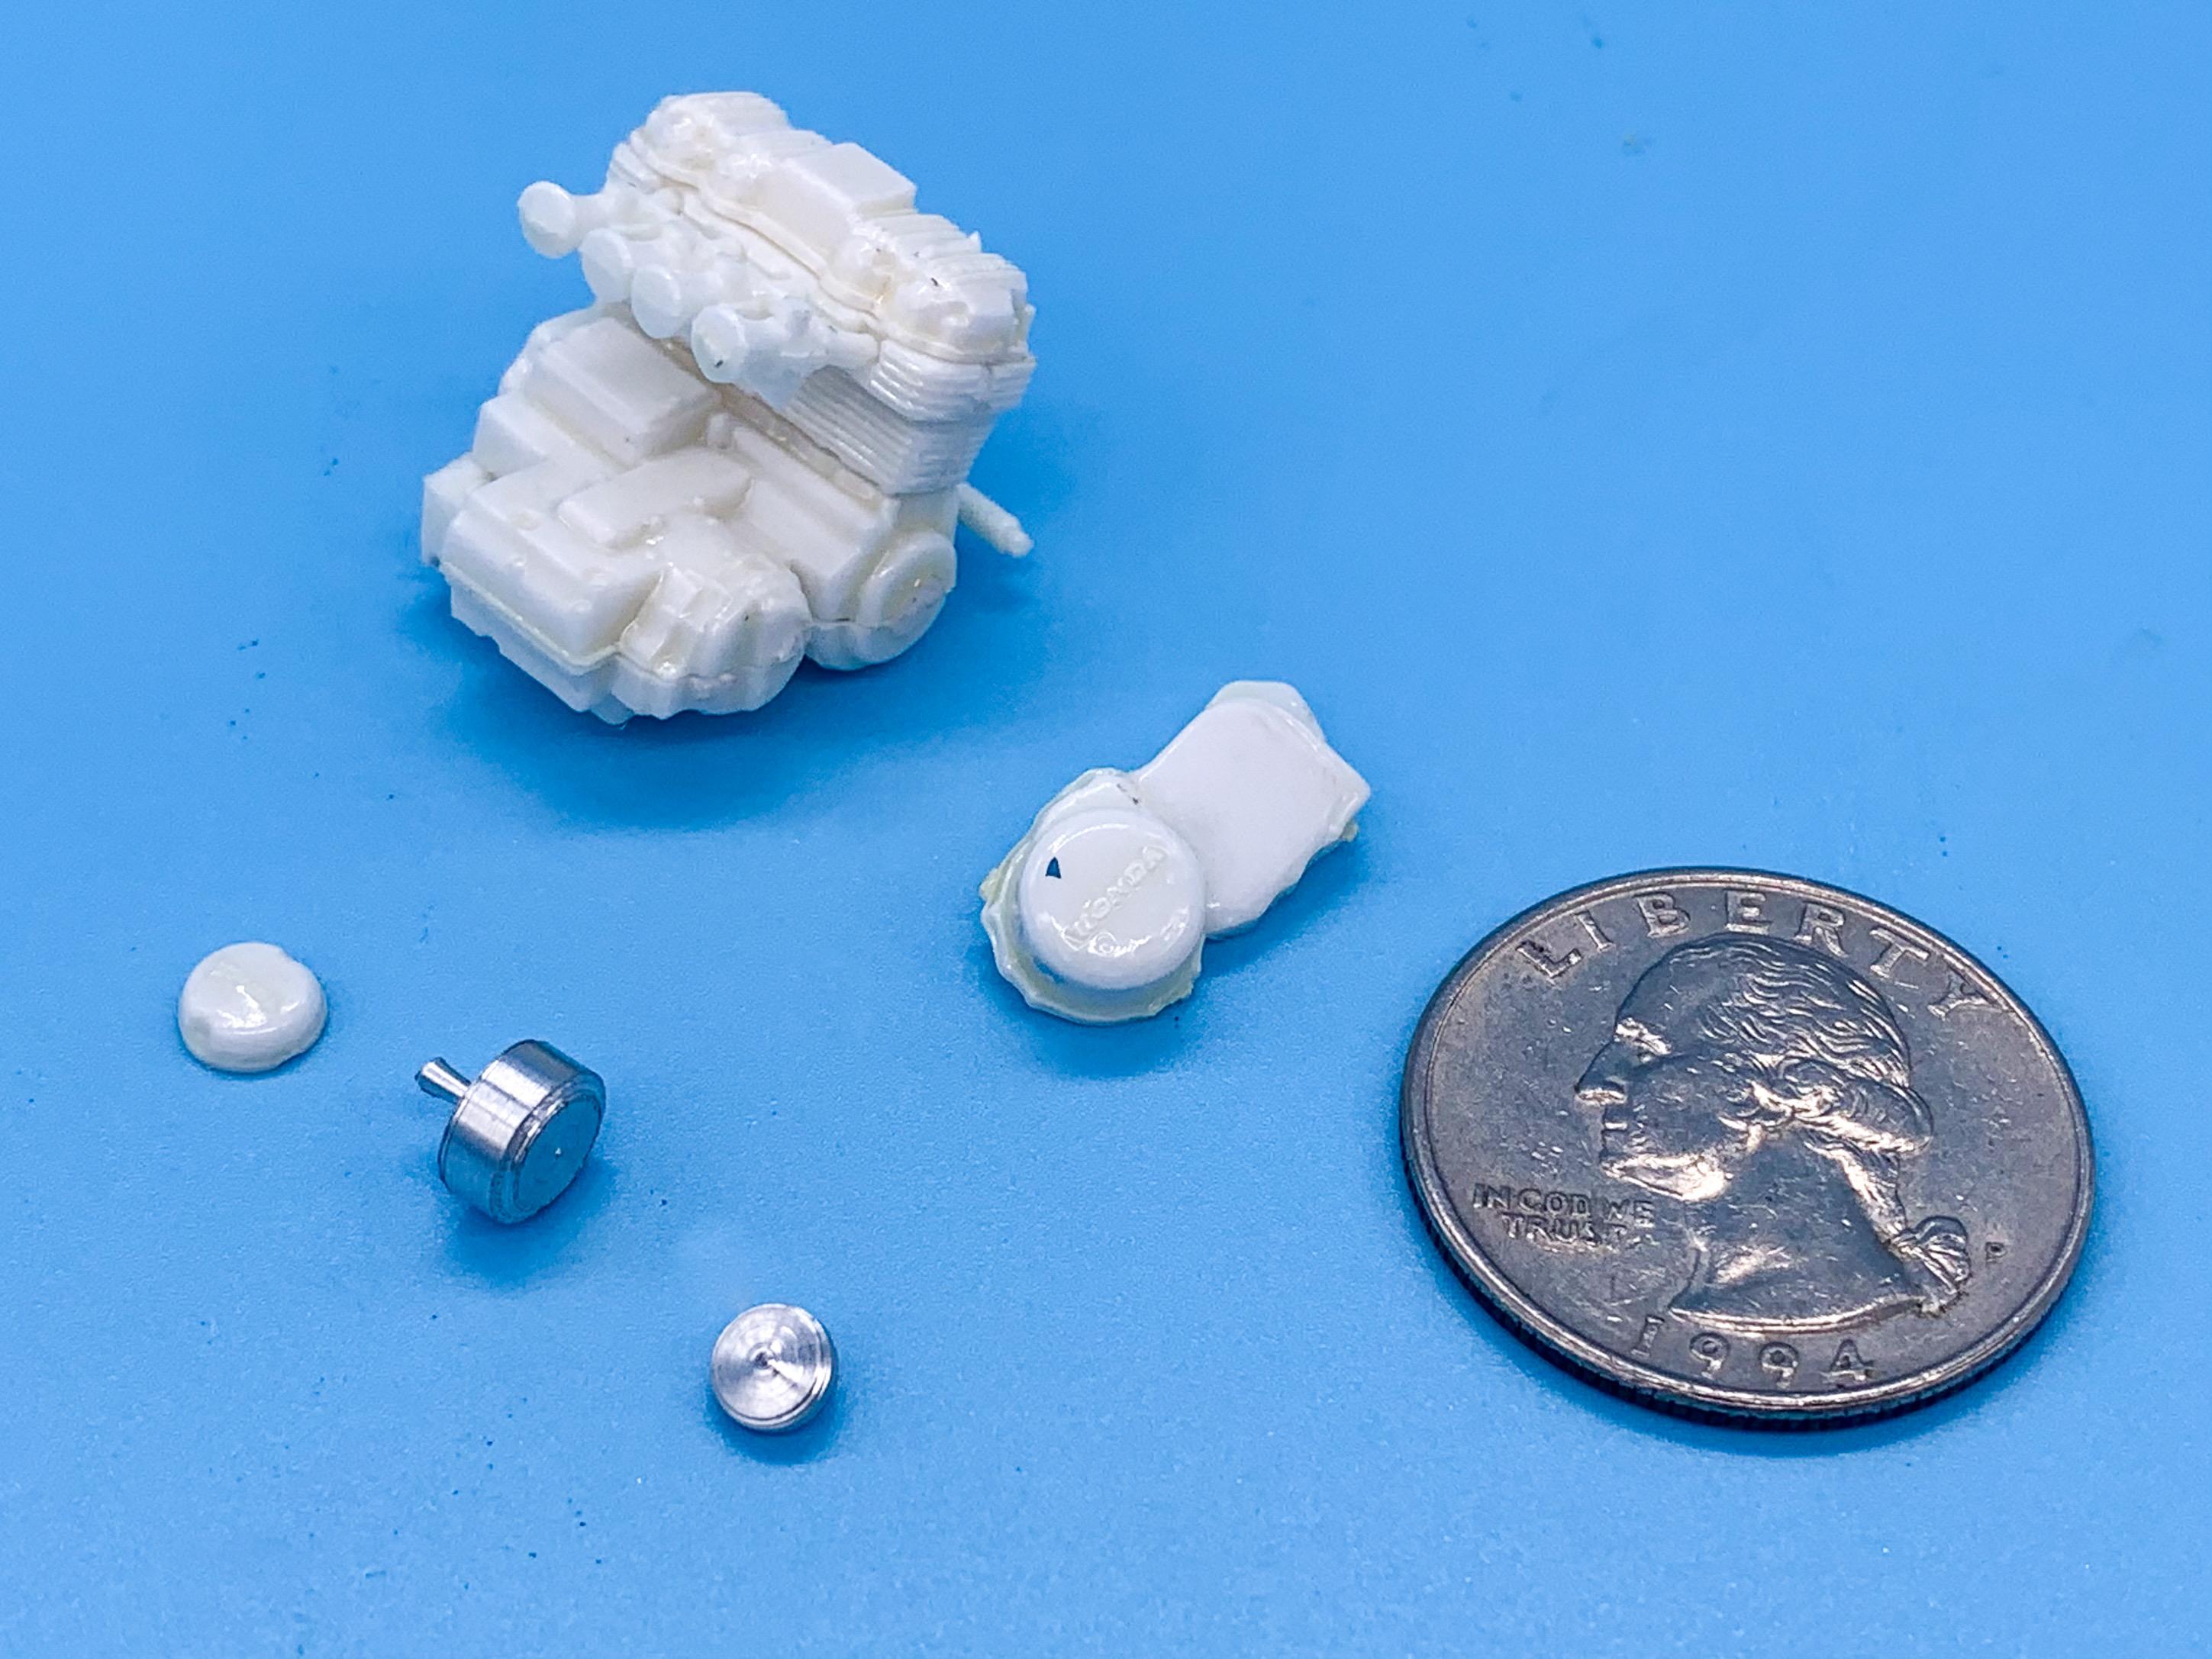
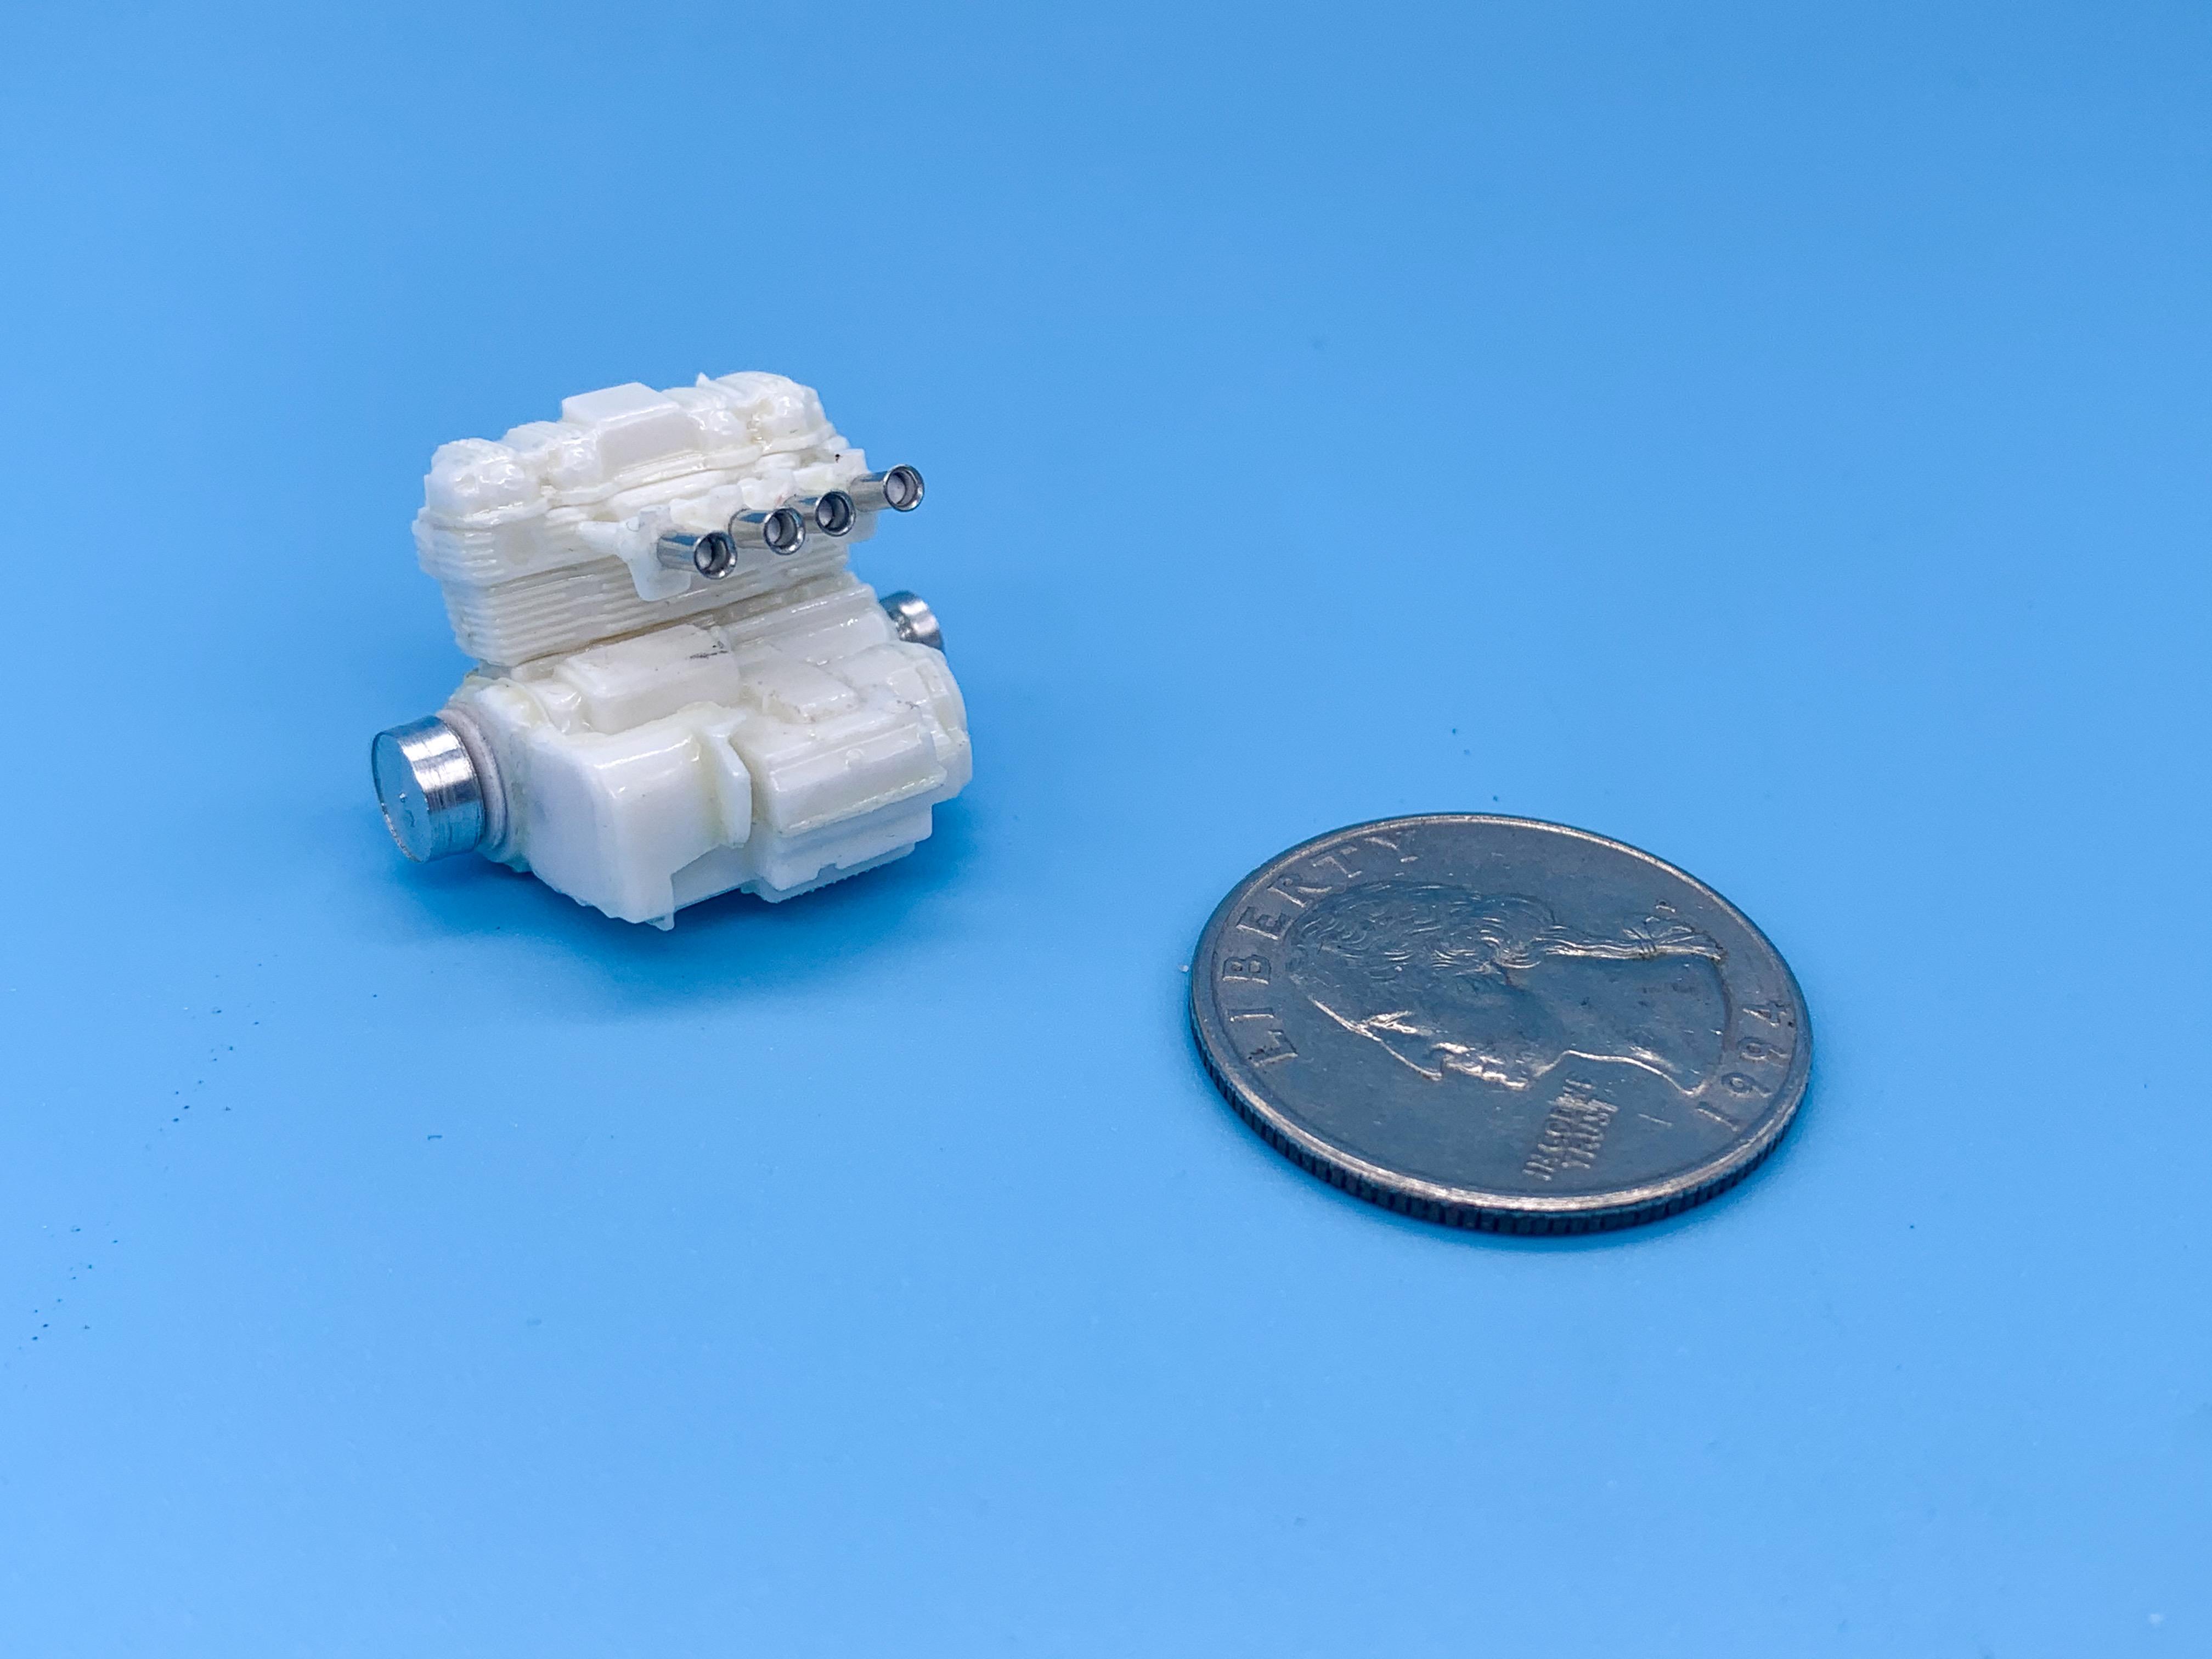
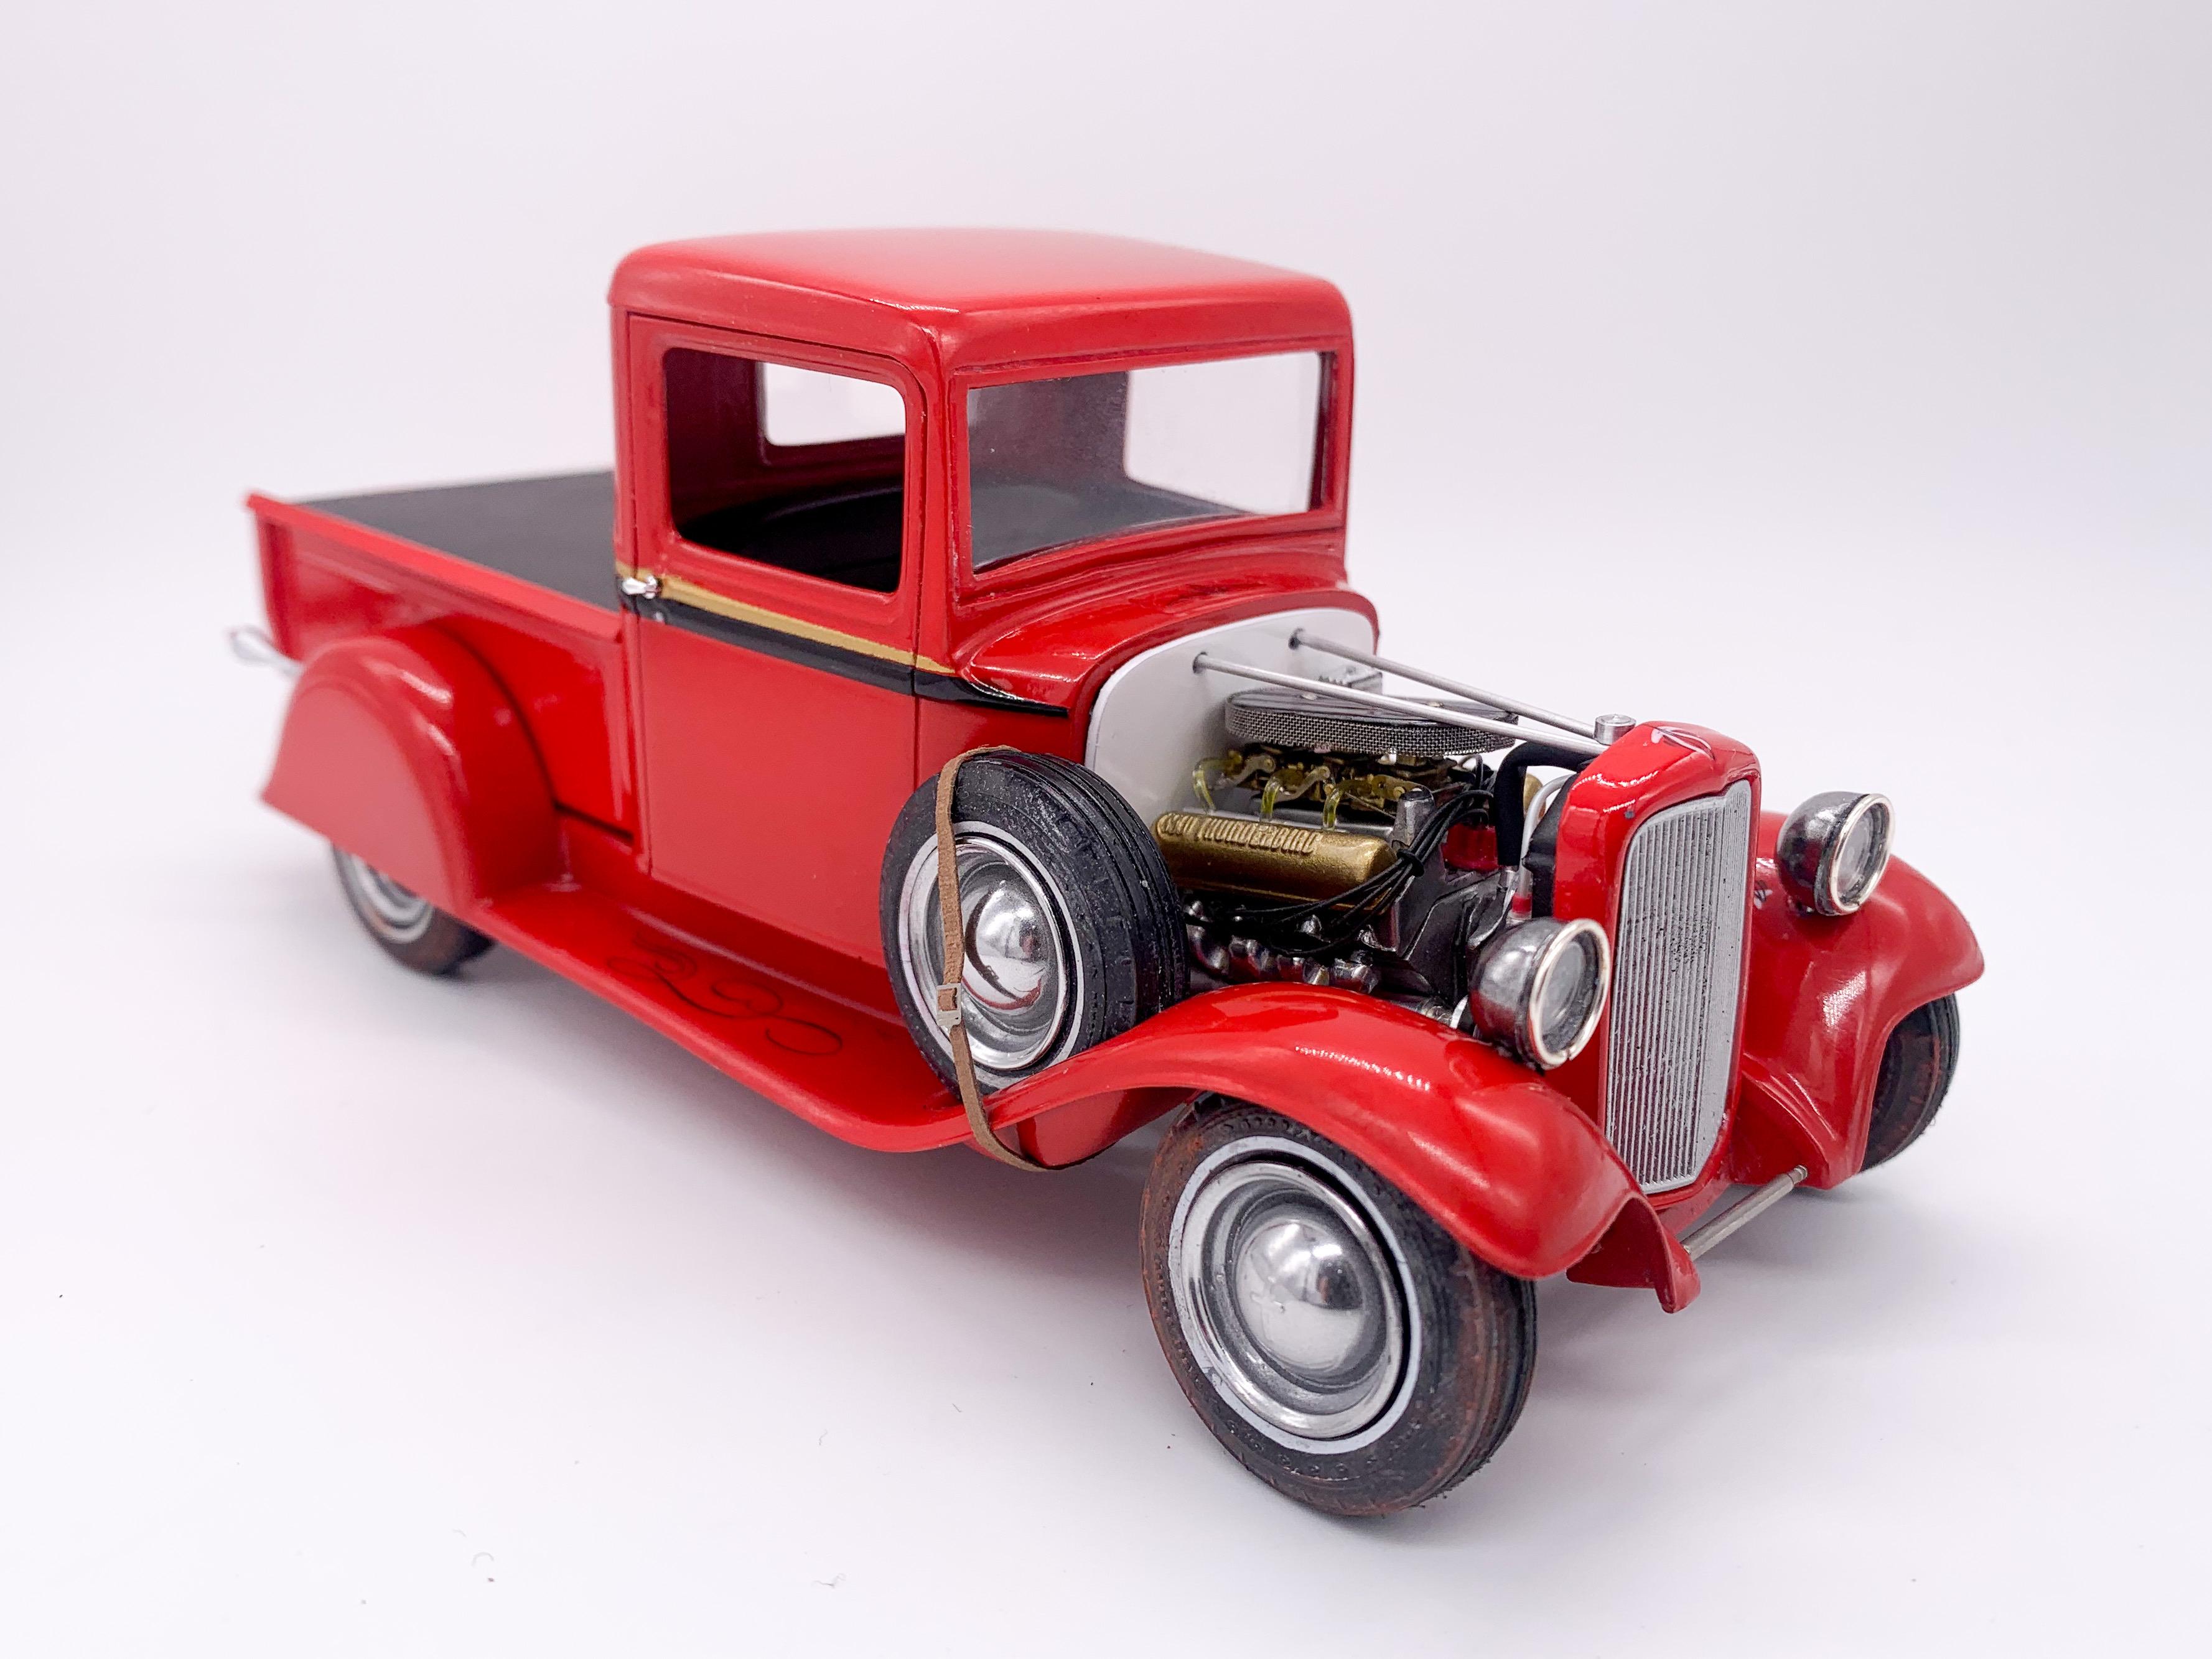
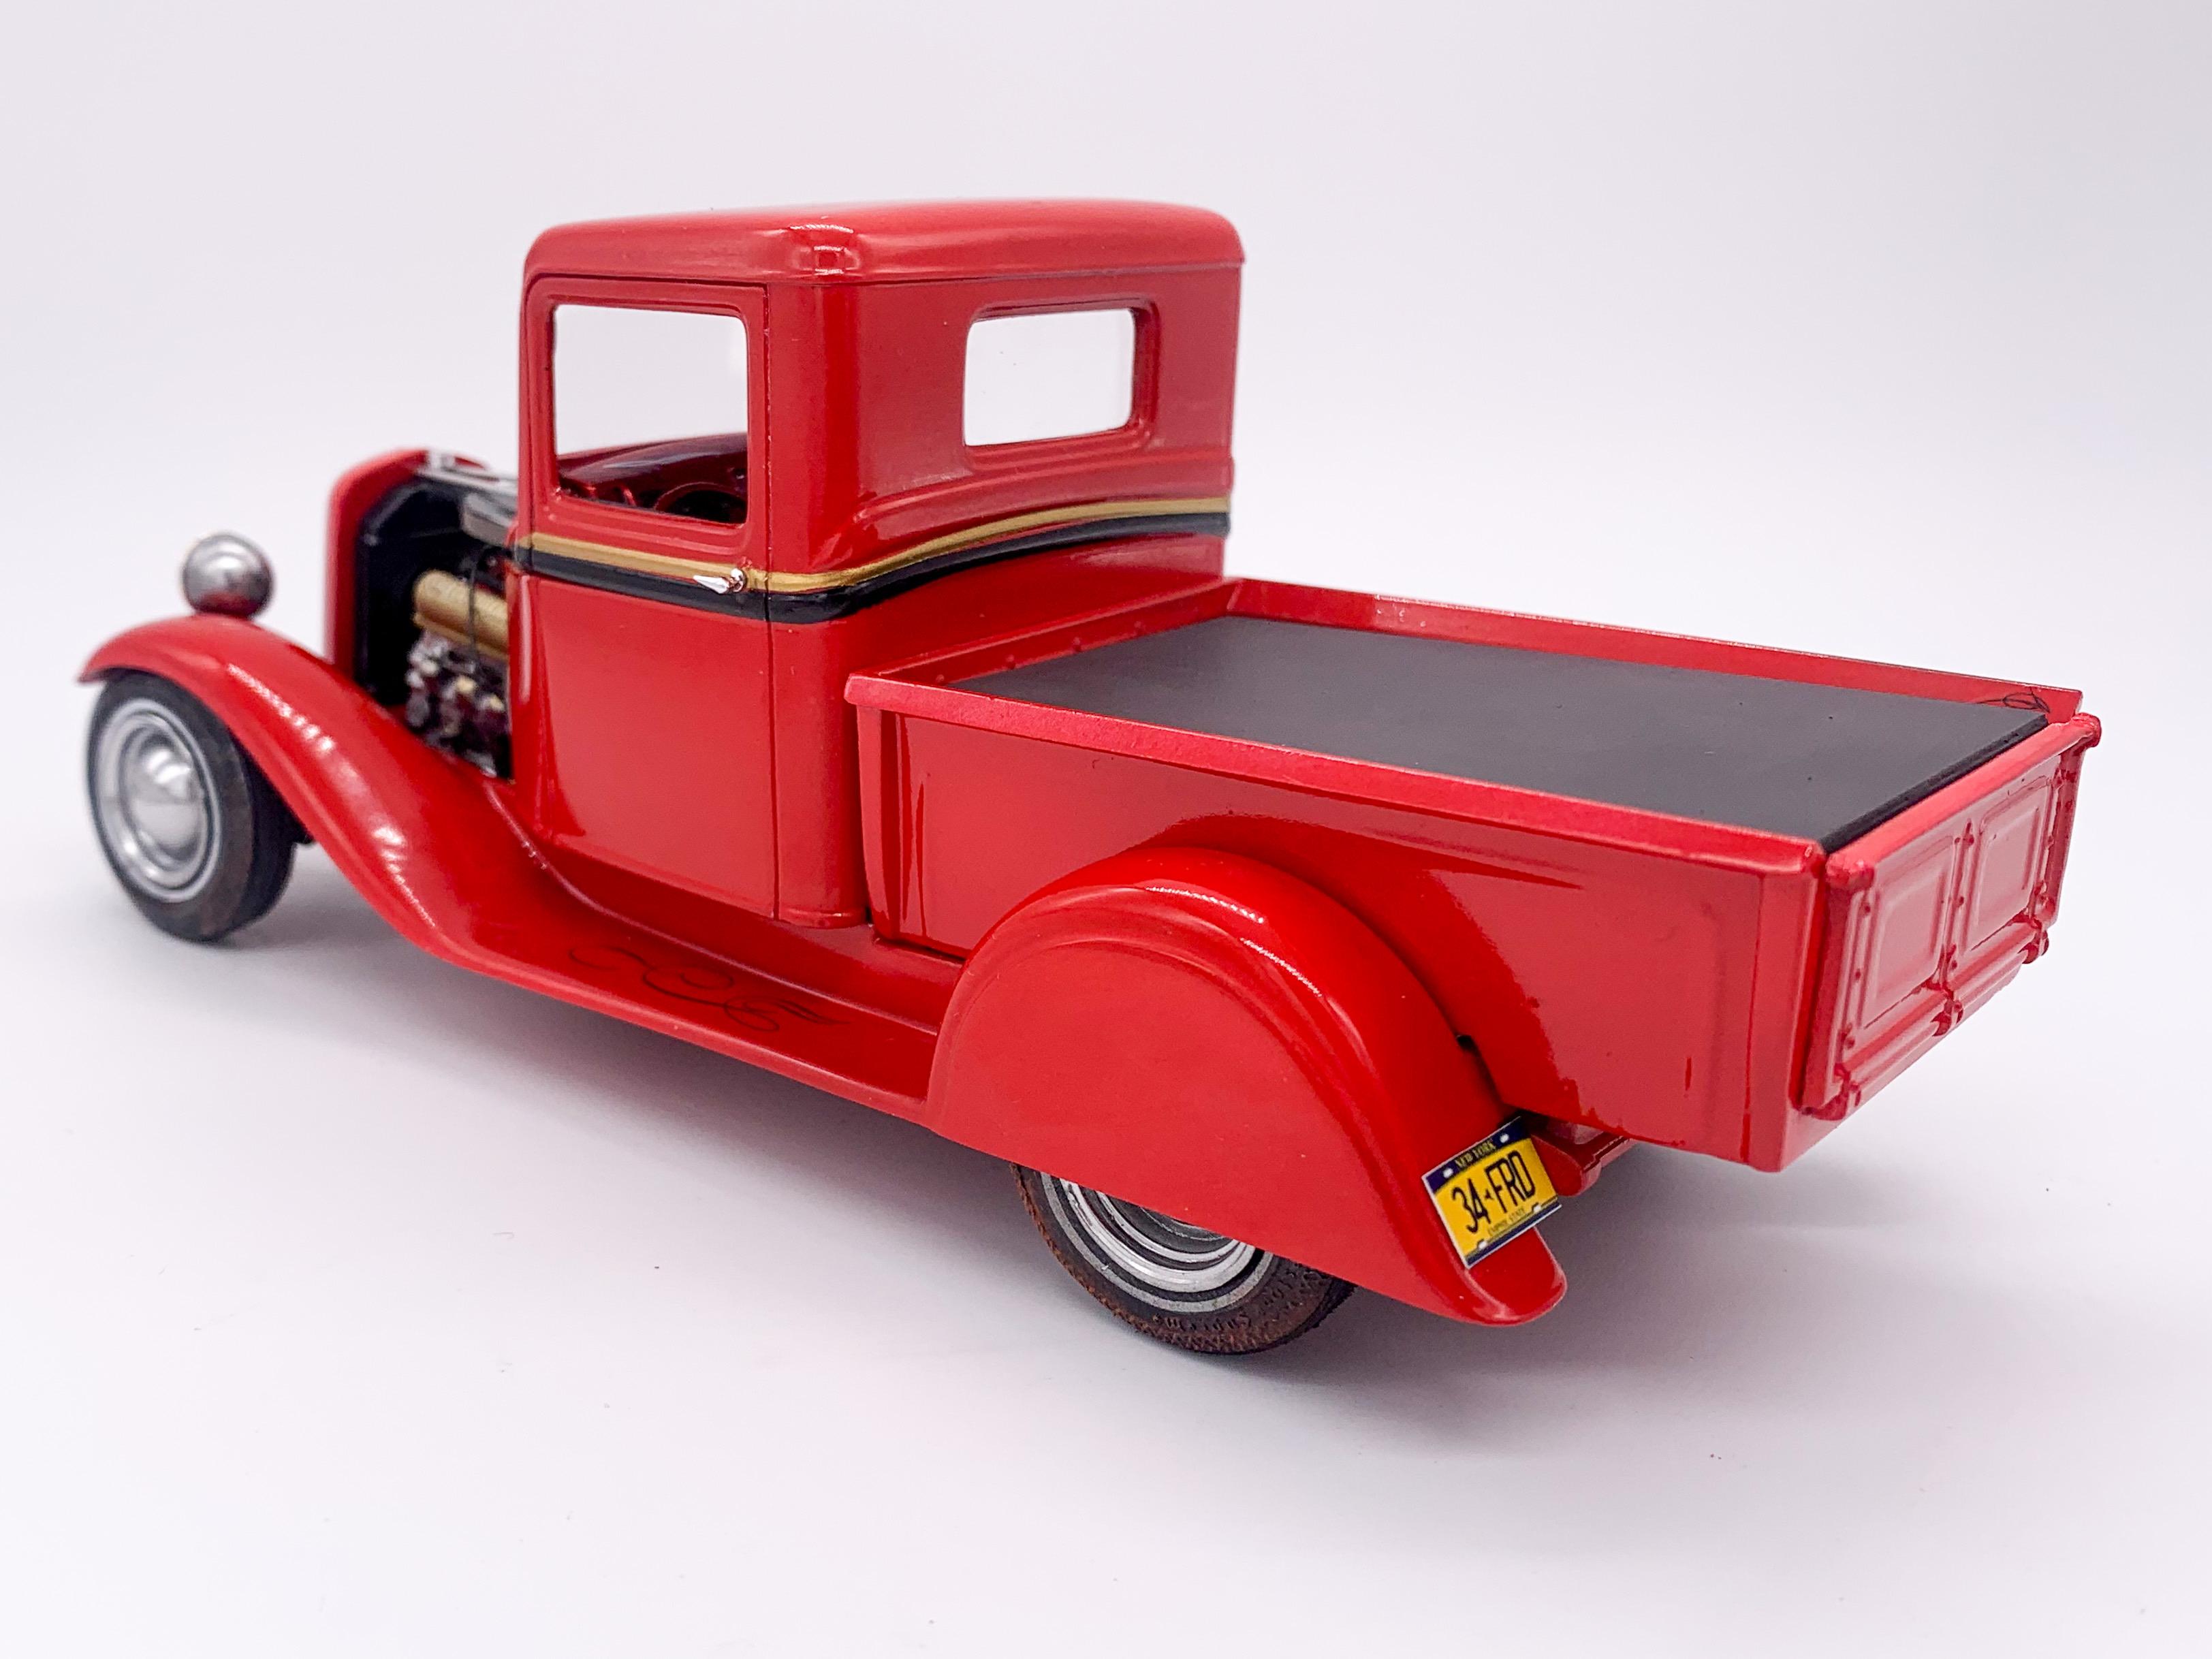
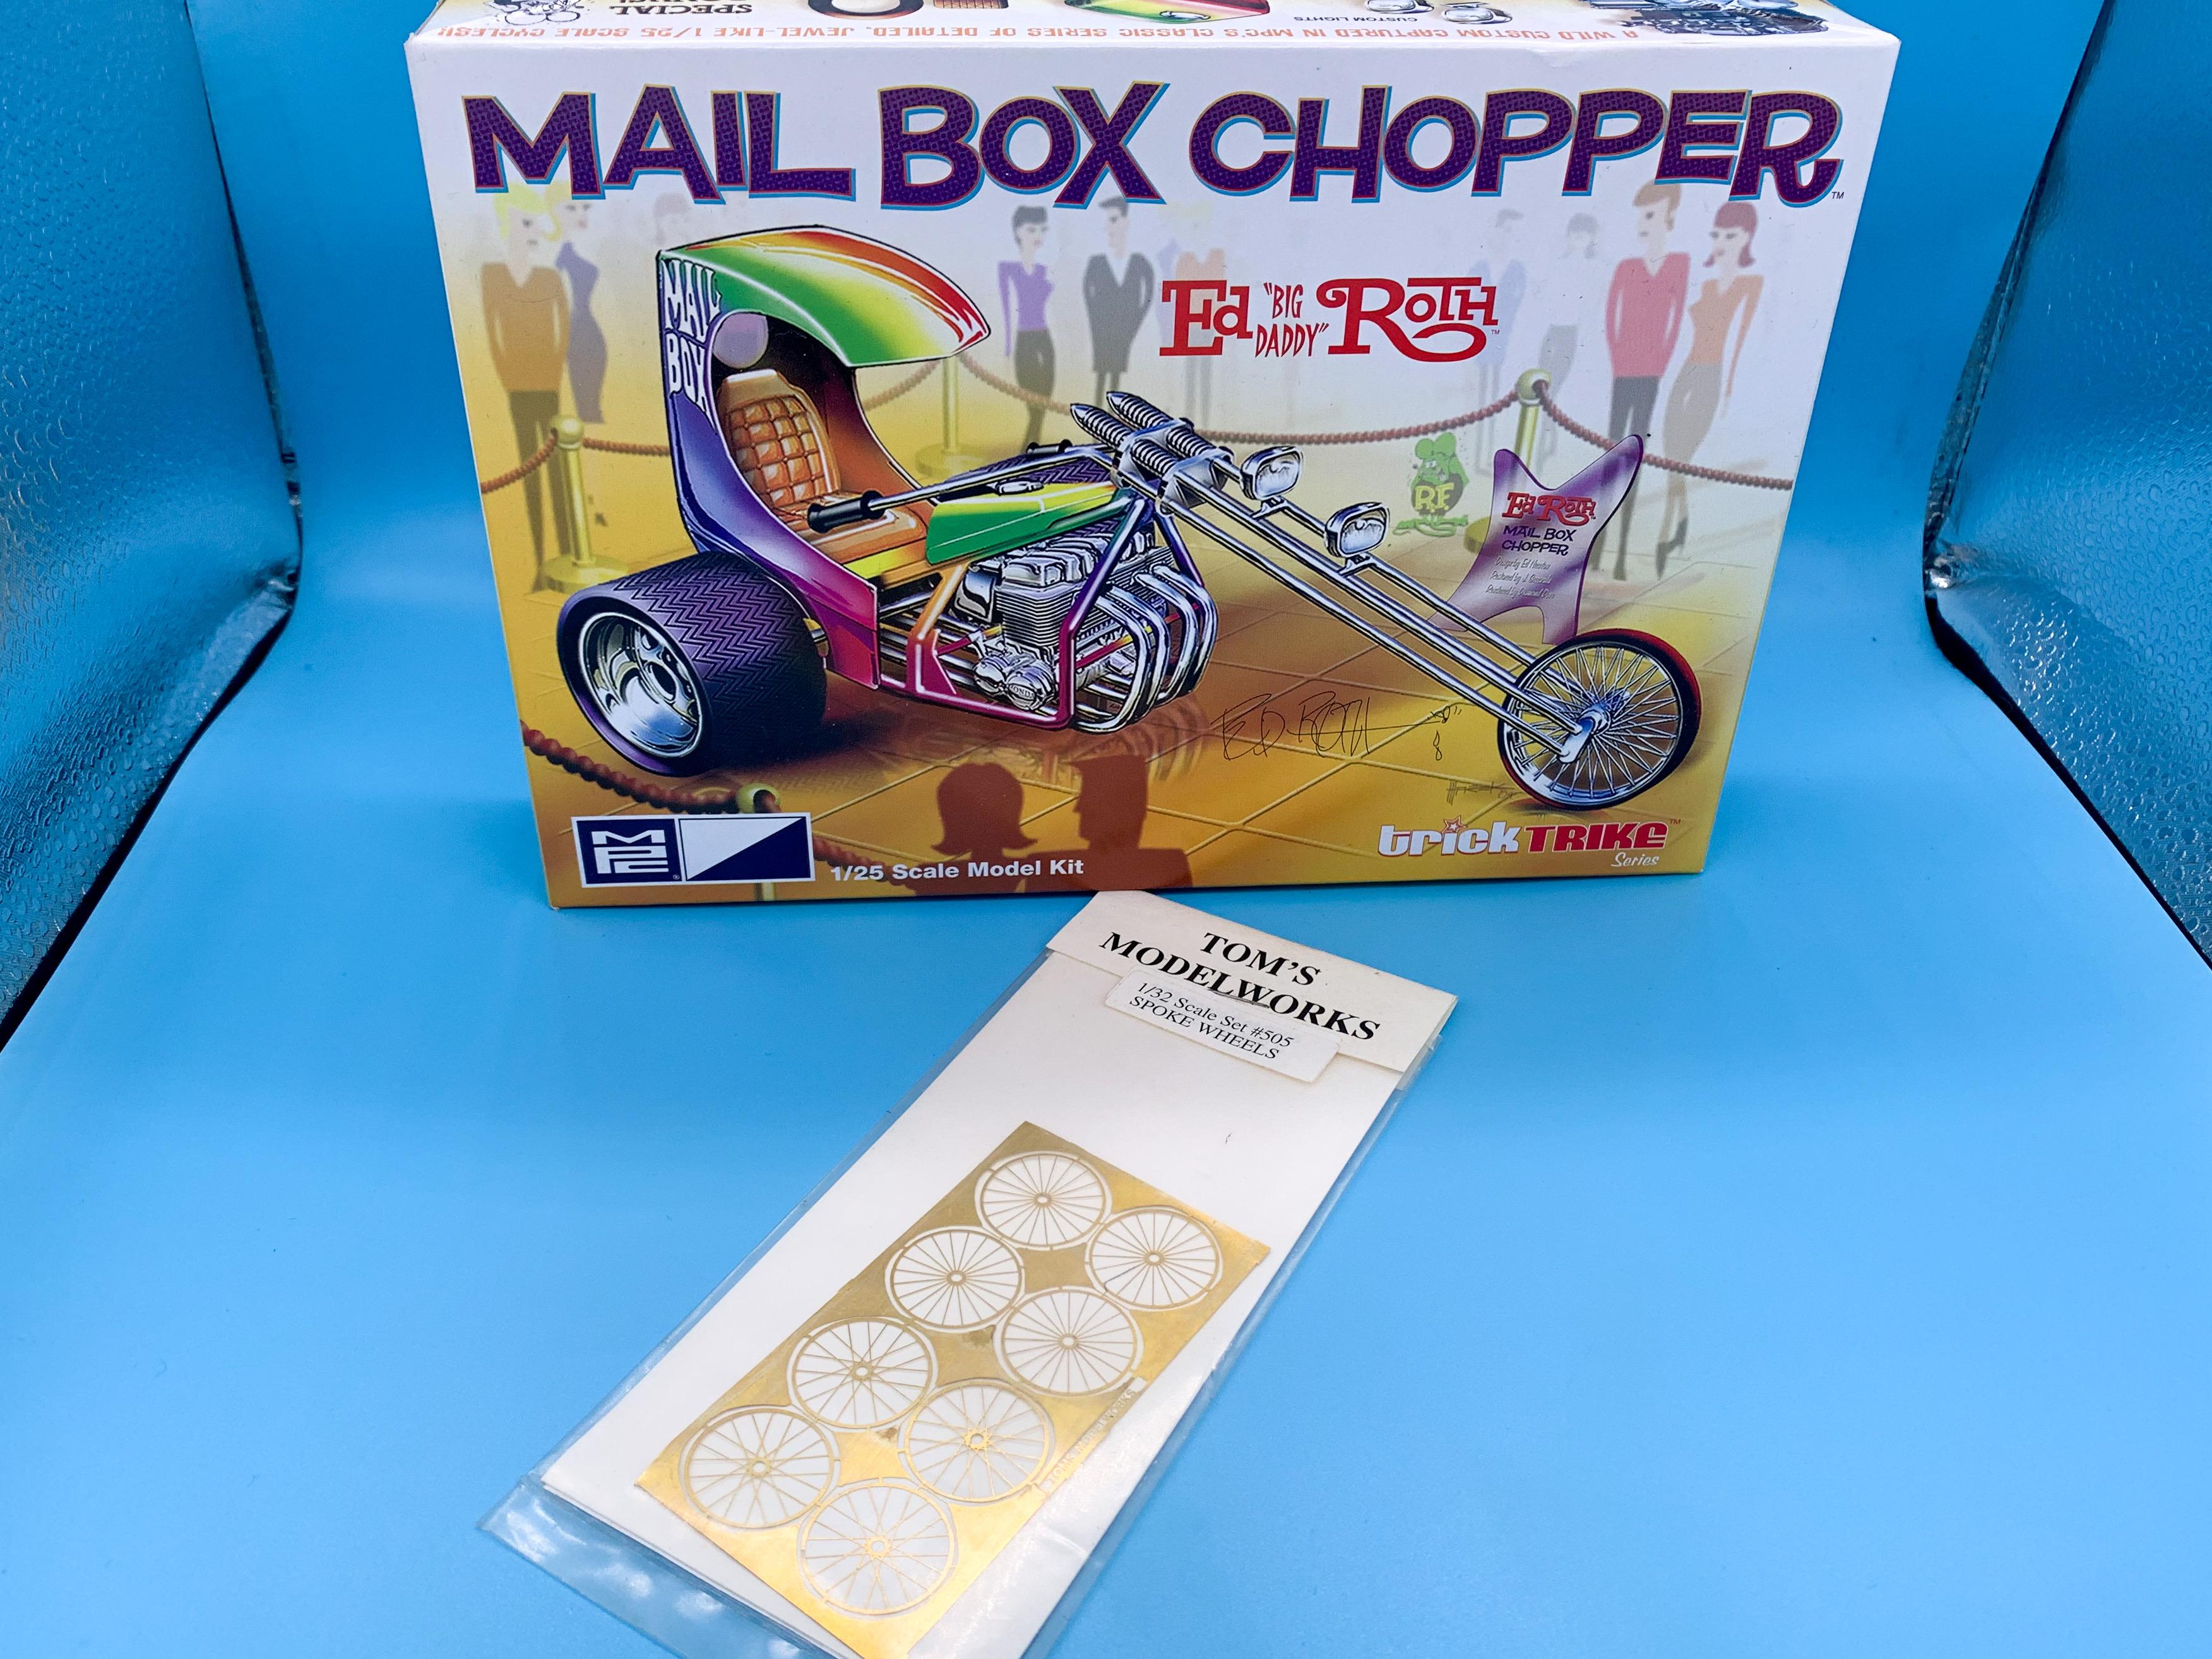
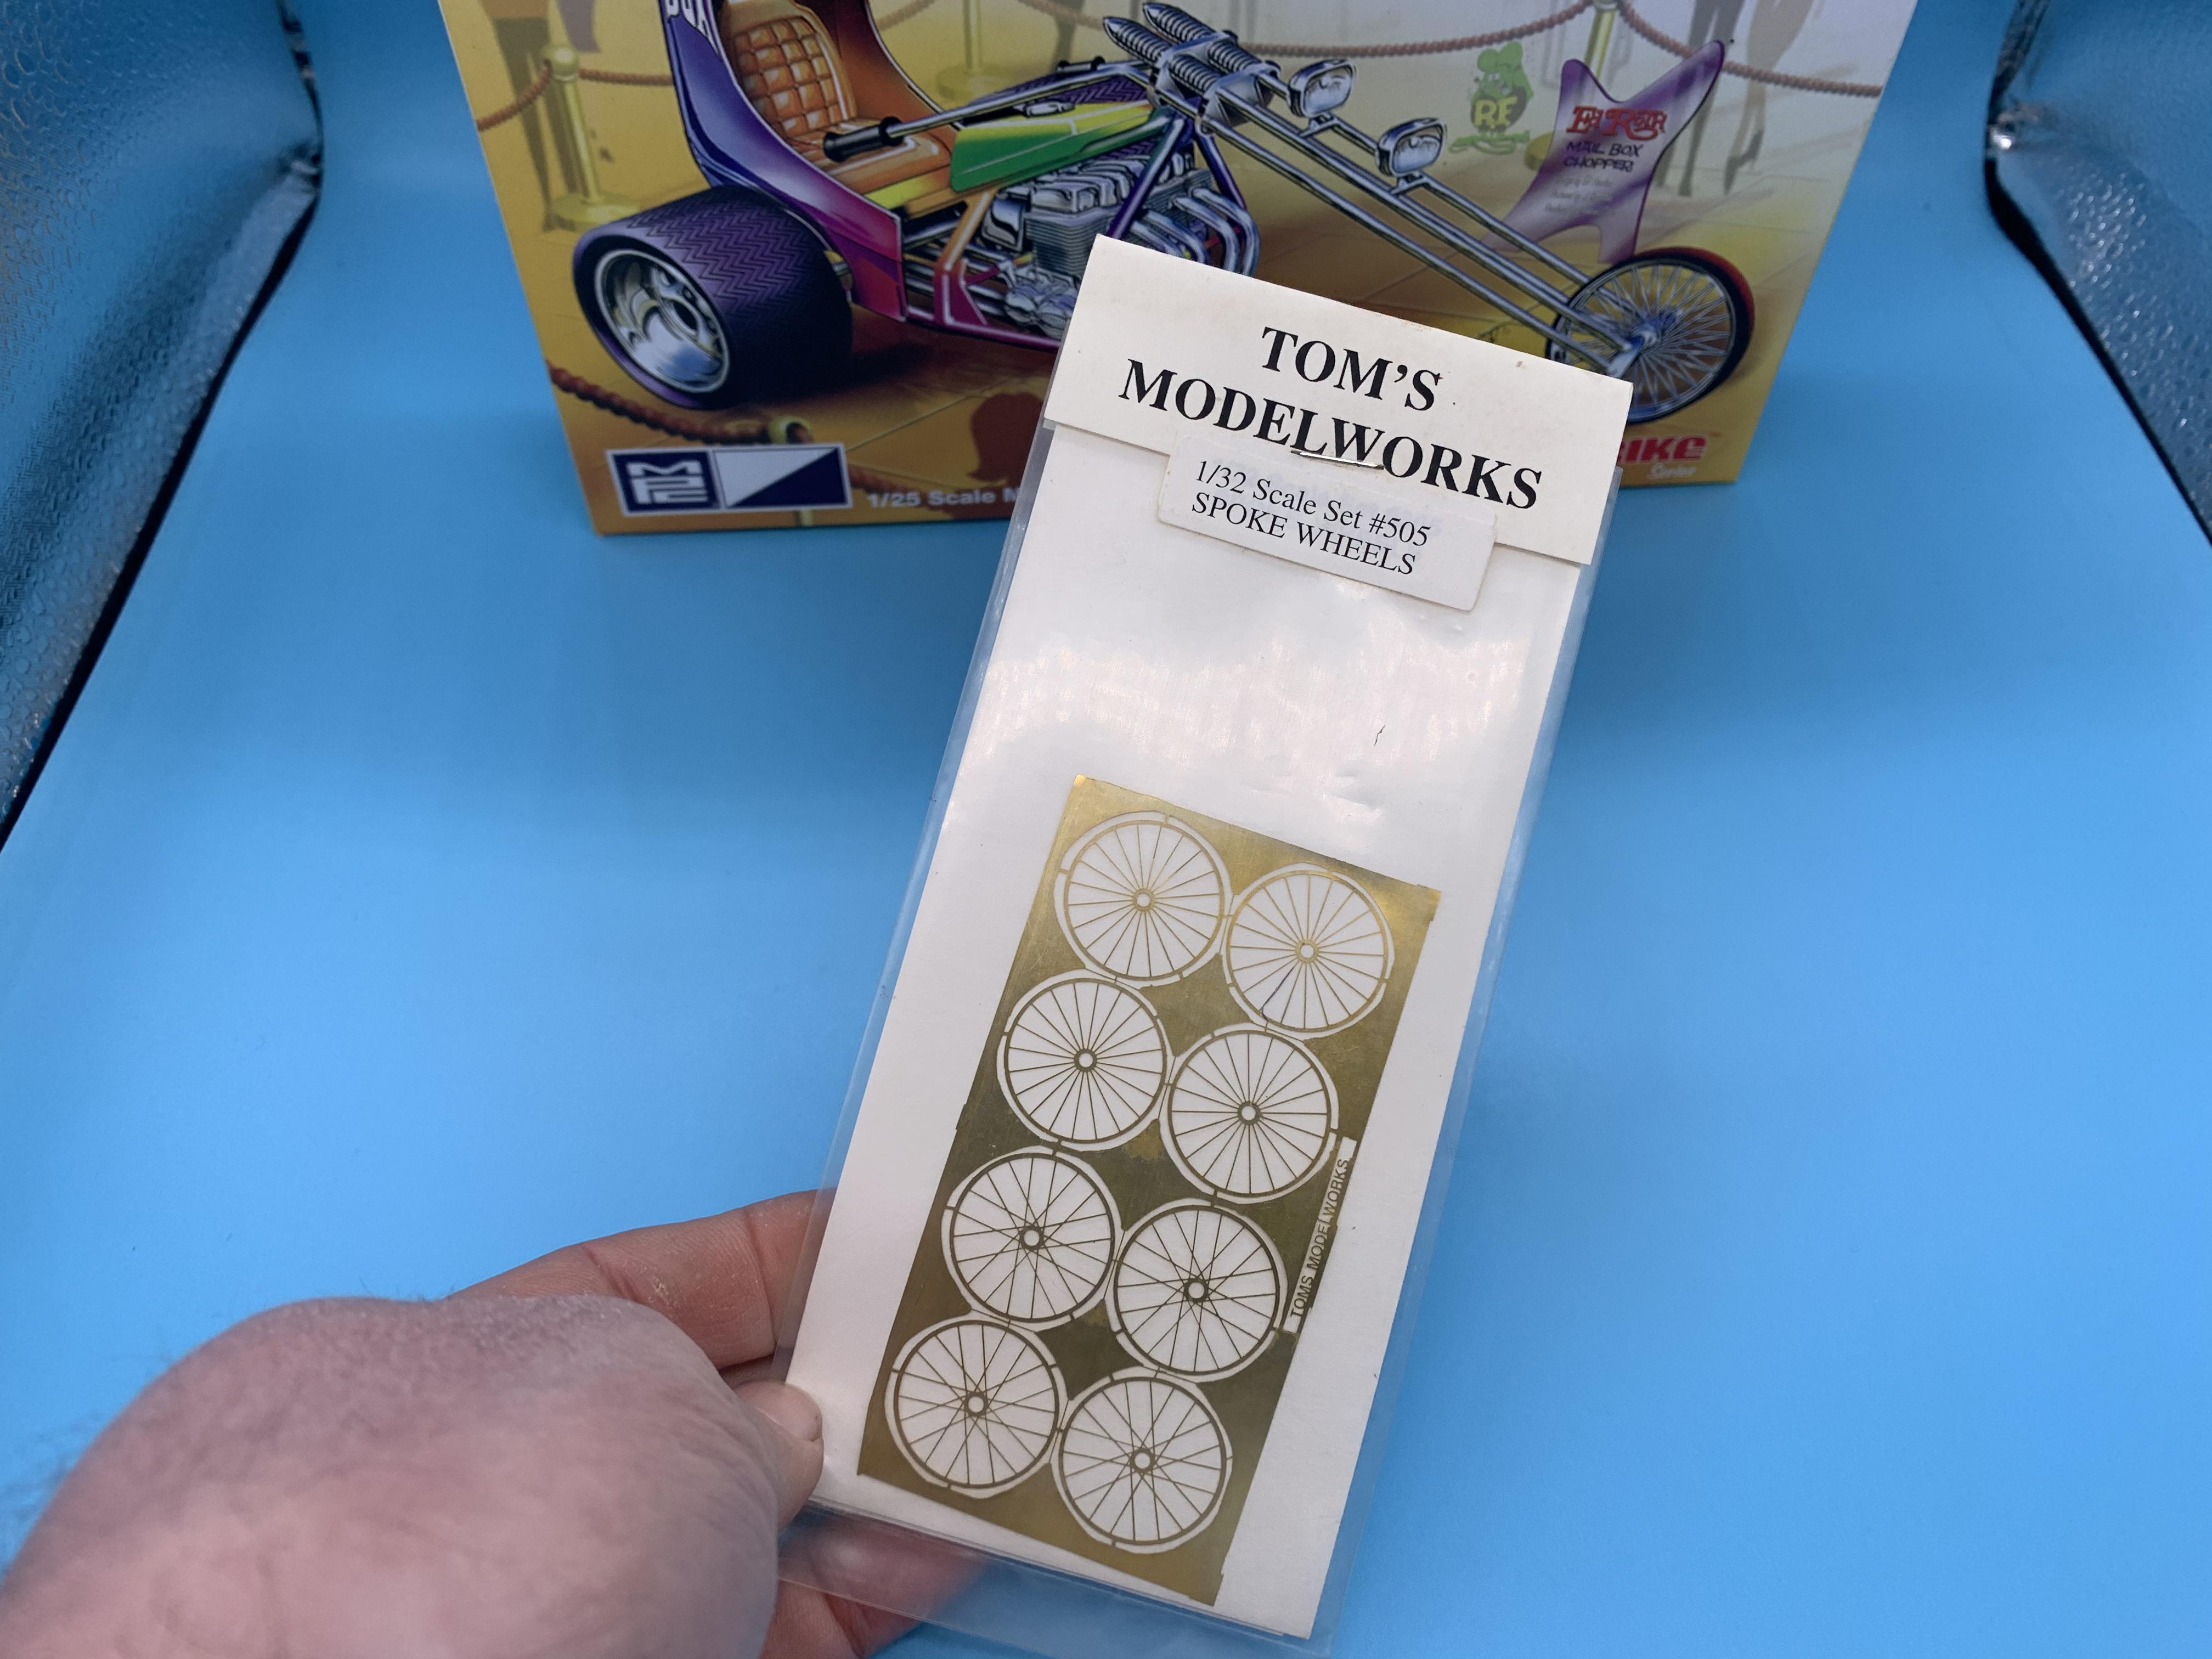
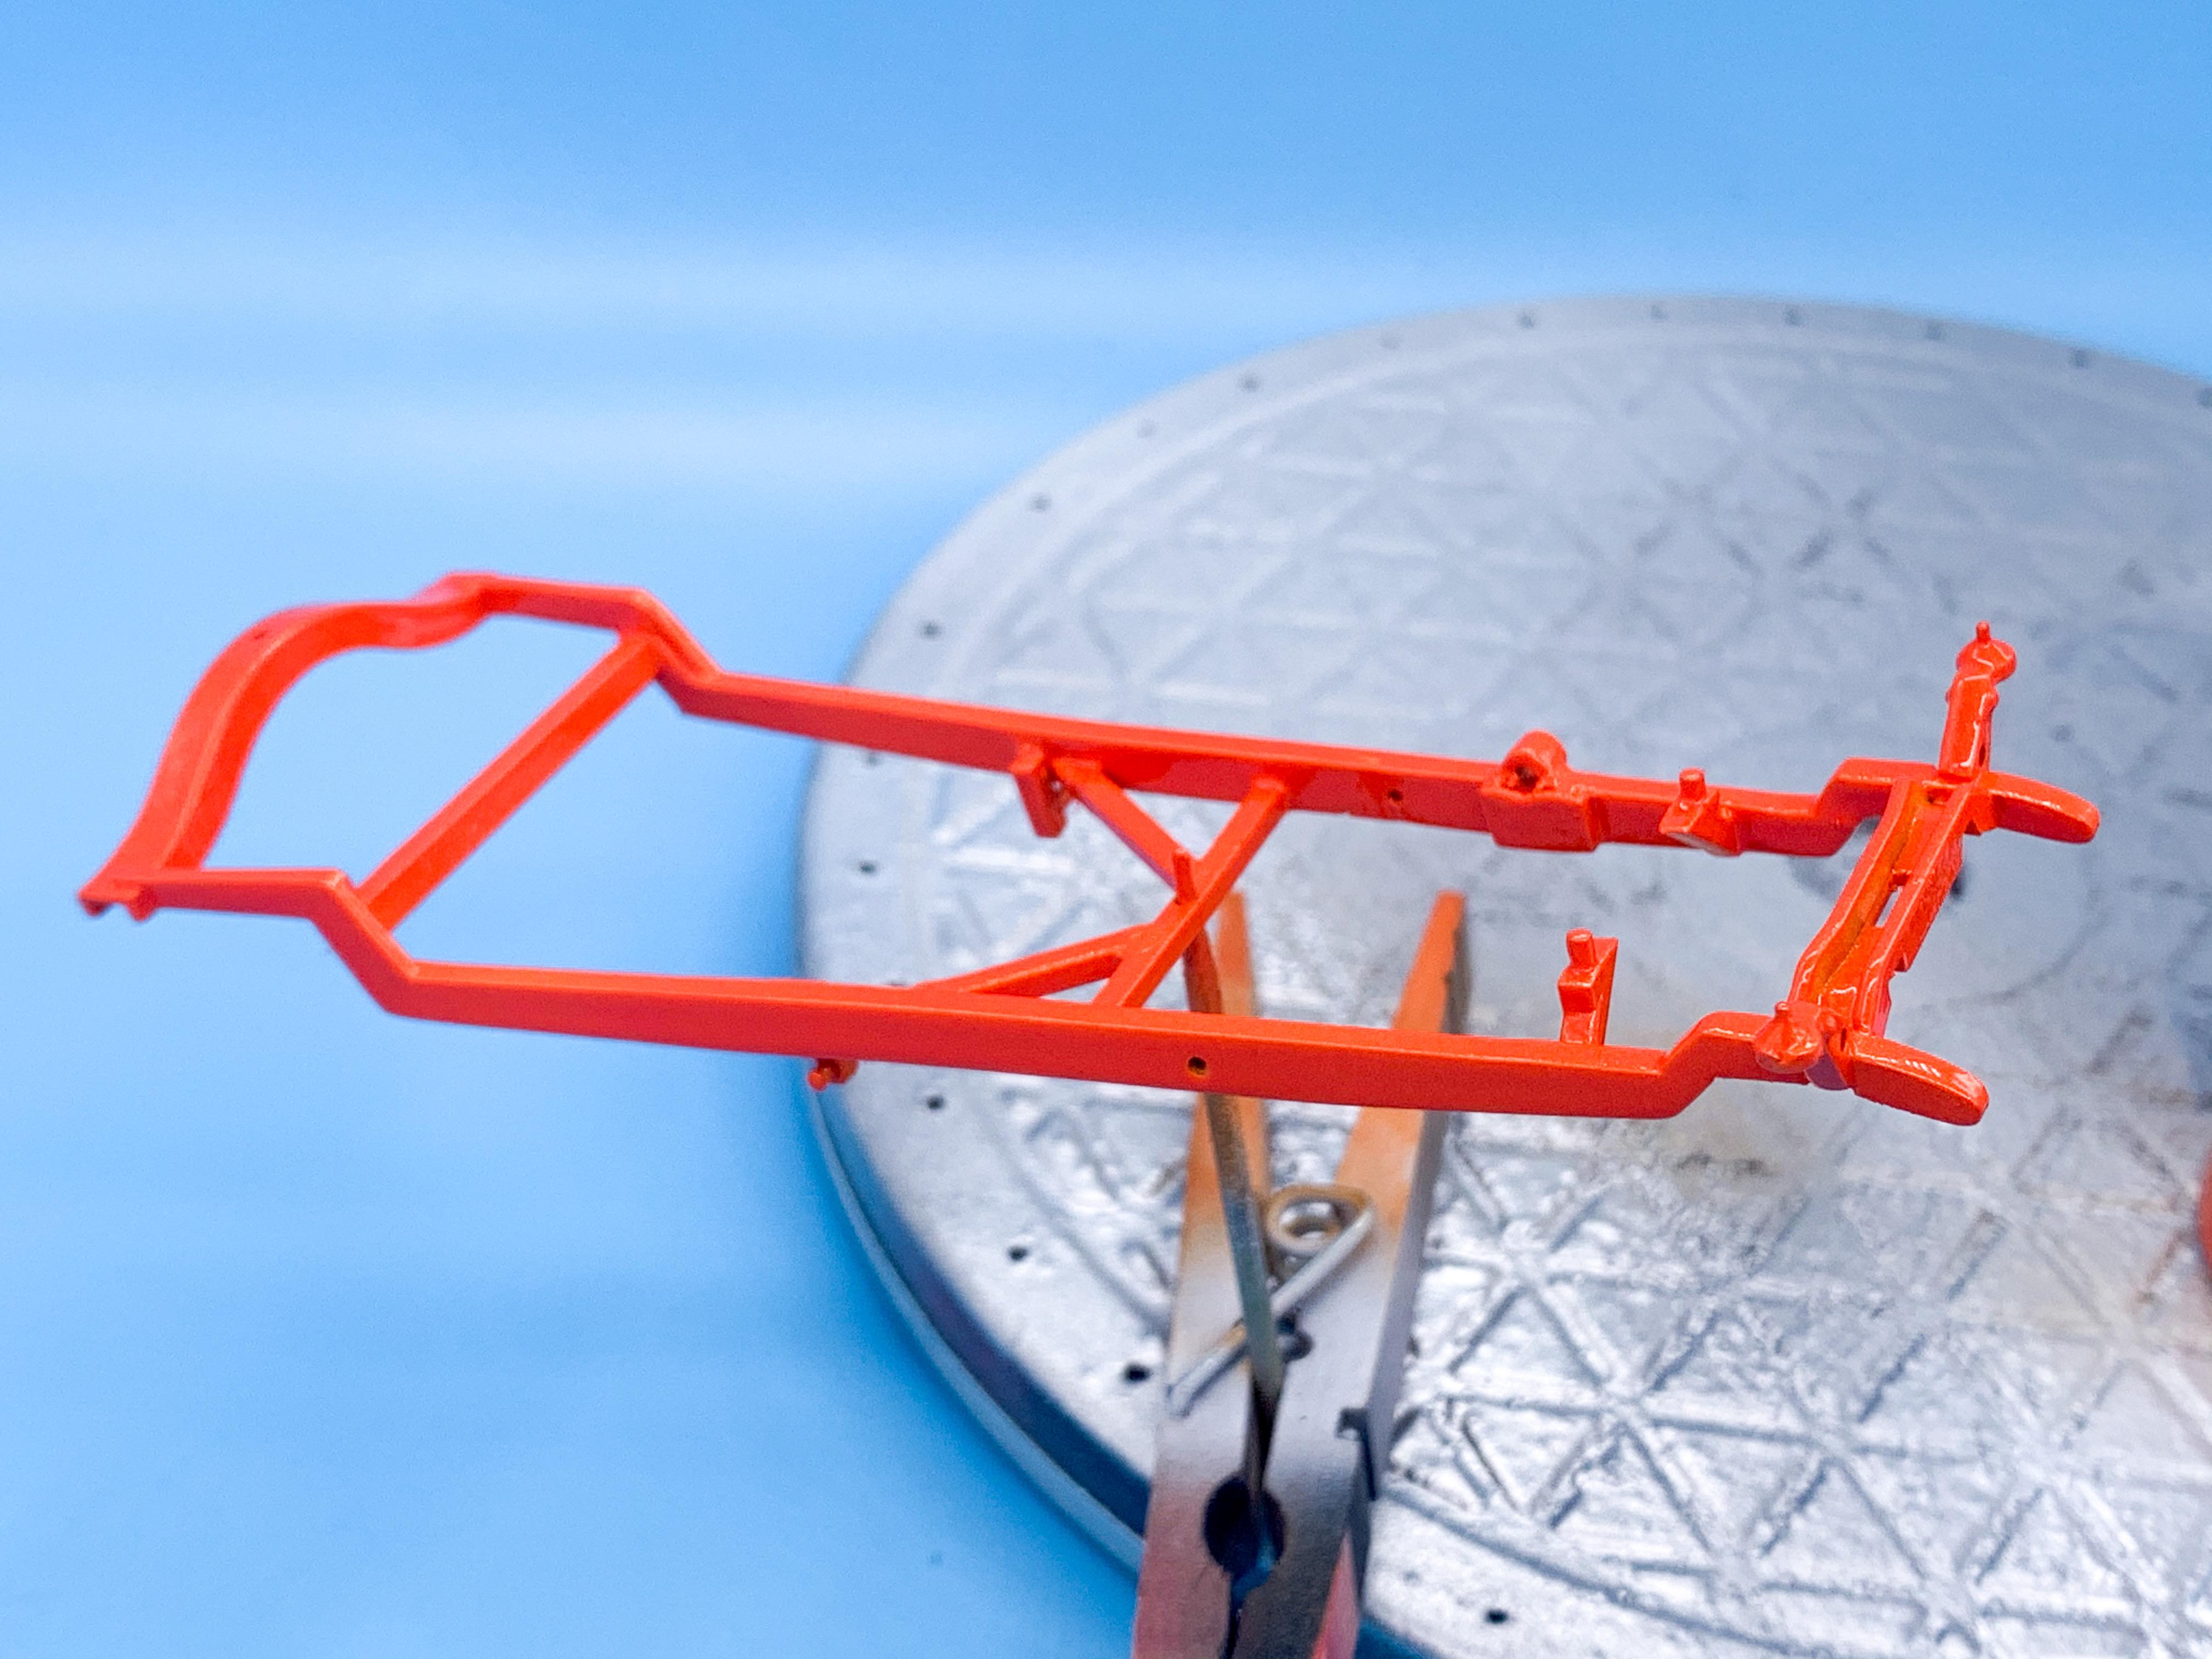
So, this is going to be a long drawn out thread I’m sure, so if you’re not very patient please feel free to come back in 2023 and see where we’re at ? I’ve always liked the MPC trike series that they started reissuing last year, but because some of them were hard to get previously (read:expensive to get) and I knew if I built one I’d want to build the full collection so I kinda held off on building any of them. Soon as I heard they were reissuing then all though, a plan started to develop. Oh, and seeing Eric Ritz’s AMAZING build of the Mail Box chopper really shows how nice these fairly basic kits can look with an expert touch: Funny thing is, I’m not even much of a trike guy - but these little kits are SO cool to me! So, what I’m thinking is that I’d like to work through them, lavish them all with a bunch of attention and extra detail and end up with a cool line-up of all six by the time I’m done. Number 1 in the series - the Mail Box trike: Now, this thing might have Roth’s name on the box, his signature on the box and Roth-themed decals IN the box...but it isn’t even close to being a replica of the 1:1 Mail Box trike: Go ahead, see if you can spot any parts on the kit that look like the actual trike...good thing I’m not trying to build a replica here... Anyhoo, first thing I wanted to address was the kit’s plastic spoked front wheels. They’re not BAD, as plastic spoked wheels go, but I cunningly copied exactly what Eric did in his build above and ordered a set of photoetched spoked wheels that I can adapt to replace the kit parts: I’ve ordered some aluminum tube to make some rims and I’ll use the kit front tire and try and make something better than the standard plastic part if I can manage it. Actually, I ordered tube for the front and rear wheels so I can make aluminum rims for them both - but I messed up my imperial/metric conversion and got the wrong stuff for the fronts. I managed to get the right stuff for the rear wheels though, so first project to get us rolling (arf arf) was to machine some rims to fancy-up those rear wheels a little: What I’m thinking is to machine down the plastic wheels to leave just the wheel face, and then replace the rim itself with these new sleeves - just a cool little detail to notice if someone were to look close. These need some more work and some polishing but here’s a quick test-fit with the tires to see if they’ll work: Whilst I wait for the material to arrive to make the fronts, I started work on the engine. Stripped the chrome, and started machining a few little parts to replace some of the plastic: Those intake trumpets stand out as a part that could definitely be improved, and my favorite Ohioan gave me a lead on some ferrules that will work nicely to make it look a little better: I shortened the metal ferrules up some, removed the kit plastic pieces, drilled, added plastic pins and it looks a whole world better to my eyes: I need to get the engine somewhat assembled because the frame builds AROUND it, so that needs to be the first bit I work on here so I can start to see how everything else fits together and what I can do to make it better. Oh, and I’m going to try and figure out a cool display stand for each of the builds, somewhat reminiscent of the box art. This is gonna be a fun coupla-three years of building ? More soon!
-
Thanks for all the kind replies everyone - I always forget to look in this part of the forum so I’m just now seeing them! My friend LOVED it - she showed it to EVERYONE, posted it on Facebook and had a hundred odd people comment on how cool it was...and, humorously, a bunch of replies from people who didn’t realise it wasn’t the real thing and wondered why she’d put it in front of a white background and had a photo shoot for it ?. One of our mutual friends told me she’d been video-calling everyone she knew to show it to them, and it’s “all she’s been talking about for two weeks” ??❤️ Moral of the story - we’re all good at what we do, and sharing our talents can really make people happy!
-
FSM - The Automotive Content Thread
OldNYJim replied to vincen47's topic in General Automotive Talk (Trucks and Cars)
I saw an interview with the owner/CEO of Kalmbach, and he said he wanted to move the company in more of a digital direction and slowly get away from print - so the increase in the number of reviews on the website versus in the magazine makes sense -
The strap is a thin strip of some textured card I got from Hobby Lobby - it has a fine embossed 'mesh' pattern to it that made it look fabric-y. I forget exactly who makes the buckle, but it's from a photoetch sheet of seatbelt buckles - maybe made by Mr Model? Thanks for the kind words!
-
Thank you! Did a shiny take on the same kit right after:
-
Found some cool patterned sheet styrene in Hobby Lobby yesterday - should be useful for some custom interior patterns or similar: I wanted some corrugated aluminum sheet, but it all looked like this:
-
Man, Michael’s must have a TONNE of those 5-window coupes in a warehouse somewhere...of the three in New York and the two in Indiana that I’ve visited that kit is the only hot rod kit they’ve had in every single store
-
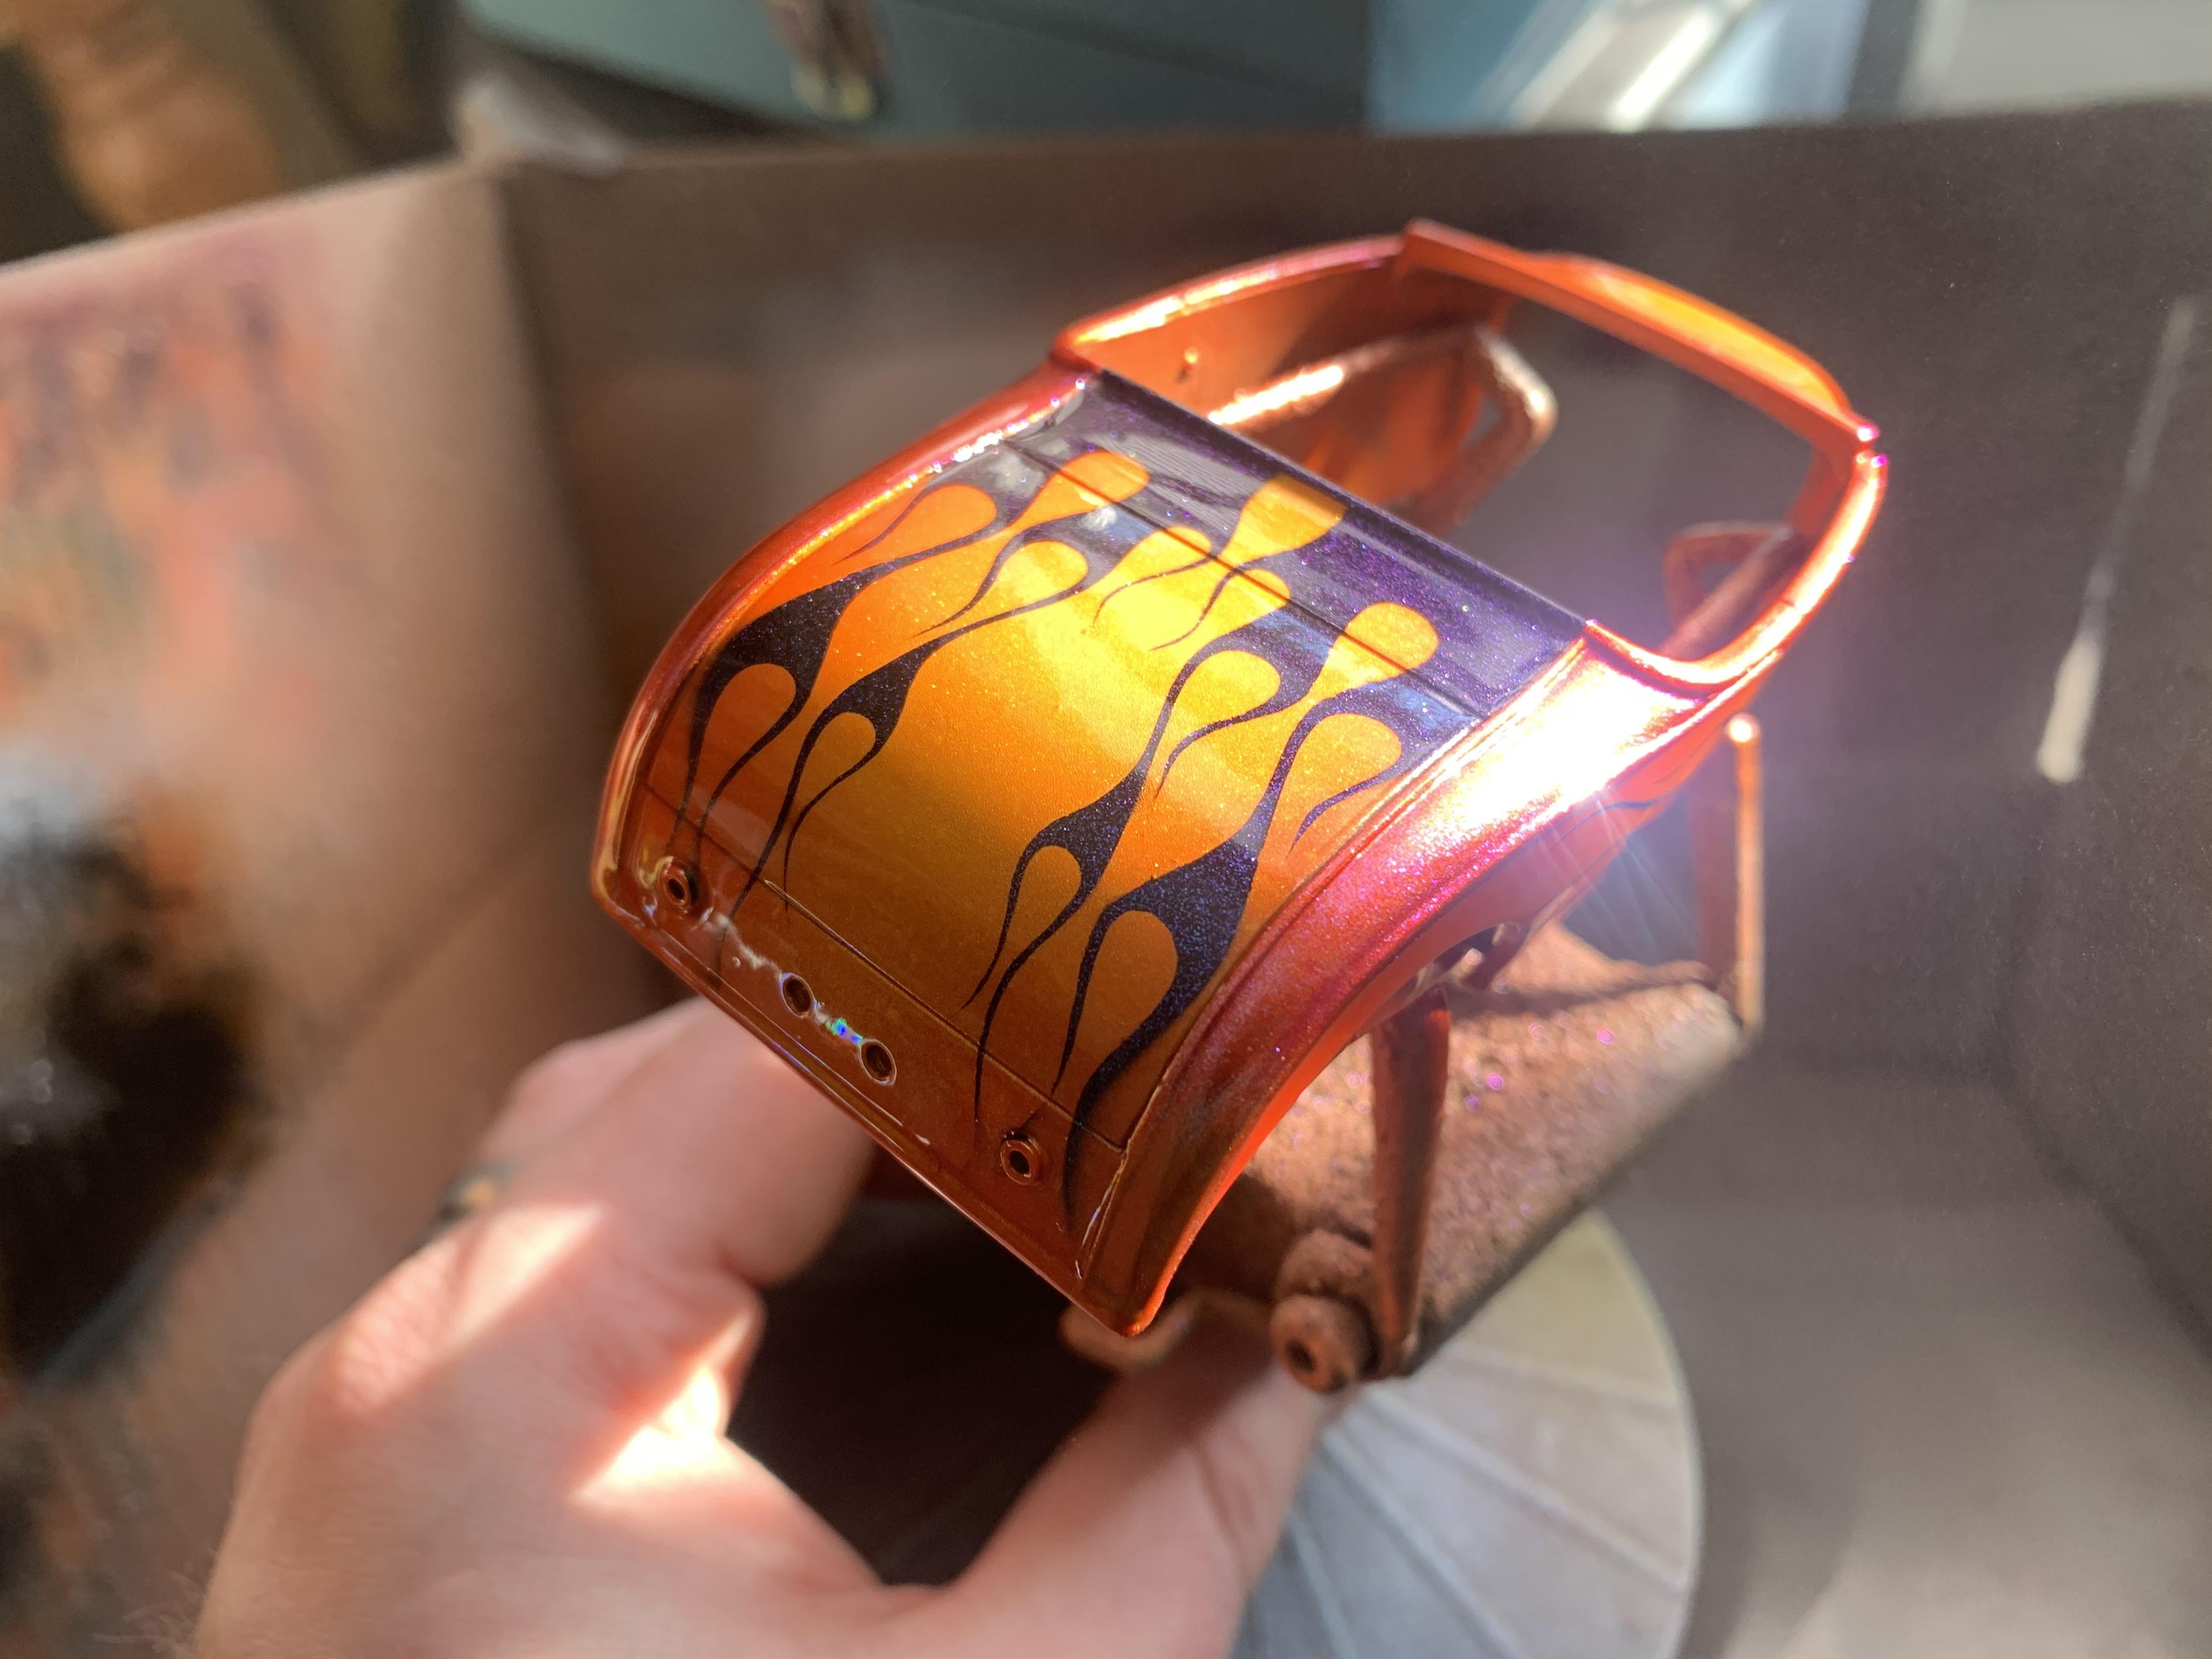
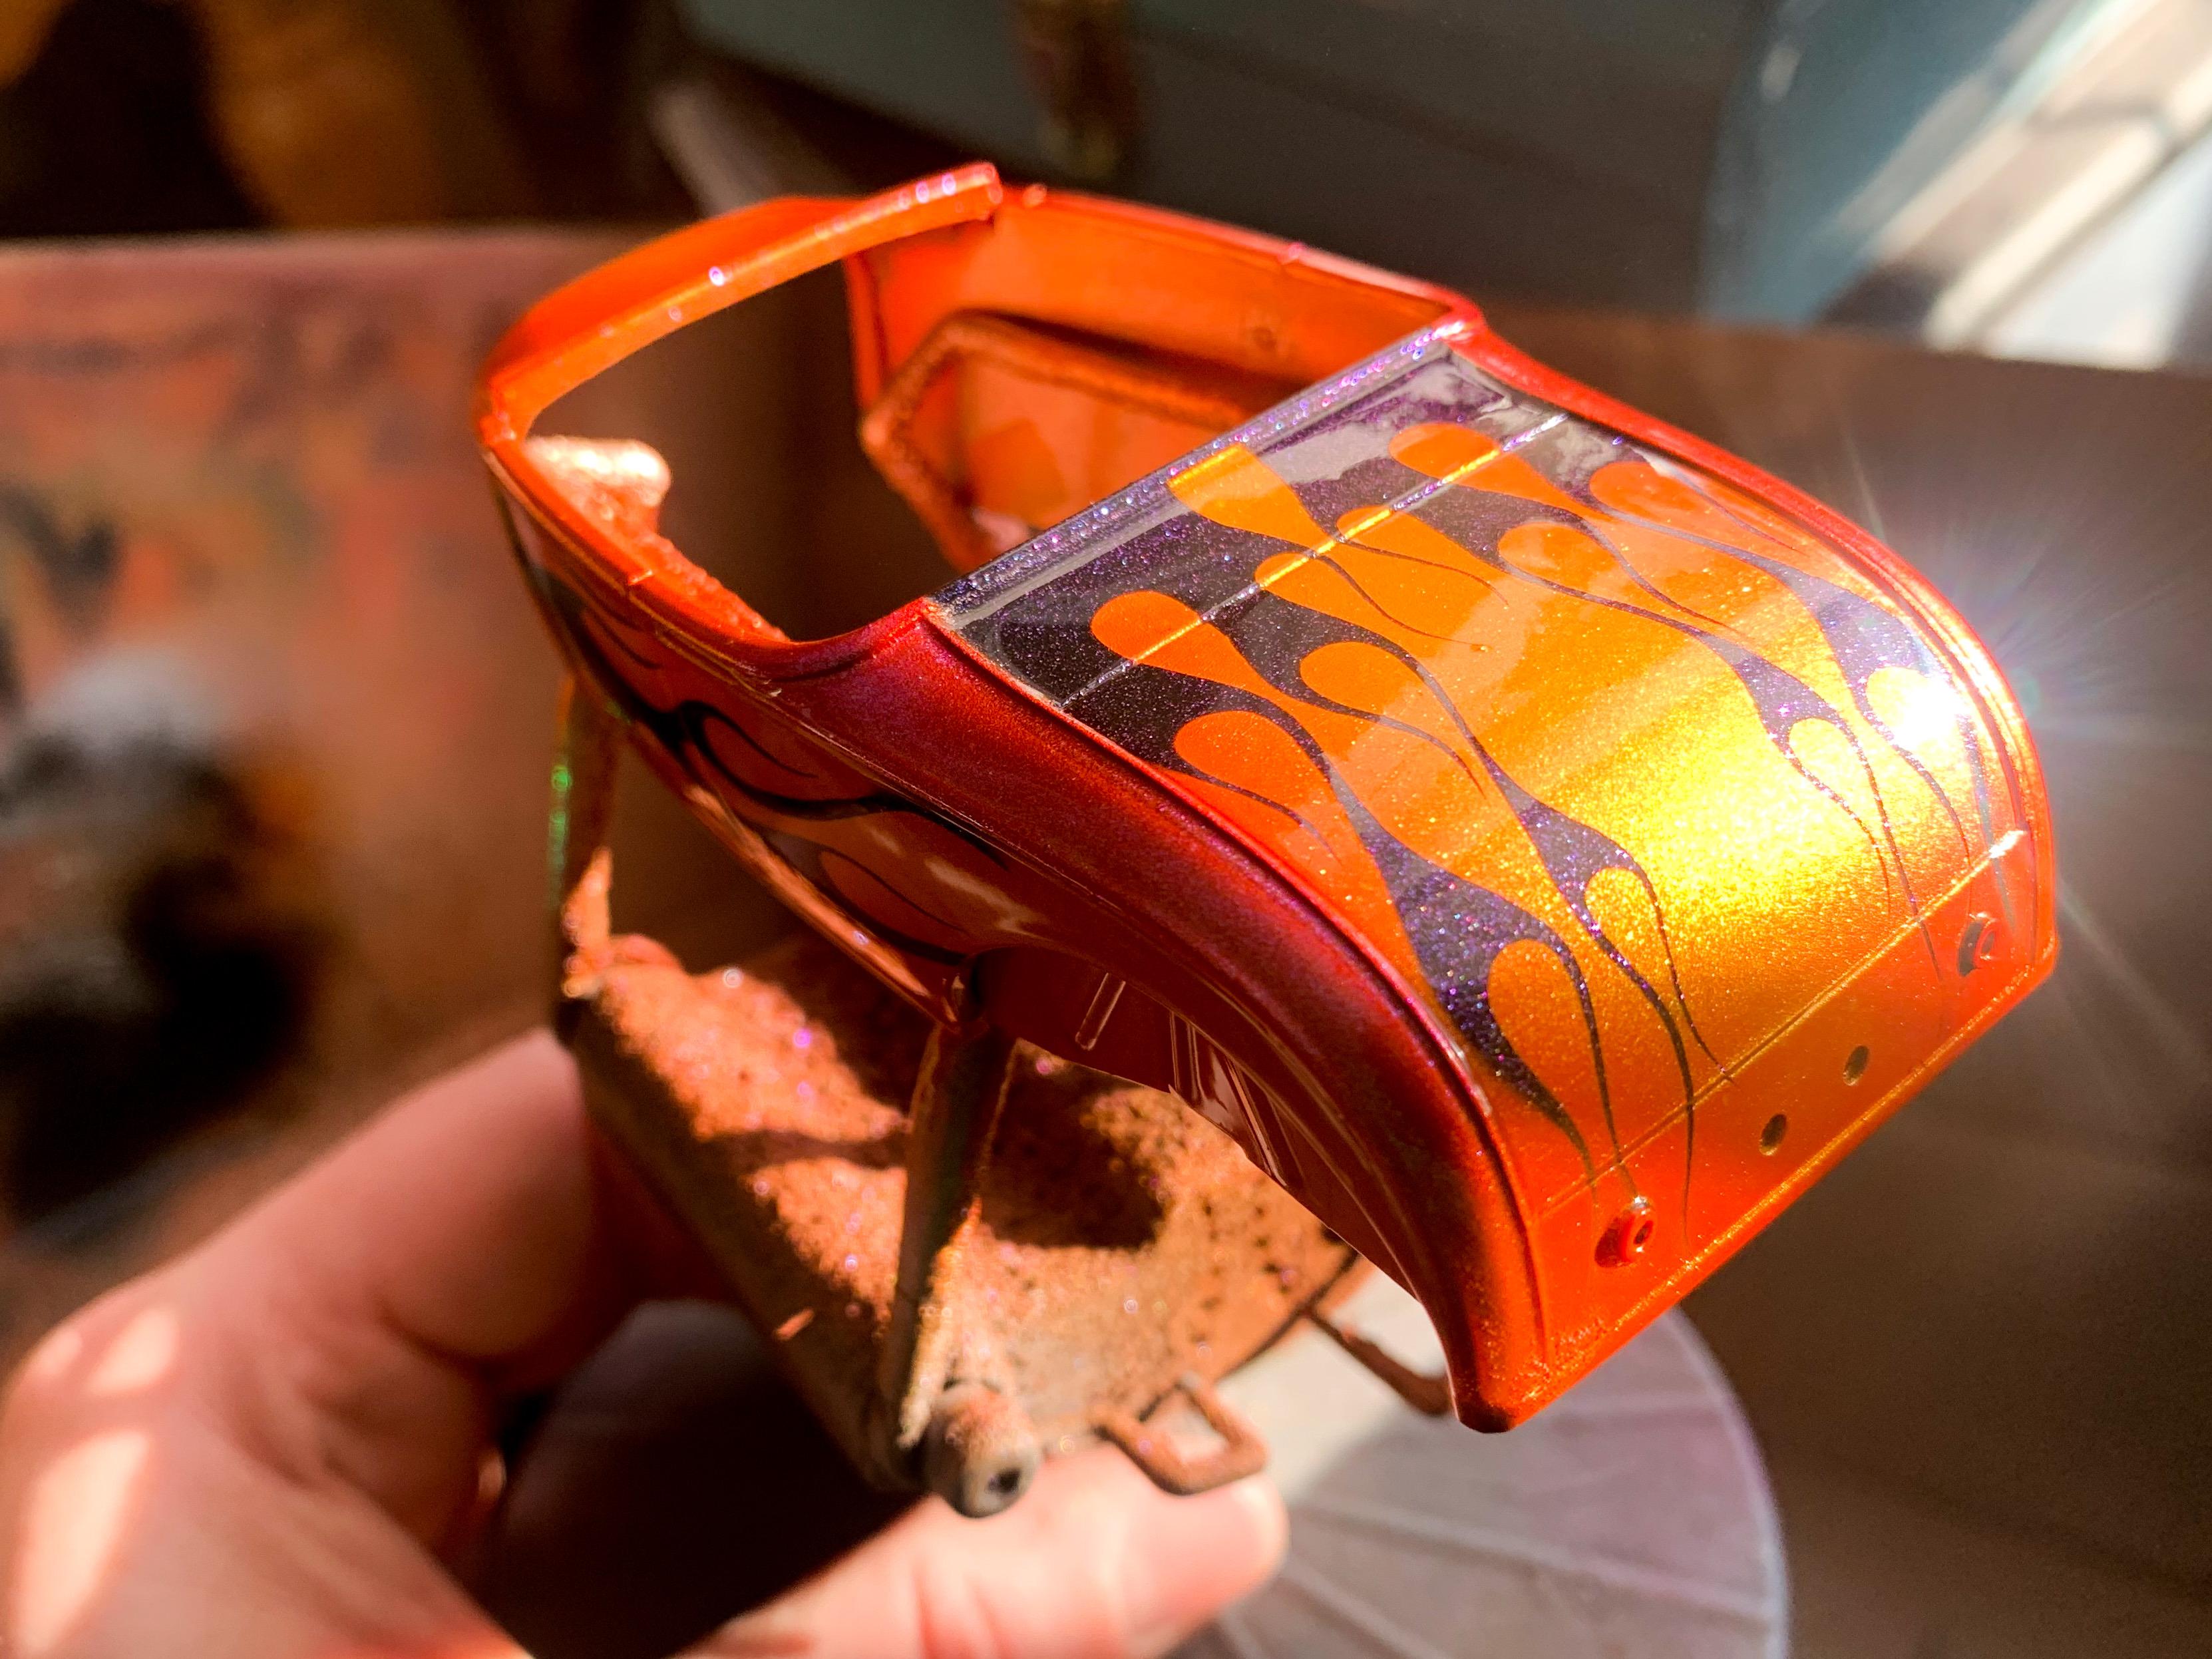
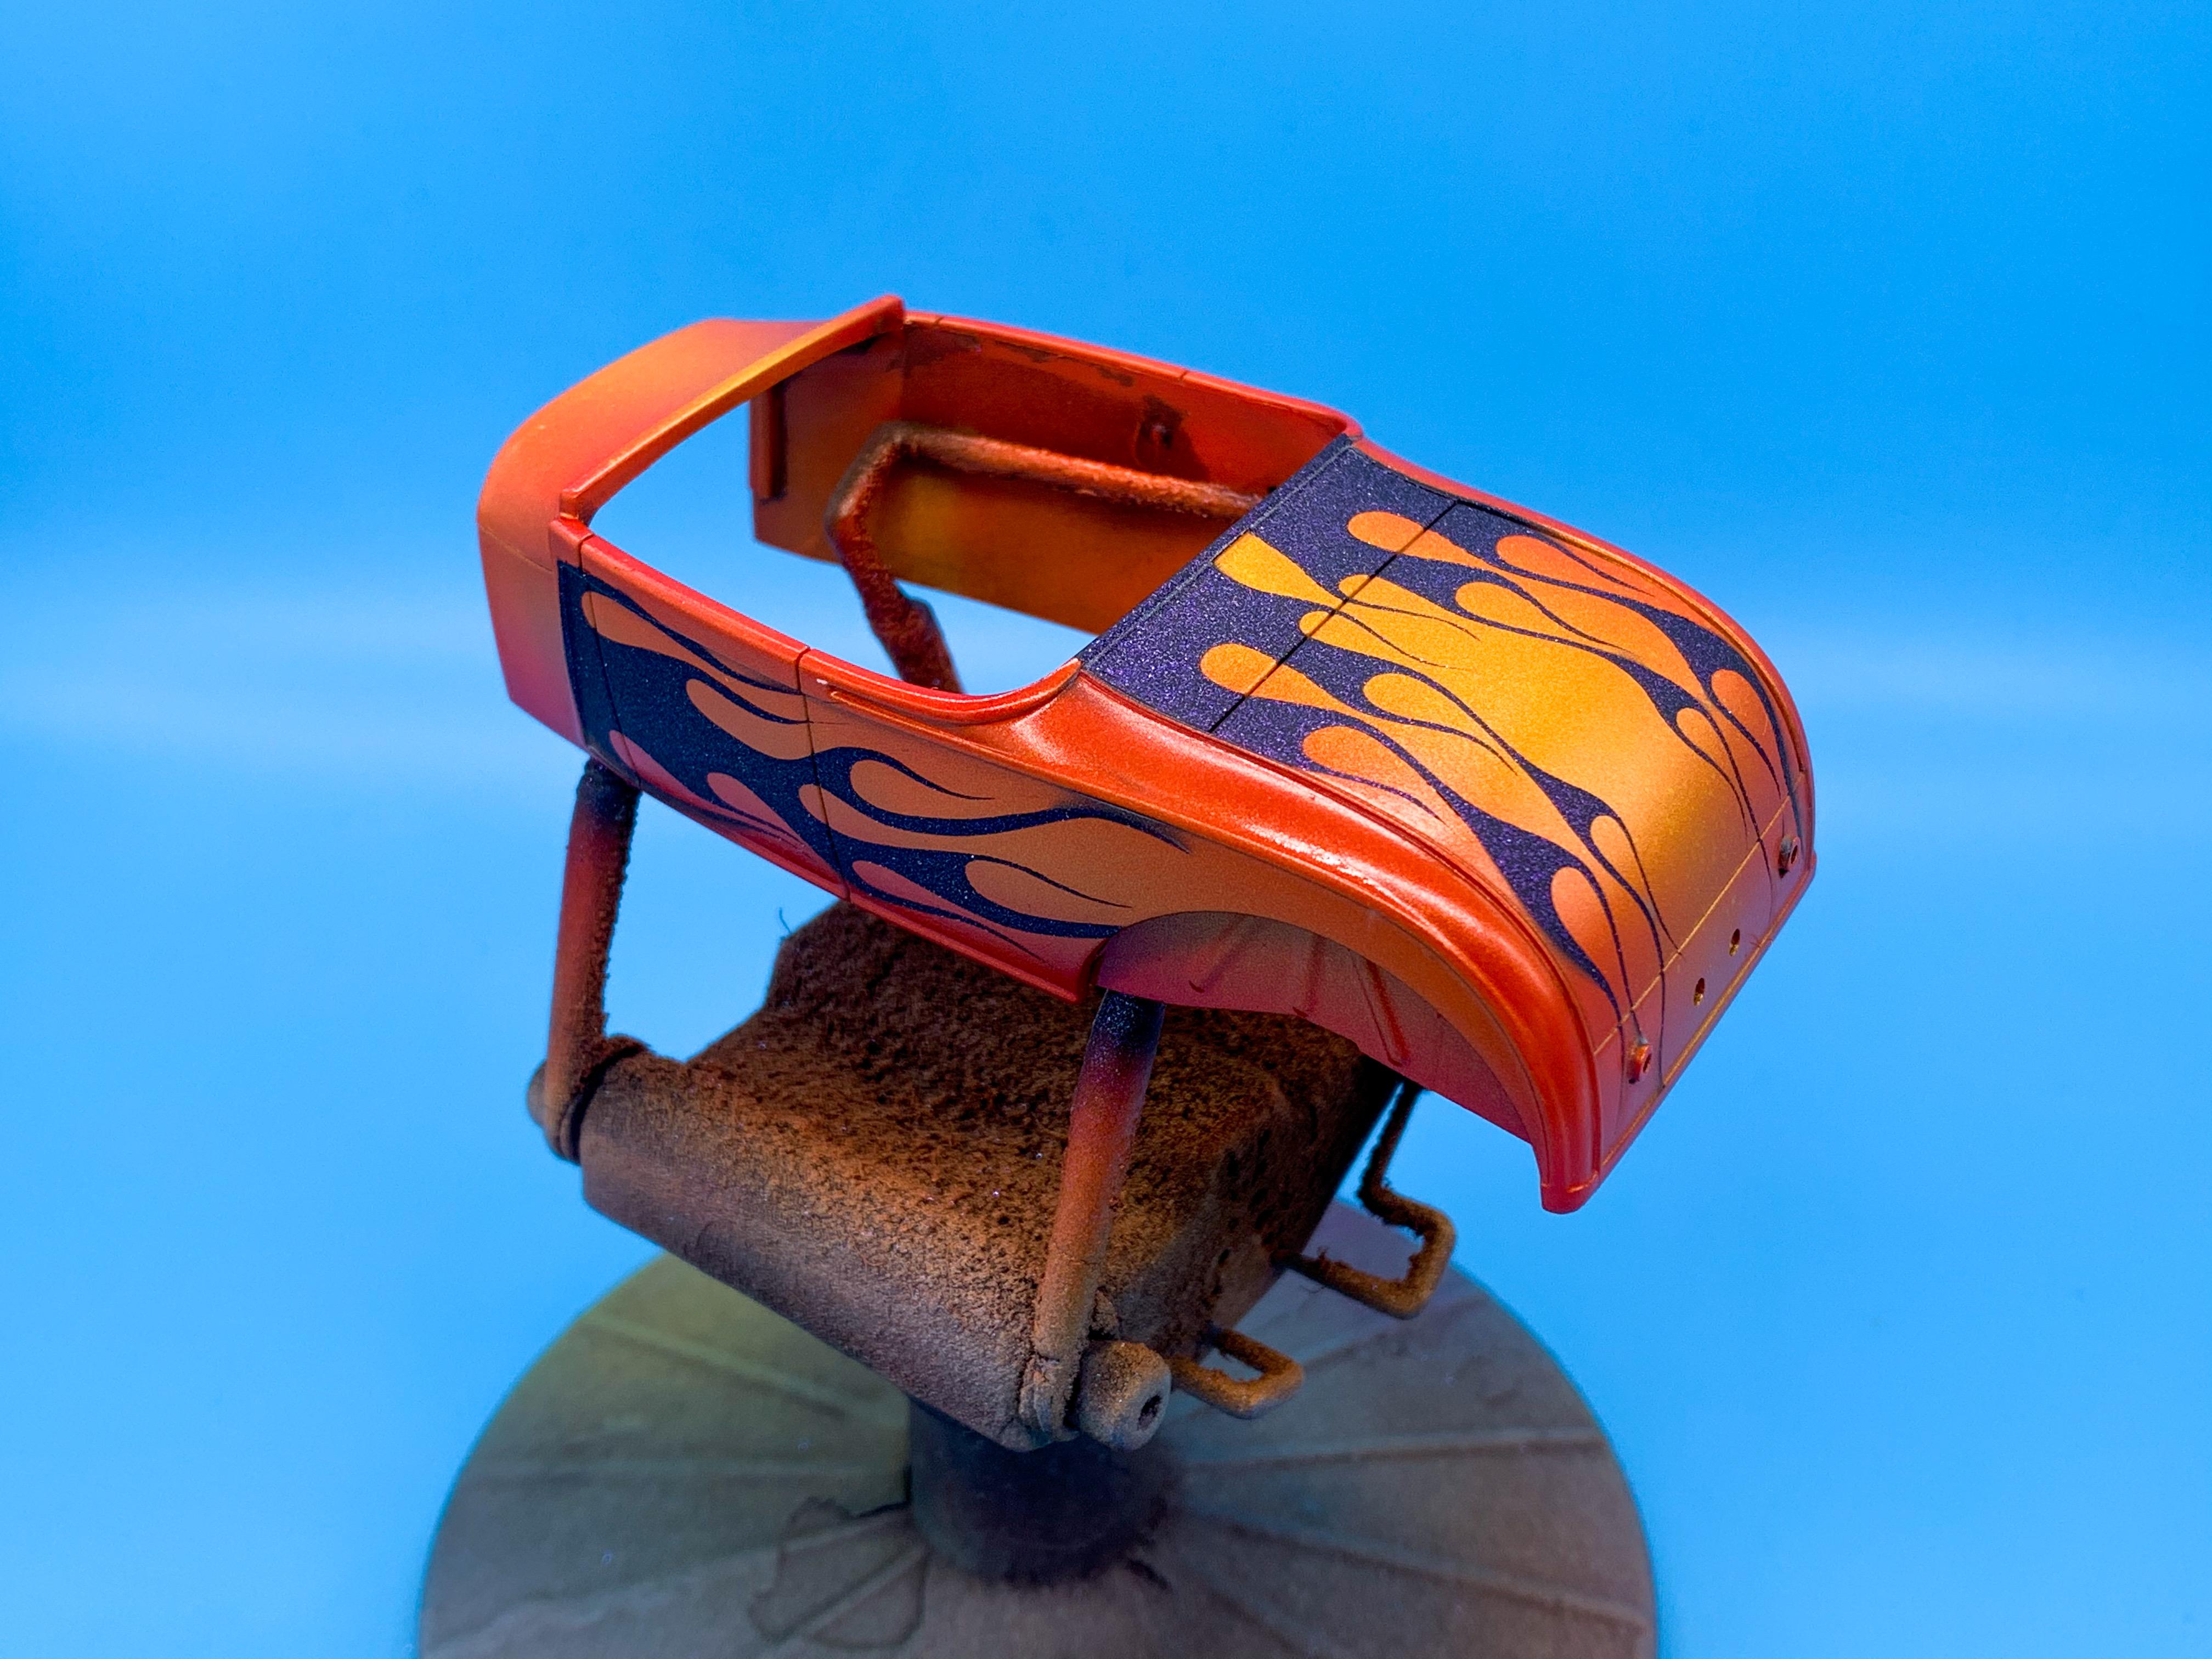
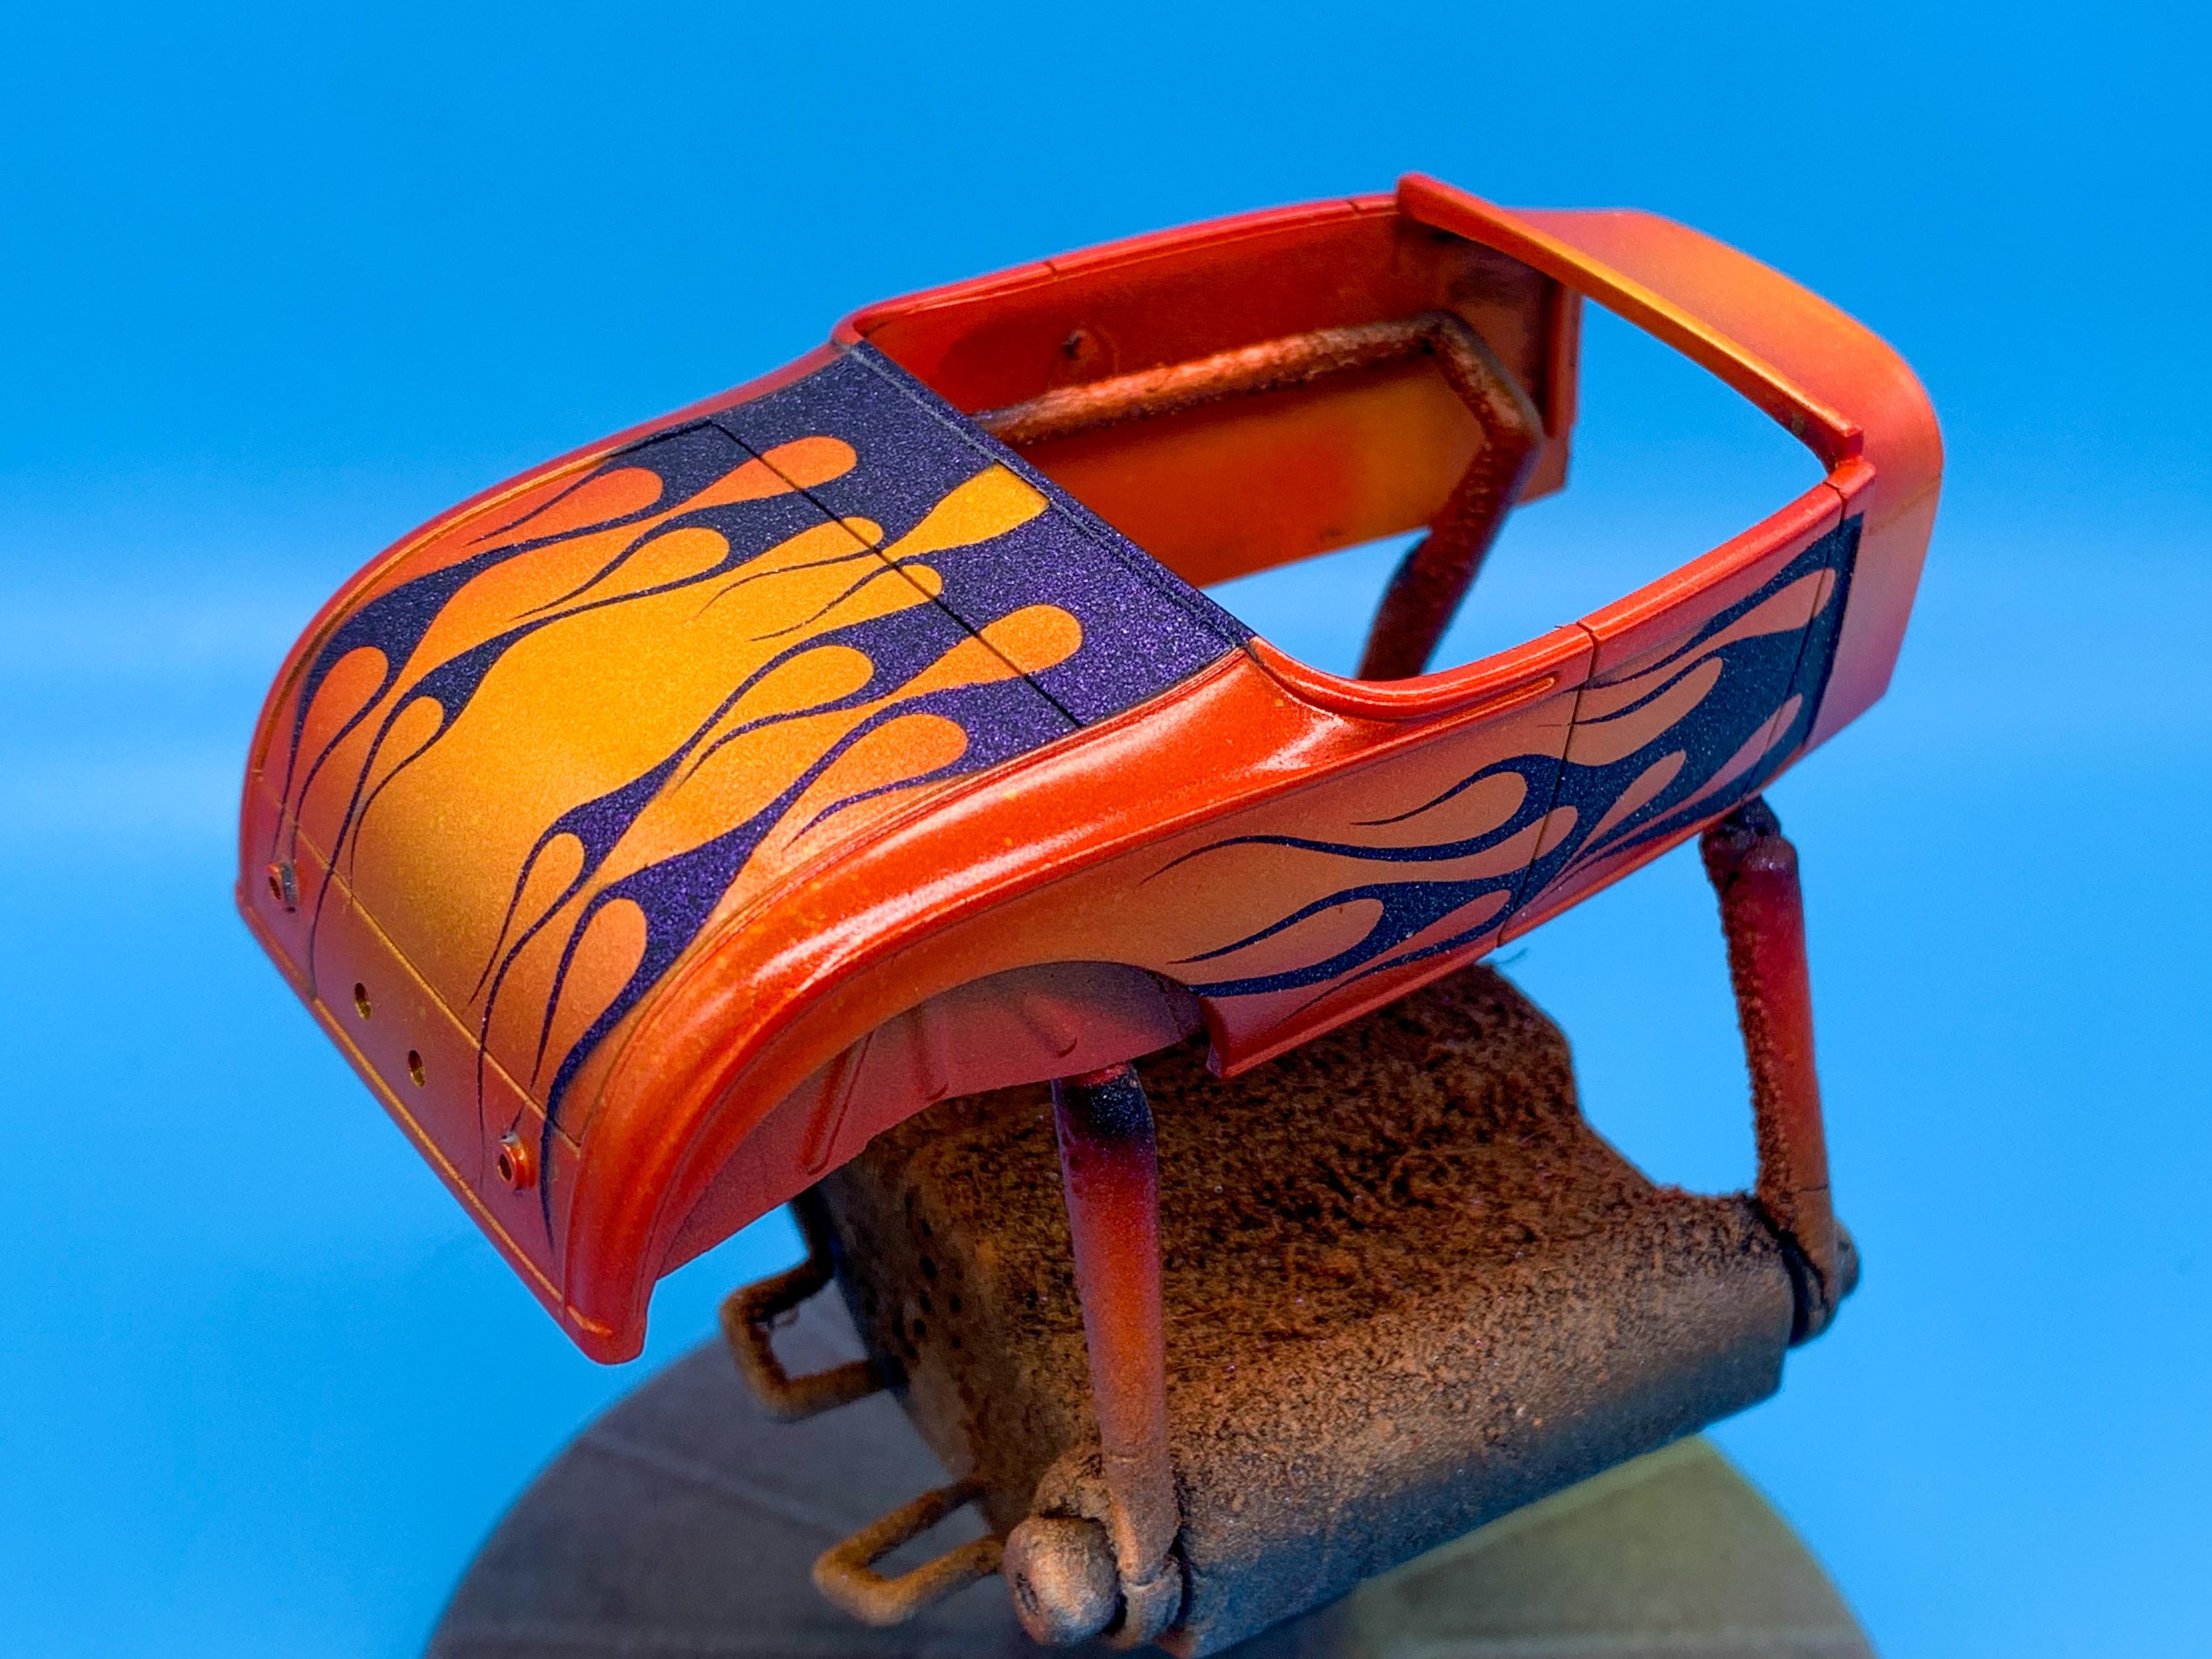
Flame day here in snowy Indiana! Used a set of my New York Speed Shop flame masks: Followed by black, then the same flip flop purple I used the first time... Then, a coat of Future followed by some more masking and then Tamiya Acrylic silver: Then candy pink, with Pearl Ex-laden clear coat over top: Then, finally, peeled the masks back and did a little freehand airbrushing to blend it all together to look how I imagined: Starting to get somewhere with this paintjob now! Still some more work to do, but I’m pleased with the weekend’s progress so far. More soon!
-
Good to know, thanks buddy!
-
The_Kyza PhotoShop rendering video
OldNYJim replied to 89AKurt's topic in General Automotive Talk (Trucks and Cars)
I really like this guy’s work - he has HUNDREDS of different designs on his Instagram too: https://instagram.com/the_kyza?igshid=g2ehbrdyy706 I don’t really know what you’d call his style - but I wish I could find more artists doing similar stuff! -
I’ve been planning to build all of the reissued MPC trikes and really wanted some sort of wire wheels for the front, having seen @Impalow use some for his. I looked at a bunch of options...and then shamelessly just ordered the same (I think?) photoetch set as Eric used for his: I’ll need to machine a rim and center for them, but they’re a big improvement over the kit parts! Need to hit the local Ace Hardware and see if they’ve got any aluminum tube of about the right diameter to machine the rims for them over the weekend
-
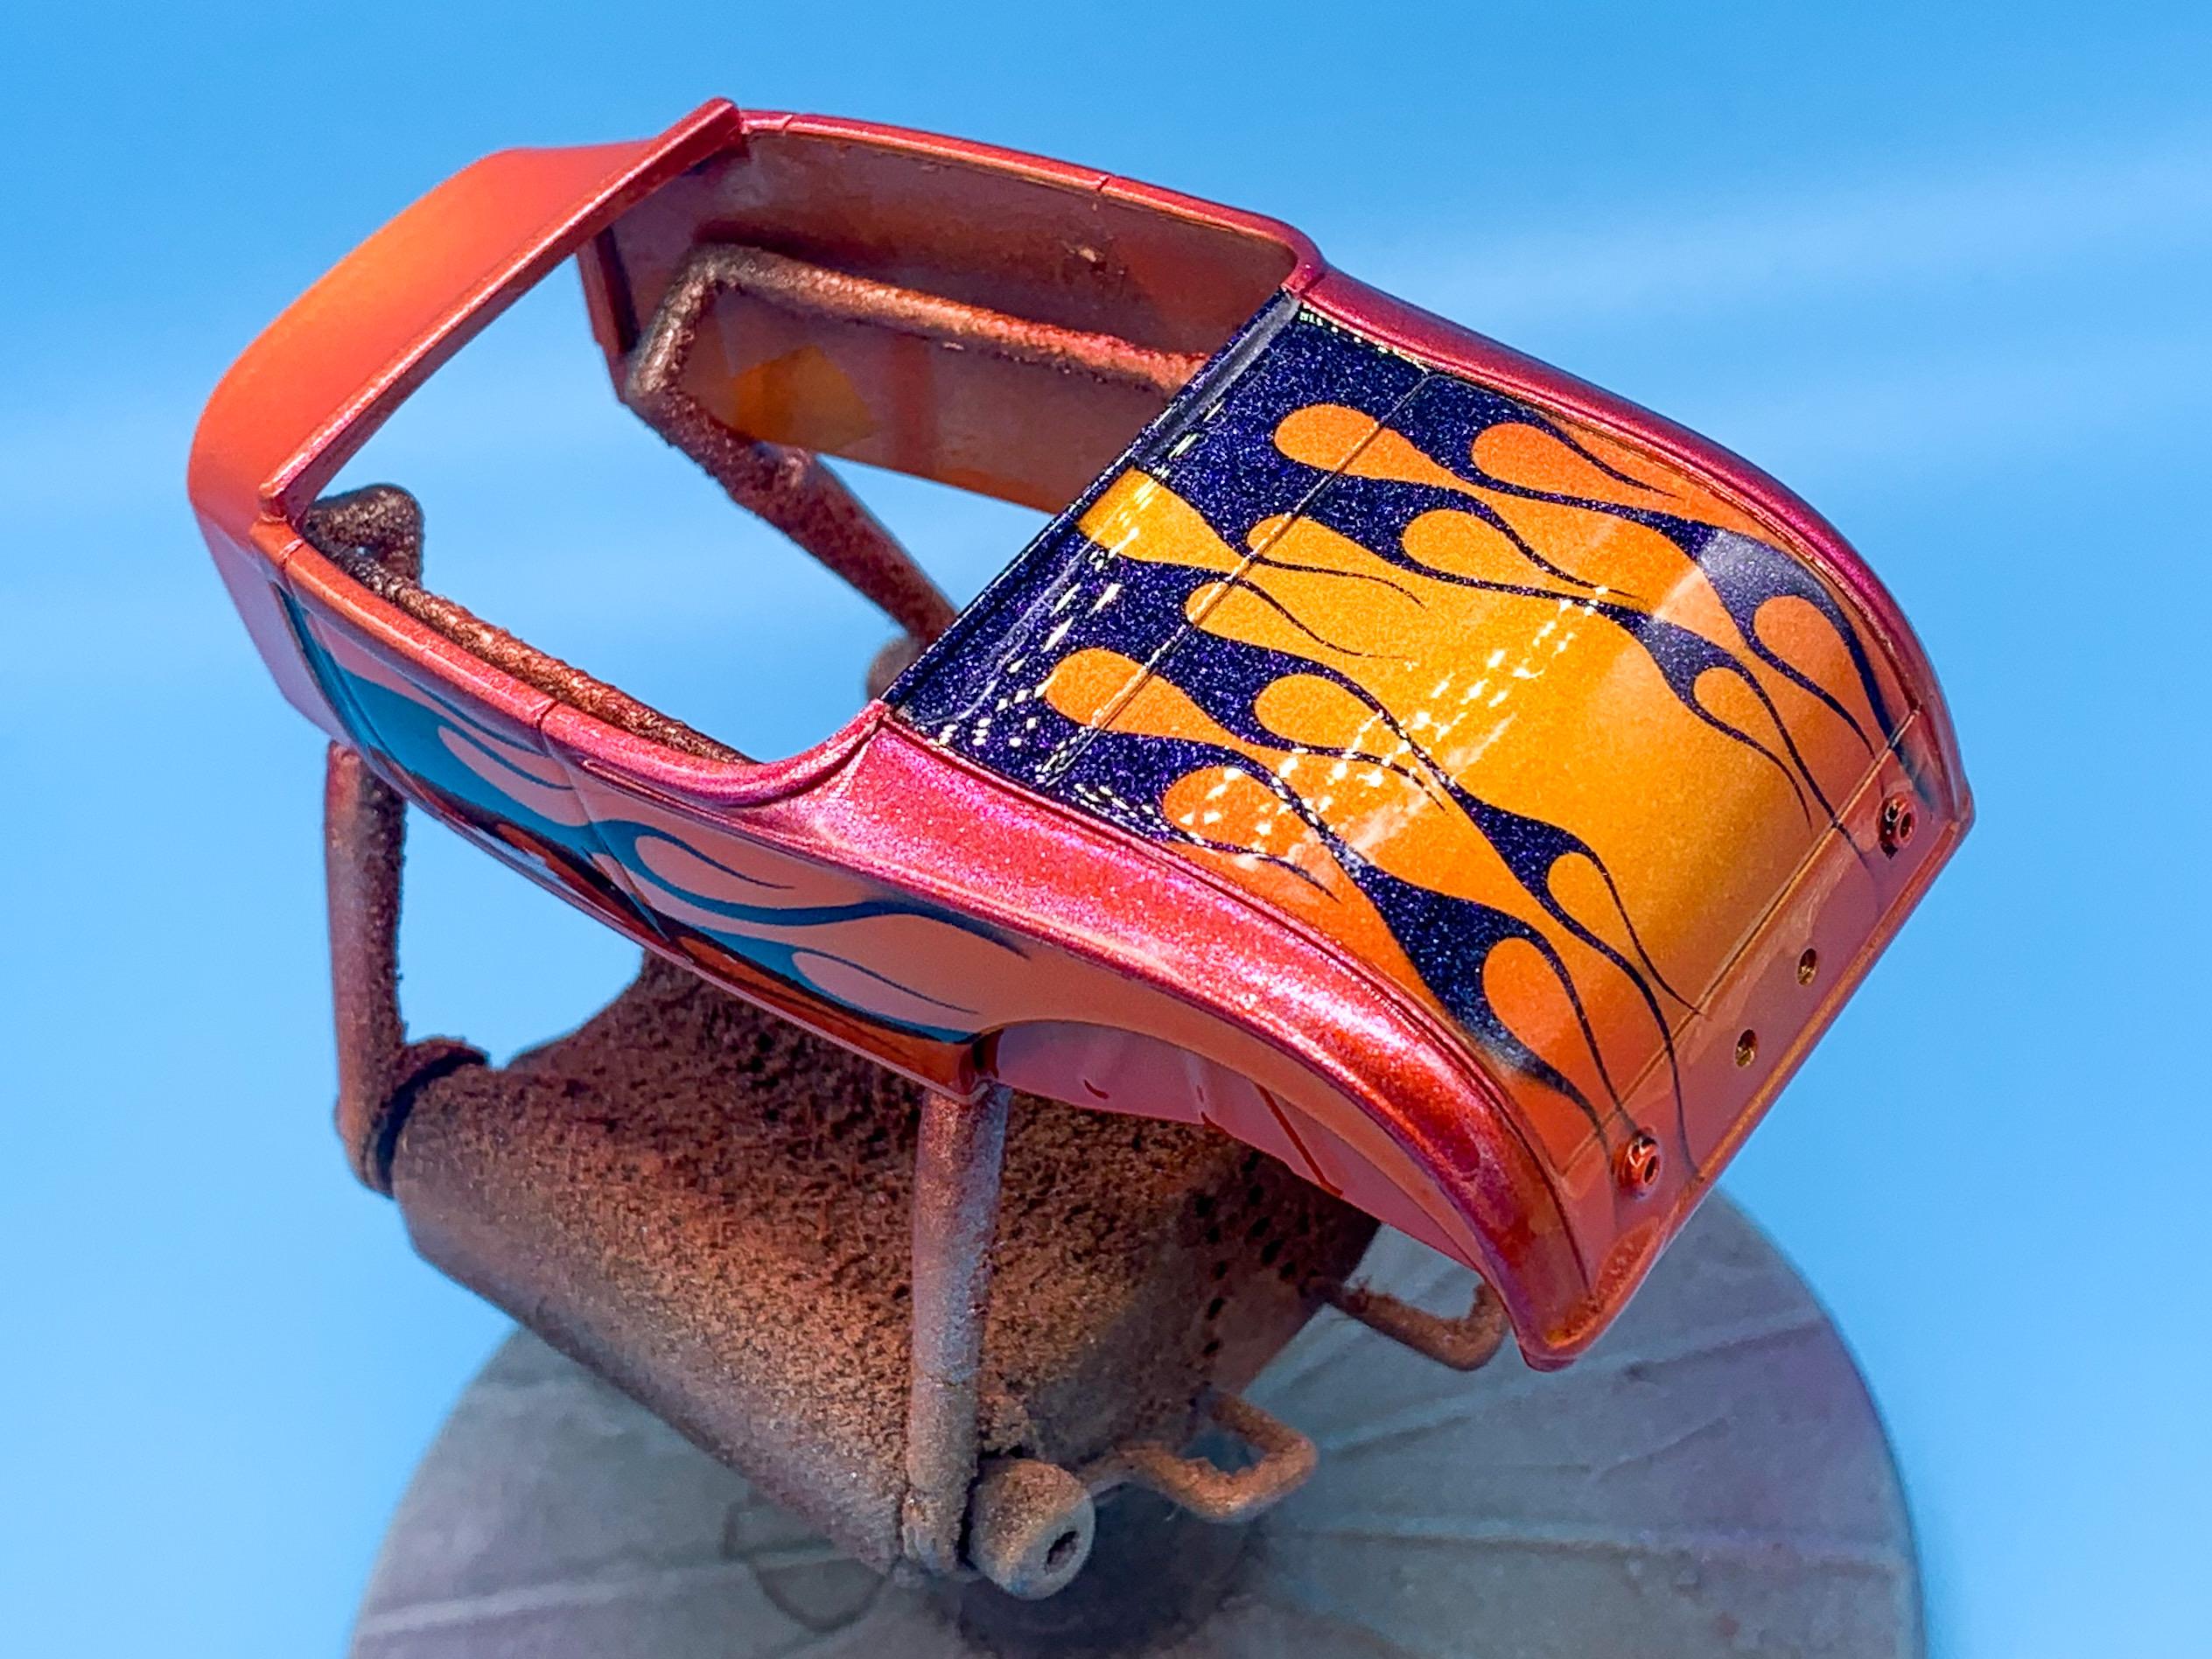
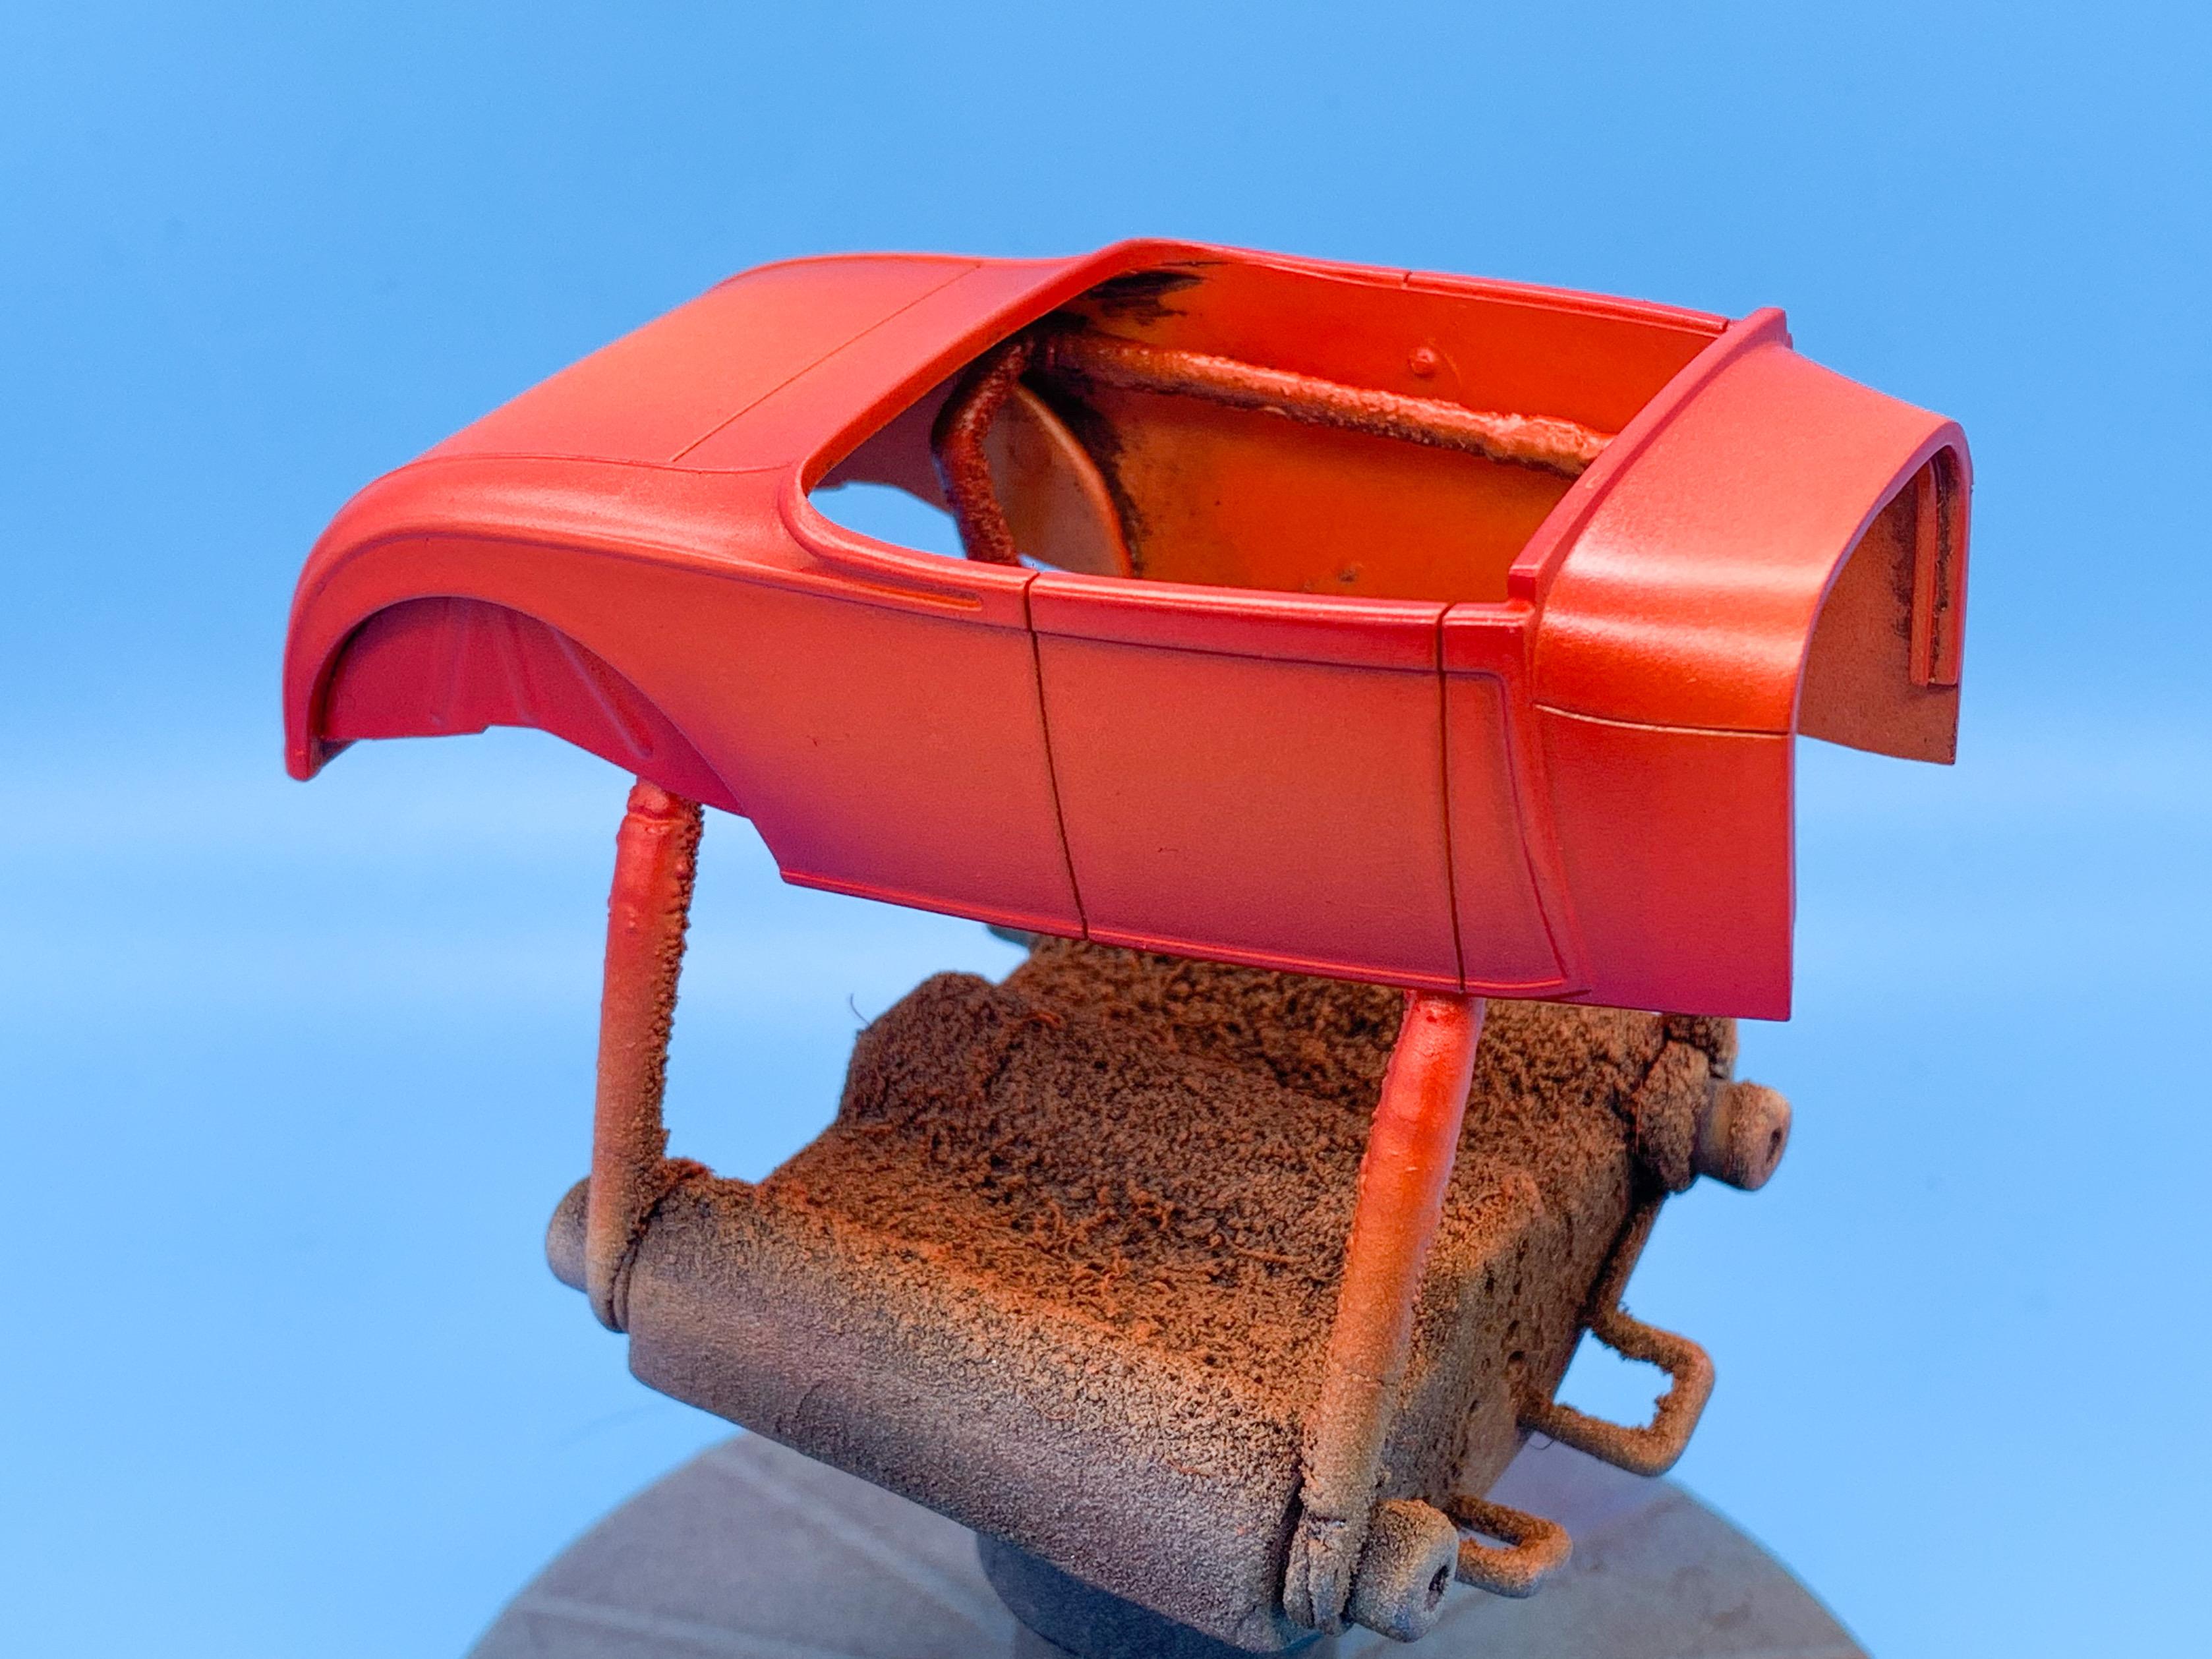
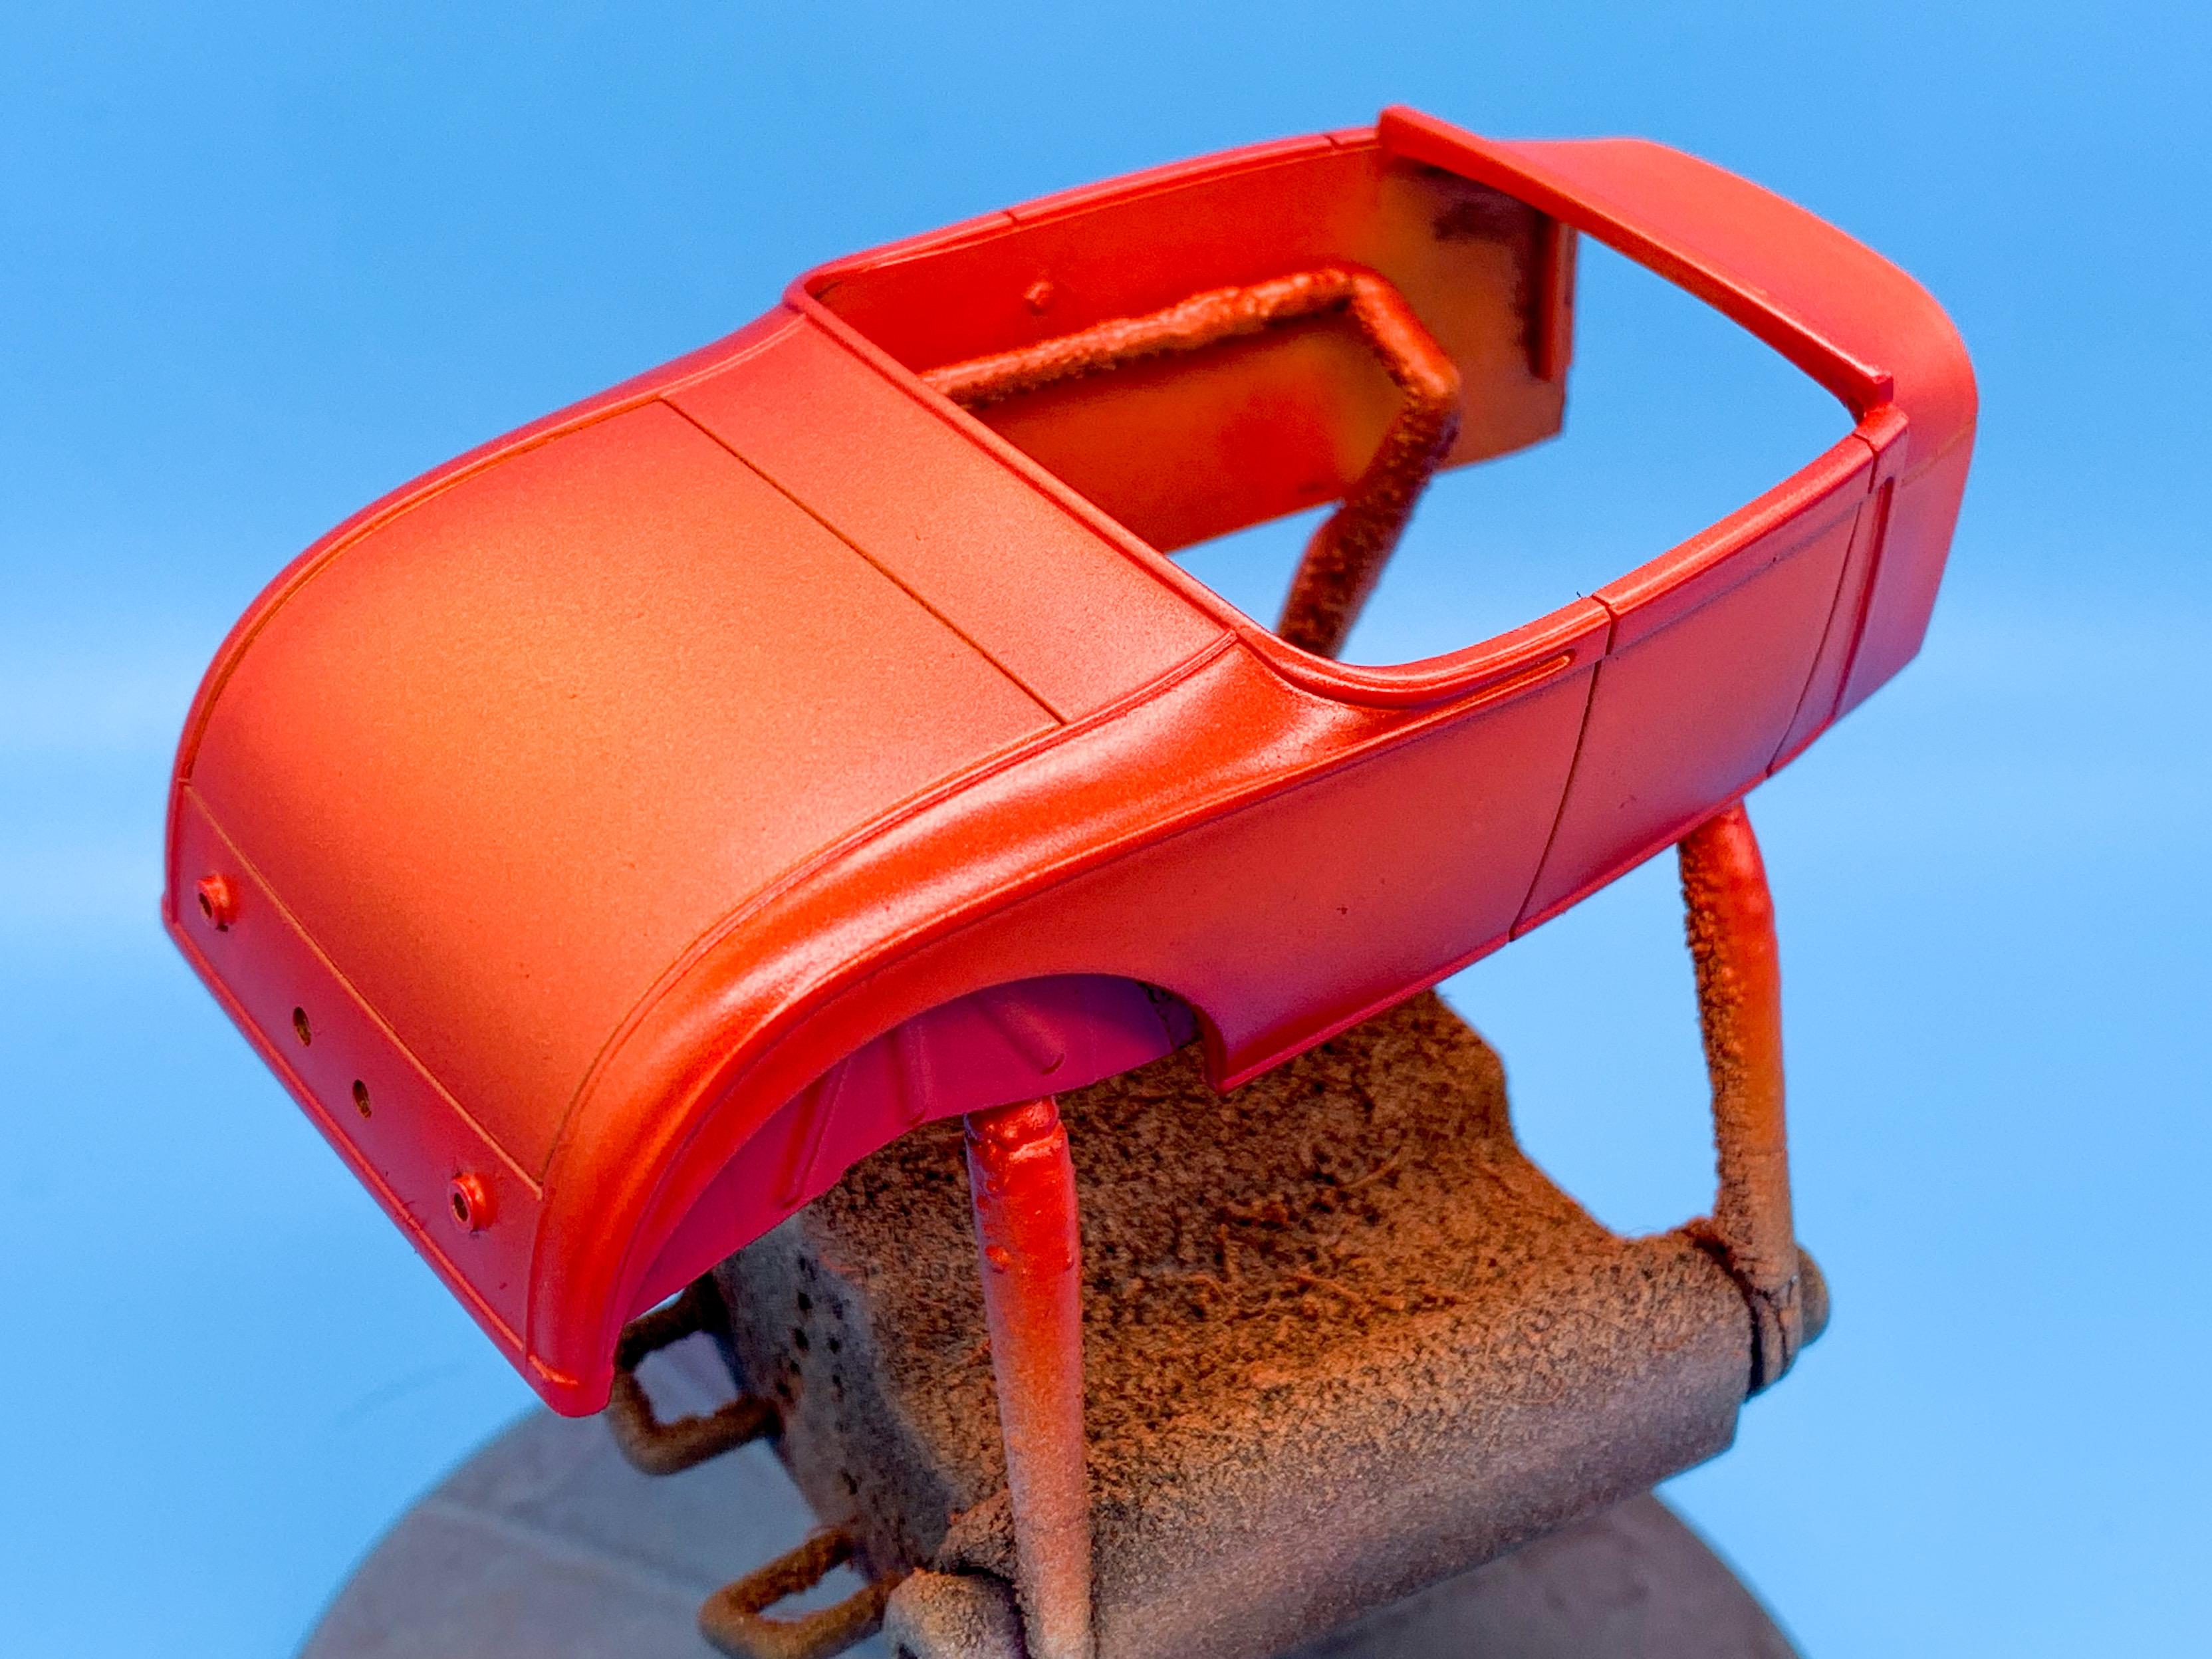
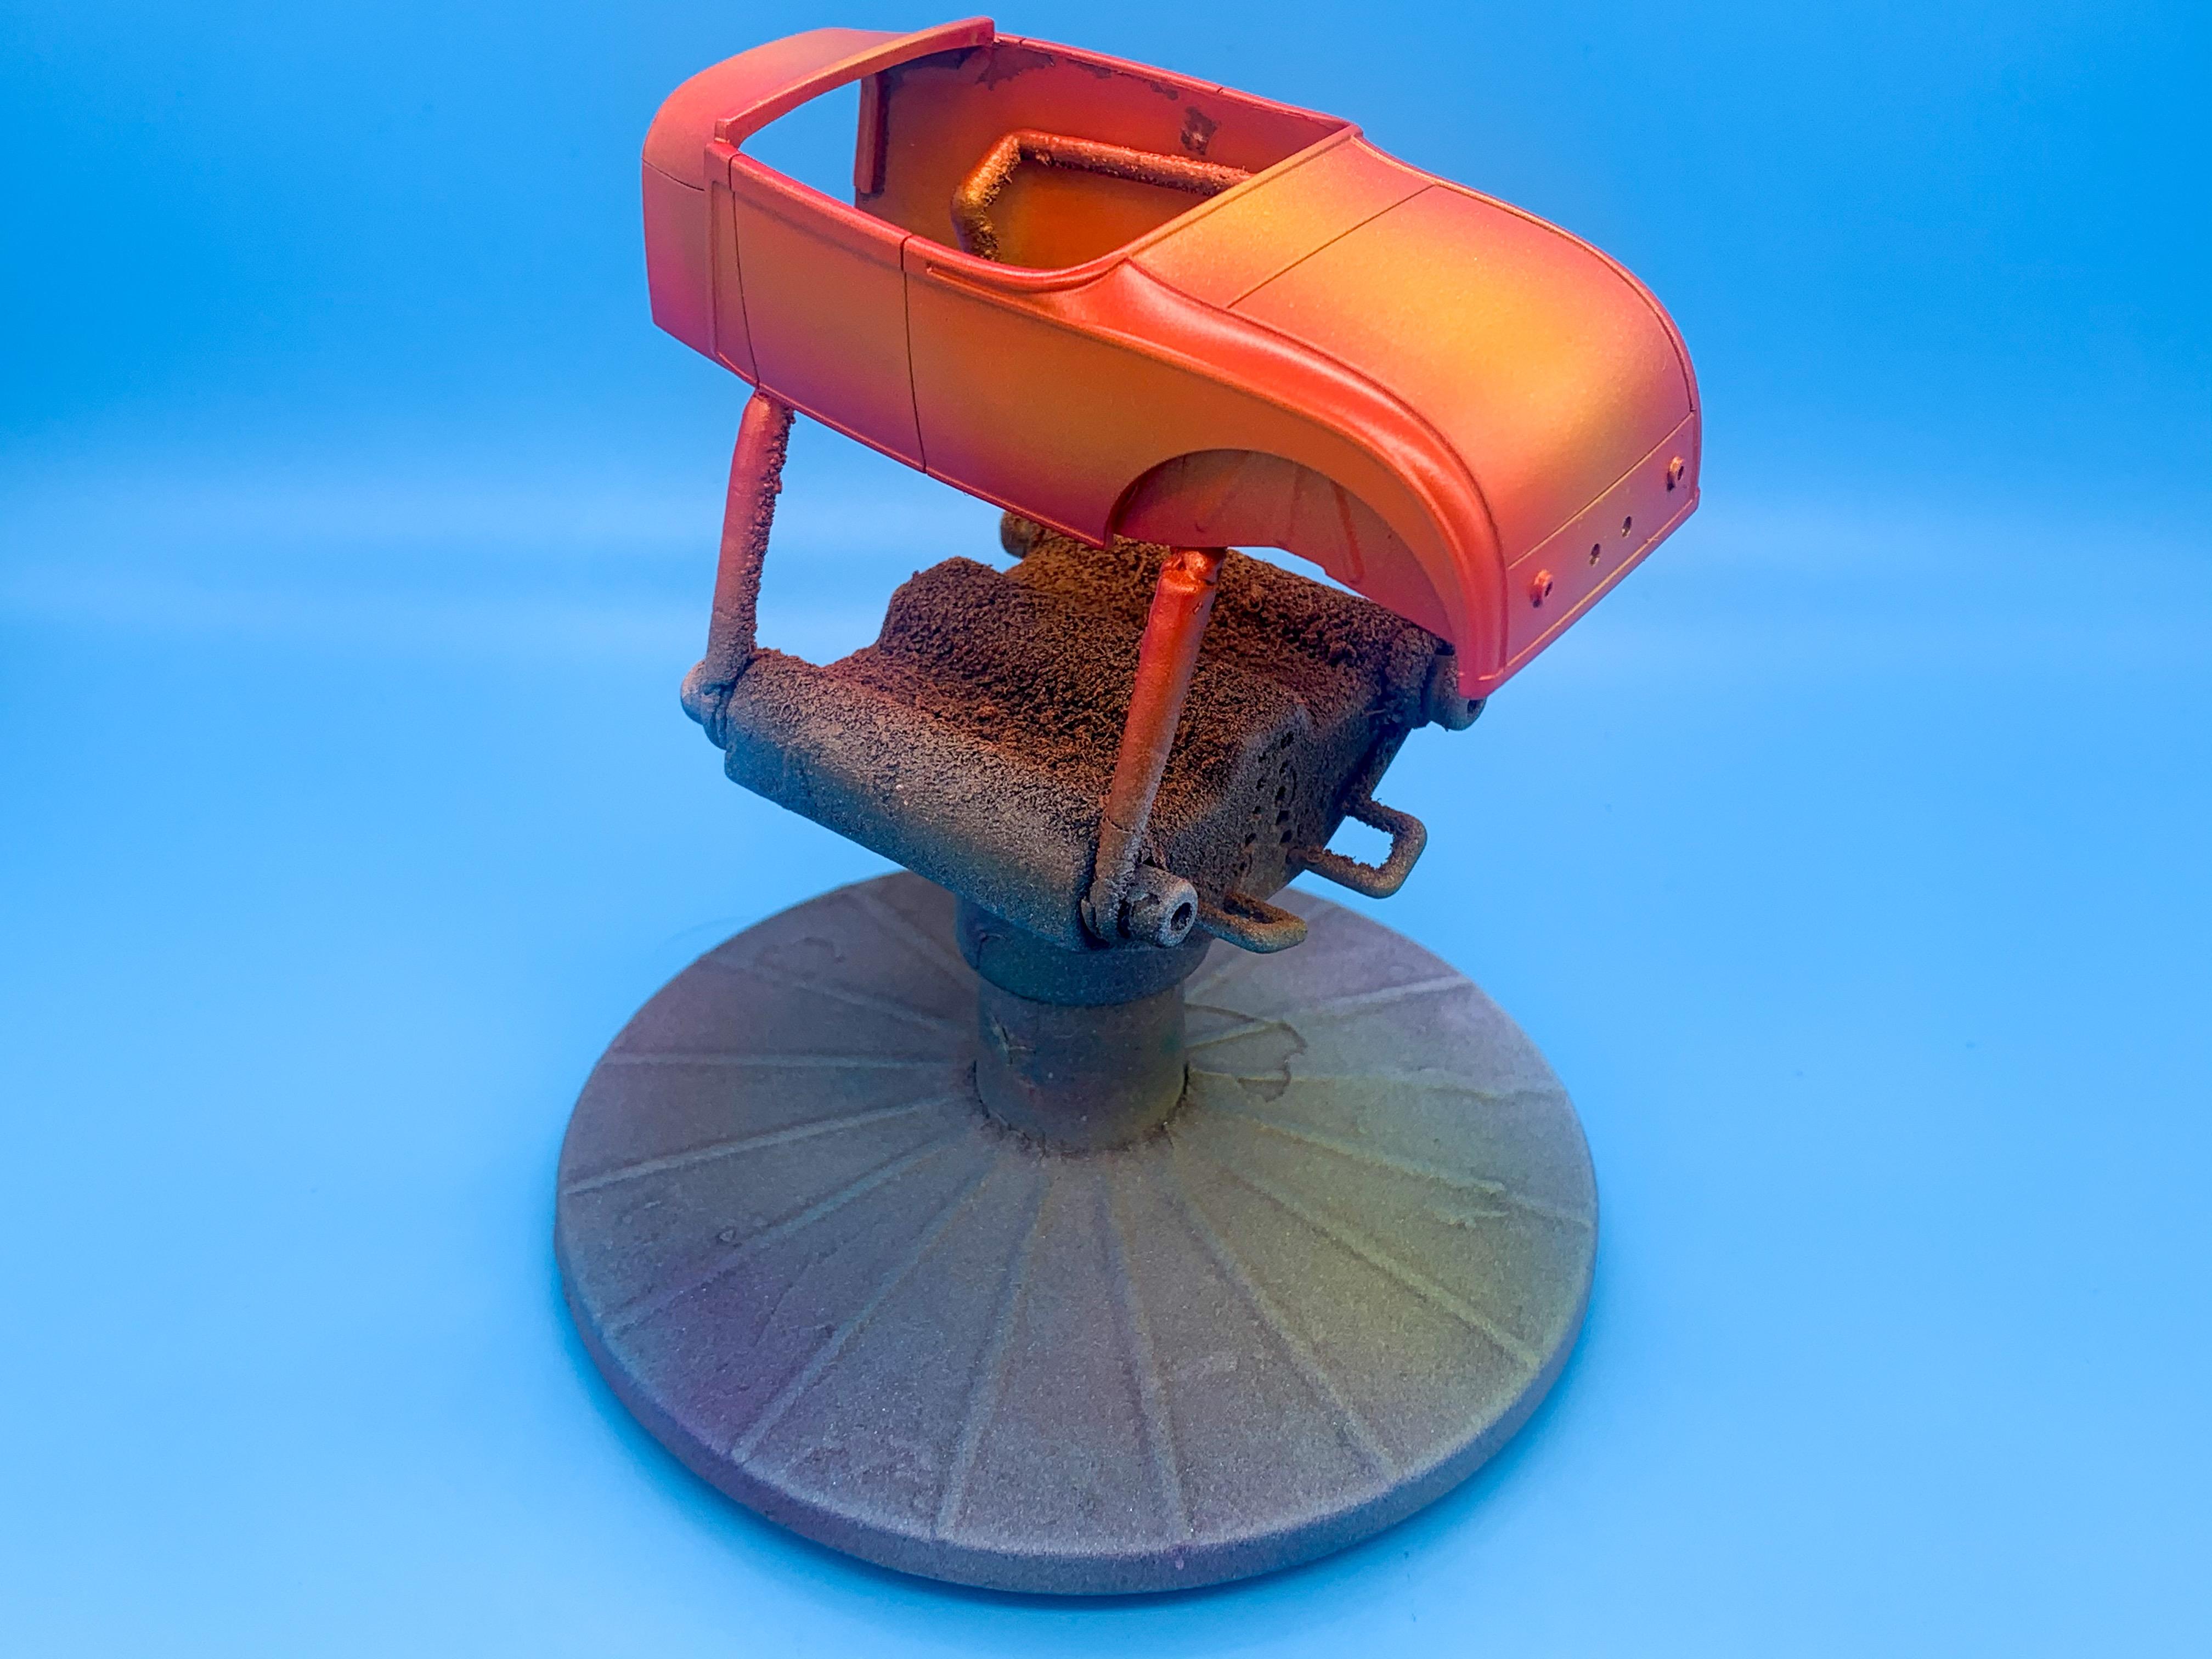
Well, I got the paintjob done and I was kinda “meh” about it. Perfectly fine and looked nice - but it didn’t blow me away. Needed a little more in terms of fades and details. So, seeing as paint is cheap and my time is cheaper - mulligan! One quick shot I snapped of it in the stripper before it gets a second chance: It was all nice and crisp and came out well - I’ve just done this kind of look a couple of times already and I hadn’t really done anything that excited me. 24 hours later...base coated in orange followed by some subtle fades of Testor’s pearl pink: I kinda imagined the orange color looking like a sunset - and the first try just looked like an orange. Closer now, but needs more sun... Way closer to what I had in mind! Looks nice with a little intercoat on there too, to gloss it up a little: Much more like what I’d imagined! I need to shoot the flames next (in the more conventional way, not the backwards method I usually use) but I’m much happier with the main color this time so it’ll be worth this extra little bit of effort. More soon!
-
I got the most twenty-dollar-ist copy of one of those I could find on all of the internet! I figure that's twice as much as my regular airbrush cost so it oughta be AMAZING by comparison My local Hobby Lobby seems to ration their Revell 29 kits and put ONE solitary new kit on the shelf every week. I've figured out by visiting every day (it's on my way home from work, helpfully) that they put one new kit on the rack every Friday - so every Friday night since the start of December I've been going and picking up another one Making the most of them being $18 with coupon before something happens to the tooling again and they're $300 suddenly. Got about 7 or 8 in the stash now I think, so I should be set for a little while. I'm actually going to apply the opposite version of the mask that's on there already so I can shoot some darker spots to add a shadow effect, as well as some subtle little fades and so on...I'd like to get some hot candy pink in this color-scheme too I think. Maybe add some highlights in a slighly lighter version of that orange color around some of the raised panel lines too? Guess we'll see how it looks once I get painting!
-
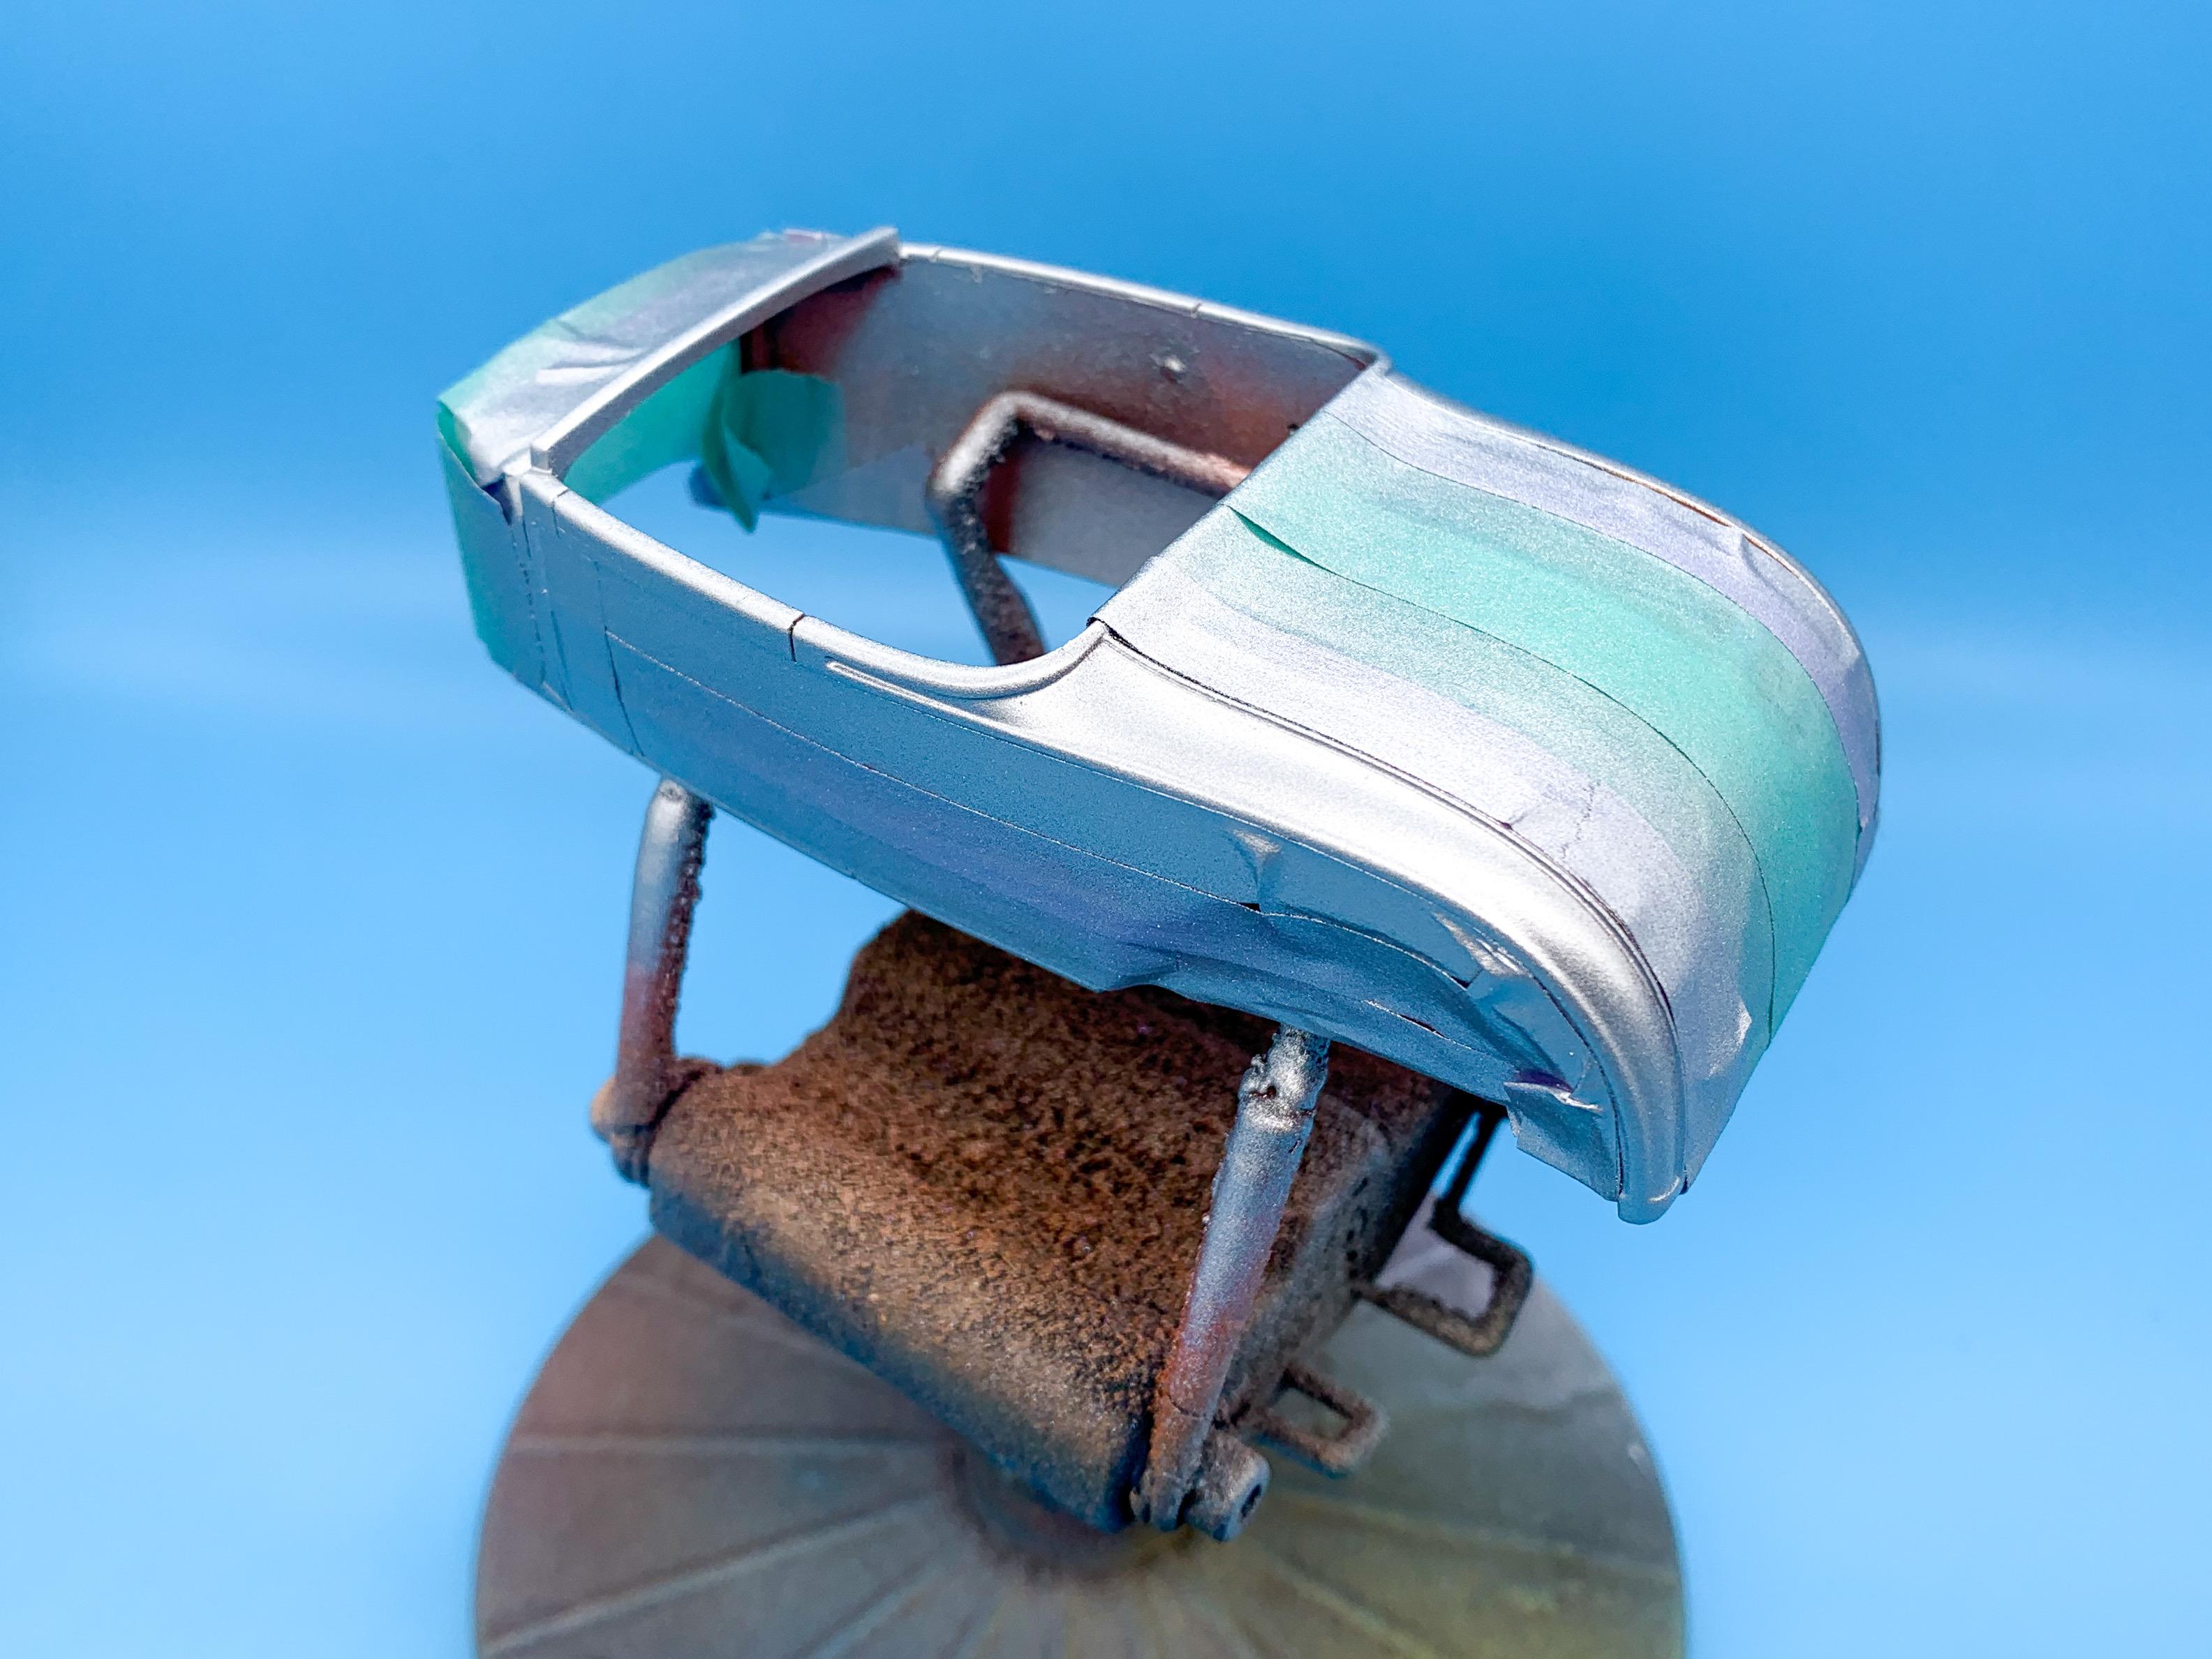
Thanks buddy! Me too! Got the next couple of steps closer tonight...cut some masks, applied them over the blue/purple paint from yesterday and then reshot in Createx pure white: Then, that same Createx tangerine that i shot on the frame: I’ll need to let the orange set up overnight before I can do the next step - I want to do some fades and shadowing, and just ordered a new airbrush that will (hopefully) allow me to do some finer detail than my regular favorite can handle. Excited for that to arrive tomorrow so I get to the next stage! More soon!
-
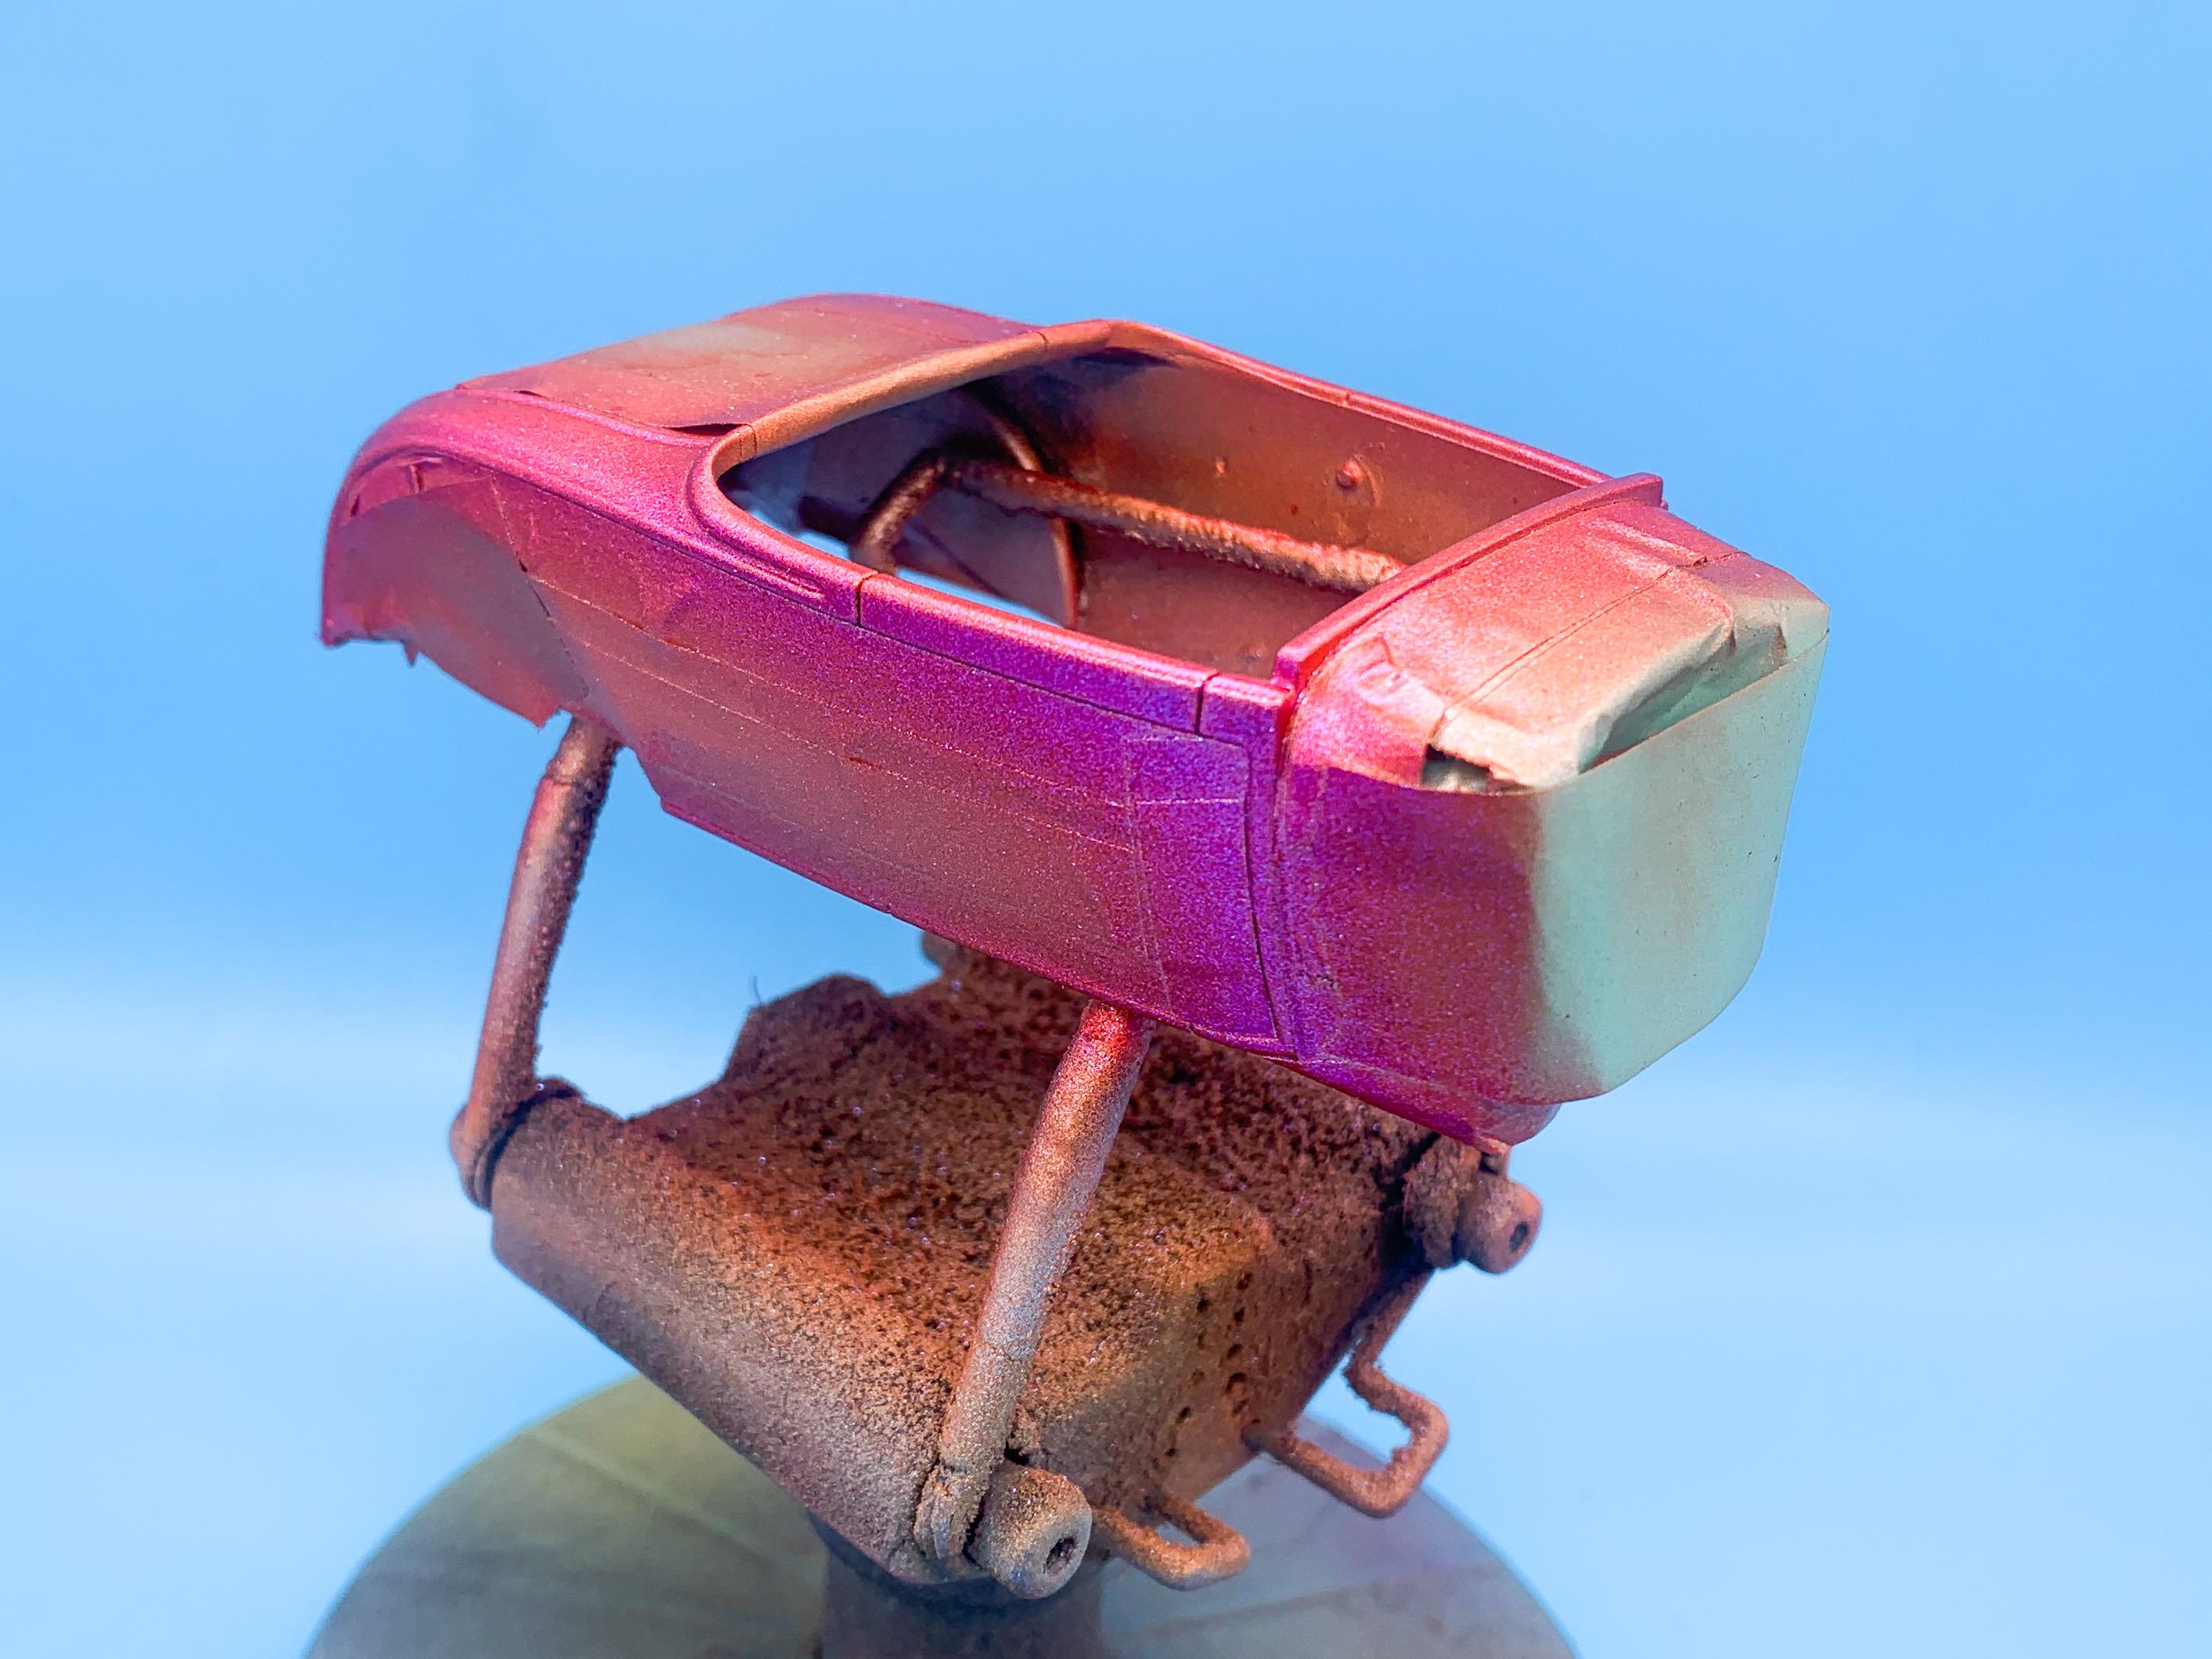
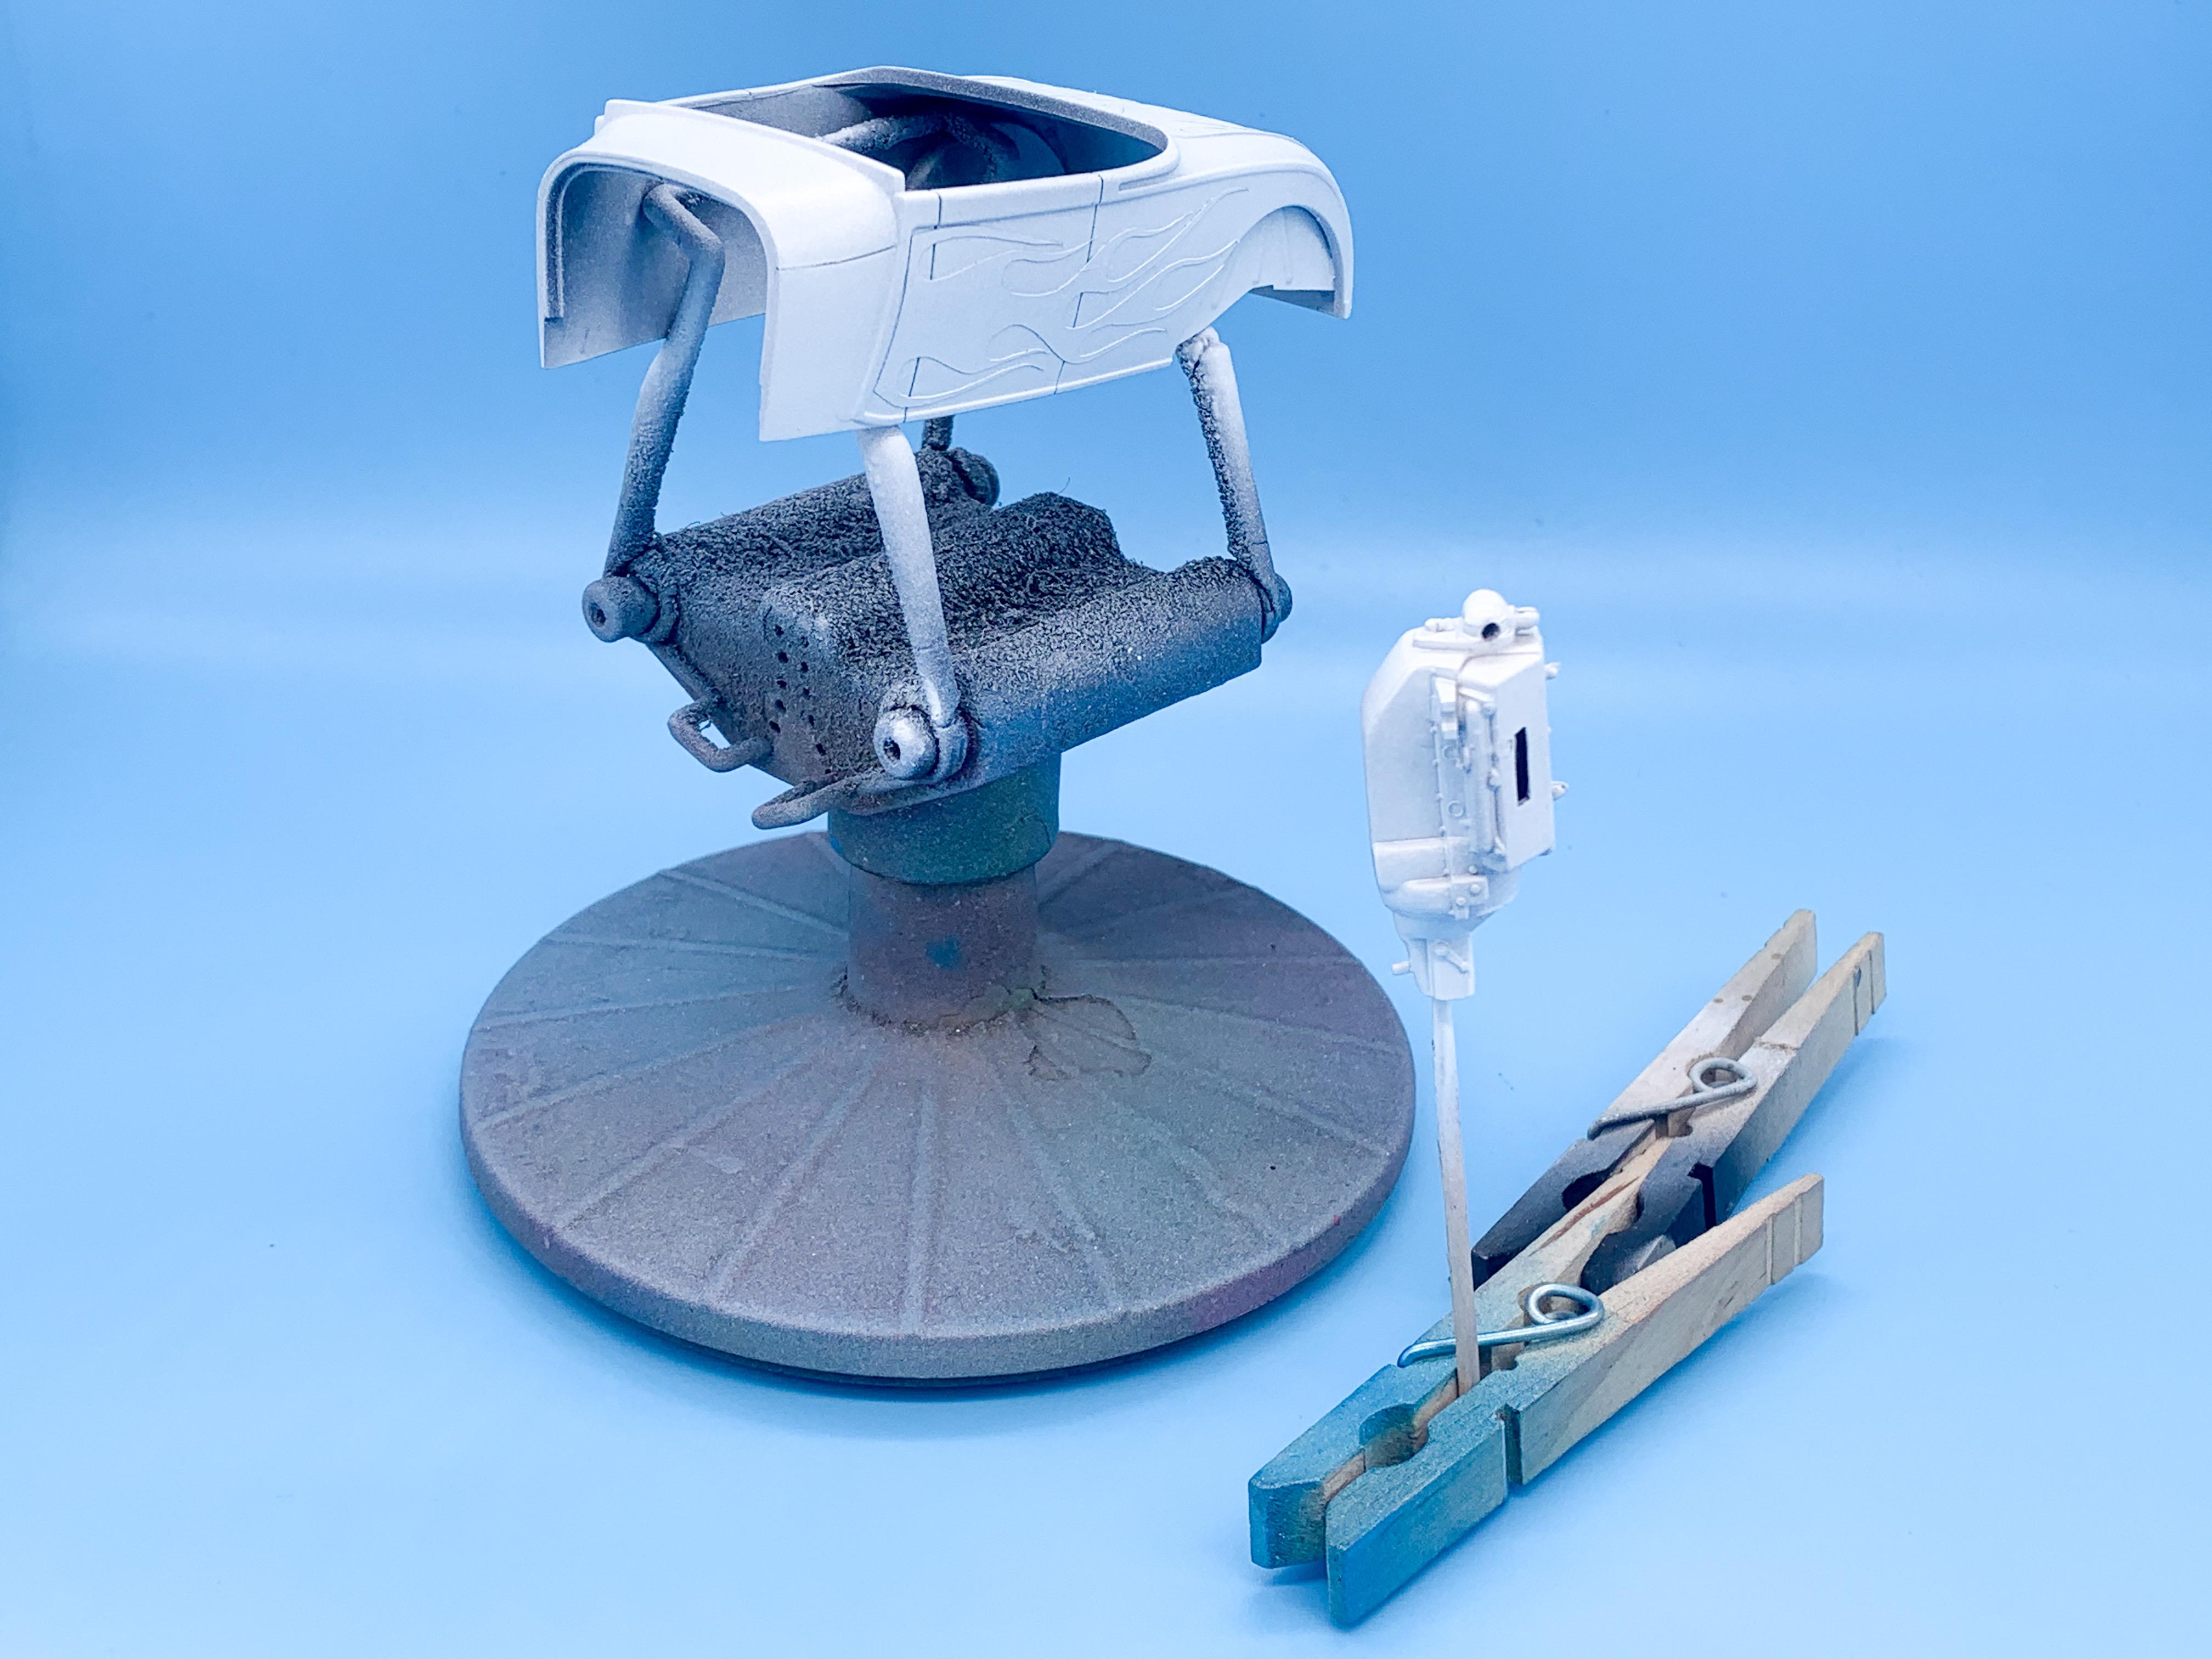
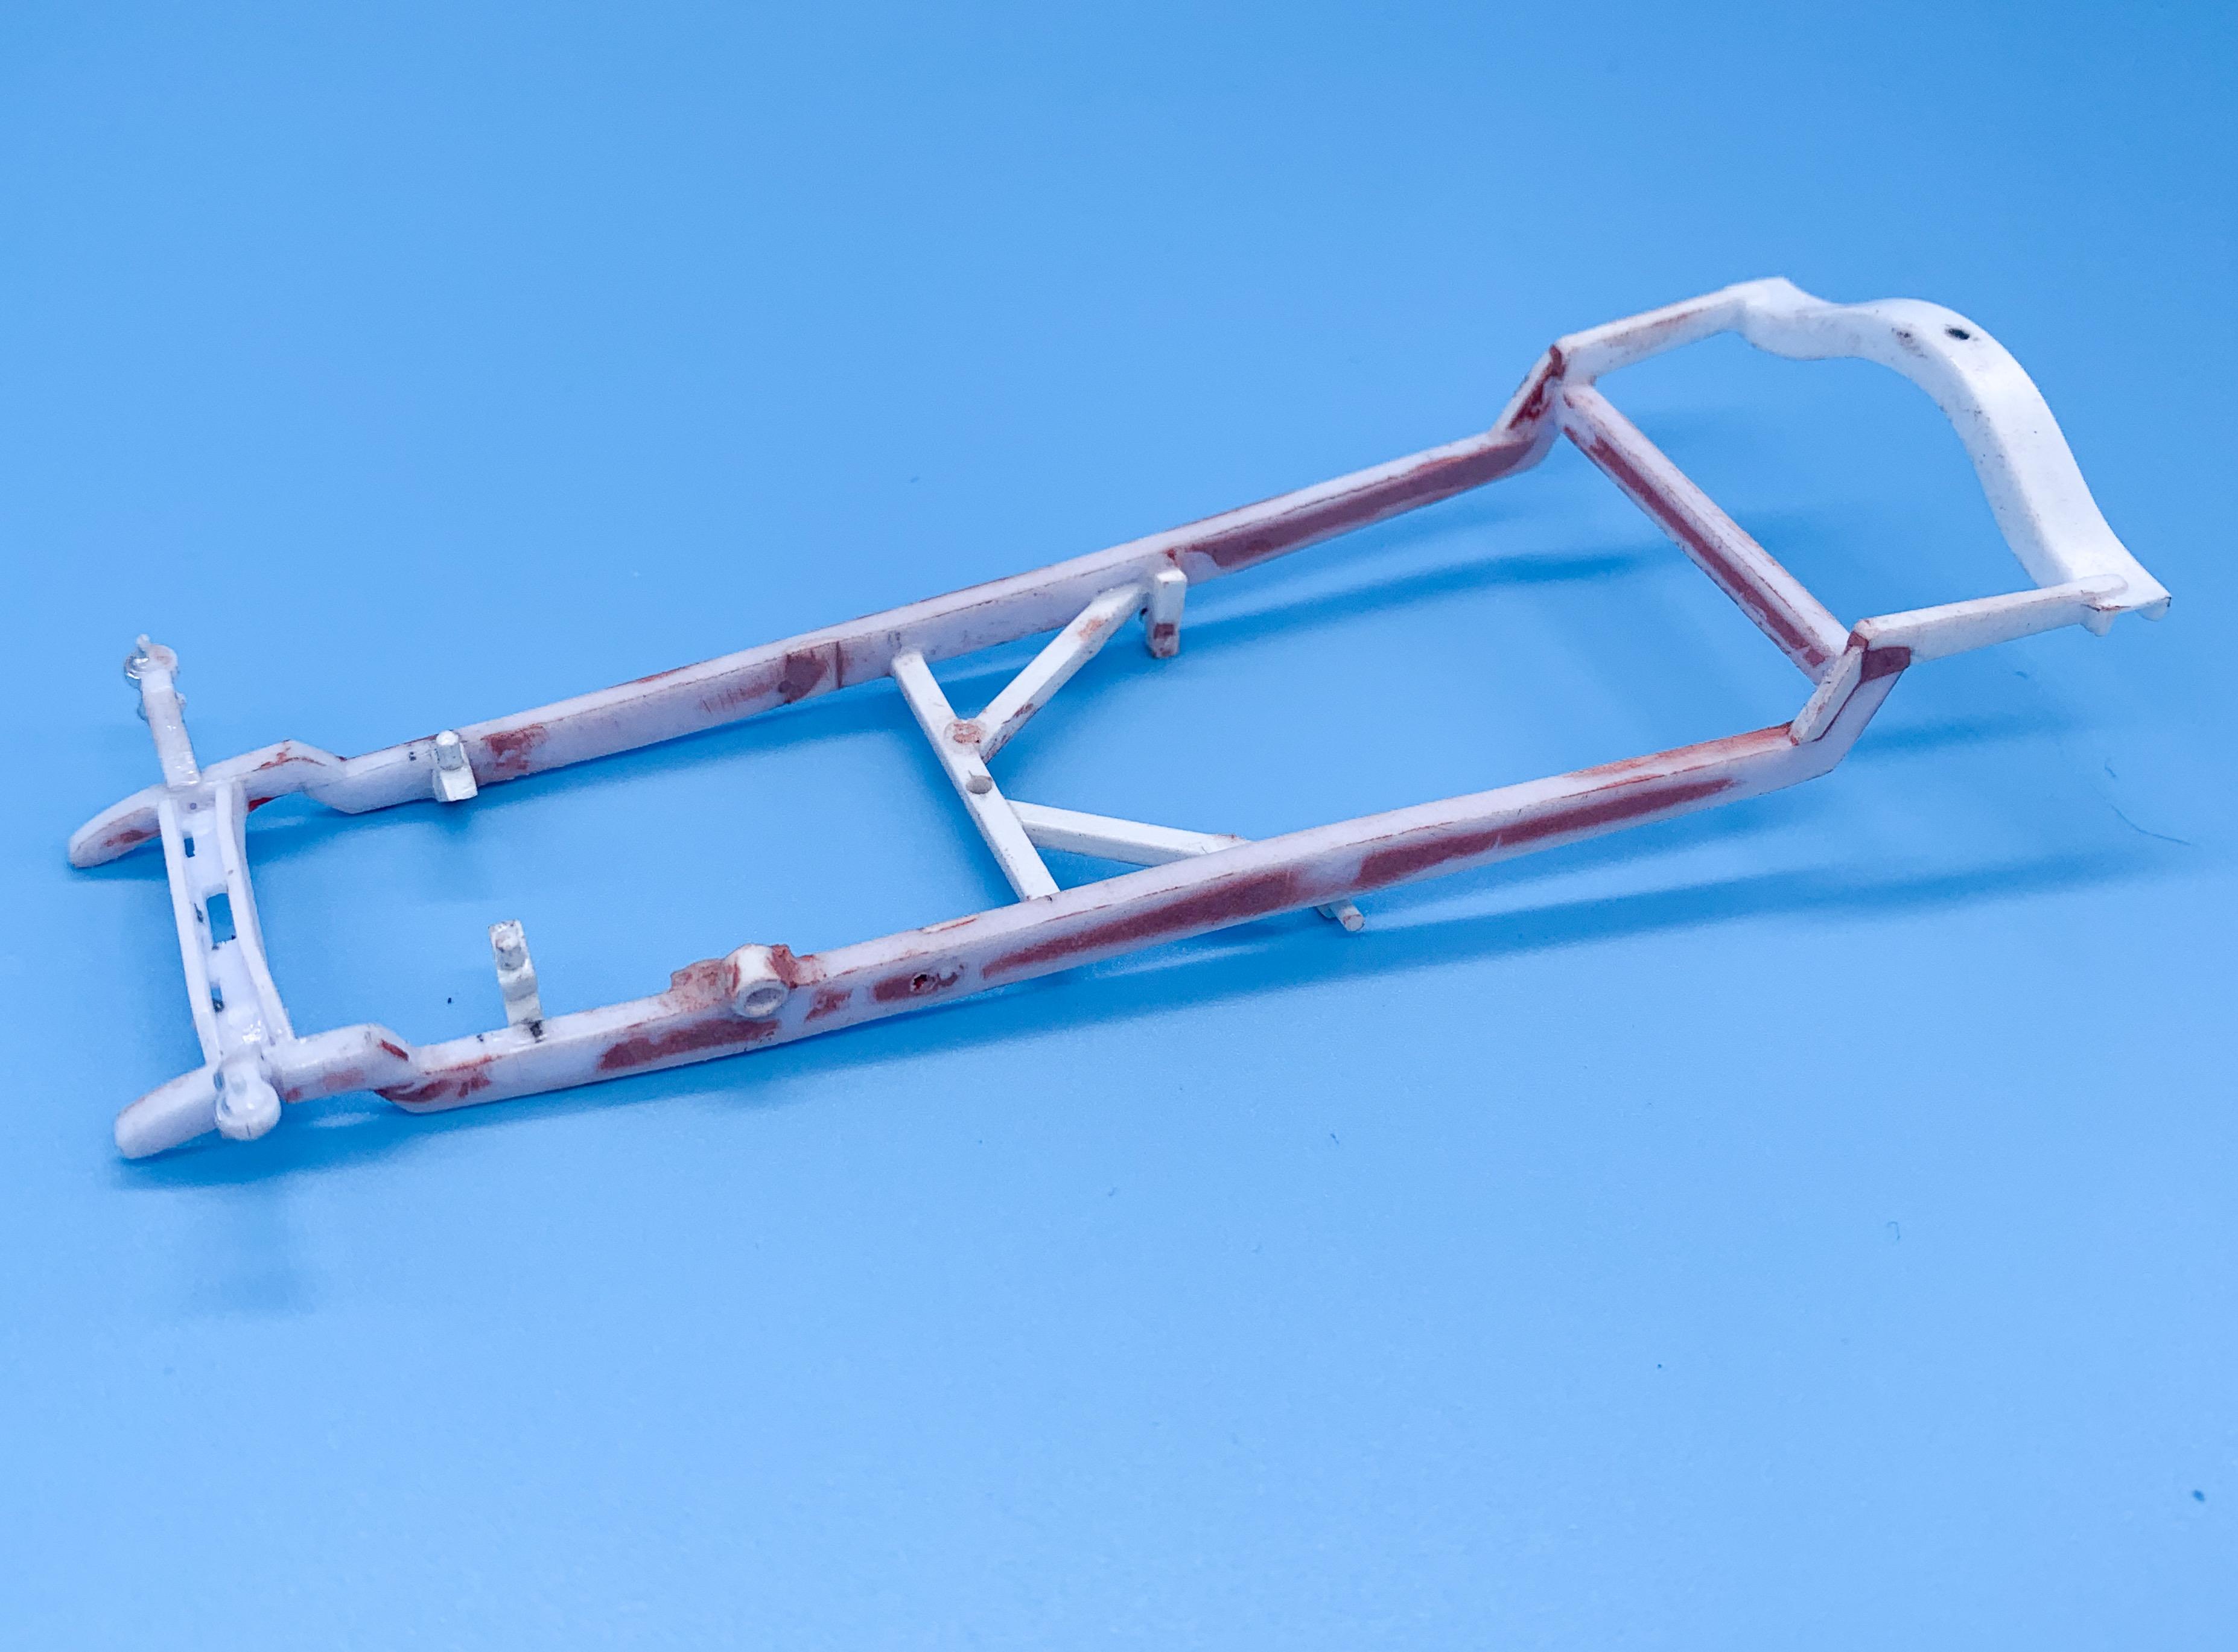
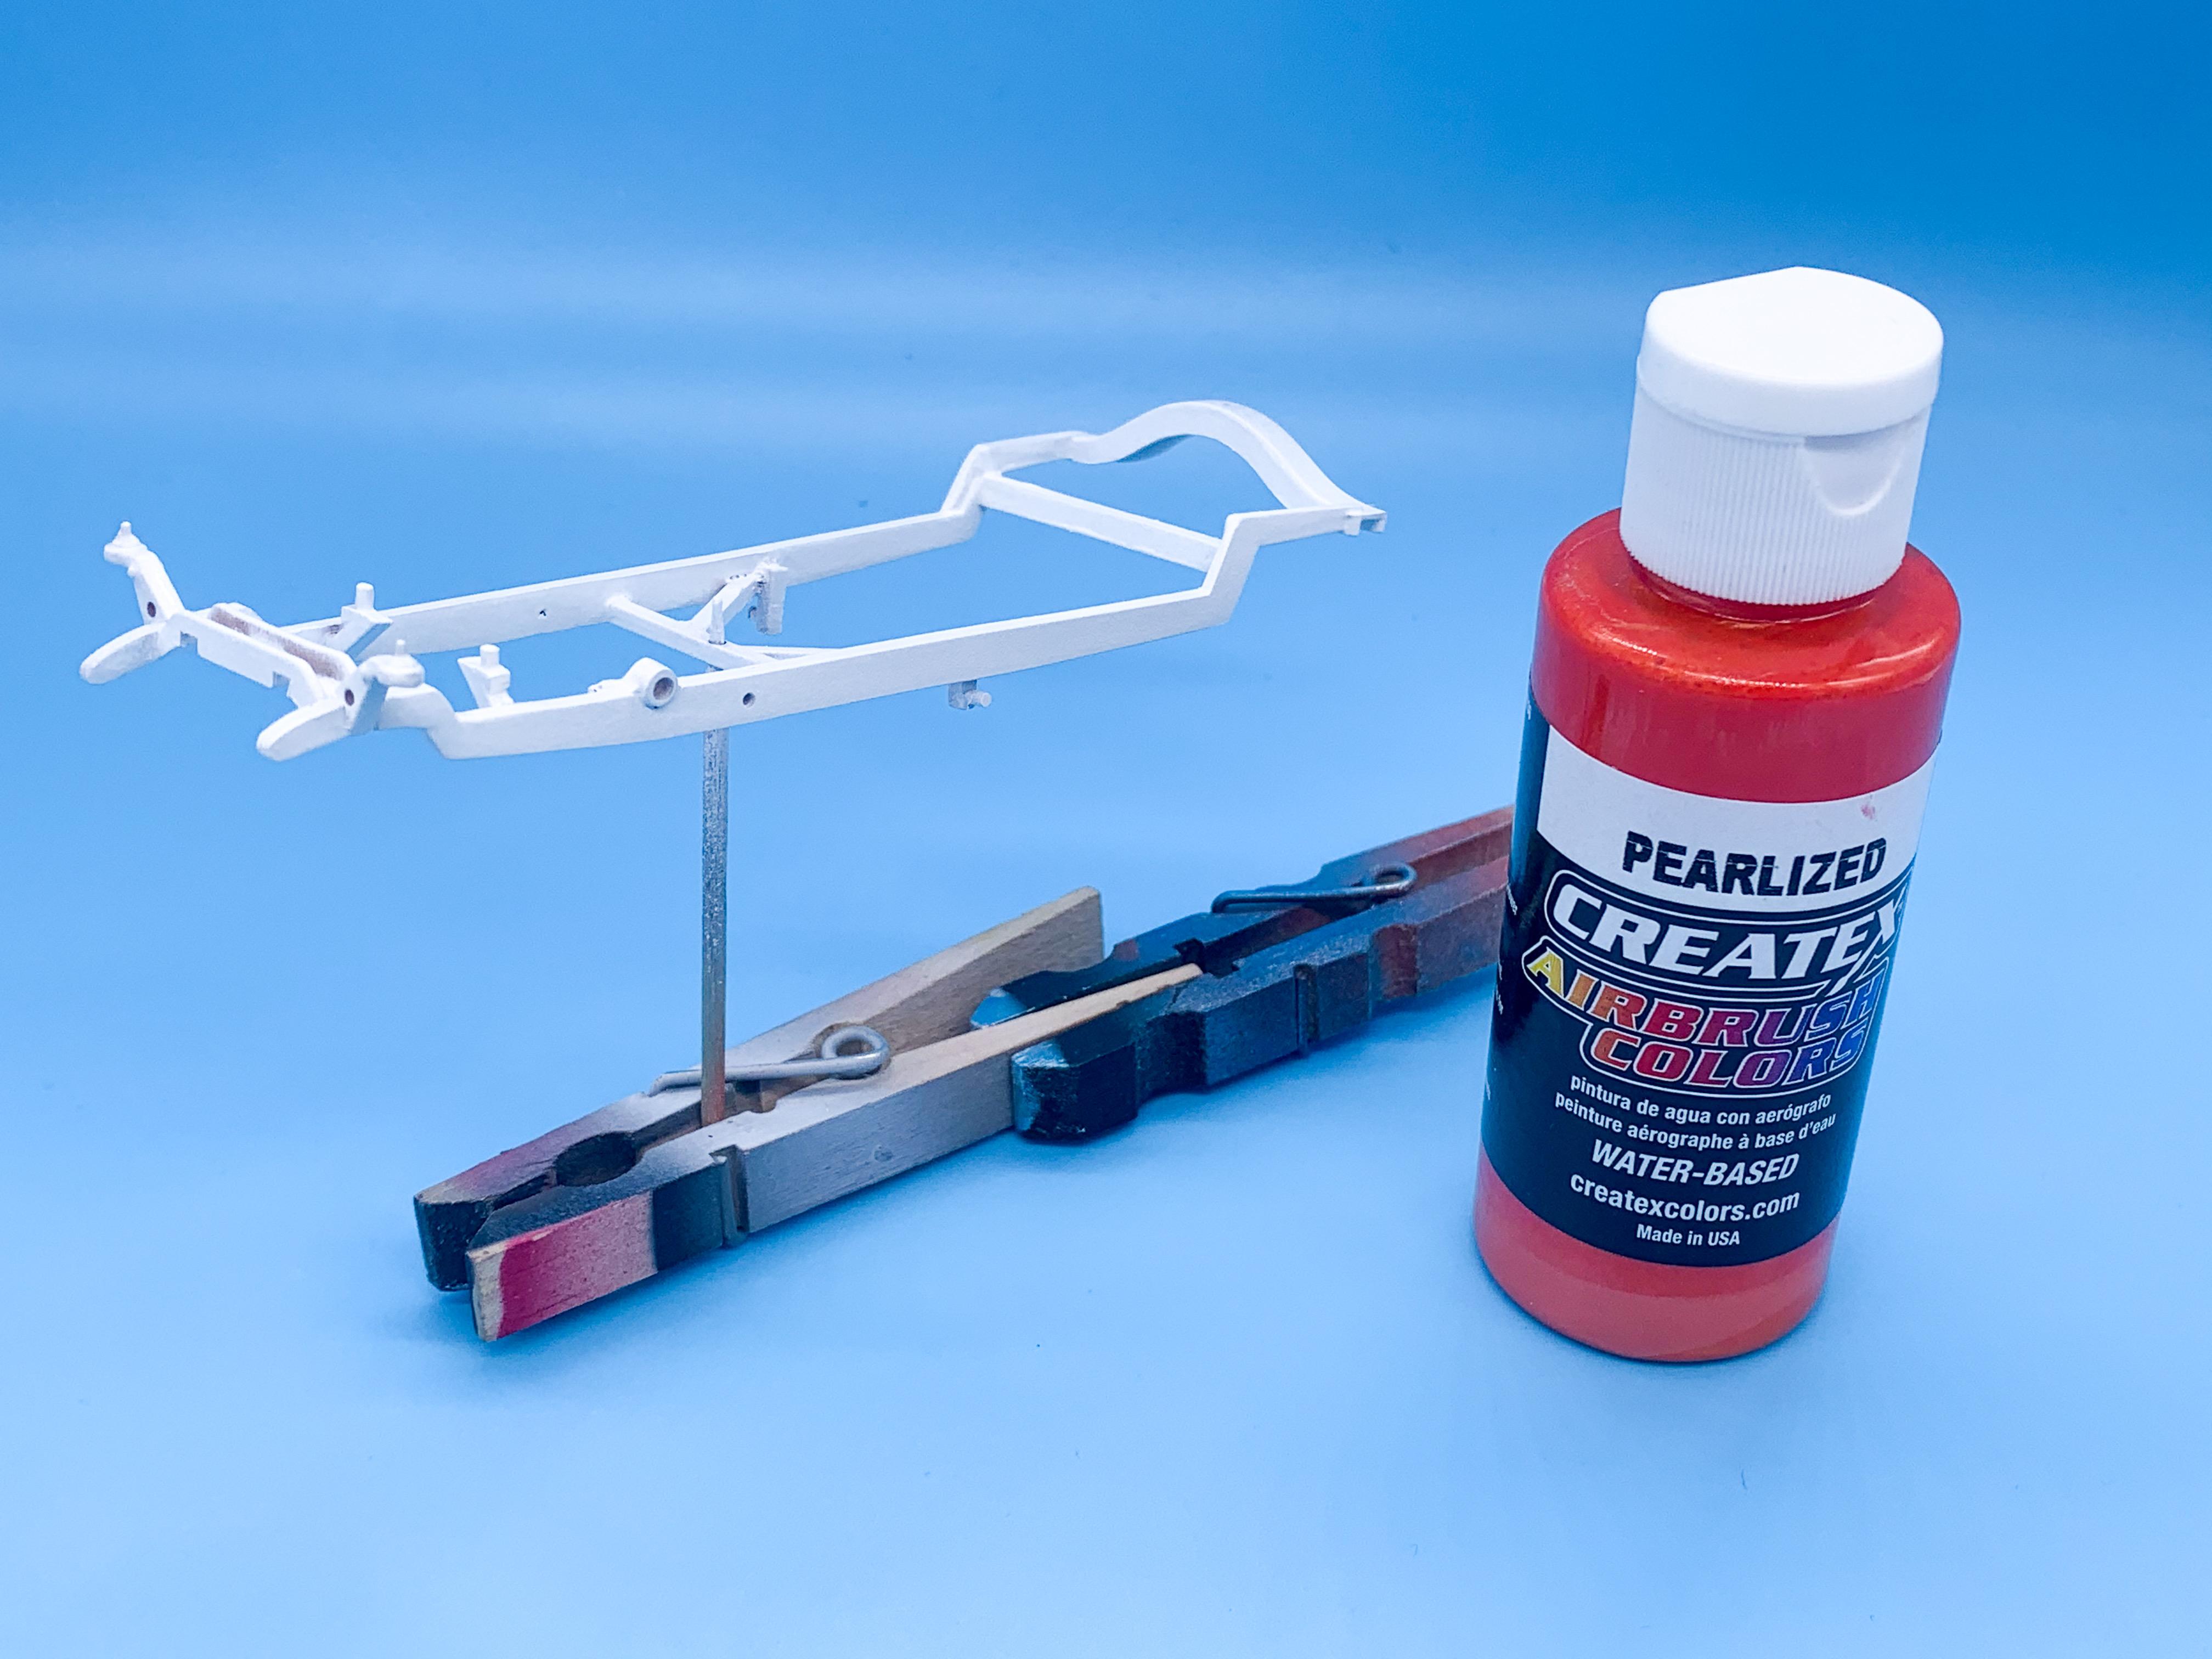
A little more progress on this one yesterday and today... got the frame smoothed out ready for primer: Then primed and shot with Createx pure white ready for tangerine candy: Couple of coats of the color on - this is going to be the main color for the body too, albeit with a couple of other colors in the mix too: The orange color wasn’t QUITE as yellow as I wanted - it’s nice but I wanted a little more flip and brightness to it, so I mixed up some yellow and gold Pearl Ex in some Future and laid some of that down too to bring the tone up a little: Much better! I need to be able to match this color when I get to the other components so I mixed plenty of topcoat so I don’t have to try and figure it out a second time further down the road. Onto the body - everyone knows if you want a nice bright color you need a nice light base, so here I am starting off with black primer: I’m doing one of my reverse-masked flame jobs, and I wanted to do some purple to blue flip-flop flames, so I needed the black as a starting point. Next up, Testor’s color changing paint: I figure rather than doing a fade paint-job for the flames I can use this paint and have the curves of the body and the way light falls on it to give me the same effect but in a more interesting way. I saw some Indian Larry choppers last year at his shop in Brooklyn, and I liked how they were using a mix of traditional parts - engines, frames and tanks and so on but with some pretty out-there paint jobs and details. Totally going for that kind of vibe on this one... Finished up tonight by shooting over this flip flop layer with some more Future as a barrier coat and tomorrow I can cut some masks and start the REALLY fun part! More soon!
-
The issues with scratch building
OldNYJim replied to IbuildScaleModels's topic in Tips, Tricks, and Tutorials
Those look great! Beautiful work! -
Scale Auto Mag DVD
OldNYJim replied to rhammer2003's topic in General Automotive Talk (Trucks and Cars)
As a current Mac OS user that’s disappointing - what format are the magazines on the disc actually in? I figured they’d be PDFs like their regular downloadable content