OldNYJim
-
Posts
252 -
Joined
-
Last visited
Content Type
Profiles
Forums
Events
Gallery
Everything posted by OldNYJim
-

34 Church Truck
OldNYJim replied to OldNYJim's topic in WIP: Model Trucks: Pickups, Vans, SUVs, Light Commercial
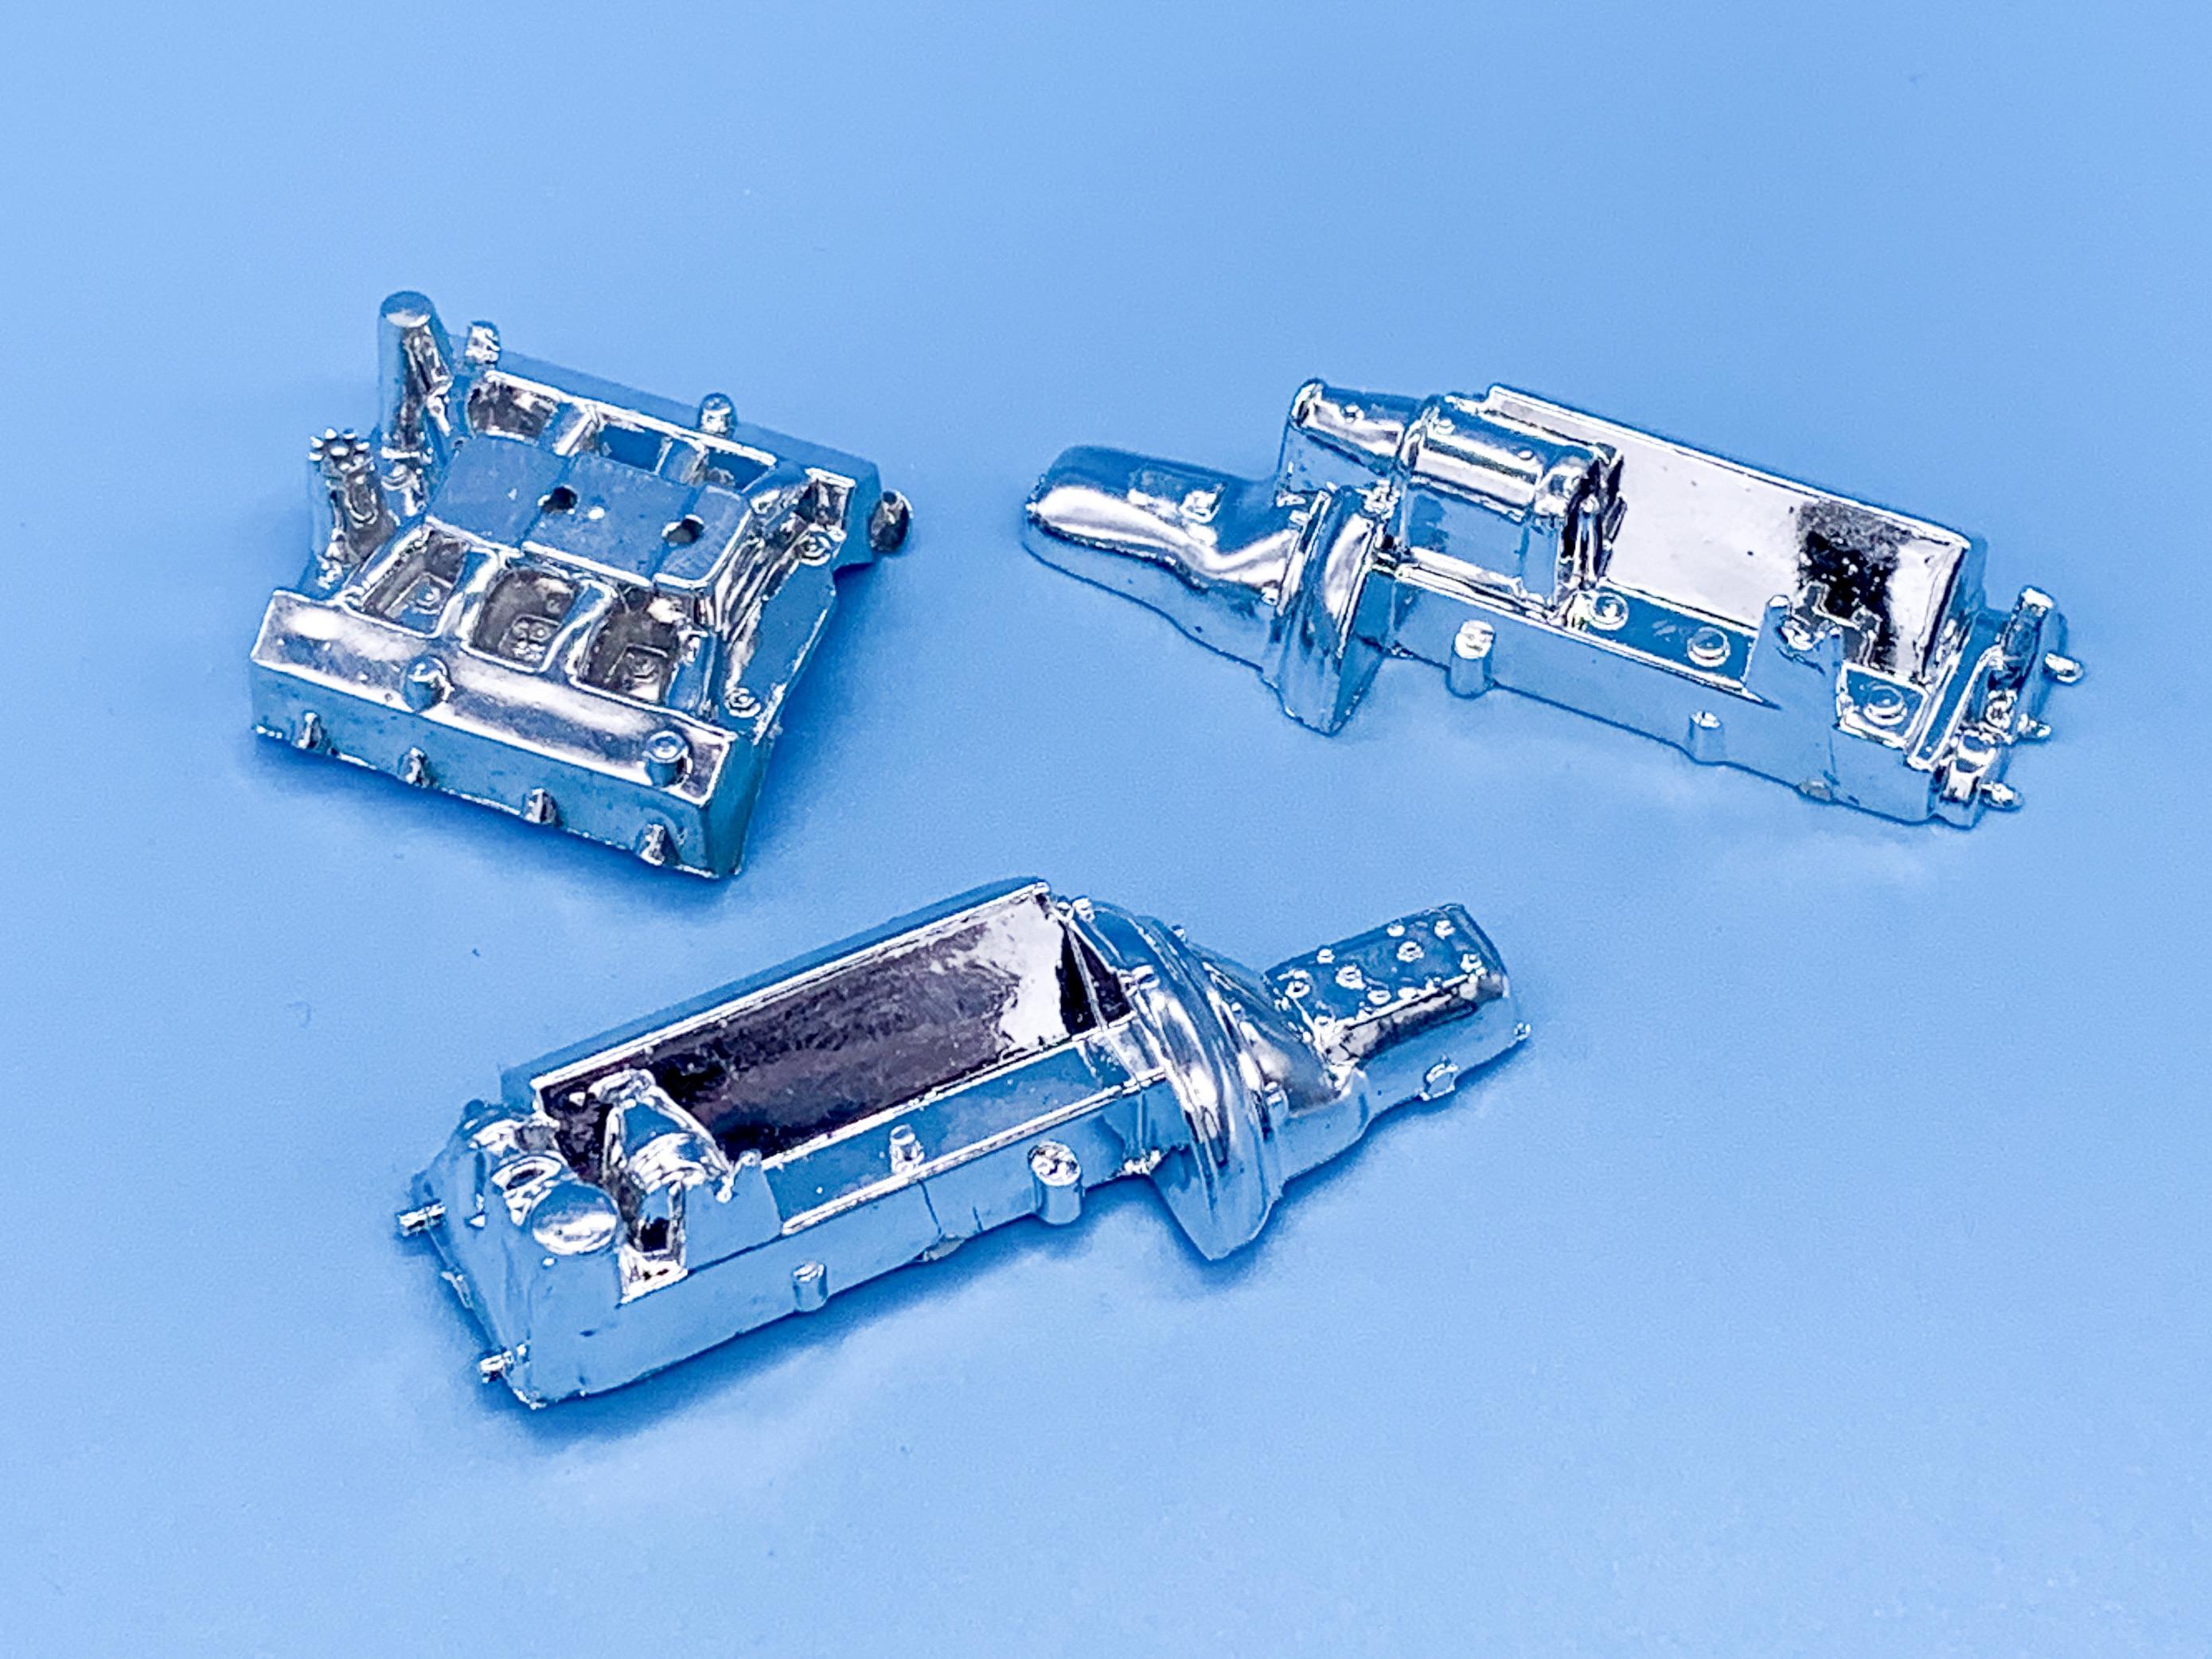
Oh yeah!!! Definitely! I wanna do all the variations of these - probably do the tow truck version next. But, like, the most ridiculously over-painted showcar looking tow-truck ever ? Meanwhile, on my more subtle project, couple of tiny little updates. I want to smooth out the underside of this truck and get it looking really clean...not streetrod-style-all-smoothed-out, but real clean and simple anyway. So, got to a-sandin’ and got that handled - had to patch a couple of holes and then tomorrow I can do the same to the top-side and then get it puttied-up and levelled out: After a few failed attempts at getting a perfect pull of those cross-emblem Moon wheels I got one today. Wasn’t even a hard part to cast, I just kept getting some little air bubbles where I didn’t need them, even after using a toothpick to dab some in all the crevices and nooks. Shot a light coat of primer on my one good one so you can see the detail...it’s VERY subtle, but I like the idea of having a bunch of tiny details on a build where you could look 10 times and still see some new little thing: Finally, I’d like to start on the engine - I know I’m kinda all over the place with this one, but I’m trying to get some of the major mods done or in-progress so I can start some mocking-up and the weekend and start figuring out stance and whatnot. I really like the look of this chromed Thunderbird mill, and I’d love to keep the kit chrome and add detail around it...but I can’t live with the big parting line in the transmission and the fit of the block to the intake (which also forms part of the cylinder heads). So, I guess for this one I’ll be stripping the chrome and doing some clean up...there’s about a 50/50 chance of this being chromed out versus body color, haven’t totally decided yet... More soon!
-
34 Church Truck
OldNYJim replied to OldNYJim's topic in WIP: Model Trucks: Pickups, Vans, SUVs, Light Commercial
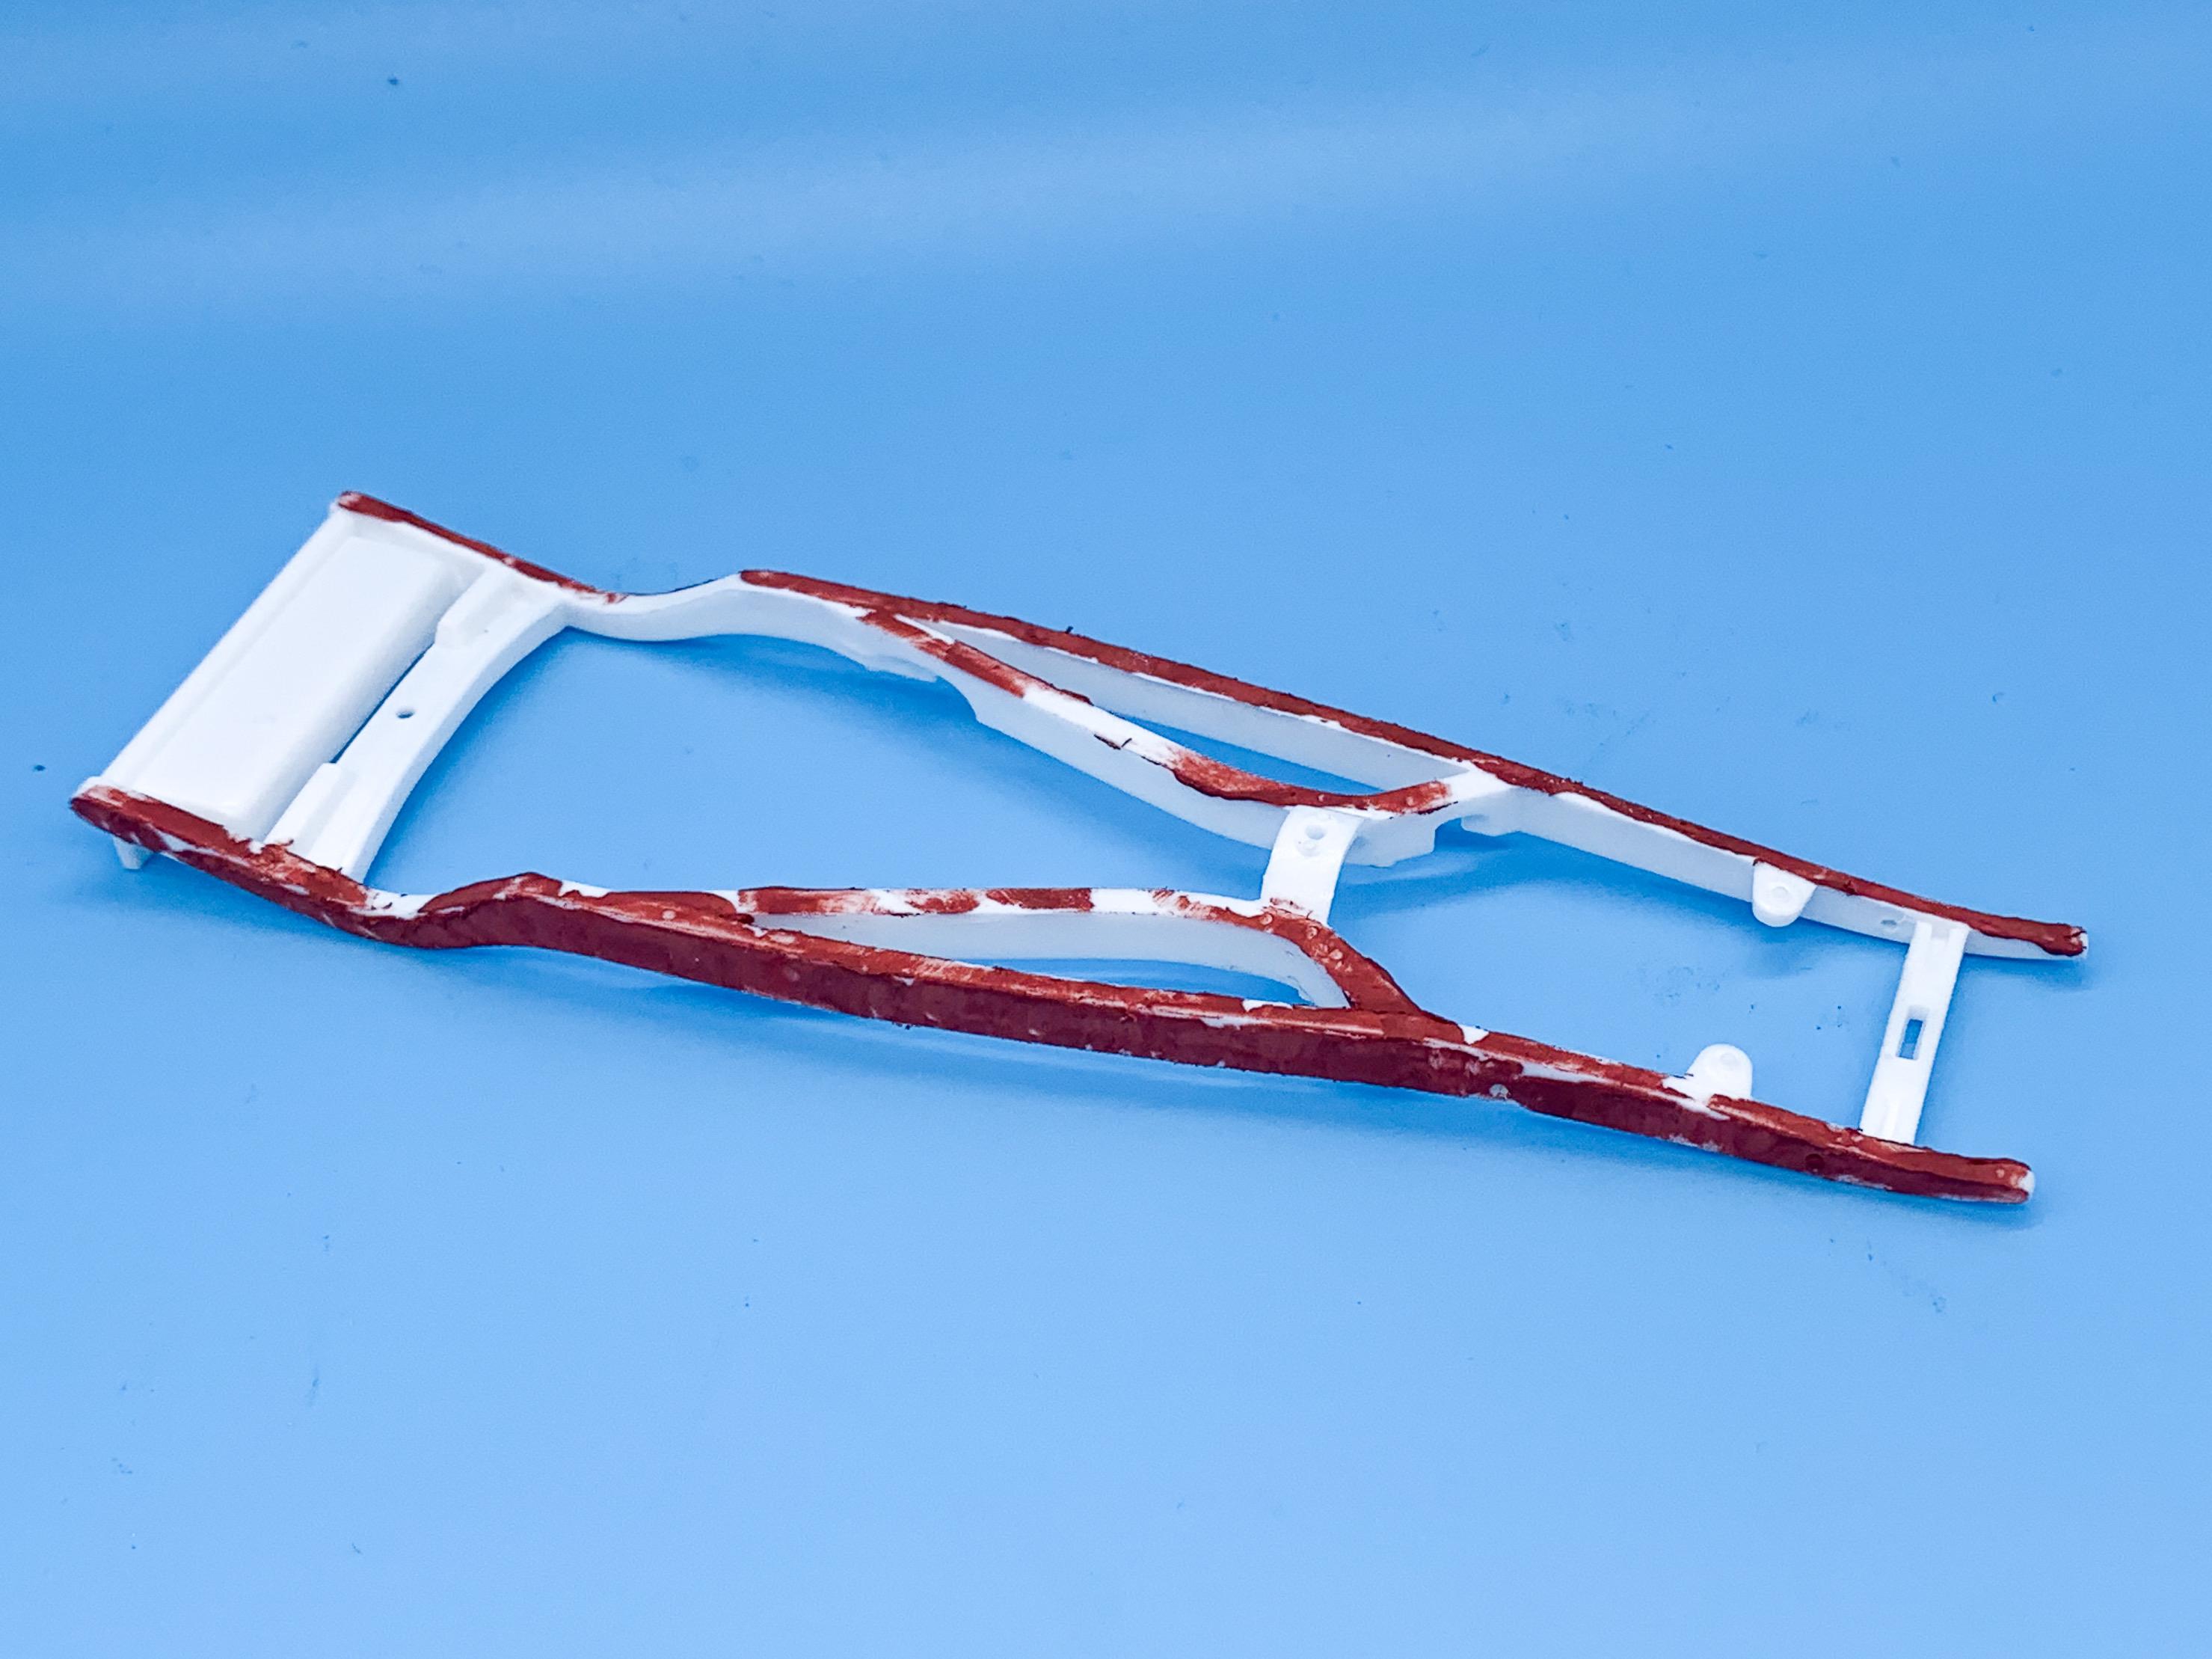
Amazing how those little fender flares transform this thing compared to not having them! Tried resin casting some of my new wheels this afternoon - it’s tricky getting the resin to flow perfectly into all the tight gaps in the mould so I’m still messing with them...just waiting for the latest attempt to harden up now, in fact... In the meantime, did some reshaping of the resin 32 grill I cast yesterday so it’ll drop in between the fenders... And whilst I was starting to shape that new windshield frame I started levelling out the kit frame rails...as you can see they weren’t particularly straight so they’ll look a lot better once I get to the paint stage here...still done more fettling to go on these... Oh, and did some research on 30s cars with fender flares - found some cool stuff! More soon!
-
Was just re-enjoying the bubbletop Comet thread from 2017...and yup, you said that before Glad you’re not sticking to it though ?????
-
You know, nothing much is cheaper than it was 30 years ago... ...so if you might want to build a particular kit before 2050, best to get one now! ?
-
That’s exactly what I would’ve wanted to do with that body too - it looks great! What IS it anyway?
-
Any Taig Lathe owners here?
OldNYJim replied to OldNYJim's topic in Model Building Questions and Answers
I really appreciate the feedback guys - and thank you @Aaronw for your detailed response. What a huge help!! Got some more reading and researching to do now! -
34 Church Truck
OldNYJim replied to OldNYJim's topic in WIP: Model Trucks: Pickups, Vans, SUVs, Light Commercial
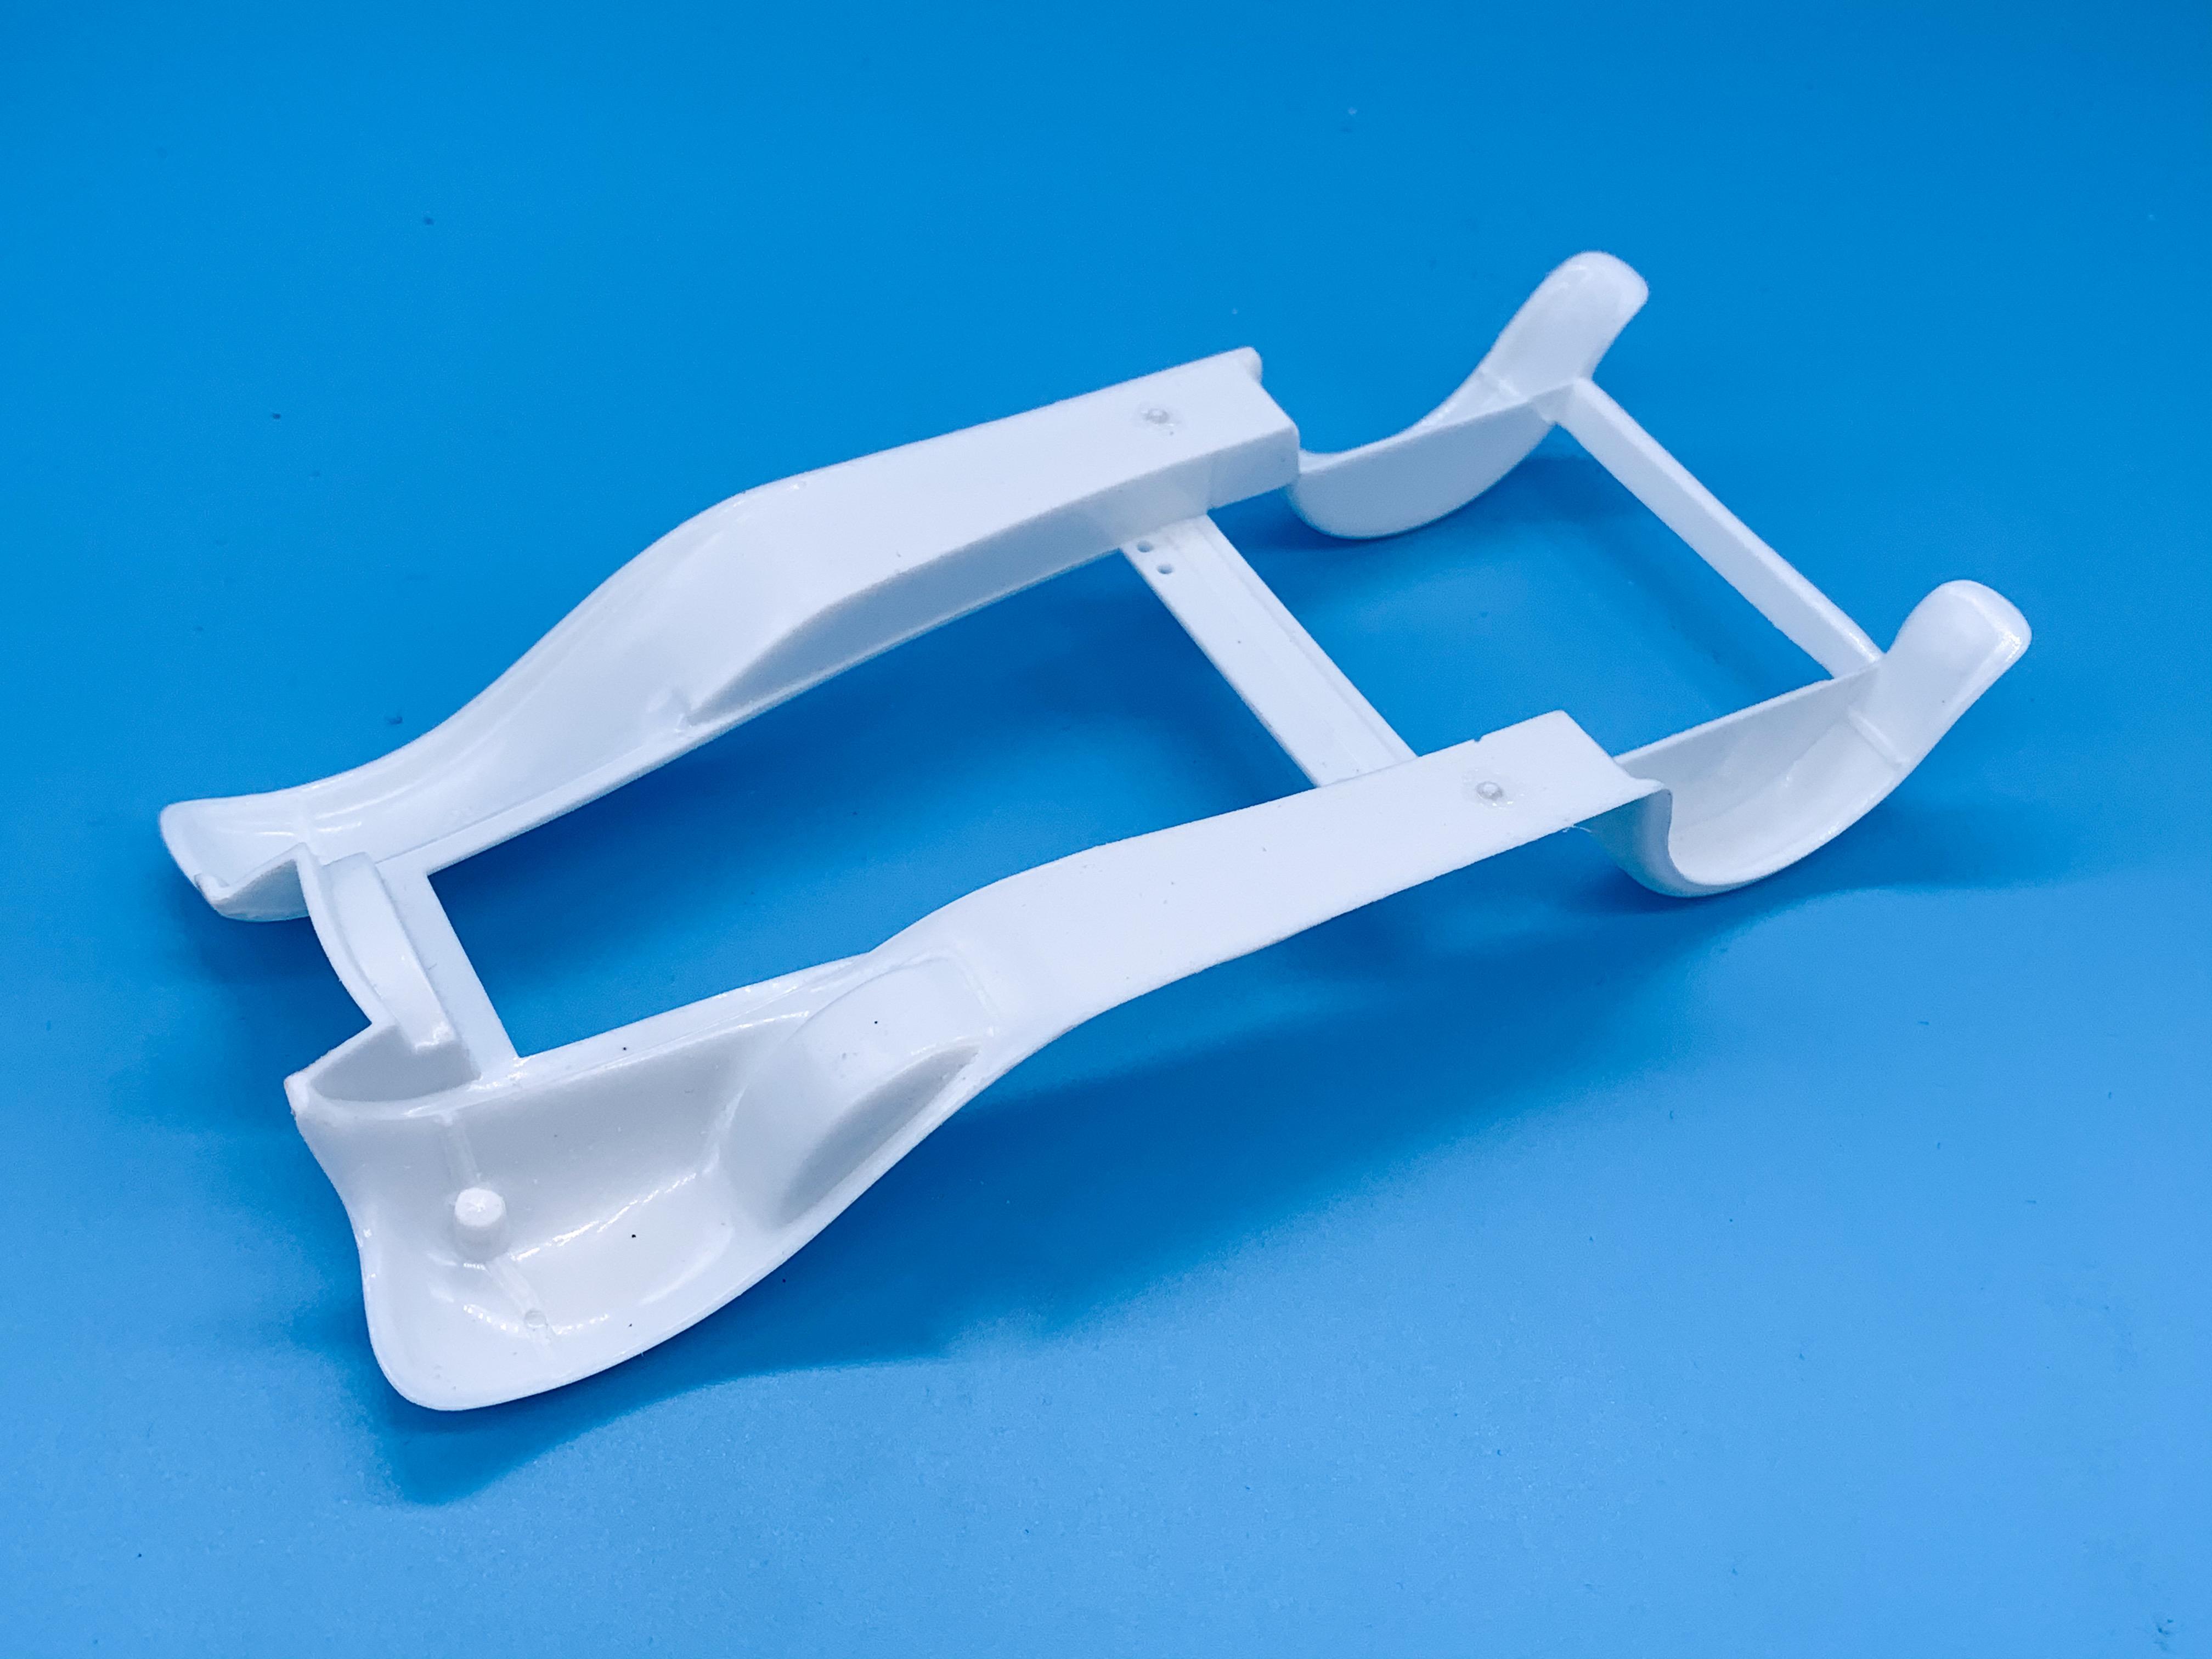
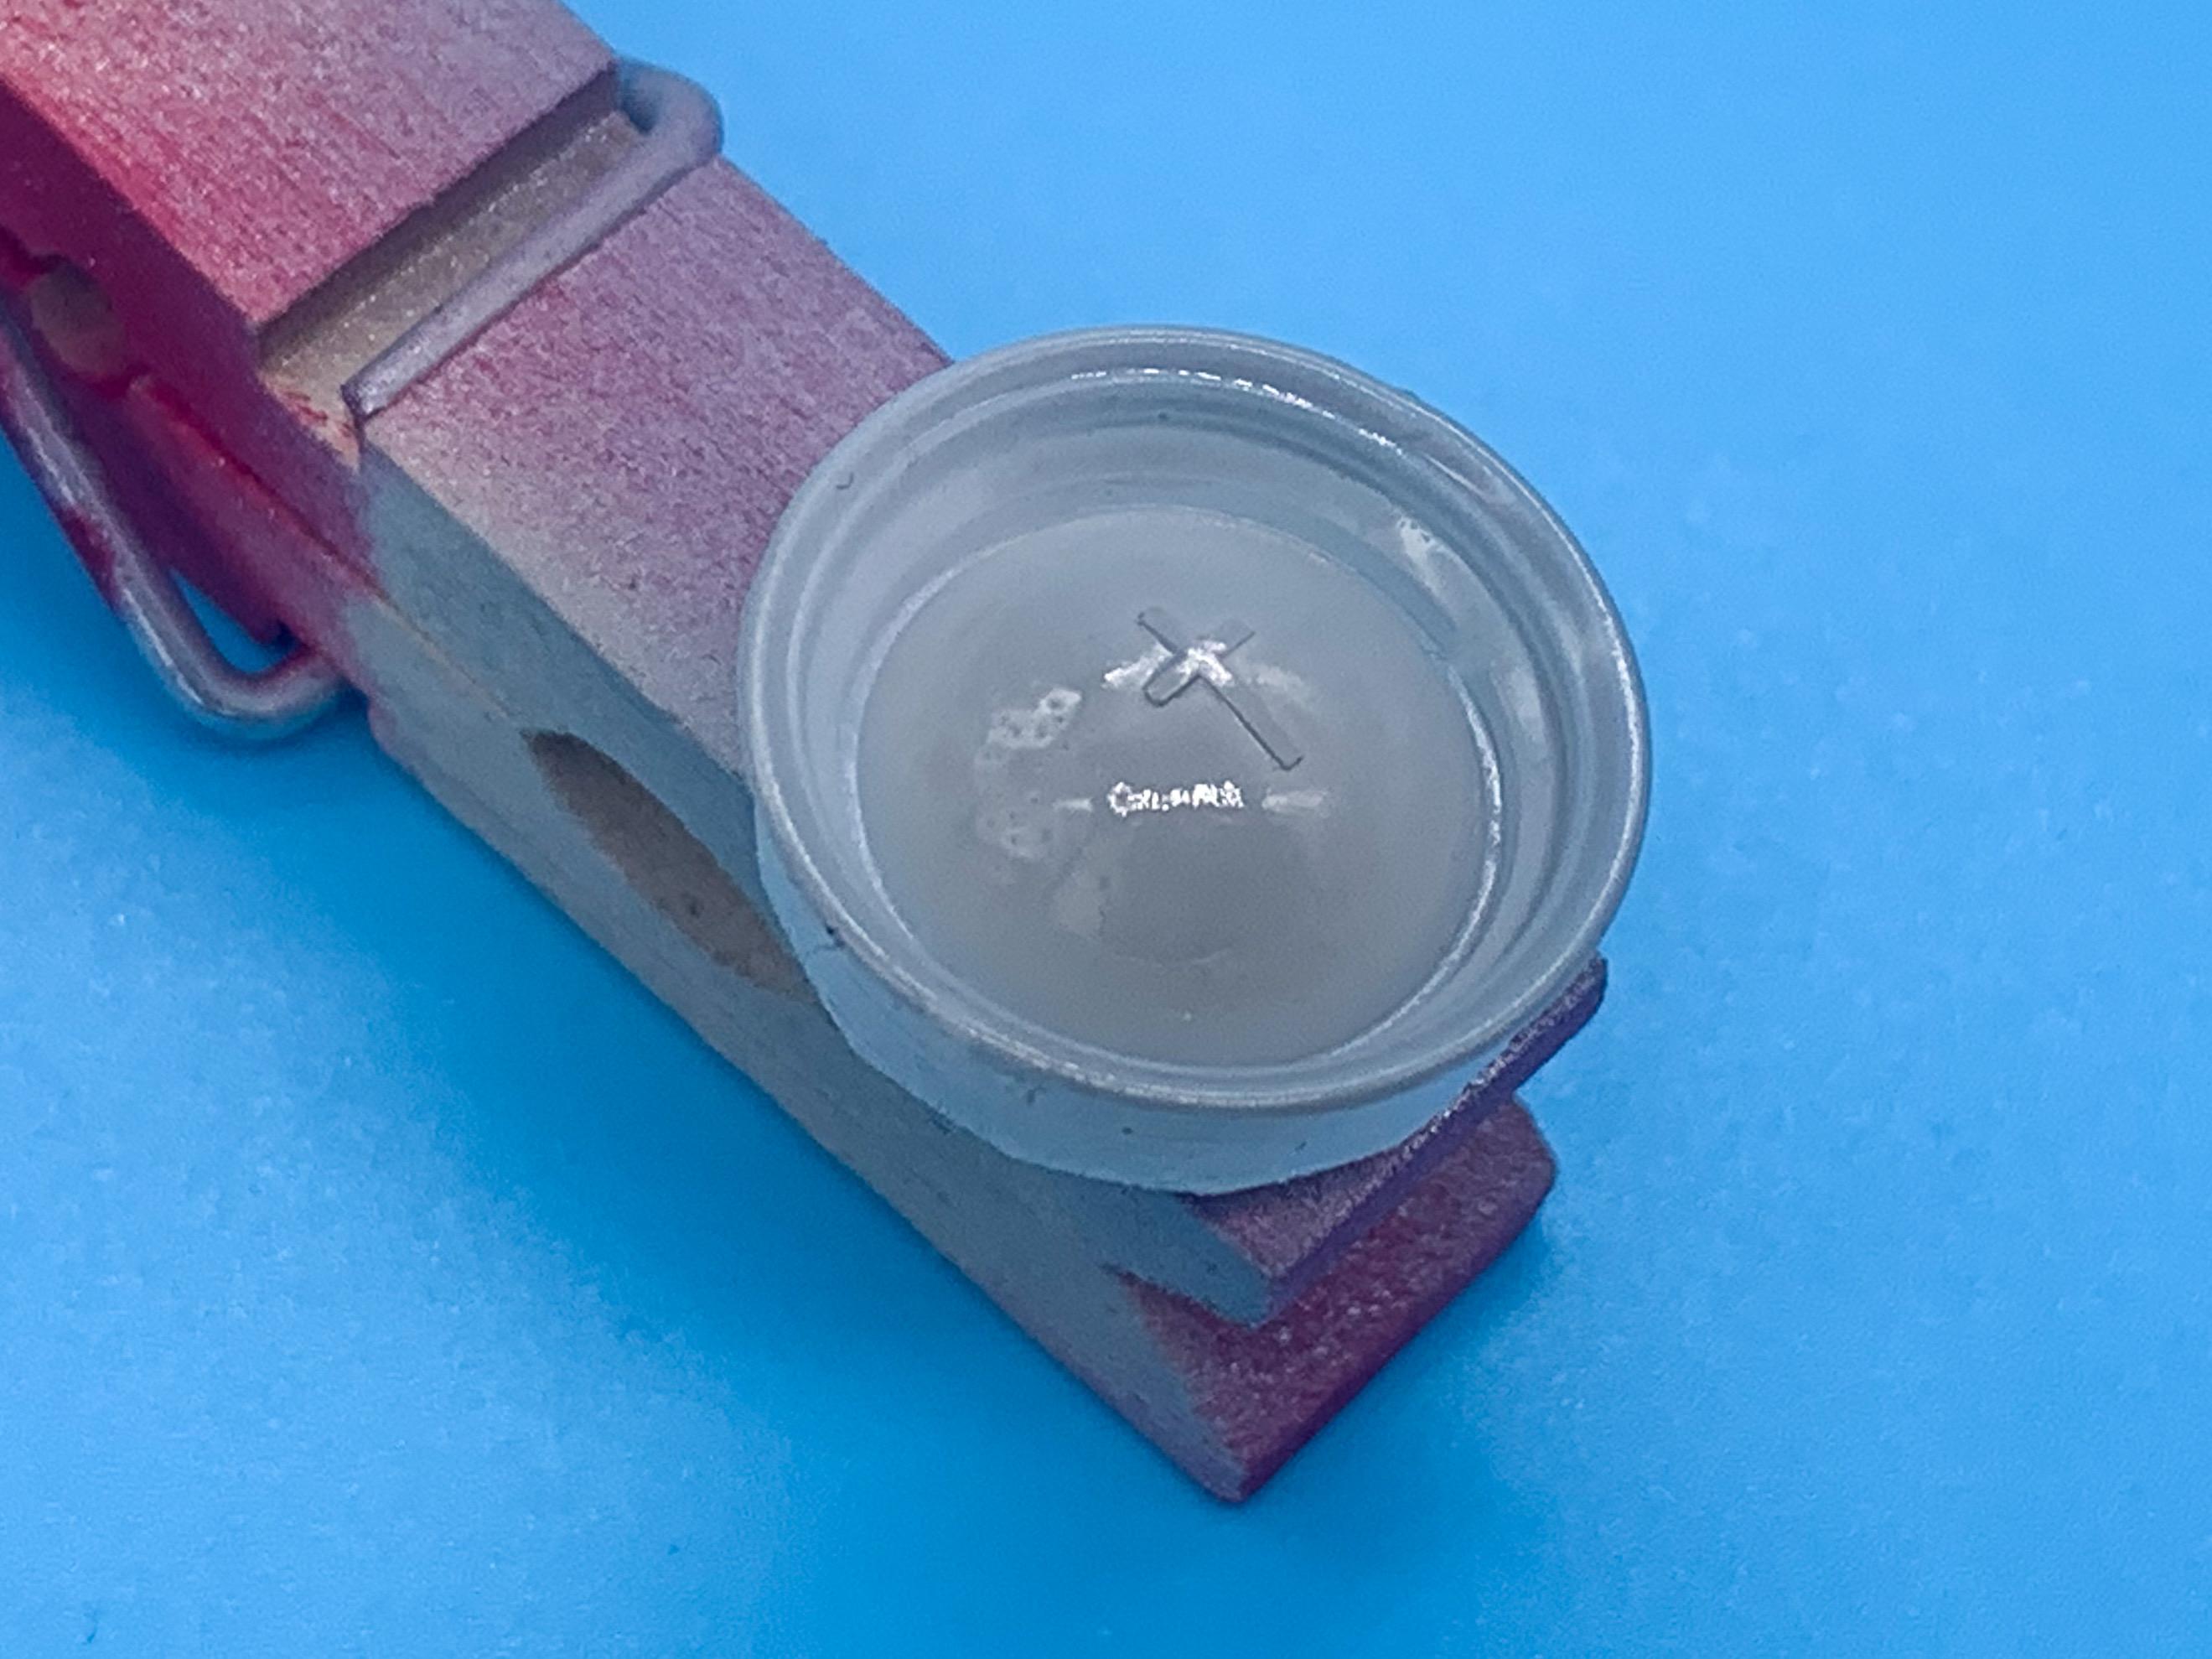
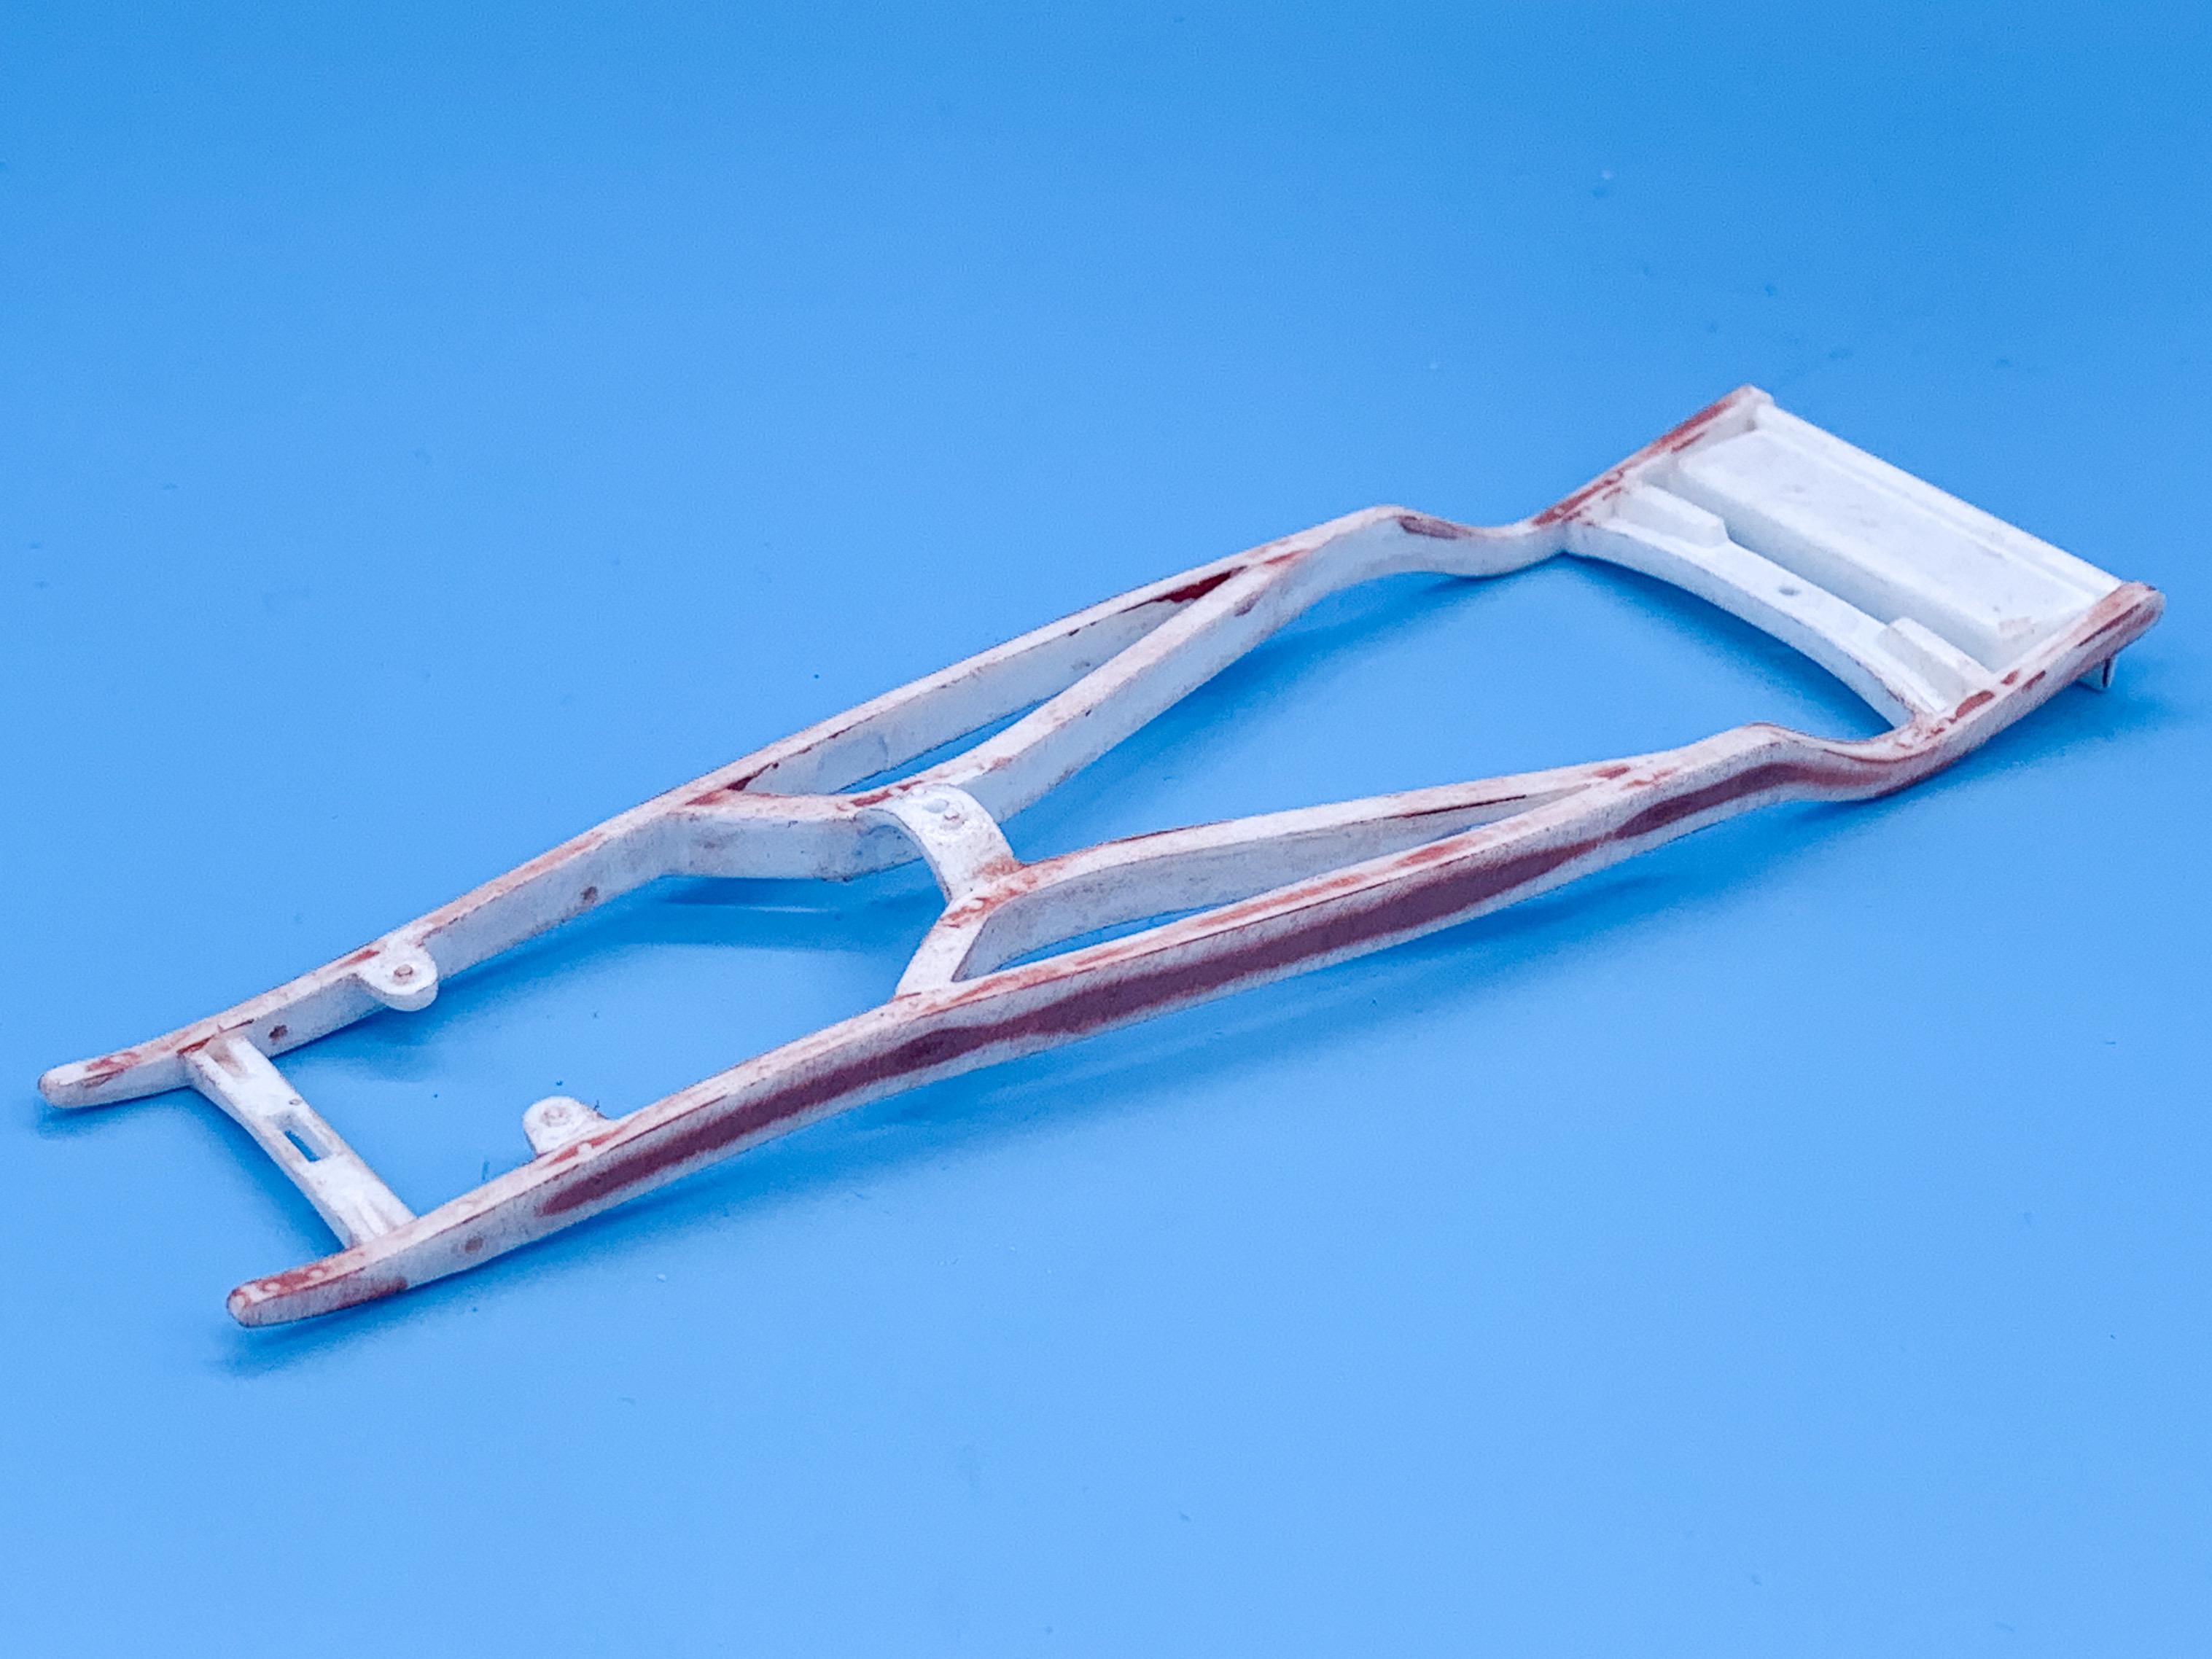
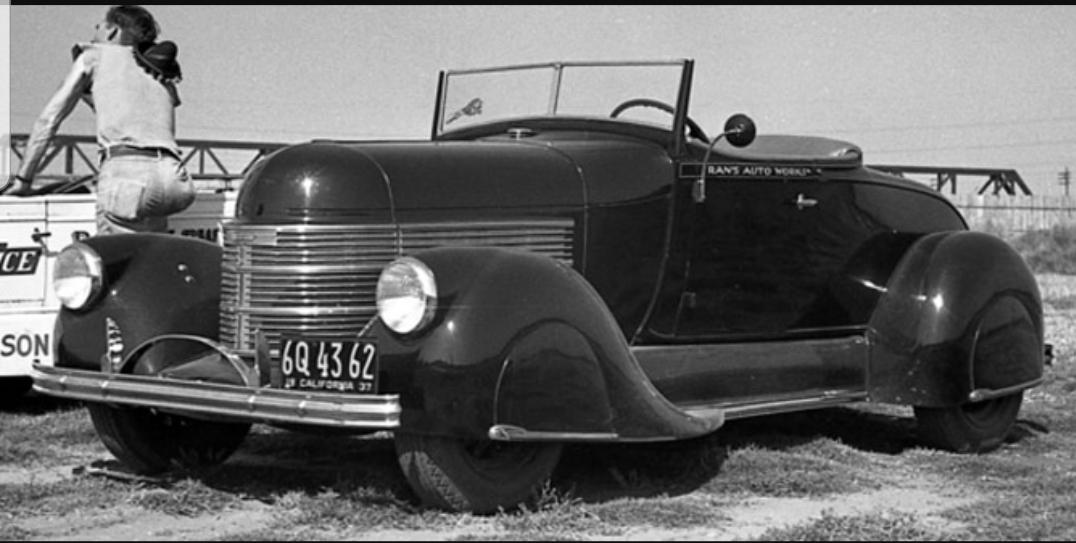
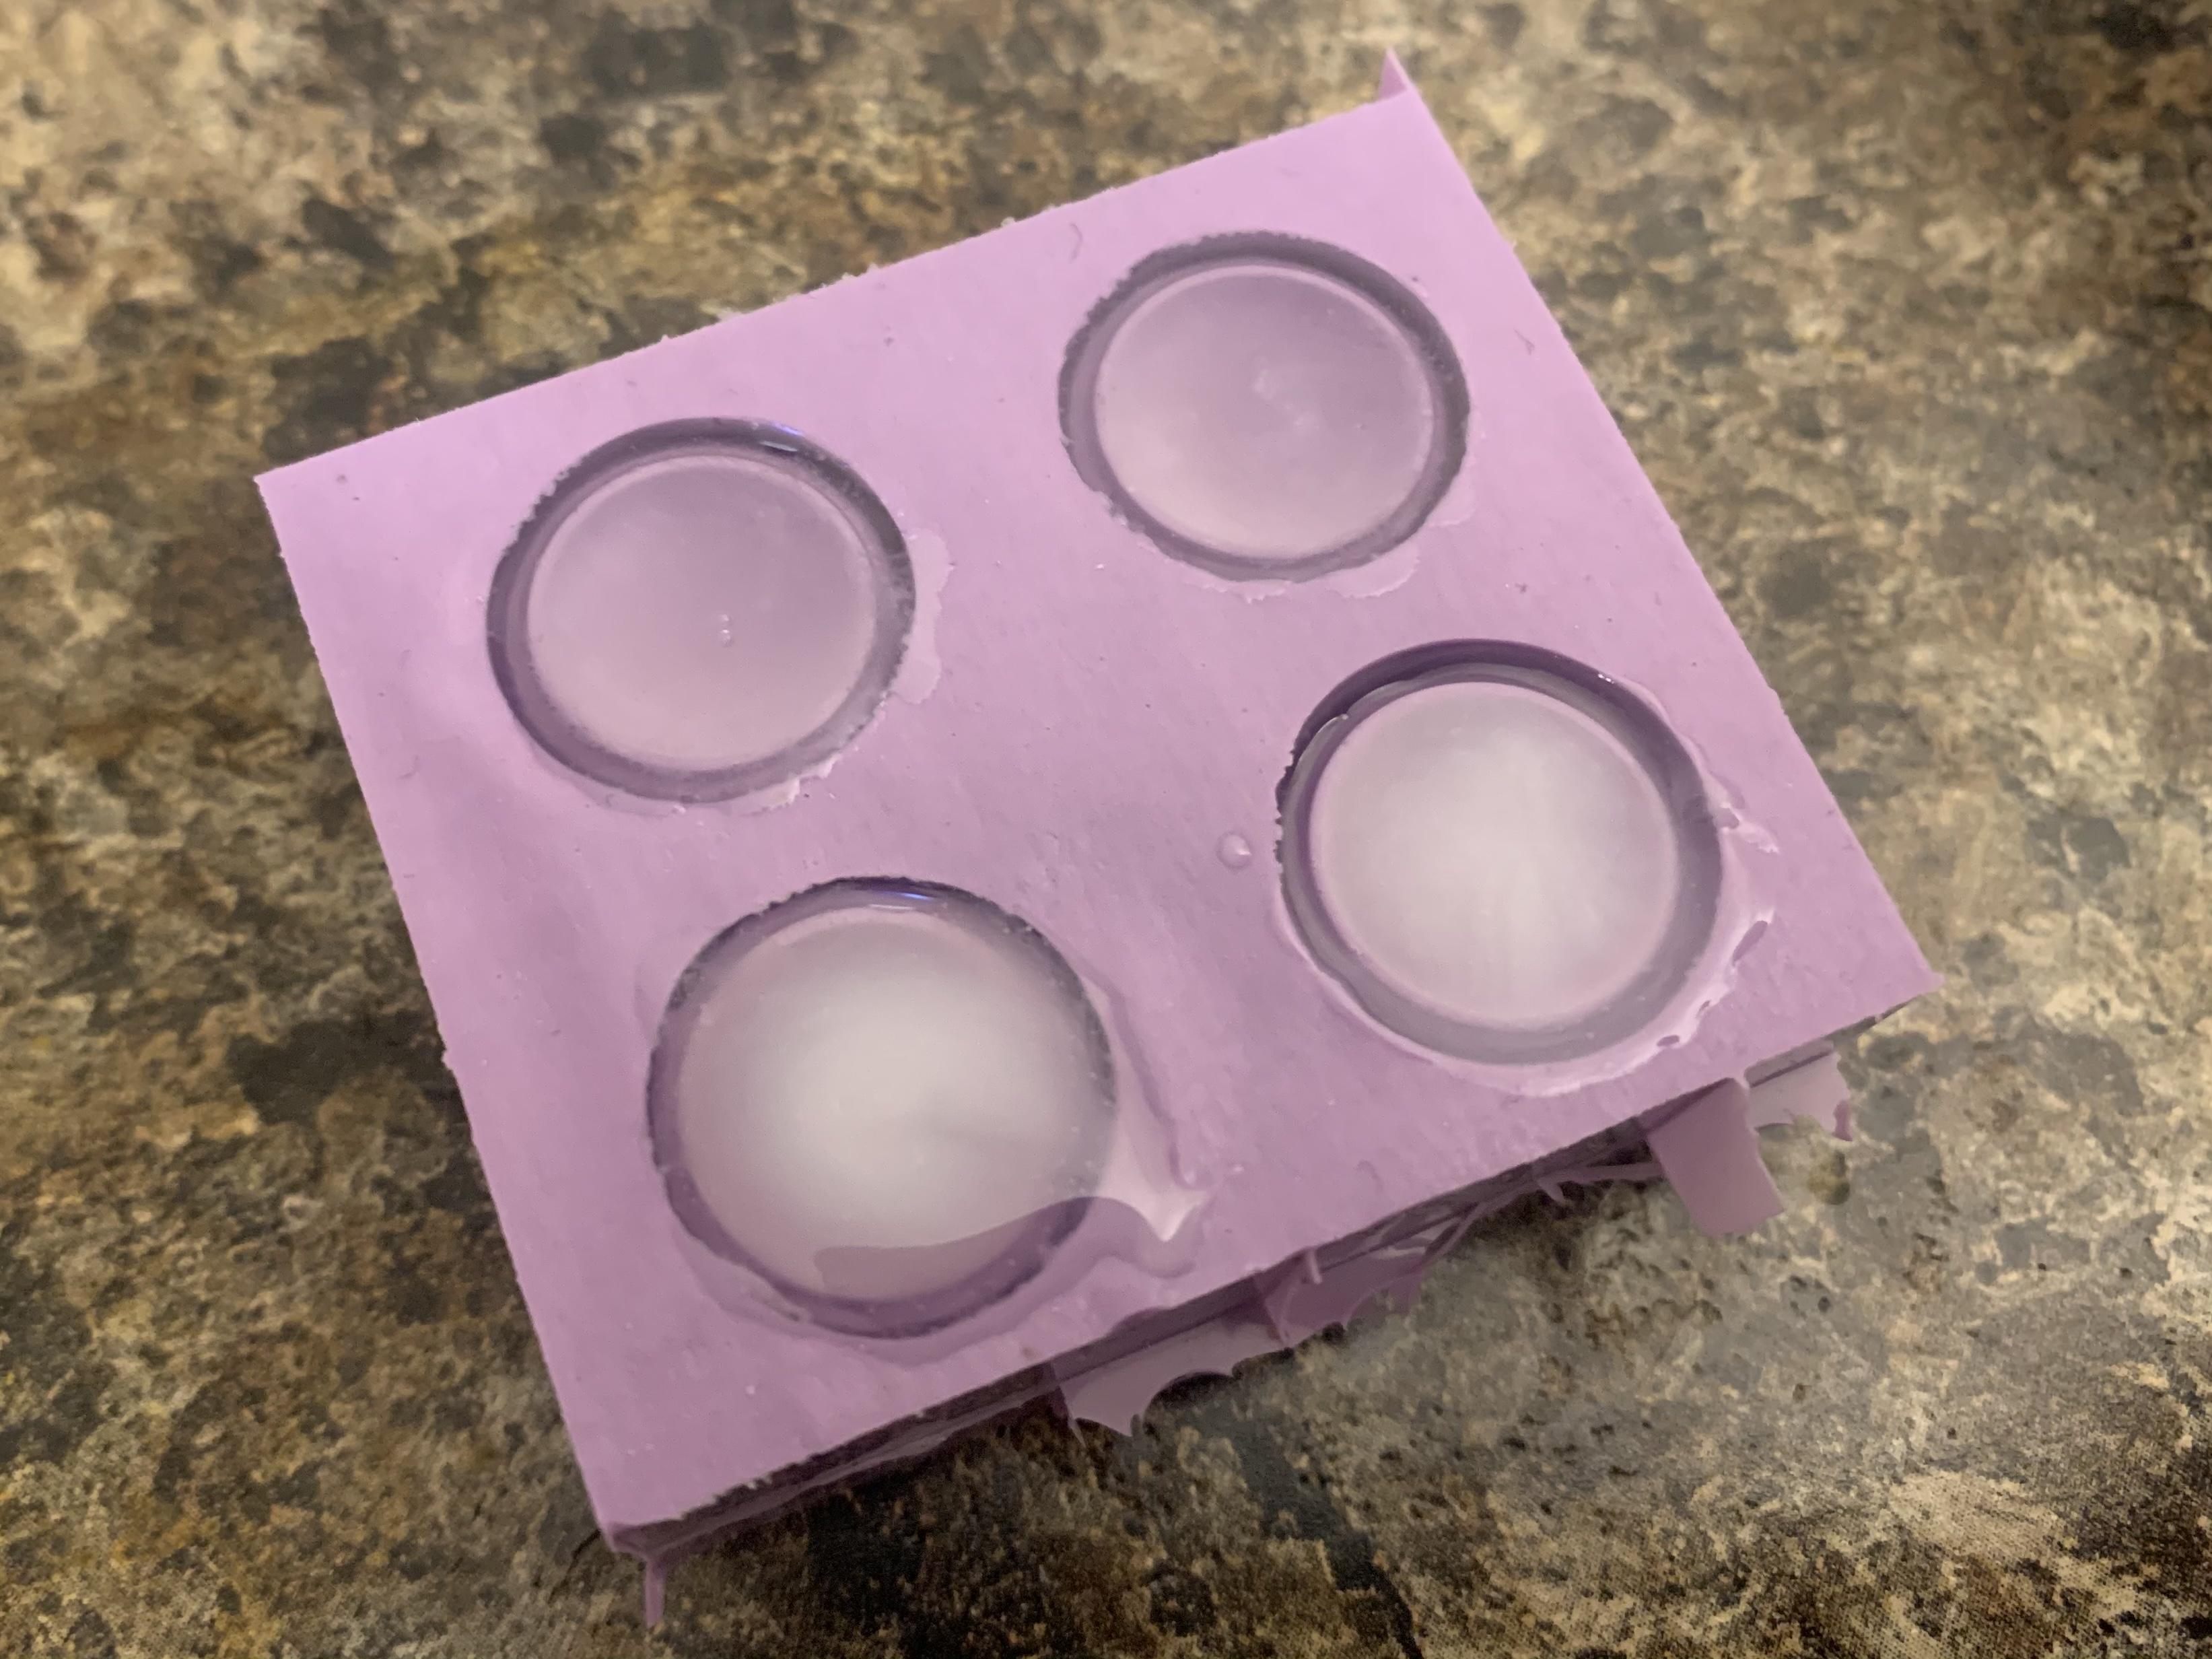
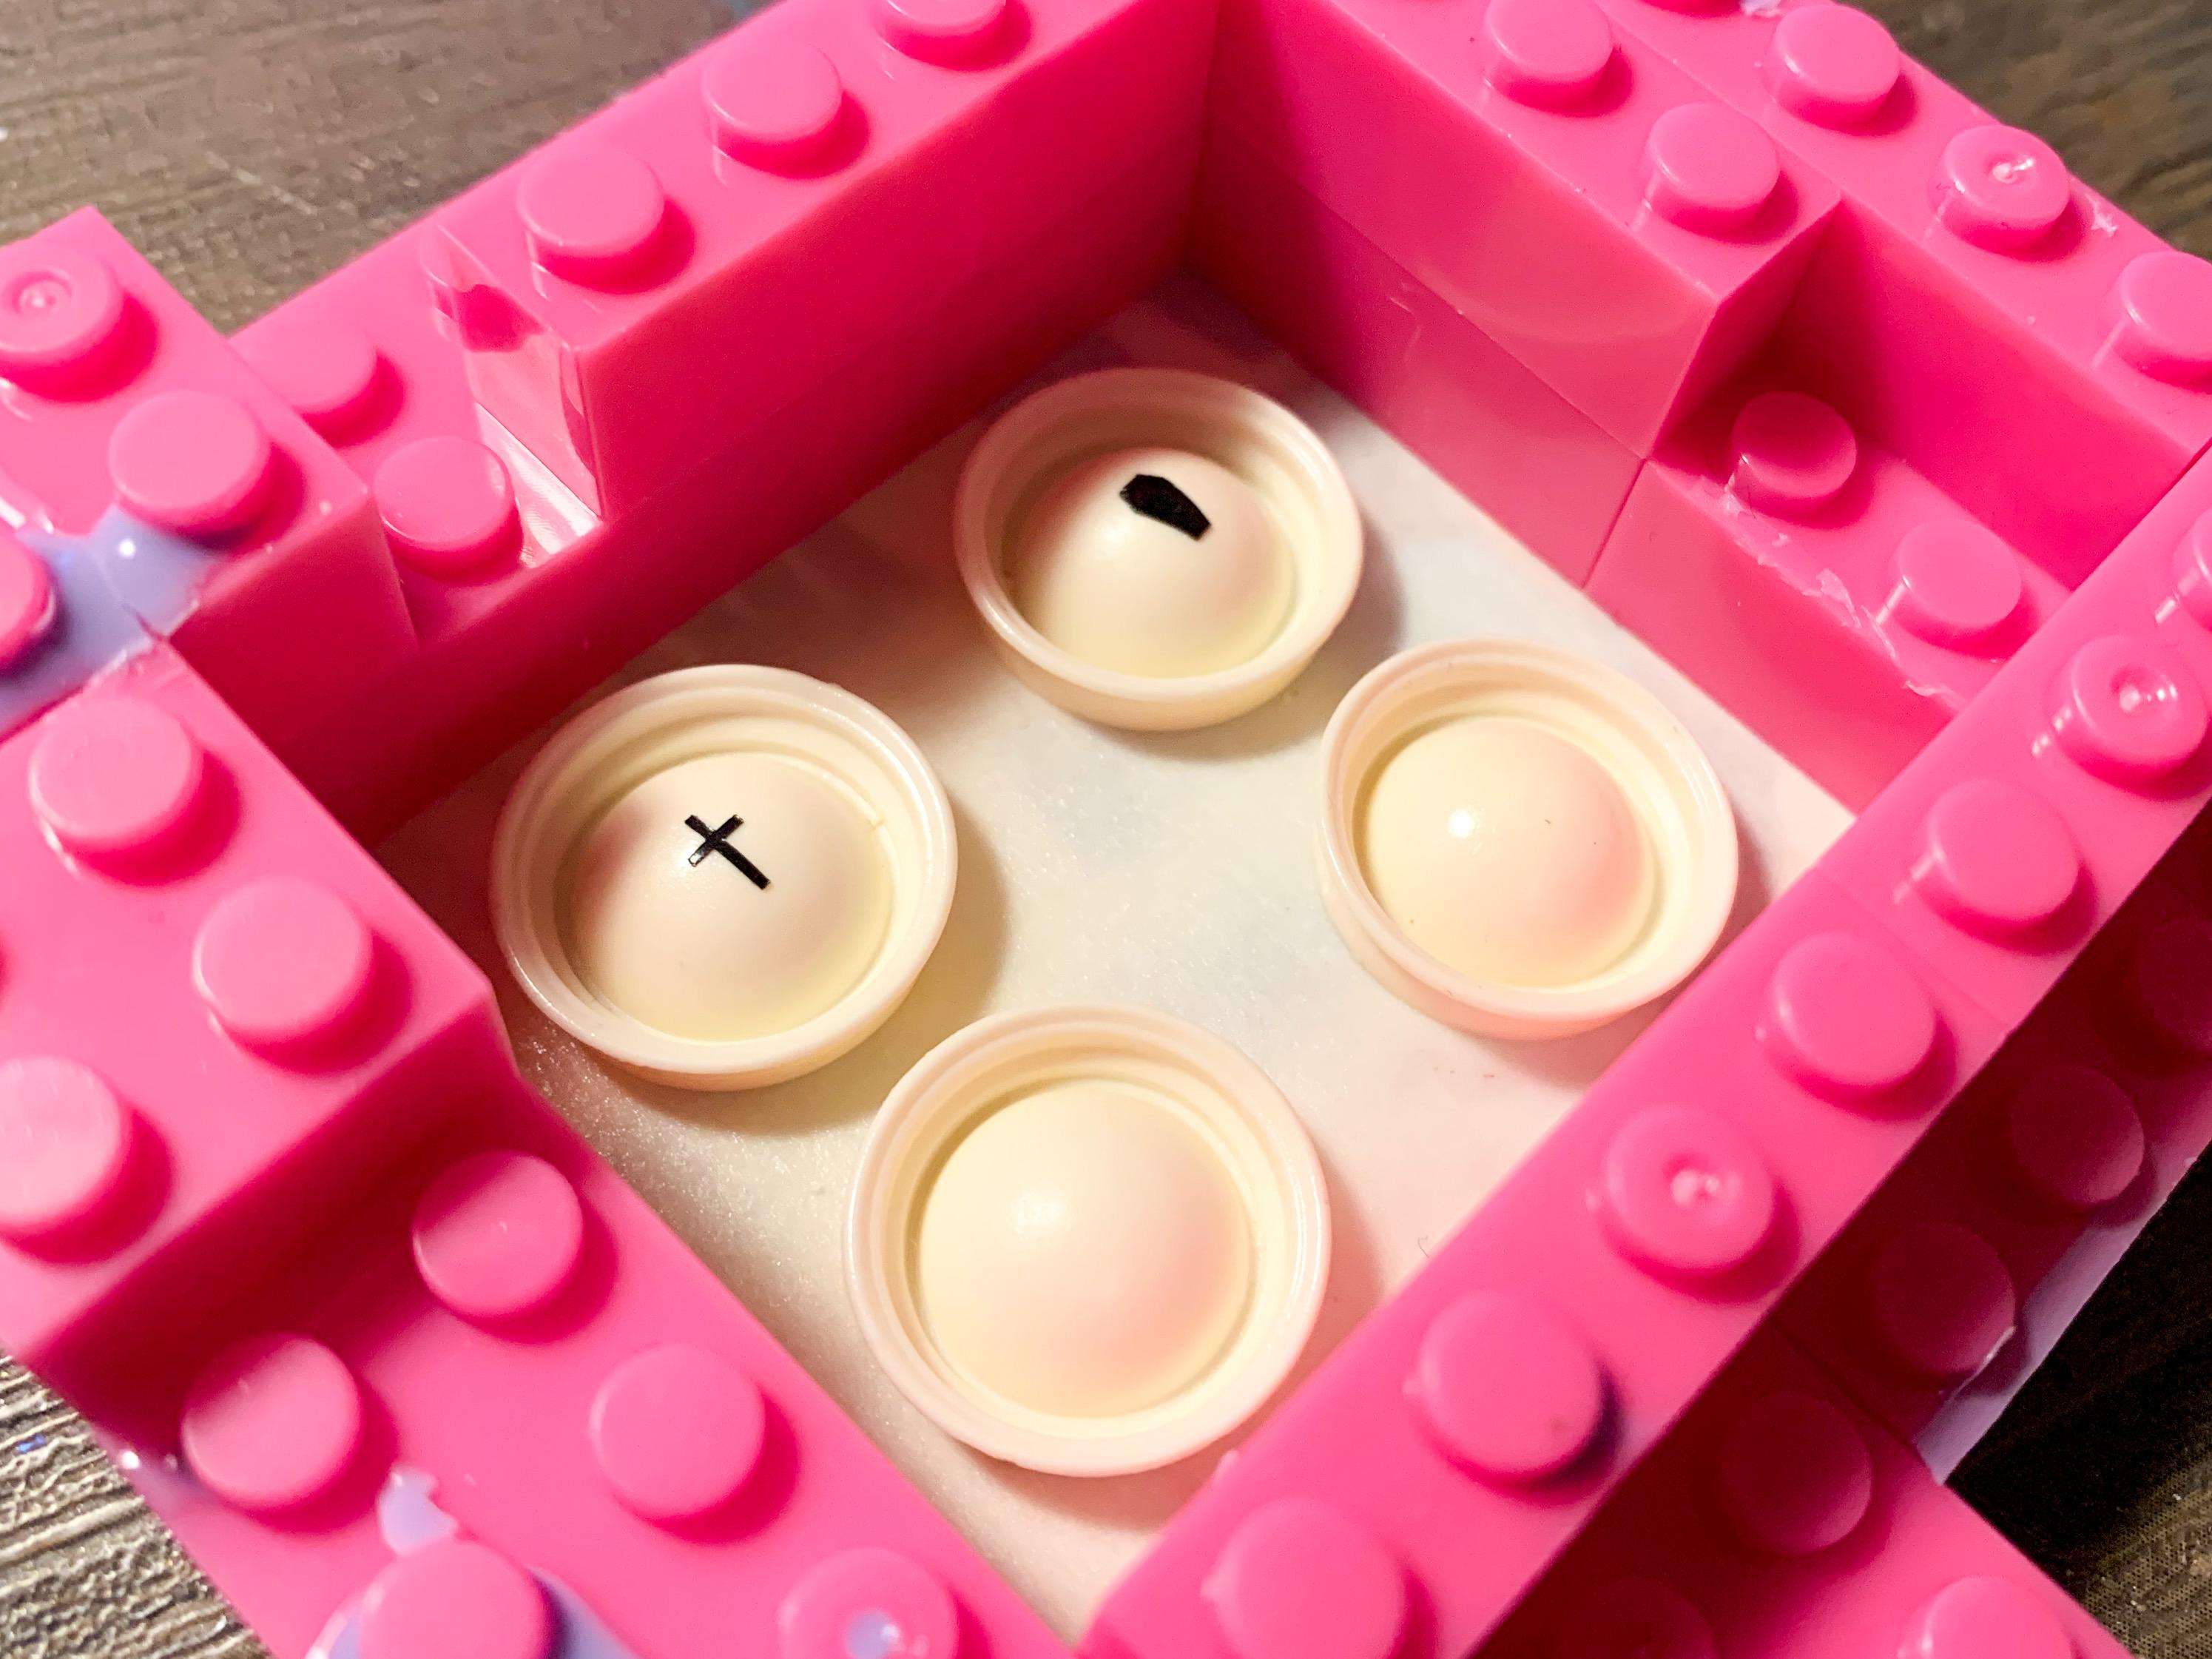
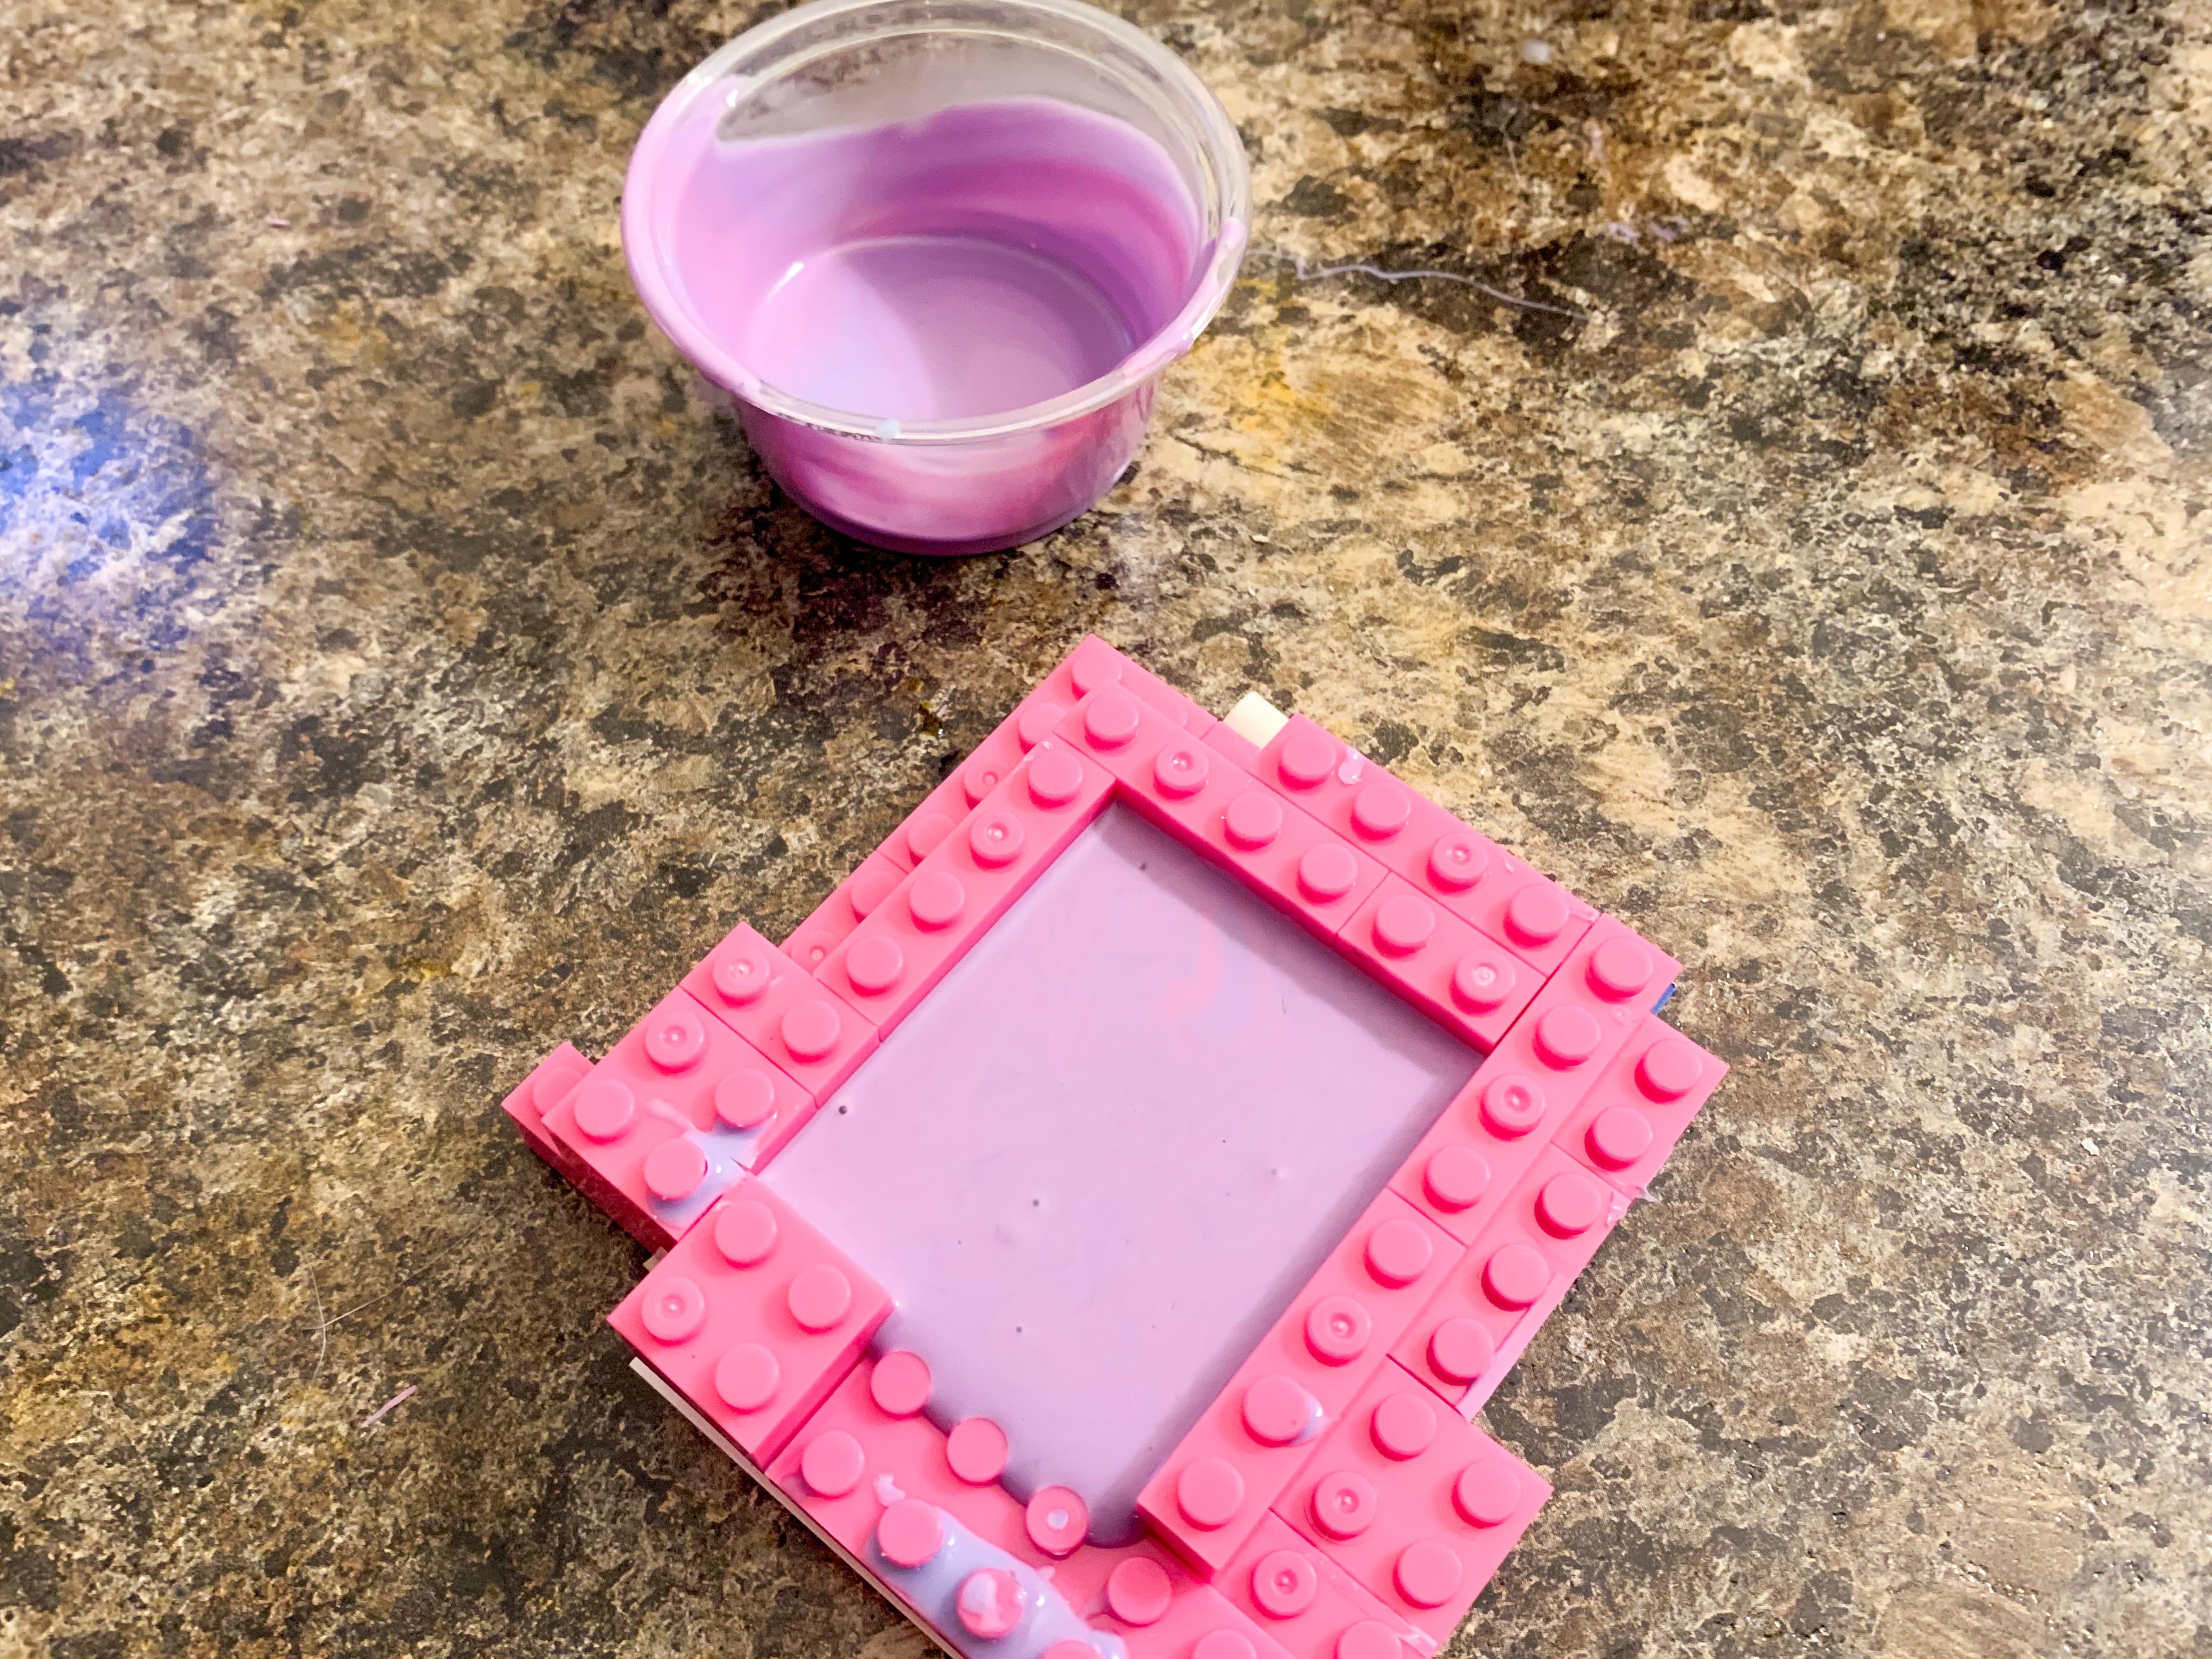
Yes sir, you’re absolutely right! I’m going to try and replicate the curves you’d see on a 32 body a little I think once I get to shaping it some more here - round them off into nice little curves on the edges I think. Back from dinner (really, I was posting and dinner was ready so I had to stop ?), been cleaning up the frame a little today - need to do the usual smoothing and levelling to get those rails nice and straight: I think I’d like to go with a ‘32 grill shell so I resin cast one of those (and some other maybe-useful bits whilst I was at it) I think I’d like Baby Moons on this one - I have a set of resin ones that I’ve had forever, but I had the idea to incorporate a cross into the hubcap, as though it was stamped into the cap. So, seeing as I wanted to cast these wheels anyway because I don’t know where they came from and thus can’t buy any more, I cut a little vinyl cross (and a coffin version, for a future build) and stuck it on the wheel so it’ll hopefully have that little raised detail when I cast copies: Pouring some resin: We’ll see how that all works out tomorrow once the mould sets up - should work ok though, hopefully... And finally, started shaping some fender flares to match the rendering I did that started this whole thing...you don’t usually see flares like this on a hot rod, but I found some cool examples of where it WAS done and looks just different enough to be interesting so I’m going to run with it I think... Starting to look like the picture! More soon!
-
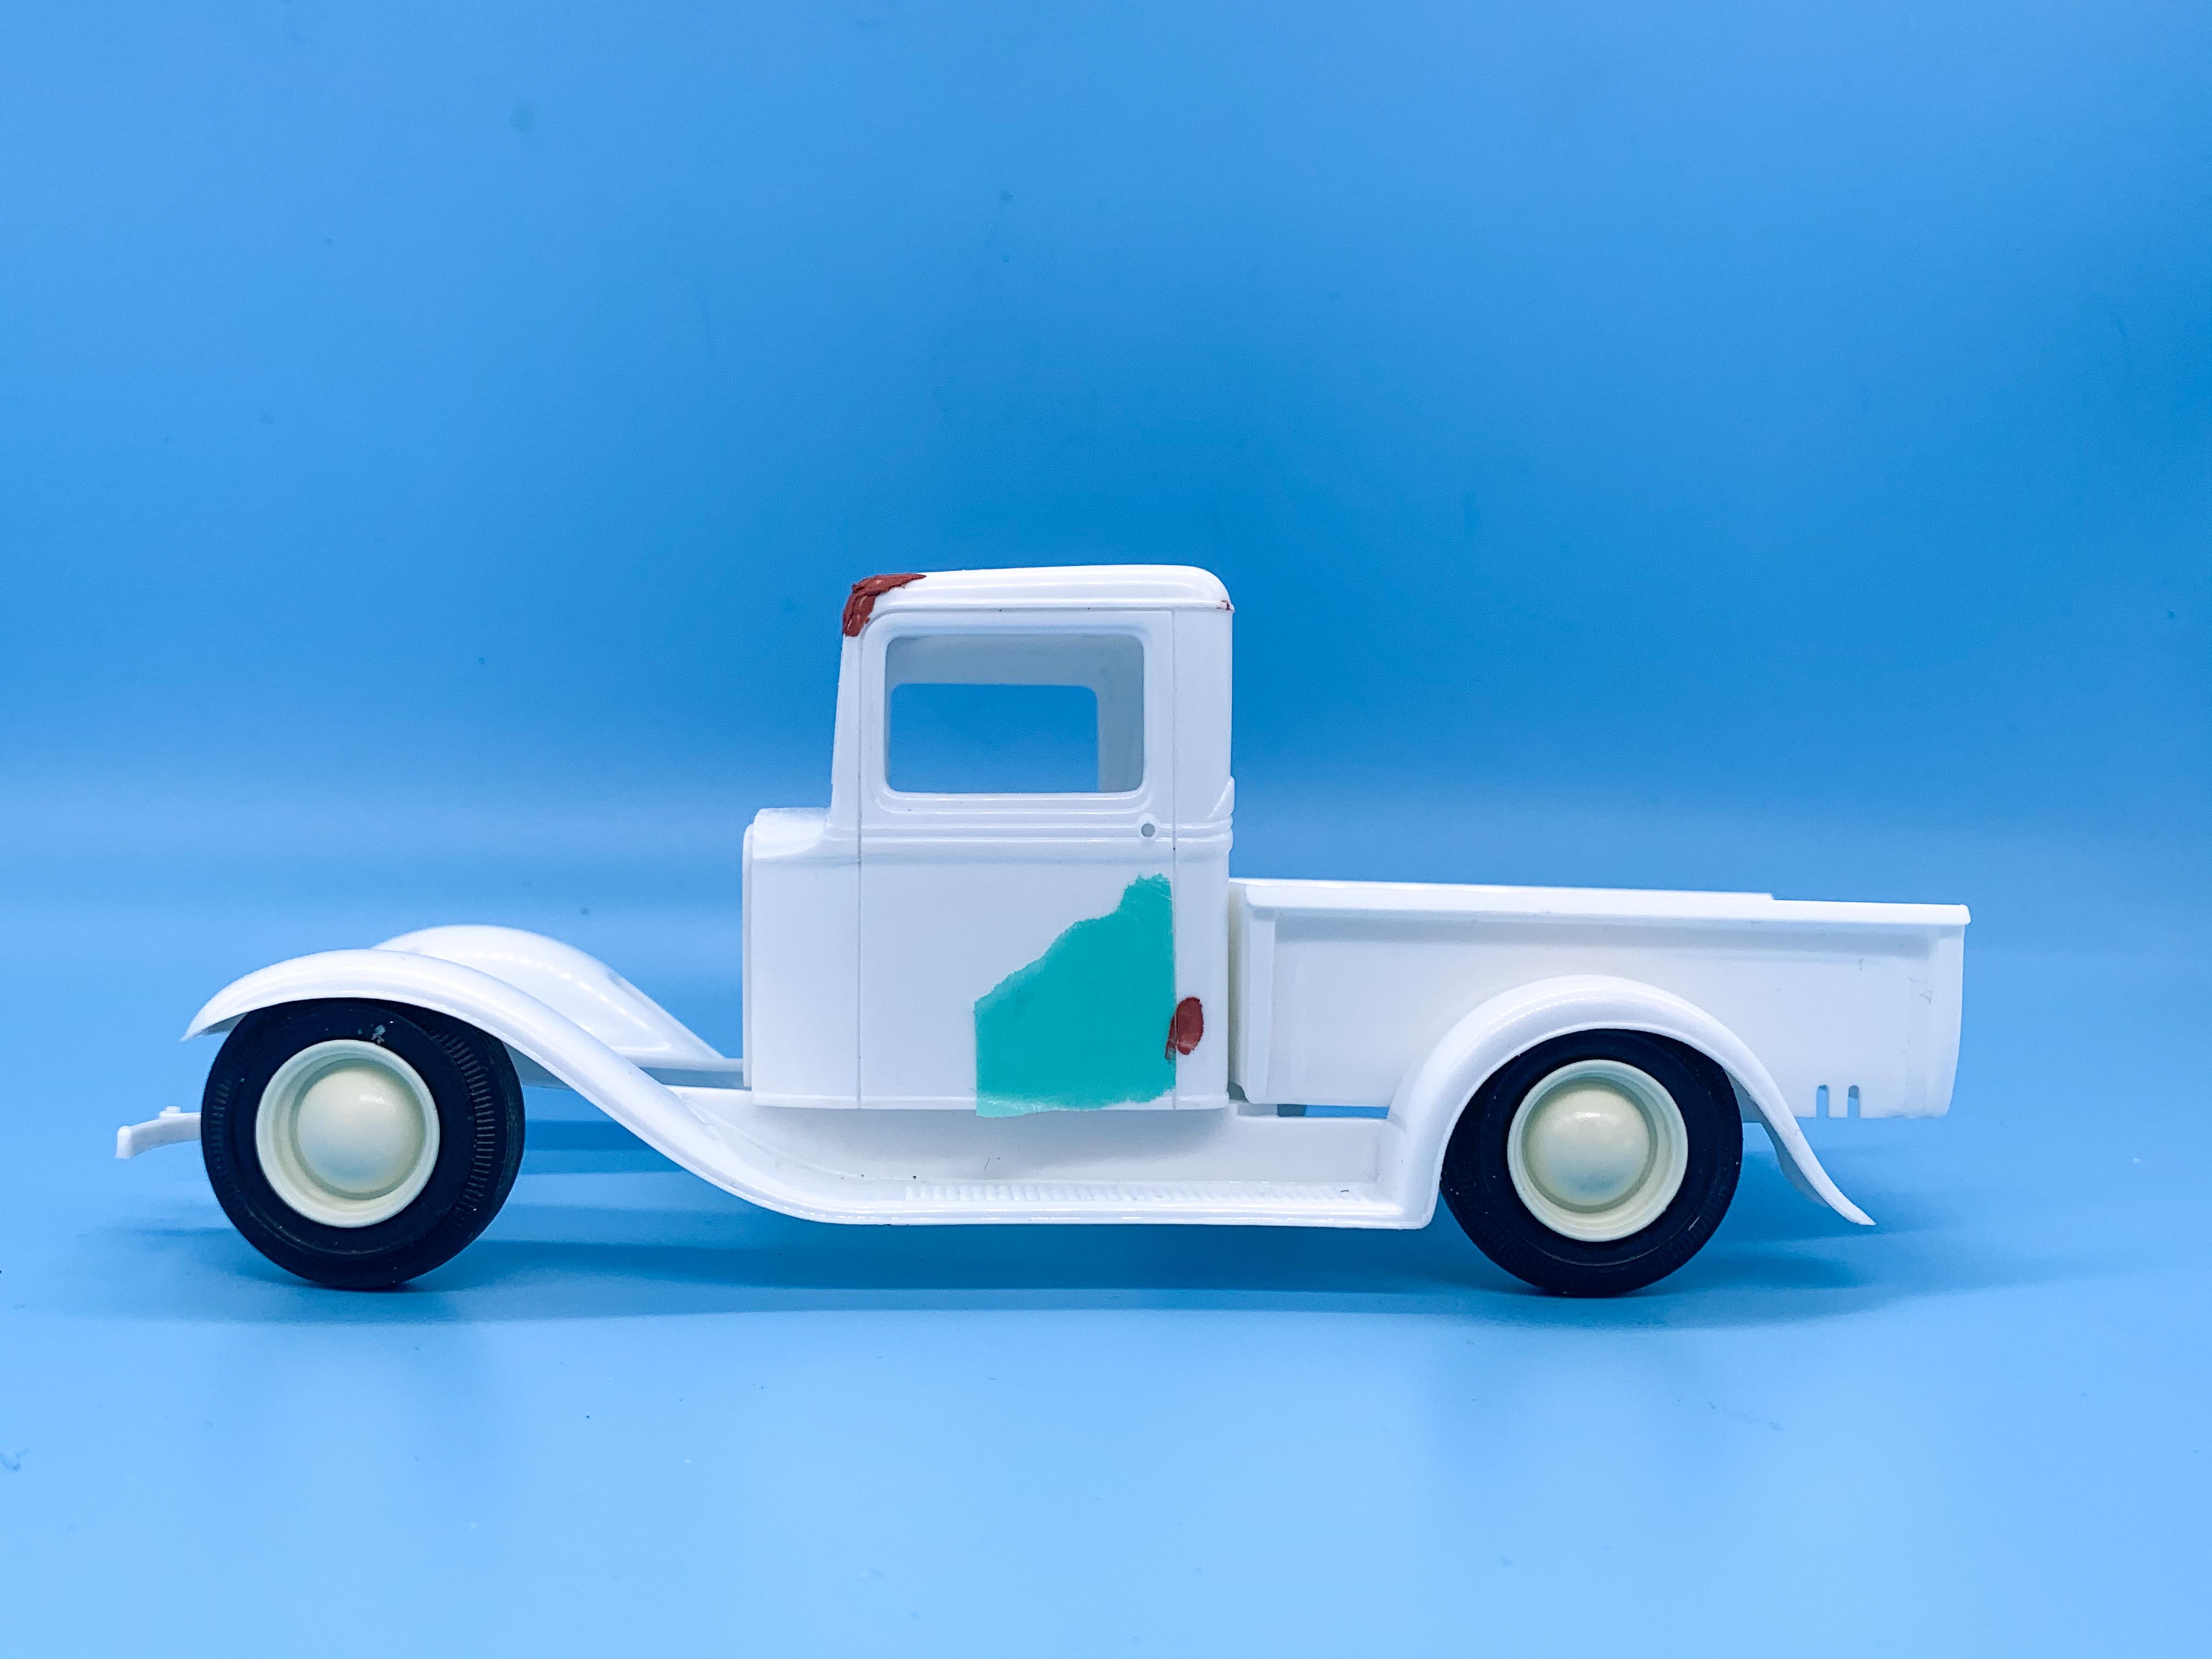
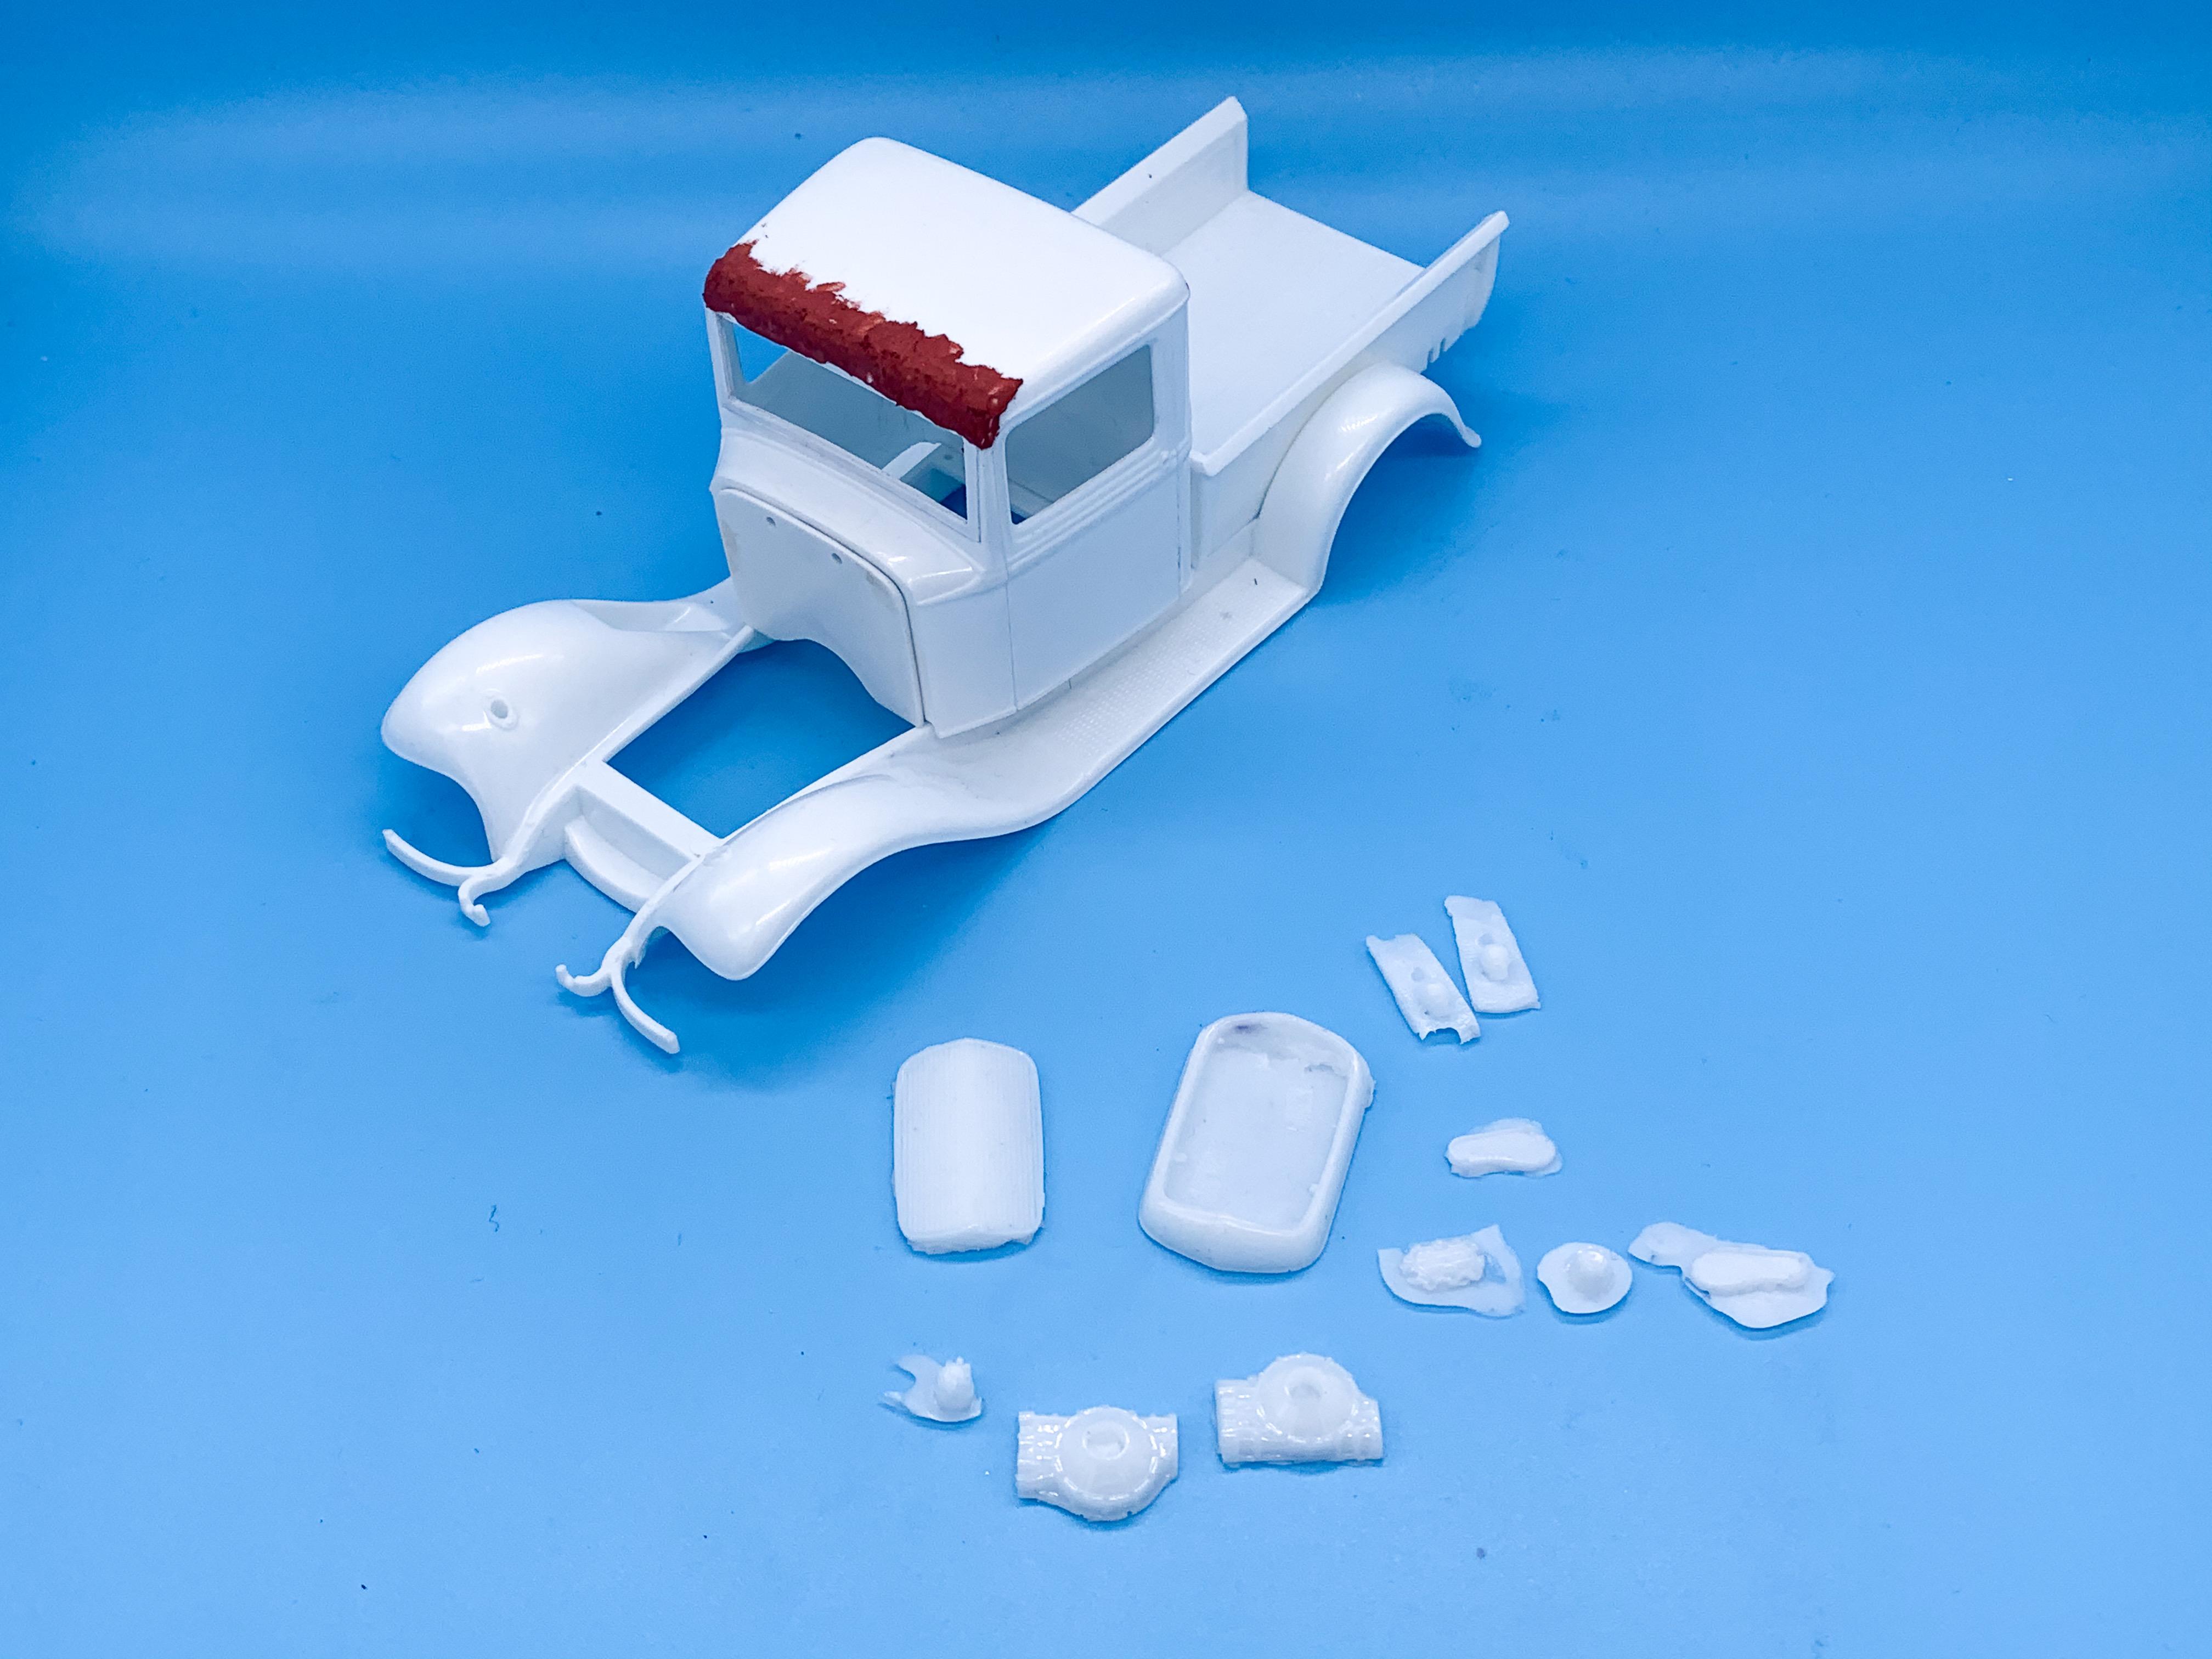
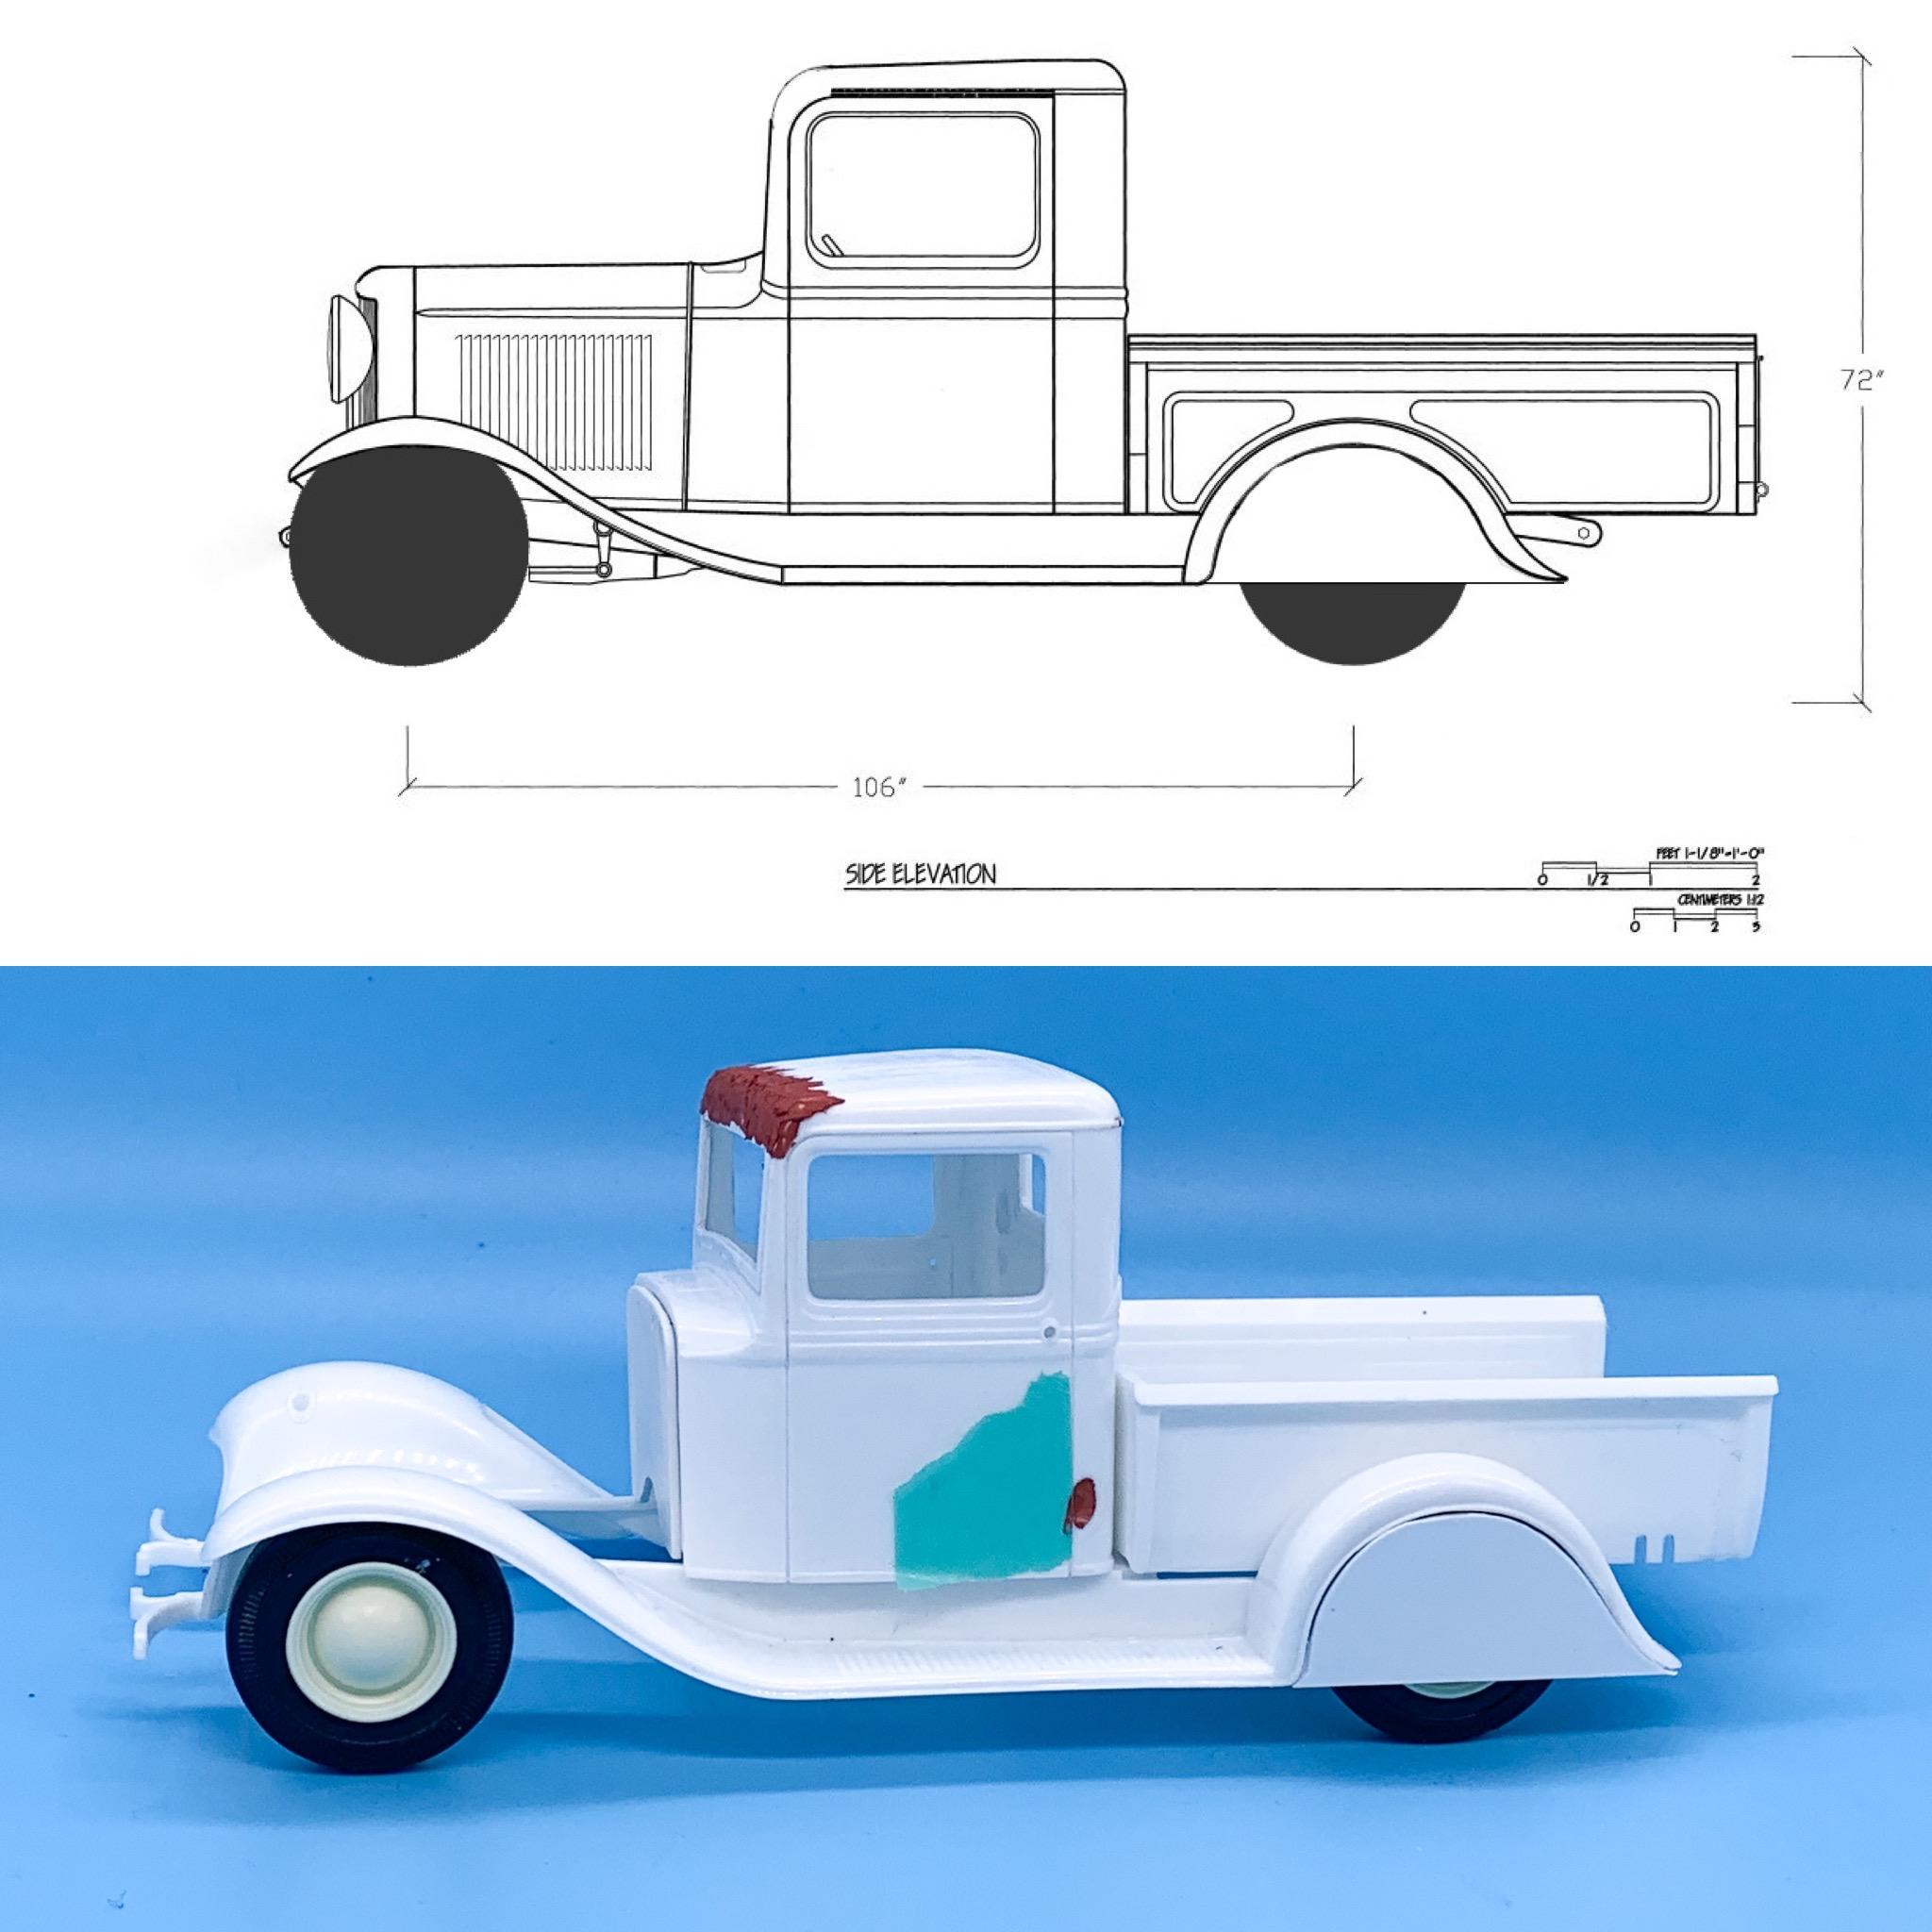
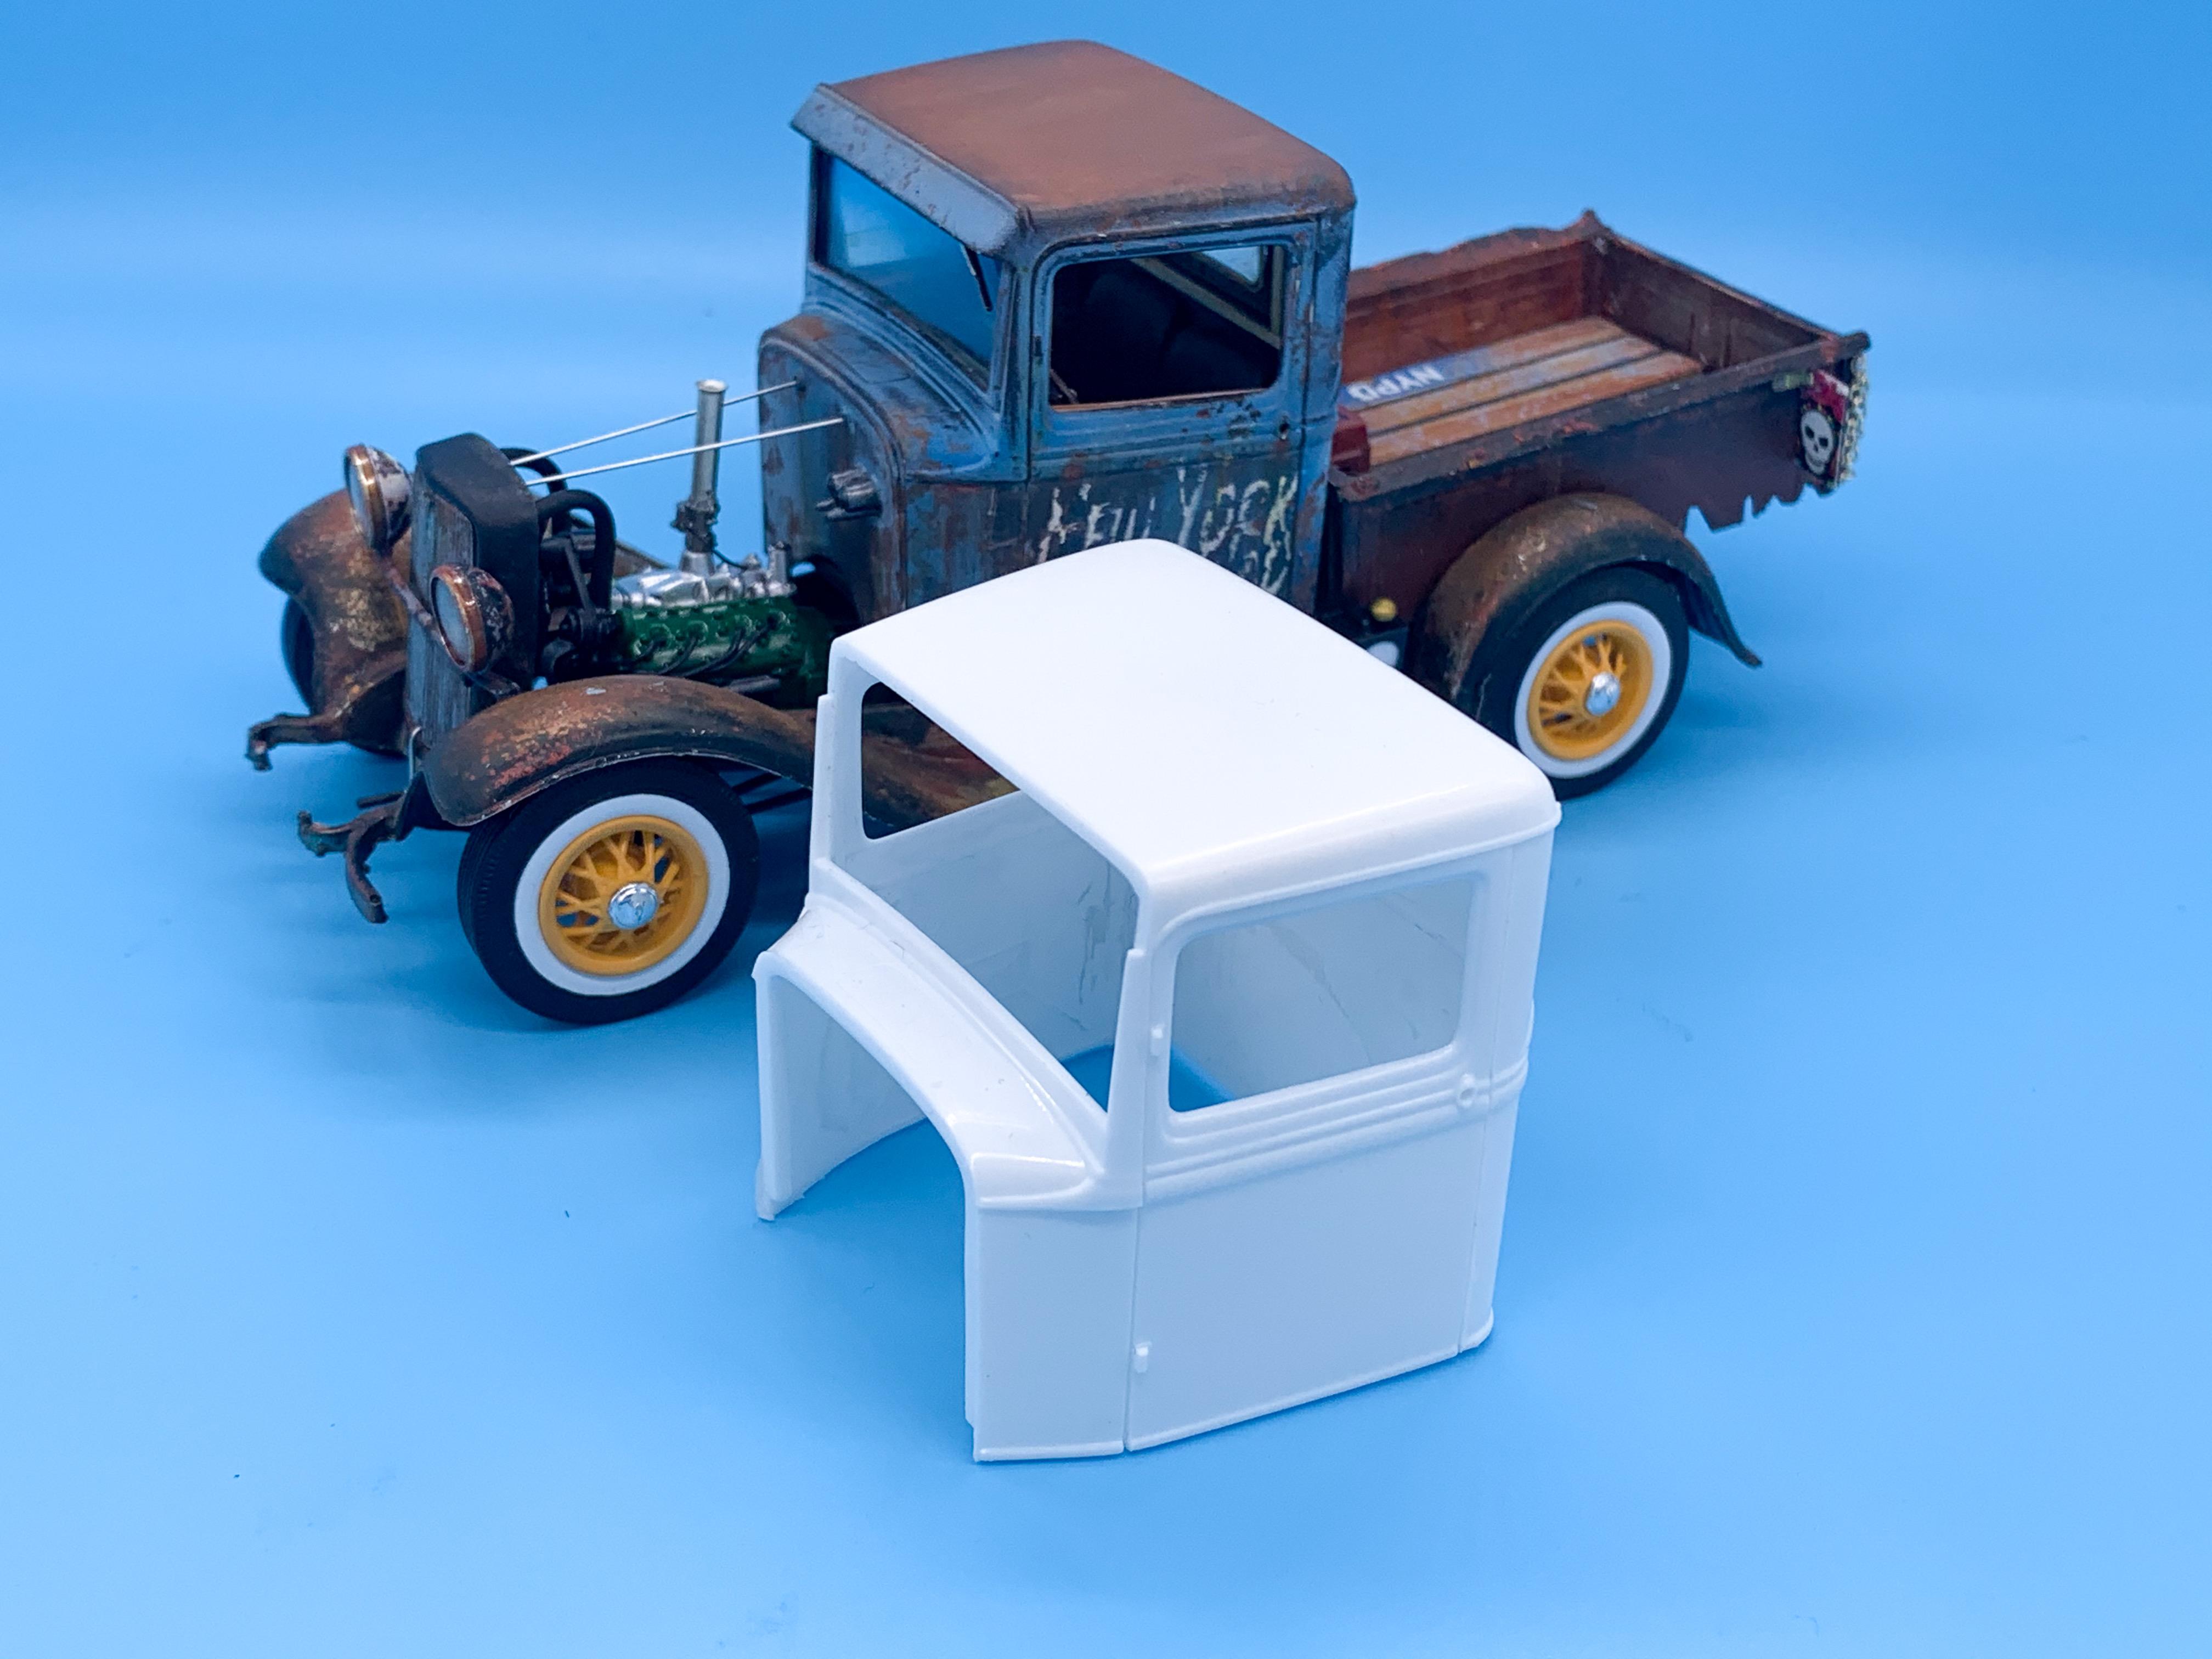
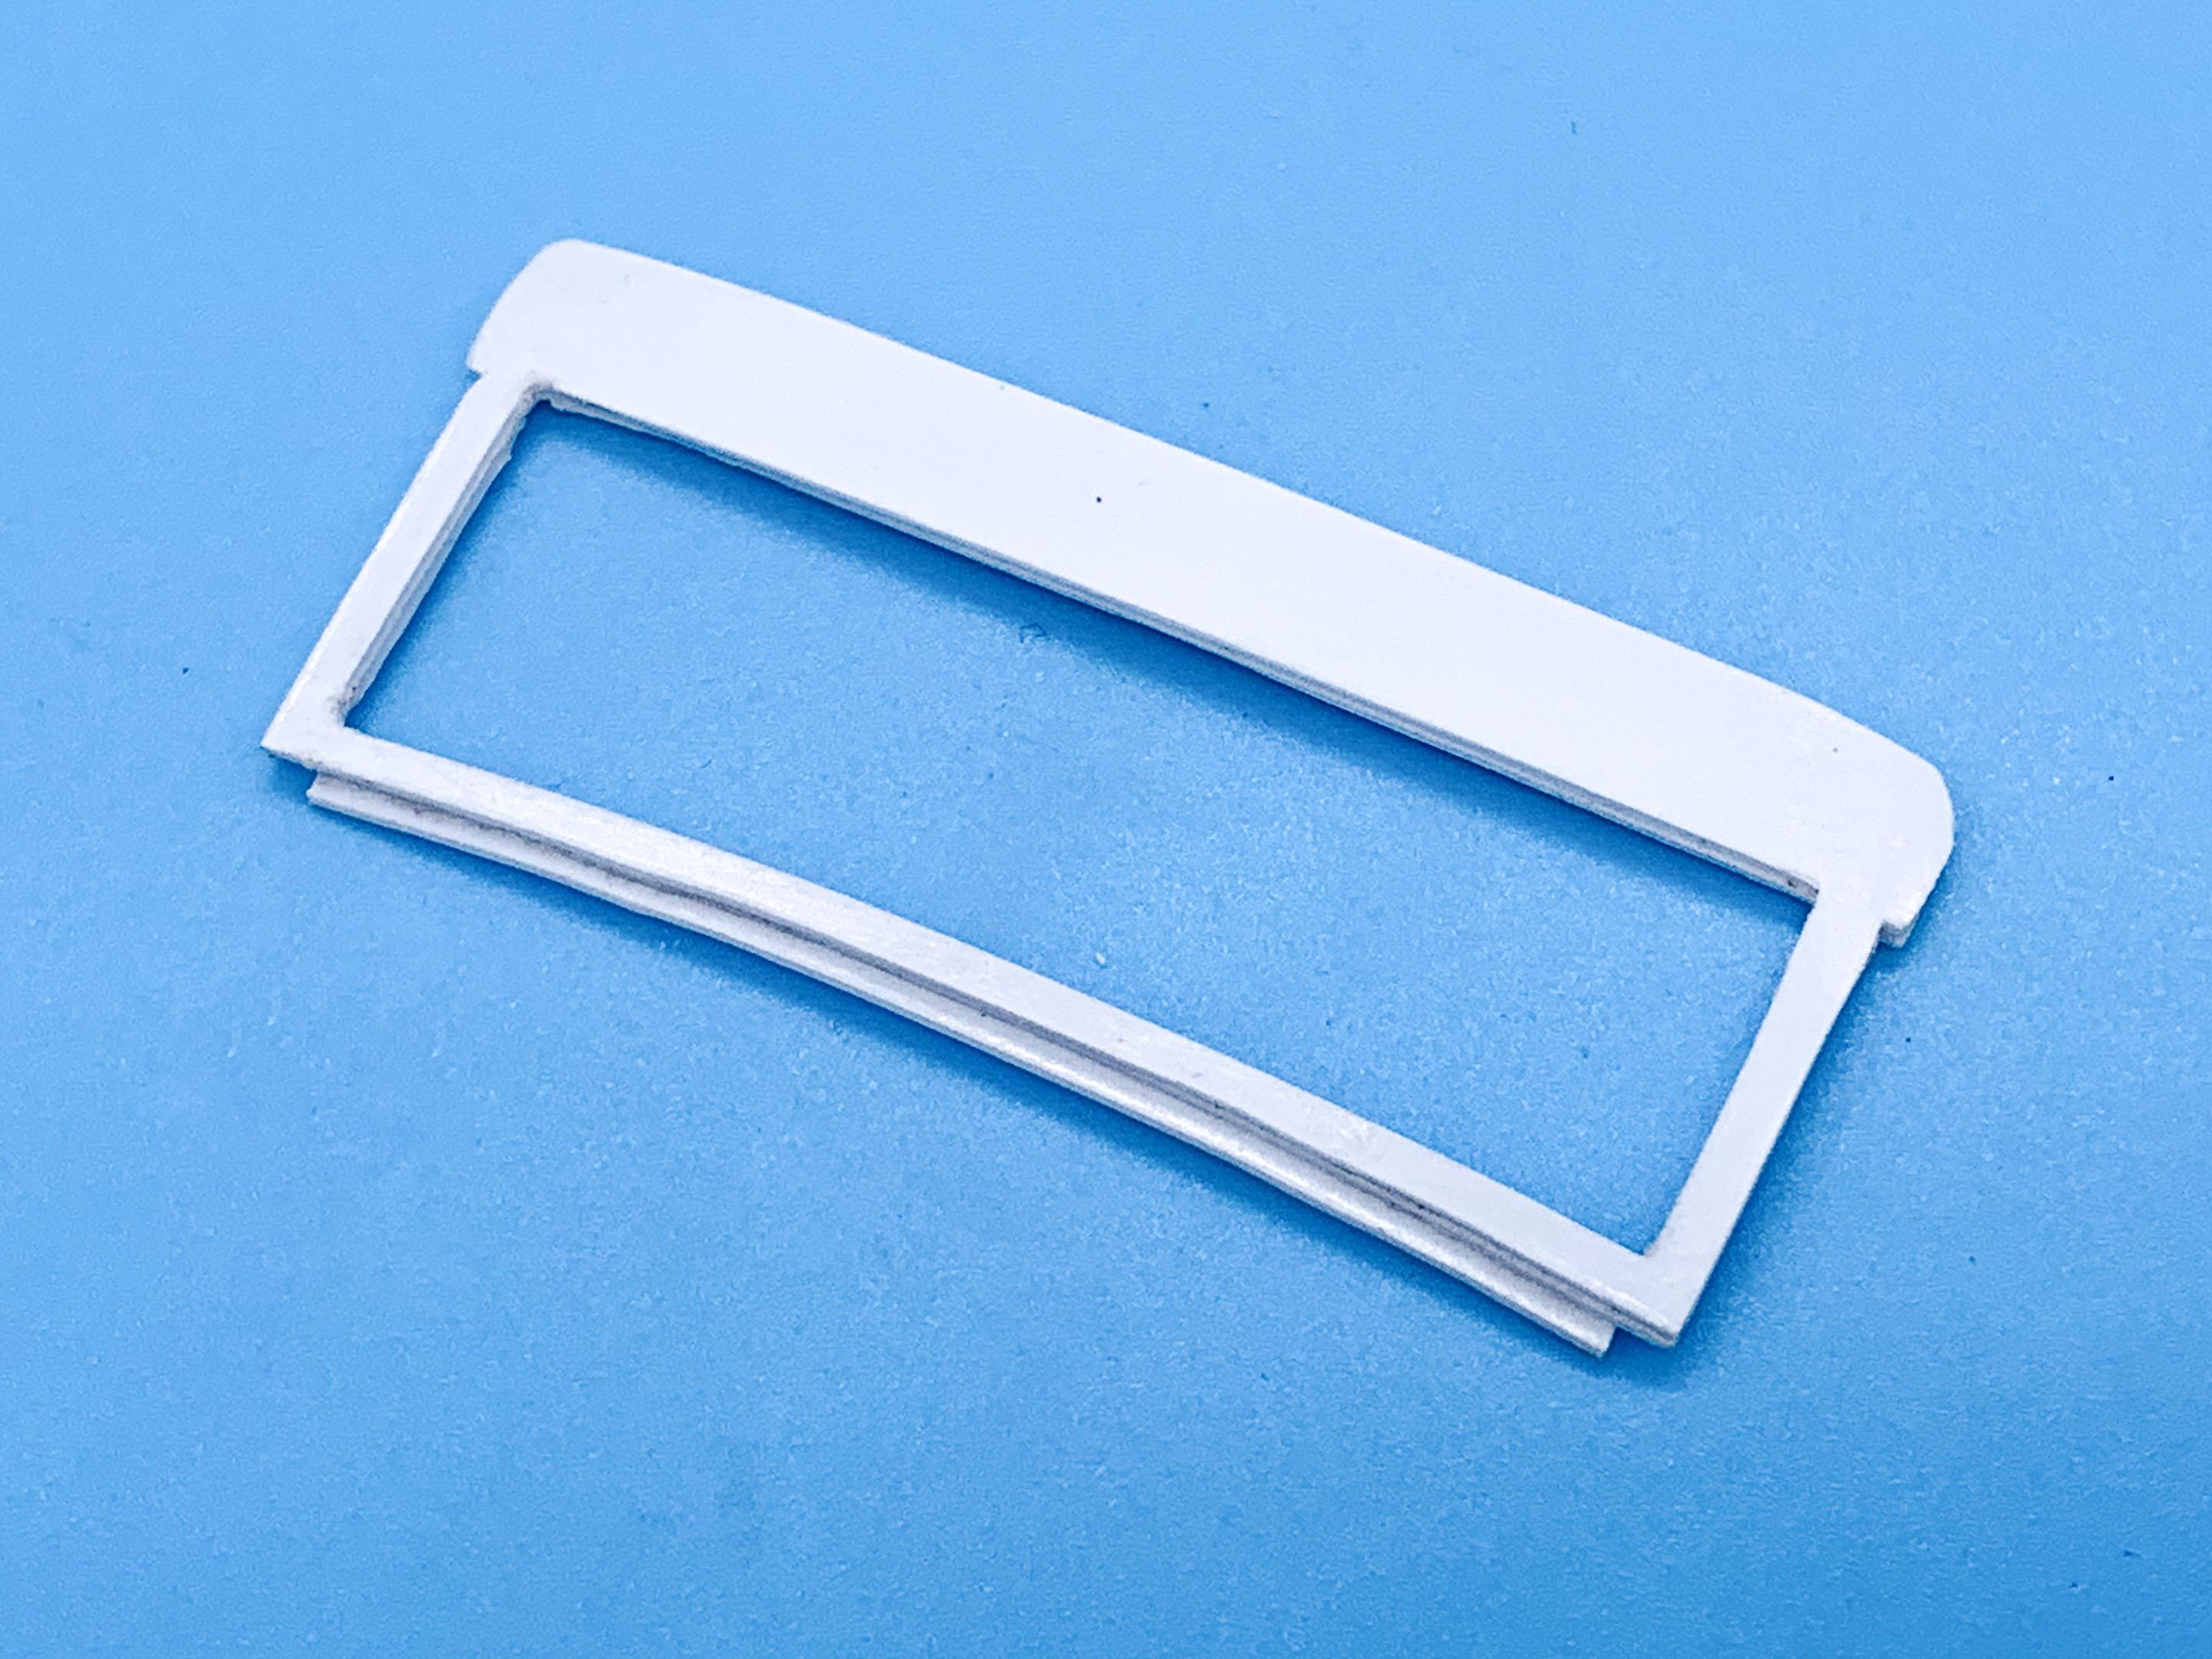
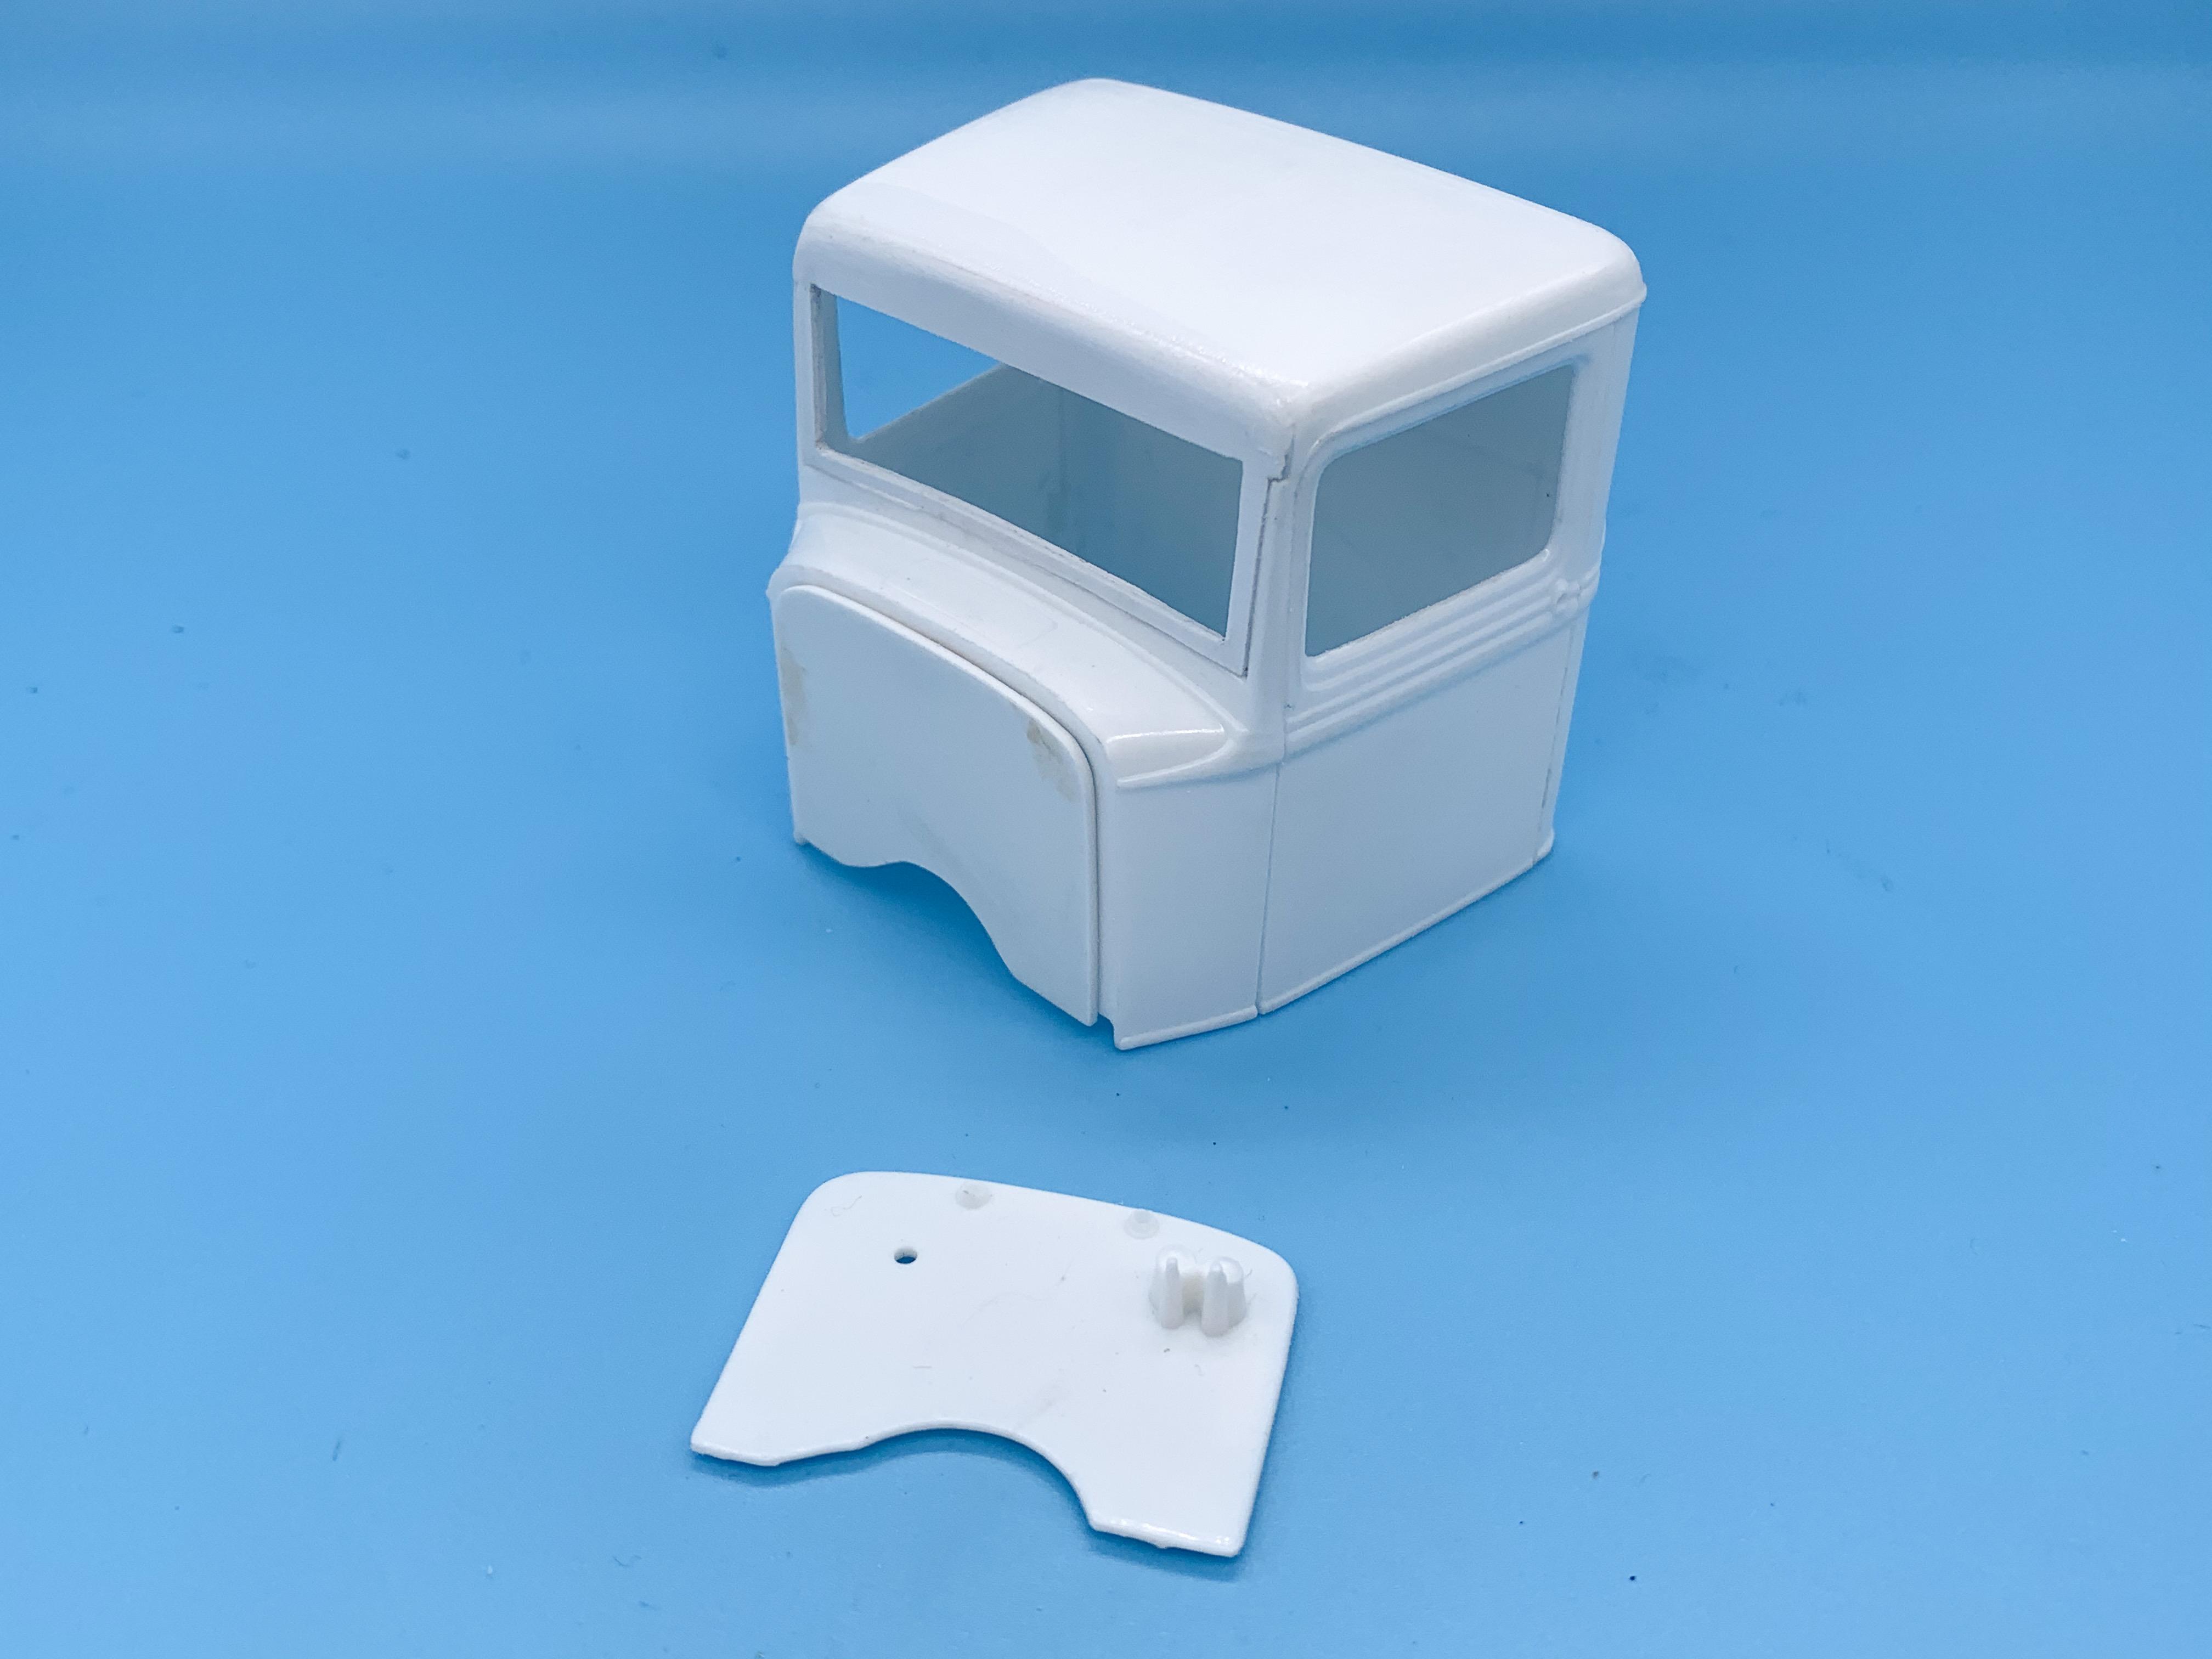
When I posted a mock-up rendering of this build, someone on my Instagram said it looked like what Farmer John would drive to church instead of his regular farm truck, and I liked it, so I guess I’m building a church truck ? I just finished a patina’d 34 truck and I wanted to do another variation but nice and clean this time - mildly hot rodded and not TOO far from the AMT/Lindberg kit, but with some cool little touches to make it a little different. Not full hot rod, not full custom, but a nice 60s inspired 34. Did a rendering of a 34 with the sunvisor removed and some simple fender flares - I think I like it! So, starting with the cab... First is making a replacement windshield frame that deletes the visor, and that I can shape into the roof to get a nice radius. Drew a frame in Illustrator and cut some styrene sheet to make the part: And a fit-check: Looks kinda awkward here, but I can glue it in place and start sanding and shaping to get a nice blend where it meets the roof now. I was going to use the kit’s optional smoothed-out firewall but I didn’t want to deal with trying to detail paint those moulded-in brake reservoirs, so I made a new one from sheet...you can see here that I’ve started blending the windshield frame to the roof a little: I’ll need scribe some lines in there once I get a little further along, but I’ll let the glue setup a little before messing with that. More soon, after dinner ?
-
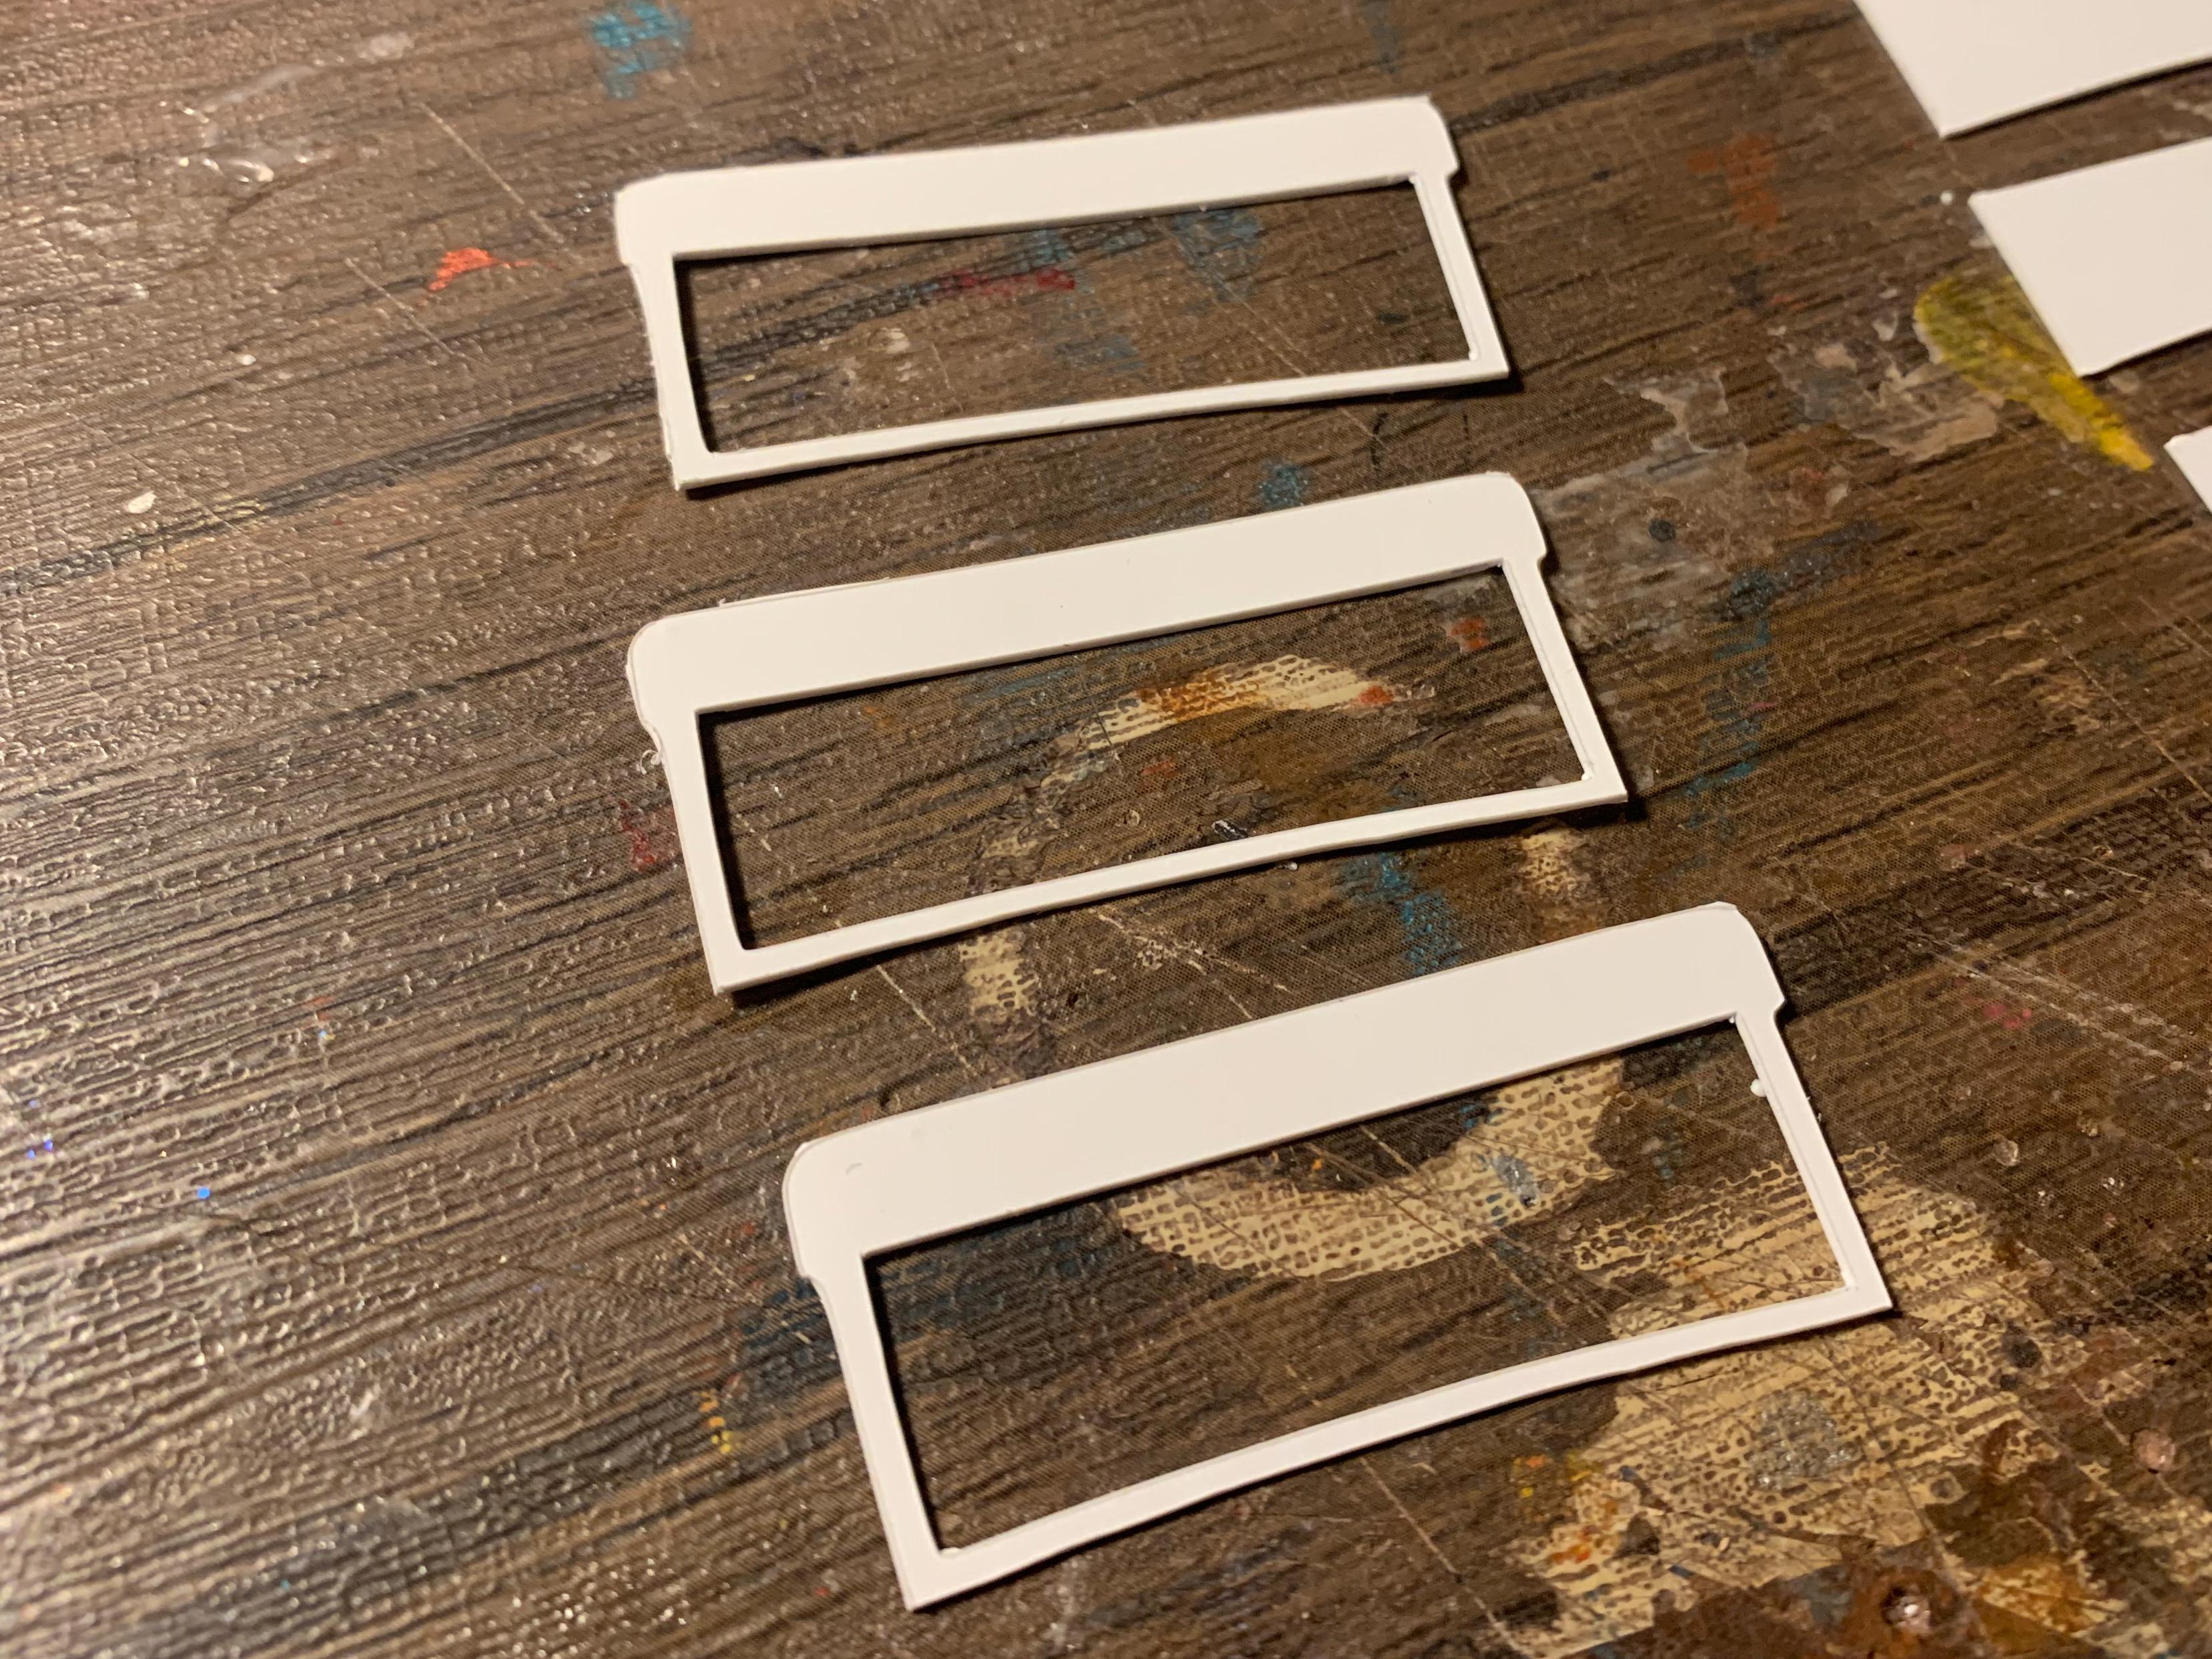
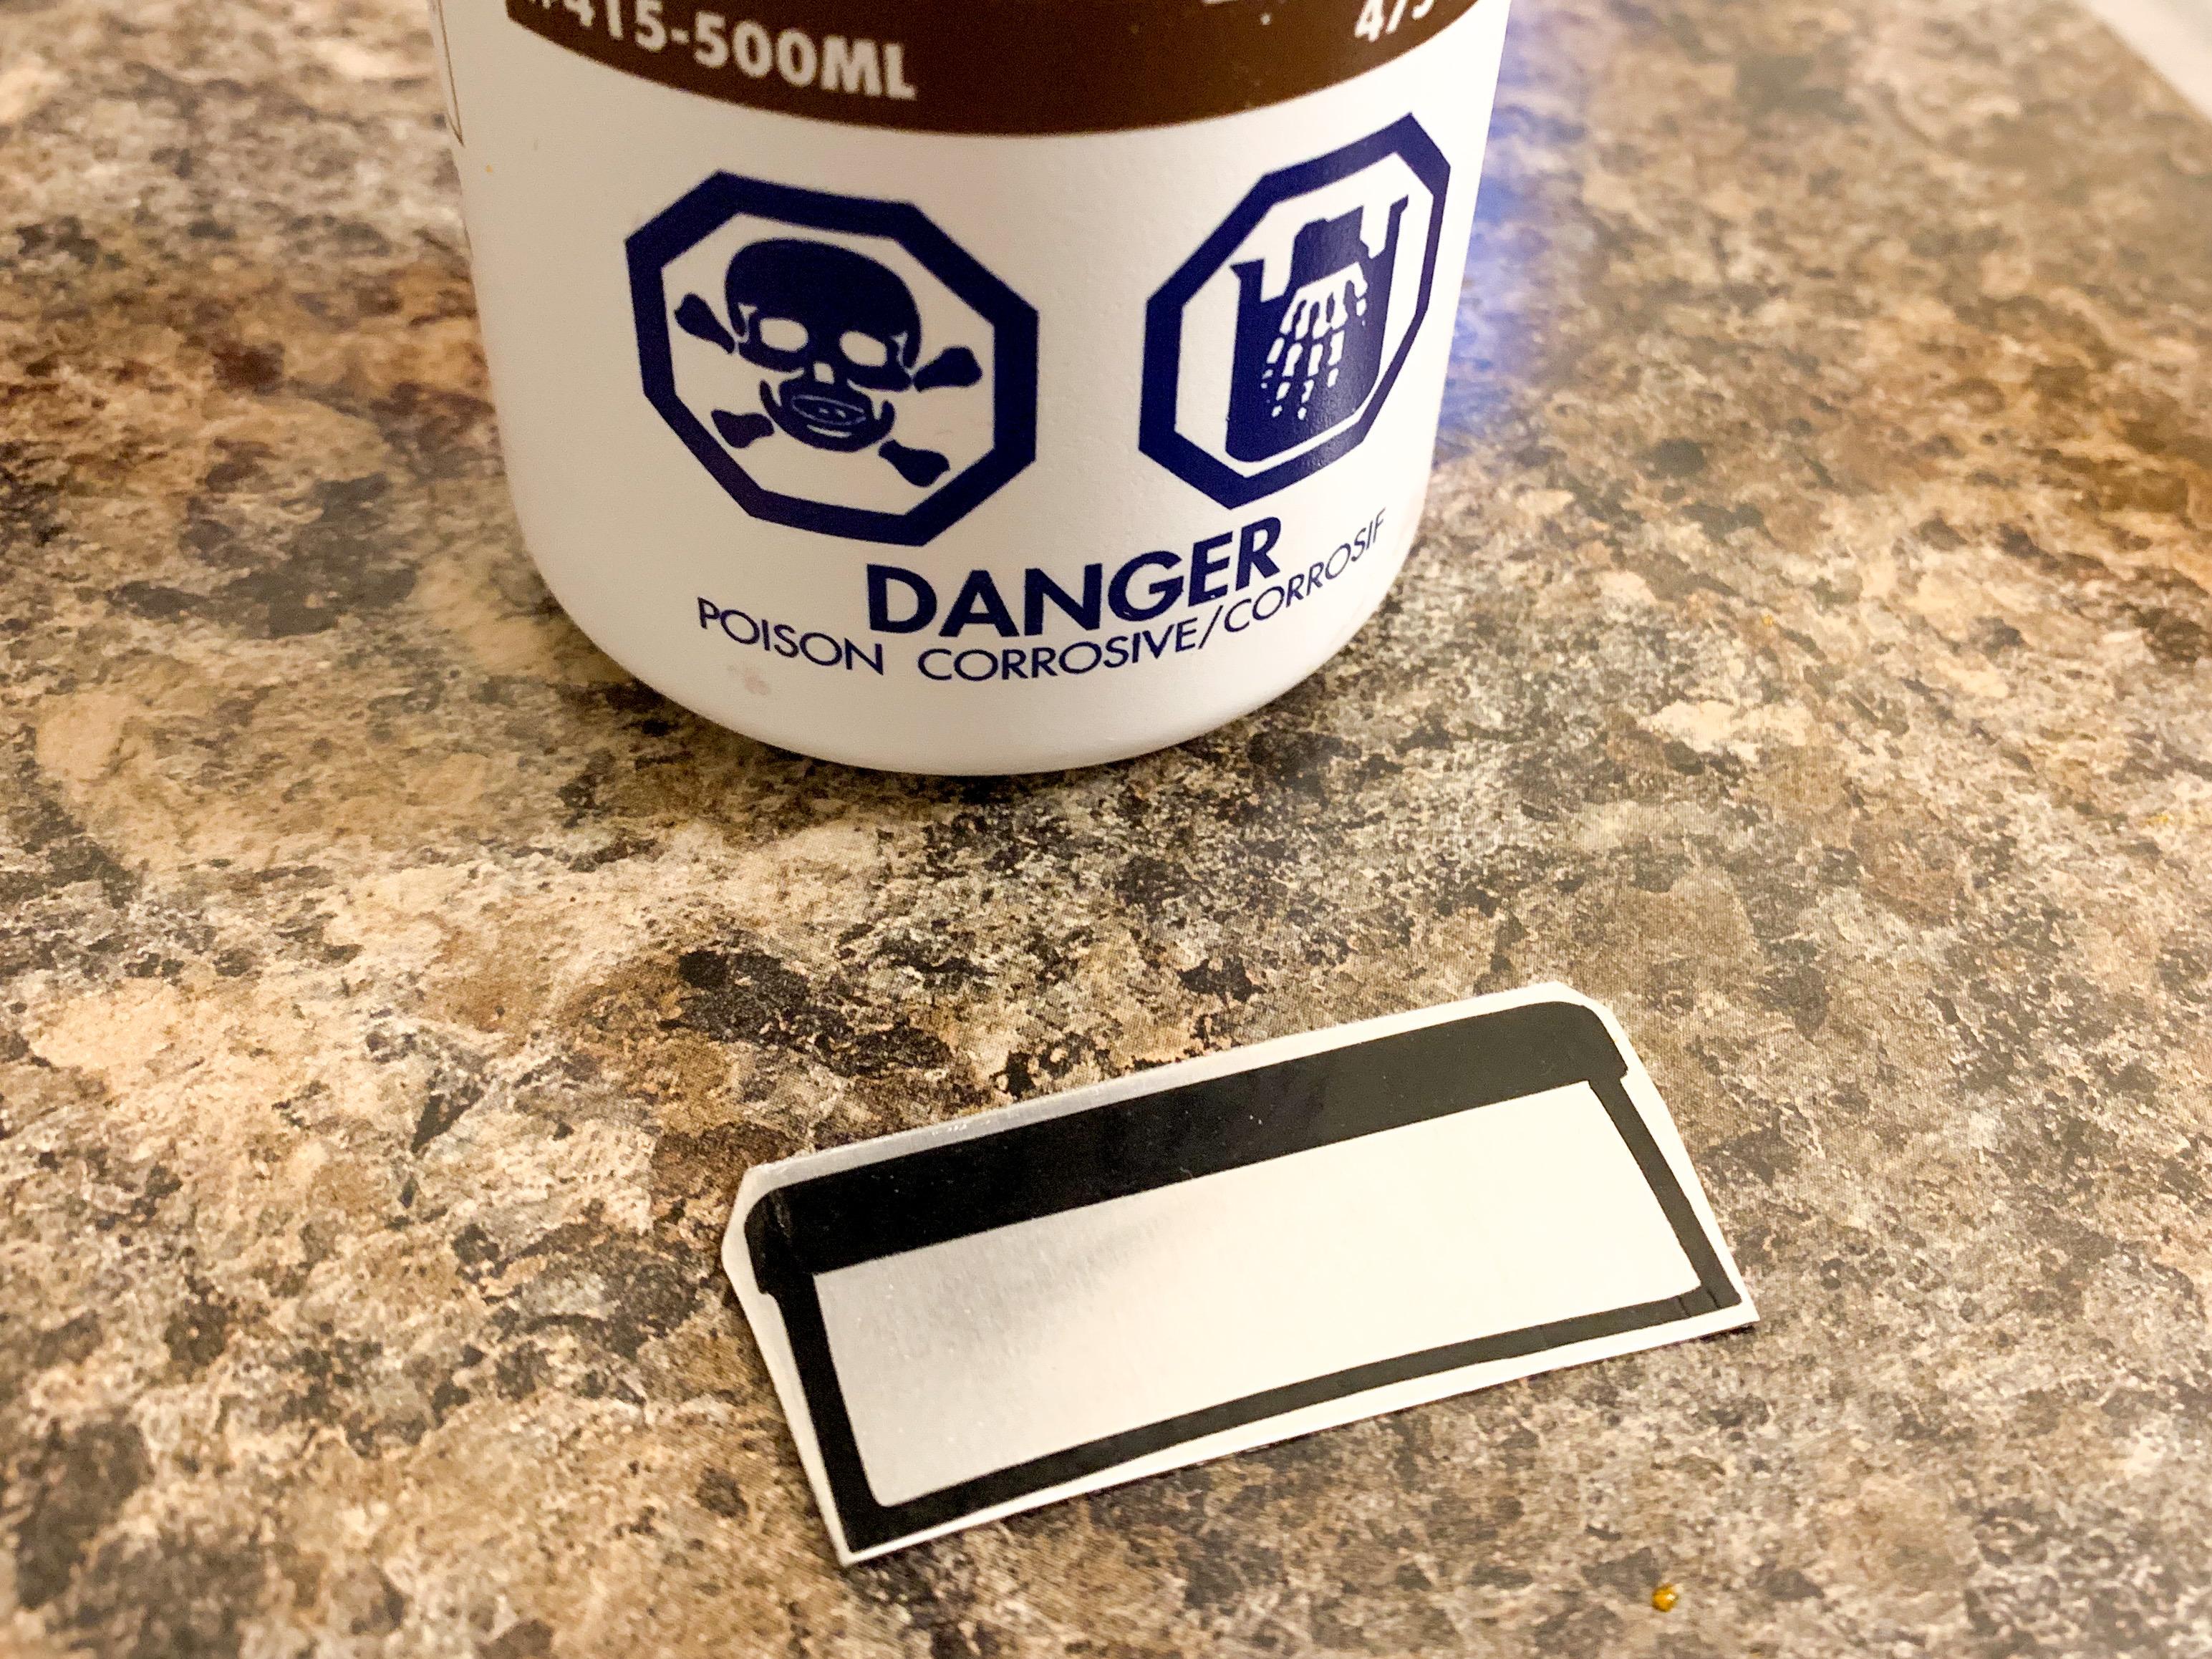
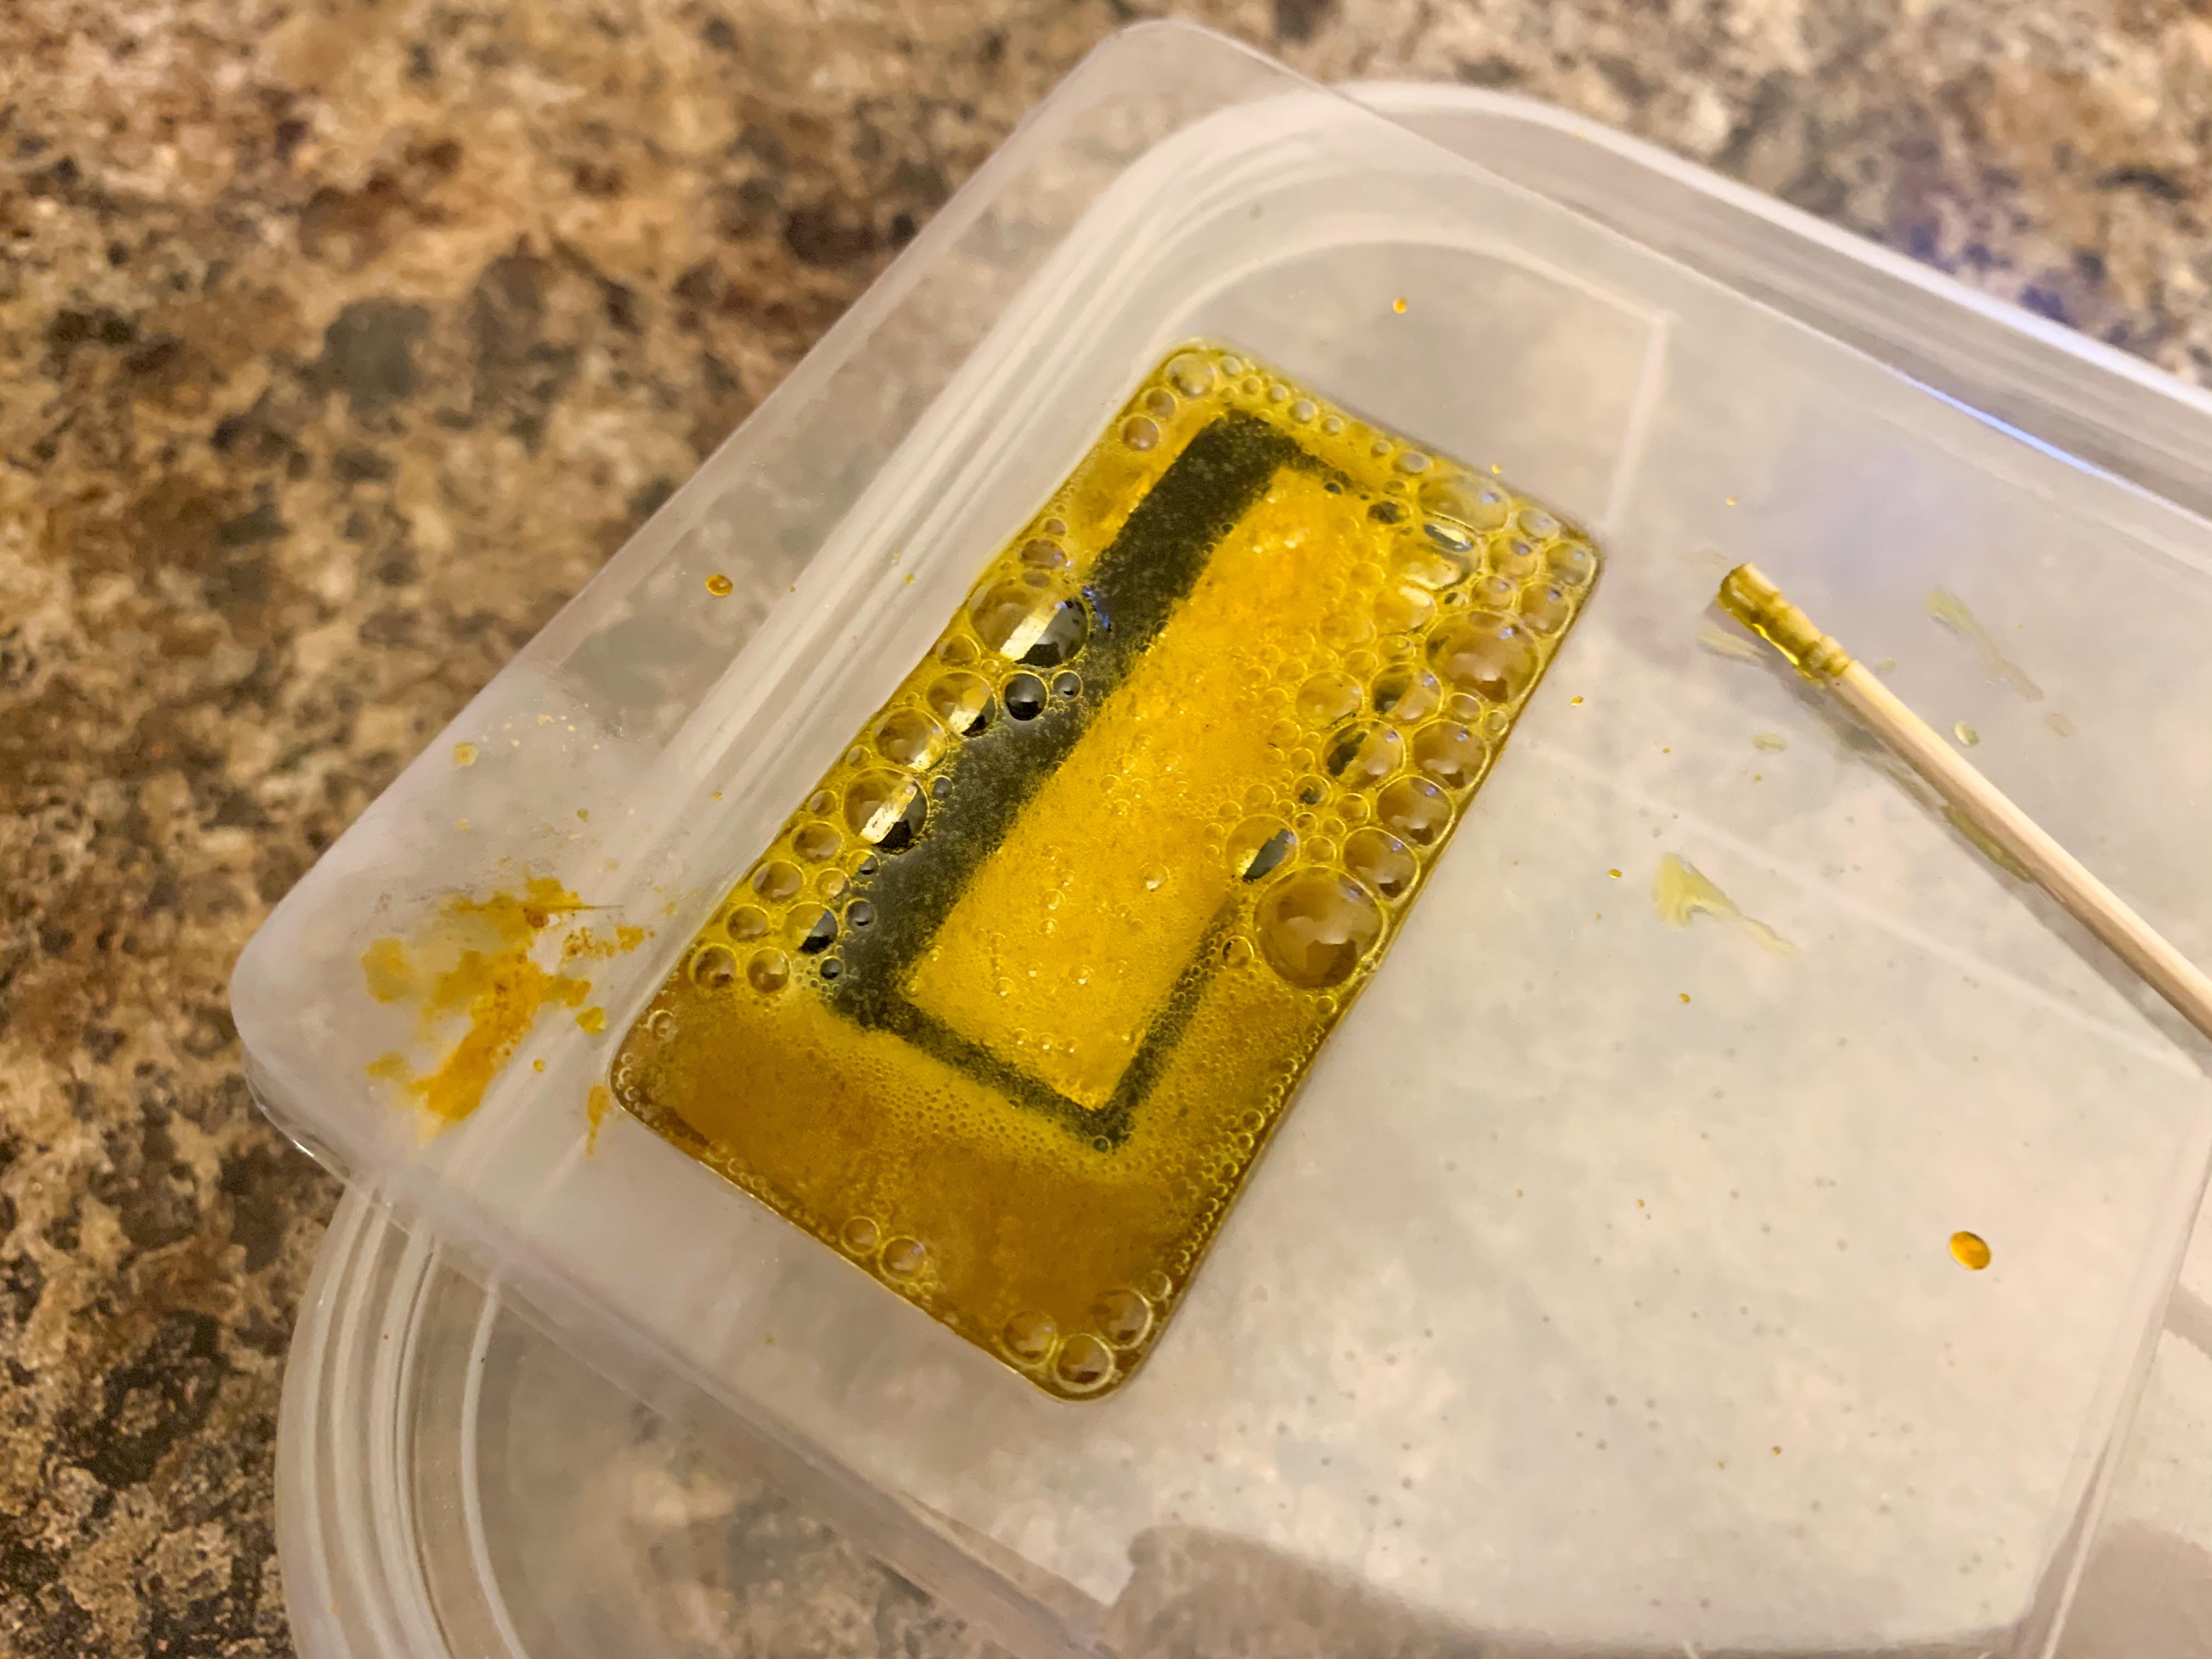
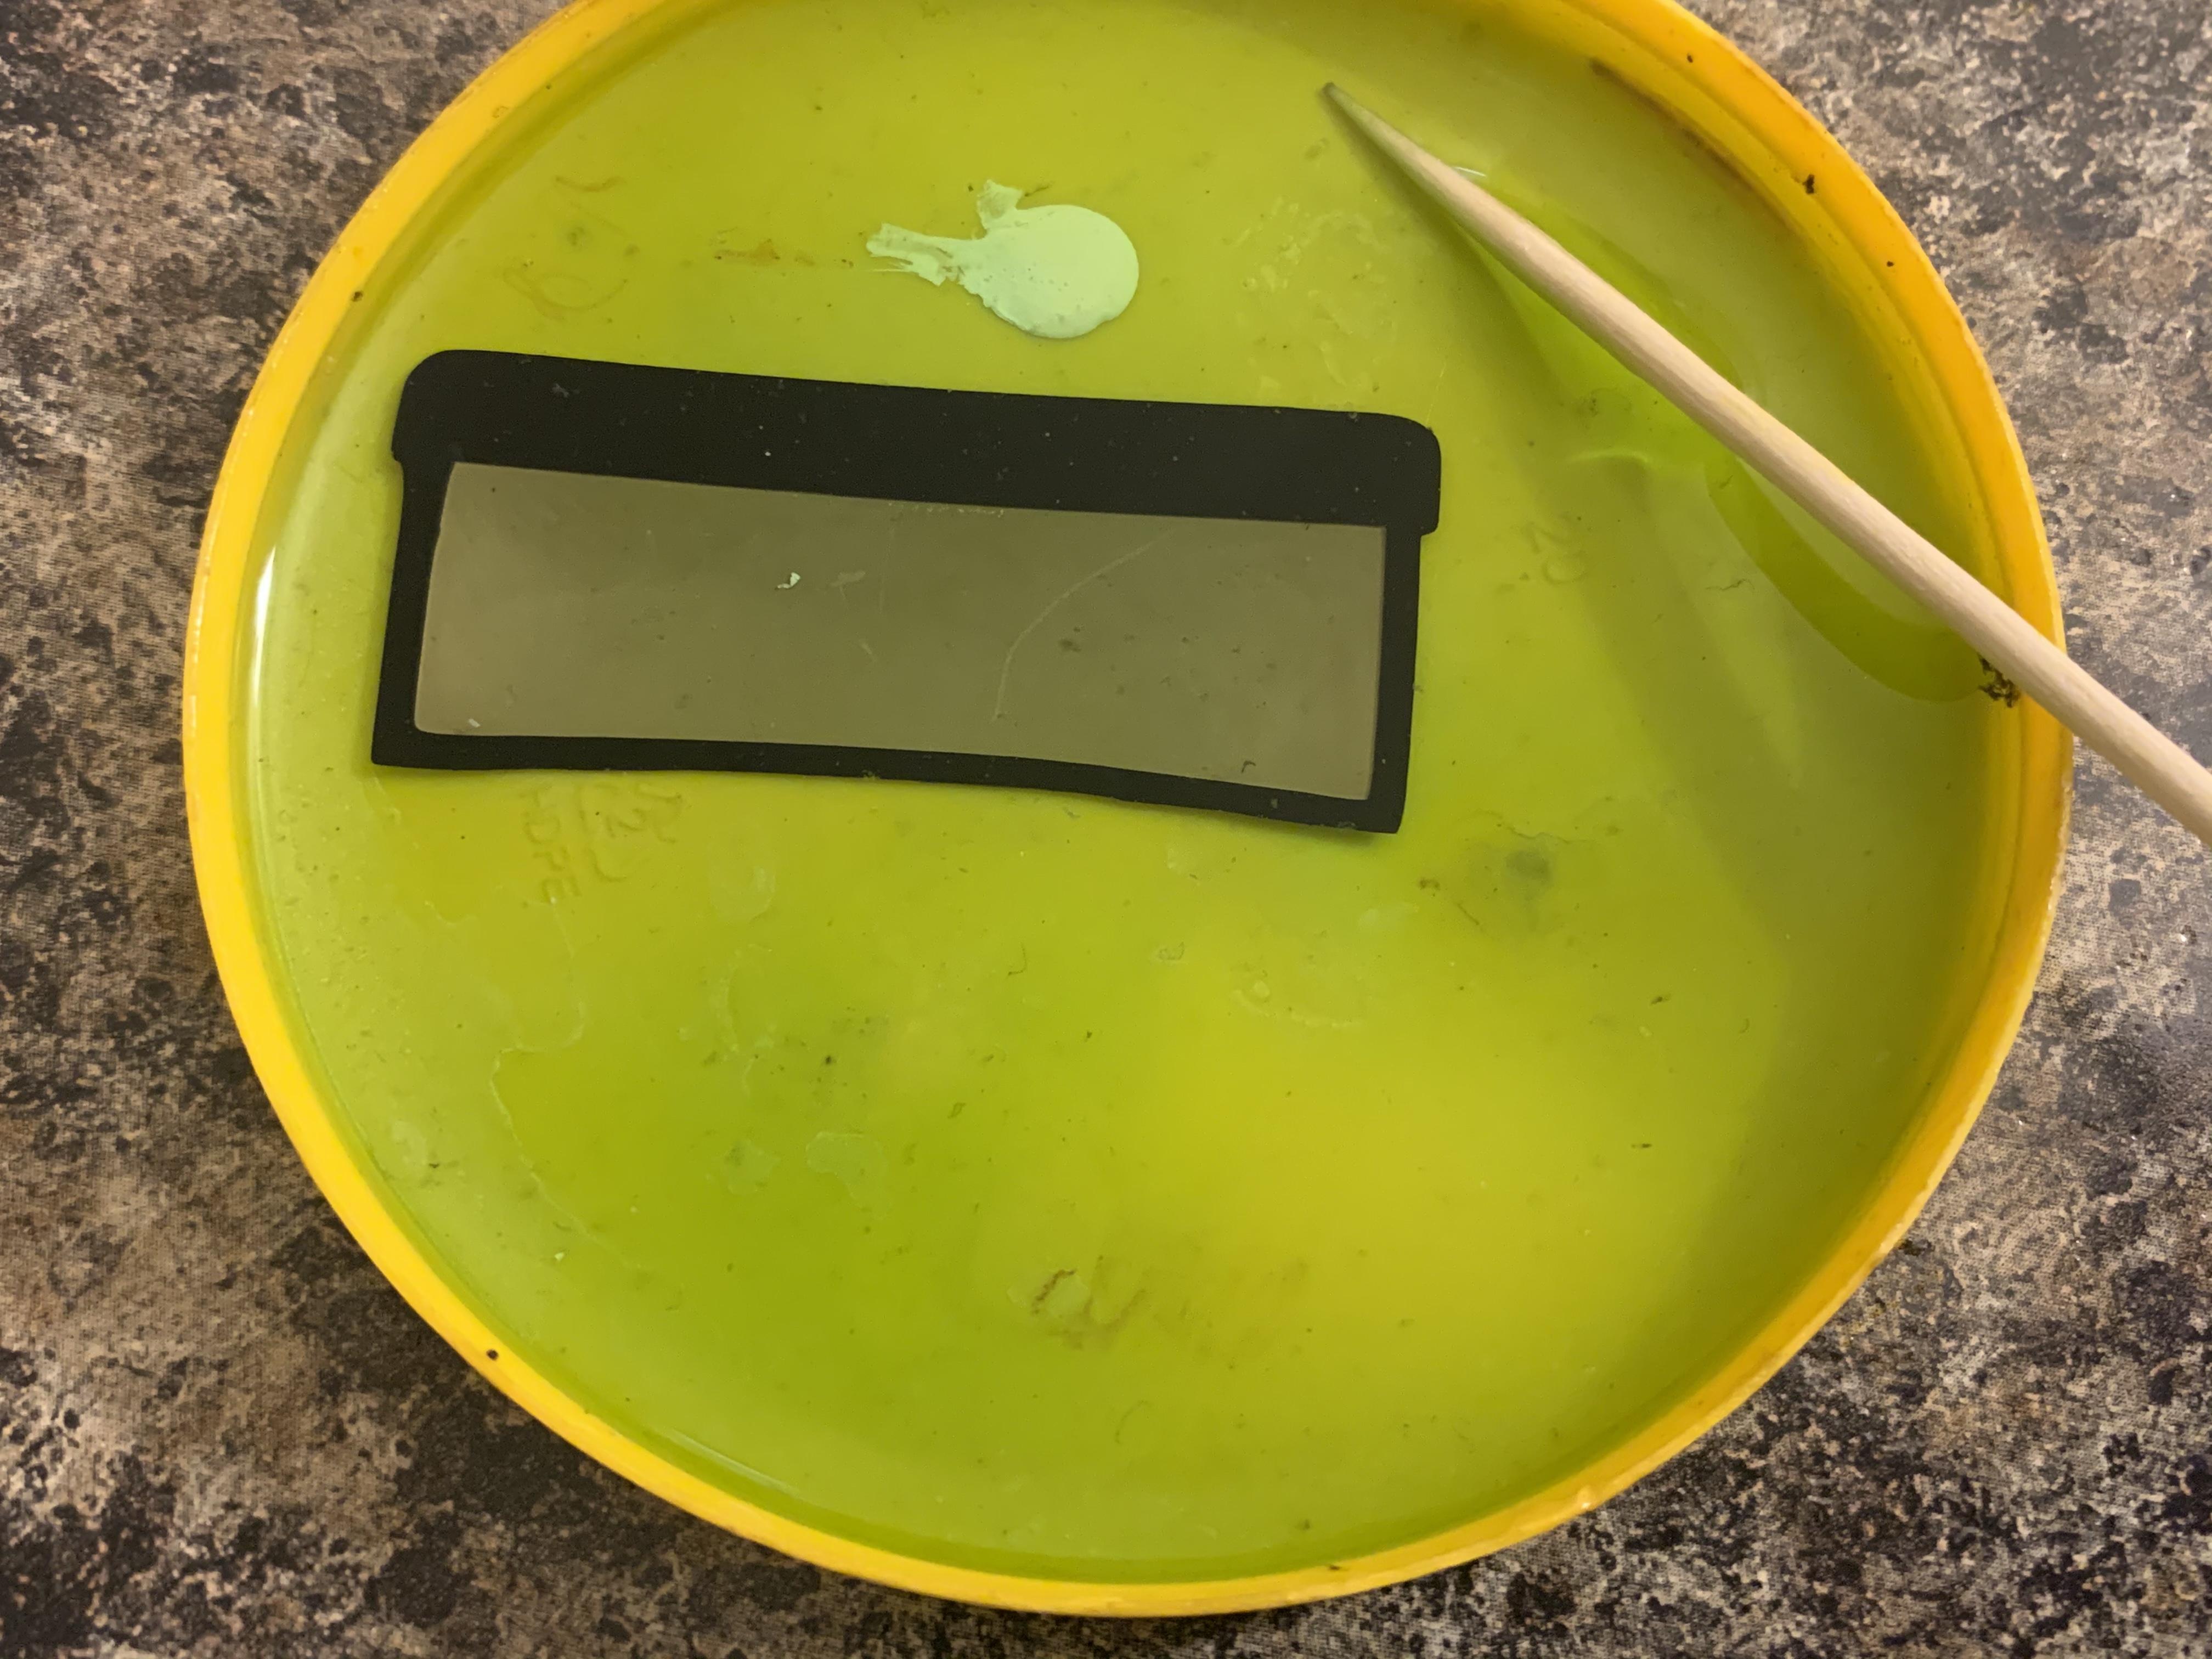
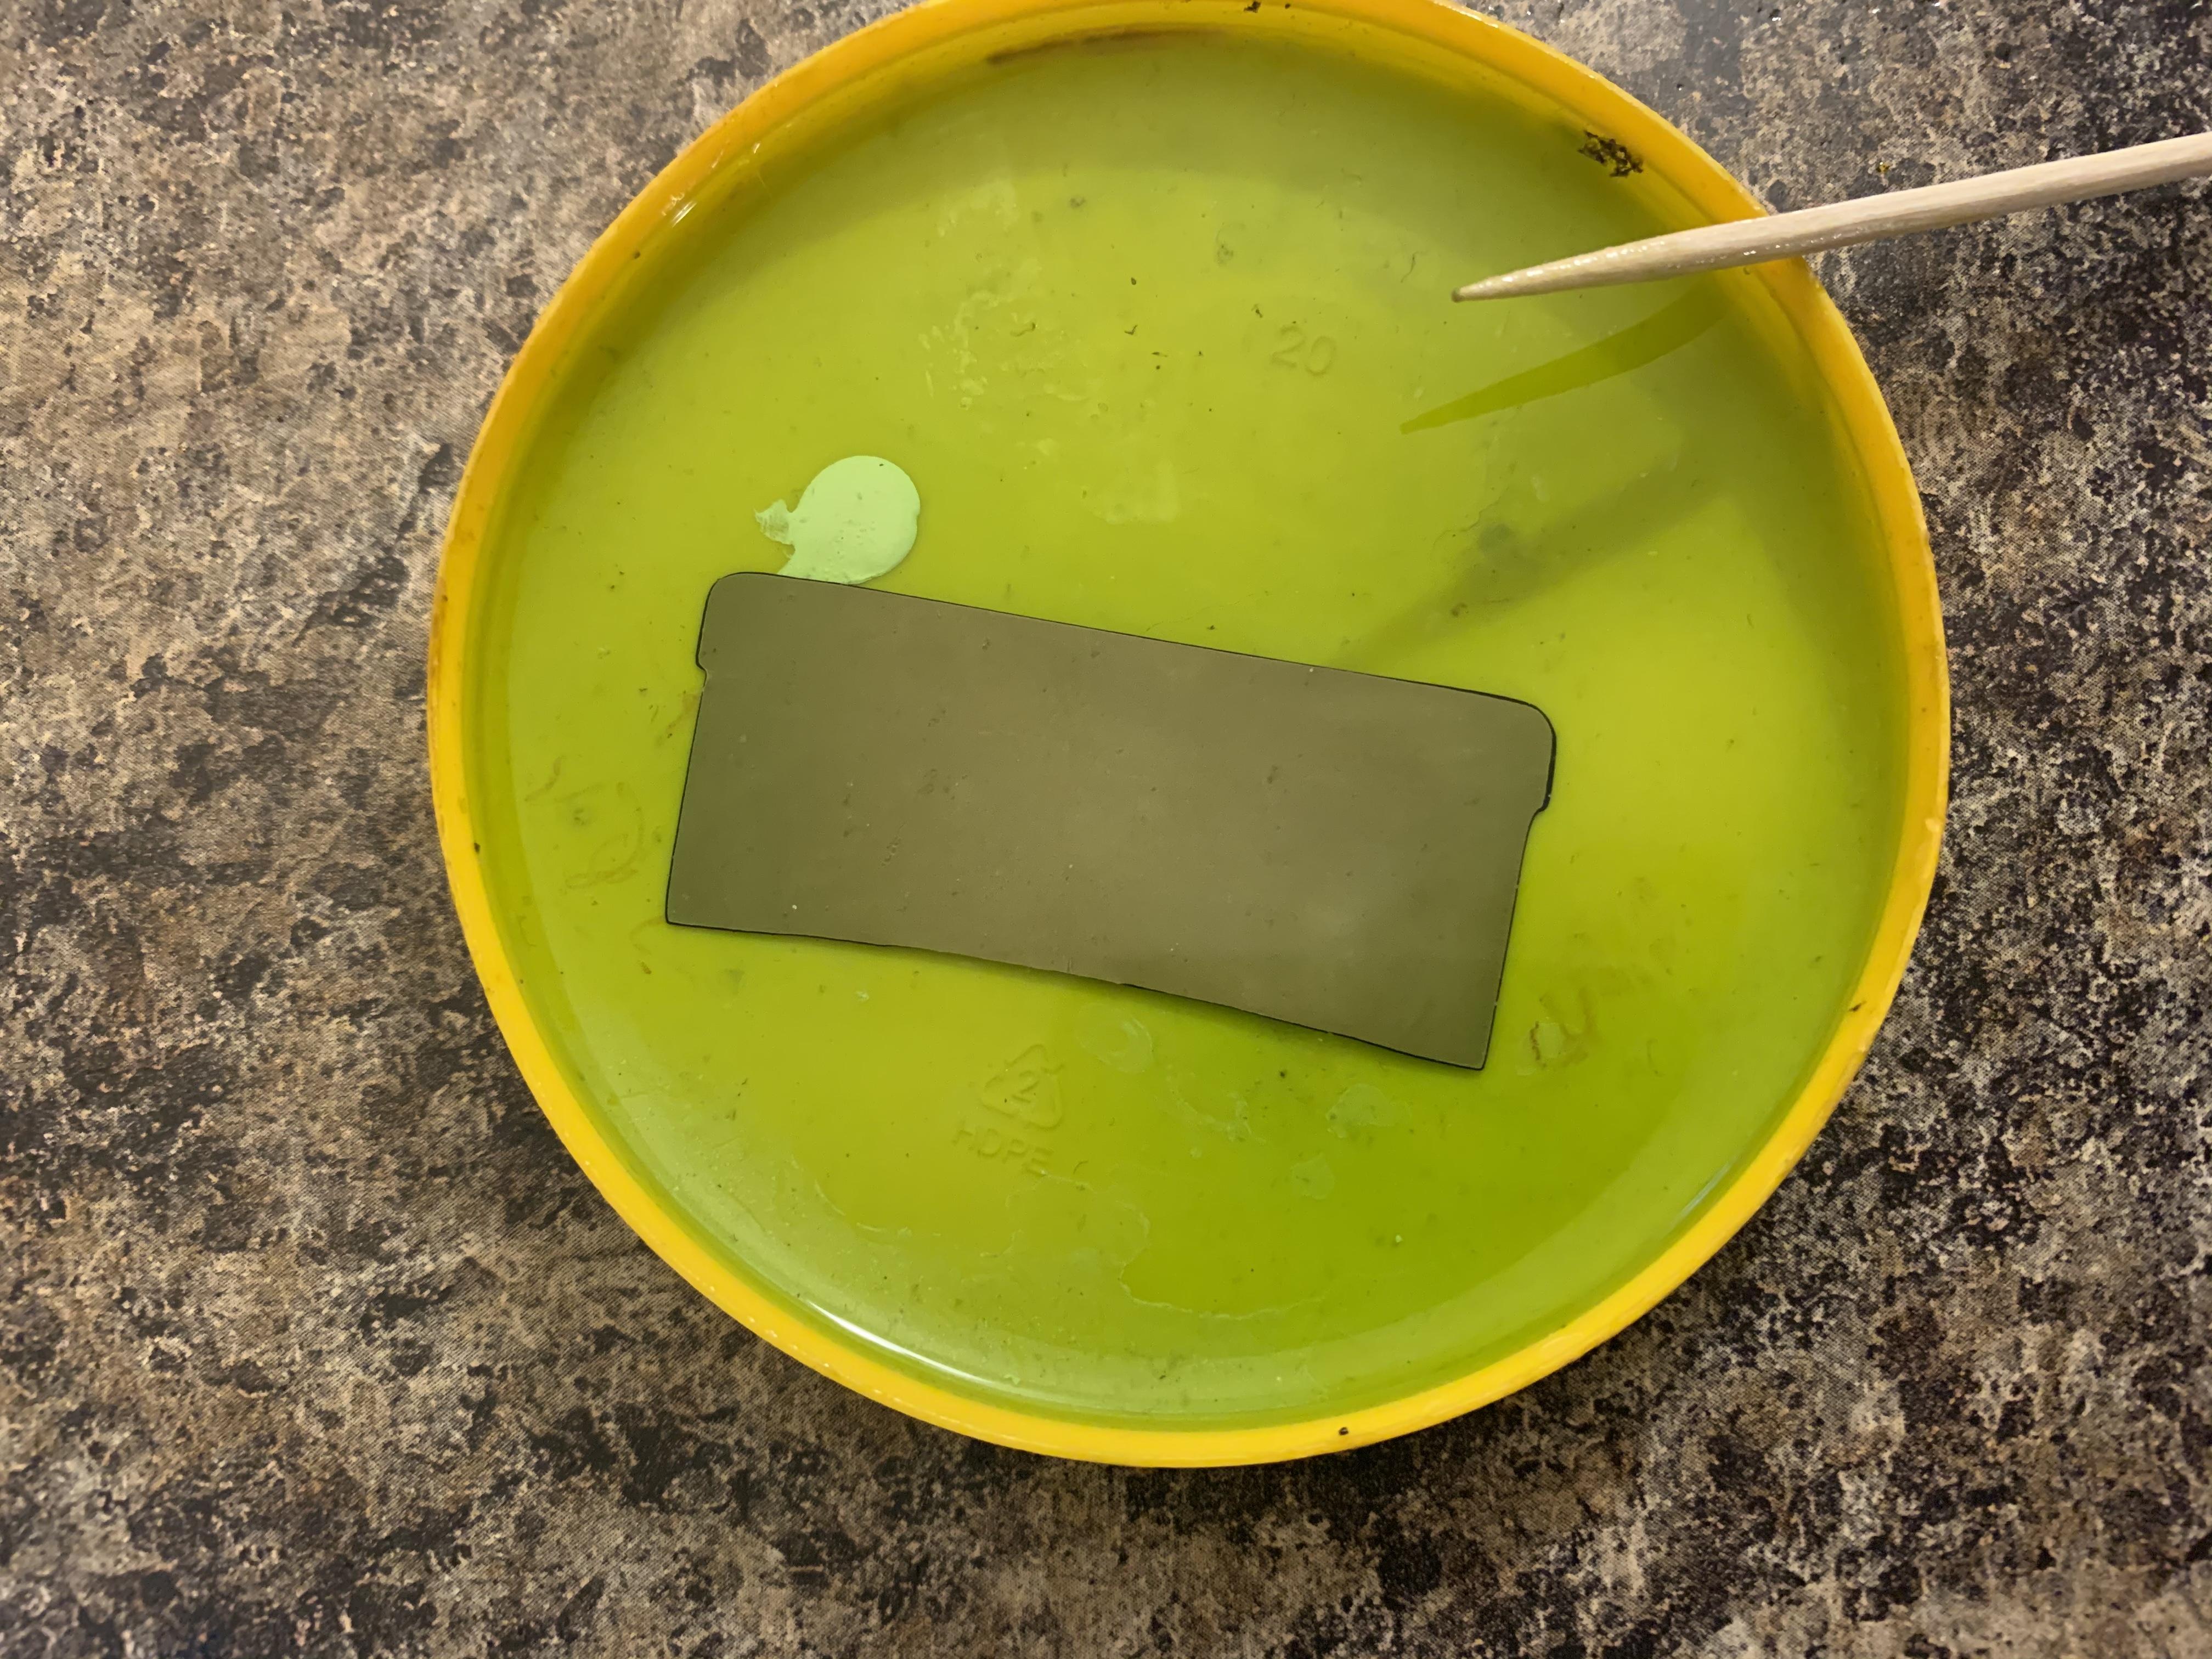
I’m trying a new technique to ‘photoetch’ metal parts, but by using a vinyl resist rather than the ‘photo’ bit of the process. I can make a vinyl mask pretty easily, and I have the materials and chemicals required here, but it’s still taking some figuring out to get it to work right. Im trying to make a windshield frame for a 34 truck - which would look like this, loosely: Vinyl resist applied to some aluminum sheet: And some chemistry starting to happen: I over-reduced the etching solution to slow the process down some seeing as this is my first time messing with this, and I think it’s going to take a bunch of experimenting to learn how to do this stuff successfully and repeatably, but I’m hopeful! My brass version of the same part is starting to etch down to the right shape on the outer edge - not sure how much of that I’ll lose by the time the opening in the center has gone though... Guess we’ll see what kind of mess we have by morning!
-
Next level stuff, Eric!!! Such a joy to see it come together!!
-
Thank you! It’s funny, blue is my go-to color for any 1:1 I’ve ever bought...but I don’t like the blue Miatas as much as the red ones. They look cool in red! Thank you sir! Eventually anyway... ? Yes sir! It comes with a clear plastic hardtop so you can mask the window and paint the rest. The fit looked a little hokey on the one in my kit though, so I’m going to go with the top-down option this time around I think... Tiny bit of progress - got all the underside stuff done - used some washes and watercolor pencils to add a little interest to the exhaust but nothing too major... And this weekend’s project is the interior. Just shot all the plastic bits (as in, what would be plastic in the 1:1 - I realize the whole kit’s plastic ?) in Tamiya NATO Black this evening: This grey is actually a little light compared to the 1:1 (although some semigloss clear darkened it up some after this photo was taken)...but I’d like to be able to pick out some of that nice detail on the dash with a black wash and make it stand out a little better. Did the opposite on the door panels - the detail is a little flat so I shot those with a darker shade to kinda hide them...trying to use some tricks to draw the eye to the interesting and well-detailed parts more, and away from the less well done stuff in the kit. We’ll see how it works when it goes together...more soon!
-
Revell 1932 Ford Roadster 25th scale
OldNYJim replied to bobthehobbyguy's topic in Model Building Questions and Answers
I’ve just been messing with one of these and didn’t spot any issue, although I’m not ready to glue it together here yet either...do you remember what the issue was, roughly? -
I did a search but there wasn't a bunch on here about them... I've been tossing up between this...: https://taigtools.com/product/10171-starter-set-1/ ...and a Sherline, and while I like the Sherline I don't think the extra money you pay to buy one will gain me much compared to this Taig, which seems like it has great reviews. At just over $450 the starter set seems like it would have everything you'd need to get going on making some little aluminum 'hop ups'...but I'd love to hear any advice from anyone more knowledgeable about these. And given my lathe experience is almost zero it'll all help...
-
The Rod Shop!
-
Invision Forum Enable Post Likes/Reactions?
OldNYJim replied to Jordan White's topic in How To Use This Board
I agree - Facebook groups are quick and easy to make, and everyone gets to be head honcho of their own little site, but good luck searching for a cool post you saw on facebook 2 years ago to find some reference info. I've got a Facebook account so I can follow some of the model clubs who don't post on here or have 'real' websites, but that's about all it's useful for to me. That said, I like my little Instagram page, and it has a lot of followers and commenters who aren't on here, but same deal - good luck searching for that useful piece of info you found on there years ago, or following an in-progress build from start to finish. -
Haha! I've been trying think of what to call the room I've got set aside in the house for hobby stuff now. 'Workshop' sounds too industrial (it's actually a pretty nice comfortable space) and 'studio' sounds too artsy. I've been calling it "my room", but then when I say I'm going up to my room it sounds like I've been bad and I've got to go write lines or something. "Jim! Go to your room, at once!"
-
Dealer List is now Available
OldNYJim replied to Dave Ambrose's topic in Model Cars Magazine News and Discussions
Dumb question, probably...what's the best link to click to just buy this copy online from SOMEONE (don't really mind who). My wife wants to get me a subscription for Christmas, but in the meantime I'd like to pick up 207...I clicked through all the local hobby stores to see if I could just click and order it but none had it listed...a lead from anyone on where has a listing for it online would be much appreciated! No complaints, I know you guys are just getting rolling again here - I just didn't want to click through every single hobby store in the country to try and find an order link, or have to call round a bunch of places -
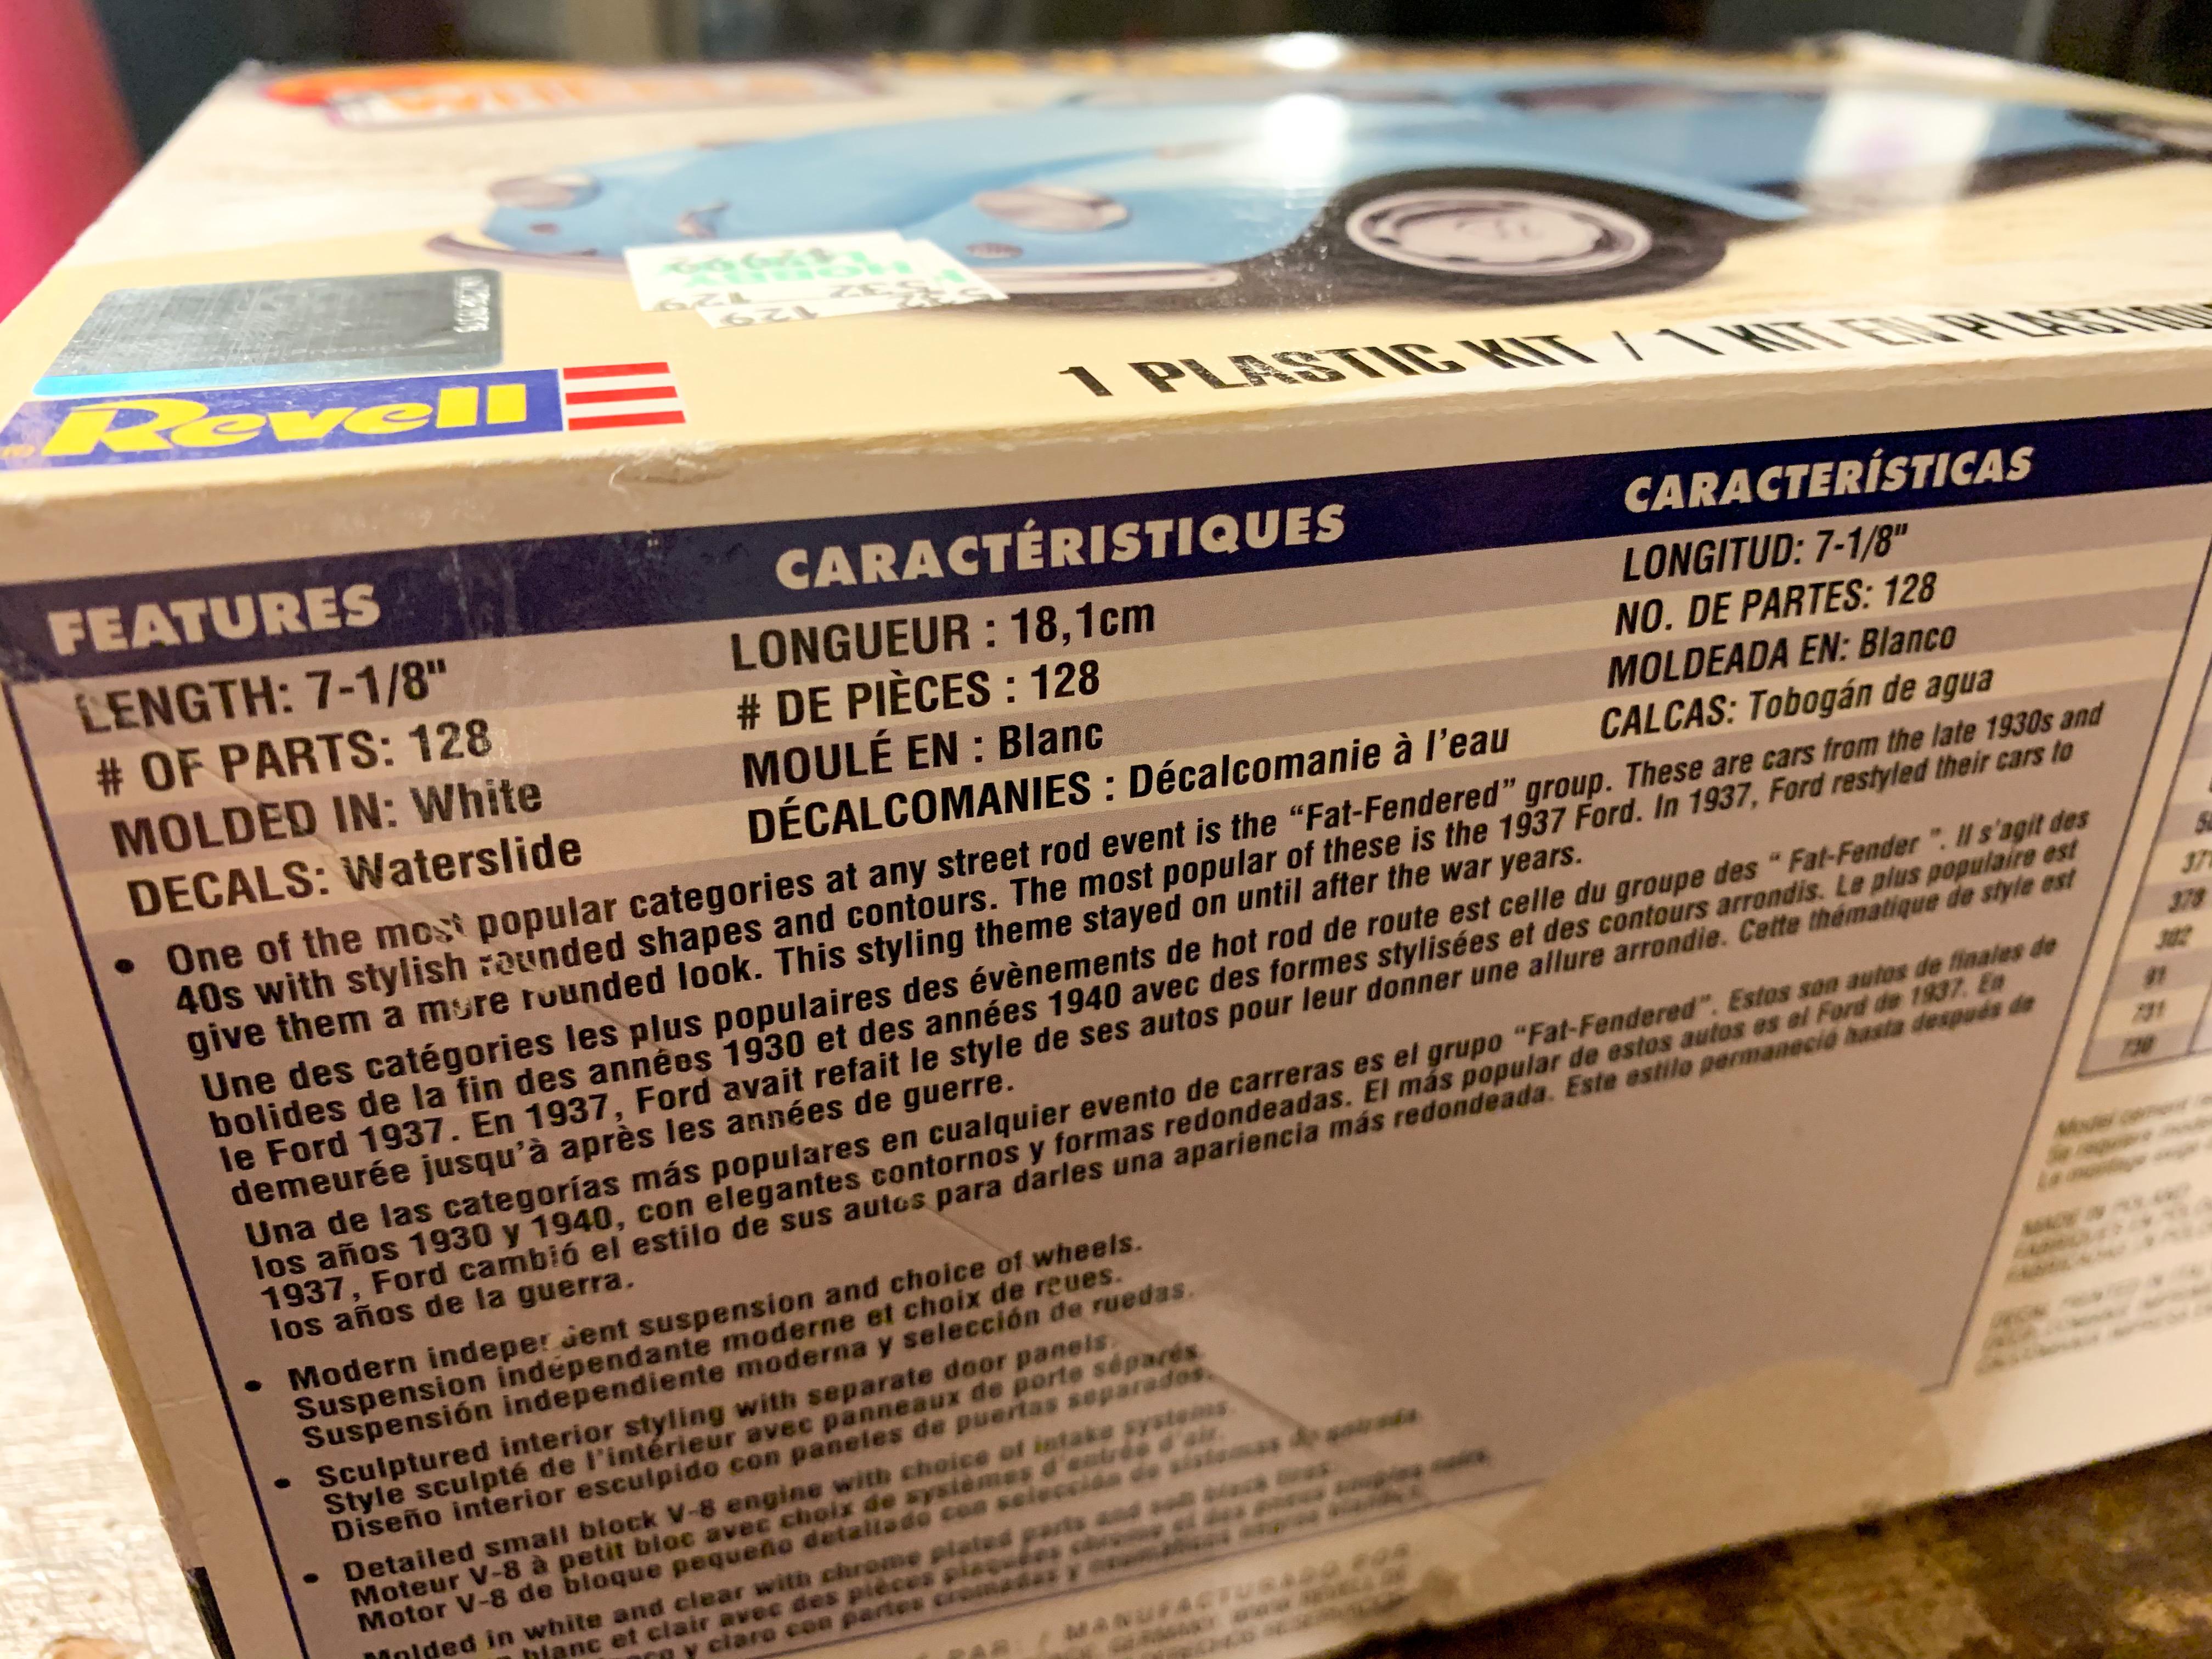
A Fordswagen would have been cool! It's definitely a small block, but I don't think its a V8 :D
-
I believe I’ve seen it mentioned on here before, although my memory is hazy...I wonder if the Ford has info about the Beetle on the box? ?
-
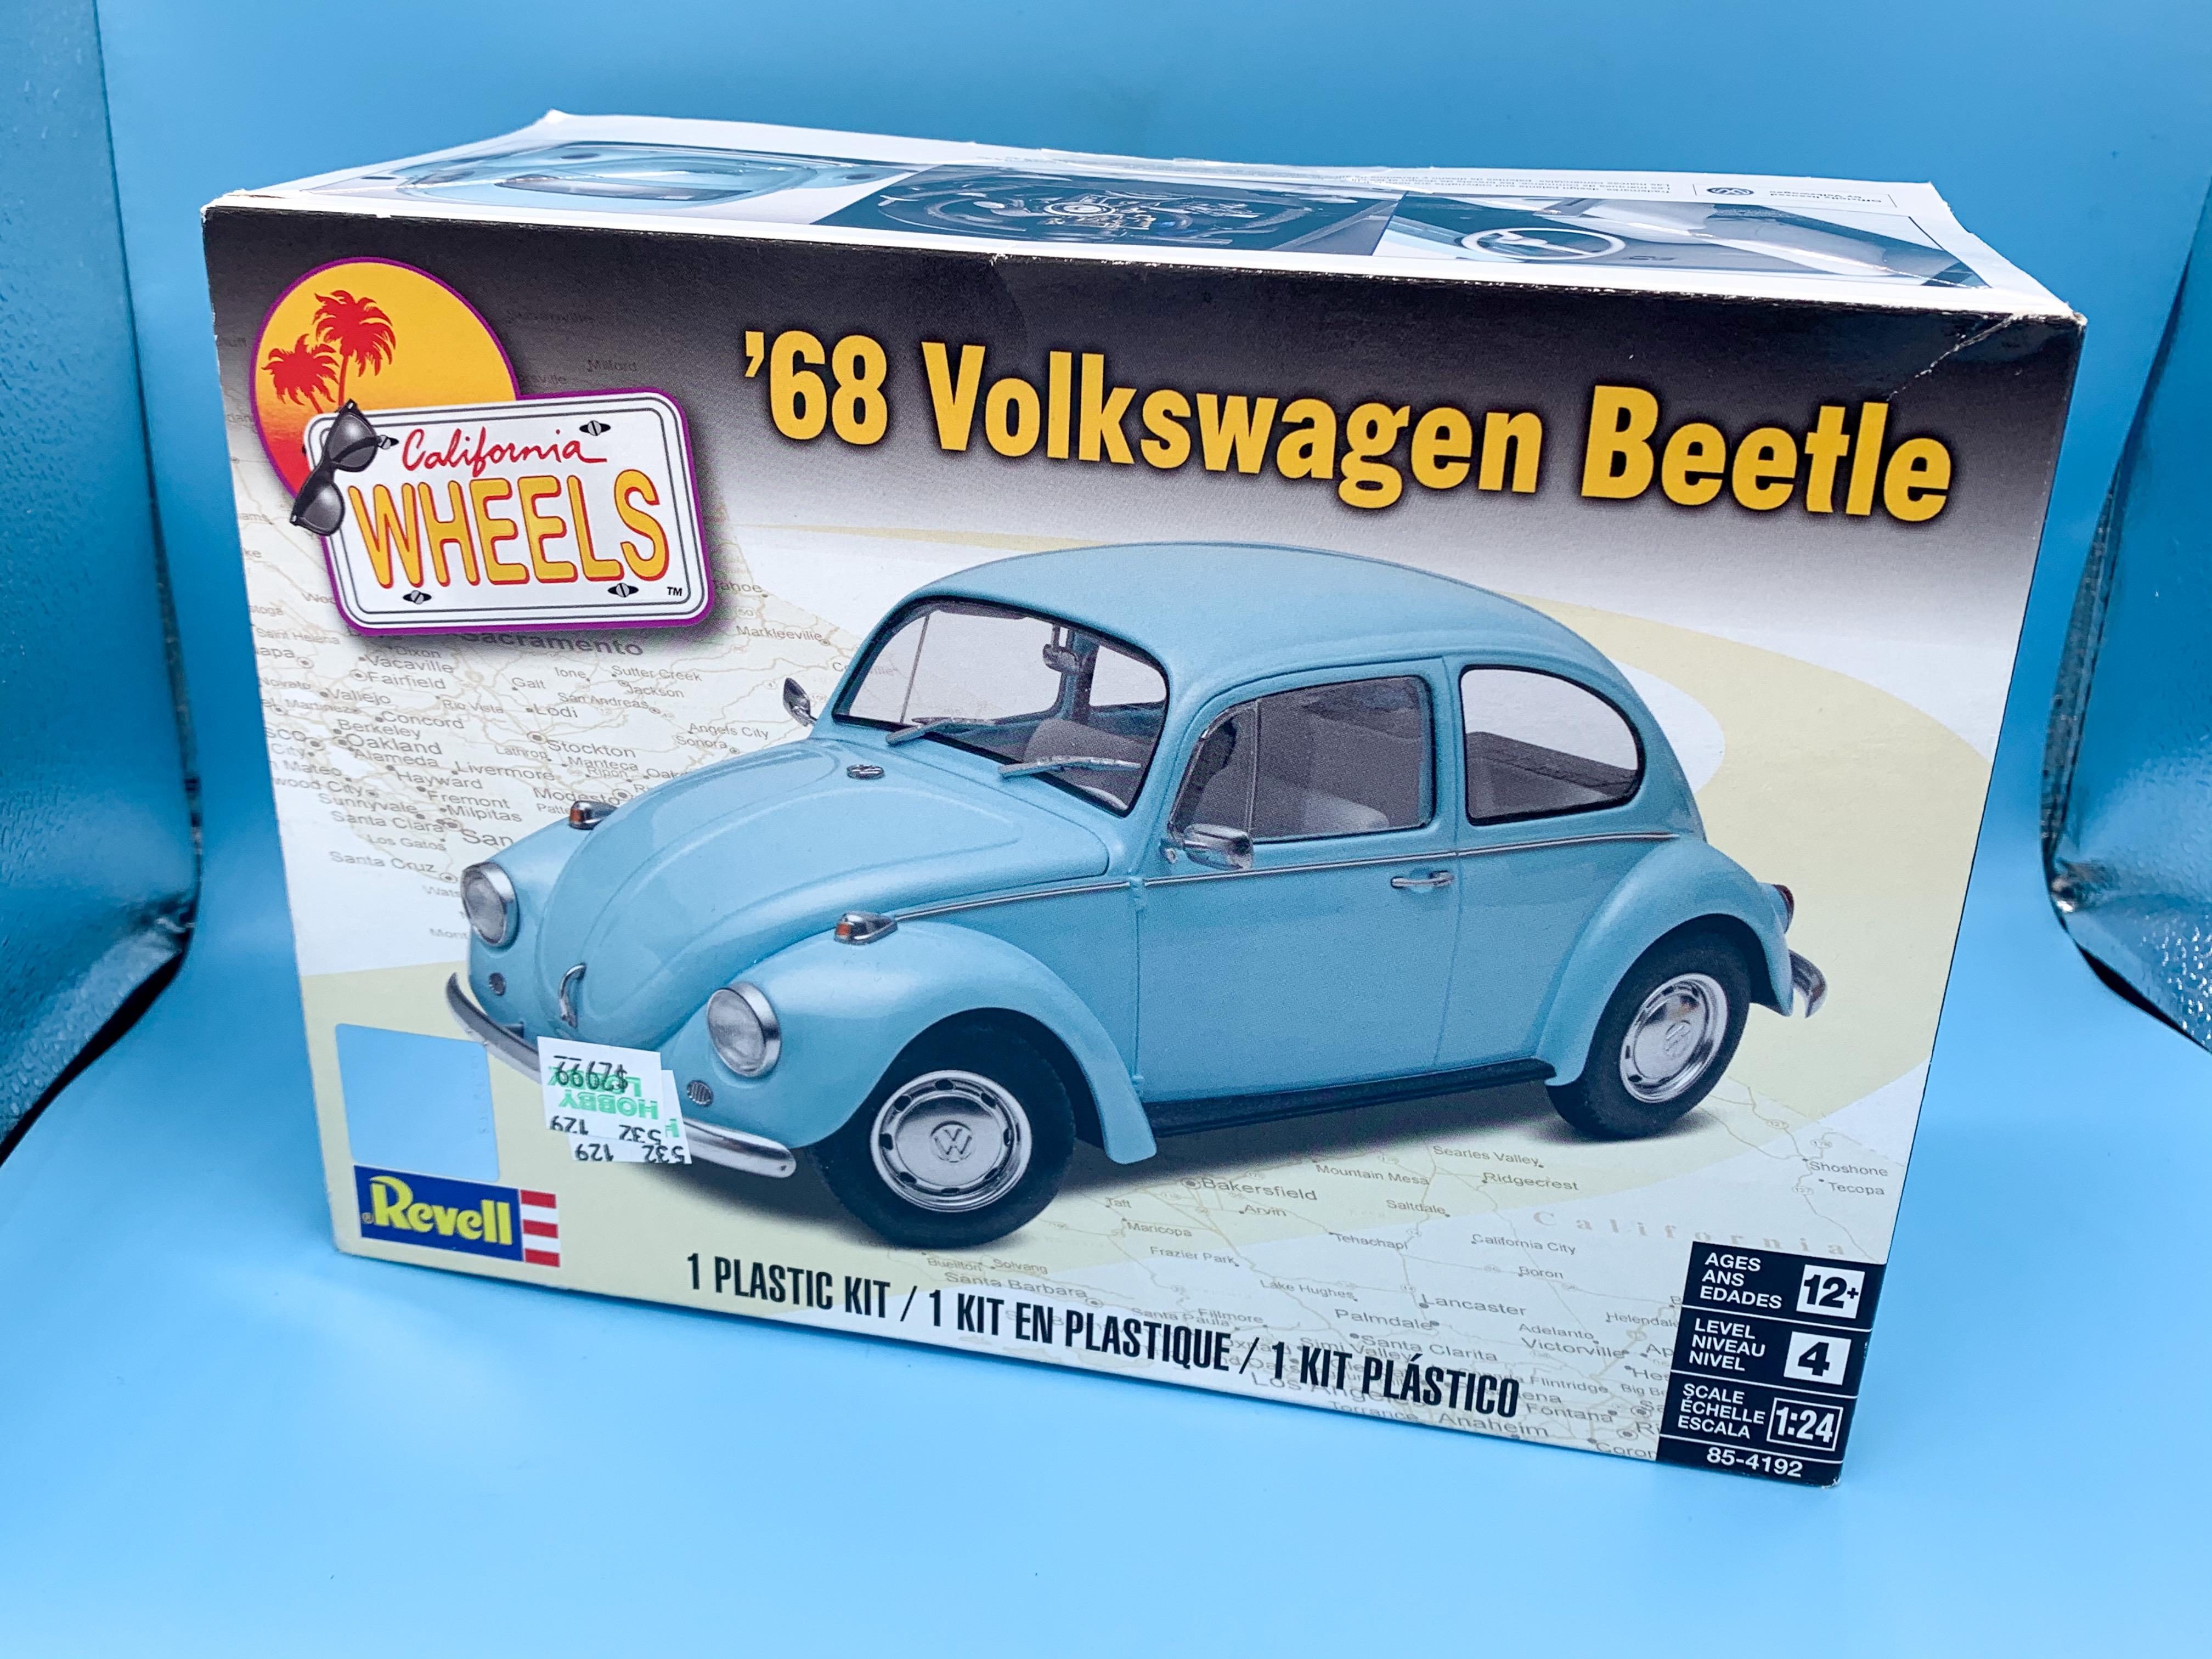
I’ve been eyeing this one lonely Beetle kit in our local Hobby Lobby for three months, but the box had had the seals broken, then had been taped up again and had THAT ripped off too and then finally had some different tape holding the lid in place. Saw the manager lady in the kit aisle and said “can you do a little discount on this?” and she said “You know, that’s been on the shelf there for a year...I can mark it as damaged if you wanted it, but I can’t accept a return if I do” so I checked it real quick and it all seems to be in there...paid $6 + tax! Score! And the box isn’t THAT bad, on the top at least... I probably would’ve paid the $18 they wanted for it anyway, even if the box does say it’s a 37 Ford on the side ?
-
Dealer List is now Available
OldNYJim replied to Dave Ambrose's topic in Model Cars Magazine News and Discussions
Brilliant, I’ve been waiting to find a place to order the latest issue. Thanks Dave! -
Thanks fellas! I like the metallic burgundy they did later on, on these - that’s on my to-build list! Meanwhile, I prepped a BUNCH of parts today, and got base colors on everything ready for primer. I’ve been referencing @Italianhorses’s recent build of this same kit, and he’s smart enough to paint a bunch of the same colored parts all at once, as I’m sure a bunch of you are. So, I figured I’d do some smart building for once here and not prep and prime and paint every individual part one by one like I normally do. Not sure why I’ve always done that, but hey ho ?♂️? Did a little detail painting on the engine...I don’t really enjoy curbside kits because of the inherent soft detail that you get stuck with out of the box...but I’m intentionally building this one out of the box so I’m running with it: I already know that I rarely if ever turn my builds over, so I’m not sure why I care what’s under there, but I’d feel like I’m cheating if I didn’t make SOME effort anyway, so I used some Silly Putty for the more tricky masking around the engine and shot some metalizer colors on the block and trans just to add a little visual interest here, then added a black wash and some light drybrushing. Oh, and while I was at it, added some detail paint and a wash to the brake discs and calipers: See - I learned to batch paint parts, for efficiency ? More soon, soon as I’ve done more!
-
64 Dodge D100 Pickup Pro Street
OldNYJim replied to AmericanMuscleFan's topic in WIP: Drag Racing Models
I appreciate you taking the time to explain, thank you Francis! The way you described makes much more sense! I've had a yearning for a lathe for a while here and I'm trying to learn a little more about that I will and won't be able to do with it aside from the obvious. Thanks again for the insight! -
64 Dodge D100 Pickup Pro Street
OldNYJim replied to AmericanMuscleFan's topic in WIP: Drag Racing Models
Outstanding as always Francis Beginner’s machining/fabricating question - is it possible to make a part such as the ‘body’ of that distributor cap, with the eight outer holes equally spaced around it, with a lathe? I’ve got to assume there’s some easy-ish trick to making a part like that and getting the spacing and angles perfect on the holes, but I can’t quite visualize how it’s done with my almost-zero machining experience...and I’m not sure what that trick is called to be able to Google it and learn more ? -
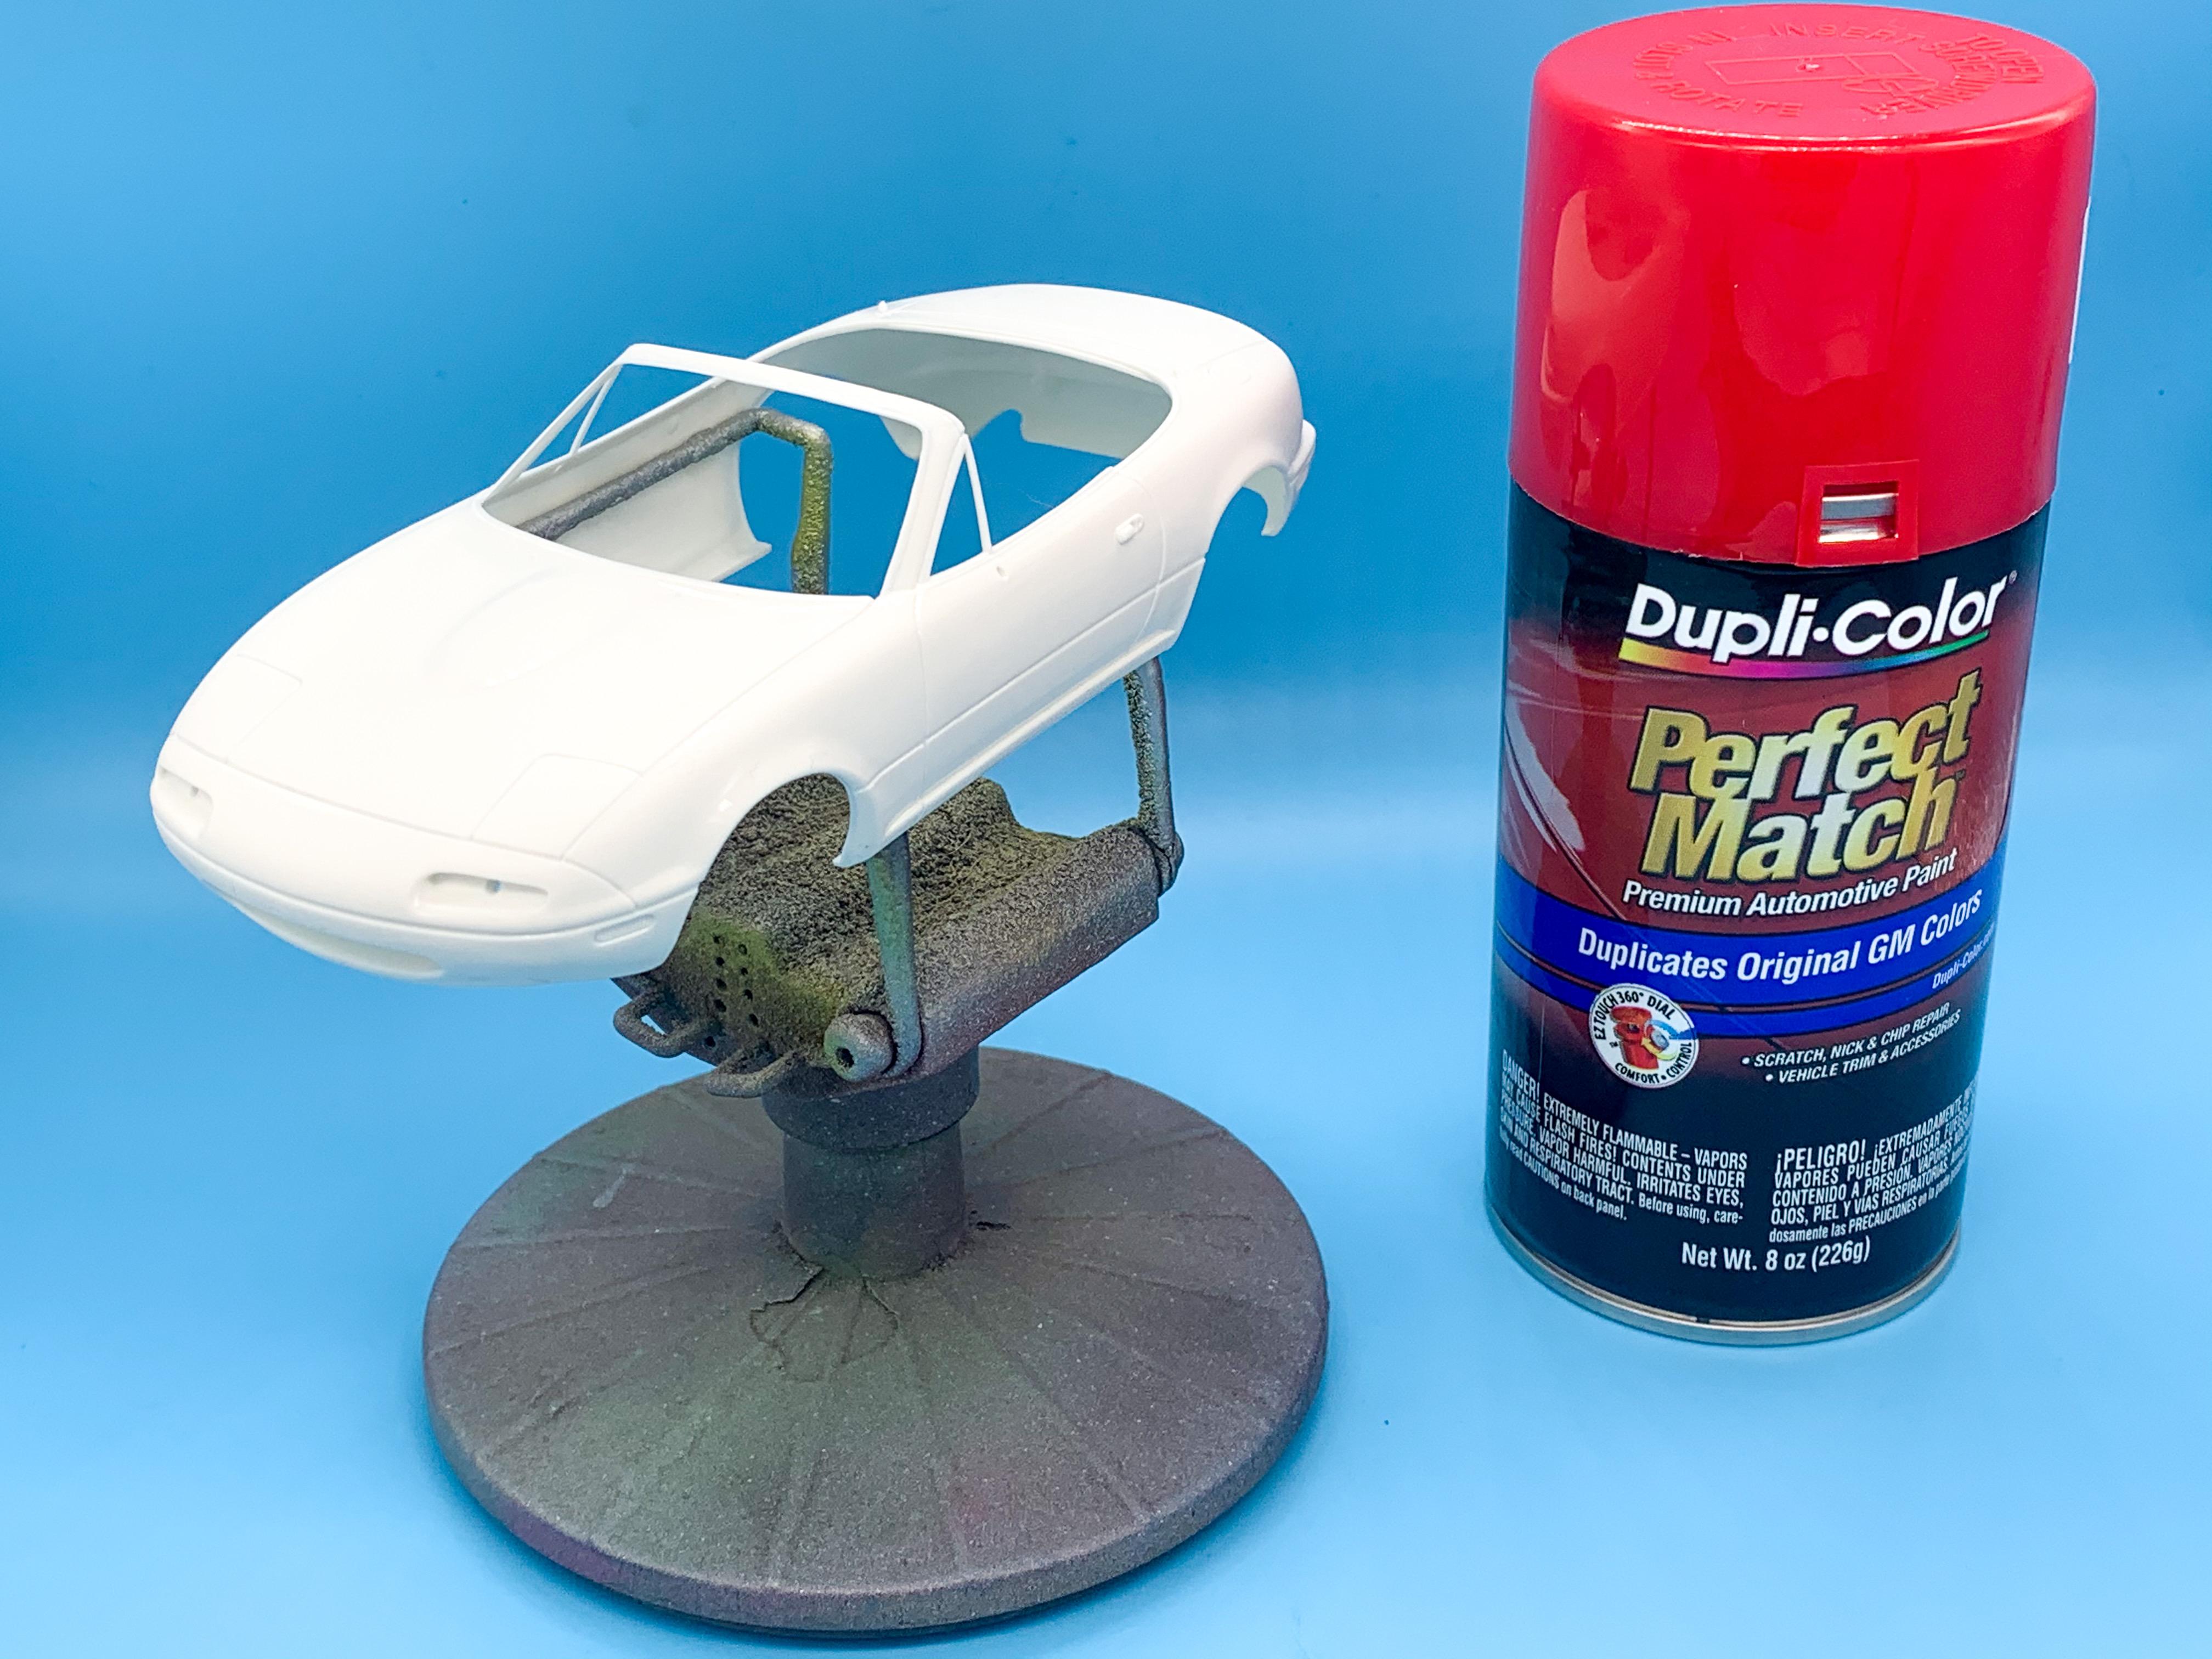
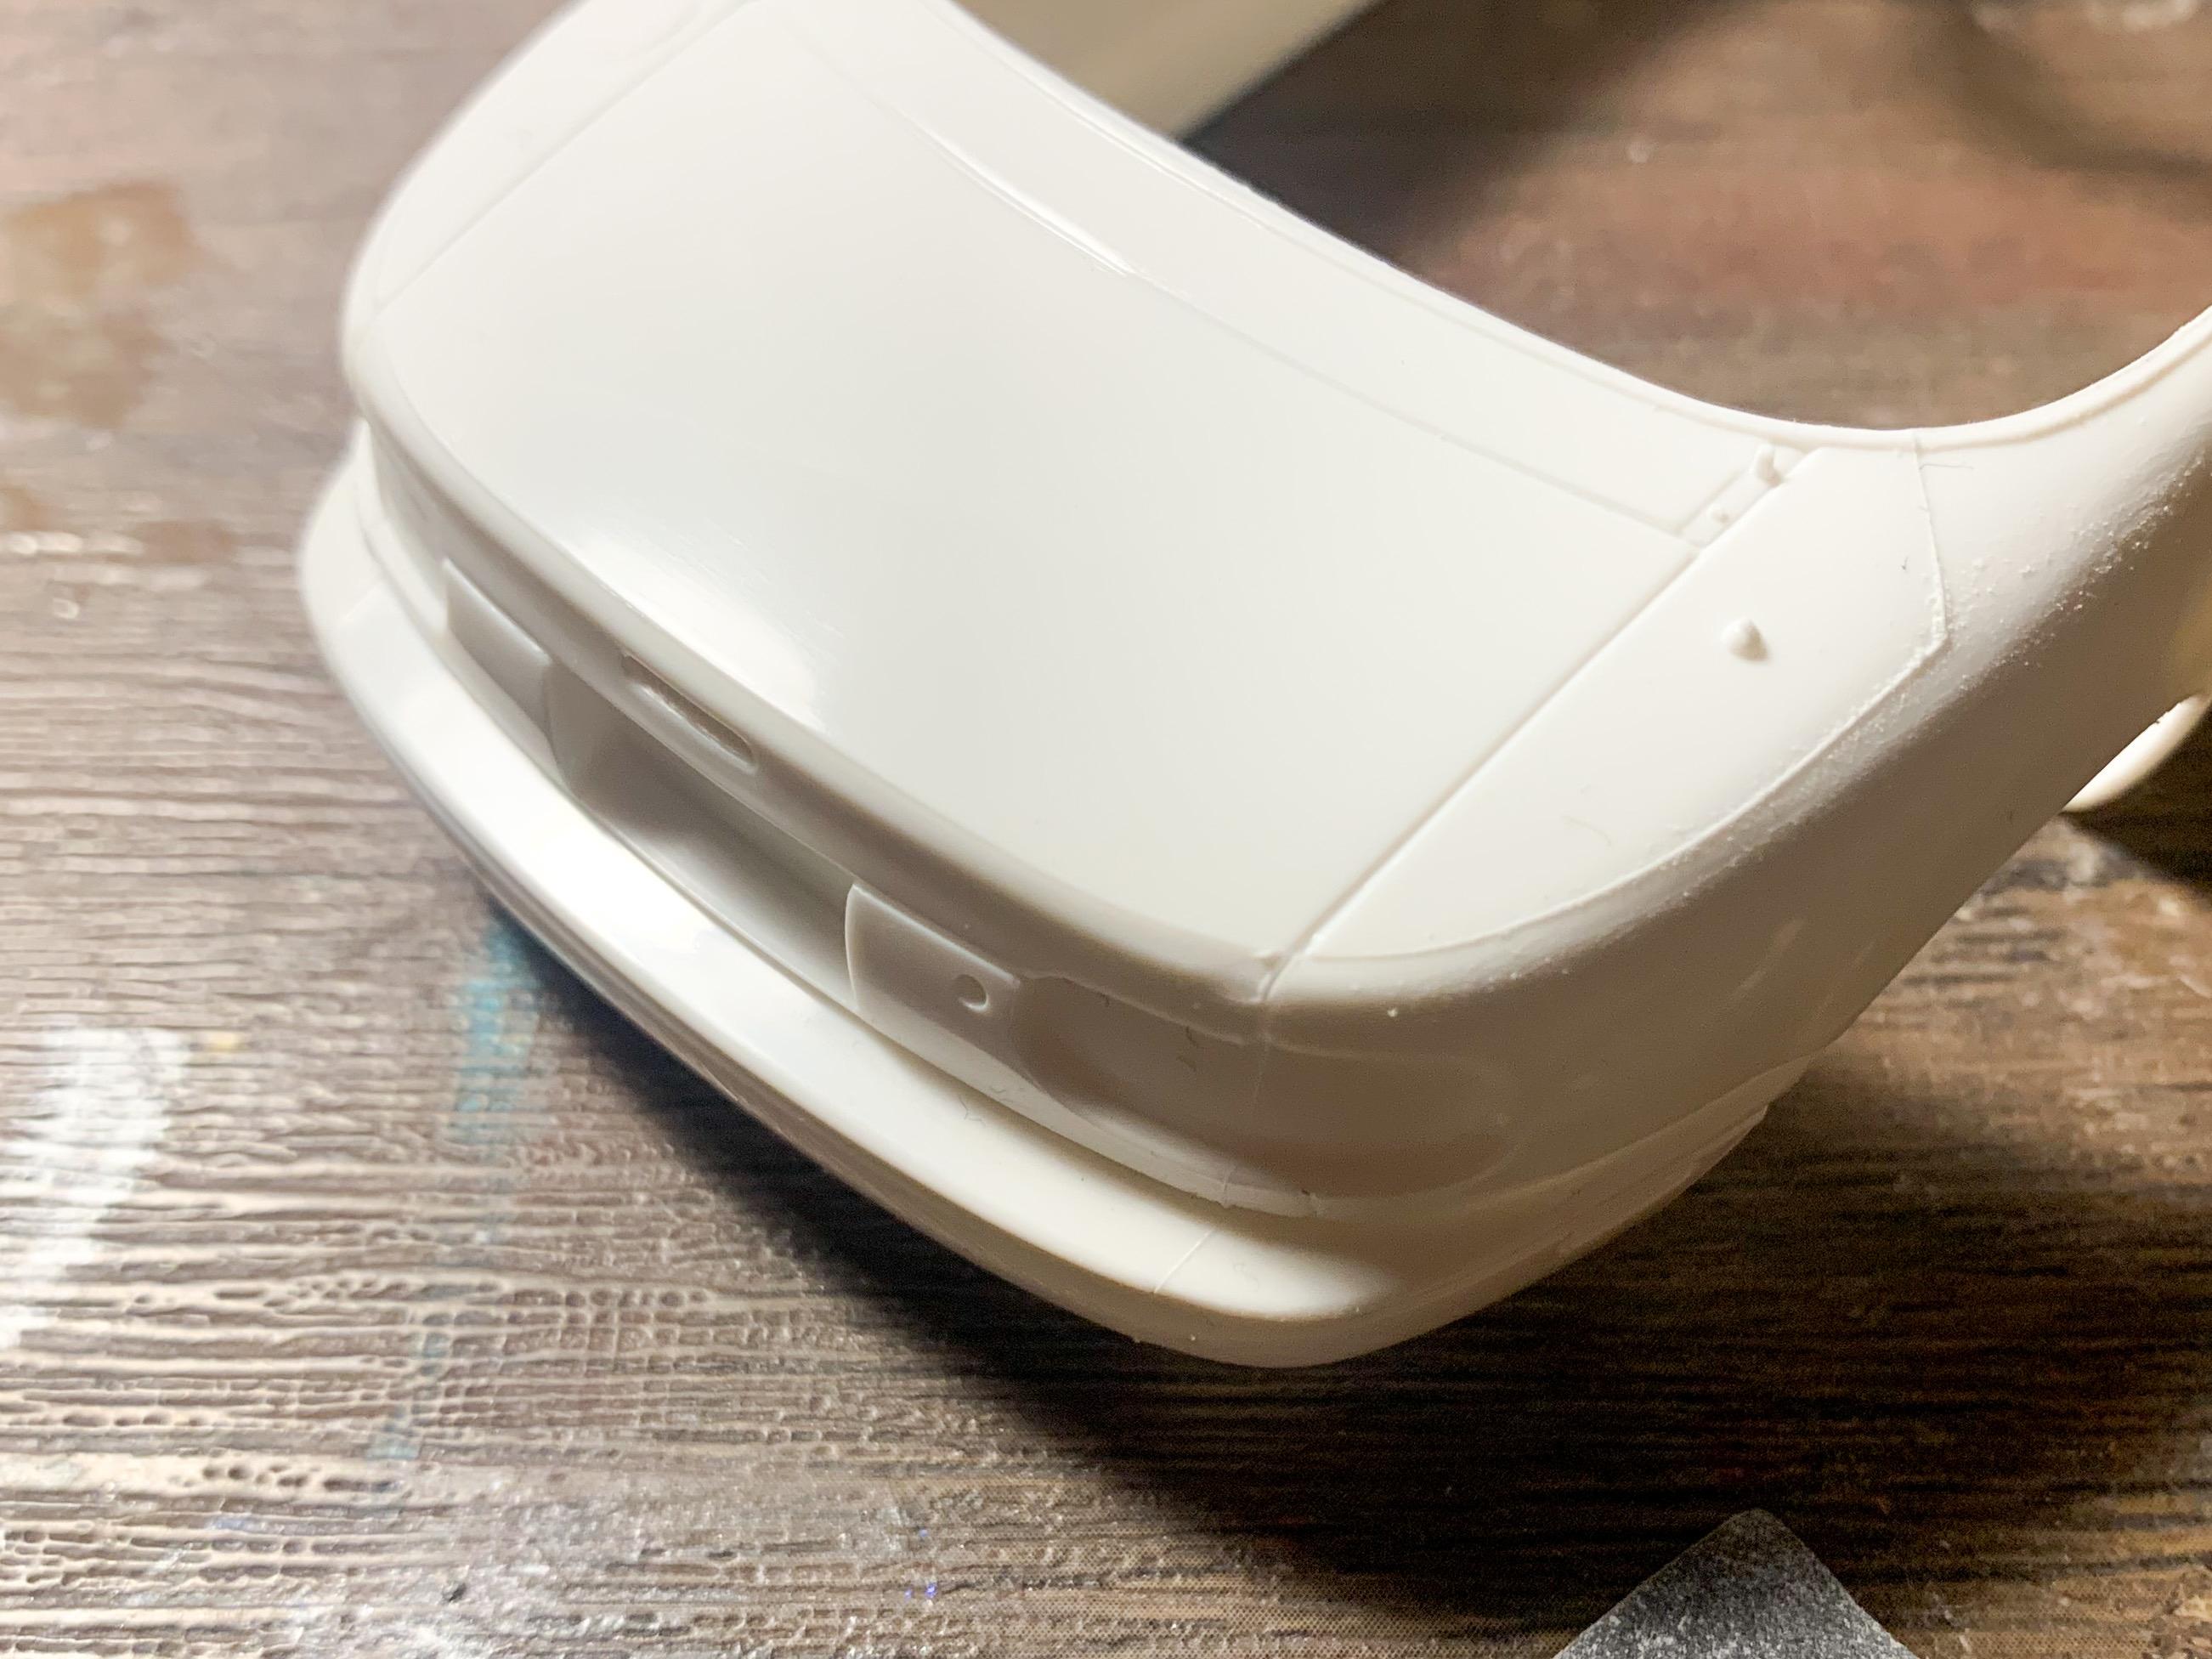
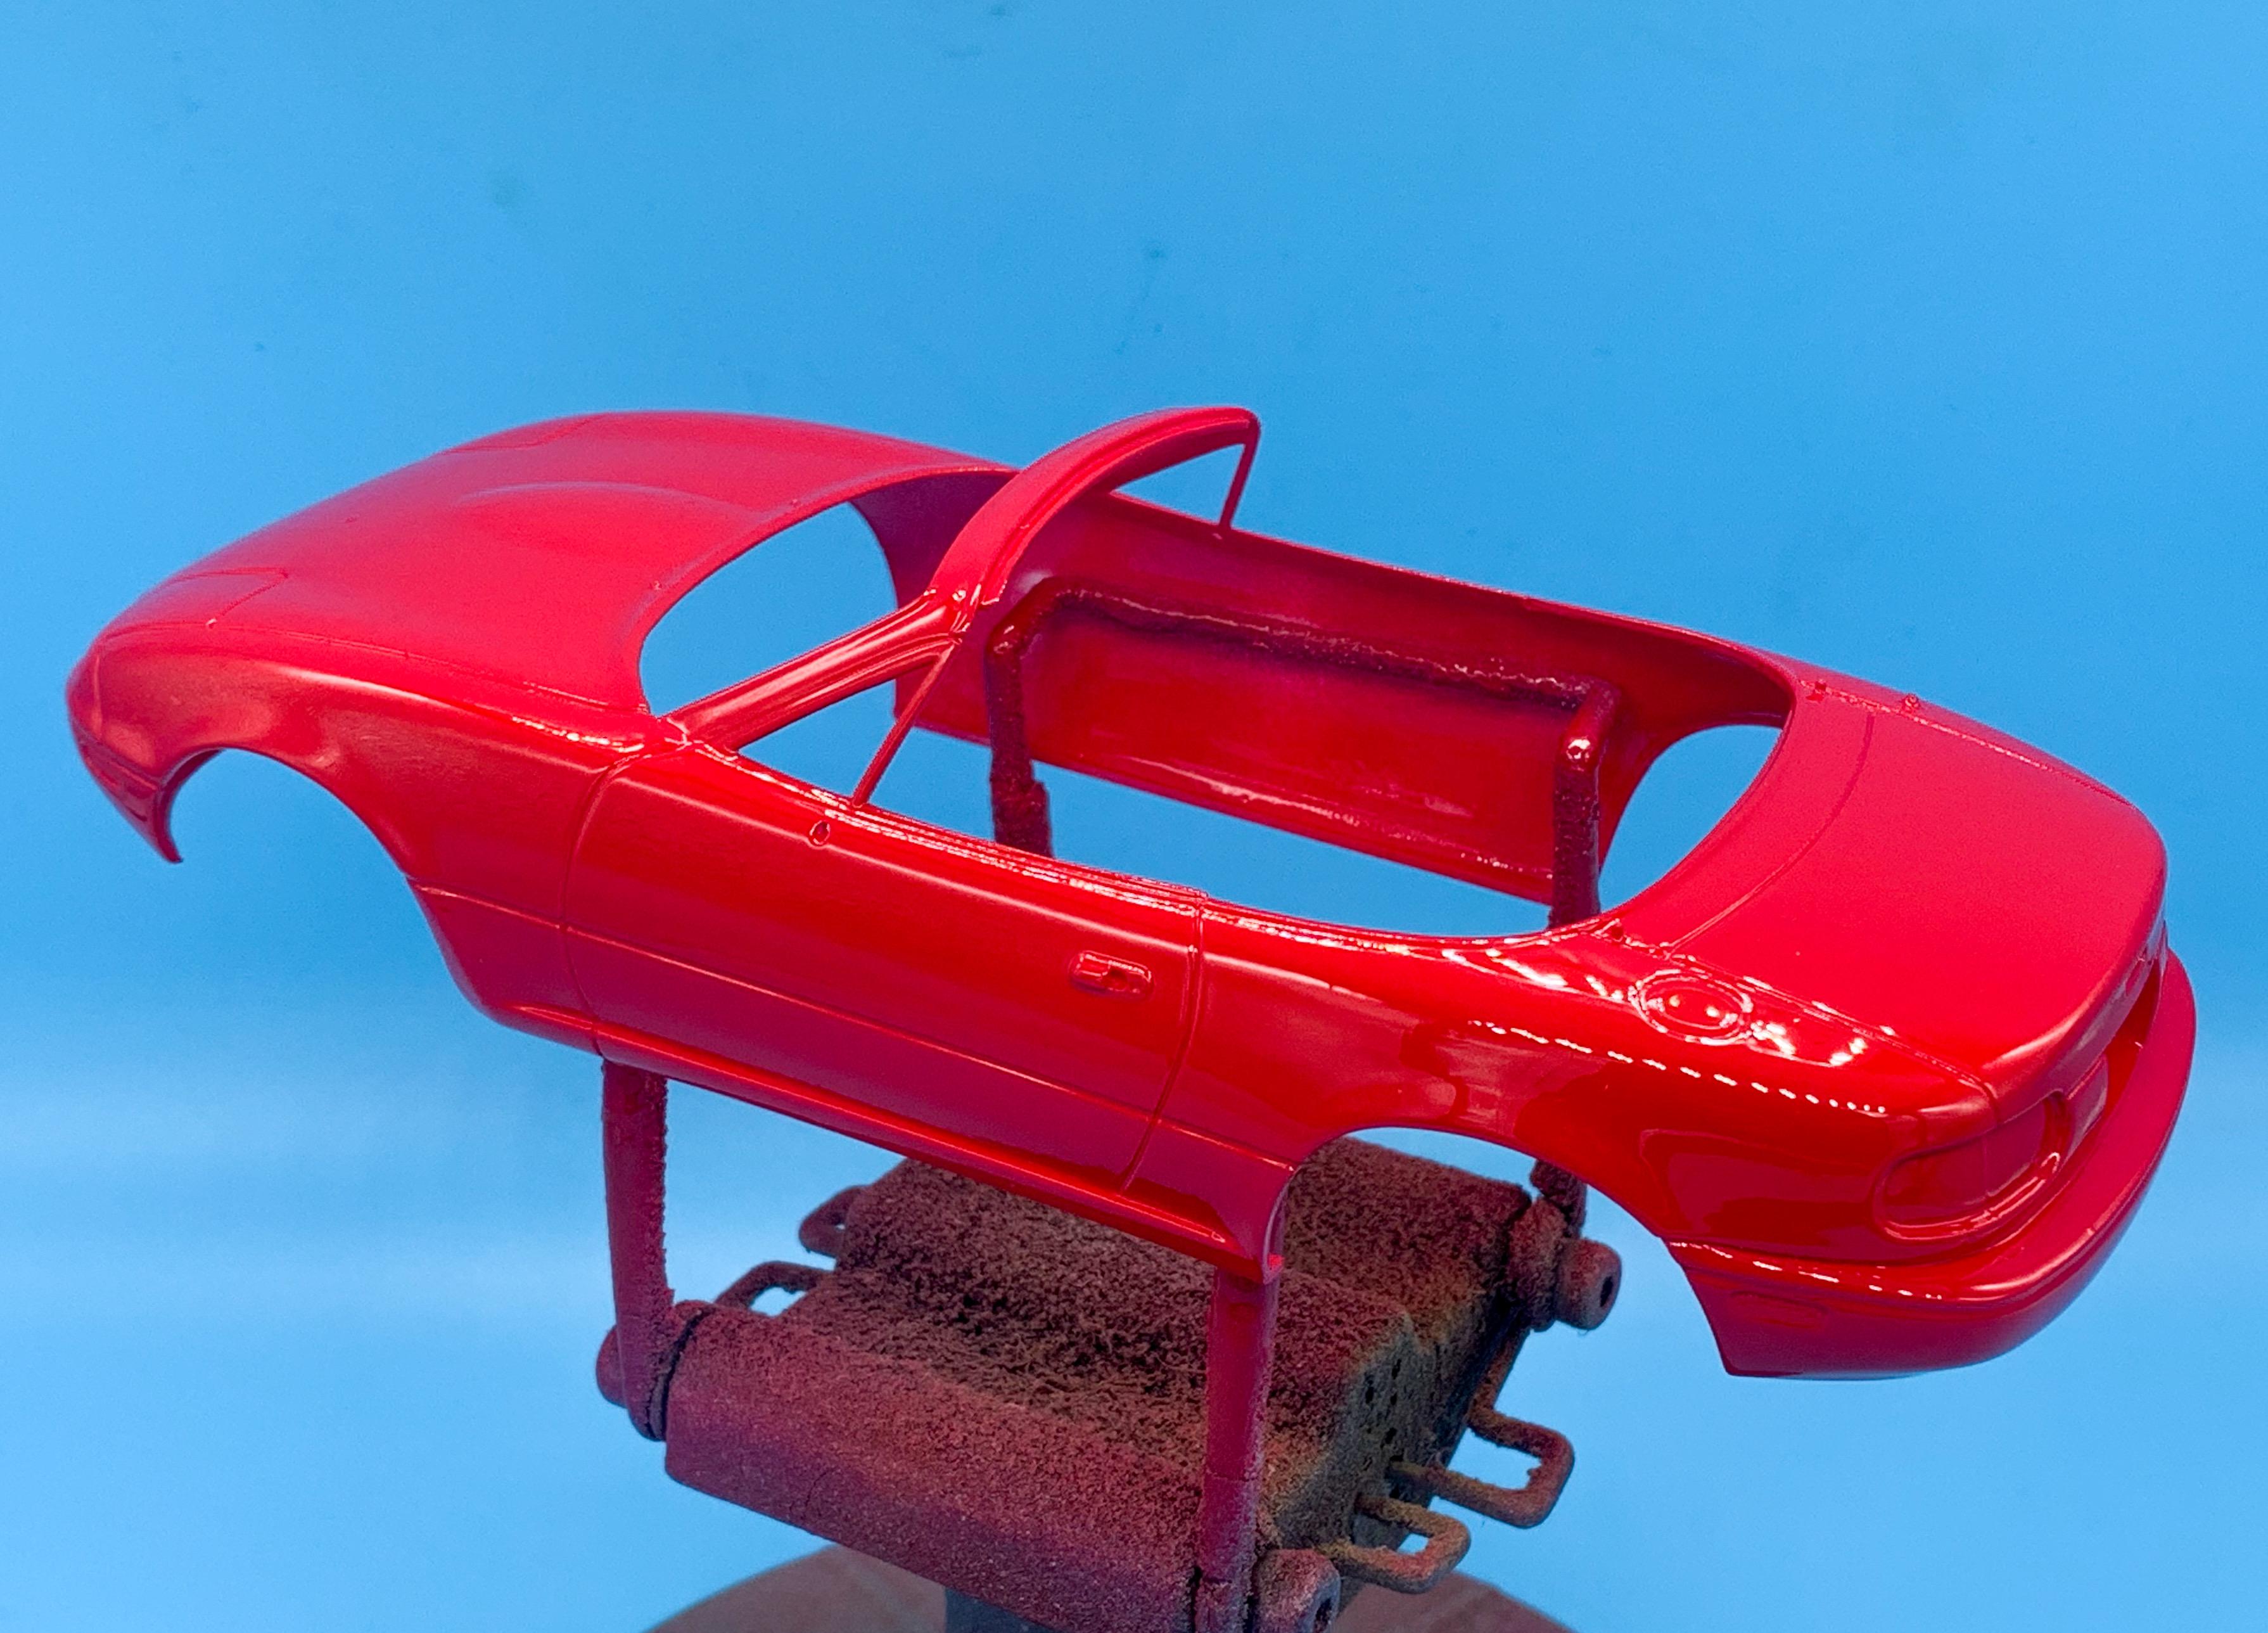
Last year I built a Revell Miata, and made the resolution that I’d build another a year on to see how I’ve improved as a modeller...and it’s nearing the end of the year so I thought I’d better get going on this year’s box-stock skills-test and see if I’m any better than I was a year ago ? This is last year’s build - it was ok...some fit and assembly issues on the Revell kit that I’d know how to handle better when I try this kit again, but I decided to take on the Tamiya kit of the same car this year and see how that goes: The Revell kit is full detail, which the Tamiya isn’t so it’s not a COMPLETELY fair comparison...but also they’re both Miatas and I’d like a nicer Miata build to put in my display case so I’m going with it ?. Will keep (mostly) box stock and concentrate on how my prep, paint and assembly chops have improved since I did the last one. Picked up a can of GM red for the body...a lot of 1:1 Miata owners use this as an easier-to-find alternative to the Mazda Classic Red these cars came in from the factory for touch ups and whatnot...they’re INCREDIBLY close to being the same color, and close enough for the girls I go with... The body needed some massaging and smoothing out before I could get to the primer stage...some bigger mould lines and imperfections that we’re used to with modern Tamiya kits, but this one was issued 30 years ago so it’s not too bad considering... All smoothed out, and some panel-line excavation later... The mirrors for this kit are on one of the black parts trees, so you’ll need to hit those with a coupla three coats of a lighter primer so they match the body... All set and in white primer to help that bright red pop nicely: I let this shrink up overnight and touched up any little imperfections that I’d missed before laying down the color itself...crept up on it with mist coats so as not to risk any wrinkling of the plastic: The original Miatas were a single stage paintjob, but they later switched to having a two-stage with a clearcoat, so seeing as this particular brand of paint needs clear anyway I guess I’m replicating that kind...so next up was some nice glossy clear: Already looks better than last year’s ? More soon, soon as I’ve done more!