OldNYJim
-
Posts
252 -
Joined
-
Last visited
Content Type
Profiles
Forums
Events
Gallery
Everything posted by OldNYJim
-

Patina’d 34 Pick Up
OldNYJim replied to OldNYJim's topic in WIP: Model Trucks: Pickups, Vans, SUVs, Light Commercial
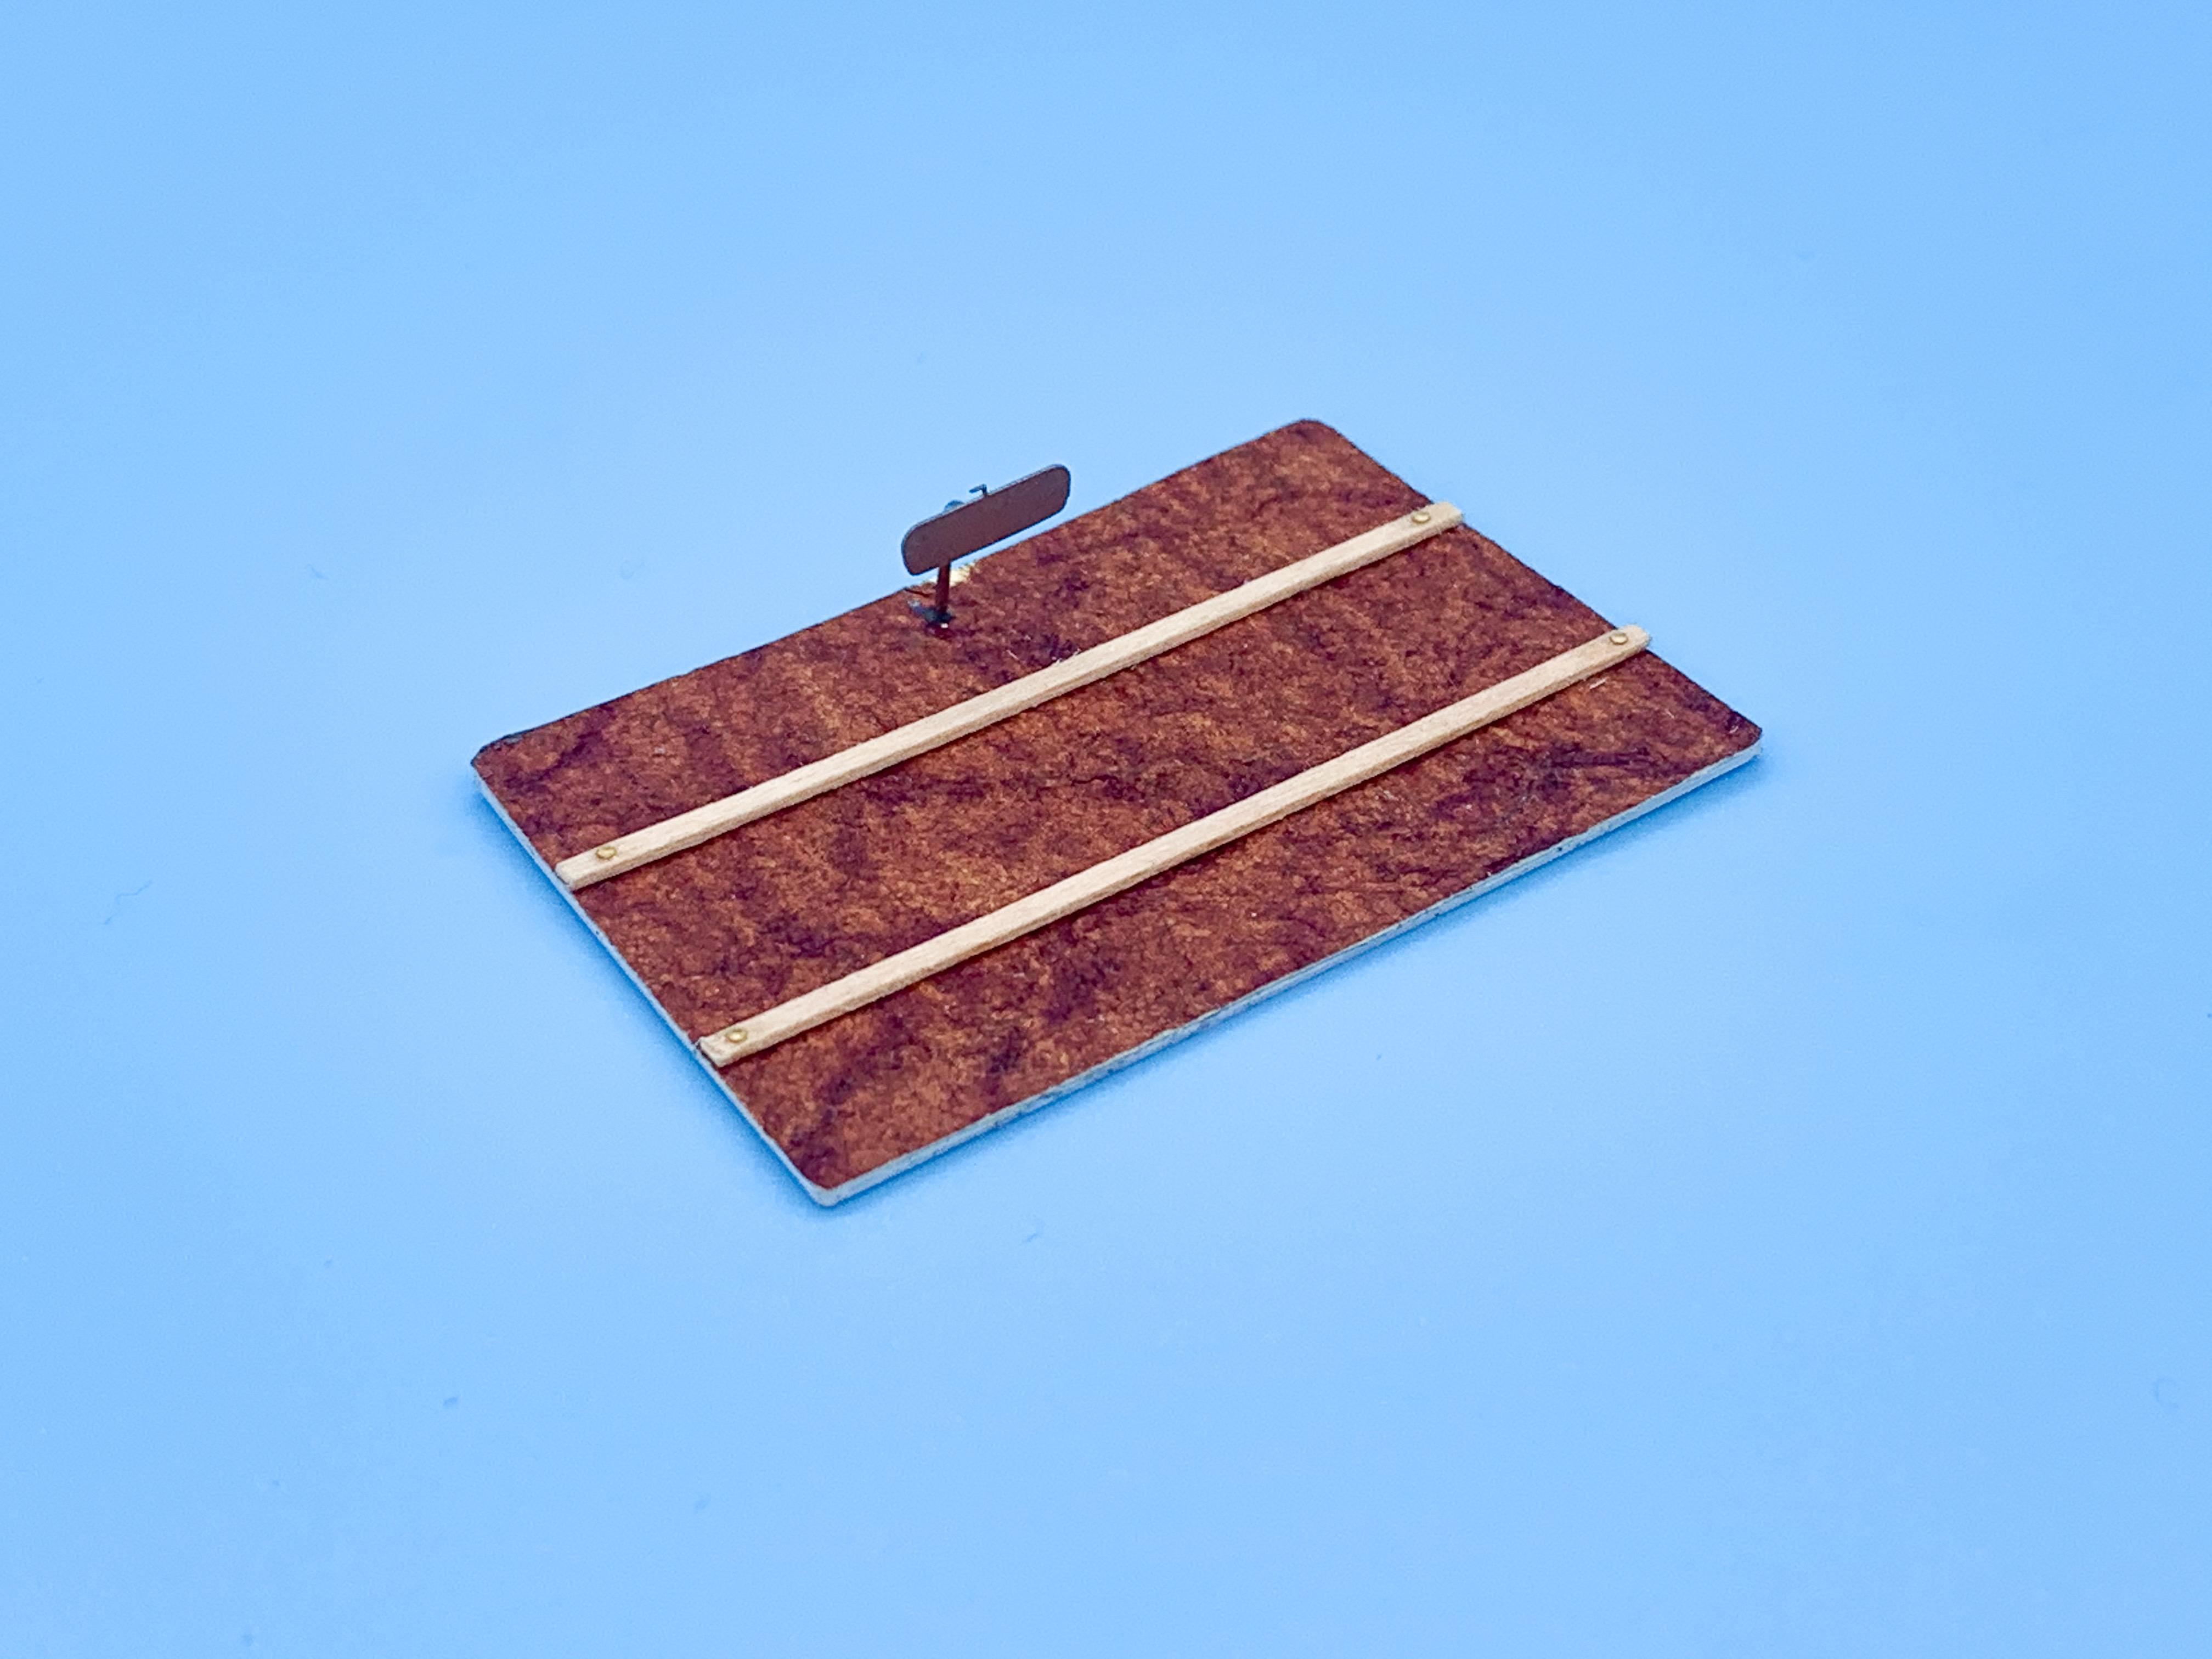
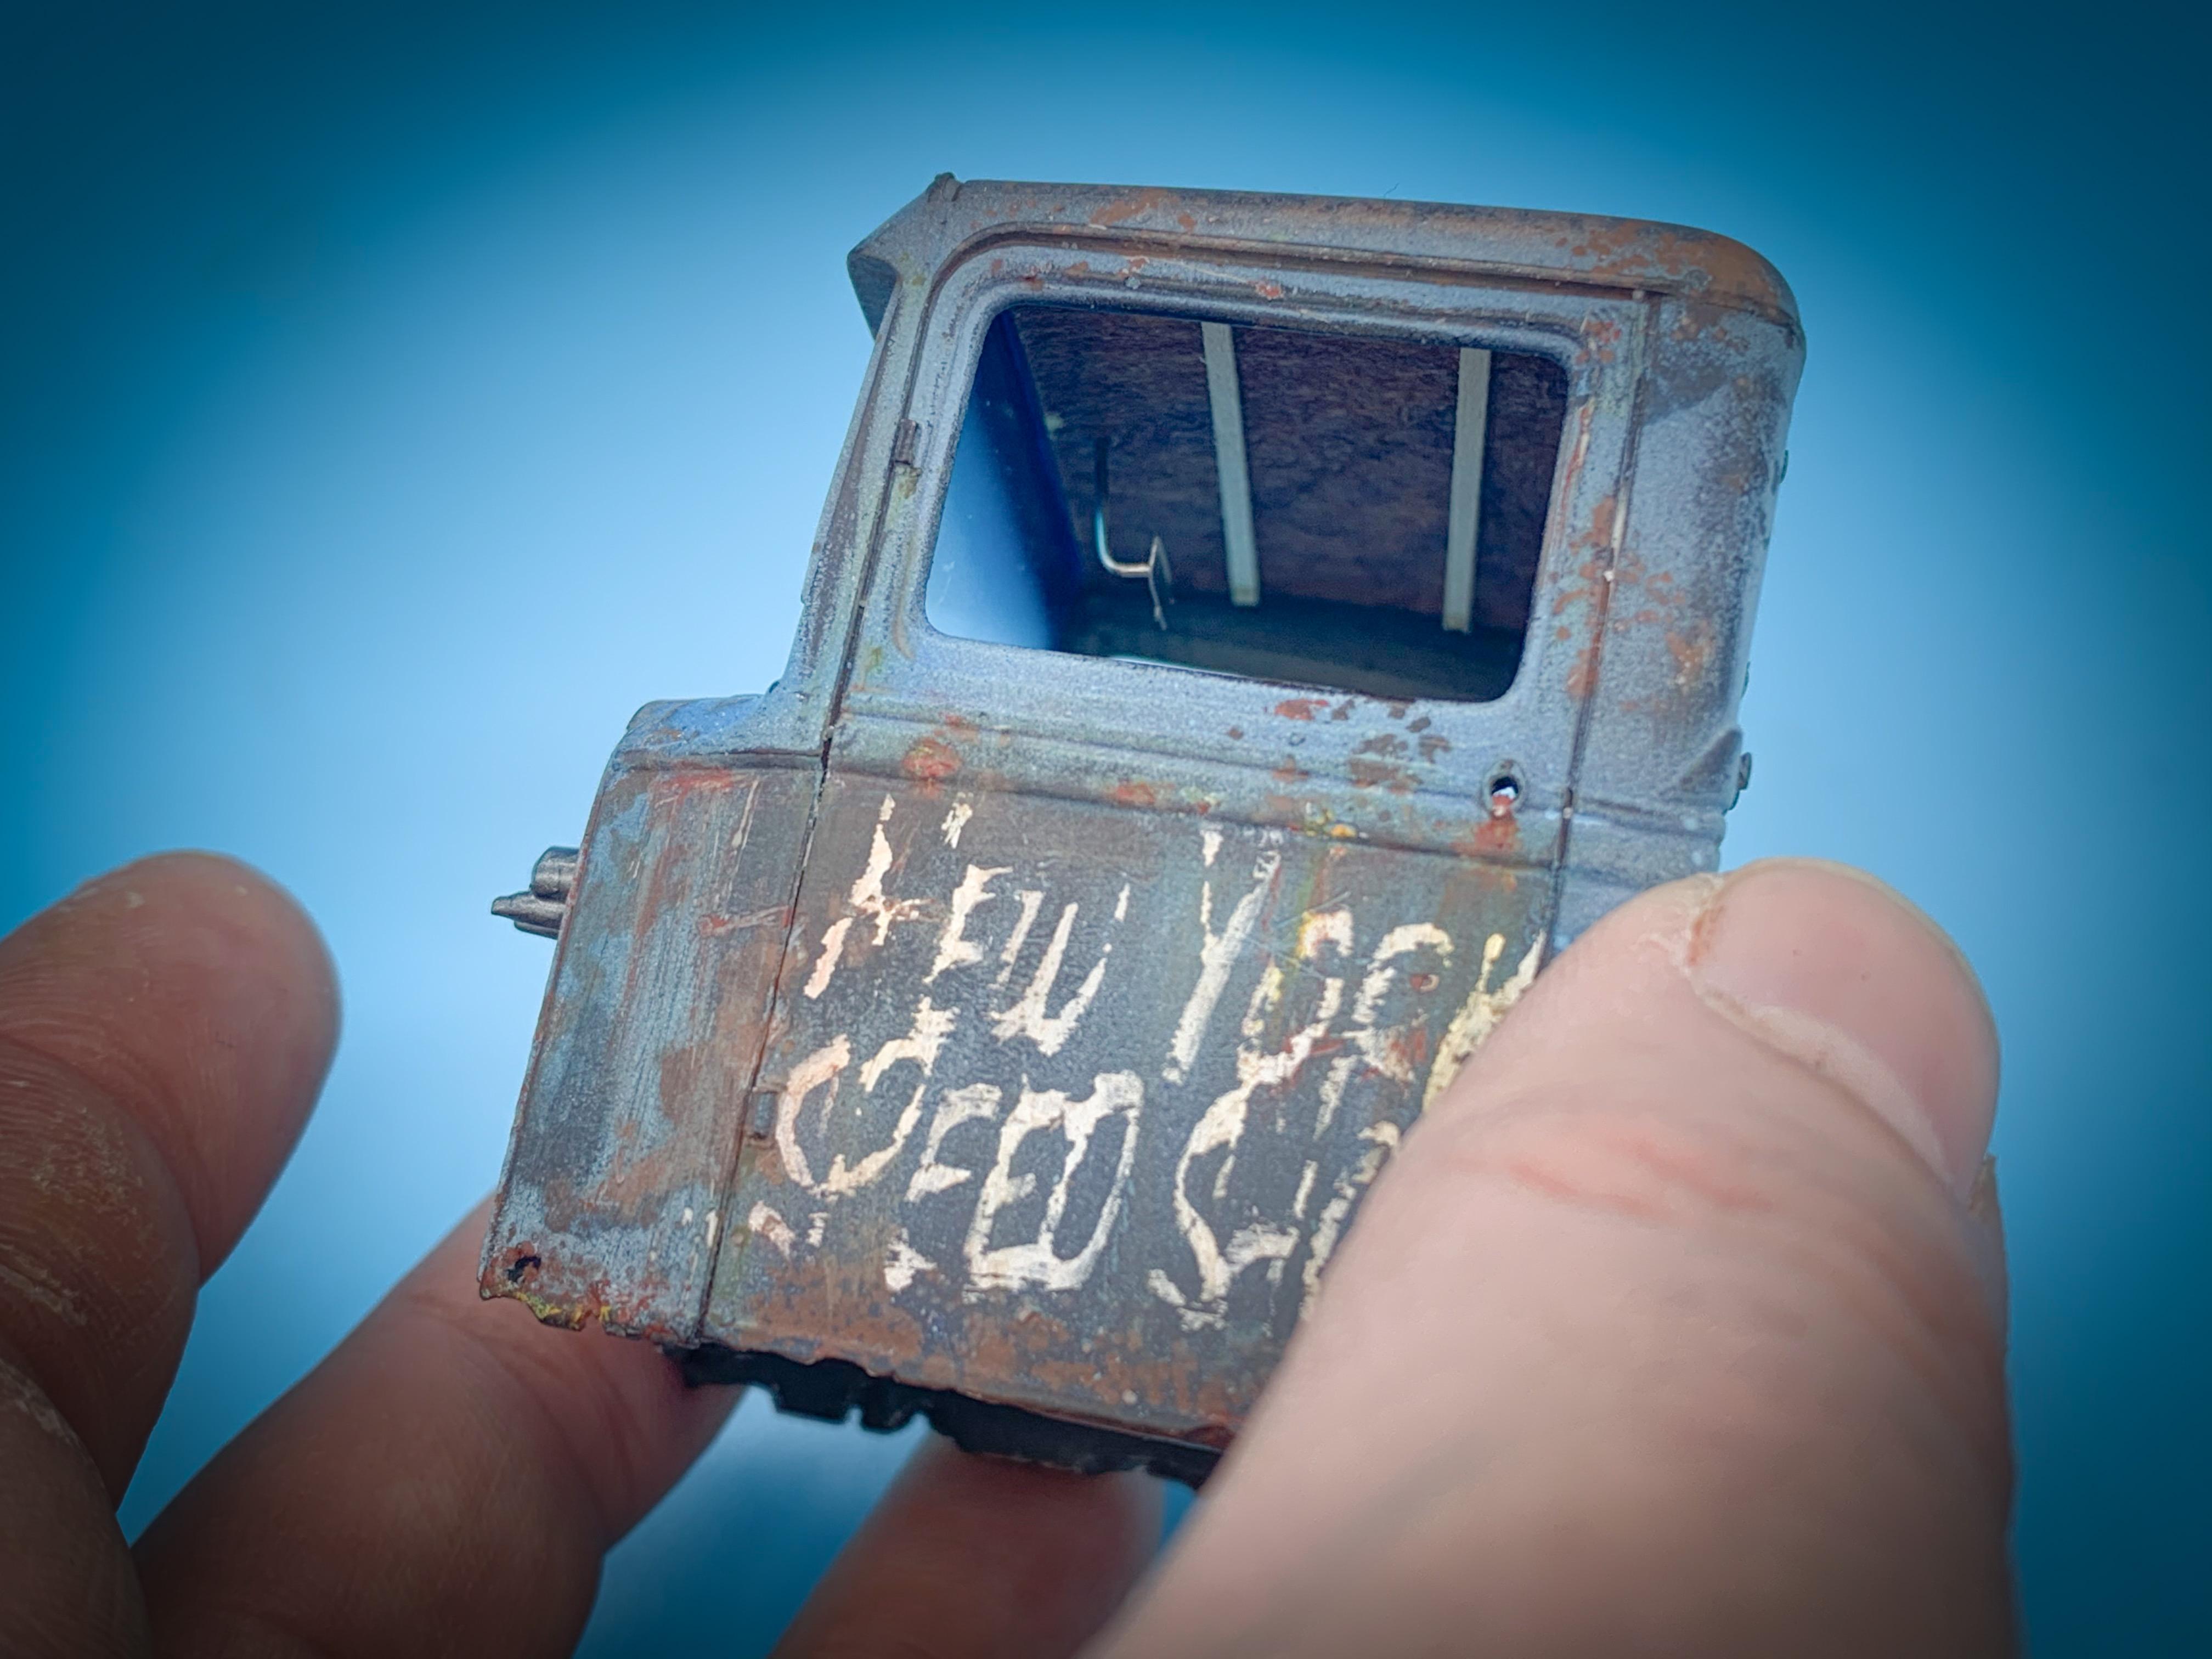
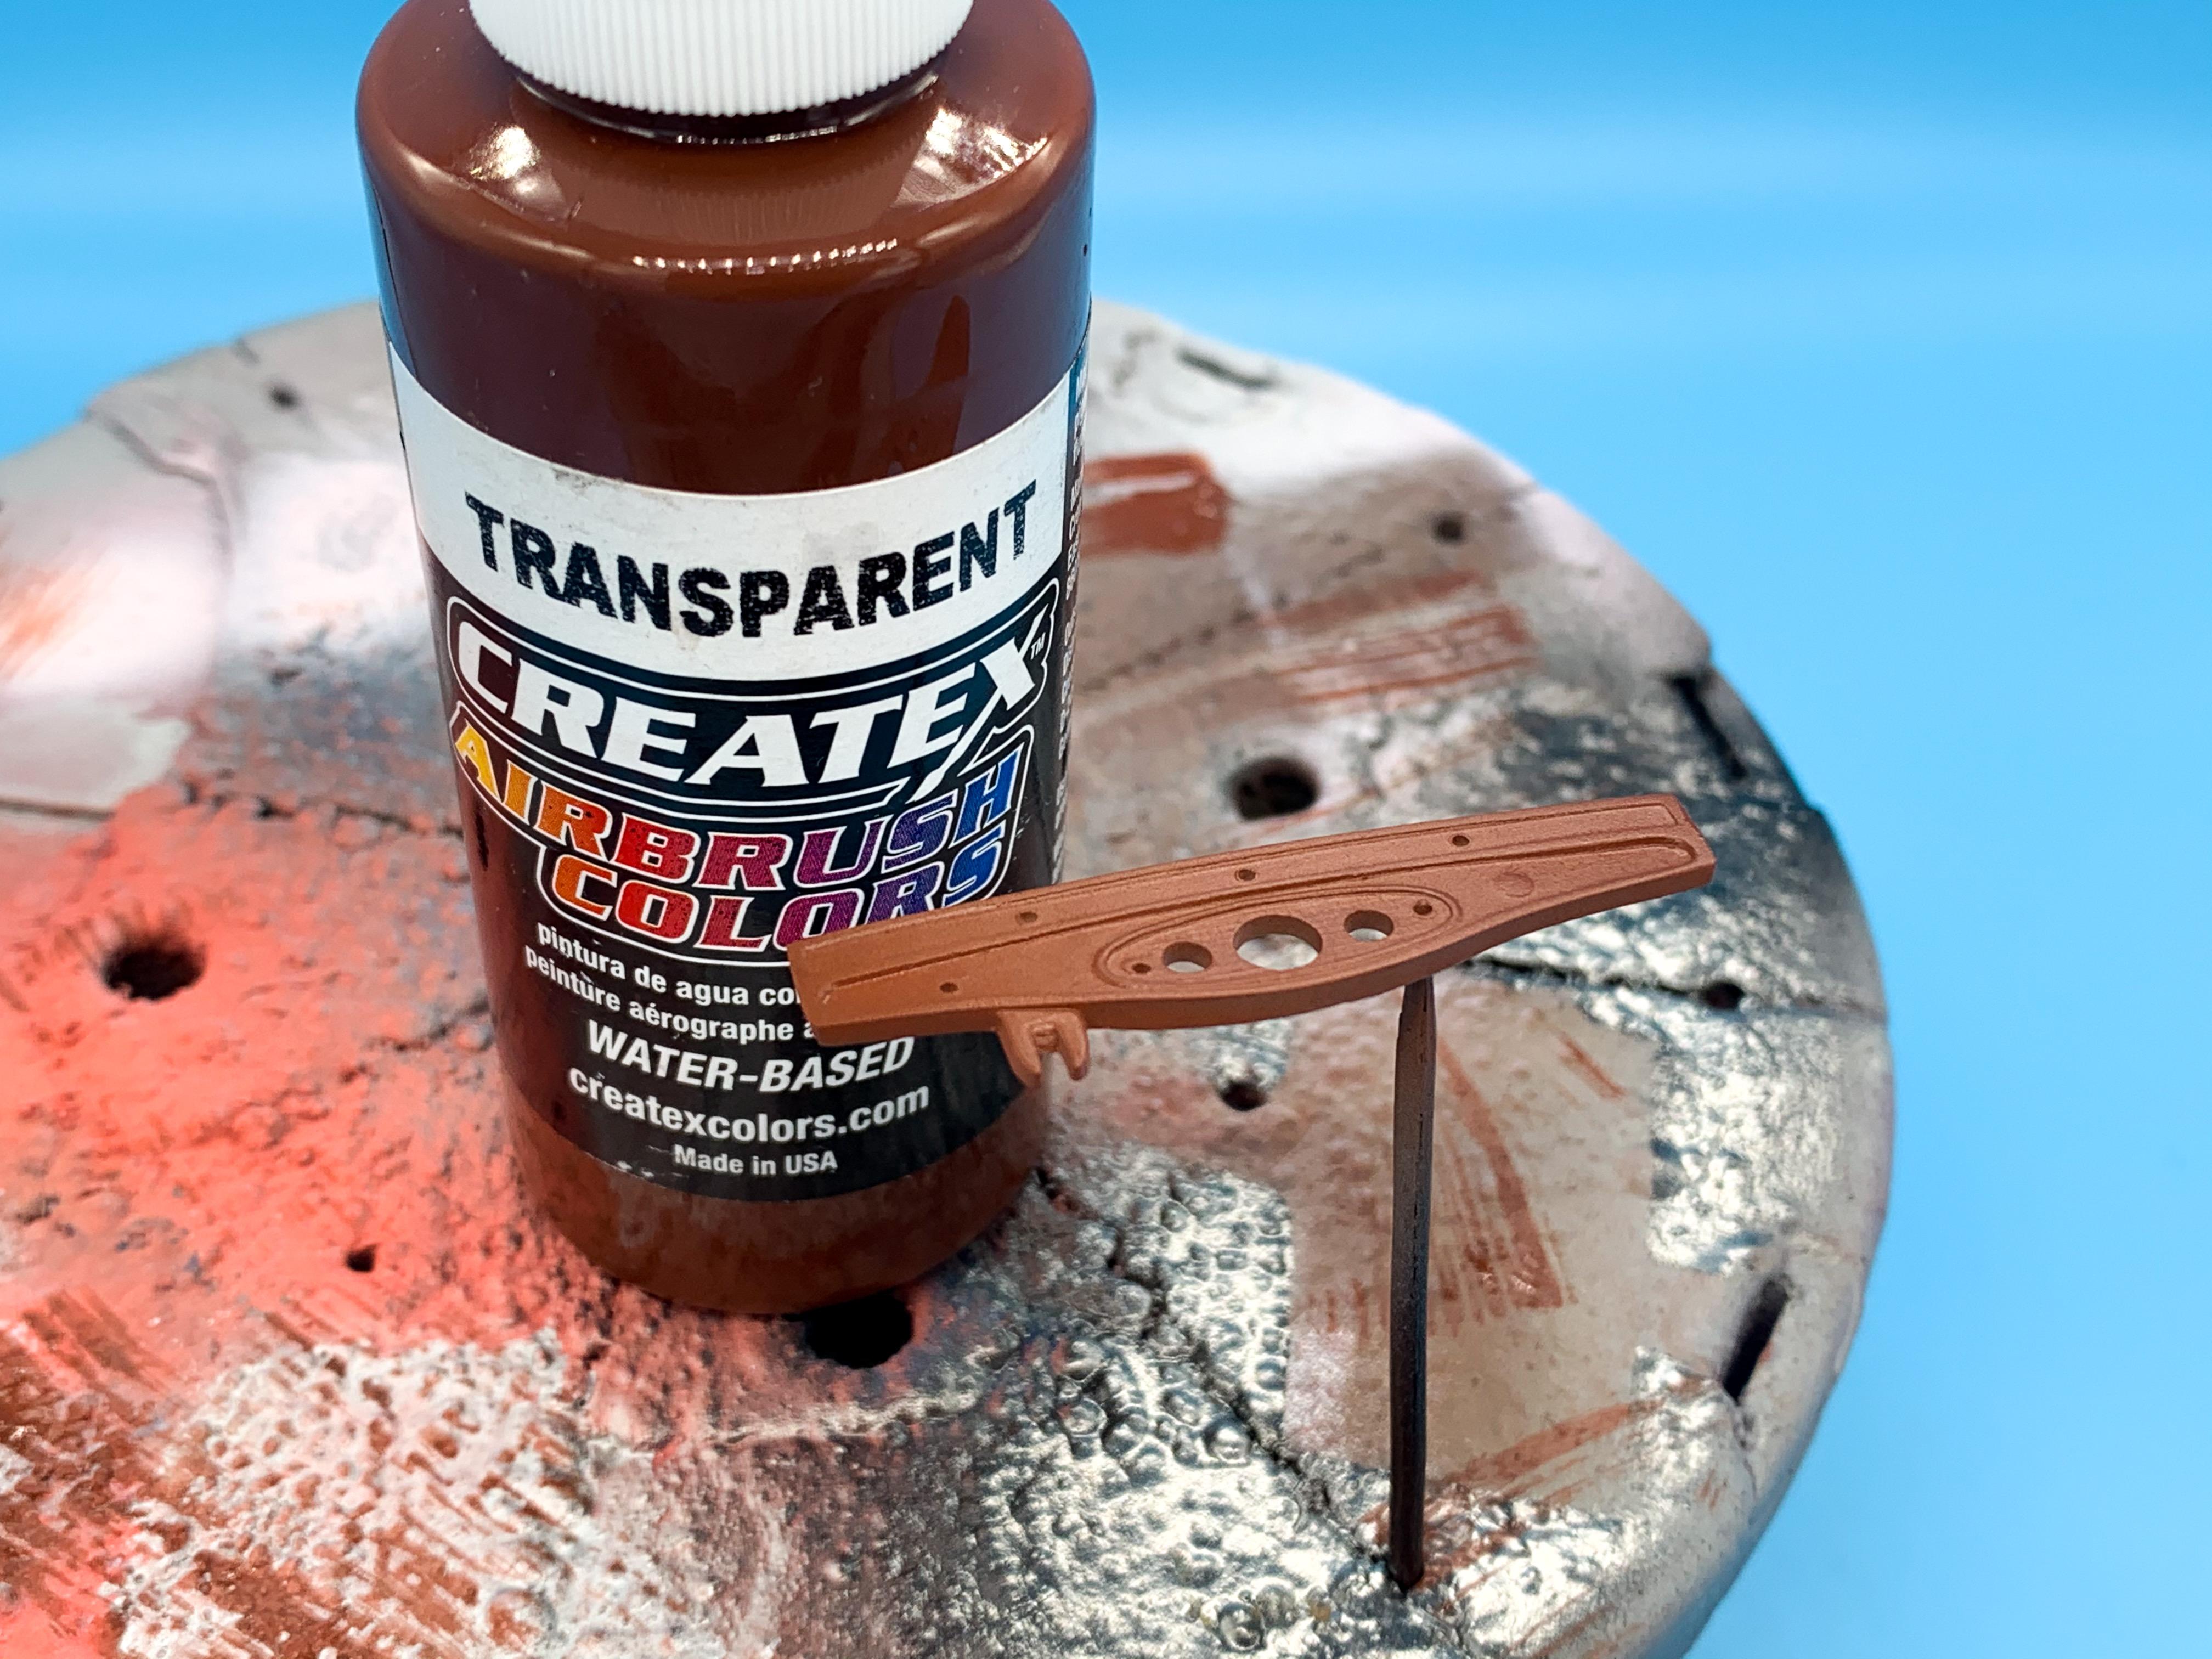
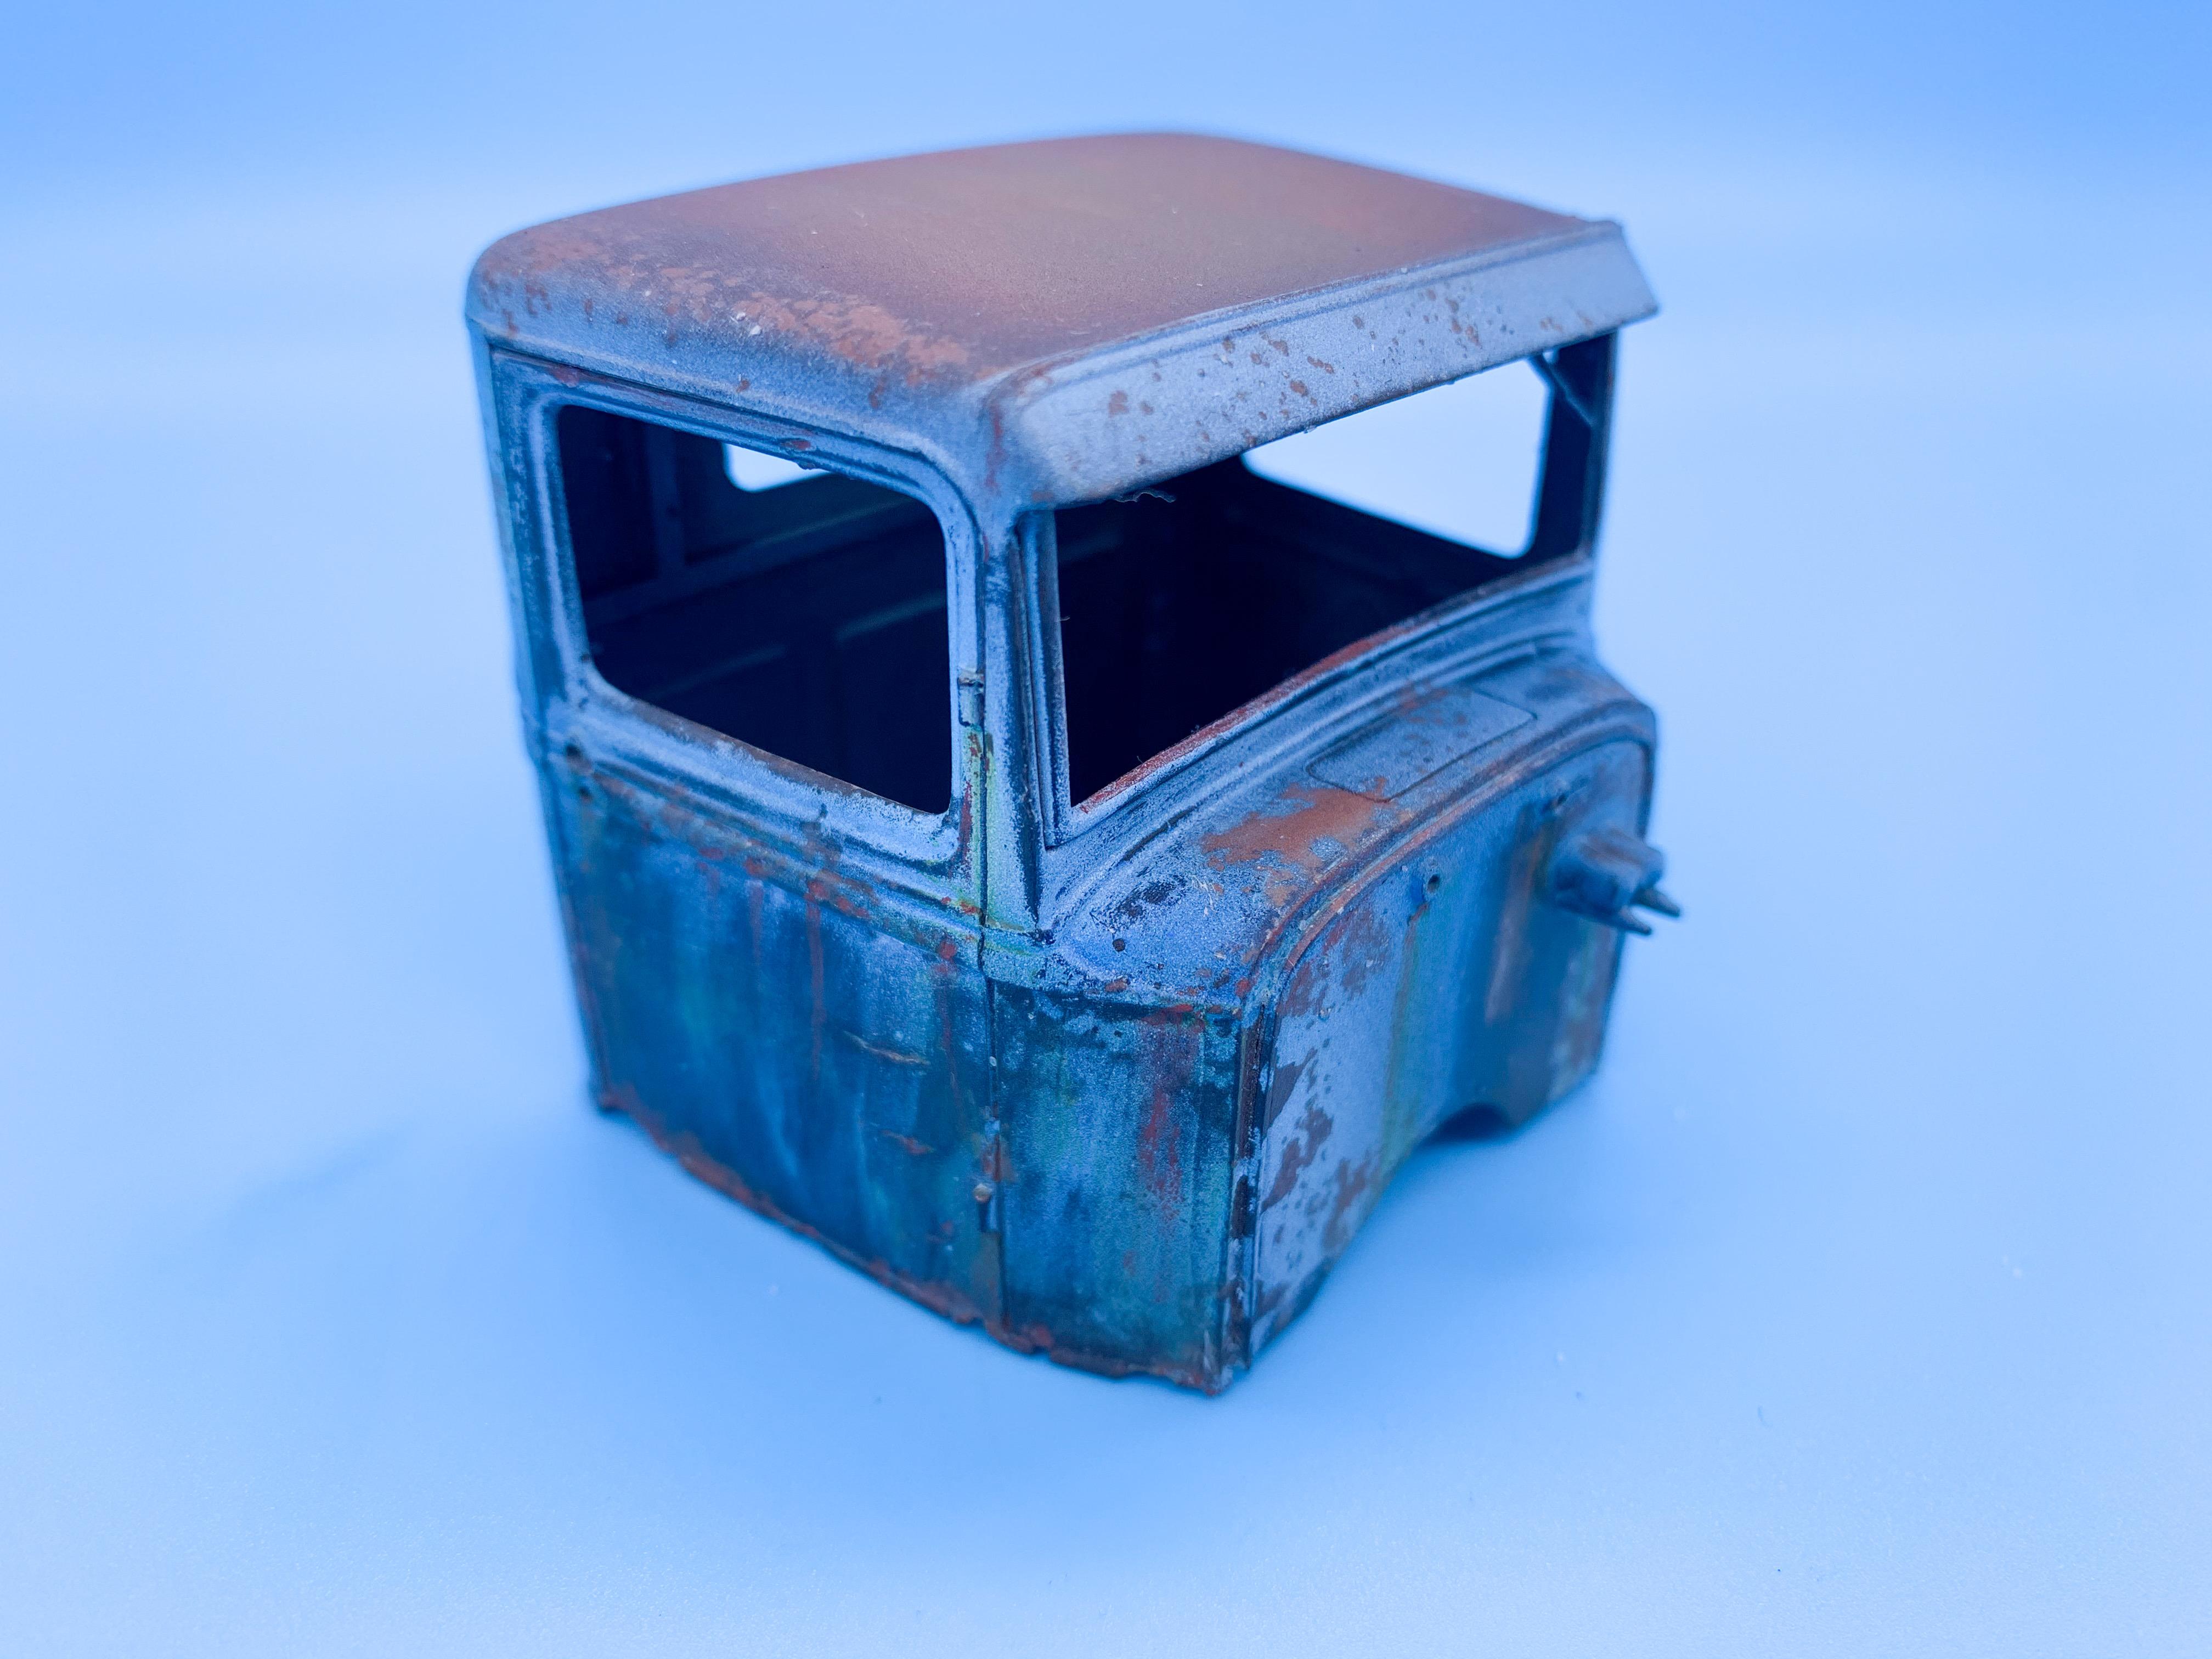
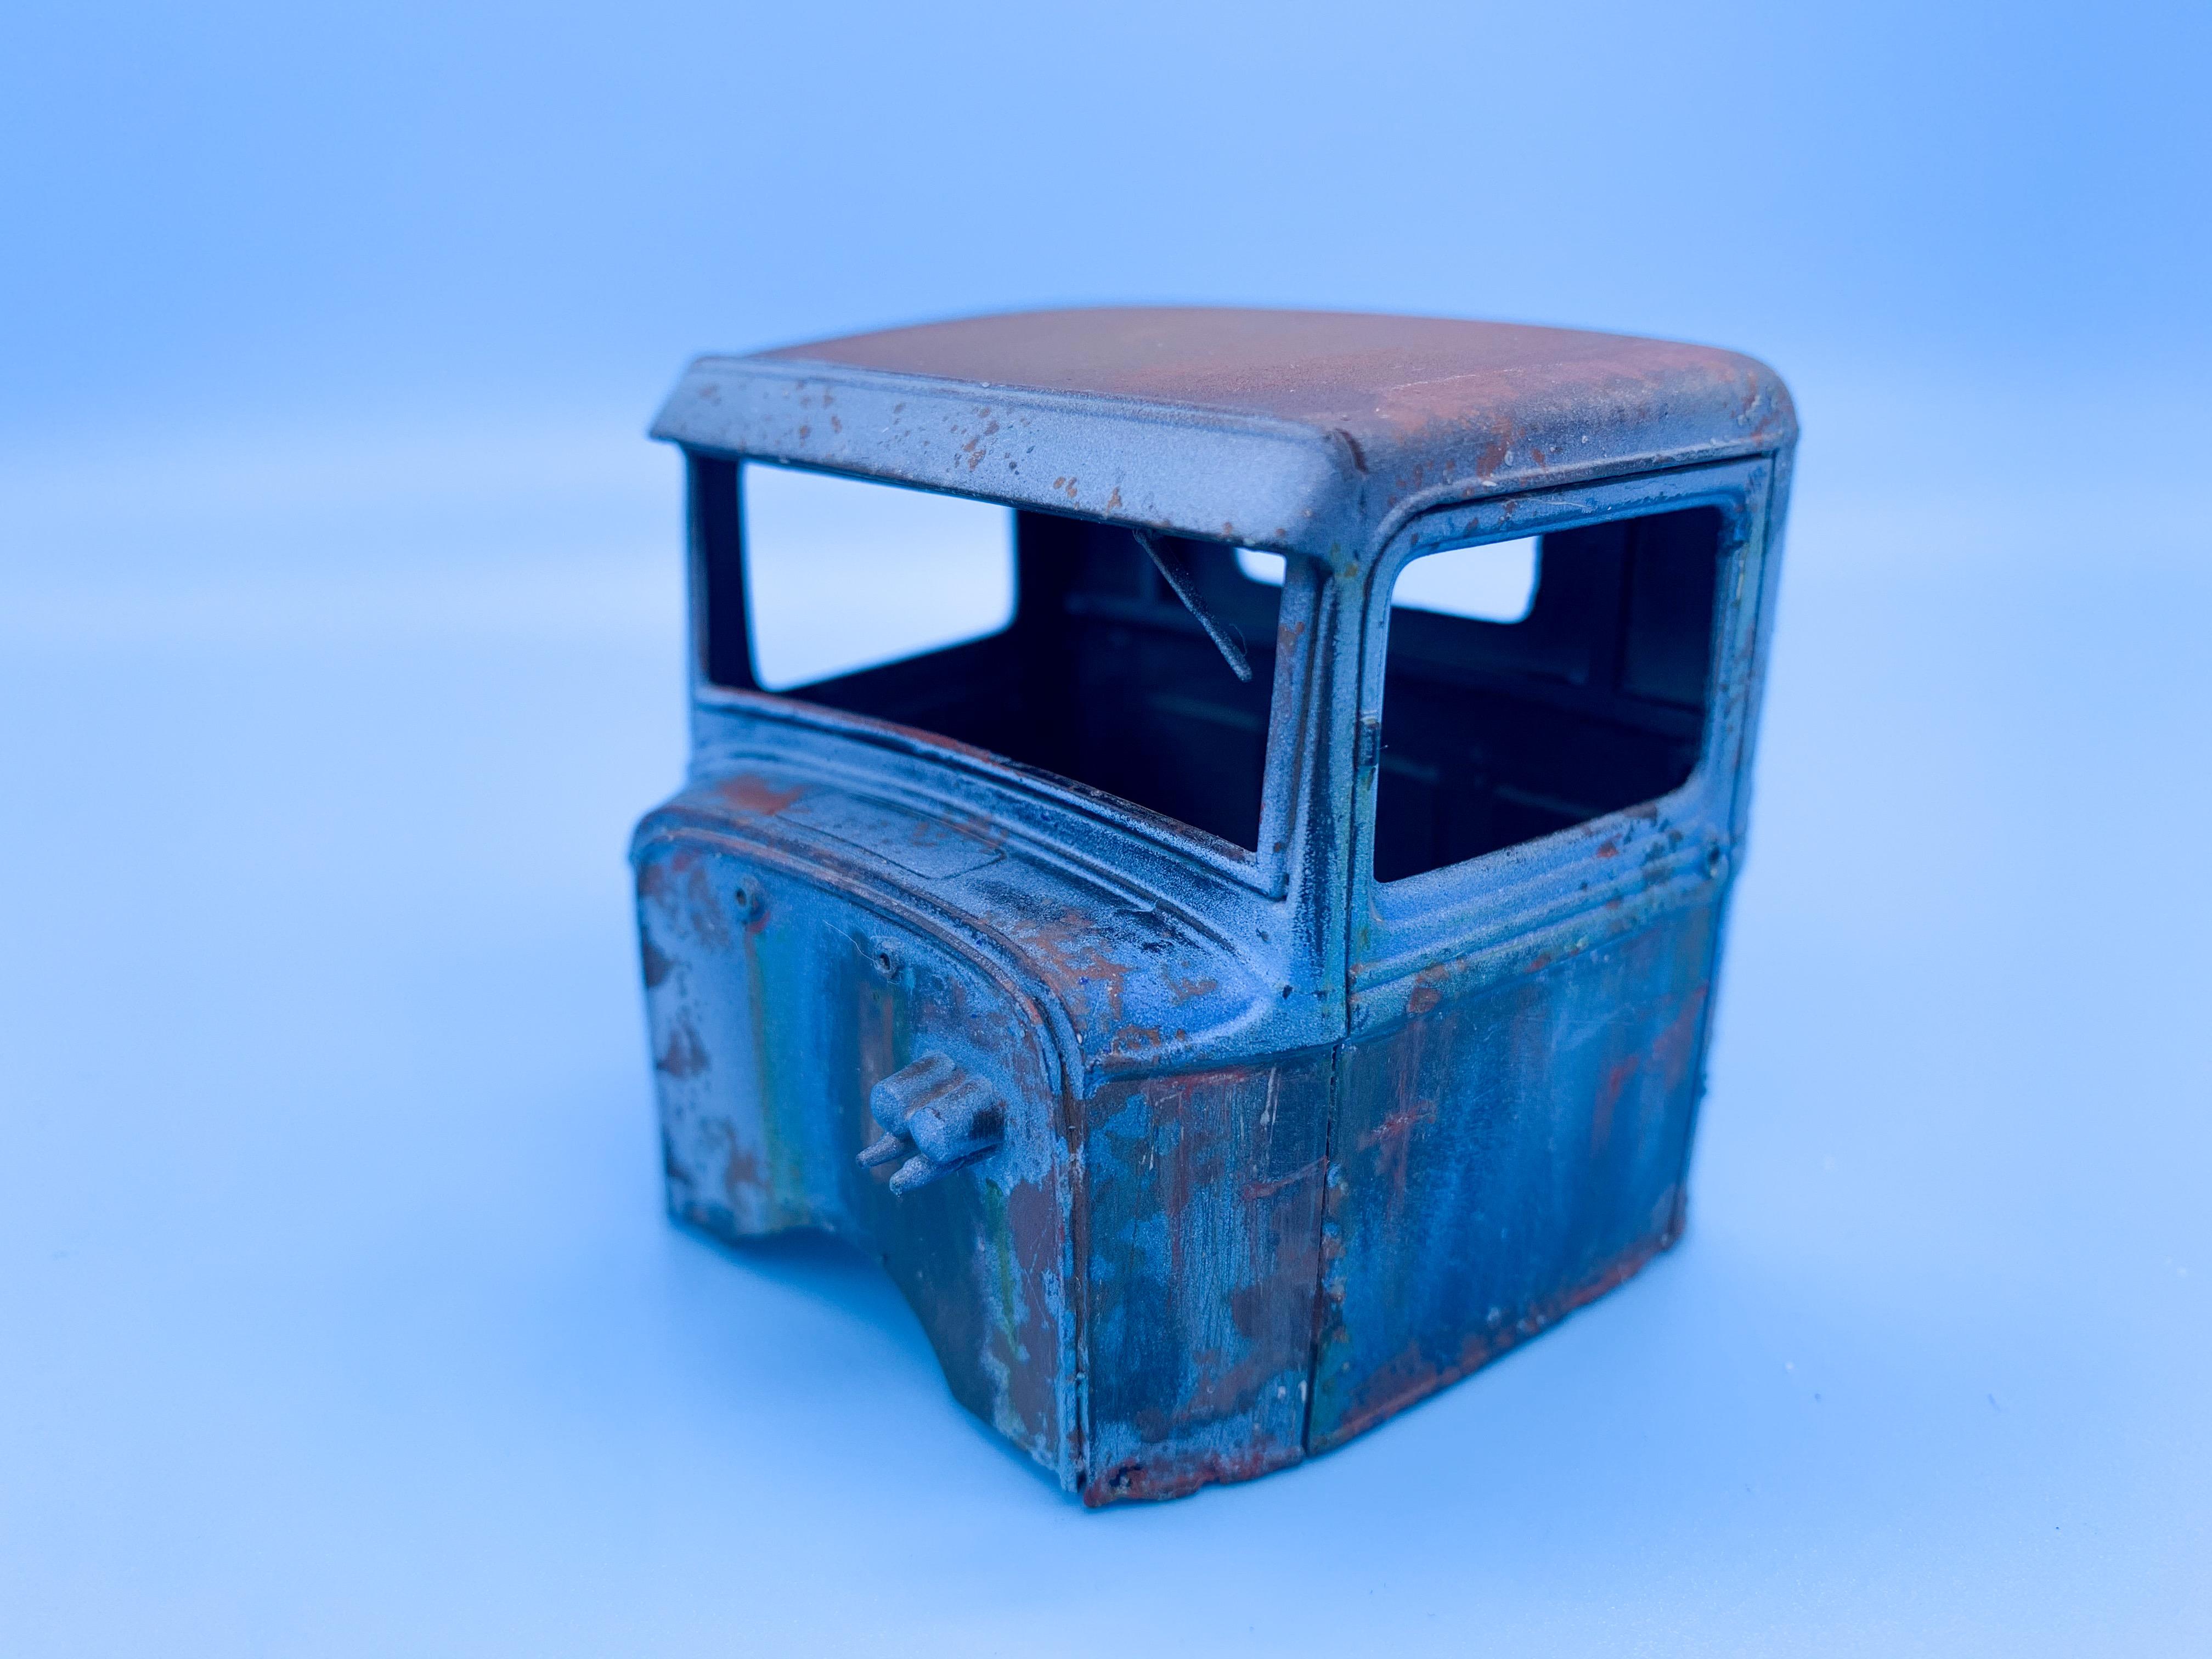
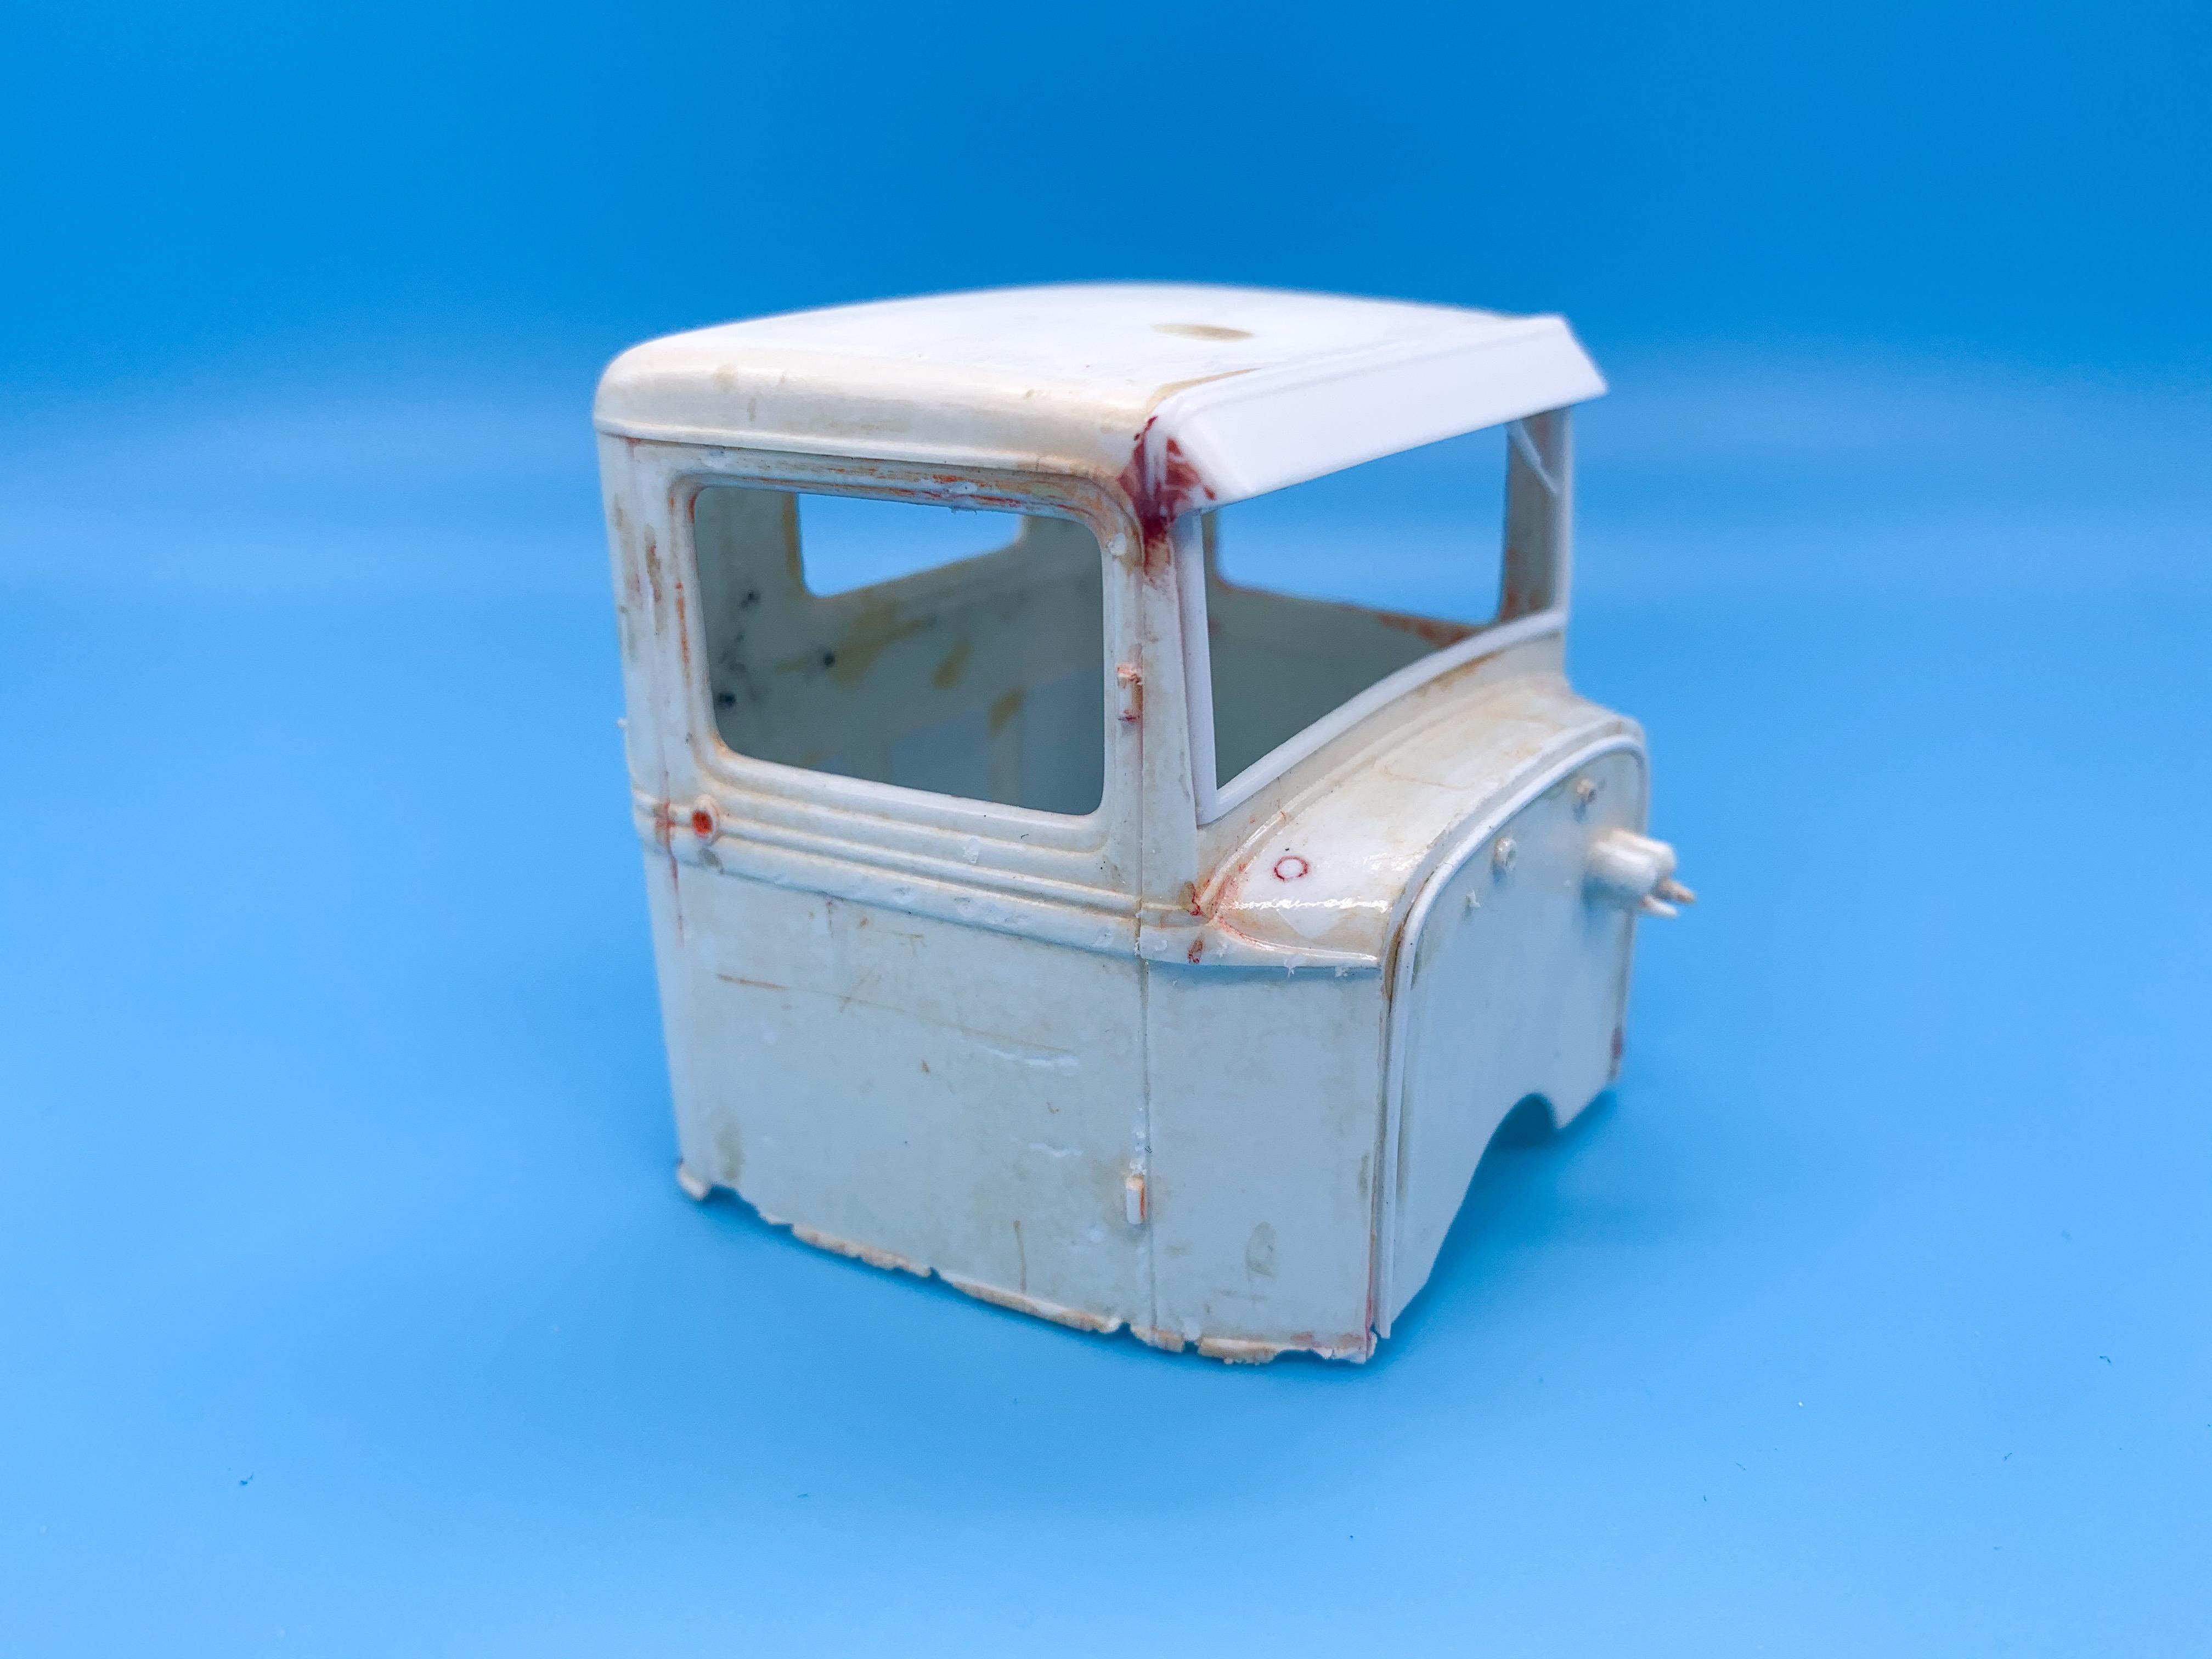
Thank you! A ‘34 tanker is certainly something that existed - that would be a cool build! Those are all the bigger, longer truck chassis with the larger wheels but the 34 kit is a pretty good starting point I’d think! Thank you! This is my third try at one of these patina’d builds and I’m slowly getting a little better. Small salt grains seem to help but I’ve used other stuff from the kitchen before too - herbs and spices and anything else my wife has in stock ? Not as much as I’d like ?. All this stuff is fairly quick to do, I only get a couple of straight hours at the bench most days...but I’d rather be doing this than sitting on the couch so I try and use my free time as best I can and keep hustling on with this stuff... Speaking of which, a little more today...got the front and rear glass airbrushed, distressed the rear panel just a little and got them in place: I wanted to add some kind of headliner or something to this build - 34 pickups likely didn’t have a headliner (or at least, I didn’t find a good reference pic of one), instead having a couple of steel braces to stop the roof sagging. I kinda copied the 1:1 design but with a distressed fabric headliner that would probably smell dusty if it was real, but with some nice new wooden braces that got installed when the other ones in the cab got put in there: Made a little rear view mirror from a photoetch piece with a pin for a stem, and got it installed. Turns out it’s pretty hard to photograph... Whilst I was messing with the cab, brush painted the master cylinders on the firewall with some Vallejo natural steel, and added a little photoetch wiper blade: And a little vid so you can actually see this junk better than I can photograph it...more soon! IMG_0404.MP4
-
I love it without the rear wing too! I know the huge rear wing kinda the whole thing with these...but I dig how sleek it looks with it gone too! Following!
-
Patina’d 34 Pick Up
OldNYJim replied to OldNYJim's topic in WIP: Model Trucks: Pickups, Vans, SUVs, Light Commercial
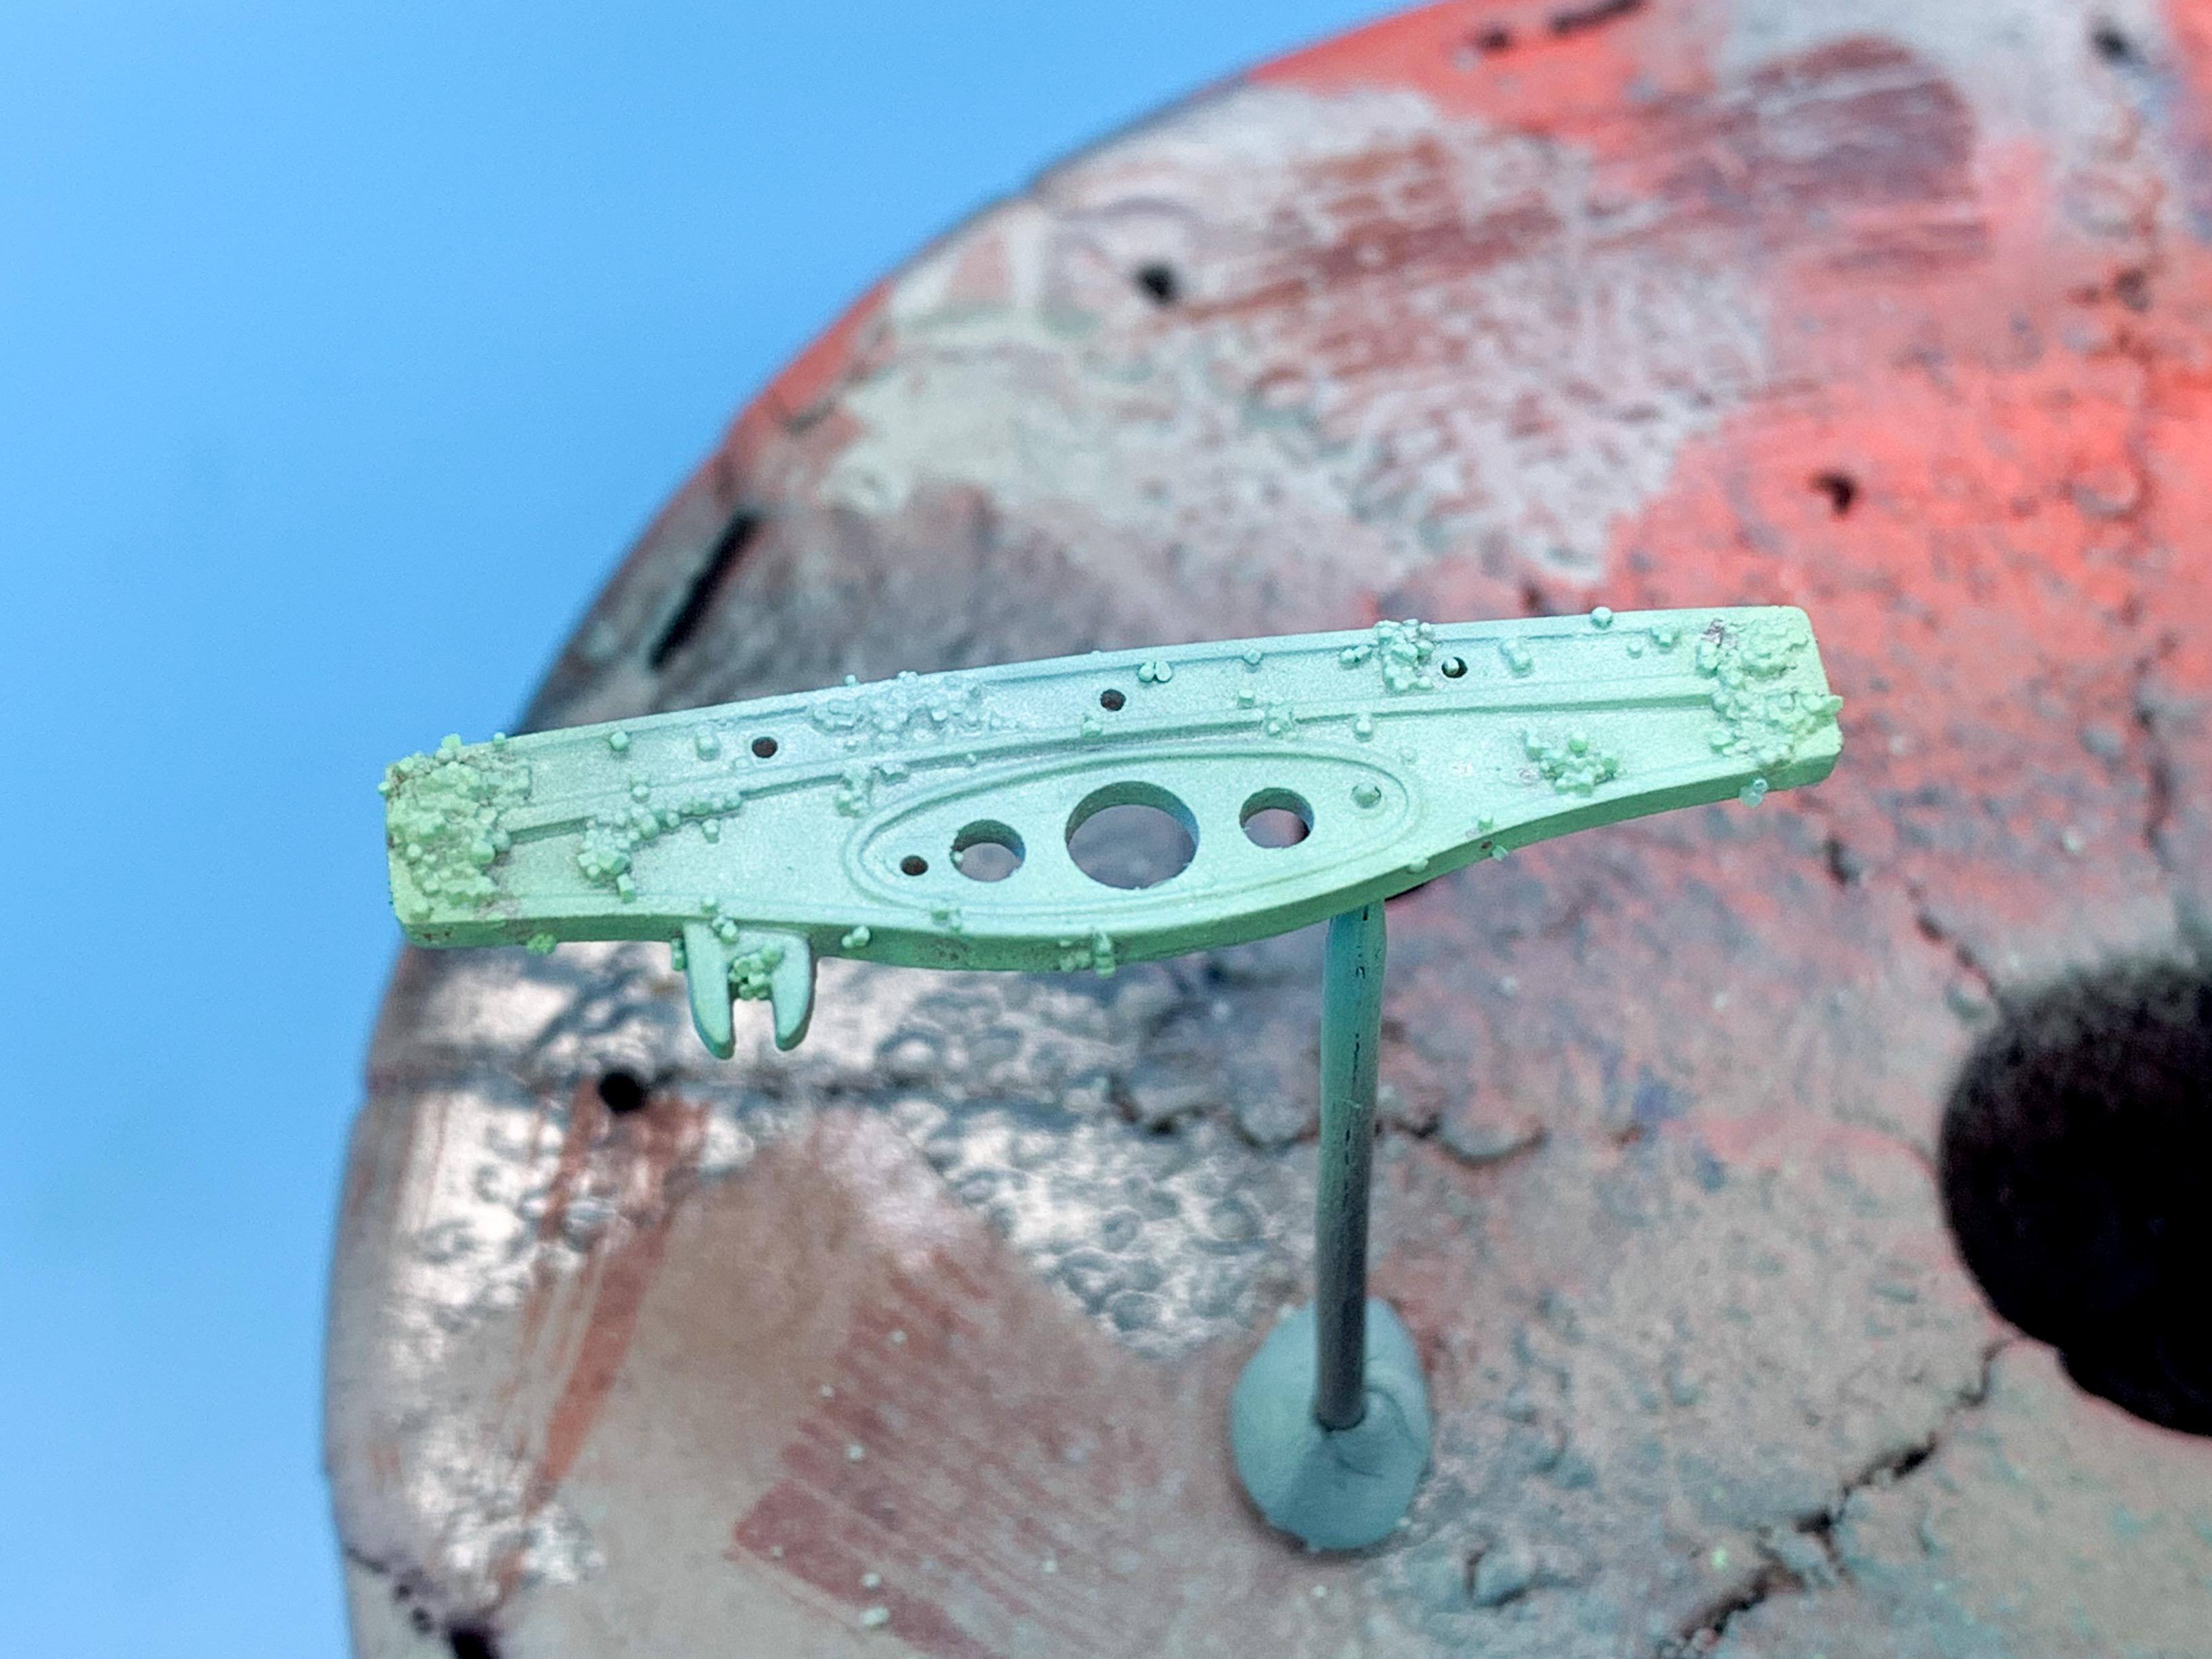
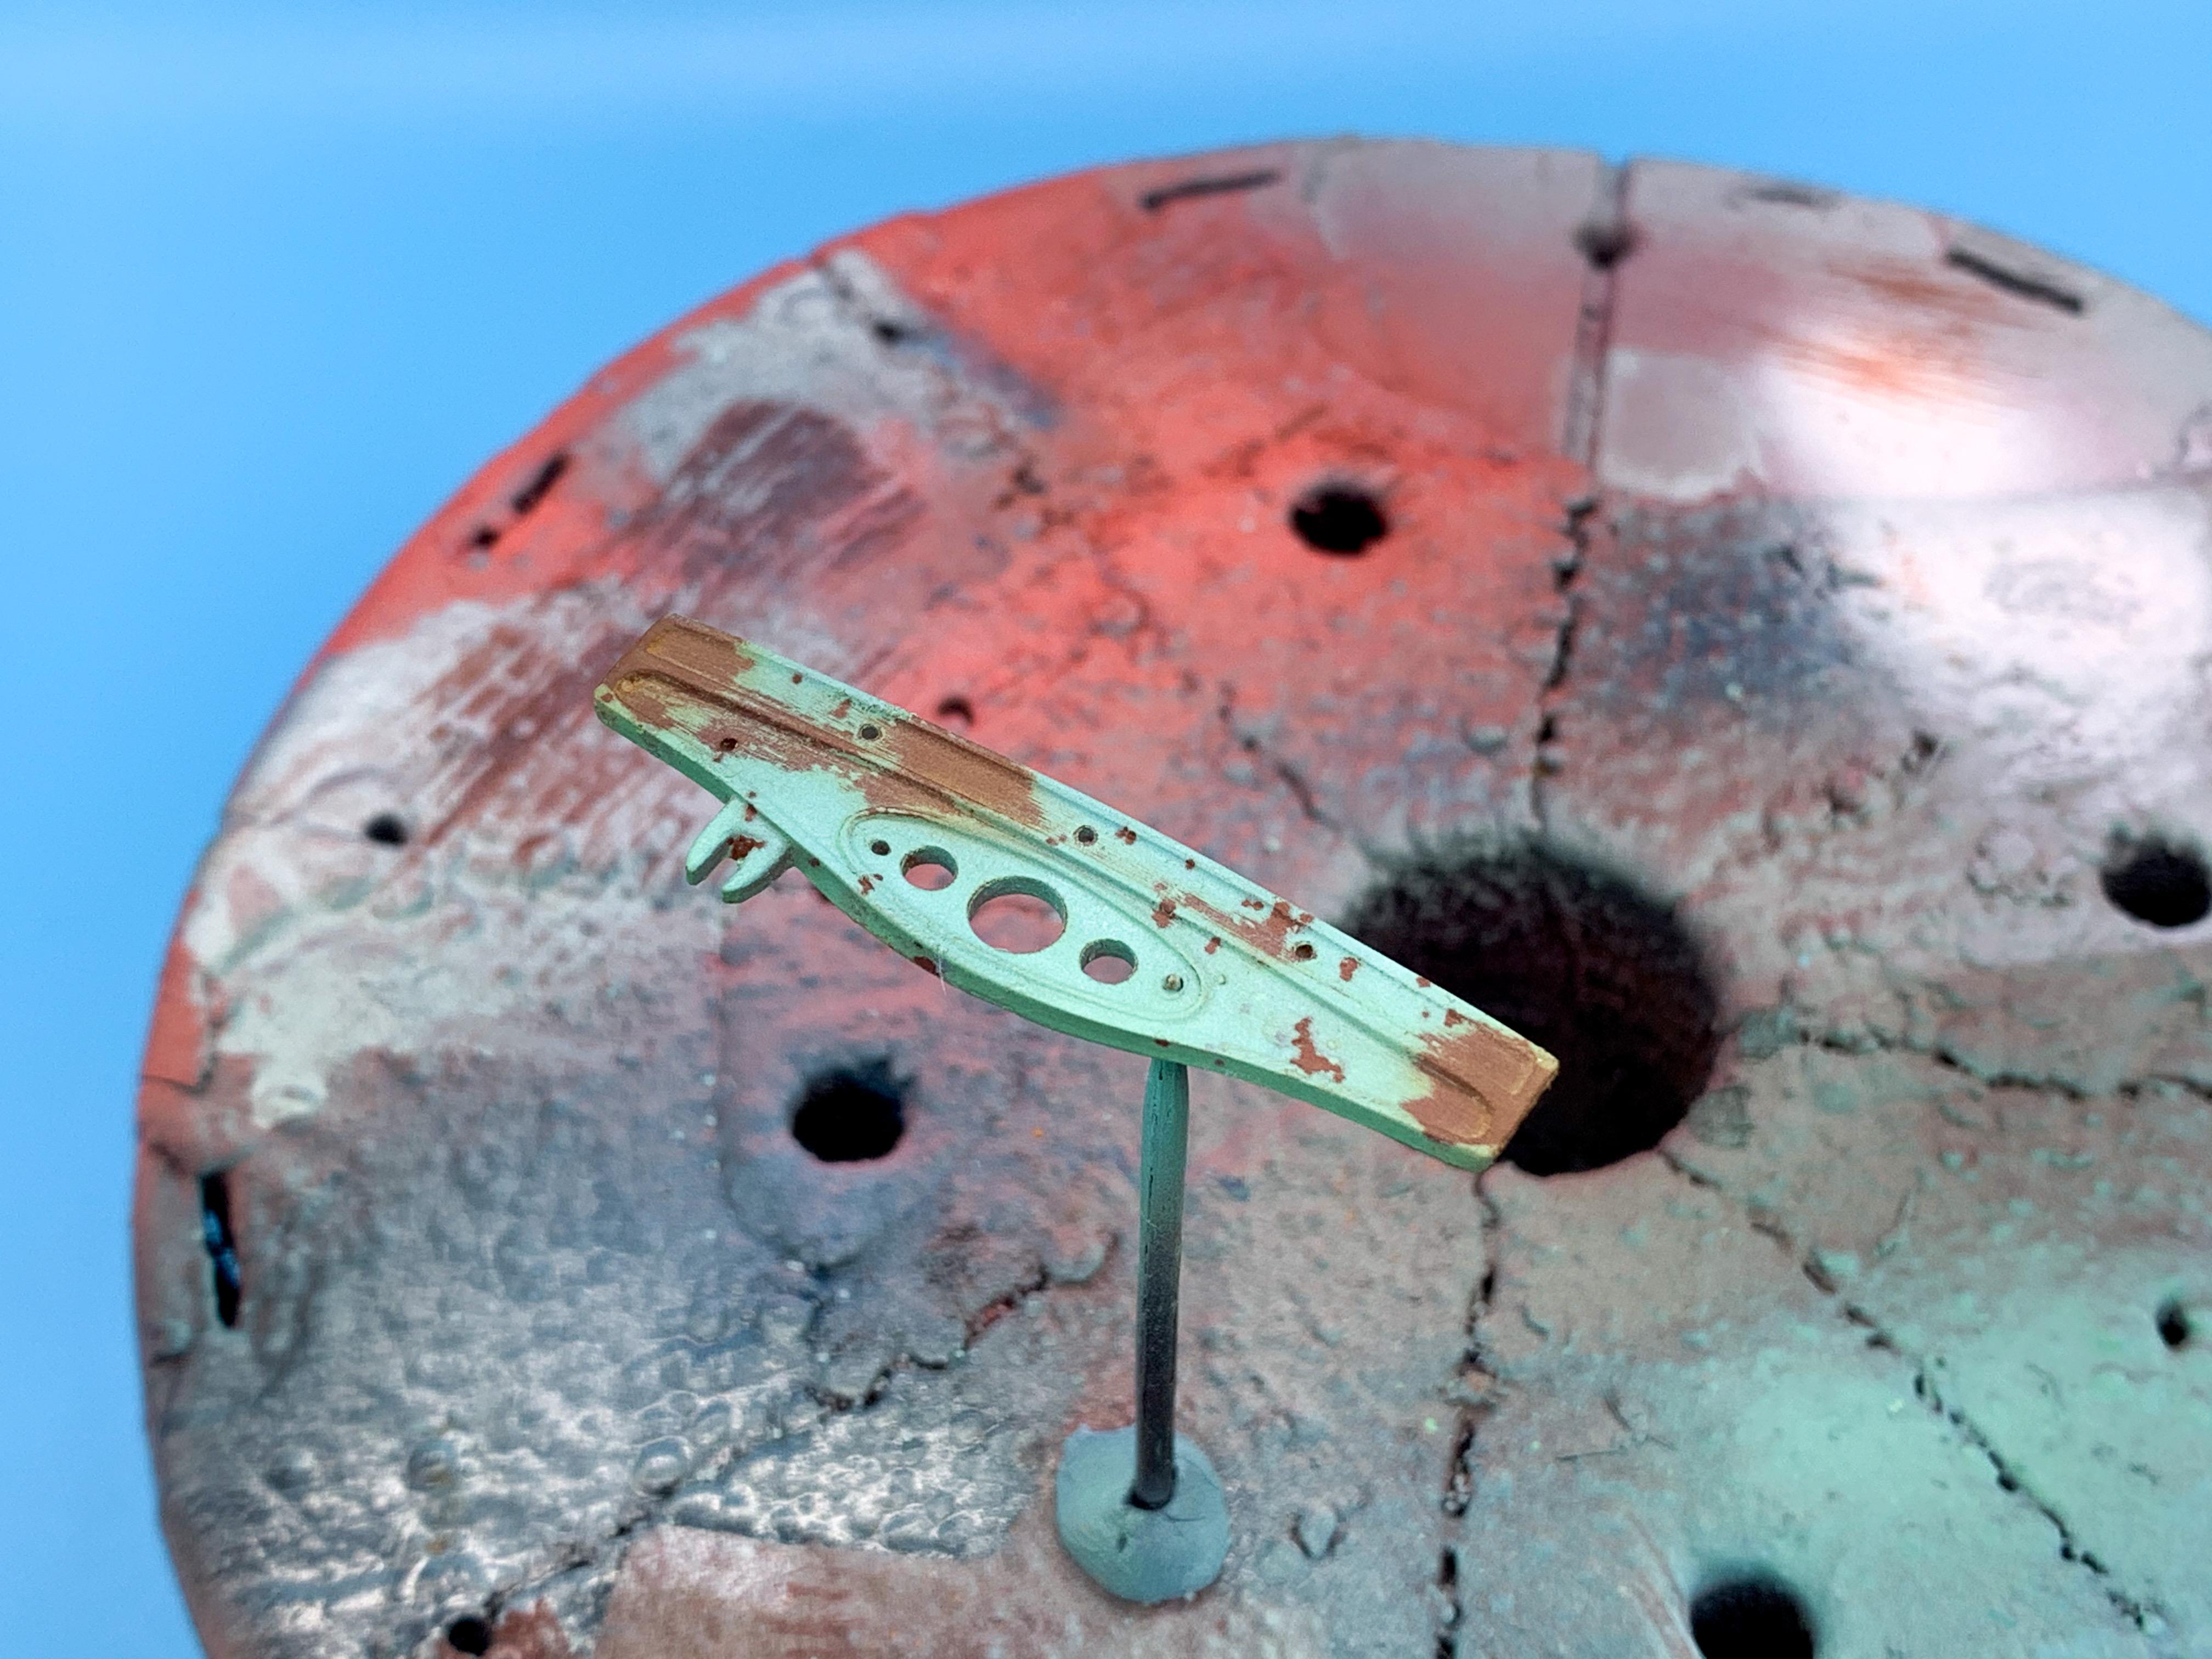
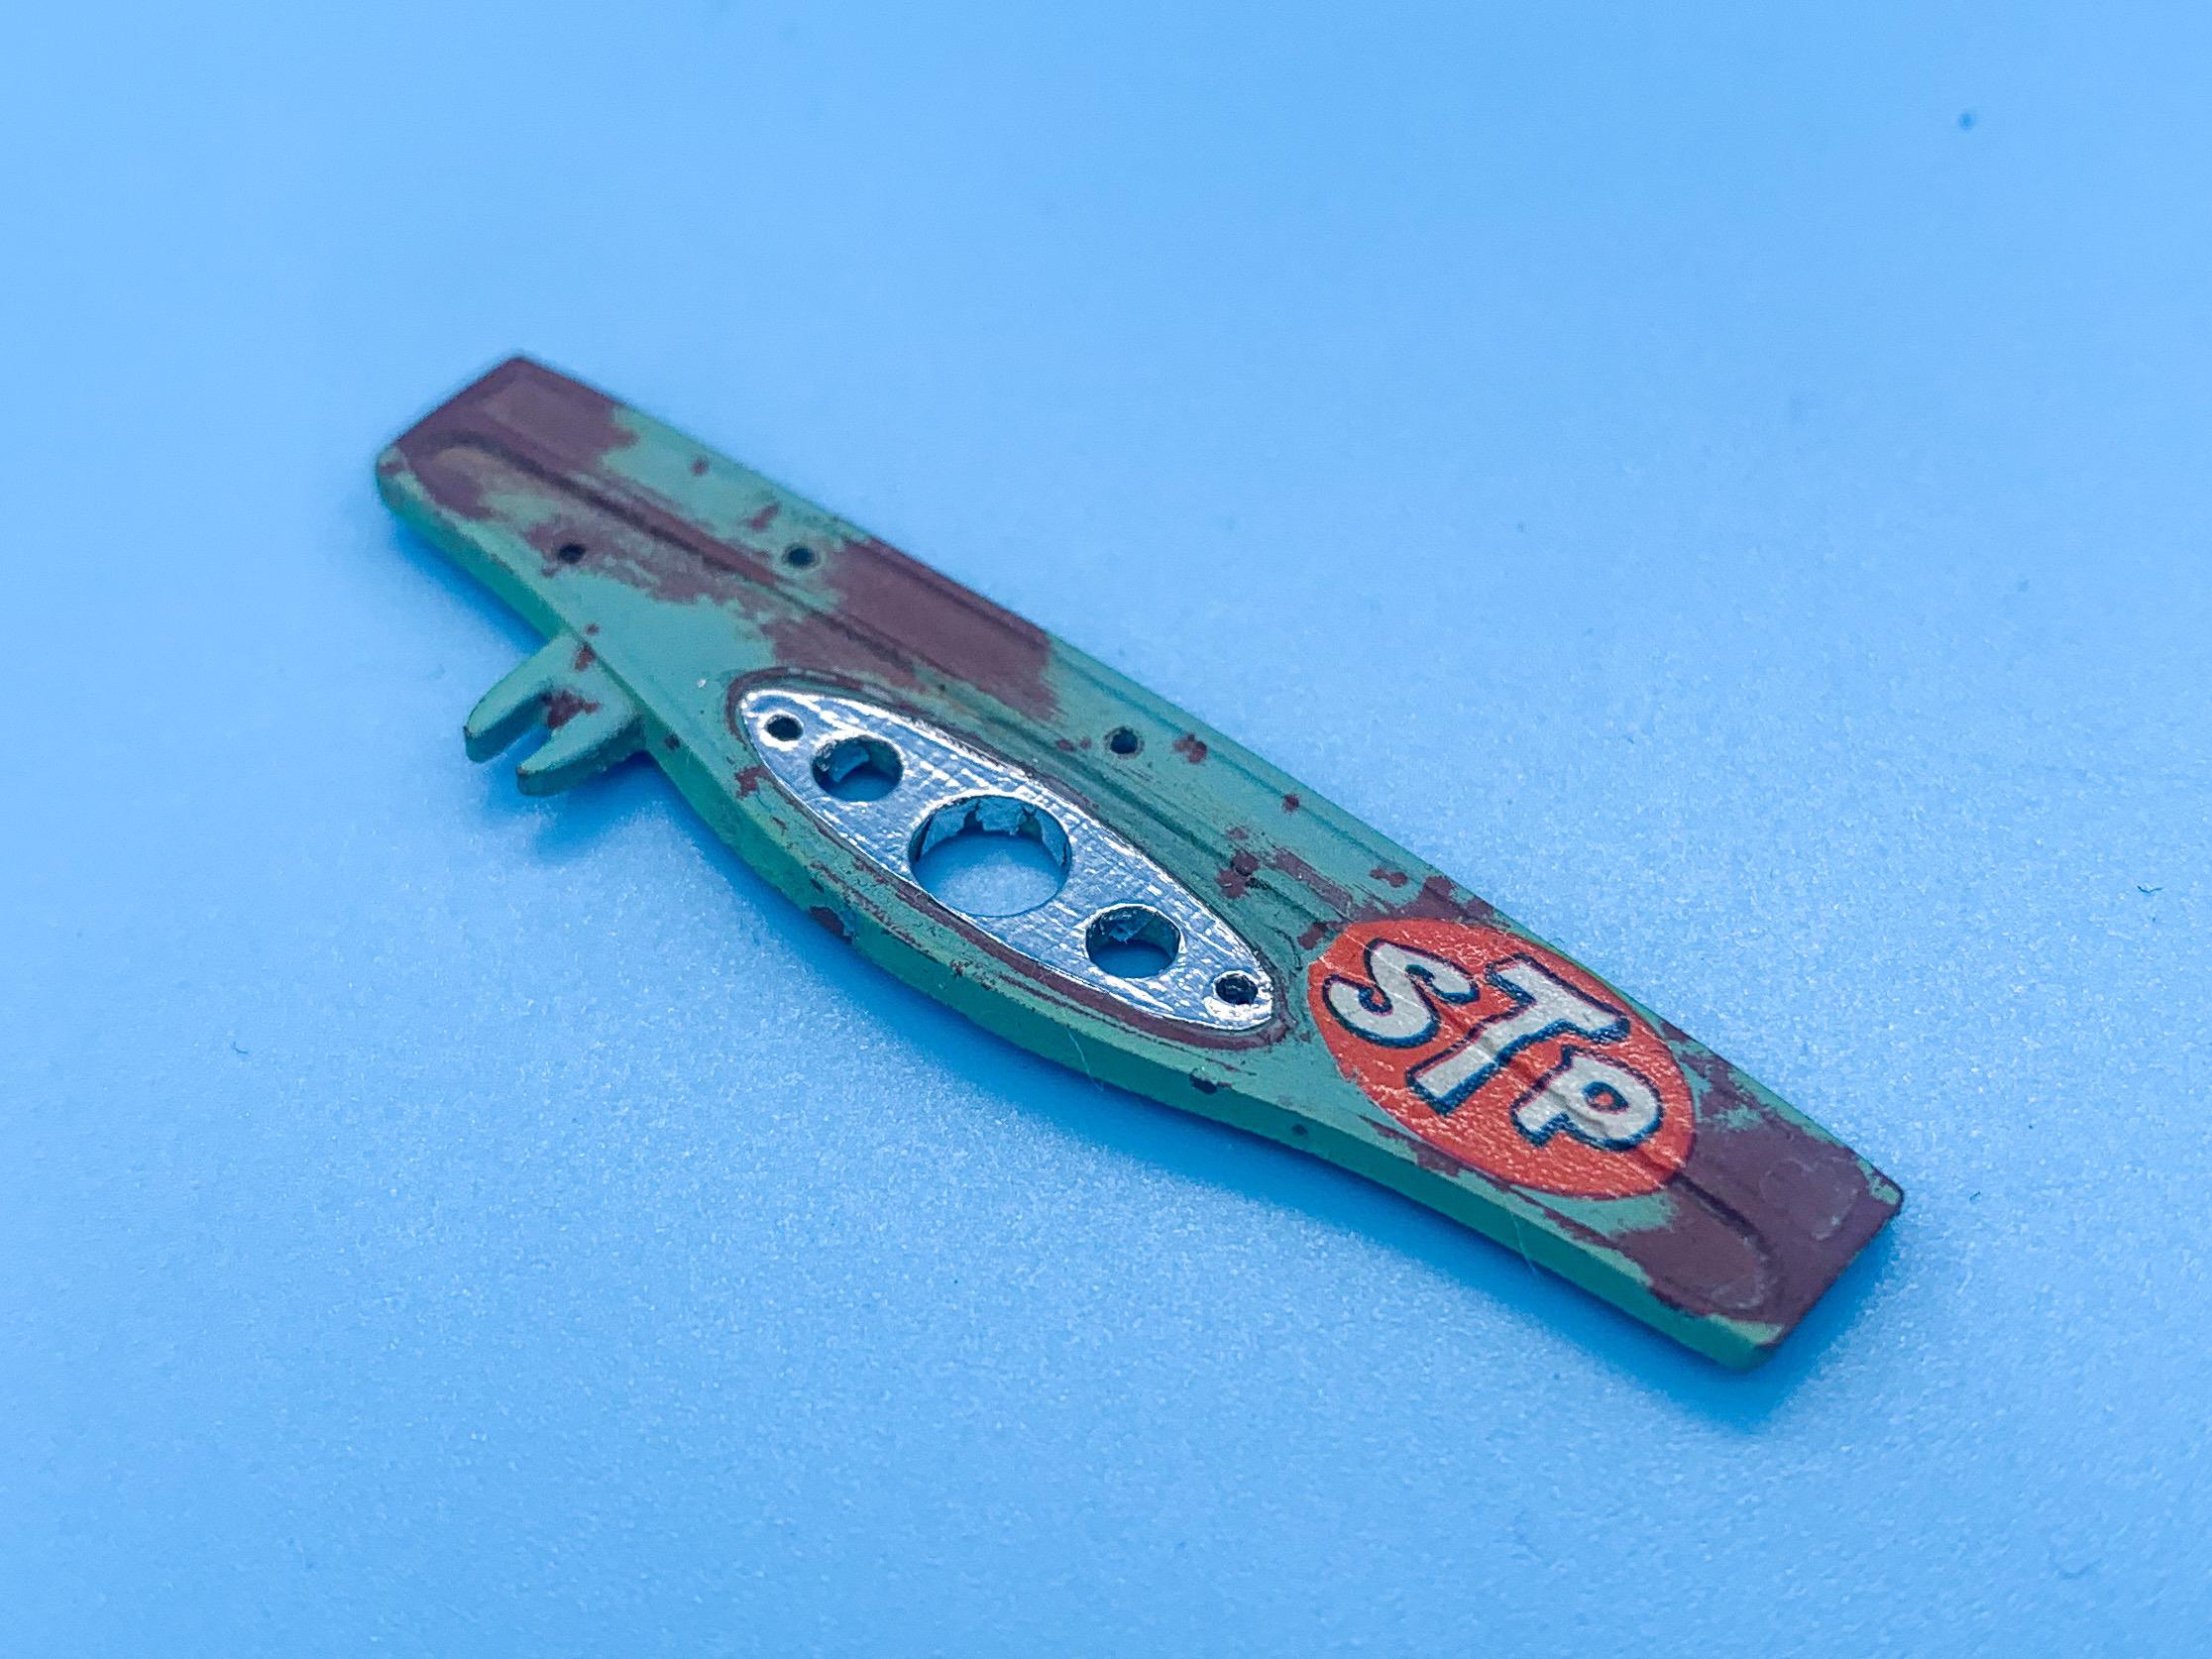
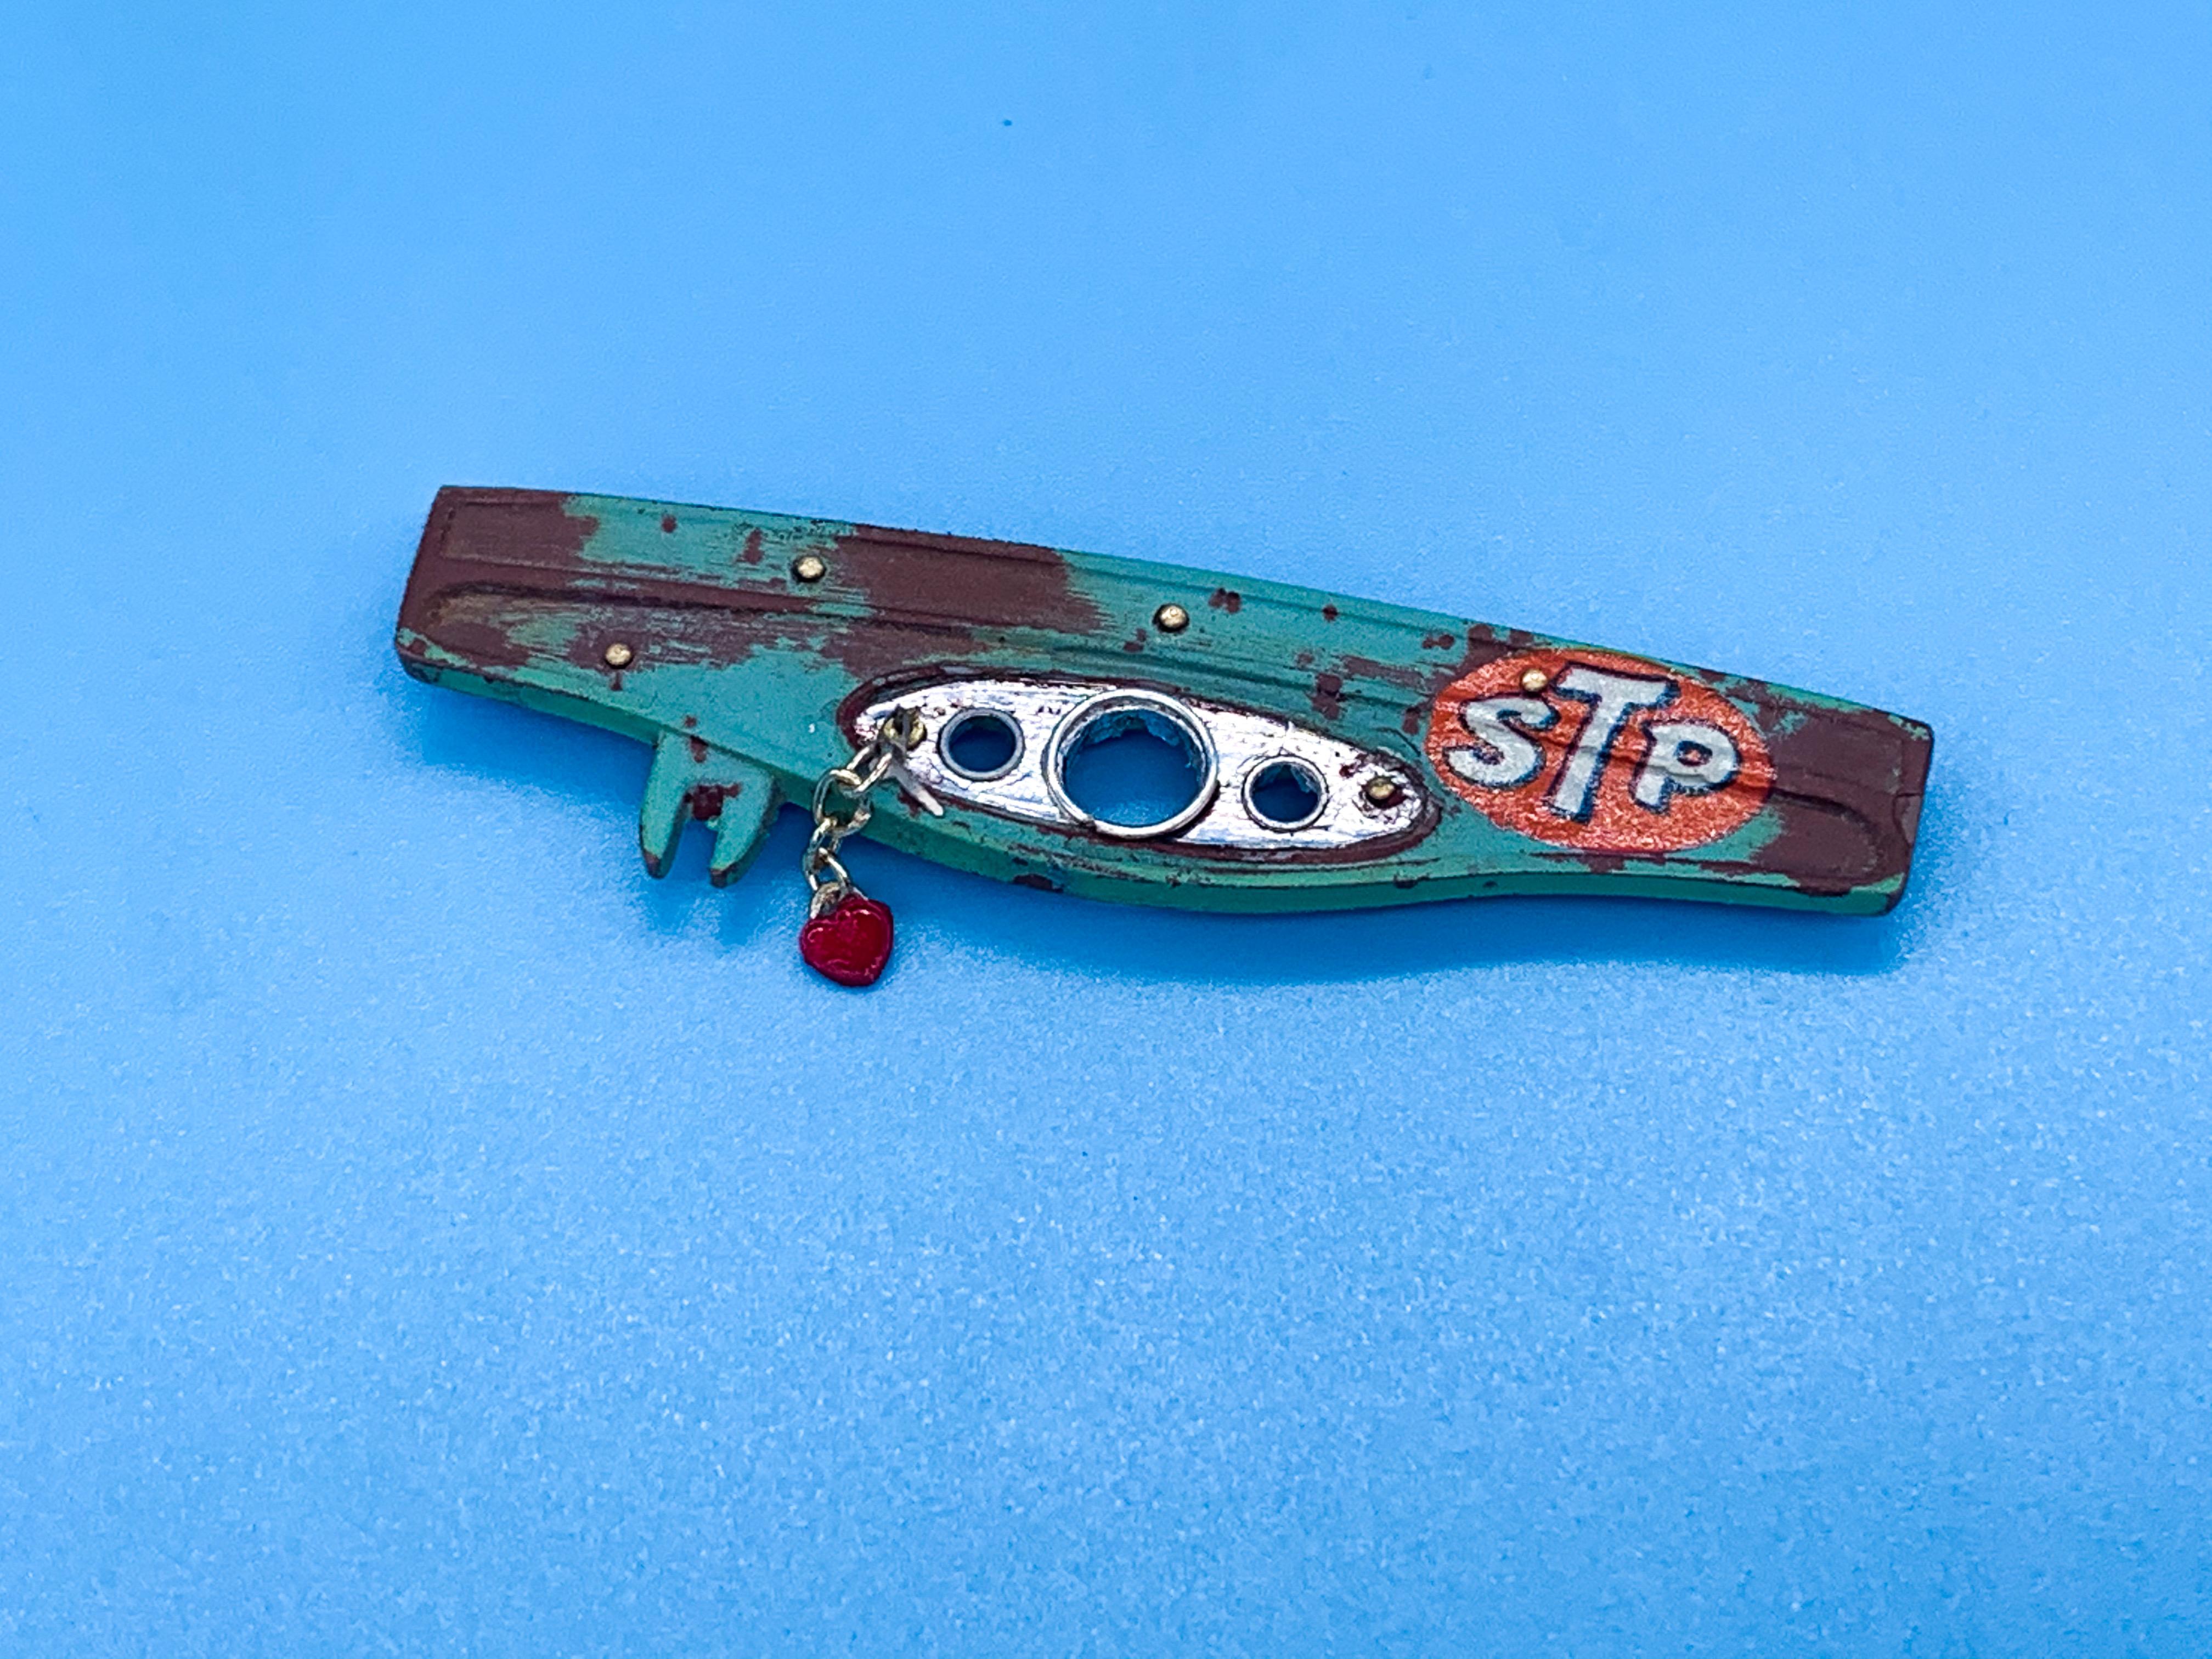
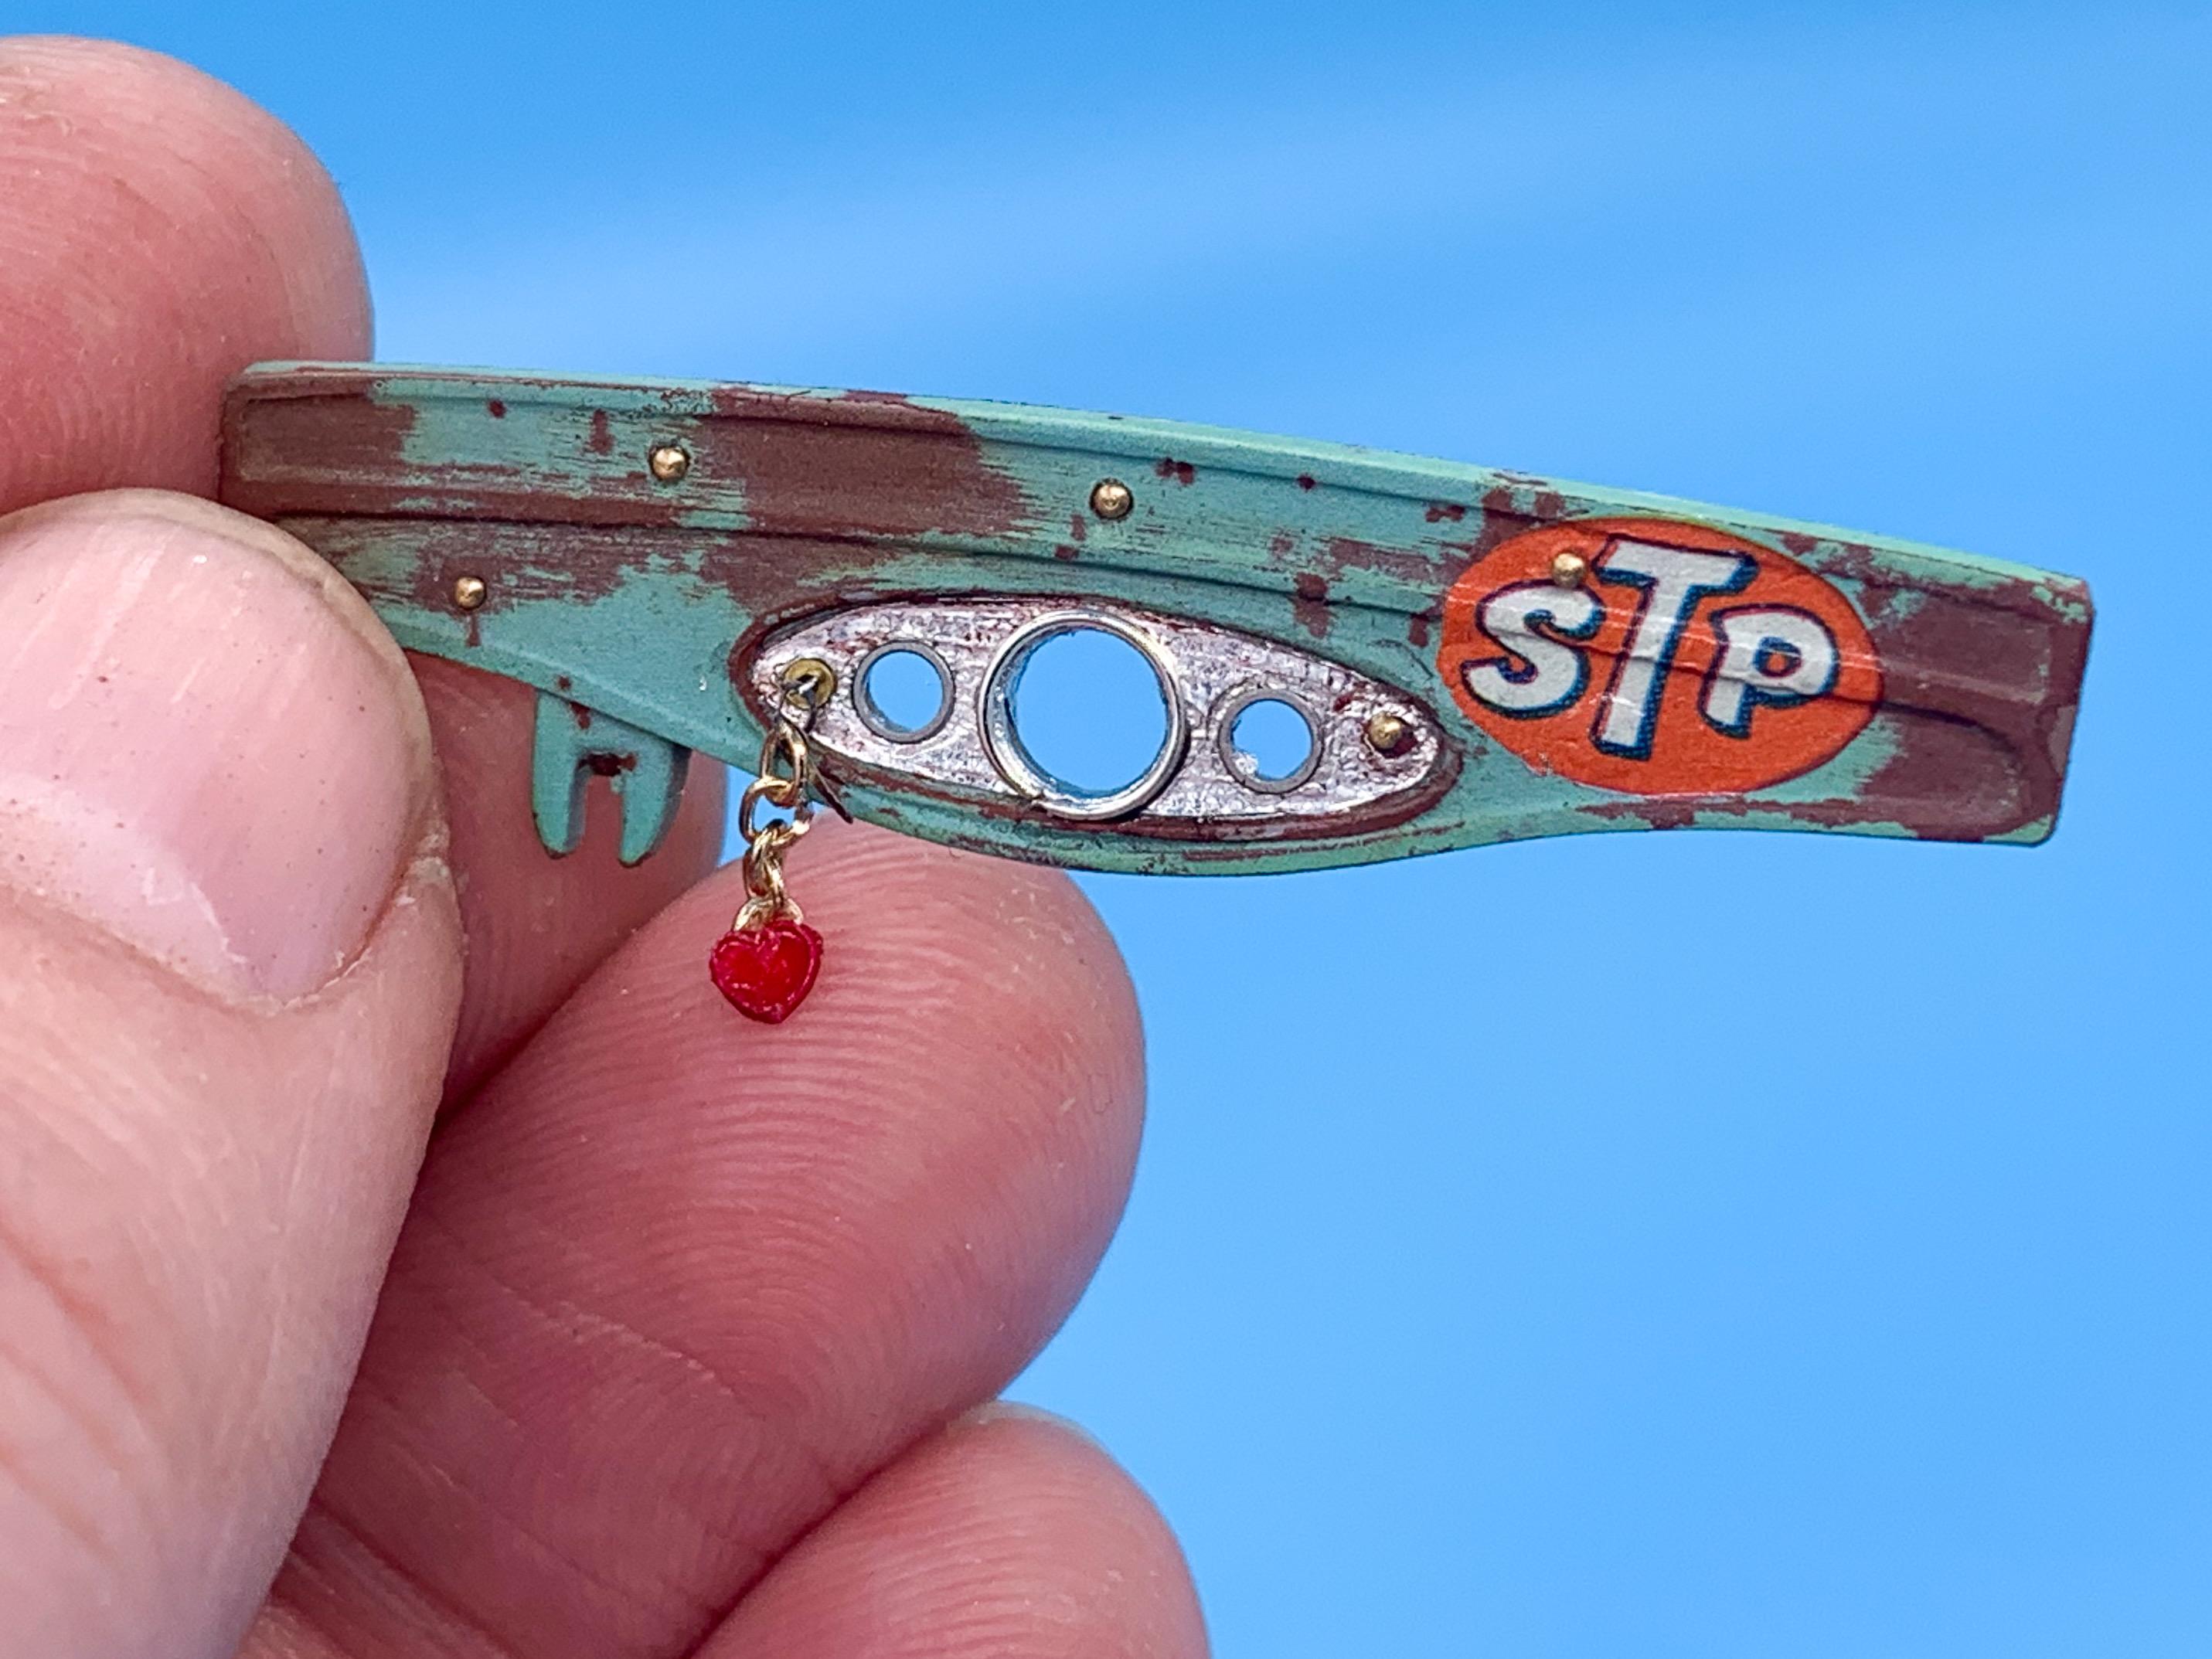
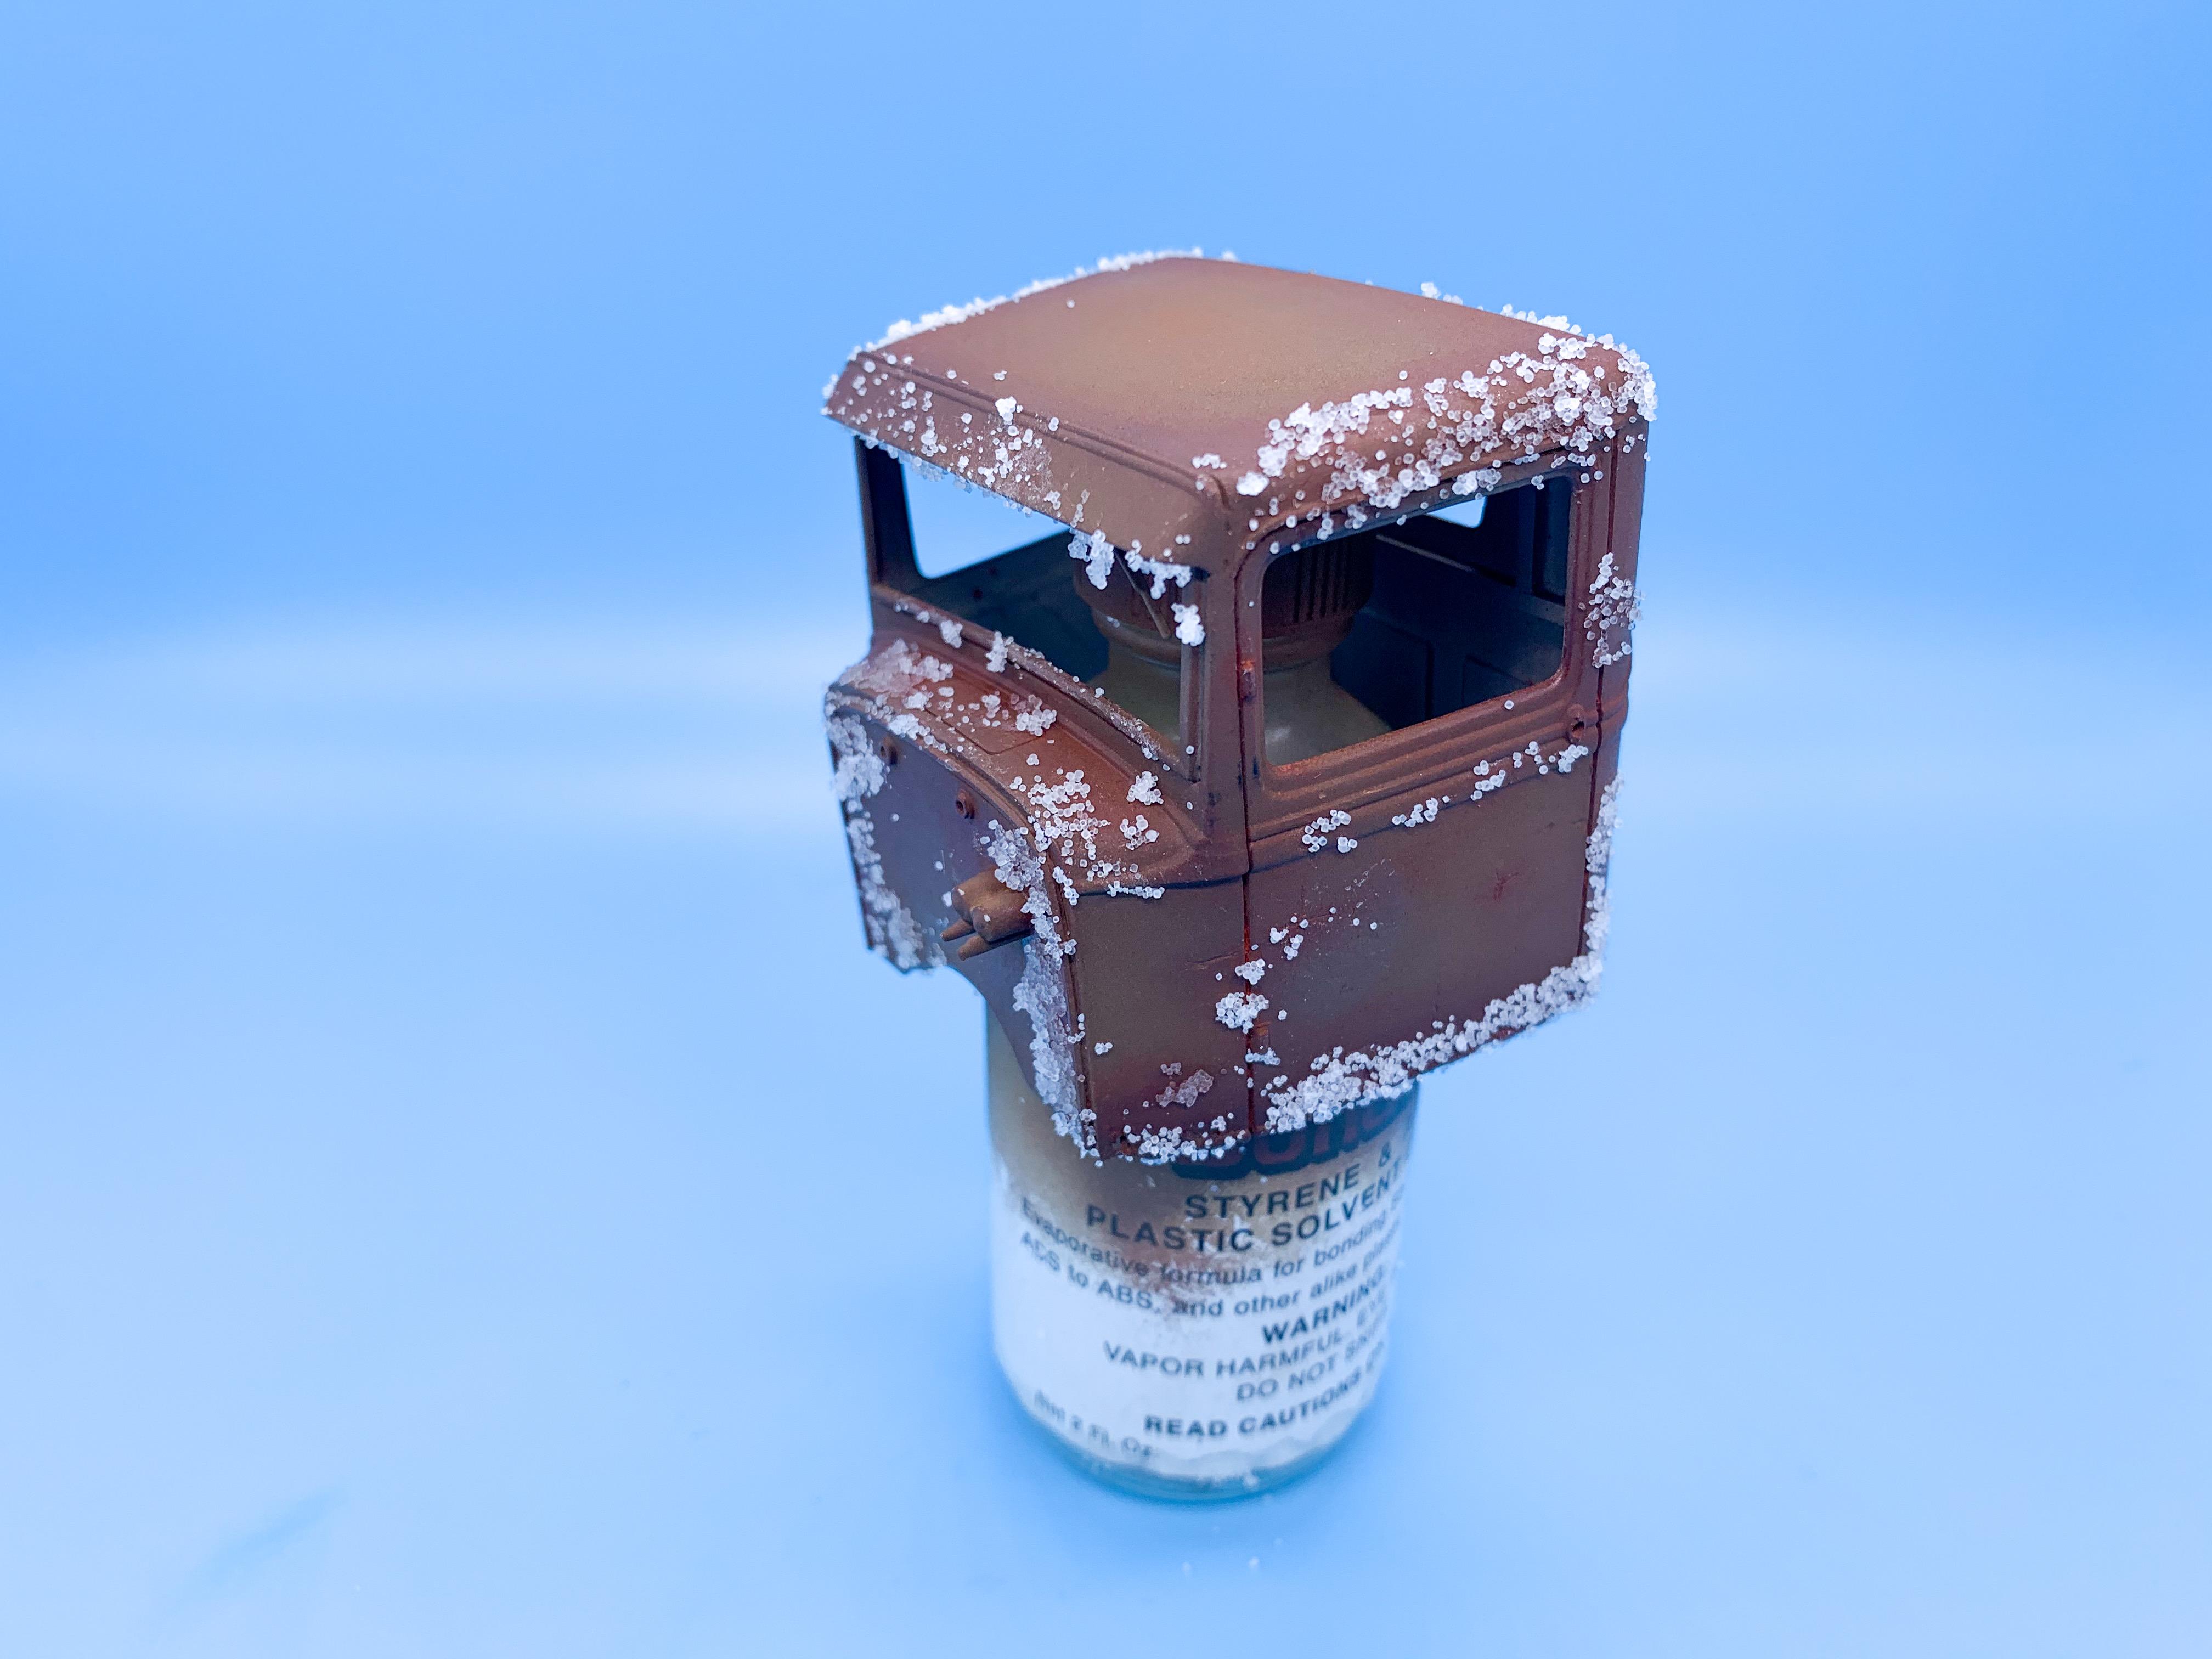
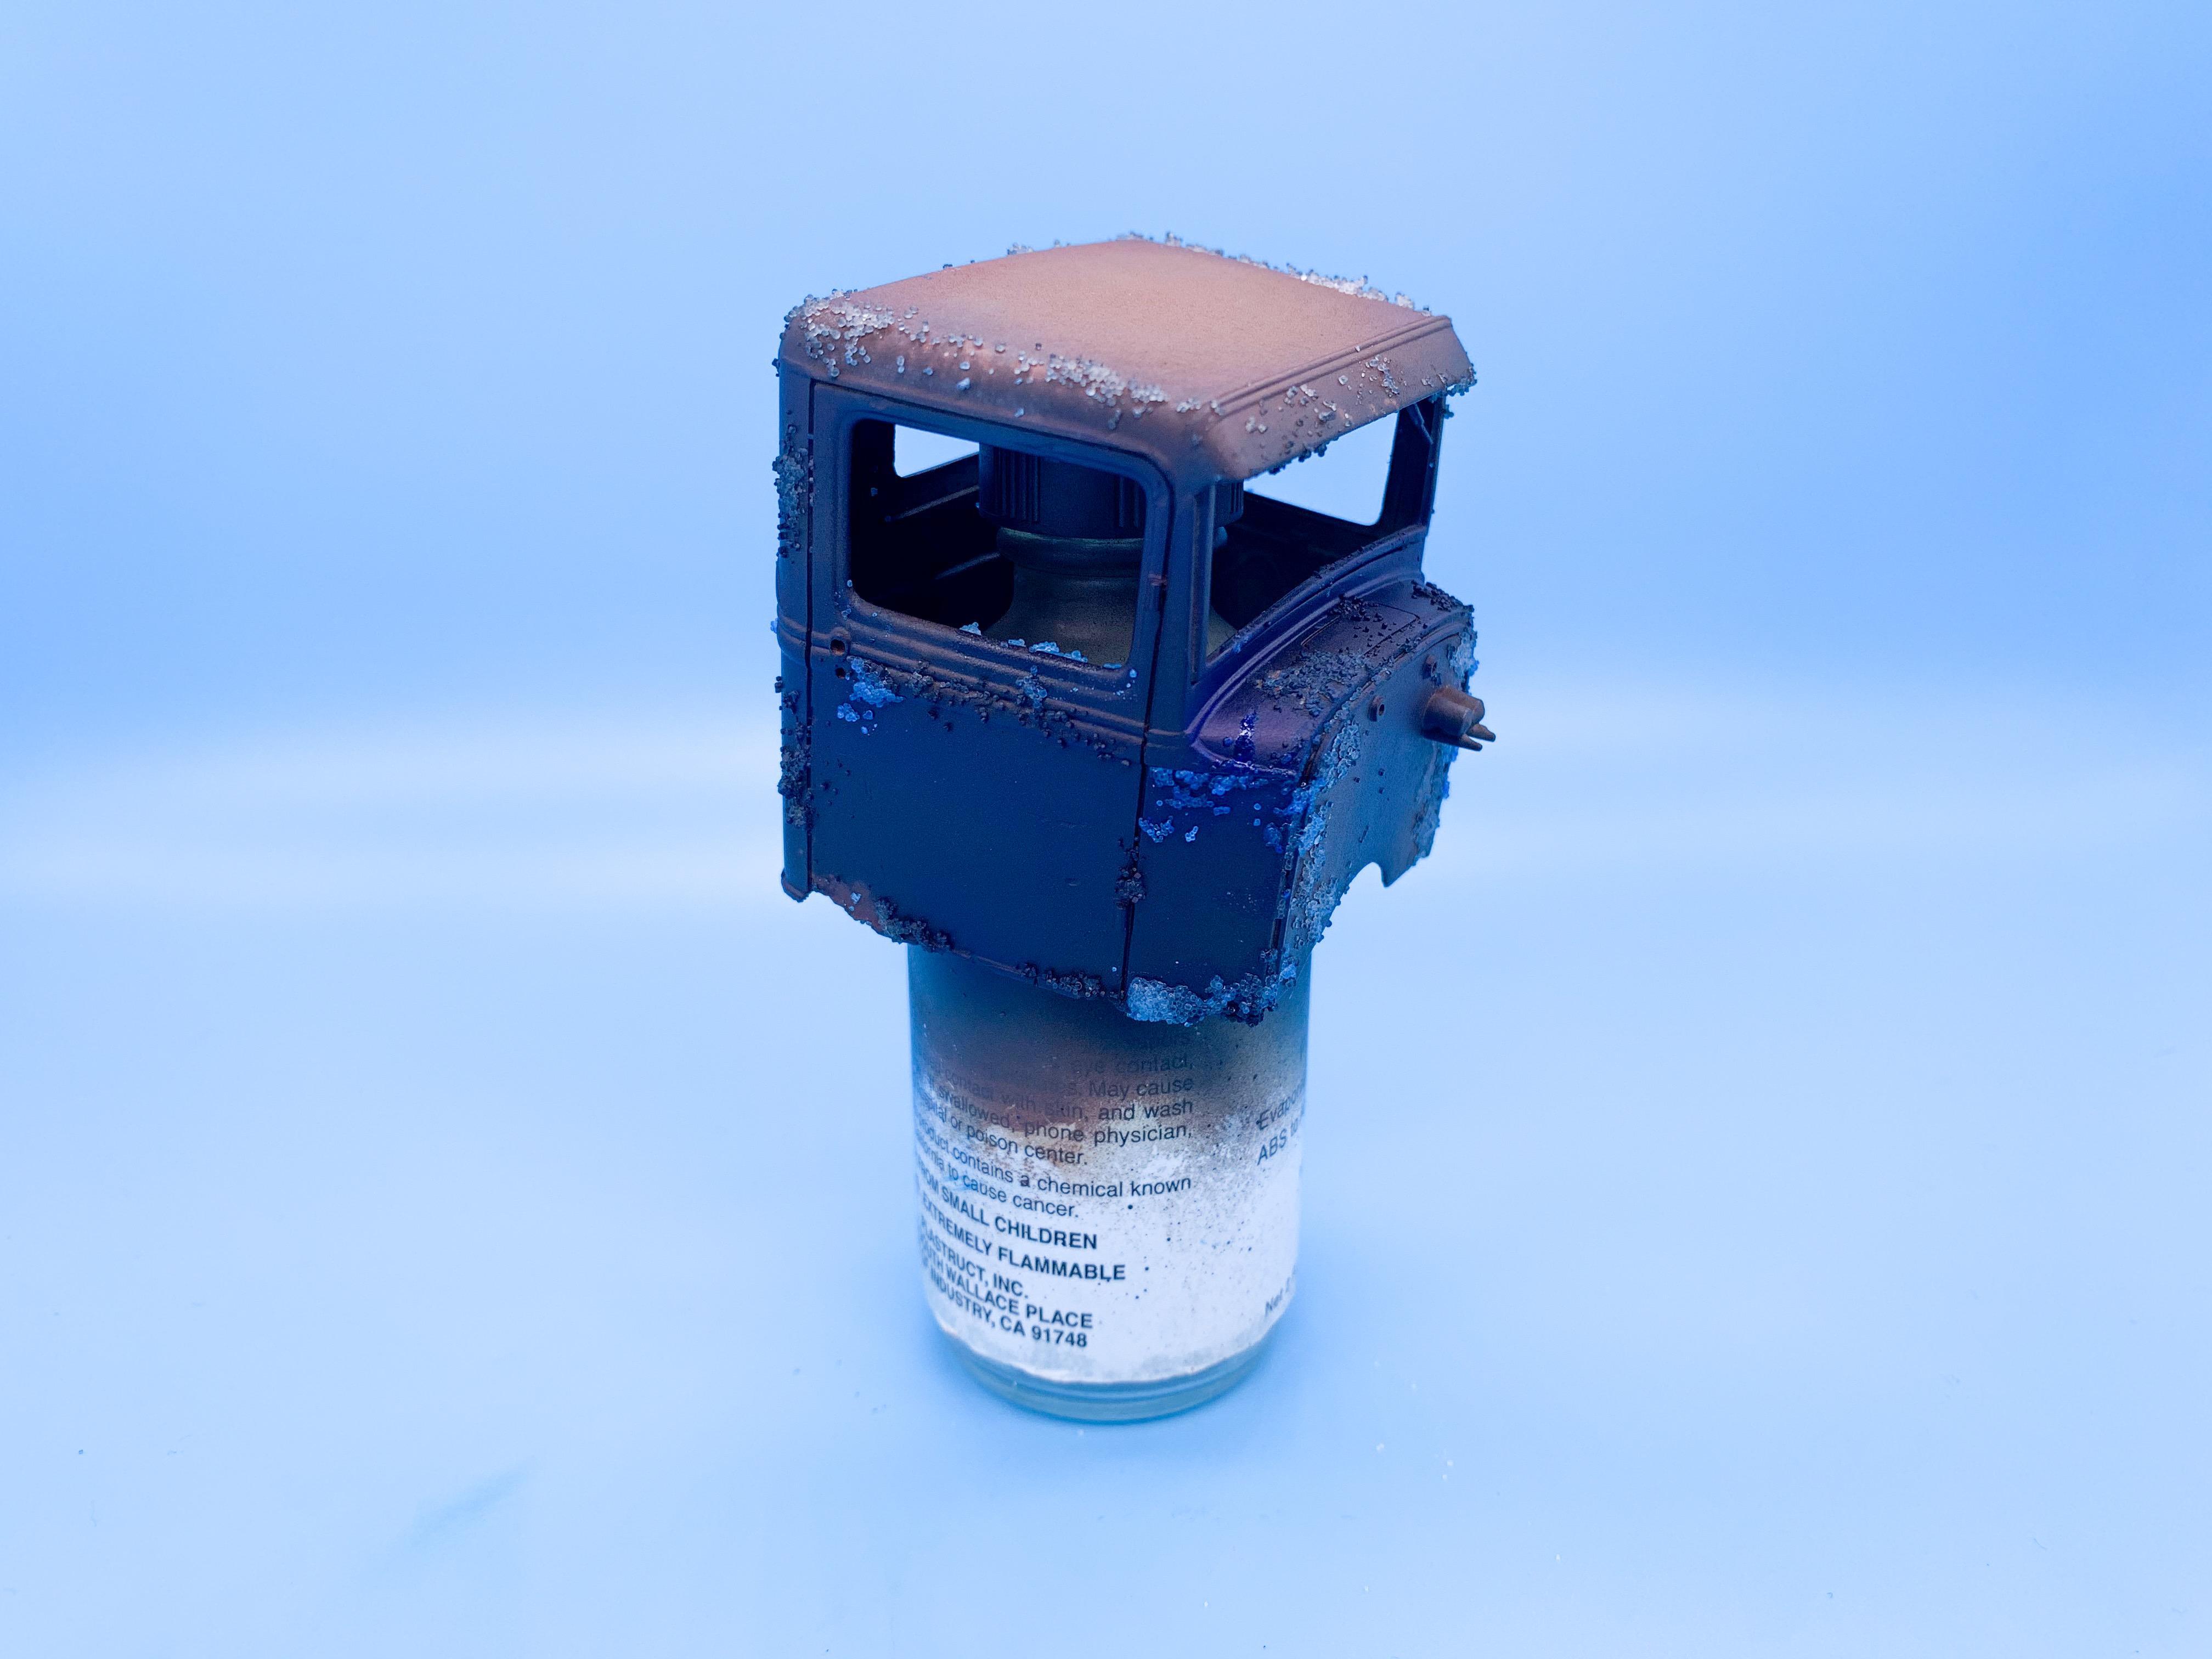
Thanks Steve! I definitely recommend it for a change of pace compared to painting stuff shiny! It’s fun! Thank you!! ❤️ Yes sir - although you could do this with rattle cans too, and plenty of people do it better than me without an airbrush. A lot of the gradients and subtle color changes on this one actually come from cheap artist’s pastels ground up and brushed on rather than the airbrush achieving the same thing, so it’s definitely doable with just rattle cans, yeah! Not a dumb question at all! I just use water - brush it onto the spots where I want the ‘rust’ to show through and sprinkle salt on top! Once it’s dried the crusty salt makes the mask and you’re all set! I’ll typically move the wet salt around with a brush a little to get it to ‘clump’ exactly where I want it to, but nothing fancier than that. Taking a break from the bench - had a solid 4 hours of messing with the dash today ??. Drilled out the moulded-in switches and rivets, primed and then shot with Createx brown: Again, add salt, and shot with a variation of the light blue that I used already on the body: Remove salt: Add a decal, because why not, and some BMF for the gauge cluster: And then I finished it off with some brass rivets, metal rings around the gauges and a little keychain with a NYC tourist “I ❤️ NY” heart shaped keychain and a photoetched key: Hardest part was that stupid keychain - took forever to loop the keys onto the chain ??? A fun little detail tho! More soon, soon as my eyes recover ??
-
What did you see on the road today?
OldNYJim replied to Harry P.'s topic in General Automotive Talk (Trucks and Cars)
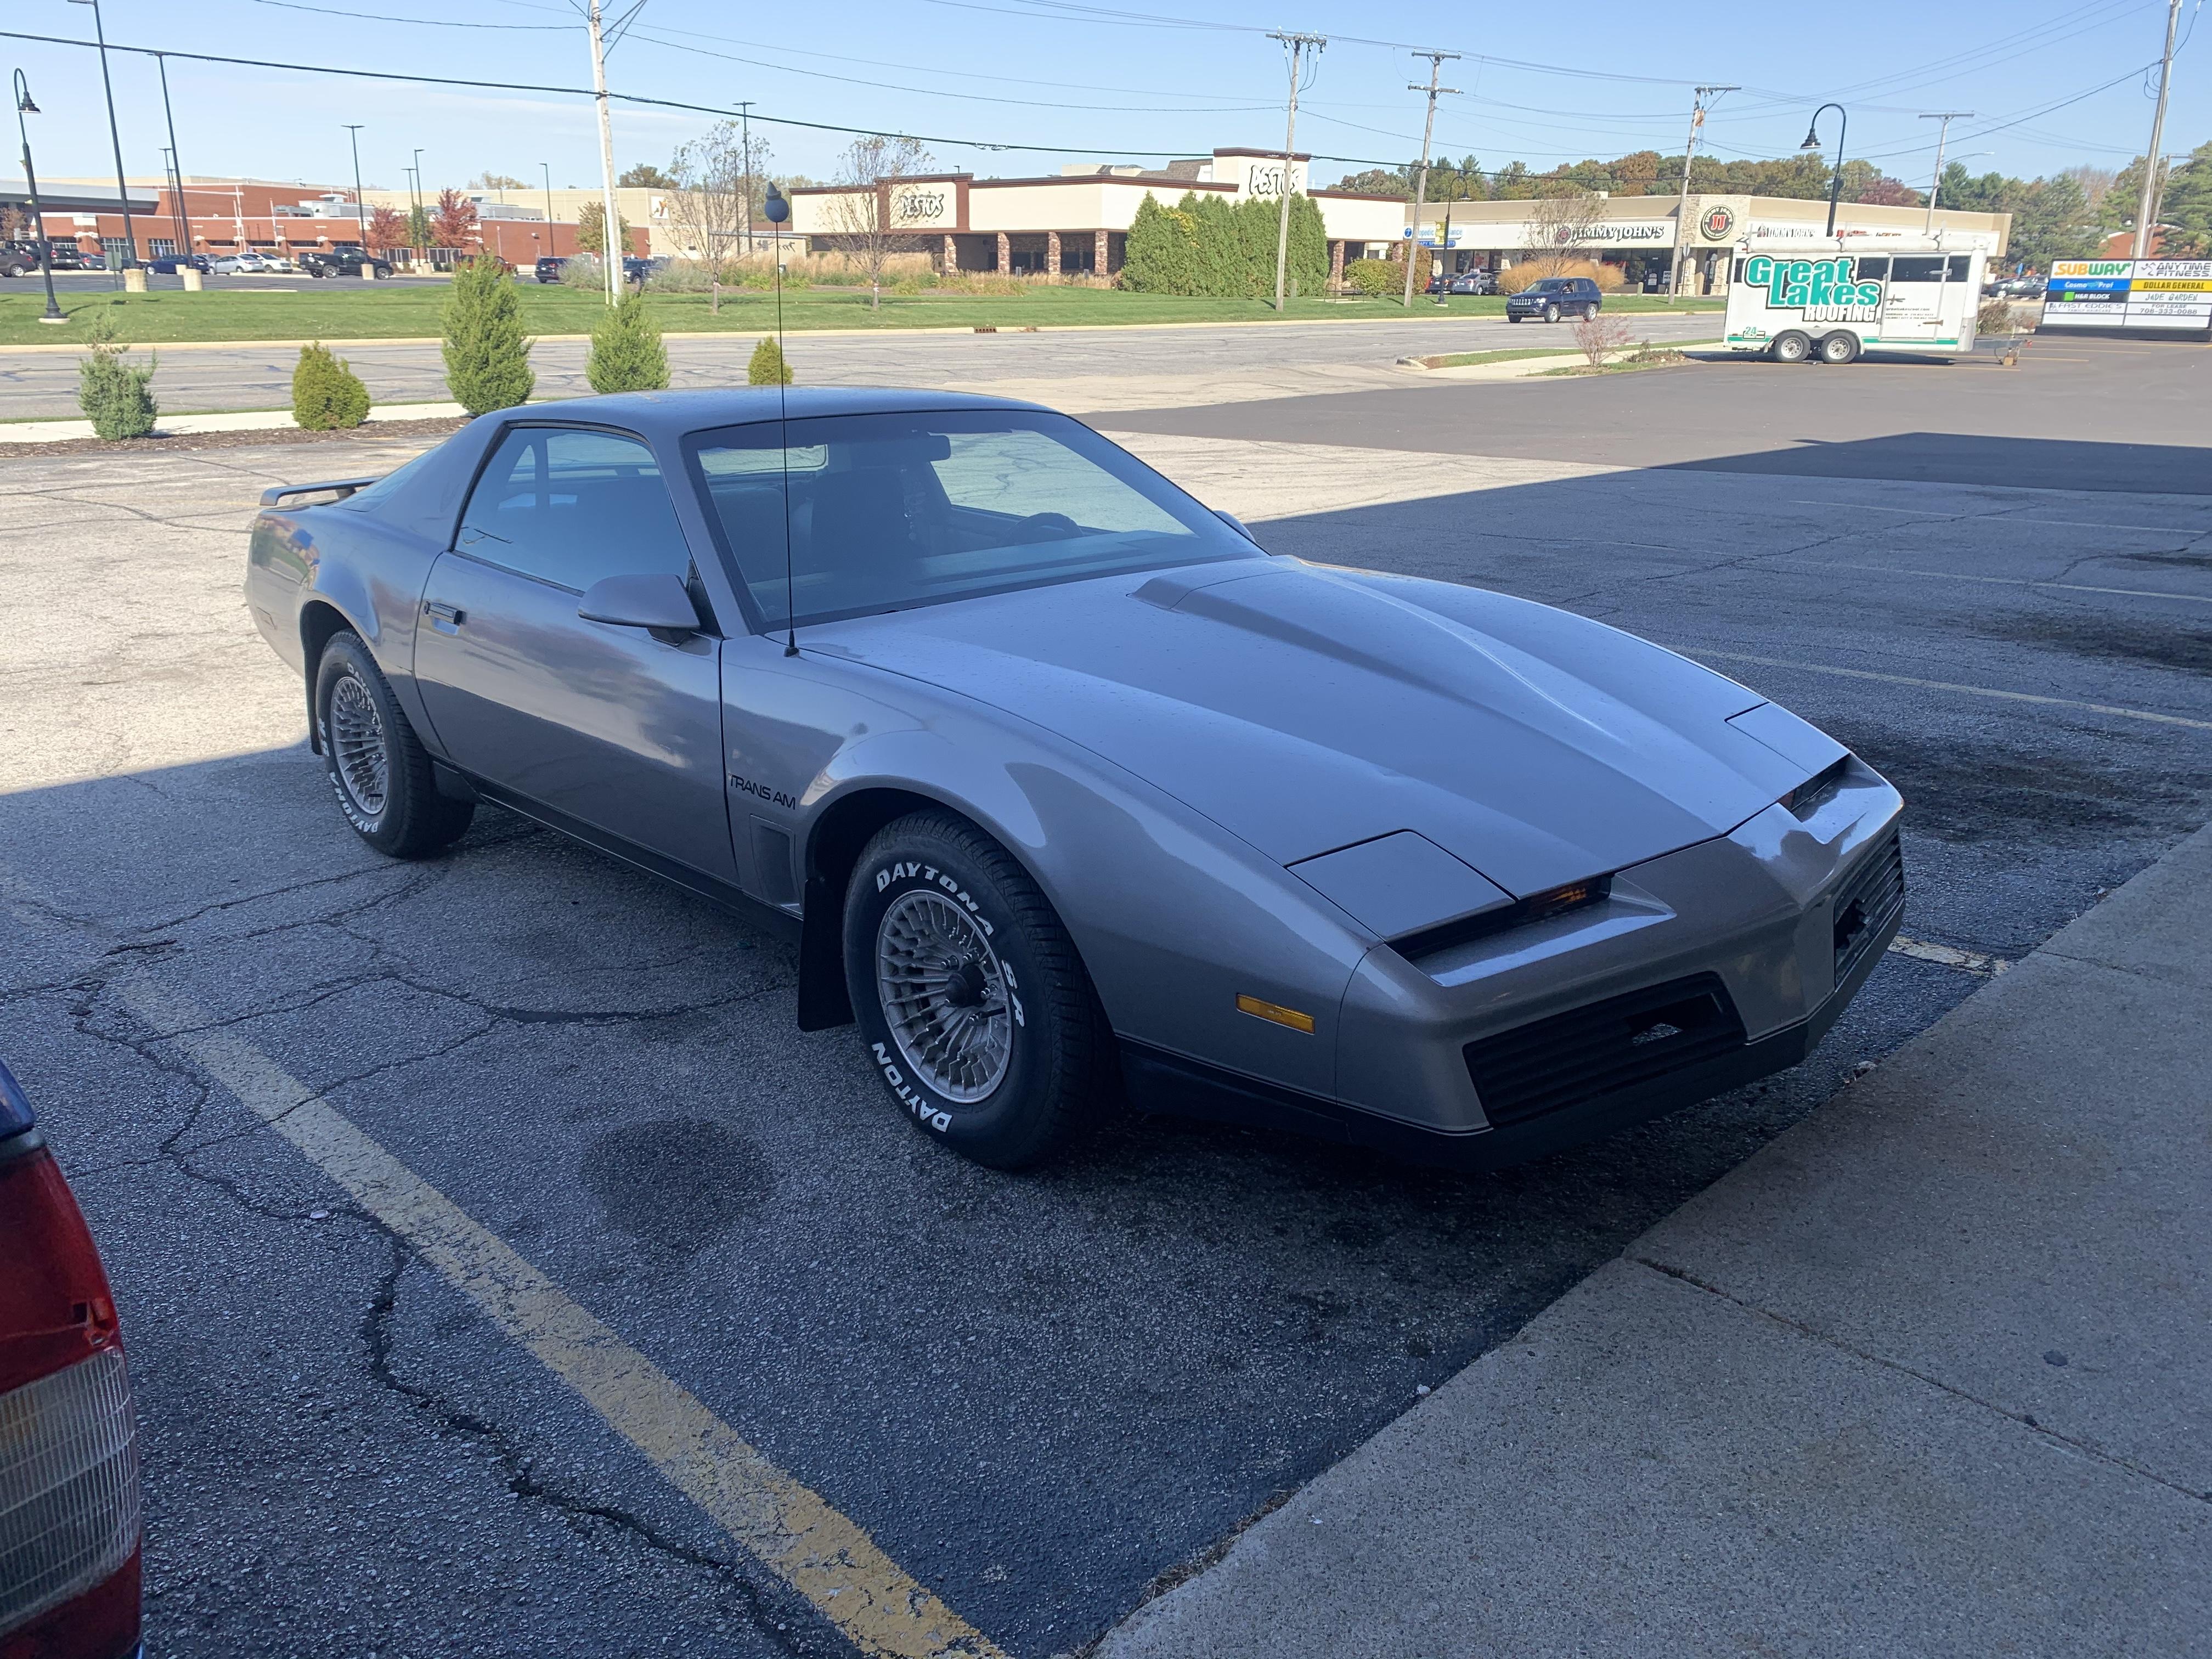
Outside the Autozone by us...not SUPER interesting, but I’d still be happy to own one!
-
1929 Ford Sport Coupe hot rod -update 10/4
OldNYJim replied to Rocking Rodney Rat's topic in WIP: Model Cars
Looking really cool so far - nice engineering! -
I think you fellas are right! Going to figure out something for the rear wheels! Thanks for all the comments (and good styling tips!)
-
LOVE the 1:1, so I’m sure the scale version will be GREAT too! Nice start!
-
Ohhh, good point! I hope it’s an Impalacycle! ??
-
Patina’d 34 Pick Up
OldNYJim replied to OldNYJim's topic in WIP: Model Trucks: Pickups, Vans, SUVs, Light Commercial
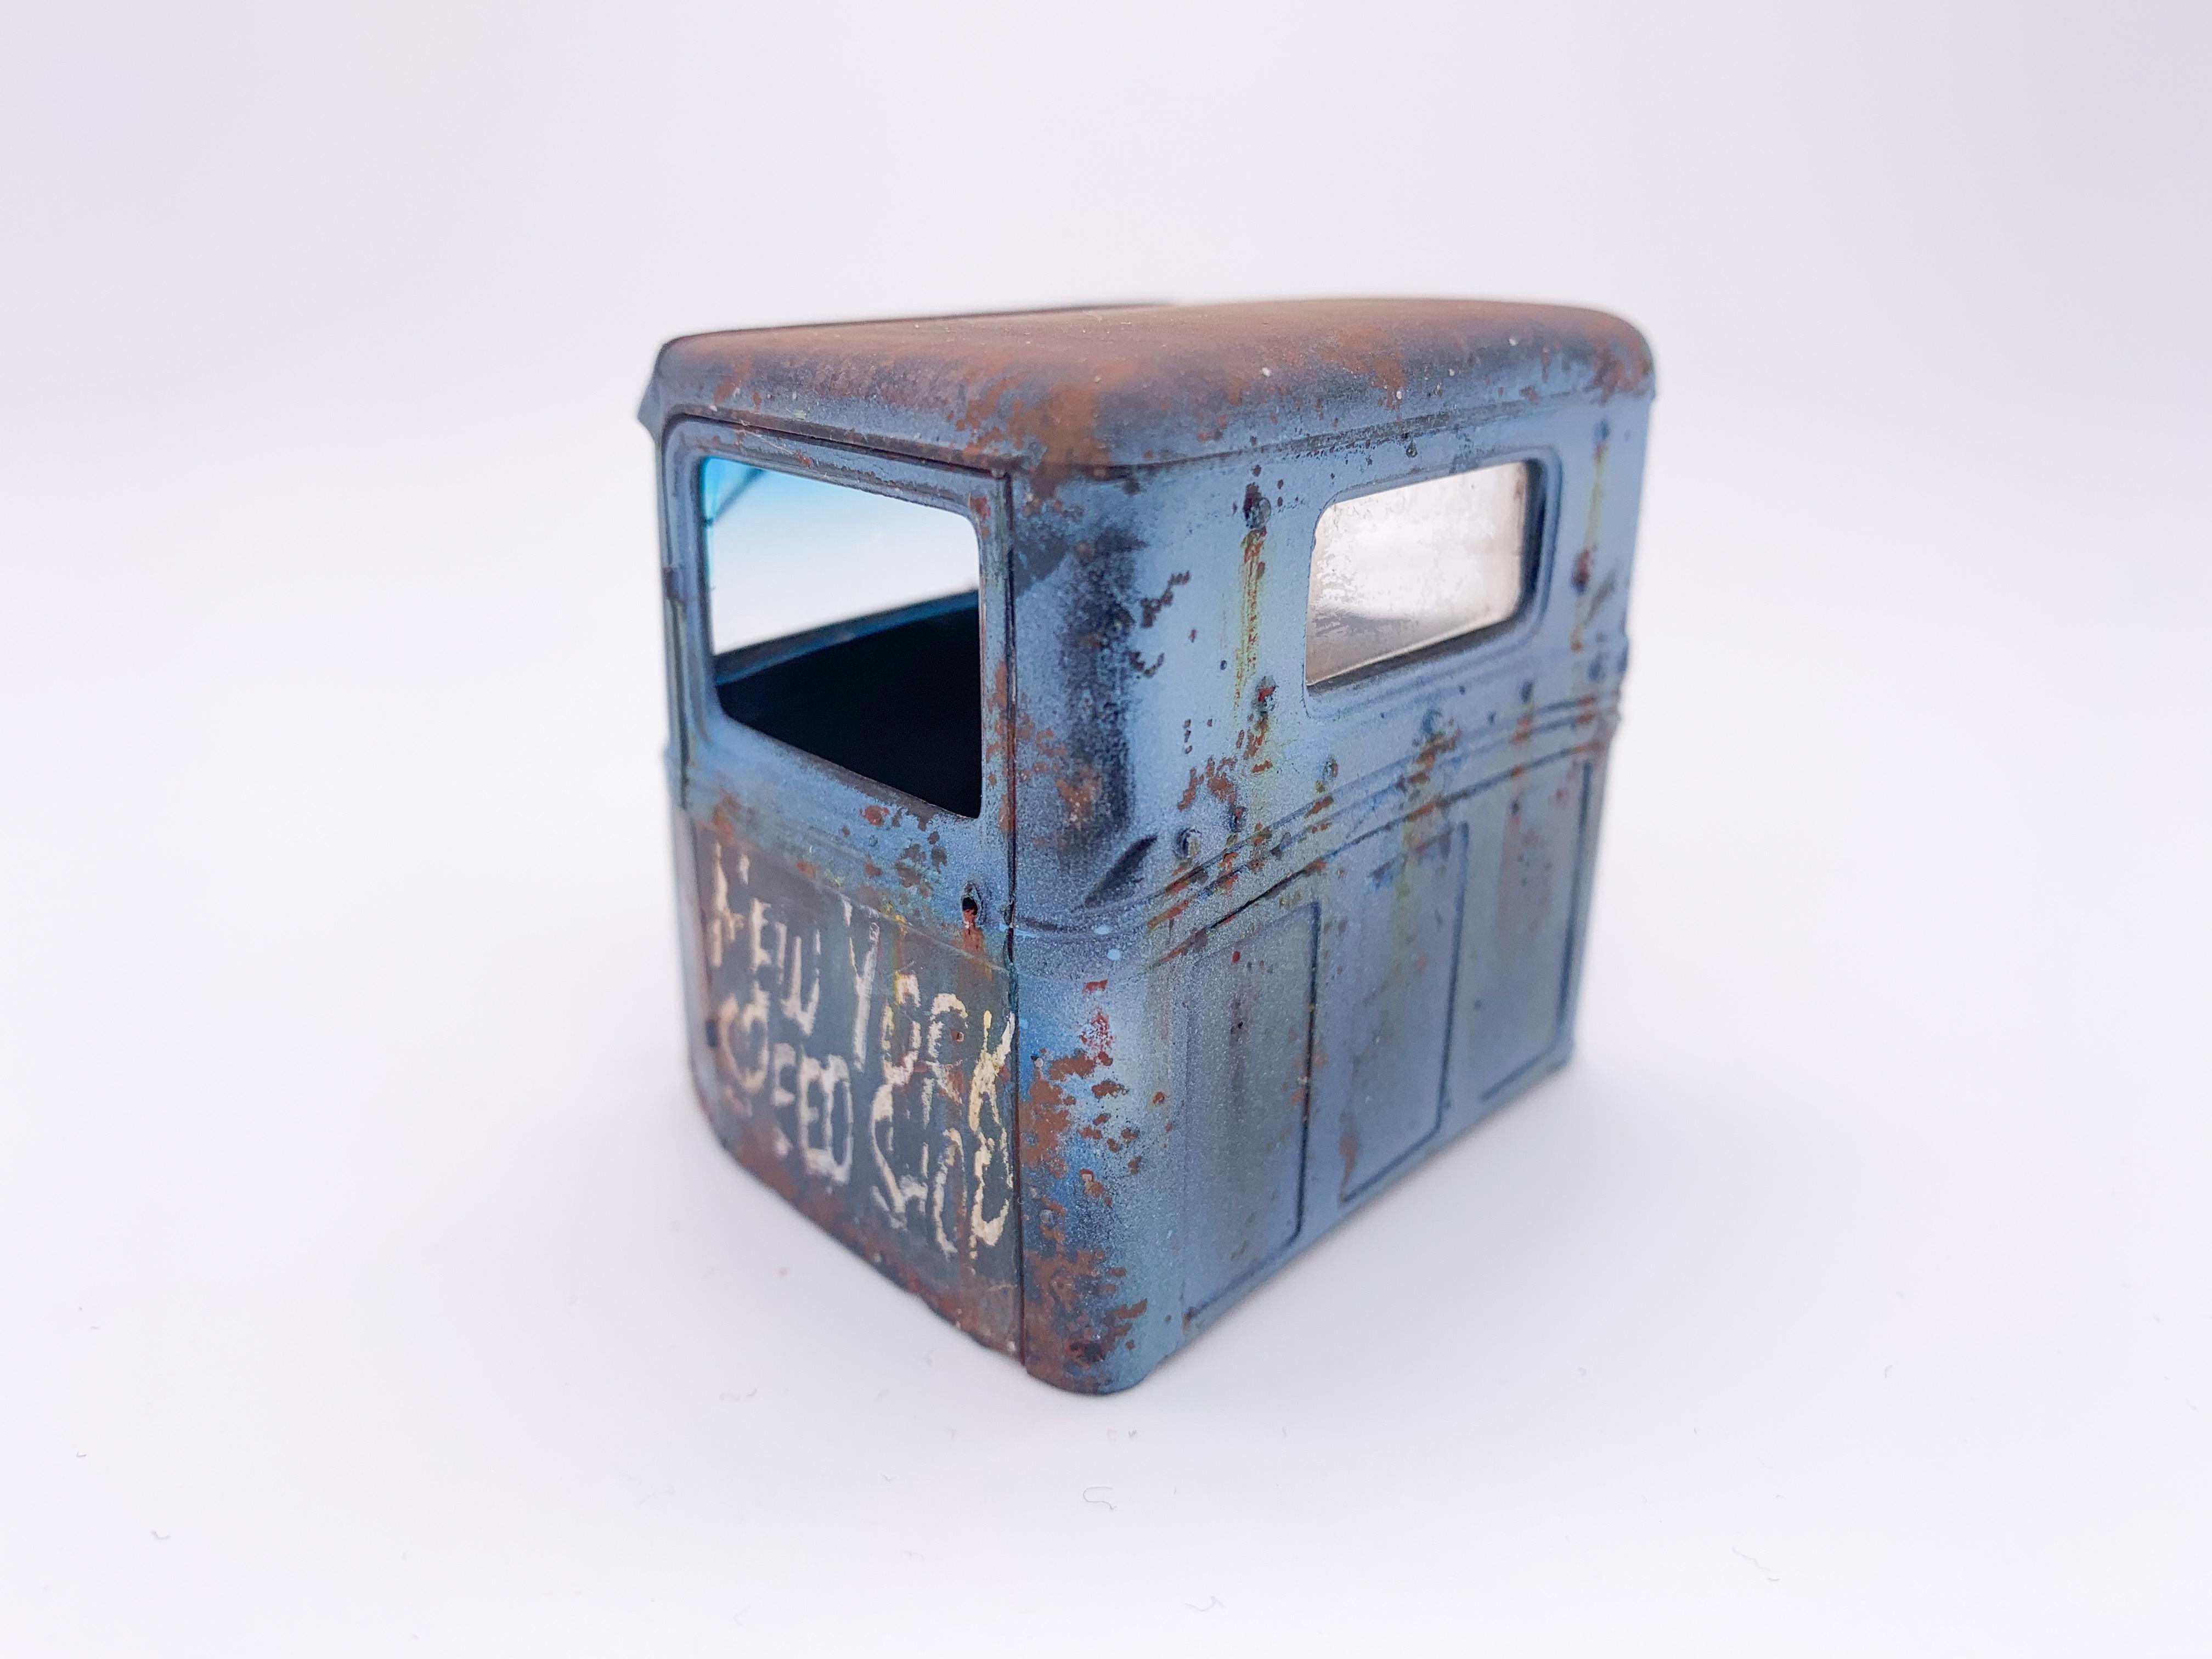
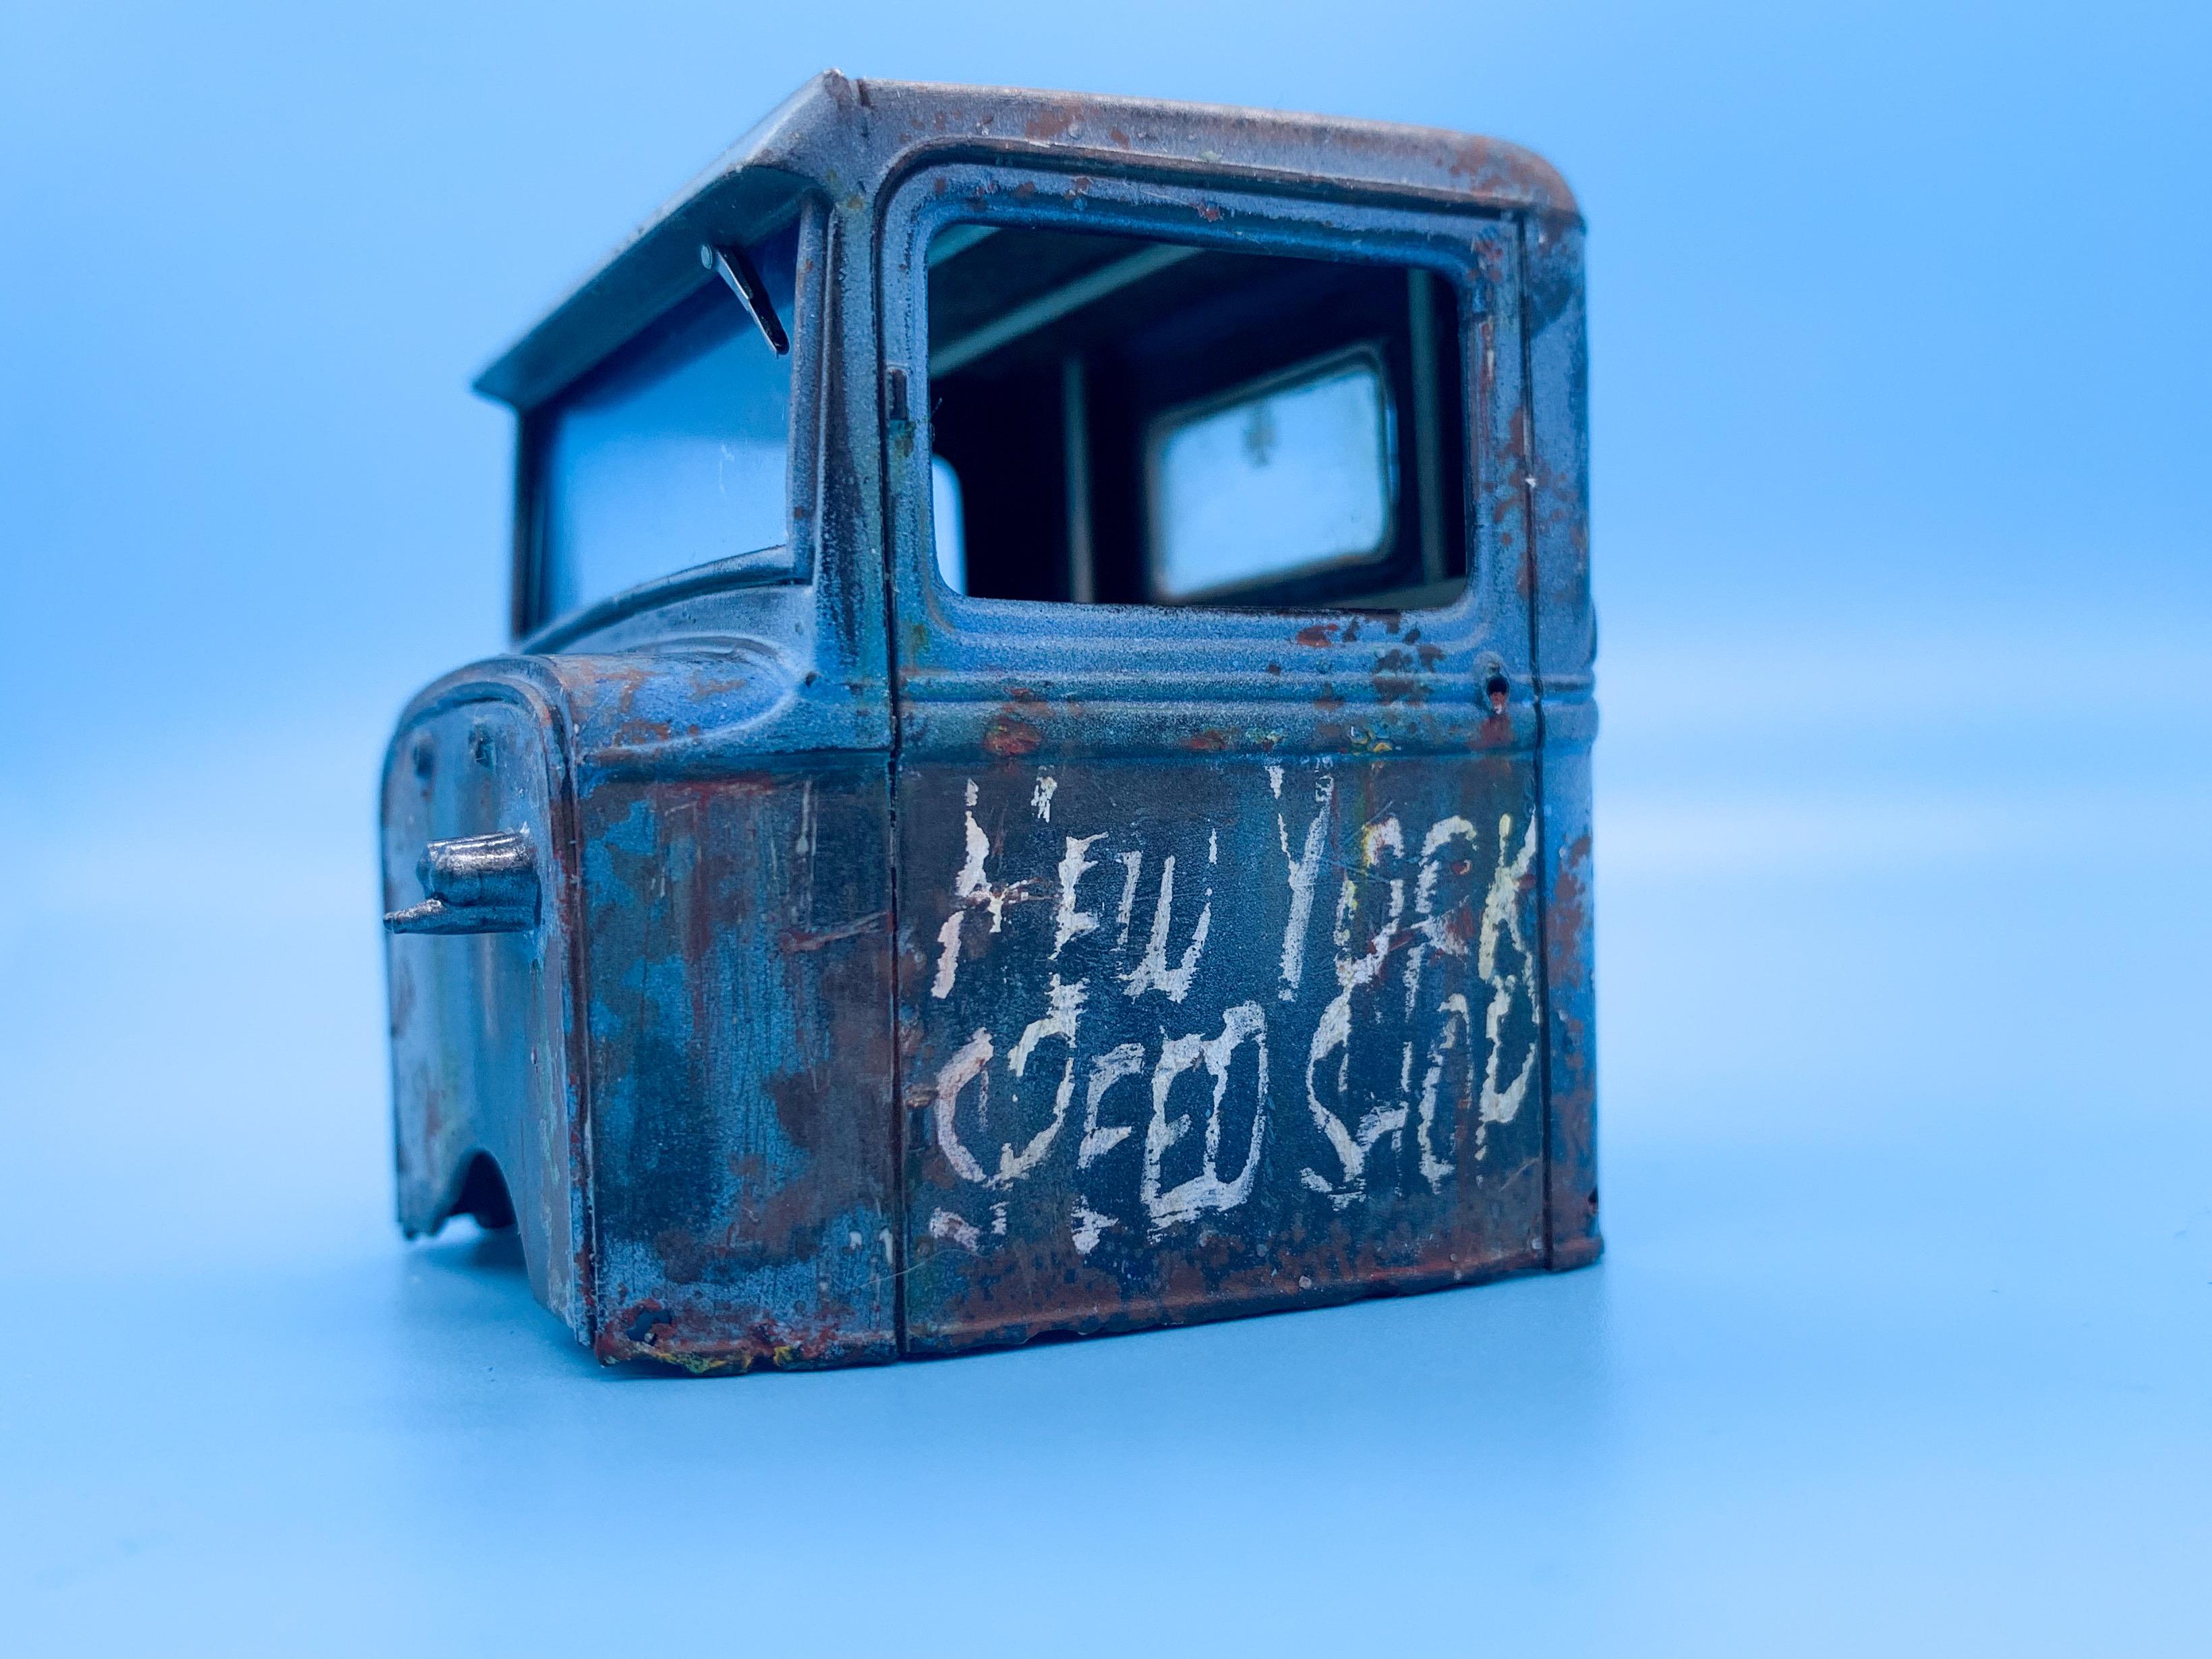
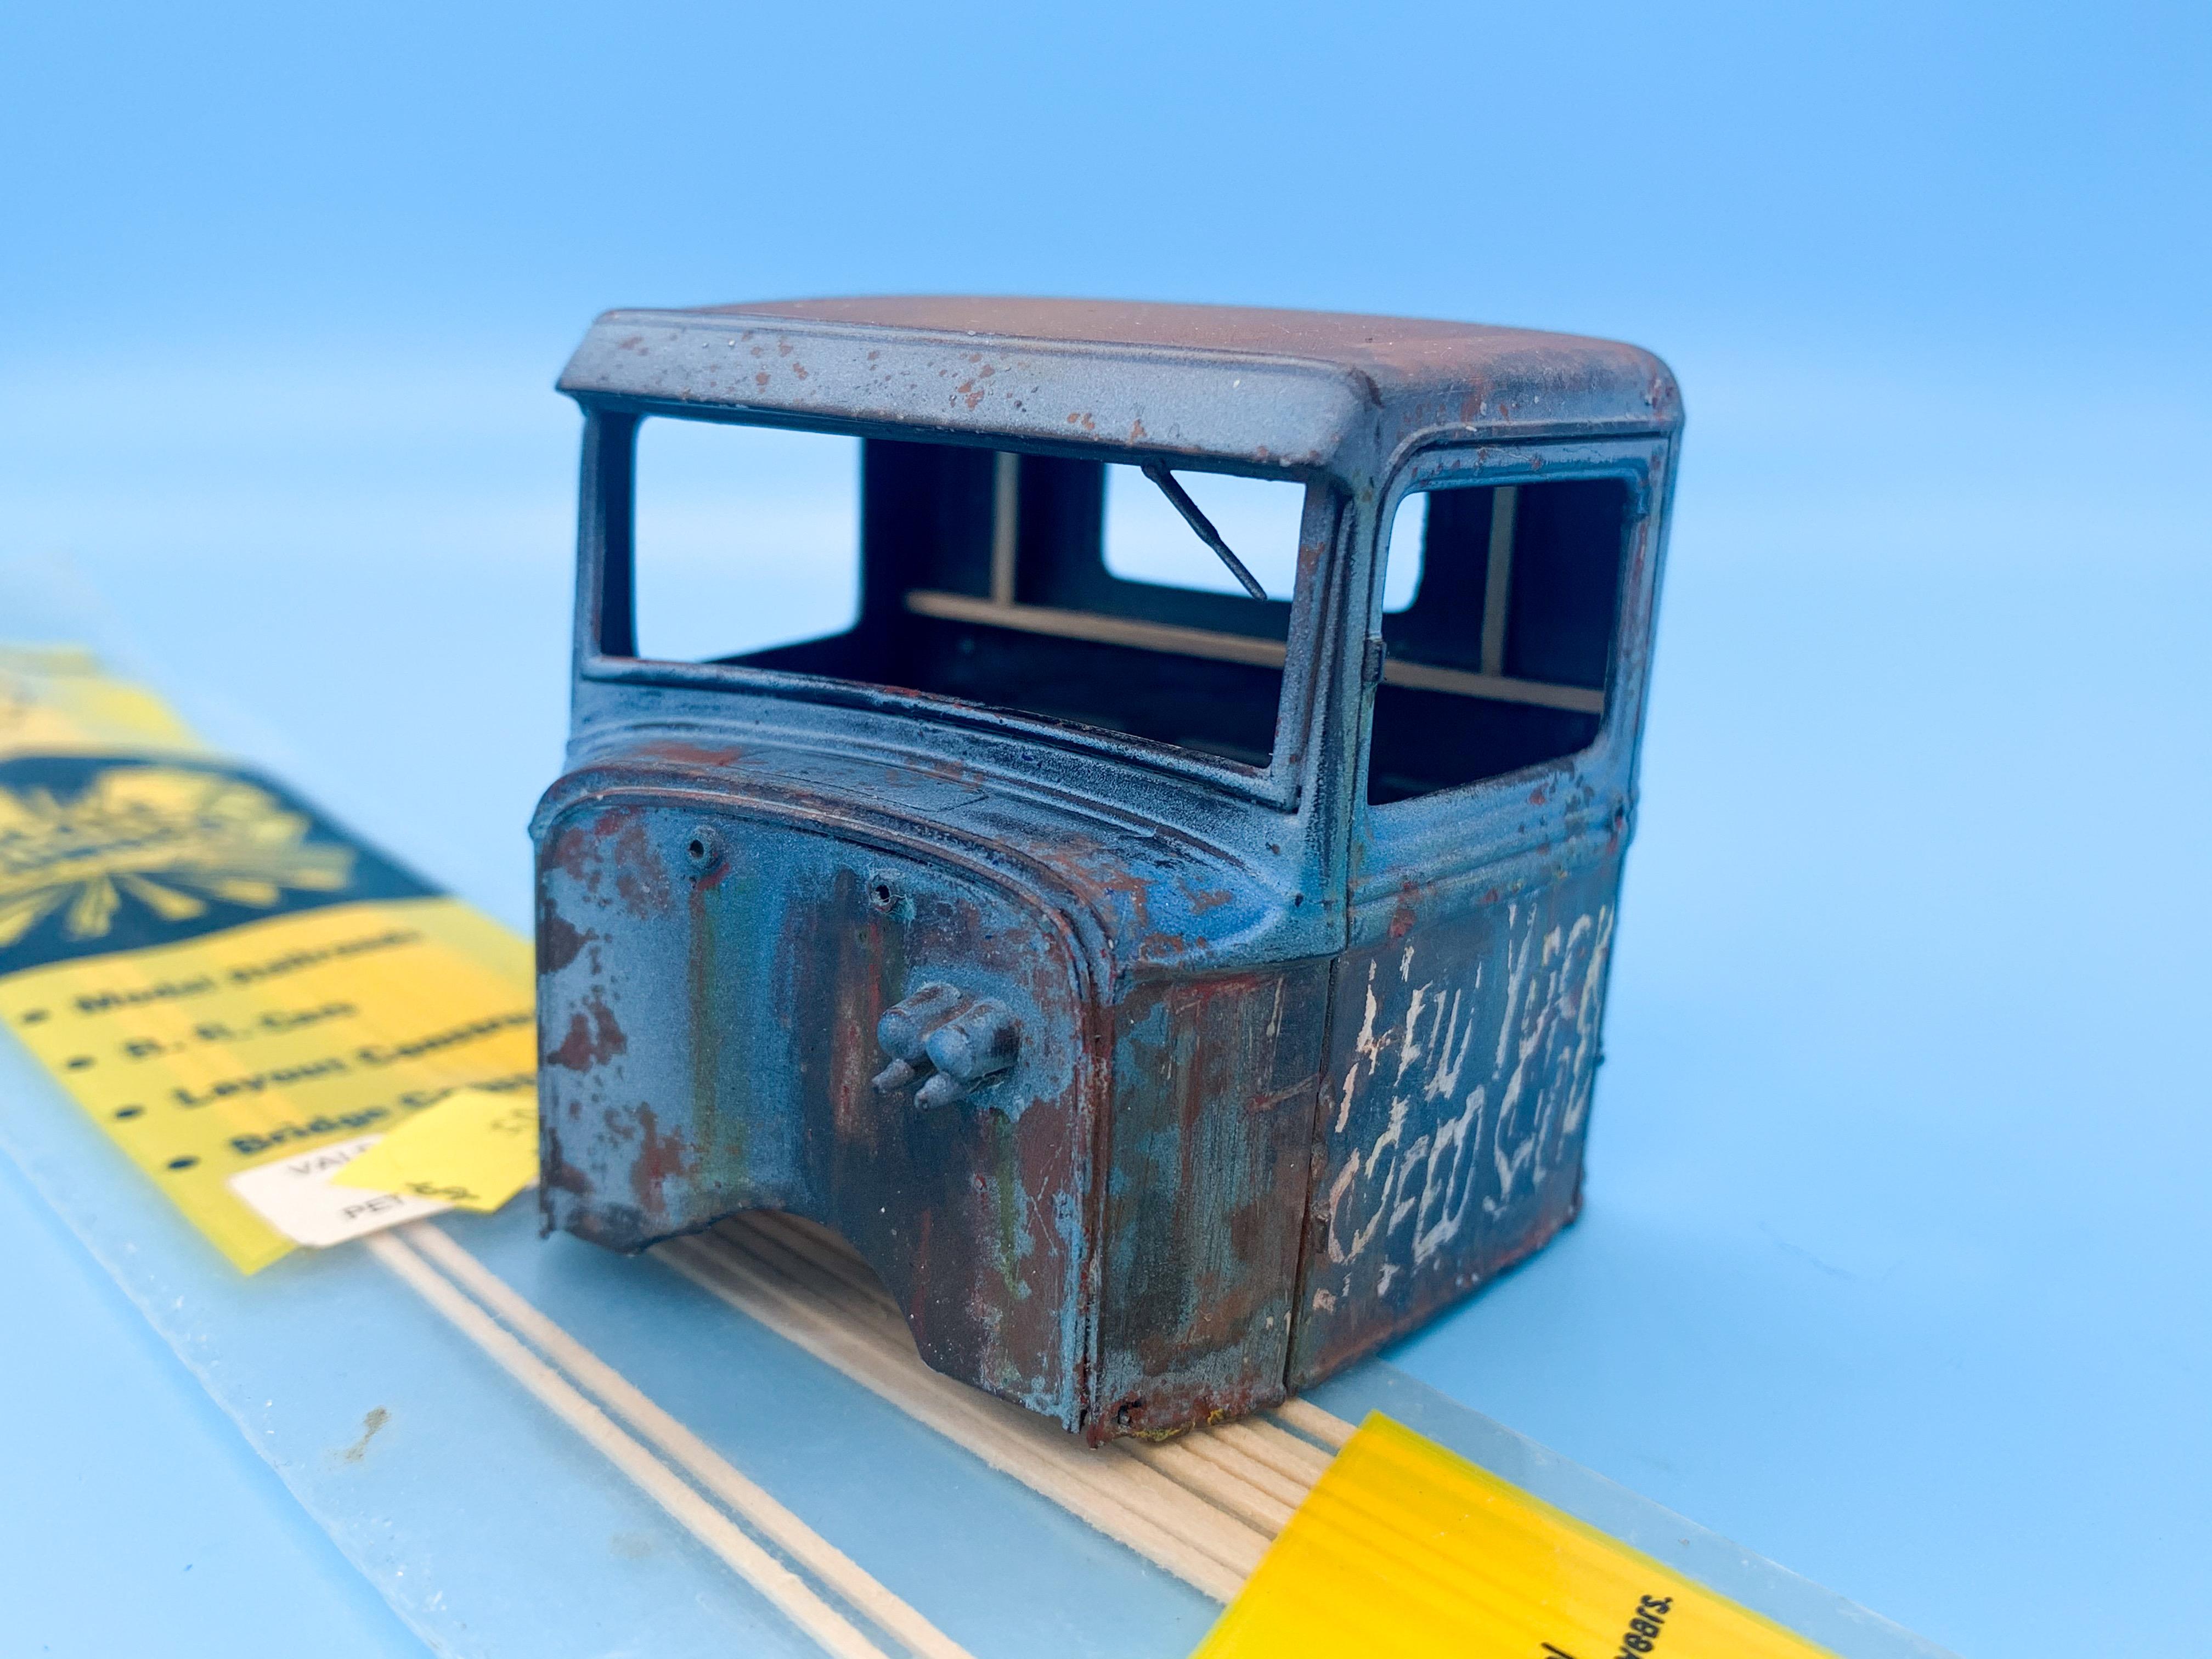
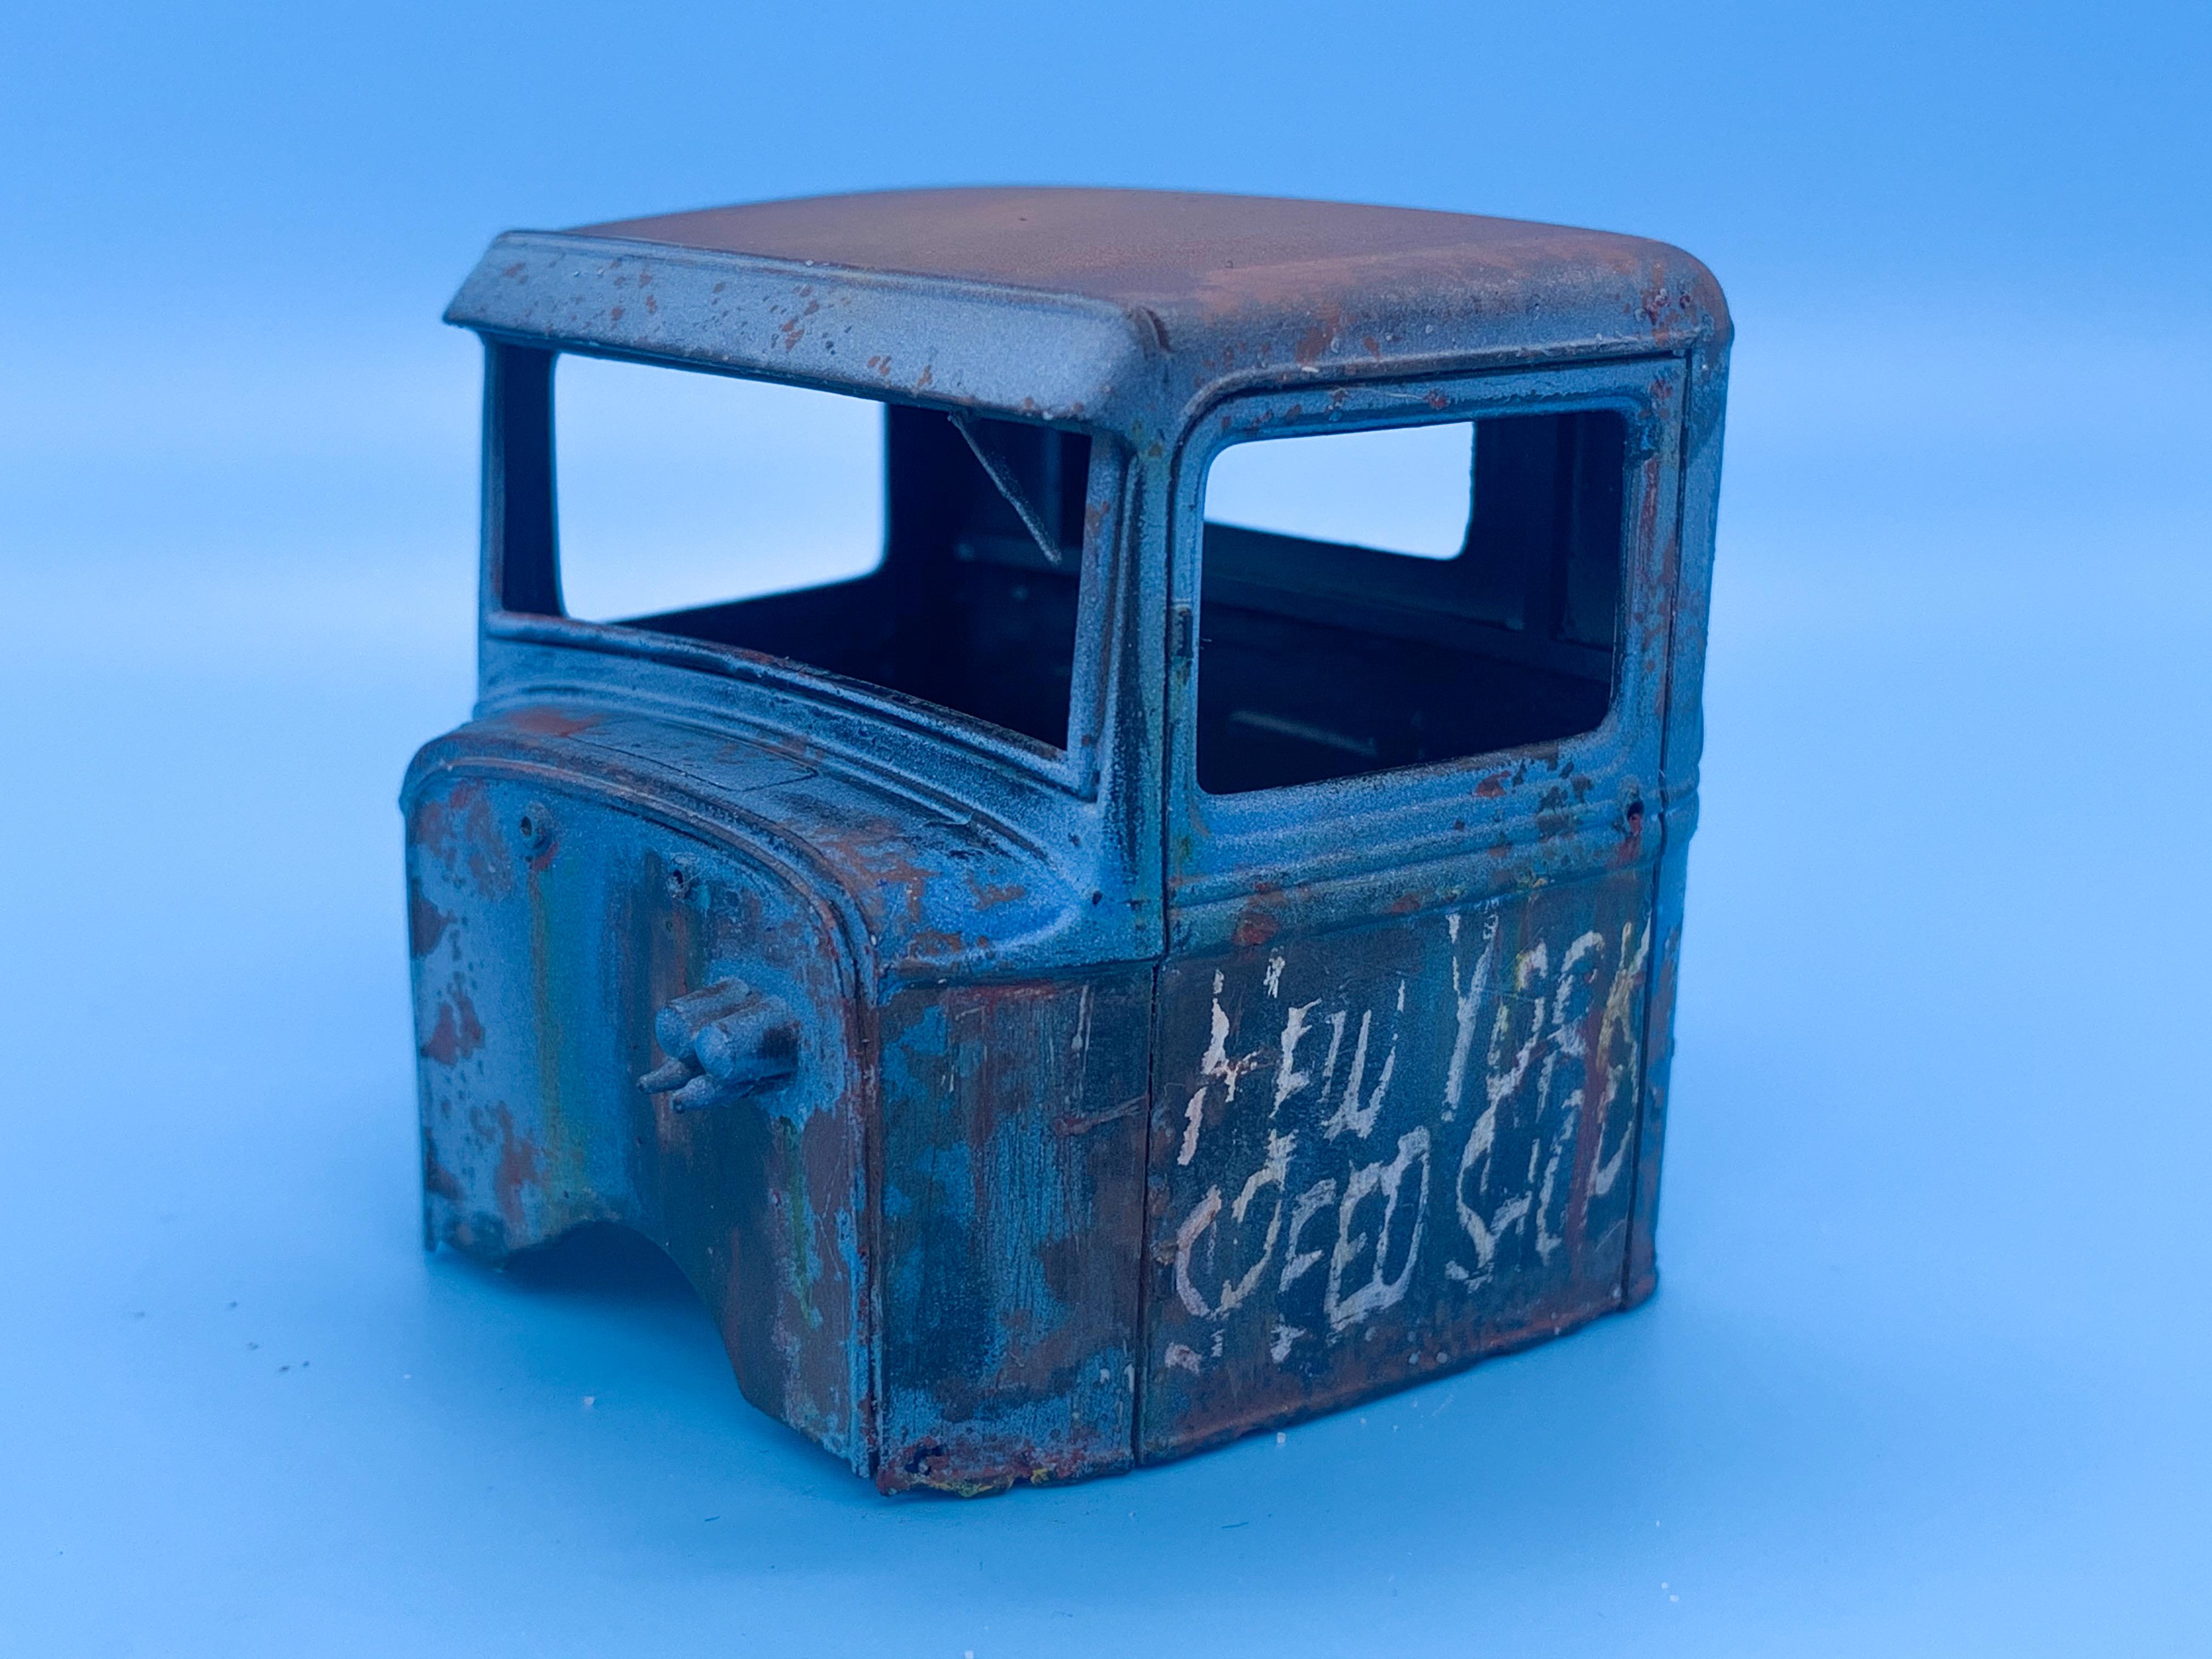
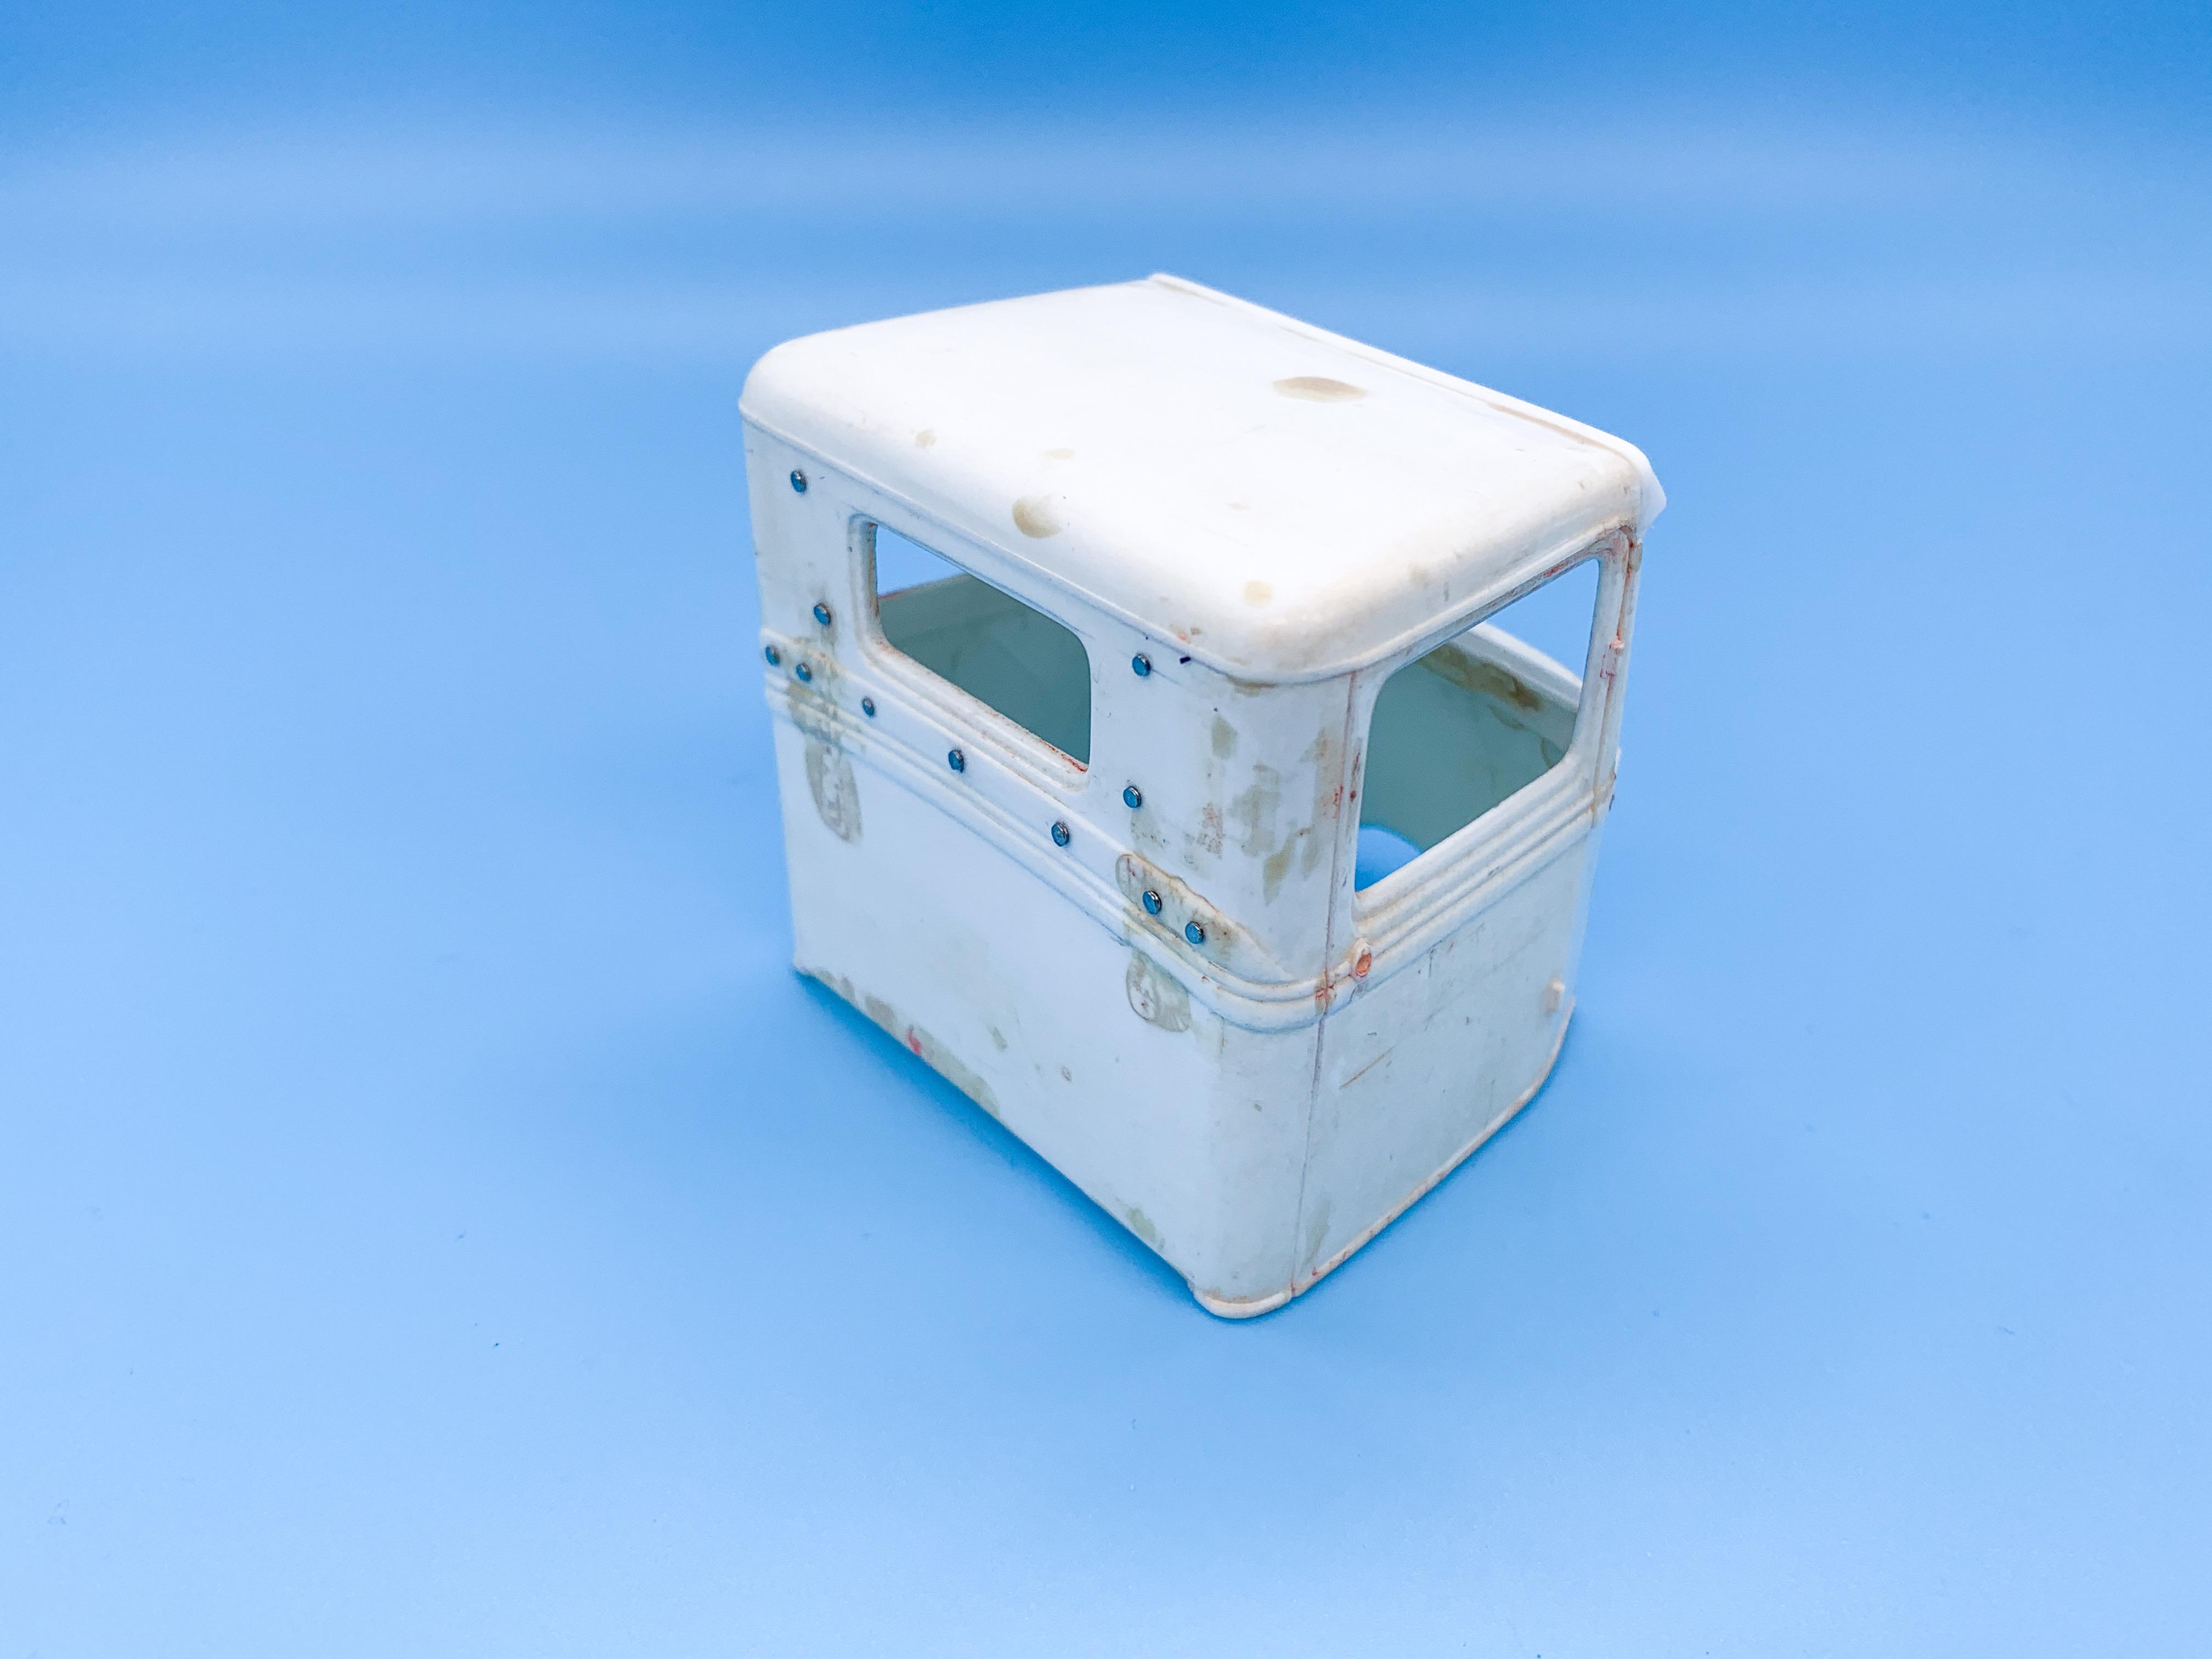
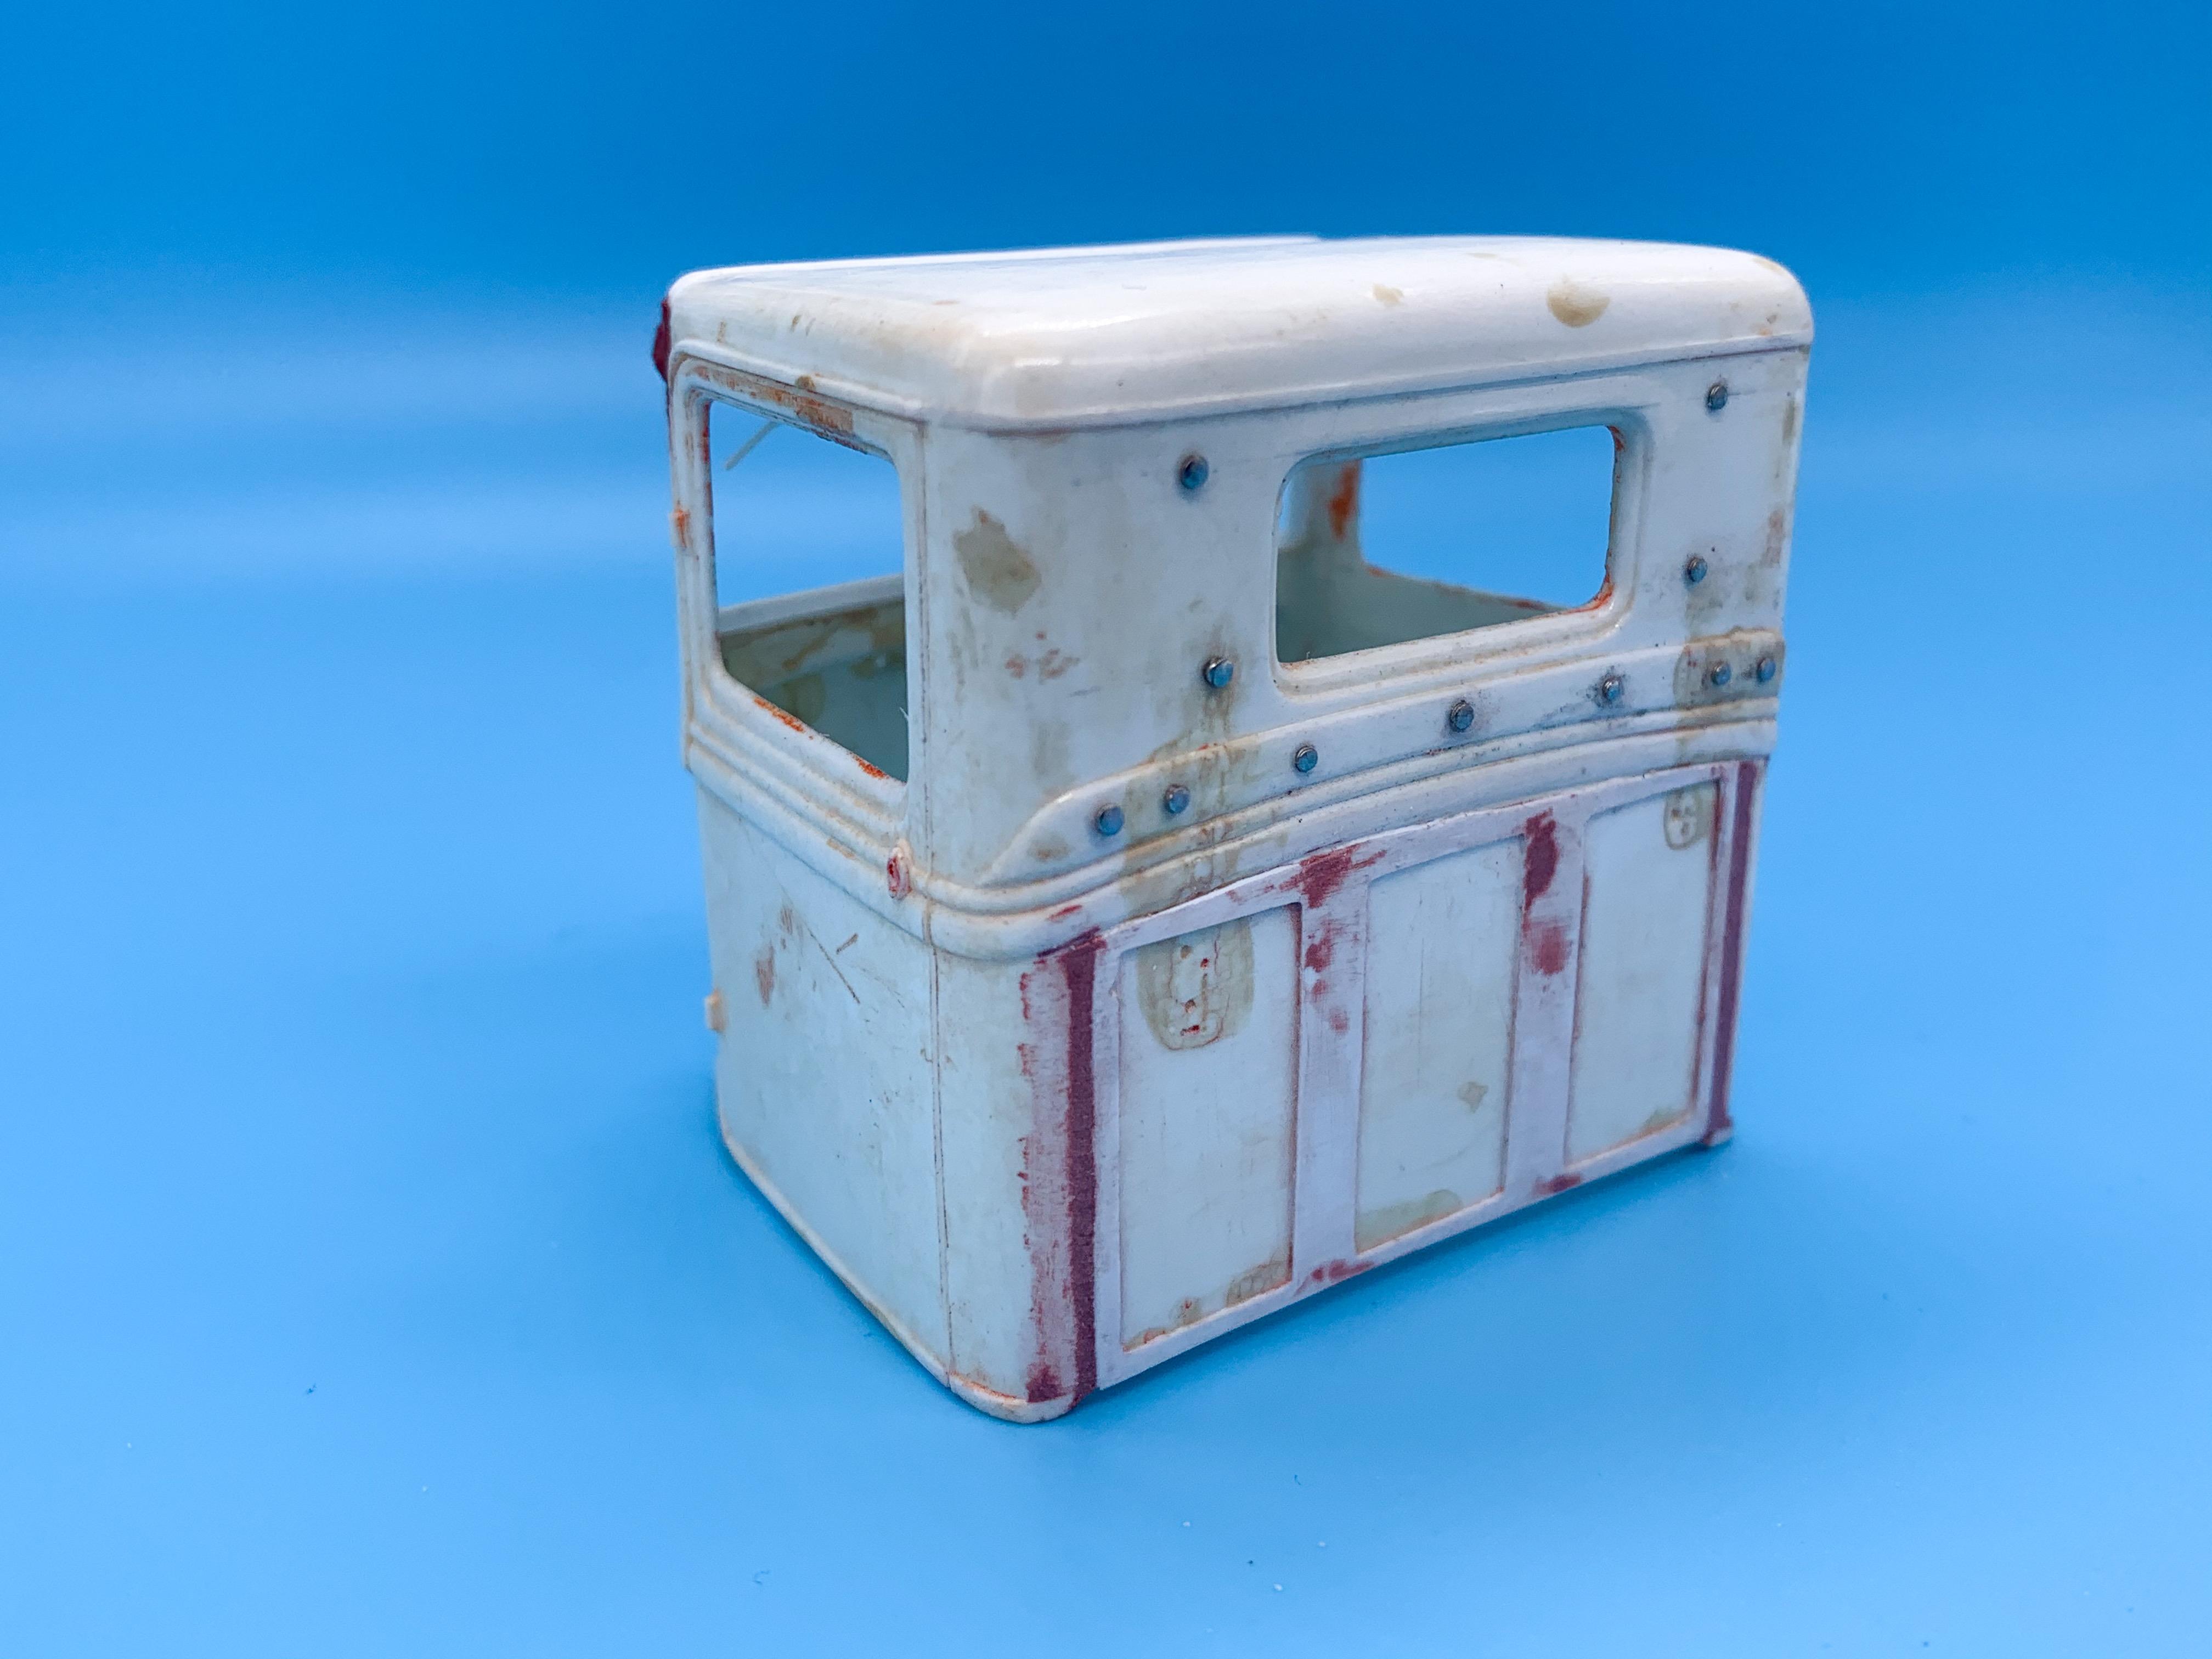
Oh man, I’m no good at this stuff, I never quite nail it how I want - but I found that looking for reference pics and kinda copying the finish and colors and textures is helping me with this one Haha! And you KNOW they’d try and lowball me and then make a killing on it ??. Thanks buddy! Thank you! ? Hot rods for life indeed!!! Tiny bit of progress today - stoopid cat woke me up at four am for nothing in particular so I wasn’t very productive. A three hour nap helped but by then it was dinner time and I still hadn’t done much ??. Still... Added window cranks and door handles to the inner door panels, along with a half-wound-down (half-wound-up?) yellowed old window on the passenger side for an extra bit of interest.... I figure this being a hot rod shop truck they had to do some maintenance on it at some point so there’s some shiny new bolts in there along with some weathered ones. Also added some of the wood braces to the interior - there’s actually more that should be in there than I’ve done so far but I’m not sure if they’ll be visible with the seats in - need to check: The backstory for this truck is maybe that it’s a current working shop truck for a modern day hot rod shop who can’t bring themselves to mess with that hard-earned patina too much...not really a barn find, kind of a “still working and looks cool” kinda aged build. Pieced together and rough, but not neglected either. I figured that the 80-something-year-old wood braces would be pretty rotten by now, so they made some replacements with nice clean new wood: I like the idea of having some REALLY ratty bits on this truck, but still having it look like it’s cared for and works and runs - a bit of a mishmash of new and old parts, so not everything is going to be quite as ‘tired’ looking as the bits I’ve done so far. That’s the plan anyway! Thanks for looking, more tomorrow if the cat doesn’t keep me up all night with his nonsense ??
-
VW Pick-up MOONEYES
OldNYJim replied to Eero's topic in Model Trucks: Pickups, Vans, SUVs, Light Commercial
I love it - the mix of patina and new shiny parts is really cool - and I love the color scheme! Nice work!! -
Patina’d 34 Pick Up
OldNYJim replied to OldNYJim's topic in WIP: Model Trucks: Pickups, Vans, SUVs, Light Commercial
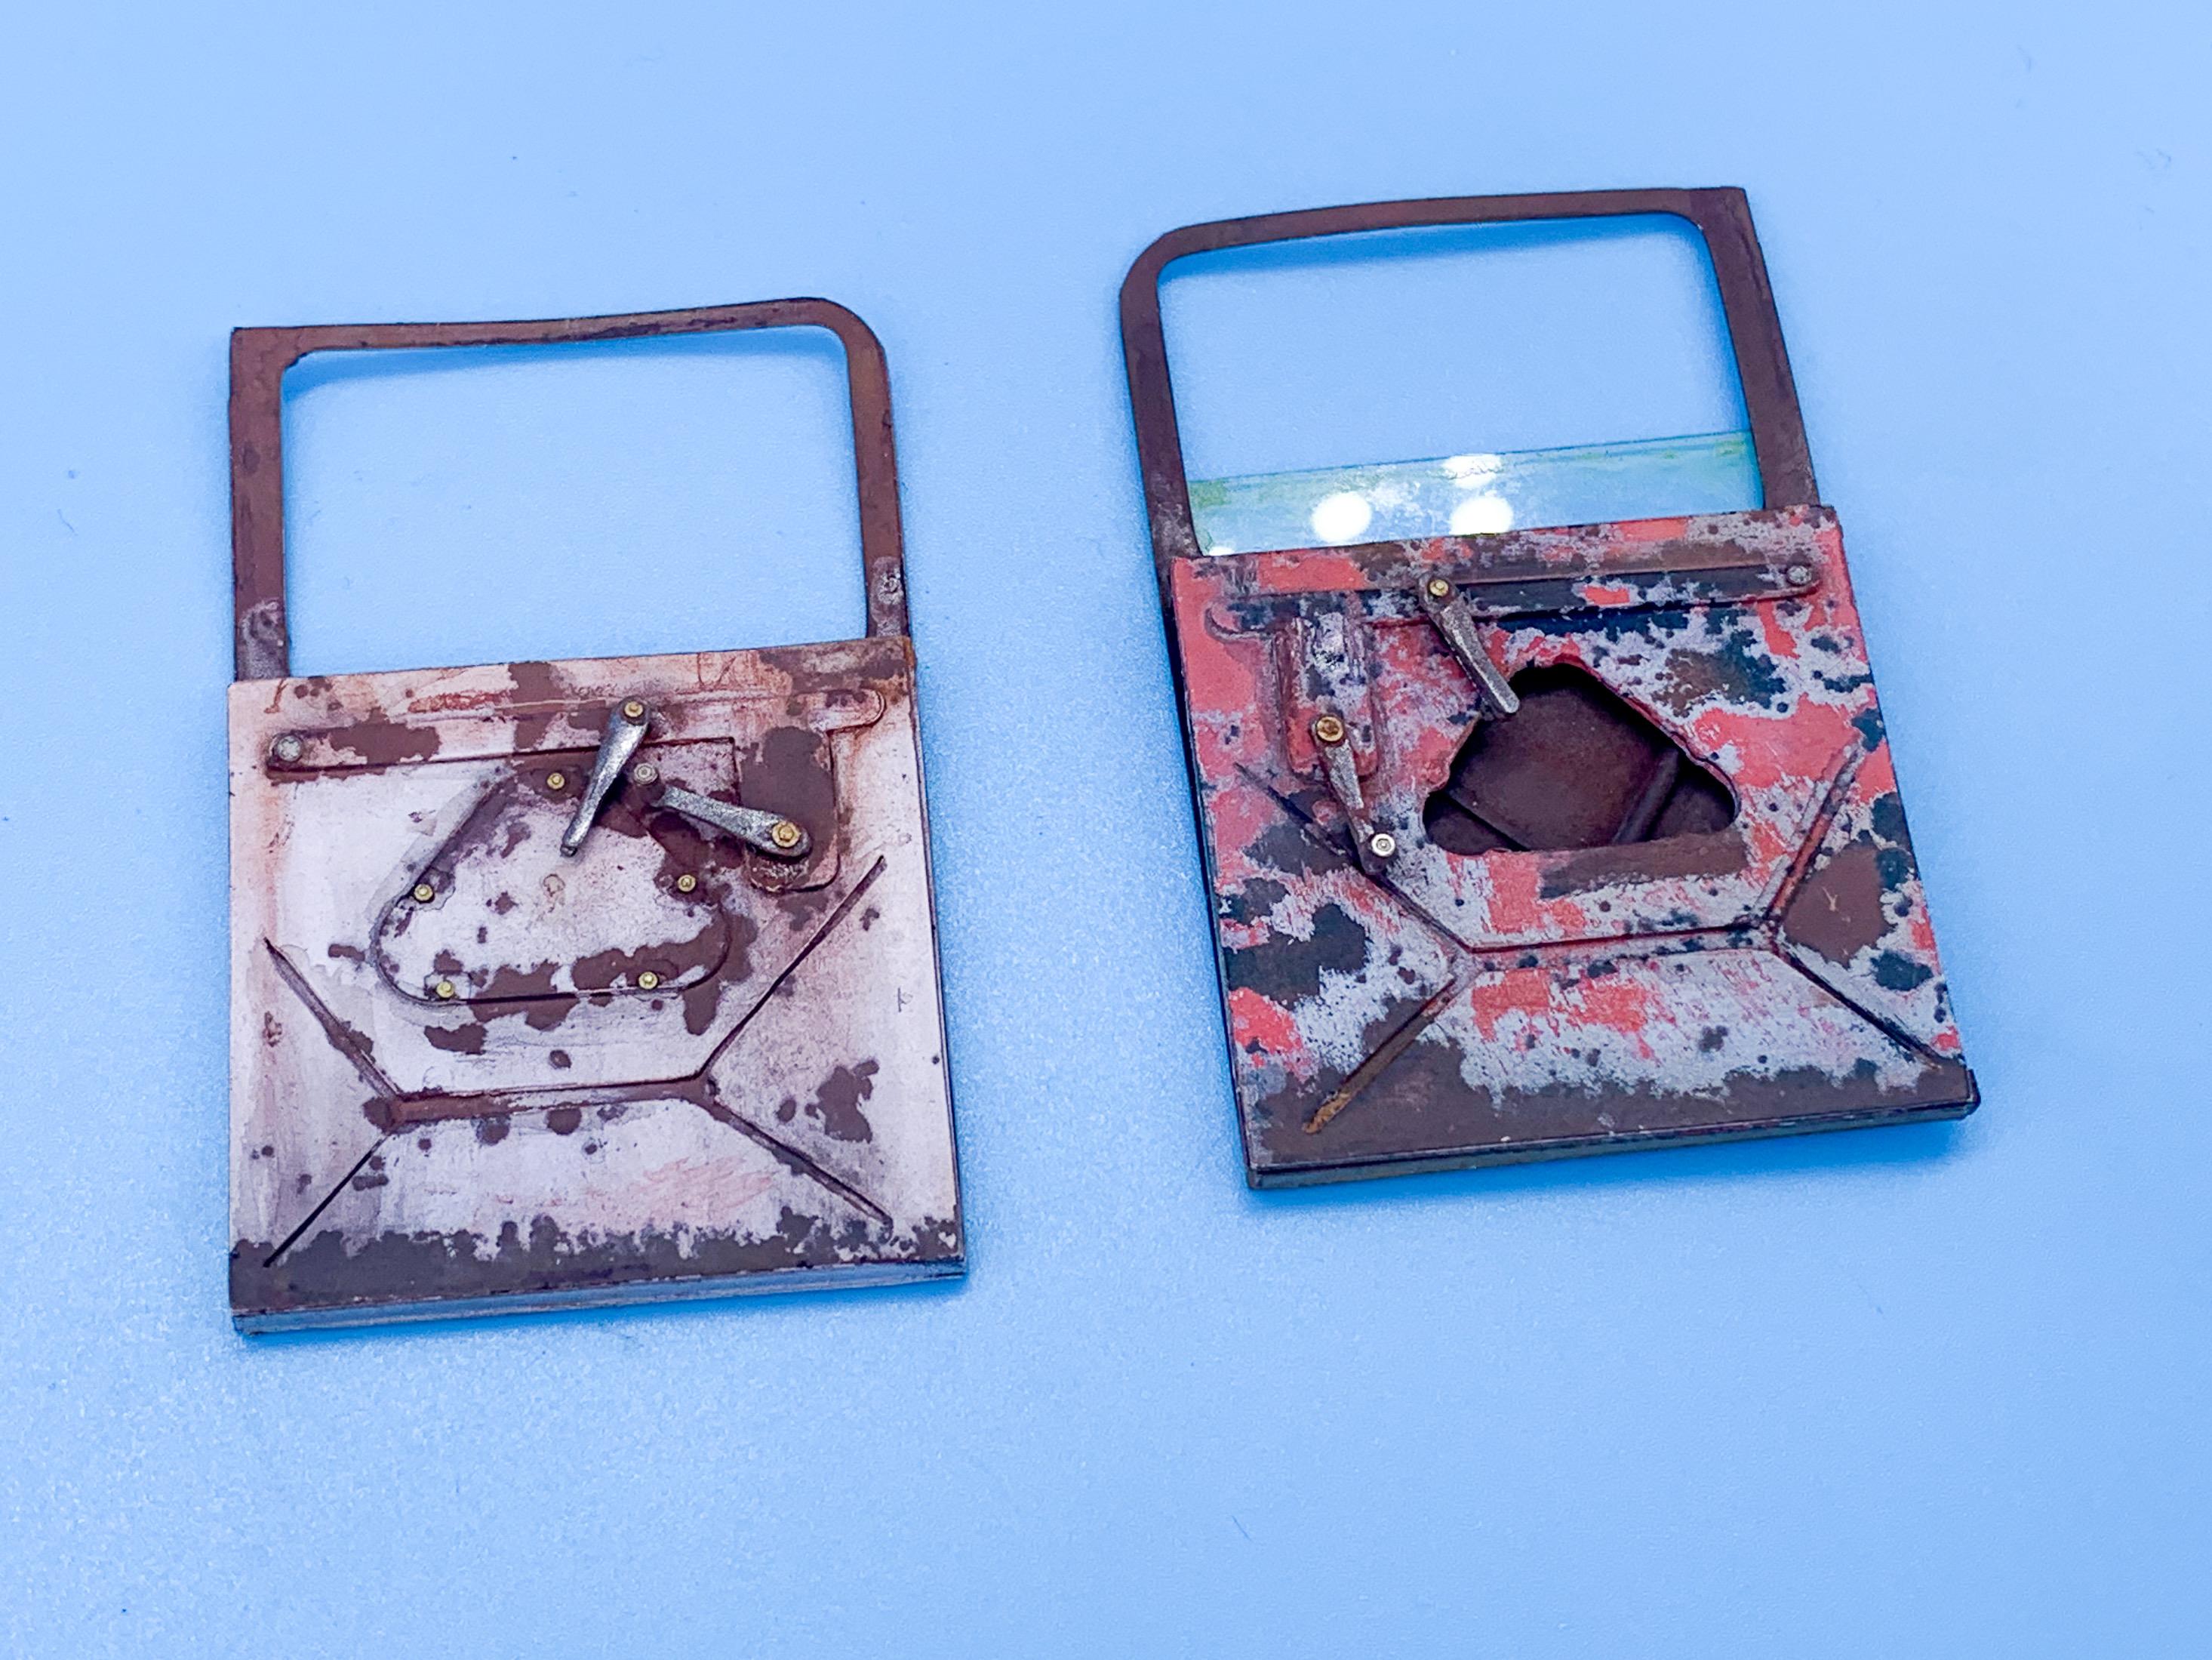
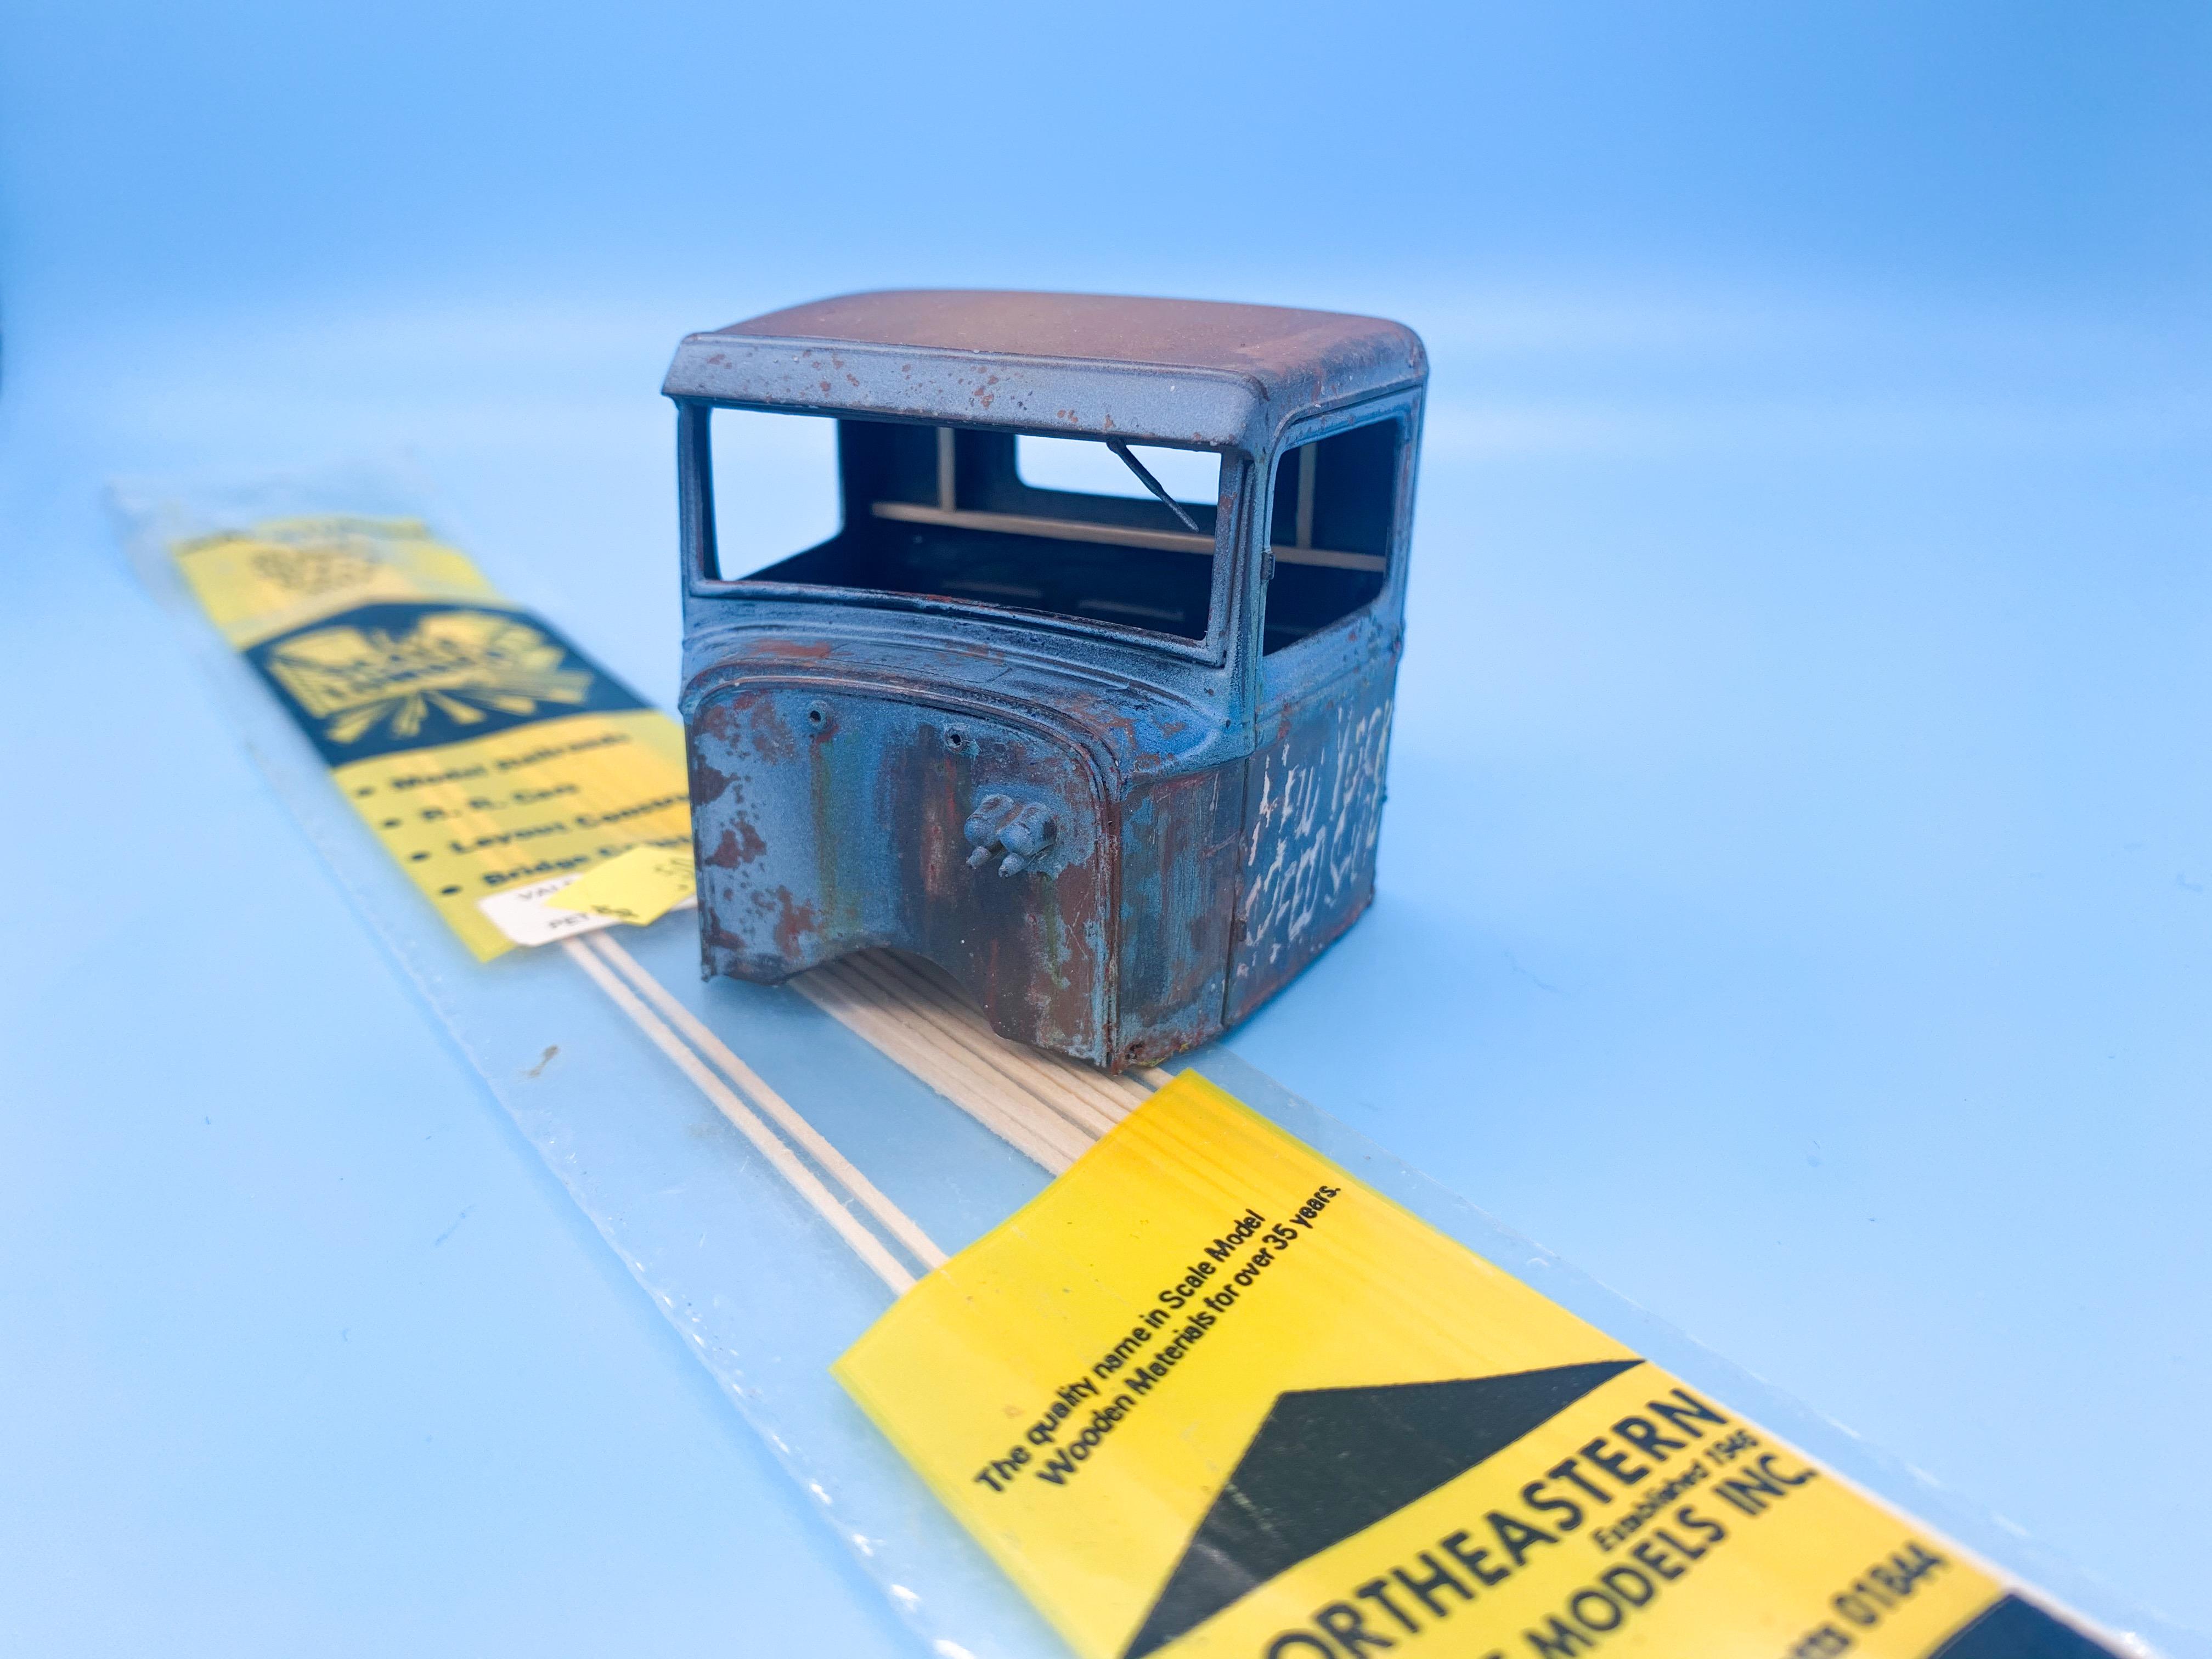
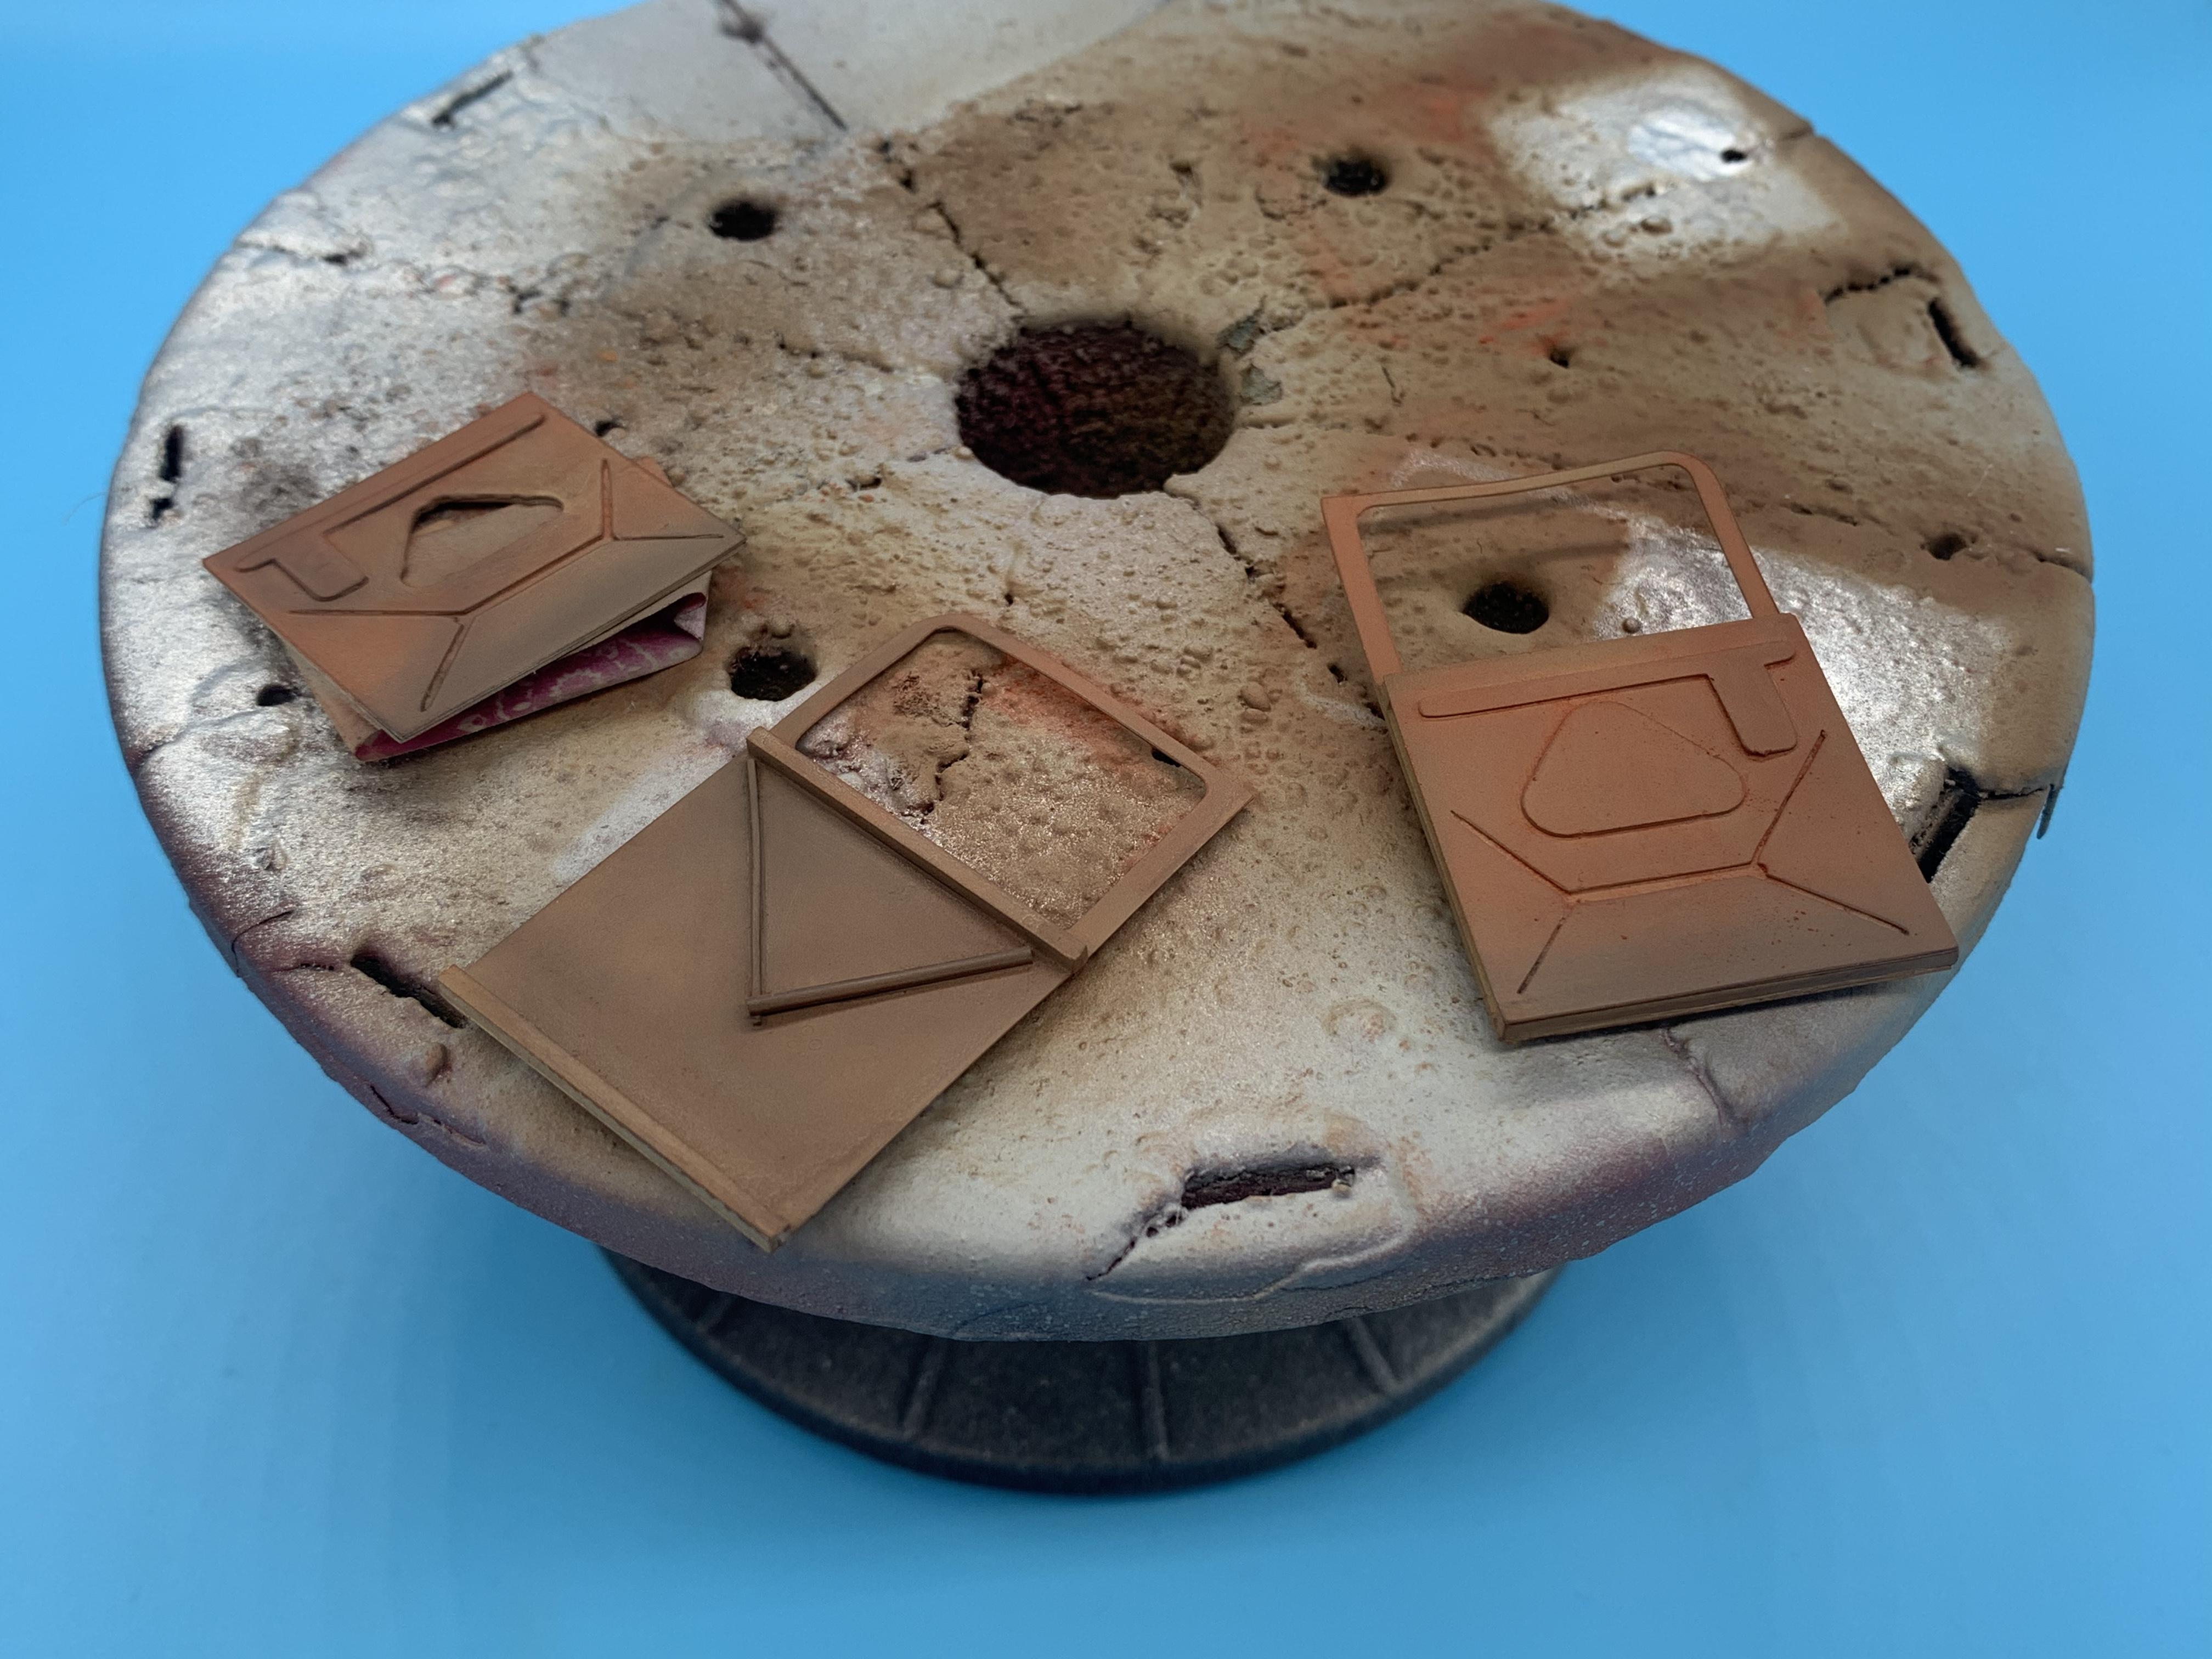
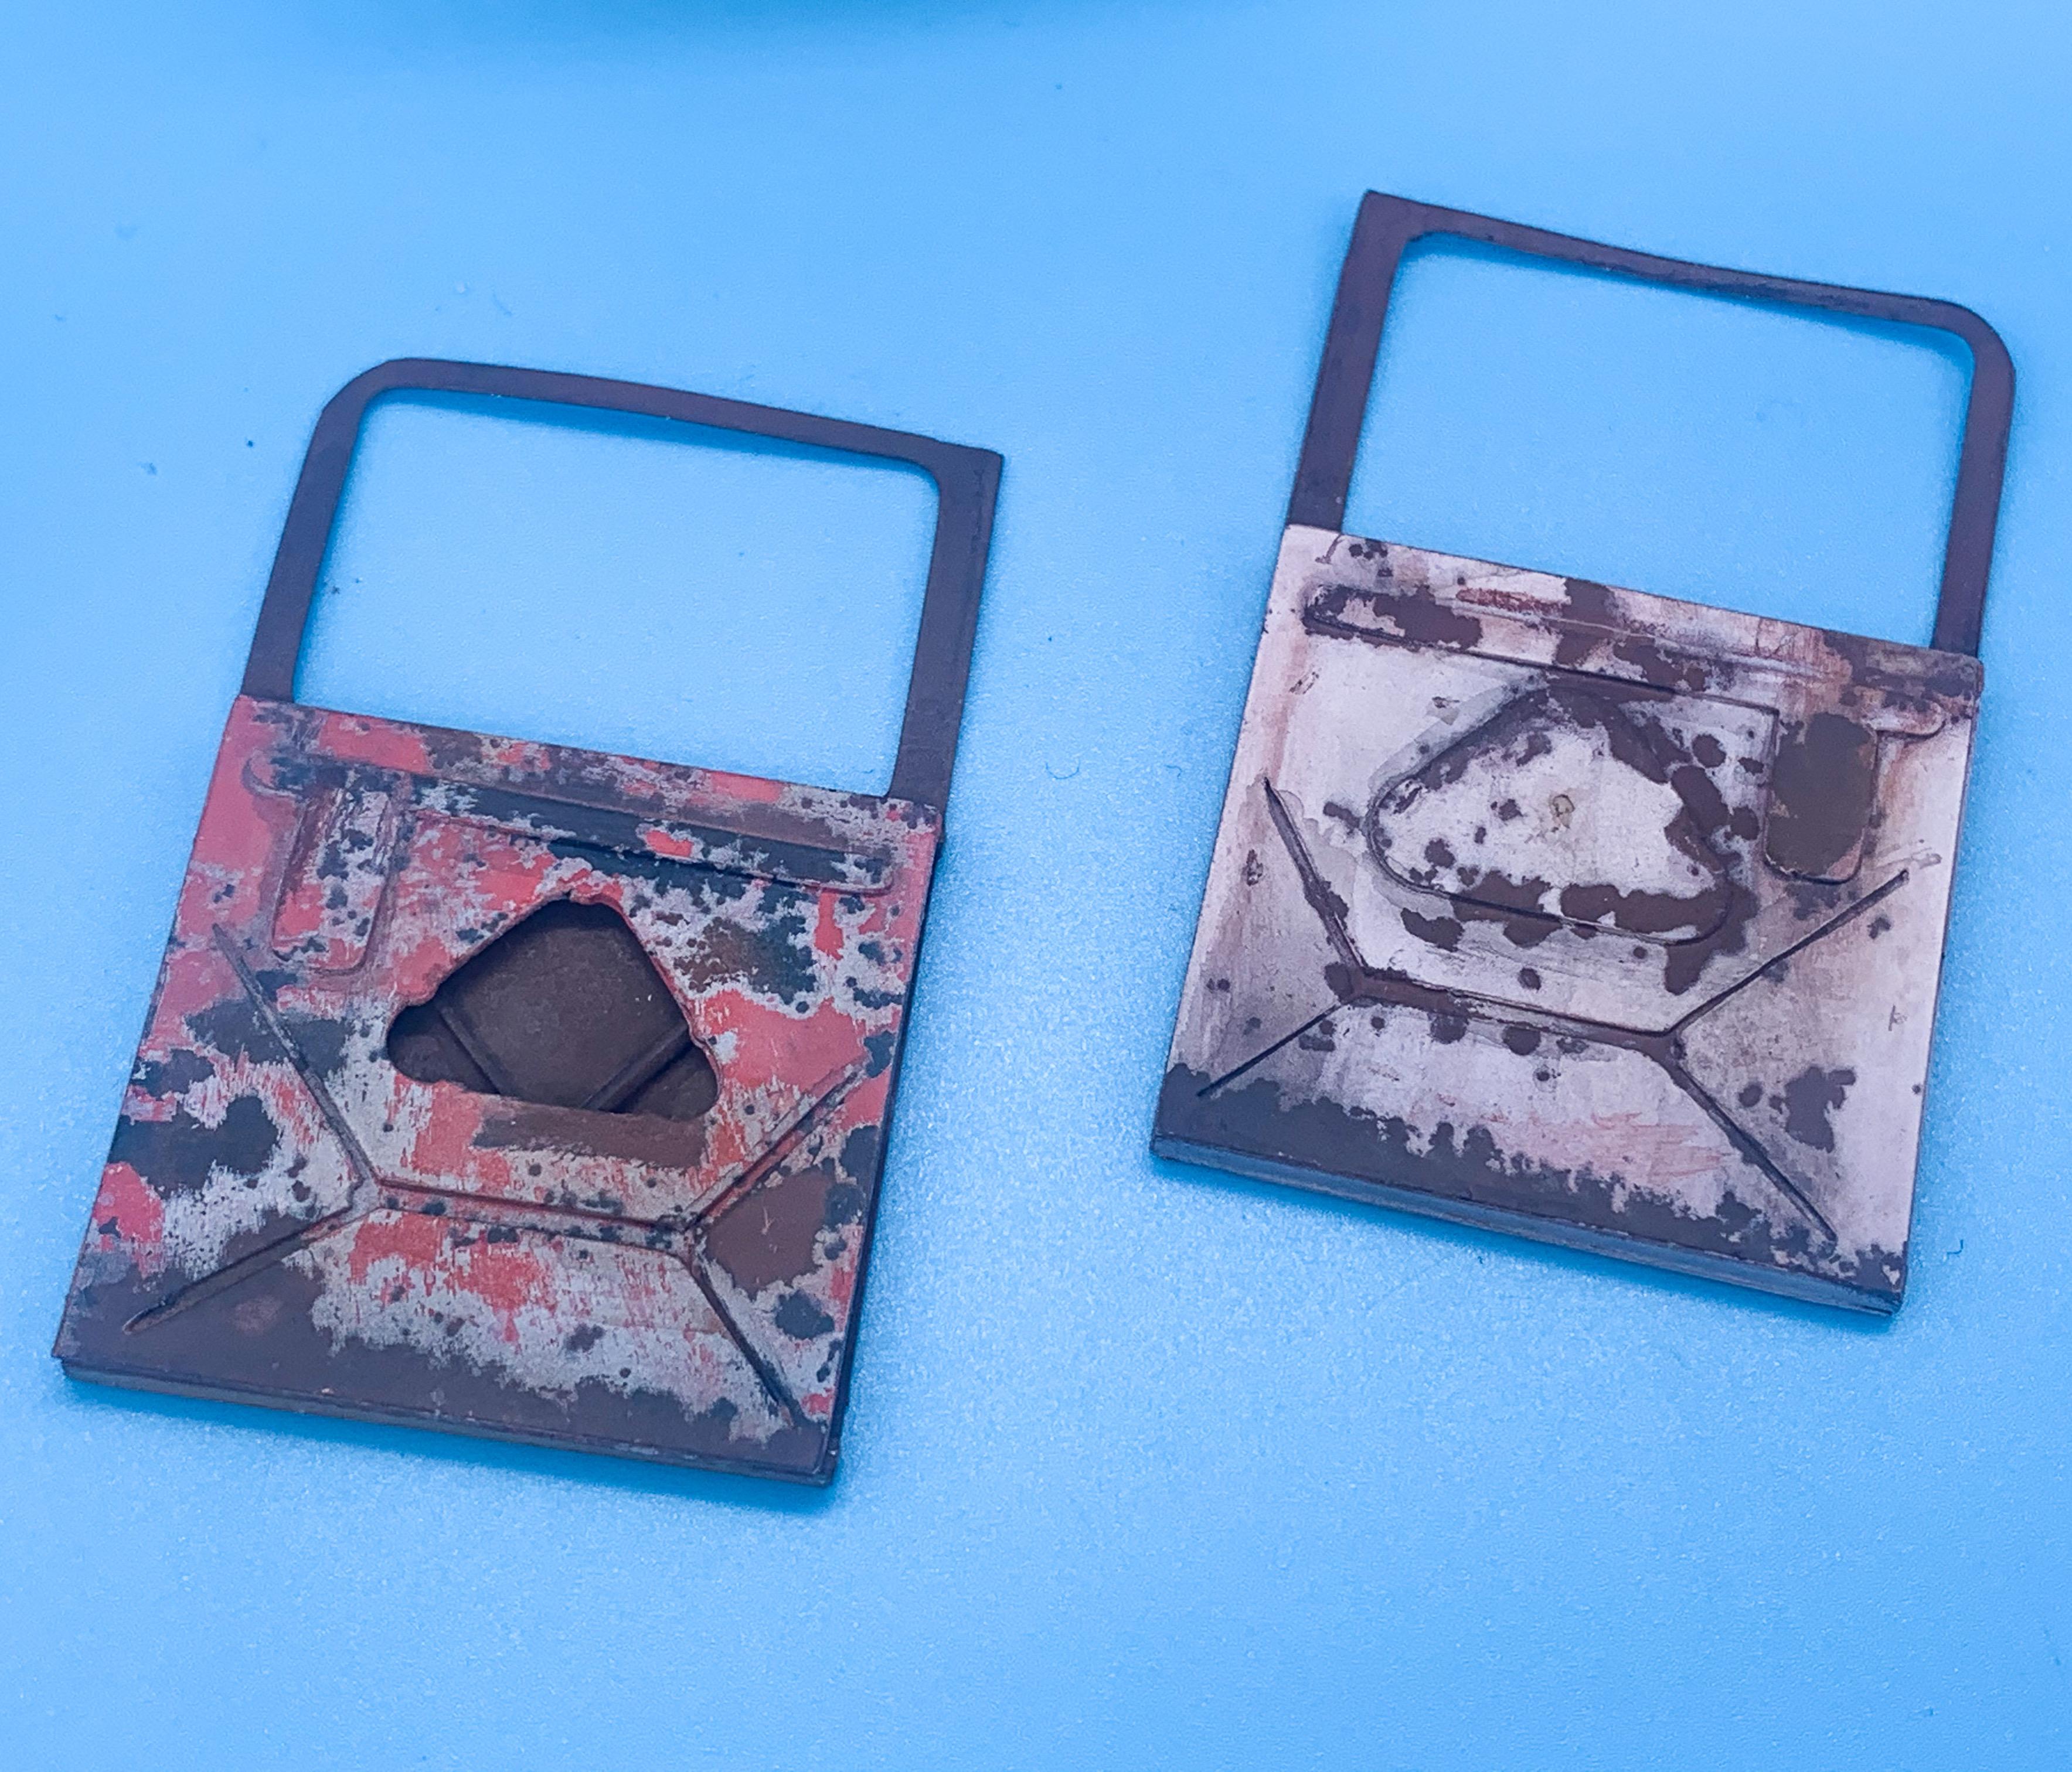
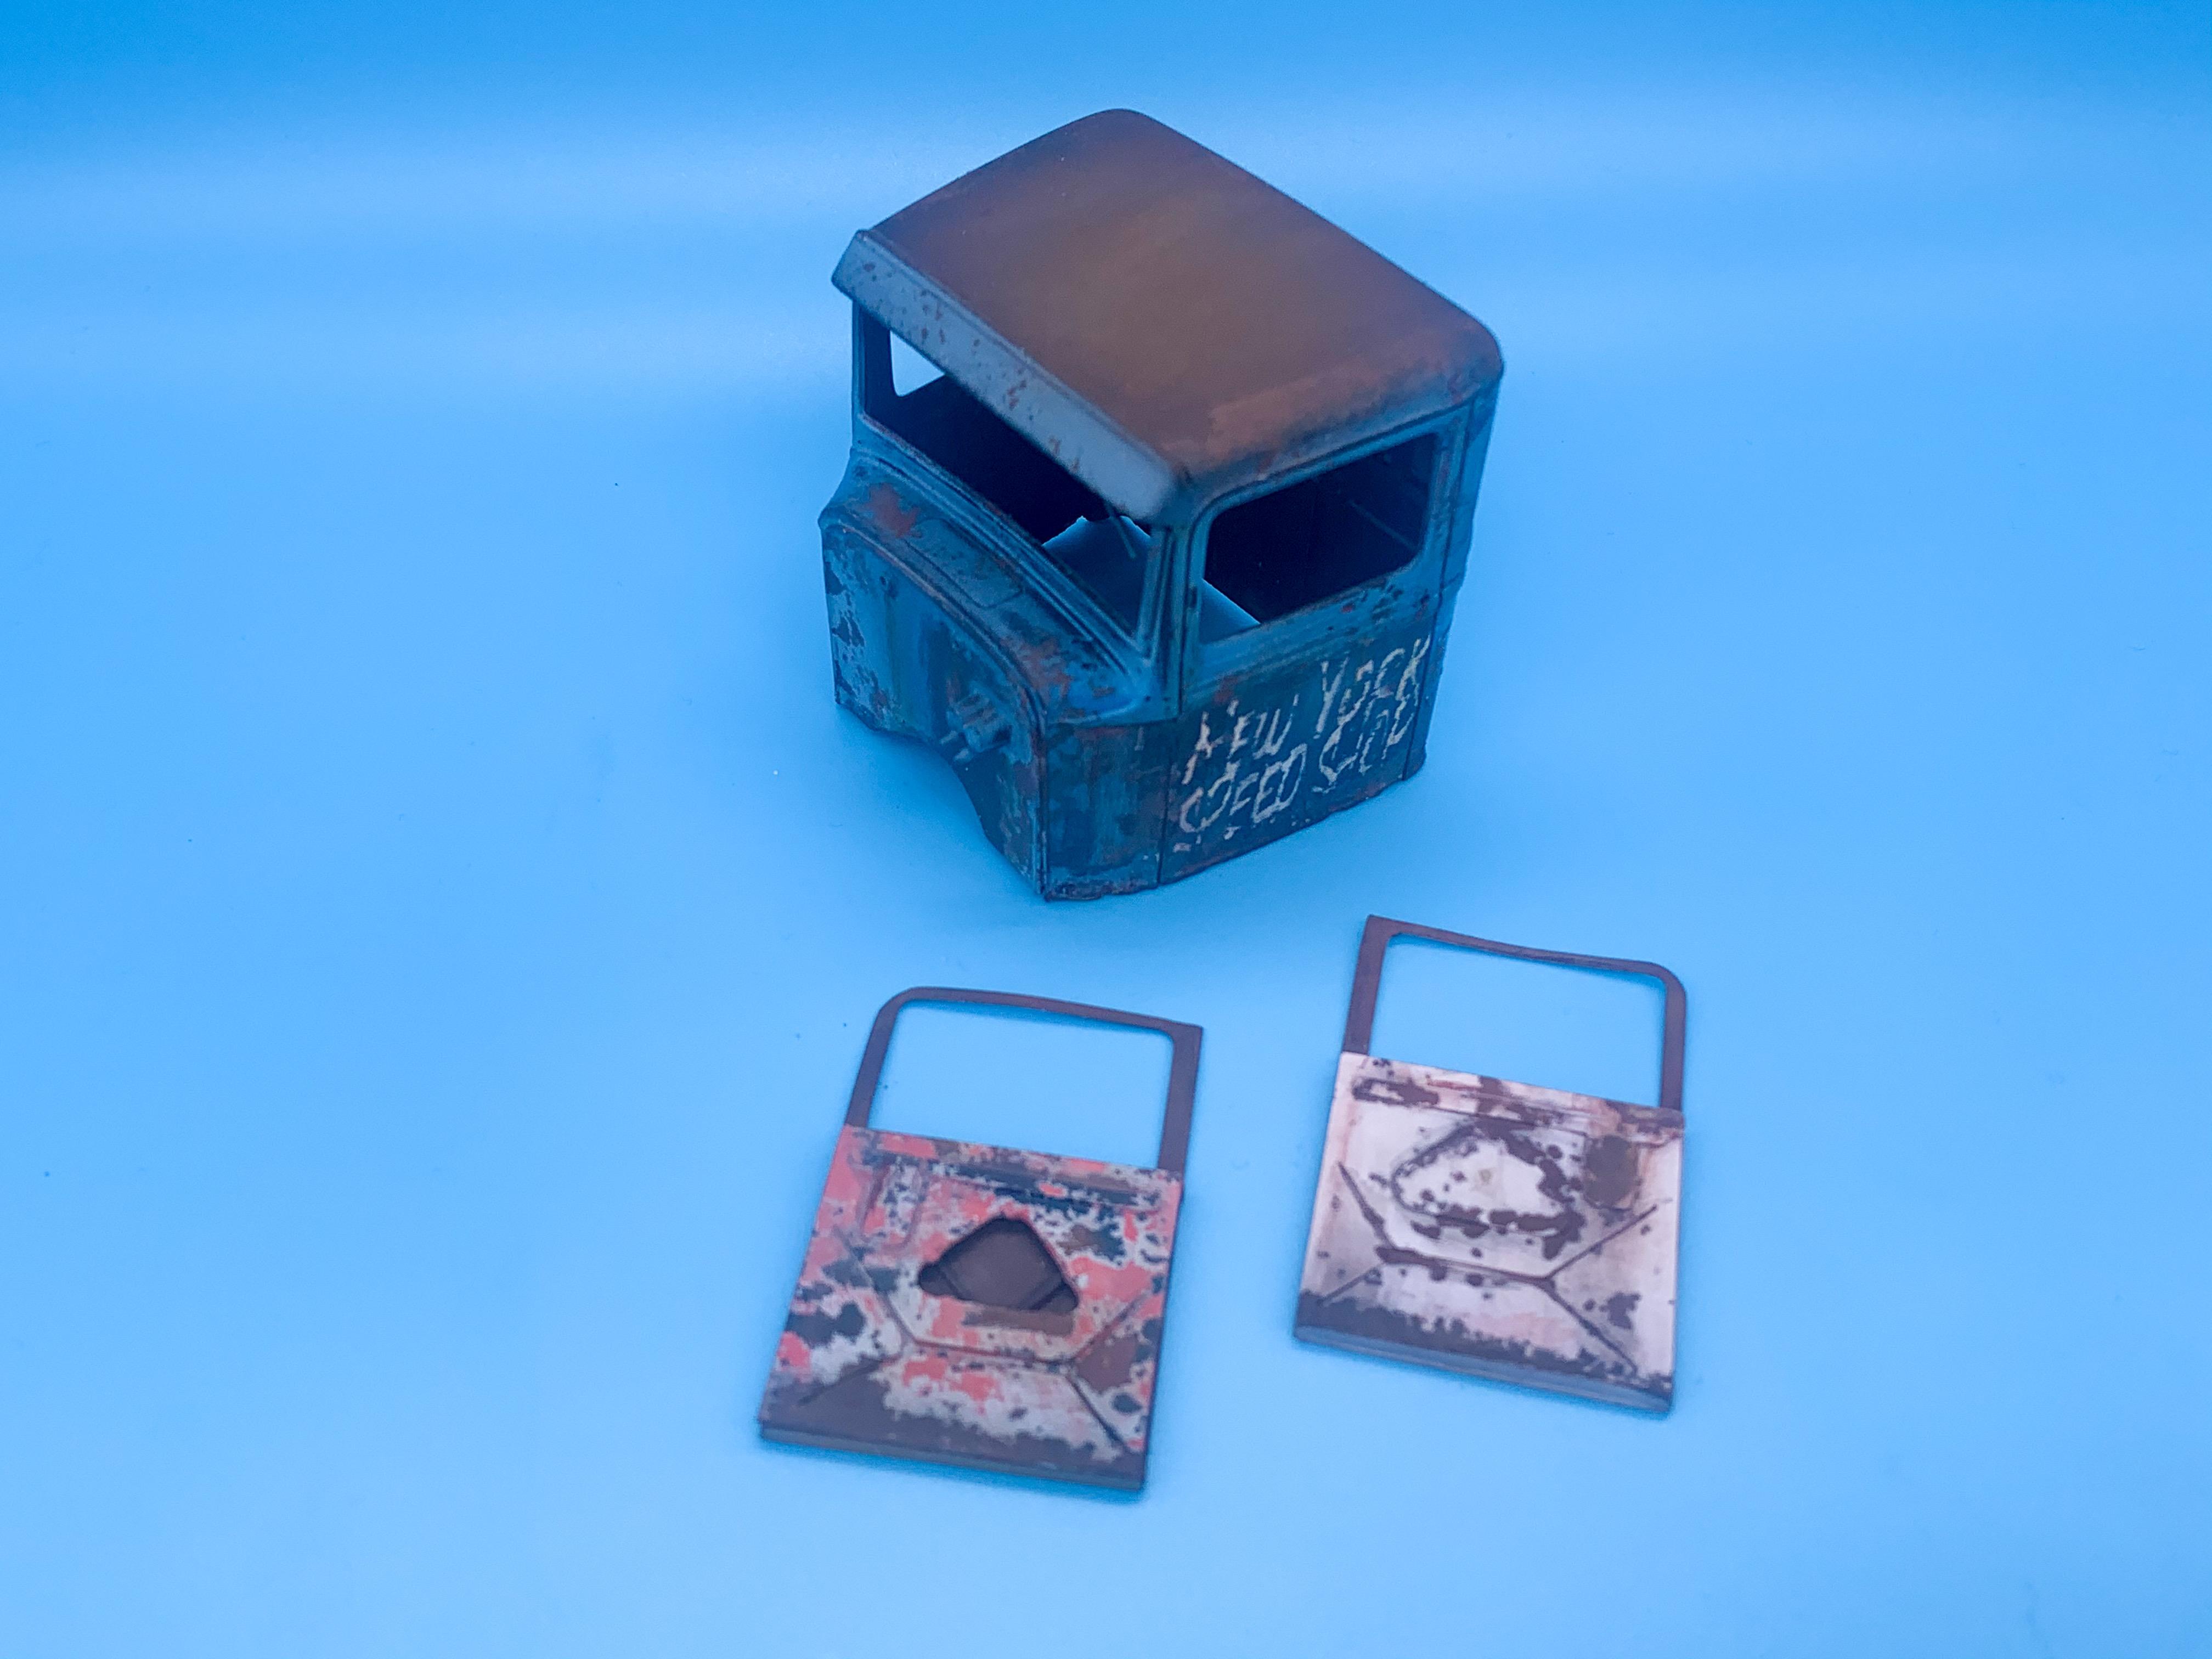
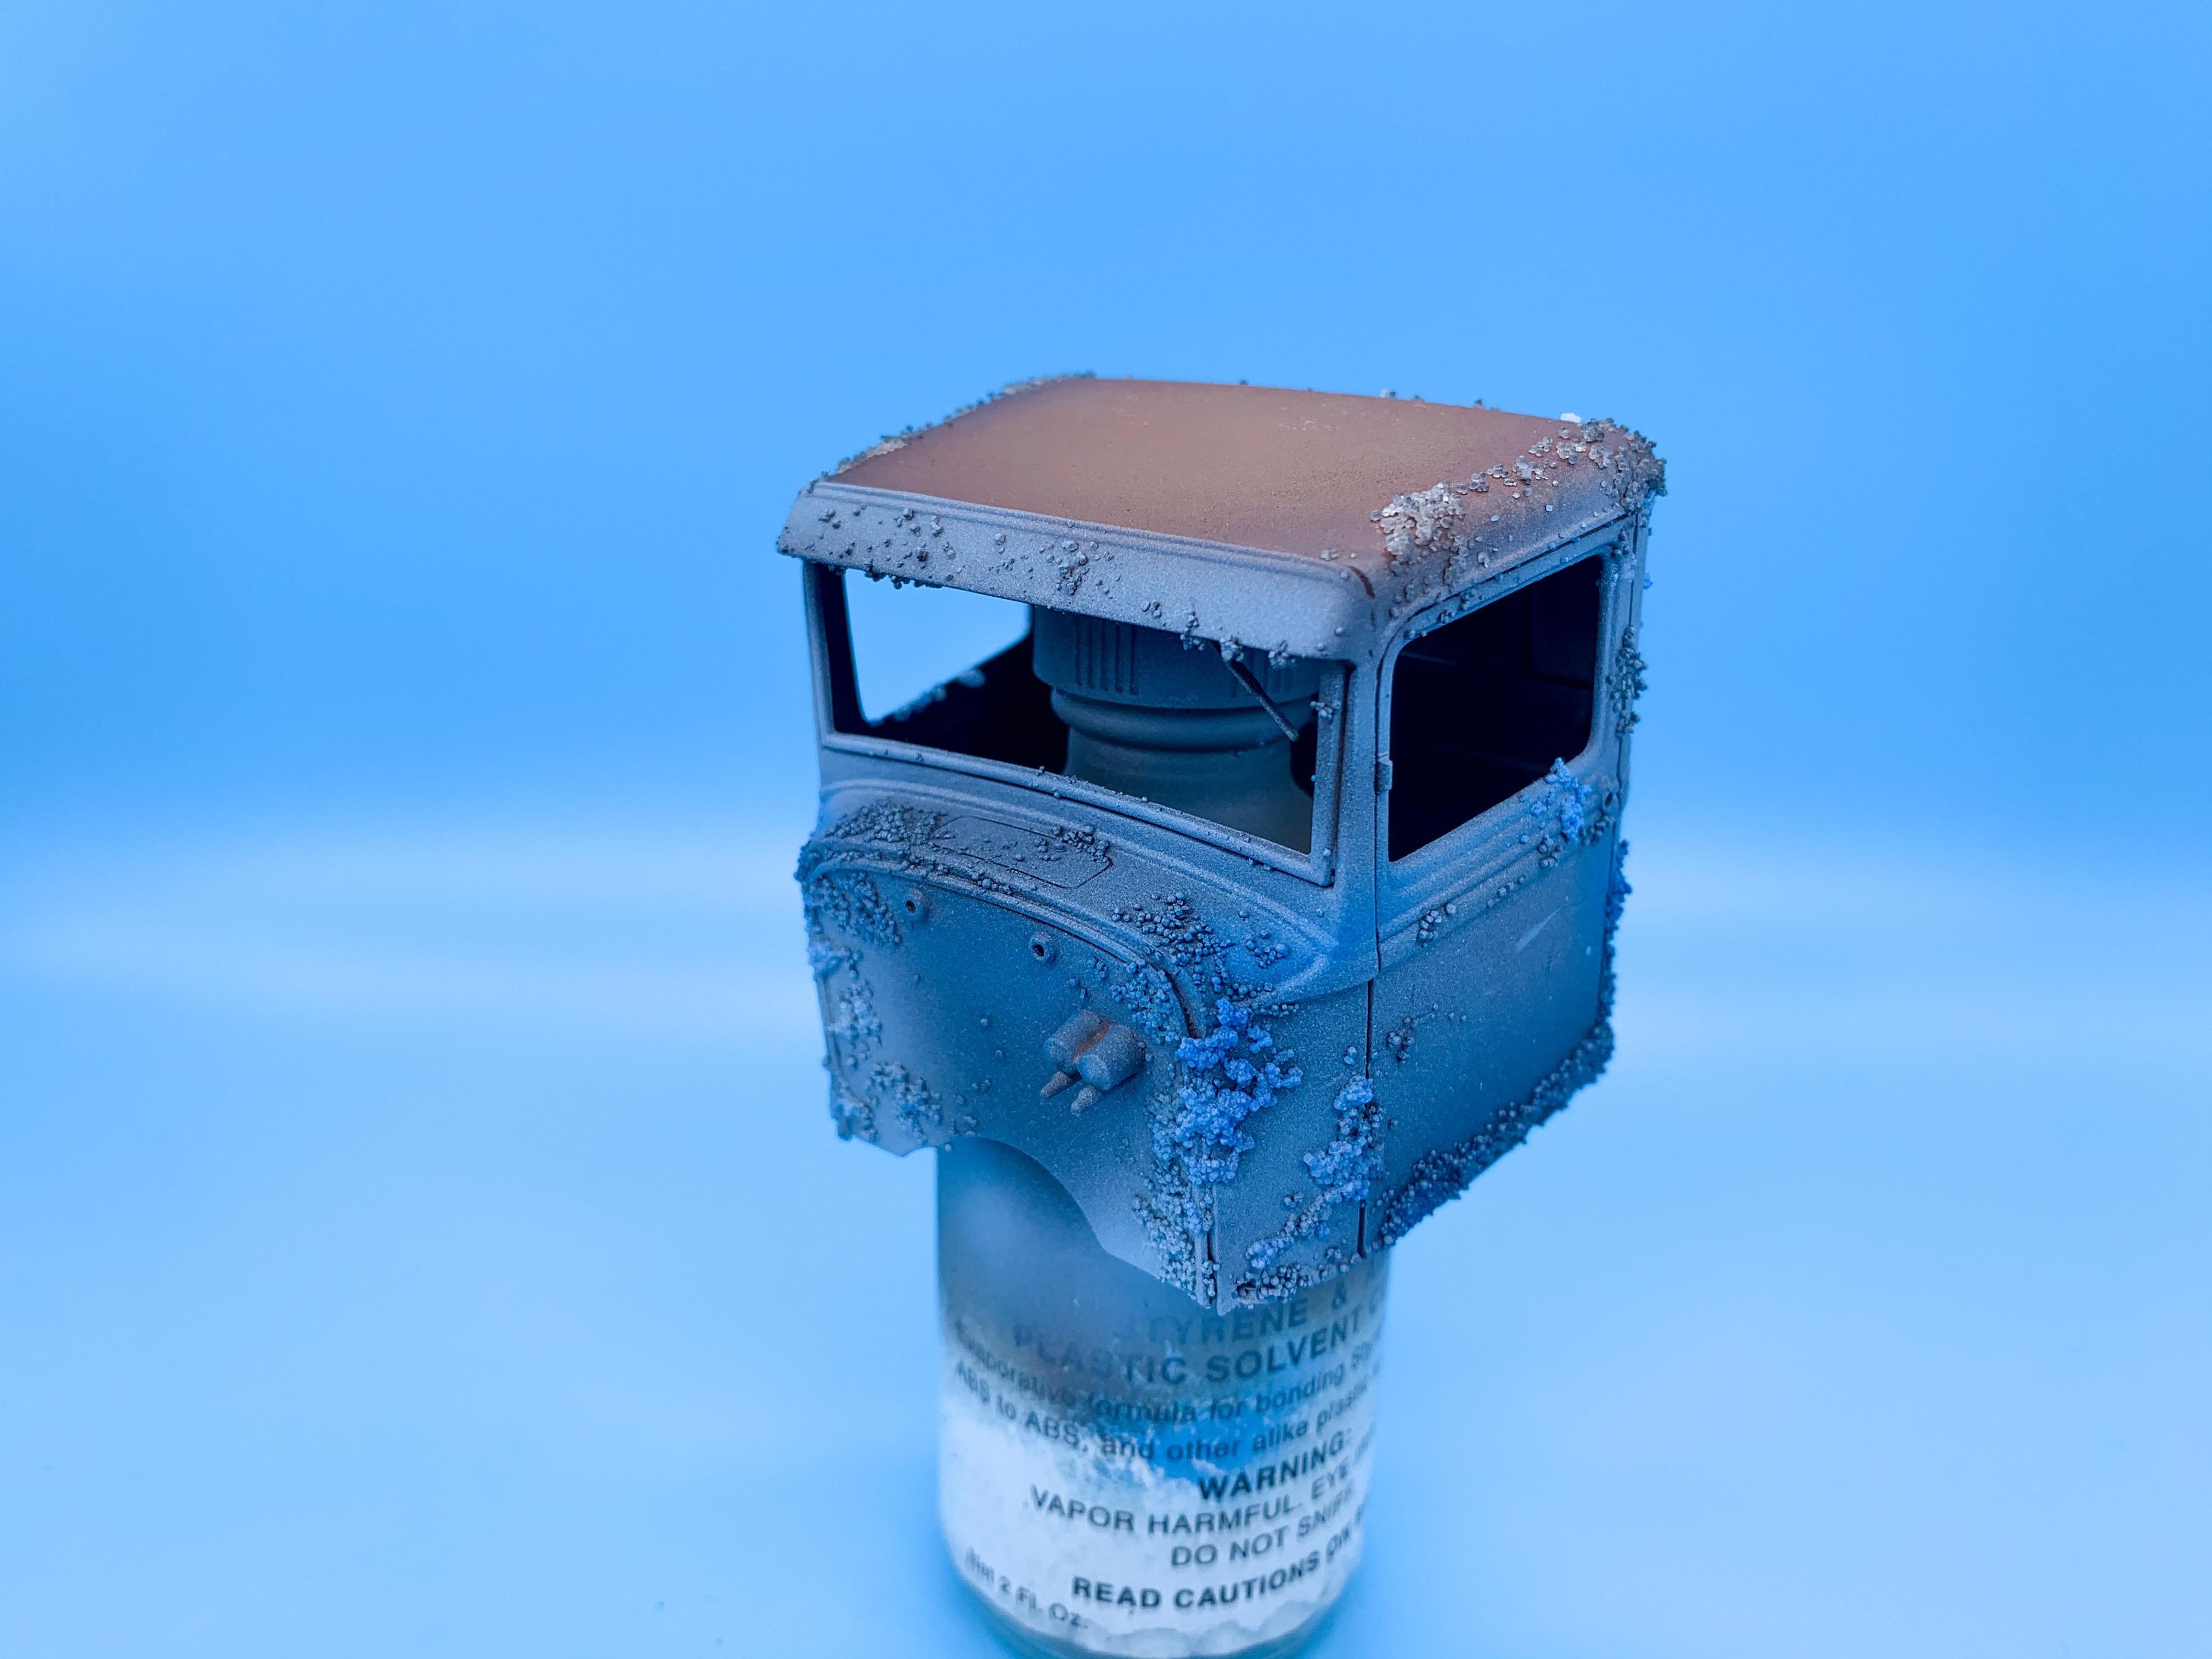
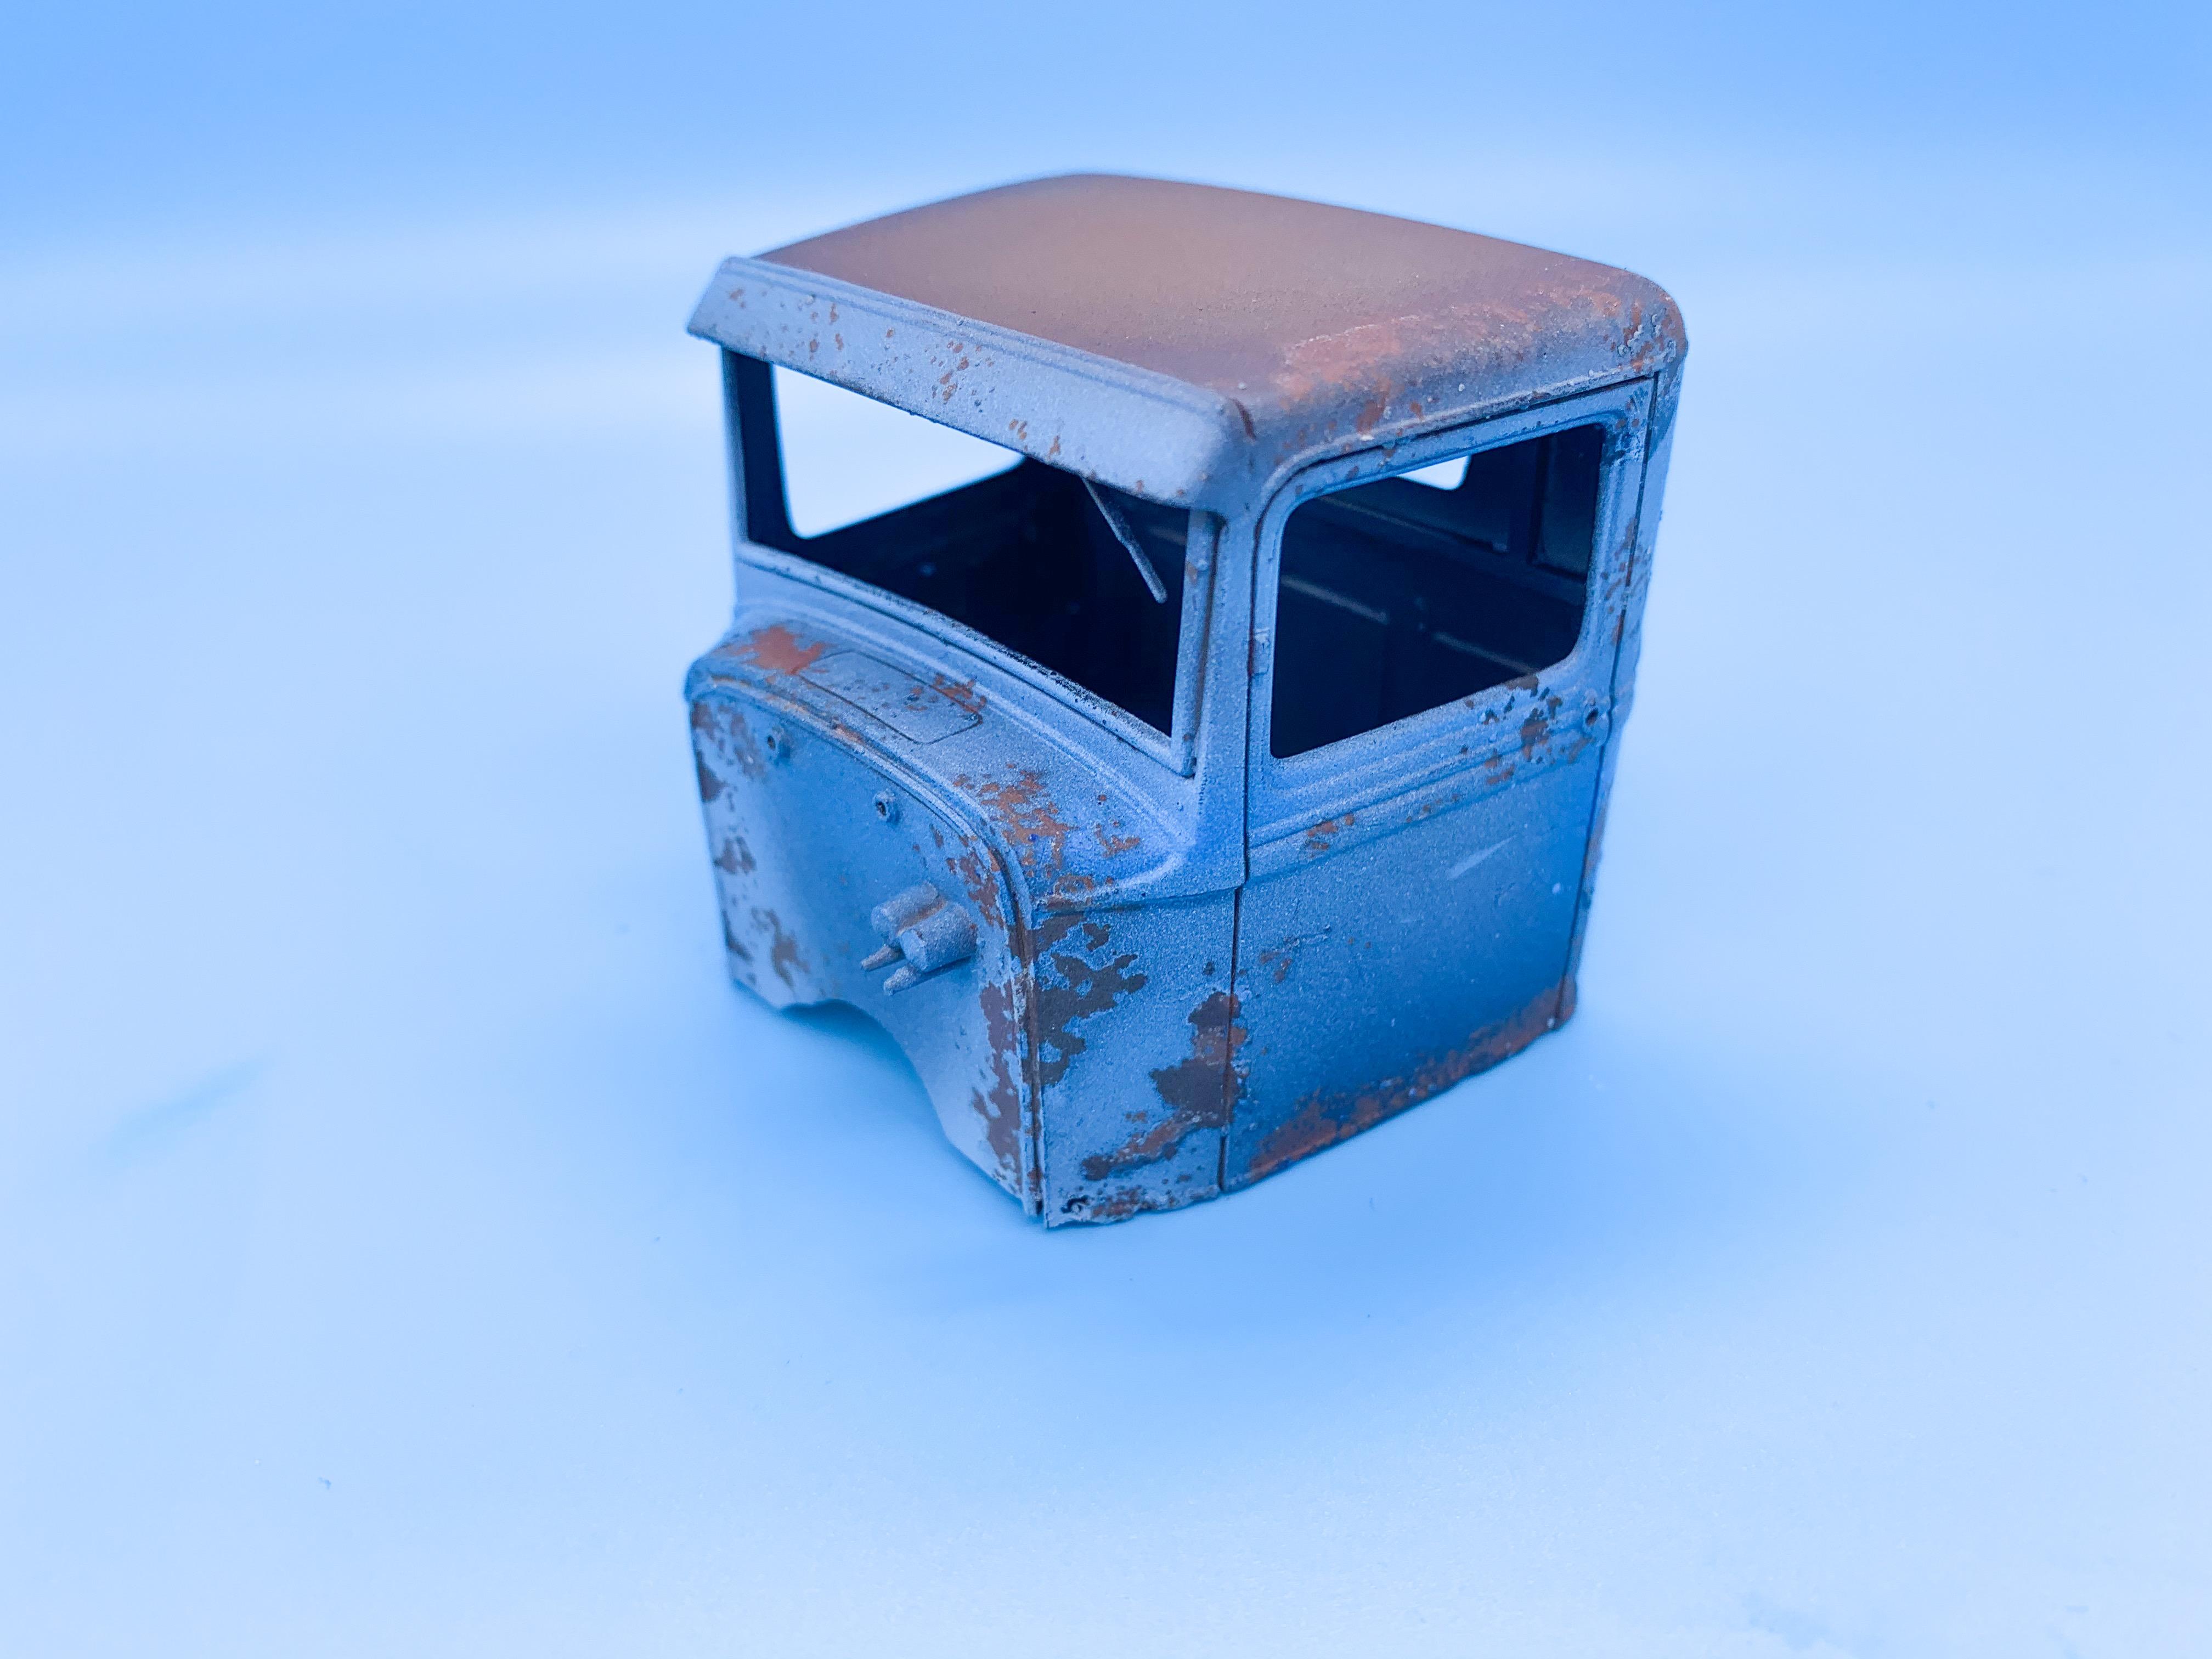
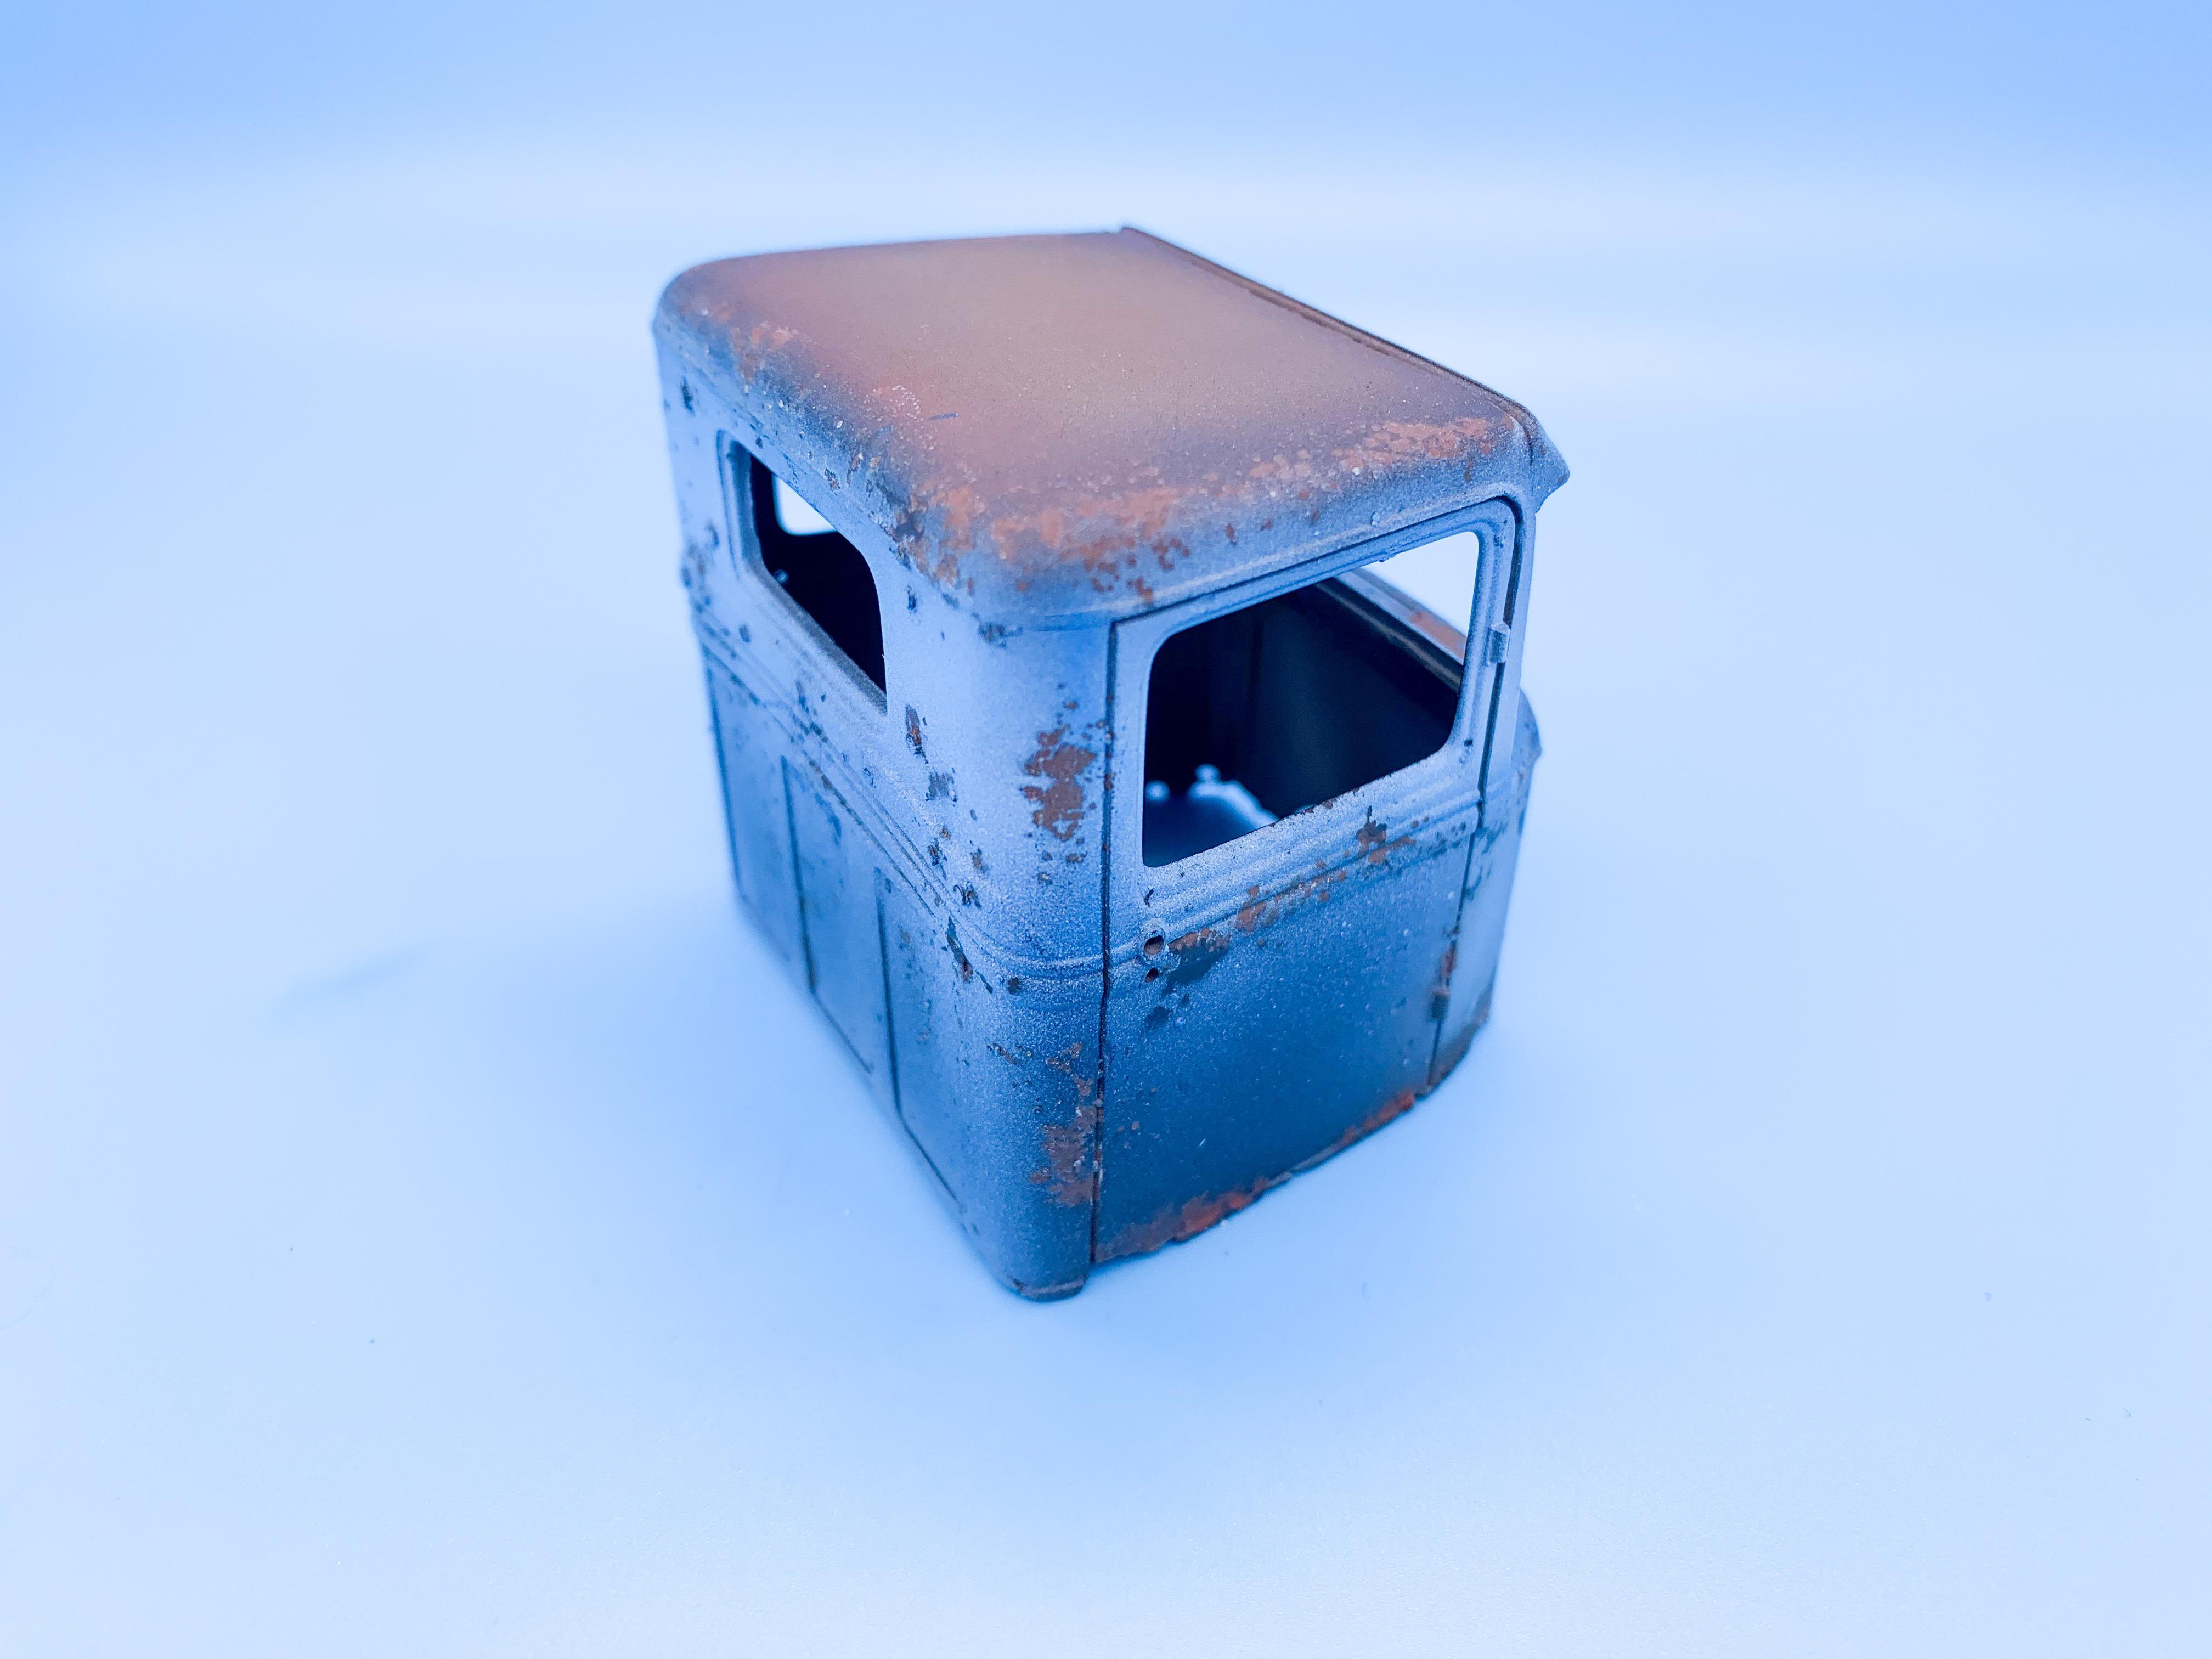
Thanks everyone!! I’m so glad you said that about the oxidized paint - I was trying to hit that effect! Like when a shiny red paintjob ends up a powdery looking pink over time. Appreciate you spotting that that’s roughly what I was trying to do!! Just used some water to hold the salt in place - used a fine brush to get the water where I wanted it then shook a little salt on there and then moved it around with a toothpick to get it just how I wanted it ?? Thanks Dennis! As a builder that I admire, and someone who knows these things inside out I’m glad I hit the mark with those couple of bits anyway. I am going to run a bed on there, so that effort might all have been pointless ?. I found a couple of reference pics where it looked like those ribs were JUST visible over the top of the bed in those couple of examples (although I’m guessing that’s not how Henry had them...) so I made mine just visible over the bed too. That said, a rusty old bed would reveal a little of them I guess, so we’ll see. Today’s progress was minor (although somehow I spent 8 hours messing with these two parts) ??...wanted to add some inner door detail seeing as the detail on the body is pretty soft and flat. Scratchbuilt some new panels: I found some pics of these trucks with the inspection panels missing, and some with them present and correct so I did one with and one without - added the internal crank rods to the one where you can see them with the panel removed to match a reference pic I found: Shot them with a rust base: And whilst I was looking for reference pics I came across a pair of 1:1 doors for sale, one with a kinda salmon pink patina’d paintjob and one in dirty white. They looked like an odd pair but just mismatched enough to be cool and catch my eye...and if I was building this thing for real and needed those parts I would’ve got those for it! So, one white inner door, one salmon pink and black and white inner door: More detailing to come on these tomorrow, but ran out of time today - scratchbuilt some replicas of the 1:1 door and window cranks and got them in Alclad ready for them to be ruined tomorrow along with some PE bolts and whatever else I can find to add. Not that they’re super visible through the sides anyway, but better than what WAS there... More soon!
-
Inspirational, aspirational work!! Always enjoy seeing your projects Tim!
-
1961 Impala Outlaw Twin Turbo
OldNYJim replied to streetmachine11's topic in WIP: Drag Racing Models
Outstanding work so far! I’ll be following -
That color is amazing! Love it!
-
Patina’d 34 Pick Up
OldNYJim replied to OldNYJim's topic in WIP: Model Trucks: Pickups, Vans, SUVs, Light Commercial
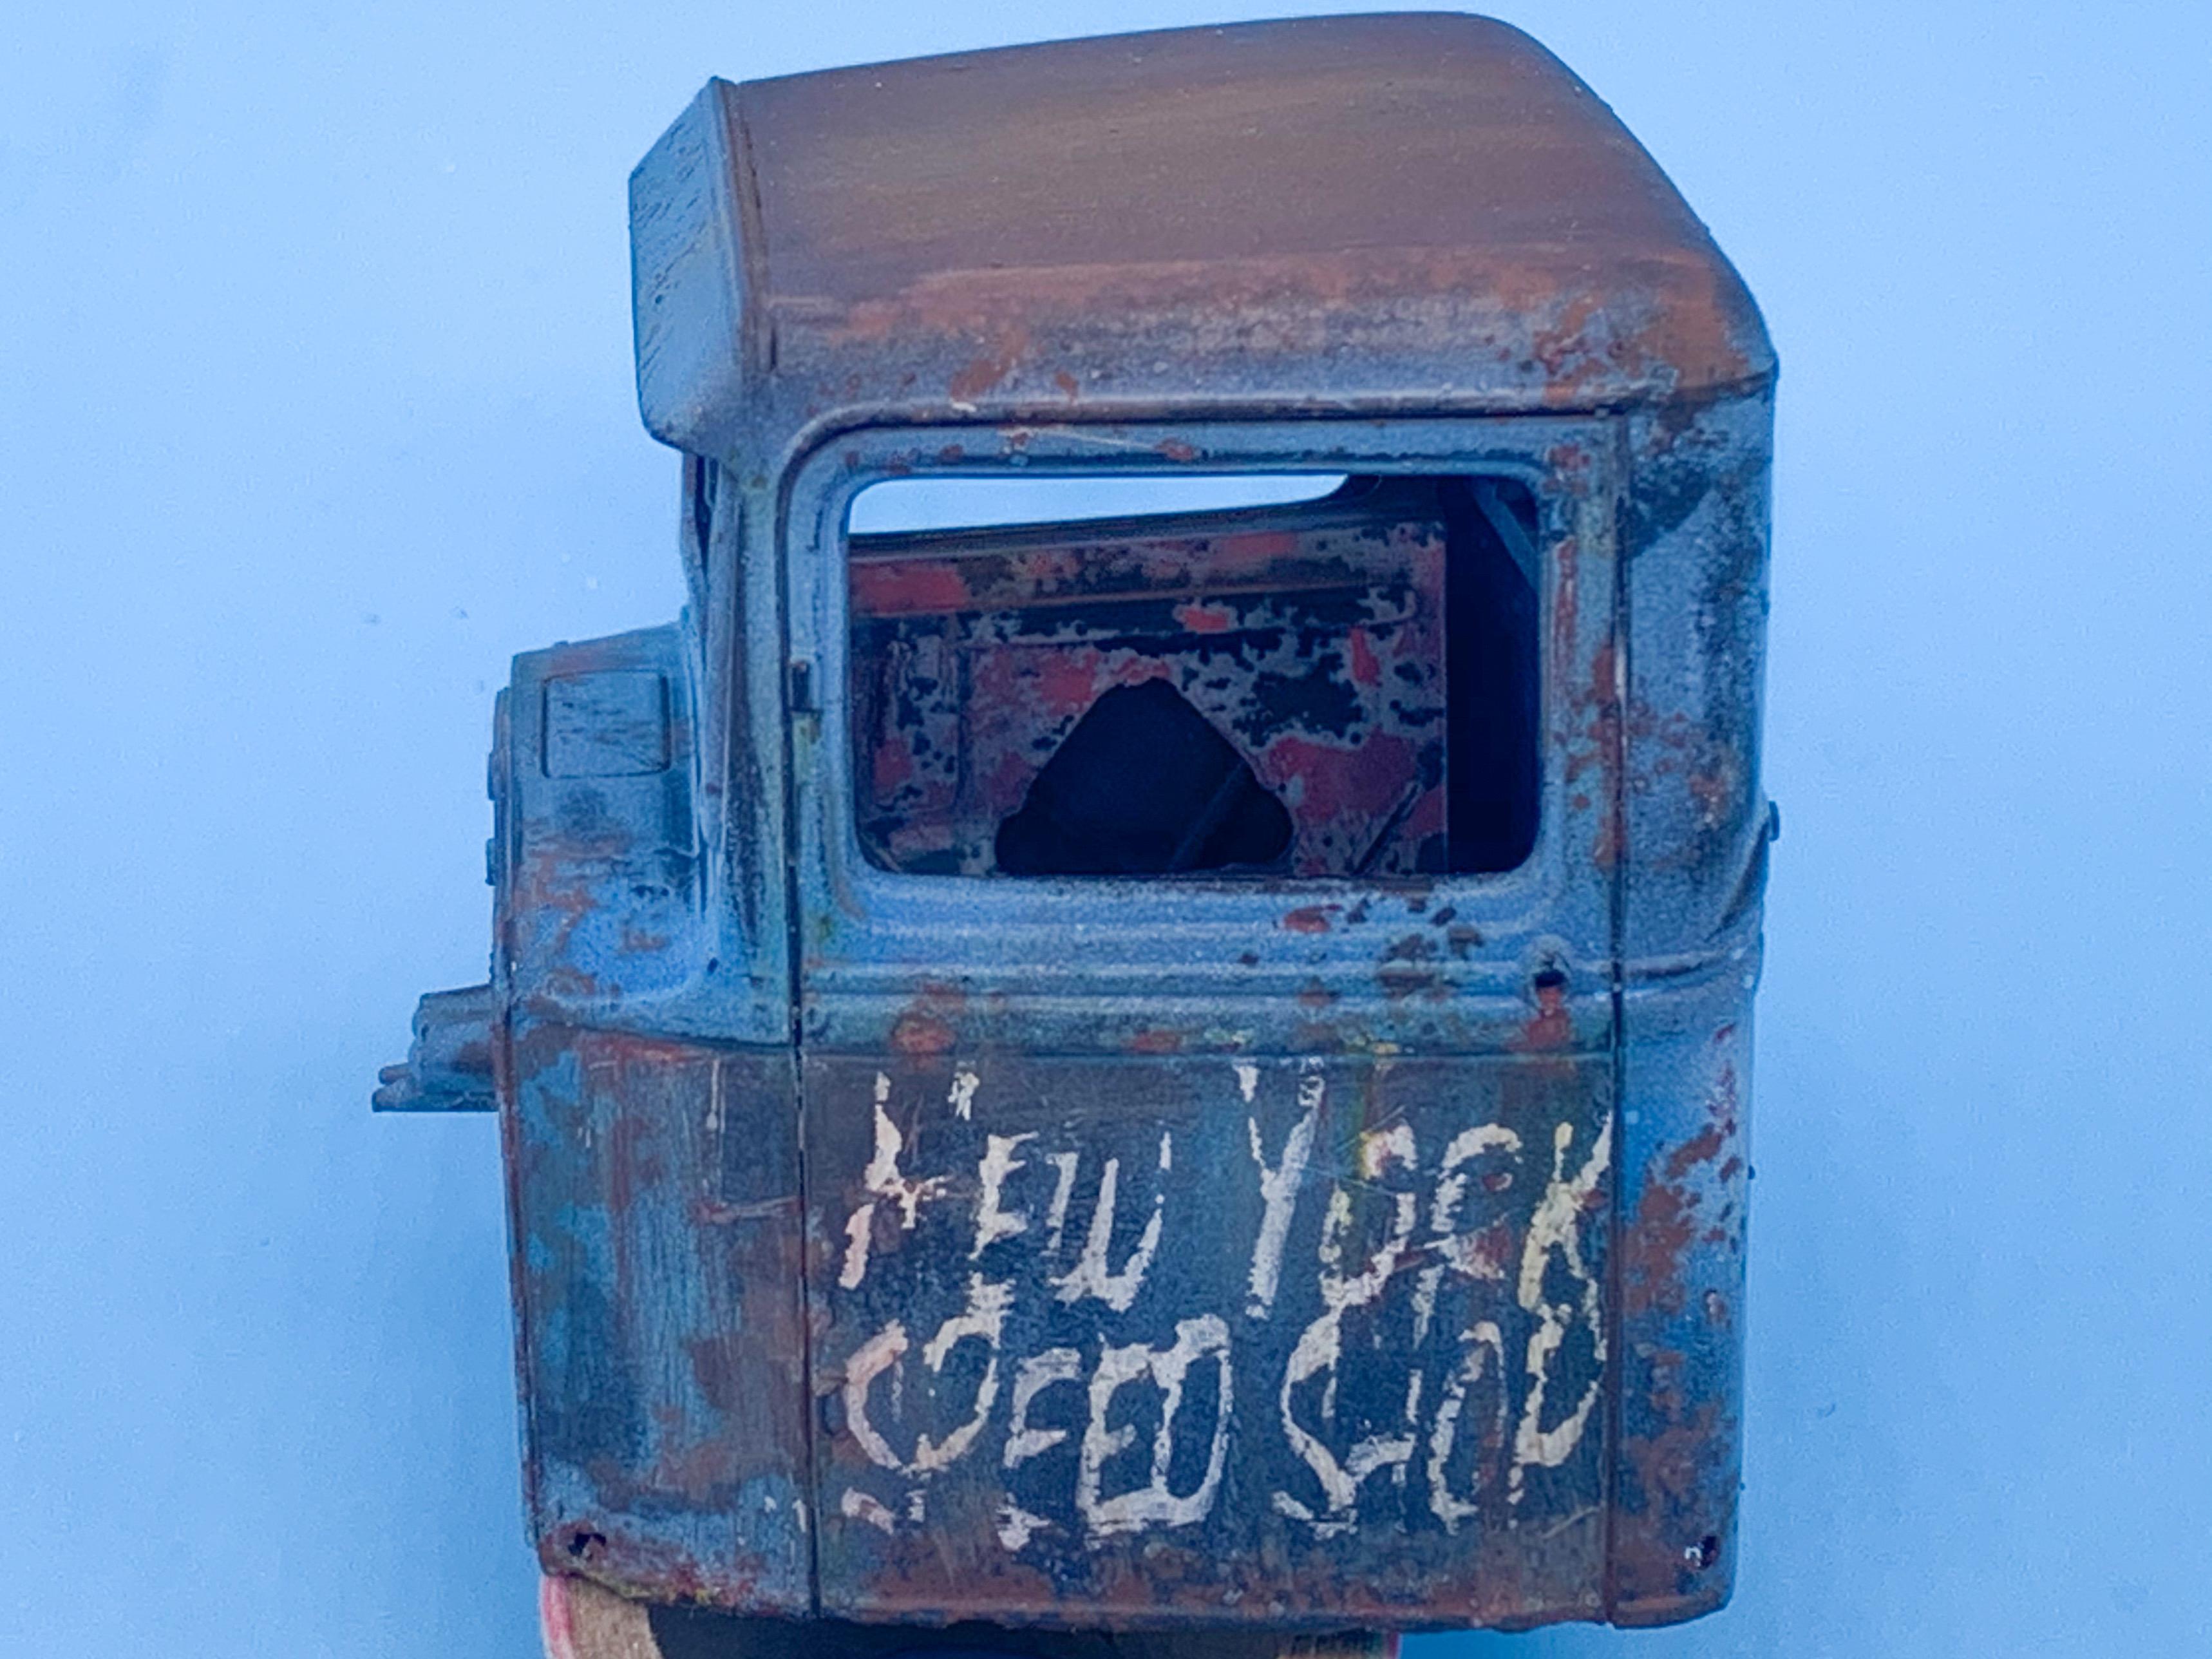
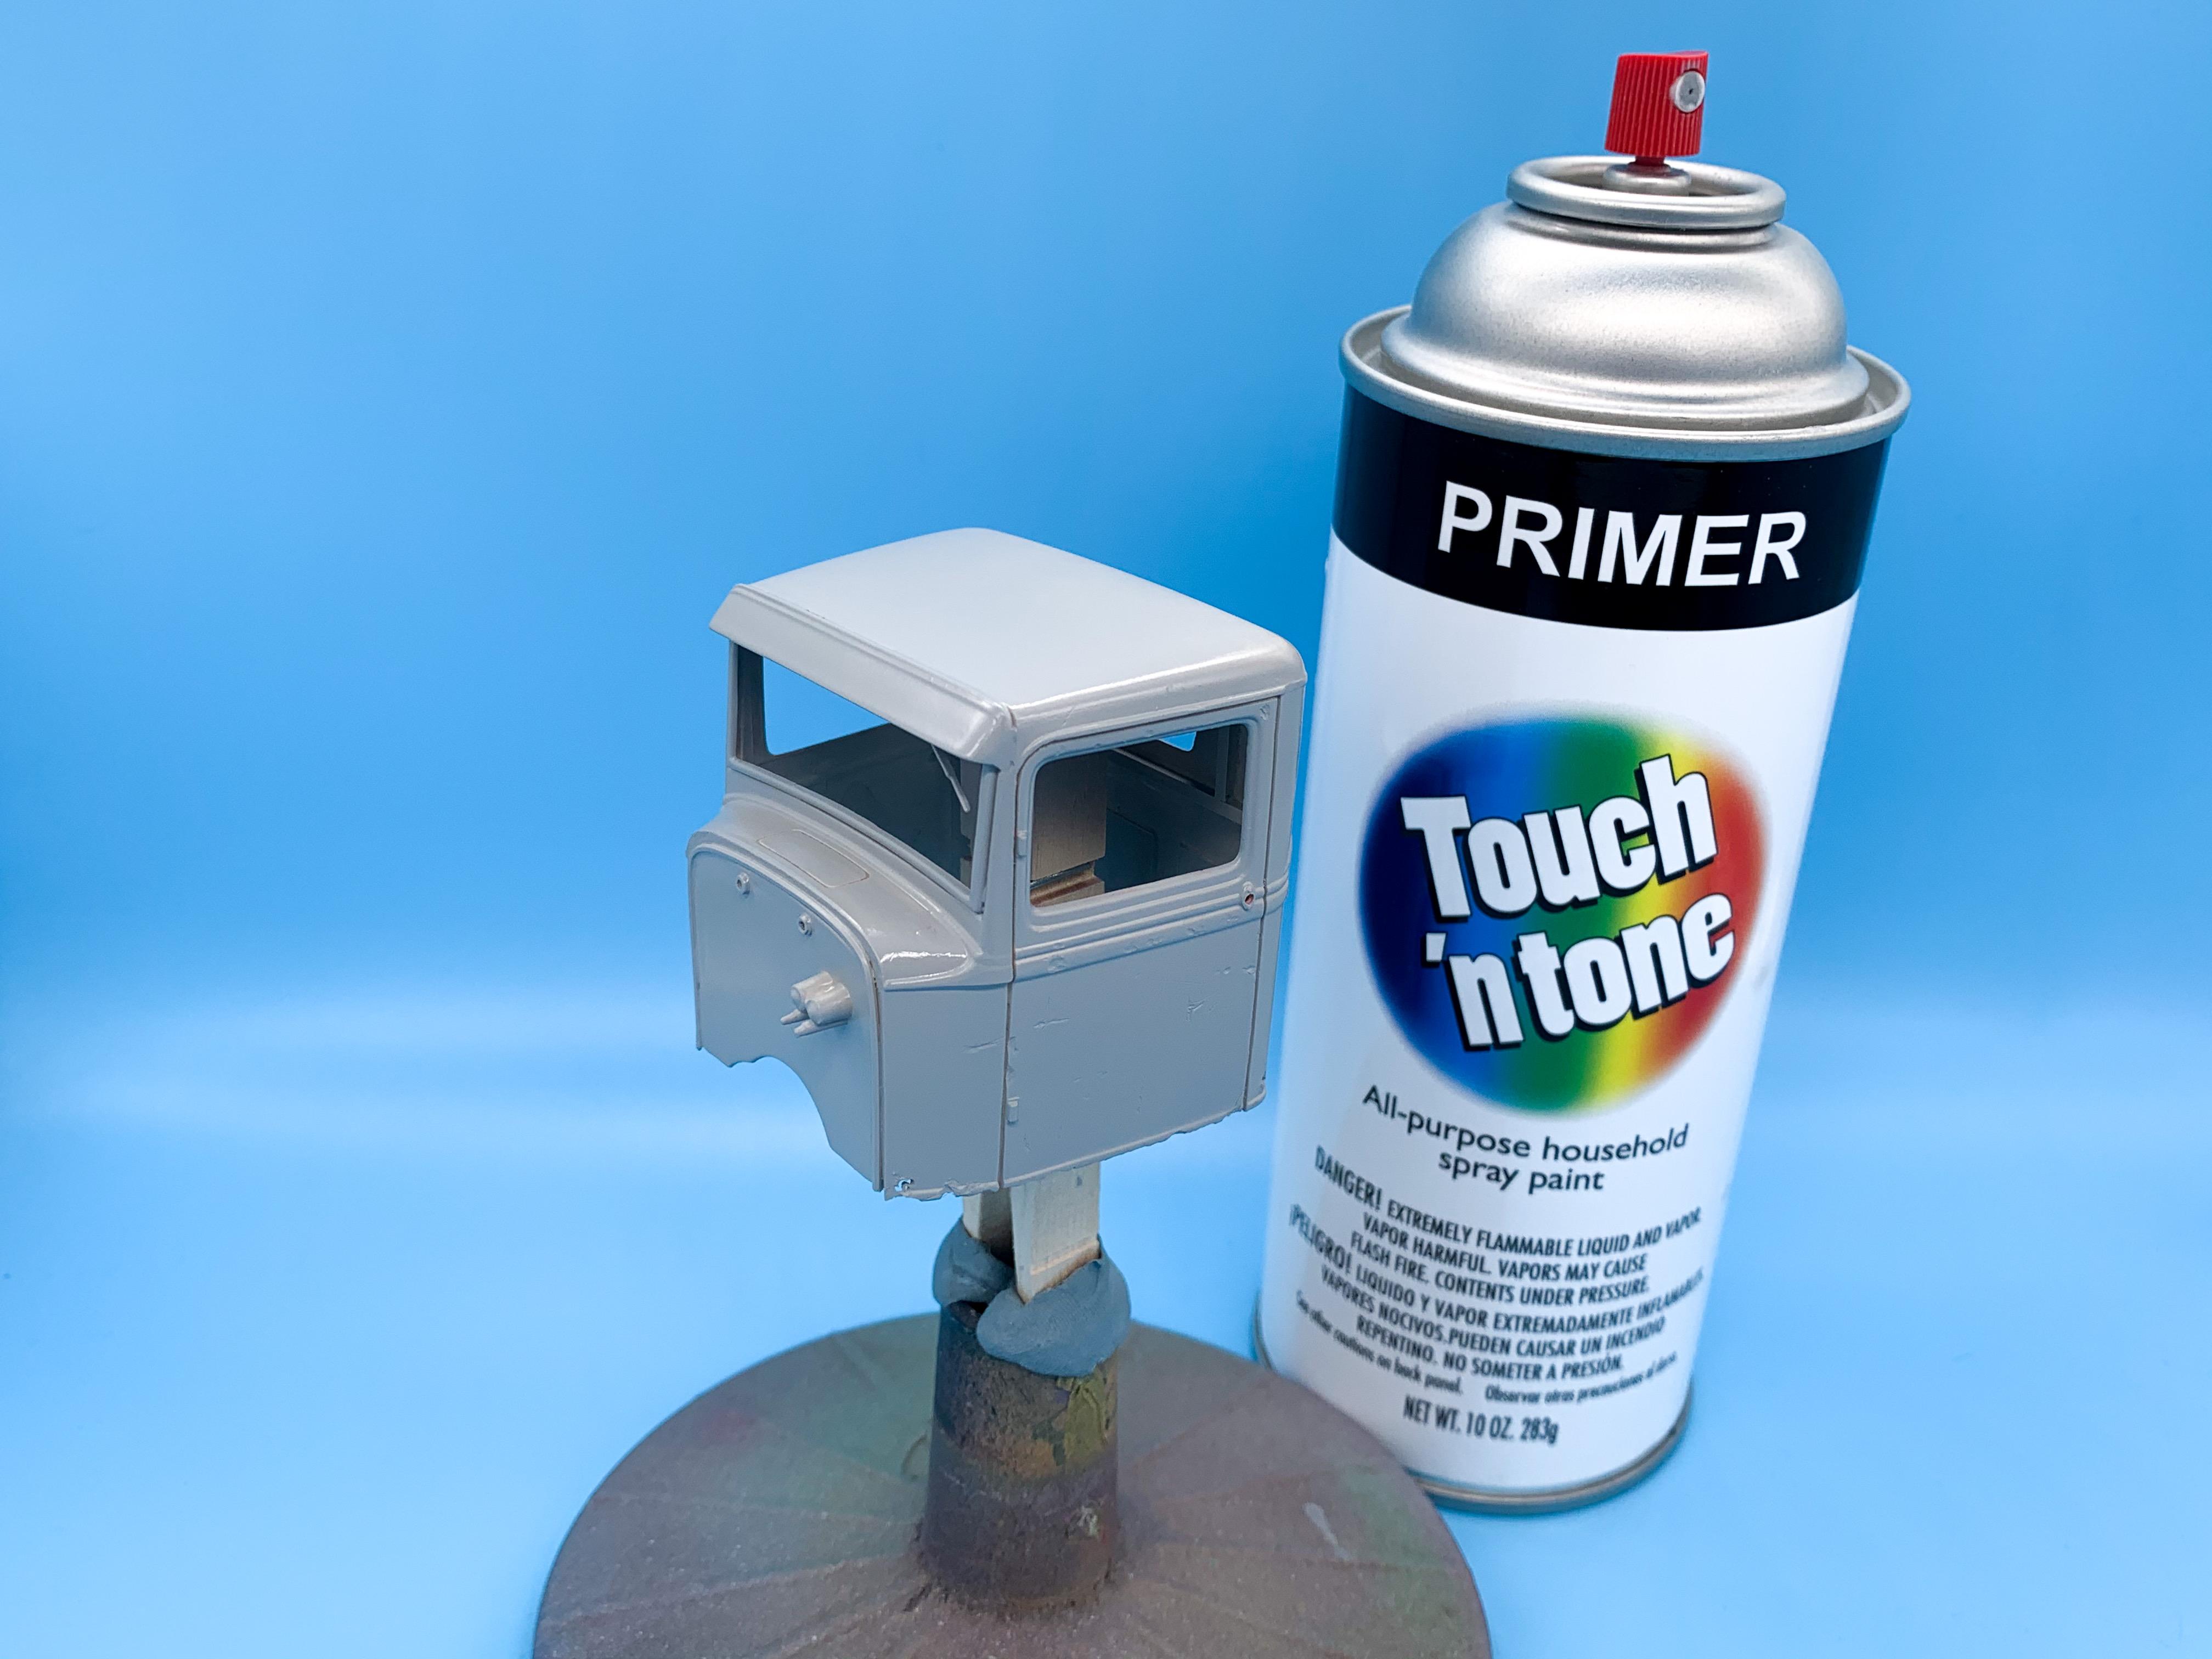
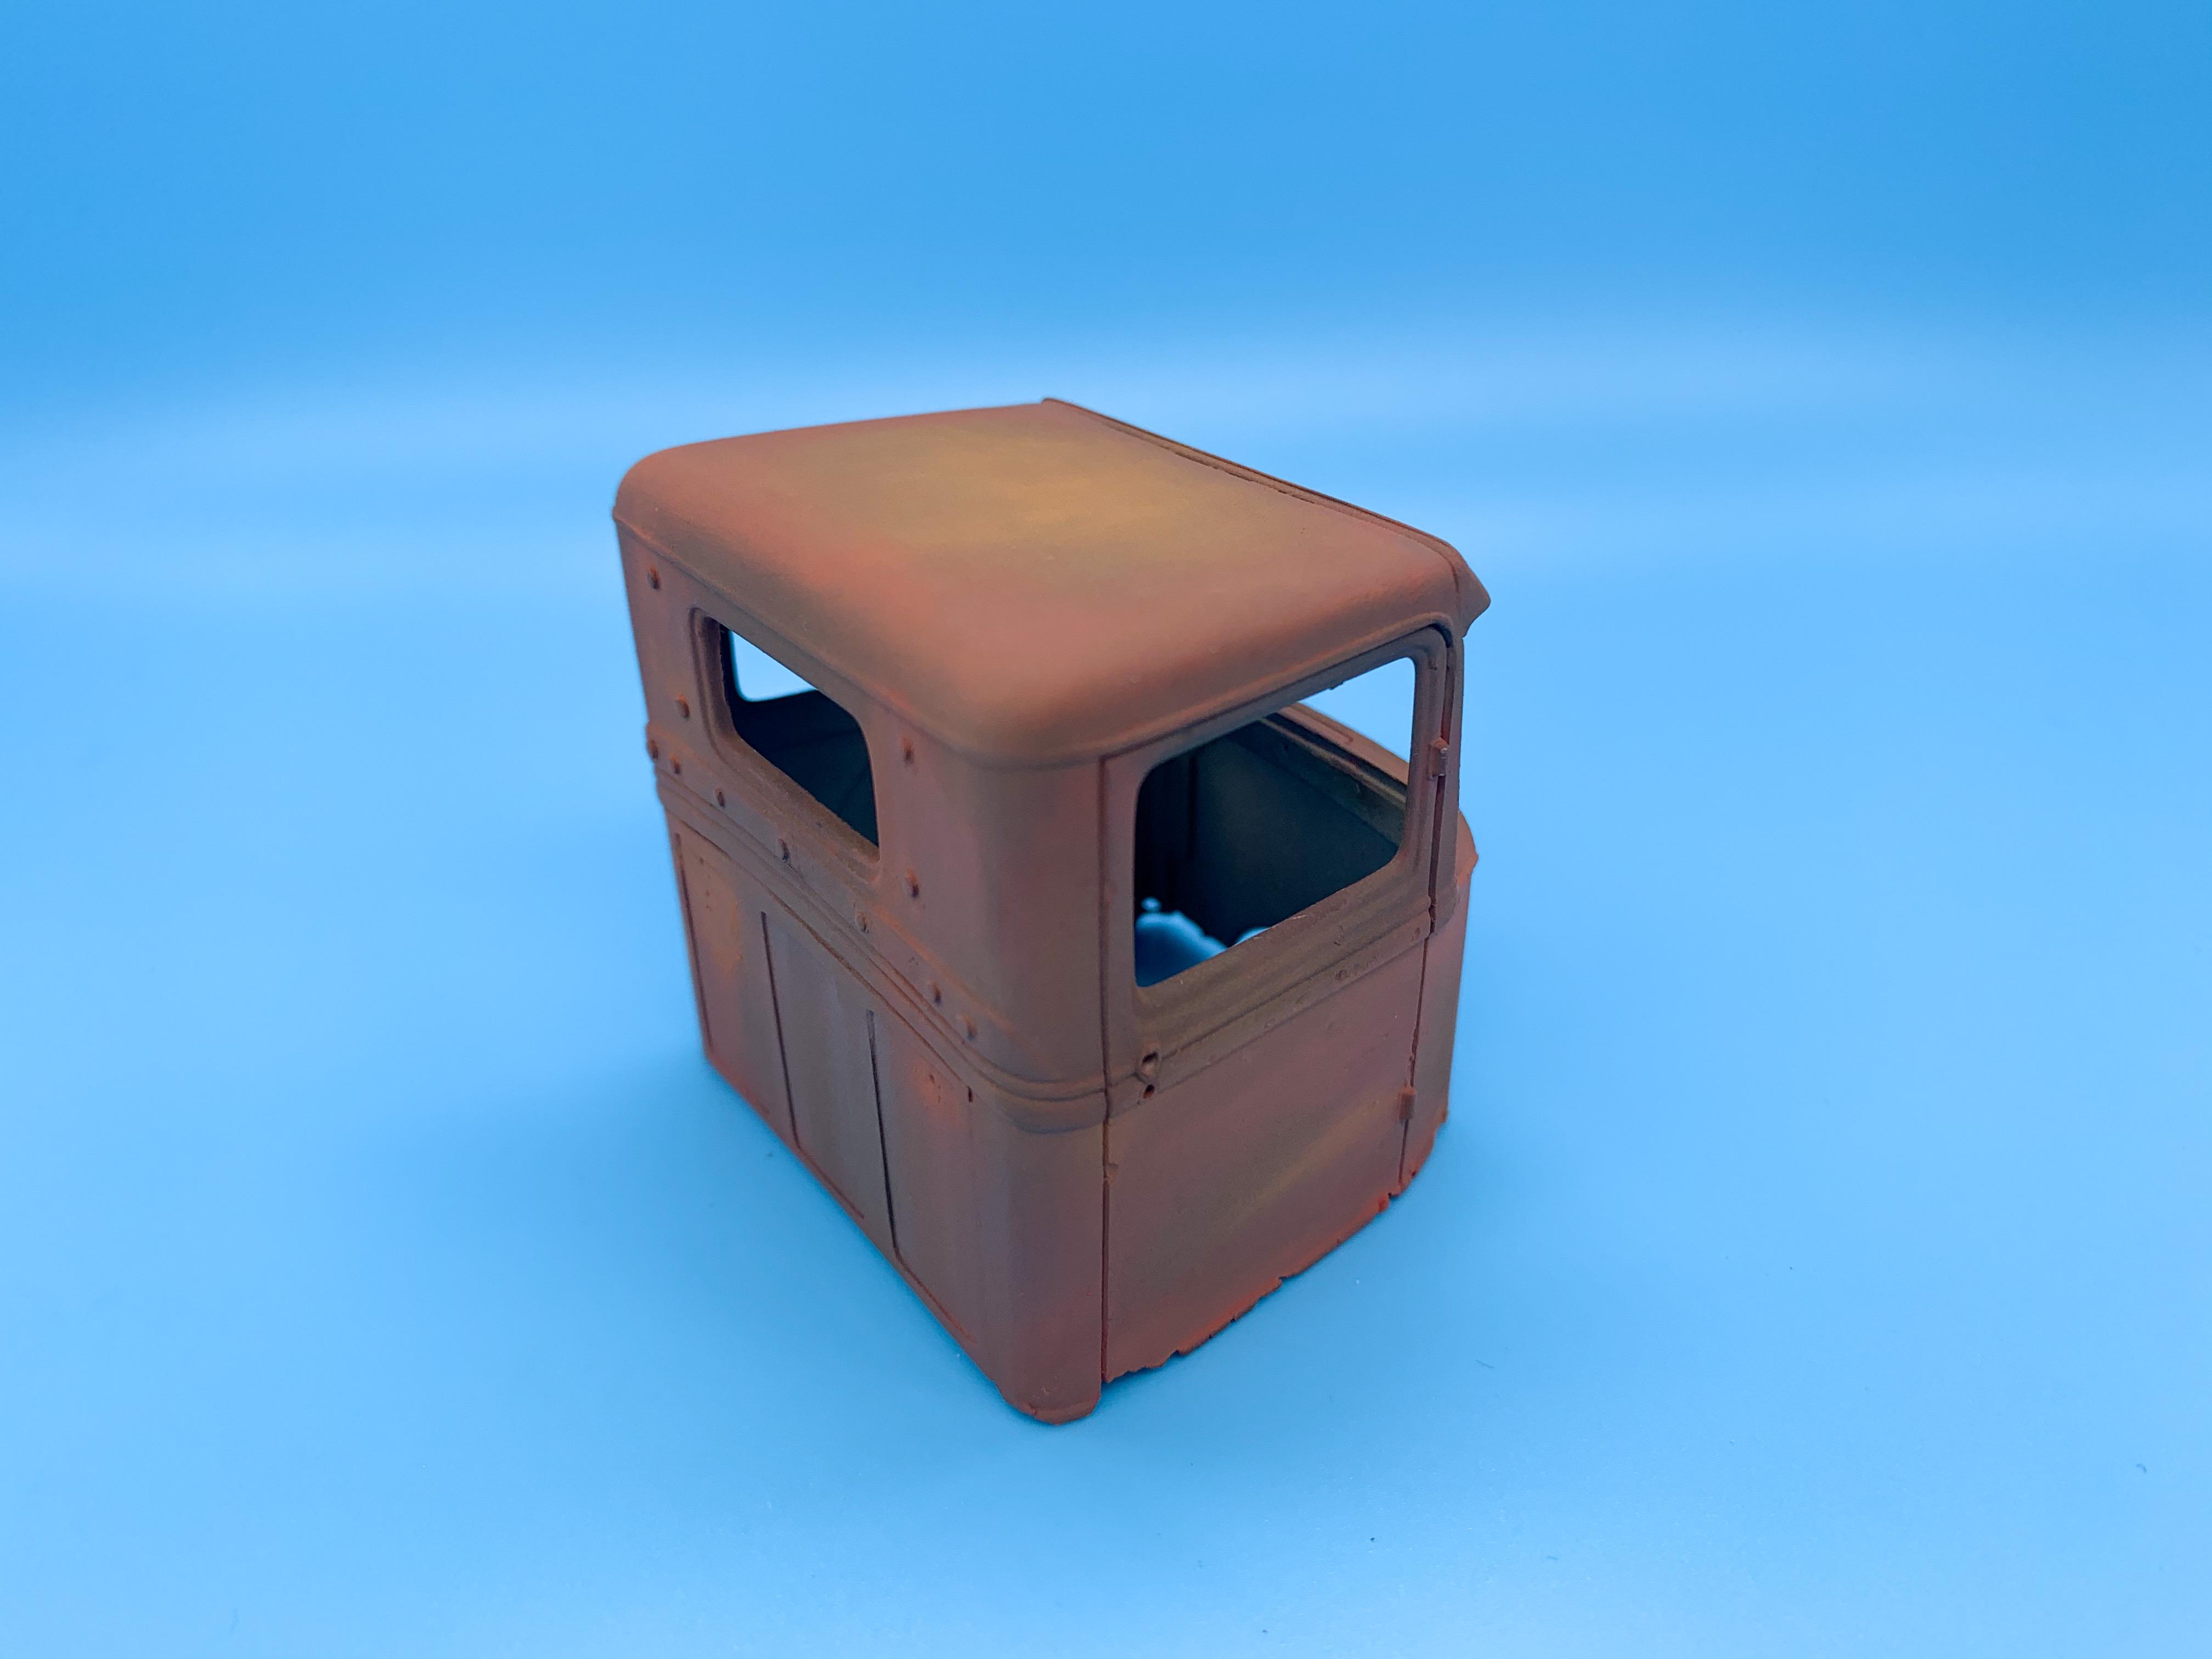
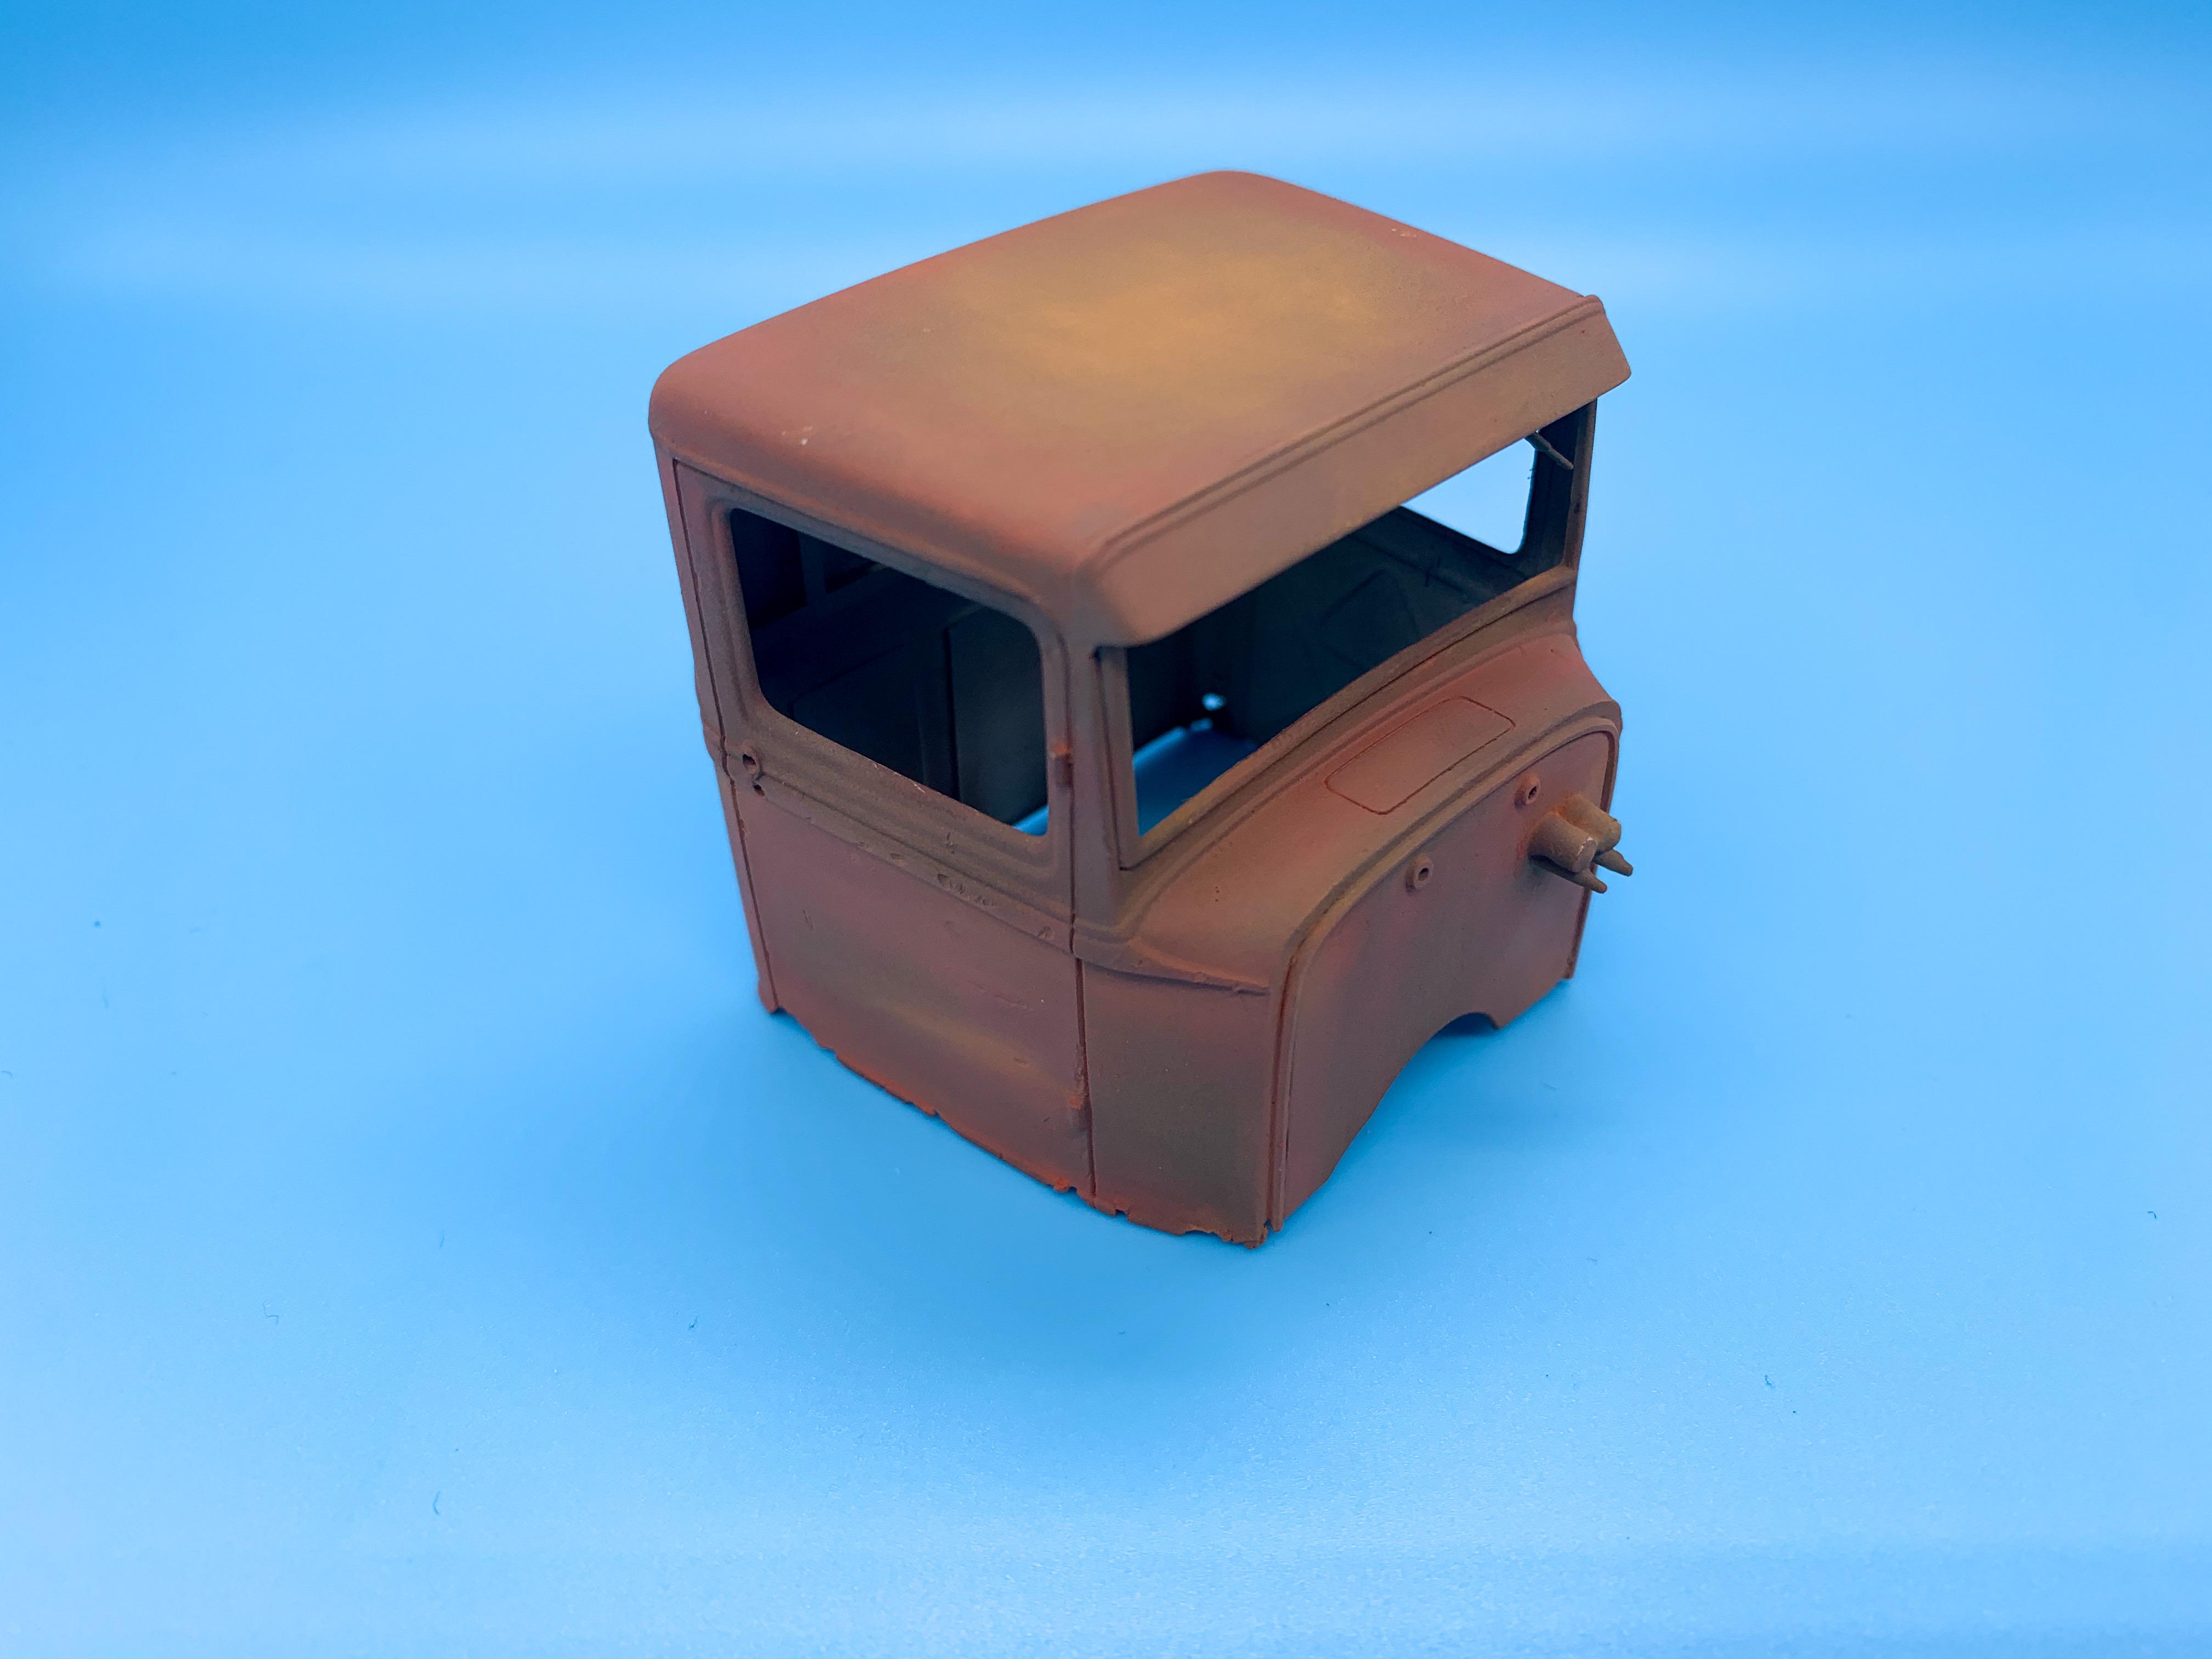
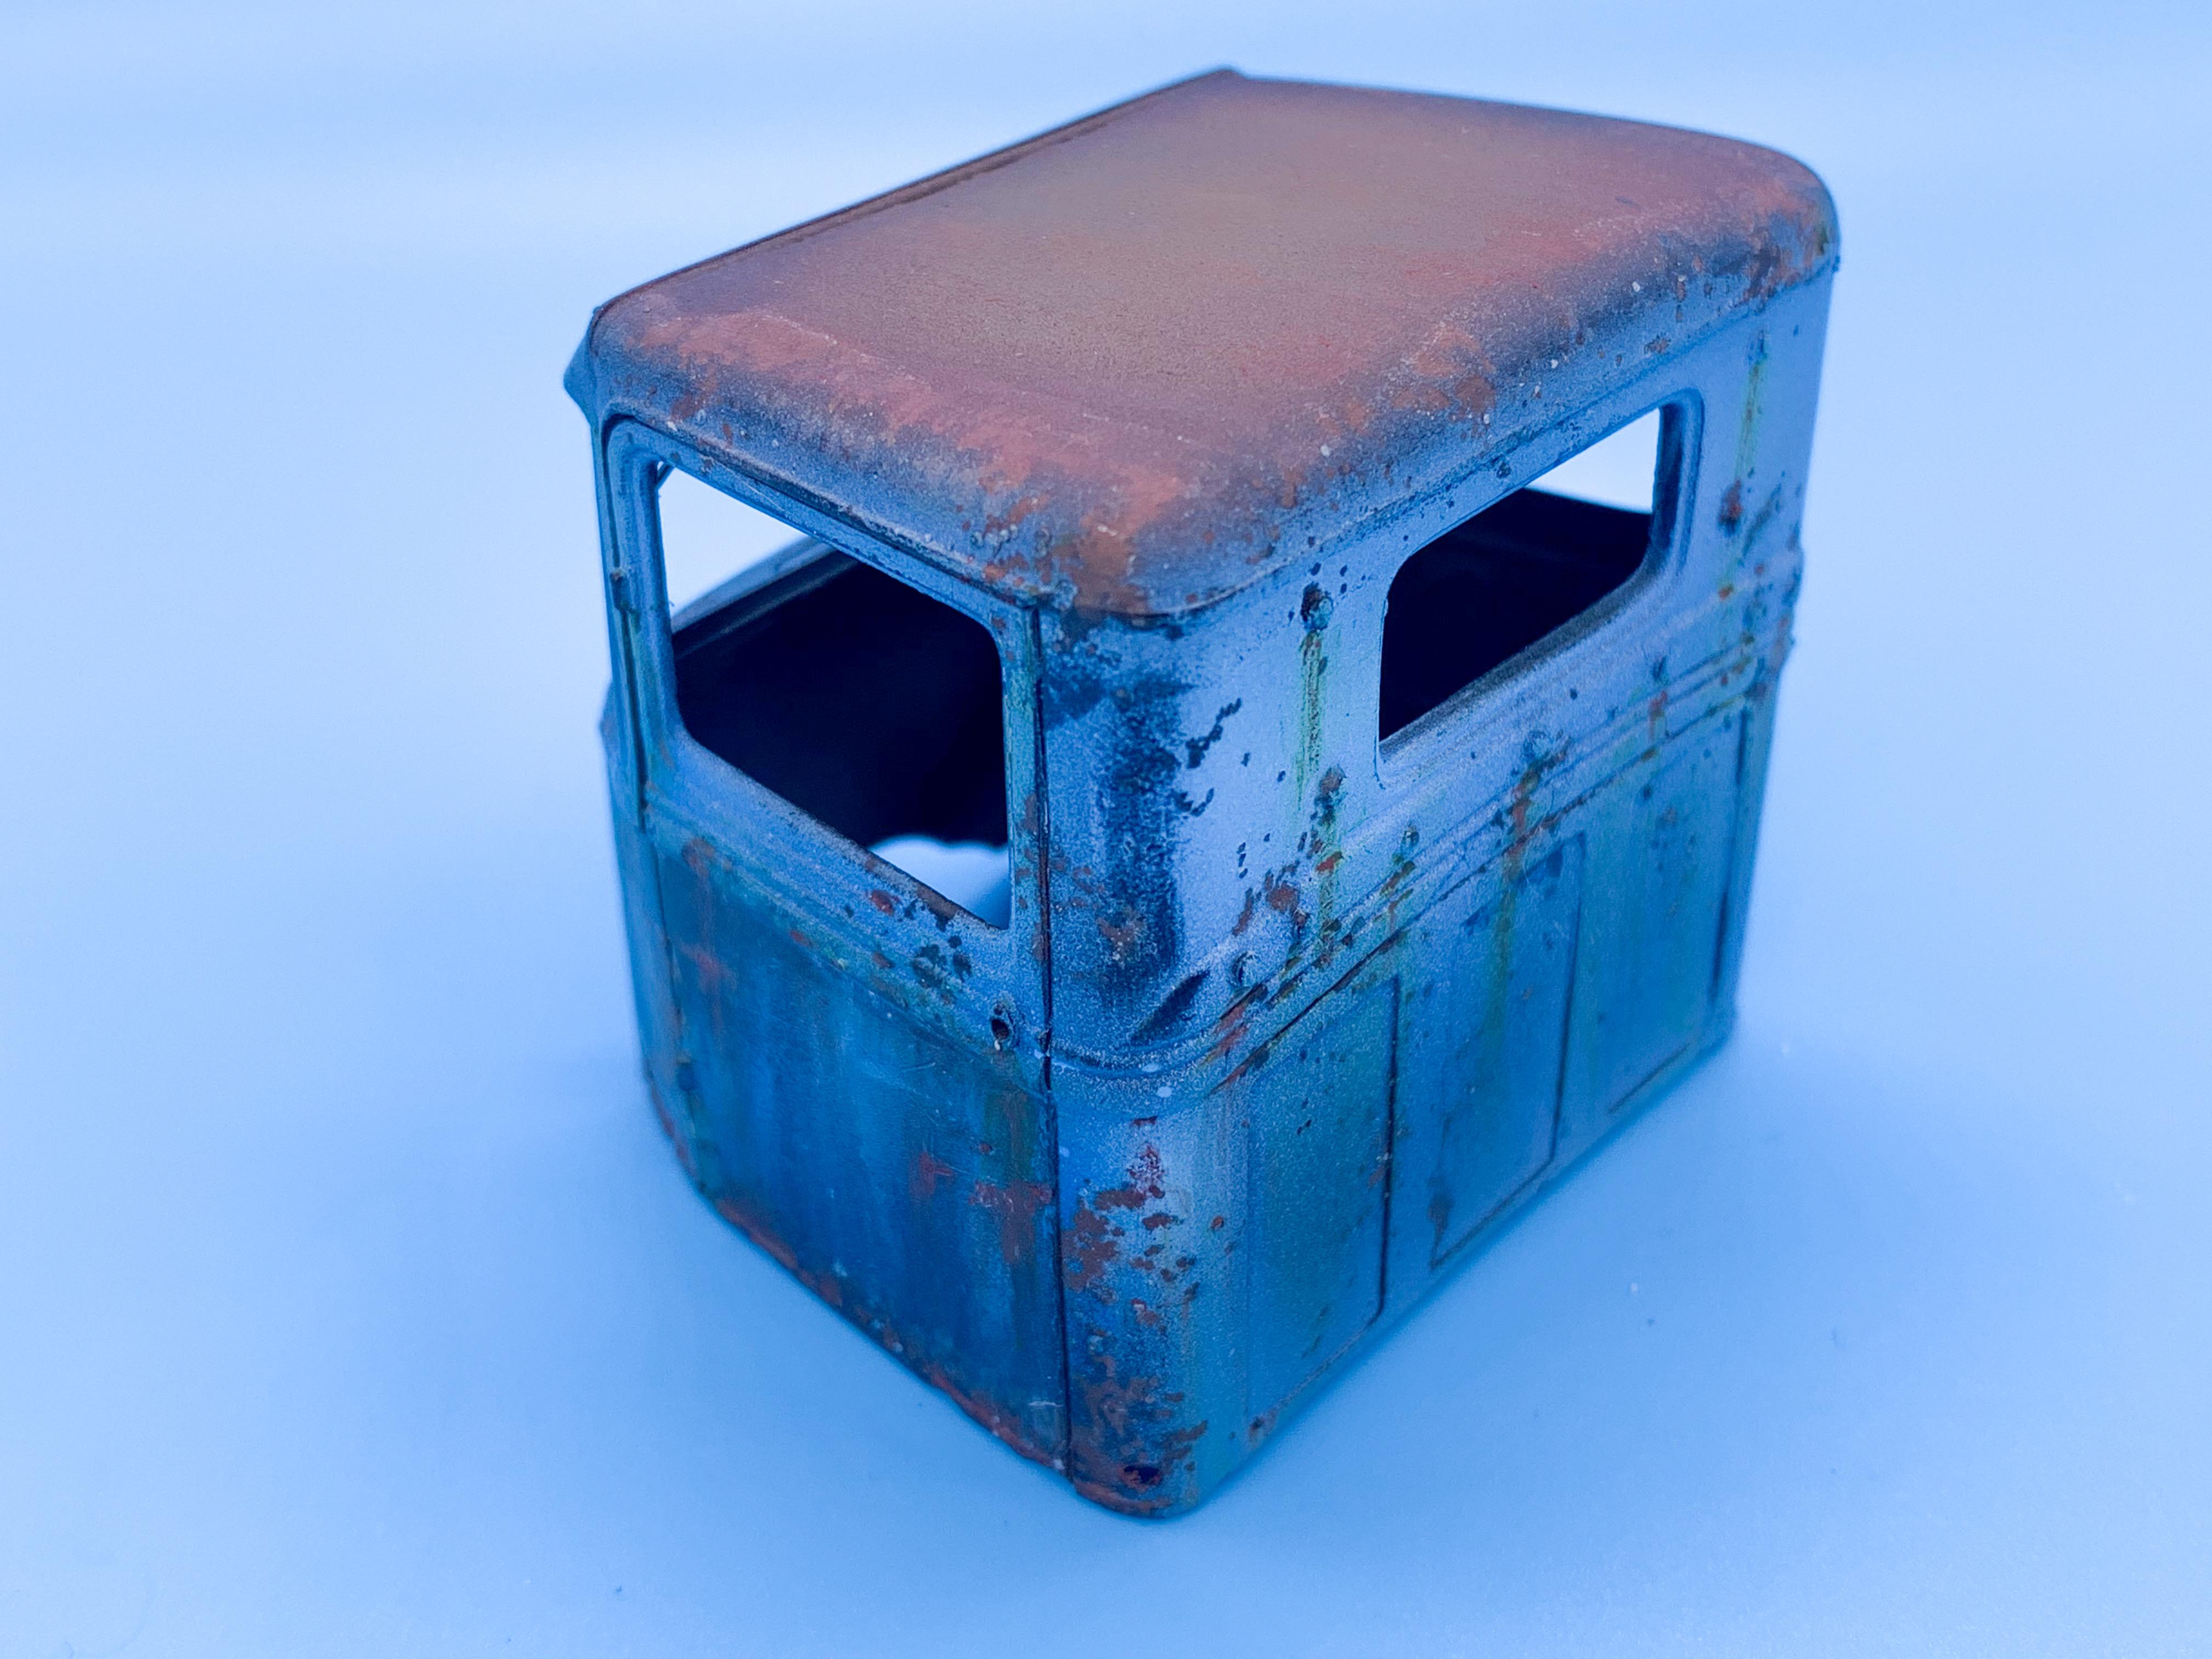
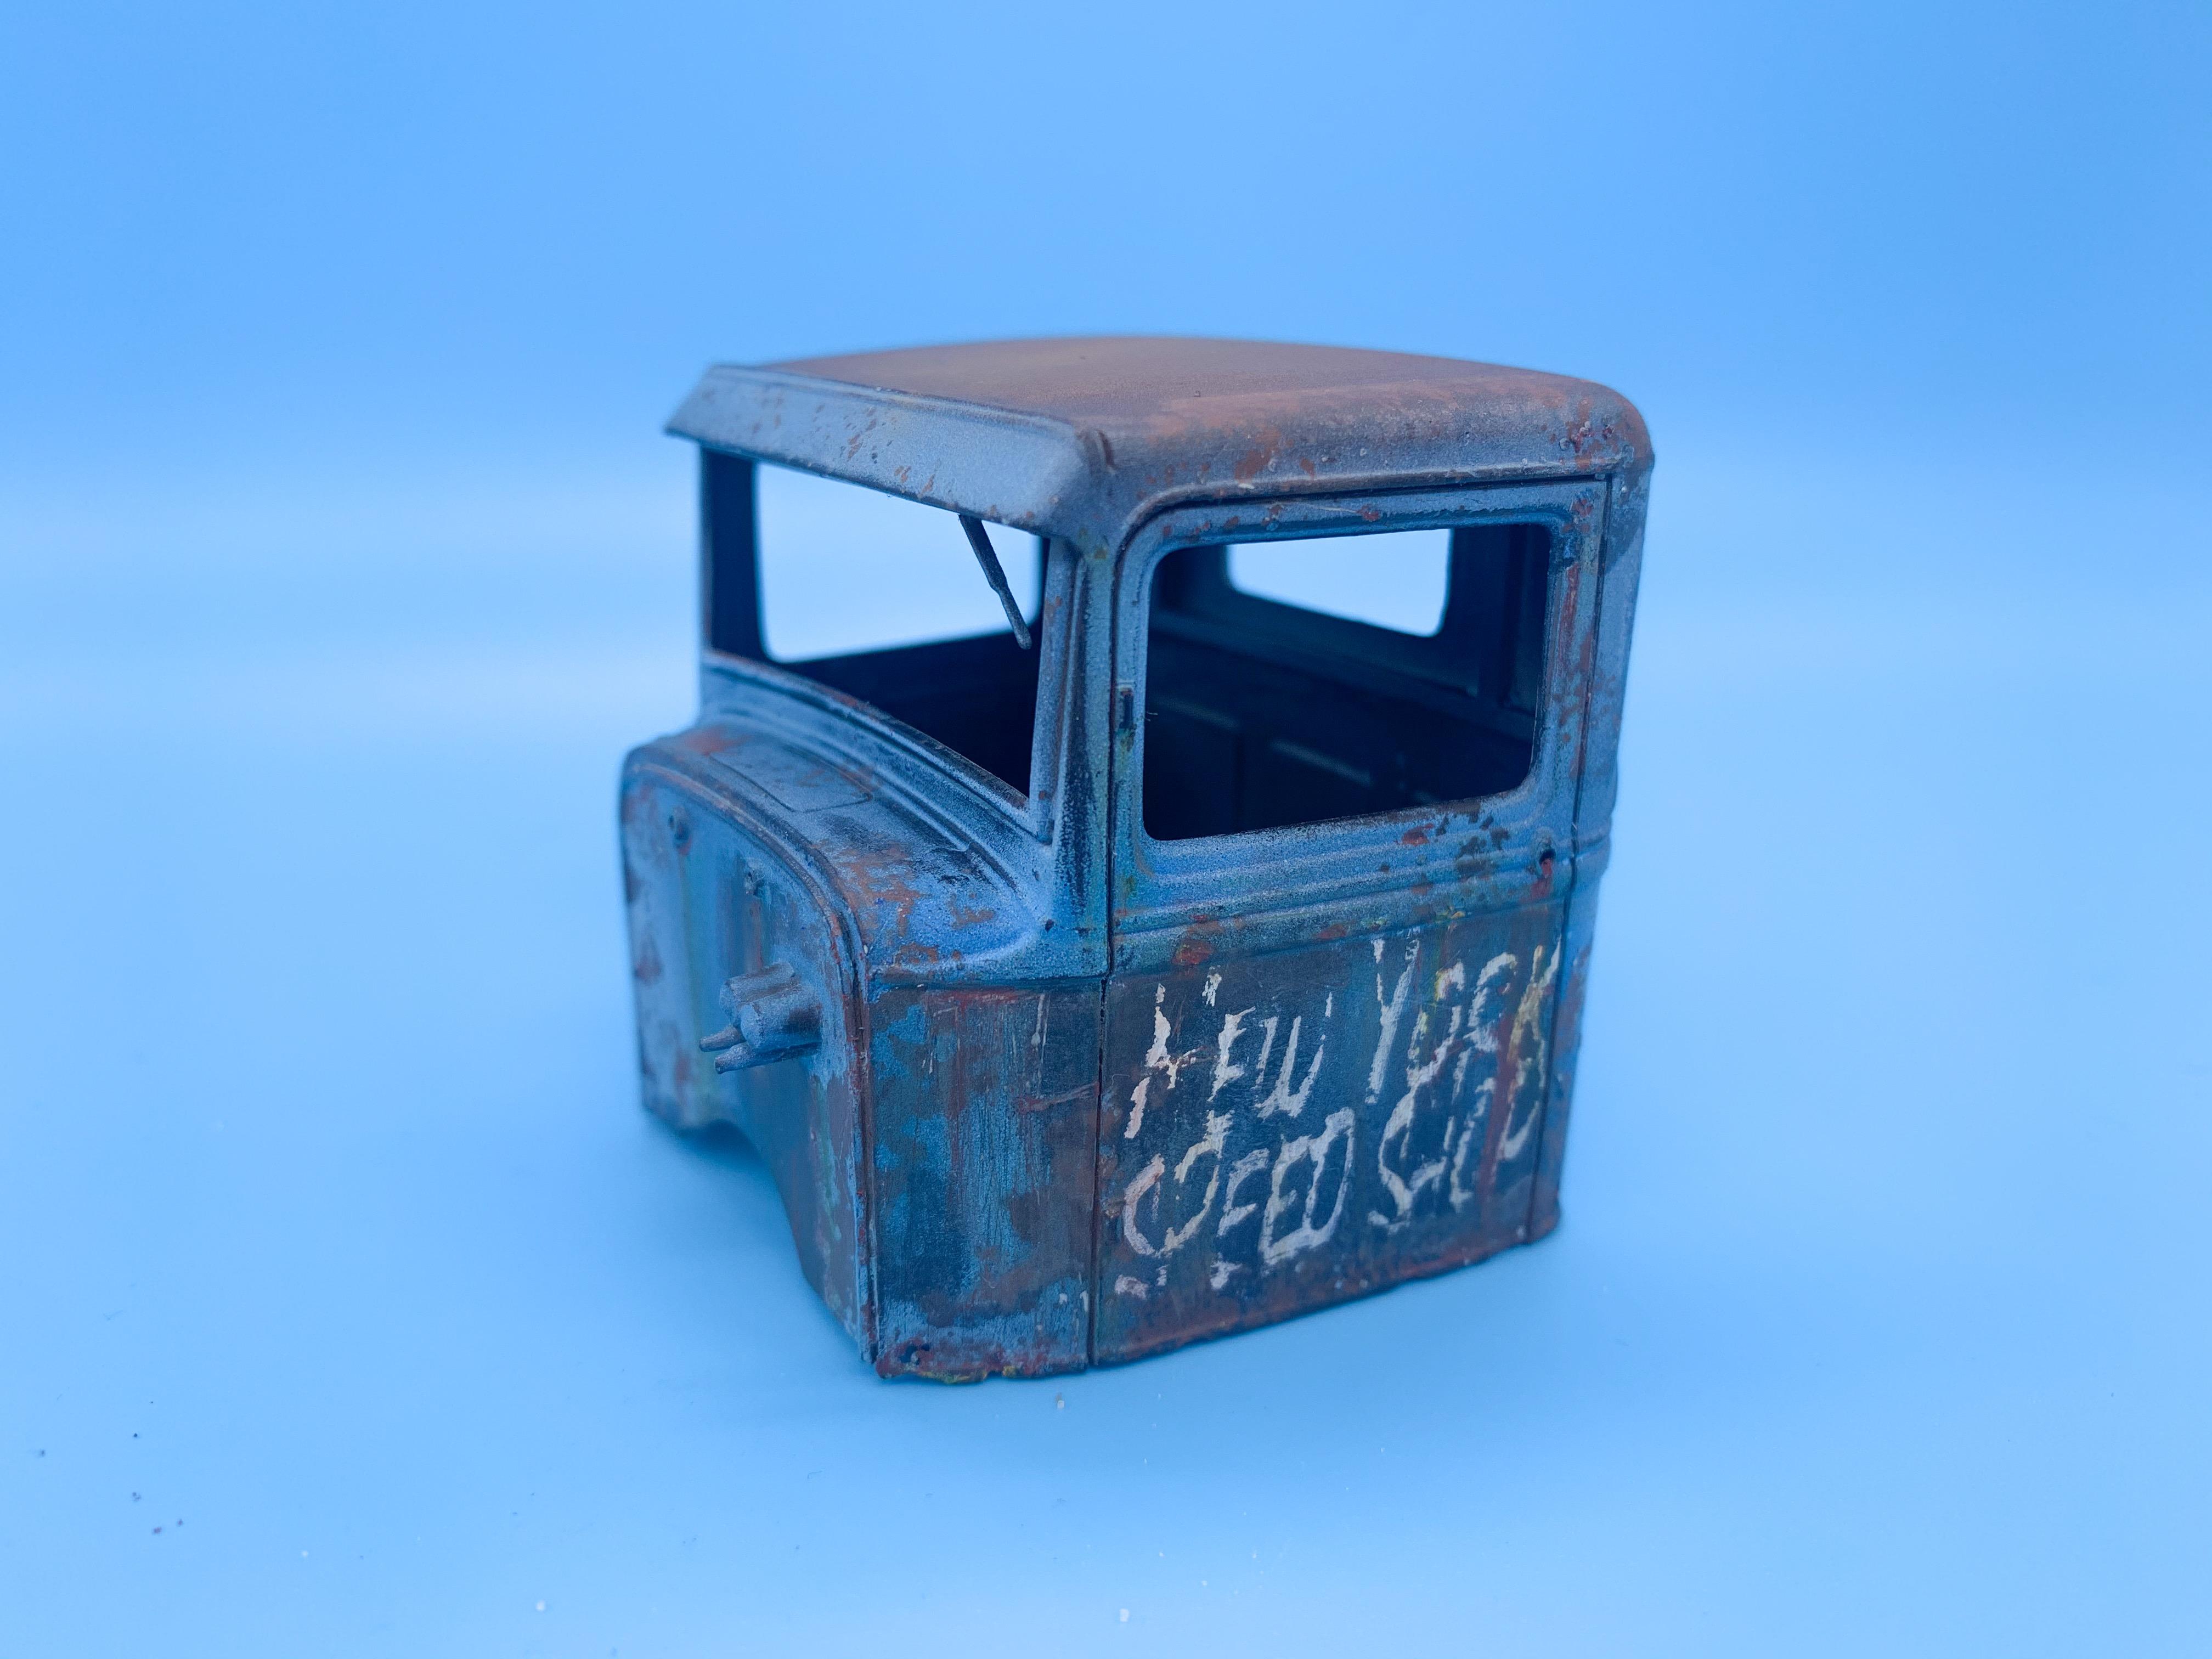
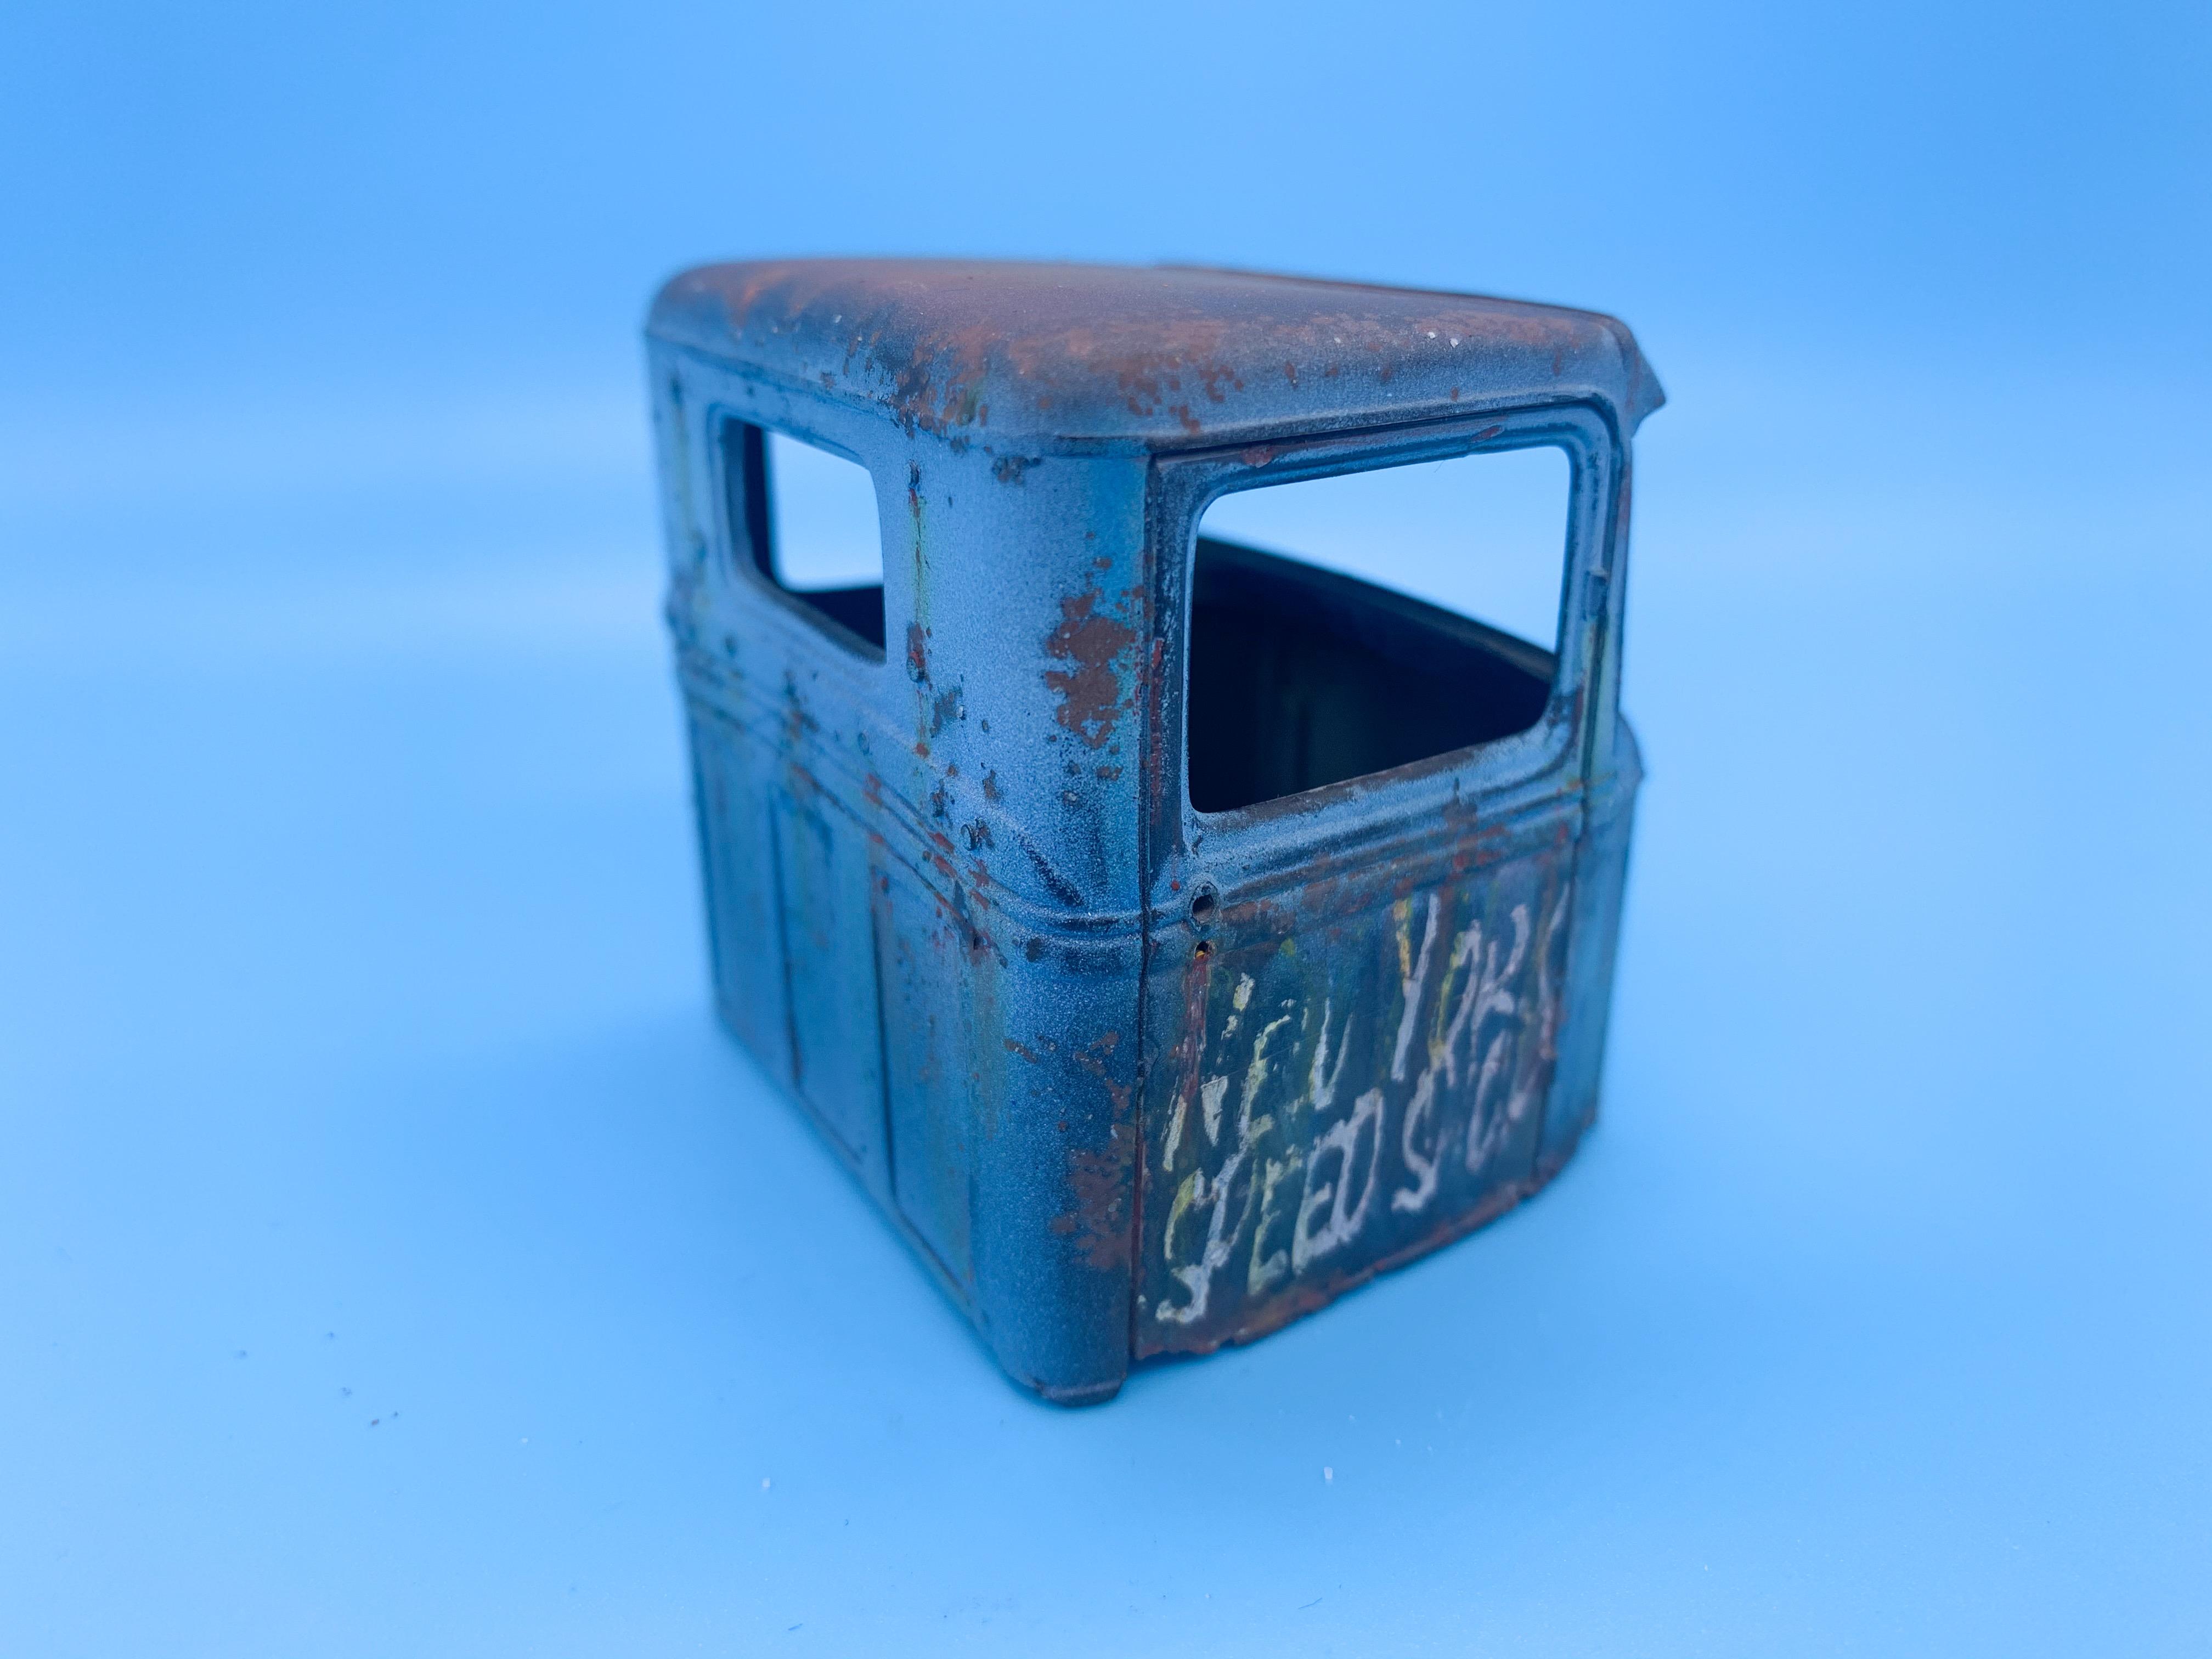
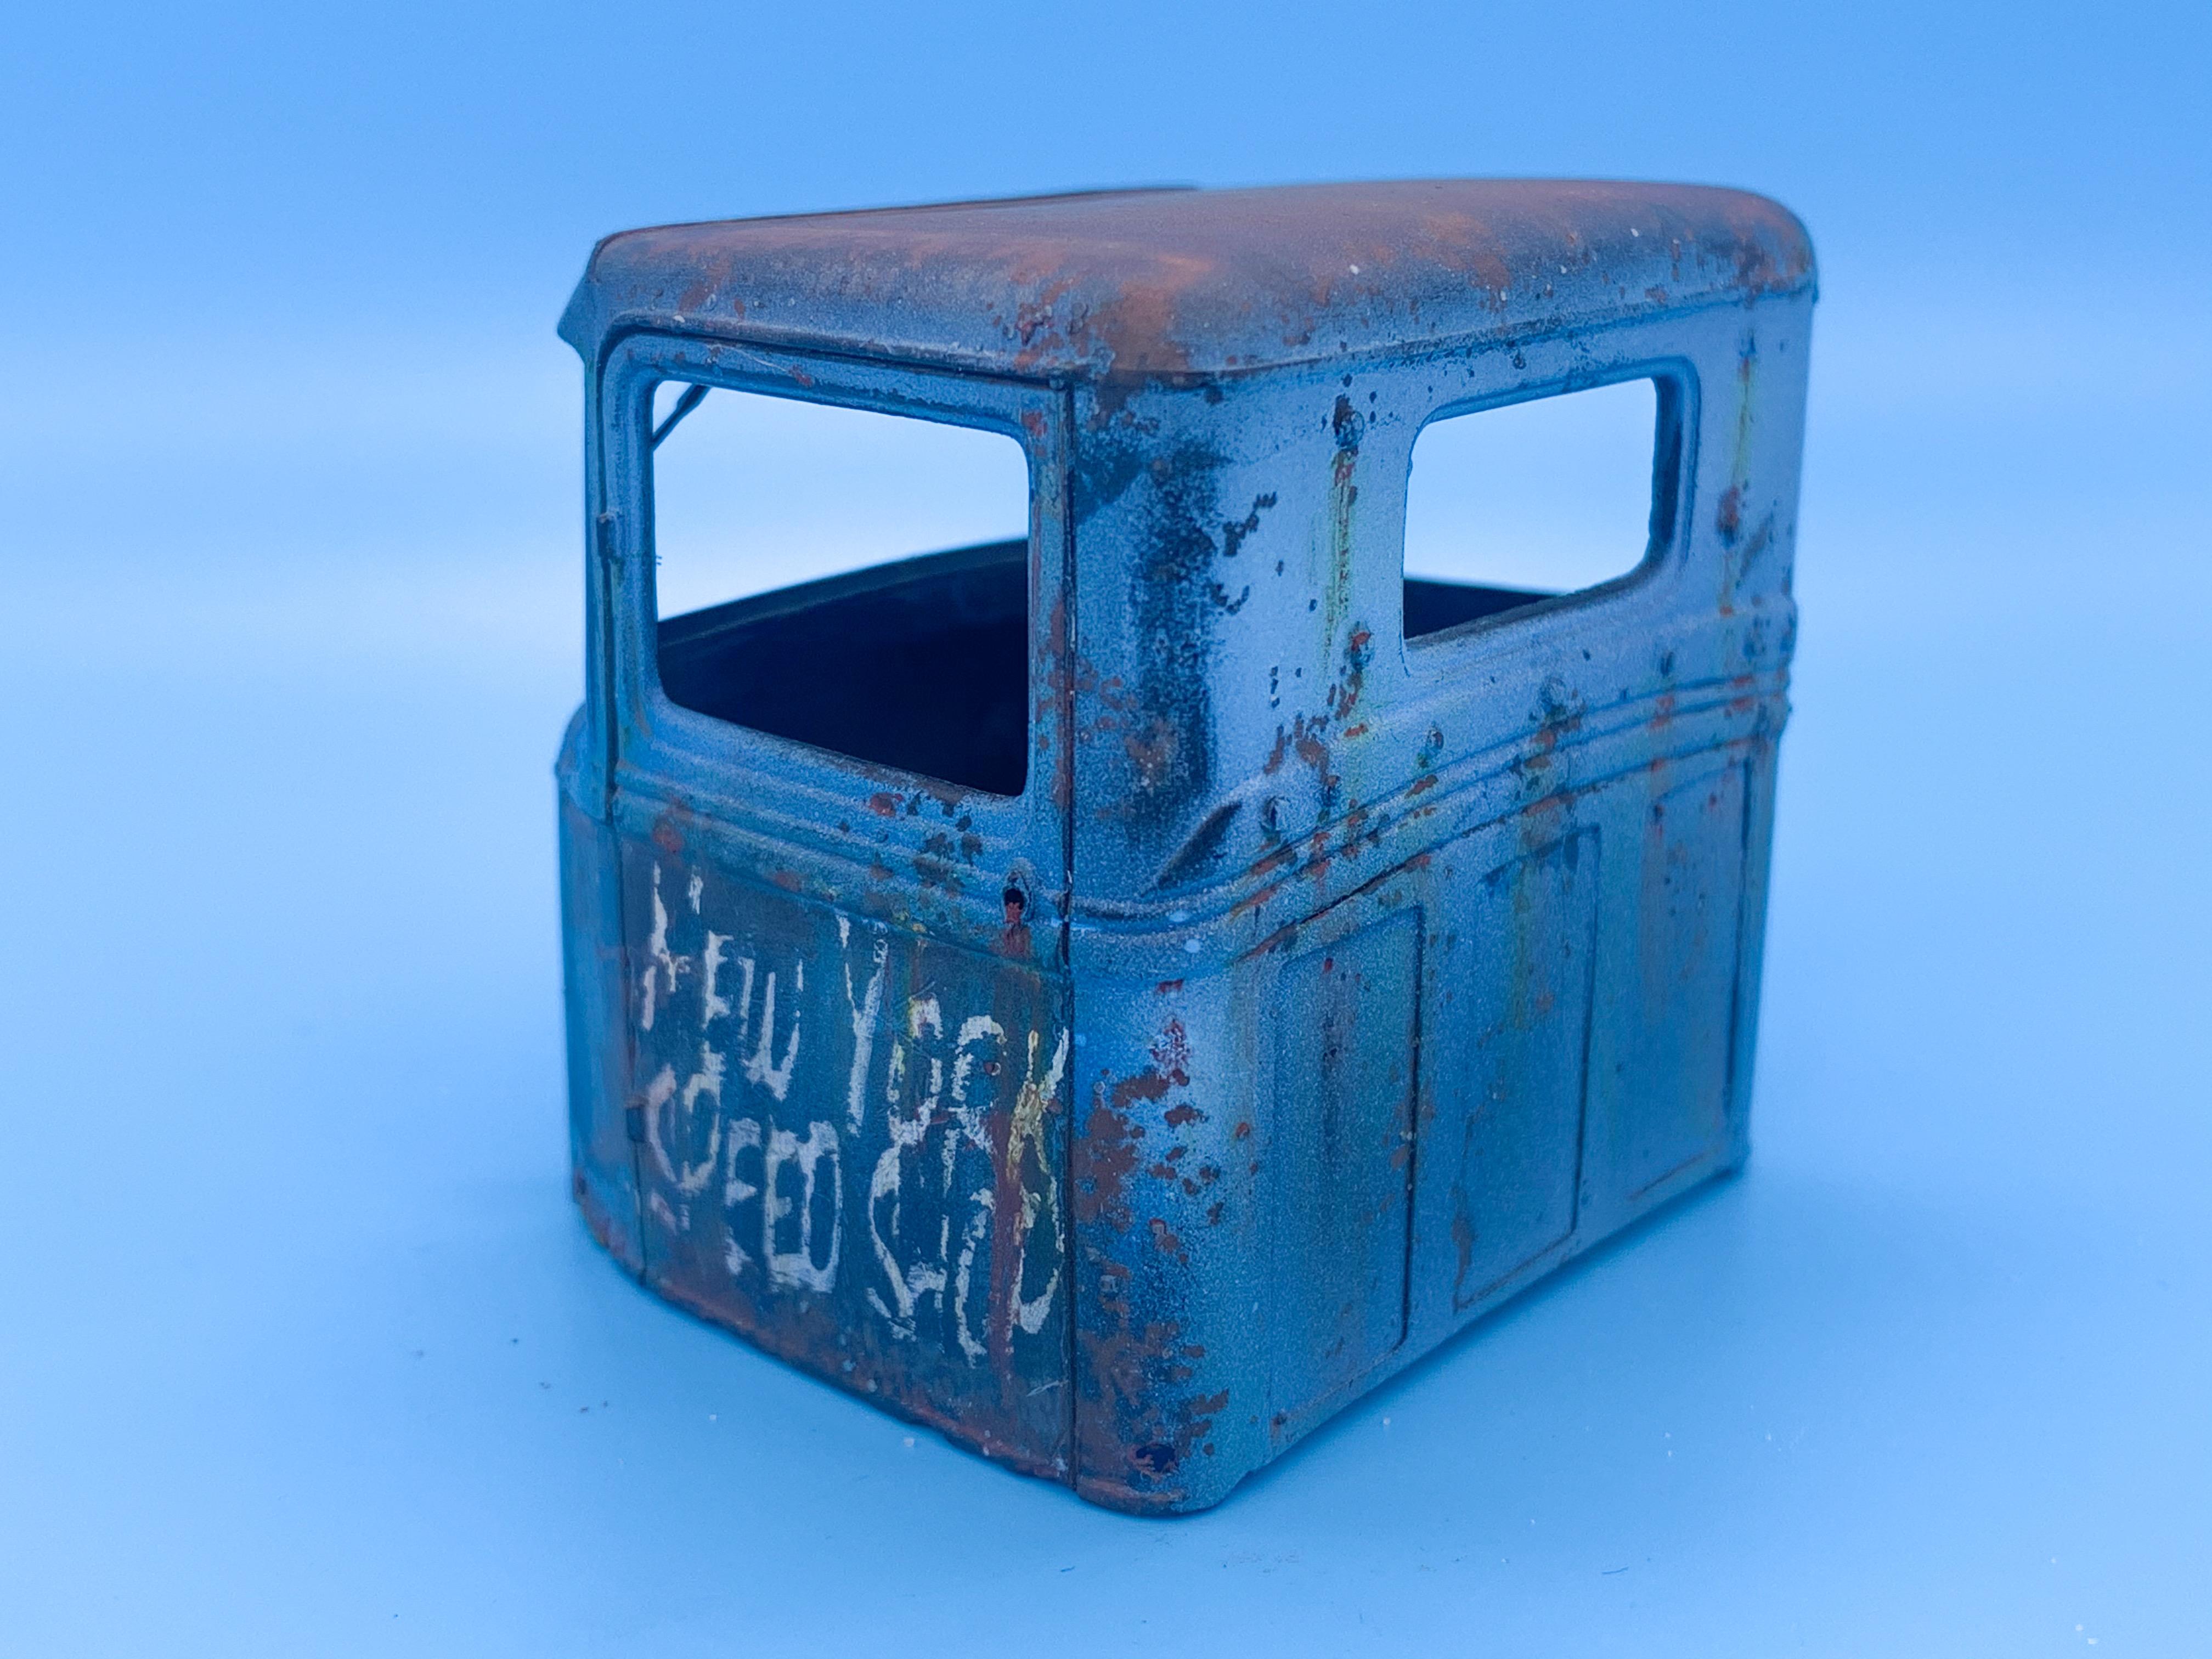
I think keep it for this one! I’ve got an idea for what to do with it, maybe...we’ll see if it works ? AHHHH, yeah! That also makes sense! Good thinking! Thank you sir! Got some paint on the body today...well, paint, pastels, watercolor pencils, regular pencils, a little of everything ? First up, primer - this stuff’s pretty good for a buck a can! Then, a brown base to get us rolling; Add salt, to season; Then some black, followed by dark blue; Followed by some light blue (there IS a reason for all this, honest ?) Starting to look like I imagined it in my head...remove the salt with a soft toothbrush: Then, I buffed back through some of the light blue: Added rust streaks with watercolors from the places I figure water would drop and run down the body, including these rivets on the back: Then masked you some vintage hand-painted lettering on the side (I know, using a mask to paint hand lettering is cheating) then buffed back through it and gave it some more weathering and rust streaks to make it look like it has been there all along: And that’s enough ruining things for one day I think ? More soon!
-
Closer ?
-
Good info, thanks Dennis! I’ll be picking those up for sure!
-
I love it on those Boyd rims! I didn’t know that there were any kits with Boyd wheels aside from the couple of Testors kits...and those few AMT American Hot Rod branded kits with the ENORMOUS 24”s in, or whatever they were. Not sure Boyd had much to do with the look of the wheels in those kits anyway, they weren’t my favorite design Anyhoo, looking great buddy! Enjoying watching this one come together!!
-
What did you see on the road today?
OldNYJim replied to Harry P.'s topic in General Automotive Talk (Trucks and Cars)
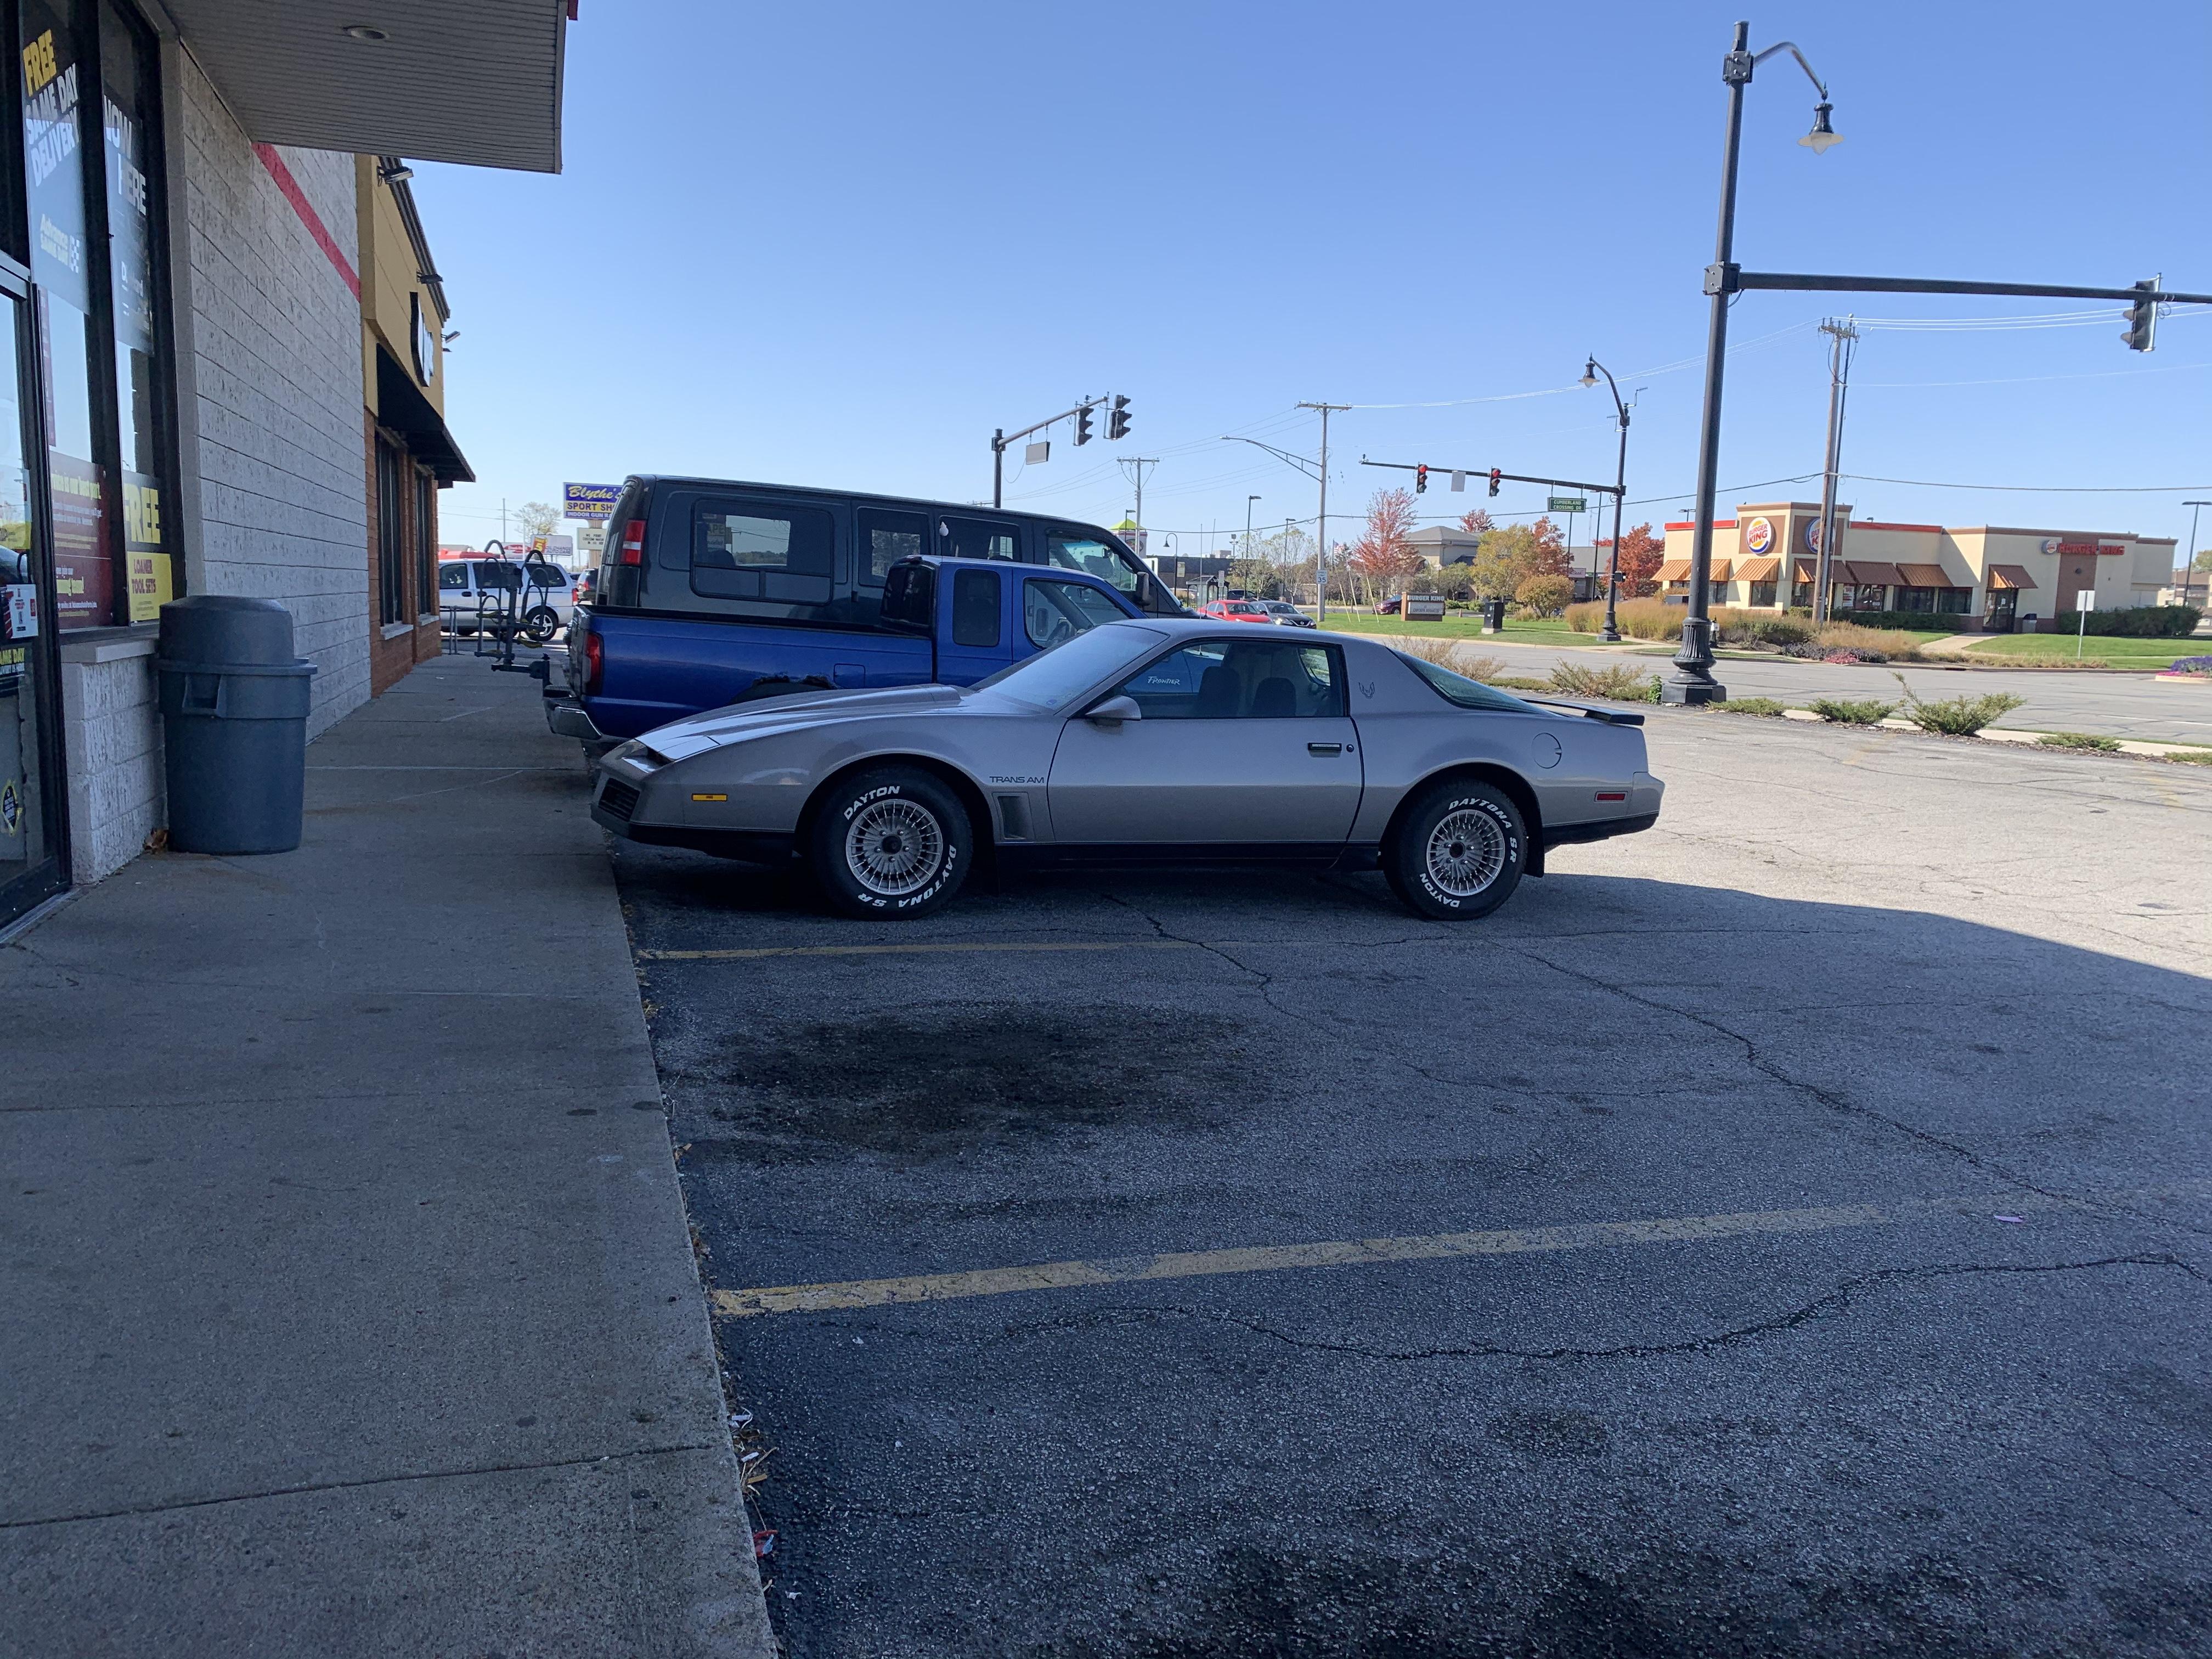
I think I’ve seen that car around the city before! Huh, cool! I wondered if that might be about what it was, but didn’t know...thanks! Spotted from the side of the road today, next to the grocery store: Couldn’t get a better photo without trespassing - I’ll save that for another day ??
-
Today I learned that airplane wheels wore pants ? Perfect name for them, you just think they’d call them something more technical-sounding ?
-
Patina’d 34 Pick Up
OldNYJim replied to OldNYJim's topic in WIP: Model Trucks: Pickups, Vans, SUVs, Light Commercial
* My wife, a true-crime fan and all round smart gal/wannabe-detective thought about this after I showed her and theorised that a working truck such as this would likely have less traffic thru the passenger door than the driver’s door. As such, rain water might be trapped in between the bottom of the door and the floor on that side more often than the other side, where the driver getting in and out of the truck frequently would stop that build up, and thus the driver’s side wouldn’t suffer rust damage as much over a long period of time. Plausible? Maybe ?♂️? -
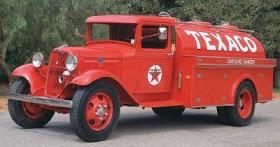
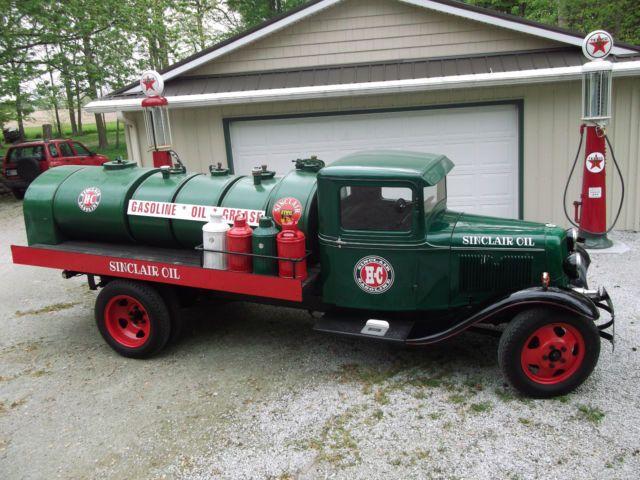
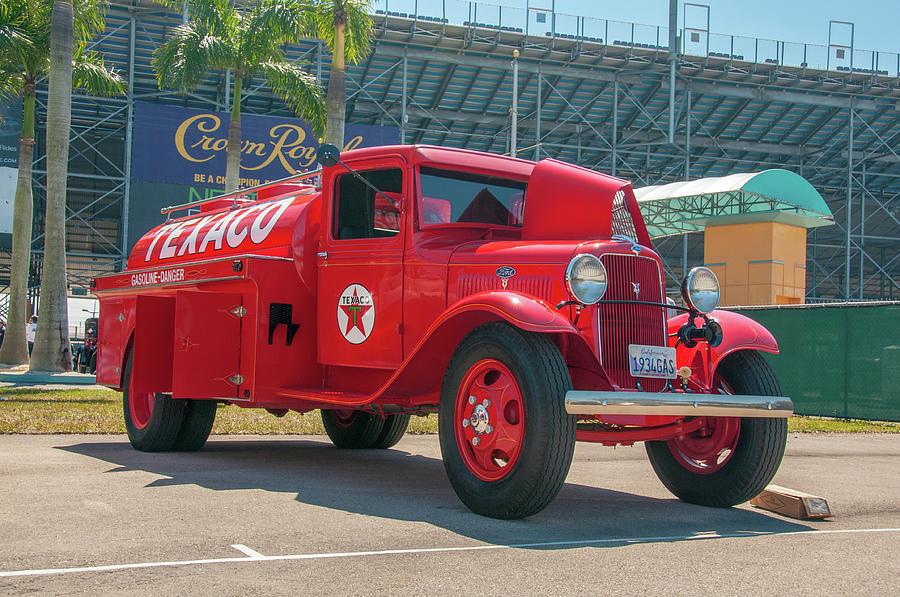
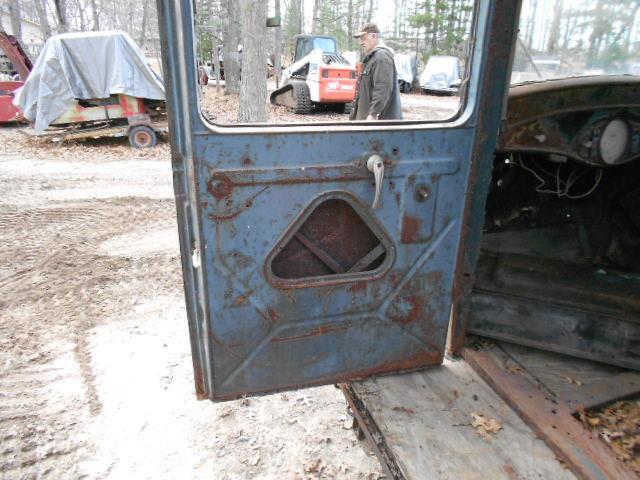
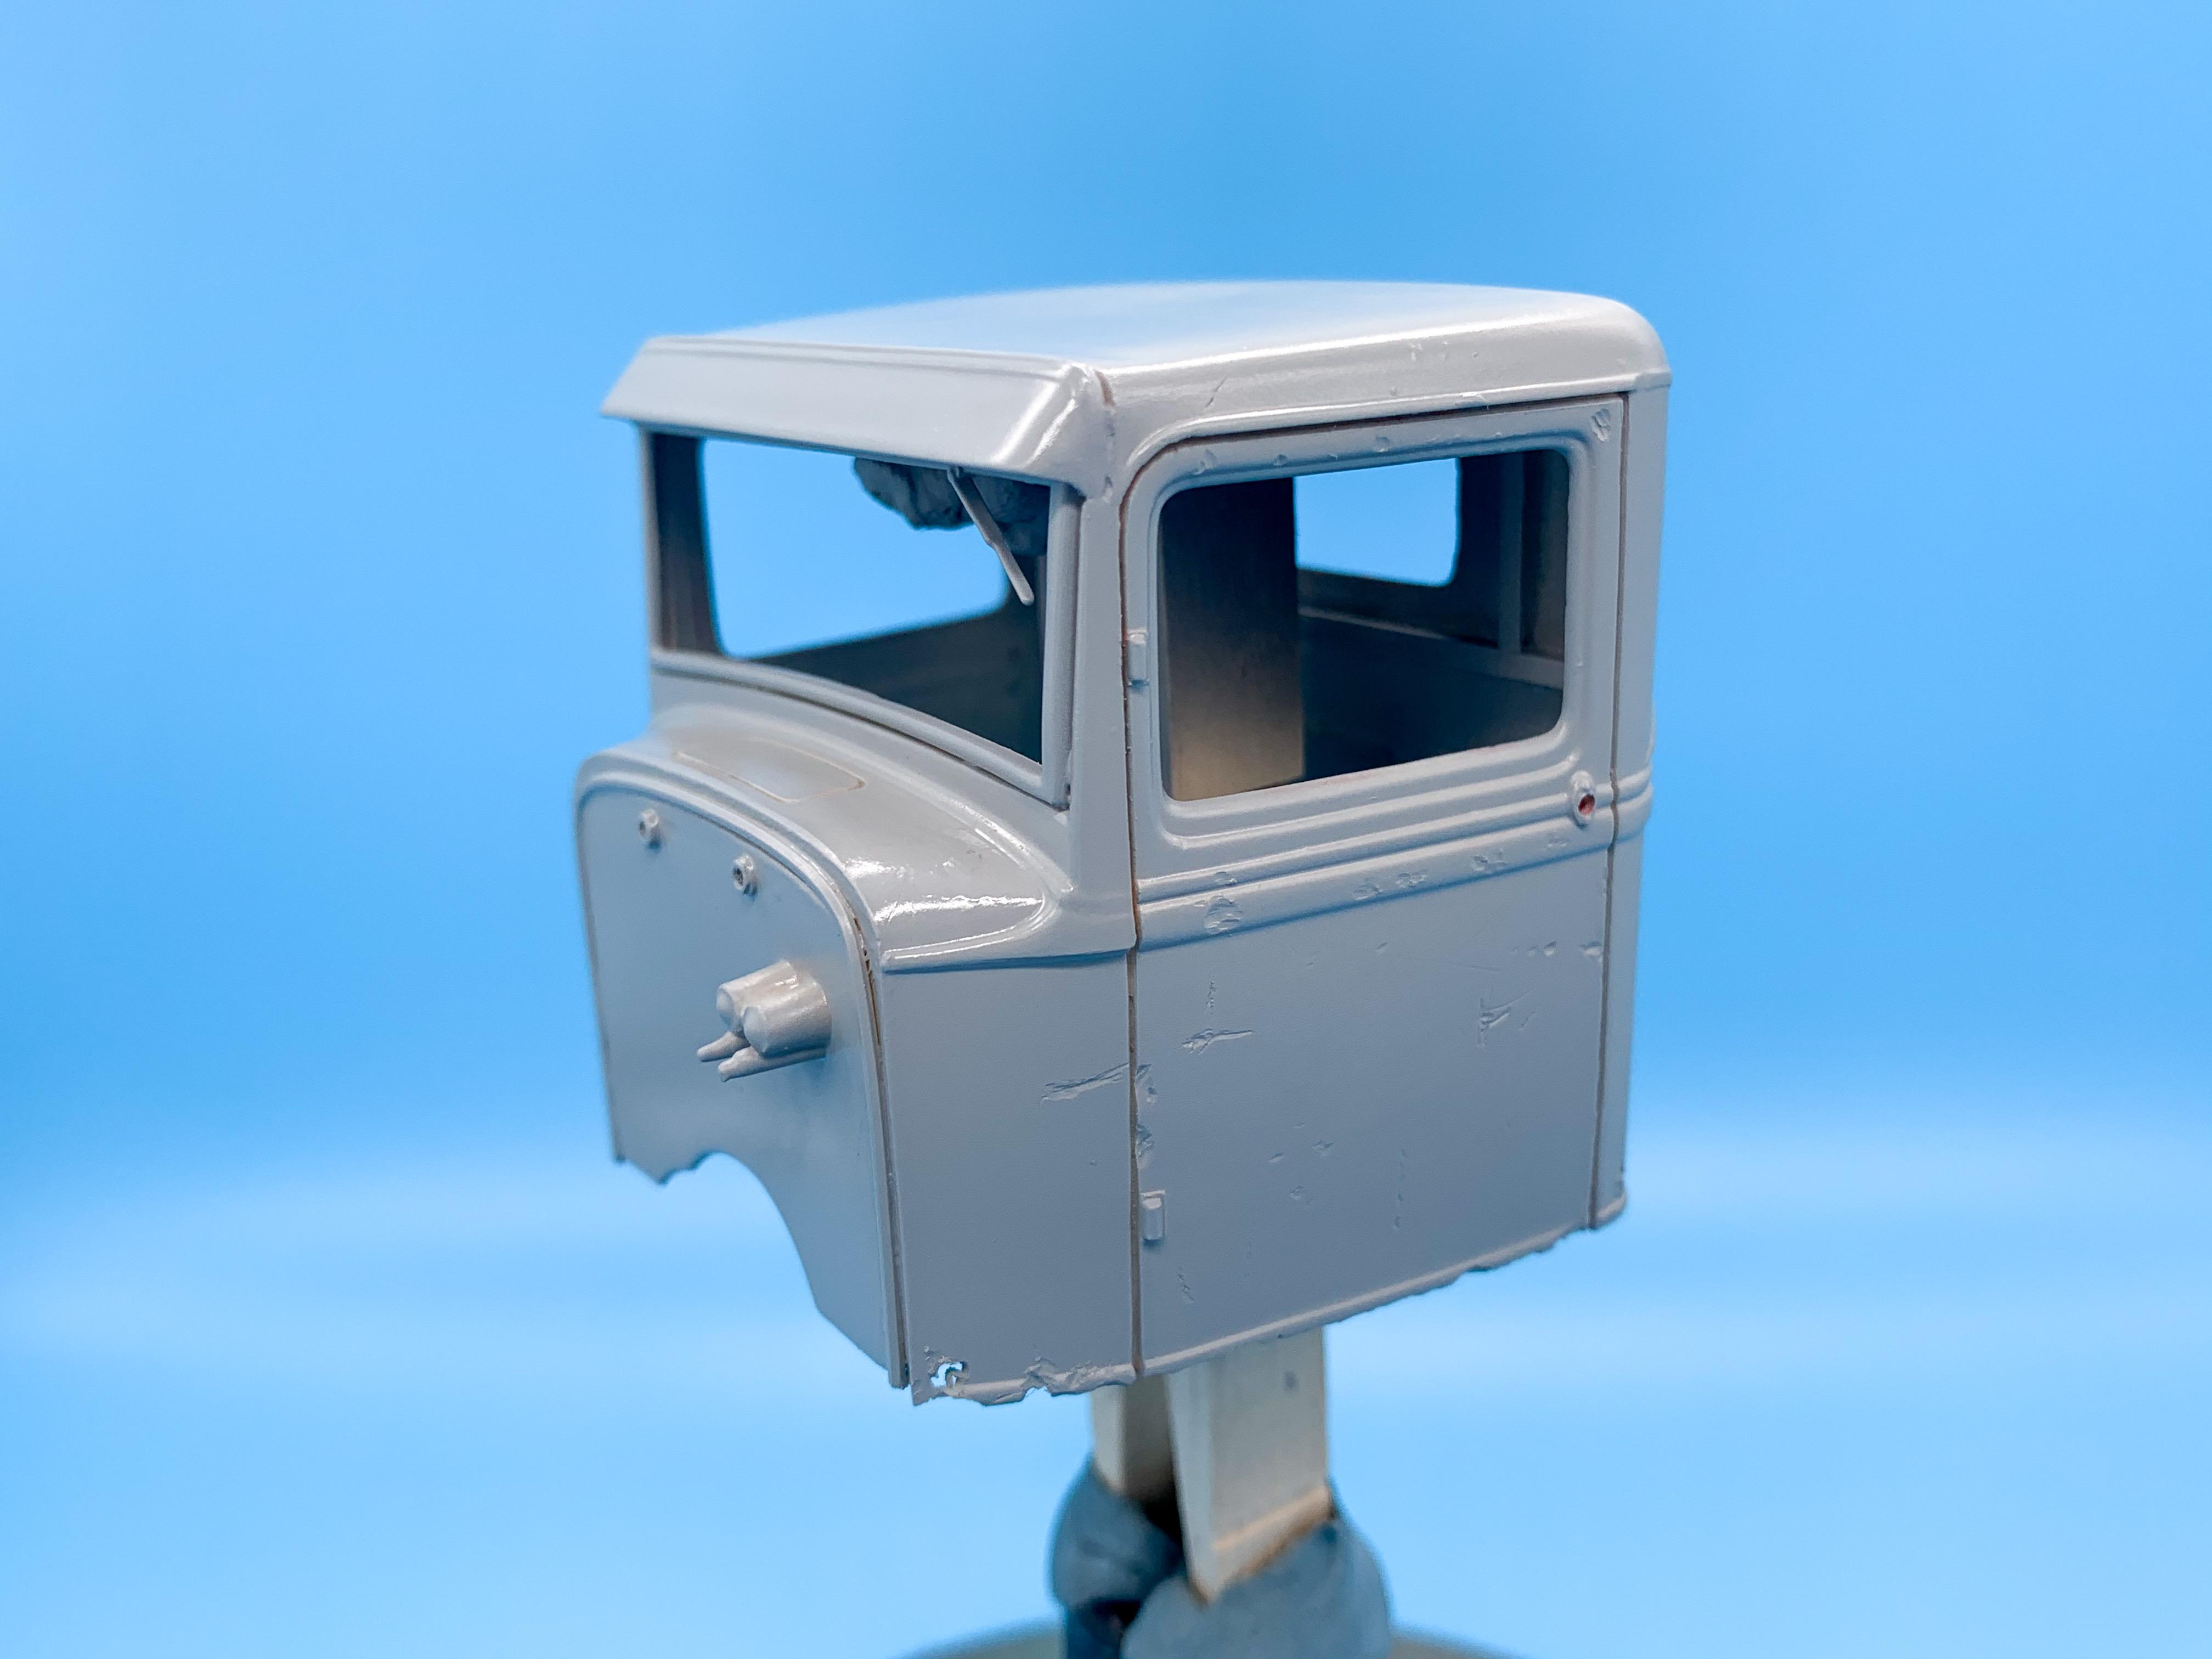
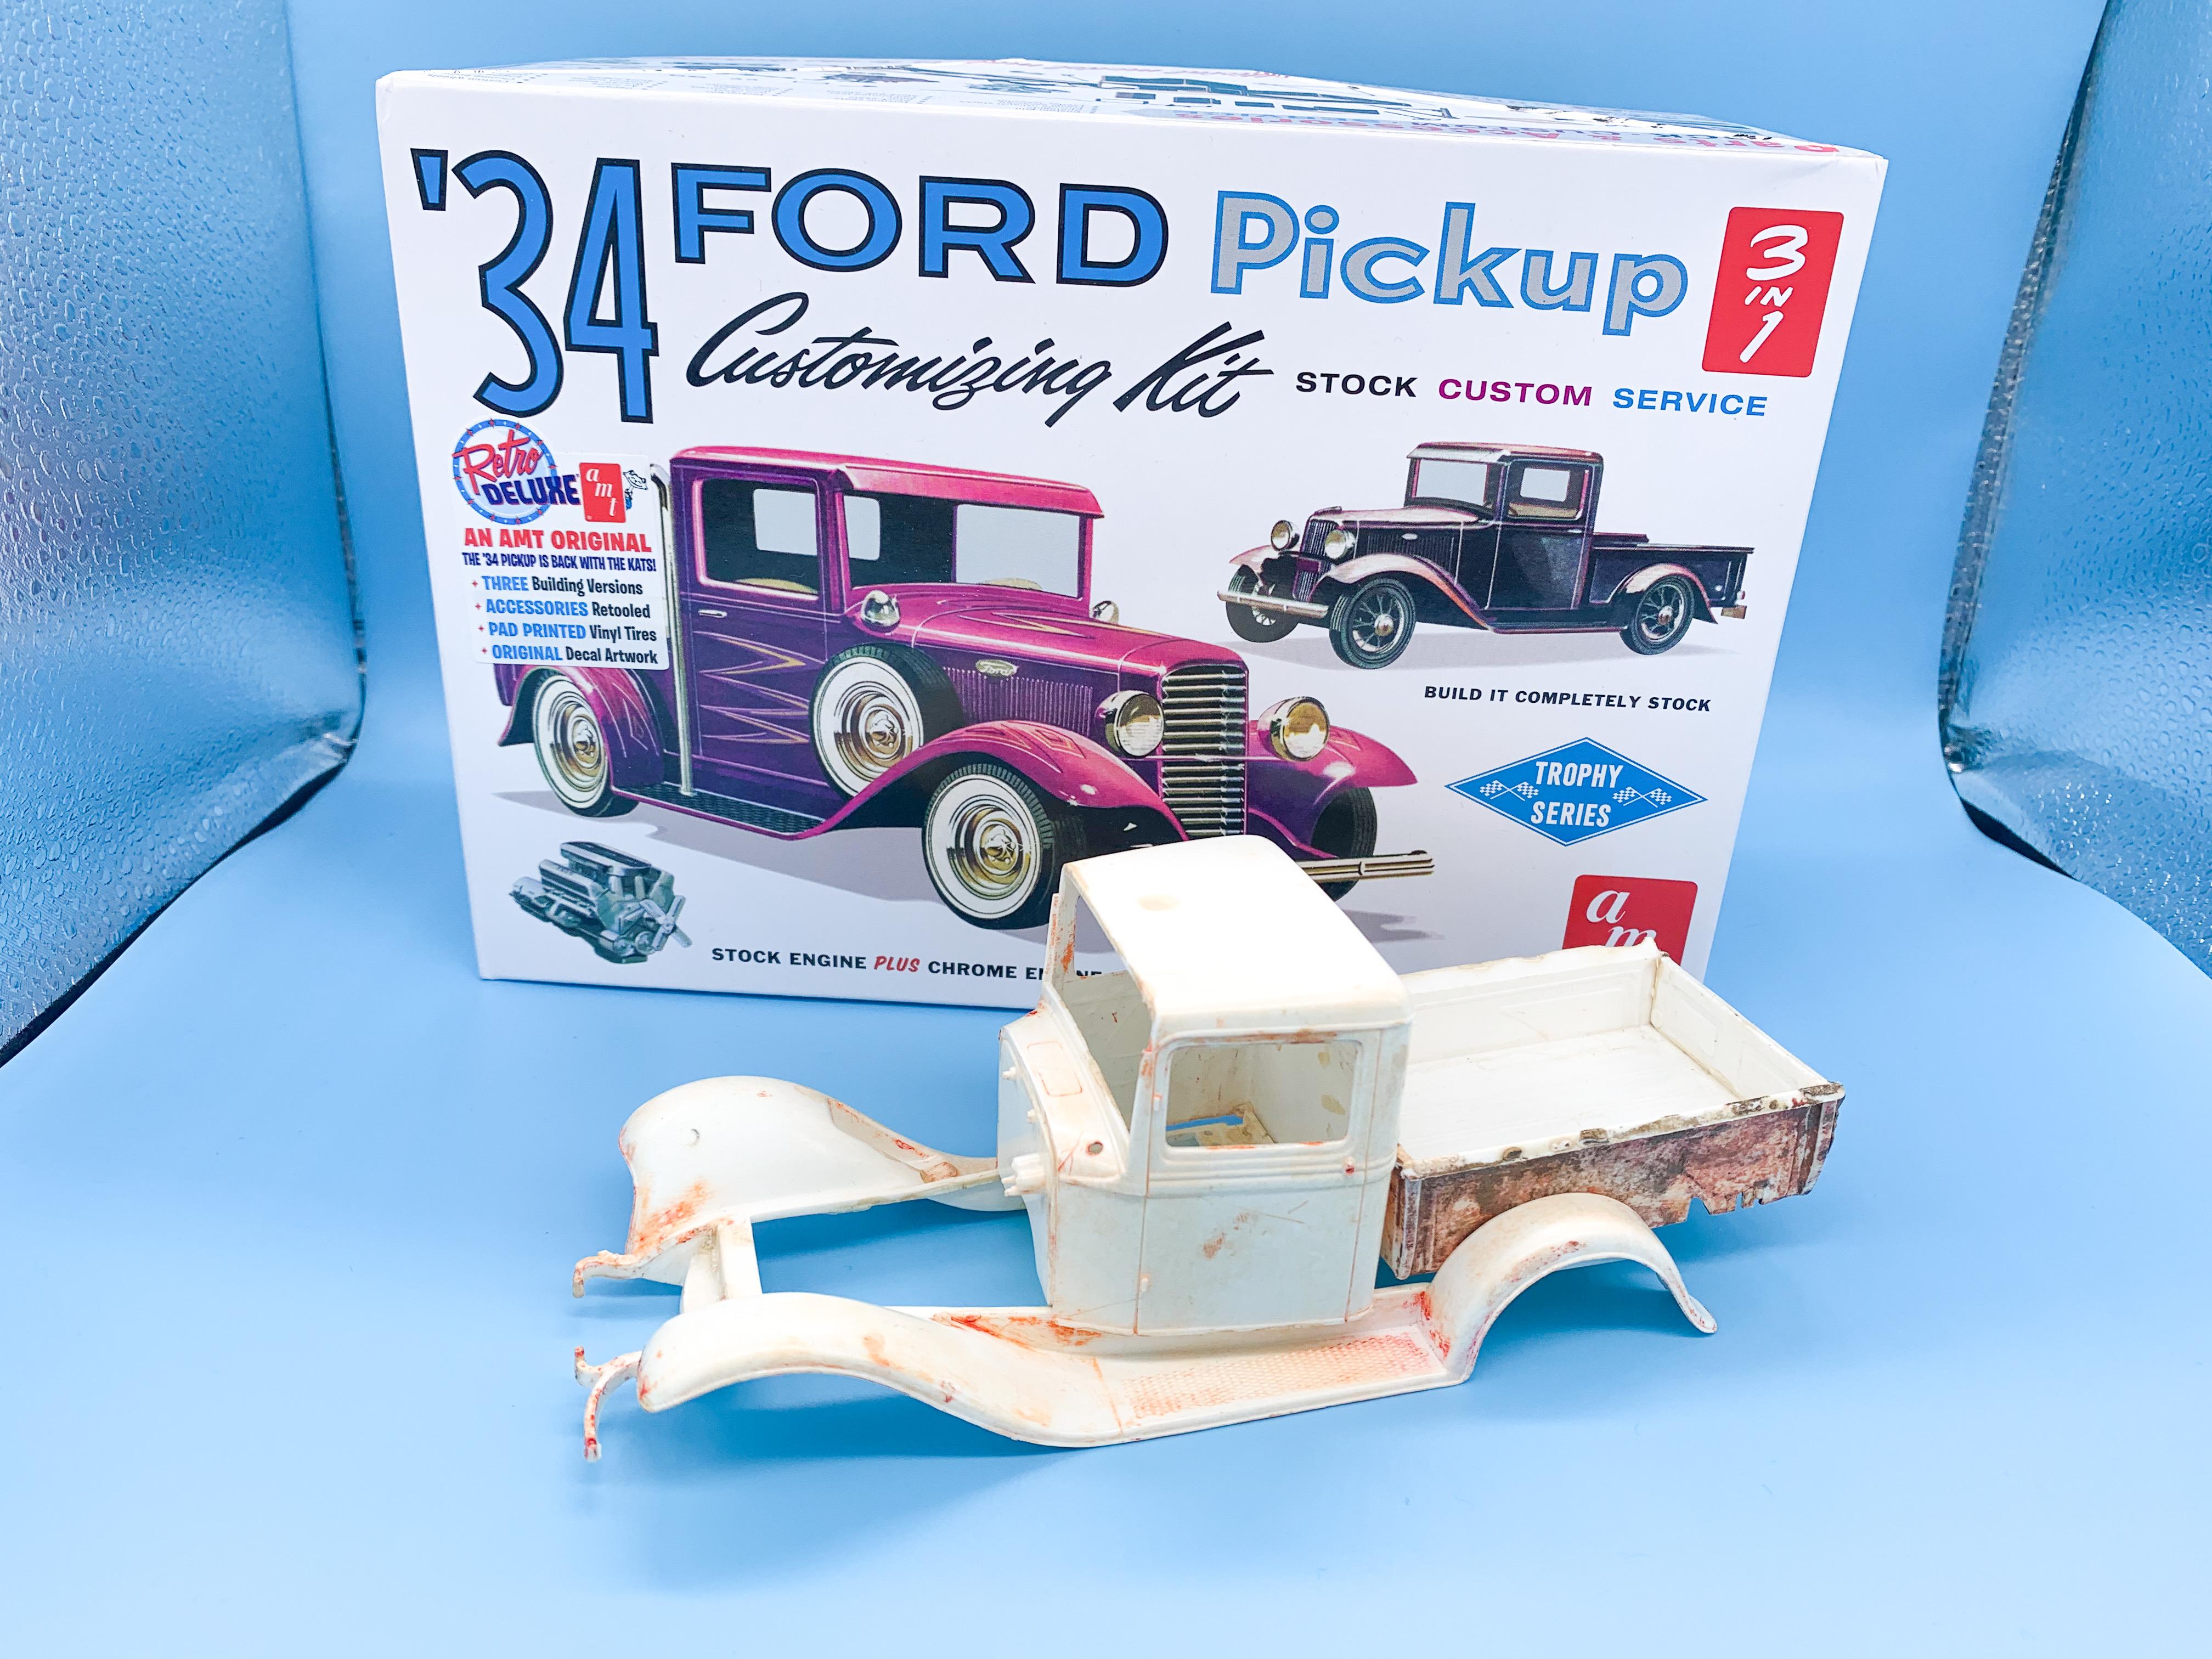
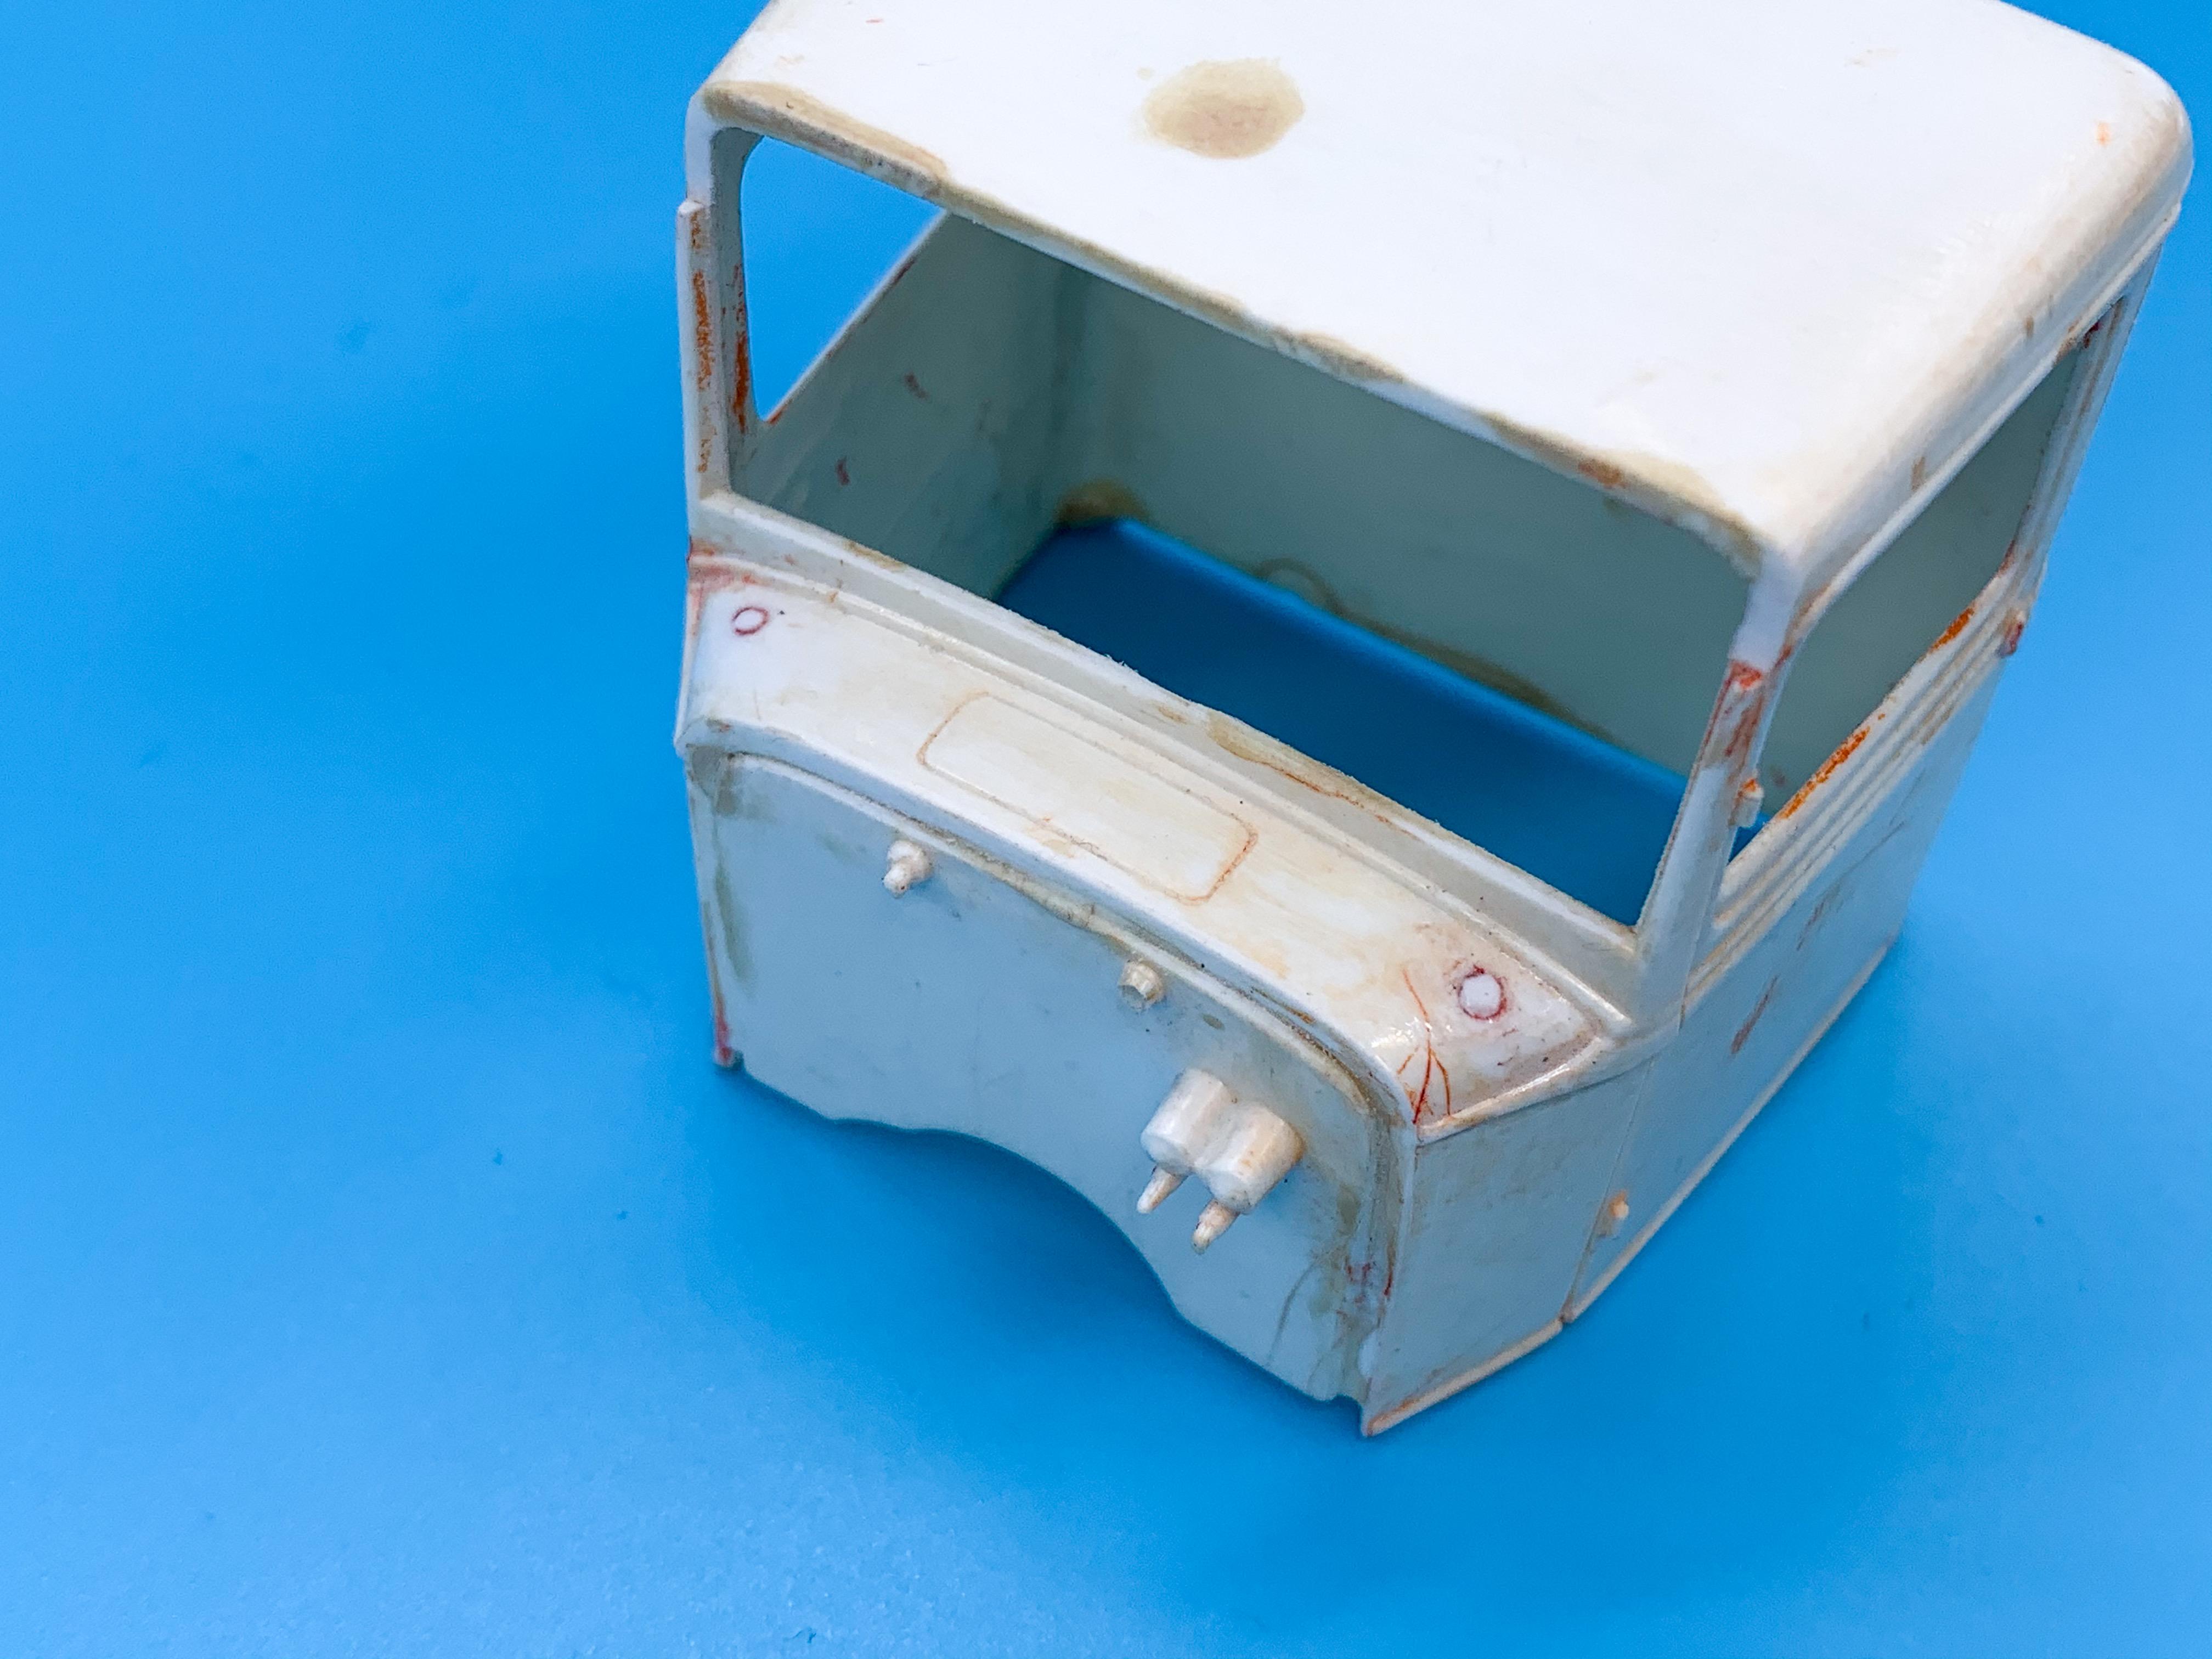
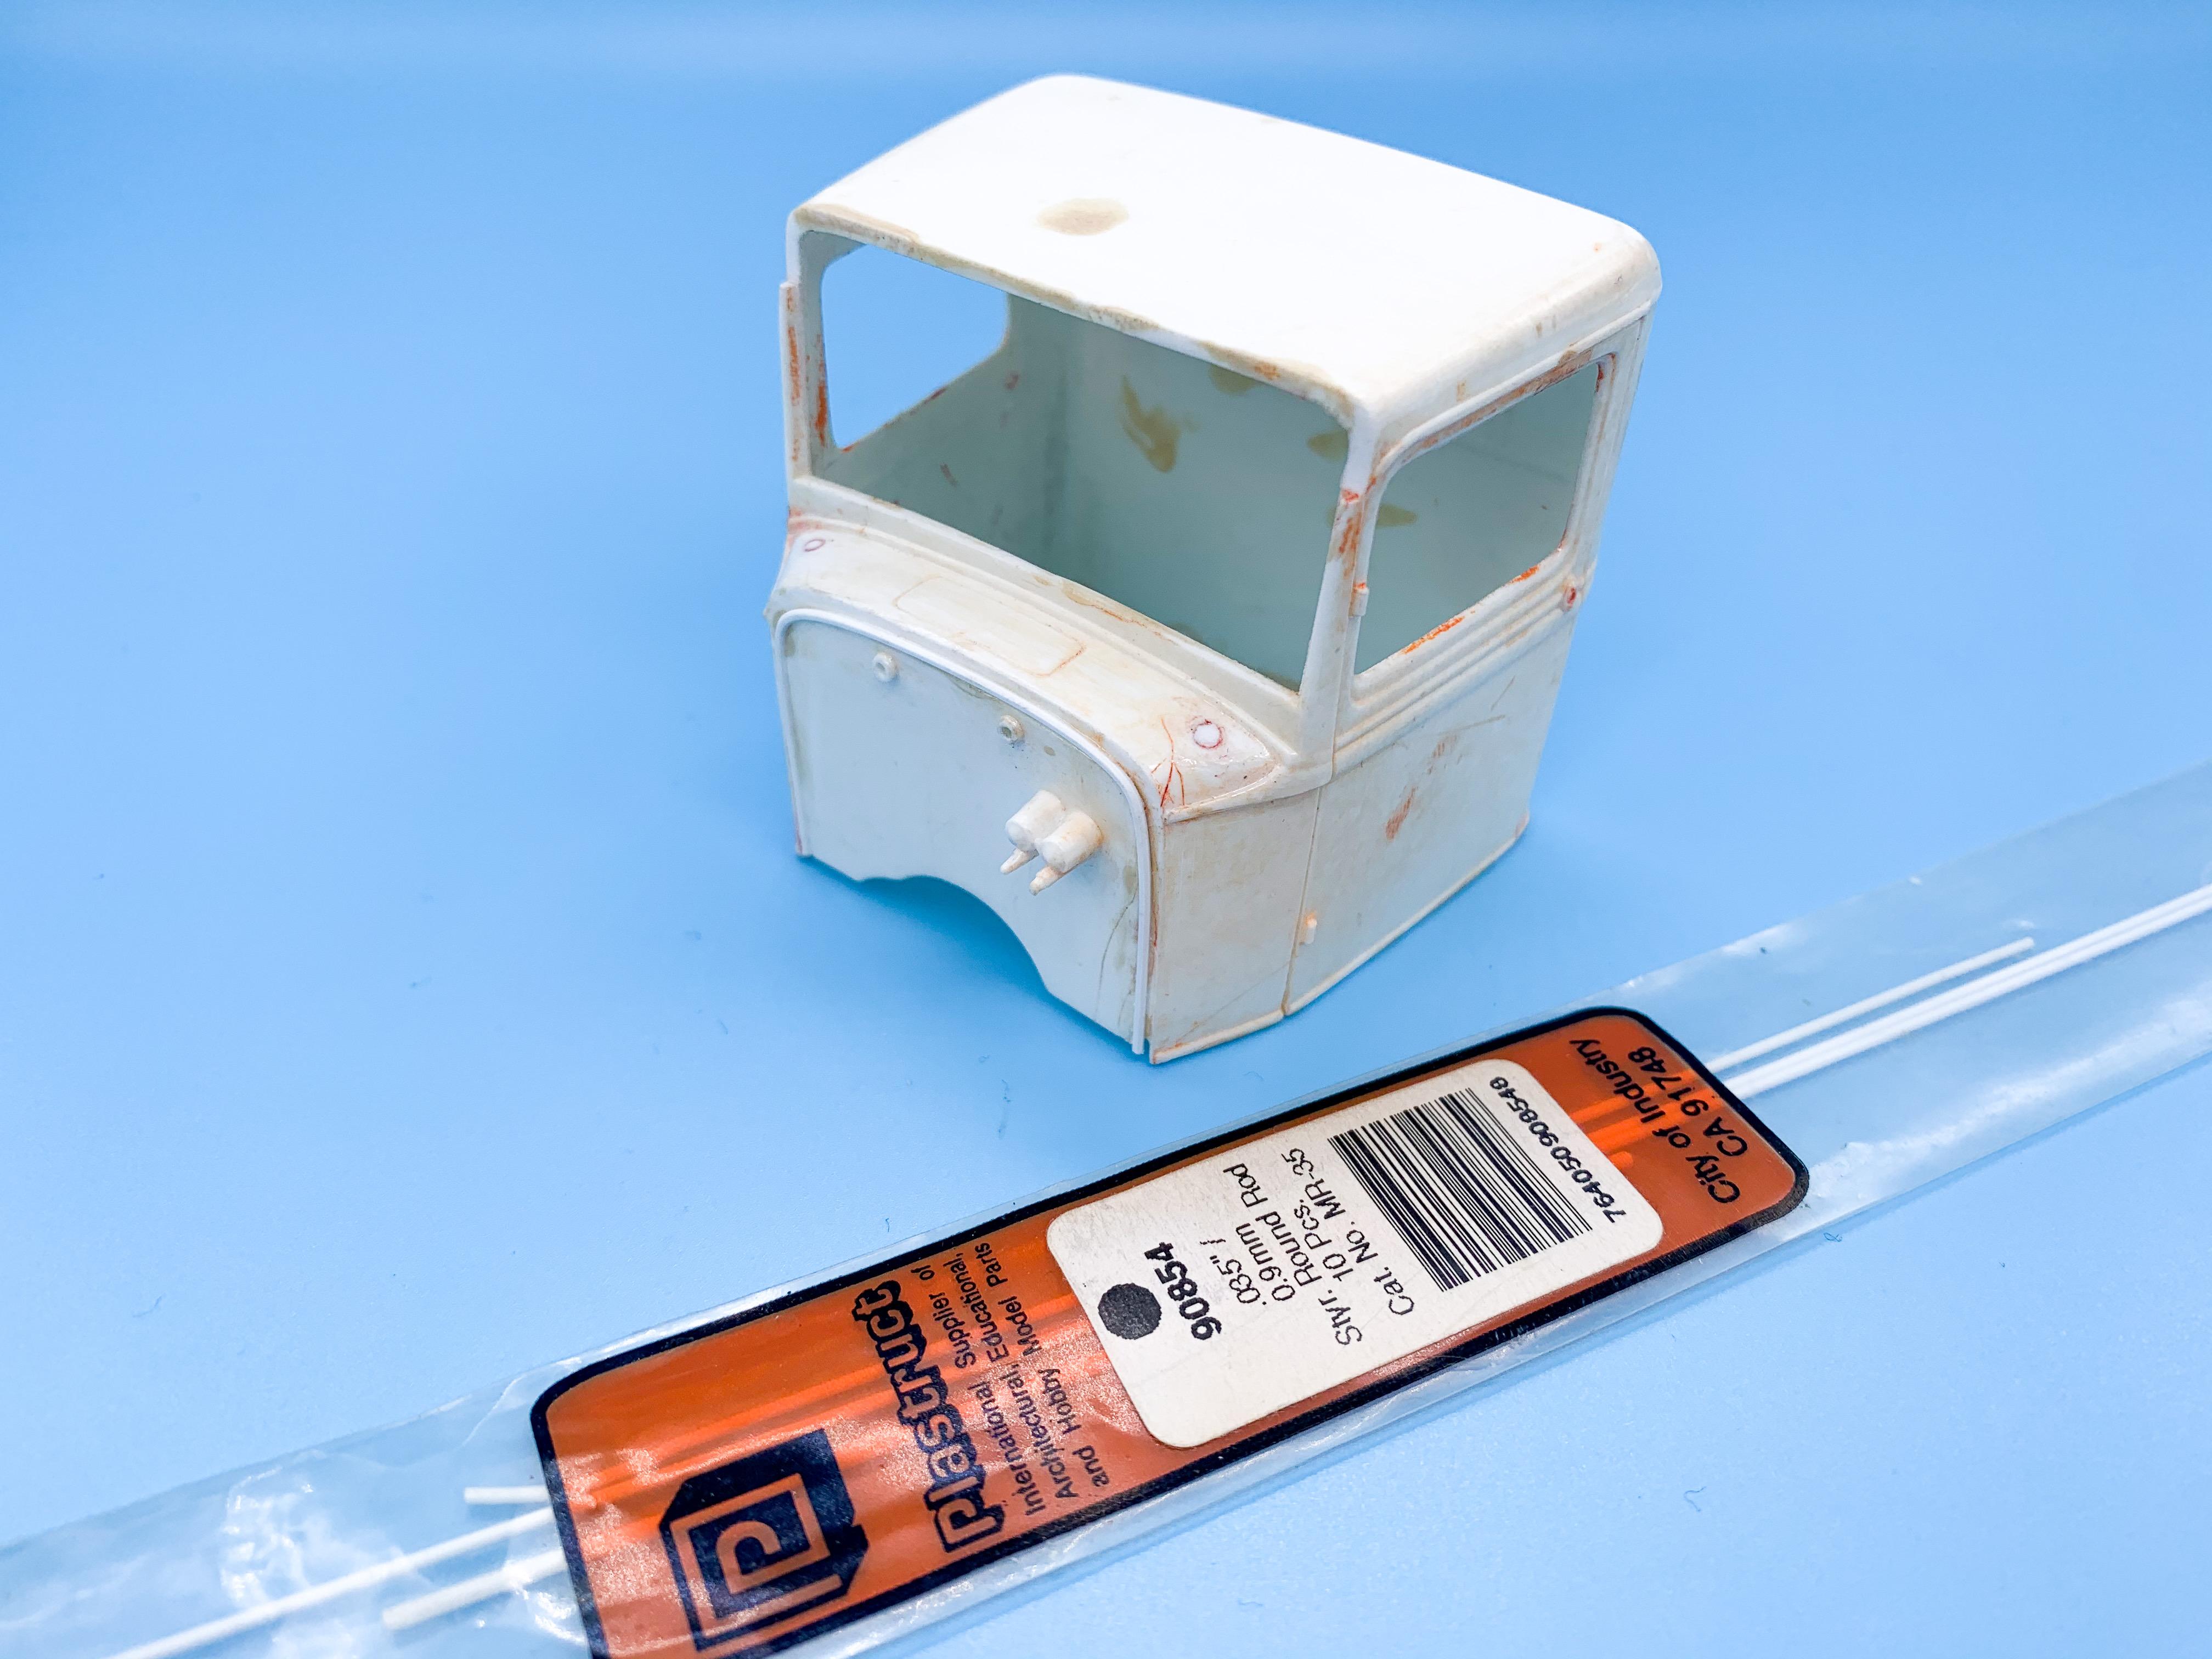
Been looking forward to building one of these for ages - and there’s a decent-sized 34 Pick Up build off on Instagram right now so it seemed a good time...picked up this old body from eBay, and a new kit from Hobby Lobby and I’m all set to see what the fuss is about Aside from wanting to build one of these I’ve been wanting to do a cool hot rod shop truck for a while, and I felt like doing some weathering and something with a little rust and patina - so combine the three and I can mark three things off my 2020 to-build list in one hit ?. The body I’m starting with is actually pretty straight and clean despite some glue-splodges, just a couple of little spots that will need some attention. Filled the holes in the cowl that I won’t be needing: I decided to keep the optional smooth sidewall, but added a styrene bead around the edge to make it look a little less flat: Added the coachbolts to the rear panel that the 1:1s have: The pins I used were a little large, so I’ve since sanded them down and flattened them out a little to get them closer to scale...and whilst I was working on the back of the cab I added the recesses that a stock 34 truck has on the lower panel there: The other side of those recesses is (just) visible in the interior of these trucks from what I can tell, so I added the opposite detail to the inside too, along with the factory wooden bracing...the bracing is moulded into the body already in the kit but it’s pretty soft and flat so this will add a little 3D-ness to the interior once it’s got some paint on it: And as you might notice from the bottom of the doors on that pic above I’ve added a little rust damage. I don’t want this thing to look full-rat-rod, all falling apart and full of holes, but a LITTLE rot and some dings and marks from 80+ years of service seemed appropriate. I looked up a bunch of photos of unrestored 34 cabs and tried to hit the spots where these rust and get damaged the most...weirdly a bunch of pics I saw had more rust damage to the passenger side of cab than the other, although I can’t think why that would be?* More soon, soon as I’ve done more!
-
And what does one do, heaven forbid, if you screw up and have to strip it? Do the usual suspects work for that too? Really impressed with your finish - makes me wanna try it myself! GREAT work!
-
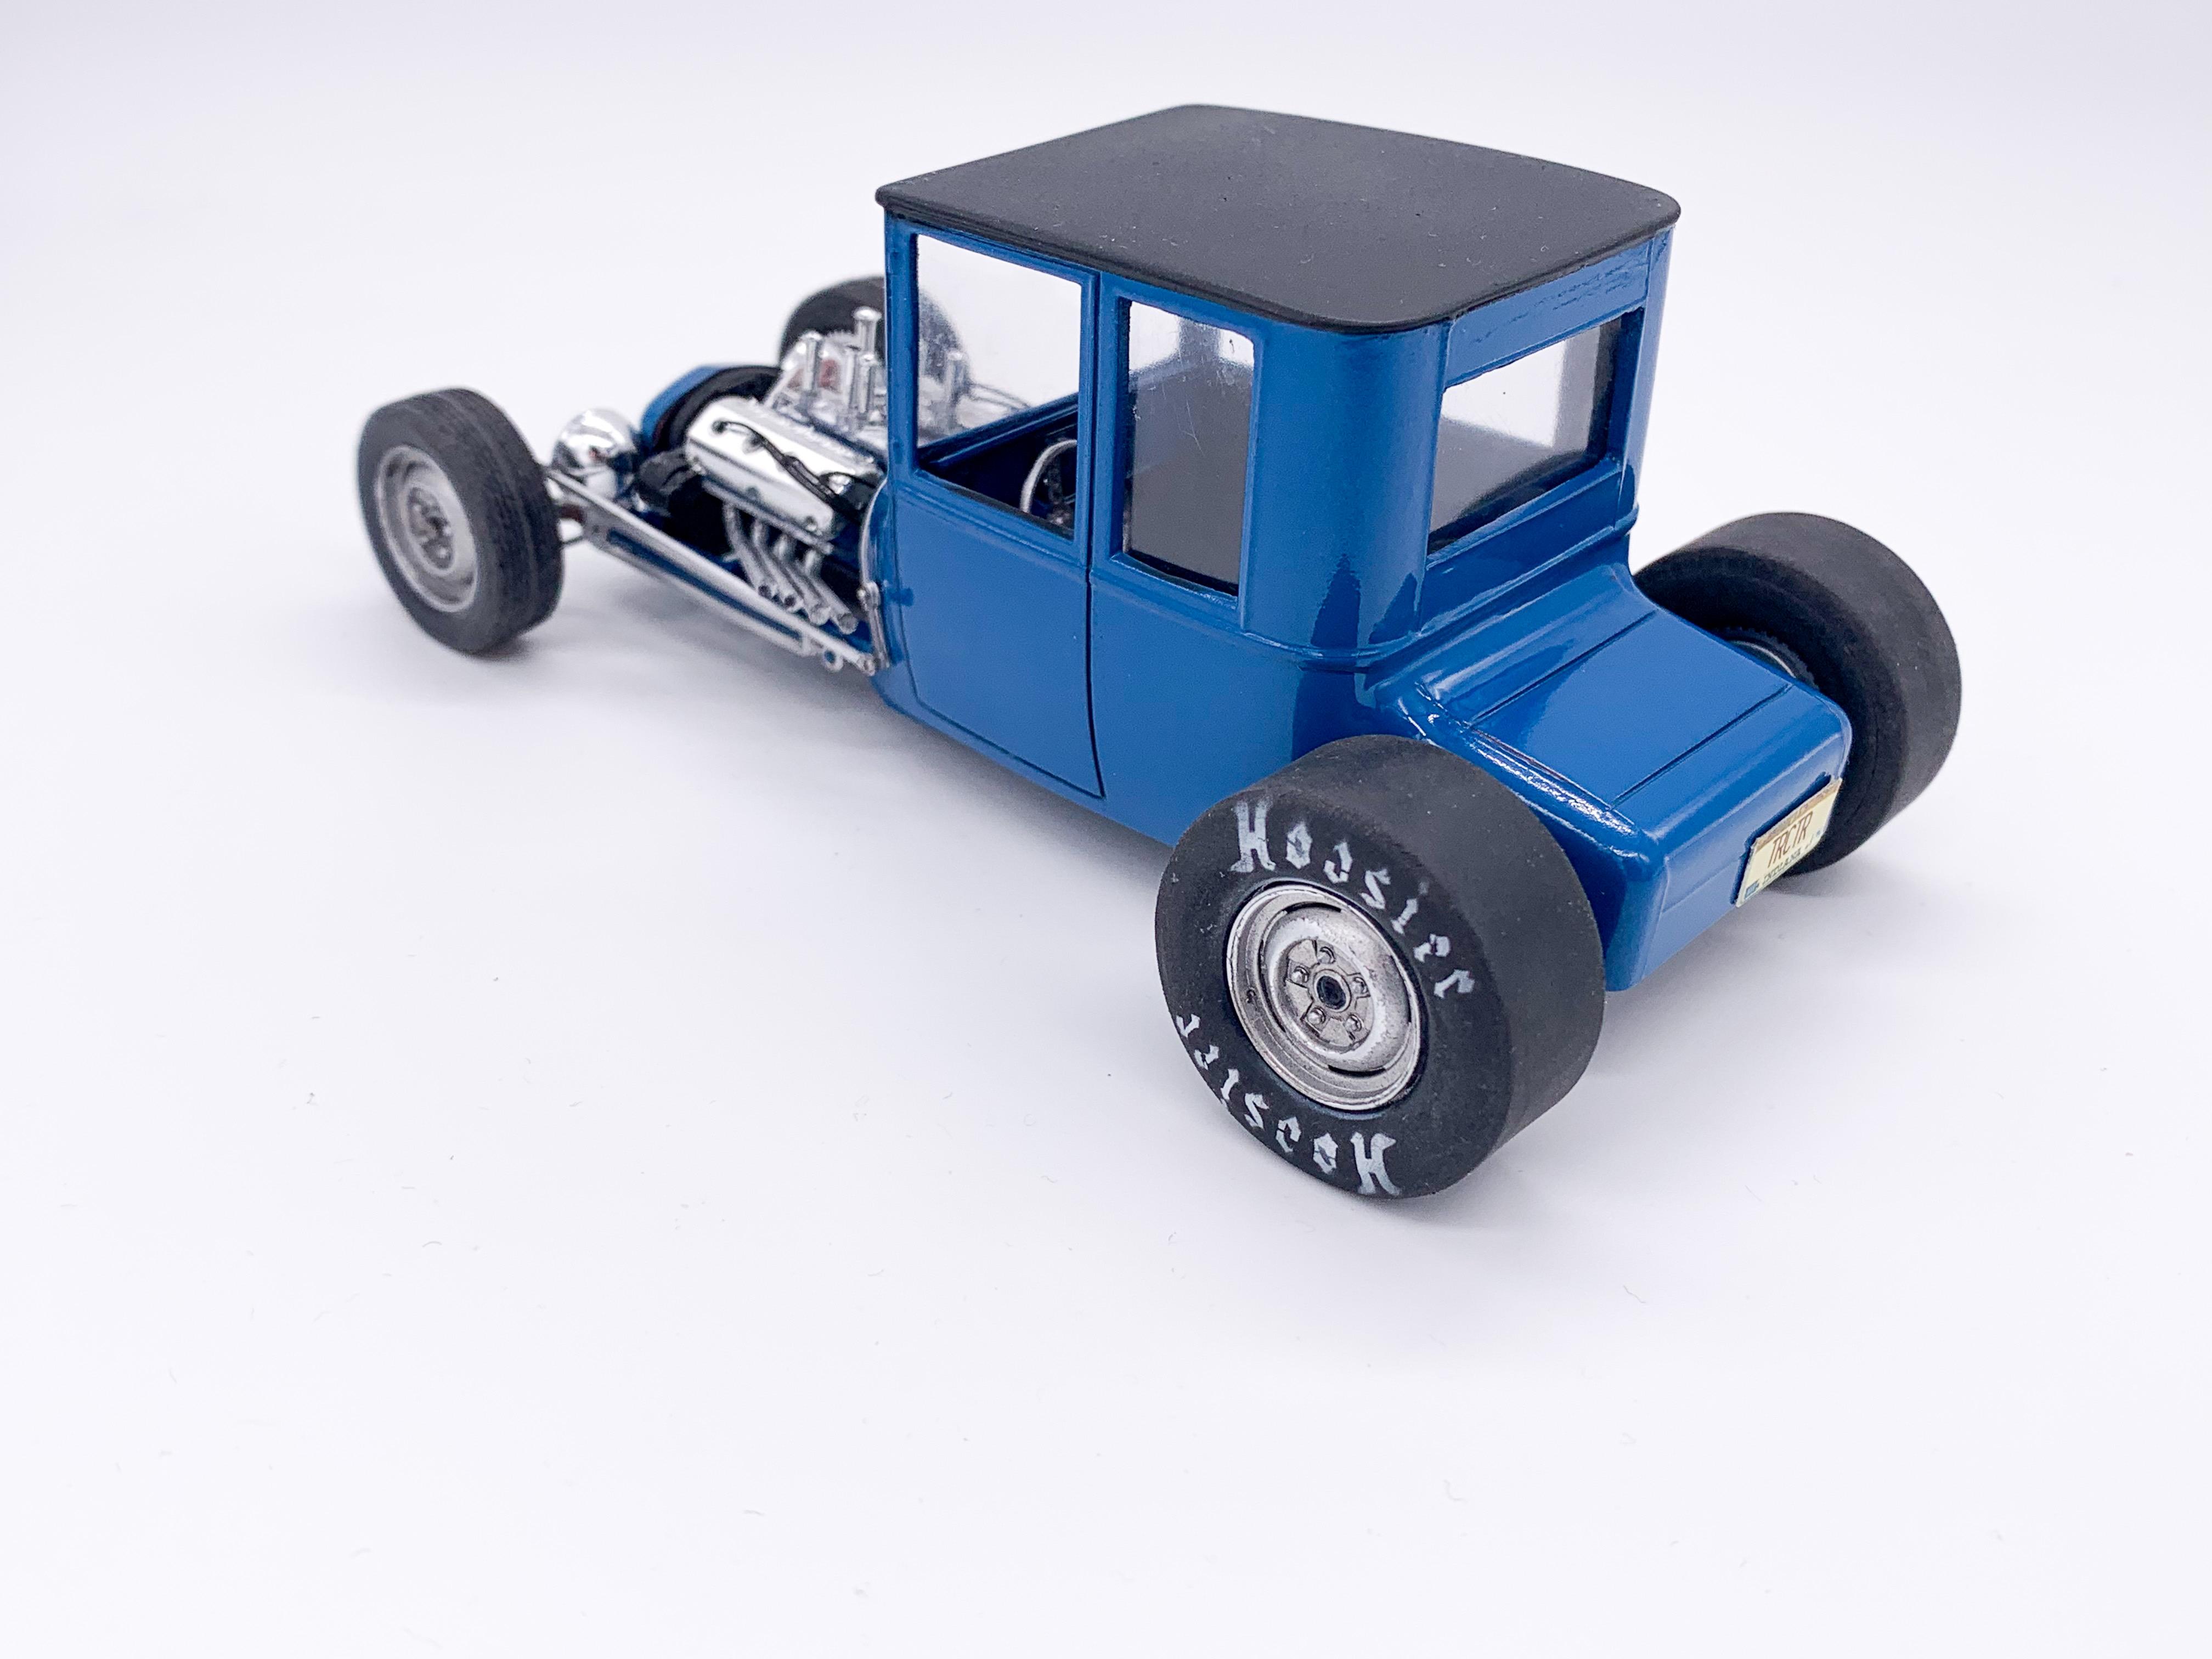
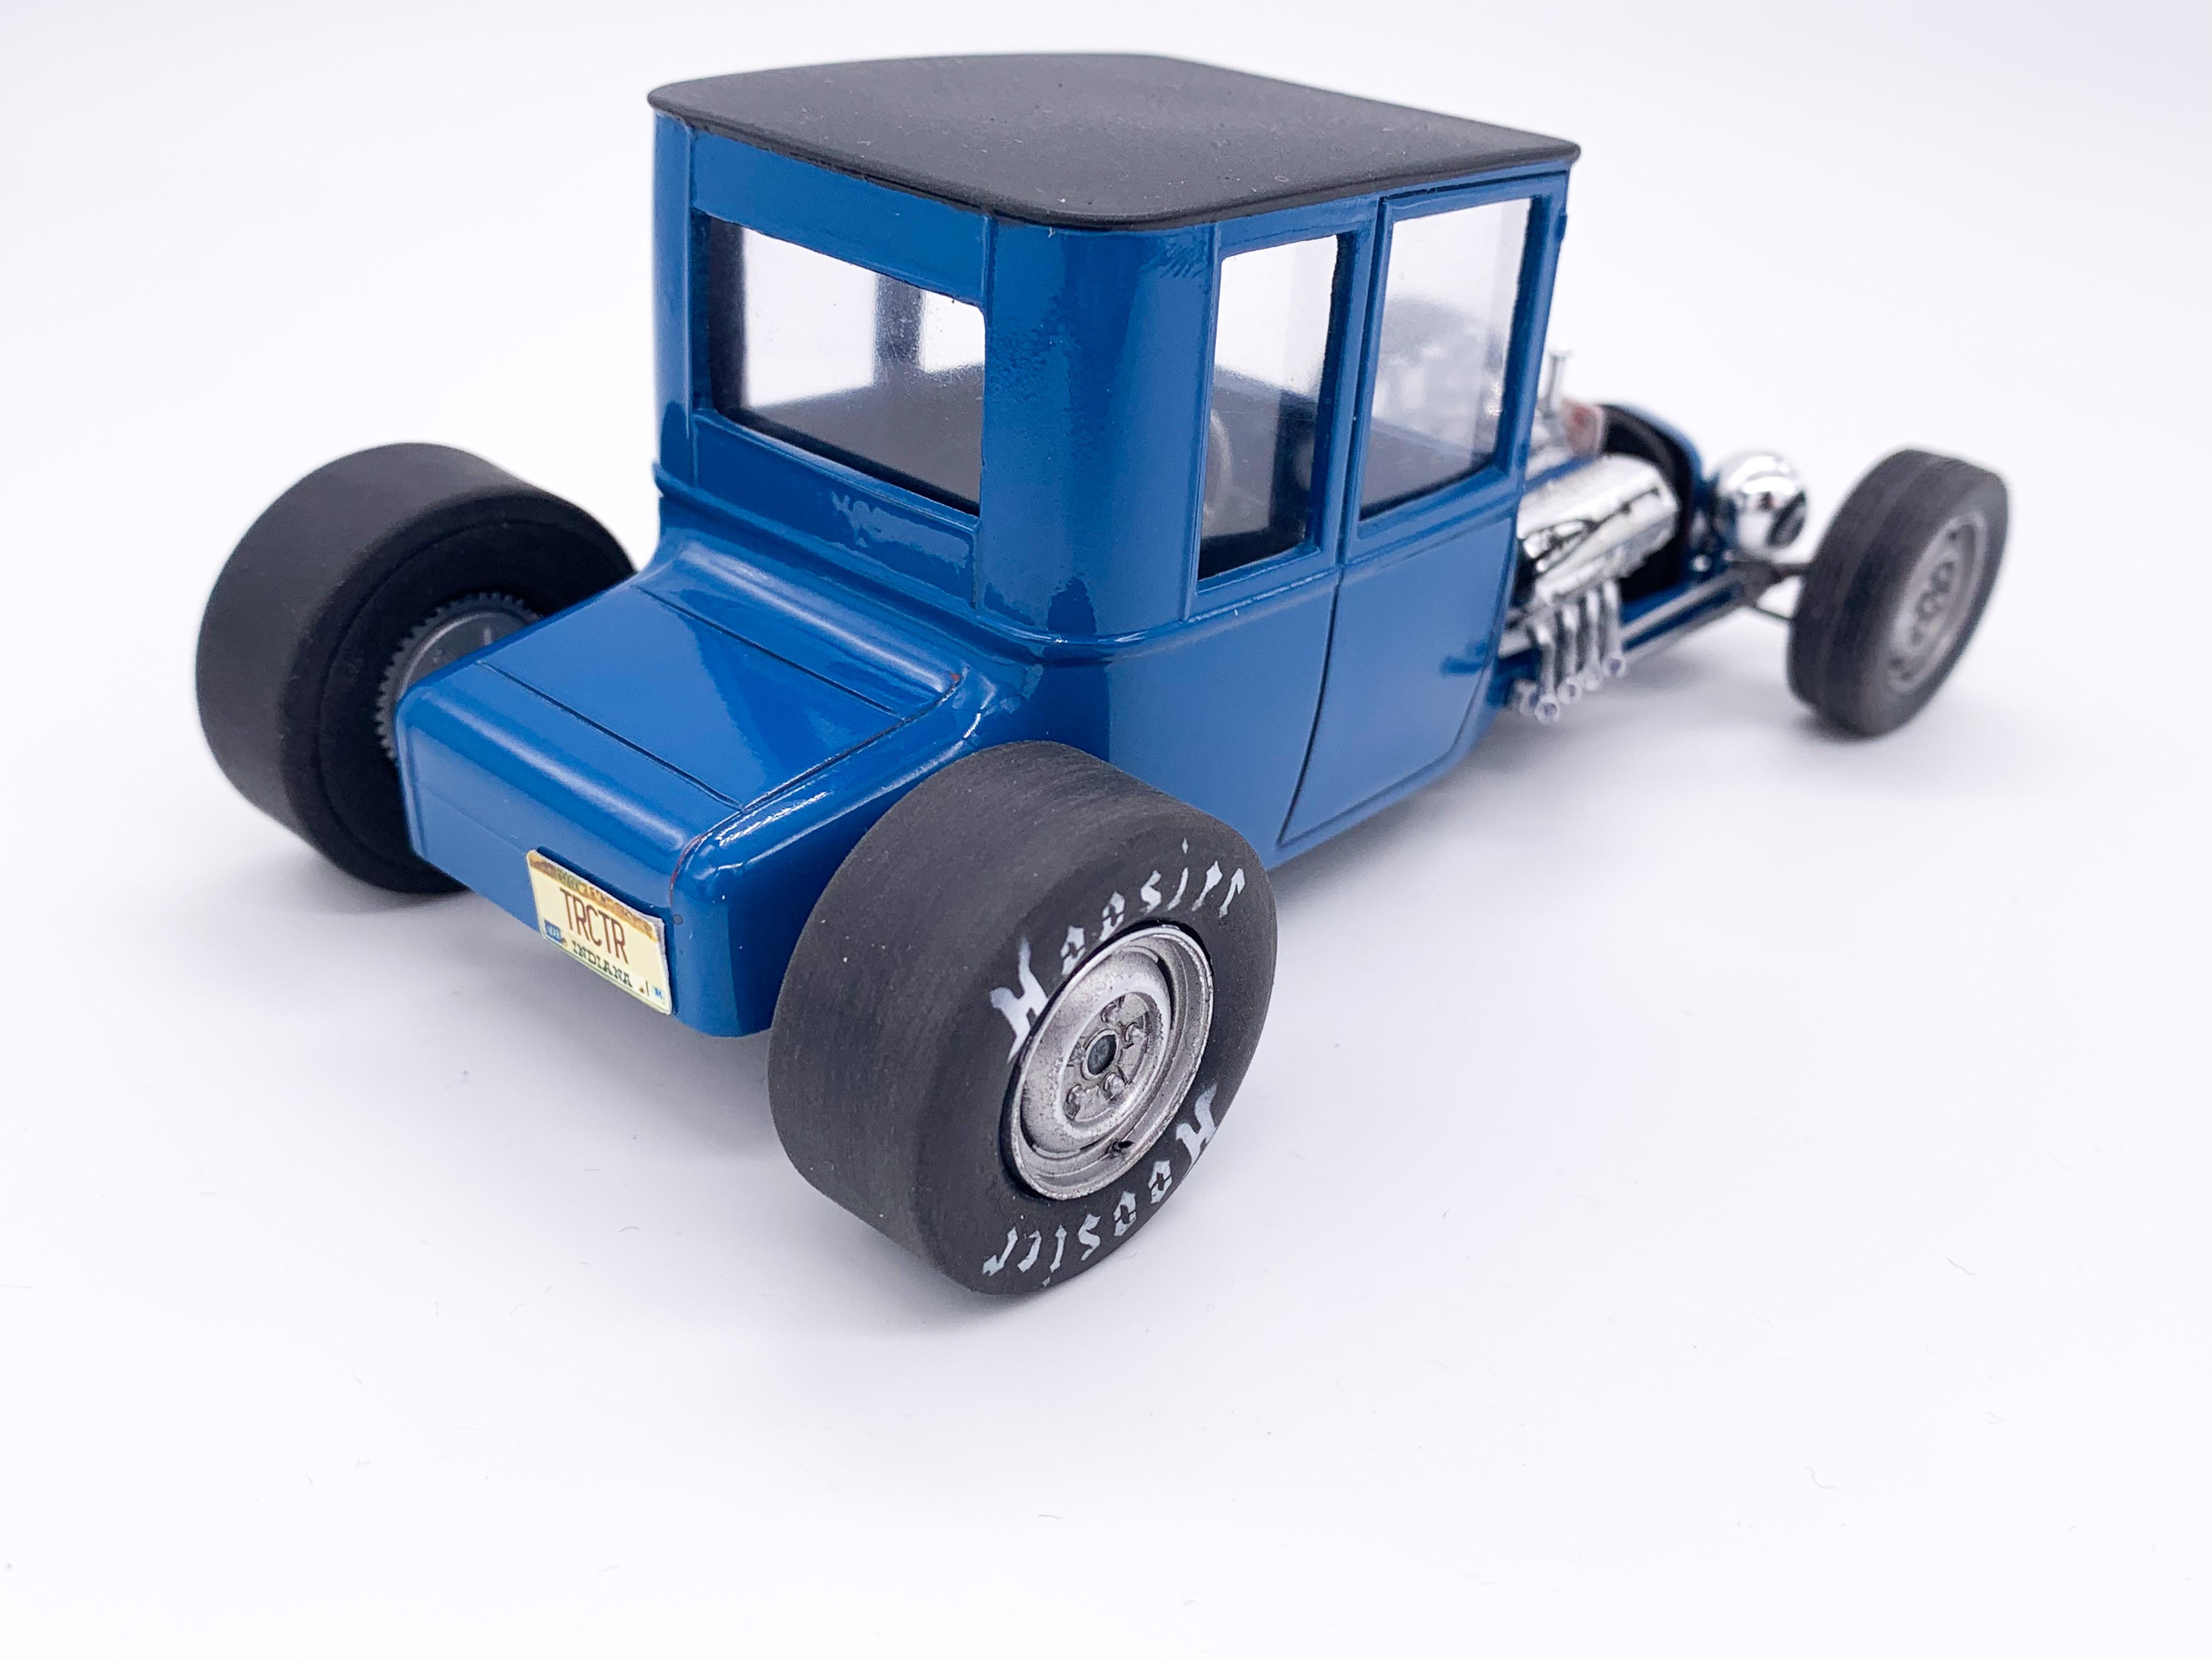
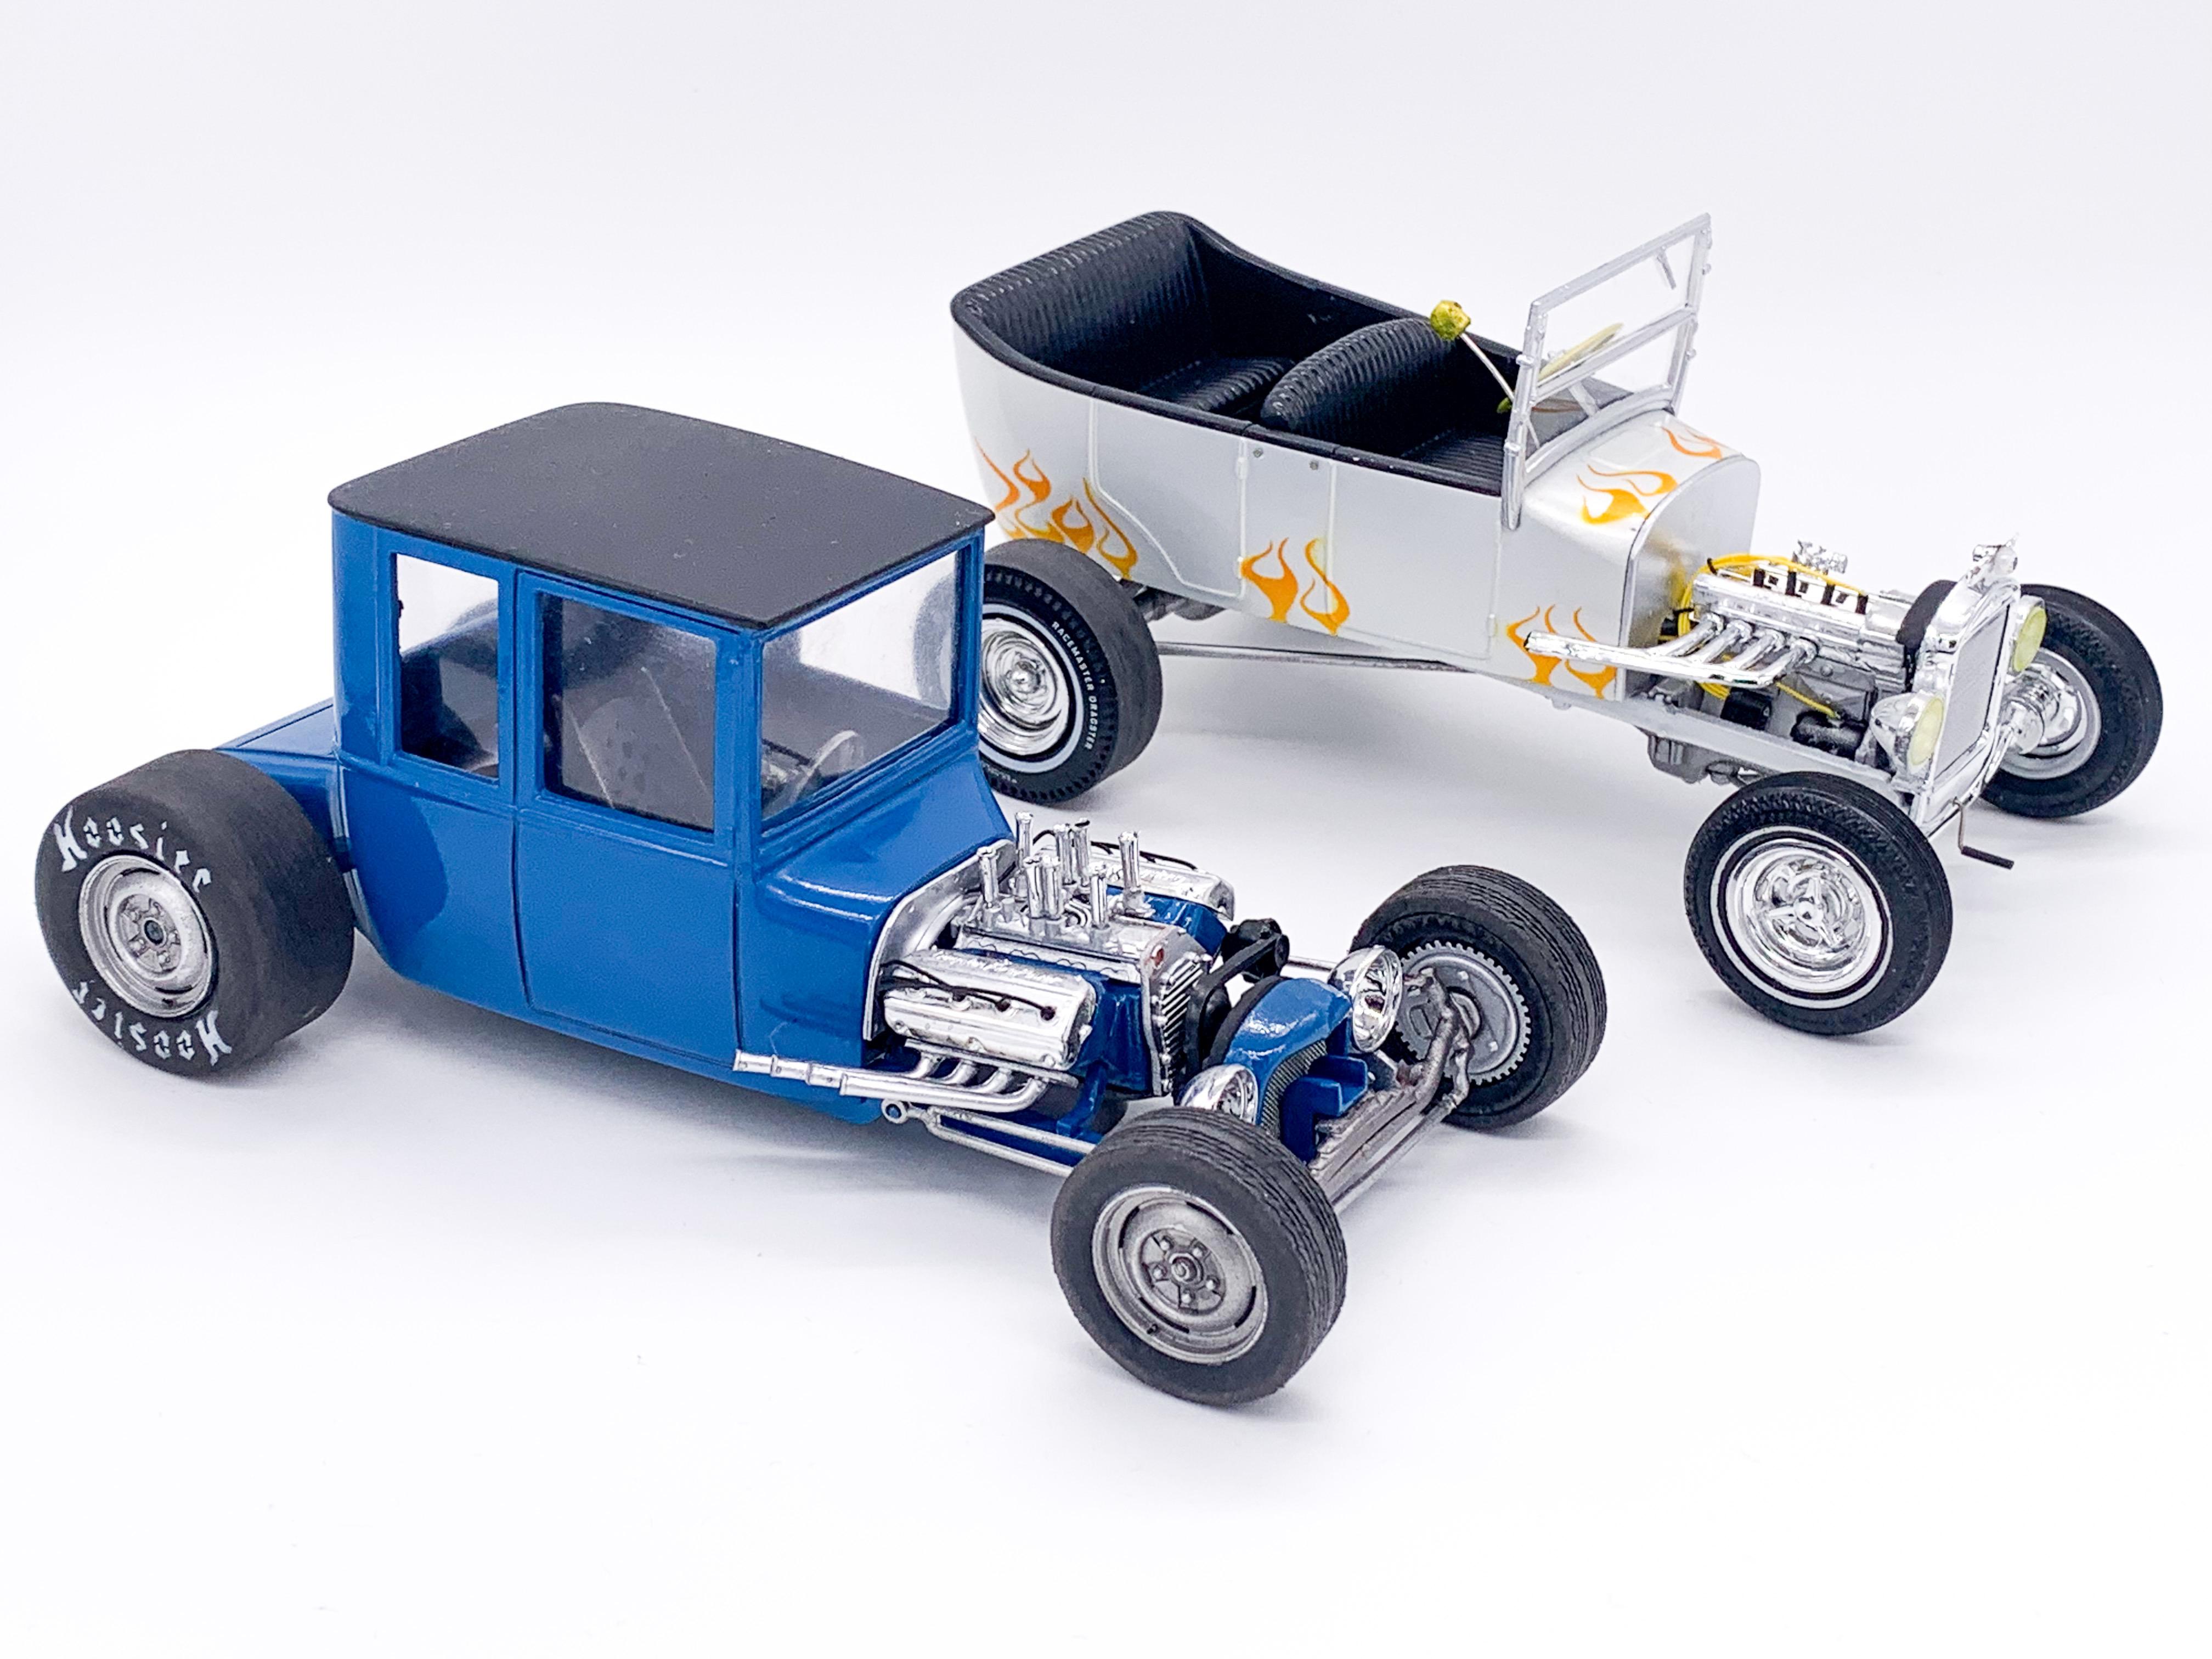
Got tired of seeing this on my bench so gave it some more attention today...think it’s almost a wrap! Couple of little bits to add once the glue’s dried enough for me to handle it but I can about call this one done...will make a decent shelf model next to my other T build from last week anyway!
-
Looking great, with that 2K clear! Dumb question; what does one use for airbrush clean-up with 2K? Regular lacquer thinner?