OldNYJim
-
Posts
249 -
Joined
-
Last visited
Content Type
Profiles
Forums
Events
Gallery
Everything posted by OldNYJim
-
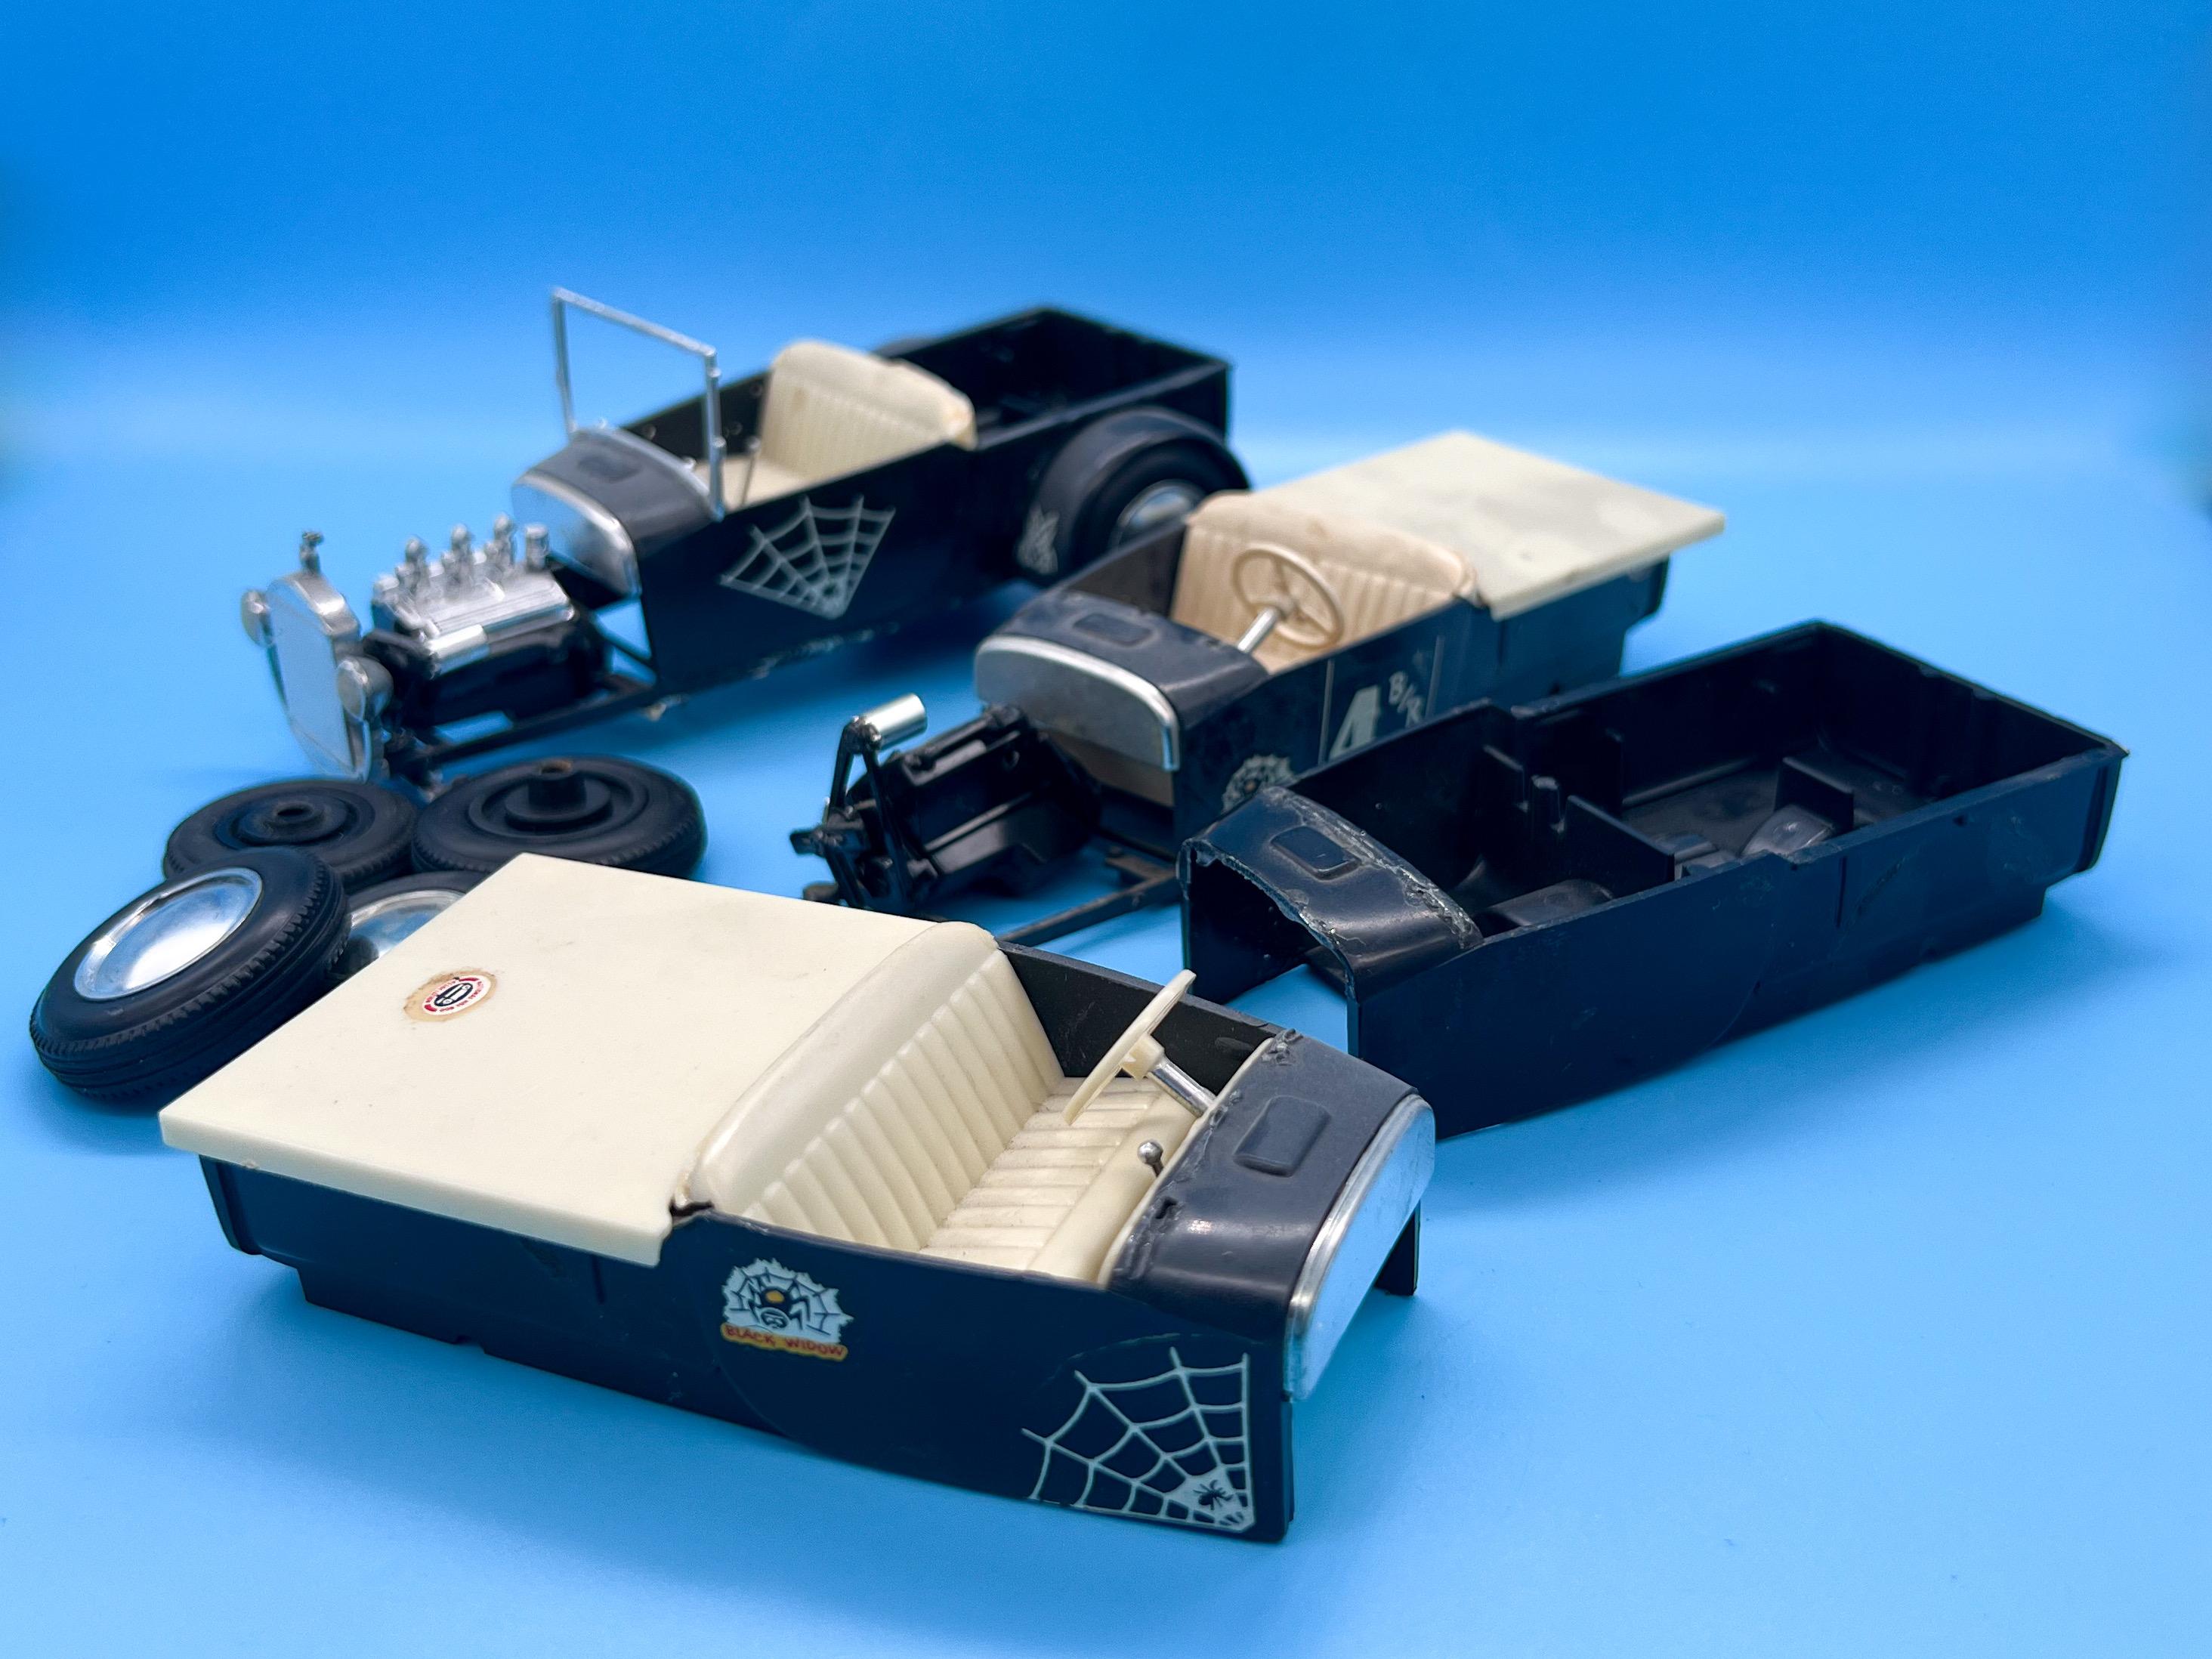
I guess this years-old thread with it’s missing photos is as good of a place as any to ask this question… Picked up four of these from eBay recently, but not sure if they’re original issues or from the later reissue: The tires are rubber, and the metal axles have serrations to lock them into the wheels…would that indicate that these are originals? Sounds like the reissue has styrene tires instead?

- 55 replies
-
- 1
-

-
- Black Widow
- Monogram
- (and 2 more)
-
Correct - MOST of the art on the one sheet I had printed was Vector (that is, artwork drawn with editable lines, for anyone unfamiliar, as opposed to a regular jpeg image like a regular photo or graphic that you’d normally see online). That said, part of what I had them print WAS just a regular old downloaded image, and they had no issues printing that for me too…the printers and software they use can handle it, it’s just not the IDEAL way to go…
-

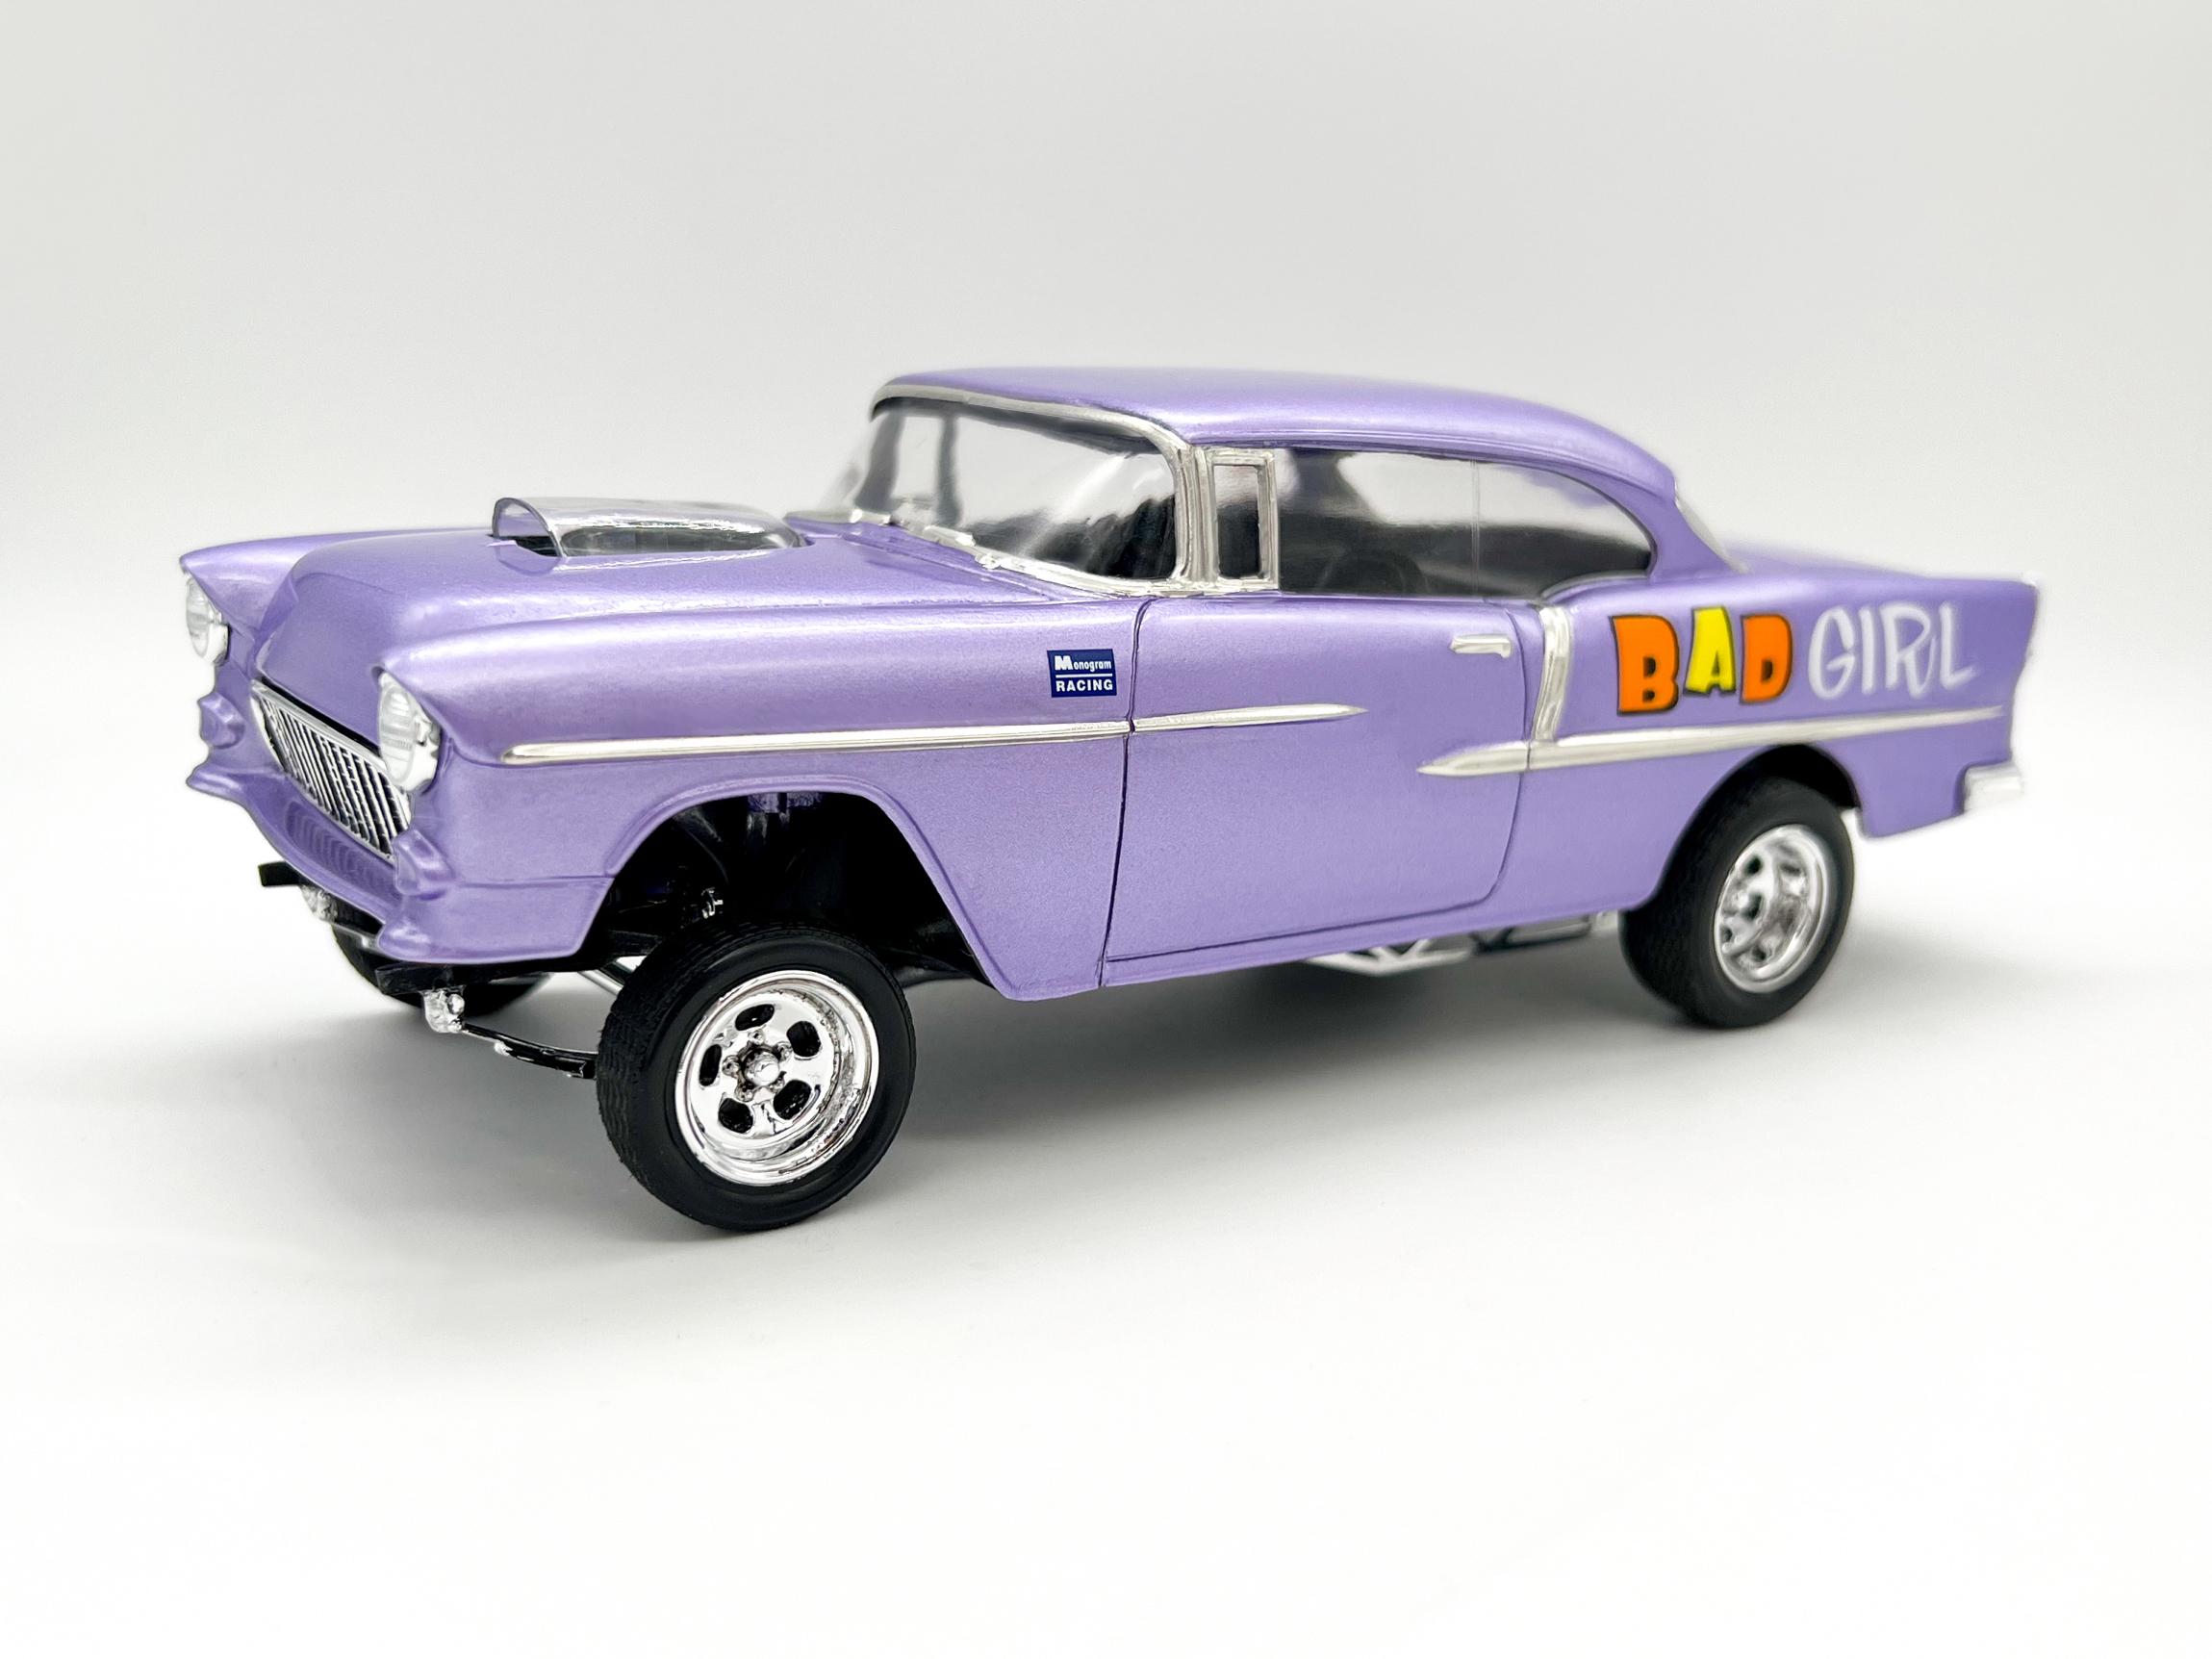
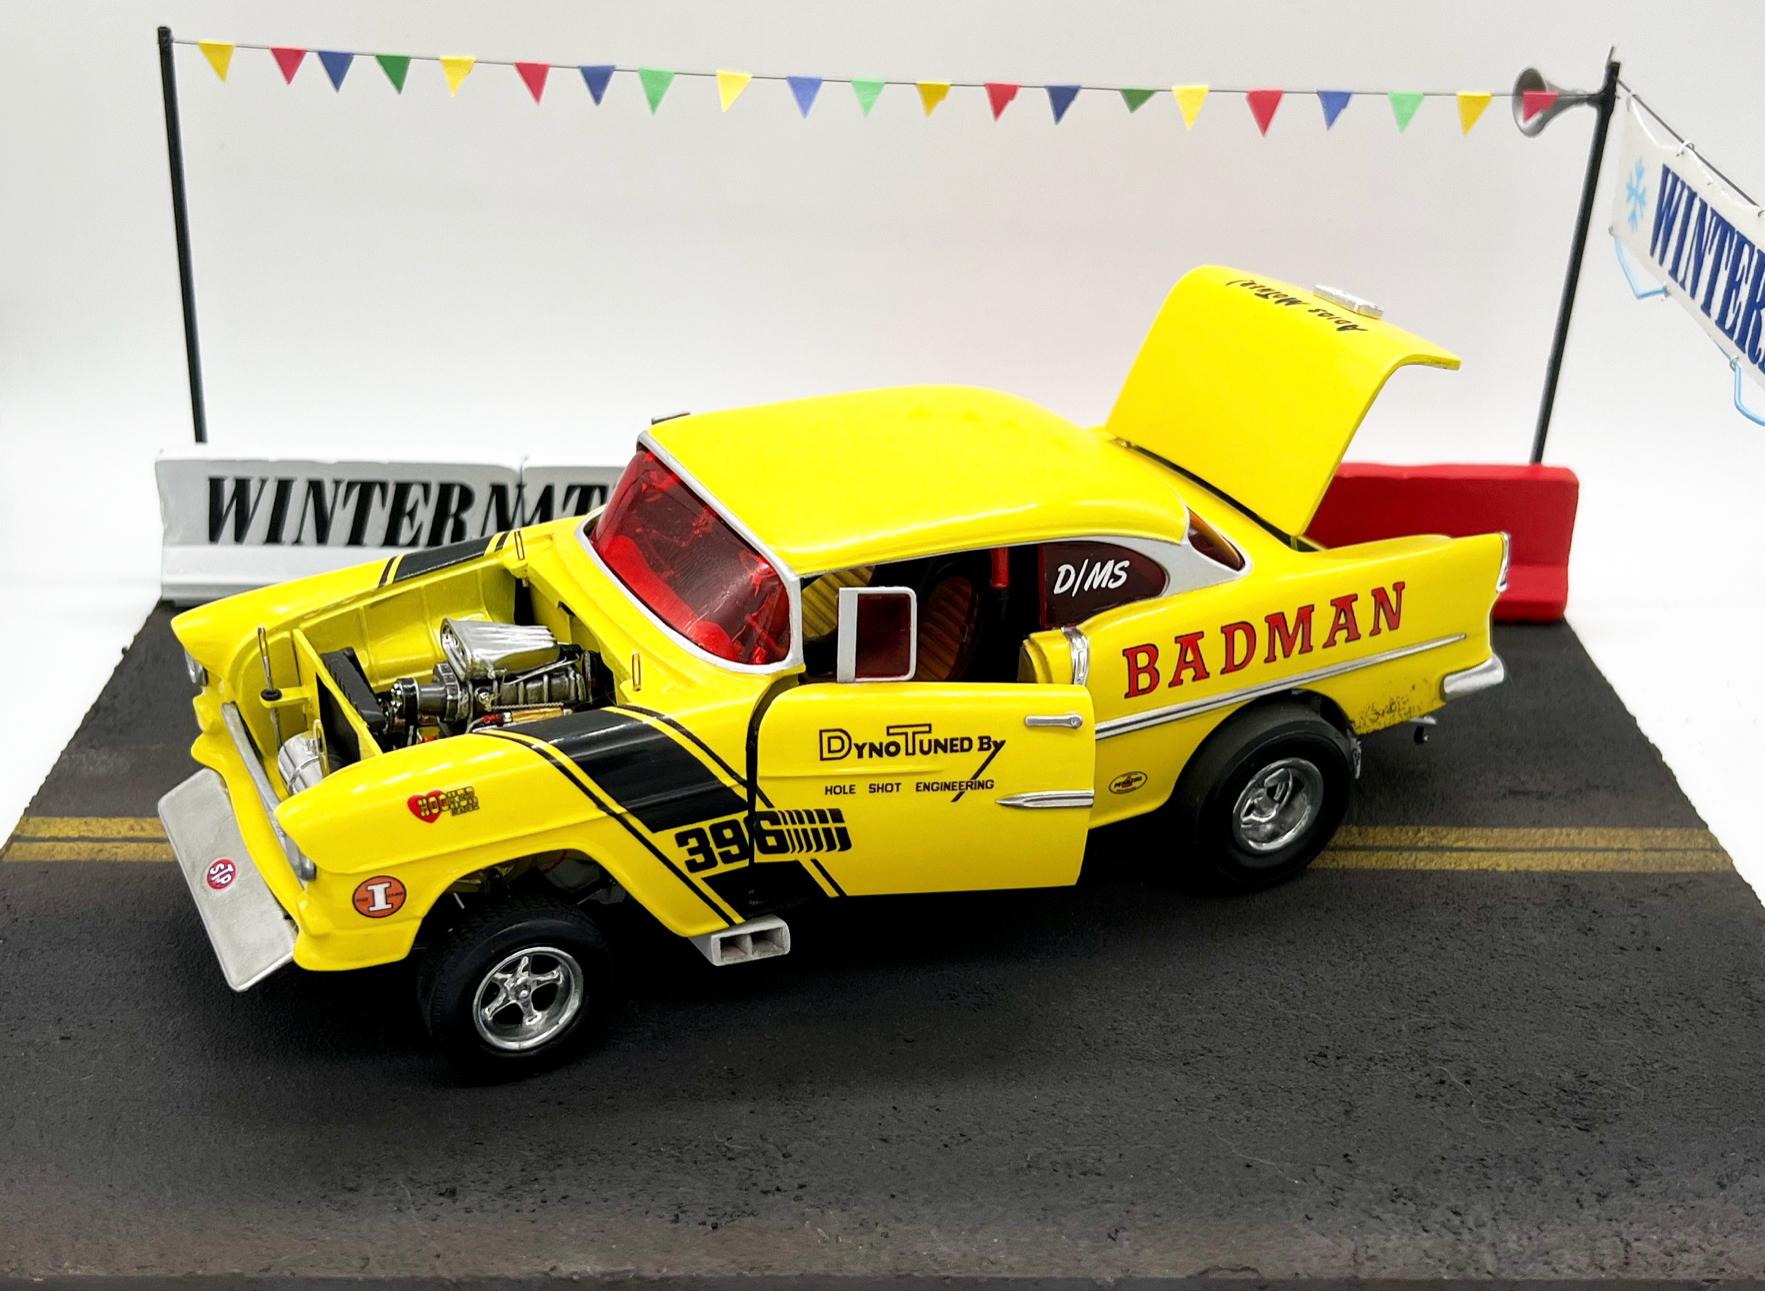
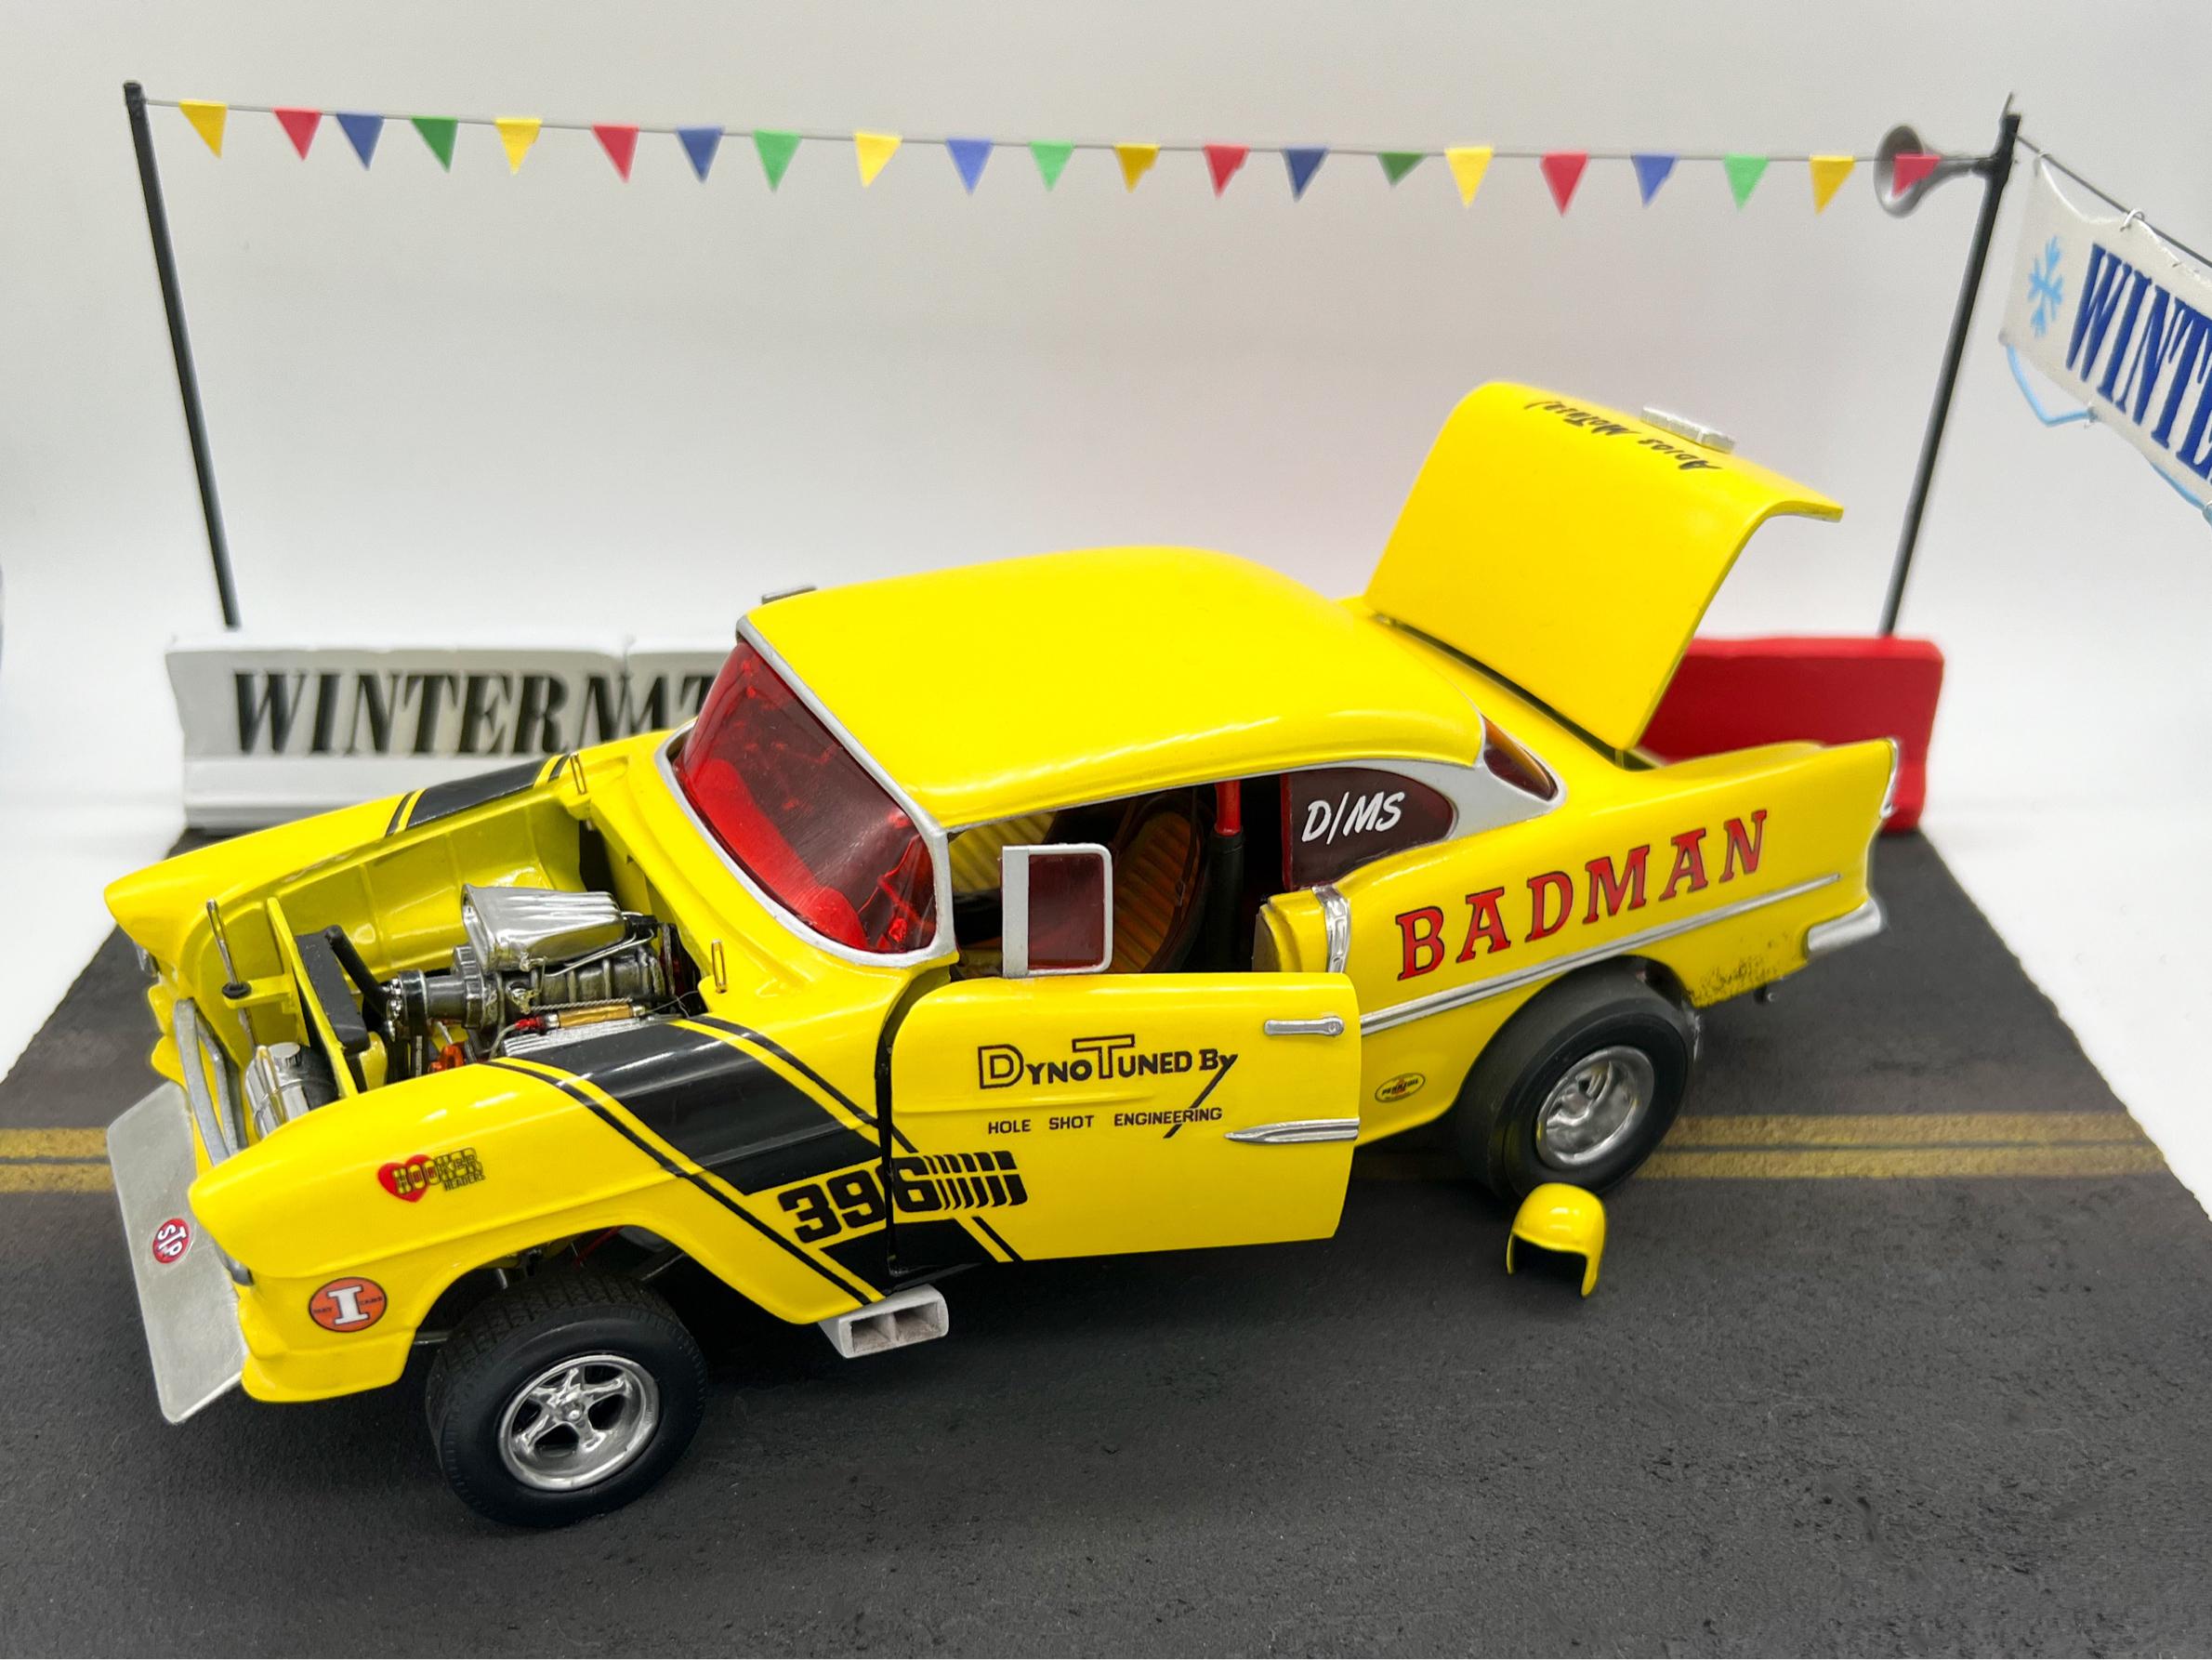
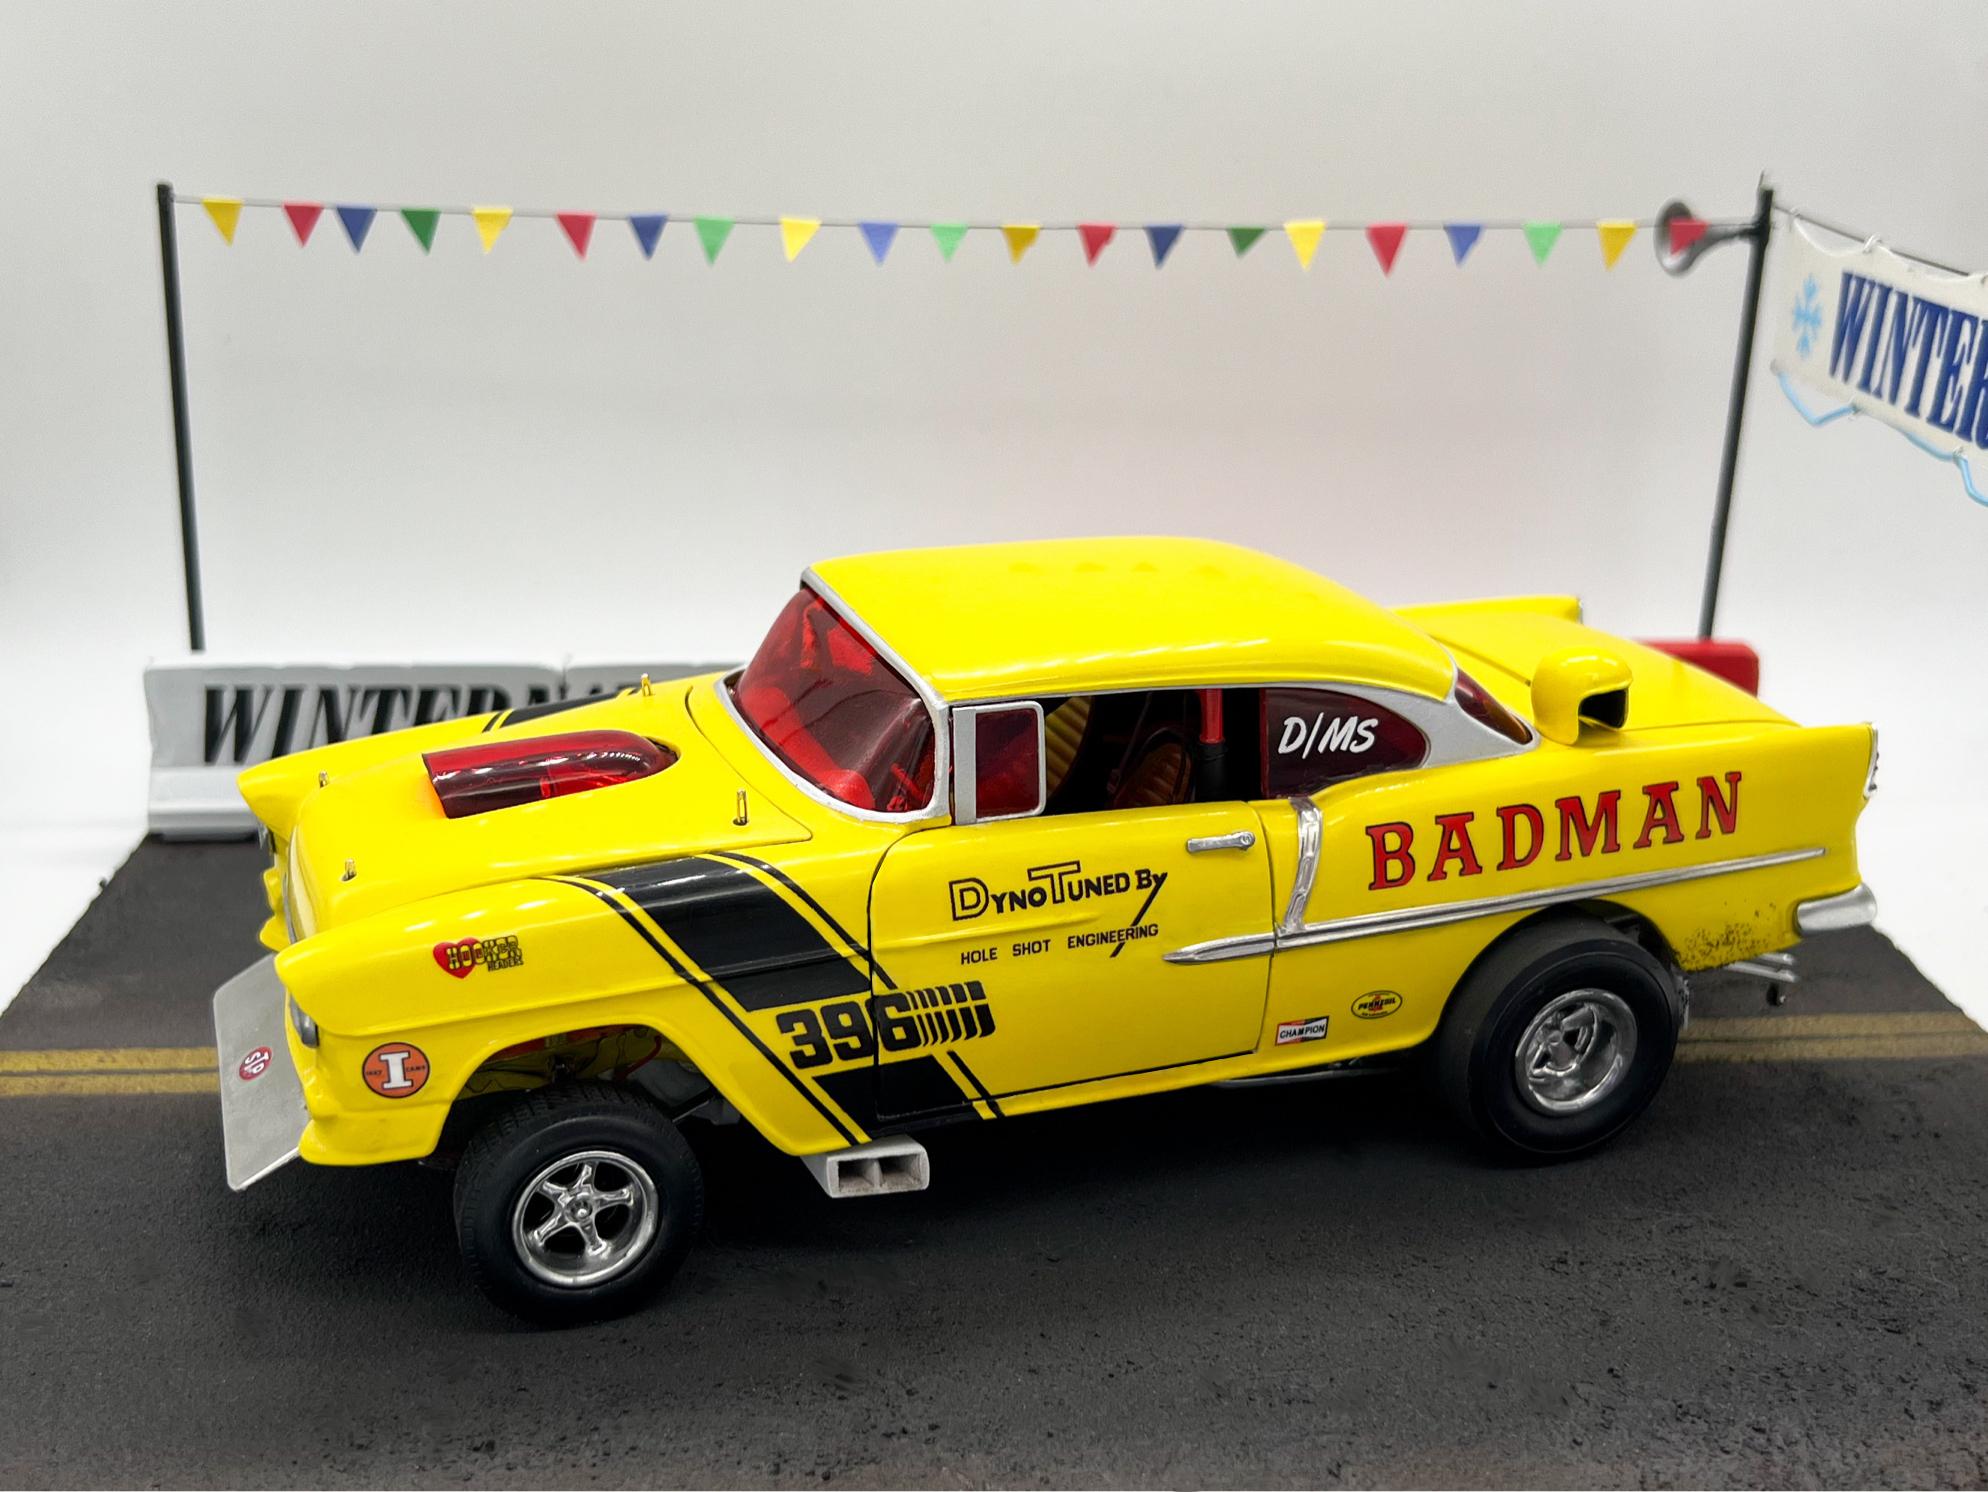
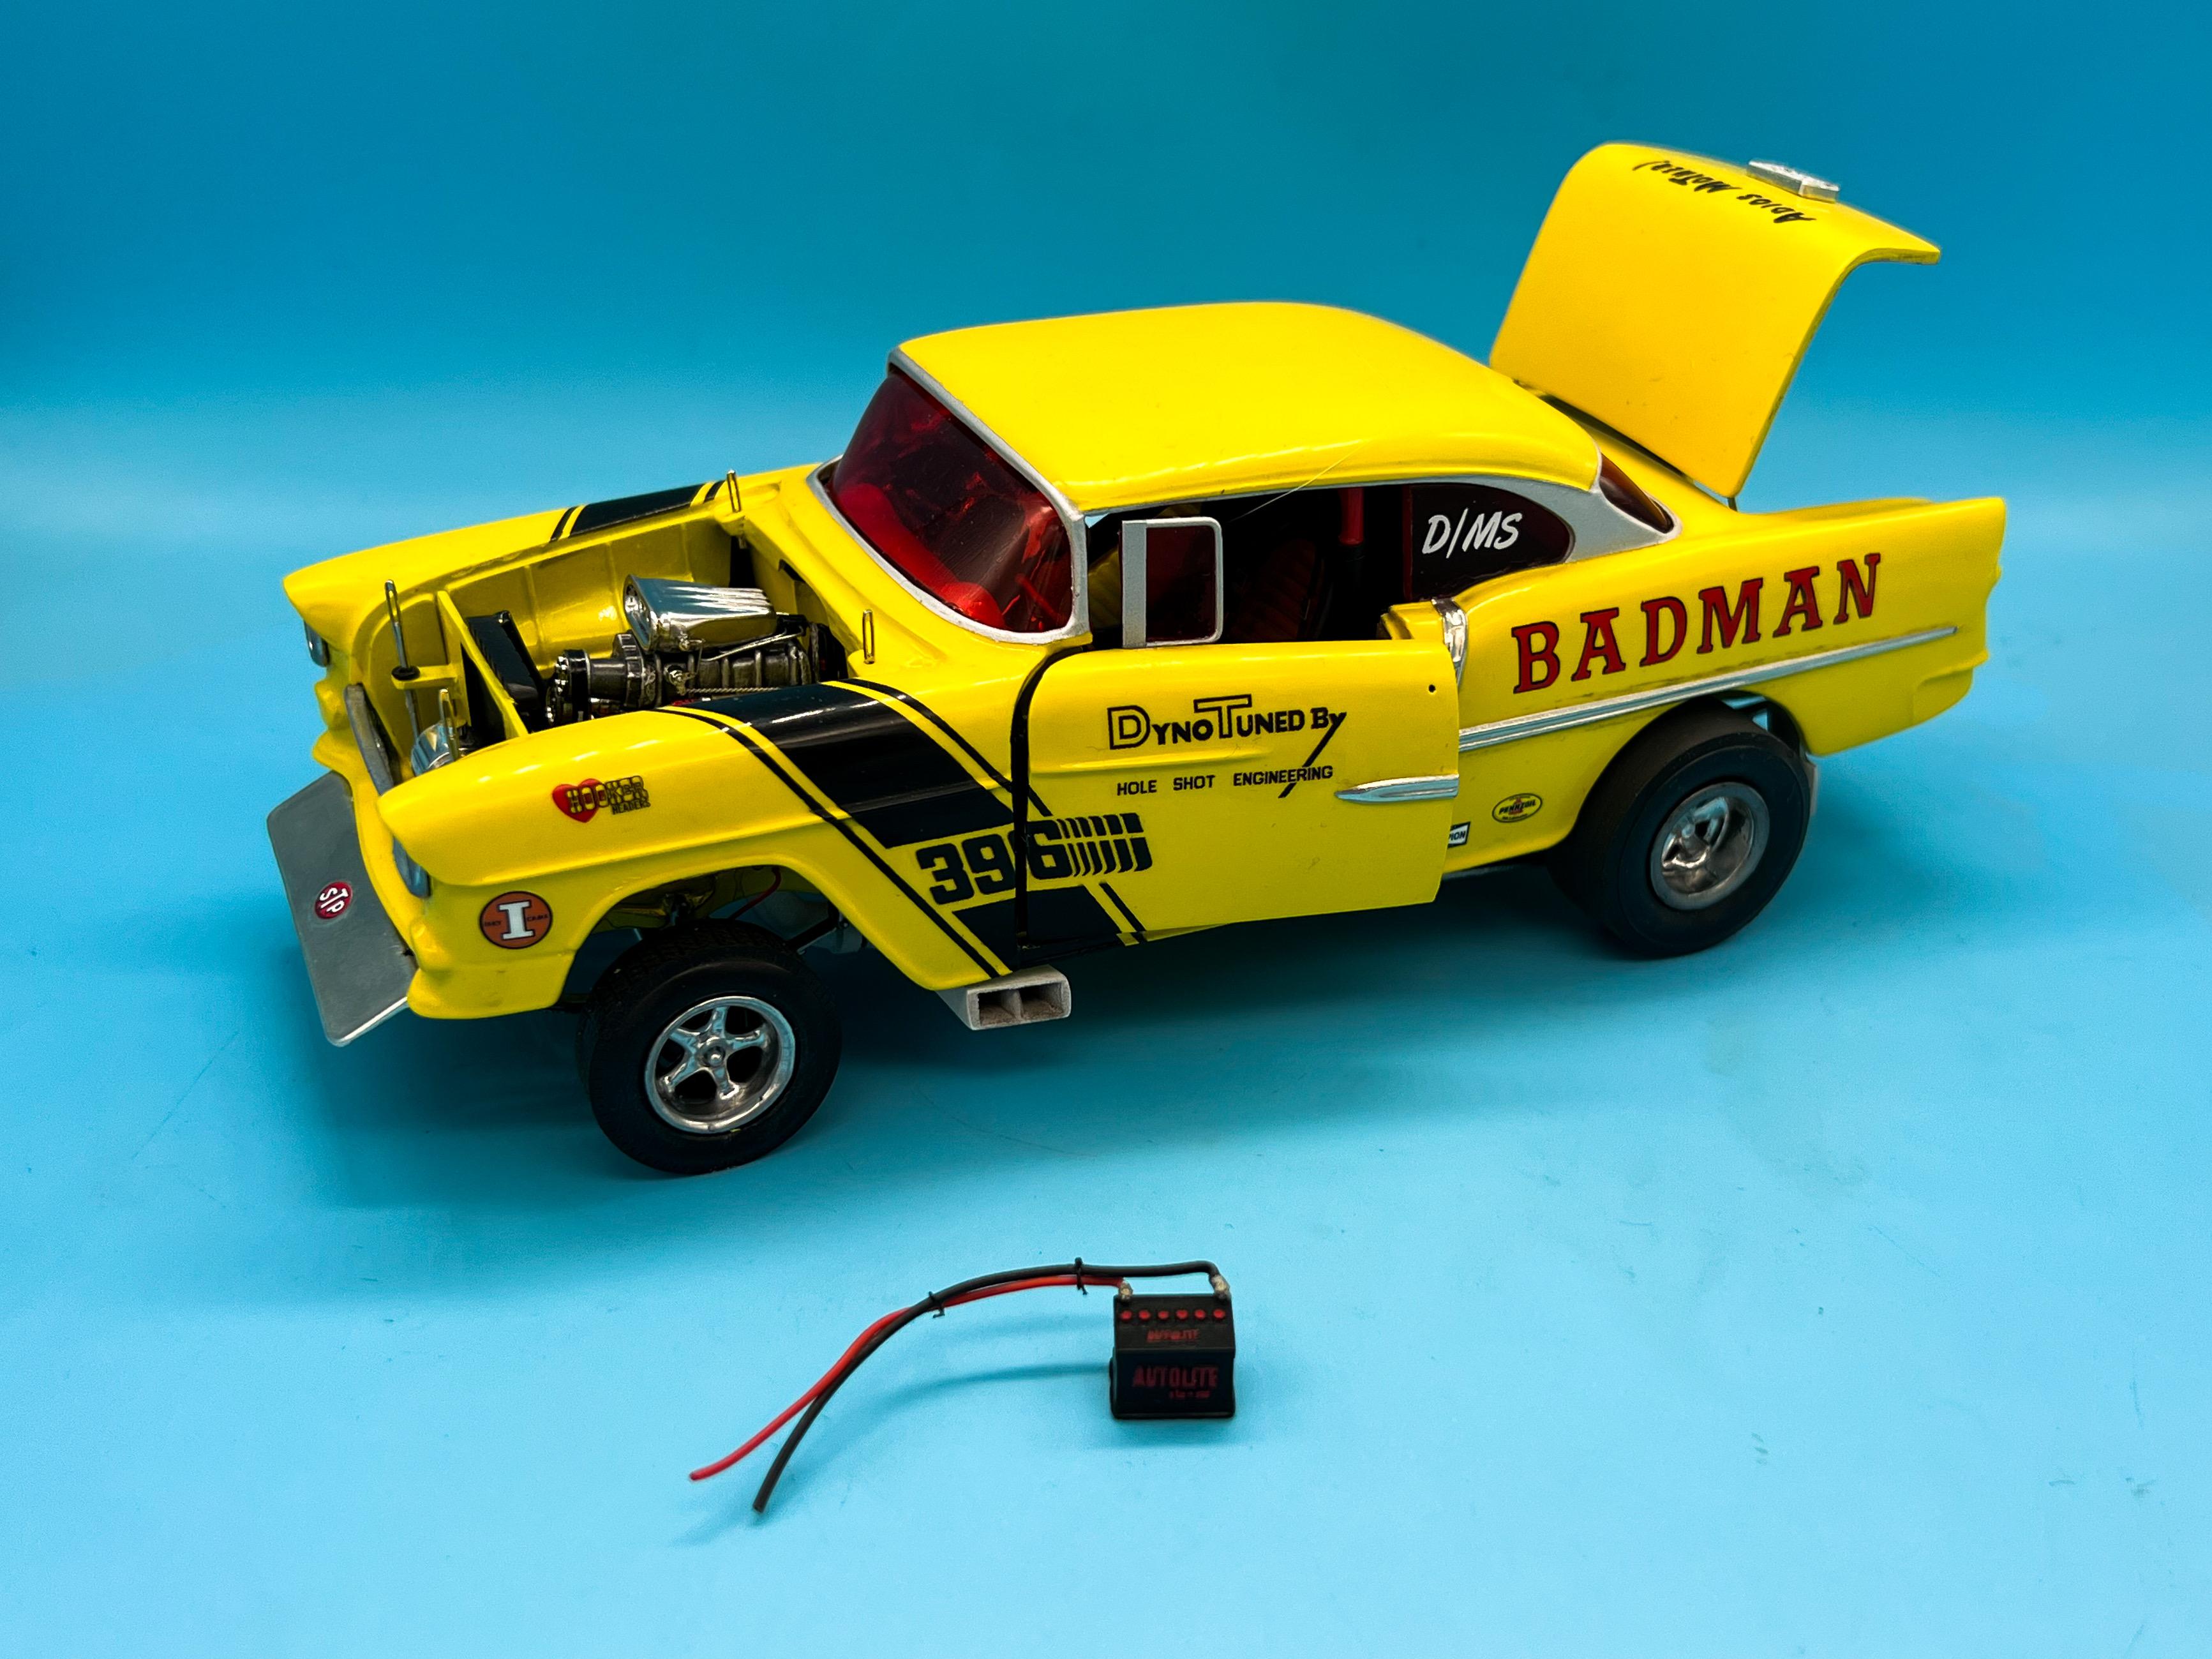
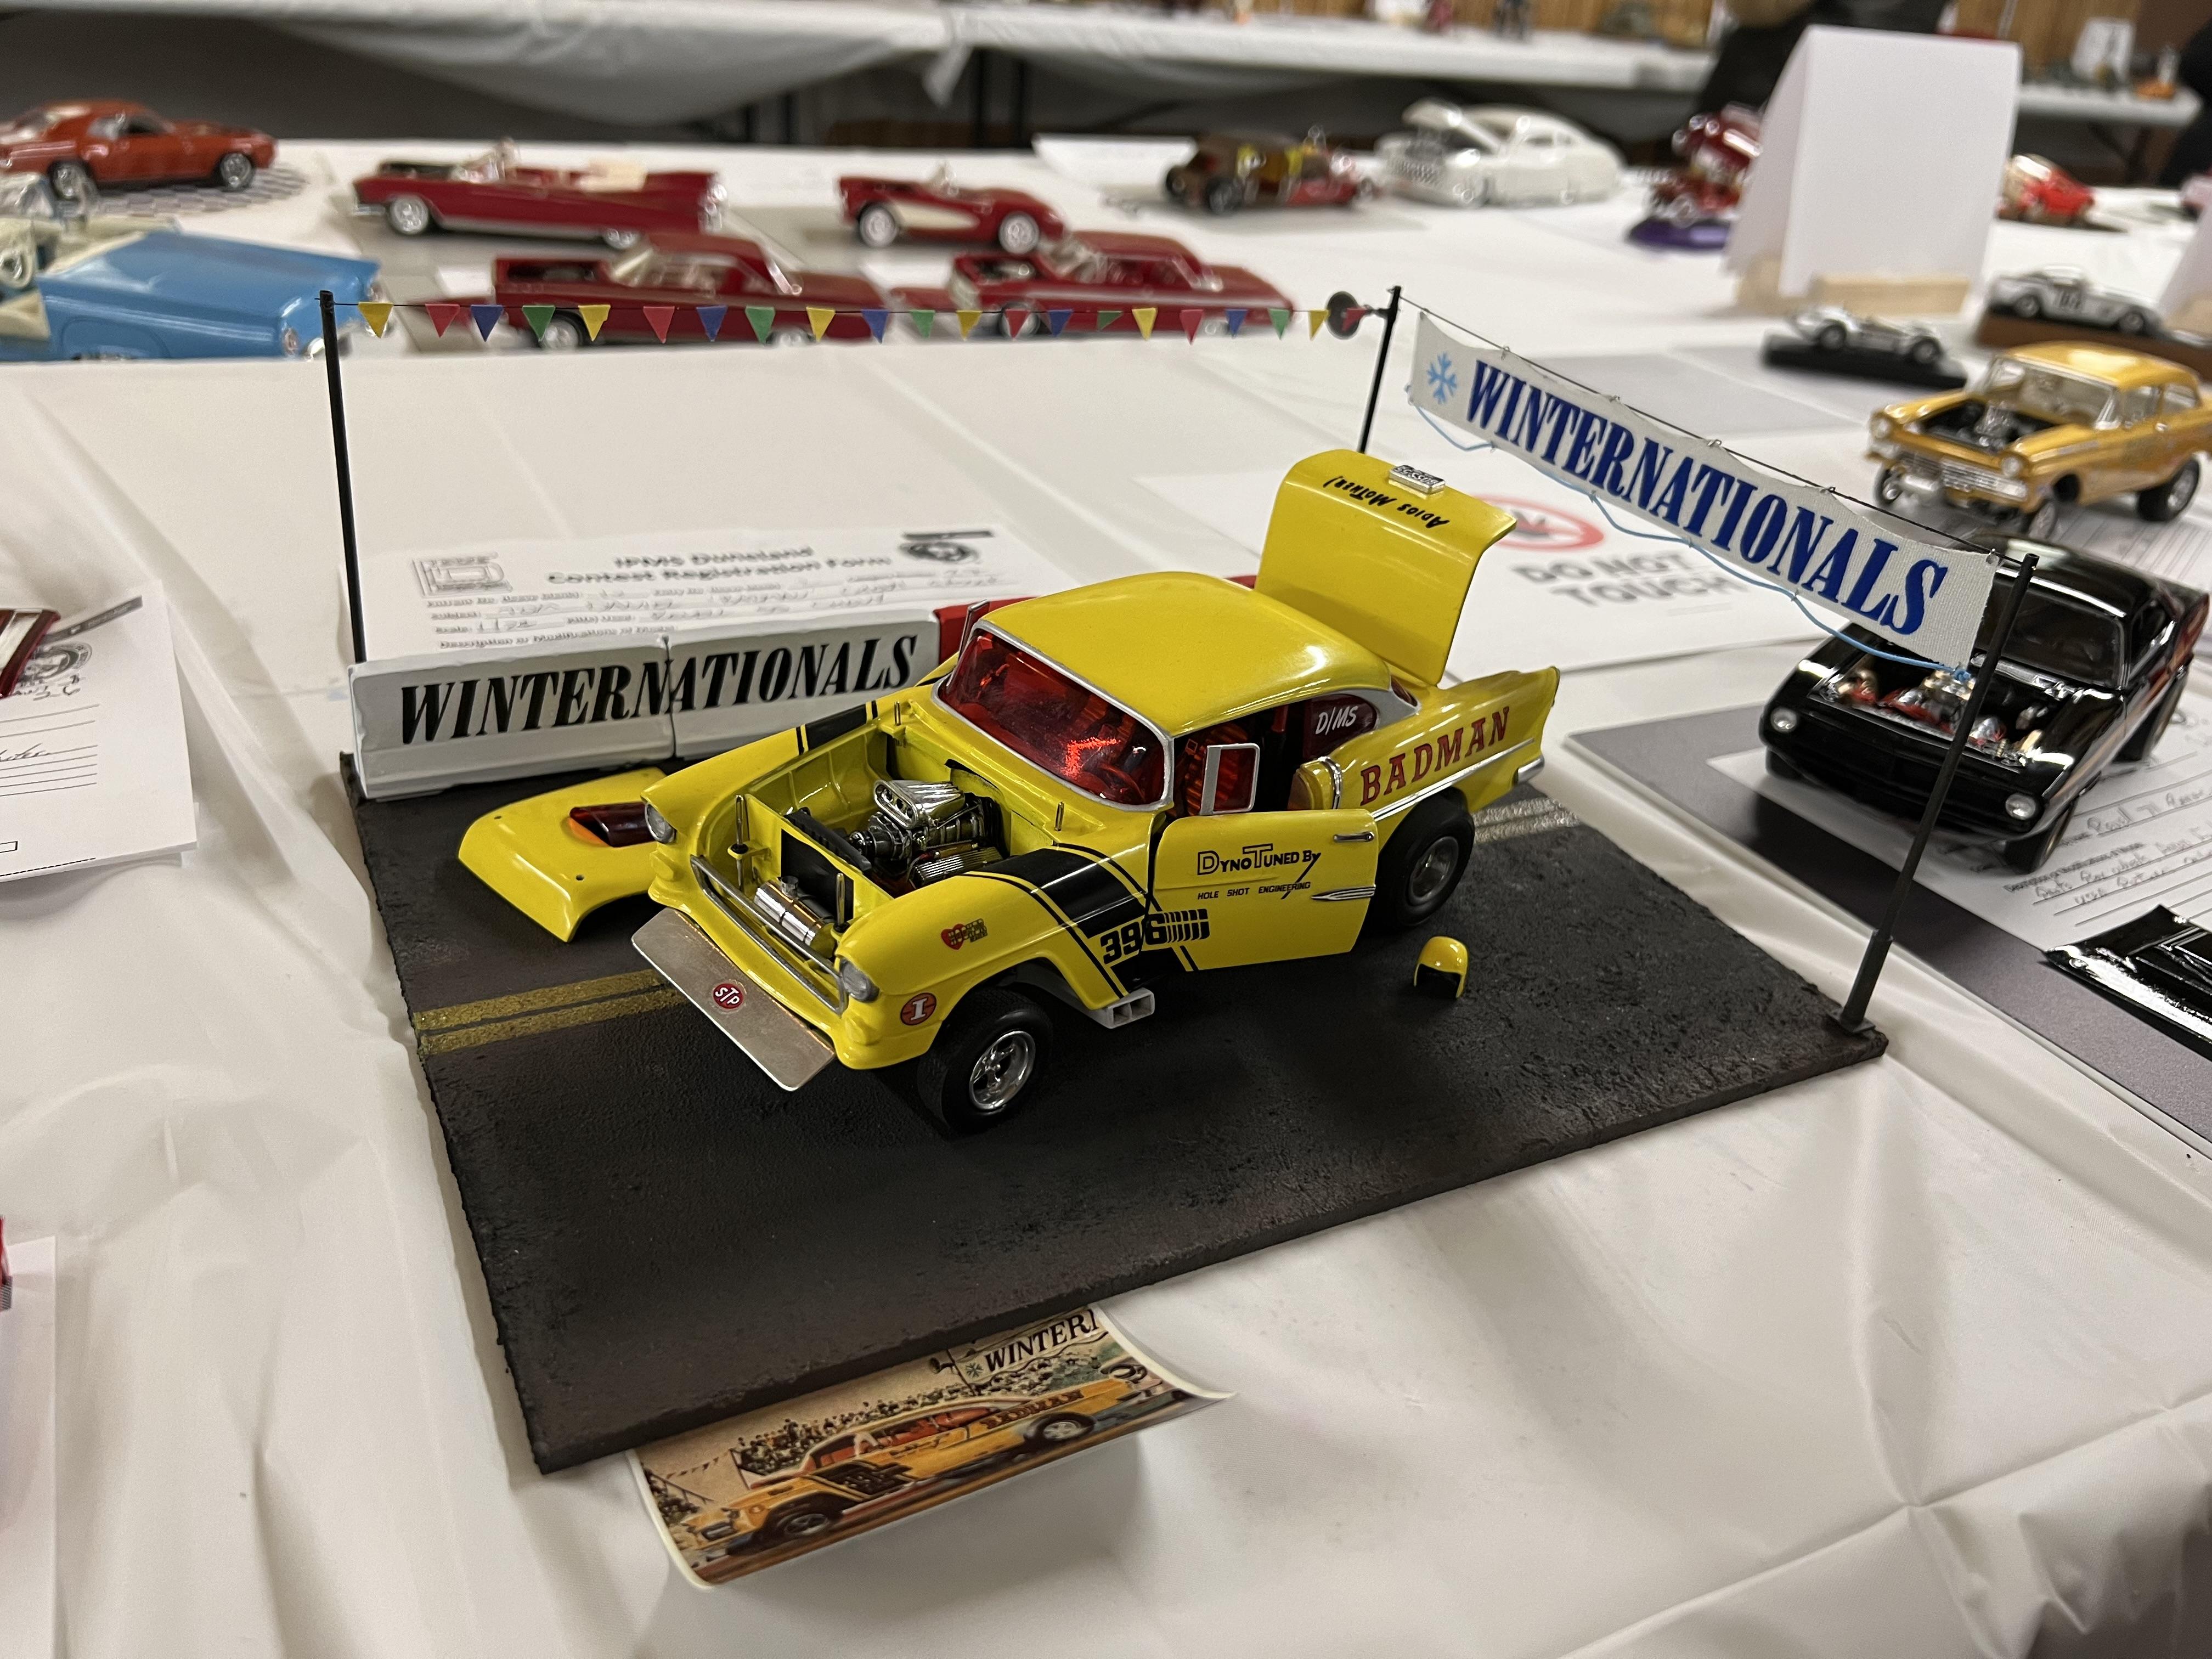
My take on the most famous ‘55 gasser street machine’…
OldNYJim replied to OldNYJim's topic in WIP: Model Cars
I laid the names out in Adobe Illustrator, and then cut masking film with my Silhouette scrapbook cutter. If you're not familiar with Illustrator the Scrapbook cutter has it's own software that will allow simple graphics to be designed, but I use Illustrator all day every day so makes sense for me to use that... -
My take on the most famous ‘55 gasser street machine’…
OldNYJim replied to OldNYJim's topic in WIP: Model Cars
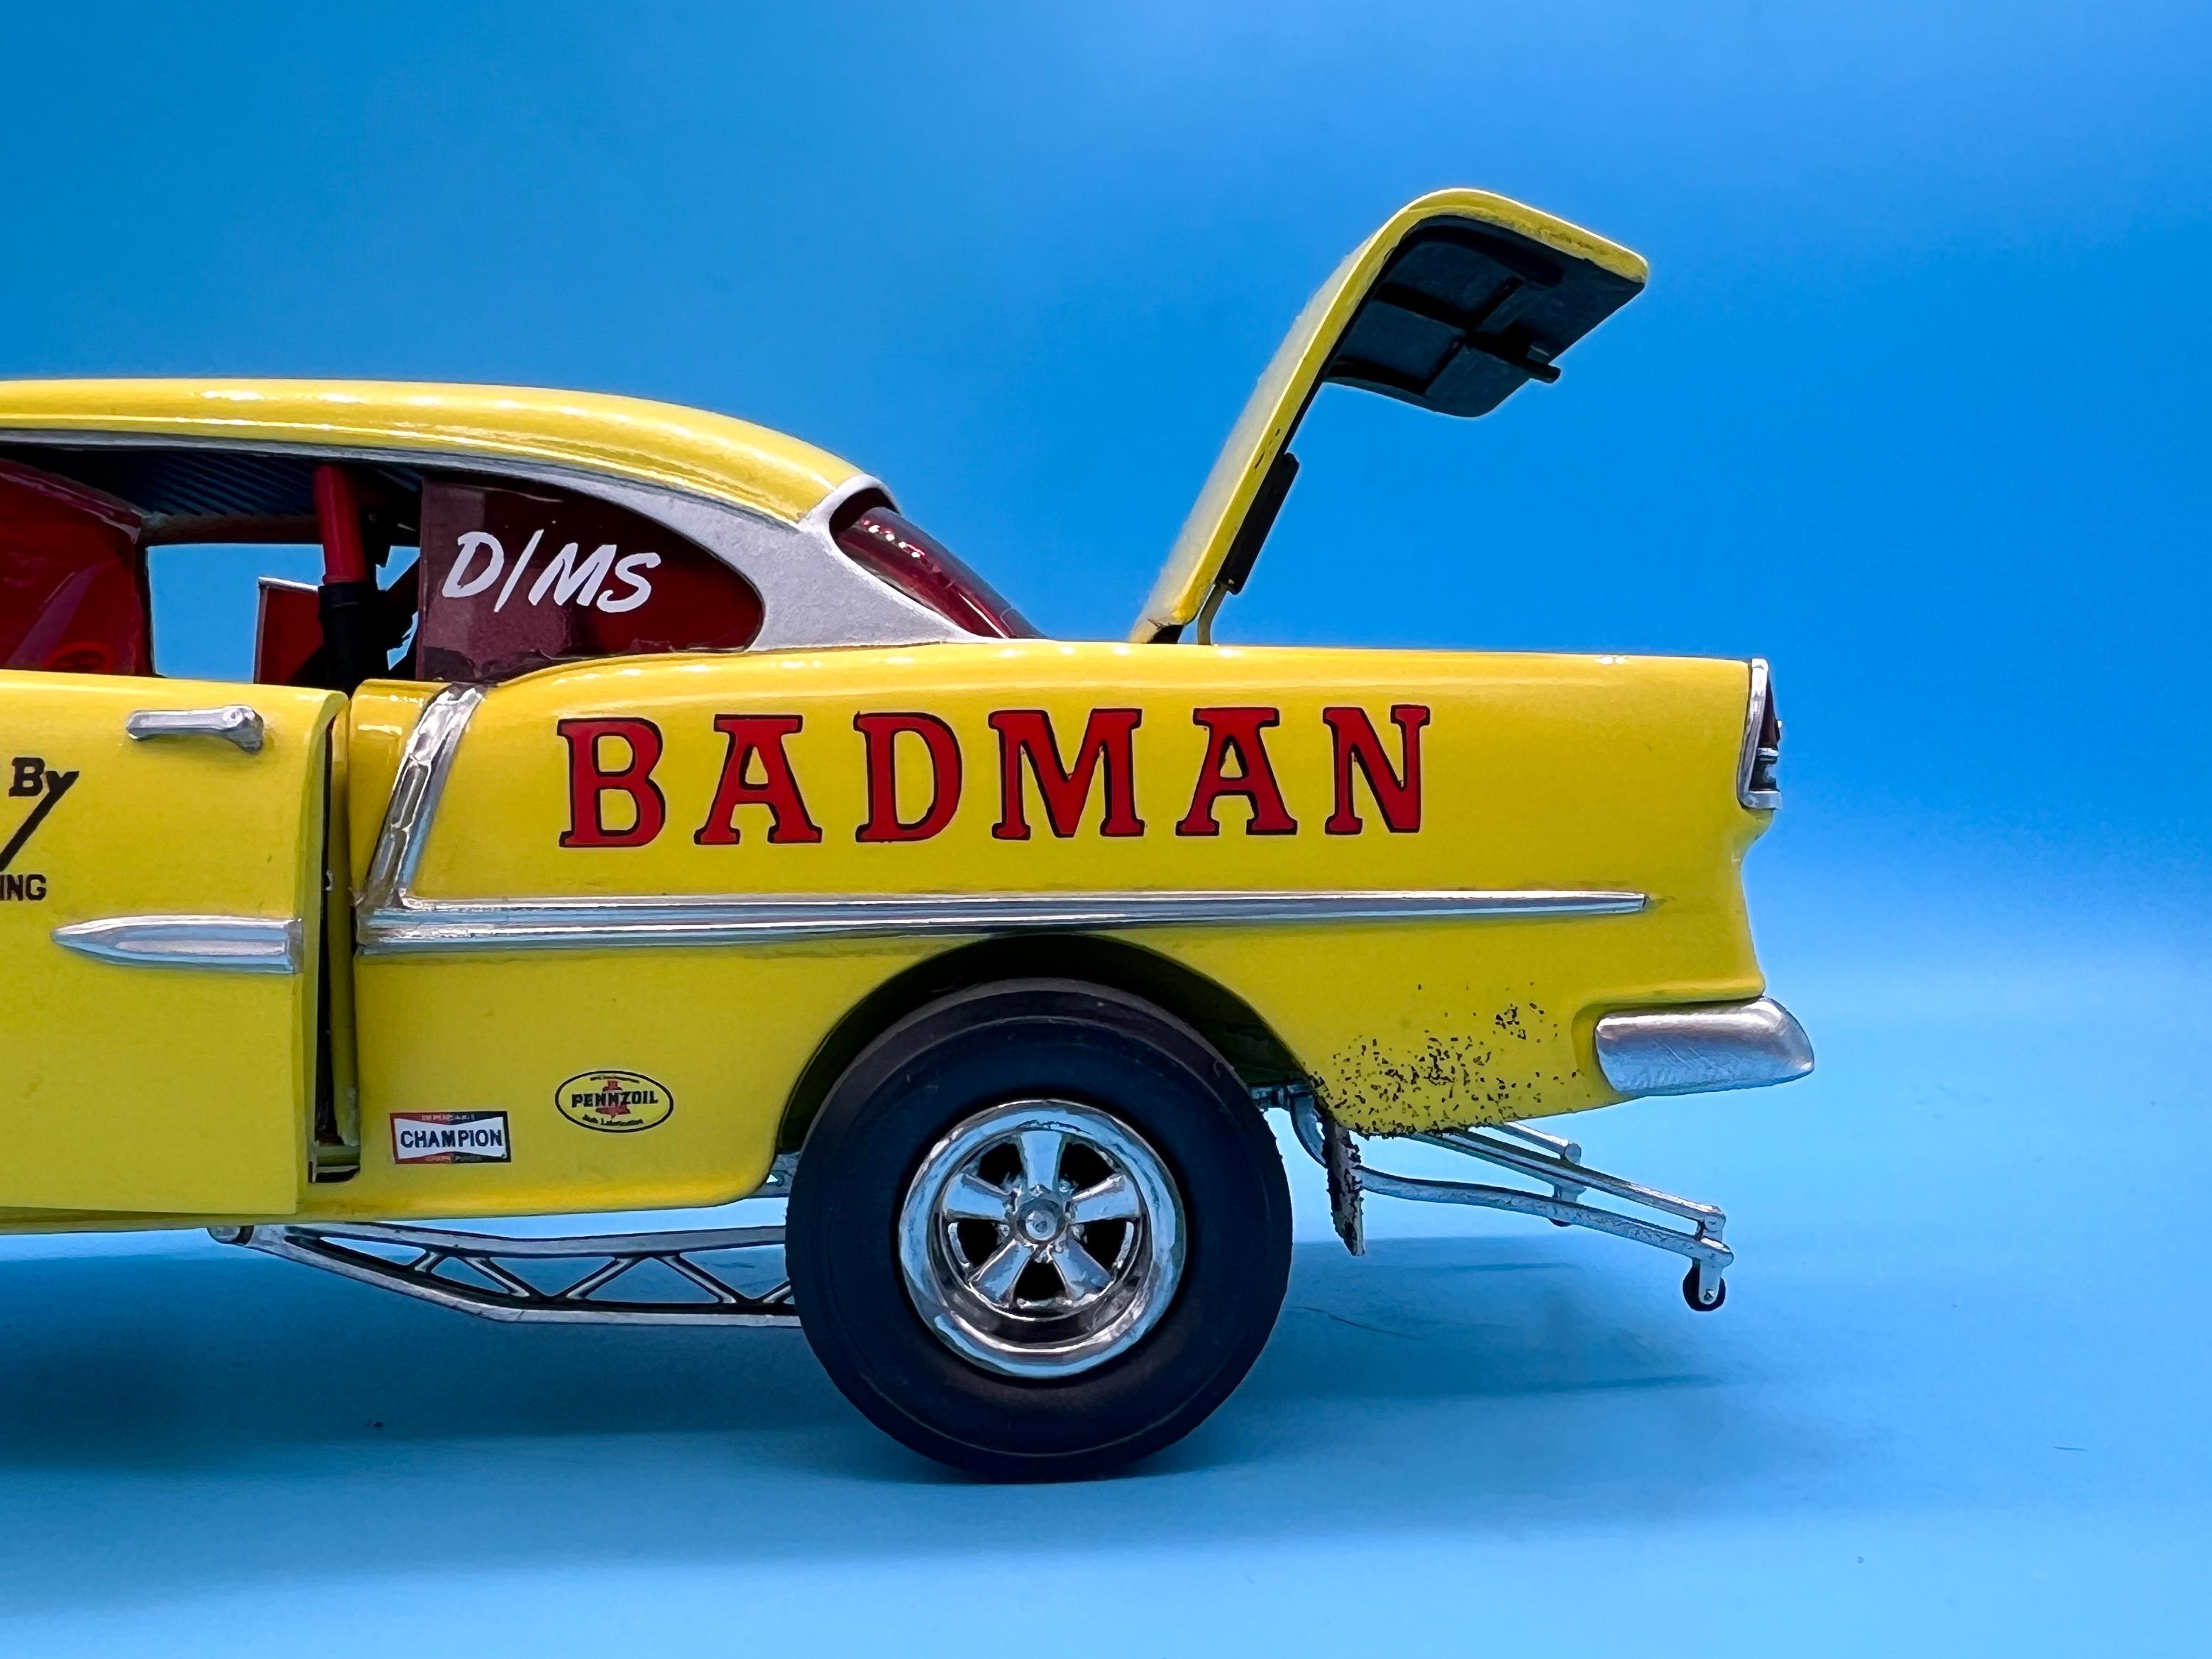
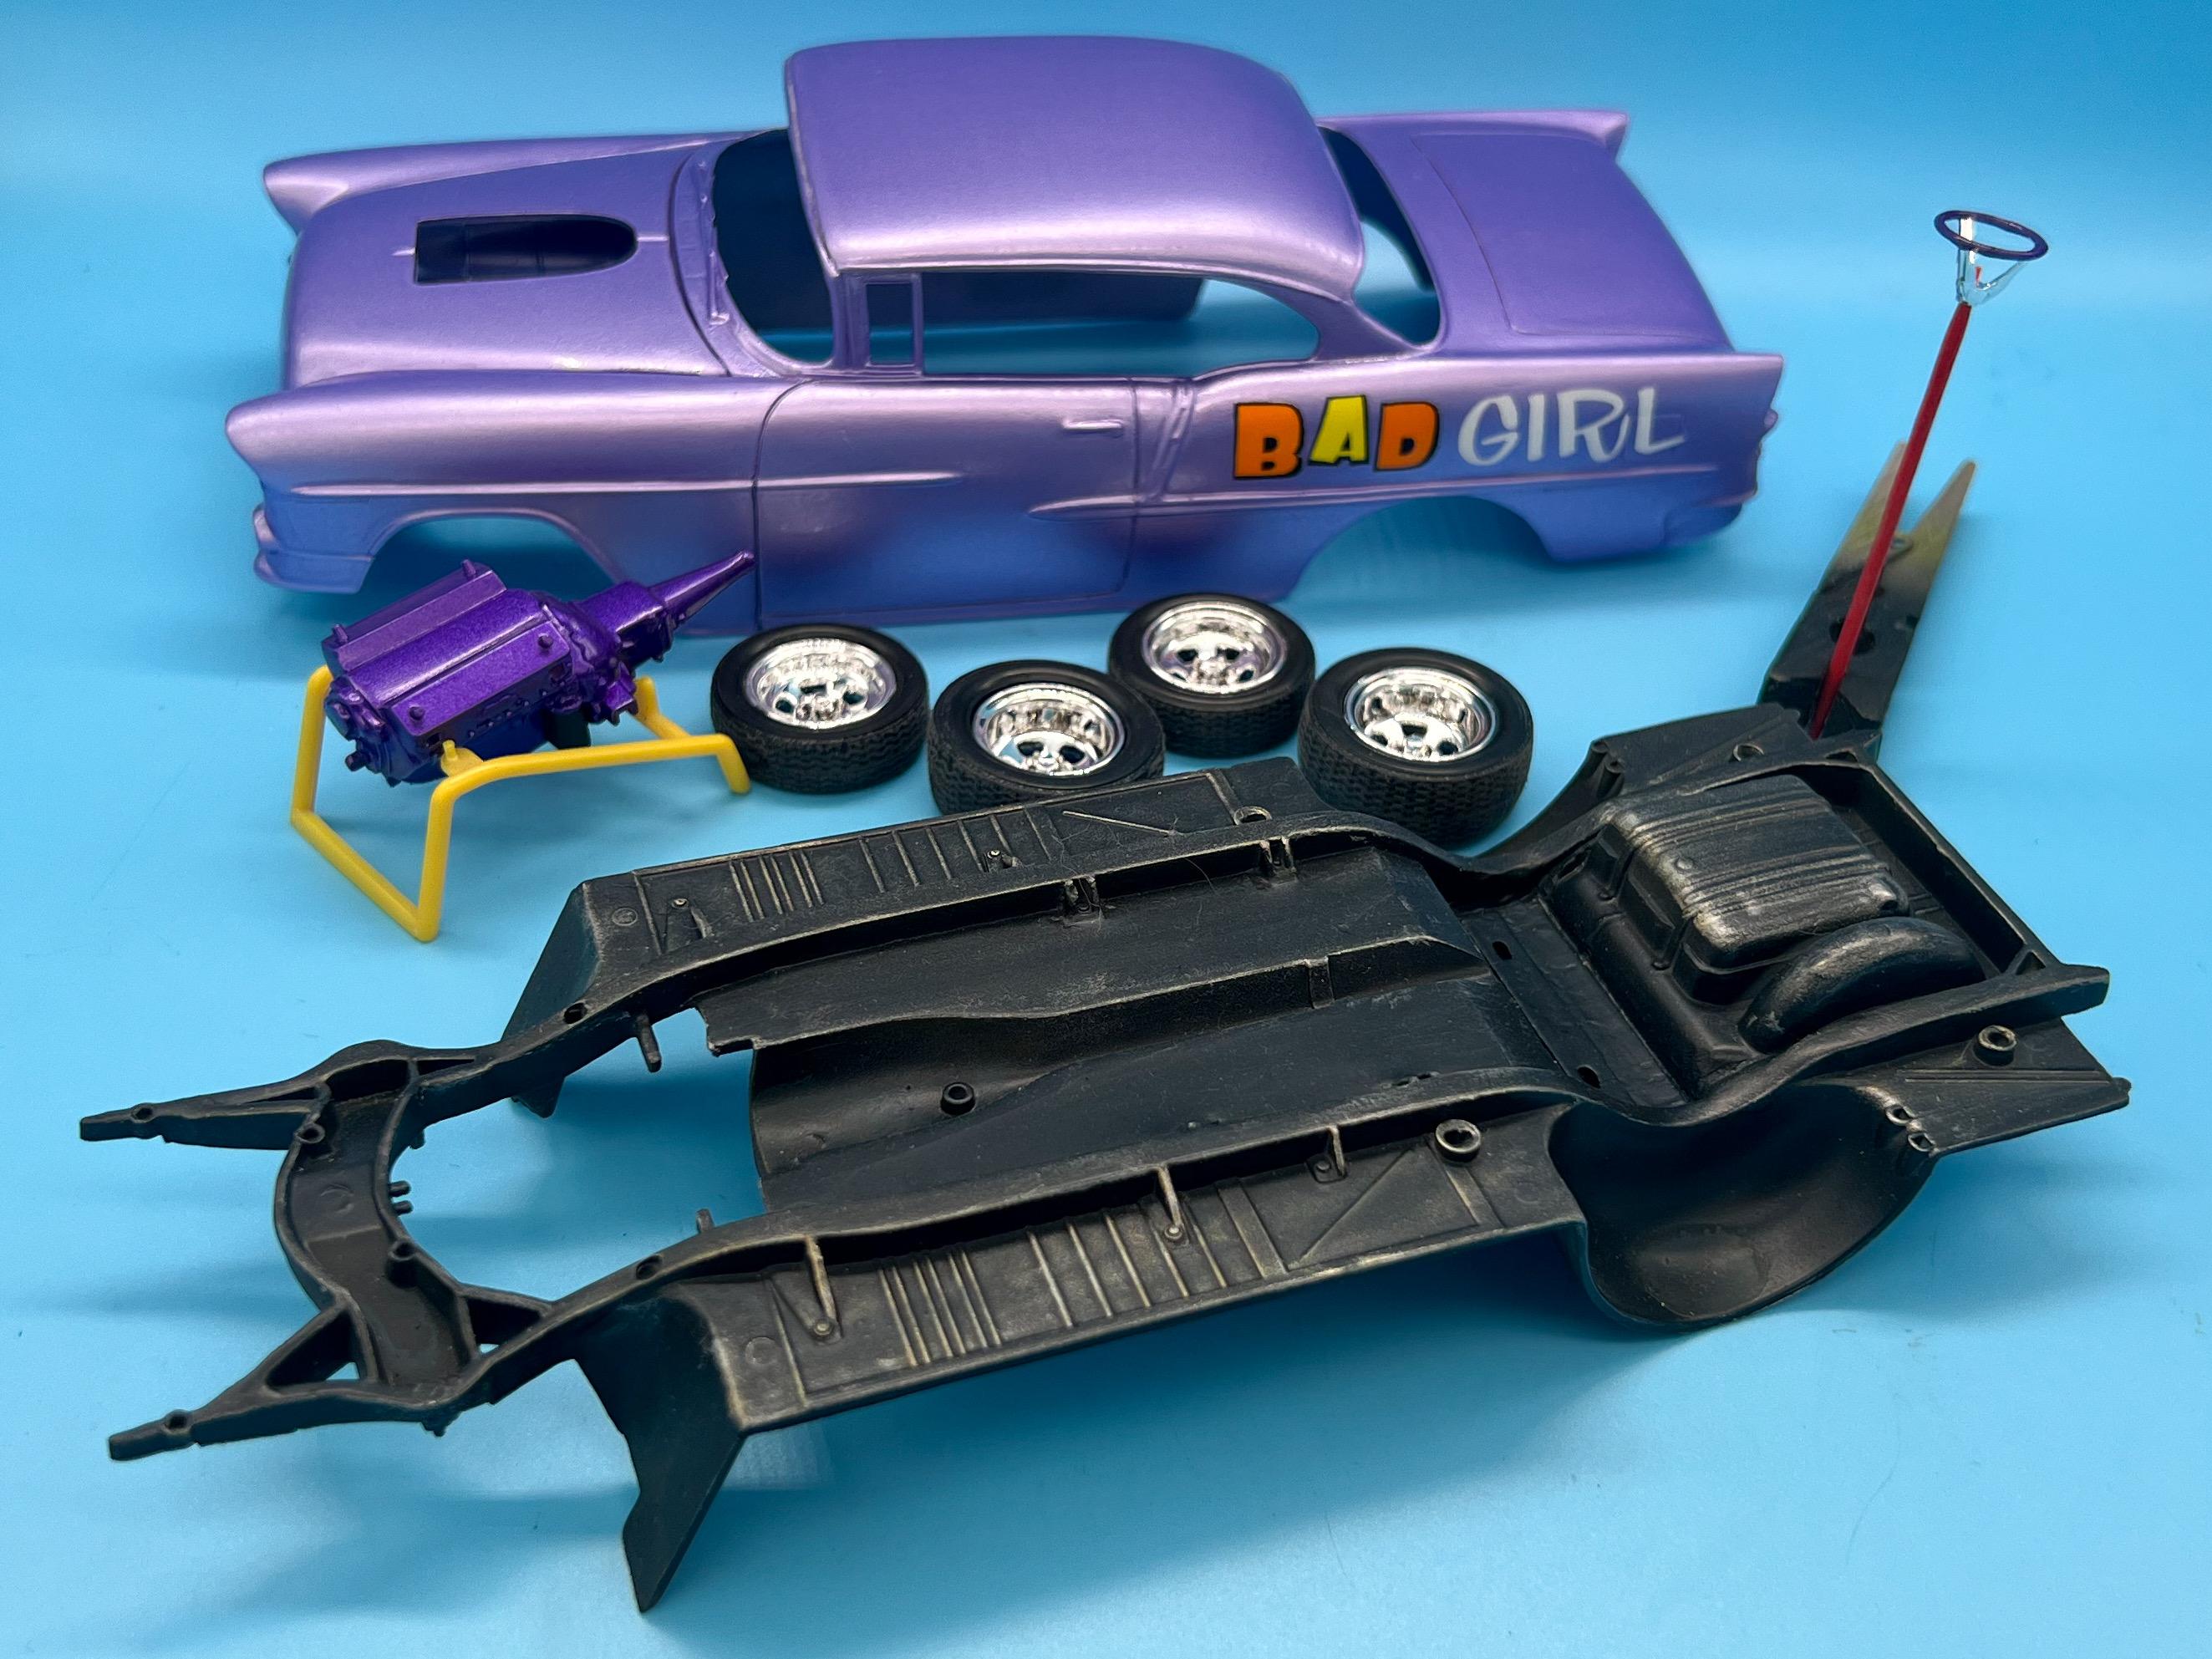
Thanks so much fellas! I didn't take a bunch of progress pics of the final week of this project - most of it was polishing out the paint on the yellow car, and assembling (mostly box stock) the lilac one. Lilac one turned out ok, for a simple build...WAY simpler of a project than I normally like to do, but it was meant to be a comparison piece for the detailed version so I left it alone and assembled it in an afternoon last weekend: And with that done, only thing left to do was finish polishing out the paint on the Badman (that thing got surprisingly dirty at the model show, considering no one was supposed to be touching any of the models...) and then take some pics on the base: And a pic of both, like the box art... This was a fun one - definitely challenging and had to push my skills to get it together, but I'm relatively pleased with it - thanks for all the nice comments and to everybody who followed along! Onto the next one!
-
Not sure if I’m the person Peteski is thinking of, but I used these guys and was very happy with the quality AND service. Fast turn-around, great quality and a fair price. Highly recommended.
-
AMT 50 chevy 3100 p/u
OldNYJim replied to Tom Kren's topic in WIP: Model Trucks: Pickups, Vans, SUVs, Light Commercial
I like the color too - the blue works really well with the wood and tan tones. -
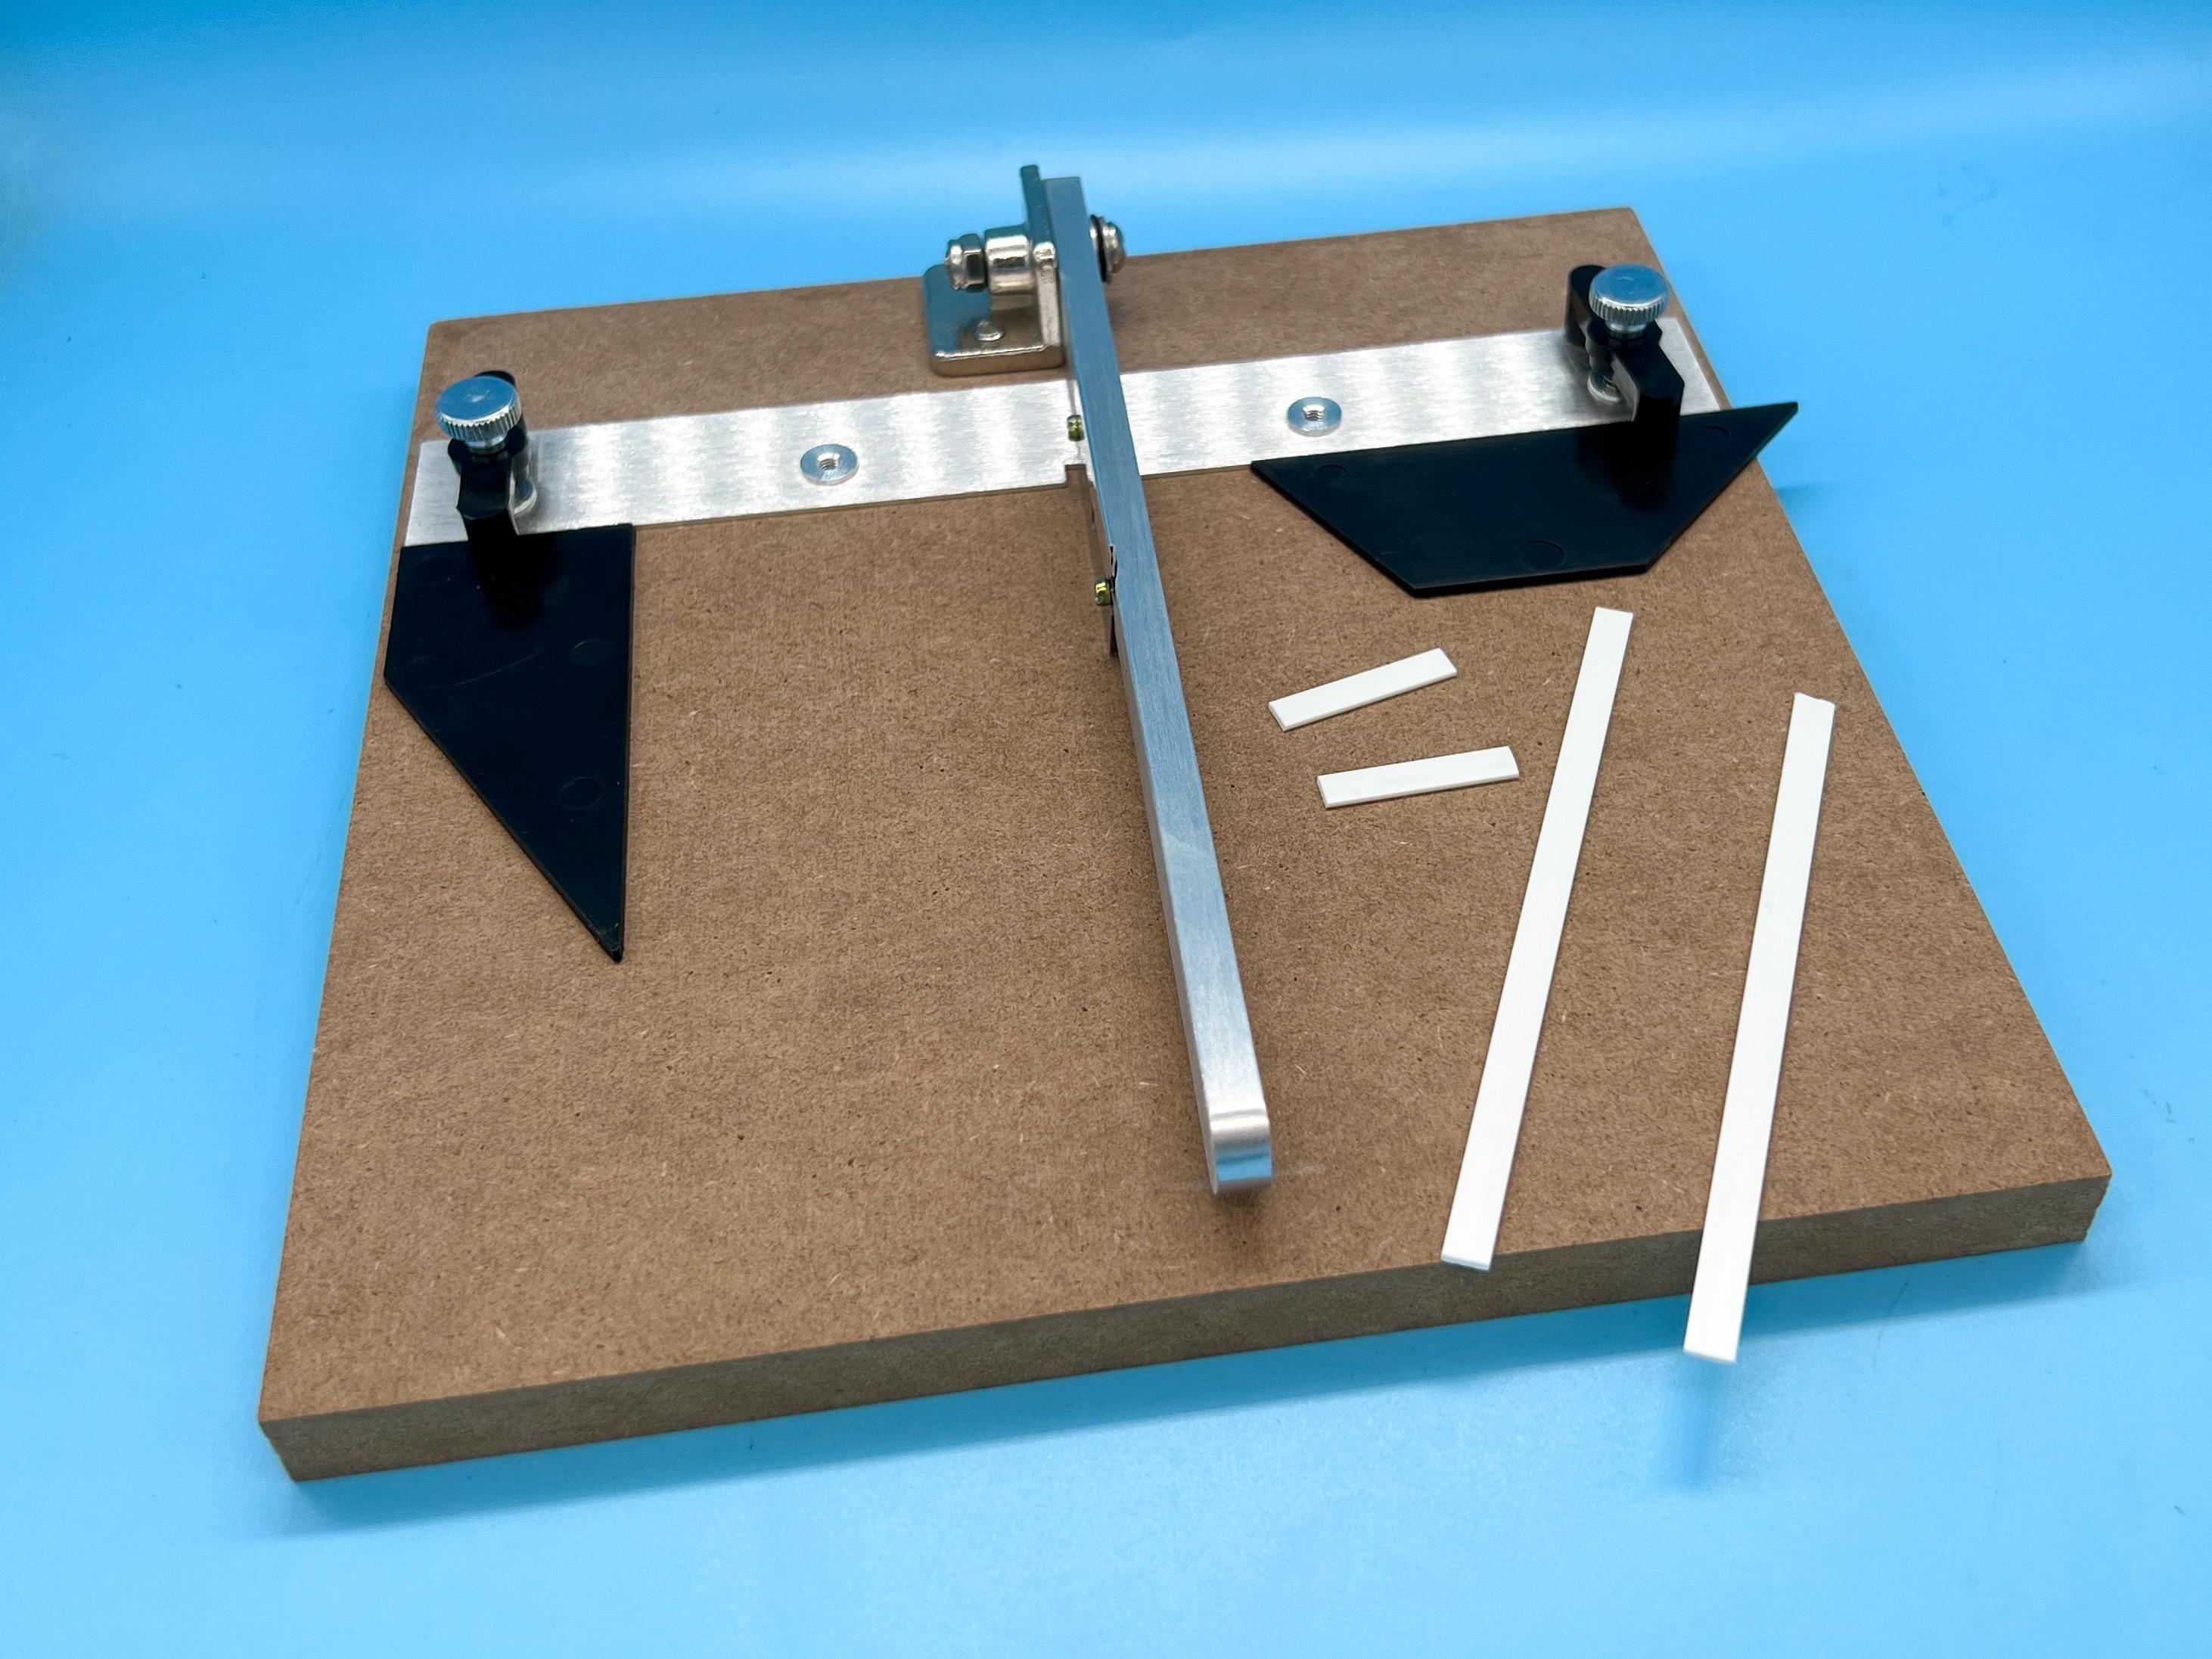
I’d wanted one of these for a while, and a co-worker surprised me with an Amazon voucher for a lunchtime project I was helping her with…so I knew immediately what to spend it on: Micro Mark Chop-It…not the fanciest of tools, but I already know I’m going to use this a bunch, especially for those tasks where you need to cut a bunch of material to identical lengths easily.
- 38,869 replies
-
- 2
-
-
- johan
- glue bombs
- (and 1 more)
-
Mine really does need a coolant flush, so I'm wondering if that might help...like you say, a little air trapped in the system maybe. It's worth a shot, seeing as it needed one anyway...
-
How long until the second ‘Hot Rod’ edition of the mag is out? If it’s the next issue, I wouldn’t get done in time ??
-
I airbrushed a little flat brown and gray around the arches for some grime on that one - plus it got a couple of heavily-diluted washes of black and brown acrylic over the whole body to add some more depth. This is only the Revell snap kit so there’s not a bunch of detail to it, but I did a short WIP thread:
-
Your 55 is a real eye catcher!
-
Yep, definitely going to be following this one…lots of updates please! ?
-
The Future of Revell...for 2024 at least.
OldNYJim replied to niteowl7710's topic in Car Kit News & Reviews
I’m excited for that one too - was this the kit that actually had hydraulics and some lowrider stuff in there already? I had one from a previous issue but someone offered me some ridiculous amount of money for it as I guess they were hard to find at one point… -
Great pics - thanks for sharing! I shot a few too, for anyone interested: https://public.fotki.com/NewYorkSpeedShop/scale-models/model-shows-contests/ipms-duneland-2023/
-
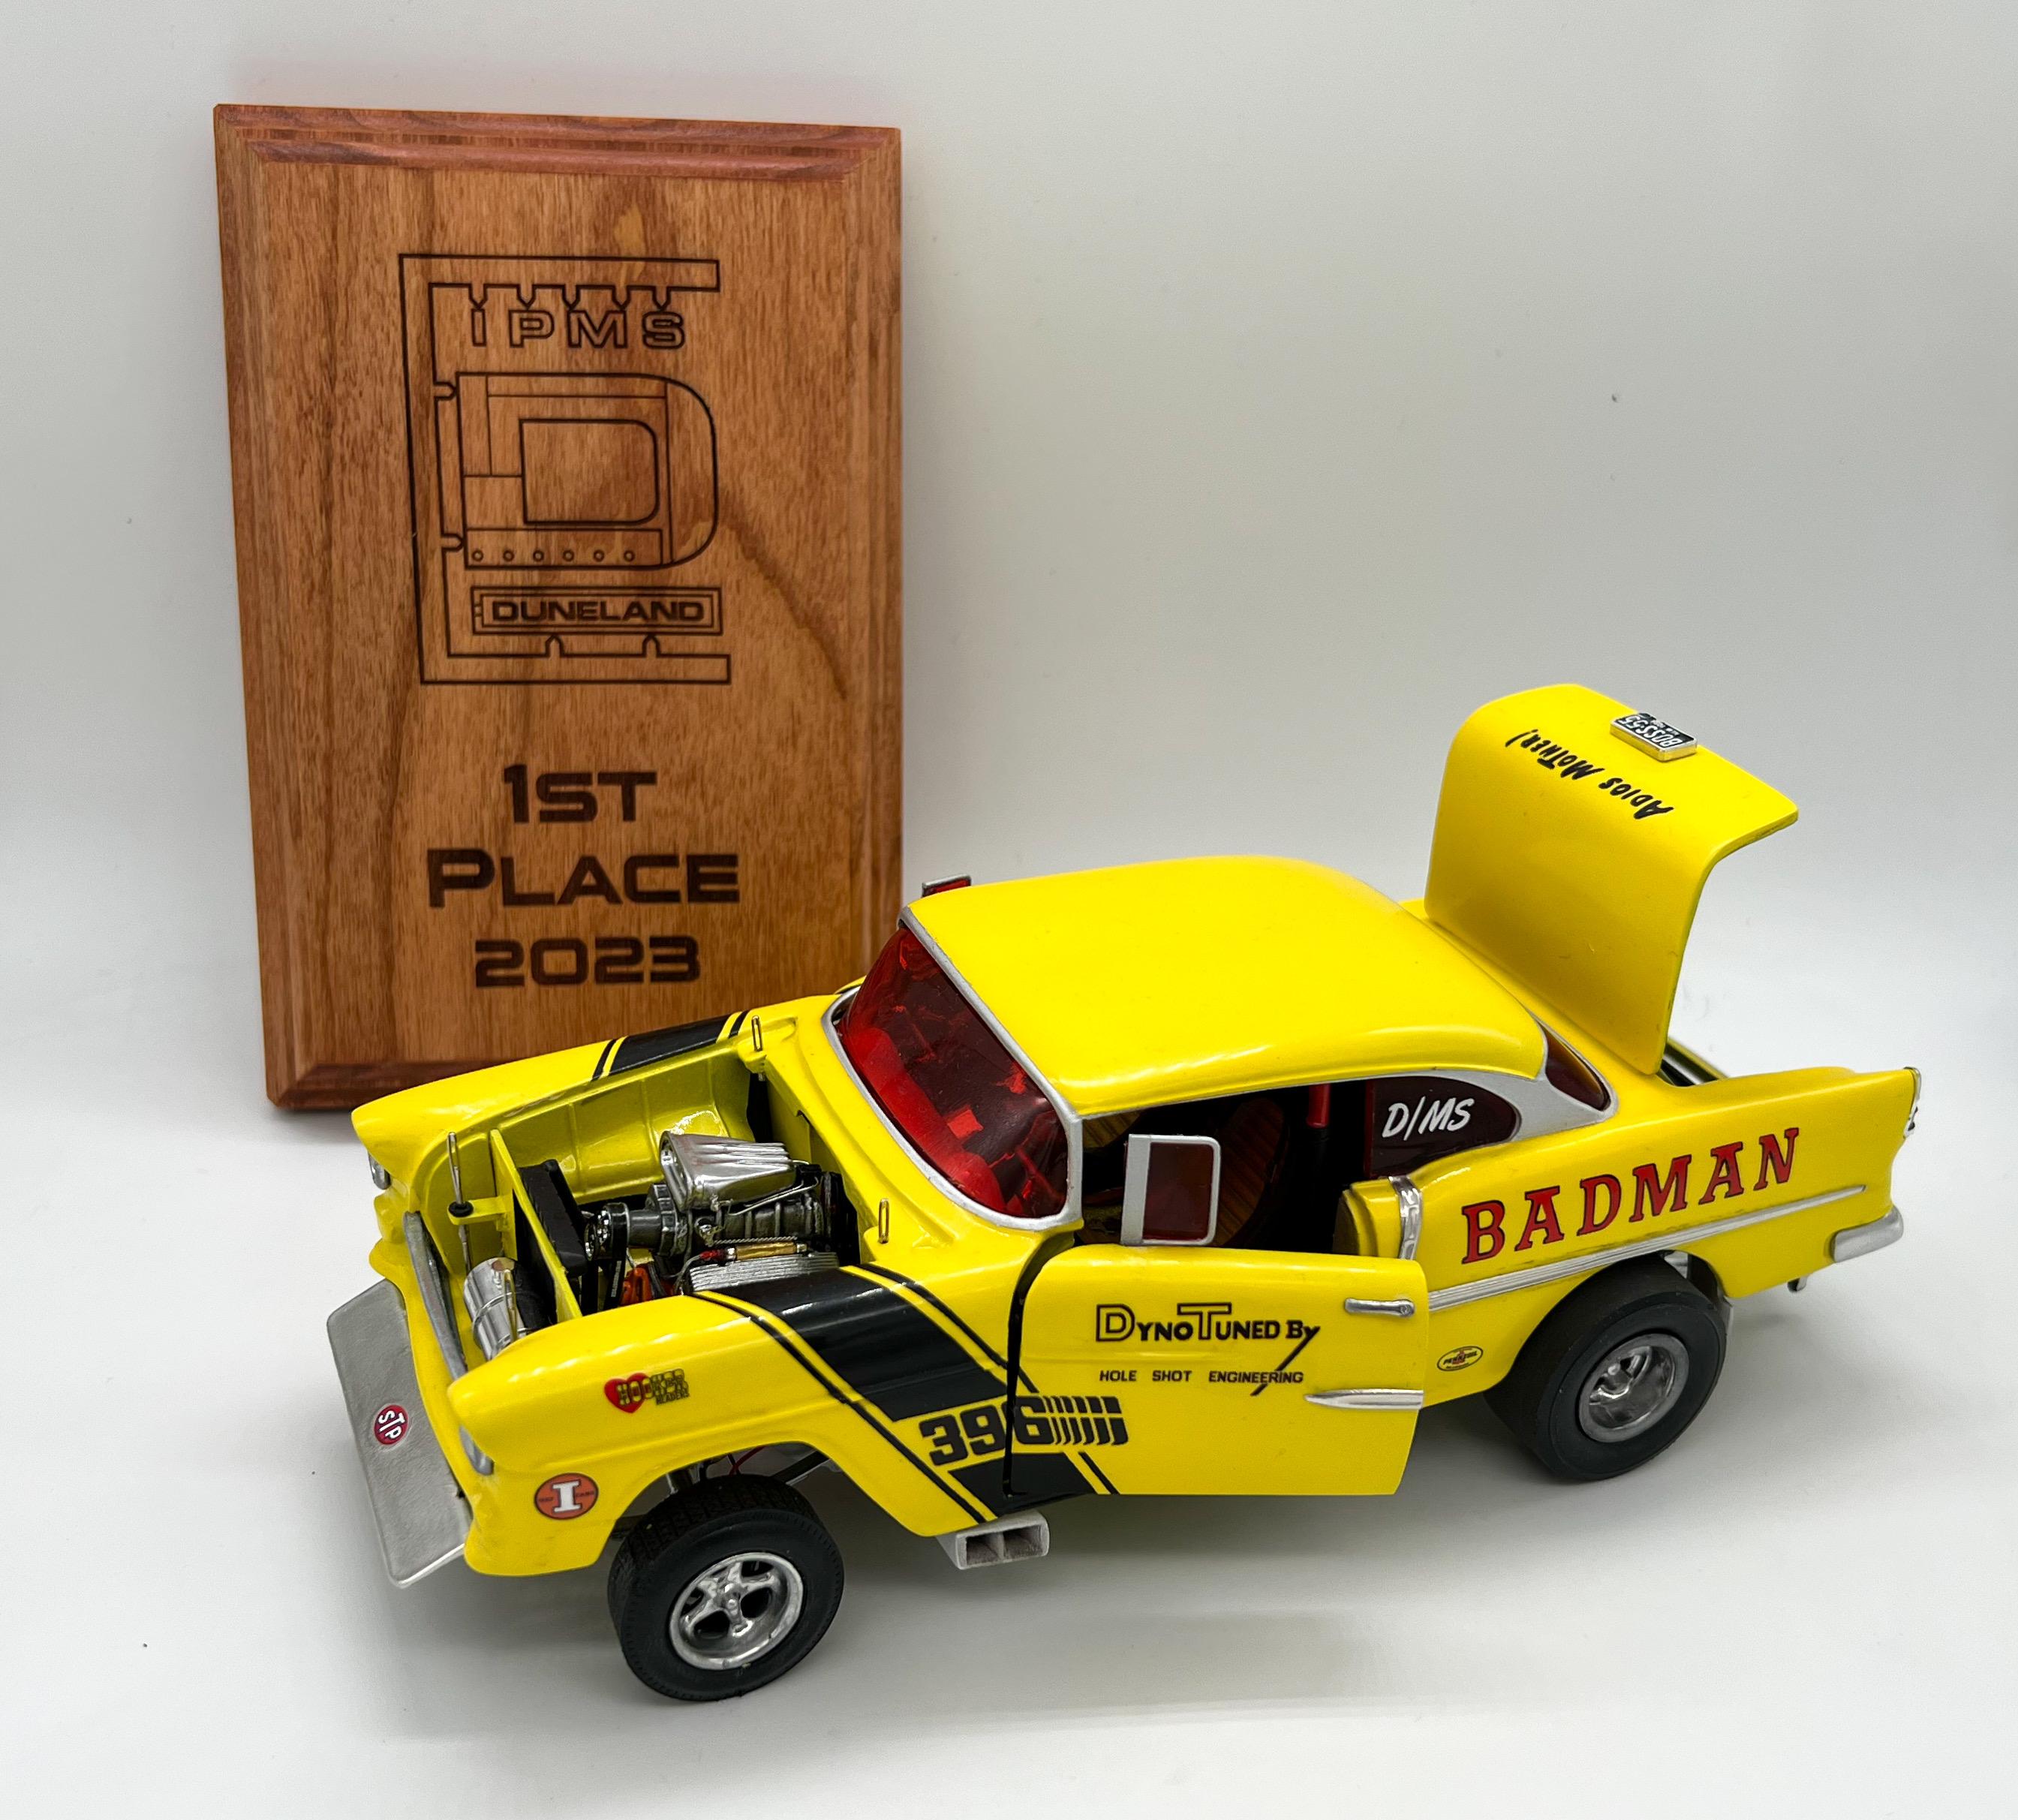
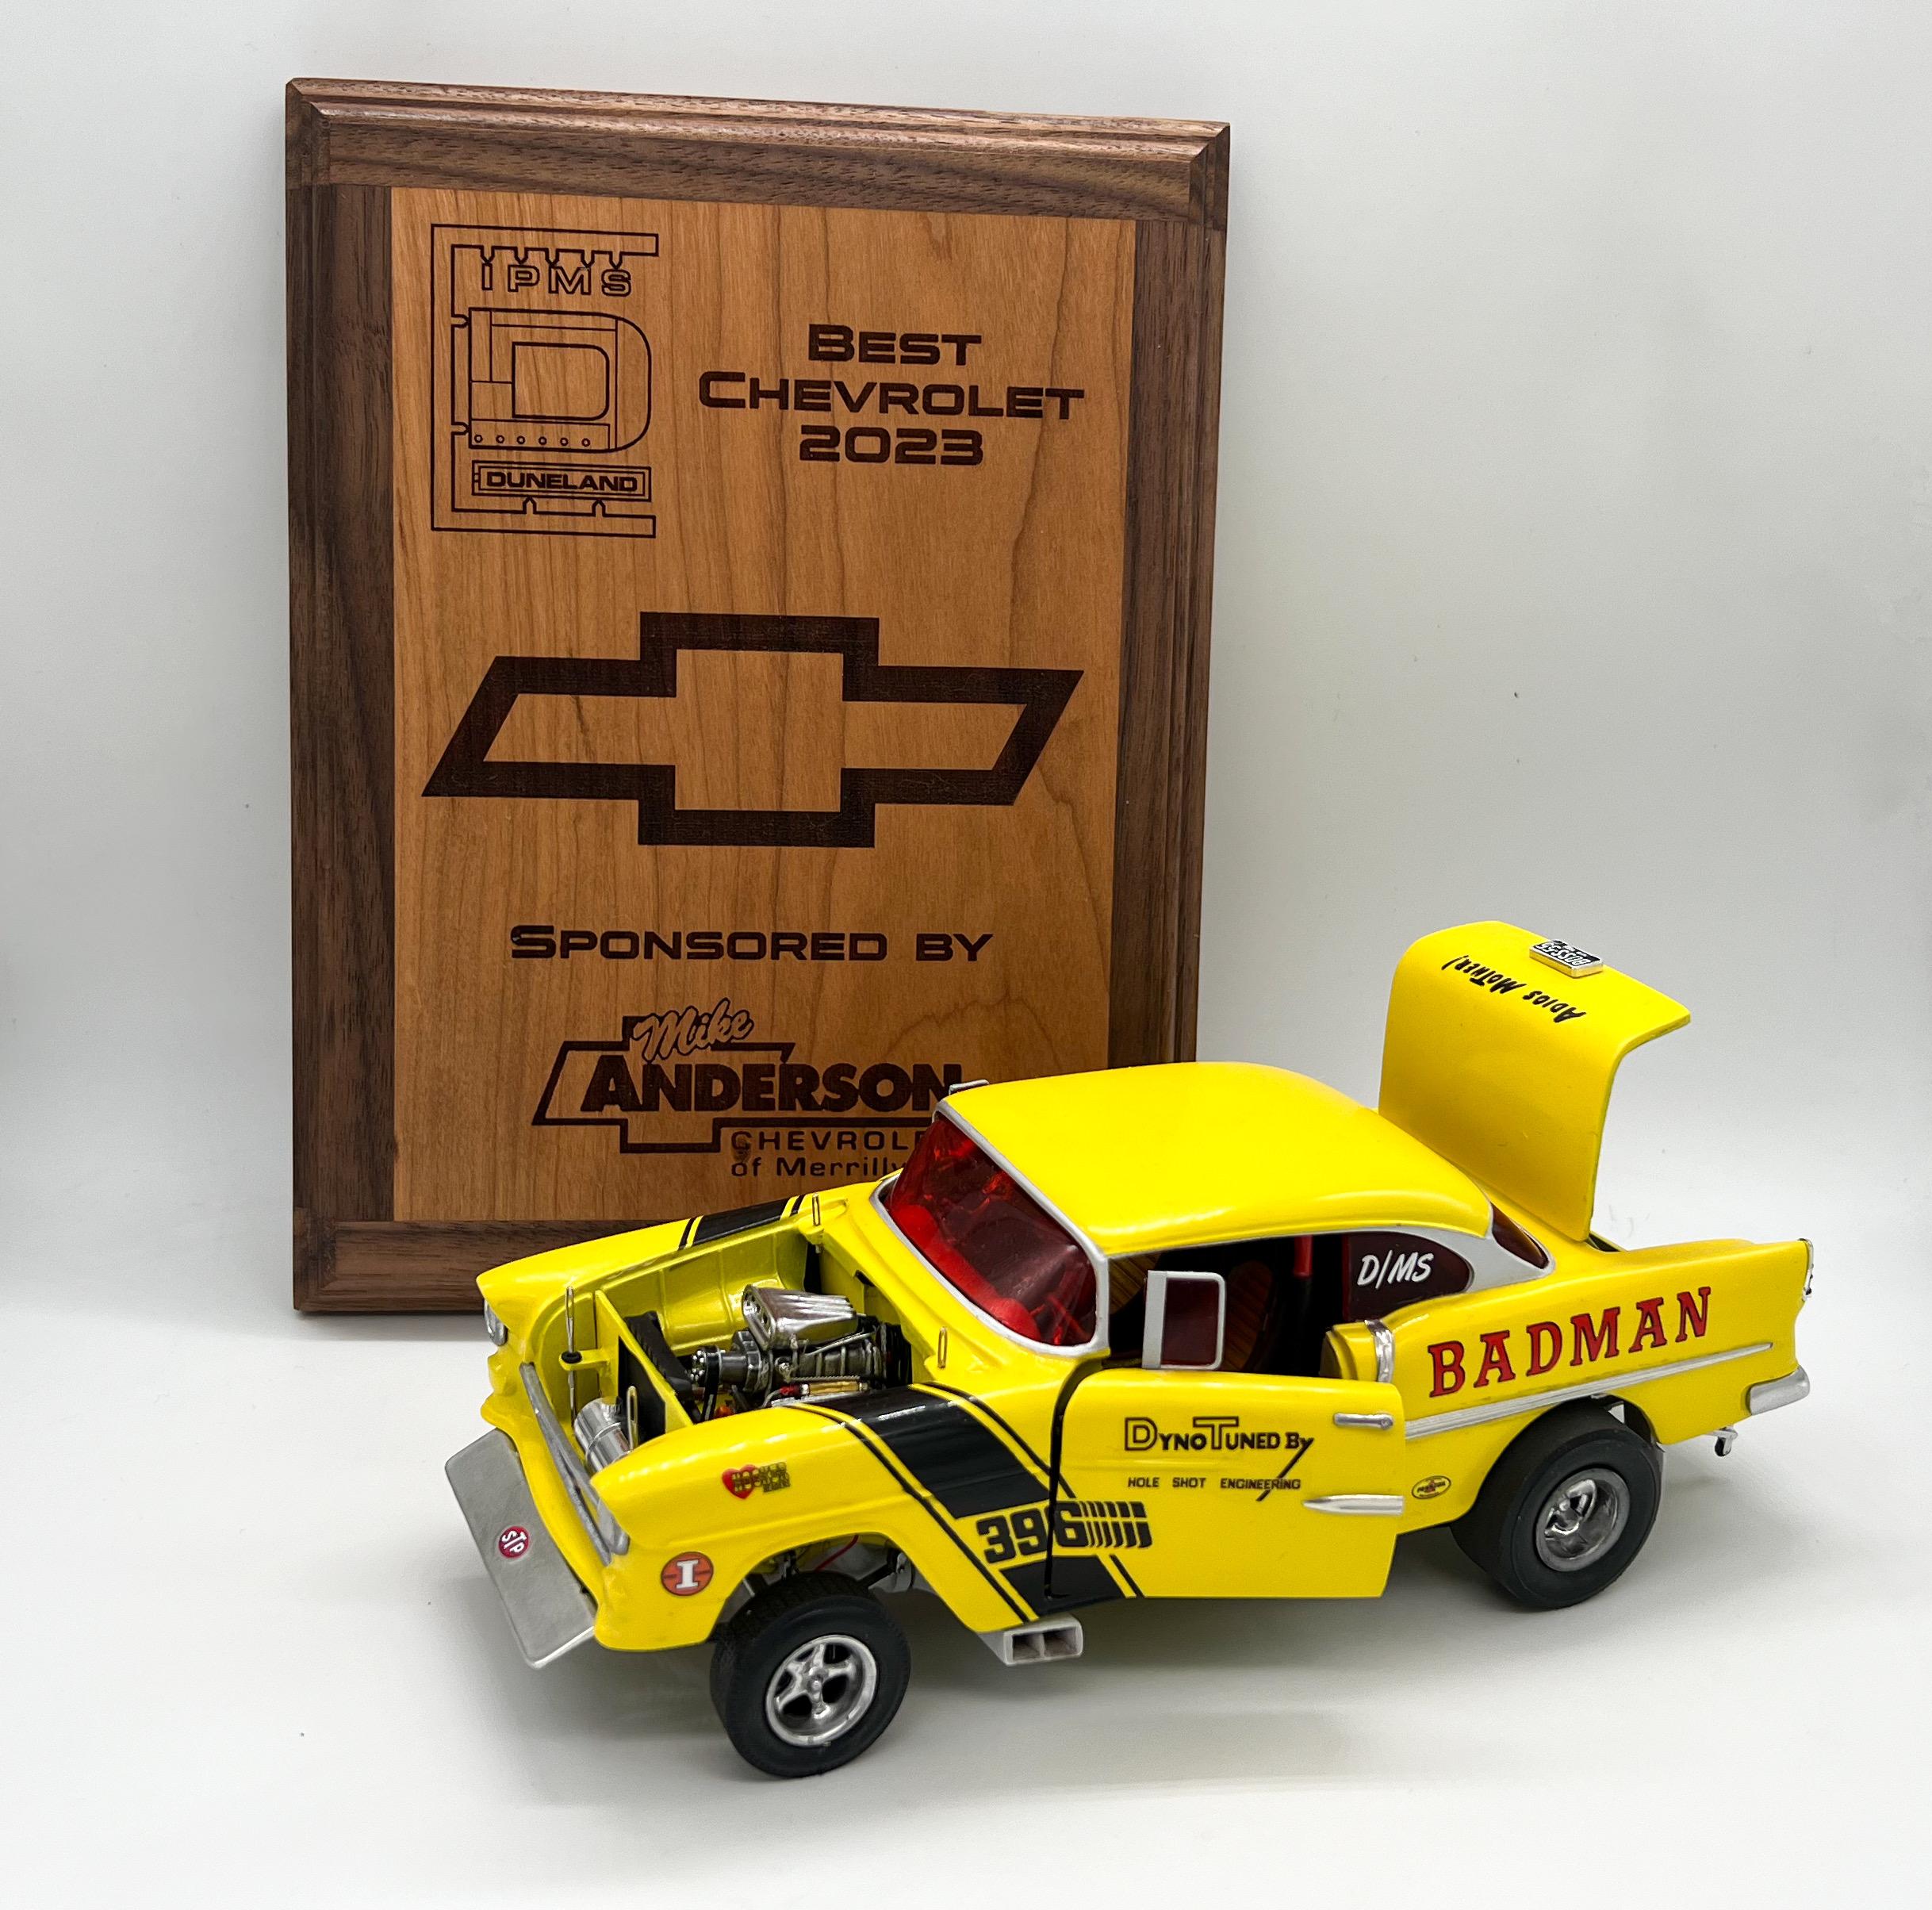
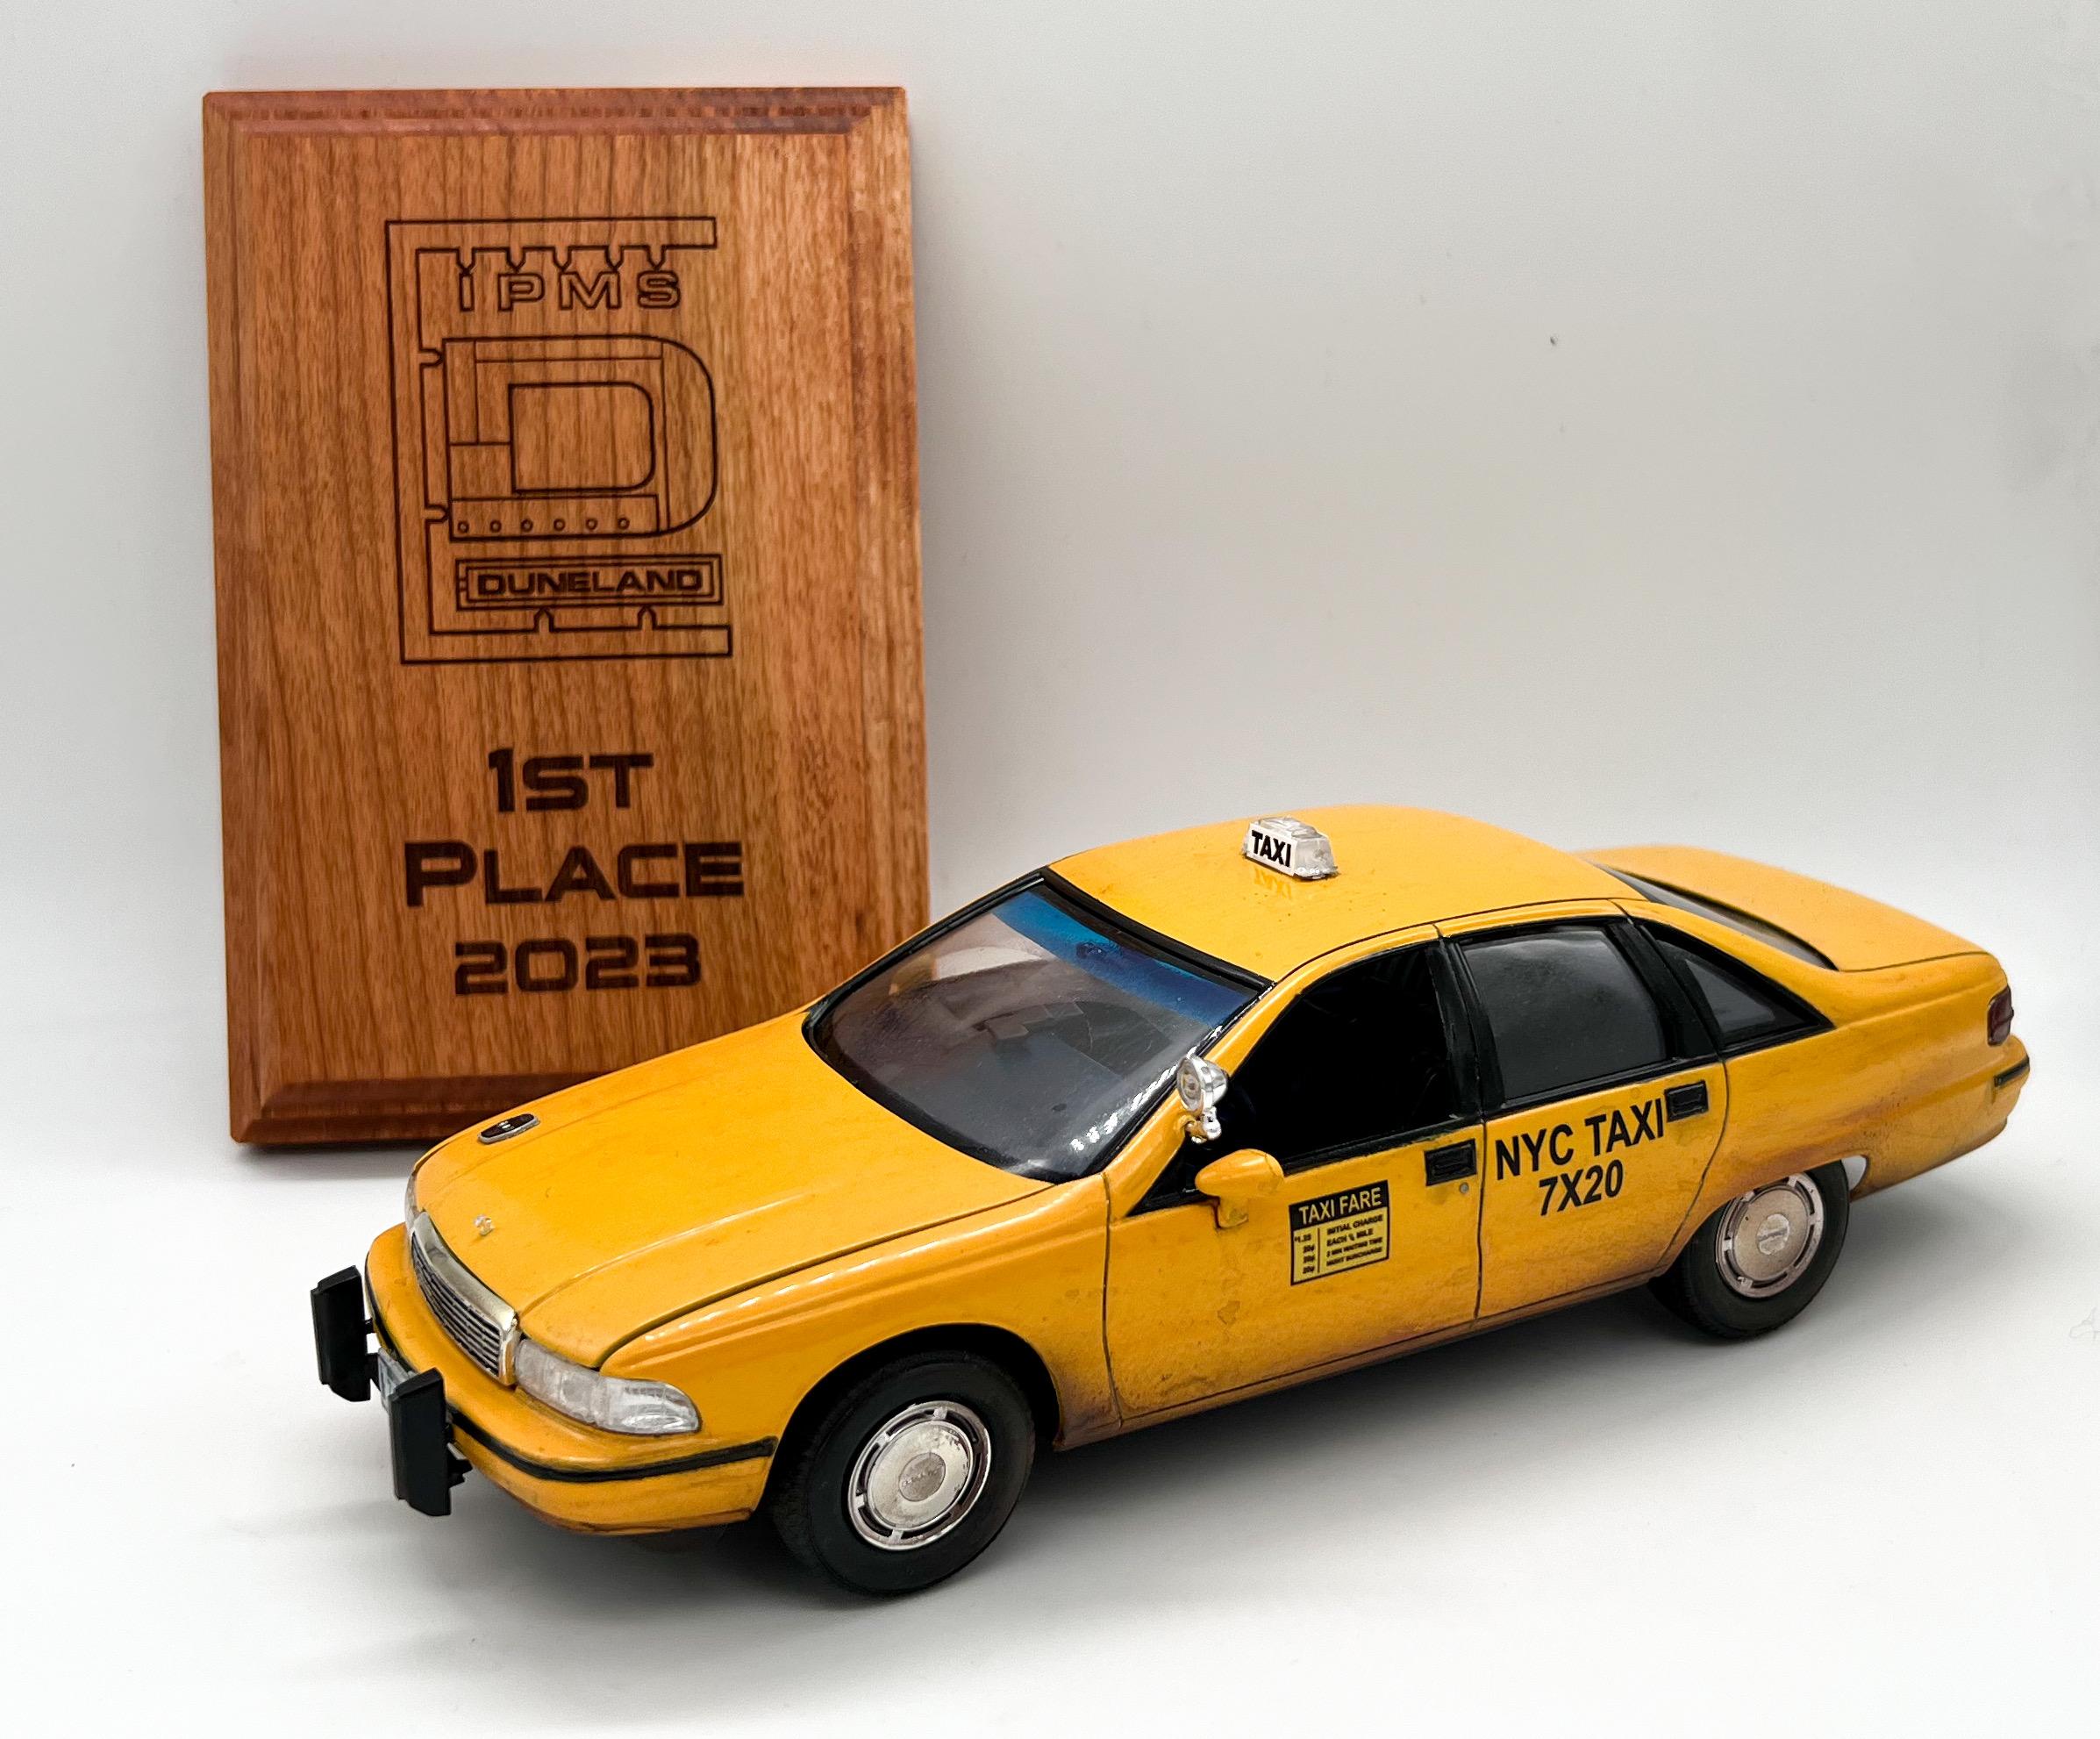
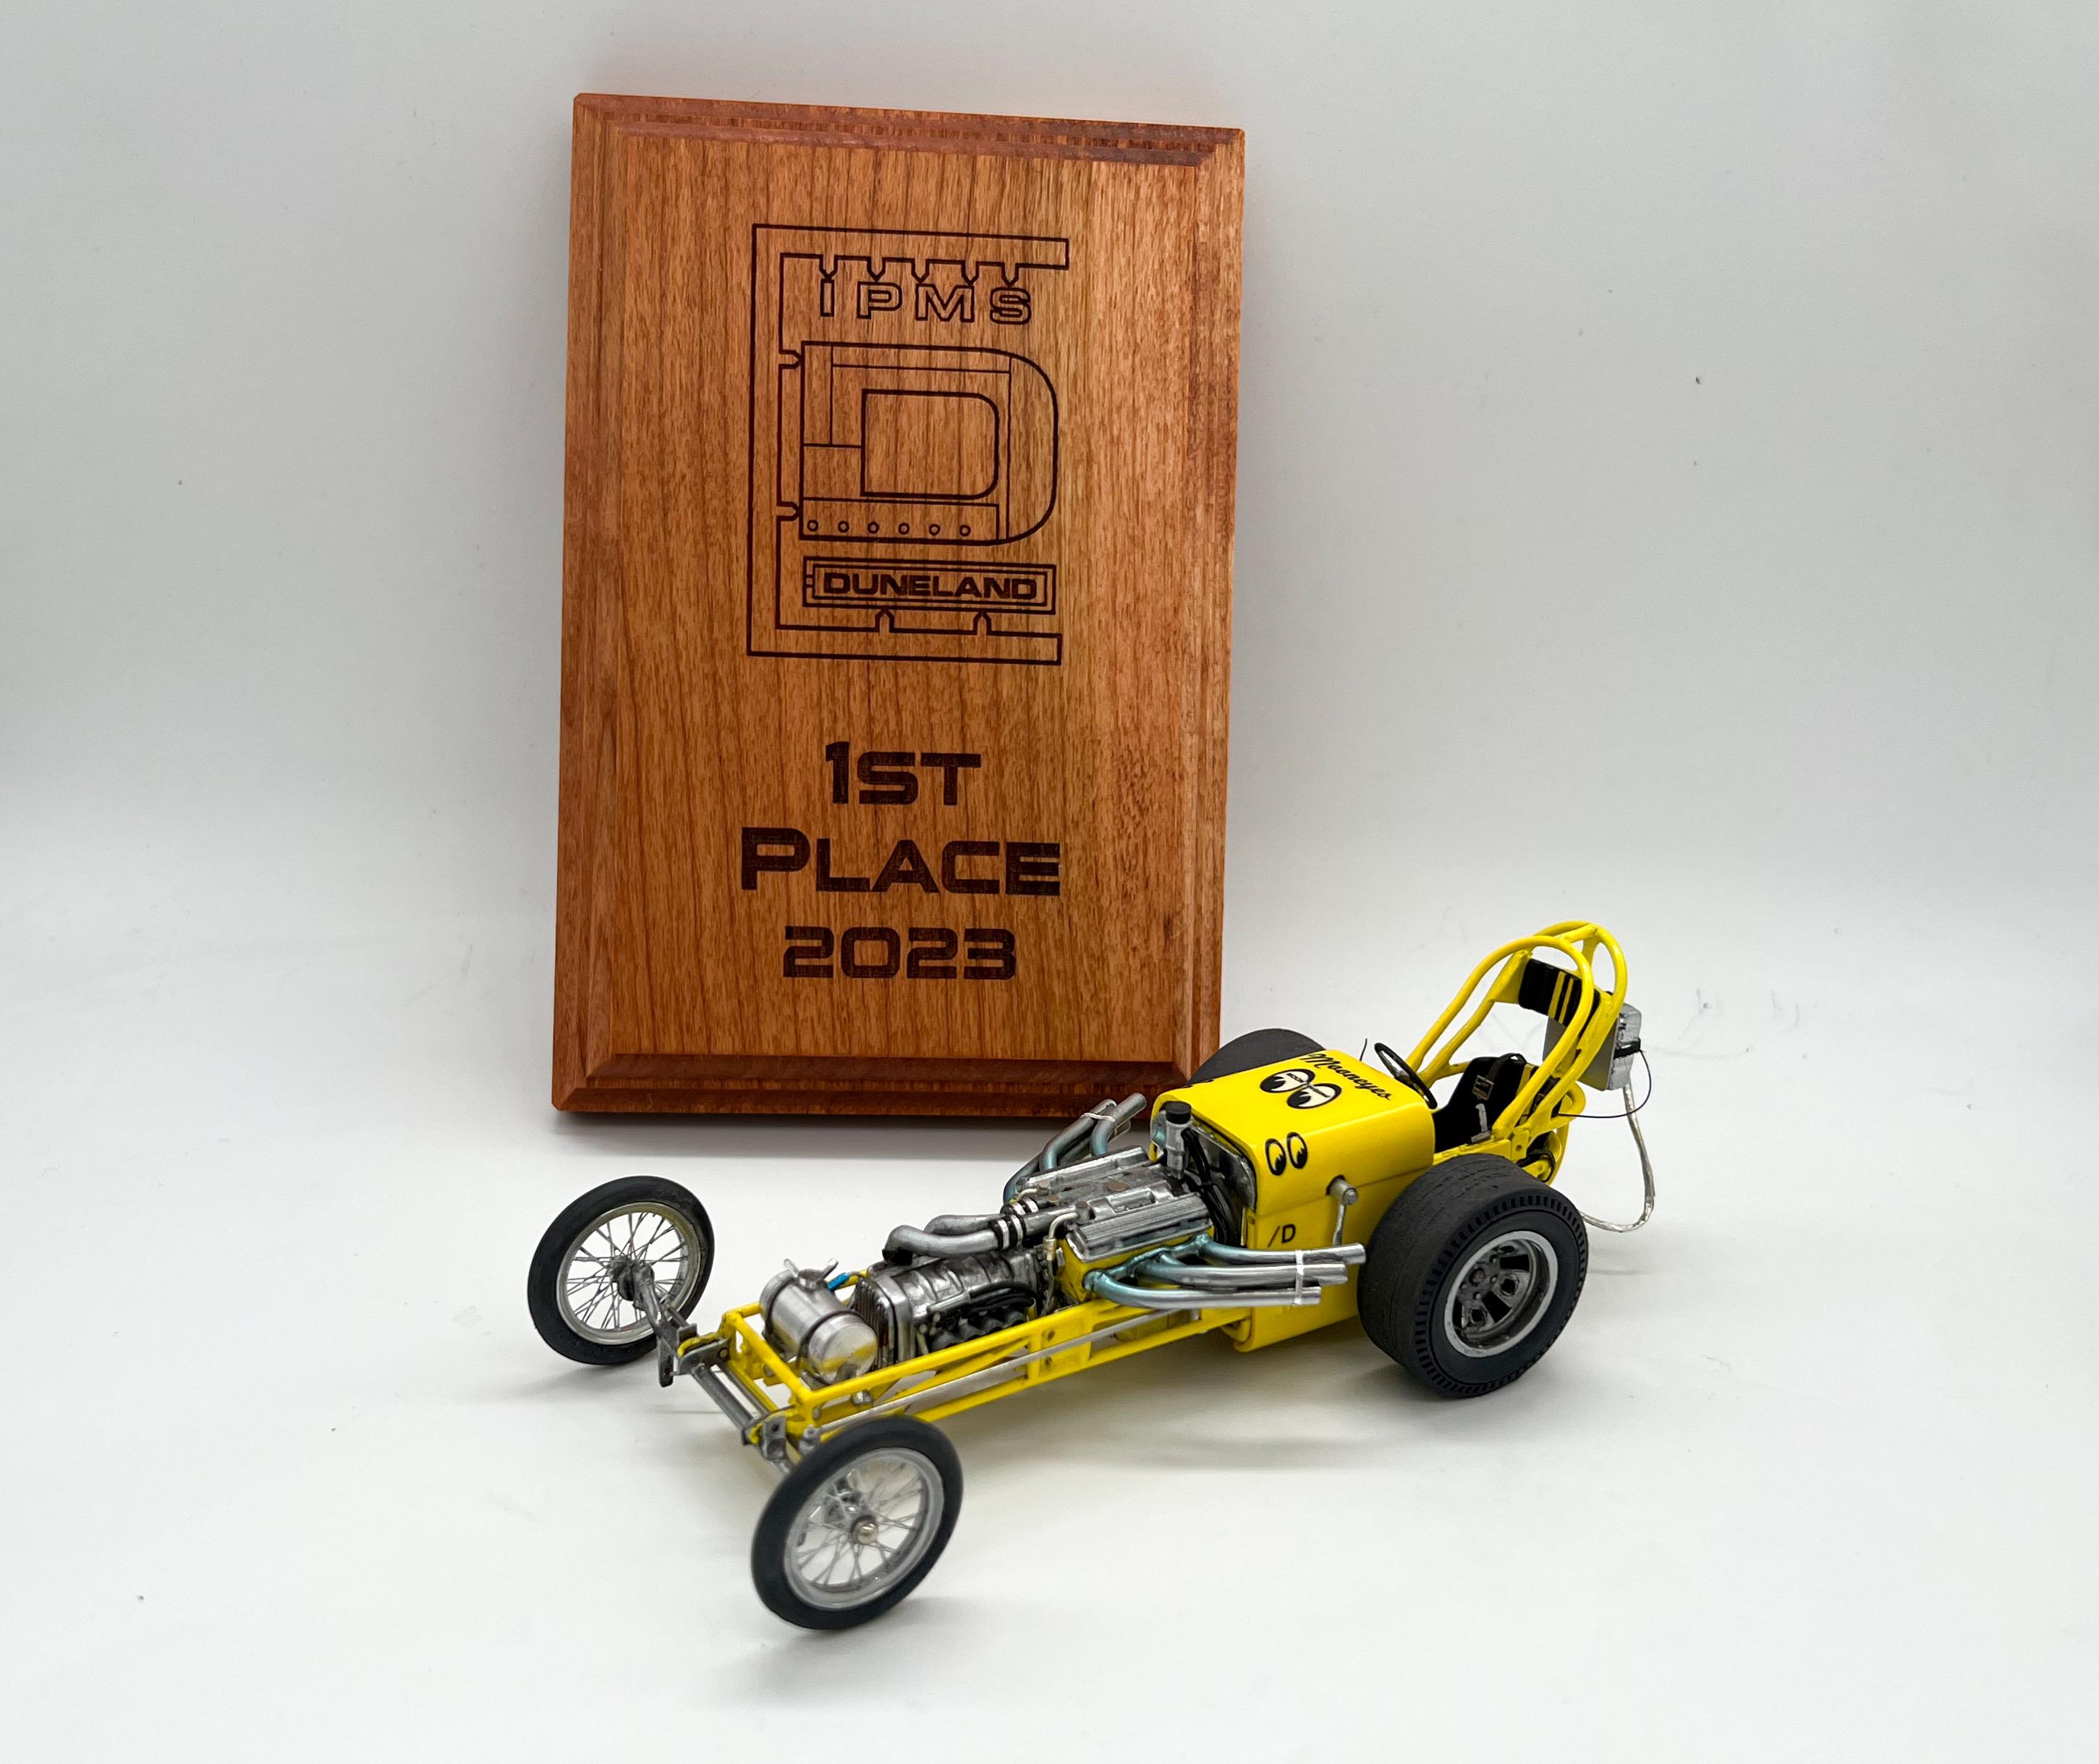
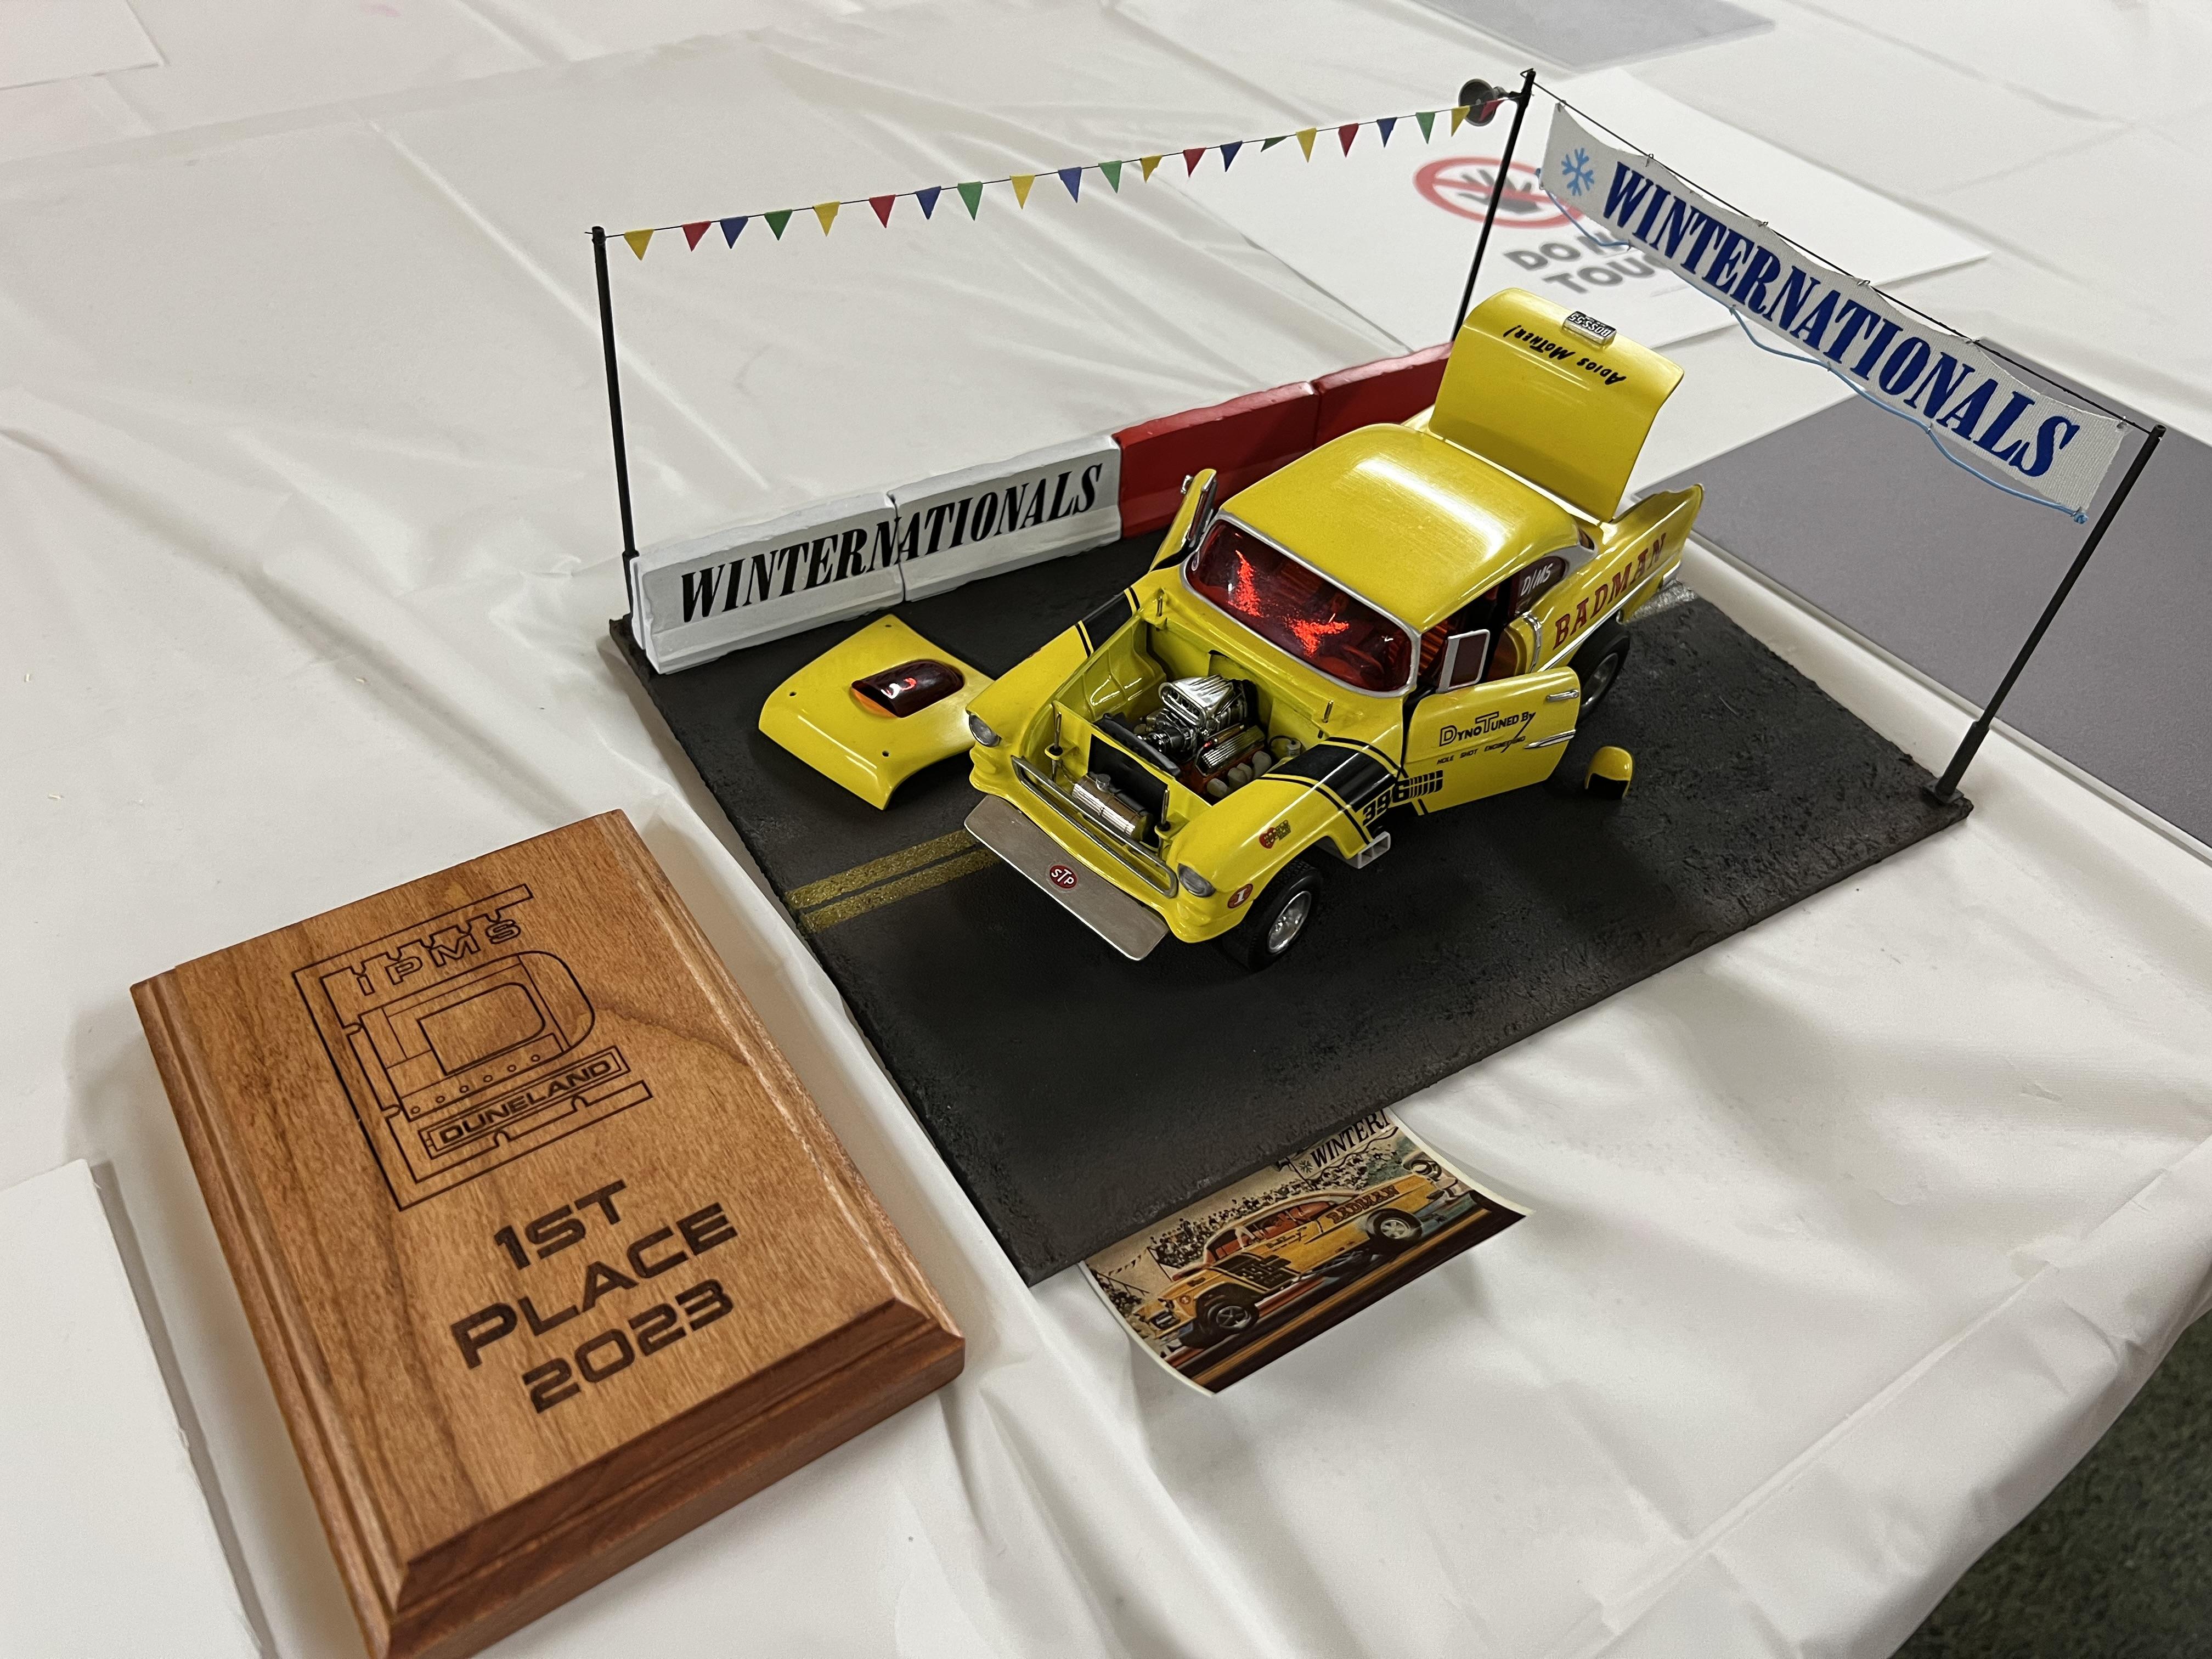
Had a GREAT day at the local IPMS show yesterday - and brought home a few awards…apparently my yellow cars are my best builds ?♂️
-
My take on the most famous ‘55 gasser street machine’…
OldNYJim replied to OldNYJim's topic in WIP: Model Cars
Thanks fellas! So, the last week was kind of a blur getting this thing put together for the IPMS show I wanted to debut it at. Then, I got sick for a couple of days and lost some time there and ended up just barely finishing it to a kinda-acceptable level at 10.30pm the night before the show…had a bunch of little stuff to do like the battery in the trunk… …and cutting a bunch of little triangular flags for the banner that hangs alongside the car in the box art: I didn’t take a bunch of pics of all the little ‘final’ details because I was hustling to get it to the show, even if I had more work to do on it still after. Bench view at 10.30 Friday night: And Show Table view 10.5 hours later… I didn’t expect it to place well - had a bunch of little flaws I didn’t fix yet and some little unfinished details…but it did ok in it’s class! Plus it won Best Chevy too: Pretty pleased with the result, even if I know the flaws and they’re super obvious to me. BUT, now I’m going to spend a couple of weeks finishing it up to my satisfaction and adding the stuff I didn’t get to finish the ‘first’ time around…like adding some rubber marbles to the rear quarter: And some other stuff like actually finishing polishing out the body (which still has some microscratches), and finishing up the second car, which I’ve been working on today: Still plenty to do on this project but just a quick update - thanks for looking - more soon!
-
Nice work - looks GREAT! Thanks for being cool enough to share your technique!!
-
Nice work using the 3d printed master as the buck for the vac forming. Smart idea!
-
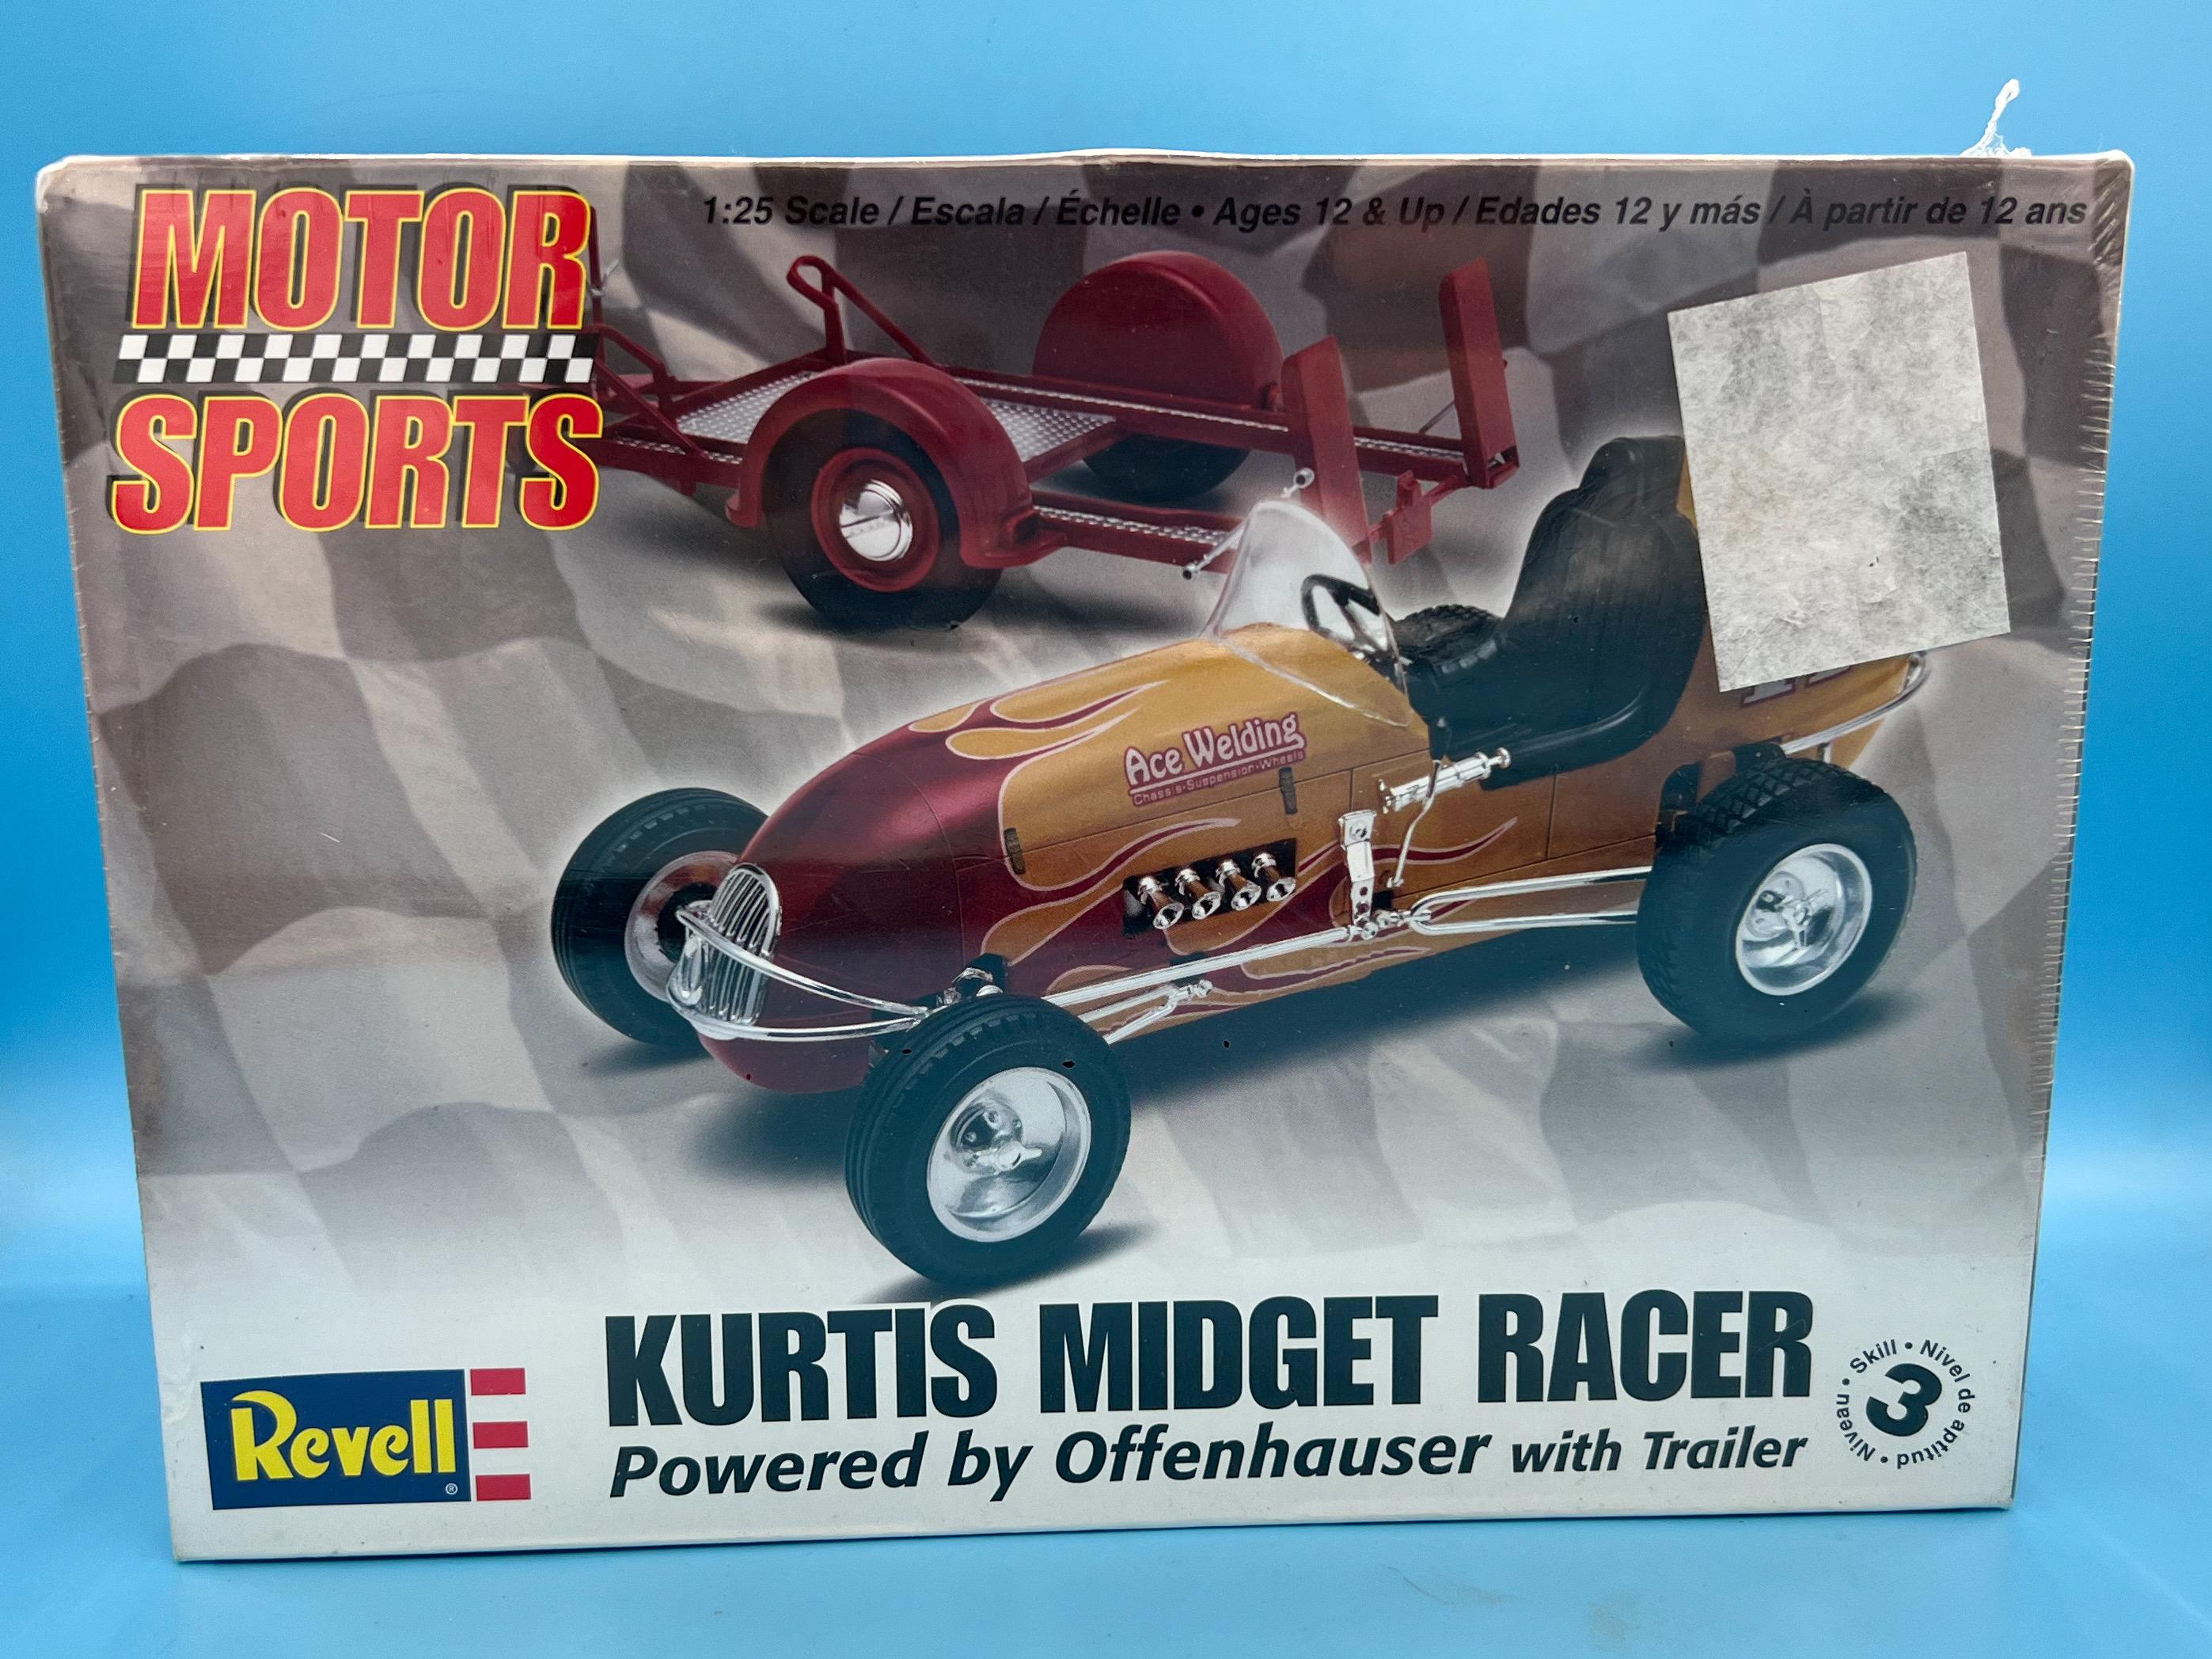
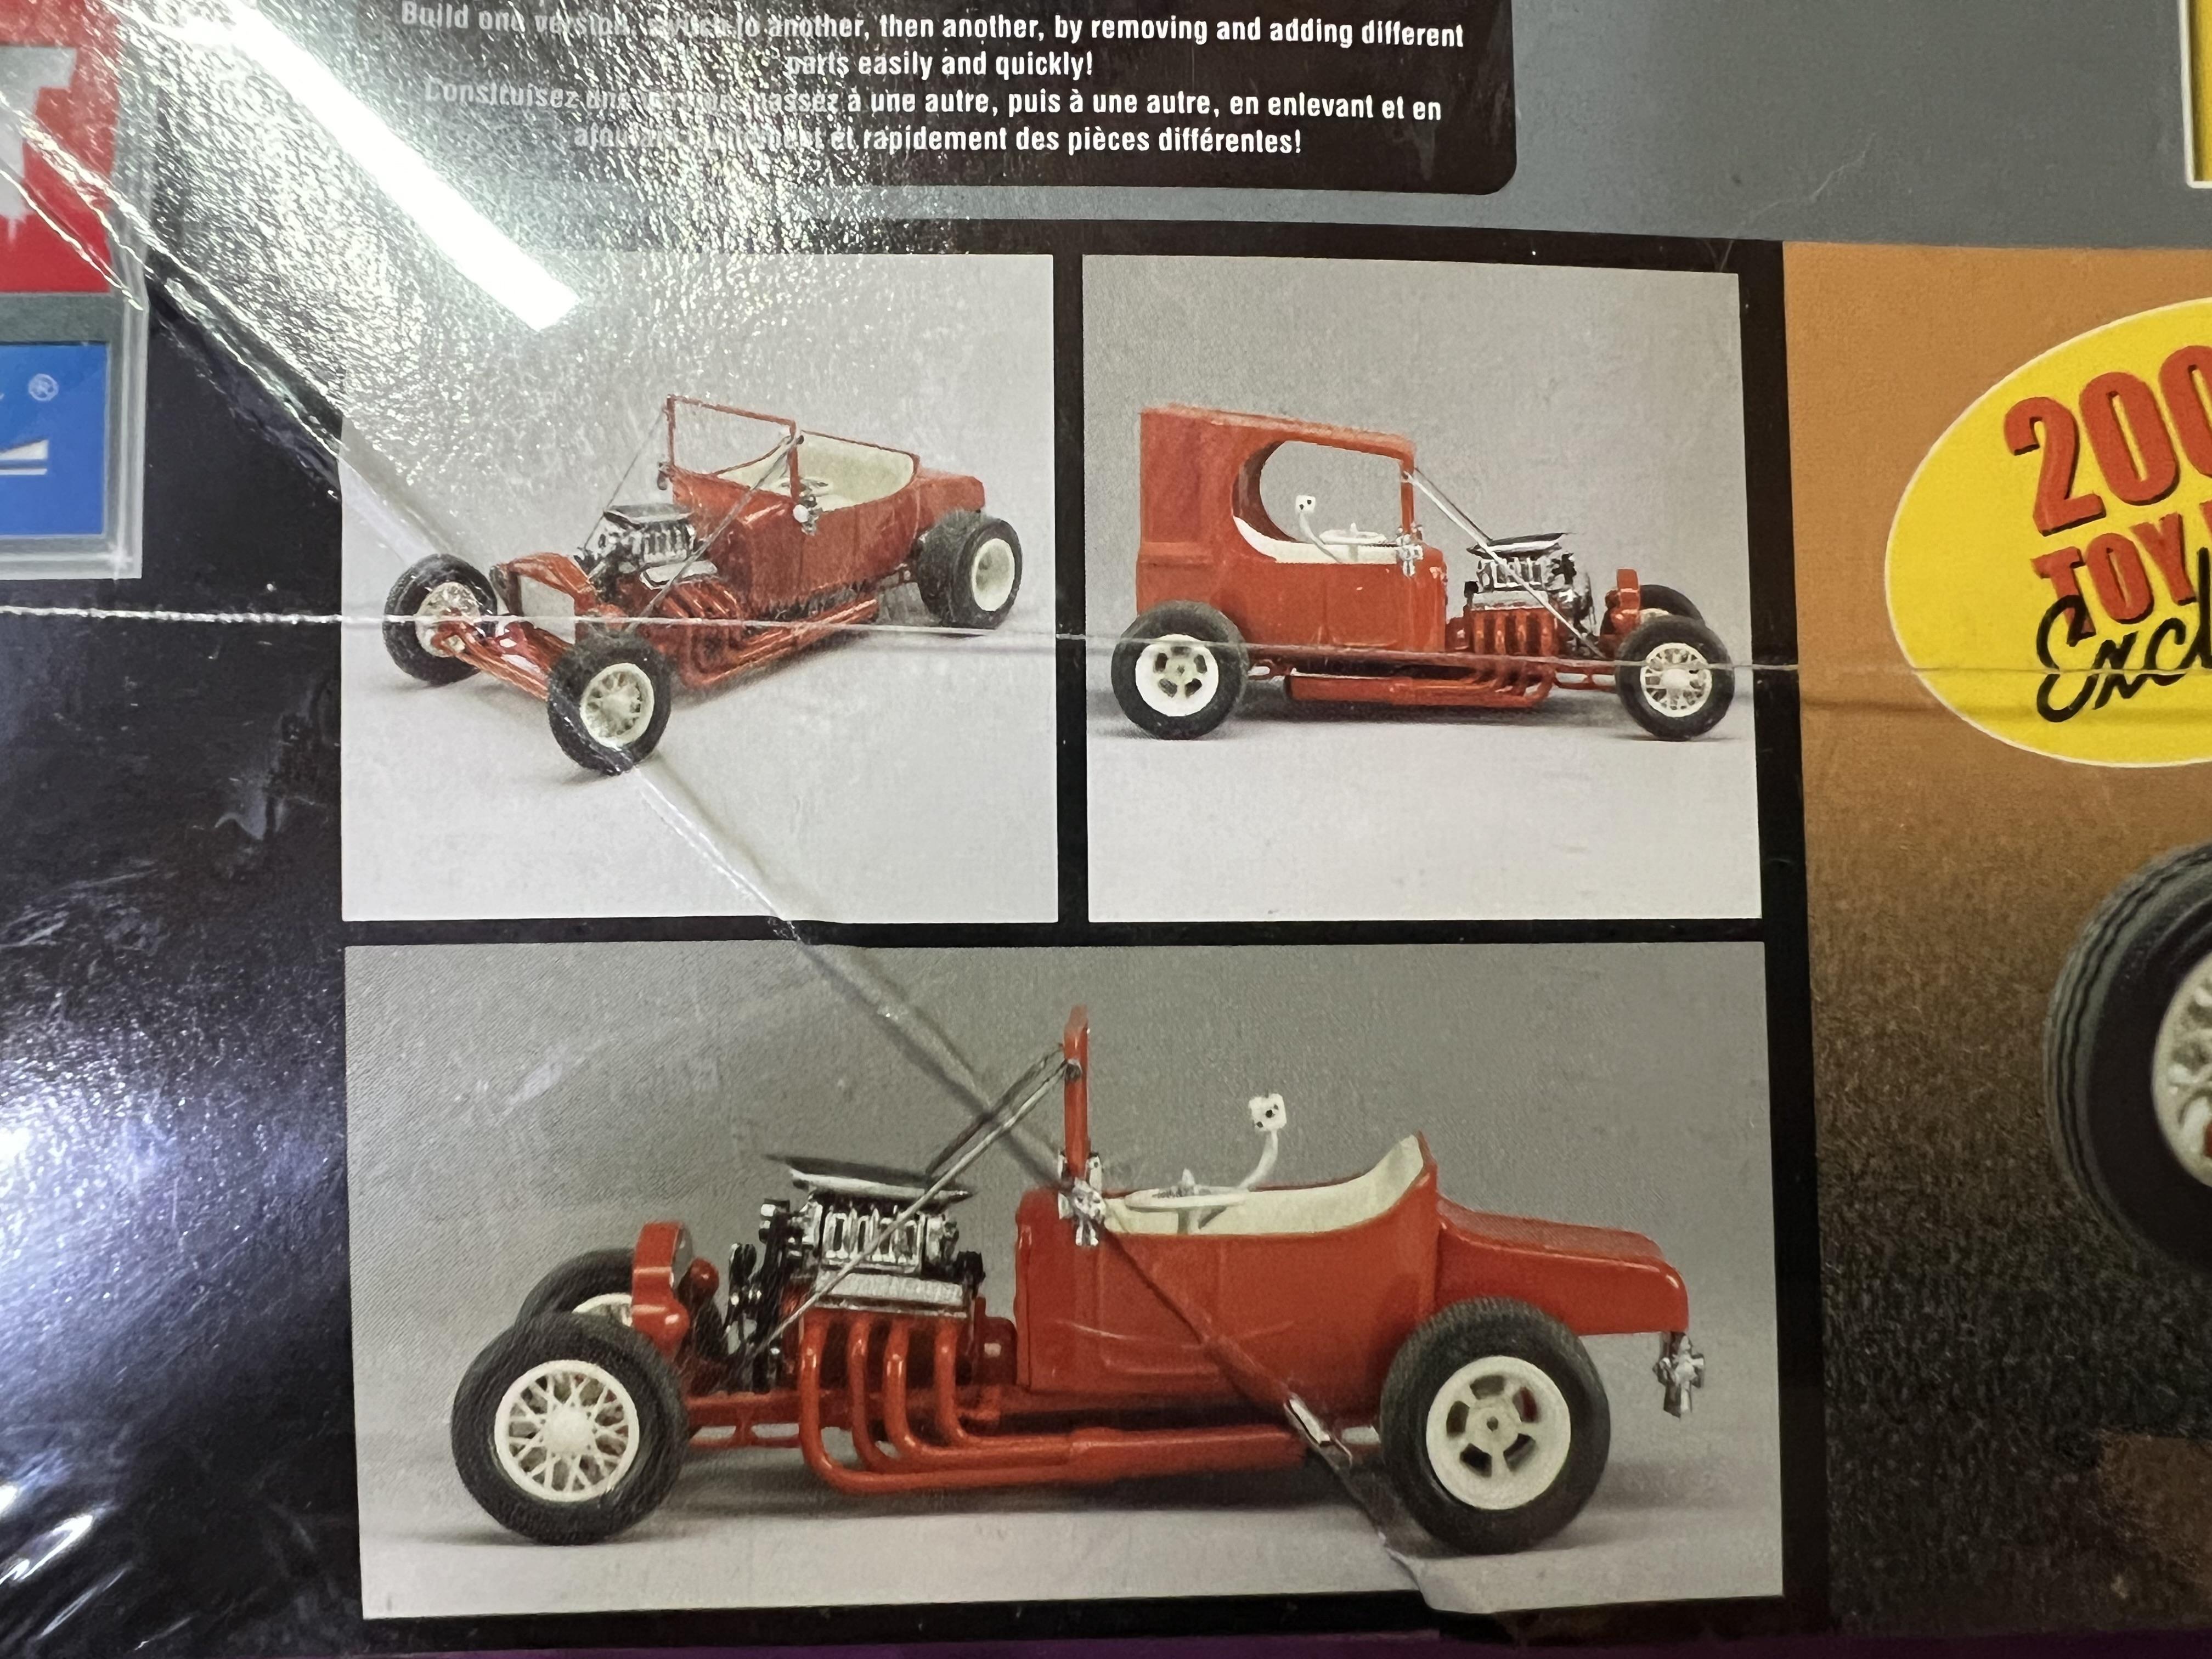
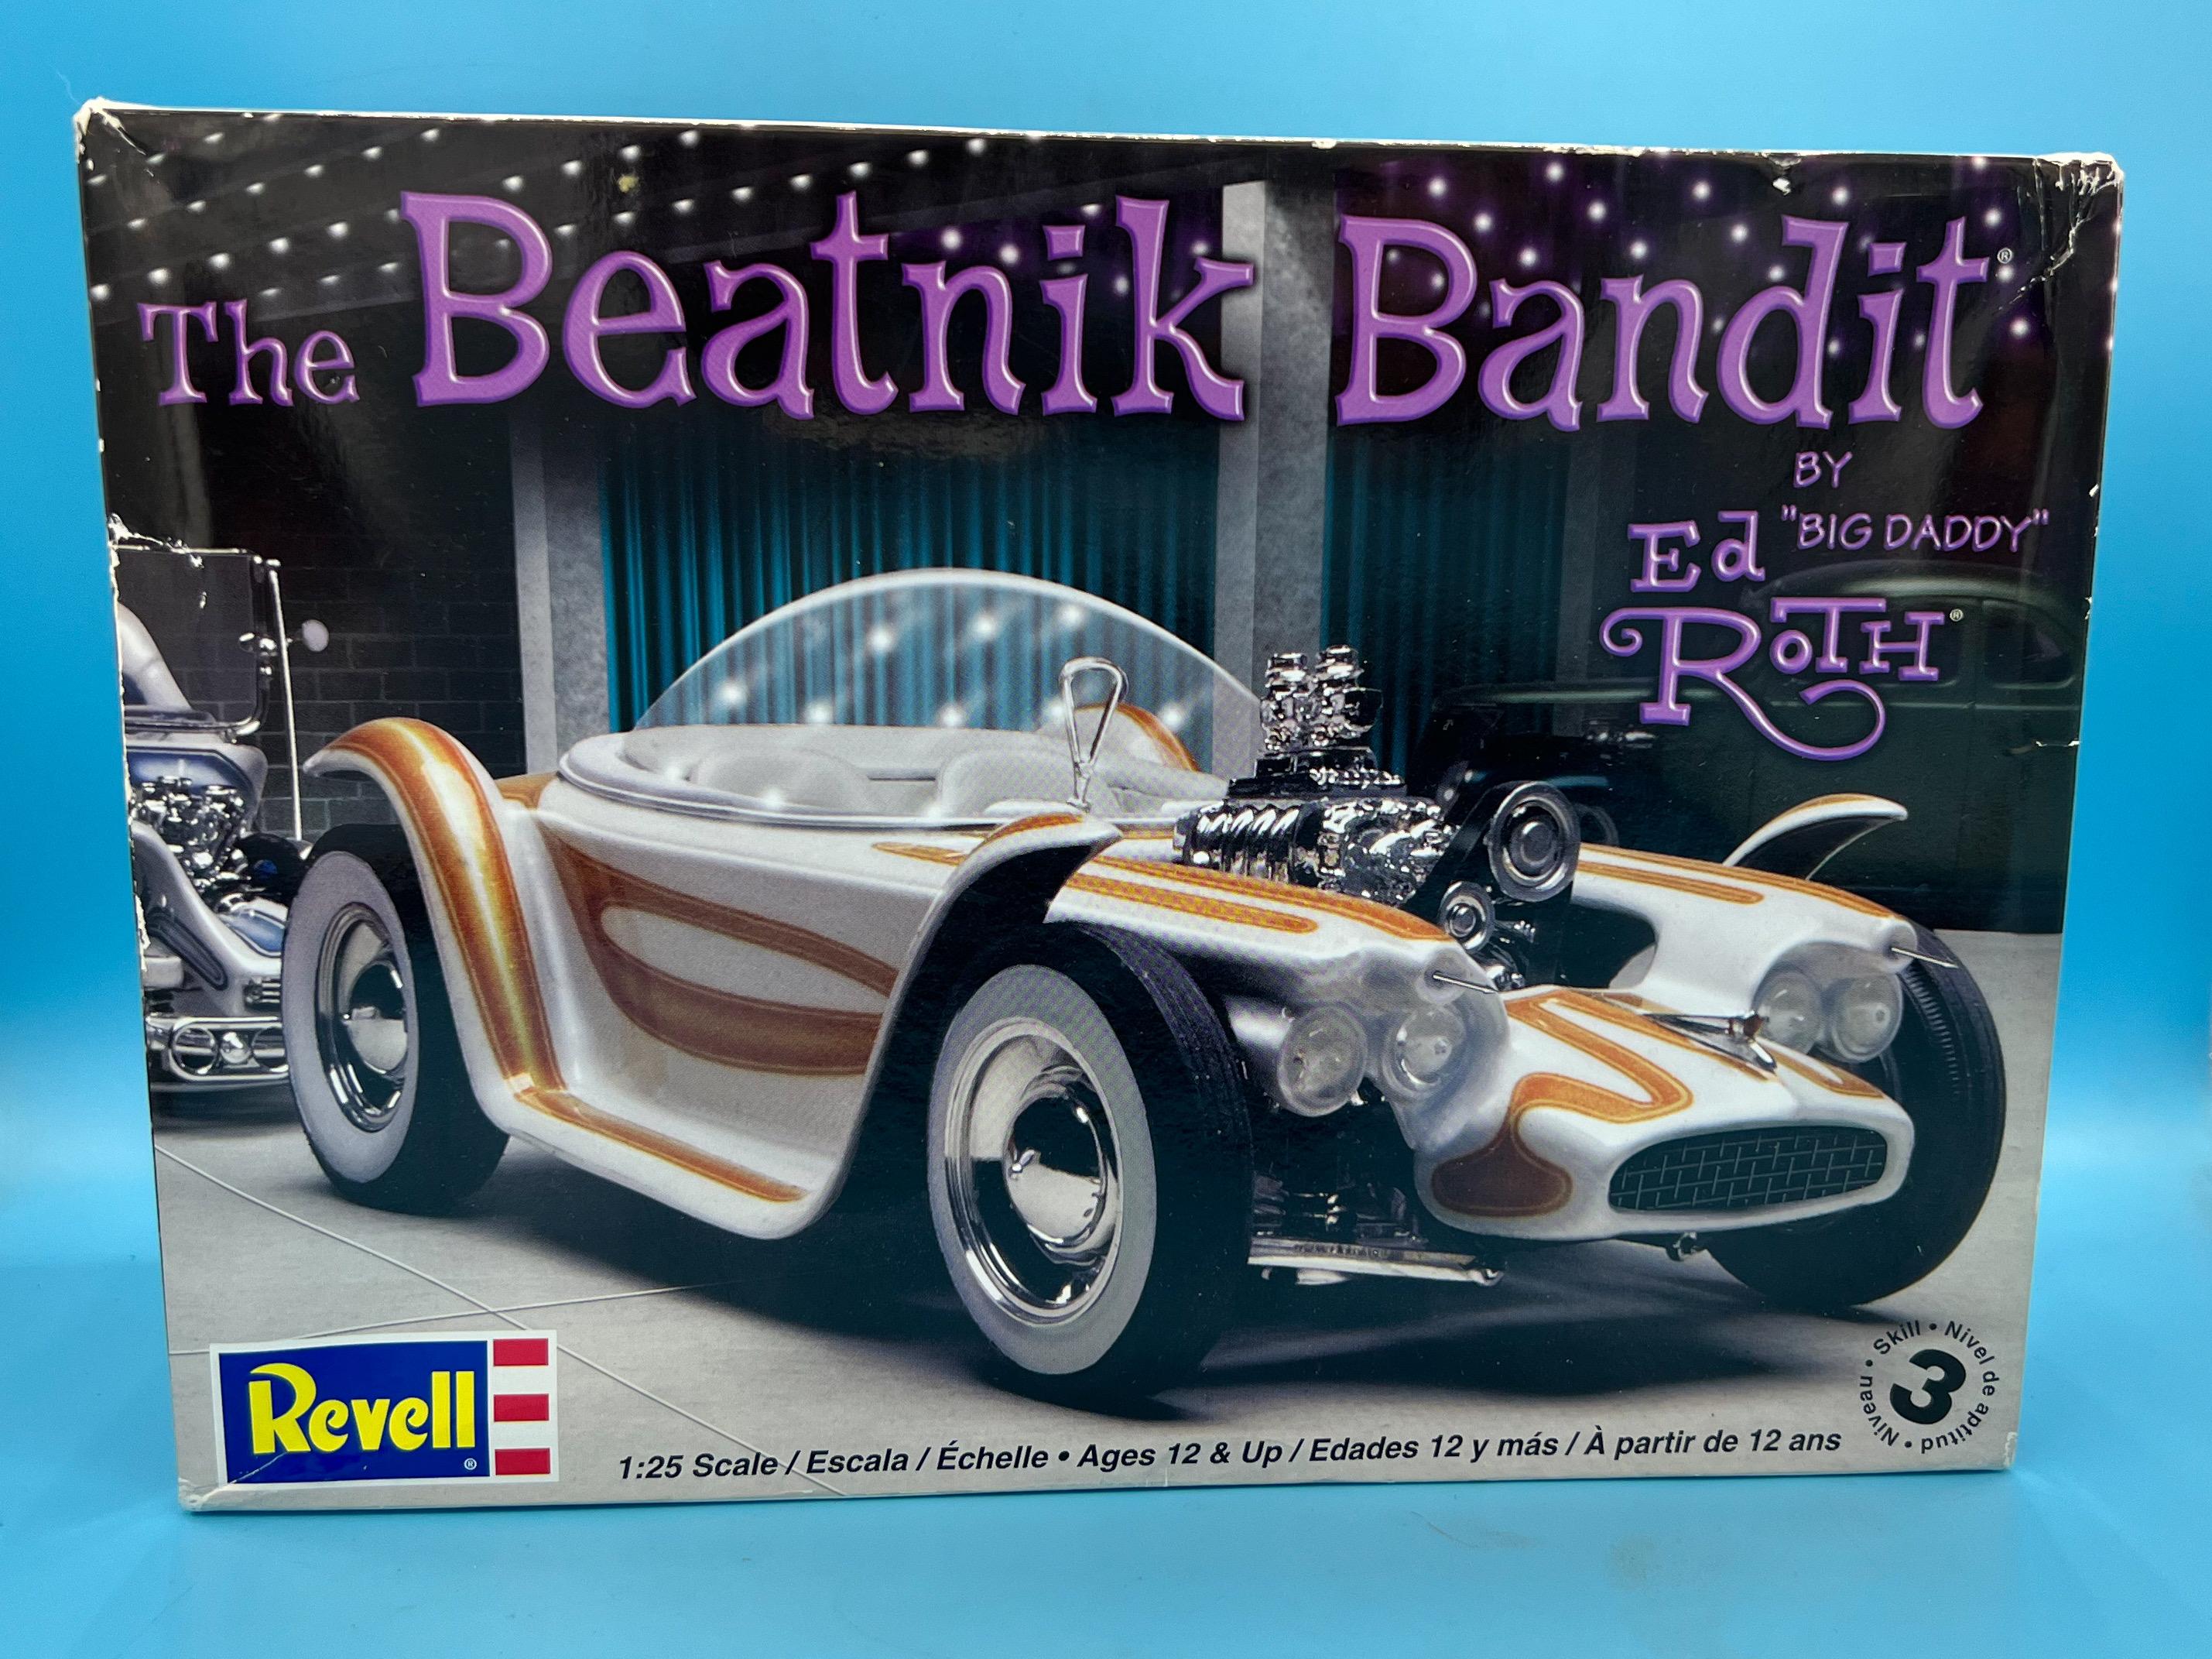
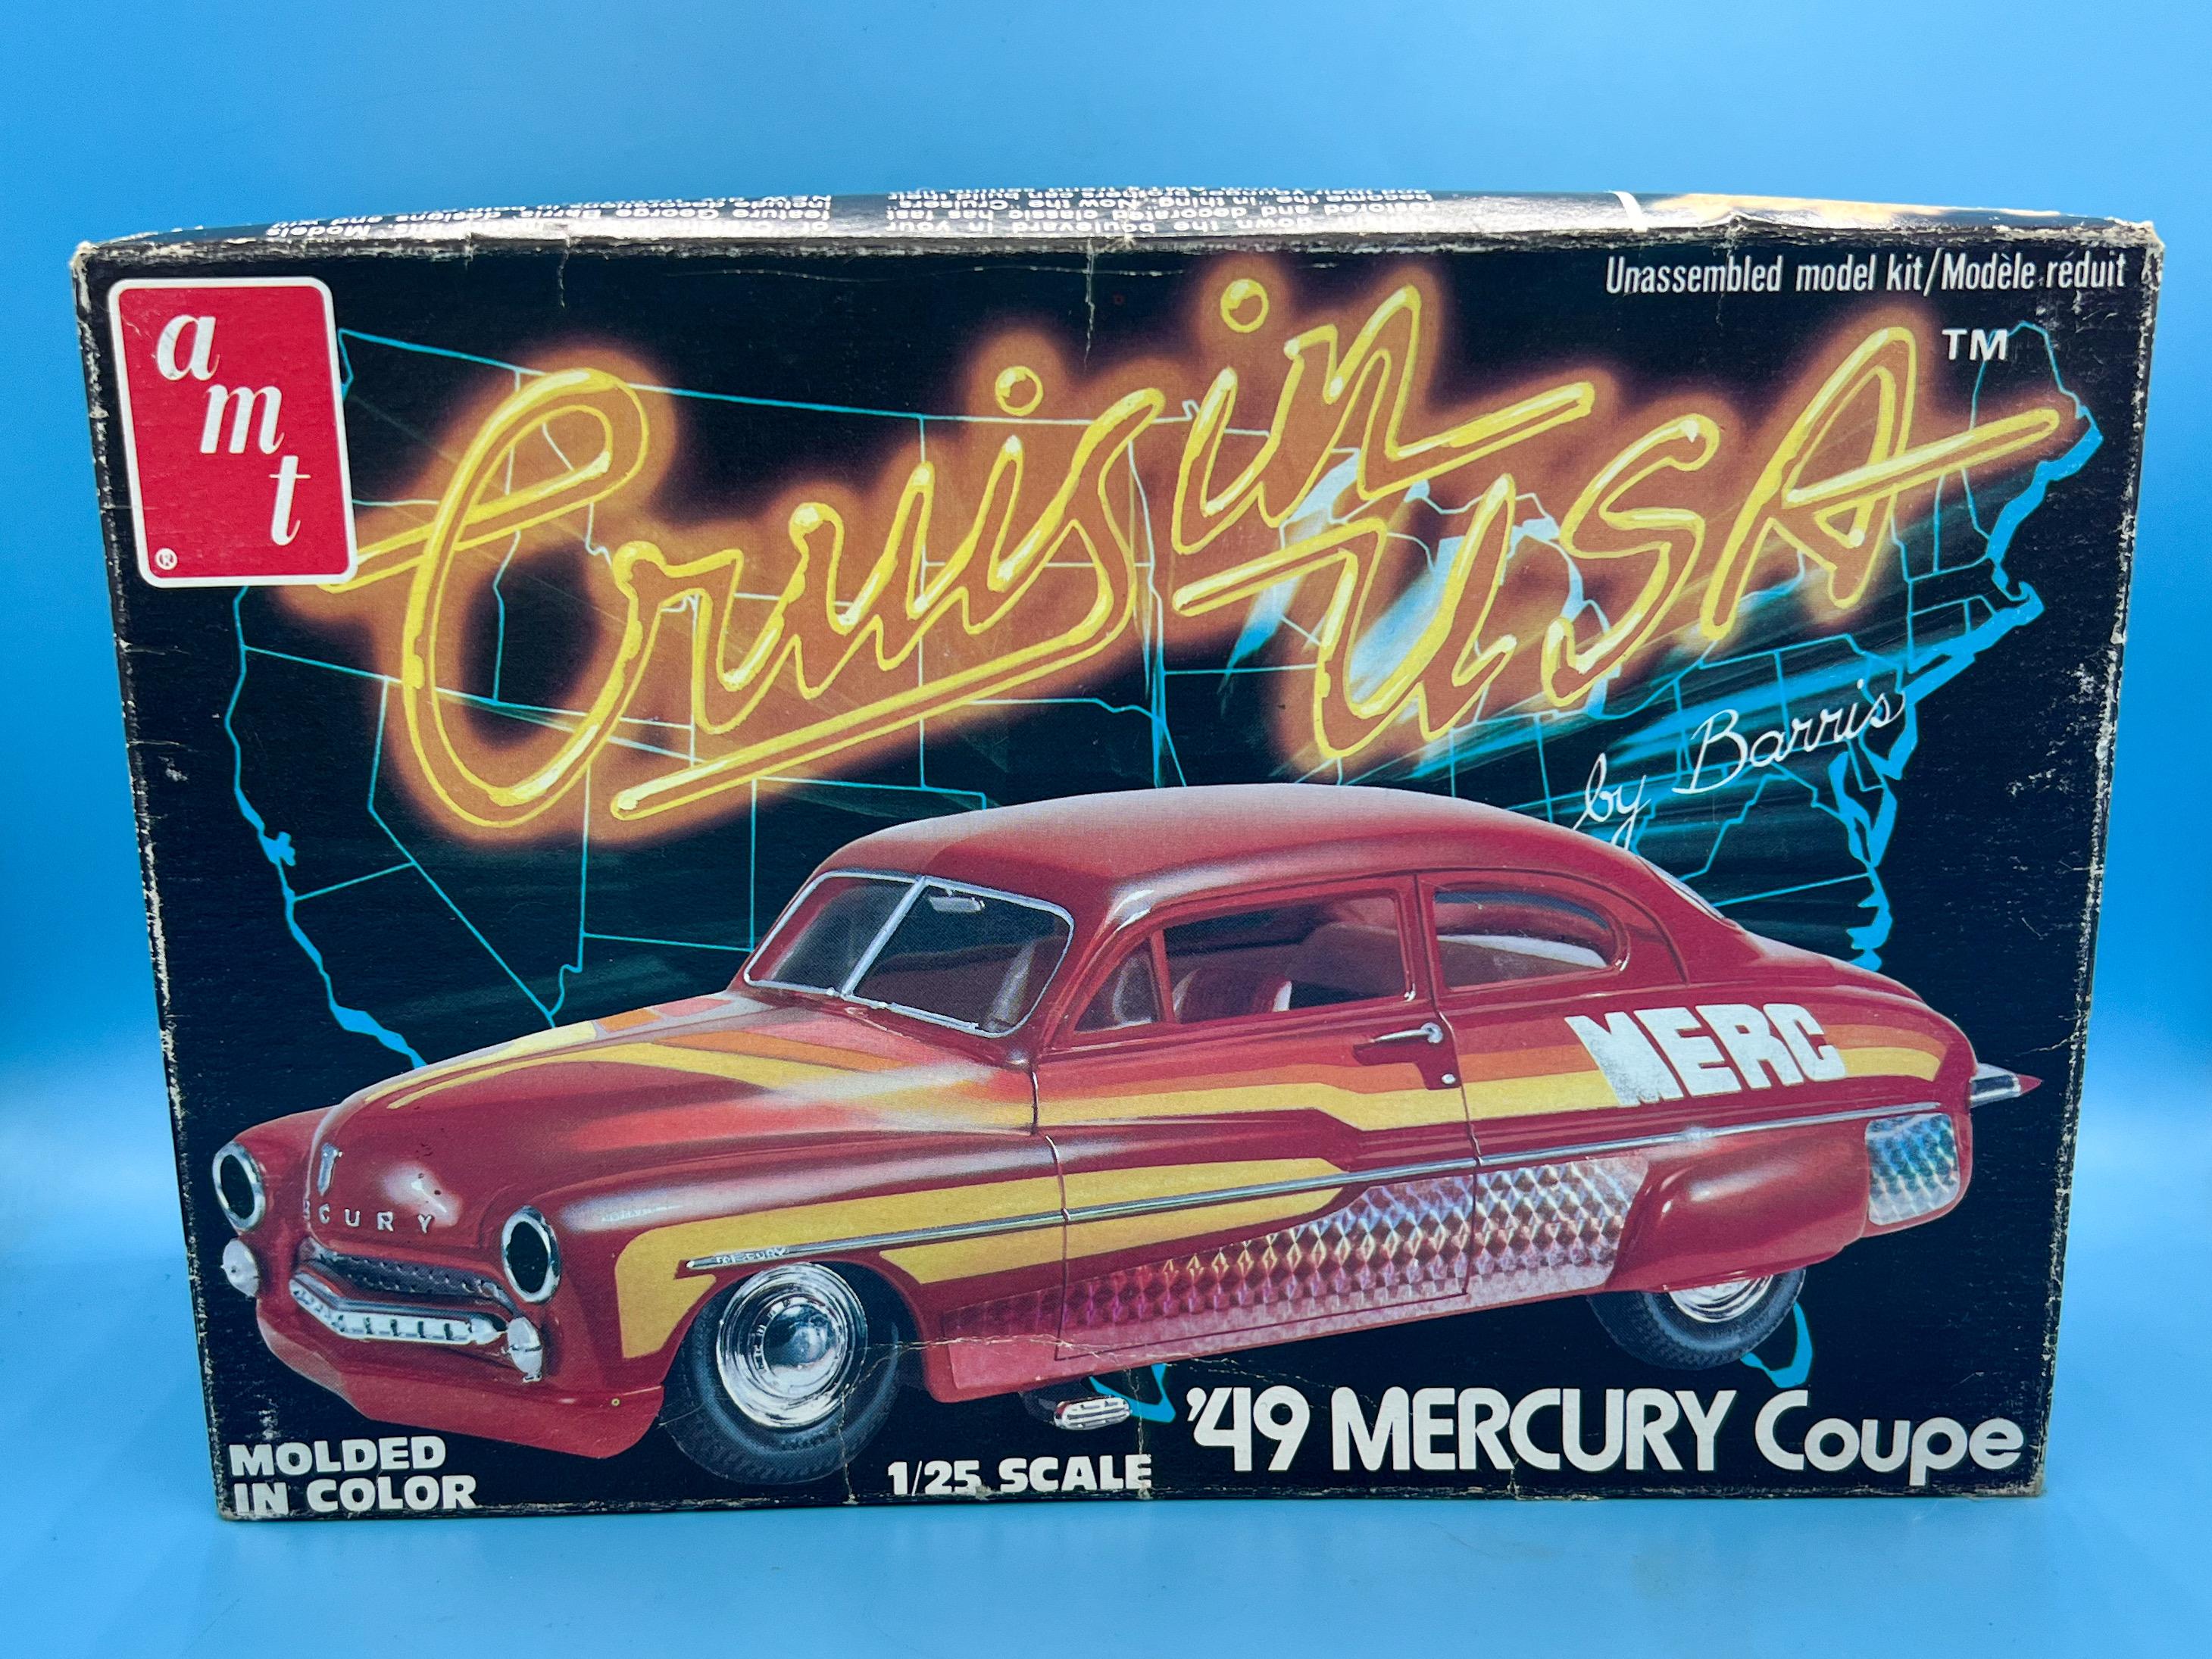
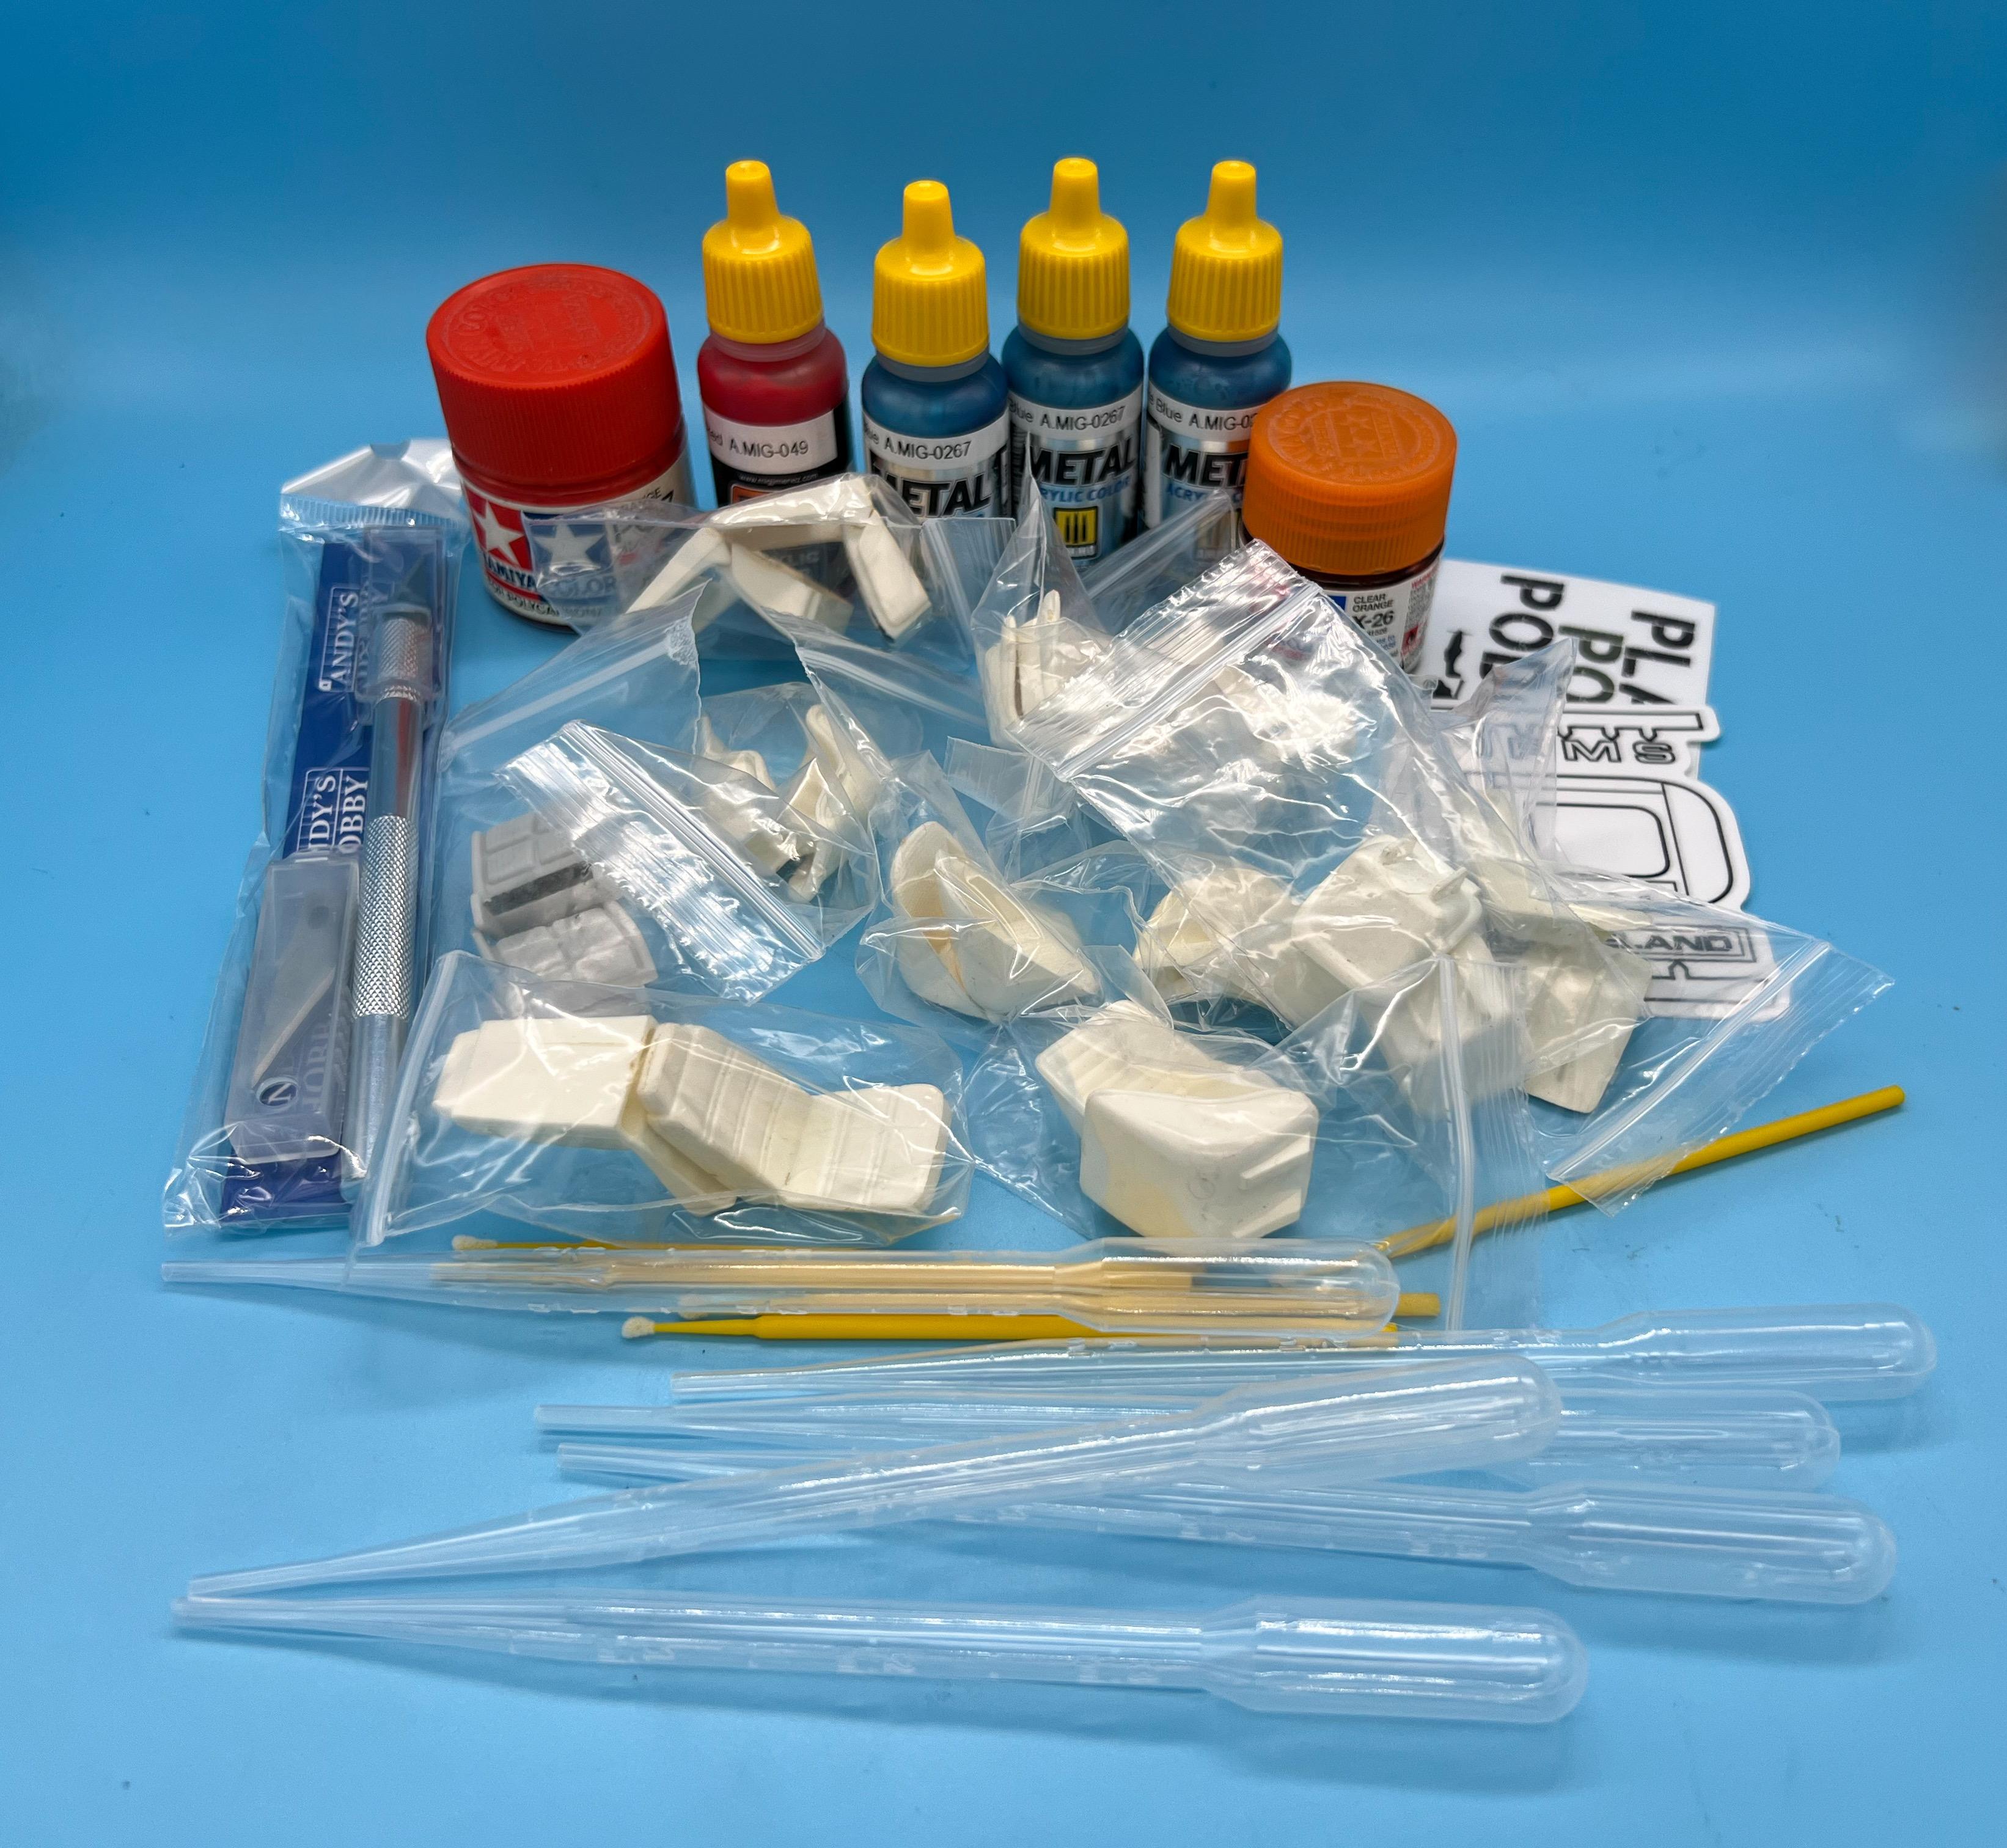
Hit the Duneland show today. Got some good raffle prize wins: Most of which I never would have specifically PICKED, which makes them fun…gets the mind whirring with ideas. Oh, and this one, which didn’t fit in my photo booth: I picked up the Flathead version of this kit last year at the same show, and was excited that they had the Offie version this year (actually, there were like seven of them for sale, but only really ‘NEED’ one…) This box art on this AMT T isn’t the best, but it’s apparently a decent kit so I added that to the stash: I particularly like the weird little truck version: One for my (as yet unstarted) collection of Roth builds: Another ugly duckling box art - I’ve had a 49 Merc on my to-build list for a while, but I won’t be taking any styling suggestions from Barris…this thing looks like if Ronald McDonald were the Joker in the Batman movies and needed a vehicle: The club had some pretty cool little goodie bags too…they had some supplies, a nice scalpel (with extra blades!) and stickers and stuff…I added the 50-cent-a-pair custom seats and $1 paints myself… Oh, and a few trophies too, but the fun of the show is the important part…
- 38,869 replies
-
- 1
-
-
- johan
- glue bombs
- (and 1 more)
-
Ollie's strike again
OldNYJim replied to GLMFAA1's topic in General Automotive Talk (Trucks and Cars)
Thanks for the update - I was going to be somewhat nearby tomorrow and considered stopping in…but I’ll give it a few weeks and see if they get a restock -
What did you see on the road today?
OldNYJim replied to Harry P.'s topic in General Automotive Talk (Trucks and Cars)
That’s a hydro excavation truck - it’s useful for making big holes in places where there might be something delicate in the area that could be damaged if you dug via a more conventional method. It blasts the ground with high pressure water to loosen the surface and then sucks up the sludge that it generates as it works -
GREAT start! I think I stumbled upon your Instagram this week too...had a lot of 1:1 car pics on. Aside from the color, that firework looks incredible - are the rivets photoetch? Or actual tiny rivets?
-
Good insight Bill, thank you! Yeah, the temp gauge reads just like it always does, so it sounds like a heater control valve or something electronic. I'd bet on the stepper motor - apparently failure of the plastic outputs on those is a common issue with this era Mustang, and mine has been making clicky clacky noises (although functioning perfectly) from within the dash since I got it. Was really hoping it wasn't a case of having to remove the dash...but it may well be, I suspect. Thanks again for the pointers! Always appreciate your input!
-
That doesn’t look fun… Today’s adventure in owning a Mustang…first day of fall where I needed the heater…no heat. Cold air, no problem, fans working fine…just no heat. It has plenty of coolant, so it’s not that. Hoping it’s a simple fix, because 14 degree weather won’t be much fun in a couple of months…thermostat maybe?
-
This gold color is gorgeous! Is that JUST the sparkle gold mica powder, mixed in clear - or was there a basecoat laid under that?