OldNYJim
-
Posts
250 -
Joined
-
Last visited
Content Type
Profiles
Forums
Events
Gallery
Everything posted by OldNYJim
-

My take on the most famous ‘55 gasser street machine’…
OldNYJim replied to OldNYJim's topic in WIP: Model Cars
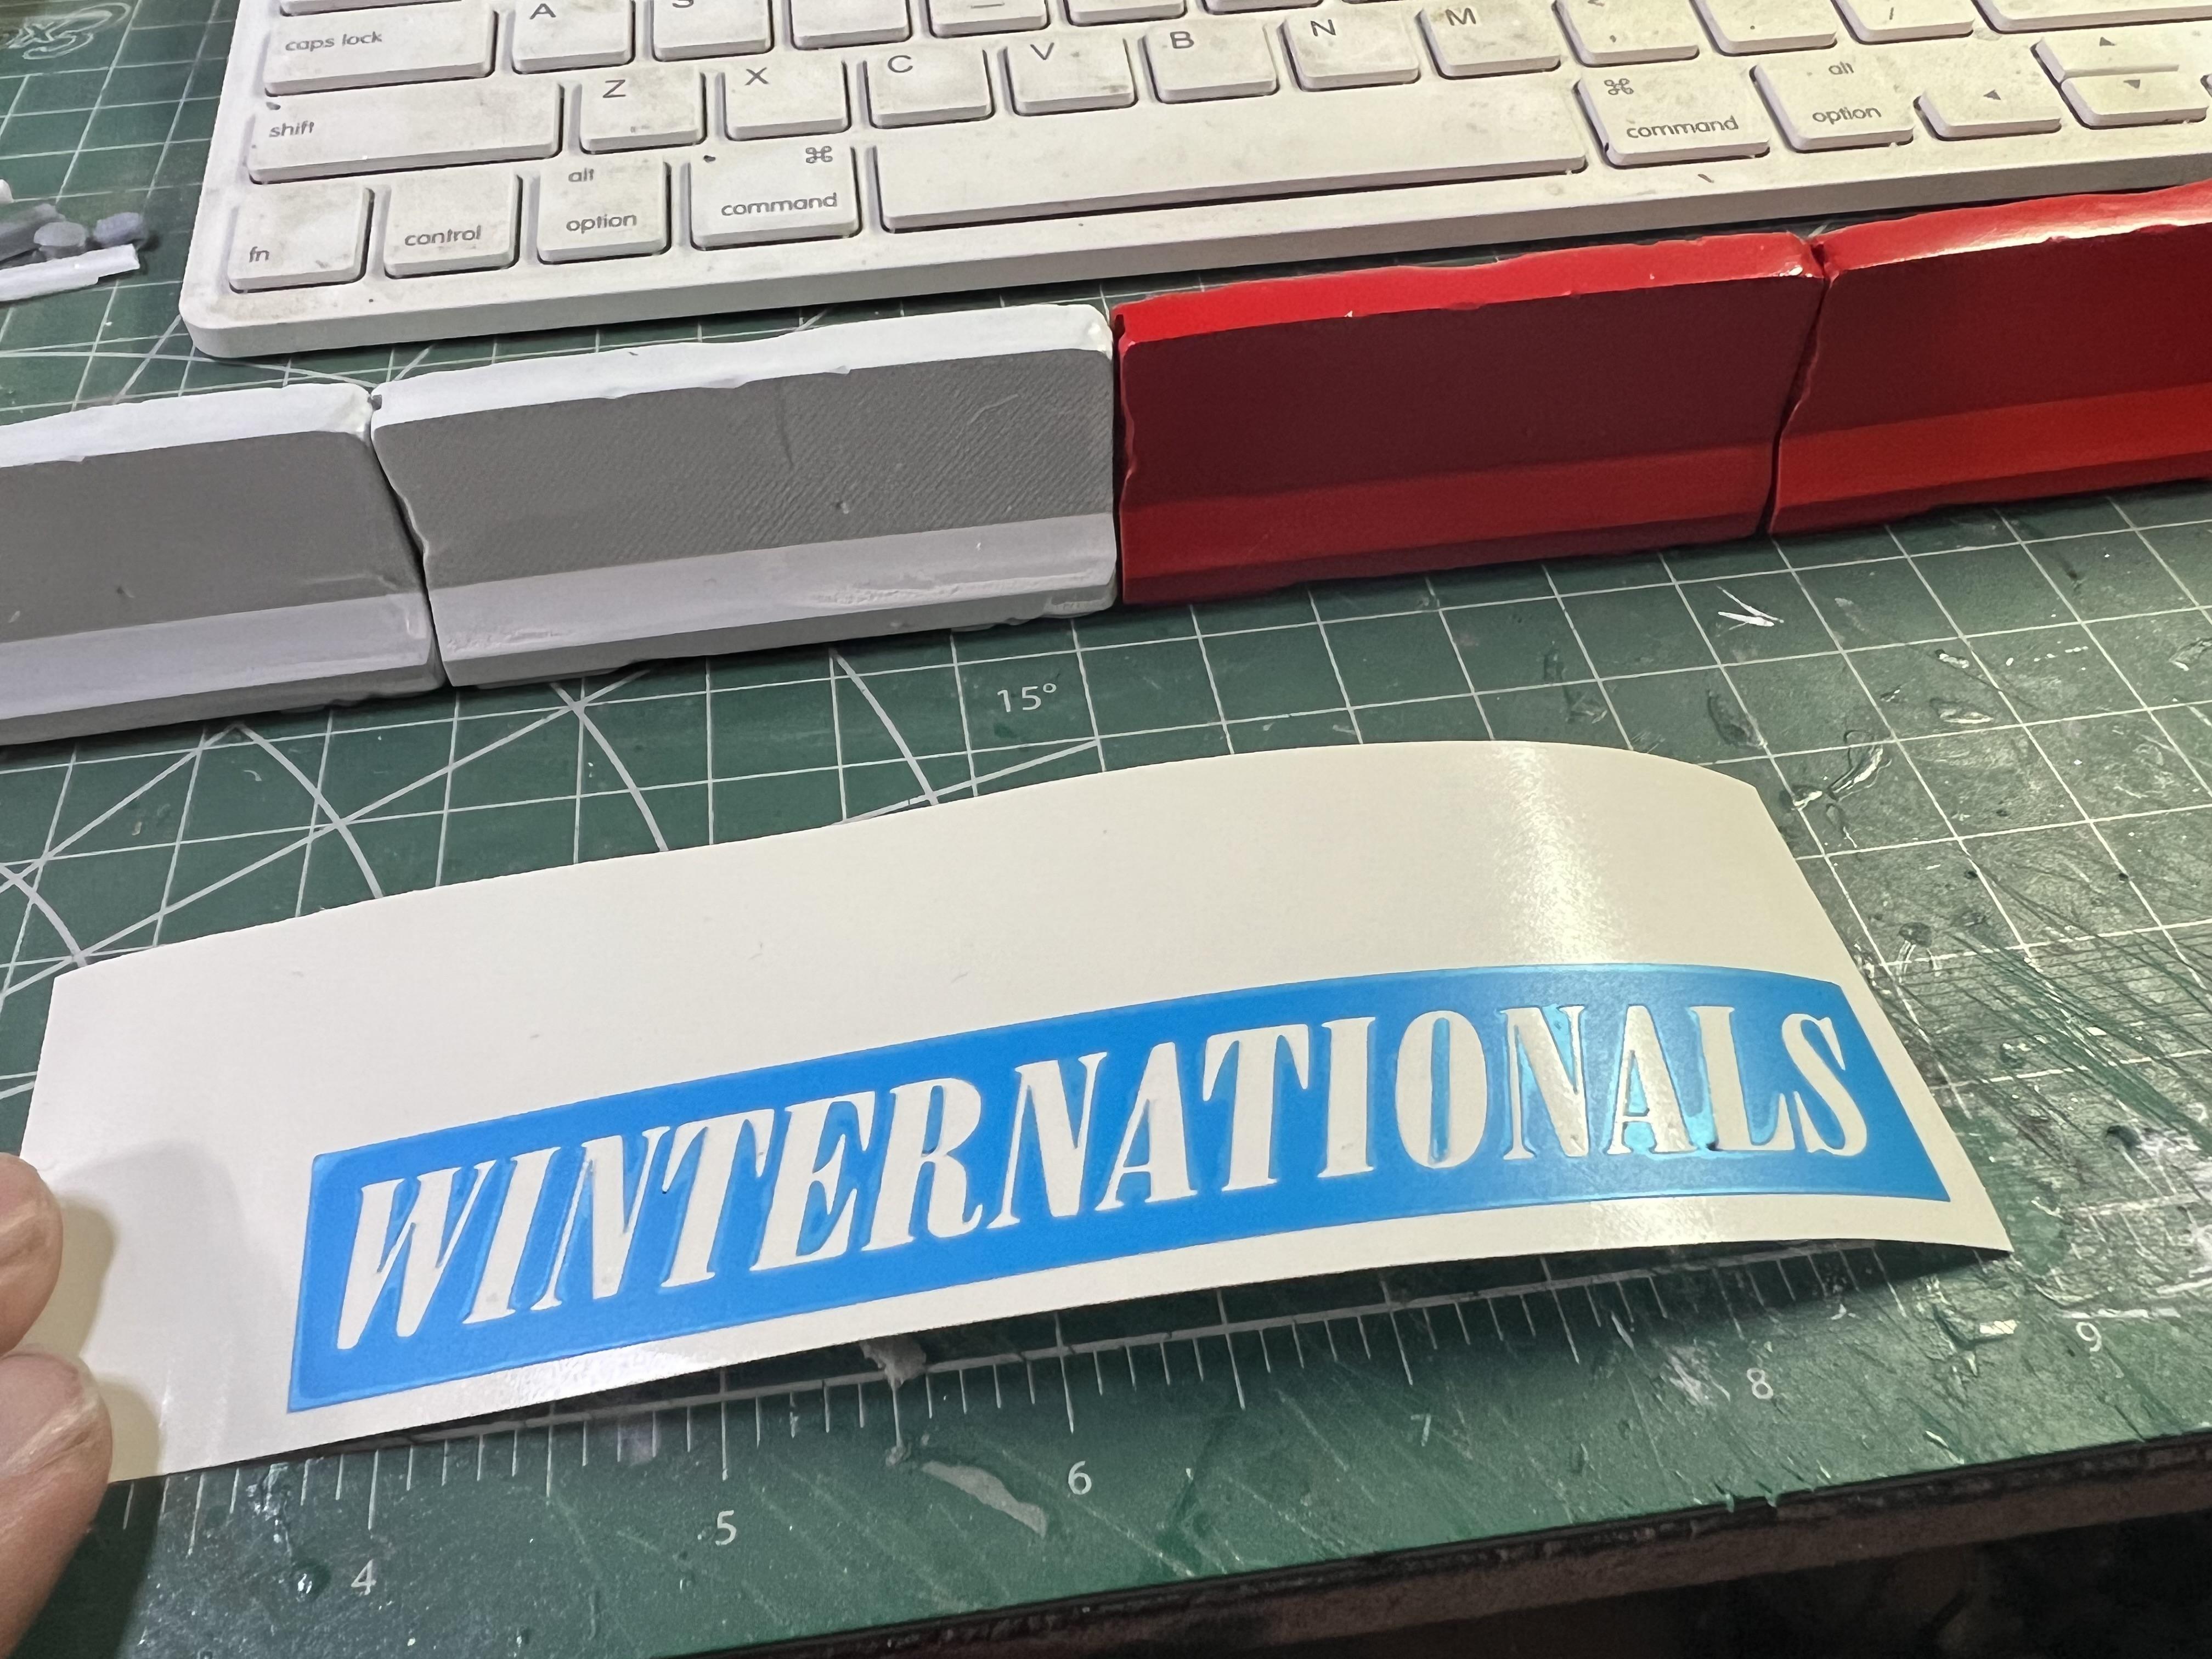
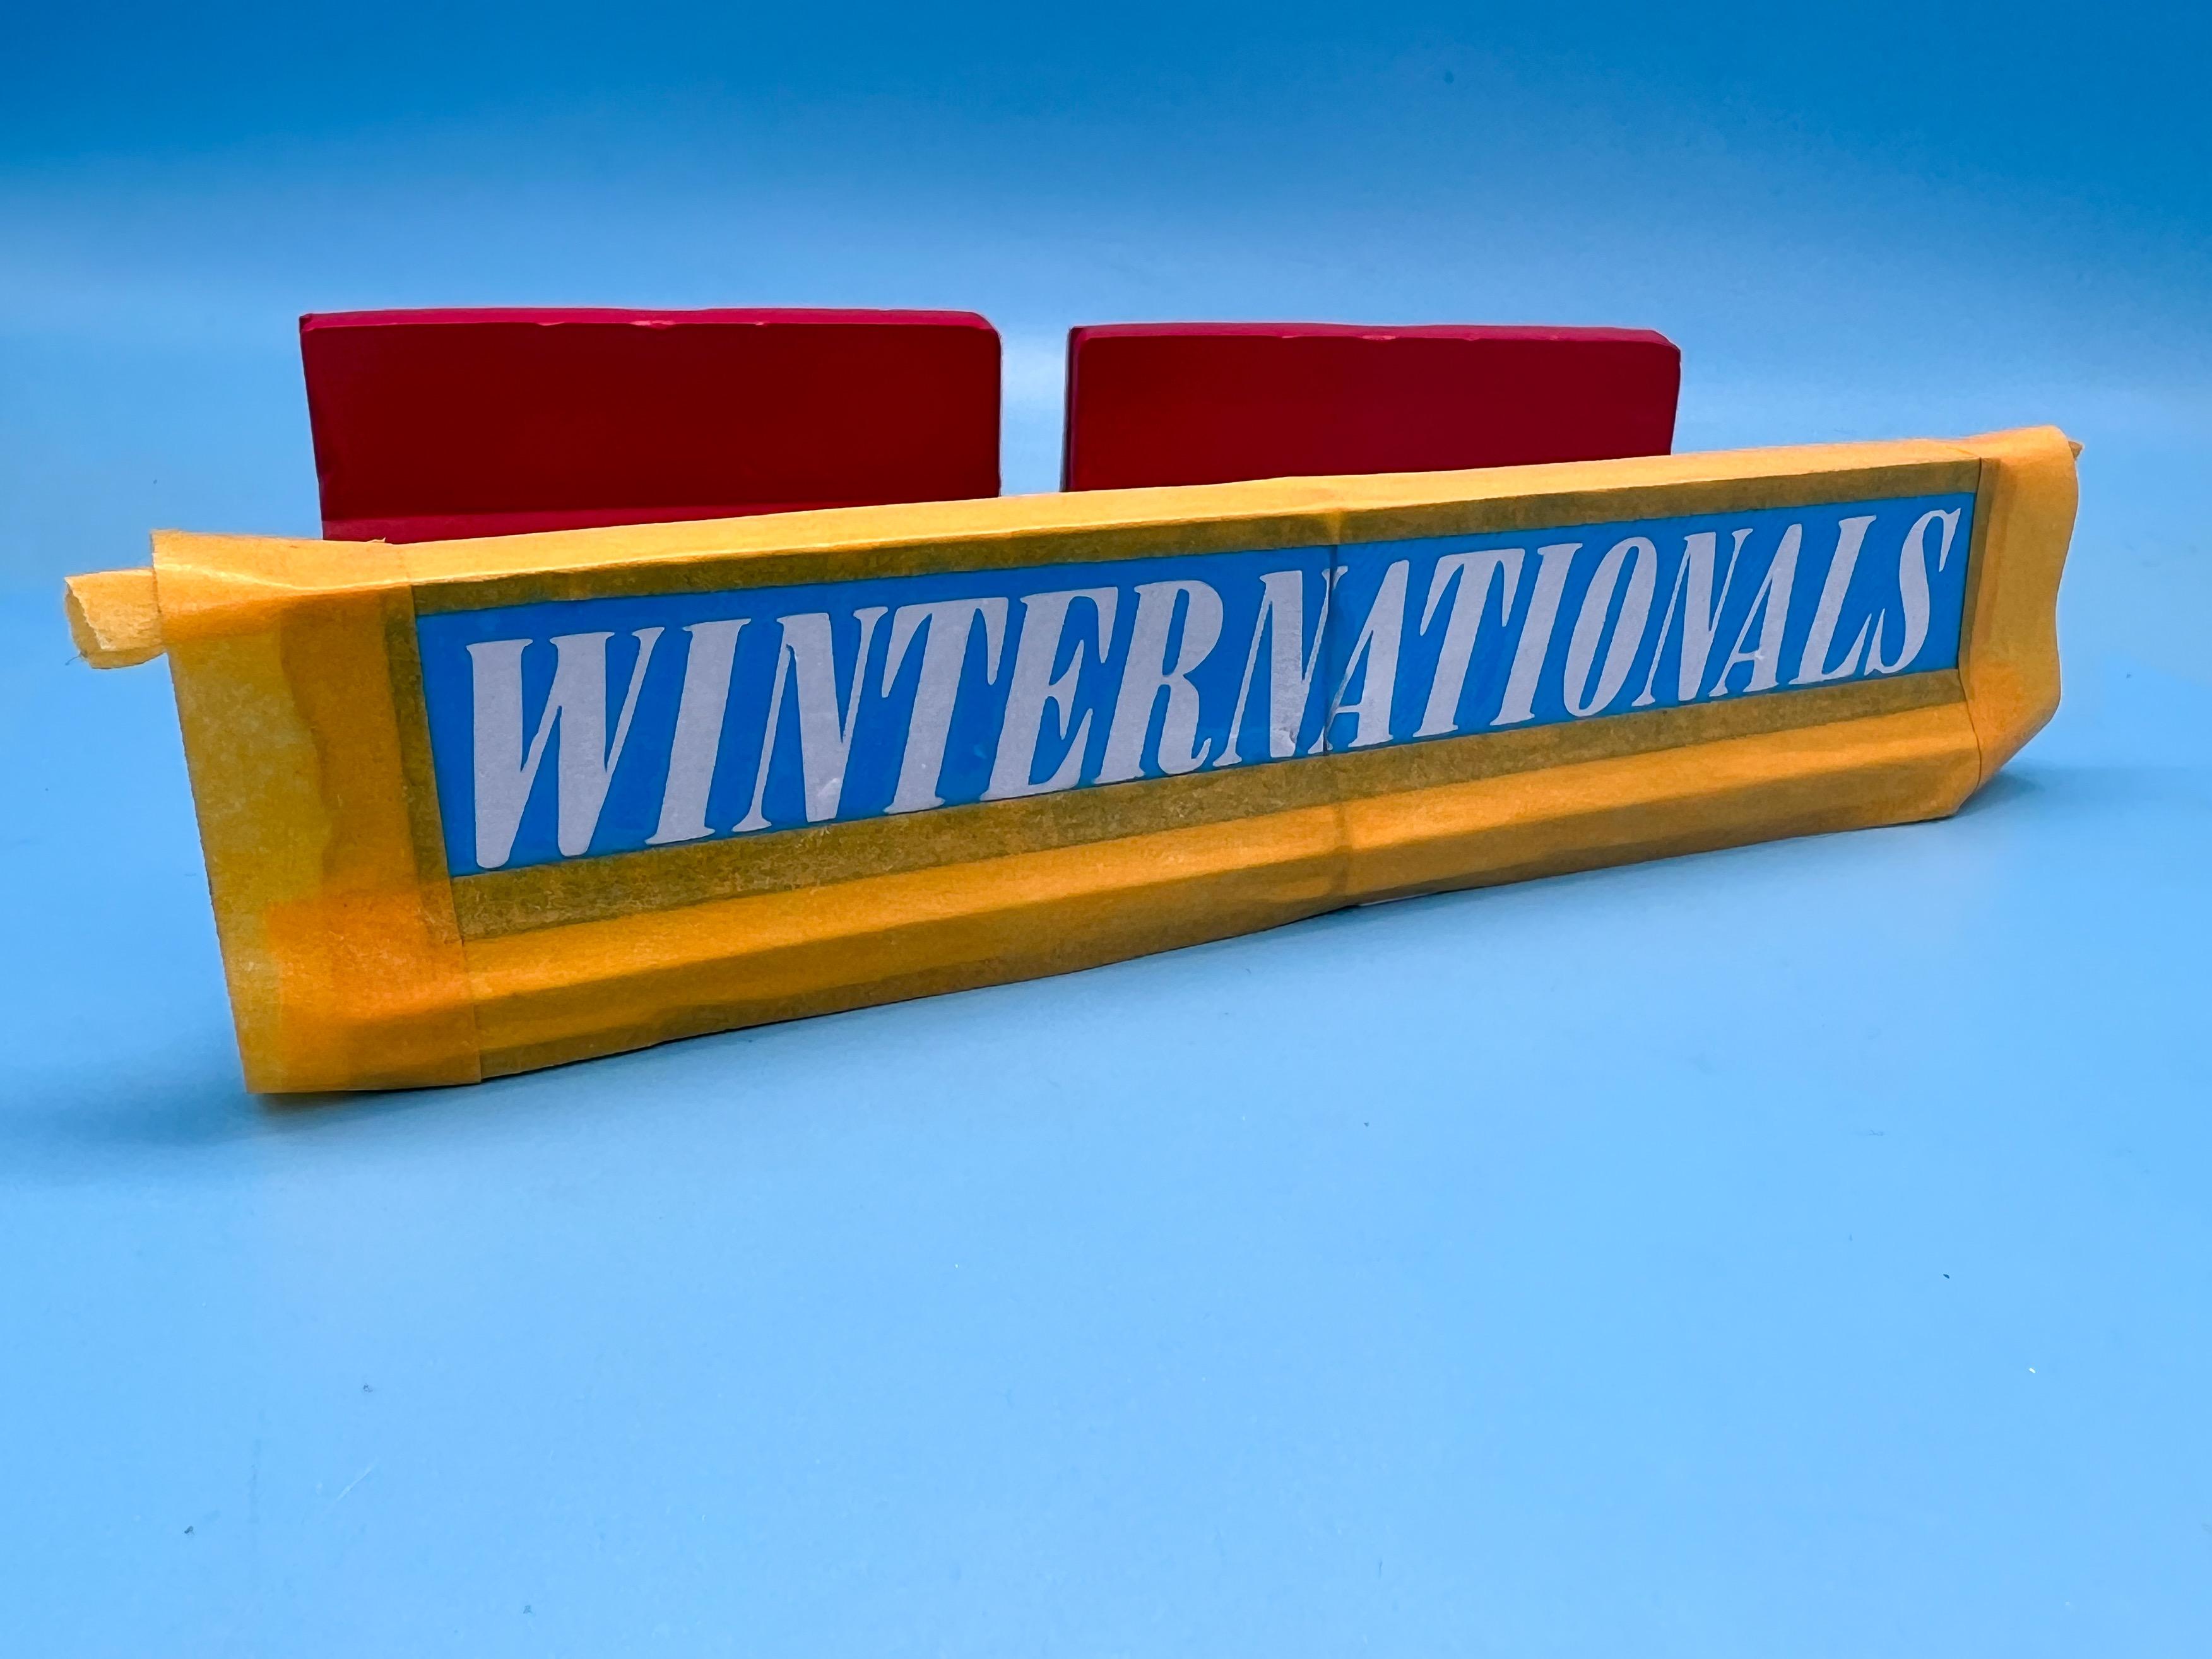
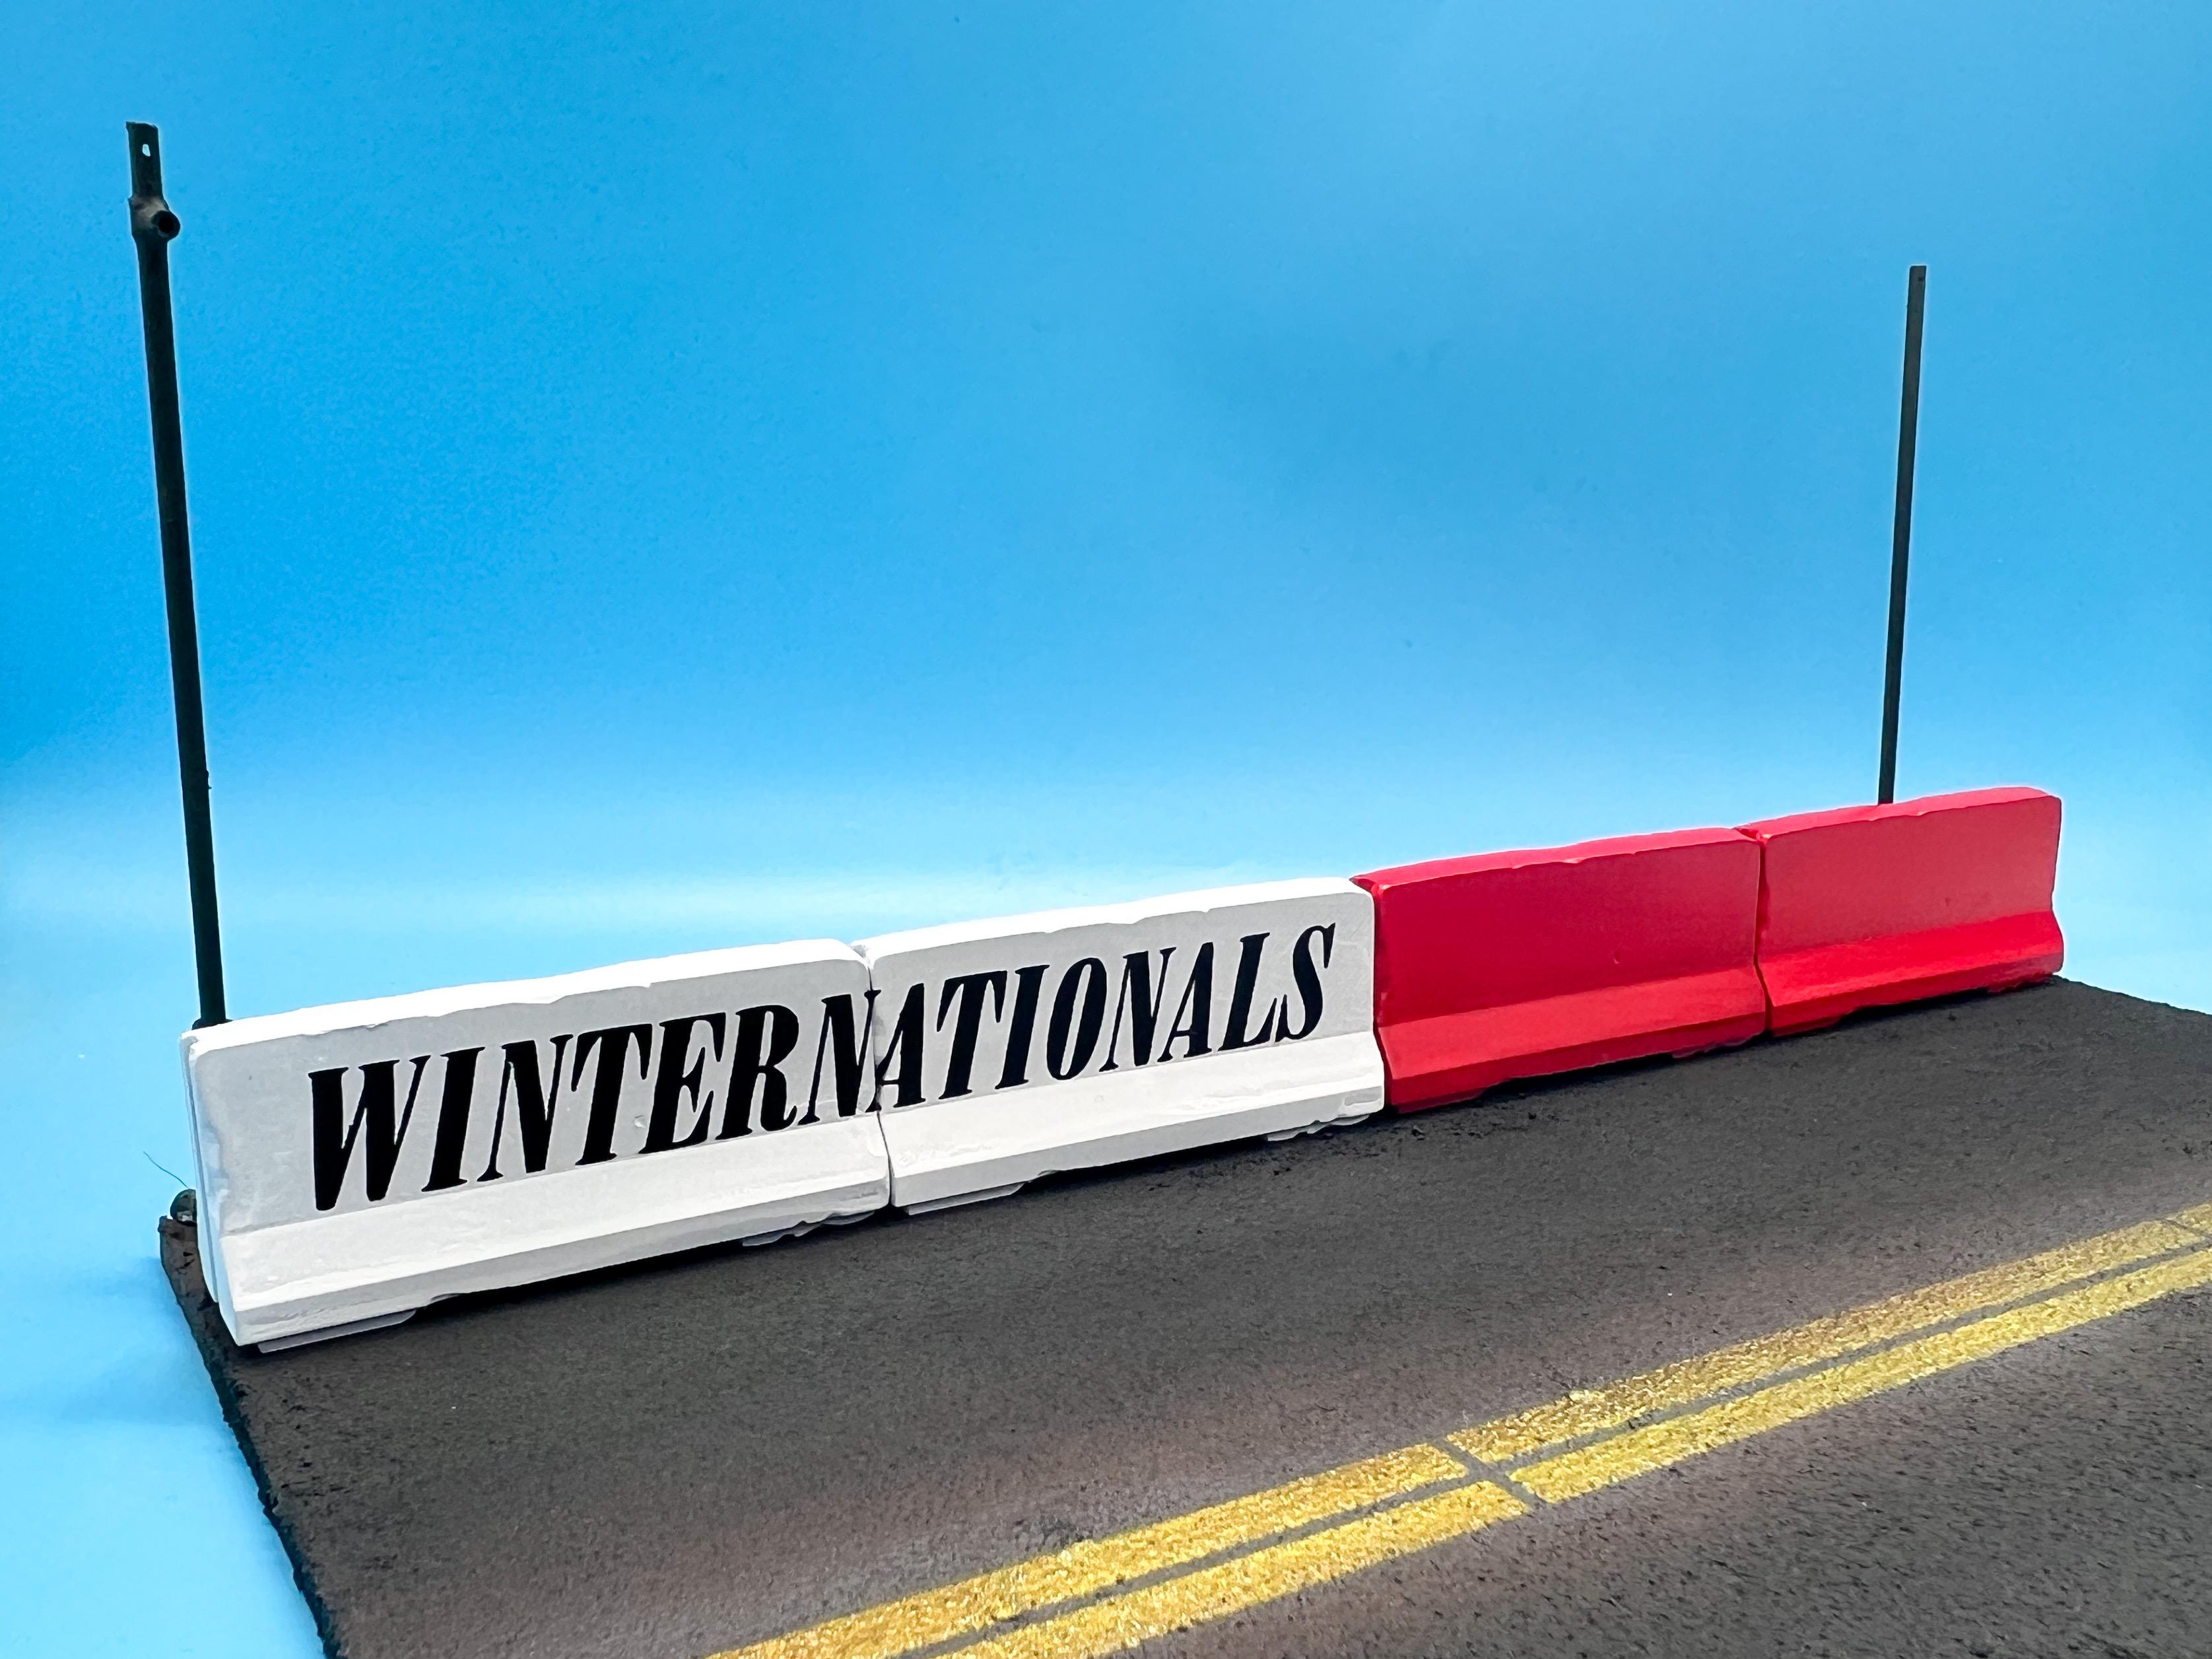
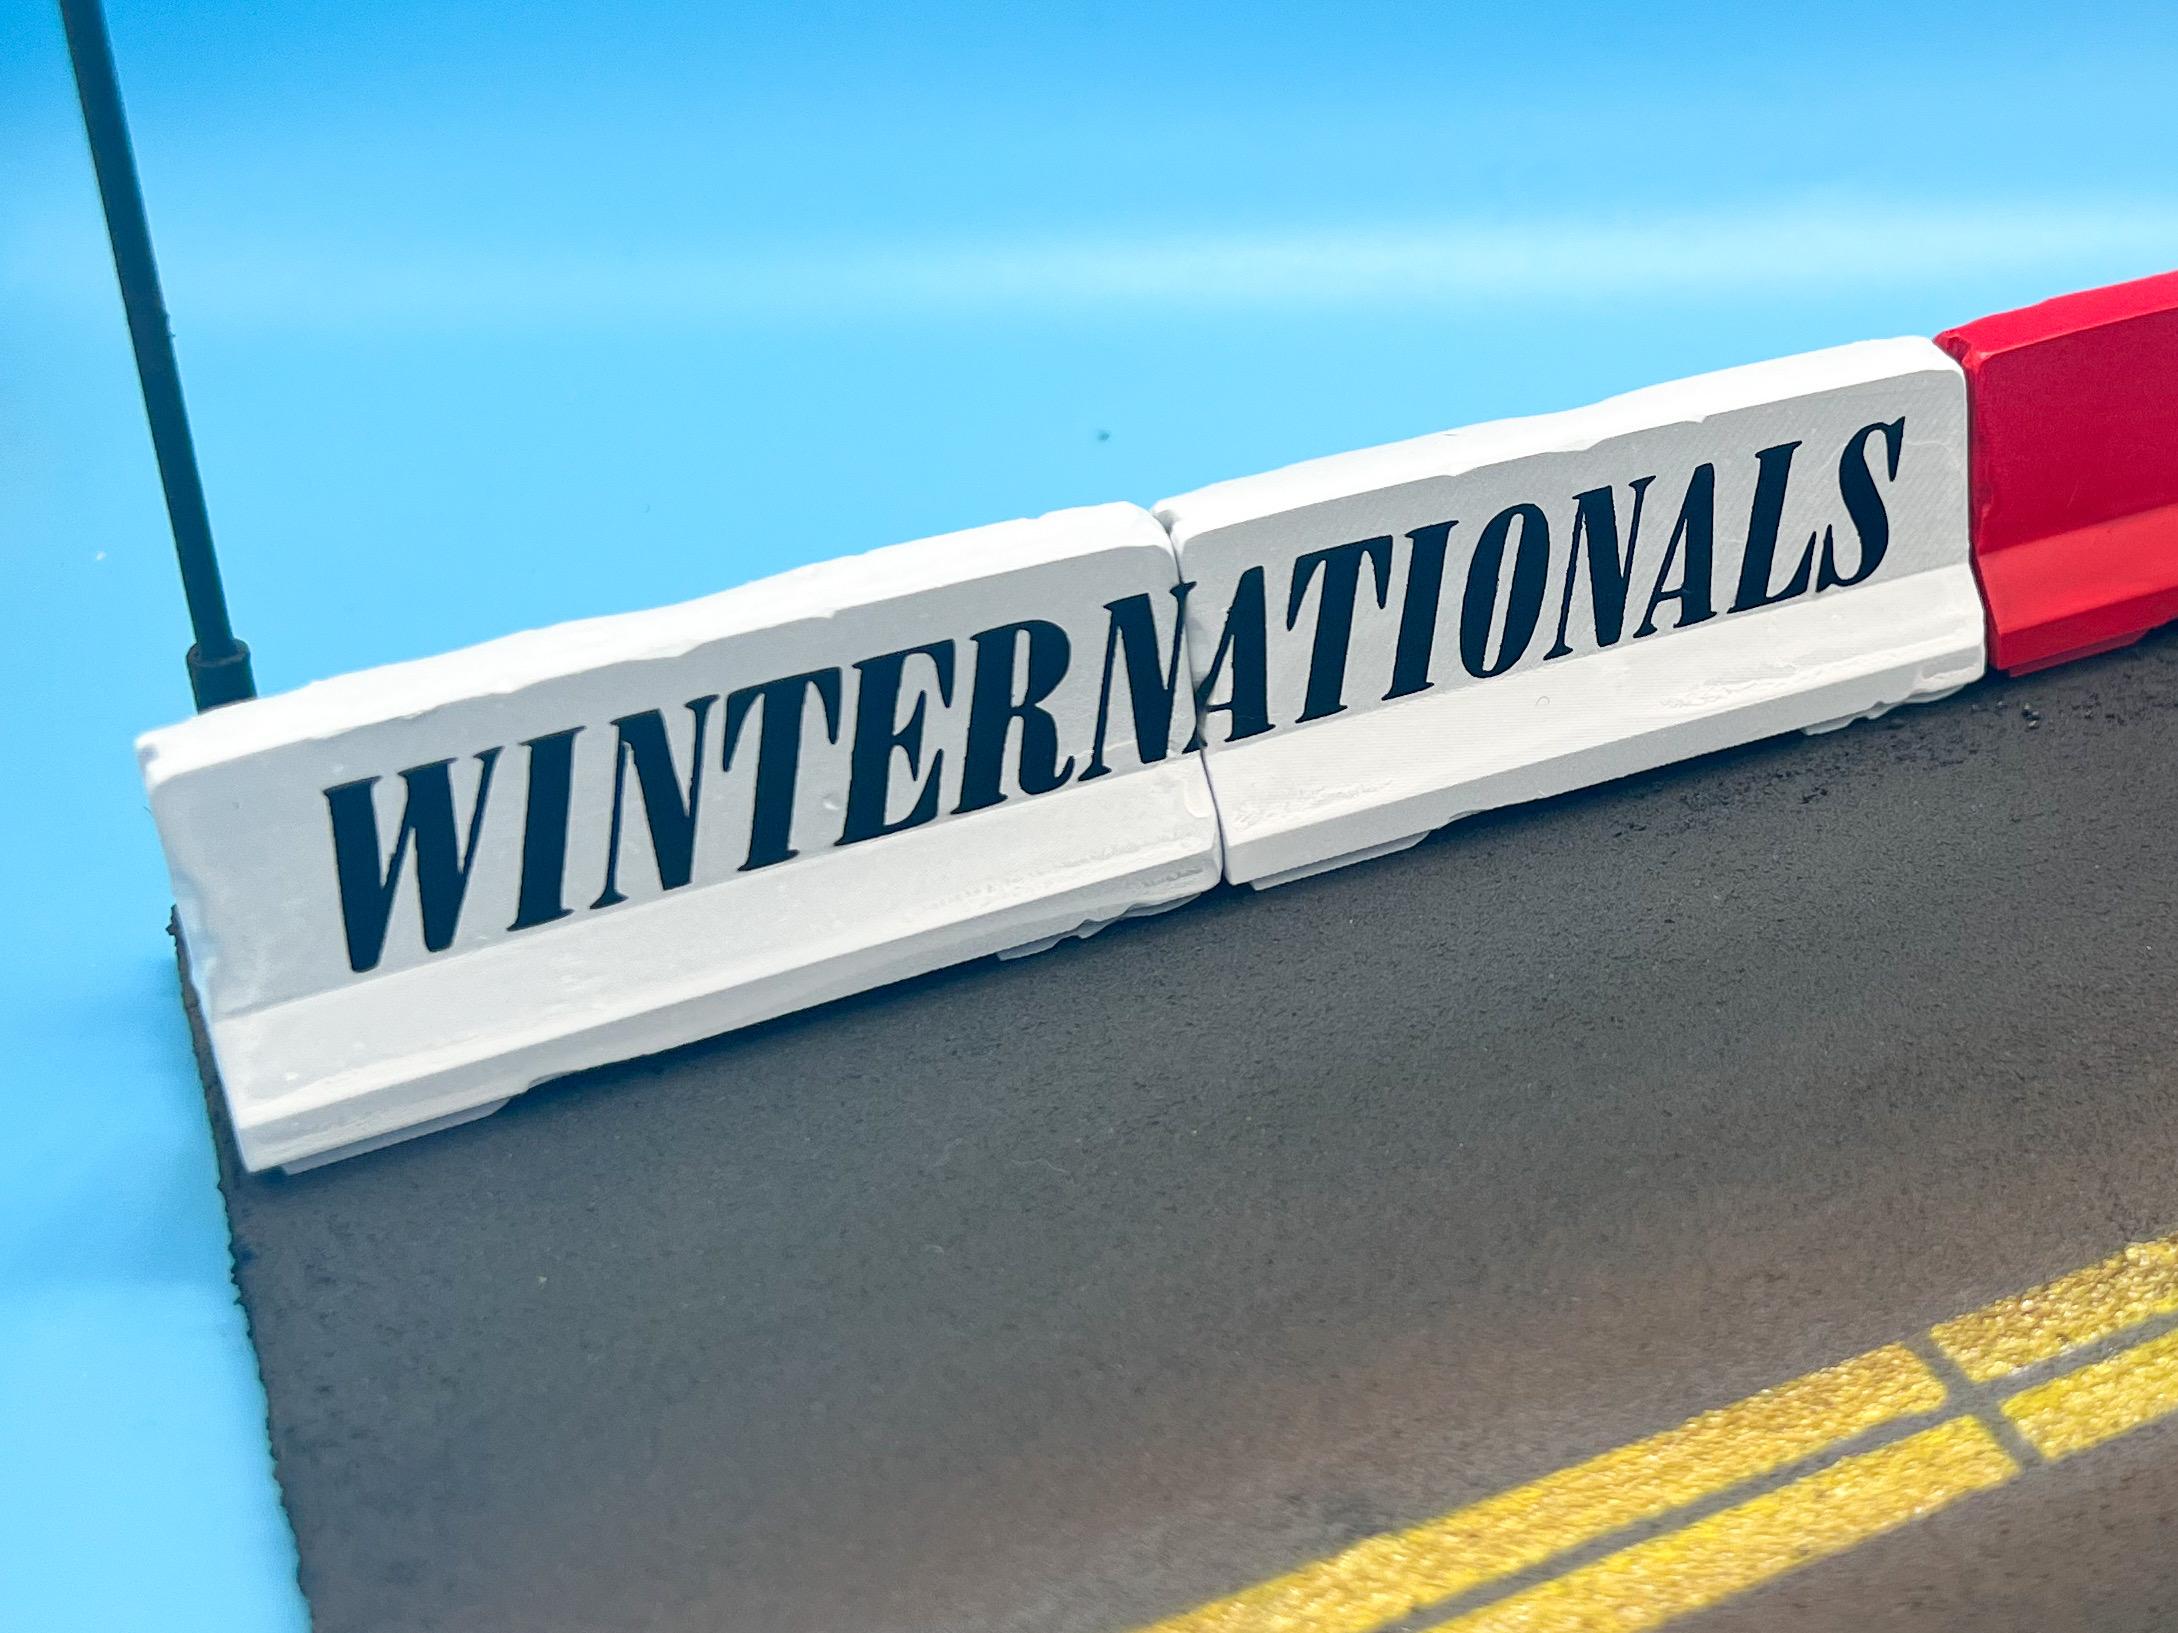
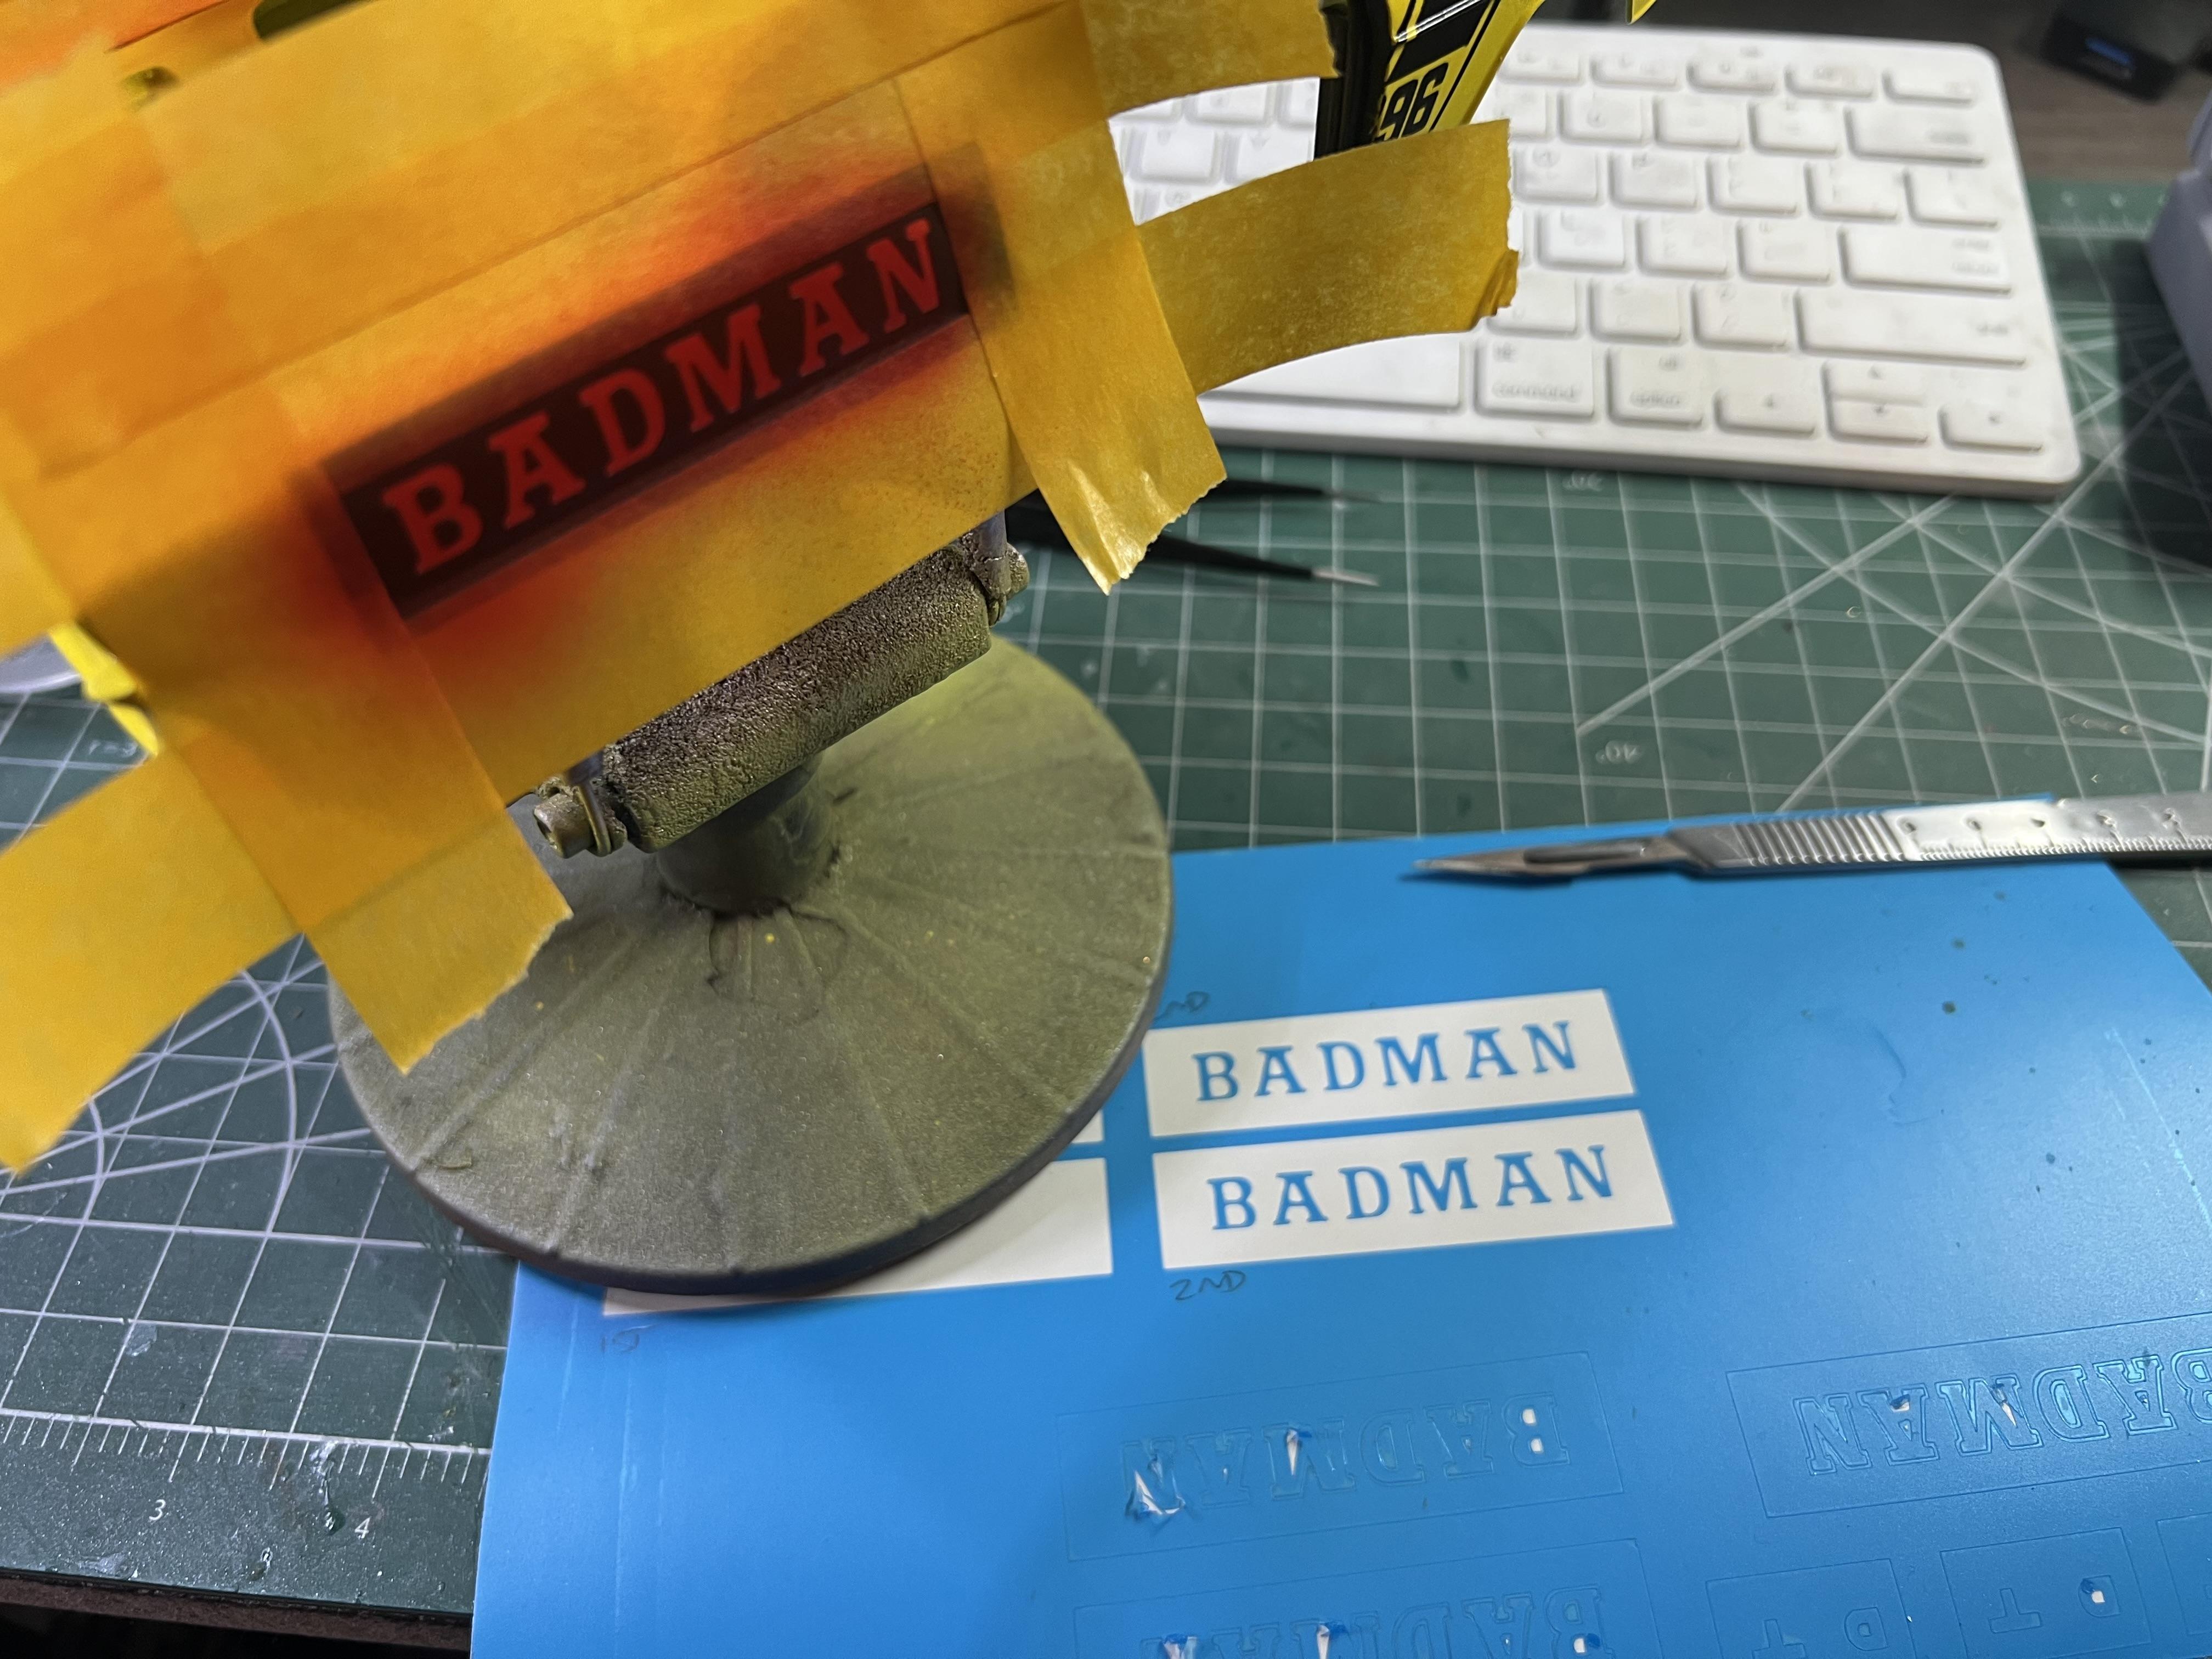
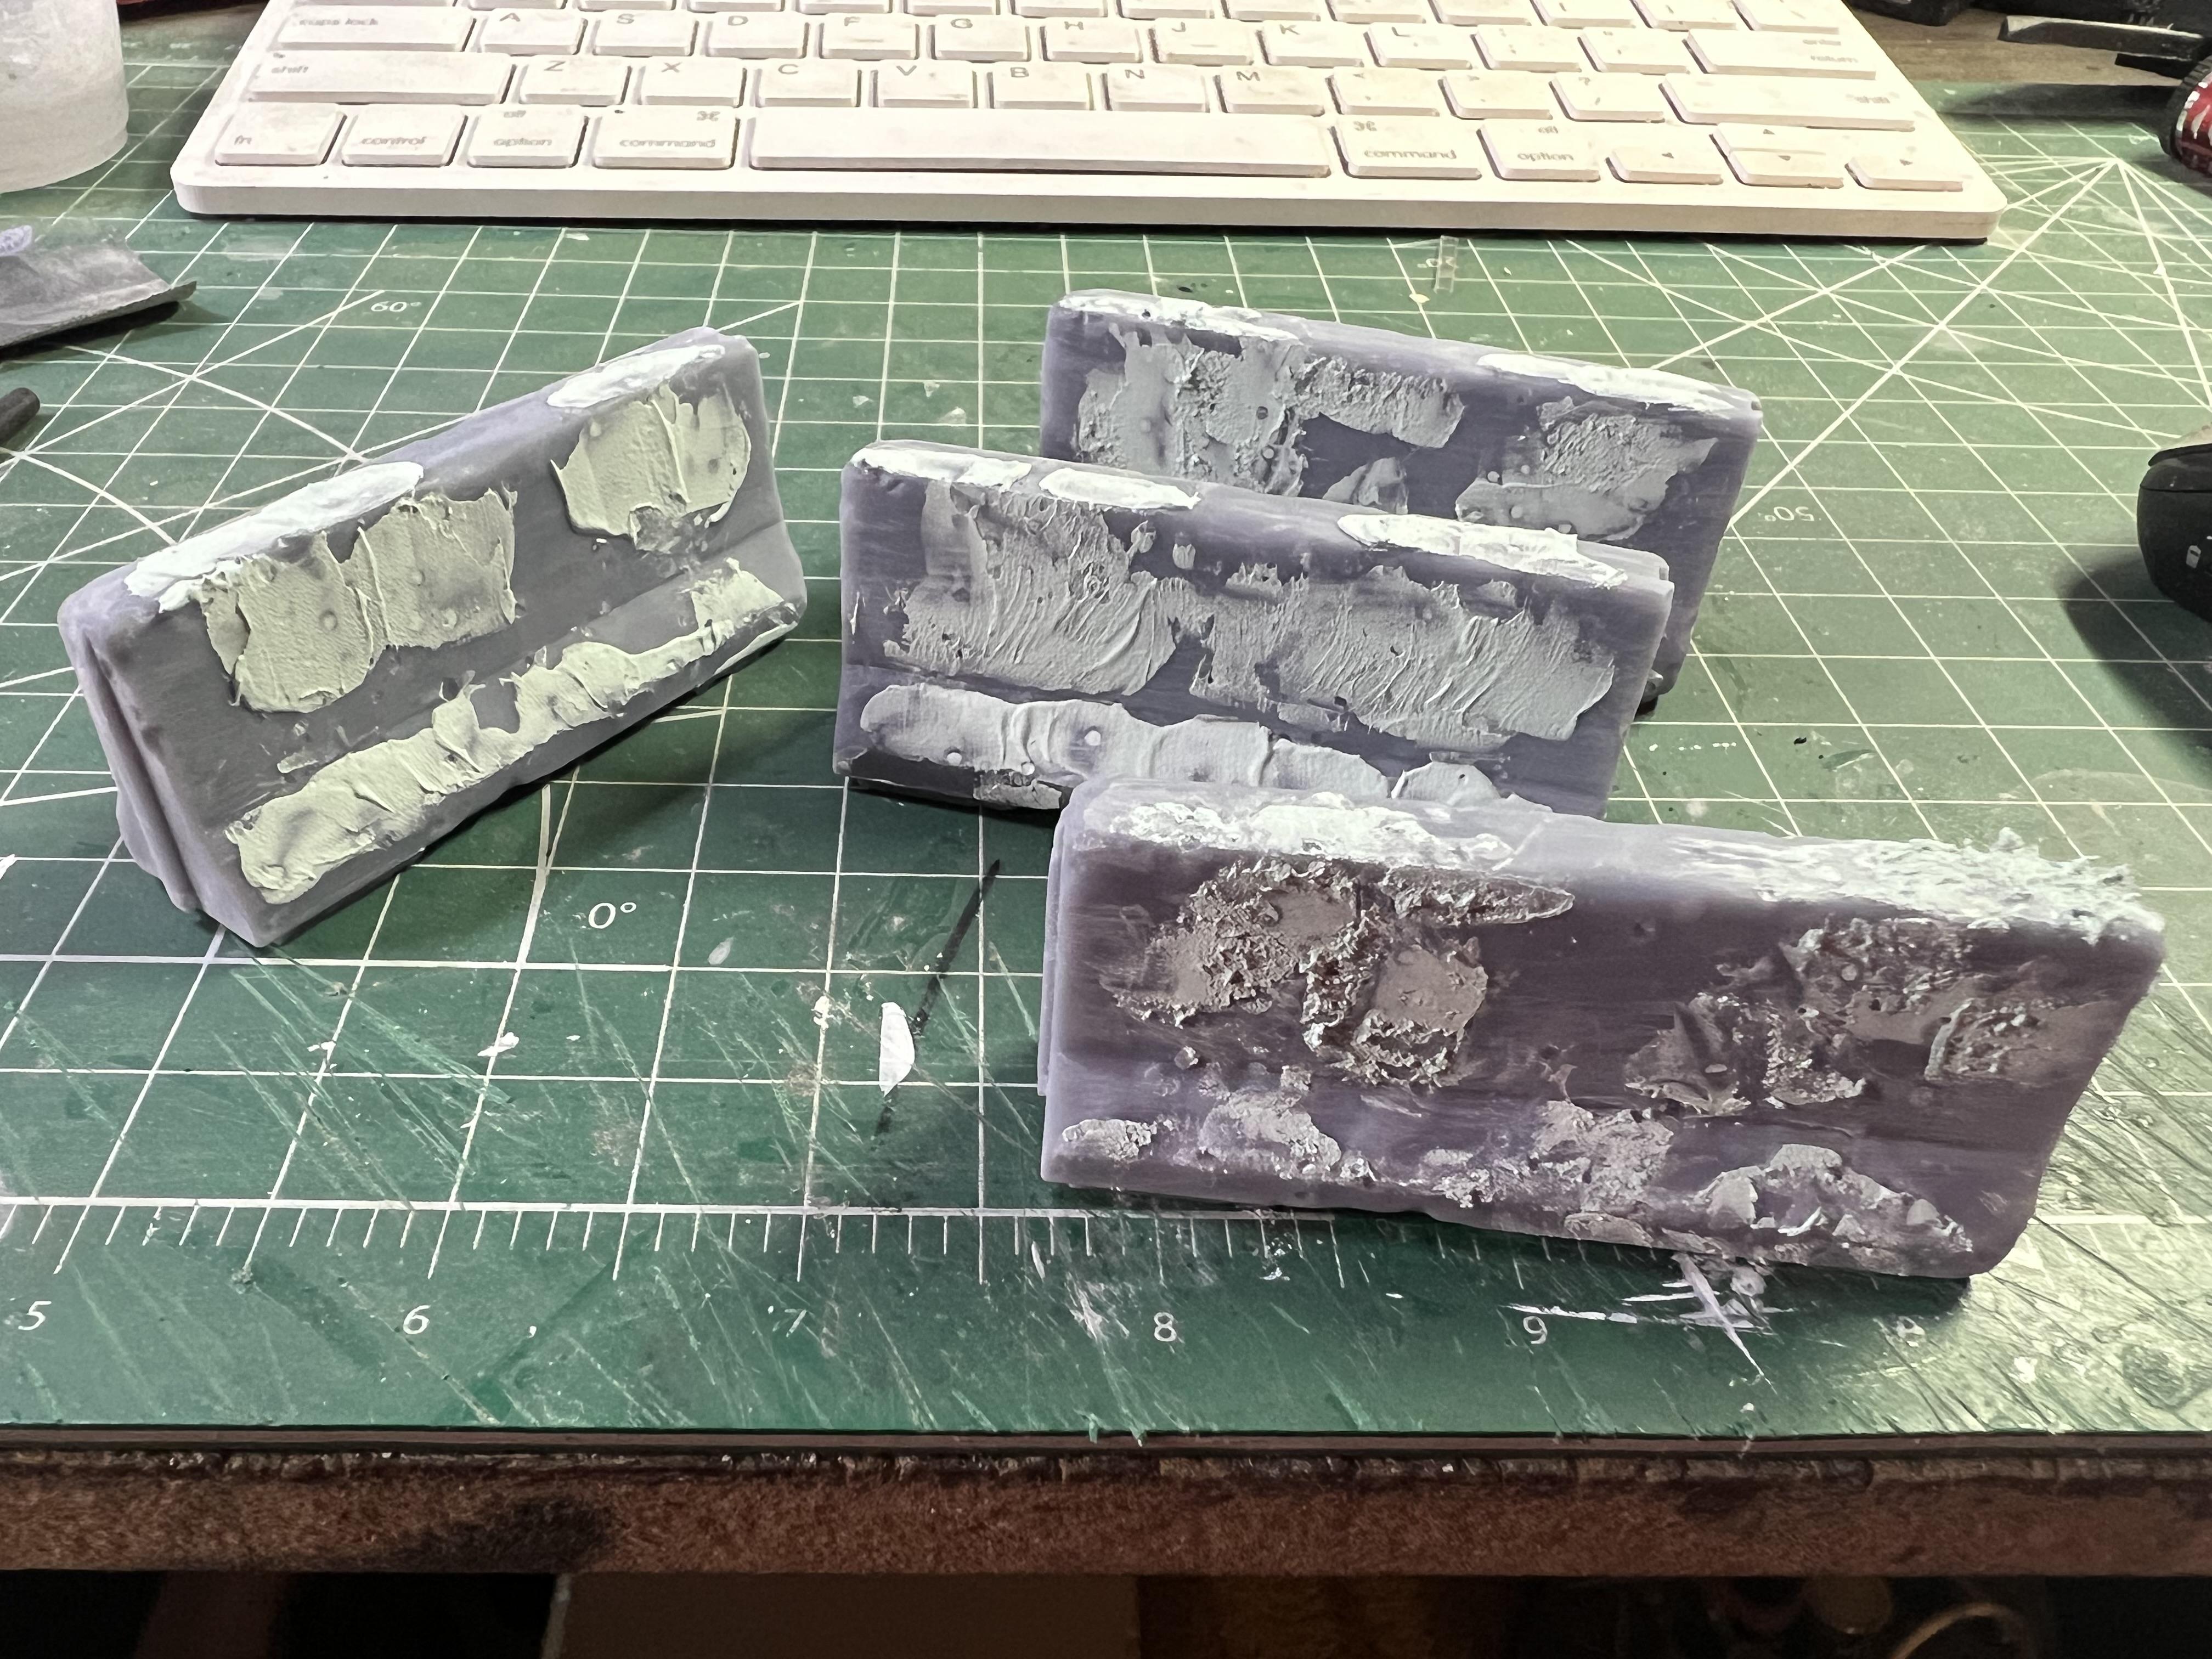
Thanks fellas! Luckily, past-Jim made a lot of mistakes and learned what NOT to do, so present-day-Jim struggles a little less…I still mess up my fair share tho ? Speaking of paint, a couple of little projects completed today… I felt like working on the display base for this thing a little today, so I painted the 3D printed concrete blocks that I had made previously, and wanted to lay down some lettering to they match the scene in the box art. Cut some masks… Taped the blocks together to keep the alignment right, then laid down the masks: And after a little of my favorite Createx black sealer, we have some passable lettering: These will get a little weathering before I’m done, but I was excited to make a little progress on the display stand anyway… There was no way I was gonna be able to successfully paint the tiny door lettering that this car should have, so I laid down decals for that today… And with that the body is finally ready for clear…excited to shine this thing up. Less excited to lay down the chrome portions after clear, but it’s gotta be done… And finally for this weekend, stripped the chrome off the suspension pieces so I can start pinning them together, removing imperfections and seeing where I can add some detail to bring them to life: That steering linkage can definitely use some work, and there’s some boltheads and stuff I can add to help things along. And that’s about today’s progress because I spent the rest of the day by the grill reading old SAEs ? Hope everyone had a good labor day! Thanks for looking!
-
My take on the most famous ‘55 gasser street machine’…
OldNYJim replied to OldNYJim's topic in WIP: Model Cars
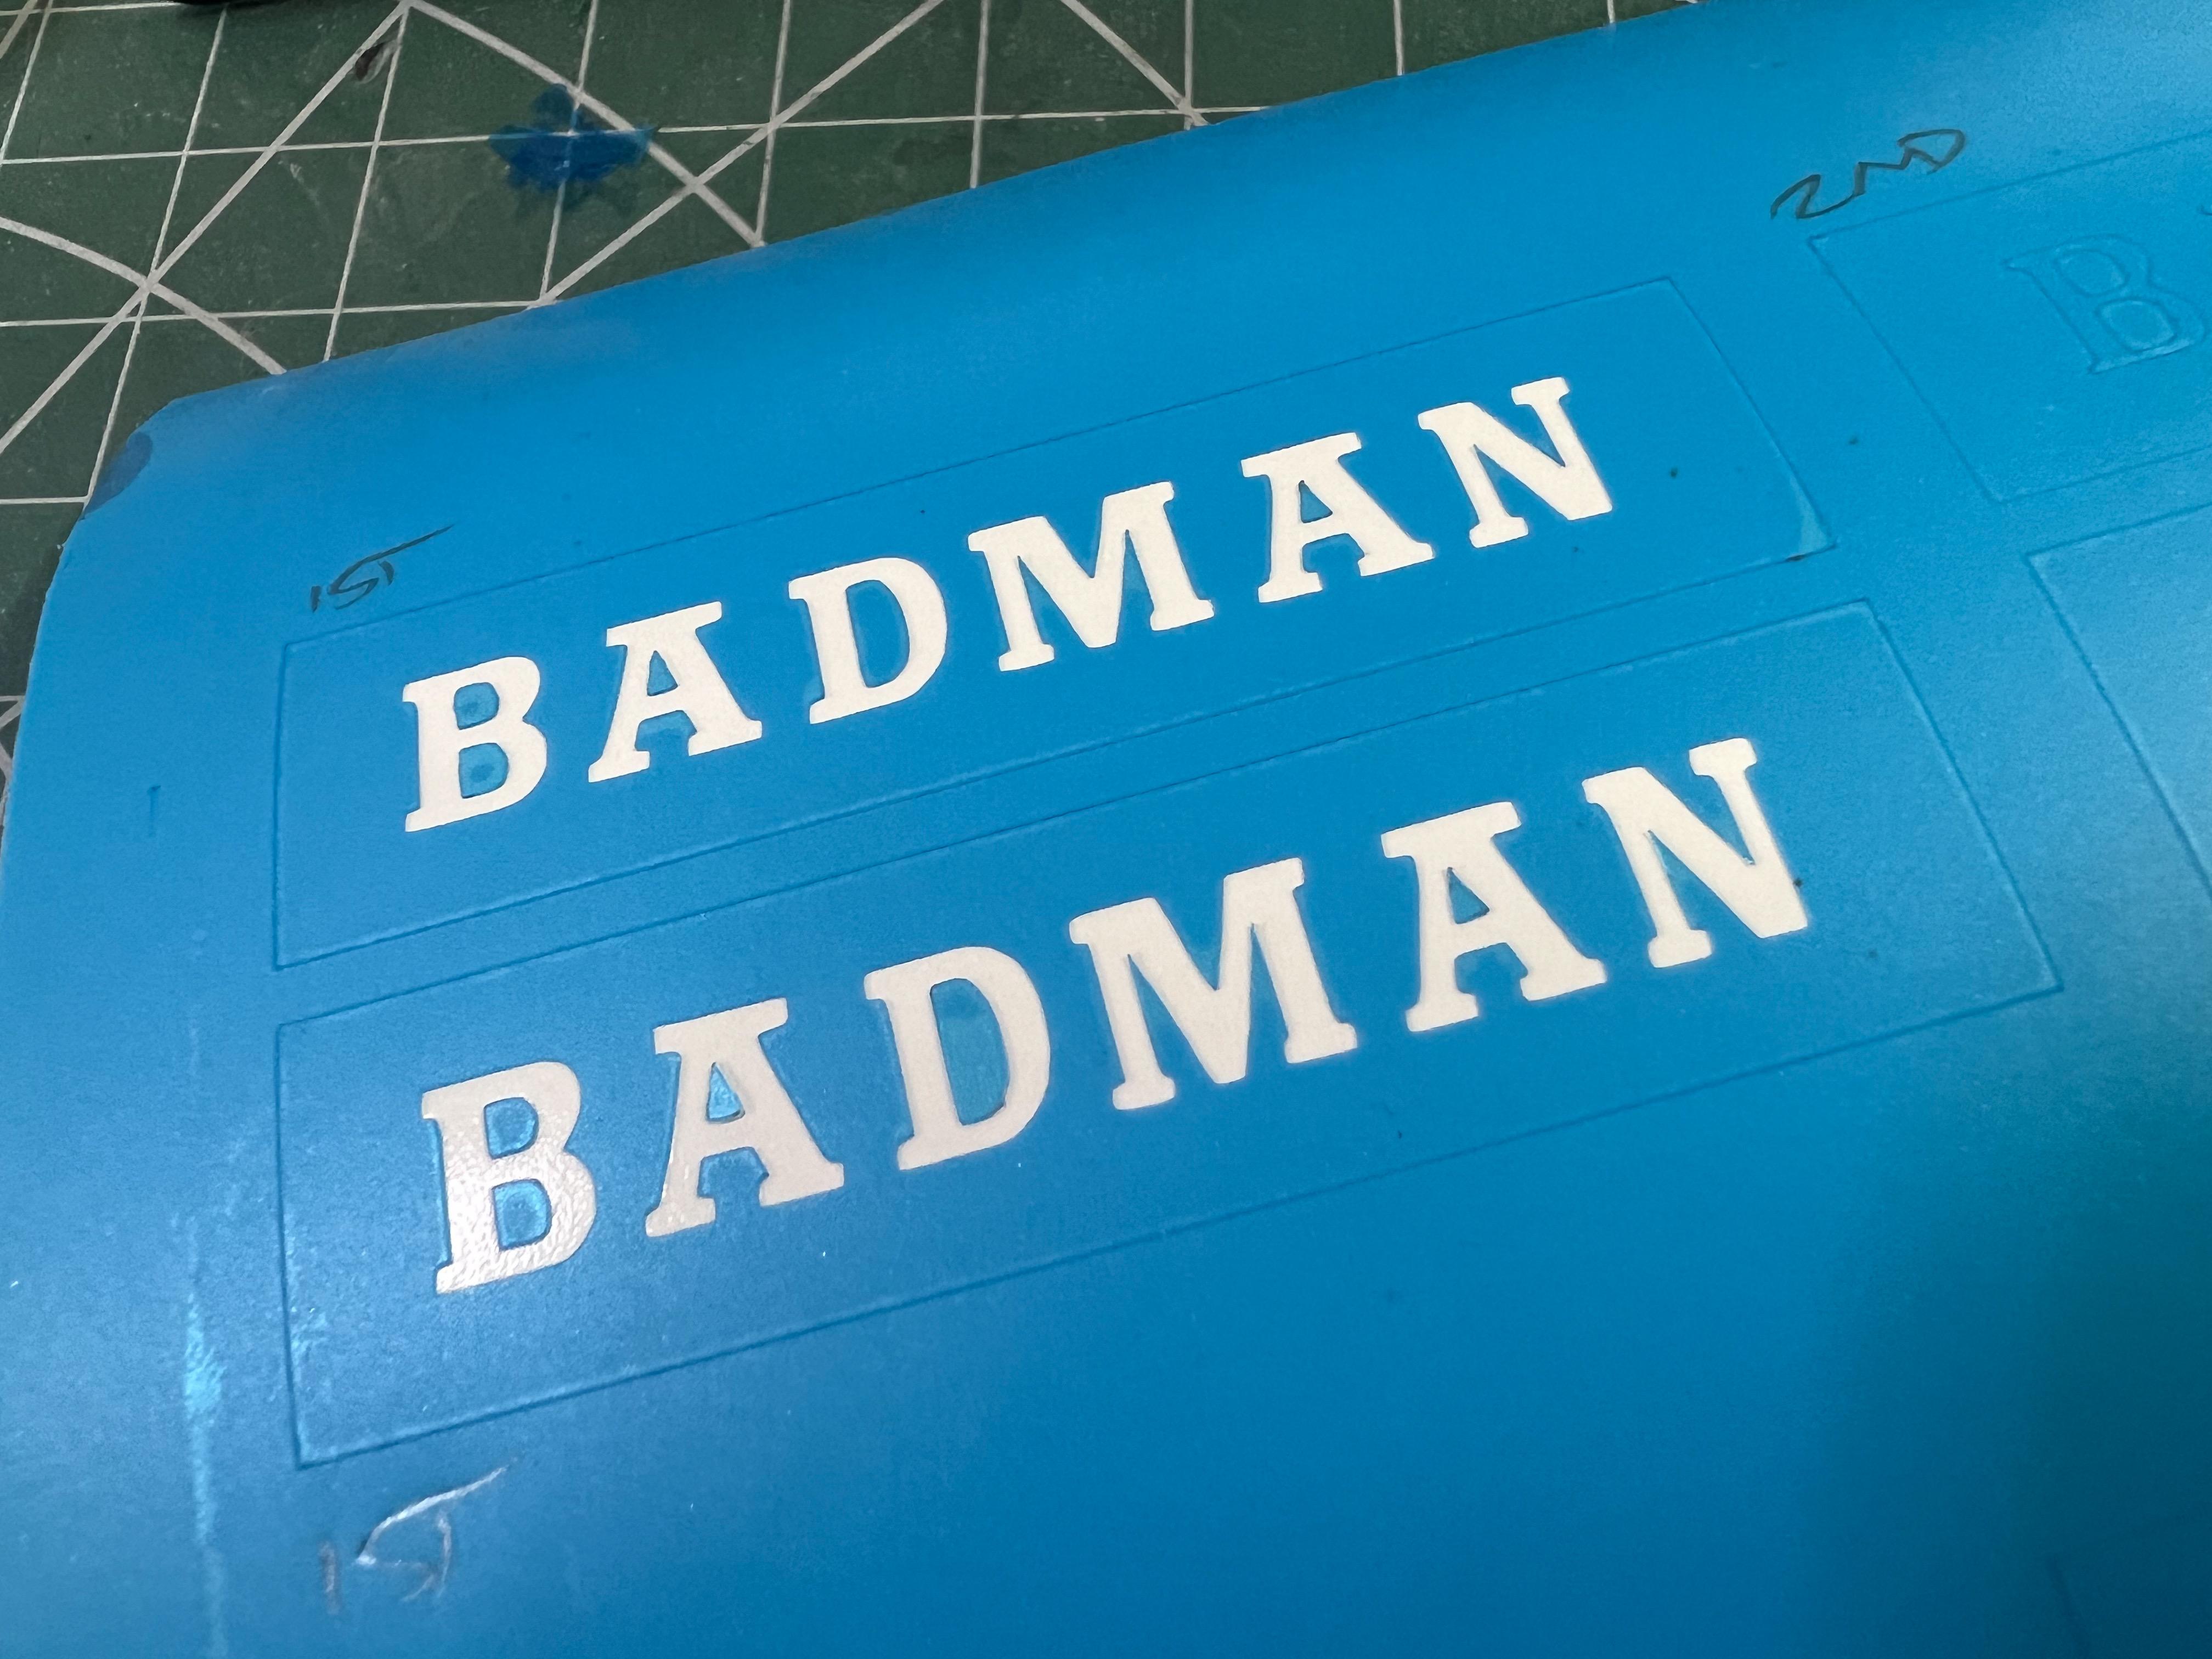
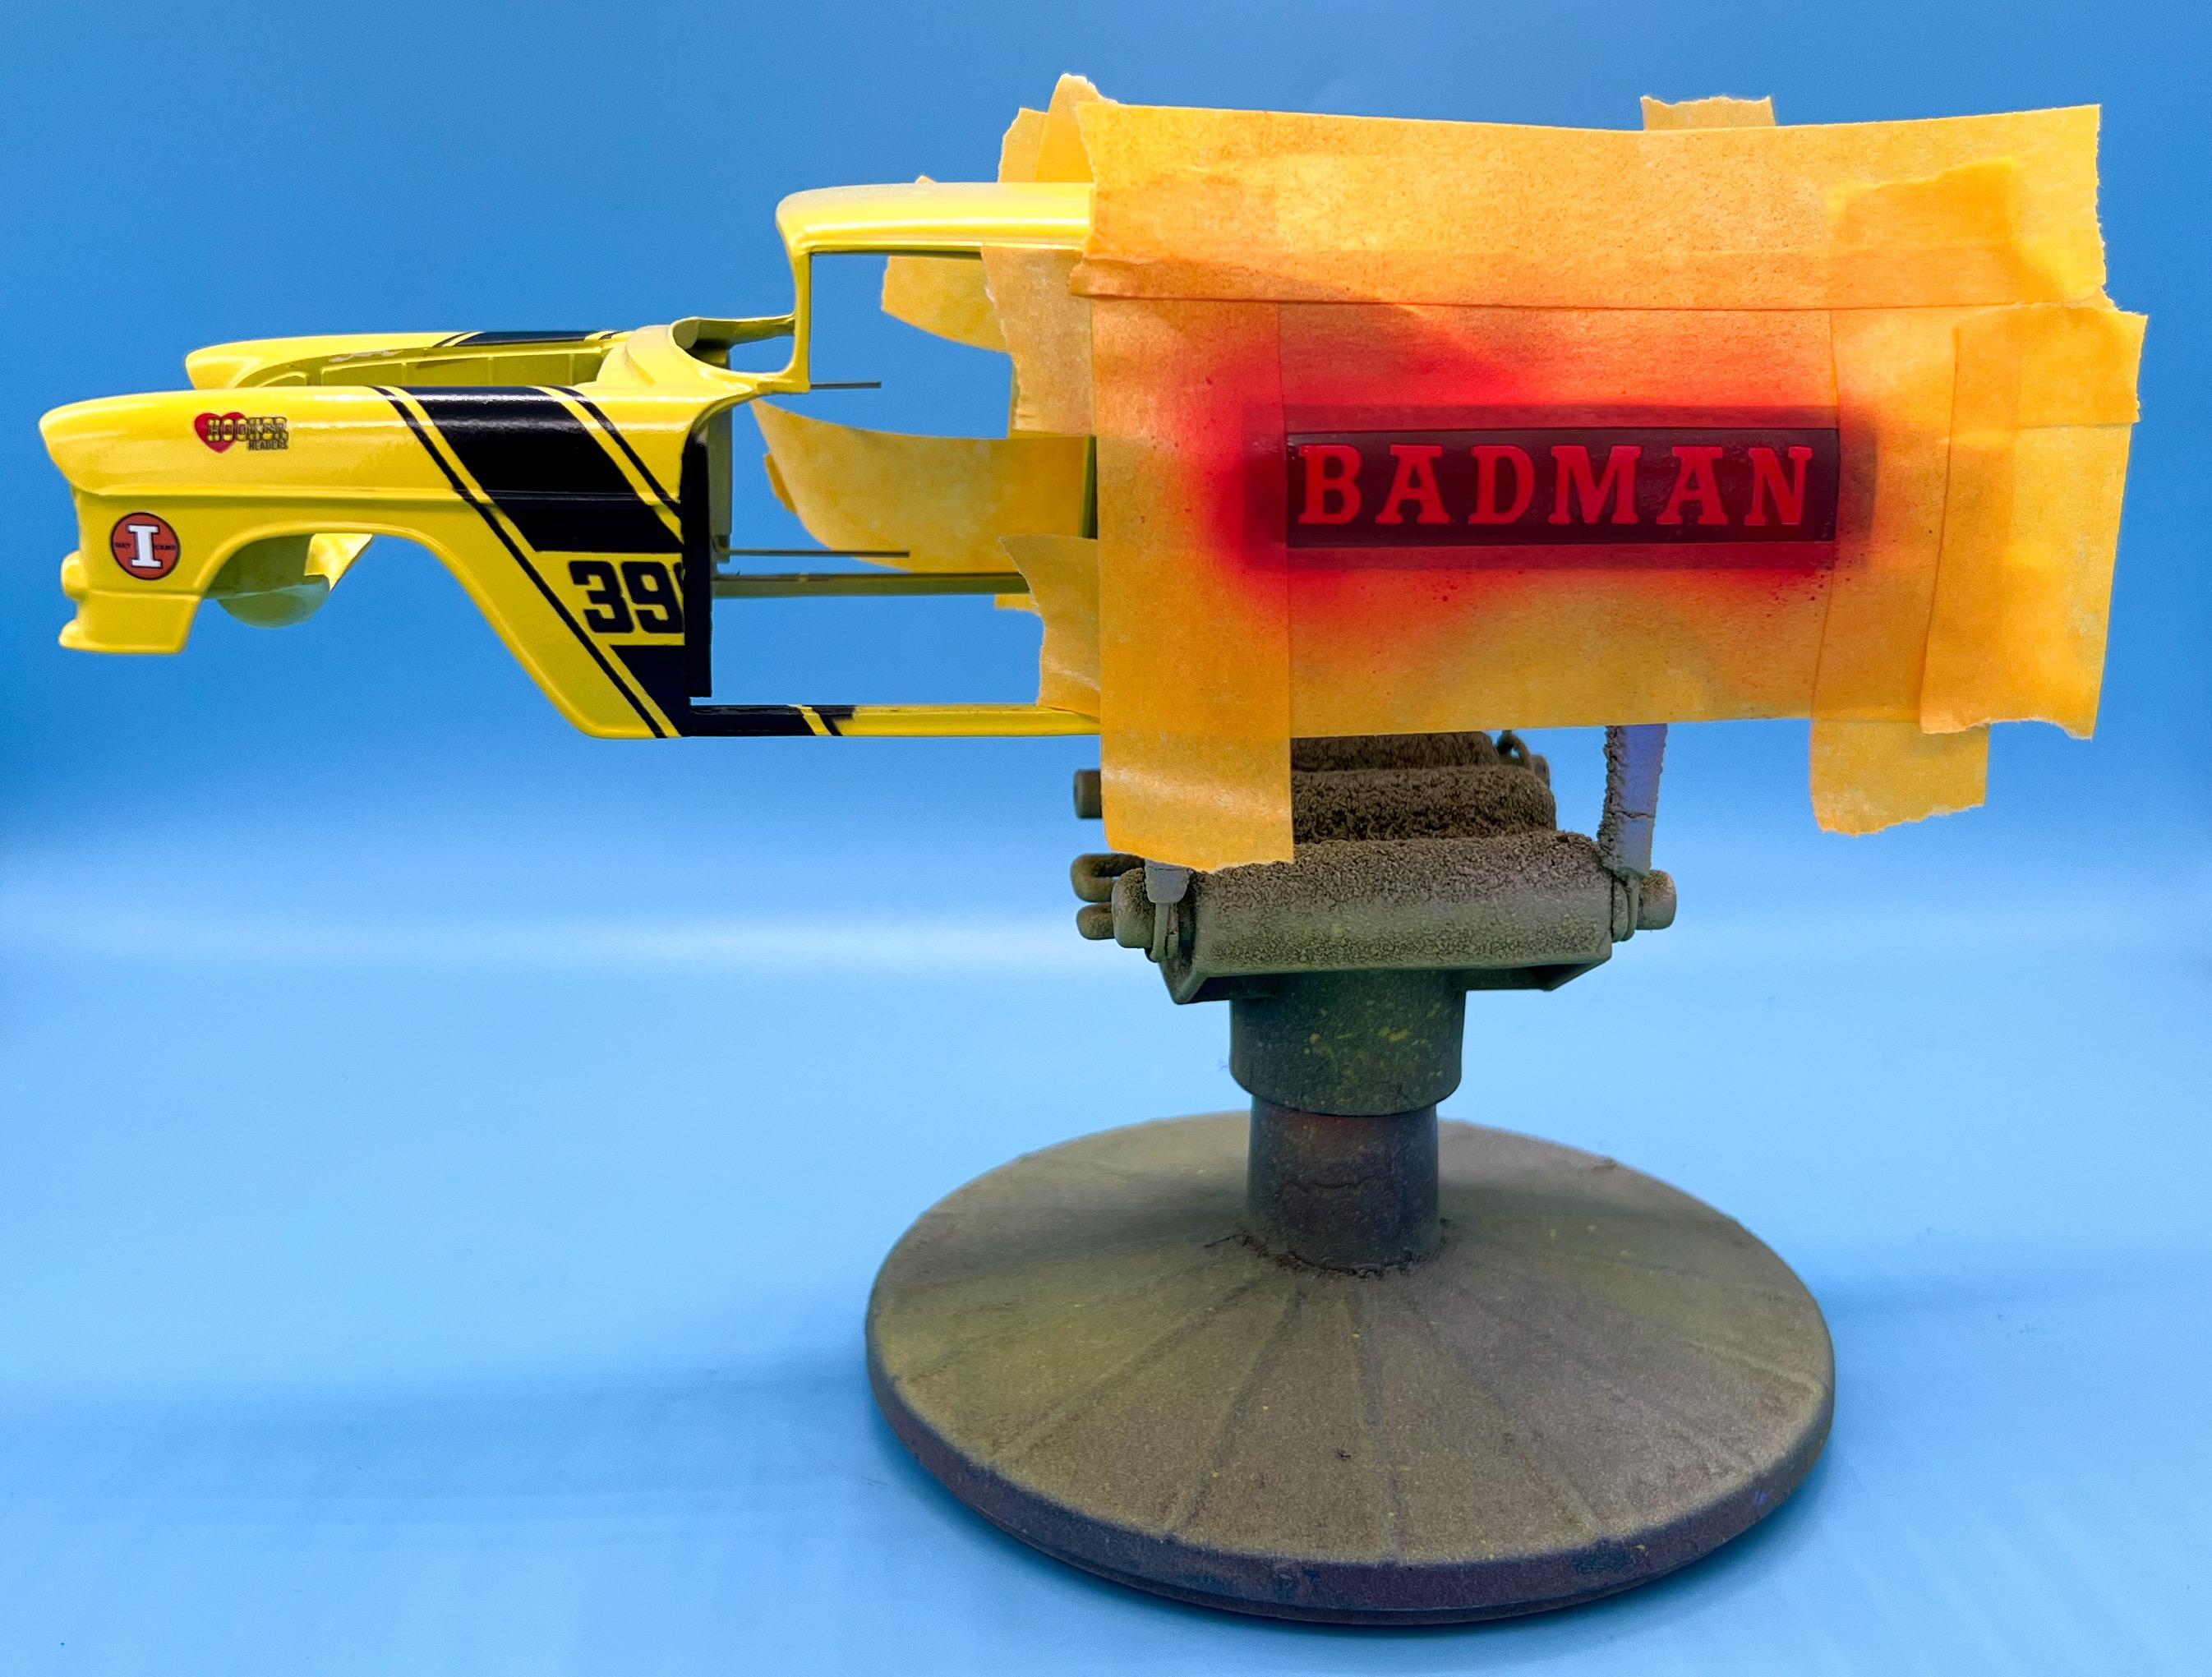
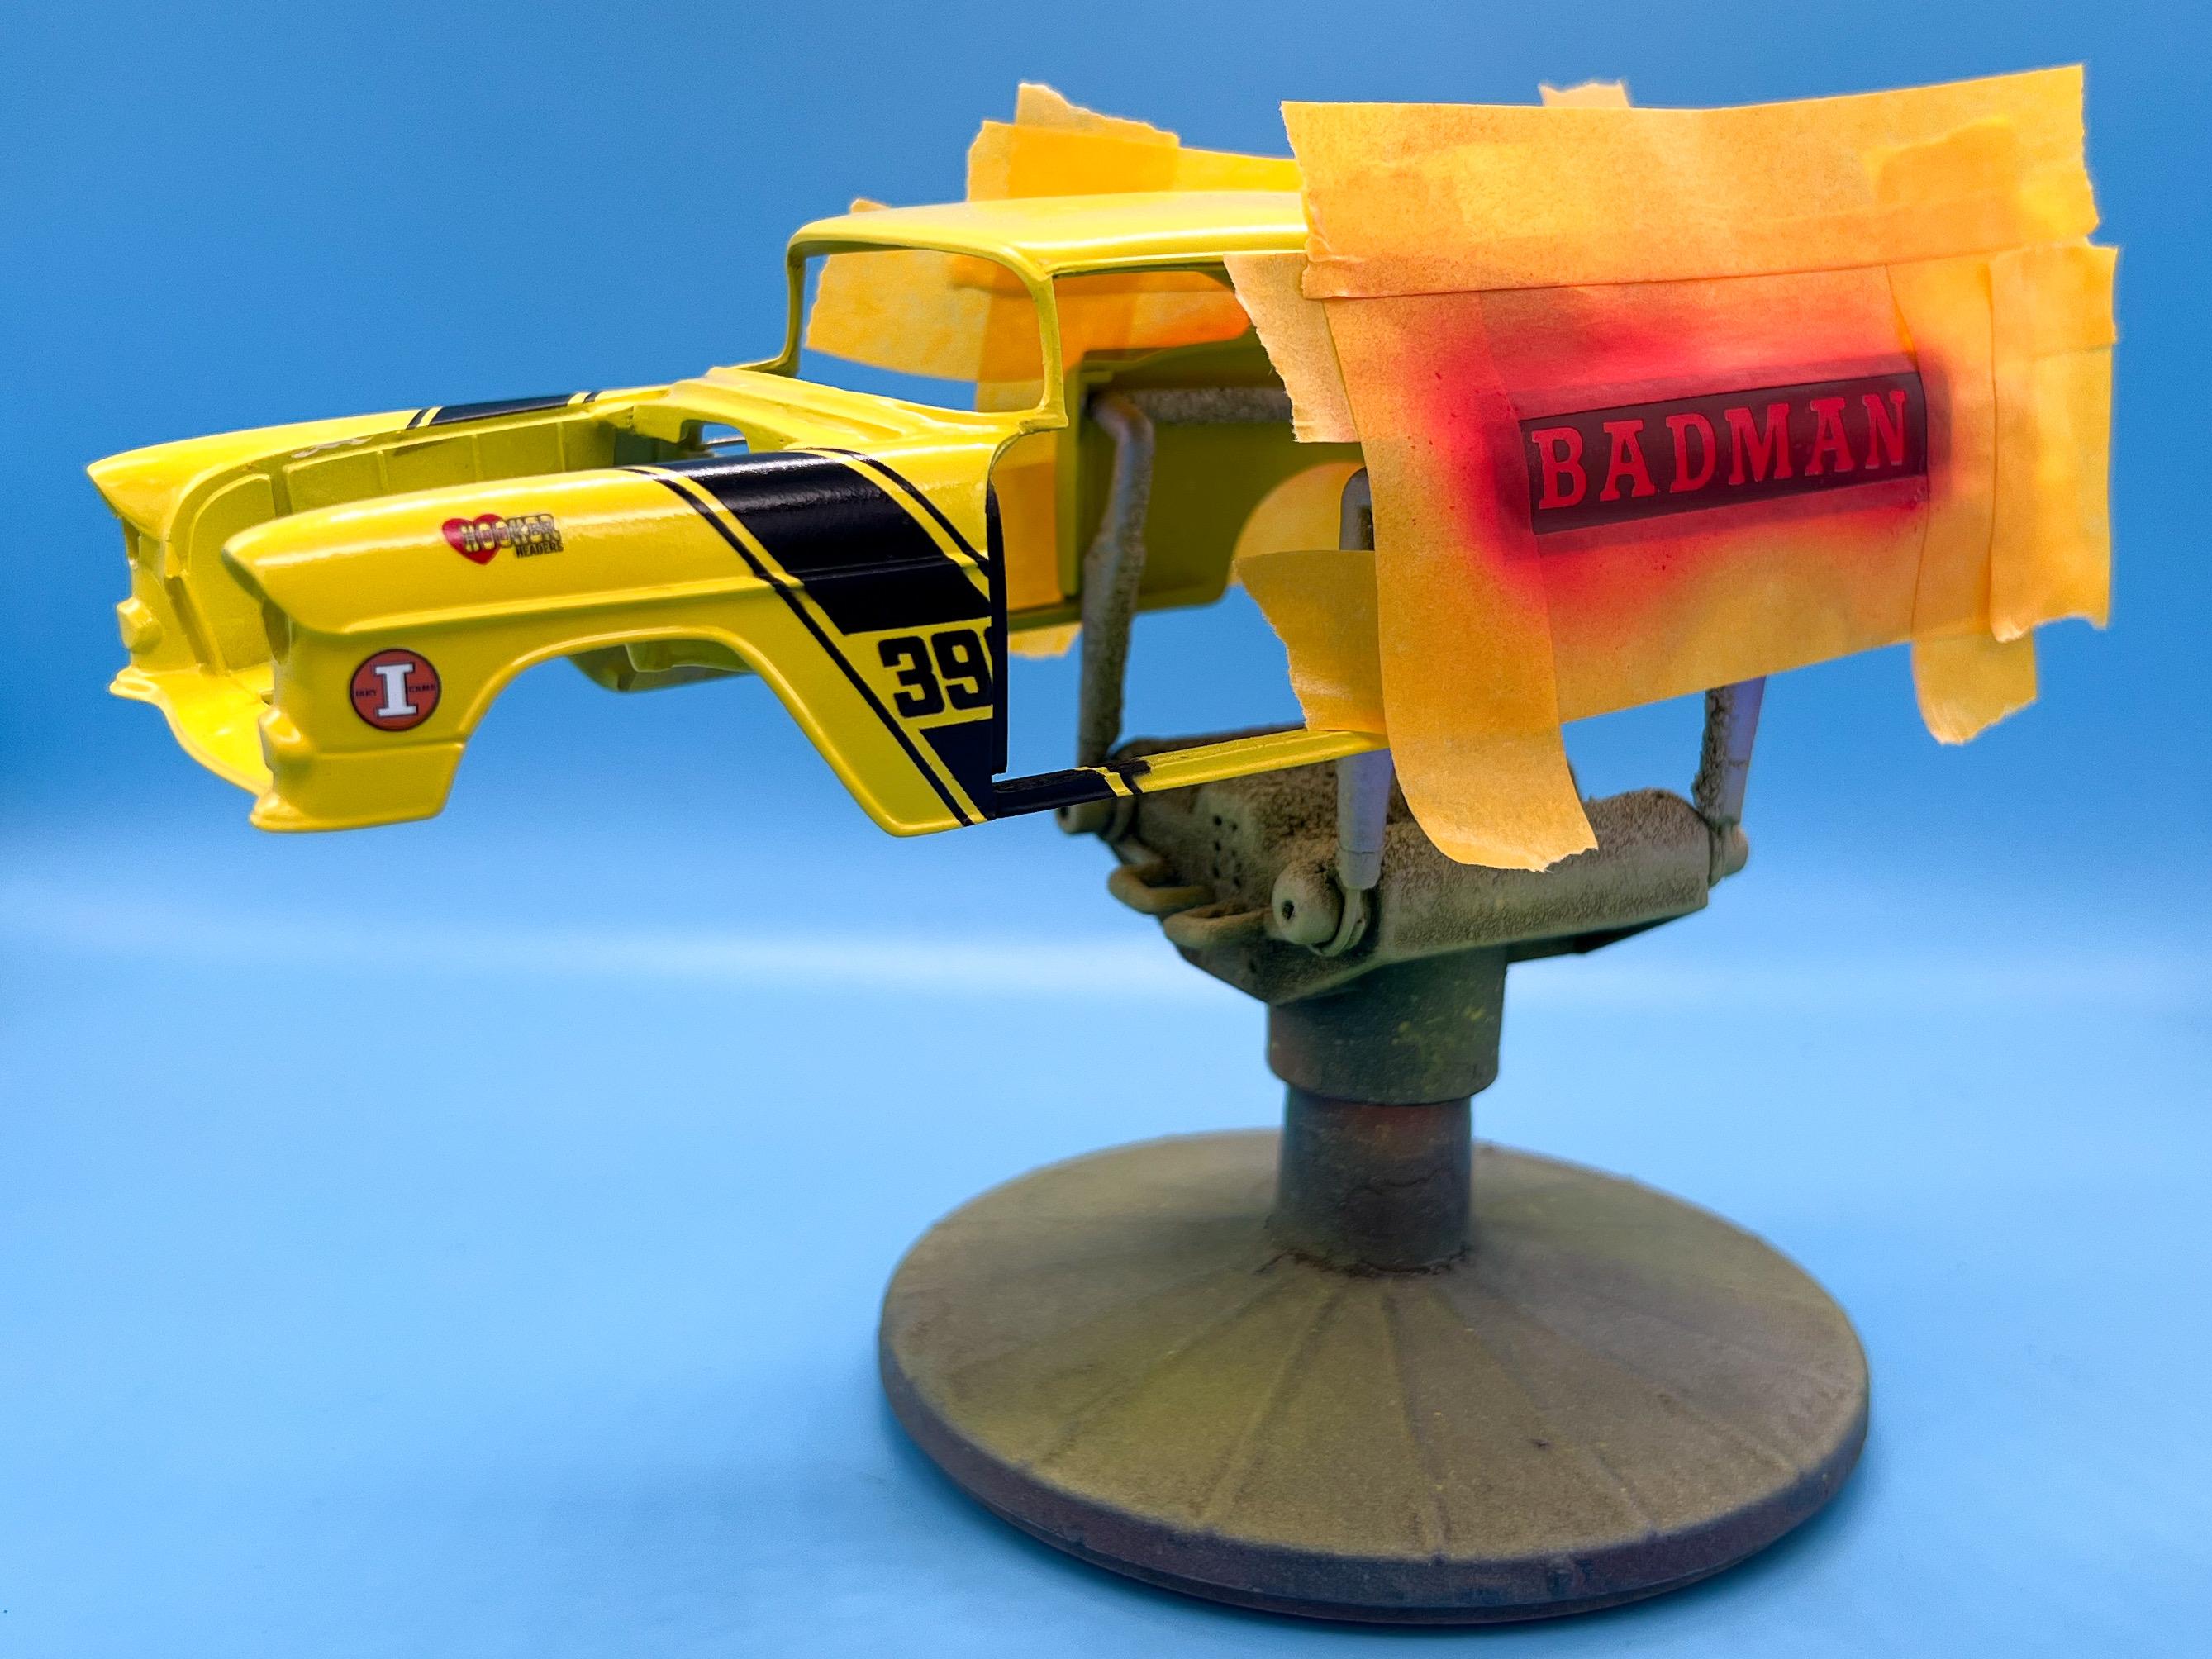
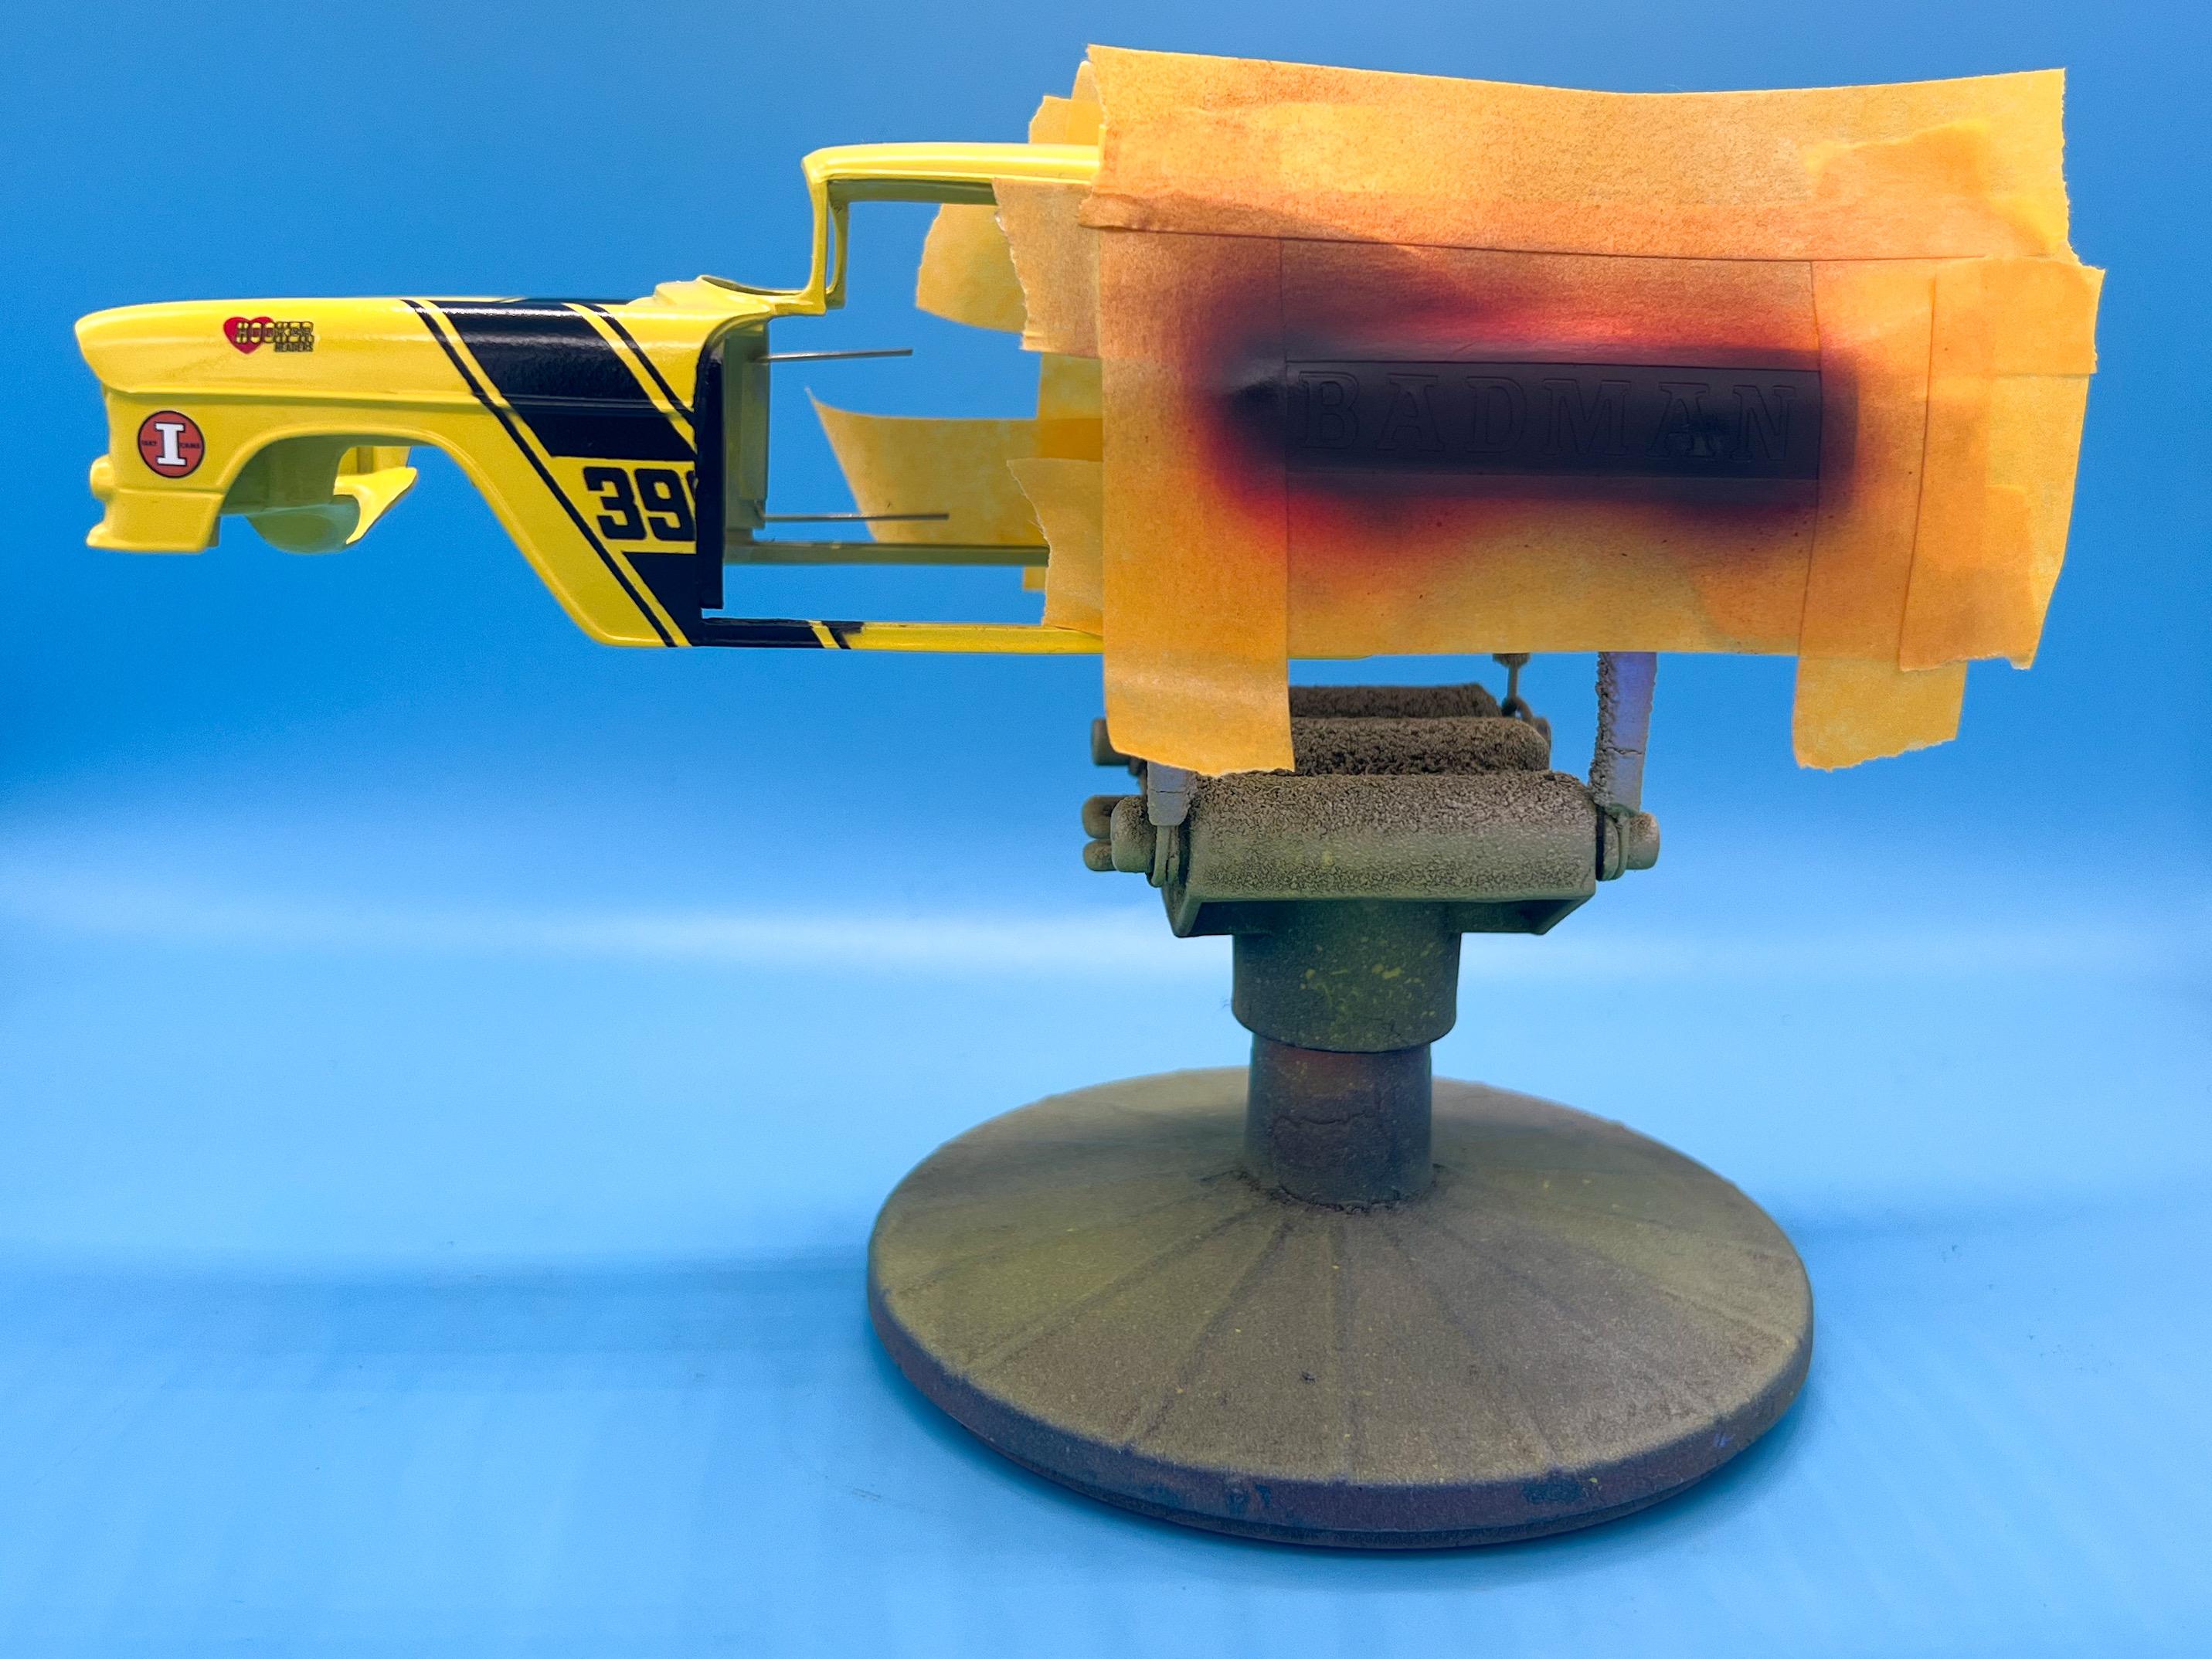
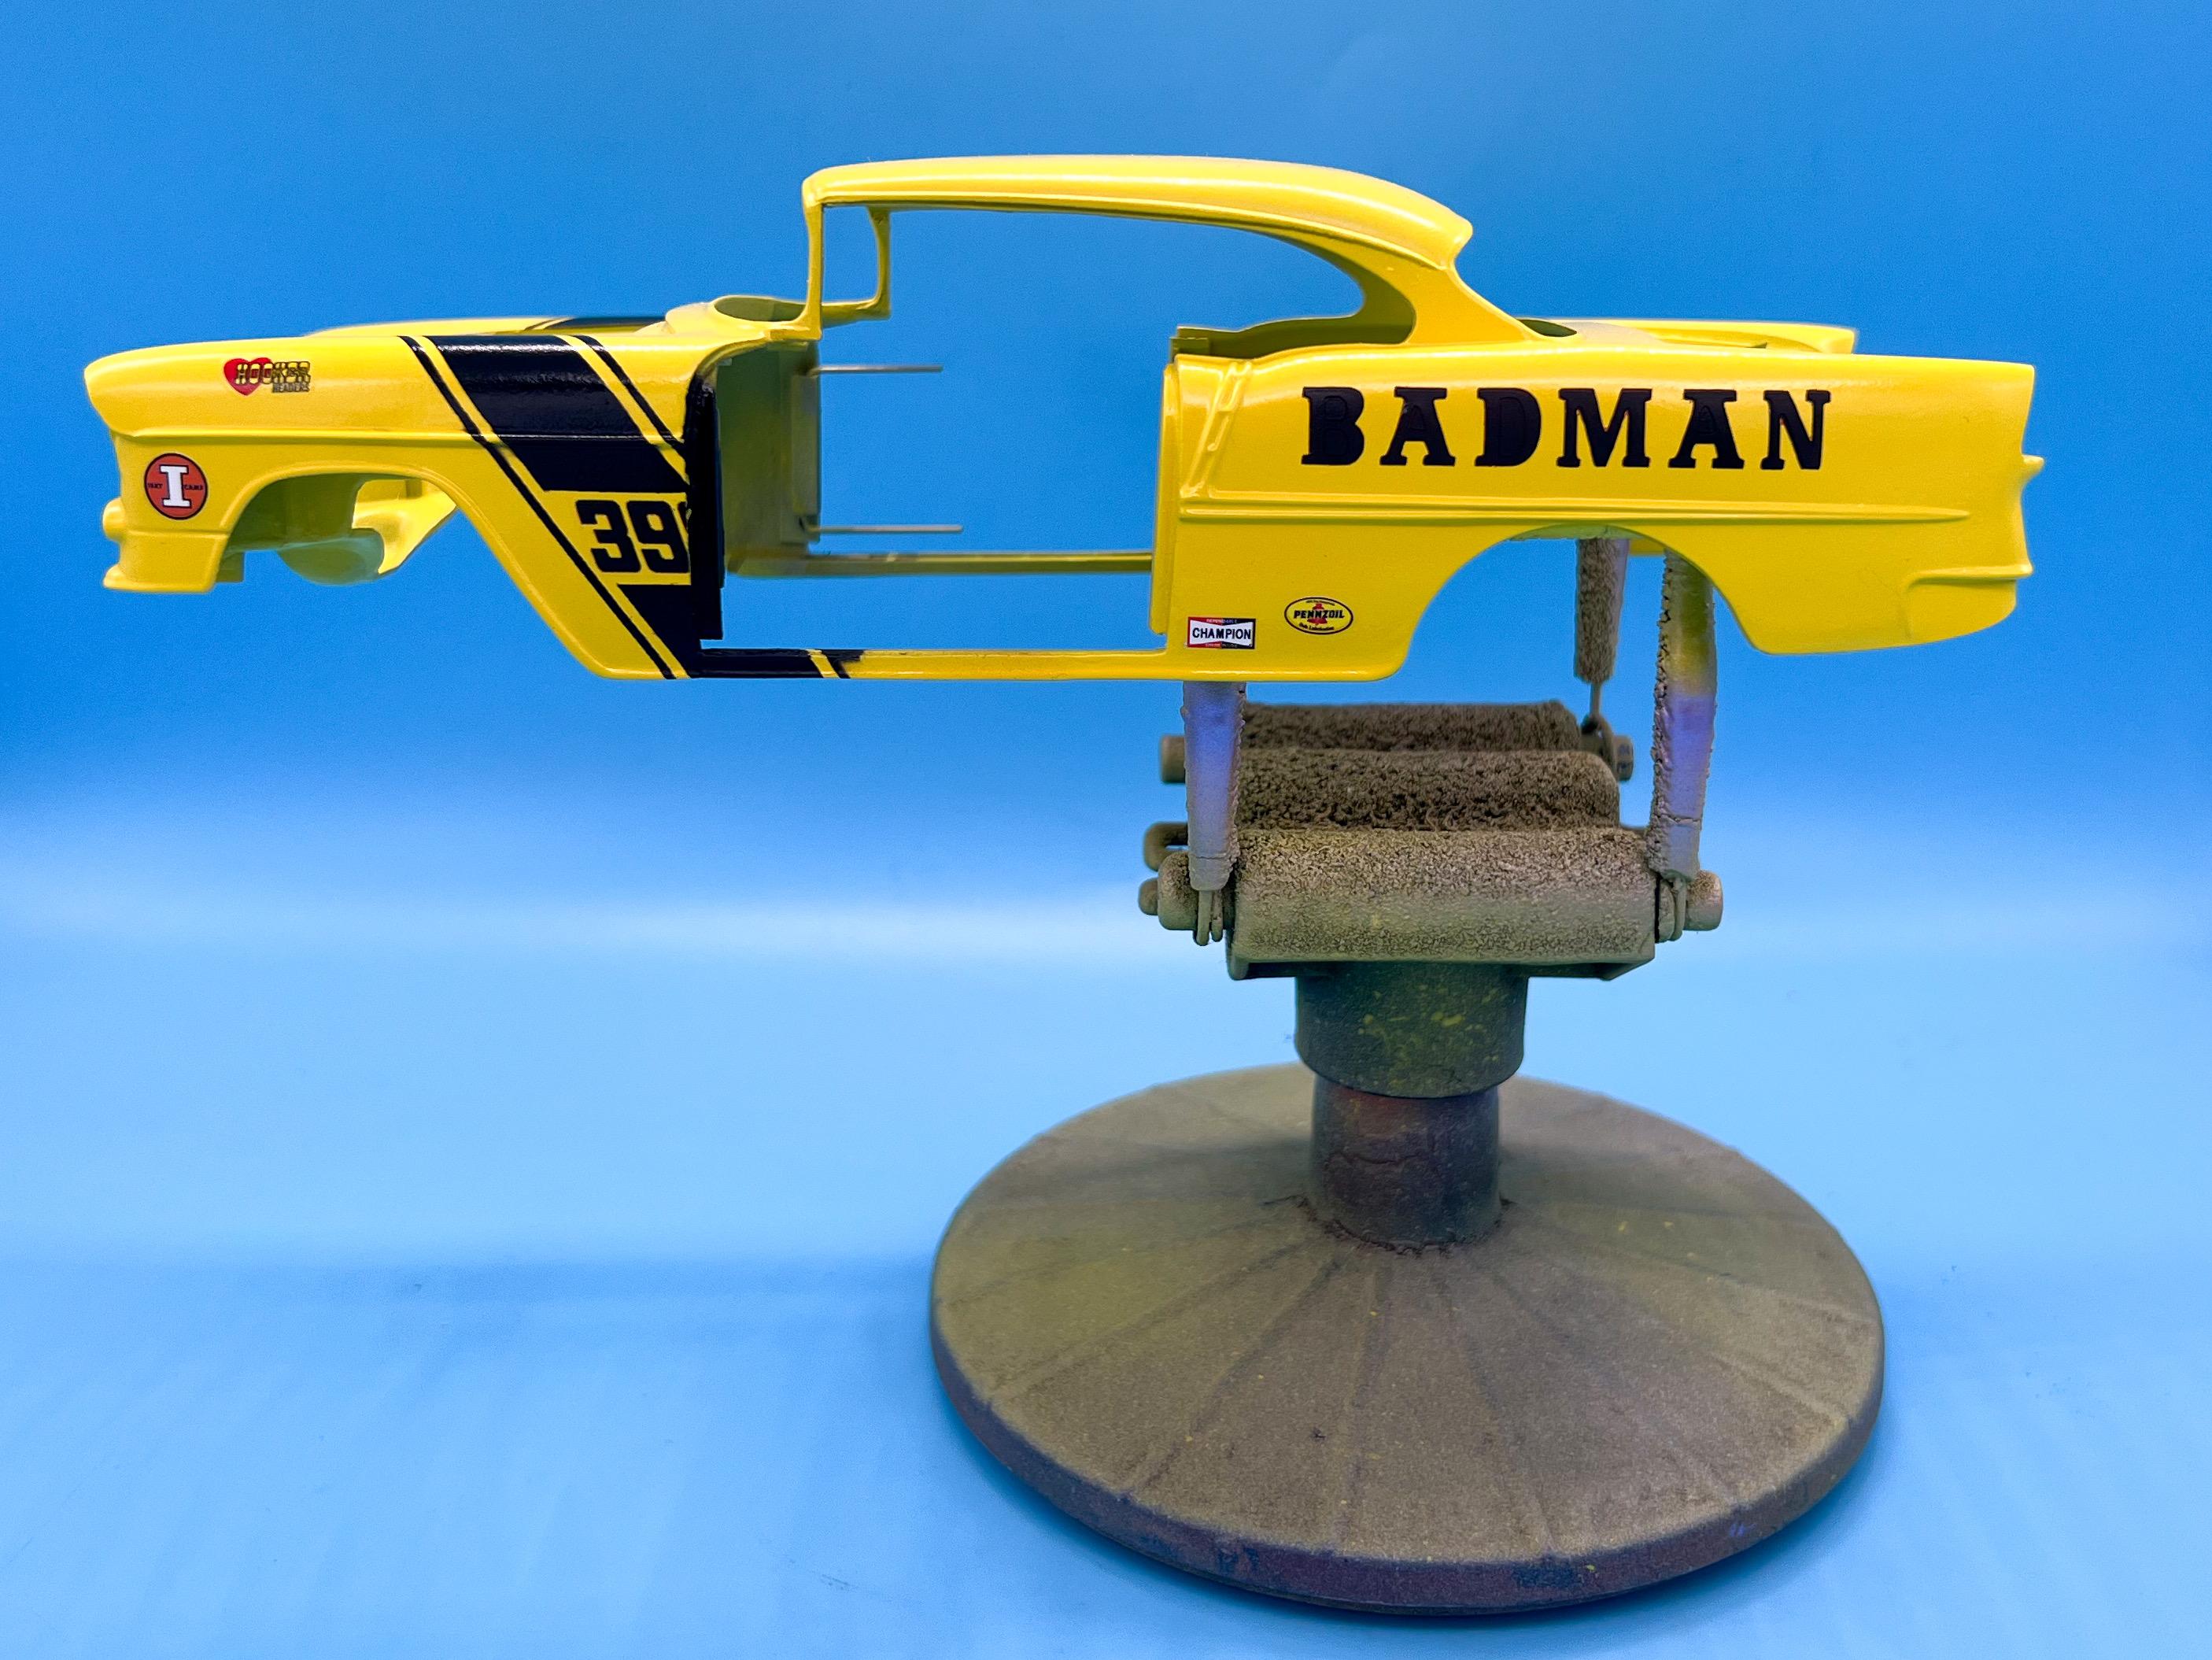
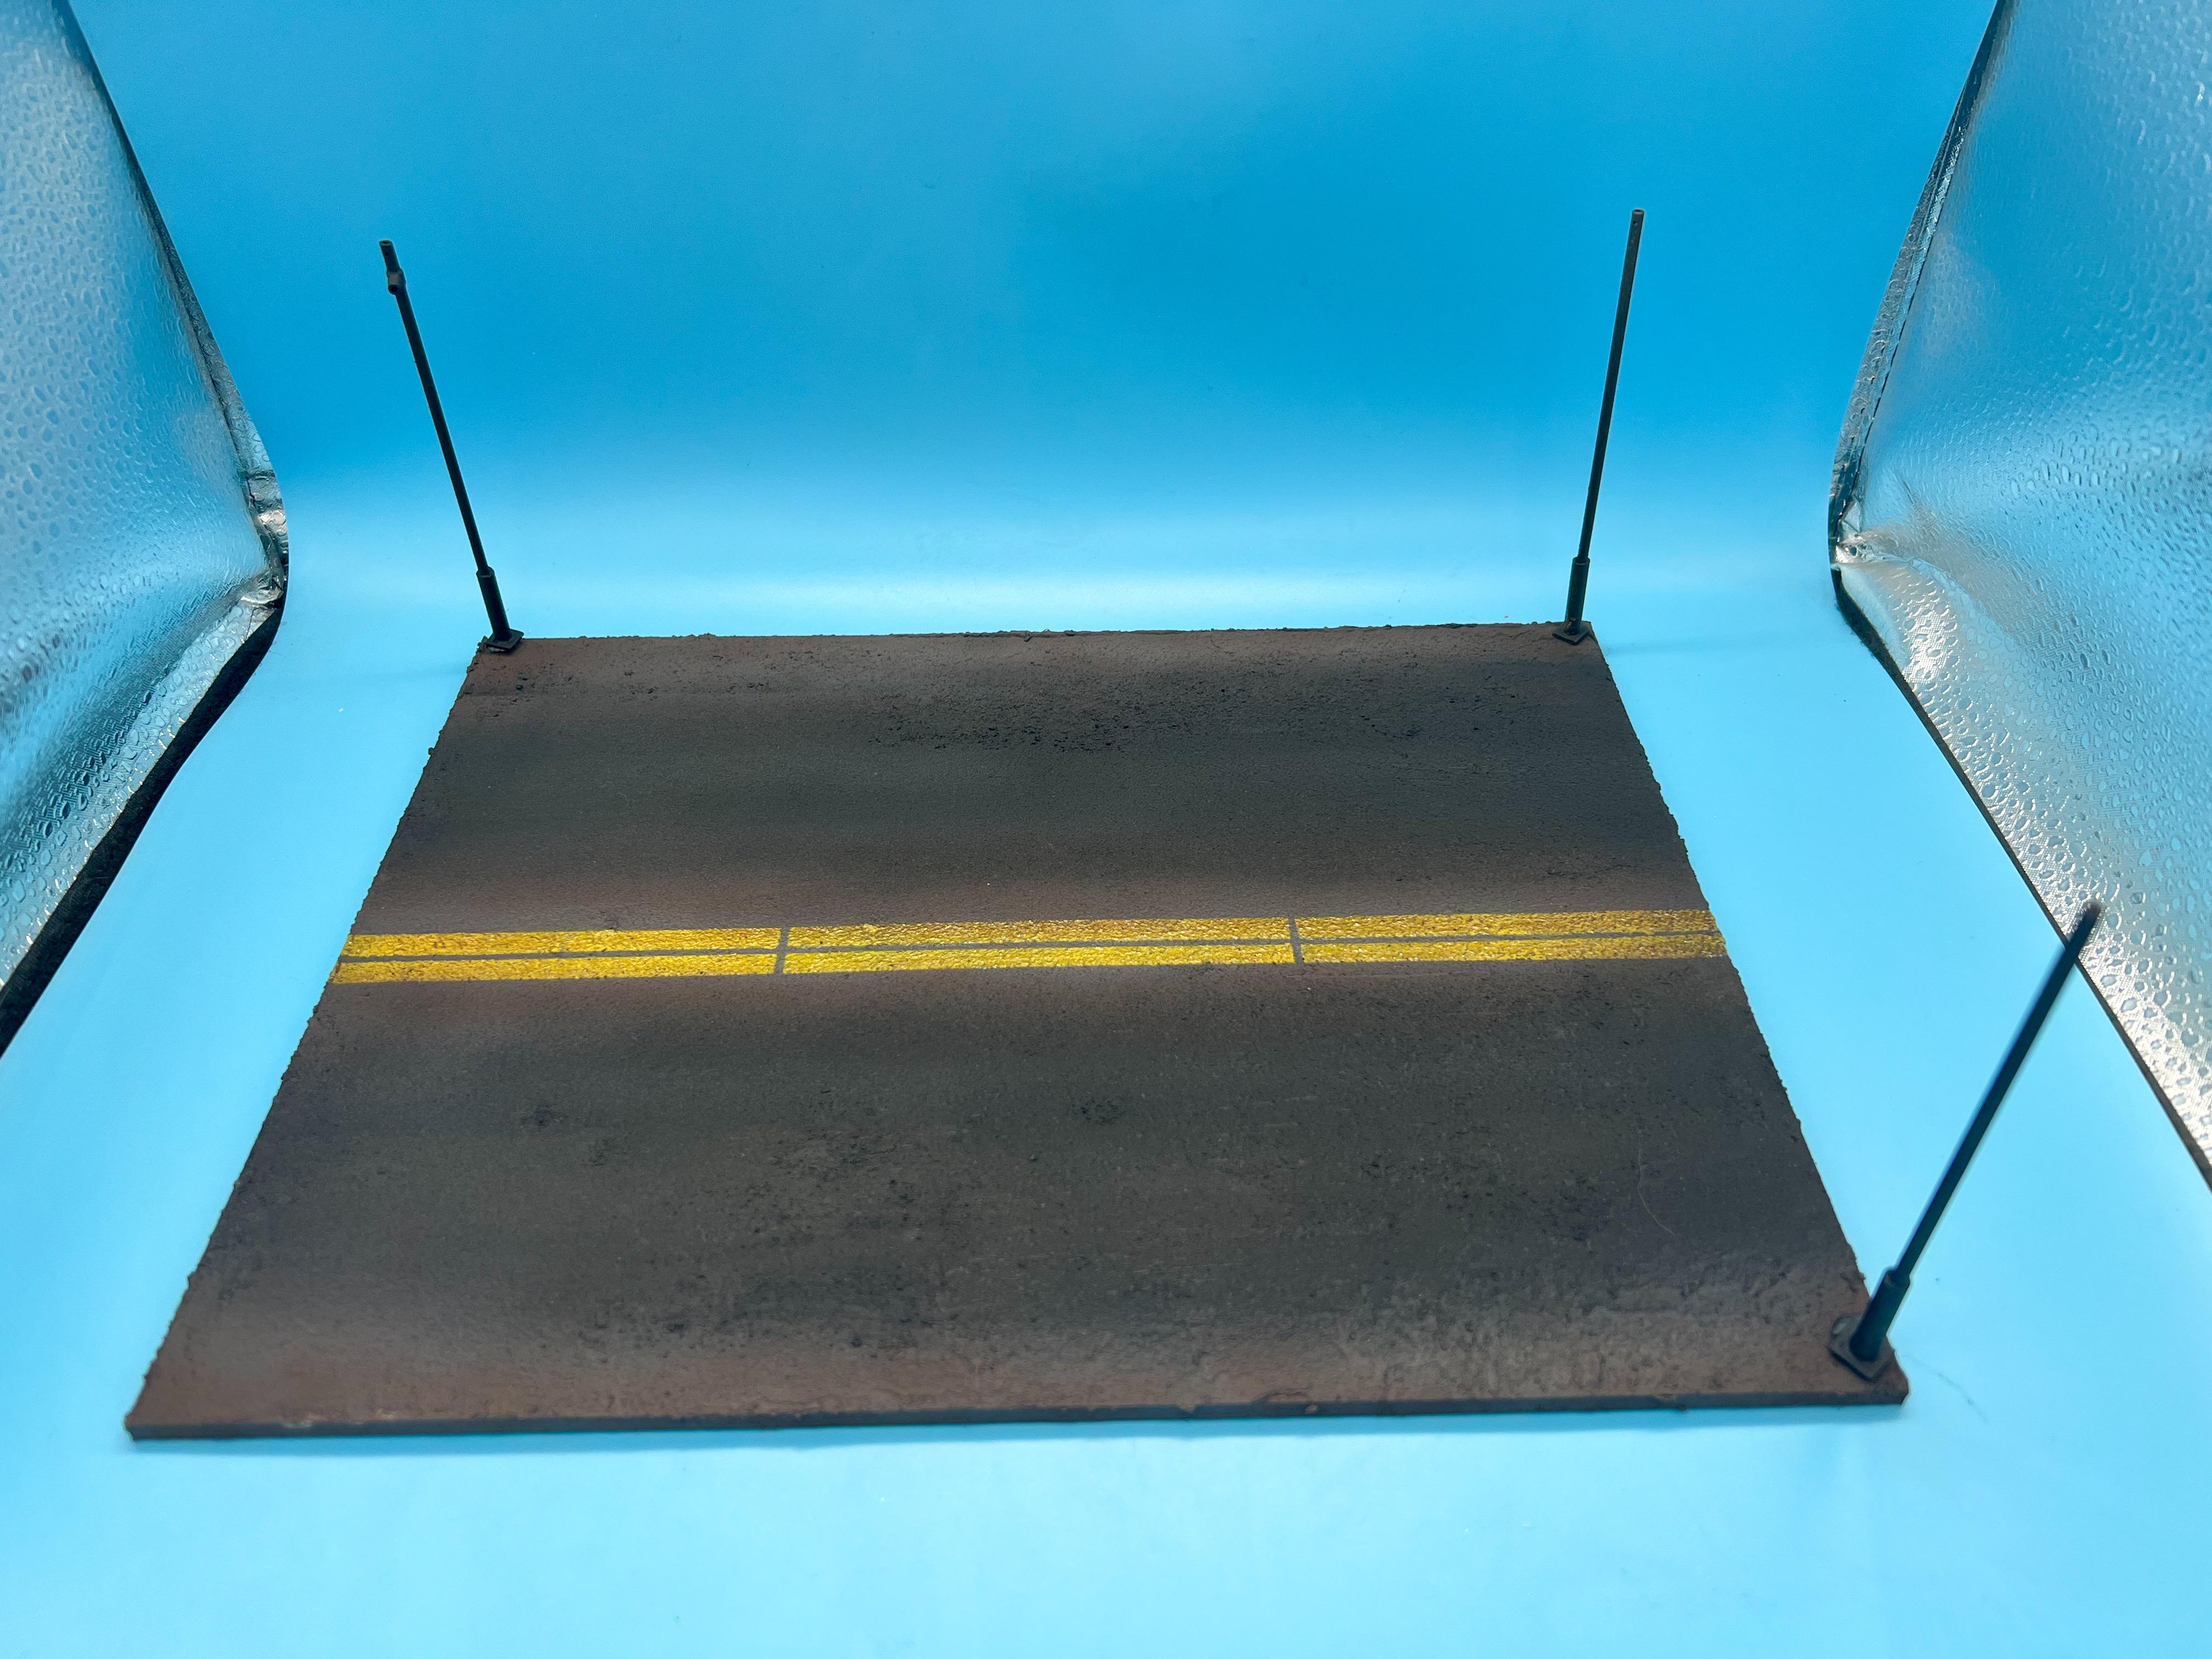
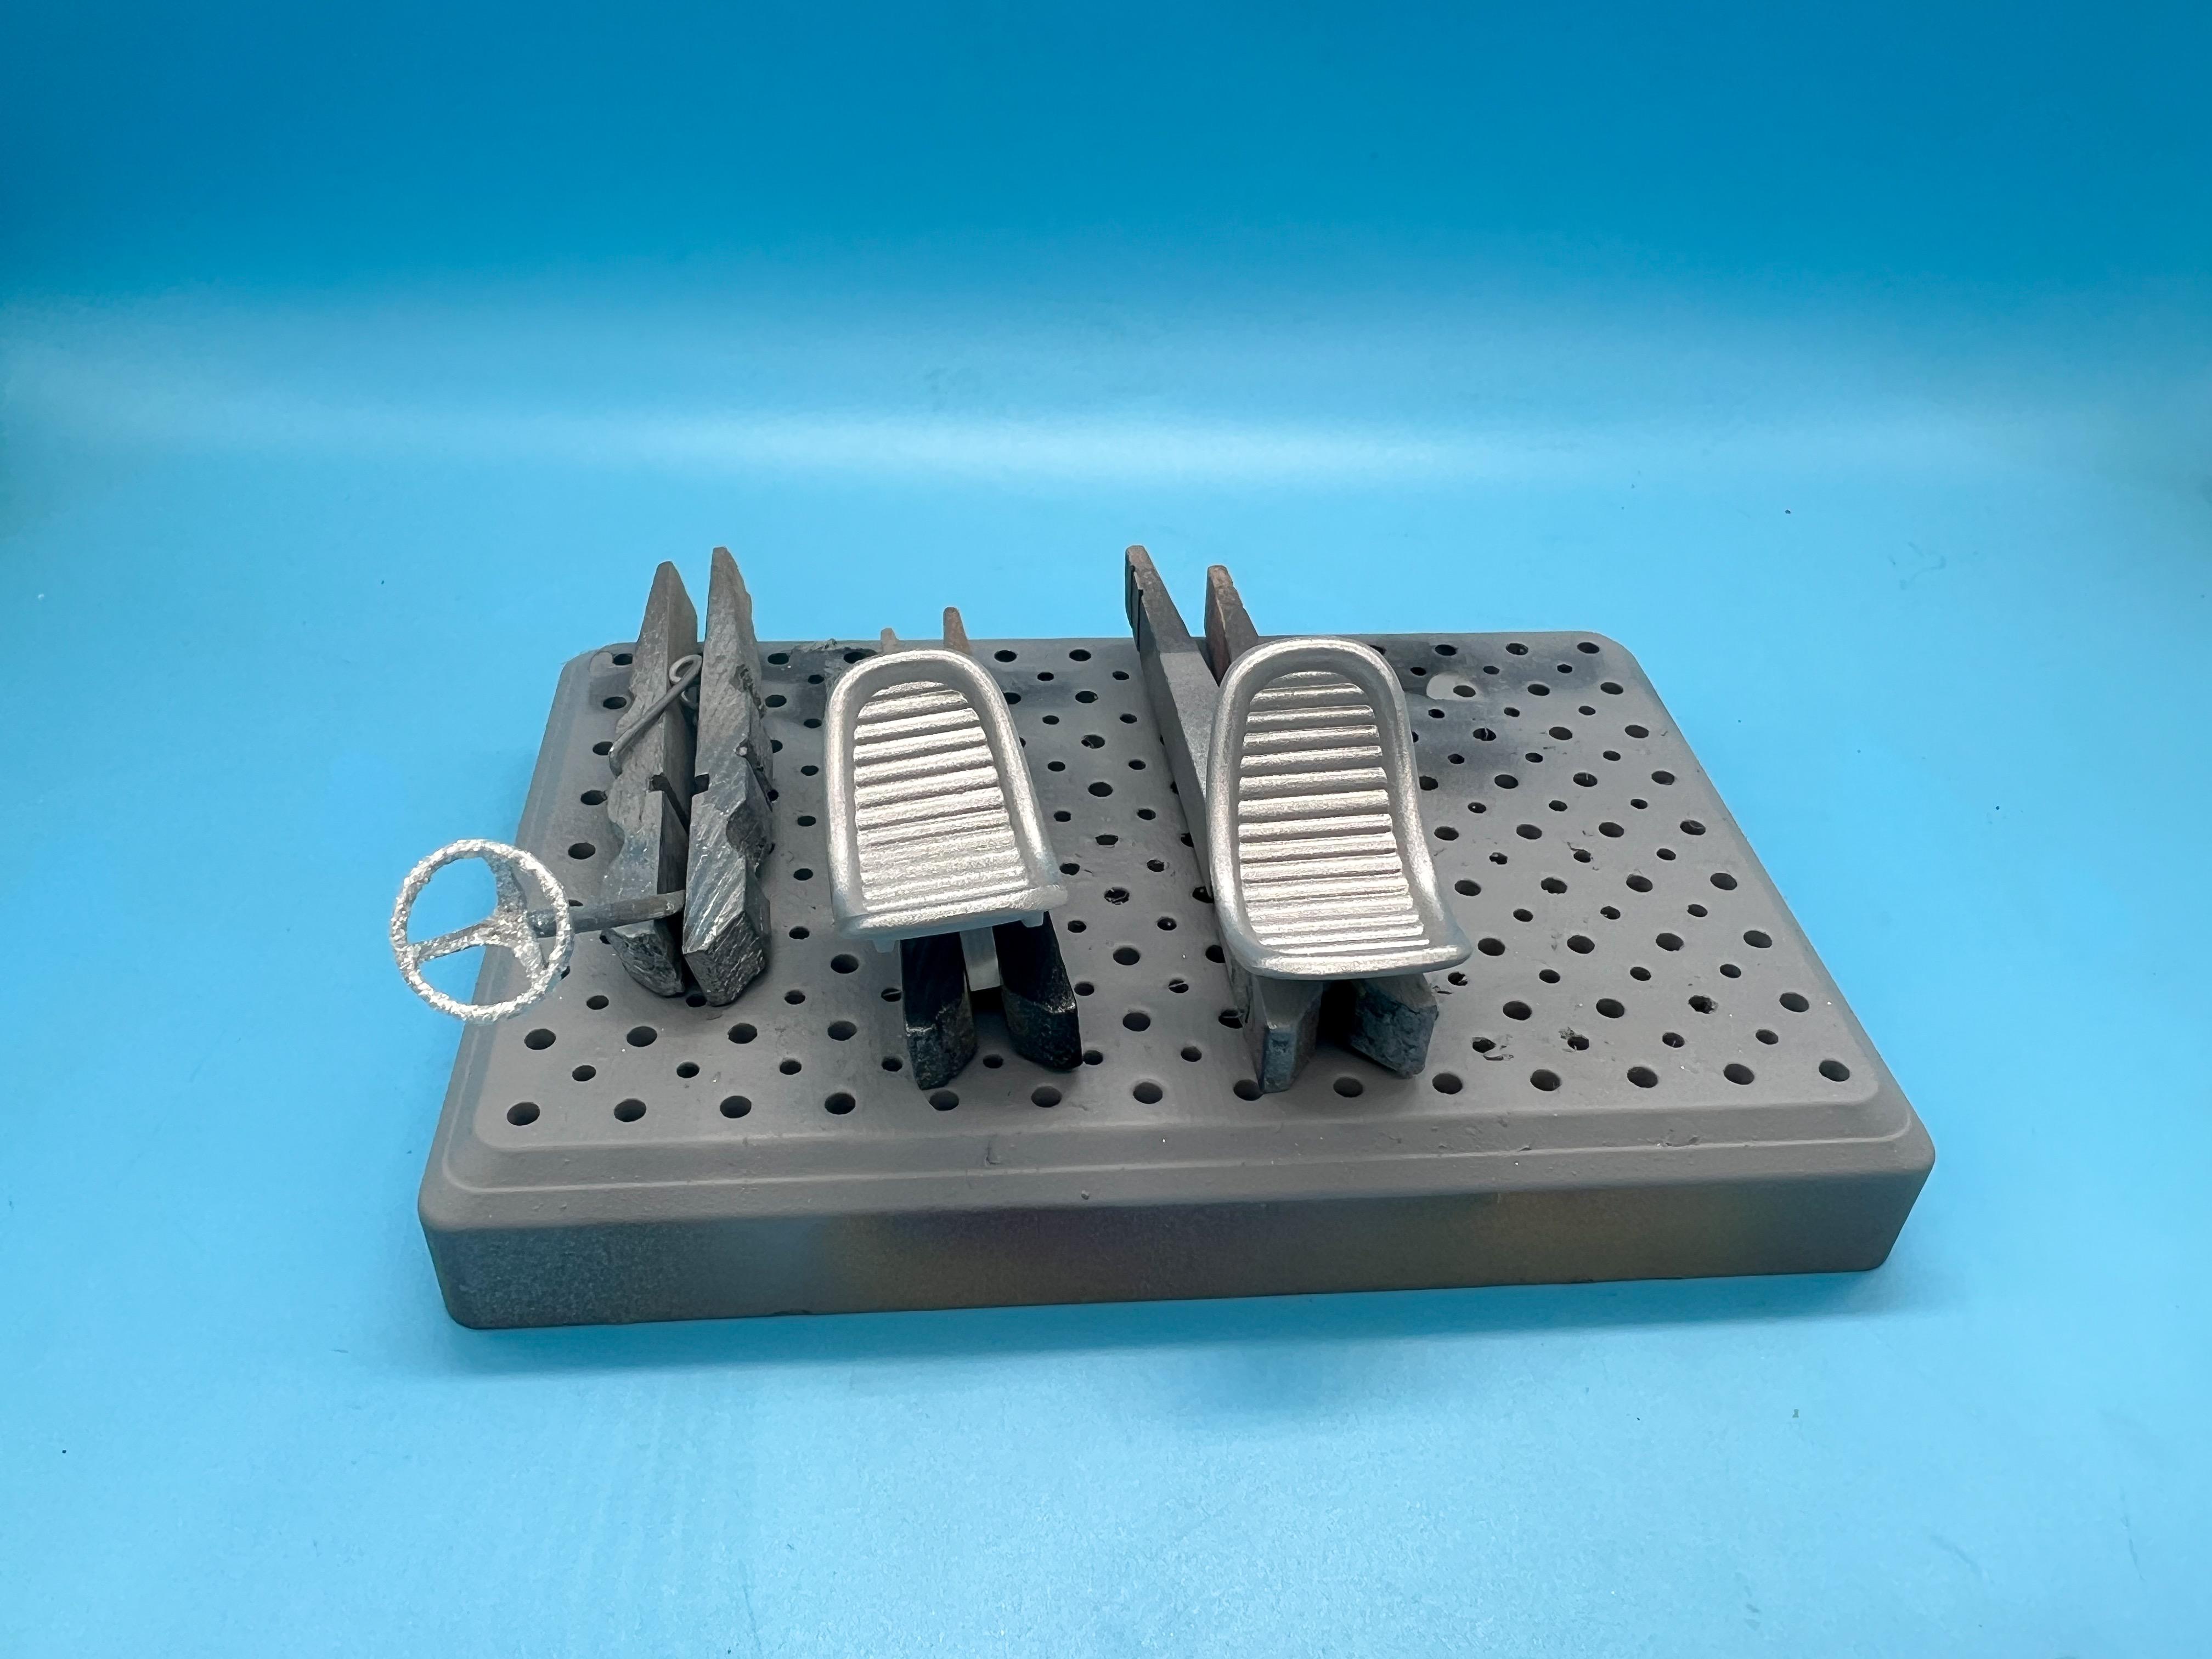
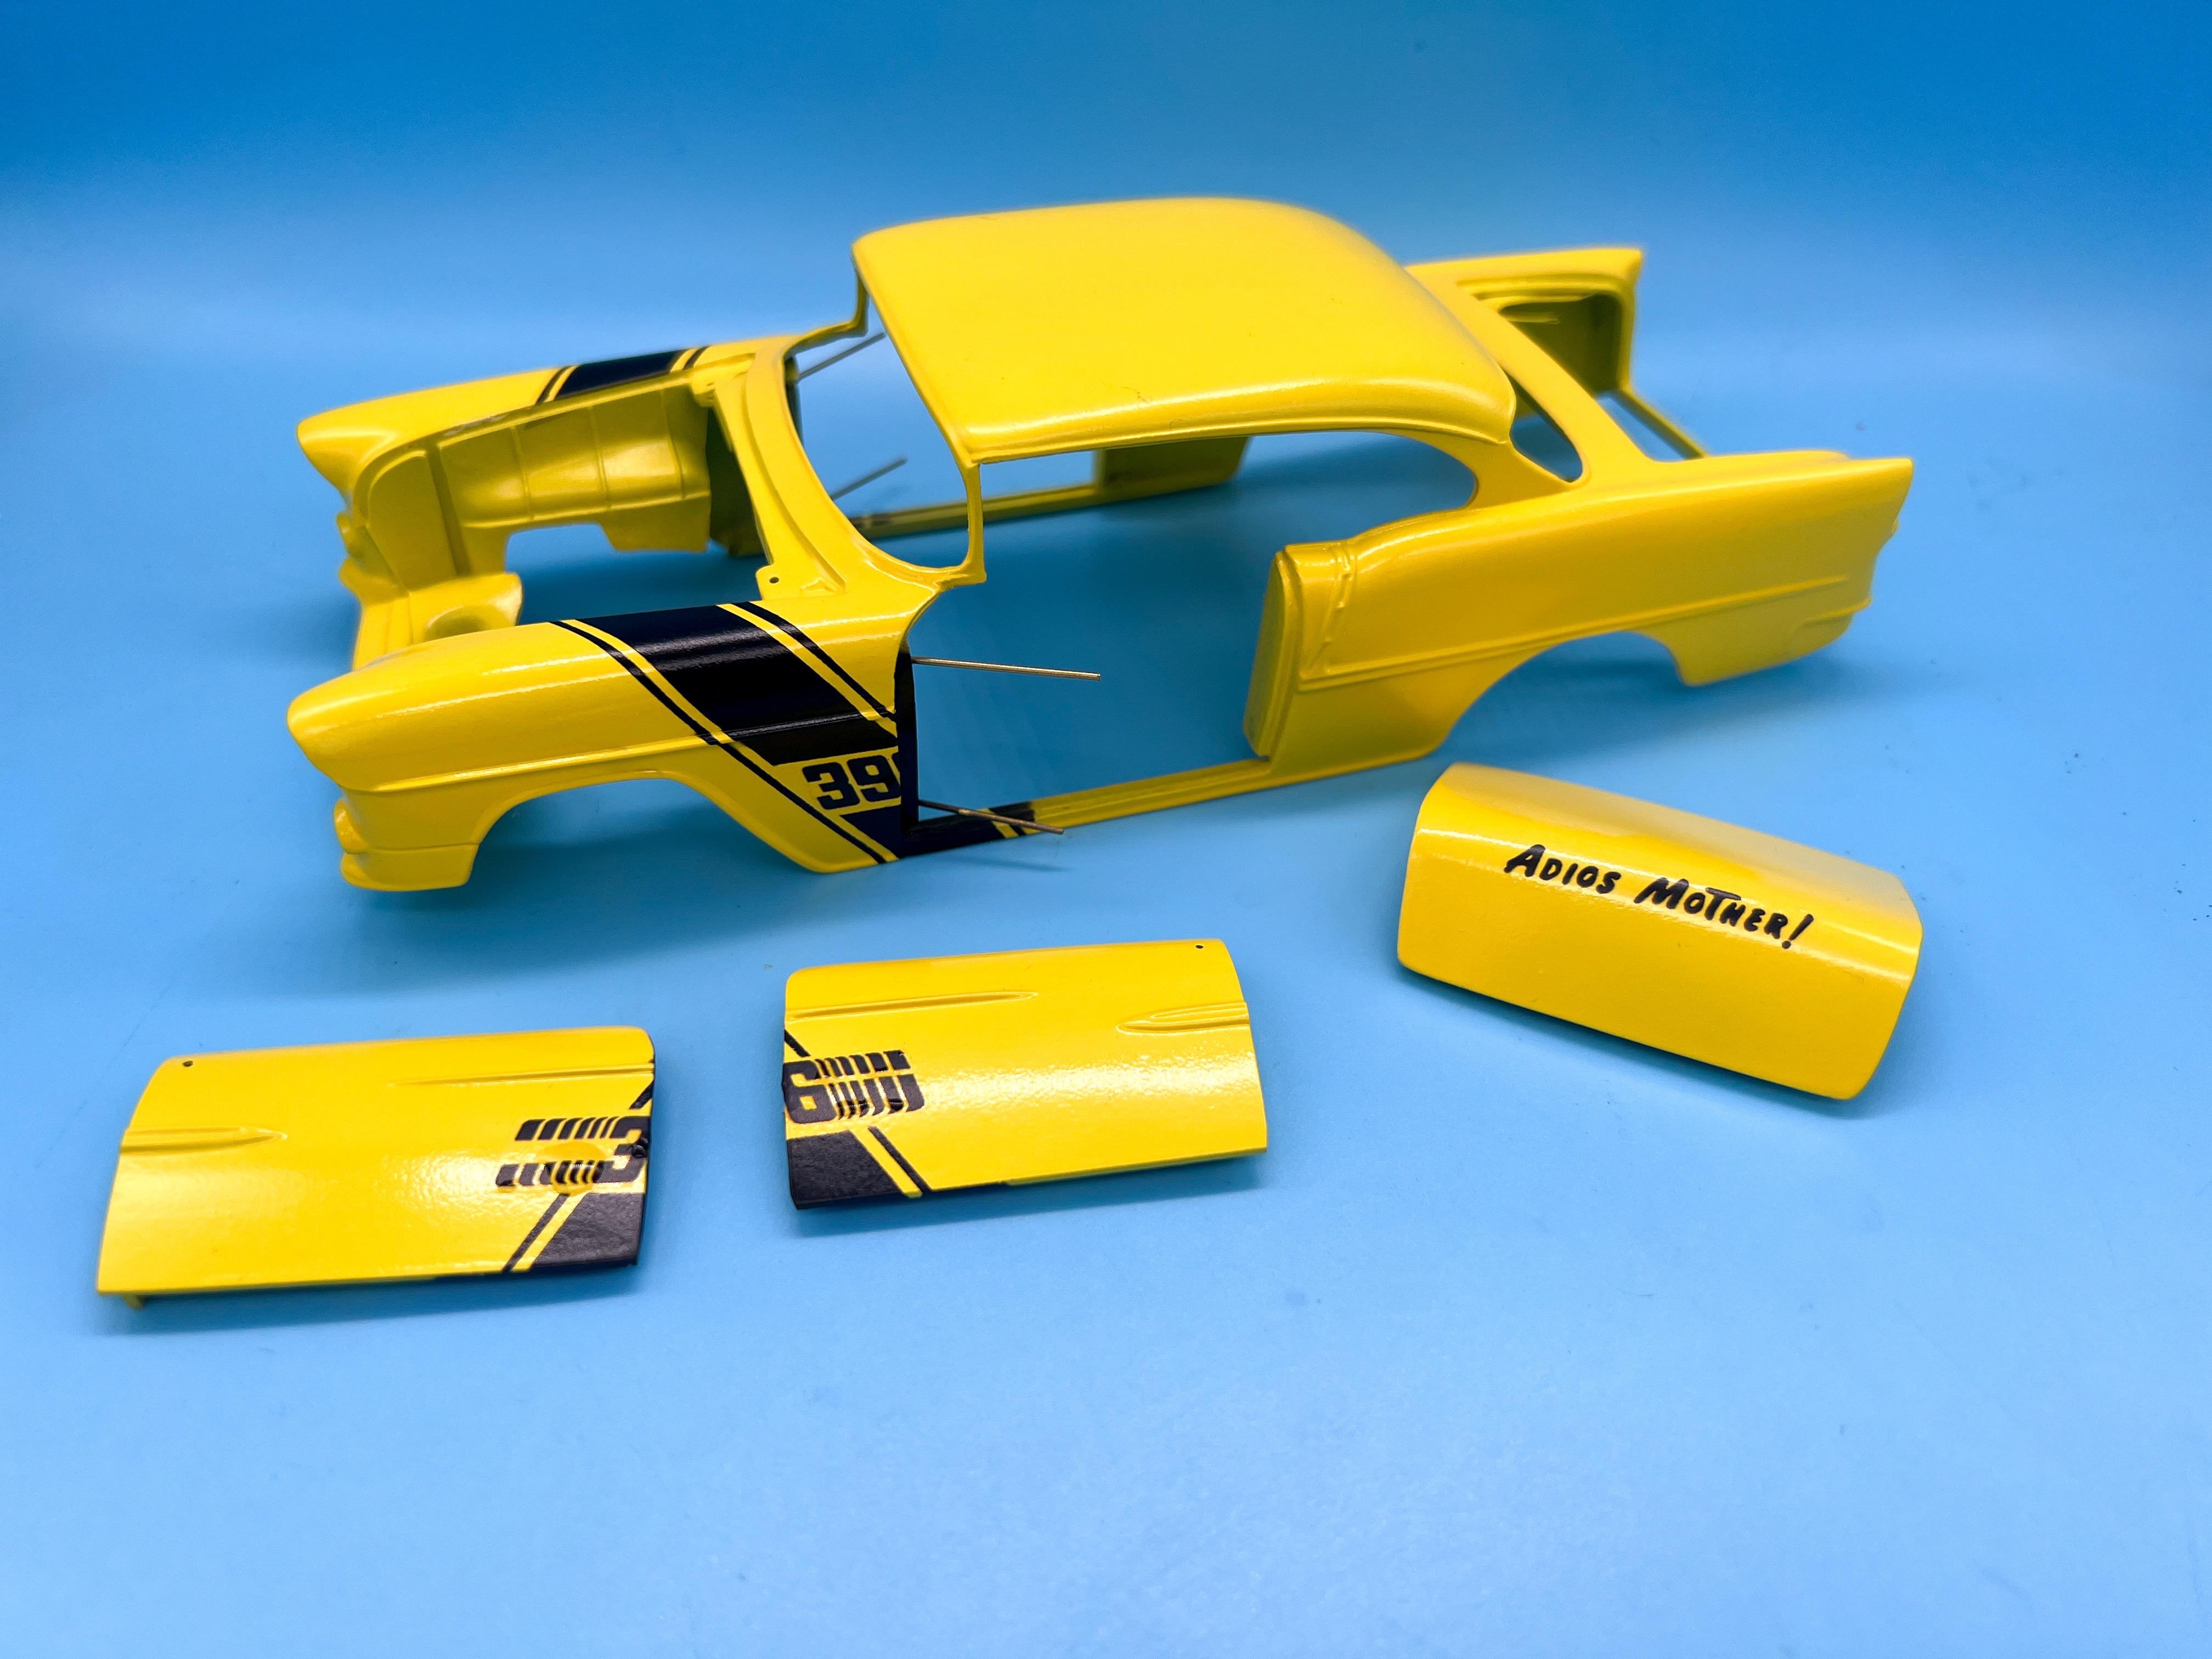
Thanks fellas! Today’s job was the signwritten lettering on the rear quarters. First up, cutting some masks (not that the cut lines are very easy to see…) There will be two steps to painting these…step one will be a larger sized letter, painted in red: Masks applied to the body: Then, a light coat of Createx pure red (which only lays down nicely over yellow pink or white, but luckily we’ve got one of those as a underlayer already): Next up, I shot a little intercoat, which is a clear to protect the paint so we can (relatively) safely mask over the top of it: Whilst that was drying, I weeded the next layer…the idea here is that I’ll lay a smaller set of the same letters down over top the ones I’ve painted already, leaving a thin edge that I can paint in black, as though the letters have been outlined with a pinstriping brush: A good trick to apply multi-piece masks is to use a very low tack tape to hold them in position - I’m using a cheap vinyl tape from Amazon that has a less sticky glue than the masking material: Once I got the second set of letters aligned (as best I could anyway - there’s only a scale quarter inch gap either side that will form my black outline) I shot Createx black sealer: Then, after giving it five minutes or so, removed the outer edges of the masks (if the paint starts to pull up with the mask at this stage, wait a little longer…) Then CAREFULLY with an X-acto and tweezers removed the remaining mask material… Looks something like this: As usual, I’ll leave this overnight and then do any little touch-ups before locking it in with some clear. Whilst I had my airbrush out, I did a little weathering on the base I made for this thing, and masked and painted some divider lines on what will be a little drag strip: And I’m starting to paint some interior pieces. Since there isn’t any color guidance from TD’s artwork on how the interior looks I have a LITTLE creative license I can use here, but I’m trying to keep it sensible and feasible…the bucket seats will be black with yellow flaked vinyl inserts (plus red belts, to keep the color scheme going throughout this build) and I wanted to do a flaked red Mooneyes style rim for the steering wheel (so that when you look at the dash you’ll see yellow dash, black gauges and red wheel all complimenting each other). The seats got a coat of a coarse-flaked Createx silver, and I shot the steering wheel silver, then dipped it in Future, then dipped THAT in a little silver flake mica powder: Once this has set up overnight I’ll brush the excess flake off the wheel (and clean up the spokes) and shoot candy red over that, and candy yellow over the seats. Another fun day at the bench…thanks for looking…more soon, soon as I’ve done more!
-
Amazing work! I bet that roof and the seat were NO walk in the park to model. Nice job!
-
My take on the most famous ‘55 gasser street machine’…
OldNYJim replied to OldNYJim's topic in WIP: Model Cars
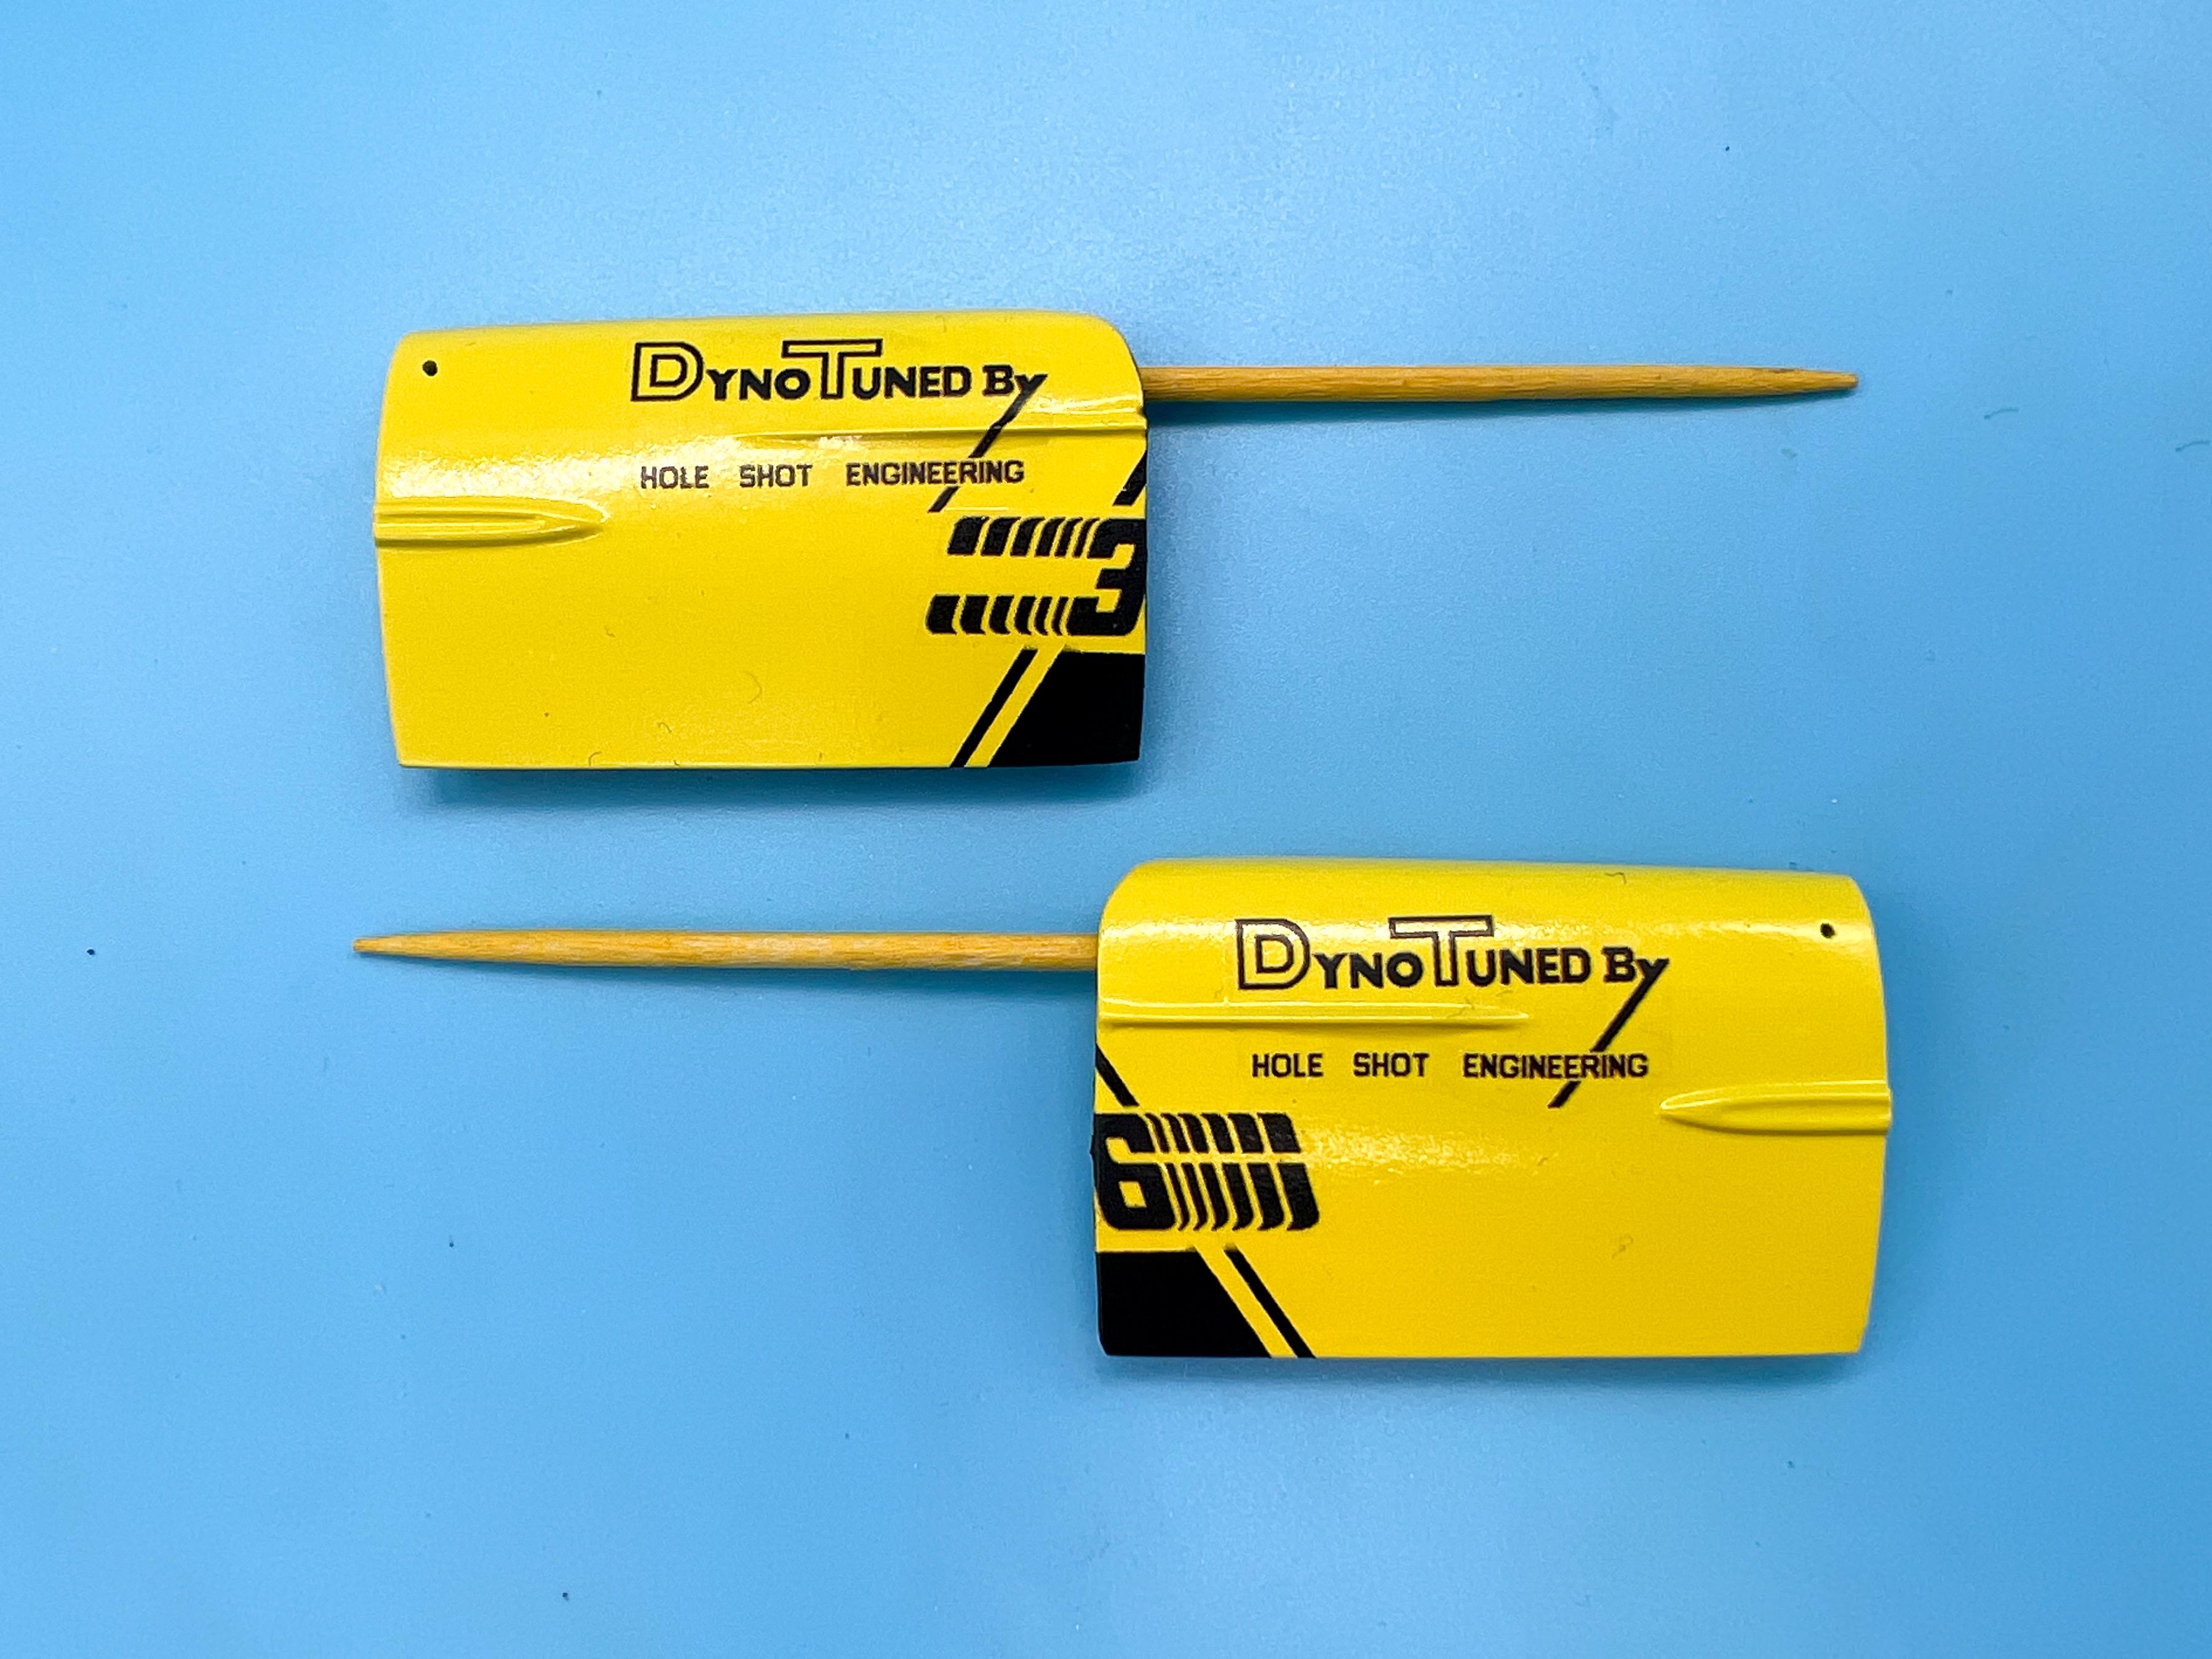
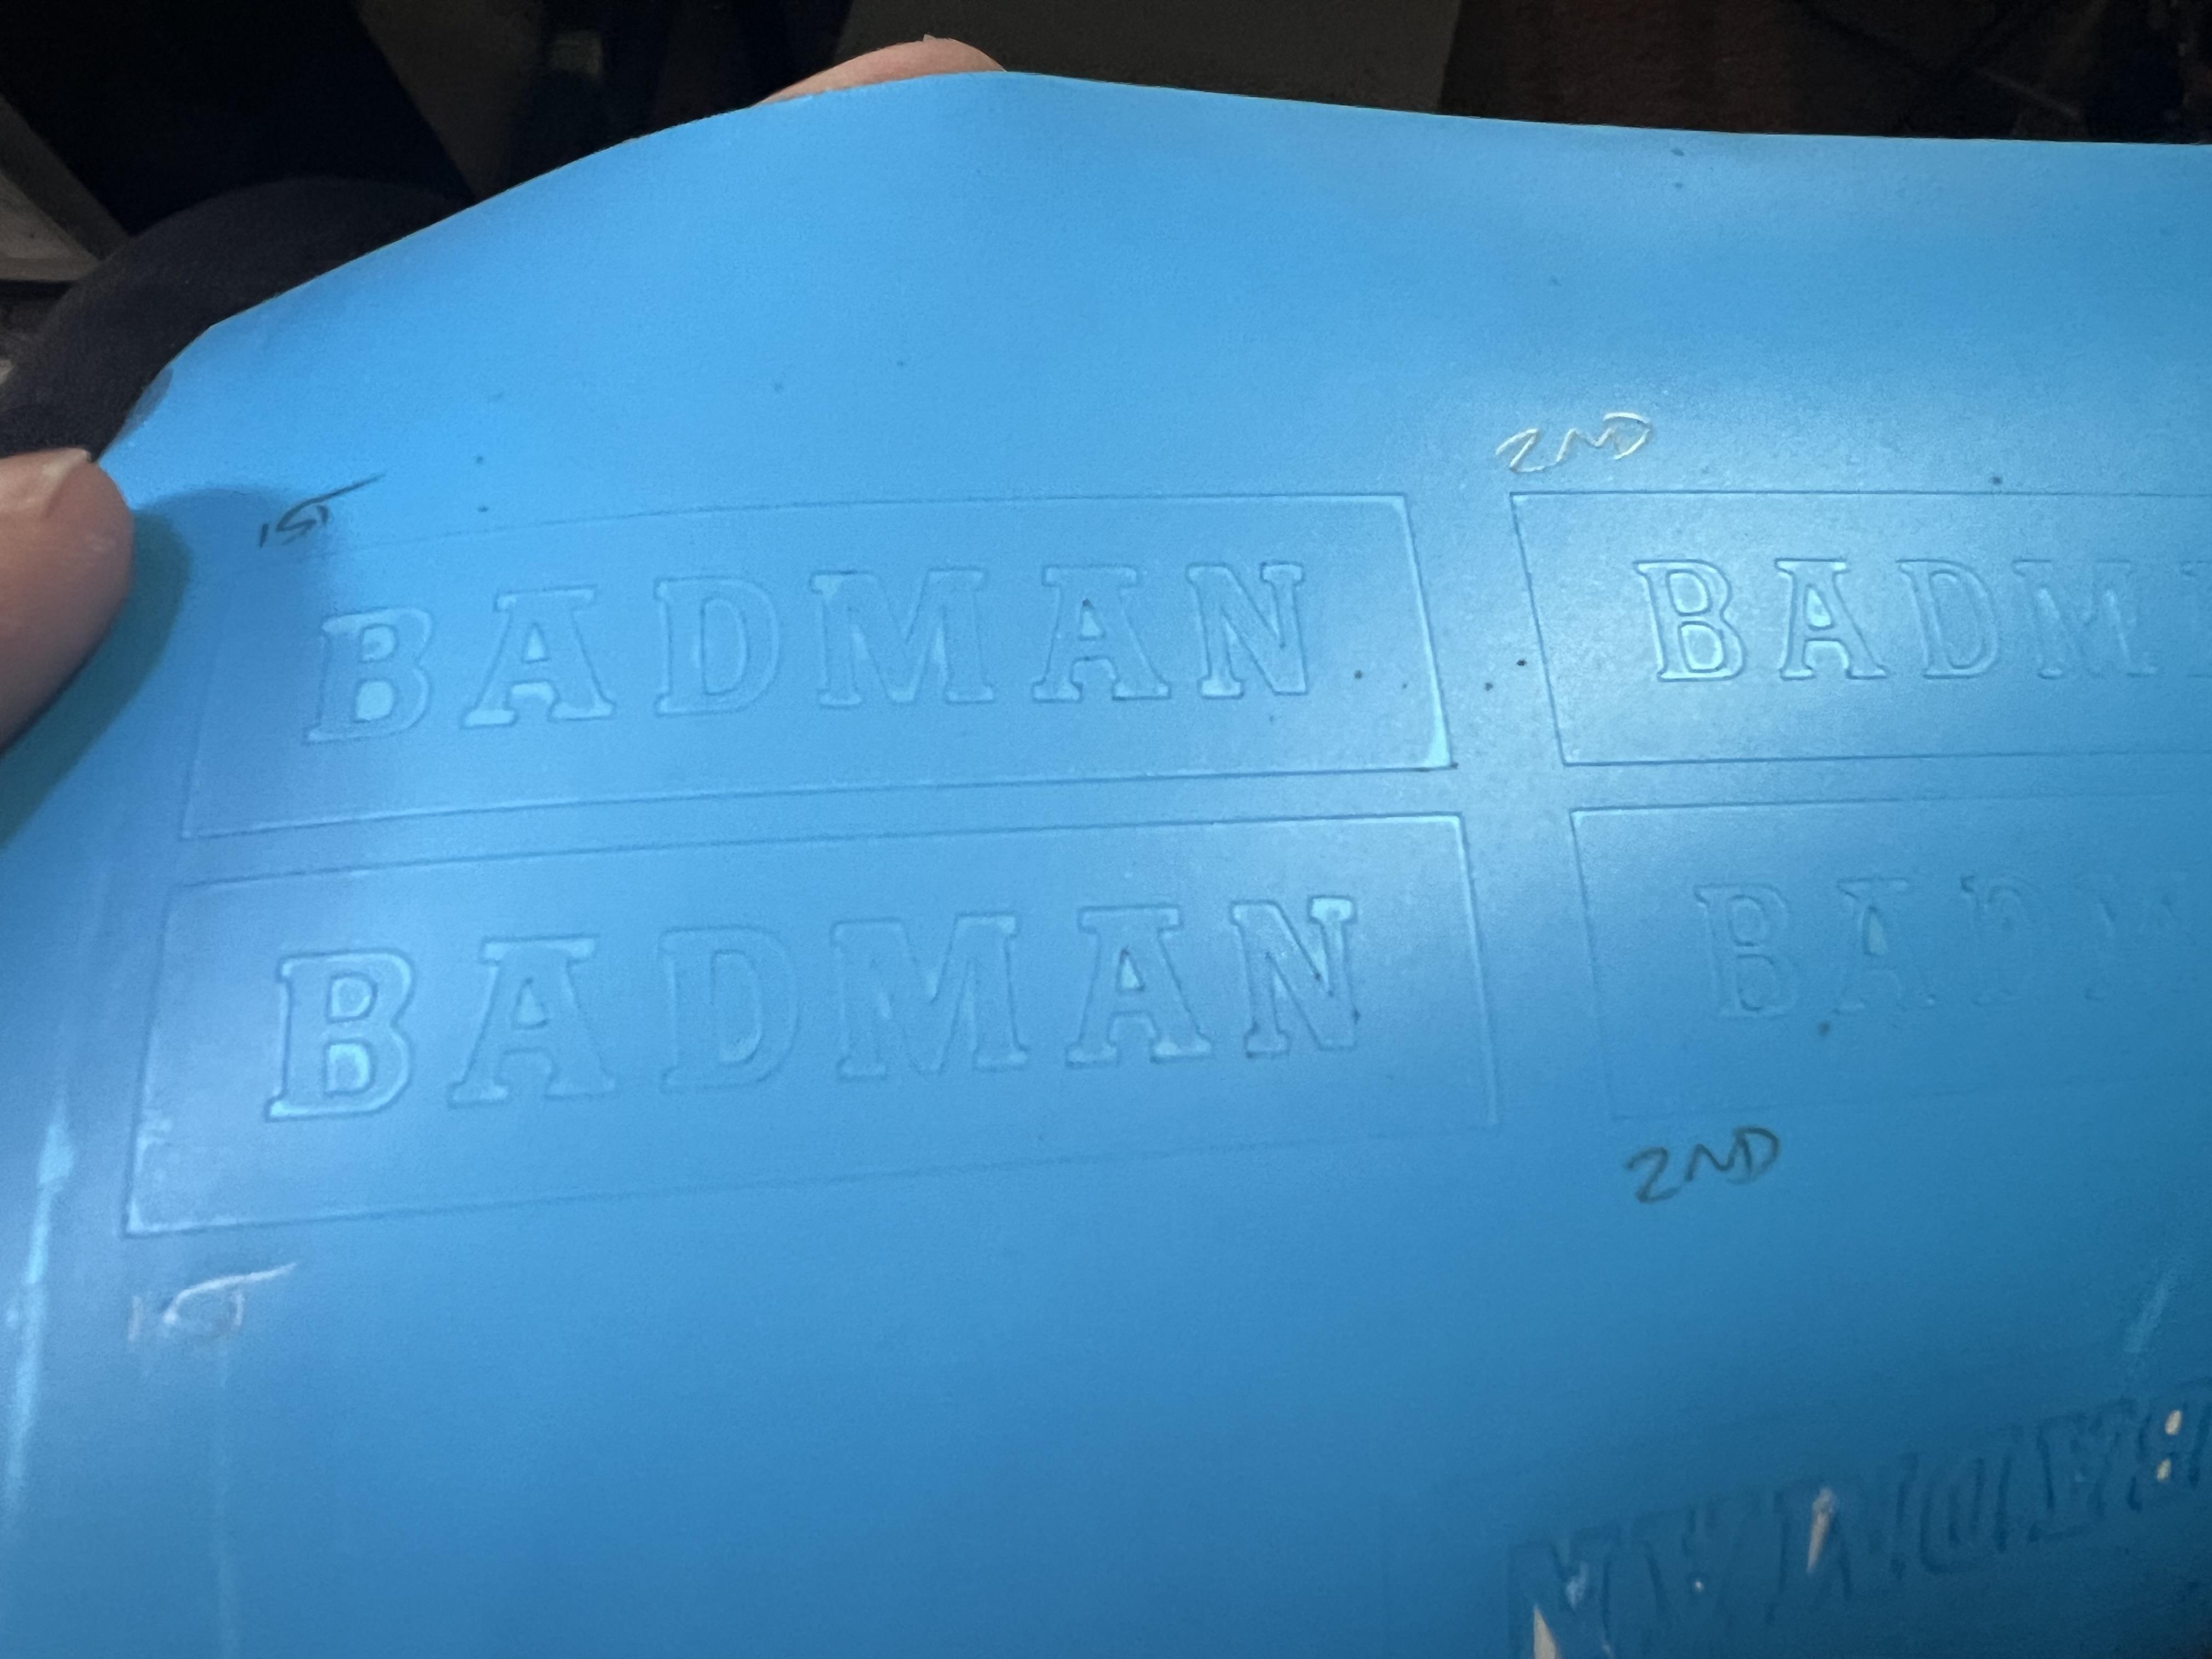
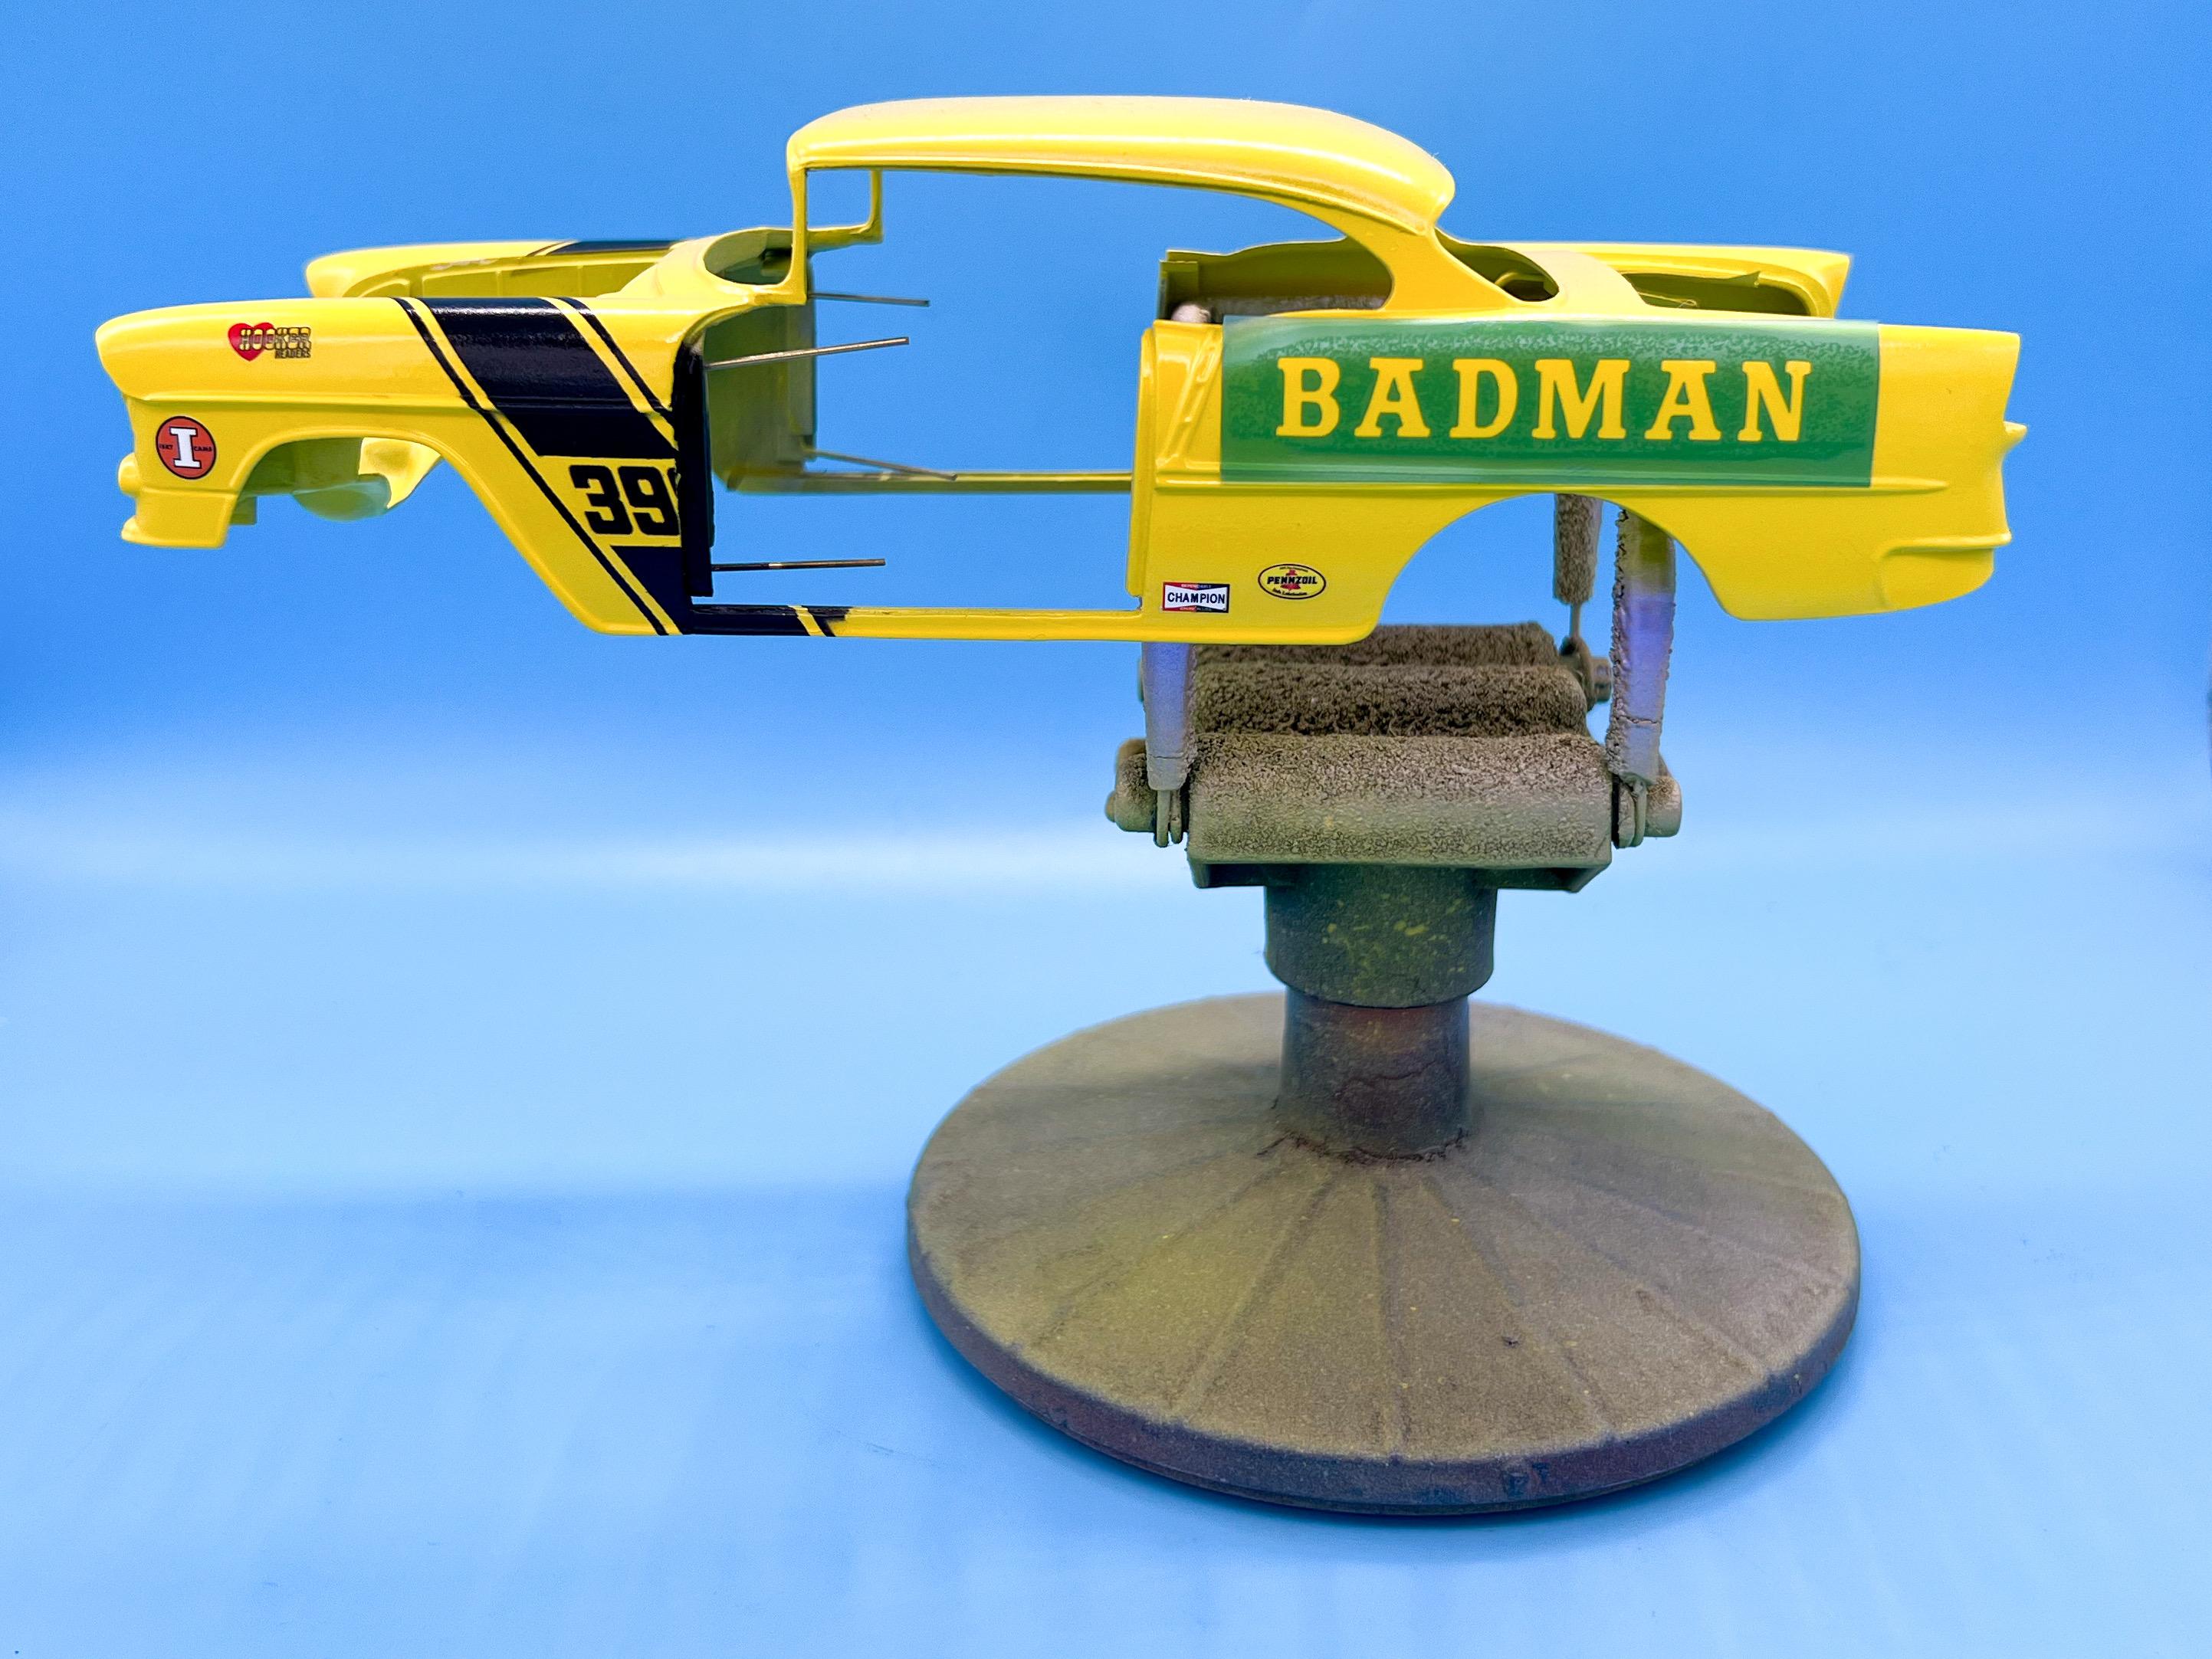
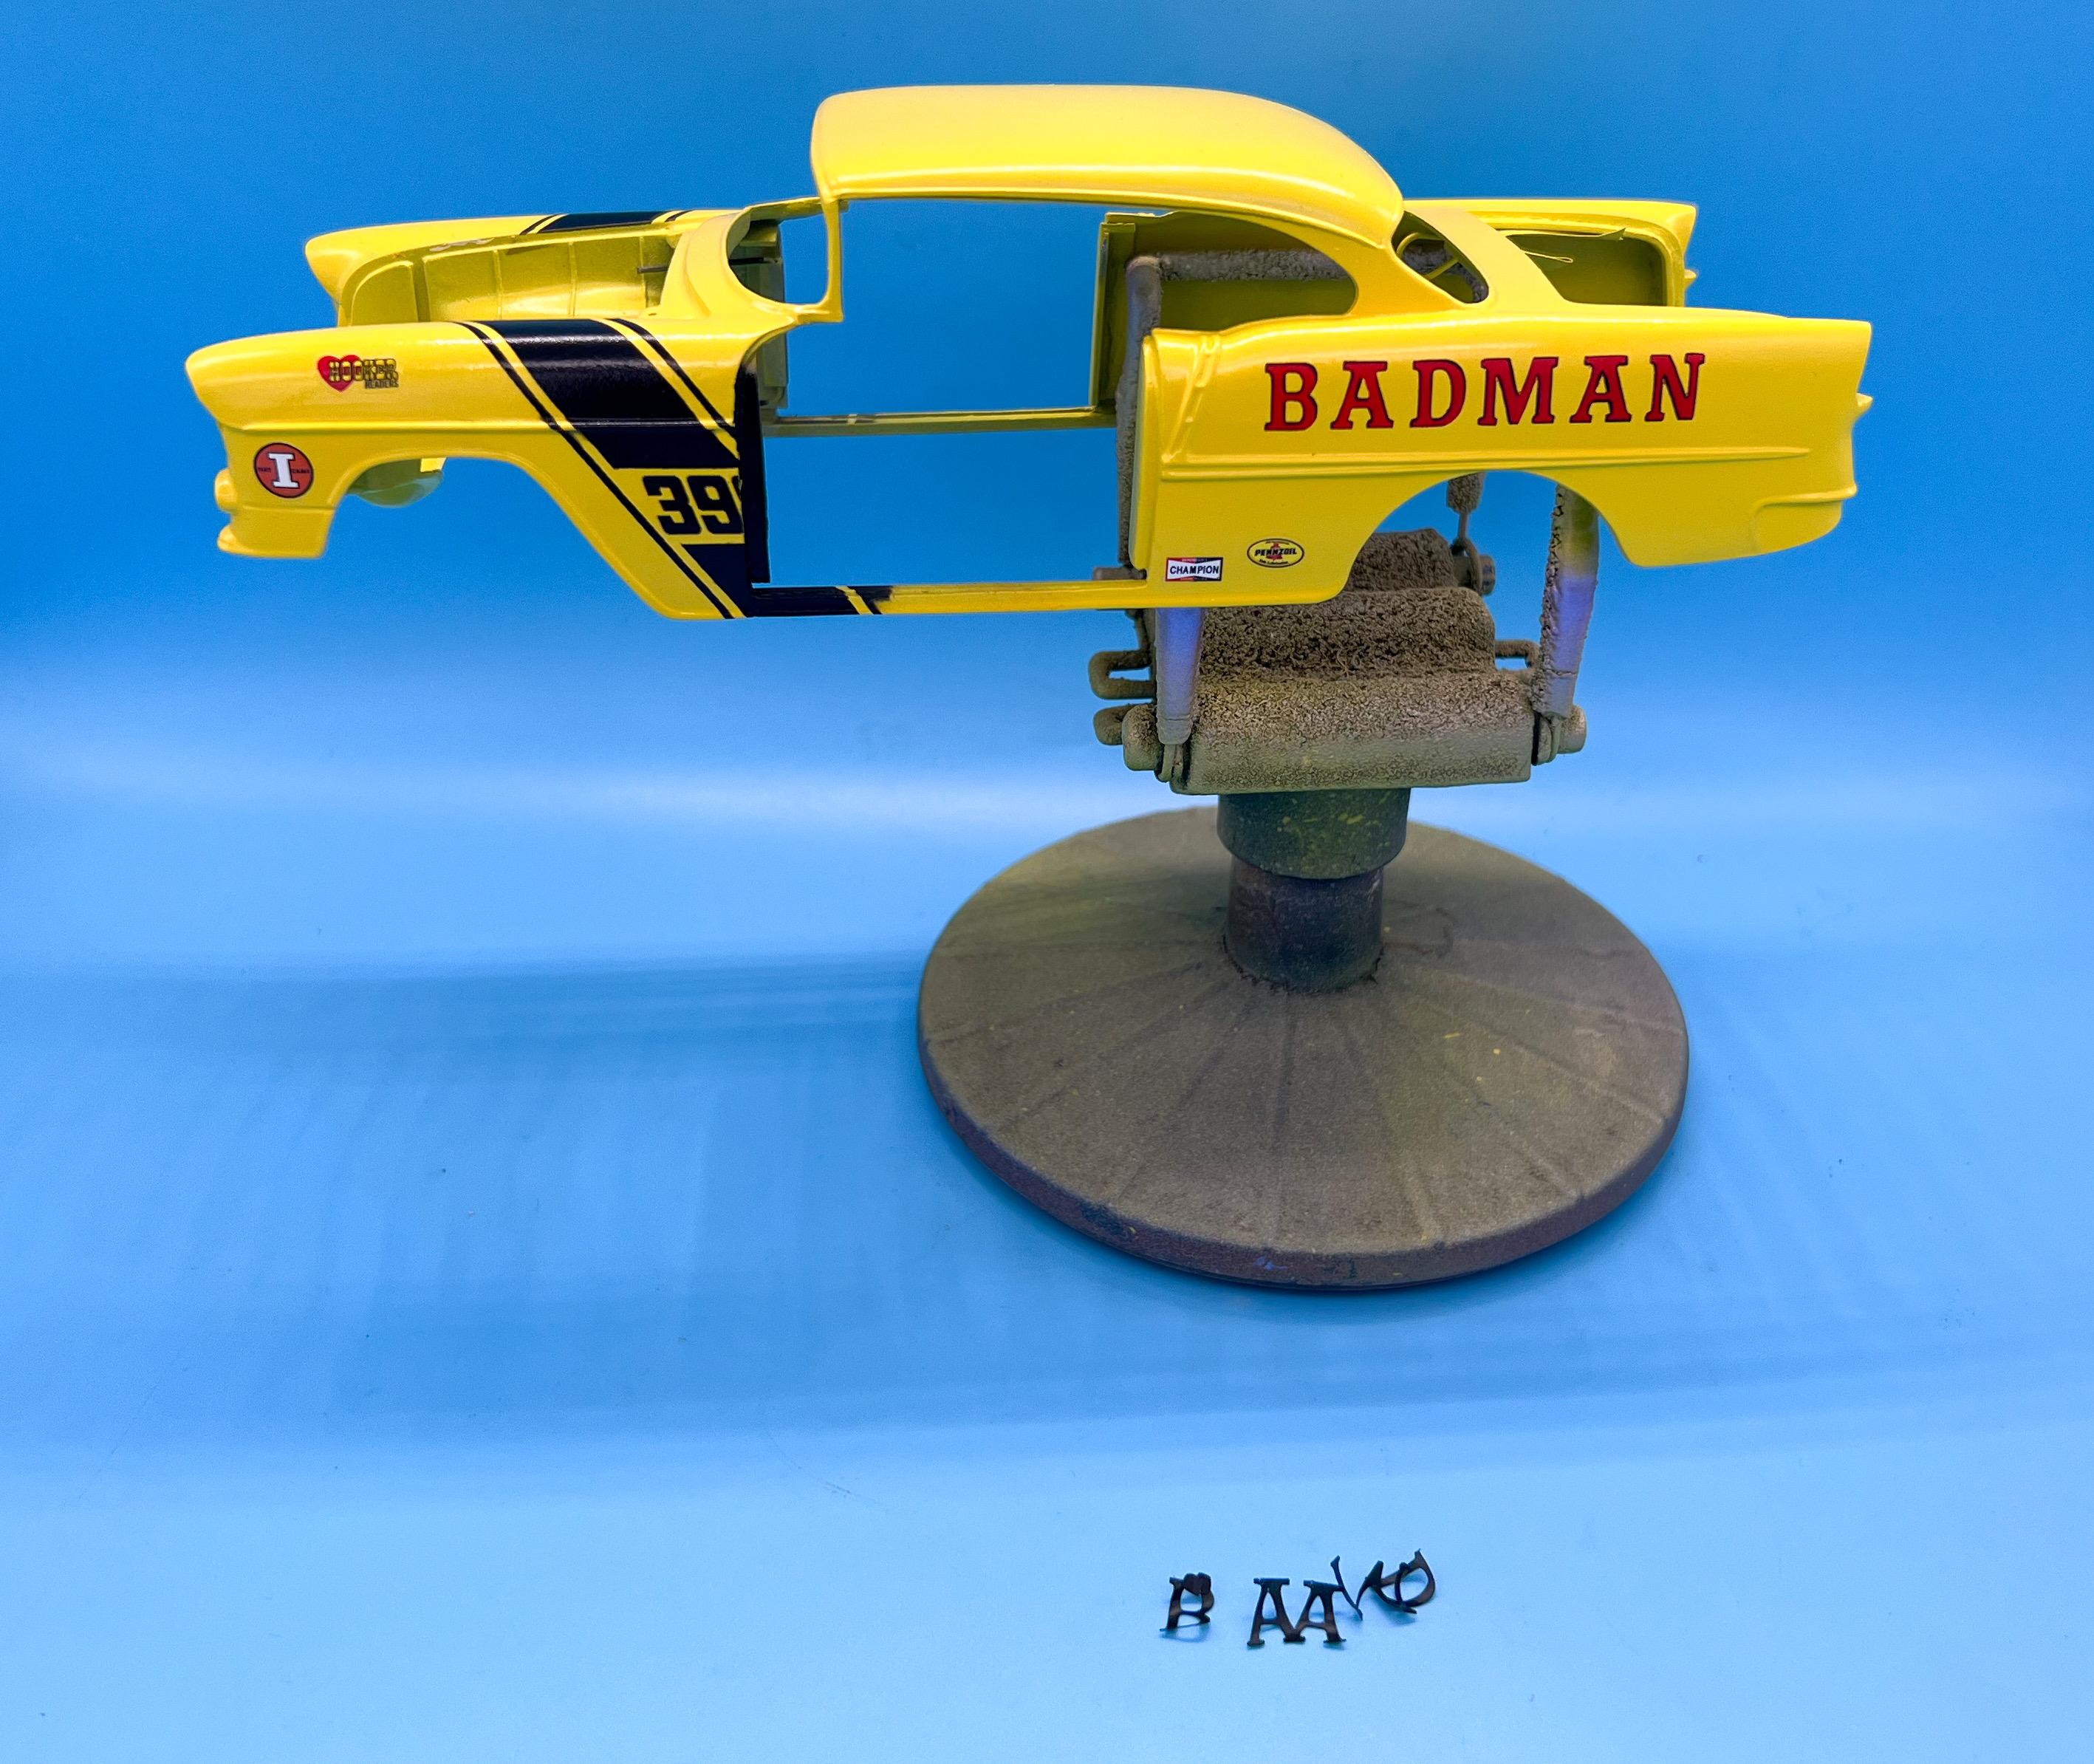
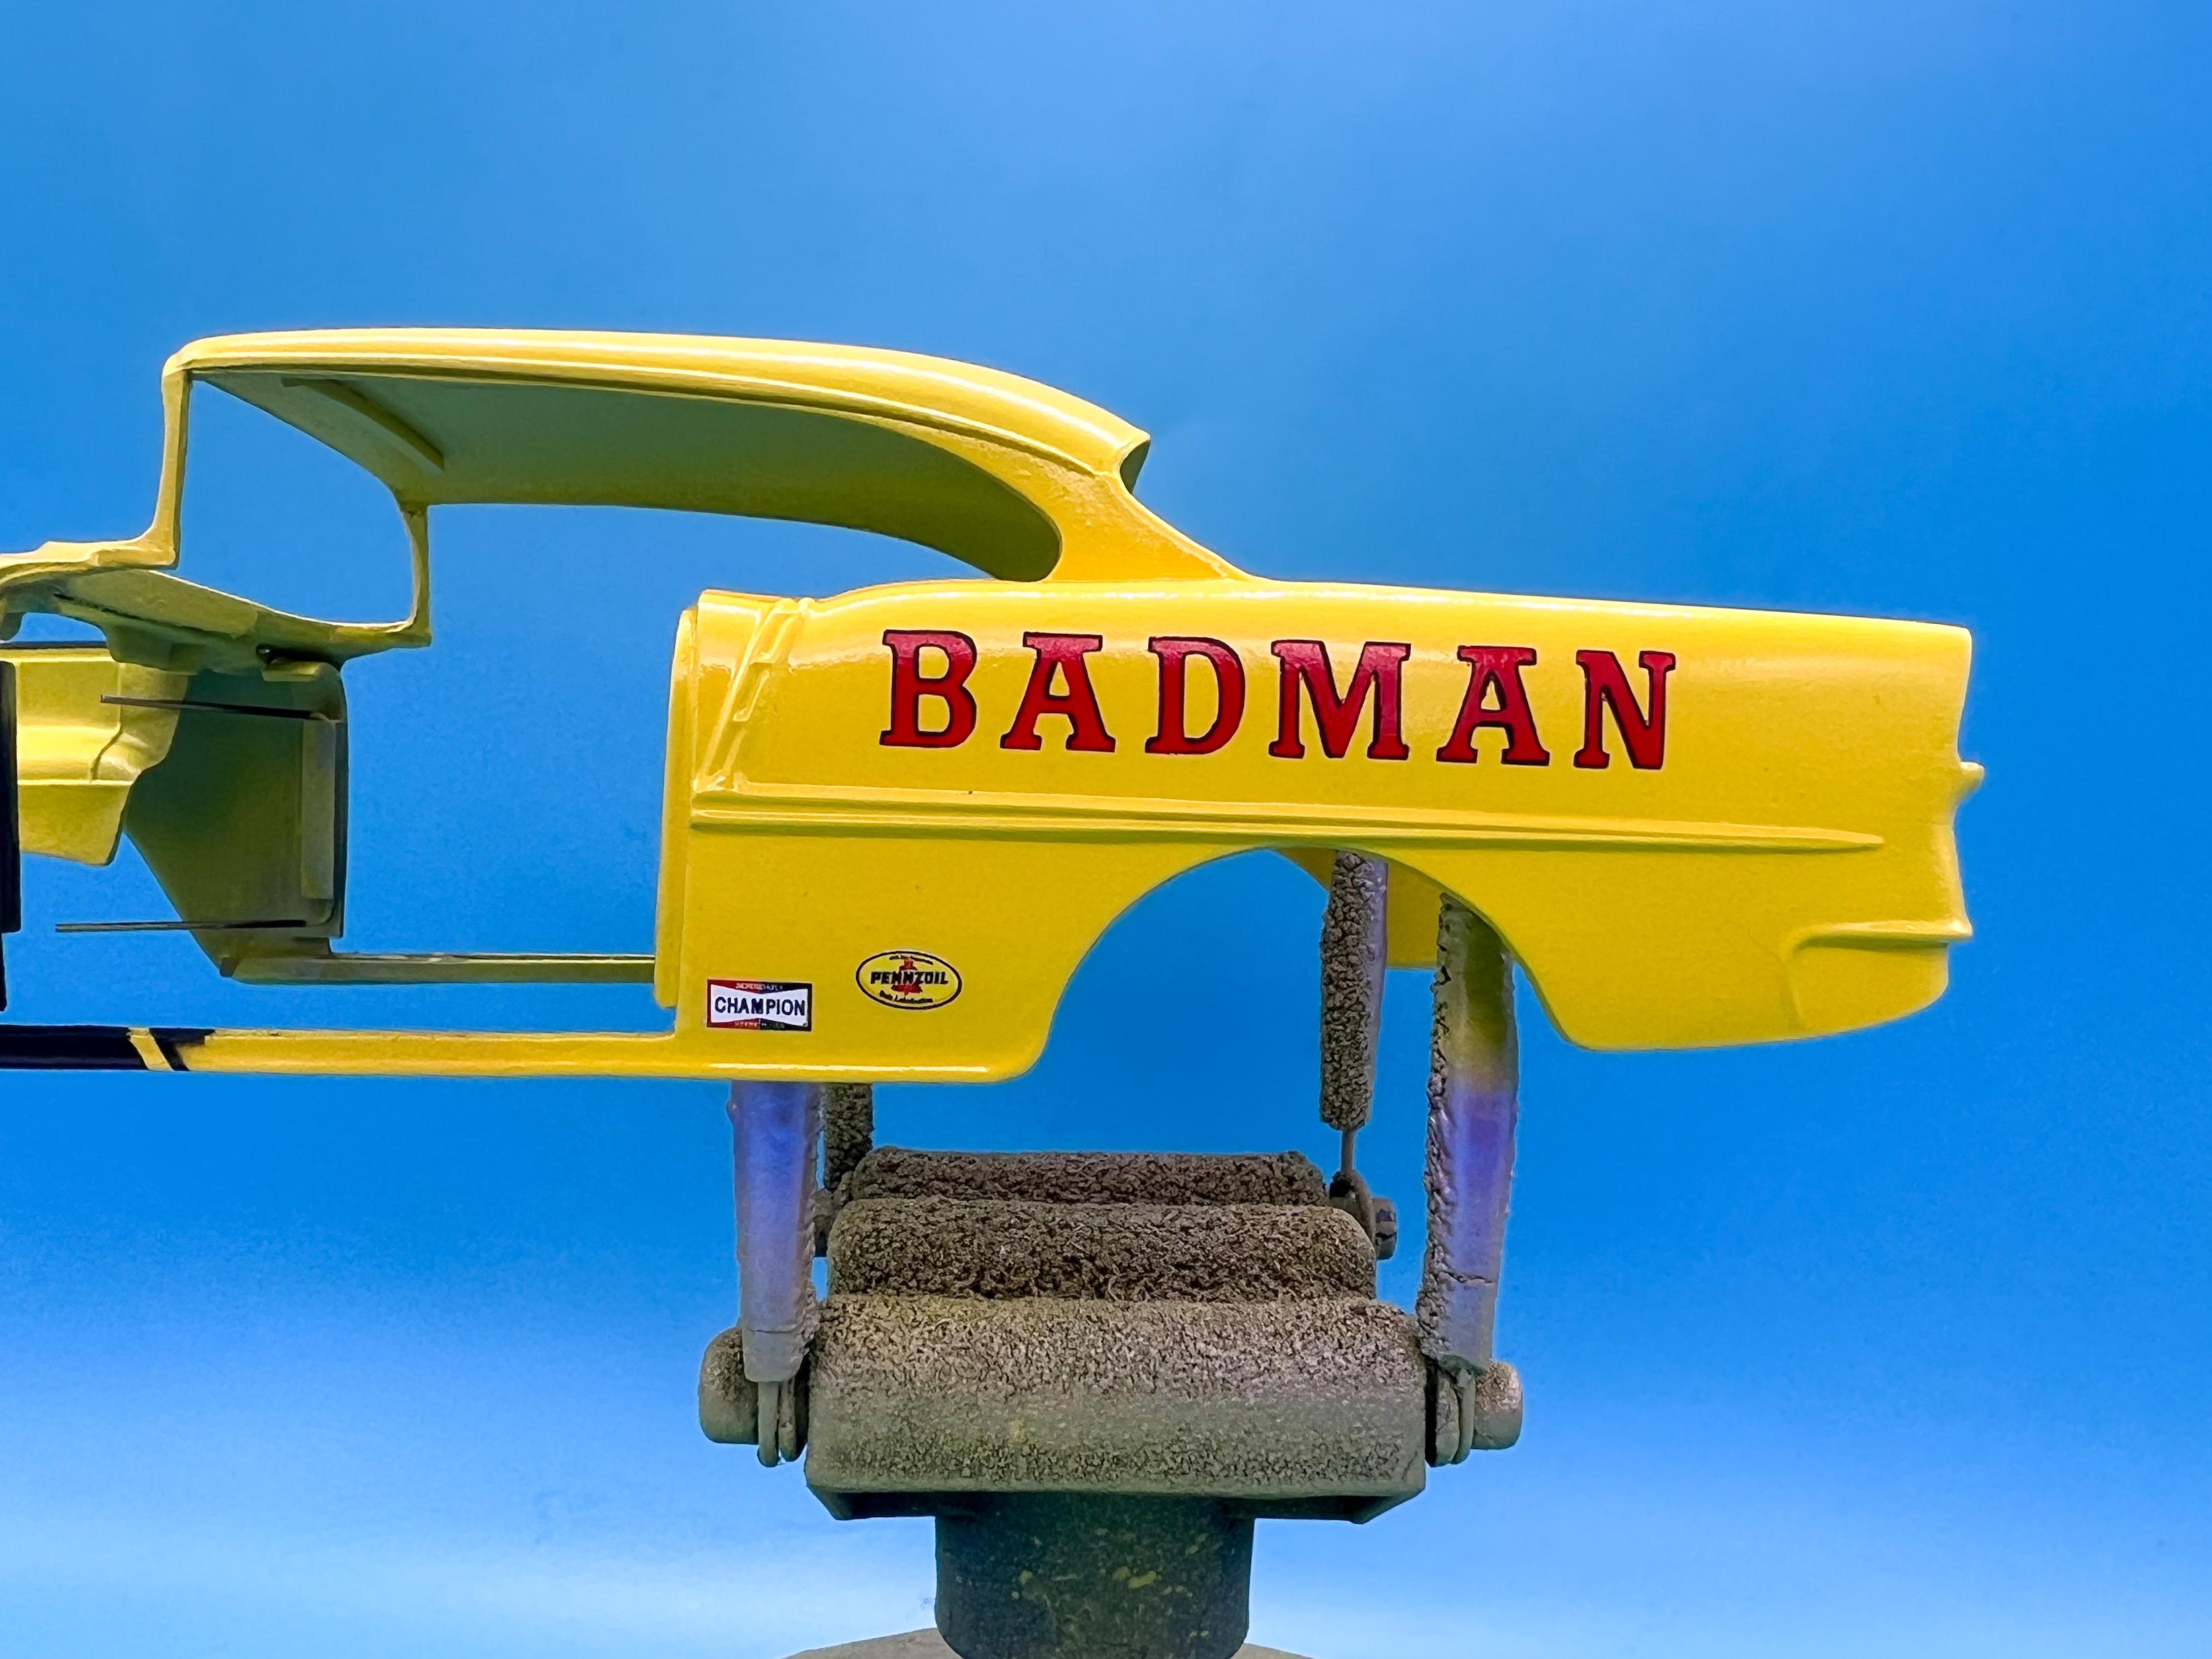
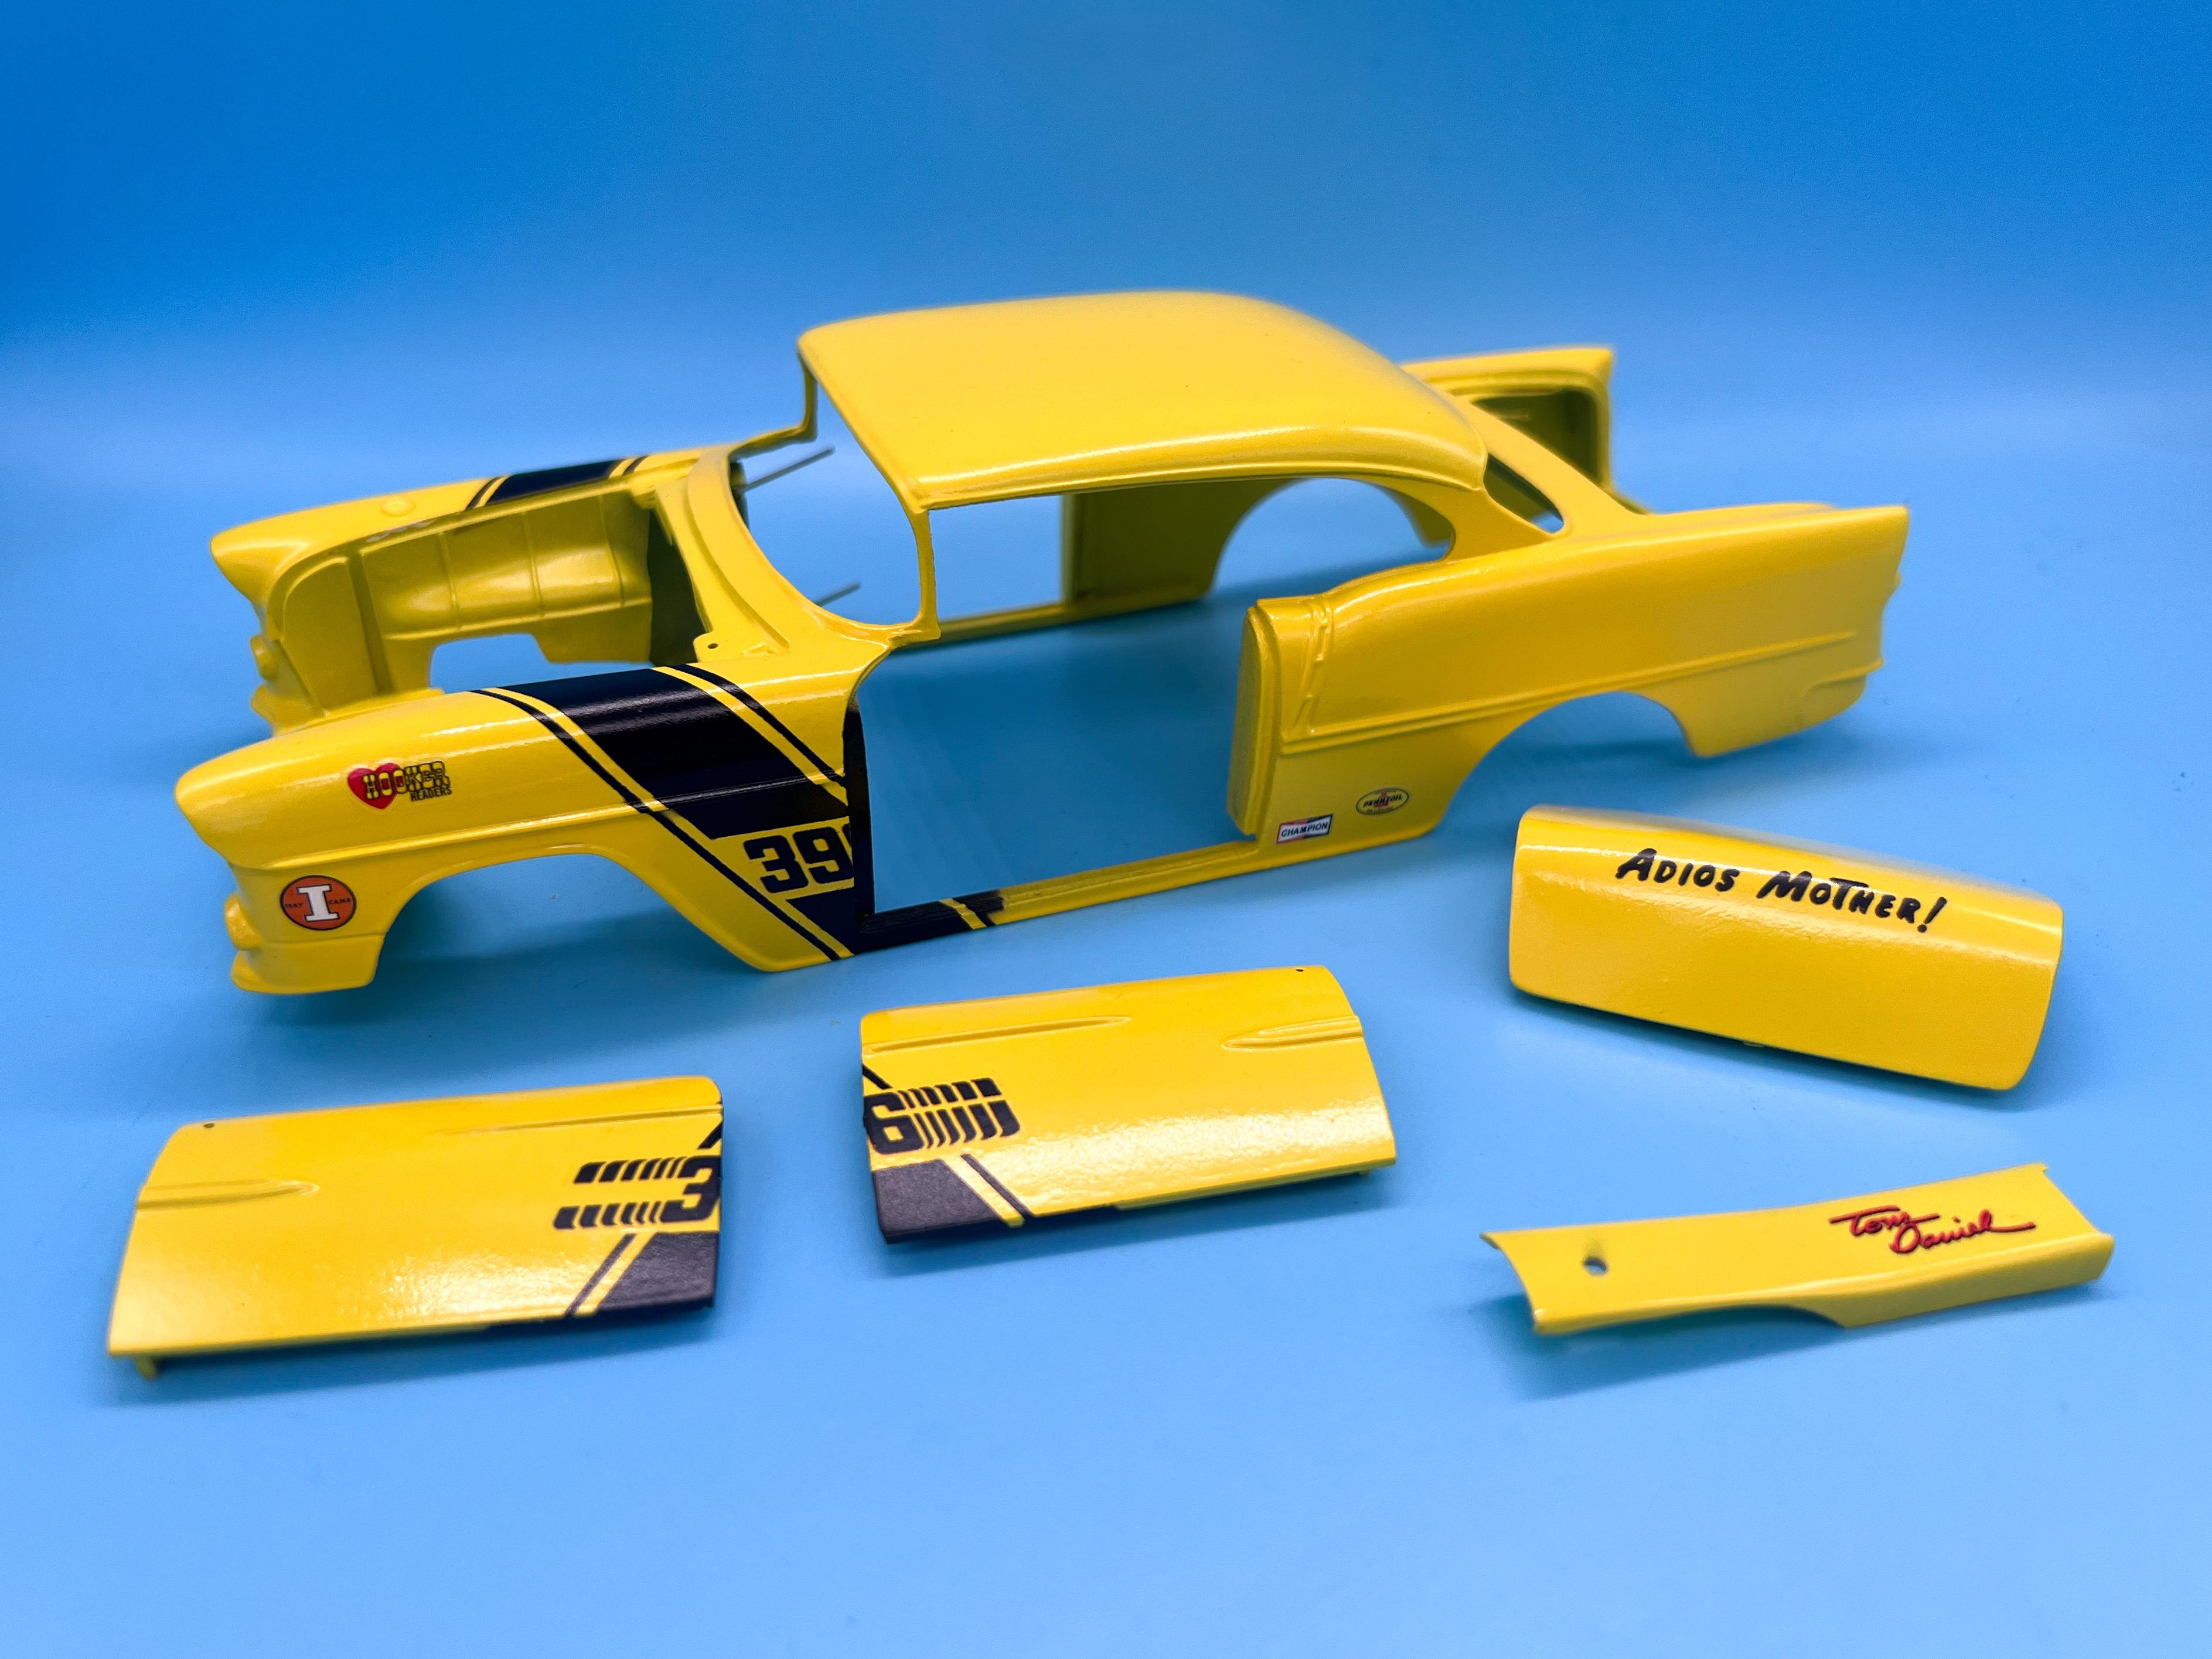
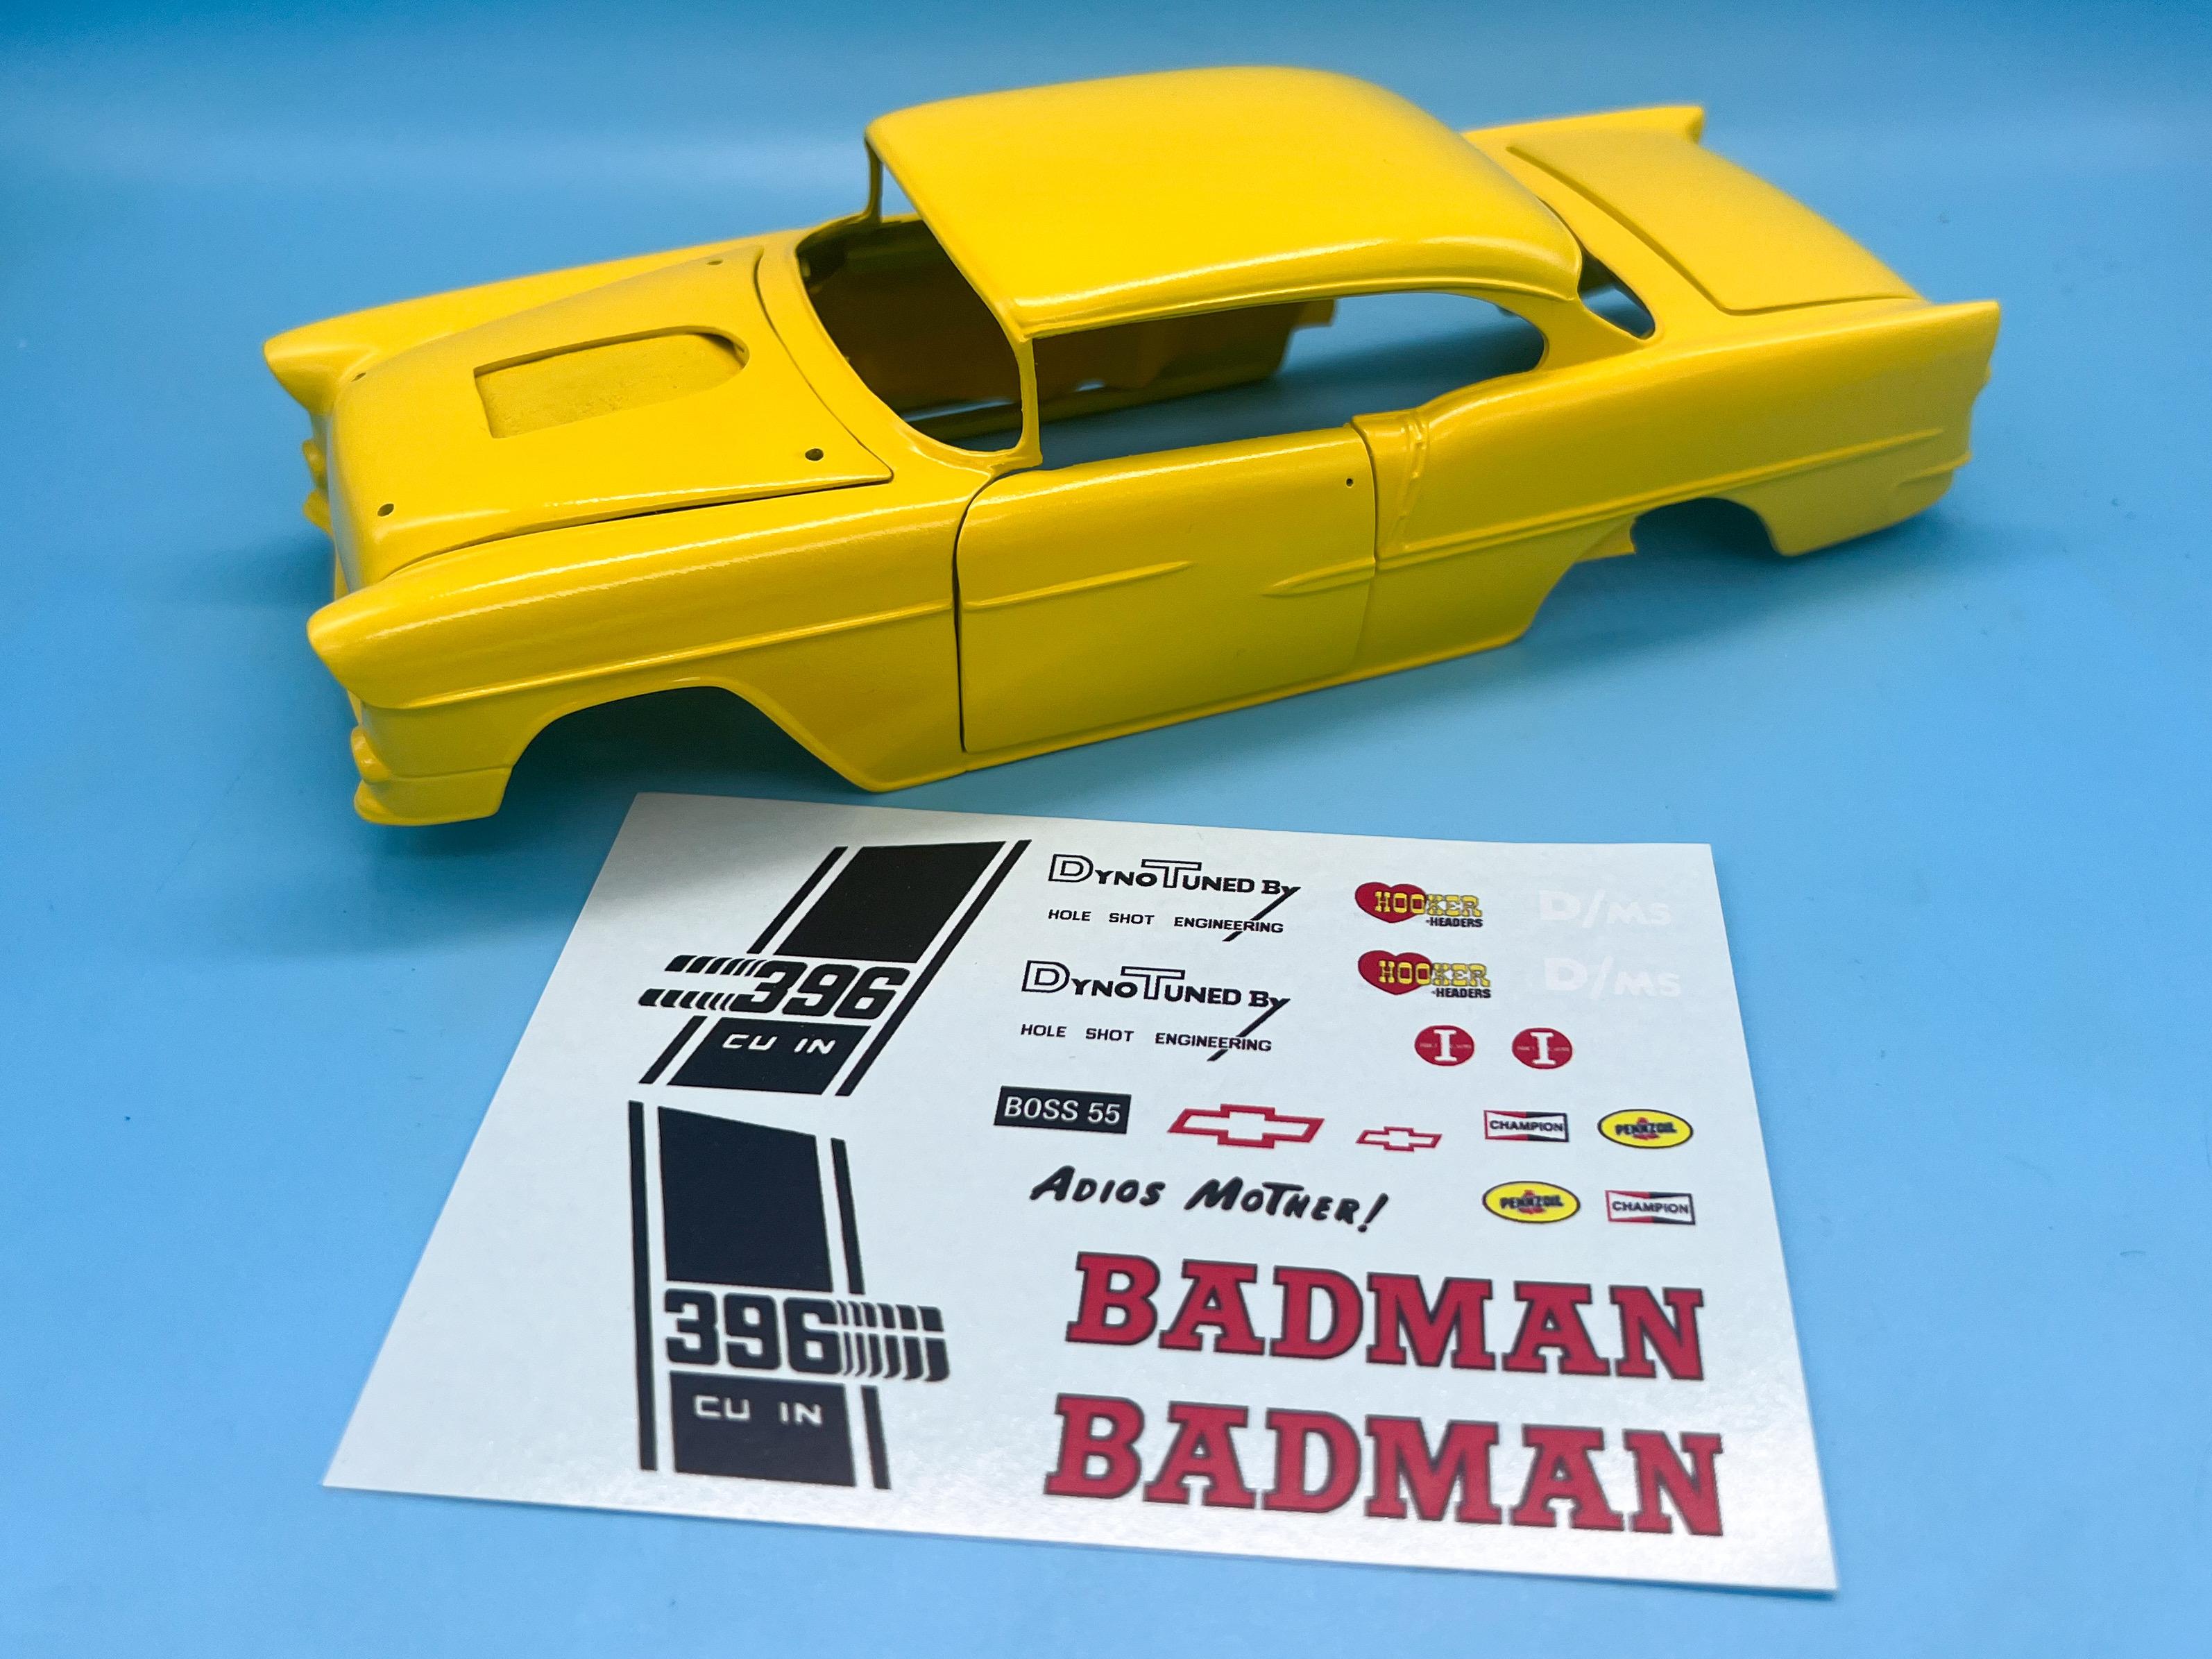
Thanks everybody! I’m using Adobe Illustrator and Dimension mostly - and TinkerCAD for the simpler stuff… A little update - started laying down some decals. The numbers on the side of the car span the front fenders AND the doors, which isn’t an issue unless you cut the doors open. To lay them down, I taped the doors closed and laid down the vinyl, spanning the two (and laid down the one for the trunk too, while I was at it… Then once they had dried, carefully sliced down the door gap with a new scalpel blade, and applied a little setting solution to the edges on both sides to make sure they wrapped around the edges nicely: The various sponsor decals aren’t well printed on the repro decal sheet that I ordered, so I dug through my decal stash and found replacements. The Hooker decals on the fender took the most digging to find…I wanted some smaller ones than would have been on the original Monogram decal sheet, because in the box art they’re smaller too…found about everything I needed after a couple of hours opening boxes and hunting through stuff… There’s another one I need to tackle on the door too…but that’s gonna take a little more work than I was hoping… Just a little update - but I was pleased to make a little progress in making this thing look Badman-y finally! More soon, soon as I’ve done more!
-
Man, that’s a great race-work kinda paint job. Nice work!!
-
That’s a gorgeous color Dave - GREAT choice! Thank you for the info!!
-
My take on the most famous ‘55 gasser street machine’…
OldNYJim replied to OldNYJim's topic in WIP: Model Cars
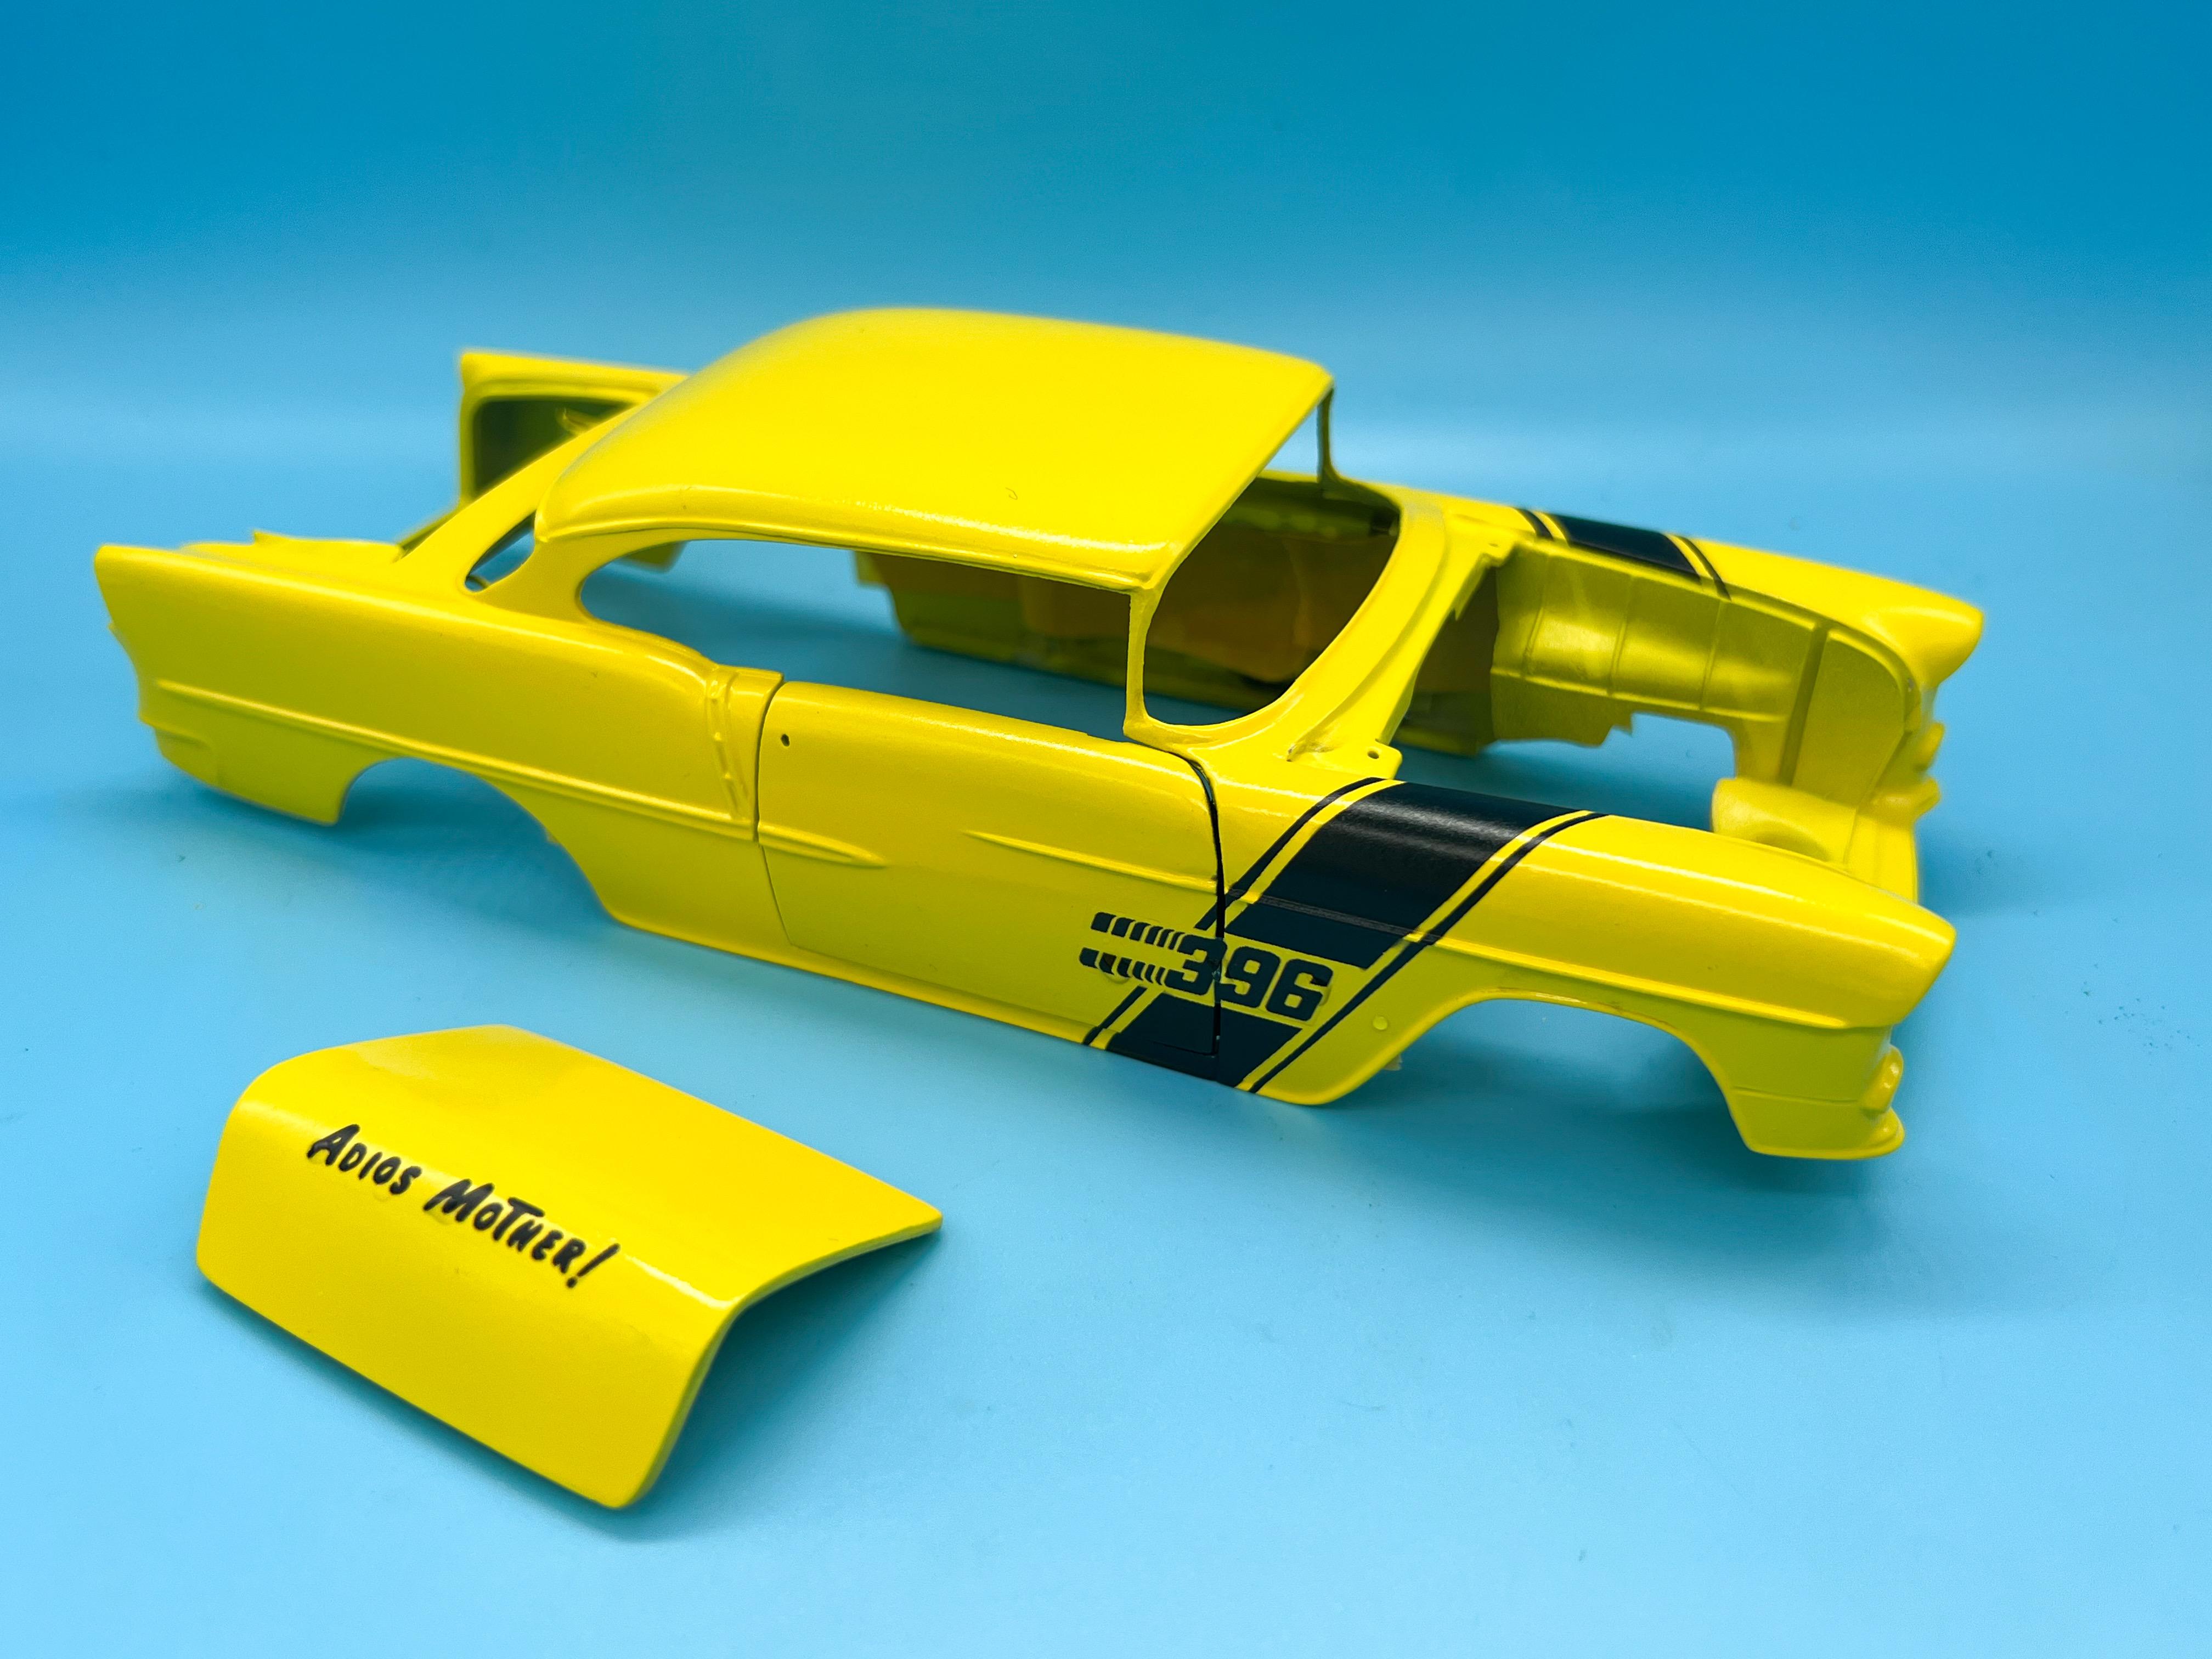
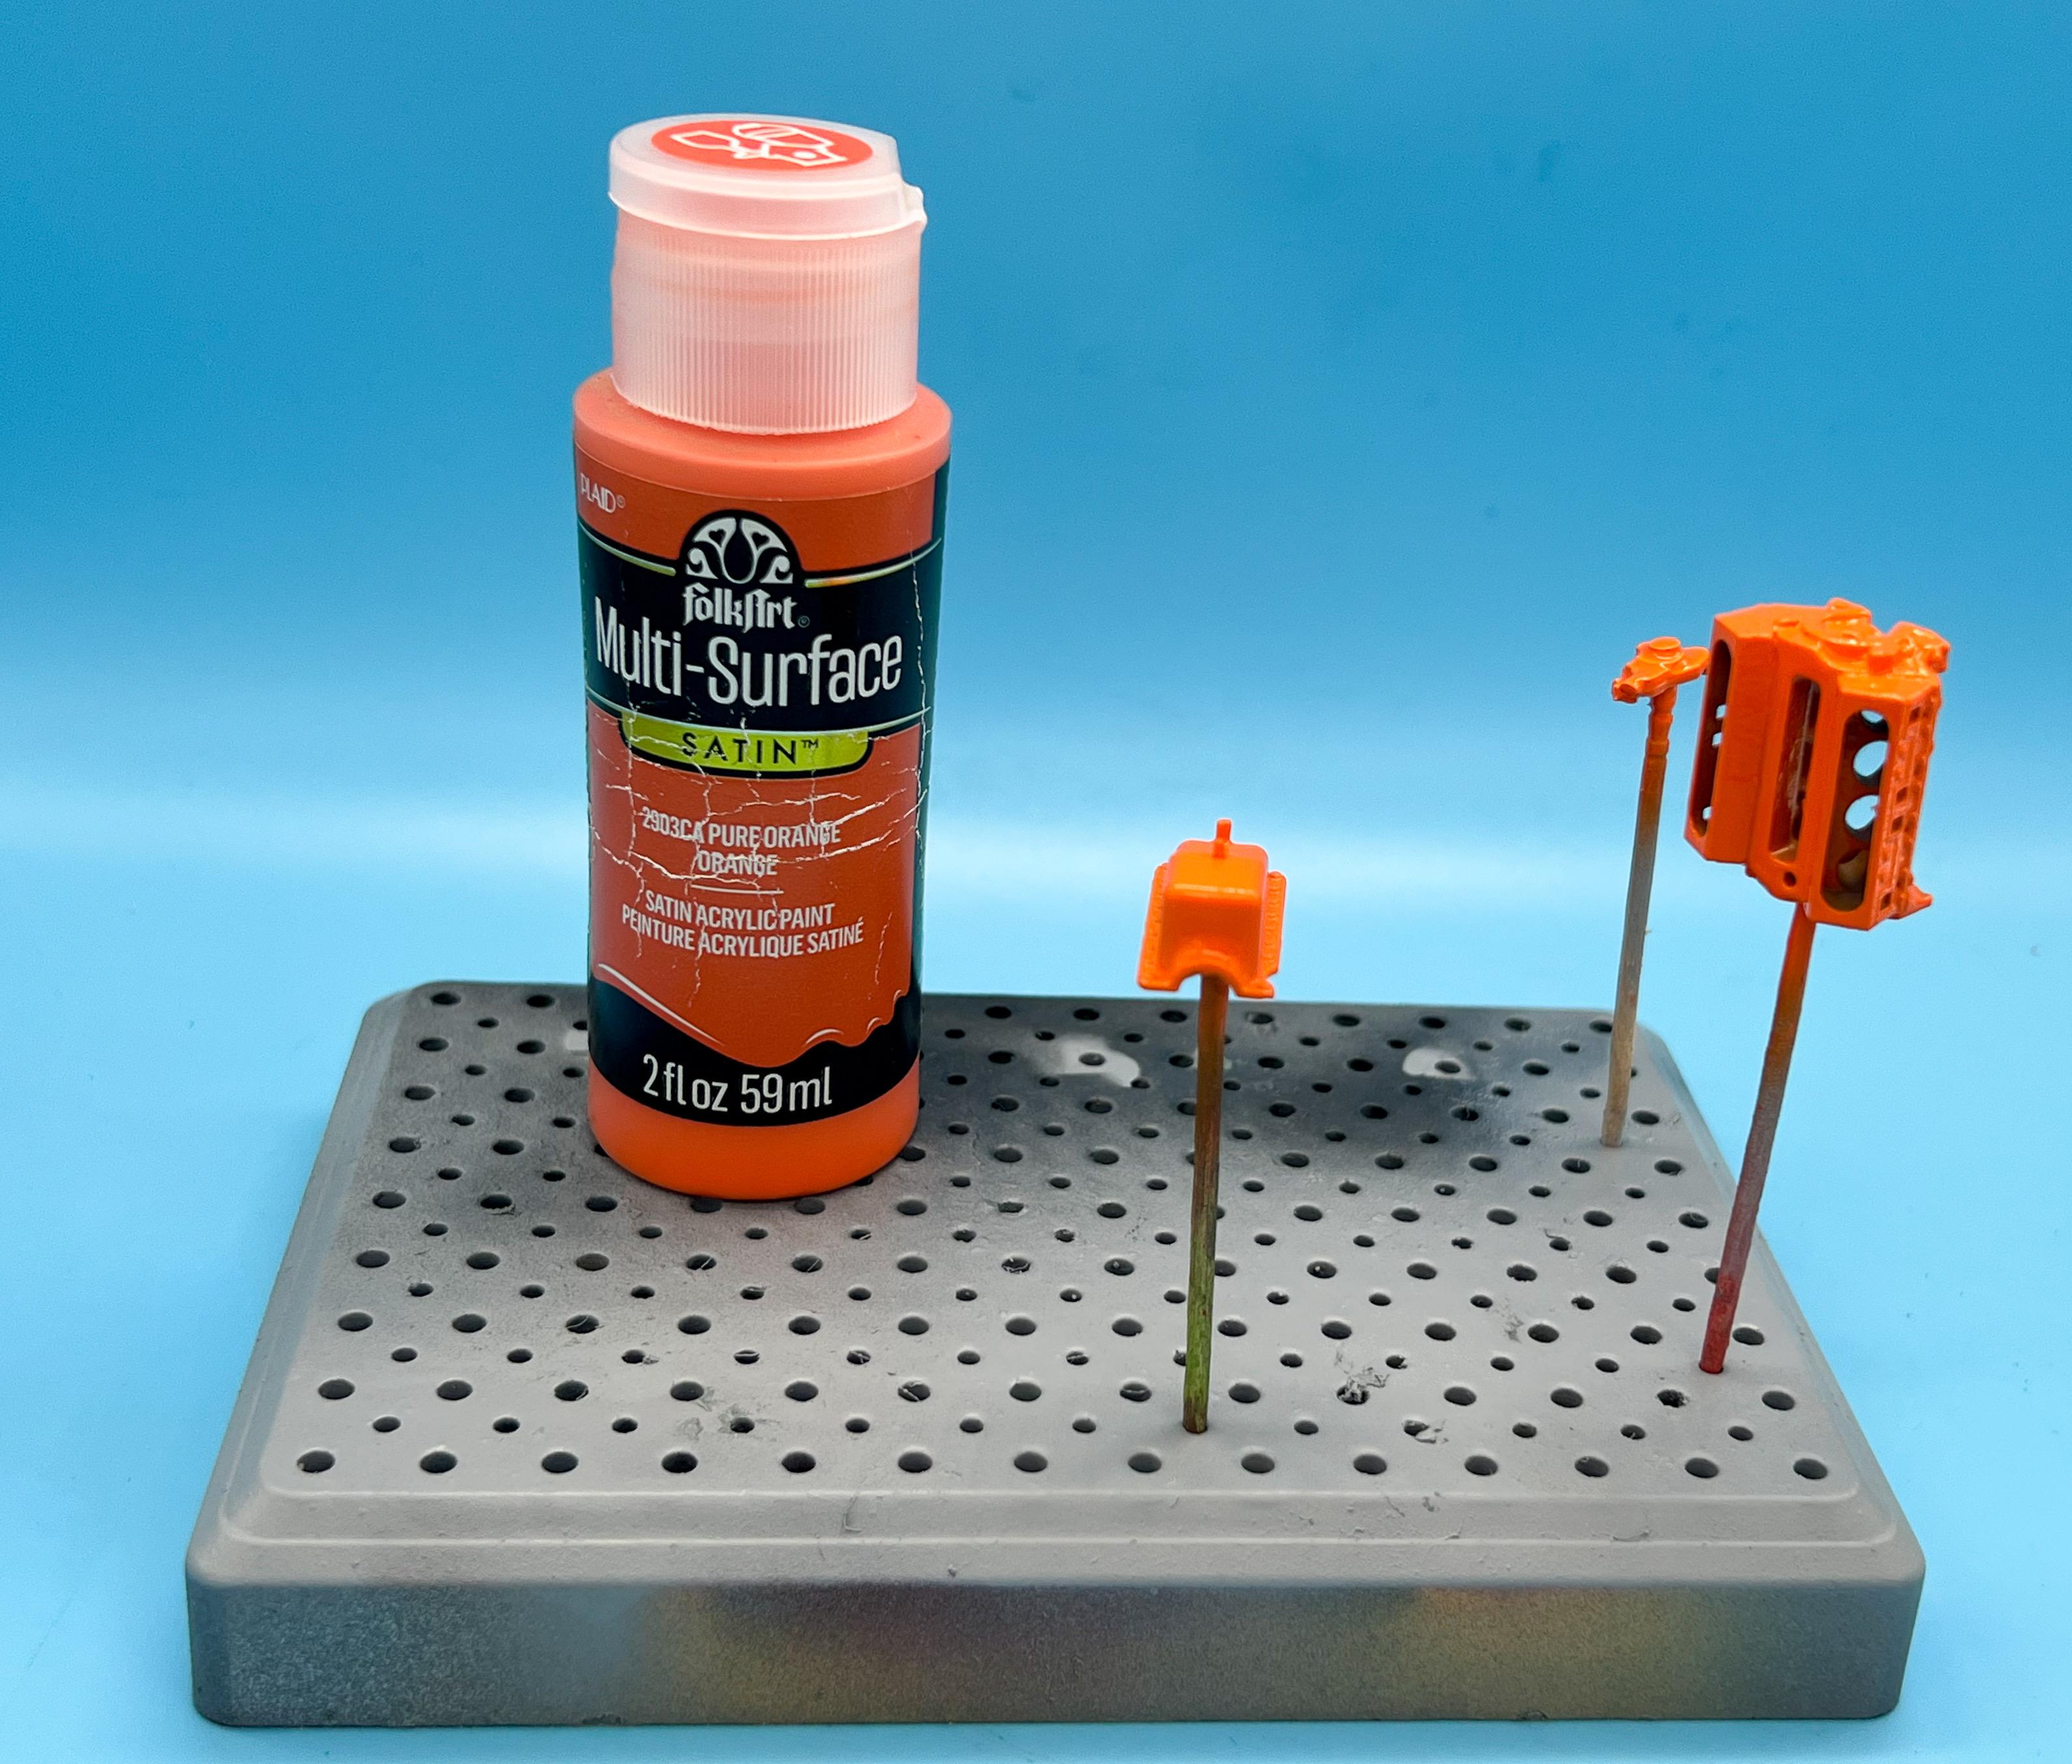
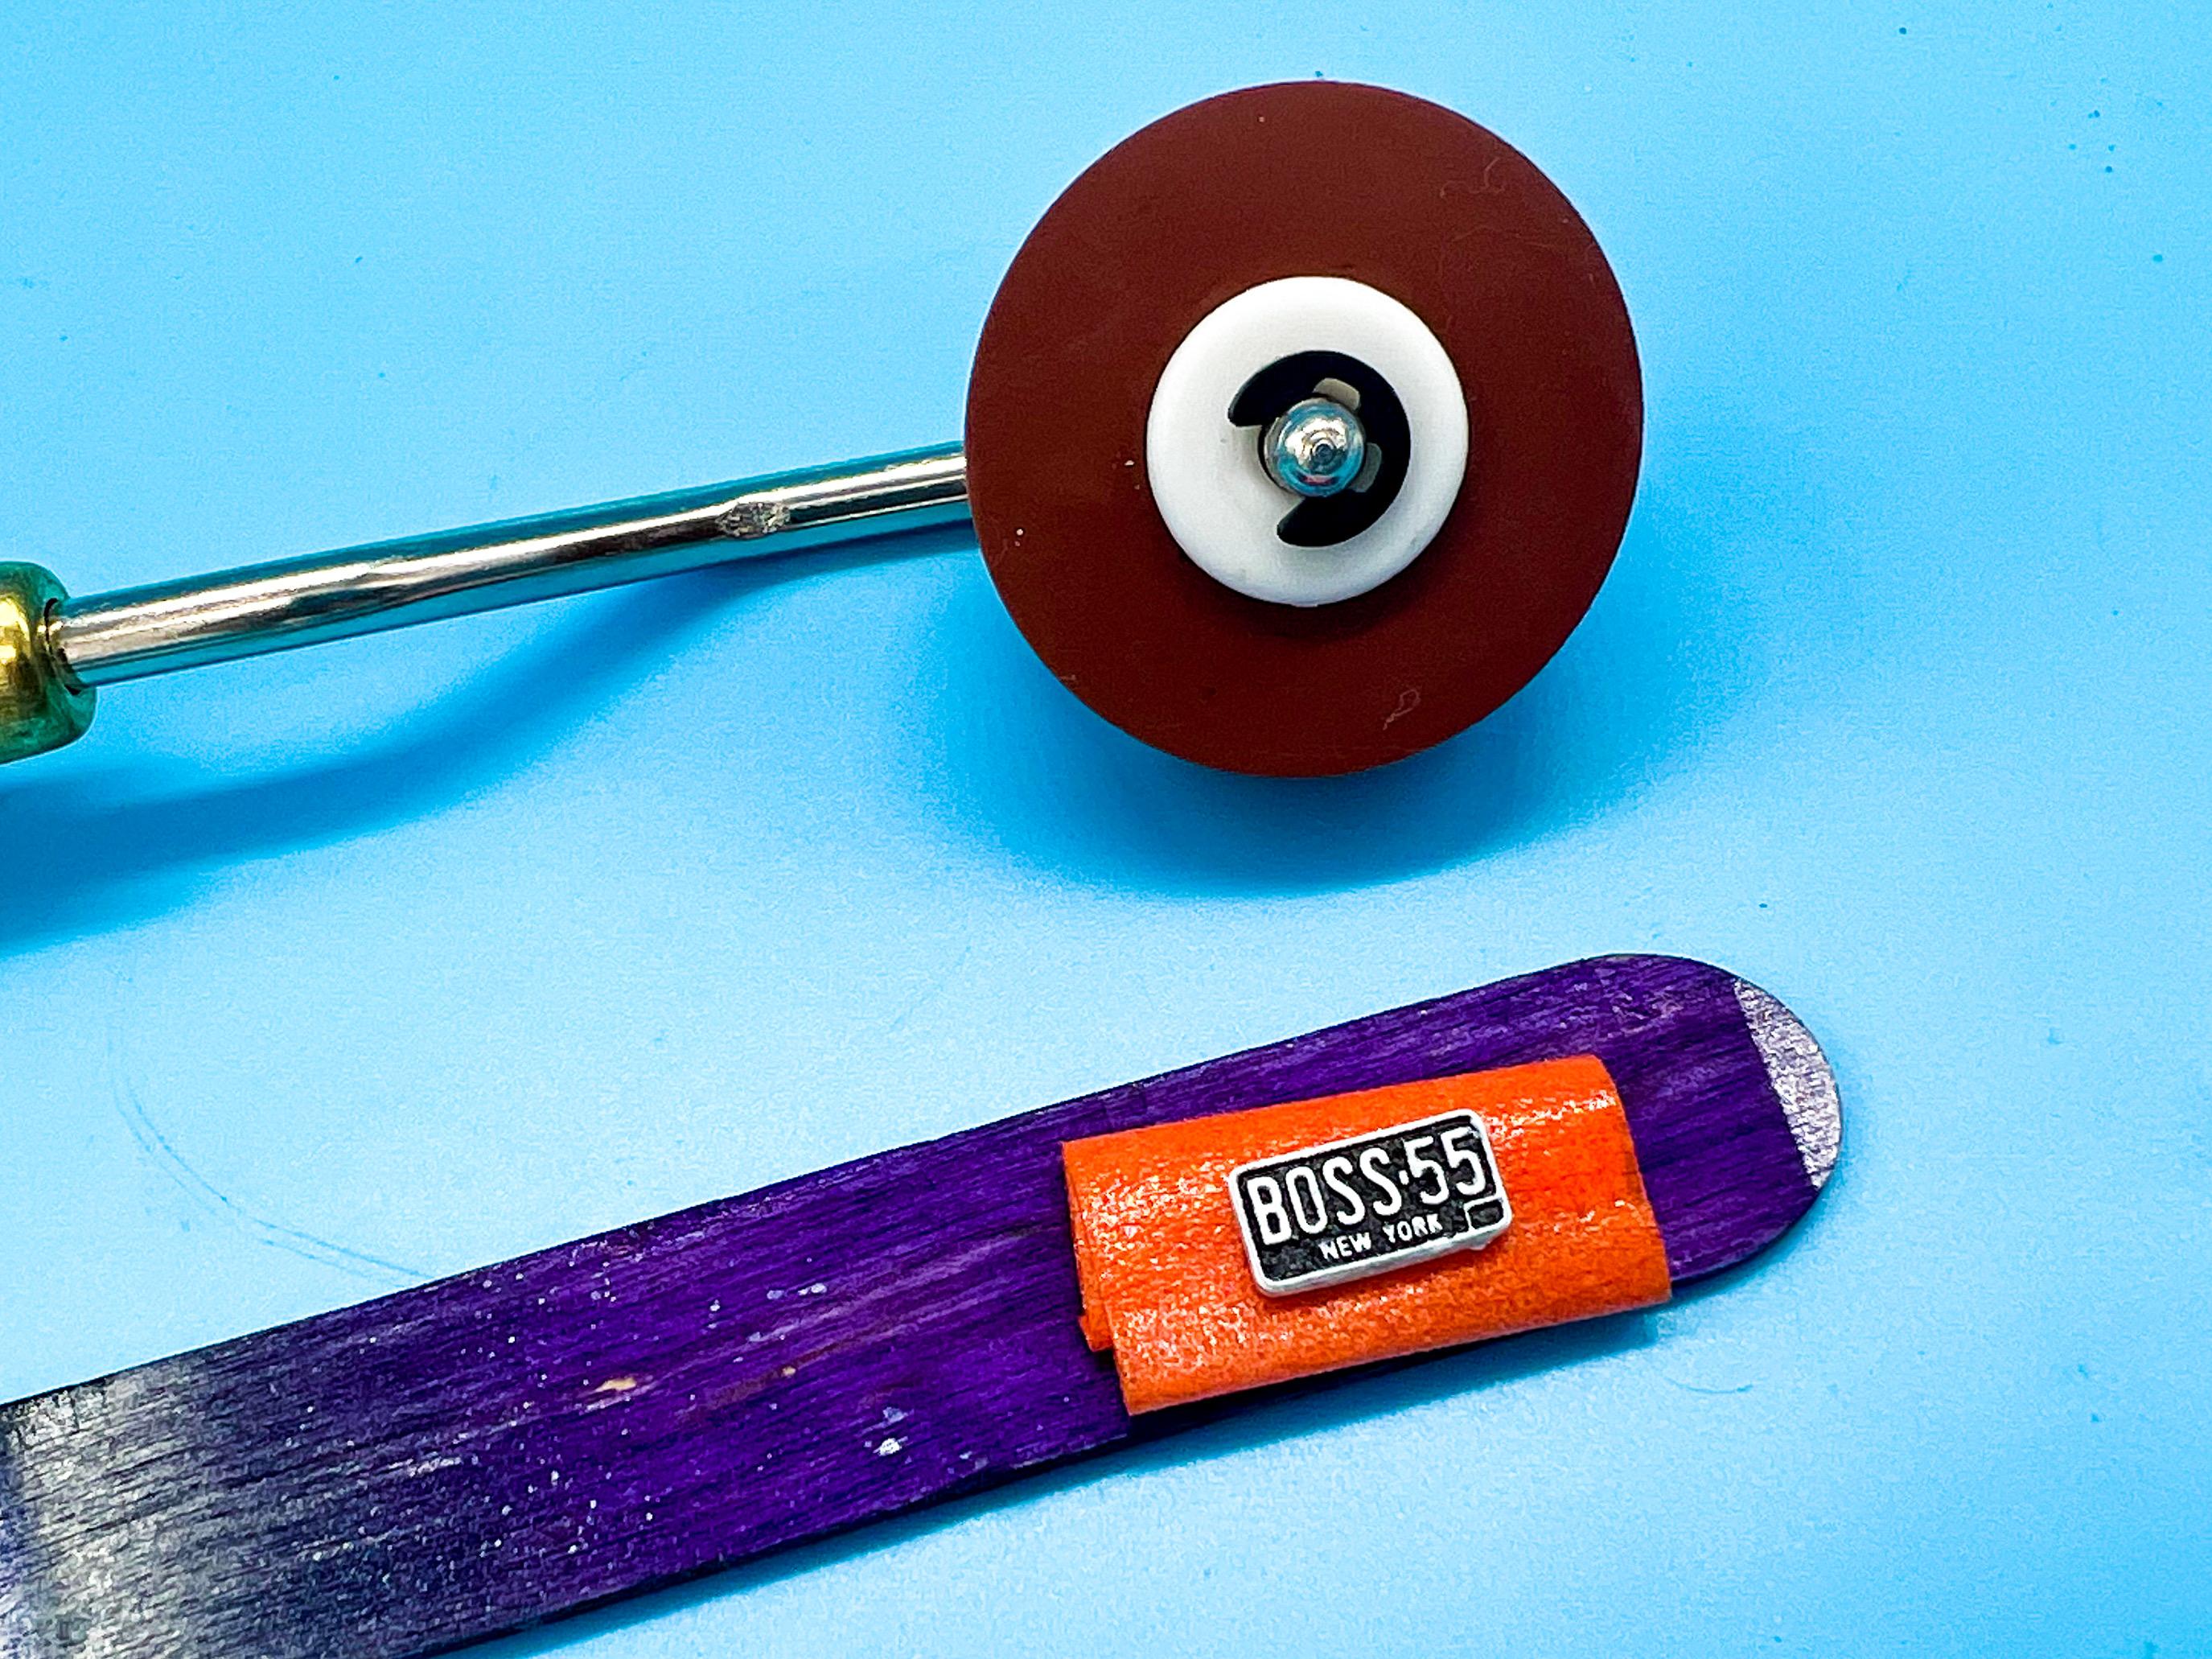
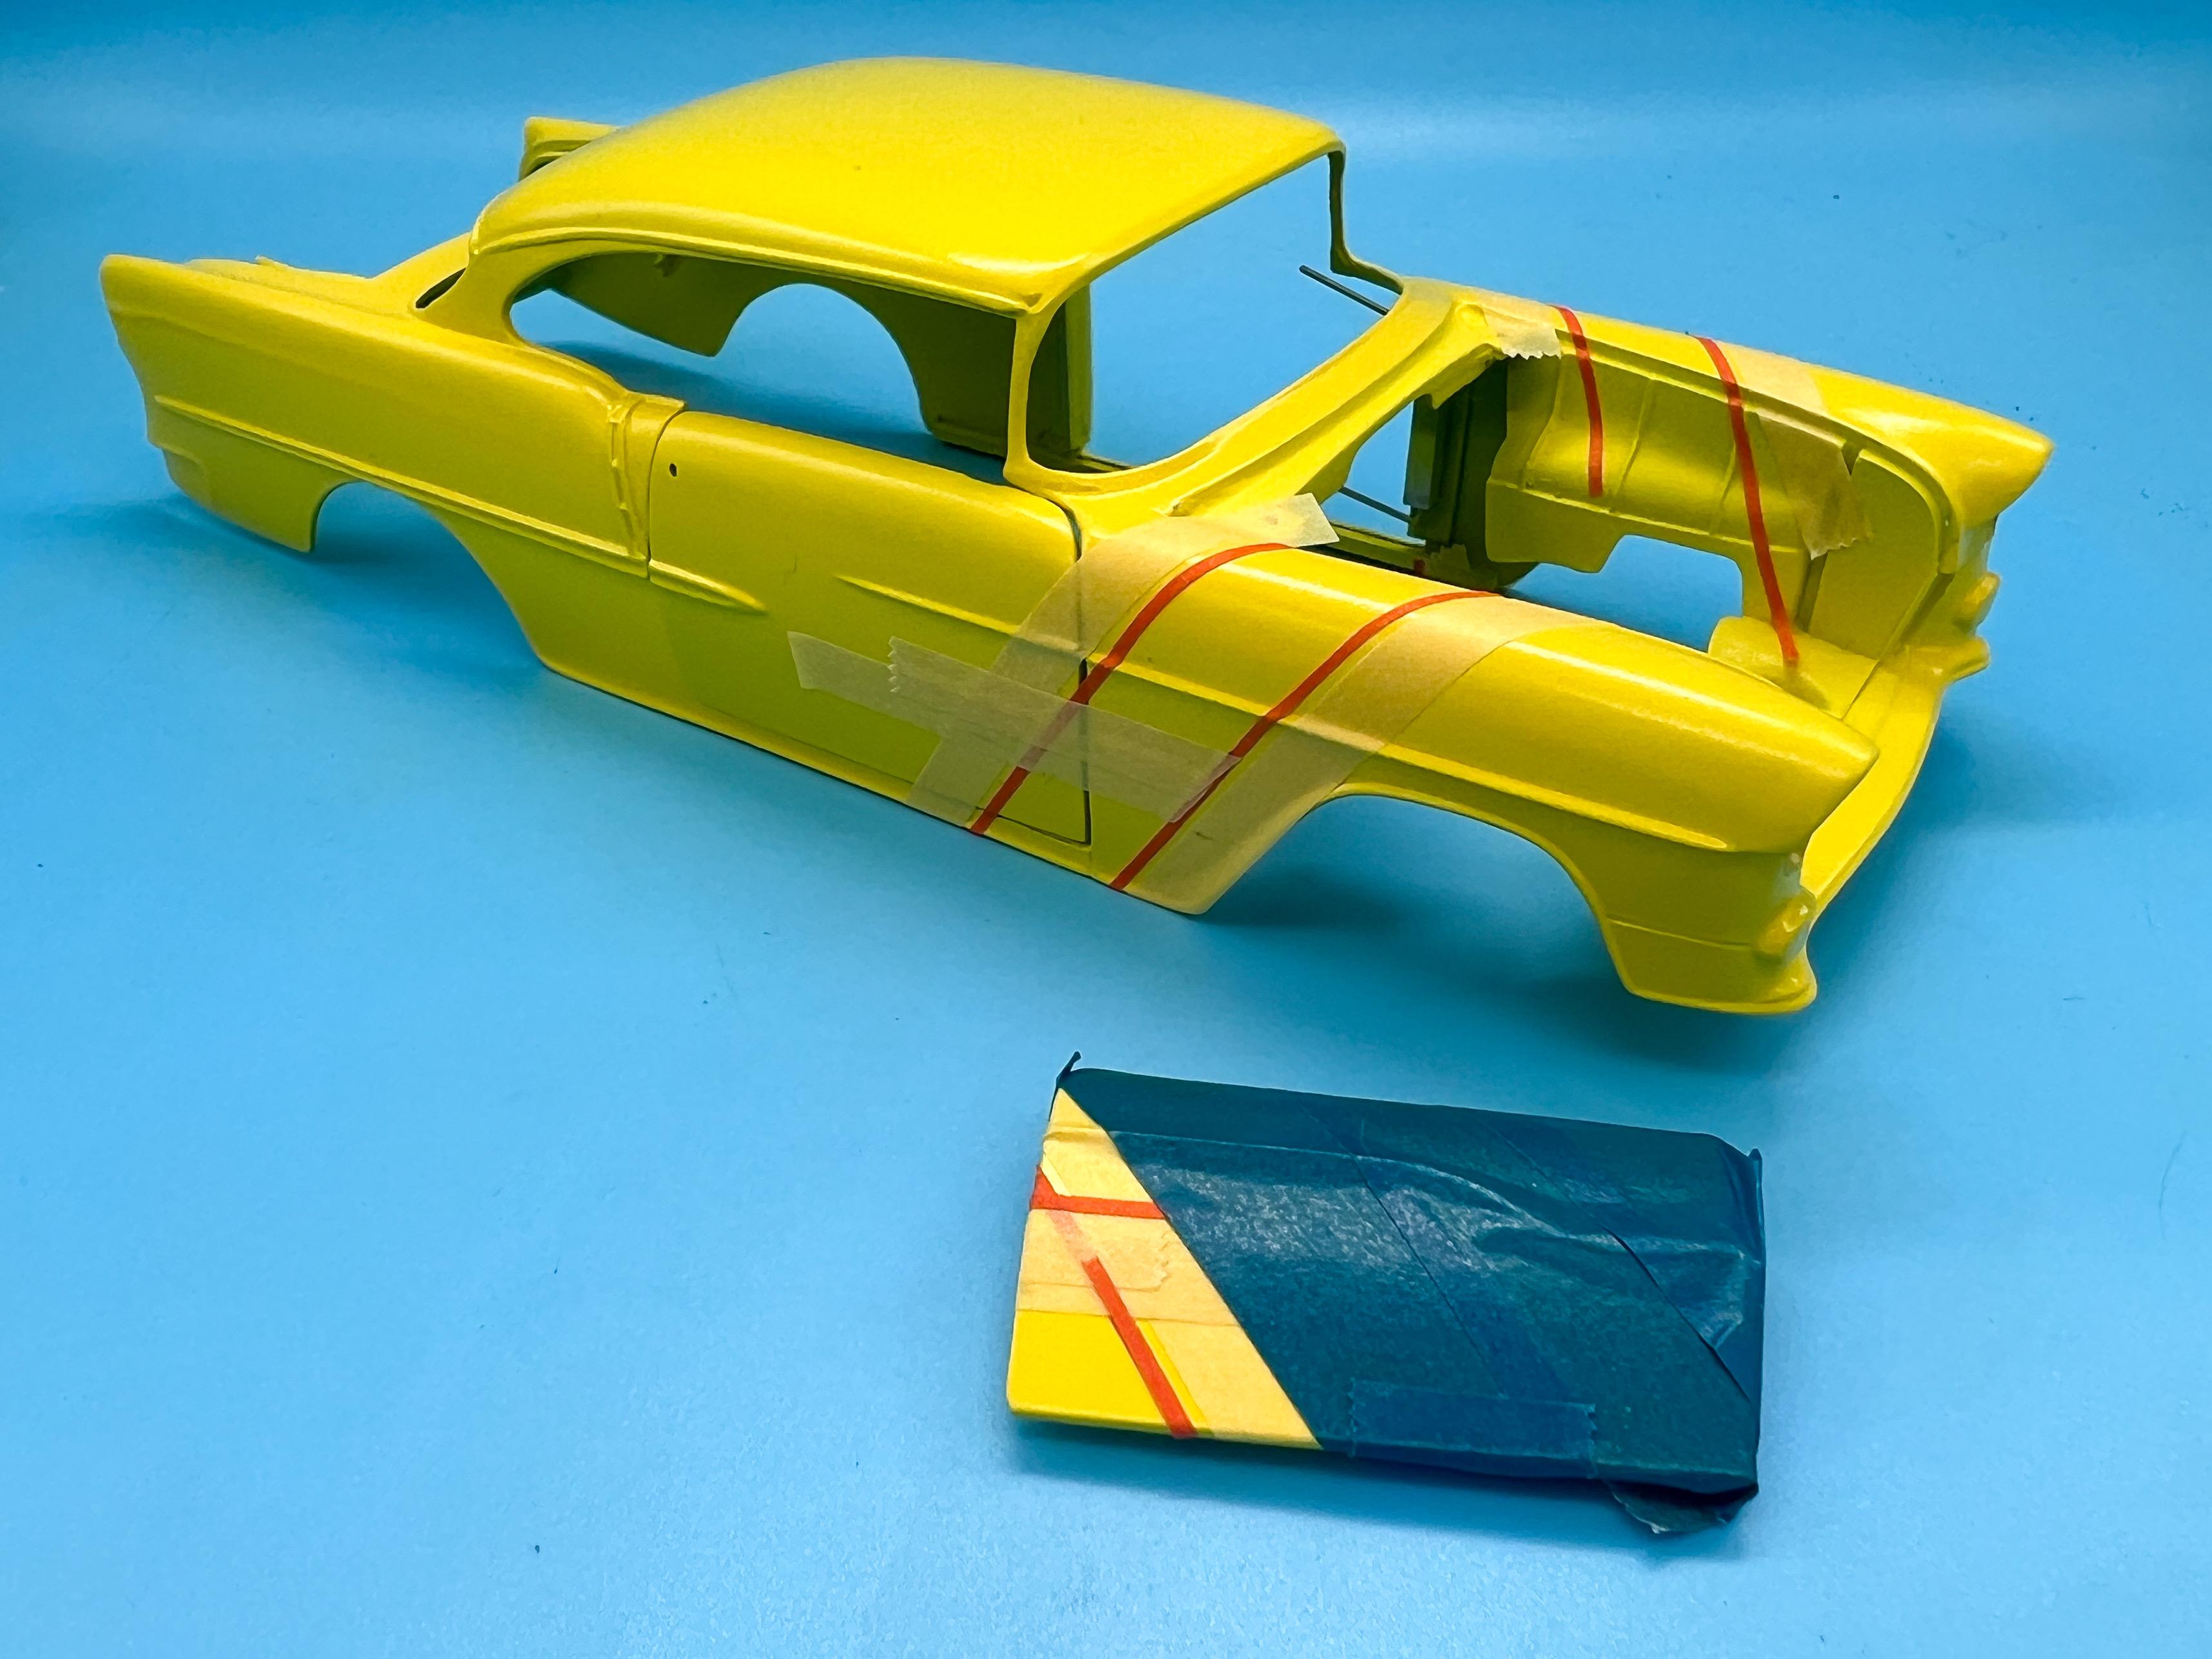
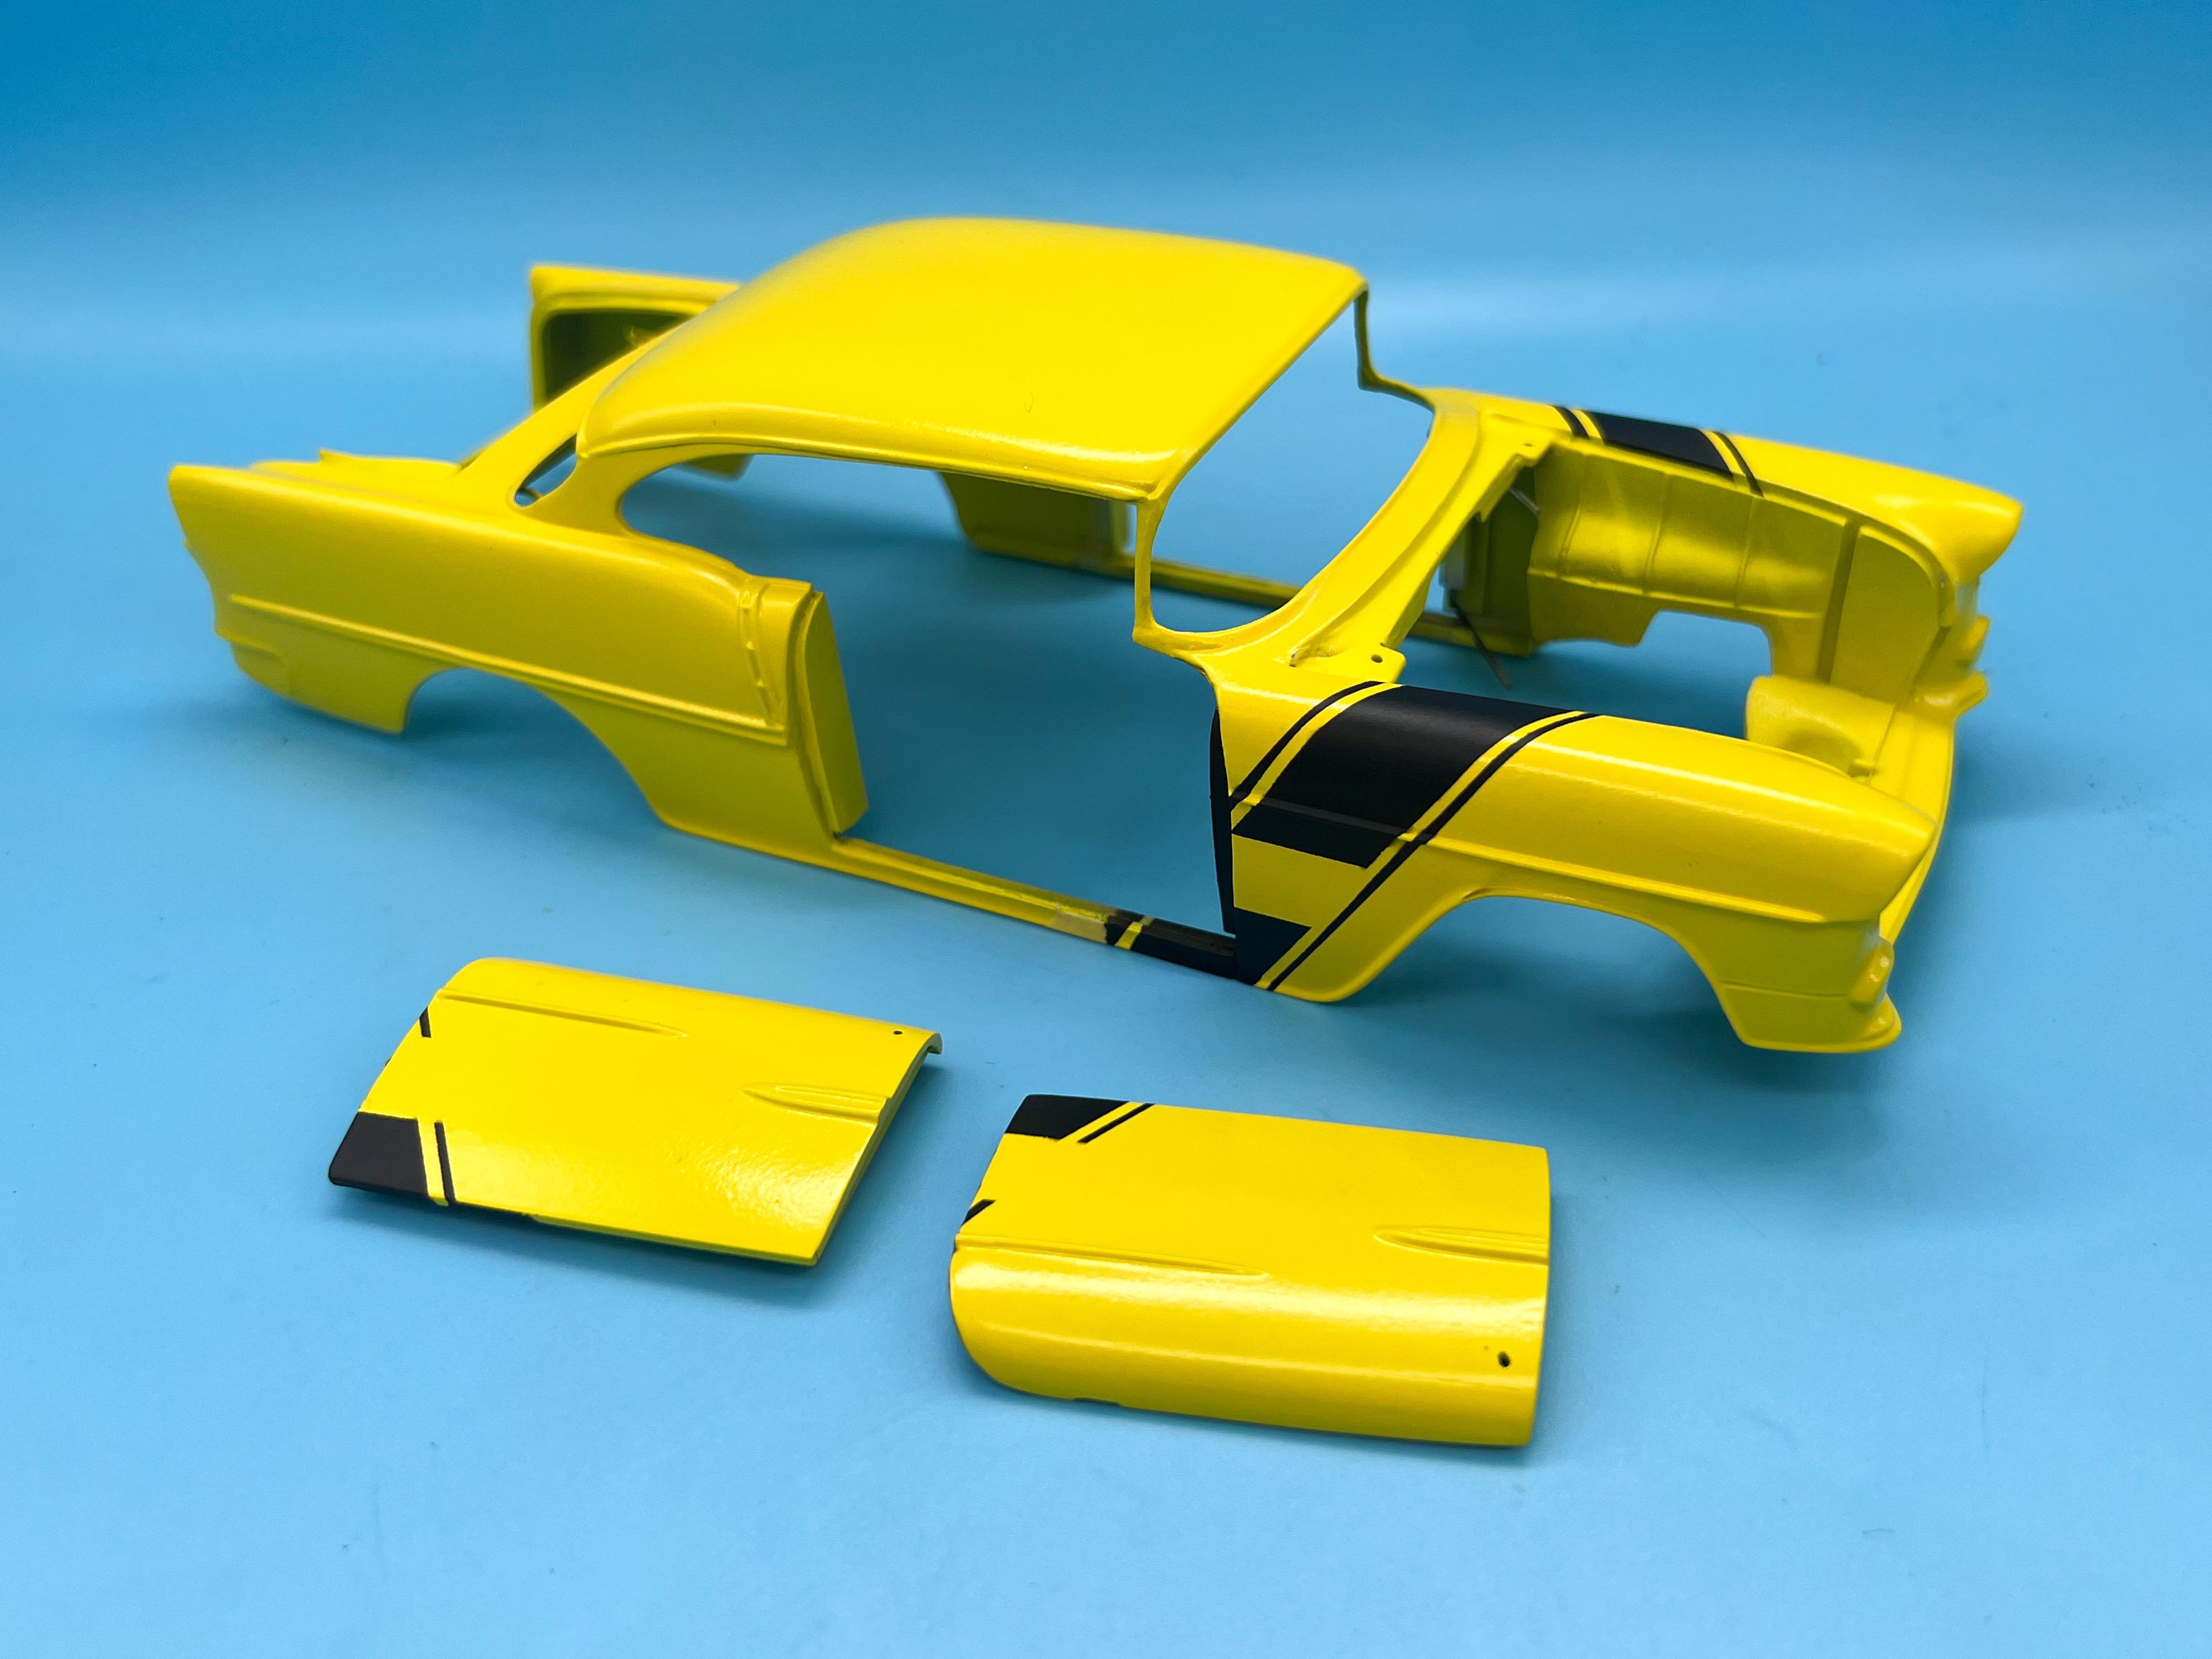
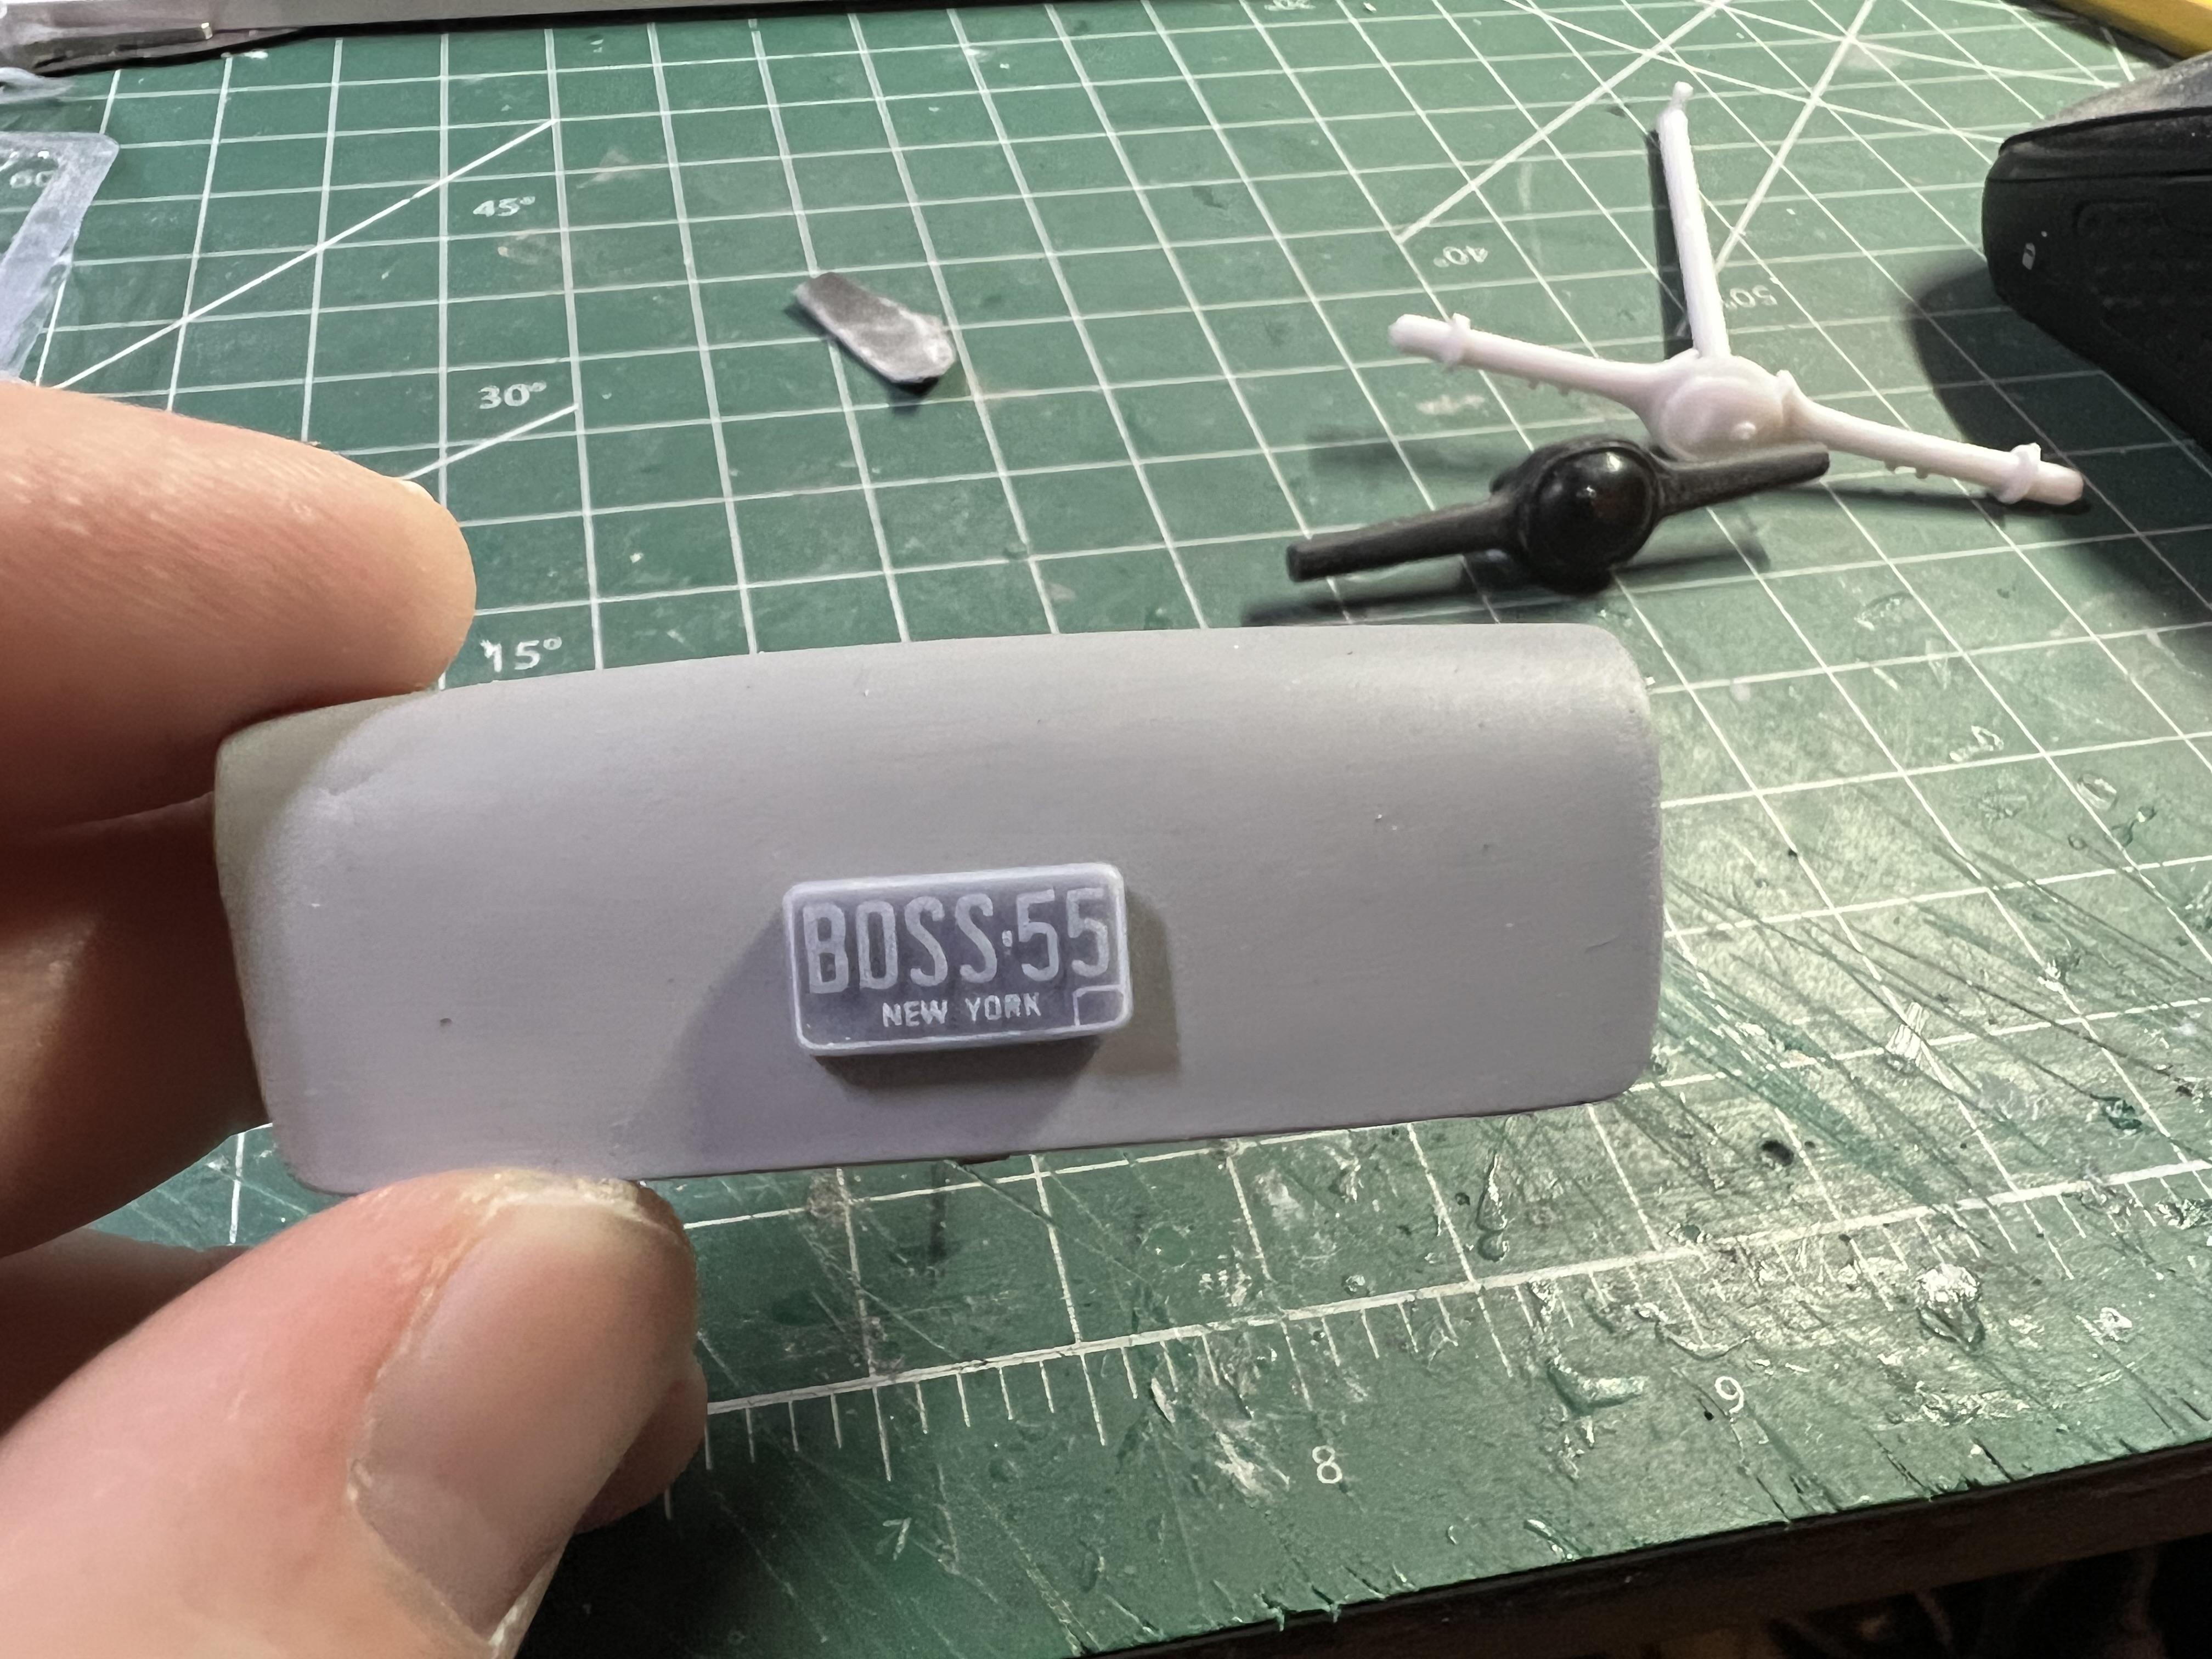
Thanks fellas! Good luck with your pickles Bob! A couple more tiny bits of progress… I wanted to paint the engine Chevy orange, but I didn’t like how the color looked with the other colors in this build. The brightest yellow I could paint, bright red lettering…I wanted a nice bright cartoony orange to keep the color palette how I had it in my head. Even my usual go-to Createx collection didn’t quite have the tone I wanted but I found one that matched the color in my head: I’ve been trying to solve the puzzle of how to paint the embossed 3D printed license plates that I’ve been printing lately, and found a few tricks that work but none of them were quite as easy and foolproof as I would’ve liked. I found a little rubber roller on Amazon at the weekend, and ordered one to experiment with. Painted the license plate black, then used a little white acrylic on the roller to pick out the fine lettering…I haven’t nailed the technique yet, but it’s the best way I found so far: I also got a set of aftermarket decals in the mail… …so obviously I’ll be trying to paint as much of this stuff as I can instead of actually using them ? First up, the stripes: I measured the decals as a guide, but also referenced the look of the box art seeing as that’s the thing I’m really trying to copy…turned out ok I think! Once this black has set up overnight I’ll clean up any little flaws or bits of whatever that needs fixing, then I’ll hit it with a light coat of clear so I can get the next steps done. Oh, and I’ve been working on the base for this thing a little too…can’t beat a fun evening of Bondo-ing some flaws on some concrete blocks to get them as perfect as can be ? Just a little progress, but some progress…more soon, soon as I’ve done more!
-
Apparently Donn Yost has, now, passed away. I never got the chance to hang out with Donn, which I really regret - but I enjoyed his tutorial videos, learned a bunch, and admired his amazing skill at laying down a paint job. A real loss to the community. A coupla three of his builds linked below:
-
What Did You Get Today? (Not Model Related)
OldNYJim replied to LOBBS's topic in The Off-Topic Lounge
Huh! Interesting! You're right - it's smart to have given the price. Do they have any cool rentals over there? Jaguar E-Type or an MG? ? -
I LOVE that color Dave! Do you recall who makes that acrylic?
-
What Did You Get Today? (Not Model Related)
OldNYJim replied to LOBBS's topic in The Off-Topic Lounge
I had no idea we were supposed to get a permit to drive in other countries (unless that’s a weird rule that only applies to Canadians, which I’m sure it isn’t…) Huh! (And whoops) -
Other model car forums
OldNYJim replied to ColonelKrypton's topic in General Automotive Talk (Trucks and Cars)
The thing is, with Facebook and Youtube - its not easy to search and find a useful piece of information like it is on a regular forum. Good luck finding a useful reference post after a month on a Facebook group. But this place - I'm constantly searching for info and finding results from maybe 15 years back that are still relevant and useful. I hope this forum never goes away - even if Youtube / Facebook / TikTok / whatever are much more the mainstream place to meet online discuss things right now...but remember, so was Myspace at one point... -
Oh, well, excuse me for mentioning it then ?♂️
-
That intake setup would be an awesome add on to any of the Revell 32 Fords with the Small Block Ford engines
-
Interesting! I checked my stash of these and not a ‘Miata’ among them…I had no idea there was an ACTUAL Miata kit! Thanks for the info - I need to find one now!
-
Nice scratchbuilding! That's really beautiful work!
-
Clever! So much masterful work to enjoy in this thread!
- 565 replies
-
- 1
-

-
- quarterman
- fisher
- (and 1 more)
-
Who doesn't love a mock-up? Let's see yours!
OldNYJim replied to Belairconvertable's topic in WIP: Model Cars
This is awesome!! Great start!! -
This one includes a hardtop AND is a Miata...what is the 'Miata version'?
-
That’s interesting - did you use the Deuce frame from the ‘29 kit or the Model A frame? Can’t quite tell from the pic…
-
I just found a bunch of stuff at the 1:1 swap meet for a buck up…
-
My take on the most famous ‘55 gasser street machine’…
OldNYJim replied to OldNYJim's topic in WIP: Model Cars
Oh, and in case the BMV is watching…YES it will be street legal and wearing it’s plate…
-
opening 32 ford roadster doors
OldNYJim replied to Paul Payne's topic in Model Building Questions and Answers
I’ll be interested to hear some ideas on this too - I’ve been wanting to open the doors on a droptop Beetle, but if you open the doors then suddenly you have a four piece body with nothing connecting the pieces -
My take on the most famous ‘55 gasser street machine’…
OldNYJim replied to OldNYJim's topic in WIP: Model Cars
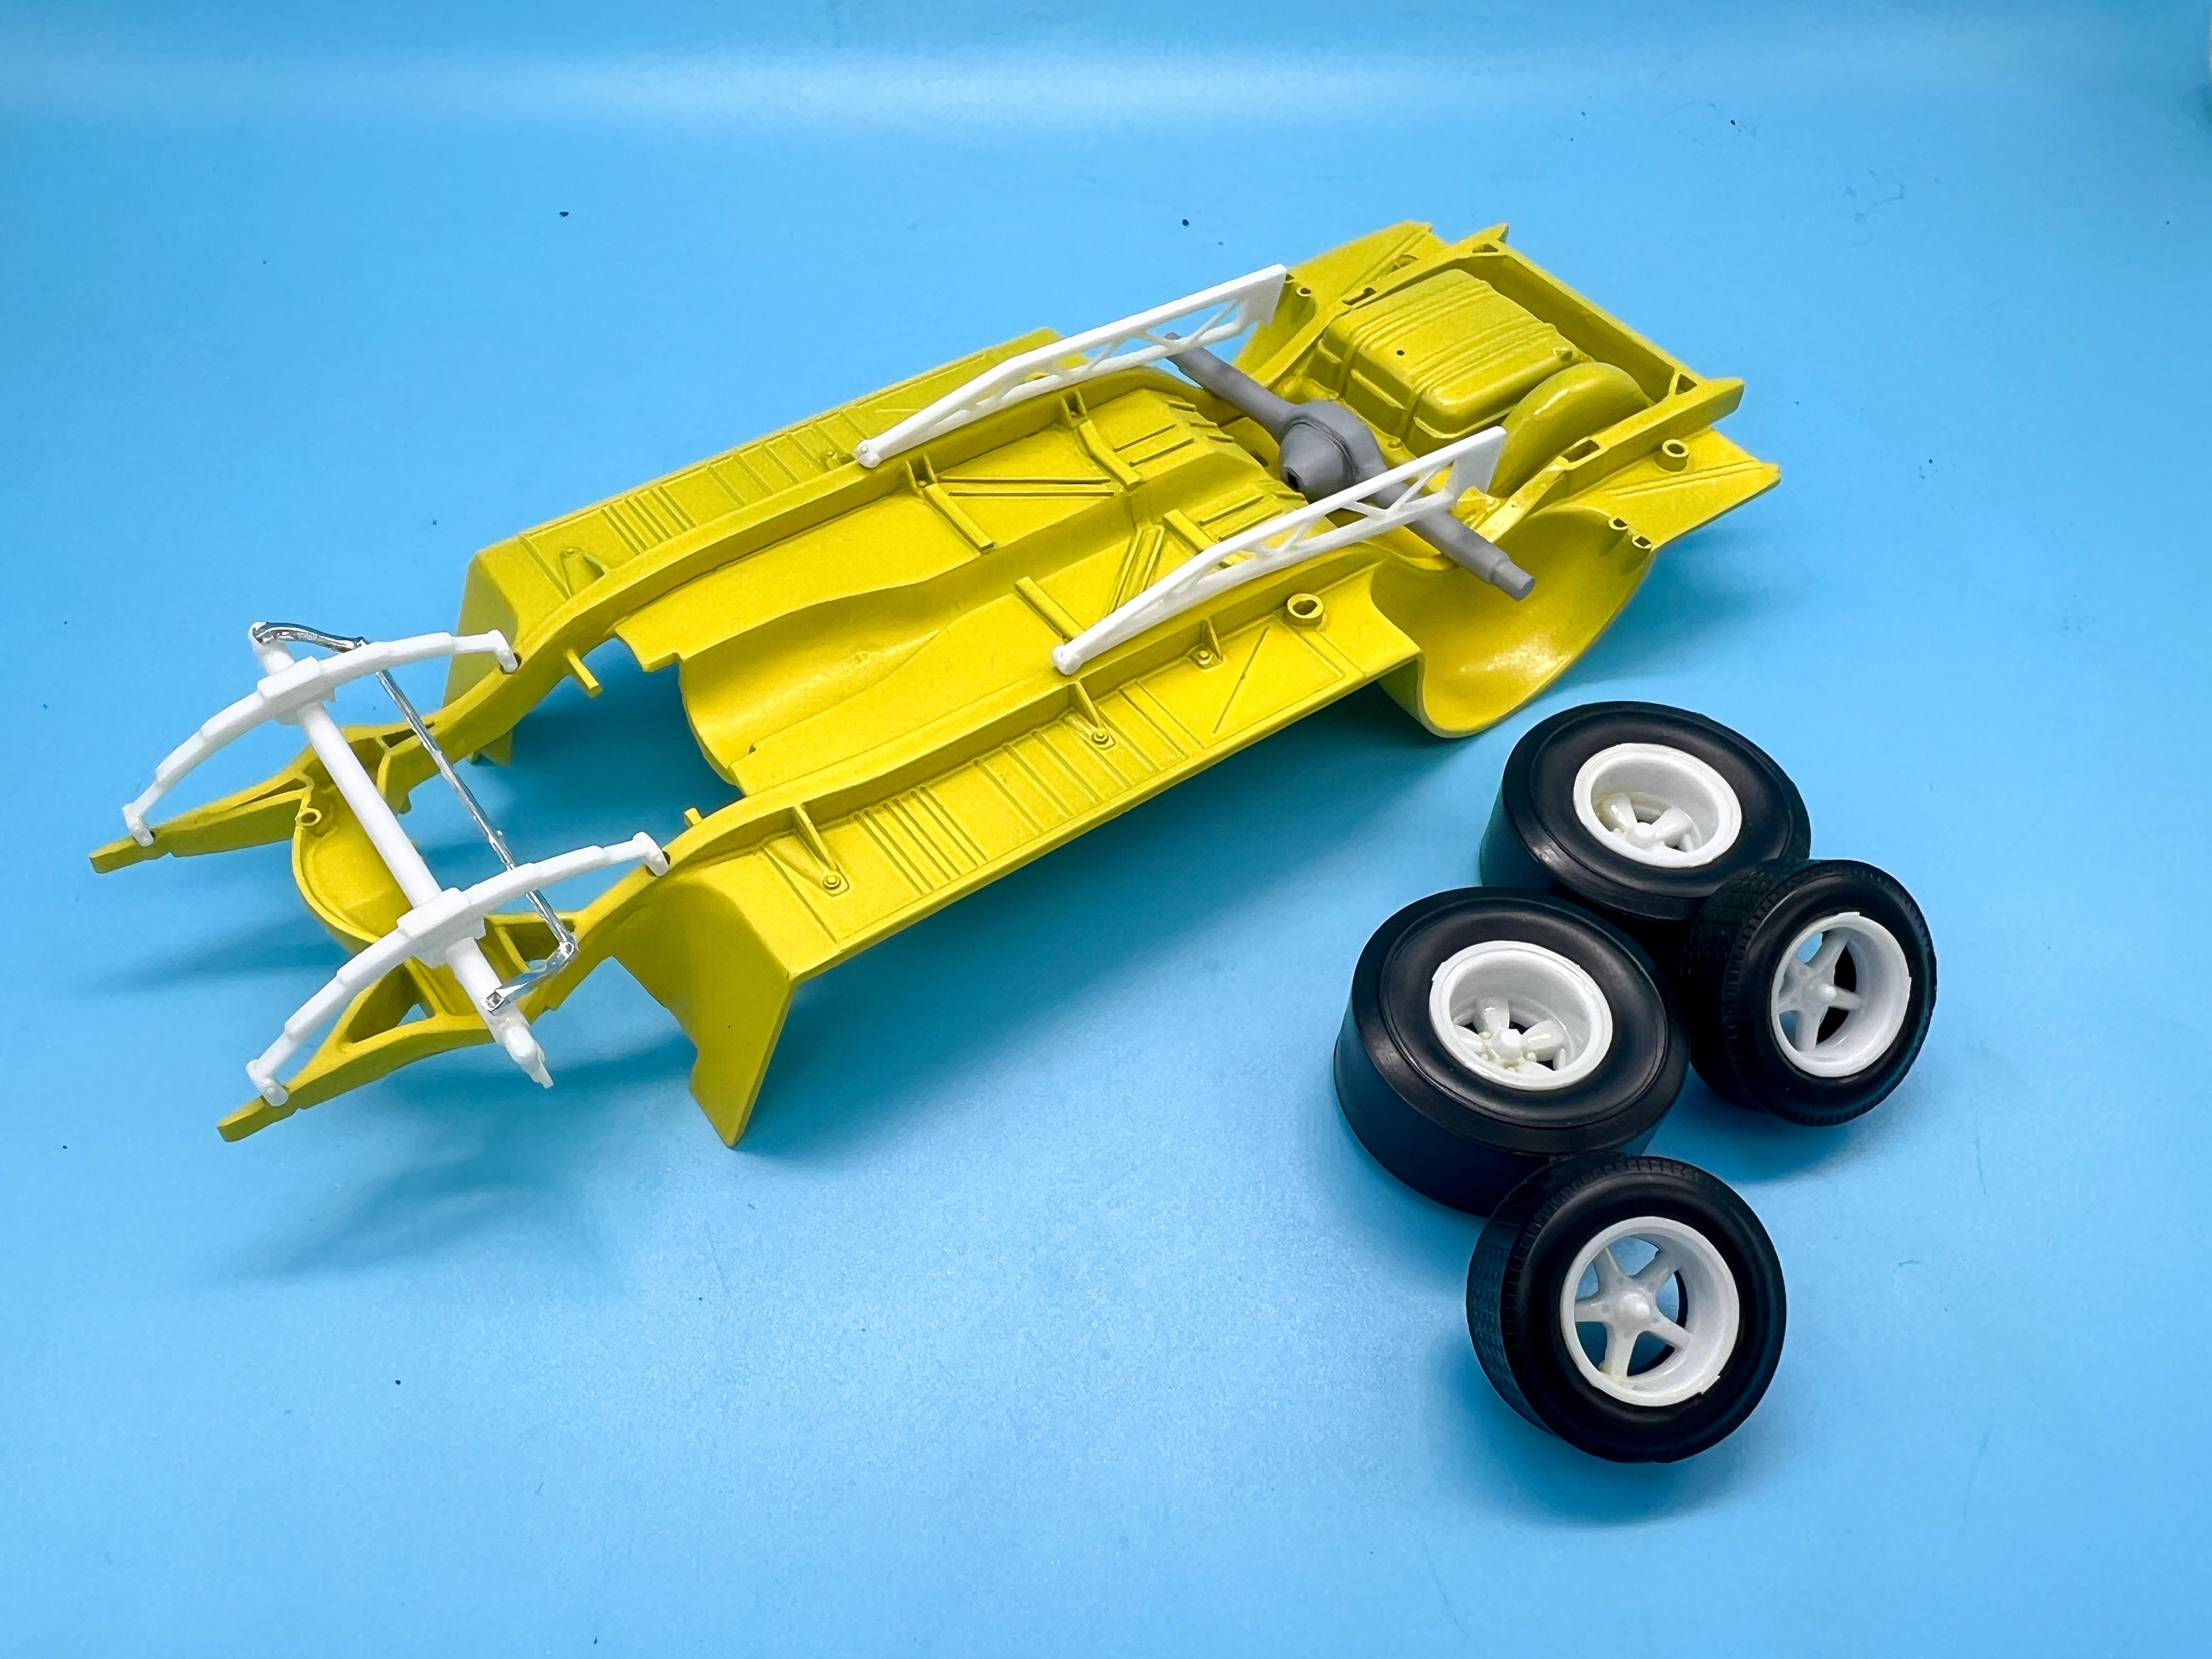
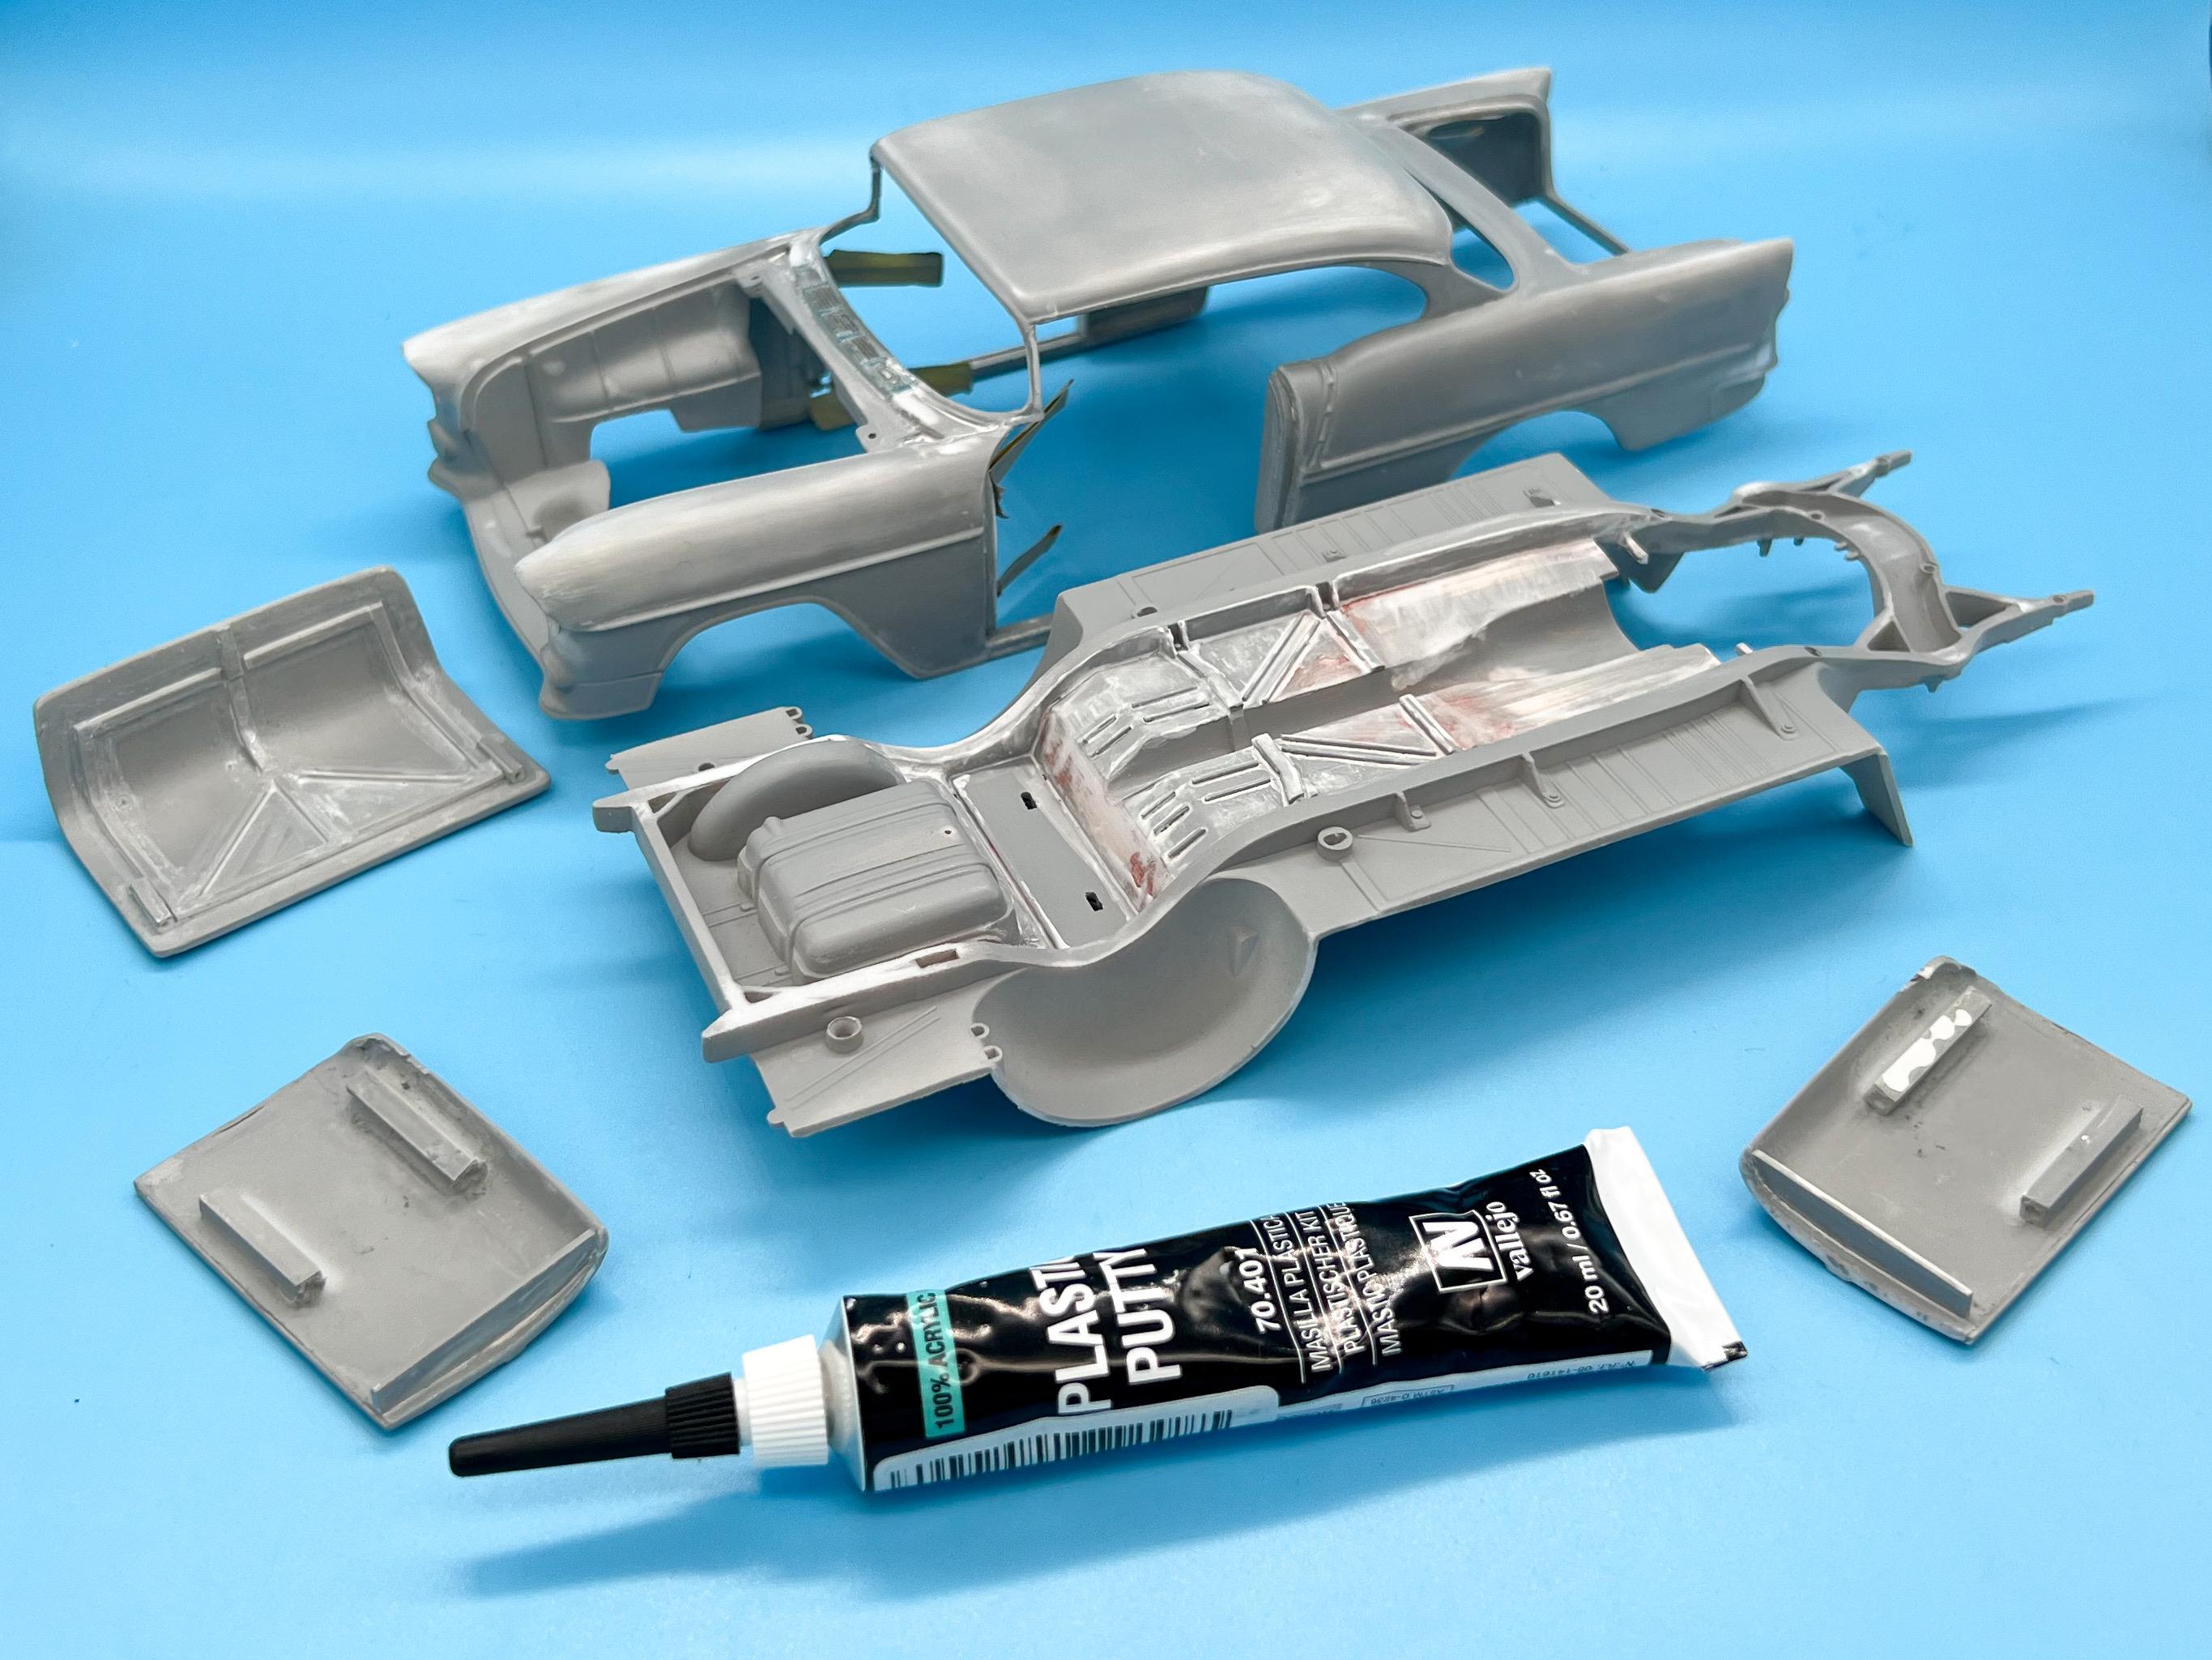
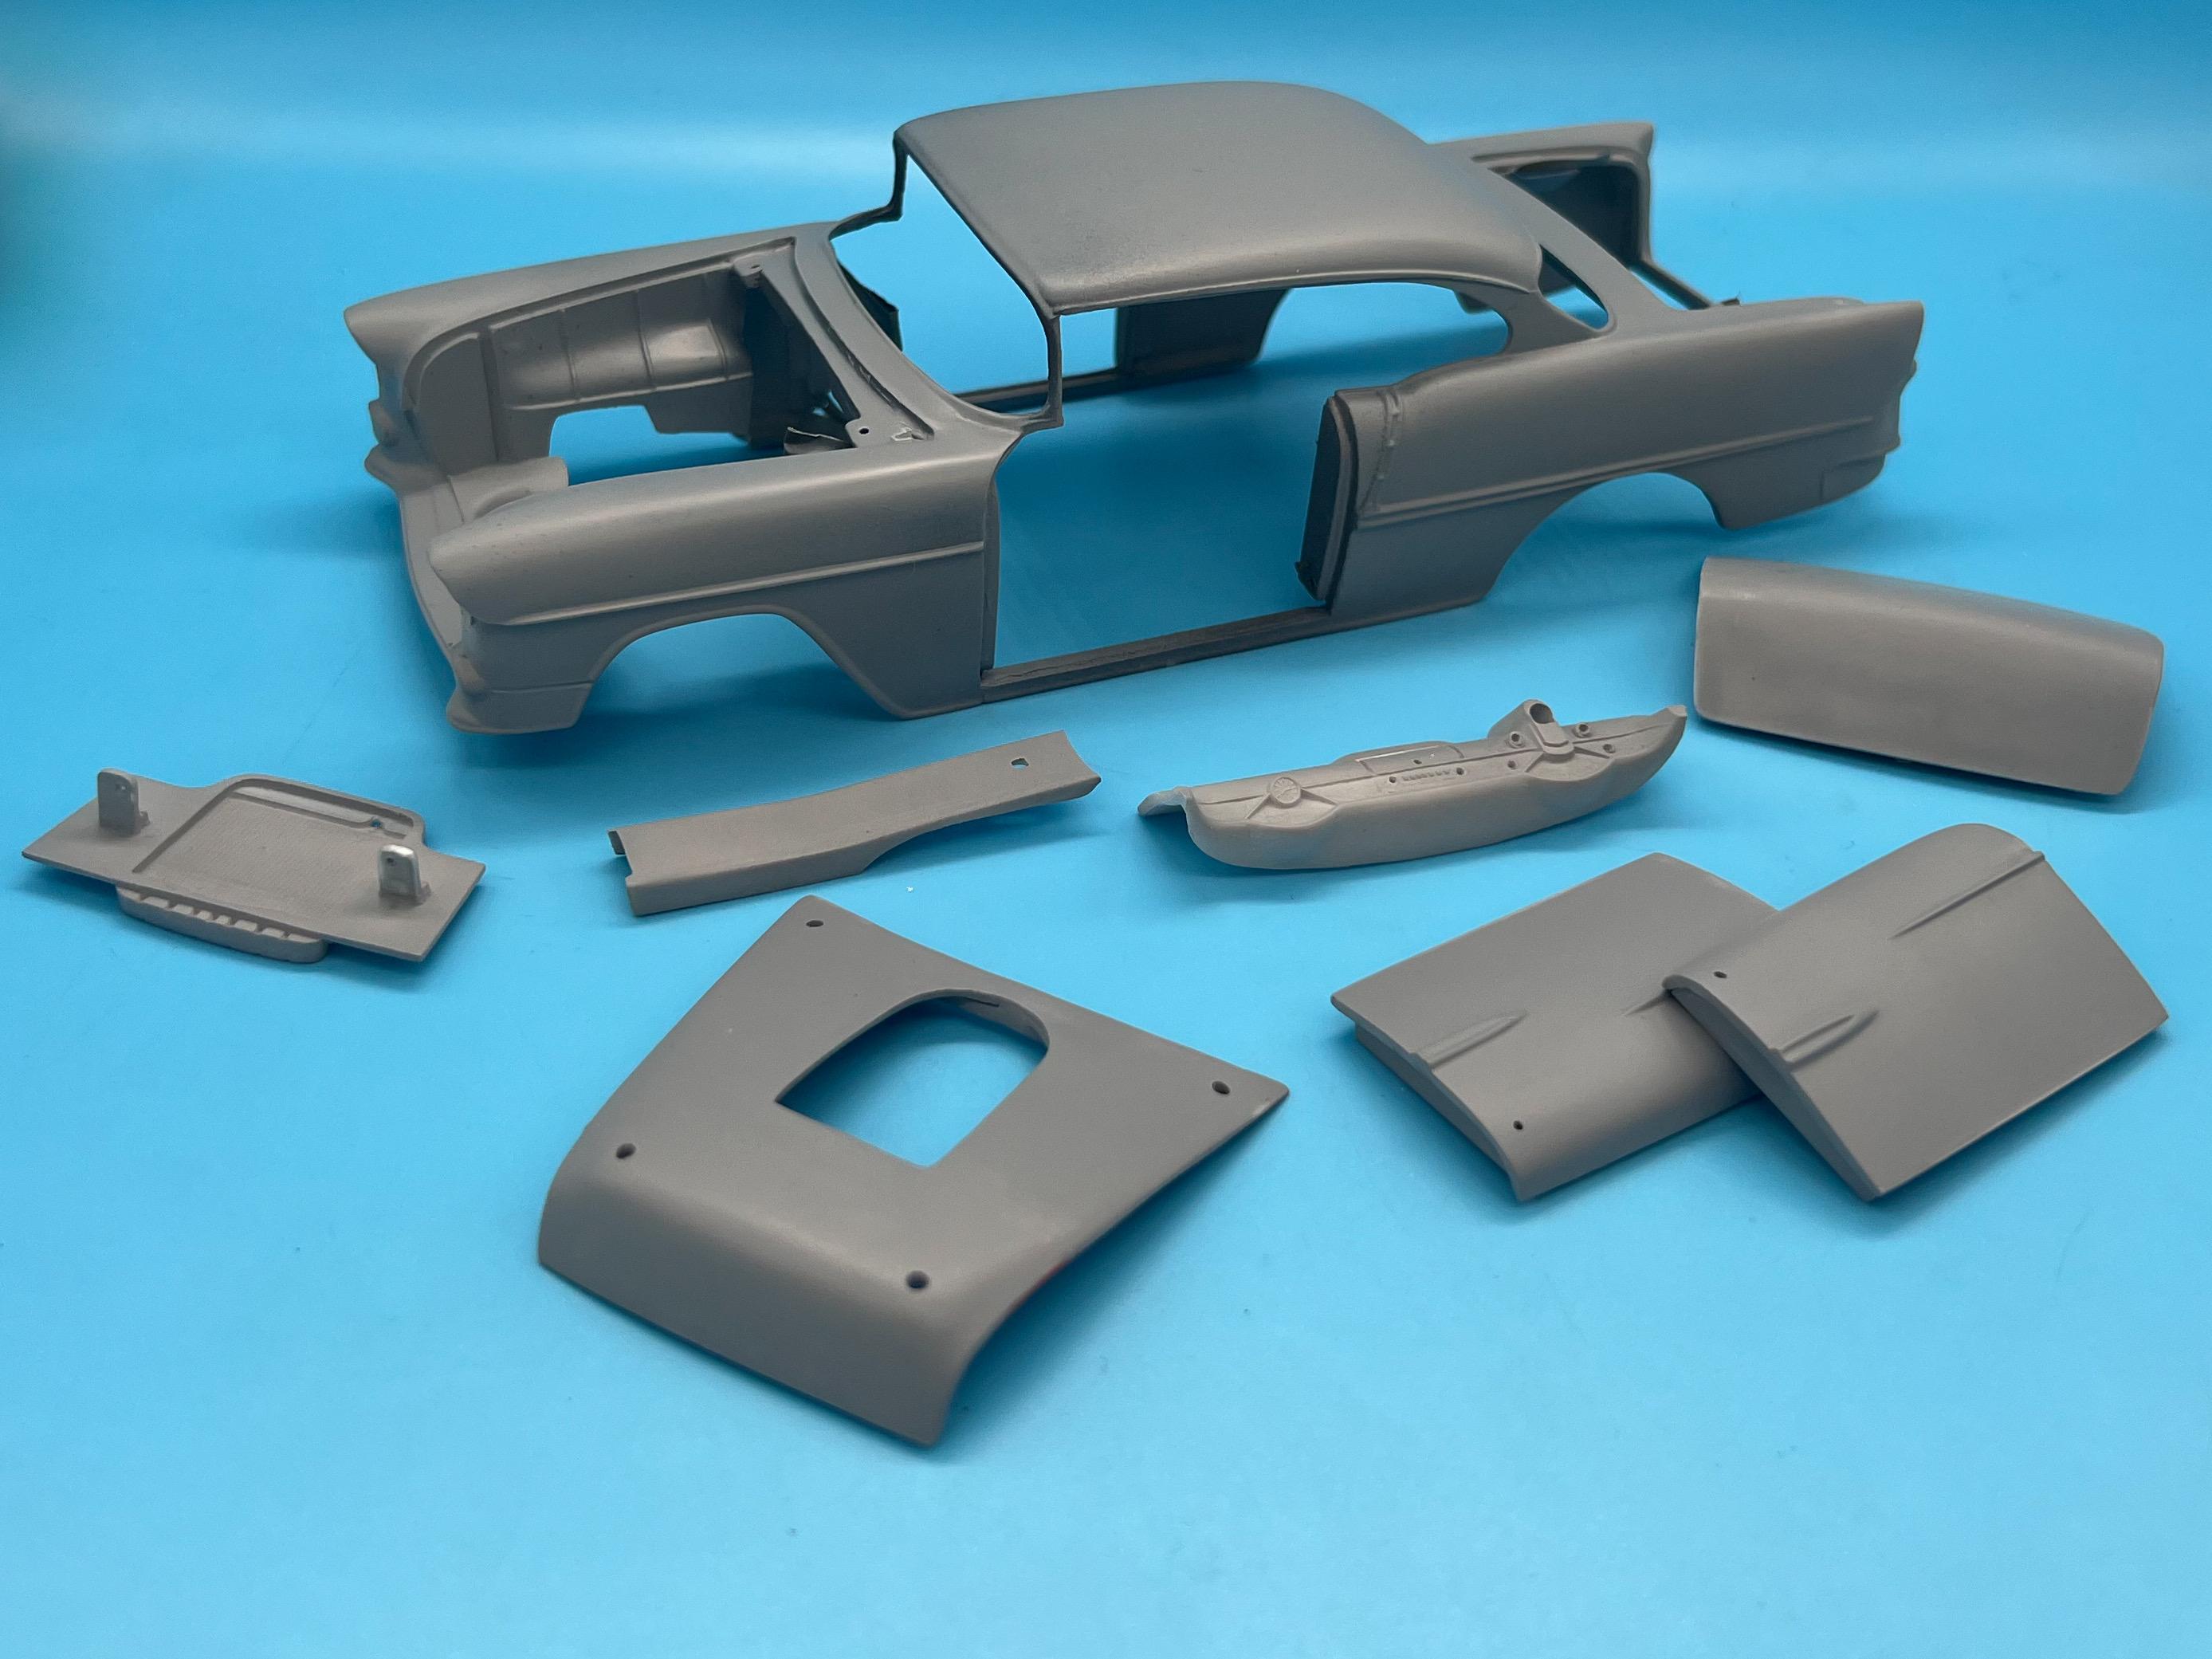
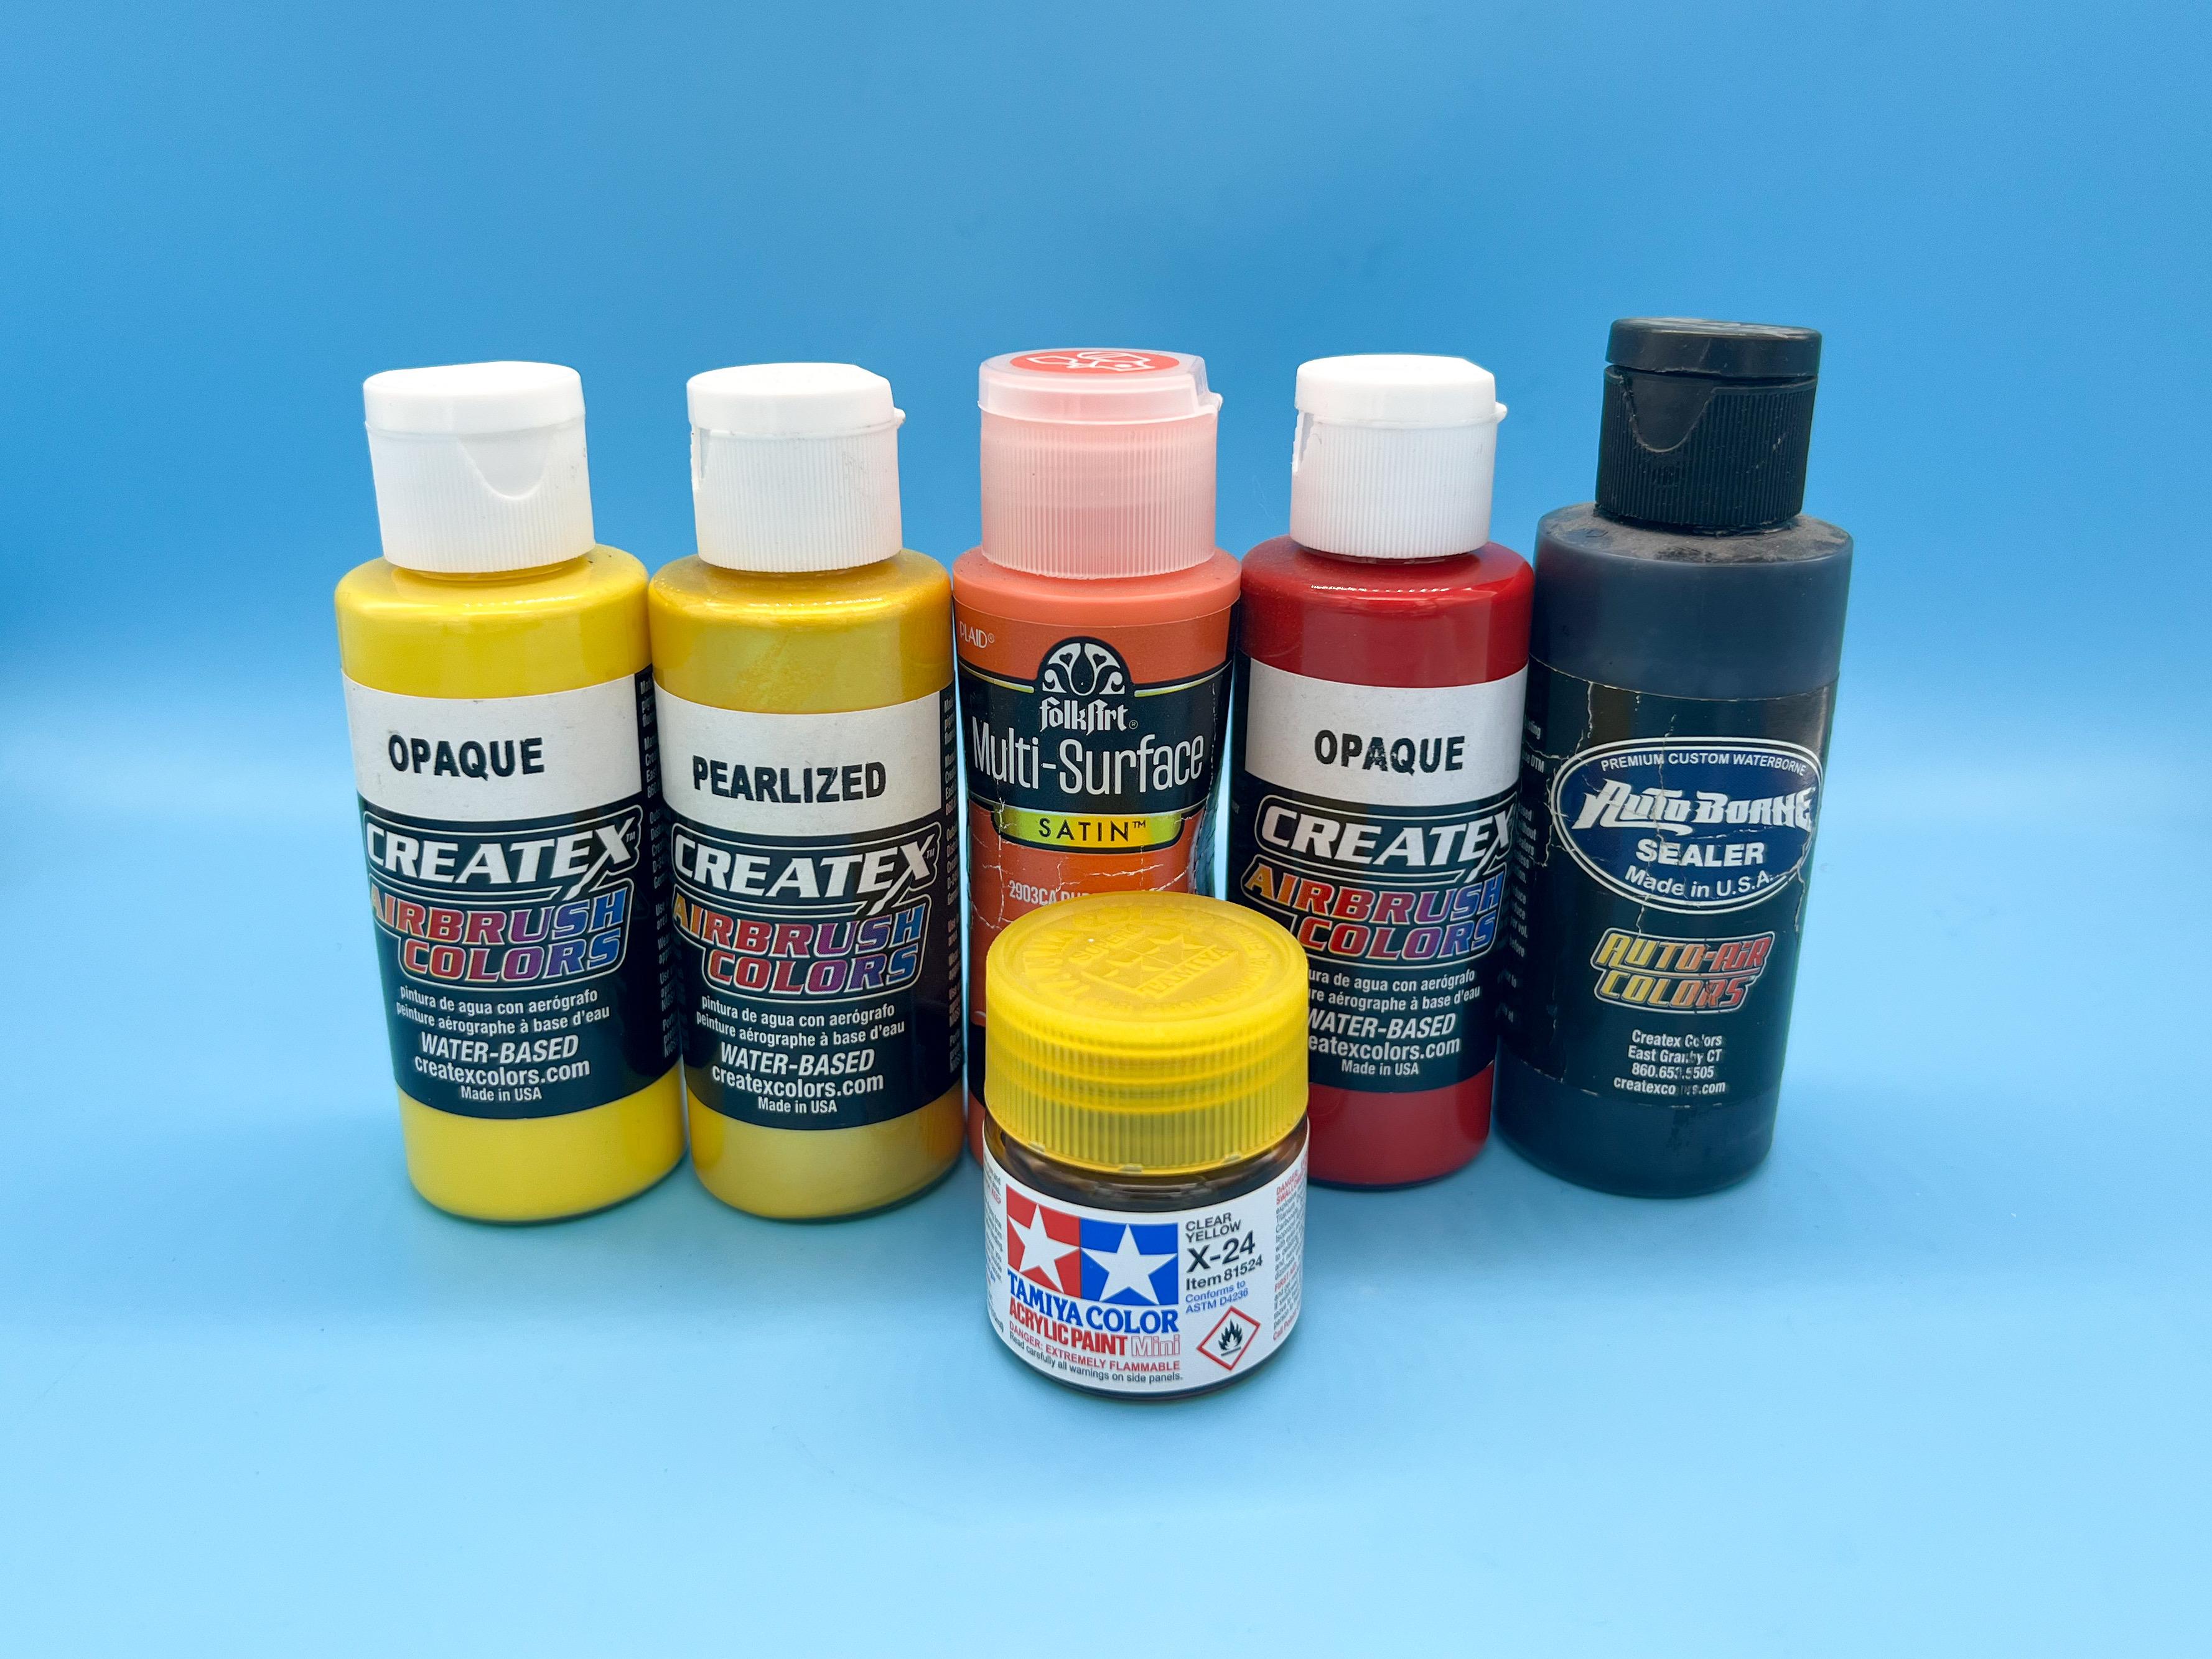
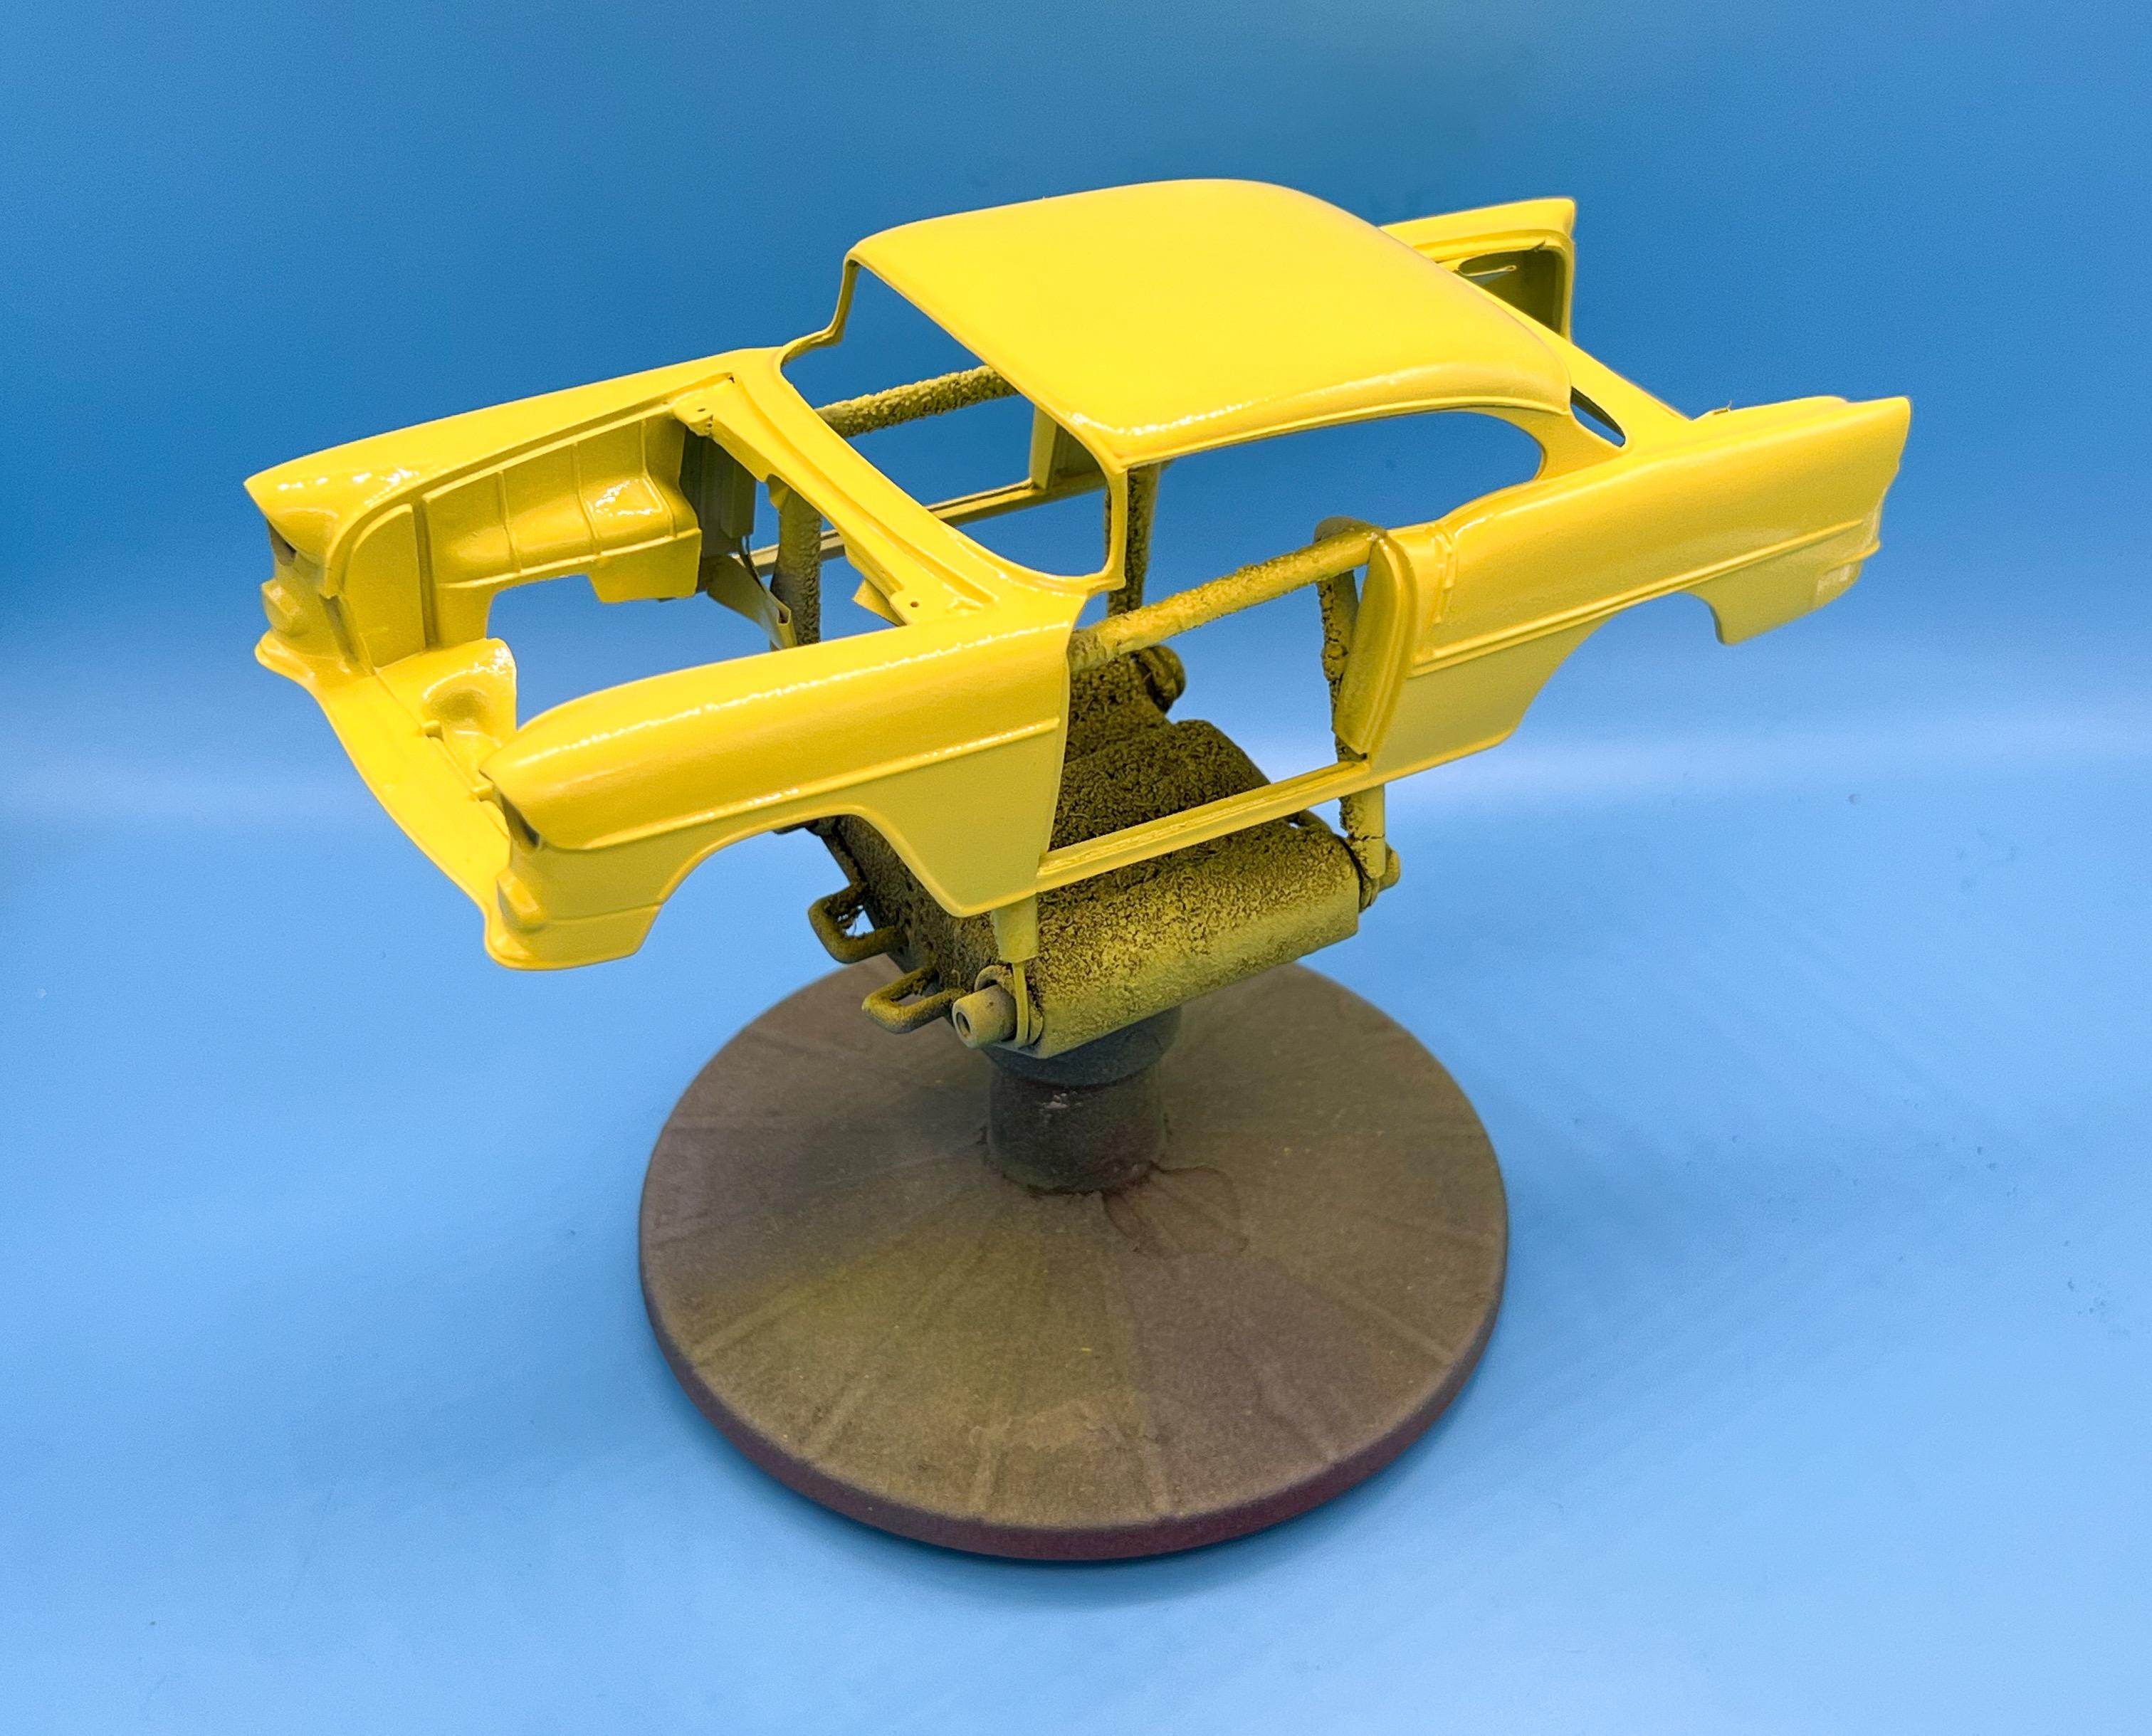
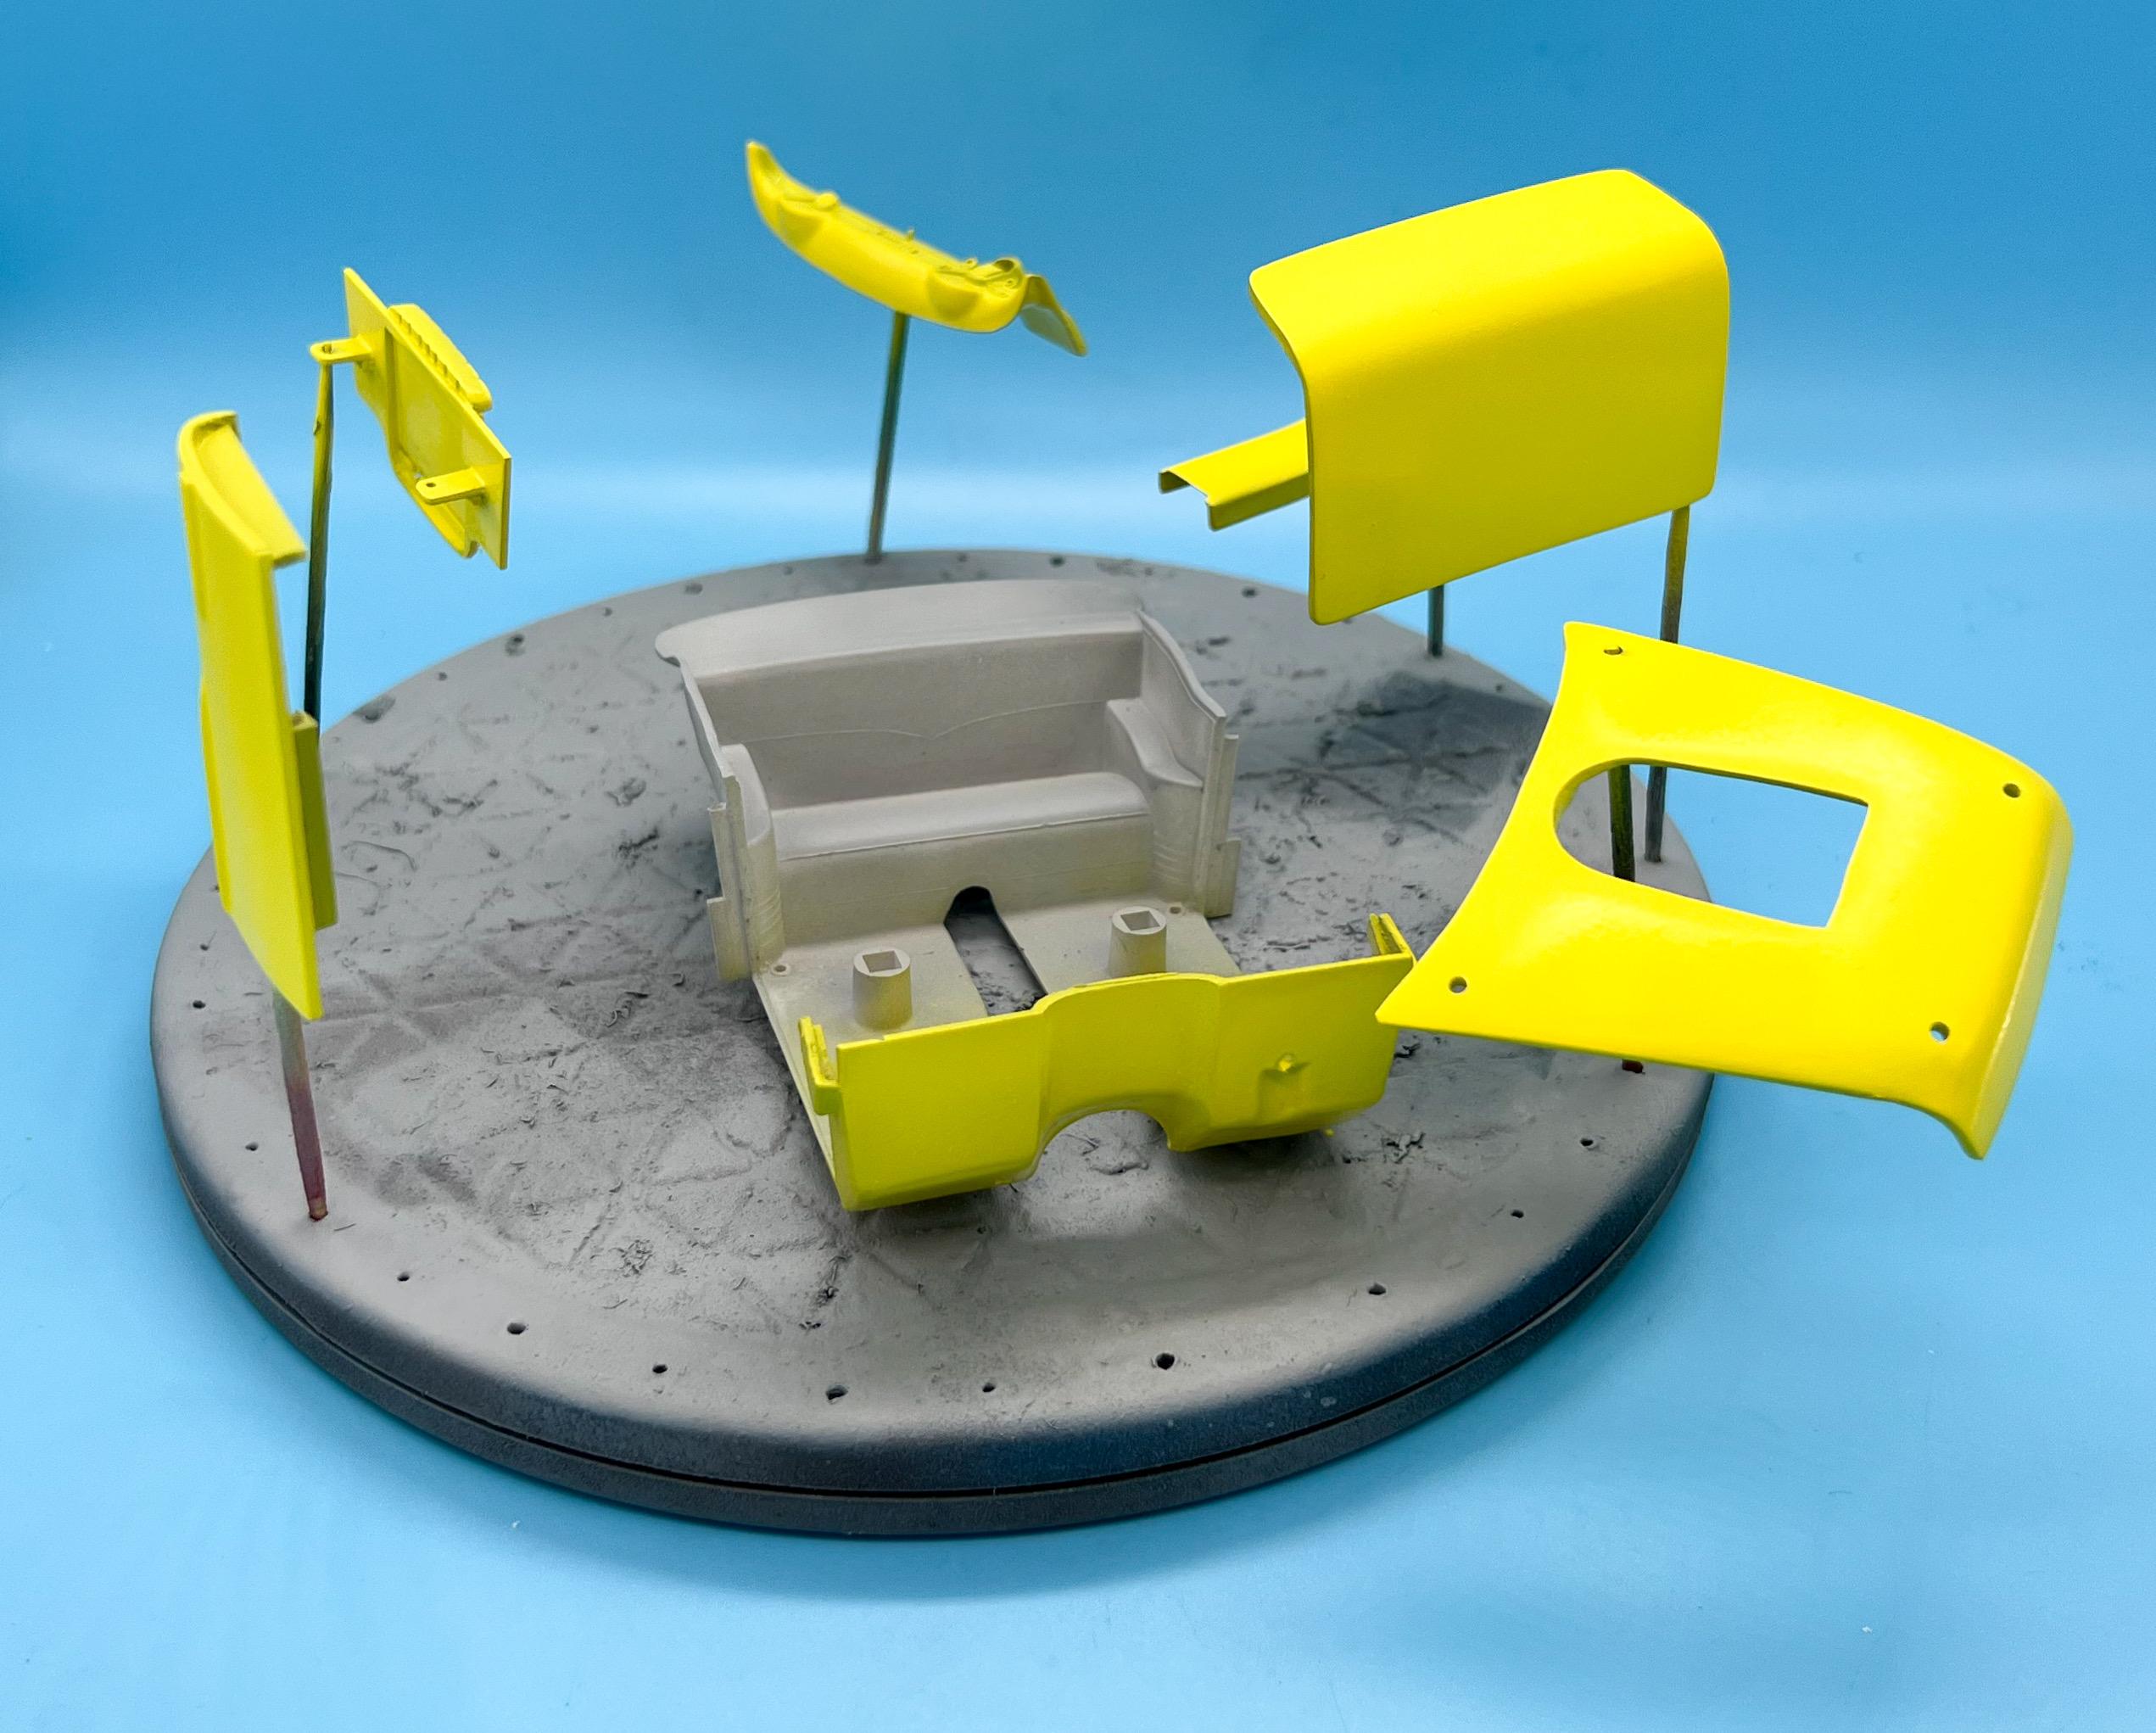
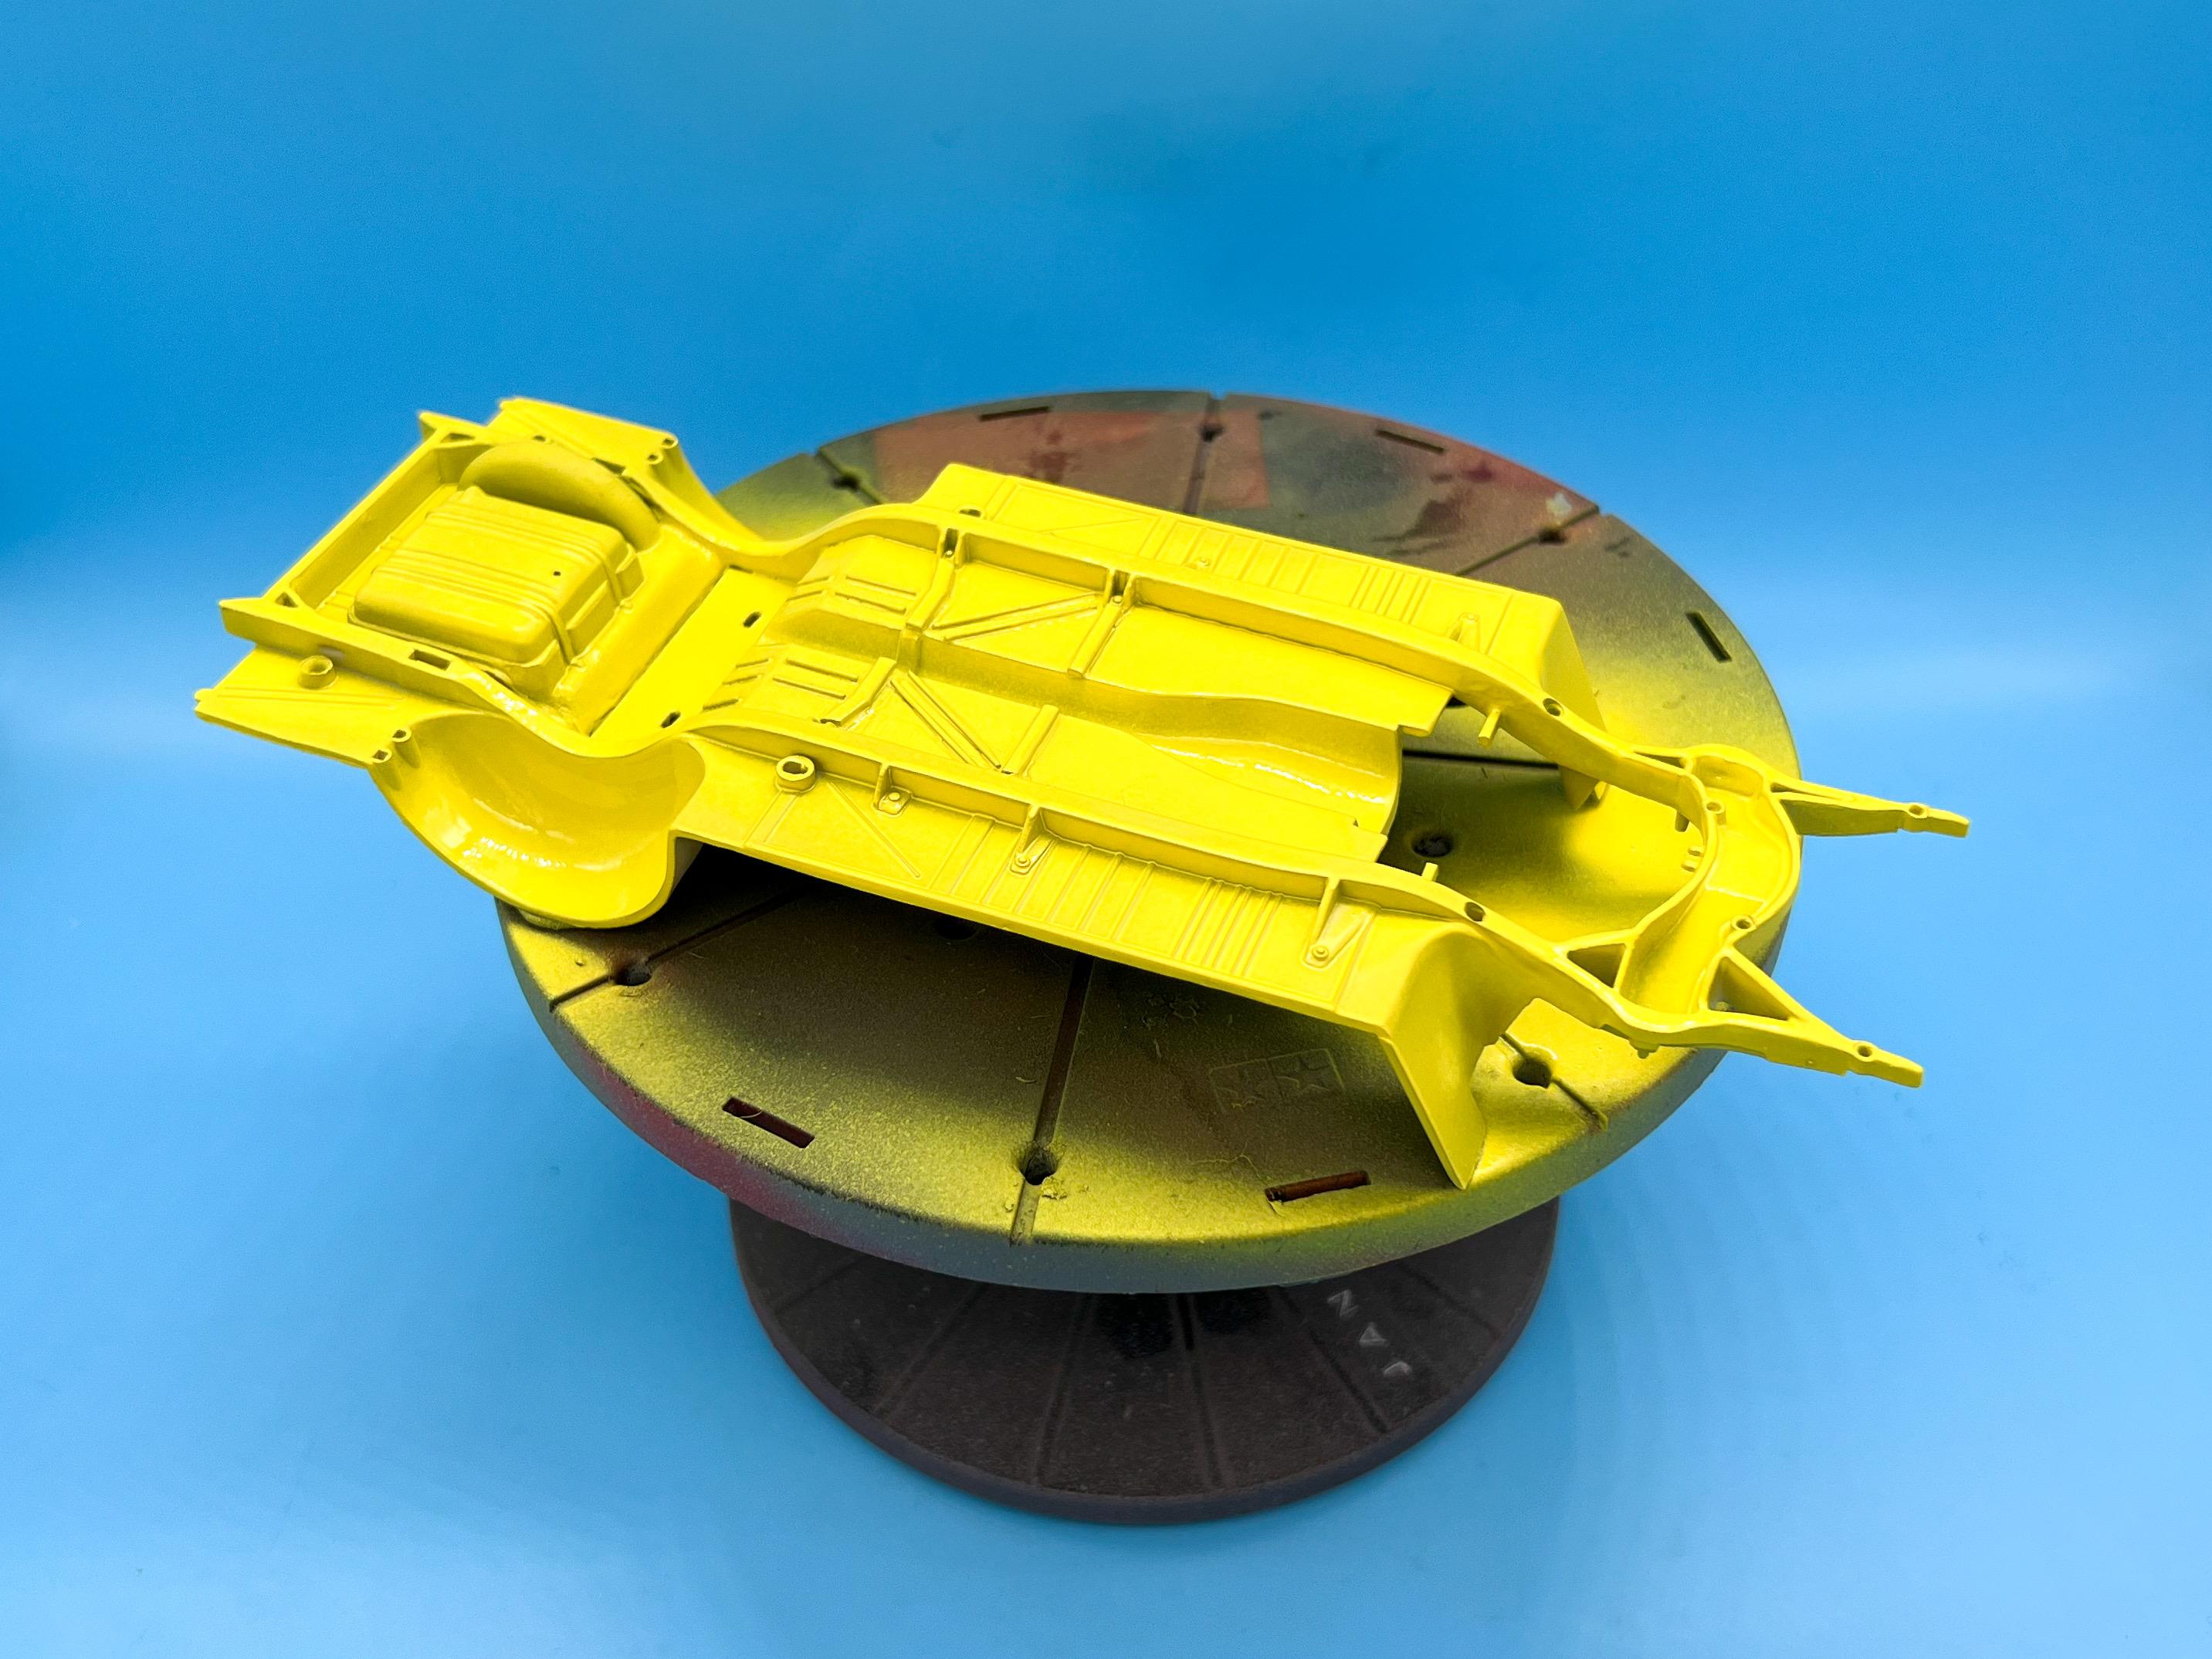
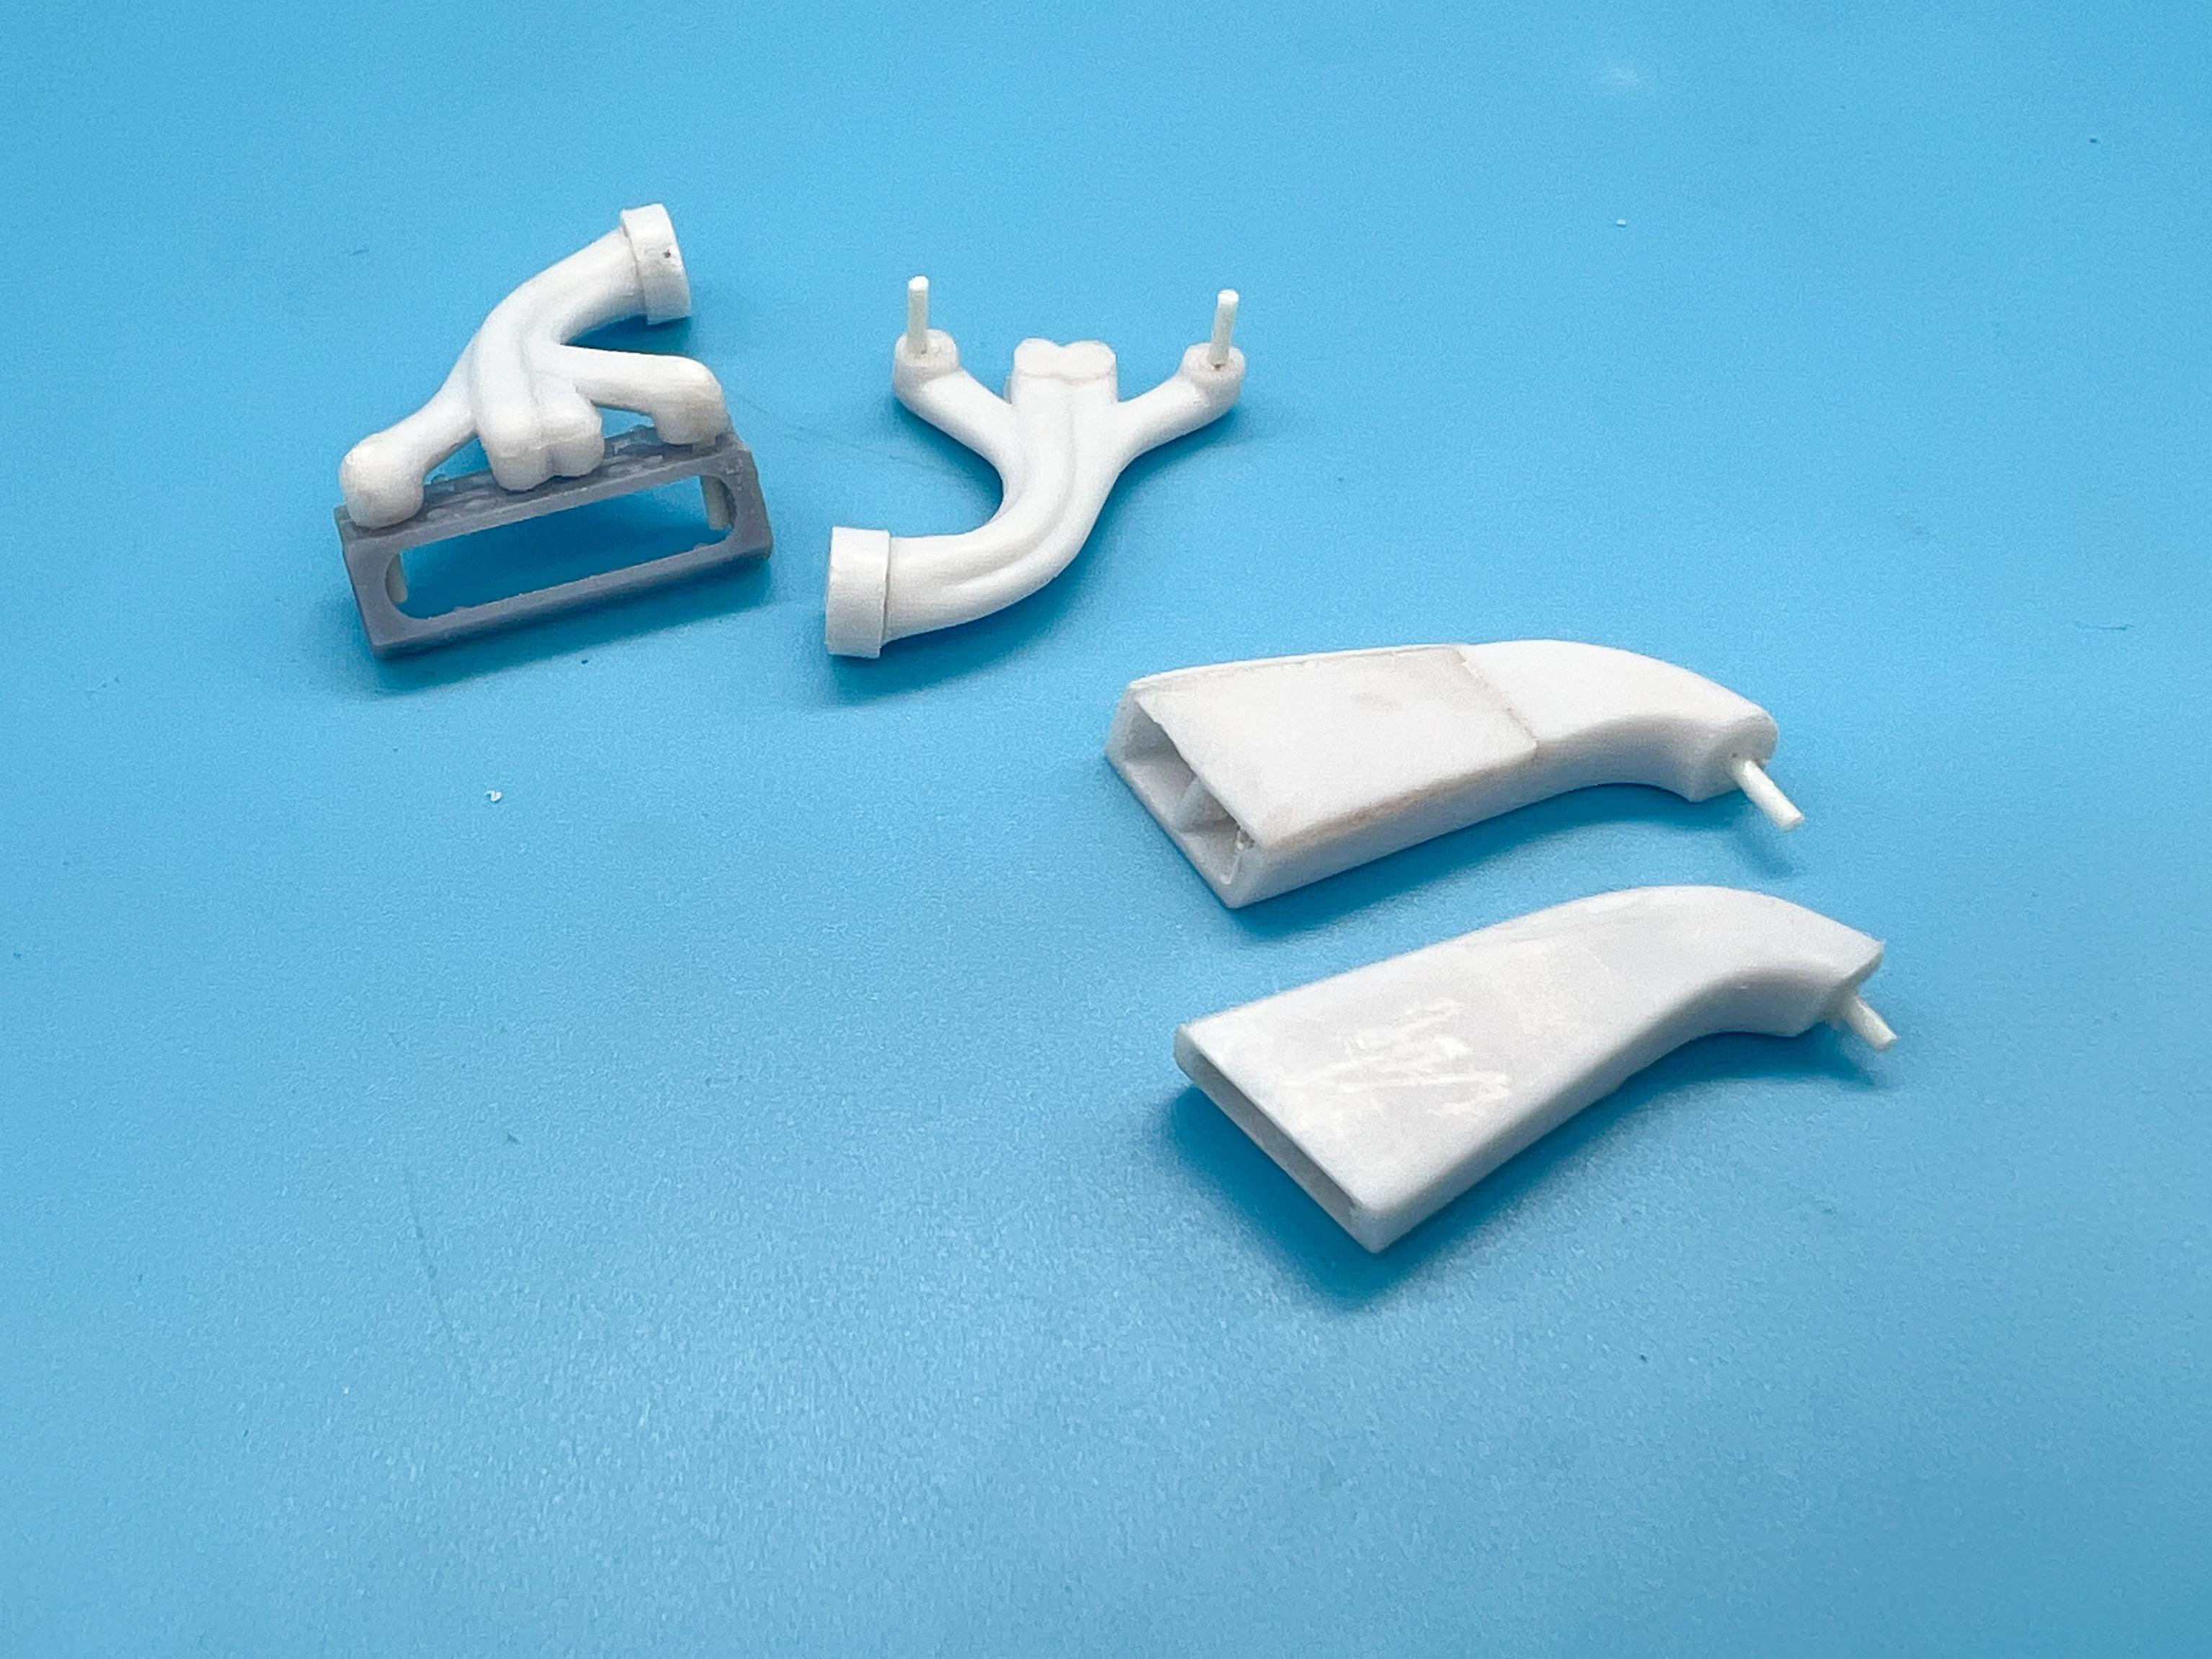
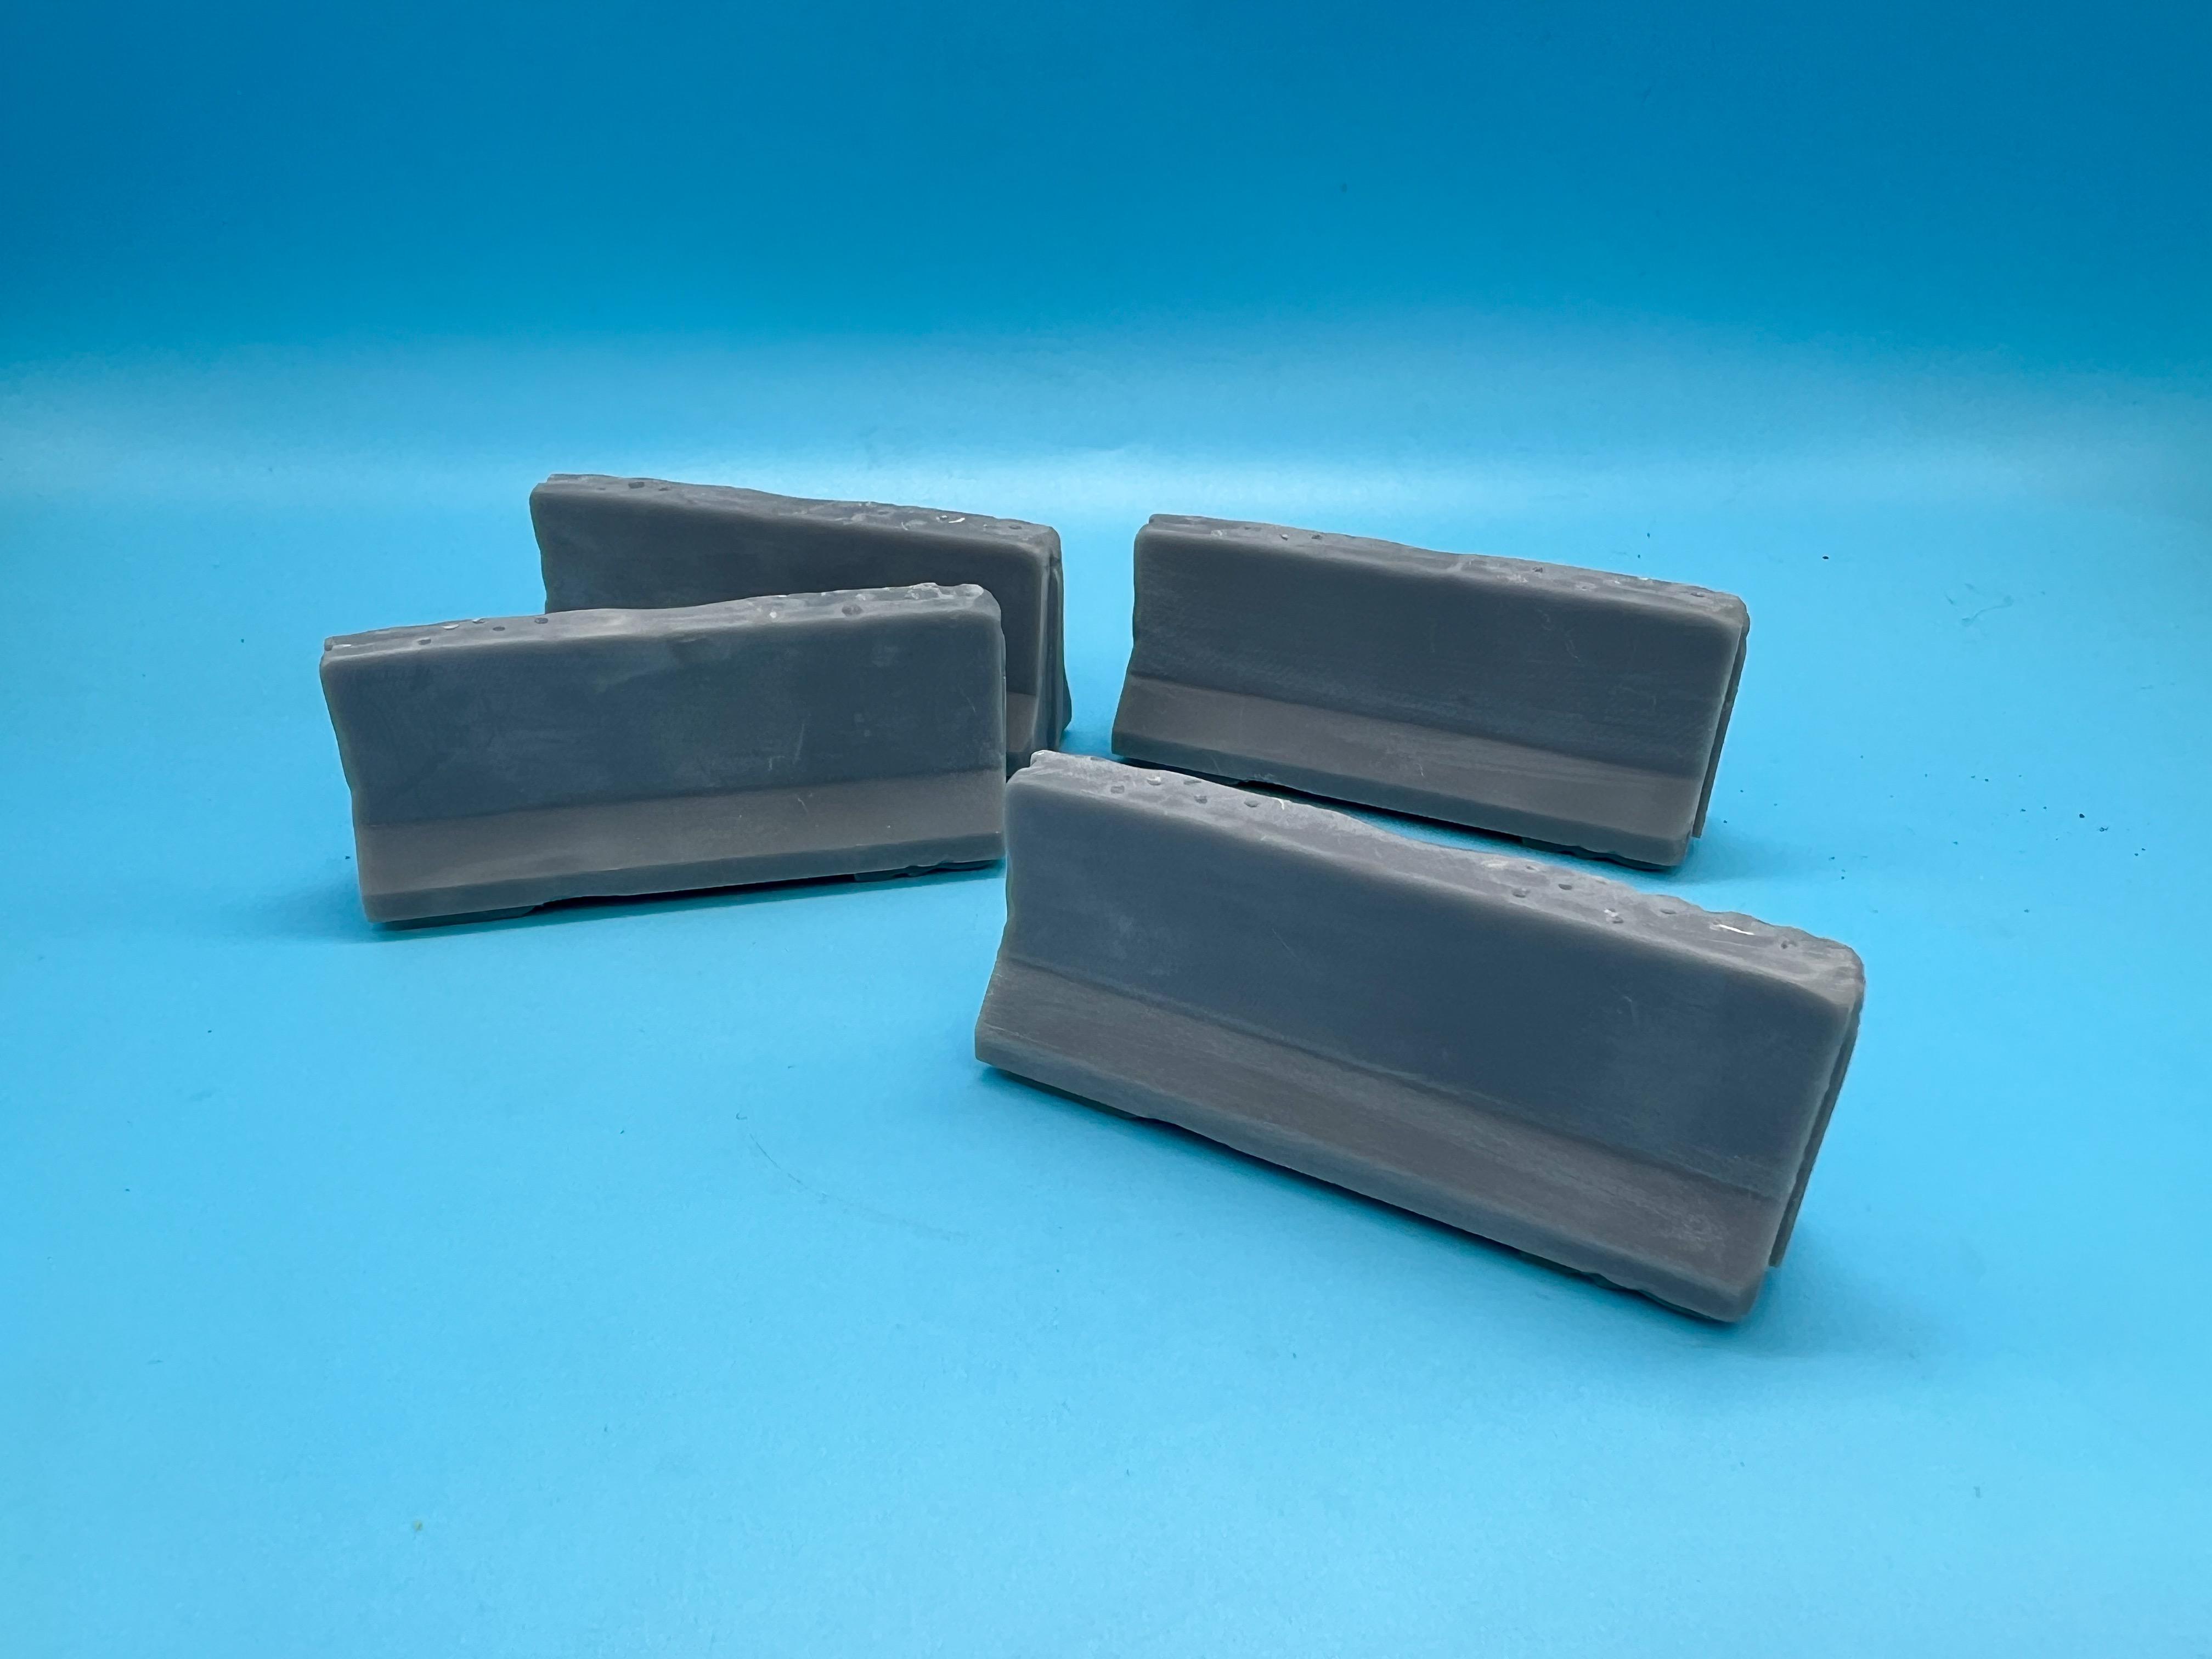
Thanks so much fellas! Correct! I just couldn’t get it to hold in position the correct way up using Elmers so I hoped nobody would notice ?. That reminds me I need to pin that thing… In the meantime…spent most of the week getting the body straight and perfect as I could - many MANY rounds of sanding and primering. Something I like for those final little pinpricks and scratches that you need to fix is this Vallejo plastic putty - dries quick and does a good job of fixing anything you need fixing that wouldn’t call for Bondo. I thinned some with water and fixed some flaws on the chassis and for final tweaks on the body: The cowl vents didn’t make it…they clogged up constantly when I primed the body and were a real pain for only a little gain so I filled those somewhere down the line…need to experiment with them more on future builds… Eventually tho, I got to this: (Actually, I think I still did a little more wetsanding and tweaking after this shot too, but I got tired of photographing the body in primer ?) Then, shot all of the outside facing parts of everything with Tamiya white as a base: I’m going to try a military modeler trick of simulating some additional shadows and depth to the inside of things like the hood and the inner trunk by leaving them in gray primer, to give some very subtle color variations to the (fairly thin) yellow paint. Speaking of which, this is my main color palette for this build: Going with the Createx yellow as it’s the brightest, purest yellow I’ve found and it really pops…the pearl yellow will be for the seat inserts, the orange for the block, red for the roll cage and lettering on the doors and black for the stripes. Oh, and clear yellow for some little interior parts like the steering wheel and shift knob and some stuff like that I think. So, after what seems like months of messing with this body…finally got it in color: Plus all the other stuff that attaches to it or goes somewhere inside it: And, this being a showrod, the underside got the same treatment too: In other non-body projects, I cleaned up those big old headers (which scale out to about 2.5-3” pipes at the top ends, so maybe they’re not SUPER out of scale) and added pins to fit them to my 3D printed engine (and to assemble them to each other when I’m doing assembly later): Still need to tweak them some more before paint… And final project for the weekend was printing up some concrete barriers for the display base I’m building for this thing too: I’ll post some pics of the sistercar that I’m working on too…made some decent steps in getting the box-stock (ish) comparison piece ready for paint but it’s not very exciting yet - just a bunch of stuff in primer. Thanks for looking - more soon, soon as I’ve done more!
-
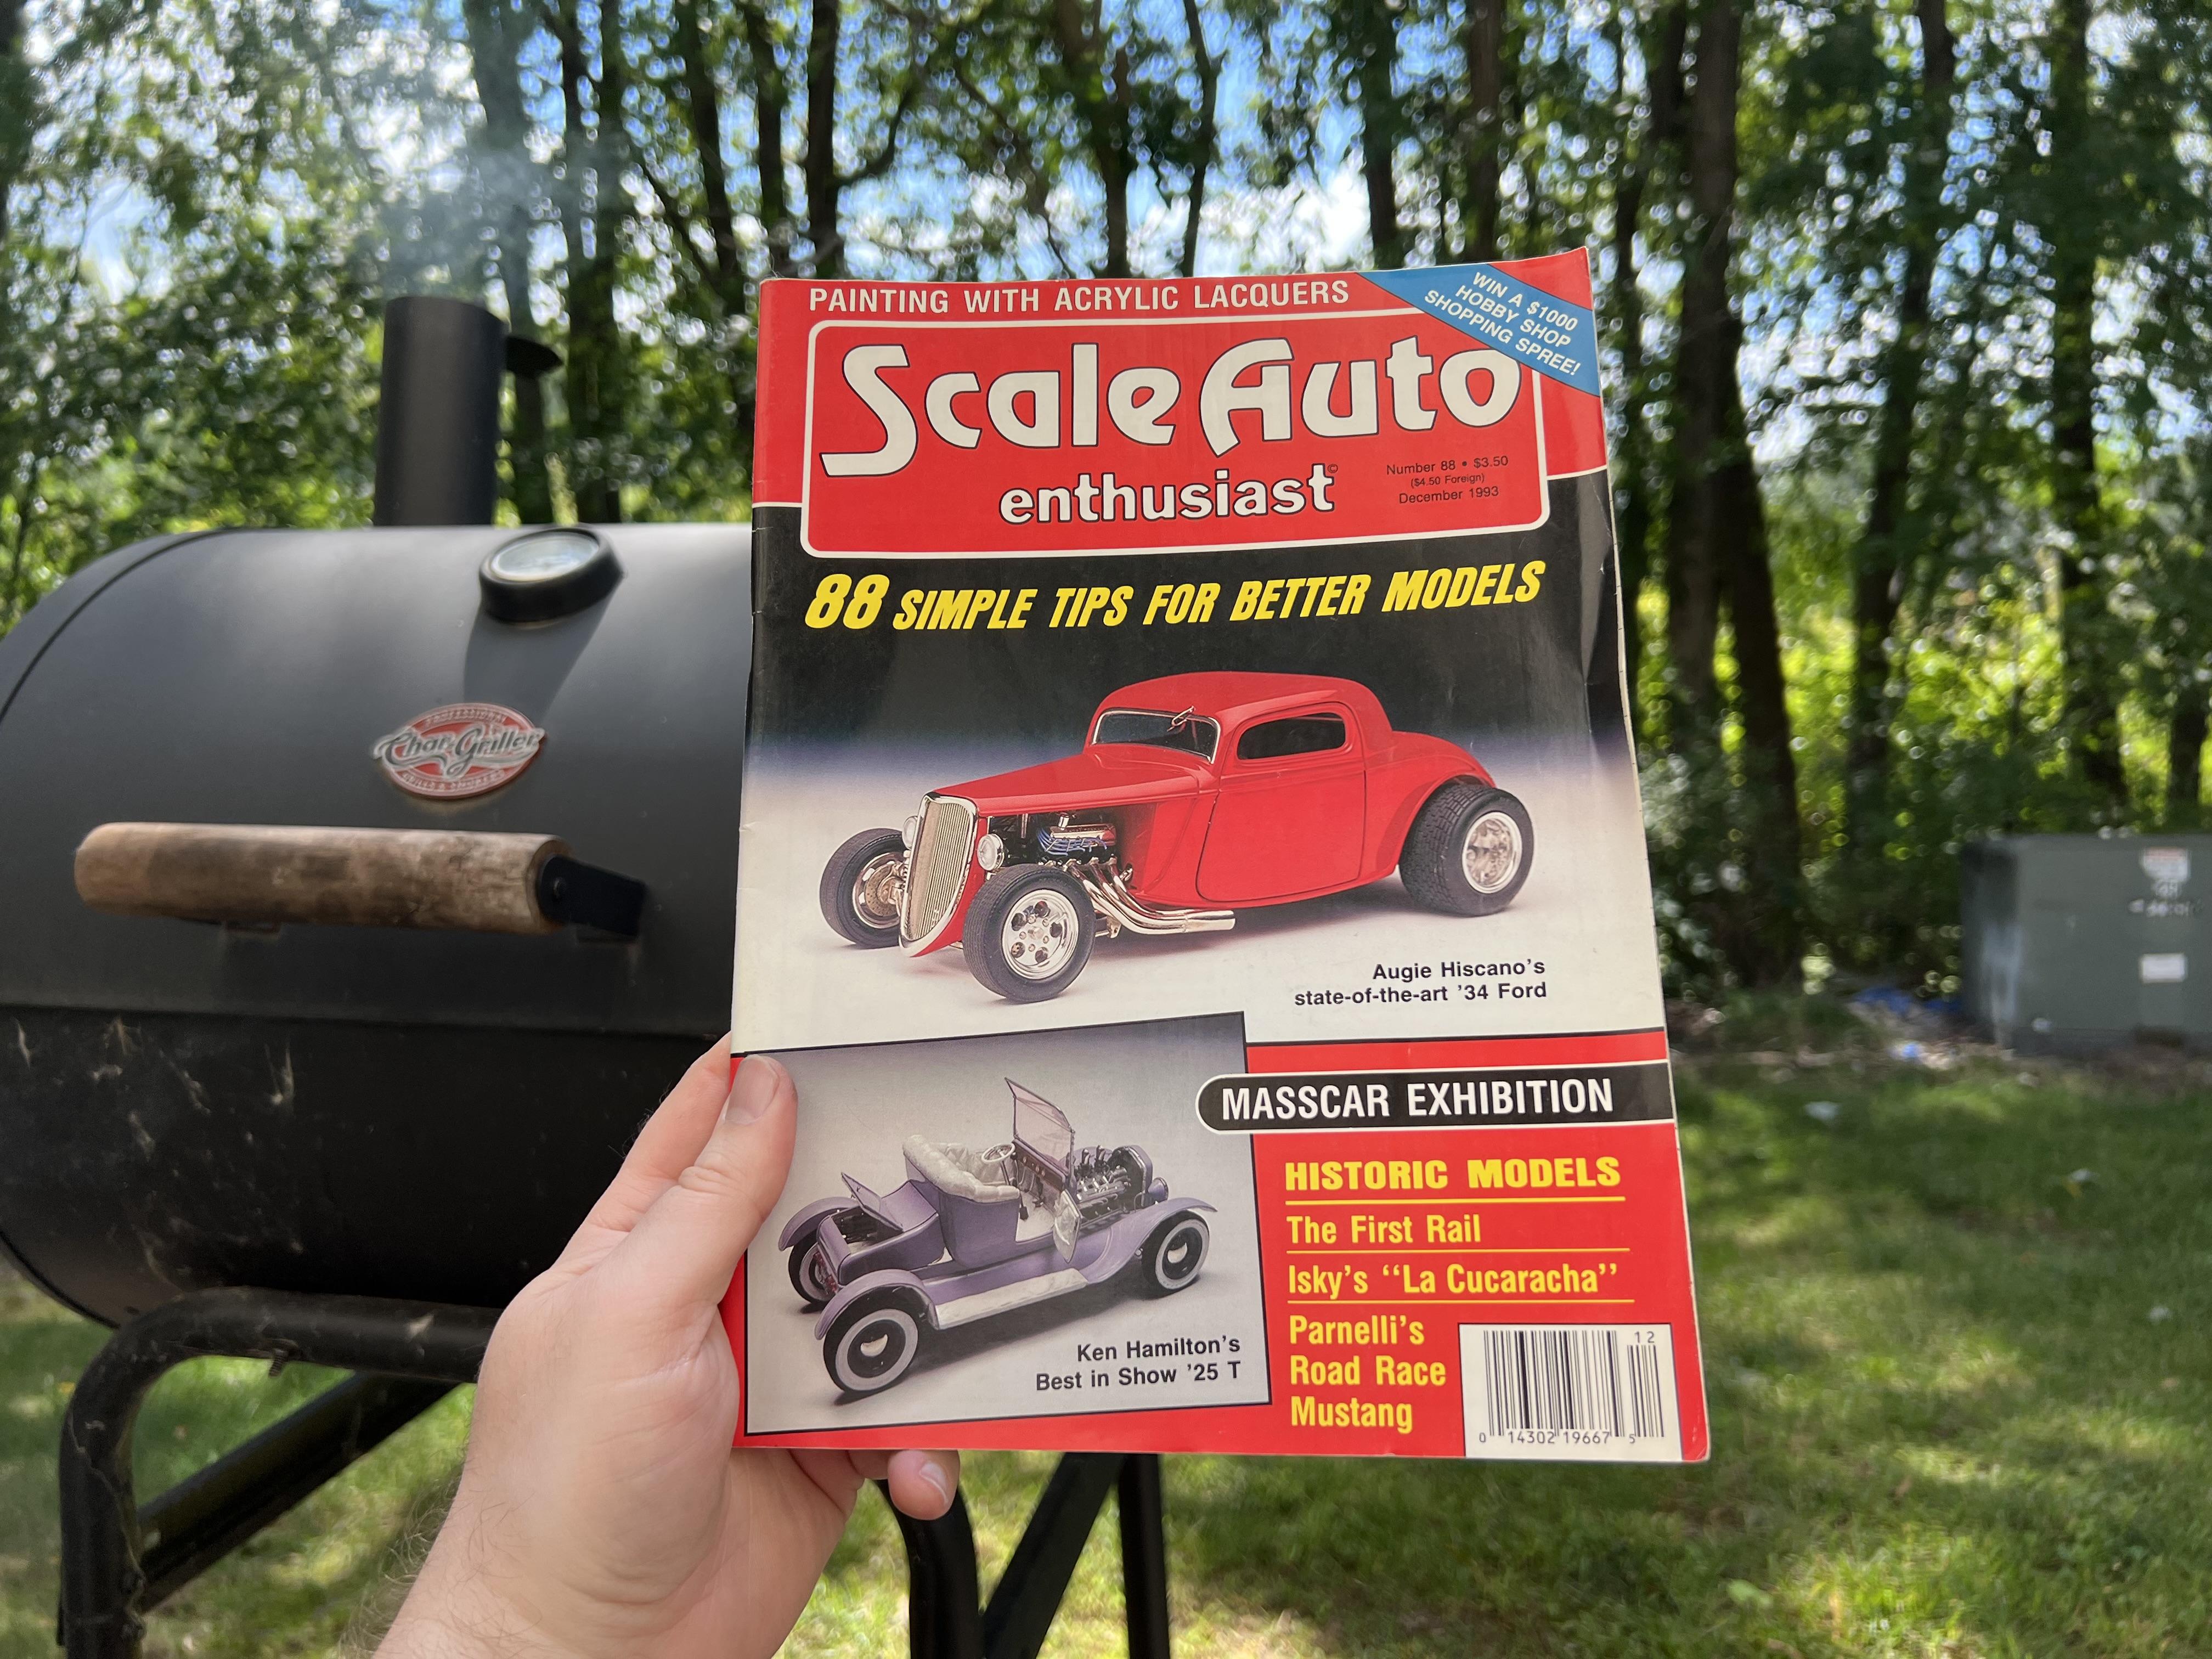
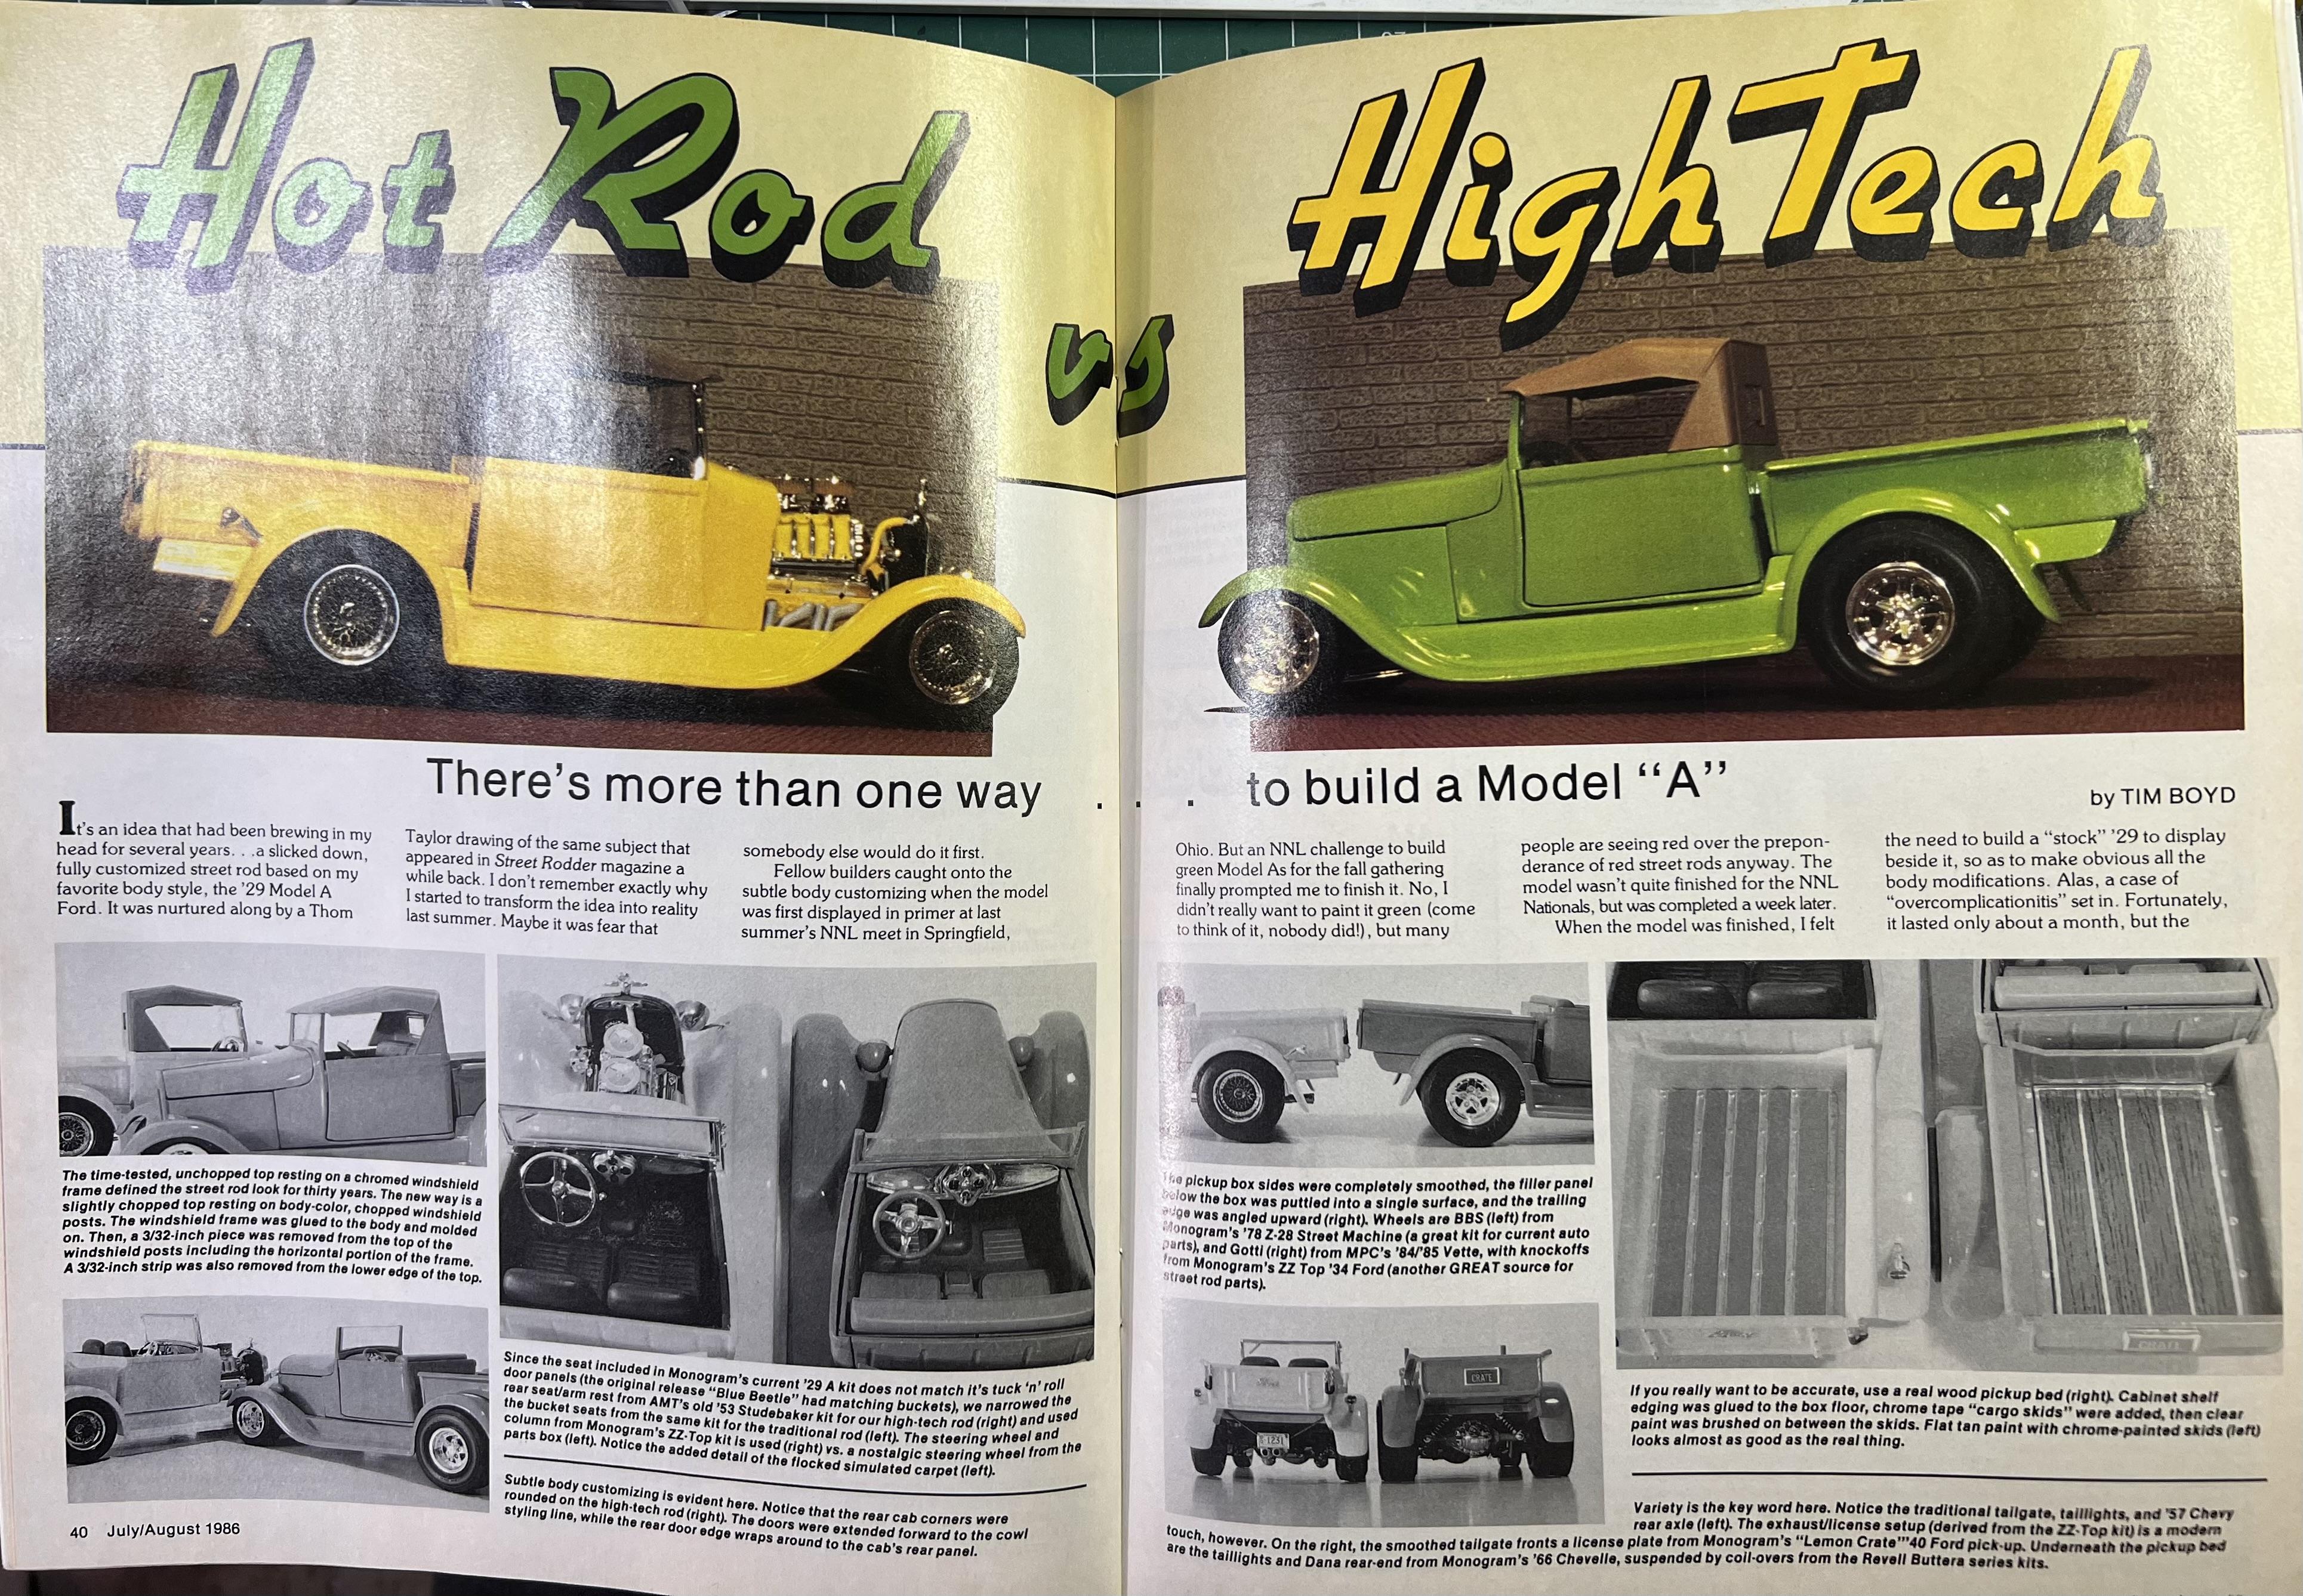
I’ve been slowly collecting parts to contribute to this thread…but in the meantime I picked up an old mid-80s Scale Auto Enthusiast magazine today and spotted these, somewhat relevant, builds… Love the ‘high tech’ smoothed out truck…even if @tim boyd notes that he didn’t like the paint color at the time…