OldNYJim
-
Posts
249 -
Joined
-
Last visited
Content Type
Profiles
Forums
Events
Gallery
Everything posted by OldNYJim
-

What was your first model car?
OldNYJim replied to Kit Karson's topic in General Automotive Talk (Trucks and Cars)
Lordy Lordy, that interior ? -
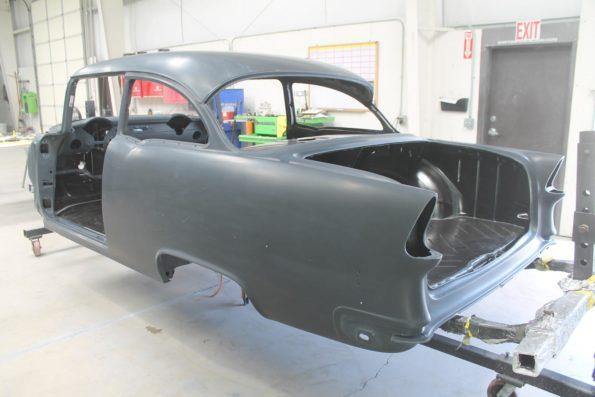
Yeah, you have to reply to all those comments otherwise you get a passive aggressive response back ? Question: when you got the body out of the dunk-tank had that paint pitted the surface or was it smooth still? That lumpy finish looked a bit like the paint being too hot for the styrene, perhaps… Wicked Colors is easy to lay down though, very forgiving…but it WILL need a primer for proper adhesion
-
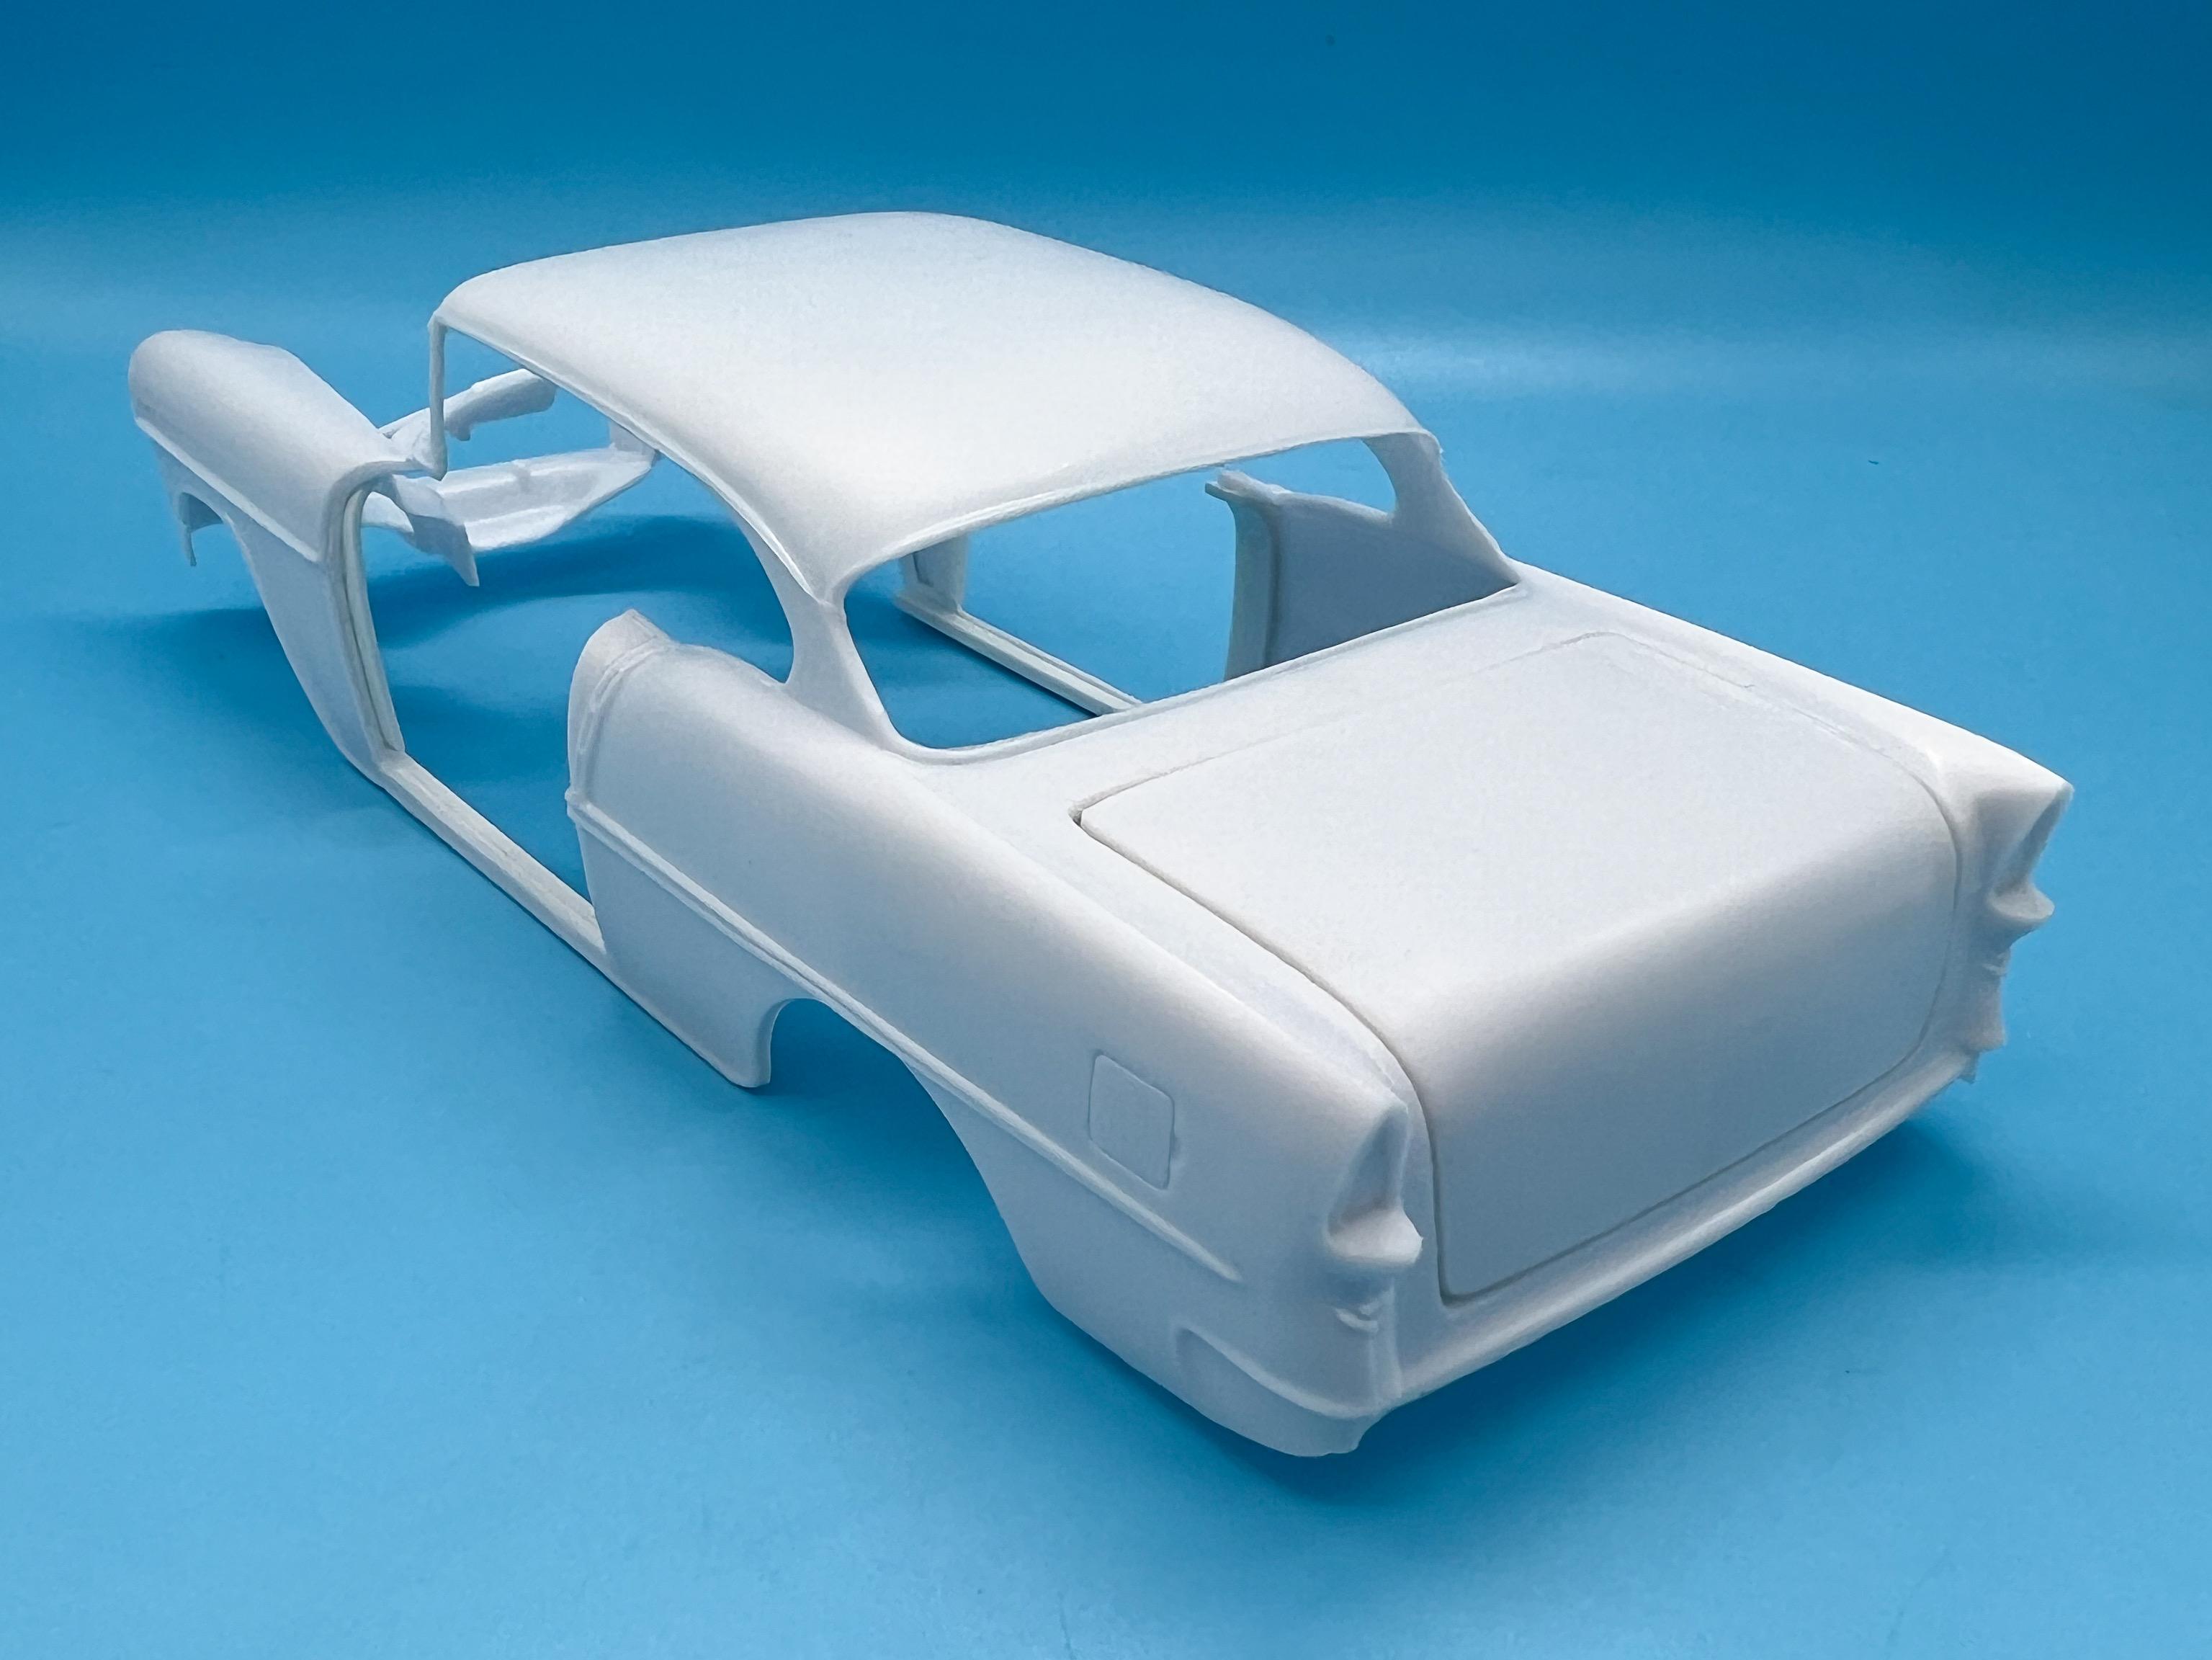
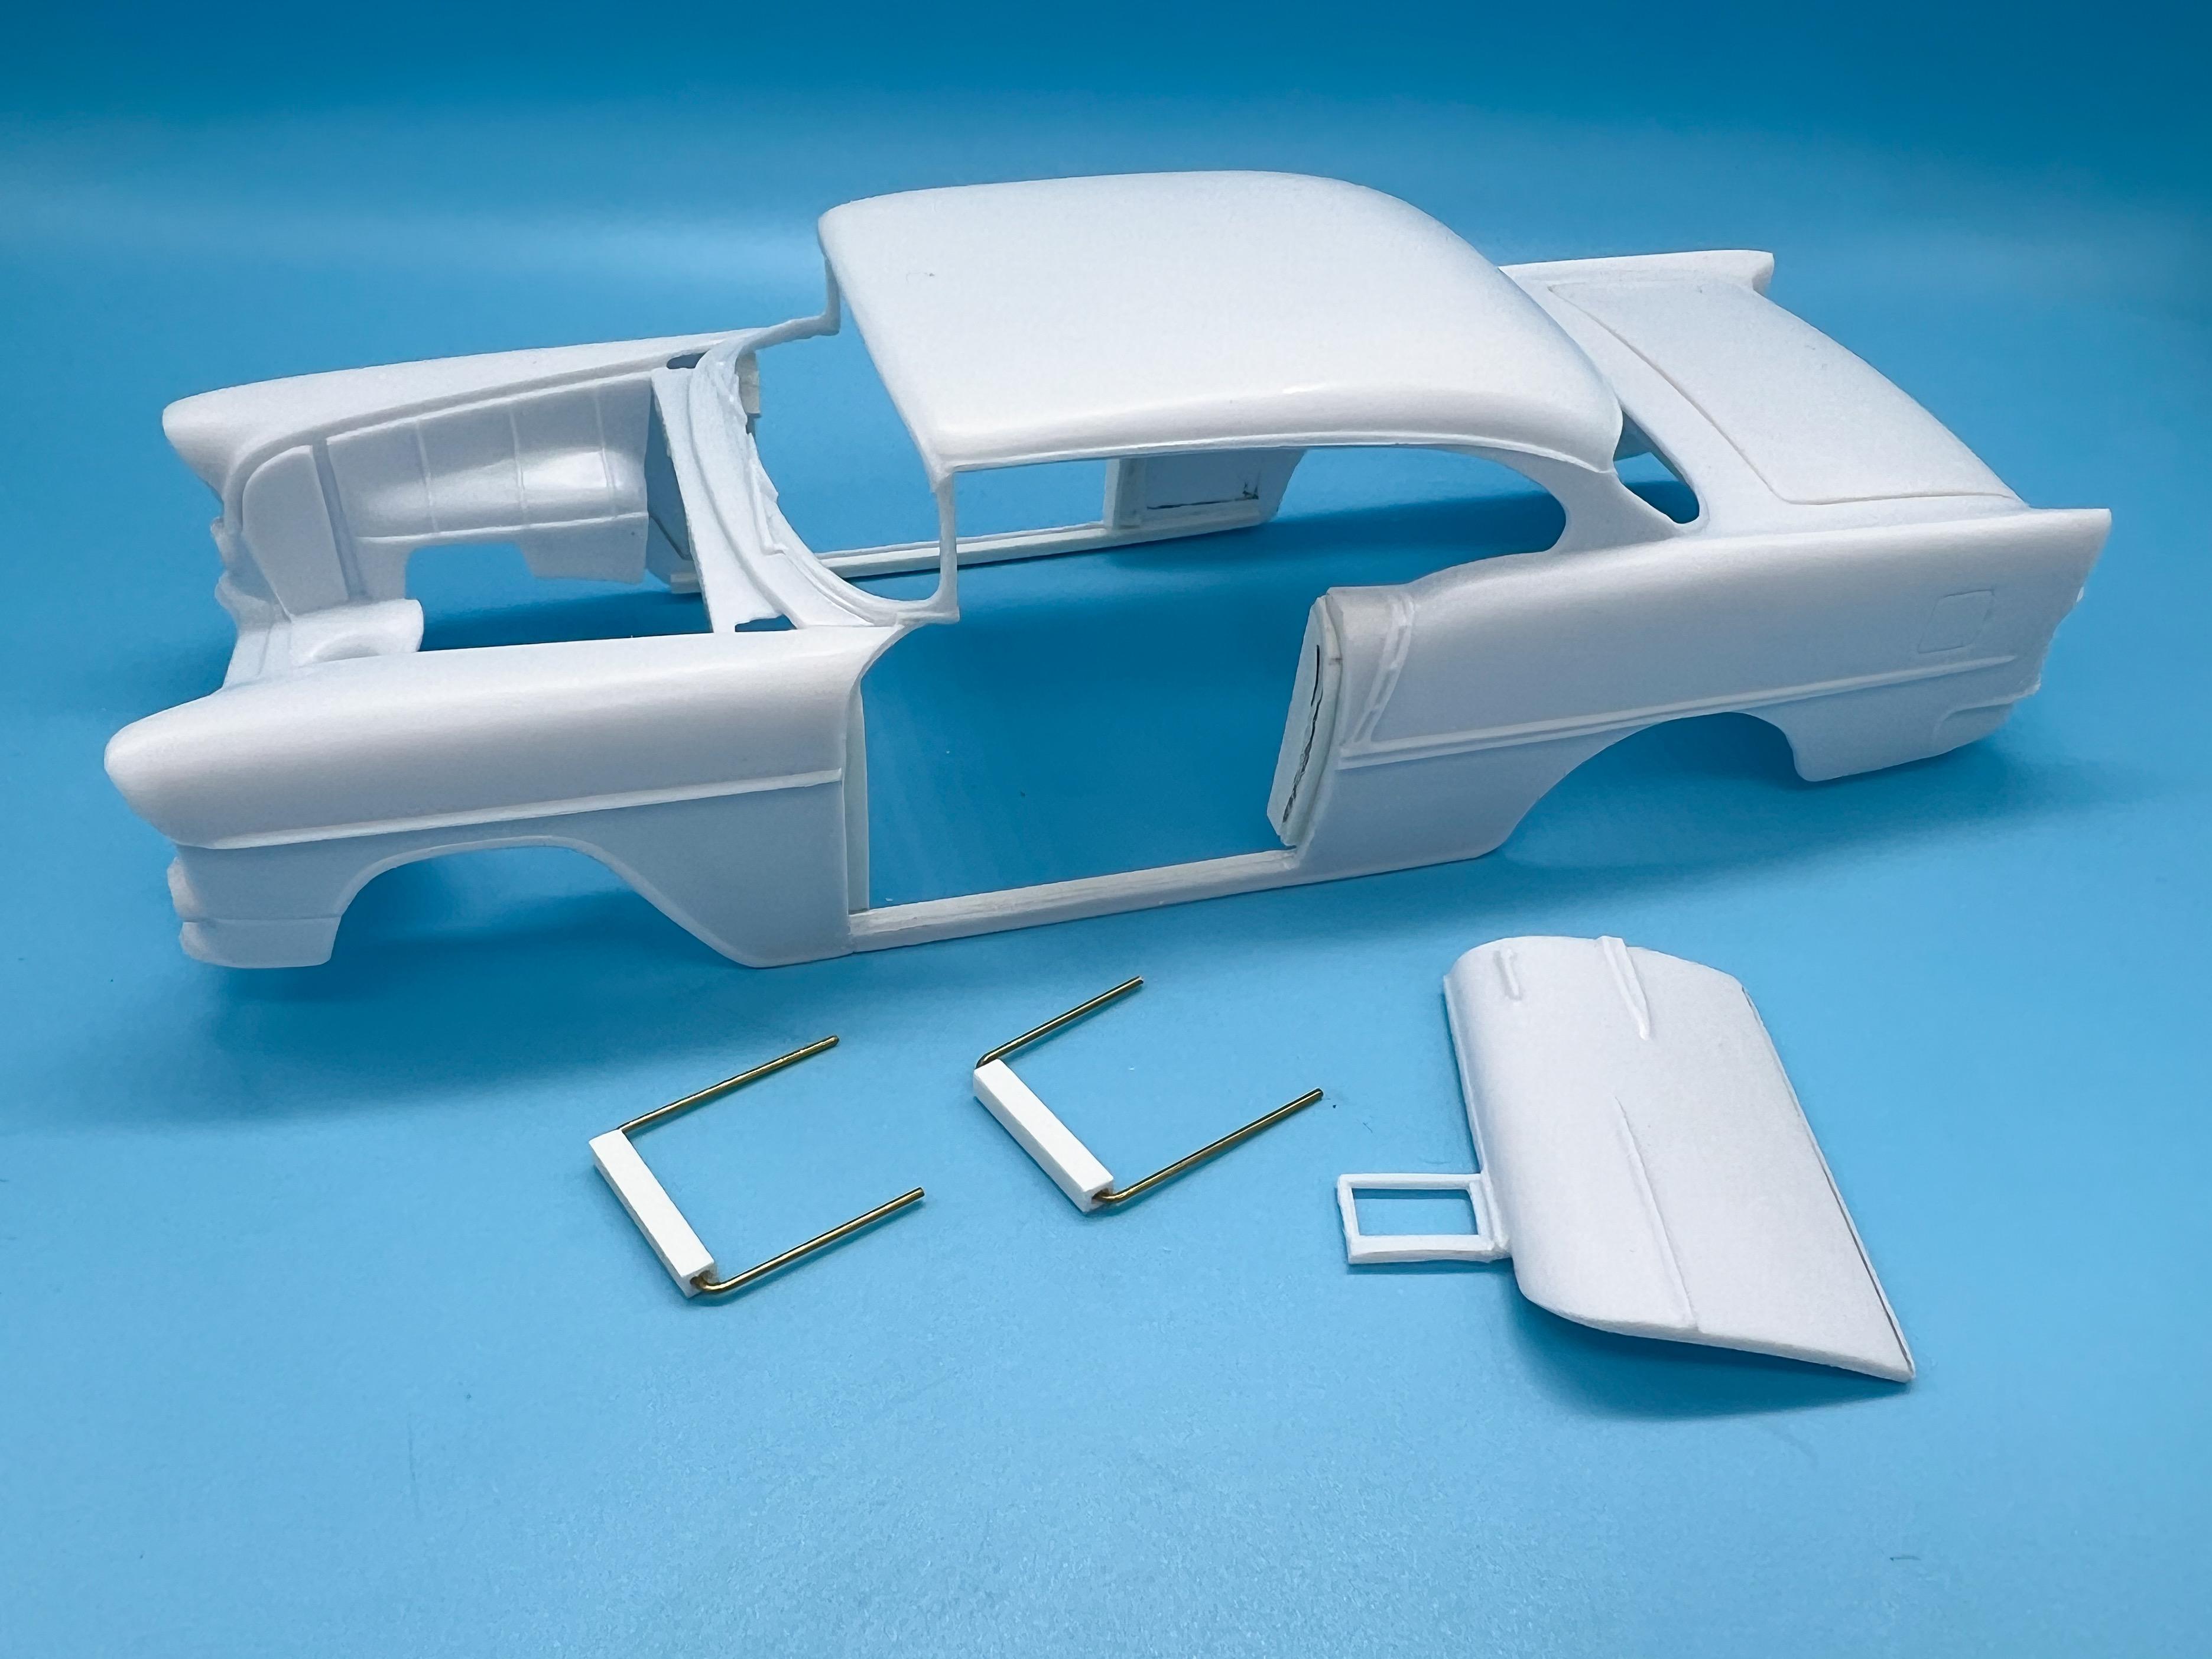
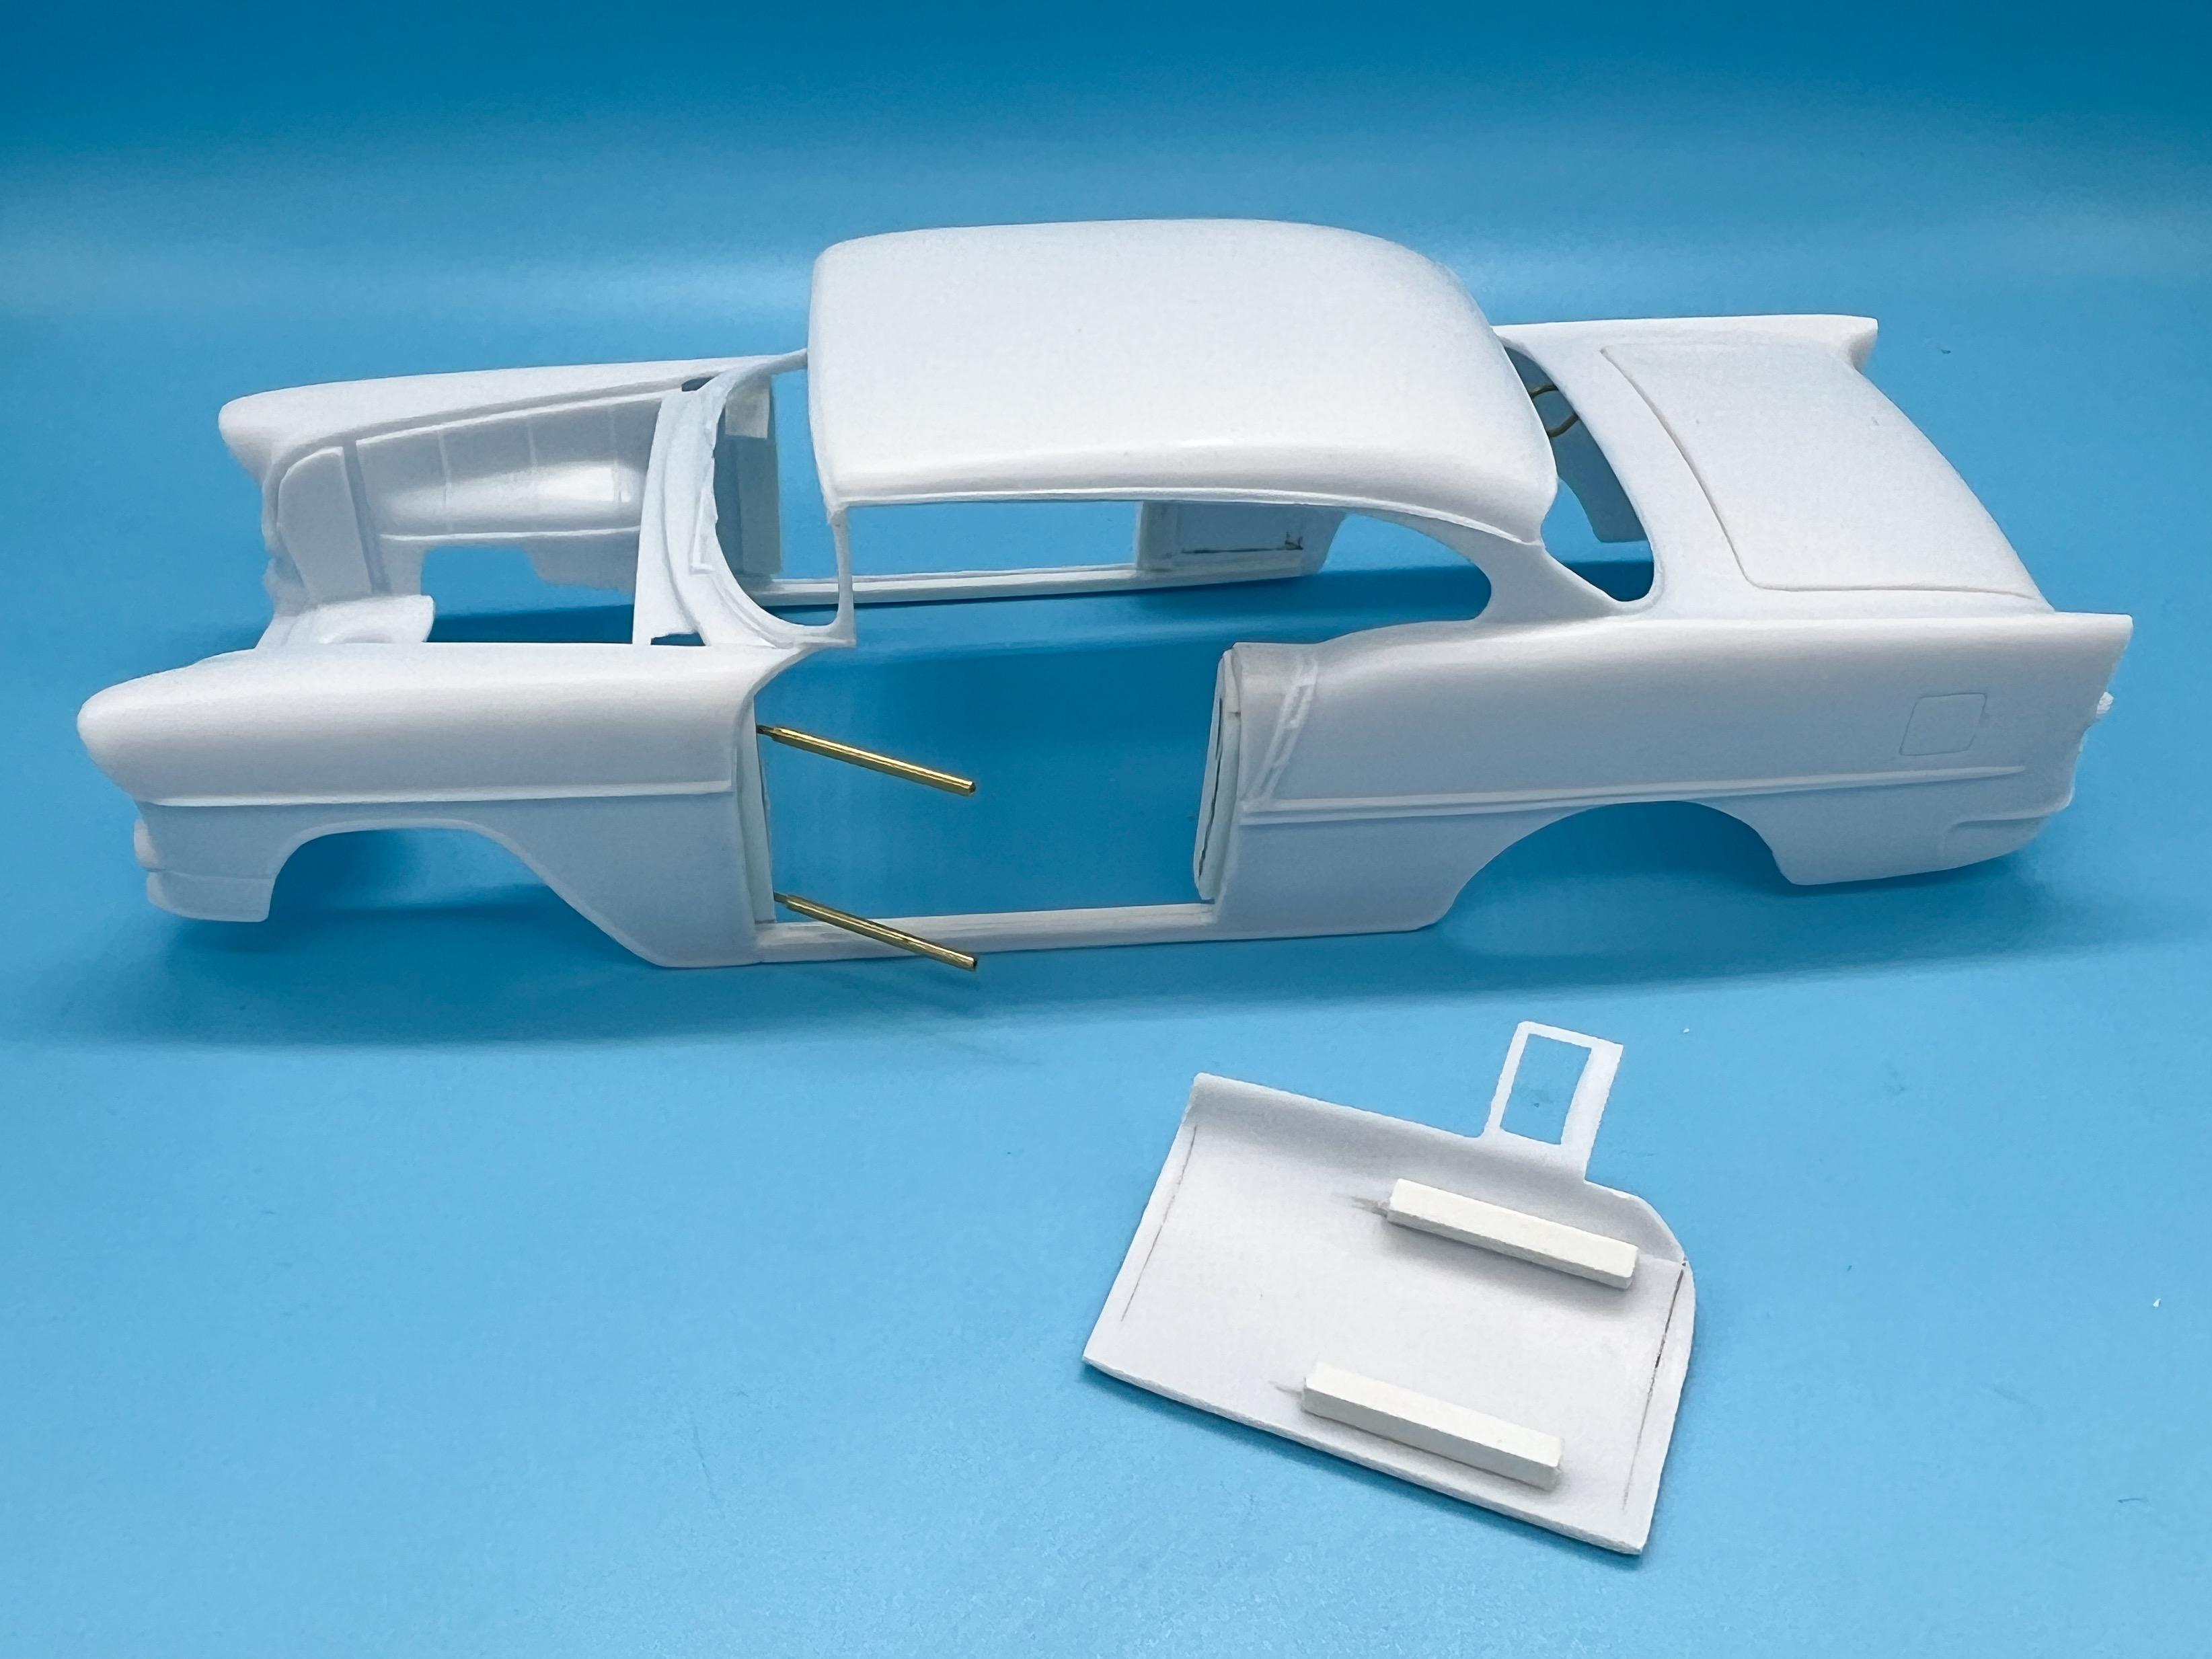
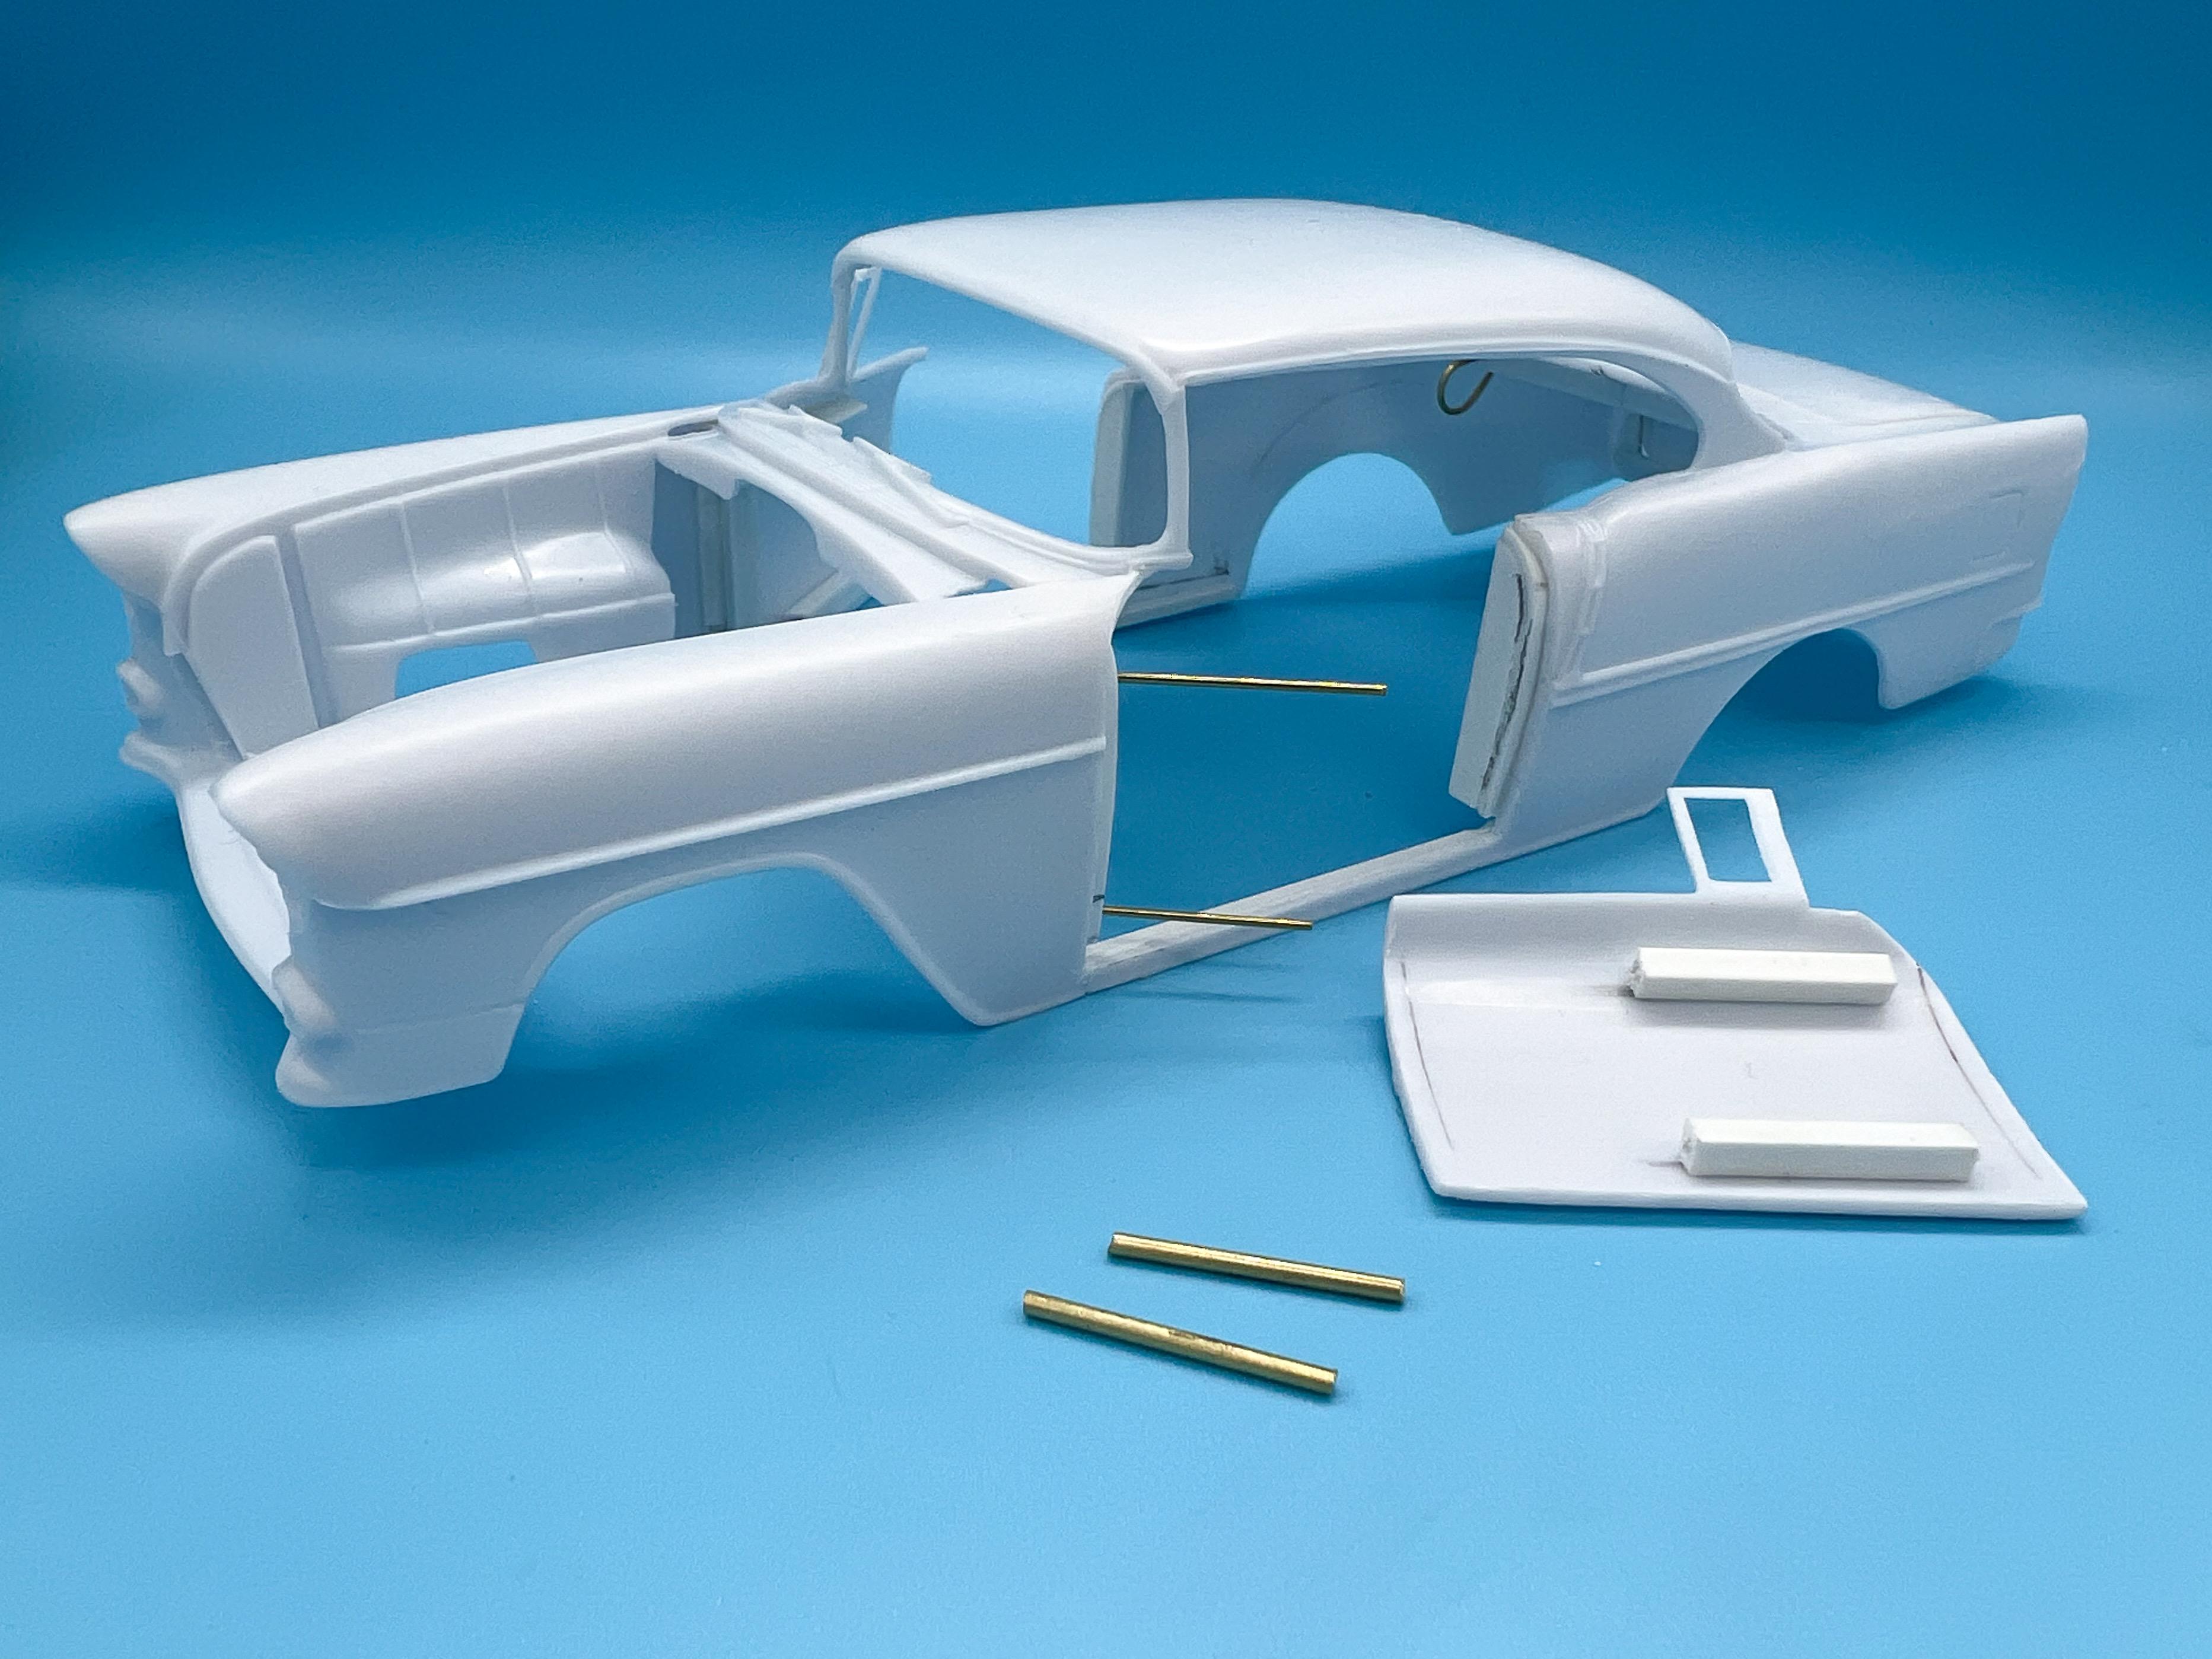
My take on the most famous ‘55 gasser street machine’…
OldNYJim replied to OldNYJim's topic in WIP: Model Cars
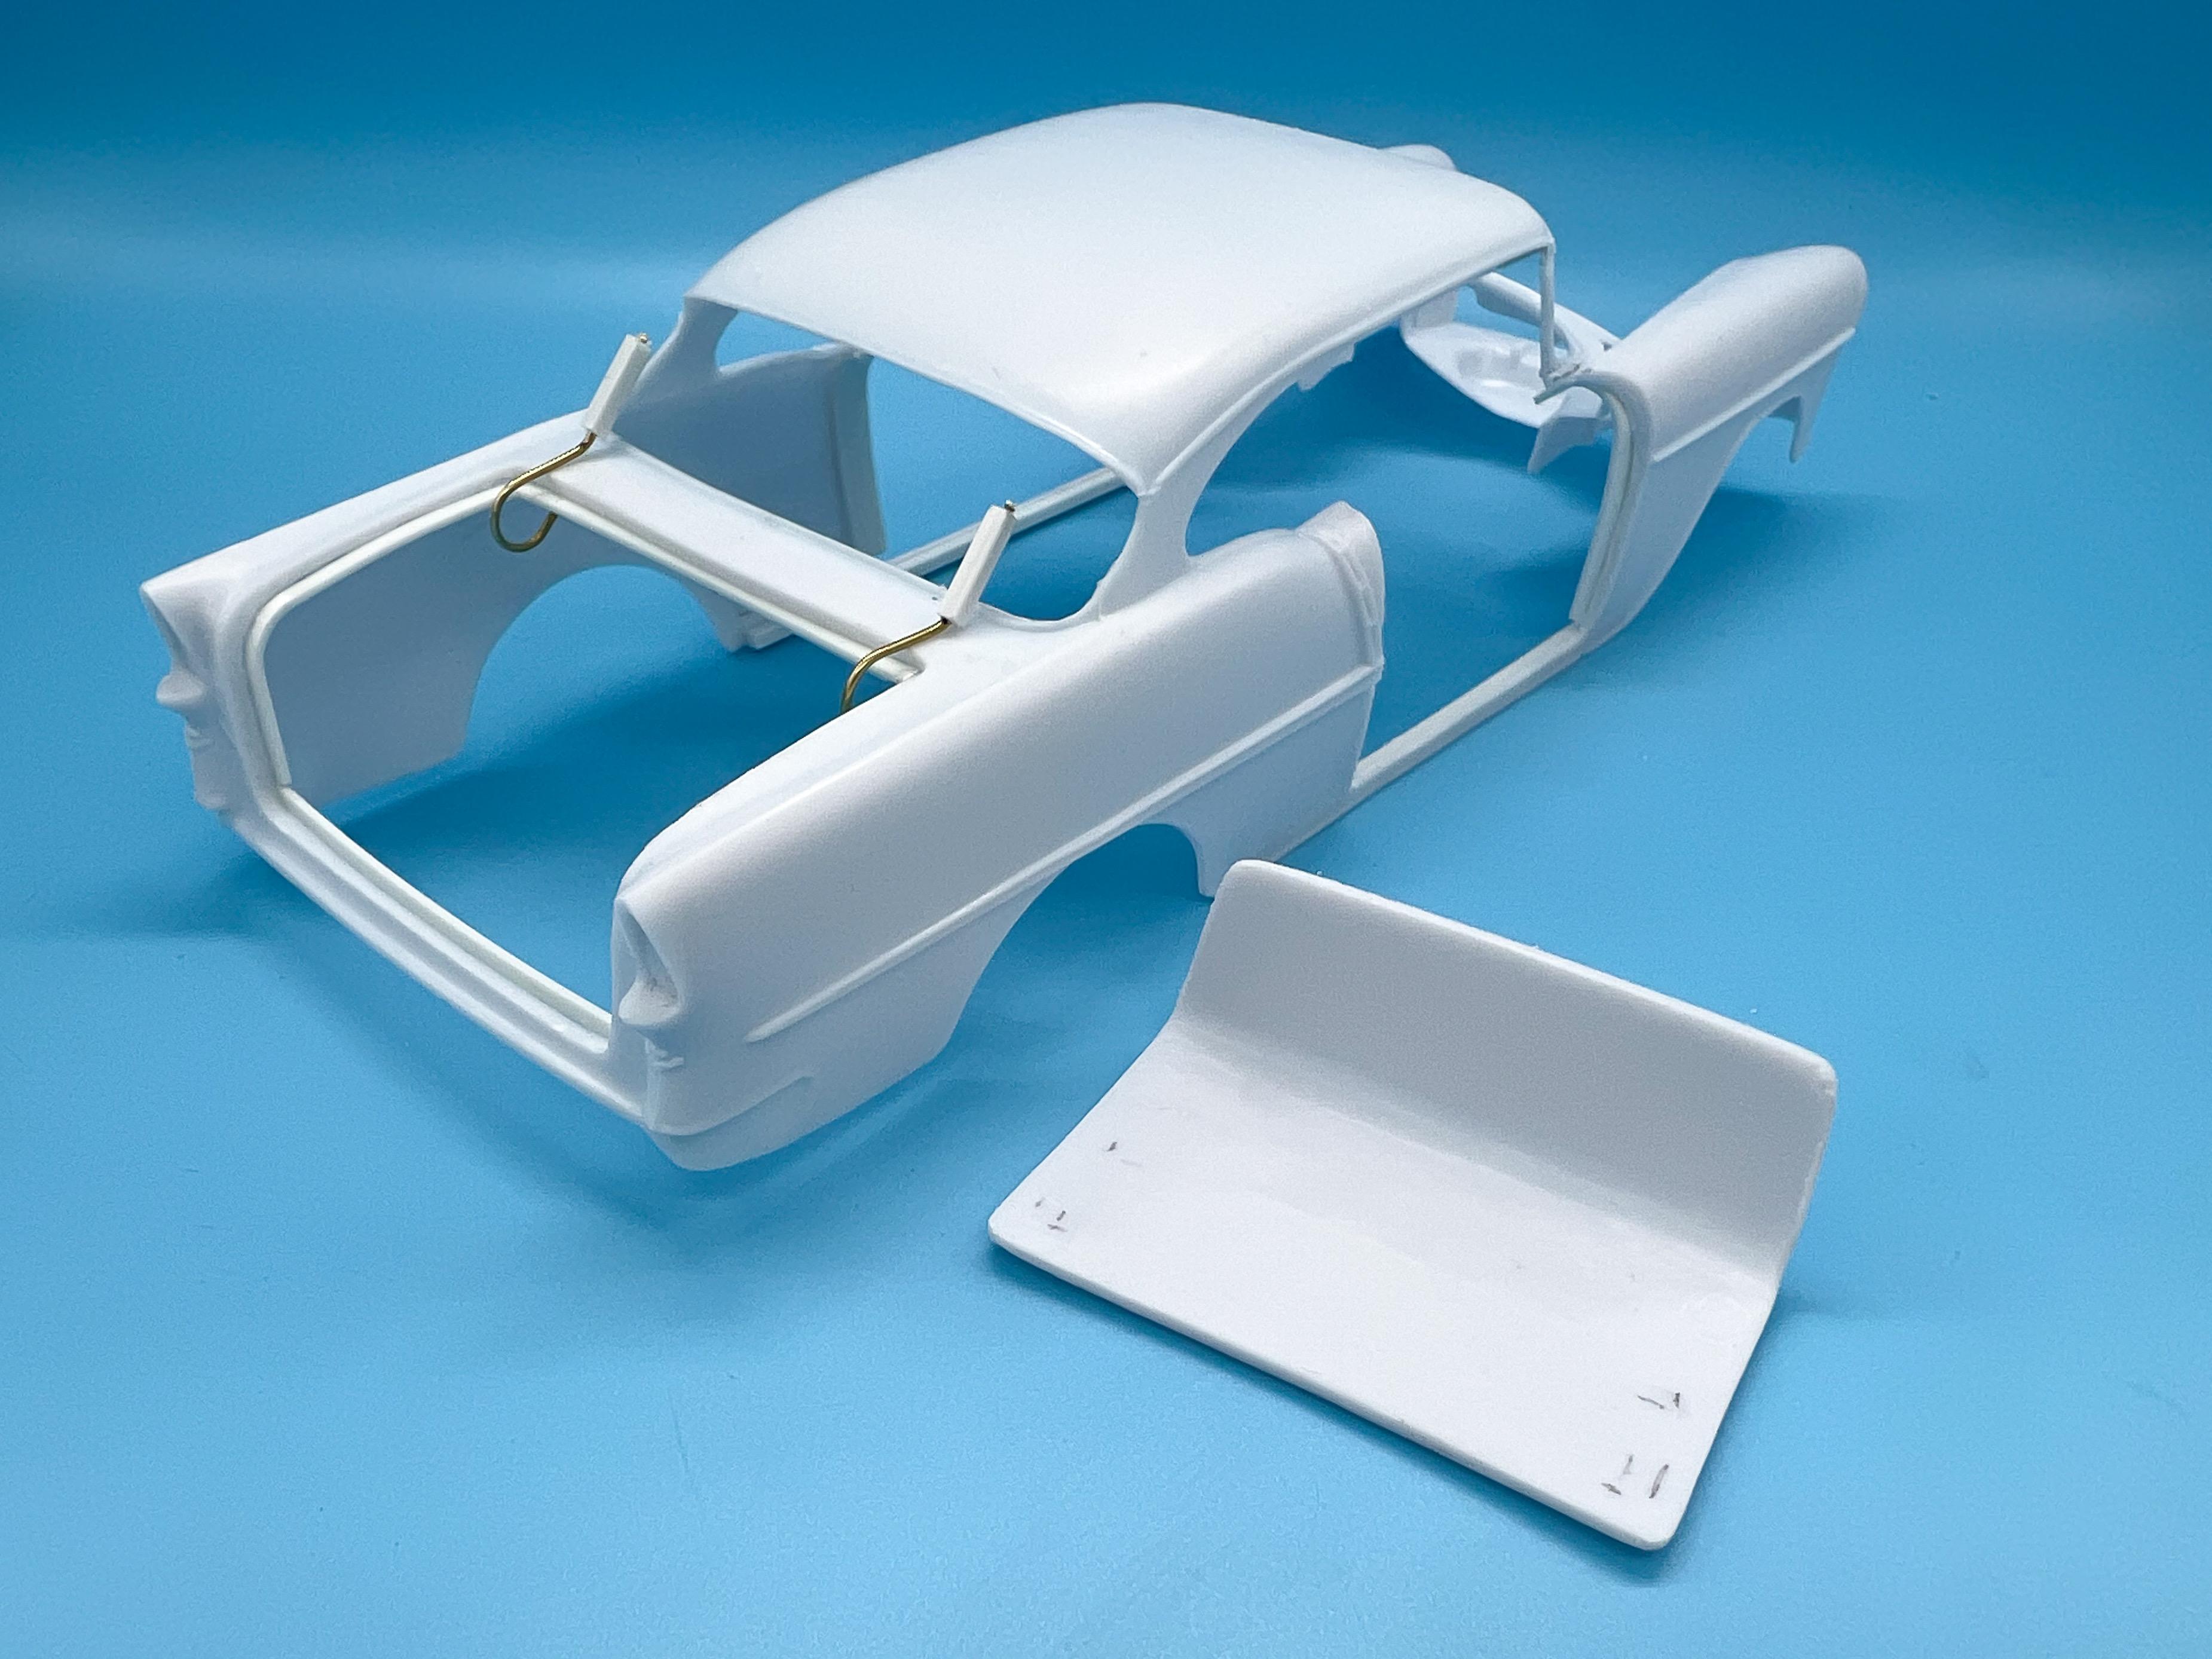
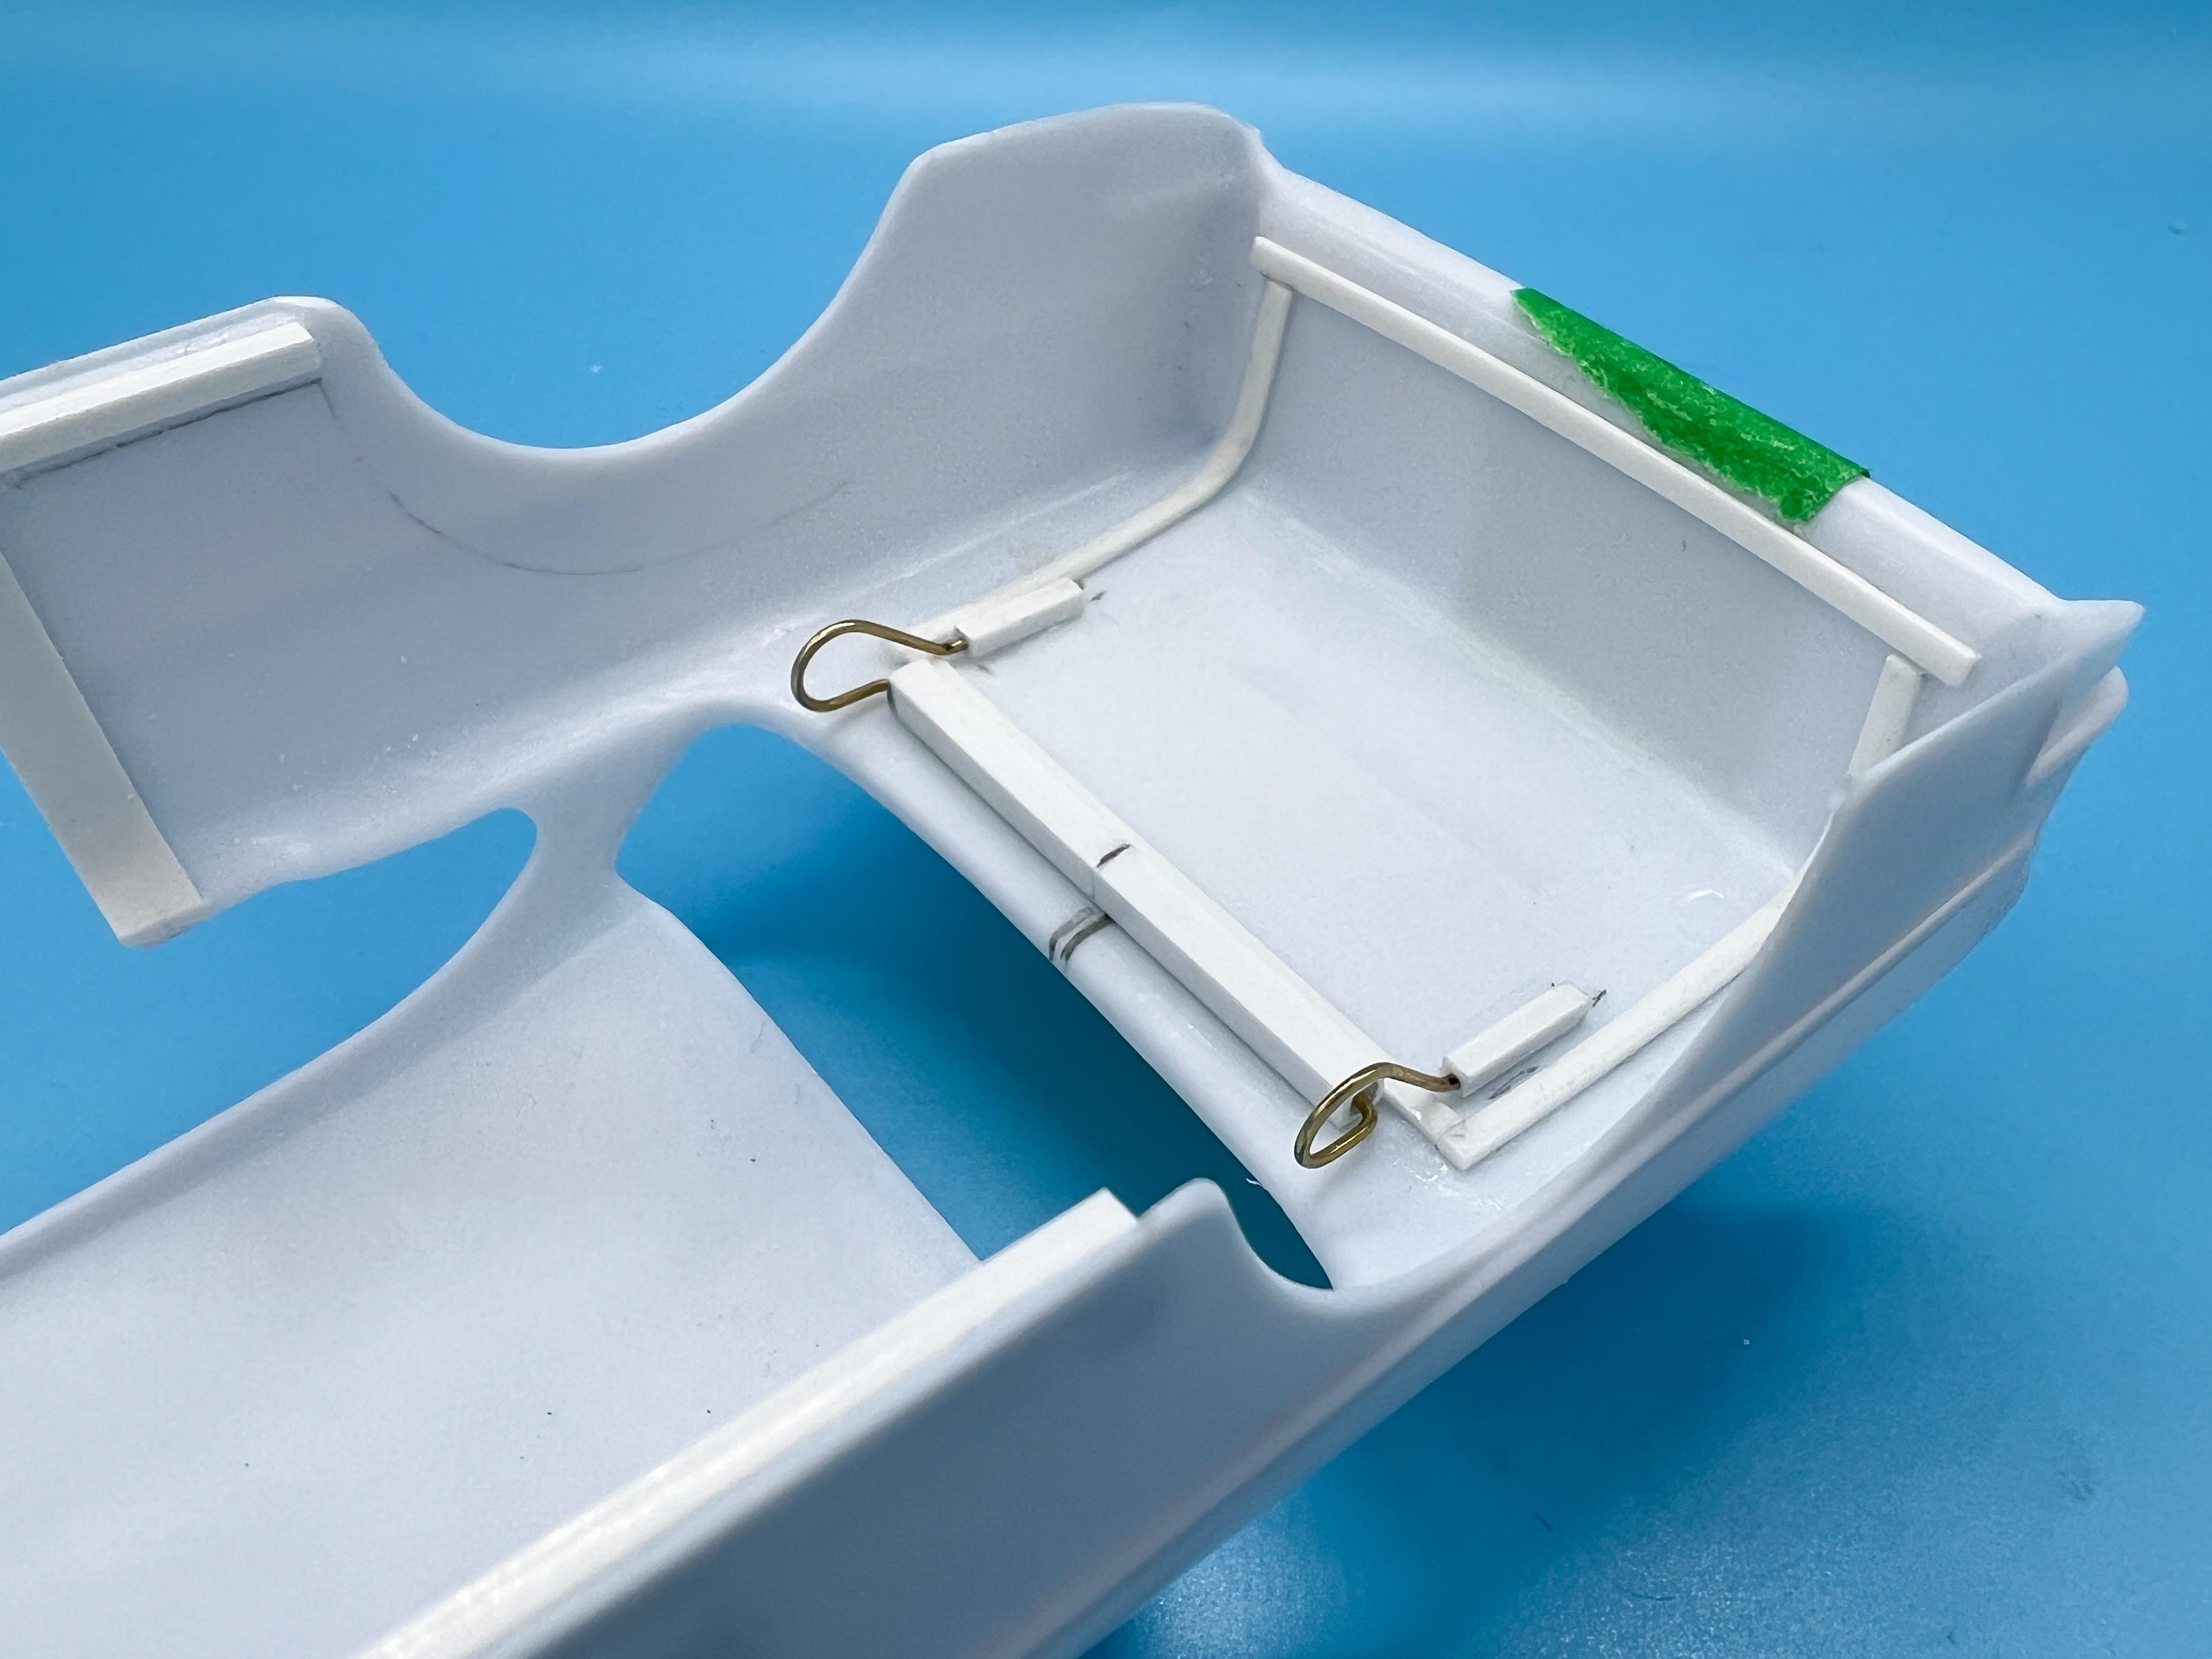
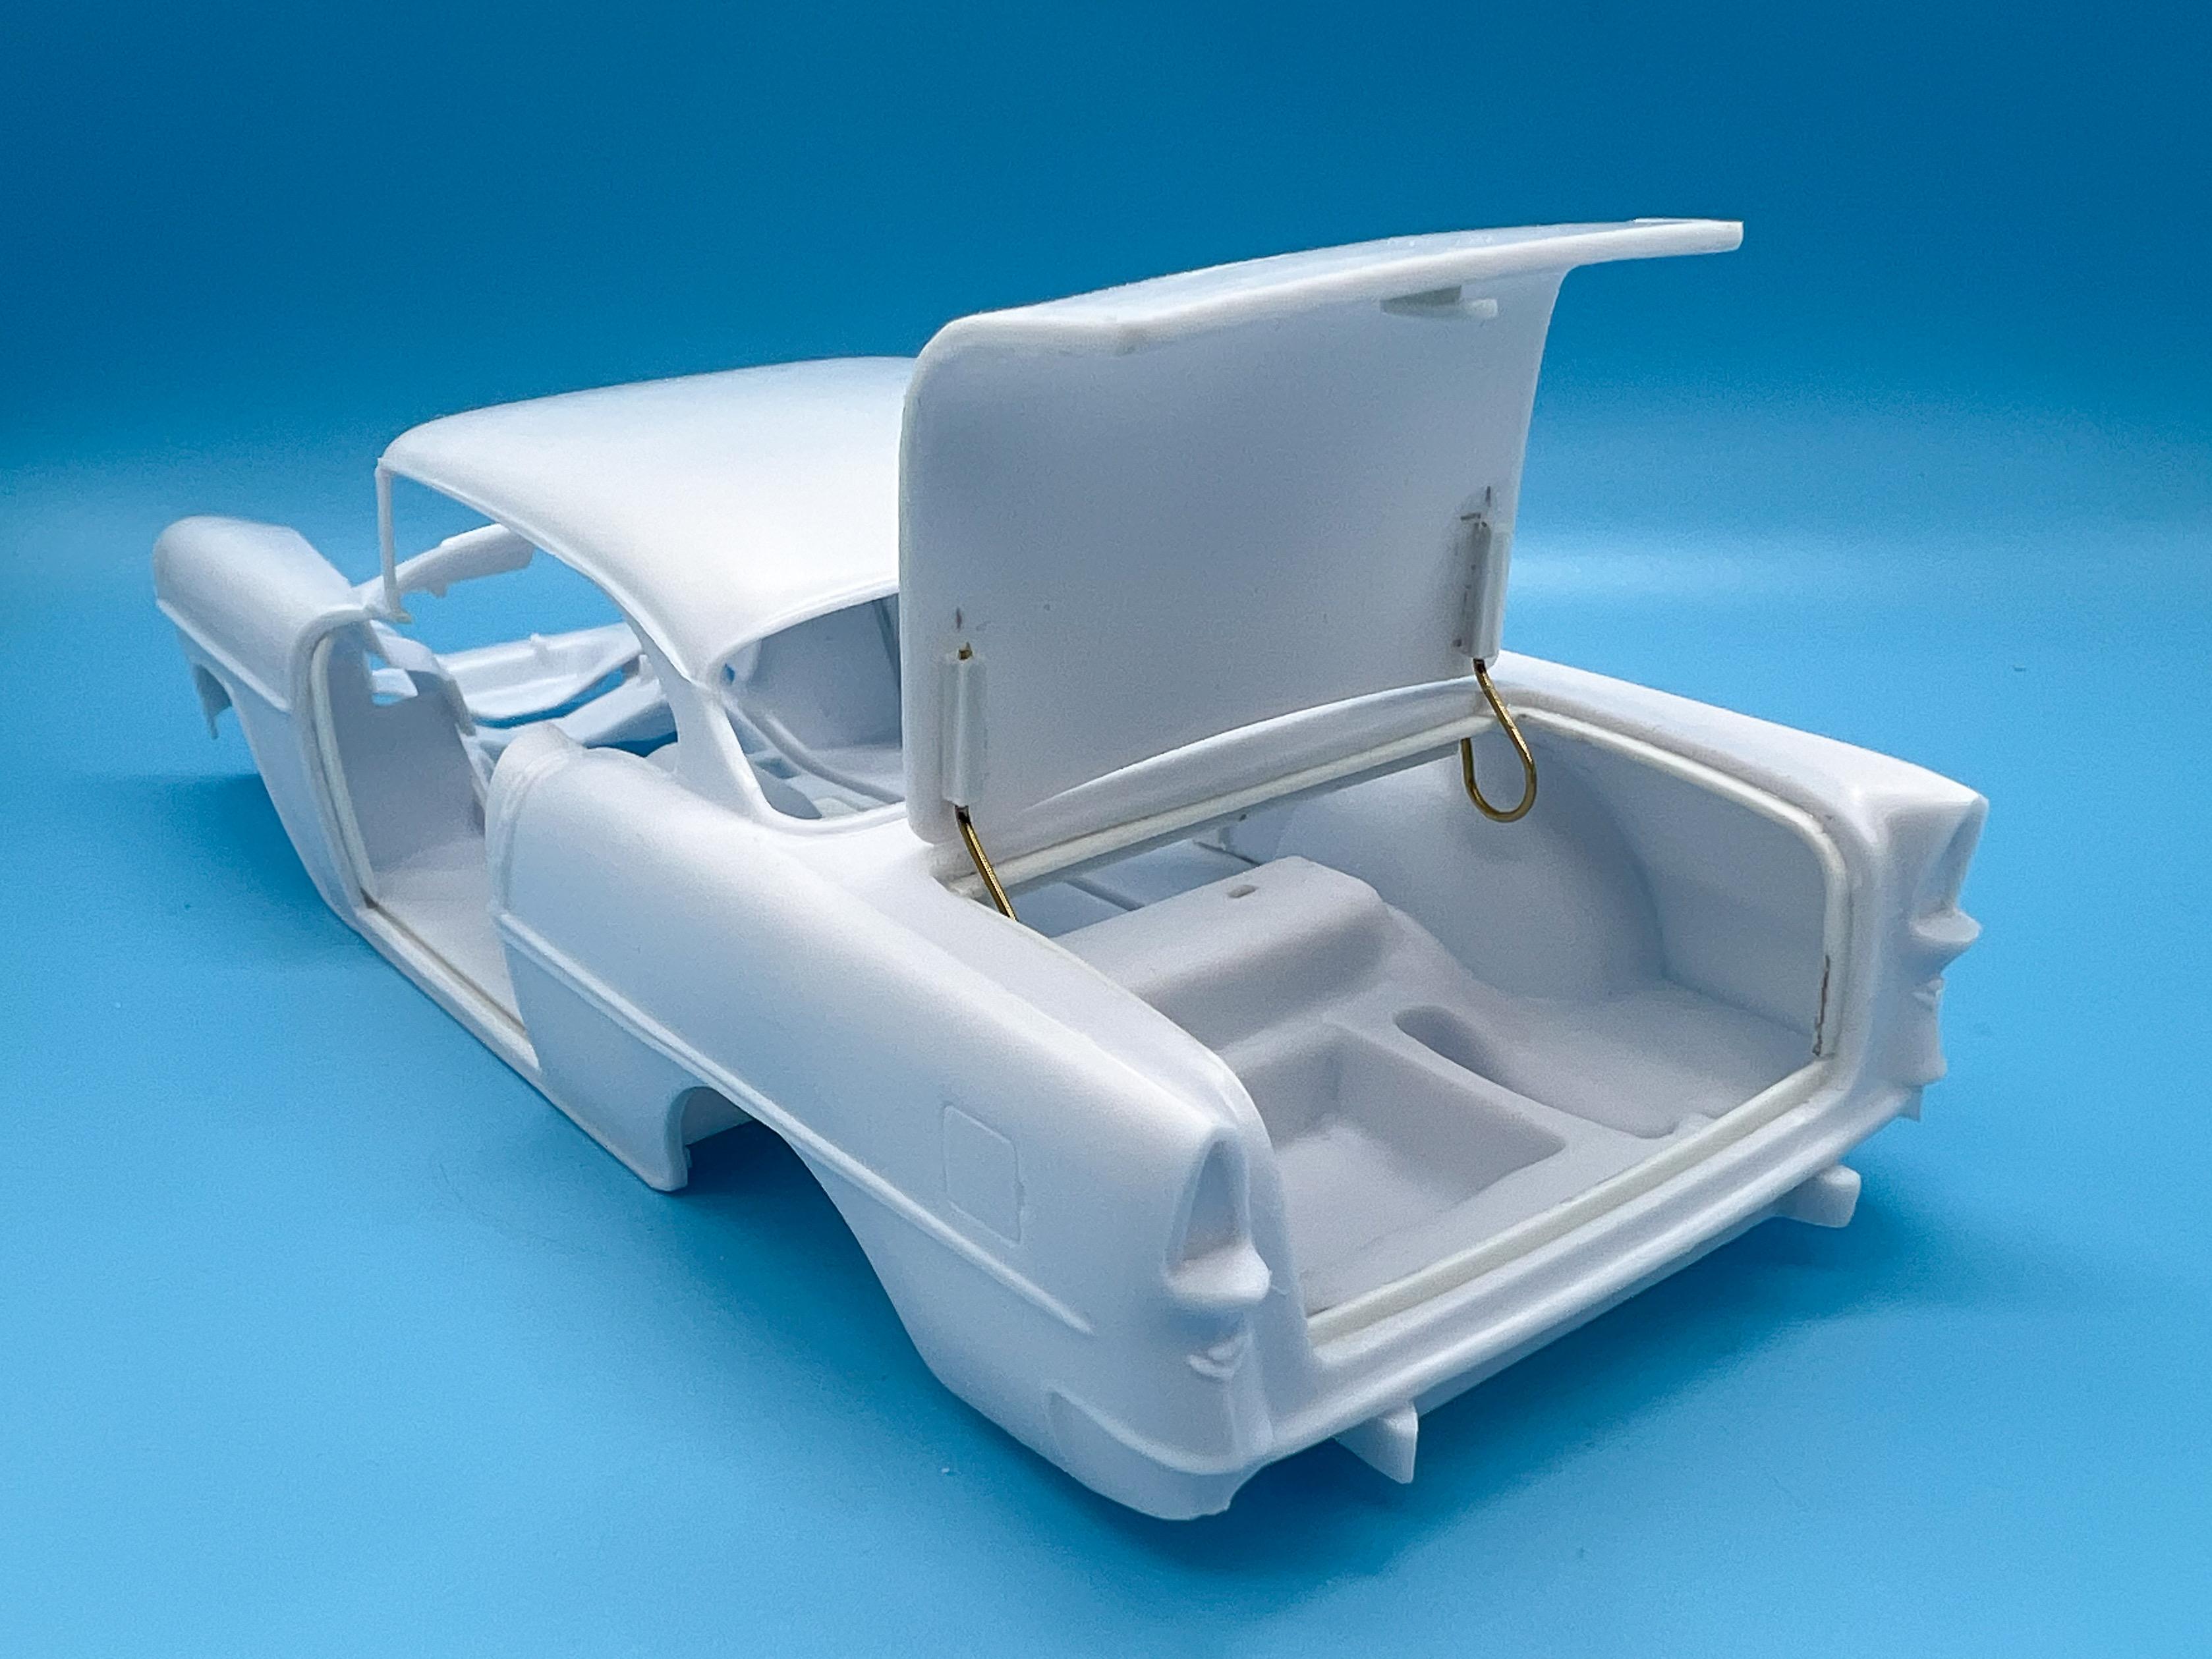
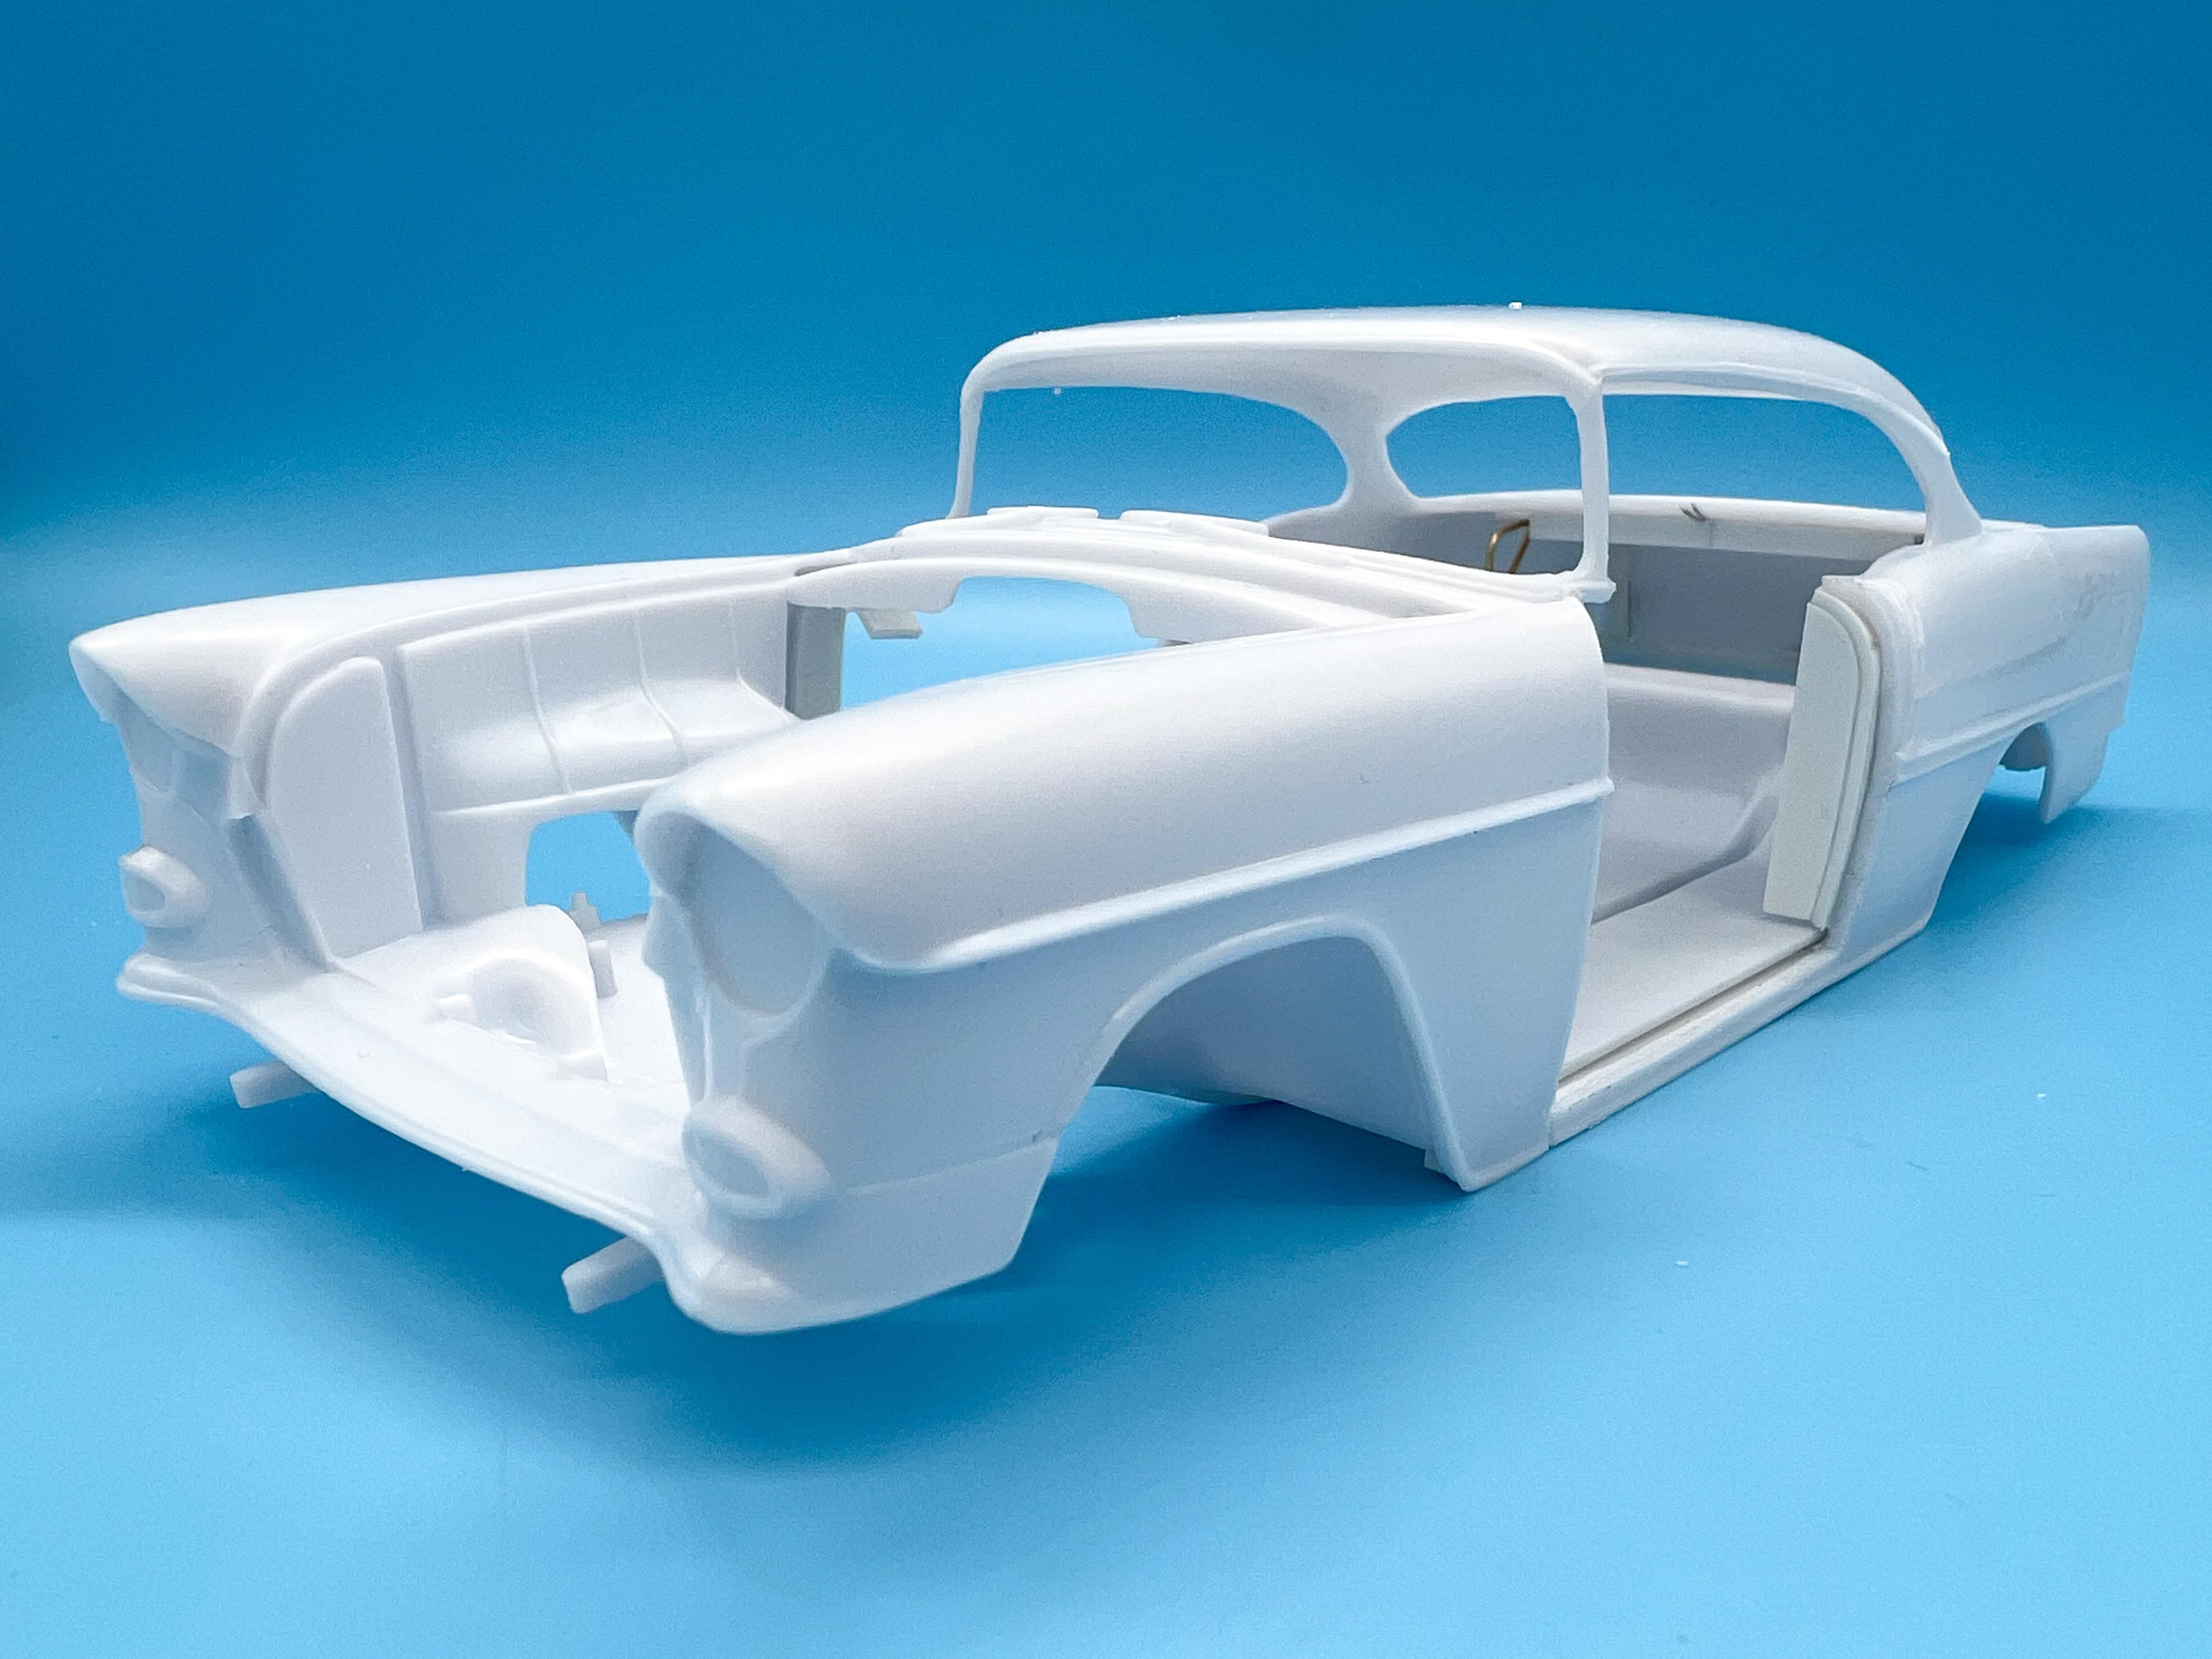
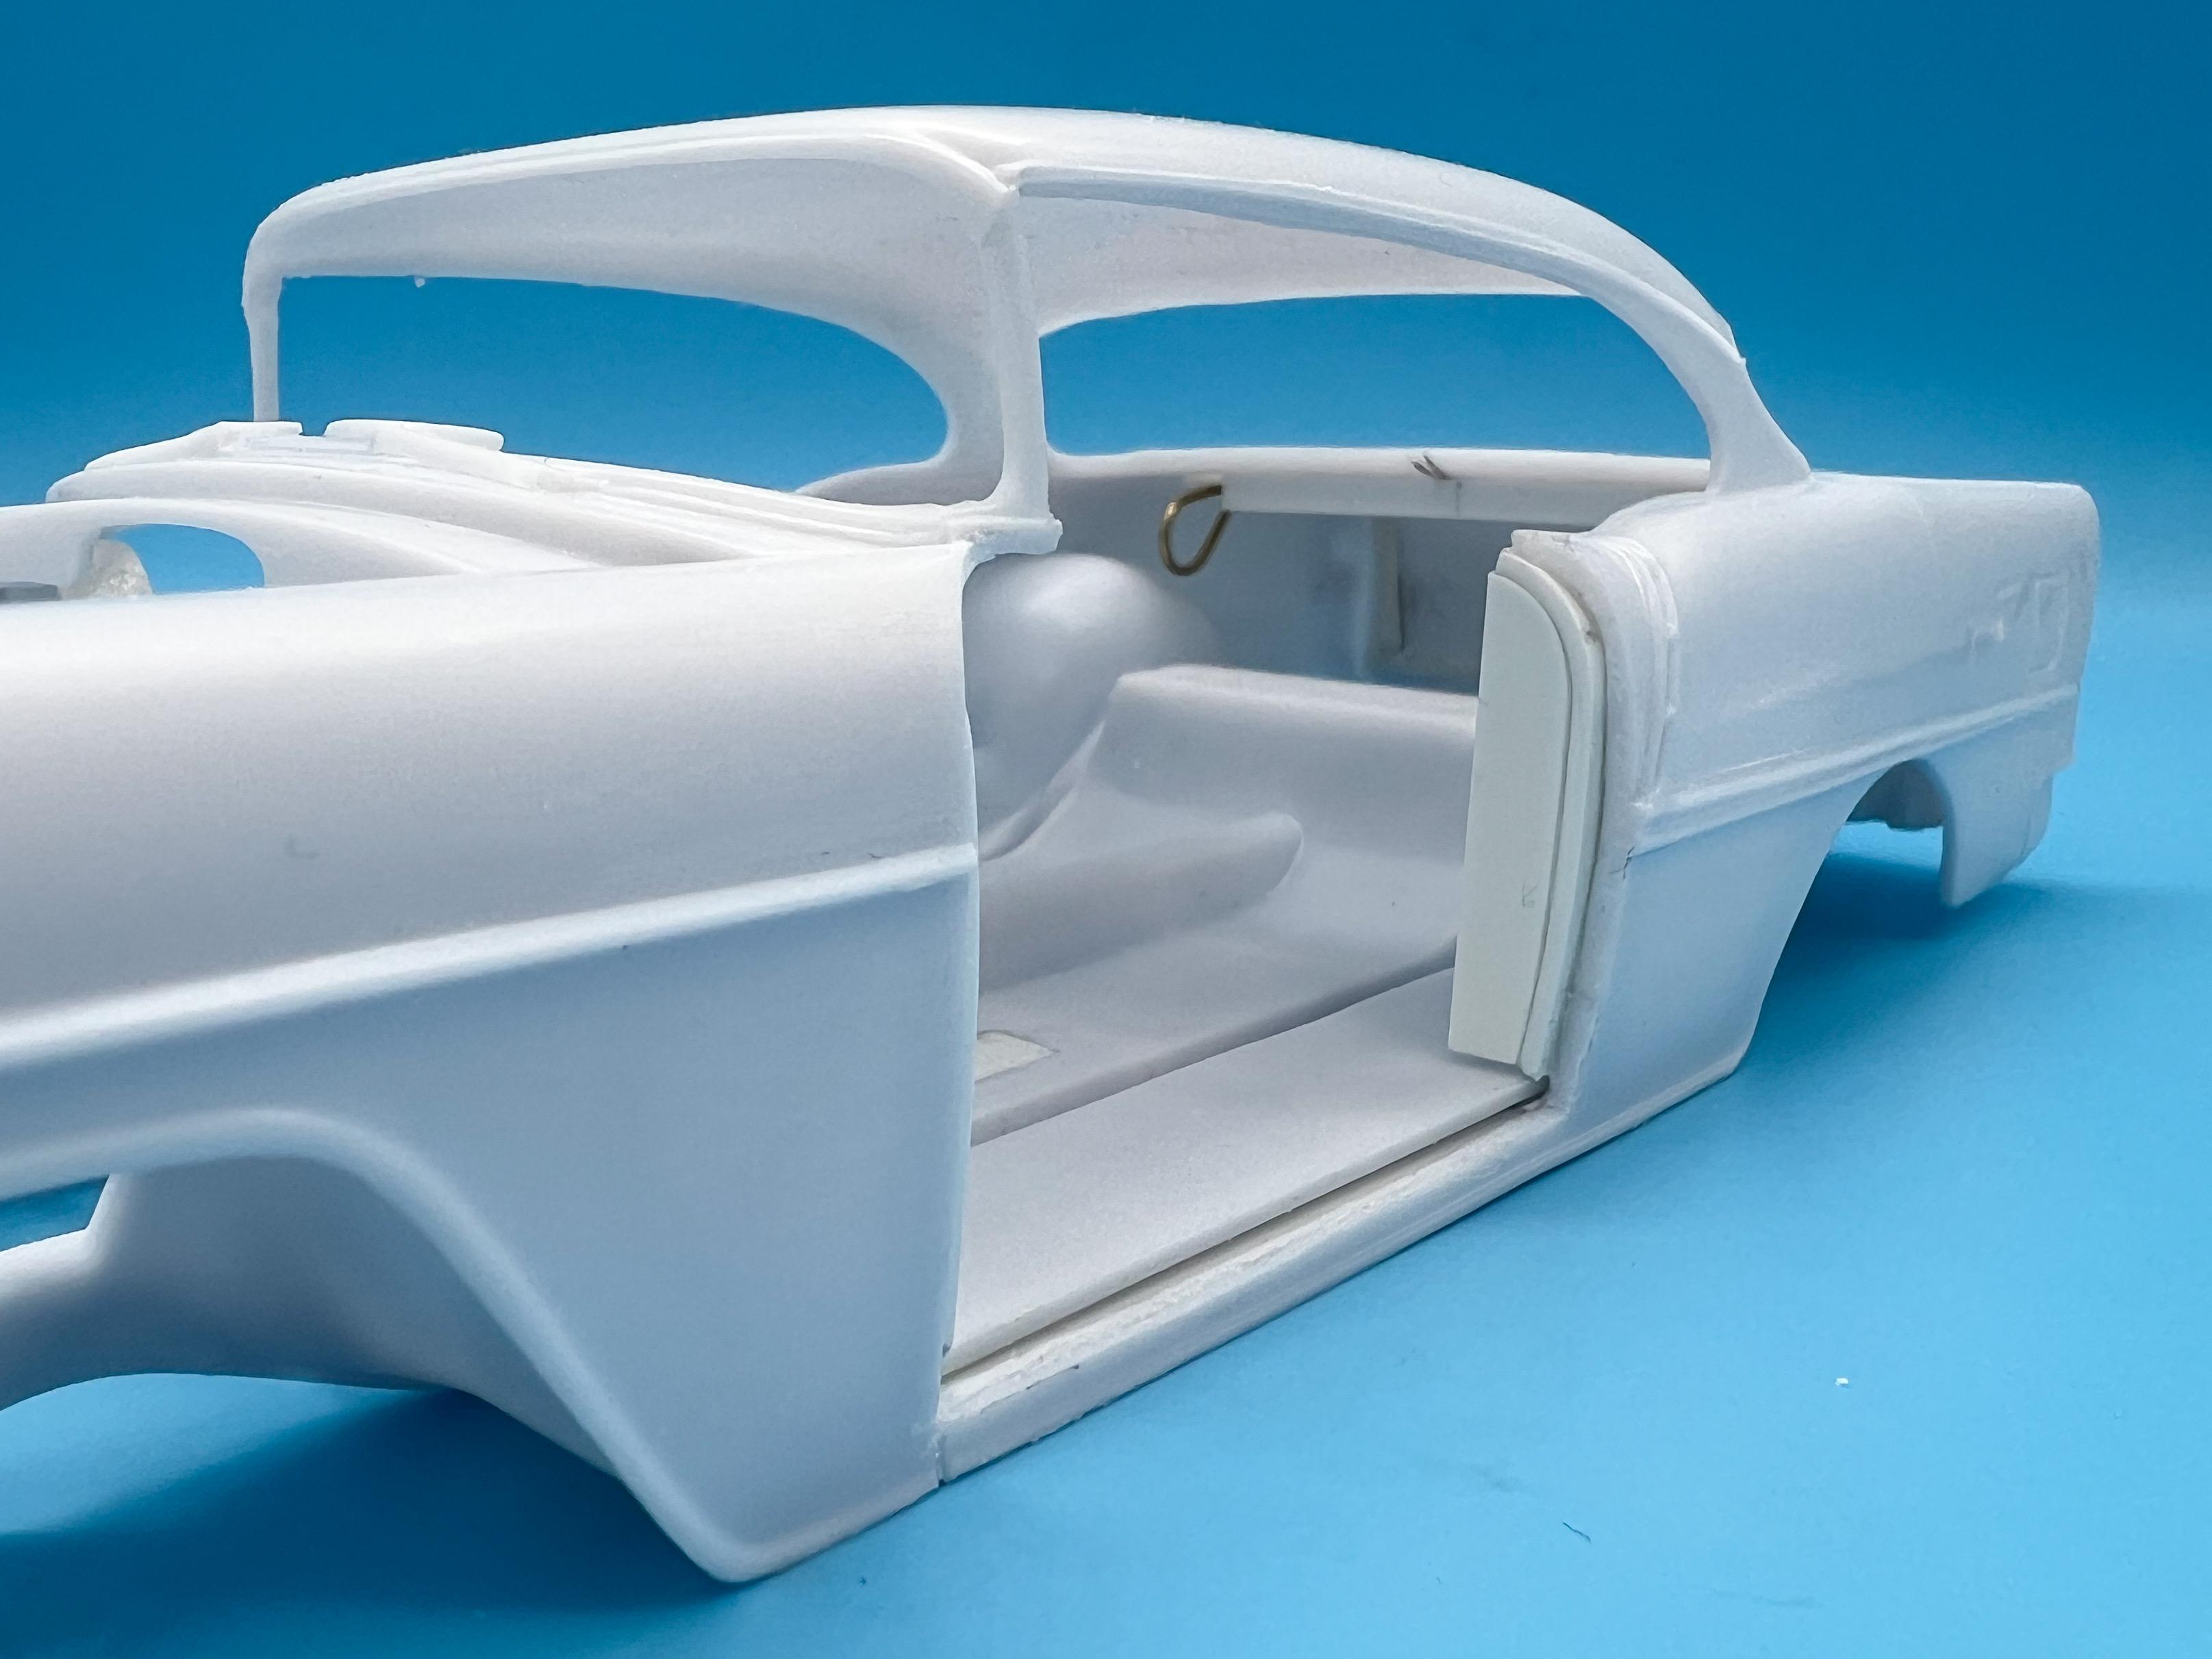
Thanks for all the nice comments, everybody! Yup! It’s there from an earlier version of the tooling, I believe… Me too! I got a couple of these so I can do just that! I like the idea, if I’m doing some kind of racecar to do something for it to race against ? Luckily, best I can tell, it’s not too complicated on the 1:1s: I’ll have to mess with it slightly to make it work in scale, but that’ll be a job for when I’ve got the hinges in place… Speaking of which, first job today was hinging the trunk (which I tackled first because there’s only one of them…) Went to Ace for some brass rod, and bent a hinge around some styrene square tube. I like using square tube for this job rather than round because you have a nice fat gluing surface to attach it to the body… Glued it in behind the upper jamb (note the little square tube receivers I’ve got slid on there, which will attach to the inner trunk lid): Then taped the trunk in place where it needs to fall and attached the receivers: I only used some tiny dots of glue initially to tack it in place - the last thing you want to do is to get glue on the brass here…). Then, removed it from the body and fabricated a little faux latch that helps locate the lid on the lower jamb and keep it from flopping around: And then a test fit once the glue had dried - closed: And open: I added a couple of strips of styrene to the bottom of the body, behind the rockers, to help locate the frame properly every time and make sure everything stays aligned as it should do though the dozens of test fits I’ll be doing…test fit with the frame in place to make sure I’m still good: Yup, still works! Of course, I have to add all the inner trunk detail now that you can see in there, but that was kinda the point of the exercise… With that done, I could start roughing in the door jambs: Because I need space for the dash I need a flat(ter) hinge for the doors than I could get away with for the trunk, but the process is about the same… hinges made: Because door cards will cover the inner doors, and they’re fairly deep, I can get away with some sturdier receivers in the doors: I made some little brass inserts that slide into the styrene tube in the doors that I can use to adjust the fit somewhat come assembly time: And a quick test fit of the doors too, to see where we’re at: Because I had to scribe some lines and cut some awkward curves I need to add some material back into the doors themselves to get a good fit, but I had decided before I started cutting that I’d rather add material to the doors than have to mess with the body itself too much - and once I’ve got the doors fitting nice I can work on the front door jamb and then figuring out a good way to mount the dash. Thanks for looking everybody - appreciate your comments!
-
I’ve played with this technique too 2 you’re right, there’s some cool patterned Washi tapes out there. Some things I learned from my experiments - first, Washi tape is somewhat translucent, and is affected by the base color underneath. If you stick bright red Washi tape over black you’ll get burgundy, most likely. Second up, due to it’s thickness, it doesn’t lay down very well into something like, for example, a tuck ‘n’ roll pattern. Works ok for flat stuff tho, like the example above. I didn’t like the somewhat glossy finish of the stuff I tried - it looked like, well, tape…but light mists of a satin clear worked ok on it, in my experience
-
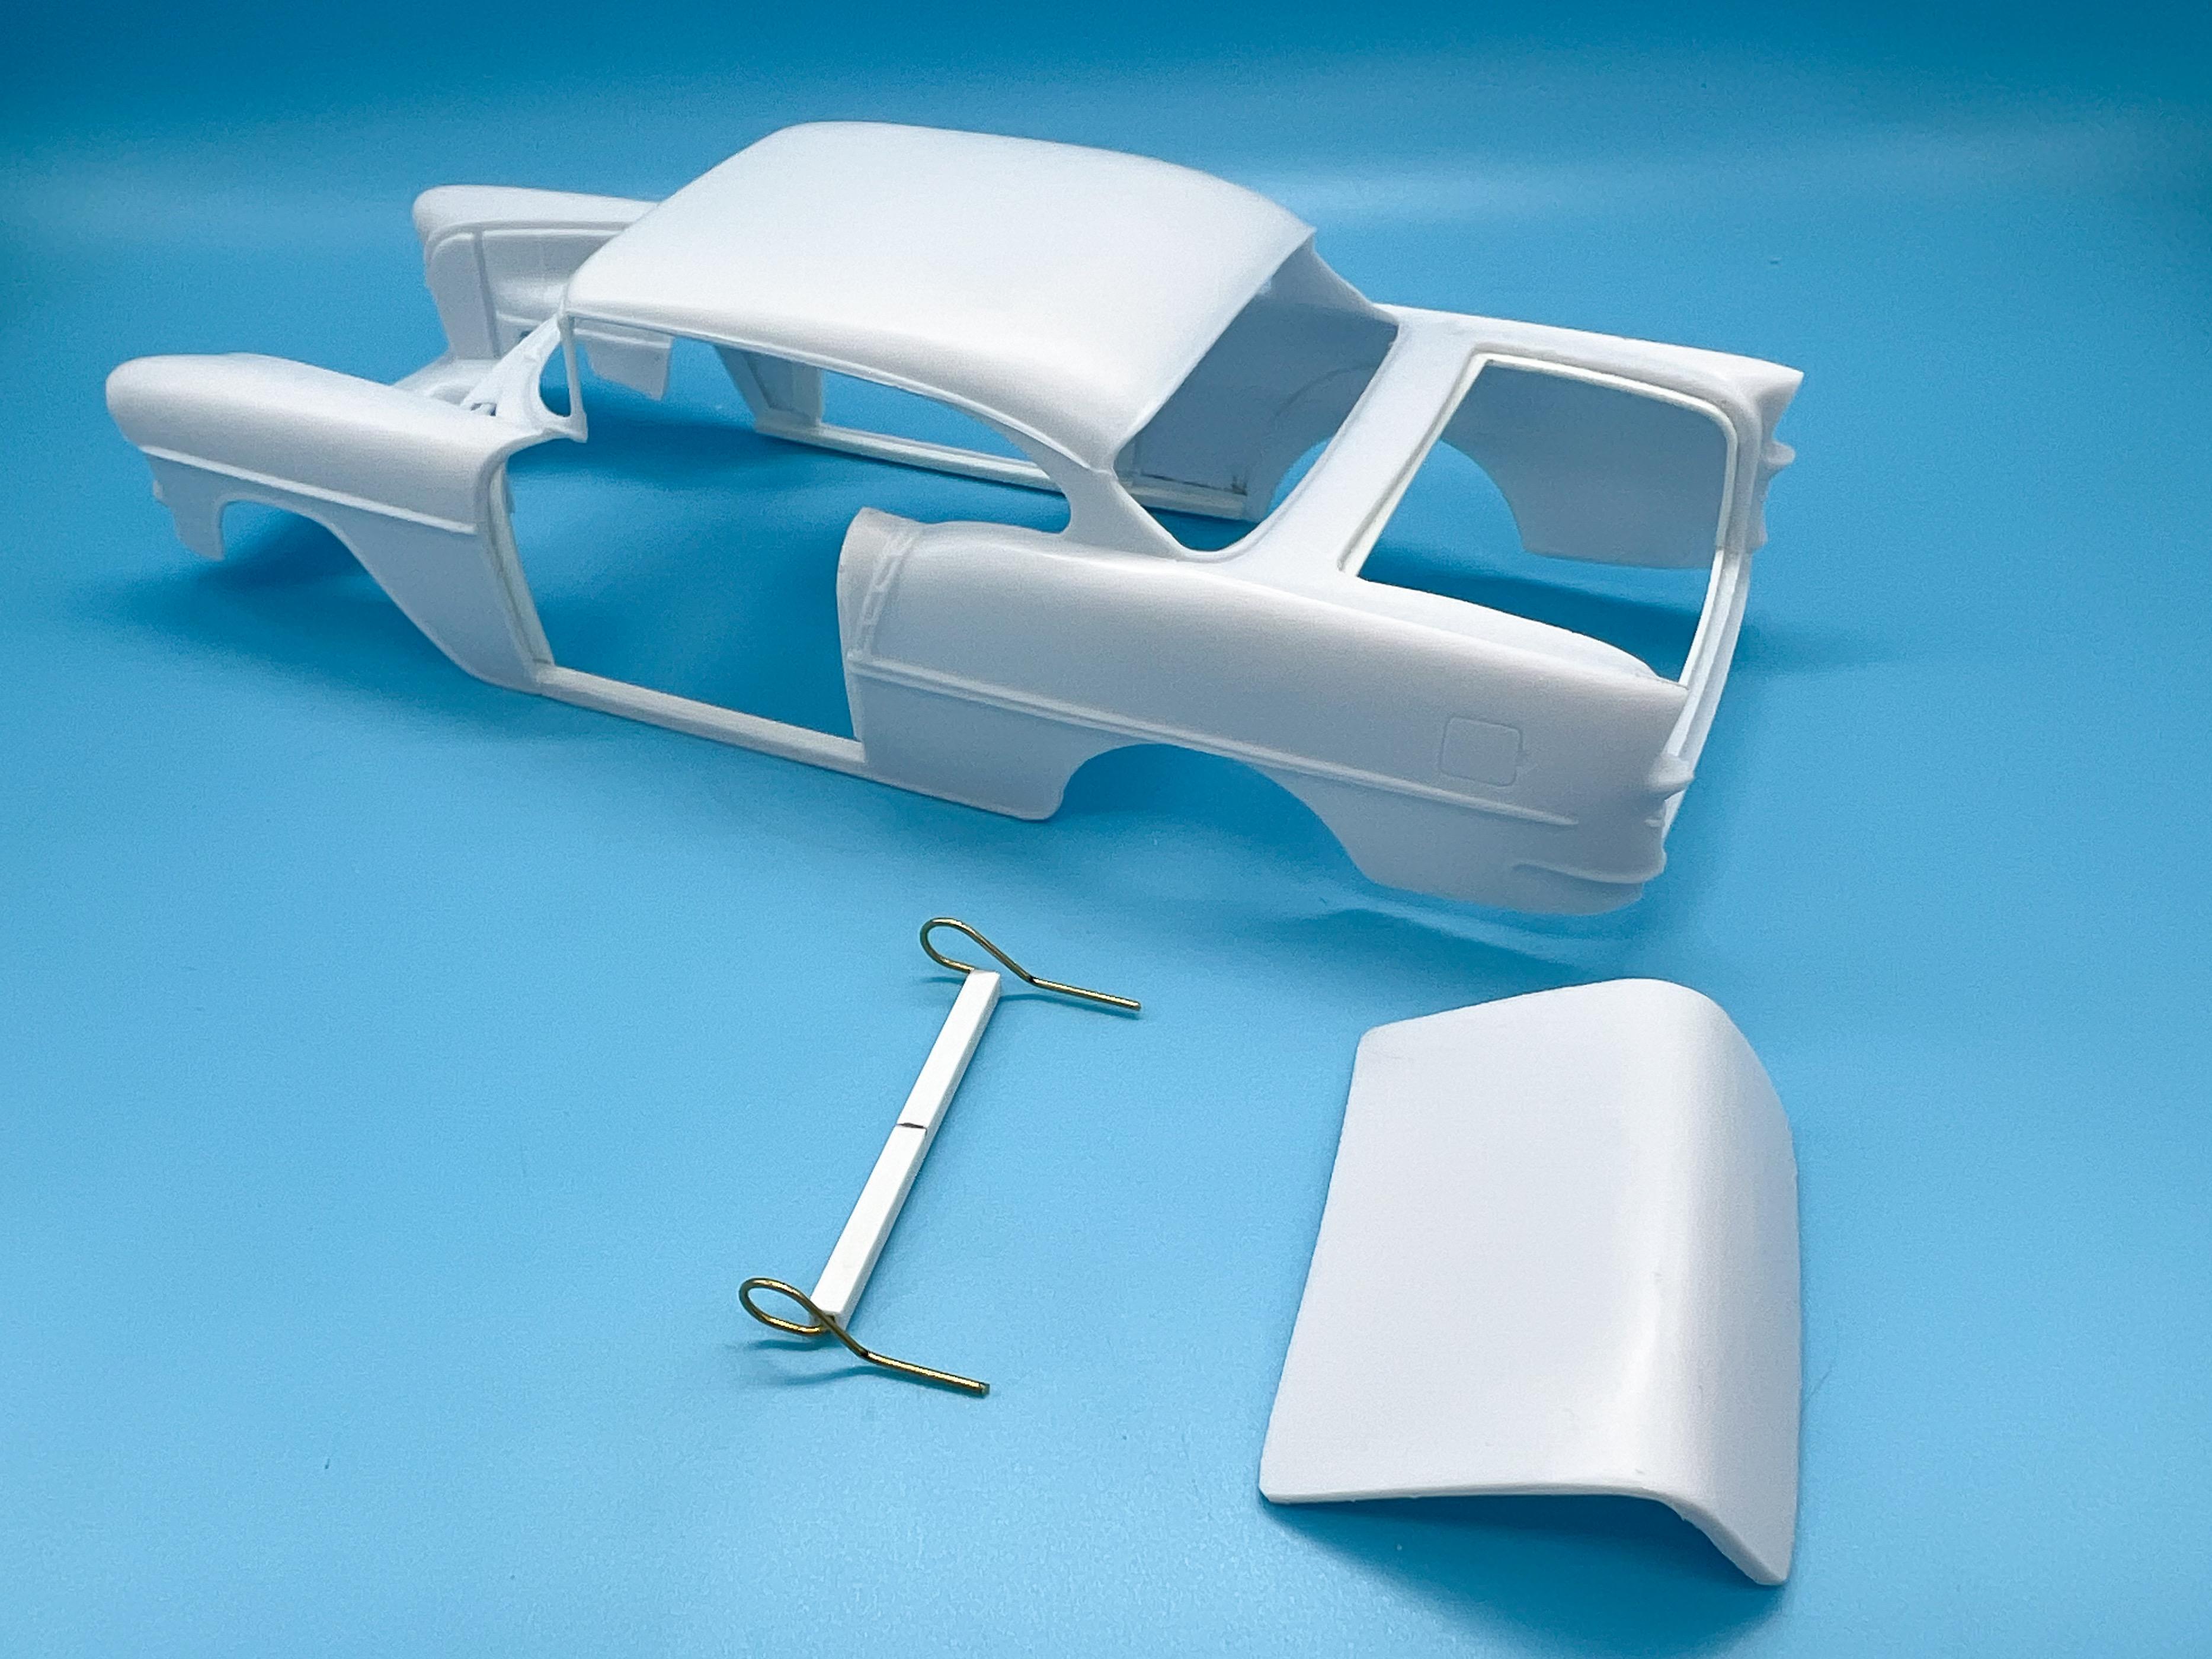
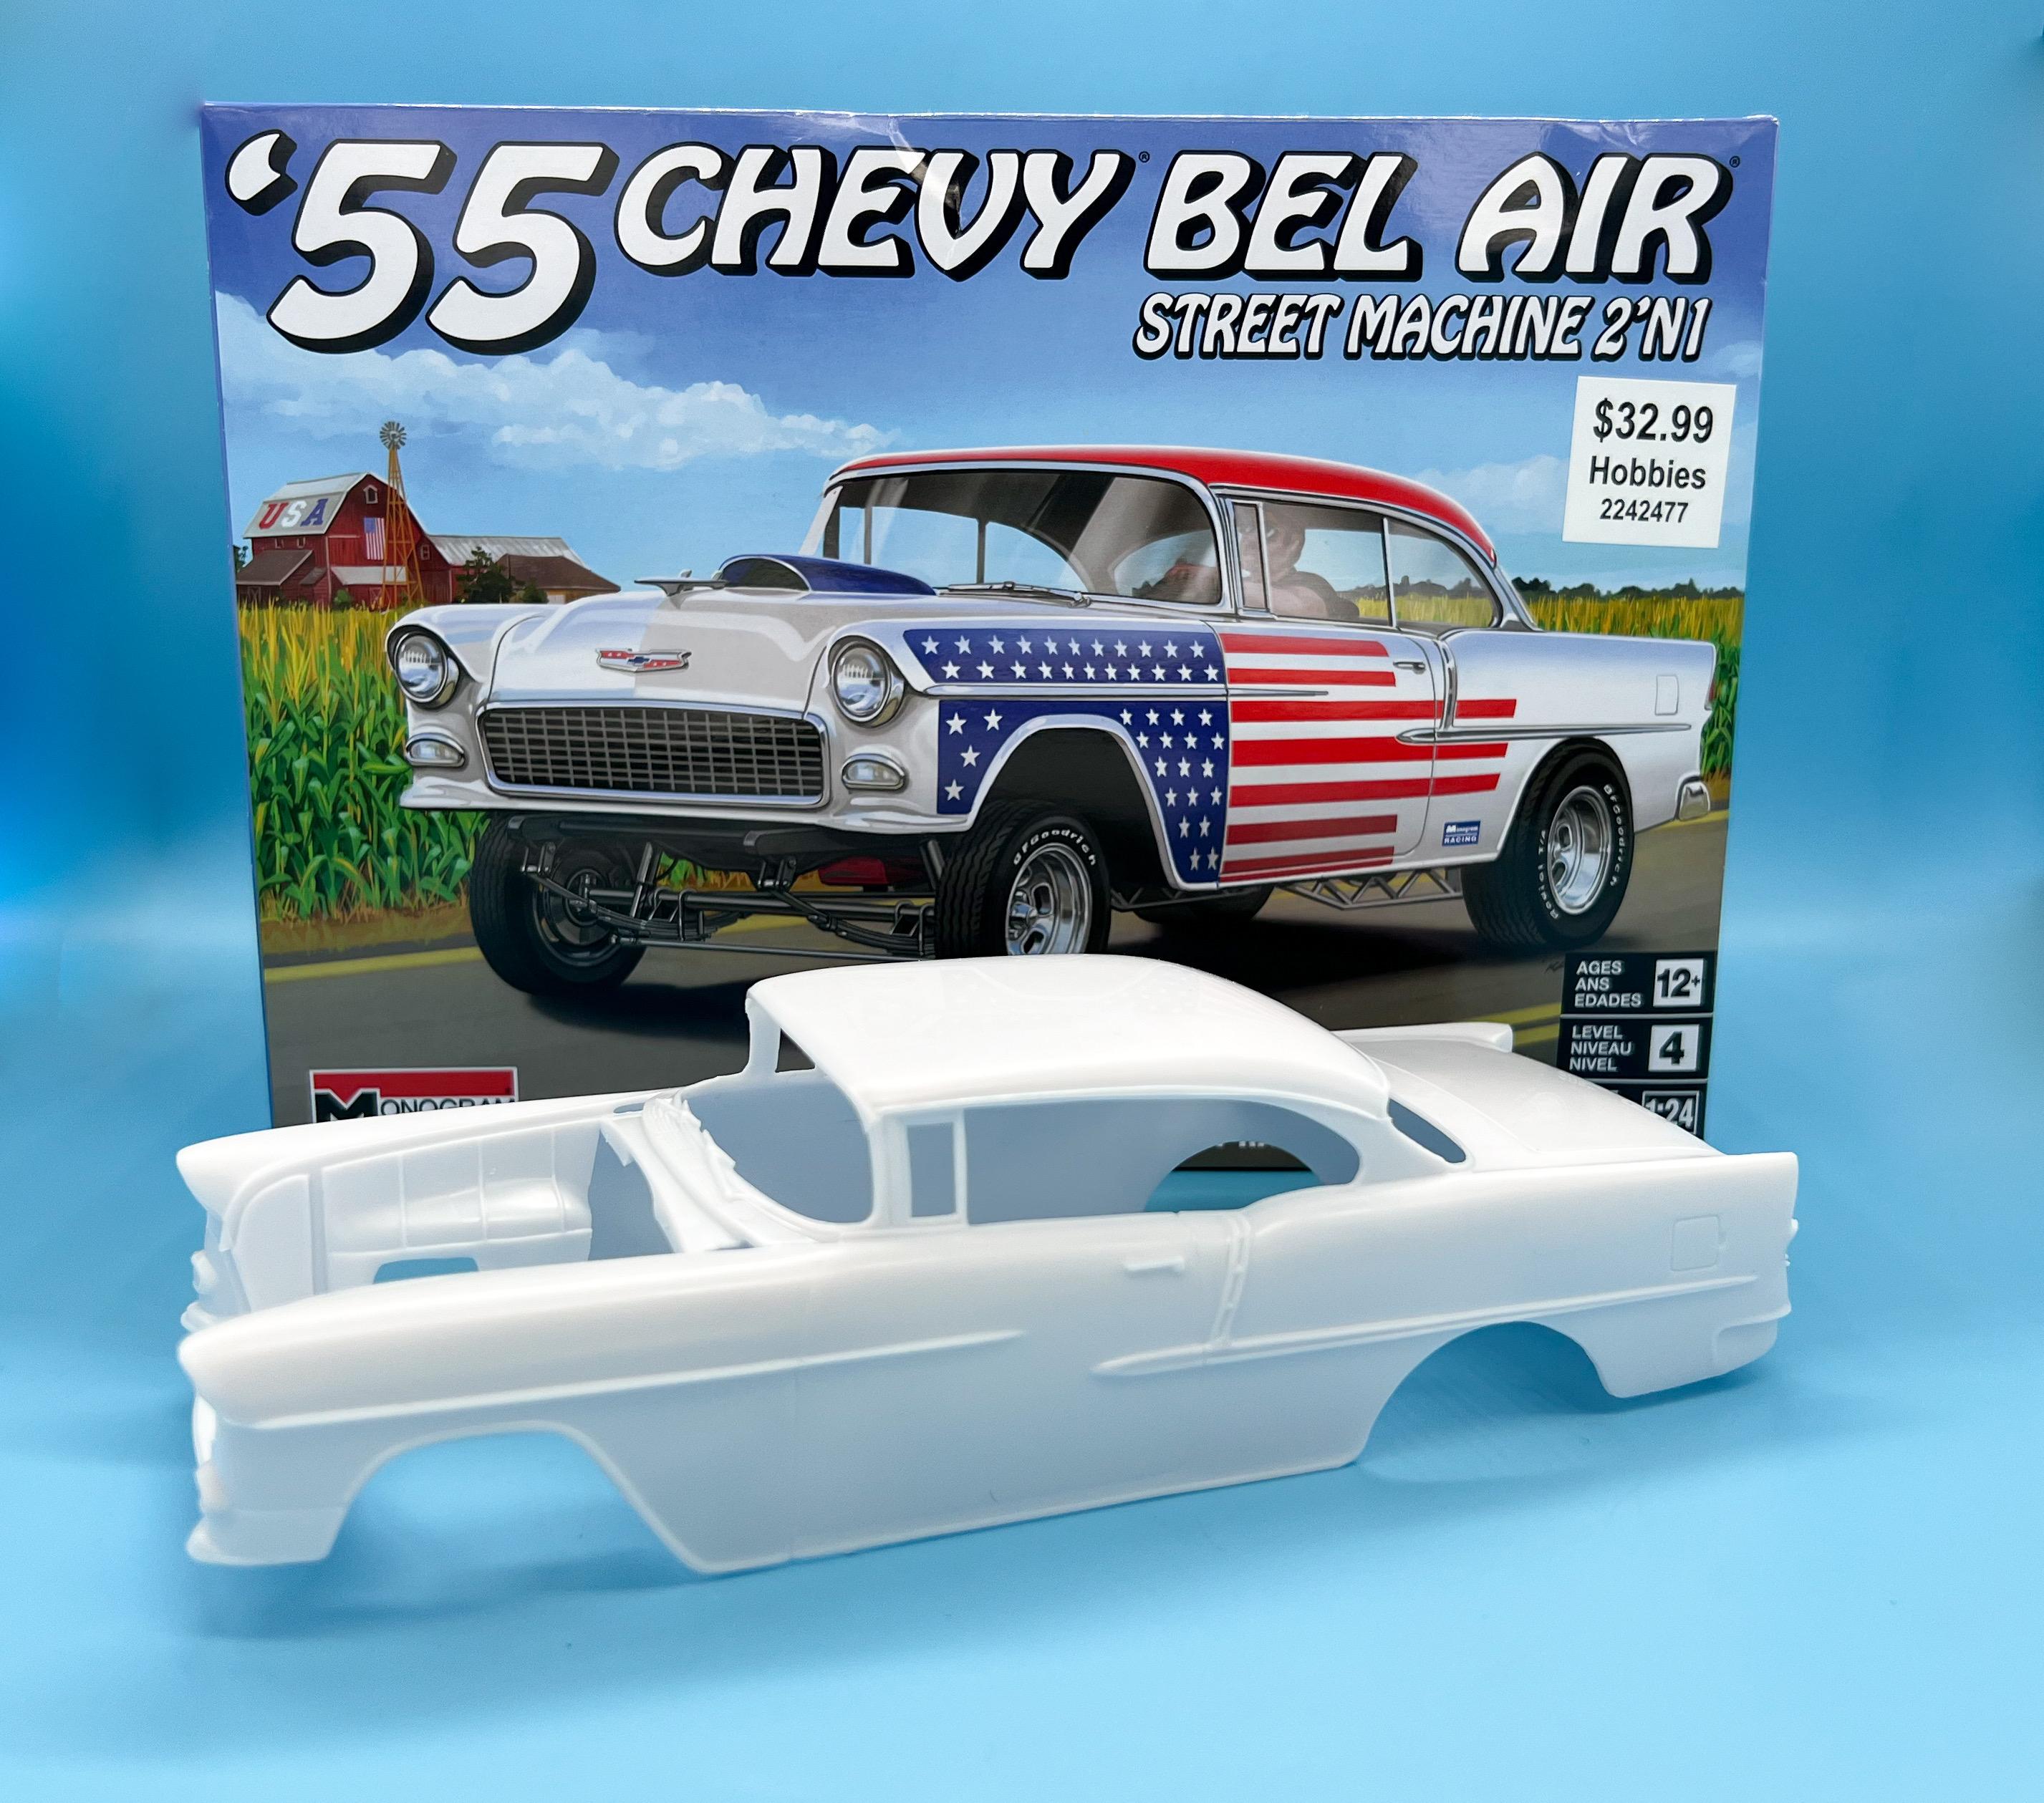
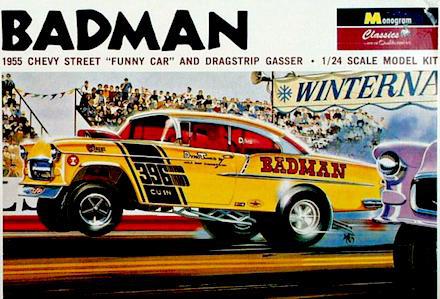
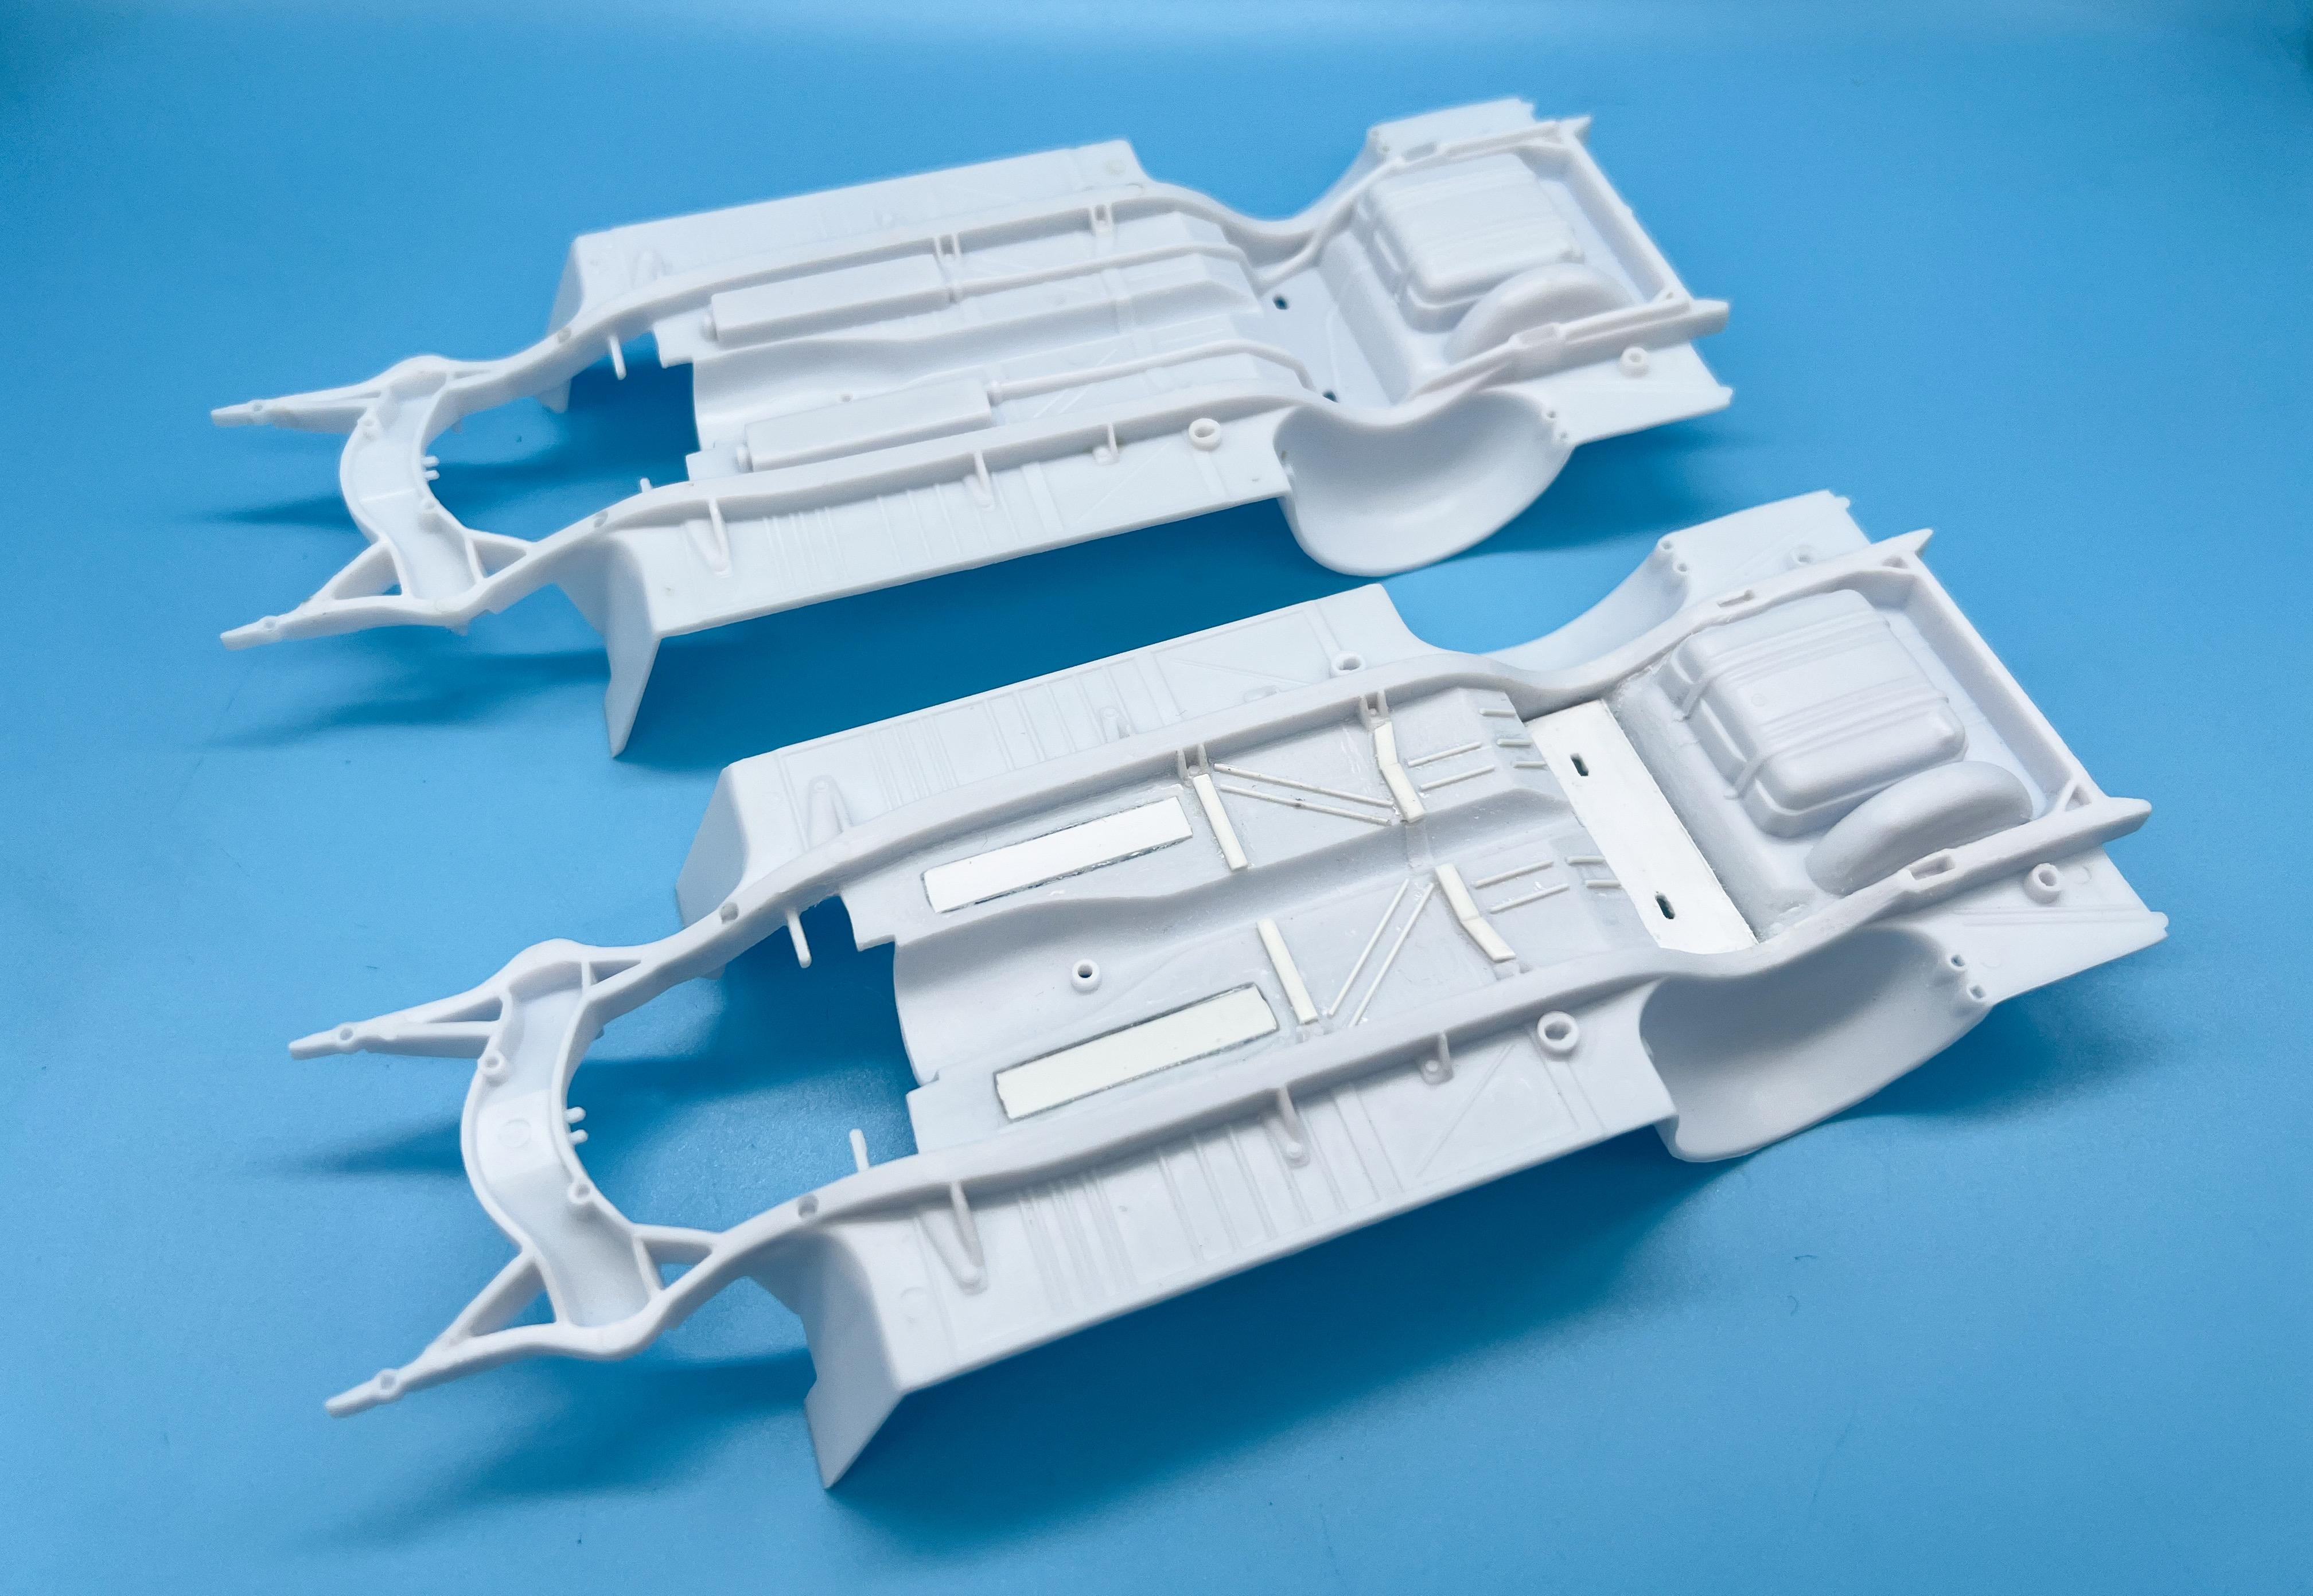
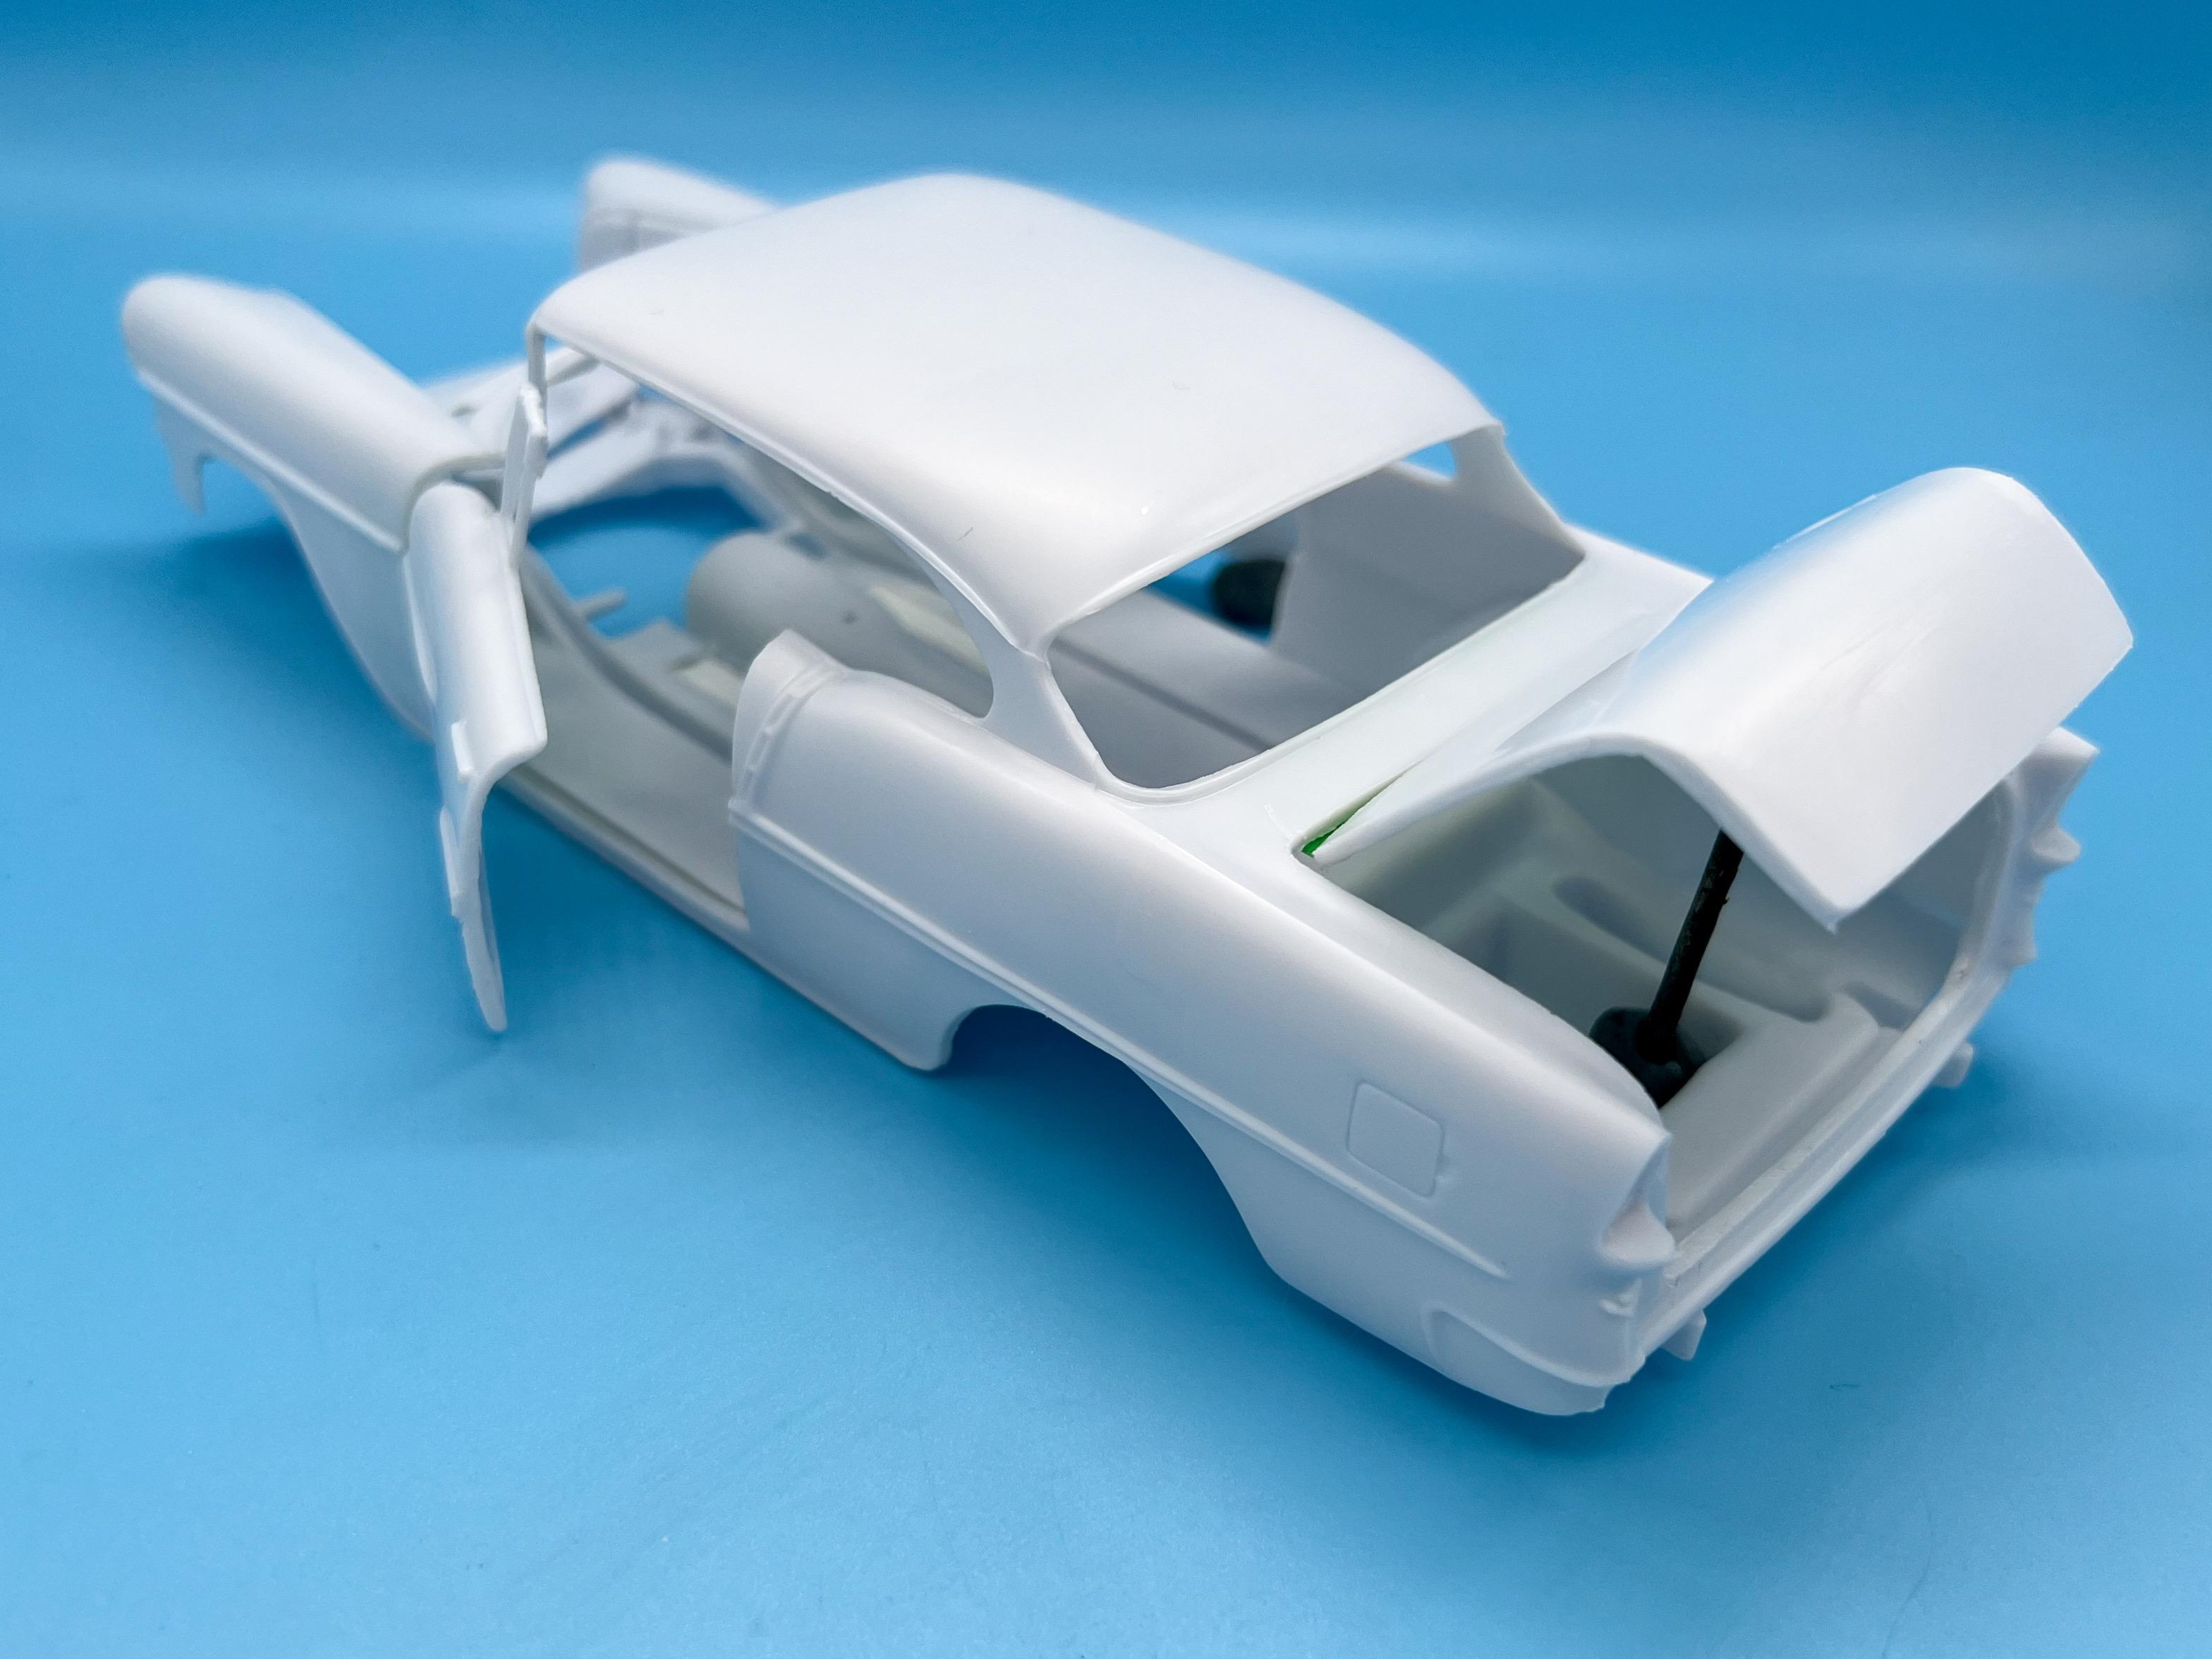
Well, arguably the most famous anyway… I was excited when this got reissued recently (and my local HL finally got them in-stock this week): Because I want to build this: The ultimate “street funny car and drag strip gasser”! Chopped roof, tinted glass, an engine that may be three different displacements (including two different sizes just in the ad above alone)…and I THINK everything to build it is still in this issue of the kit. Sweet! Sidebar: I posted this build in this section because I’ll be trying to make it loosely street-legal as Tom Daniel intended… “BOSS 55” license plate and all… First job, getting some of the tedious work done right out of the gate, removing the molded-in exhaust from the frame, because we won’t be needing those…(virgin frame top, modified one bottom): Aside from being a little boring, it wasn’t too tough to clean these up - a couple of strips of styrene to fill some airspace under the muffler and some little patch pieces and roundbar to get it back where it was before I started sanding and grinding. Speaking of tedious work, next up was a couple of hours of careful(ish) scribing to get the doors and trunk opened… And the rest of day 1’s progress was starting to make jambs - first for the trunk: …and then for the doors: Fairly humble start - tomorrow’s job is hinges…thanks for looking, more soon!
- 103 replies
-
- 18
-

-
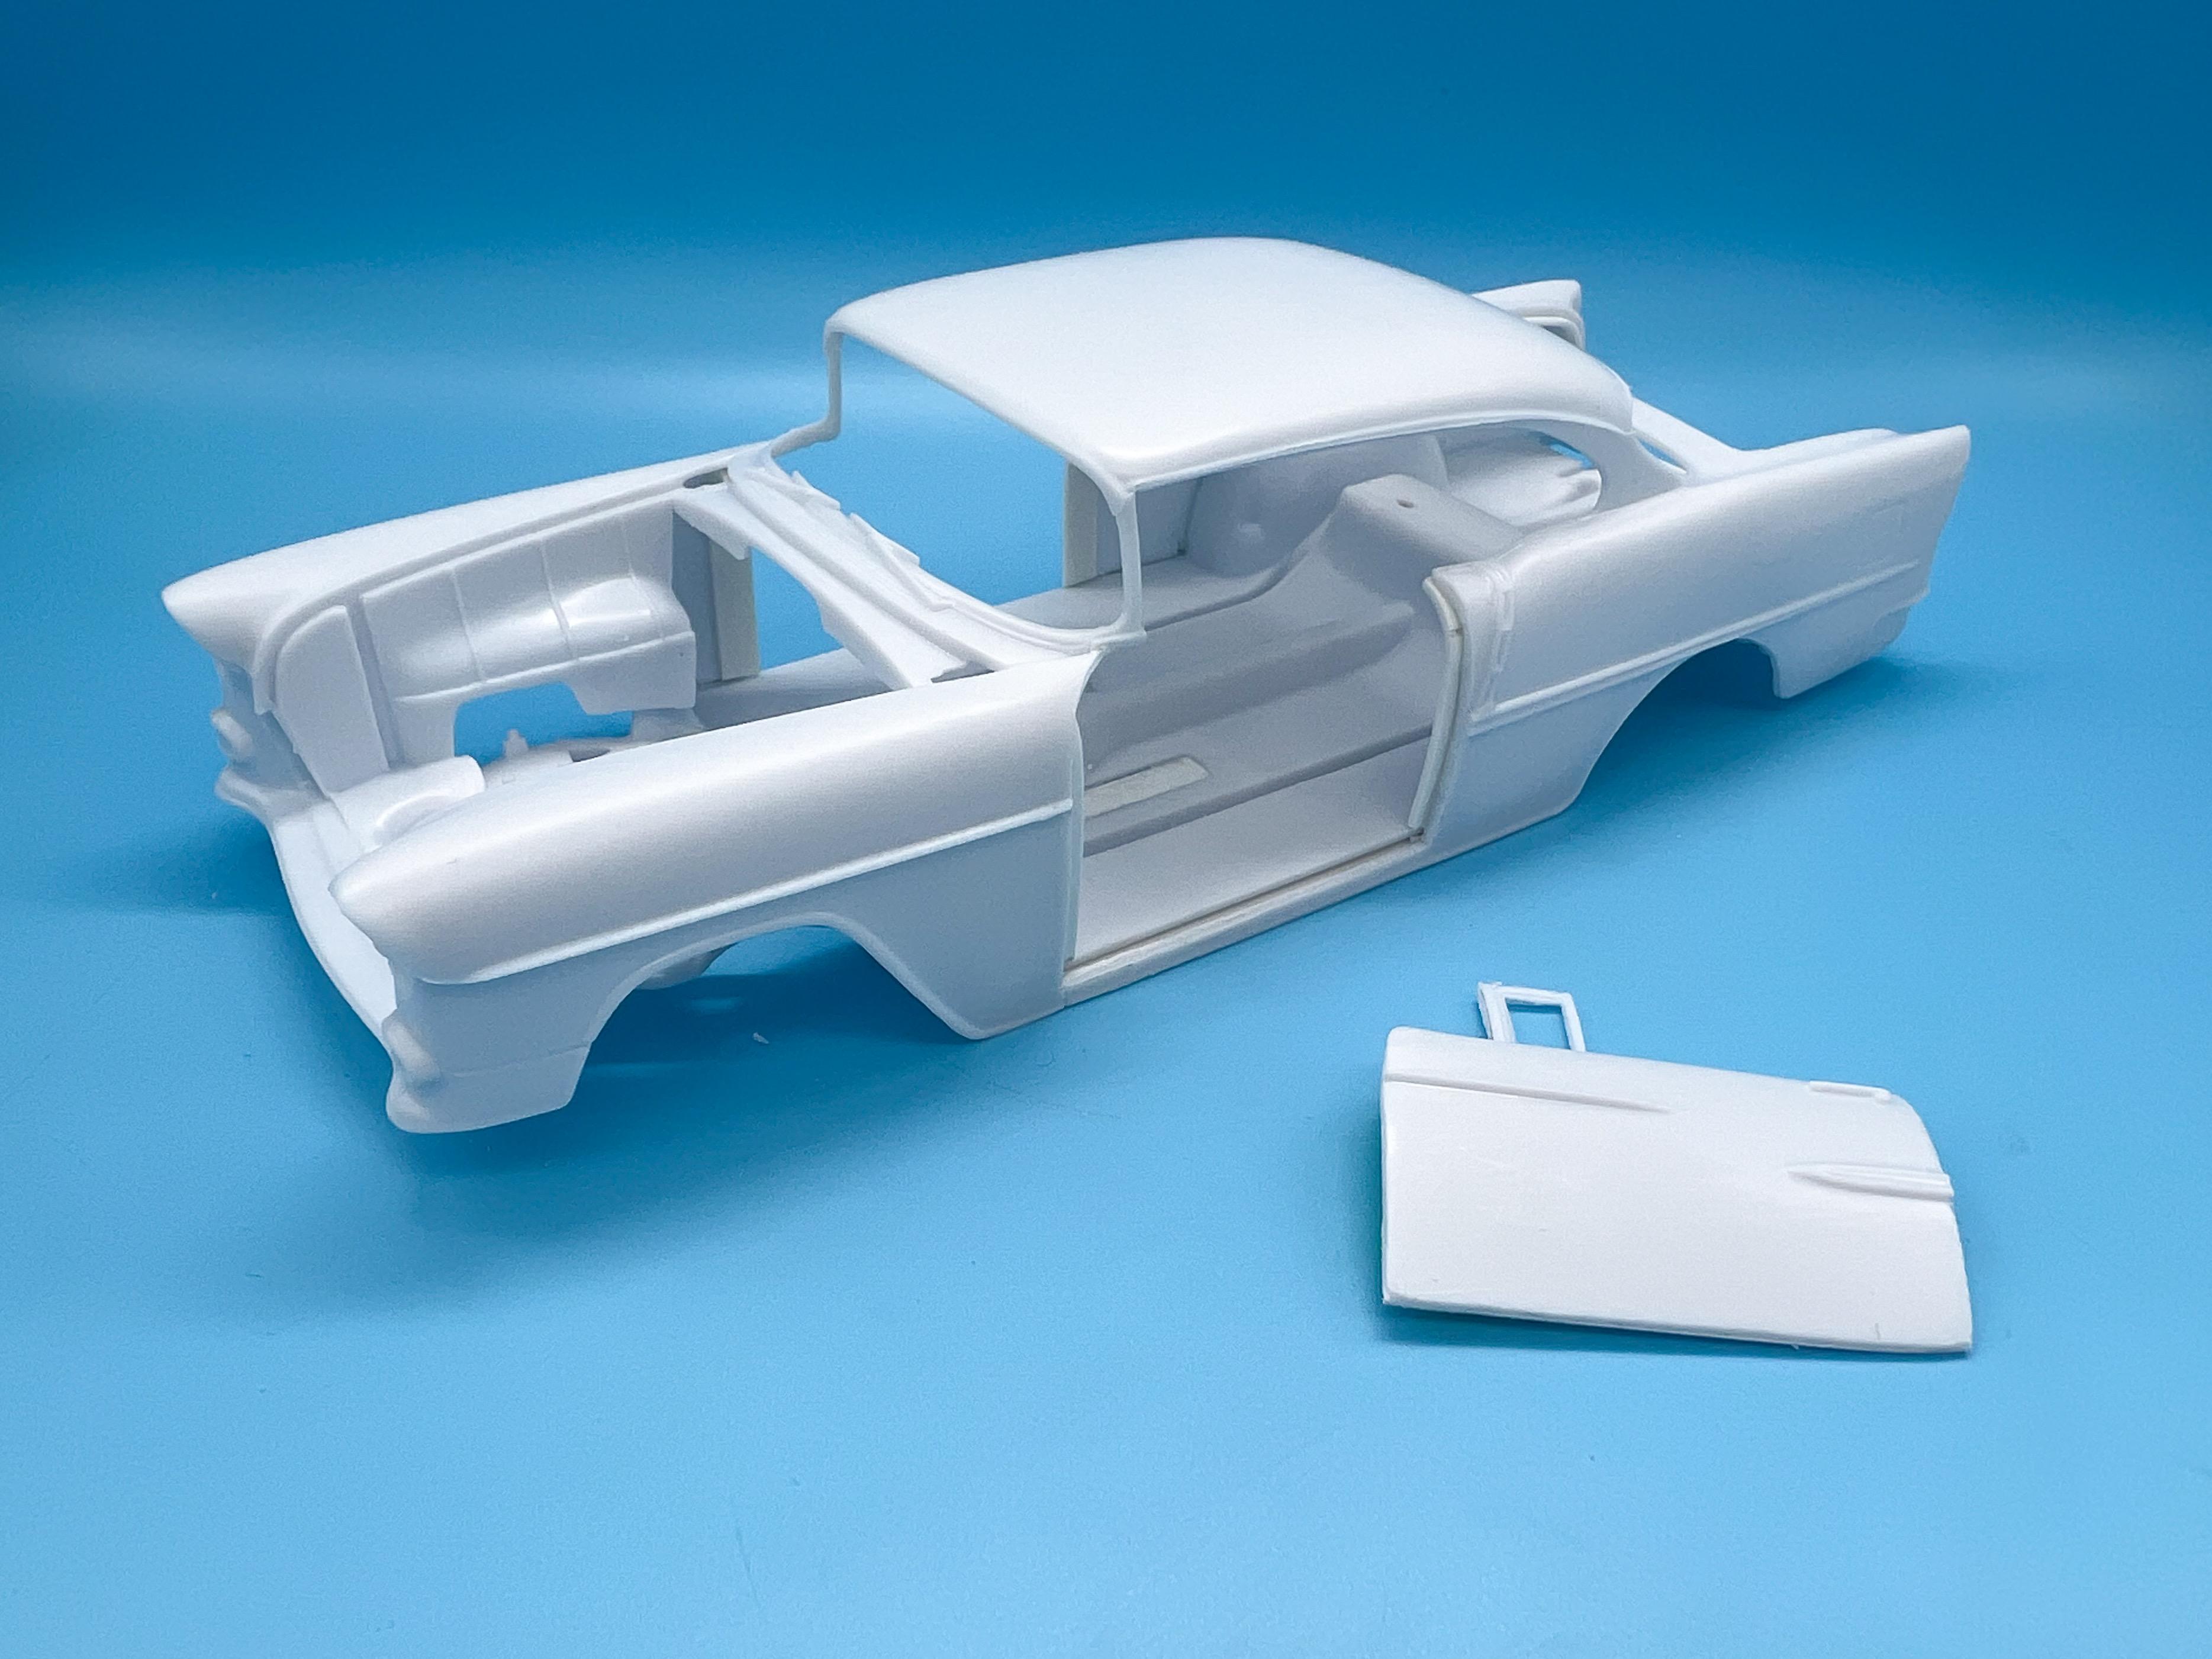
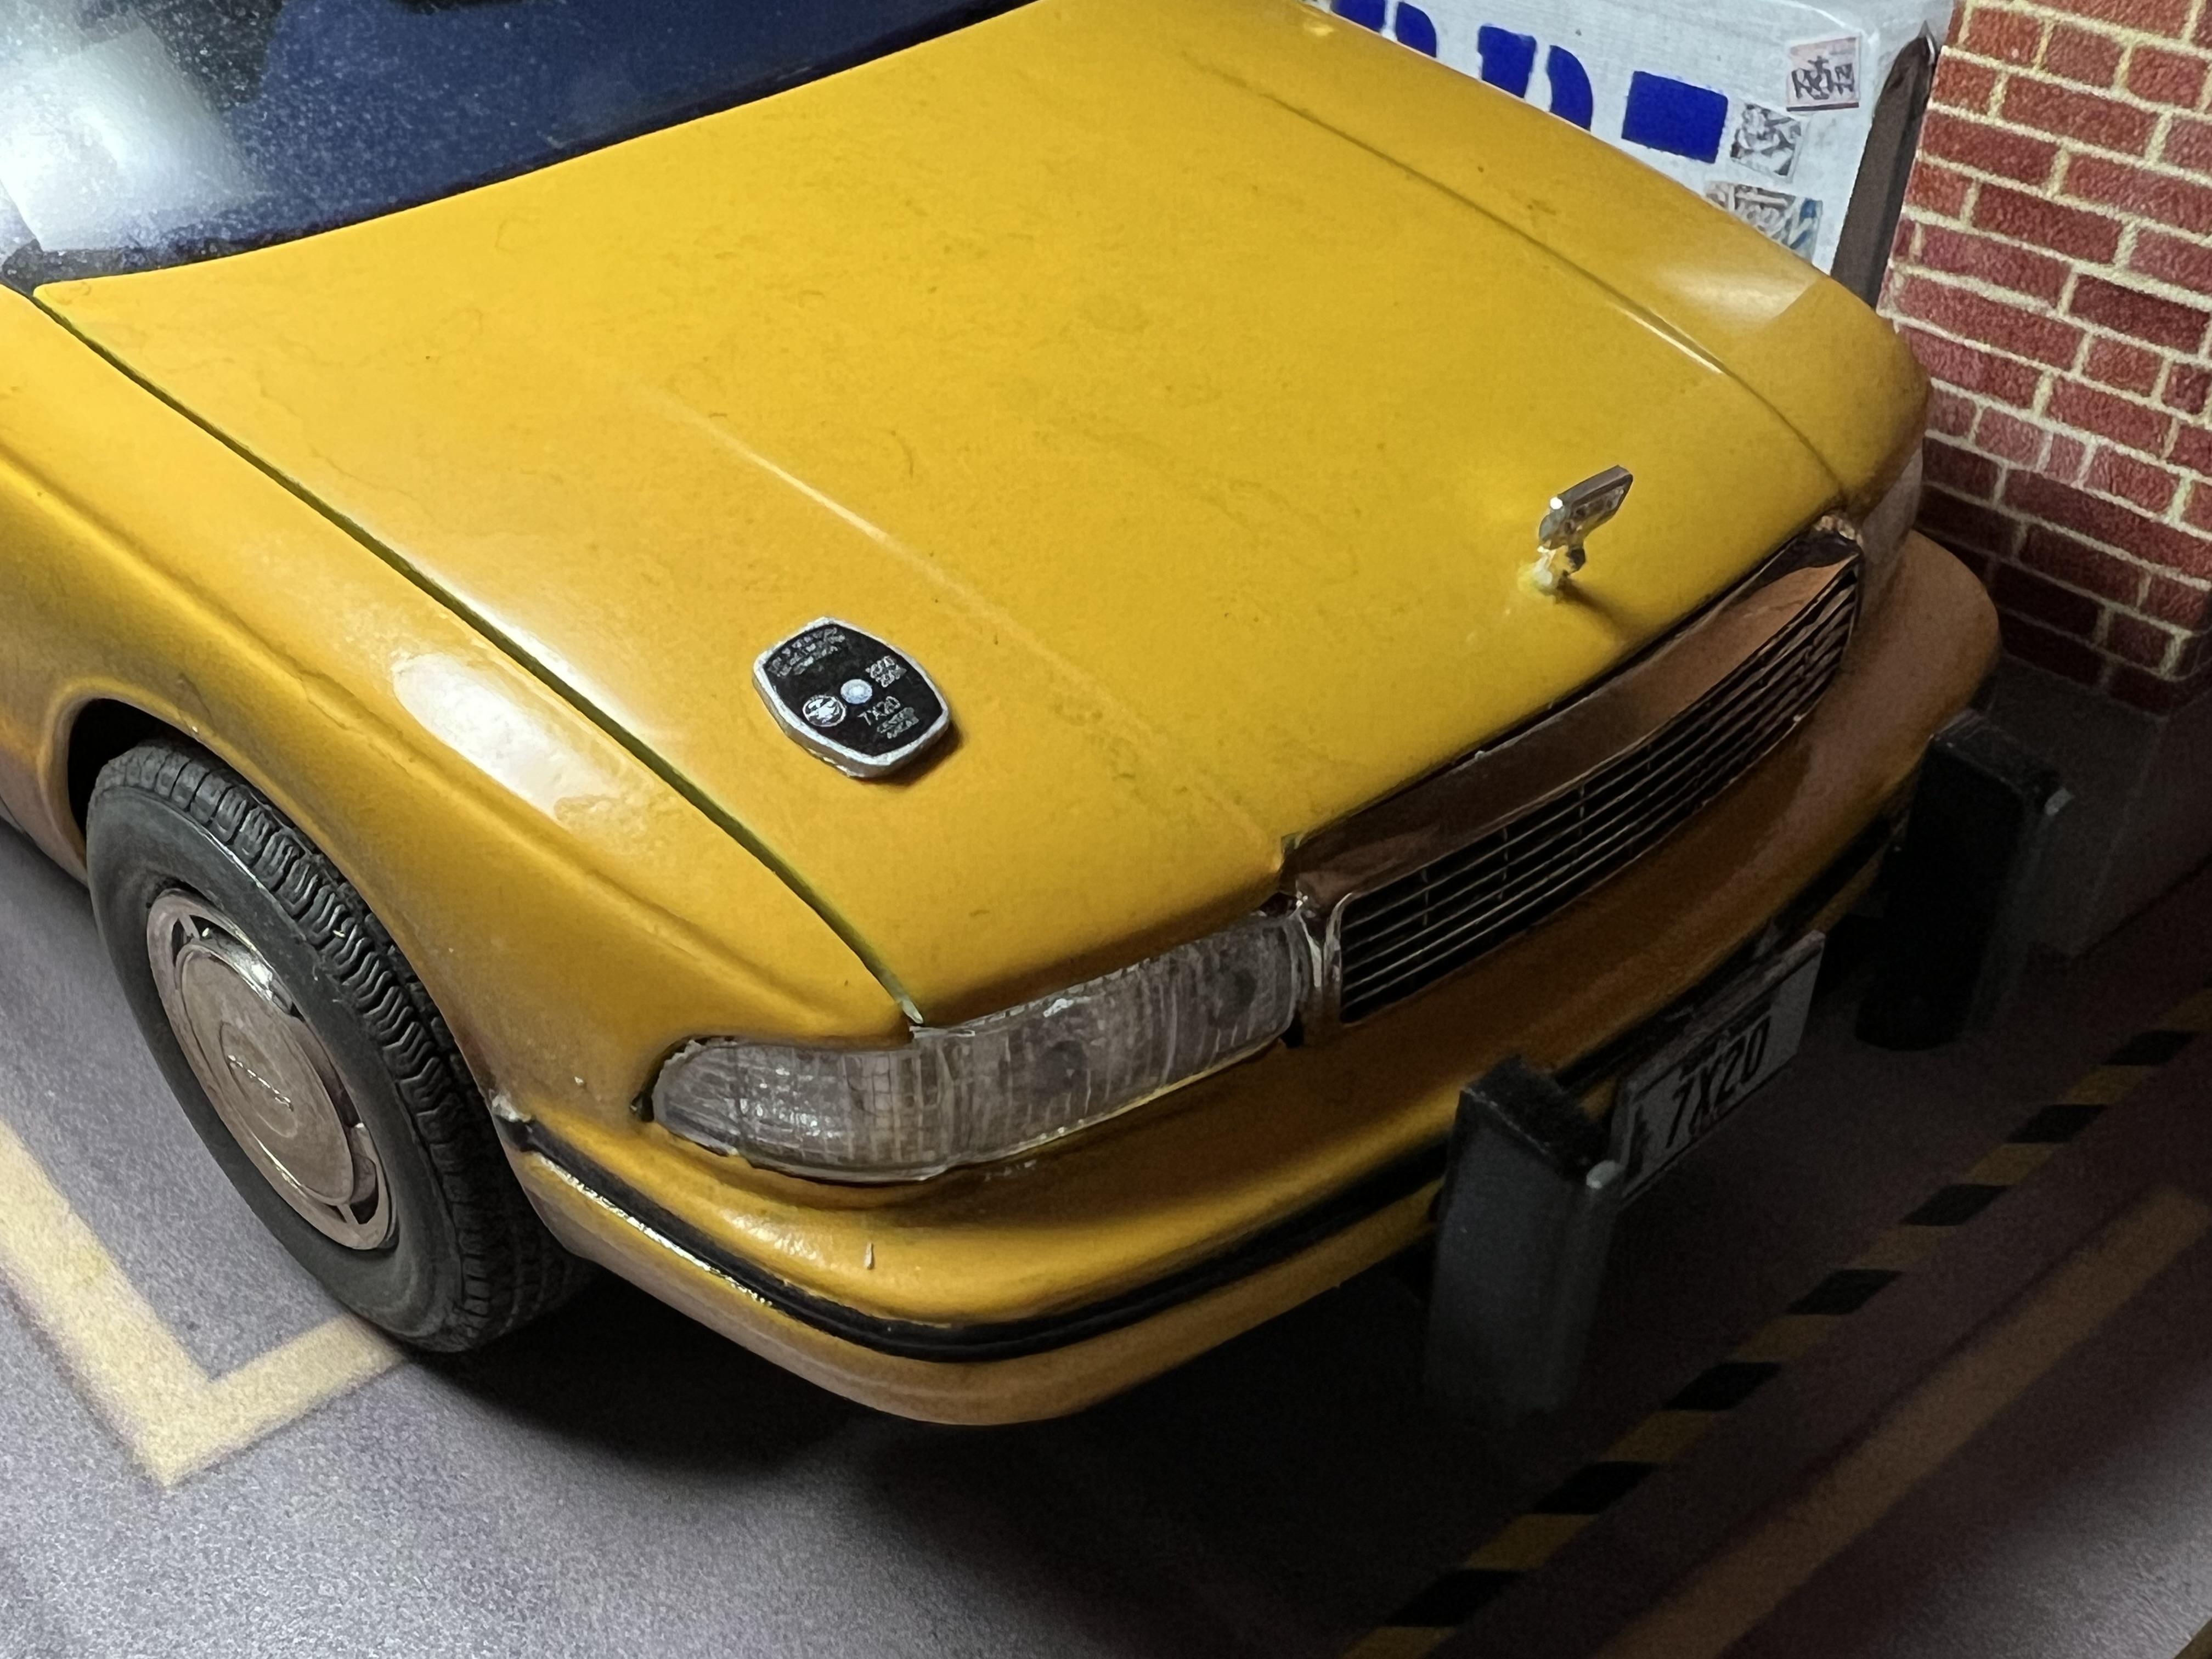
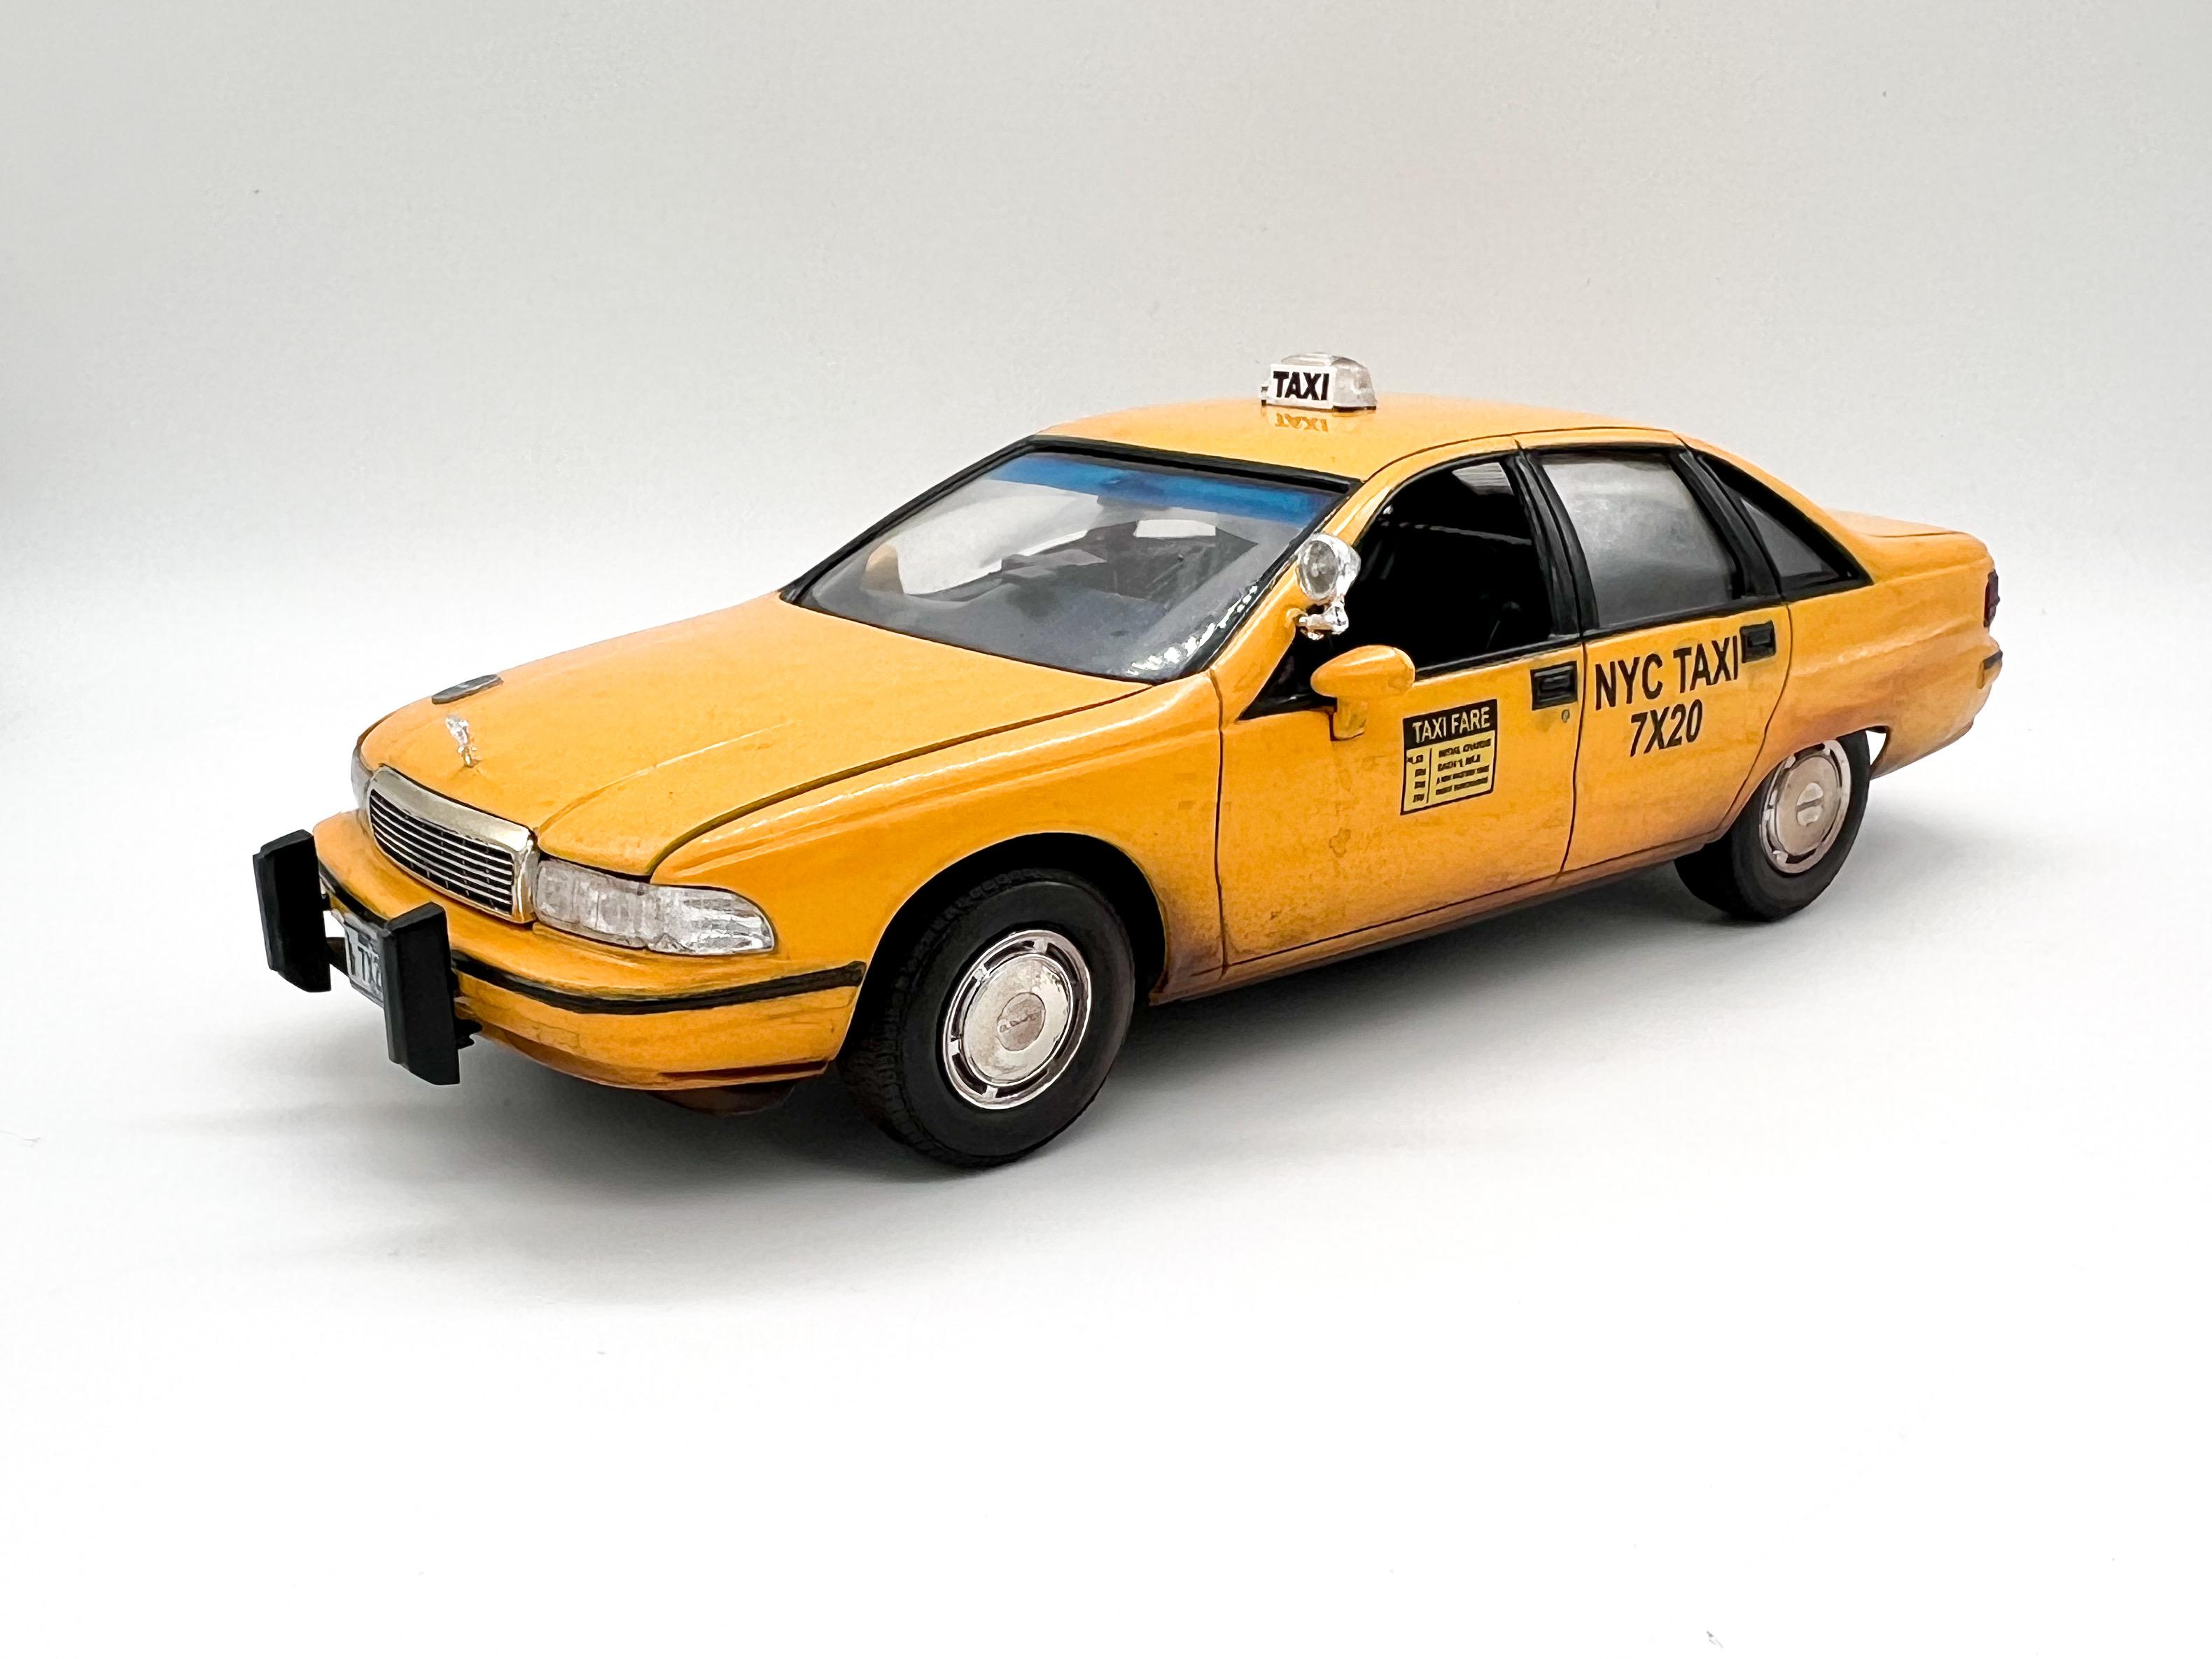
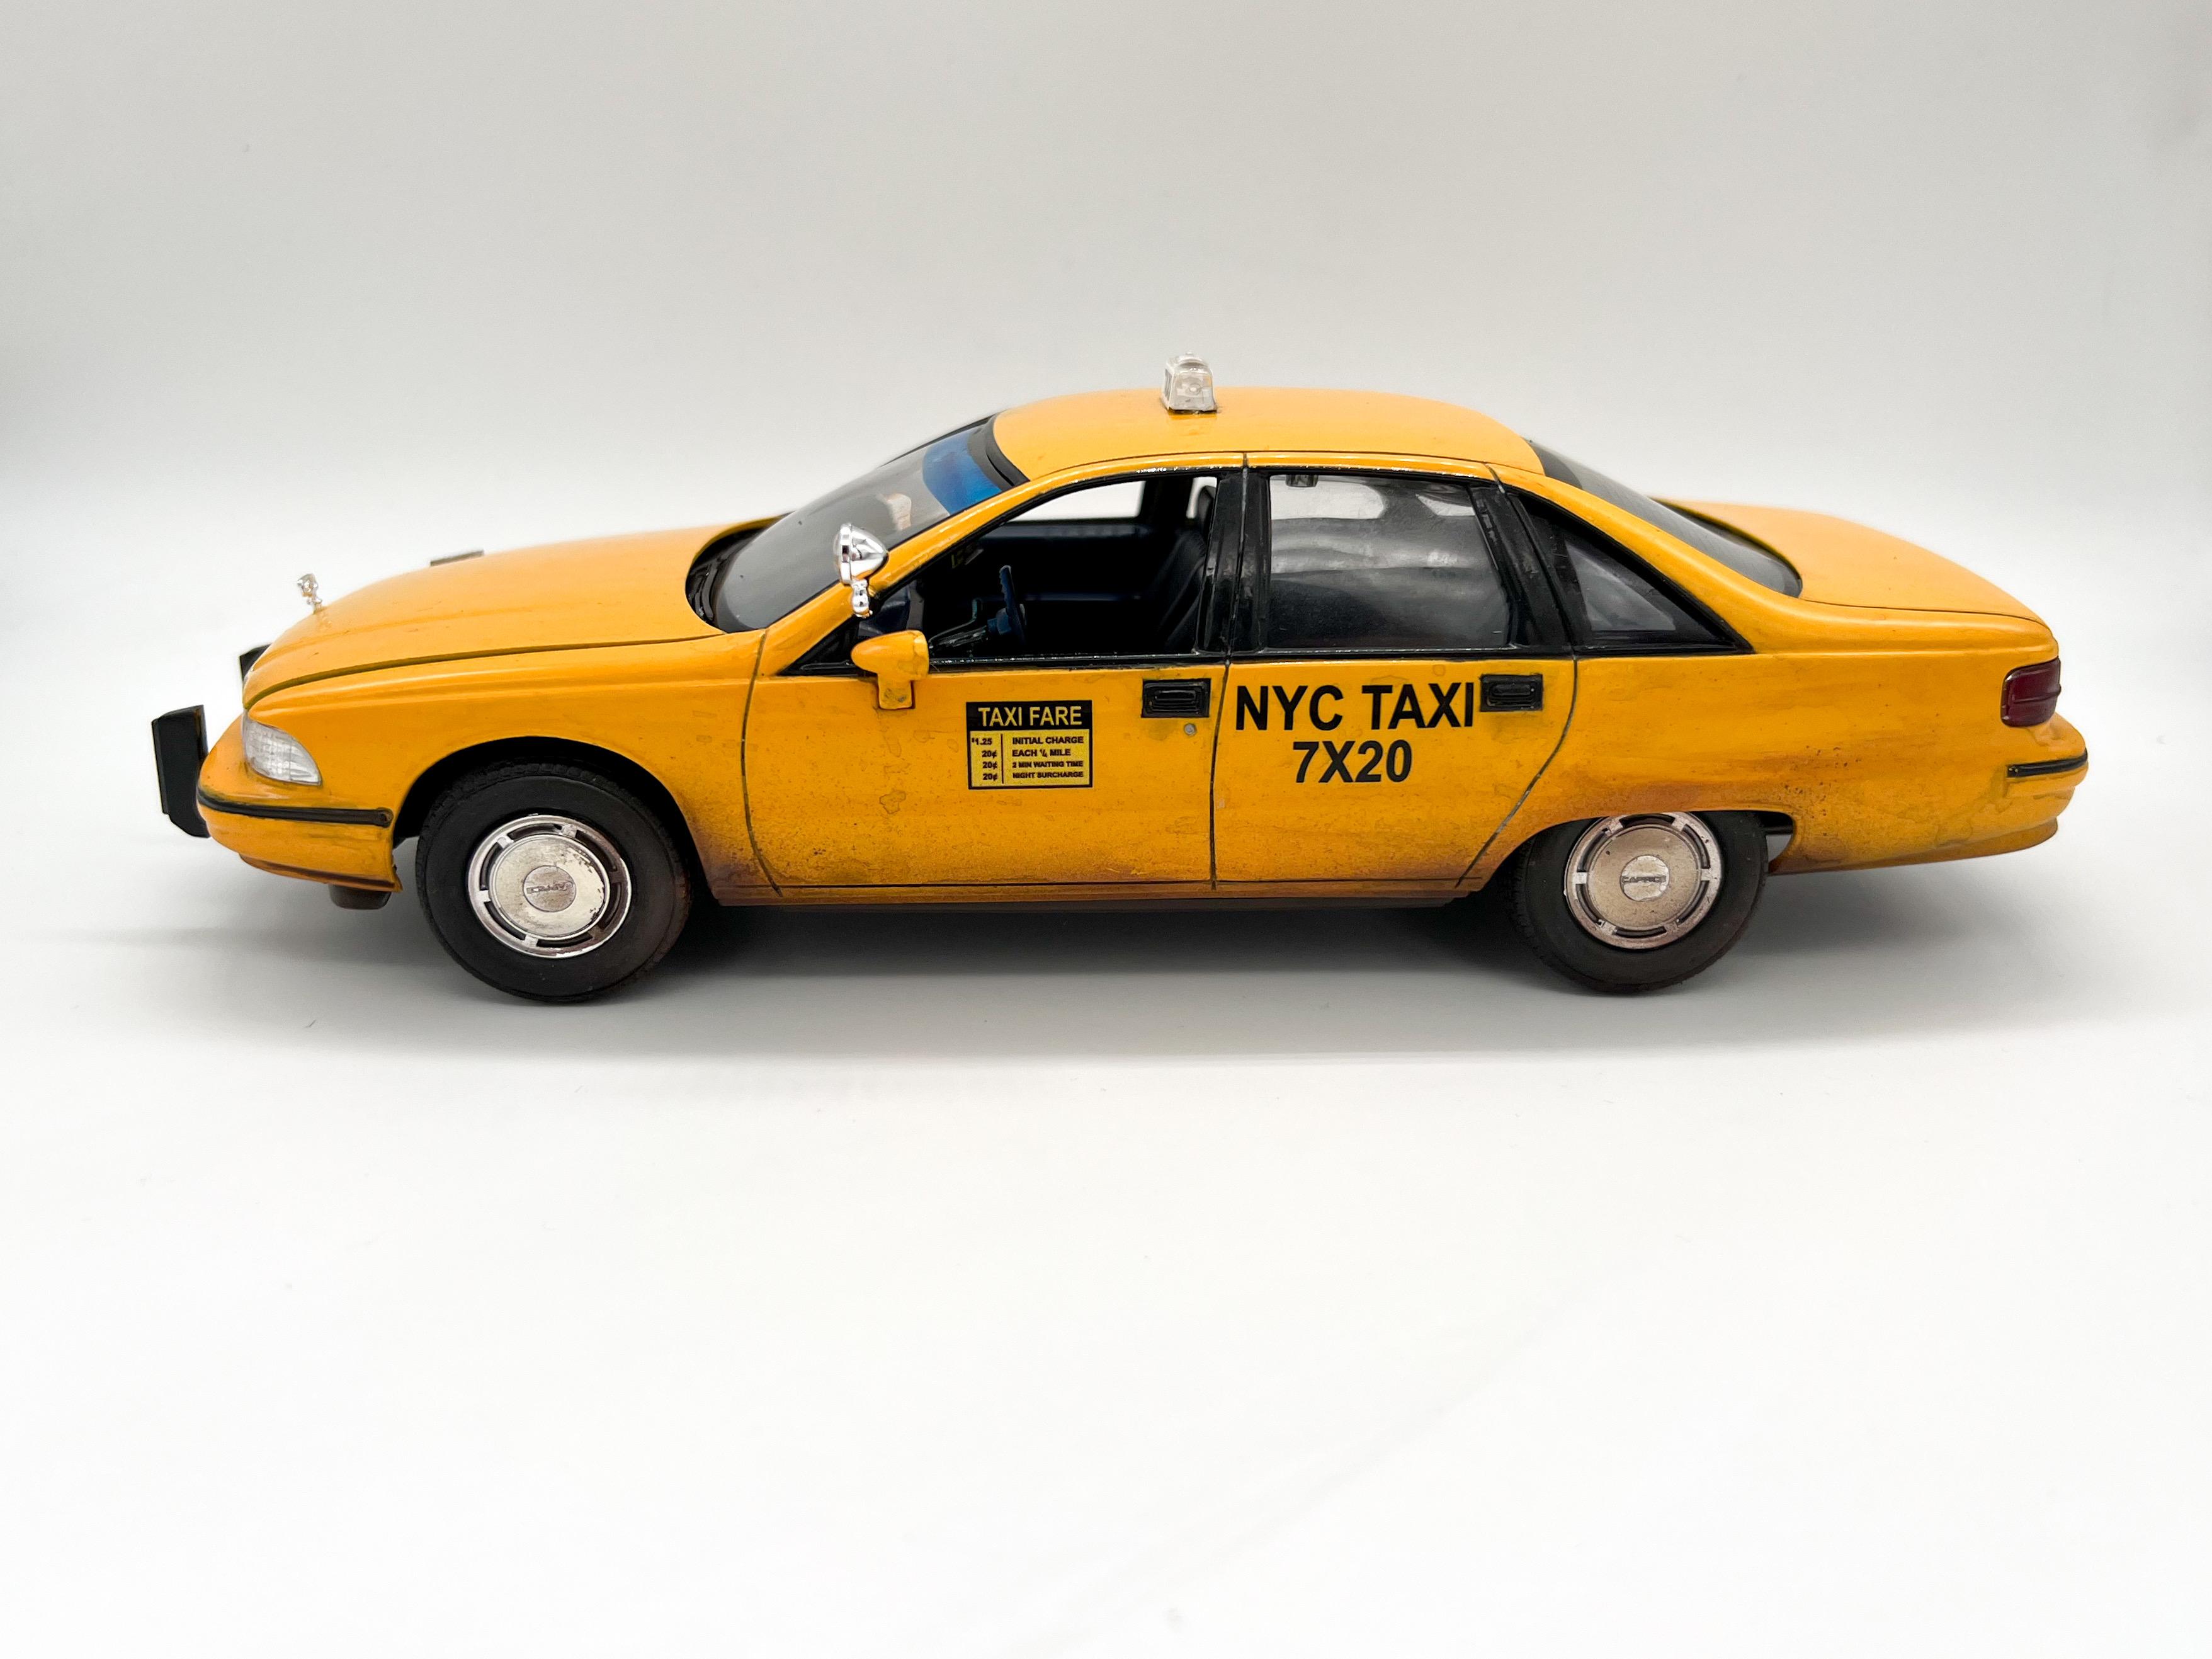
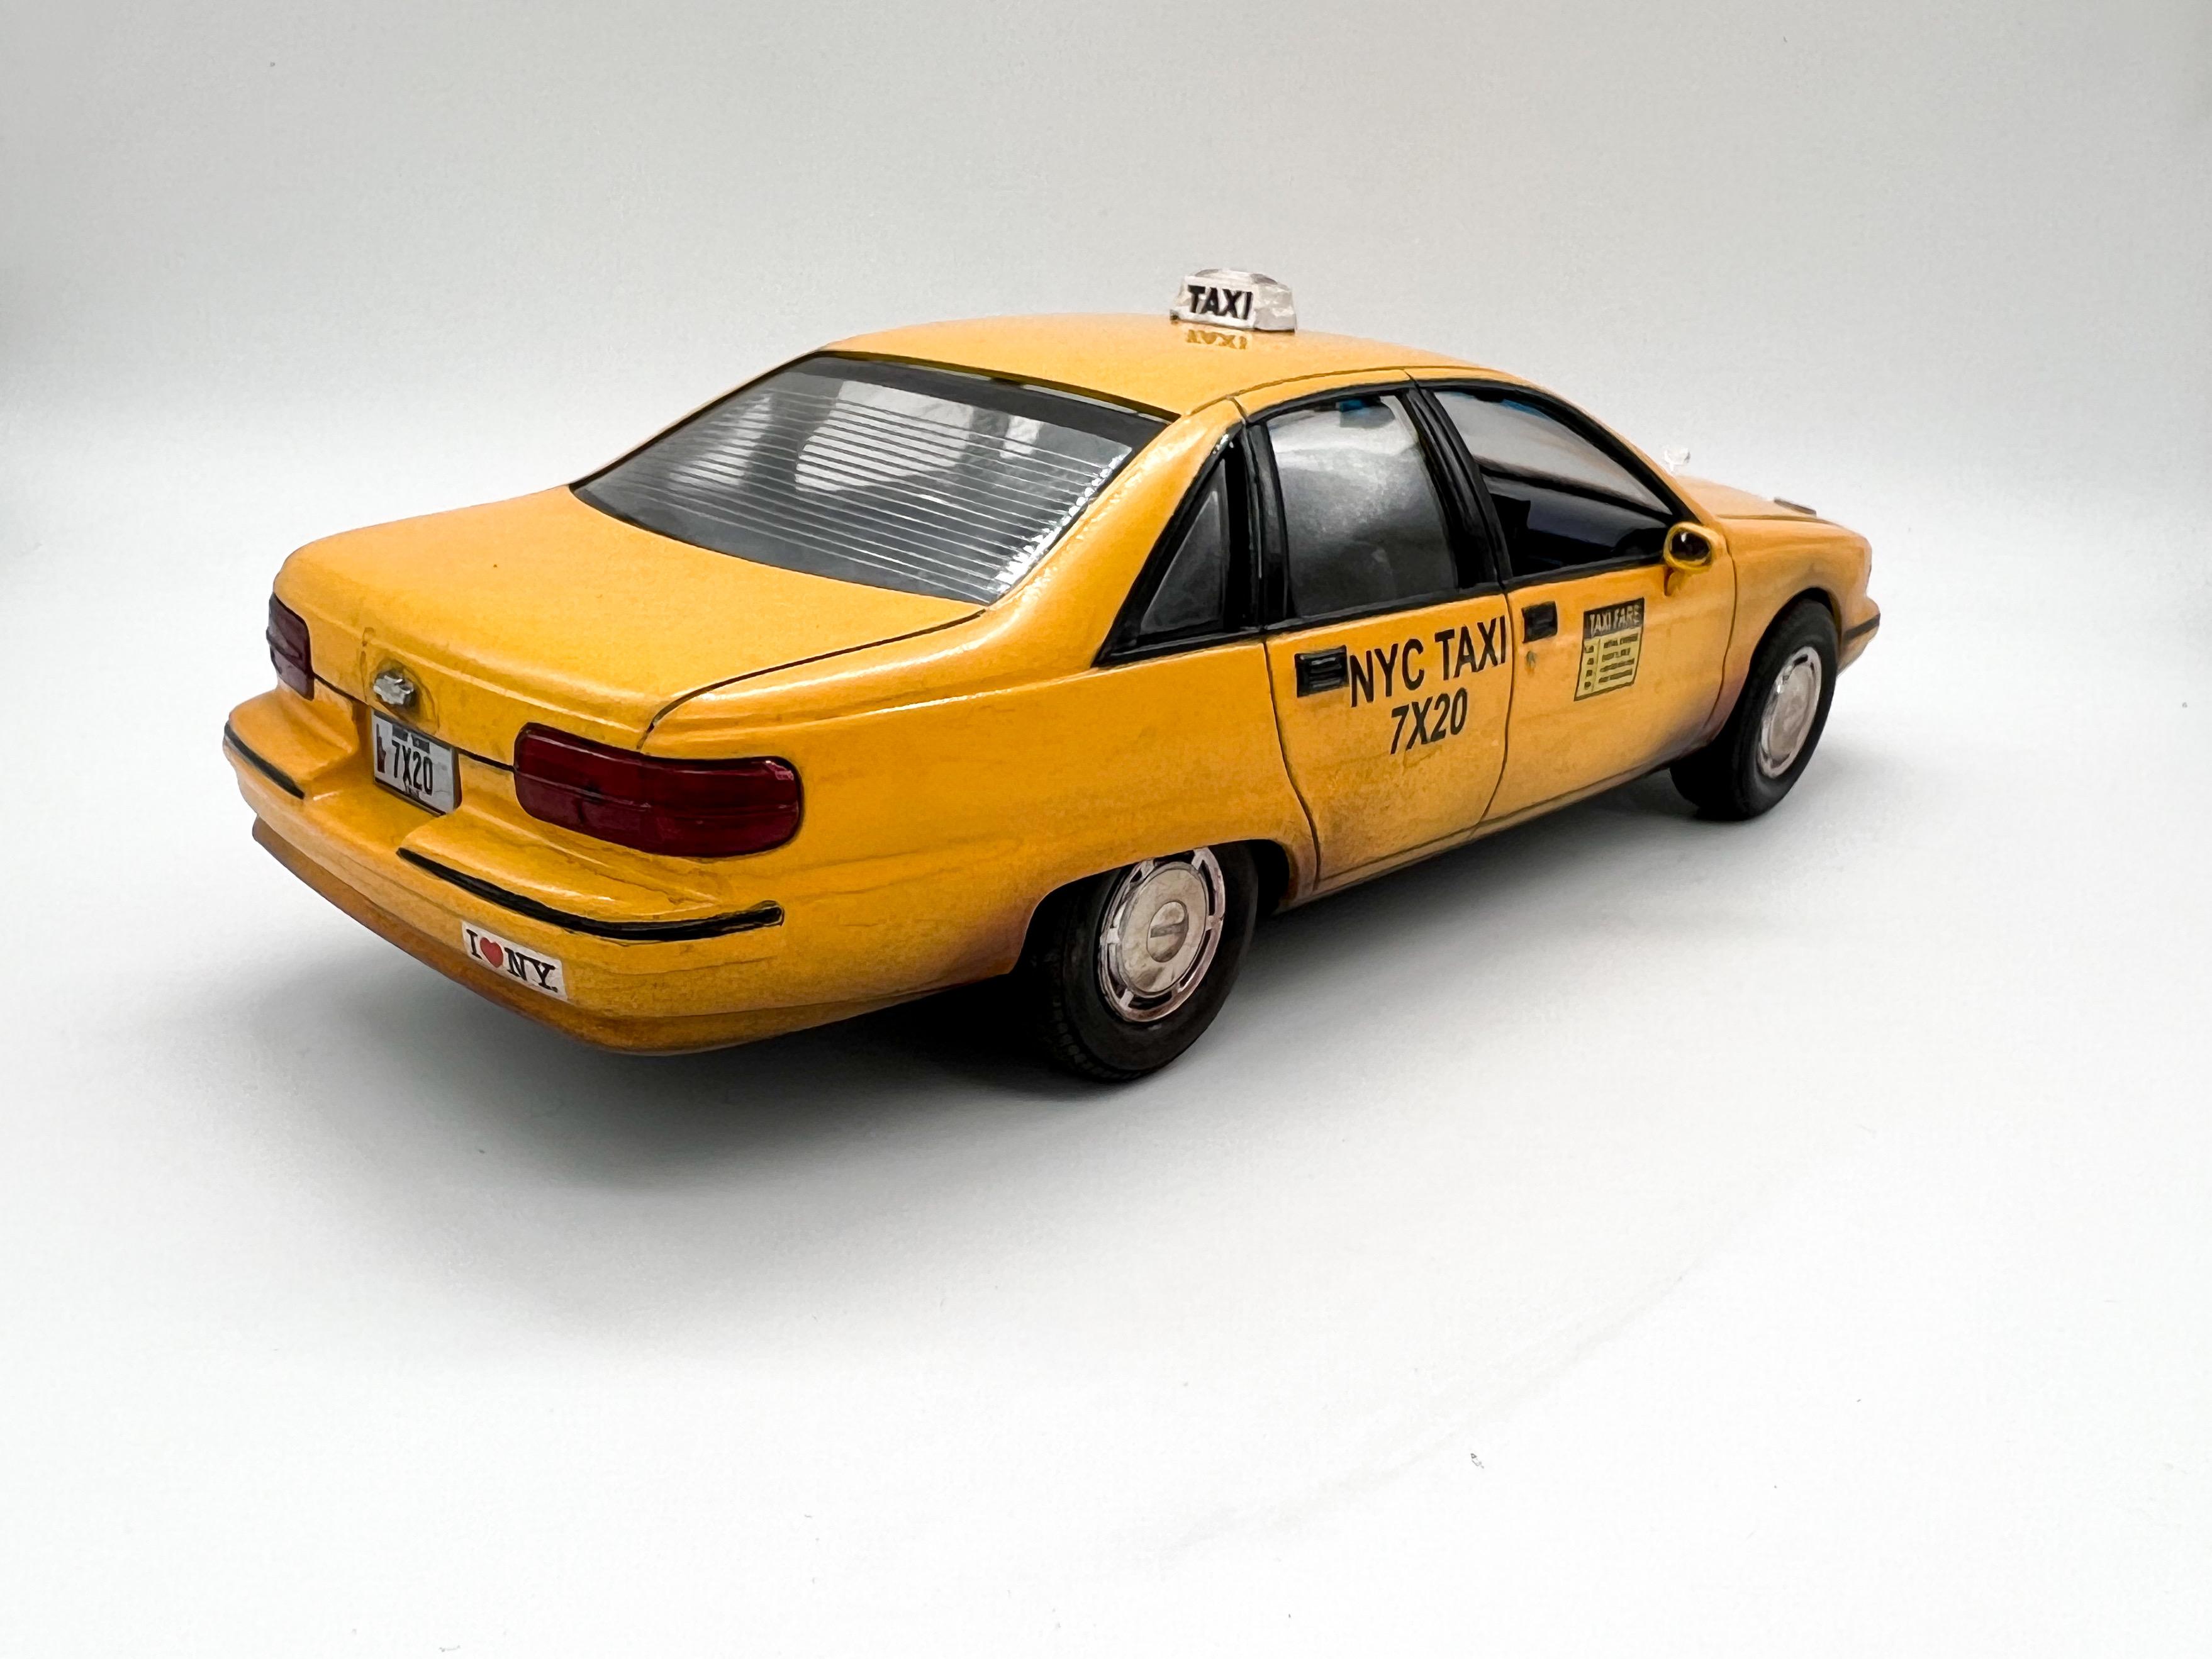
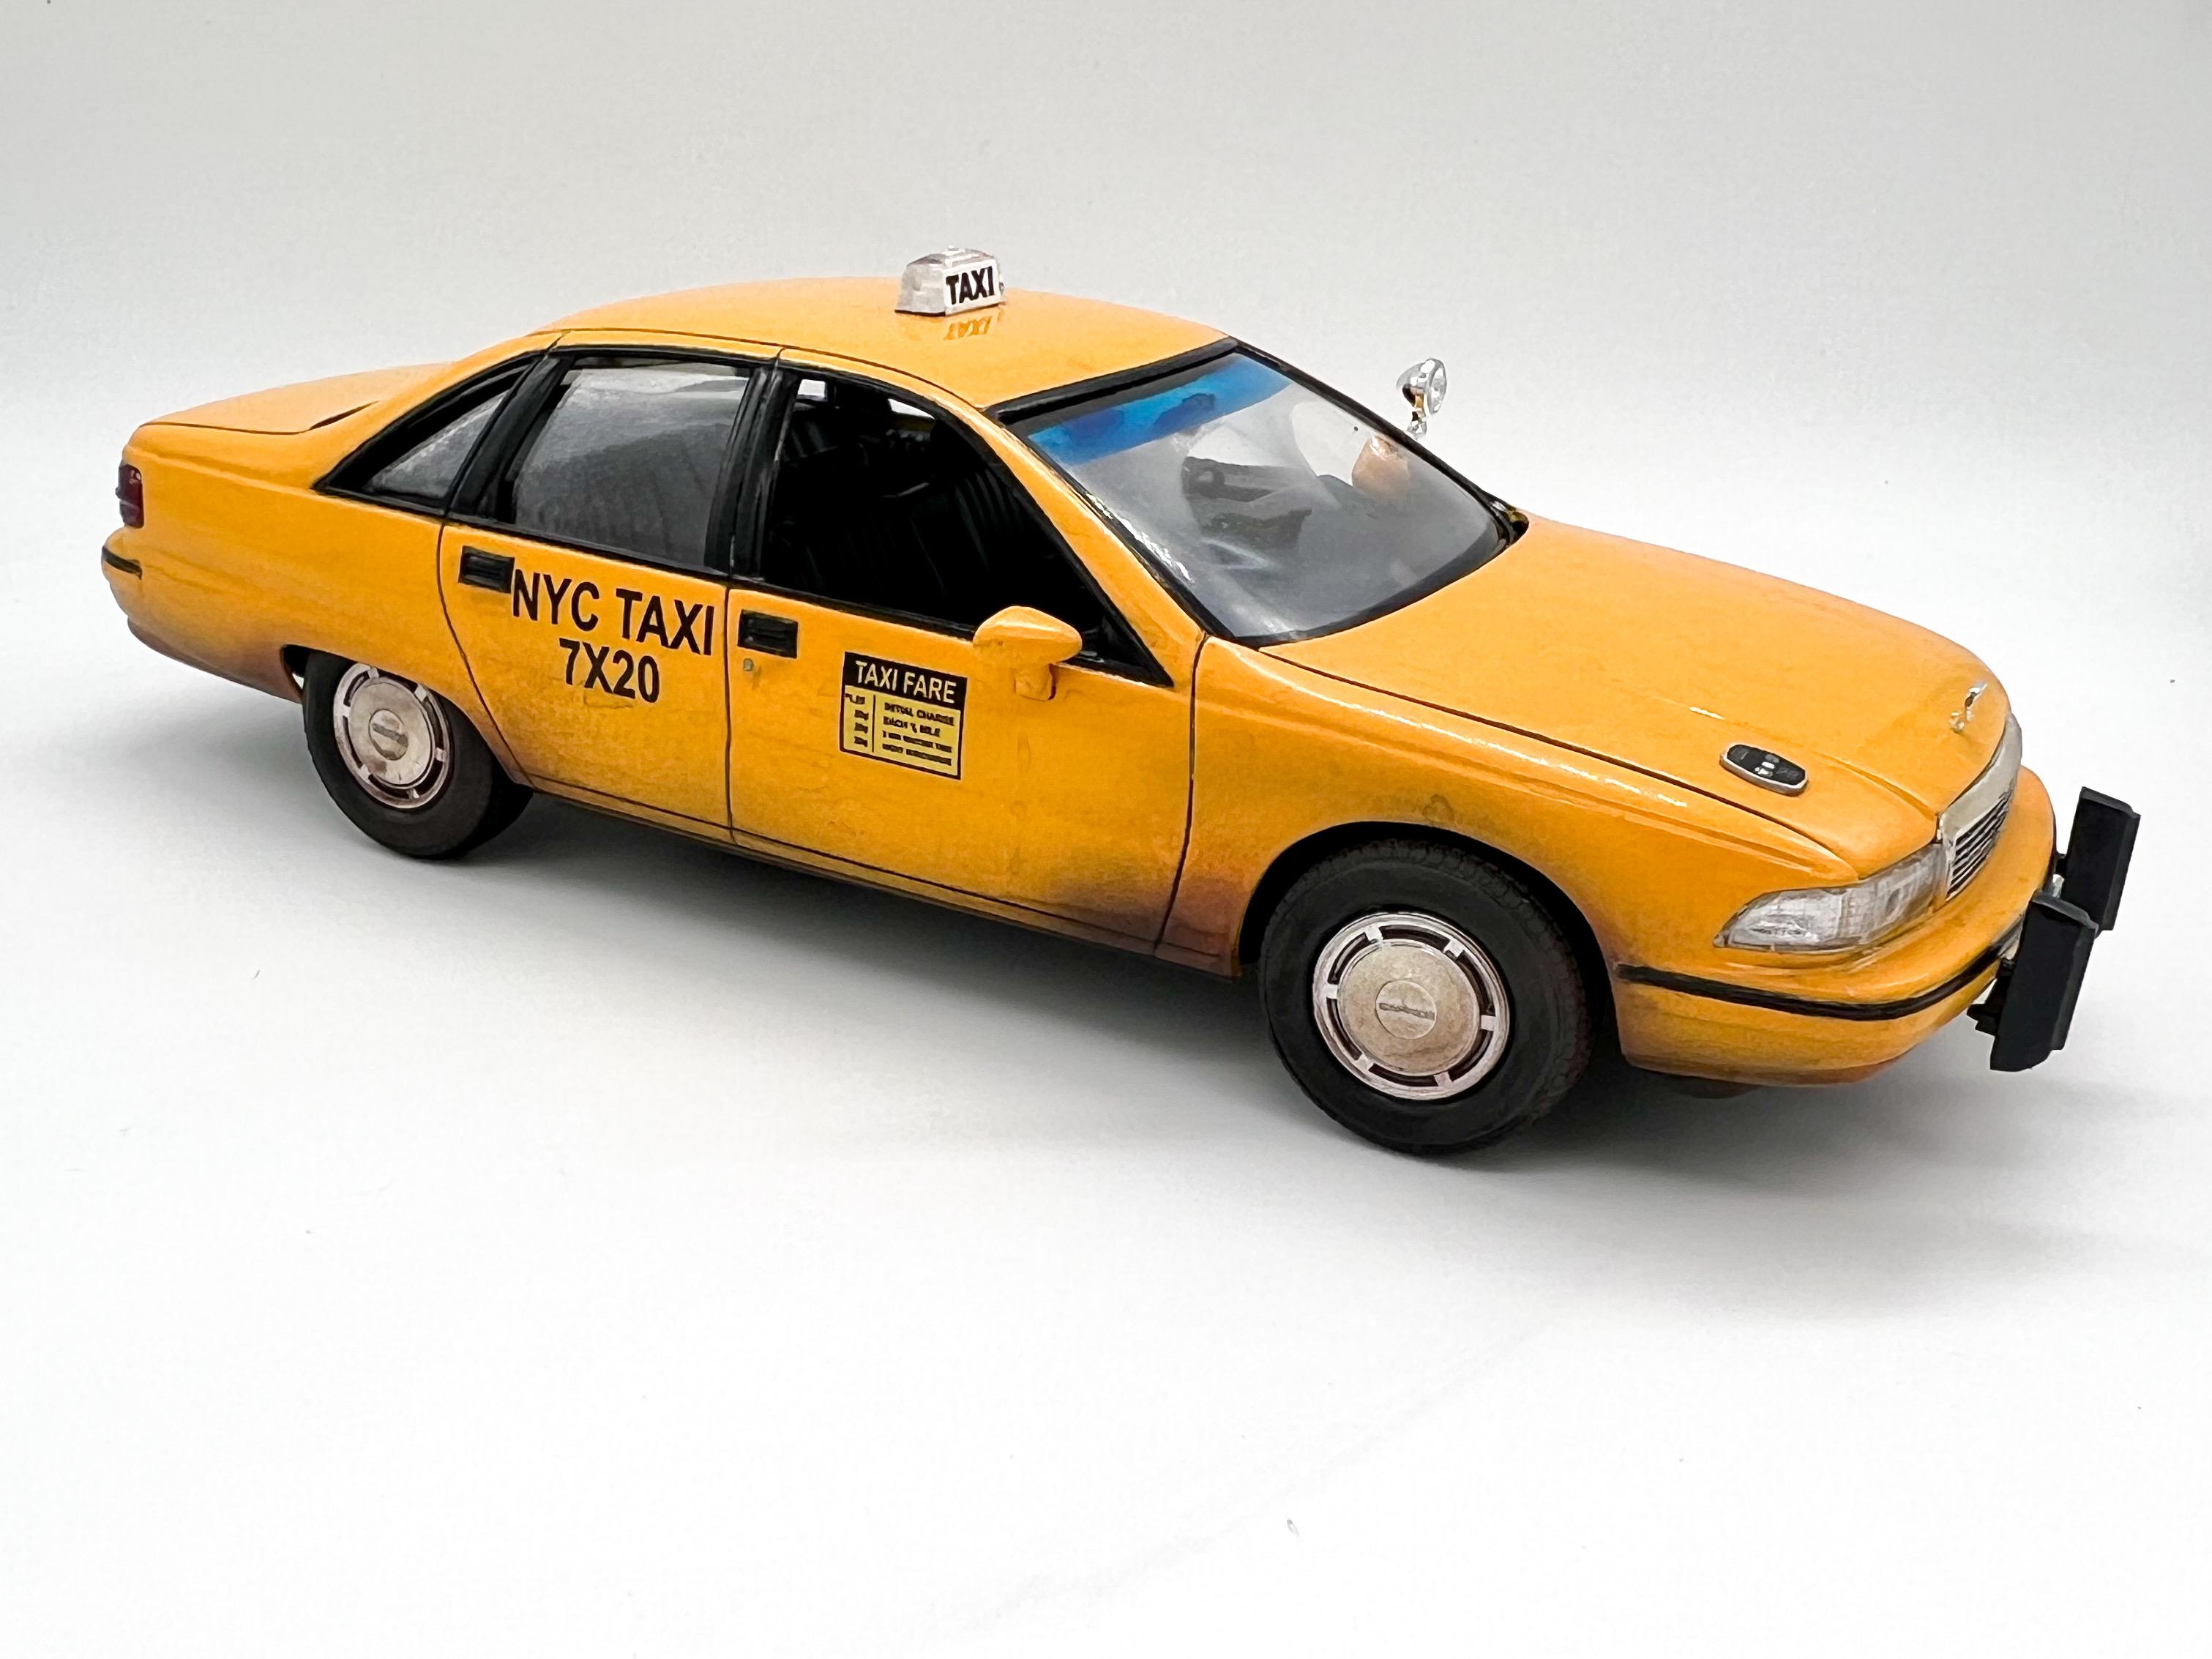
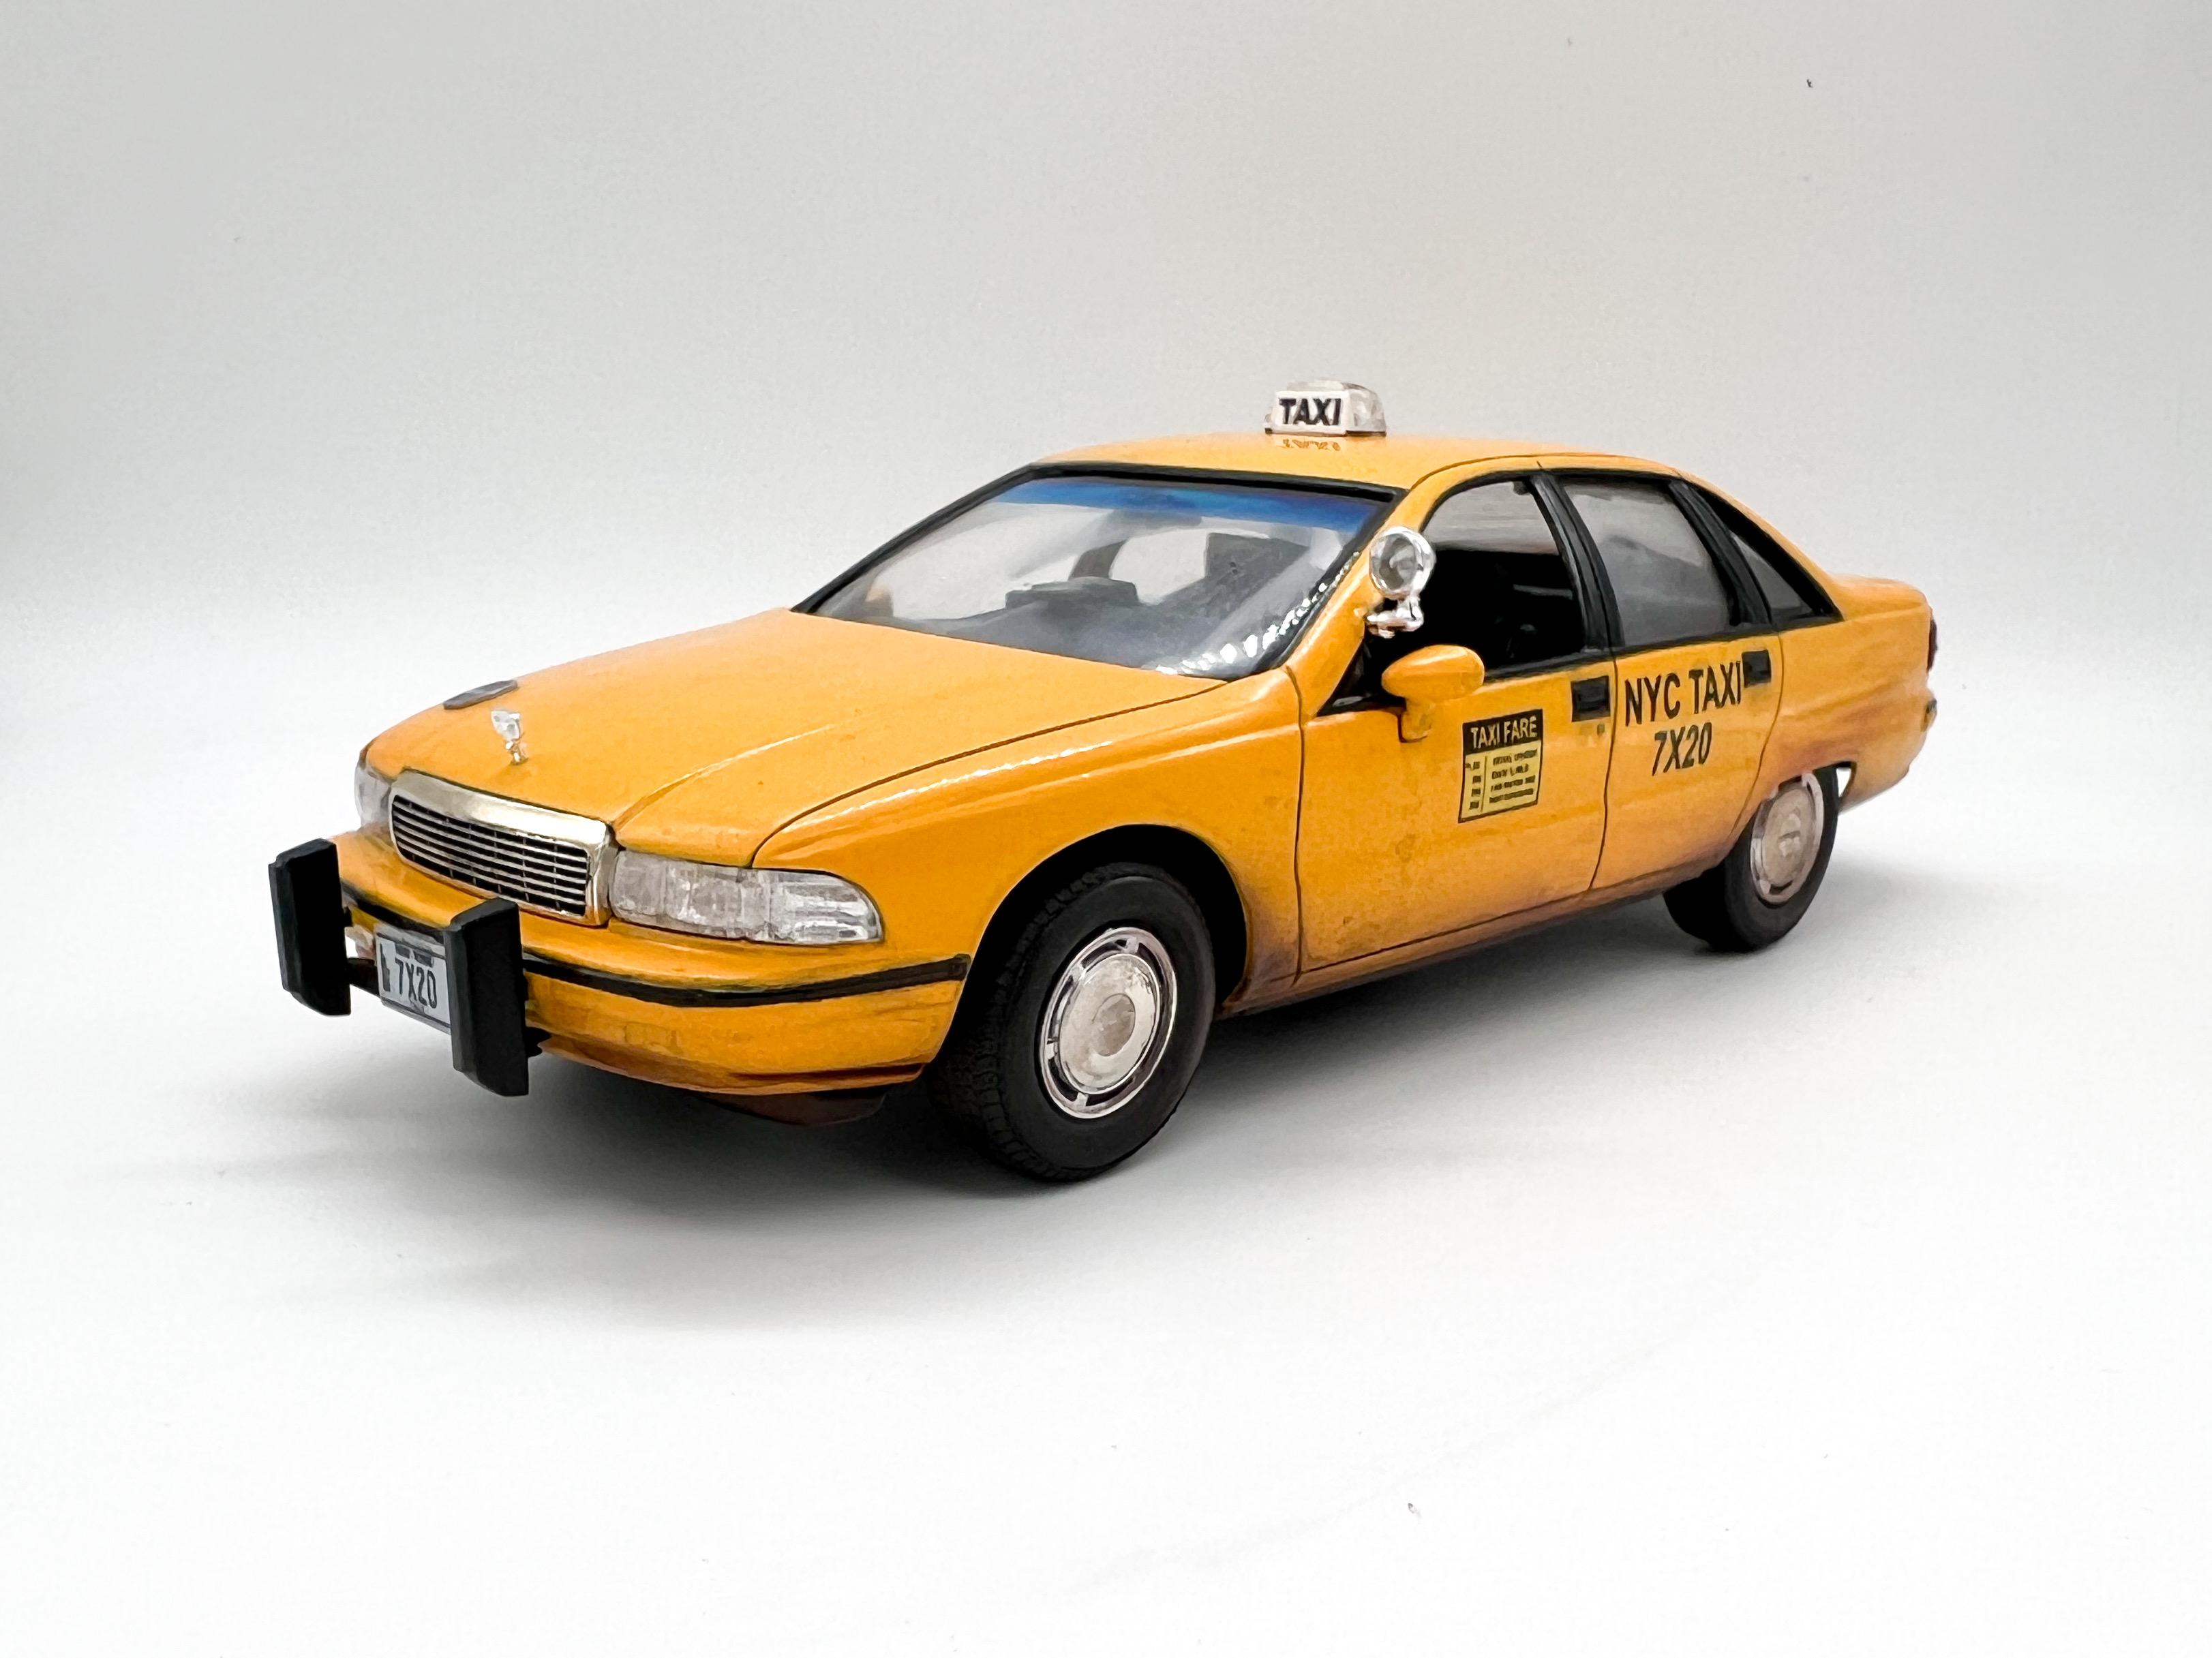
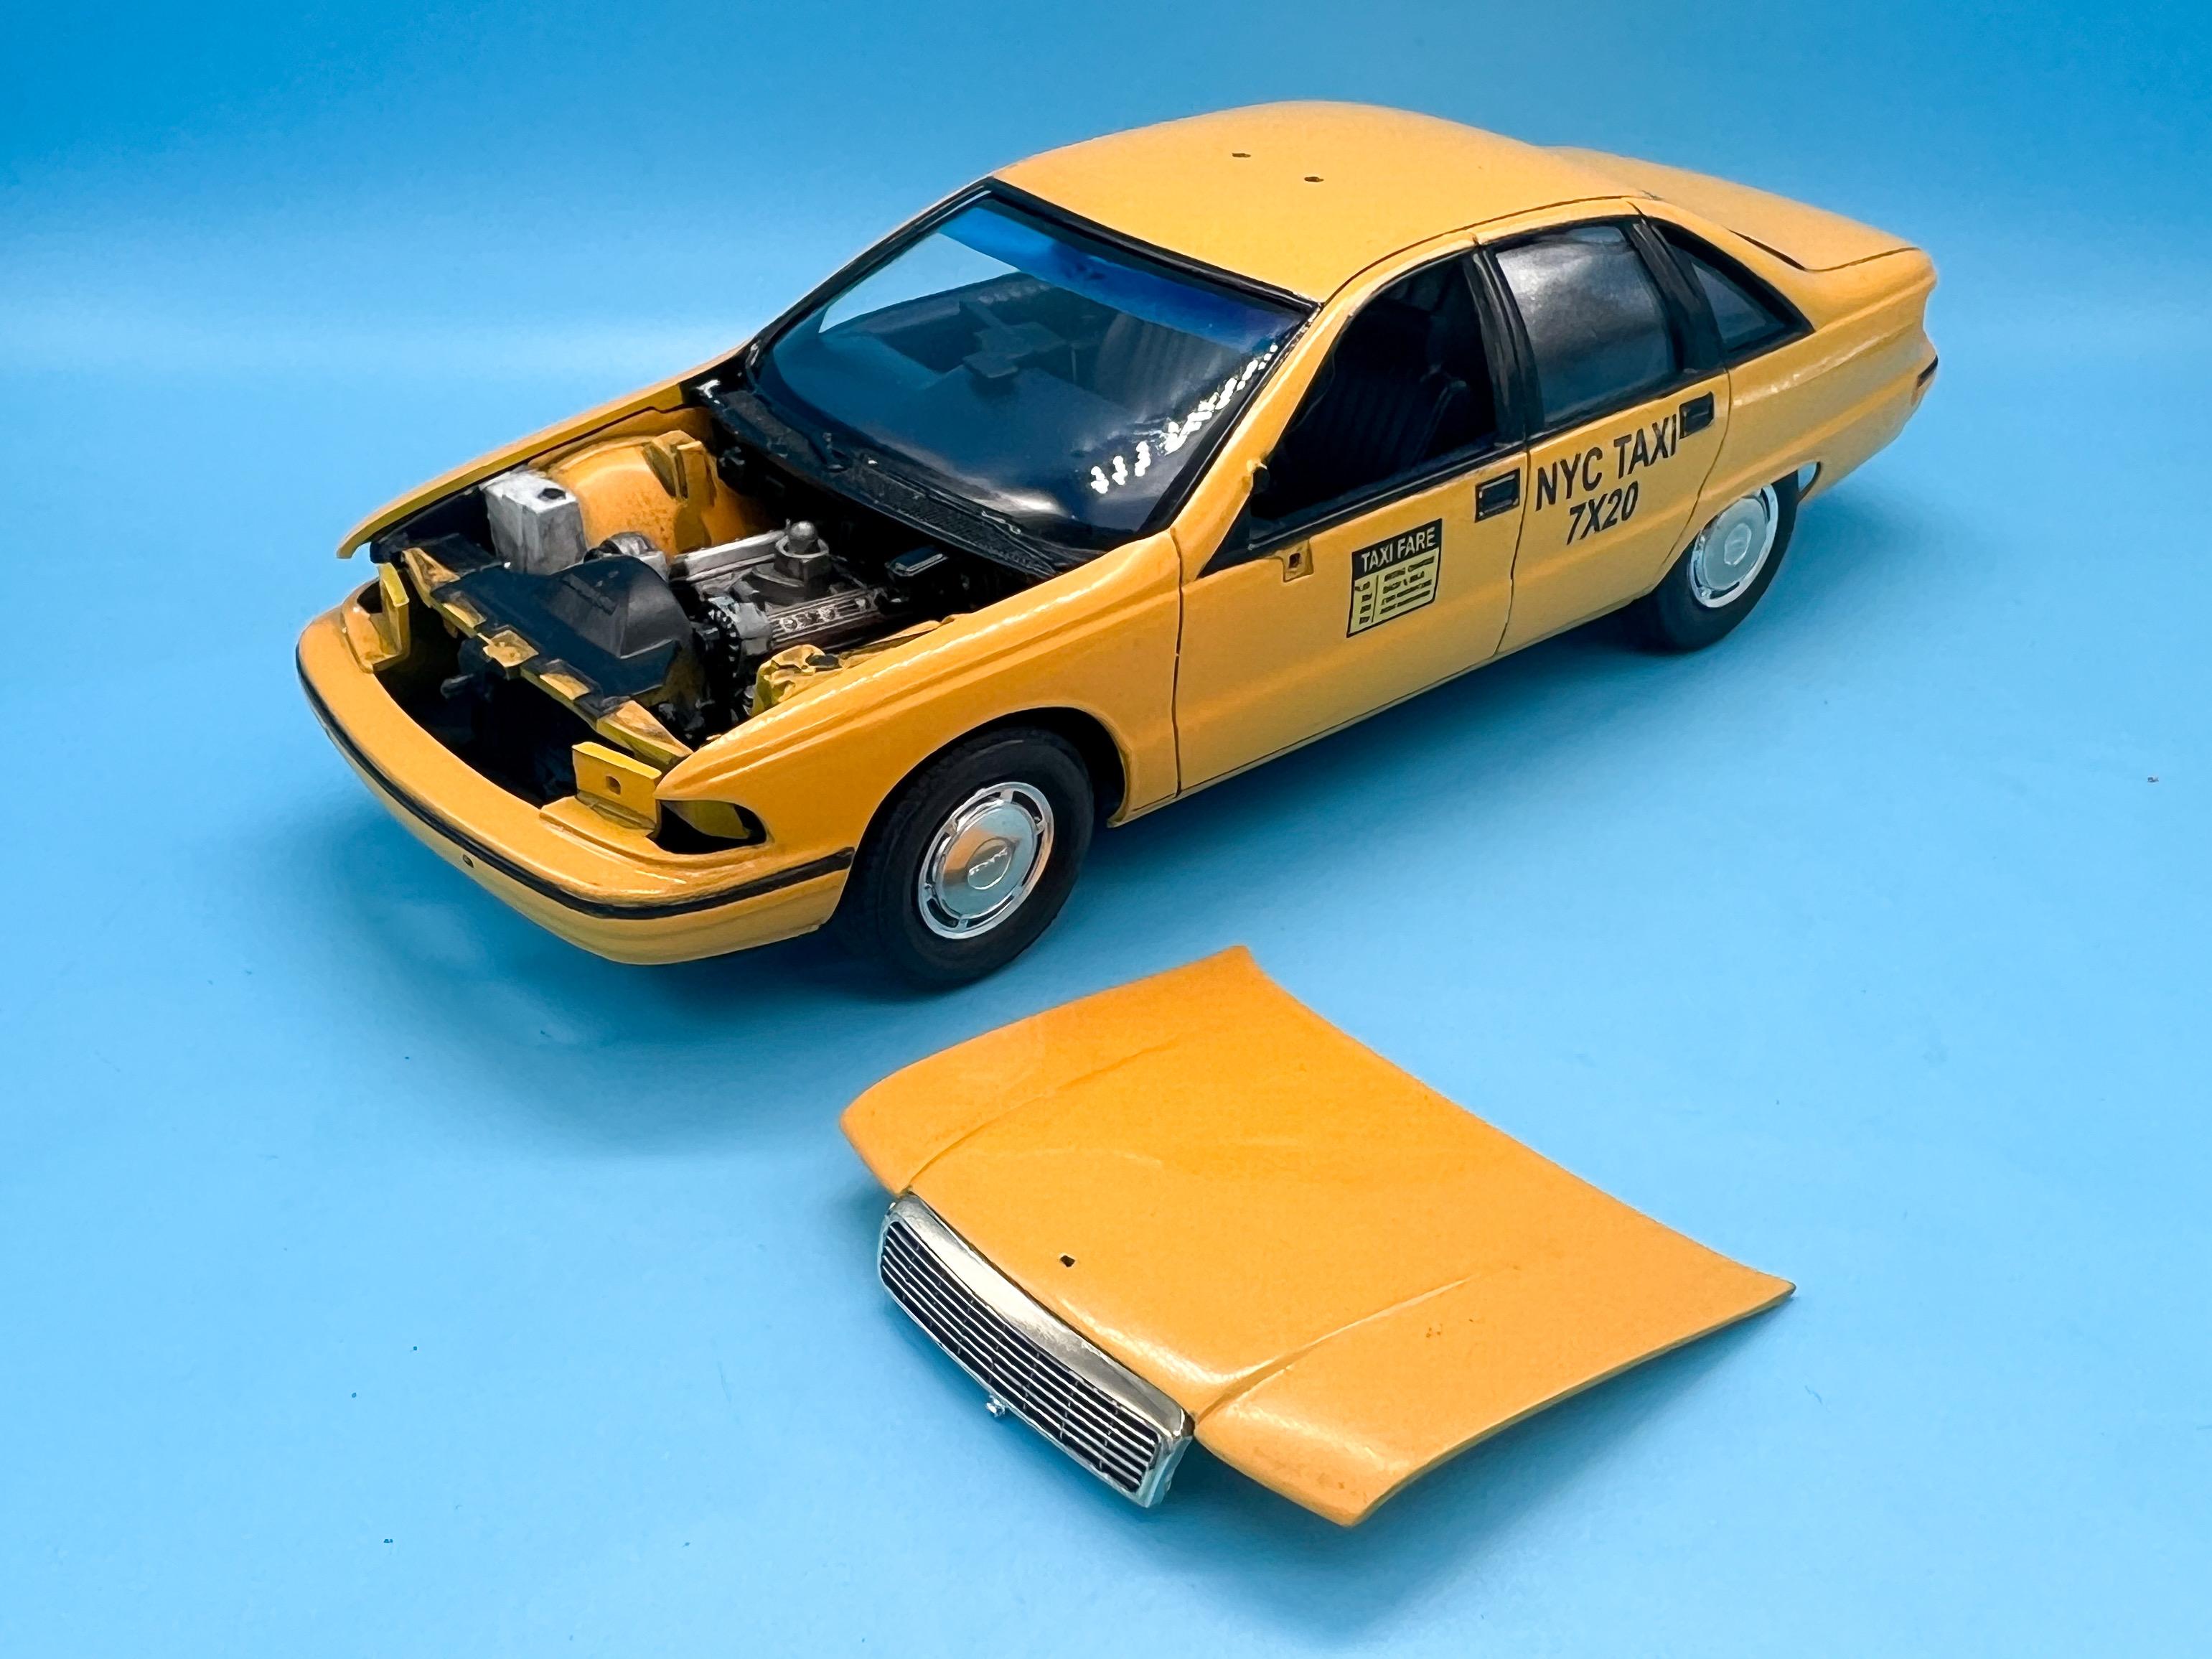
Building a New York taxi from the Revell Caprice Snap Kit
OldNYJim replied to OldNYJim's topic in WIP: Model Cars
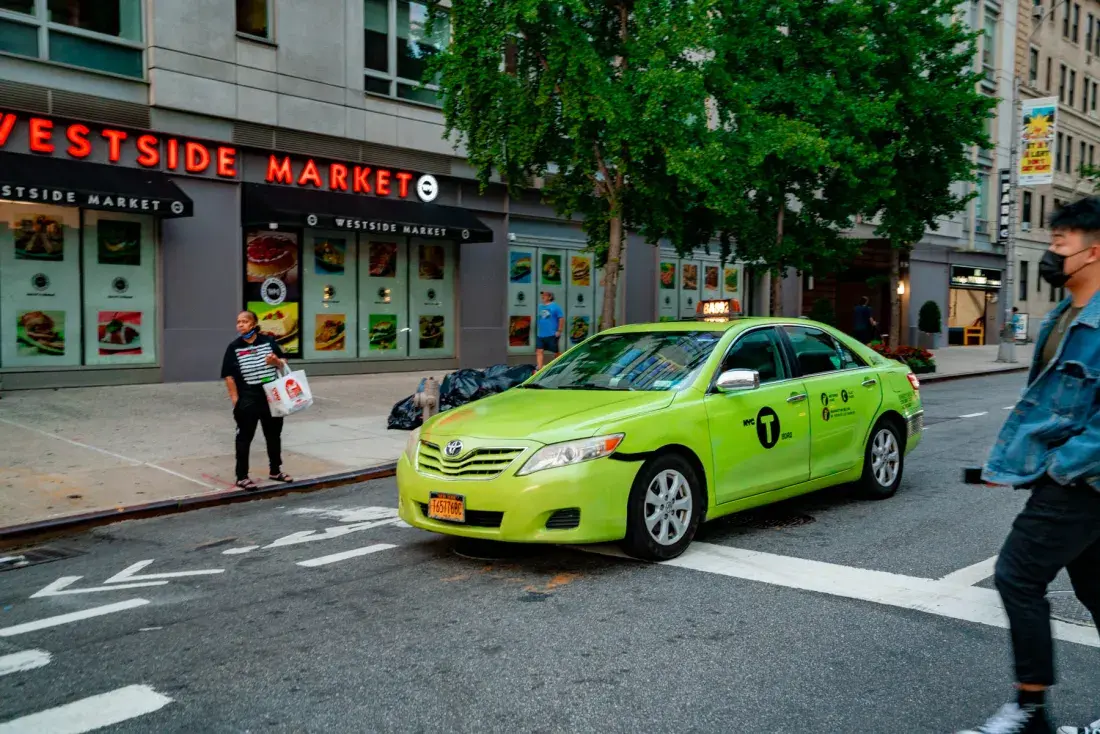
Thank you!! I probably shoulda explained that tv remote, huh? That’s the medallion - a little metal plaque that mounts to the hood of an NY cab to prove it’s legit and properly certified. That little chunk of metal would sell, pre-Uber anyway, for up to a MILLION dollars. Here’s a close-up: Because they got so expensive, NY introduced a cheaper variation for aspiring cab-drivers which would allow them to operate for a much lower starting price (but only permitted them to pickup fares in certain areas, primarily outside of Manhattan) - and they had to run this pea-green color scheme: I need to build one of those too… Yep - this one is deep into a 48 hour rotating-driver shift ?
-
That color looks GREAT! Nice work!
-
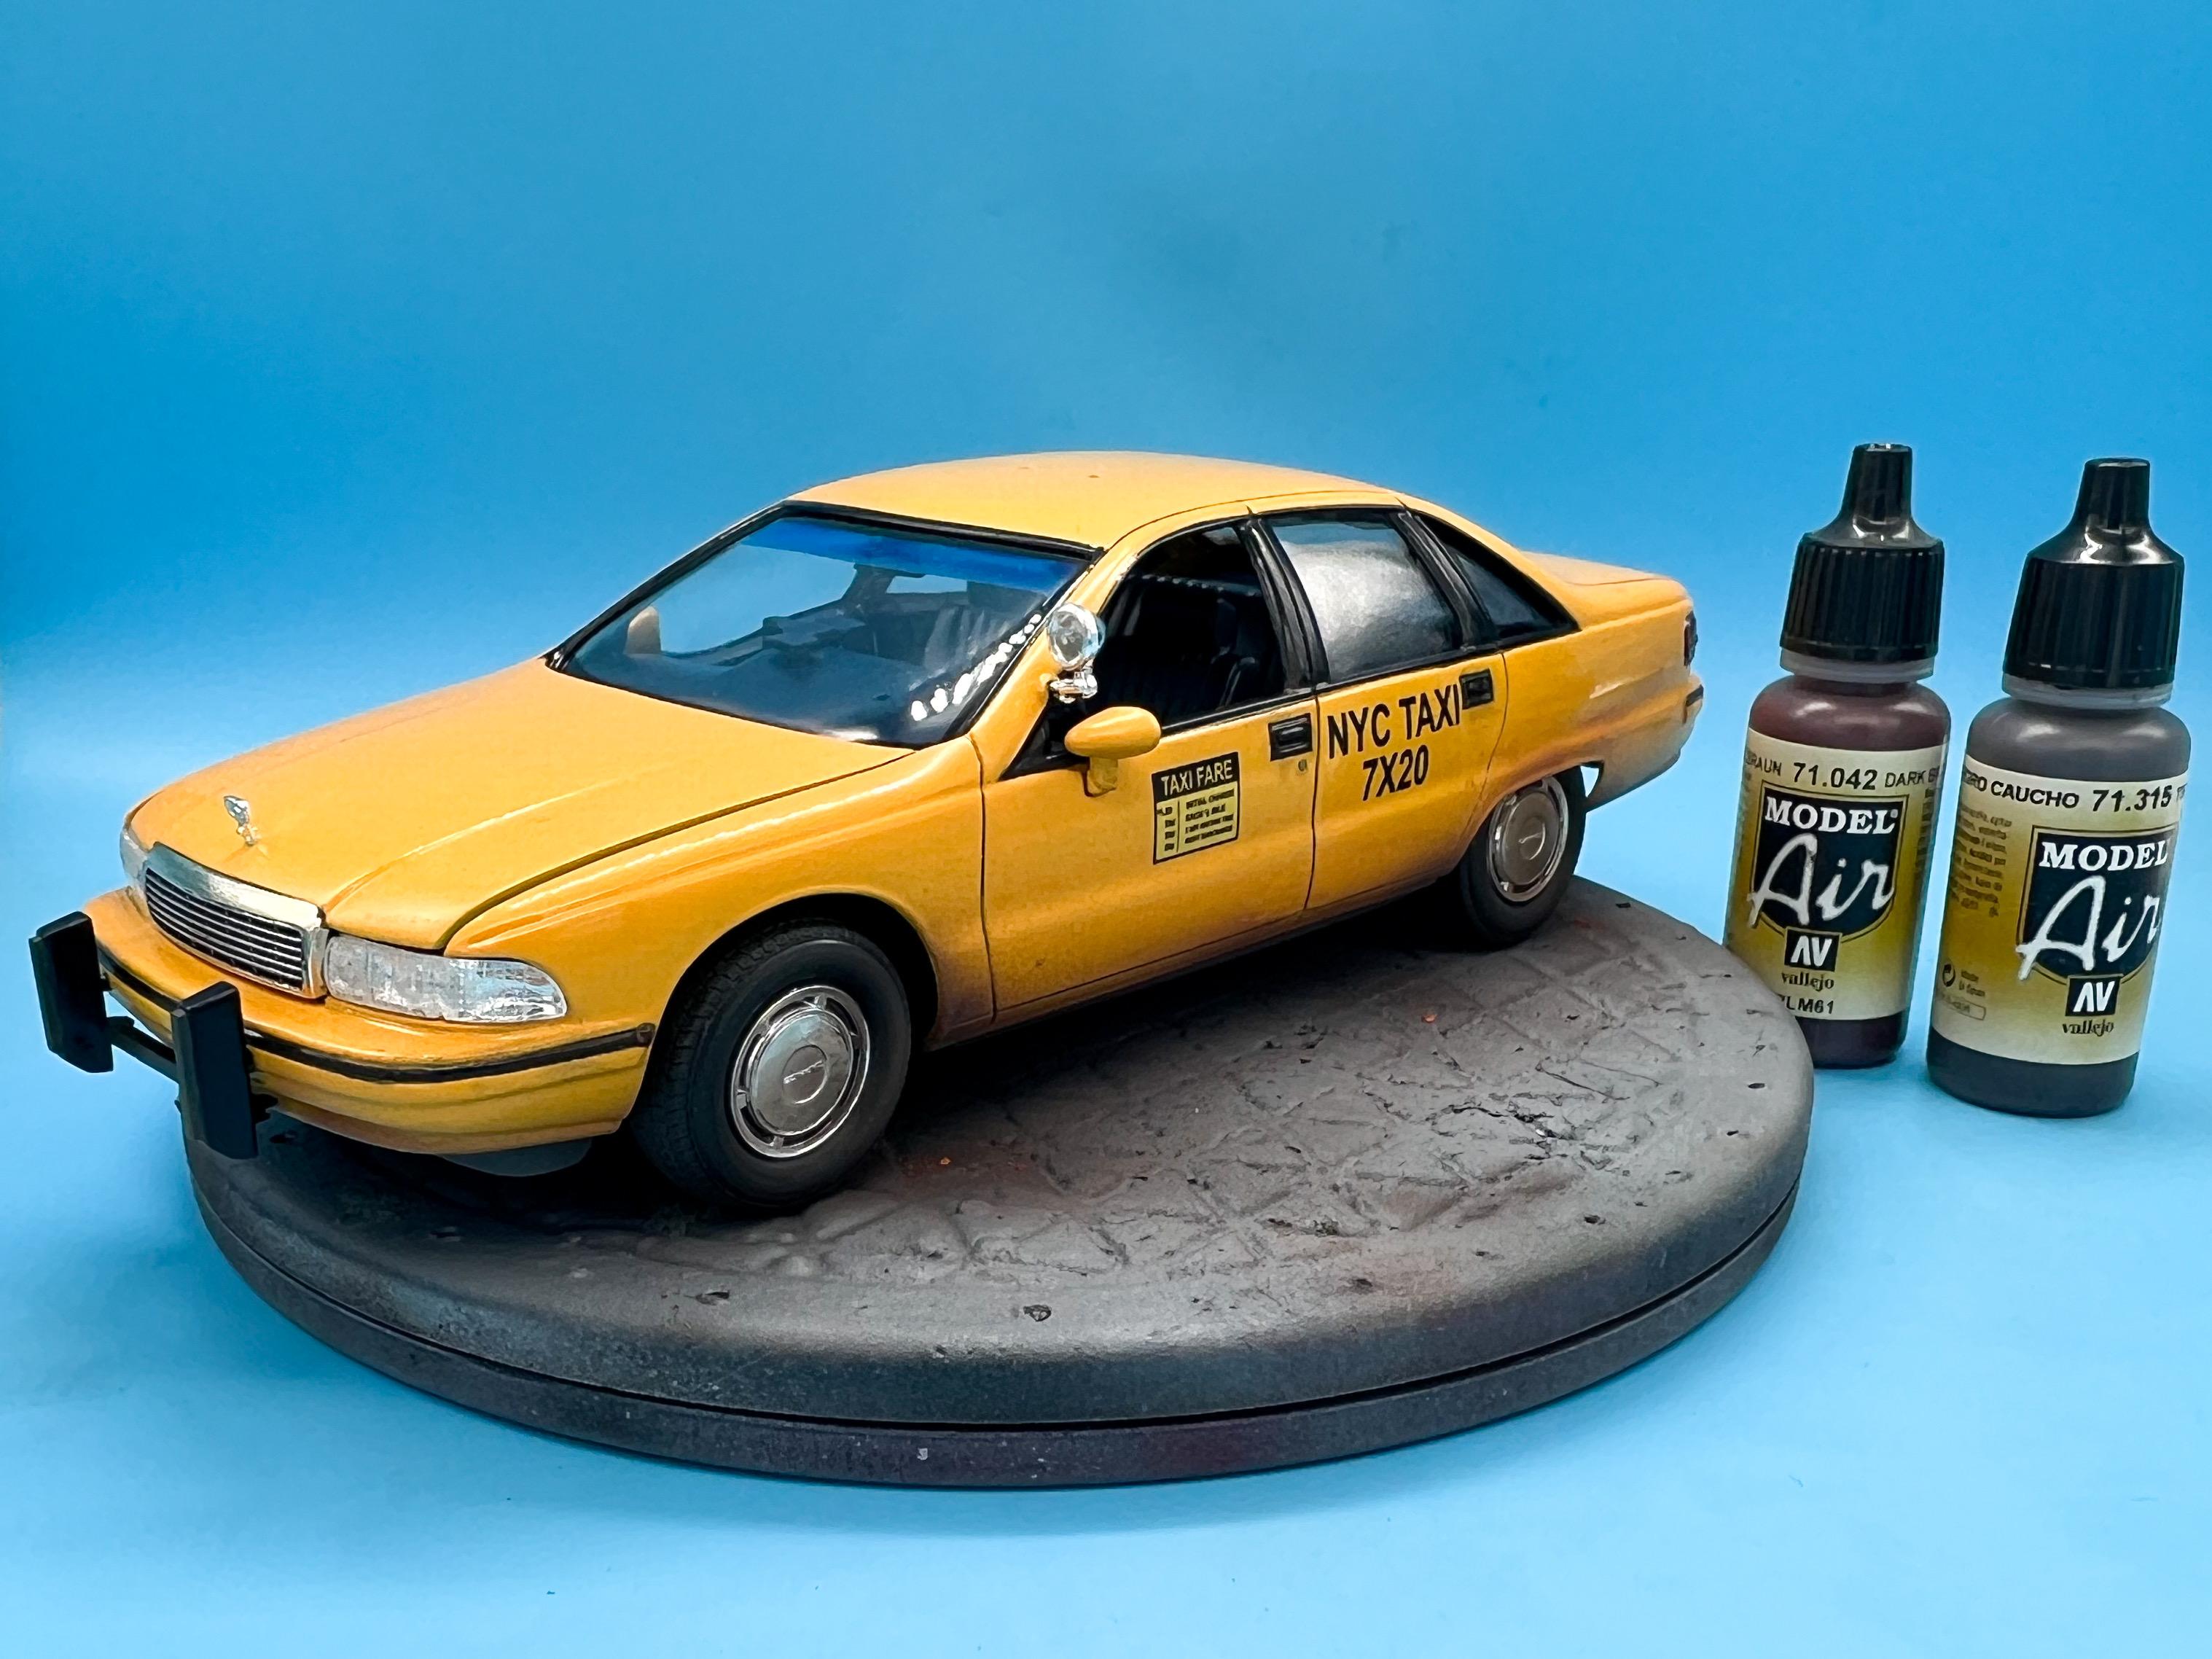
Building a New York taxi from the Revell Caprice Snap Kit
OldNYJim replied to OldNYJim's topic in WIP: Model Cars
Thanks fellas! I finished this one up this week - most of what I had left to do was just attaching the last few parts to it…and attaching some good old NY grime to it too… Some finished pics…thanks for following along! Can’t wait to tackle another one of these - it’s a fun kit and it basically fell together!
-
I found this post by Bill, @Ace-Garageguy, whilst looking for something else, and it’s definitely worthy of reposting info THIS thread too - really useful tutorial on flipnose hinging:
-
That would be a $14.99 special edition if the departed Scale Auto had published it ? Really enjoyed spending a coupla three hours reading through this - thanks Randy, and MCM! I love the bonus content you guys throw in now and then - the downloadable printable parts, extras like this...keep up the GREAT work!
-
My local store actually had some new stuff and moved the Gundam stuff out of the model aisle and into clearance. Shelves were well stocked with some of the newer Revell releases that they haven't had before. Not much on clearance worth shouting about, a few cans of the Testor's Glitter and satin enamels, plus four or five of the little bottles reduced in price but nothing that I needed.
-
Ollie's strike again
OldNYJim replied to GLMFAA1's topic in General Automotive Talk (Trucks and Cars)
That's even more helpful! Couldn't ask for much more than that - appreciate it Robert! -
Ollie's strike again
OldNYJim replied to GLMFAA1's topic in General Automotive Talk (Trucks and Cars)
That’s really helpful to know, considering I’ve been debating whether to drive to Merrillville and see if they had anything I wanted. Thank you!!! -
The art of scratchbuilding
OldNYJim replied to ColonelKrypton's topic in Tips, Tricks, and Tutorials
I've seen a number of Japanese builders use Oyumaru for quick 'n' easy mold making - it's actually available on Amazon but I haven't picked any up yet. I should, because it looks like it works great! -
I, too, would like to see a WIP on this one - I never saw this kit before!
-
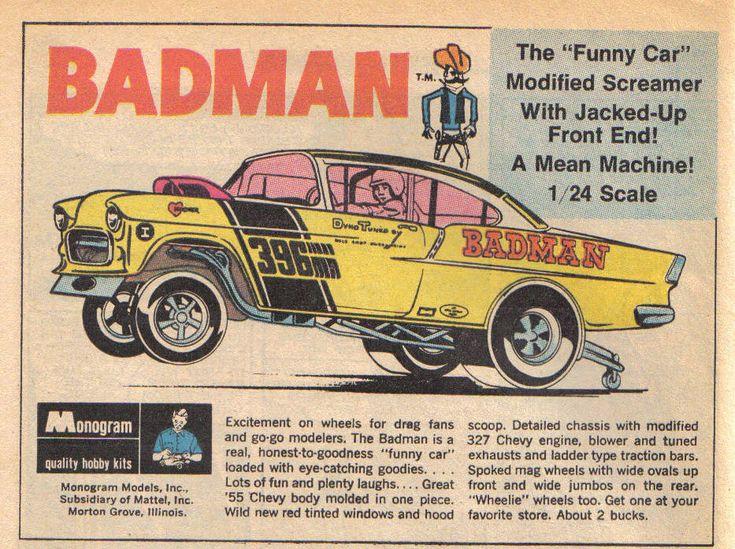
Funny think about the Badman...it's what we consider to be a typical looking period gasser, looking at it with today's eyes...but the box art at the time referred to it primarily as a funny car: (I know this box is from the more recent reissue, but the copy is the same)
-
1/24 Cobra 289 FIA / USRRC wheels
OldNYJim replied to Hoffman's topic in Car Aftermarket / Resin / 3D Printed
Those stencils are a GREAT solution to laying down tire lettering - nice work! -
This video might be helpful: In fact, the whole series is really good - definitely worth watching IMO
-
Leave the maker…take all the mugs
-
"Plywood"
-
Nice score!
-
Yes - 1/12th is the same as 1:12th Or, in architect’s scale, that’s 1” = 1’ or “one inch” scale
-
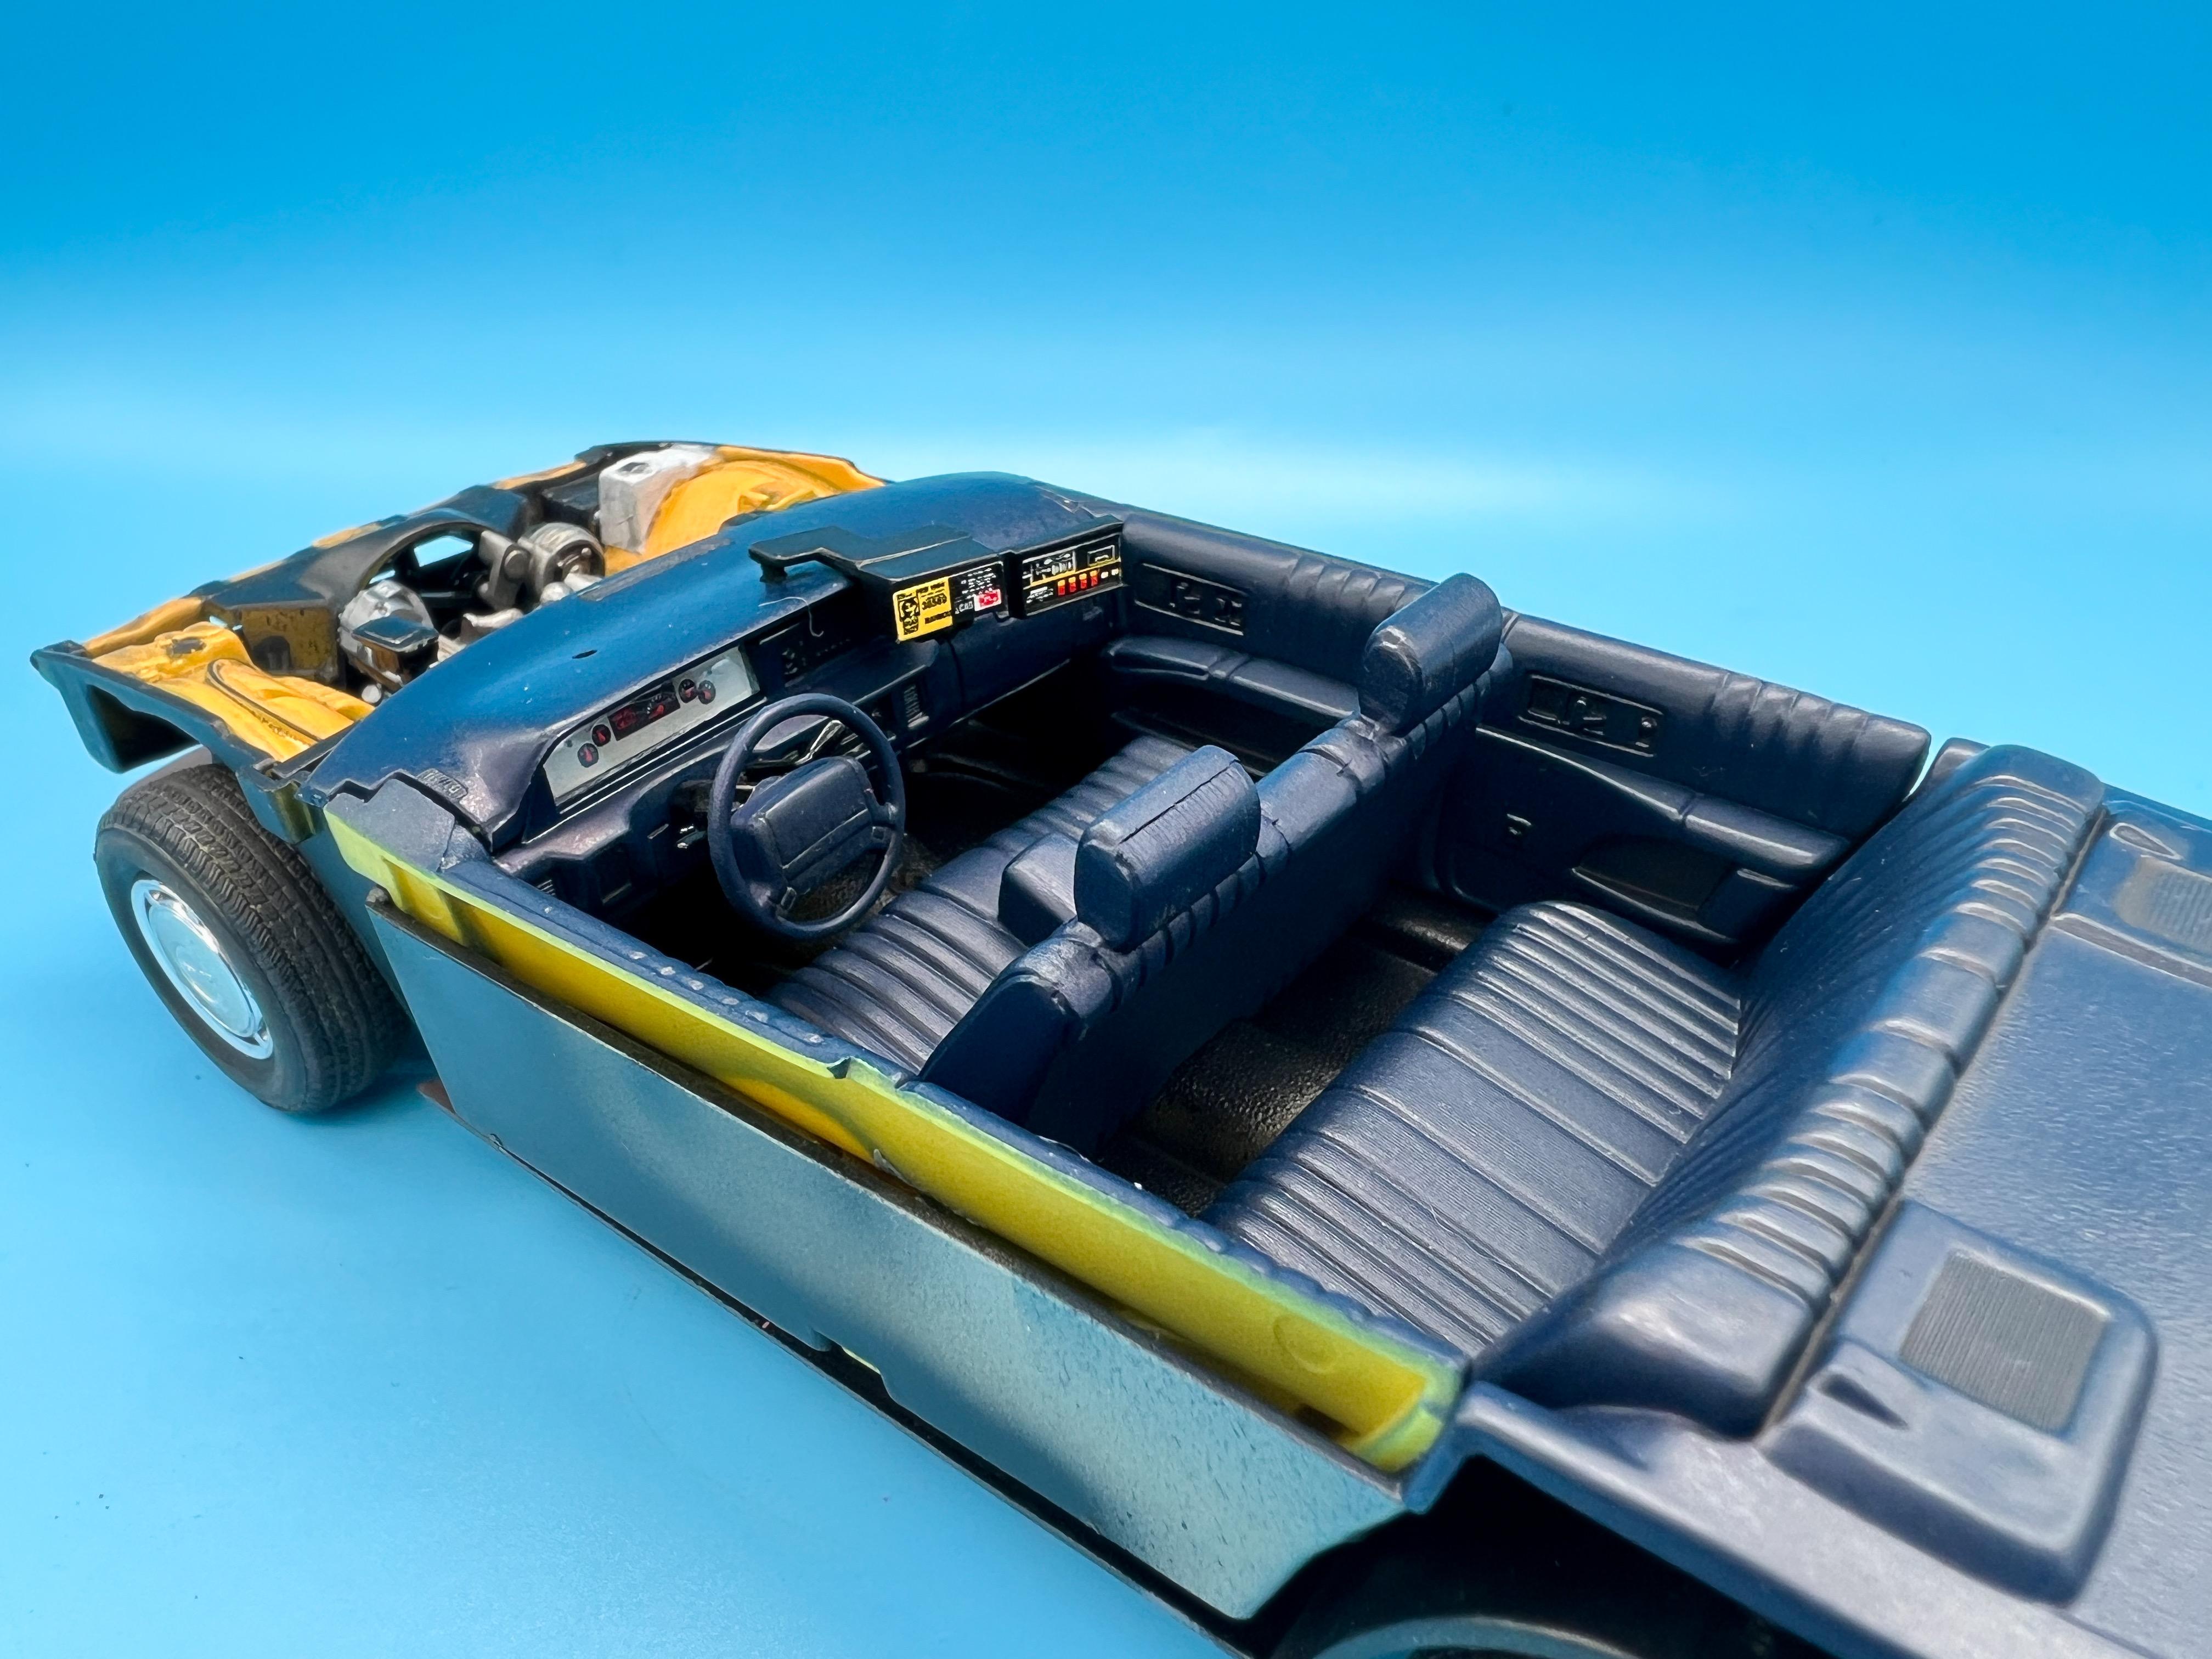
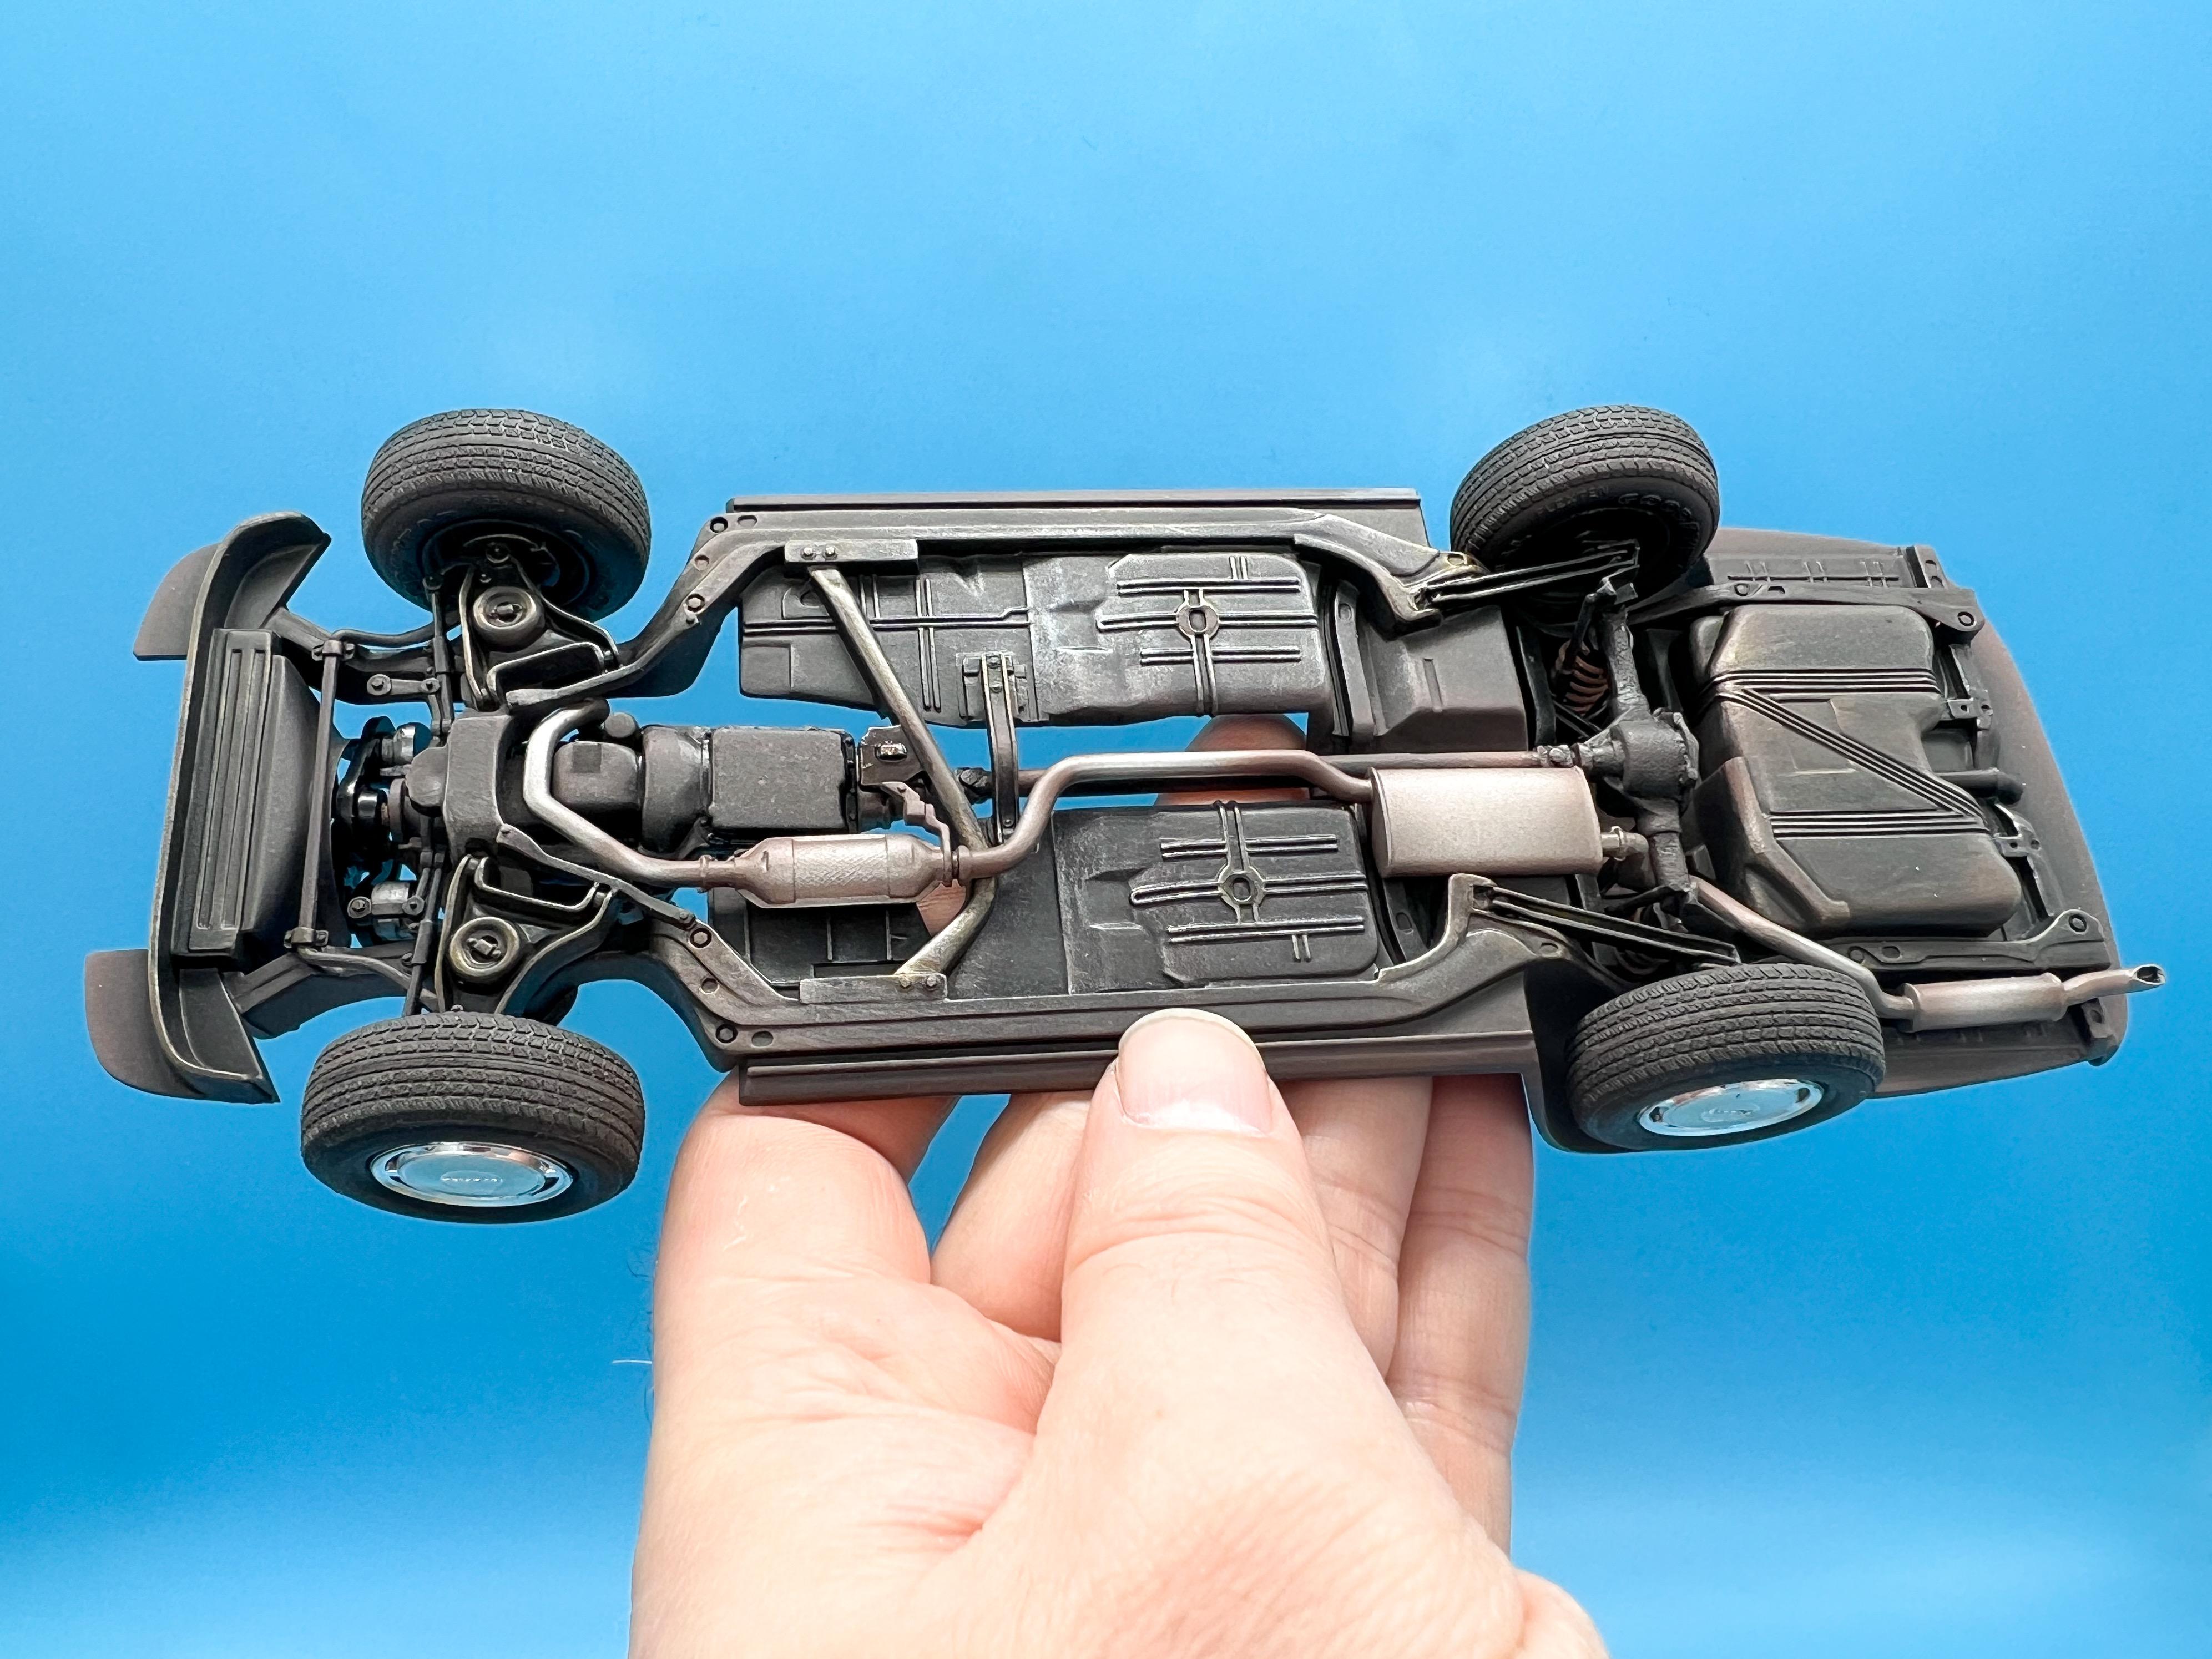
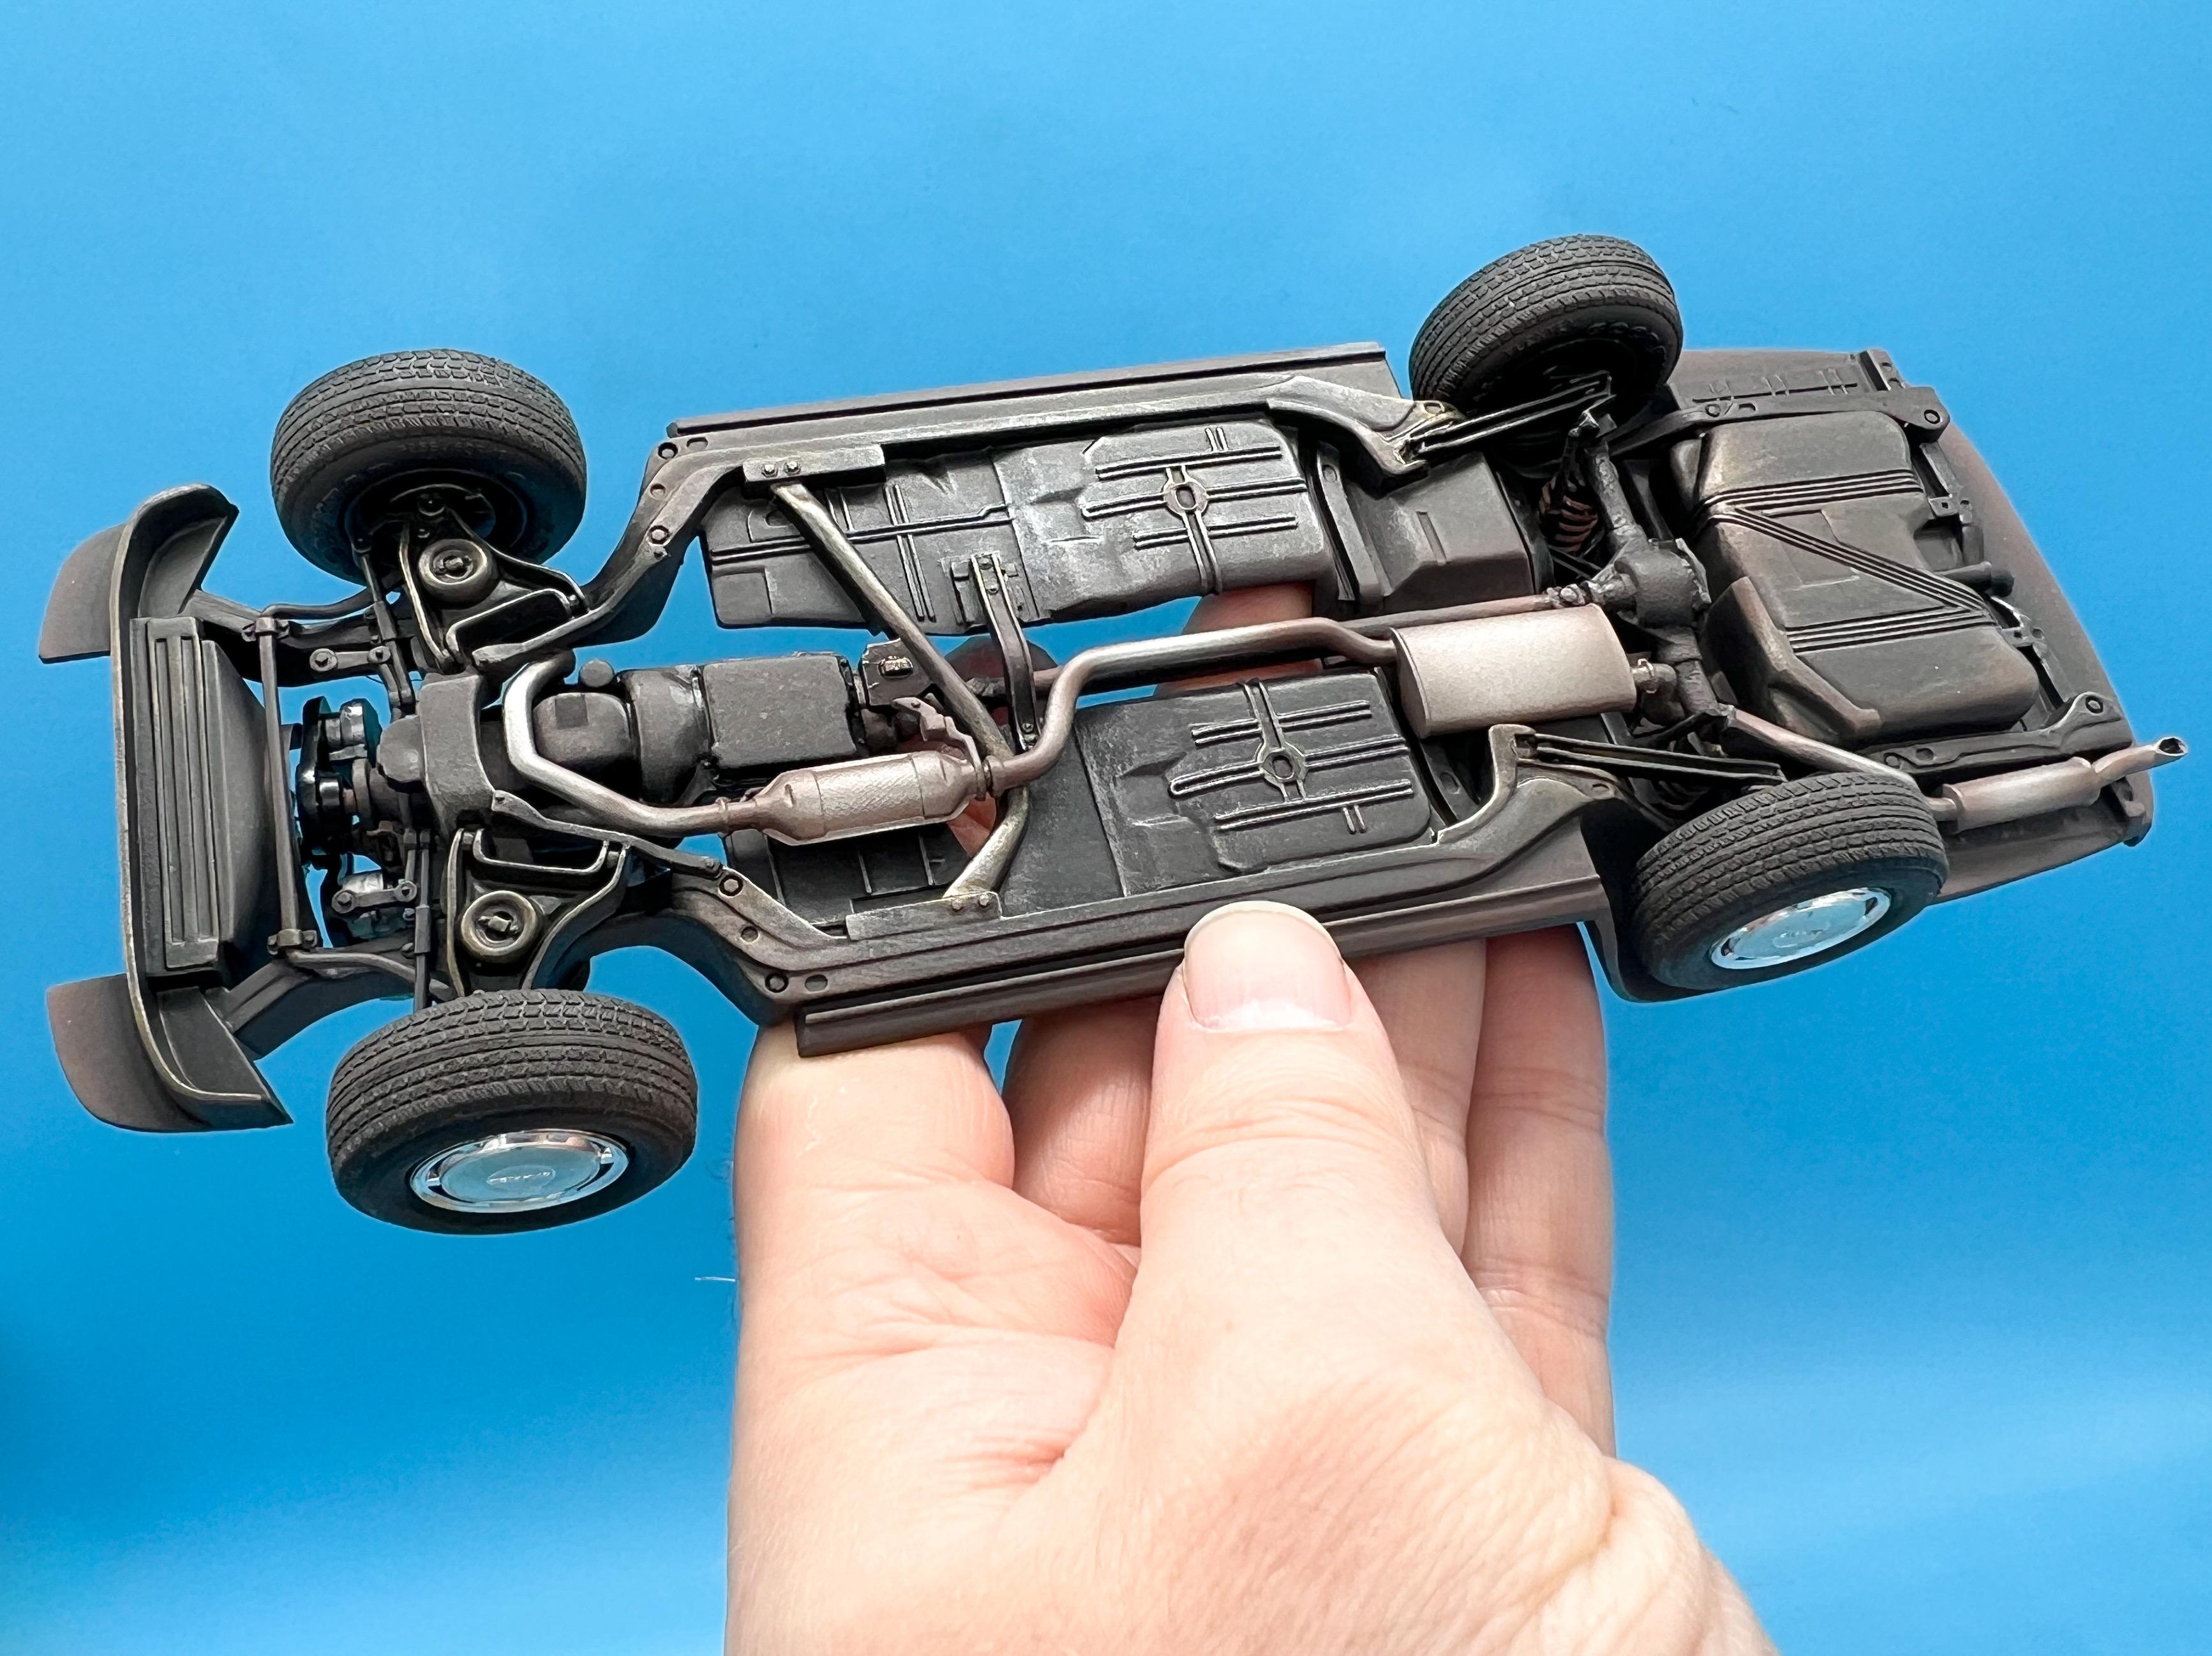
Building a New York taxi from the Revell Caprice Snap Kit
OldNYJim replied to OldNYJim's topic in WIP: Model Cars
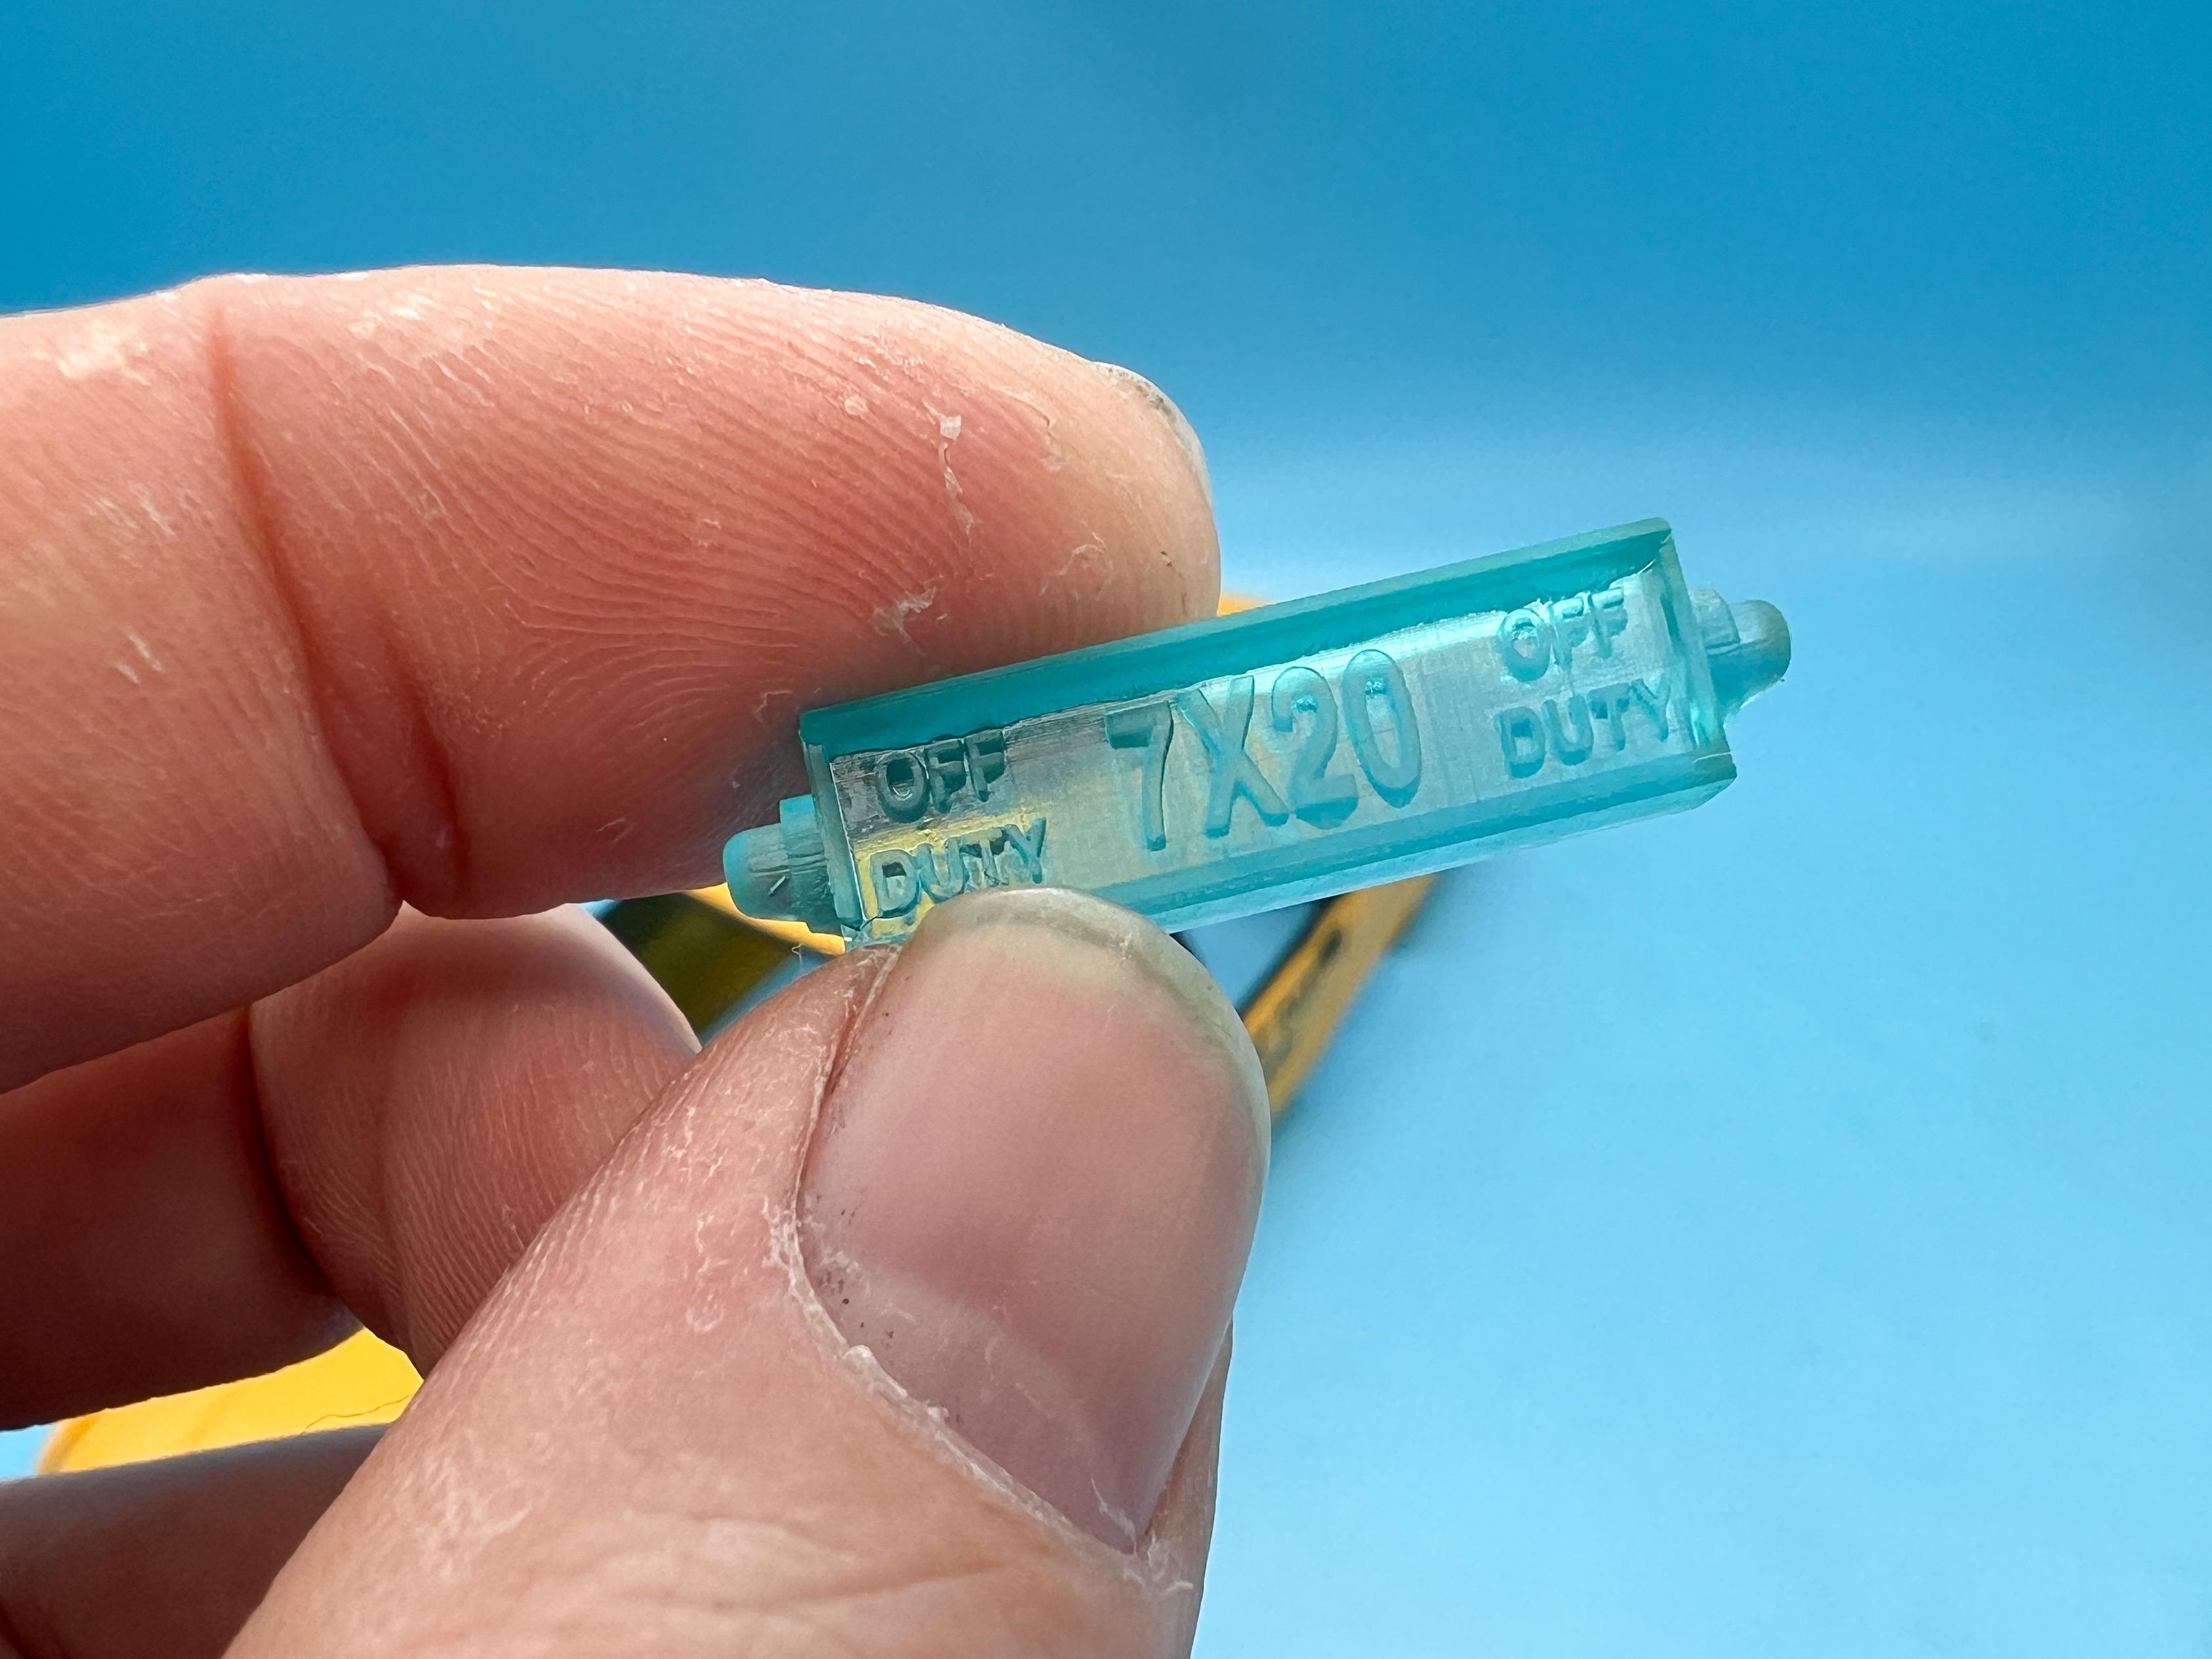
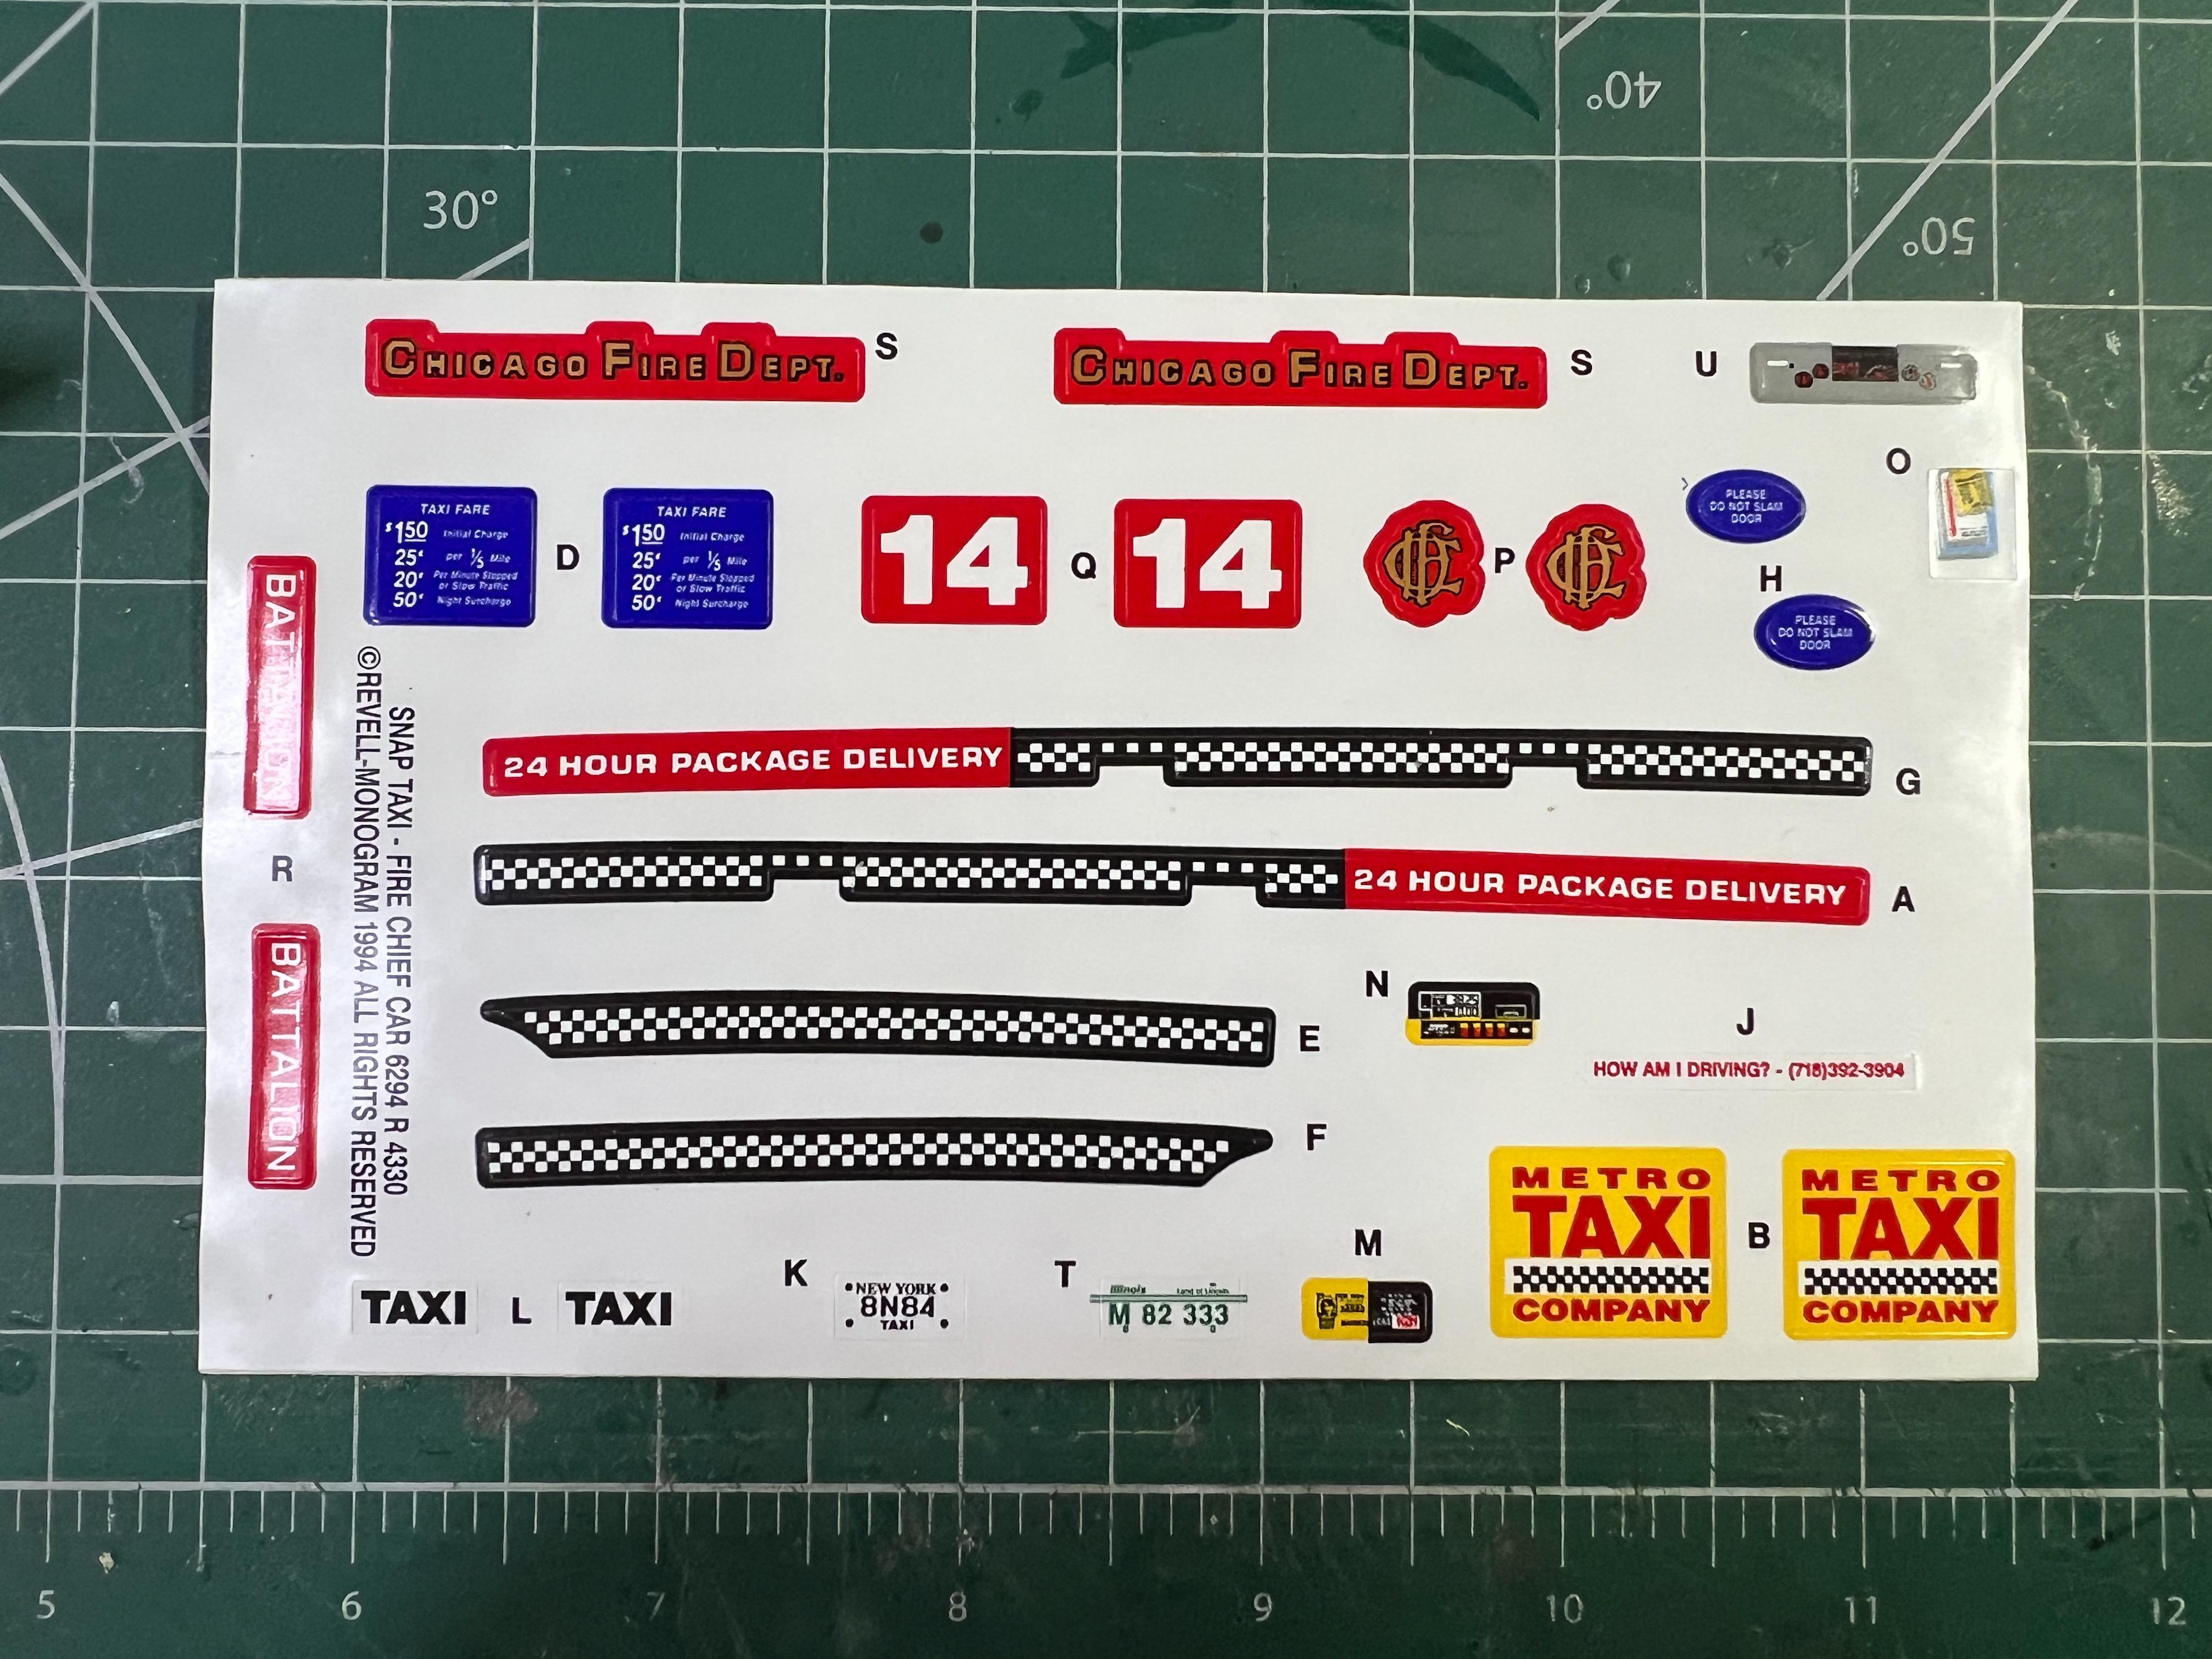
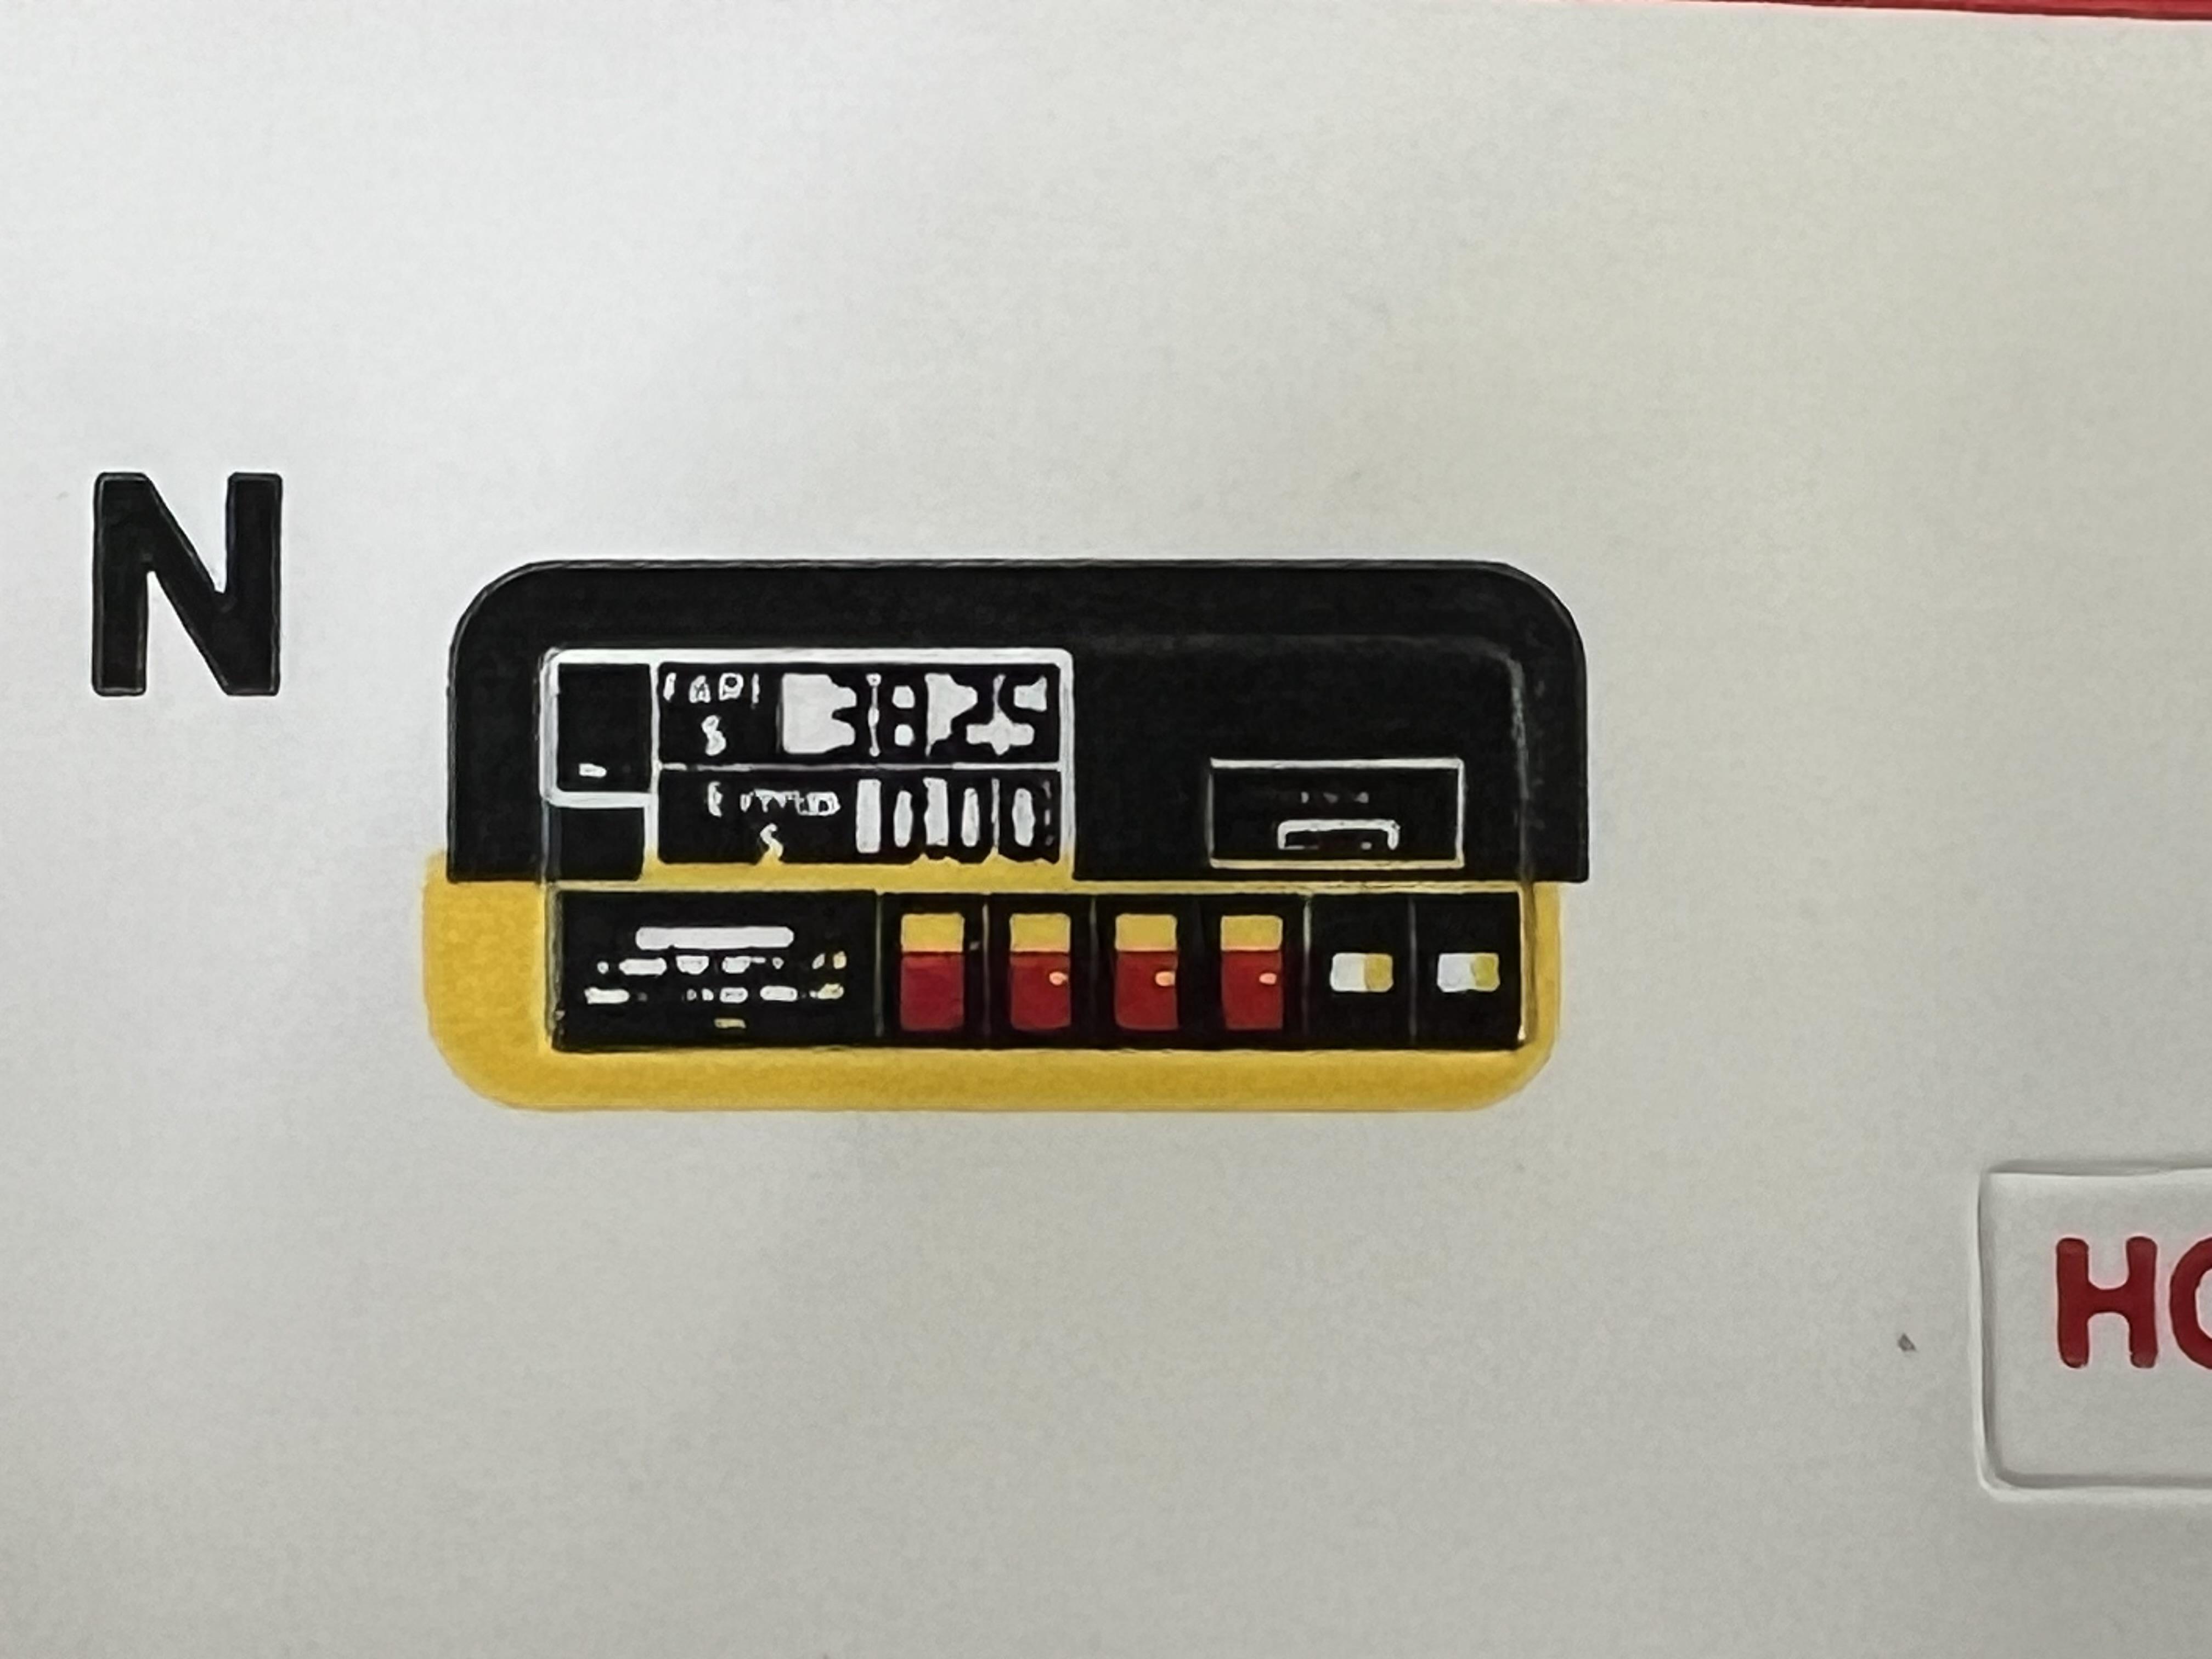
Thanks fellas! A little more progress this weekend, after spending the week priming and painting about everything that I hadn’t painted already…got a real yard sale coming together! None of the bits I had left to handle were of any particular note - lots of satin black, but the wheels did get a coat of satin clear to dull down the chrome a little, plus a light black-wash and some weathering on the tires: Polished out the body - I didn’t go NUTS on it, because it’ll be getting some weathering and really isn’t meant to be show-car shiny…just got the orange peel off it and gave it an in-scale sheen: One kit part I WON’T be using is the kit’s taxi sign on the roof - it’s not accurate for a NY car so I 3D modeled one and printed it today: I got the few decals (actually stickers) applied to the dash and fare-meter - they’re all I’ll be using from the kit’s sheet: Apparently the driver of this cab is named Shah Duzy Mahmou, which I guess is feasible ? And he just got a $38-and-change fare: The interior literally snaps together, as you’d hope from a snap kit, and everything fits beautifully - this kit was really a joy to piece together so far: After test fitting everything I un-snapped it and got the engine glued in place - one of the few parts I felt NEEDED glue, to be safe…I love how this underside turned out! Next up, getting the interior tub, frame and body all together for the final time… And now we’re down to some of the final little details before I can add a light layer of exterior weathering and wrap this thing up…I’m excited to do a little airbrushing and some washes to add some subtle grime and use to this thing… Thanks for looking - more soon, soon as I’ve done more!
-
I need to build one of these!! Love those old green ‘n’ black NYPD liveries! Figure we’ll be seeing more of these built (or at least purchased) now Ollie’s has them…doesn’t look a bad kit from the pics Casey posted there
-
No thanks