dino246gt
-
Posts
2,244 -
Joined
-
Last visited
Content Type
Profiles
Forums
Events
Gallery
Everything posted by dino246gt
-

1970 Pontiac Trans Am - Box Stock - Update 12/26/2022
dino246gt replied to Exotics_Builder's topic in WIP: Model Cars
Love the blue you've chosen for that F-Bird! -
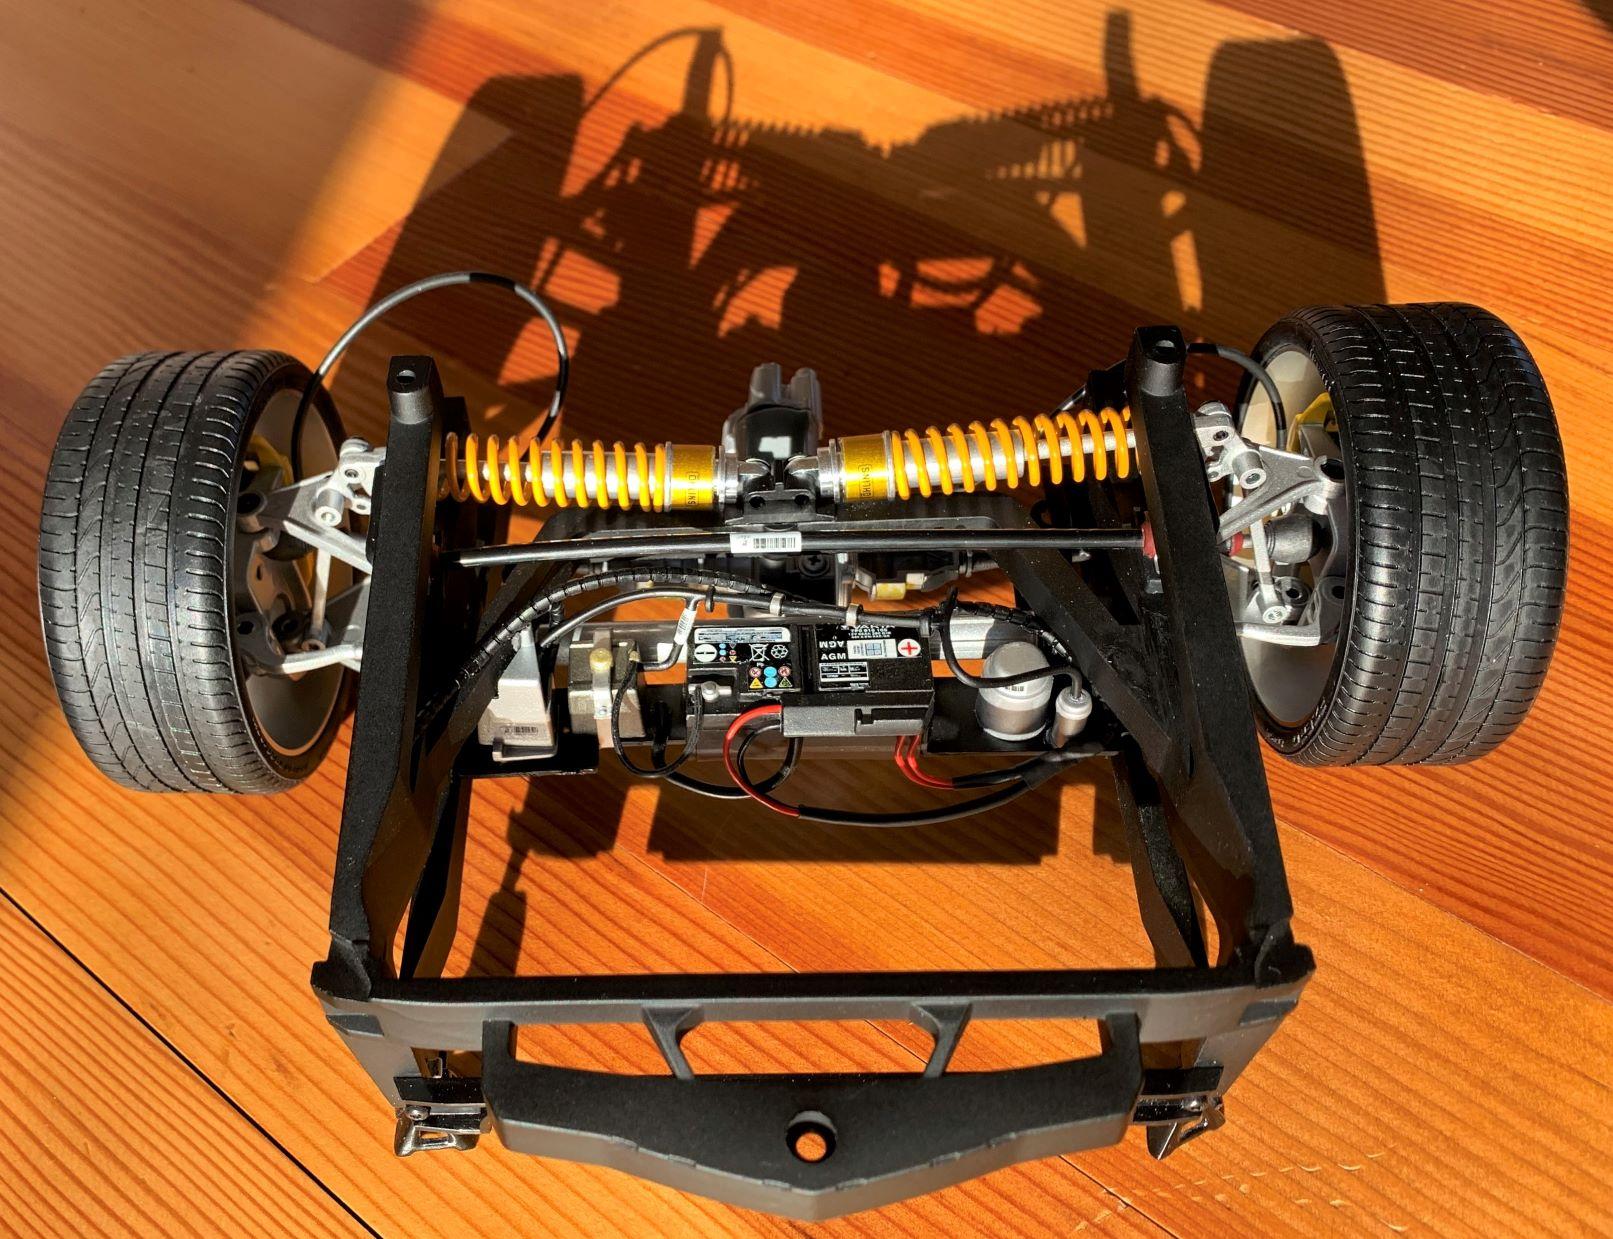
I'll be biting the big bucks bullet on this kit soon, waiting to get the FULL kit, probably available in January! I love what you've done to it so far! Is it as great a kit as it looks to be? I have the Pocher Aventador also, which I started but after my father-in-laws passing, it got burried under his stuff, and my wife isn't quite ready to let it go yet, so it's not accessible. However, someday I'll have both of these Lambos built to display together, I LOVE the Miura! Here's what's under the front of the Aventador, so far! Cheers, or should I say CIAO!

-
Amazing fab work man, I love it! I also modified one of those 'Birds, I'll be bringing it to our annual show this month! I LOVE the kind of work you do, thank you for taking the time to share photos with easy to understand explanations Very nice!
-
AMT 2017 Camaro "Fiftieth" Anniversary Edition
dino246gt replied to mustang1989's topic in WIP: Model Cars
Interior is beautifully and realistically built and detailed, nice work! -
I hope you don't submerge it, probably just needed more time for the paint to gas out, maybe, hopefully? Do the light sanding and a good washing, then let it sit for a few days before more clear. Or use the dehydrator. I'm sure it'll turn out looking great!
-
I did a lot more, but here it is basically finished, I'm keeping it simple! I'll post more pictures eventually, cheers!
-
2wipers, 2 wiper motors, 2 wiper motor backs, 2 folding mechanisms, and 2 clamps at the dashboard, plus the 2 part mirror! And there's a few little pieces added to the dashboard, that's a lot of little pieces, I love that Takom made it so detailed! I added these cool 1/24th tail lights I got from Spot Model, to comply with local requirements for street use!
-
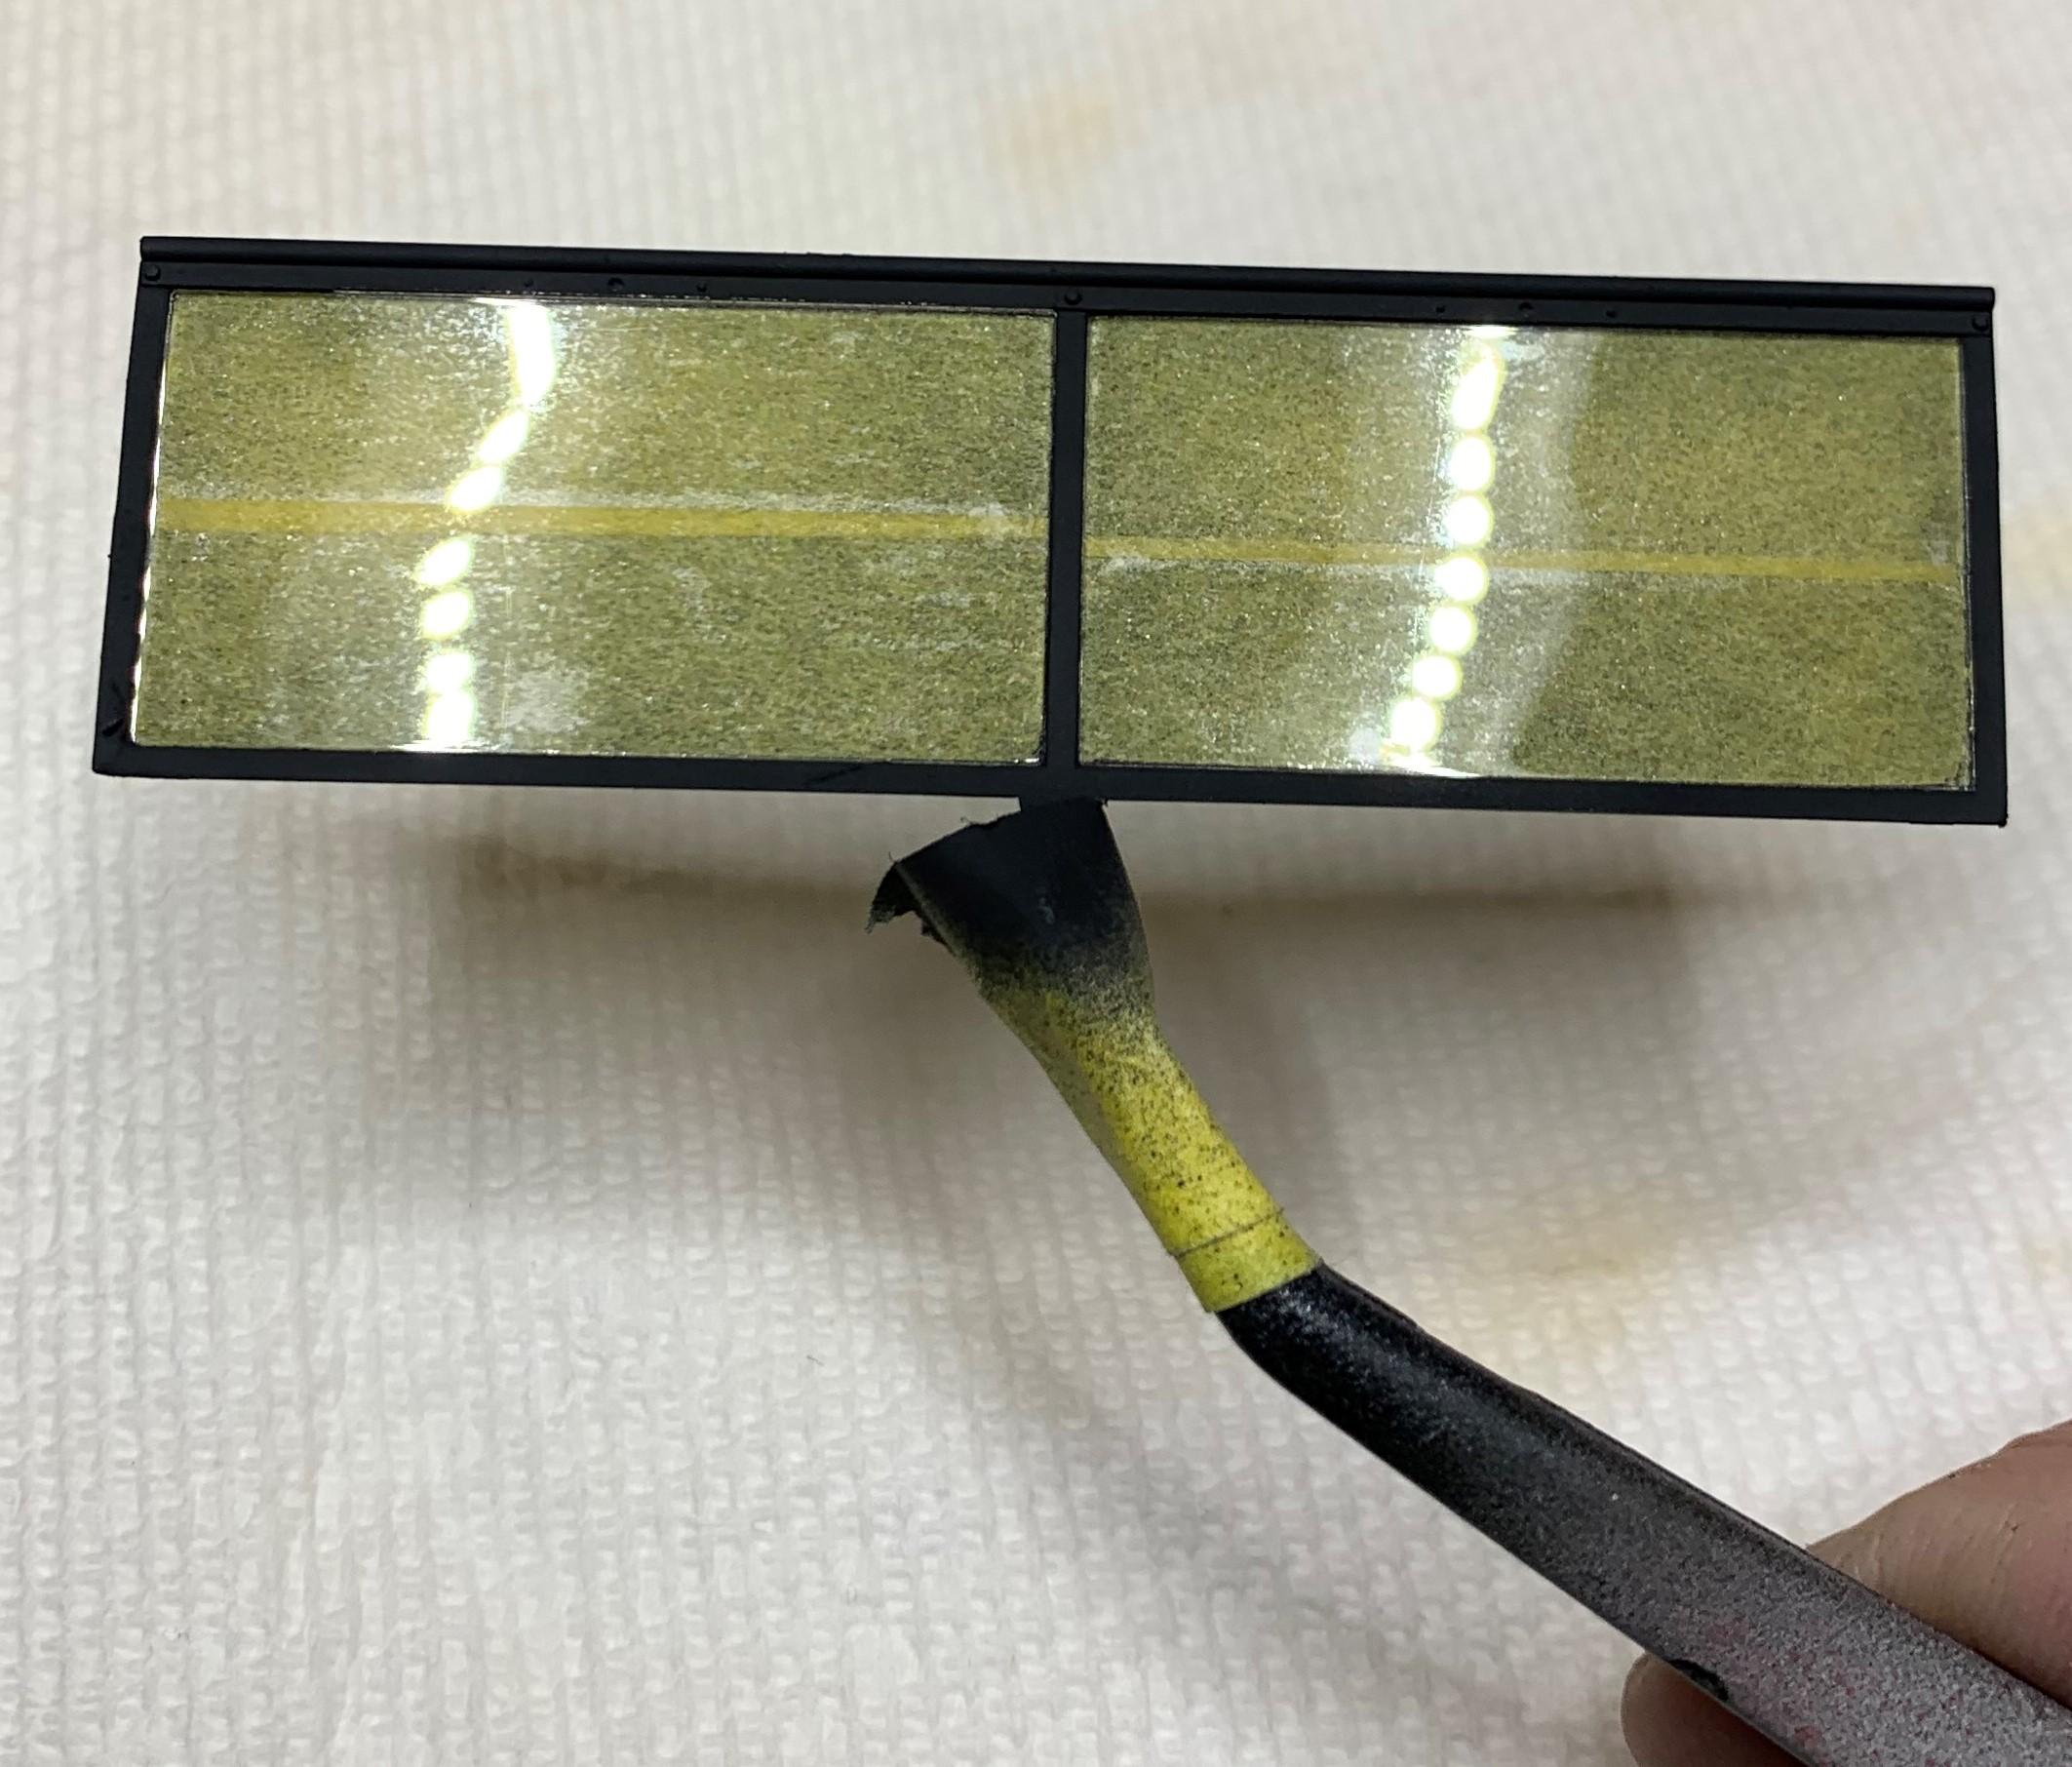
I masked the "glass", both sides, then airbrushed it, both sides. Carefully, I removed the tape, that "glass" is very thin and possibly breakable! So here it is! Ya think it's finished but no, there's still TEN more parts to the windshield and I'm not even using the 2 part rifle case!
-
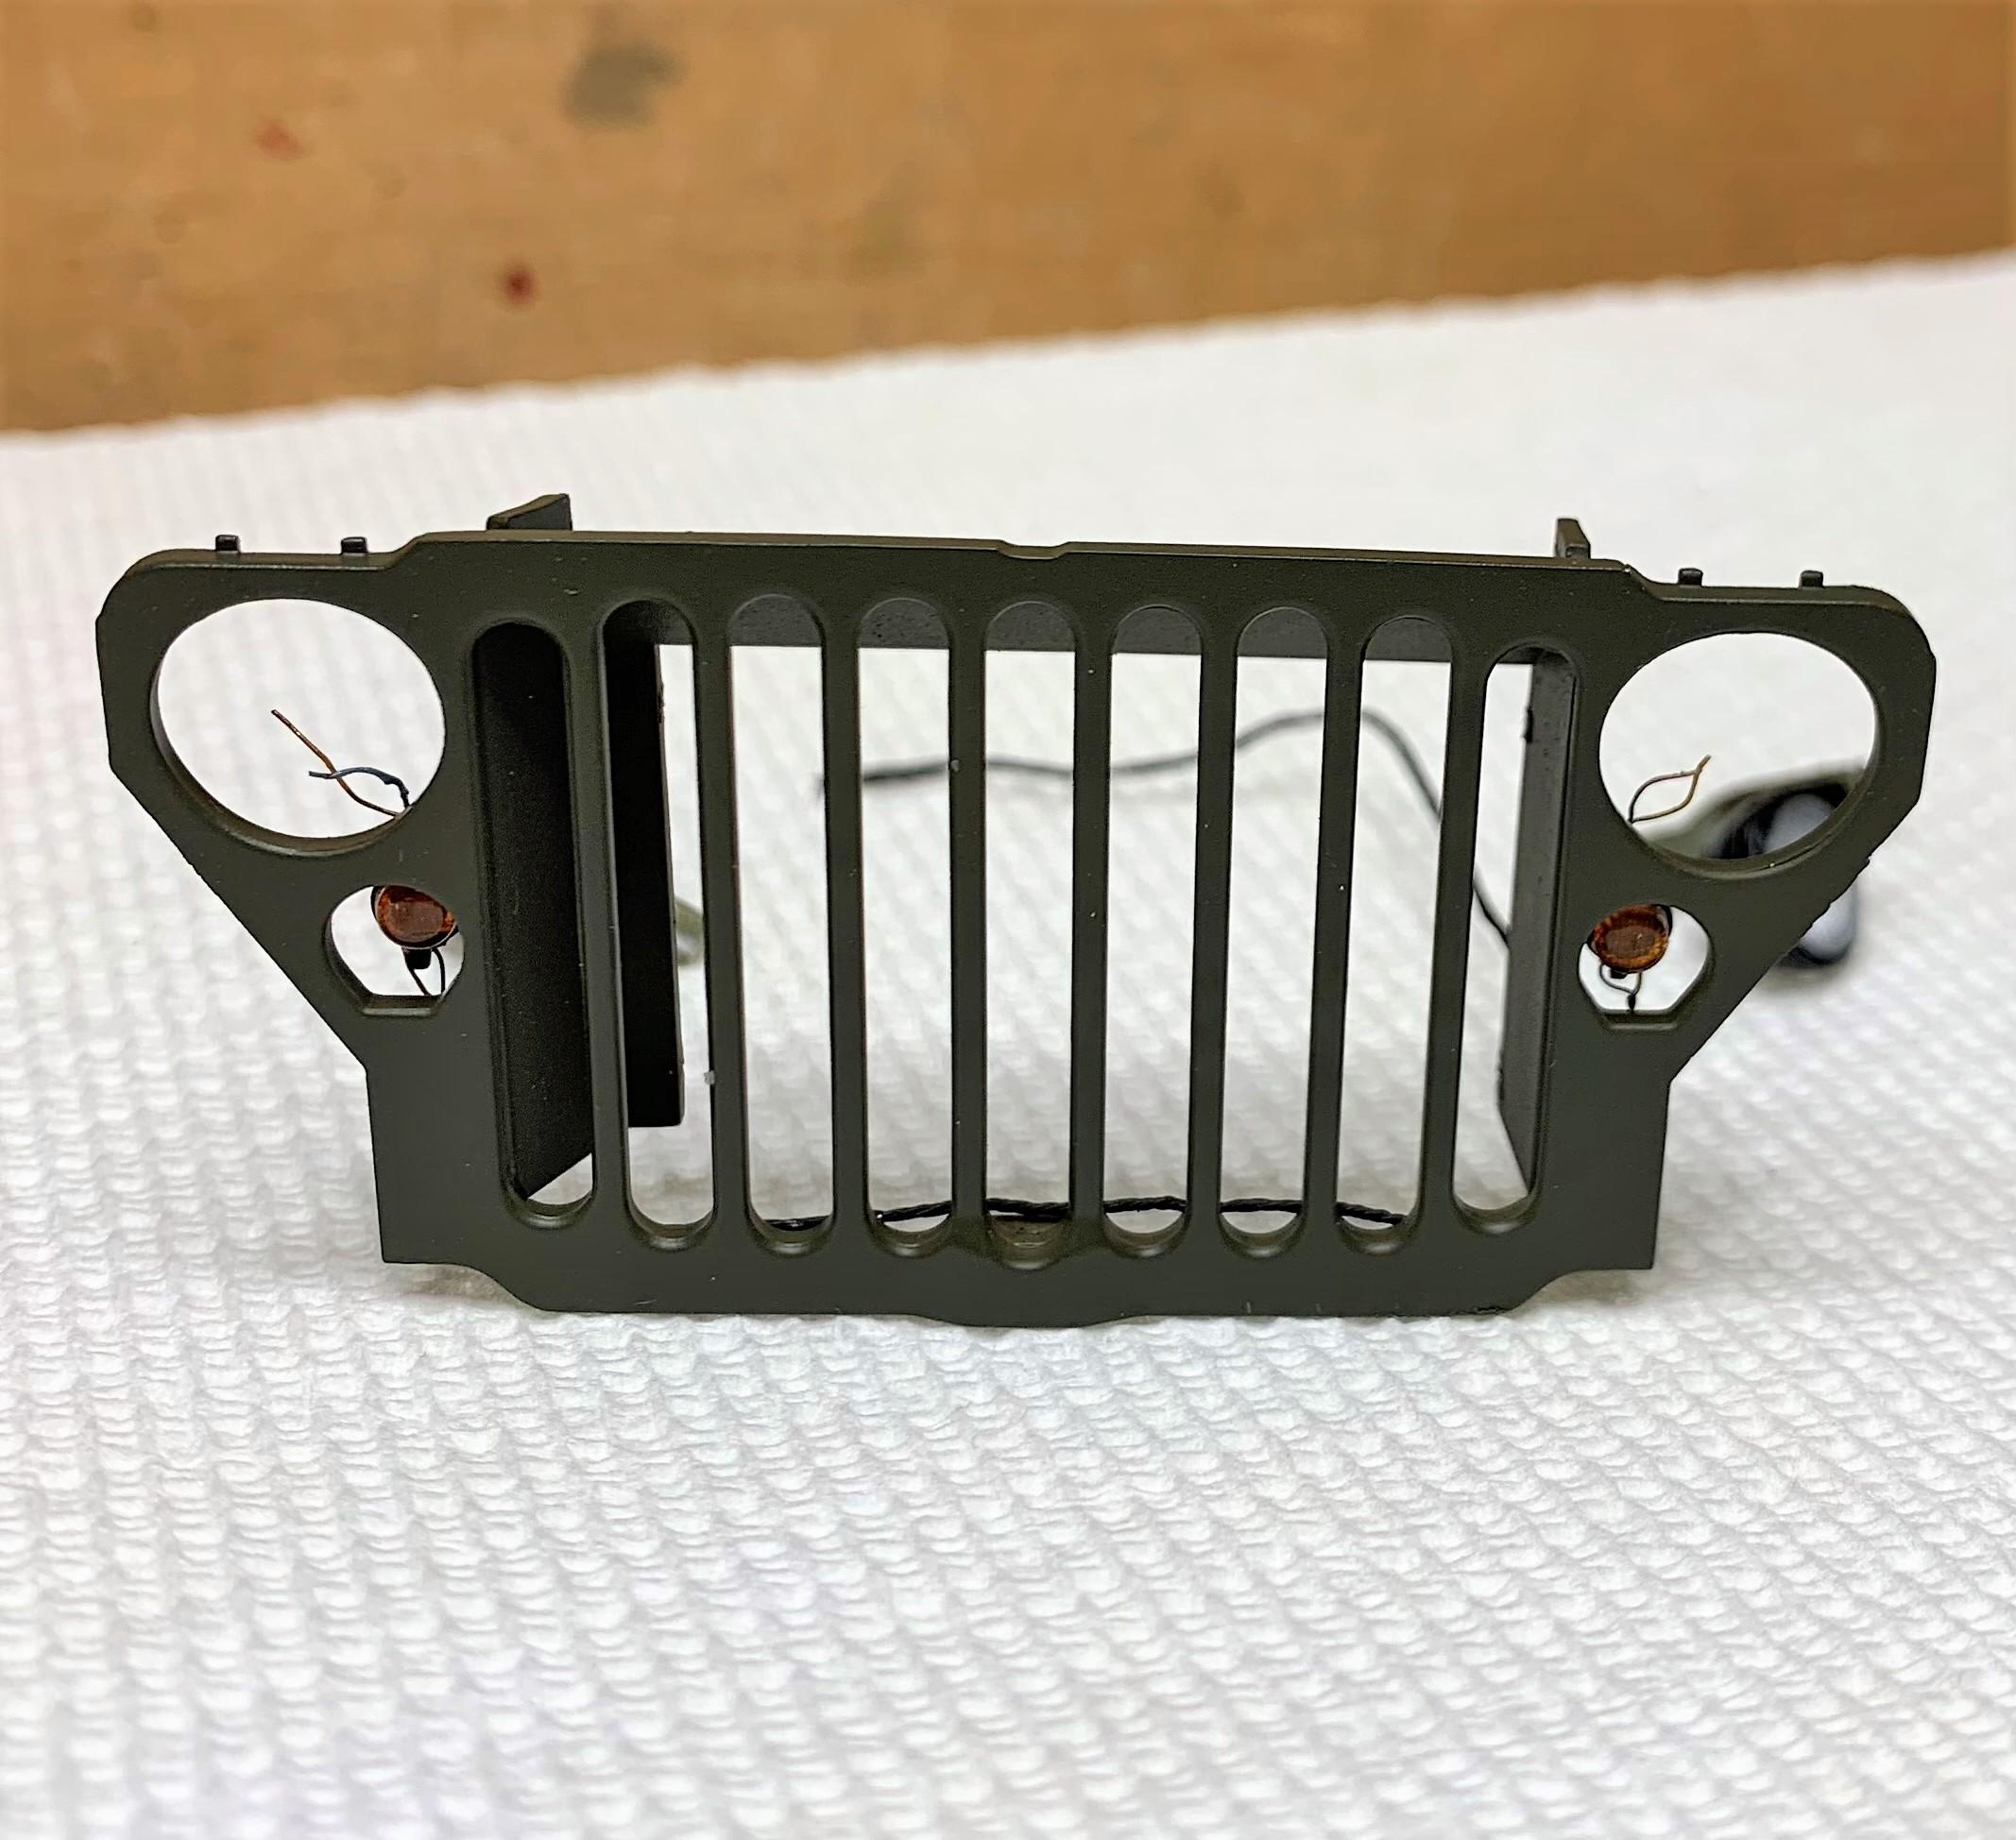
Headlights are straight from the box, foiled inside and semi-gloss black out. Parking lights are modified for street use, but they had a notch in them for the kit faces, so that had to be filled, very little tiny wee bits of styrene! LOL Too small to foil so I brushed some Tamiya LP-48 "Sparkling Silver" into the buckets, then cowl light lenses from a 1/25th Revell '32 Ford kit, painted clear orange were applied. Had to comply with local ordinances to make it street legal! I made up some wiring by twisting thin speaker wire strands and brush painting them in various acrylics, then flat black. Paint beads on wire so constant back and forth evens it out, be patient.
-
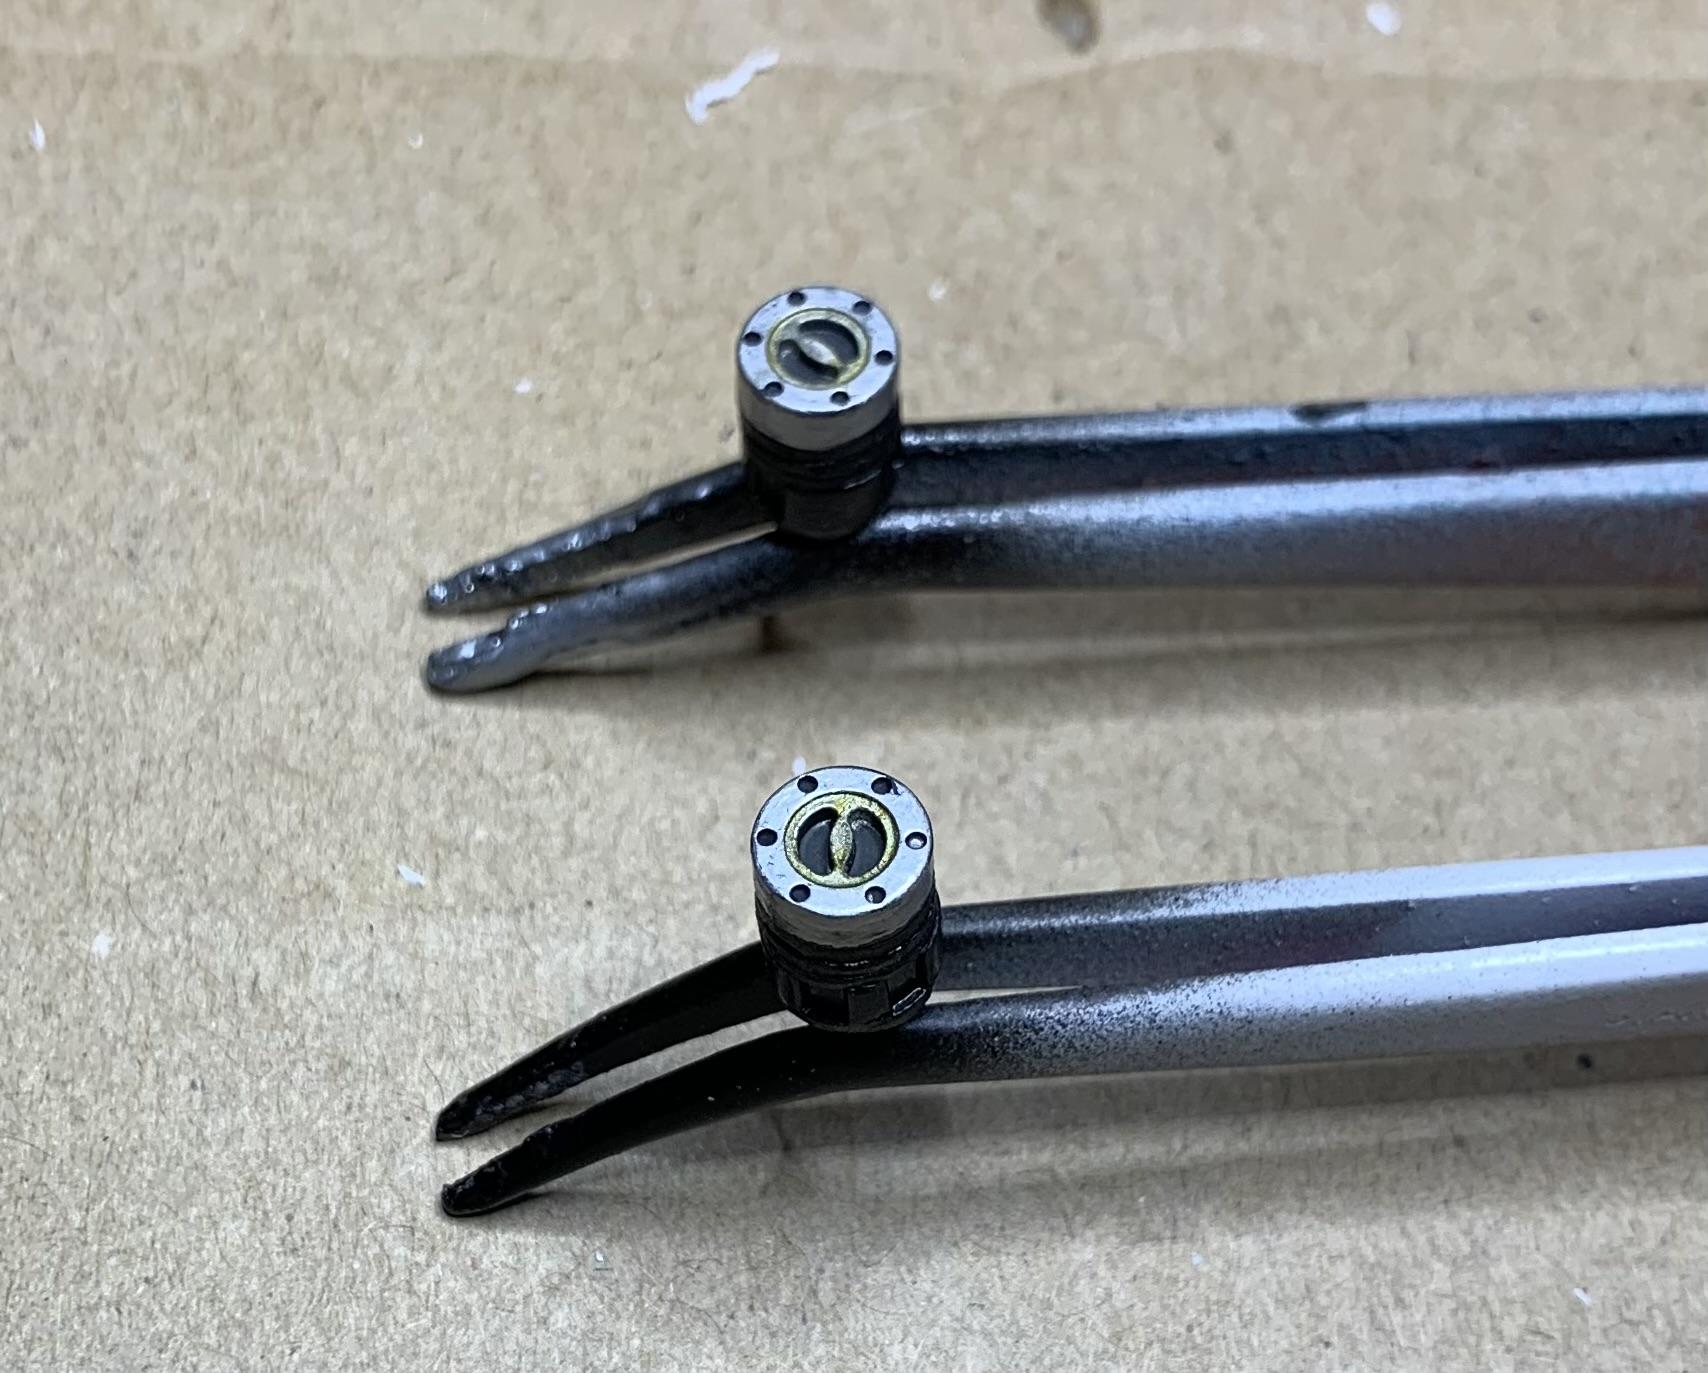
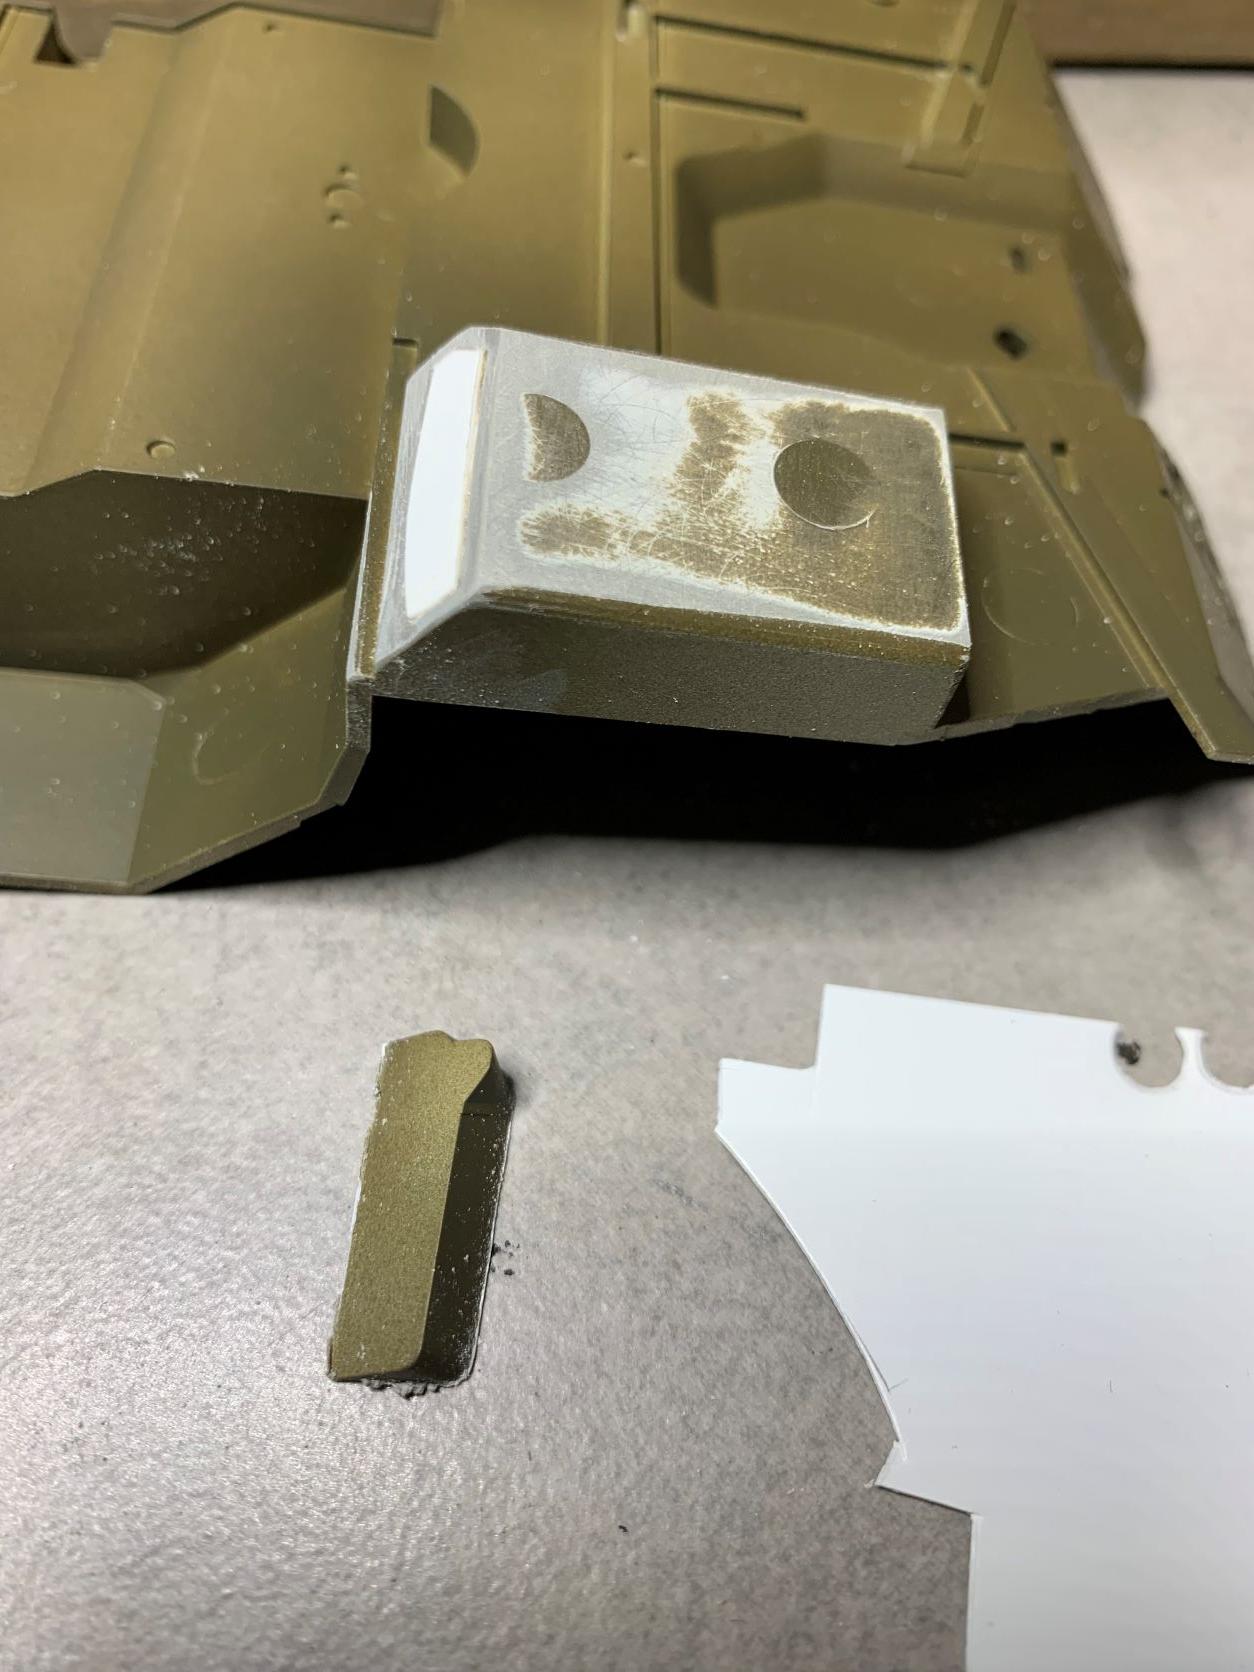
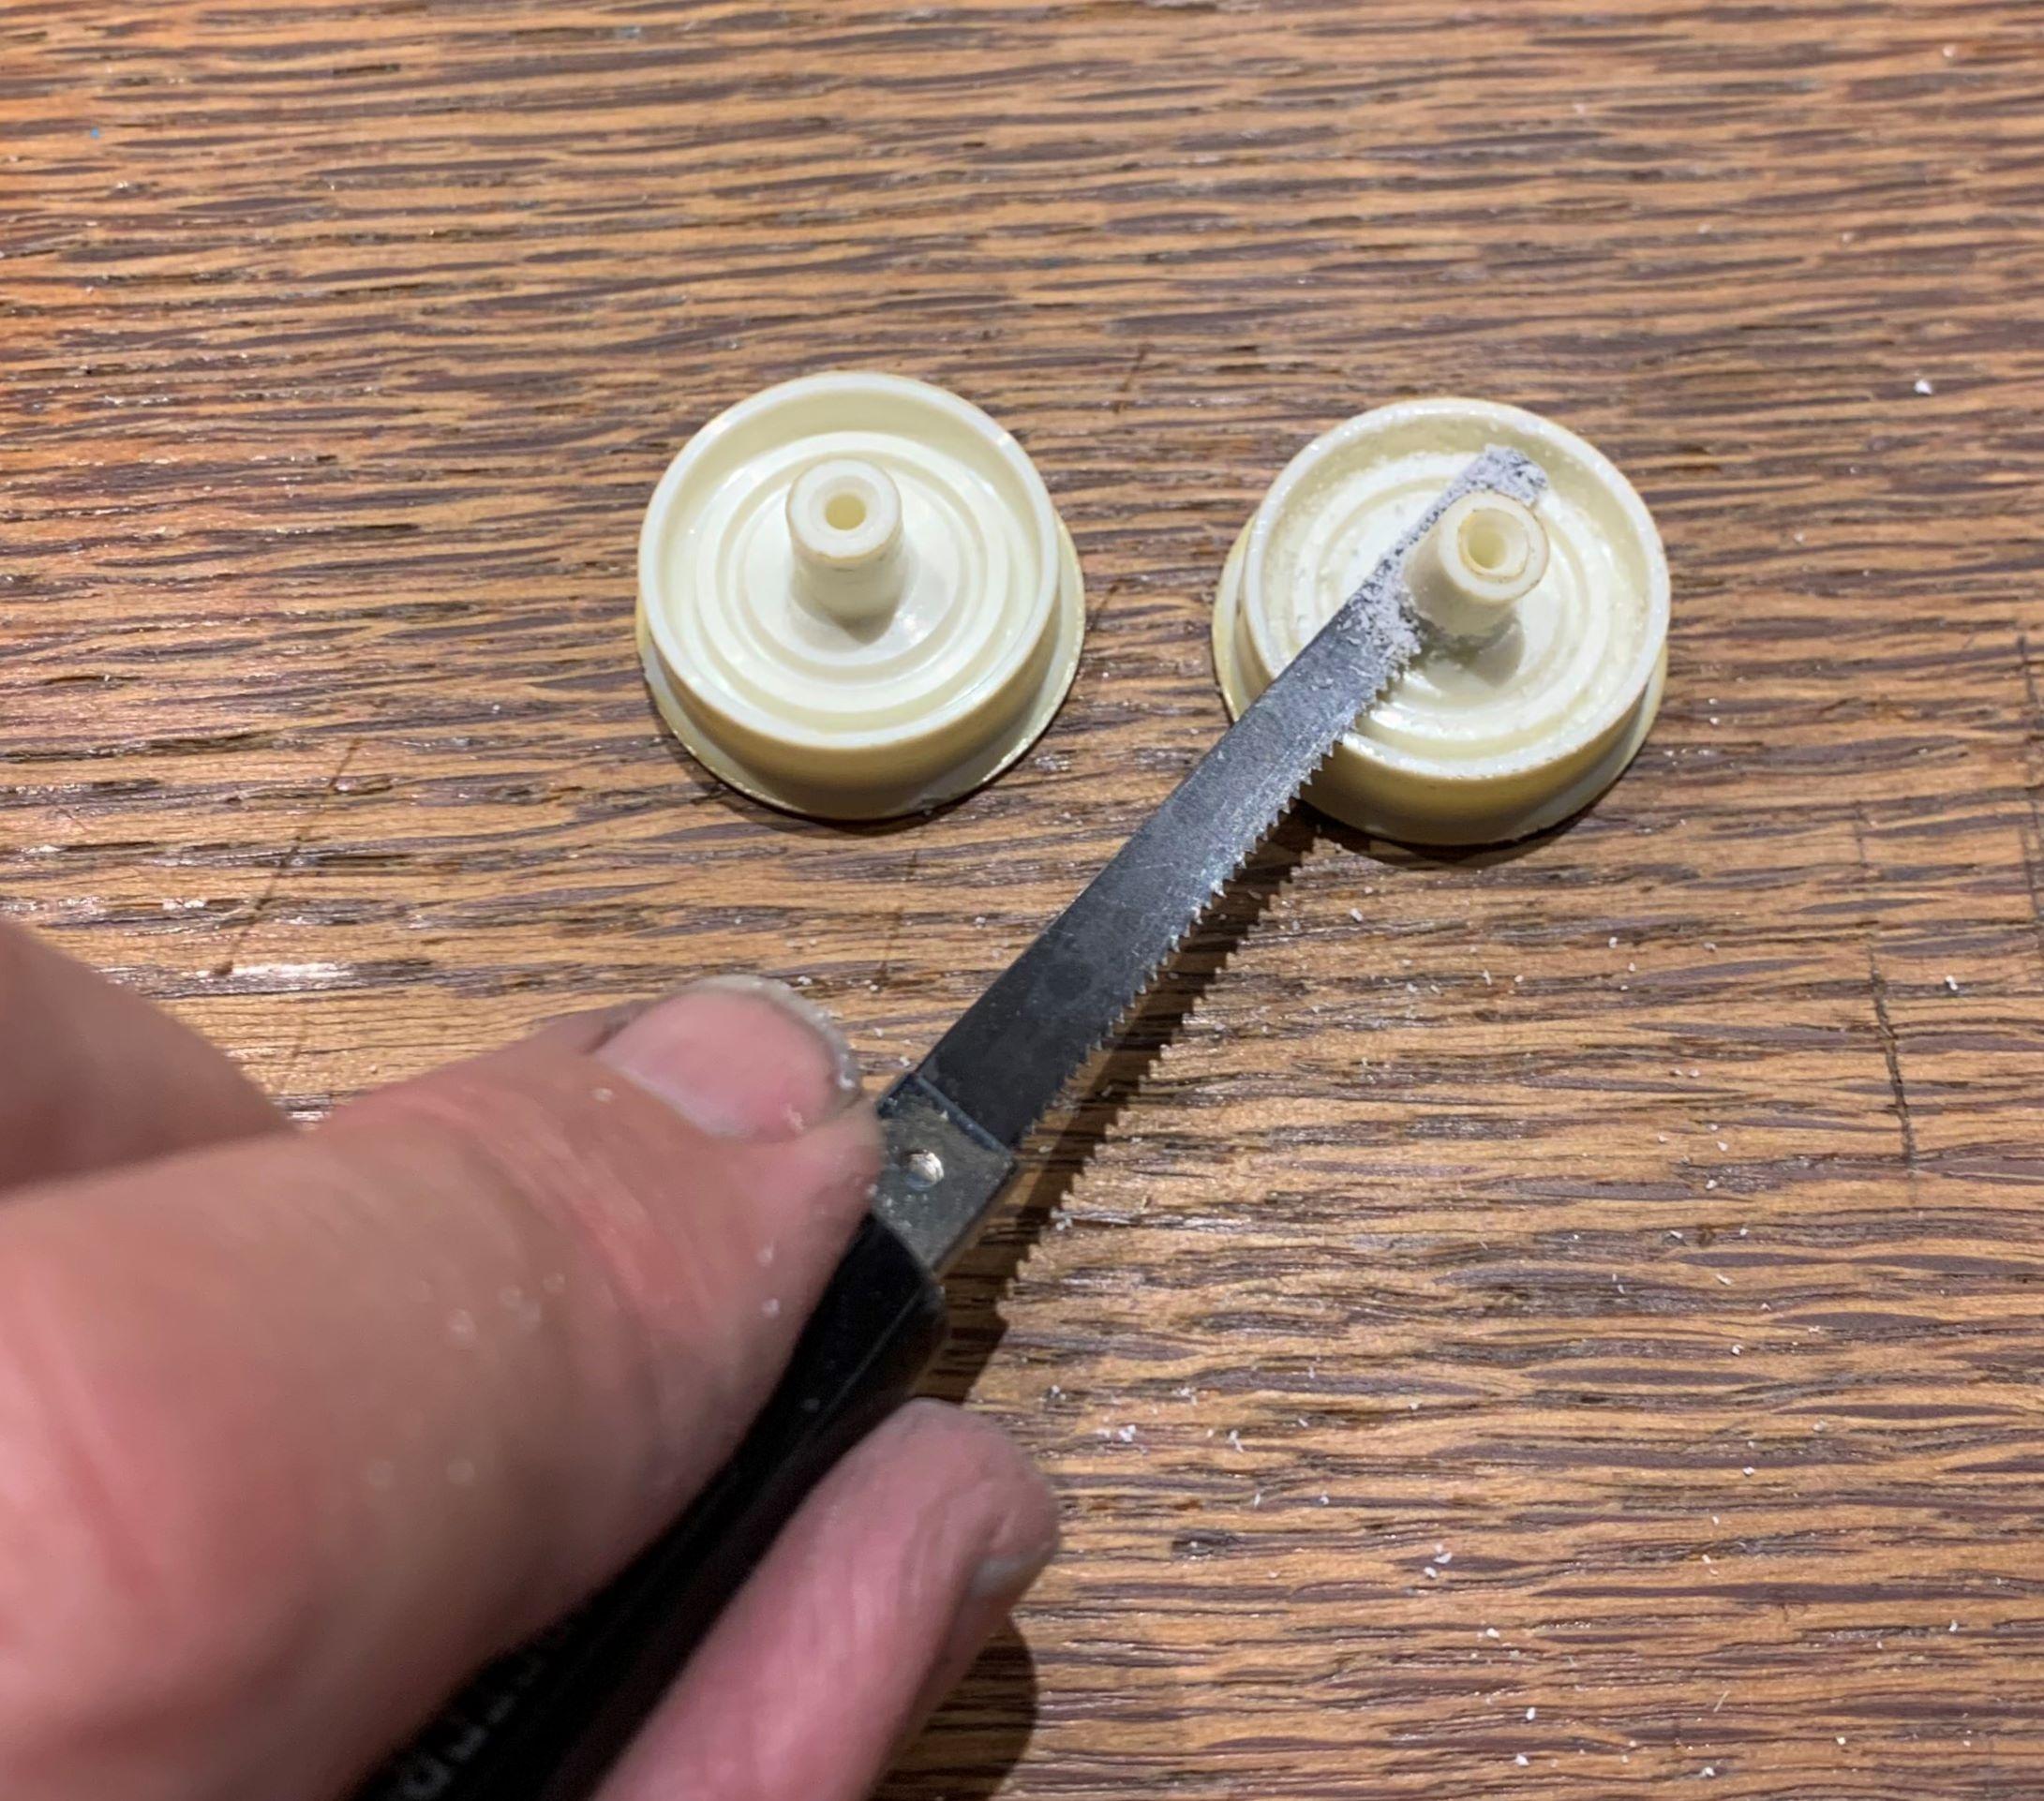
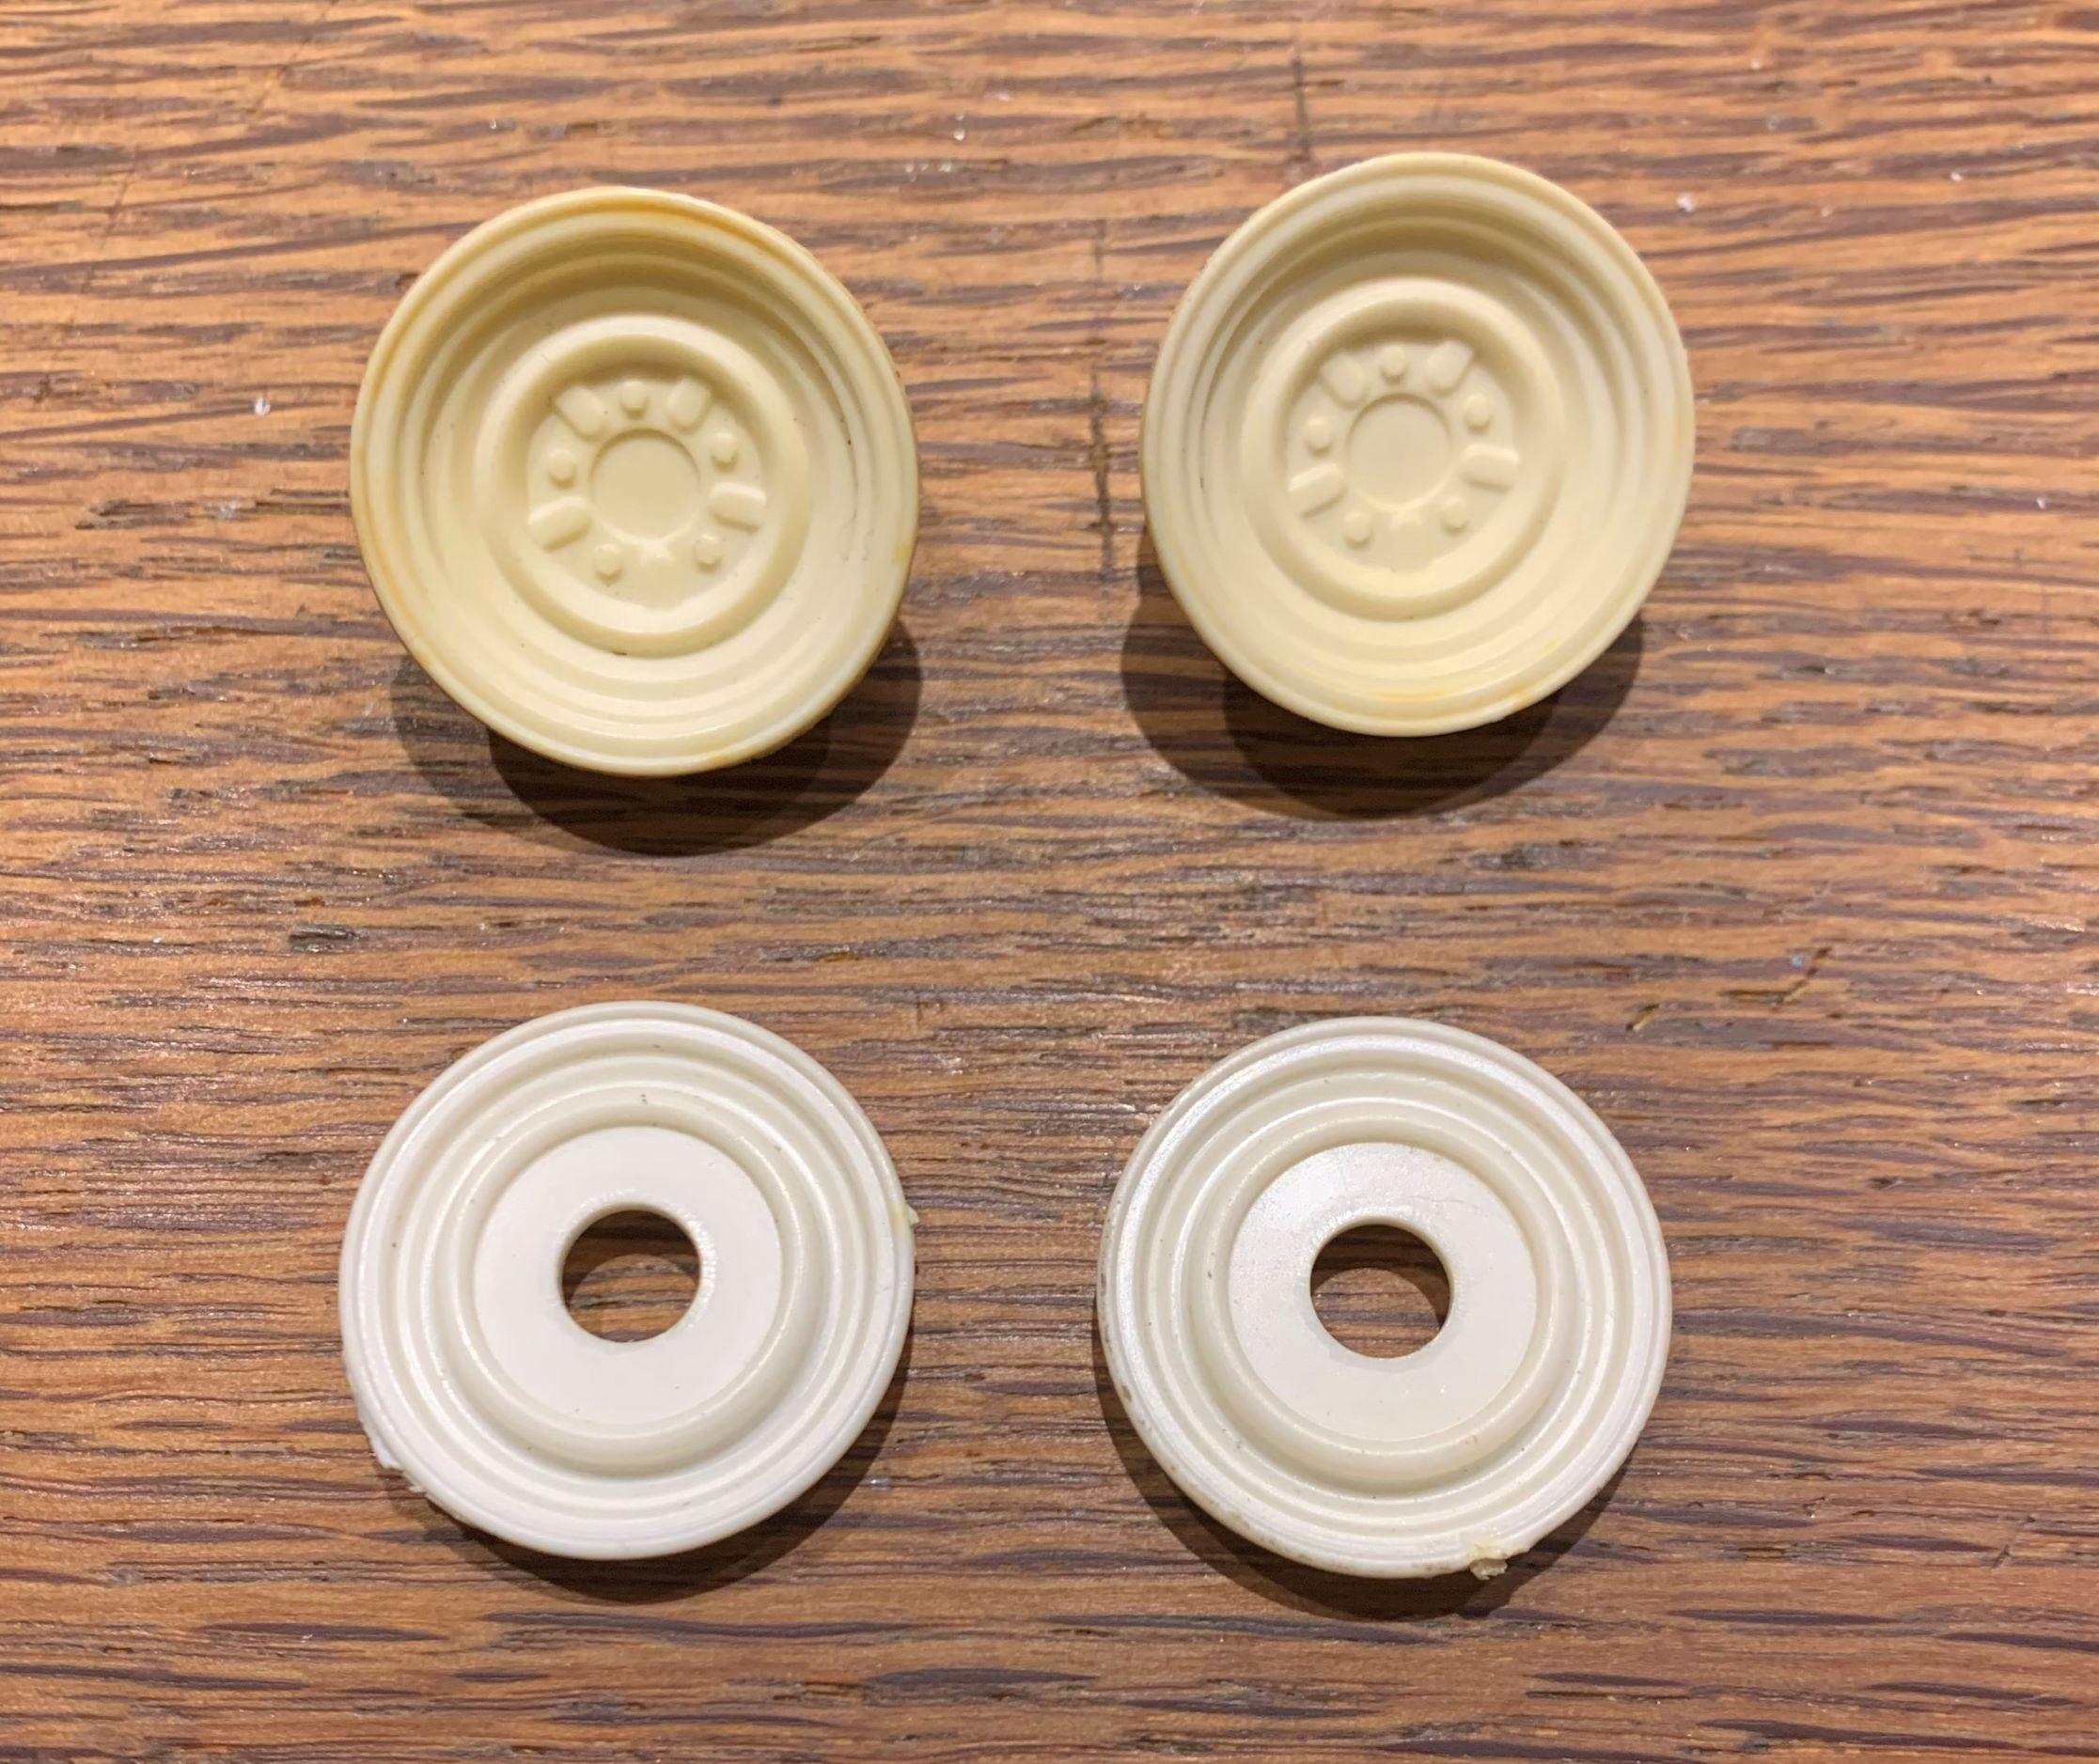
Because I had the Warn hubs 3D printed to 1/4" diameter, I punched some .010 styrene sheet into circles with a 1/4" hole punch, these will simulate the ribbed look of the hubs on the axle ends. Because I brush painted the turning piece of the hubs with Alclad II Lacquer, ALC 118 "Gold Titanium" it took several coats, it's NOT made for brush painting! BUT......... it turned out okay!
-
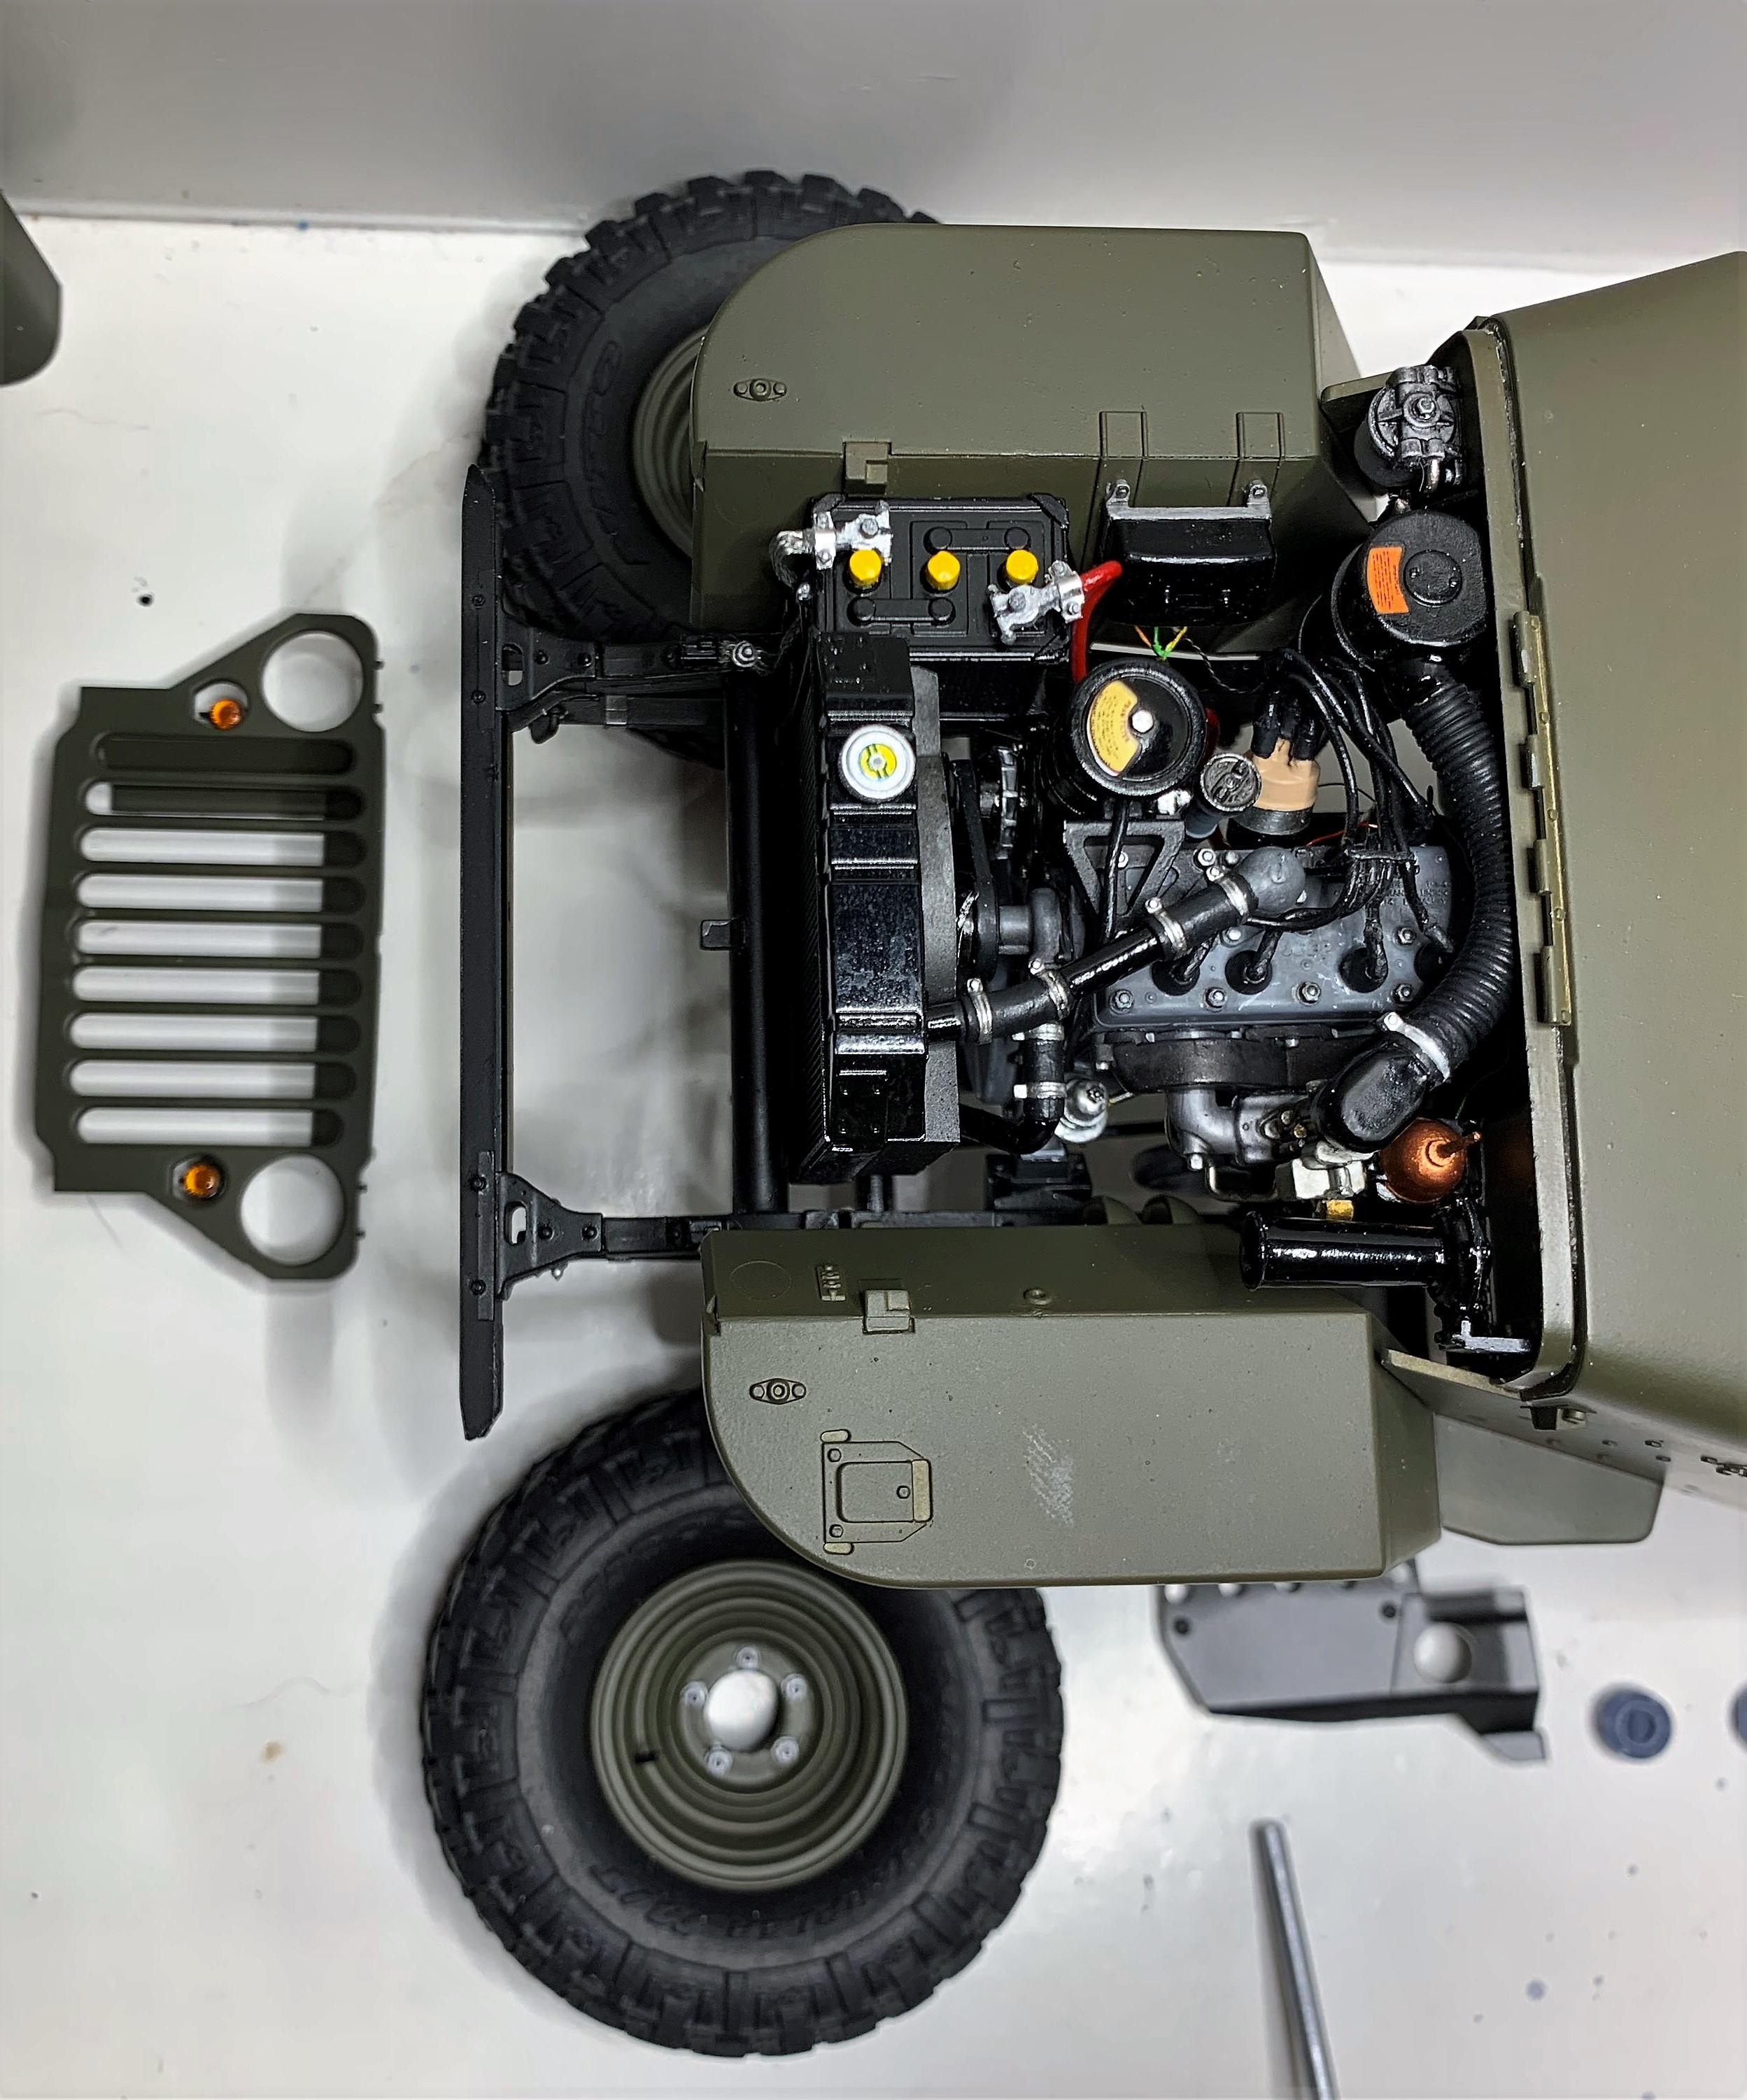
Because I added plug wires, and I didn't put them through the bracket on the head, my air filter couldn't connect to the carb without interfering with the hood. So I cut off the kit part and made a new one to go around the wires, solder wrapped with wire then painted rubber black. Here's the battery and that air filter "hose" installed. Note the ground wire bolted to the frame!
-
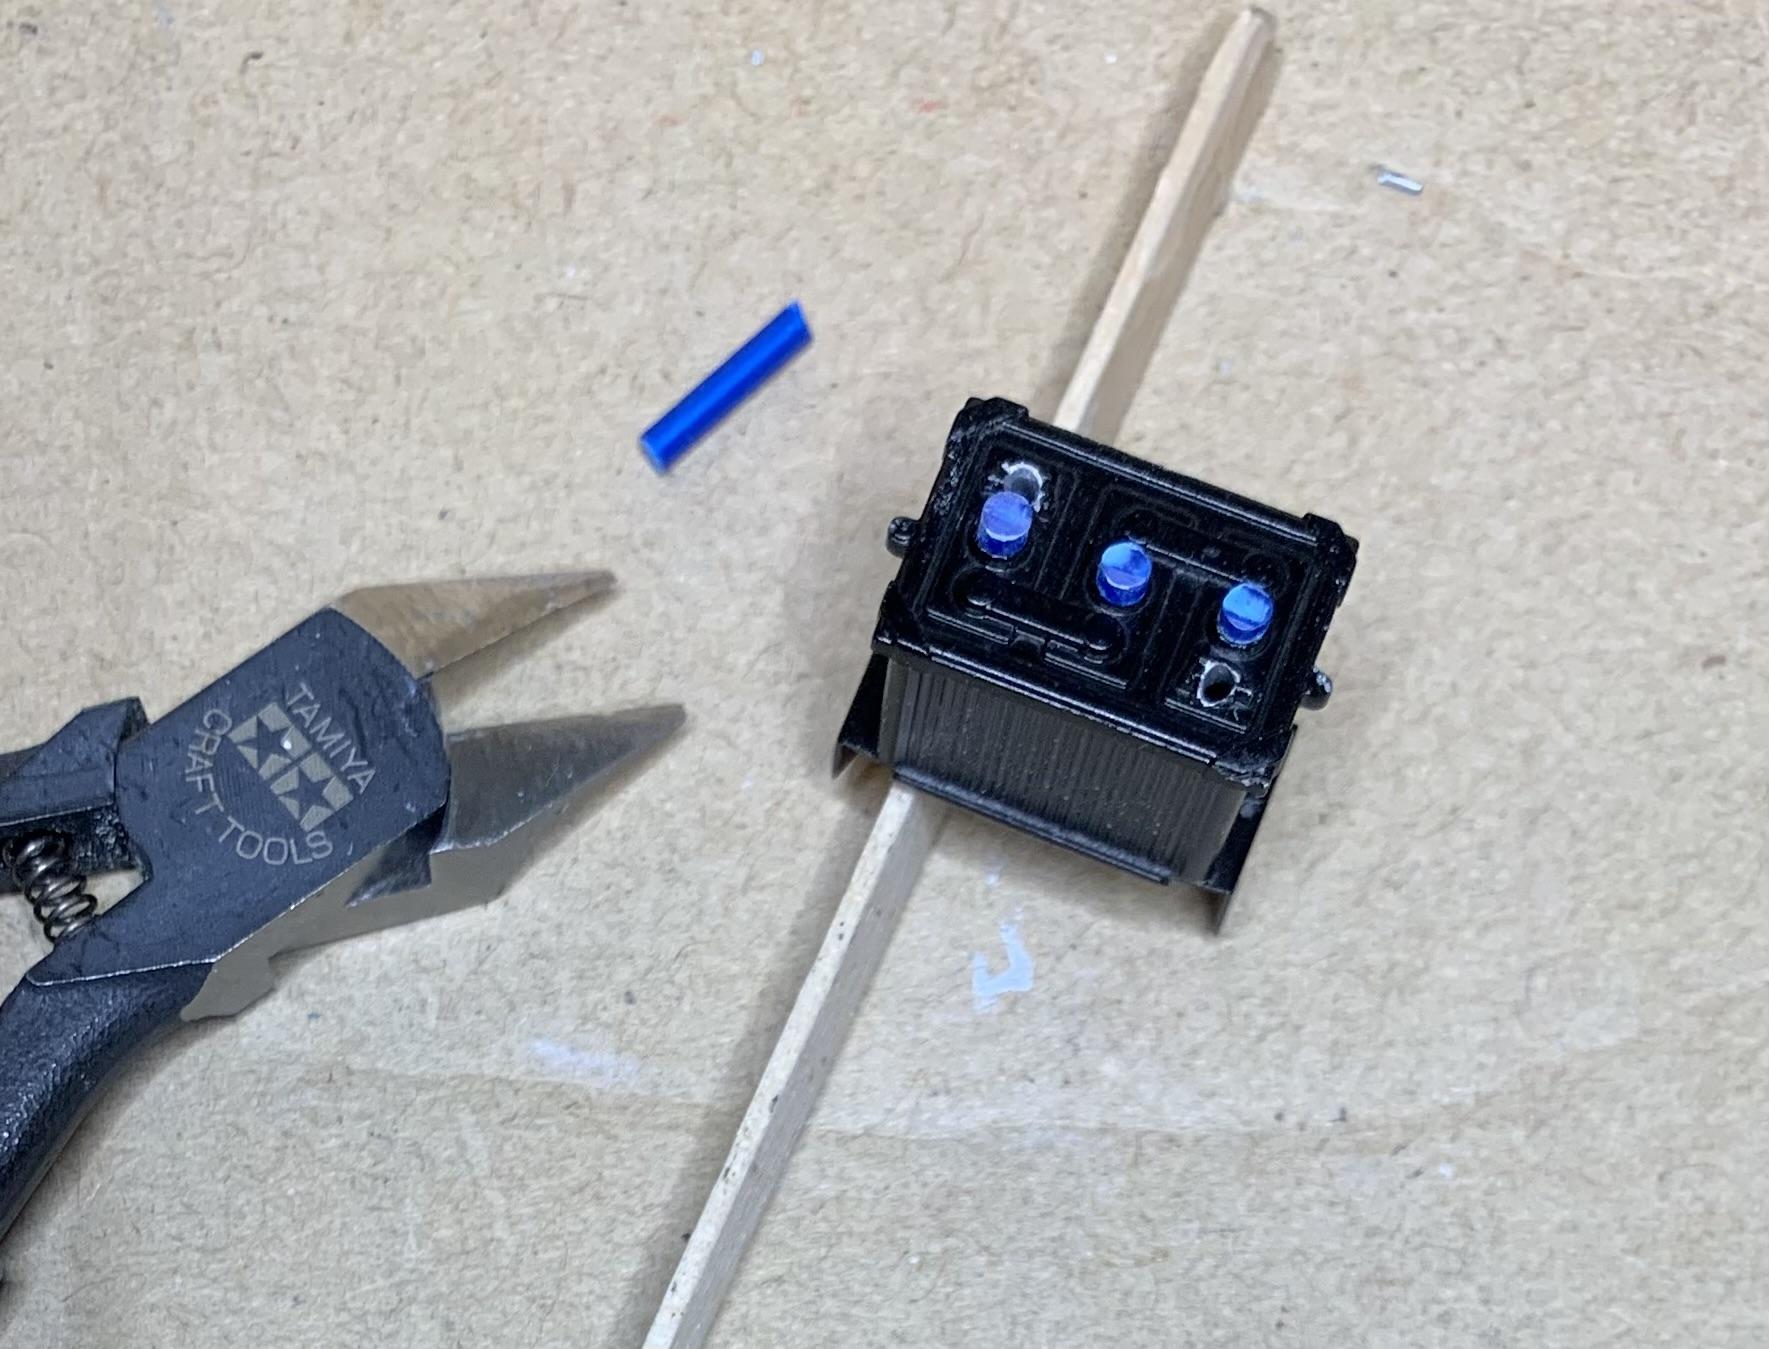
I drilled out the tabs on the voltage regulator and added more Grandt Line bolts to wire it, most go to the generator. Ignore the white glue on the gauges, it dried clear. I started making battery cable ends from styrene. I flattened some 1/24th braided line to get the old style ground cable and made clamps for both from a beer can and more Grandt Line fake nuts and bolts. I used a 1/24th Subaru driveshaft for the caps, perfect size and it's a scrap parts kit, so why not? Here is the battery ready for installation.
-
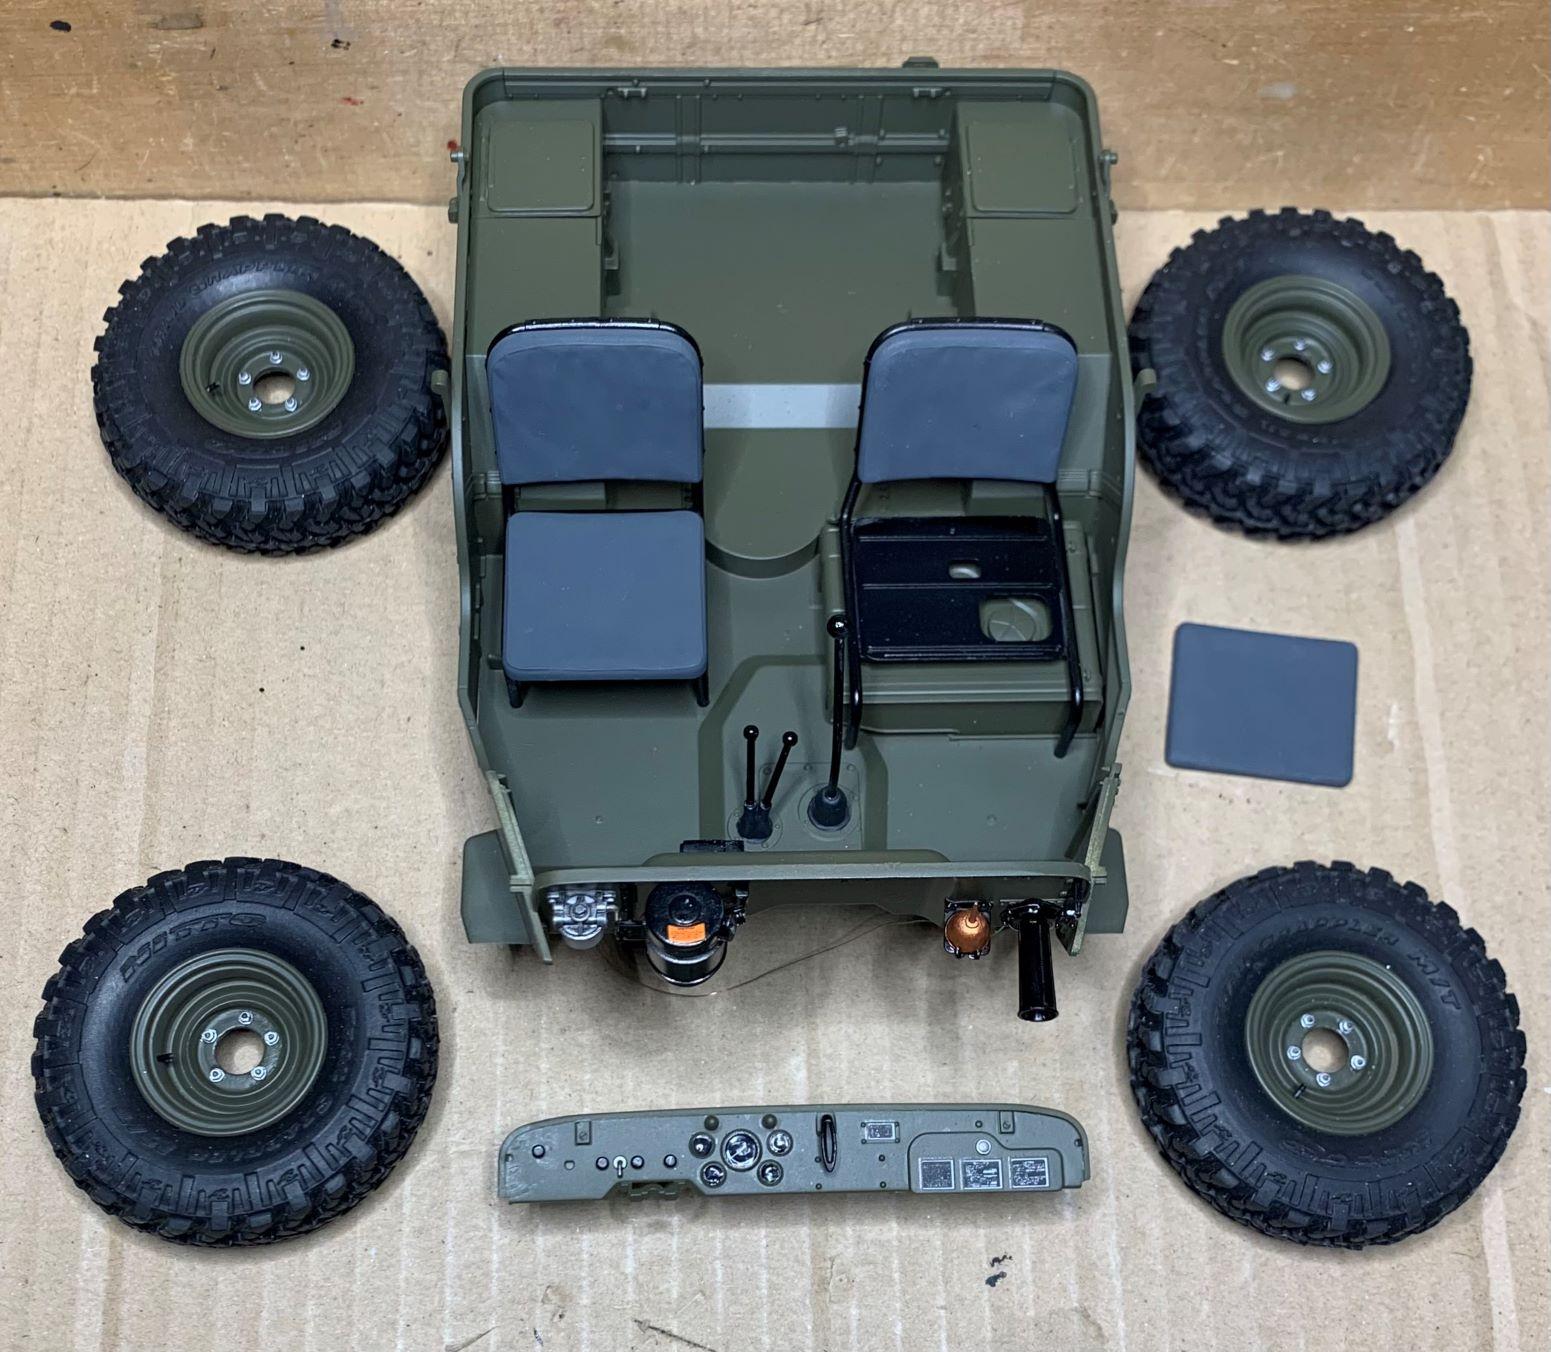
I started to detail the firewall and dashboard as I was getting excited to put it all together! That's an oil can on the firewall, 2 part, painted with Tamiya XF-6 "Copper" and the decal on the air filter is from my 1/25th spares. Seats are multi piece and I airbrushed the frames in semi-gloss black, the cushions in Tamiya XF-63 "German Grey". As always, mixed 50/50 at 20 psi Shifters are rubber black, semi-gloss black, and gloss black from bottom to top. There's even a separate floor starter button!
-
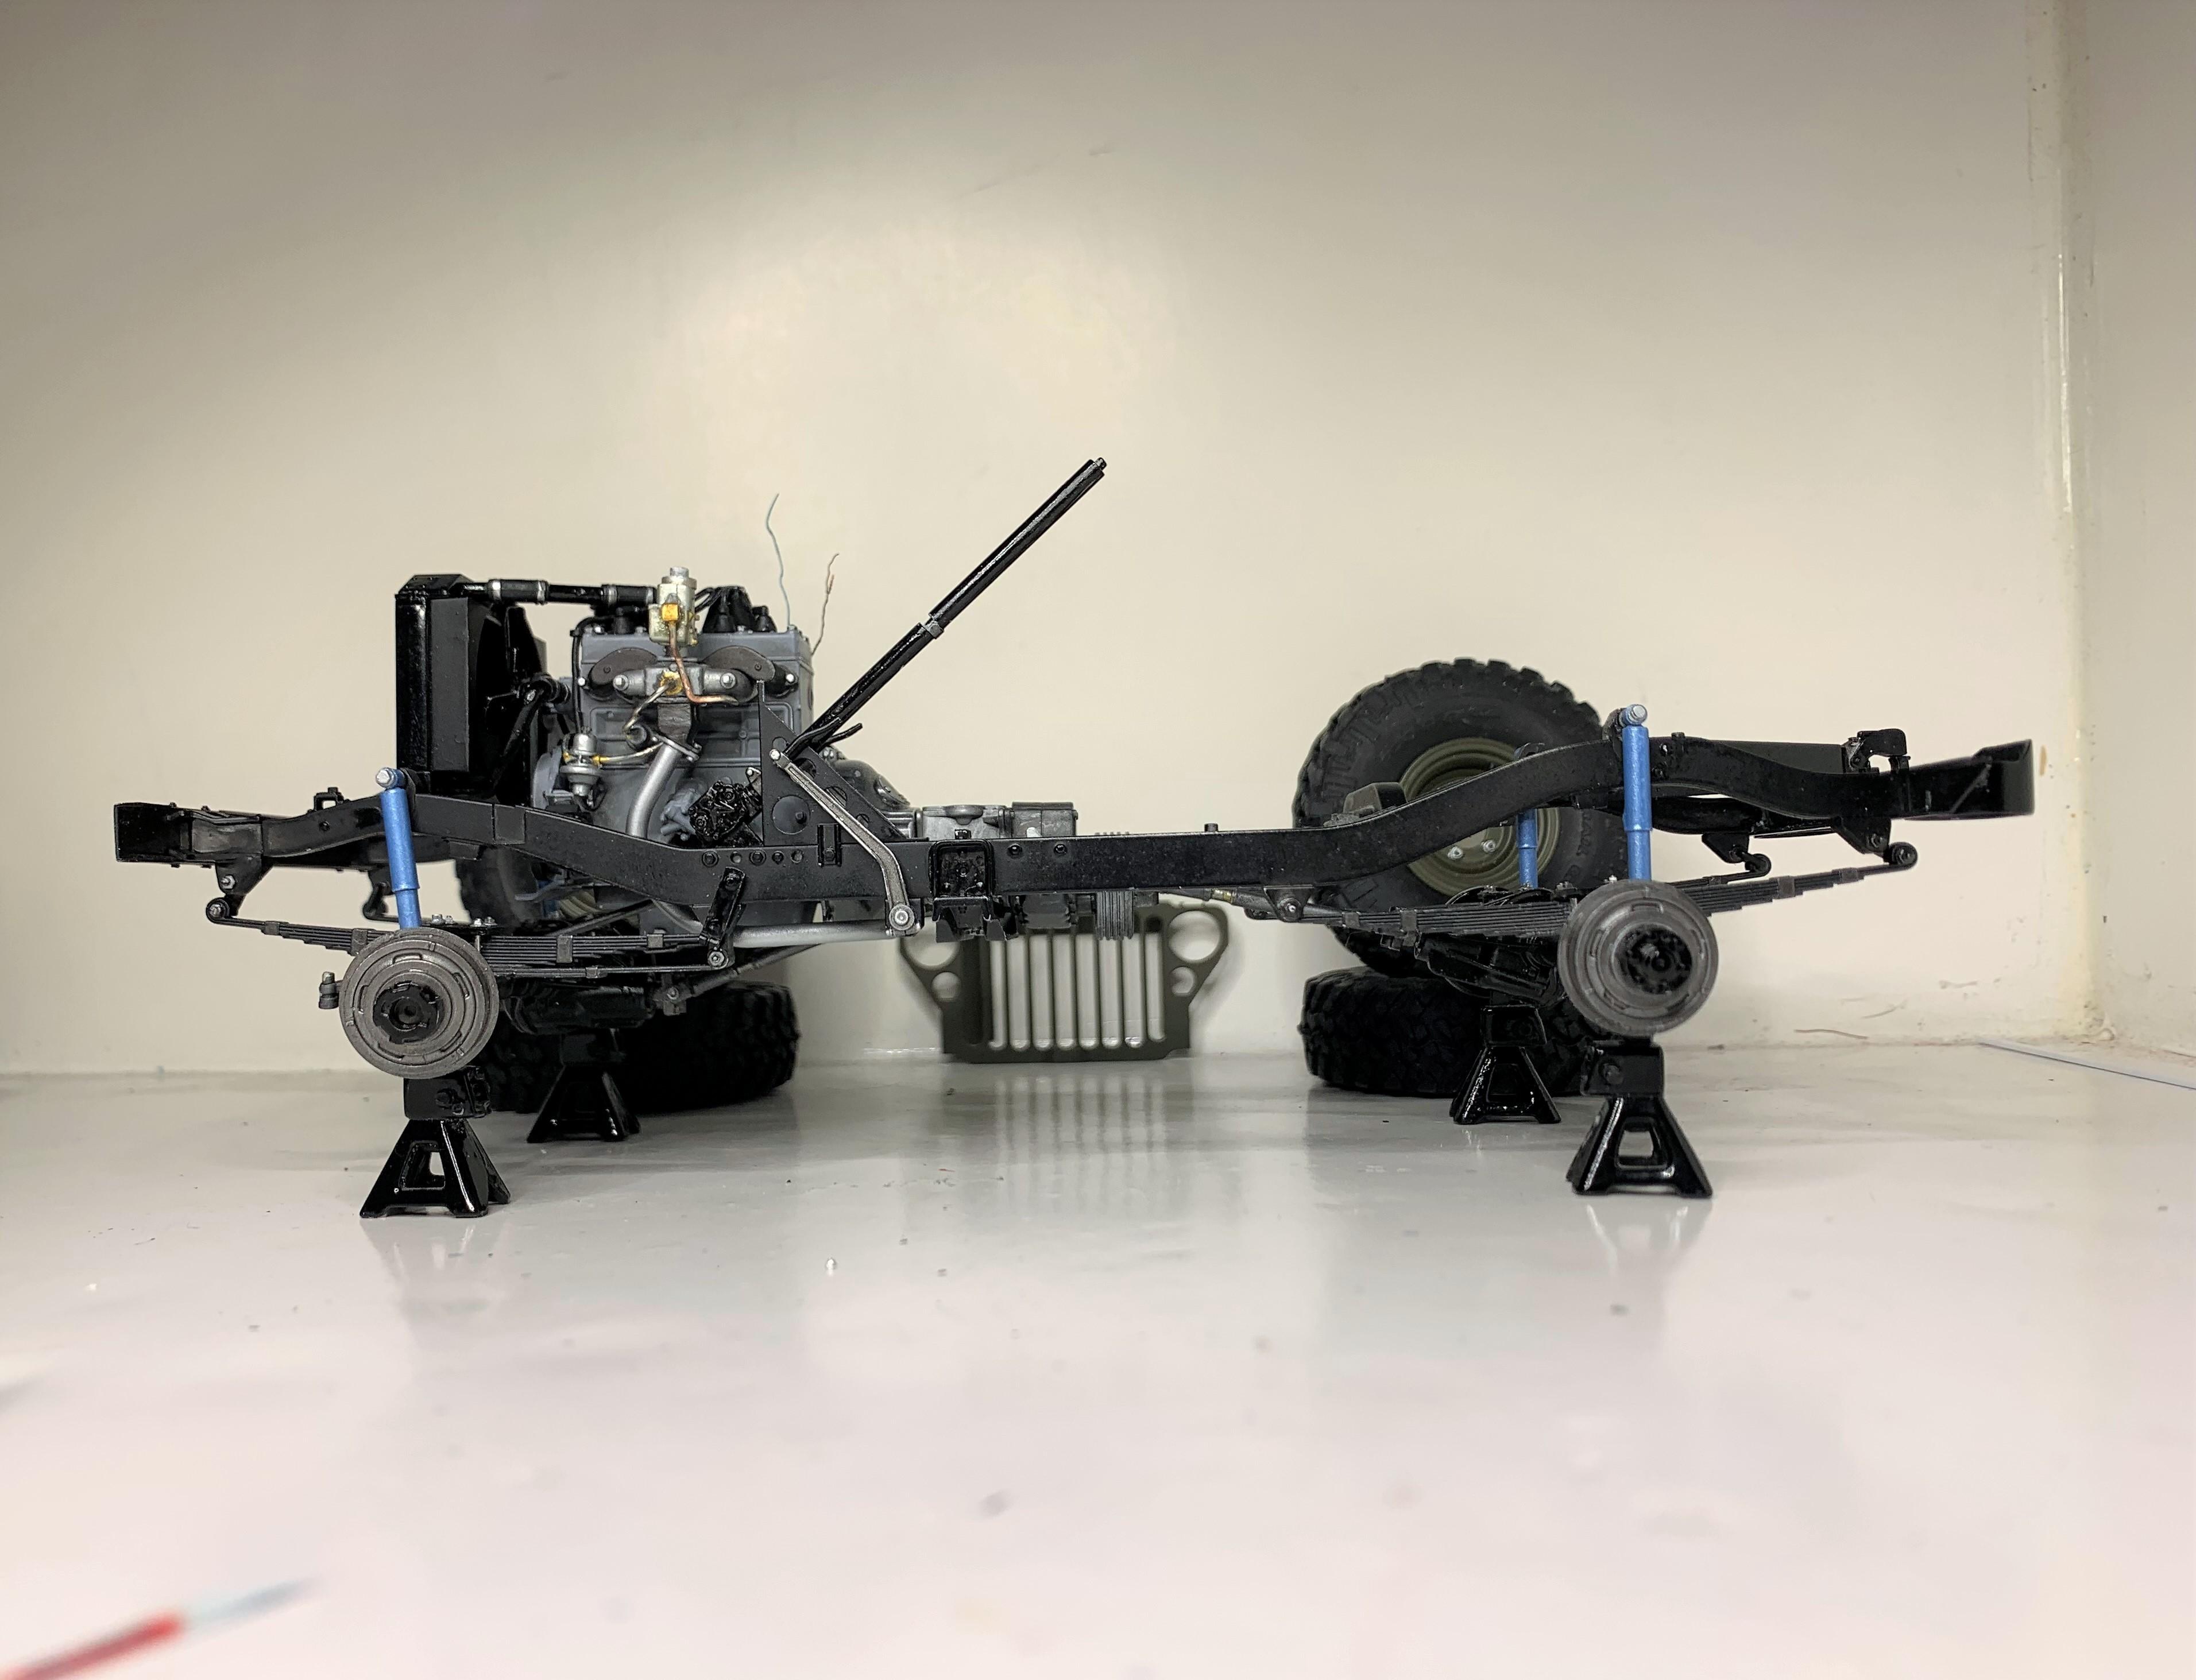
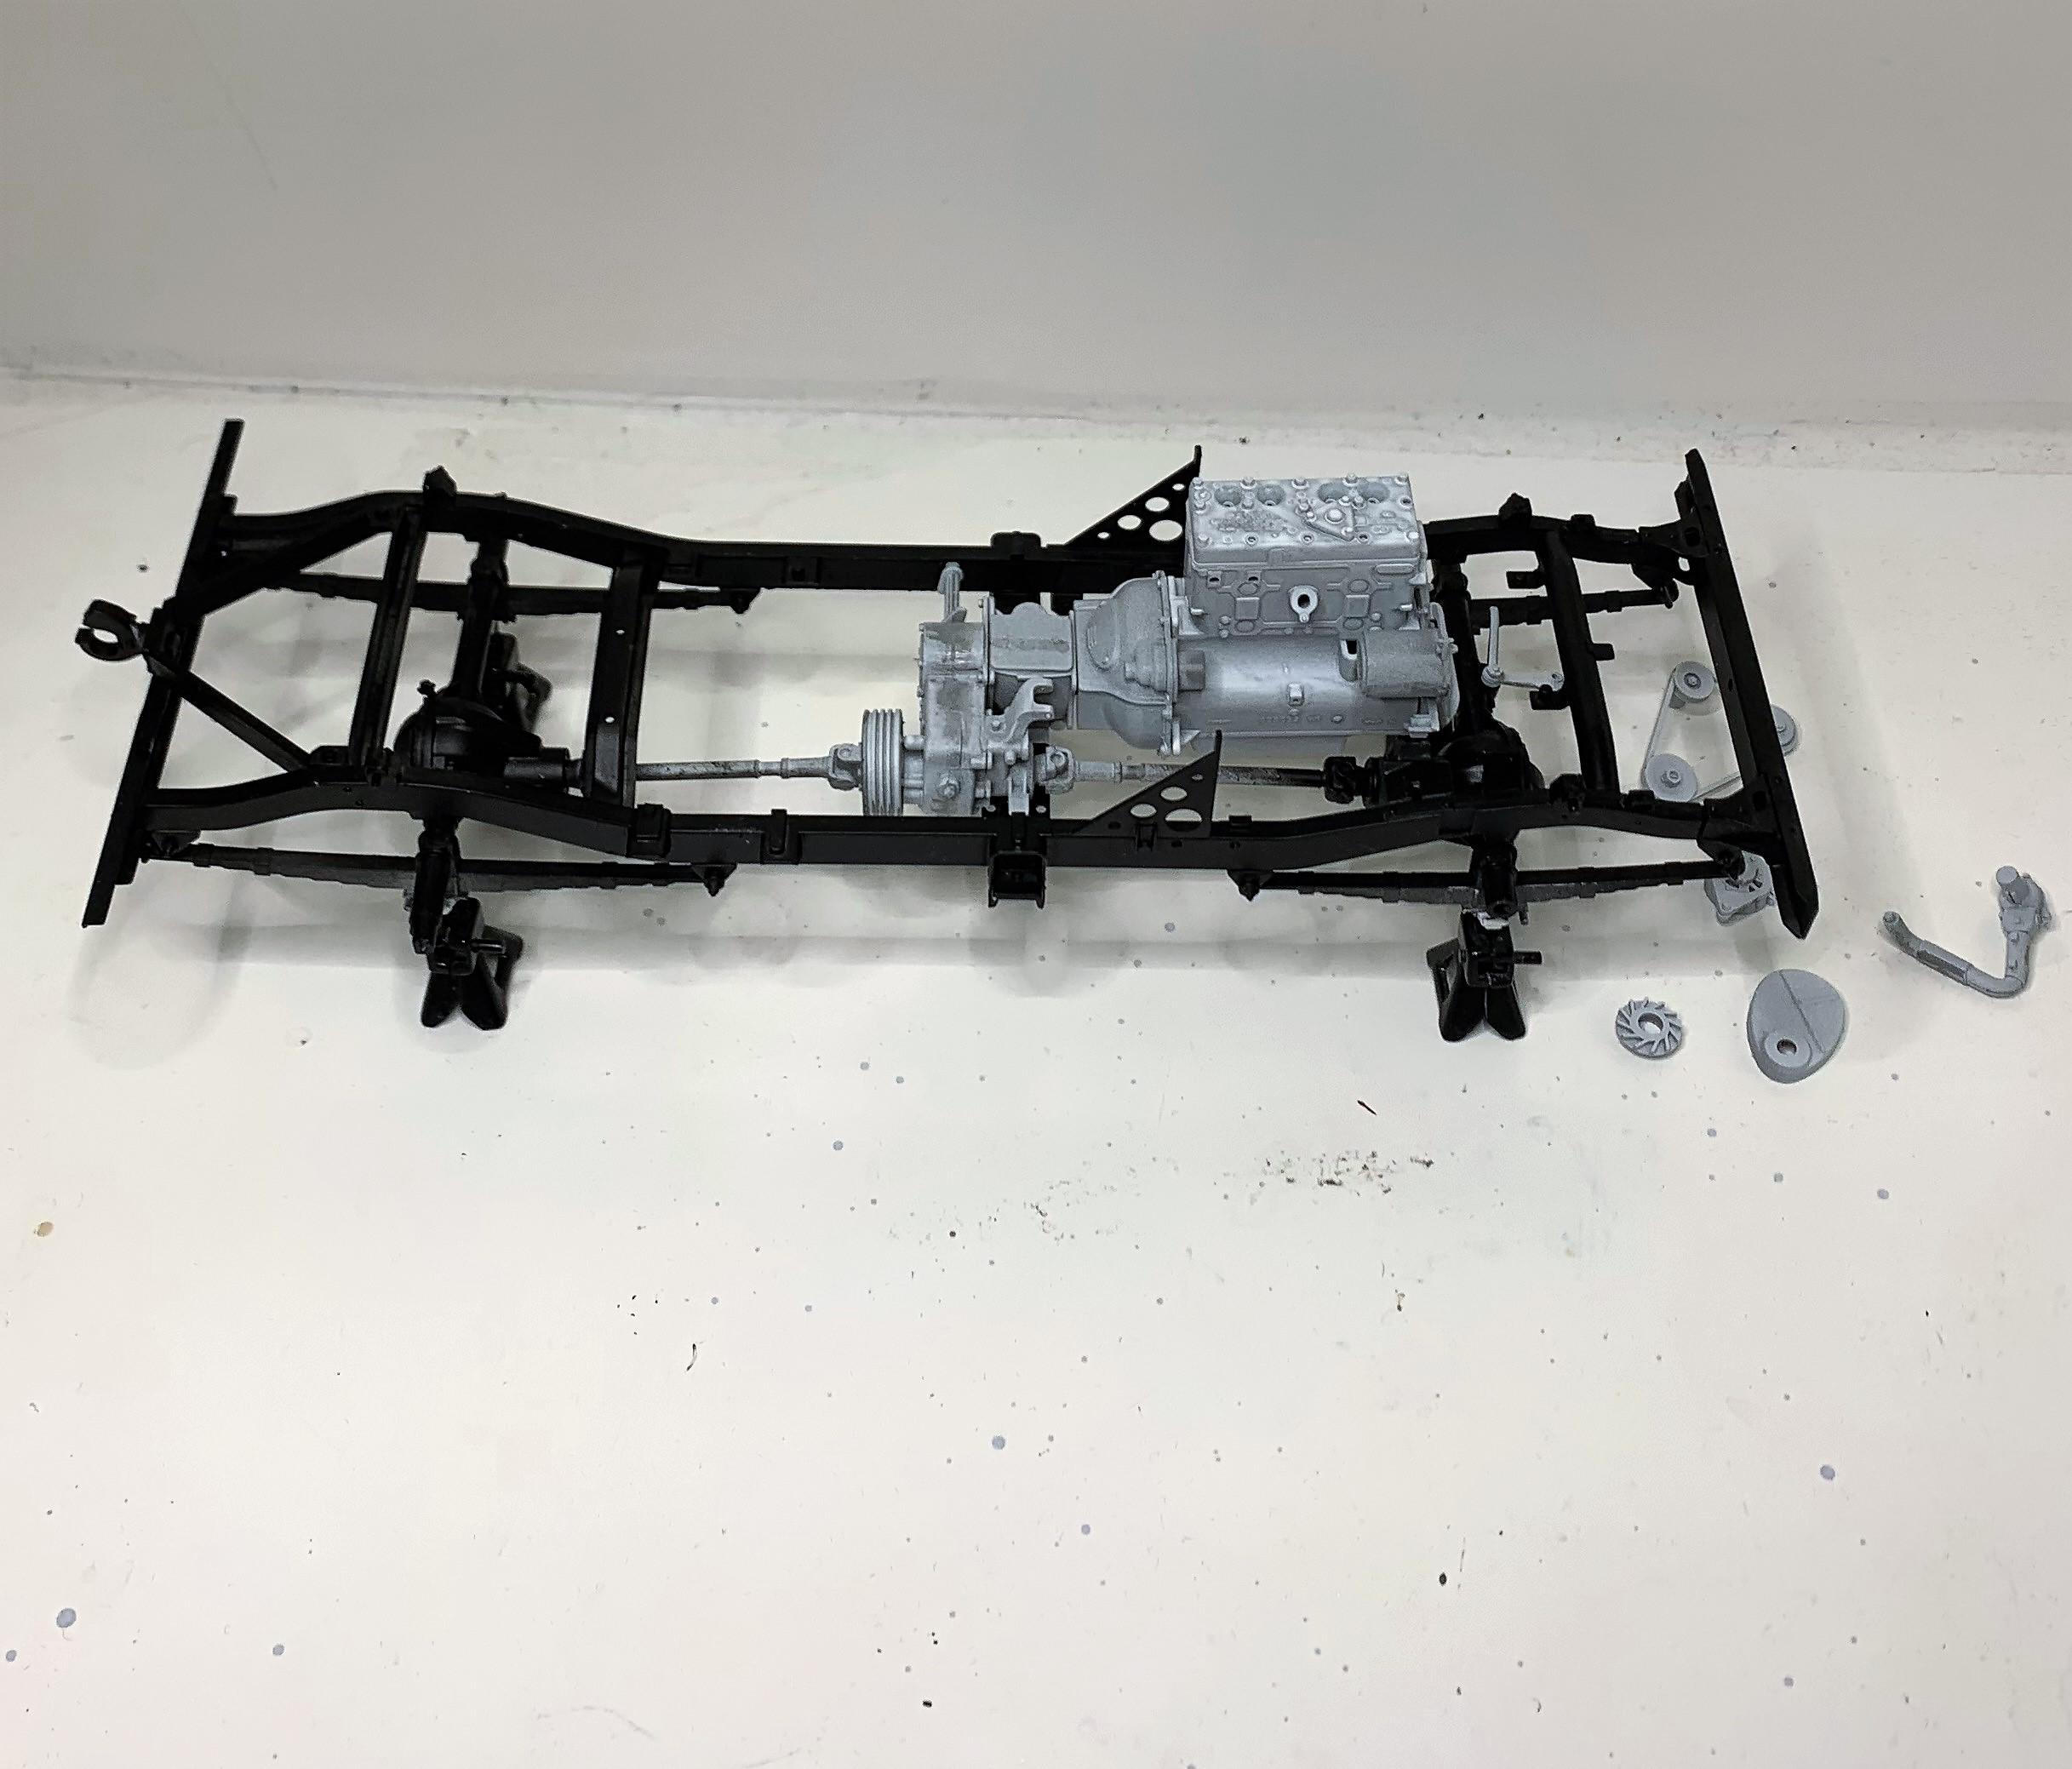
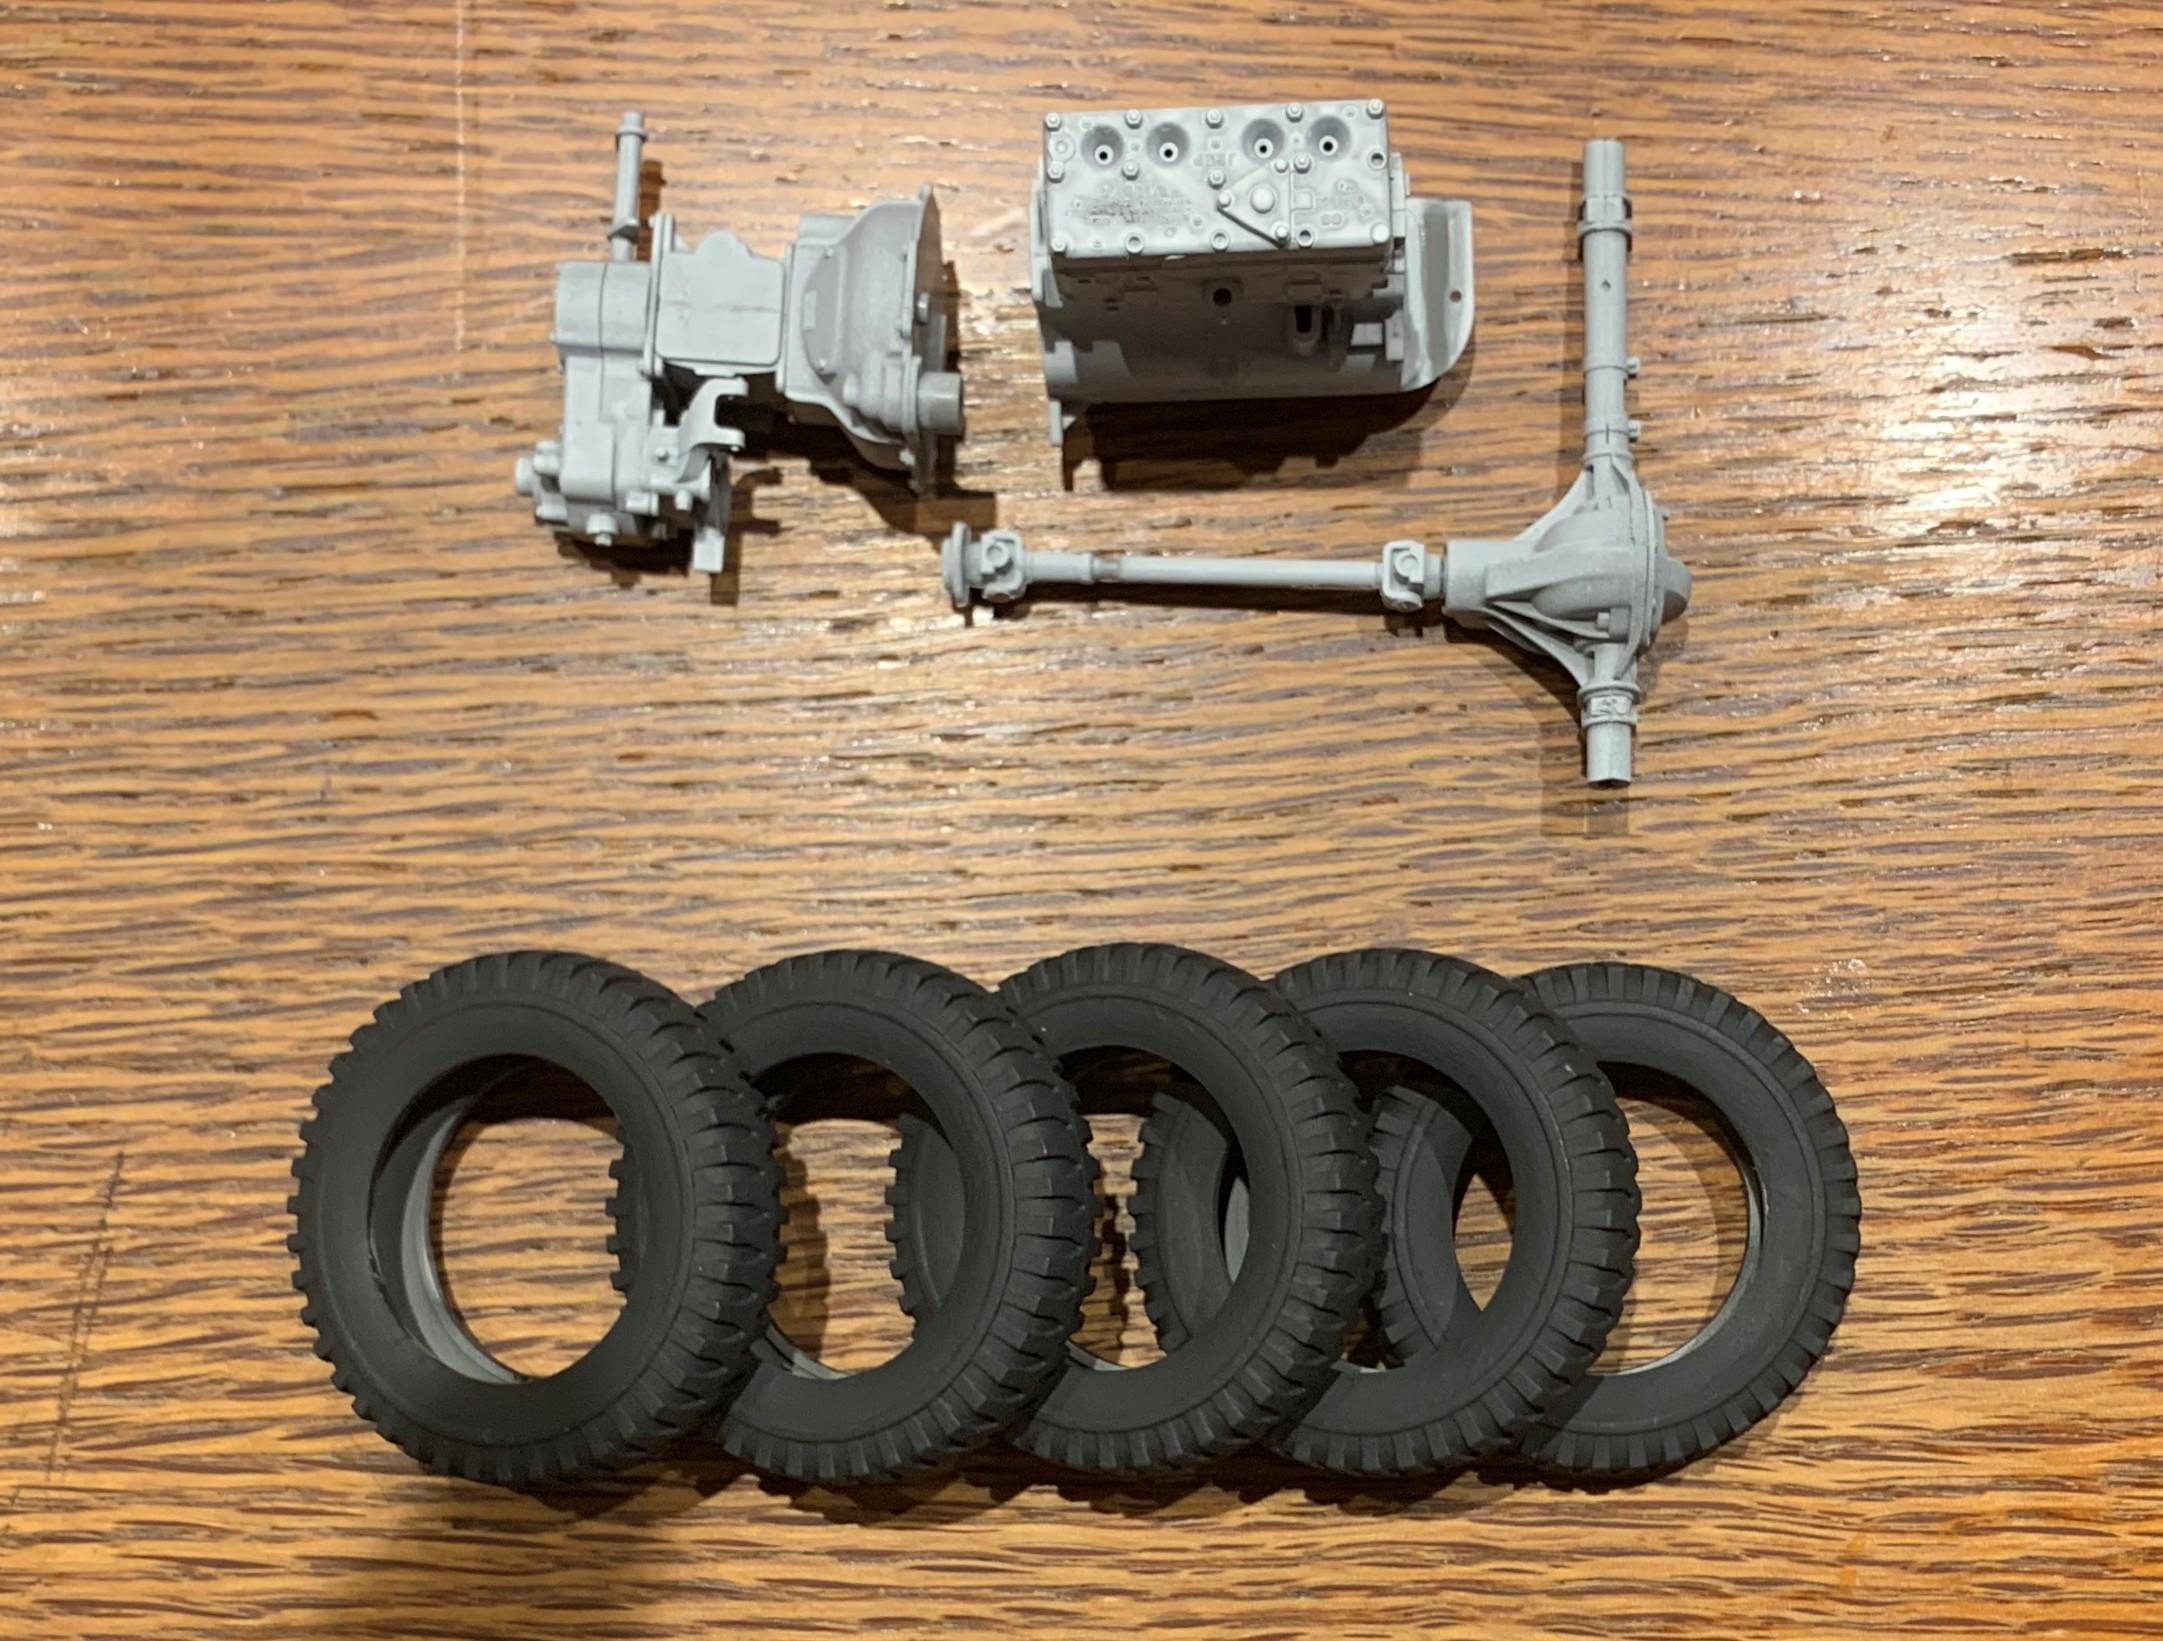
I glued the engine, transmission and transfer case into the frame and it's starting to look like something. There's so much kit detail provided, look at the pedal mechanism, and one on the other side of the frame rail too! I test fitted the body, the sides, rear, firewall and cowl are not glued, just pressed together, that's how well they're molded! Pedal arms come through the floor, so you can't glue the pedals on before the floor is on. You can't glue the firewall in after the body sides are on, and you can't fit the body to the chassis IF the firewall in on, so be patient and follow the instructions! At least this part! LOL
-
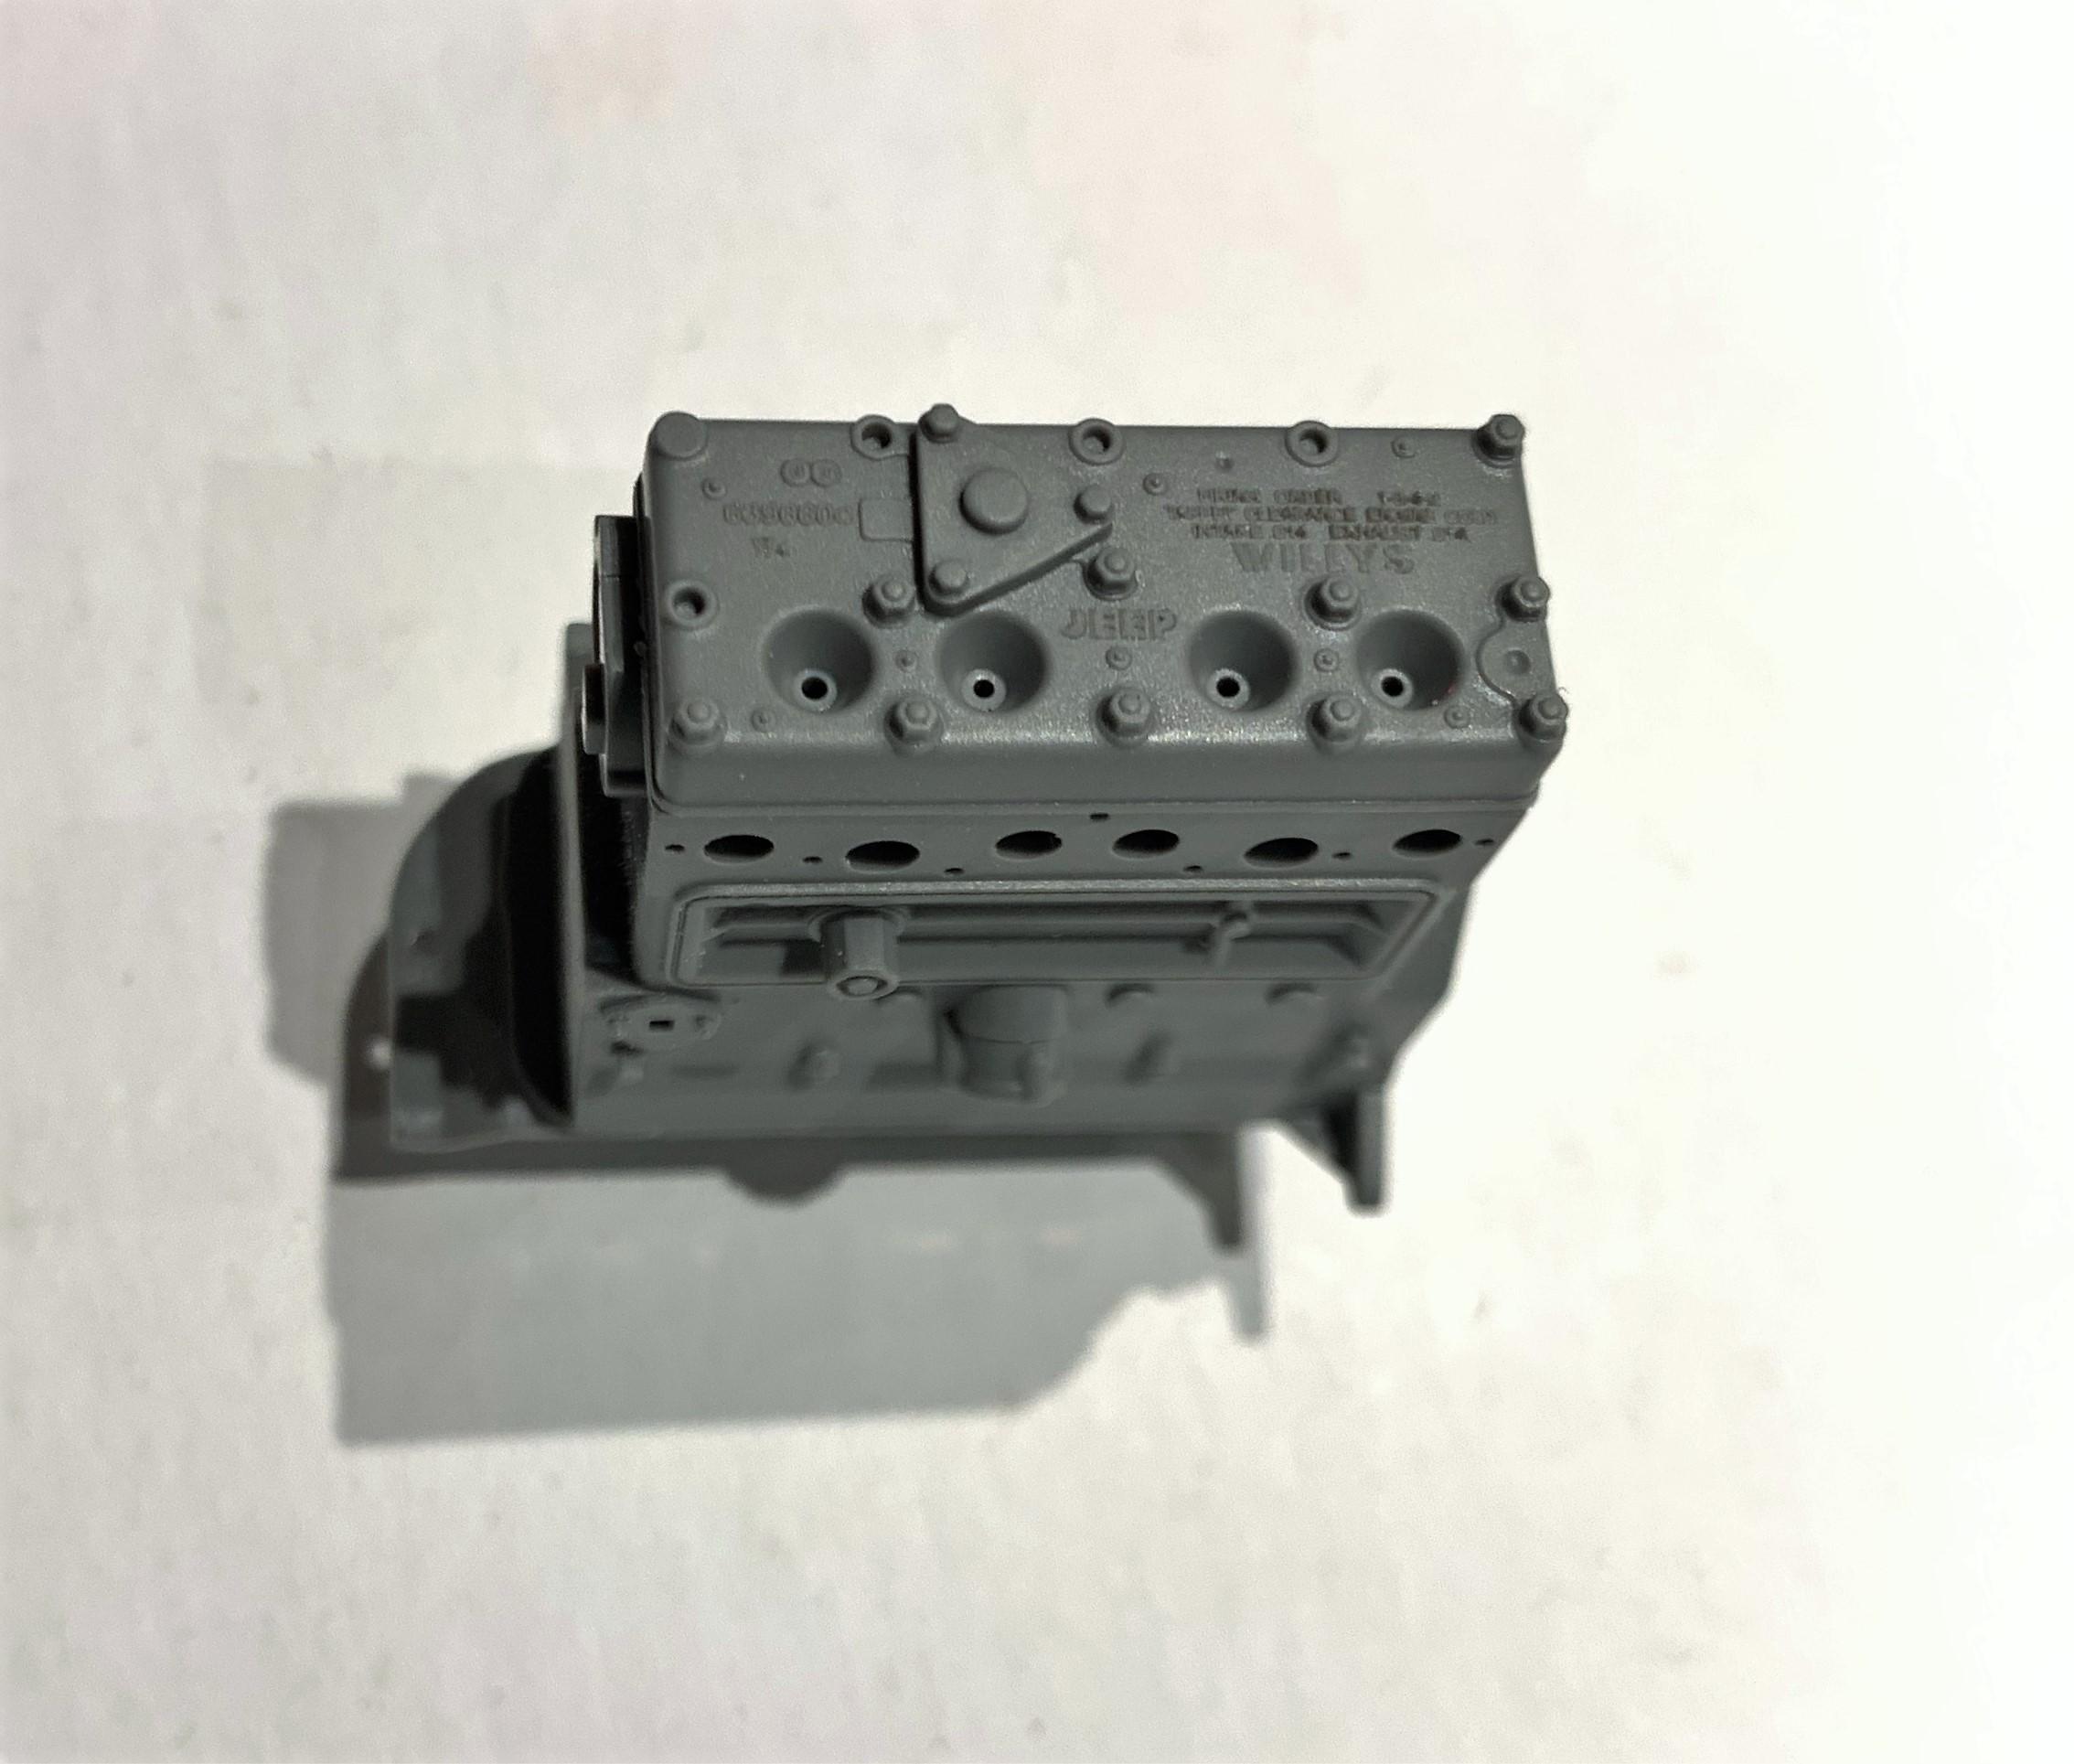
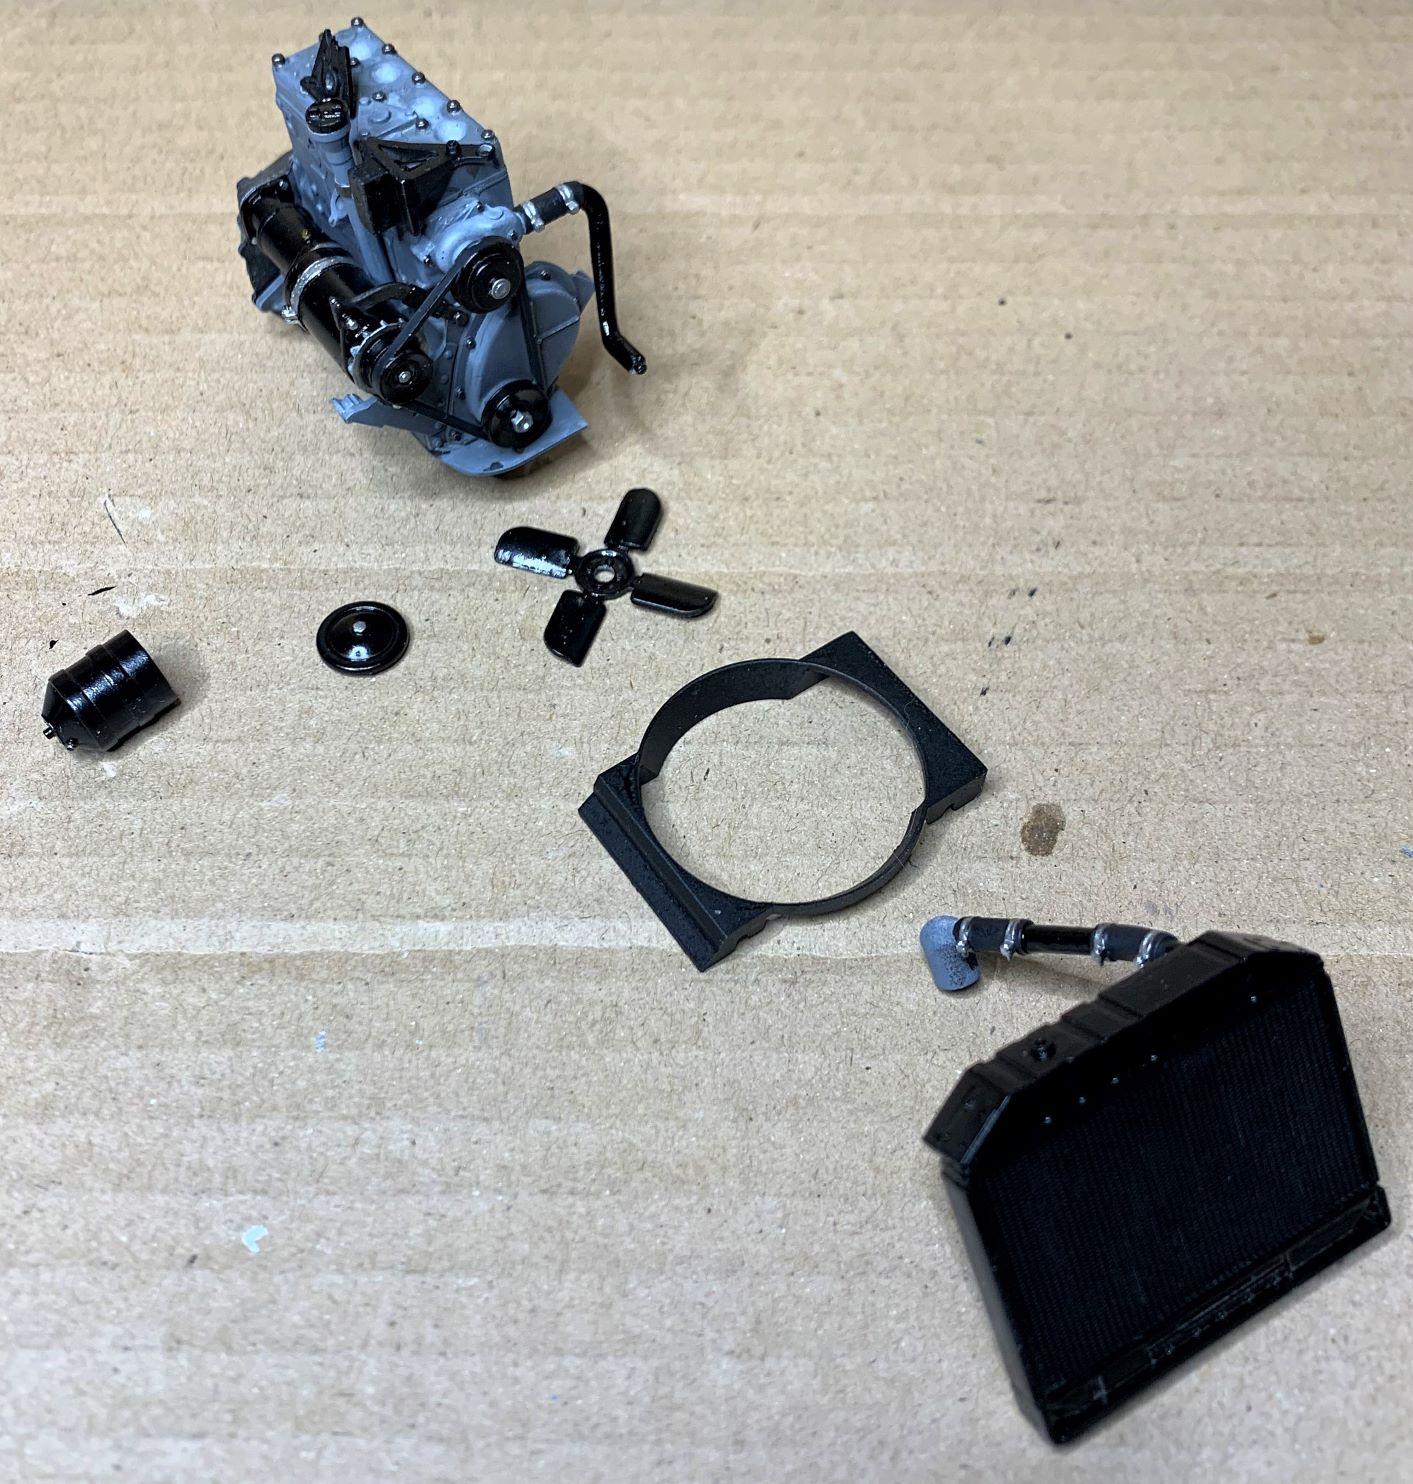
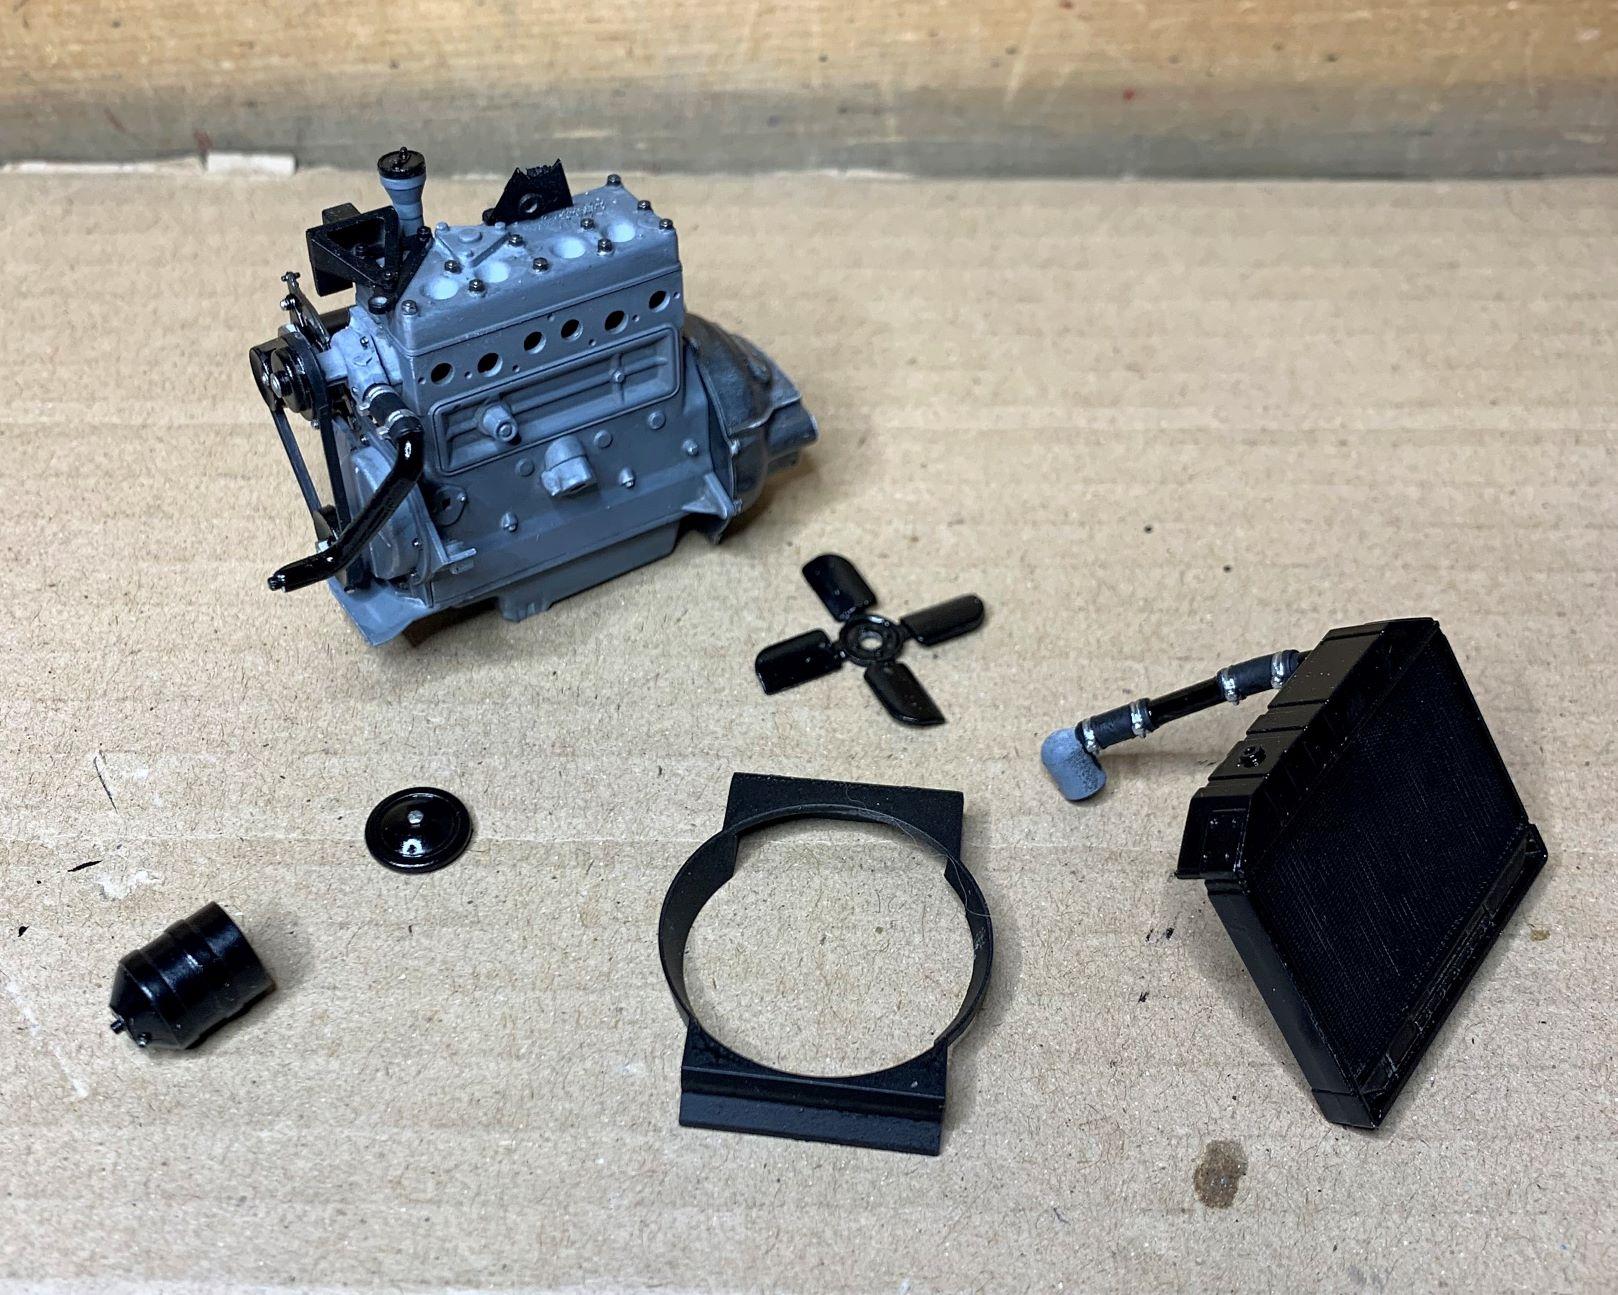
That little engine is a masterpiece of styrene from a commercial kit, wow! So may pieces, all molded so crisply and the fit is perfect! I added fuel lines and plug wires, but I put the wires over that thing on the head, found out later, they should've gone through the hole, lower down.
-
The rims fit the tires so well that I had to glue the backs on after I stuffed the tires with foam scraps, so I had to mask and re-spray the backs! Then I needed to cut off part of the gas tank under the floor for tire clearance. It's all going to work out though, check out some of this kits parts, wow, such great detail. Multi piece body, each front fender was 2 parts! I glued the hood hinge to the cowl. Even the gas tank is multi piece with great realism right out of the box!
-
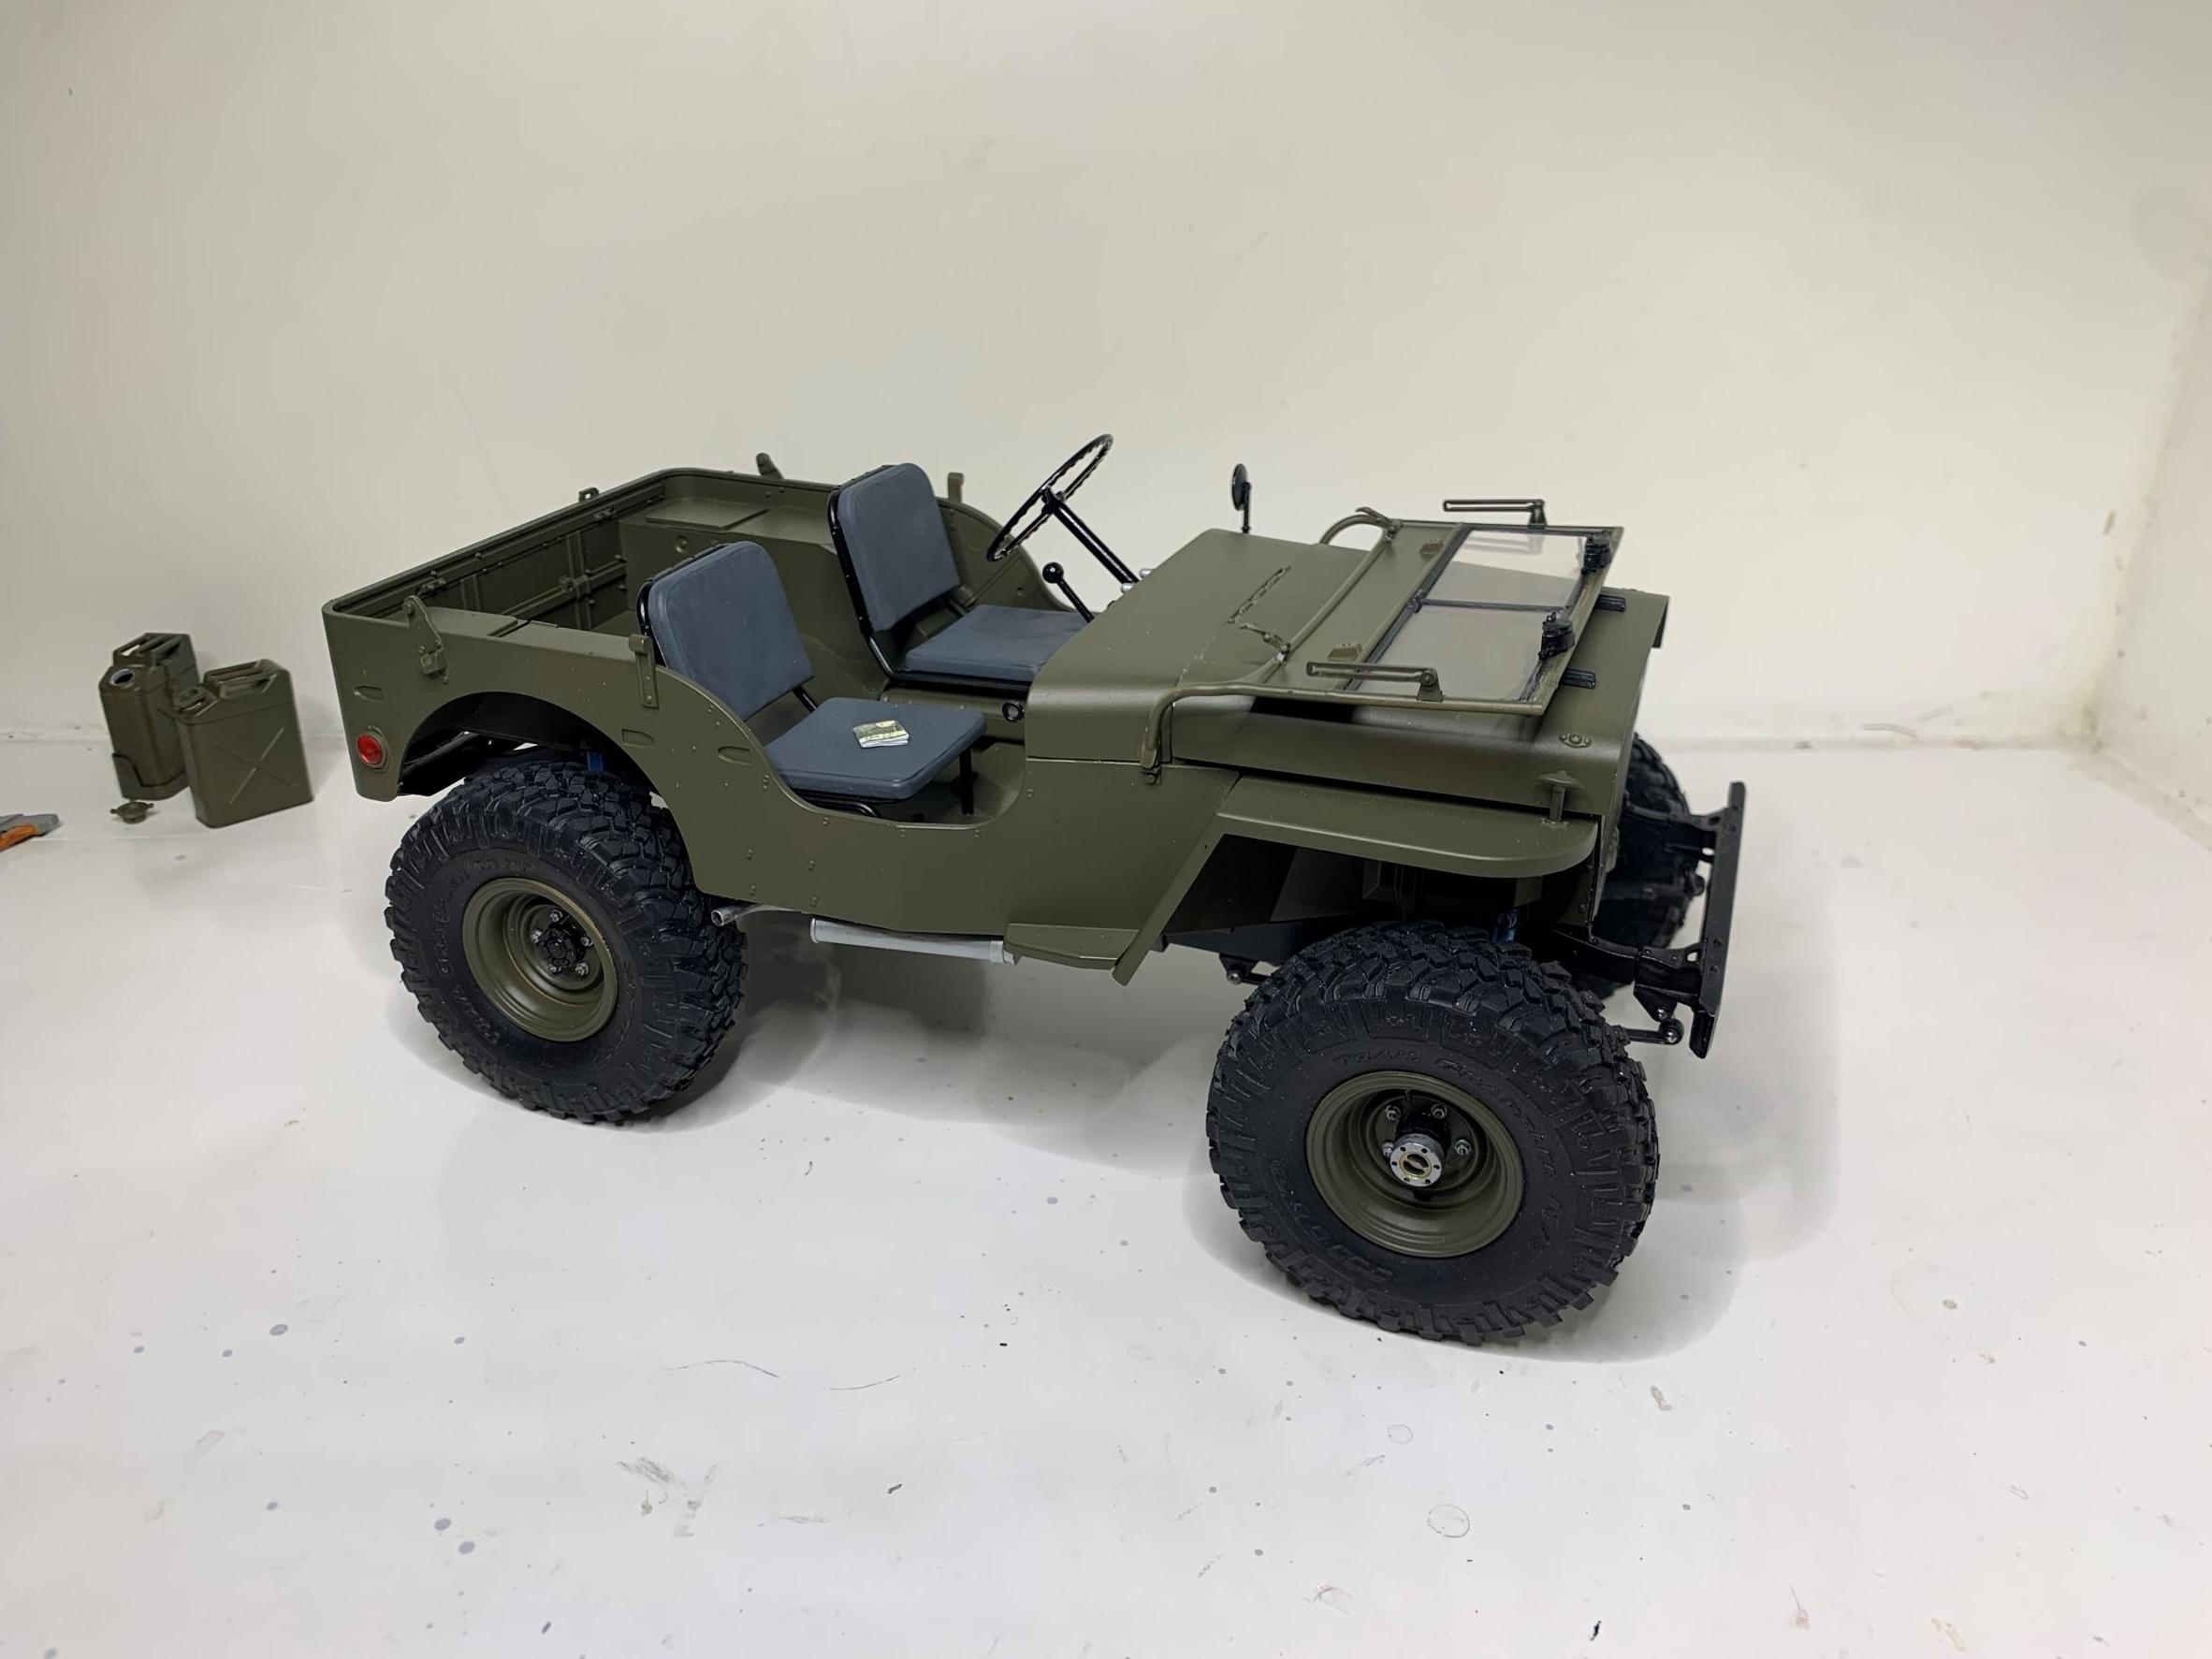
The 2 part tires do look remarkably good, no seam shows. Yeah I've seen those videos and more, plus I used to have a Flat Fender Jeep! I don't build military models so I wasn't quite sure if this kit could be built as a cool flat fender, but I'm trying! The military body is quite different than a CJ2A, so I'm leaving all the extra bits off, making it a stripped down, but totally restored Jeep.
-
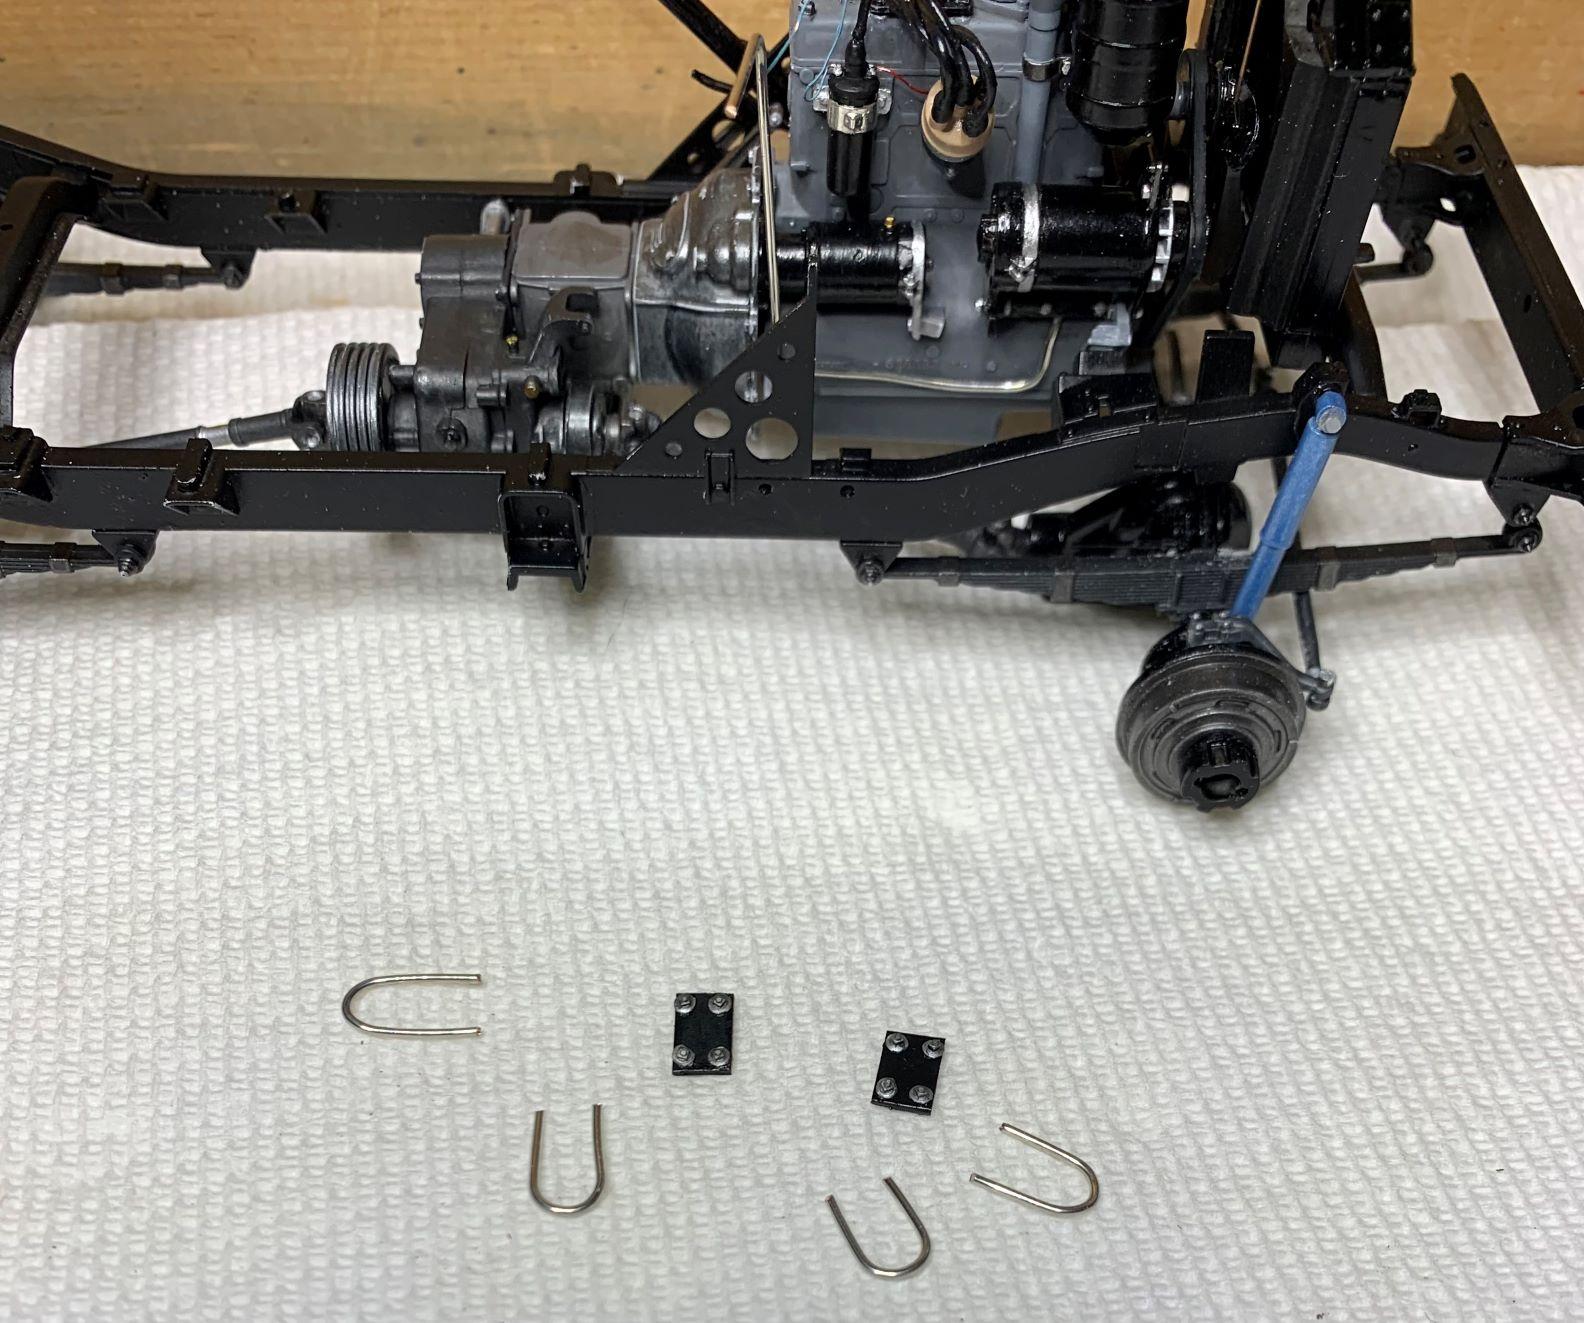
Of course now I'll need to make U-bolts and mounting plates to hold the axles to the springs! 20 gauge beading wire from Michael's bent around the axle, then cut to length for the U-bolts, and .015 styrene for the plates, with Grandt Line (from the railroad section) nuts worked.
-
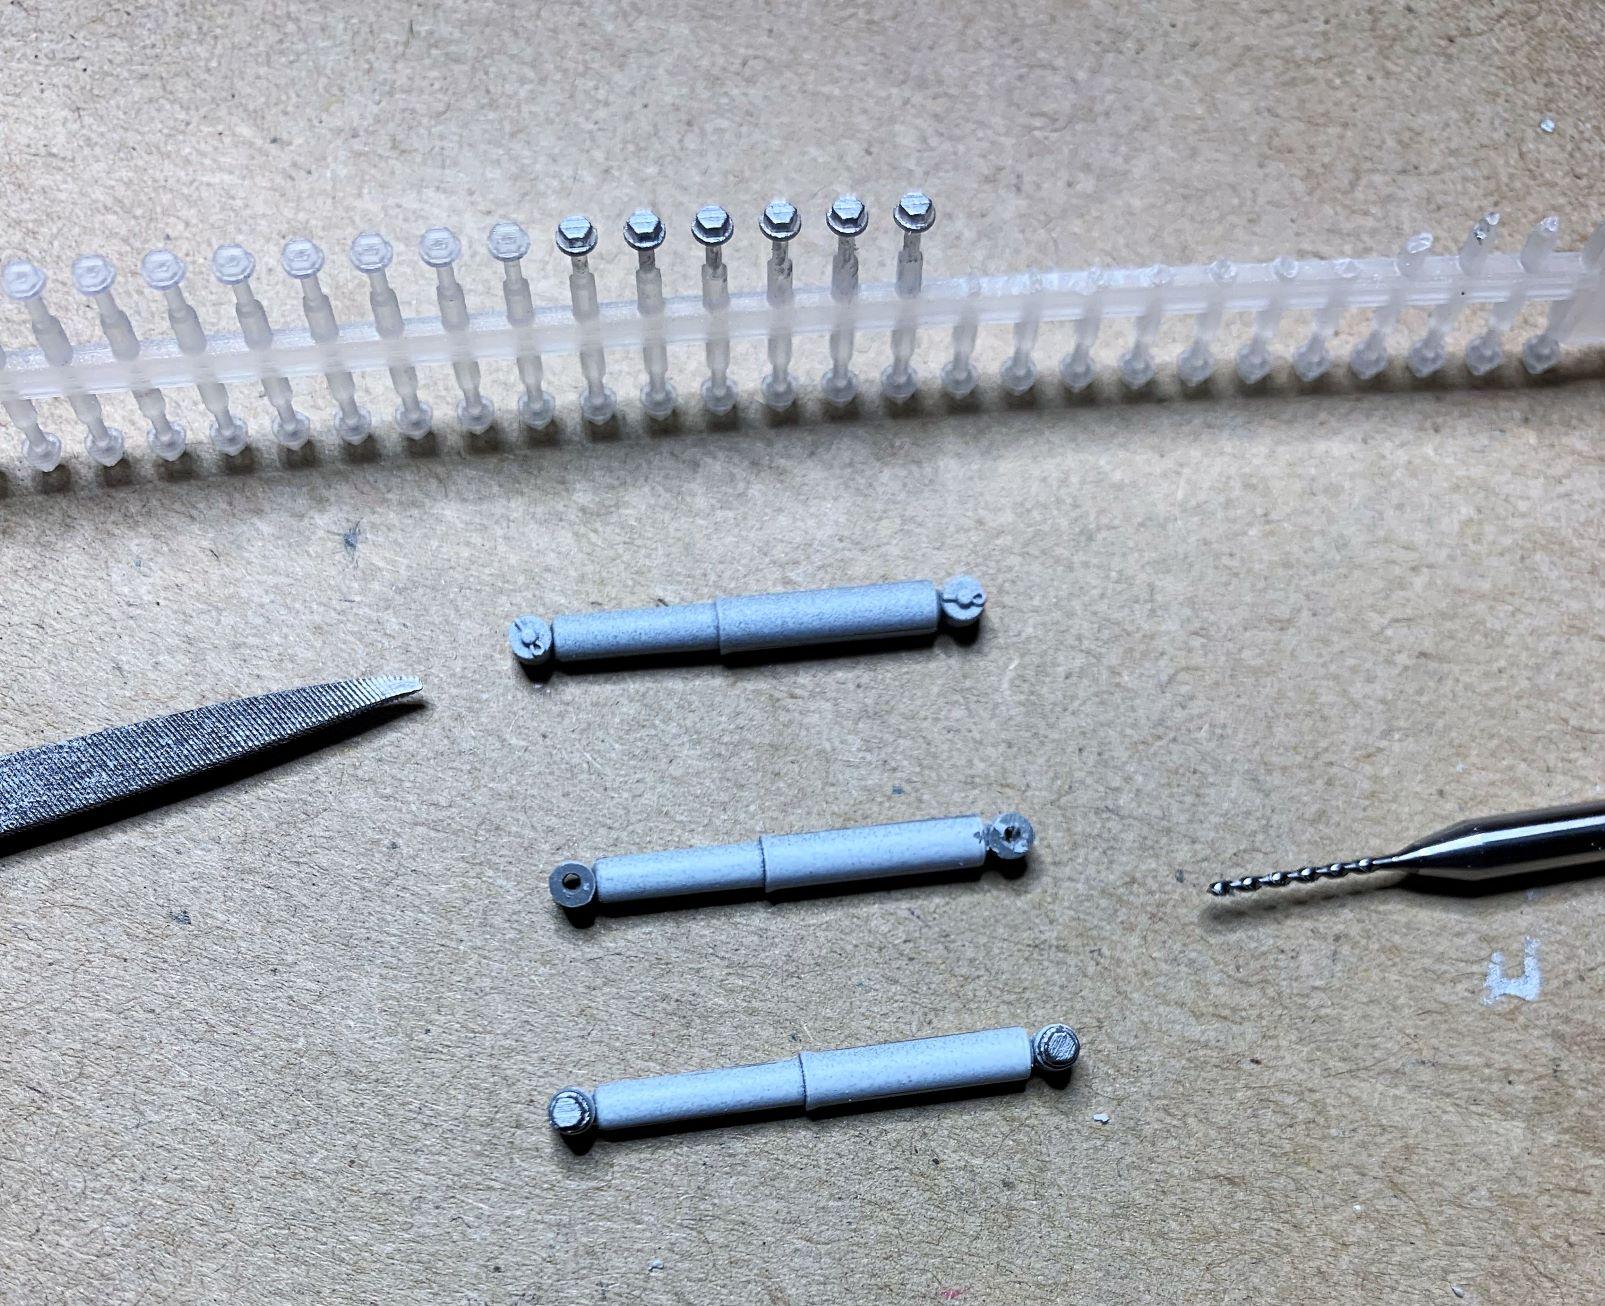
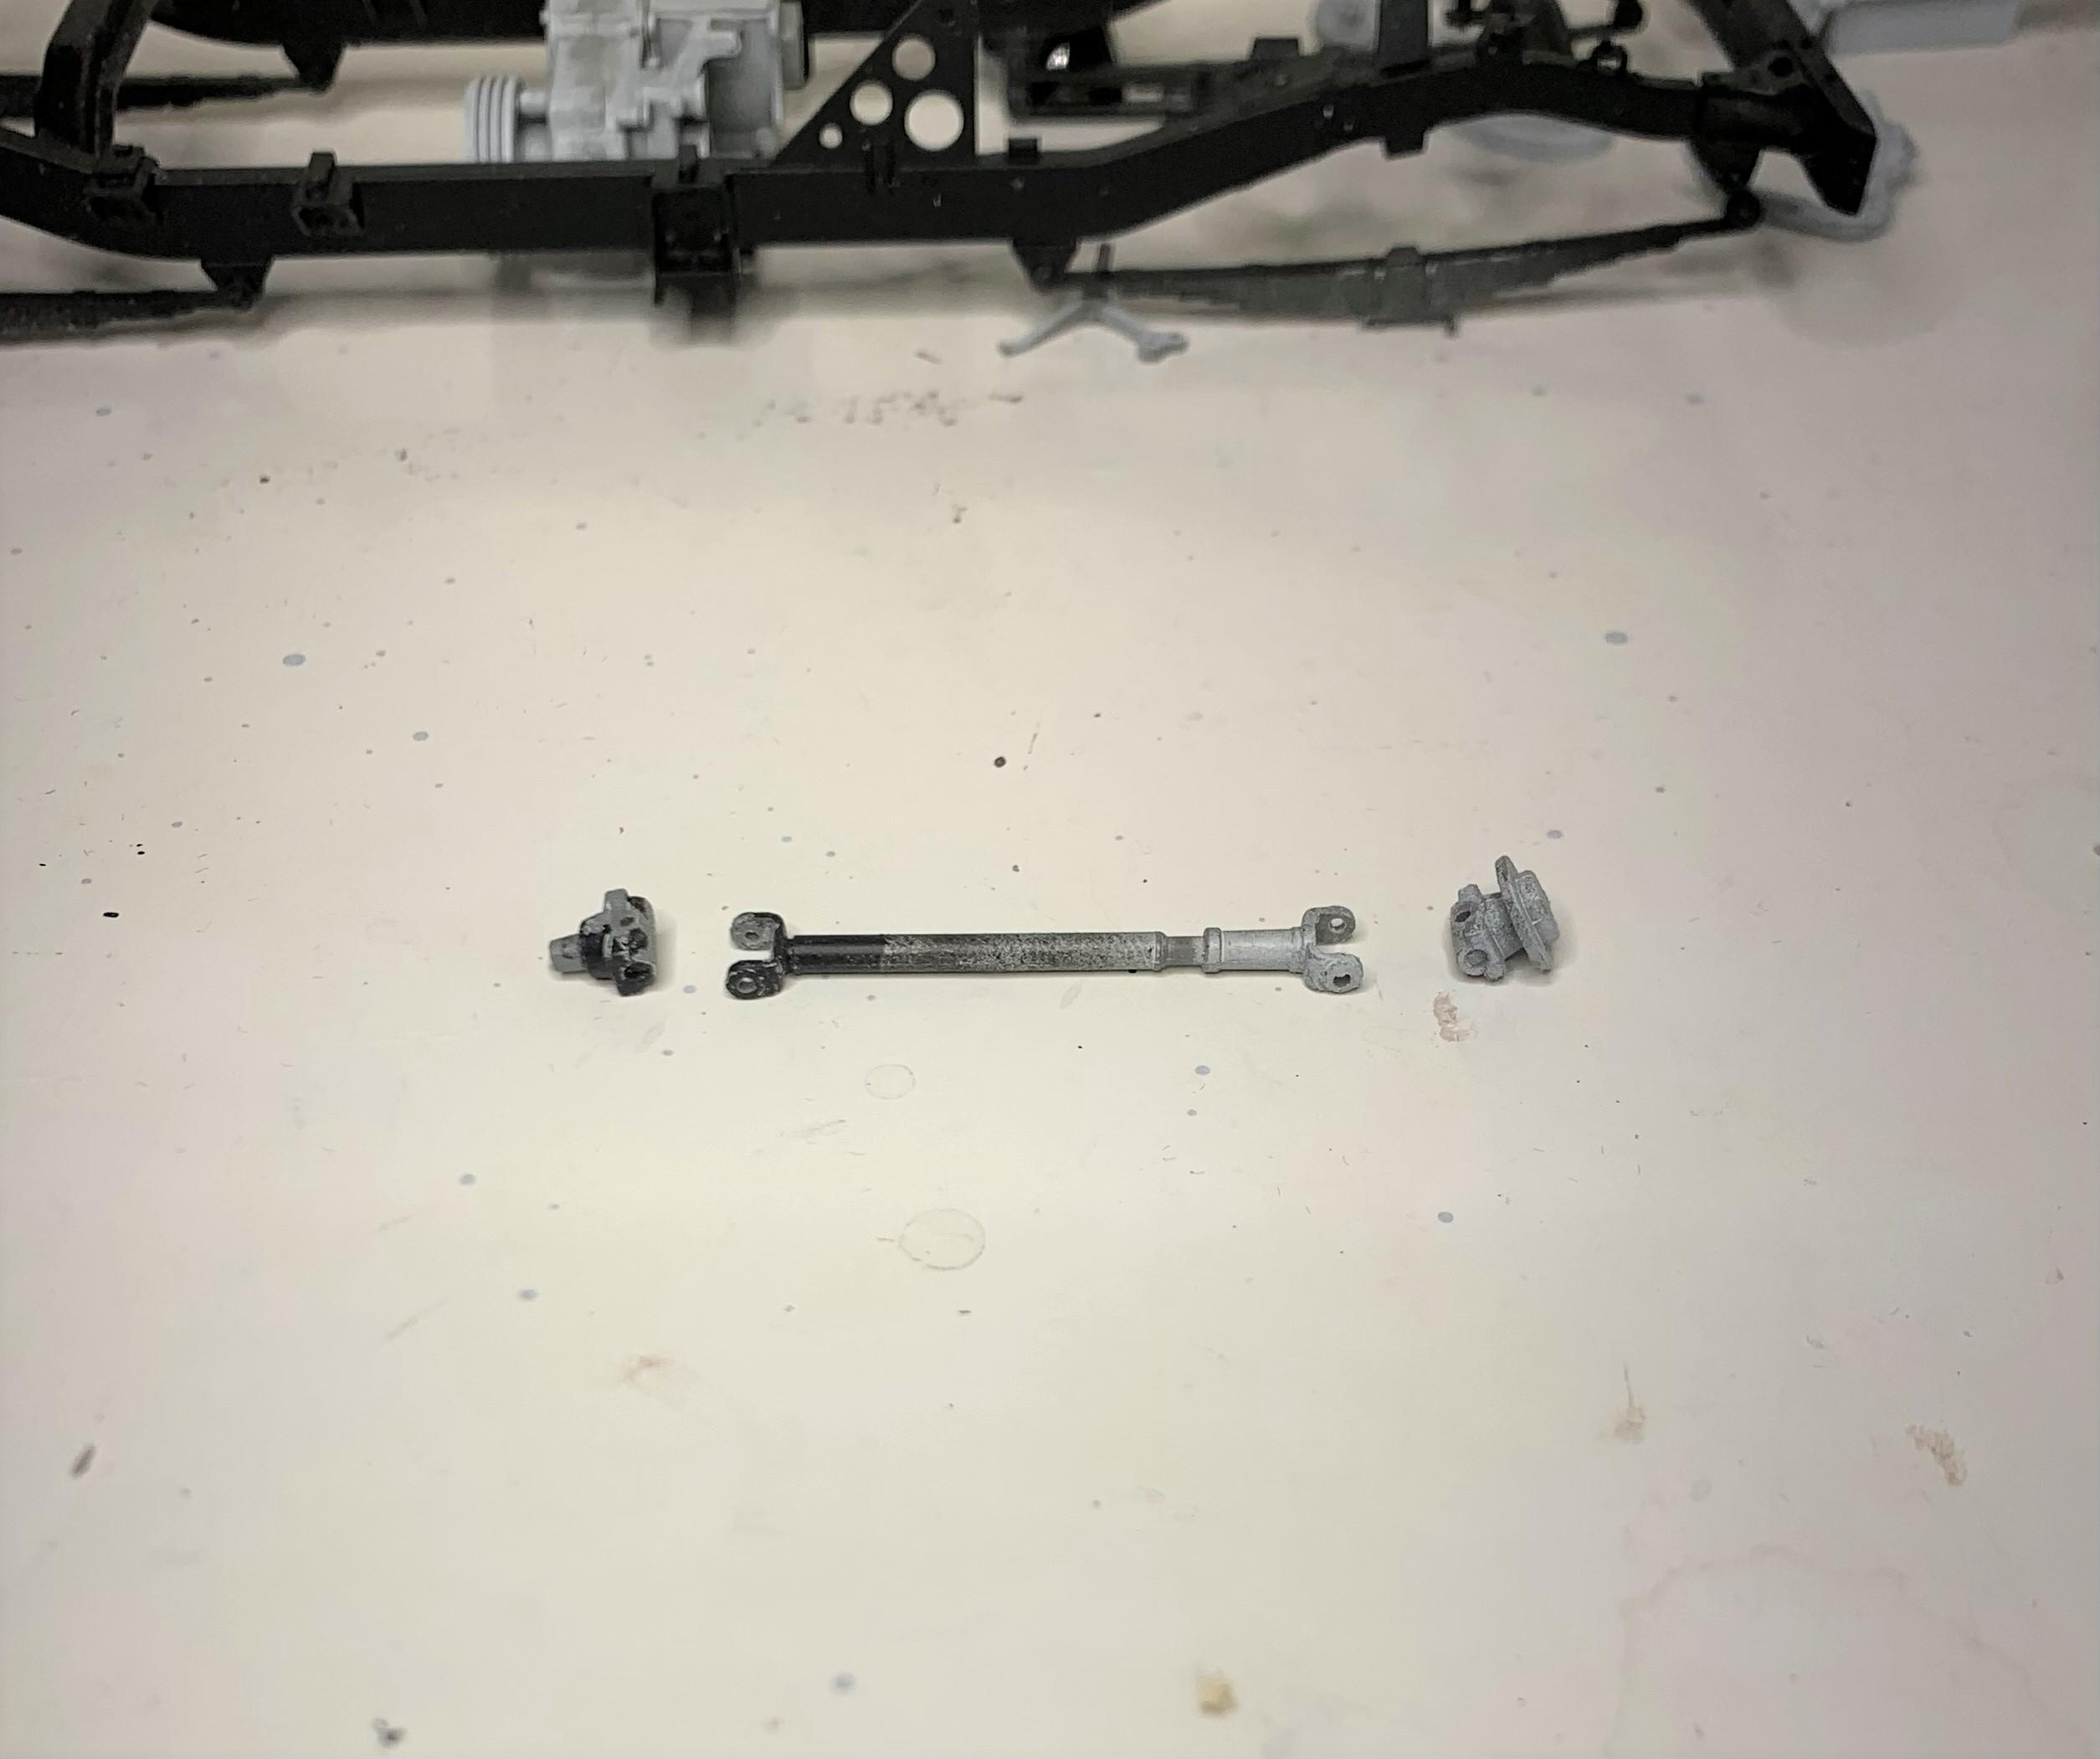
With the axles now glued under the springs I am able to make the driveshafts fit. The front axle must remain level, so the angles there are more severe, at the rear, I've tilted the diff up but still needed more length and a slight angle adjustment. Now the shocks will need now mounts, and I decided to file off the kit cotter pin detail and use 3D printed bolt heads instead.
-
I primed all parts, still on sprues with Tamiya white fine surface primer. I assembled the frame and airbrushed Tamiya XF-18 semi-gloss black mixed 50/50 with Tamiya acrylic thinner, 20 psi. With the taller tires I'm using I'll have to mount the axles below the leaf springs, not over them, so the driveshafts need modification. They need to be slightly lengthened and the angles need to be changed, so I carefully cut the ends off.
-
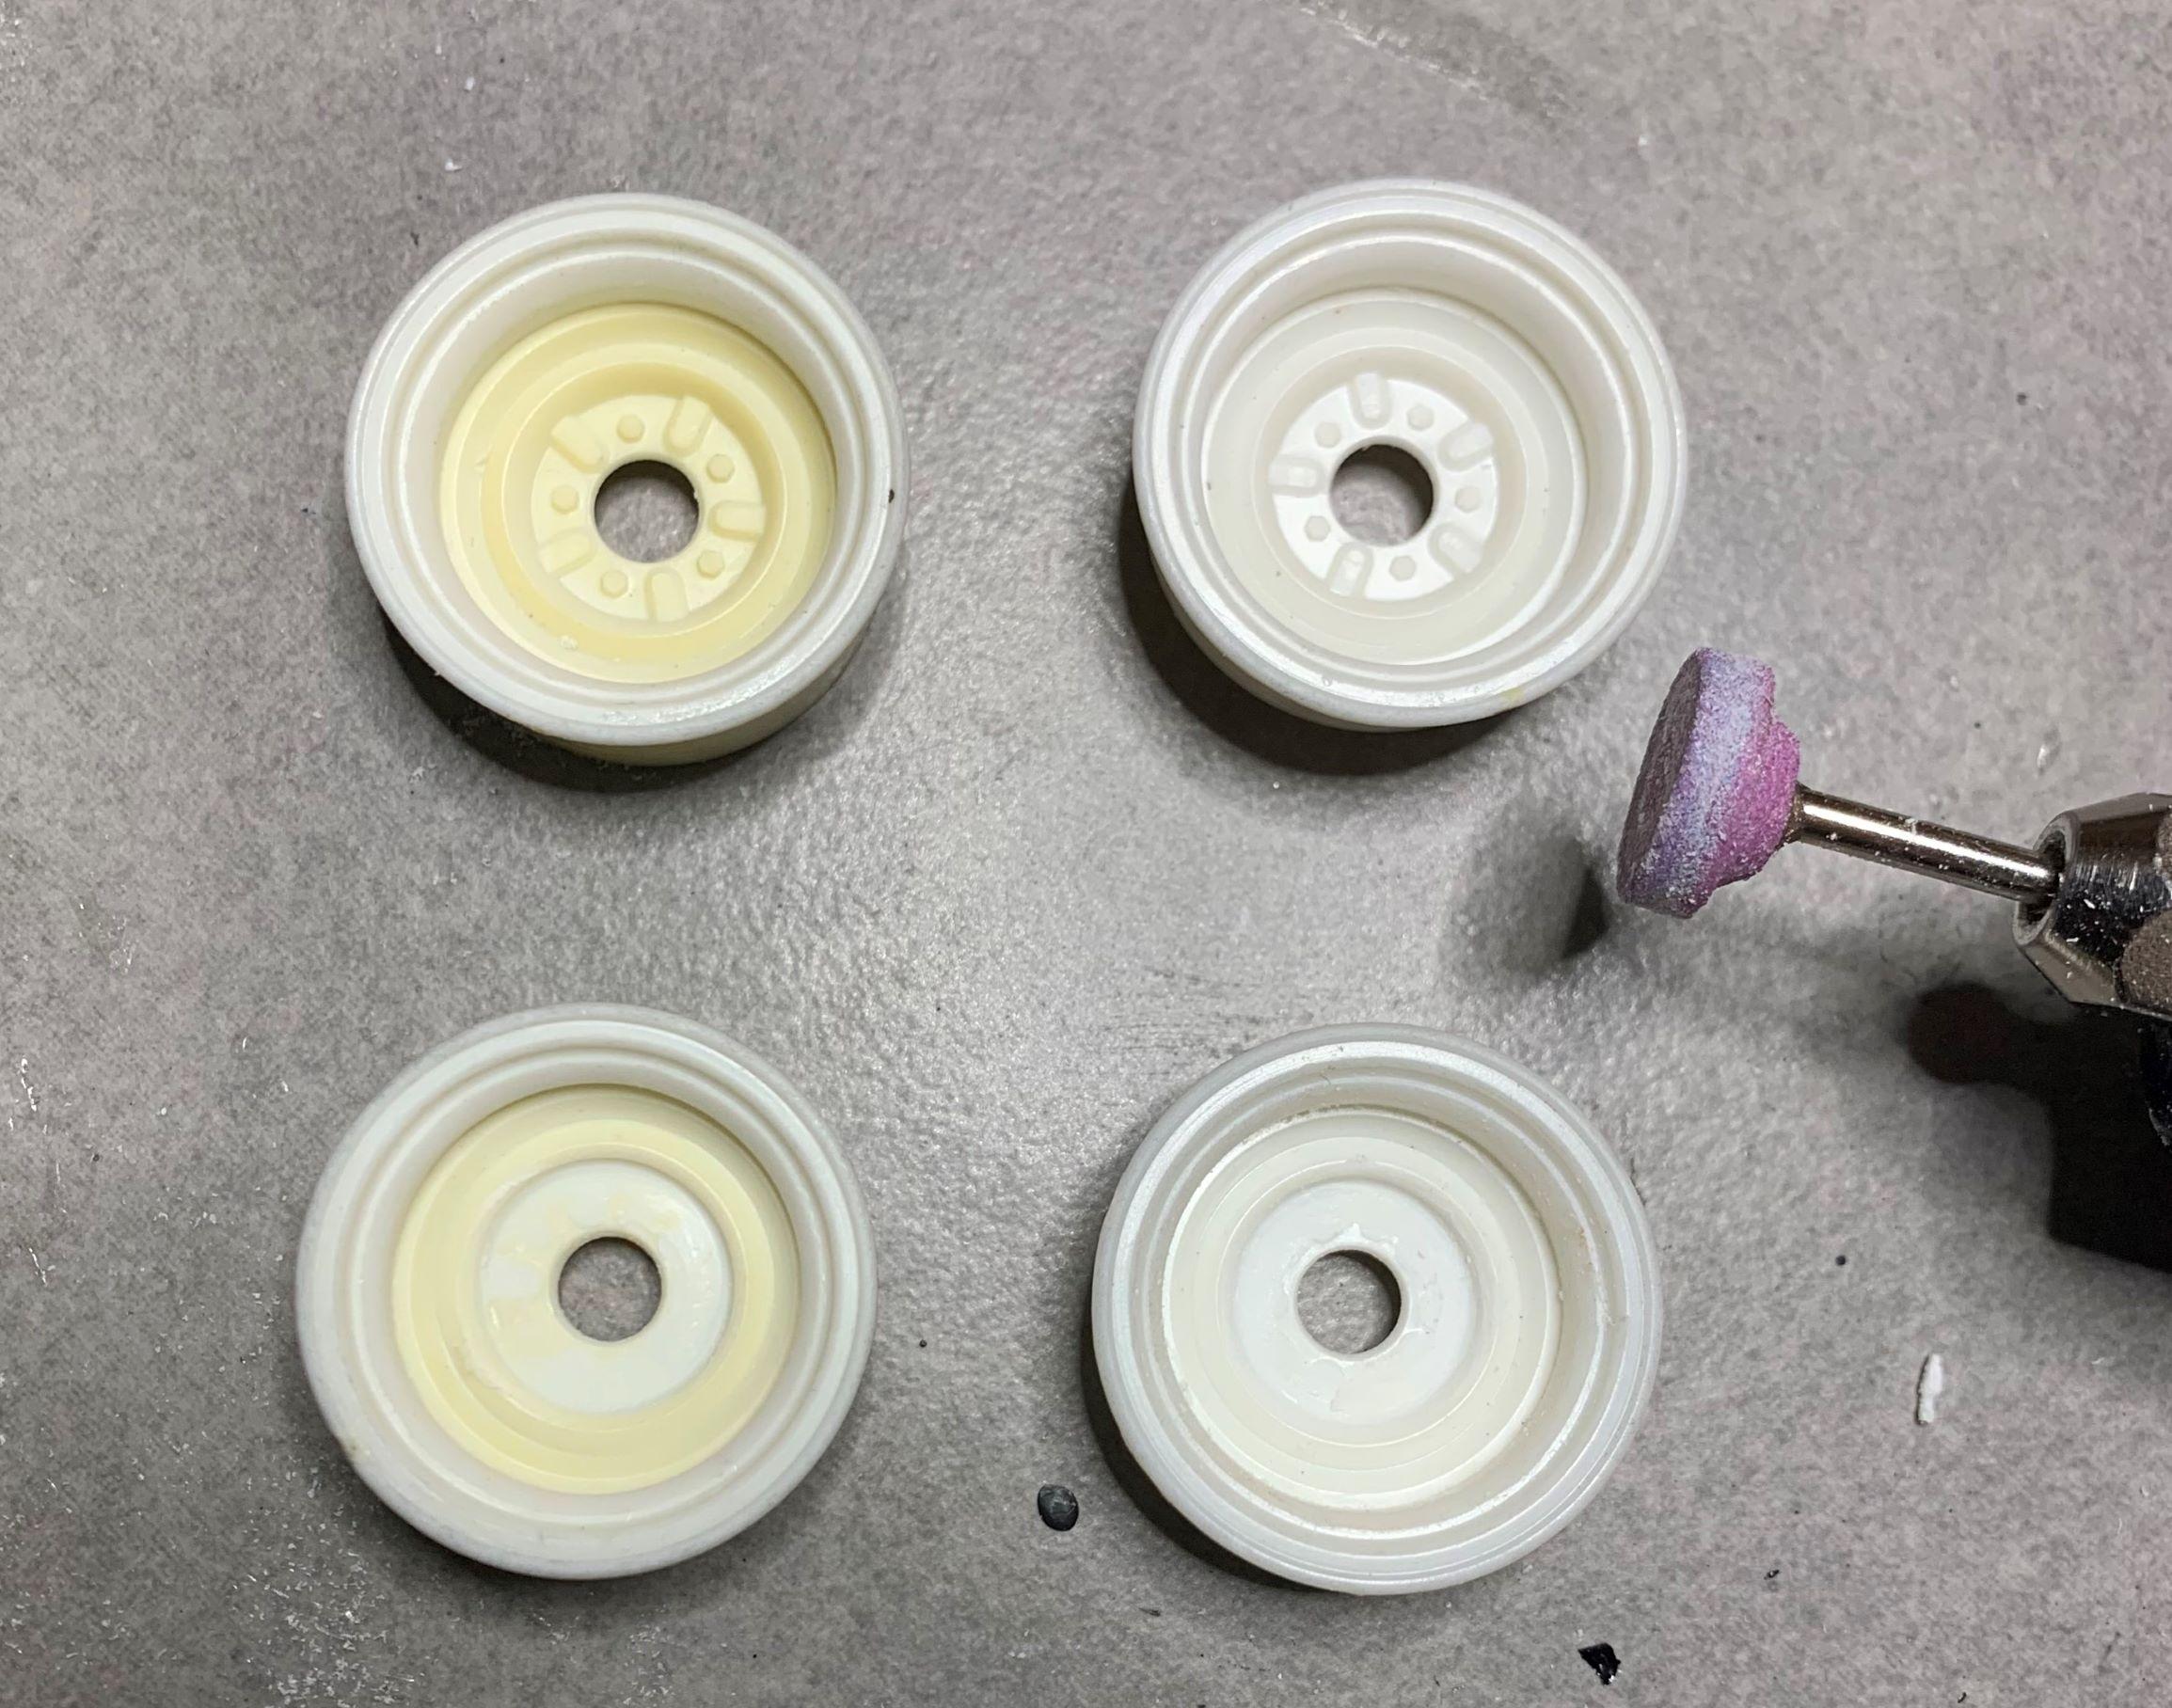
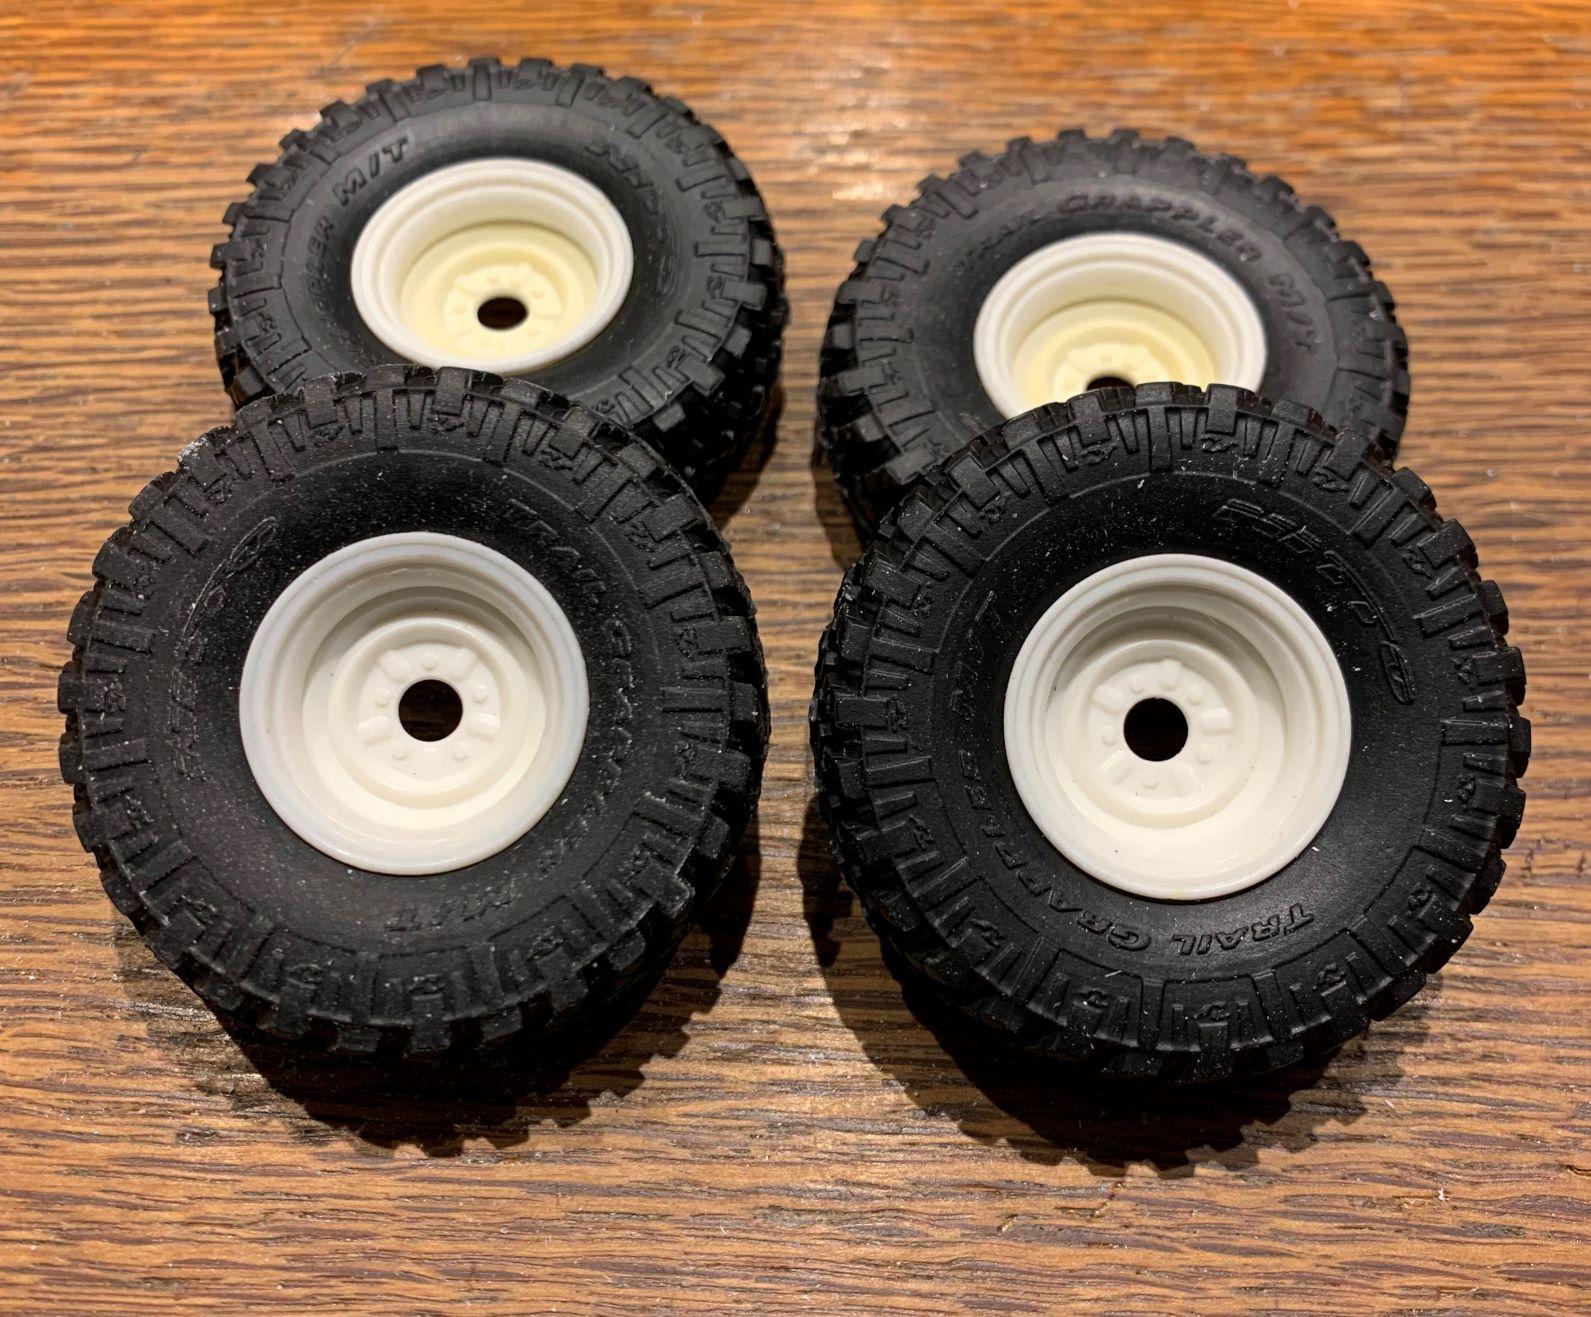
Now I have 8' wide wheels, for a Chevy! Luckily that pink thing in the Dremel bag was just the right size to sand the Chevy bolts off! I enlarged the center hole and drilled for Jeep bolt pattern and for valve stems. With my R/C tires they're starting to look like what I wanted! (this picture was before I made the Jeep bolt pattern)
-
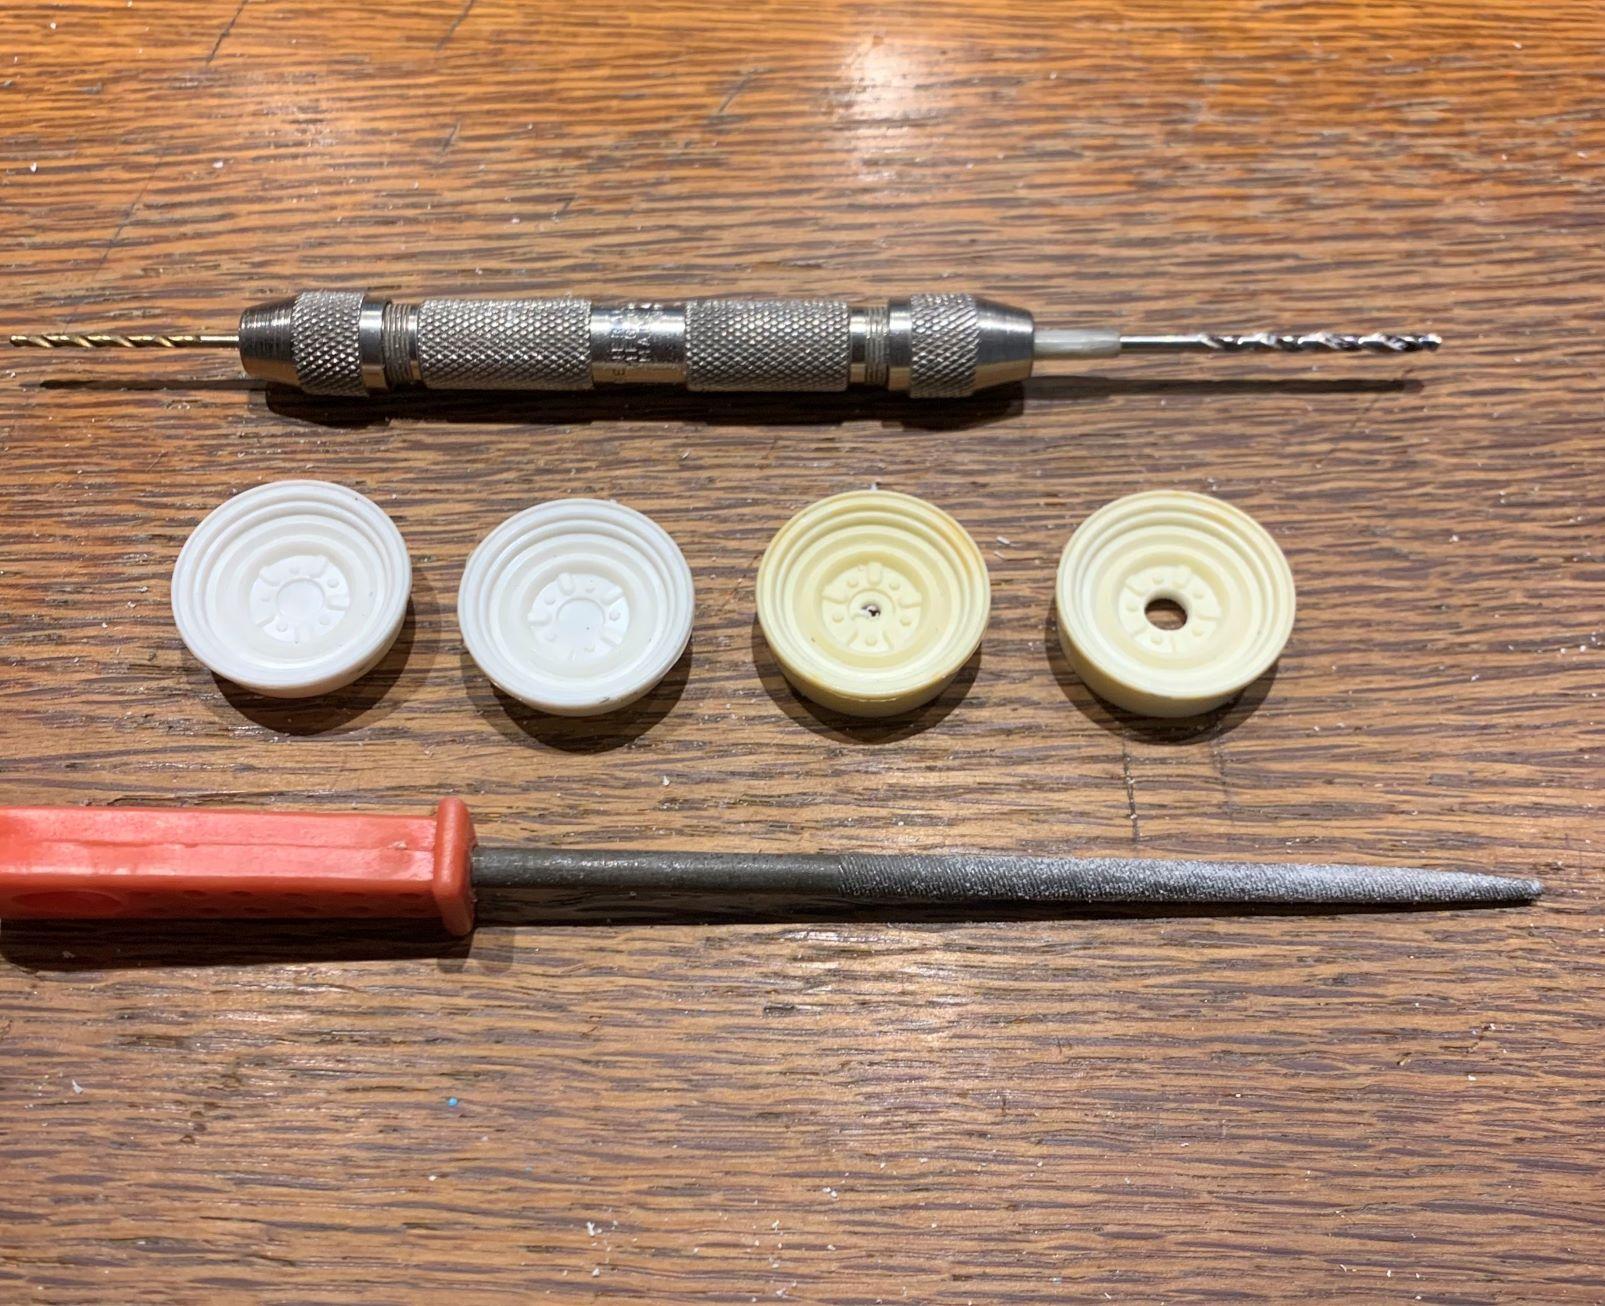
I drilled out the centers, and smoothed my outer rings by sliding them up and down some rolled up sandpaper! Once I glued the outer rings onto the face of the wheel, I removed the lip from the wheel I'm using as the middle. The one in the background is already done.
-
The fronts and rears are different on those Chevies, but I need mostly the outer rings, so I started to make 8 of them, 1 for backs, and 1 for fronts to make deeper dish scale 8" width wheels. AND..... I need 1 for the middle, so 12 Chevy wheels made into 4 Jeep wheels!
-
R/C shops sell tires in a 1 inch size, which in 1/16th scale is 16 inches, perfect! There's a great selection of tires available, but no suitable rims for what I envisioned. I have a bunch of junk AMT 1/16th scale Chevies so I started to make Jeep wheels from them.
-
First thing I did was to glue the 2 tires halves together and paint them with Tamiya XF-85 acrylic "rubber black" Don't do that! Now the rims won't fit, they must go between the tire halves! No matter for me though as I plan to replace them with different rims and tires.