dino246gt
-
Posts
2,244 -
Joined
-
Last visited
Content Type
Profiles
Forums
Events
Gallery
Everything posted by dino246gt
-
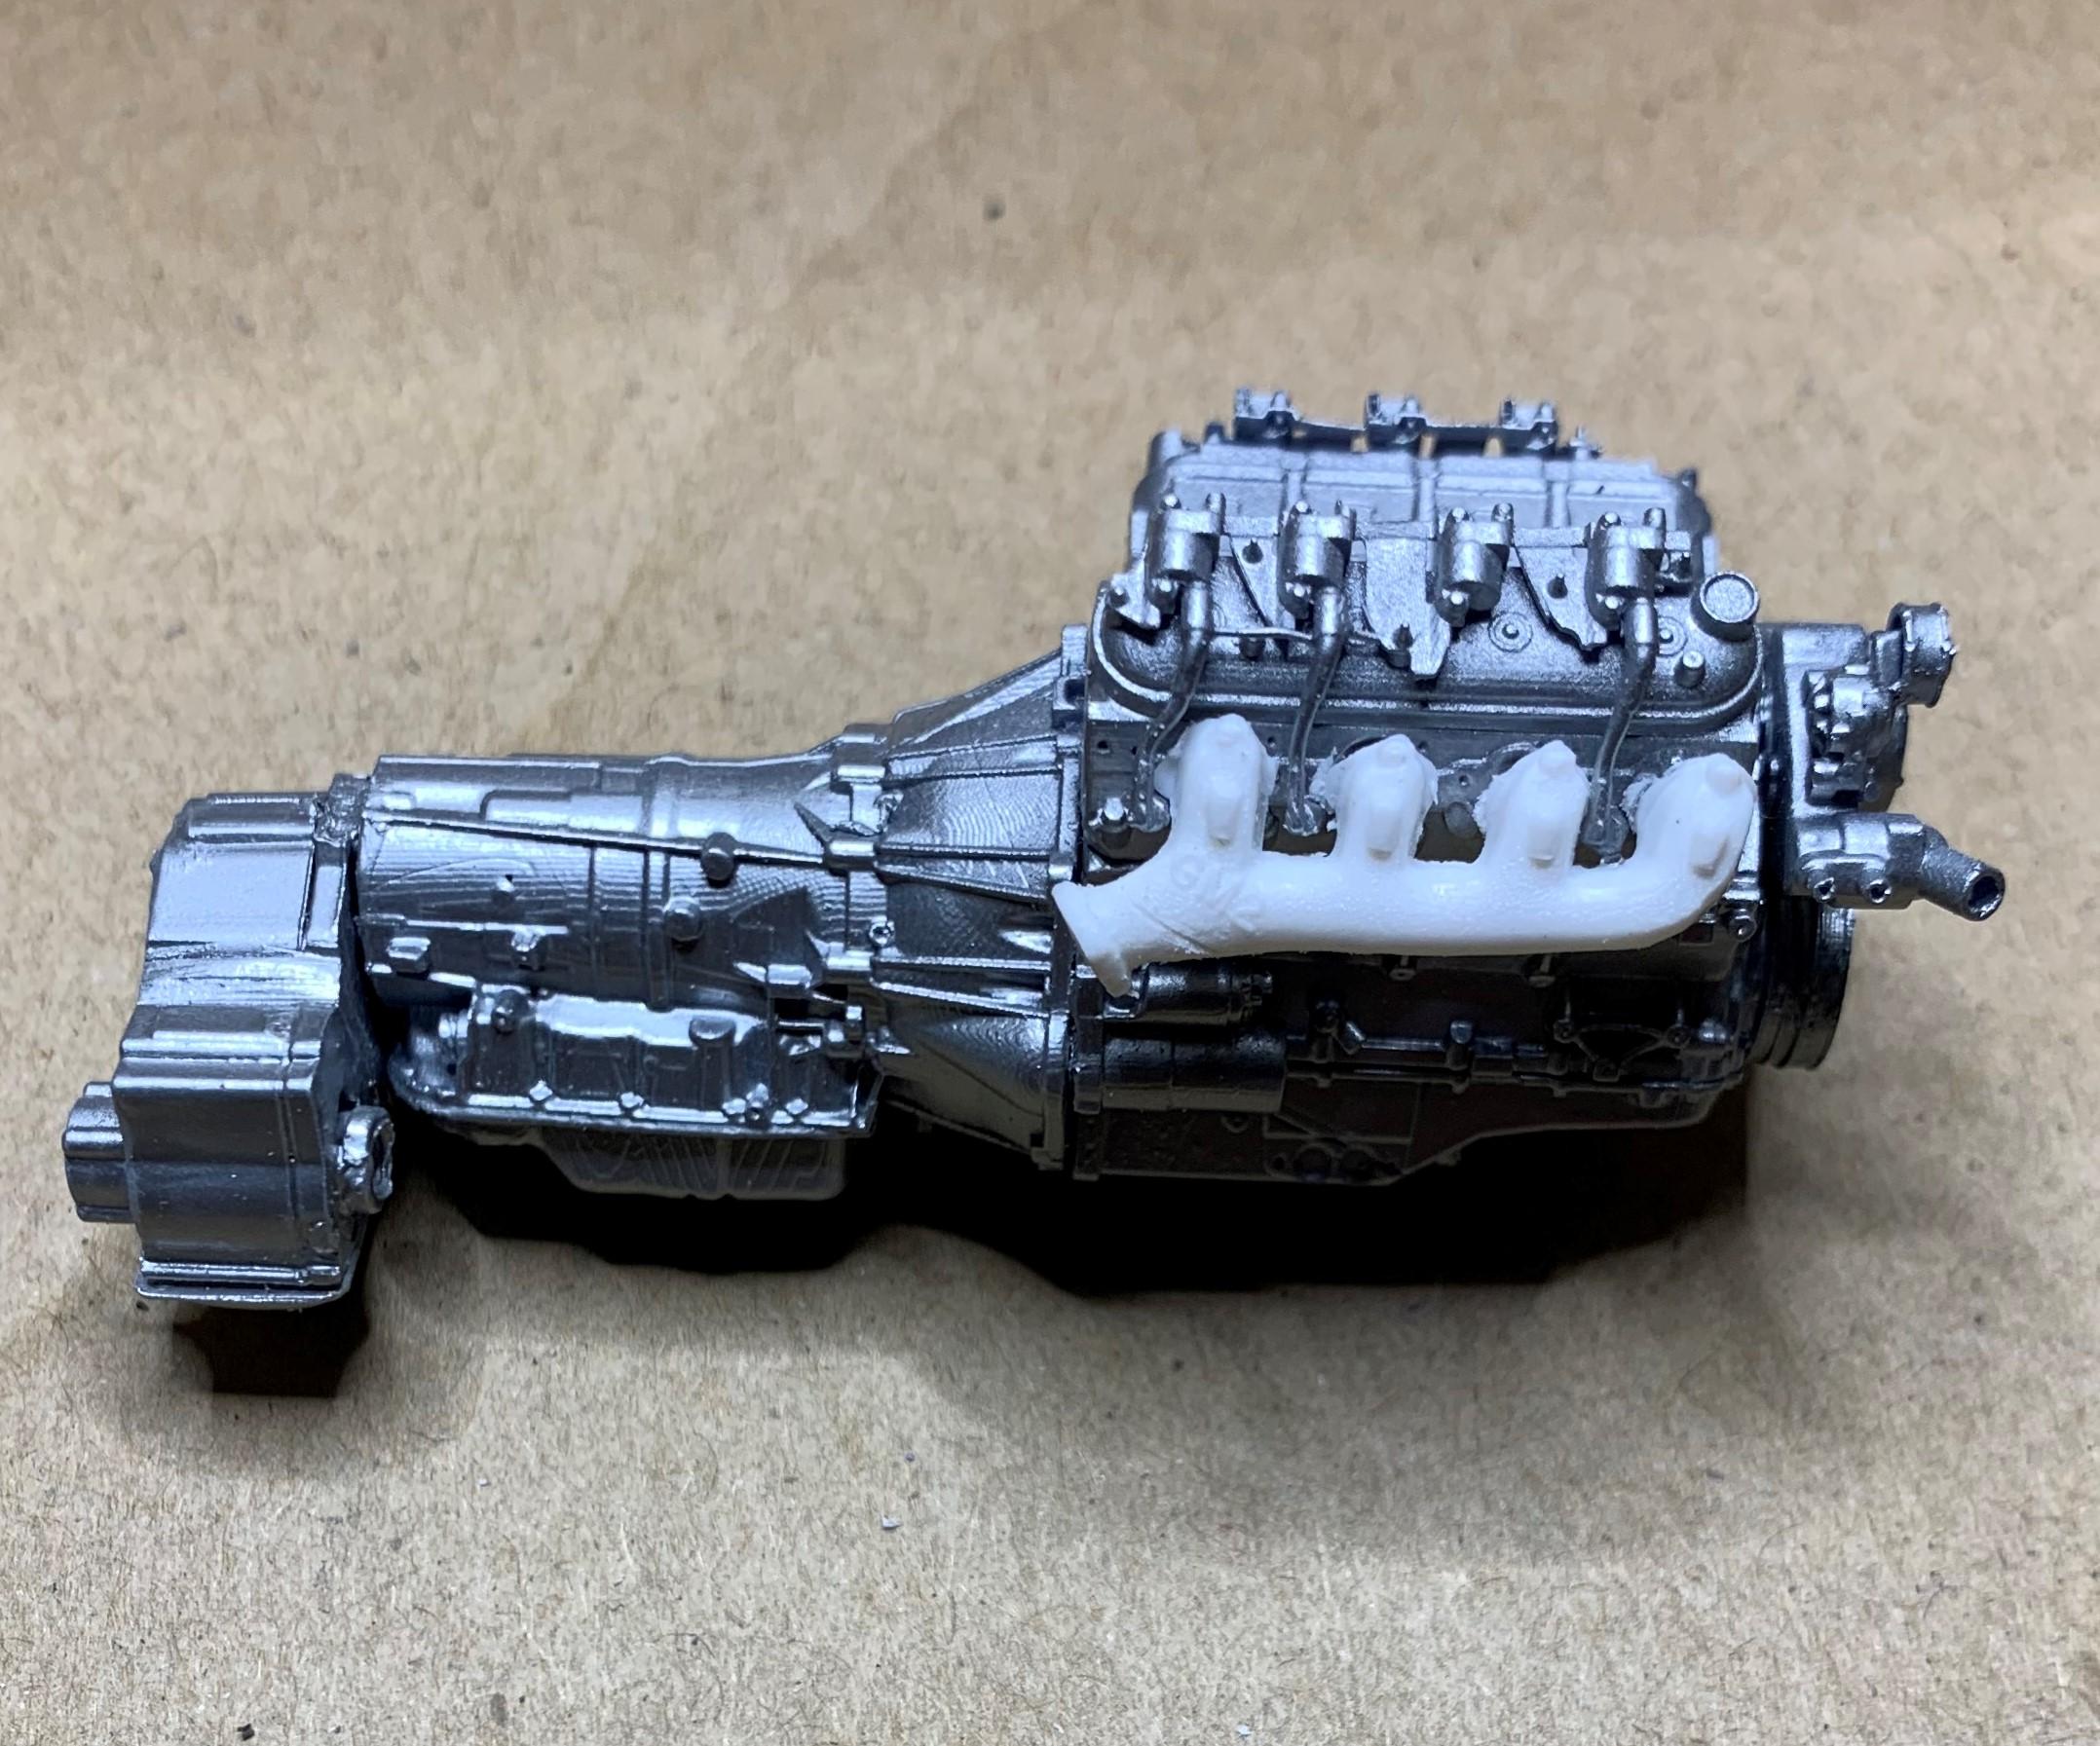
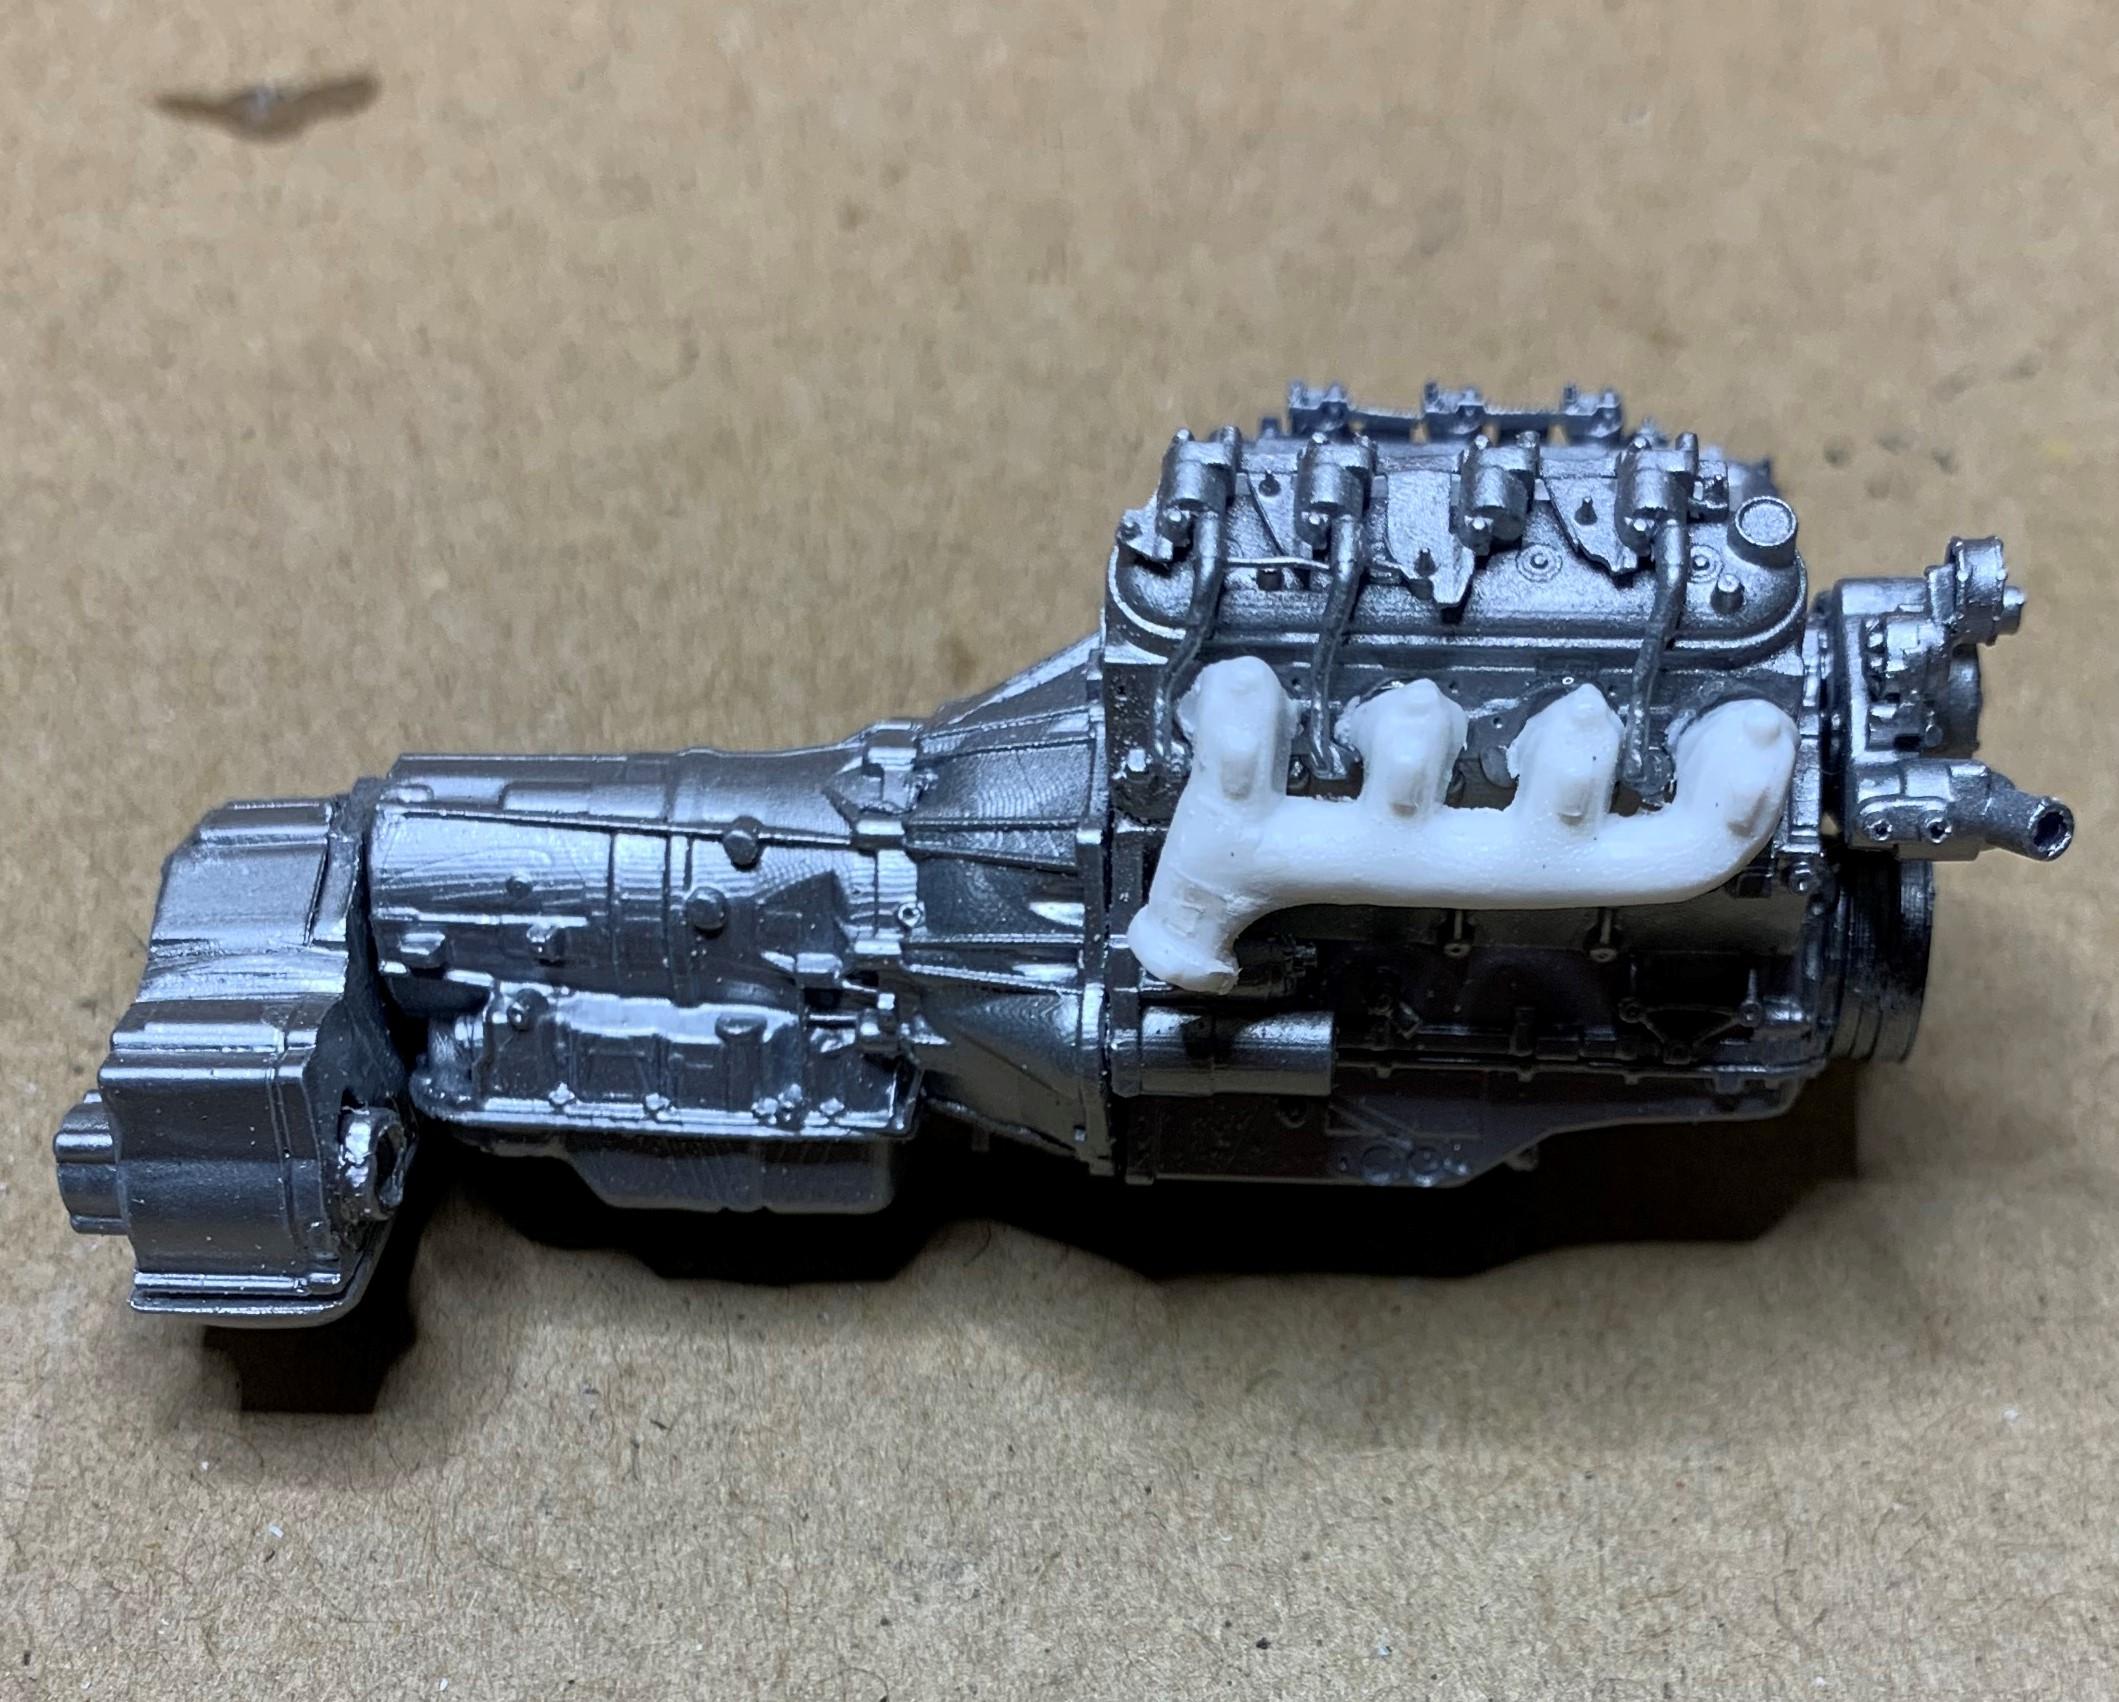
 Texas 3D some very nice stuff he makes! I have bought a few times. Here's some of his engines I have, I made the "labels" myself.
-
I also made this little piece to go under the rad, it hides my sloppy glue holding the rad in place!
-
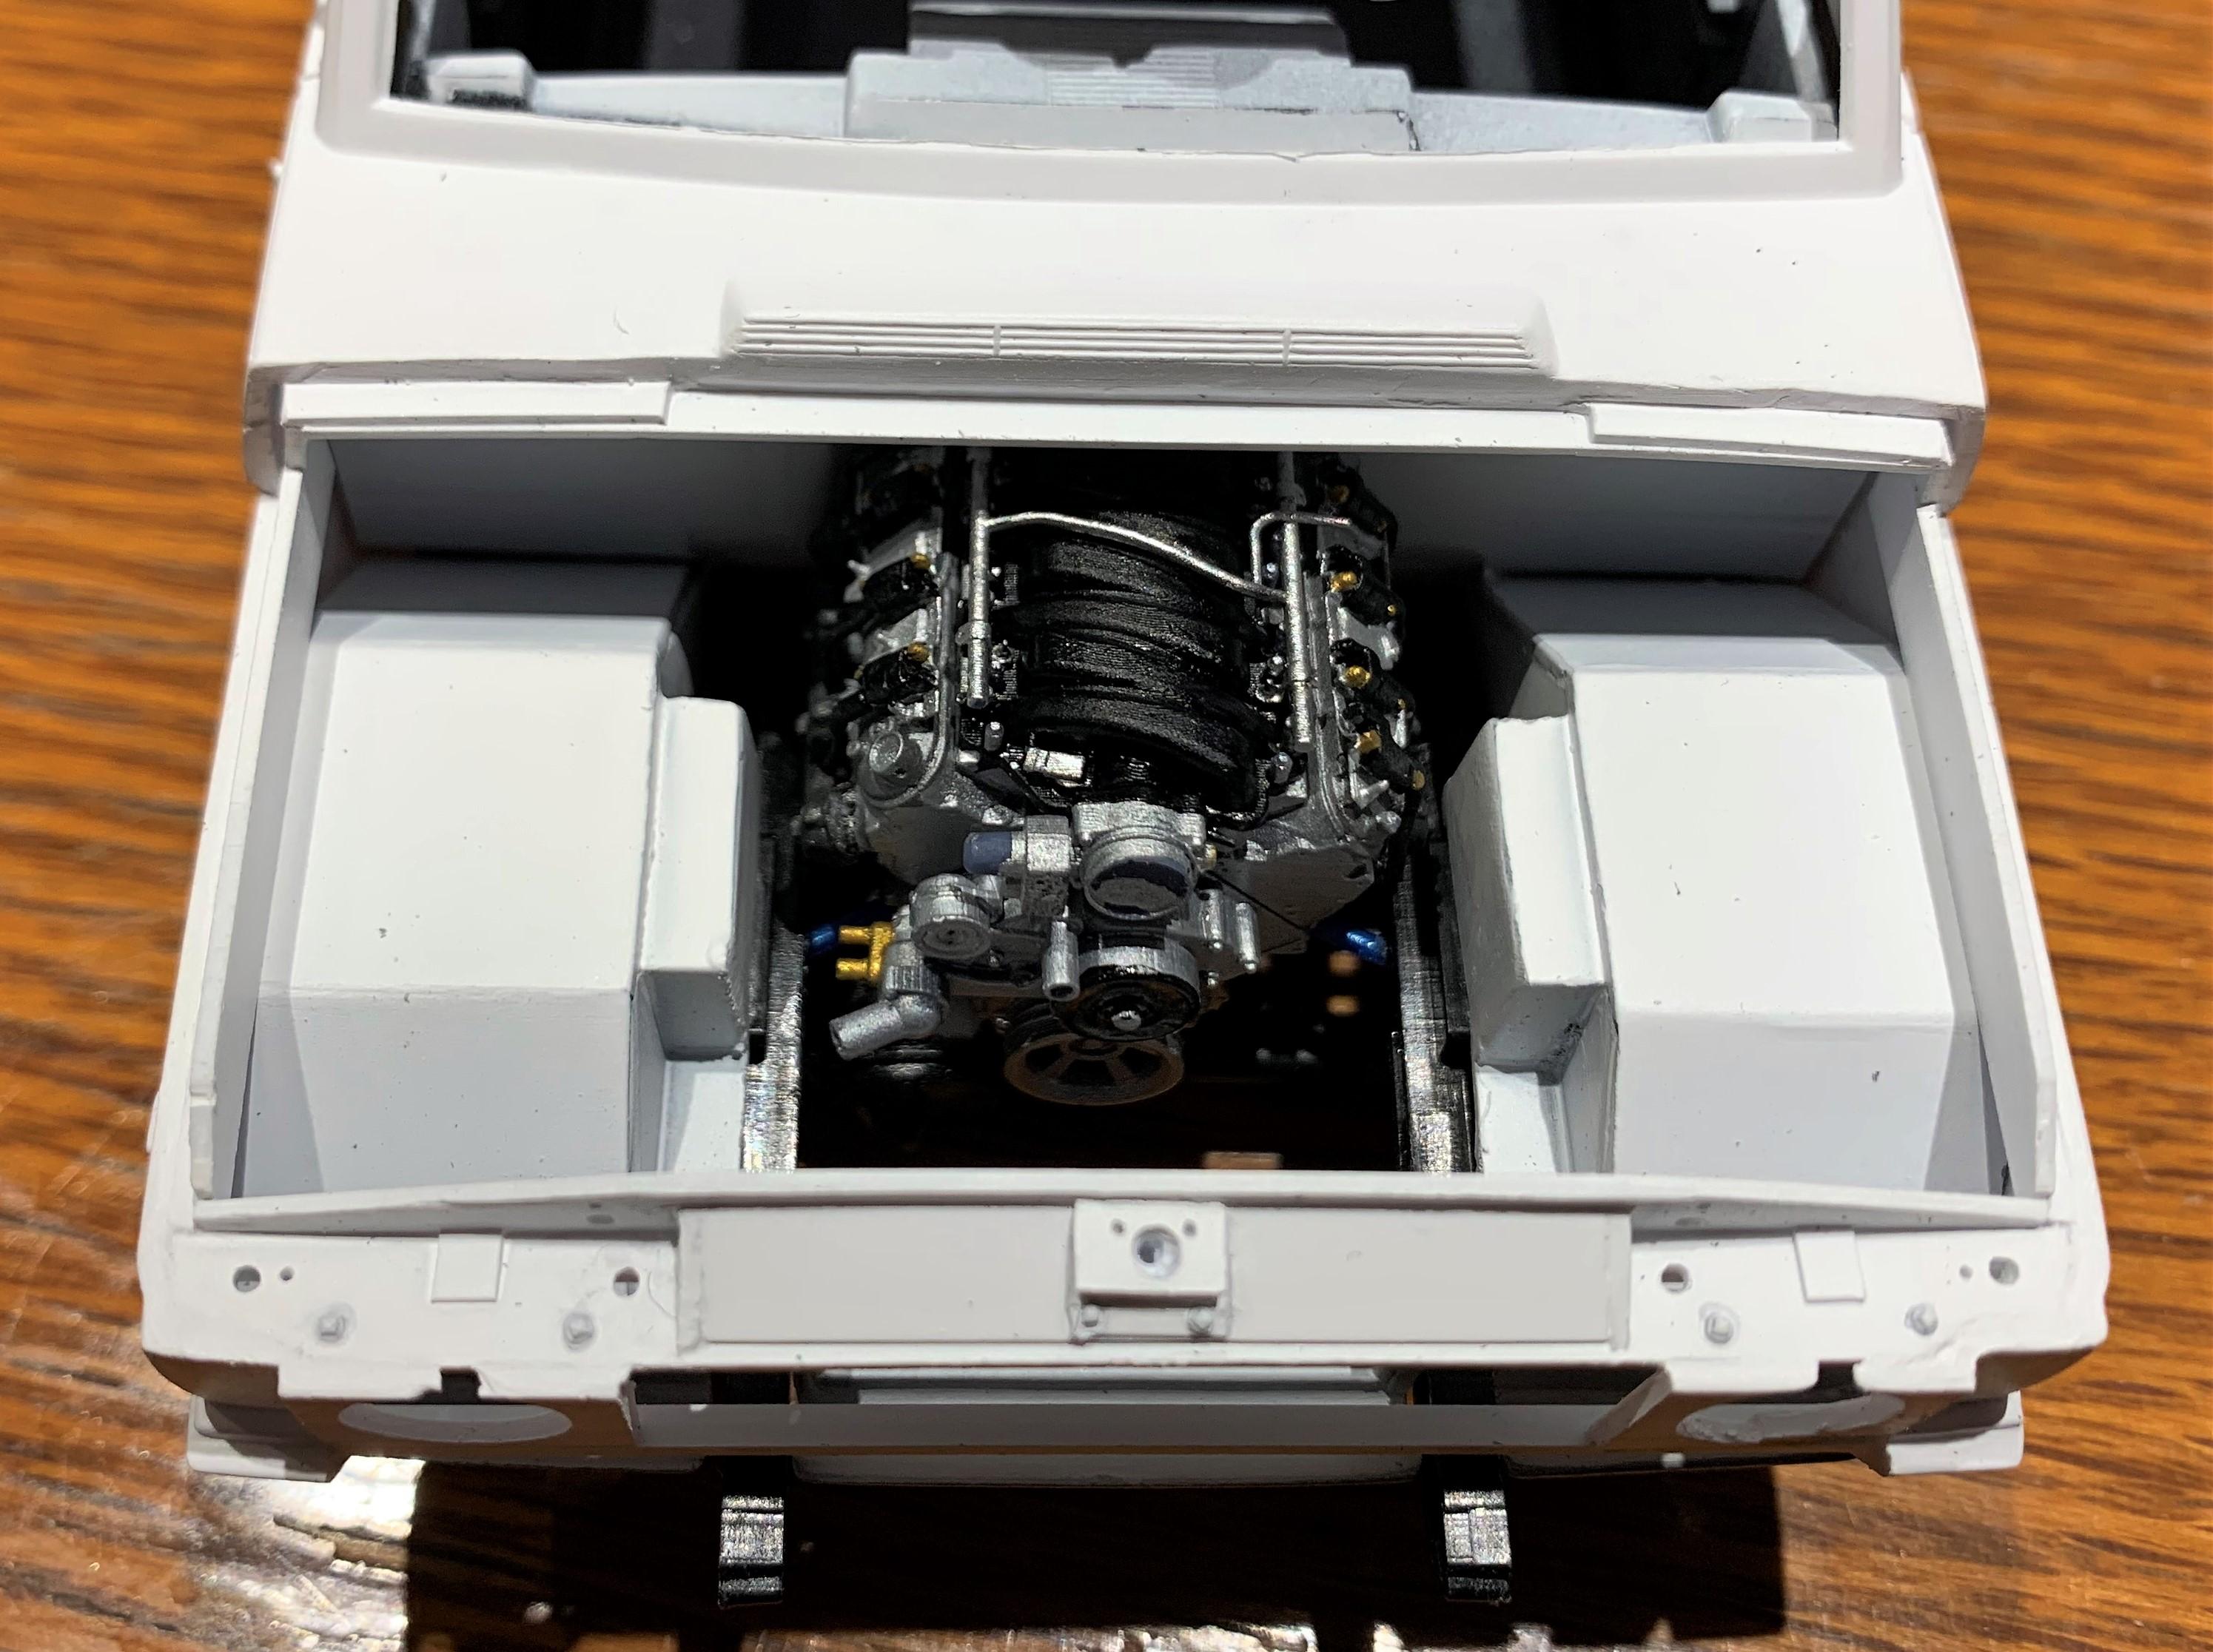
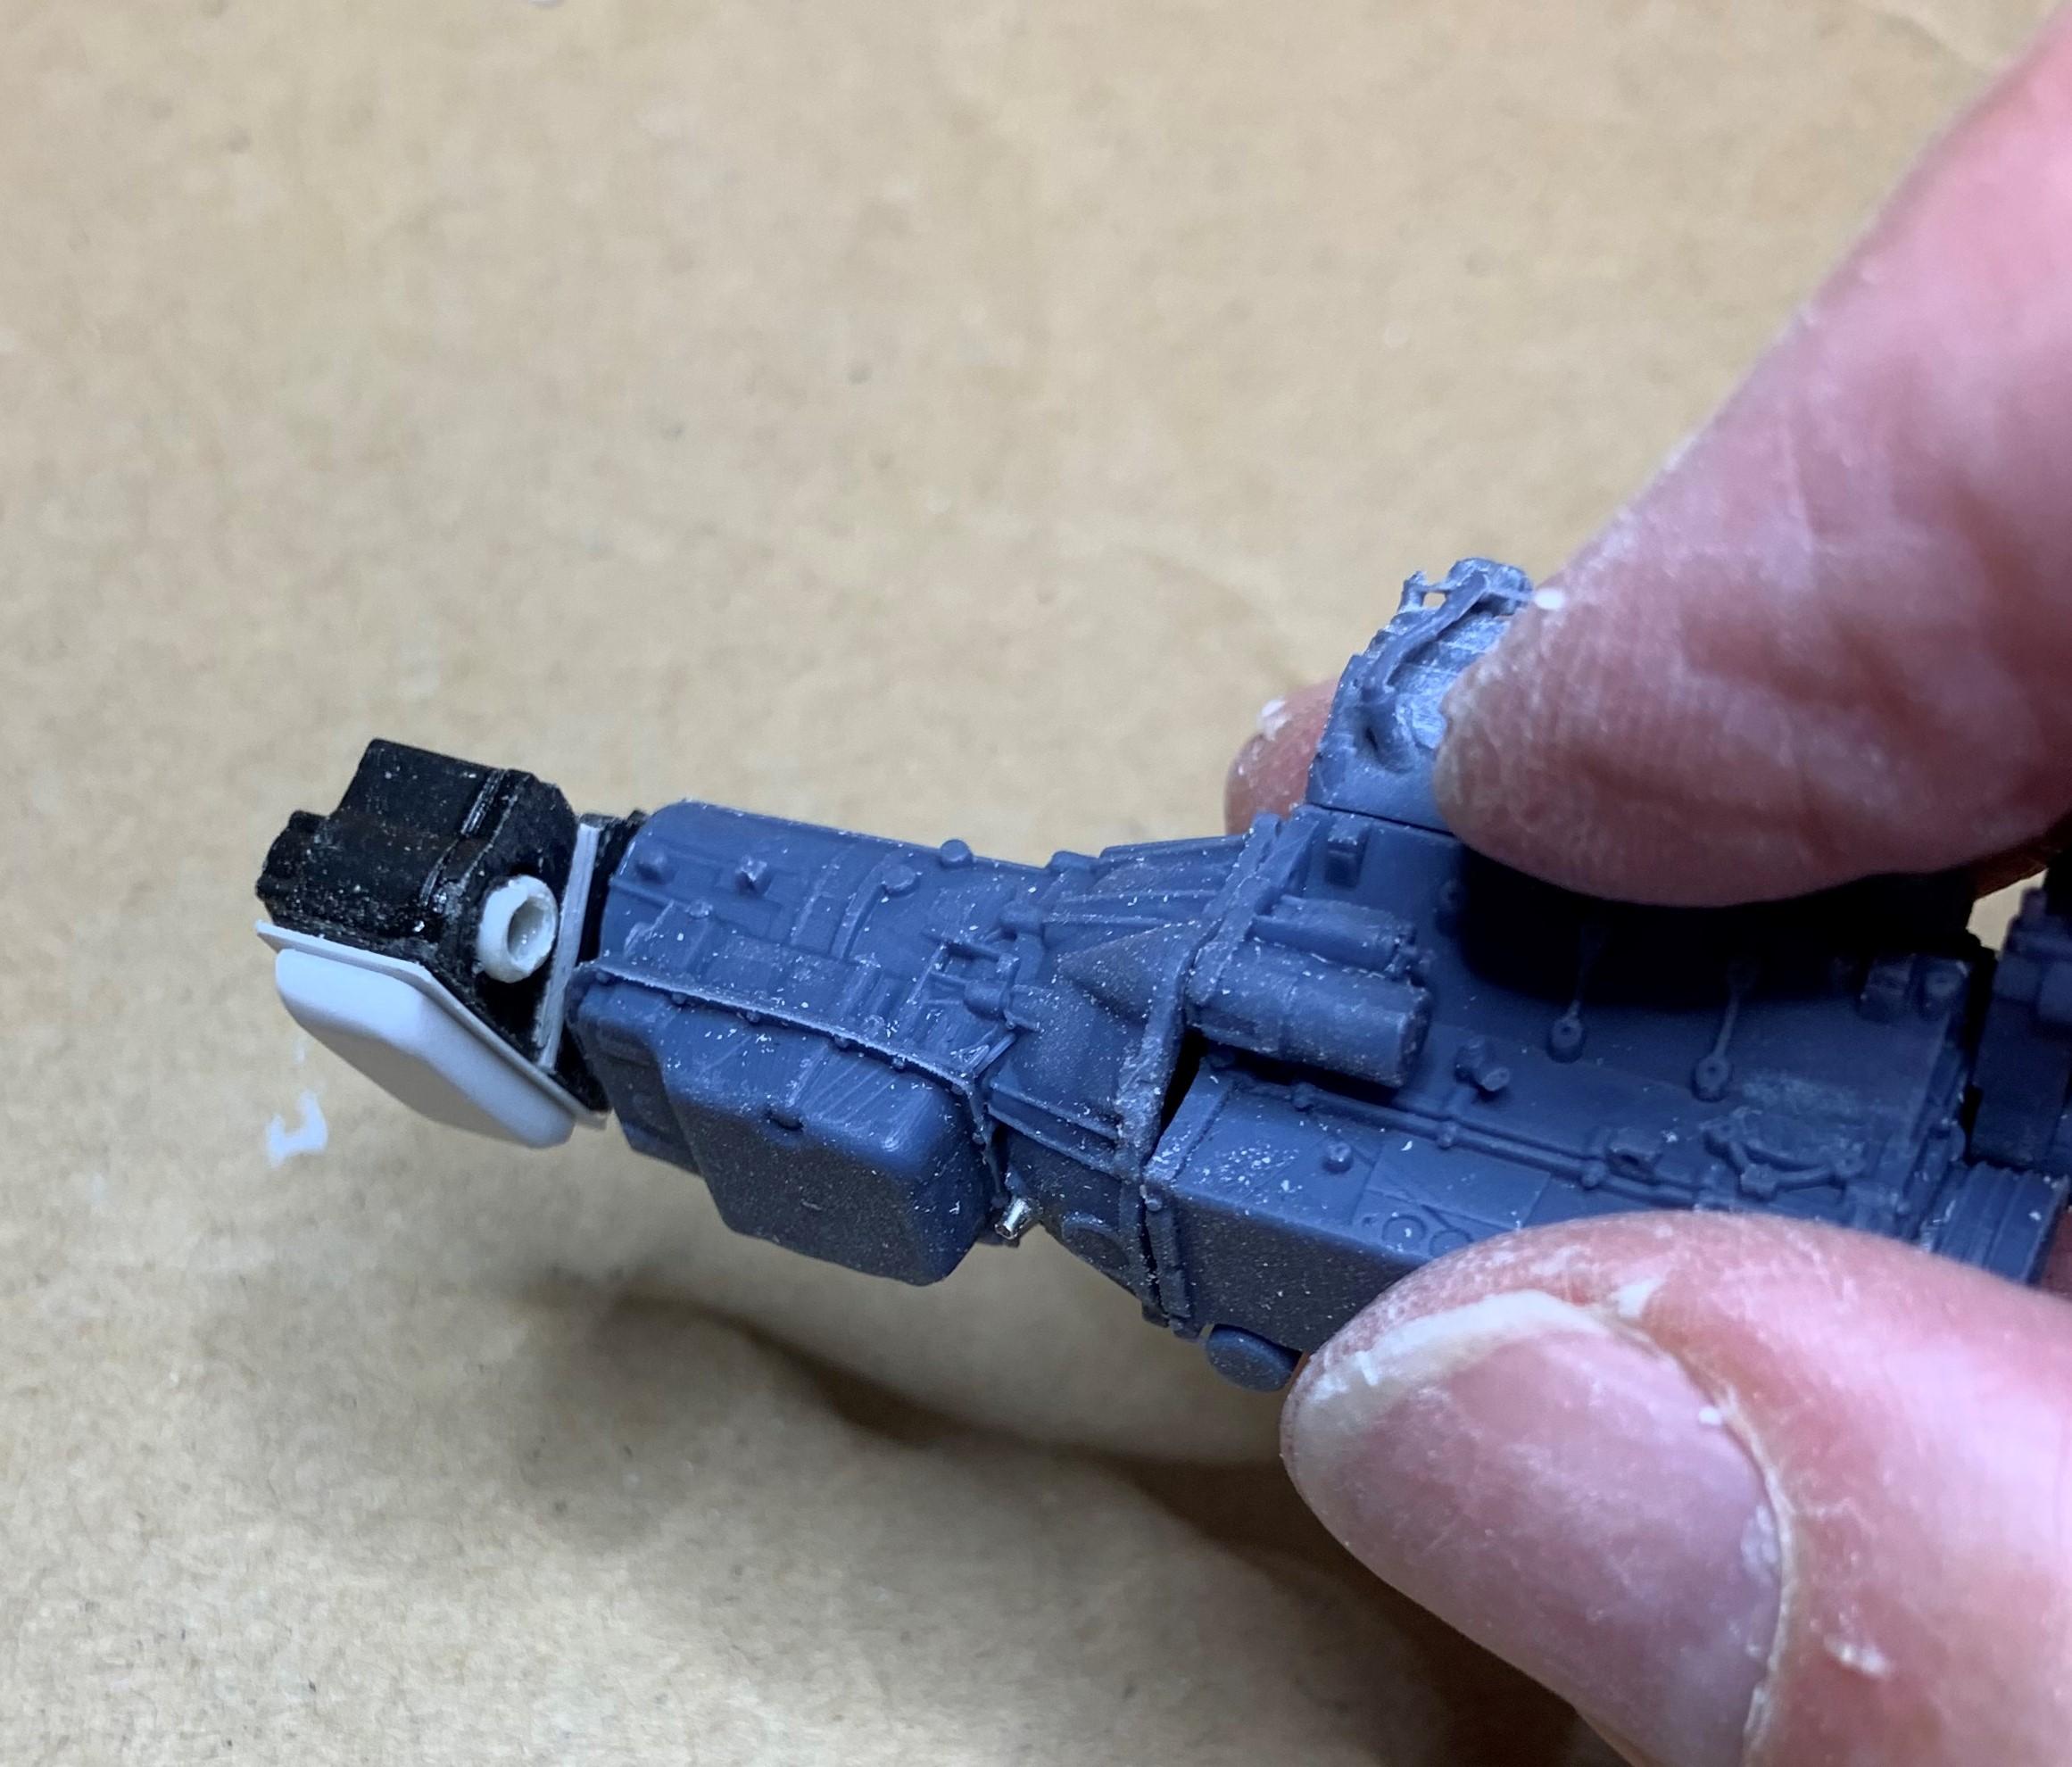
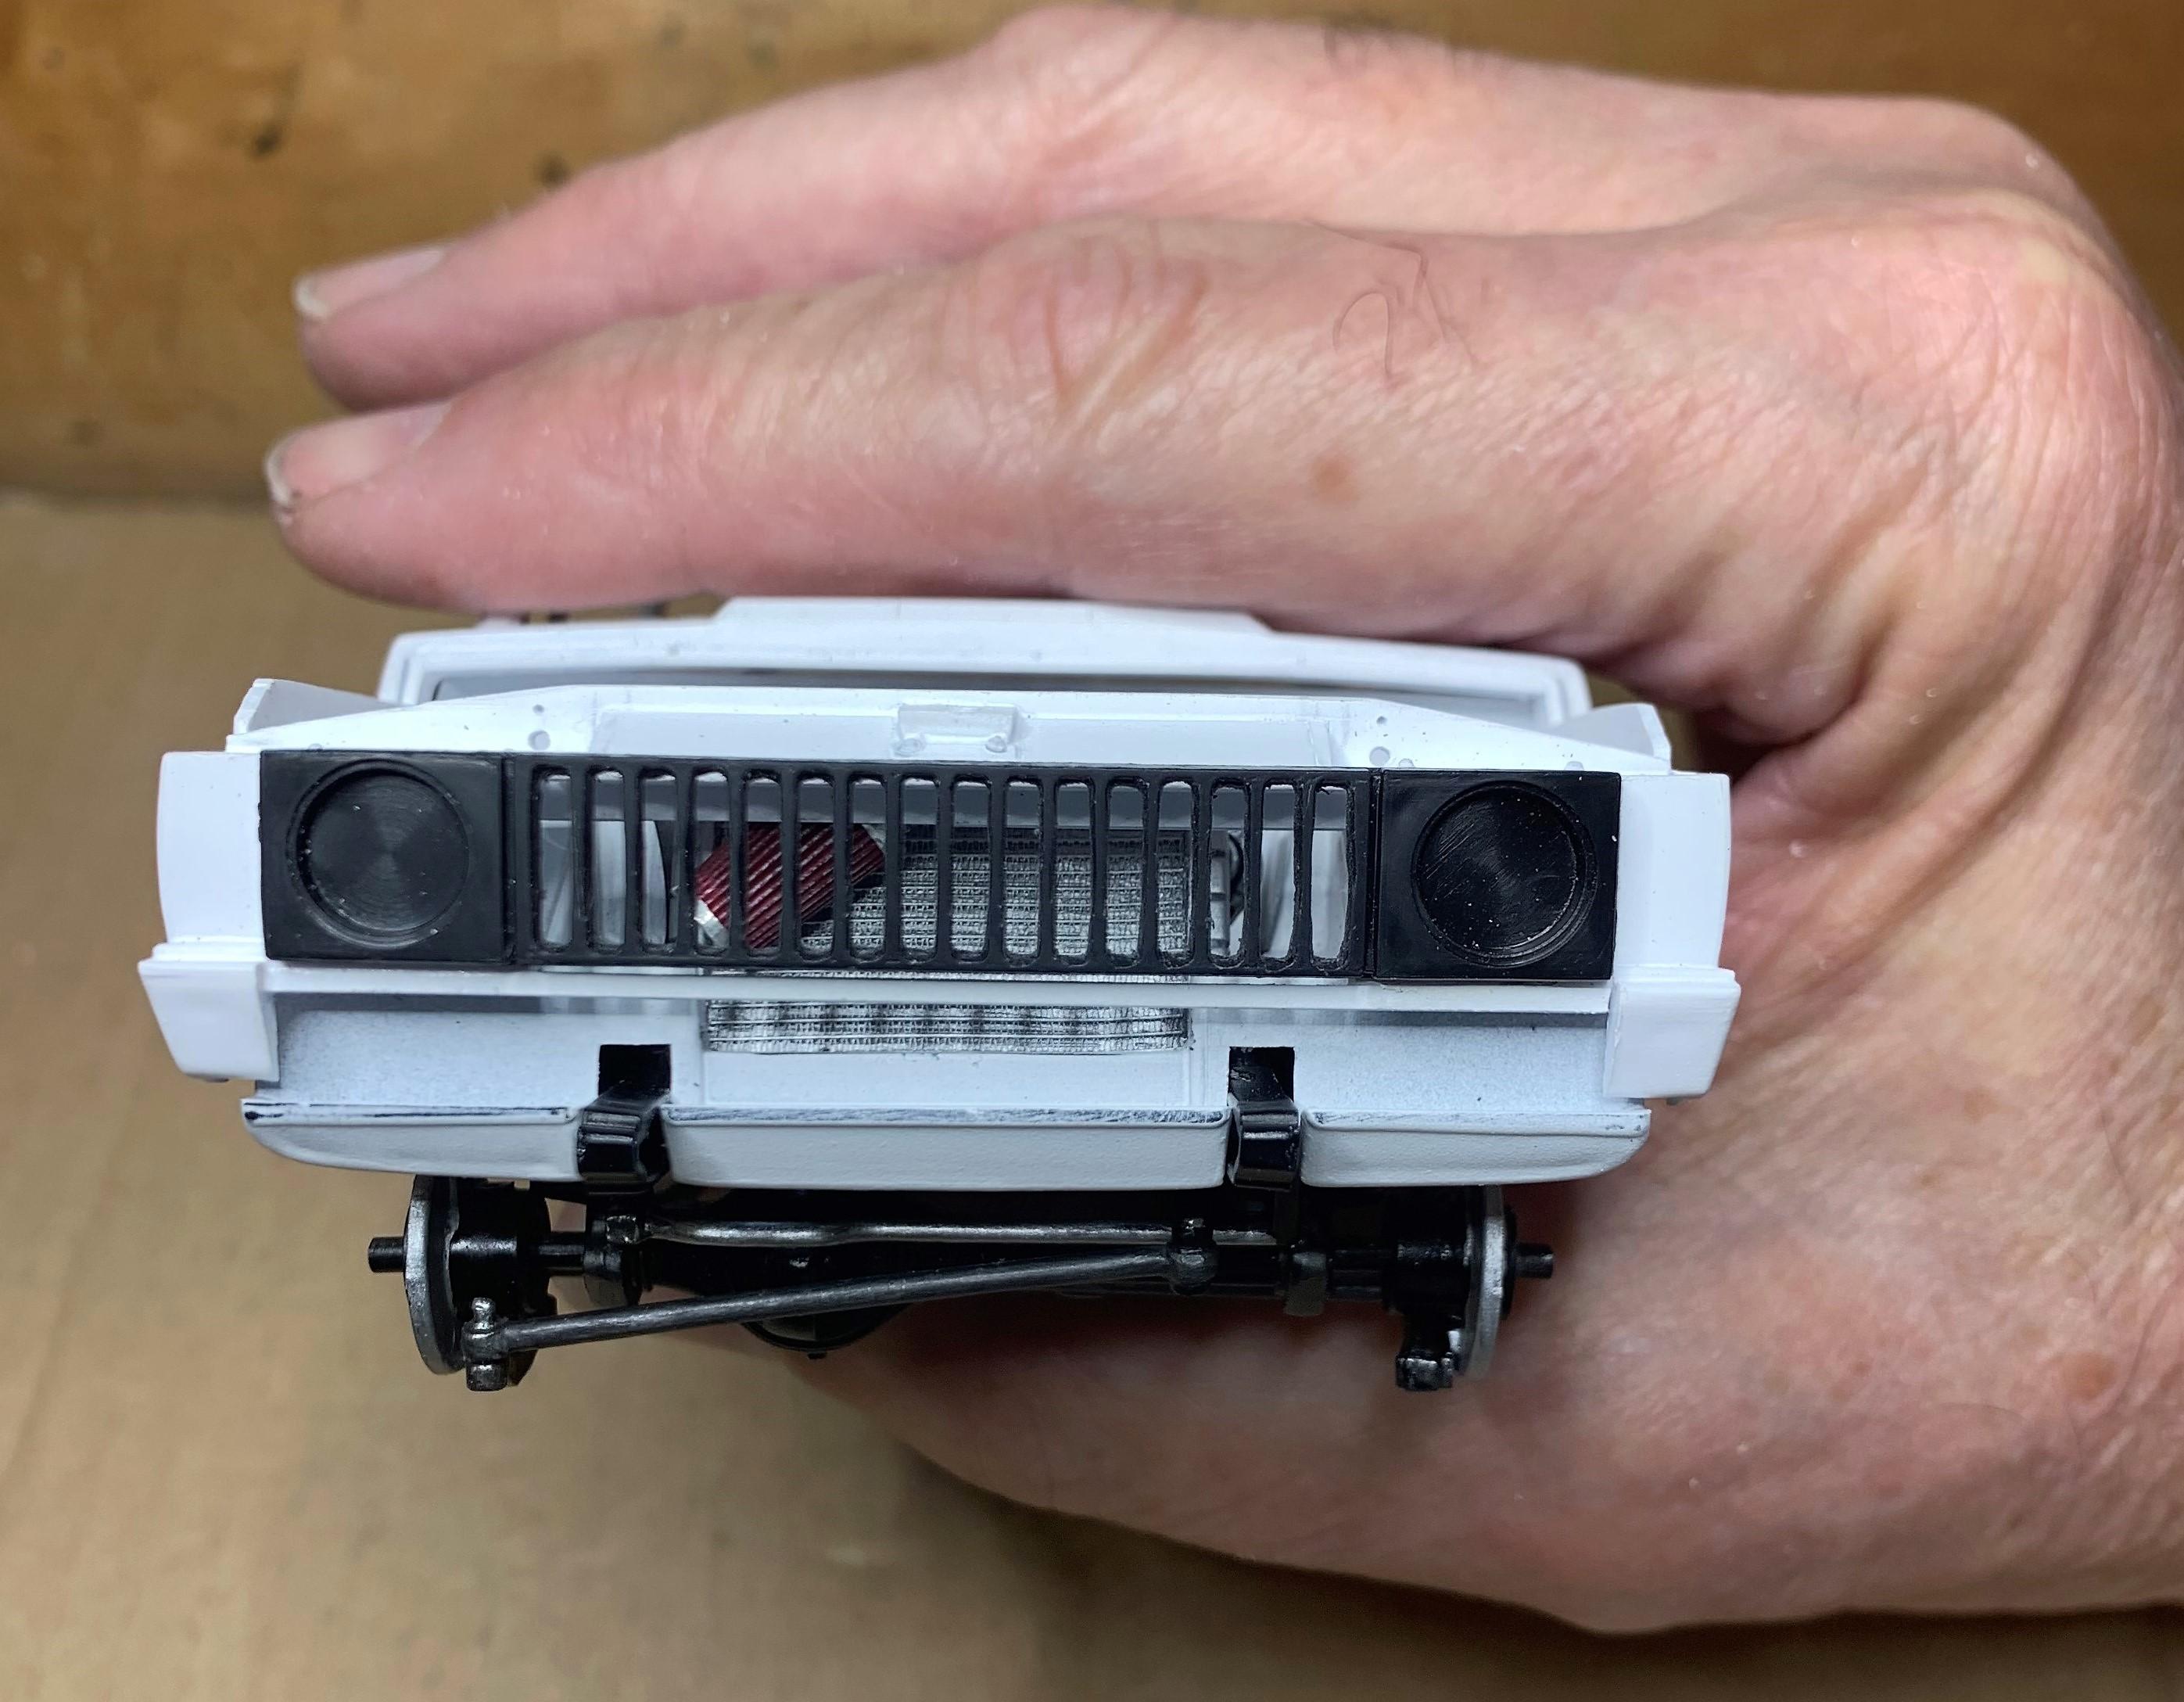
1: I mounted the rad with a slight lean so that I could fit the intake over and in front of it. 2: I made a little side filler neck and put a 3D cap on it sitting level. Also made a serpentine belt from .010 X .040 styrene painted rubber black and found some tiny white letters on a decal to add to it, not sure what they say, they're the tiniest I had! 3: This is what will show through the opened up grille........... eventually!
-
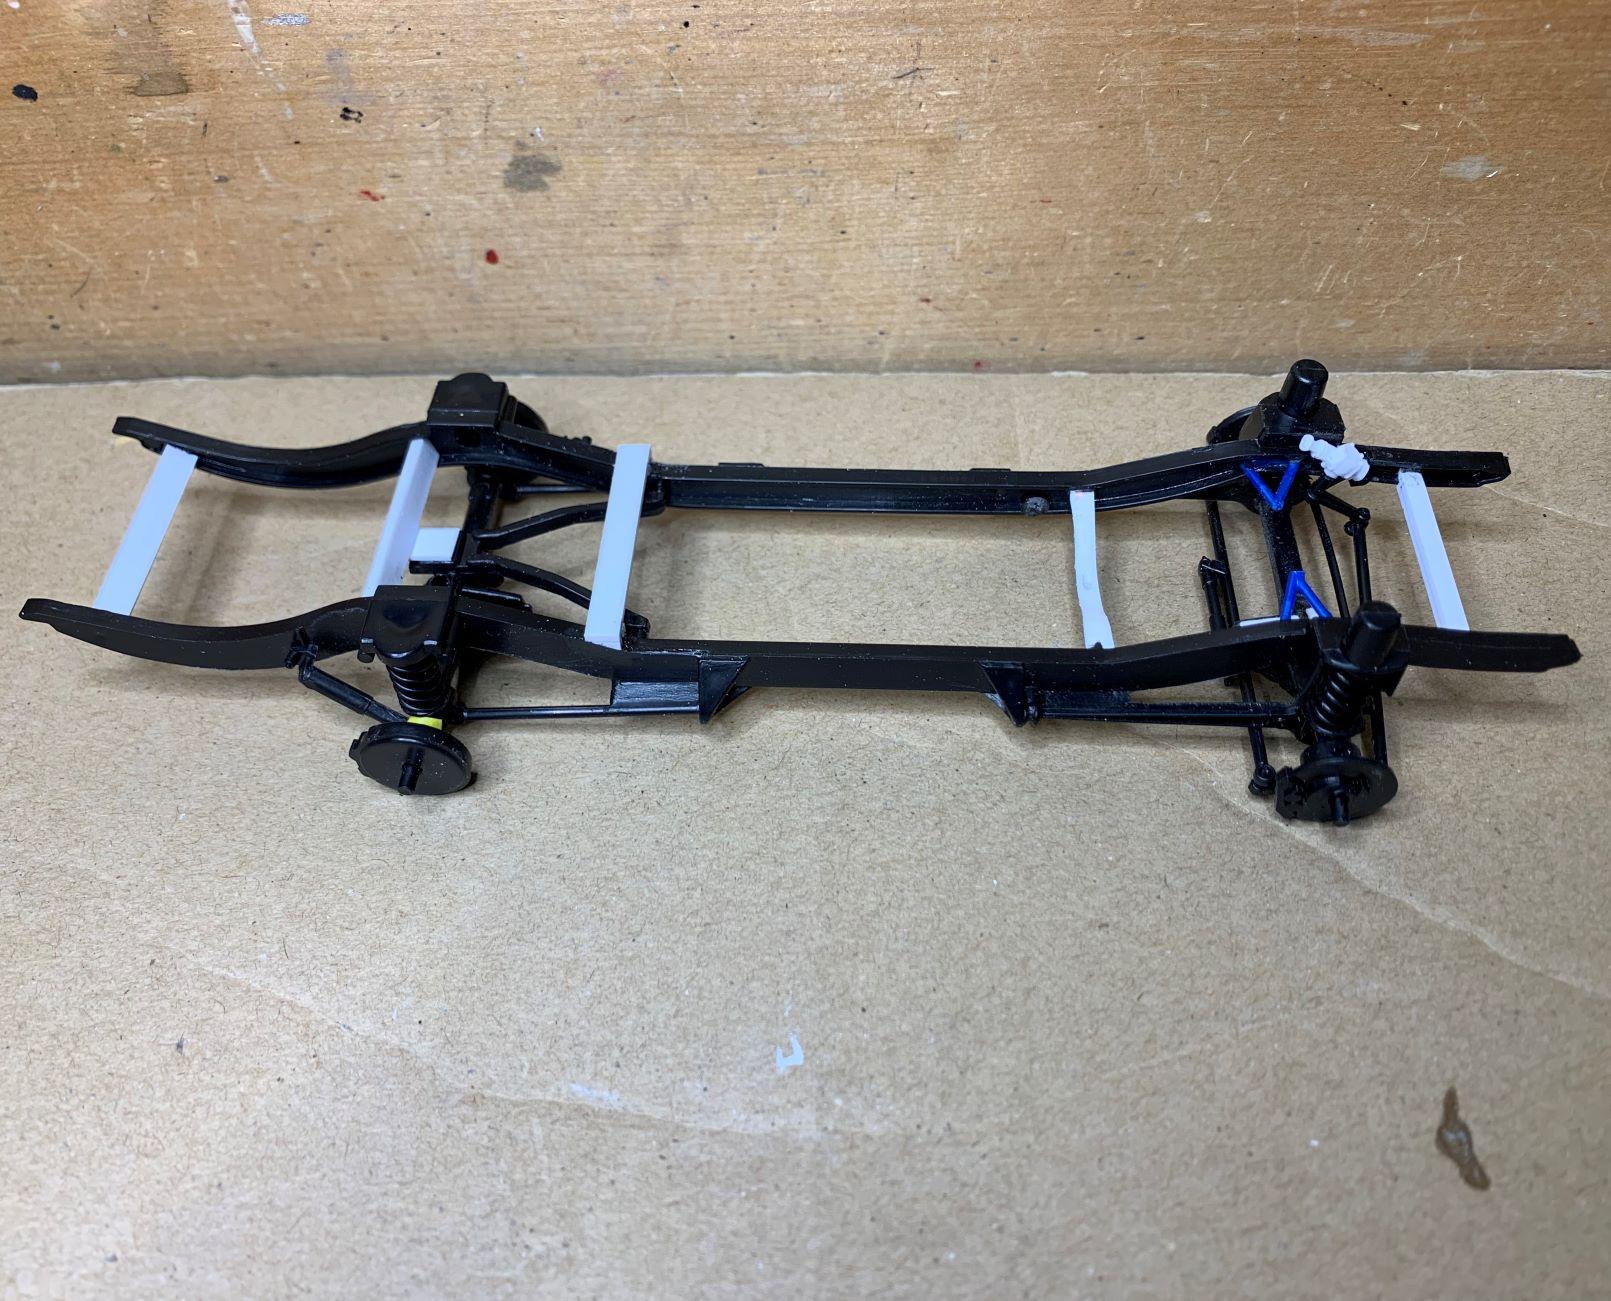
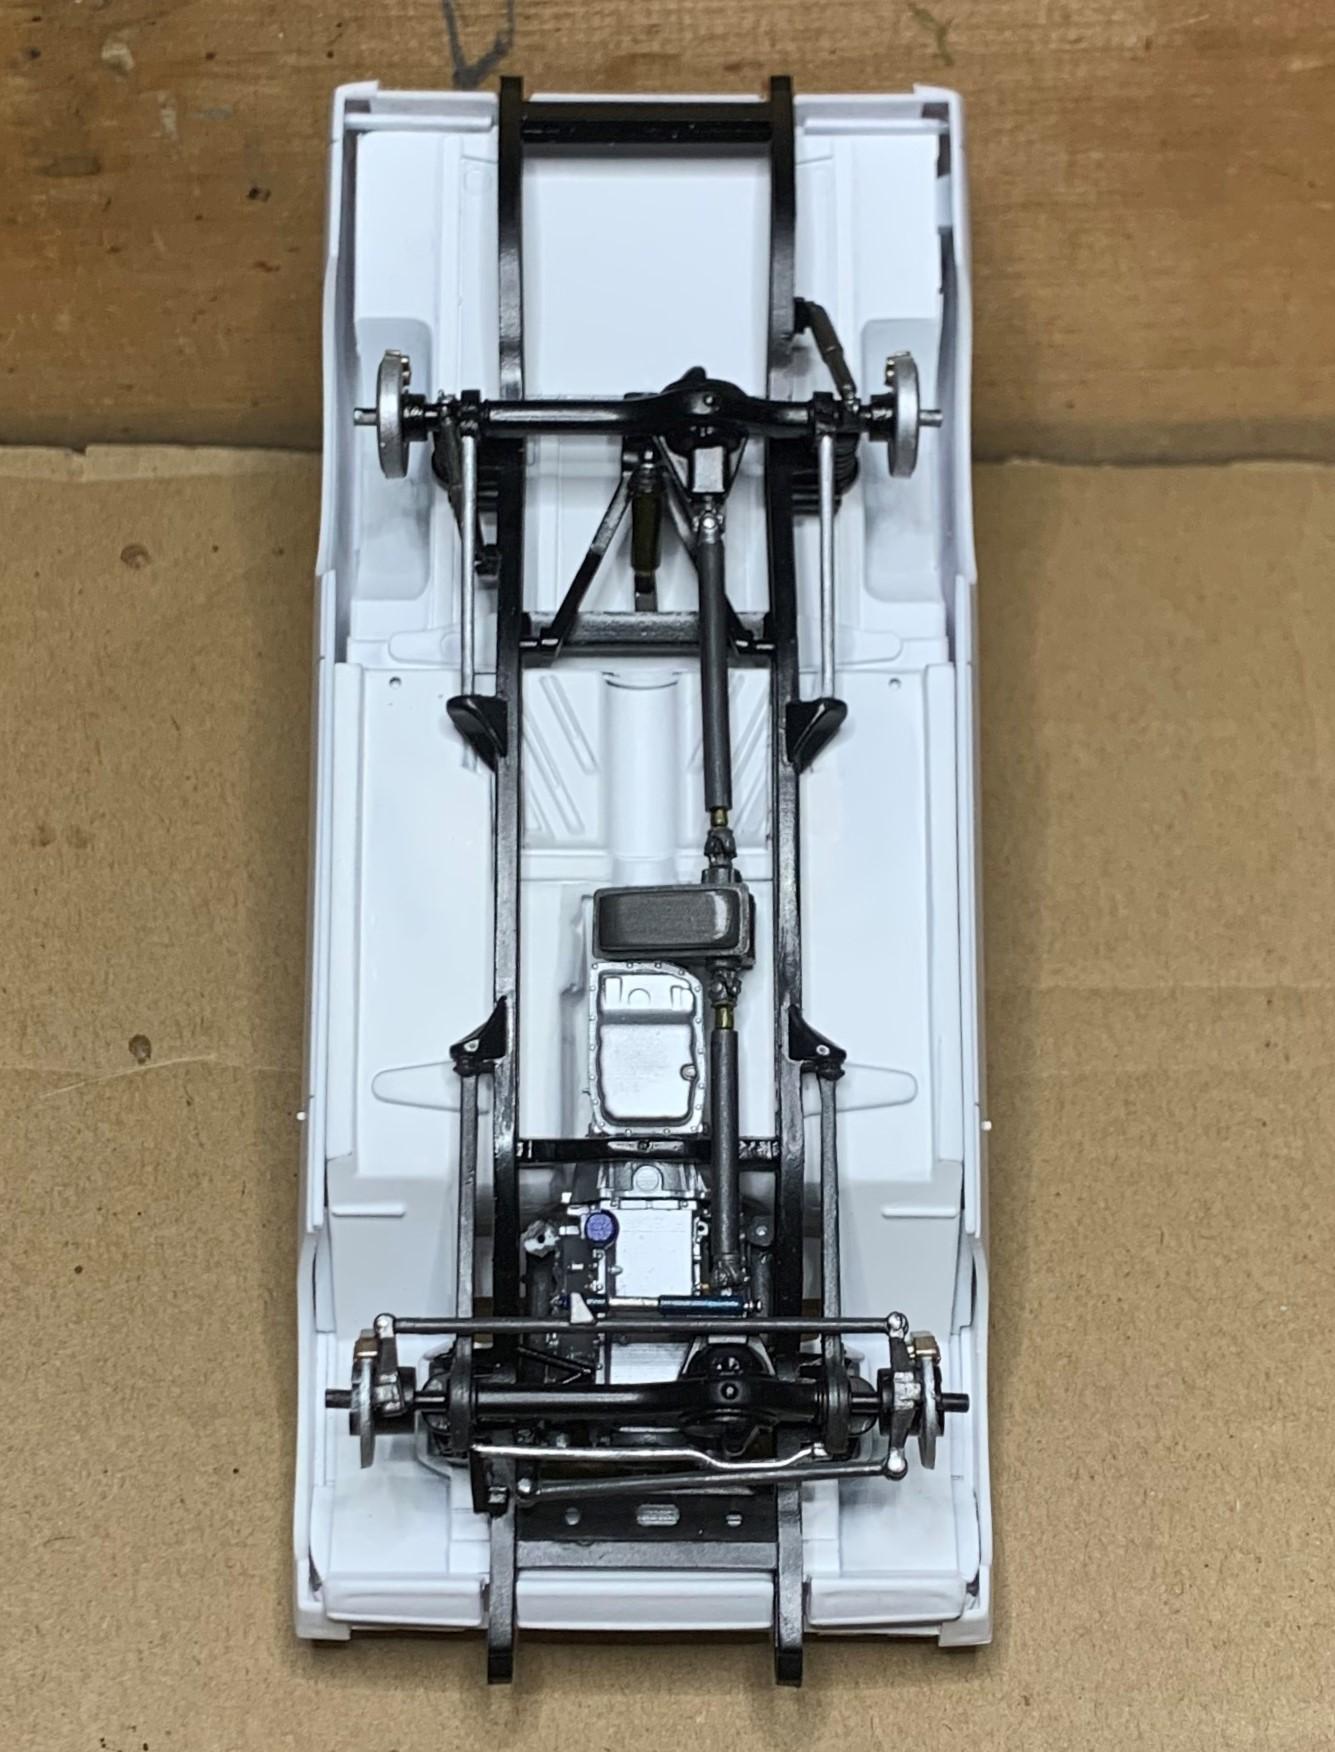
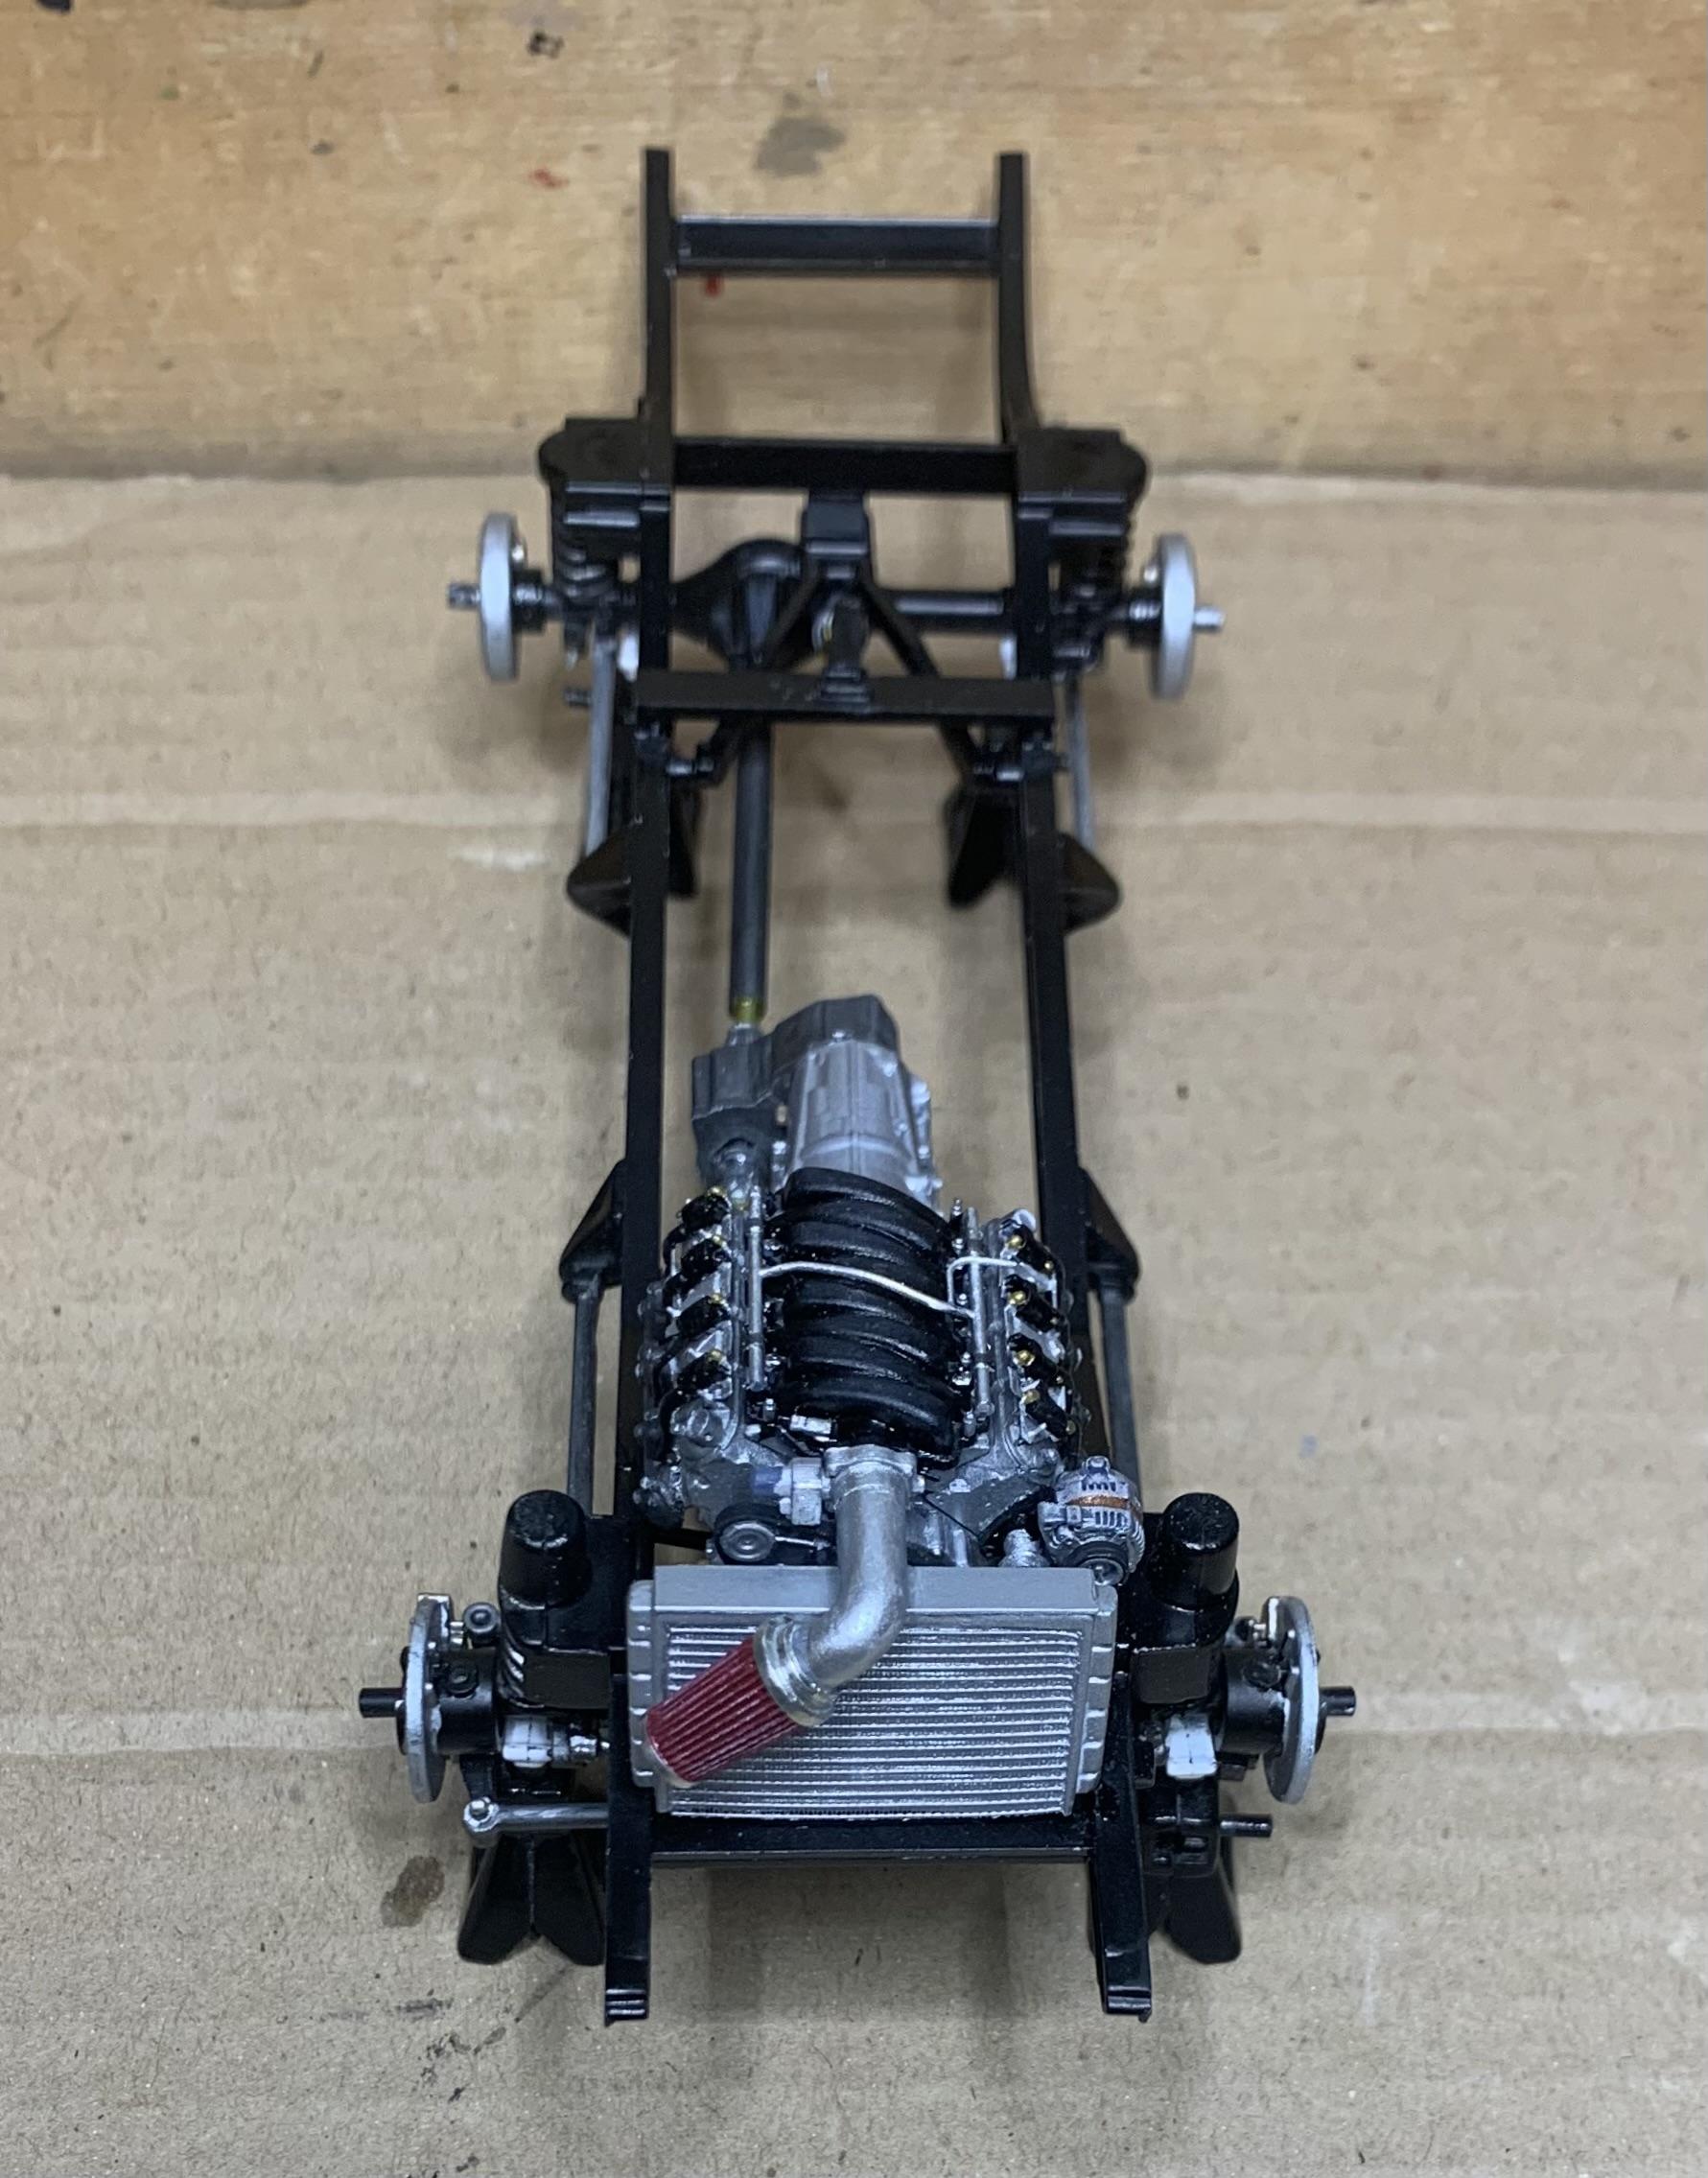
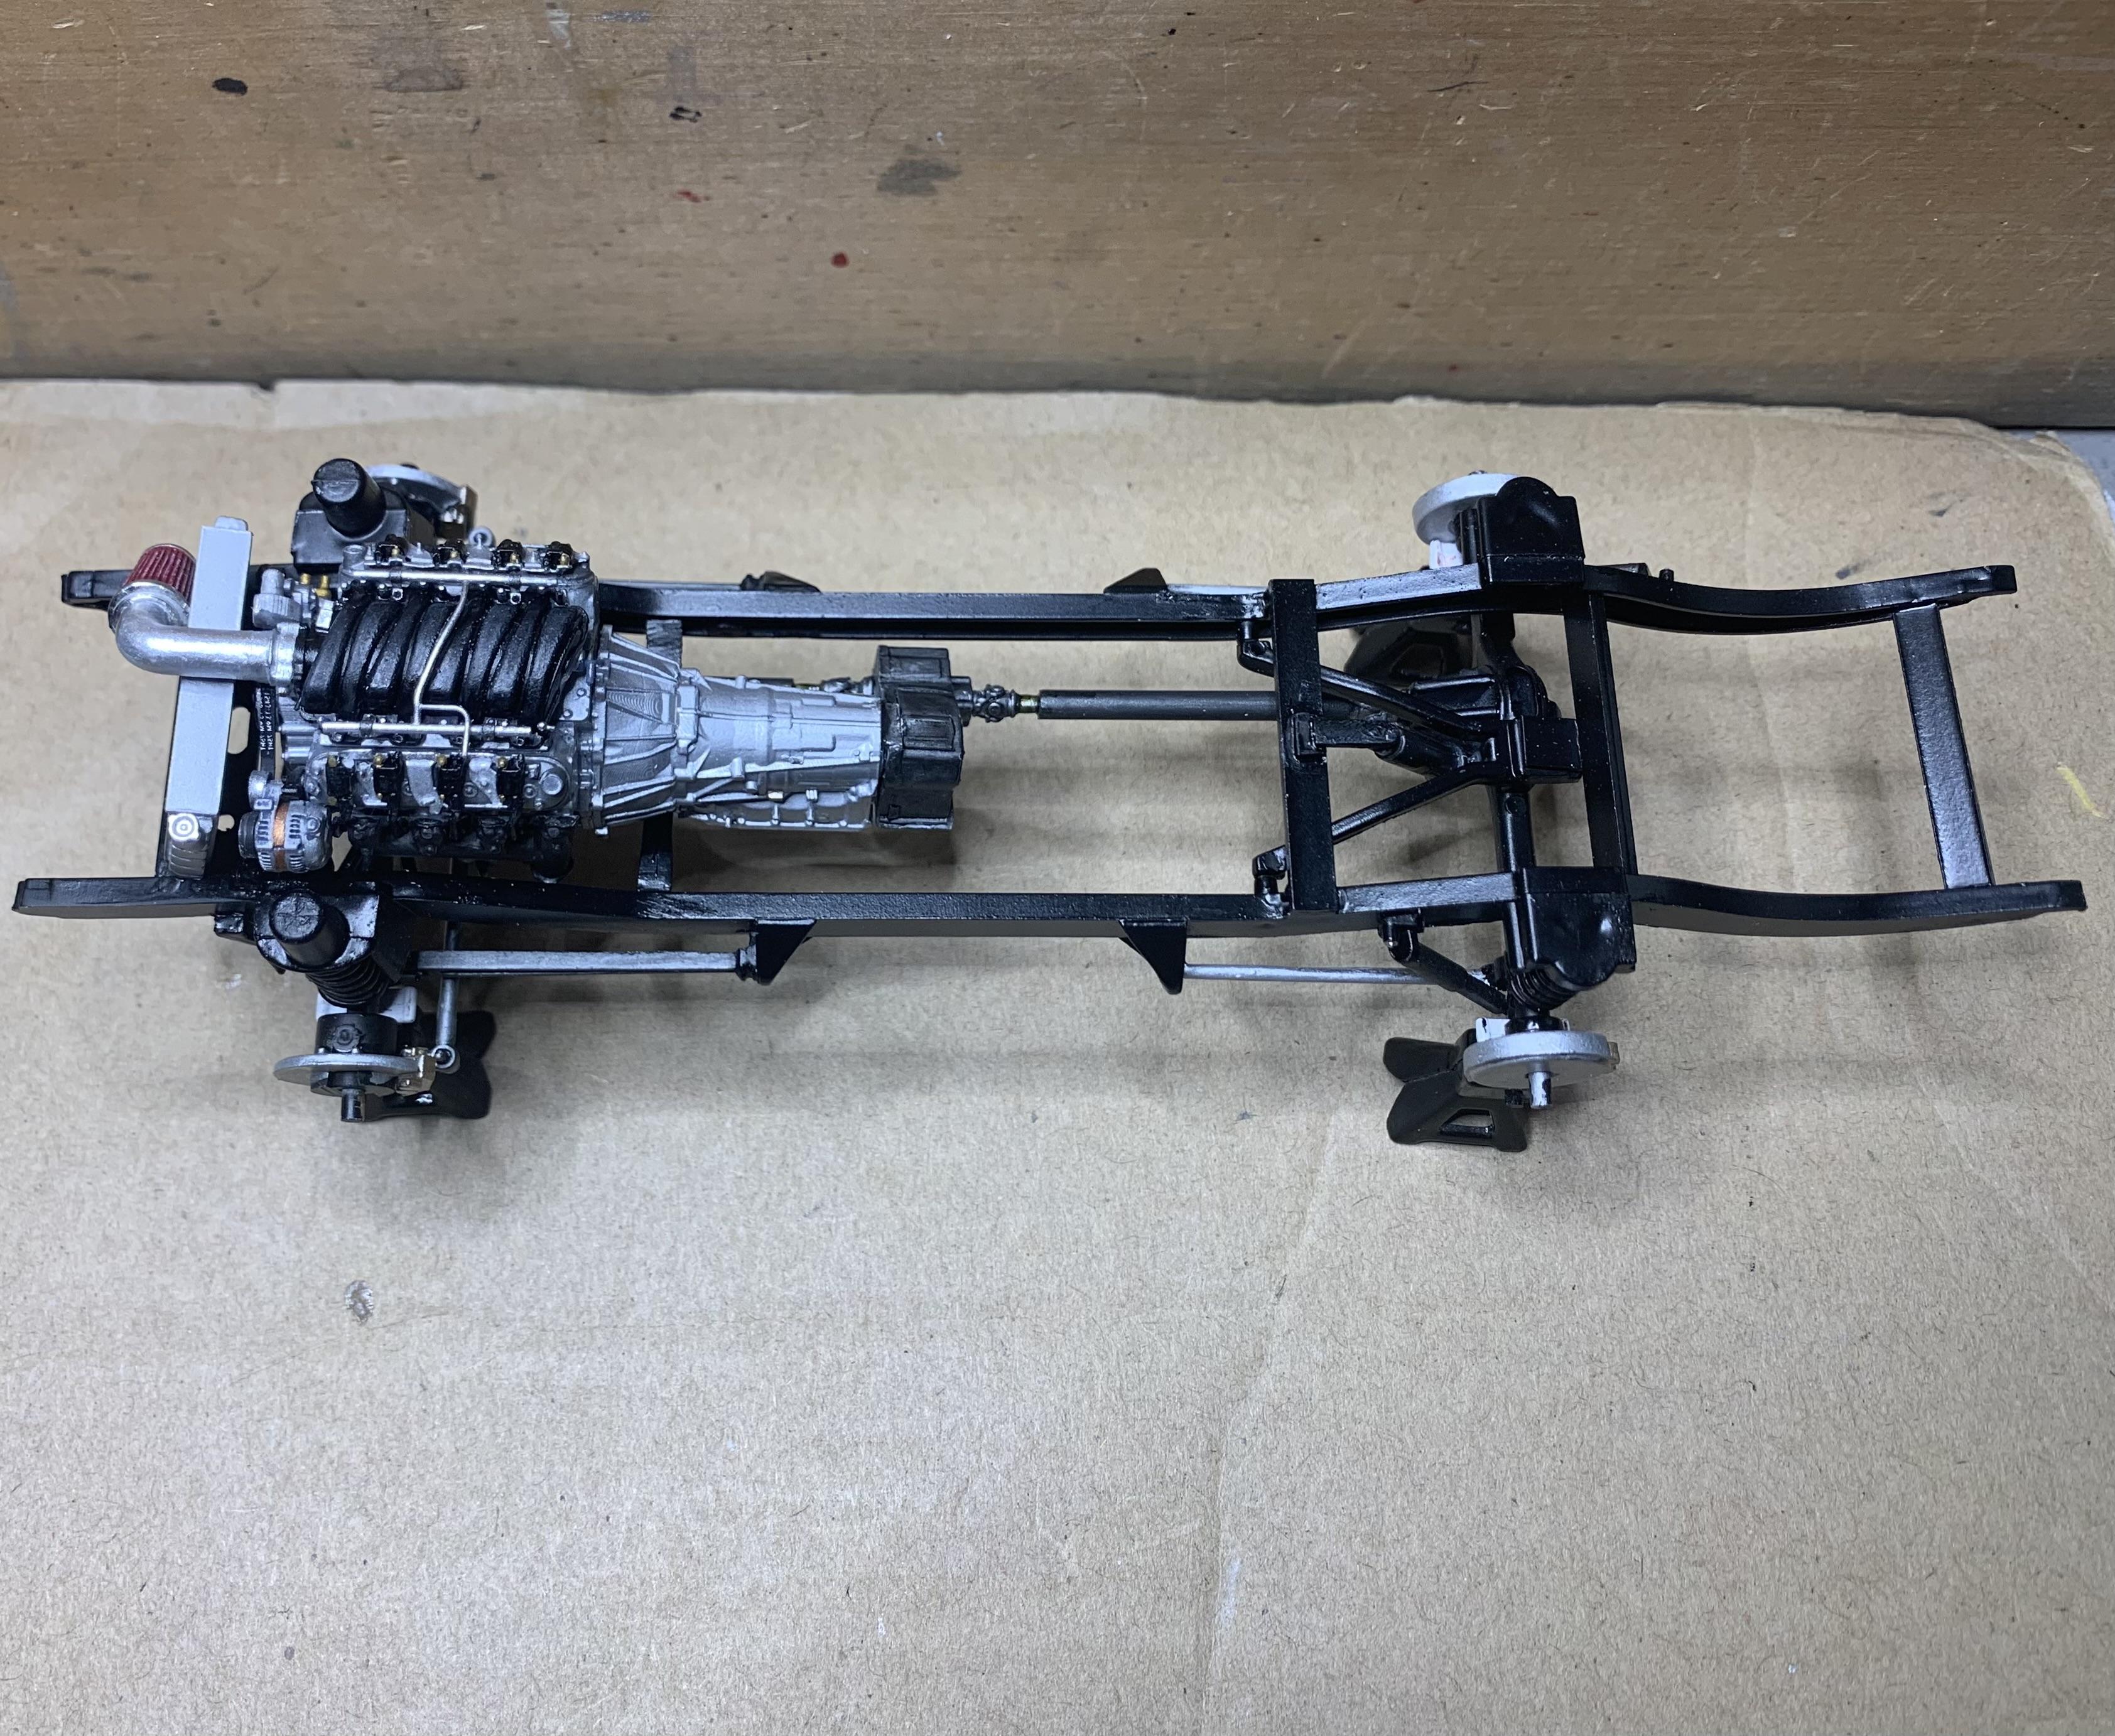
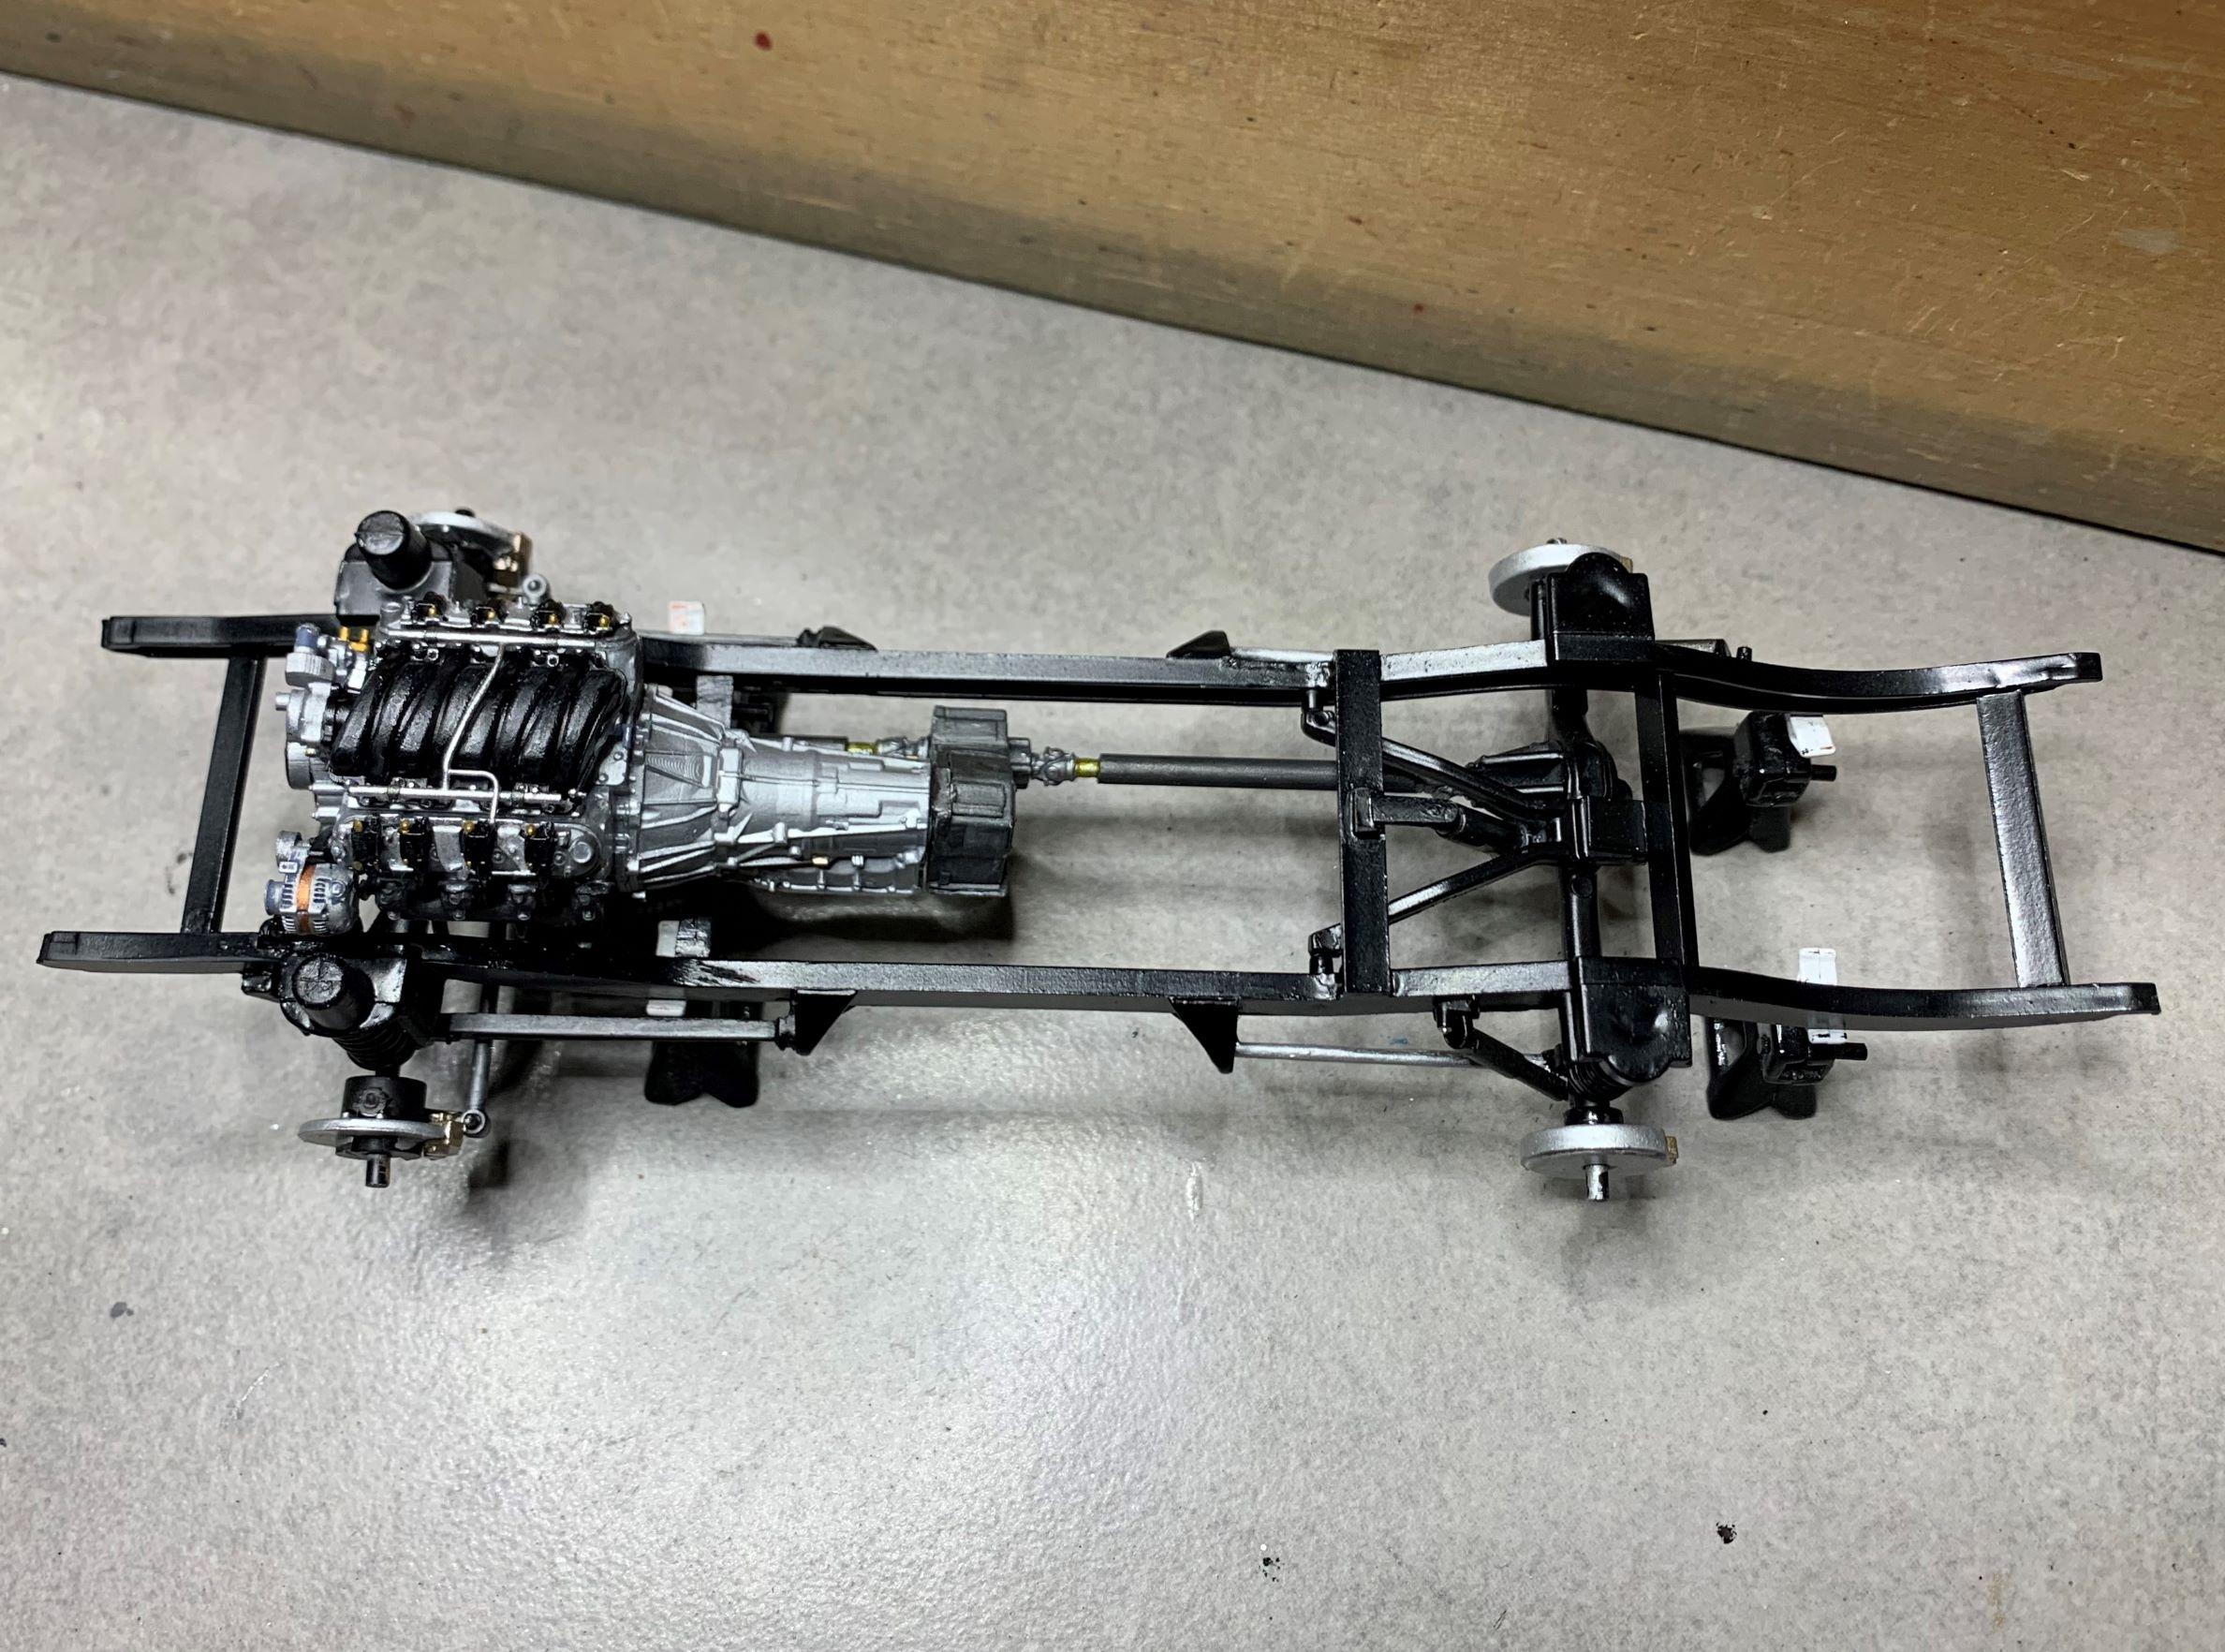
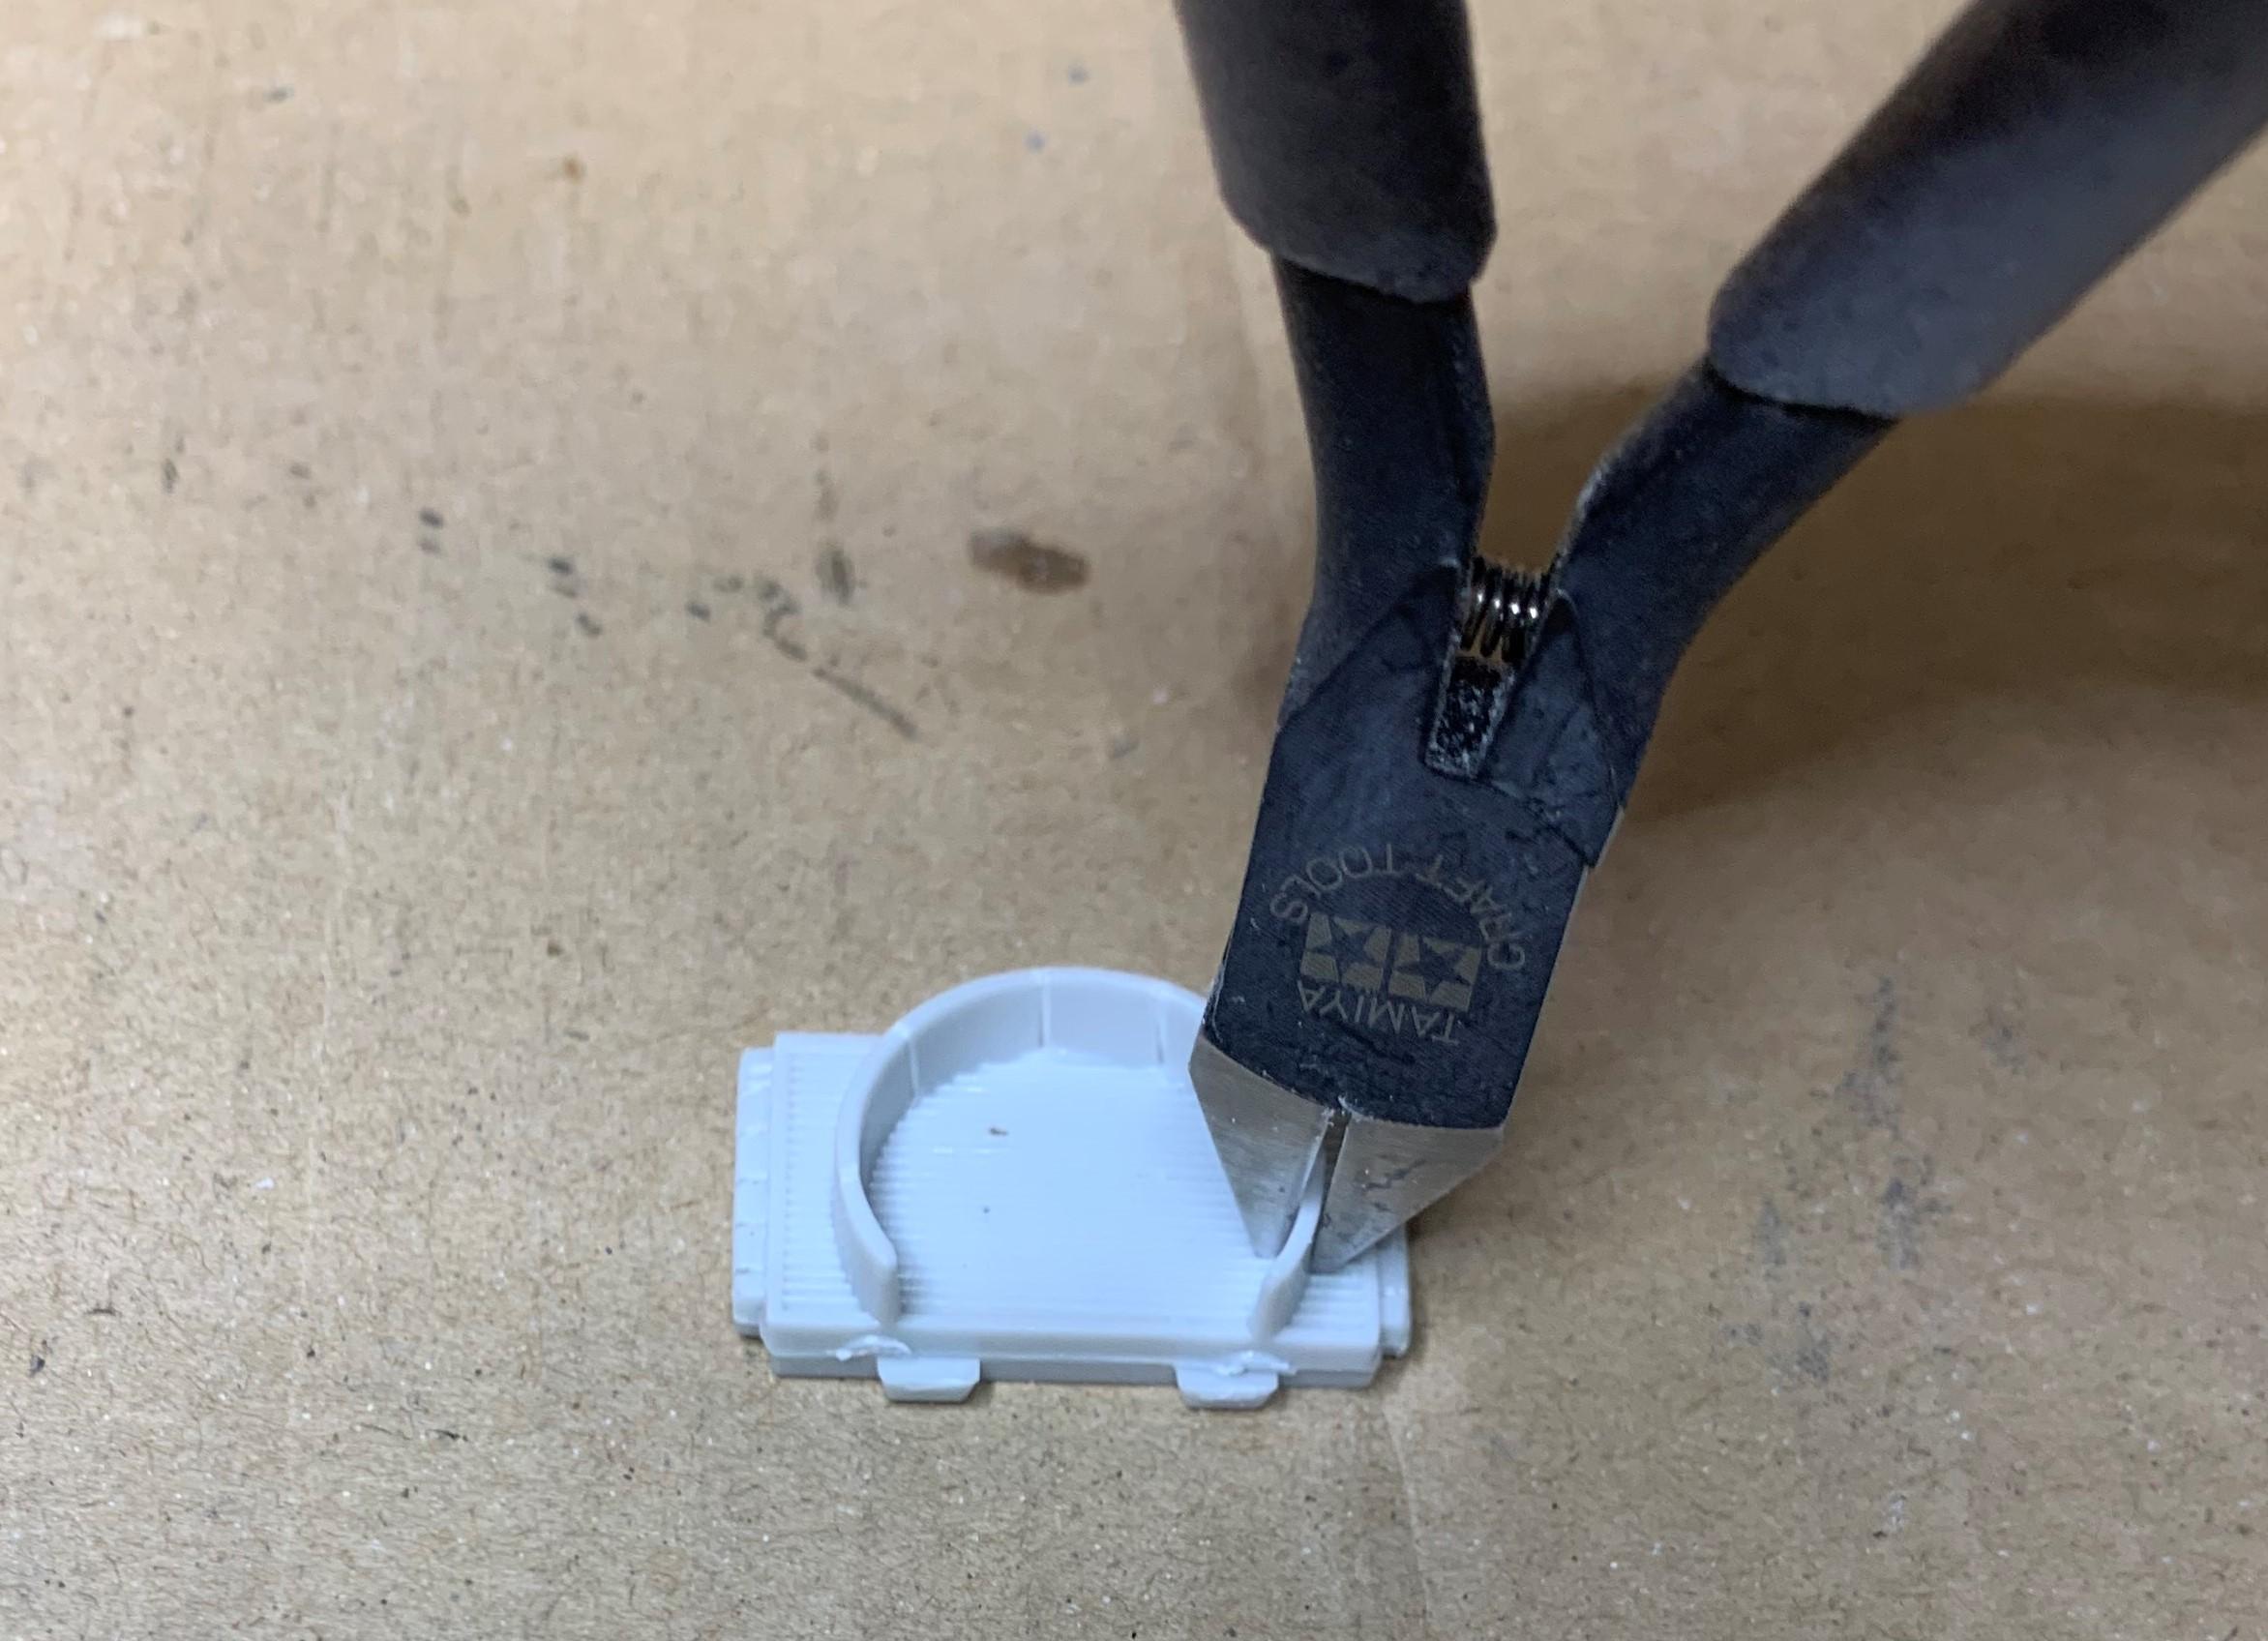
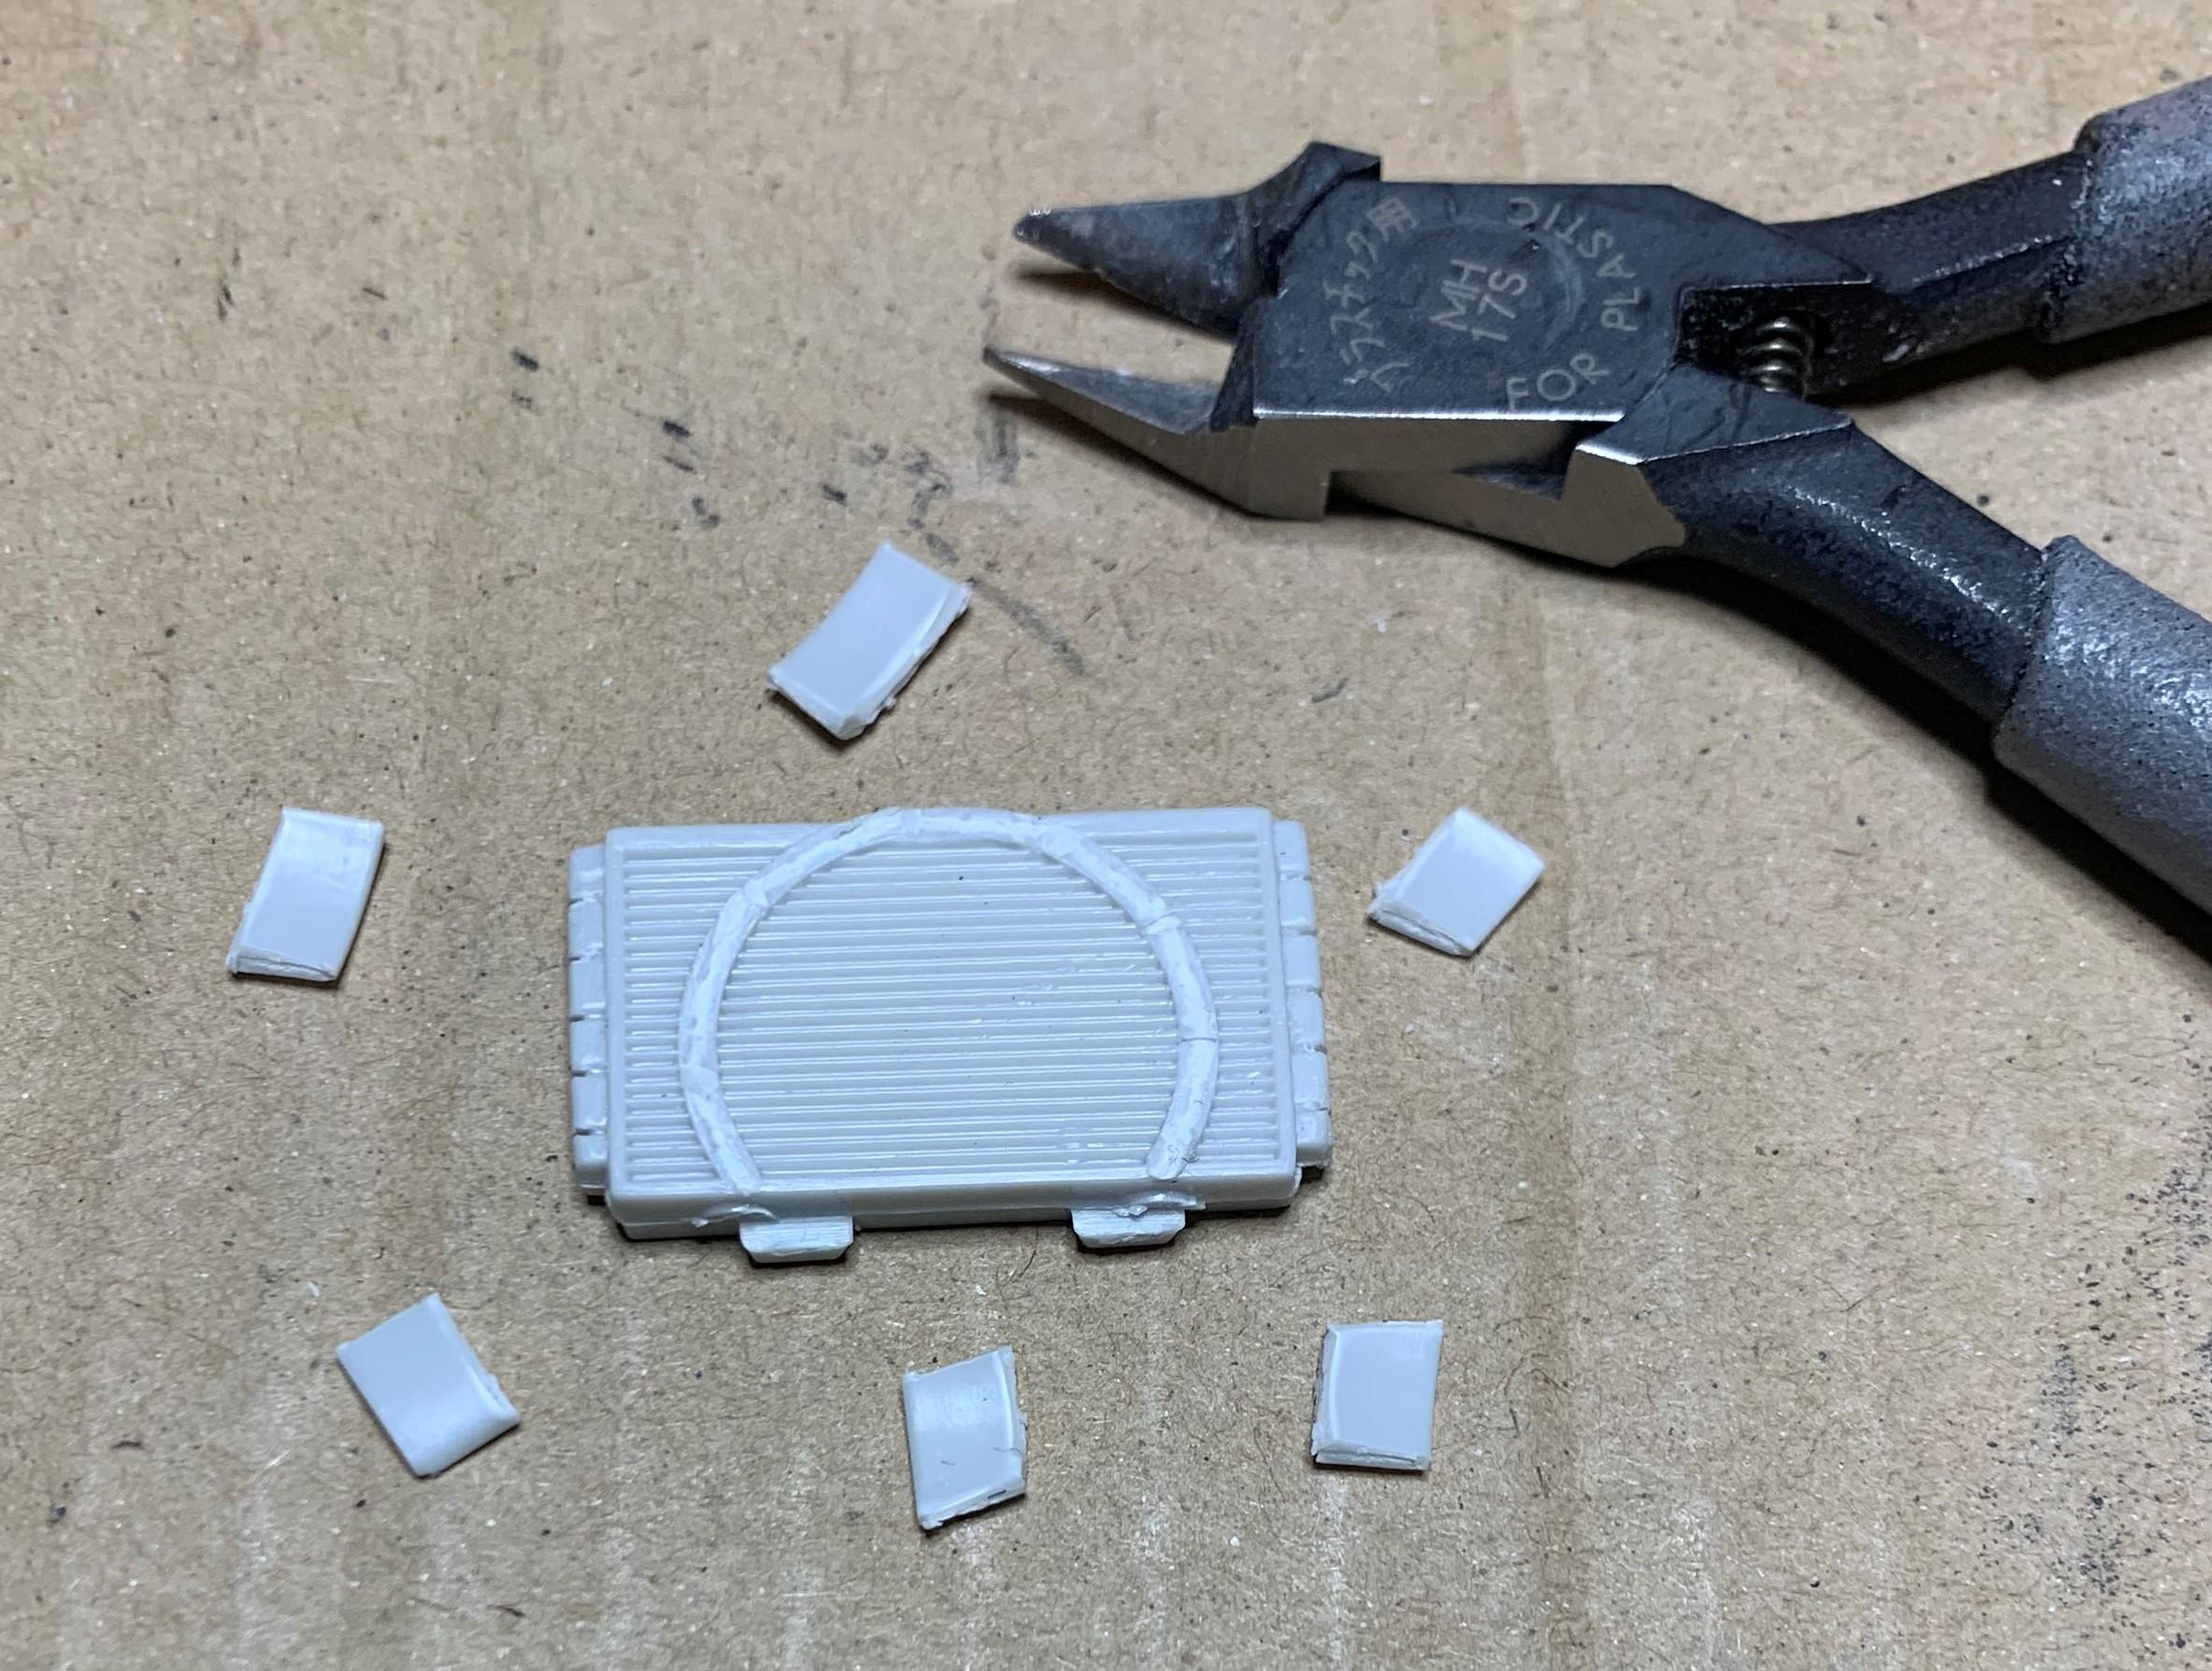
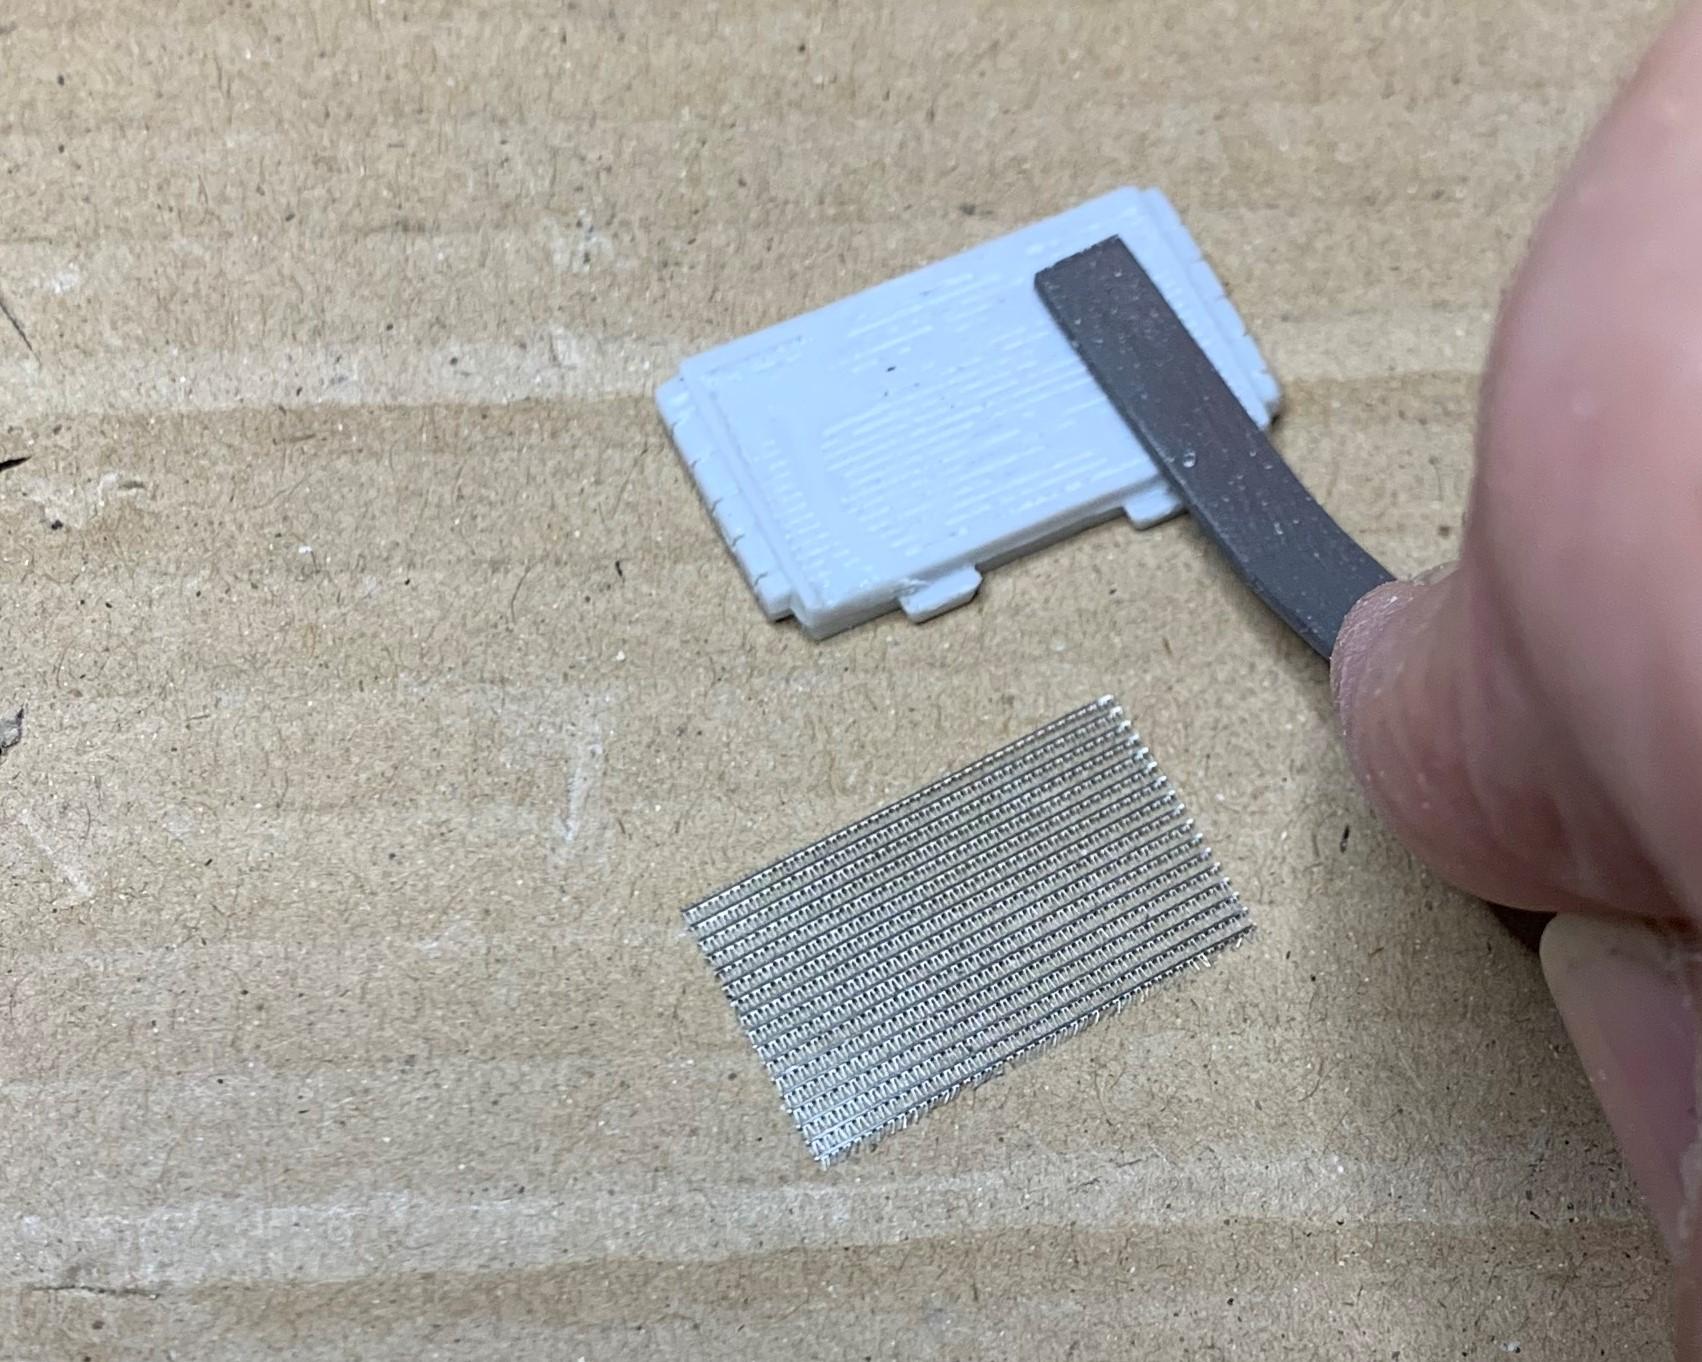
1: So I mounted the engine and driveshafts in the frame, it's a tight fit, but so far, so good! 2: I took a rad from a Nascar kit and decided to mount it backwards, so I had to remove the fan shroud, first by making several cuts this way: 3: Then I cut the shroud off this way. 4: Next I filed the rad down to leave a reveal on the top and sides so I could put some photo-etch rad screen into the front.
-
This is so cool! Can't wait to see more of it! I love "different"!
-
All I need to say is WOW!
-
Nice two tone! Looks great!
-
'51 Studebaker, Peking to Paris Rally (community build project)
dino246gt replied to Ace-Garageguy's topic in WIP: Model Cars
Very impressive work! I'm watching and enjoying the ride! Cheers. -
Looking real good, nice build!
-
Model Builder Poll
dino246gt replied to Dave Ambrose's topic in Model Cars Magazine News and Discussions
I submitted my form, we should all, that way they have a better idea of what WE want to see in the magazine! Basically, model cars! Cheers -
NNL North Coverage?
dino246gt replied to StevenGuthmiller's topic in Model Cars Magazine News and Discussions
Steve, your Dodge looks amazing, well because it IS amazing! -
I love this project, looks so cool. You'll fix the paint I'm sure. I always have painting issues, but they get fixed! Cheers, keep on "truckin"
-
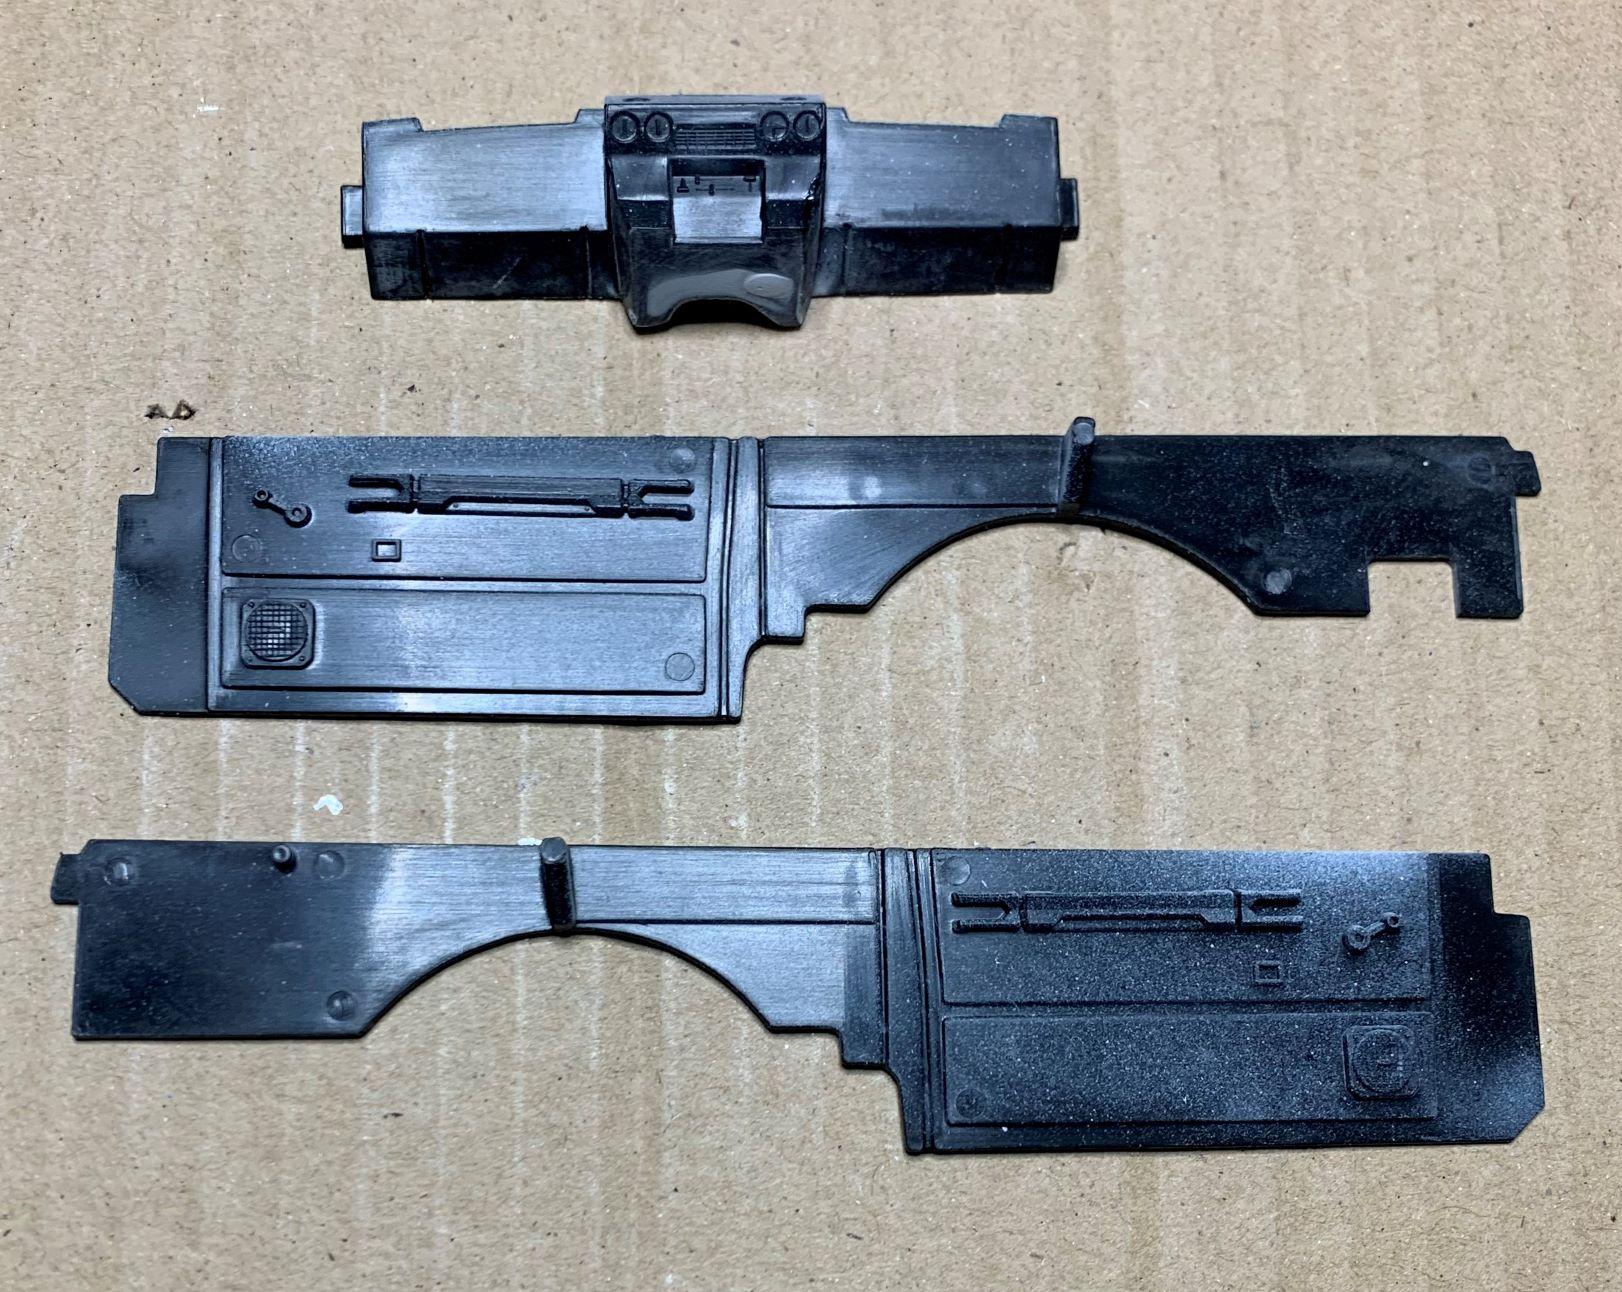
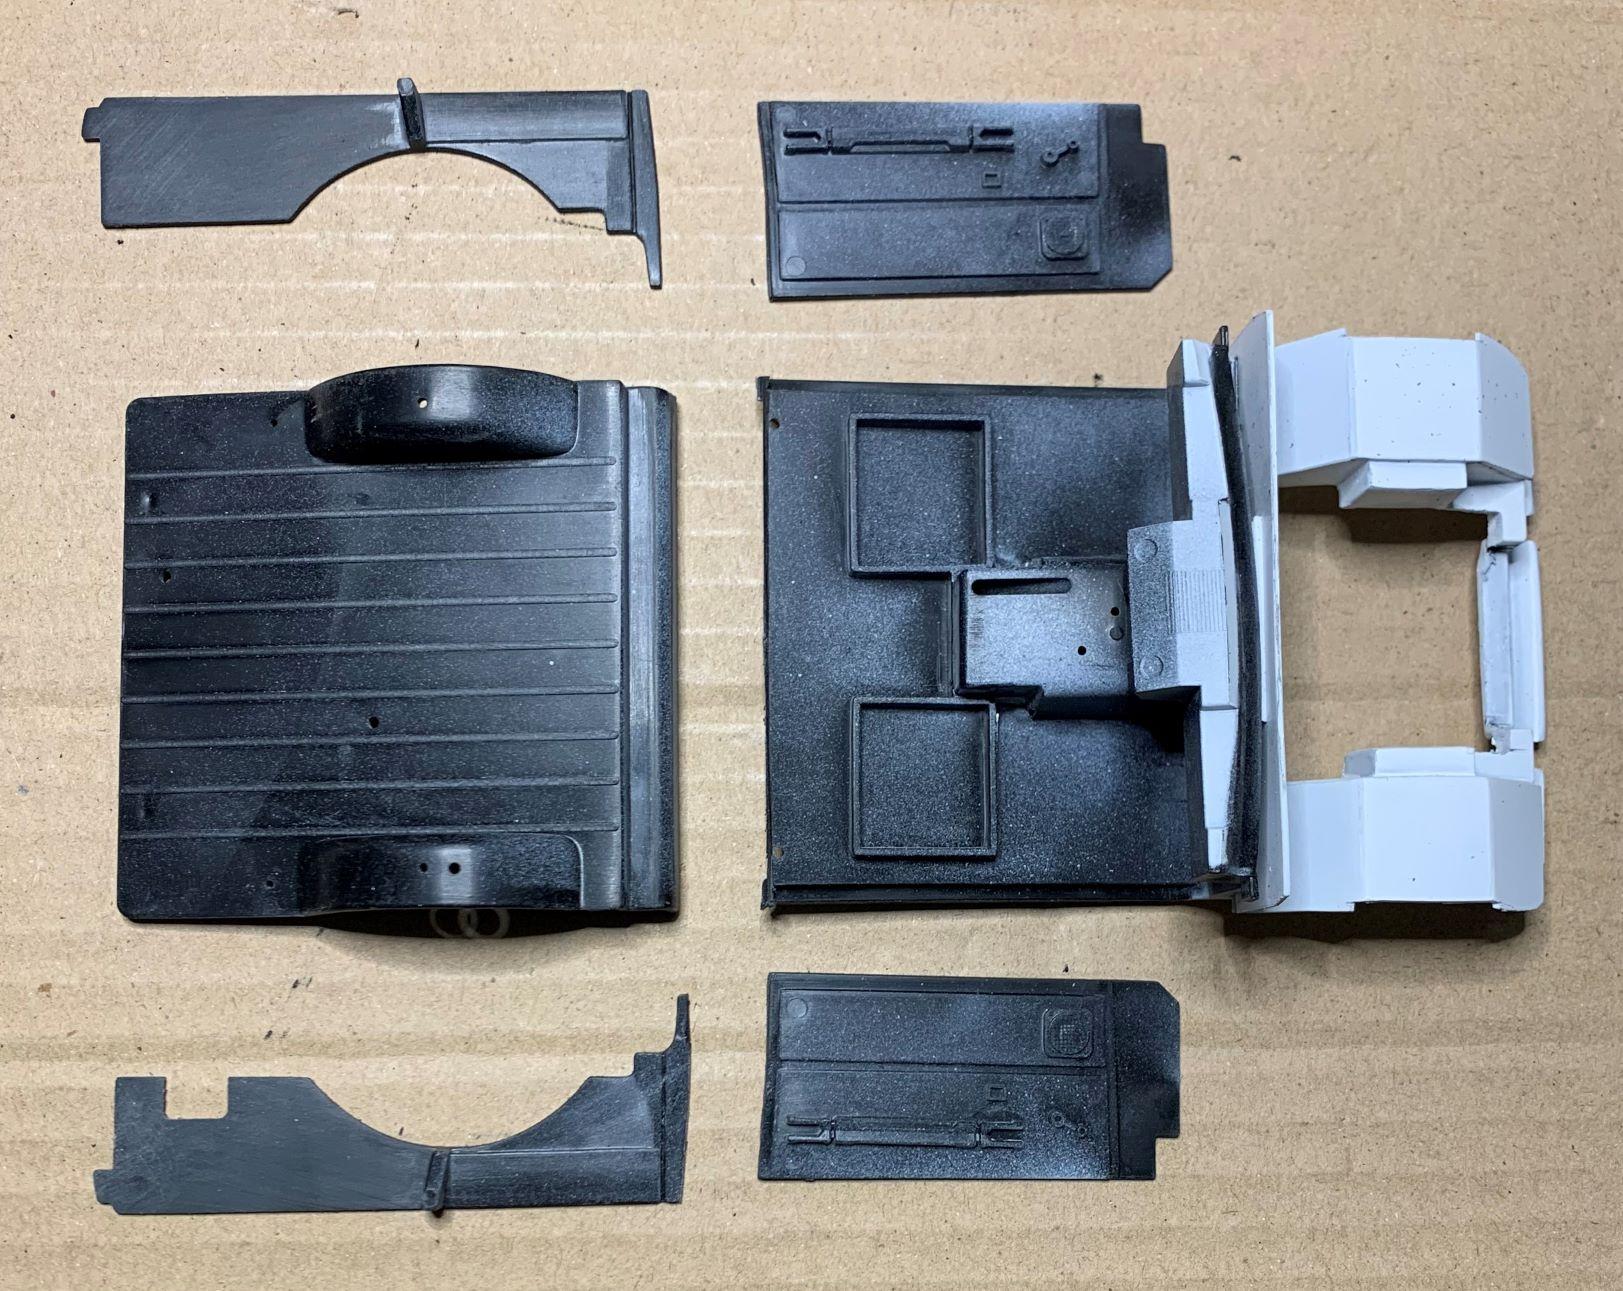
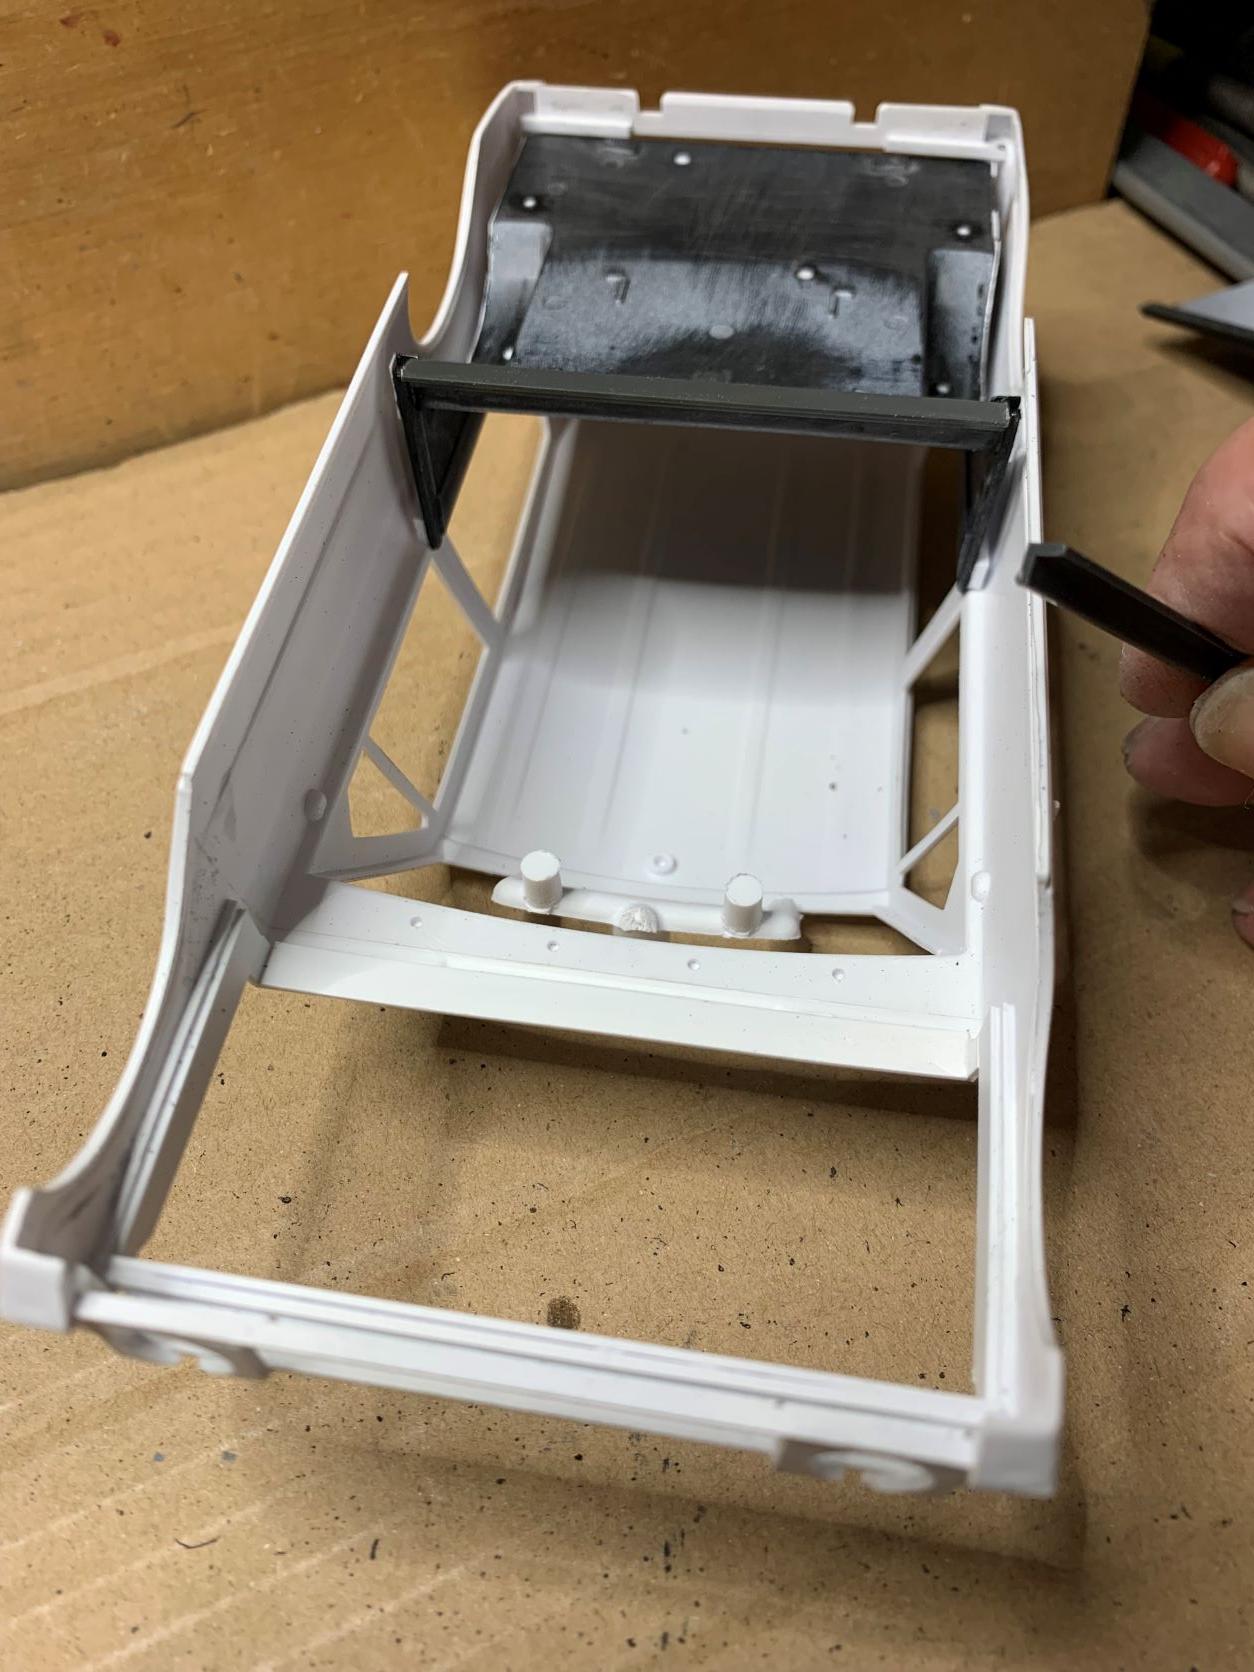
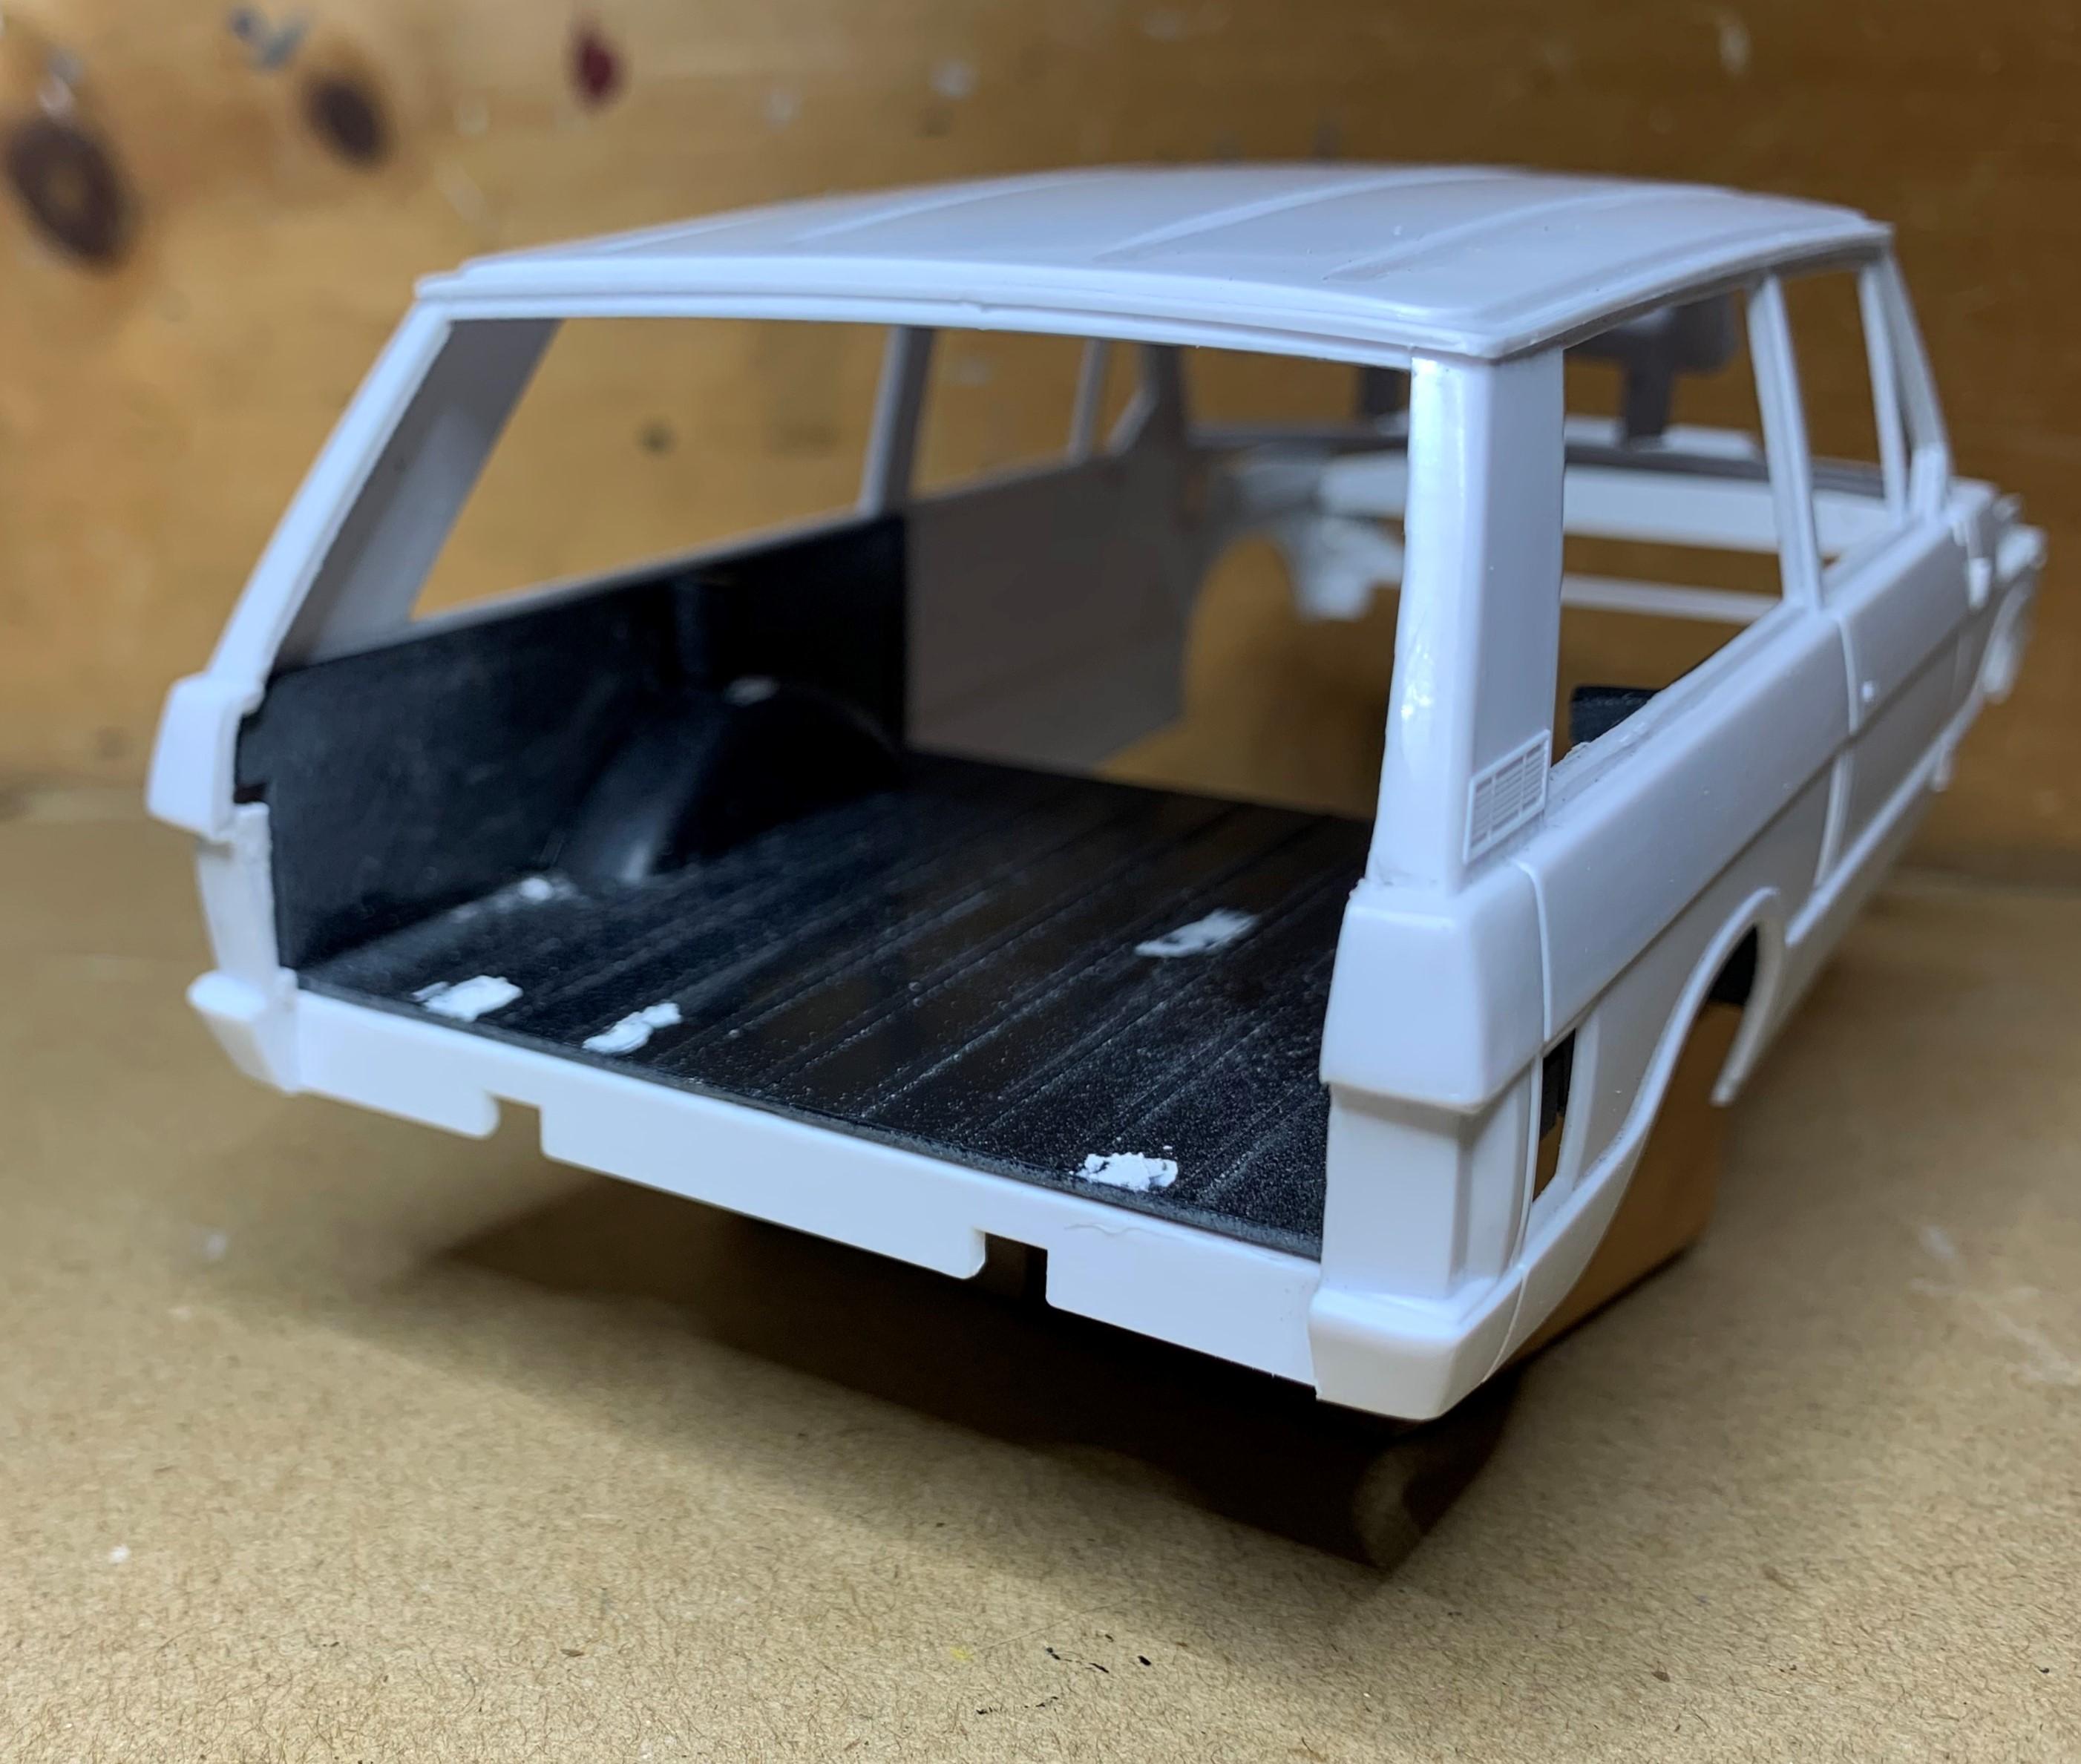
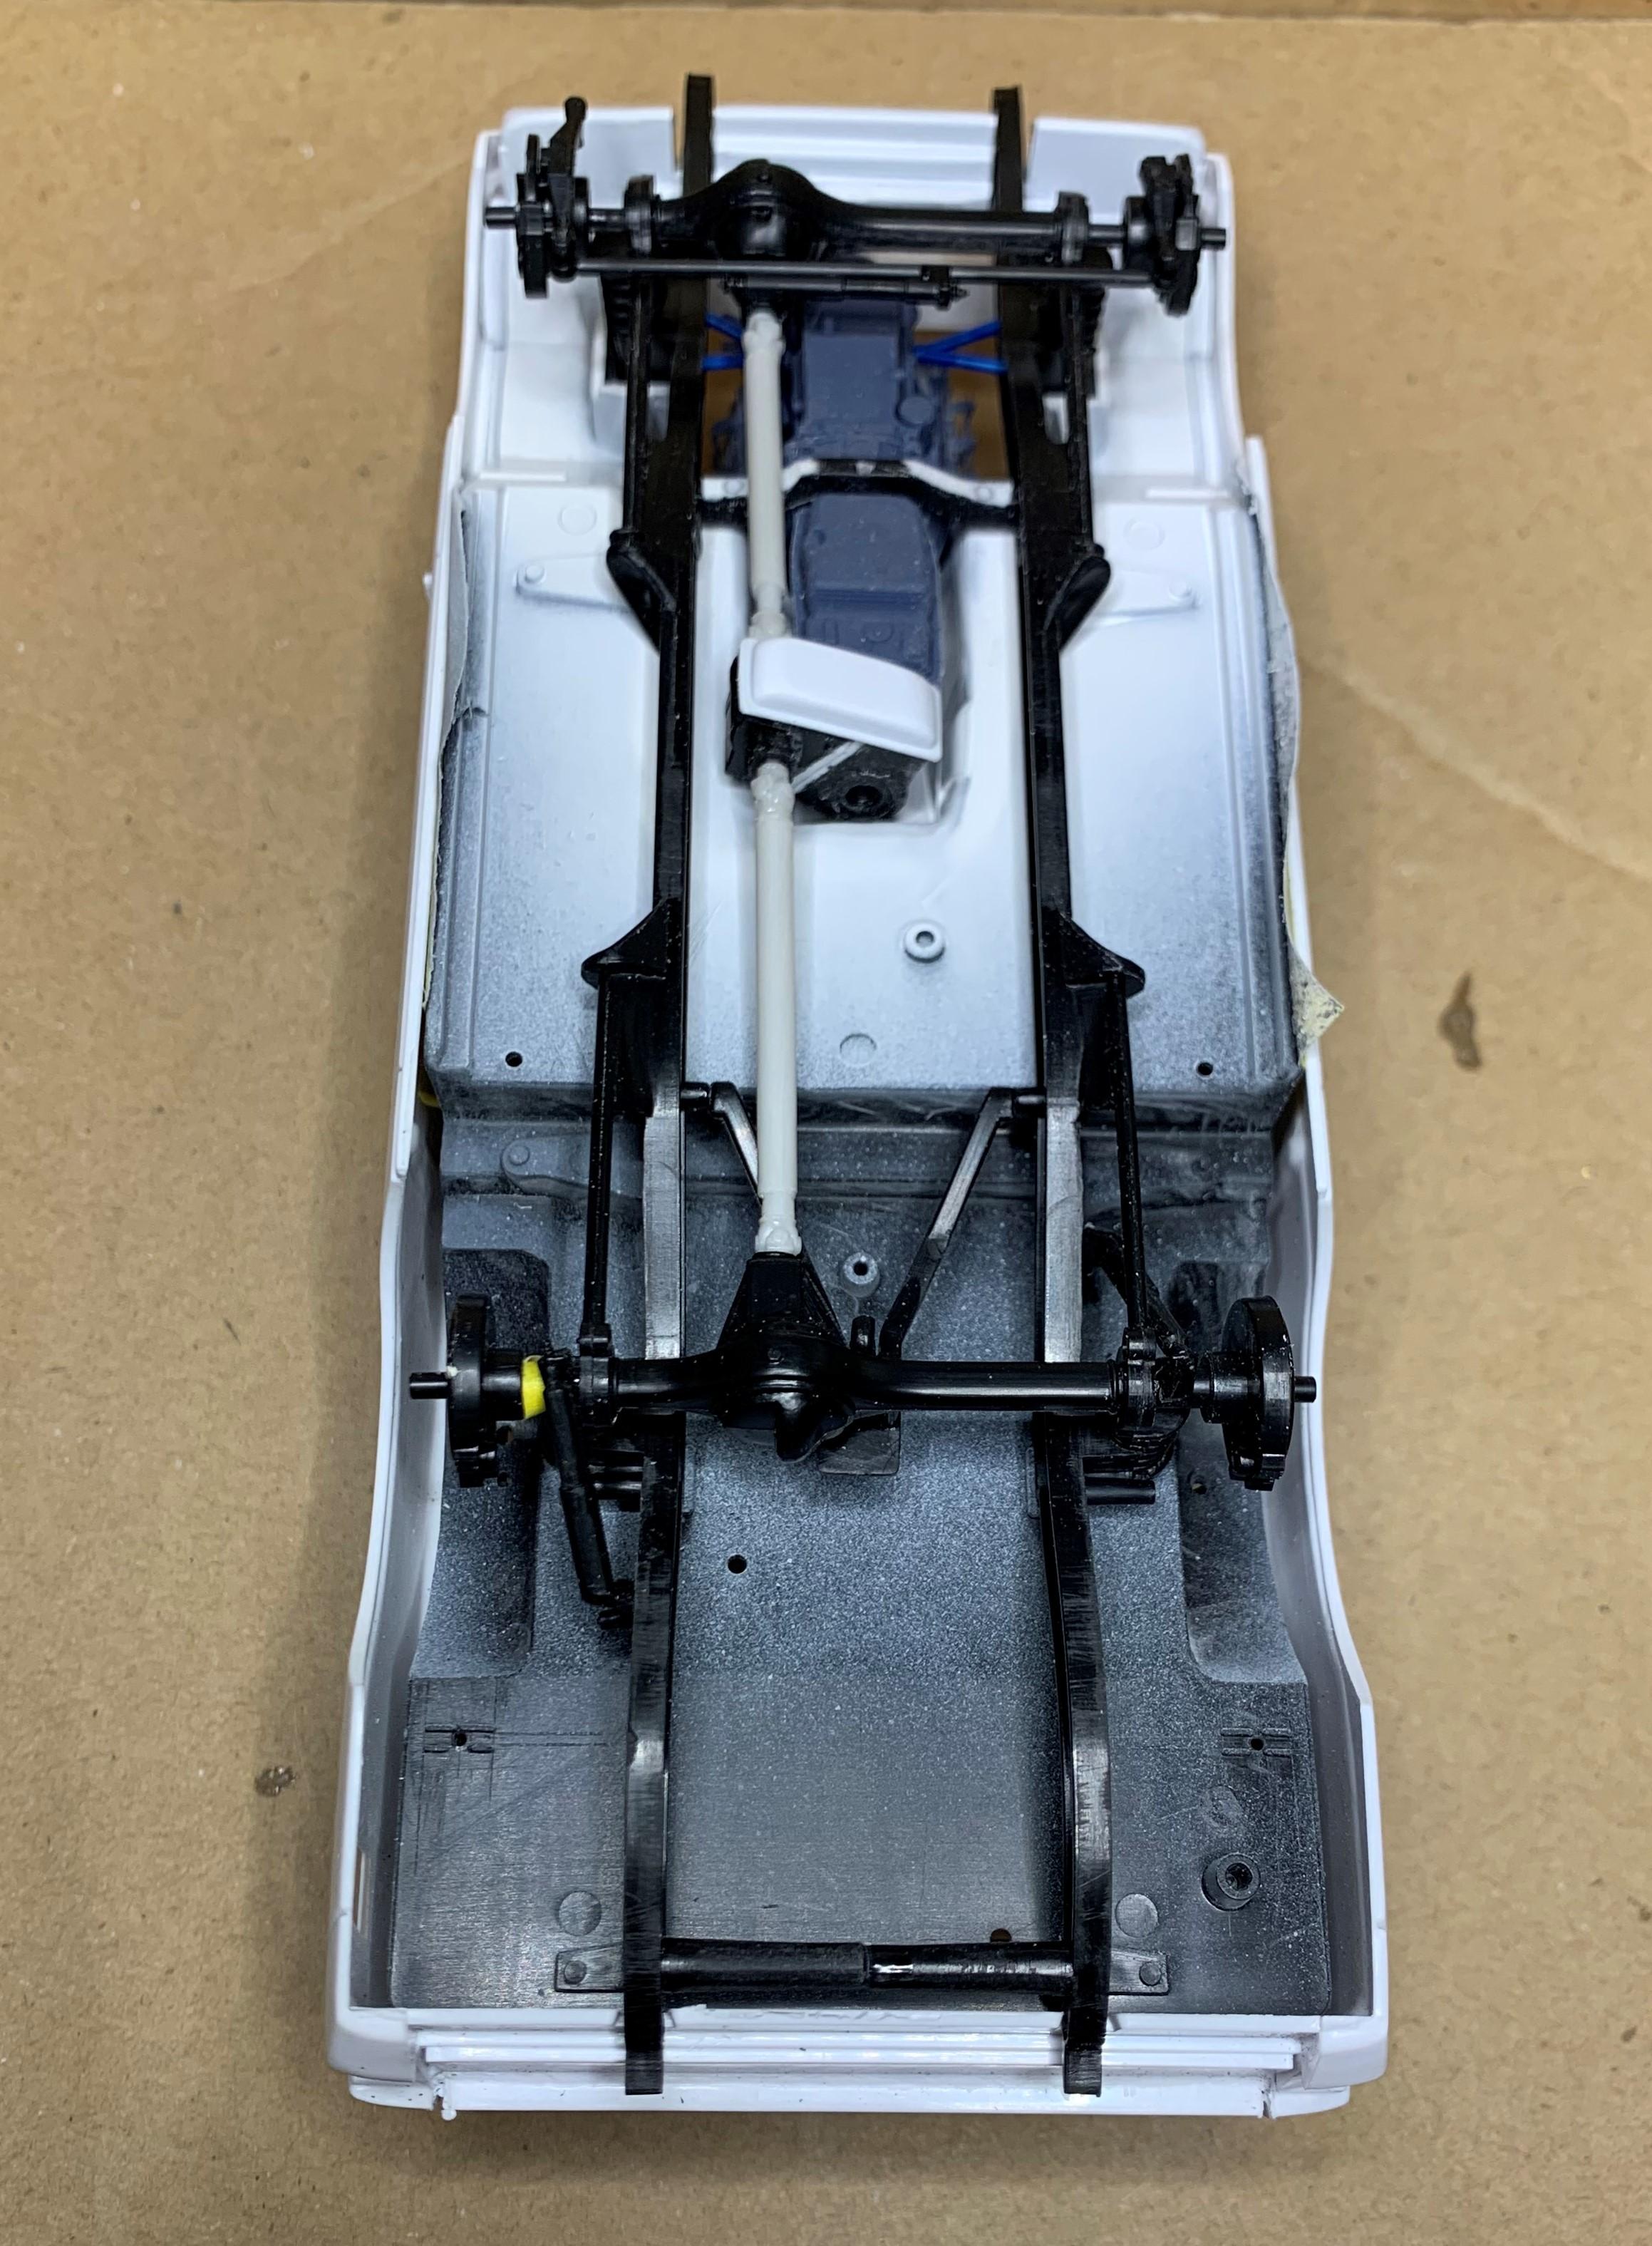
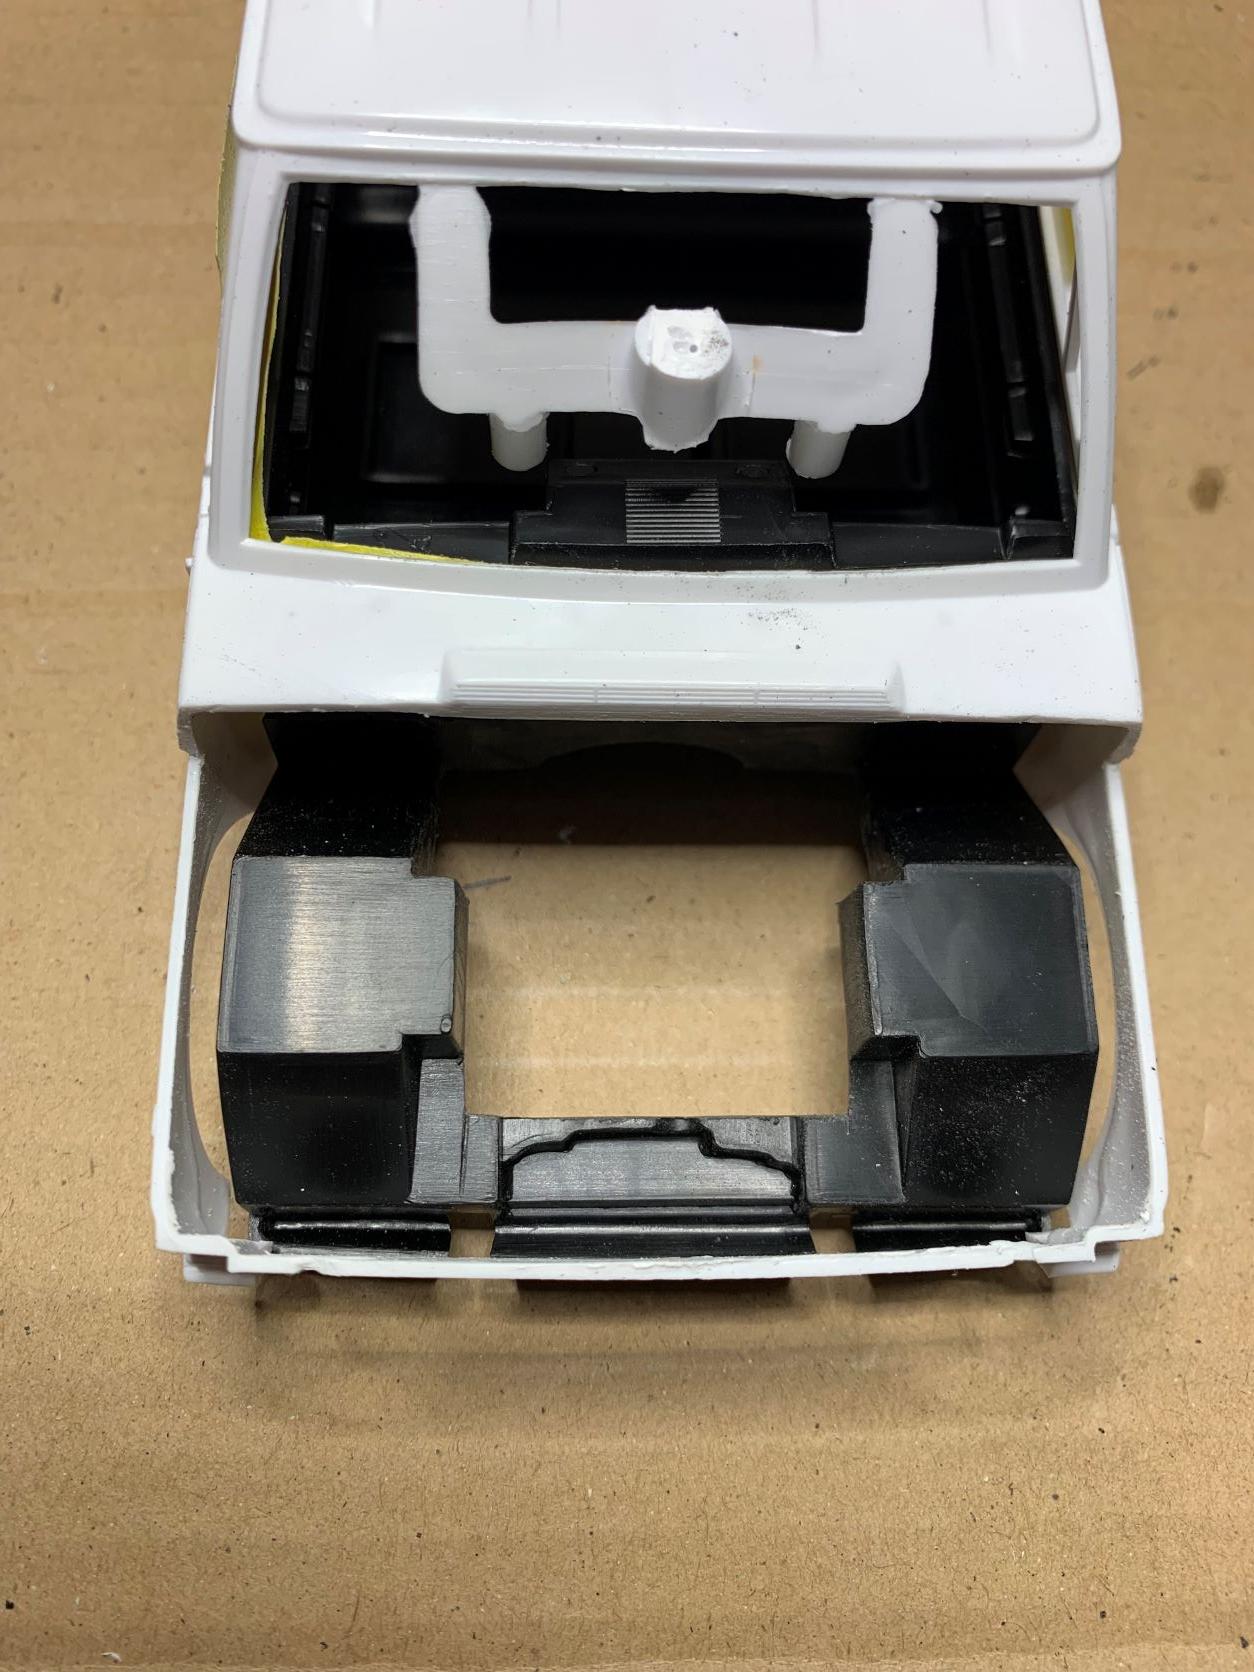
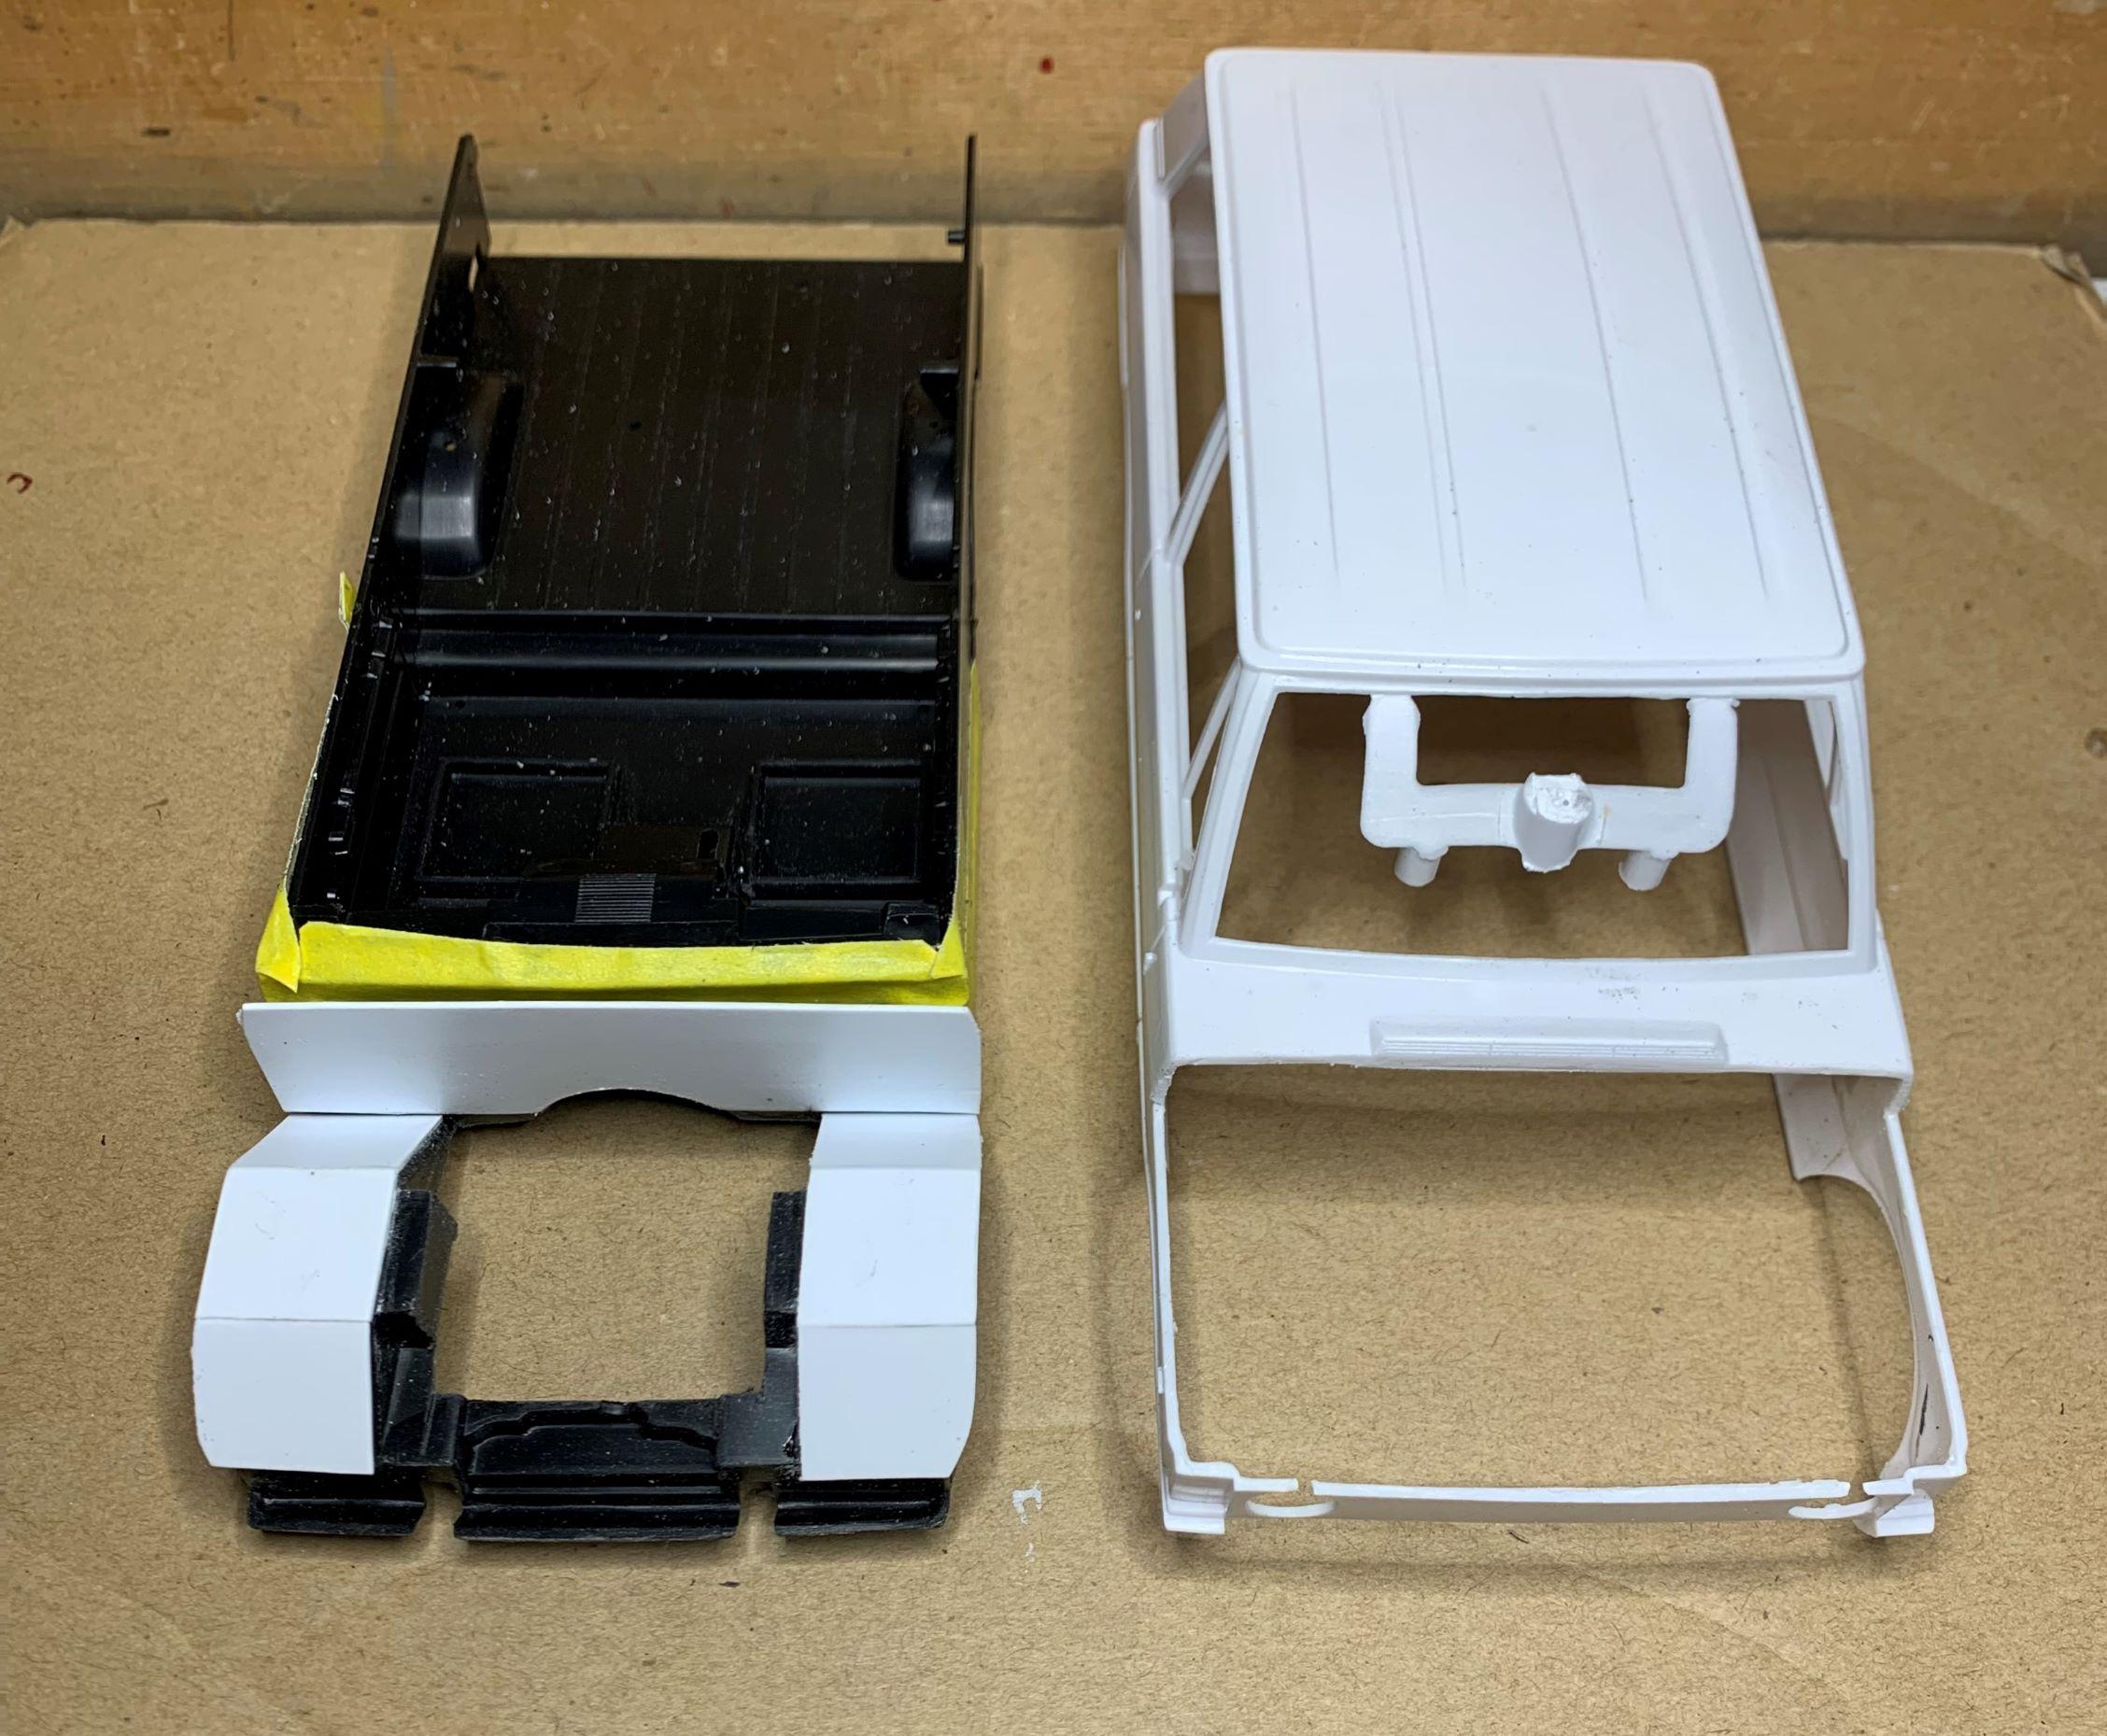
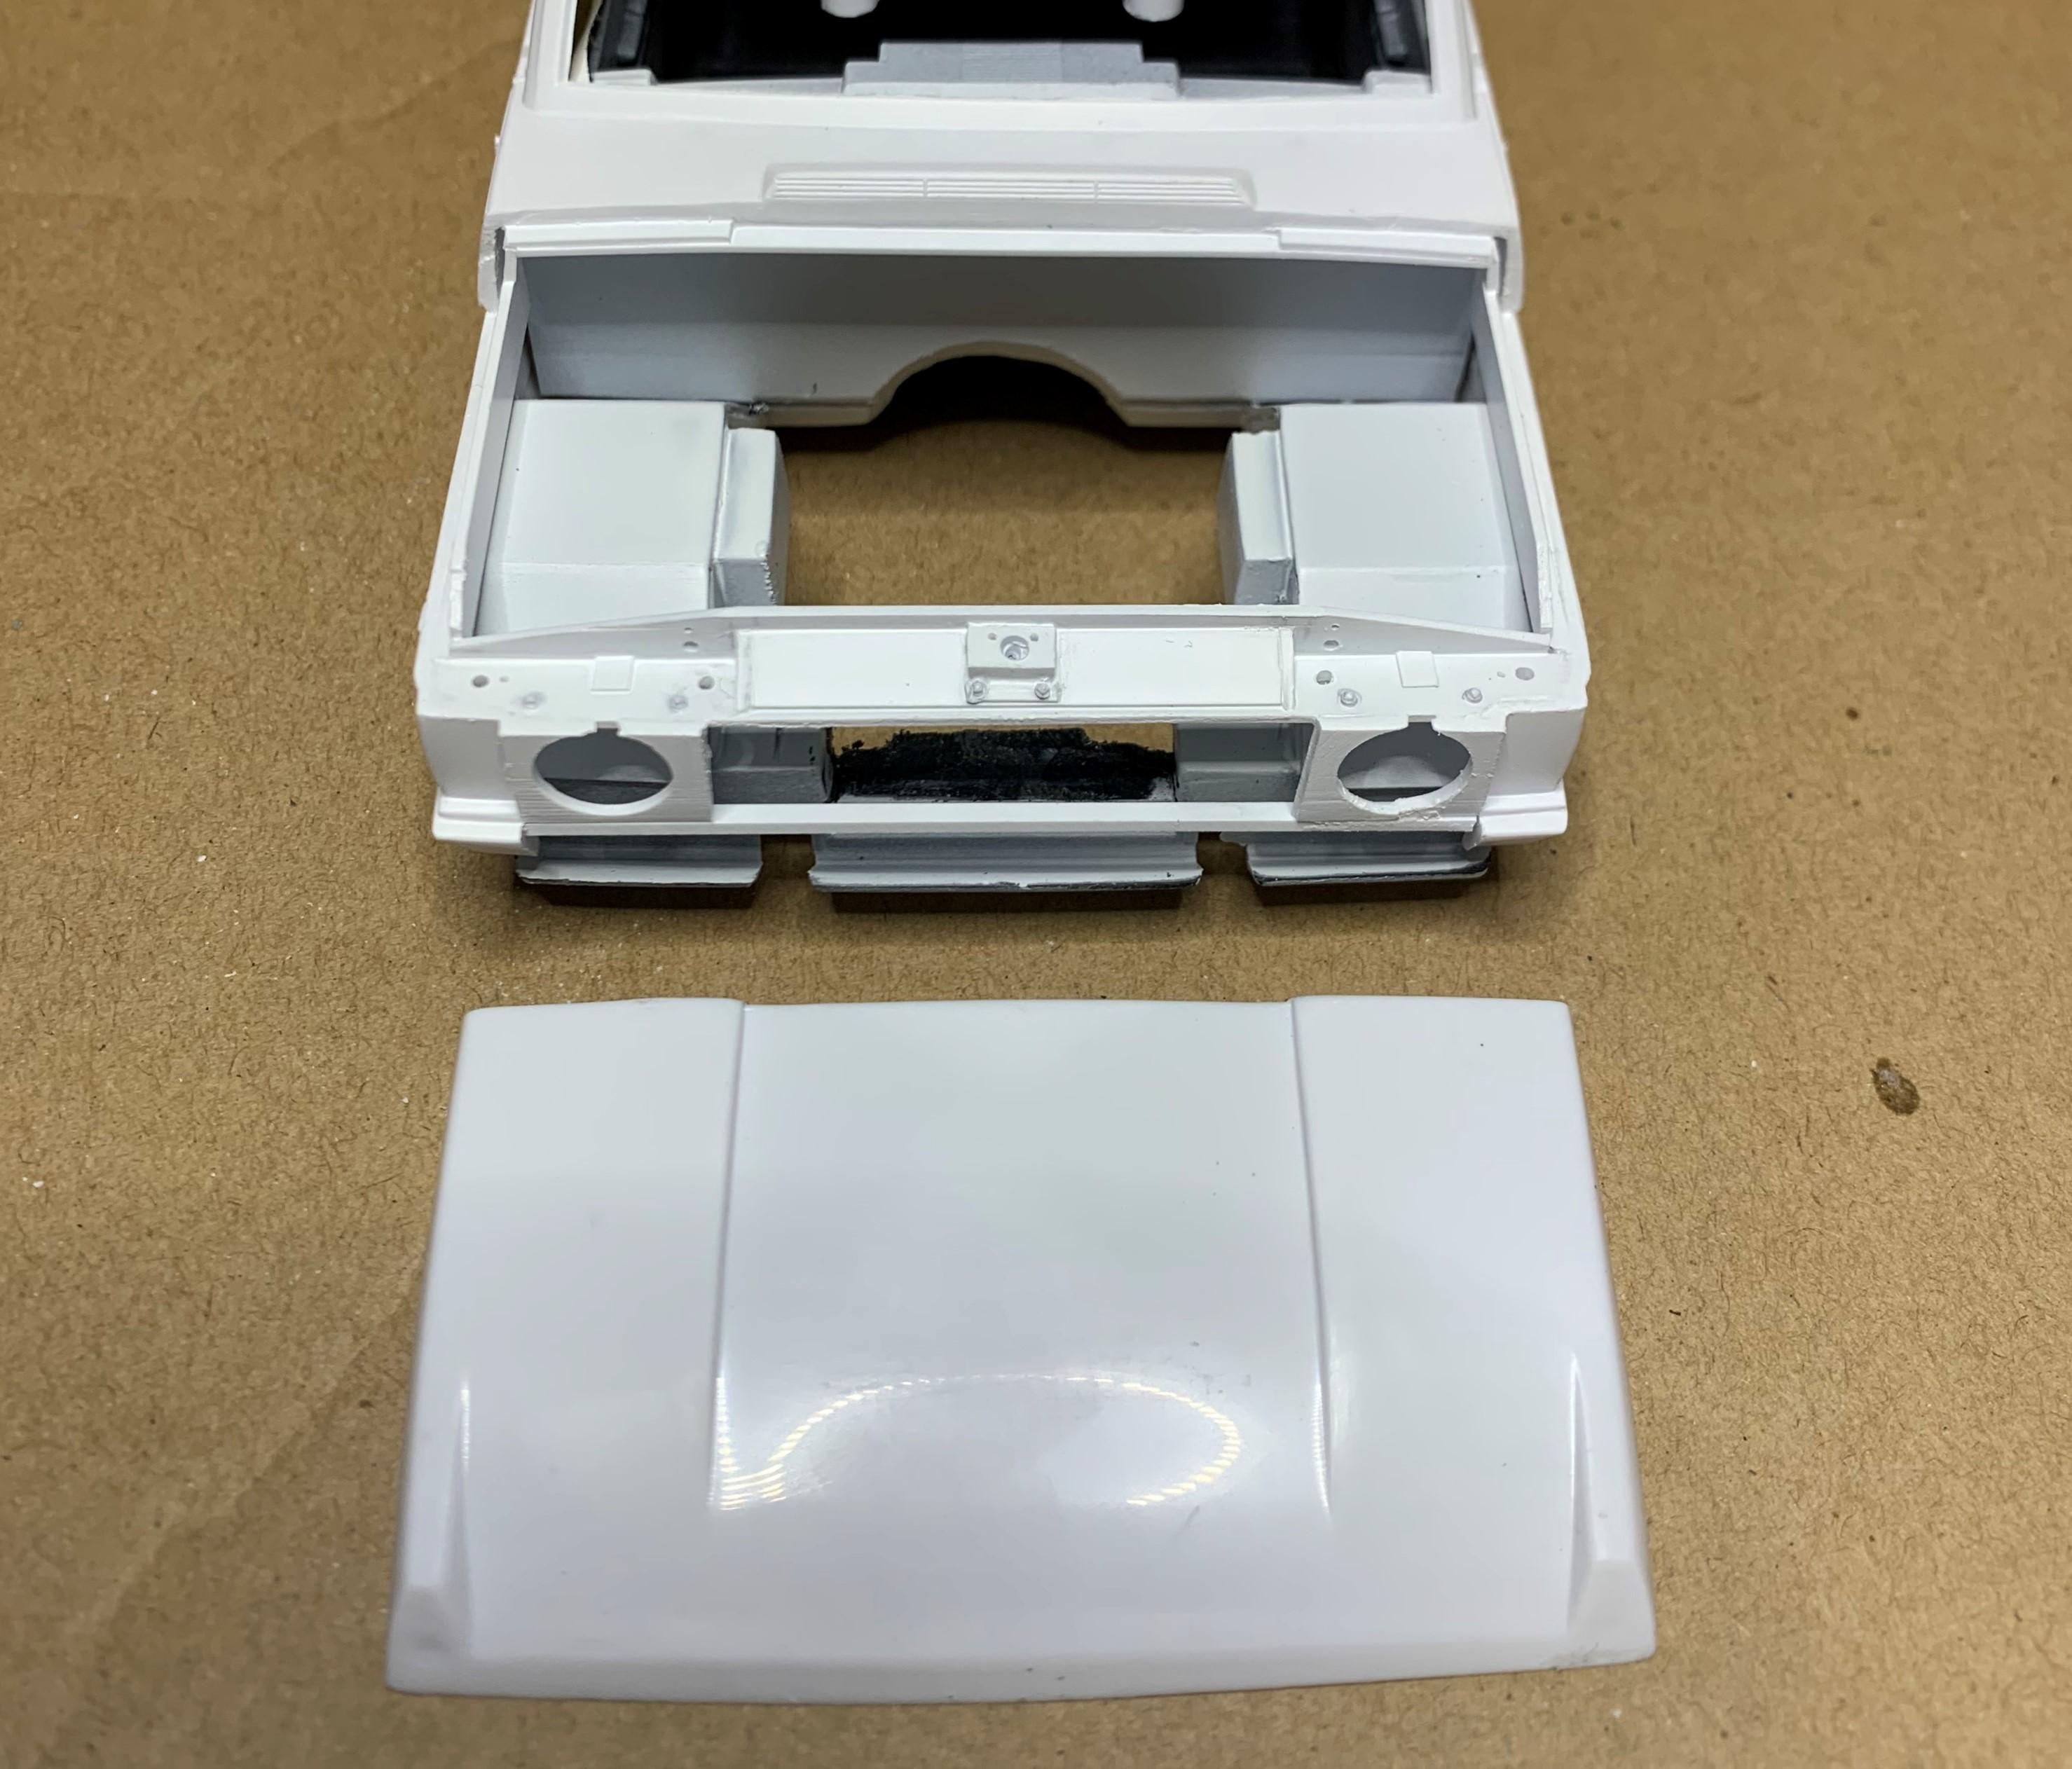
So when I decided to cut the hood open, and make the inner fenders and firewall, I made them a bit taller than the way the kit was designed, which was curbside. This would allow me to have a body lift kit, sort of, as the frame will now sit a bit lower, body a bit higher. That meant the interior would be too deep, so I made the rear compartment, which I plan to have painted sheet metal to match the body, and added that to the body. I can put spacers on the underside of the rear compartment floor to keep the frame level, but mounted to the front as planned. That might explain some of the pictures in the post above!
-
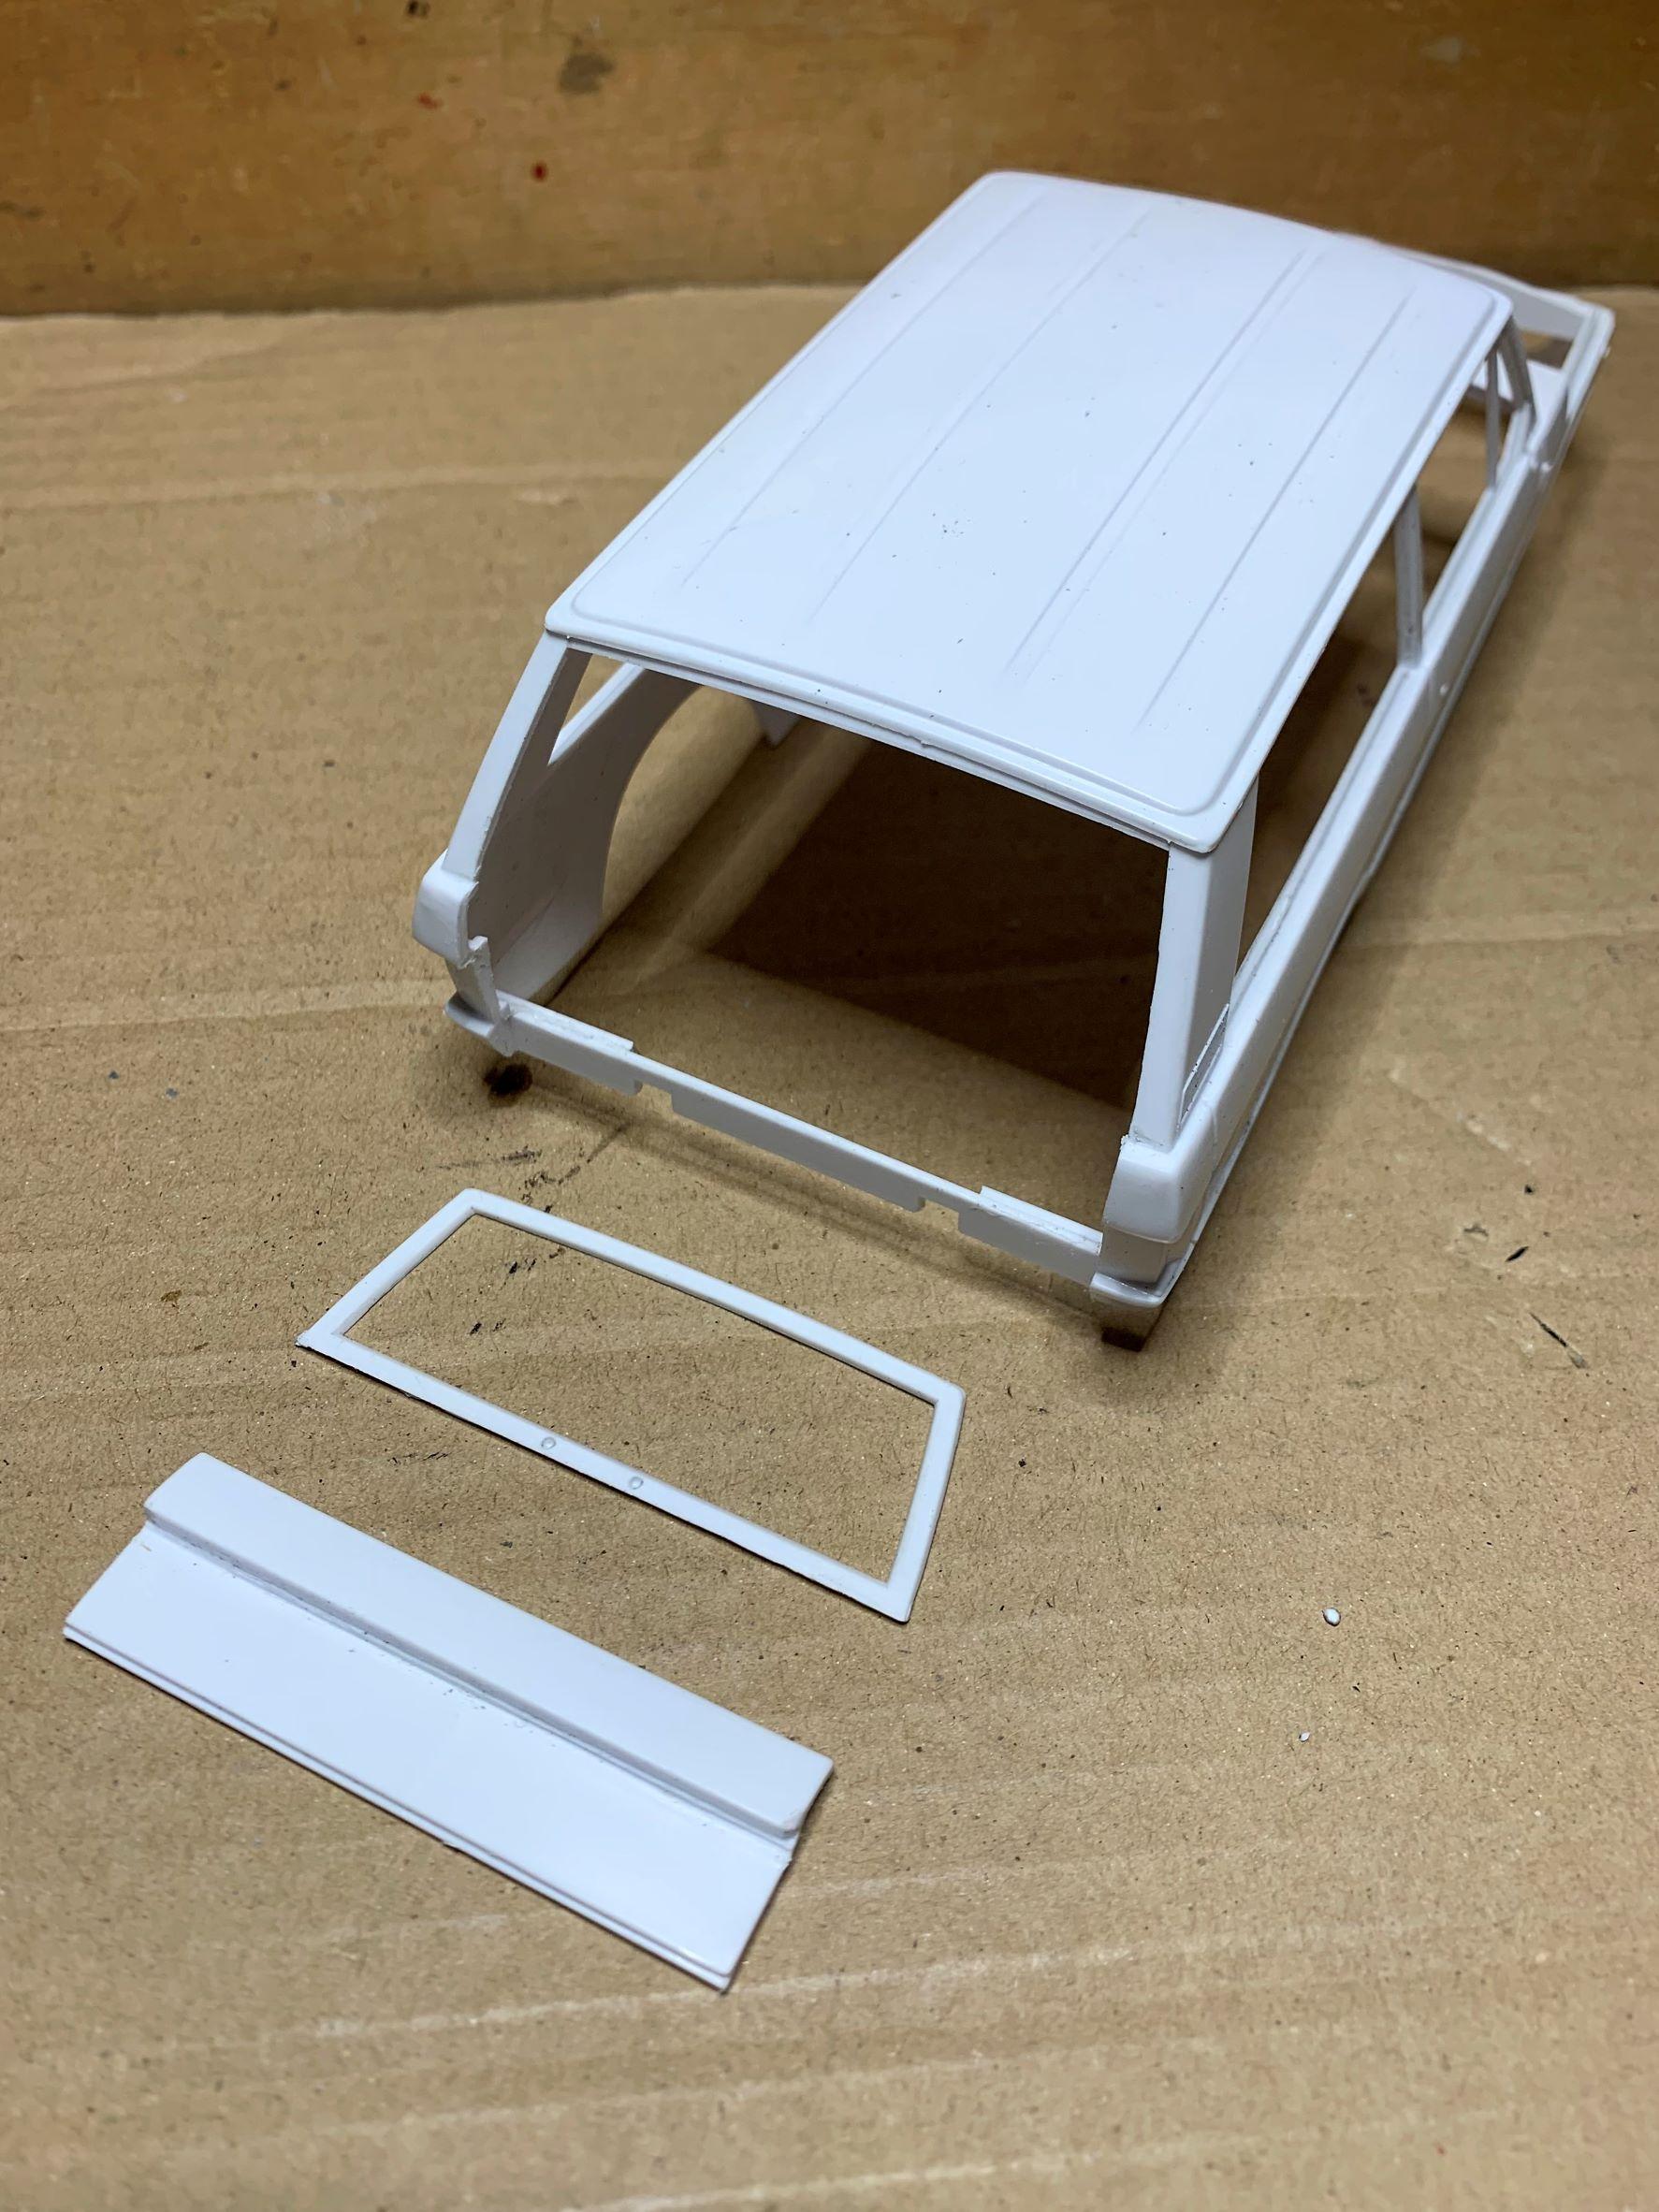
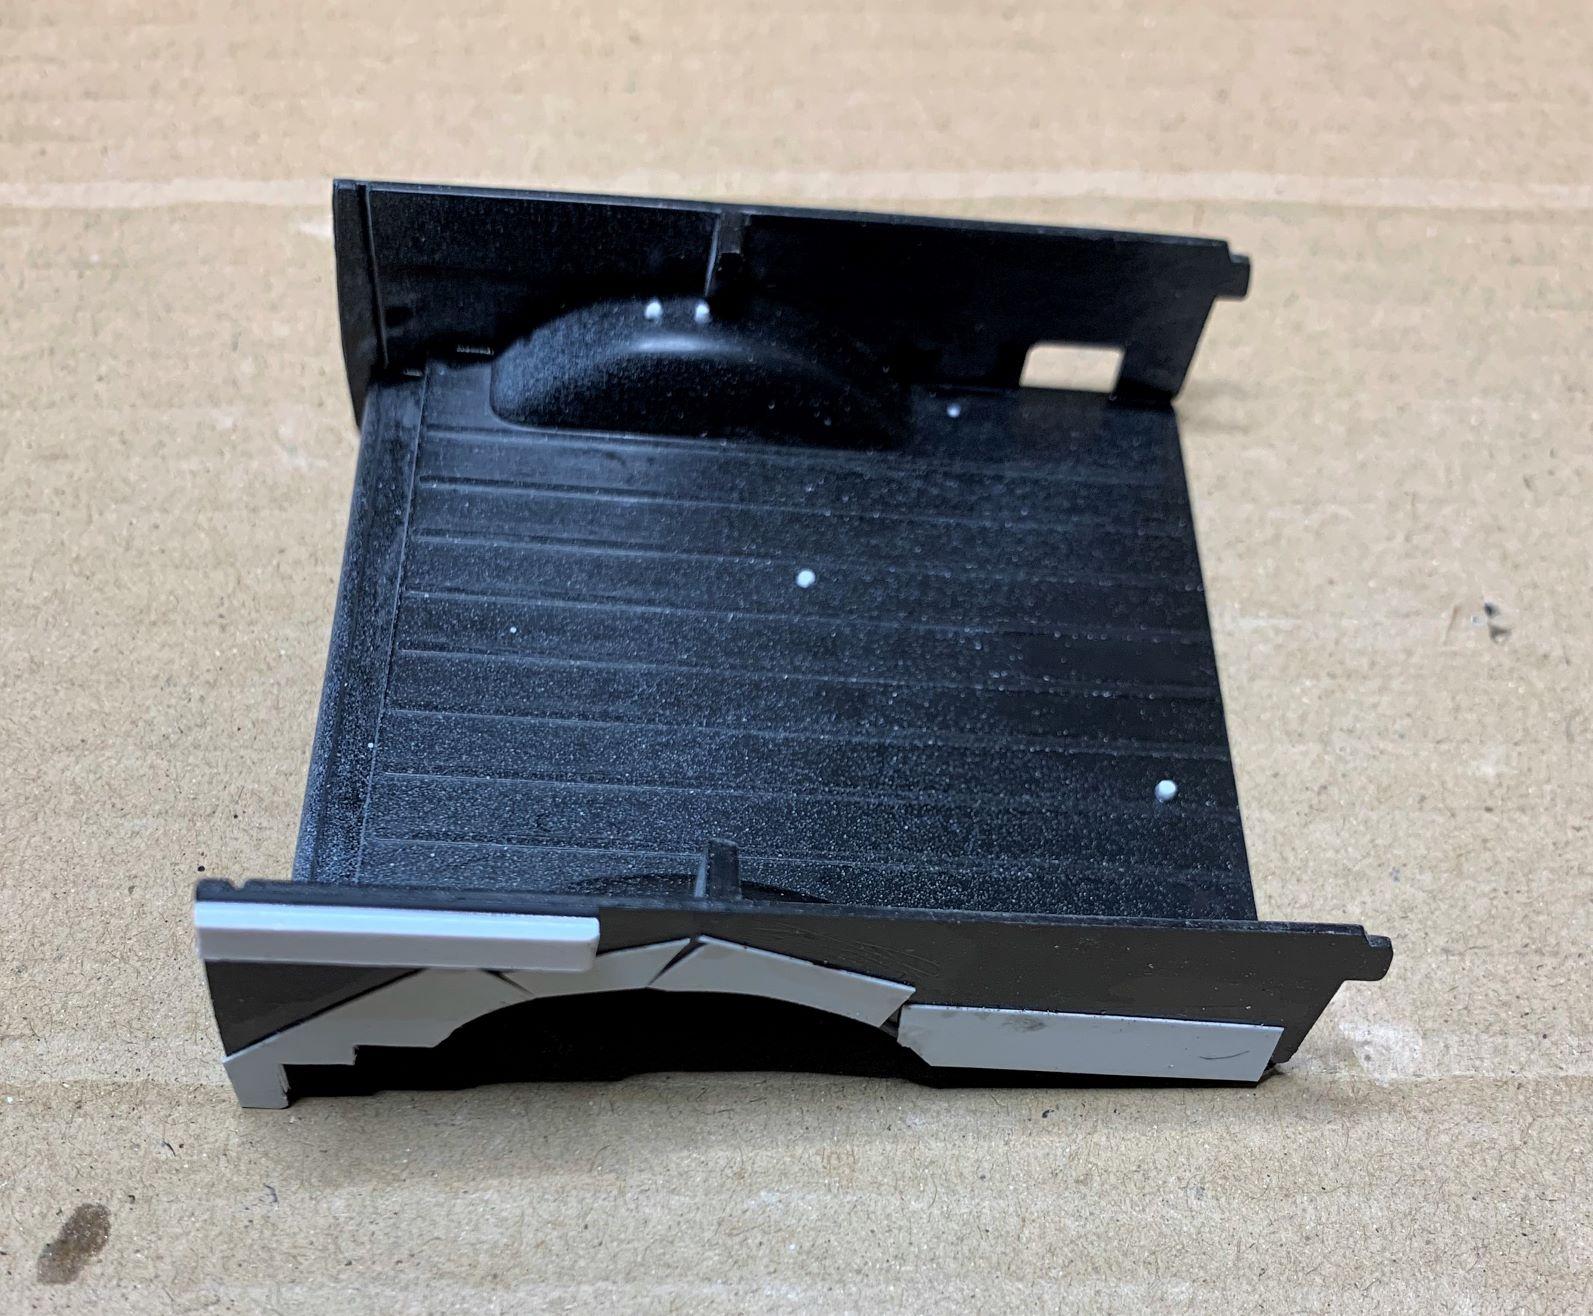
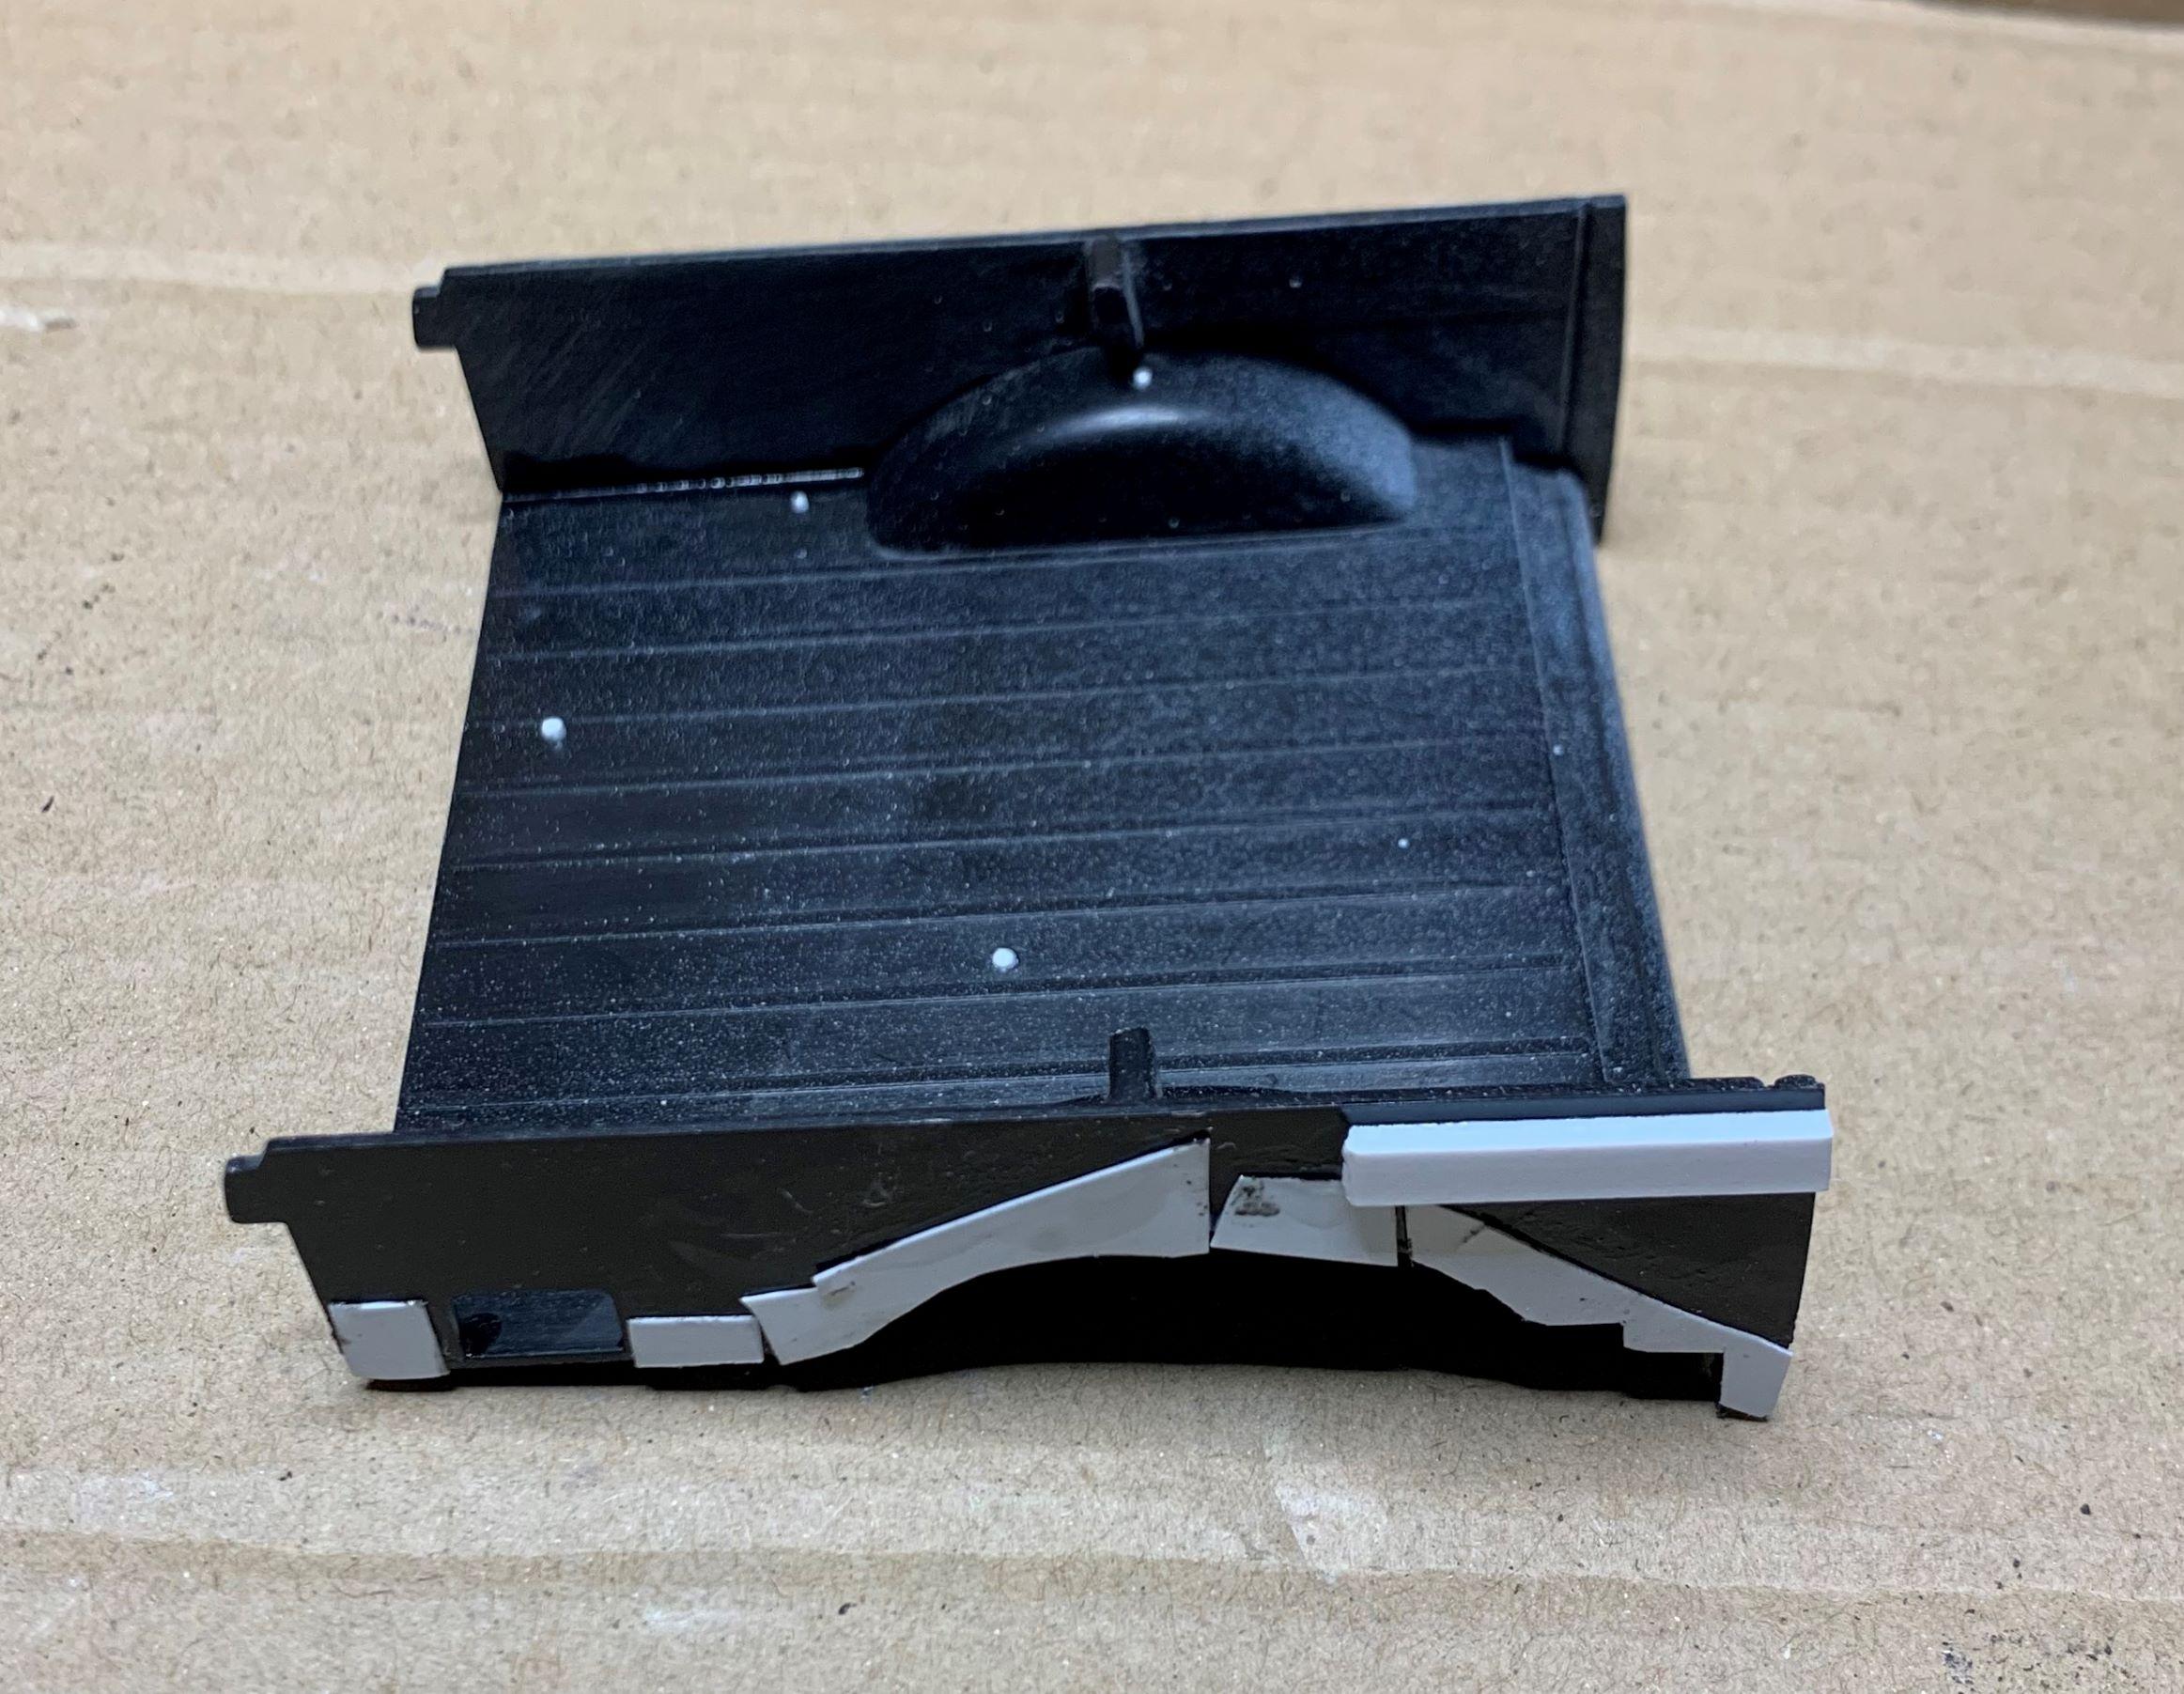
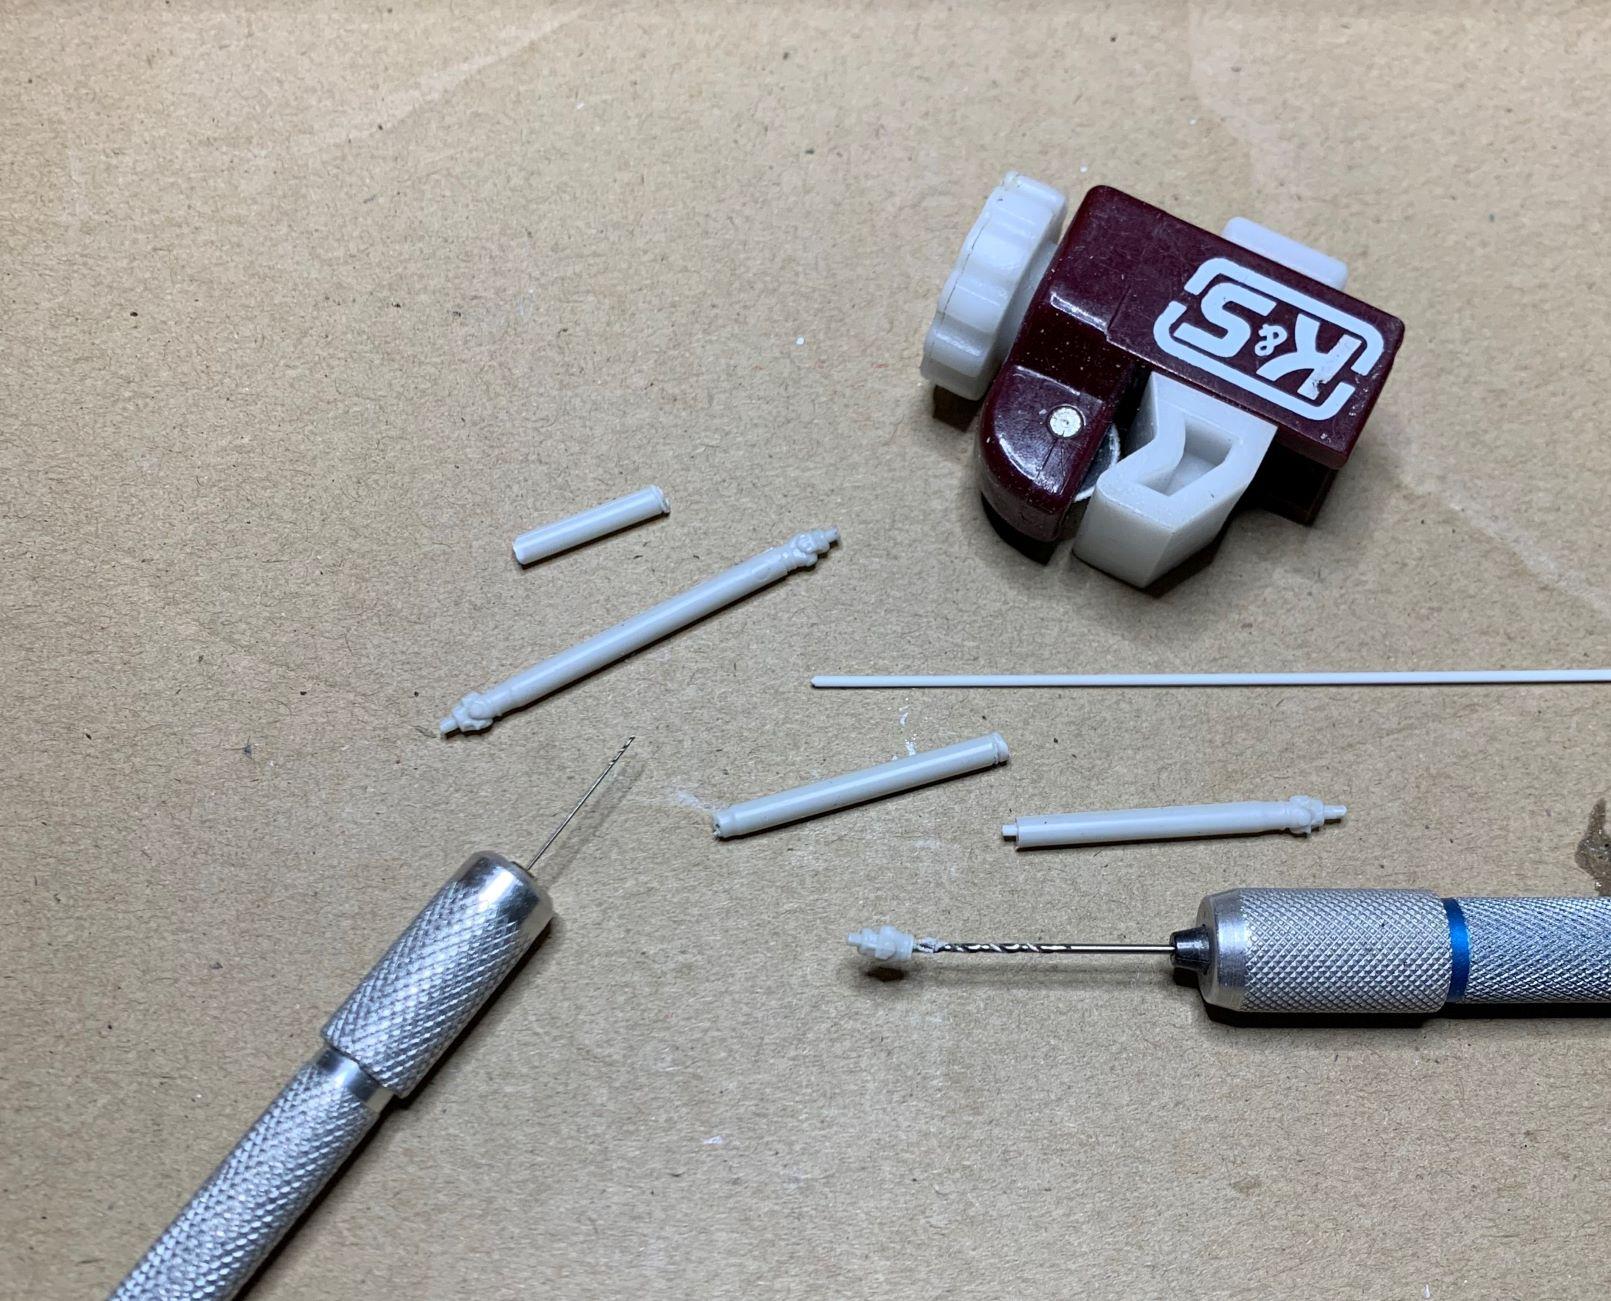
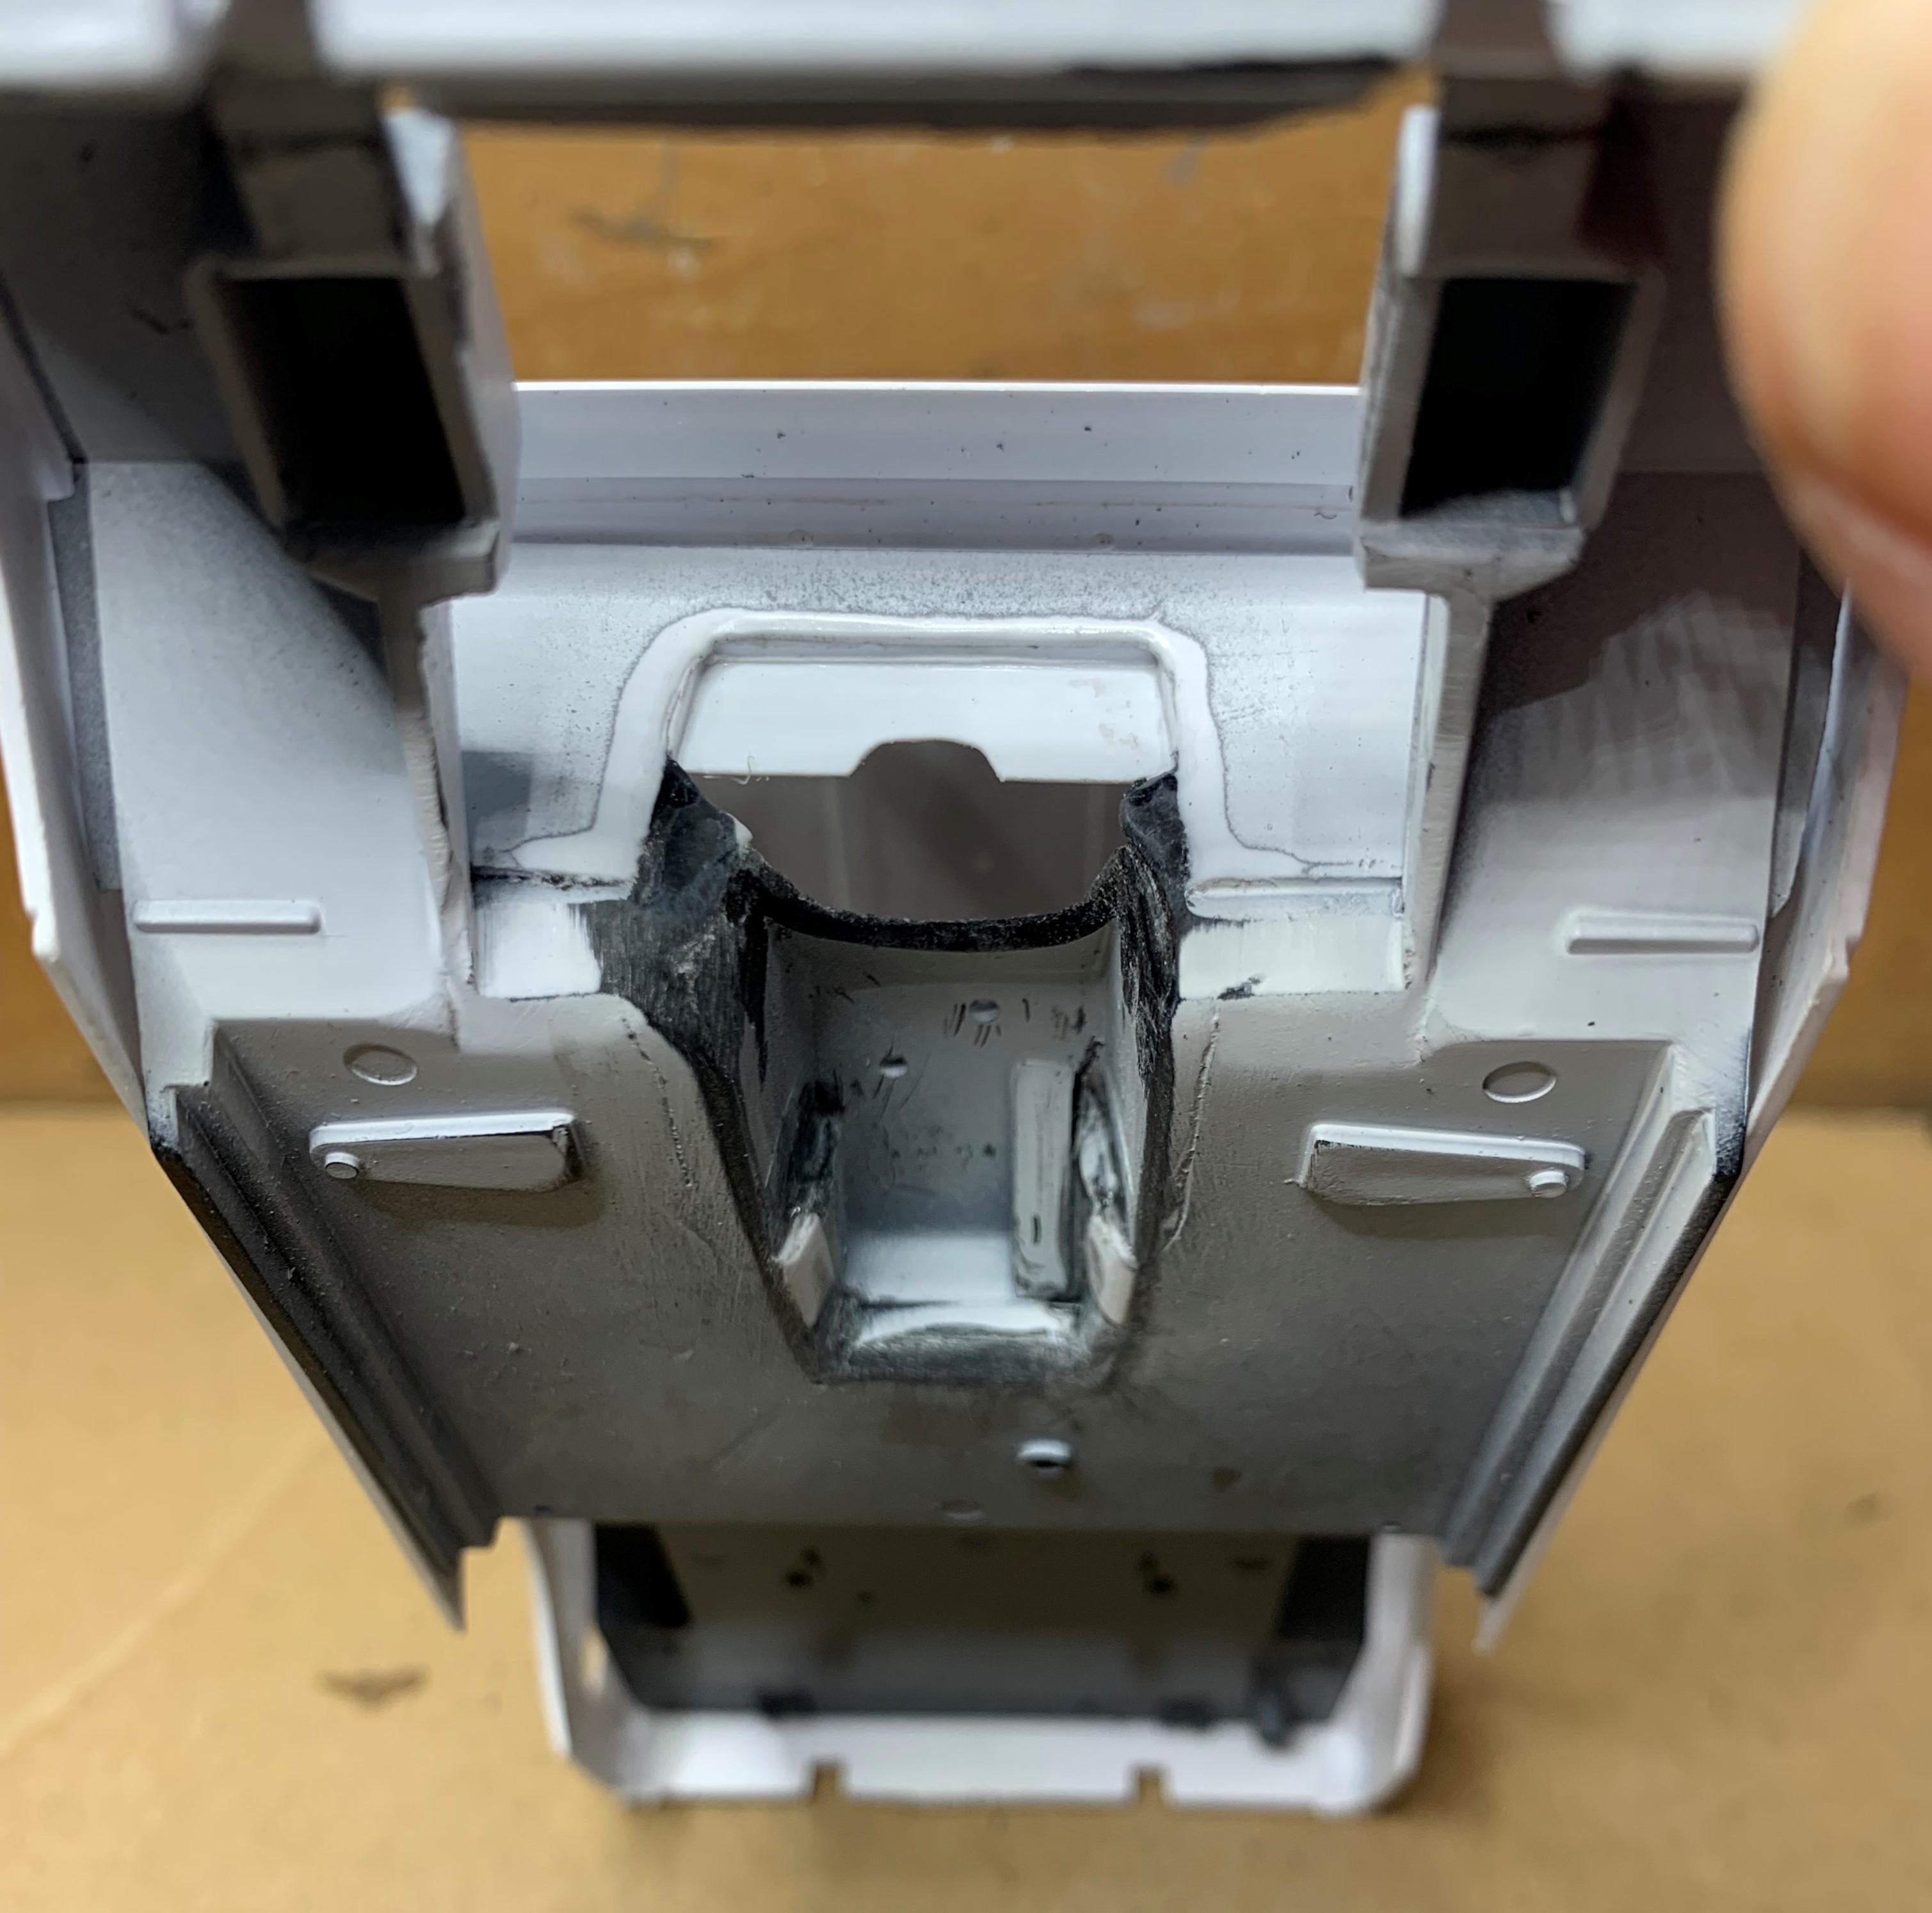
1: Of course now I can't leave the suspension molded to the rails with THIS much extra plastic! 2: After some plastic surgery, it's more "refined". Just the usual dragging the backside of the blade over and over, then finishing with thin files. 3: I cut the tailgate open, the kit provided it partly cut out, so I finished that! 4: Here's the side panels, which I will cut. 5: Side panels cut, and floor also. 6 and 7: Assembled rear area, only 3 pieces, but I added locater blocks to keep the upper sides level with the window openings, and filled all the holes with sprue. 8 and 9: It fits nicely now!
-
Very cool build, I love those Ramblers, with mods of course and yours, IS modified, I love it!
-
Aoshima Toyota RN-30
dino246gt replied to Mad Slammer's topic in WIP: Model Trucks: Pickups, Vans, SUVs, Light Commercial
Nice little truck build, I like it a lot! -
I couldn't fit that big engine and auto trans and front driveshaft AND headers, so I went with exhaust manifolds. 1 and 2: On the driver's side, no problem, but on the passenger's side, where the front driveshaft is, I had to modify the exhaust manifold. 3 So now the motor fits, on to making more realistic frame crossmembers! 4 Various widths and thicknesses of Plastruct and Evergreen styrene pieces make the crossmembers. 5 Not exactly high detail, but WAY better than what came with this kit. I've built the 4 door version of this kit, in fact 2 from different manufacturers, and they're both exactly the same, and curbsides but with great chassis and interior detail! I thought this kit would just be a 2 door version, but NO, it's a terrible kit! However, I love doing this kind of stuff, so just so you know the Italeri (2 door) is NOT the same kit as the Aoshima and Revell Germany (4 door) kits.
-
Willys Jeep Surrey Gala
dino246gt replied to crossfire 2004's topic in Model Trucks: Pickups, Vans, SUVs, Light Commercial
Very cool! -
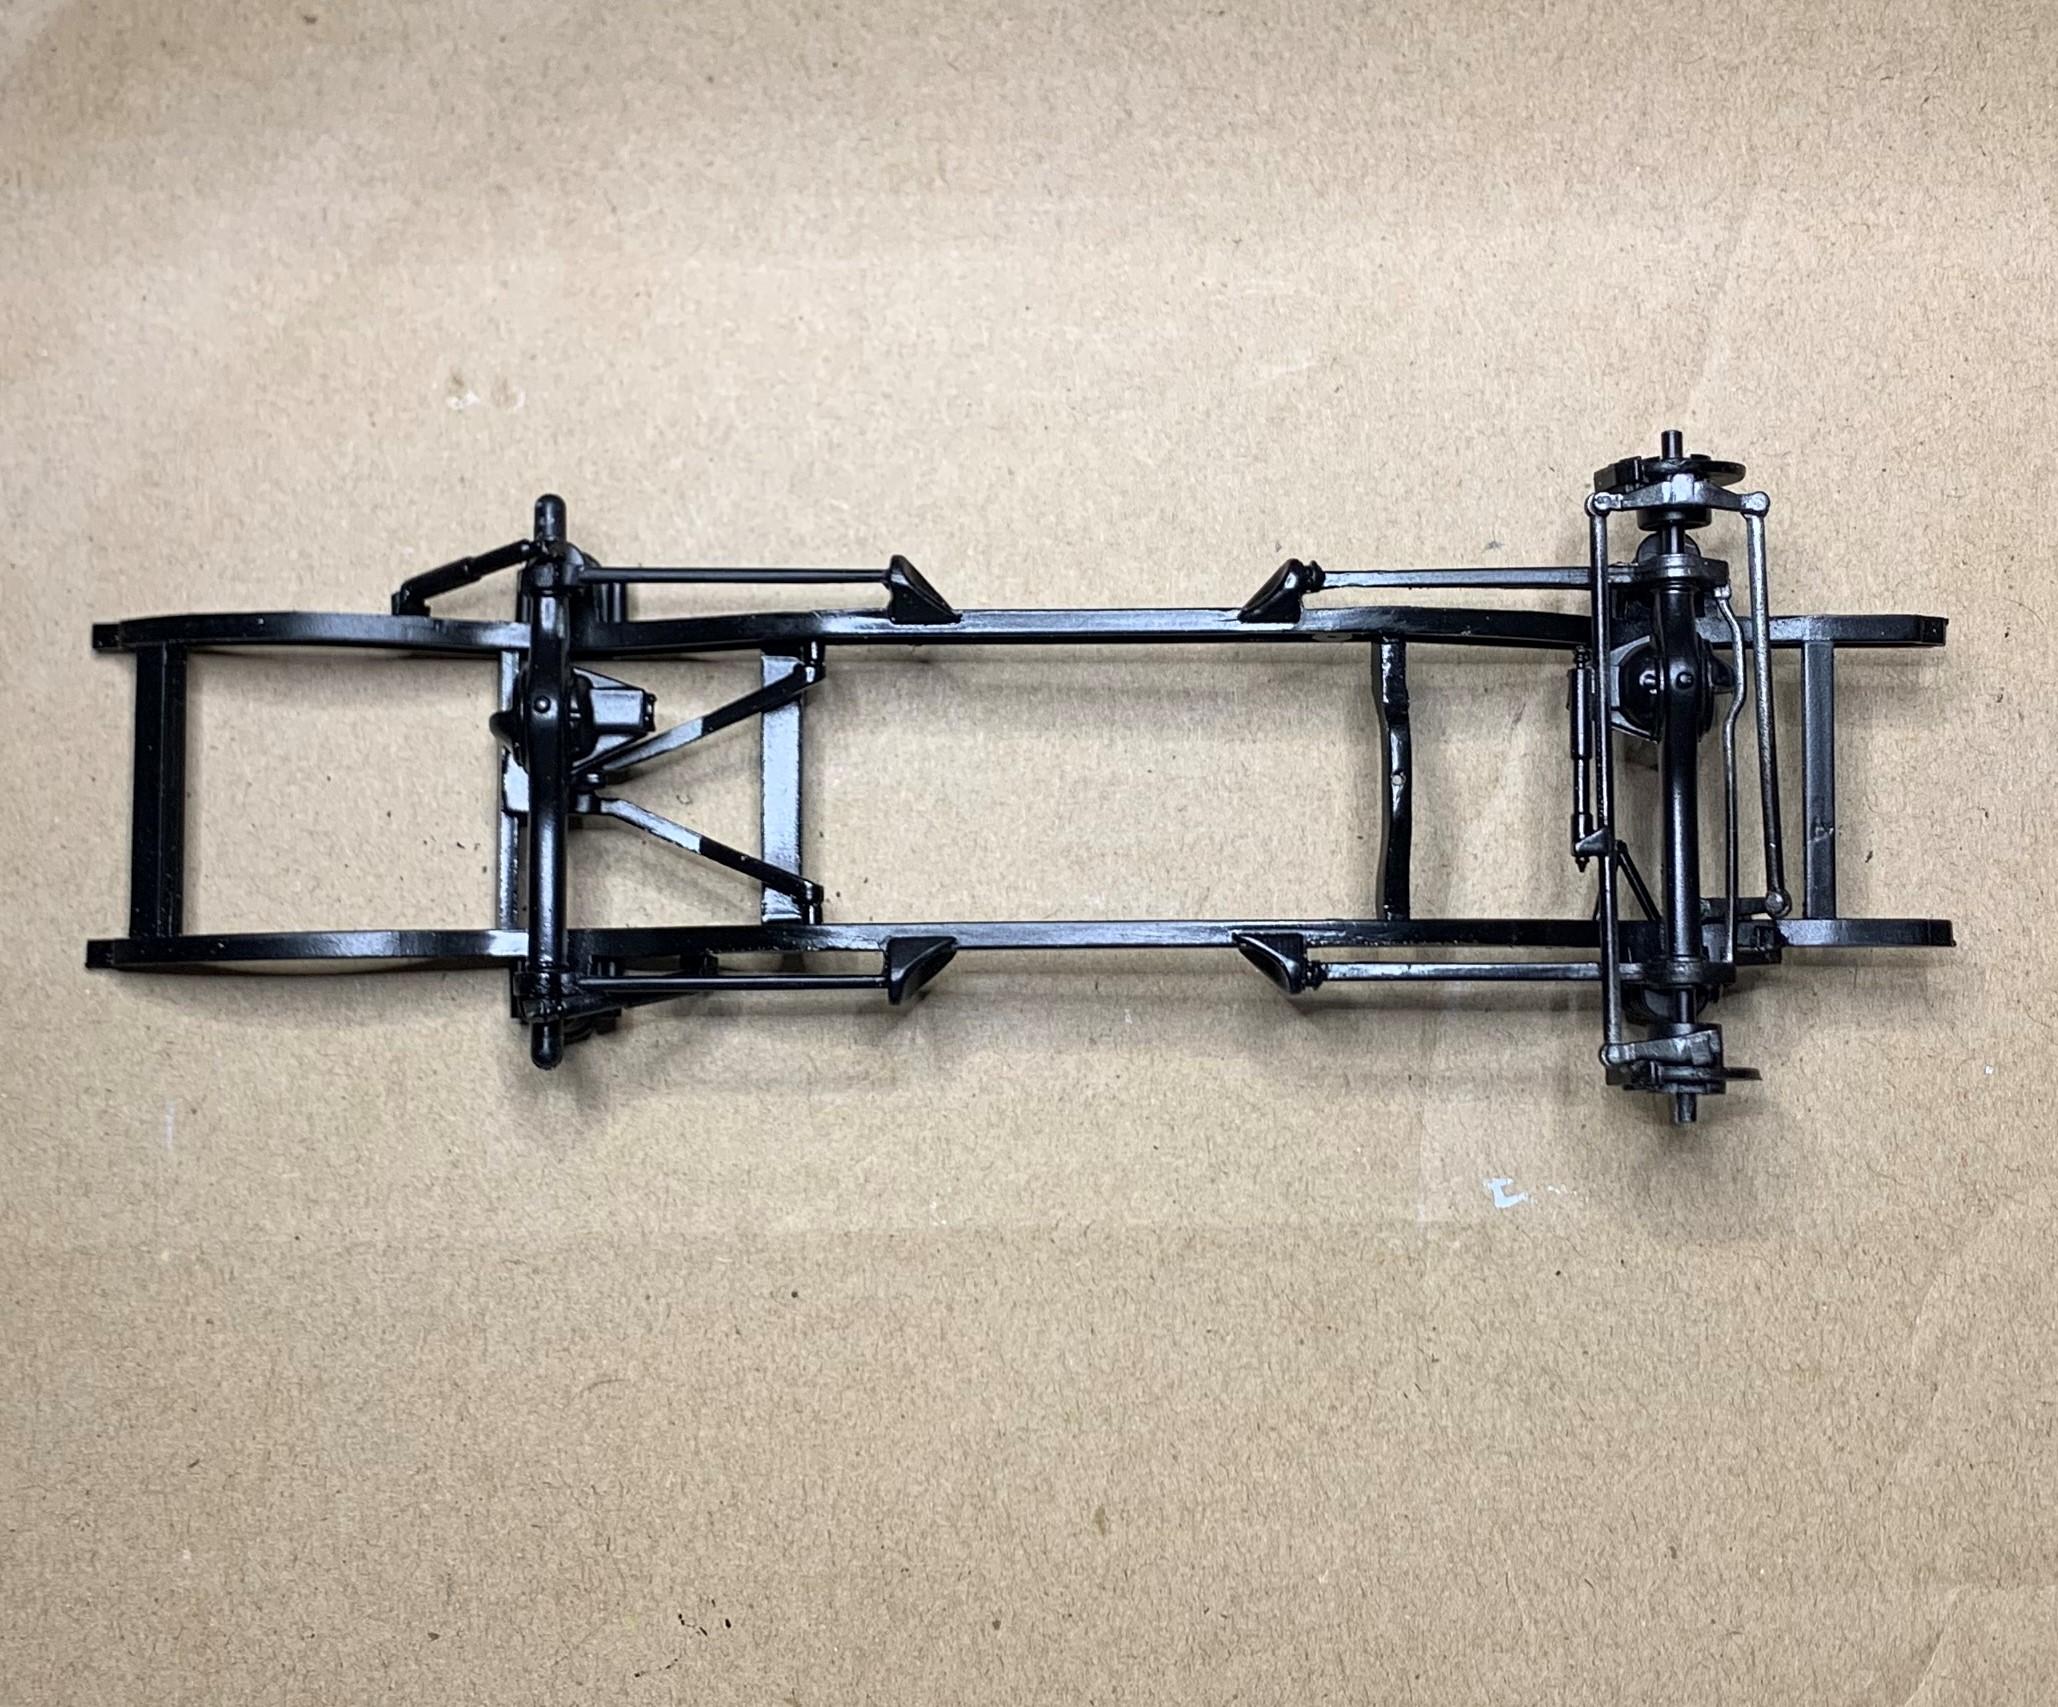
1 I had a couple of '62 Catalina kits for parts, so I used both driveshafts, cut, drilled and made to the length I need. 2 With my modified transfer case, and floorpan, it all fits! Next step will be to make an exhaust system, then add some more realistic crossmembers to that simplified kit frame!
-
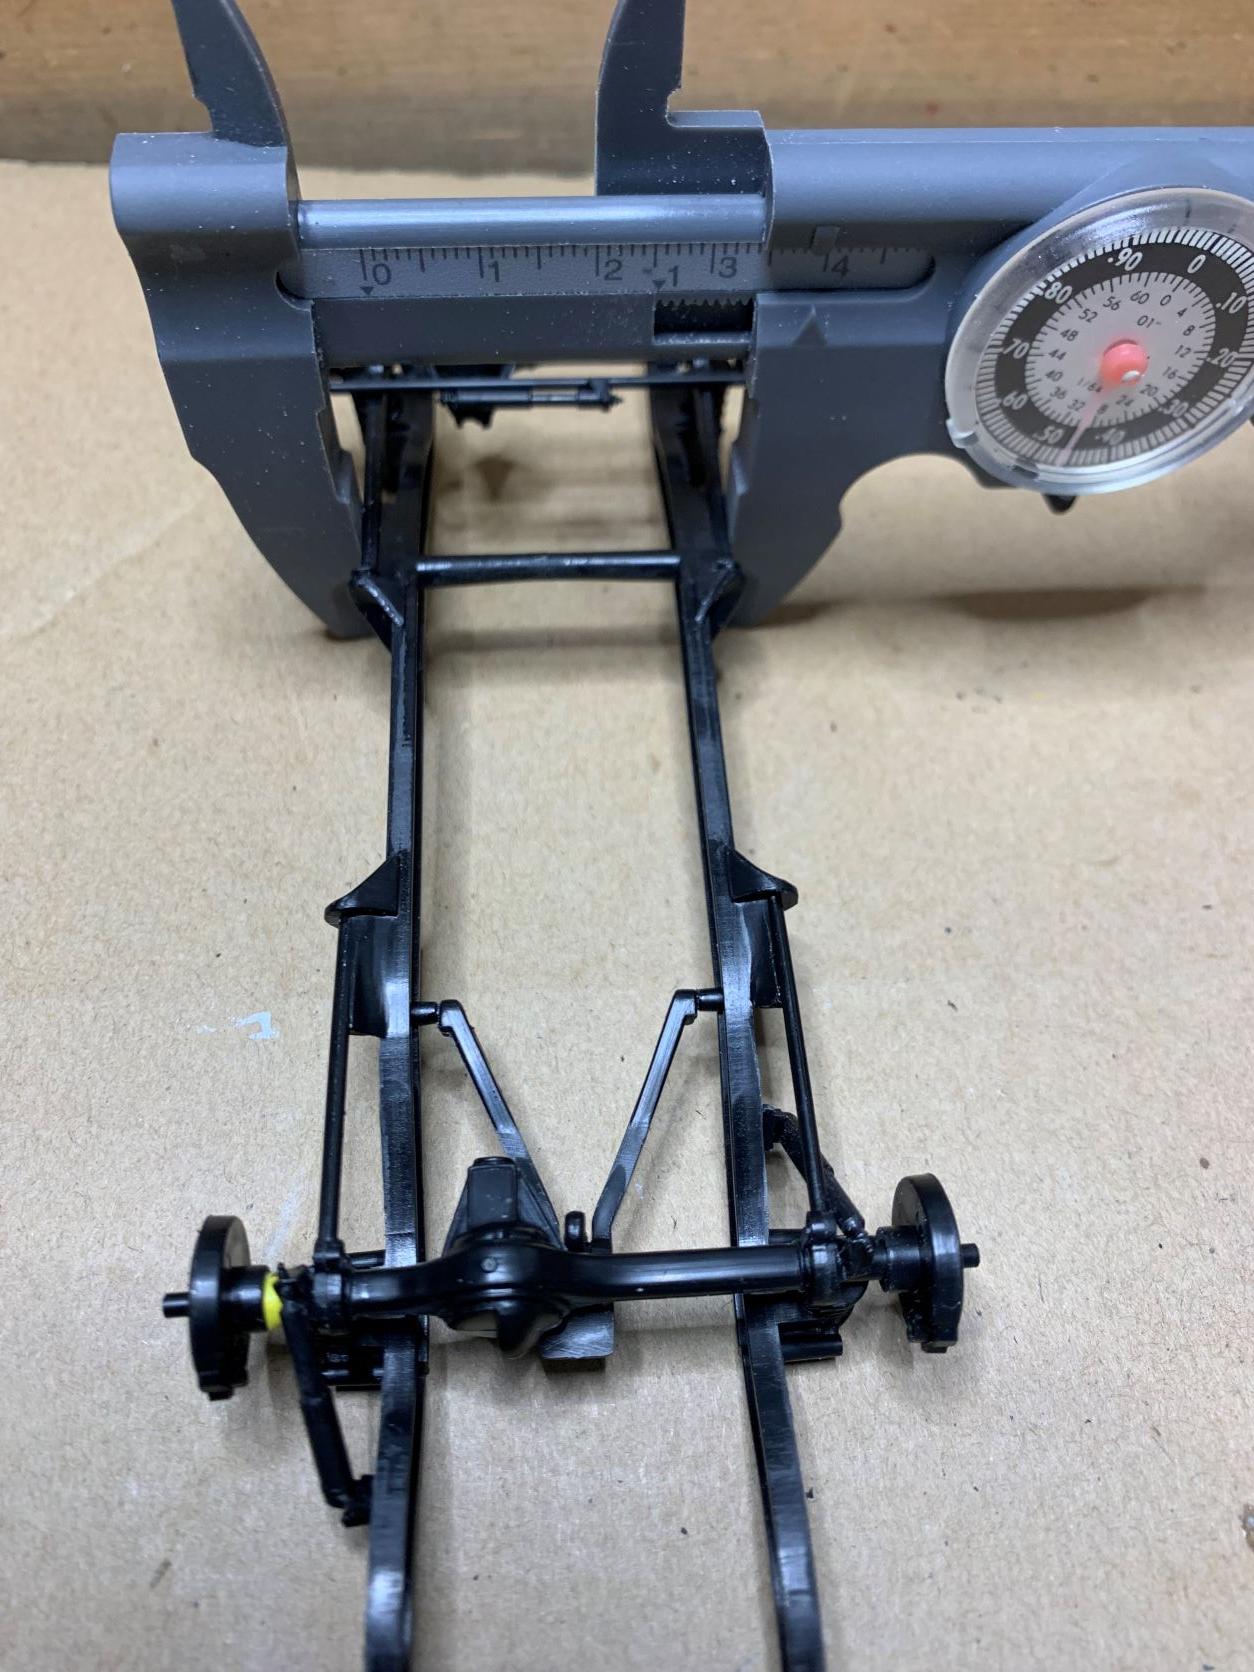
I decided to go with the LS3 and auto, so........... 1 I measured the kit frame and locked my calipers so I could make a better crossmember and keep the width the same. 2 I assembled the 3D engine and transmission after I cut off the headers, then made my new crossmember and motor mounts. 3 I had to use some scraps to make a transfer case work with the big transmission. 4 Then to make room for everything in the body firewall and floorpan.
-
Wow, this is looking great! I love that slight chop and channeled look! Flathead?
-
The Goat Wagon Update 12/30/22 Body In Paint!
dino246gt replied to Plowboy's topic in WIP: Model Cars
I love the stance and your bodywork is excellent, looks like a GTO wagon kit! Sweet! -
AMT 2017 Camaro "Fiftieth" Anniversary Edition
dino246gt replied to mustang1989's topic in WIP: Model Cars
Excellent so far and I'm sure you'll finish it as beautifully as the engine and chassis you've built. Nice work! -
So far I'm thinking of a Chevy "crate motor" But I'll see how I can fit it in. Soon!
-
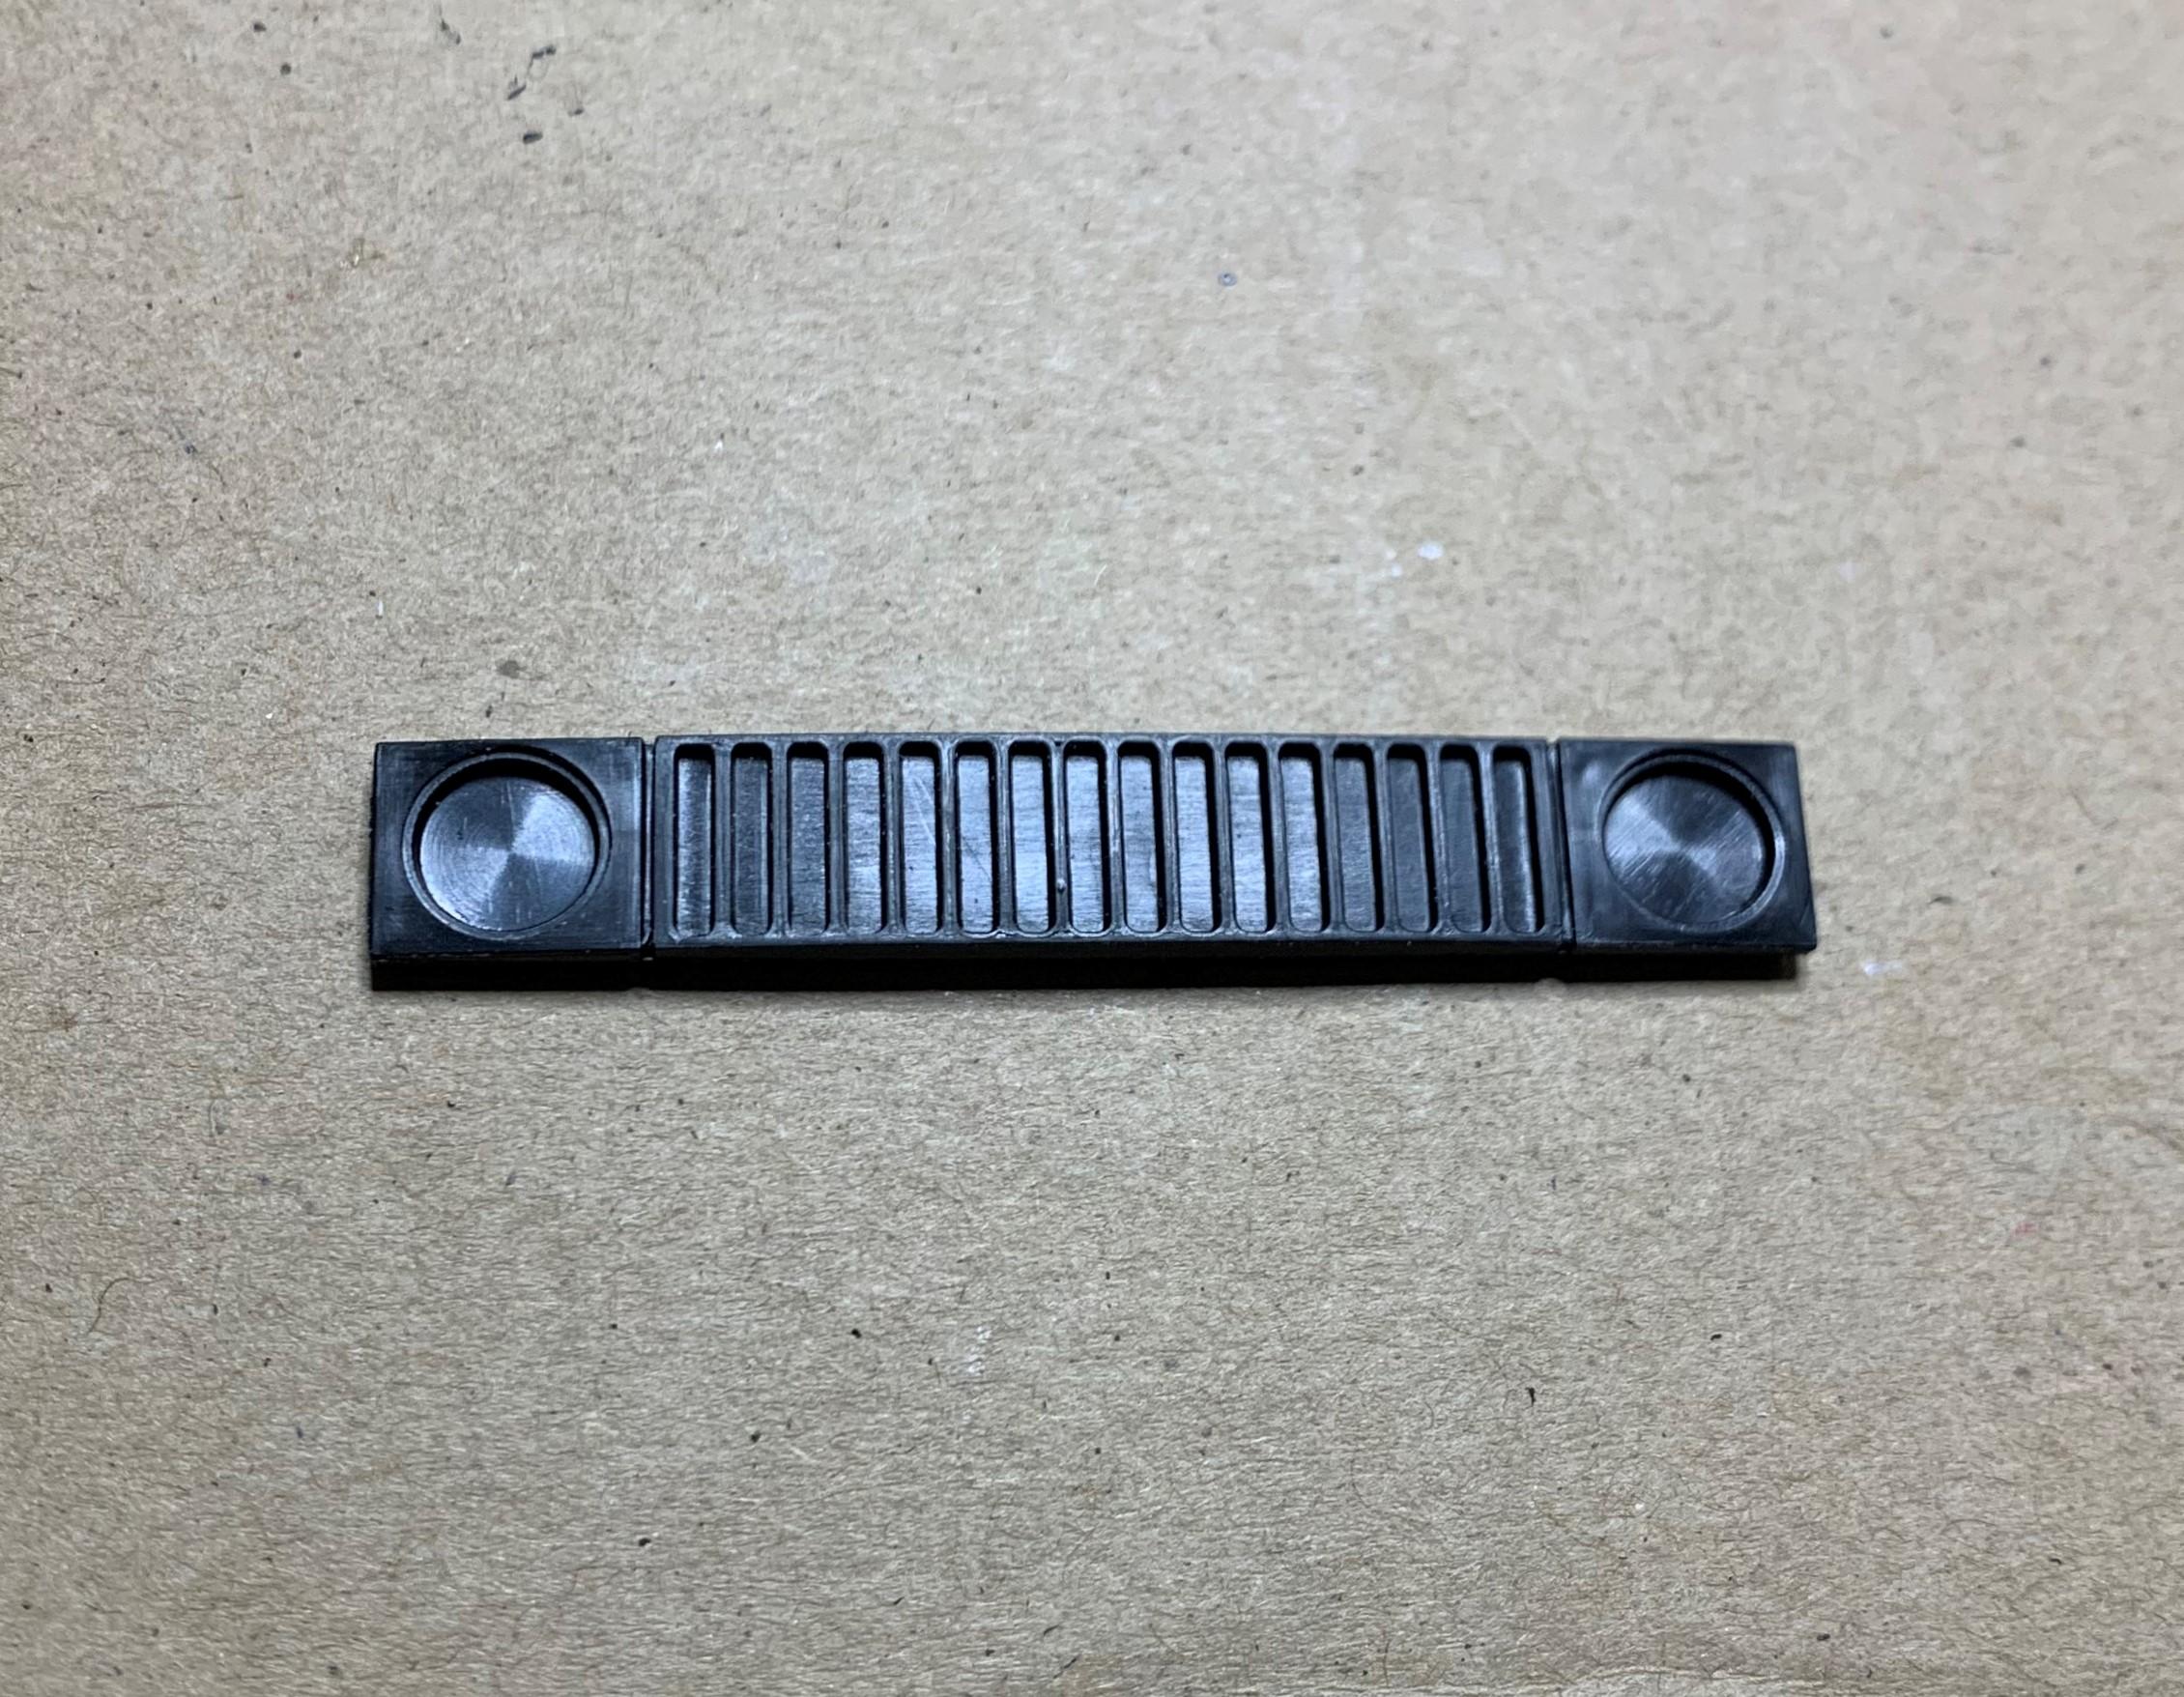
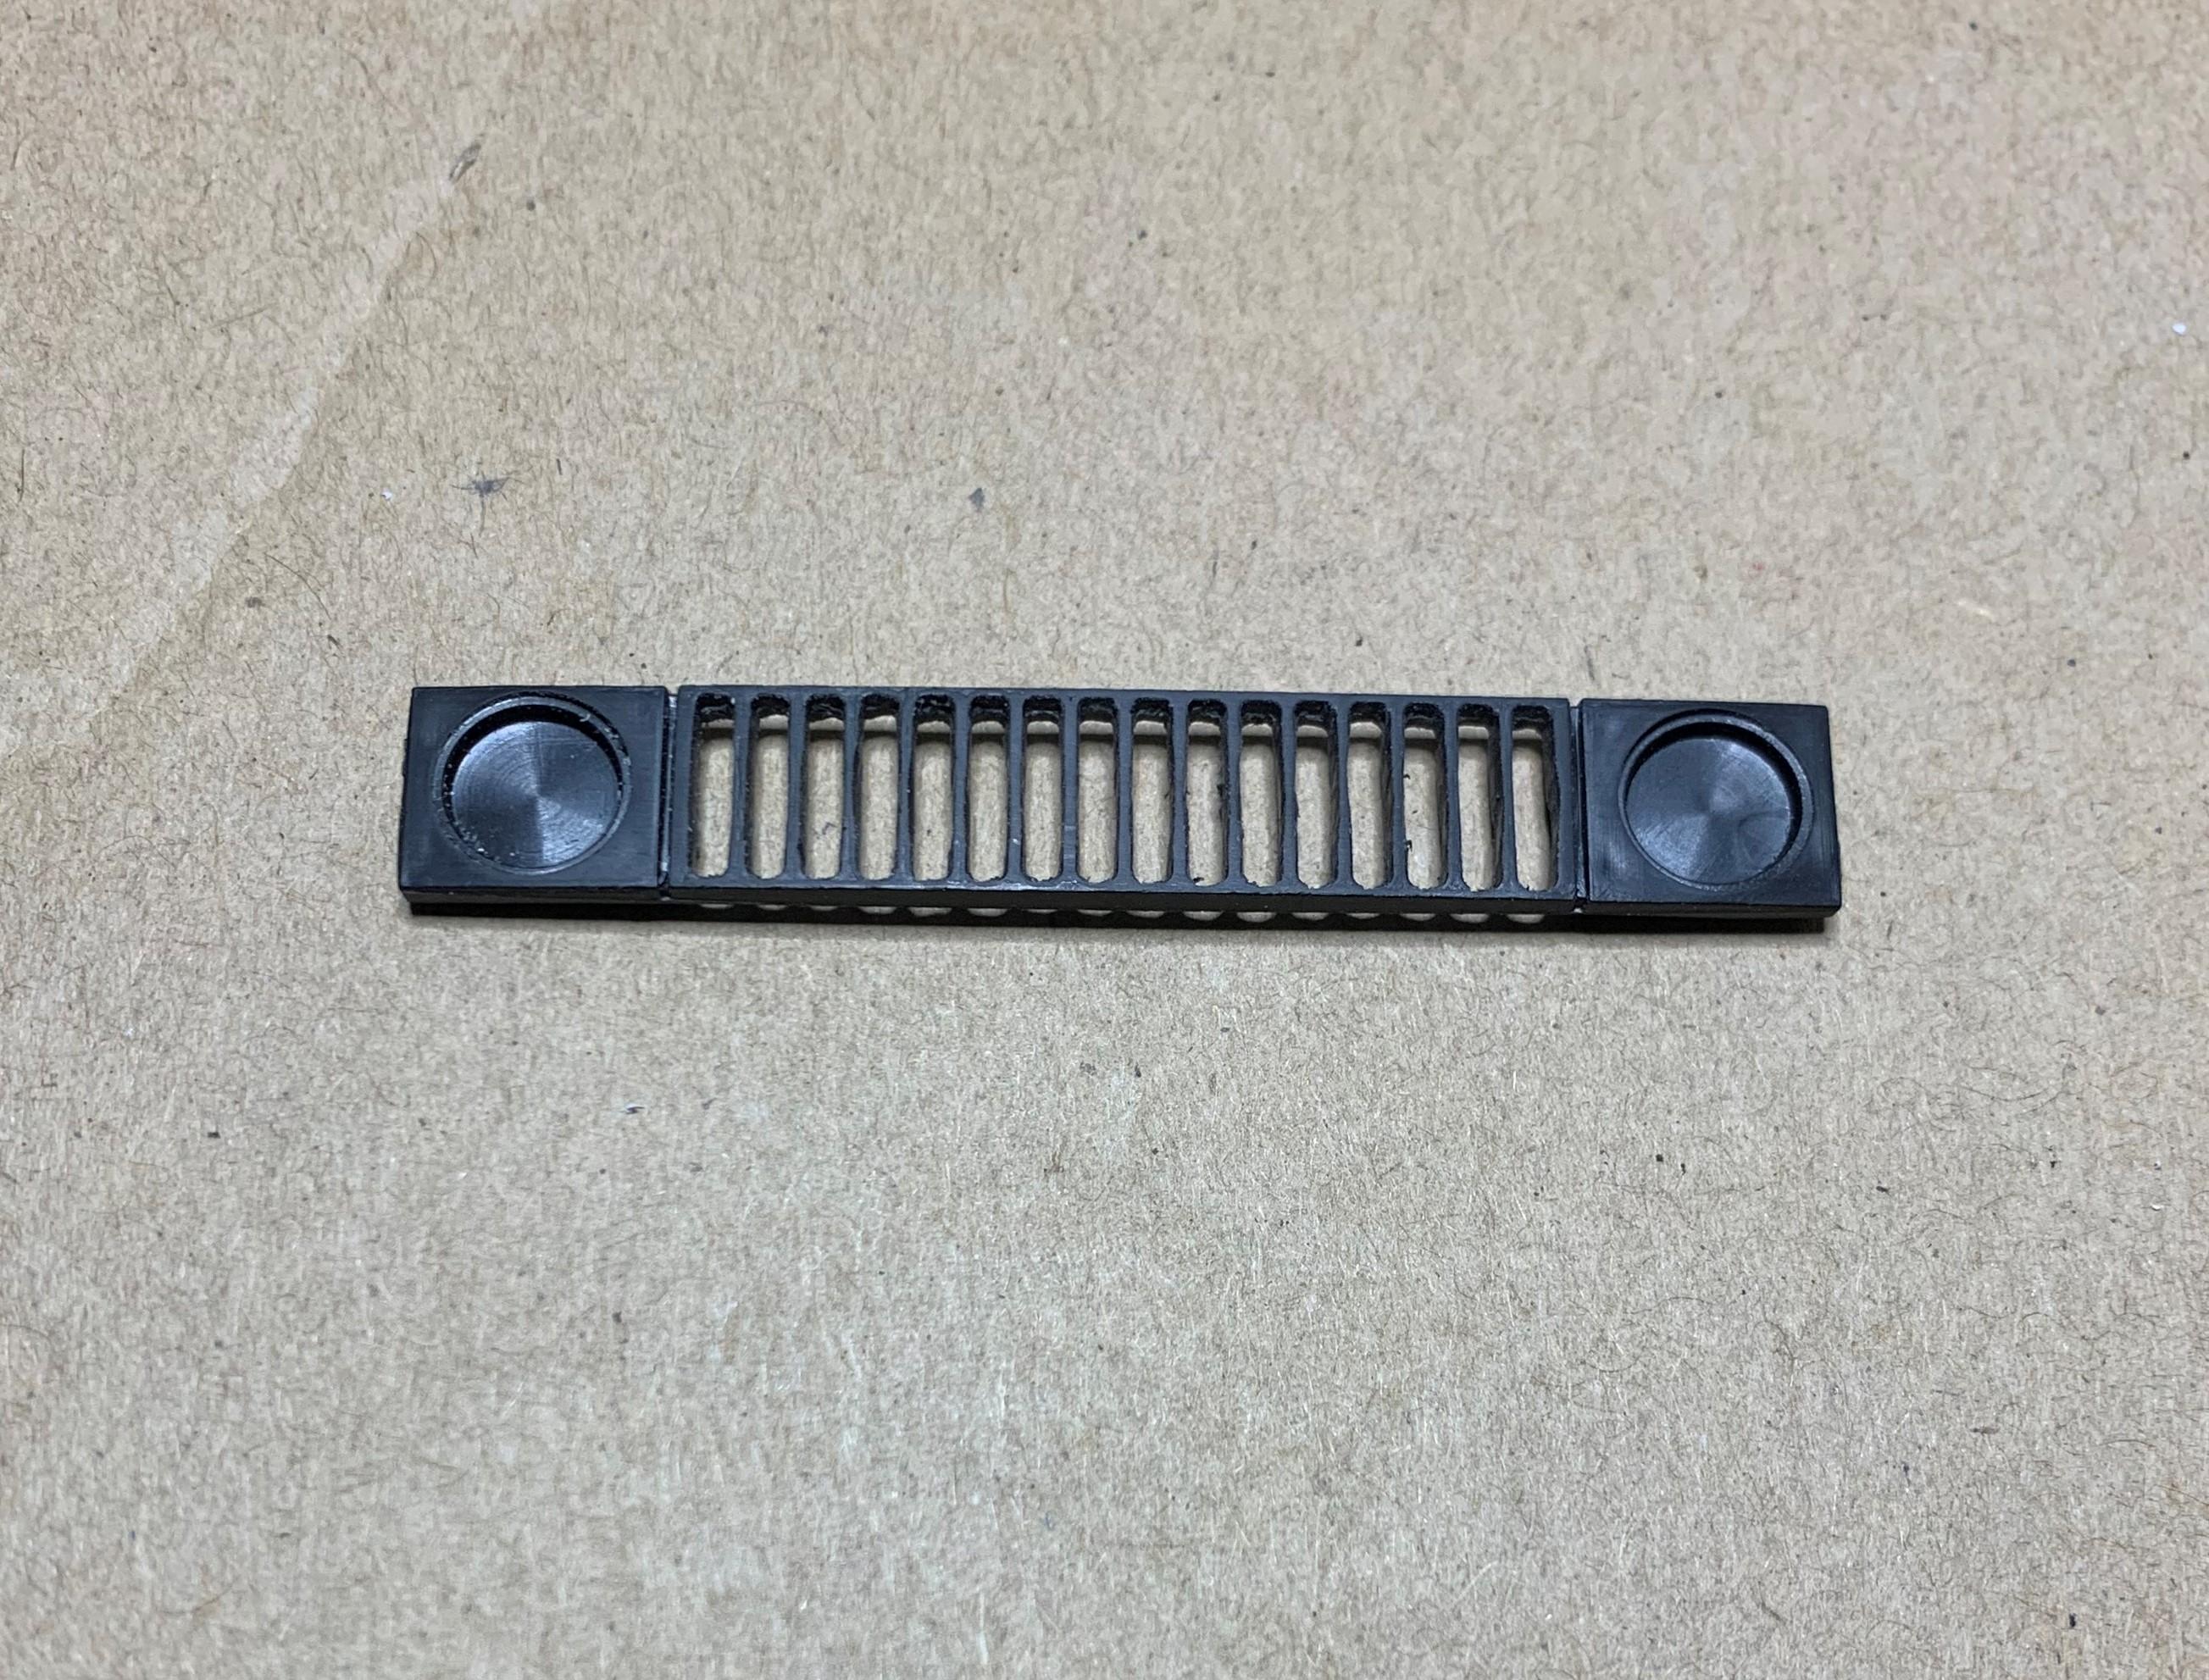
1 With the hood removed, I could see that the inner fenders are not wide enough. 2 I covered them with .020 styrene sheet to match the body contour and started a firewall. 3 Then I started to make a rad core and some inner fender detail. 4 Kit grille 5 Opened up grille, small drill to top and bottom, then backside of the blade dragged up and down both sides of 16 thin slots!


.JPG.a55df57e3cd48d3f89dacbf402a502bc.JPG)