
Ben
-
Posts
3,991 -
Joined
-
Last visited
Content Type
Profiles
Forums
Events
Gallery
Everything posted by Ben
-
1:250 scale Mack cabover
Ben replied to Russell C's topic in Model Trucks: Big Rigs and Heavy Equipment
Good lord!!!!!!! What won 1st place and beat that??????????? Outstanding!!!!!!!!!!!!! -
My friend is getting in touch with Jan (CTM) to find out if he will supply him with parts. If he will, I'll be placing an order for a few sets. You can buy a set off me. I won't charge you any more than what i have to pay and shipping should be cheap as It can be sent in a padded envelope.
-
That's sharp!!!!!!
-
This is the second set my friend in England sent me. This set is for the Lonestar and the Prostar. It has enough emblems to do one of each.
-
These are the instructions that come with the Lonestar set. Really nice!
-
-
-
My friend in England sent me these awesome photo etch sets from CTM (Czech Truck Models). These will make a great kit even better!!!!!!! This first set is primarilly for the Lonestar. I have heard that a Prostar set is in the works.
-
I bought a case of the Moebius version Prostars from Tower Hobbies and then traded a couple of them to my buddy in England for the Revell version Prostar and Lonestar. You can never have enough models!!!!!! LOL
-
Wow! I wish I could weather that well!!!!!!! I had to look twice to tell if that last picwas the real truck or not!
-
Peterbilt 379 with Century 1075 rotator
Ben replied to Bricksonwheels's topic in Model Trucks: Big Rigs and Heavy Equipment
That is outstanding!!!!!!! Beautiful work! -
I got mine! Thanks Dave and Moebius!!!!!!!!!!!!!!!
-
Revell 1990 Mustang LX with increased headroom.
Ben replied to Maindrian Pace's topic in WIP: Model Cars
Looking forward to more pics!!!! -
Yes, they are in Europe but shipping wasn't too bad. I think it was a week and a half, maybe two weeks? They are good people to deal with. I've bought from them several times. They have all kinds of neat stuff. Mostly catering to big rigs though.
-
Hey Tom, I use these. http://www.modelmakershop.com/modelmakershop/index.php?cat=c73_Photo-Etched-Parts.html&XTCsid=9794ij5dkq1ijlff23ngb95jn4 They have a photo etched backing that has facets etched into them and then they have a red, amber or clear lens. VERY realistic looking!
-
I think we all have probably done things like this. Just proves your a good ol' human.
-
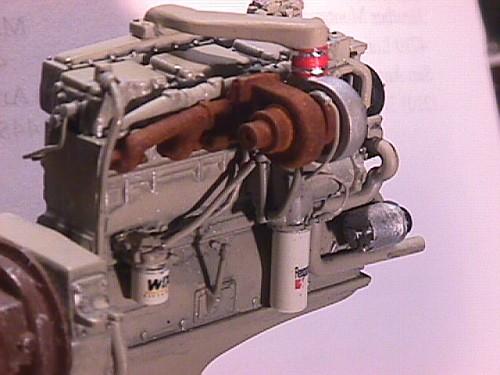
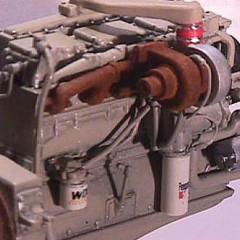
I think you might get more help if you change the title of the post to show your looking for ways to "rust" things. I use a product called Sophisticated Finishes Rust Antiquing Set. It's sold at Michaels Craft stores and I believe at Hobby Lobby as well. It's made by a company called Triangle Coatings. It's a two step process that actually rusts the plastic part. The first step is to paint the part with two coats of a special paint that comes in the kit that is loaded with super fine iron particles. Once this dries, you paint it with the second part which looks like Windex. This actually makes rust form. Here's some pics of it used on an exhaust manifold/turbo and a brake drum.
-
Needle nose Kenworth who makes one in resin?
Ben replied to Mr mopar's topic in Truck Aftermarket / Resin / 3D Printed
Illini Resin Replicas http://apps.aitruckmodels.com/Gallery/album.cfm?a=8735 -
Revell 1990 Mustang LX with increased headroom.
Ben replied to Maindrian Pace's topic in WIP: Model Cars
I also forgot to mention, there are many silicone mold material companies out there and they offer different durometers of silicone. You can talk with thier tech people and they can help you in deciding the best durometer for what your molding. -
Revell 1990 Mustang LX with increased headroom.
Ben replied to Maindrian Pace's topic in WIP: Model Cars
Your doing a great job on this Mike!!!! On the mold, what could be done when making the "inner" mold is to pour a thin silicone liner into the body cavity, let that cure, then form a "plug" out of a smooth material that can be easily removed from the rubber when needed. Once you have the "plug" sitting in your silicone lined shell, you then pour more silicone mold material around the plug. This will give you your silicone, inner mold with a large plug in the center. After this cures, pop your plug out, this now leaves a large cavity to carefully "fold" the remaining portion of your mold into and release the body. After you remove the inner mold from the body and release it, it will pop back into it's original shape. Place your plug back into the inner mold to make it "solid" again and you ready to cast with it. -
Freightliner FLD Daycab
Ben replied to 20dakota04's topic in WIP: Model Trucks: Big Rigs and Heavy Equipment
I'm hoping to have that stuff here soon, Ray. I spoke with Jamie and he mentined he was trying to finish everything this week. If you haven't made your other front fender, rear section, Gary wallace has a nice set of resin ones! I scratch built one side on my FLD and the Gary showed me the ones he has. Saved me from having to make an exact copy for the other side. -
Best tool for sanding diecast?
Ben replied to sjordan2's topic in Model Building Questions and Answers
Were you planning on repainting the whole piece of metal after you correct it? If so (if it's all metal, no plastic) get some B12 Chemtool carburator cleaner. You can get the spray or the dip and soak the part in it. It will remove all the paint and leave a nice smooth surface. Sanding may leave scratches. I've stripped several diecast bodies this way. When repainting, you need to use an etching primer as the first coat. -
Cool little tank for airbrush compressor
Ben replied to Ben's topic in Model Building Questions and Answers
I happen to already have a nice water trap, regulator setup that I was using with my other airbrush and the compressor comes with a water trap/regulator setup as well. I recently bought the DVD that Donn Yost sells on airbrushing and he has three water traps inline! I think my two should be sufficient though. You can never have dry enough air. I plan on regulating the compressor at about 100psi and then the output of the tank will be about 20psi. I will be installing the drain on the bottom of the tank just in case humidity forms in it and it collects a little water. -
That turned out sharp!!!!!!!! Nice save!!!!!!!!!!
-
Bending machine (mini slip roller)
Ben replied to Ben's topic in Model Building Questions and Answers
No, I don't think that would work as the heat shield ends up being only about 3/8" in diameter once properly rolled so the rollers need to be as small as possible. Even if I can't get them rolled to 3/8", I could get them close and caefully finish with a dowel. The beginning bend is the most crucial as that's where I have had them kink on me. Once they get the bend going it's a little easier to get it to the size needed. I think with a little work, that mini slip roller from micro Mark should work. It looks like the top can be removed with the four thumb screws so I could slide the heat gaurd off that way?