
stump
-
Posts
985 -
Joined
-
Last visited
Content Type
Profiles
Forums
Events
Gallery
Everything posted by stump
-
Thank you all so very much for your encouragement and enthusiasm guys. Huge thanks to Dave once more...he saved my skin again with some excellent reference and a couple of very kool parts. (pics later...) For now, just a couple of teaser "mocked up" shots. Both front and rear in primer, rear half mounted to the chassis, motor mounted...... I have re-done my body mounts (holes in the lower sill area to be plugged) and it now has hidden attachment points (small bolts) beneath the chassis/body. The blower manifold has been tweaked, and as a result, the blower now sits 5mm lower. The motor is an "in progress" of being lowered several more mm's too..... With the blower/scoop sitting on top, I could easily see I got carried away when designing the manifold etc.....easy fixes thank goodness. I have a day off work tomorrow, so chances are I can get some more done. Stay tuned for updates, and thank you all for tagging along guys. cheers Greg
-
Man, that cracked me up reading you and Daniel comparing notes there.....I only wish I had enough hair to grow a 2inch pony tail. Outstanding work on the nos fittings and wheels btw Dave. Excellent stuff indeed.
-
Derrick, this is smokin' mate.................... And yep, diggin' this magnet idea a whole lot.....so simple, concealed and perfect for the job.
-

FULL BUILD REVIEW: 1/12 Revell Shelby Mustang GT500
stump replied to David Thibodeau's topic in Car Kit News & Reviews
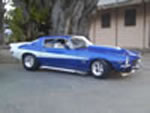
Looks EXcellent.. Loving that blue too......the white stripes actually suit it I think. Look forward to seeing the motor/chassis build-up. -
Hey, thanks Richard. Yes...it's taking a little longer than I'd hoped, but getting closer we are. Been busy with motor parts as well..... After fabricating a new idler mount, I gave it a shot of gold to try and replicate a gold anodised look.... Also added mounts/shafts to add the pulley to. Pulley in place, held with bolts from Scale Hardware. The brace holding it all together is just a length of flattened aluminium tube. And I started on the fuel system/pump.... Well, that's about it for now guys...more to come in the weeks ahead I hope. Ordered some odds'n'ends from Tim @ TRD the other day which will save me from scratching a couple of things together.. Thanks for stopping by, and I hope you enjoy it too. cheers Greg
-
Rear valance taking shape..... After several more nights of adding putty, sanding, re-shaping, adding more putty.....I got anxious and wanted to get it all one colour. Ok....so I also wanted to use it as a guide, to help show up any low areas.....and low areas are something it is NOT short on........ Still many, many highs and lows to iron out.....but I feel it IS getting there.......I may be a grand-father before I get it done.....and I don't even have kids.... CLOSE up showing much extra work required..... Continues......
-
Hey, thanks Derrick. Well, finally got some pics of recent goings on...... The front clip is progressing ever soo slowly. It has had another putty coat since I took this the other night. But at least both sides are getting closer to matching up. The rear fenders are a little more advanced. The prominent body line particular to the '69 is looking much better. Even with the obvious bulge in the rear flanks, it was a task and a half to keep this line, and get them looking the same..... I laid (glued) some this solder along the line I wanted, then built it up with putty. These shots show the process and progress....Still in a very un-finished state at present. This one has the first application of putty added... Continues......
-
Hey Paul, Just take your time with things. Yes, the bigger scales can quite easily consume larger quantities of cash, but you soon see the value in them when done. Also, working with a disability or related ailment can't be too easy. I do feel for you mate. I have heard it said that building models can be therapeutic....though I'm yet to see that. A lot of what you see getting done in large scale, can be transferred to small scale..I only stepped up 'cause my eyes are beginning to let me down. And the 1/24-25 scale offers a lot more scope and range of parts too. Chassis' can be adapted from a Sportsman kit to suit pretty much what ever you choose. Look forward to seeing what you decide on Paul. Oh, and don't worry about drooling over this site.....I do it every visit myself. Just watch out for your keyboard.
-
(insert thumbs up smilie here) Cheers Mike.
-
69 Daytona Pro Mod 1/16th scale updated 4/3/12 ..It's a wrap!
stump replied to Romell R's topic in WIP: Drag Racing Models
Rom, this just gets better mate.... The floor pan, the seat and harness......and that carbon hat. To die for.....(I can see it's not going to suit your build, just send it to me. ) Can't wait to see how the butterflies turn out mate. Keep up the excellent work. -
Hey Mike, great minds DO think alike..... I have those same 5 pics saved in my reference folder....not sure I stole/borrowed them off you. I just copied them from the net.
-
1/16 Scale Army Vega Funny Car - Finished 10/14/2018
stump replied to Mooneyzs's topic in WIP: Drag Racing Models
Chris, this is getting better with each instalment.. Details on the clutch can and manifold look sweet as. Great tip, looking for brake parts in alternate areas too...would never have thought to look at 1/18 parts. I'll be checking evilbay now.... Be interested to see Charlie's linkages too....they sound kool. -
Thanks Chris and Derrick. Had a few family issues lately and haven't had a great deal of bench time. Hope to get back on it soon tho. cheers.
-
Hi Paul, mate, yes...as Dave mentioned, there IS going to be a LOT of work ahead of you converting a F/car body. Speaking from recent experience, it can be (and IS) very, very daunting, plus a huge challenge..The results are very gratifying though. And you end up with quite a unique model which no-one else has. The other side of the coin is to opt for a body which has been already converted for you. There IS still plenty of fabrication work to be done on them. Aside from scratching together a chassis, you can open doors, cut the front off to make "removable".....plus loads more. Have a look here, Terry has some really kool stuff available in 1/16 scale. Look forward to seeing what you decide on mate, and some progress of course.
-
FULL BUILD REVIEW: 1/12 Revell Shelby Mustang GT500
stump replied to David Thibodeau's topic in Car Kit News & Reviews
Thank you SO much David. This is the #1 kit on my "got to have" list, has been since seeing those first test shots..Think I'll need a couple..... I'm torn somewhat on the detail level....though I'm a huge fan of details, I accept that by simplifying things, it keeps costs down, which, in turn...makes me happy. The "details" can always be added by those of us that wish too. Which I think helps justify (to myself) that I NEED several of them. Look forward to seeing more progress. PS: The stripes would've been nicer with a "black" option as well......oh well, there's always masking tape..... -
Now...that's got a kool factor of 10/10 in my book......
-
TDR 427 Roadster is Now for Sale
stump replied to DaytonaTim's topic in Car Aftermarket / Resin / 3D Printed
Big congrats Tim. The cost quoted/estimated would include delivery too, is that correct Tim ? Which, when the size is taken into account, helps a good bit in my opinion...Shipping these items across country or o/seas can't be too cheap.... I've only purchased 2 small items previously, and they were from the "older" technology, I'm really looking forward to seeing my NEW bits I ordered the other day. I doubt 3D'ing will ever out do the big model makers, but it sure as heck opens up the market for guys wanting something just that bit different. You can be sure I'll be back Tim.....tho it may still take me a while to save for a Roadster. (if I stop buying other parts I'll be right..... ) -
I see the start date goes back a bit on this.....glad I'm not alone in taking my time with things..... Larsa, you are undoubtedly building a master piece mate, looks absolutely fabulous, and extremely realistic in several photos. If you had made that base blend in with the back ground just a little more, I'd have sworn it was a real one parked on the board walk at the beach....Two thumbs up mate.
-
Holy wheel-tubbs batman !!... Dave, they look superb. The TDR lads did good, as I can attest to them being very capable of. Keep her going man, you're in the home stretch I'd say, and on a winner....
-
Hey Joe, Yeah, the shocks/struts are still a work in progress.....The springs are old leftovers from a 1/12 Tamiya kit...either an F1 or my really old Datsun. I used 2 sizes of aluminium tube for the core, 1/8 and the next size up which slips neatly over it. The larger of these was matched to a plastic tube, and glued flush with the top of that plastic tube. (inside, so the plastic is just to give it roughly the correct size.) The smaller (1/8) tube slides freely up and down inside, and I tapped a small countersunk screw into the bottom of it, to prevent it sliding out the top. Still working on a thread system.....the tap and die set I have is way too course.... So I'm off shopping for a better set.
-
I love how you always end a great post Dave... You know we do, right. ?? Looking so superb as always mate. Love the floor pan. (love the whole lot, hey, and as Tyrone pointed out, looks very realistic)
-
Thanks so much Dave, Jay, Richard and Romell. Jay, I'm really pleased you gained inspiration from my work mate, only too pleased to pass on anything which others may benefit from. I've definitely picked up a lot from other guys, so what goes around, comes around. Life is like a merry-go-round, as my nephew would say... Well guys, another "no pic update".... Tonight I really got stuck into the old body work......well, what's left of it.......... The "old" inner rear fenders are ALL but gone. Great news is, the new fenders didn't cave in on me................ I have just finished re-doing the lower part of these fenders too, but they still require lots of tidying up, mainly along the character line, which is where they were joined. Whilst removing all the old orange plastic from inside, I also fully opened up the rear window area and around the insides of the quarter window area... The front end has also received plenty of putty and file work and is progressing very well. I'll try and get some pics tomorrow arvo to give you a better idea of things...my explanations are sometimes difficult to follow..... cheers guys Greg
-
69 Daytona Pro Mod 1/16th scale updated 4/3/12 ..It's a wrap!
stump replied to Romell R's topic in WIP: Drag Racing Models
Romell, That wheel turned out real trick mate, great work on crafting that up.. -
Many thanks Dave. I was close...within a whisker at the rear, about 10mm at the front............. Well, as mentioned in my previous post, and with Dave saving my butt once again...body modifications have filled my time of late. The front end required (still needs lots more time) the most in regard to mods....It was shortened by 10mm, just behind the grill area. The nose of the hood has been reshaped and re-contoured too. It looks a LOT closer to photos of reference cars I have..(well, it will when finished. ) The rear end is where I started....it always looked tail heavy.....Dave's email confirmed this fact. So, here it is with a whole "scale foot" lopped out of it.......I've started re-contouring the edge where it rolls over to the tail panel. The lower sections of fender will be added once I have the correct shape for the top half all sorted.... An overview gives a better indication of how it looks now. Chassis work..... Only the Funny Car style hoop I added the other night, plus the new steering wheel position...... NEW fabricated "sheet-metal" diff in the works.... Think I'm going to head off to the local Ford Dealer for a new centre for it............ And started messing with shocks/struts..... Well, that brings this weekend to a screaming halt......More as it happens guys, and thanks for stopping by. cheers Greg
-
Two thumbs up Joe, fantastic work/progress as always mate.