
Casey429
-
Posts
441 -
Joined
-
Last visited
Content Type
Profiles
Forums
Events
Gallery
Everything posted by Casey429
-
 Just a quick update, again from between work on the Western Star. I got the chassis up on it it's rear wheels, still trying to figure out some hubcaps for the front so they're just set in place for now. I've been playing with the idea of using the Farr air cleaner from my spare Road Boss. As of now, I need the Peterbilt one for another project I have in the pipeline. I've modified the tube to fit the Peterbilt opening and shortened the opposite end to mate up properly. I've never seen a Peterbilt with one of these, so I'm not sure if it was an option. I've looked through lots of Tim's photos and can't find anything, paging Mr. Ahlborn! And another comparison shot with Old Yeller. The shortened frame makes a big difference when they're side by side. Once I get the Star done, I'm going to go at this one a little harder. I've got a paintjob picked out, I just haven't found the exact color I'm after. Since I had so much trouble with the Duplicolor and Valspar paints on the Star, both of those are out. I need to do some browsing of the paint stands at the hobby shop. Thanks for looking!
 -
White Western Star Logger
Casey429 replied to Casey429's topic in WIP: Model Trucks: Big Rigs and Heavy Equipment
I've kept plugging away at the Star, and it's finally starting to look like a truck! First, a few of the little details. Air cleaner is black with a foiled grille, straight from the box. I added the 2nd luberfiner from my donor Road Boss. I turned the mounting bracket sideways to allow enough material for them to attach to. I have an old Autocar dump that my dad built way back when, and it also has two with the bracket rotated 90 degrees like this. I think it adds to the heavy duty look. I also got the stripes on and a few other little doodads attached. The only major thing to note is I sanded the horn caps smooth and foiled them. The stripes were kind of a bear, and even with some Microset, I couldn't get them to snuggle down over some of the details, but it still looks ok to me. The cab isn't permanently attached yet, just sitting here for the photos. I'm fiddling with cab and hood alignment despite many mock ups prior to paint, and I've got it pretty much where I want it. I'm just waiting to attach the fuel tanks before I put the cab on for good. I'll add the mirrors and other accessories once it's on. One thing I noticed was the decals are printed off. The lower pinstripe on the driver's side is thicker than the passenger. I didn't notice it til after they were on, or else I would've cut them apart and used the other decal pieces. I'm not sure if I'm going to put in another piece to connect them or not because of this. The black of the window rubber looks a little wobbly, and in person it's not this bad, I promise. But, the cab guard will obscure it a little bit, so I'm not that worried about it. I need to start masking this stuff before I paint it! This will probably be the last update before I move it under glass. It's coming together fast now, and I'm pretty excited how it's turning out. This might be one of my favorite builds, despite all the little bumps in the road. Thanks for looking! -
One other thing I forgot to add was I did some modification to the front fenders. As our resident Peterbilt guru Tim has addressed in the past, the front fenders leave "buck tooth gap" between them and the bumper. Following some advice from him, I "rolled" the fender forward and repositioned the skirt lower. I filled in the resulting gap this some styrene an glazing putty. I also cut off the rear fender step and positioned it 1/8" higher on the fender. I also added the rolled edge with some .020 round rod.
-
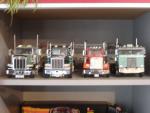
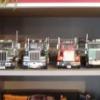
Jeff, I've got a couple more surviors in the display case along with some that weren't so fortunate. I still have the wrecker body for the yellow Peterbilt, but it's missing the tow bar from the rear and some other little bits. One day I might convert it back to a wrecker, but for now it's a tractor. In among the trucks and parts was a trashed red 359, the T501 version which was the newer truck. We robbed a lot of parts from it to convert the wrecker to the tractor, and repowered it with the Cummins as well. I haven't taken too many pictures of Dad's old trucks, but now I'm thinking I should. All I've got handy at the moment is a few shots of his Diamond Reo with my Road Boss, and one from way way back when I built a DM800 tractor with the remnants of his DM800 mixer.
-
Hey everyone. Between build sessions on the Western Star, I picked up the reissued California Hauler 359. I've been waiting for this for a long time. I always liked the Unilite conventionals and almost bought one off of evilBay everal times. I've got one of the original 359 Wreckers that my dad built way back when that has more or less survived the last 40 or so years intact, so that's part of the motivation. It's going to be pretty much out of the box, but with a few modifications to correct some of the kit errors and put my own spin on it. Like all my truck builds, I started with the engine. I dechromed many of the parts and gave it a proper shade of white with a chassis color transmission, black in this case. Speaking of the chassis, that is the one major modification I took on. The kit scales out to roughly a 205" wheelbase, which I always thought was a bit much for a daycab tractor. I shortened it to a 180" wheelbase, seemed to be about the most common among all of my other daycabs. I'm pretty pleased with it. I moved one air tank to the other framerail, and moved the one that would be above the battery box to the rear as well. Plans call for both forward mounted fuel tanks and a COE style battery box. I pulled the Wrecker out for comparison. It was converted to a tractor back in the '90s by dad and myself when we found it and other survivors in my grandparent's attic. Fast forward a bit, and the chassis is painted and the Detroit has found its home. I'm going with a blue interior on my truck, and here's all I have so far. I still need to pick up some brown to do the woodgrain on the dash and doors. Wheels are the kit pieces, with baby moons like I did on the Western Star. I need to find something else for the front, as the brass fasteners aren't quite big enough to cover the hub. Any suggestions? Thanks again for looking everyone!
-
White Western Star Logger
Casey429 replied to Casey429's topic in WIP: Model Trucks: Big Rigs and Heavy Equipment
Just a quick update for you all. We had an unseasonably warm Christmas Day here in SW PA, so I took advantage of it. After multiple mishaps with my original paint idea, I wasn't sure what to do next. I wanted to paint the Star black, since I always liked the black/red combo. But try as I might, I couldn't get it to look even half decent. So after looking at the box art and grabbing some Krylon bright white, I have a white White Western Star. I'm also going to use the red stripes from the kit decals. I'll give the paint a few good days to cure, and then I should be able to button this up. Maybe even before years end. Thanks for looking! -
Prostar to Cat conversion
Casey429 replied to Tony Bryan's topic in WIP: Model Trucks: Big Rigs and Heavy Equipment
From what I've read, for EPA regulations the US market Cat trucks use the International MaxxForce engines painted Cat yellow. With Caterpillar leaving the highway engine market a few years back, they don't have an engine that is emissions compliant for highway use. By partnering with Navistar, they saved a lot of R&D on their end to get back in the highway market. I can't speak for what powers the ones down under, but they're much better looking for sure. I like the rebadge approach better than the tacking an ugly hood onto a Paystar approach. -
White Western Star Logger
Casey429 replied to Casey429's topic in WIP: Model Trucks: Big Rigs and Heavy Equipment
Just another quick update. We had some unseasonably warm weather today in SW Pennsylvania so I took full advantage. Lots of red paint flew today. I'll let it sit for a while to dry so this will be it for about a week or so. Red everywhere! Fuel tanks, battery box, trailer, and some other miscellaneous bits got their color. I like the results, but I don't think I'll be using Valspar again any time soon. It takes forever to dry and despite the can saying dry to the touch in 40 minutes, that isn't the case. I'll also never use this much red again lol. Everything needs to be prepped and primed exactly the same so it matches, and it ended up eating up lots of time. But it should all be worth it in the end. I wasn't sure what to do for taillights, so I looked online at some 1:1 logging trucks. Most have them under the chassis, my guess is to prevent a mishap with a wayward log. With my pintle plate, I couldn't do that and at this point it's too late to redo it. So I took some 3/8 x 1/4 Evergreen square tubing and capped one end. . And I got the mudflaps for the tractor done. They're from the trailer kit. Testors flat black and silver. I wasn't too thrilled with some of the boogers in them at first, but real rubber isn't flawless either. I then scraped the paint from the letters with an Xacto and colored them with a yellow Sharpie. I also stuck a small red lens on the end (this truck will have lots of extra lights). I'm pretty happy with the result. It's getting to that point where it's a bunch of time consuming little details that will come together in a big in the end. I had a bit of a paint failure on the cab and hood, so those will need some more attention. With the weather slated to cool off big time, I hope I can get it redone before Old Man Winter sneaks up on me. Thanks for looking! -
White Western Star Logger
Casey429 replied to Casey429's topic in WIP: Model Trucks: Big Rigs and Heavy Equipment
A little update on the Star. I got the chassis sitting on it's own 10 feet. Now its starting to look like a truck! I've been doing a little experiment with some rear hubcaps. Some of those folding brass fasteners with some Duplicolor chrome looks like they'll do the trick. Here you can see how the Road Boss wheels are a little off in the molding. I've also been playing with some exhaust ideas. I want to run dual stacks on this but the kit muffler leaves a lot to be desired. I have this set from the Italeri truck accessory kit and they're miles ahead of the kit parts. I contemplated straight pipes, but wanted something a little quitter for running up and down the mountains. Tips are aluminum tube that I miter cut. They'll get polished before final assembly. Final height might need some adjustment, but that'll wait til later. They'll probably end up being a hair taller than the headache rack. I also decided to add a spare tire. But, since I robbed all the wheels from the Road Boss, I didn't have any spare spoke wheel rims left. Easy fix. Take one old and bad looking aluminum wheel: Slice off the hub... Paint black to match, and we have a spoke rim. Still needs a beauty ring painted on, but that won't take long. Thanks again everyone! -
Meng F350 welding rig
Casey429 replied to zaina's topic in WIP: Model Trucks: Pickups, Vans, SUVs, Light Commercial
Looks like a lot of rigs running around SW Pennsylvania as of late. With all the Marcellus Shale drilling and pipelining going on, guys are coming in from all over. -
White Western Star Logger
Casey429 replied to Casey429's topic in WIP: Model Trucks: Big Rigs and Heavy Equipment
A long, long, looooooong overdue update on my Star. I ended up deciding to kick it up a notch and go ahead and stretch the rear of the frame on this one. It just didn't seem right to have the tail still looking like a tractor. Thanks to tbill's generosity, he went ahead and sent me some Diamond Reo frame rail sections. However, they didn't match up to the Western Star rails. The Diamond Reo rails have a radiused edge, where the Western Star is square. So, if anyone else has a need for the Diamond Reo rail pieces, PM me and I'll pay the favor forward. I wanted to pick up another Western Star to pillage for parts, but my LHS didn't have one. So I picked up another Road Boss, since it shares most of its bits with the Western Star. This also gave me a matching set of spoke wheels for the trailer, and some other parts I'll use. I added about 1 1/2" to the aft end of the truck and redid the pintle plate. Then I doused everything in a nice coat of Valspar Classic Red. I added these Italeri spoke wheels to the front. I removed some of the webbing (not sure if it's cause they're a European style wheel or supposed to be a brake drum, but it didn't look right) and painted them red to match. Black rims and a silver beauty ring and wedges complete the look. The hubs are actually the rear hubs painted to look like fronts, and I added the red oil cap from Plastruct rod. For the rears, I did the same. Pretty much identical to my Road Boss, just red instead of orange. I'll put some baby moon caps on the drive and trailer axles, since I used rear hubs on the front. One thing I noticed too is there must be some mold alignment issue with the Road Boss tooling. The webs on a couple of the wheels are way off. I noticed this on my Road Boss build, and is why I wanted another Western Star as a donor. Too late to do anything about it now, so I'll live with it. For the interior, I built it up just like the Road Boss. Krylon Mocha Brown for most of it, Testors black and silver for the gauge faces. I didn't spend too much time on details, since you won't hardly be able to see any of it. I'm really liking how things are turning out so far. I'm still doing final prep and bodywork on the cab, hood, and log trailer. I need to make the most of this unseasonably warm weather, so paint will be flying soon. Thanks for looking everyone! -
1980 Ford F-250
Casey429 replied to Arnd's topic in WIP: Model Trucks: Pickups, Vans, SUVs, Light Commercial
Arnd, In a single gas tank application, the truck will only have the rear tank. But, it's more common to have a single tank when the truck is a short bed, especially if it's 4x4. Yours being a 4x2, a long bed and an F-250, I'd advise leaving the dual tanks. Especially it being a beaten down work truck, one tank has probably rusted out so the other keeps the ol' girl going. -
Ford F350 by Meng Models
Casey429 replied to martinfan5's topic in Model Trucks: Pickups, Vans, SUVs, Light Commercial
One other nitpicky little thing. The vents in the fender emblems are a dark red on the diesel trucks. Other than that, it looks good. I need to get one of these and do a shortbed conversion to match my 1:1. -
Ford F350
Casey429 replied to martinfan5's topic in WIP: Model Trucks: Pickups, Vans, SUVs, Light Commercial
As the owner of a 1:1 6.4L Power Stroke Super Duty, I must say the engine is dead on. It's all there, both EGR coolers, VGT controller, fuel cooler, filters, oil fill, all of it. Nicely done. -
Stellar, just stellar. The Hunter decals are a really nice touch.
-
1972 Peterbilt 359M
Casey429 replied to Old Albion's topic in Model Trucks: Big Rigs and Heavy Equipment
Great looking Pete! -
The wheels in the box art appear to be the standard 17" painted aluminum ones that are standard on '10-up XLT trim trucks, while the ones on the test shot are 20" units from an '11-up King Ranch or Platinum truck. Difference being, the King Ranch has gold inserts and the Platinum's are black. Also, the box art depicts a single outlet exhaust, like a gas engine where the diesel has a twin outlet "diffuser", designed to lower tailpipe exhaust gas temperature during regen cycles. But, the pipe appears to have the diesel's vents in the wall. The box art shows the grilles in the fender vents as being red, indicating the Power Stroke Diesel option. The box art also depicts the truck with color matched mirror tops. This is inaccurate for what seems to be an XLT trim truck. If it had been a Chrome Package truck, these caps would be chrome, and it would also require a different grille. The painted tops are only found on King Ranch trucks, unless it has the Chrome Package. That all being said, I don't care! I've been craving a late model (hopefully) diesel pickup for years, and the fact that I've got an '08 F-250 in the driveway makes this better. I'll need to chop it down to a short bed to build mine, and I'll have to do some fiddling to make it match my Lariat trim, but I'm willing to make sacrifices. Mine also has the uber-rare (for 6.4L PSD trucks) ZF-6 speed manual transmission so that might be my bugaboo. Even though Meng has decided to kit the Super Crew 8' box, I don't see it holding up too many conversions. I think it's easier to subtract a couple of doors or a scale 1'3" from the box than to add it in. Bring it on.
-
old dog on the bench
Casey429 replied to Chris guthro's topic in WIP: Model Trucks: Big Rigs and Heavy Equipment
Nice work on the Bulldog. Reminds me of the one I built some time ago. Probably 10 years or so. I lost the Bulldog somewhere along the line and haven't found a replacement yet. Box stock other than the stack top. I used a side pipe from somewhere since it had the turnout on it. -
Southern cab load
Casey429 replied to Chris guthro's topic in Model Trucks: Big Rigs and Heavy Equipment
Sorry about the loss of your Star, but at least you were able to save something. Looks good. -
New Moebius Ford Pick-ups 1971 Ranger XLT AND 1969 Custom SWB
Casey429 replied to SteveG's topic in Truck Kit News & Reviews
Seeing those few preliminary shots of the 4 years of grilles and the 4x4 components has me even more excited for these. By the looks of it, the transfer case appears to be a divorced NP205, so I'm going out on a limb and speculating that there's a 4x4 F-250 in the works. If not, a 4x4 F-100 will still get the job done, since 4x4s are more common in these parts. I see lots of these making great era-correct work trucks, regardless of model or engine. Back then, towing capacity wasn't as much a concern as it is today in our world dominated by 3/4 and 1-ton diesels, so it wasn't uncommon to see lots of Big Six, 3-on-the-tree F-100s in construction. -
White Western Star Logger
Casey429 posted a topic in WIP: Model Trucks: Big Rigs and Heavy Equipment
As part of my resolutions for 2014, I promised myself I'd build more. Shouldn't be too hard, I finished just one for '13, my Road Boss. I started the Roadrunner trailer the same time I got the Road Boss, and originally intended on adding it to a built up Pete 359. I axed that idea after a while, so the trailer went back into the box. While working on the Road Boss, I stumbled on the Western Star reissue, and decided they were a perfect match. I didn't pick up the Star until a few days after Christmas, so it's been a long time coming. Here's where I'm at. I started off with the engine. Pretty much the same way I built the one for the Road Boss. Cummins beige for the big part, Testors for the rest. I should've done a better job removing mold lines from the turbo housings, but these usually have a pronounced one on the real things. Not a huge deal to fix, so I might. Air cylinders are yet to be put on the transmission. The chassis was done pretty straightforward. I didn't have any extra frame rails to stretch the rear properly, and I don't want to get to bogged down with the details. So, I just made a pintle plate for the rear, with some gussets. I based this on a dump truck we installed a similar setup on back when I wrenched for a living. Since we're going for a heavy duty look, I pulled out these Italeri spoke wheels I've been saving for a rainy day. They popped right into the kit tires with no fuss. A quick bath to dechrome, and we're in business. And last but not least, a glimpse of what's to come. I have a paint job picked out already too, but with the current temp here in SW PA a bracing 16 degrees, that'll have to wait. I don't want to reveal too much, but it will be inspired by a large company with an elephant for a logo. Speaking of companies, I'll be homebrewing decals for this one like I did on the Road Boss. Feel free to chip in and thanks for looking! P.S. I have a question for you, Tim. On your green Star, how did you go about concocting the dual exhaust plumbing? I want to have dual stacks on this one, and this, like the Road Boss, has a pretty crazy looking exhaust system I'll need to work around. -
That's got it fixed, thanks Brett. I never would've thought to try that, I've posted links and such from this PC before. Maybe I haven't since updating to IE11 (I just install the stuff as updates are sent, don't pay much mind to them). But, thanks again!
-
Hey all, I'm trying to post some photos of may latest build, and I can't get the things to work. I copy the link from my Photobucket as per usual, but they won't paste into the topic window. It'll paste right into MS Word and the address bar in my browser but not where I need it most. Anyone else having any issues like this? Any help is much appreciated, thanks in advance!
-
I picked up this Dodge when Ollie's had a bunch of Lindberg kits cheap, I think I paid $7.99 for it. I didn't want to build it stock, the only option on this one. I didn't want to do a really shiny build either, that way I didn't really have to stress over getting it all right. So I decided to let my imagination run wild and with some judicious raiding of my parts stash, here's where she sits. The engine is the kit block and some other bits, but that's about it. Tunnel ram & carbs I think are from a Revell '70 Buick GSX. I made the deep sump oil pan by grafting on another one from a broken spare oil pan. Alternator is from a '69 Charger. I wanted it to look wild so I painted it Lawn-Boy Green with kit heads done in Testors aluminum. Intake and valve covers are Duplicolor chrome, carbs and pan are Testors gold, yellow distributor cap, and a purple oil filter to represent a Royal Purple piece. I drilled the heads for headers that I'll build, just need to see if I can snake them through the chassis or send them out the fenderwells. In my mind, it's a 505 stroker with Indy Cylinder heads and a bunch of other go fast goodies, it'll be thirsty with those dual Holleys. It's backed up by a beefed 727 TorqueFlight. I kept the chassis pretty simple. Primer with body color overspray, dusted with red oxide primer to mimic surface rust. I'm shooting for a fairly clean original looking car that's been bought on eBay or Craigslist and hopped up. I scratched up some subframe connectors and did the front suspension up to look like its been freshened up and painted. Gloss black k-member and a mix of silvers for the other parts. Eventually, the rear fenderwells and quarters will get caked with rubber. Same idea for the body. A little primer, a little putty, a few dings, scratches and other assorted blemishes. I removed the trim from the door and left it and the quarter in primer. The passenger rocker was replaced and puttied, but there was racing to do. I was going for the work in progress look. The go fast has been sorted out, and the look good is still in the works. Color is Cummins Beige, close to Tan Poly, a factory color. Who knows, maybe it's had a Maaco repaint at some point. And a few mockkup shots...front wheels and tires are out of the box, rears are parts box Goodyear cheater slicks and 5 spoke mags. I flipped the front spindles for oil pan ground clearance, and the rear will get shackles. I'm still deciding between a set of old school slapper bars or ladder bars too. Let me know what you think, and thanks for lookin!
-
Here are my two workhorses: 1994 F-150 XLT. 5.0, E4OD auto 4x4. It has the SixLiter tune up (learned about it on a Ford Truck forum, high output coil, 8mm wires, timing bump) BBK shorty headers that leak badly, K&N intake, soon to have a Flowmaster cat-back, Rancho RS5000 shocks, new brakes, new headlights and clear markers, and a bunch of other TLC and upgrades. I sacrificed a mint 2WD '95 to save it back in 2010. With donor body parts and some fresh paint, the old girl still turns a few heads. Color is Tobago Green (same as Calypso on a Mustang) with a dark Tourmaline insert and grey interior. I've had this truck since August of 2007, and she just rolled over 120k on the ticker tonight! Pic is from when I put it back together, I have some more recent ones on my phone I need to upload. I'll never part with this one. And the new daily, a 2008 F-250 Lariat. 6.4 Power Stroke Diesel backed by a ZF 6 Speed manual (yep, she's a rare beast). I bought it last year and the previous owner installed the 5" Diamond Eye DPF delete turbo back exhaust and SCT LiveWire programer. Since then I swapped to the 2012 18" OE wheels (20's that were on it were off of a '12 Lariat), installed an S&B intake, a Sinister Diesel EGR delete and coolant filter. Not pictured is the smoked Recon cab light lenses and smoked LED mirror and 3rd brake lights. Oxford White over Pueblo Gold with a camel leather interior. Next mod is a South Bend 3250 dual dusc clutch (the stock one gets kinda cranky when you put your foot down). I love to drive this truck and I don't think I'll ever let it go either.