mvadrag
-
Posts
140 -
Joined
-
Last visited
Content Type
Profiles
Forums
Events
Gallery
Everything posted by mvadrag
-
I want to see how you do the weld detail. I simulated that once on a AMT '34 Ford pick up with paint, not too exciting. Yours should have texture...
-
Wow! I like the paint job, two tone and the red stripe. Good stance too.
-
Thanks Dennis. I have lots of projects that also got the axe or the box! But they all help to gain experience for the next one(s). I have a stash of Aurora kit parts that a friend collected for me (nothing totally complete). He had lots of contacts and kept me fed with parts cars. I even tried to restore an over glued stock body for a future nice build. These came highly polished out of the box. The street rod body above is untouched.

-
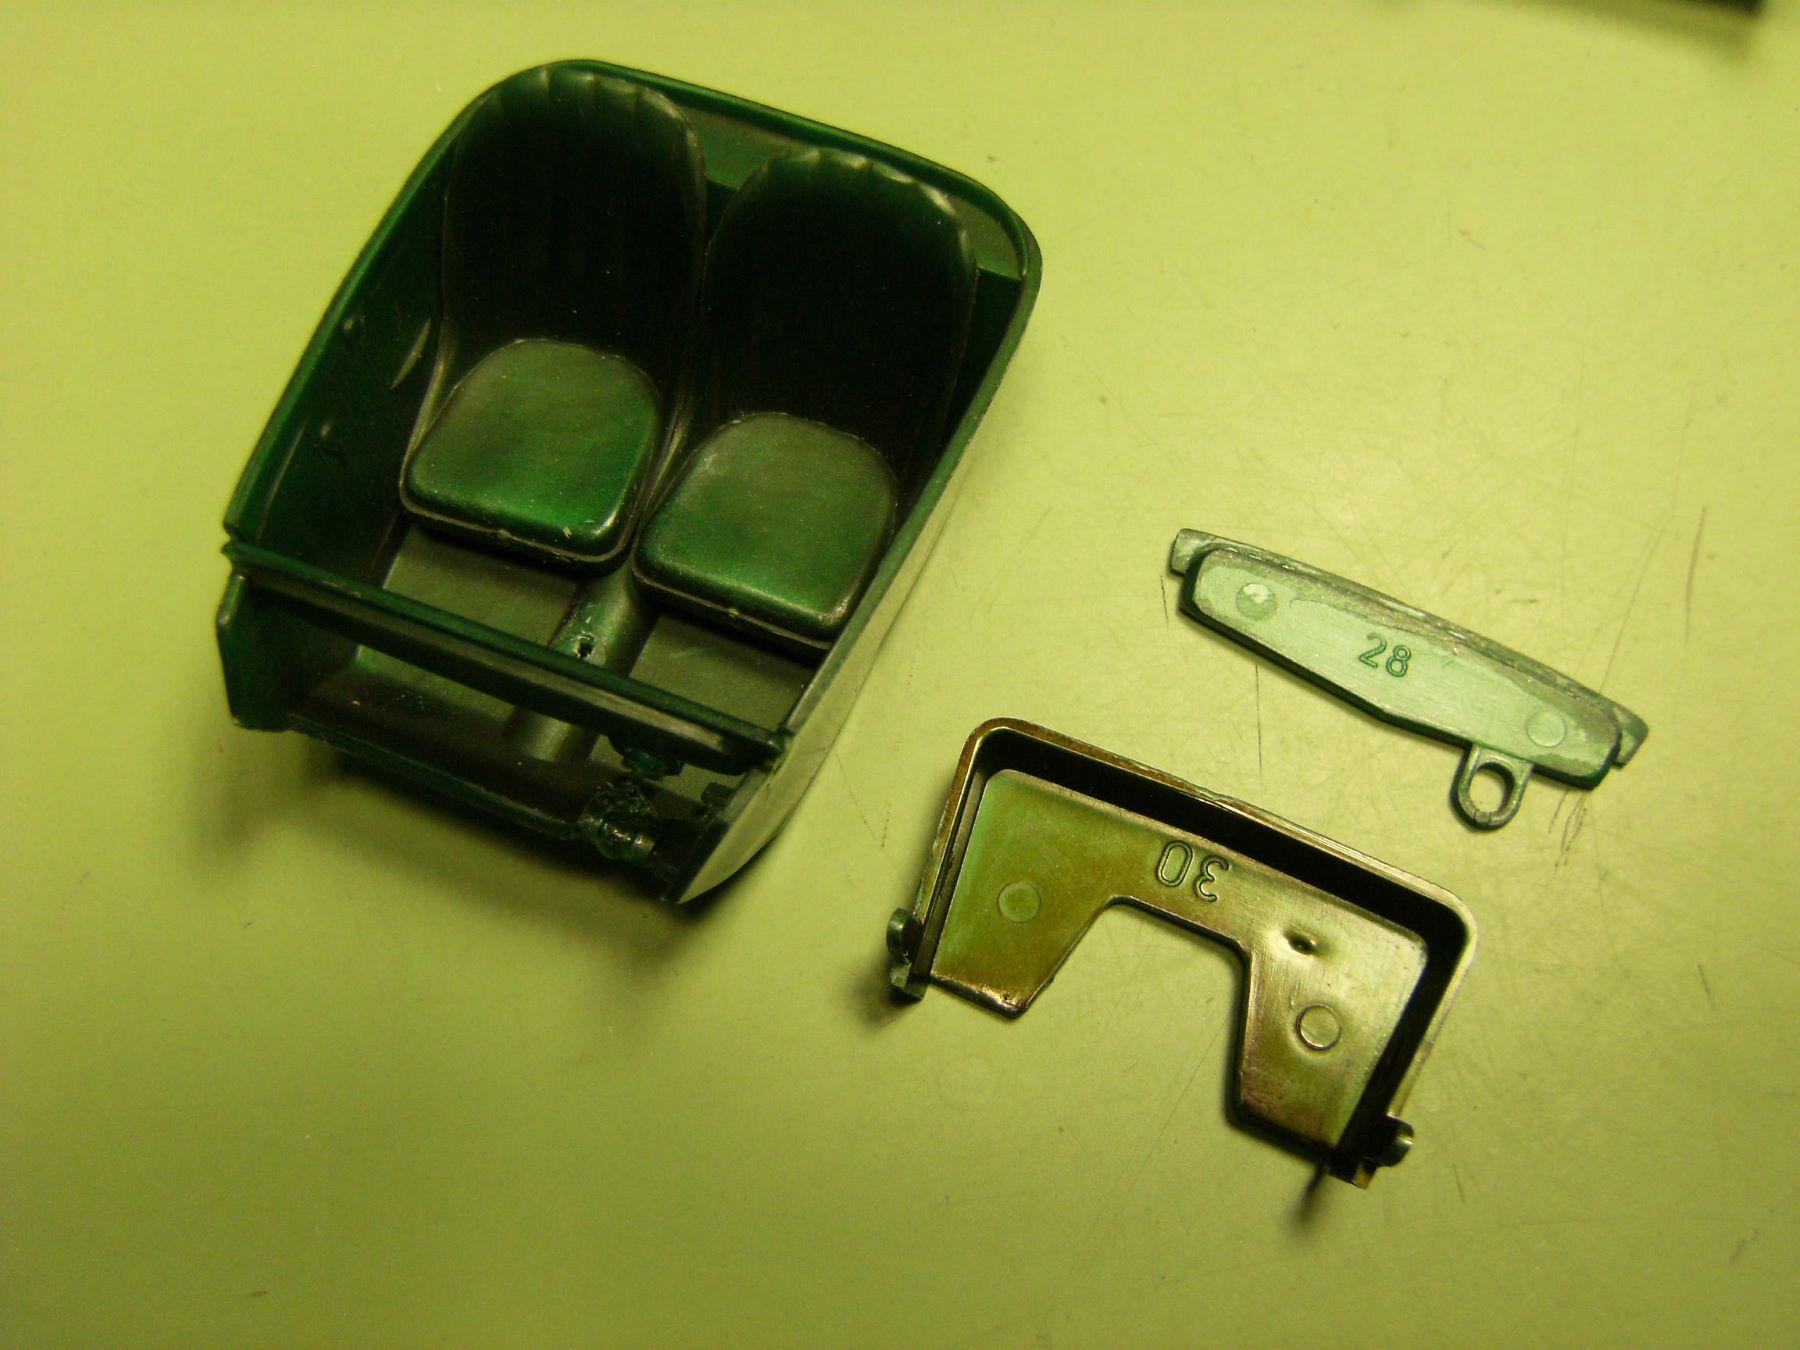
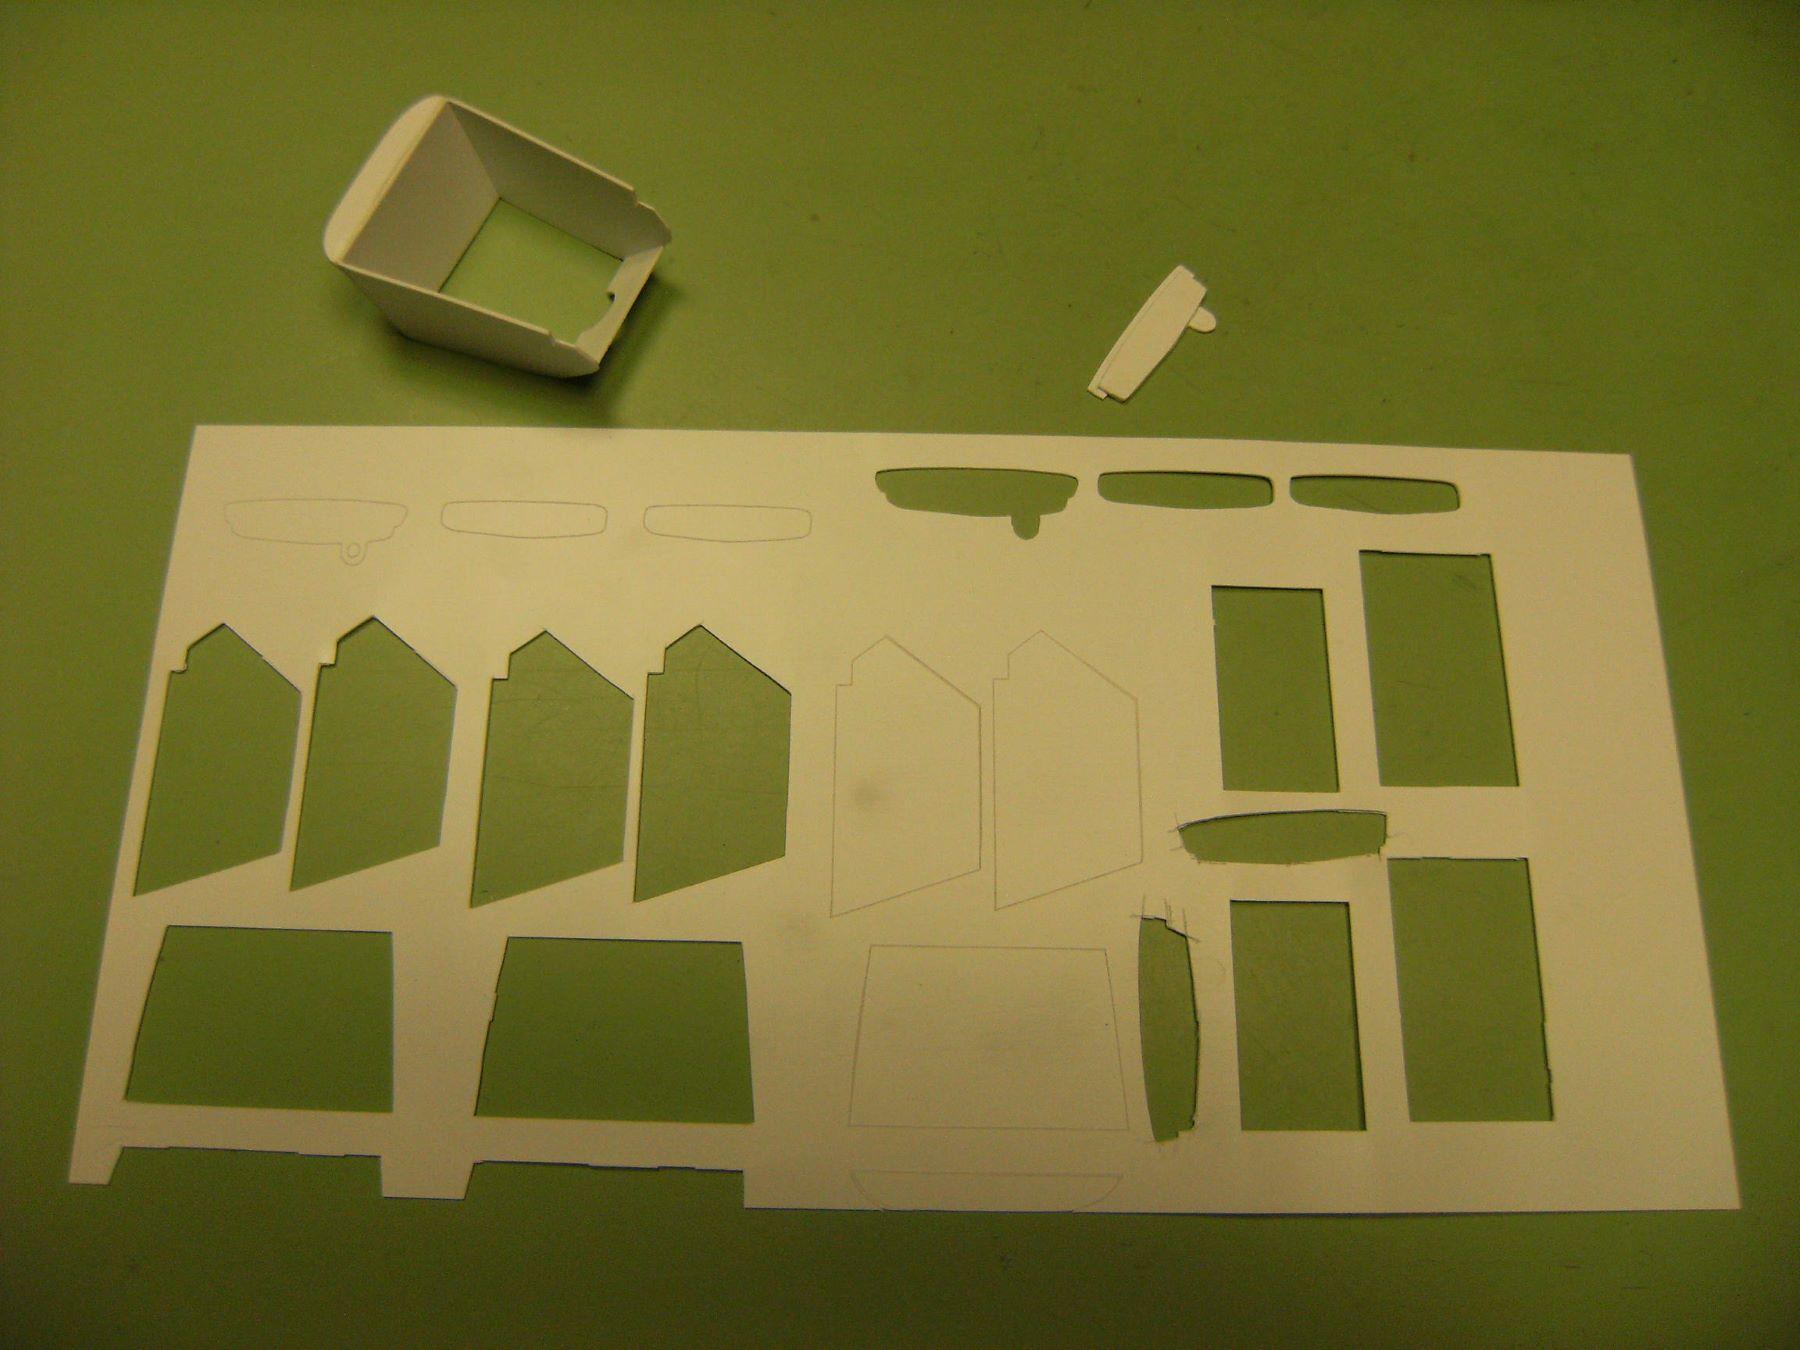
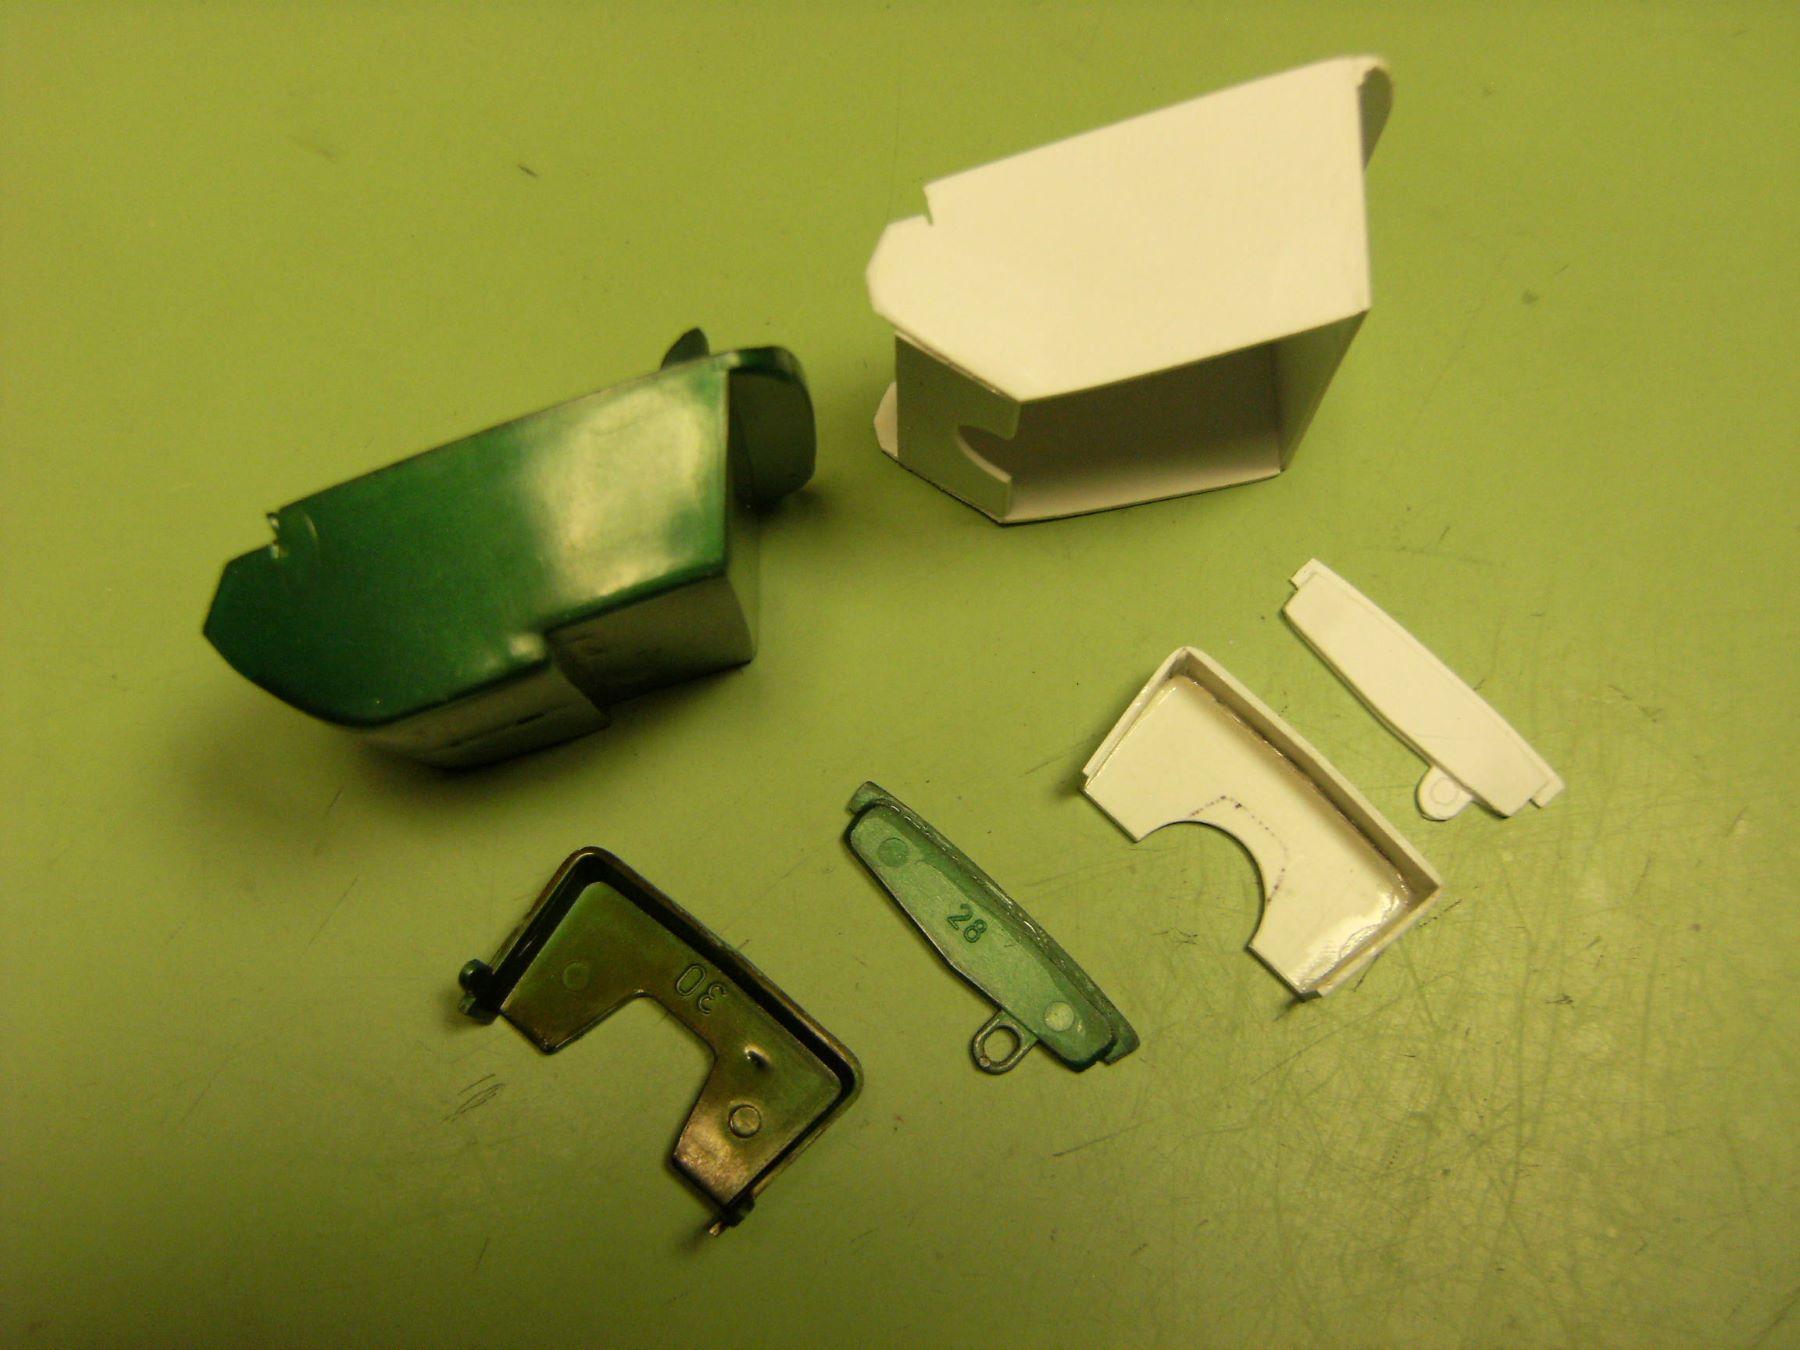
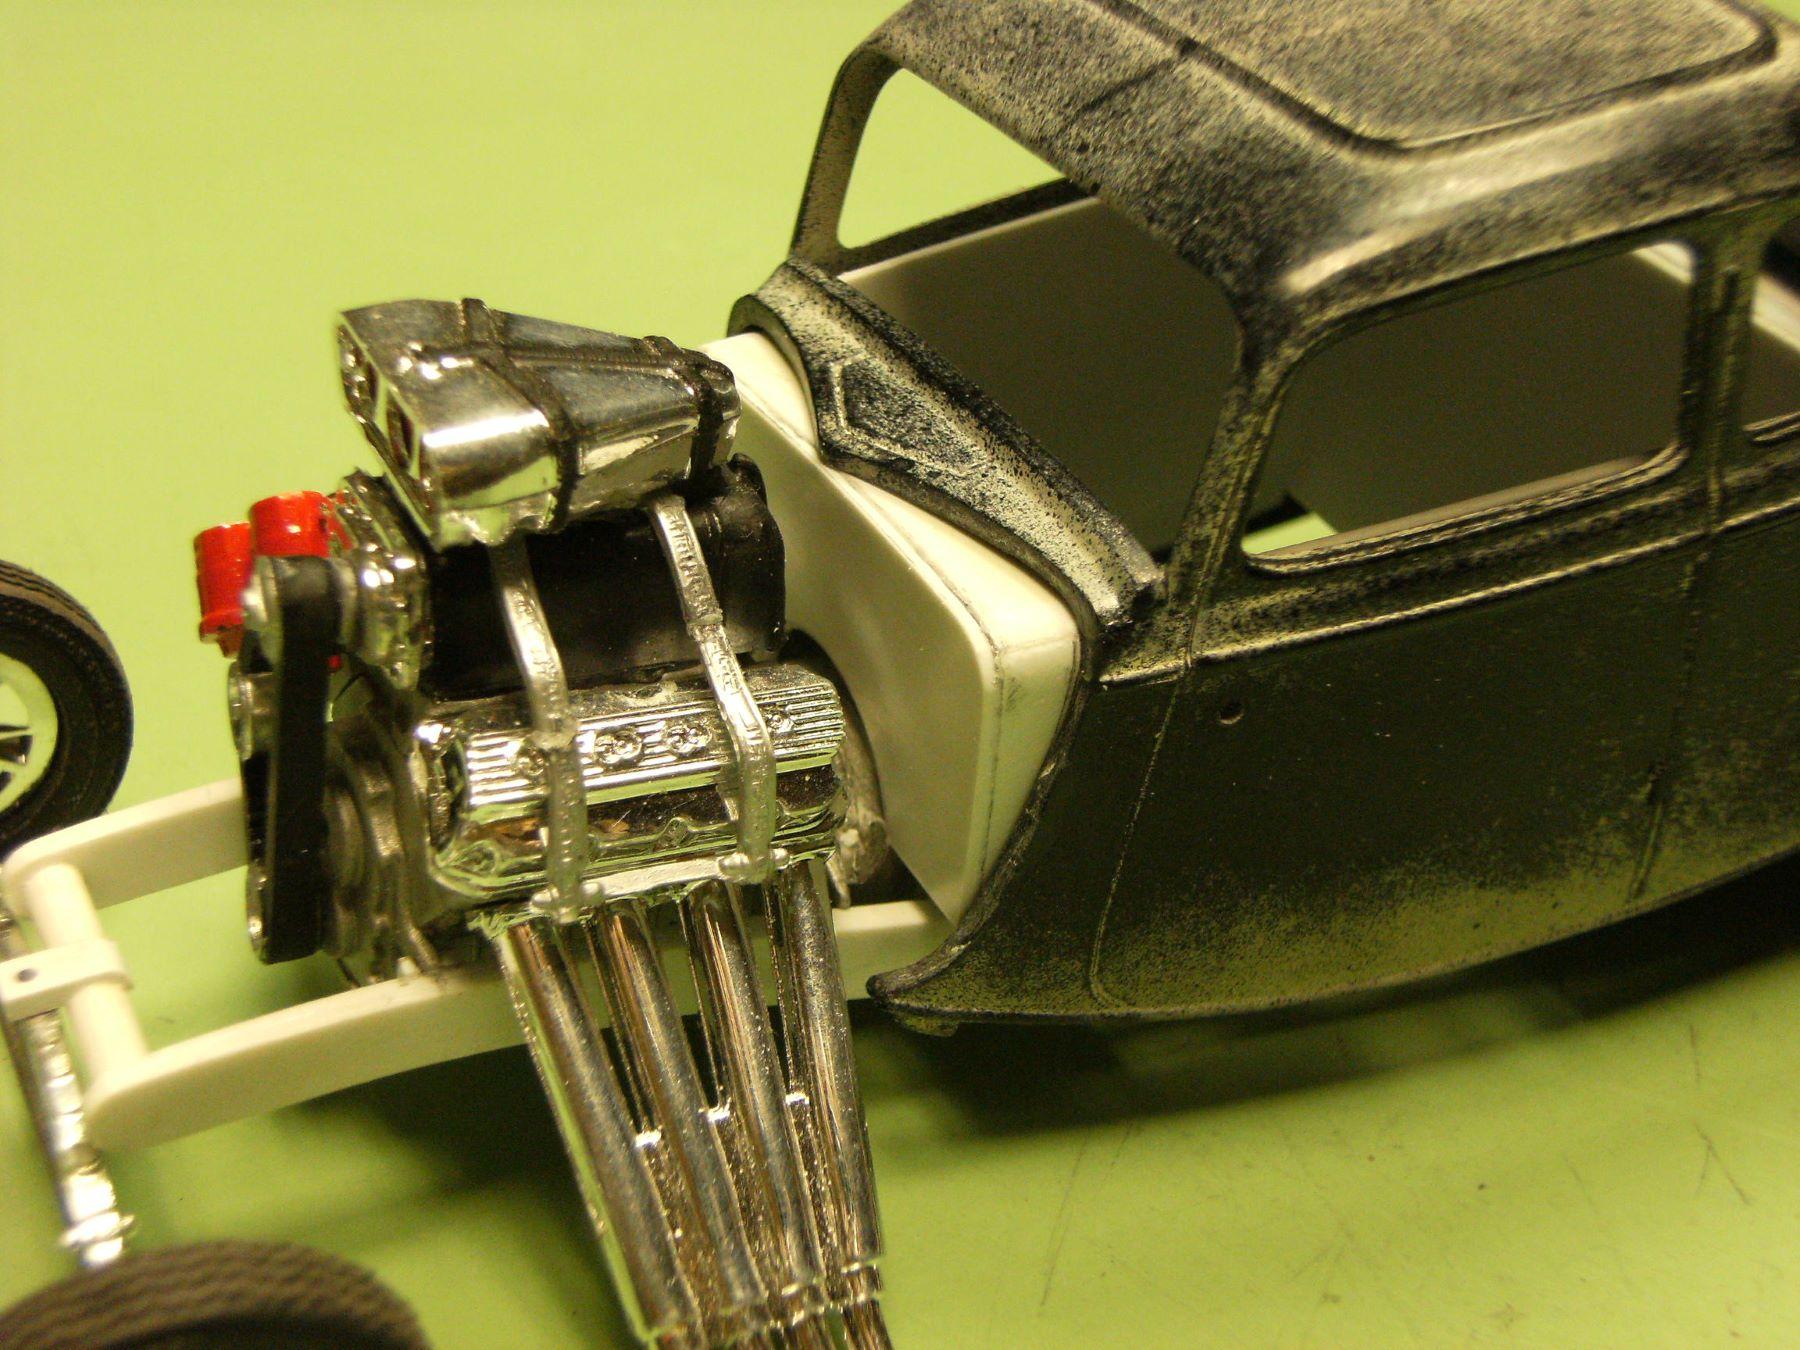
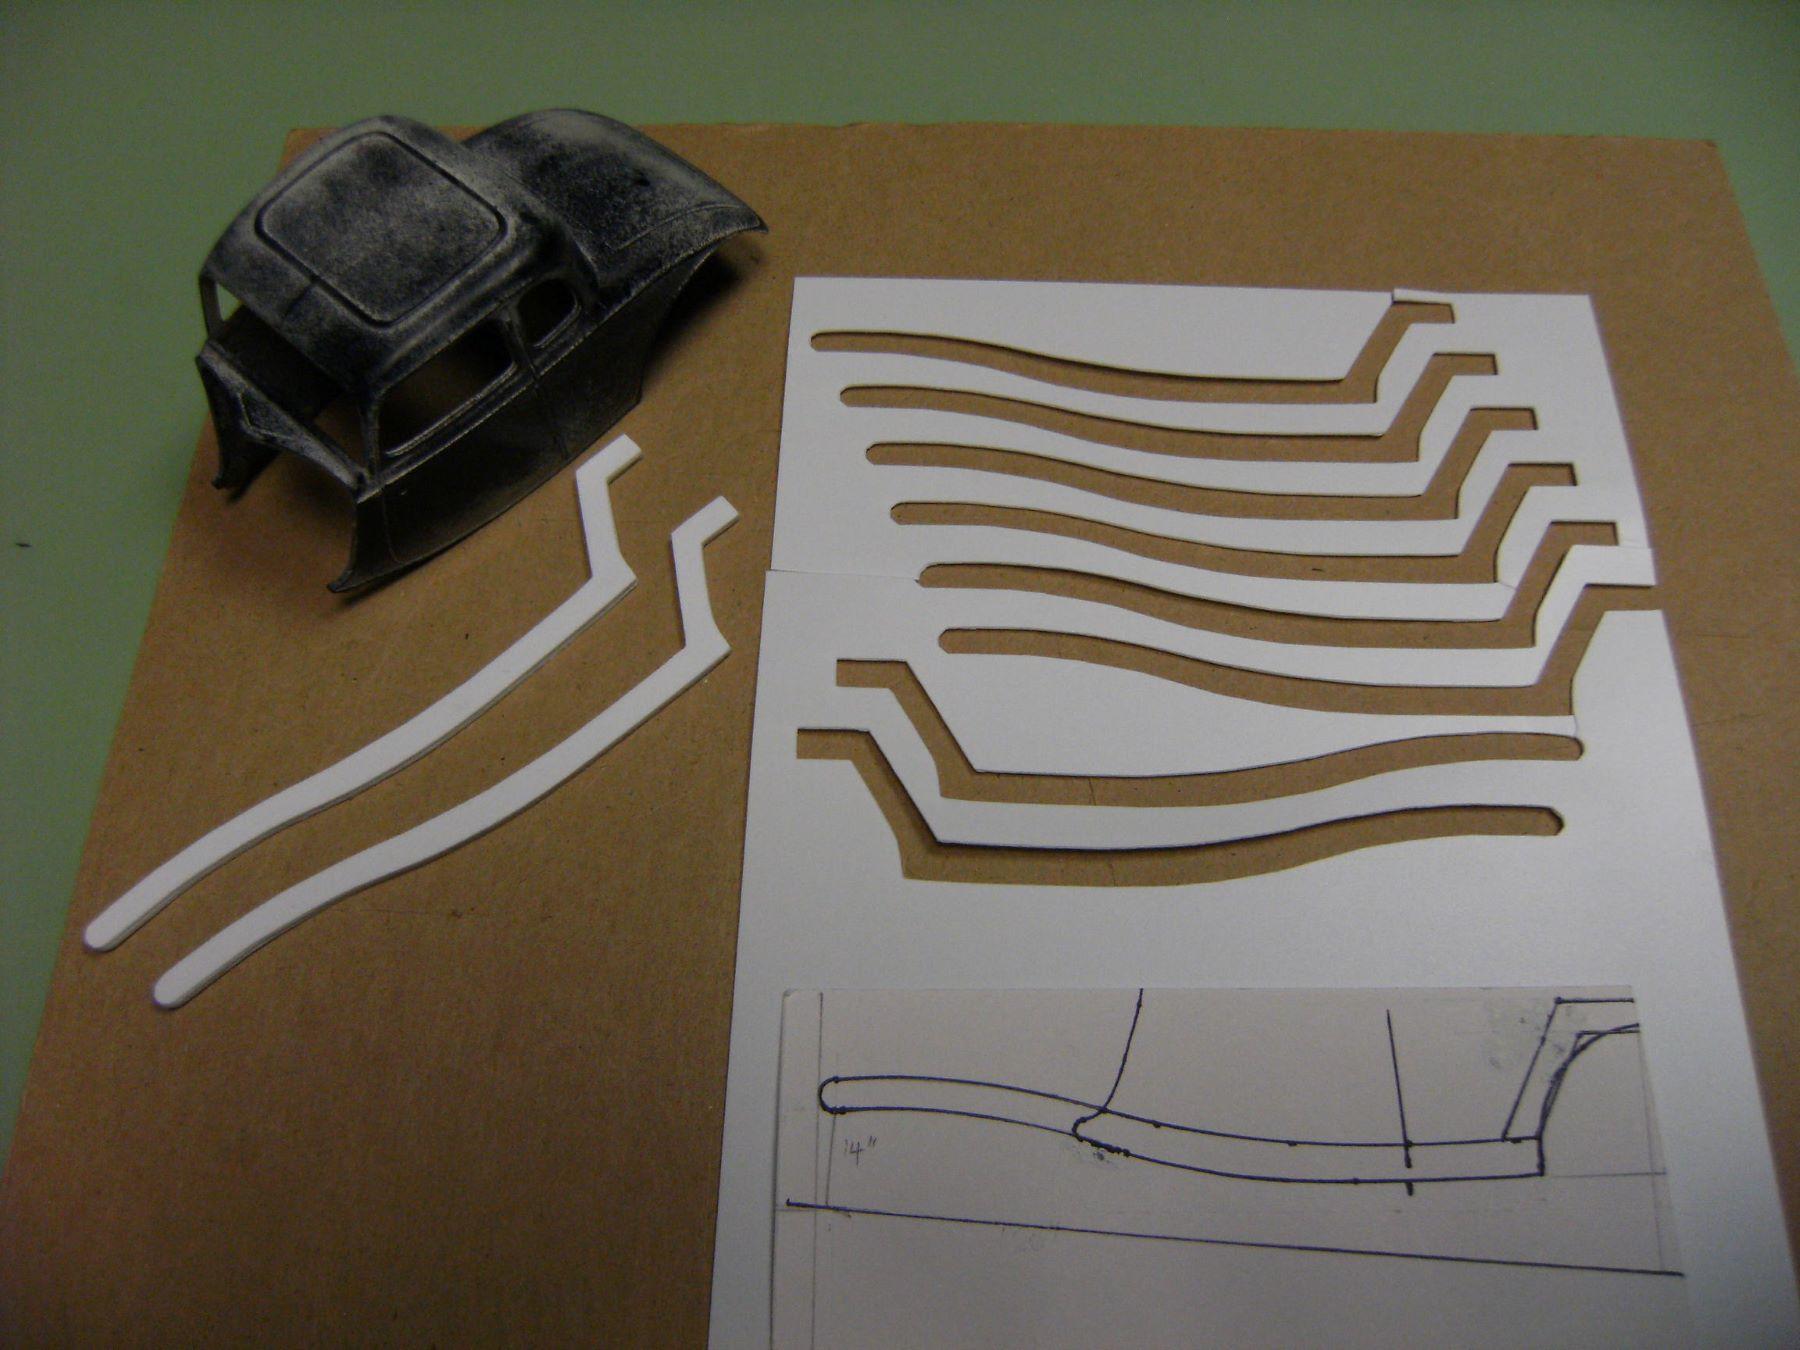
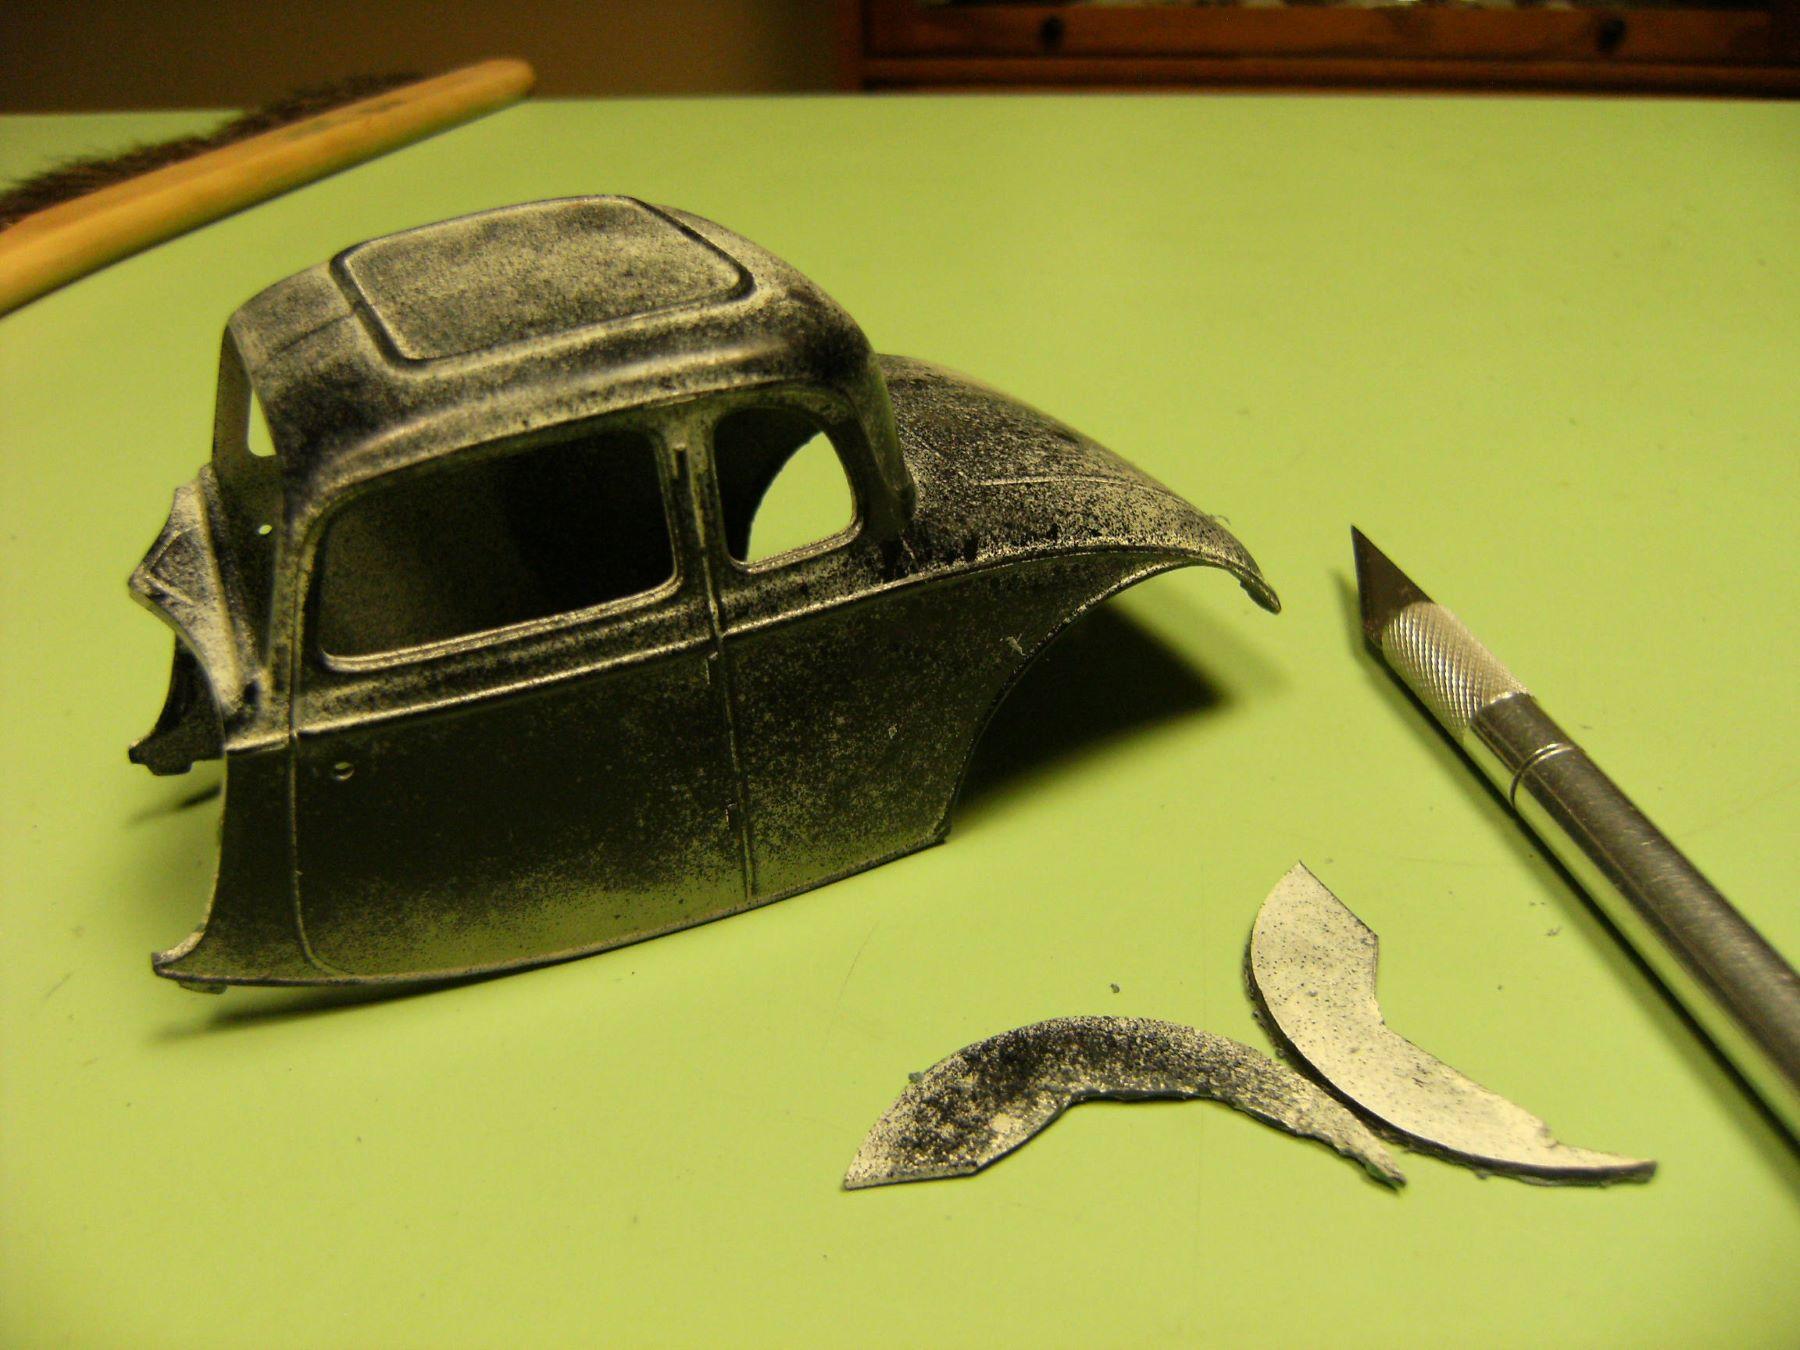
I needed to duplicate these interior parts for this build, so I followed the same process to get parts fabricated. That step on the back of the dash indexes to a tab on the body under the cowl, so it was critical I got the fit correct. I traced out the interior shape in a top view and a side view. Cleaned up the drawing, scanned it and imported it into Inkscape to get more parts to cut out. Below you see the styrene sheet with parts I used to laminate the interior panels. I had to finagle the shapes to get a good fit to the to the body and chassis. I also fabricated a fire wall from sheet stock. That was tricky. The fire wall, dash and forward part of the interior locate the body so it sits right.
-
Thanks for the encouraging words, Tim. I am interested in getting the patina on the body, so I will continue progress on this build.
-
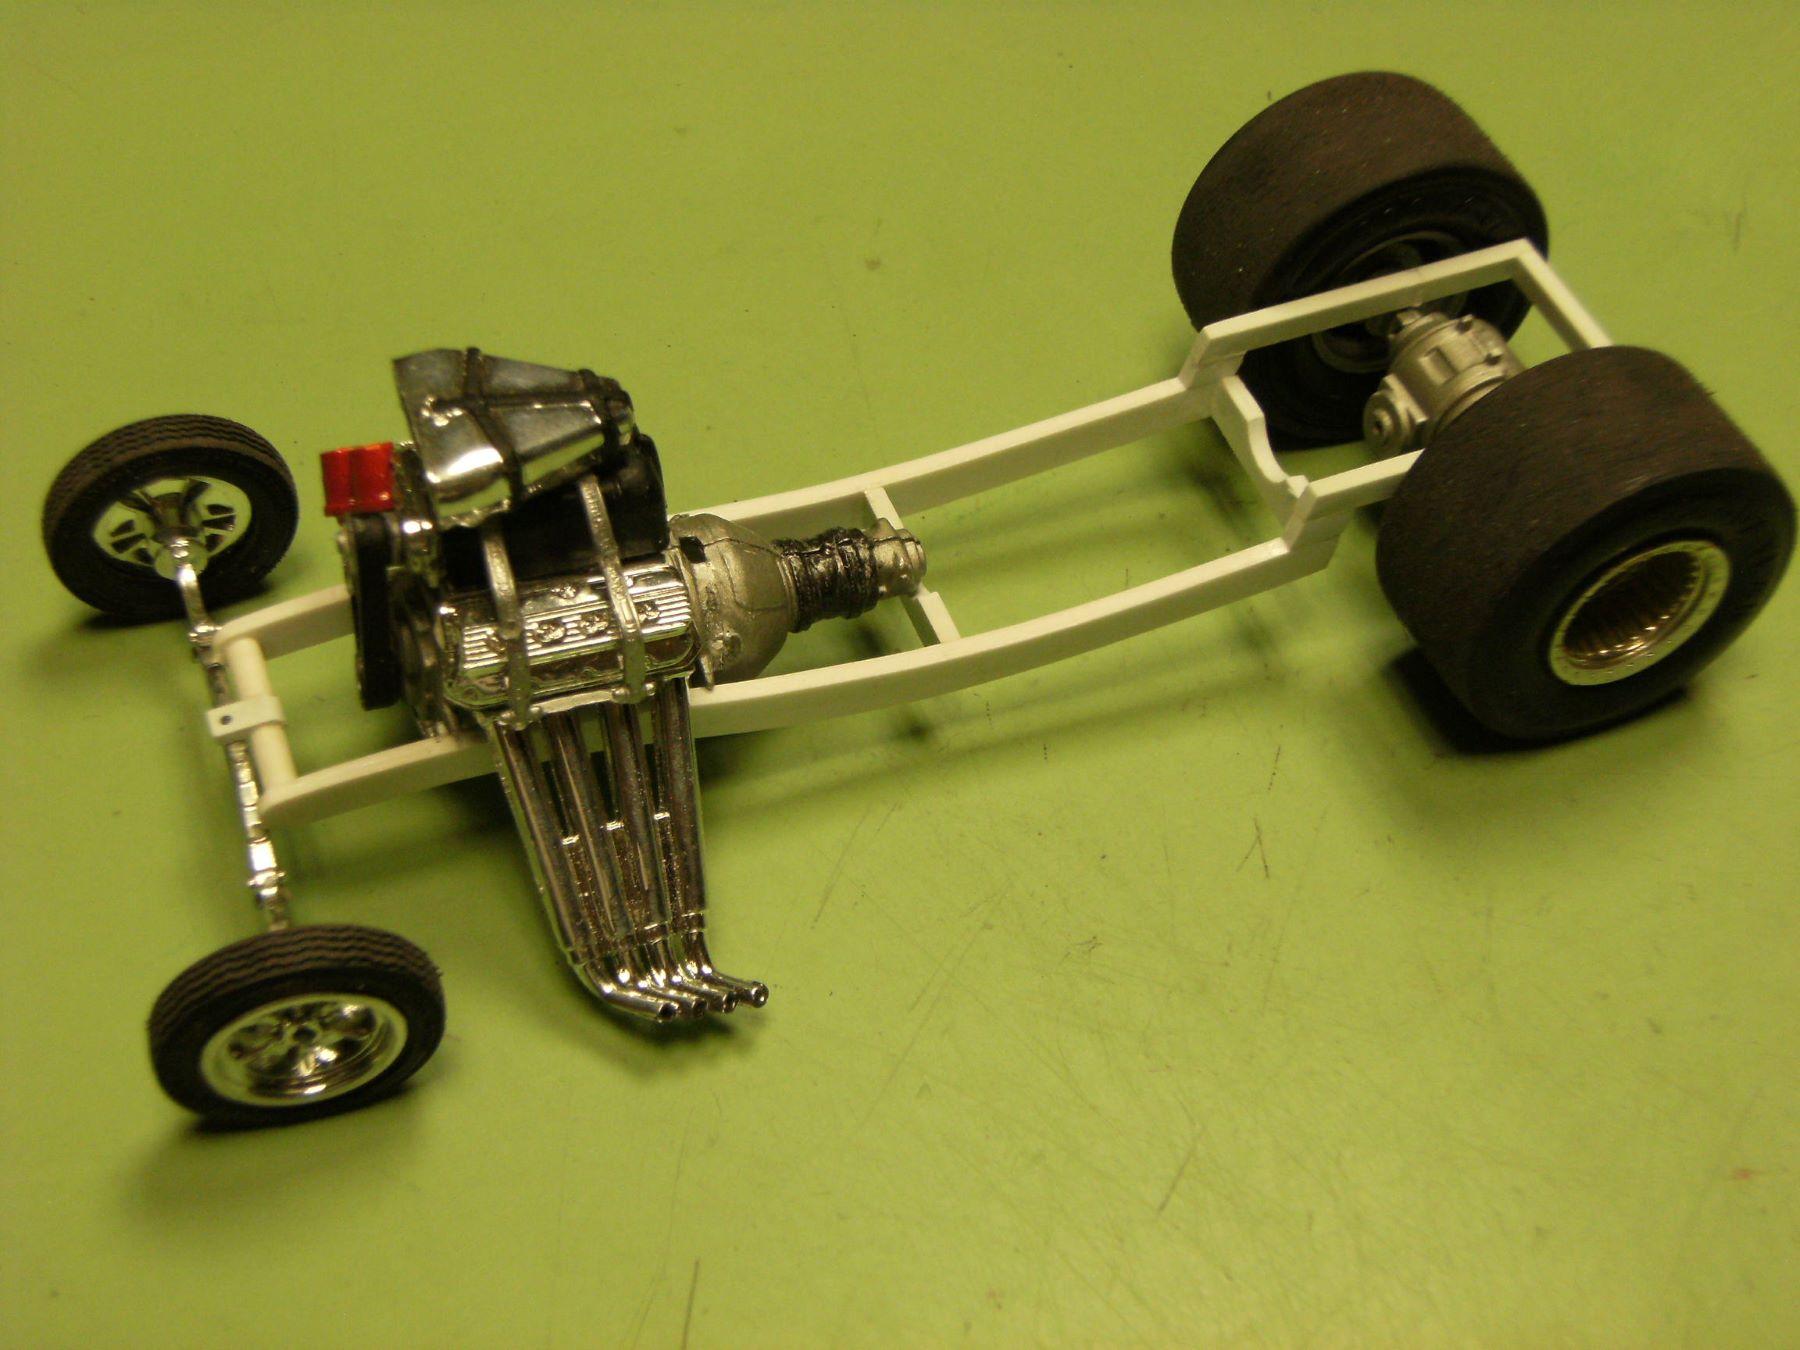
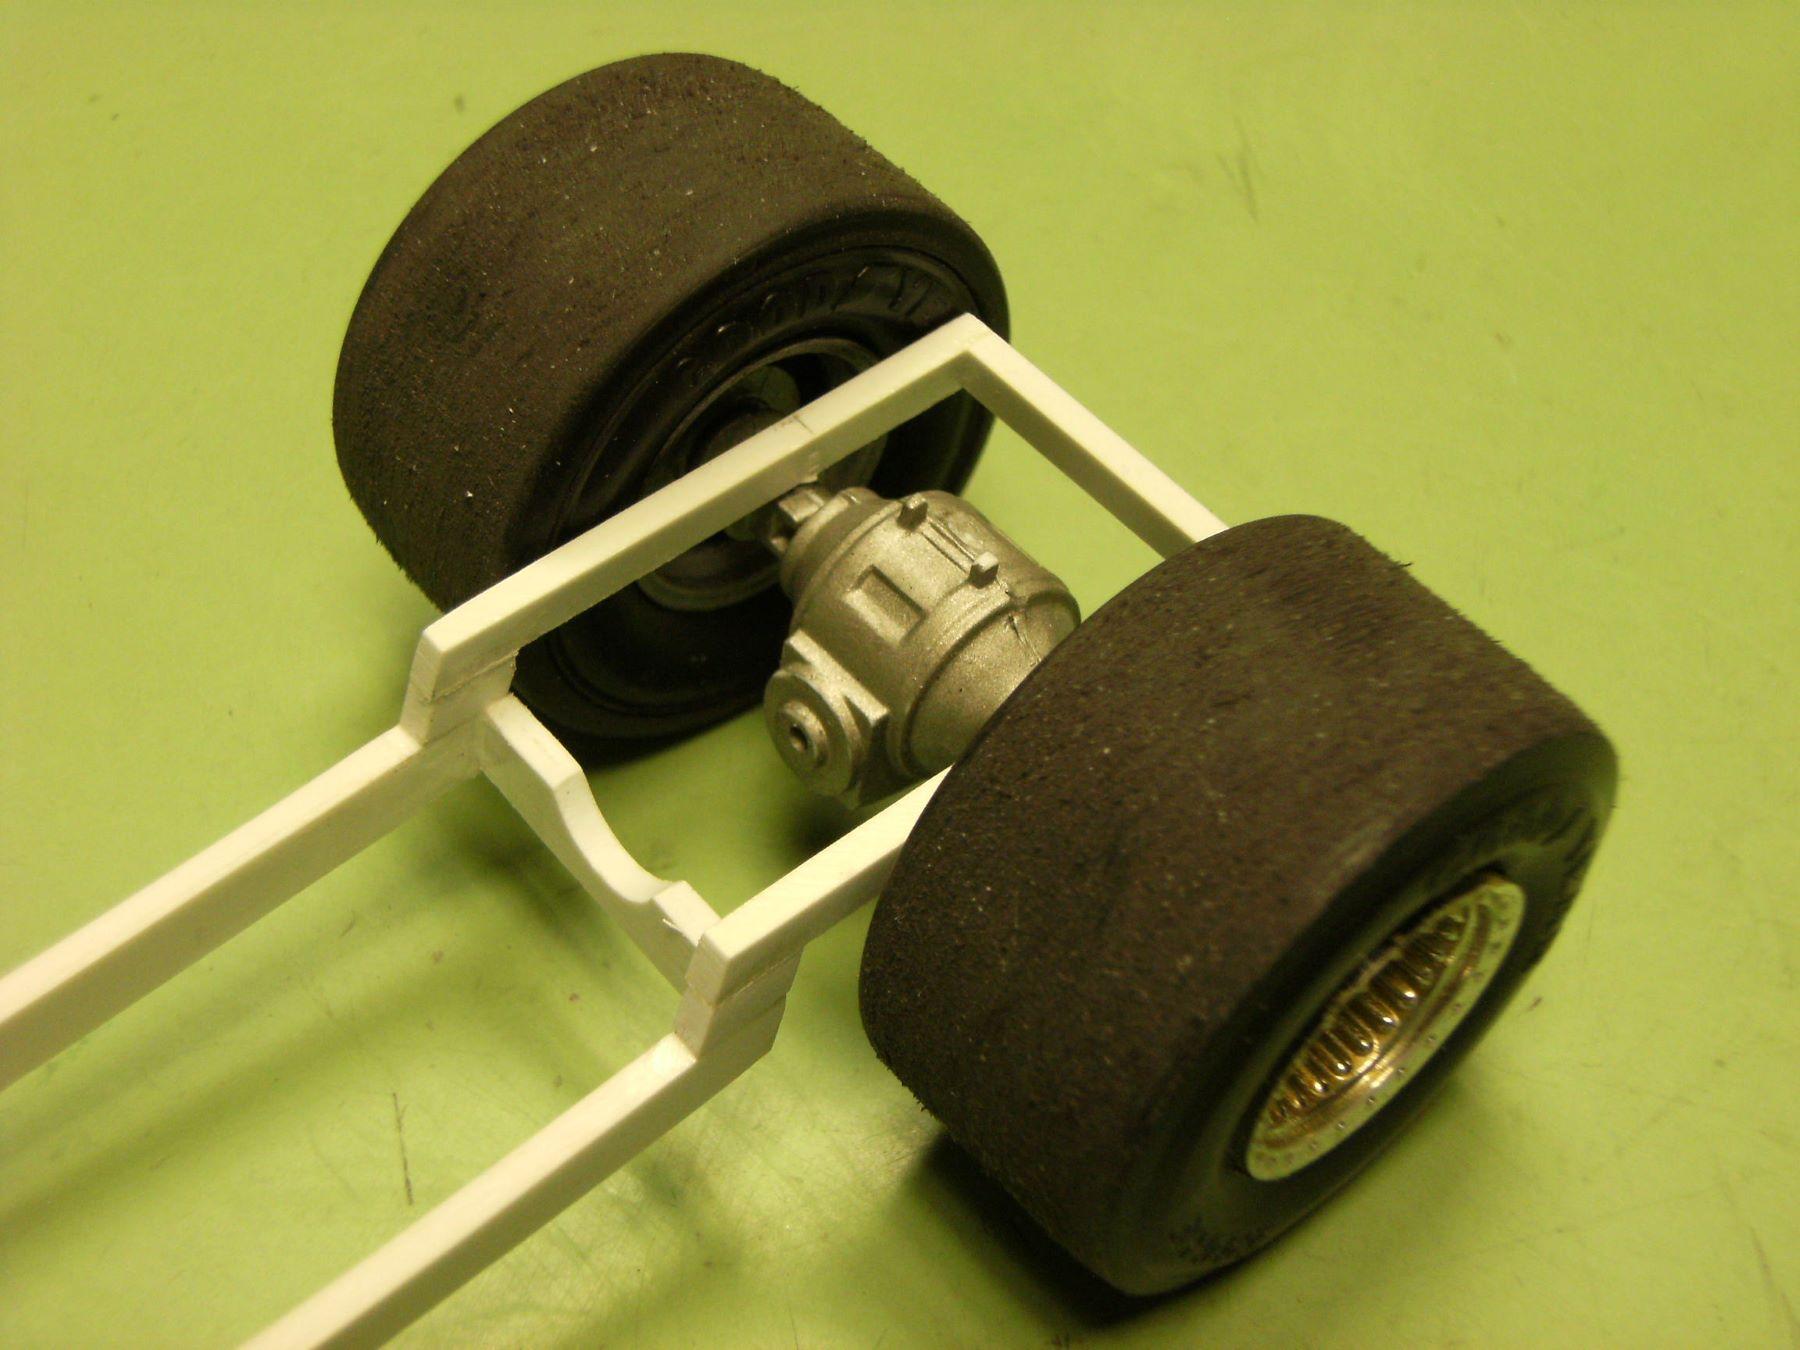
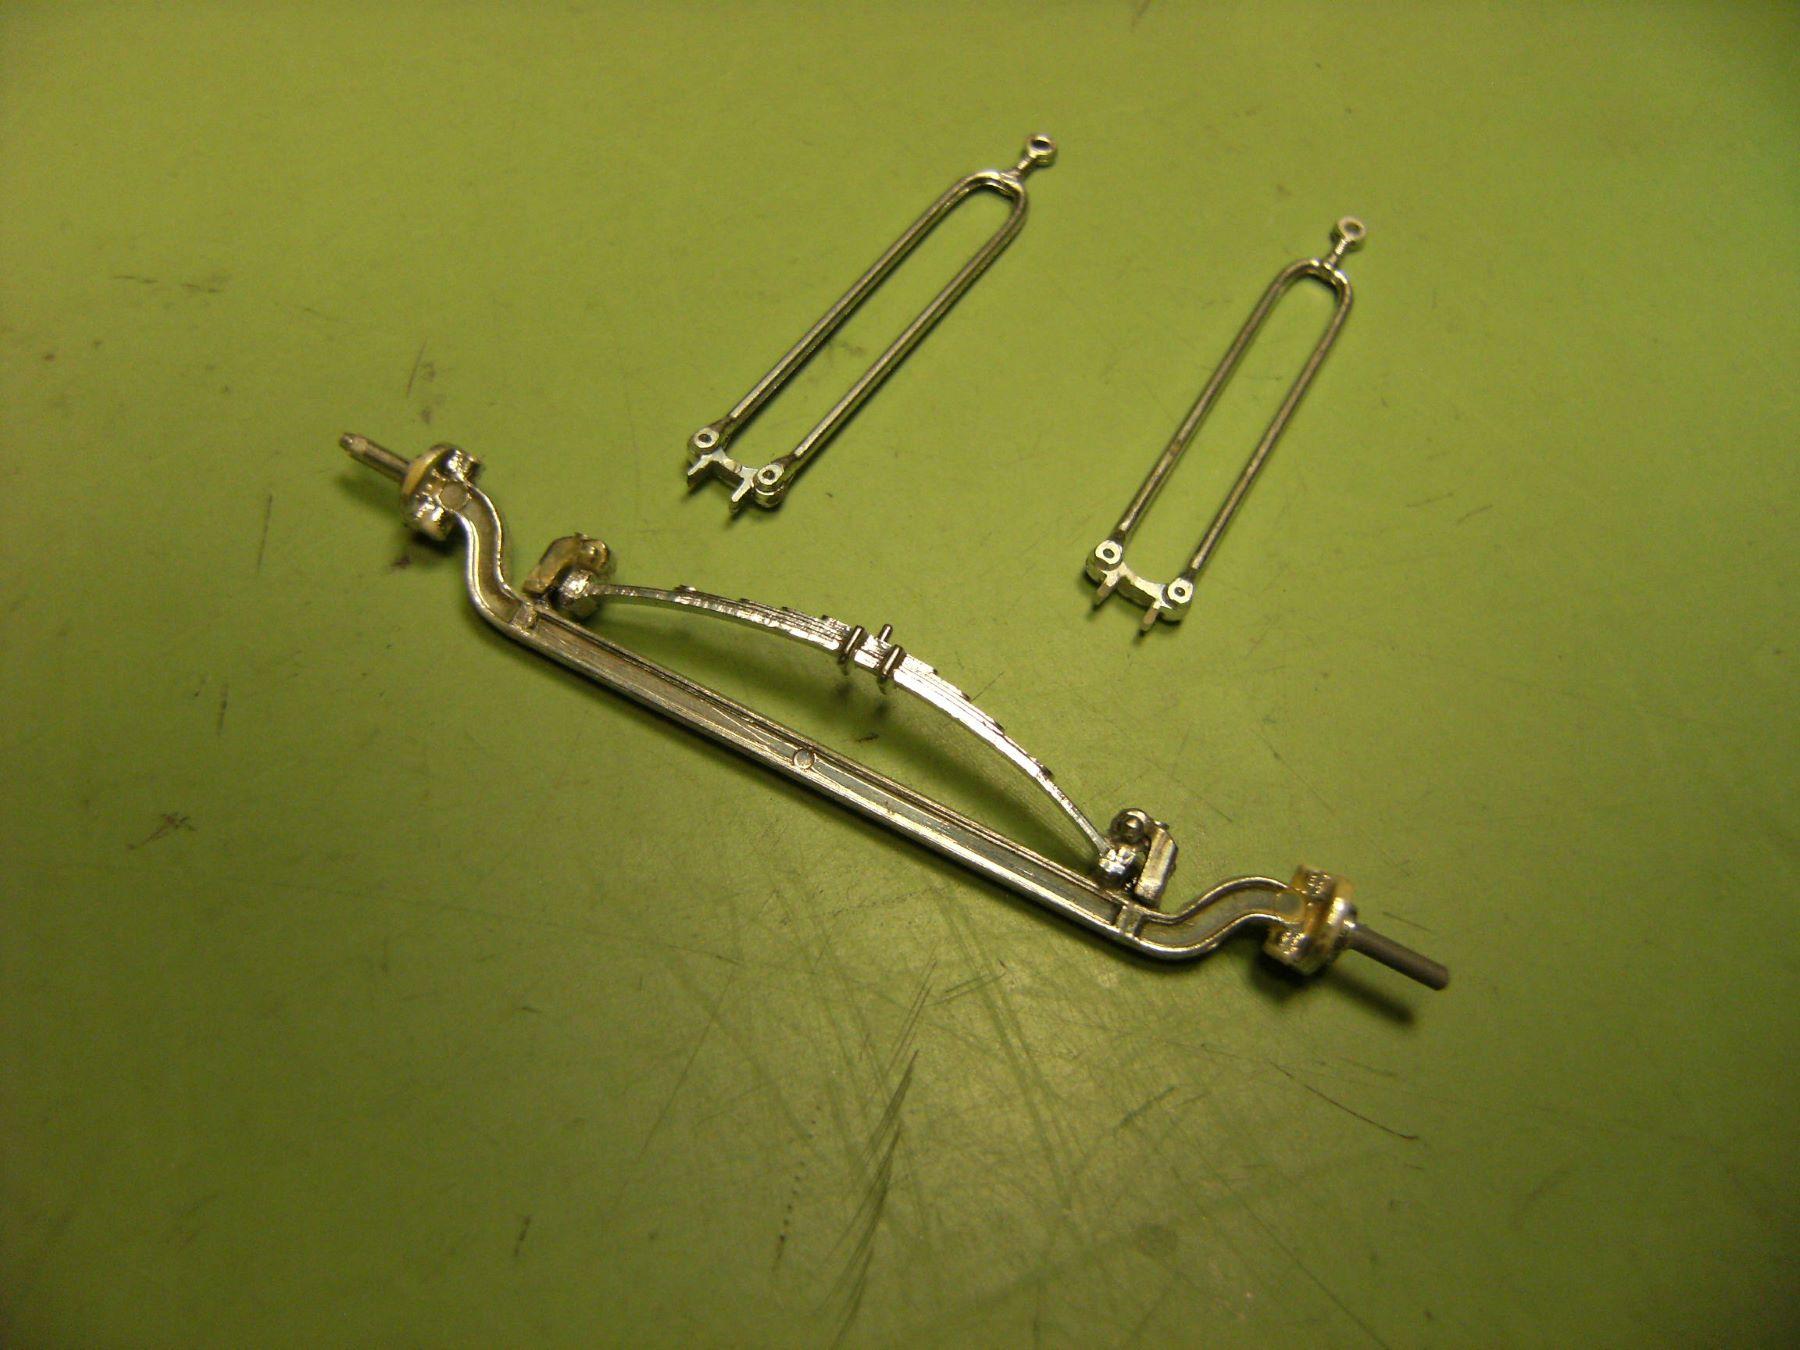
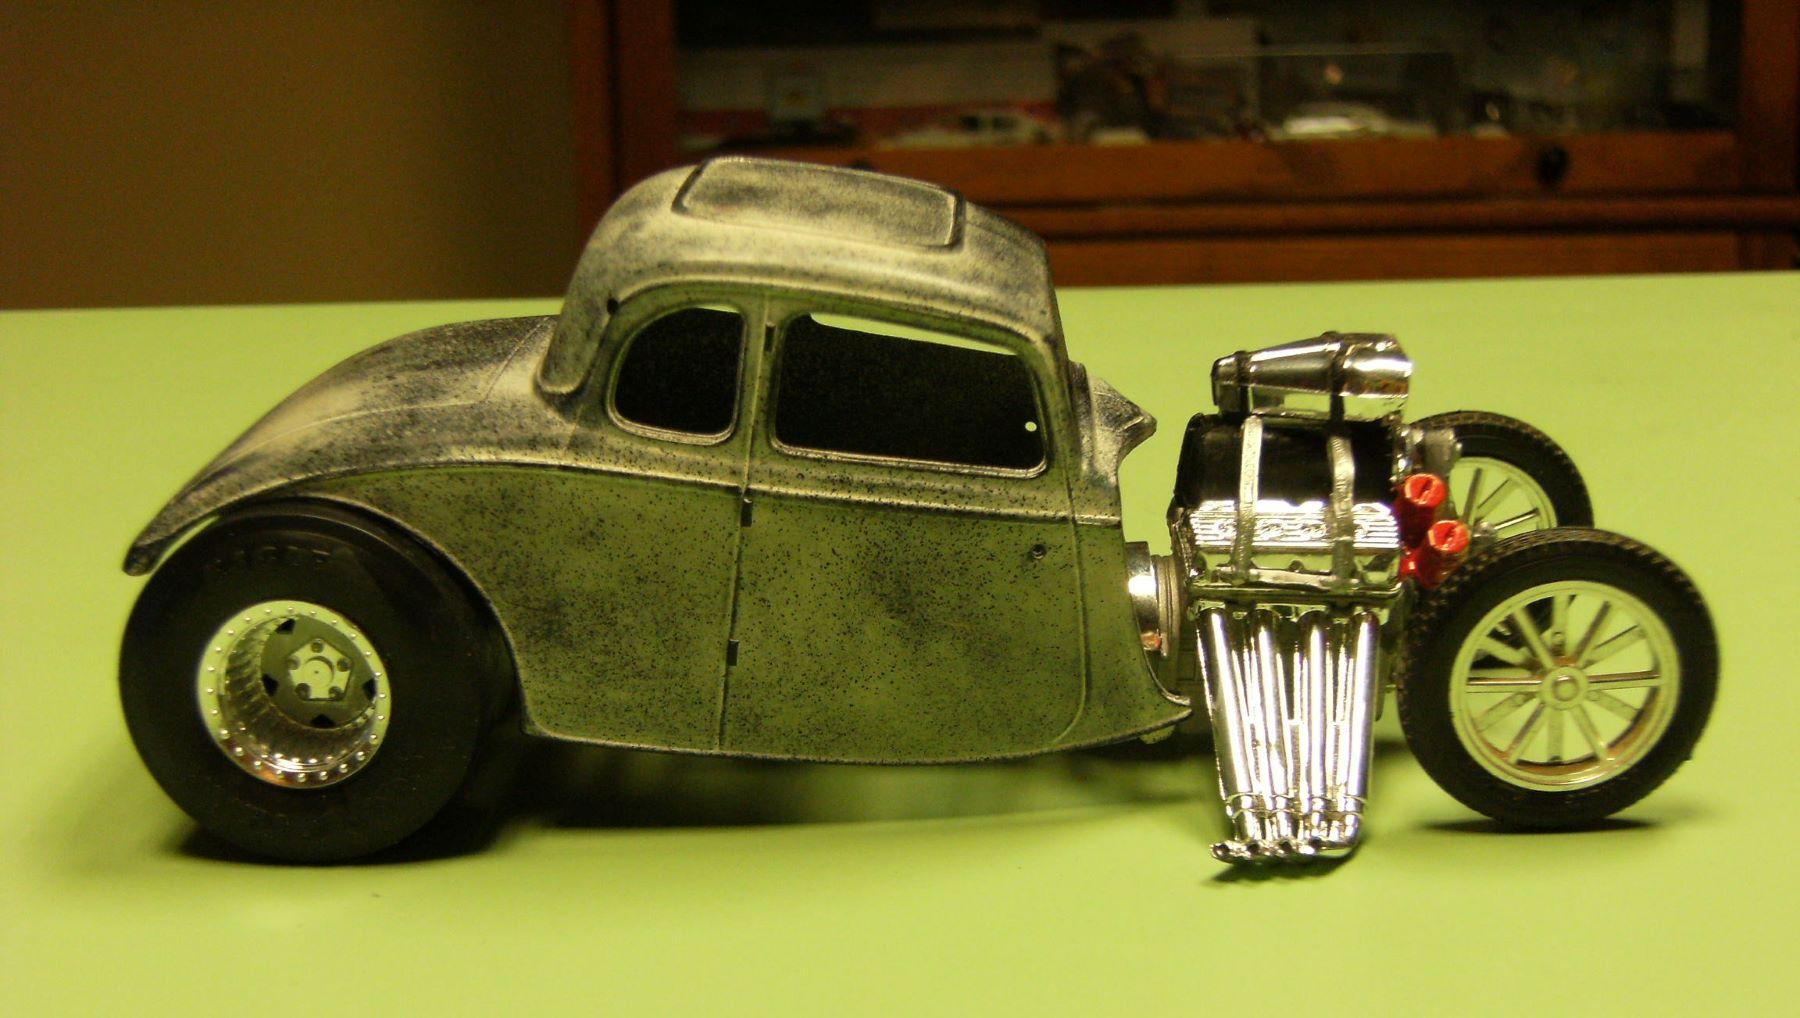
I neglected to show how all the parts fit on the chassis. The front axle comes from the Revell C-1132 Roadster chassis speed equipment, I like the hairpin radius rods (not attached yet). I made the front perch just like Dennis Lacy showed how to do it in his Ala Kart post. I was going for a look and not necessarily realism, so I drilled holes for pins to attach the rear axle. Here you can see the rear kick up I made with rectangular styrene stock. Nice detail on the front axle. I think these parts are now in the new Revell Fiat kit.
-
Those tail lights look great. Love that Testors stop light red!! (and turn signal amber, too) I use the Testors red on those Ford tear drop tail lights I find when I buy parts bags at shows.
-
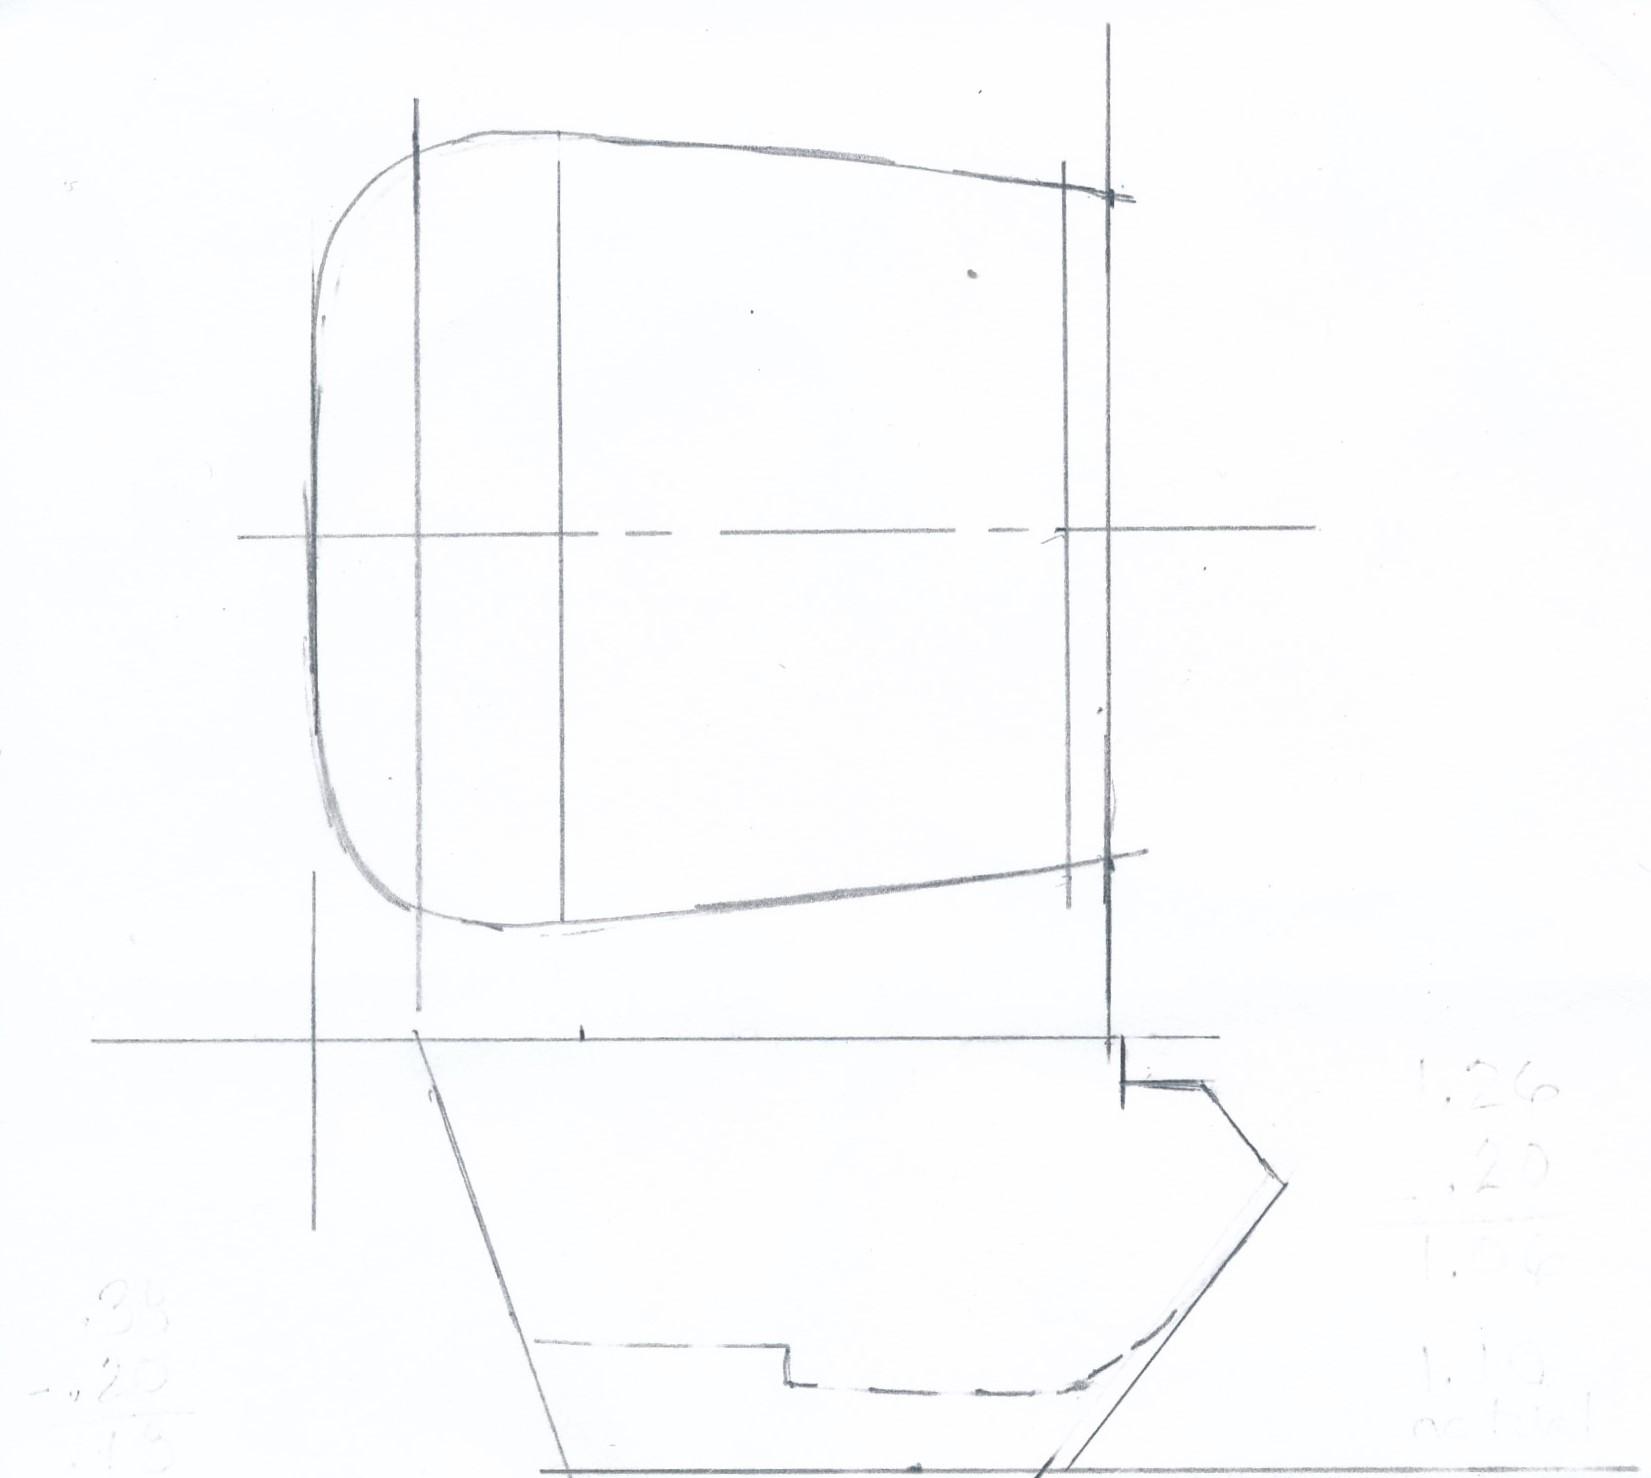
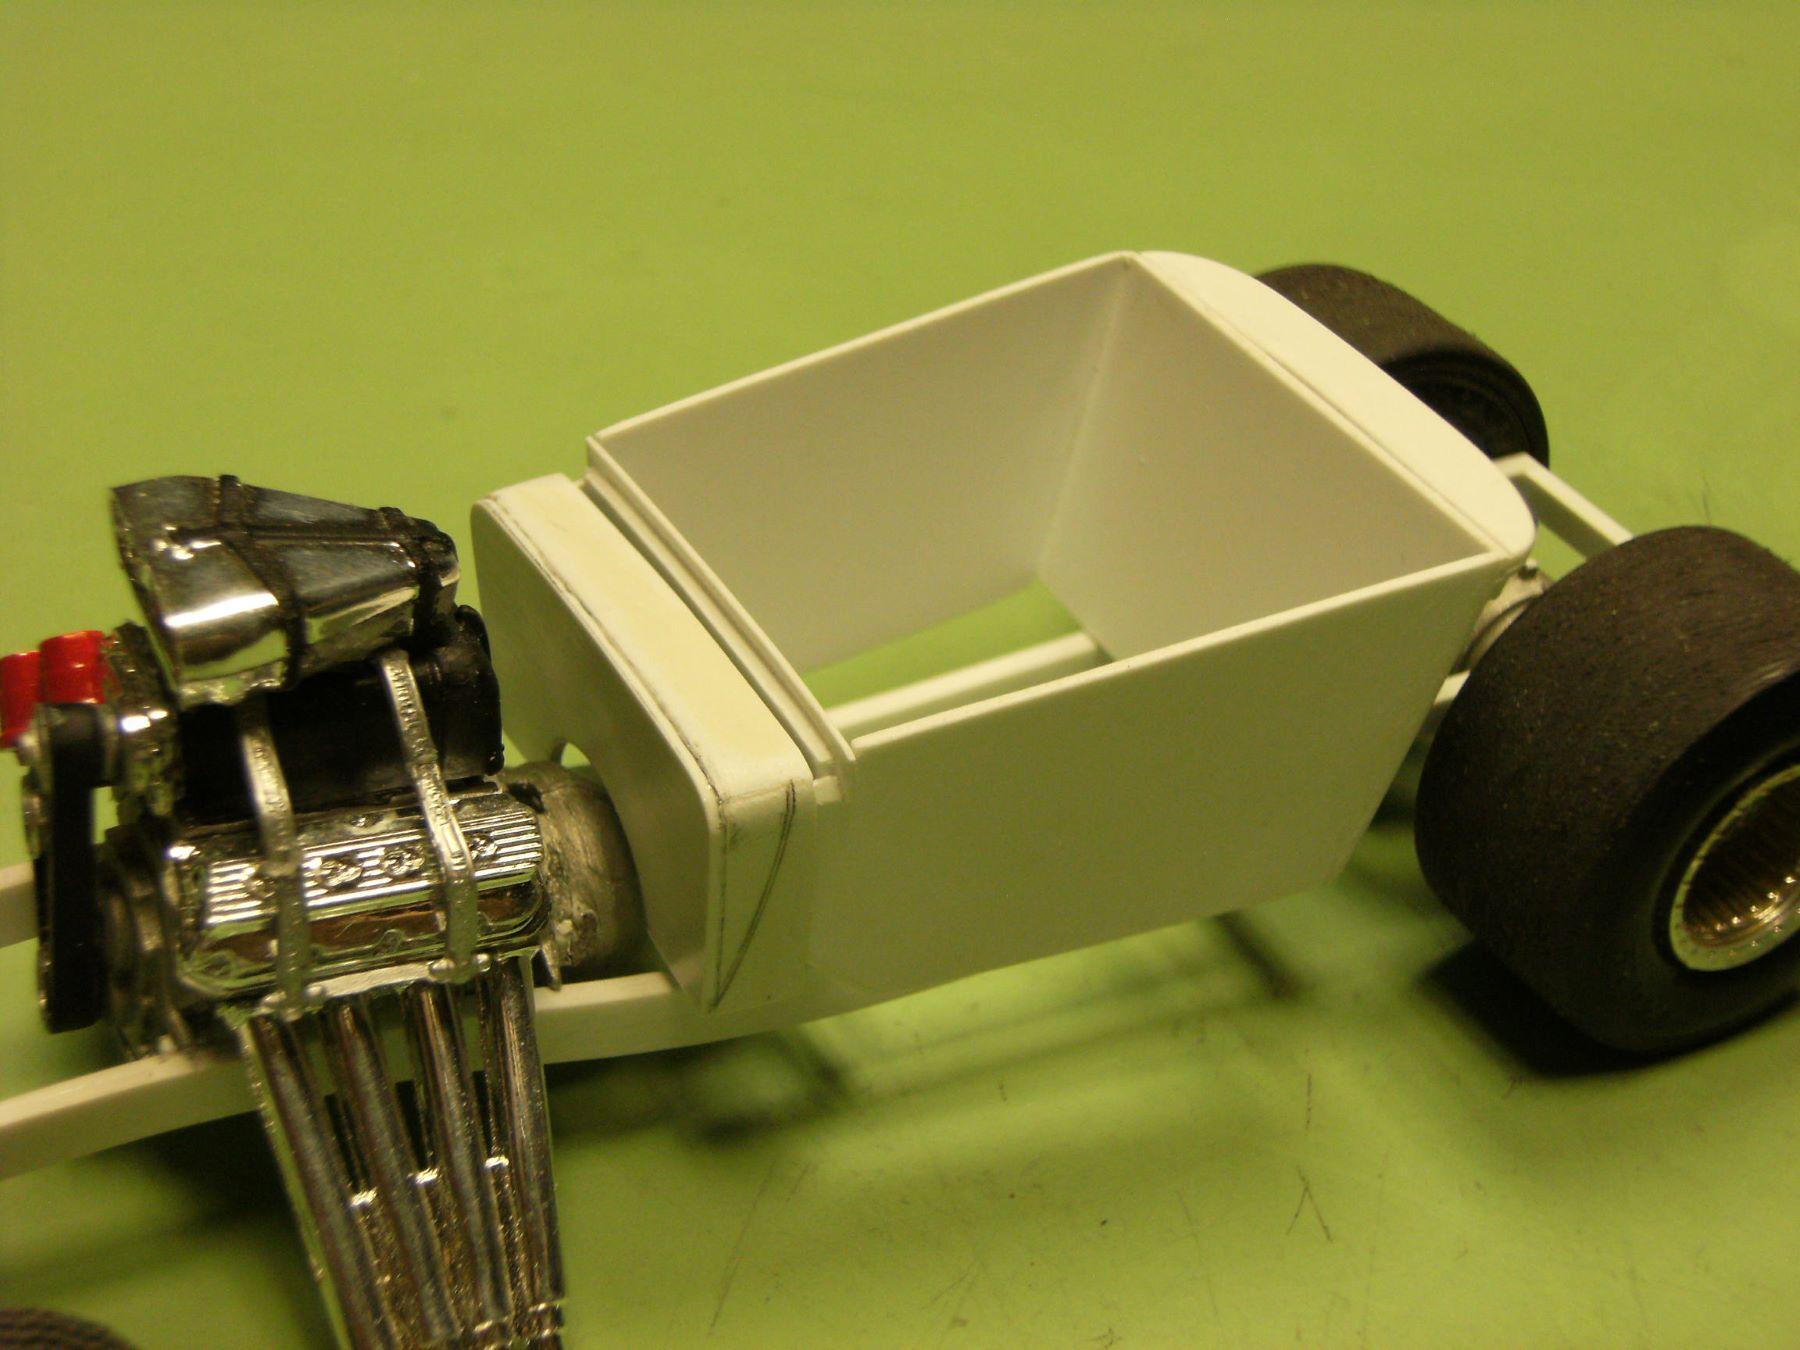
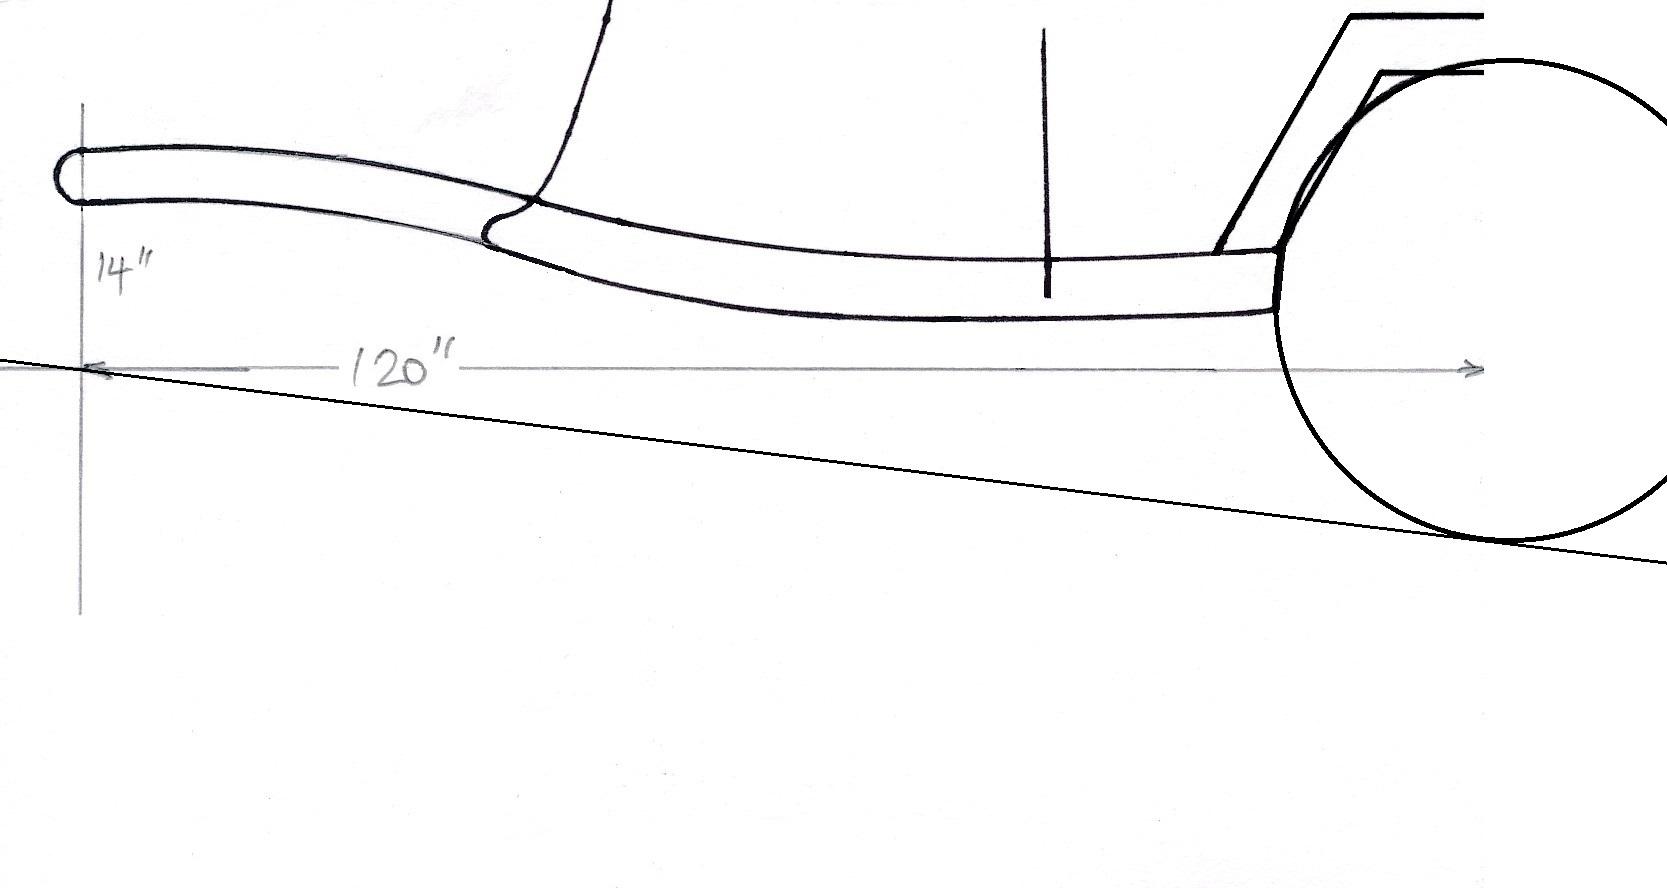
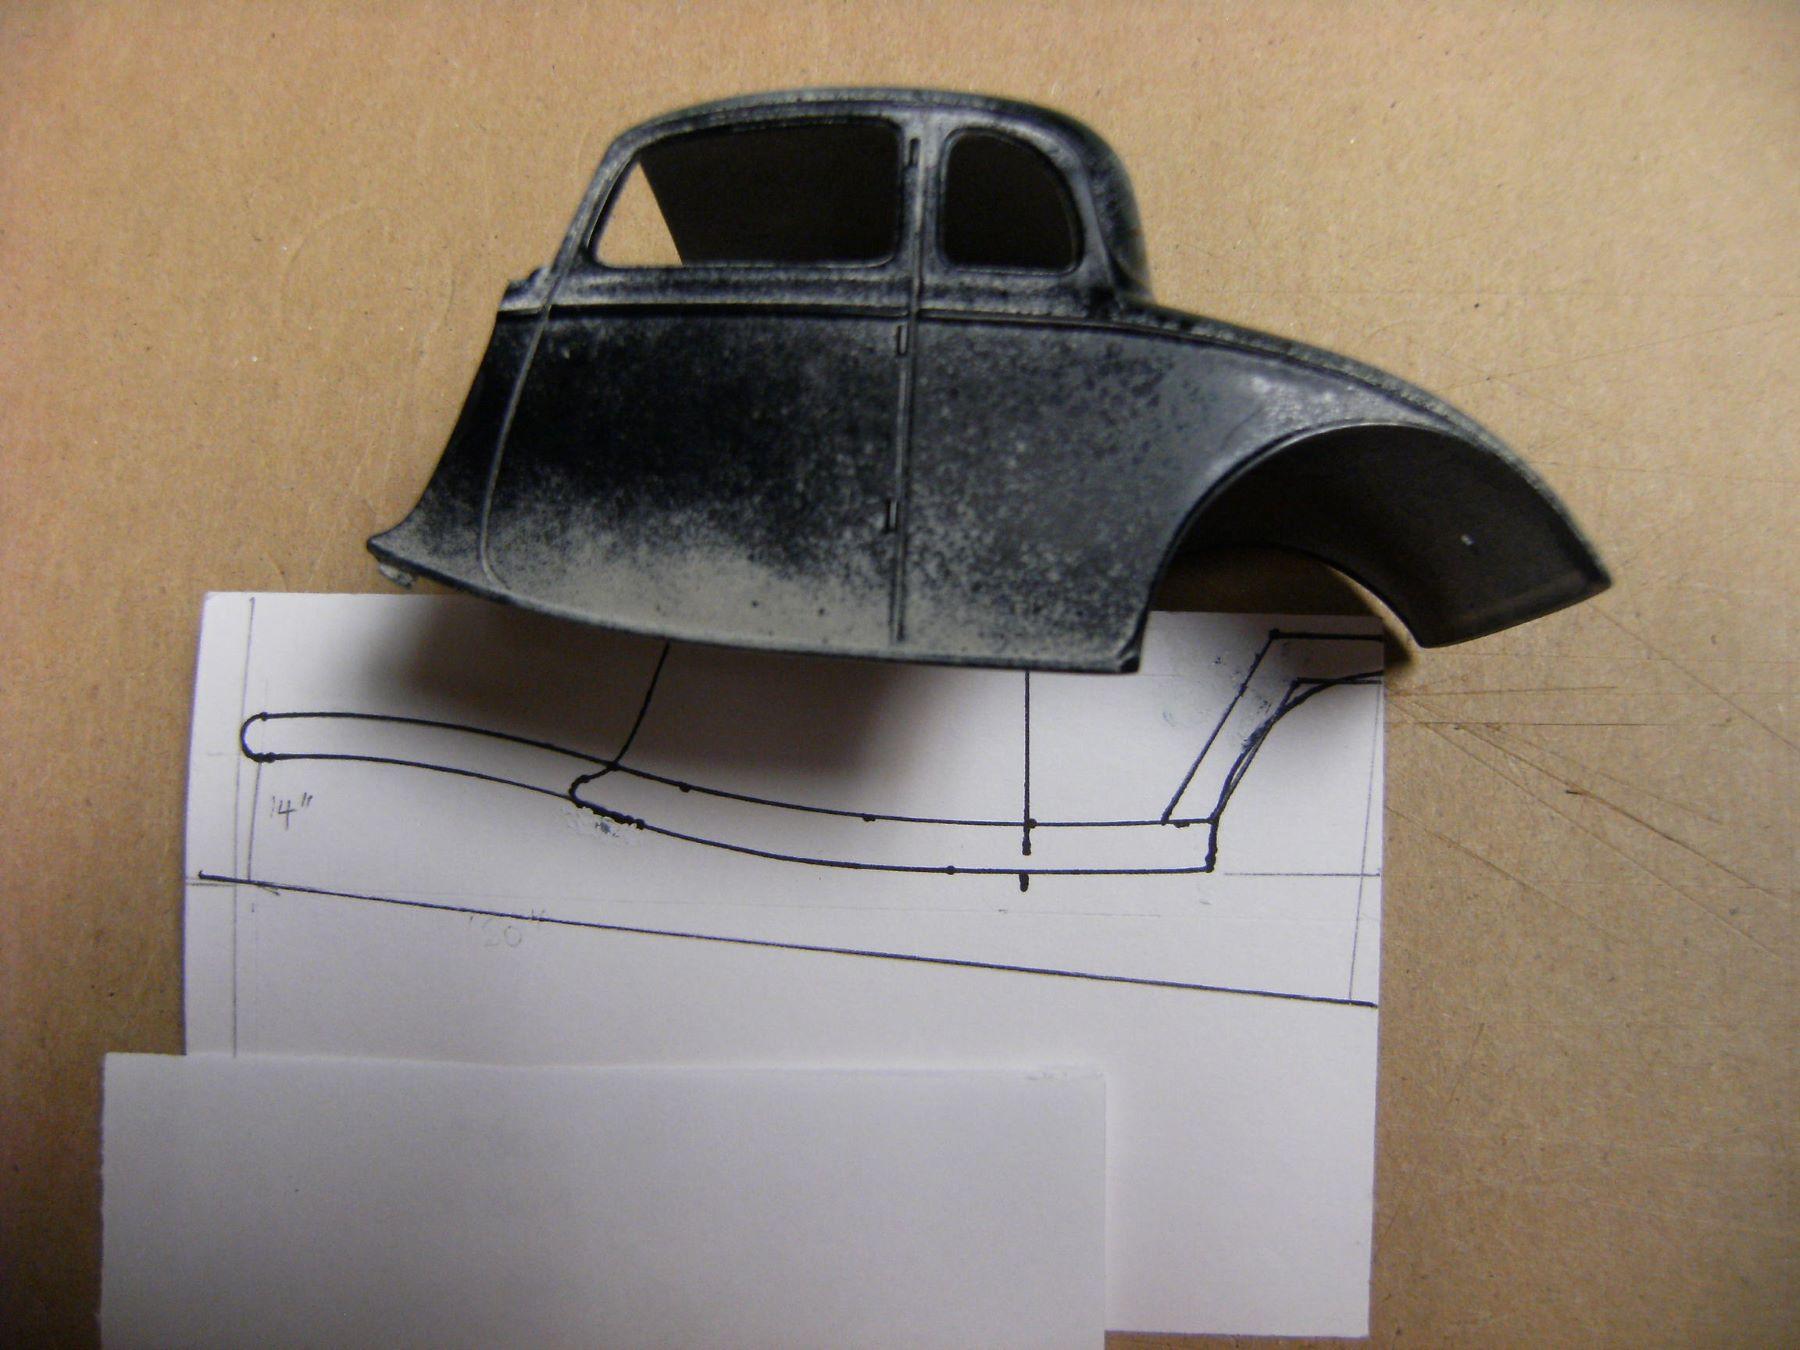
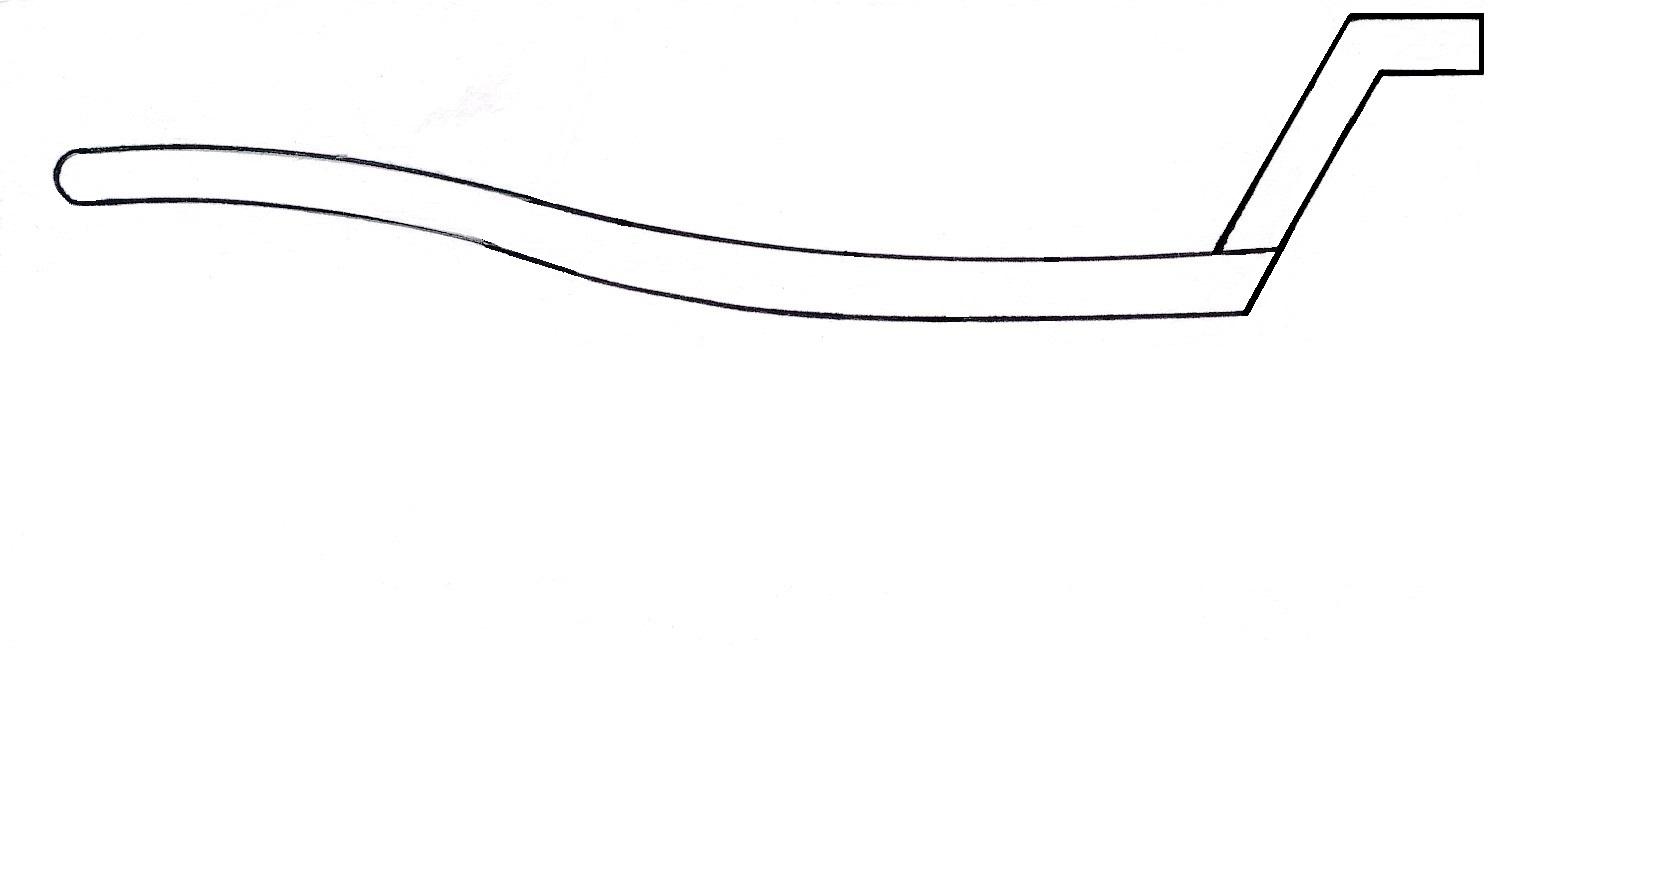
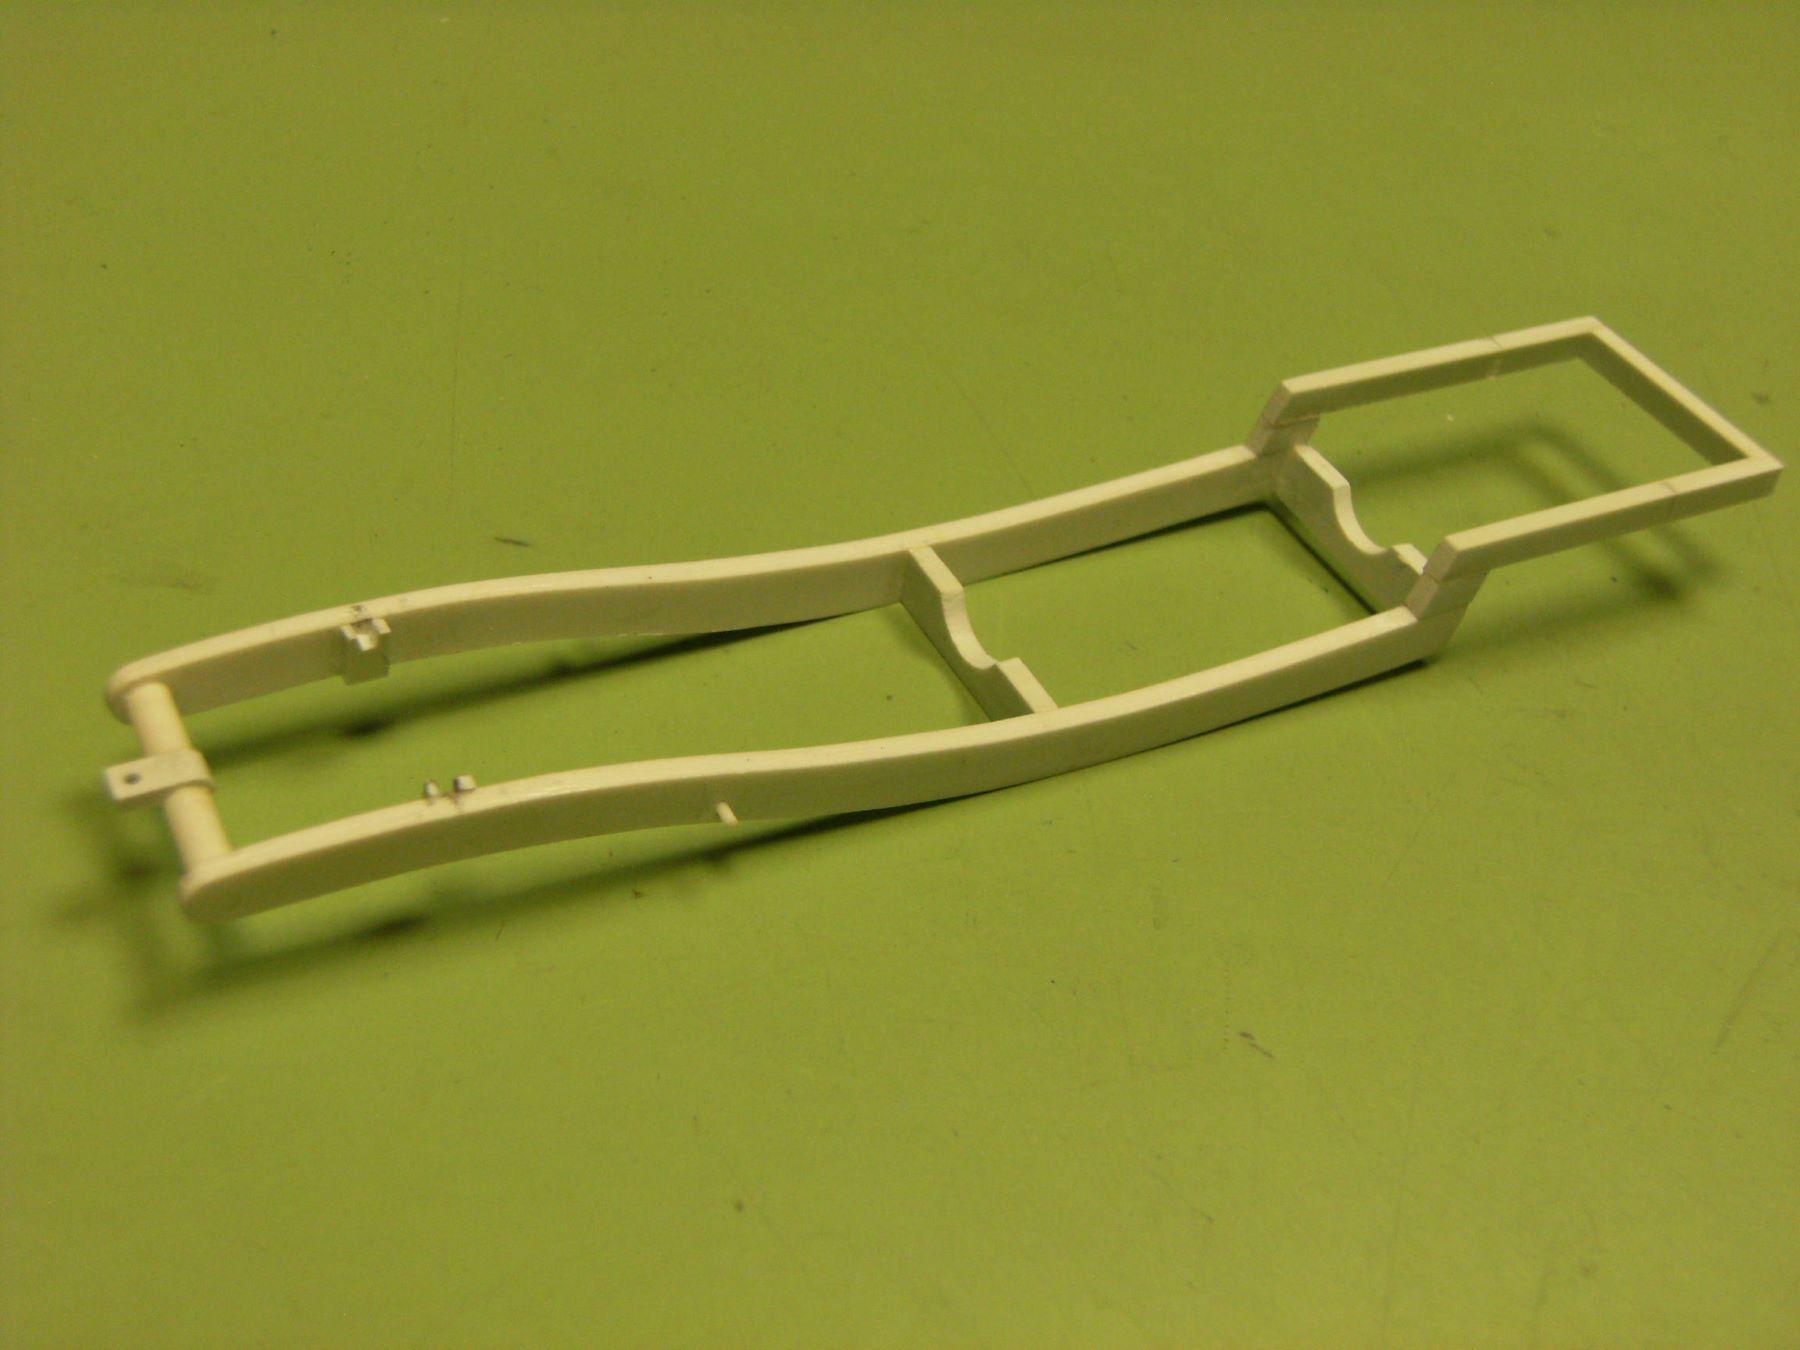
Next step was to create a chassis. I wanted one that would follow the contours of the body and allow for the funny car engine and big rear tires. First I traced the shape of the body on a piece of paper. I then drew in a rough outline of the chassis I wanted. Here is the cleaned up sketch. Next I scanned the sketch into my computer and cleaned it up more with Microsoft Paint. I imported that sketch into a vector art program called Inkscape to create a .dxt file. The reason for the .dxf is so I could use it in my Silhouette Cameo craft machine to cutout the shape of the frame on .020 styrene sheet. That sound too complicated?? It really is not once you get the hang of it. Here you see the .020 sheet with the pieces removed. You have to laminate four of the pieces to get a good useable thickness: .080 (2" frame thickness in 1:1). You can see that I cutoff the frame kick up when I could not get it to work the way i wanted. The final(?) result below after I added engine mounts and cross members. The rear axle hard attaches to the frame.
-
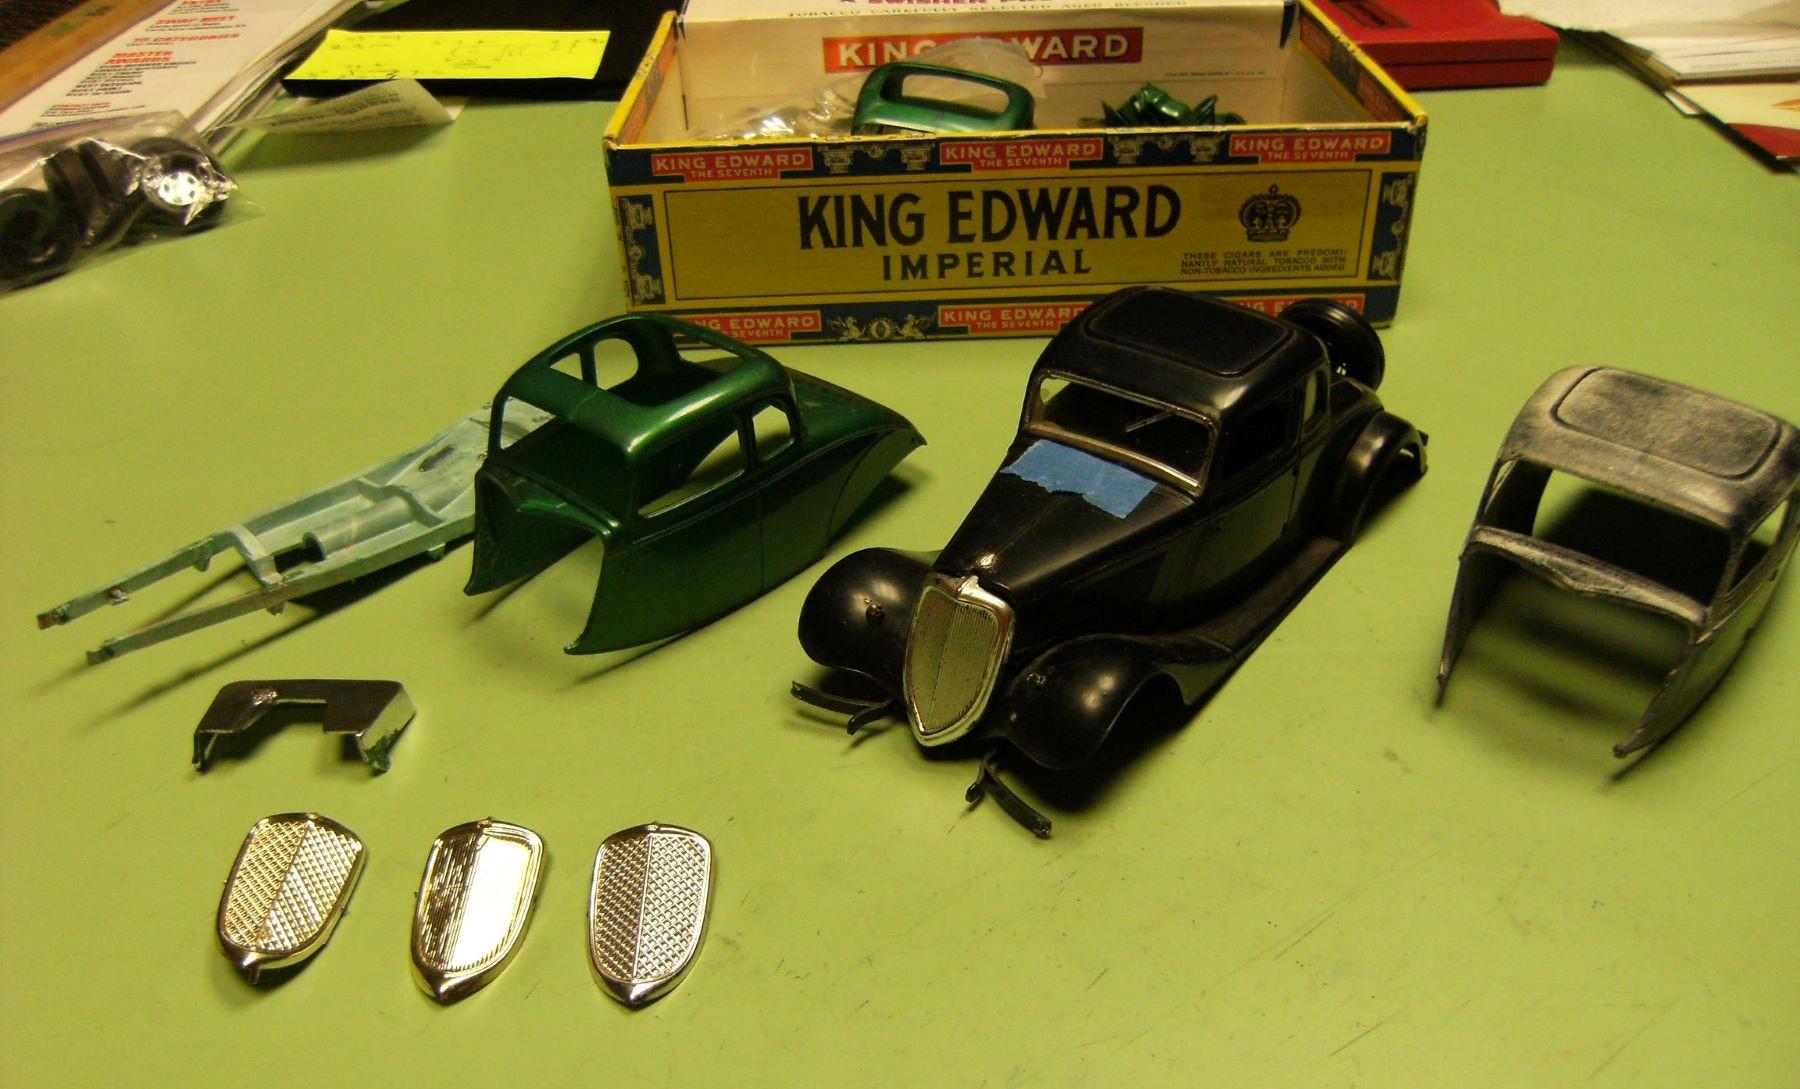
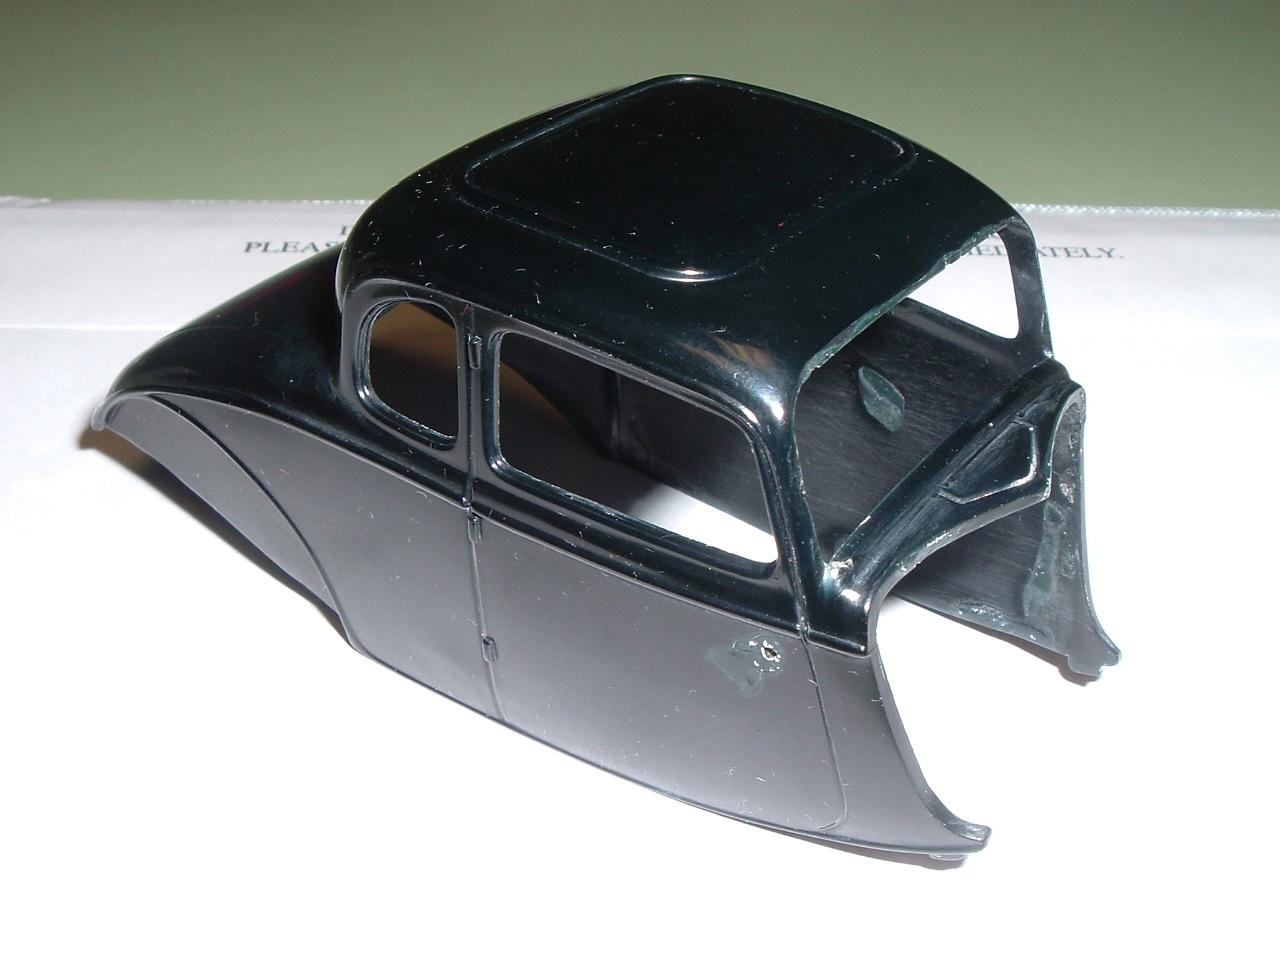
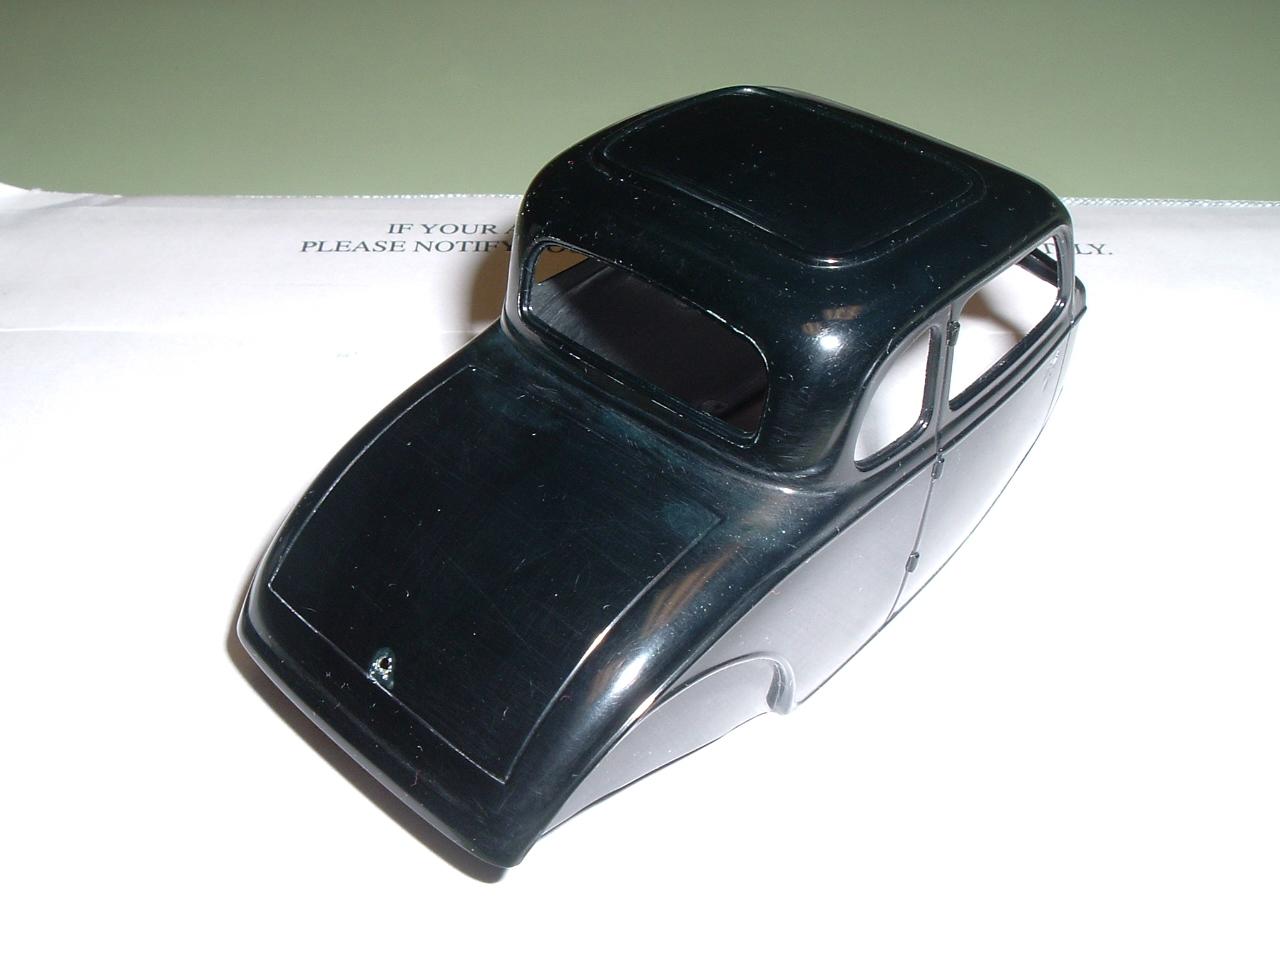
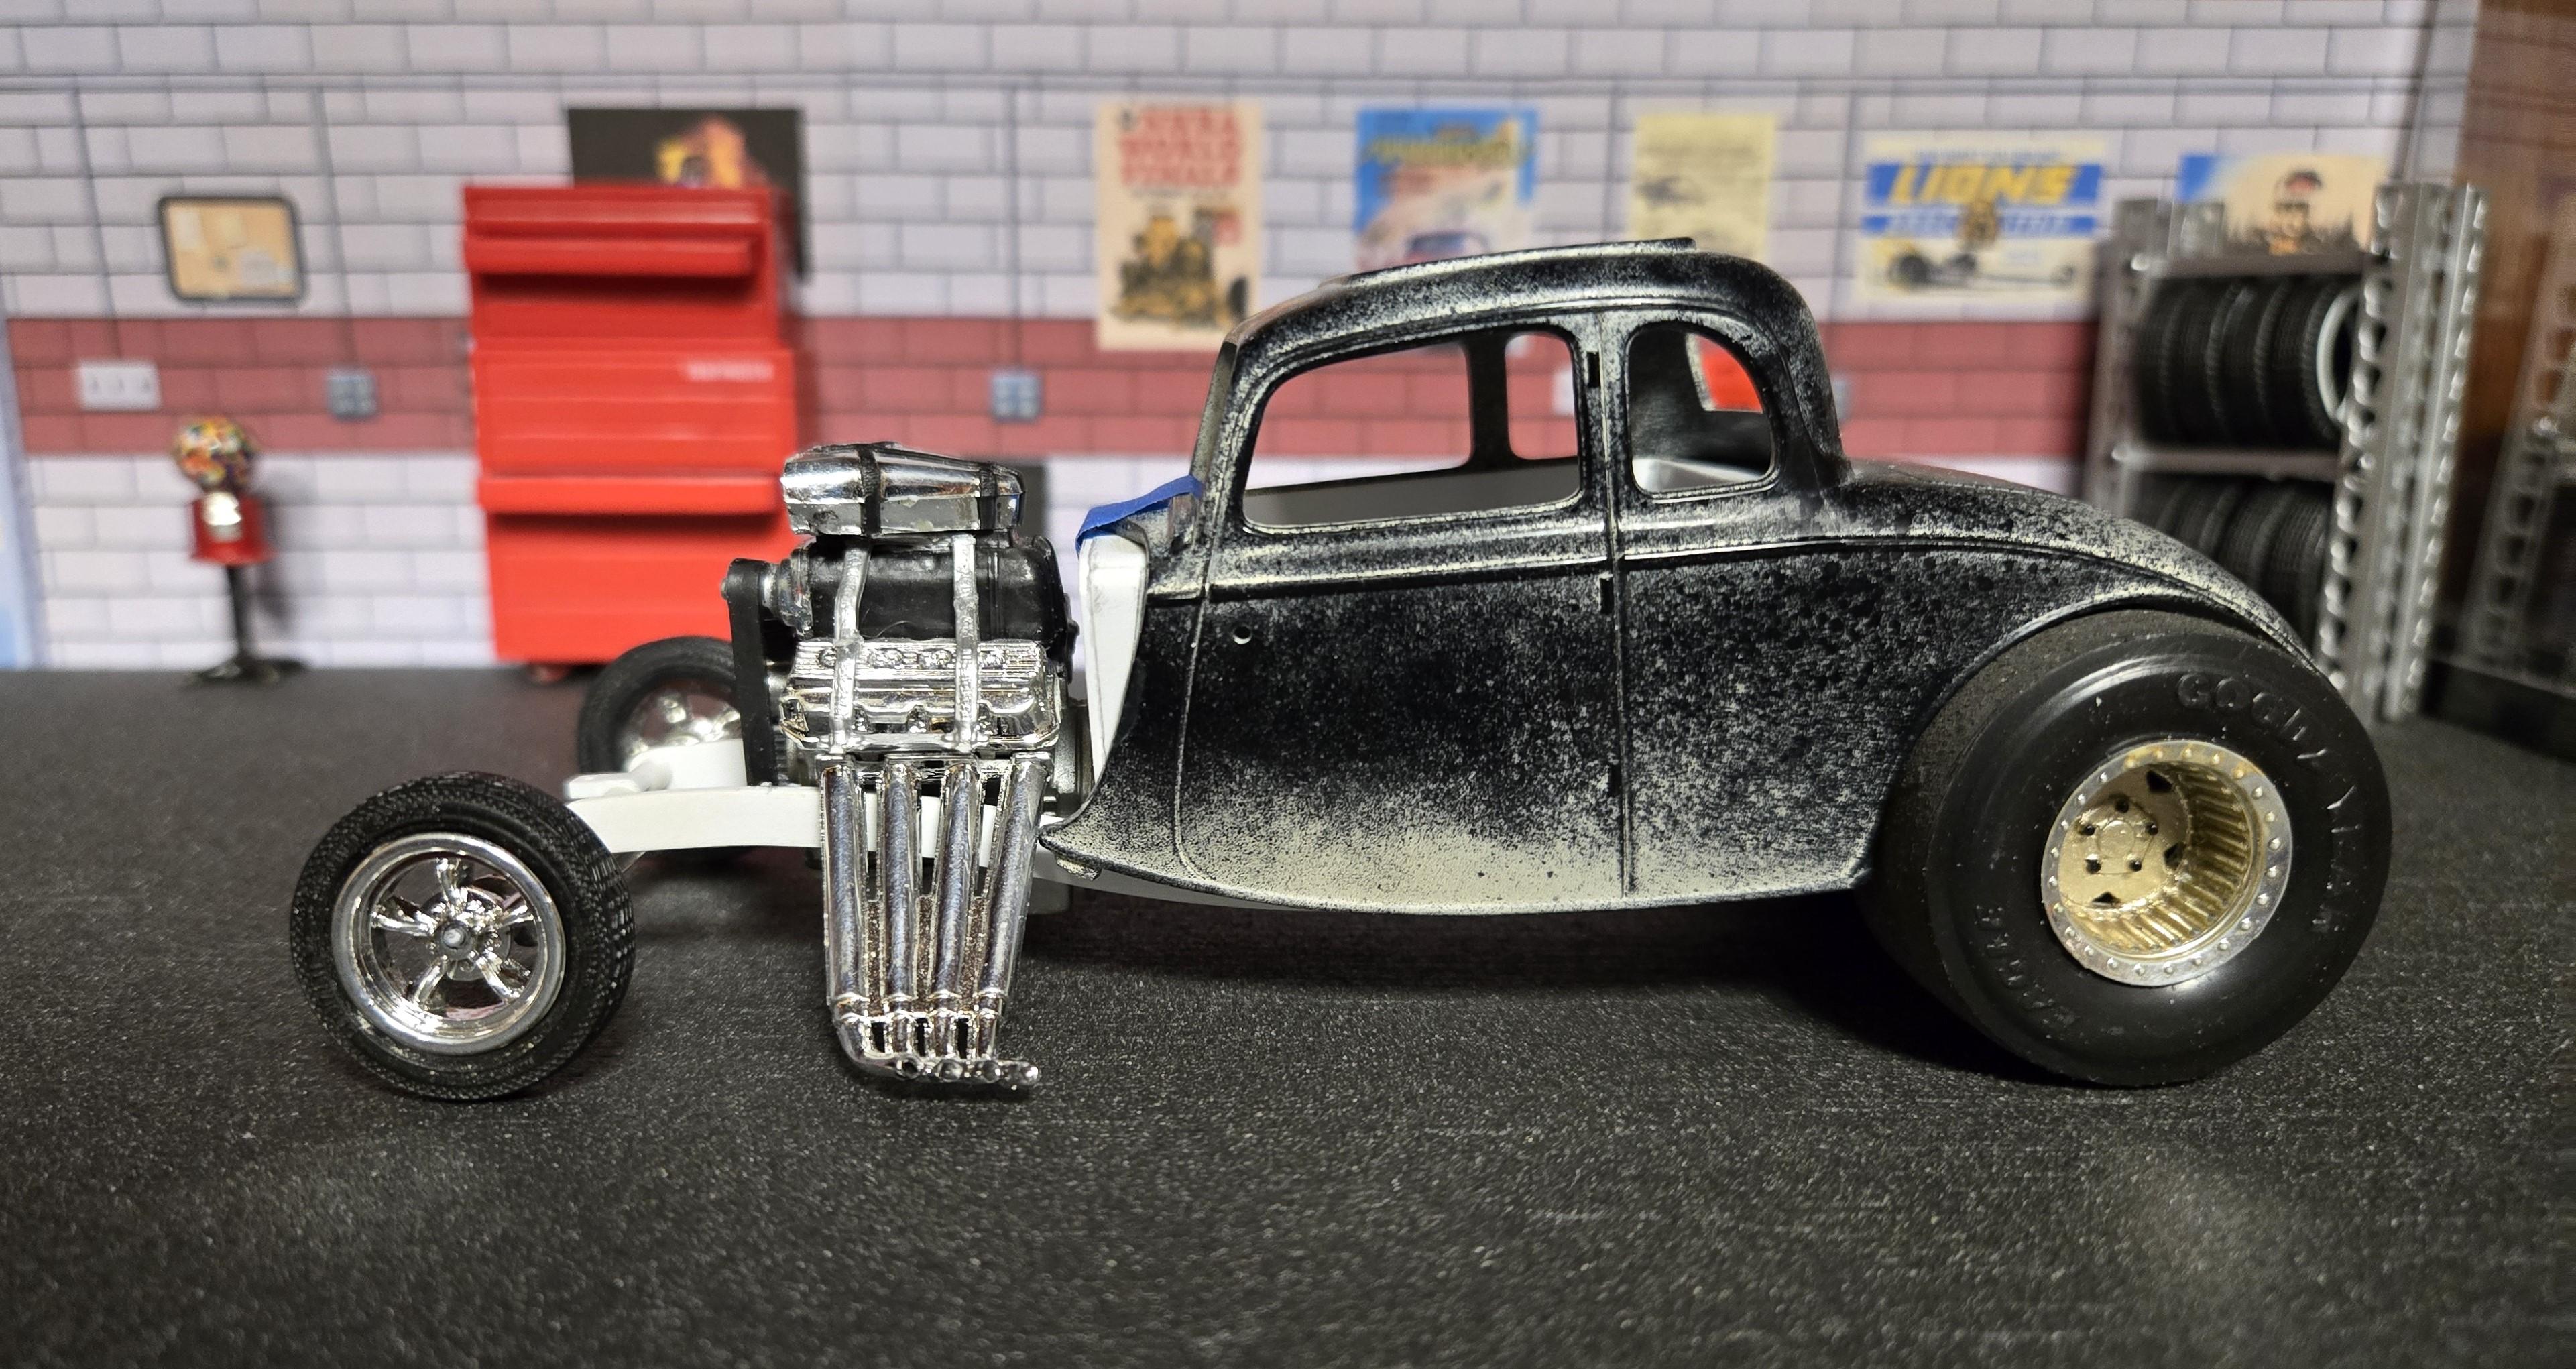
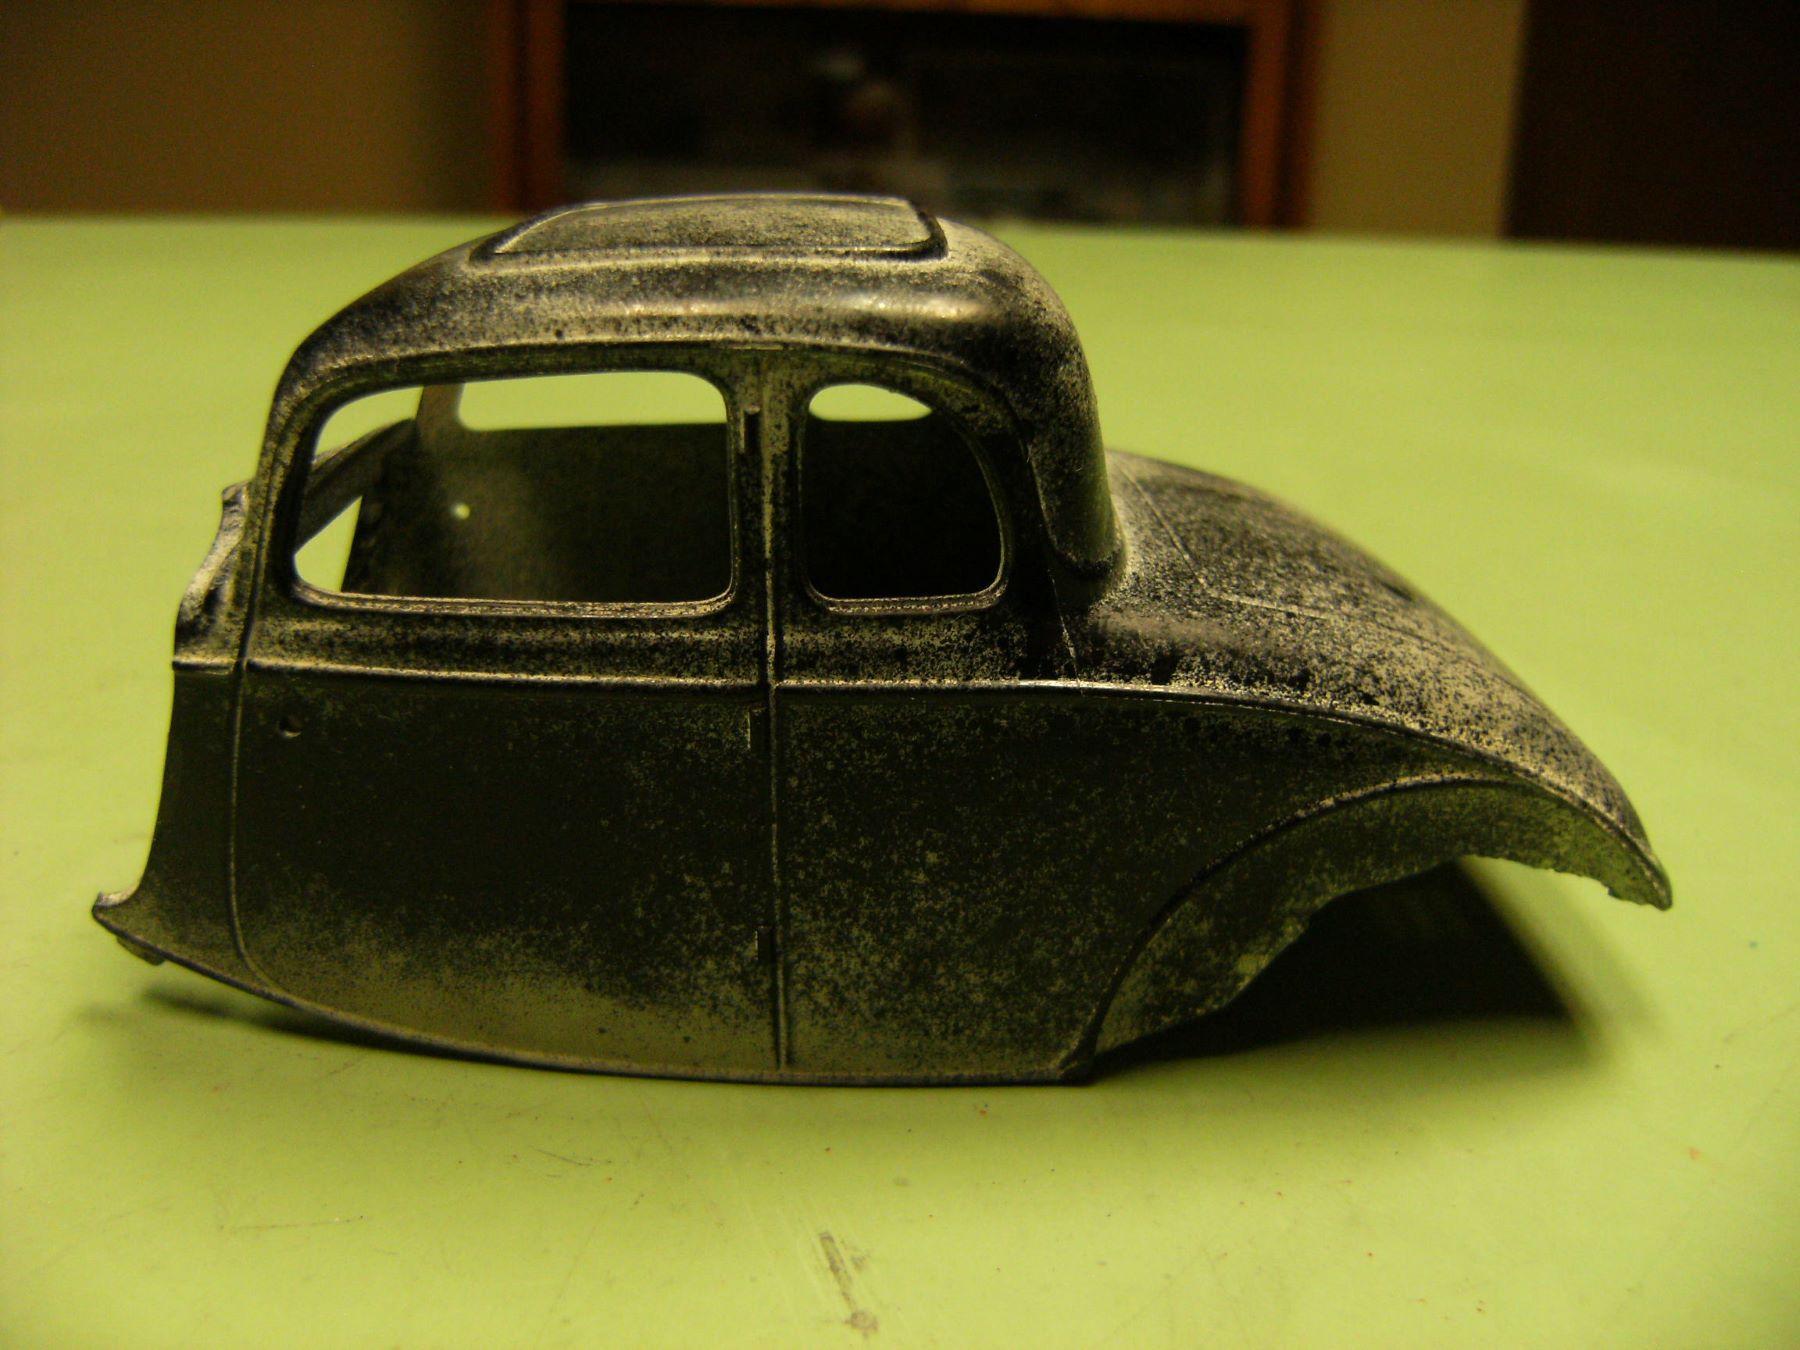
A few days ago I posted this image in "Who doesn't love a mock-up?" I noted it was an updated version with a scratched chassis, firewall and interior. I thought it might be interesting to show how I got this far (and maybe never finish). Here is body I started with from the old Aurora double kit, stock and street rod. This is the stock body, the street rod is metallic green with an open roof. Don't know what that paint strayed on it is, but It will not come off, I tried. I will cover it with a fake patina, thus the rat rod title. I trimmed off the ragged wheelwells using the old back of an X-acto knife method. That got me the start to the first mock-up. The back wheels, tires and rearend from a Monogram funny car, along with the engine from a similar kit. Front wheels are from the Monogram Boot Hill Express (my favorite). All salvaged from "parts kits".
-

Who doesn't love a mock-up? Let's see yours!
mvadrag replied to Belairconvertable's topic in WIP: Model Cars
It has been a while since I posed this mockup. Here is an updated version with a scratched chassis, firewall and interior.
-
I stumbled upon this thread yesterday, and I agree that 3D printed engines are very nice options for adding to your build. But, I prefer styrene plastic and years ago a friend of mine bought out the used kits from a slot car track that was closing down. There were lots of engine and chassis parts but no bodies. I snagged all the GM kits and sold engine kit baggies on eBay to generate extra model money. They all sold quickly and included multiples of: Monogram 1993 Chevrolet Z28 Camaro GM LT1 5.7L Engine Revell 1999 Chevrolet Z28 Camaro GM LS1 5.7L Engine Revell 2005 Chevrolet Corvette C6 LS2 5.7L Engine Revell 2001 Chevrolet Corvette Z06 LS6 5.7L Engine AMT 1966 Chevrolet Nova 327 Engine and Stand AMT 1995 Chevrolet Corvette ZR1 GM LT5 5.7L Engine AMT 1994 Pontiac Firebird GTA Buick Turbo 231 V6 Engine AMT 1966 Chevrolet Nova “Resto Rod” V8 Engine
-
I built one of these way back in high school. Still have it, but I ordered a cowl hood to "update it" a few years ago.
-
It is sitting on my shelf in the mocked up mode. I was trying to figure out the front suspension and then summer hit, a modeling time dropped off. I am glad people are still interested in this build!
-
I went out to my tool box and it was 1 1/8 inch size. You might need one bigger or smaller depending on the tire size. This size is good for MPC pro stock and funny car slicks.
-
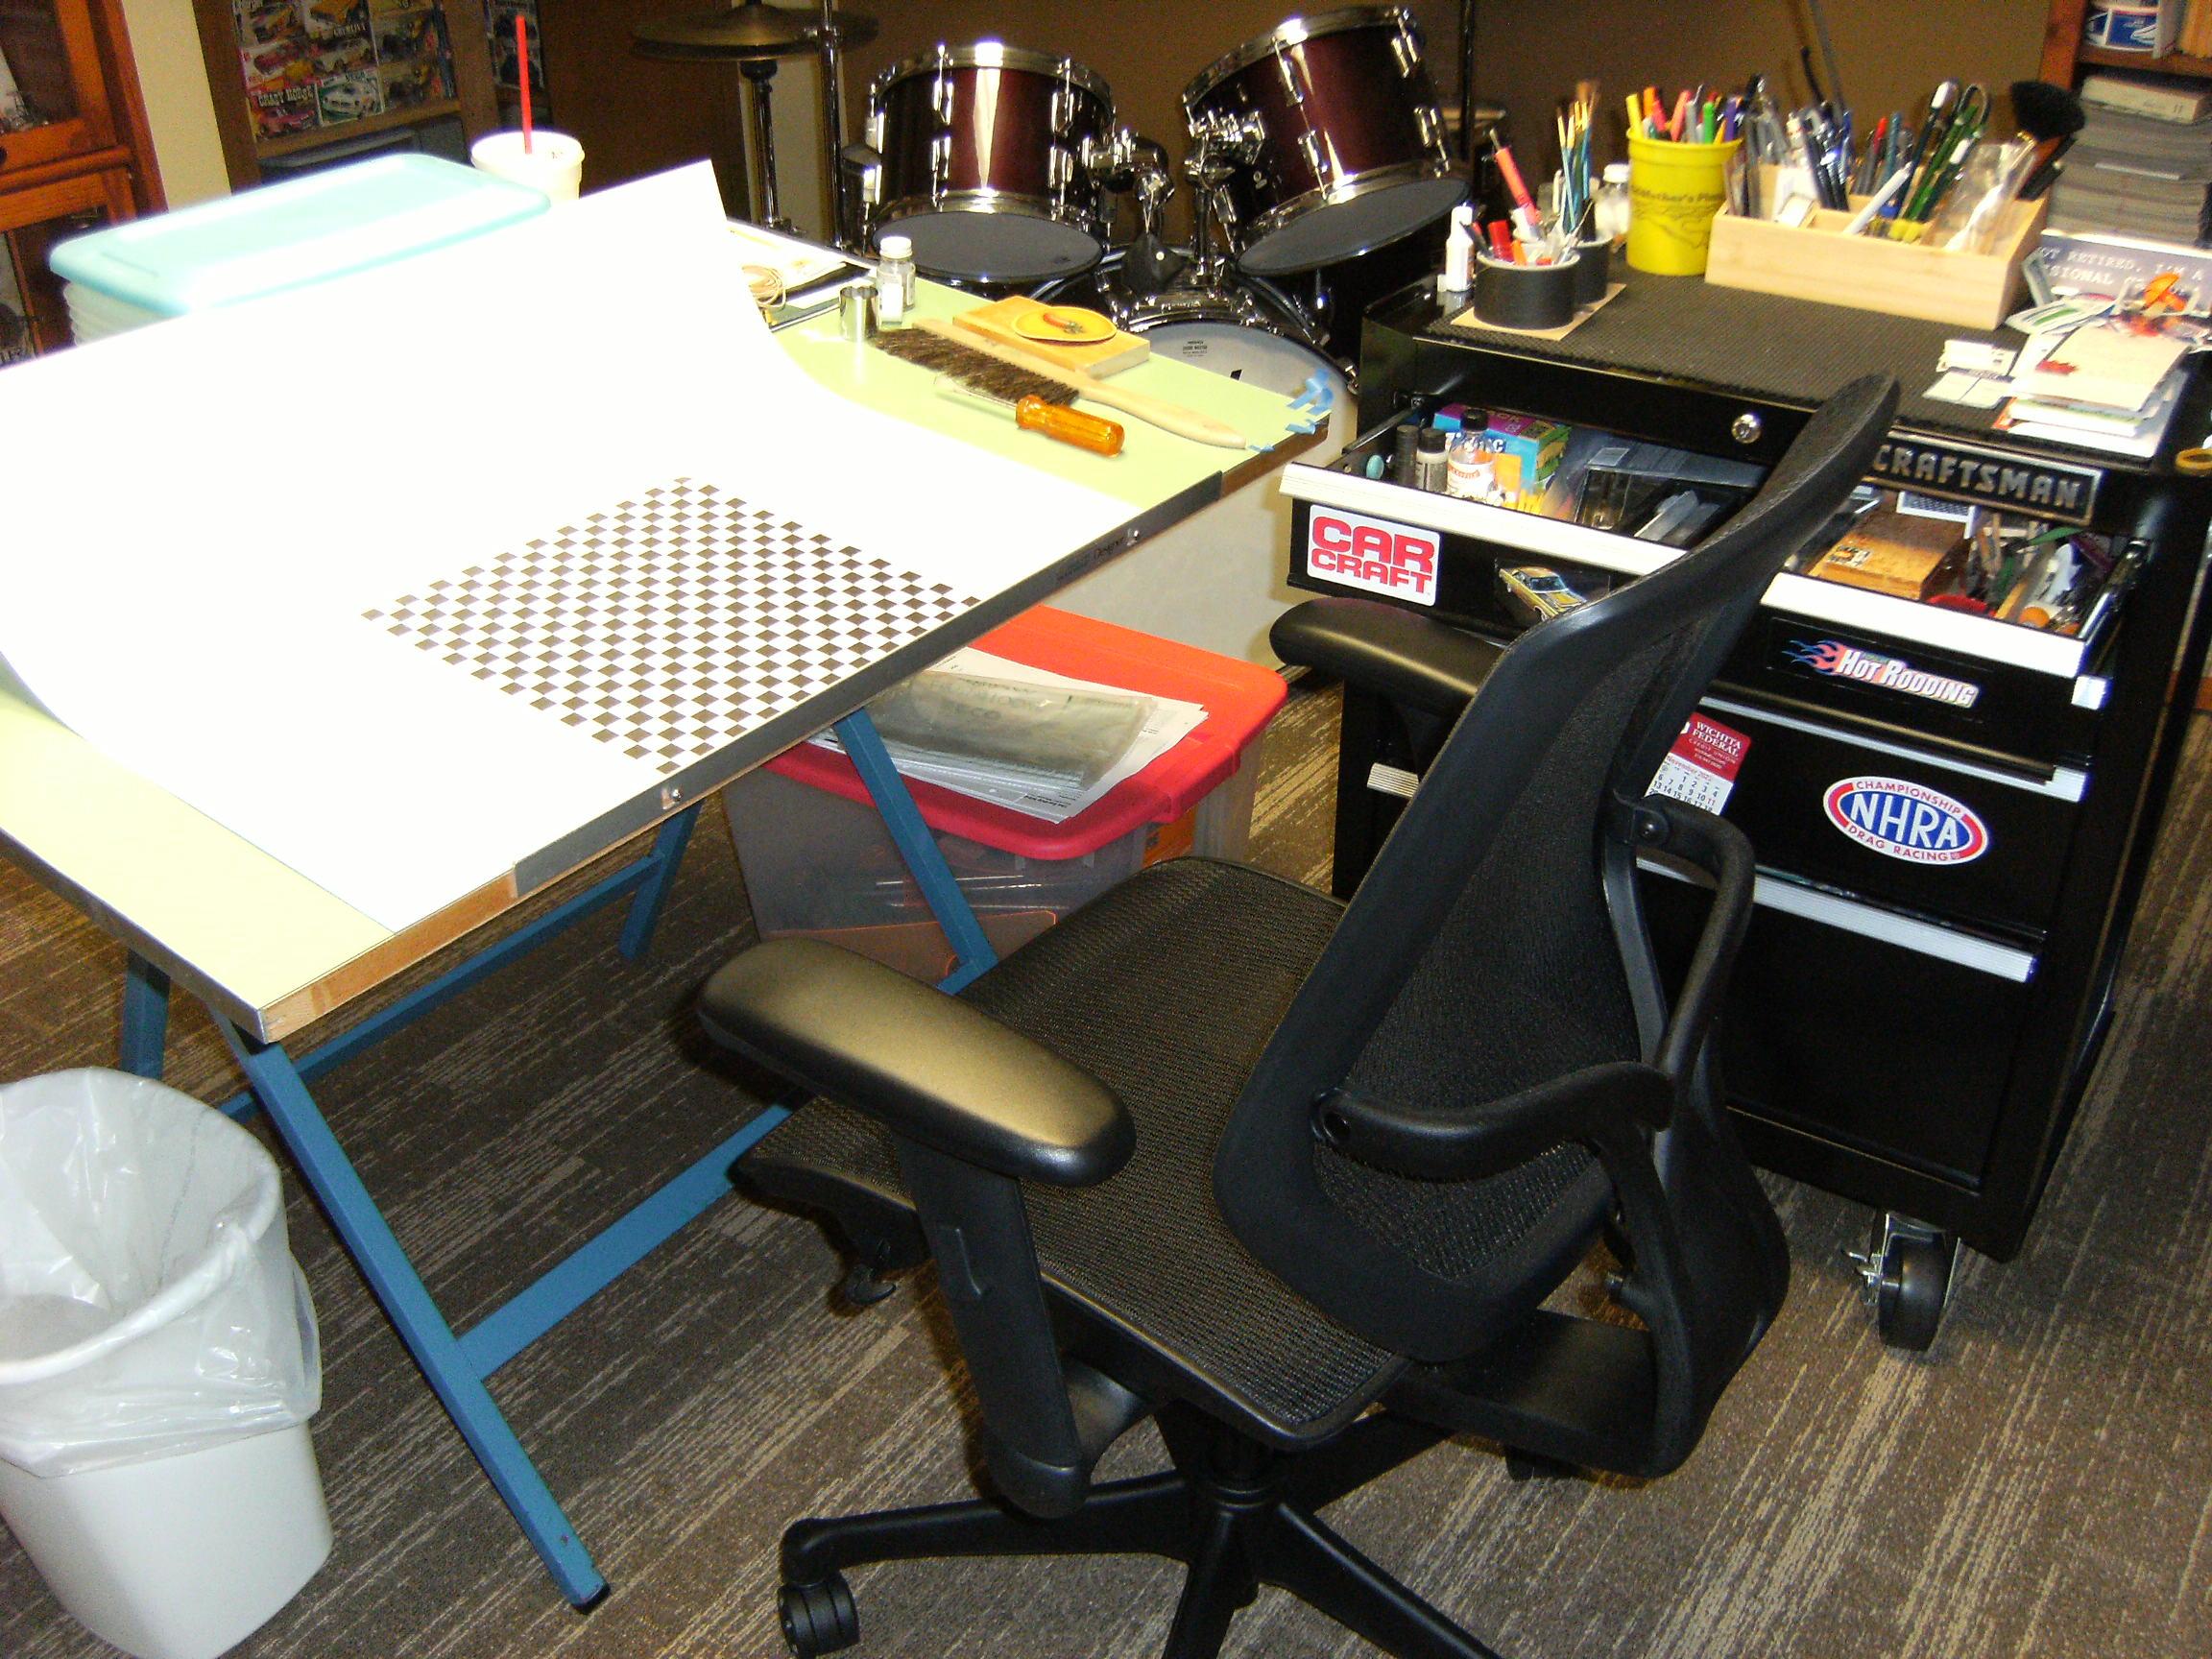
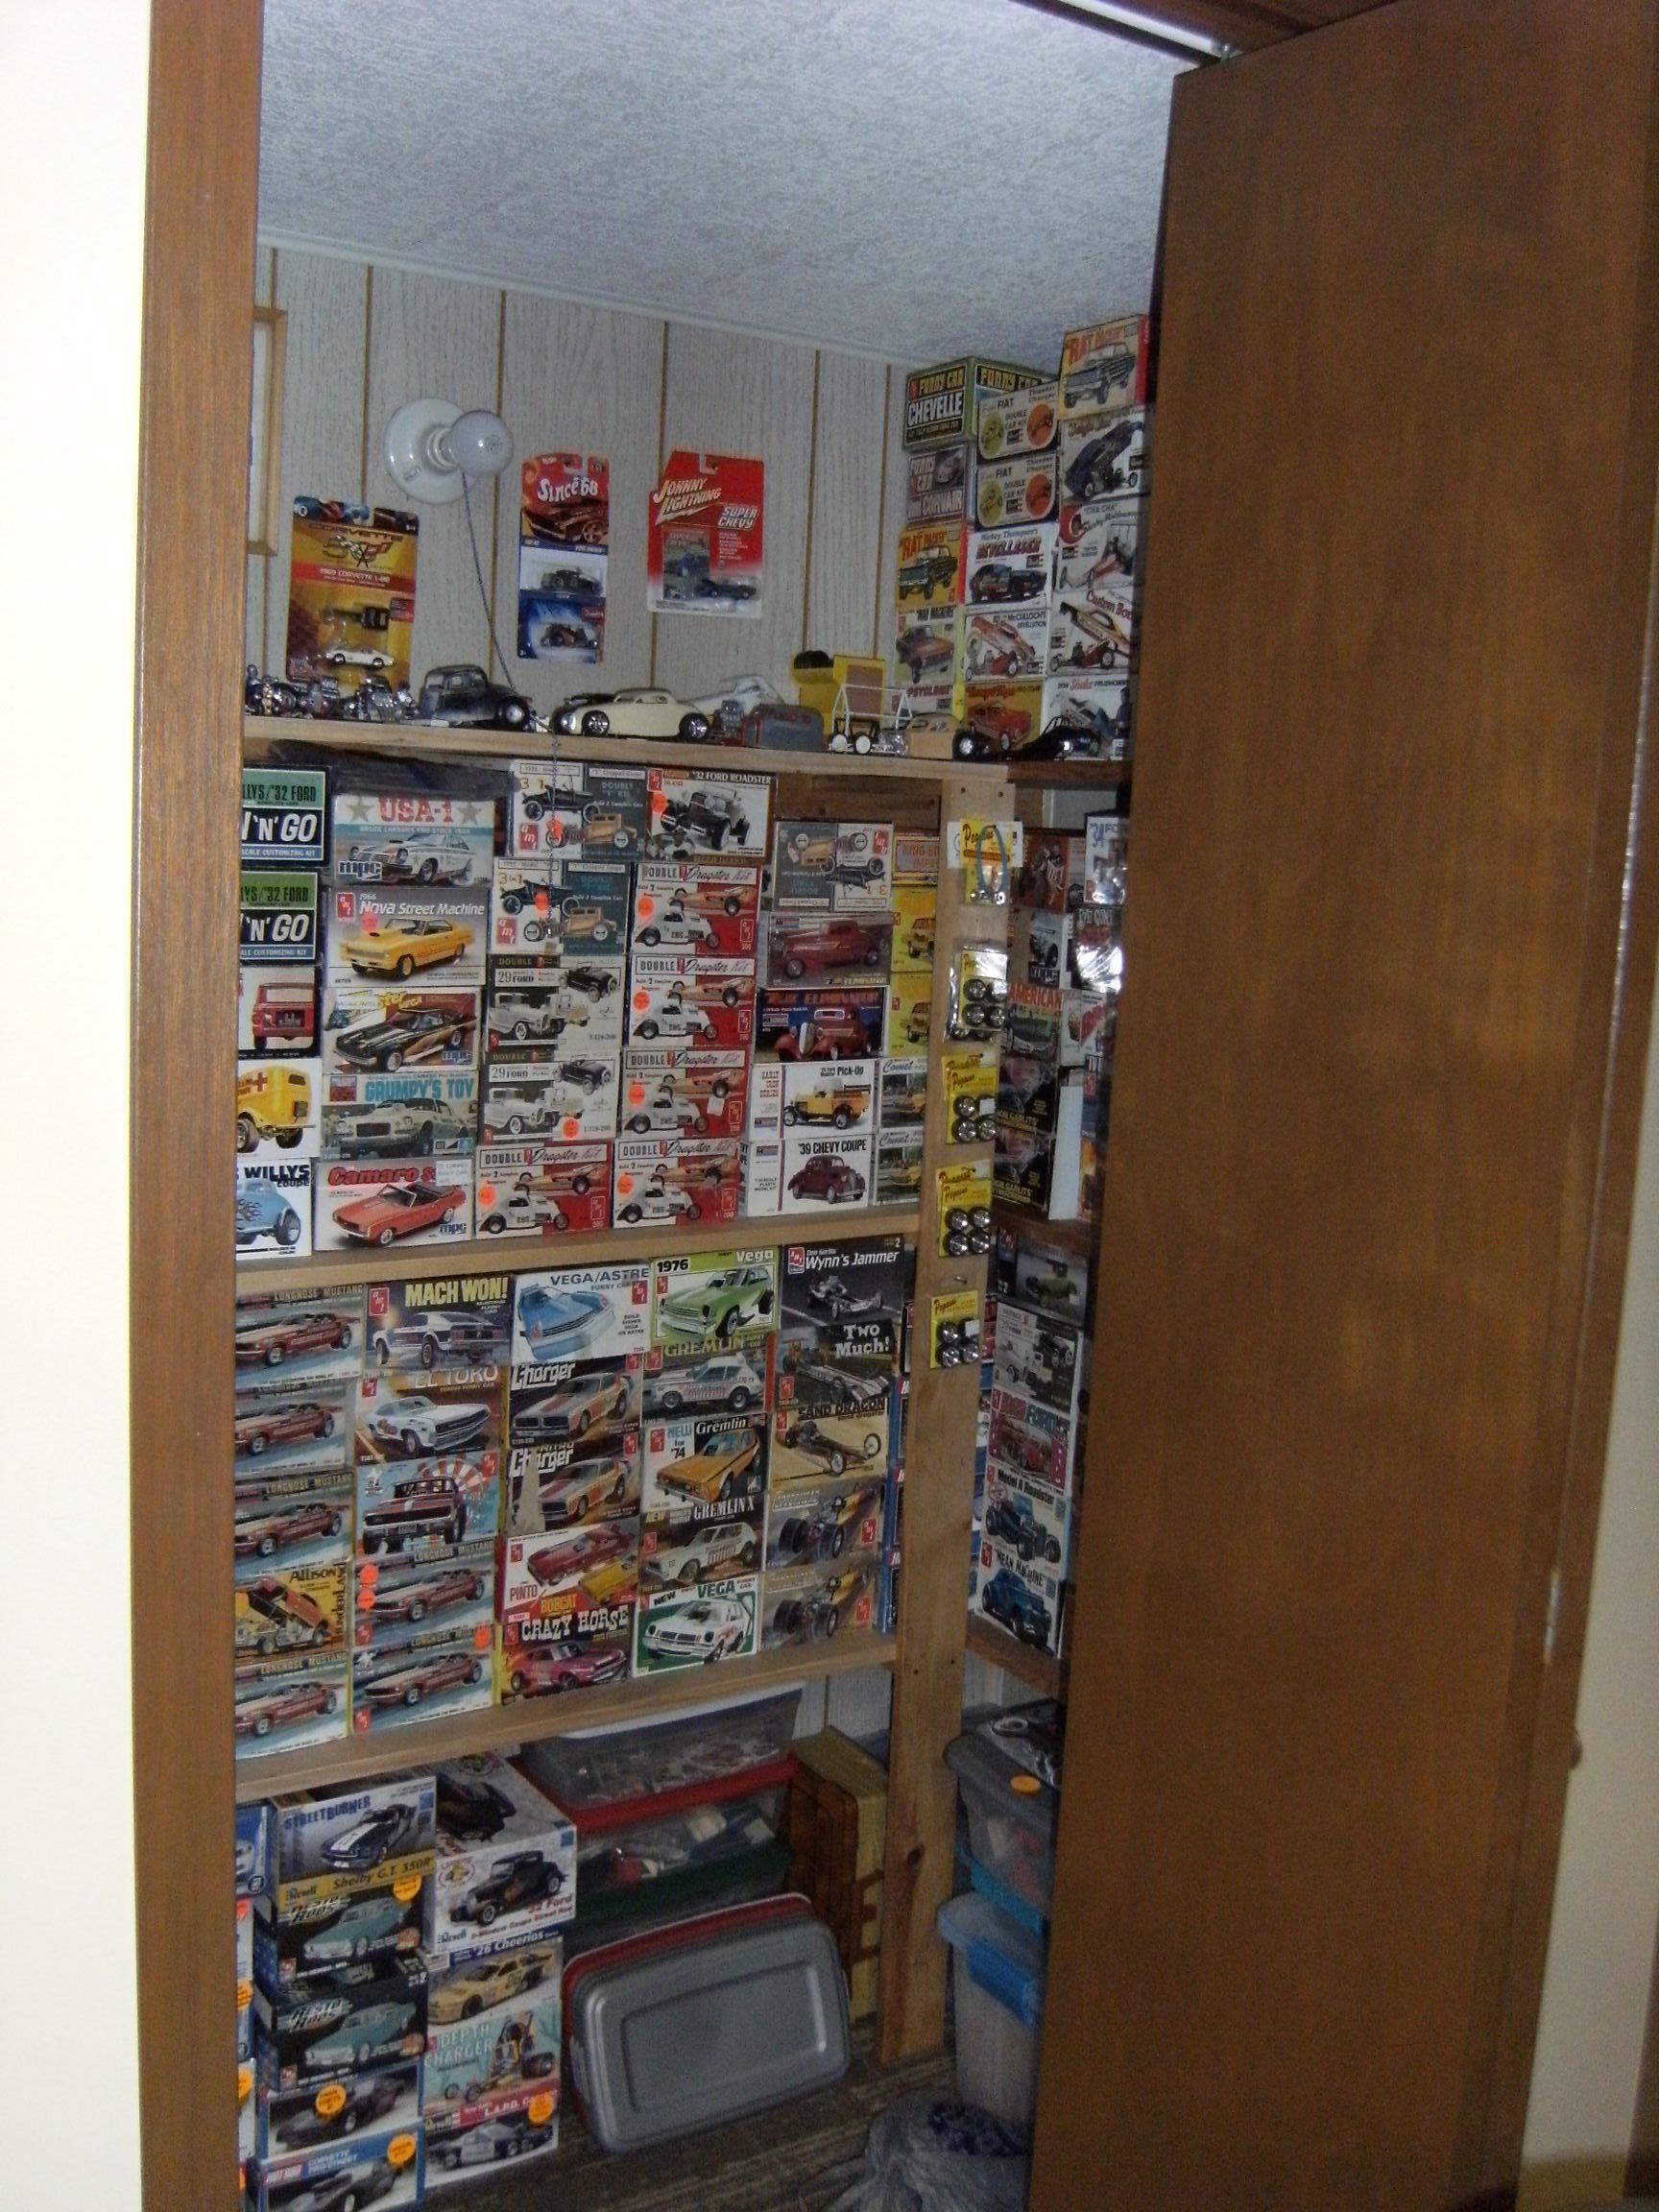
You guys have some nice set ups! I have a hobby room in my basement for modeling and art stuff. Most equipment and supplies are in the tool chest. Models are stored in an extended closet with shelves. The drafting table is where I work, though now the set up is for model pictures. It gets messy when things are in full swing. I constantly clean and put away so I have room to work. The stash:
-
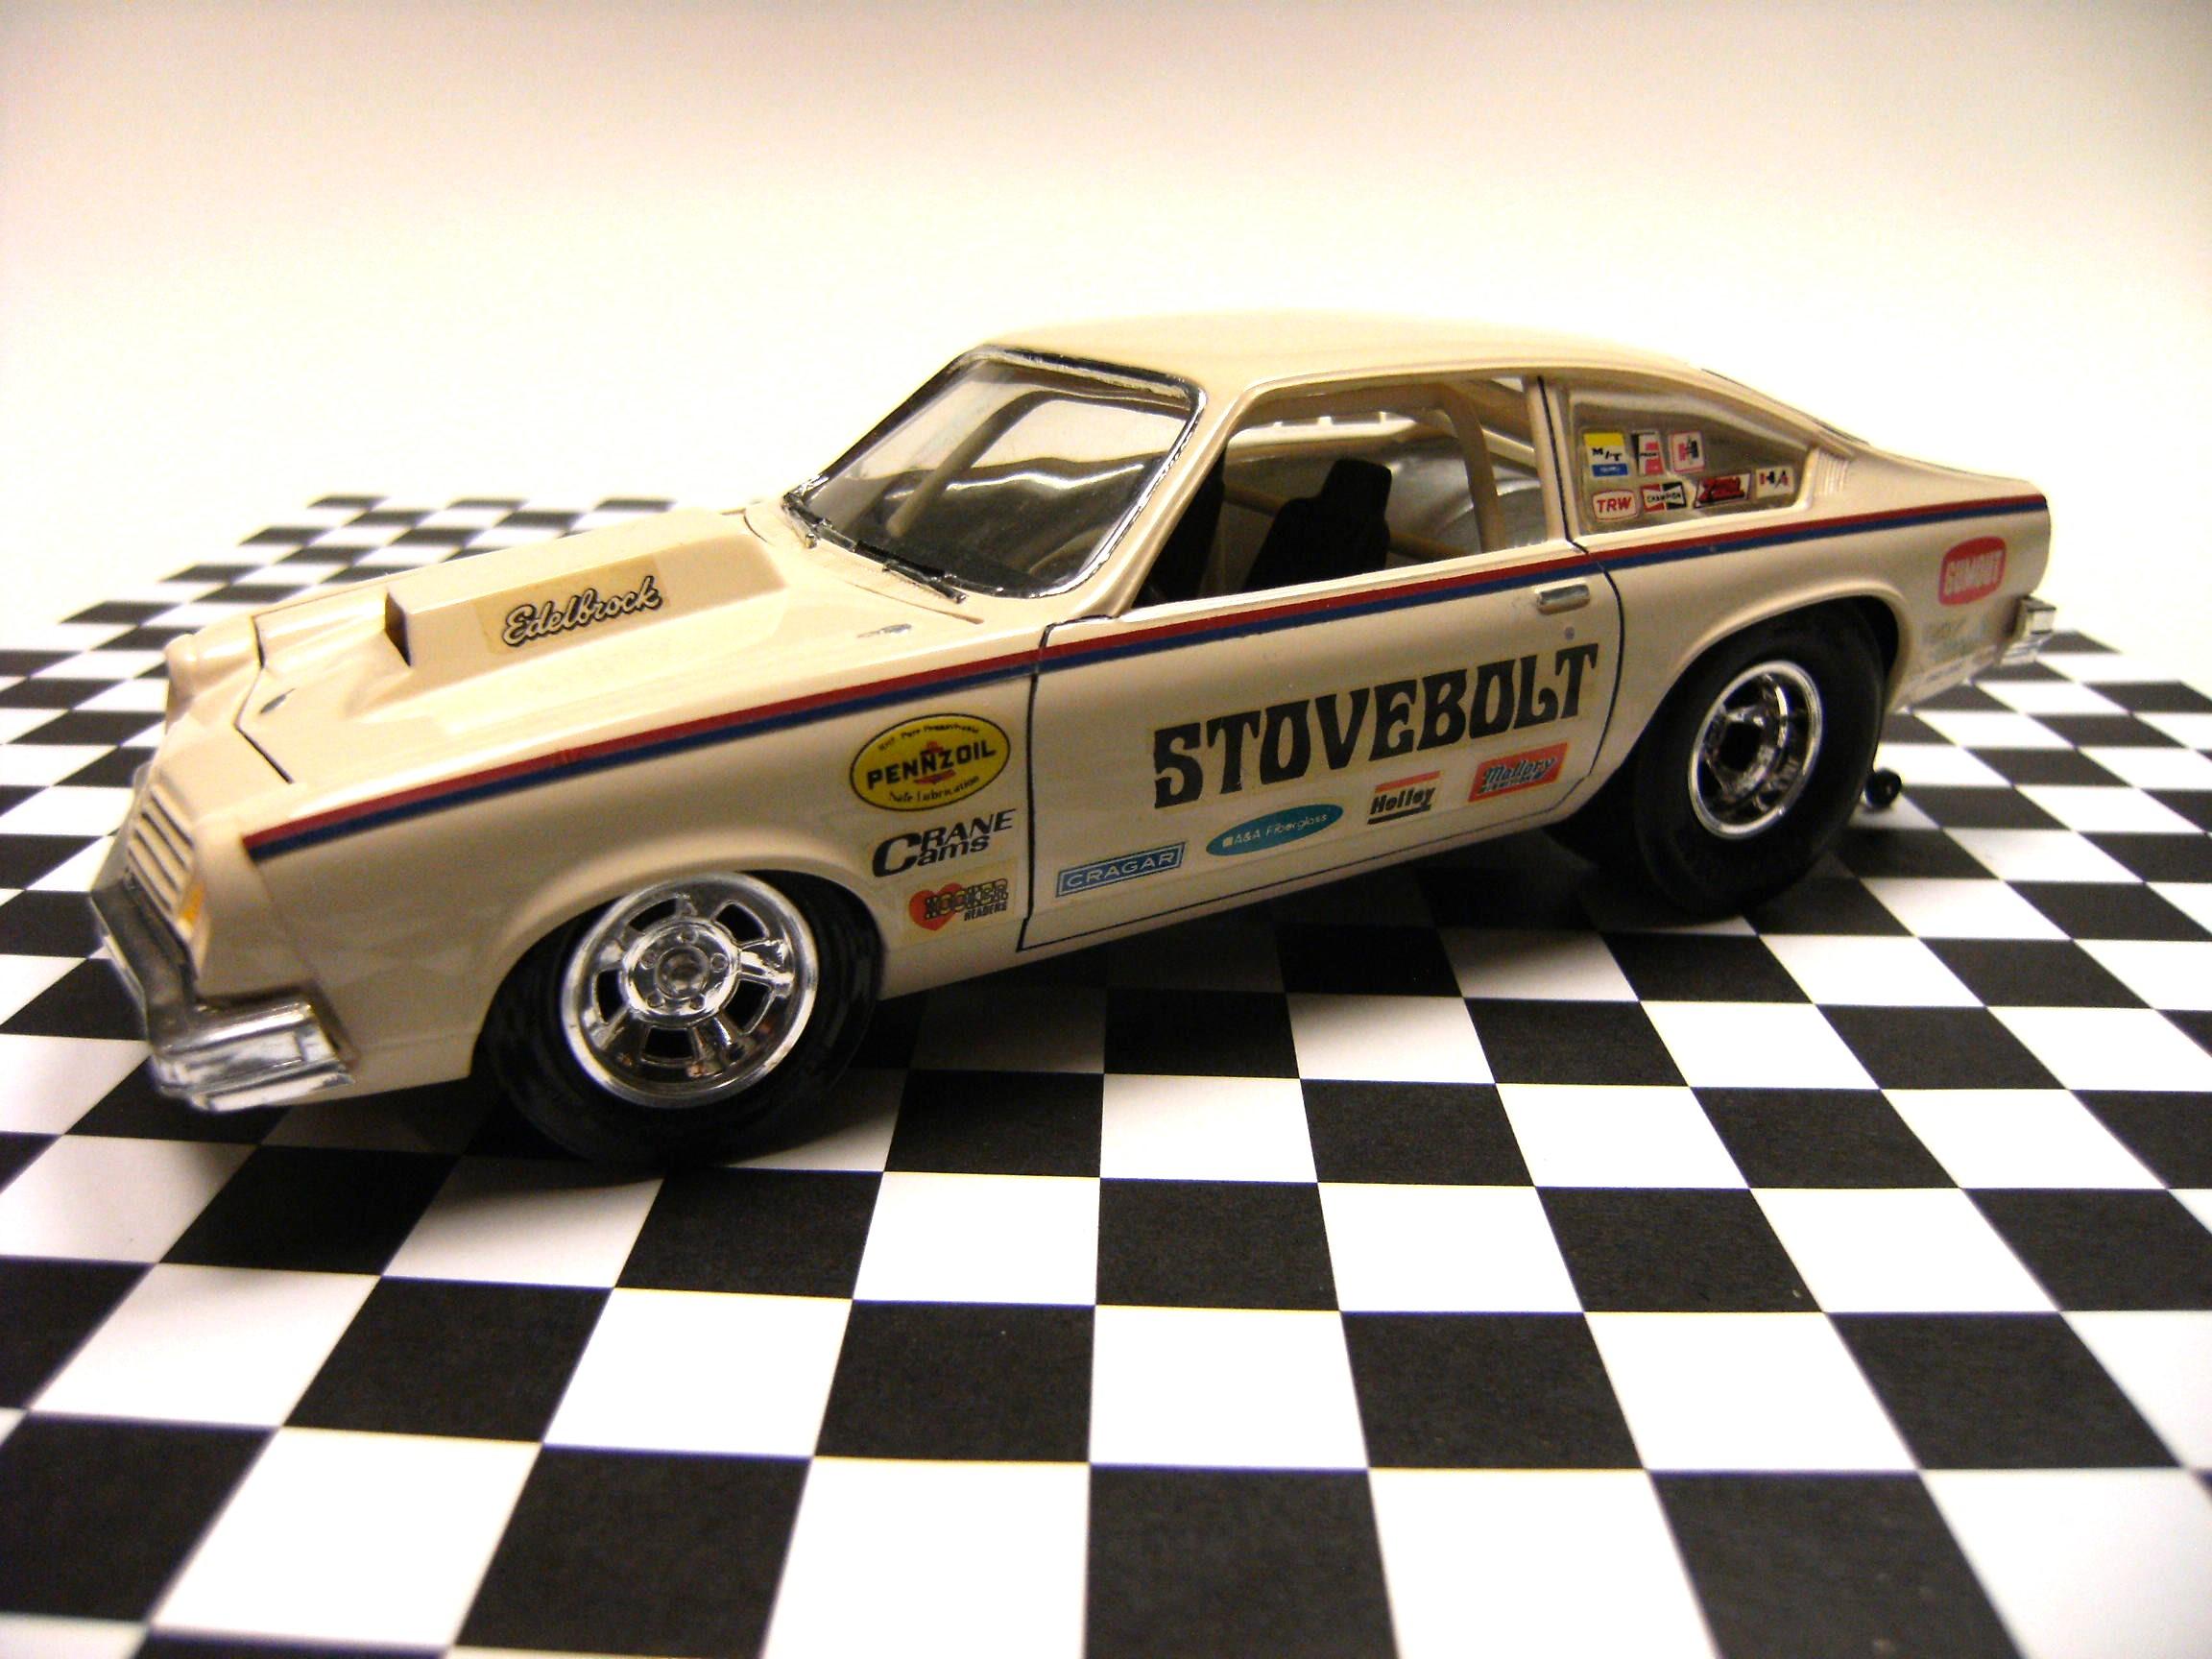
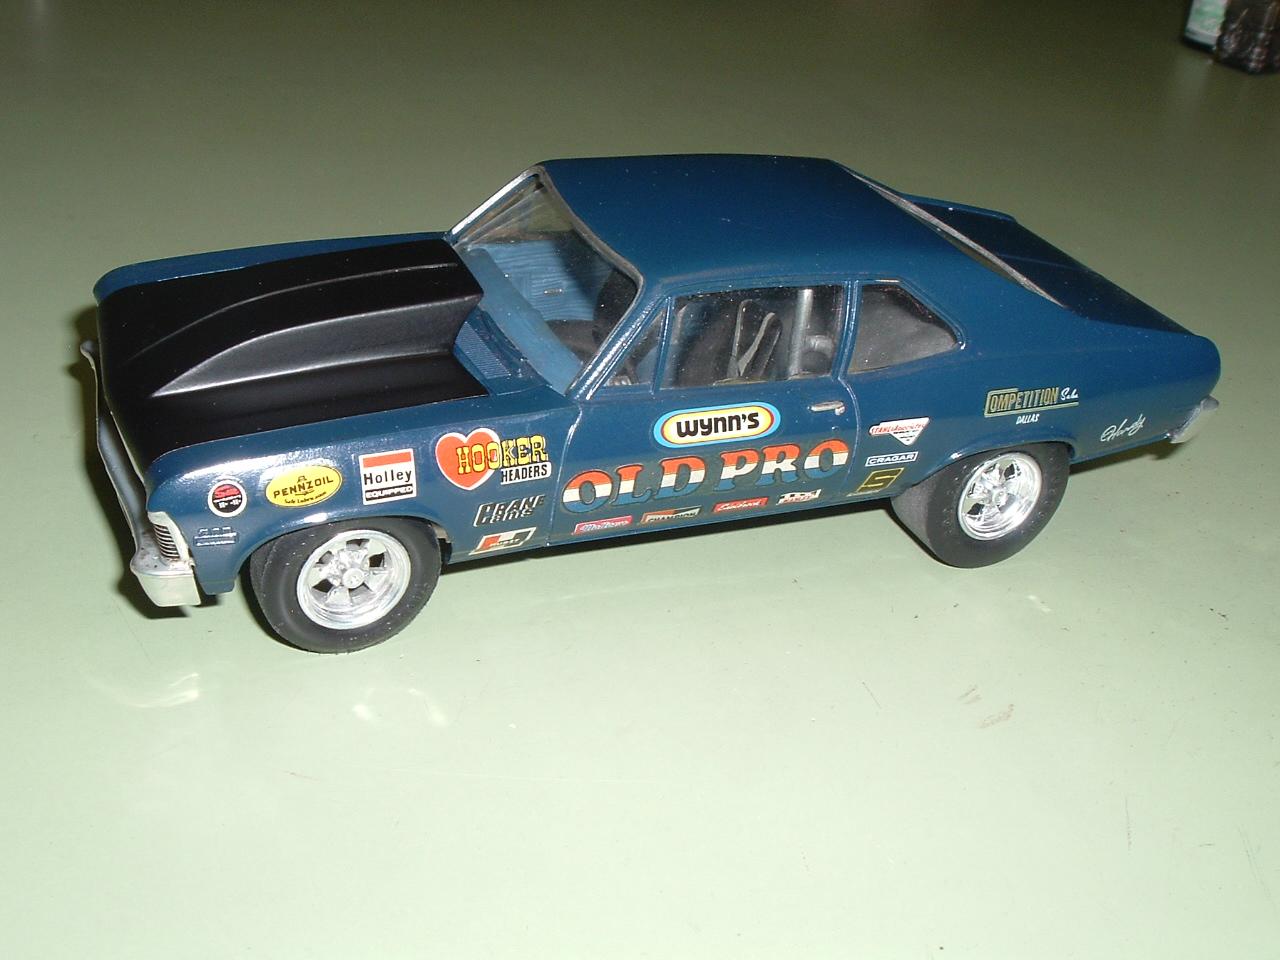
These two survive from high school, I graduated in 1974. First is my version of a MPC Bruce Larson USA-1 Vega pro stock. Paint is yellowed Testors white enamel out of the can. Updated with some bare metal foil in the 80's. Next up is AMT's Old Pro 1972 Nova. Updated with a tall resin cowl induction hood about ten years ago when I scored five cowl induction hoods for $10 at a model show.
-
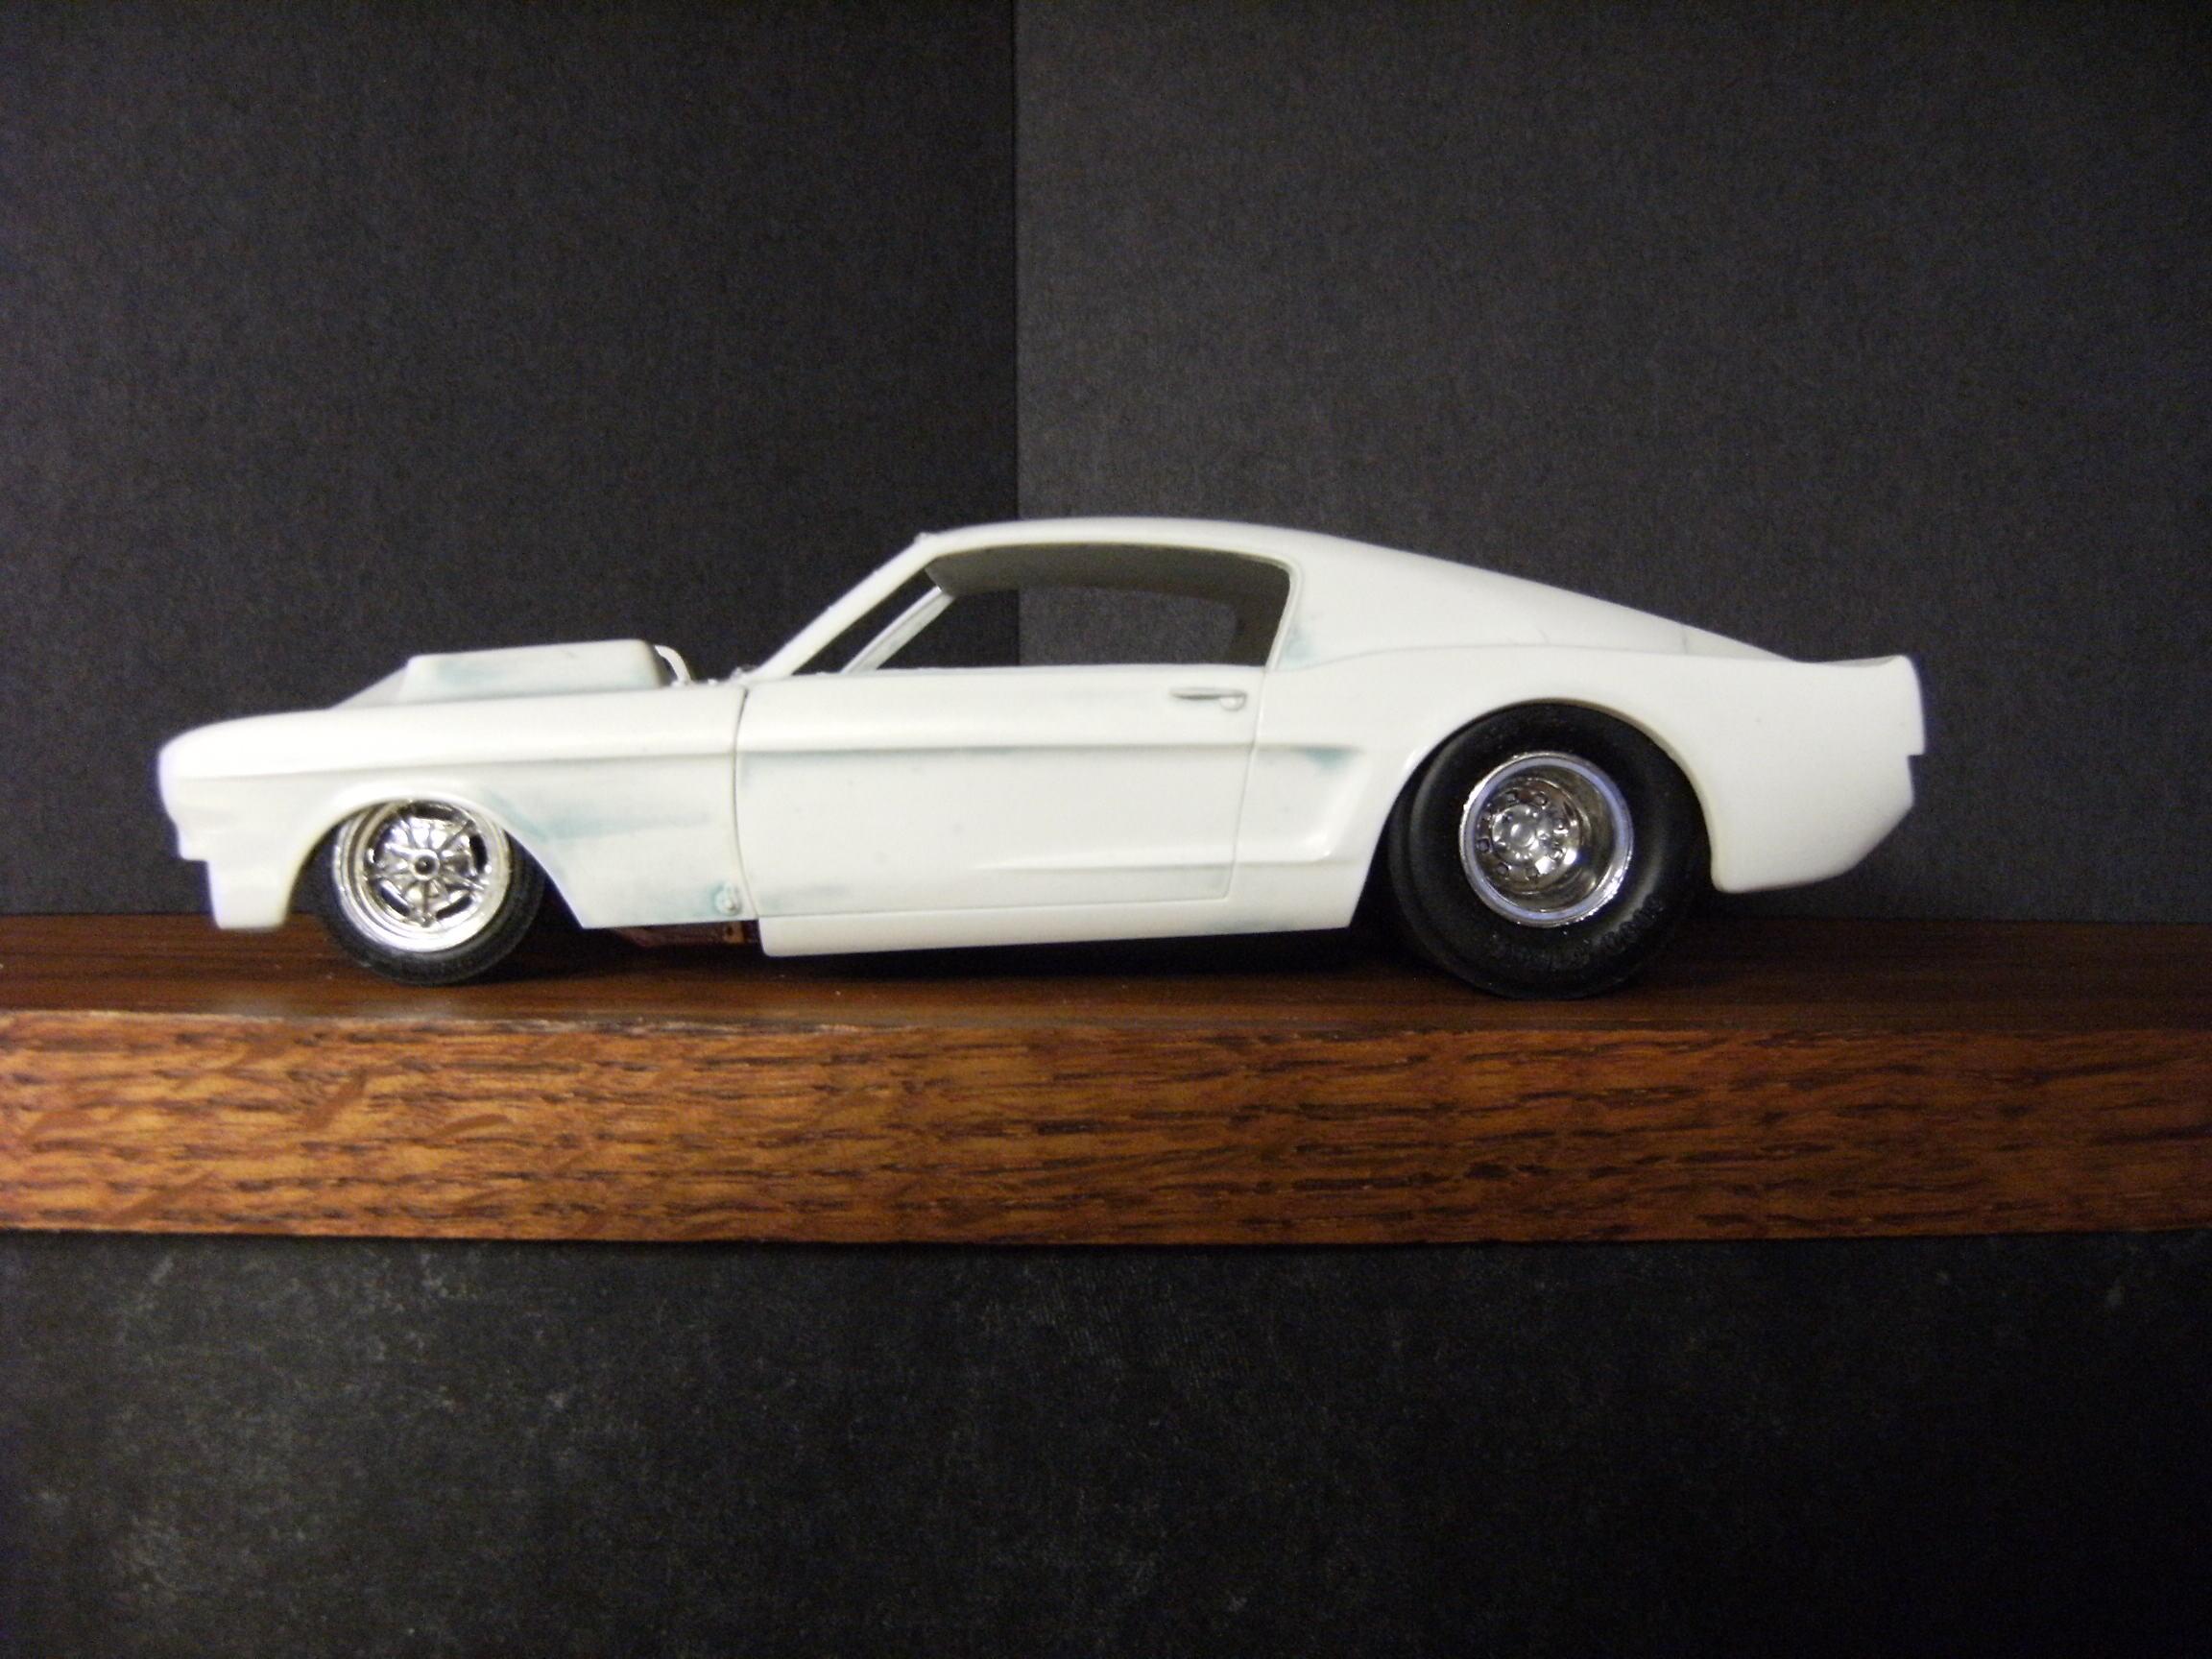
It sure is. The old MPC Malco Mustang was just wrong. Box art looked like a '67, but the plastic came out '65 or '66. The new issue has addressed that problem, but I have a stash of old built kits.
-
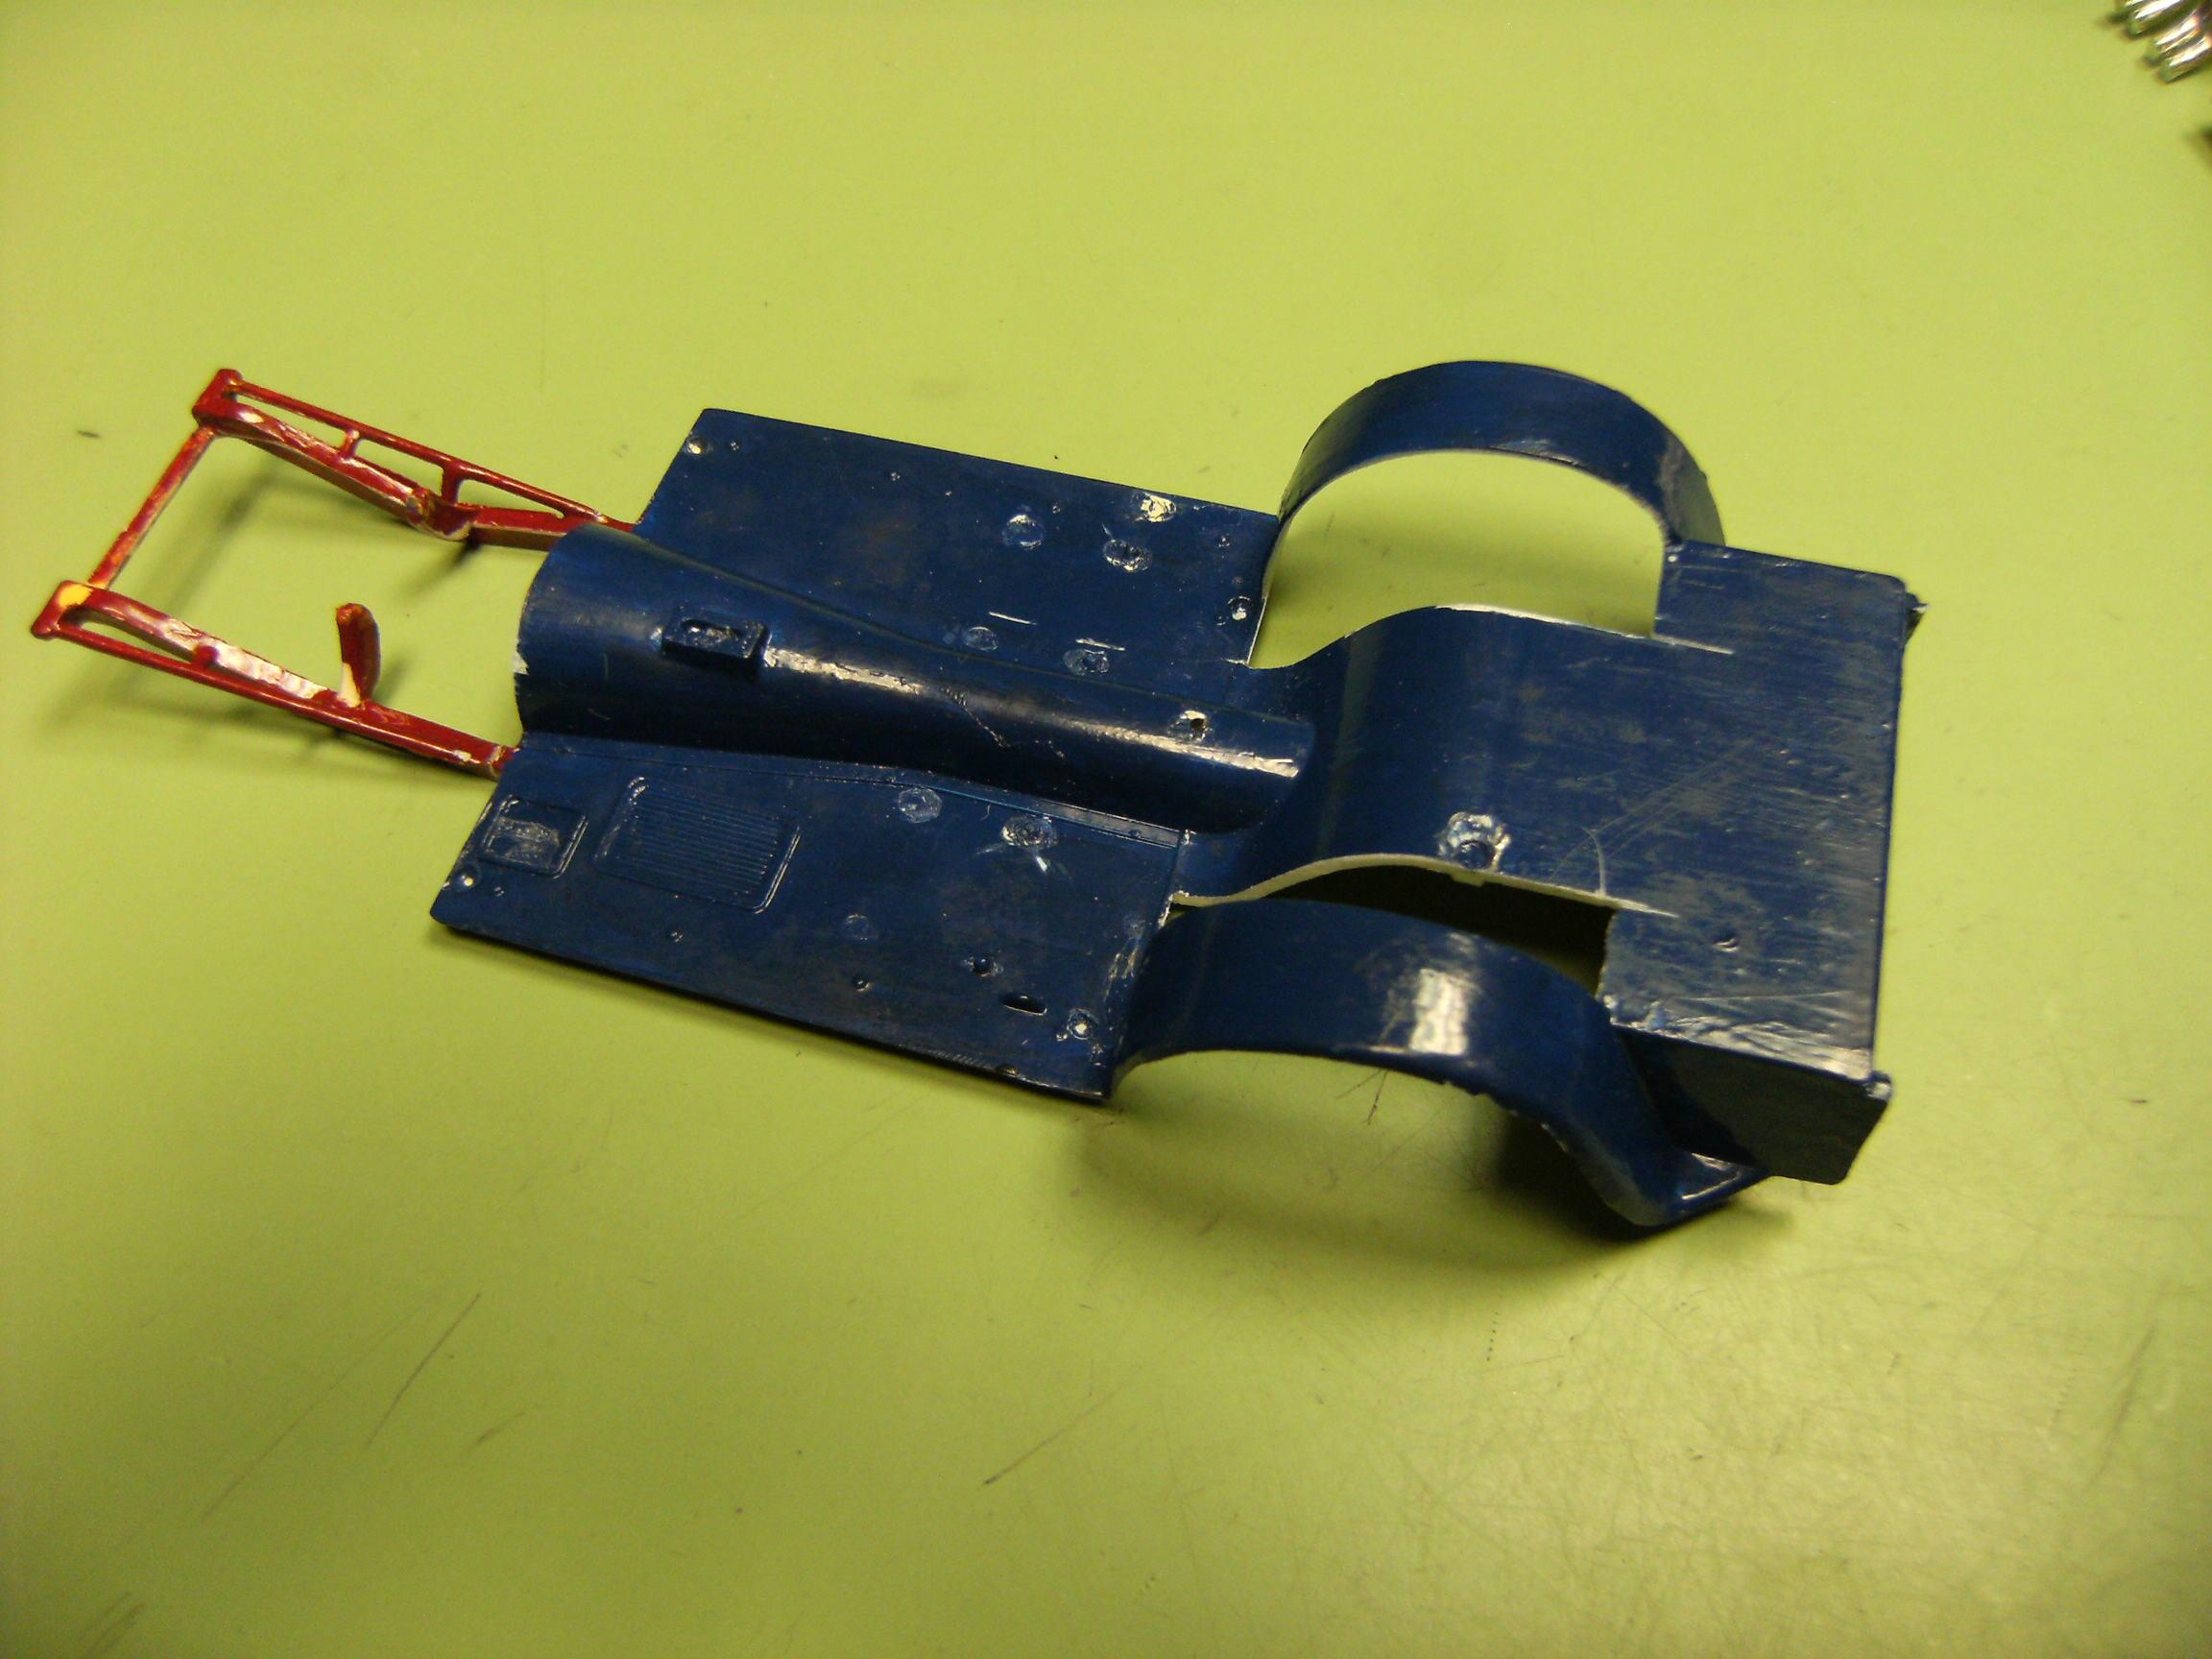
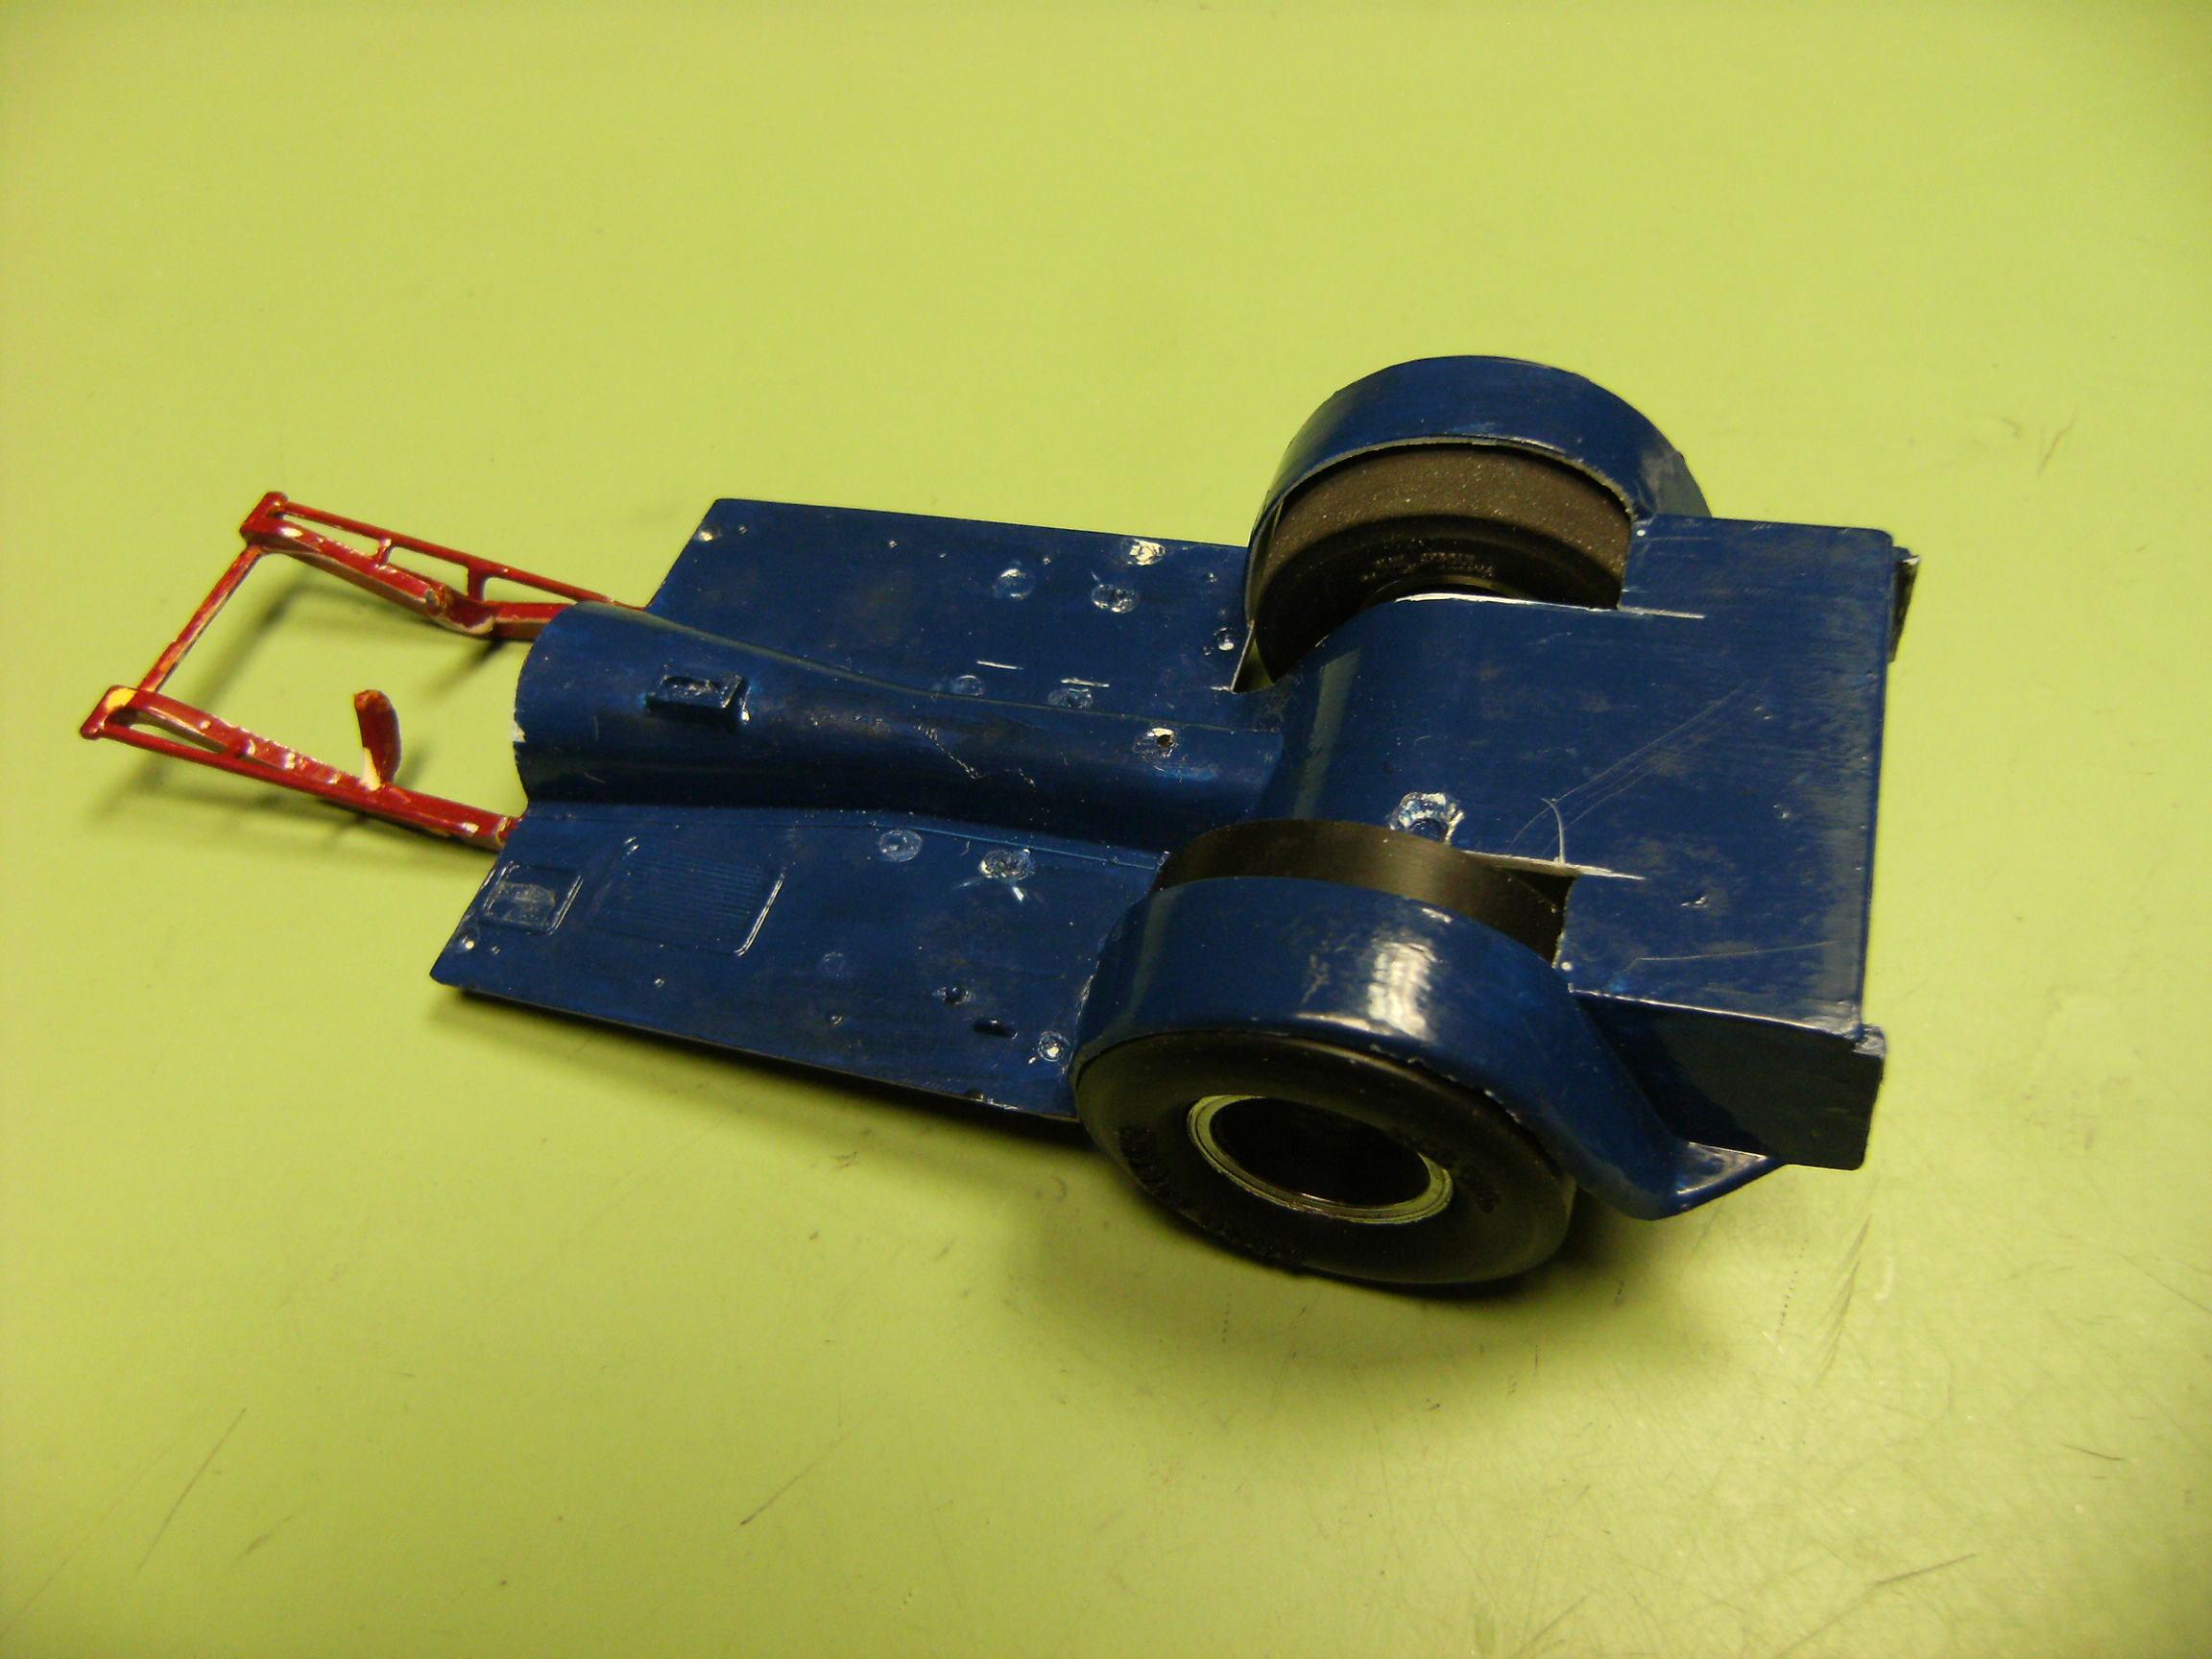
Jumping ahead: the blue painted chassis was going to be too much work to clean up and add wheel wells. I transferred measurements from it to a damaged unpainted chassis from the box of parts (right side), compare to stock chassis on left. I also built wheel tubs using a technique AmericanMuscleFan described in his detailed builds using a large half inch socket and laminated sheets of .020 styrene. I added coil spring supports to the chassis and rear axle using Evergreen plastic tube. The plastic stubs are to help decide spring length required. Here is the new chassis under the body for a fit check. Still have to figure out modifying the old roll cage (I plan to use as much of the old kit parts as I can).
-
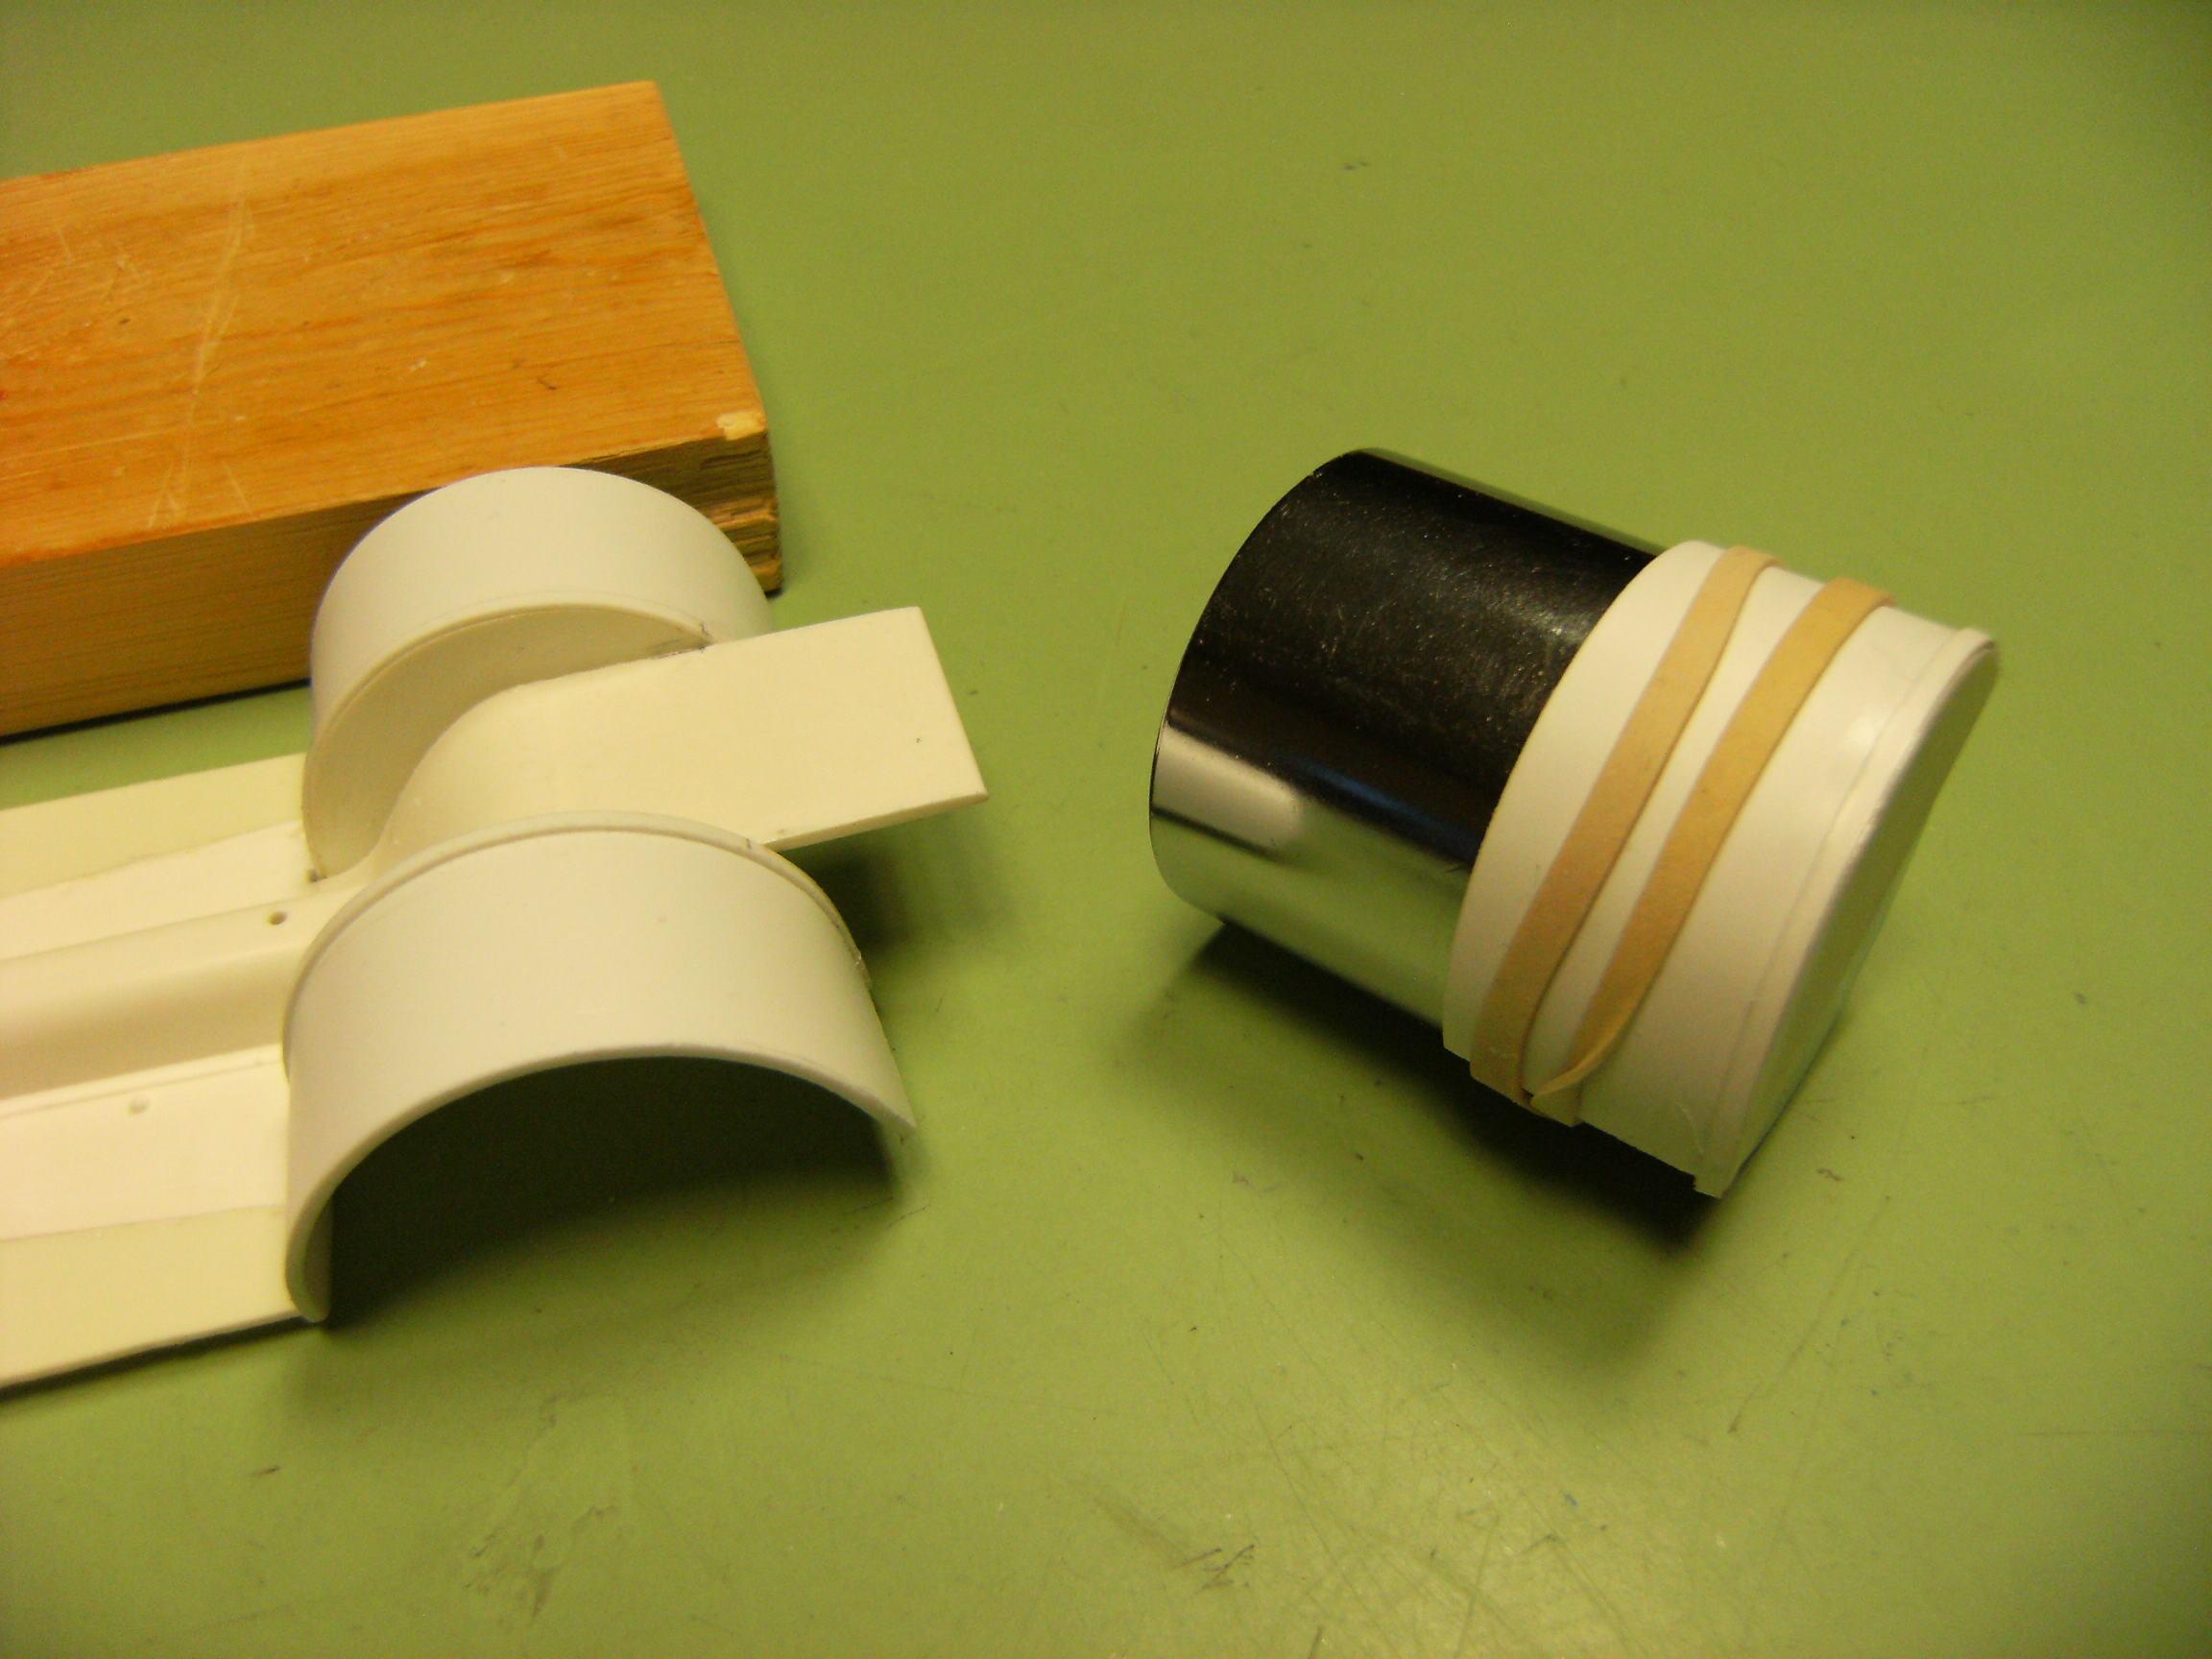
To determine how much I had to cut out of the chassis to fit the MPC slicks I used an old painted chassis from that box of parts. Used the back of a no. 11 blade to scribe along the wheel well to cut loose the inside edge. Then I measured and cut the chassis pan to fit the slicks. I found a rear axle I could narrow to see how things fit.
-
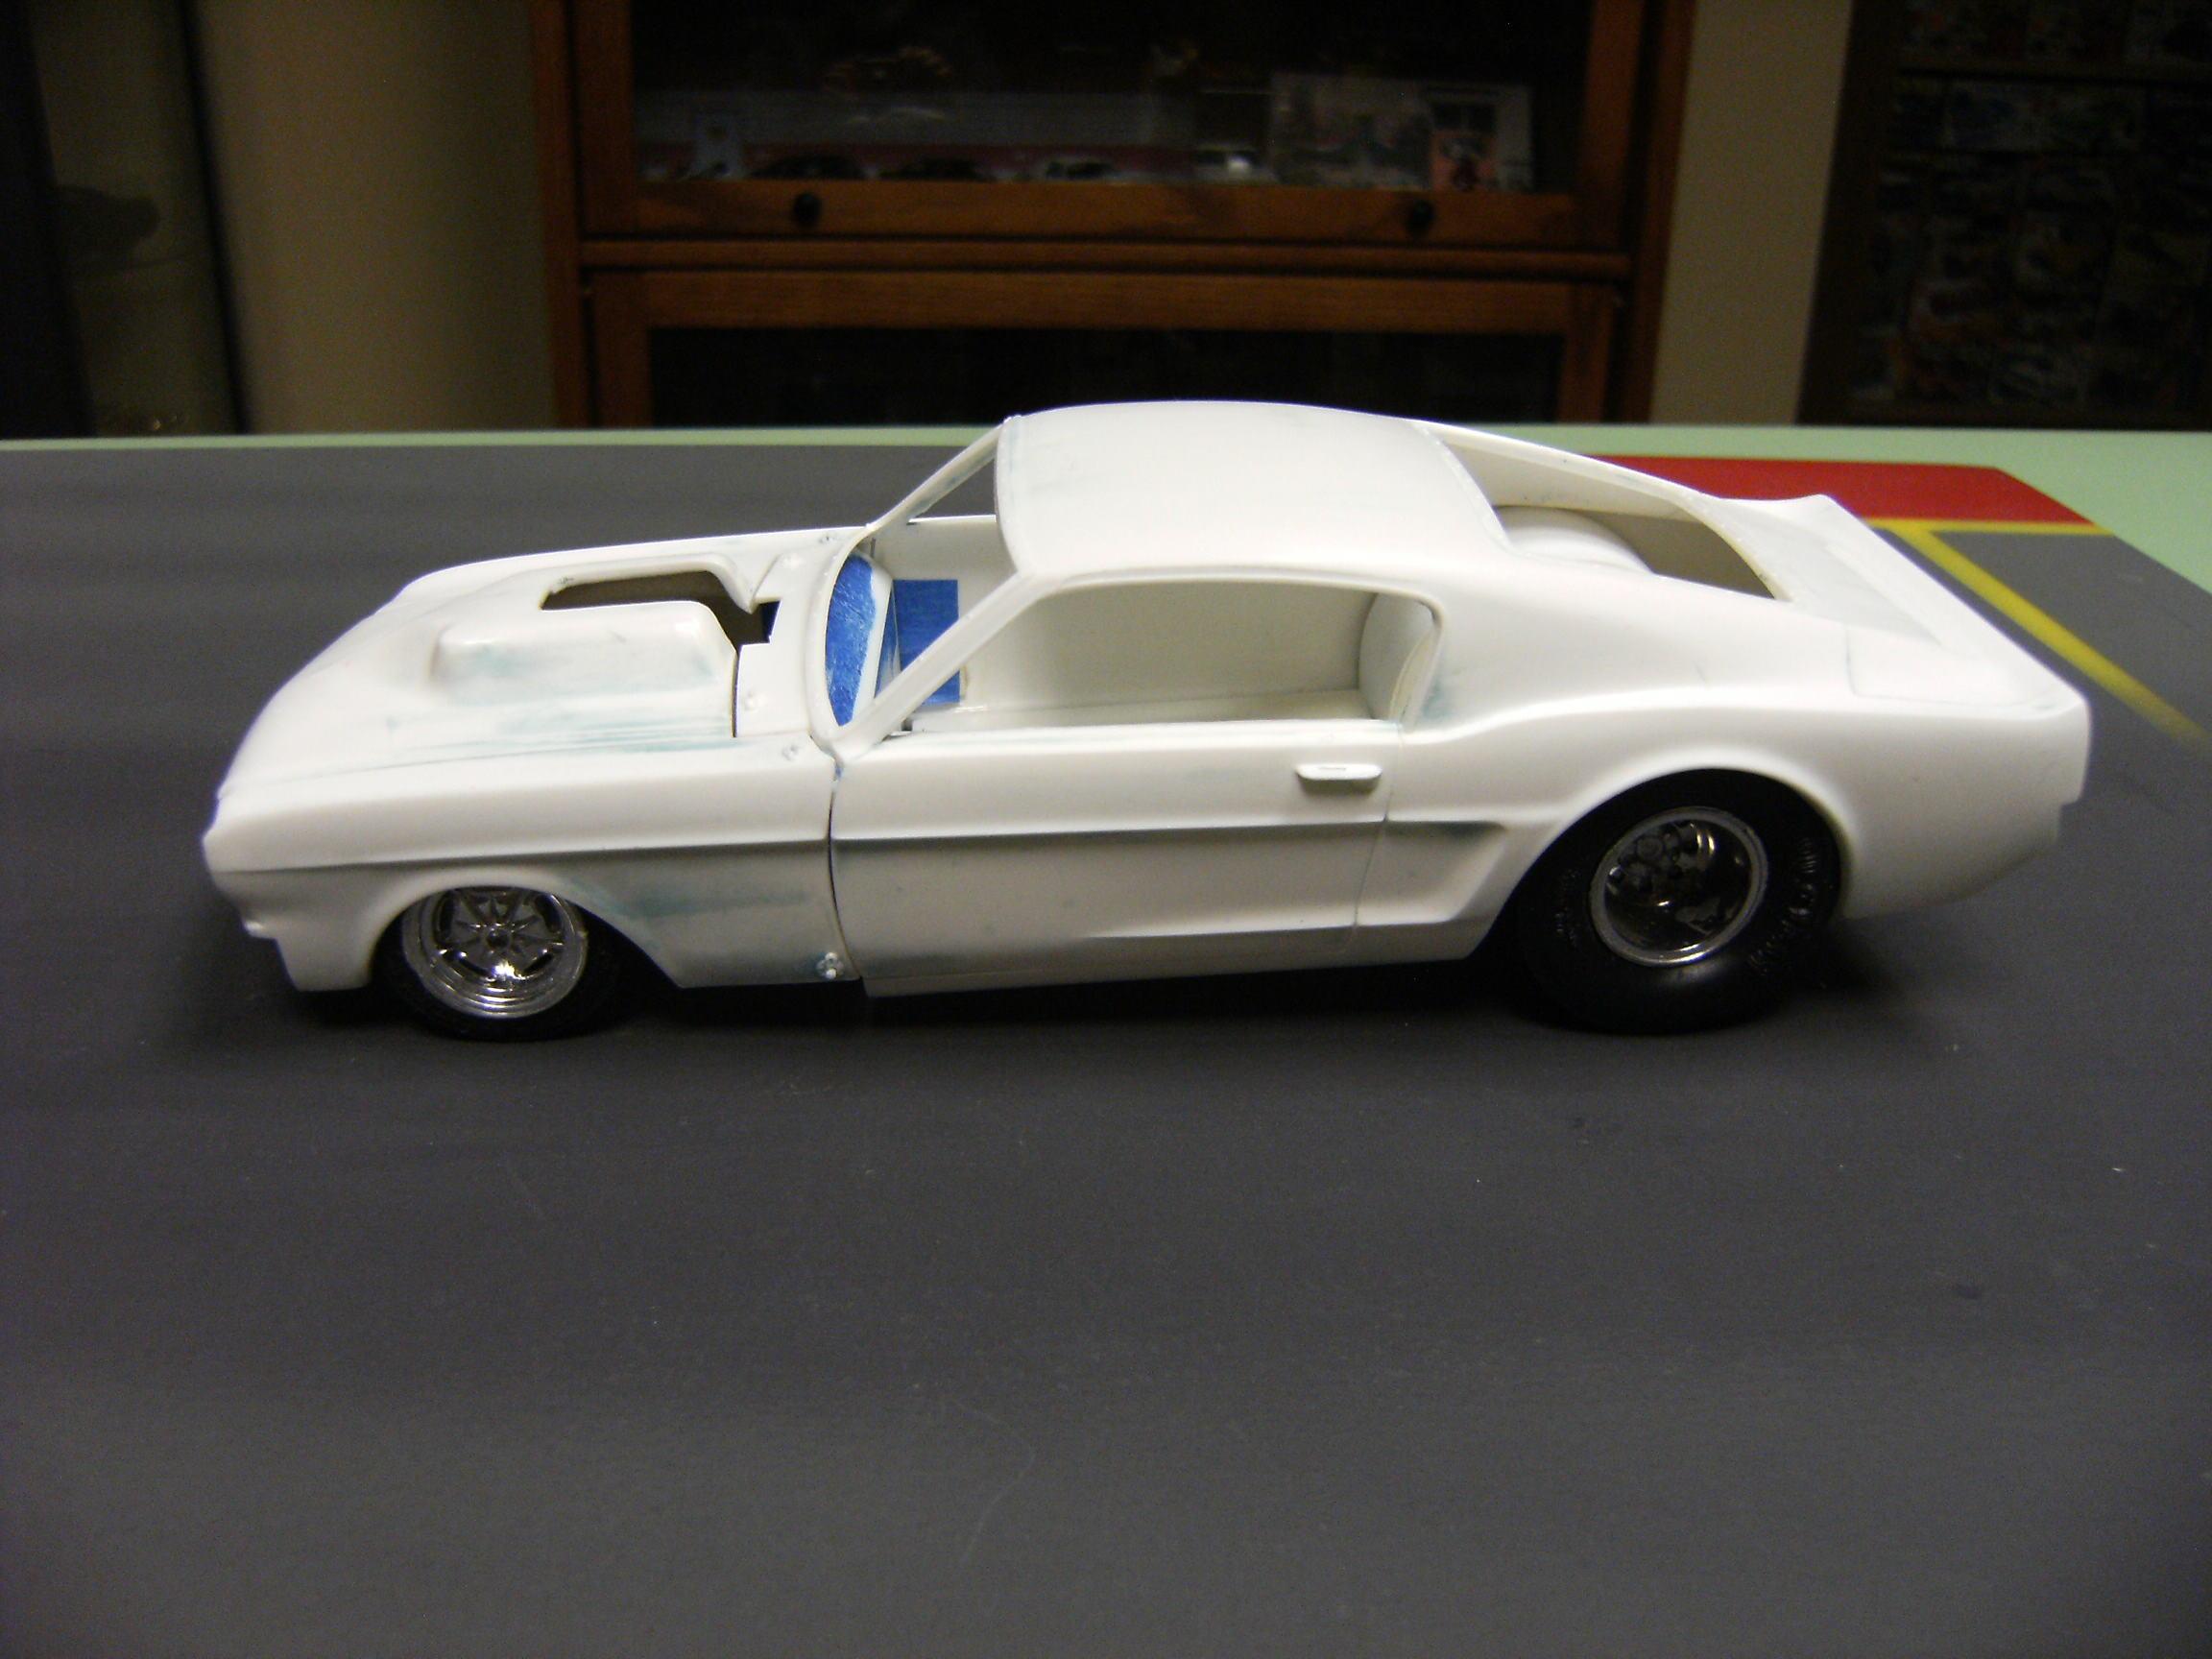
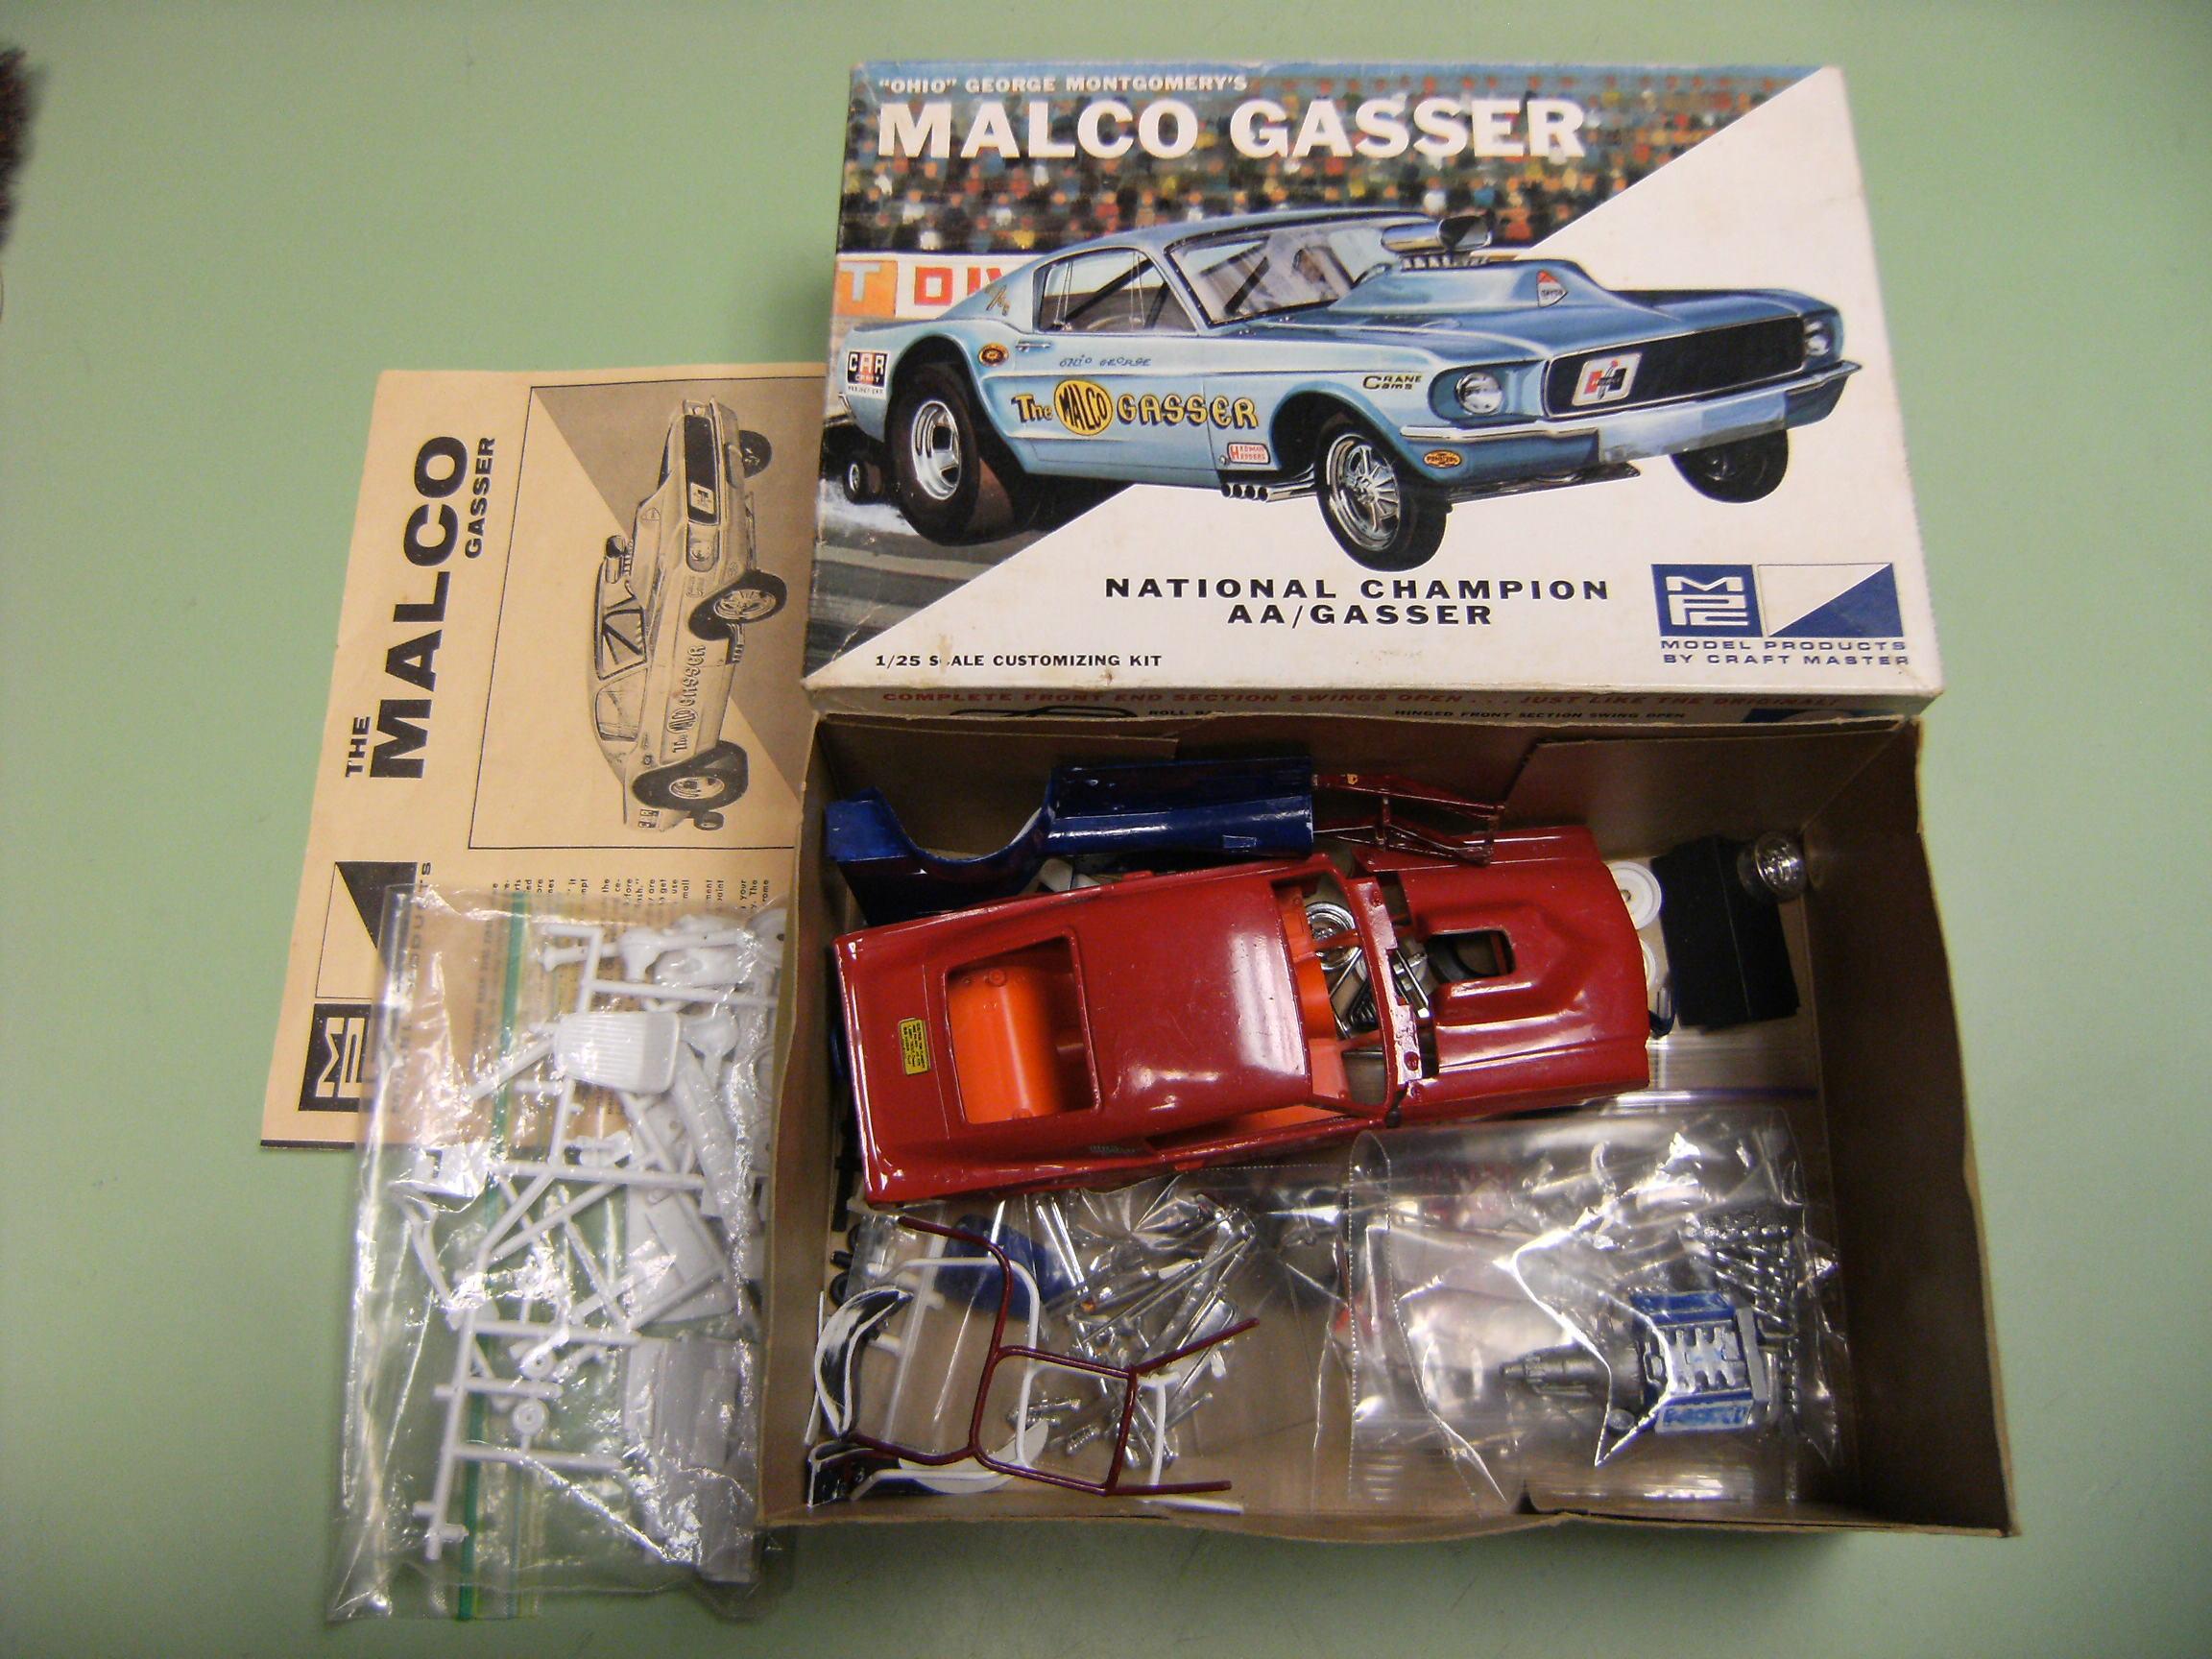
Hi all, I have been playing around with a box with two Malco Mustangs from the way back and falling apart. One body went in the dunk tank and then I started mocking up a stance with MPC dragster wheels and slicks (these are out of an old Garlits car). Looks like this: Here is the box of old parts I will work with. The front fender unit and the body really don't line up very well in this example. The red one in the box fits up better, but I already stripped the mockup body so I will make it work. I may just glue the fenders to the body to keep everything lined up and keep things simple so I can finish sooner than later. Here you see I glued some tabs to the body to line up the front fenders. I have also sanded the tops of the fenders up front to taper them. These old bodies had almost square front edges.
-
Who doesn't love a mock-up? Let's see yours!
mvadrag replied to Belairconvertable's topic in WIP: Model Cars
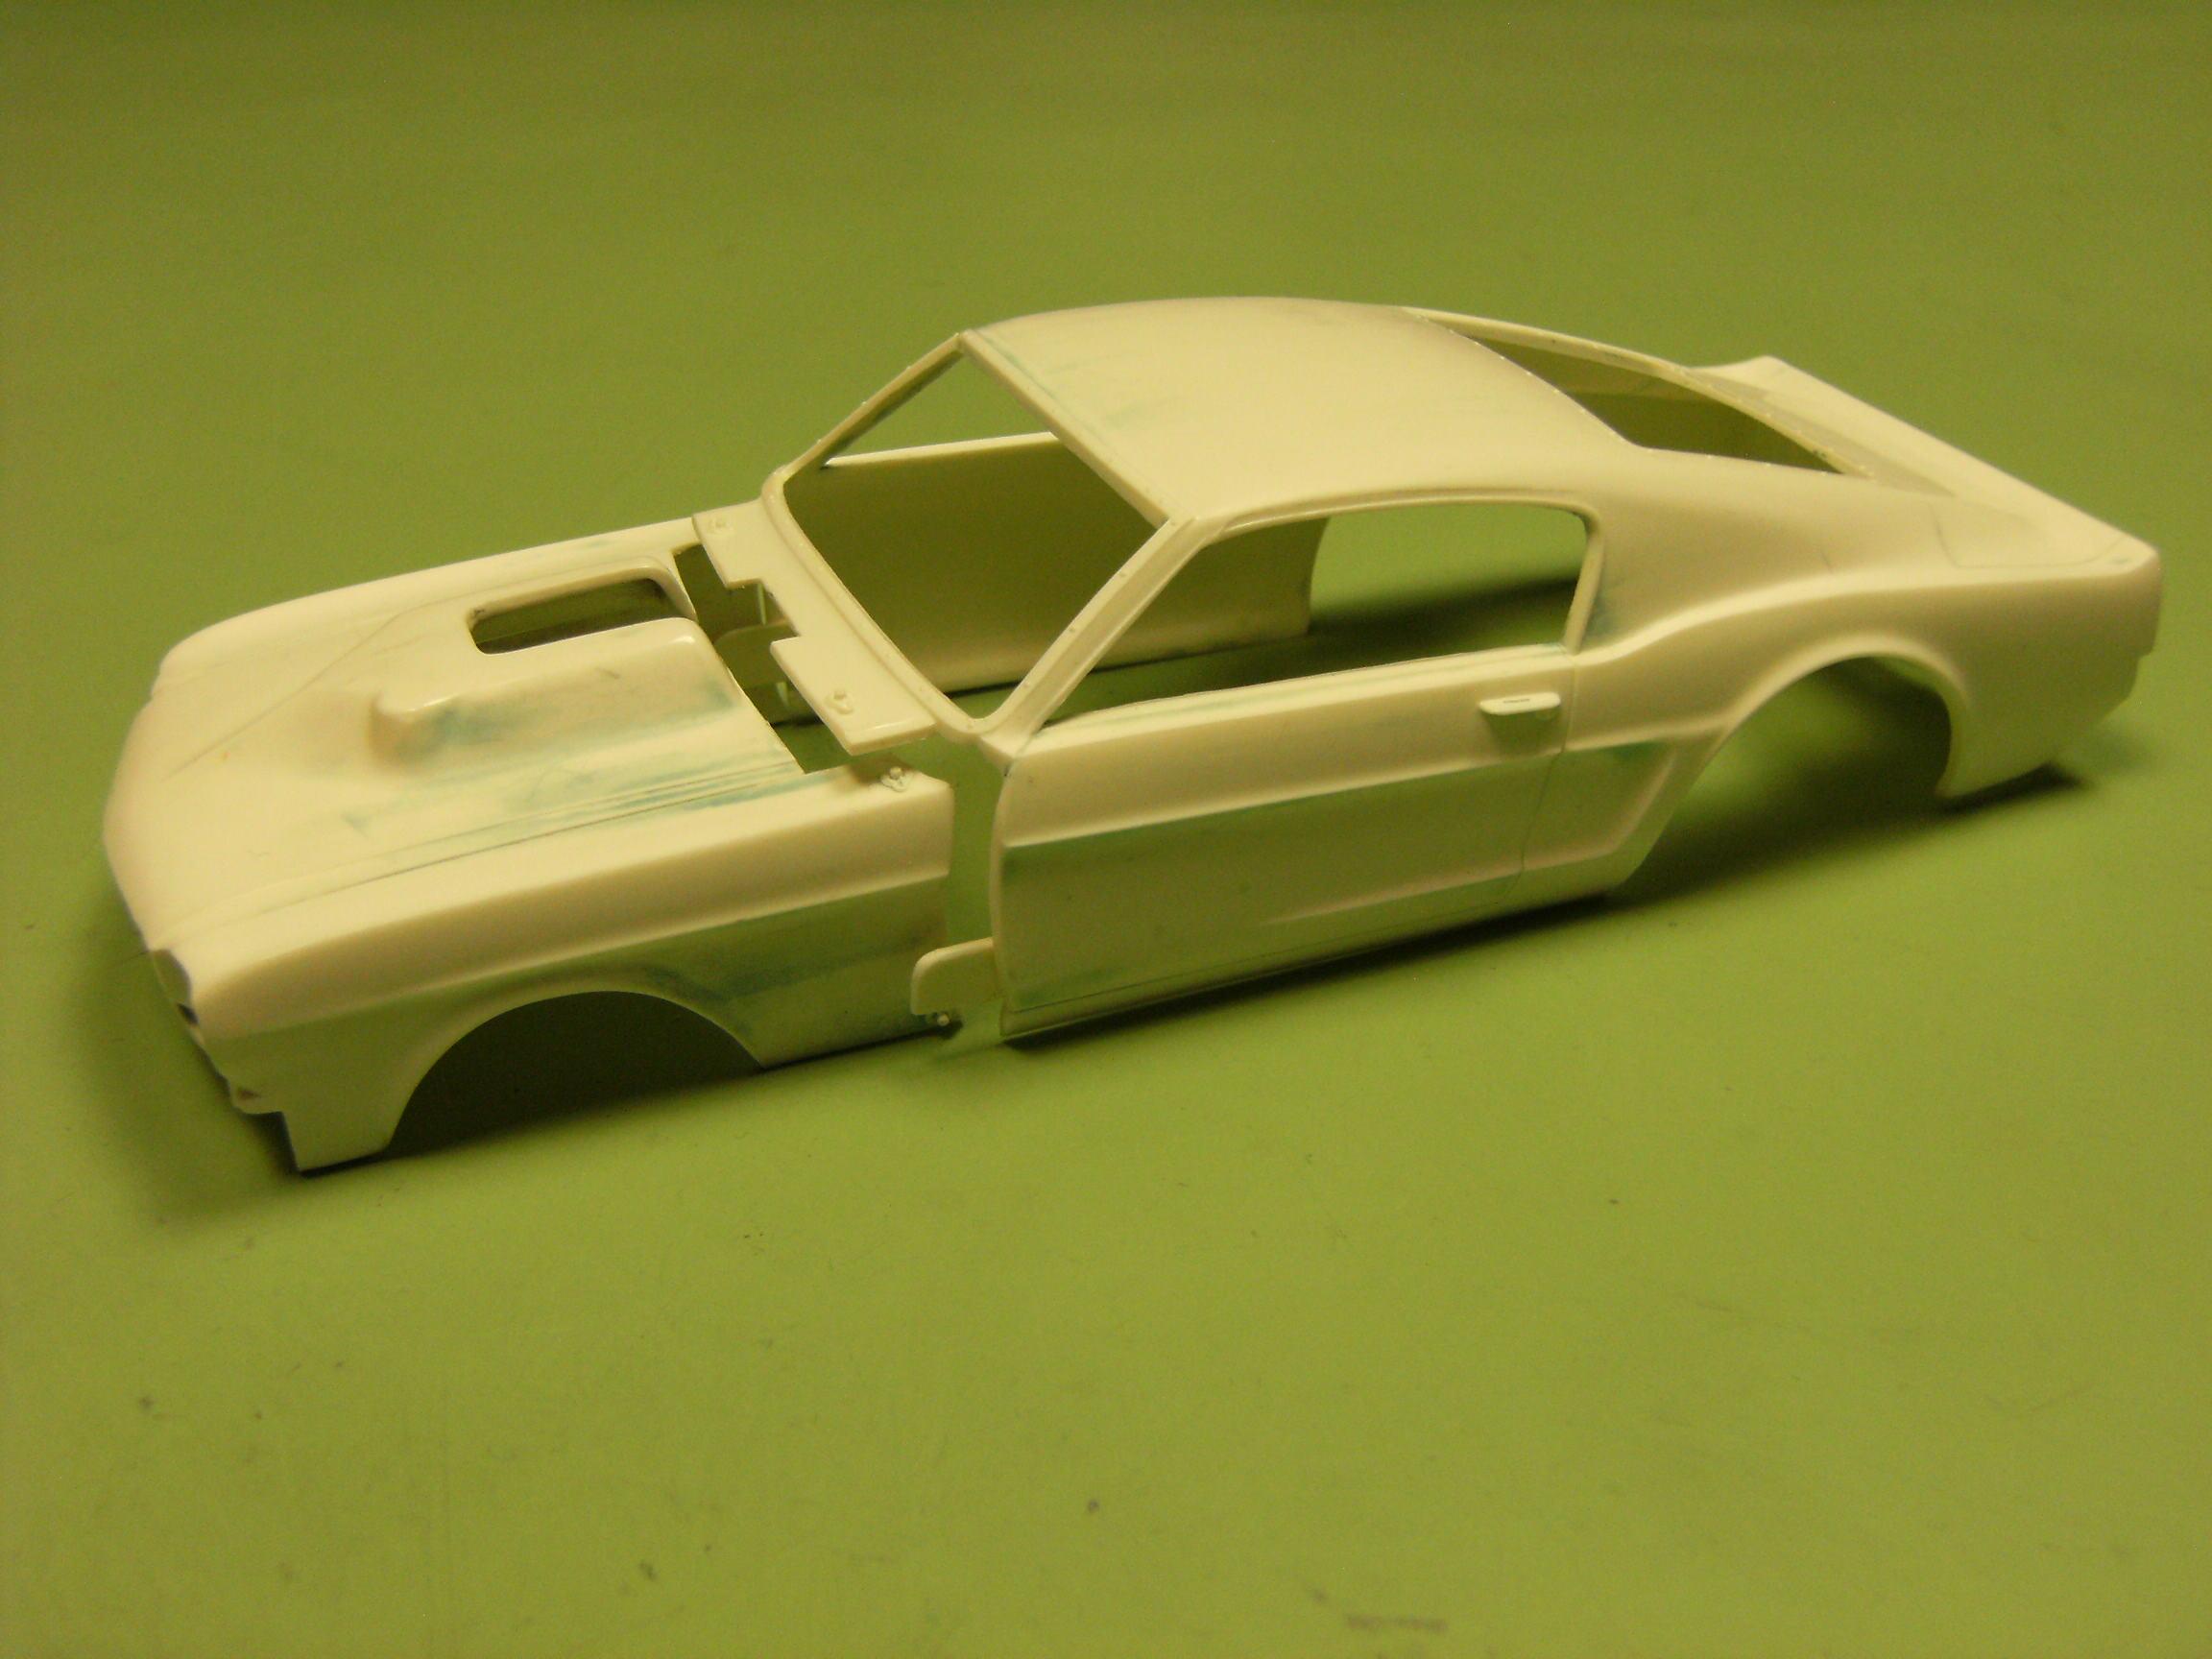
I am trying for a more modern stance for MPC's old Malco Gasser Mustang with the wheels and tires tucked inside the lowered body. I still want the zoomies coming out under the front fenders like the gasser.
-
With the release of the new AMT Time Machine Chevelle, an enterprising modeler can make the hard to find Olds F-85 funny car. The Chevelle and Olds share the same chassis (the interior tub is a pinch wider than the Chevy II version). You have to alter the Olds convertible wheelbase to fit the chassis. This is an original (restoration?), but not completely out of box. Front wheels are wrong for this.
-
I have one of these, 1981 vintage Night Stalker. Black plastic... yuck! I like what you are doing with this, should come out cool lookin'. I'll watch this progress.
-
I found this in my stash.
-
Street Outlaws Endgame
mvadrag replied to Snake45's topic in General Automotive Talk (Trucks and Cars)
That's the way I watched Fastest in America, too. My wife didn't want to see Street Outlaws two nights in a row, so I DVR'd the Tuesday night shows to watch later. I fast forwarded through the "getting A to B" stuff and all the JJ talking to the girls about strategy looking for the burn outs, then I would watch the races to see who won. On the End Game episodes, it is interesting that only JJ focused on getting his Chevy II out to grudge race, where the rest of them were about building the car. I laughed at JJ building the engine on the garage floor, and replacing the bearings and rings without showing them measuring anything. Lots of editing? The Chevy II looked more sleeper white with primer spots and chrome than the final clear coated primer with blacked out trim.

.JPG.954b185576dace52aee60e809a1d6122.JPG)