
SteveG
-
Posts
1,212 -
Joined
-
Last visited
Content Type
Profiles
Forums
Events
Gallery
Everything posted by SteveG
-
Sneak peek .... Lindberg Charger Police Package
SteveG replied to SteveG's topic in Car Kit News & Reviews
Thanks Aaron, Well, it's not pefect but pretty close. That photo is of the exact car I modeled it after as I recognize the 1247972 CA exempt plates. CHP is expanding there use of the Chargers. Last year they bought 88 of the '08 model, all plain Jane's in standard colors and full wheel covers for mostly undercover work and some training usage. They also added some slick top '09 Black and Whites to the fleet for standard patrol. I heard that there's 12 of them. I have photos of at least seven of them that I found doing my research. This biggest complaint I heard is the lack of trunk space. Still as far as I can tell there's only one all white CHP "Ghost Charger". -Steve -
Sneak peek .... Lindberg Charger Police Package
SteveG replied to SteveG's topic in Car Kit News & Reviews
There will be at least two wheel options, the Steelies with separate center cap plus the plain 5 spoke covers although they will molded as a separate wheel. There will probably be a leftover set of alloys included too. I'll try to post some more photos later. The tail lamps should be clear, I painted mine to simulate the 09 style. Price should be in the $25.00 or less range I'm told. -Steve -
.... built from a combination of Lindbergs first round test shot and prototype resin parts. I still have to add the spotlights and antennas. The spotlights are included, the antennas will be from scratch. I'll probably add a push bar mounted siren from my parts box. The kit also comes with push bar mounted lamps but I left them off this version. The decals are from my own stash, there are no plans for Lindberg to do a CHP version at this time but it's possible. The Vision bar is included with the kit along with seven others. I painted the lenses as they most likely will be molded clear. I modeled this it after a real CHP unit known as the "Ghost Charger" because of its all white paint scheme. It should be on display at the NNL East hopefully with some of the latest round of test shot parts. there are still a couple of revisions to be made but it's getting real close to being ready. I know everyone been asking what's taking so long but consider that they've added over 75 new parts to this version and that puts the current count at over 200 pieces. I believe it will be worth the wait. Stay tuned .... Steve
-
Here's some photos of it from the Stevens International booth at I-hobby Expo last fall. Note the disclaimer on the sign in this photo. It's interesting they diplayed it with all the correction markings and the short shot on the left windshield post. Must have been the only copy of it state side at the time. -Steve
-
Very nice work !!! If you can build replica stock I guess I'm going to have to Hot Rod something ... This is pure speculation but I wouldn't be surprised if Revell does the 210 version at some point too.
-
The plastic version of the '68 Bullitt kit has the same interior as the GT. The diecast Bullitt kit is the only one that has the "more correct" interior, it's still not totally correct either as one of the rear seat cushions (I forget which one) still has the 67 pattern. That's as close as you'll get though with the Revell tooling. Feel free to contact Revell but I was recently told by a very reliable source that Revell has already heard about the issue and is now looking into how it happened. Beyond that I don't have any answers but at least we now know they got the message. -Steve
-
A number of departments ran 57 Chevy's with the Police Package with engines ranging from the Blue Flame six to the Power Pack 220 hp 283. The Ohio State Patrol used the V8 150 2dr sedans and Toronto's used the six. In fact the 2dr sedans were the Standard Police Package and the 4dr sedan and wagons Police Packages were special order. I built this OSP replica from an old AAM resin kit. The Revell kit would be perfect for this, all you need besides the Police Equipment is a back seat. Multi-carbs and F-I would have been passed on due to higher maintence costs but you could always do a phantom. A four door conversion would be pretty easy as they shared the same roof lines and wheelbases. Chicago and the Military both used 57 Chevy 4 door sedans to name two. -Steve
-
Well done guys !!! I hope to get my hands on one in a couple of days as I've have one on order through my LHS. -Steve
-
Thanks Len, it's one of my favorite quotes and a great movie. The box art shows the correct factory dummy plates, it's just a circle with a small stamped 4 point star in the center. It goes in place of the dagmars which are rarely seen on the 150 series cars. They should be molded on the bumper if not separate. I'd be really dissapointed if they changed that as they looked to be correct on the early test shot I saw in Chicago. -Steve
-
Are the dummy plates included as separate parts to replace the dagmars or are they molded on the bumper? -Steve
-
Nice work on the street version Len, The 283ci Turbo-Fire 4bbI V-8 engine your refering to is commonly refered to as the "Powerpack 283" which had 220 hp. Here are all the other engine choice for the '57 Chevy line up. 235ci Blue Flame lbbl 6cyl-140 hp 265ci Turbo-Fire 2bbl V-8-162 hp 283ci Super Turbo-Fire 2bbI V-8-185 hp 283ci Turbo-Fire 2x4bbl V-8-245 hp 283ci Turbo-Fire 2x4bbl V-8-270 hp 283ci Turbo-Fire FI V-8-250 hp 283ci Turbo-Fire FI V-8-283 hp (solid lifter) There's a Ton of great information out there on the 55-57 Chevy's. Here's an excellent source for more information. Tri-Five.com -Steve
-
Very nice update guys !!! One question, how were the seat belts done? Steve
-
collectors choice special edition- 1961 Impalas
SteveG replied to MR BIGGS's topic in Car Kit News & Reviews
My information may be old but that's what I was told late last year. Seems funny they would be in the current catalog and also be an exclusive but I guess anythings possible. Steve -
collectors choice special edition- 1961 Impalas
SteveG replied to MR BIGGS's topic in Car Kit News & Reviews
Sorry about the quality but this is the best photo I have of what's actually in the box. -
collectors choice special edition- 1961 Impalas
SteveG replied to MR BIGGS's topic in Car Kit News & Reviews
I'm pretty sure both of those kits are scheduled for normal distribution, they were originally scheduled for release late last year. -Steve -
I'm certainly not implying that Lindberg's 72 Challenger is a better kit overall. But it's the only other 1/25th scale hardtop kit currently out there to compare it to body wise. I think the overall body shape is more accurate then Revells although I'm not going to give them much credit for it as Palmer looks to have just coppied an MPC kit body and it's certainly not perfect. No stock hood, soft details, etc .... For what it's worth, I could kit bash the Lindberg Hardtop kit with the AMT kit and have pretty nice model without a lot of work. Clearly the Revell kit is way more detailed but I can't get passed the body shape issues and I don't see any easy way to fix it. I guess I'll wait to see how well Mike's 70 Challenger build up comes out before I pass final judgement. -Steve
-
Here's a few more comparison photos, the Lindberg 72 Challenger is on the left and the AMT is on the right Lindberg kit is on top, the Revell body is noticebly taller. For giggles I parked it next to the AMT 09 Challenger Promo and it's just as big. Maybe Revell got the measurements confused while they tool up their own 09 Challenger kit. While I really like the 68 Mustang GT kit that is also based on a diecast. This one, not so much. It's seems to me like it's lost somewhere between being a 1/24th scale and 1/25th scale kit. I'm having trouble finding the good parts of it, any other thoughts? I do like the sport mirrors with the separate mirror glass. Why does Revell keep having trouble with these E-bodies? Hopefully I'll like the 62 Corvette and the 77 T/A better when they finally come out. -Steve
-
The only item I see missing from this kit to make the Bullitt car is the correct CA license plate decals. JJZ-109 -Steve
-
It is the the updated one, I got it at the the Toledo NNL late last year. I didn't notice the rear wheel openings until you mentioned it and I checked my reference photos and your right, the opening is too tall in the rear. Not a huge error but you may want to email Don some photos. -Steve
-
Bill, Here's a photo of the rear floor area of a beautifully restored 57 Bel Air I took years ago. It's been a while since I researched these cars and I'm talking about stock 57 Chevy's not the SEDCO prepped cars. I'm 99% sure the color represents the factory applied primer which is generally called Red-oxide. Of course no restorer these days would actually use lacquer primer. They would use their mixing system to make the color in paint. There's probably no standard color either as the Red-oxide primer was probably supplied by several paint manufacturers and they all probably had their own shade which could have been more Red or more Brown then the other guys. I guess you can say that we're both right. My suggestion to the builder is to use what you have available that can best match the color. -Steve
-
Excellent update, keep them coming Len and Bill. As far as the floor pan underside, I'm assuming plain old Red-Oxide primer would work just as well if you have it available. I think I still have a nearly full can from the last 57 Chevy I built. -Steve
-
AMT 1960 El Camino revised outdoor photos 3/14/09
SteveG replied to Irvin Arter Jr.'s topic in Model Cars
Nice work Irv !!! I also have a stripped built up '60 El Camino just begging to get restored. I hope mine comes out lookng that good. -Steve -
..... other then a couple of minor touch-ups, I'm calling this one done. It's my '70 Coronet Montville Township Fire Chief's Car. It's built from a Modelhaus kit which I removed the door trim and changed the dash and steering wheel to make it look more like a Municipal vehicle. I also modified the exhaust and added a few pieces that I borrowed from a Johan Police Fury along with several other kits. Special thanks to Brandon VanNess for the custom decals. If your interested in the build up photos just follow the link below. Thanks for looking !!! -Steve 70 Coronet Sedan build up
-
Metal axles has never been a deal breaker for me, probably half of what I build have them whether it's a vintage kit or a Modelhaus resin or whatever. In cases where I want to eliminate them it's never been all that hard. For me the deal breaker is this body shape, as far this kit goes it's very acceptable. Not so much on the 70 Challenger. I bought them both at the same time and I was very dissapointed when I opened the Challenger. -Steve
-
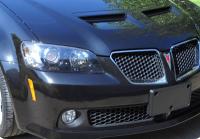
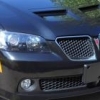
To answer a couple of questions, I hear the interior may have been carried over from Revell's 67 Shelby diecast. Once it's built the metal axles are well hidden, they are also carried over from the diecast version. Here's a photo of the kit body compared to a built diecast version. The box art shows the Drag car with two mags on the front and two steel wheels on the rear and I guess that's how the Tasca cars were build although my refence photos show a deeper dish steel wheel and the kit wheel looks shallow to me. This car has chrome rear while other were painted and others had four mags. -Steve