alan barton
-
Posts
2,105 -
Joined
-
Last visited
Content Type
Profiles
Forums
Events
Gallery
Everything posted by alan barton
-
Yep, like 'em a lot! I did something similar recently with the bucket in red, using more of the kit components. They would make great cruising partners! Cheers Alan

-
A semi-period correct 1948 Ford Gasser...(UPDATED w/parts list)
alan barton replied to tim boyd's topic in Drag Racing
So Revell does a chopped 48 and most people think,"Aahh, Sam Barris custom." Tim Boyd comes along and goes - "Cool gasser fodder!" This thing sits soooo right and it wouldn't matter if it was period correct or not! Such a great model Tim, you certainly have the knack! Cheers Alan -
Took some pictures of my latest build, Pro Street '46 Ford
alan barton replied to Kelly Burns's topic in Drag Racing
I missed this as well but, wow, Kelly, you really nailed the Fat Jack look. The instant I saw it I went - Hey, the Fat Jack car! Stance is perfecto! Cheers Alan -
I couldn't have said it better myself! There is a warped part of me that gets more kicks from restoring tragedies than starting with fresh new models of which I have an abundance! Cheers Alan
-
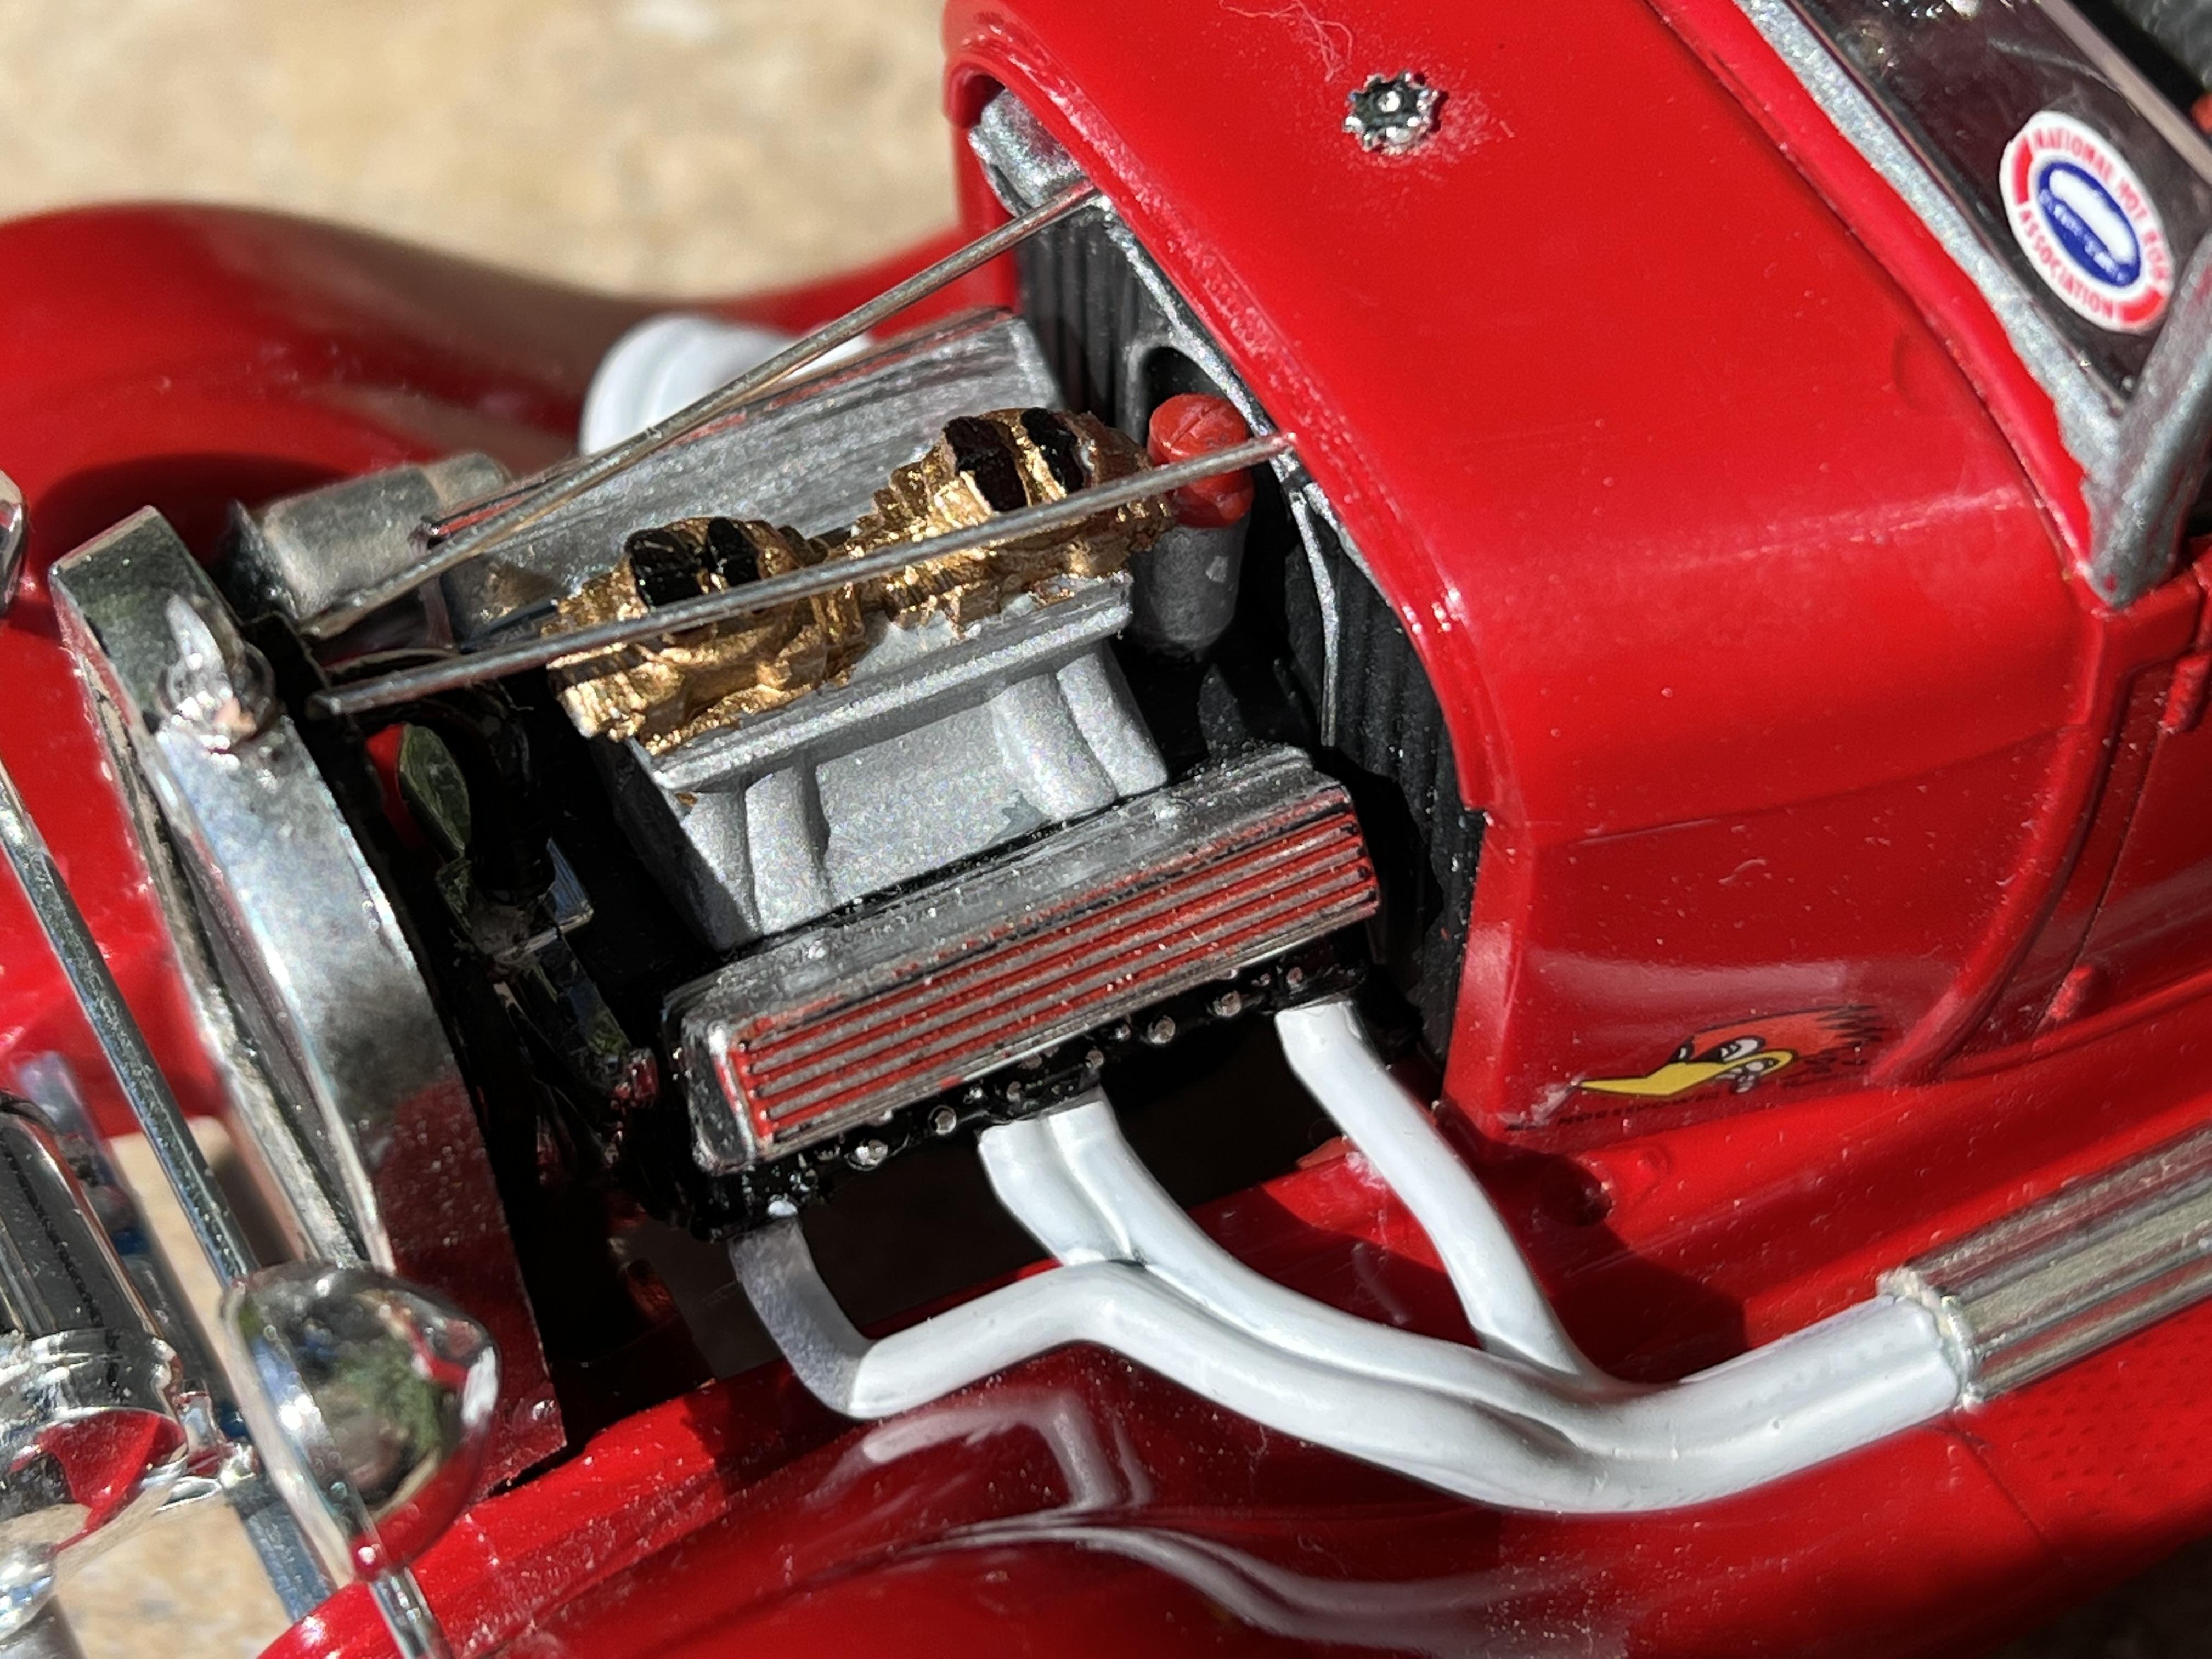
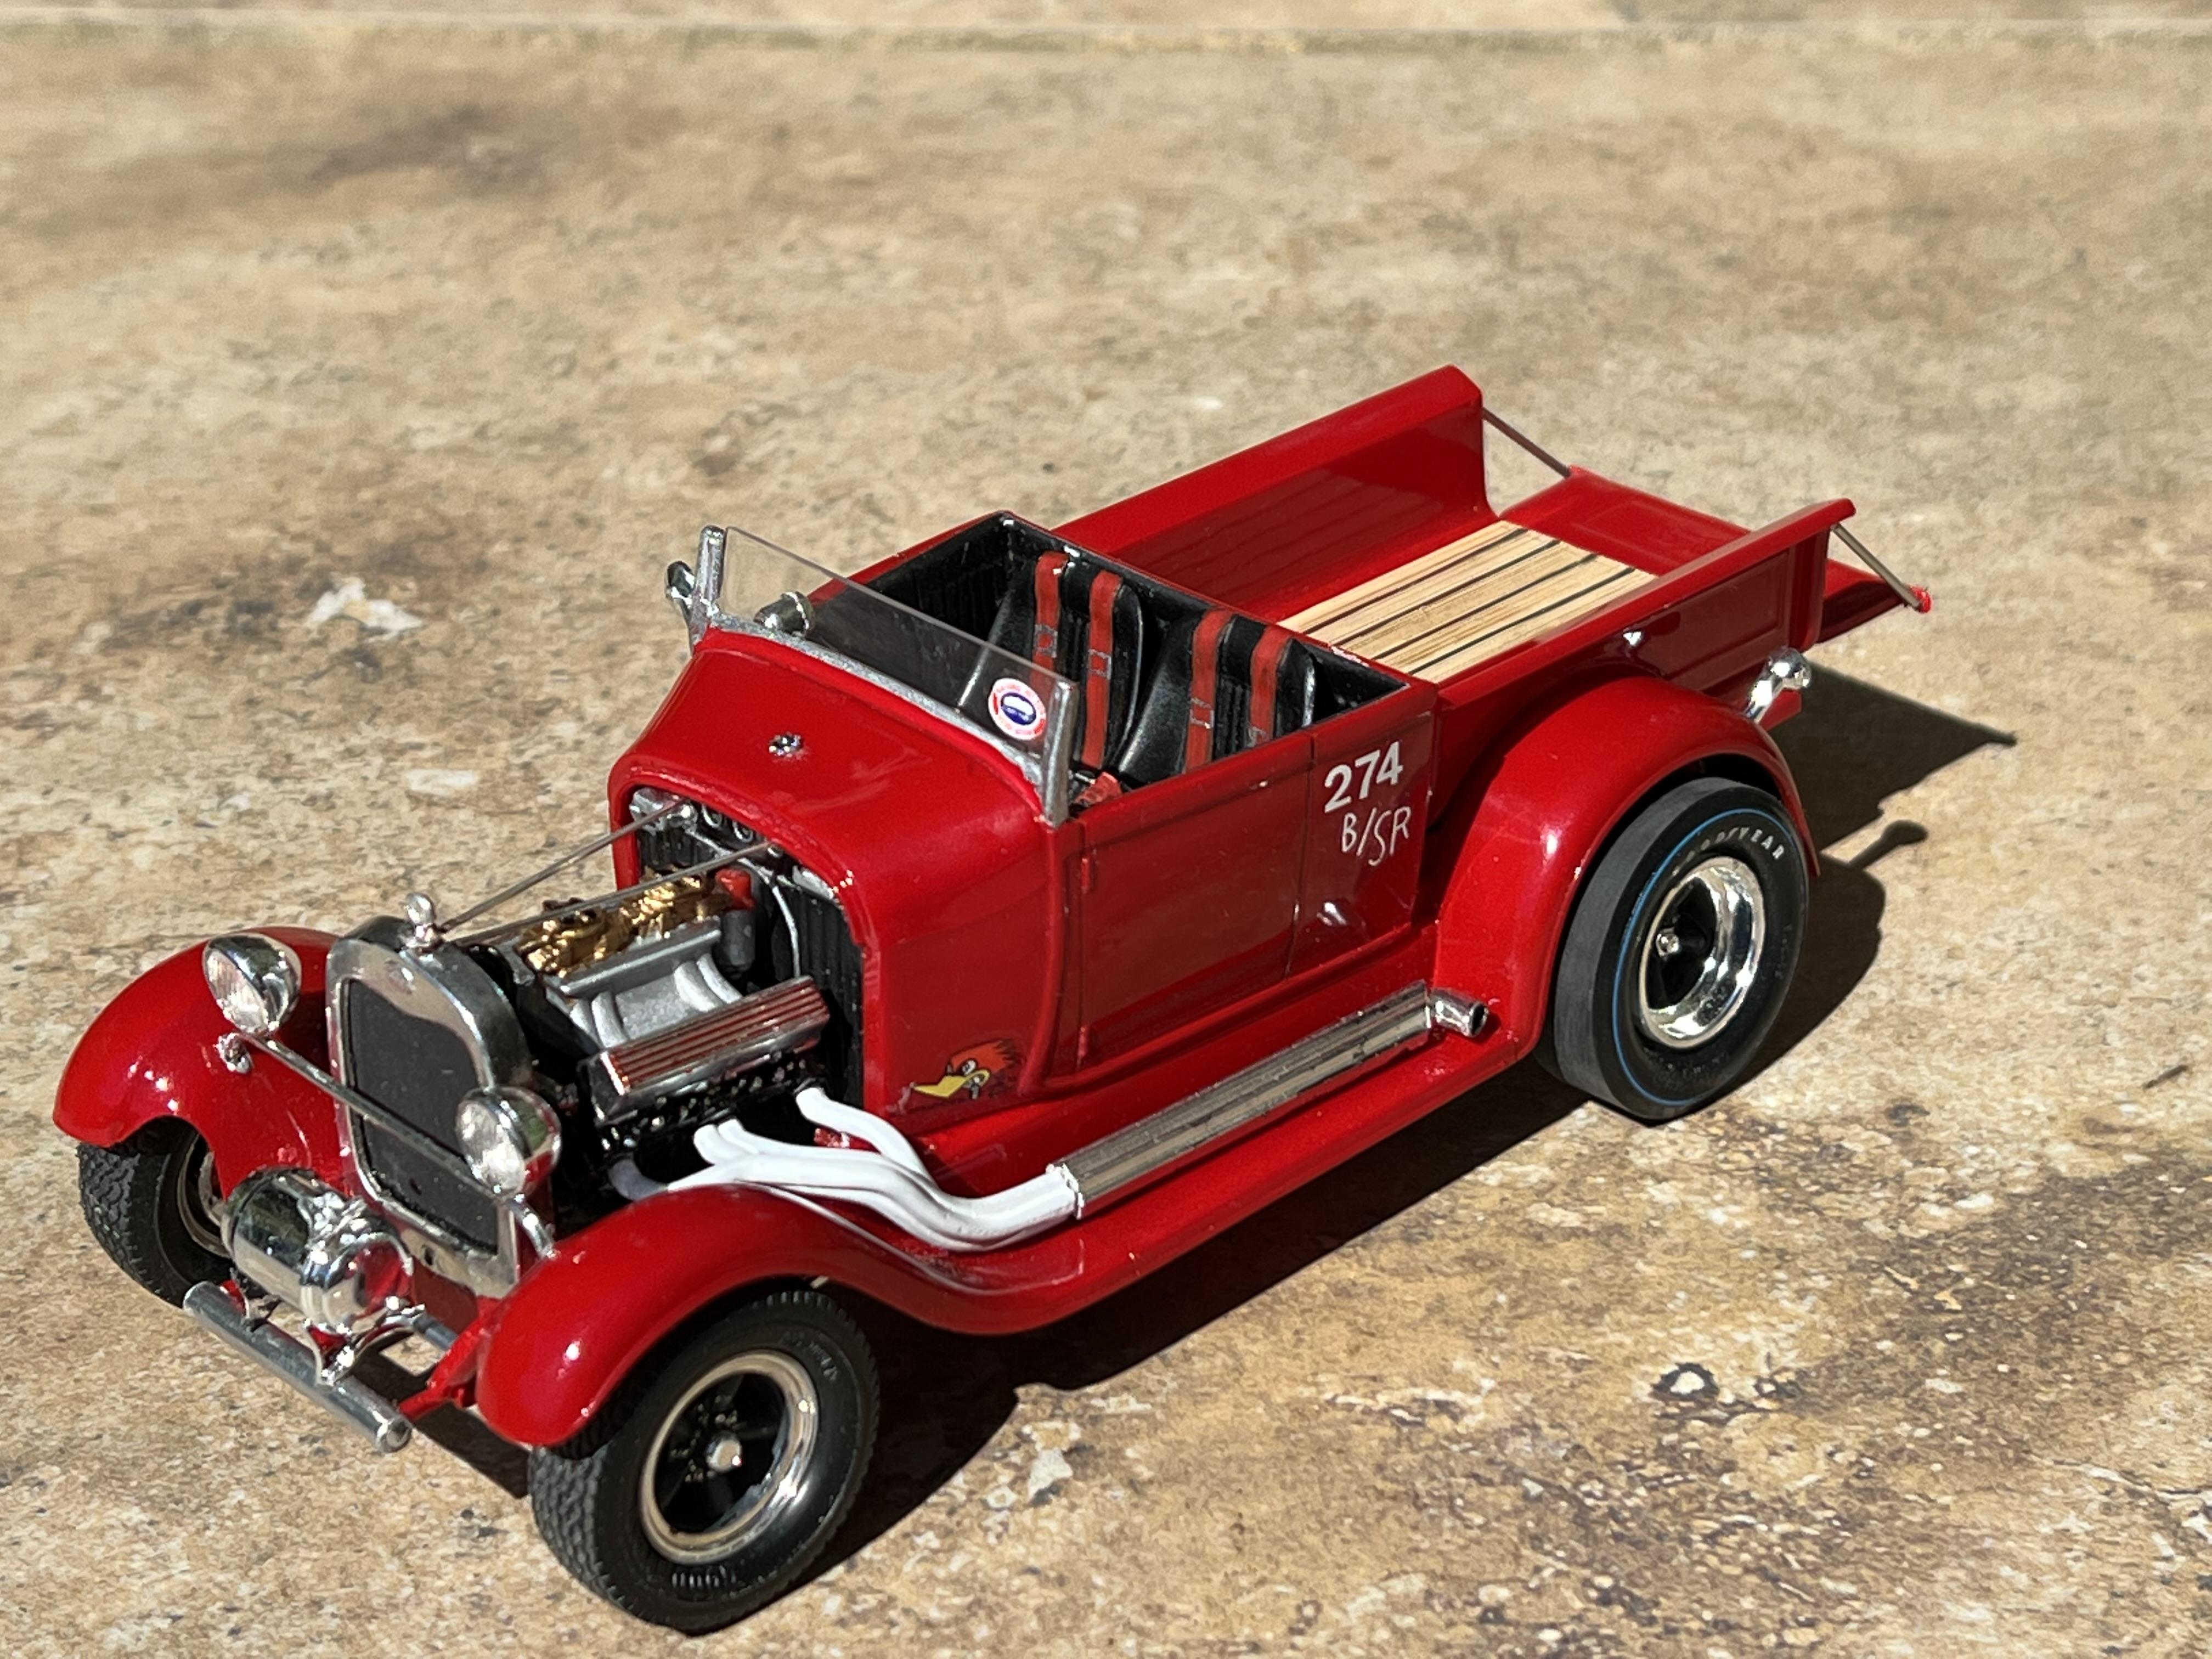
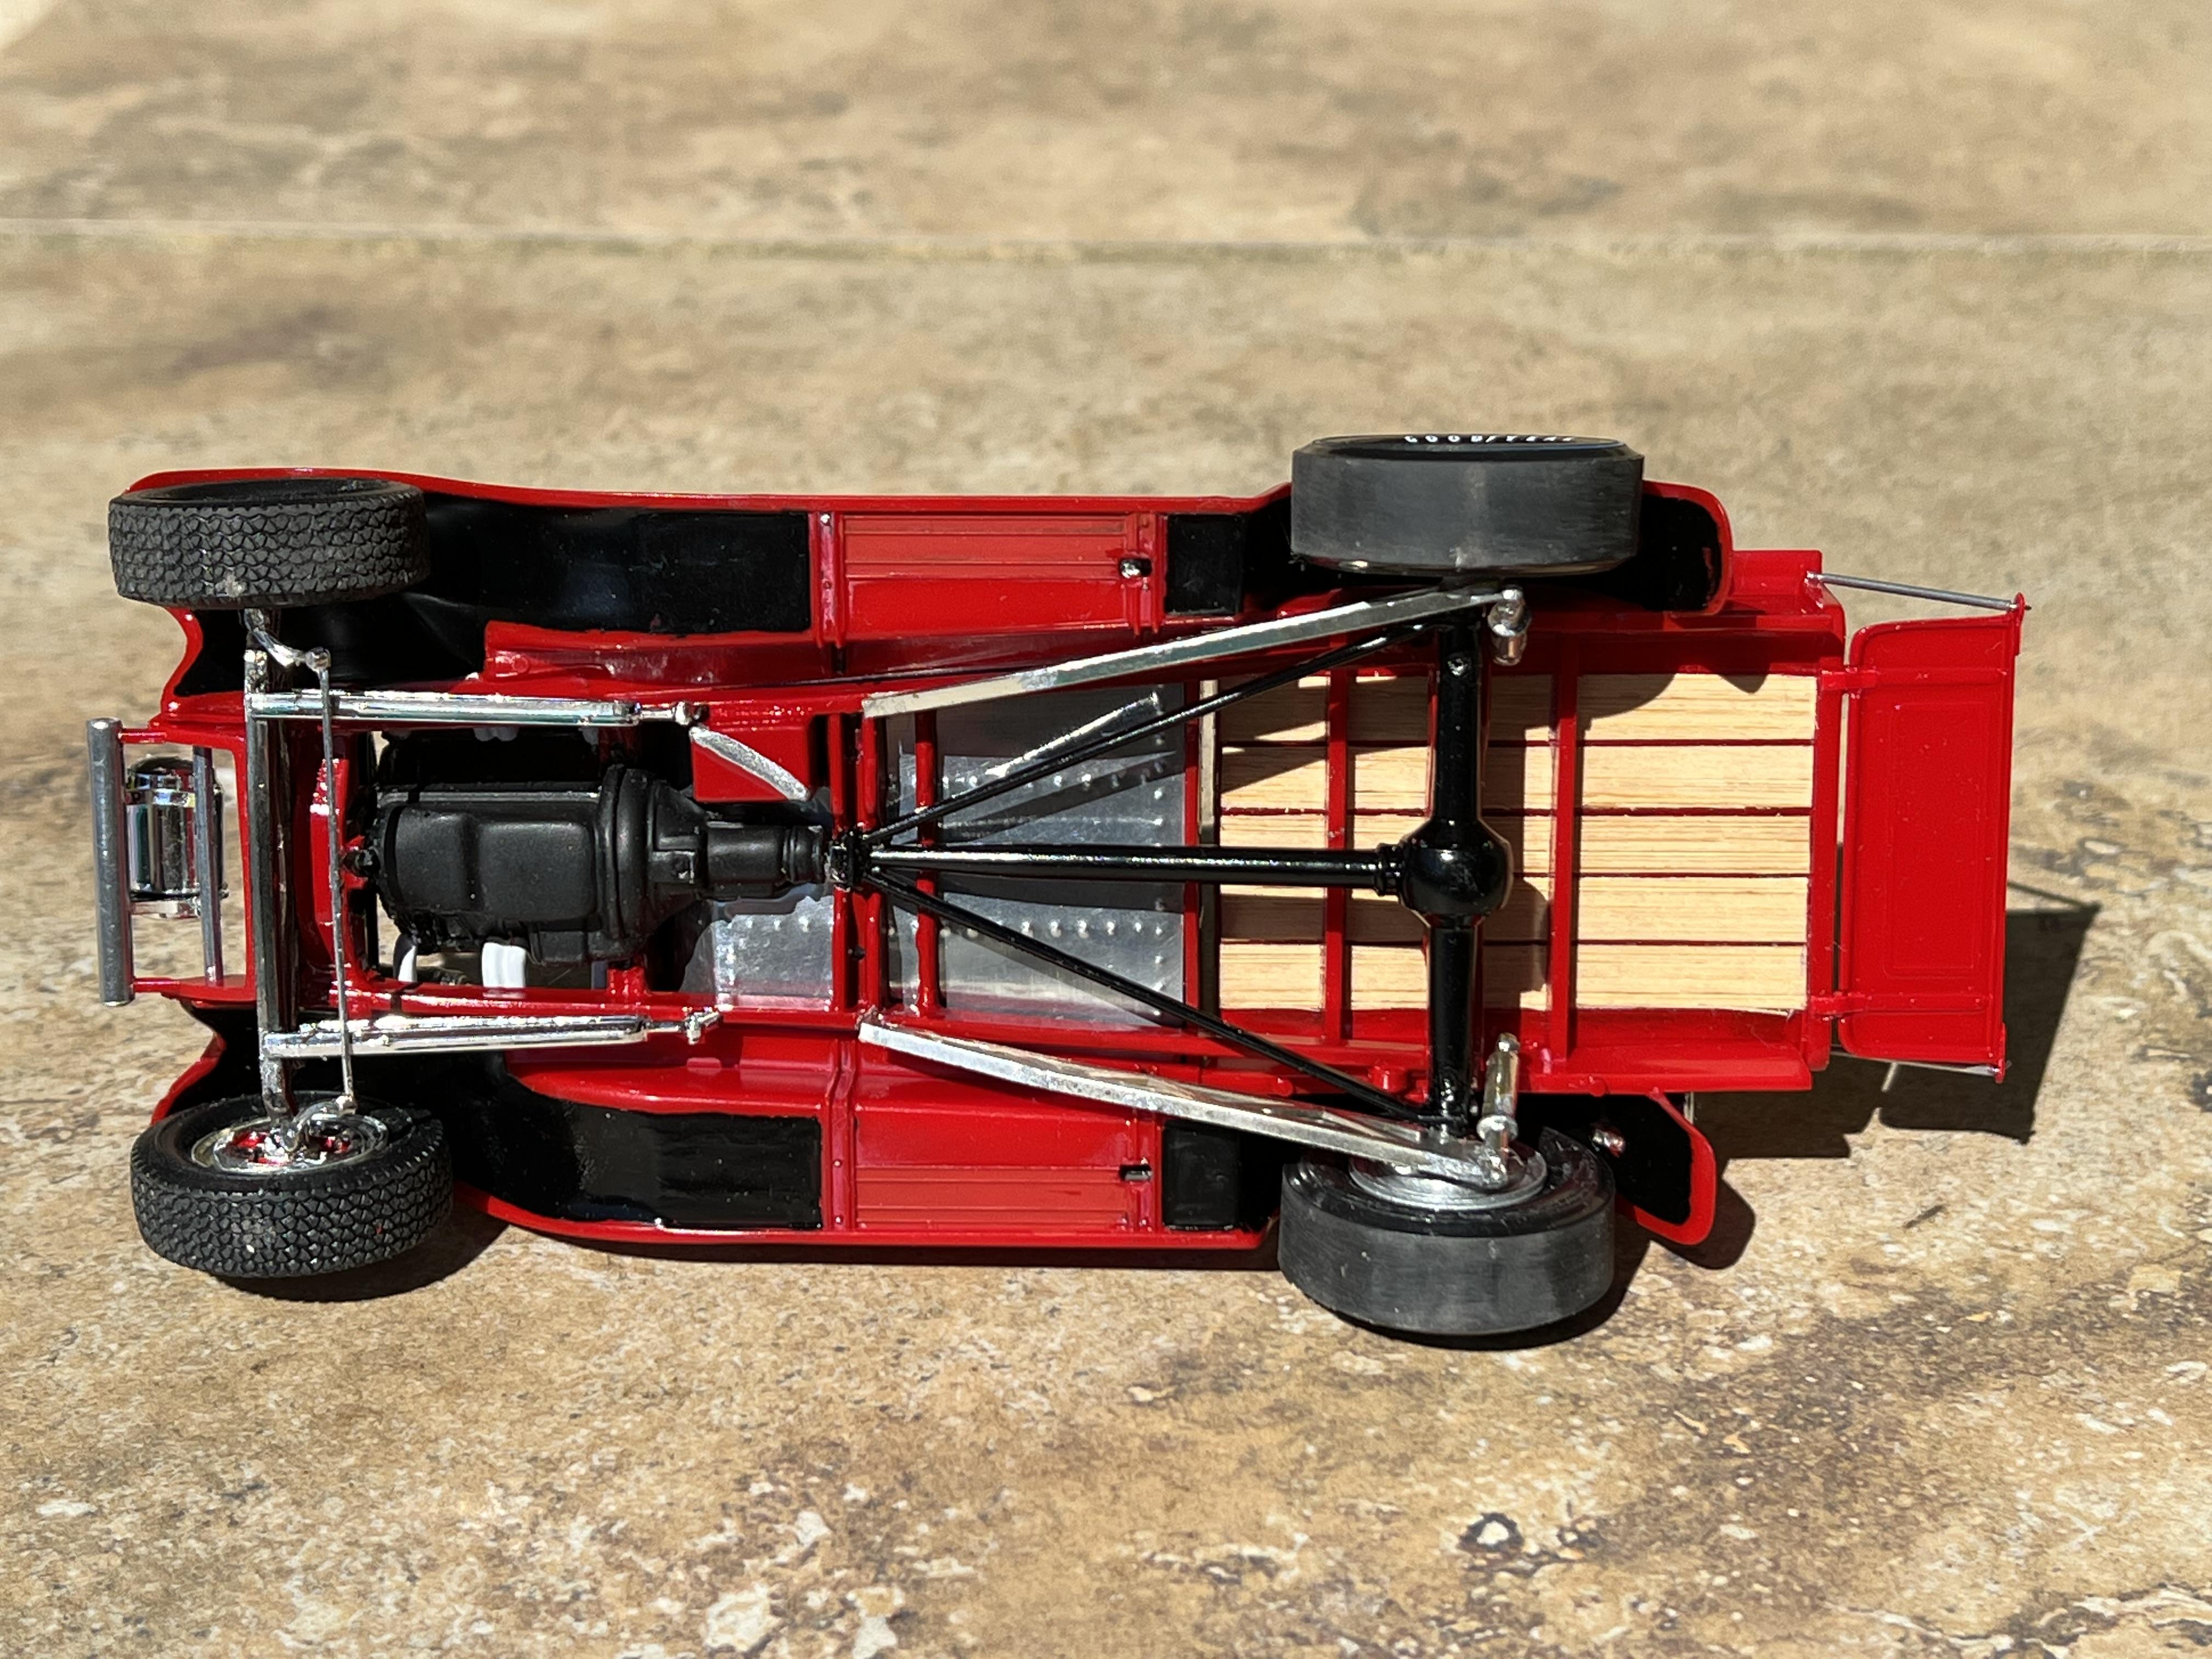
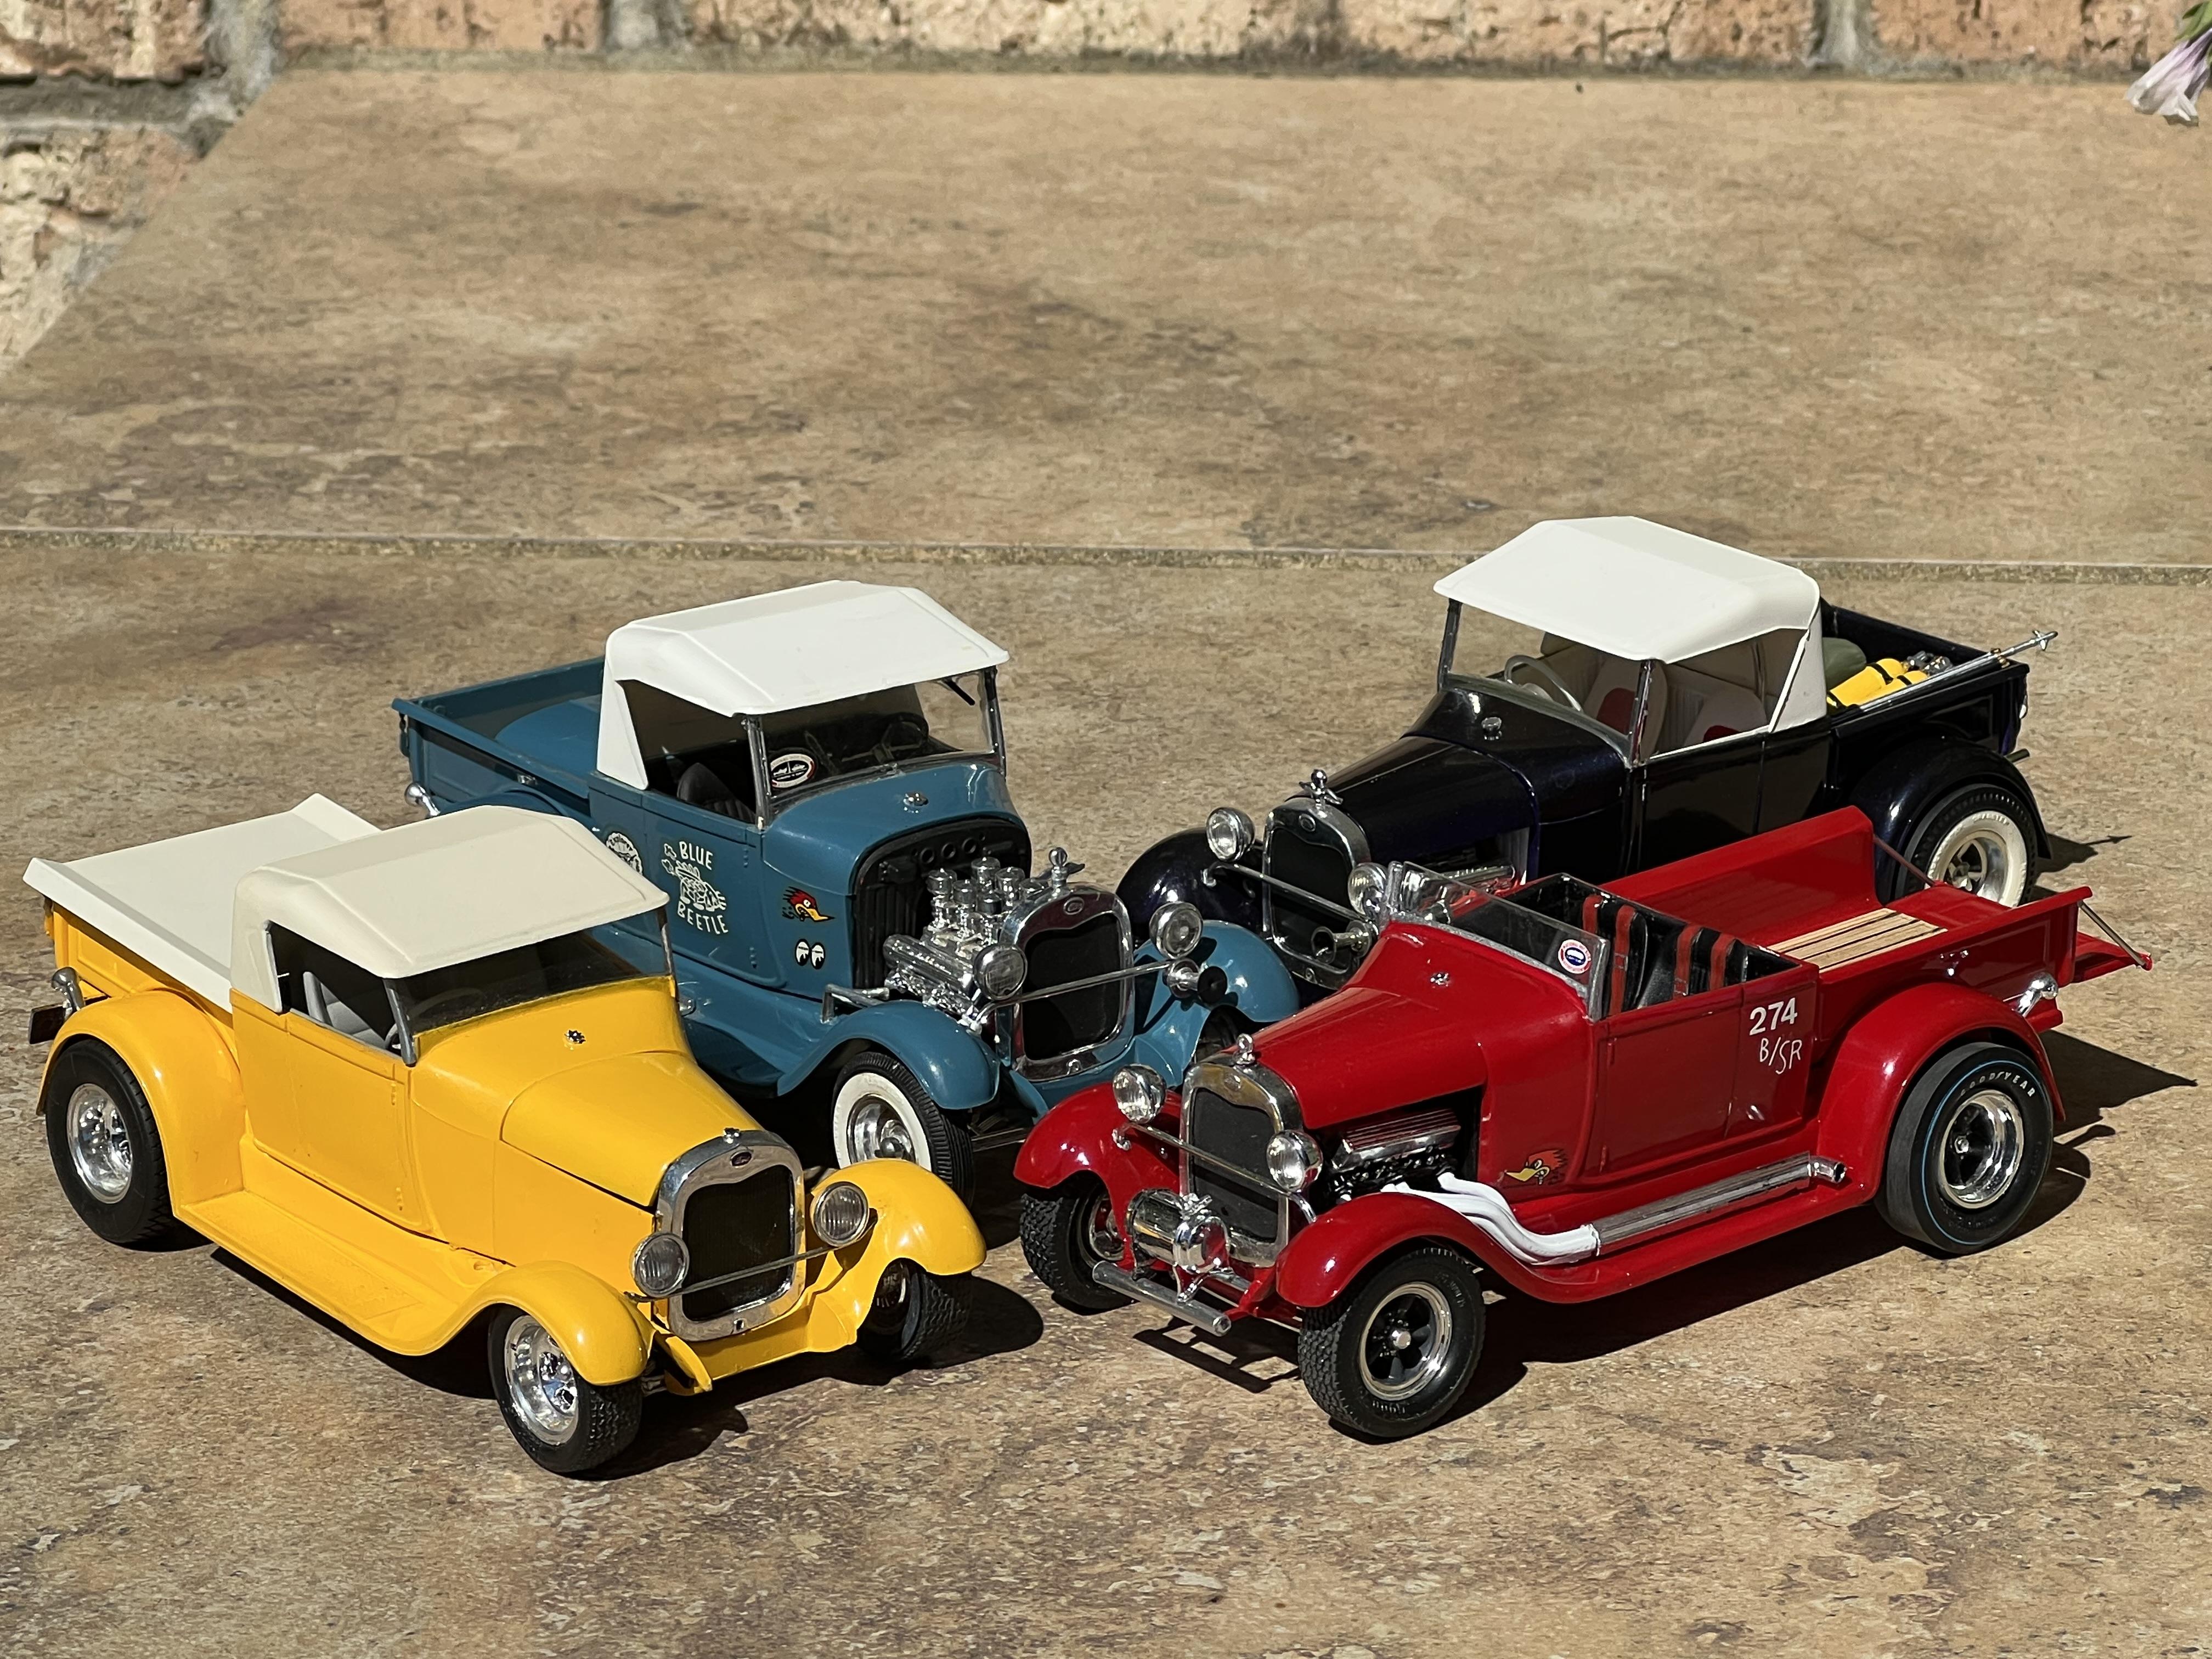
I've been a fan of Monogram hot rod models since I was thirteen and have built multiple copies of all of them. A new member of our local model club, (an under 40 year old at that), had bought the Blue Bandito repop and asked if I might have the parts to make it into the Boss-A-Bone. To be totally honest, I was stunned that this guy even knew of the existence of this kit, let alone had an interest in it, so I was happy to oblige. It turned out, however, that I had at least two fairly clean sets of the necessary parts which got me thinking...... I dragged out a whole bunch of mildly gluebombed parts and set about creating my own Boss A Bone. I have only made a few changes from the original concept - I liked the bucket seats from an MPC Pontiac GTO as they looked racier than the custom buckets in the kit. I also felt that the weak point of all the Tom Daniels's kits were the tyres and to a lesser extent the wheels so I upgraded those with AMT parts. Also, there was no way I was going to leave that farm gate bolted to the front bumper irons. Instead, I fitted a Moon tank to fill the gap. The windscreen has been chopped and just like my 1:1 roadster, does not have a top bar. I think these small changes add a bit of realism to the model without changing its character. I'm also not a fan of the side pipes but they are such a strong design feature of the car that I decided to live with them. They are growing on me. I used thin strips of model ship building wood to detail the pickup bed, top and bottom, and used a Revell tailgate as it had the reverse image pf the Ford script embossed into it which suited my desire to have the tailgate lowered to reduce wind resistance. The last photo is of my fleet and includes a genuine survivor of the original Blue Beetle. I have two more projects based on the Monogram pickup to be completed, soon I hope! Cheers Alan
-
Thanks, Bill. From a tip I got here a few years ago, I carefully sliced the cowl panel free of the firewall and then shimmed it out with thin styrene until all the swage lines were in alignment. Fiddly but well worth it. The other thing I do is tack glue the top to the body with tiny drops of tube glue and when that is dry, run liquid glue along the back of the seam in an attempt to avoid boogering up the outer surfaces. Nerve-wracking but it worked for me. Cheers Alan
-
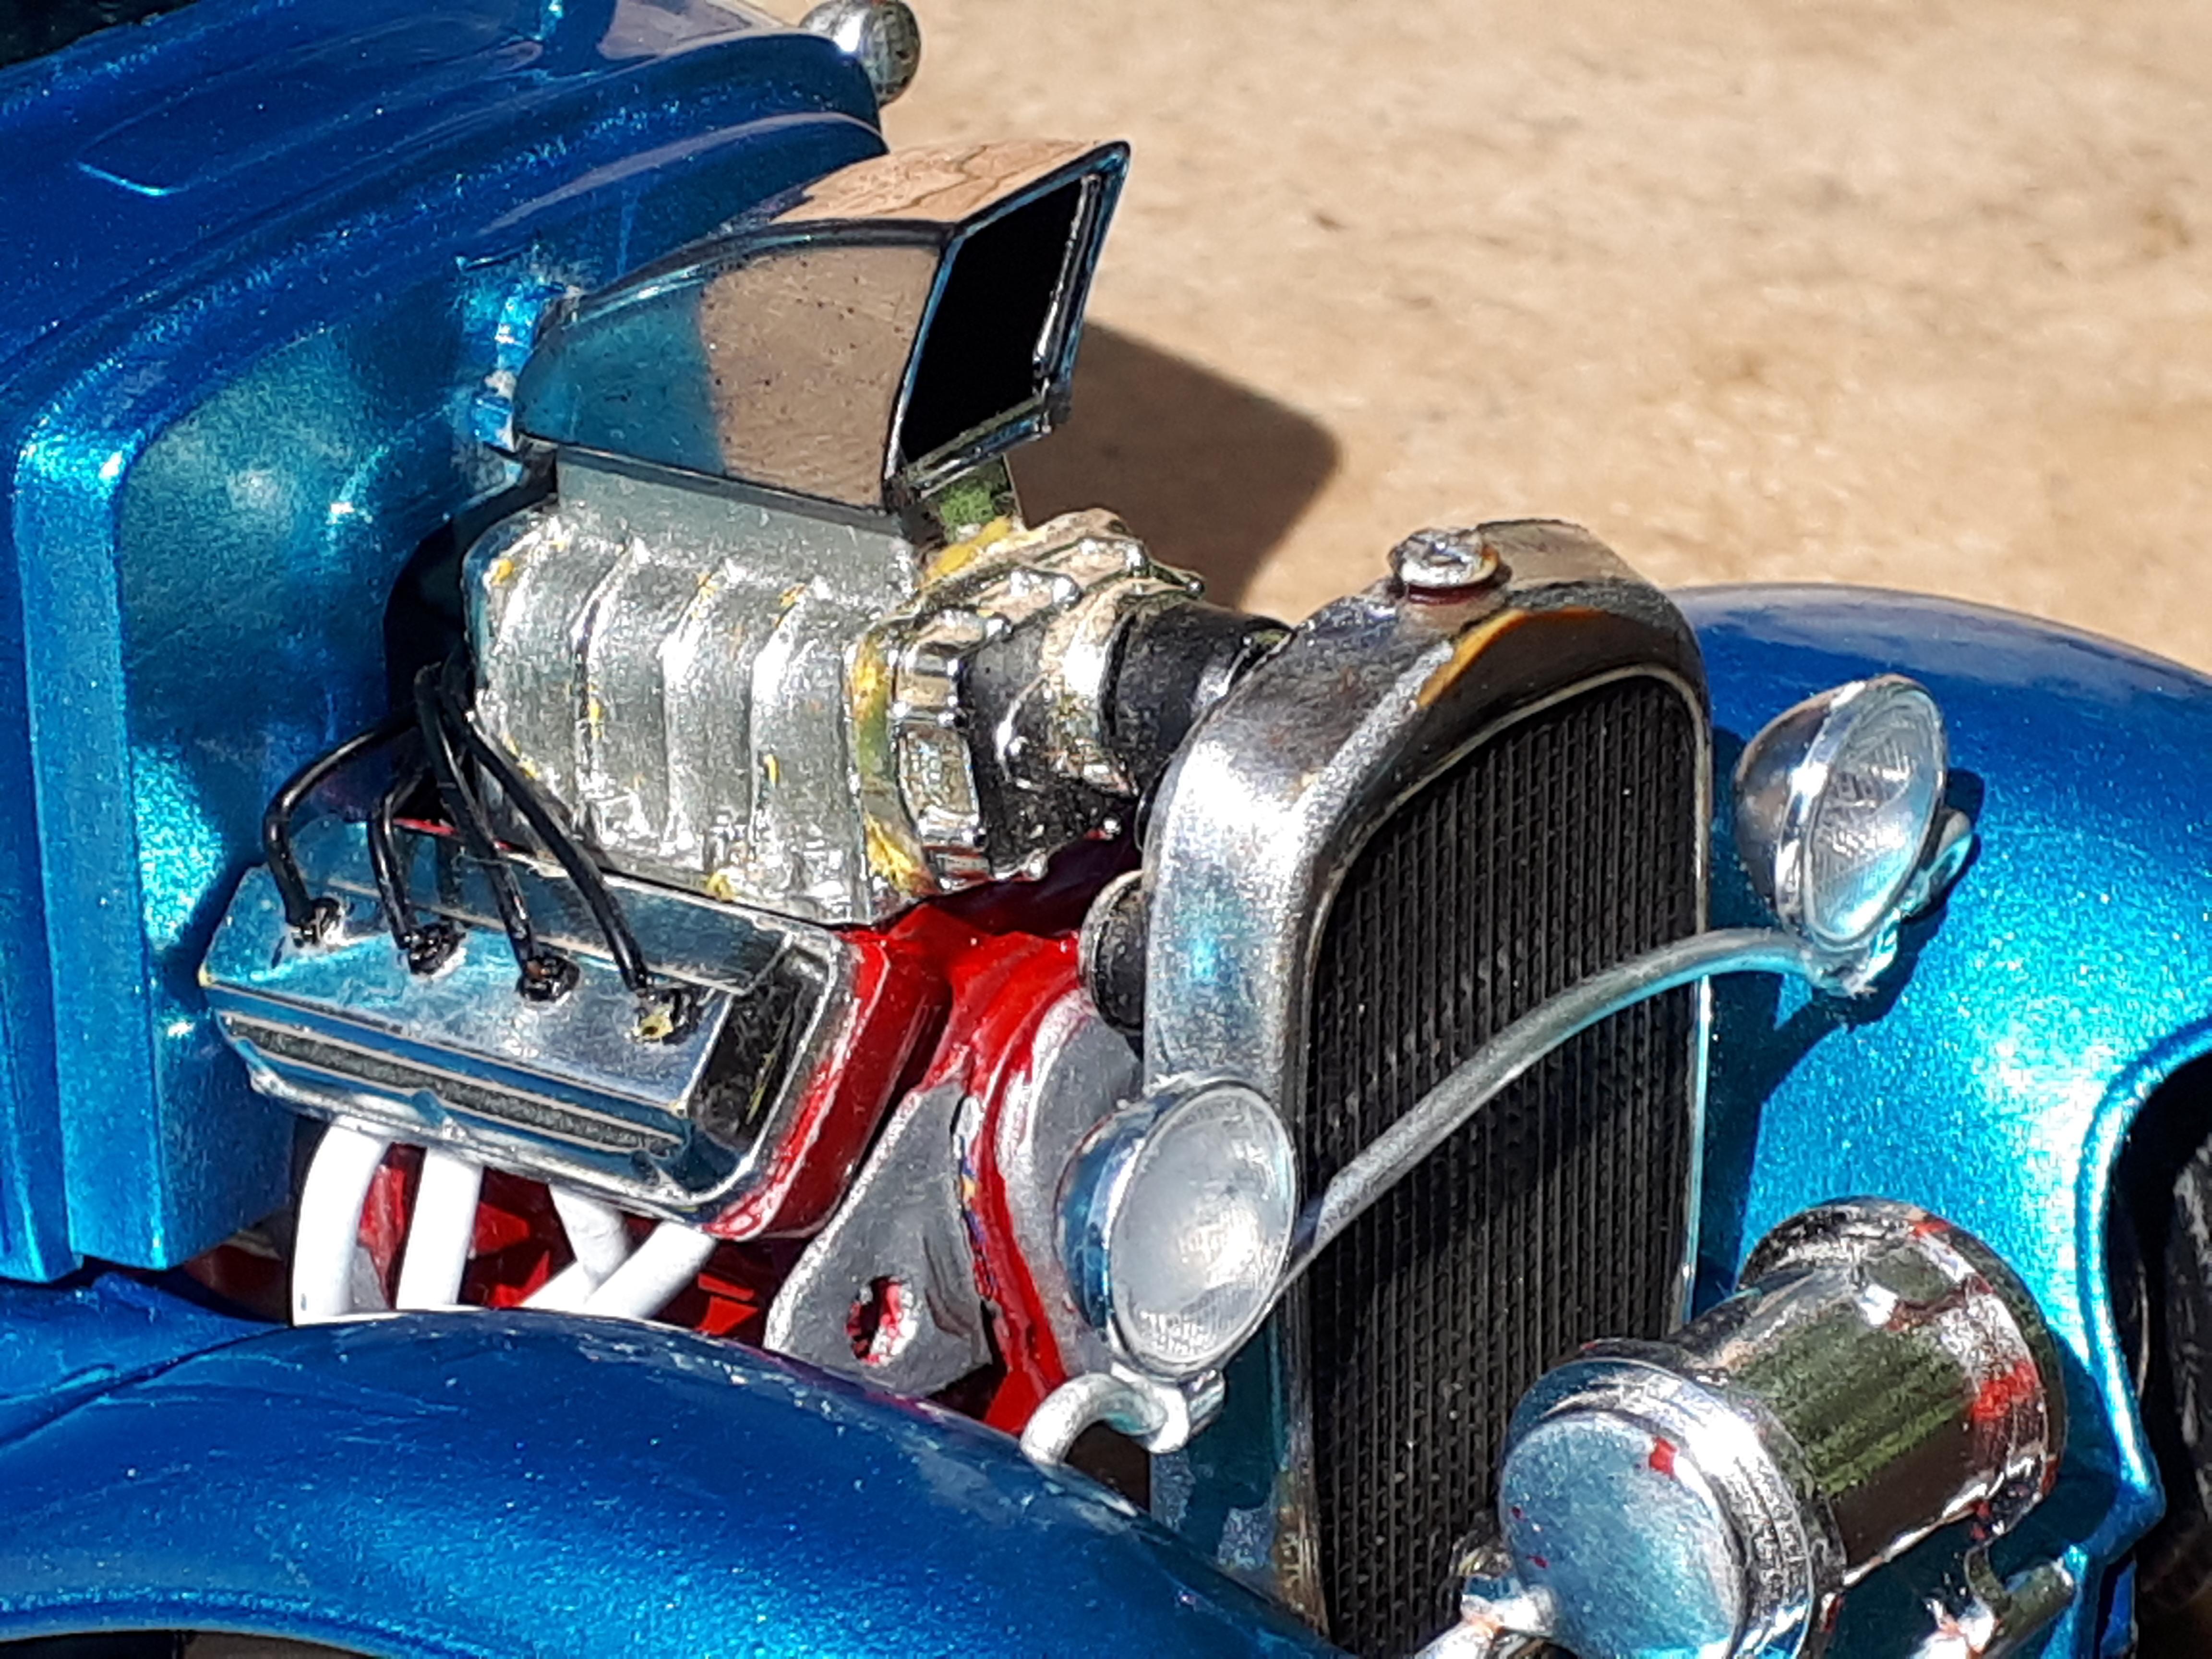
On a trip to the USA back before COVID< I found a gluebombed Hubley '32 Chevy five window coupe in a Pomona antique mall for $20. Couldn't leave it behind but wasn't quite sure what I would do with it. The biggest problem is that these old Hubleys are around 1/20th scale and I had very few spare parts or donor kits to suit. But then I got lucky. While out shopping one evening I checked the toy rack in Target and found a Hot Wheels monster truck based on the old Twin Mill show car. The wheels looked like they would work and as the toy was marked down to $5, I grabbed both copies off the peg. A quick mock-up showed me that a gasser was the only way to go as those tyres were never going to let it hug the ground anyway! Sadly, these otherwise fantastic wheels and tyres are too big in diameter to fit the Hubley Model A Fords, just in case you were wondering. The next win was that I still had an oversized engine from the Monogram S'cool Bus so even though a big block Chevy or a 409 would have been ideal, a Hemi would work fine! The trick with building any of the Hubley cars is to hunt through your parts boxes for the biggest 1/24th or 1/25th scale parts you can find. That's how I chose the Moon tank, hood scoop and parachute. The best part is you end up using parts that are probably too big for a normal model! Win, win! The headers are scratchbuilt from Evergreen and the headlights are the big set from the Revell Model A kits with an aluminium craft wire headlight bar.. Other than removing the fender spare tyre wells and filling some seams on the multi piece body, it did not take a lot of work to reach this result and I am very happy with it. Hope you enjoy something different in the pits! Cheers Alan
-
What they said! I have a small fleet of funny cars and yours would look really nice sitting alongside them! I've never built an AMC before but will be starting a replica of a local, very successful Gremlin dirt track racer later this year. Cheers Alan
-
I love boats and I love this one! The combination of parts you used is perfect for the finished product. Cheers Alan
-
Thanks everyone, your comments mean a great deal to me! Whilst it is somewhat of a "formula" car, I love it for the era it represents. My model rod and custom collection is quite extensive and I try to include models from every era from the thirties to the current day - this one definitely filled a gap! Cheers Alan
-
There is a lot you can learn by coming to this forum and your B400 is a classic example of this fact. I have built ( and struggled) with a number of Jimmy Flintstone bodies before and have the B400 in my to-do list. Your build thread on how you removed the roof and dealt with the thick casting will be a massive help when I start mine. Congratulations on a fine project and thank you for taking the time to detail your build. Cheers Alan
-
Still the very best 32 kit ever made and you really took advantage of their simplicity to achieve these attractive results. I have eight of these built and another three under construction and if I found another one tomorrow, I would buy it too! The promer look is a natural on your model. Cheers Alan
-
Looong & Looow 33 Ford Roadster... "à la Coddington"
alan barton replied to Claude Thibodeau's topic in Model Cars
The amount of scratchbuilding in this model is very impressive! You left no stone unturned in capturing all the styling elements of the Boyd era. I love the mesh inserts in the door panels! This is one of your best for sure! Cheers Alan -
The OTHER Model A coupe-old school Monogram custom
alan barton replied to pack rat's topic in Model Cars
Great minds think alike! I created a red version using exactly the same theme earlier this year. The main yet insignificant difference being that I used the '30 Woody as the donor car. I do love the blue and will have to consider this for a future model. You have really captured the Monogram spirit in your creation. Cheers Alan -
Ray, only one thing counts. Did you have fun? To me, looks like you did! Cheers Alan
-
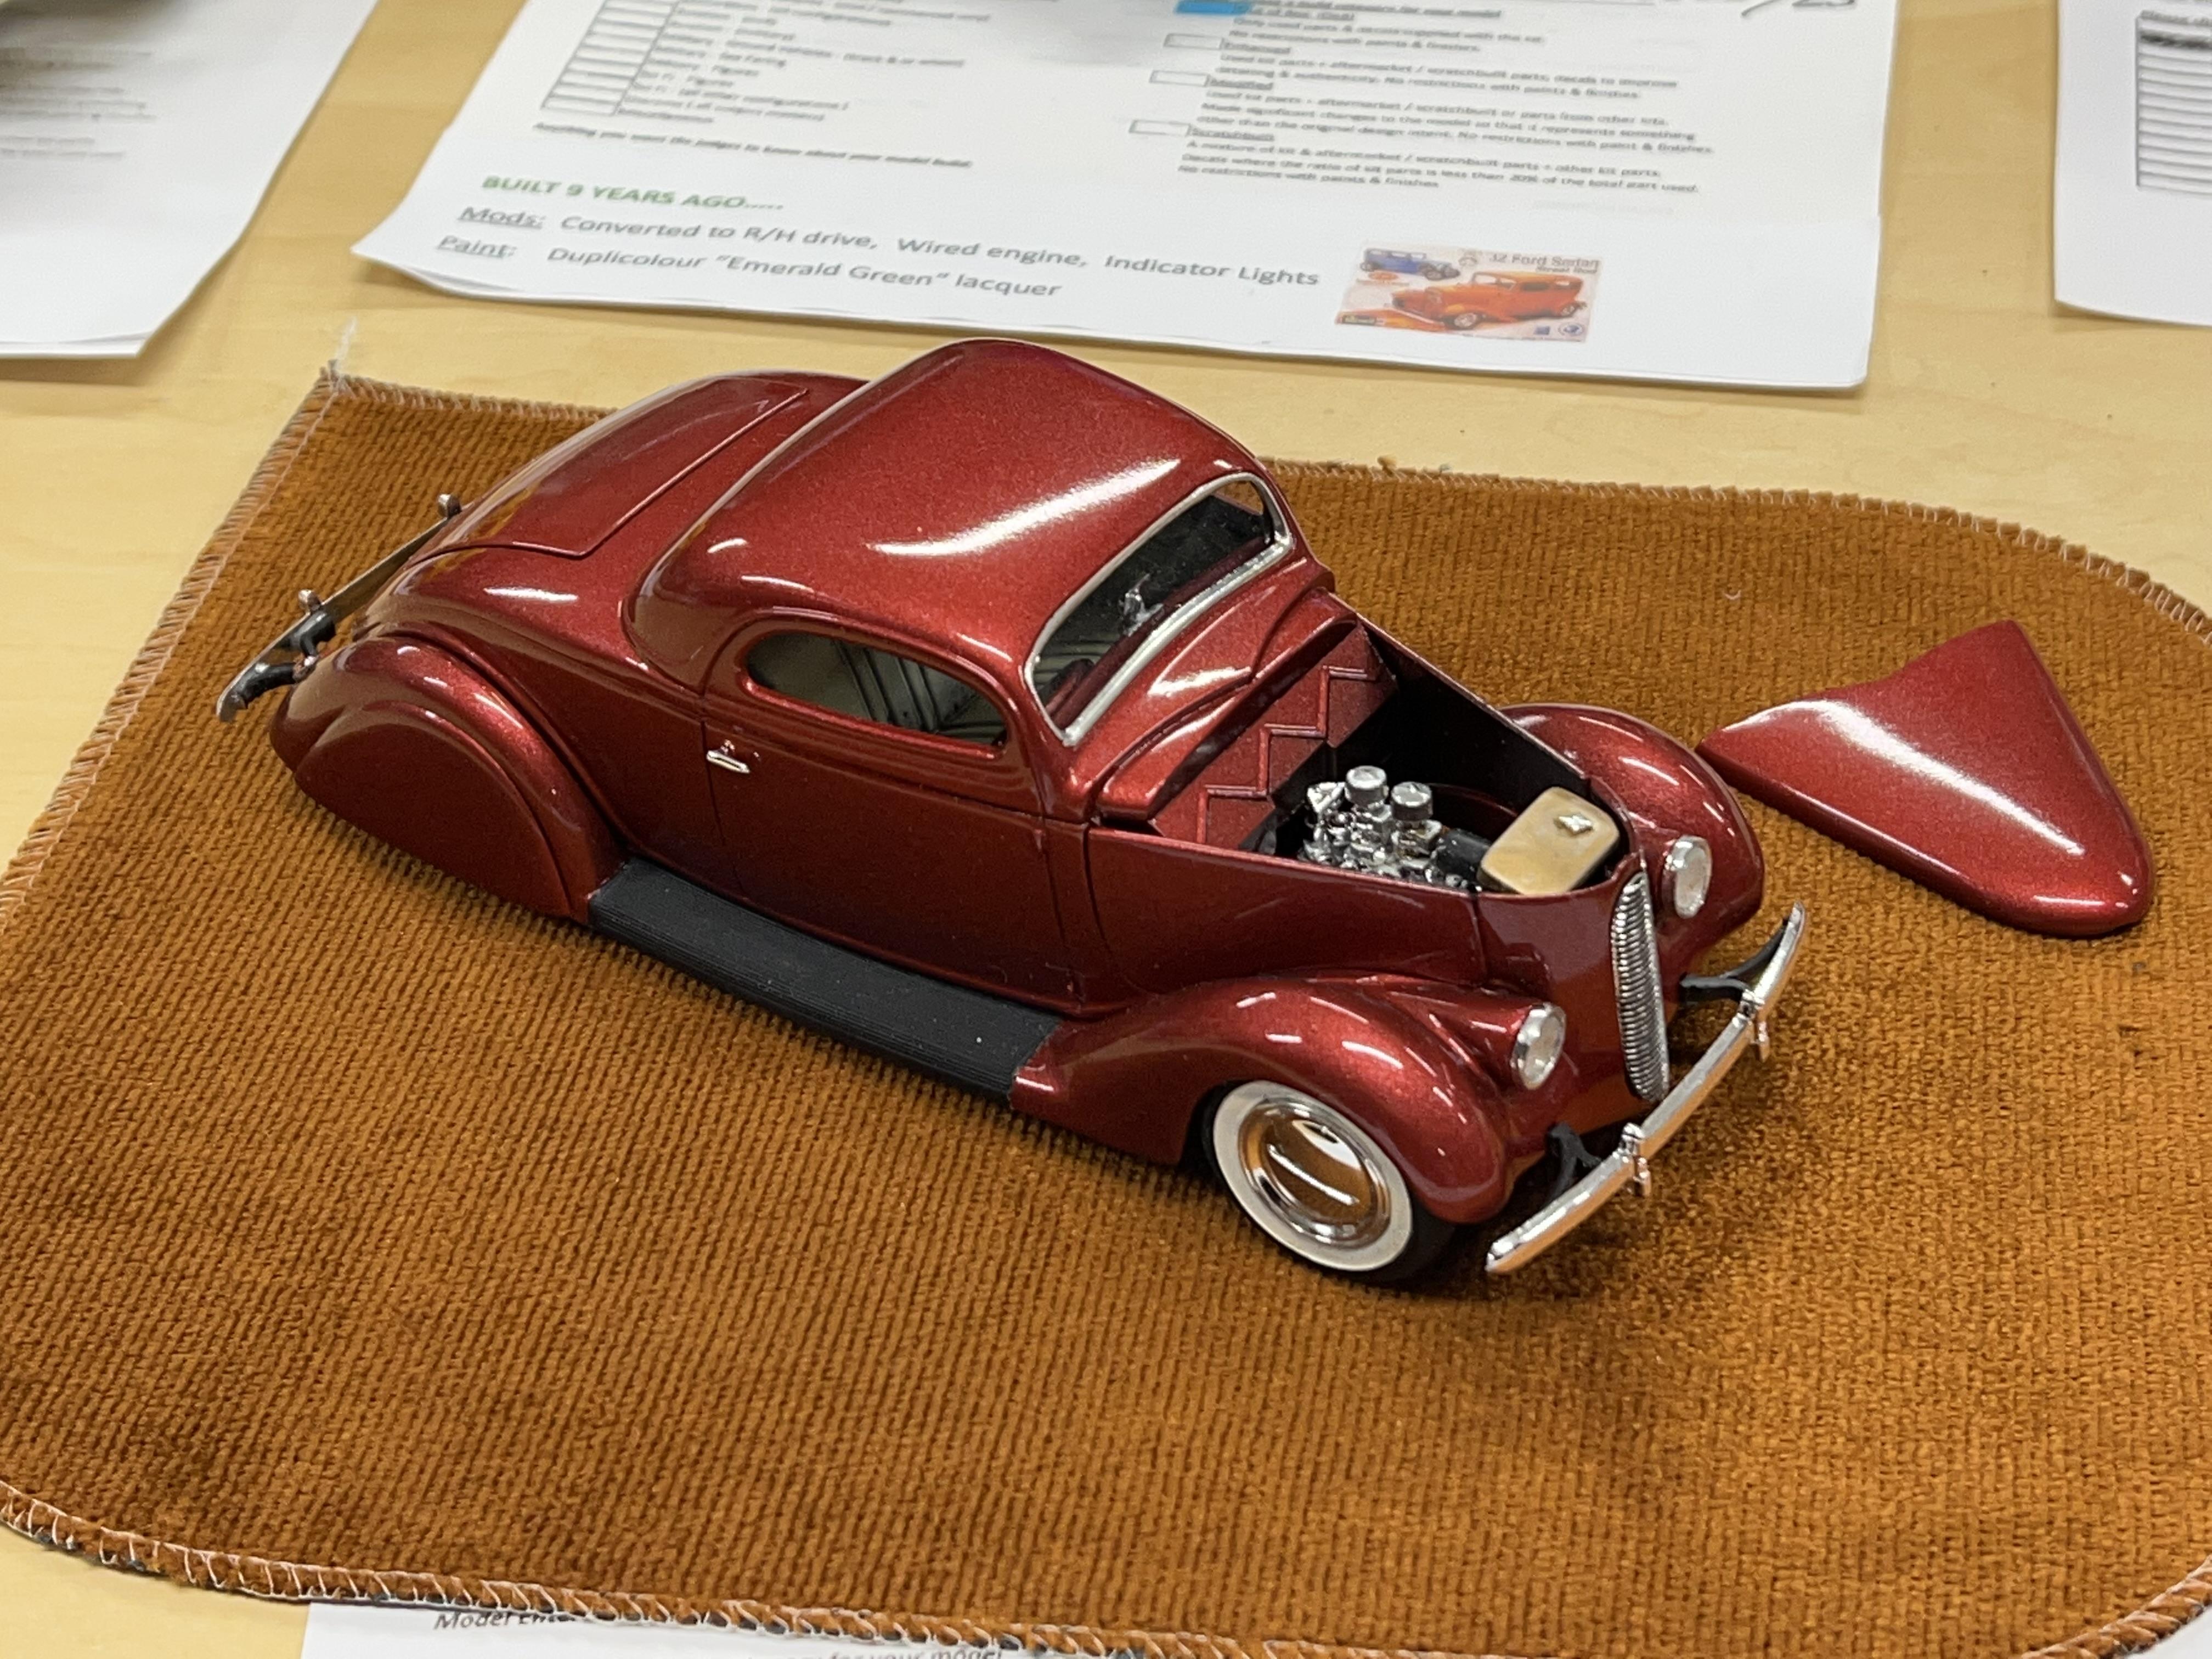
Thanks Bob, Paul and Mario. And Chris, I would love to take credit but I am pretty sure that I got the idea for the grille from a model I saw here years ago! And now that I look at it, I remember that while I INTENDED to use the ripple bumpers, I ended up using the stock forty bumpers instead! I was going for a very simple look on this custom. You just have to massage the bumper irons with the heat of your fingers to get them to fit the 40 bumpers nicely. Thanks everyone, glad you like it. Cheers Alan
-
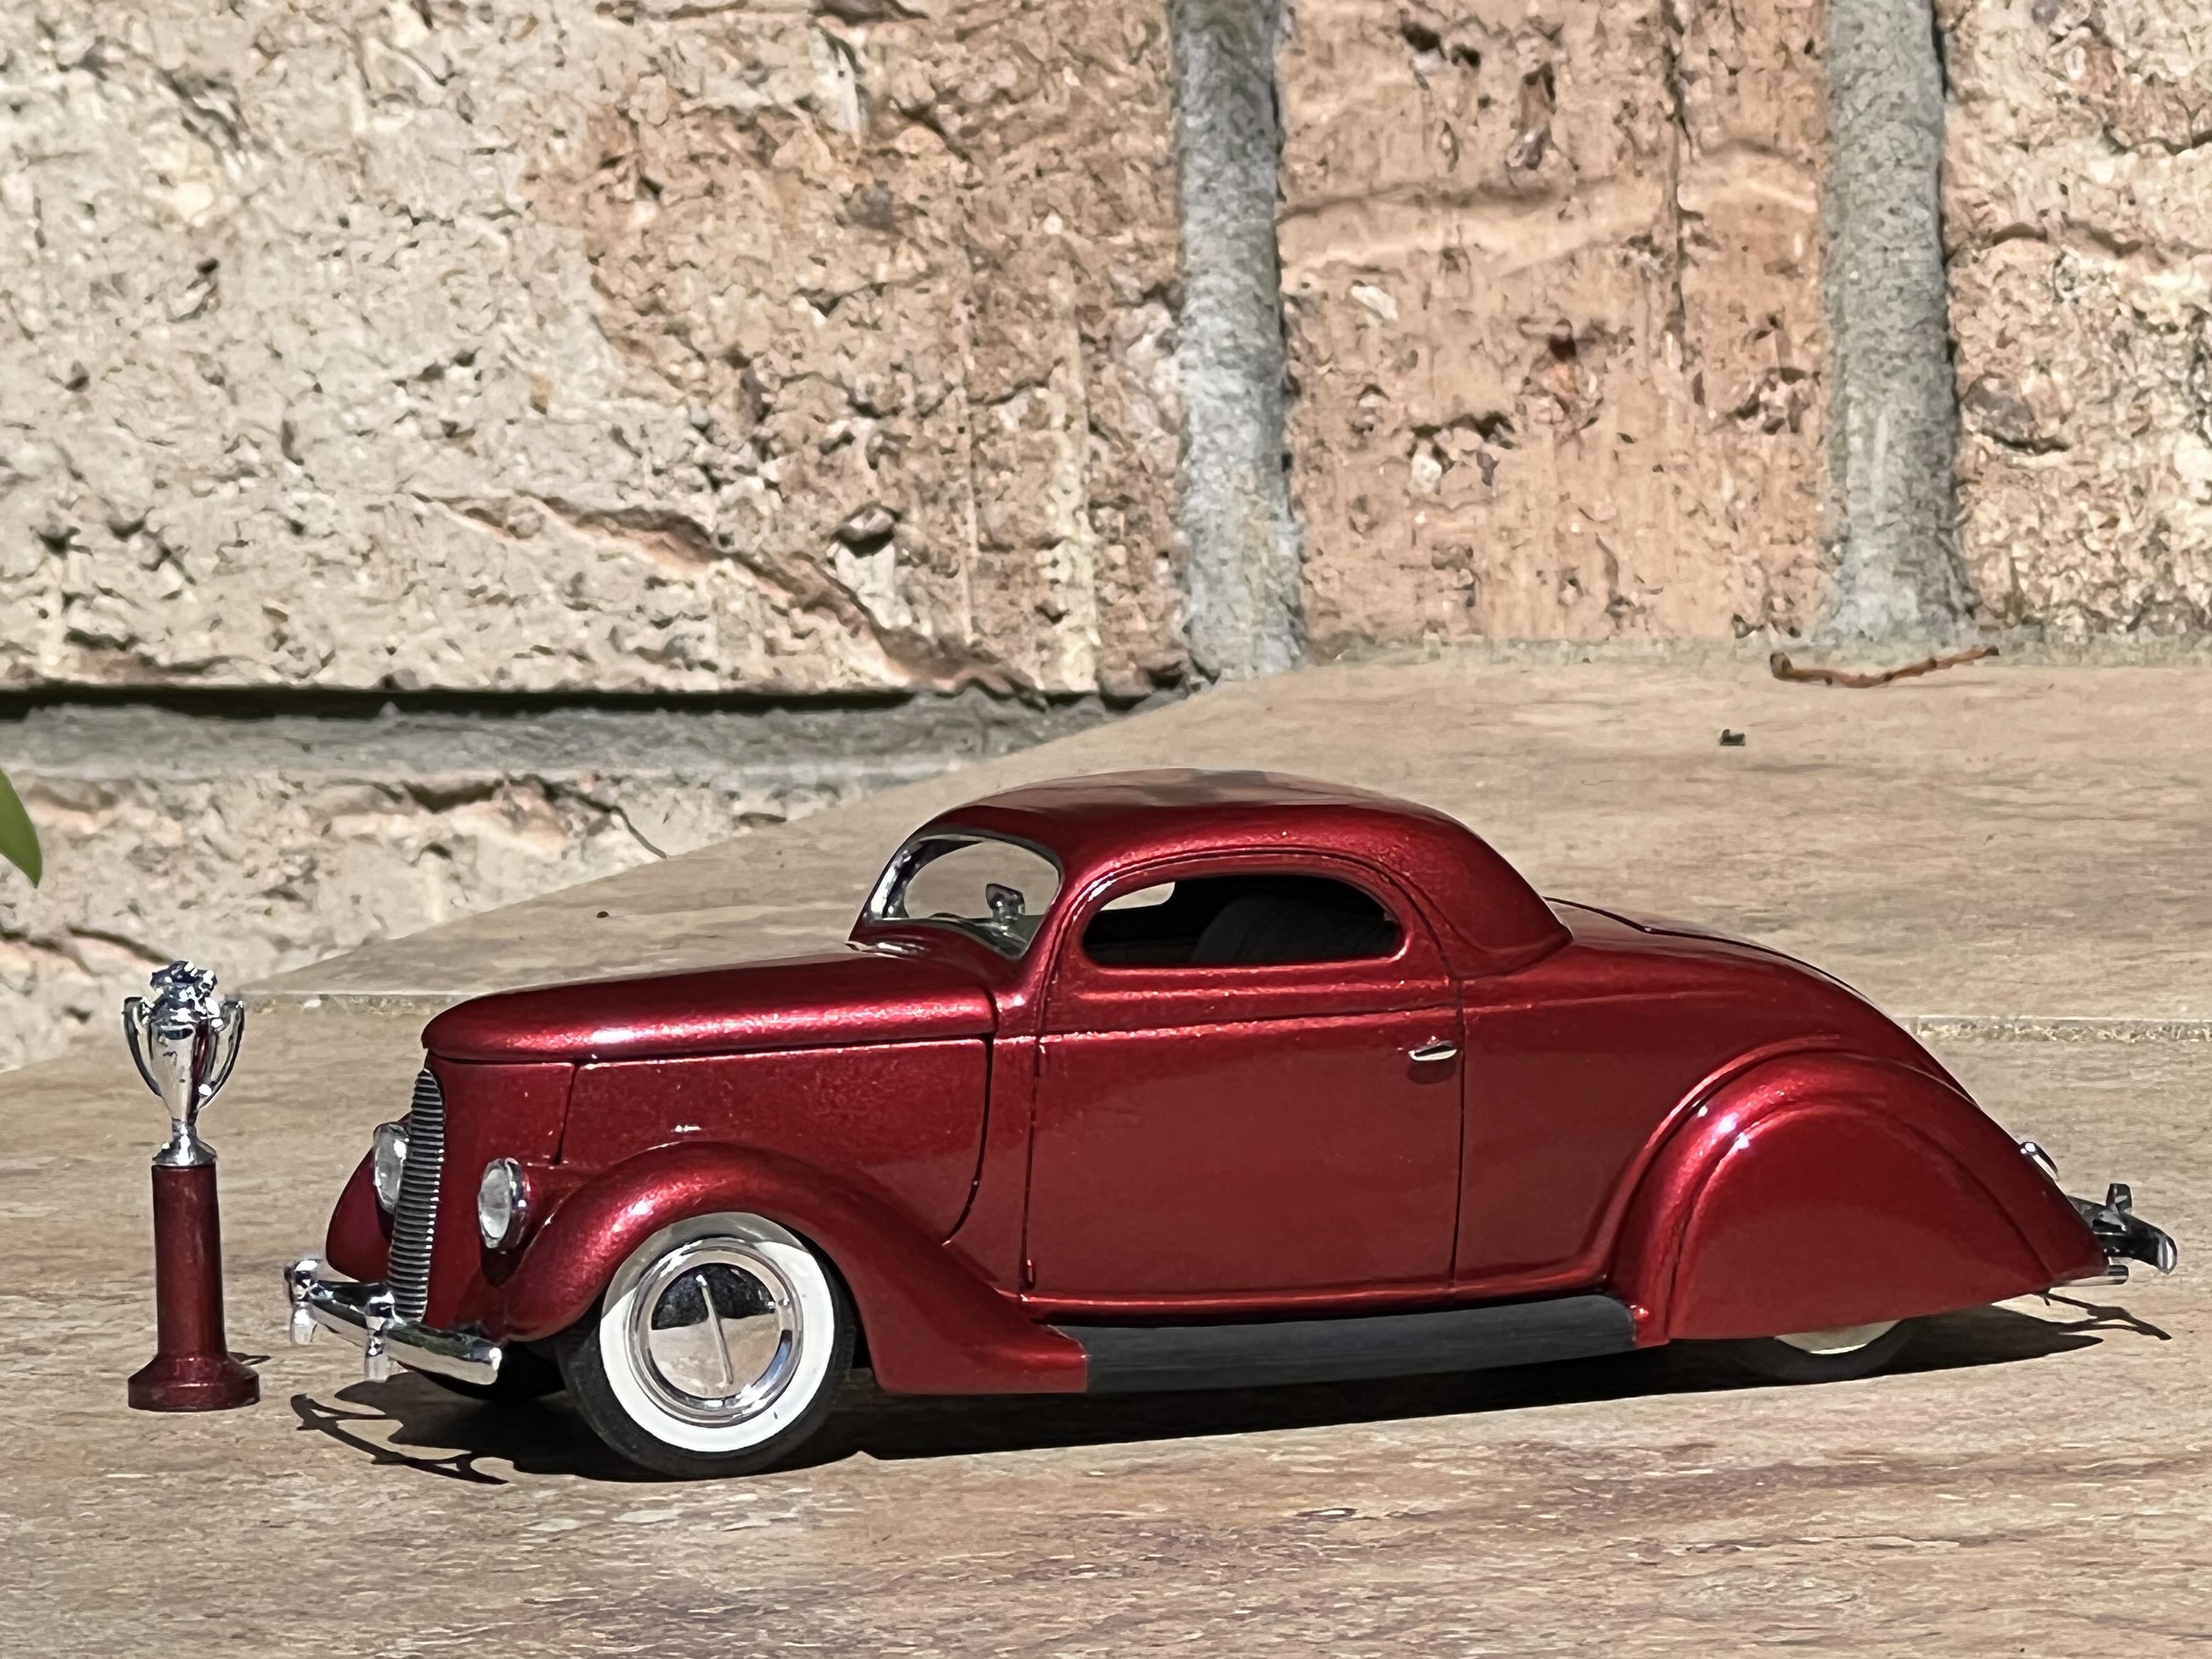
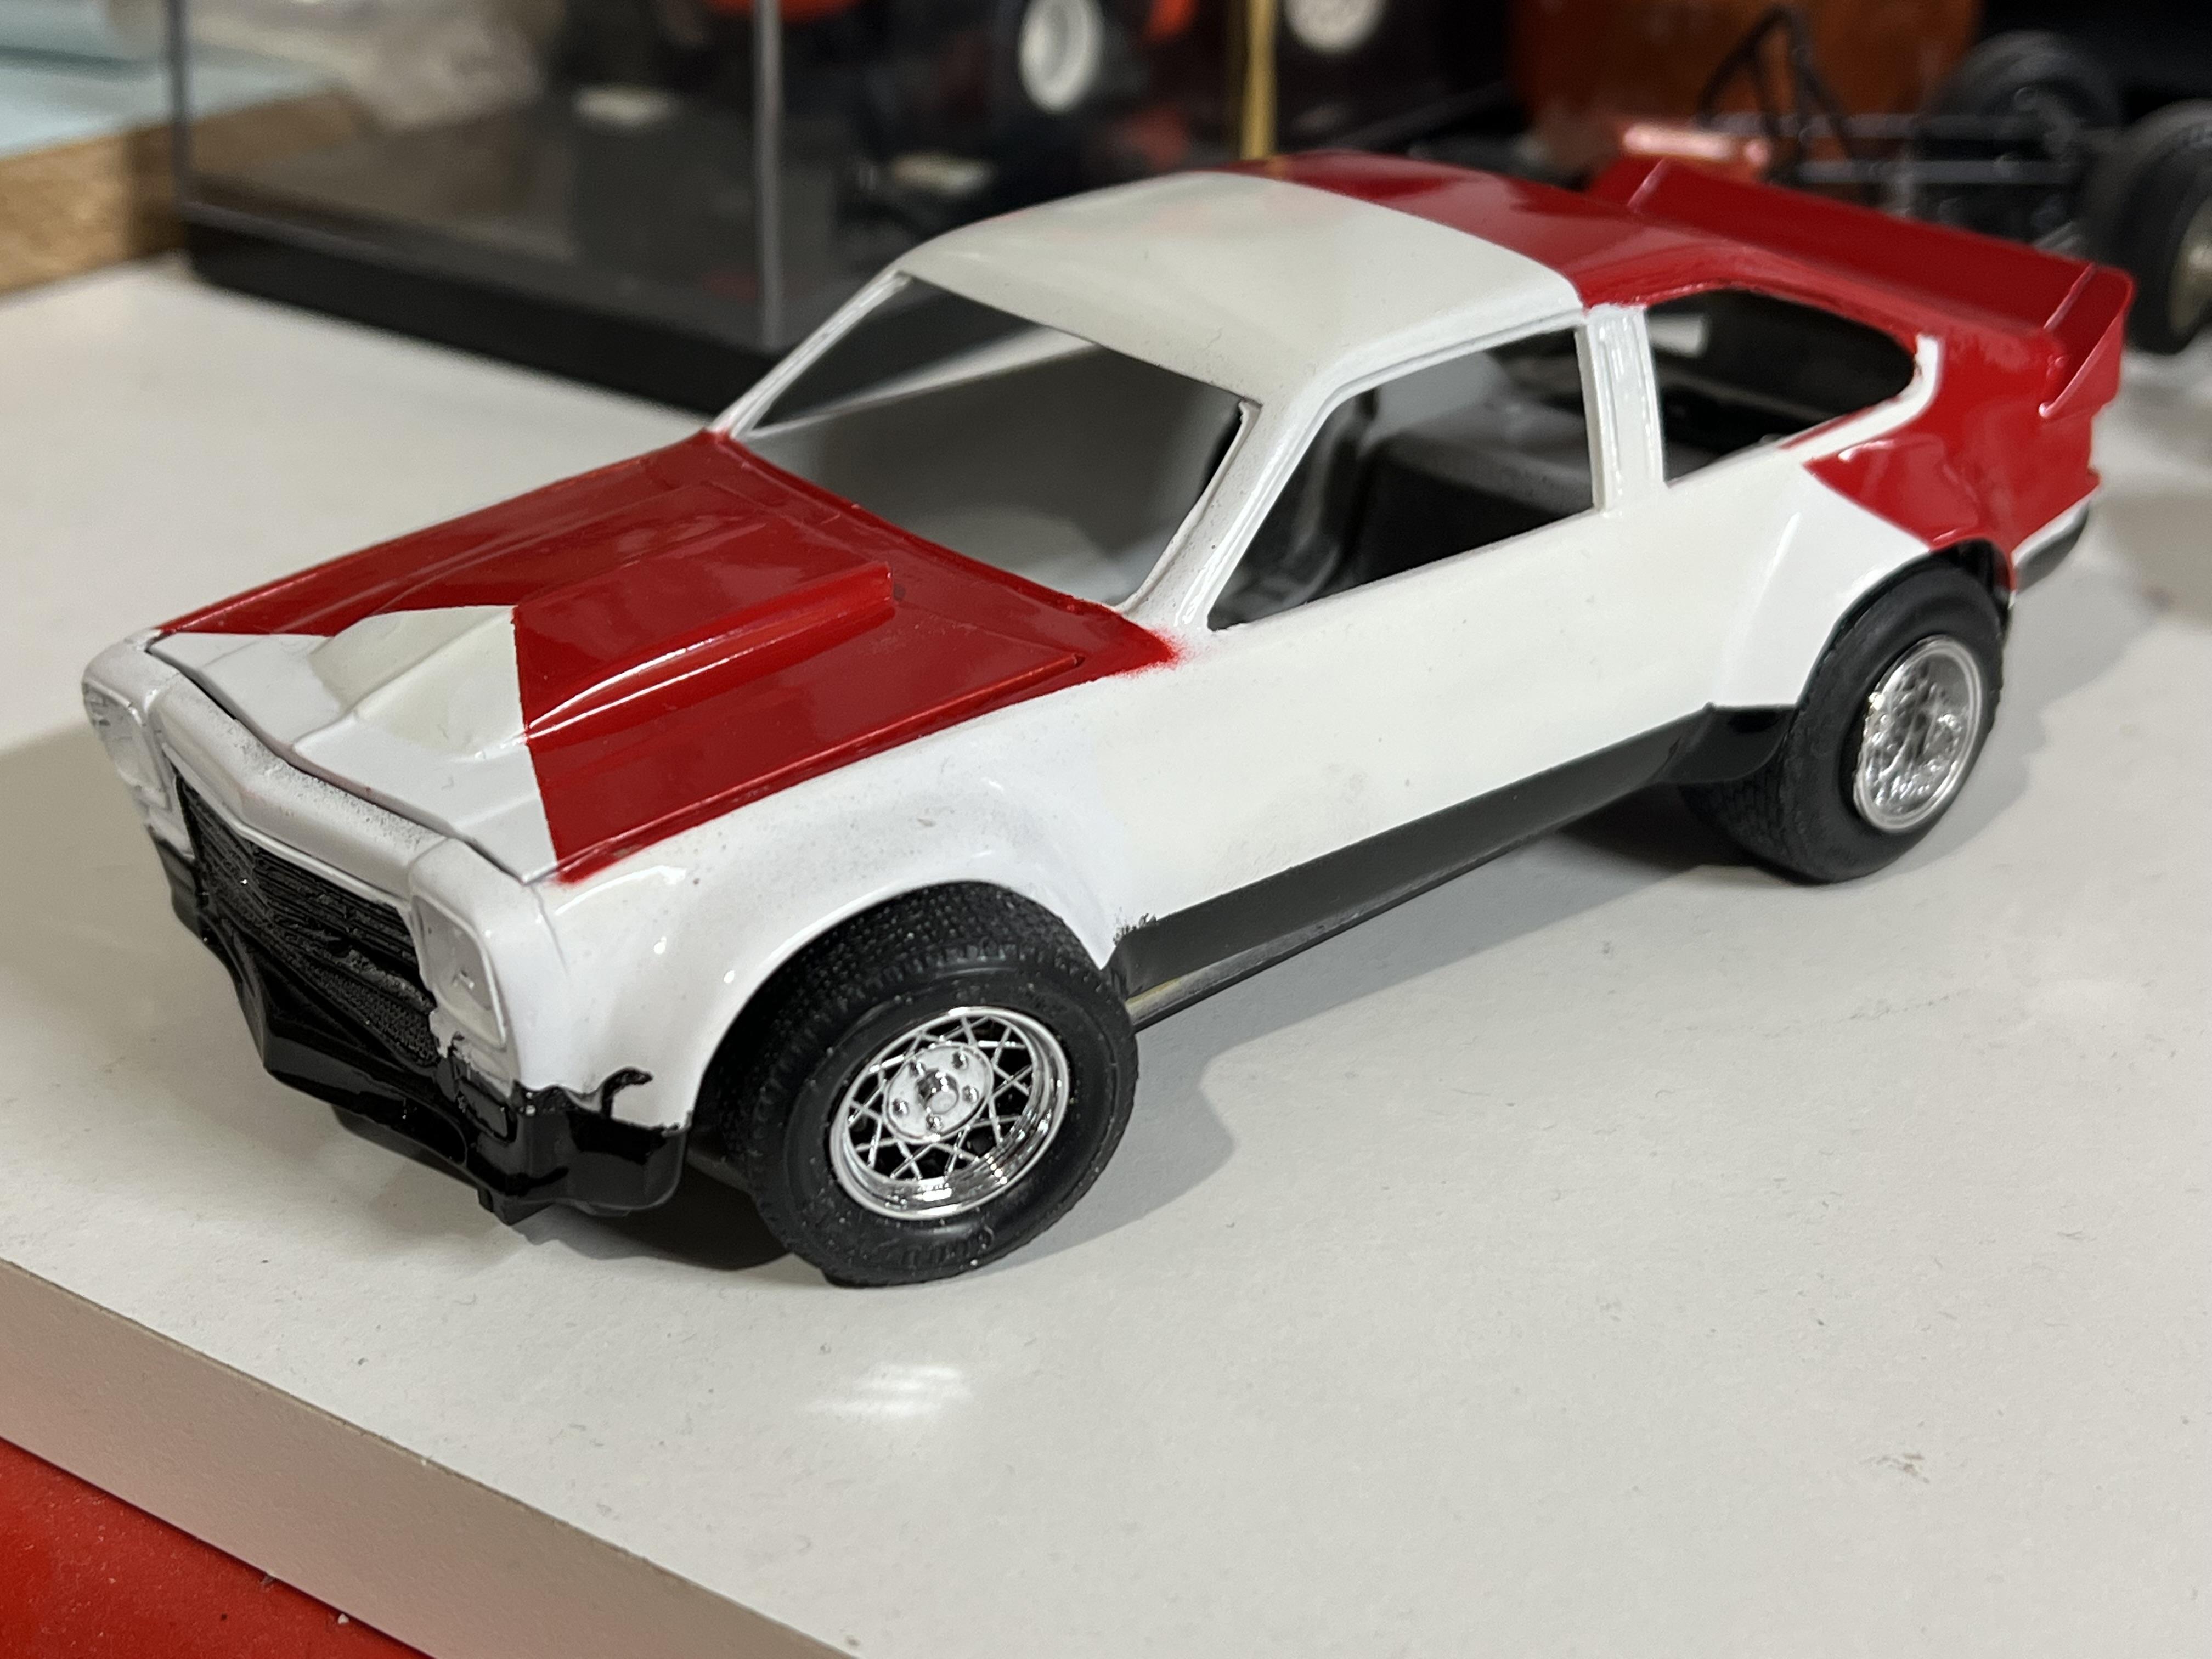
I have been building very complex models over the last few years with lots of bodywork so I really felt like taking it easy and doing a simple box stock build. Almost. This is about as close as I get to box stock! It was built from the recent re-issue and used mostly parts from the box, the exceptions being flipper hubcaps and ripple bumpers from the AMT 40 Ford Sedan Delivery kit, the custom headlights and grille, plus my obligatory right hand drive conversion. The headlights started out as the chromed conical tips from two ballpoint pens and the grille is the custom Buick unit from the AMT 57 Chevy, trimmed to fit the elongated opening of the kits custom grille shell. It is basically stock running gear but I dropped the rear as far as it would go without major surgery and used some bits of sheet styrene to convert the single carb manifold into duals. Paint is Tamiya Metallic Red over Tamiya flat black topped with about three coats of Tamiya clear gloss, all straight from the spray can. I was a Testors fan forever but as it is no longer available in Australia I am slowly developing my skills on the Tamiya paint - it does require a different approach to what I am used to. Hope you like it. Cheers Alan
-
That was fun! Didn't know what to expect but I really enjoyed it. And congratulations on a very fine build. Cheers Alan
-
I've always had a soft spot for wagons, having spent the formative years of my life in the back of one but wow, this is so NICE! I might have to copy this colour scheme for one of my own! Cheers Alan
-
Nice work Gustavo! I had planned the same conversion and already had the wheel arches filled and the strip of Evergreen added around the waistline, just like yours. That was as far as I got so your finished product is certainly a great inspiration to get mine finished! Cheers Alan
-
Pleased to say that my issue 213 arrived here in Perth Western Australia on the 23rd of May, less than a month after it was posted in the USA. That is a massive improvement on the five plus months it took for Issue 2010 to arrive hear. Since last year, I received issue 209, 211, 212, 210 and 213!!! who knows what the postal pixies are up to?!?!?
-
Next up will be a Monza, and this model will be a replica of the "Super Chook" Kentucky Fired Chicken car. For the Americans in the audience, Aussies call a chicken, a chook. If you are going to KFC, you are going to get some chook for dinner. Thus, the name of the car. It was driven quite successfully by Leo Gommers at Claremont Speedway and later by Colin Knox. The original version had very protruding cylindrical flares but later received an IMSA style body kit - this is the version I am going to build. Like the Corvette above, the Monzas were popular at speedways across the country, especially after Gene Welch brought a four car team out from the USA for a summer tour down under. We never saw Monzas in our showrooms and I doubt whether very many ever made their way to the country as road cars - I cant recall ever seeing one in the wild. Many years ago after following Tim Boyd's advice in Street Rodder Magazine , I bought the MPC Monza to get what he believed to be the best detailed small block available at the time in 1/25th scale. It is still waiting in a box with a special project! As I researched cars for the display in October, I realised that the Monza body was languishing untouched in another box, and it came with IMSA flares so it was time to start another project. It might seem a little crazy but I am keen to get all bodywork and paint completed on these projects as early as possible so that I can use the remaining time to complete the somewhat easier chassis work. As with all such projects it is never as easy as it first looks. The fibreglass Monza bodies for the speedway had fairly vertical sides while the kit had a lot of roll-under to the rocker panels. Plus, the body kit did not quite match the contours visible in my one reference photo so there was a fair bit of trimming to do to get things close ( plus just a smidge of putty!) I tack glued the body kit in place and then worked out what bits needed to be removed to get things right. I then used a woodworking tool called a marking gauge to scribe part way through the inside of the body at the waste line so that I could gently bend the lower body panels outwards to get things looking correct. I have since applied a responsible amount of body filler and we have some serious sanding ahead of us! Cheers Alan
-
Next up is one I am really excited about. I had never owned one of the MPC Super Stocker series of models so was pleased to hear that the GTO had been re-issued. I had good intentions of buying one but decided to wait as a friend of mine along with our wives were planning to attend the Adelaide Toy Fair in South Australia last June. You can imagine my surprise when the second table I walked up to had not one but two Dick Trickle Mustang kits, complete but bagged, not boxed, on his stall for $50 a piece. If you are thinking that is a bit spendy, consider that the GTO currently on the local hobby shop shelves would have set me back upwards of $65Aus so in any language the Mustangs were a bargain. I love dirt trackers and Dave loves Mustangs so they both came home with us. Every state in Australia had a two or three competitors in Mustangs in the seventies and when you consider how rare ( then ) they were on our streets, they were a big deal to see on a speedway. I have been very impressed with this kit although I did find the rear end assembly a bit fiddly. The weird bit is the fact that the Mustang body has had its sills removed and as a result the bottom of the rollcage hangs out in the breeze - probably something to do with the fact that these were essentially a GM style frame. Two strips of styrene sheet rectified that problem. I also cut the top bars of the cage for now - this lets the rollcage sit higher in the body and will save a lot of work later. As it was the top bar that should have aligned with the window opening ( where you would normally rest your elbow) was a good 3mm lower than it should be. The other problem, if you can call it that, is that the car has a big block Chevy engine. I have no qualms about swapping out the engine for a Ford but I love those over the top headers so I have elected to paint the Chevy engine blue, add some Ford rocker covers and front mounted distributor, and fake it! The neat thing is, apart from the flares and a change of rolling stock, this will nearly be a box stock kit. Once again I used aluminium wire and thin plastic to create the flairs. Like the Torana, this one is going to have a little twist in tis final livery but I will reveal all as it nears completion. Cheers Alan
-
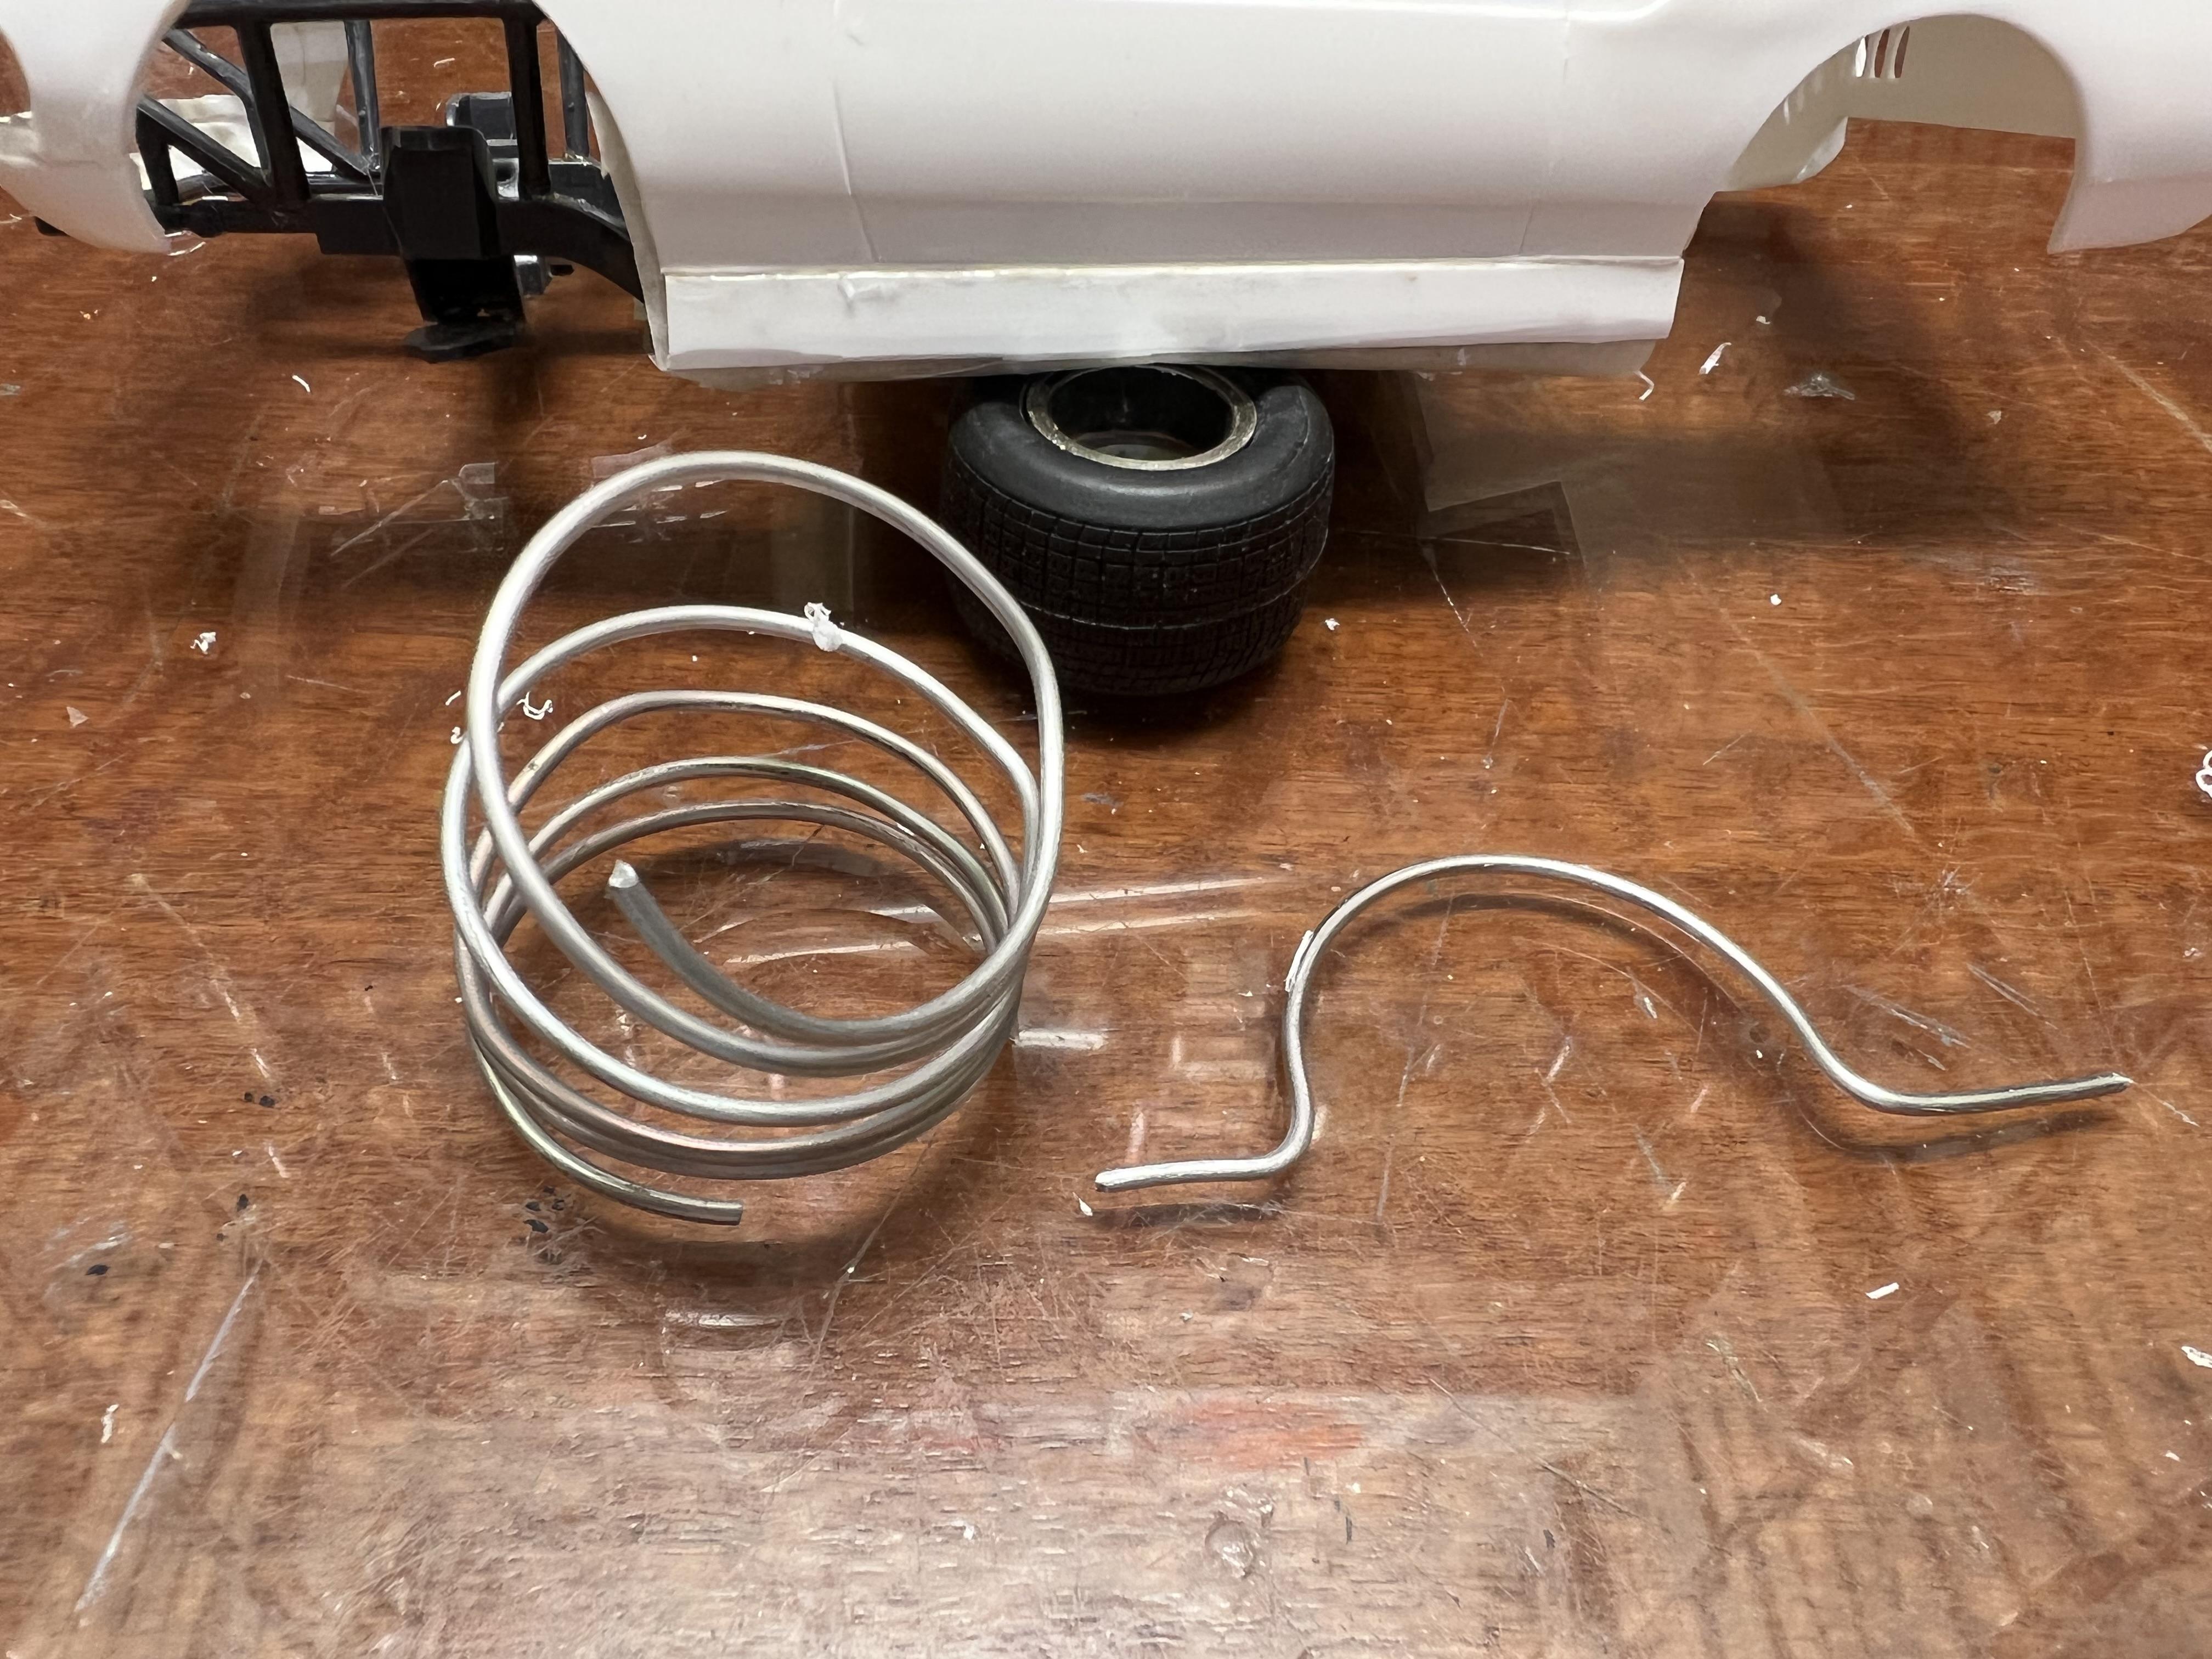
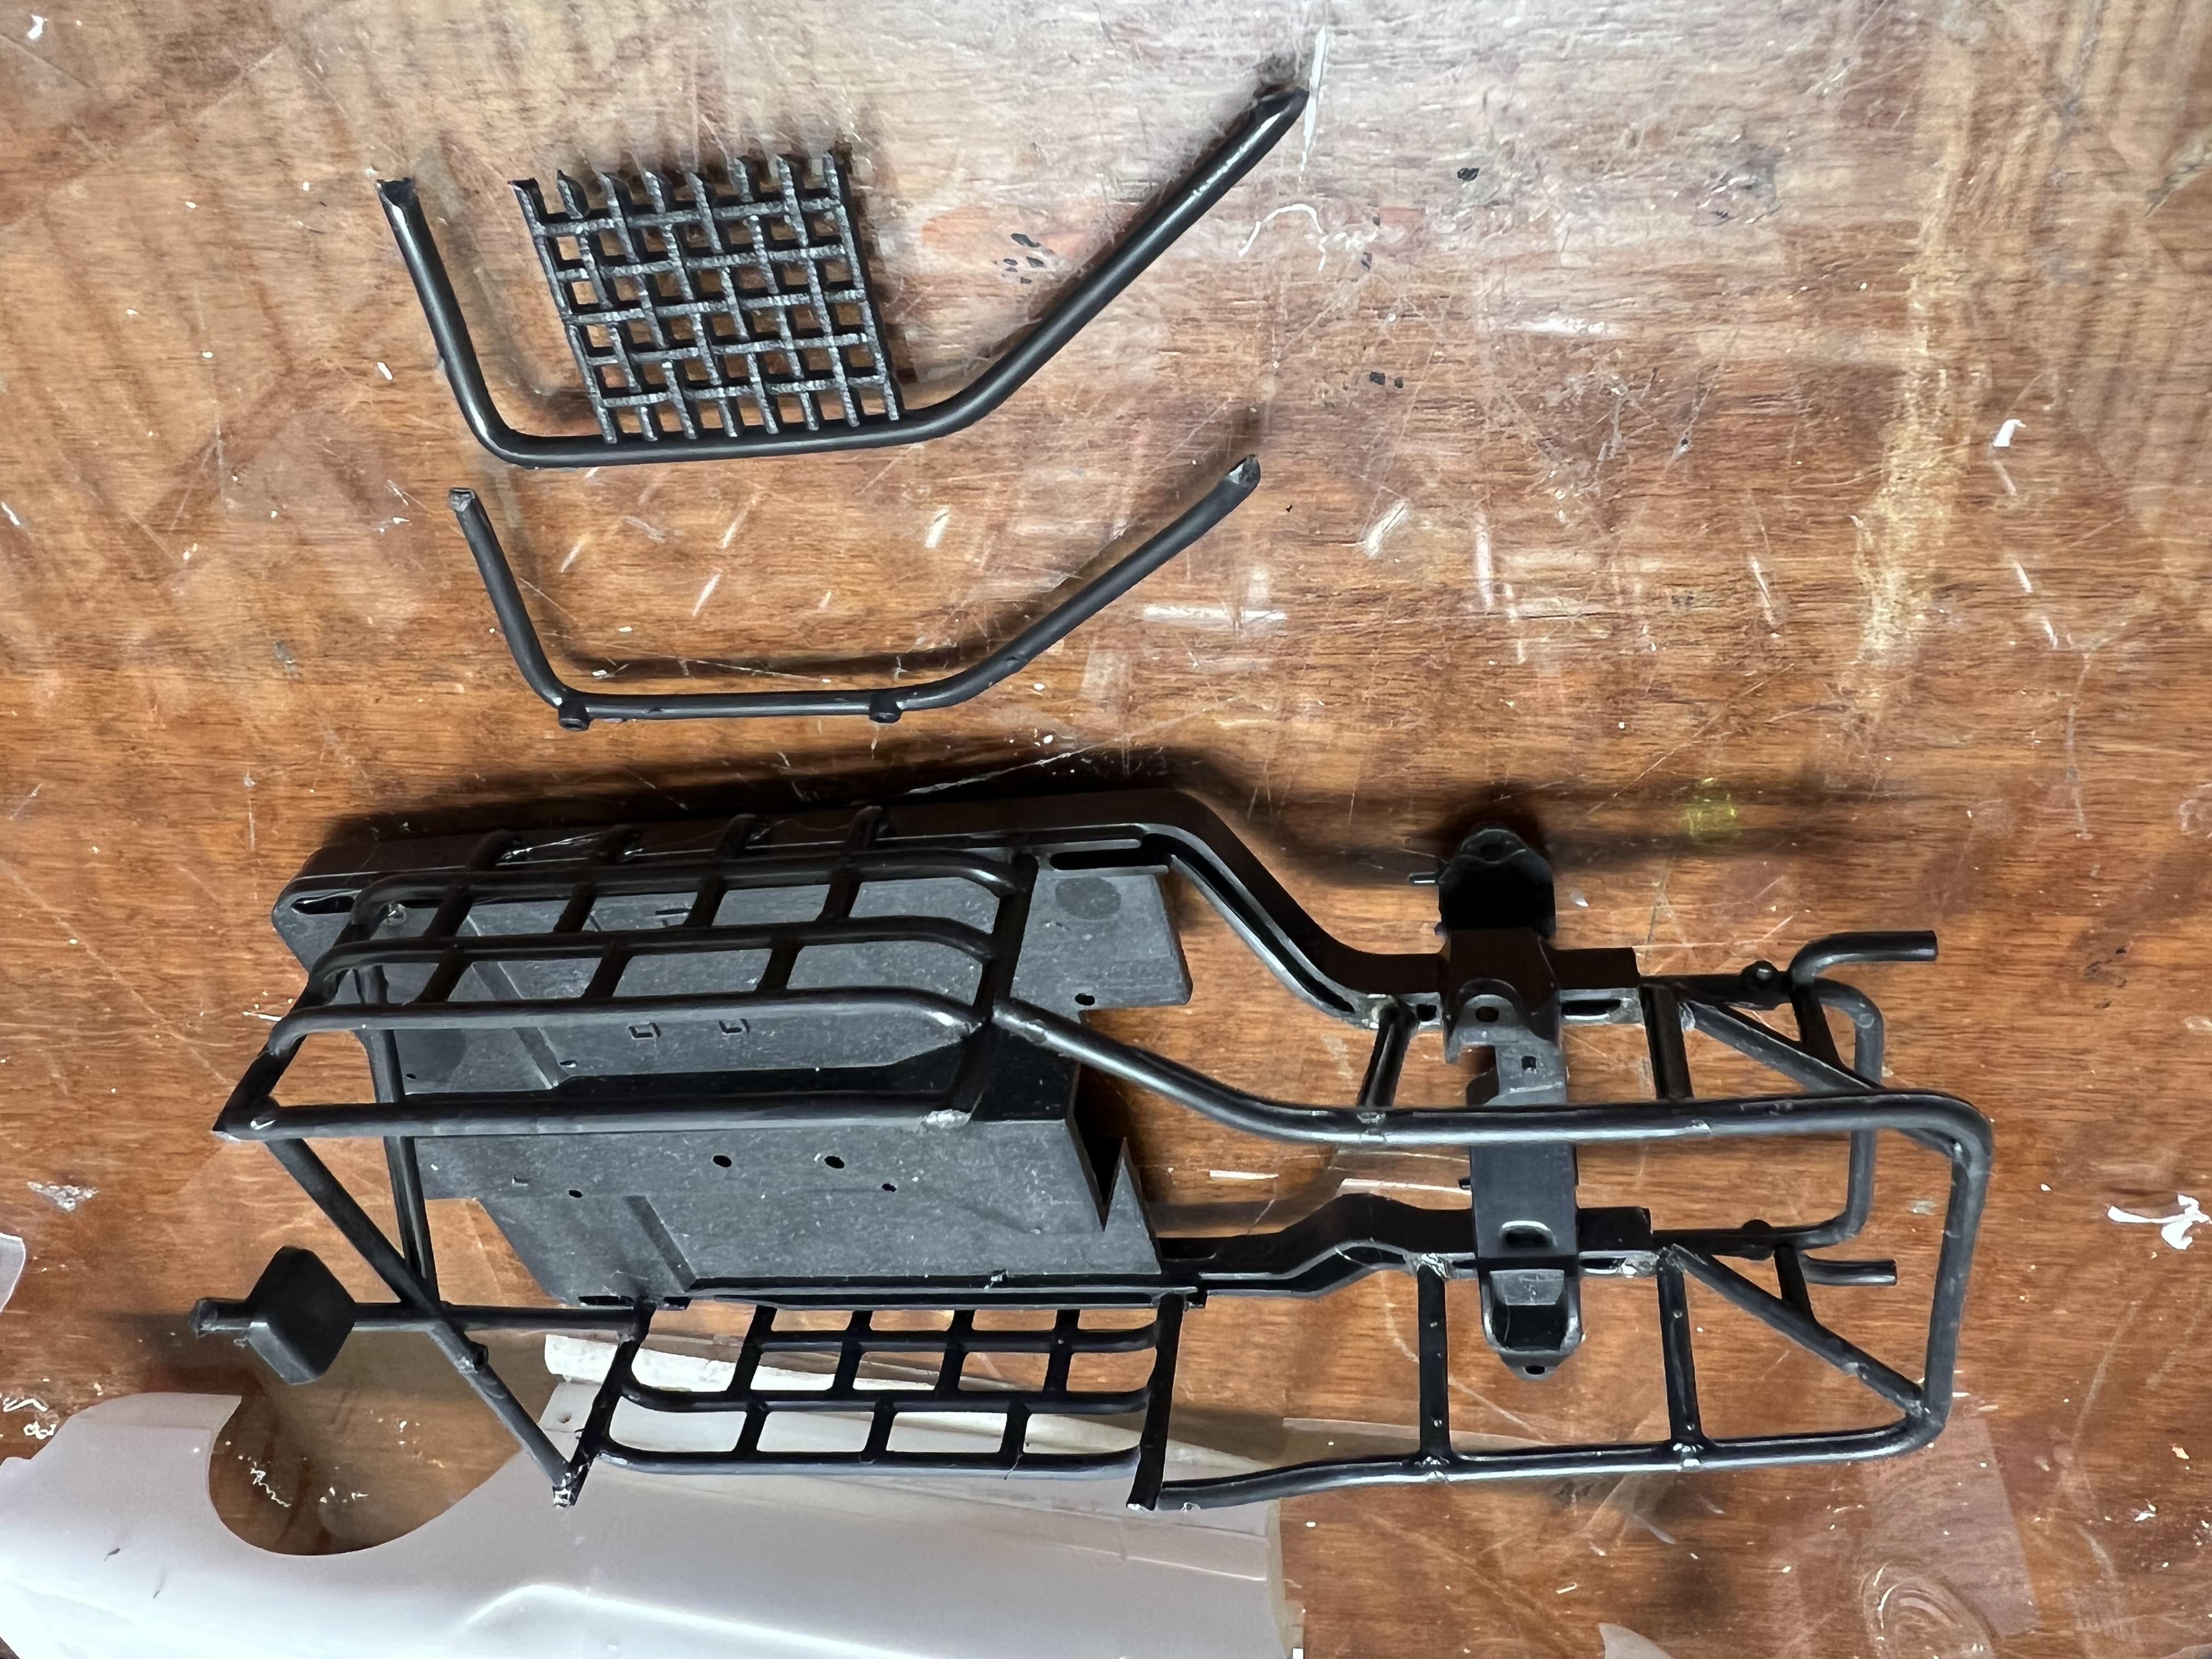
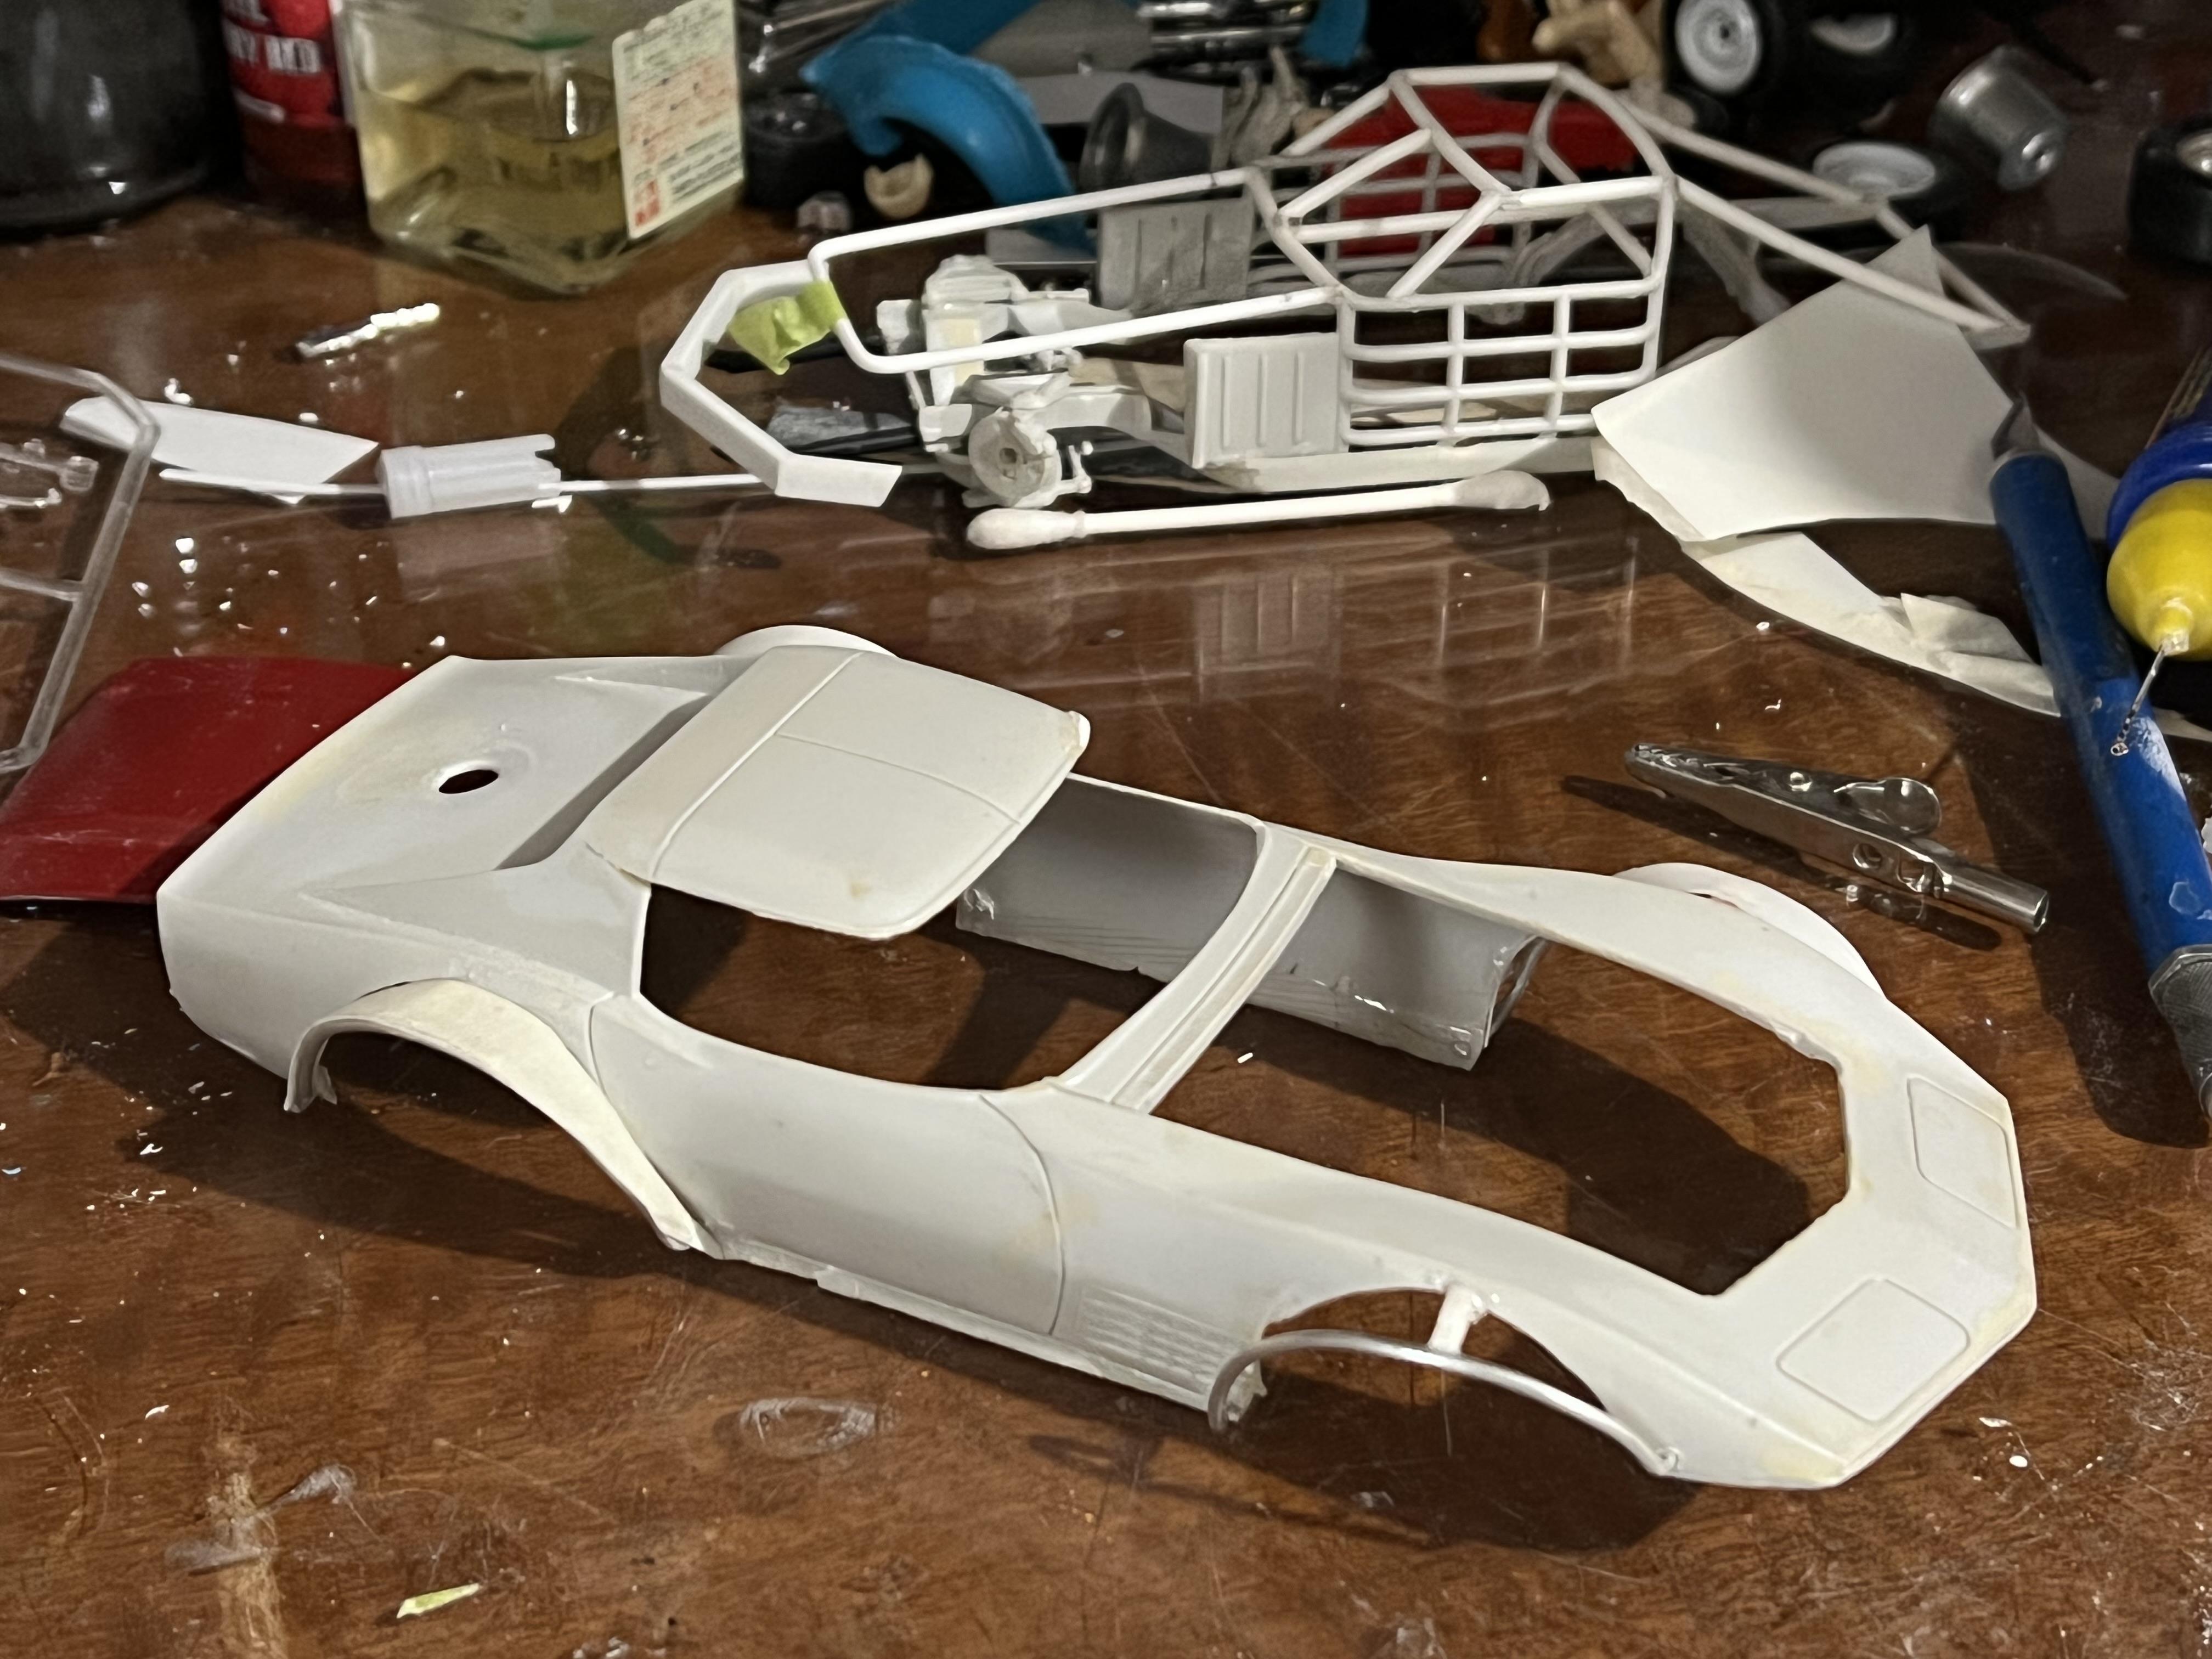
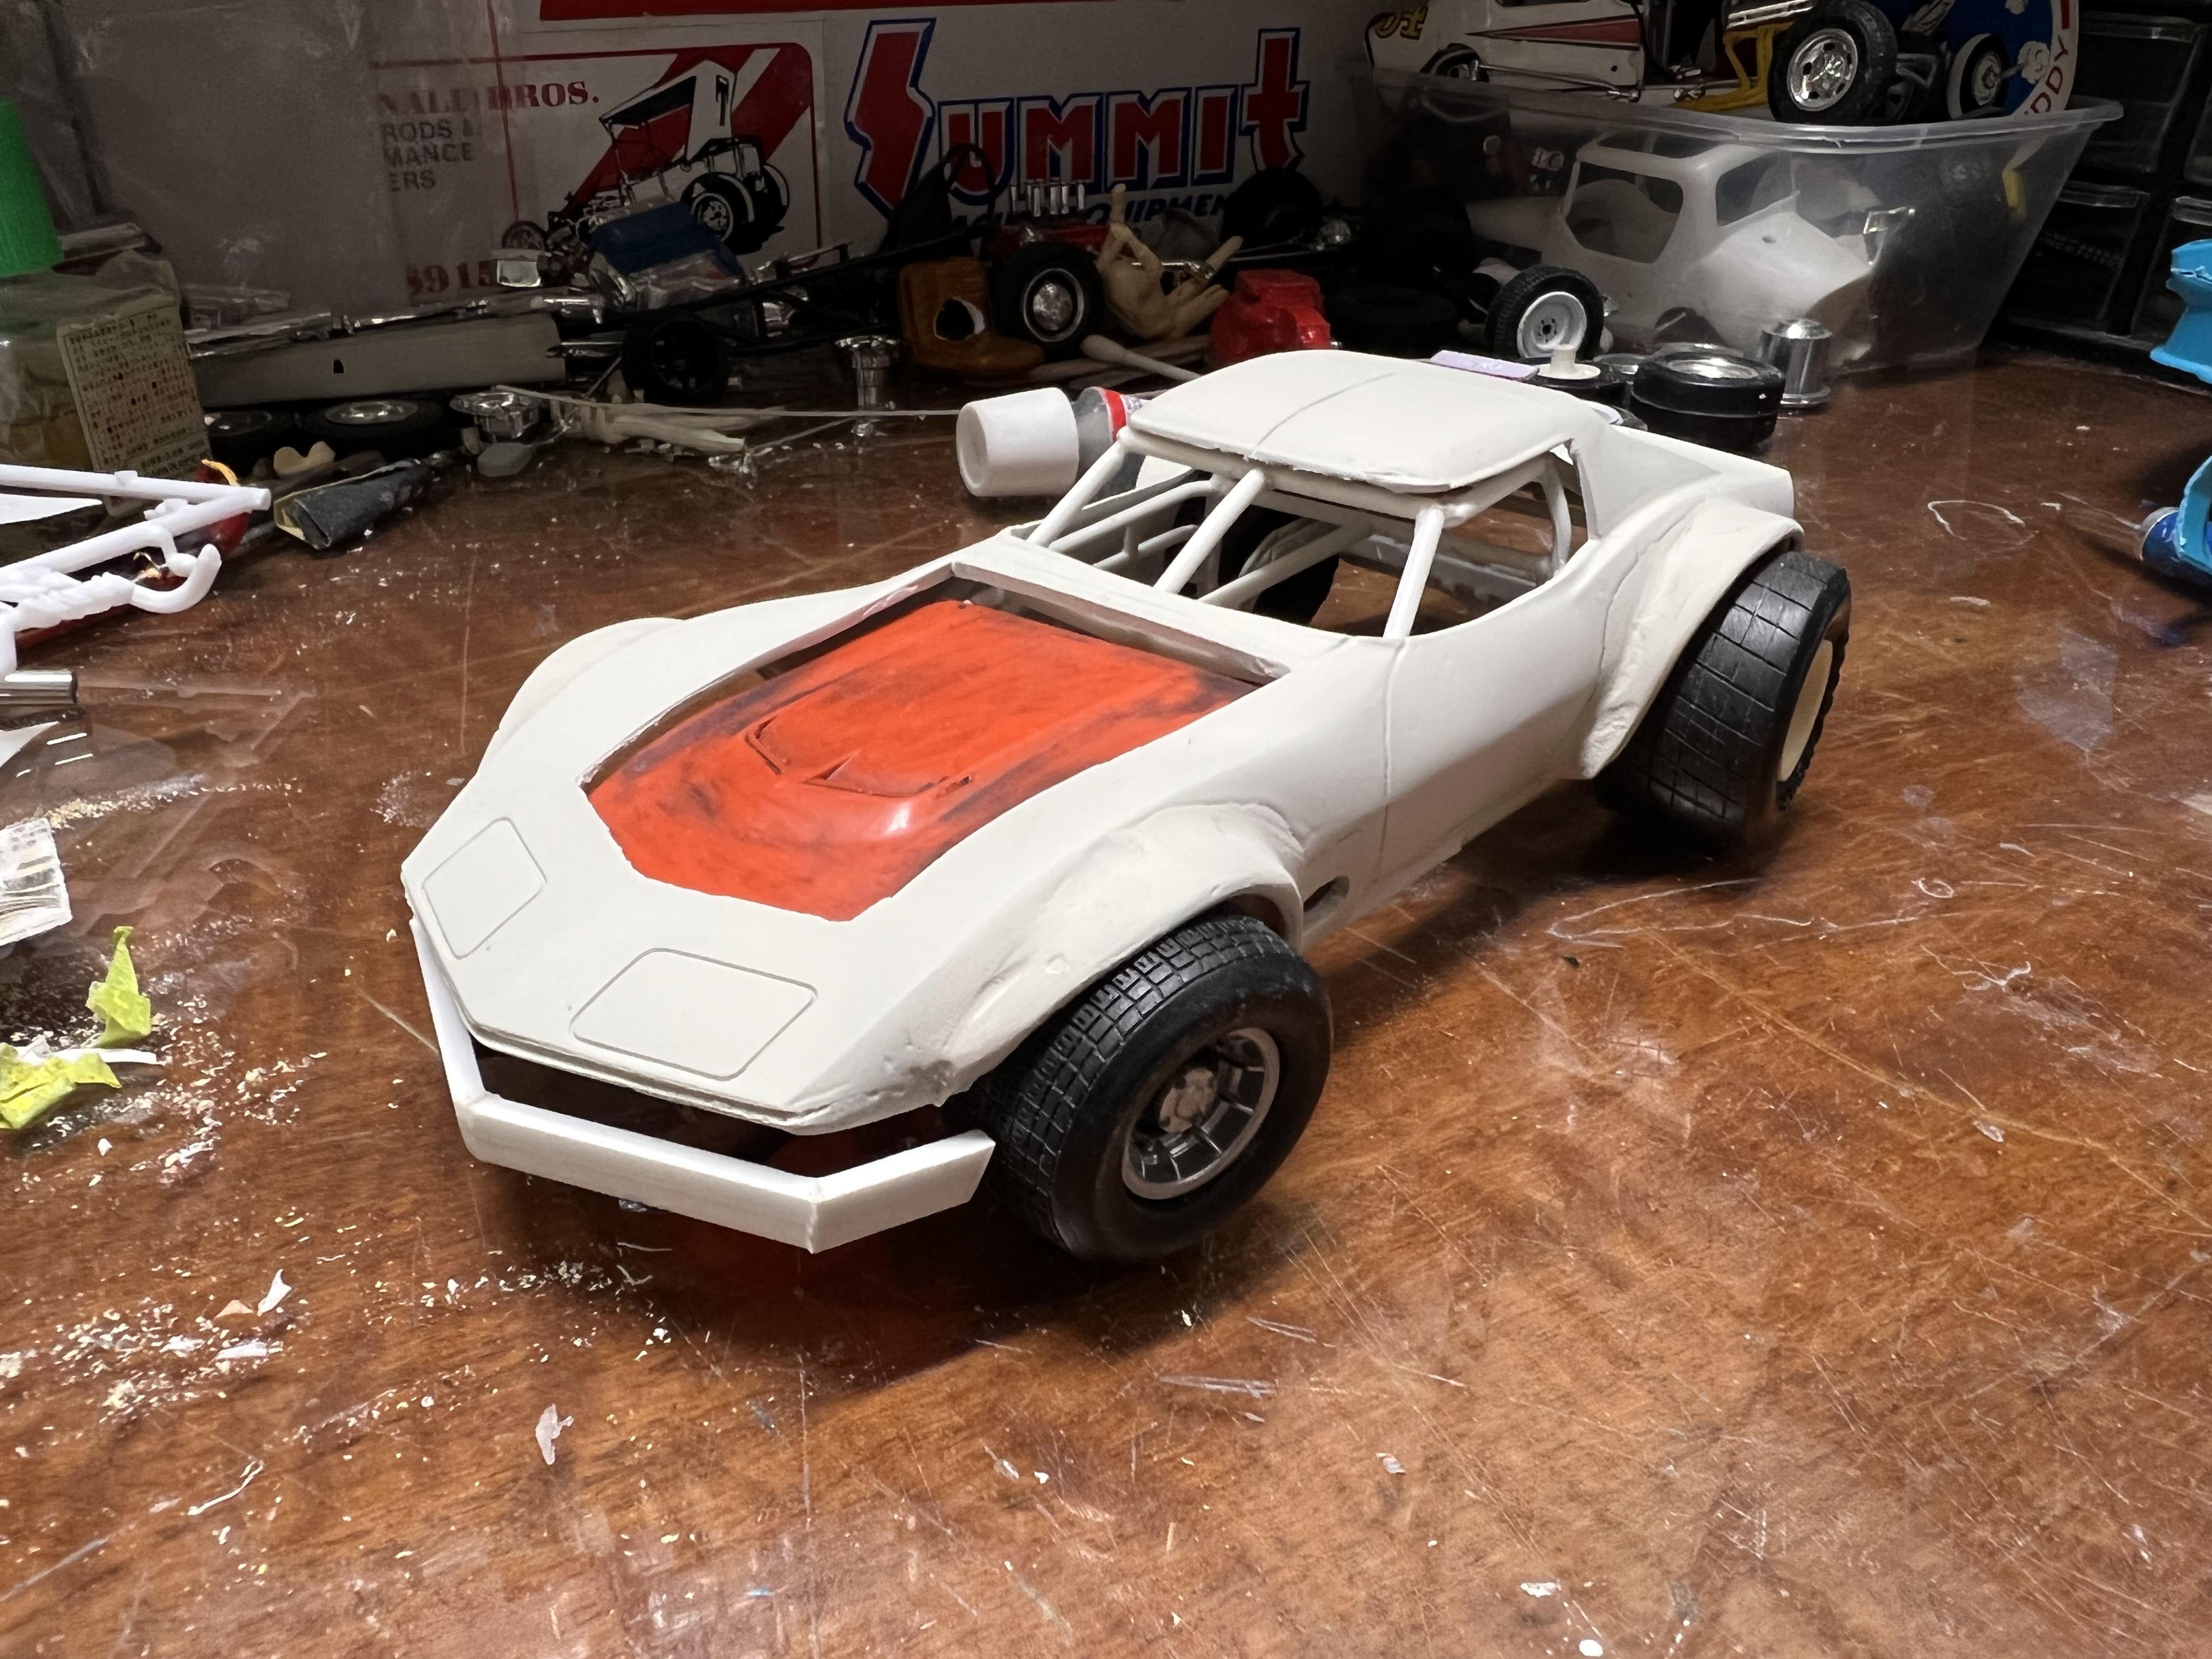
So while I wait to receive the decals, I have started on several other cars. I will continue to show multiple cars on this one thread but will give them separate posts Under Glass when they are completed. In the eighties, Corvette bodied Super Sedans were very popular right across Australia. I am stating with a glue bombed AMT Corvette - about a 71 I think, maybe earlier. Windscreen pillars have been removed along with the front bumper and roll pan. These cars were among the first to use a fully fabricated tube chassis in Oz but some lo-bucks teams would use the GM style perimeter frame from an HQ-HZ Holden one ton utility. These frames have a passing resemblance to, of all things, a Corvette frame so in the interests of simplicity I completely removed the floor and IRS mounting points of the AMT Corvette frame and began building my roll cage on top of that platform. Initially I also lowered the front edge of the roof down a smidge but on reflection it looked odd so I lifted it back to stock. I also made some wide flares for this car although if I was modelling a car from a few years later these would not have been present - it would have just had radiused wheel arches instead. Aussie speedway cars starting losing their flares around 1981 if I recall correctly but I like them so included them in this build. I wrapped some aluminium craft wire around a wooden dowel - this gives a smooth curve. I then cut off appropriate lengths of the curve and bent the ends in at 90 degrees - these were then inserted though holes drilled in the body and superglue was applied. I adjust the angle of the flares to suit the tyres and then glue small strips of plastic between the wire and the body to establish this distance. Finally, I cut and fit small strips of thin styrene sheet to fill the gaps. Eventually a skim coat of bog blends everything in. In the photo you can see the rear flare filled in while I am still establishing the front one. You can also see the beginning of the frame in the background. In the second mockup photo the frame has dropped away from the body - that fabricated bumper will be snug to the body eventually. Cheers Alan
-
It's been a while but time for an update. I got the white and red paint on the Torrie, plus the black sill panels. A friend in our model club is very talented in creating decals so he is doing them for me - I will explain the significance of those decals when I get them applied to the car. For the Aussies viewing now, -think MDHT! Narrowing the flares made a huge difference and another friend has just 3D printed a set of wide and wider rims for me. These are an Australian wheel known as an Aunger Hot Wire. Similar yet different to an Appliance wire mag or a European BBS wheel, they were very popular on street machines as well as racecars and up until now, there was only one rare source for them and they needed a lot of work, especially in regards to width. They are the ones you can see in this photo but it will have the #D printed ones next time I post a picture. These will be the finishing touch on the model. Cheers Alan