alan barton
-
Posts
2,105 -
Joined
-
Last visited
Content Type
Profiles
Forums
Events
Gallery
Everything posted by alan barton
-
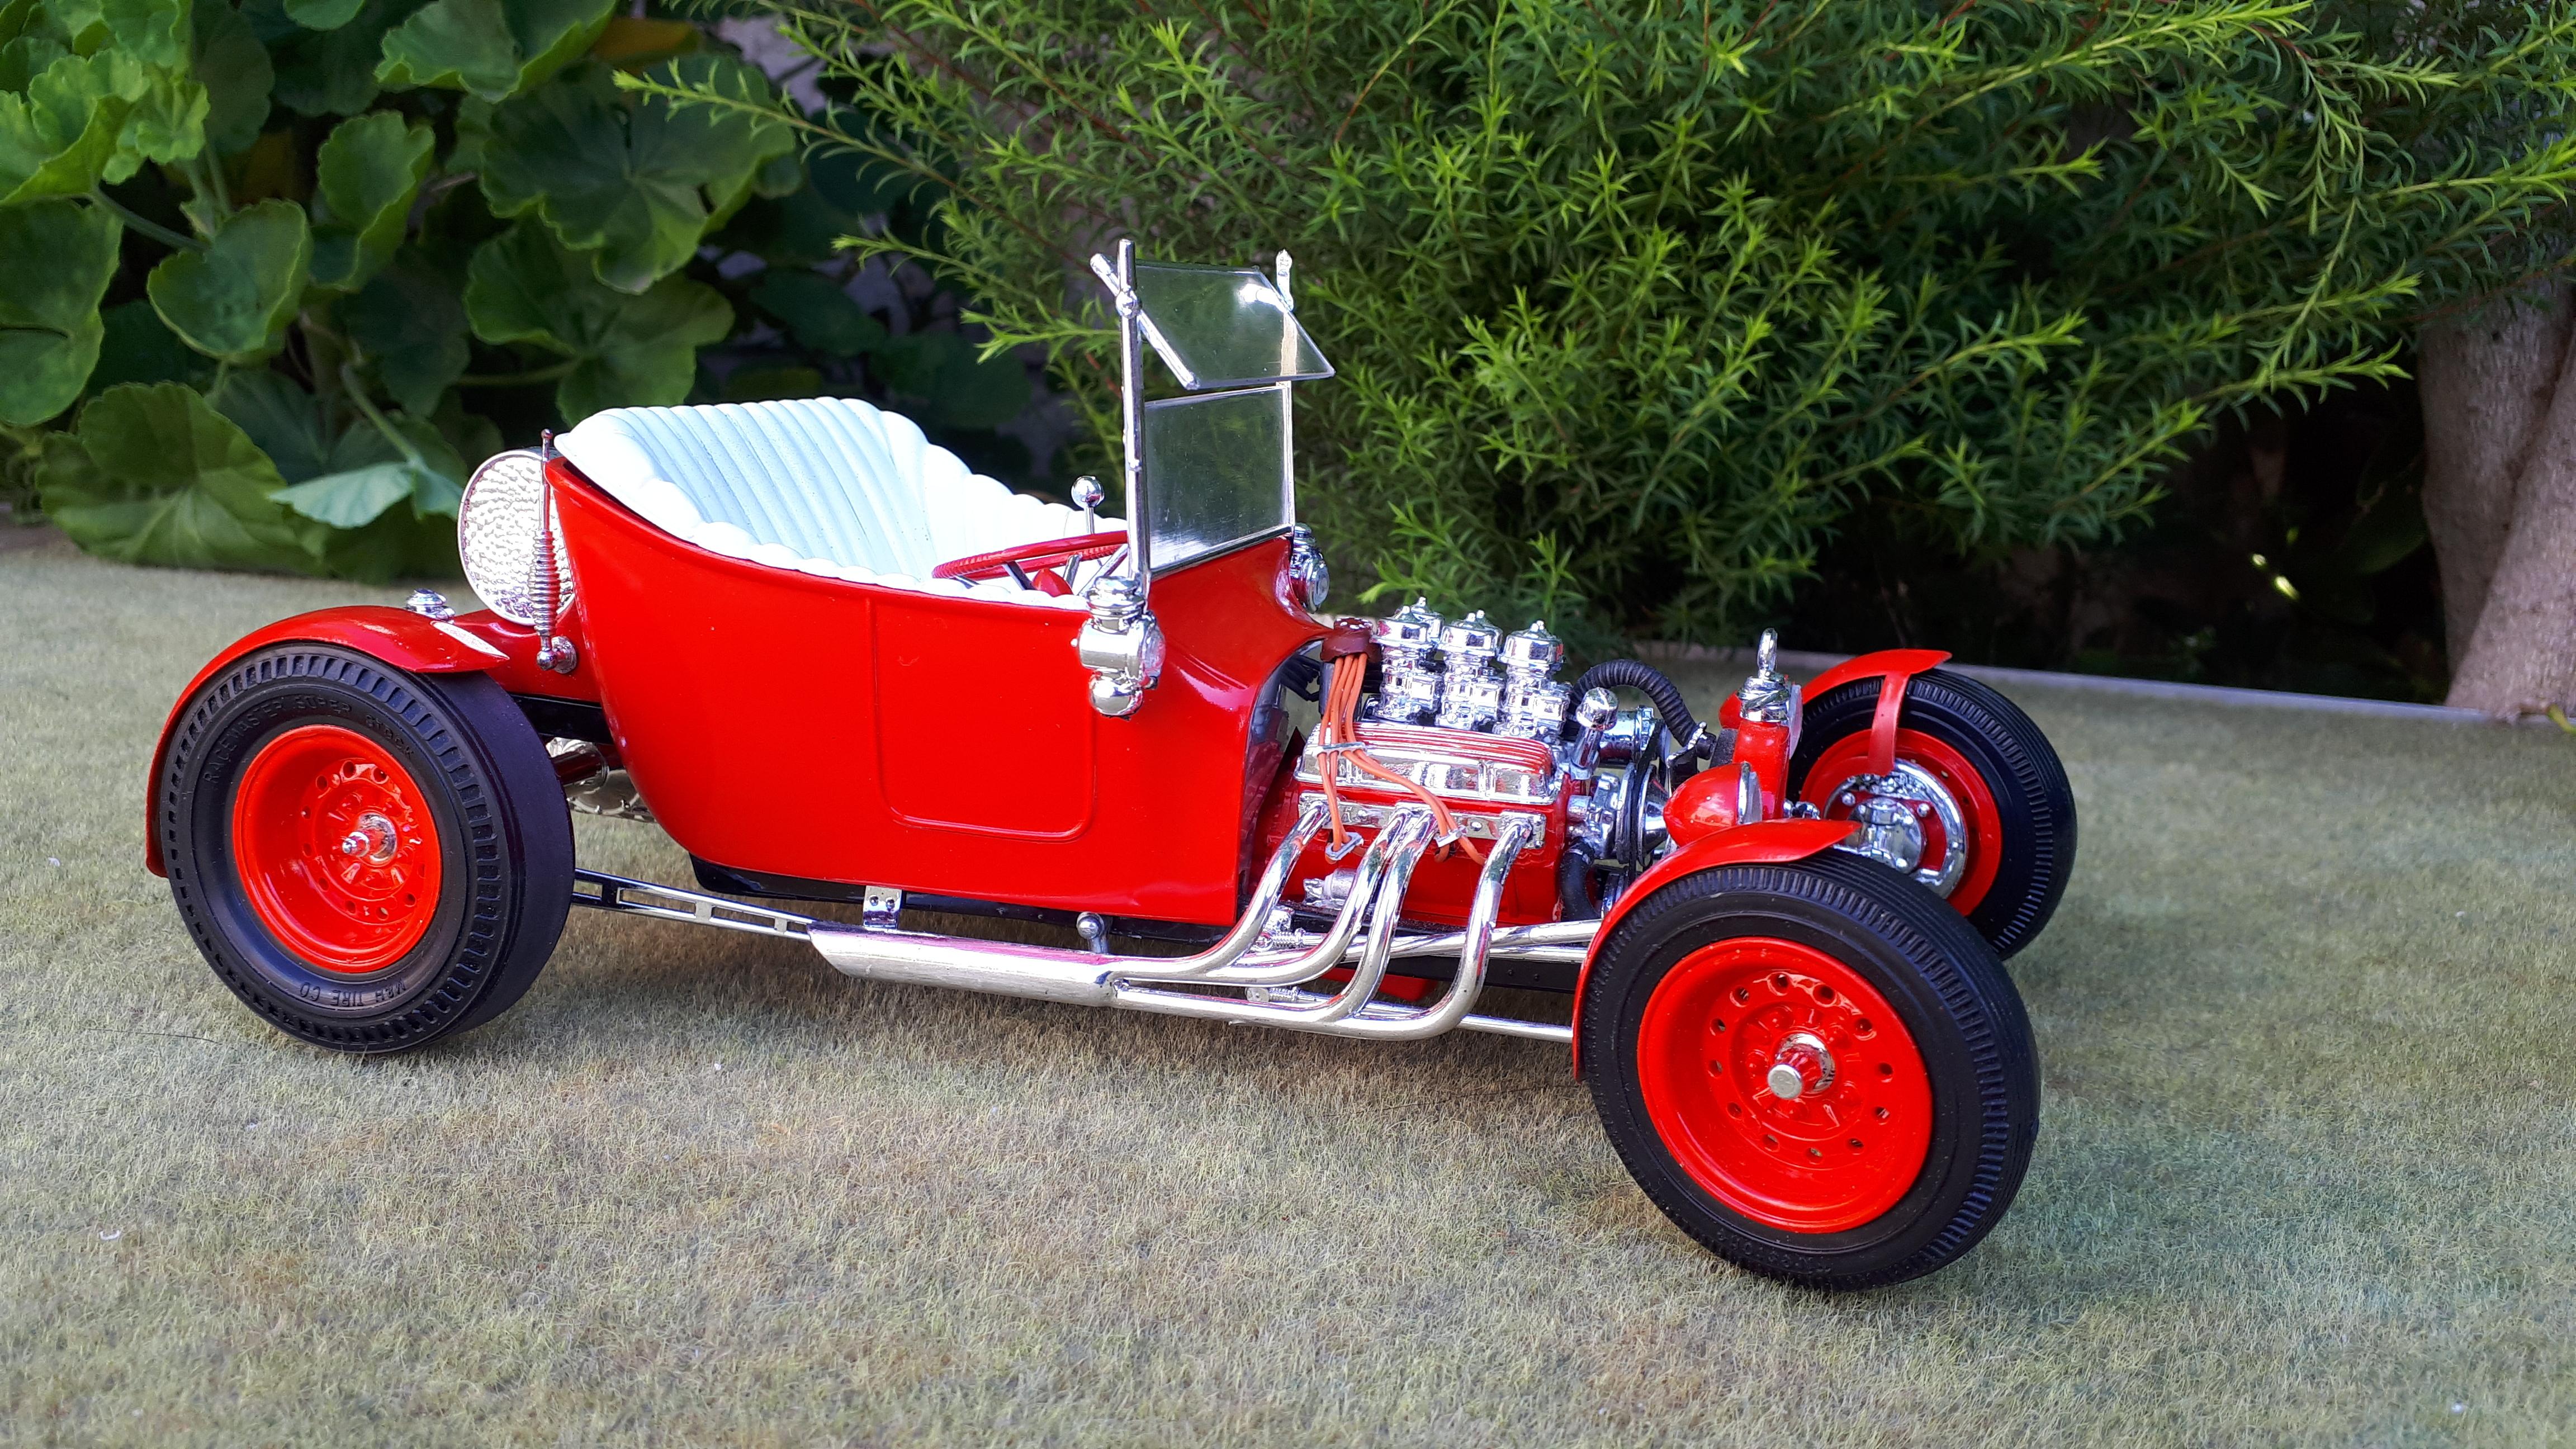
As promised in my WIP thread, here is the finished 1/16th Tee N t. I can honestly say I had a ball building this and I would recommend it to anyone - don't be put off by the Pyro or Lindberg brand on the box! Cheers Alan

-
Great subject for a thread, Phill! Here are some of mine. First, the AMT 41 Ford. A great kit, really nice to build but tricky to get down in the weeds. I trimmed the crossmember, shaved the spring, sliced the tyres and slotted the backing plates and it still needs to go lower! Cheers Alan
-
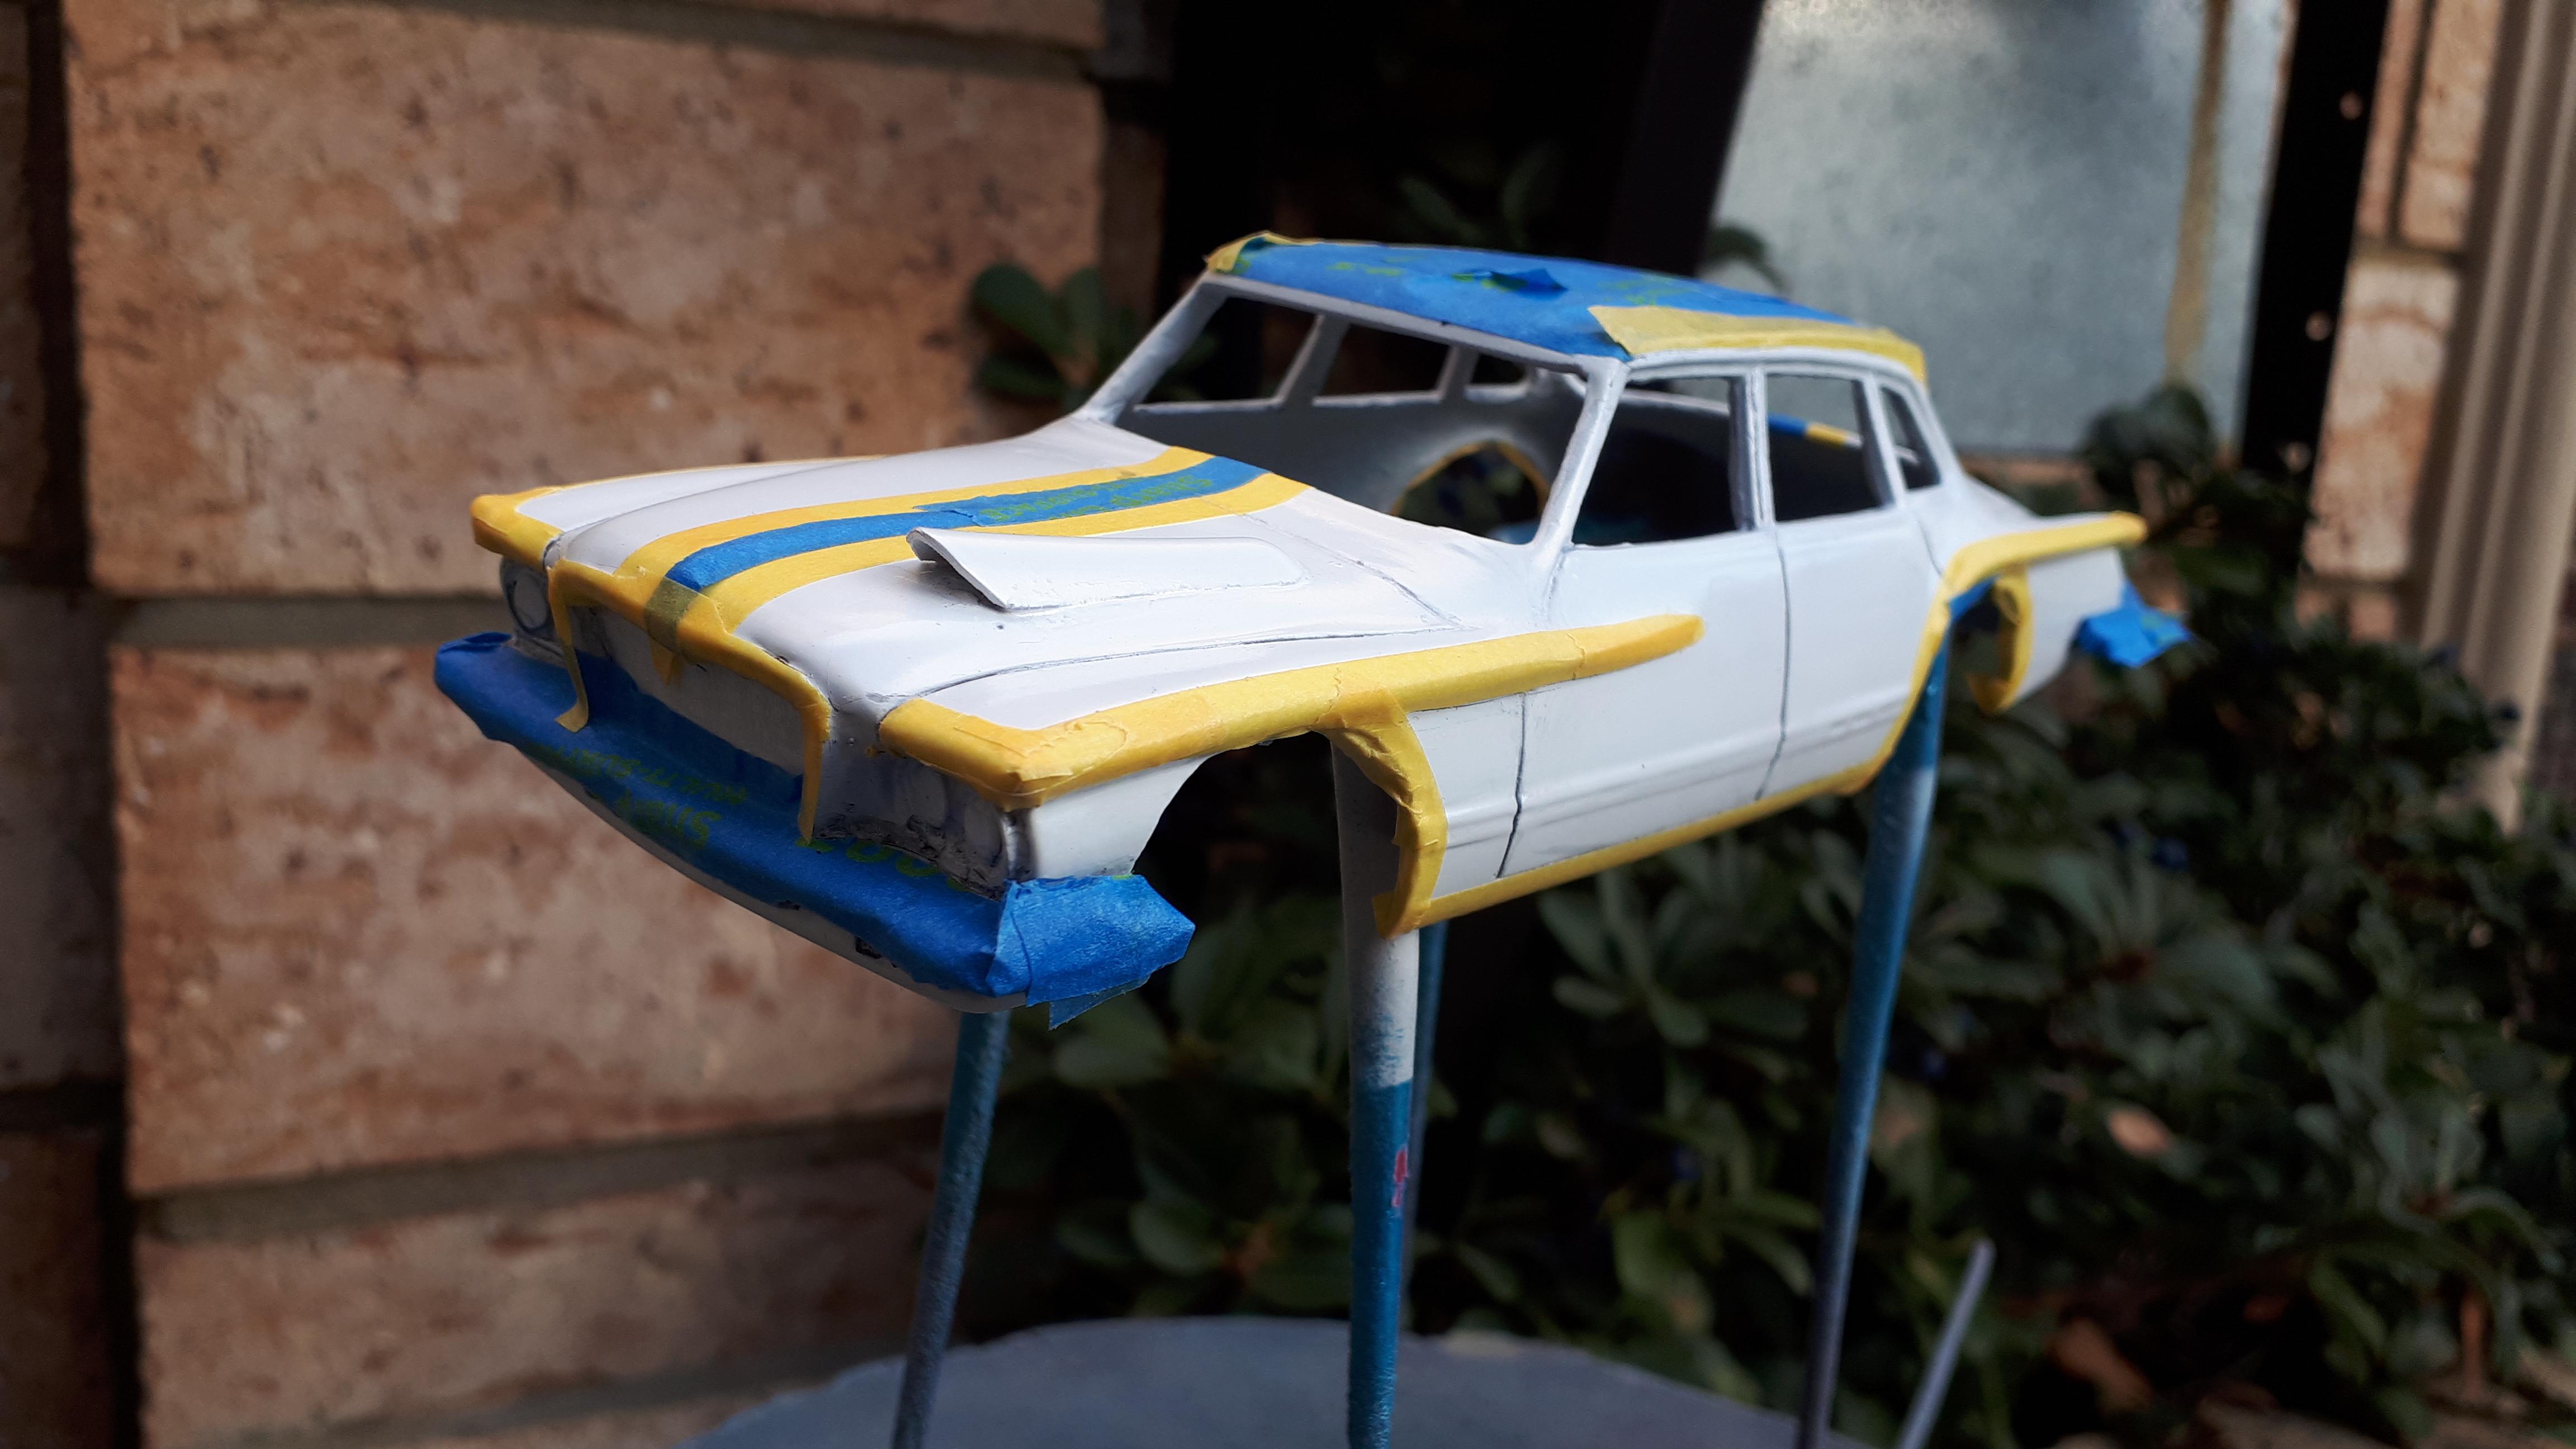
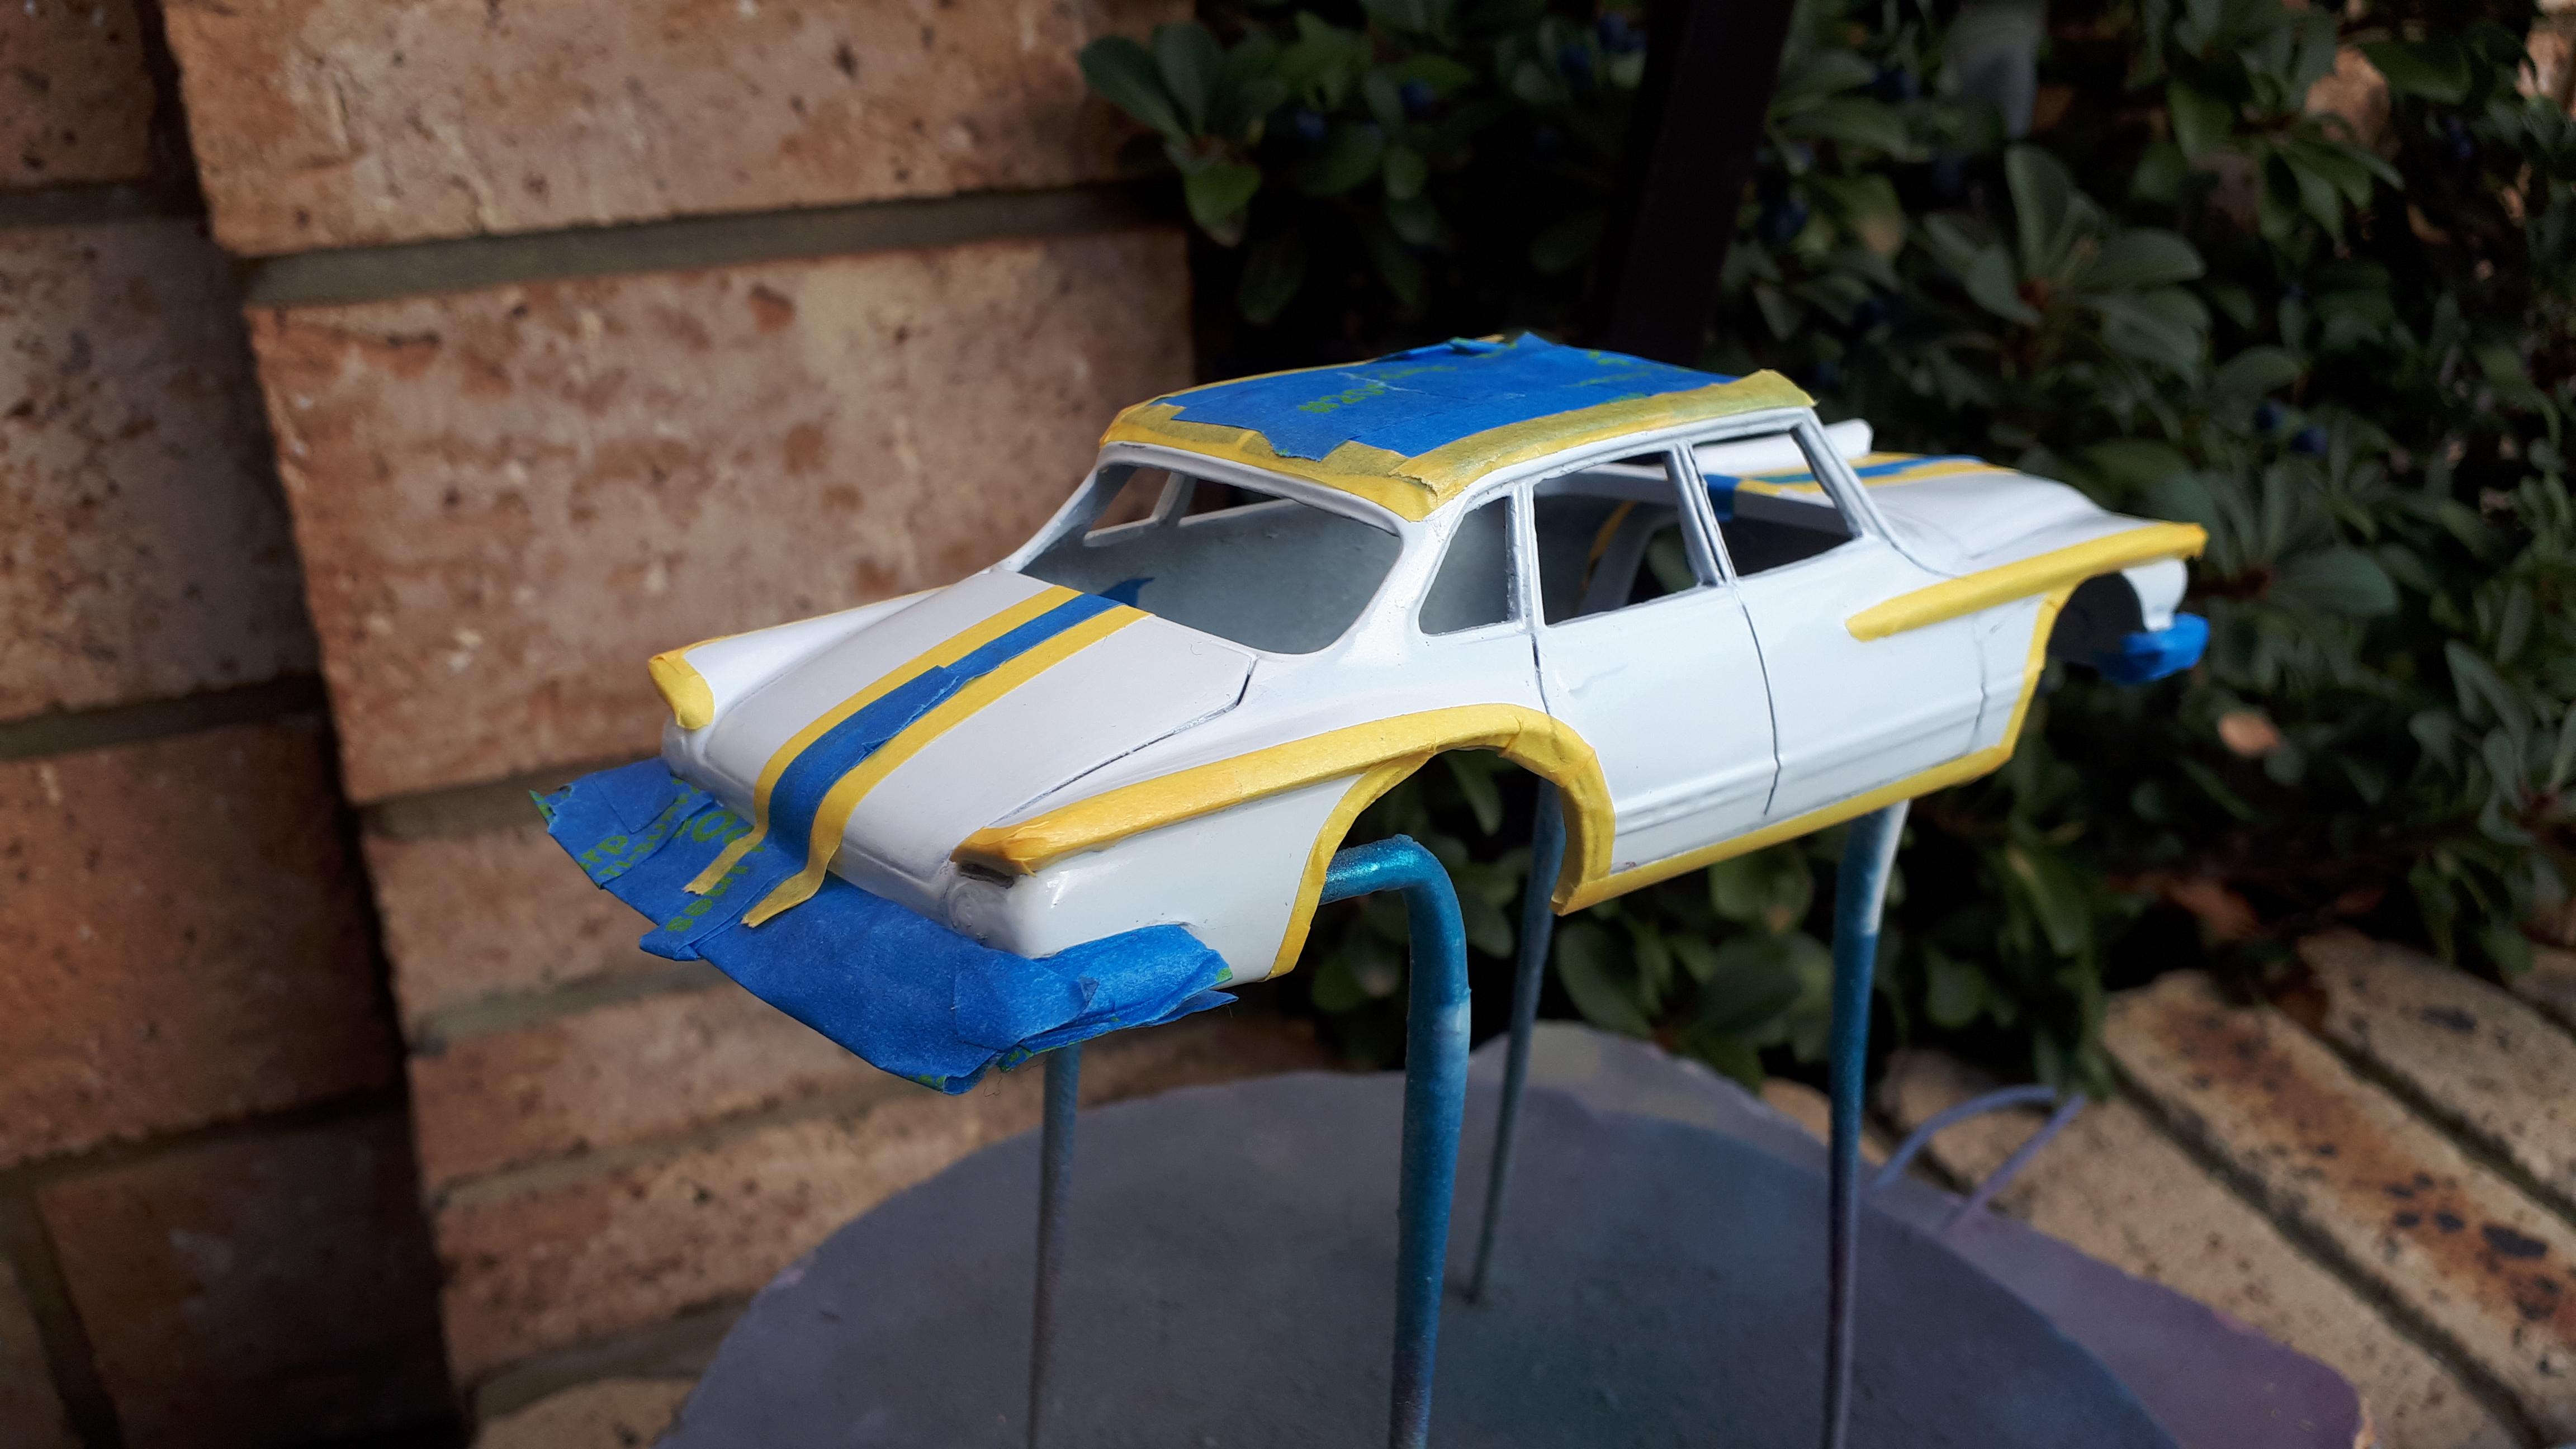
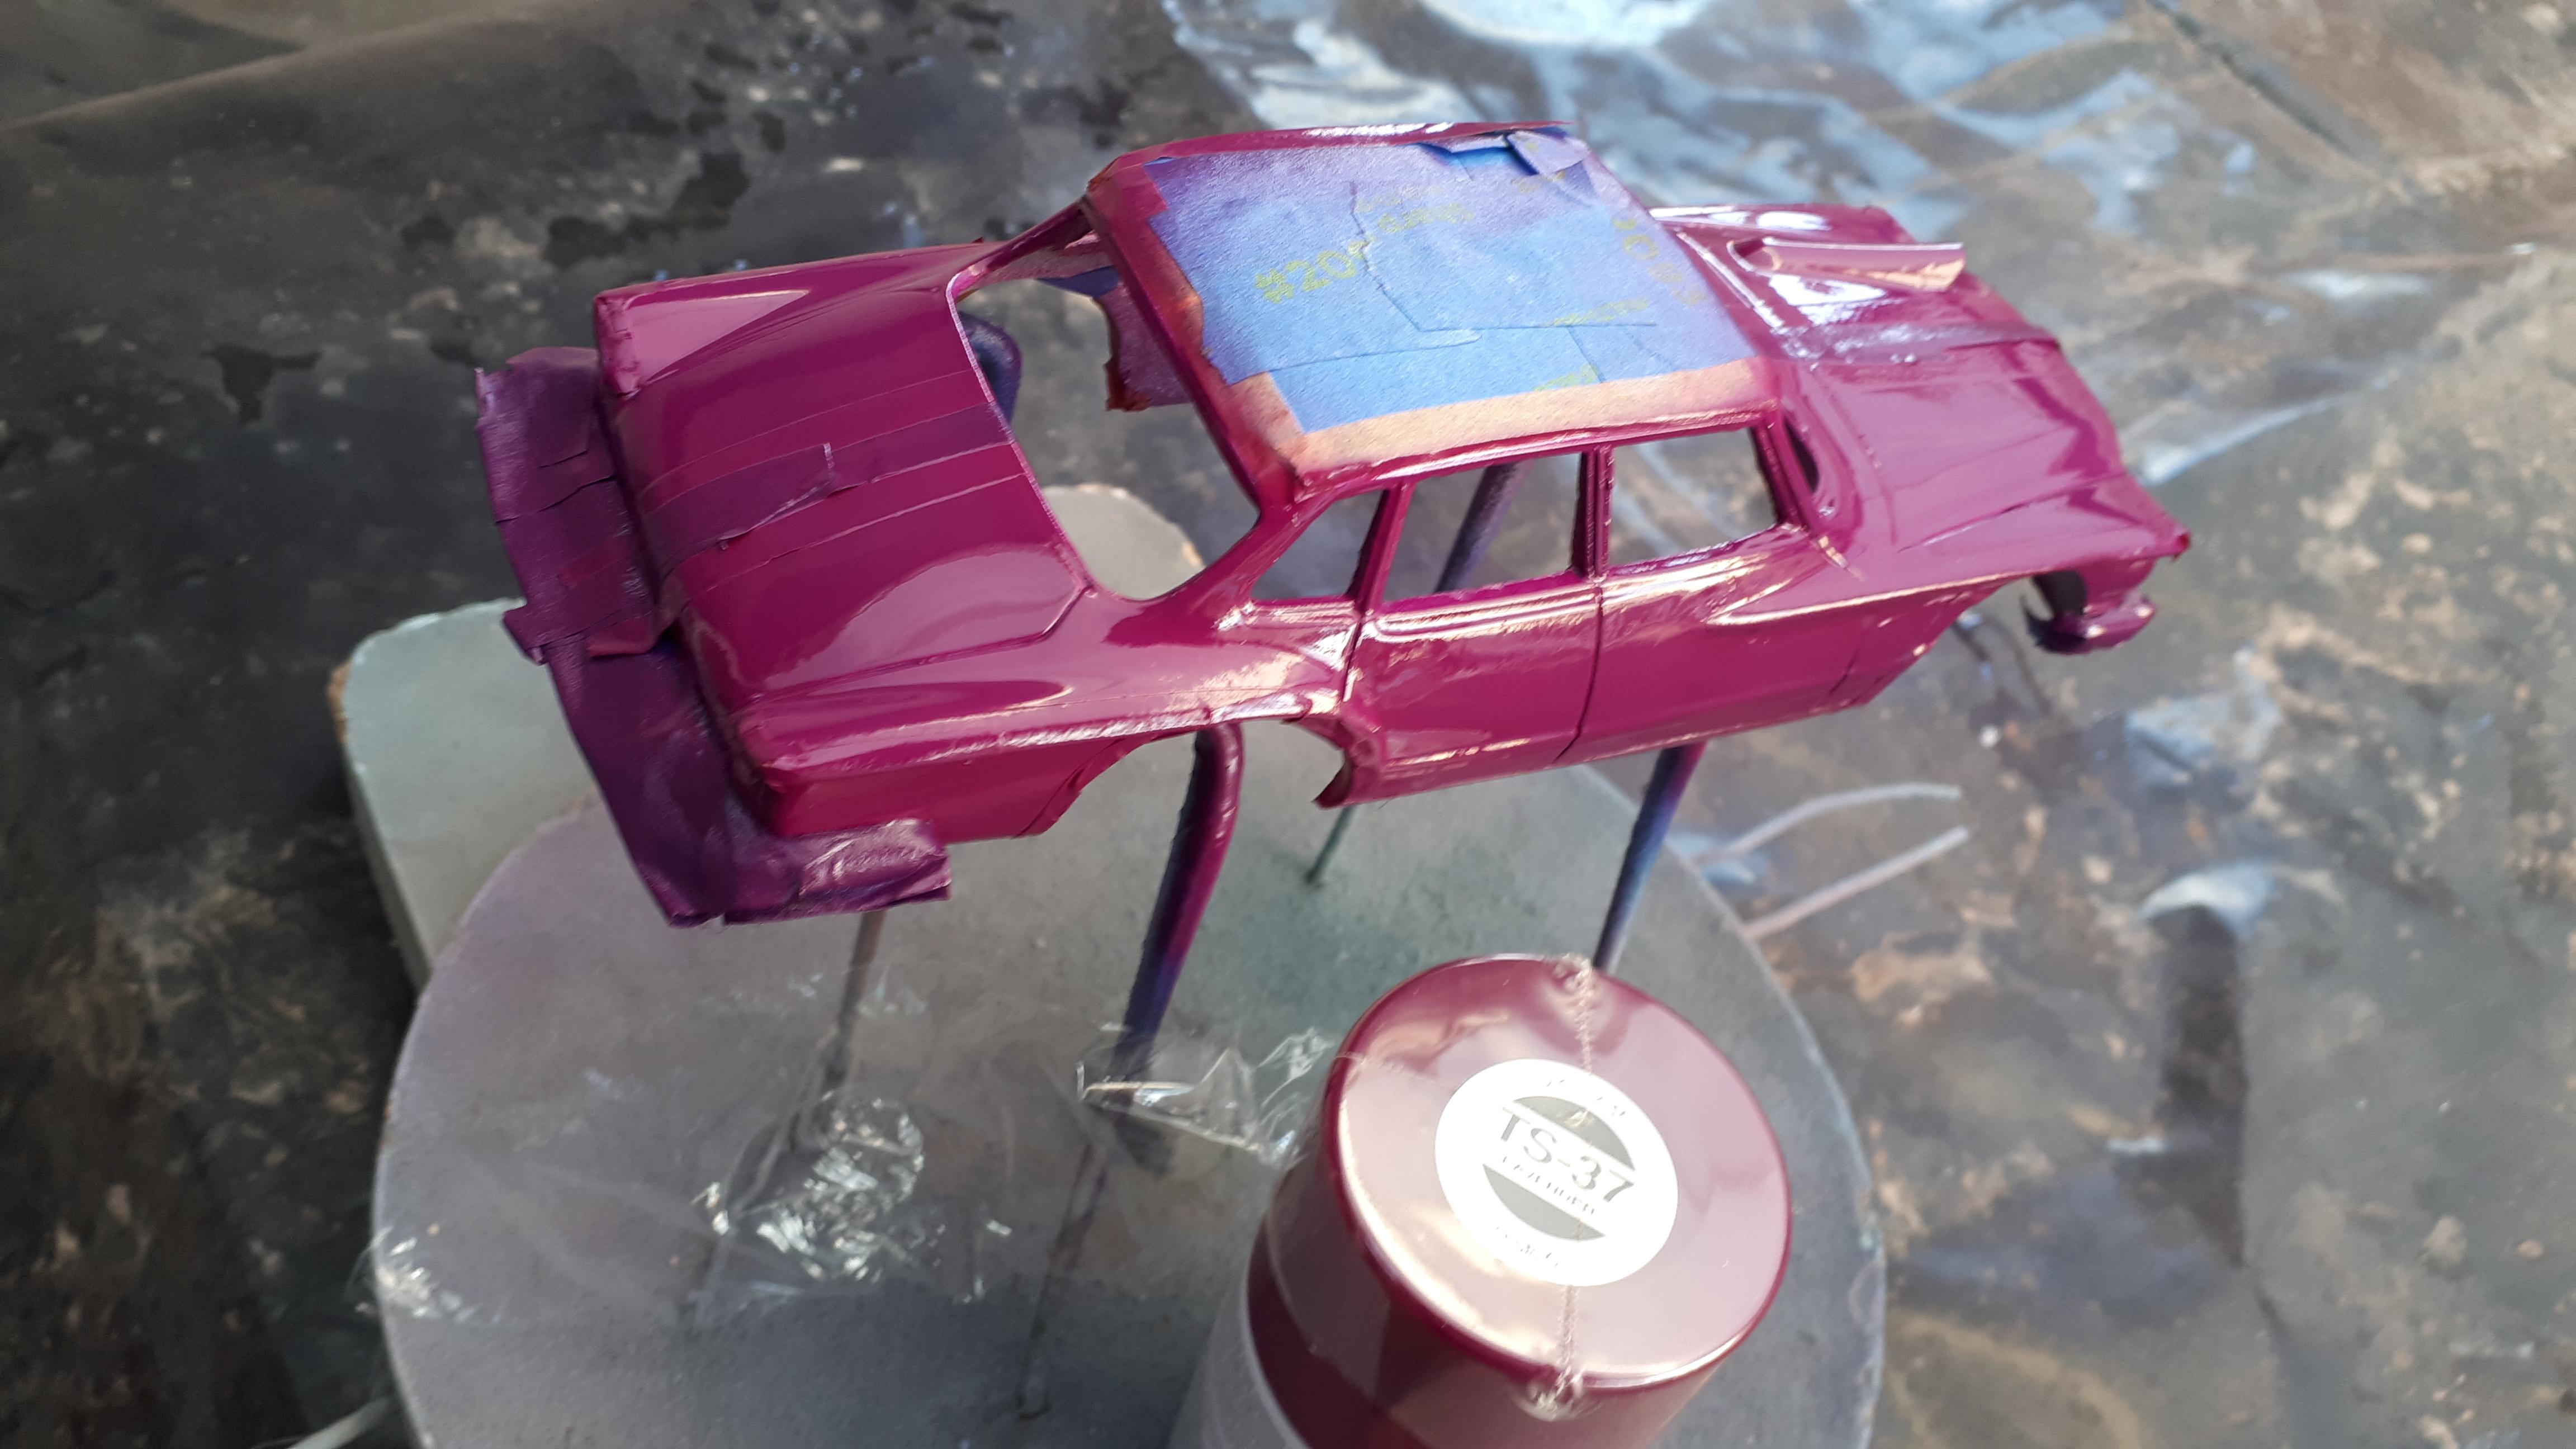
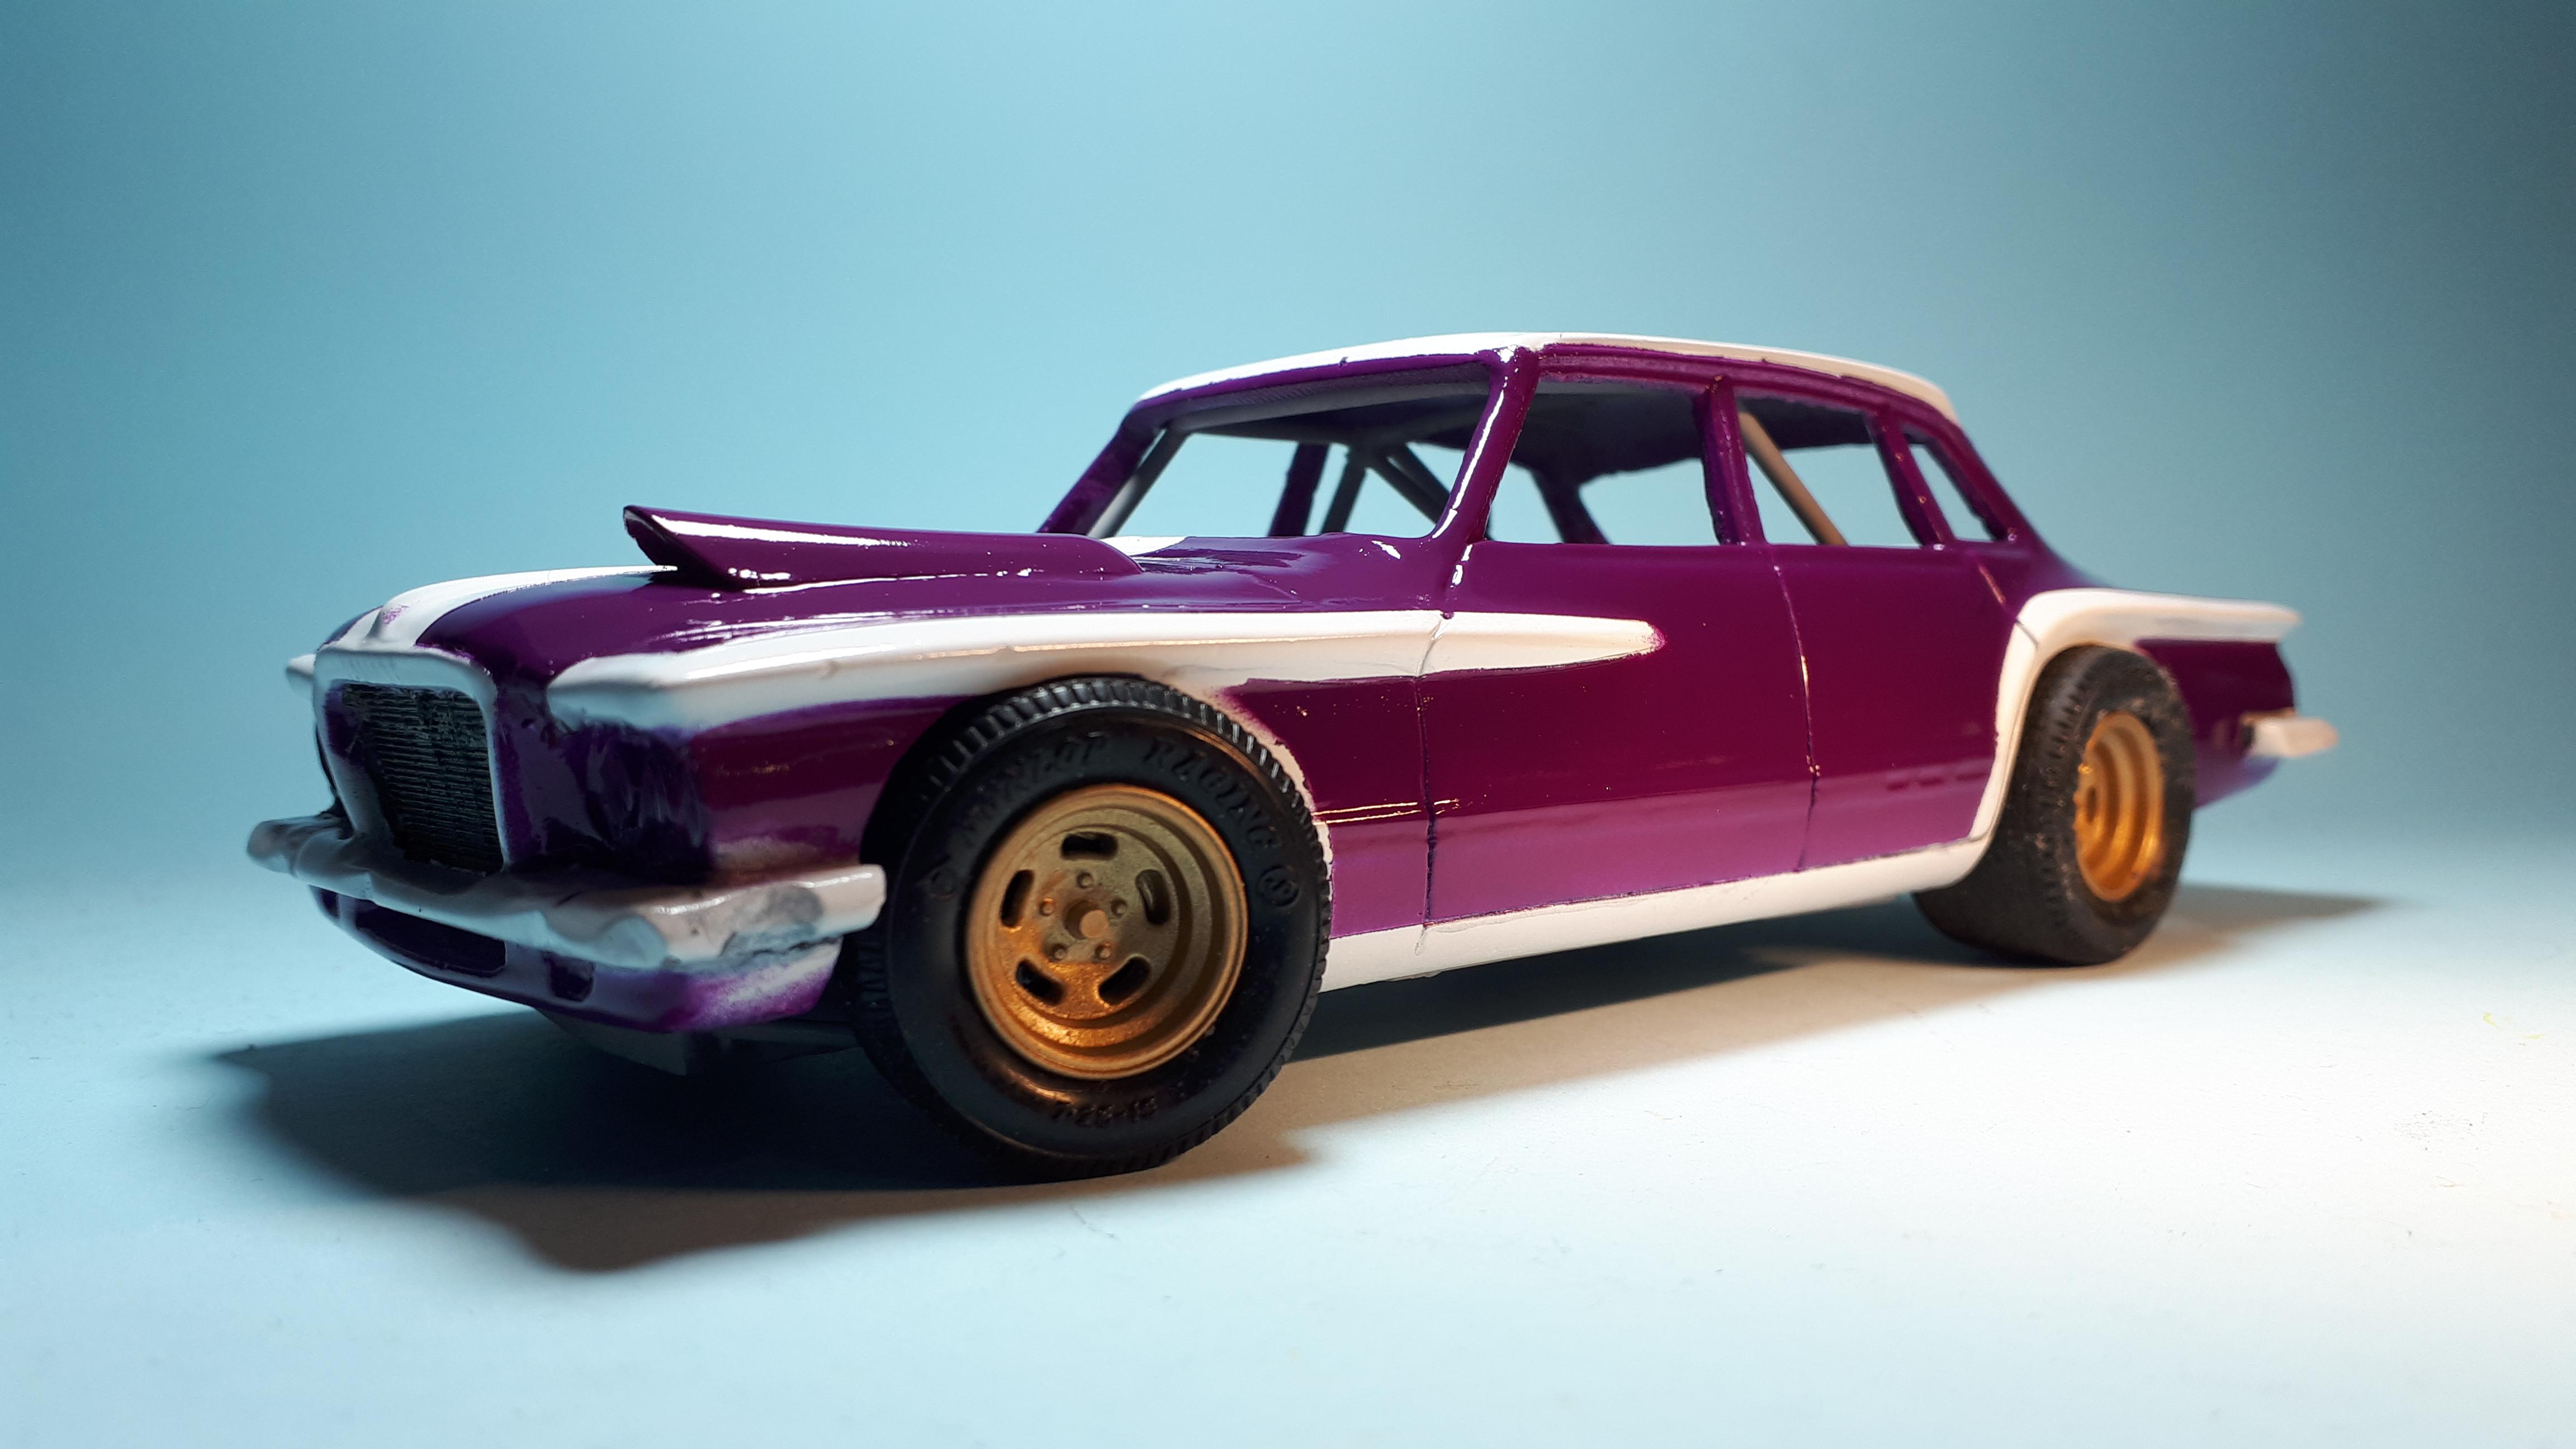
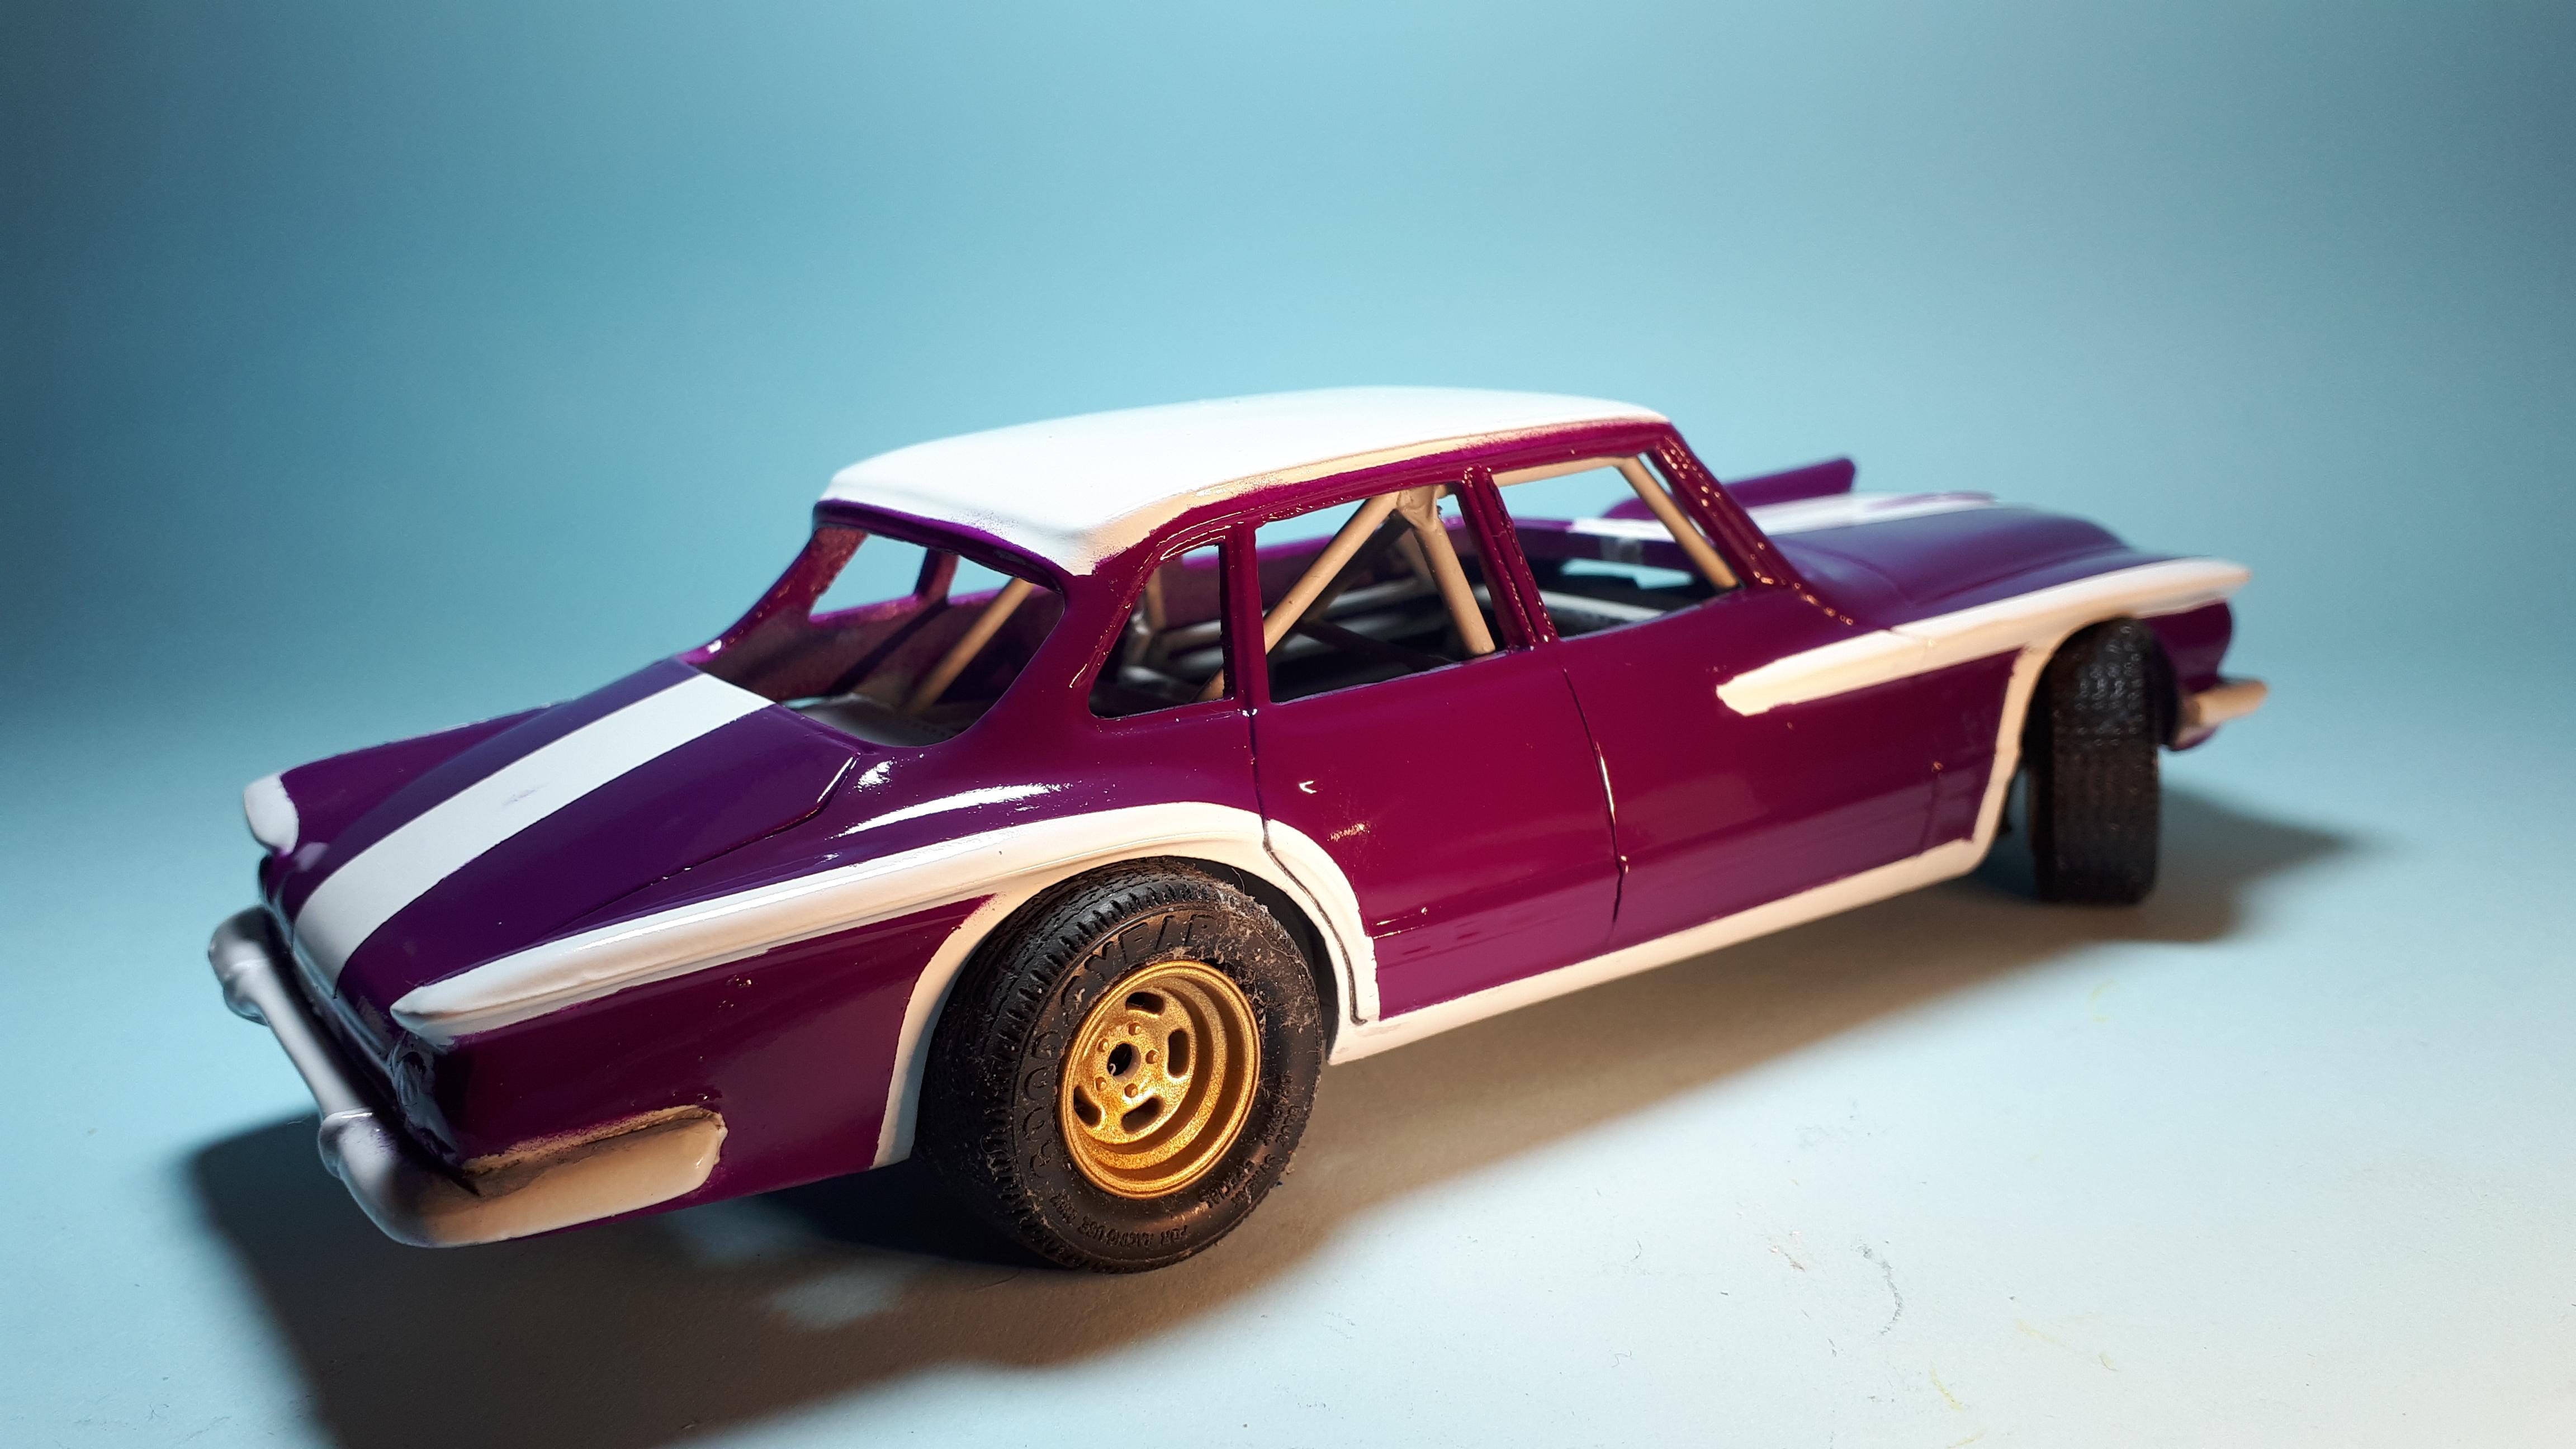
Spent the last few nights masking up a paint design for the Val. I want it to be very seventies and I wanted to highlight the distinctive body lines that were unique to that car. It was amazingly wet here in Perth for most of today but when I got home from work the rain had cleared and it was reasonably balmy so I grabbed a can of Tamiya Lavender and went for it! I can't say I enjoy masking up a model but this one has come out reasonably cleanly and will only take a little bit of cleanup. Still uncertain of a suitable colour for the rollcage - black was very common for home built cars of the era but I am keeping my options open.
-
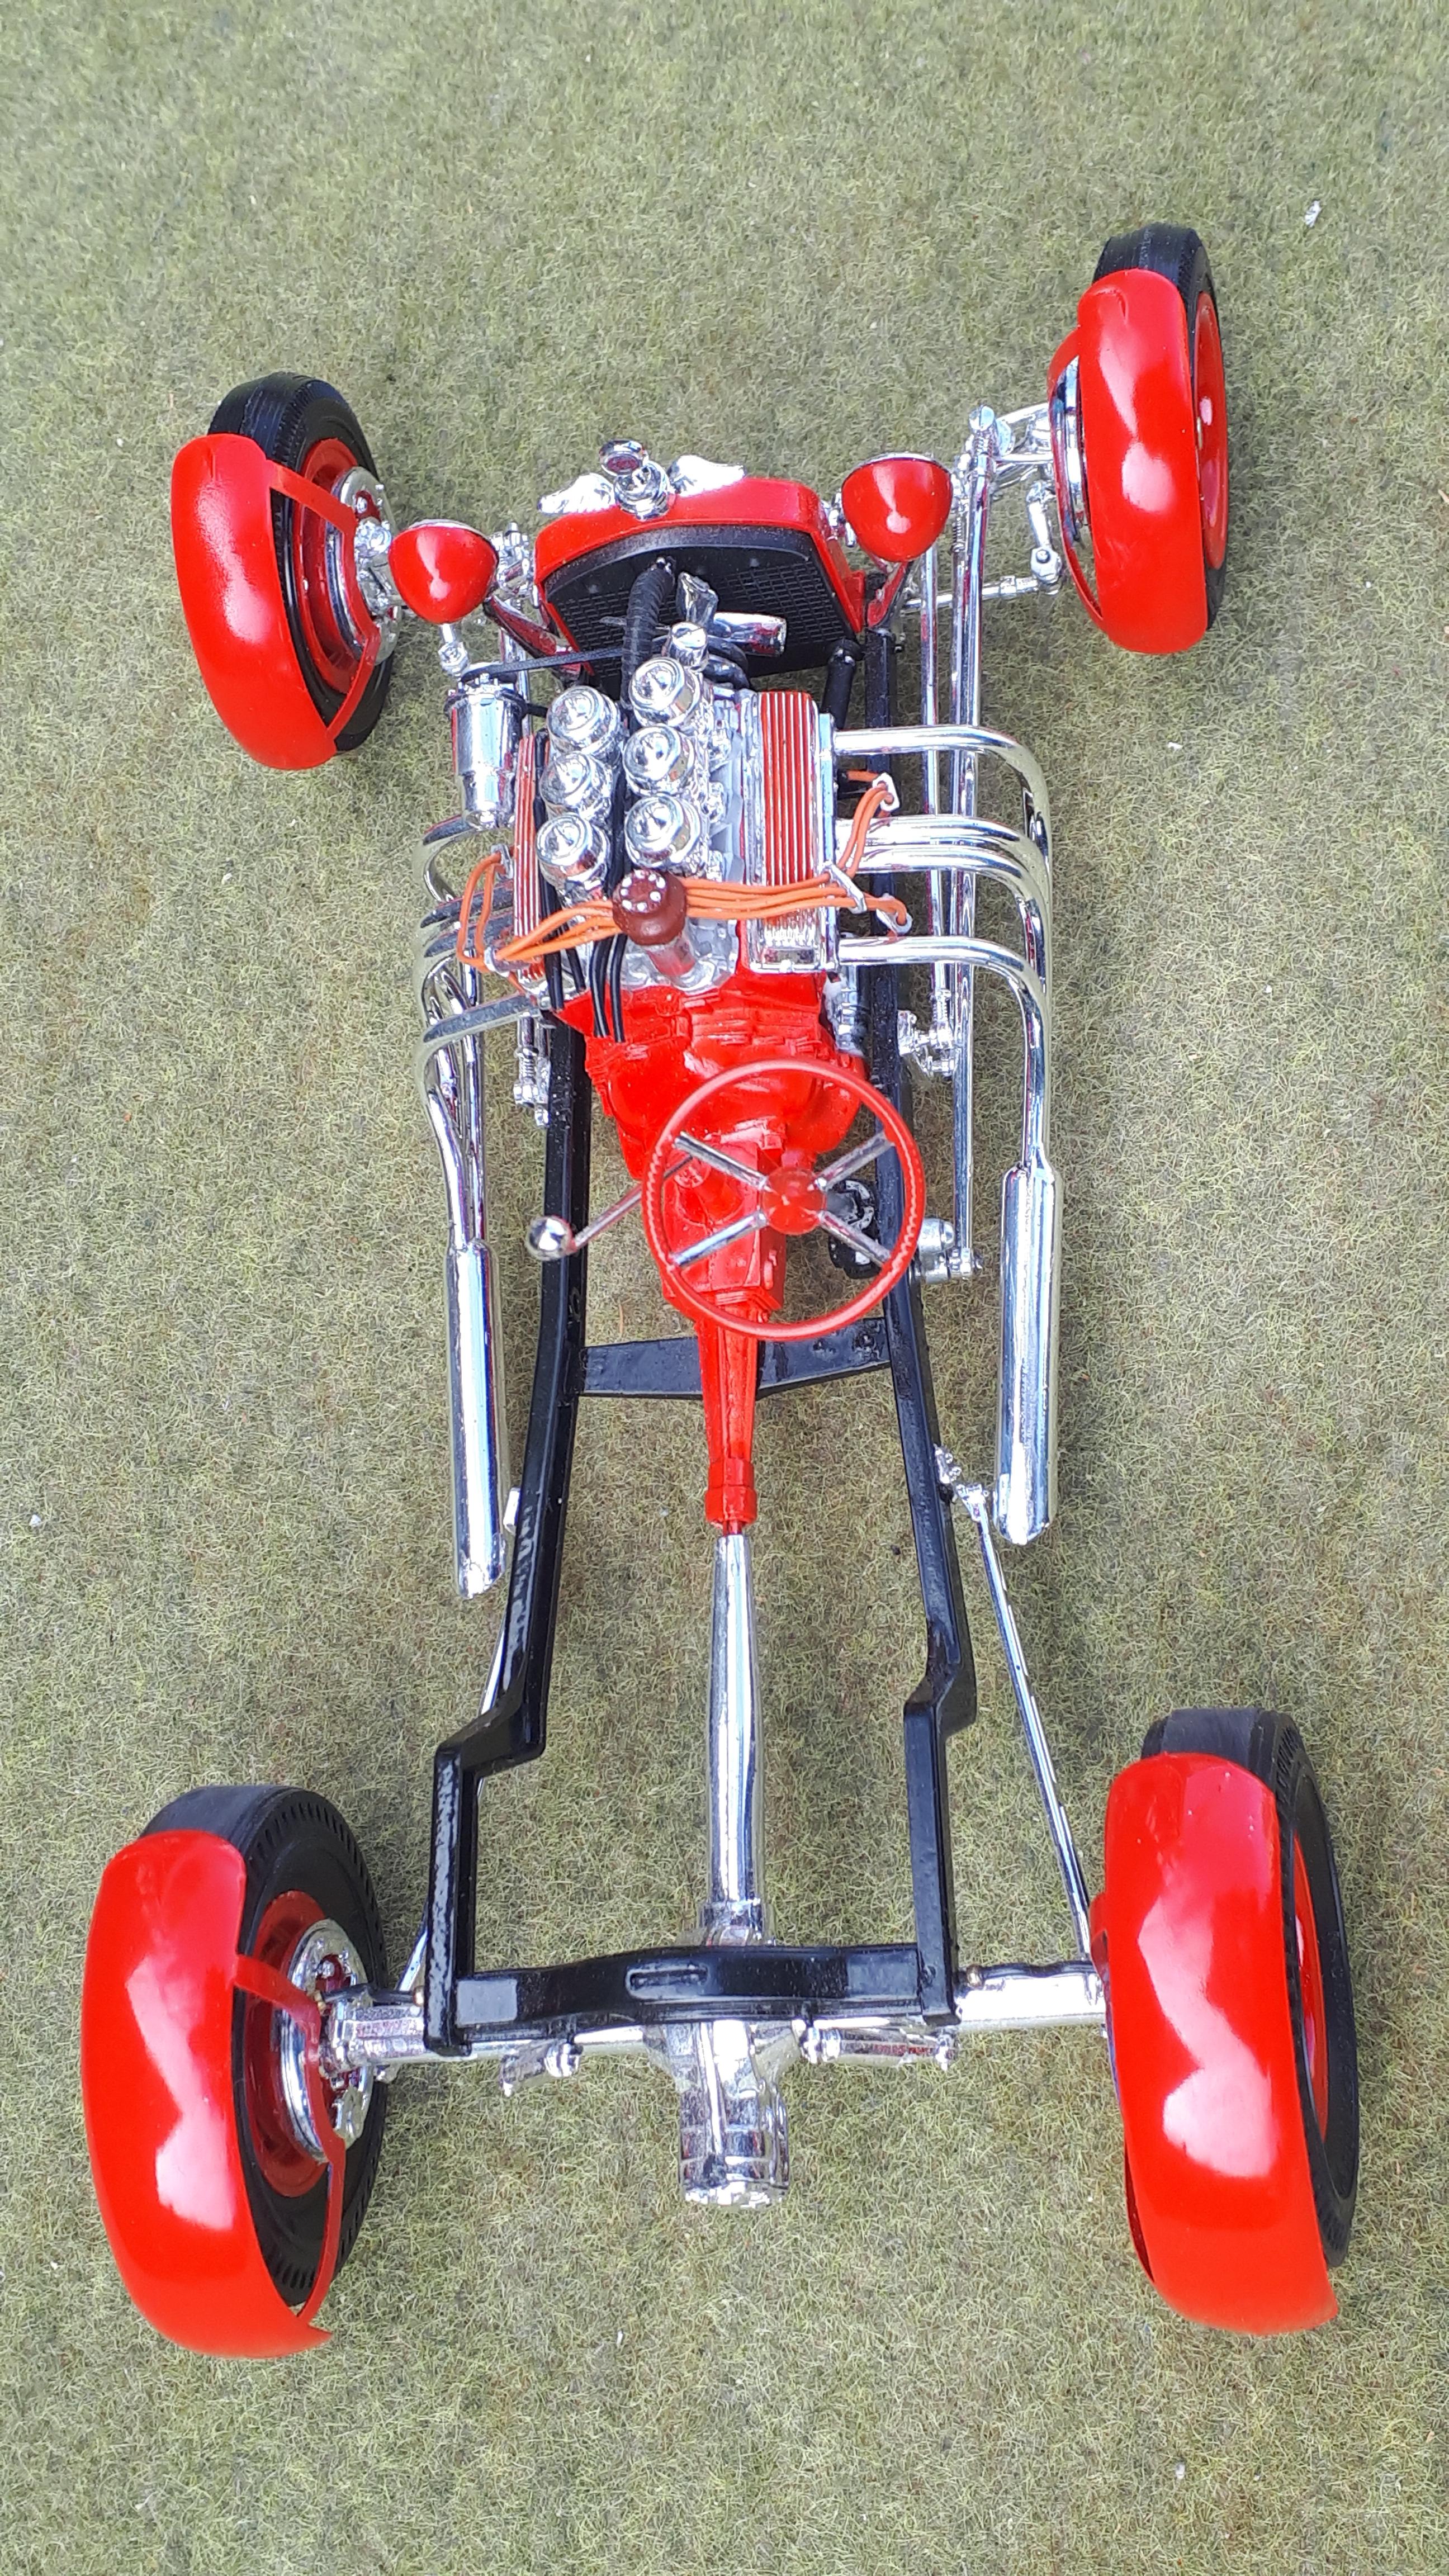
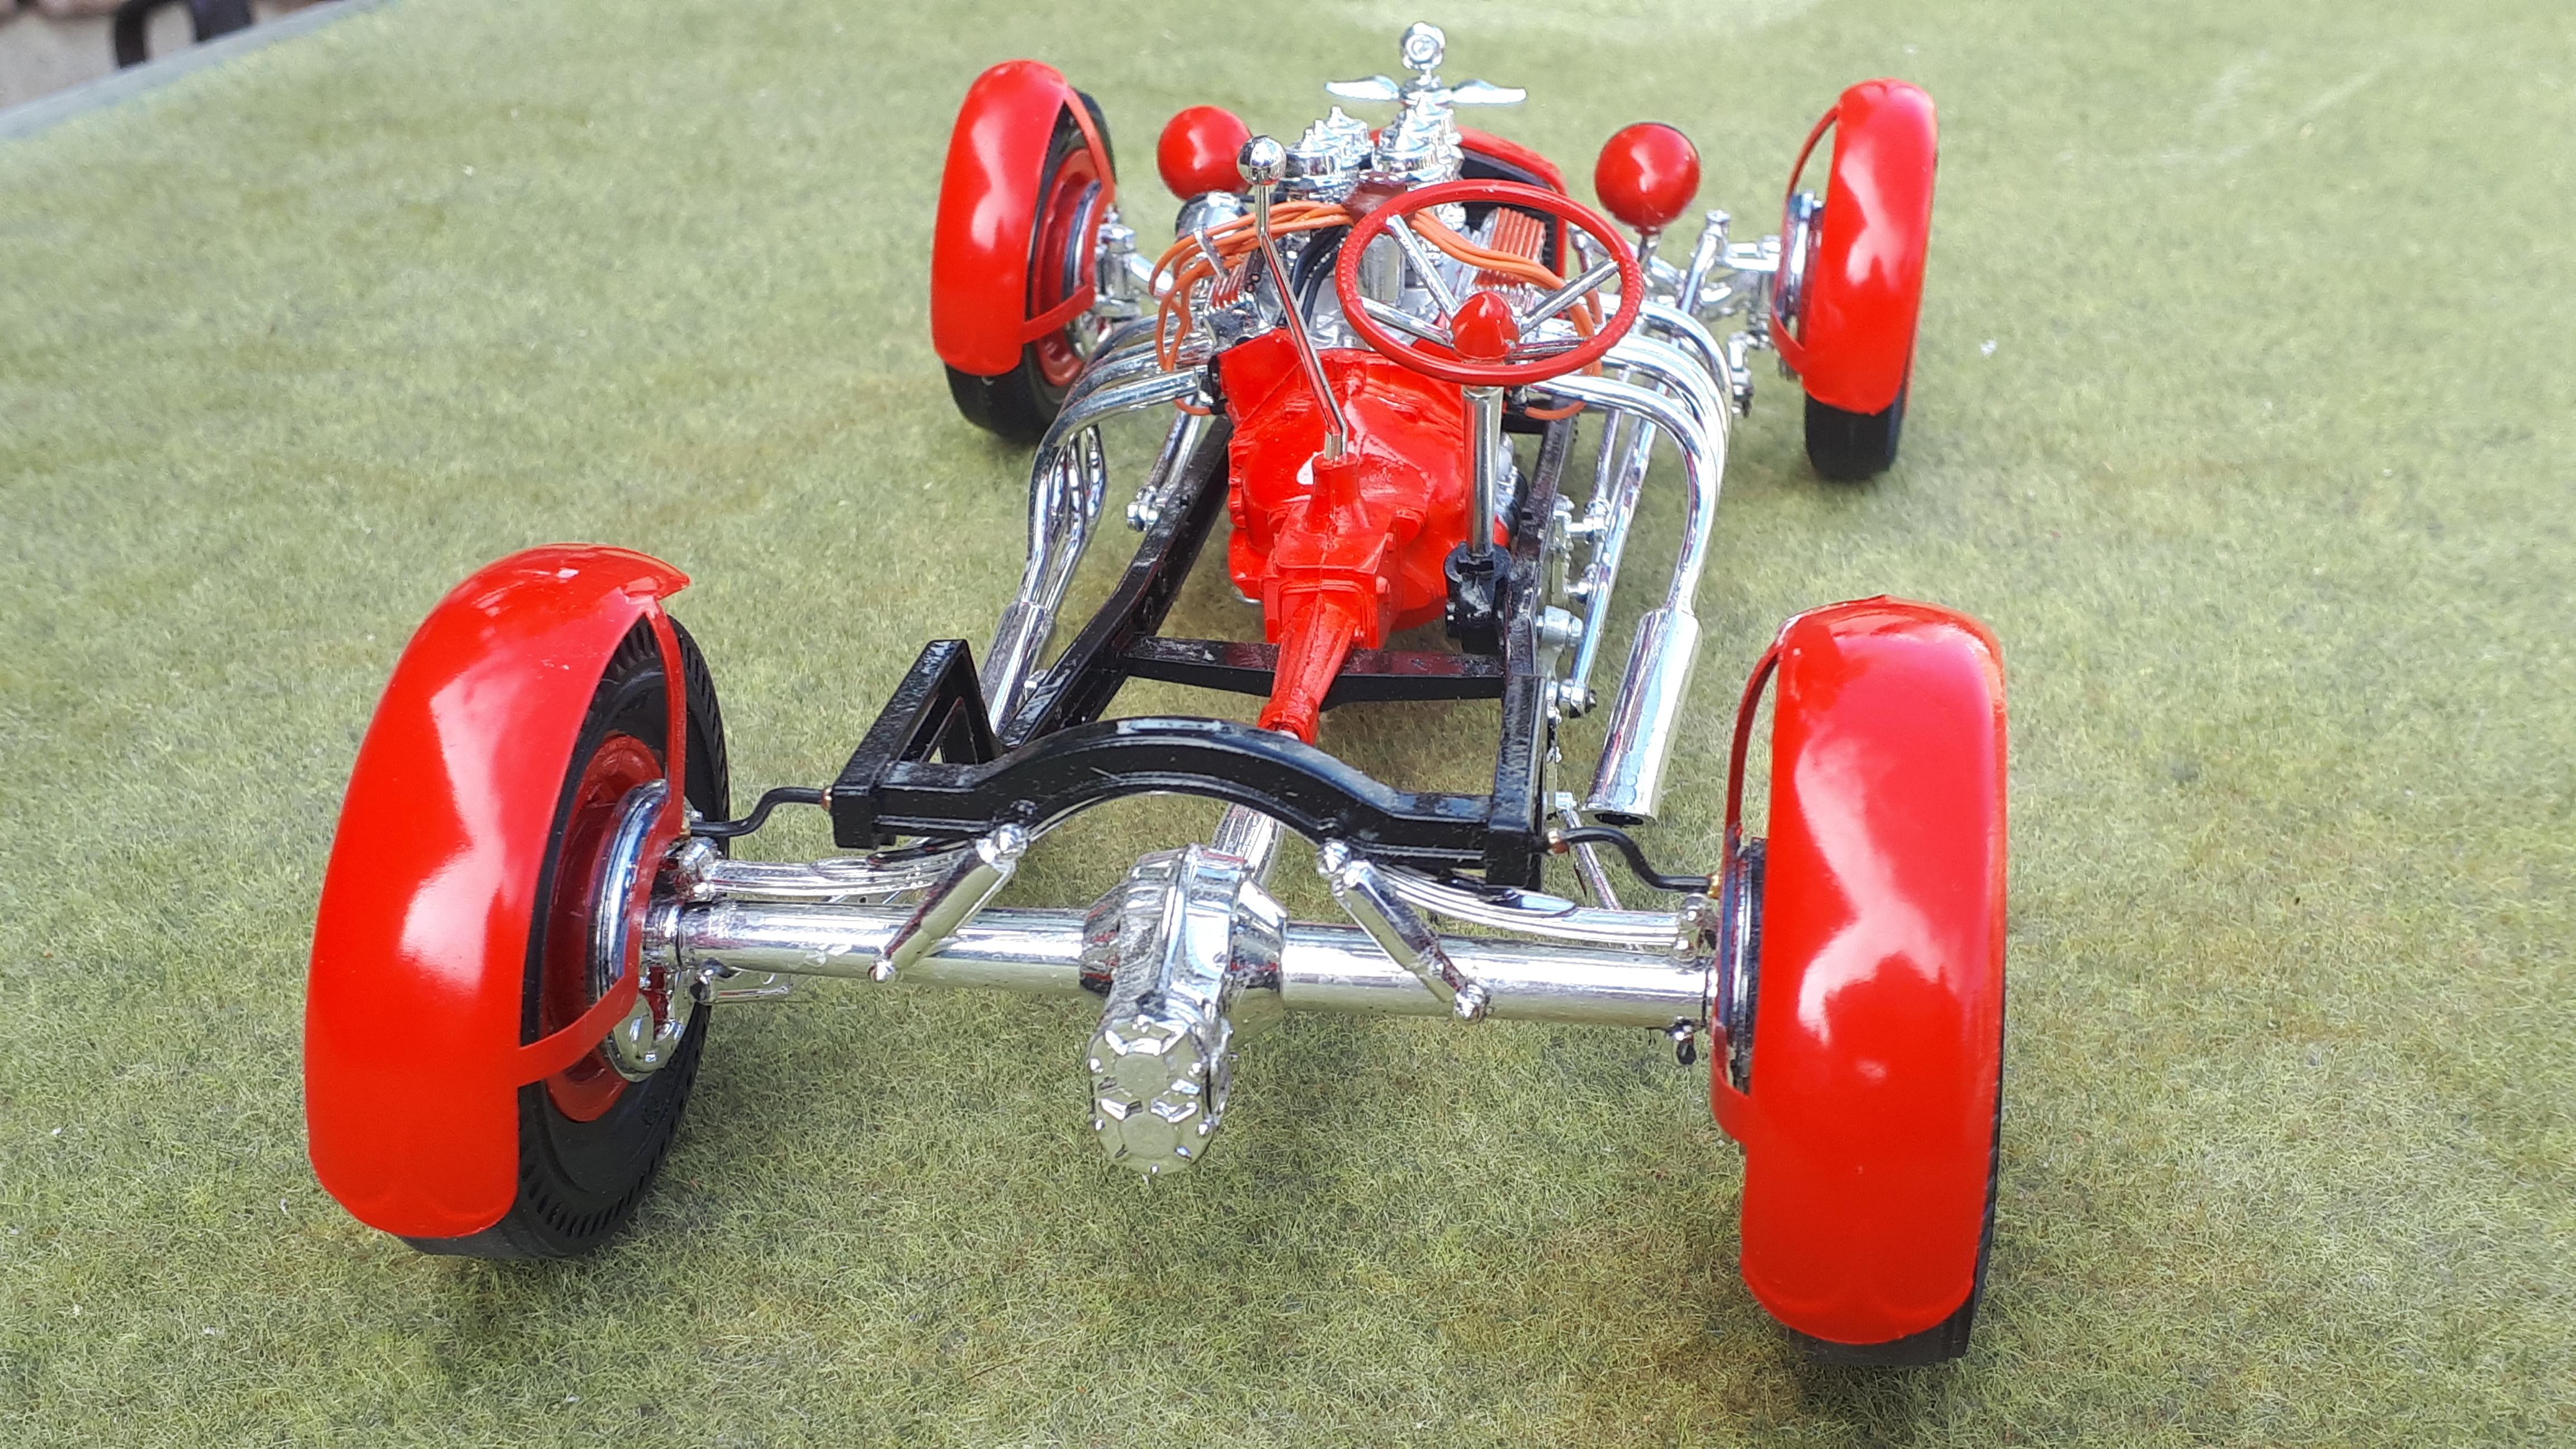
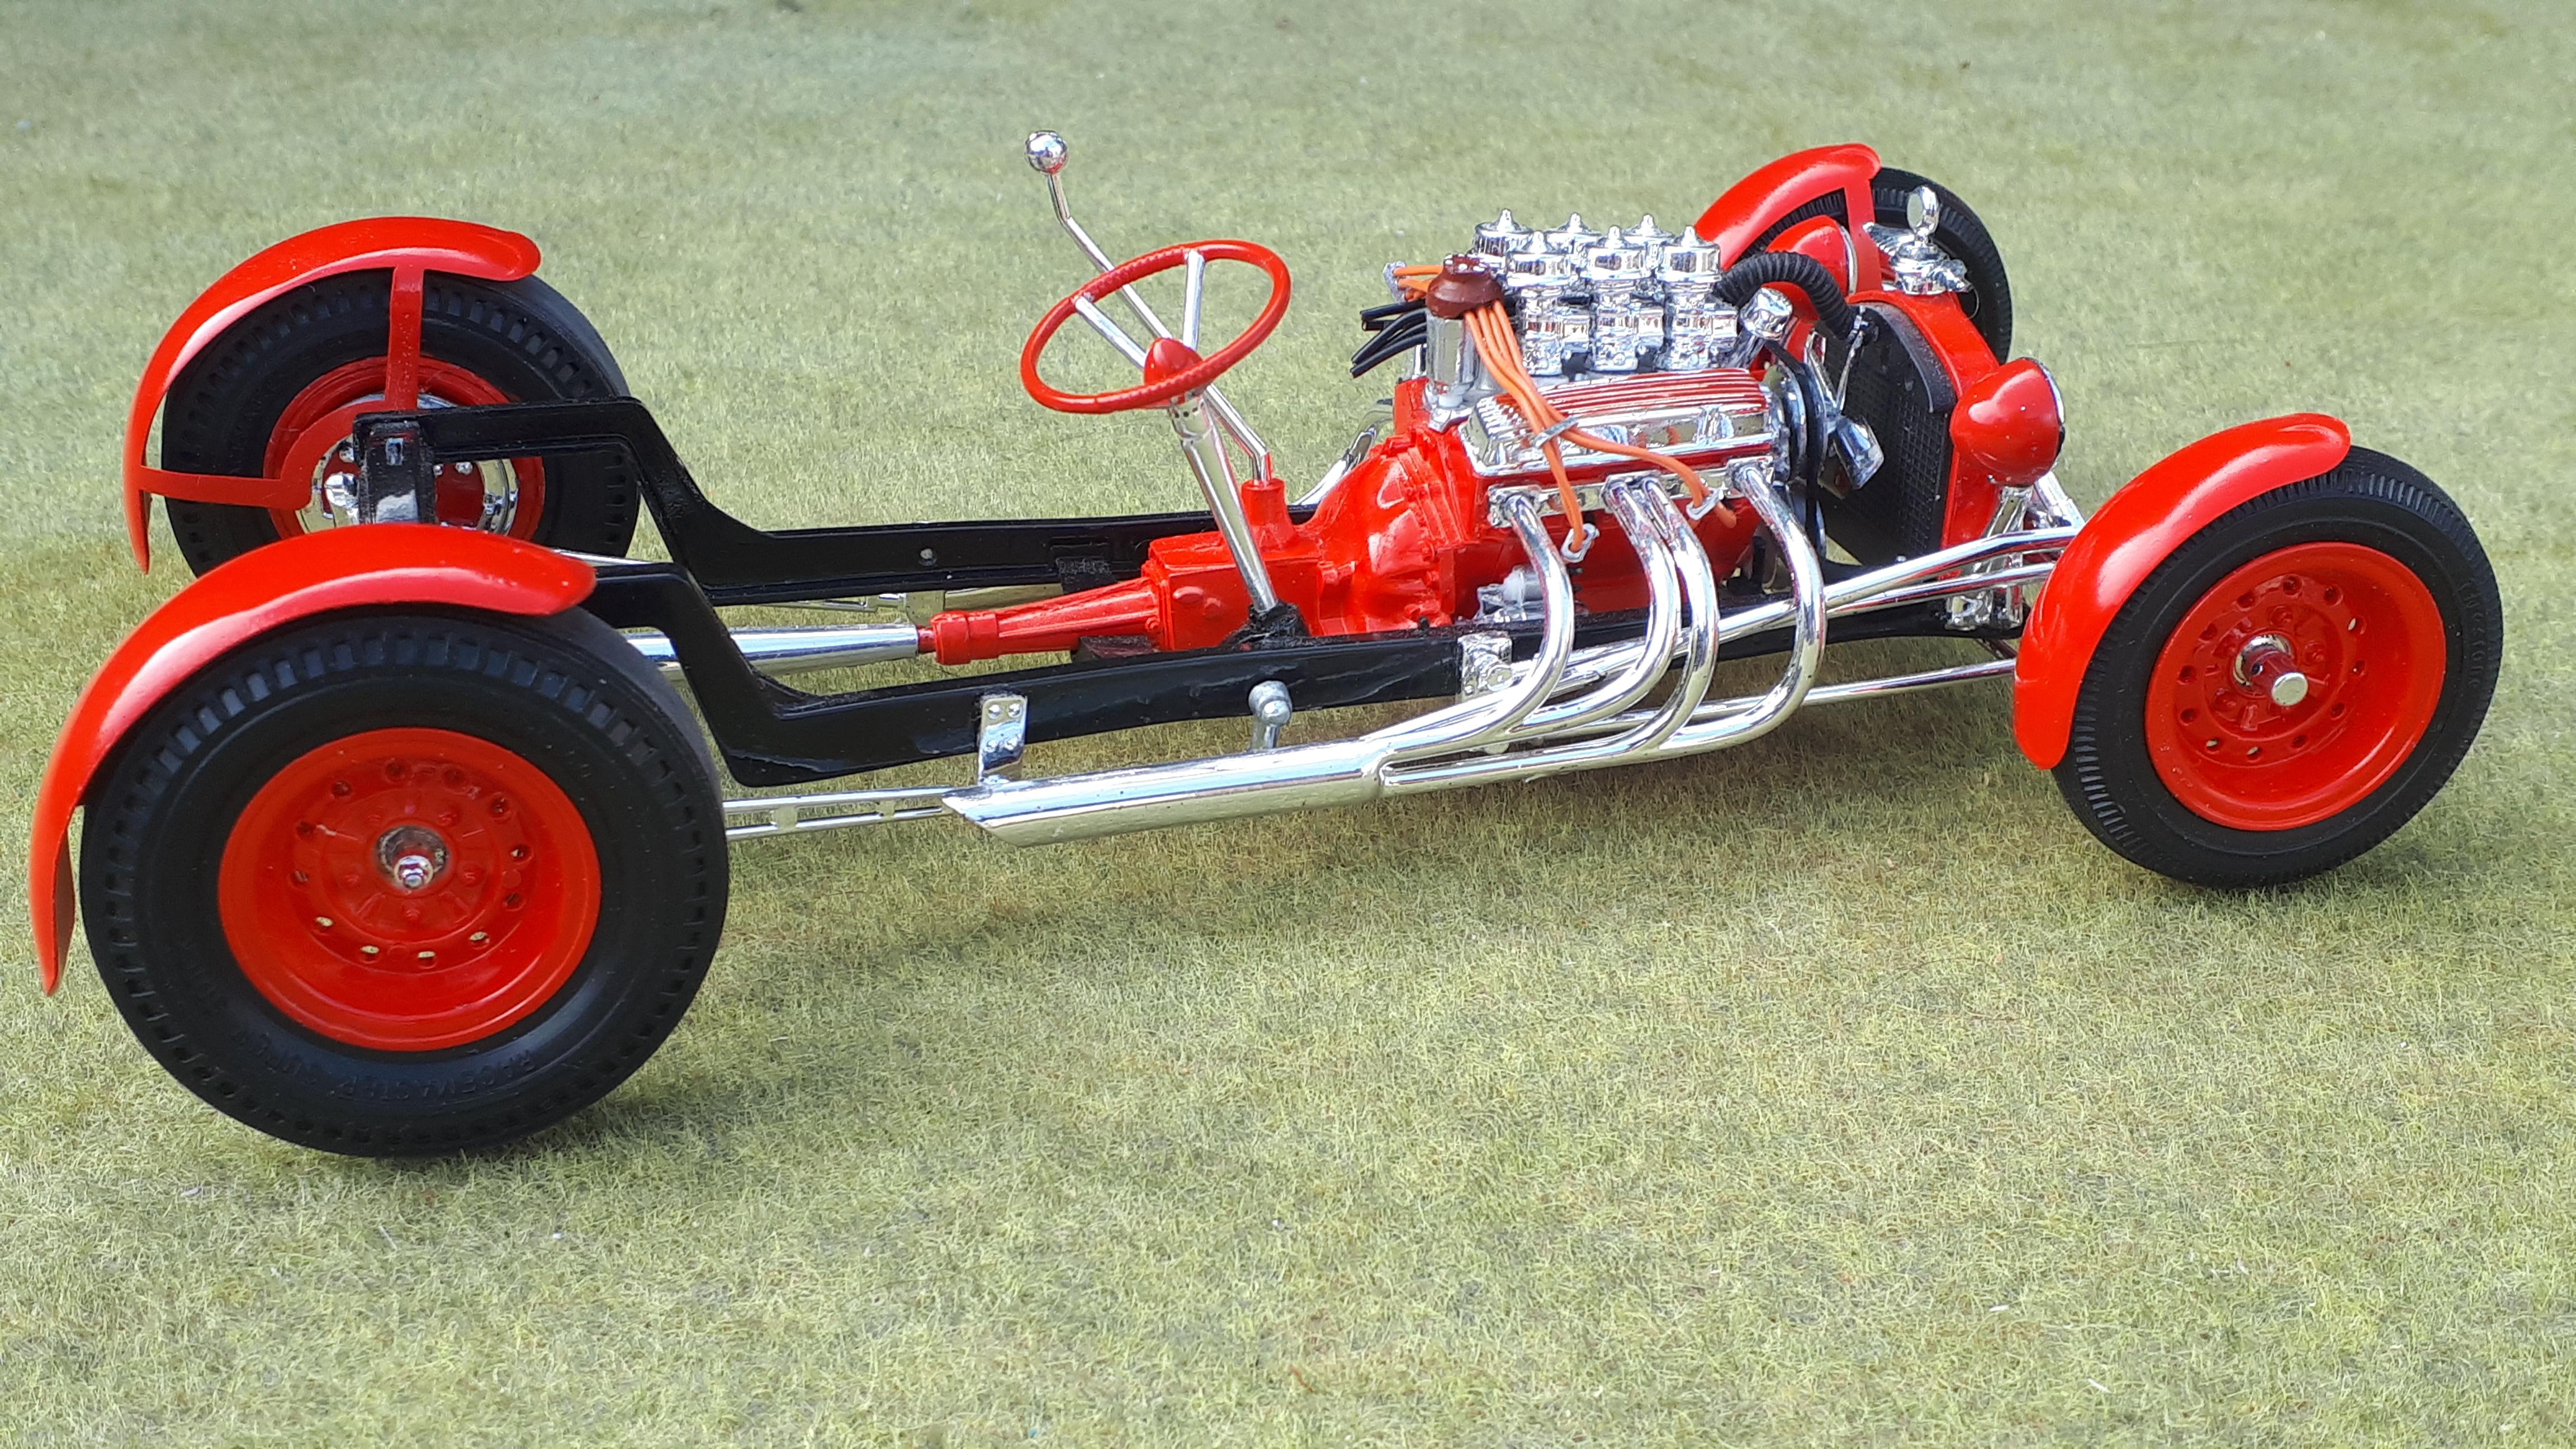
So before I go over to Under Glass, here are a few shots of the finished chassis. As it is based on a Z'd Model A chassis, it would also make a great start to an old school channeled 31 Model A roadster using the Minicraft kit. With the spare body from my teenage build and the left over chassis from The Serpent and the Minicraft flathead, I can see a track T in my future. This really is a wonderful model and could be built box stock with outstanding results. It is a quality that you don't usually associate with either Pyro or Lindberg. I would call it one of the undiscovered jewels in the scale hot rodding world. I mean, how many have you ever seen built?
-
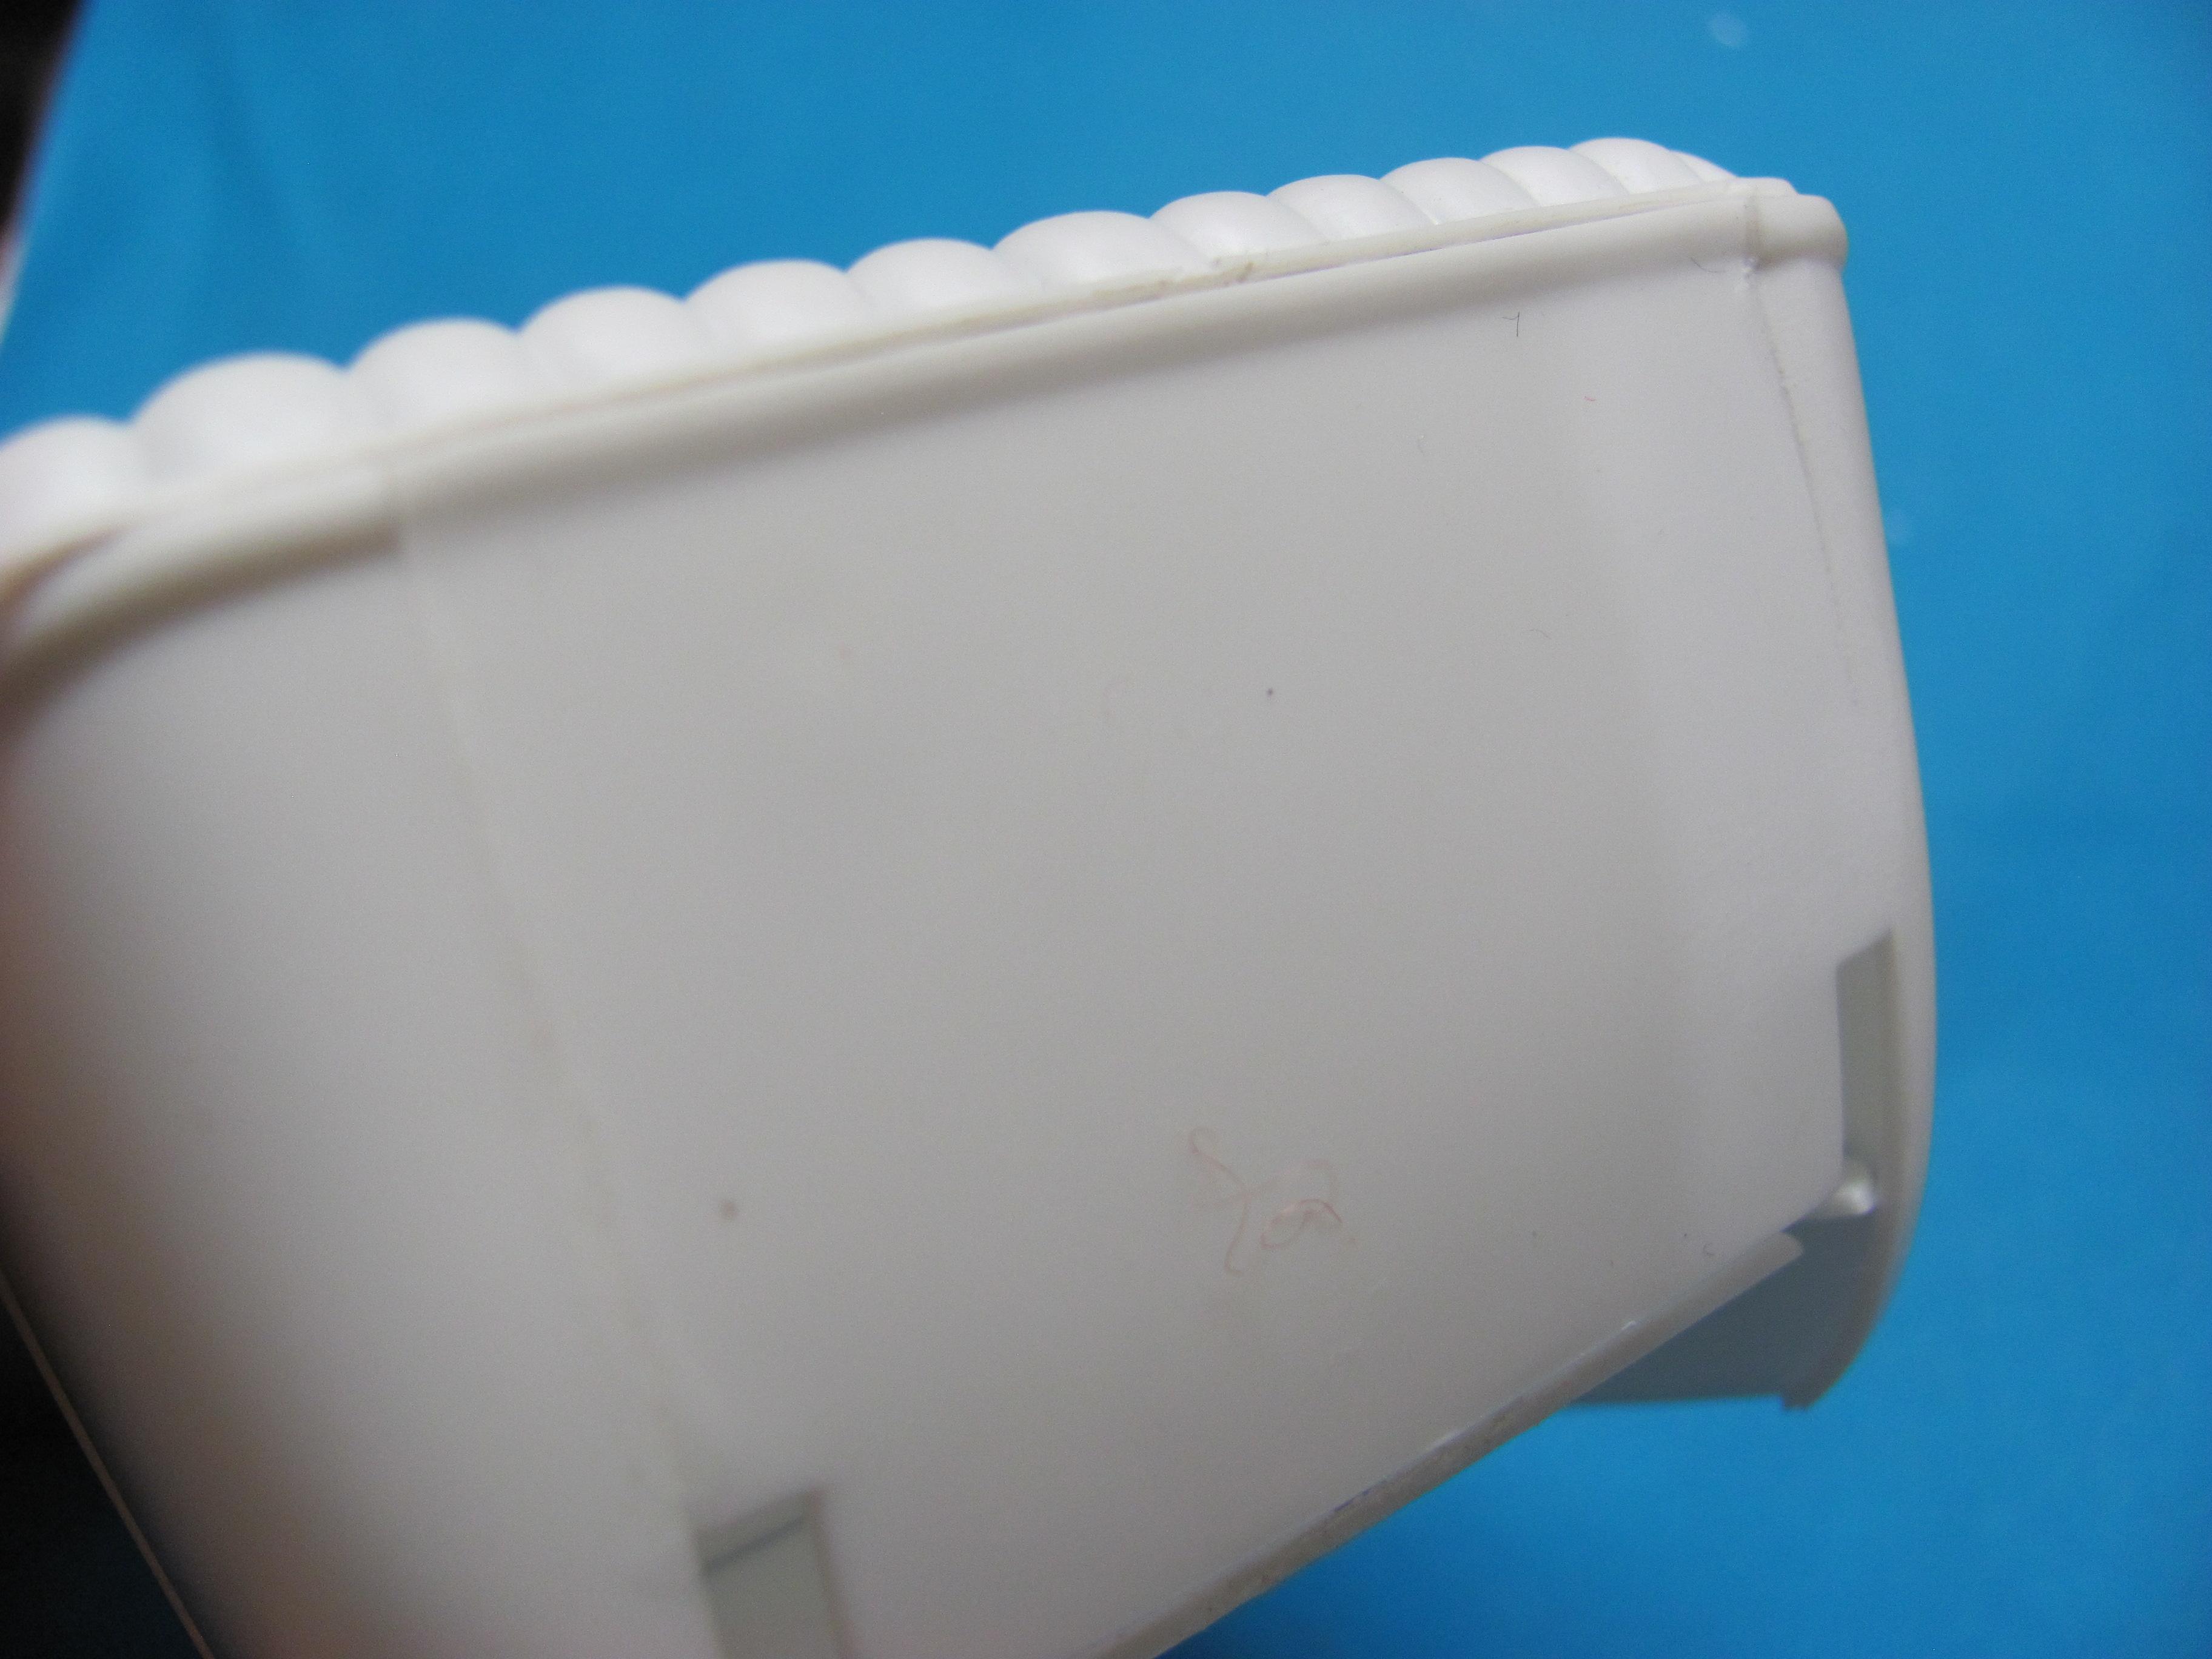
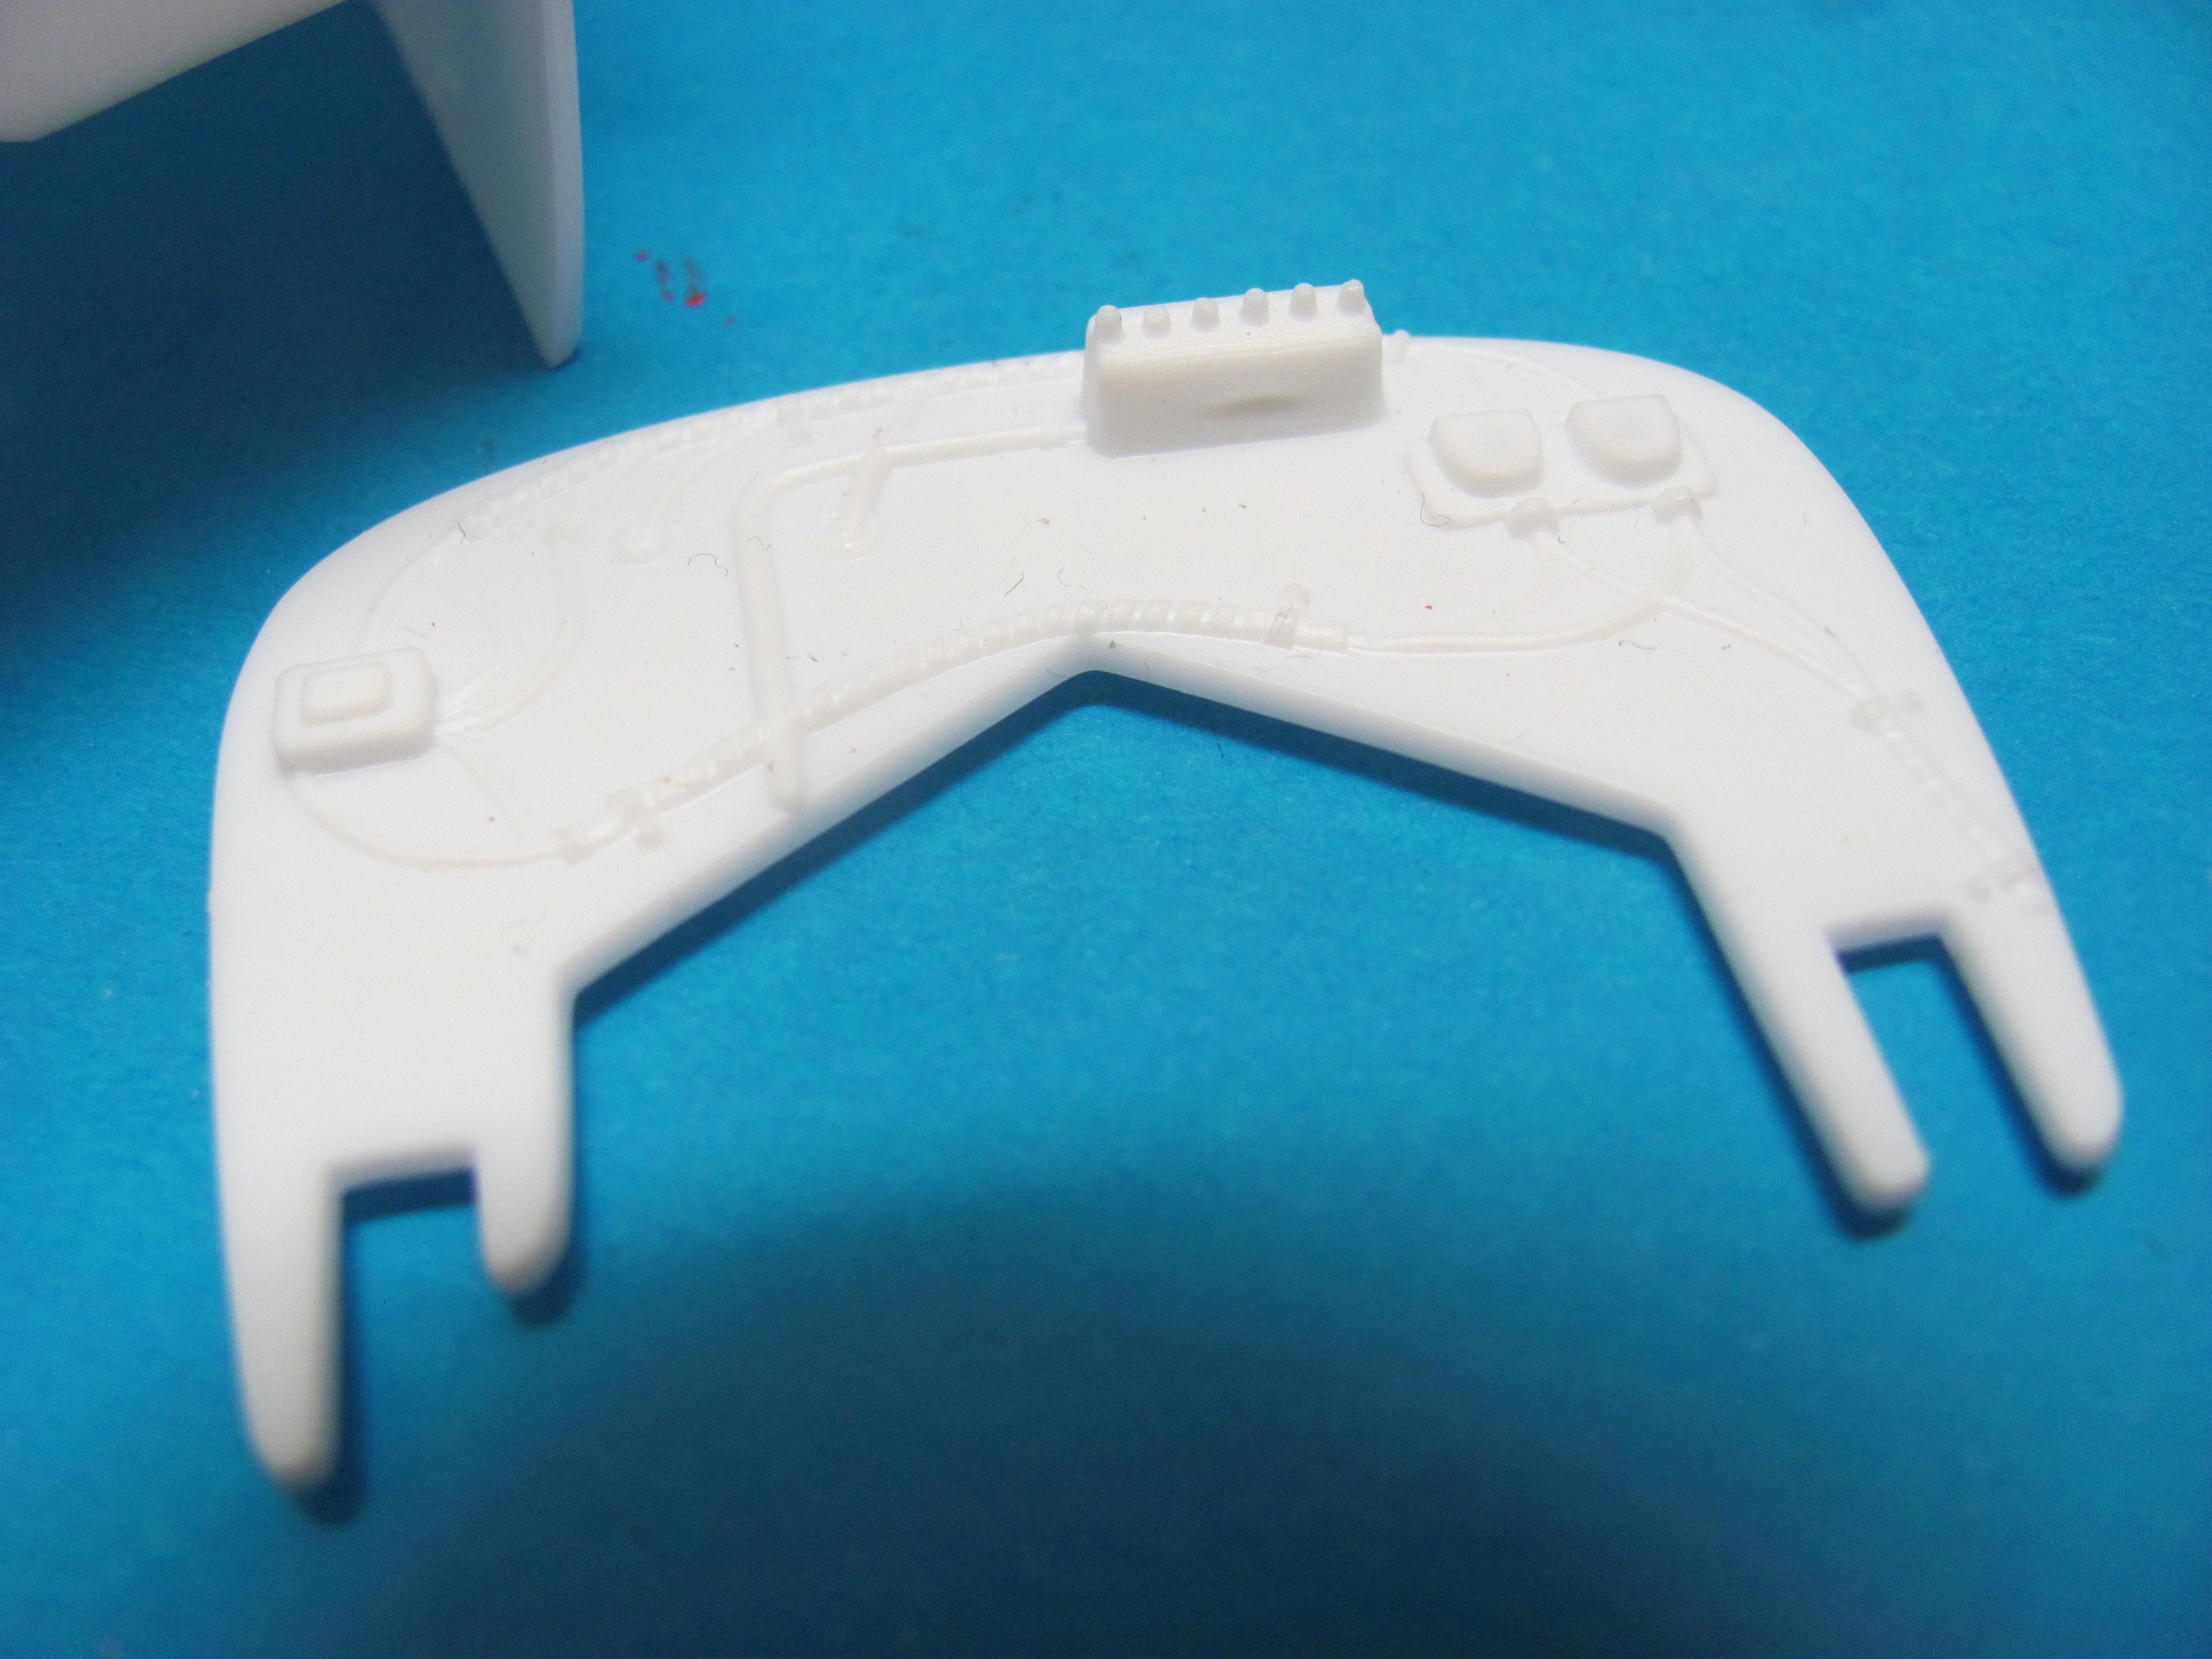
The body is multi-piece but that is not a terrible thing. Everything lines up pretty well and again, I like to use the Testors tube glue to get everything squared up with a bit of working time. I did the find the swage line across the top of the back of the body was a bit vague so i added a strip of Evergreen half round over the existing moulding and felt it was worth the effort. The firewall was in white plastic and had a lot of moulded in detail so I chose use it as a pattern for a polished aluminium replacement. I then cut off the fuel distribution block before turning the firewall inside out and gluing it to the front of the body. I also glued that left over surround from the dashboard in the previous photos This made everything much more rigid. I left it to dry quite a few days before spending some time vigorously filing the top of the cowl where the two pieces joined to make sure I got a smooth invisible join. Just basic Model building 101 stuff but it makes a difference and I'm sure I didn't do it when I was thirteen!
-
These are the fenders that used to be in the Tee N T but are now in The Serpent. I had a lot of work ahead of me trying to repair or replace the originals otherwise. Considering that Australian rods have always had to run fenders of some sort, these really fit the bill. Back in the sixties, there was a 27 T bucket built in Melbourne by the Mitchell Brothers. It was called the Surf Buggy but it had startlingly similar proportions to the Tee N T. I can remember my brother and I consulting a copy of Austrlaian Hot Rodding Review to make sure we had the details correct!
-
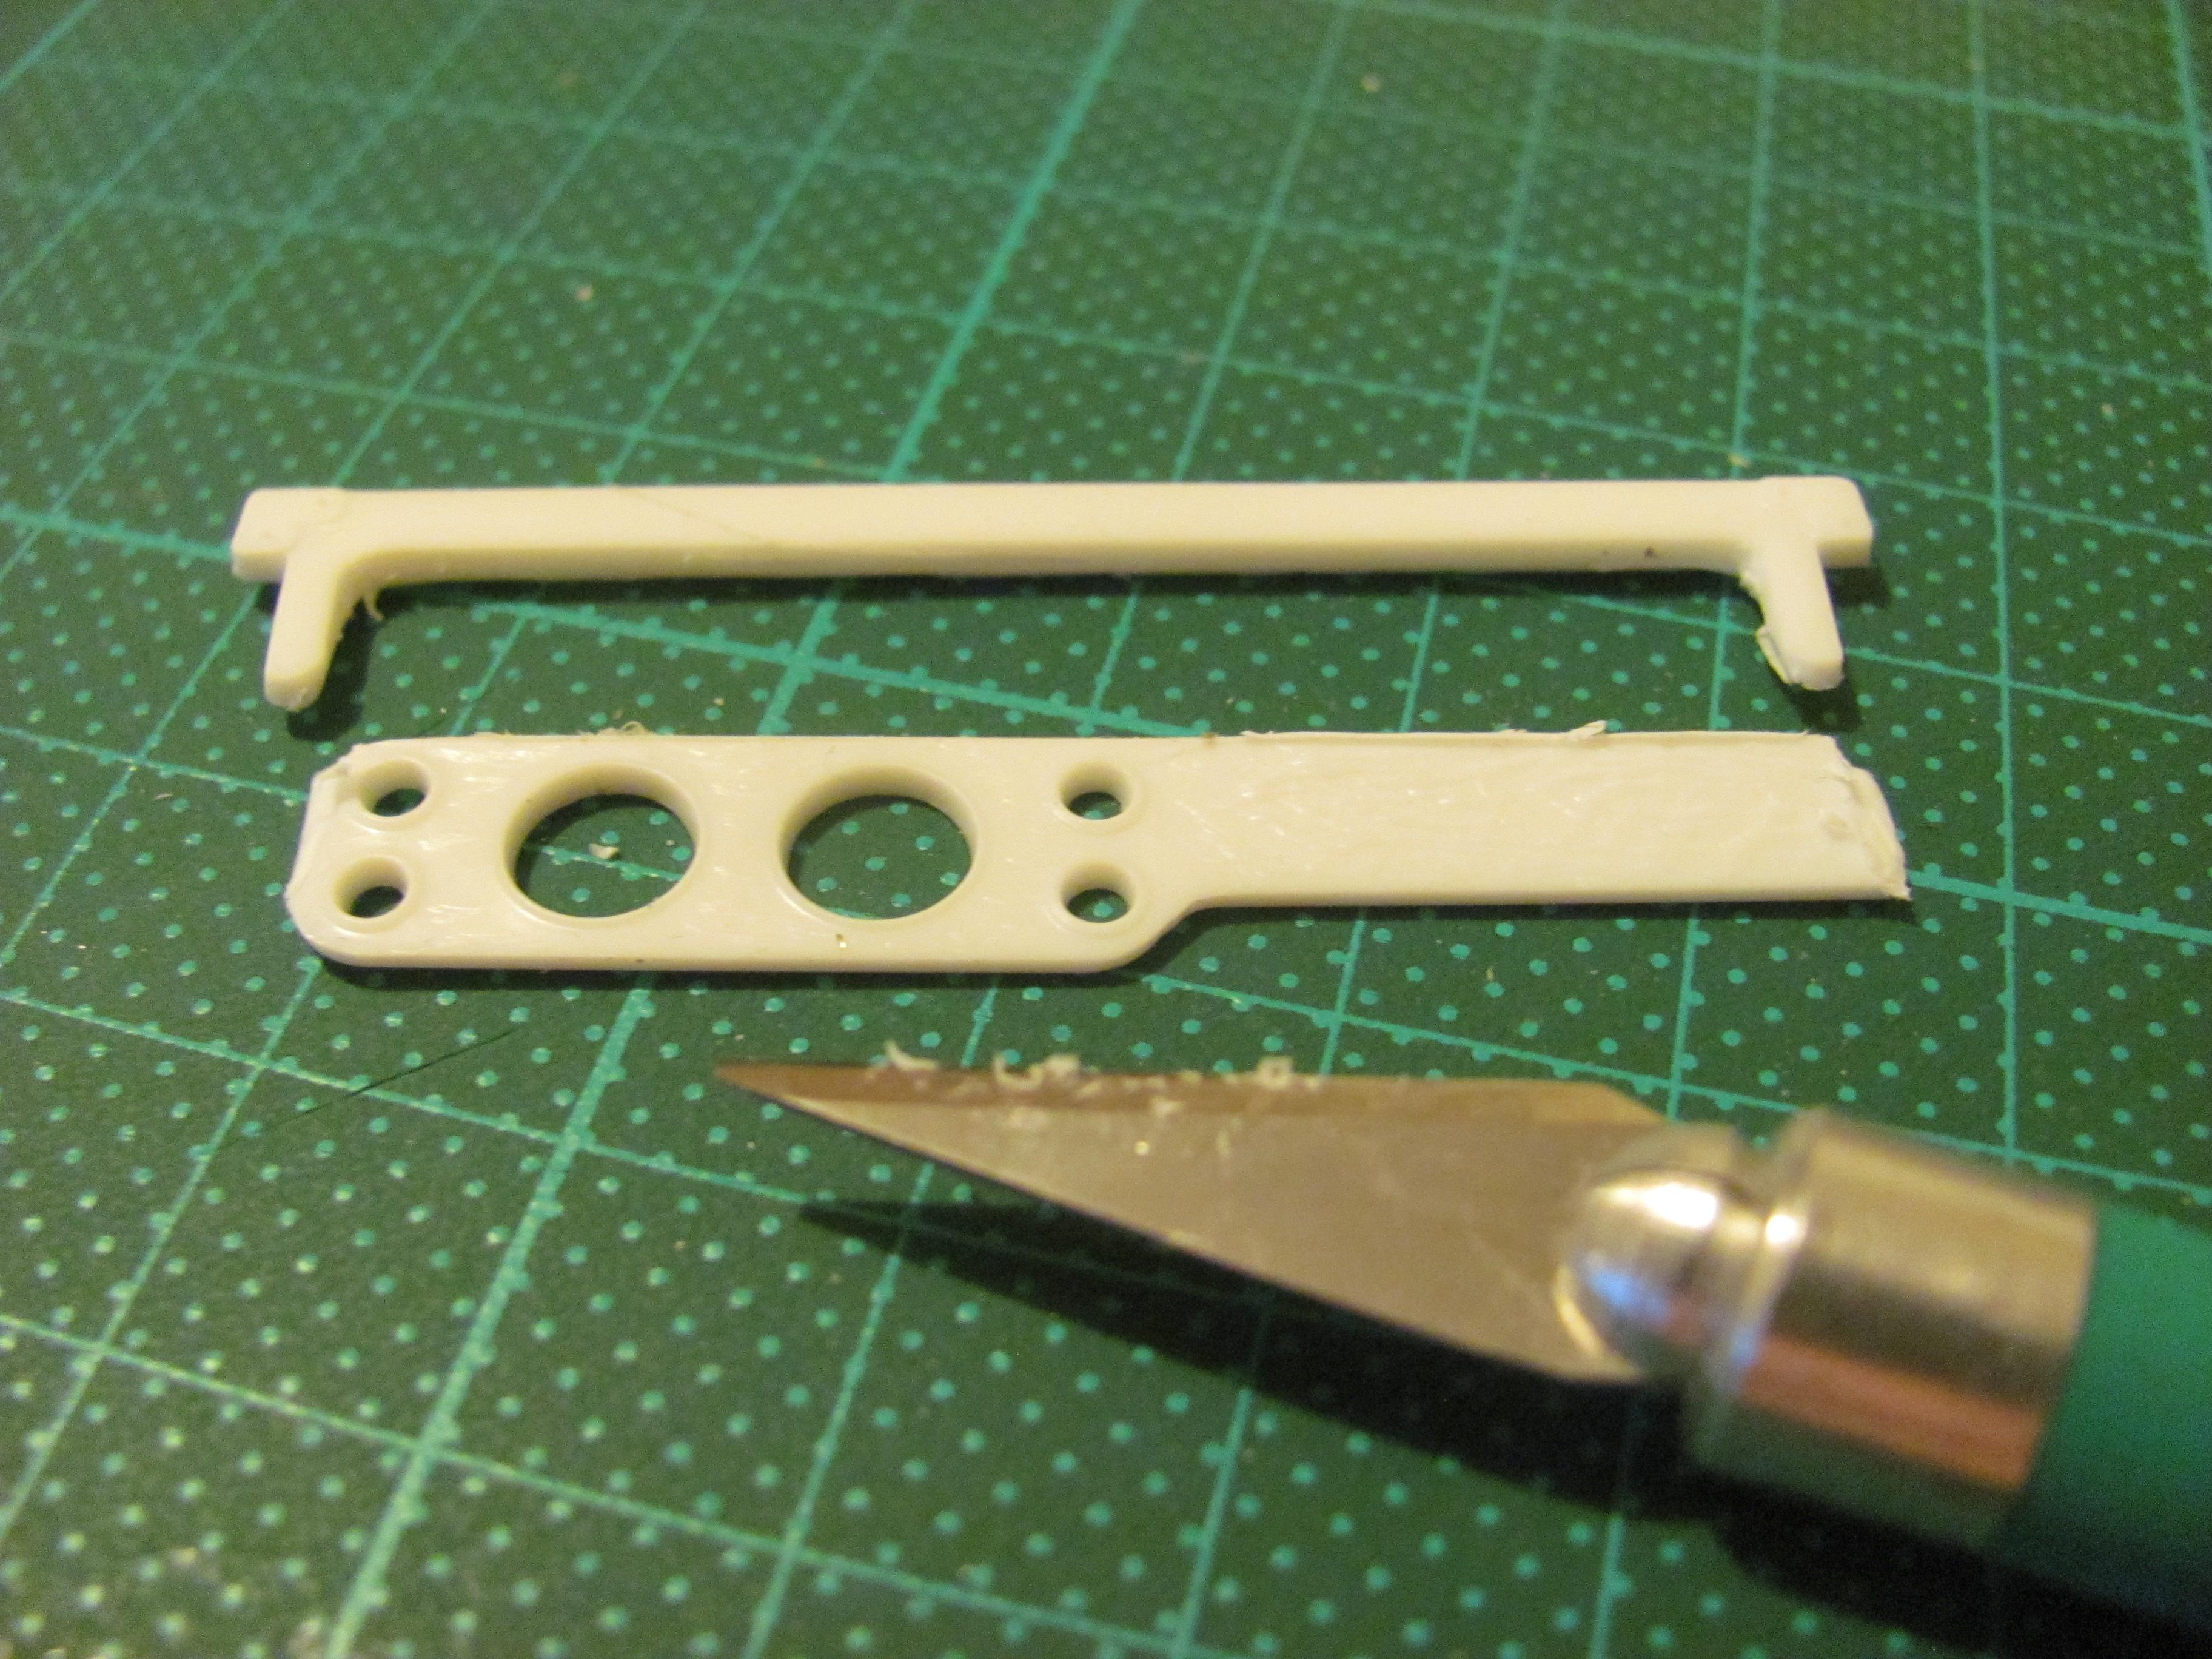
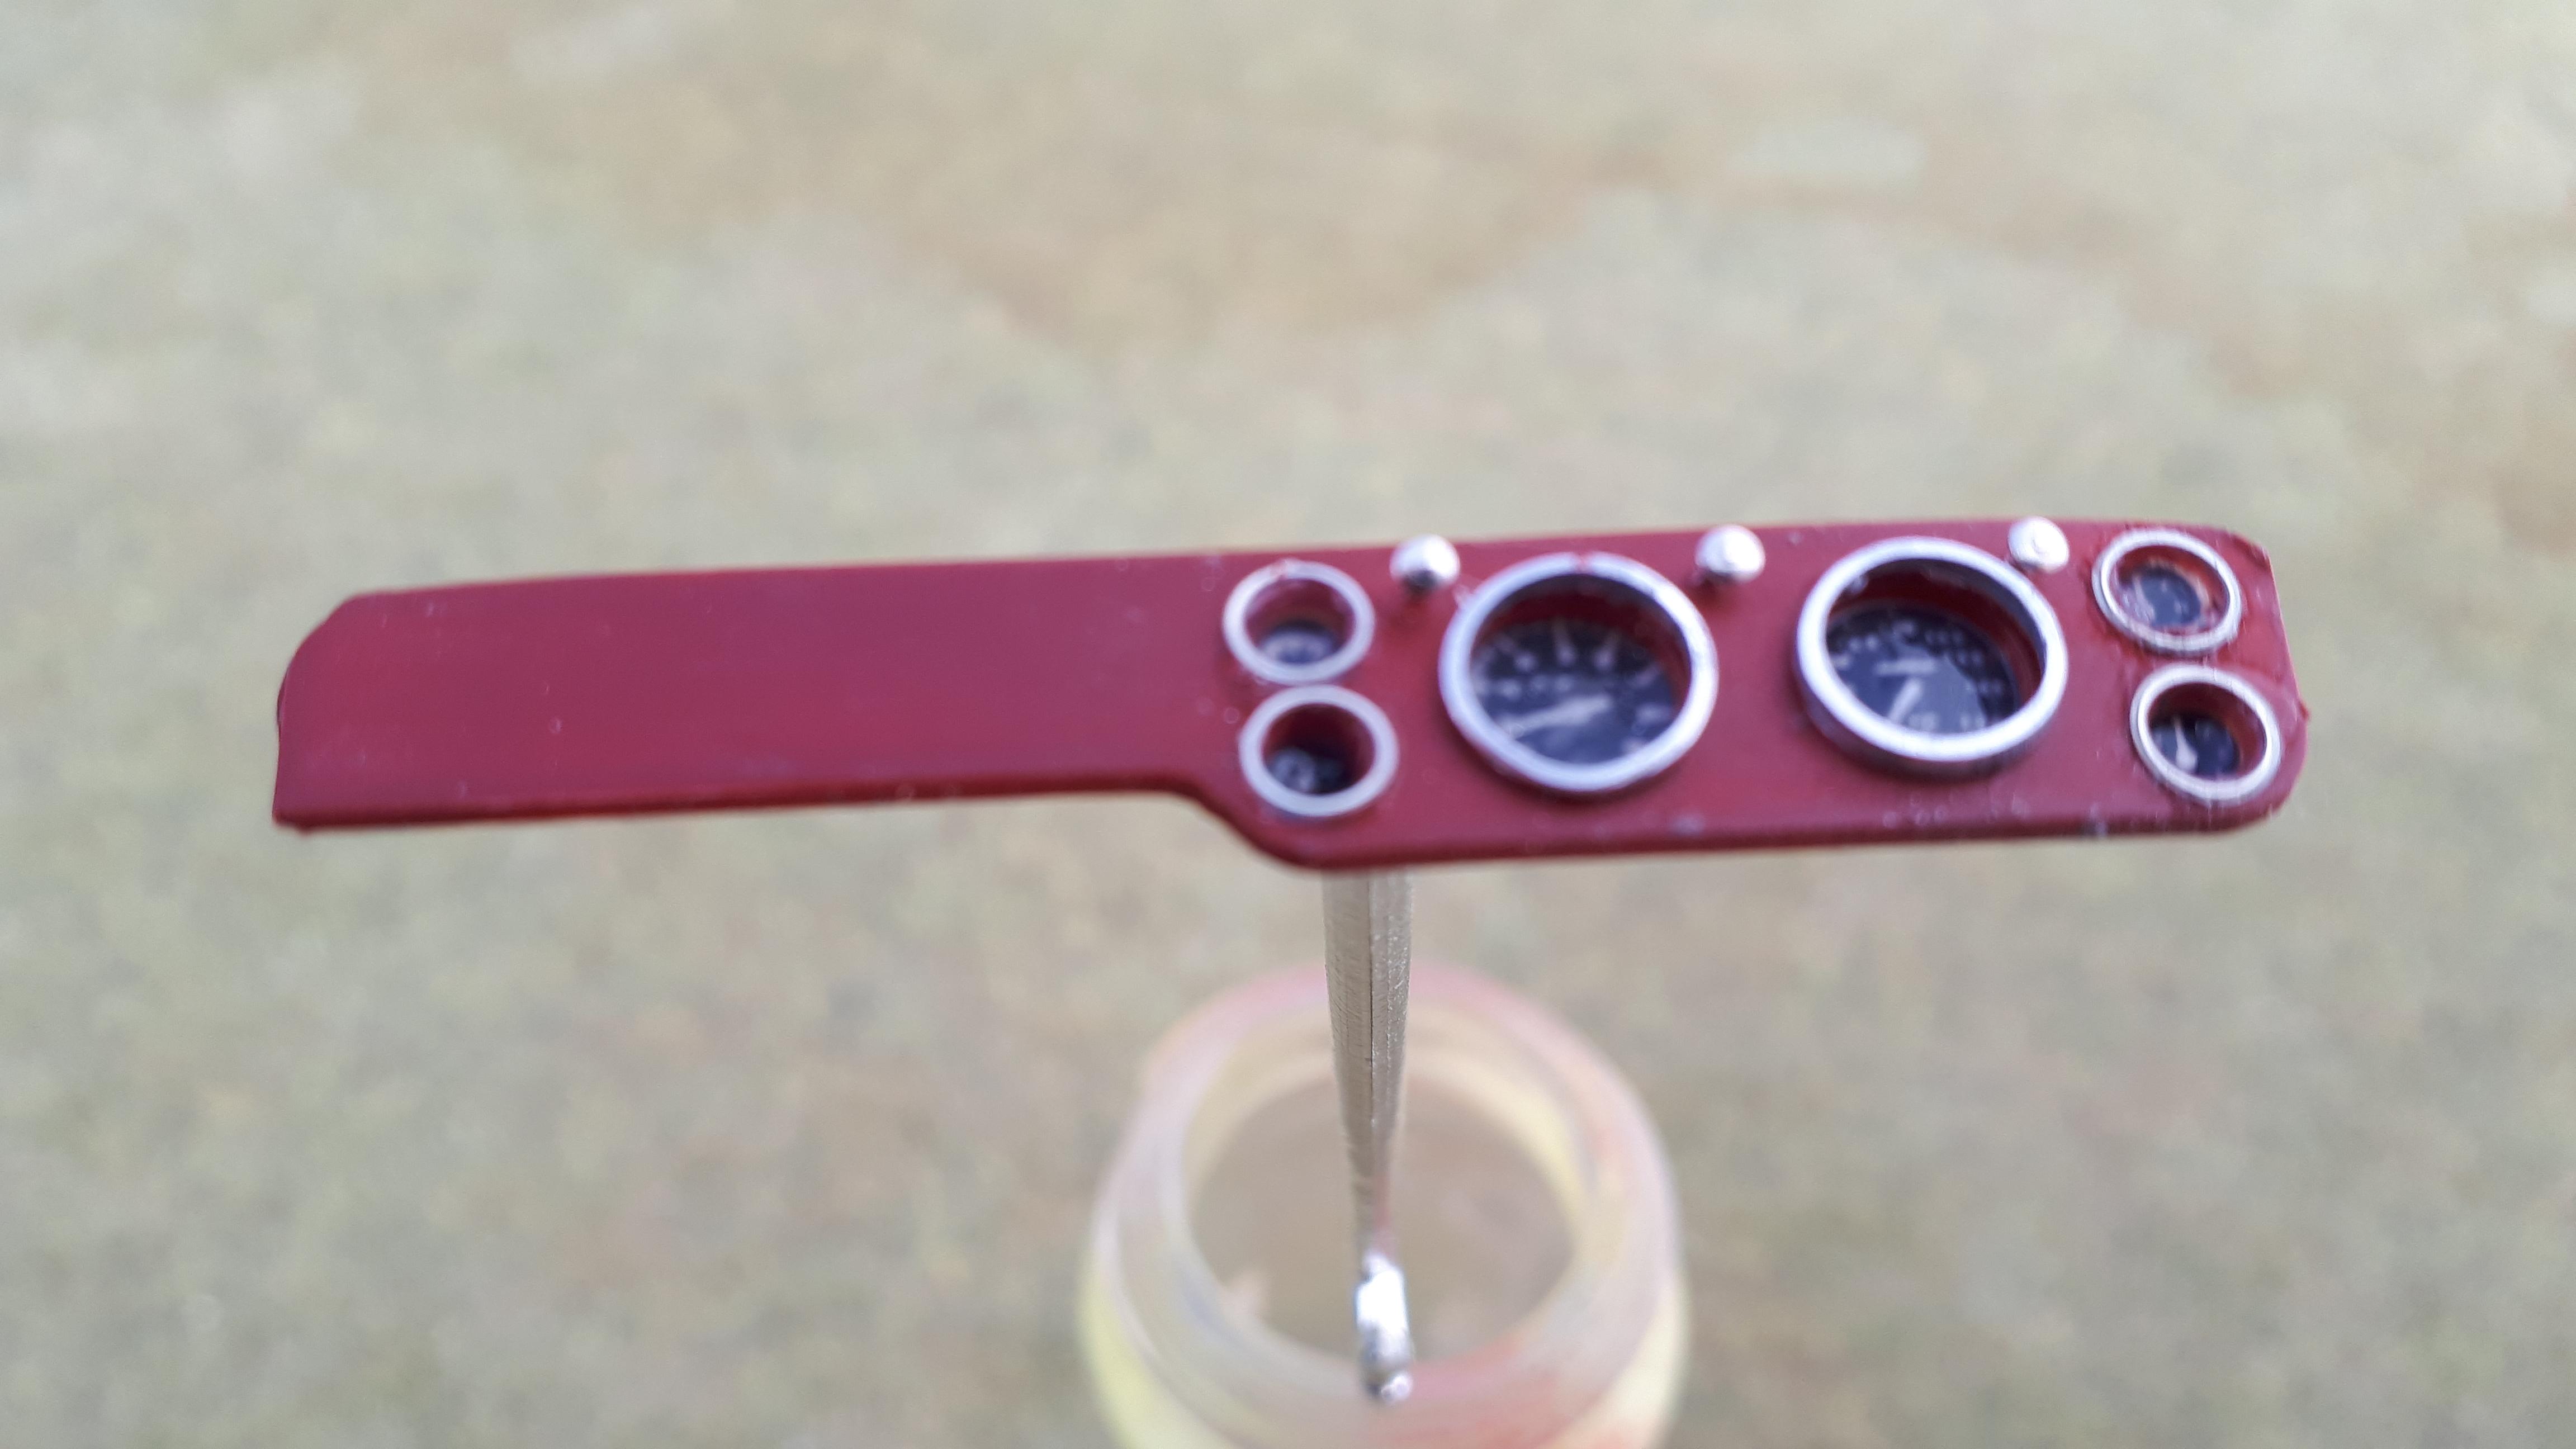
I liked the detail in the stock dash so I decided to sever it from its surround and re-join it on the opposite side. This also made detail painting a little easier. Lindberg gives you clear instrument faces with the markings engraved on them and I added slices of K&S aluminium tubing for the gauge bezels.
-
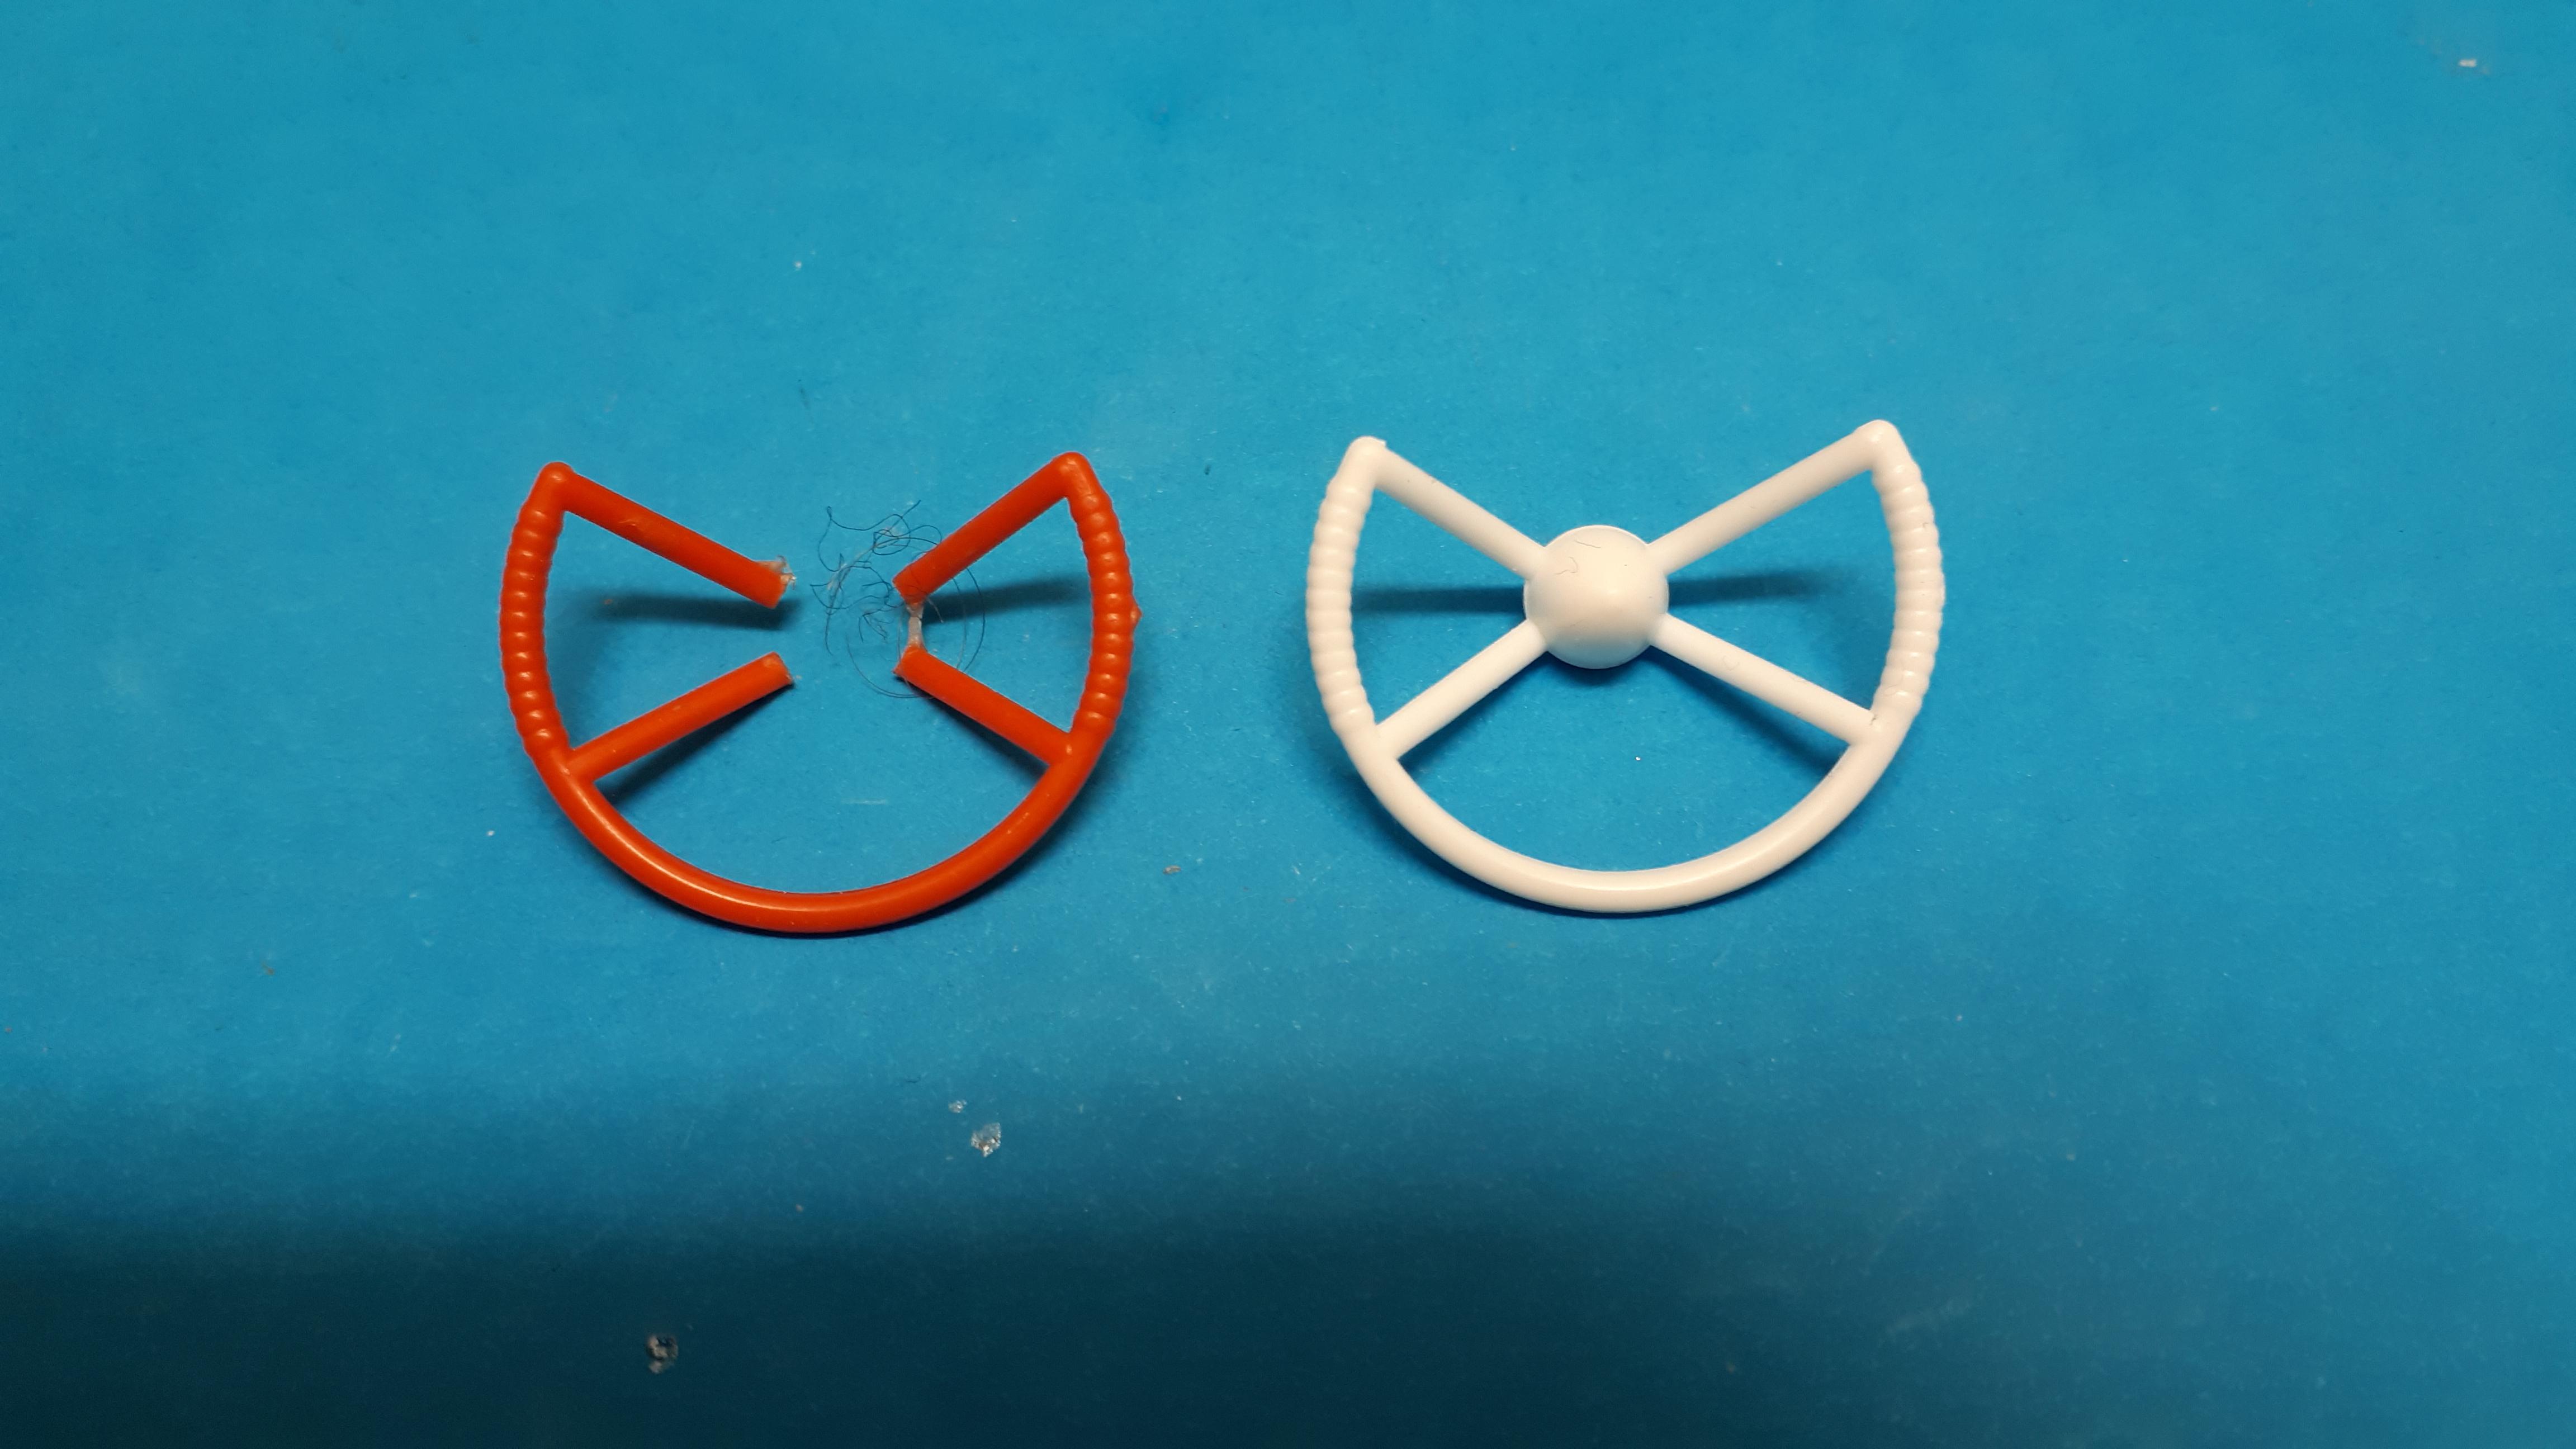
I am a big fan of the adage – Never throw anything out! I still had the broken steering wheel from my childhood kit. I never knew why I kept it nearly fifty years but it was meant to be. It was a very simple job to trim it to fit the new kit wheel and give myself a 360 degree steering wheel. I have driven a few T buckets with near vertical steering columns and I can tell you the last thing you would want is a steering wheel that is missing 120 degrees of its rim!
-
The engine is a beauty – a small block Chevy, probably a 283 considering the era, with six carbs, a magneto and a sweeping set of headers. I remember my childhood version including a separate fan belt in the box but Lindberg must have forgotten about it so I made one from some thick black self- adhesive amalgamating tape. The only real trick here is to use Testor’s “orange tube” glue which is nice and thick and slow setting and gives you adequate time to ensure all six carbs are nicely aligned. I also made up some fuel lines from black vinyl tubing and brass jewellery findings. The linkages come in the kit.
-
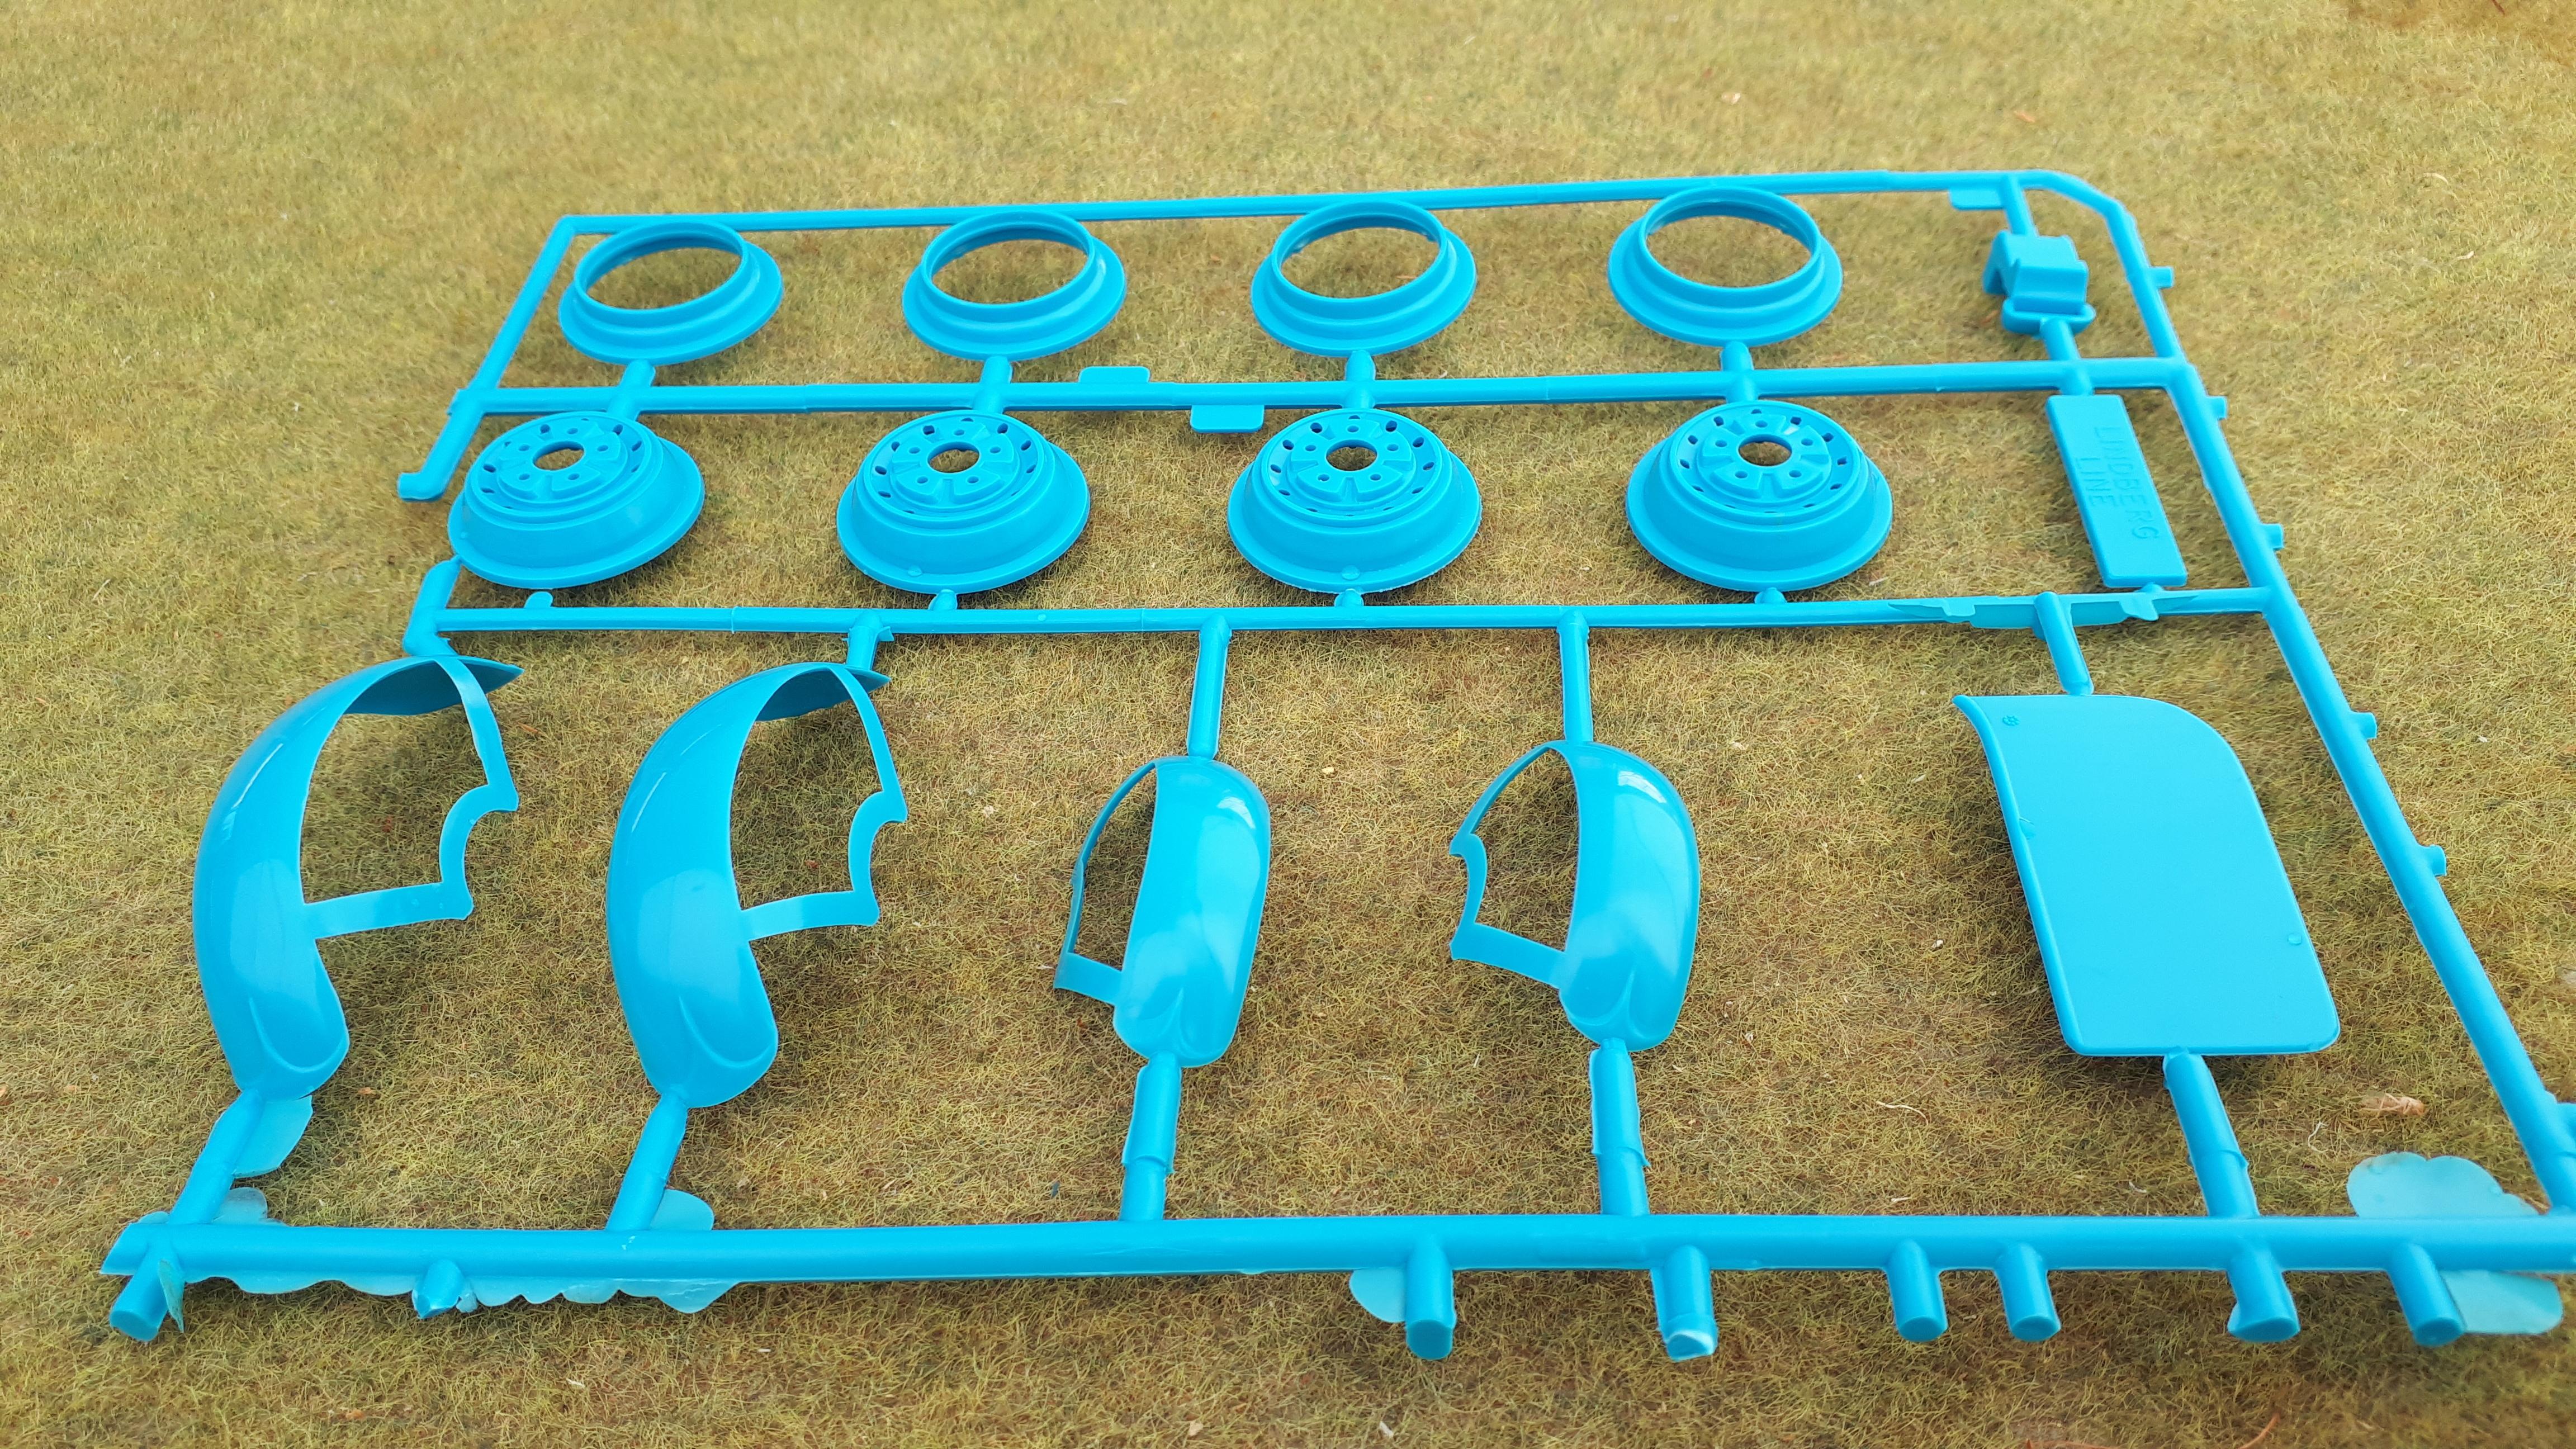
The front and rear suspension assembles very smoothly. I would stress the need to thoroughly remove paint and chrome from any joints as these are relatively heavy models as plastic kits go and they will revert to their kit form if you don’t get everything securely welded together! As the steering arm and king pins are all separate parts, this was the easiest steering conversion I have ever done – all I had to do was assemble the parts on the opposite ends of the axle! The stance is perfect straight out of the box (didn’t think I would ever say that!) so there is no need to adjust the height of crossmembers or springs – they will work just fine. All the chrome suspension members are beautifully moulded and just take some careful trimming of the sprue points and a dab of Molotow pen to make them perfect.
-
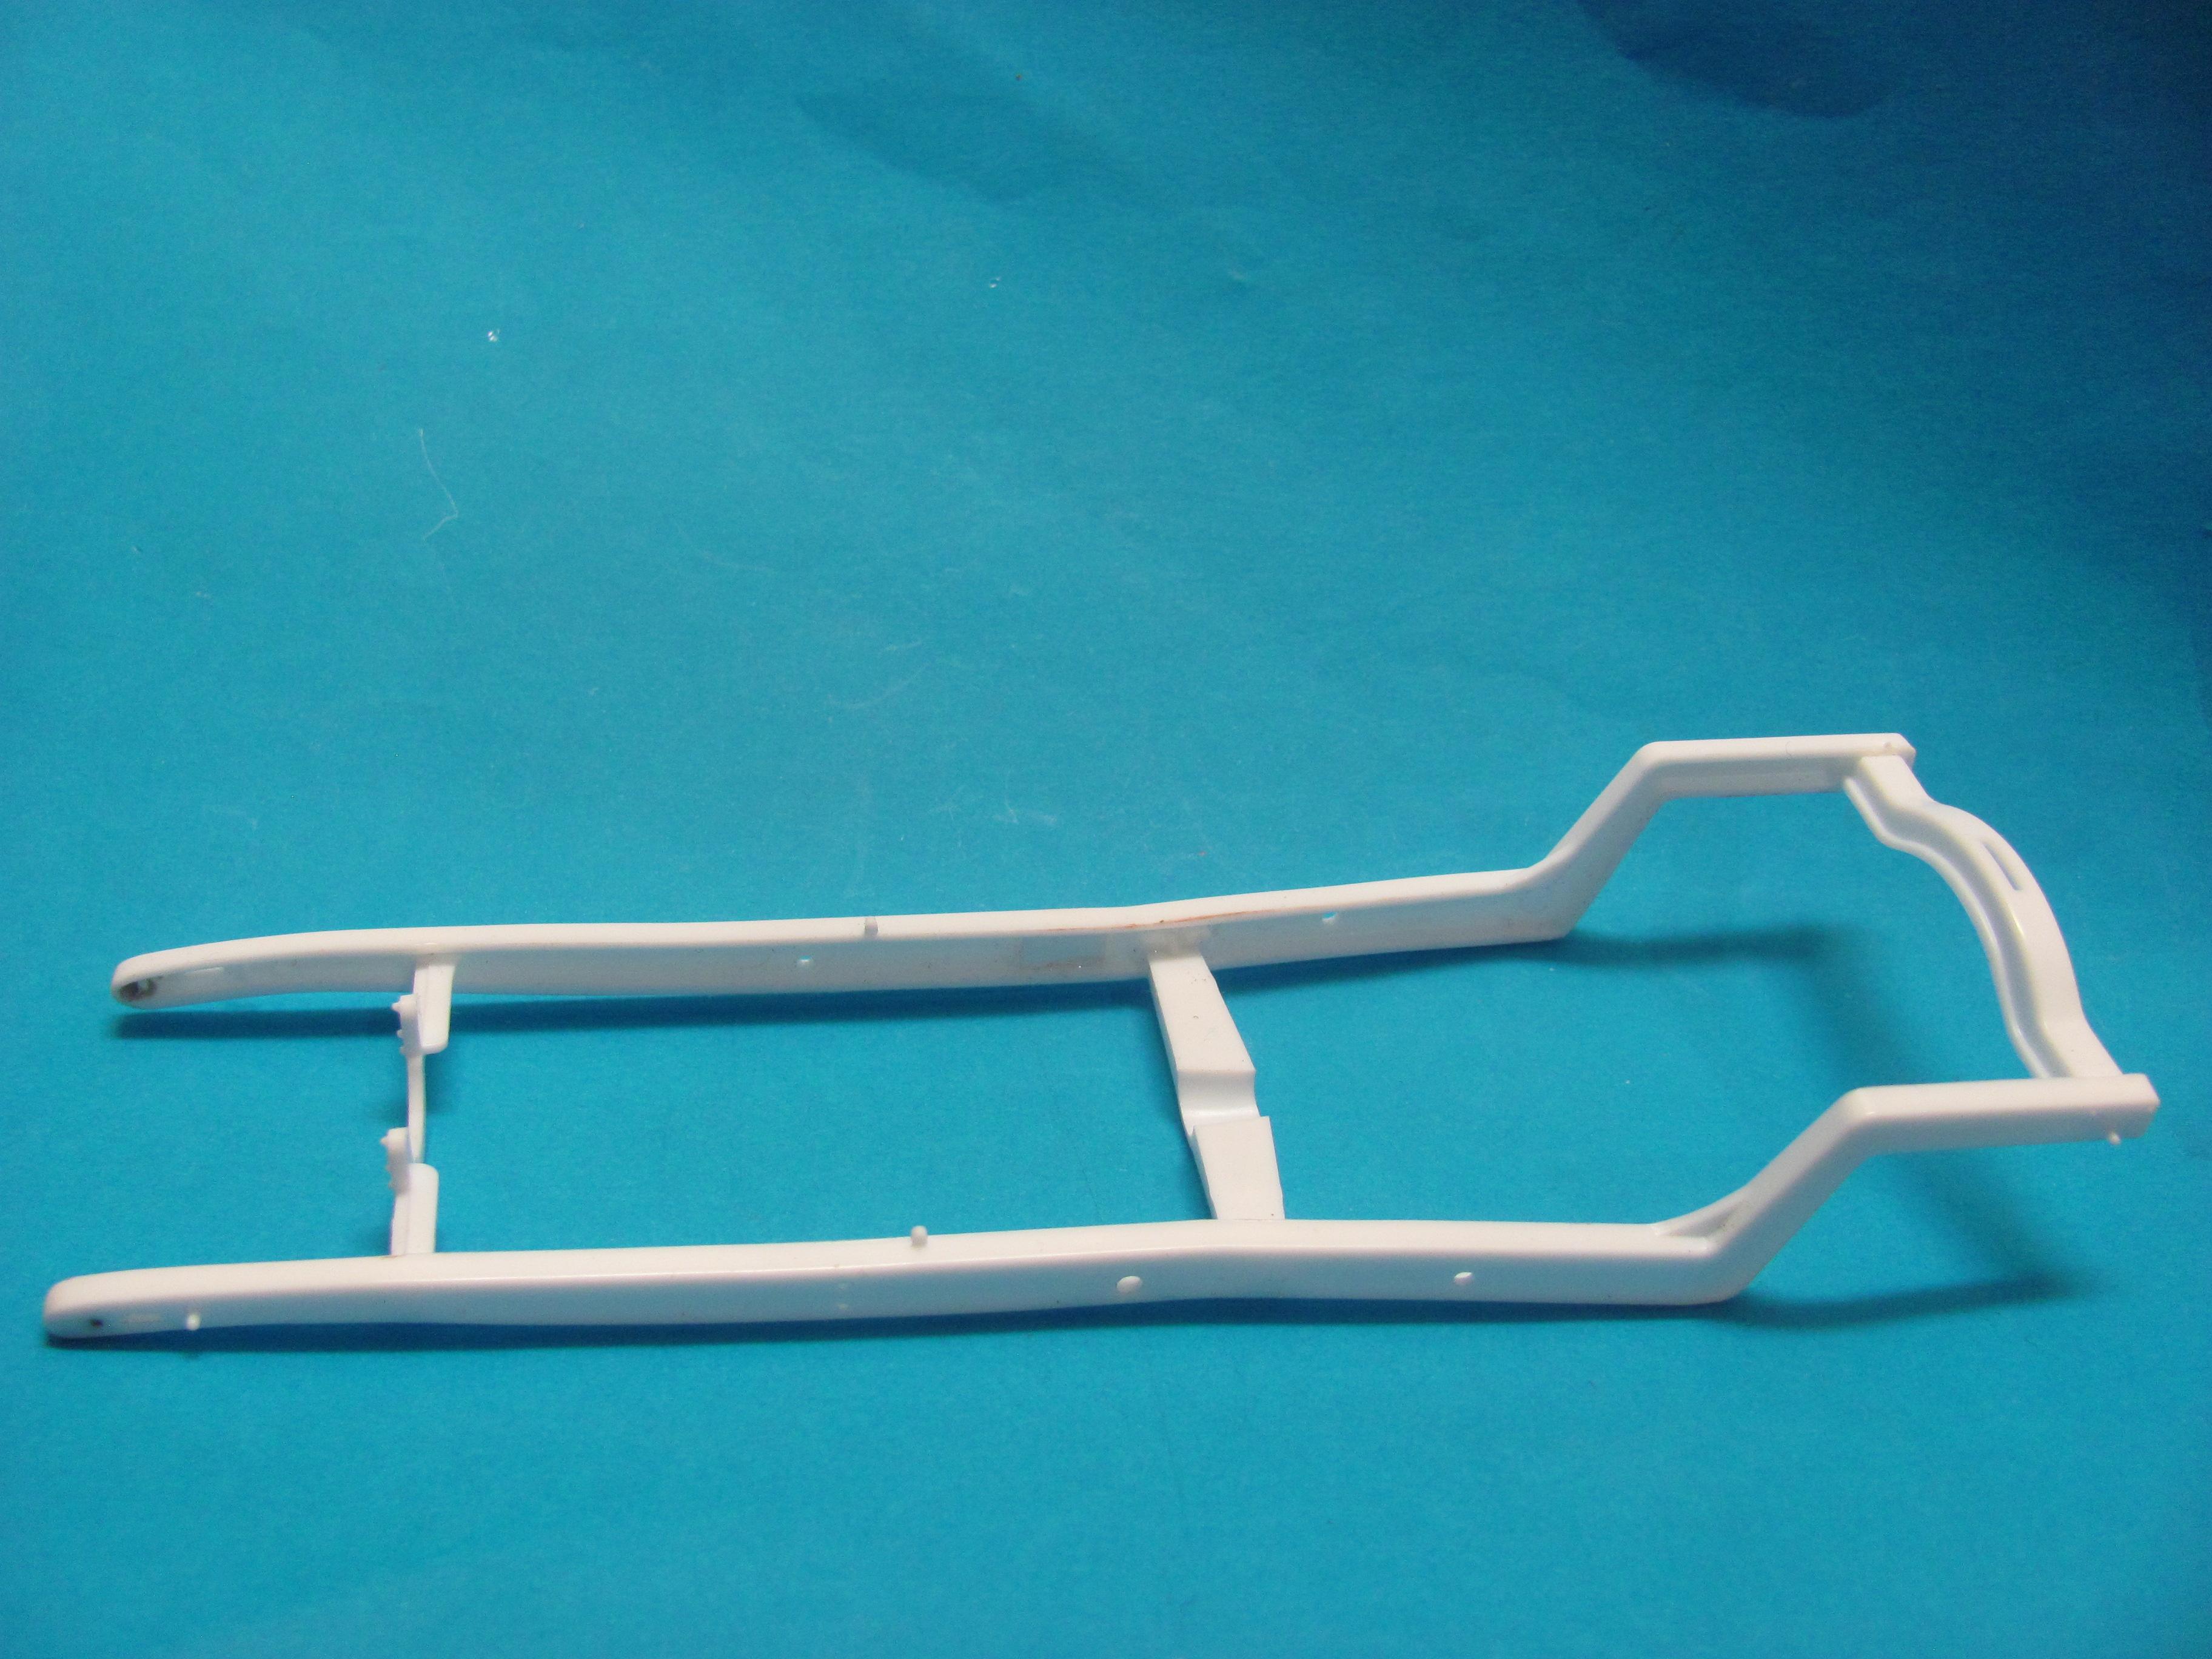
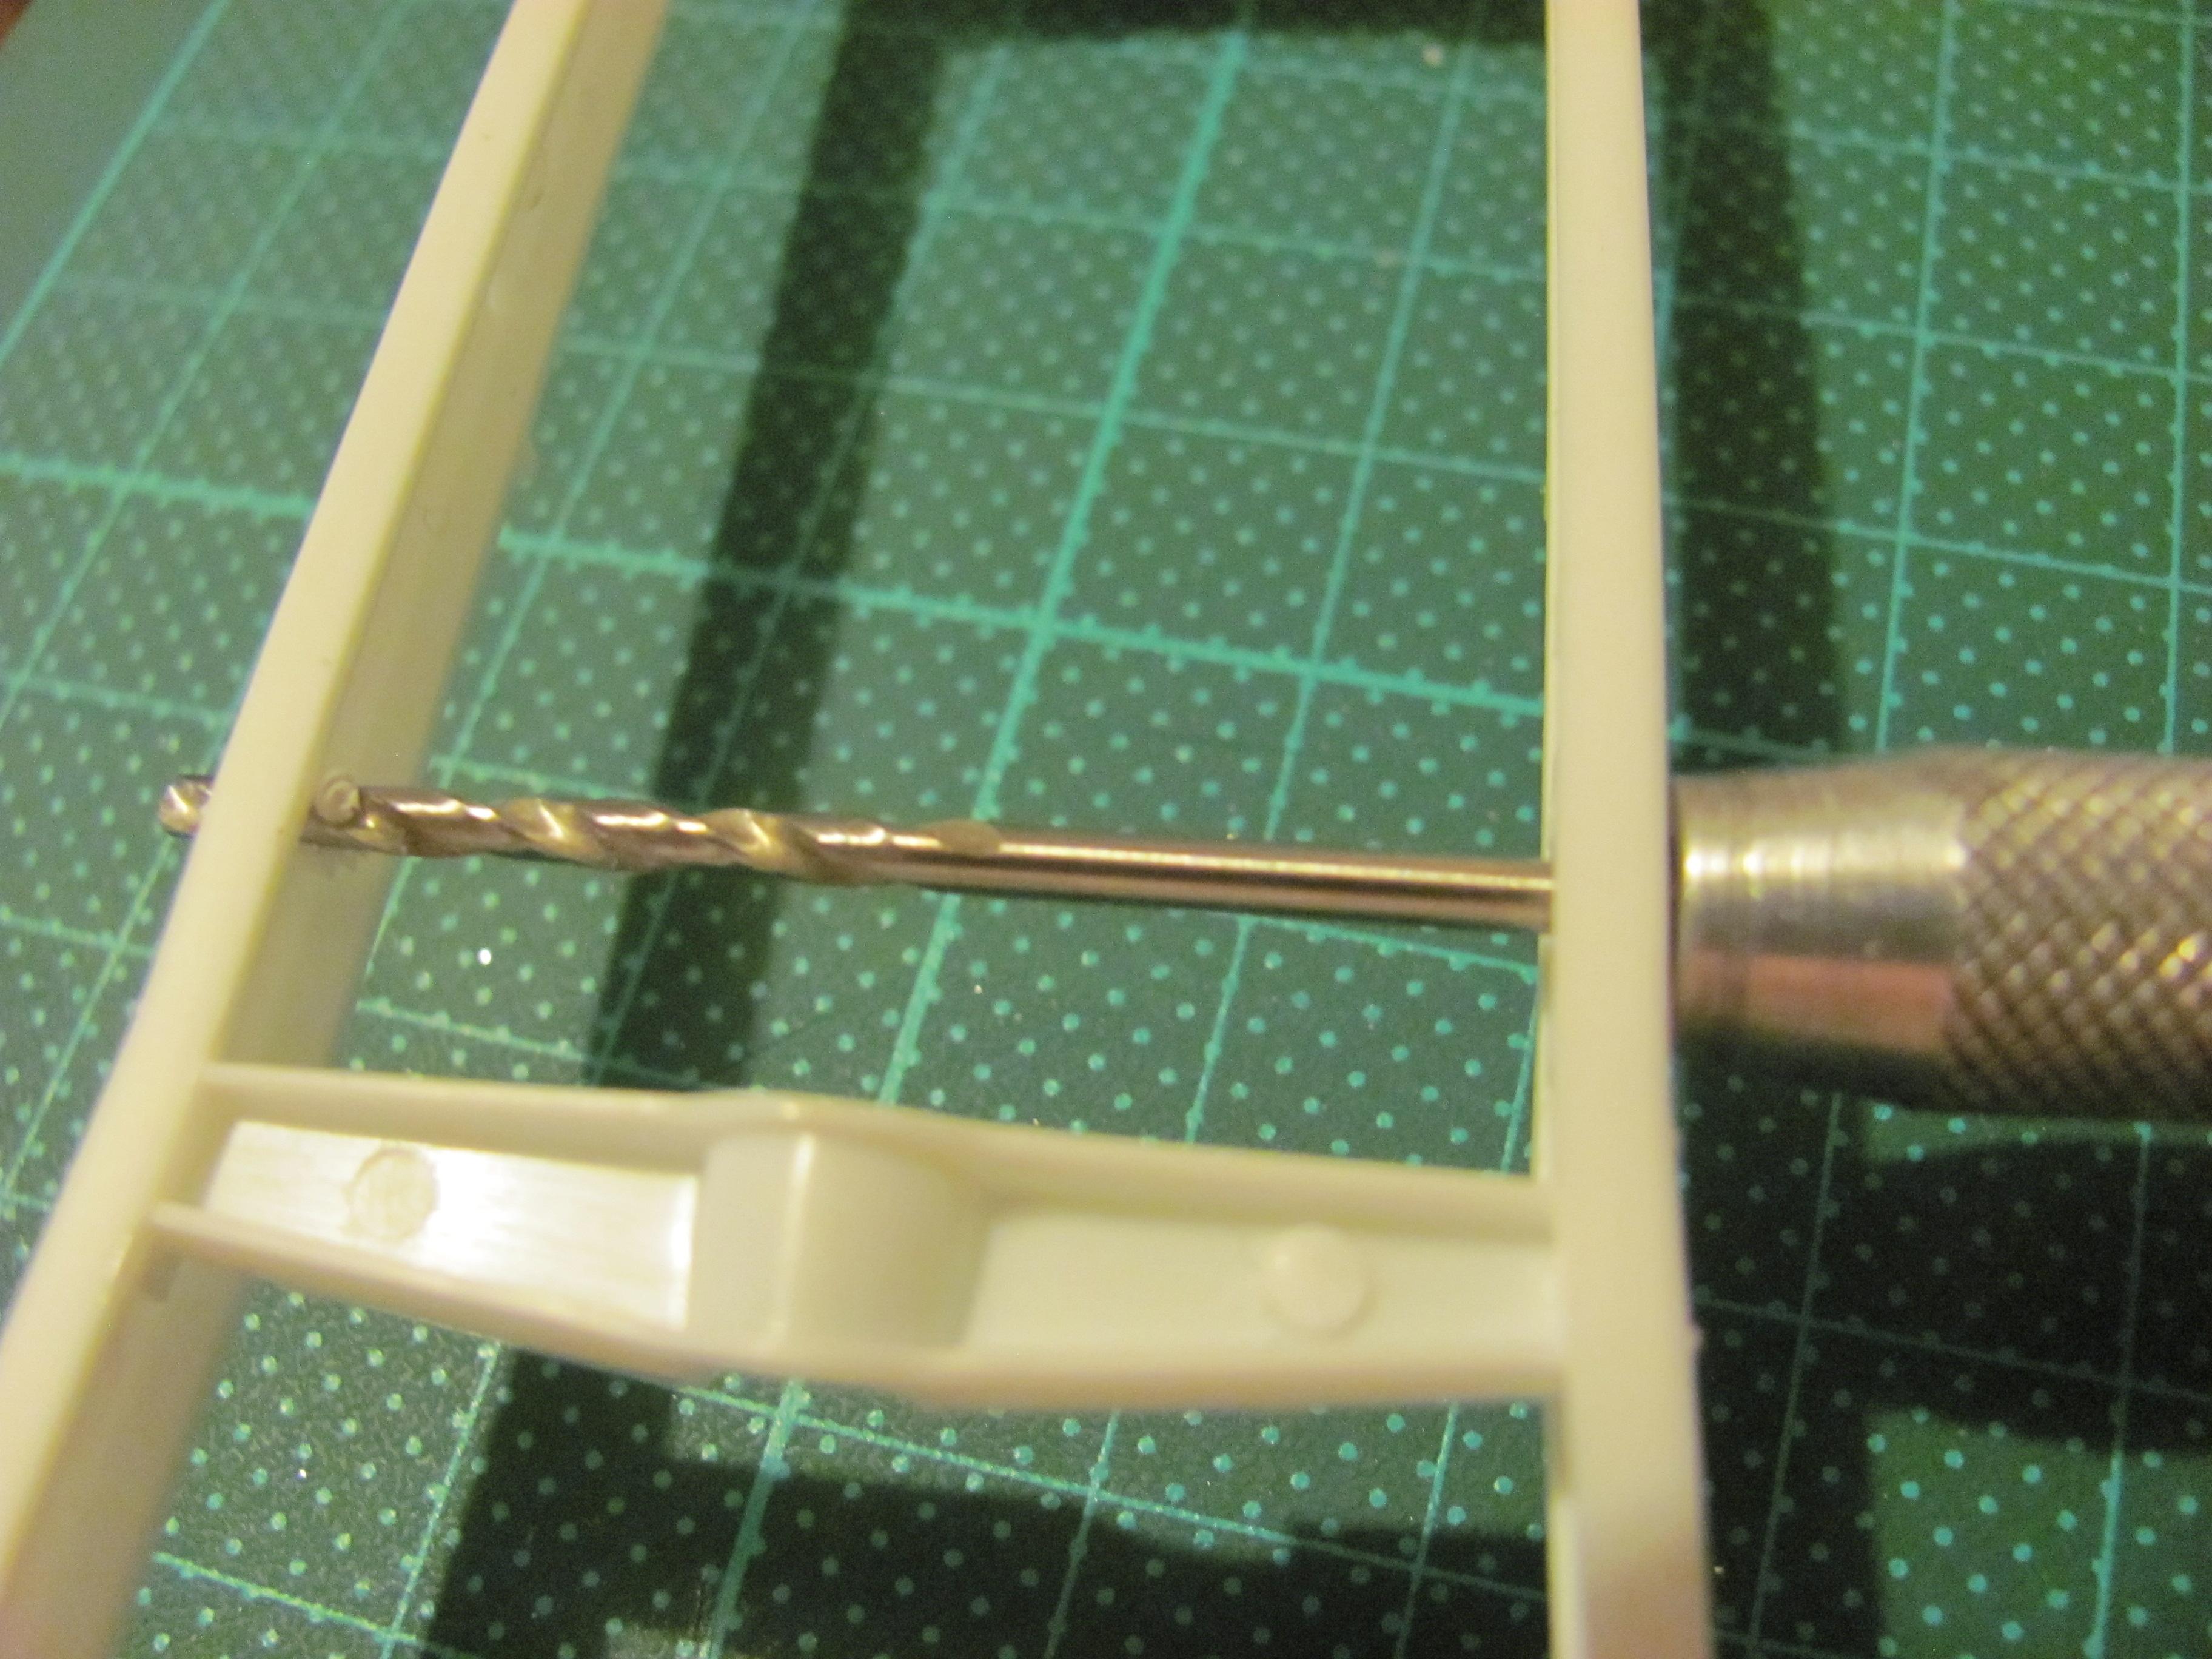
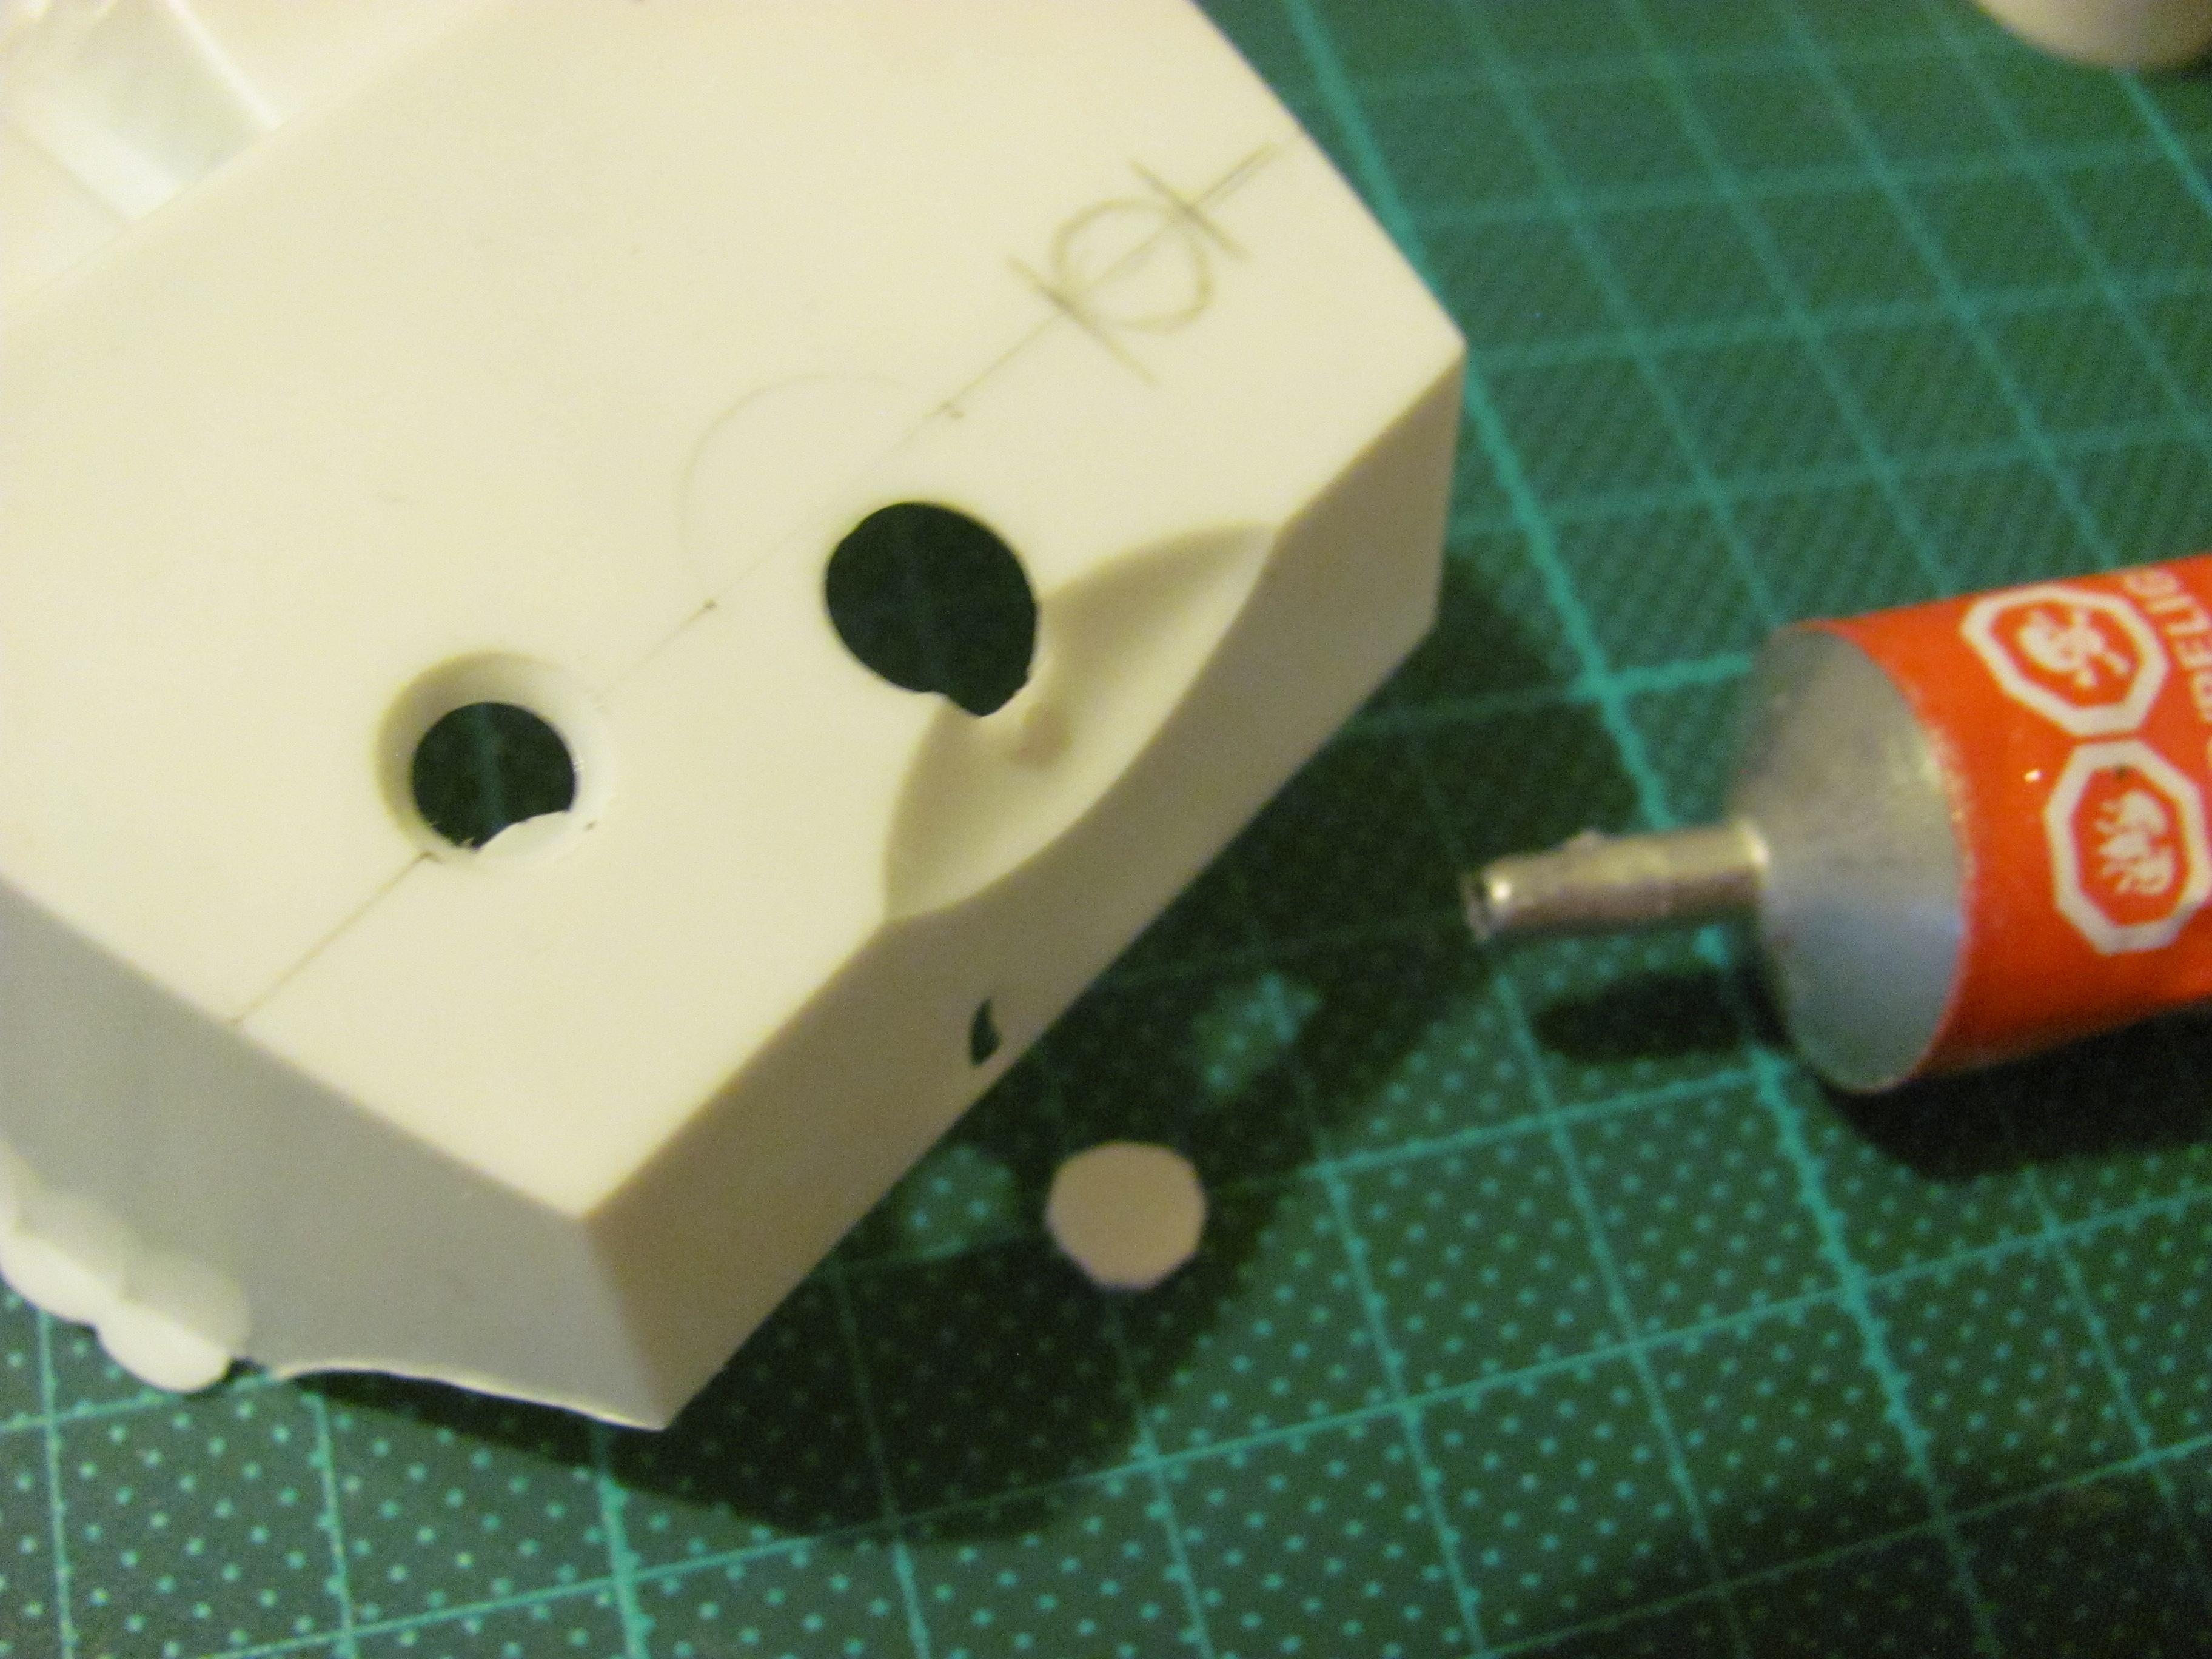
Back to simpler things. The chassis is made up of multiple rails and crossmembers and requires care in assembly . I have a scribed flat steel plate with small magnets that I purchased at a hardware and this jig made it much easier to keep everything square and true. The majority of models in my collection have been converted to right hand drive so I used a long drill to transfer the position of the steering box to the opposite frame rail. After that it was just a simple case of sand, prime and paint.
-
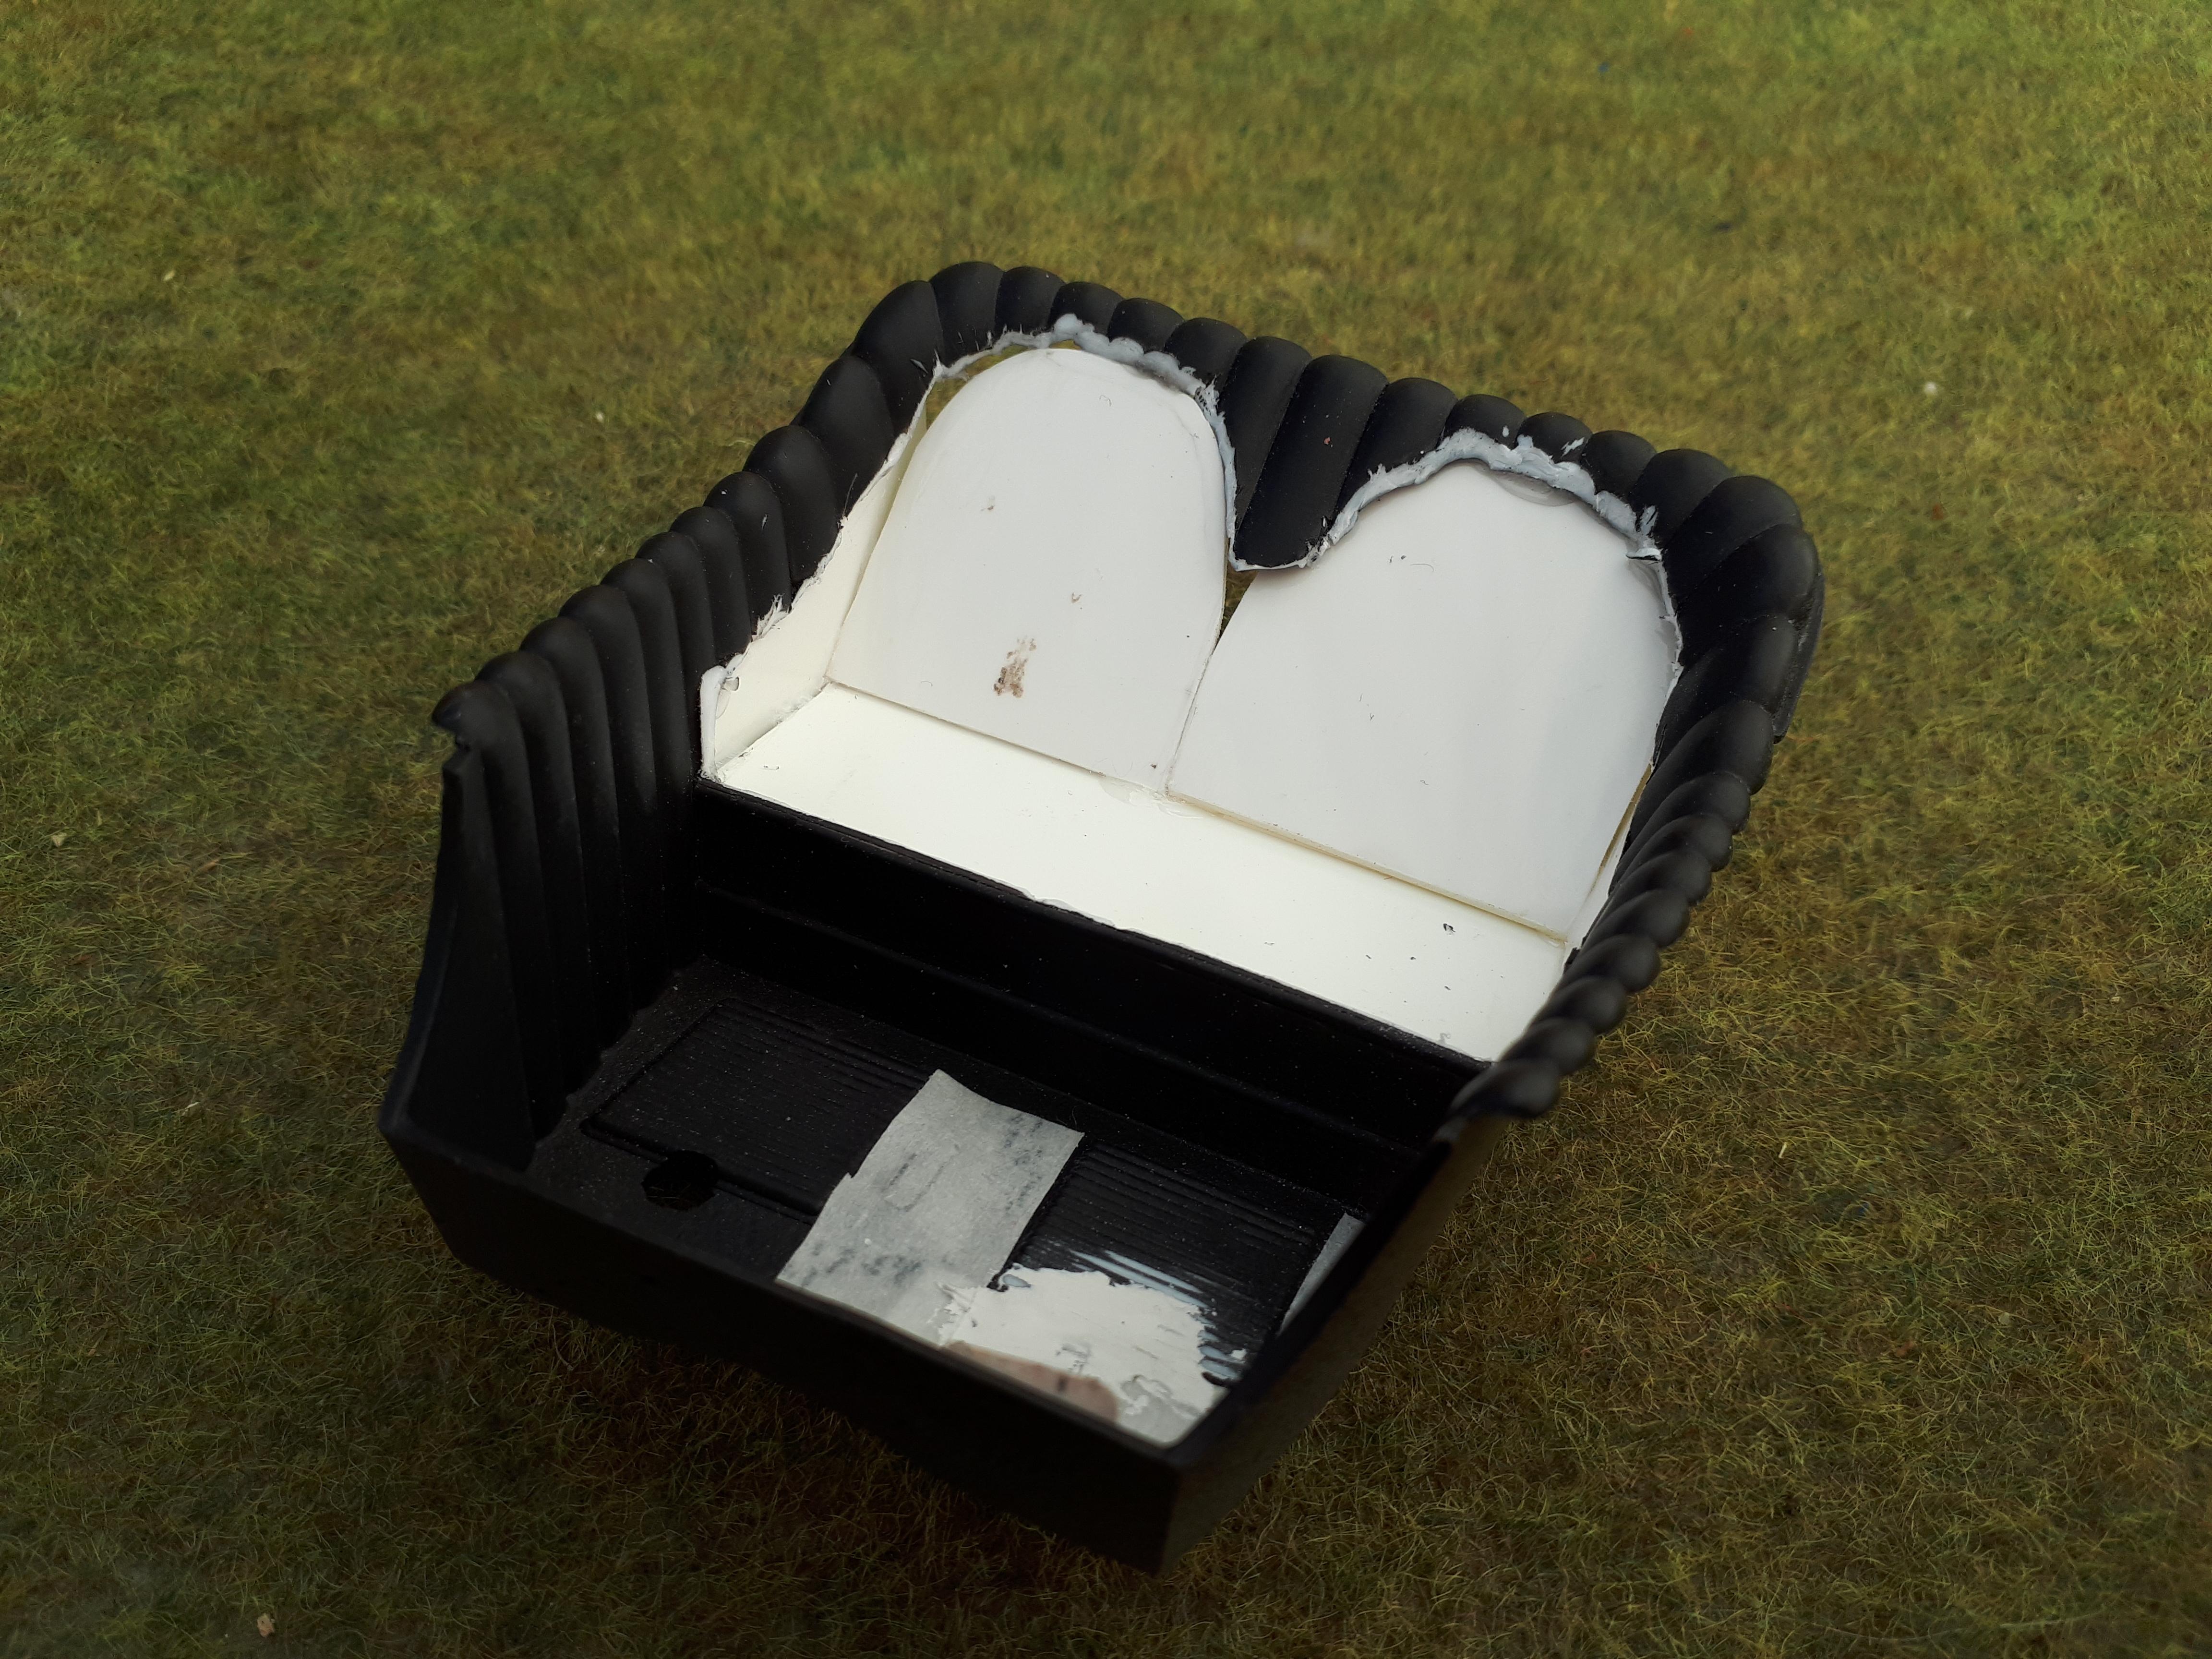
The next step was to coat the whole area with body filler, or “bog” to give me a basis on which to start carving some pleats. At this stage I thought this would be the easiest way but it turned out I was wrong! To cut a long and boring story short, this took multiple applications to get anywhere near acceptable results. I used a knife, needle files and sandpaper to varying degrees to try to continue the pleats that all ready existed around the edges of the interior bucket. I think next time I would try using Evergreen half round strips instead. Fortunately, my decision to do an early sixties style pure white interior helped disguise the waviness a bit. This was easily the hardest part of this project, entirely self inflicted and would probably require that much time again to get it perfect. Lesson learned! Oh yeah, not sure if I have a photo handy but I did make the seat base using Evergreen strips with a slice from a broken plastic coat hanger to make the bolster for under your knees. This was way easier to do than the seat back!
-
I briefly considered leaving it as it was and so I threw a coat of flat black over the whole thing but instantly regretted it. The first step in the conversion to a normal bench style seat was to use an X-acto and a razor saw to remove the buckets. This was a relatively straight forward procedure. I then cut some inserts form flat sheet styrene to fill the gaps. Again, easy peasy
-
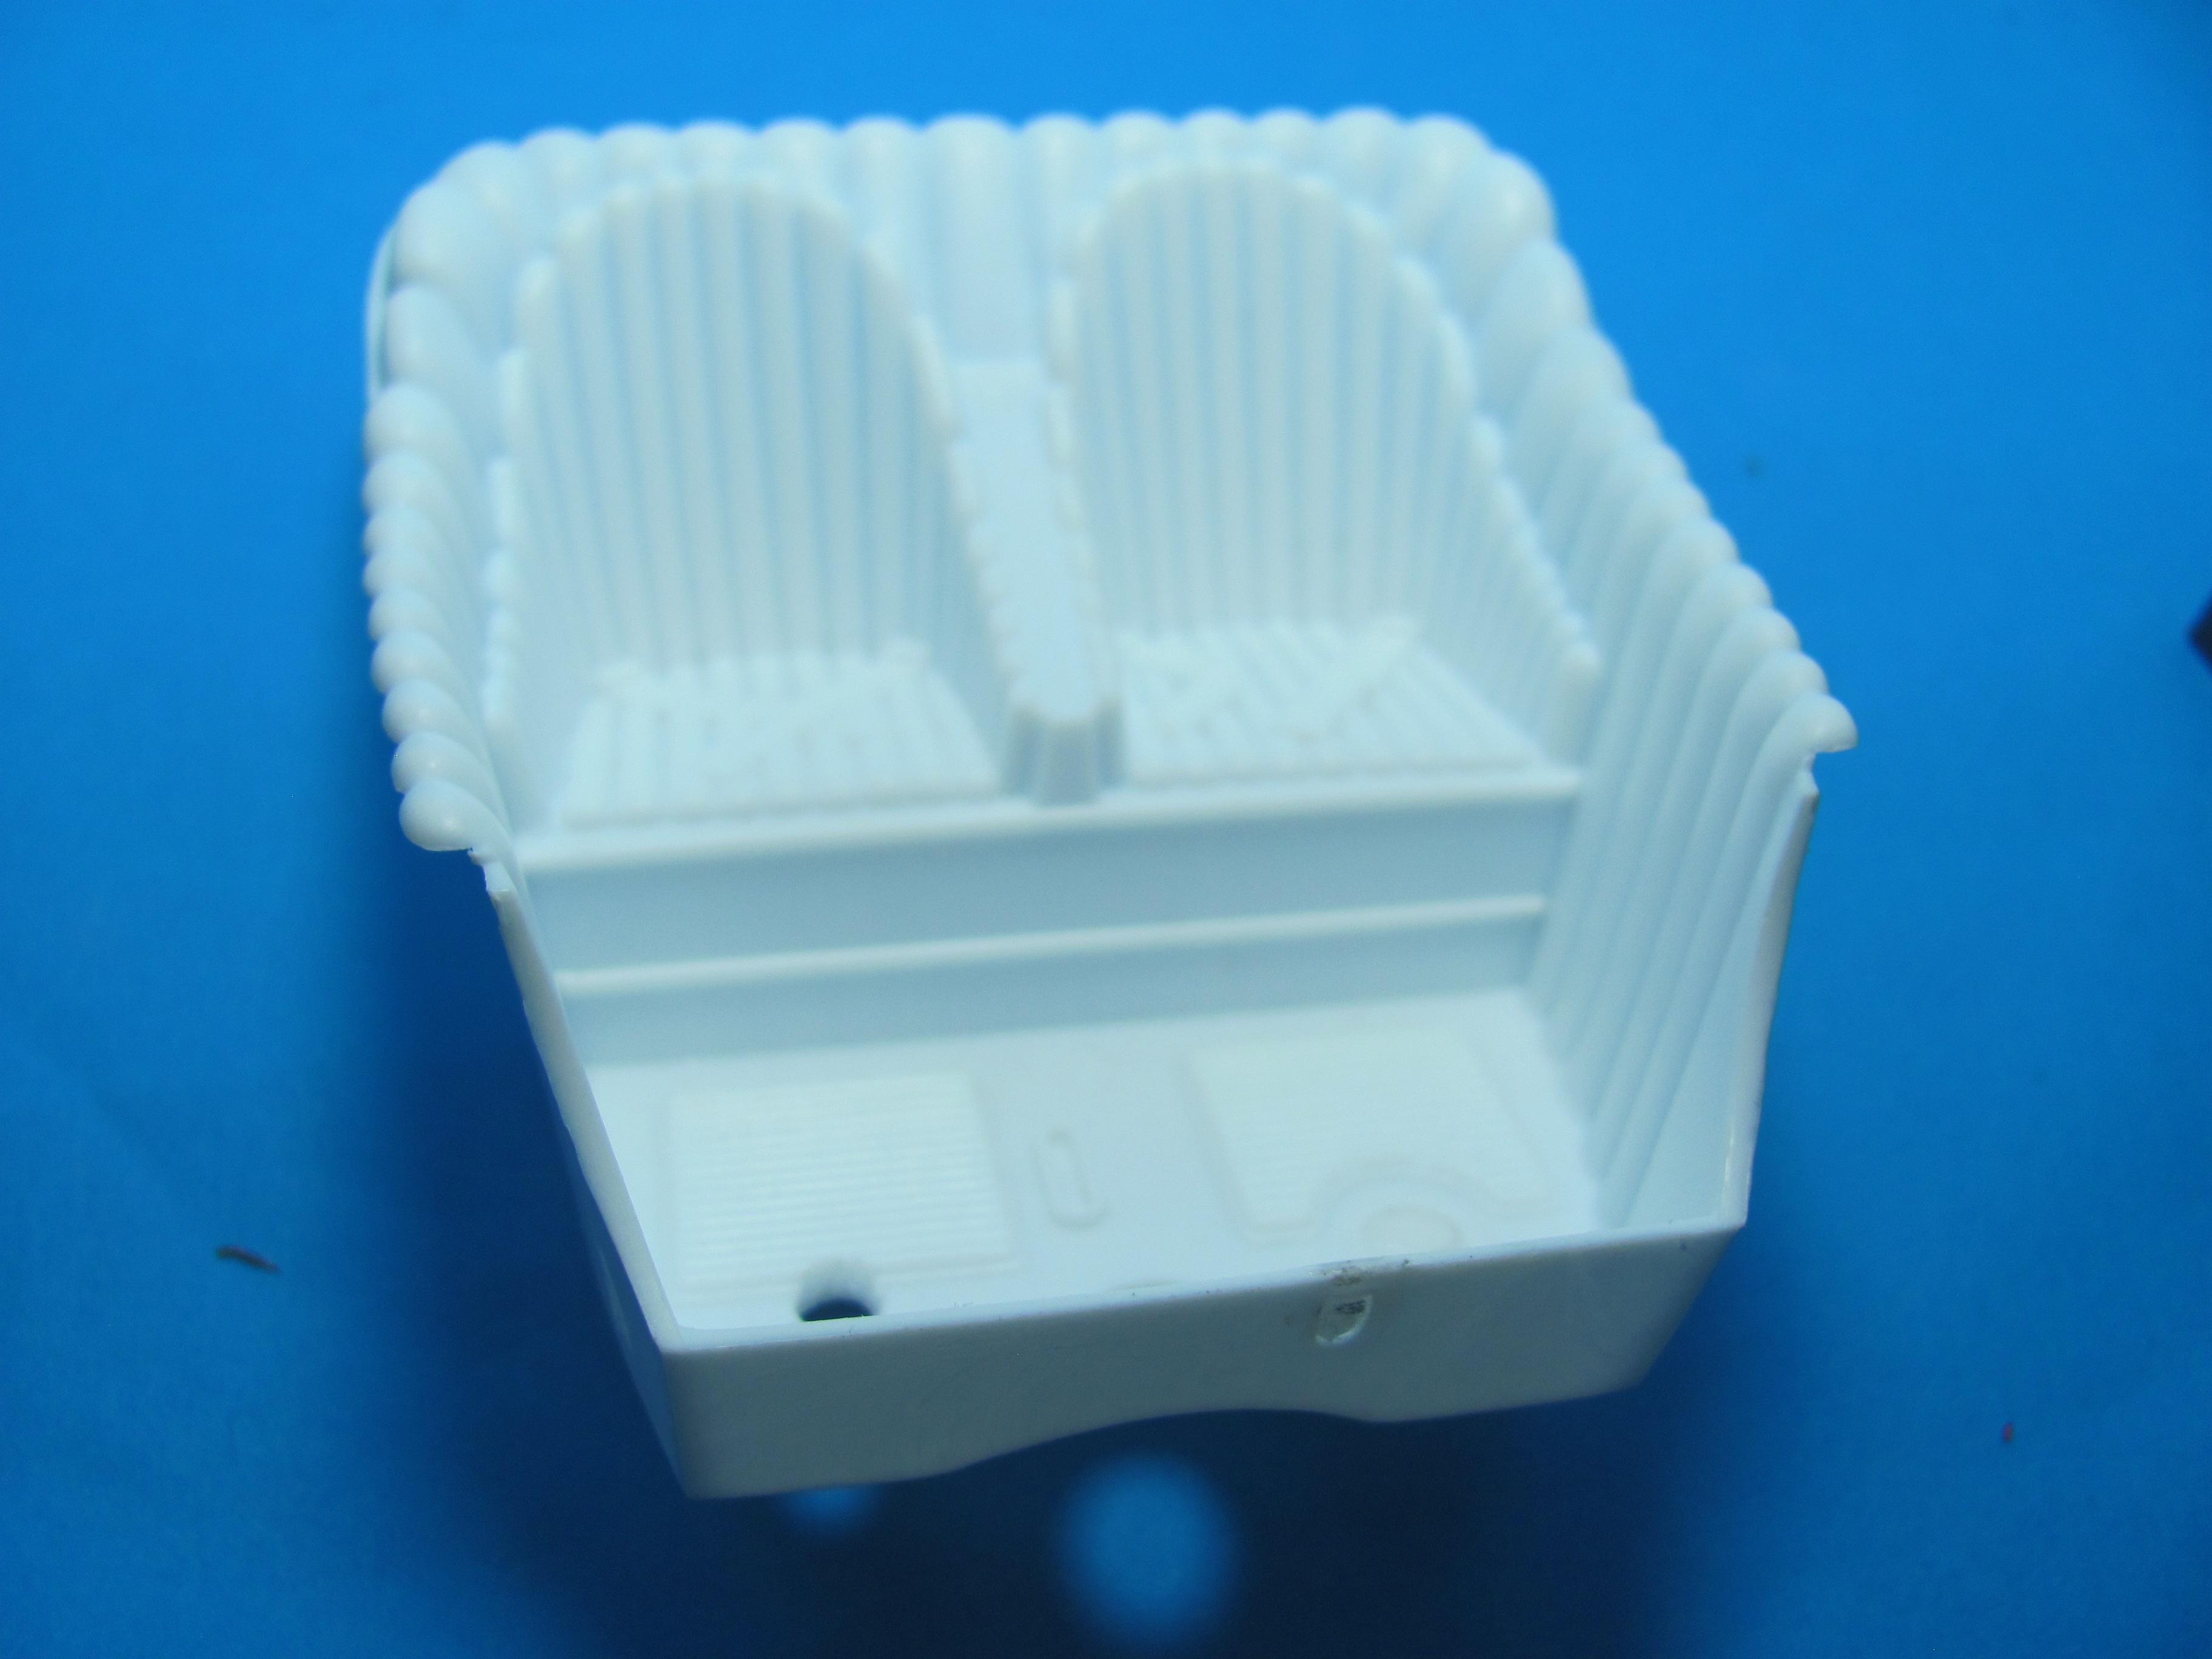
I've called this up as a Pyro kit because a) I built one as a kid and b) Pyro mastered it originally and the Lindberg Bull Horn T does not come with all the parts that the Pyro used. I have very fond memories of this kit. Back around 1970 or so, my brother and I pooled our resources to buy this kit. It was $4.50 when an MPC at K mart was $2.00 so it was a big investment. looking back, it was probably a little beyond our skill levels but we did the best we could and made an elaborate show display for it. It came out pretty good and Mum must have thought so as well because it was the only model we ever built that was allowed to be displayed on the top of the TV set. Considering that that spot was usually reserved for Mum's china cats, we had really made the big time with this honour! When I heard that the kit was to be re-issued after all these years, i was very excited but it simply didn't show up in Australia, not for years anyway. My wife and I visited the U.S.A in 2013 and finished up at Tom Geiger's place In N.J. so he took us to a hobby shop and I was able to purchase it there and carefully take it home in our baggage. I still had the sad remains of our teenage build and hoped that I could use those parts to convert the Bullhorn T to the Tee N T - more on that later. As you examine the kit, it becomes very obvious that someone at Pyro had purchased a Monogram Big Rod and put it in the Shrinkerator. There are so many parts on this kit that are absolutely identical to its 1/8th scale cousin that it can't be a coincidence. Never the less, there are some uniquely different parts to the kit as well. Most obvious was the unusual twin bucket style interior tub. I never liked it as a kid so as an experienced adult modeller I decided to do something about it. Silly me!
-
Ausmodules - a modular diorama concept for model car shows.
alan barton replied to alan barton's topic in WIP: Dioramas
Thanks, Rob and Ian. I'm glad you appreciate the concept. However, it doesn't look like the world is ready for it just yet - I thought that more interest might have been shown by people who organise or attend model car shows.. Not to worry, at least here in Australia we know the concept works. It's just a matter of who wants to take it on and make it a truly international project. Cheers Alan -
I see a fair bit of Iron Trap Garage going on there! I particularly like the rust stains on the paint. i don't think I've ever seen anyone attempt a bent grille before! Cheers Alan
-
Which just proves how nicely these kits come up with nothing more than an original colour choice, quality paint finish and clean paint detailing. Lovely work Roger, be sure to put it in the Group 29 thread. Cheers Alan
-
38 Ford Coupe Hardtop racer
alan barton replied to alan barton's topic in Other Racing: Road Racing, Salt Flat Racers
Thanks guys, glad you all liked it. It was a fun build and it could never be worse than what I started with! Cheers Alan -
Hi Mike, Your colour choice is very nice, not one I would have thought of. Can I make one more suggestion? That chopped windshield looks like it was made from railway track! With a sharp Xacto you could trim the frame on all four sides to at least half the width that AMT made it. To keep to the out of the box theme, i am pretty sure you could then fit or modify to fit the glass from the stock screen. These chopped windshields look really clunky if you don't put them on diet. Of course, if you're not allowed to change it I understand but it is a little cheat that would go a long way in my humble opinion! Cheers Alan
-
Very cool! It struck a cord with me - I build one over 20 years ago using the same frame but left off the rollcage. Pretty straight forward kit bash really and the body is so out there!
-
Ausmodules - a modular diorama concept for model car shows.
alan barton replied to alan barton's topic in WIP: Dioramas
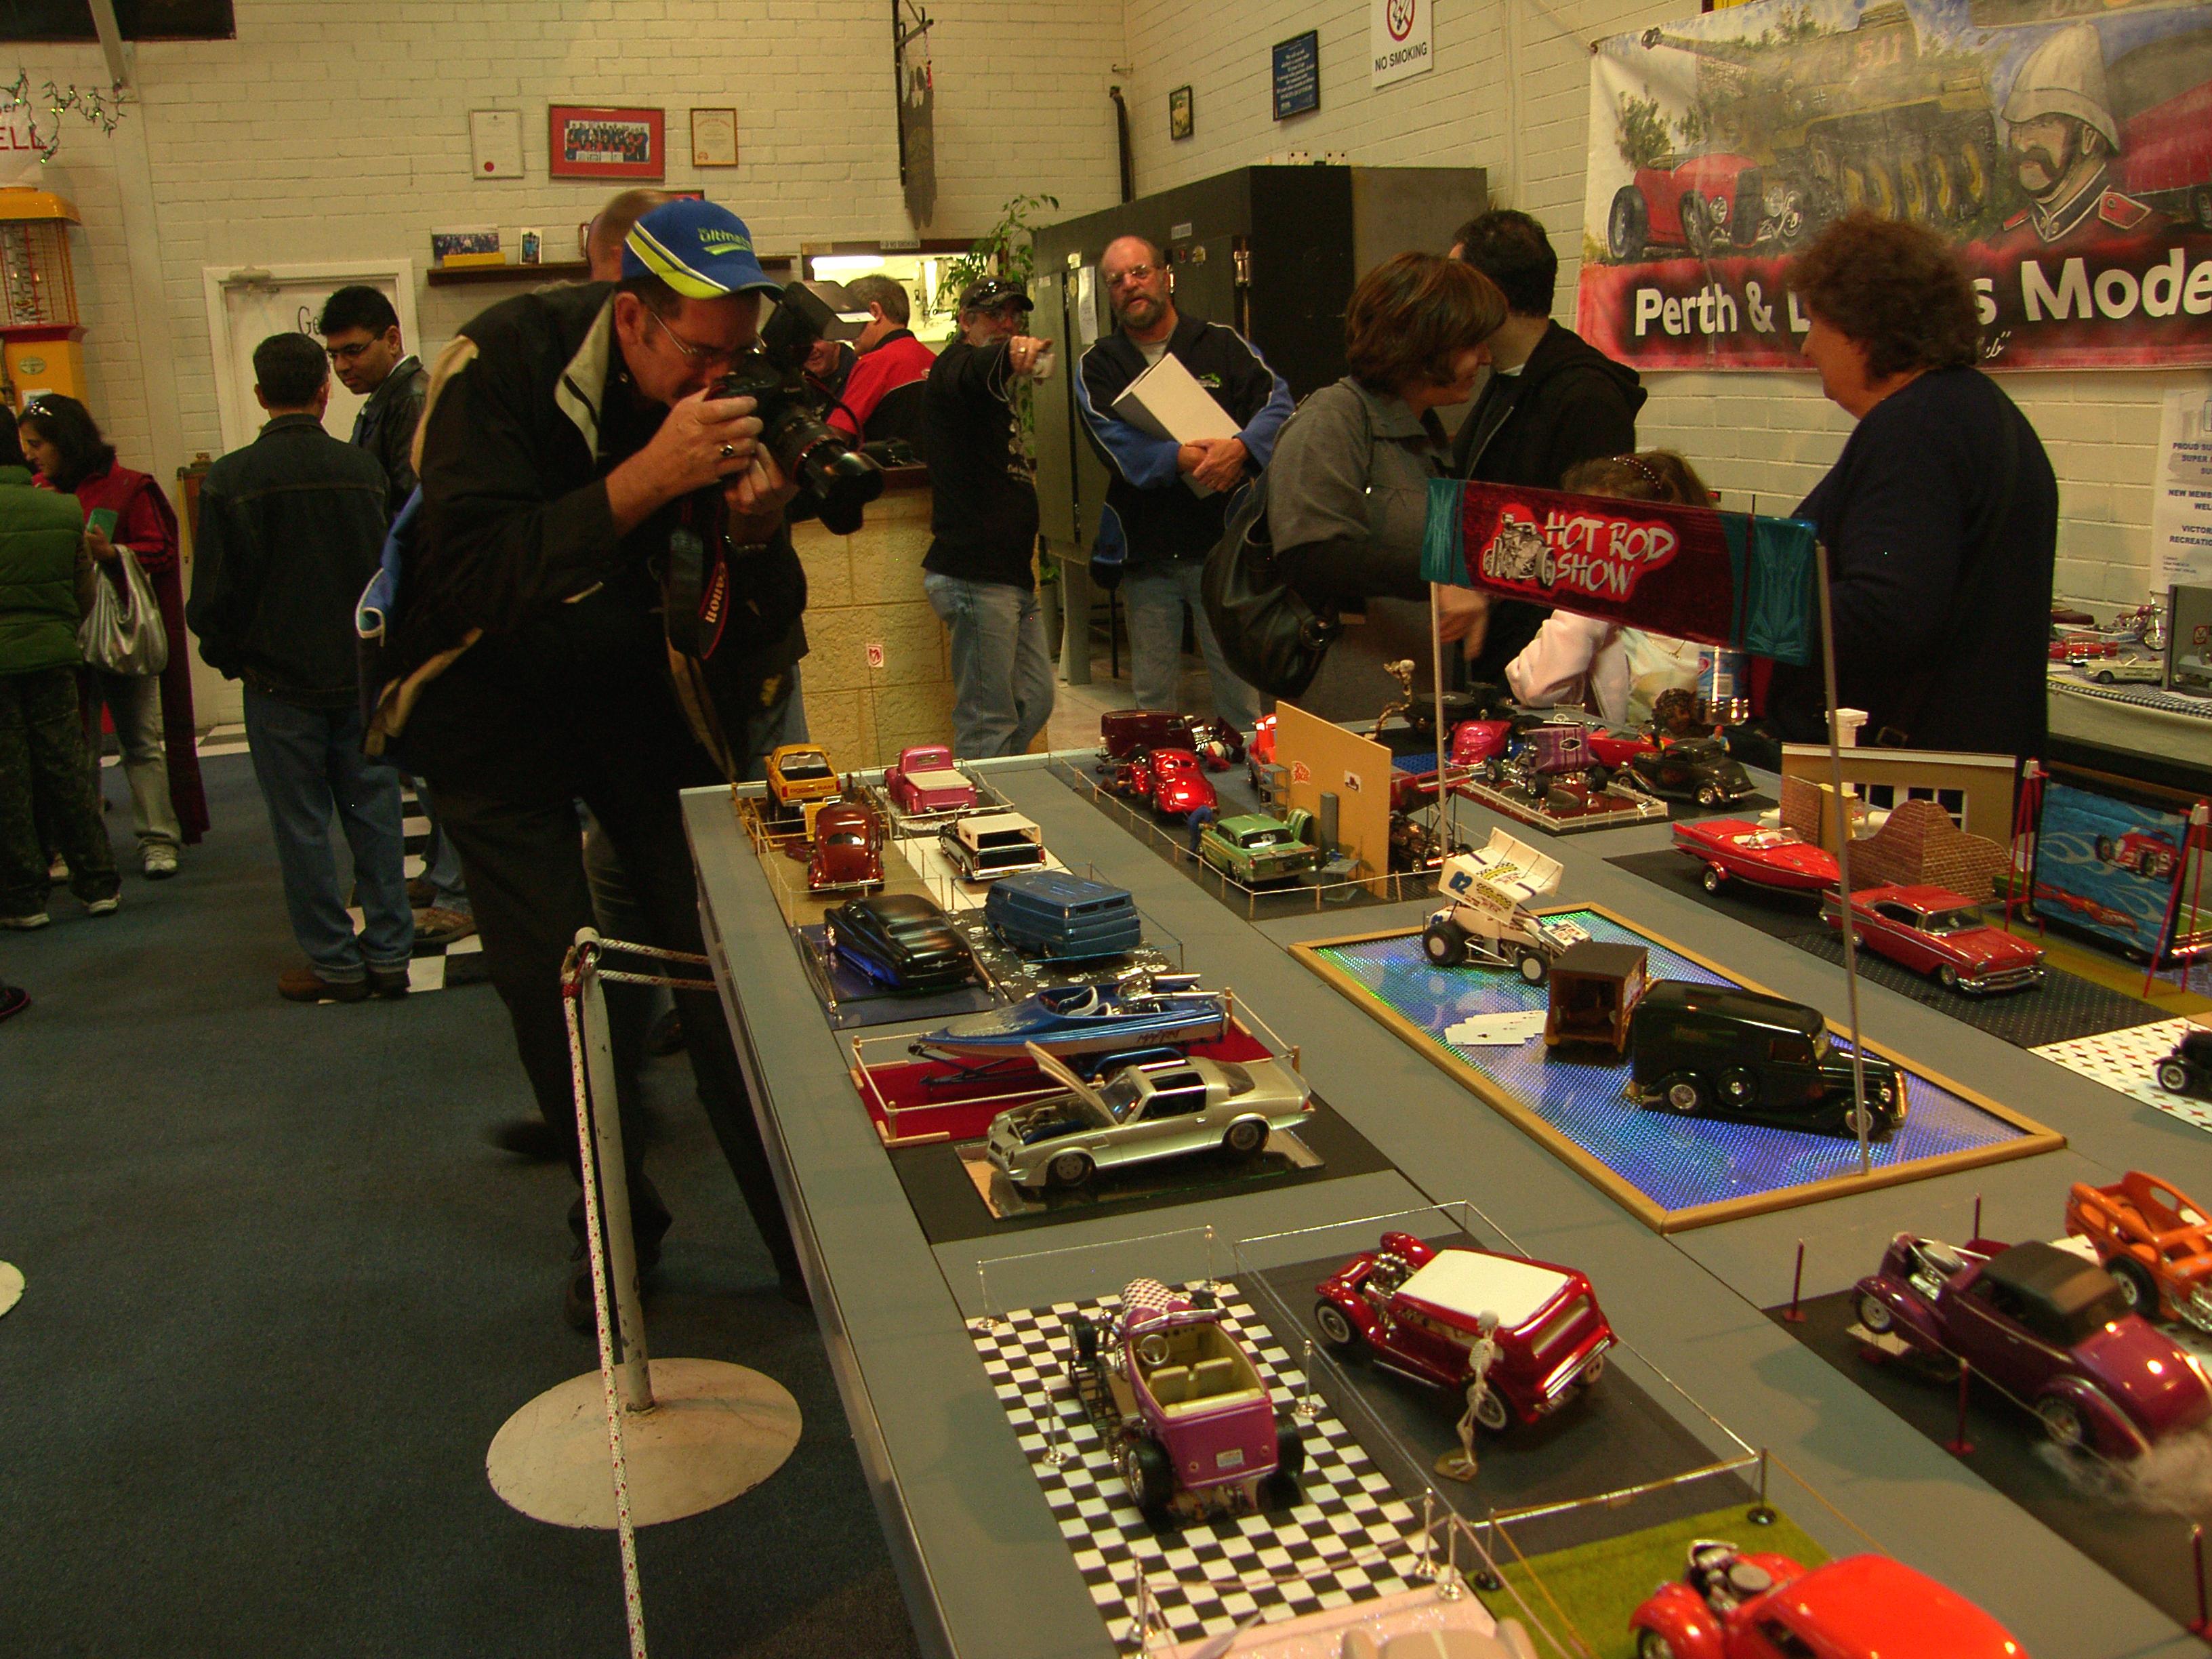
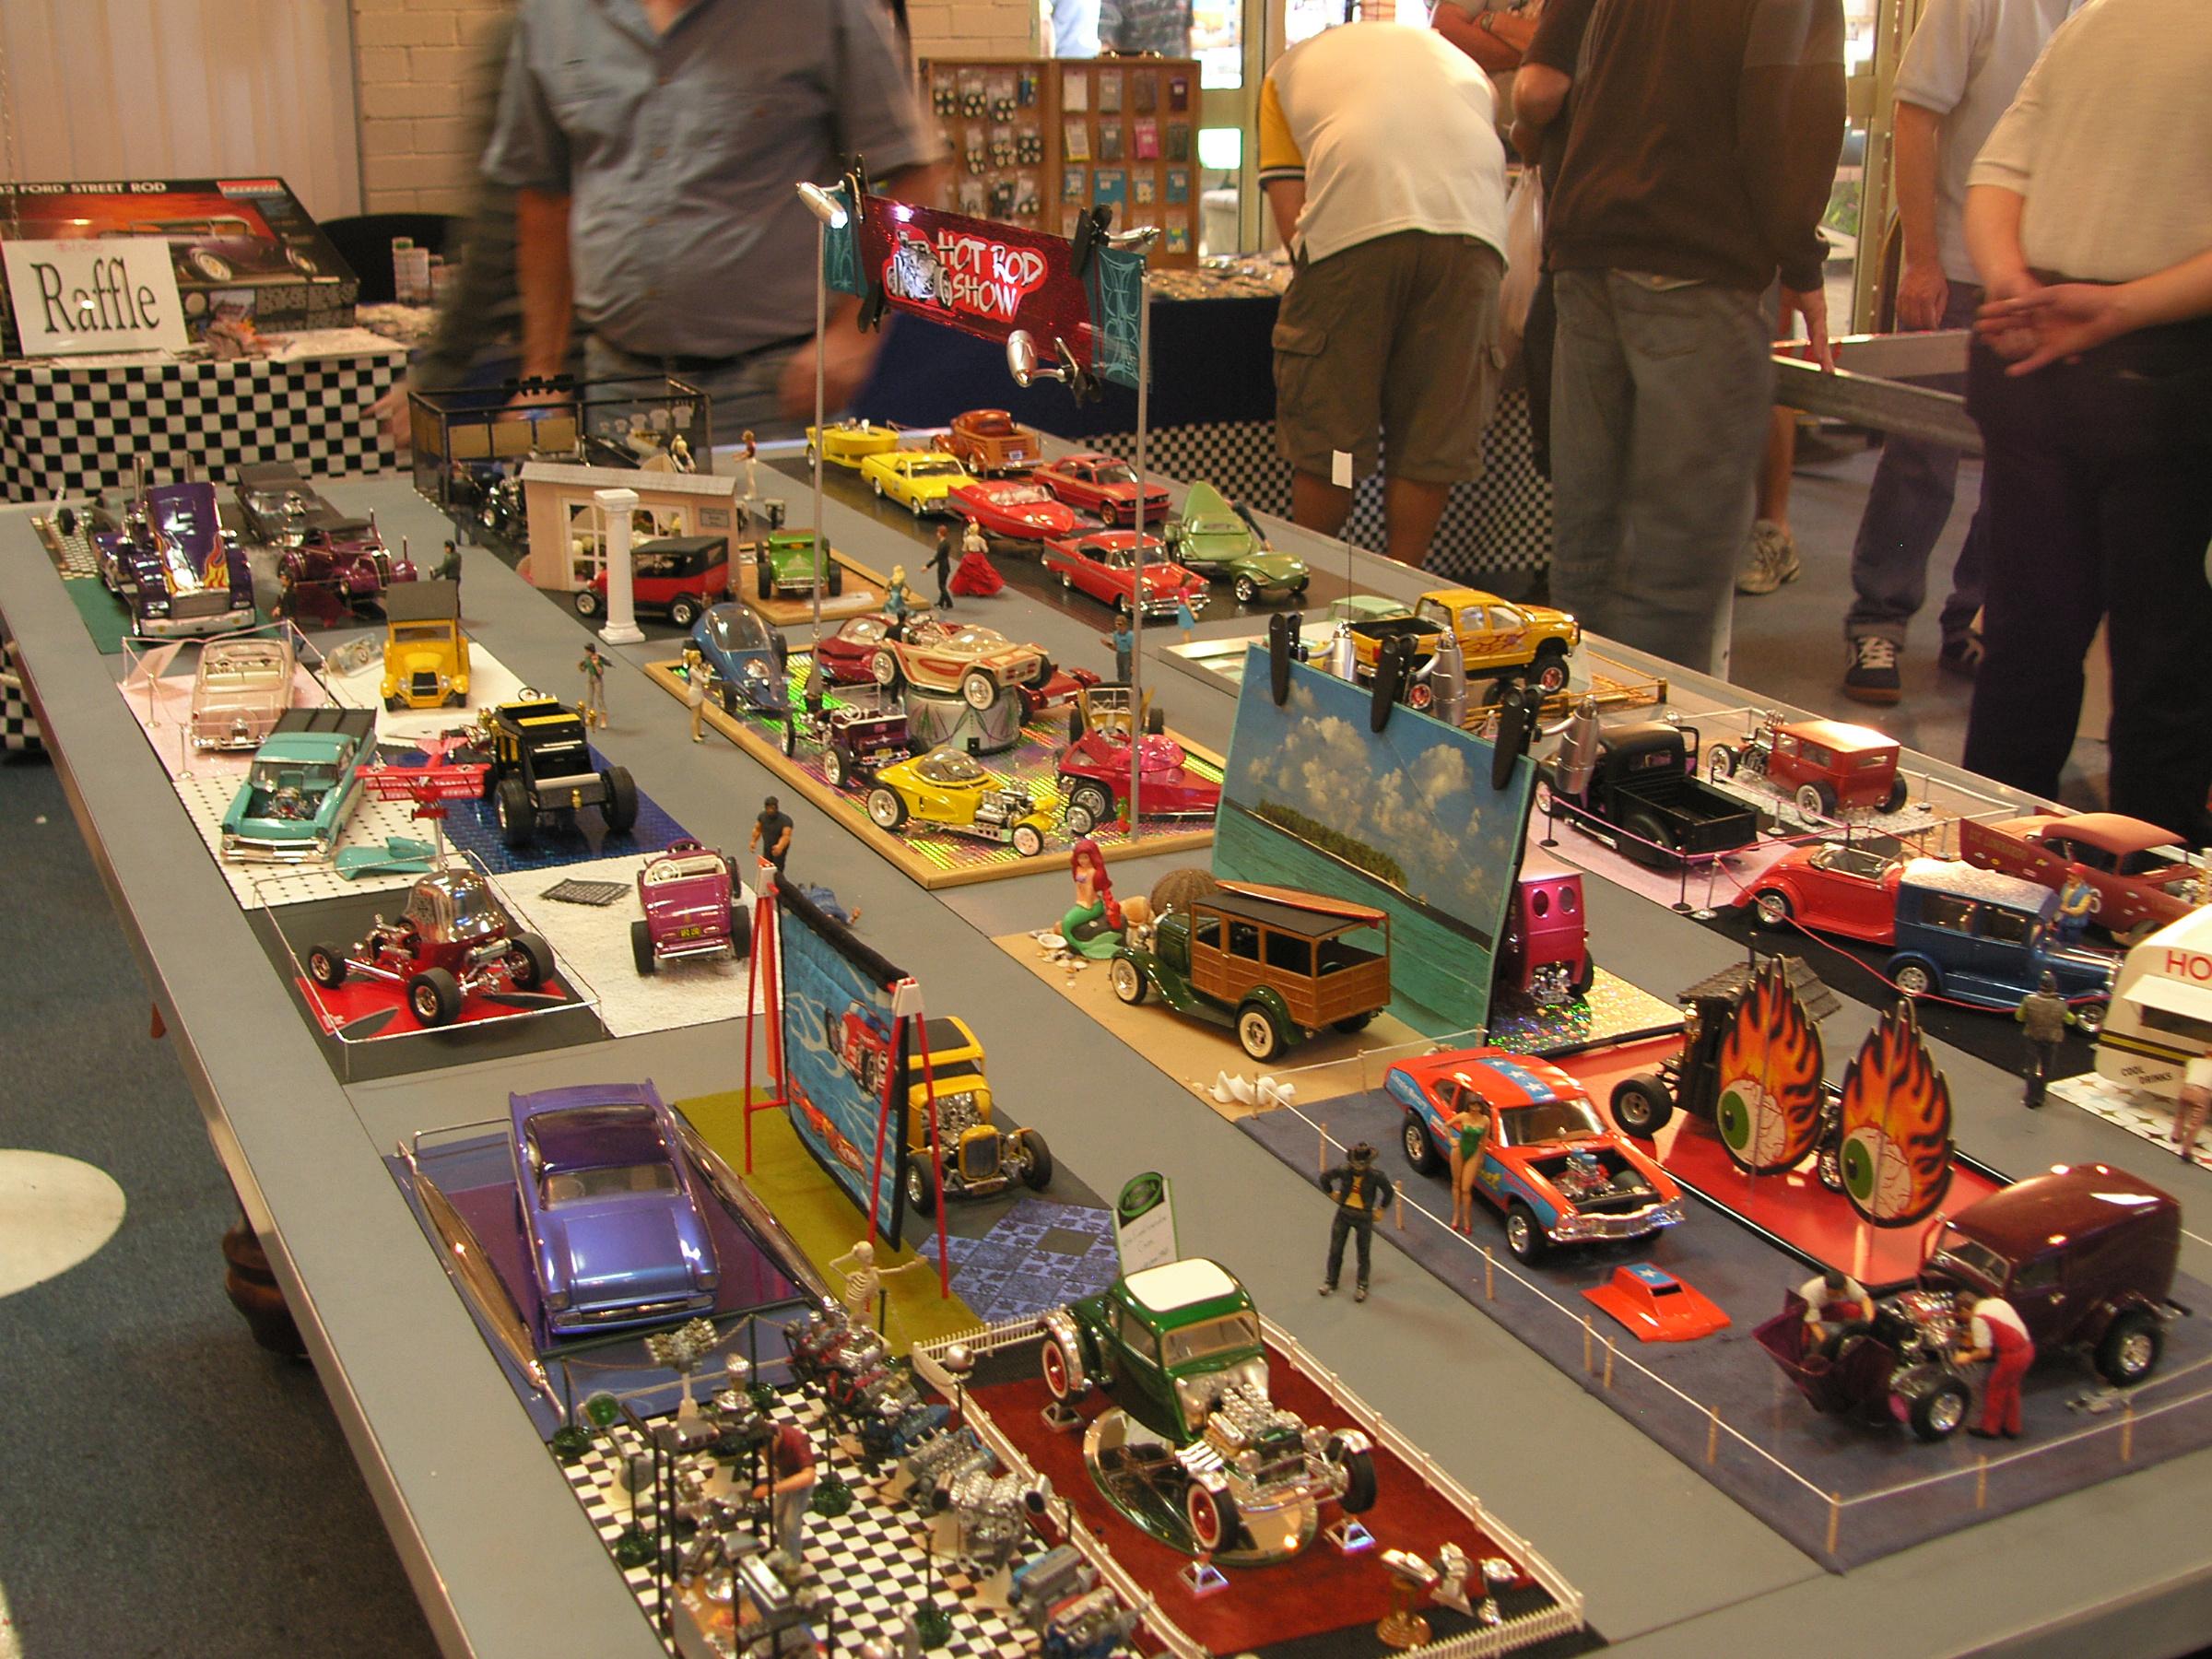
Here's some more shots from the second and third years.Looking at them reminded me of one more point - we didn't put entrant cards next to the models - they would have ruined the whole effect. Instead, we had a board in front of the display with the entrant cards positioned to match. Did you notice the pedal car display in the last lot of photos - the guy made them from Hot Wheels cars! Cool or what?
-
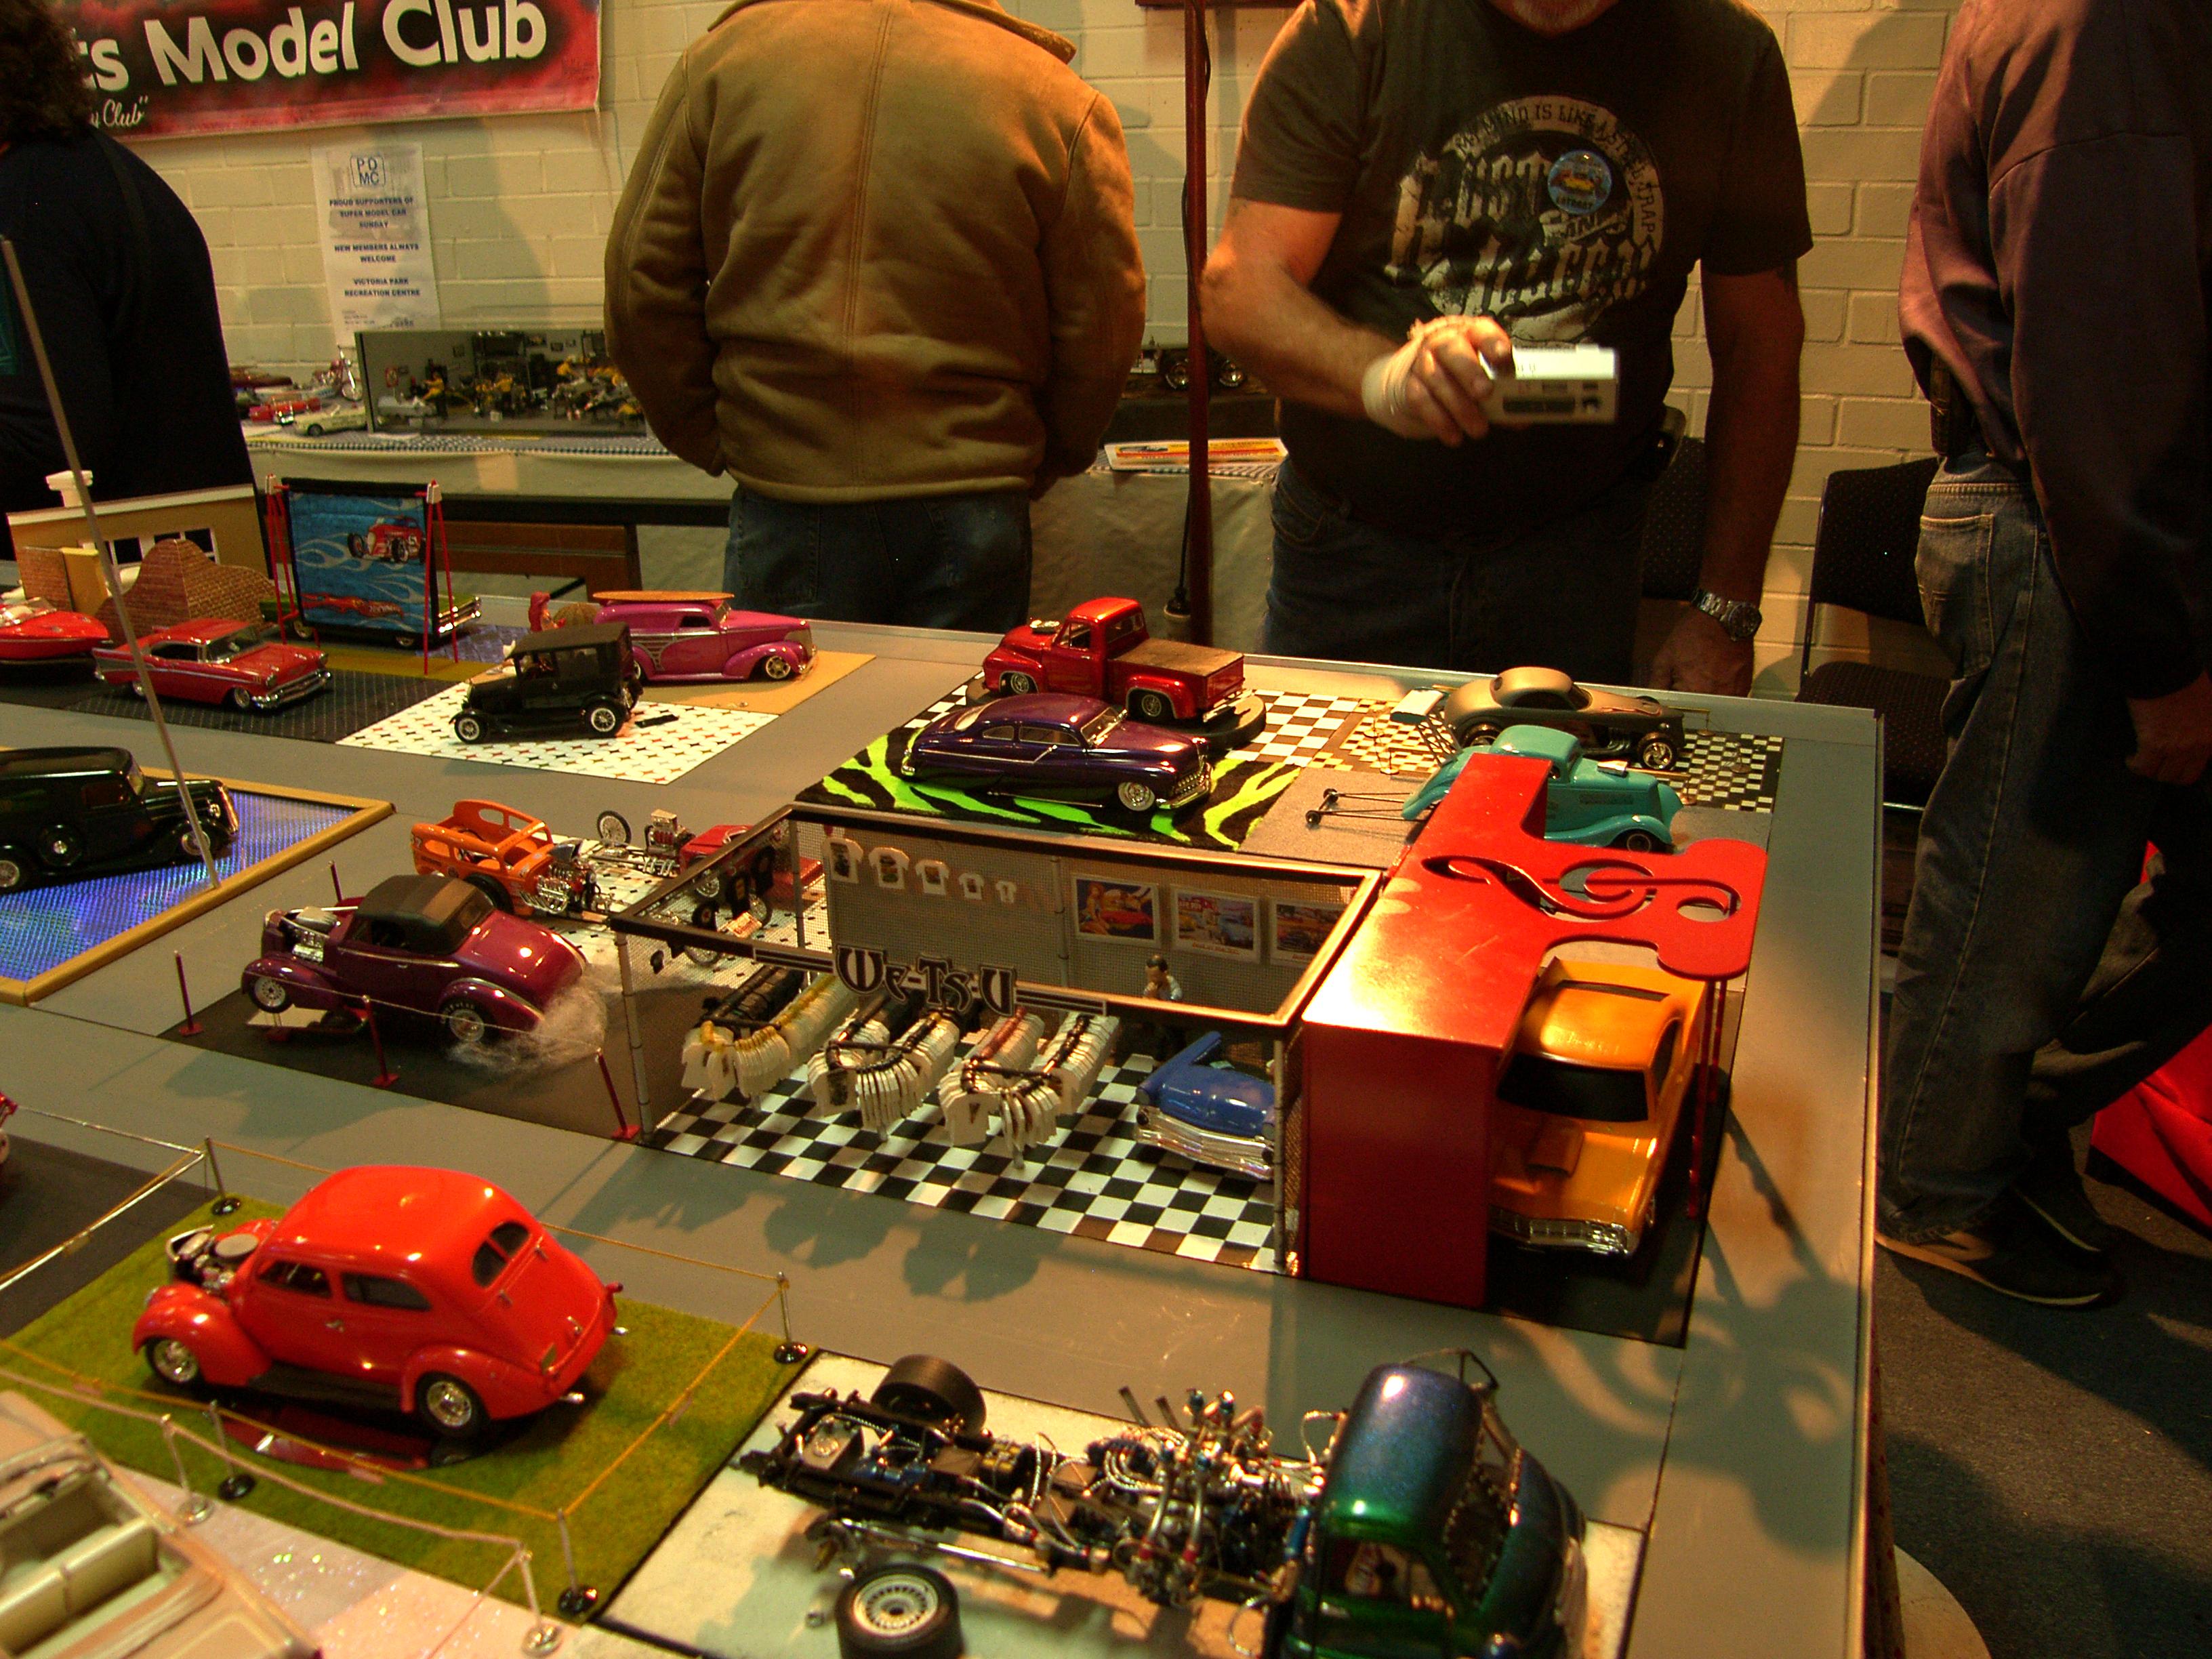
Hi guys, This thread was intitiated by Rocking Rodney Rat's green T show rod display. Back around 2008 I introduced a concept to our NNL called Ausmodules. The idea is that at a model car show you create a diorama of a hot rod show and have entrants bring their own standard sized module to combine to create a whole car show. The idea was to be able to create a terrific diorama that would entertain show patrons but, at the end of the show, everyone takes their module home and no-one has to store a huge, fragile display until next year. The concept is extremely simple. The host club obtains a 4x8 sheet of 1/2 inch plywood, chipboard or mdf as a base - no further preparation needed. This is the only large item that will need storage and hey, its a big flat board so someone in the club is bound to have room in their workshop where it can stay out of the way til it is used next time. Next, the club gets some walkways cut up , also from 1/2 inch or 12mm mdf, and paints then grey or some walkway like colour.The measurements need to be fairly accurate and I can't lay my hand on those specs right now but I will find them for sure. The host club lays these walkways in place as the modules are laid out. The entrants need an accurately cut base - we used 300 x 150 x 12 mm but we are a metric country so if this was to go international (my original vision) we might have to reconsider the specs to suit feet an inches scenario. 300 x 150 will handle pretty much any 1/24 or 1/25 scale car and most light and even semi trailer tractors. If you need a bigger space ( and personally I would avoid this except for the host club entrants) you make them in multiples of the original size - for example, 600 x 150 The rules from here are simple. 1. Base must be 300mm x 150mm. 2. Nothing is to be attached to the edges of the board, to avoid interference. Raw cut timber is just fine. 3. Now, the biggest rule of all. Everything, I mean EVERYTHING (except the actual model) must be firmly glued to the base board. This is to avoid bits falling off and damaging someone else's model or ruining their display. The host club simply has a box or bin alongside the display and when an entrant turns up, you politely request him to turn his display upside down over the box. Anything that falls off (ground cover, mirrors, angel hair, display accessories etc) doesn't go on the Ausmodules display. 4. Go nuts!! Build whatever display you want for whatever model you like. That's why it is a hot rod show - every car in the world has been seen at a hot rod show at some time. The same couldn't be said of a classic car show, or a race car show, or a one marque show. Everyone is welcome. Hot rod, custom, rat rod, vintage, classic, showroom stock, muscle car, race car, lowrider - I could go on. As long as it is 1/24th or 1/25th, it is welcome. Thats it - four rules!!! My vision was that this would be run at shows and NNLs all over the world. Imagine the excitement of having no idea what your main display looked like until everyone had submitted their module? You could go travelling with one module in your baggage and place it in every show you attended and it would look different each time. We ran Ausmodules for three years and it looked awesome every year but we could see interest was starting to peeter out - we live in the most remote city on the planet so we don't get an influx of new entrants each year. Then, for one last shot, we made a new set of blank modules and walkways covered in model railway grass sheet and distributed them to our entrants.They went home and created swap meet bays and brought them back for a giant swap meet - what a way to use up all your old parts! One thing you might notice from our photos was that there aren't many figures on the display - this was mainly because a) our clubmembers didn't have many back then and b) it takes a while to set them up. Our club now has over 400 figures in it's ranks and we would definitely use them if we do it again. I hope you enjoy these photos, taken over the three years that we did it. We had club displays, speed shops, a T- shirt shop, even a stereo shop with a working video! Rocking Rodney Rat's display, on a 300 x 150mm base, would have been the star of the show! If anyone decides to have a go at this next show season, all I would ask is that you refer to it as an Ausmodules display, just to acknowledge where the idea came from. Cheers Alan .
-
No worries, Rodney, I just found some of the pictures so I will start a new thread under Dioramas. Cheers Alan
-
You haven't missed anything, Alan! The good thing is, we got Aussie bodies when none were available but the fibreglass, although very thin, just fights you every step of the way. For whatever reason, the resin that Americans take for granted just wasn't available on the Aussie market for many years so you take what you get. I did a 1968 HK Holden ute once. I had all the usual issues of chipping and cracking but minimised them by epoxying the chassis to the body and then building the interior like a ship in a bottle. Got it painted, decalled and only needed to glue the dash board in place and then drop in the glass. While holding the dash between my finger and thumb as the epoxy kicked, the hood chose to split straight down the middle. It's still split to this day - I was done! Sorry for a bit of a lull in proceedings but I have taken the week off to get some major progress made on my 1:1 garage project so haven't had time to get more paint prep done. Glad everyone is enjoying it, they do make a tough looking race car and there were quite a few of them in Australia - not common but definitely not unheard of! Cheers Alan
-
38 Ford Coupe Hardtop racer
alan barton replied to alan barton's topic in WIP: Other Racing: Road Racing, Land Speed Racers
I must be getting old or something but I dragged that car out when I first started this project a few years ago, realised that it was wildly different in proportions to the 40 front end and put it back on the shelf. Thanks Dr Kerry, now need to go back and have another look. How did I miss that? Cheers Alan