alan barton
-
Posts
2,105 -
Joined
-
Last visited
Content Type
Profiles
Forums
Events
Gallery
Everything posted by alan barton
-
38 Ford Coupe Hardtop racer
alan barton replied to alan barton's topic in Other Racing: Road Racing, Salt Flat Racers
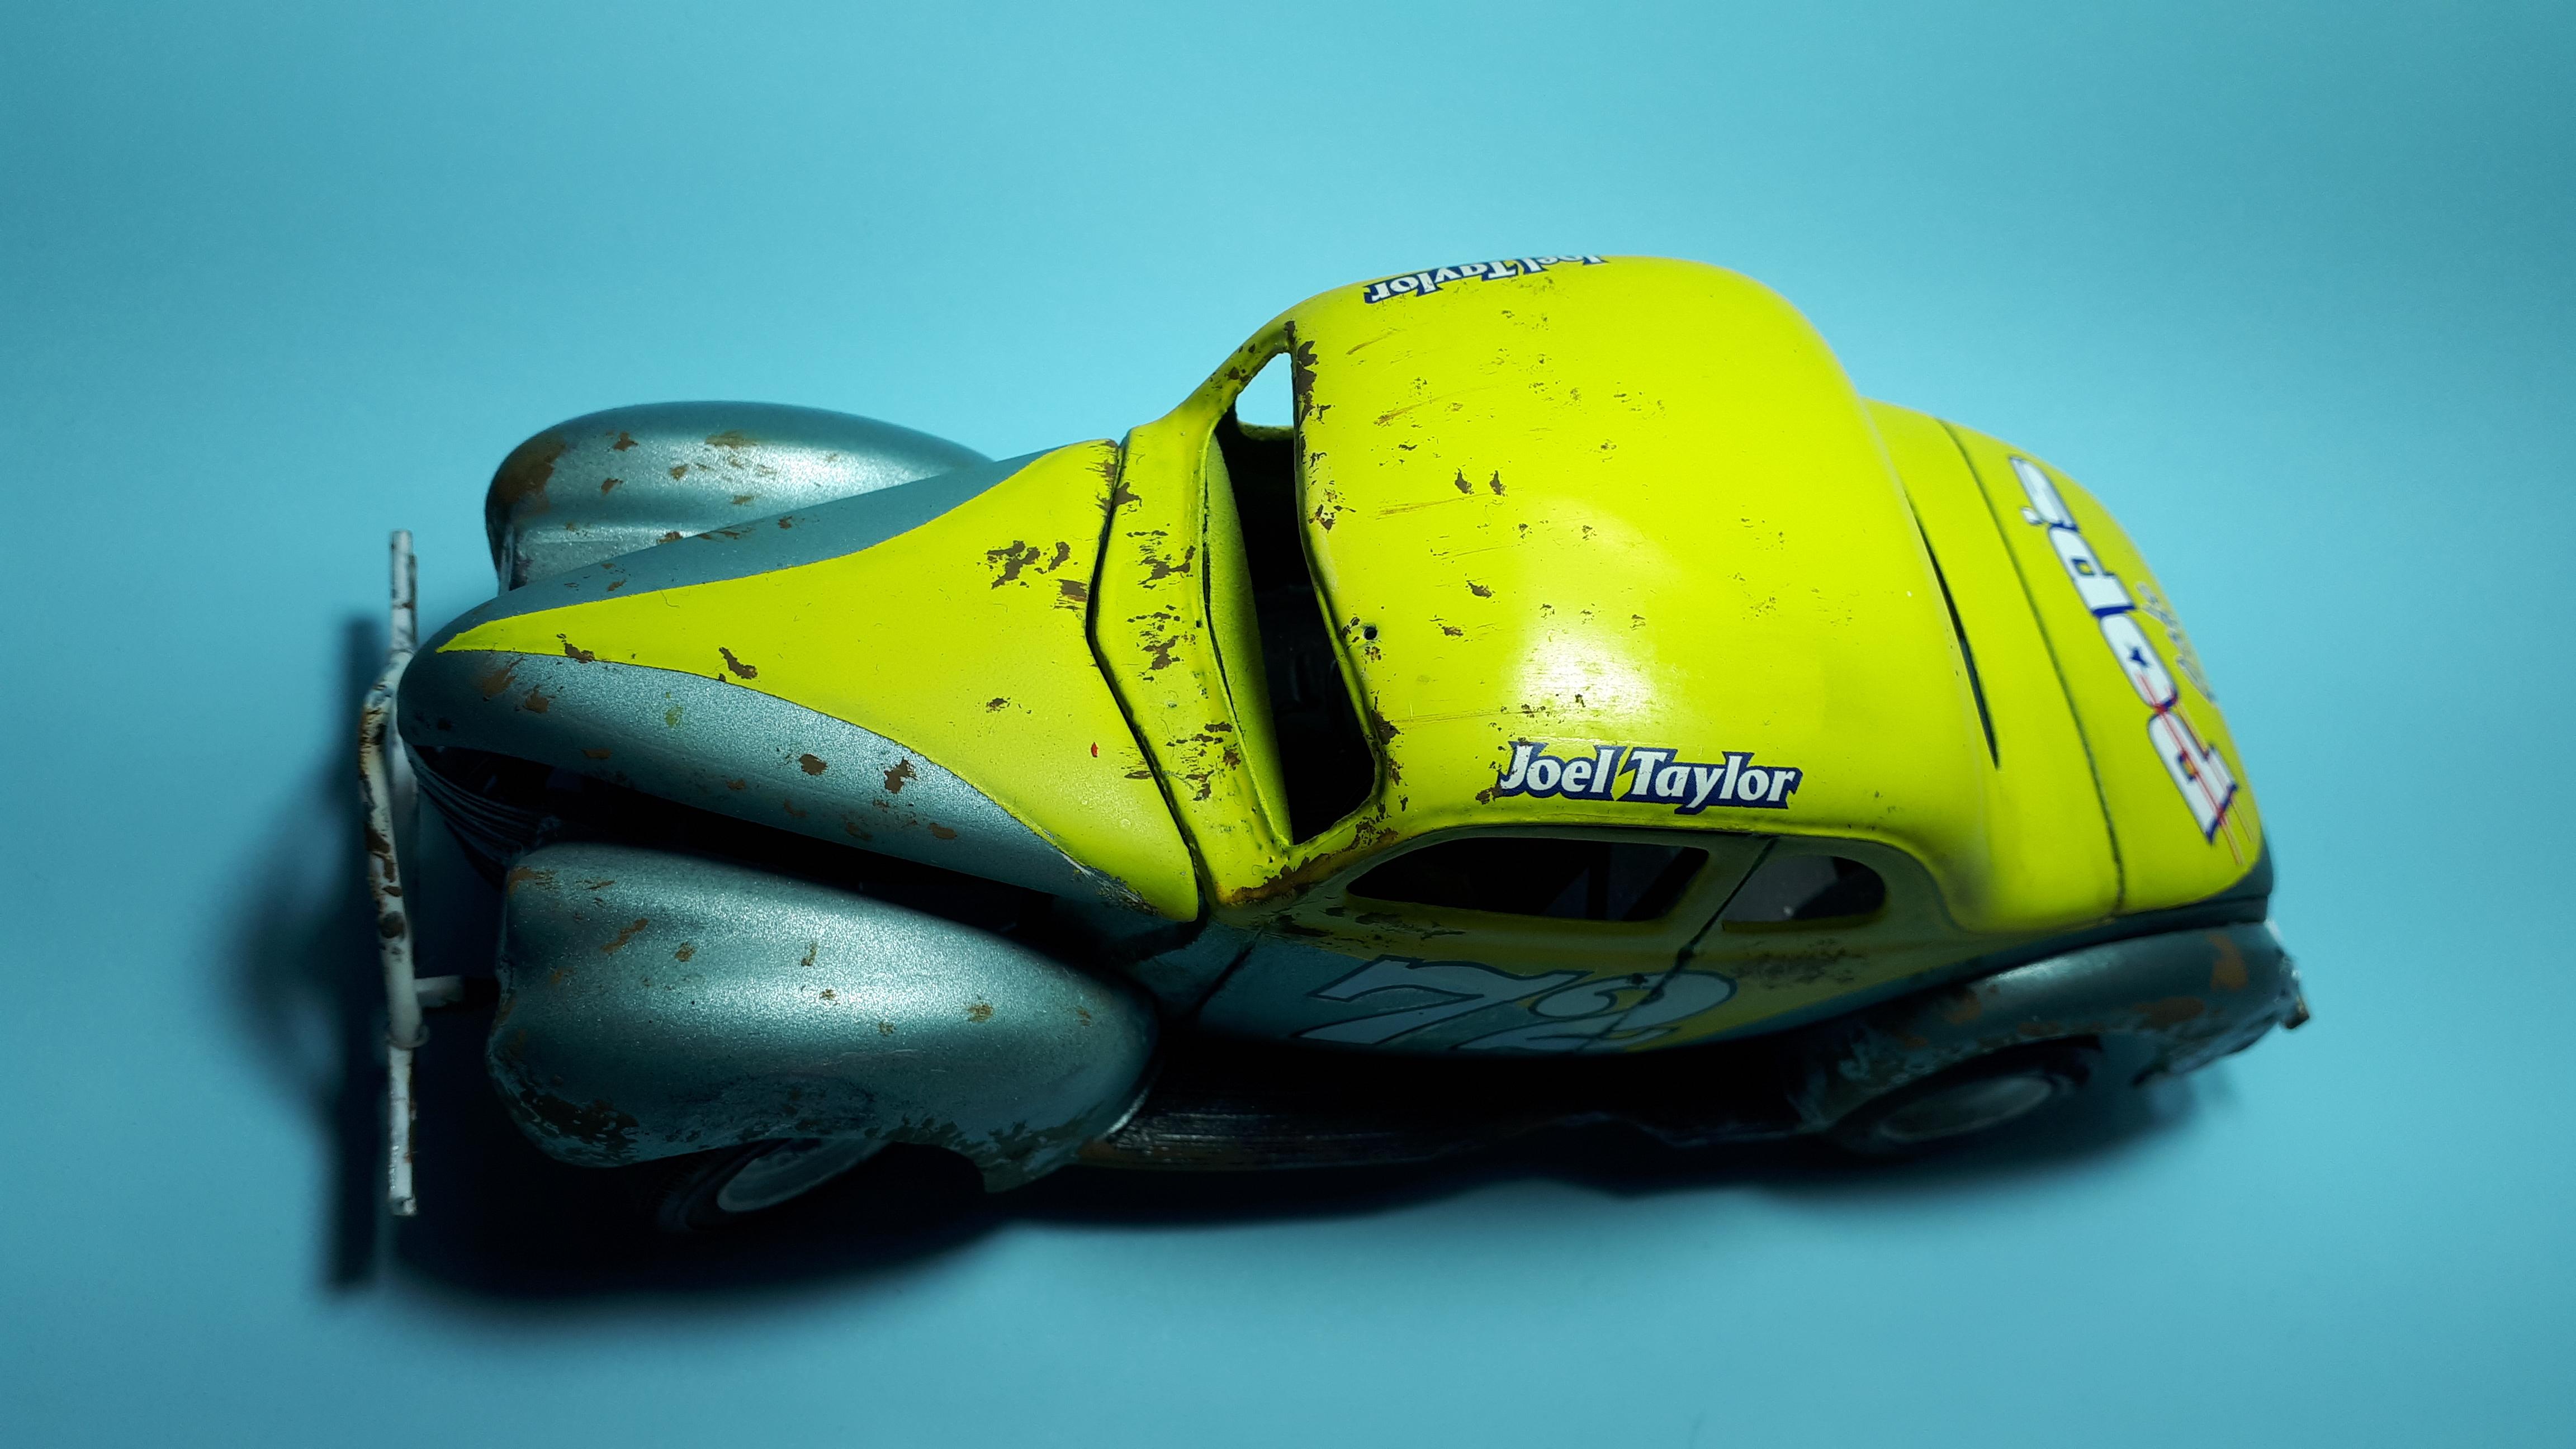
Just realised I took the race photos before I got the weathering done. Will get a new set done shortly. And I hadn't put the steering wheel in yet! That will teach me for getting impatient to take some photos.
-
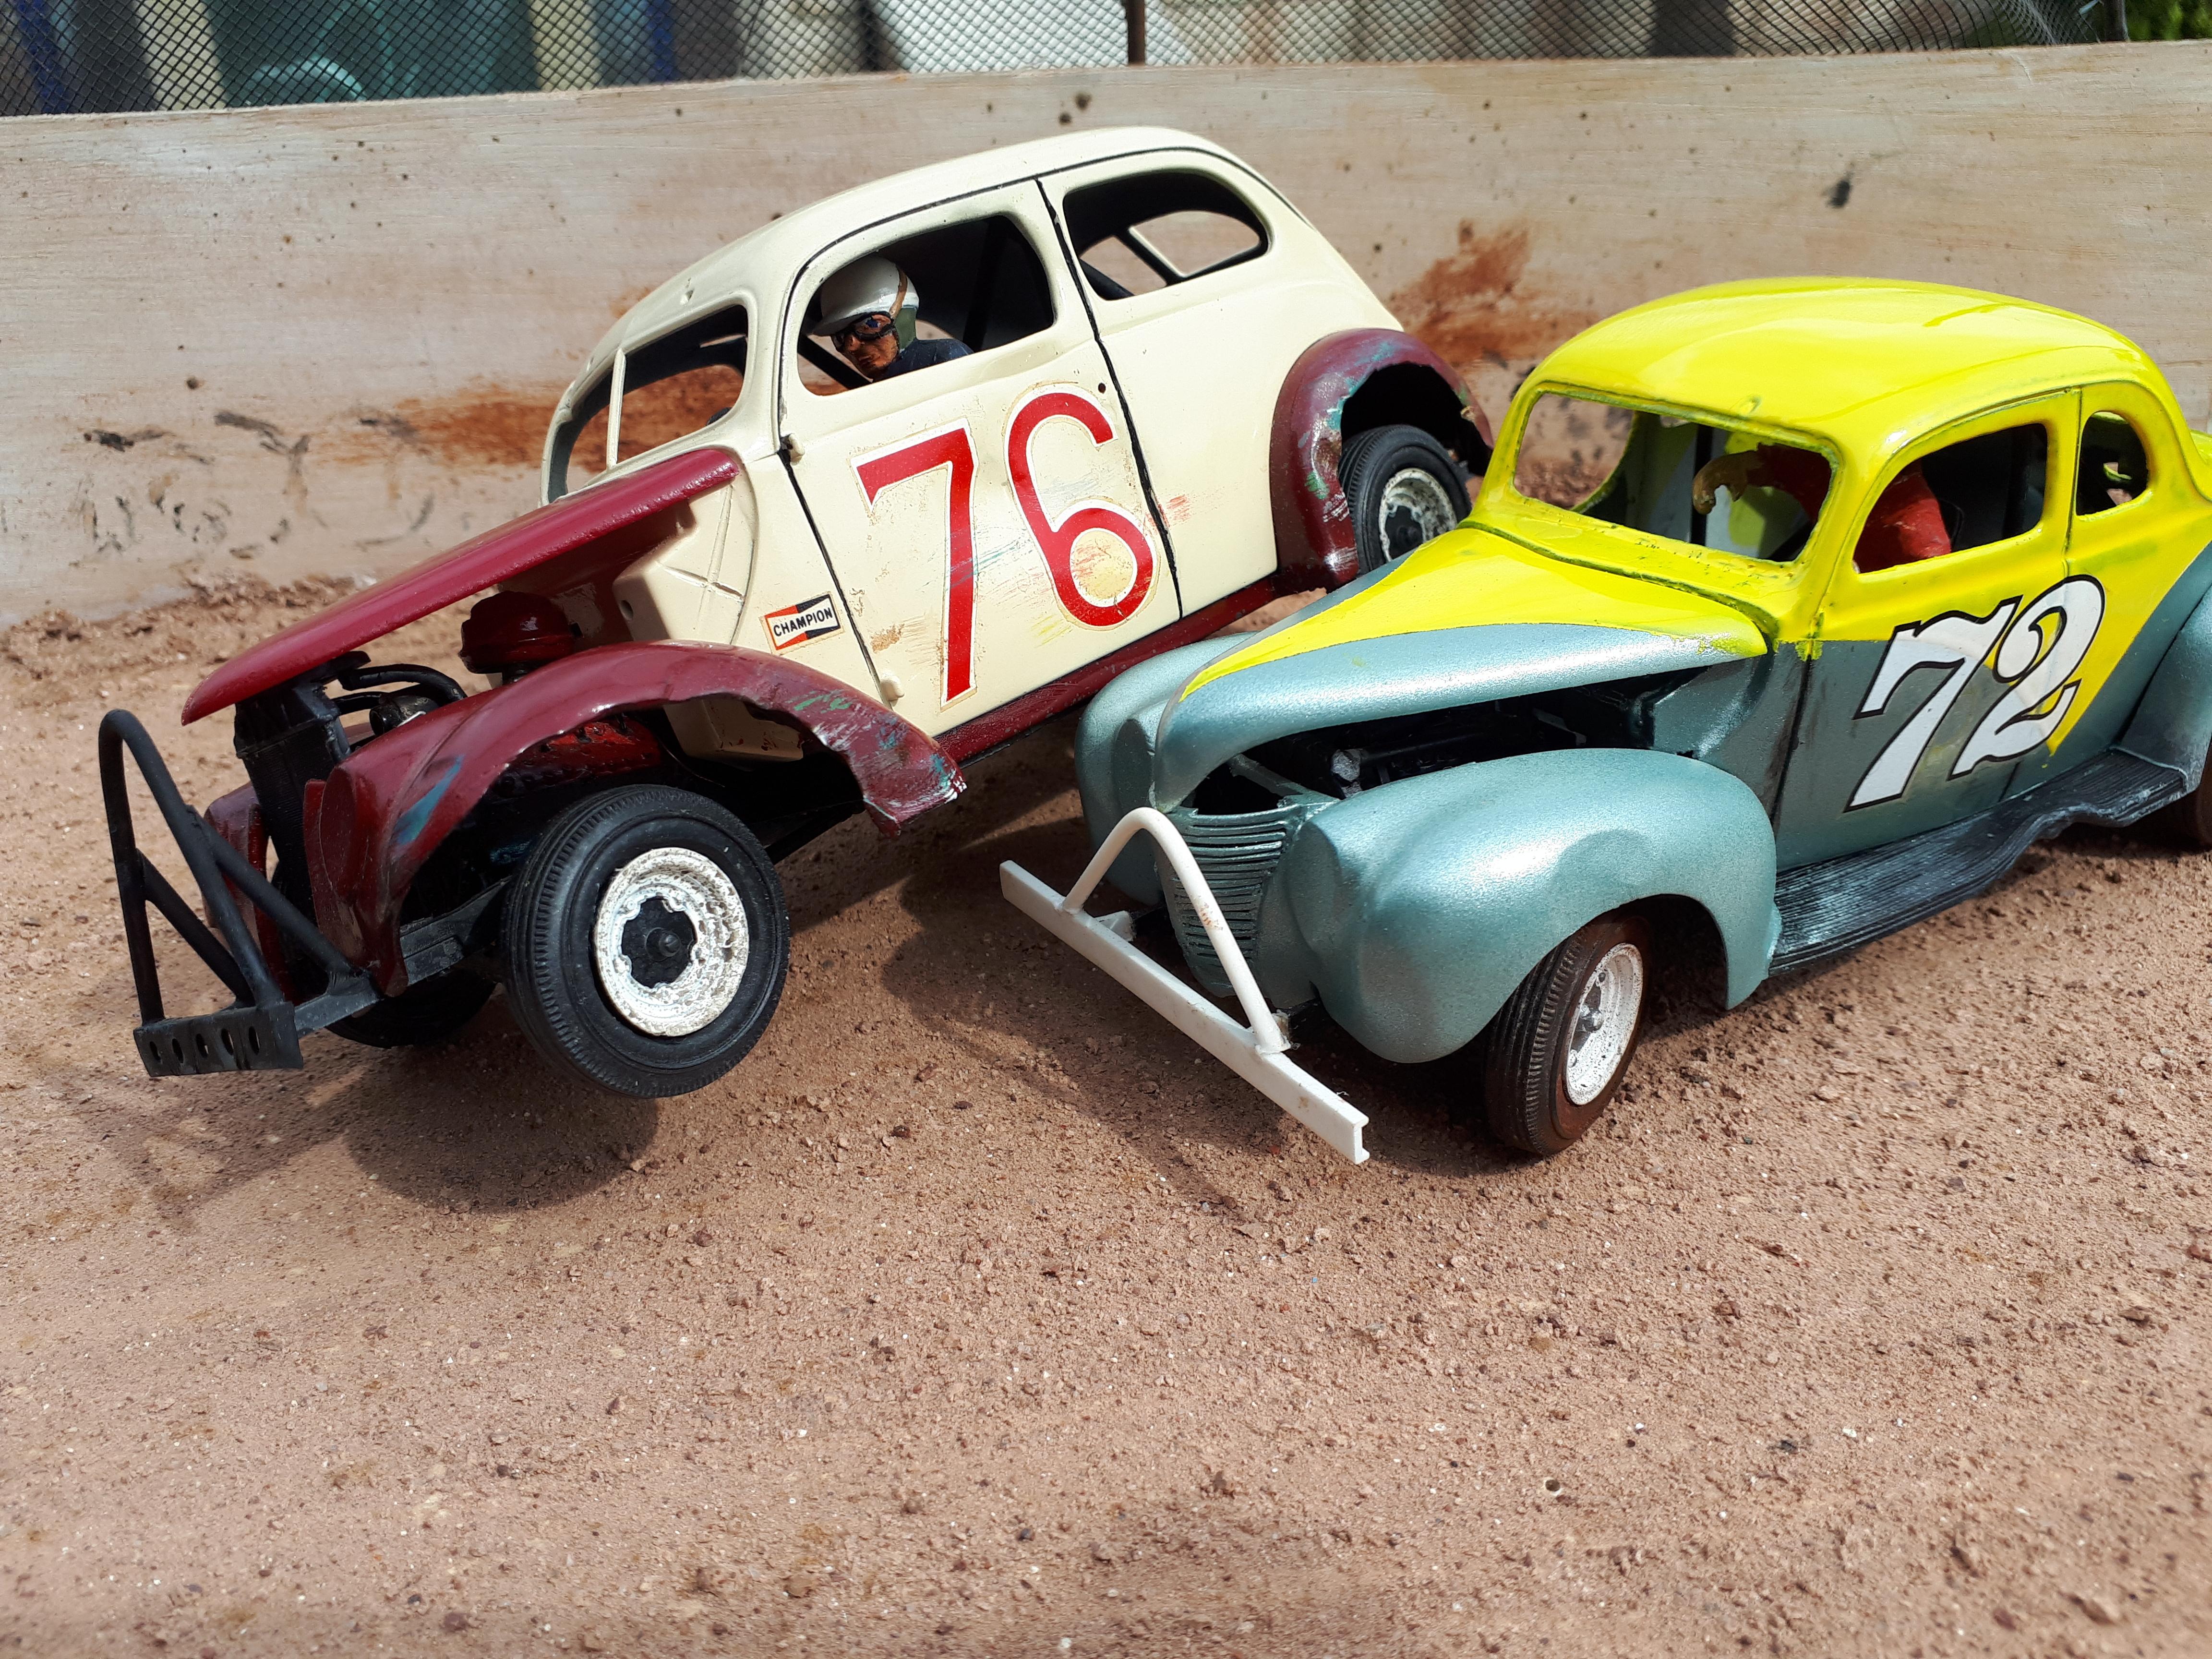
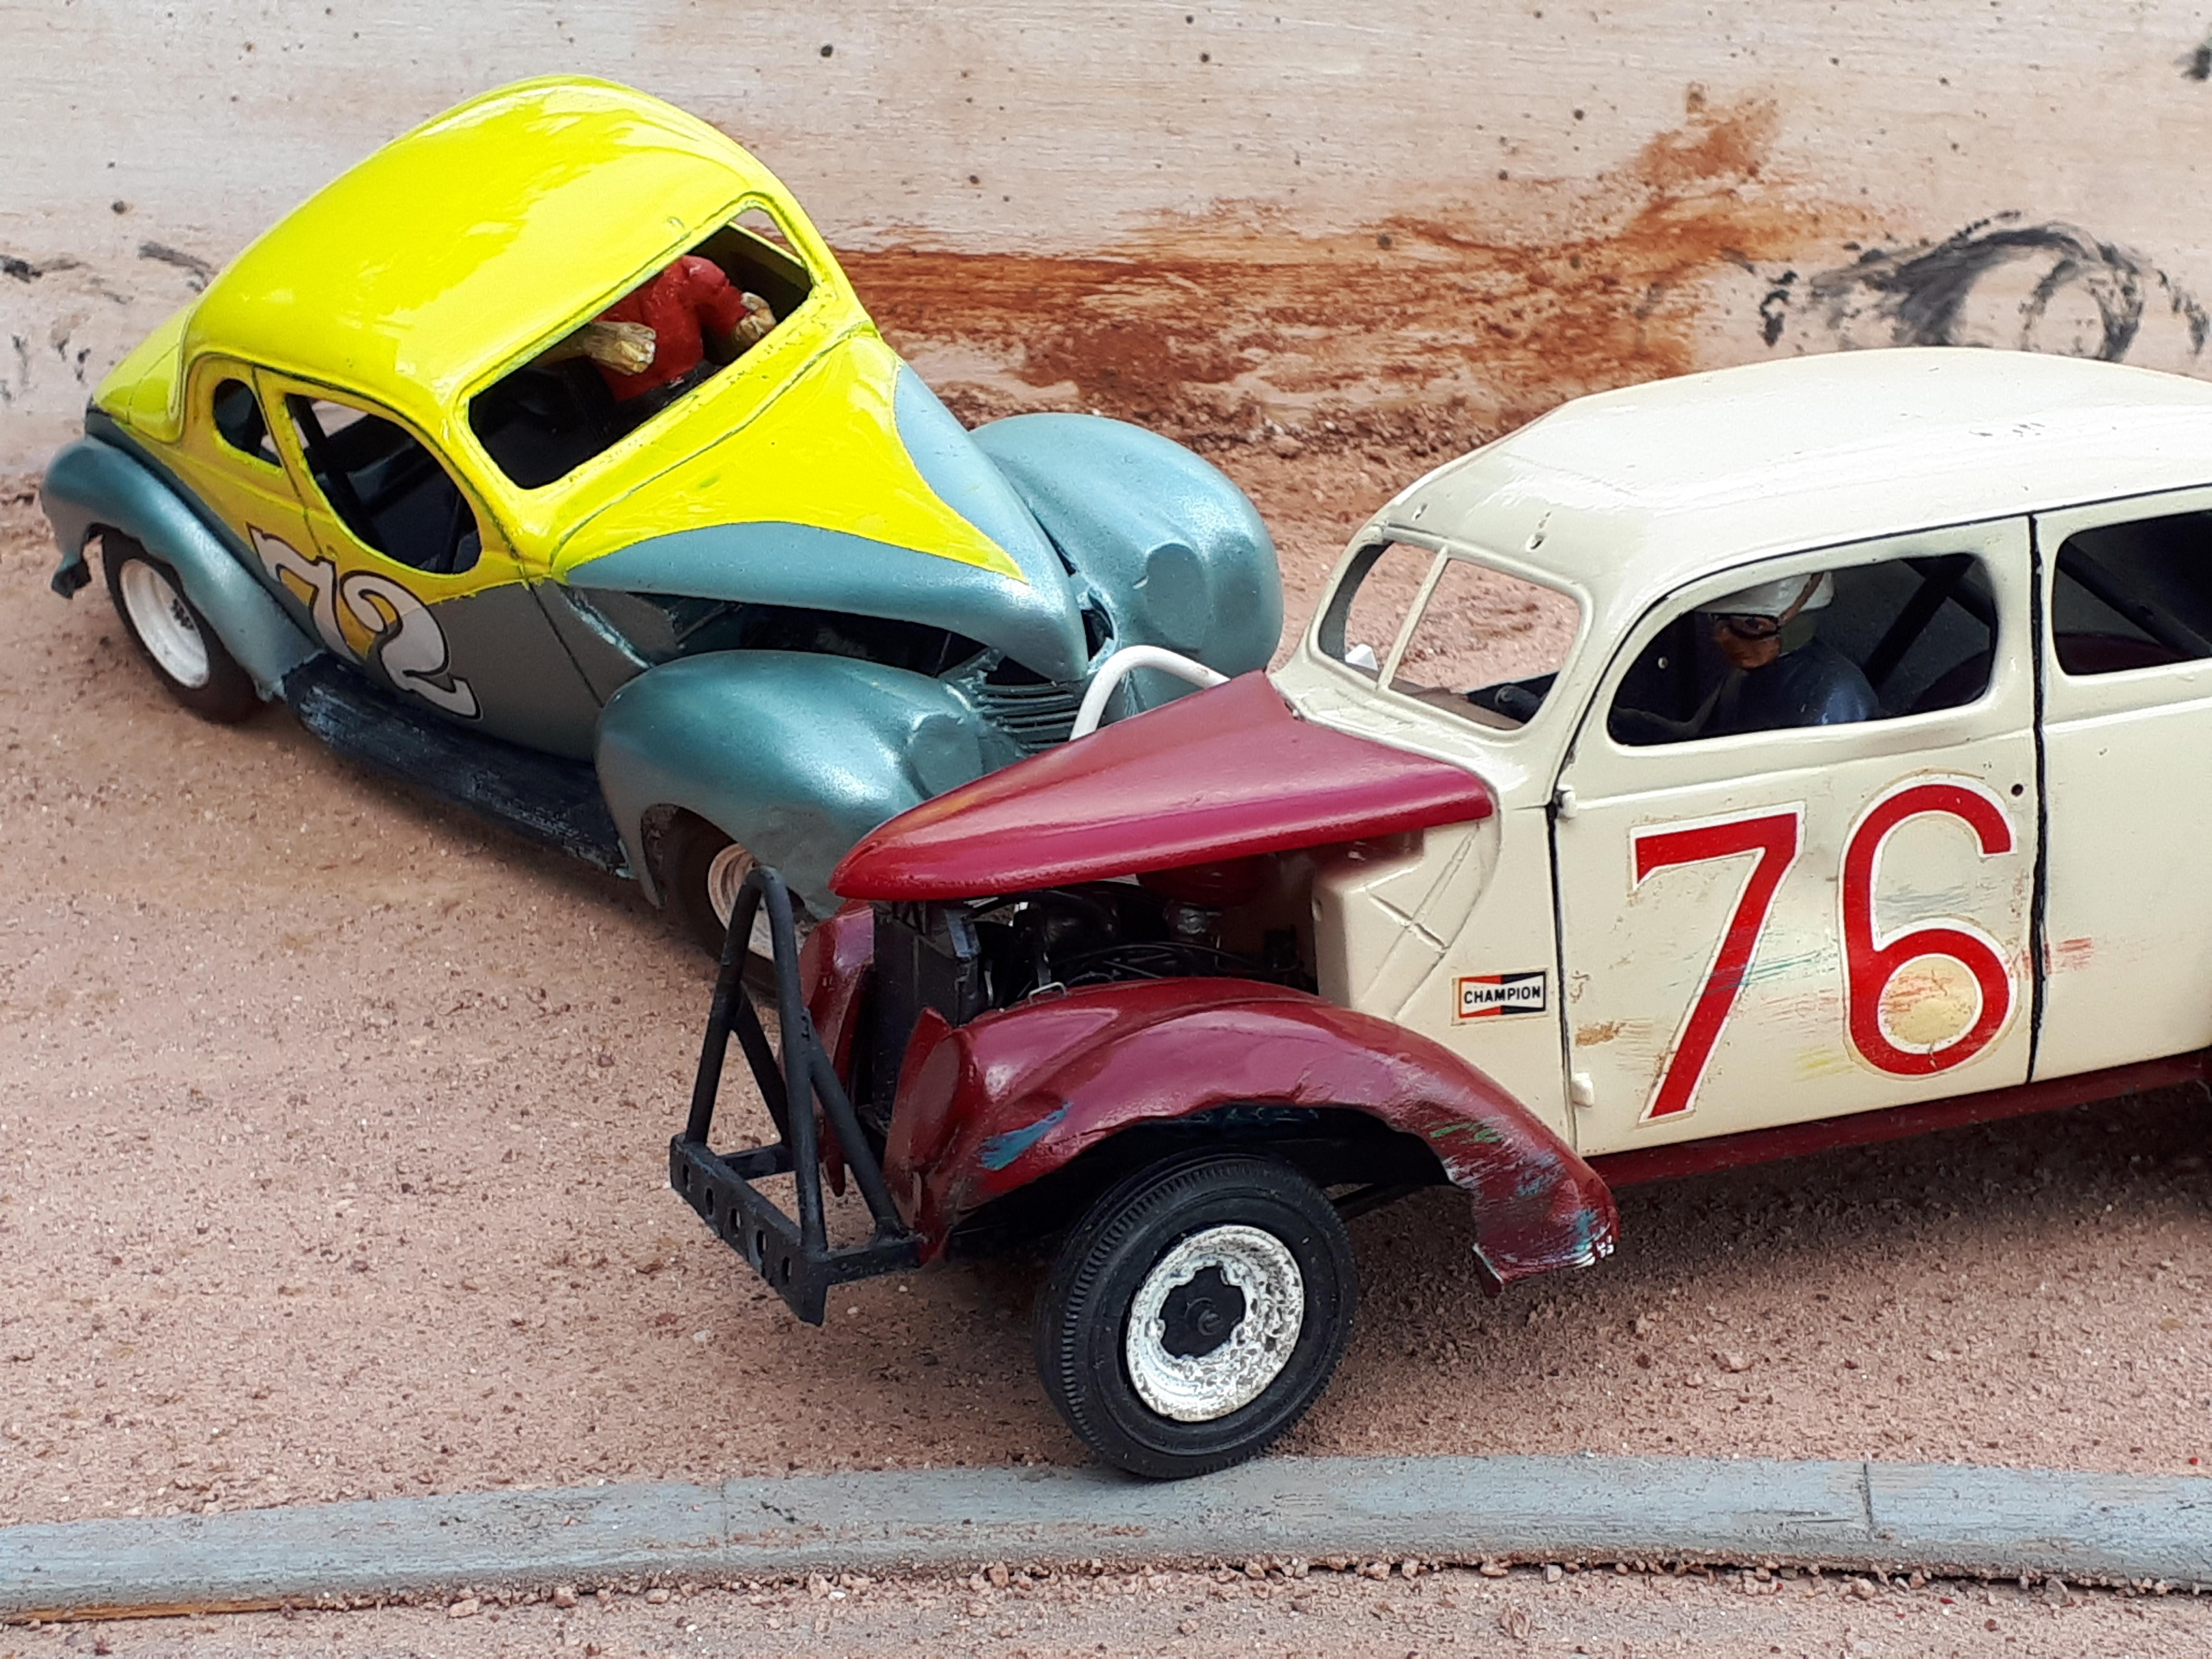
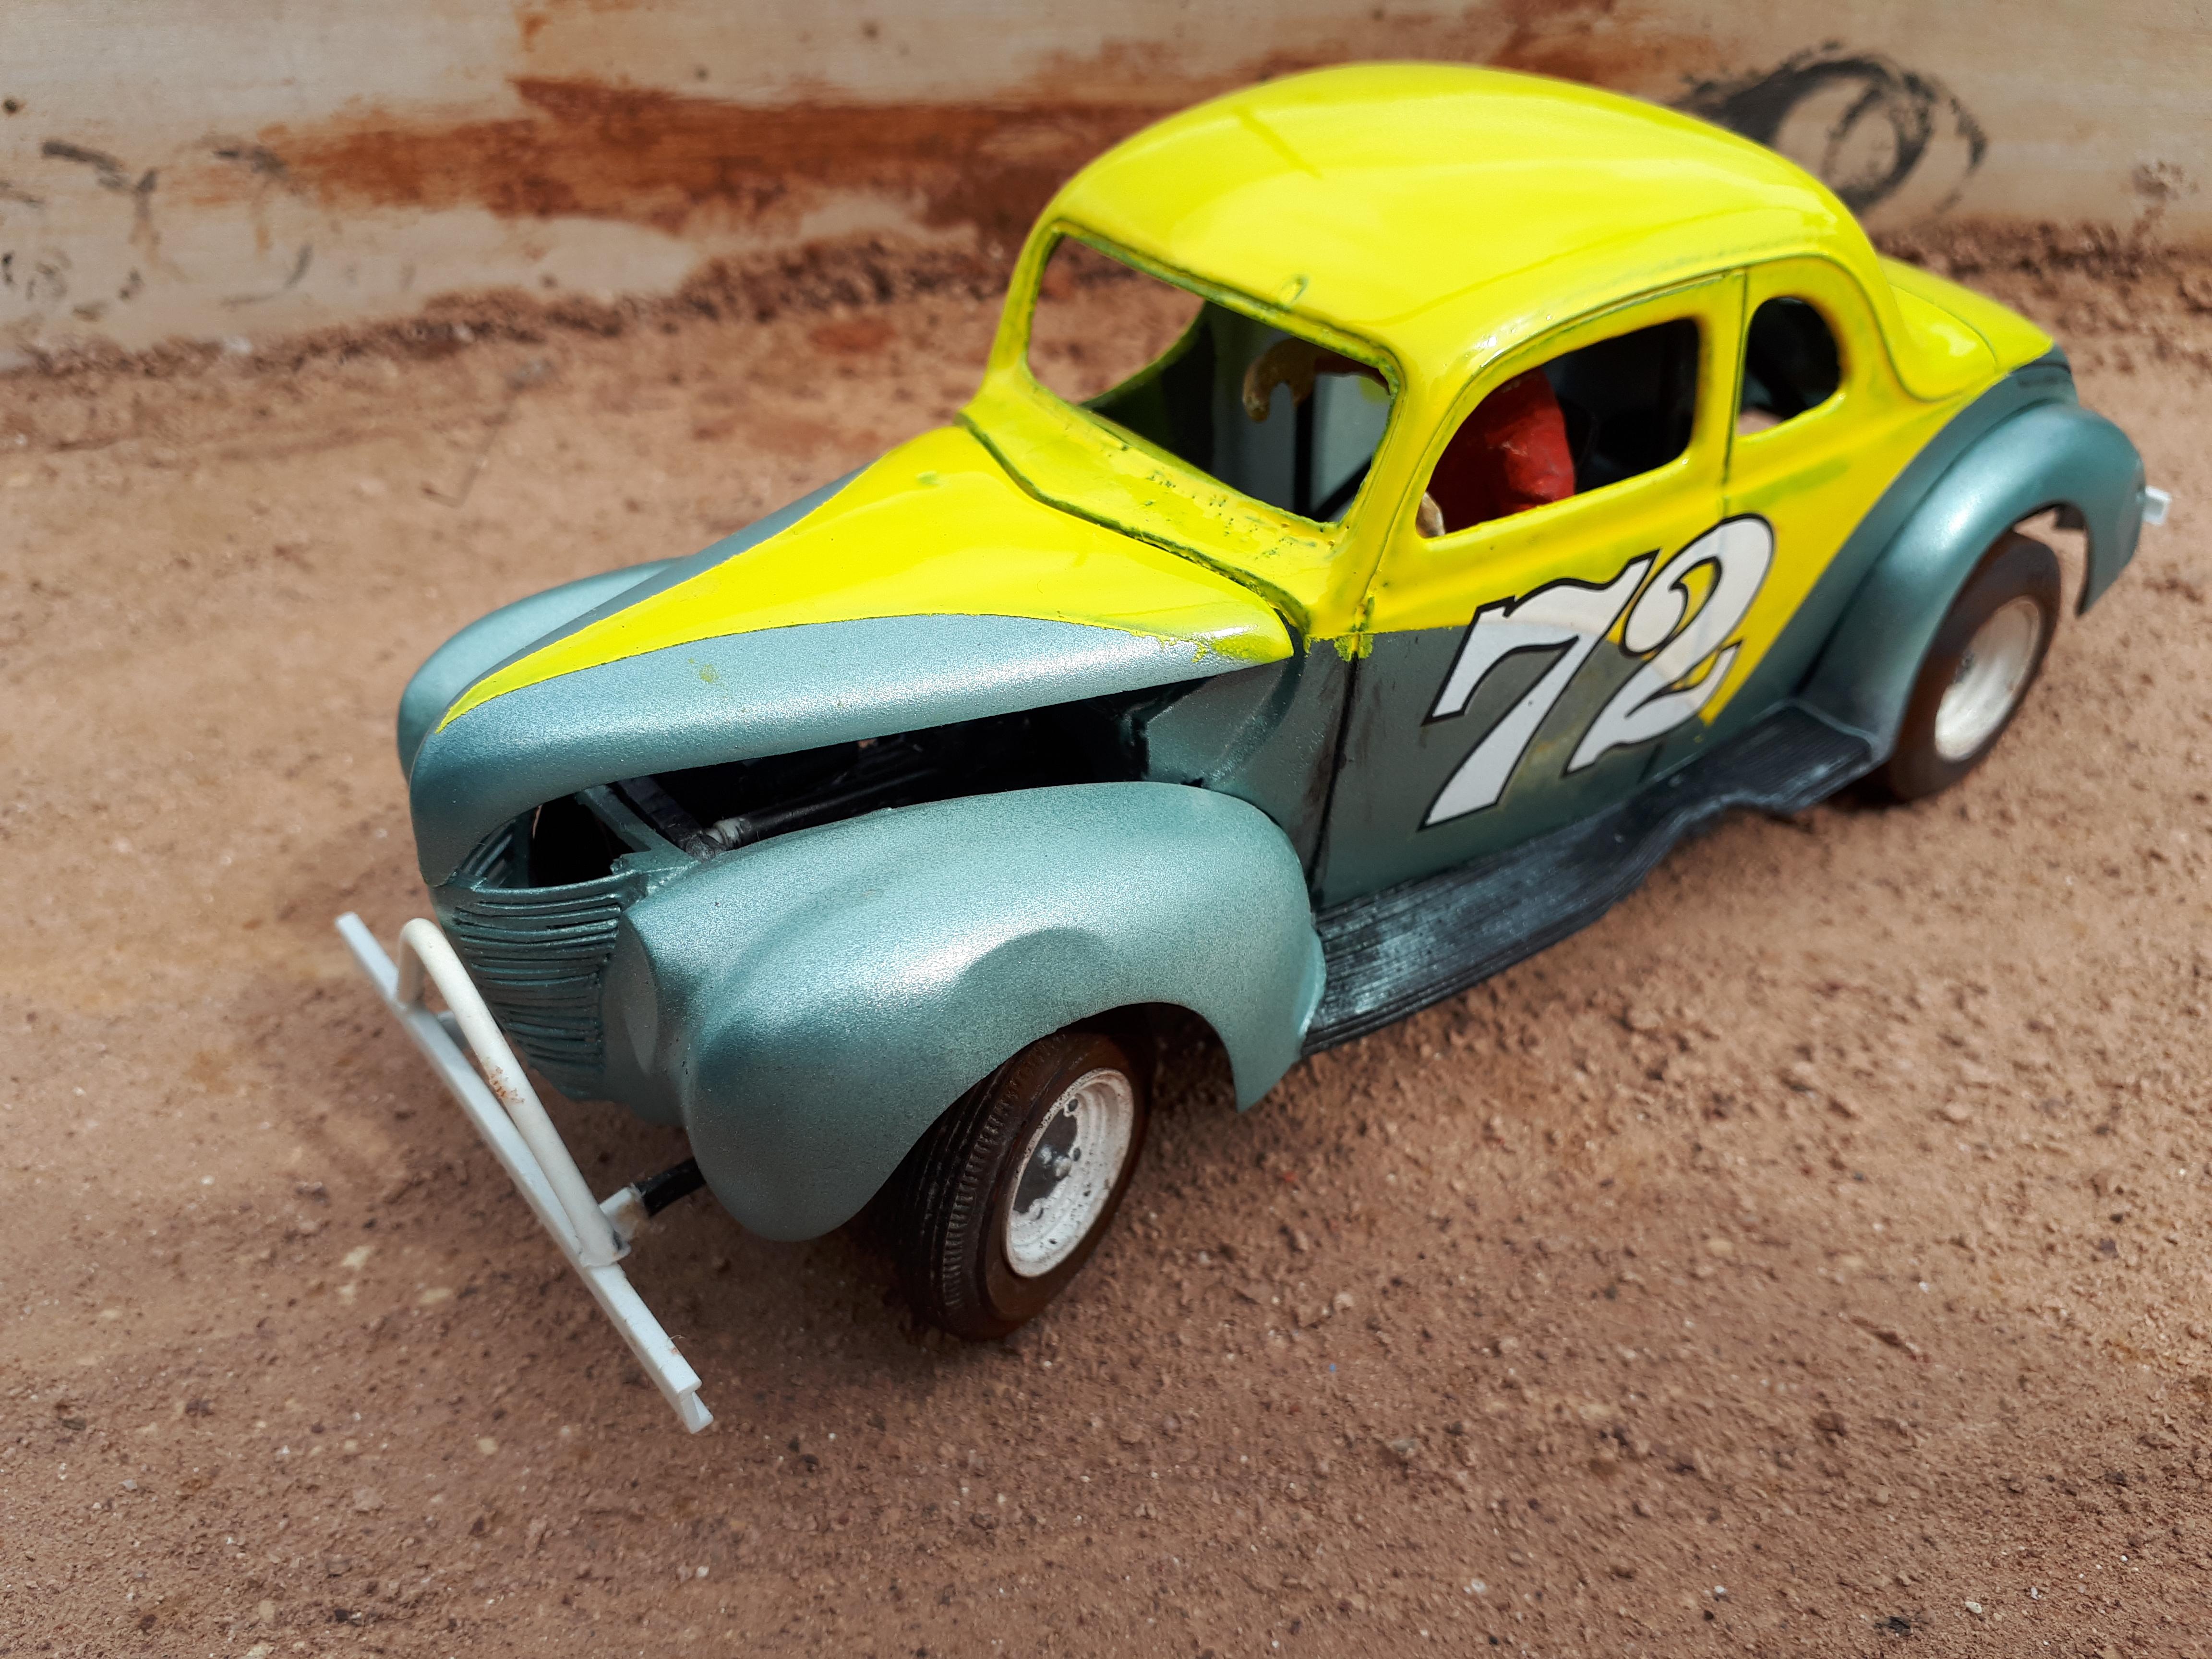
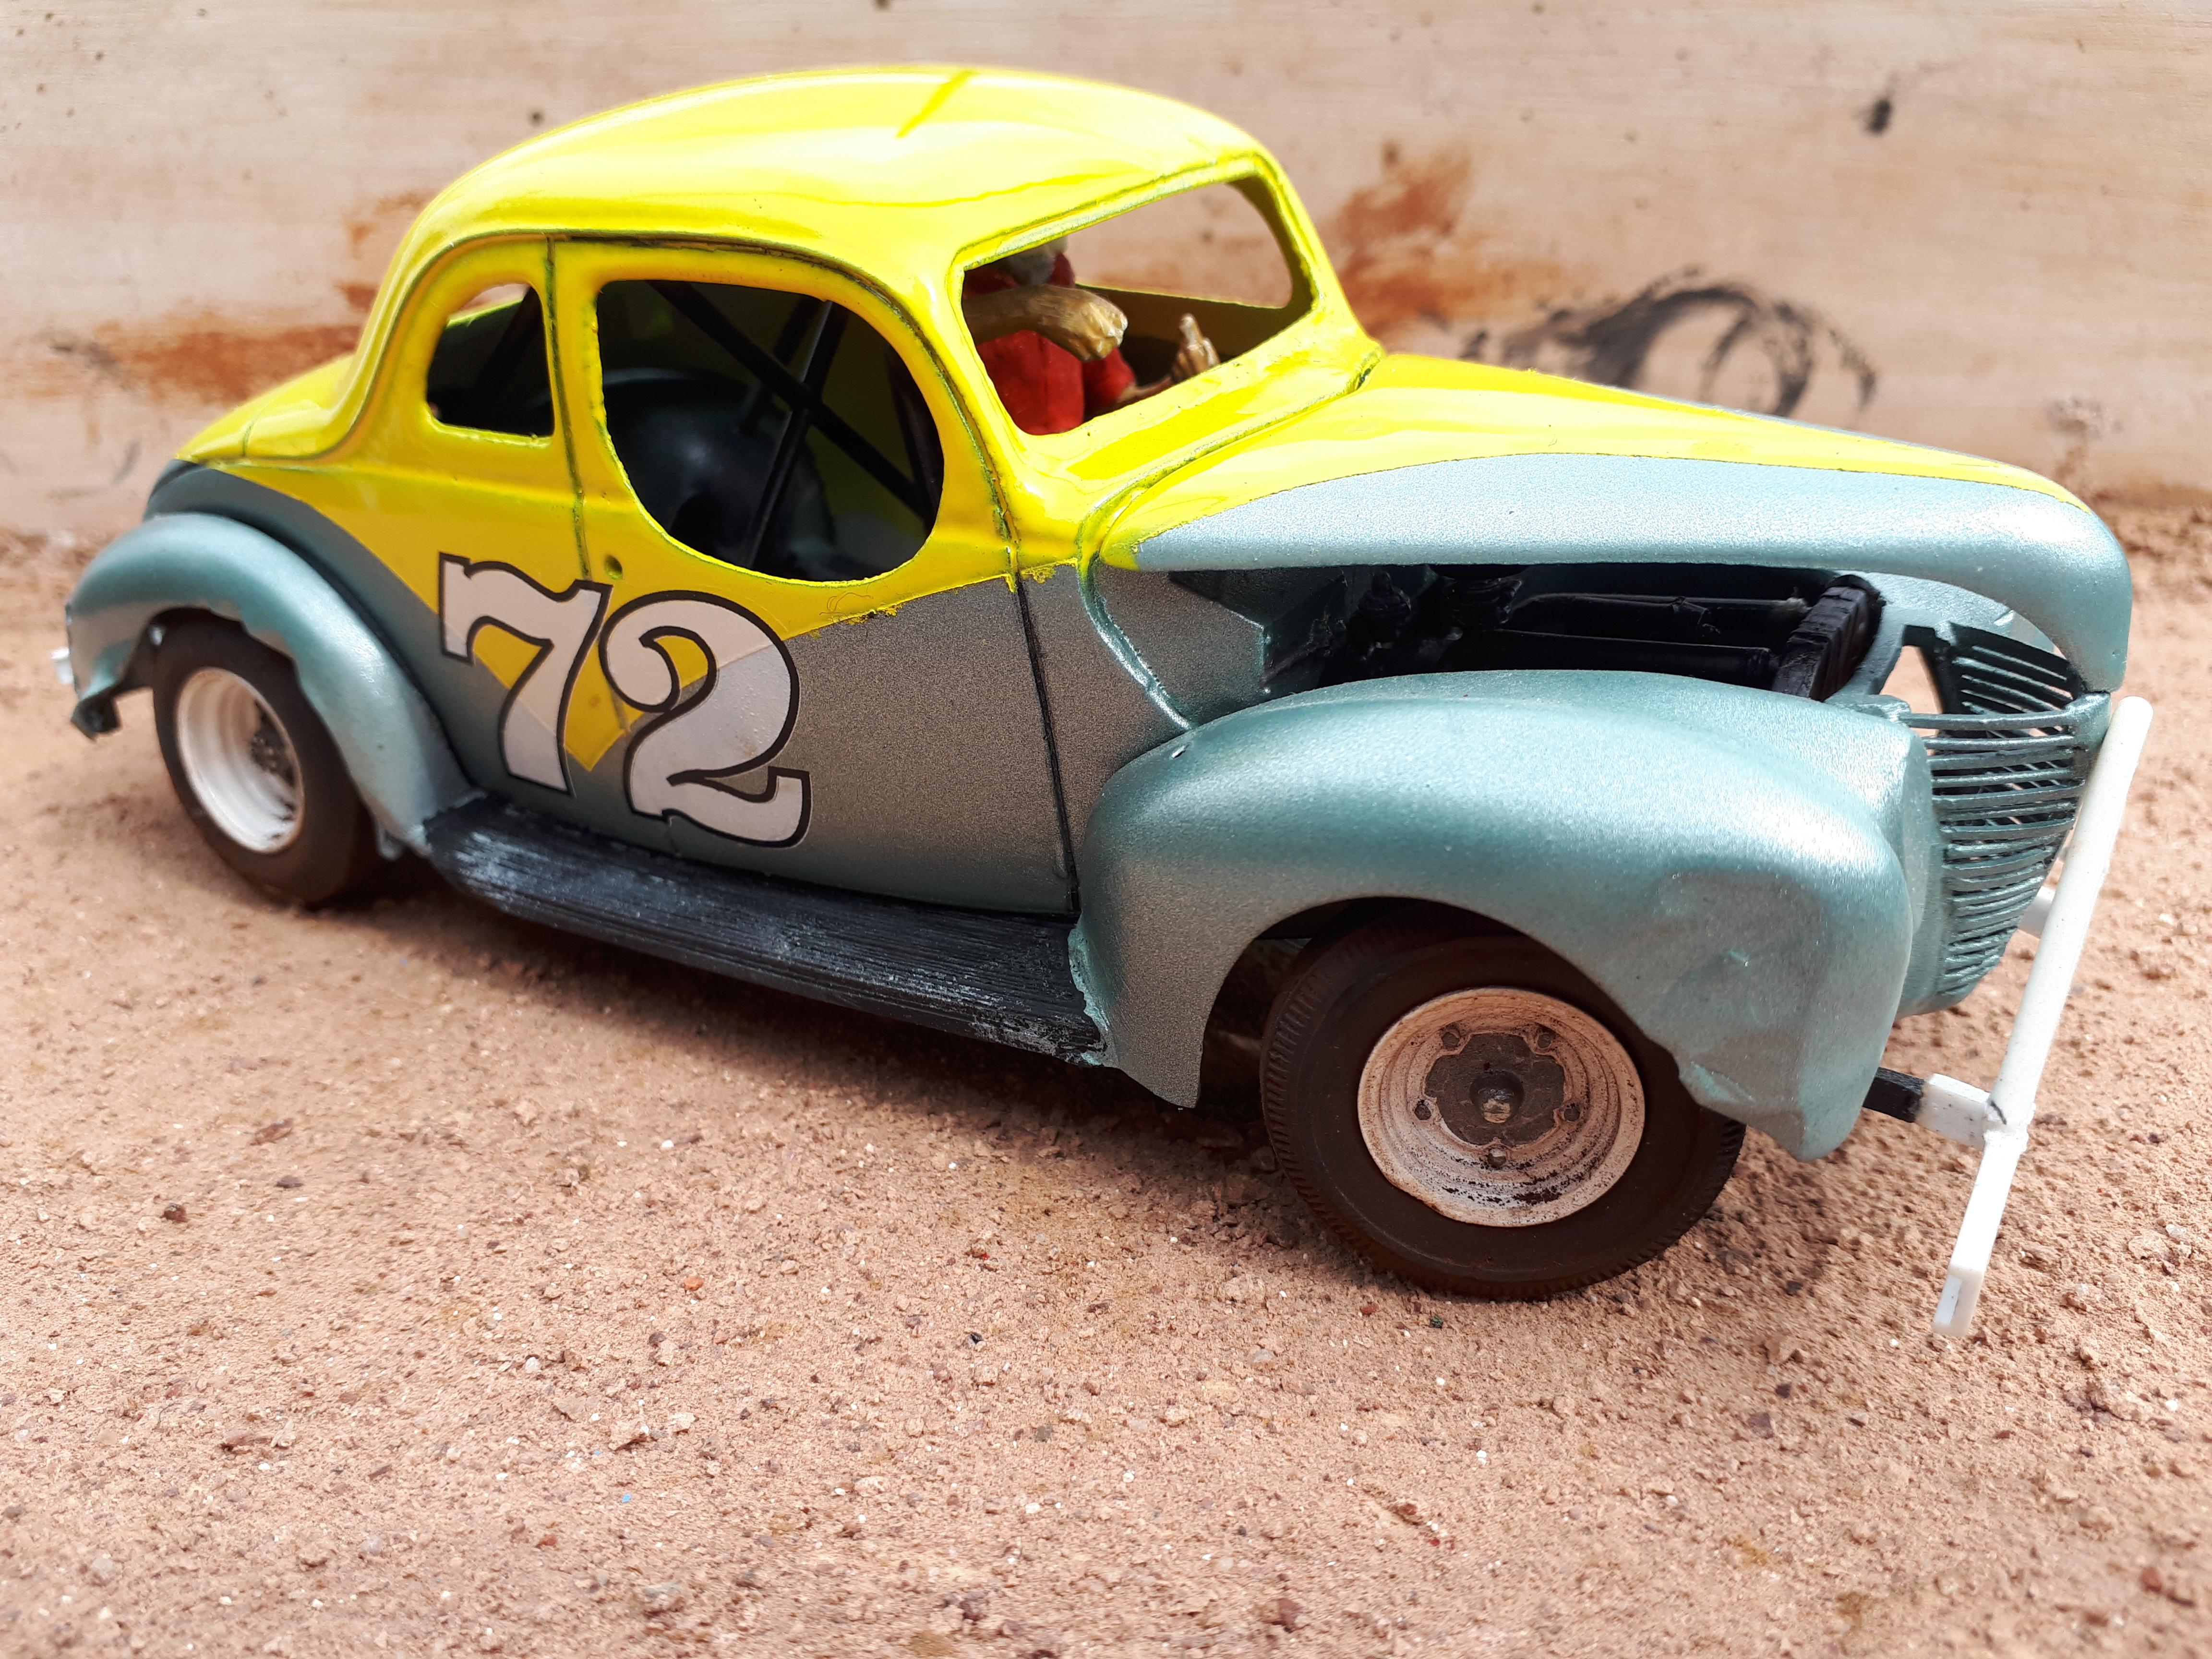
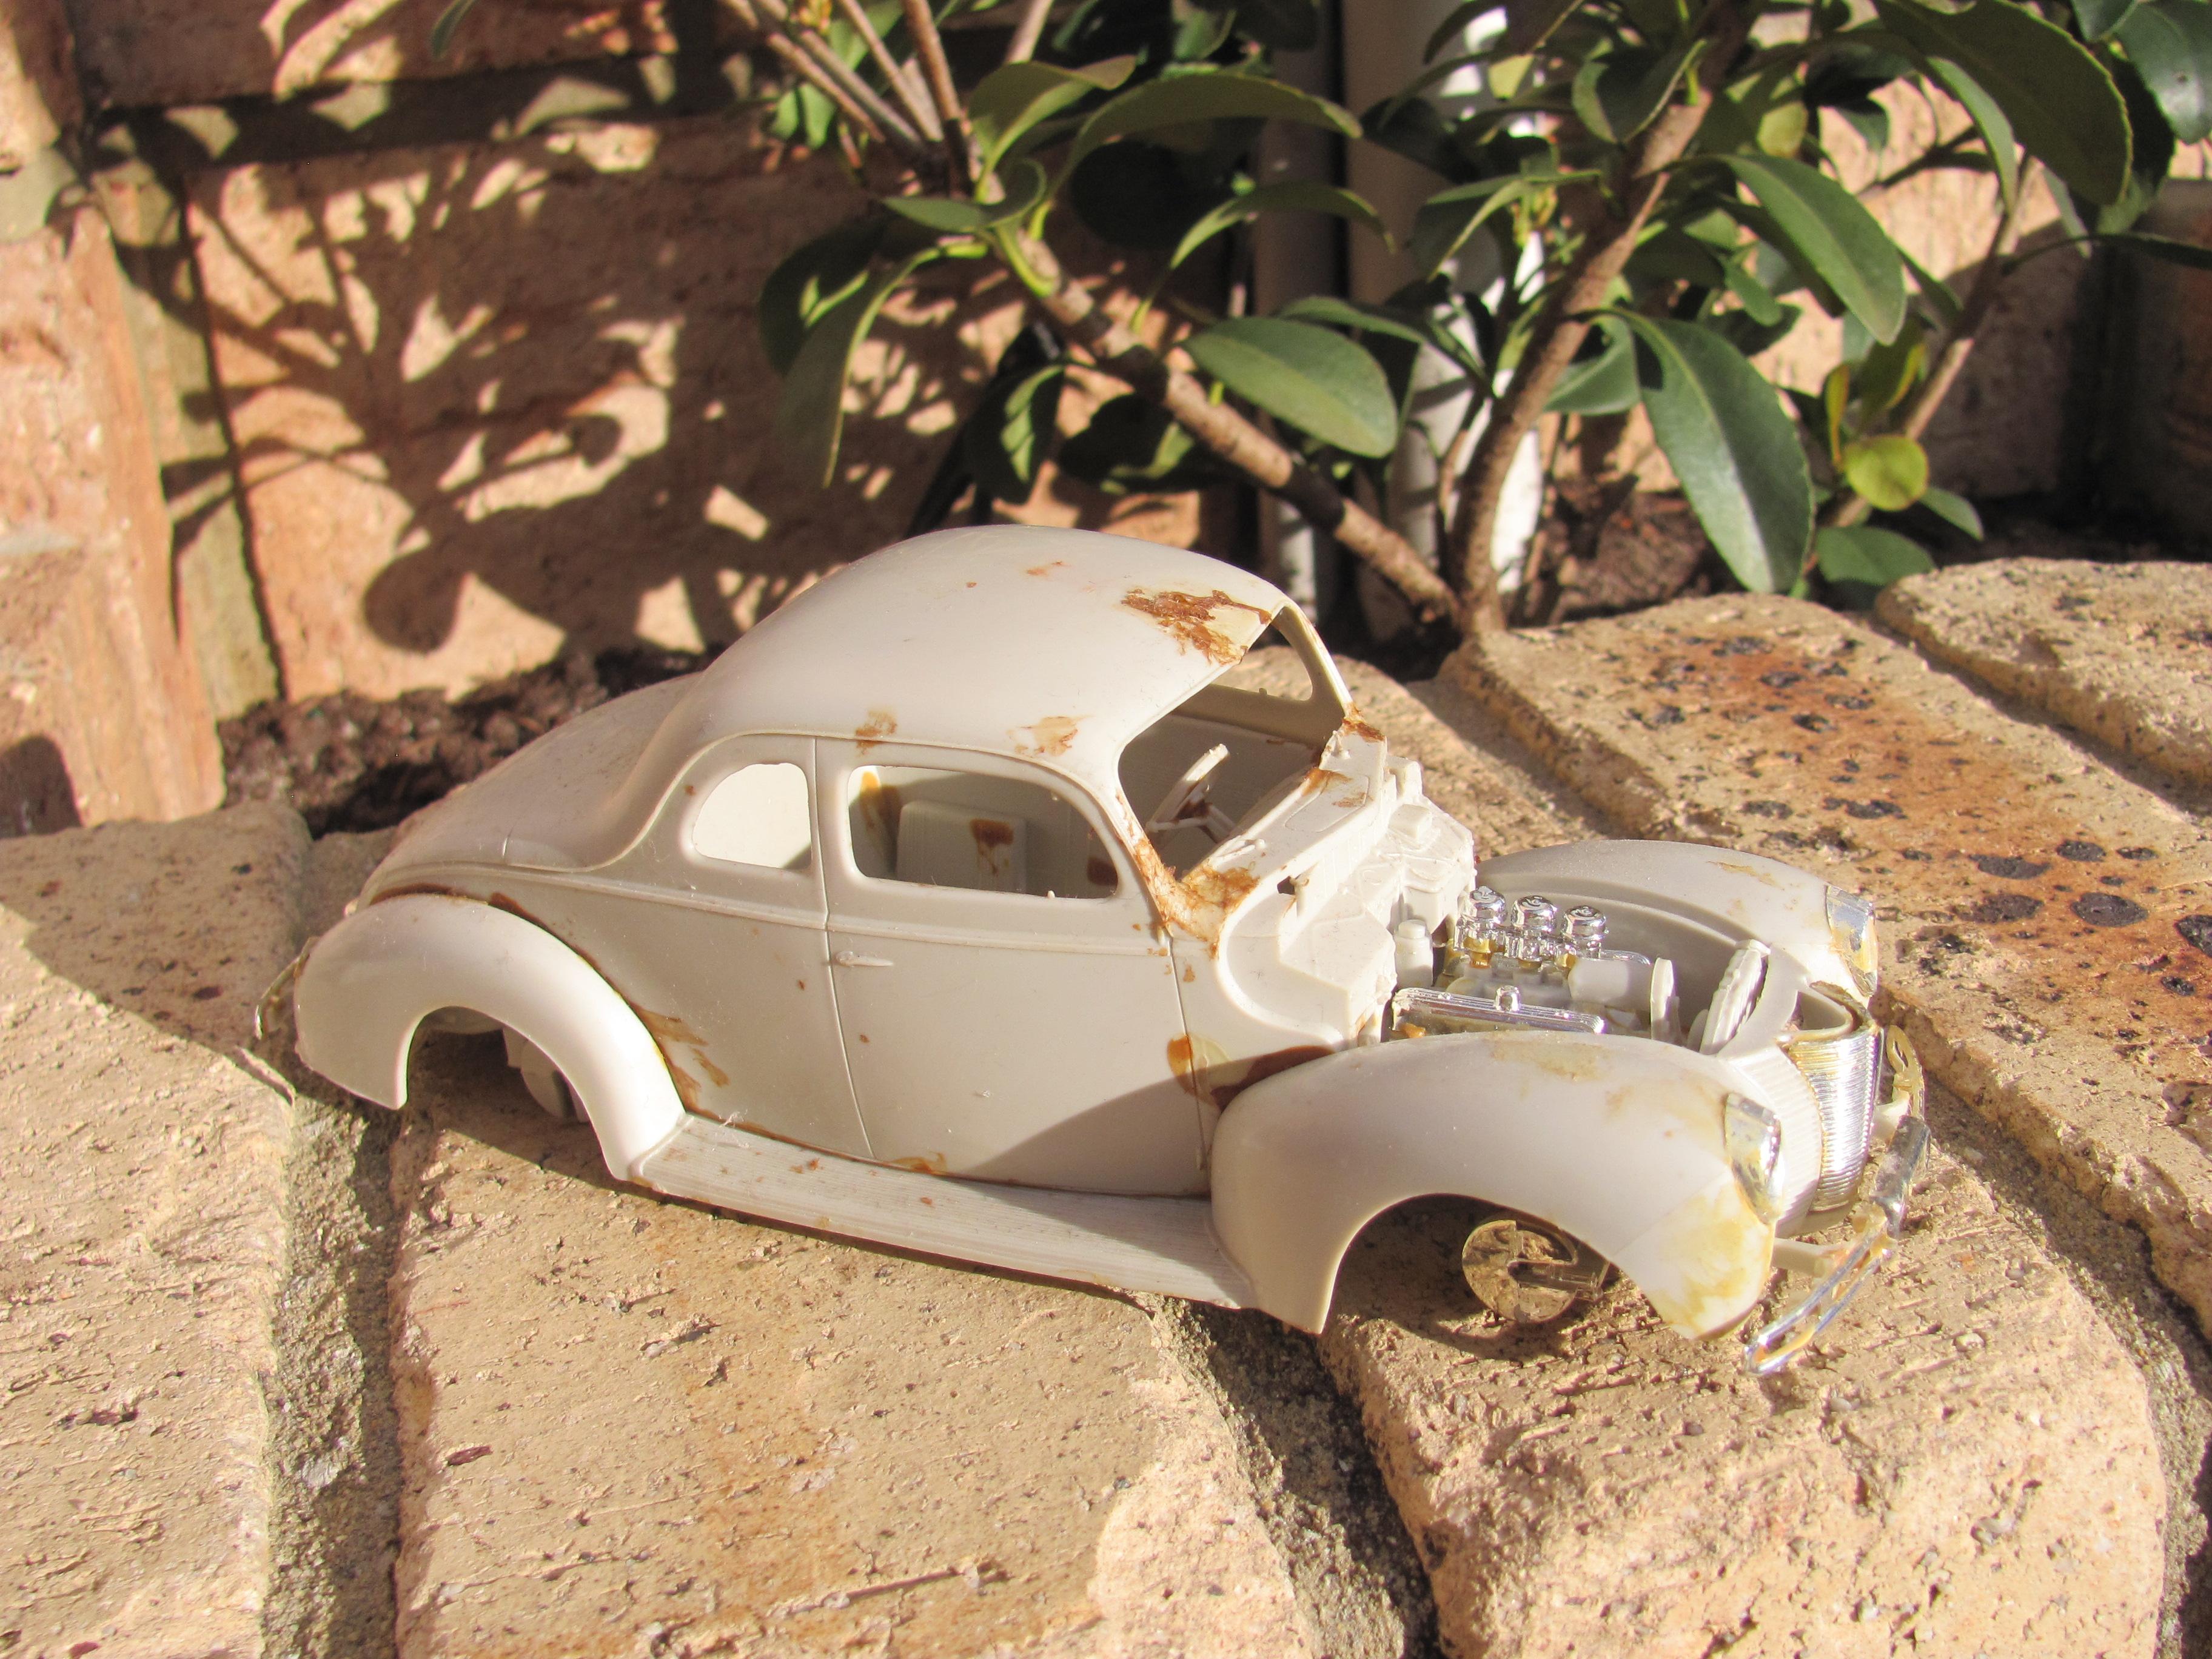
Here she is, warts and all. It started off as a very gluebombed '40 coupe. I am happy that it definitely reads as a '38 now but I will need to refine my techniques if I want to do a "nice" one as a street rod. The colour scheme is growing on me but if I suddenly found a picture of a colour scheme that spoke my name, it would be stripped in an instant and off to the spray booth. Equally, i don't think the numbers and signwriting are quite era correct but I couldn't find anything else better in my stash (if only a decal printer would one day do a set of random race numbers that are NOT NASCAR based!) Rear tyres are the front tyres from a sprintcar kit. Damage was done with a lit candle and a pair of pliers and the edges of sheetmetal were thinned wherever I could. It is seen racing my '37 Tudor that I finished a few years ago. The Monogram 40 Ford pickup is a great chassis swap if you want to backdate this kit - it drops in like it was made for it! Hope you enjoy my day at the races! Cheers Alan
-
38 Ford Coupe Hardtop racer
alan barton replied to alan barton's topic in WIP: Other Racing: Road Racing, Land Speed Racers
Can't say I have Rick, but now that you mention it, keeping the curve in the plastic was a drama - coiling up a length of brass wire and snipping off lengths could go a long way to fixing this. Might have to try it on the street version - thanks for the inspiration! Cheers Alan -
Dead right, Tm, Bernard and Plowboy. Yes it has issues but the quality of the parts far outweighs them. Put it another way, it is easier to fix the issues mentioned than replace all those parts if they weren't there! I bought six roadsters and two coupes will probably buy one more of each, even at the RRP of $65 here in Australia.( if they get here!) Have already built two of the roadsters and one of the coupes, have another coupe and roadster and Tudor like the one above on the bench and did a great little kit bashed coupe using the leftovers like Plowboy said and a Jimmy Flintstone 29 coupe body. Too much fun! The QC is not a deal breaker to me. Yes, a Q/C AND a 9 inch would have been awesome but there are Q/Cs out there already but there WASN"T a good coilover rear end. Go to any rod run and the coilover rears will far outweigh the transverse spring rears. The Q/C in the AMT 25 T is a very easy fit. I wont be showing my finished coupe until it has been published in my magazine column but here is a sneak peak of the rear end conversion. By the way, love your roadsters, Plowboy! Cheers Alan
-
Big V8s
alan barton replied to unclescott58's topic in All The Rest: Motorcycles, Aviation, Military, Sci-Fi, Figures
I've enjoyed your collection unclescott, even if they are not exactly my cup of tea. I have a story to tell about these large engines though. About ten years ago I had a part time job in a truly magnificent motoring bookshop here in Perth. Sadly the general downturn in the retail world killed it off after fifteen years but the Pitstop Bookshop was one of those places that all gearheads would love. One of the conditions of employment was that you had to have a strong interest in cars or motorsports. Even the girls out the back in the storeroom ran a Falcon hardtop muscle car, a flip front Mini Cooper etc etc. It was a great place to work and the best job I ever had. Knowing my interest in models, the owner, Peter, came up to me one day and said "Haynes Workshop Manuals are releasing a scale model of a four cylinder engine - do you think we should get some in?". I explained that in my modelling circles there would be limited interest but on the other hand, I was a high school auto shop teacher as well and there might be some educational value. "Get 10", I suggested. Peter ordered 50! I have never been so wrong in my life. Those things flew out the door faster than we could order them in! I forget how many we eventually sold but it was in the hundreds. I built one and had it on the front counter and absolutely every customer had to press the button to see it whirl around. We got heaps of enquiries about a V8 so Peter asked me to investigate. I found the Revell V8 in a local hobby shop so bought one and assembled it. What an absolute dog! Screws snapped, the casting was warped for the cylinder block, it fought me all the way and was very substandard compared to the Haynes 4 banger. I told Peter that if he wanted to spend the next six months answering calls from irate customers, sure, go ahead and order them in. Wisely, he didn't. Shortly after the store closed up, Haynes released a V8 but I never got to try that one for size. looks like you both did way better than I did! Cheers Alan -
38 Ford Coupe Hardtop racer
alan barton replied to alan barton's topic in WIP: Other Racing: Road Racing, Land Speed Racers
Thanks Dr Kerry, I remember you from over at Fred's! Yeah, I just don't have a solution for the grille right now. I will be posting the finished car in Under Glass today and you will see that it is close but not nearly good enough. Even photoetch would be of limited value because the grille is a compound curve. I cant think of a kit grille that could be modified but I am definitely open to suggestions if any one has seen one in their travels that think might work. I can certainly see either a 38 coupe or convertible looking very slick as a custom! Cheers Alan -
38 Ford Coupe Hardtop racer
alan barton replied to alan barton's topic in WIP: Other Racing: Road Racing, Land Speed Racers
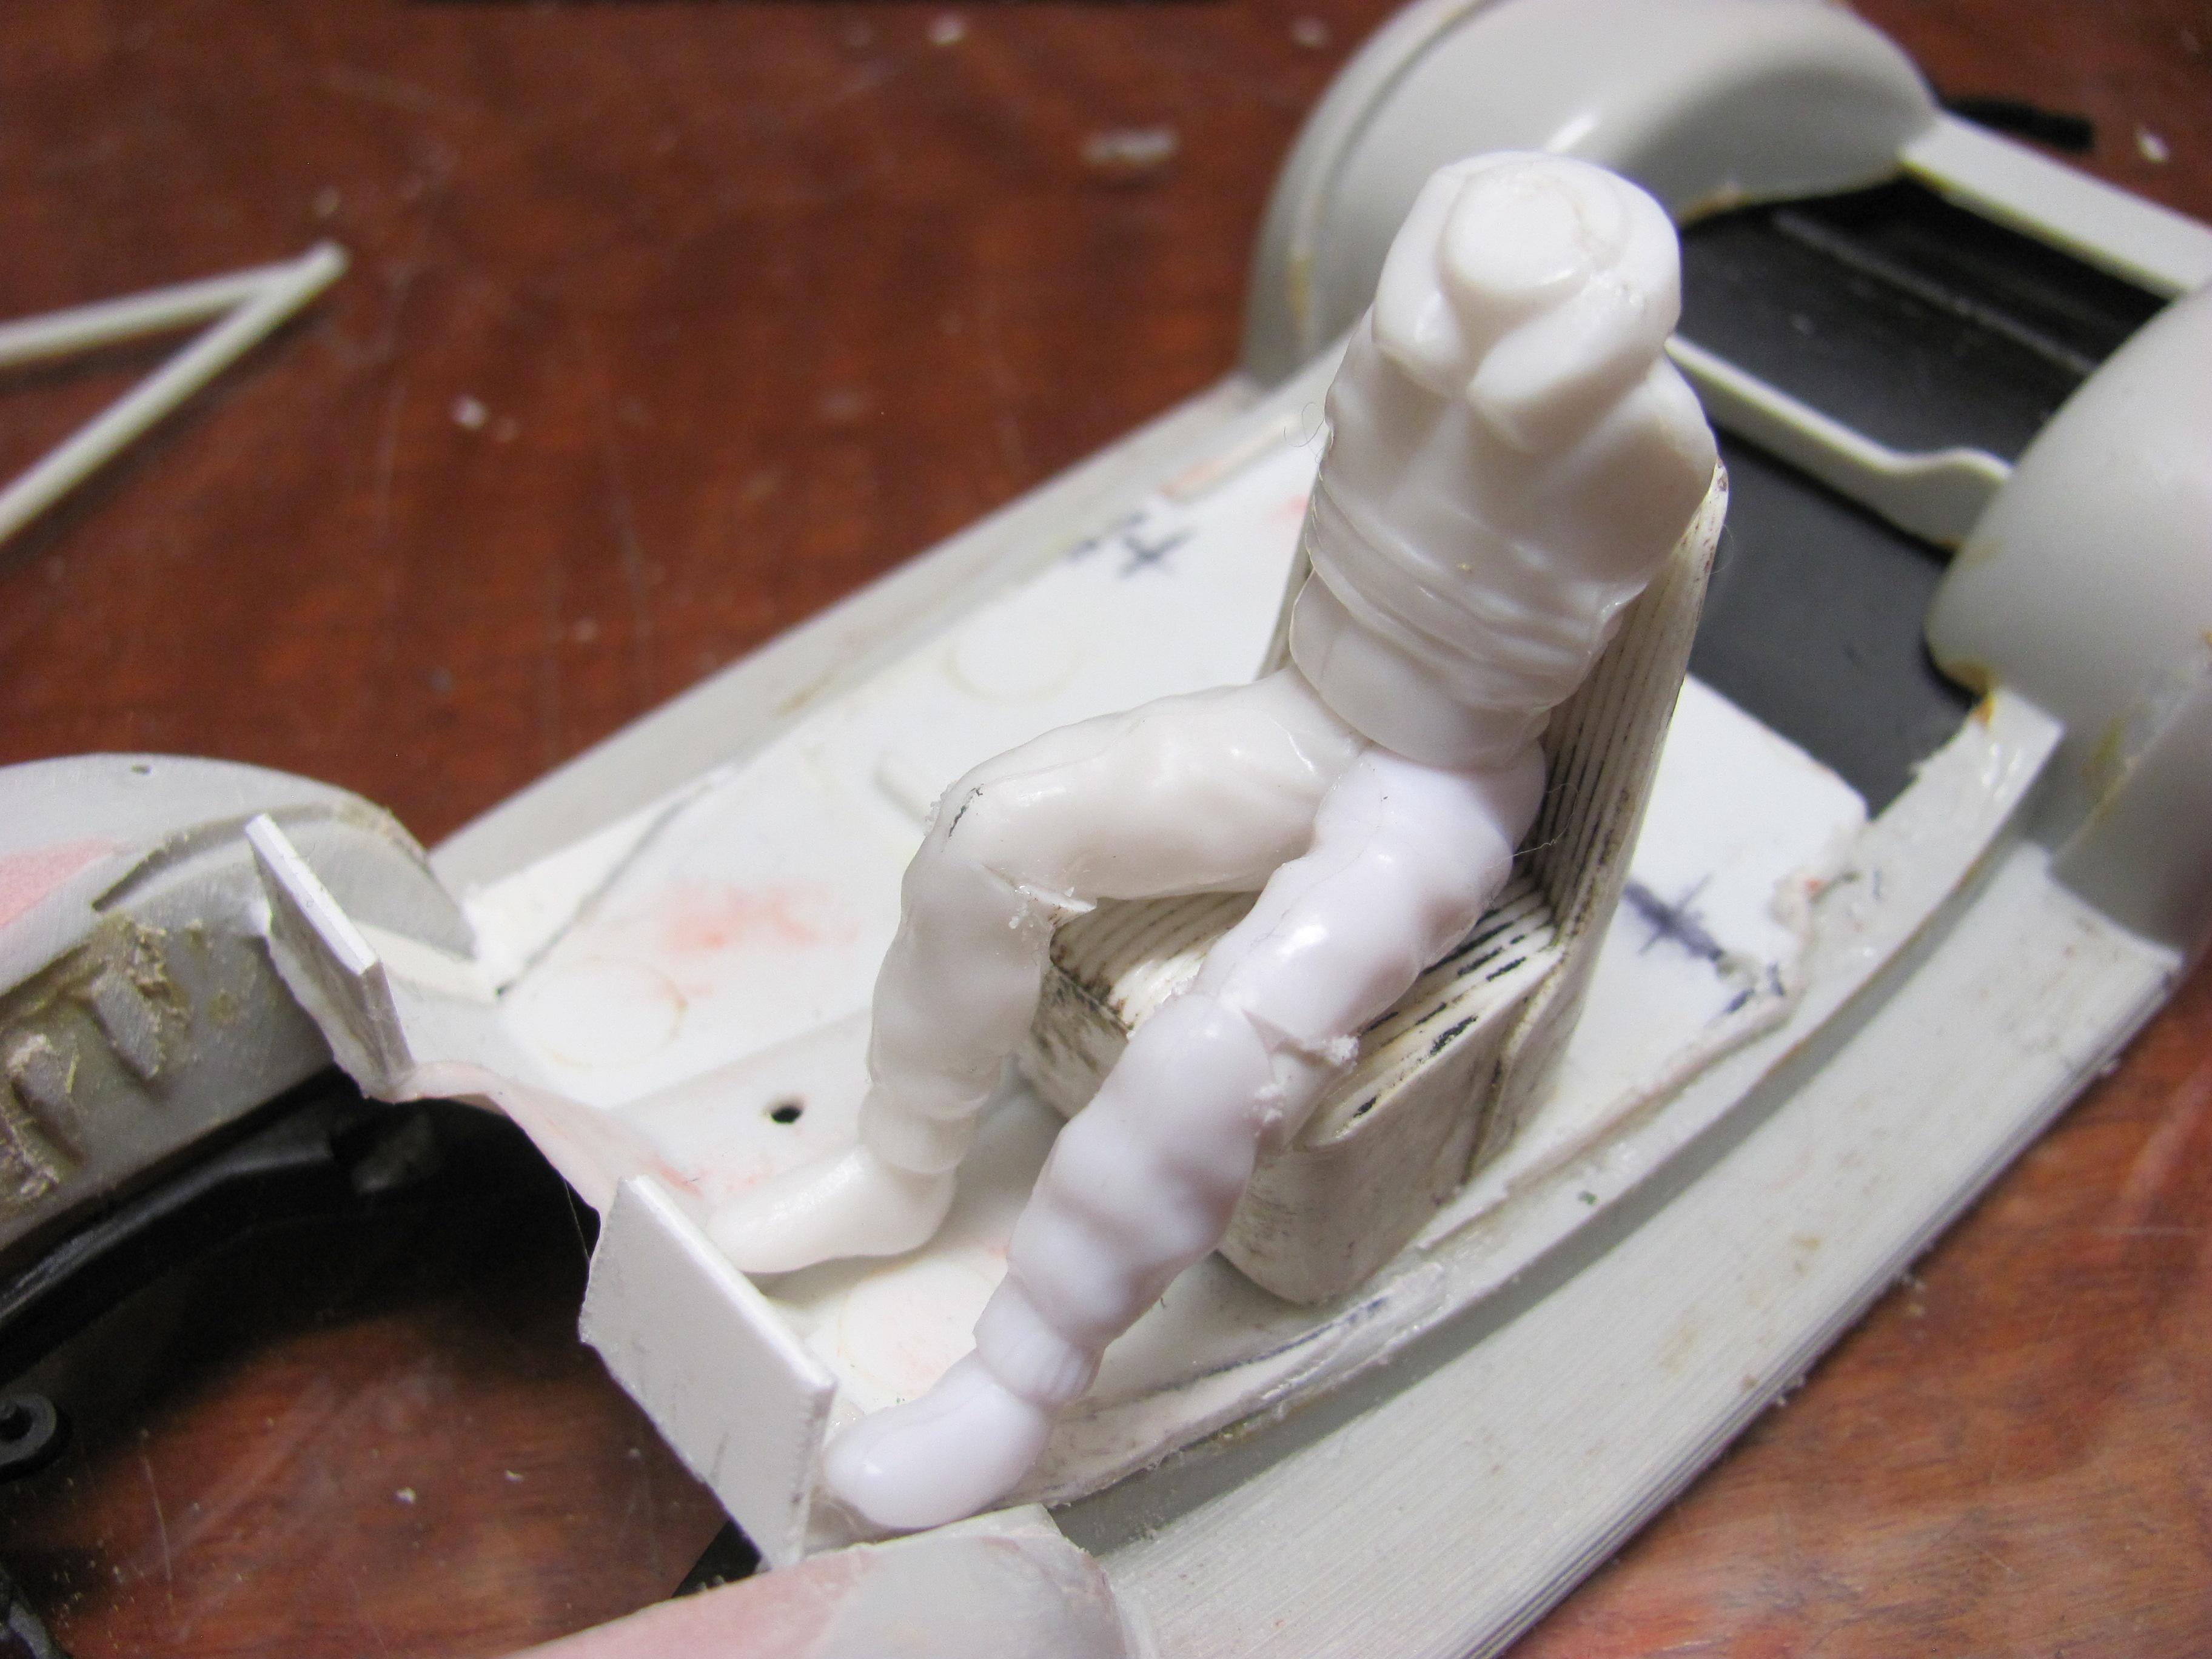
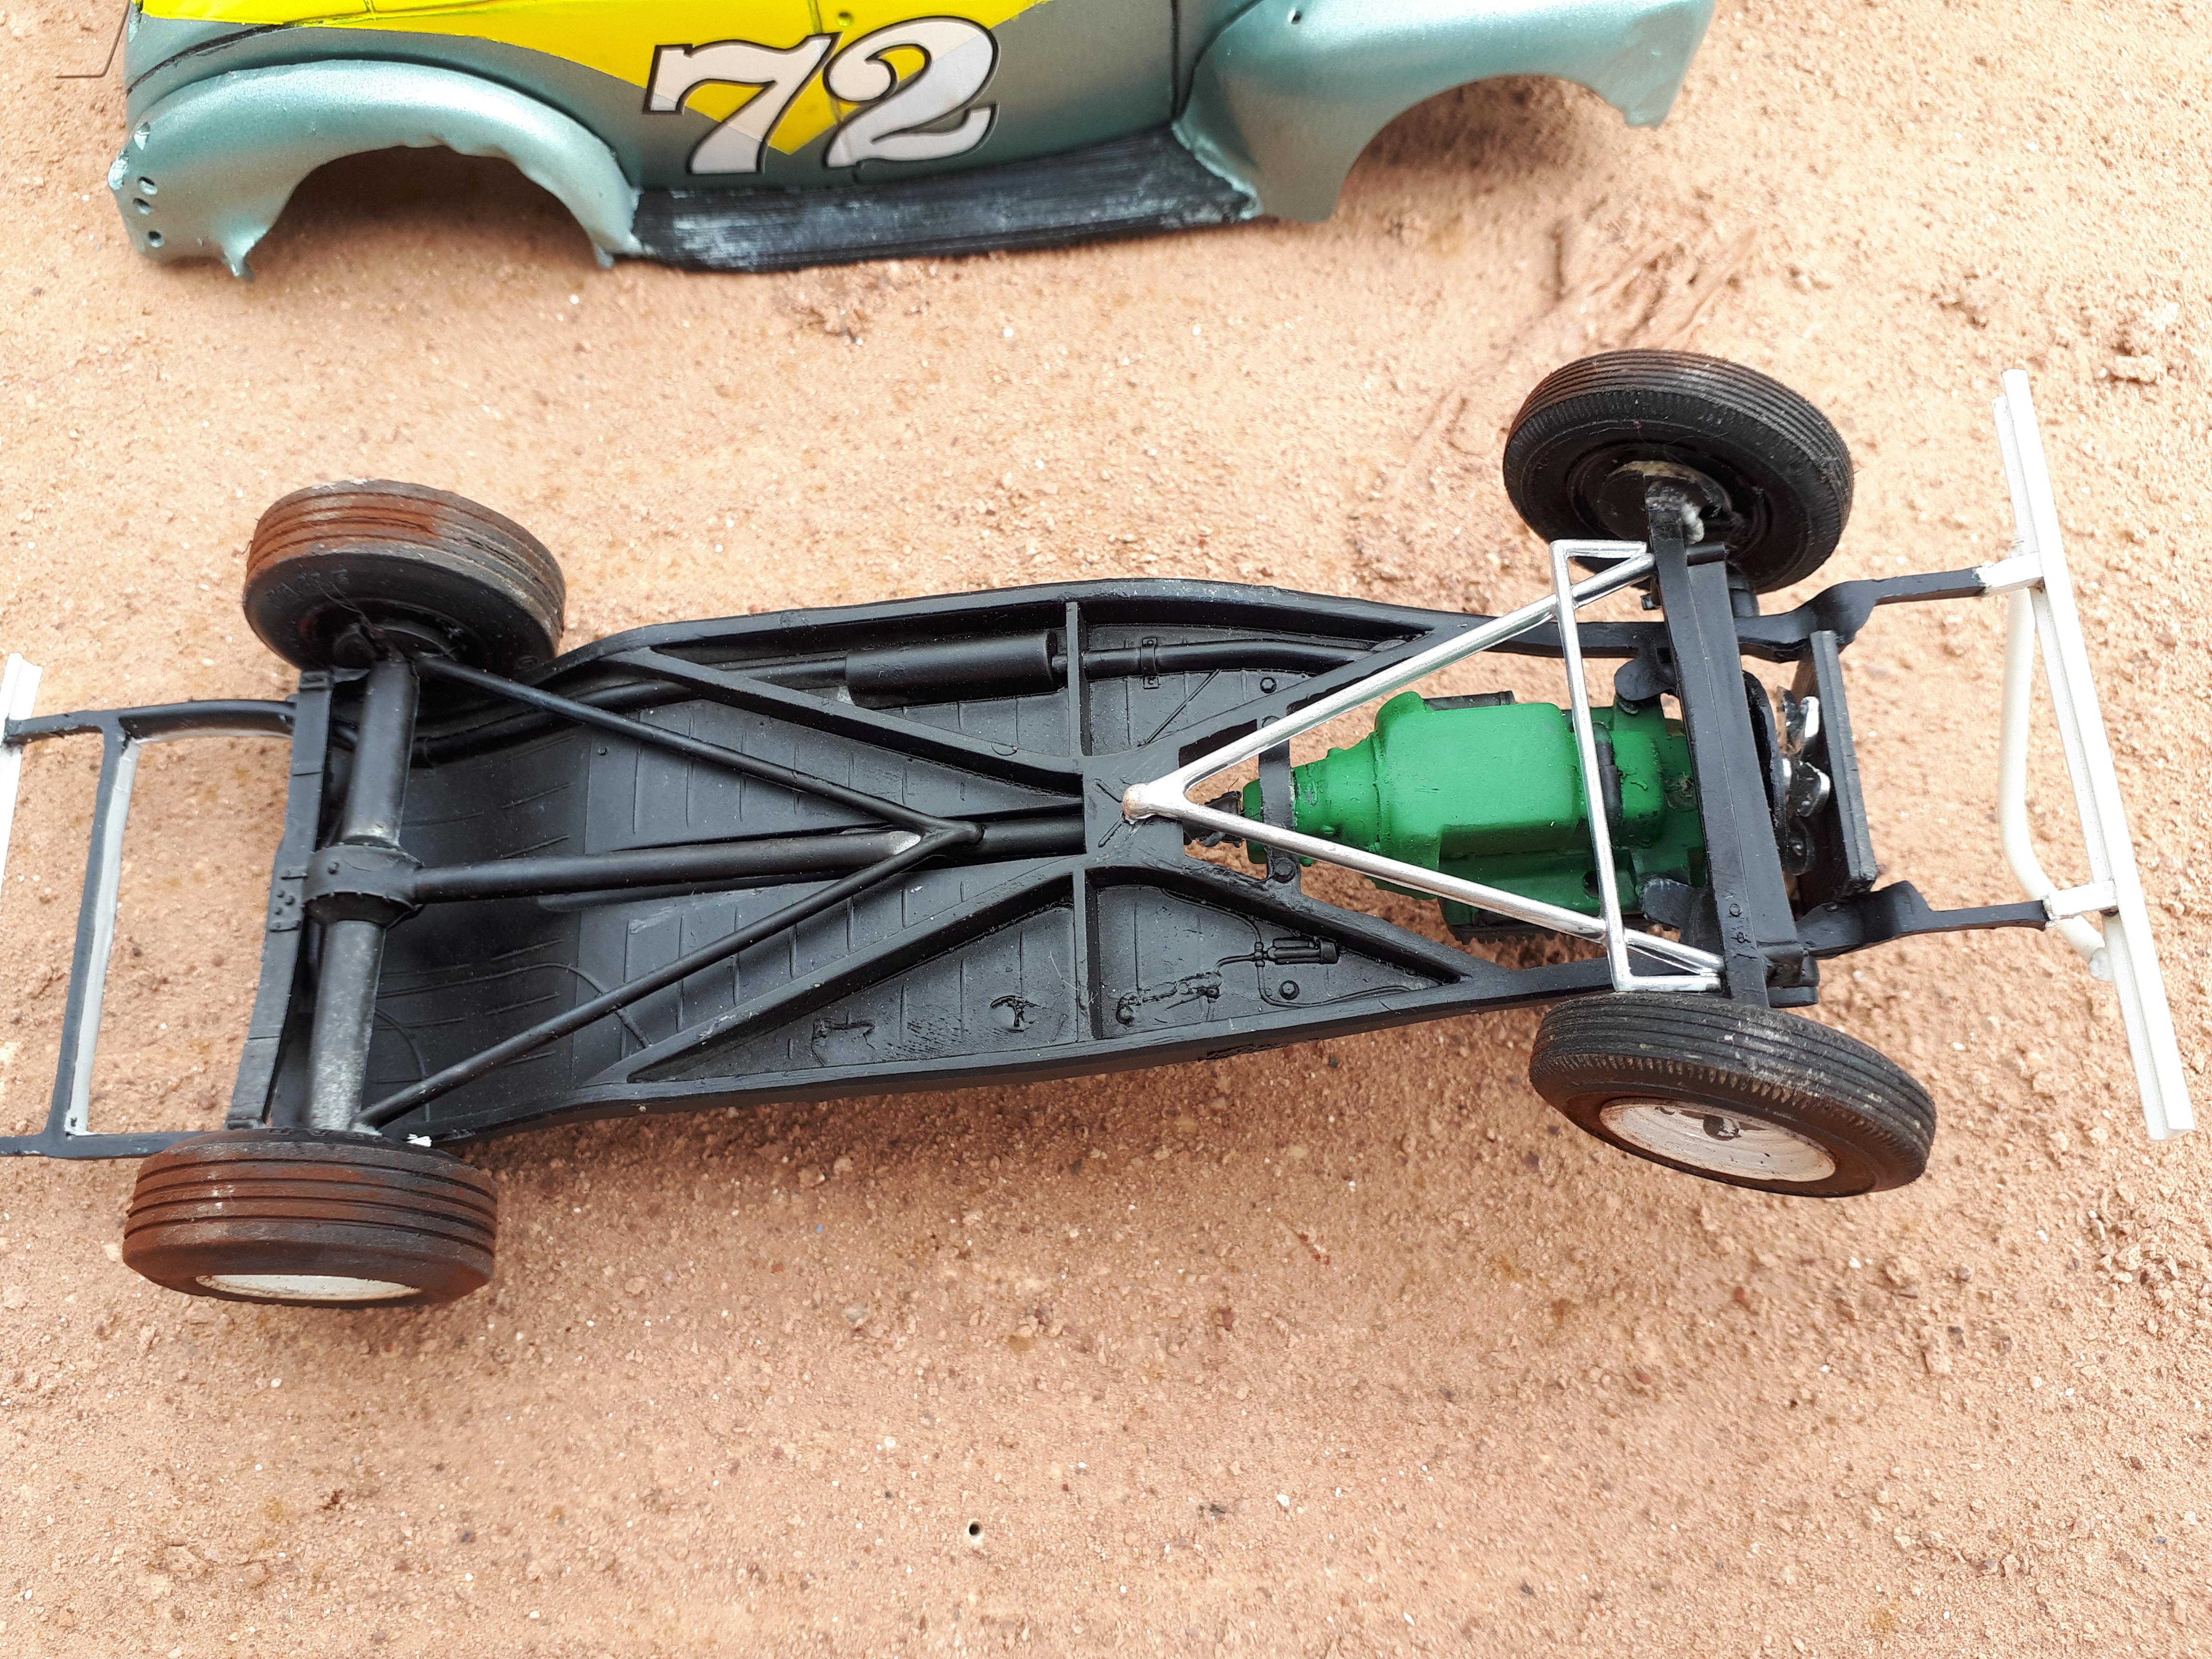
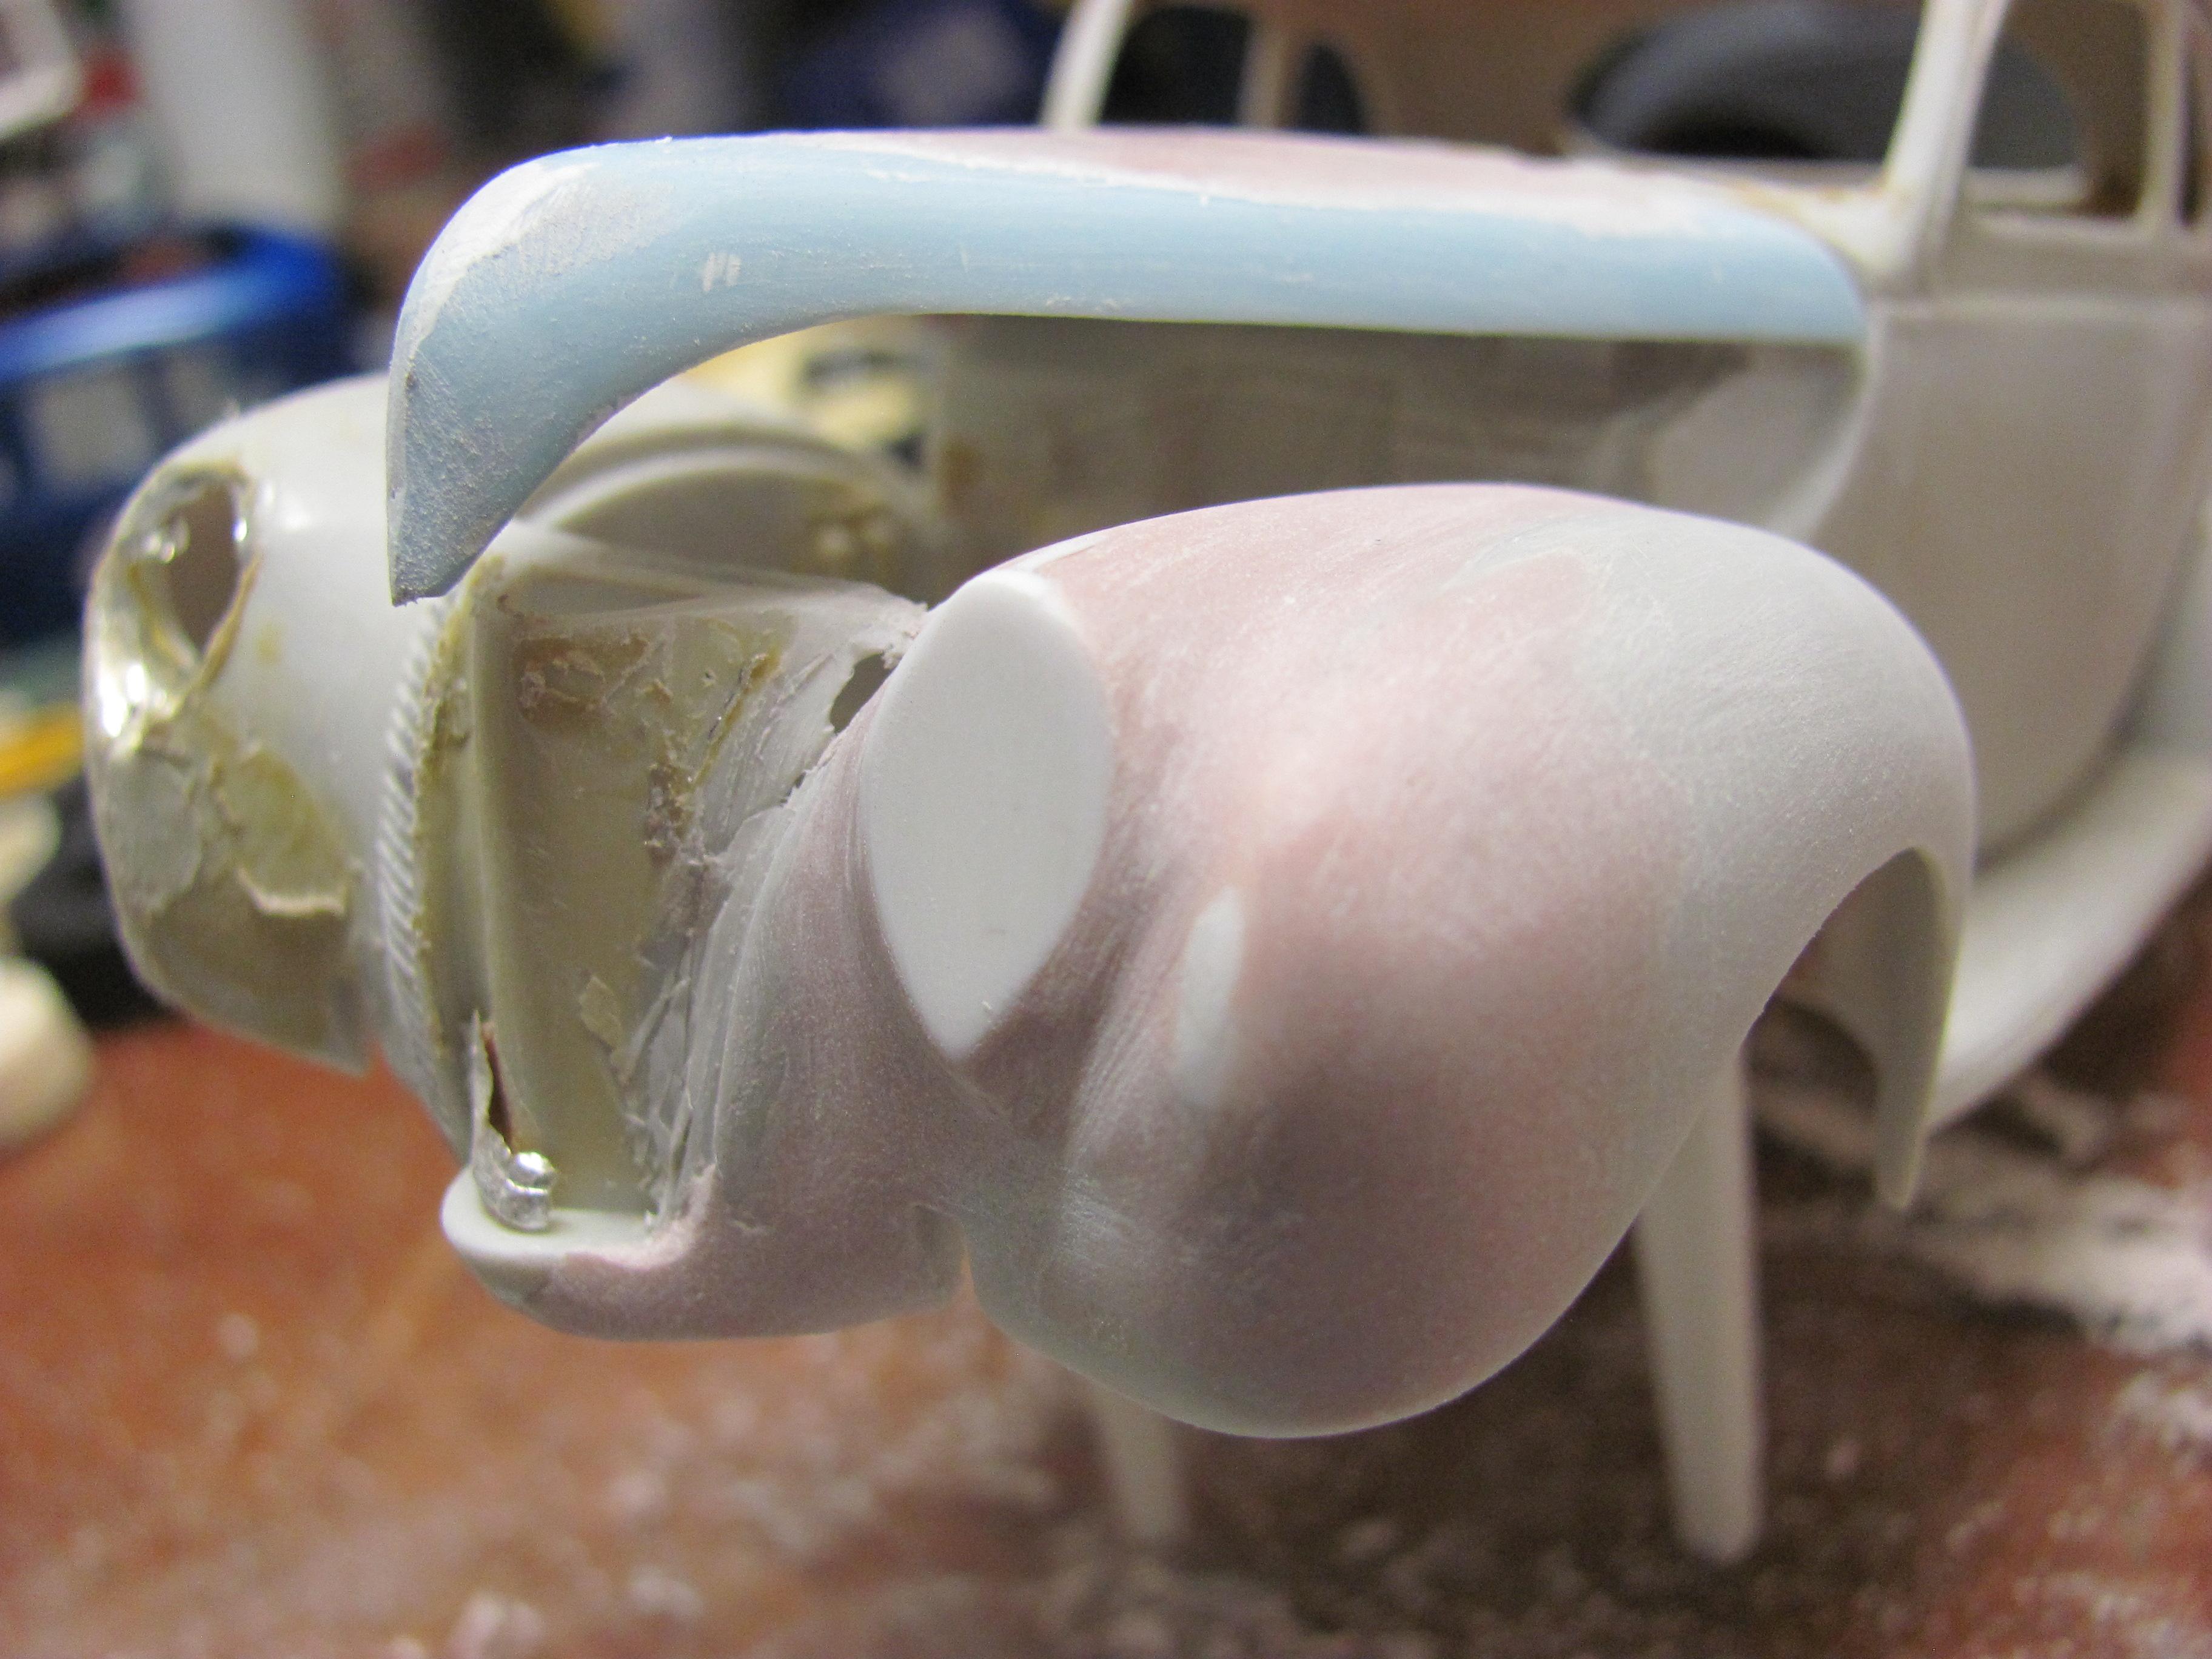
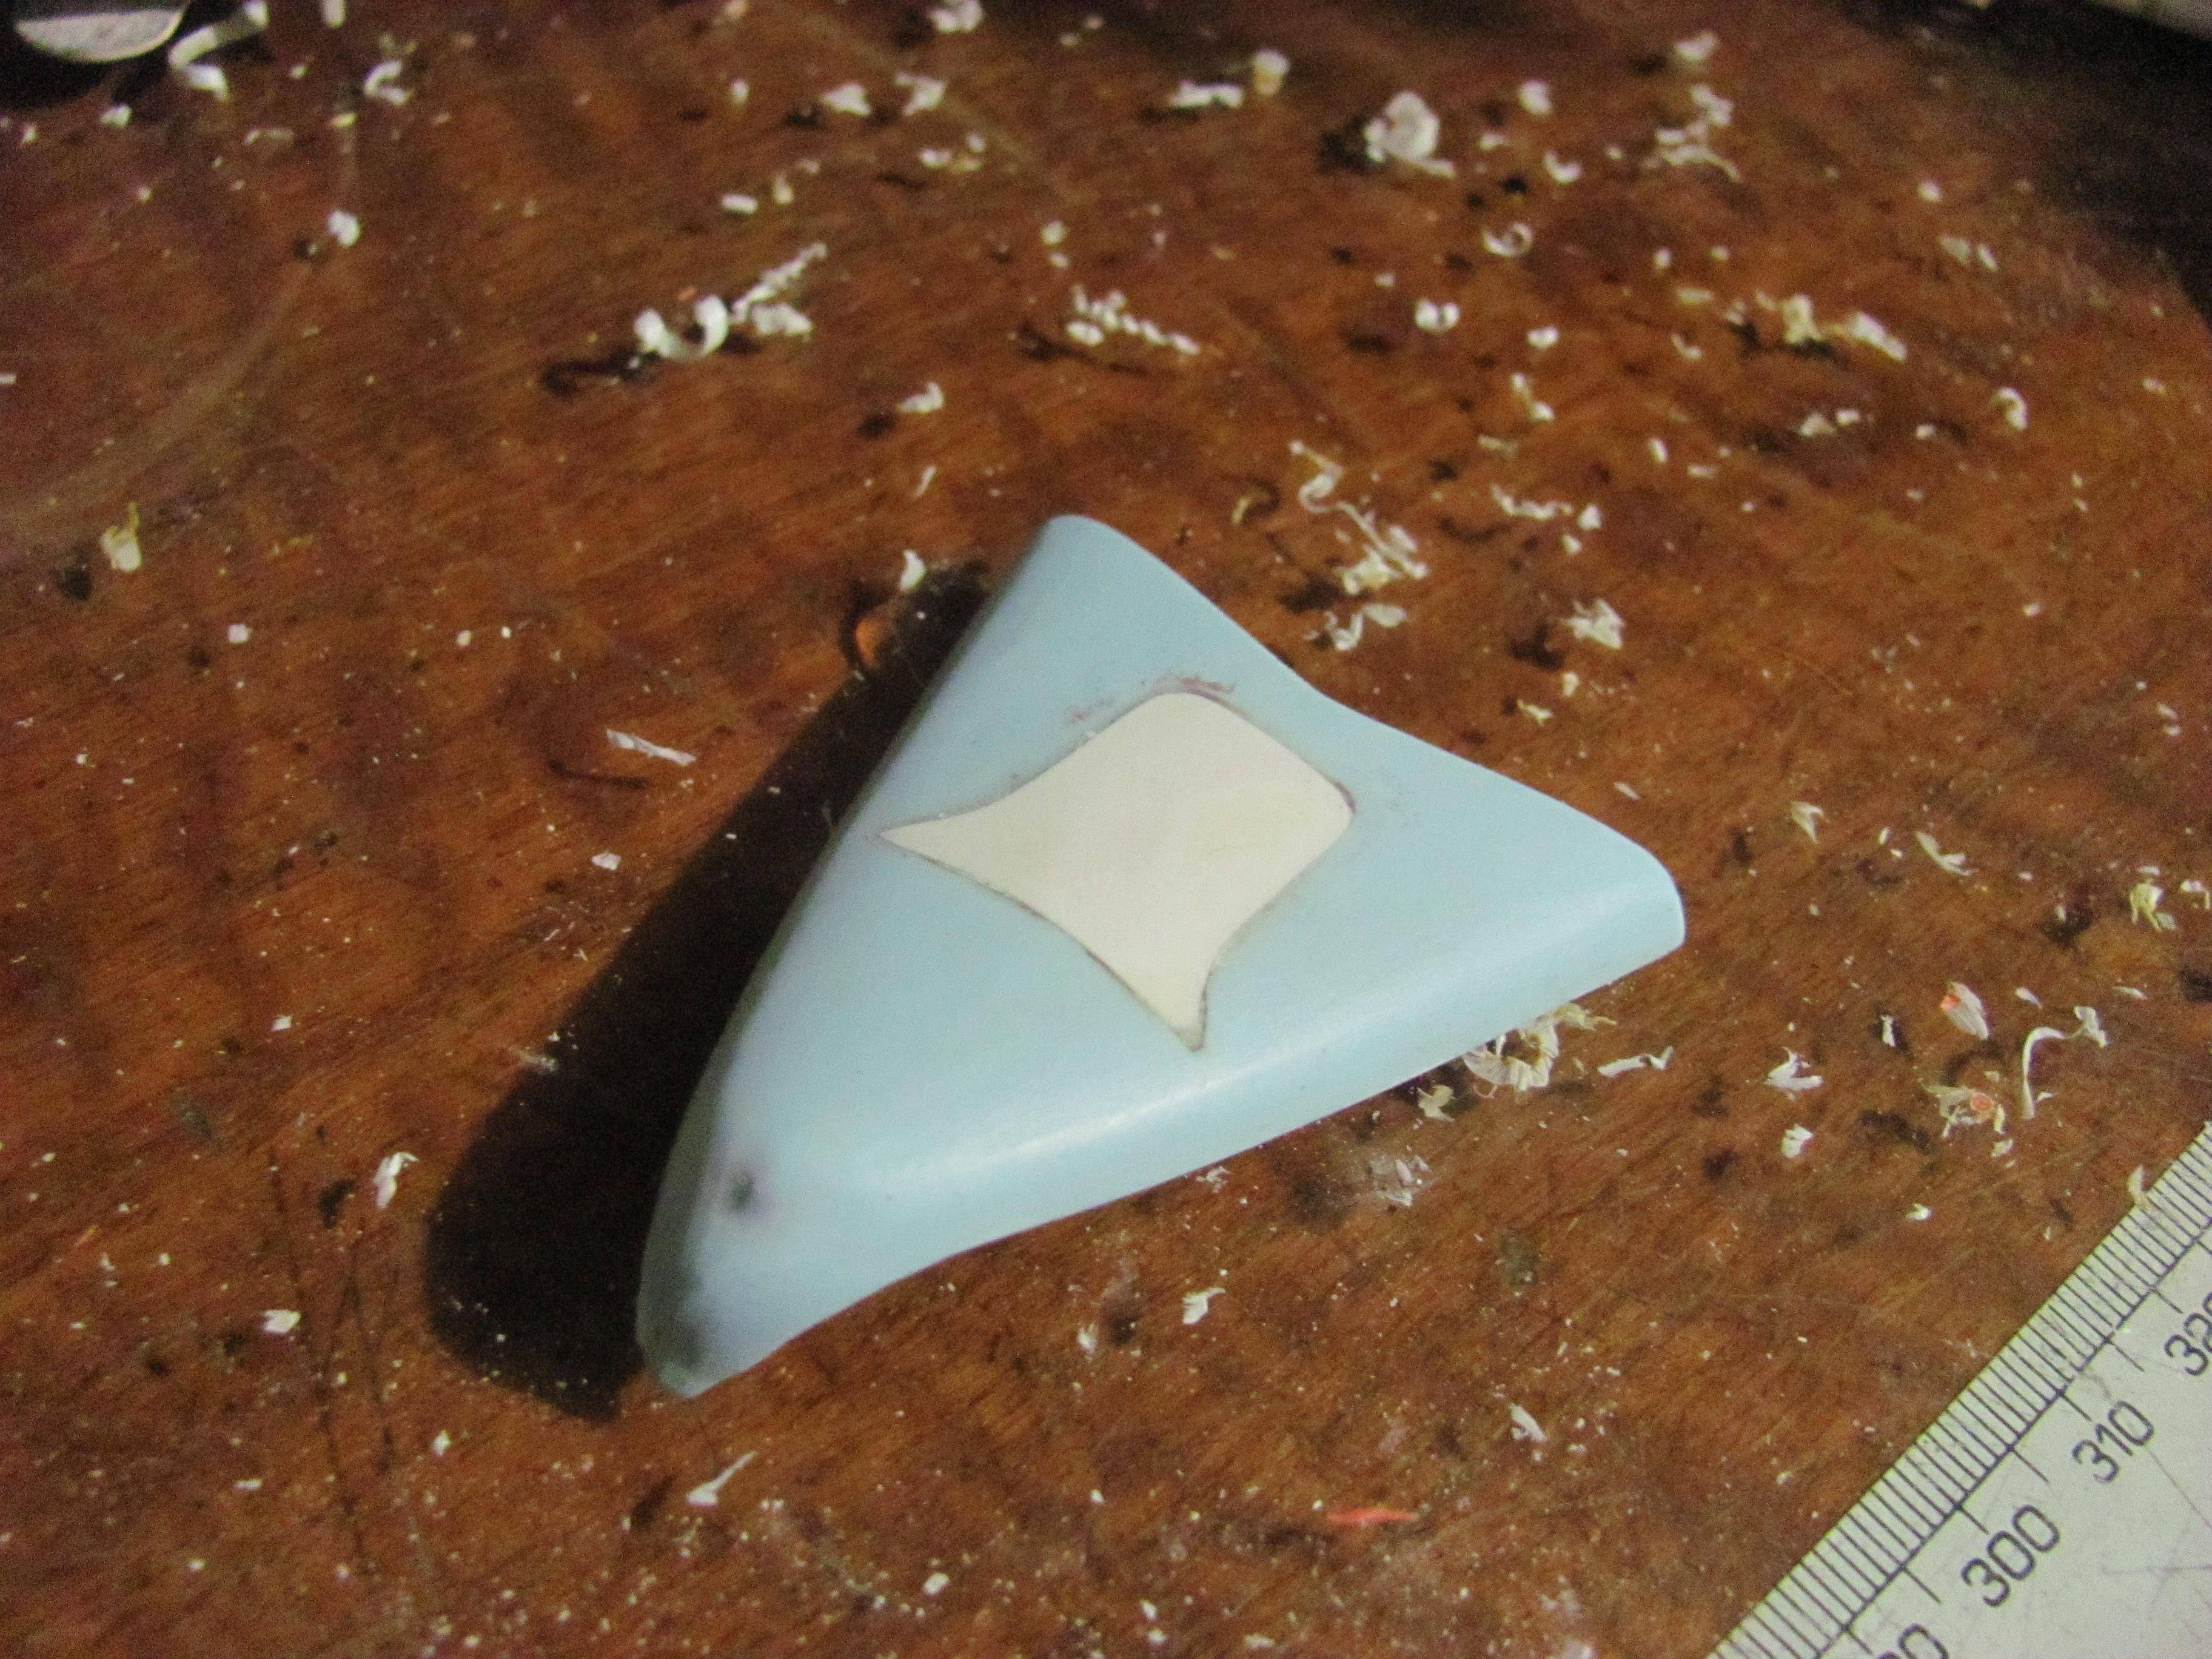
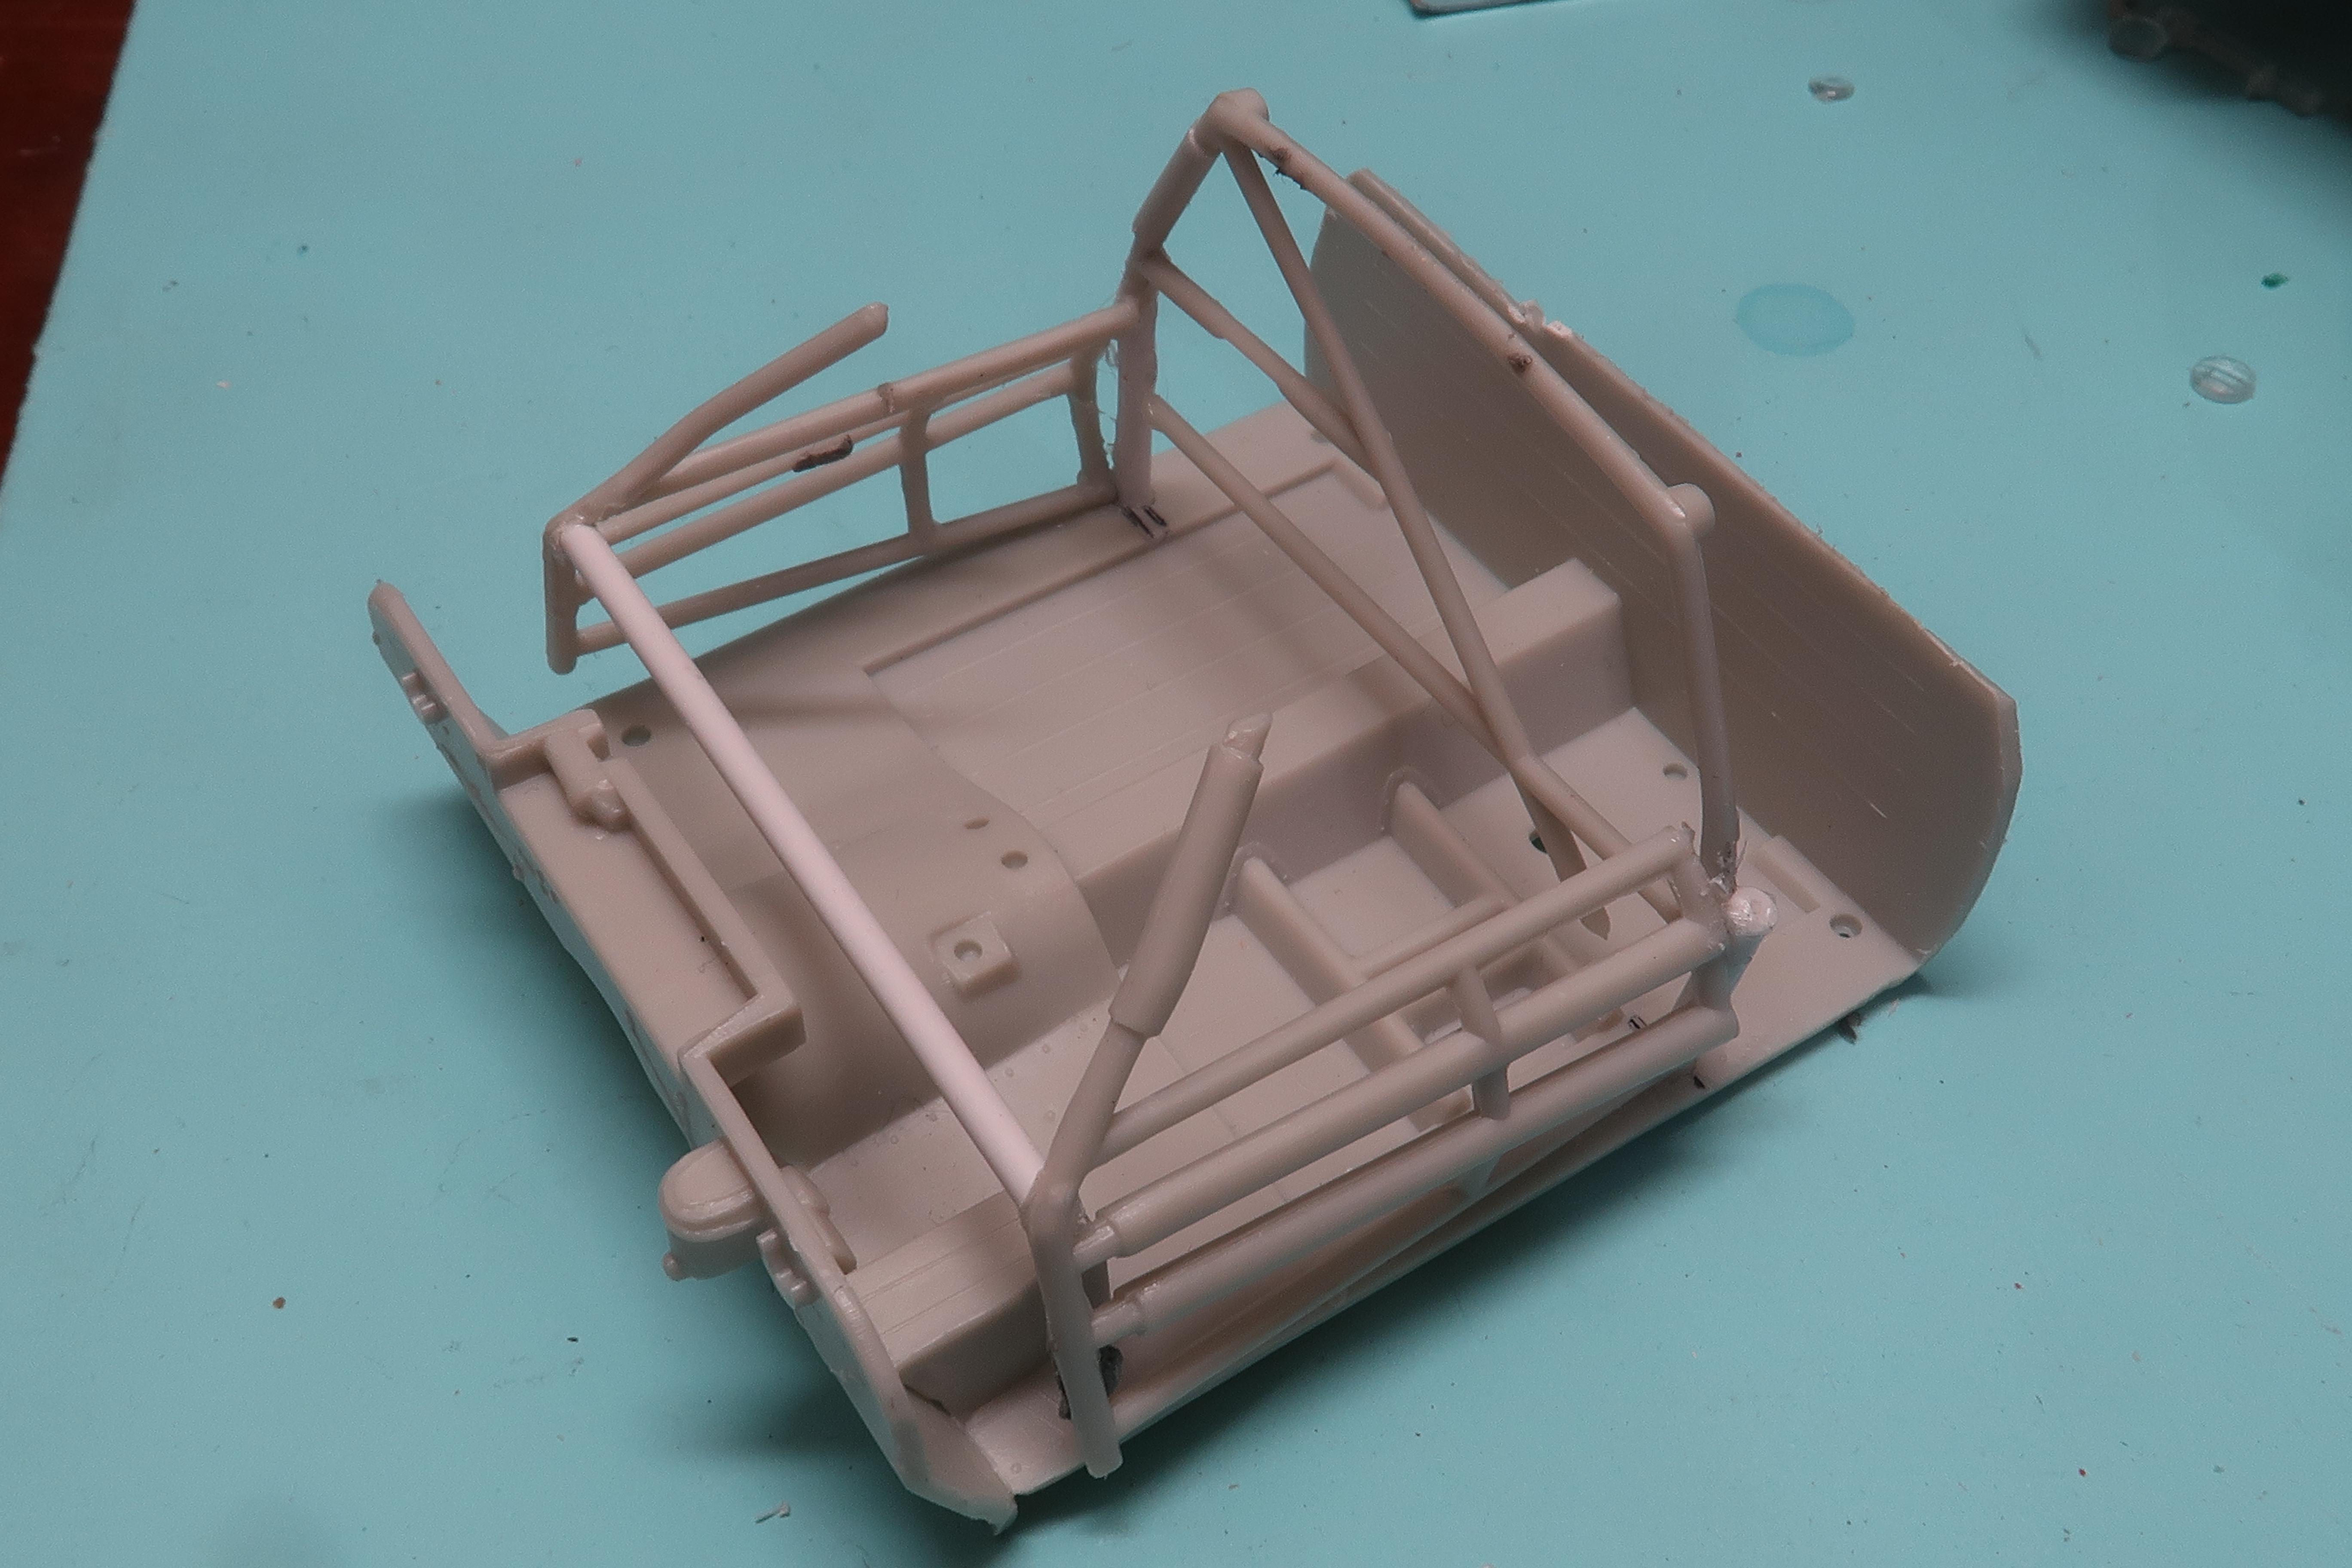
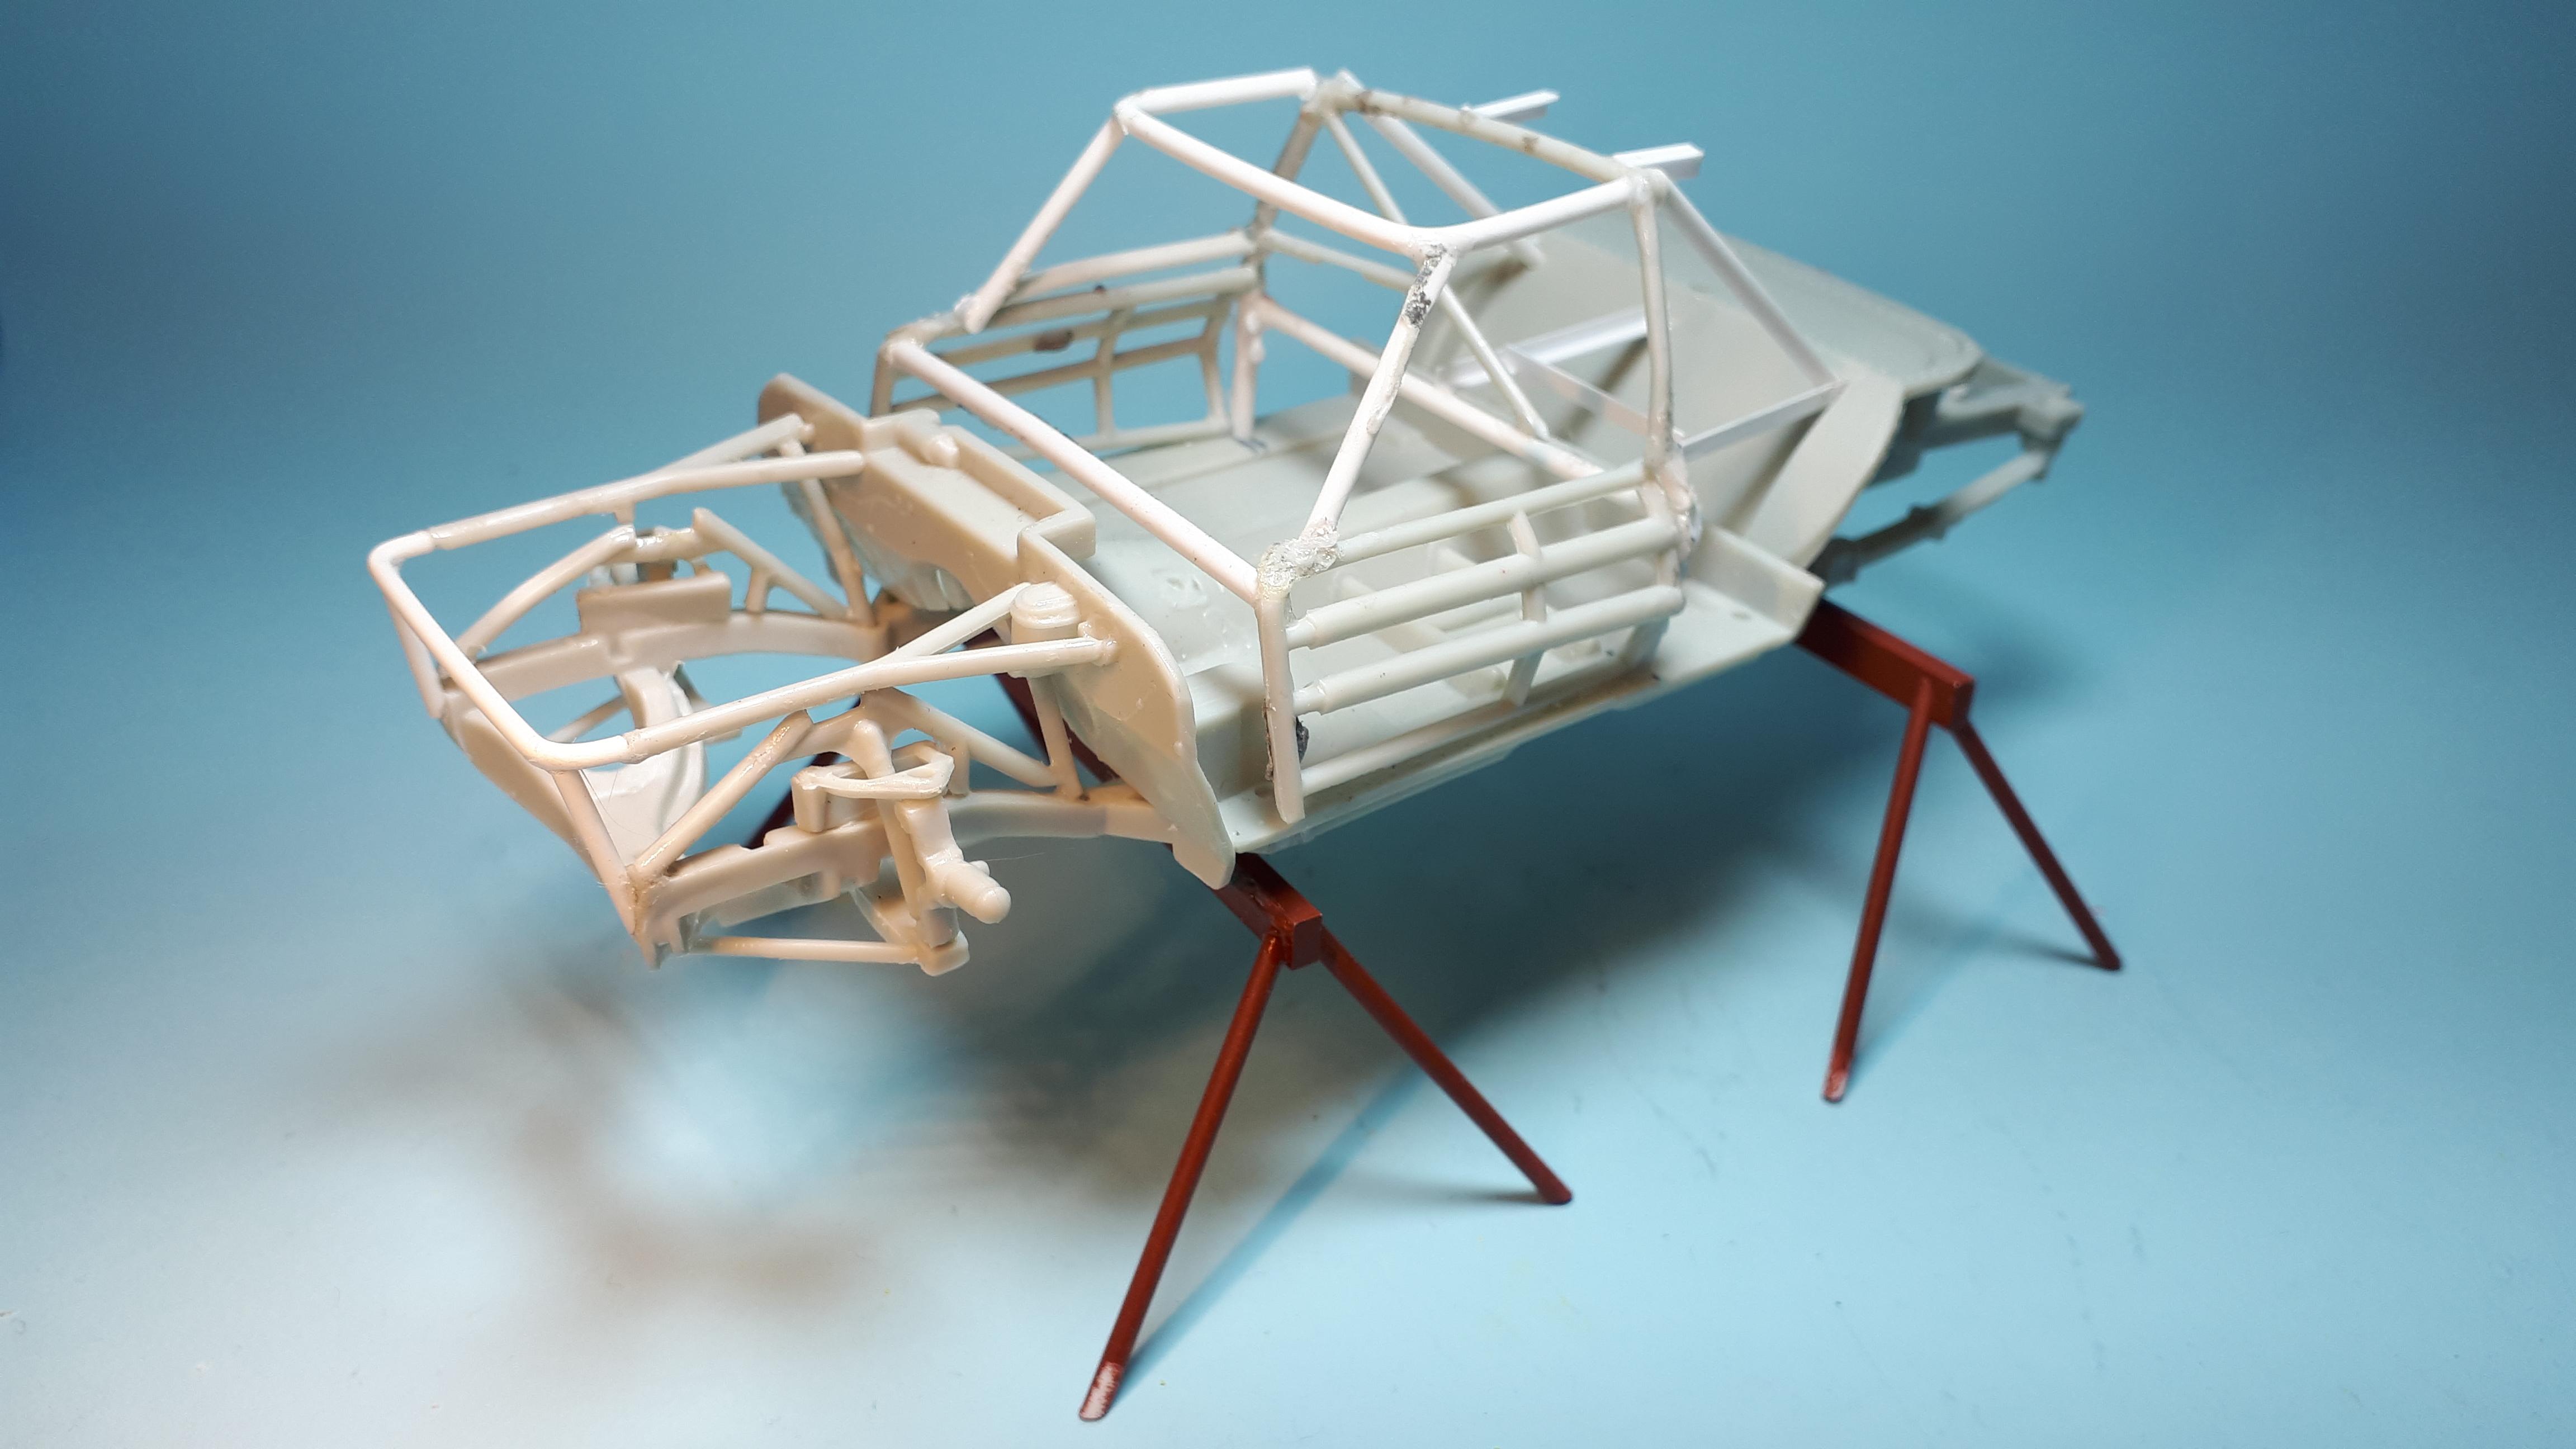
We only need a floor to work with for a racecar so I cut all the sides off the tub and installed the rollbar from the kit. I added extra support braces later. A seat was grabbed from the parts box and I then began surgery on a Monogram sprint car driver. His torso was shortened, his leg position changed and after the steering wheel was installed, I reworked his arms to give an action packed pose. Although i didn't get a photo, I sued the hi tech custom dash from a later version of the coupe to make a 38 dash. You carefully use a razor saw to slice away all the modern junk and then drill some holes where the gauges and switches should have been.
-
38 Ford Coupe Hardtop racer
alan barton replied to alan barton's topic in WIP: Other Racing: Road Racing, Land Speed Racers
The easy part was the frame. It is essentially the stock kit part. I added channel bumpers front and rear and glued the front and rear ends in cock-eyed to give the old girl a bit of body English as she roared through the turns. The stock fuel tank was cut from the rear of the frame as these cars usually ran a jerry can inside the cabin for safety. My research photos showed cars like this leaning into the turns rather than massively over-steering like later styles of dirt track racer. I then sprayed the whole lot flat black and brush painted the engine in a factory like dark green.
-
38 Ford Coupe Hardtop racer
alan barton replied to alan barton's topic in WIP: Other Racing: Road Racing, Land Speed Racers
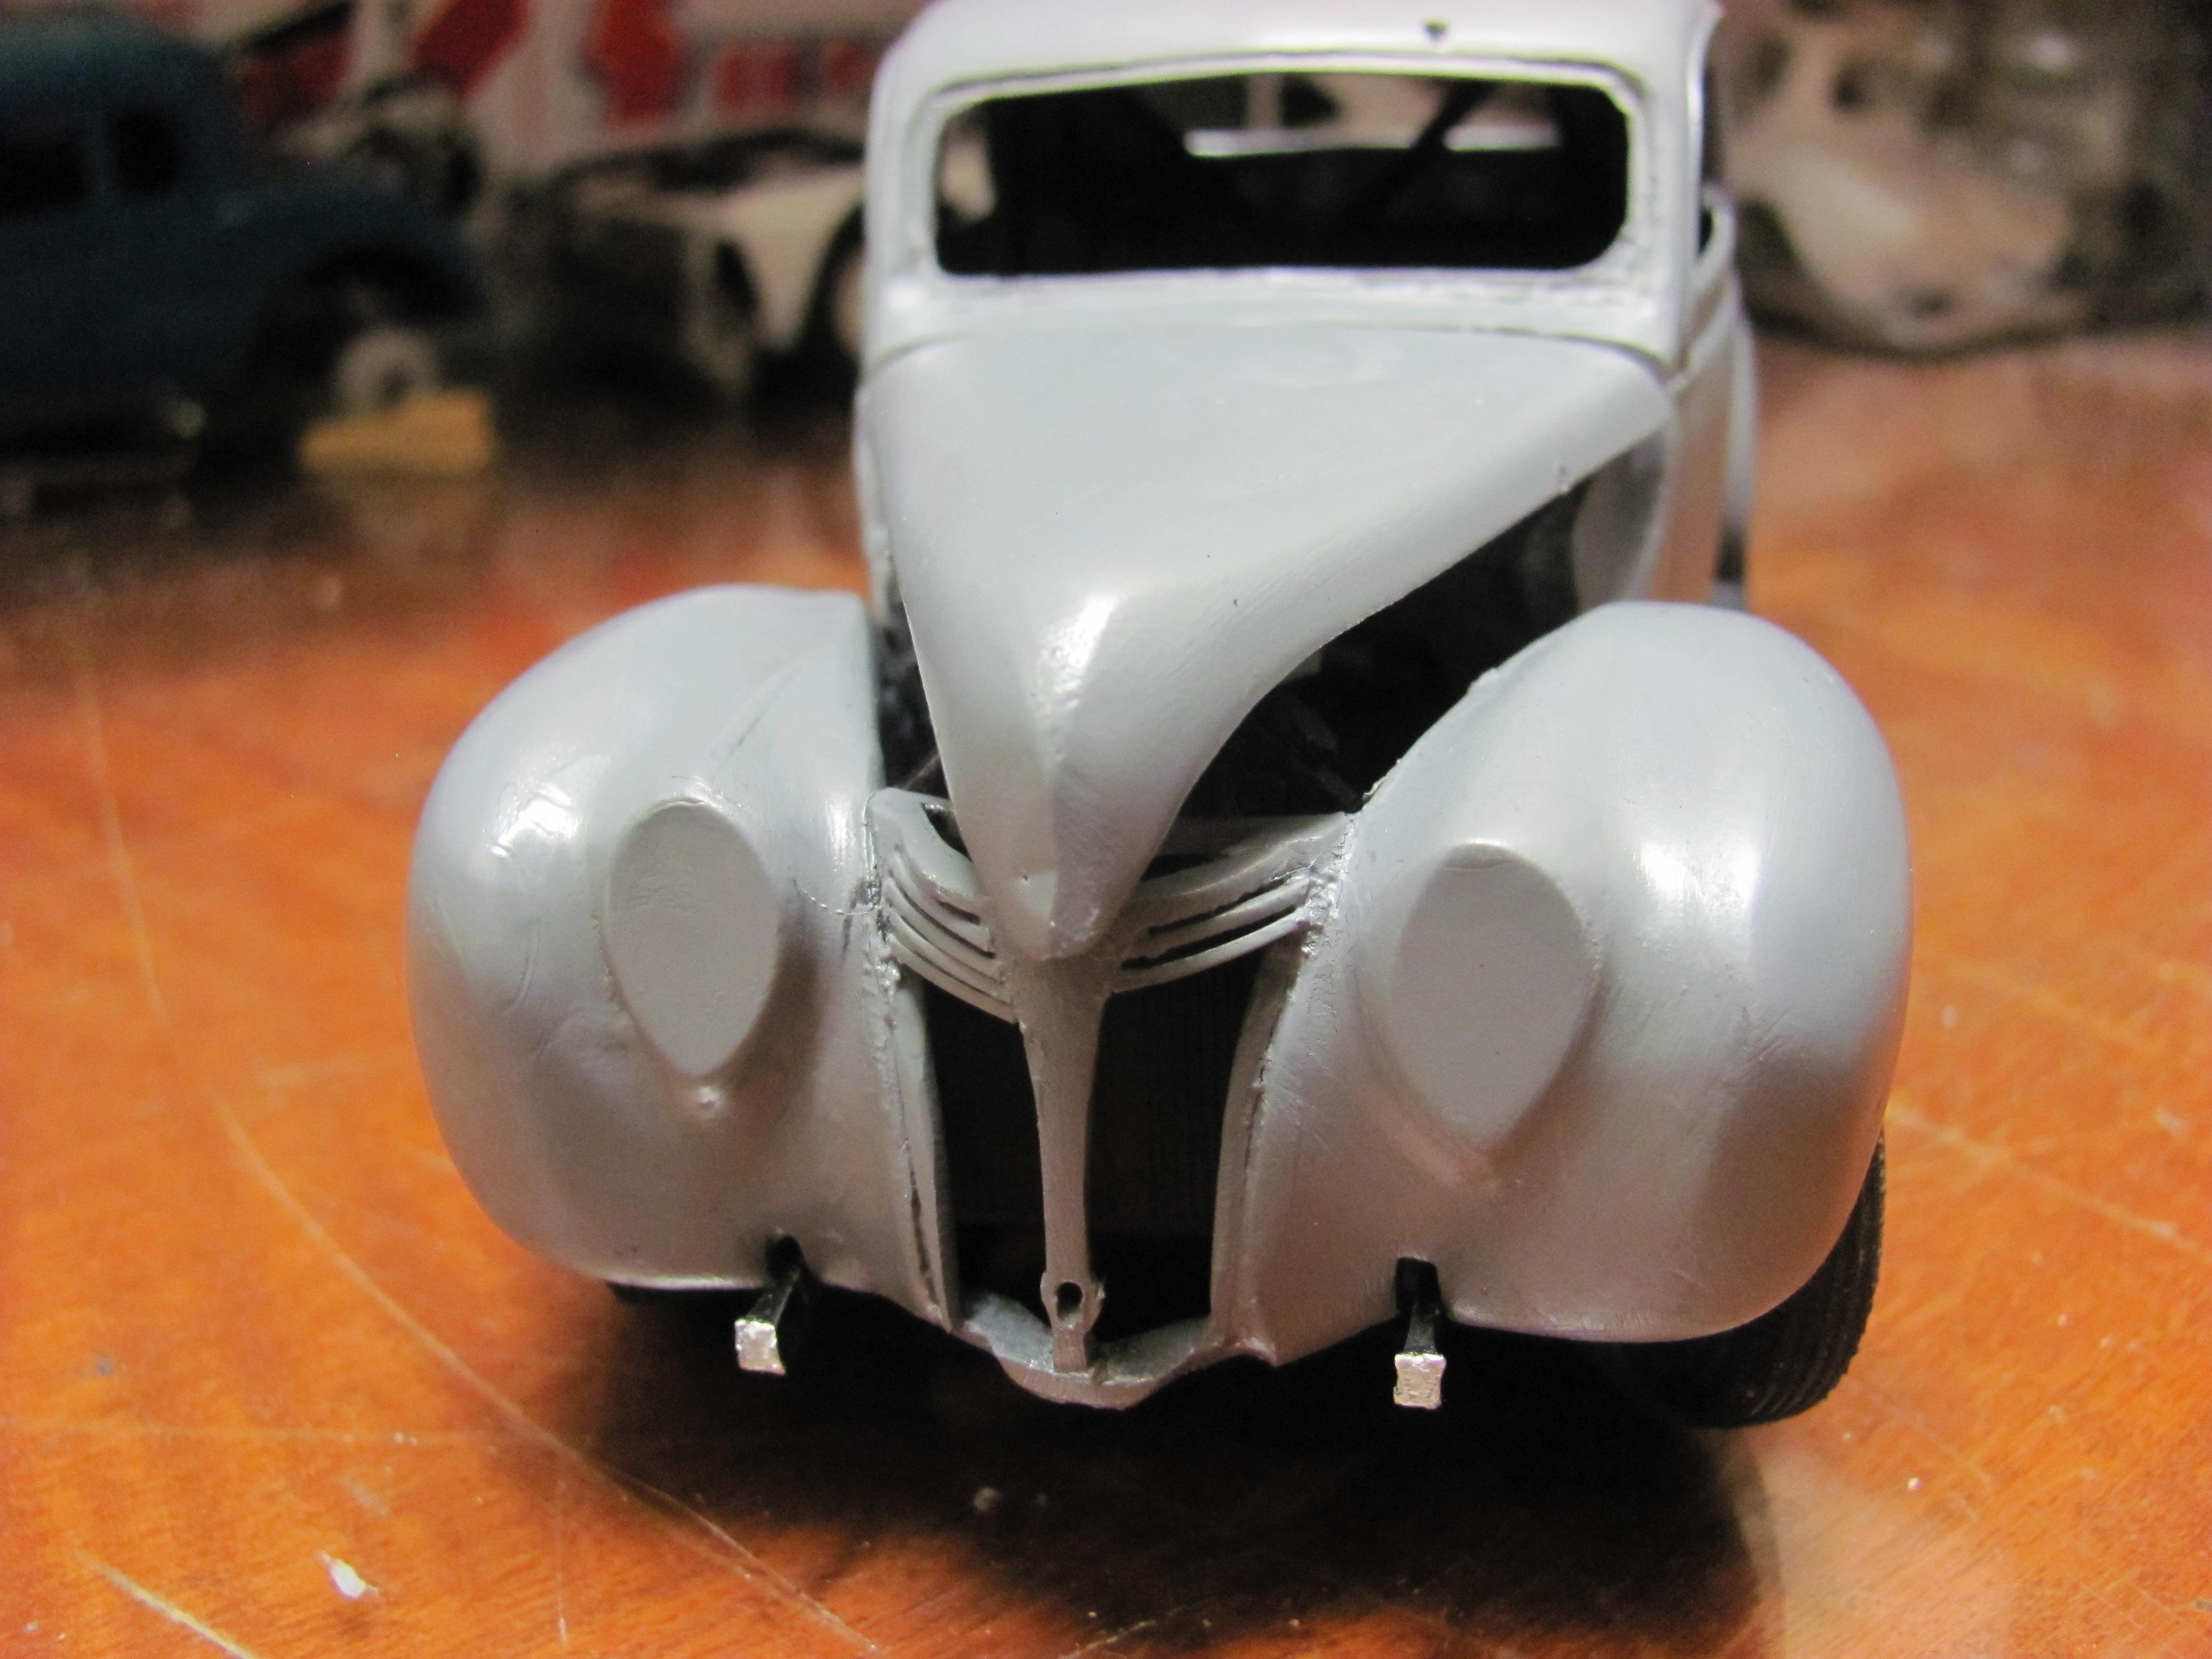
The rear of the '38 fenders are more vertical than a '40 and then swoop out to meet the running boards. The hood opening is a straight, deeper curve than the little S bend that is on a '40 so I grabbed a sharp X acto and did a bit of whittlin". By far the hardest part, and in my opinion the least successful part of this conversion, was trying to create the fine bars of the '38 grille. I started by carving out the centre of the filler piece that comes in the sedan of the 40. I then used thin Evergreen rod to try and form up the grille bars. It was not easy and took quite a few nights to get this far. I guess it is this sort of detail that separates the masters from the run of the mill modellers and I don't think I am there just yet! It worked out fine for a stockcar that would have had more hits than Elvis but if I want to do a street rod with an exact grille I am going to need a plan B!
-
38 Ford Coupe Hardtop racer
alan barton replied to alan barton's topic in WIP: Other Racing: Road Racing, Land Speed Racers
I originally thought that Monogram 37 Ford fenders would be a good start but it turns out they have little in common with a 38, other than the shape of the headlight buckets. At the front, I started by gluing layers of plastic over the '40 headlight opening s and sanding them to the bulbous shape of the '38. I then used masking tape to transfer the shape of the 37 headlights to flat styrene and cut them to shape. I then used trial and error to make a spine to run back form the headlight plate some way down the fender towards the rear. I applied body putty over this spine and then spent a few quiet hours sanding, reputtying, sanding again until the shape of the headlight bullets were as close as I could make it to make photos.
-
38 Ford Coupe Hardtop racer
alan barton replied to alan barton's topic in WIP: Other Racing: Road Racing, Land Speed Racers
First order of business was to attempt the '38 body mods. I started with the worst hood in my stash and with some cutting, filing and filling it came out pretty close to a '38 hood, sans the side panels, as they were usually raced. There is enough plastic in the nose of the AMT hood to be able to file it back quite ruthlessly. I had taken research photos of a local 38 sedan to help get the contours right.
-
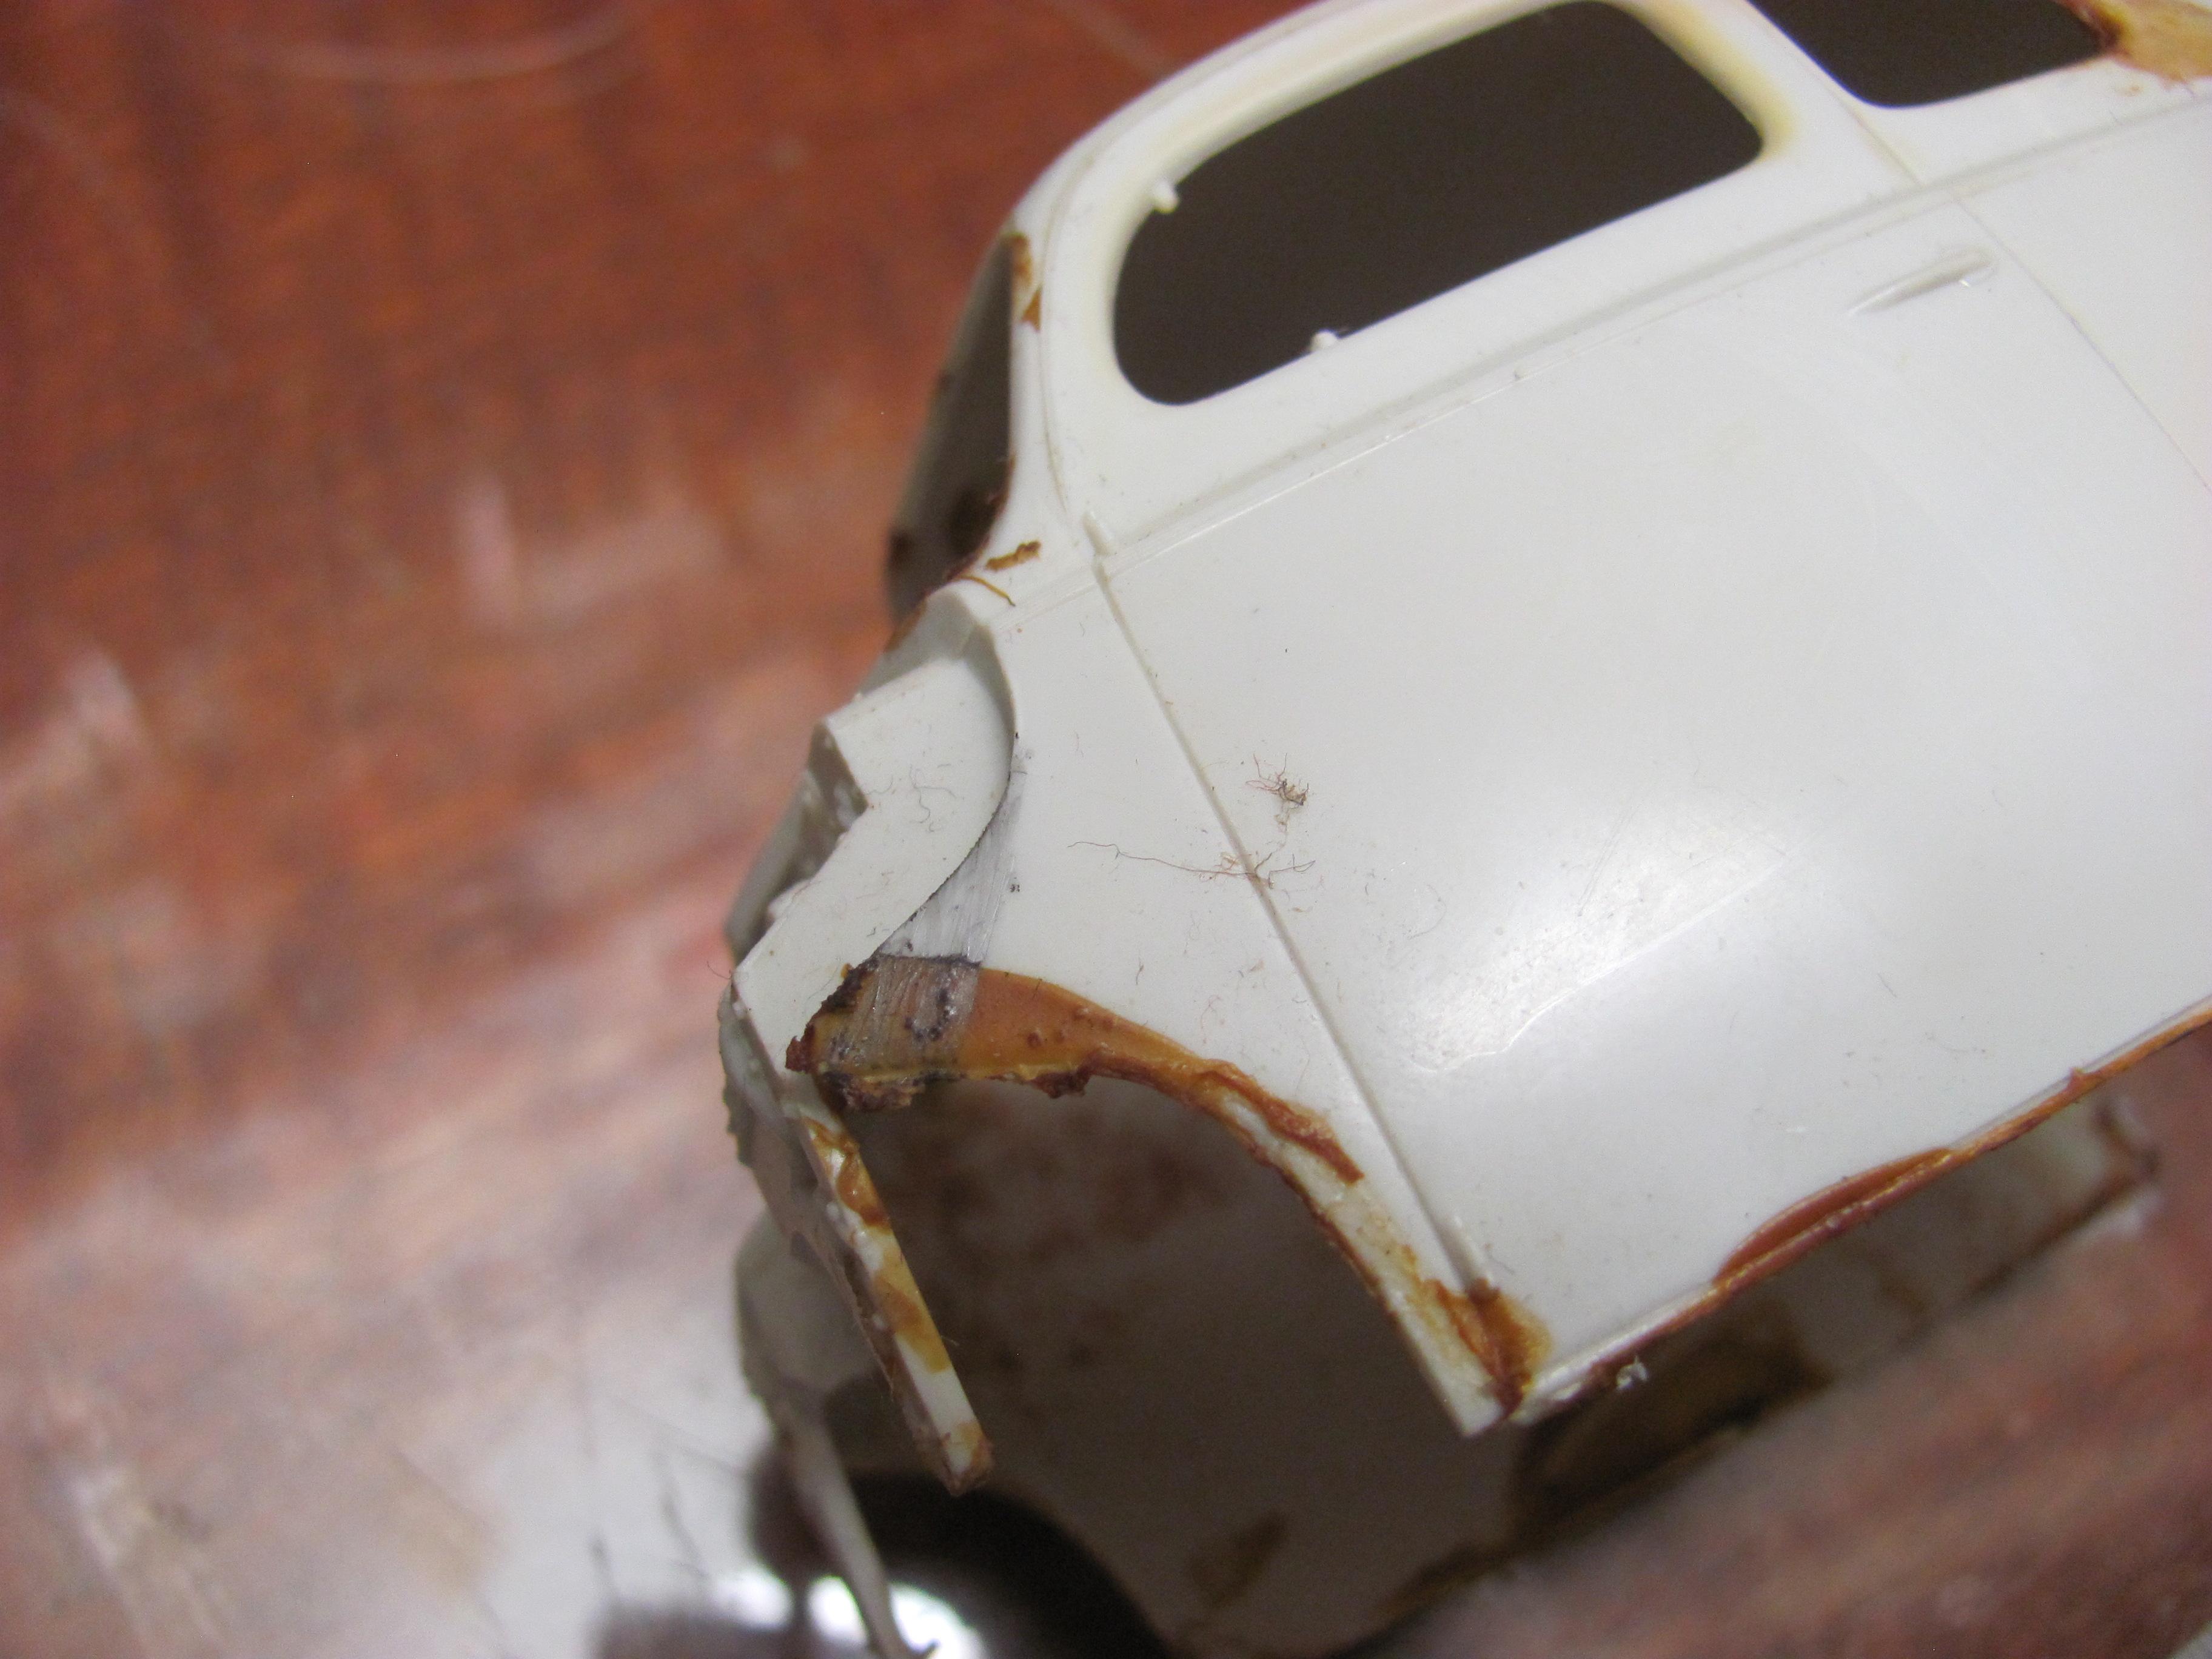
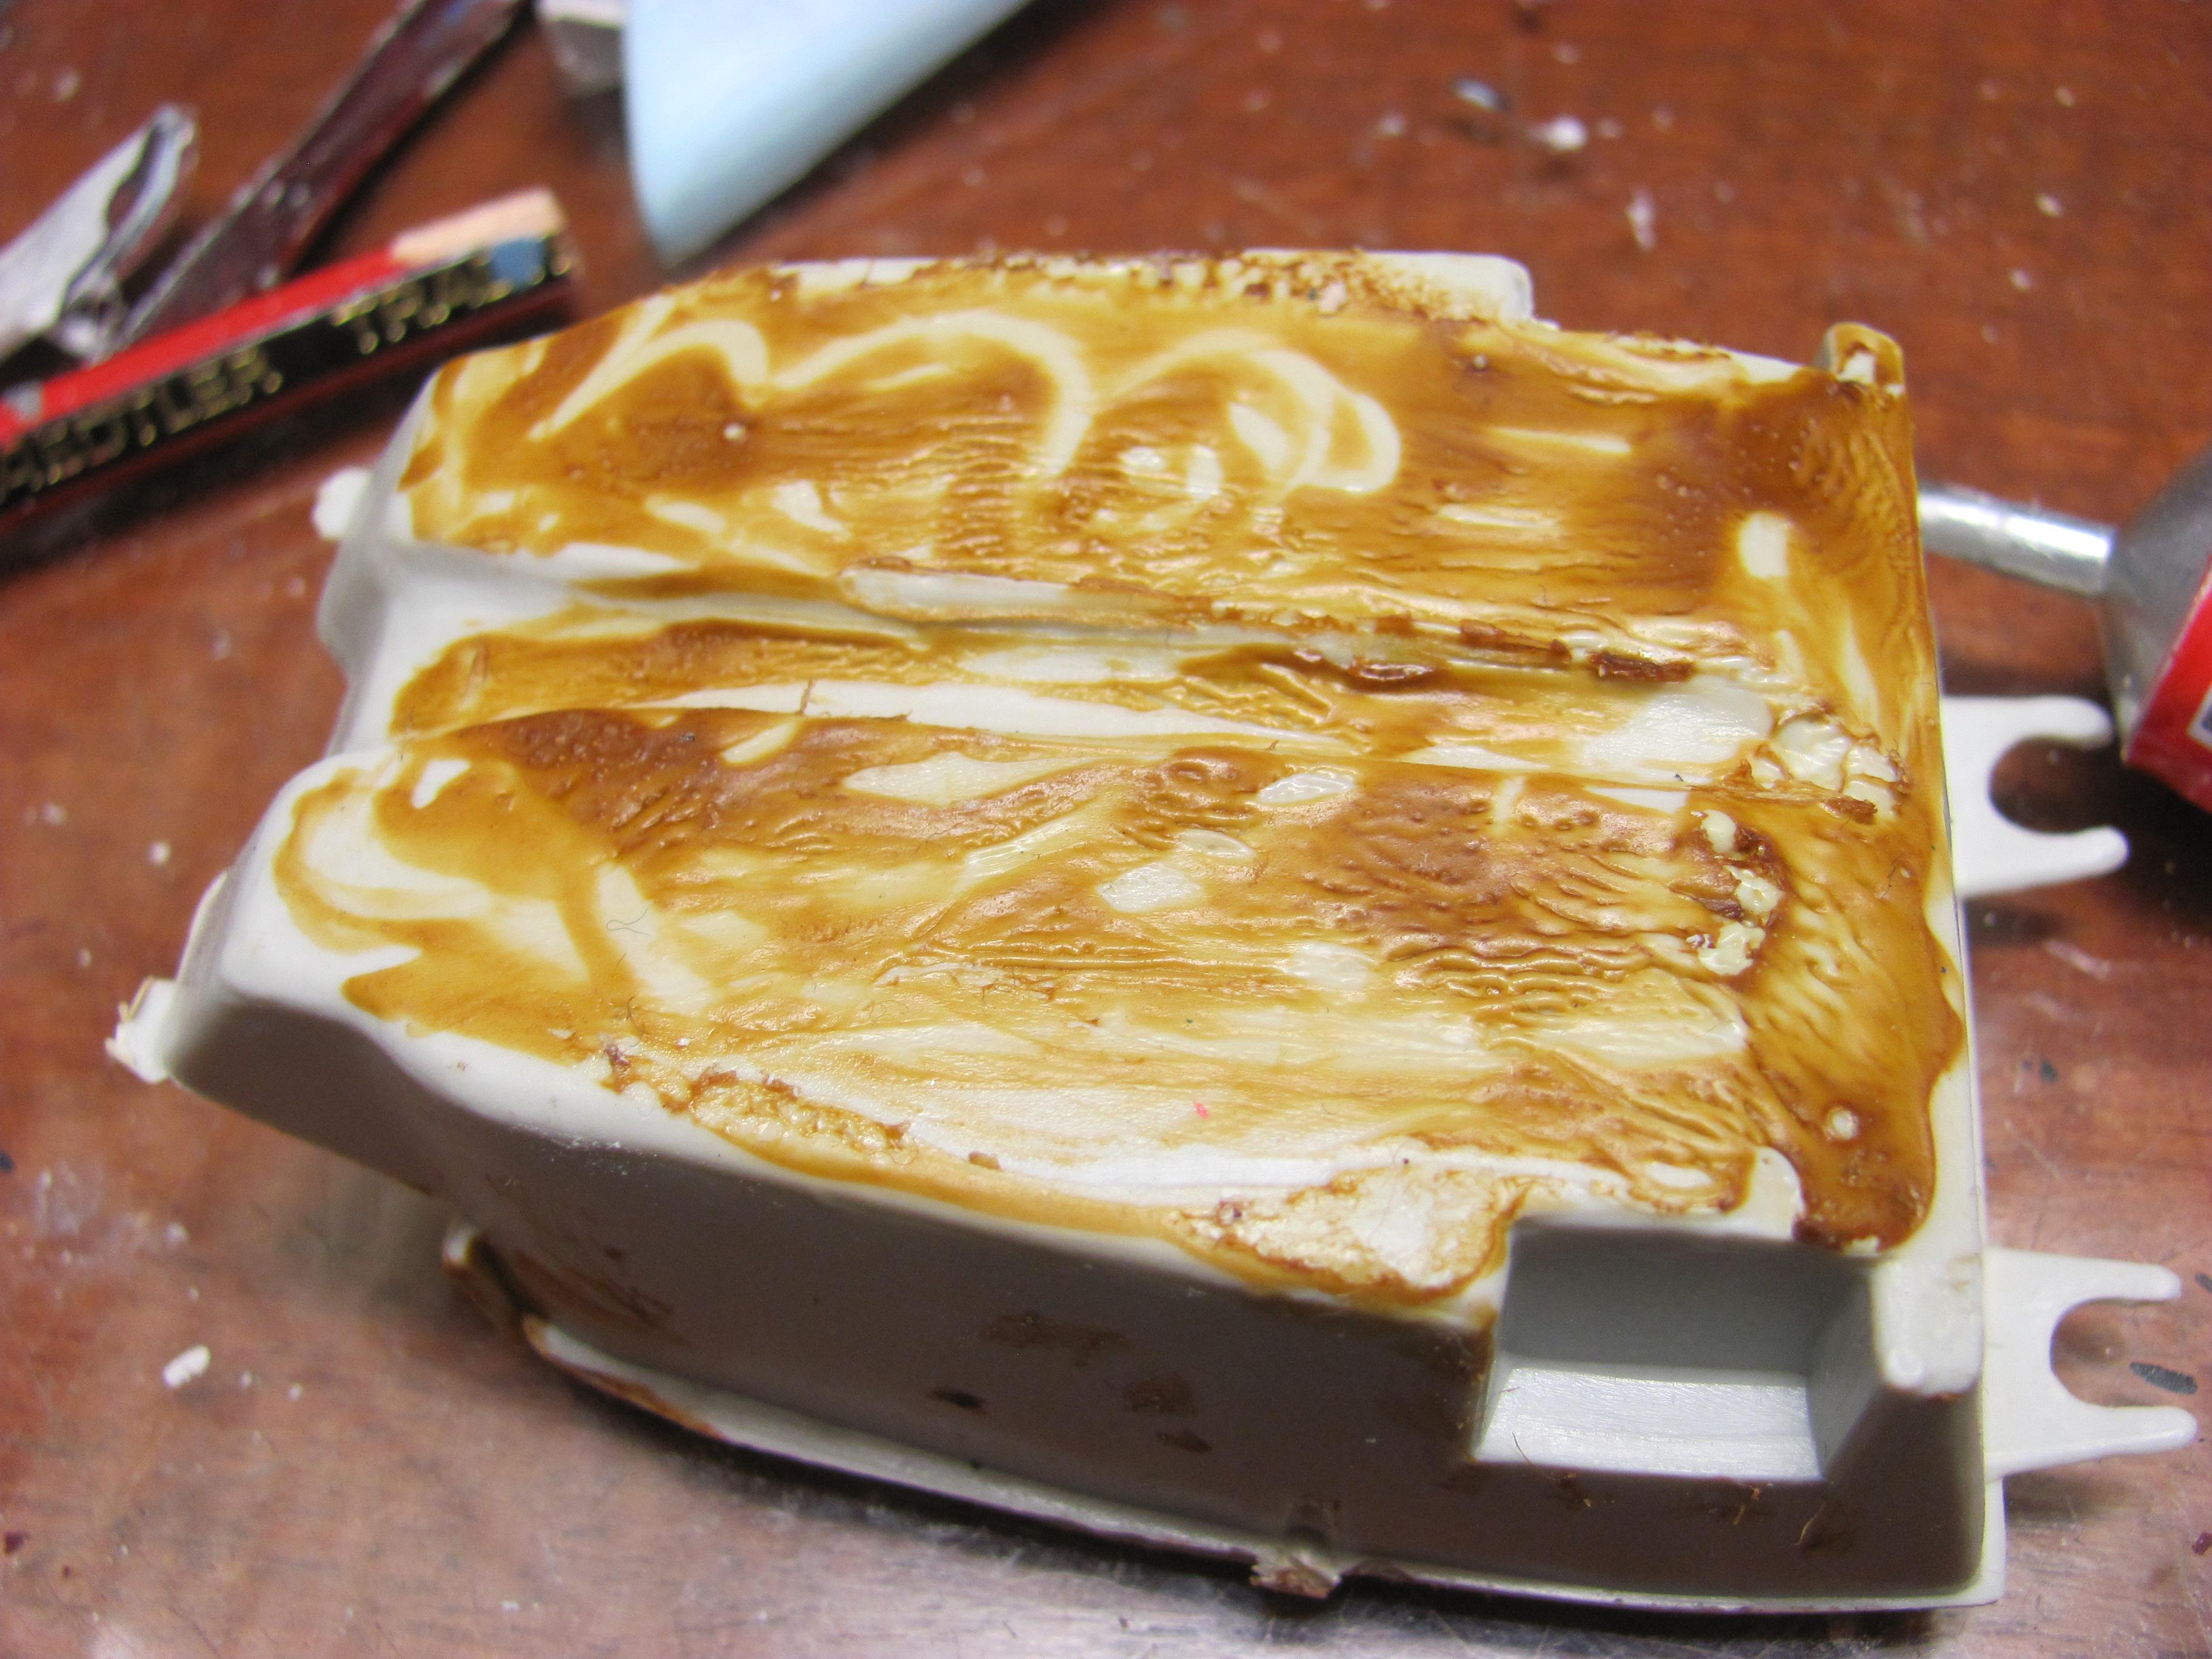
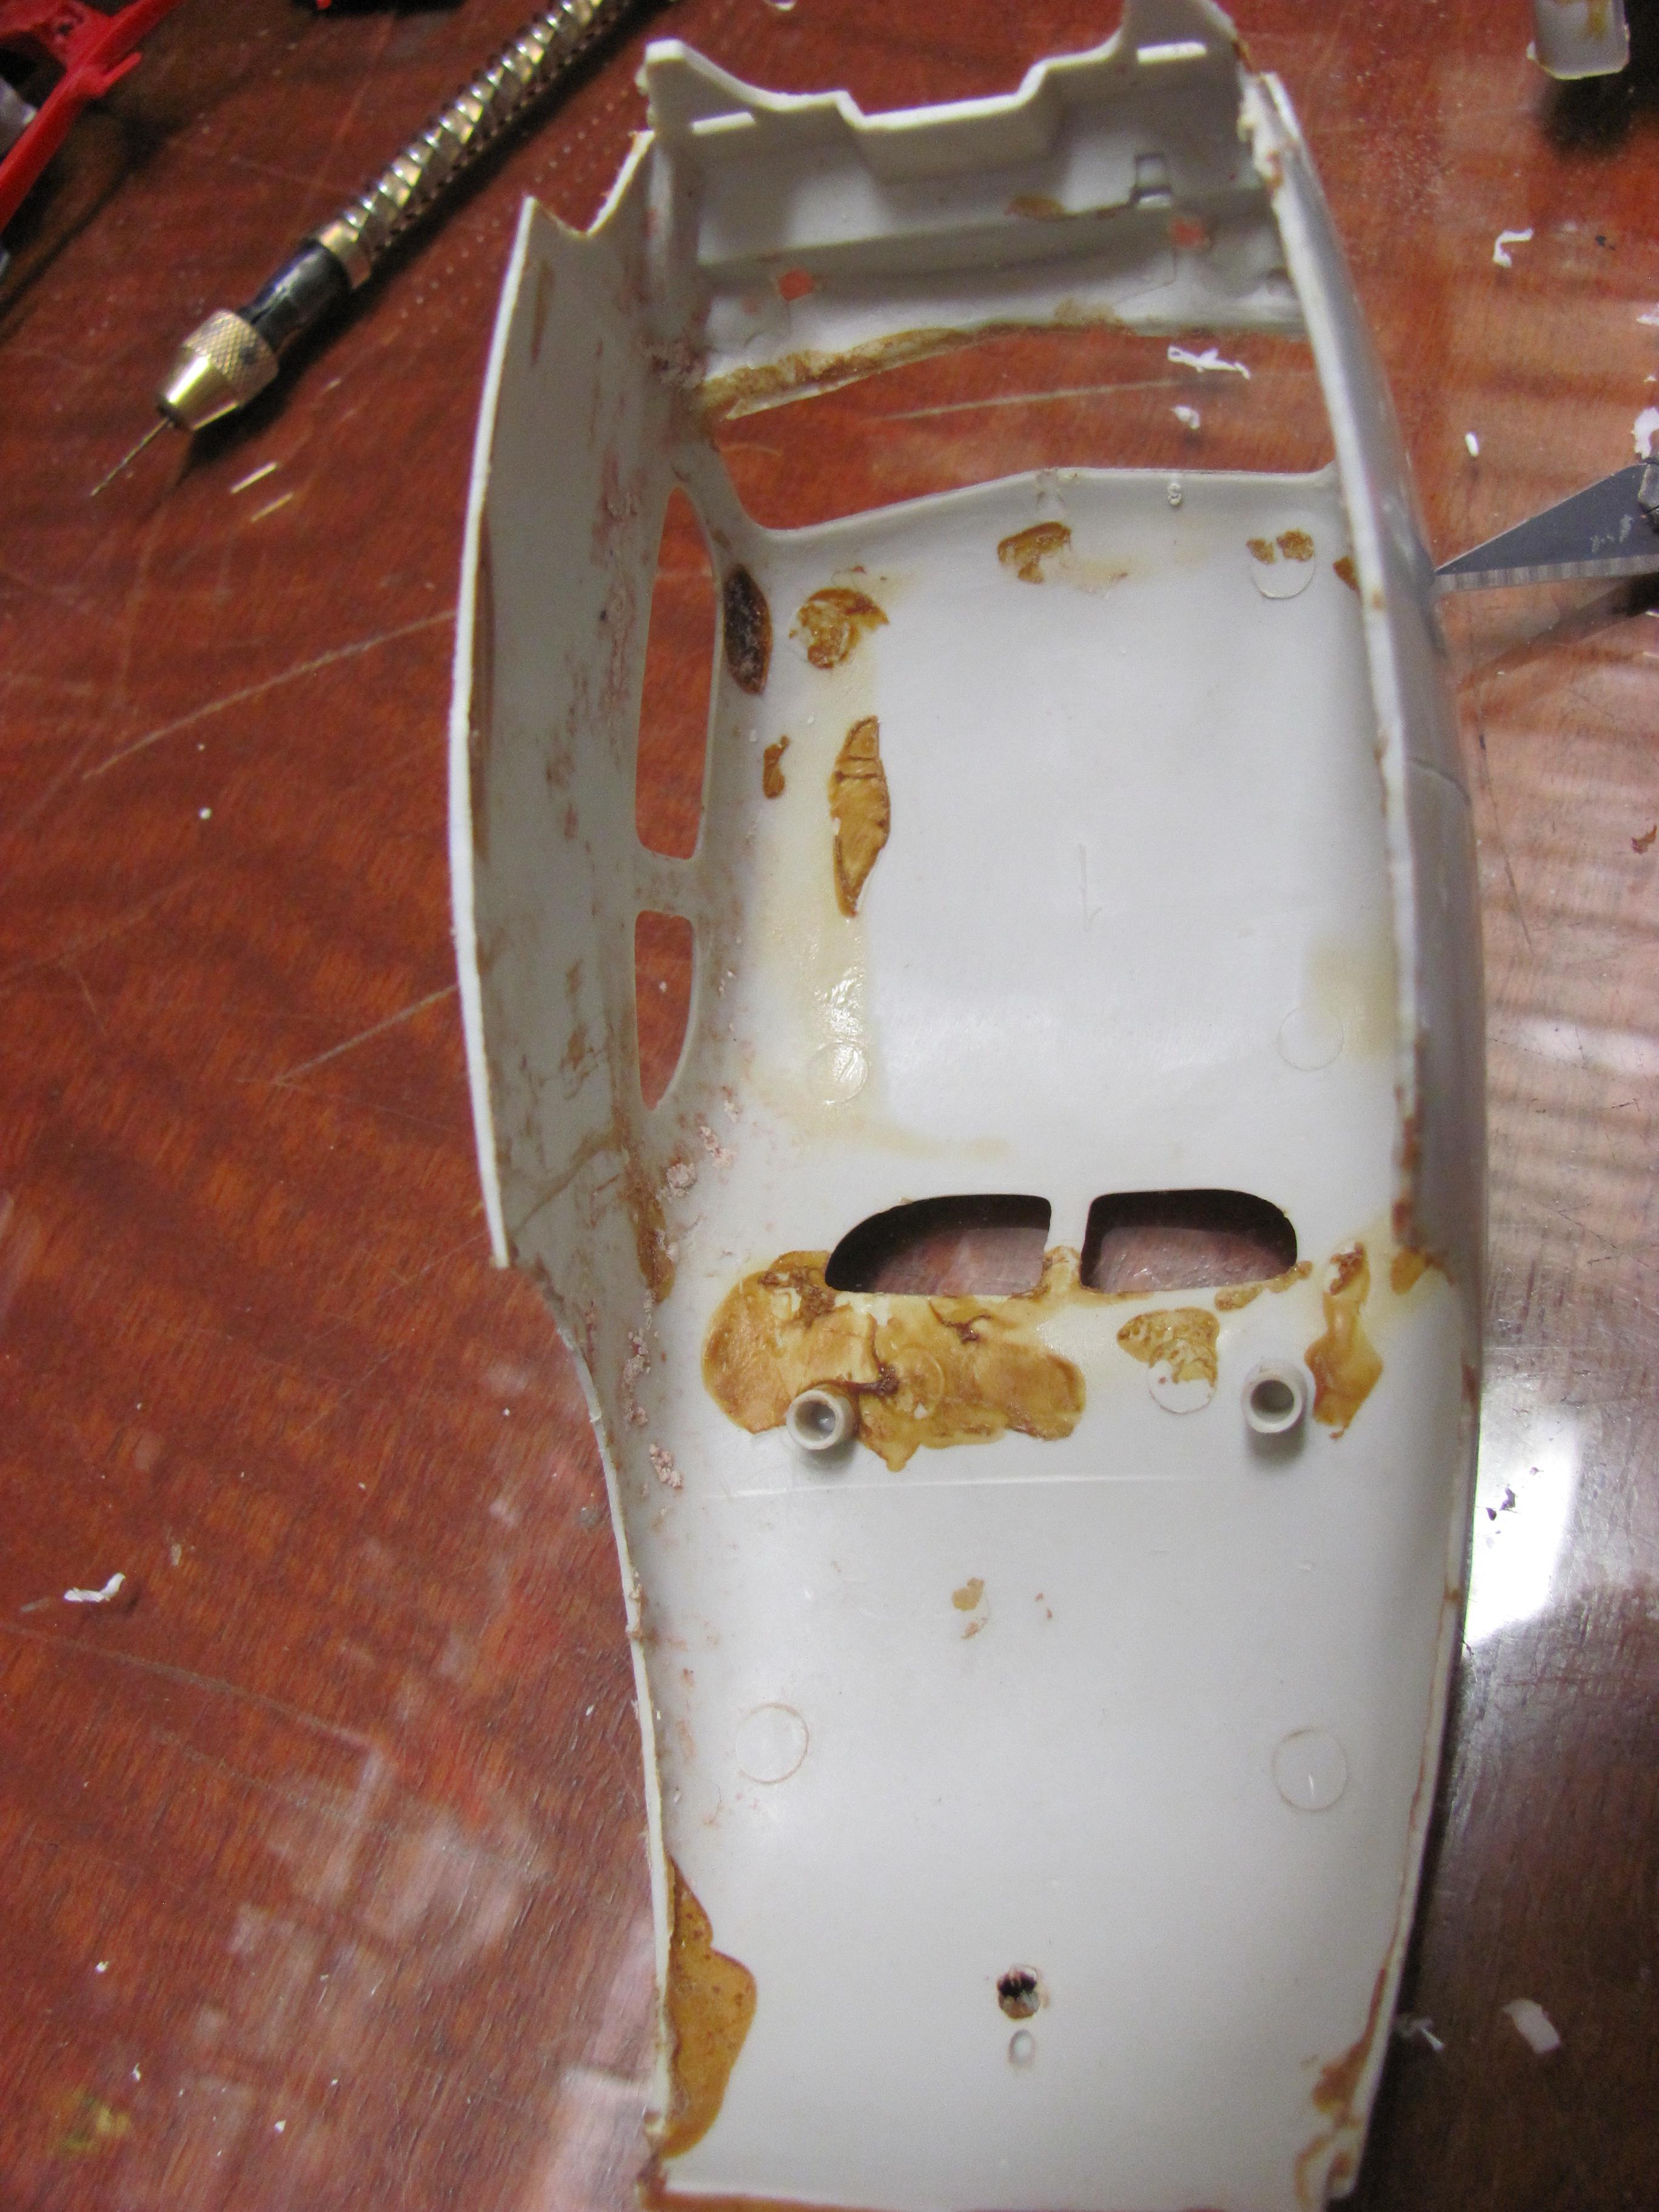
Years ago I was given a box full of models that had been built with more enthusiasm than skill. They took the term "glue bomb" to a new level because they had been assembled with various forms of contact cement ( gorilla snot") and silicone adhesive. I have saved a coupe but wow, they were a mess. One was an AMT 40 Ford coupe so I figured it would be perfect for a dirt track stock car from the early fifties. A popular choice was the 1938 Ford coupe so i decided to have a go at backdating the 40 to a 38. My hope was that if it came out OK, I could do a street rod version as the only thing close to a 38 was the AMT snap kit, the Black Force. Very cool but a long way from factory proportions. Here is what I started with.
-
Hi Lee, here's a photo of my project car on my Bonneville shelf in one of my display cabinets. yep, I gotta git her done ( copyright, snake 45!) . I still have the wooden moulds but haven't used my vacformer for ten years or so. I did buy some new rubber seals a while ago so maybe its time to fire it back up and pop out some new copies. I guess the tyranny of distance could be an issue but I often wondered why there wasn't much interest in vacform models - they have significant advantages over resin, especially when it comes to race cars. Getting back to the original poster's question - Tom, if you can get hold of good side on, head on and tail on shots of the Speed Demon, I reckon that would be a fairly easy model for me to master and vacform. Oh yeah, length, width, wheelbase and height would make it easier as well. The biggest issue, not insurmountable, is the canopy. When I last attempted clear vacforming, I was very disappointed wiht the results. I now ahve a mate who produces very nice slot car bodies and he has said he will teach me the tricks so I might have some learning ahead of me. I'm up for it - what do you think? Cheers Alan
-
The one thing that has stopped me starting my example is wondering how to detail the intricate grille. The detail seems to be a bit soft for a black ink wash and my hand is nowhere near steady enough to re-scribe it. I will be interested to see how you approach it. Love the paint by the way. Perfect for this style of car. Cheers Alan
-
Wow, looks like you've got two there! Did you get the tailfins that I laminated as well? I spent a long time on carving the wooden moulds for these ( I used jelutong, great to work with) and on my first prototype I missed those little scoops immediately behind the headrest. I was using the provided photos and dimensions from a promotional calendar that the team had published - wish I had taken a copy of it before returning it to the guy! I would love to do the Redhead special from World's Fastest Indian but it would be all guesstimated - have never seen any straight on photos or dimensions of that car.. LSR stuff is great fun -it's all about the shape, colour and stance! I visited Bonneville in 92 and 2010 and can say from experience that many fo the cars, even the high dollar ones, are not particularly pretty under the skin, so kerbside is just fine in my eyes. Cheers Alan
-
Hi Steve, I'm really enjoying this one. Pontiacs were not particularly common in Australia and were based on RHD versions of the Canadian Pontiac Laurentian and Parisienne. My grandfather owned Pontiacs throughout the sixties and into the seventies before he passed so the hold a soft spot in my heart. He had a 64 Parissienne in baby blue , a four door sedan which was considered a luxury car in Australia. It was pretty special to go for a ride with Grandpa in such a huge car when you were only eight or nine years old! Thank you for sharing your techniques on this one. Cheers Alan
-
That is a great piece of history to still own after all these years. You obviously did a great job back then. The rear wheels and tyres plus the engine and headers look like they came from the AMT Double Dragster kit, with ram tubes added. Cheers Alan
-
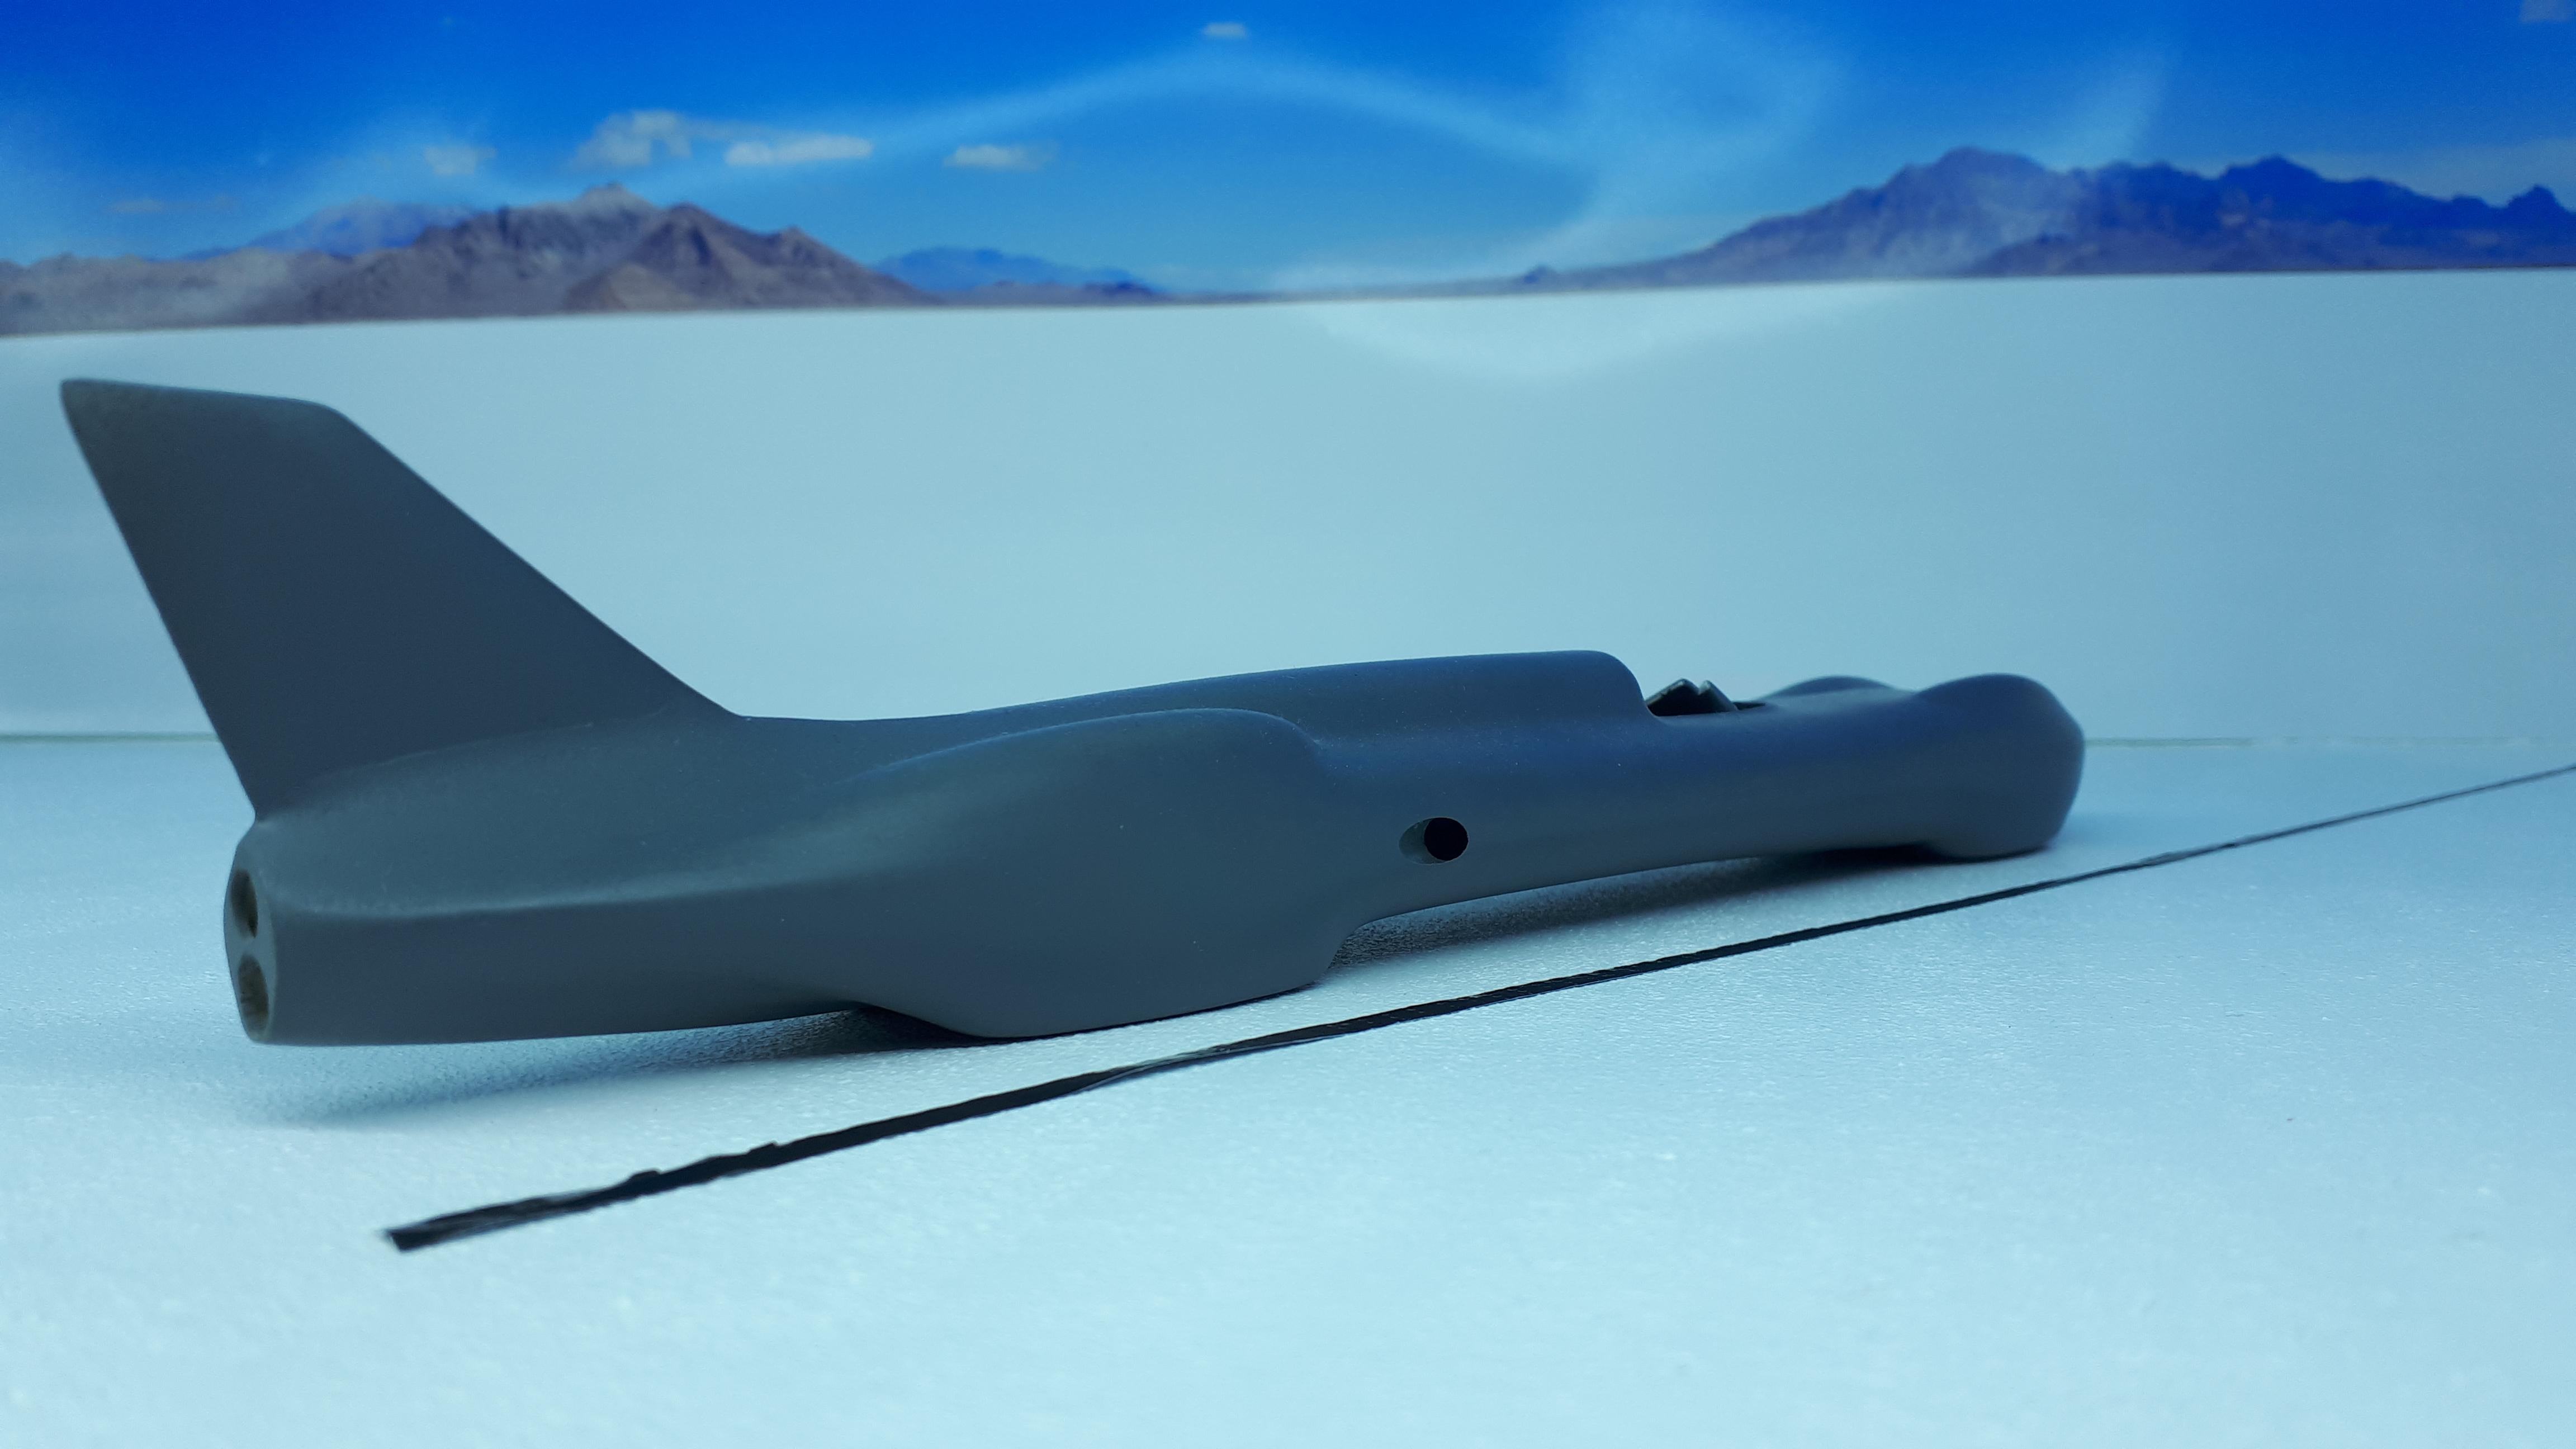
Many many years ago I did a vacform of the Vesco -Nish Streamliner (spelling?) as a commission for a guy in Chicago ( I think, it was a long time ago). This is the car that became the Turbinator II and had the wheel driven Worlds LSR at some stage. He had me make 20 of them but I have never seen one finished, apart from one that a friend built here in Perth. My version is in primer, might have to move it up the list and get some paint on it but we are just hitting the start of our winter weather so it might be a while yet. Cheers Alan
-
Hi Mike, I know you said at the start that you were planning to build it box stock but having finished my own phaeton last year, could I respectfully suggest two upgrades? One, ditch the tyres! These things do nothing for a street rod! They are the wrong diameter and width for any respectable hot rod, no matter what style you build. Seeing as how you already acknowledge that you must have big and littles ( I agree!) my favourites are the Monogram Michelin TRX or unbranded later versions for the front, and Monogram GT radials for the rear - they were in most of their early muscle car kits. Secondly, the kit windshield bares little resemblance to the real thing. If you have a Monogram 1/24th or Revell 1/25th windshield in your parts box, it will overcome the toy like appearance of the AMT item. By the way, your gold 30 tub is gorgeous - it has completely changed the plans I had for my own version! That is so sweet, and almost box stock! Love it! Cheers Alan
-
After priming I got a couple of coats of Tamiya white on it as a base coat. My plan is to go for typical seventies colour, probably purple, but leave a white outline around all those sculptured features on the Valaint. This is the first mockup and I am pretty happy at this stage. I don't intend to open the hood, as much as Tom Geiger would like me to show the leaning tower of power! I may still slide a slant six, or facsimile thereof, underneath to give the impression. I once opened the trunk on a fibreglass mould and bought myself a whole heap of trouble with cracking ans chipping, and after I fixed it all, the lid over time warped into the shape of a Pringle. I did however cut a hole in the hood to let air into the triple Webers that would have been under the hood and then grafted on a suitably ugly hood scoop made from the handle of a takeaway soup spoon. This model is meant to represent a reasonably low budget backyard effort so stylish craftsmanship would look out of place!
-
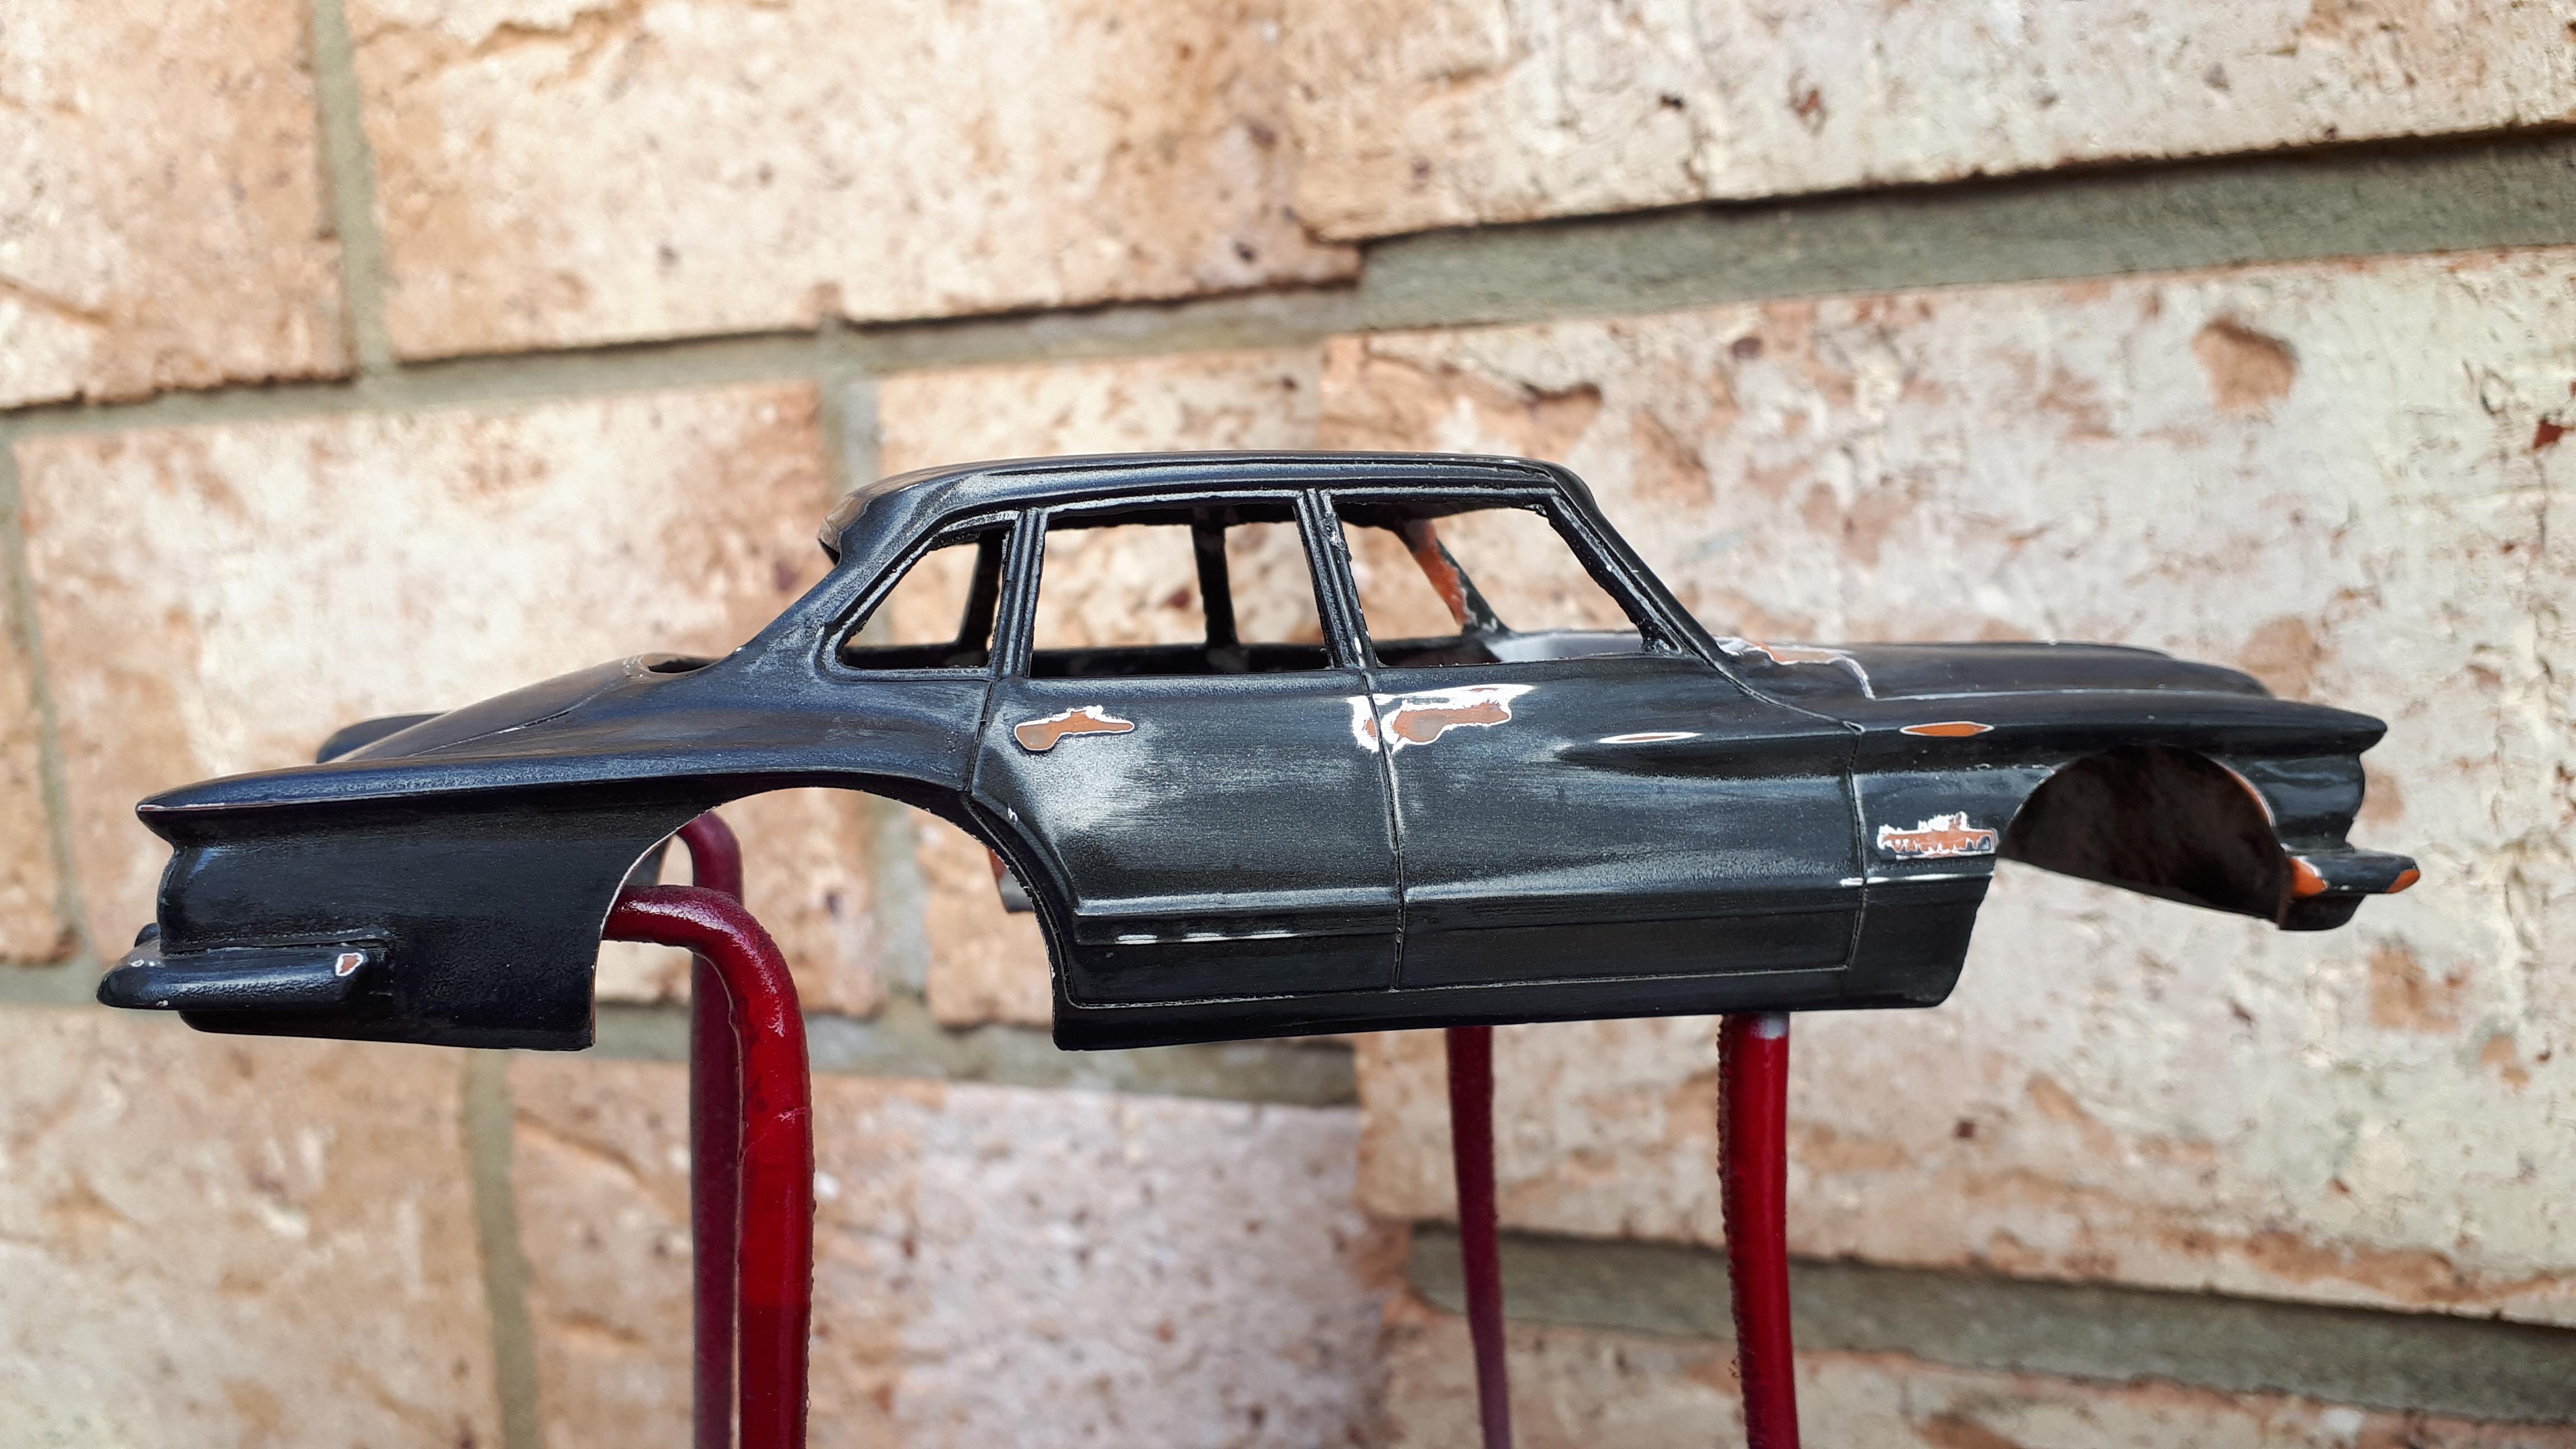
I ground the front over riders from the bumper, removed the door handles, flattened the moulded in headlights to allow for flat sheet metal covers later on and tried to sharpen up the panel lines where I could. The wheel arches were hogged out quite generously - I wanted to model a period when Aussie regulations had the guys remove the tubing wheelflares that were common throughout the sixties and just go for sheetmetal body panels instead.
-
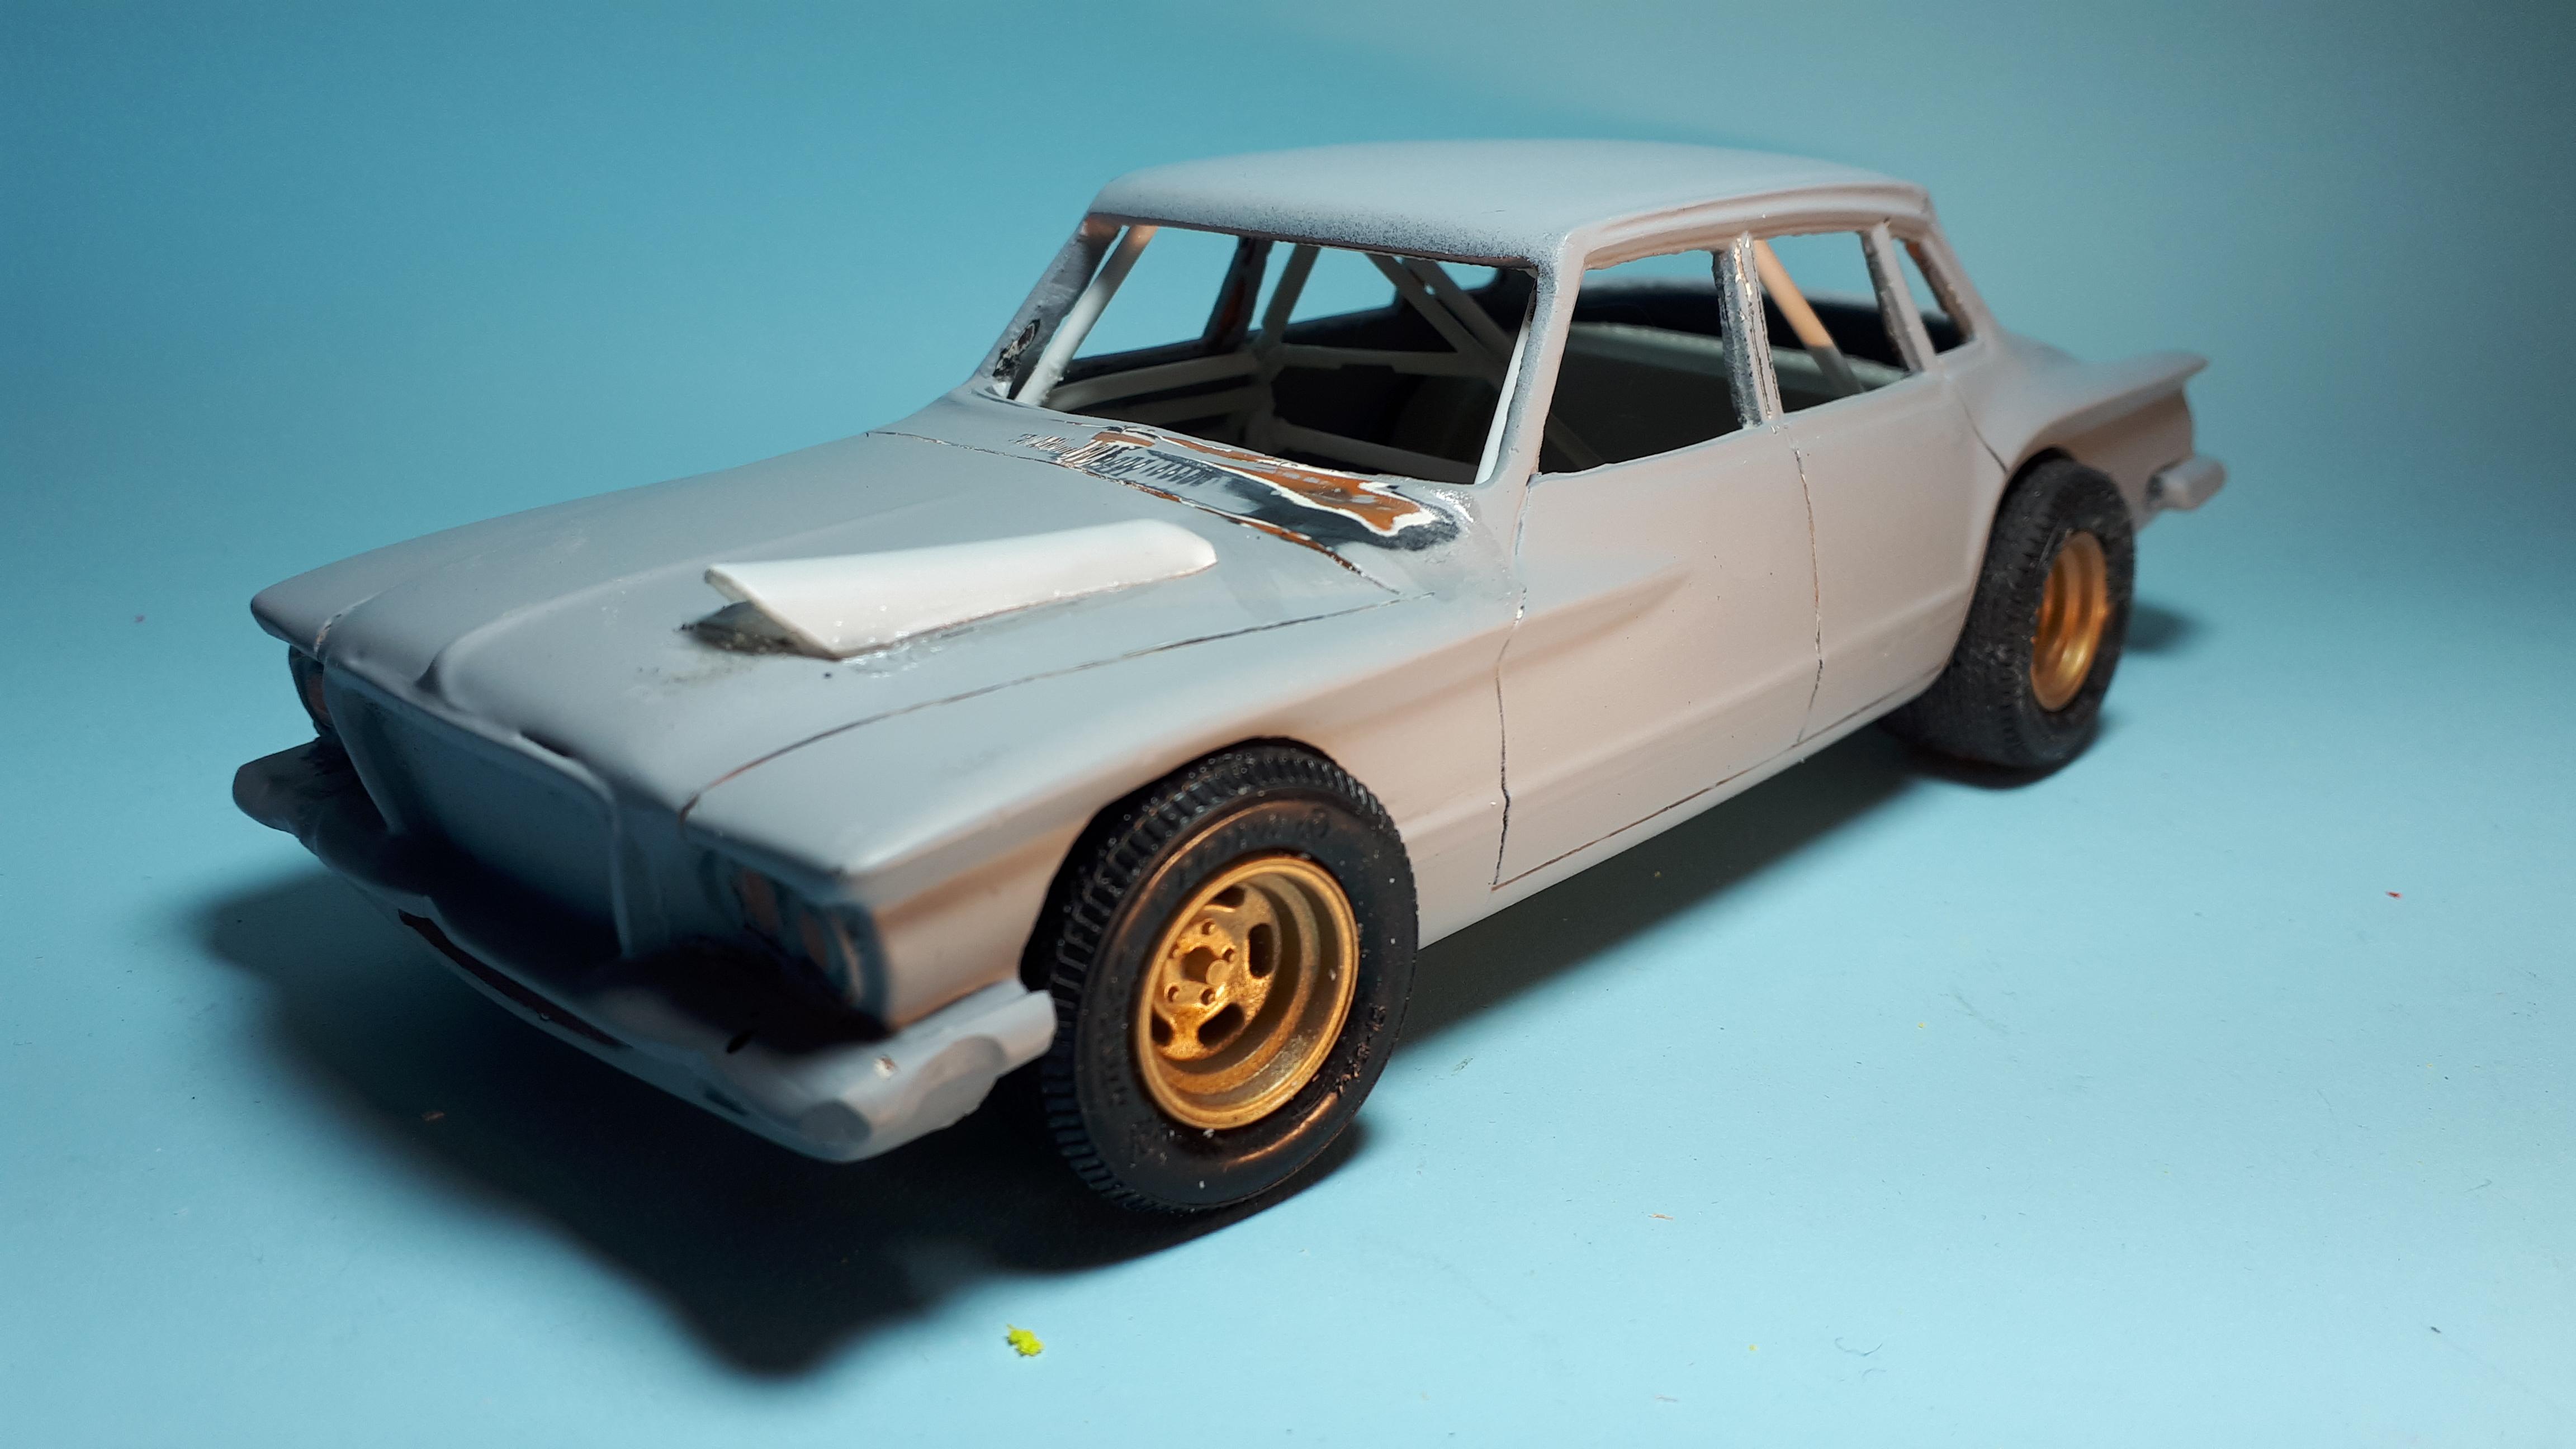
The lower half of the rollcage was ideal and I thought I could massage the top half but after a less than stellar result I cut it off and scratchbuilt a new top section in the style of Aussie speedway cars of the mid to late seventies.
-
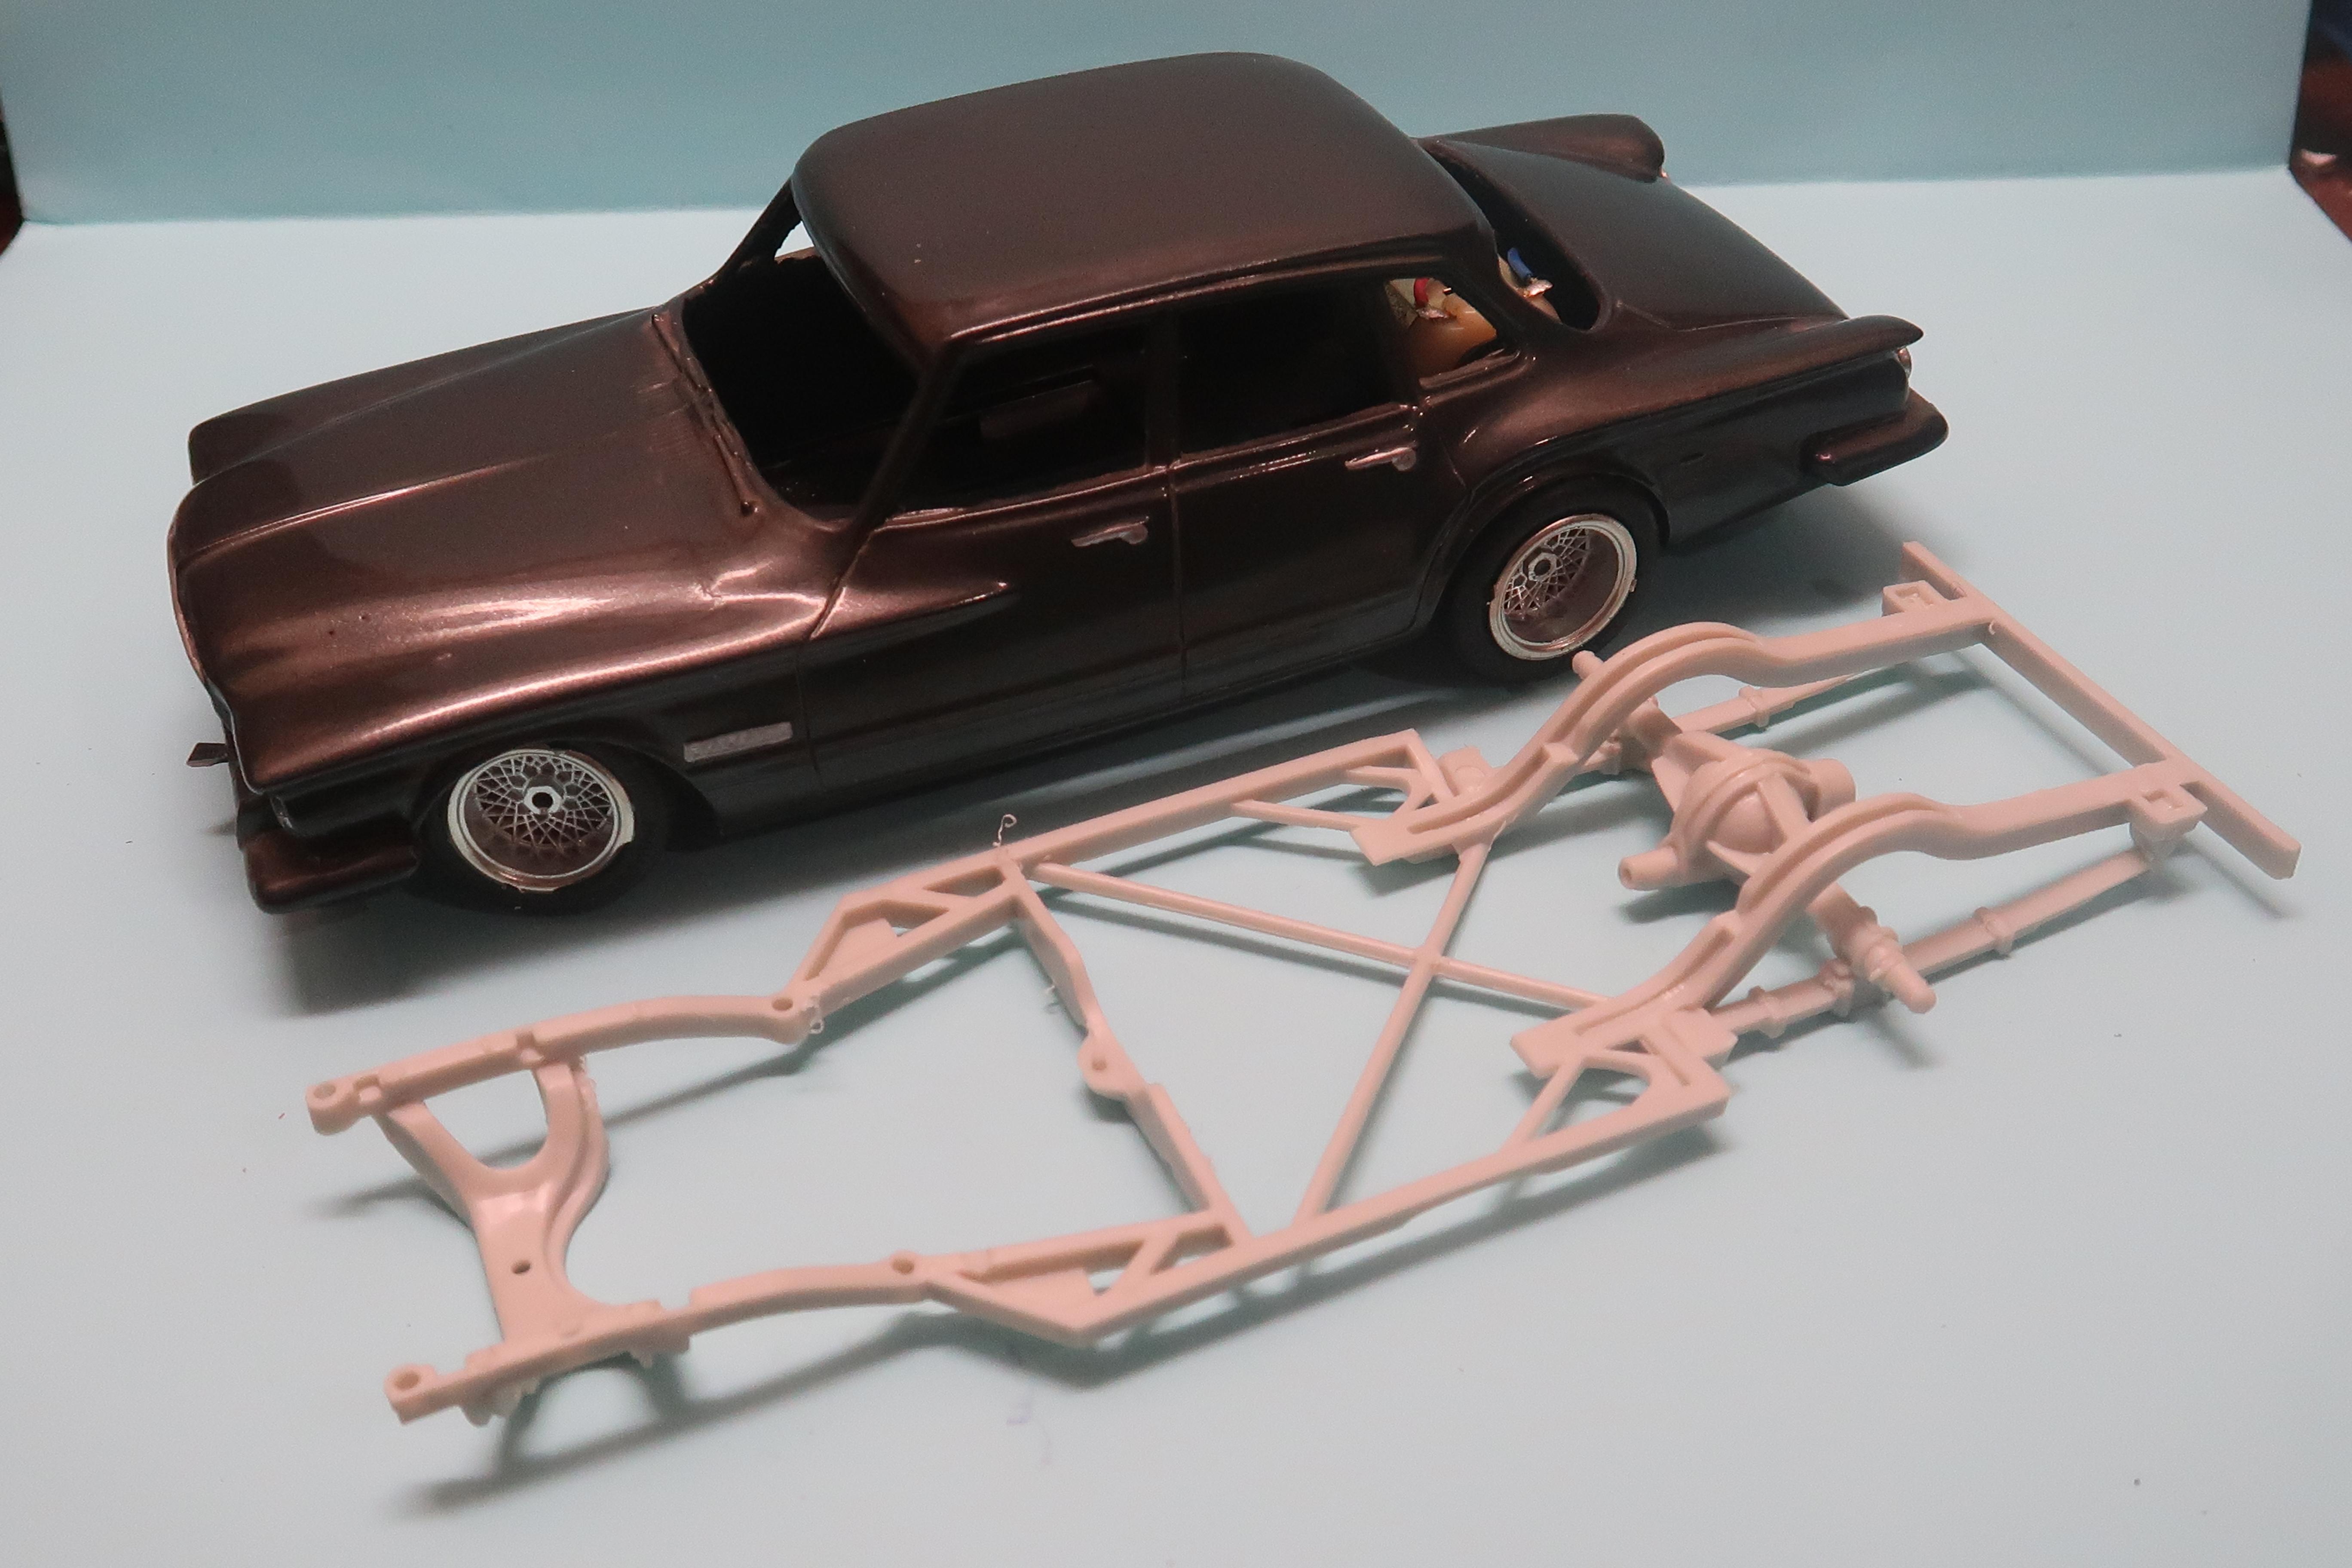
The MPC kit car chassis had all the right features for a Chrysler product such as torsion bar front end and leaf spring rear and a well detailed roll-cage. The wheelbase was a bit long so I shortened the chassis just under the firewall, where I could make a strong re-connection and the work wouldn't be hard to disguise.
-
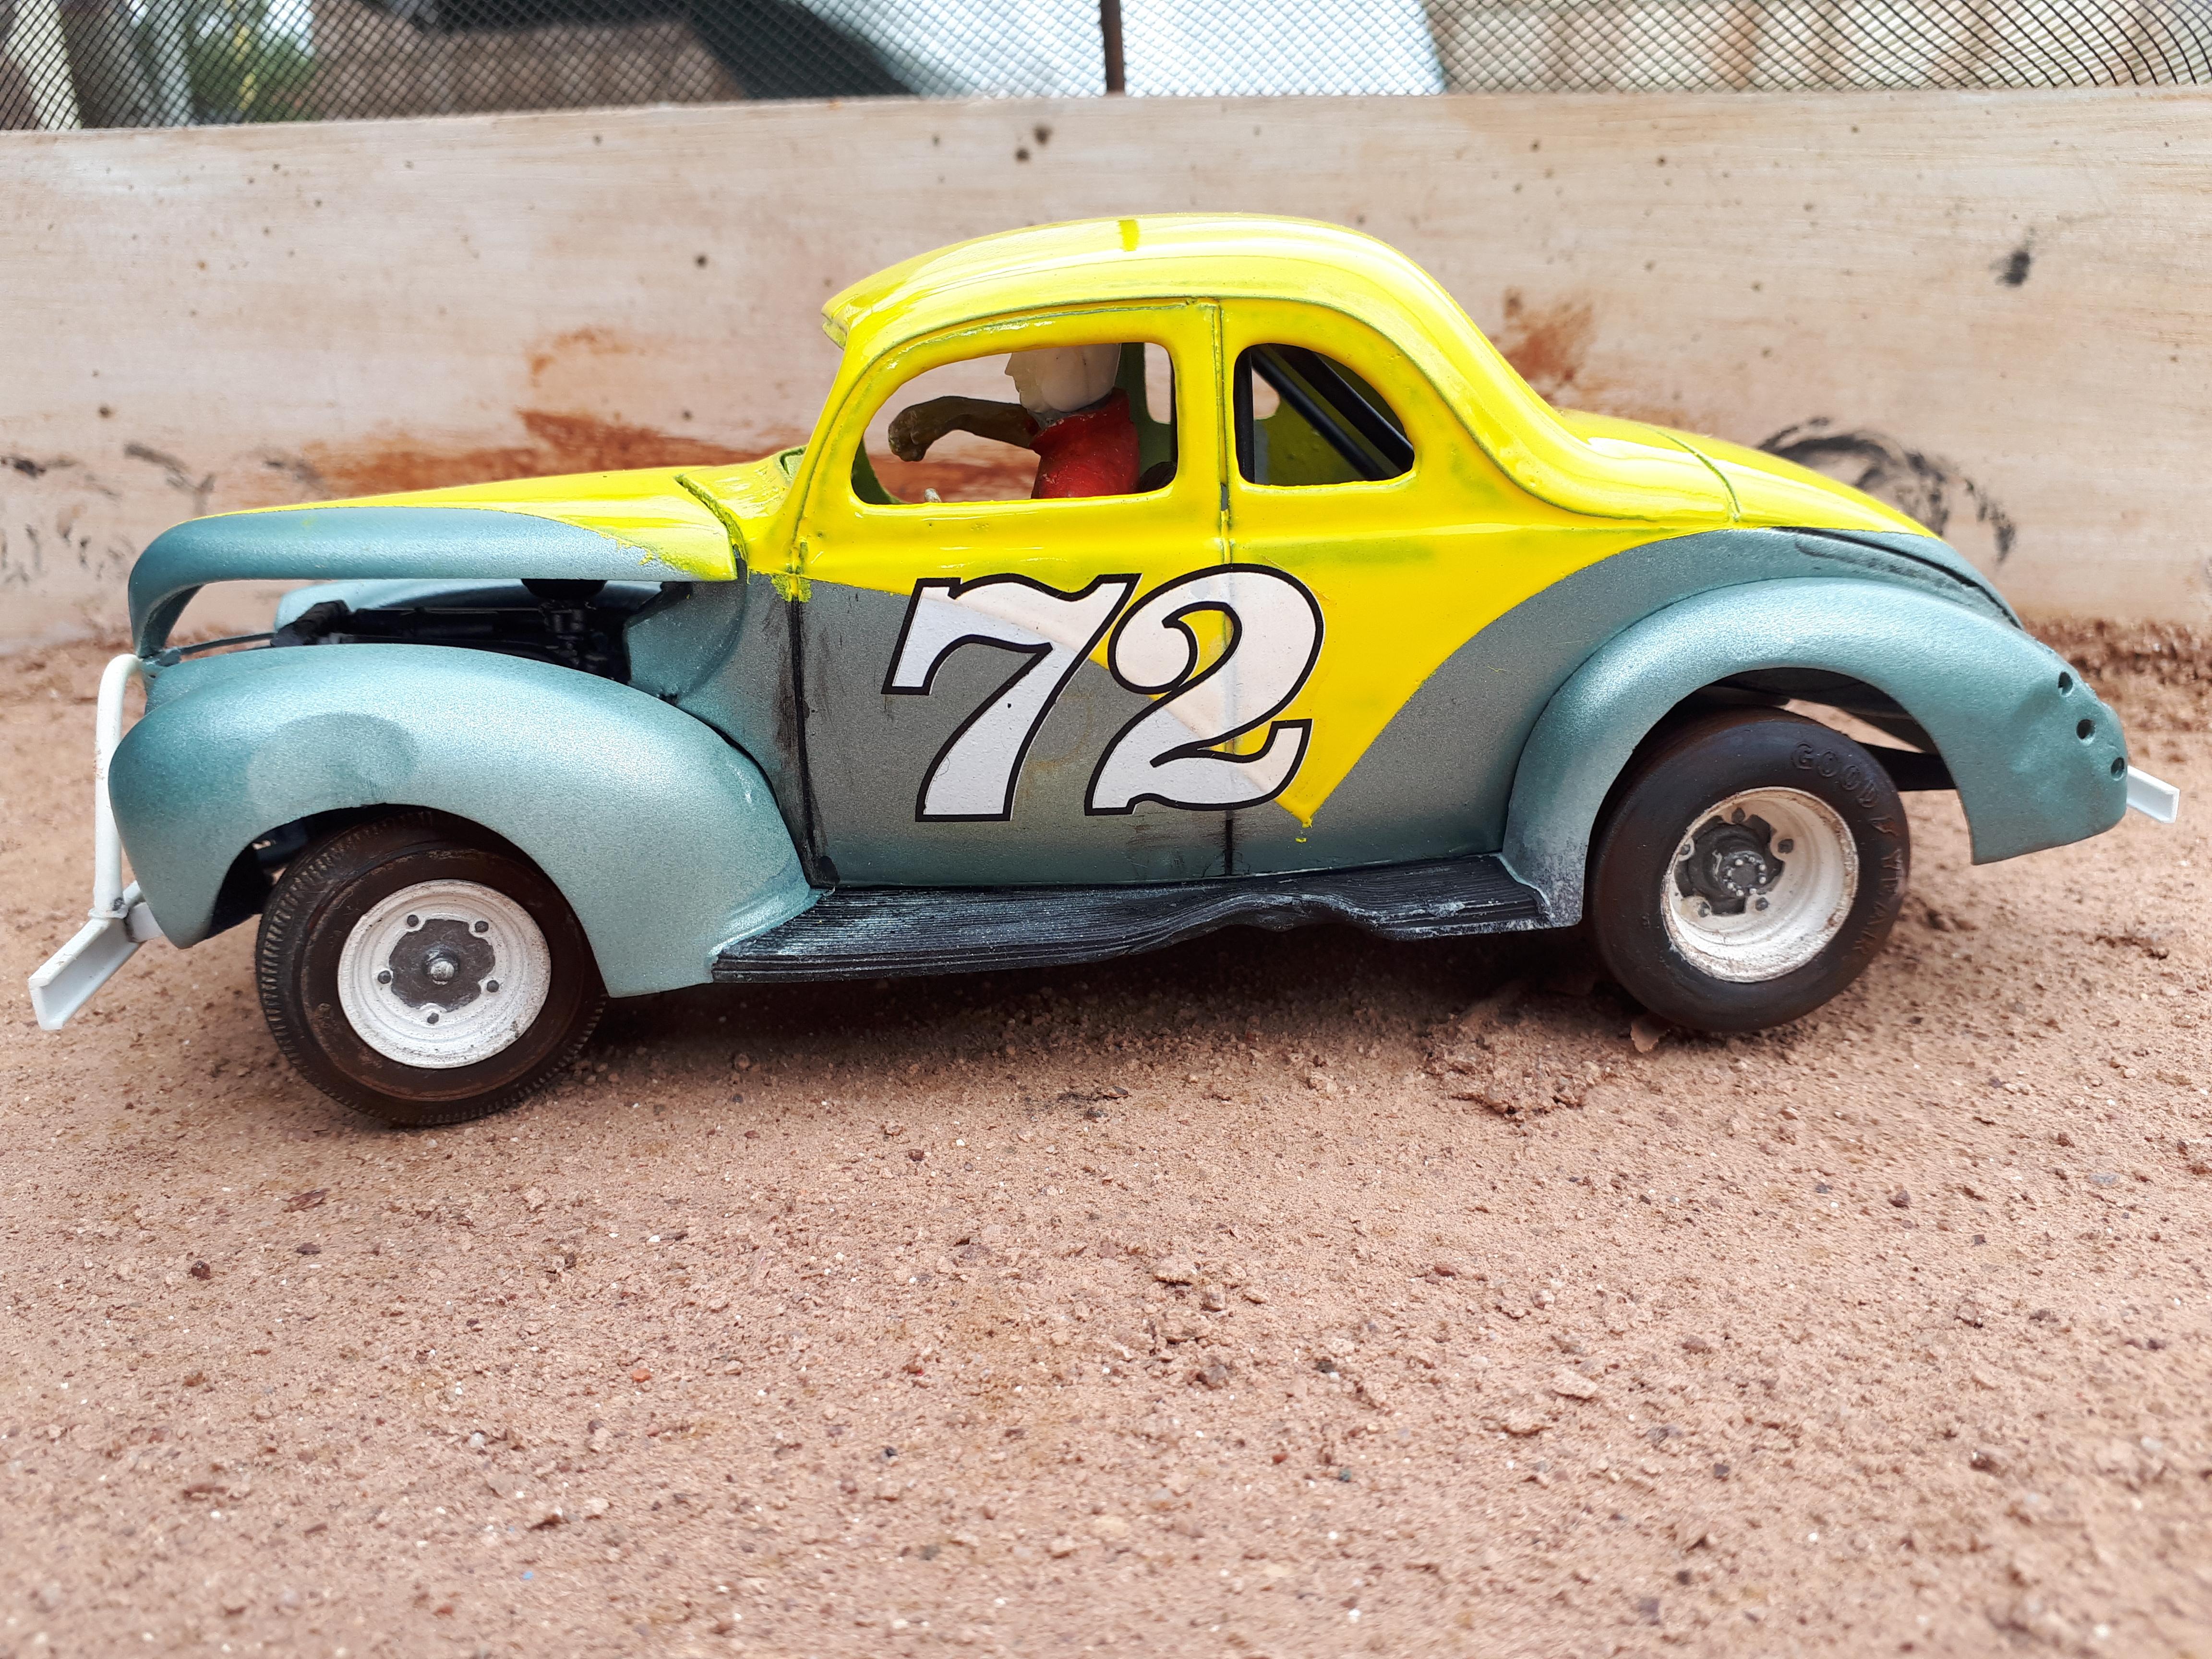
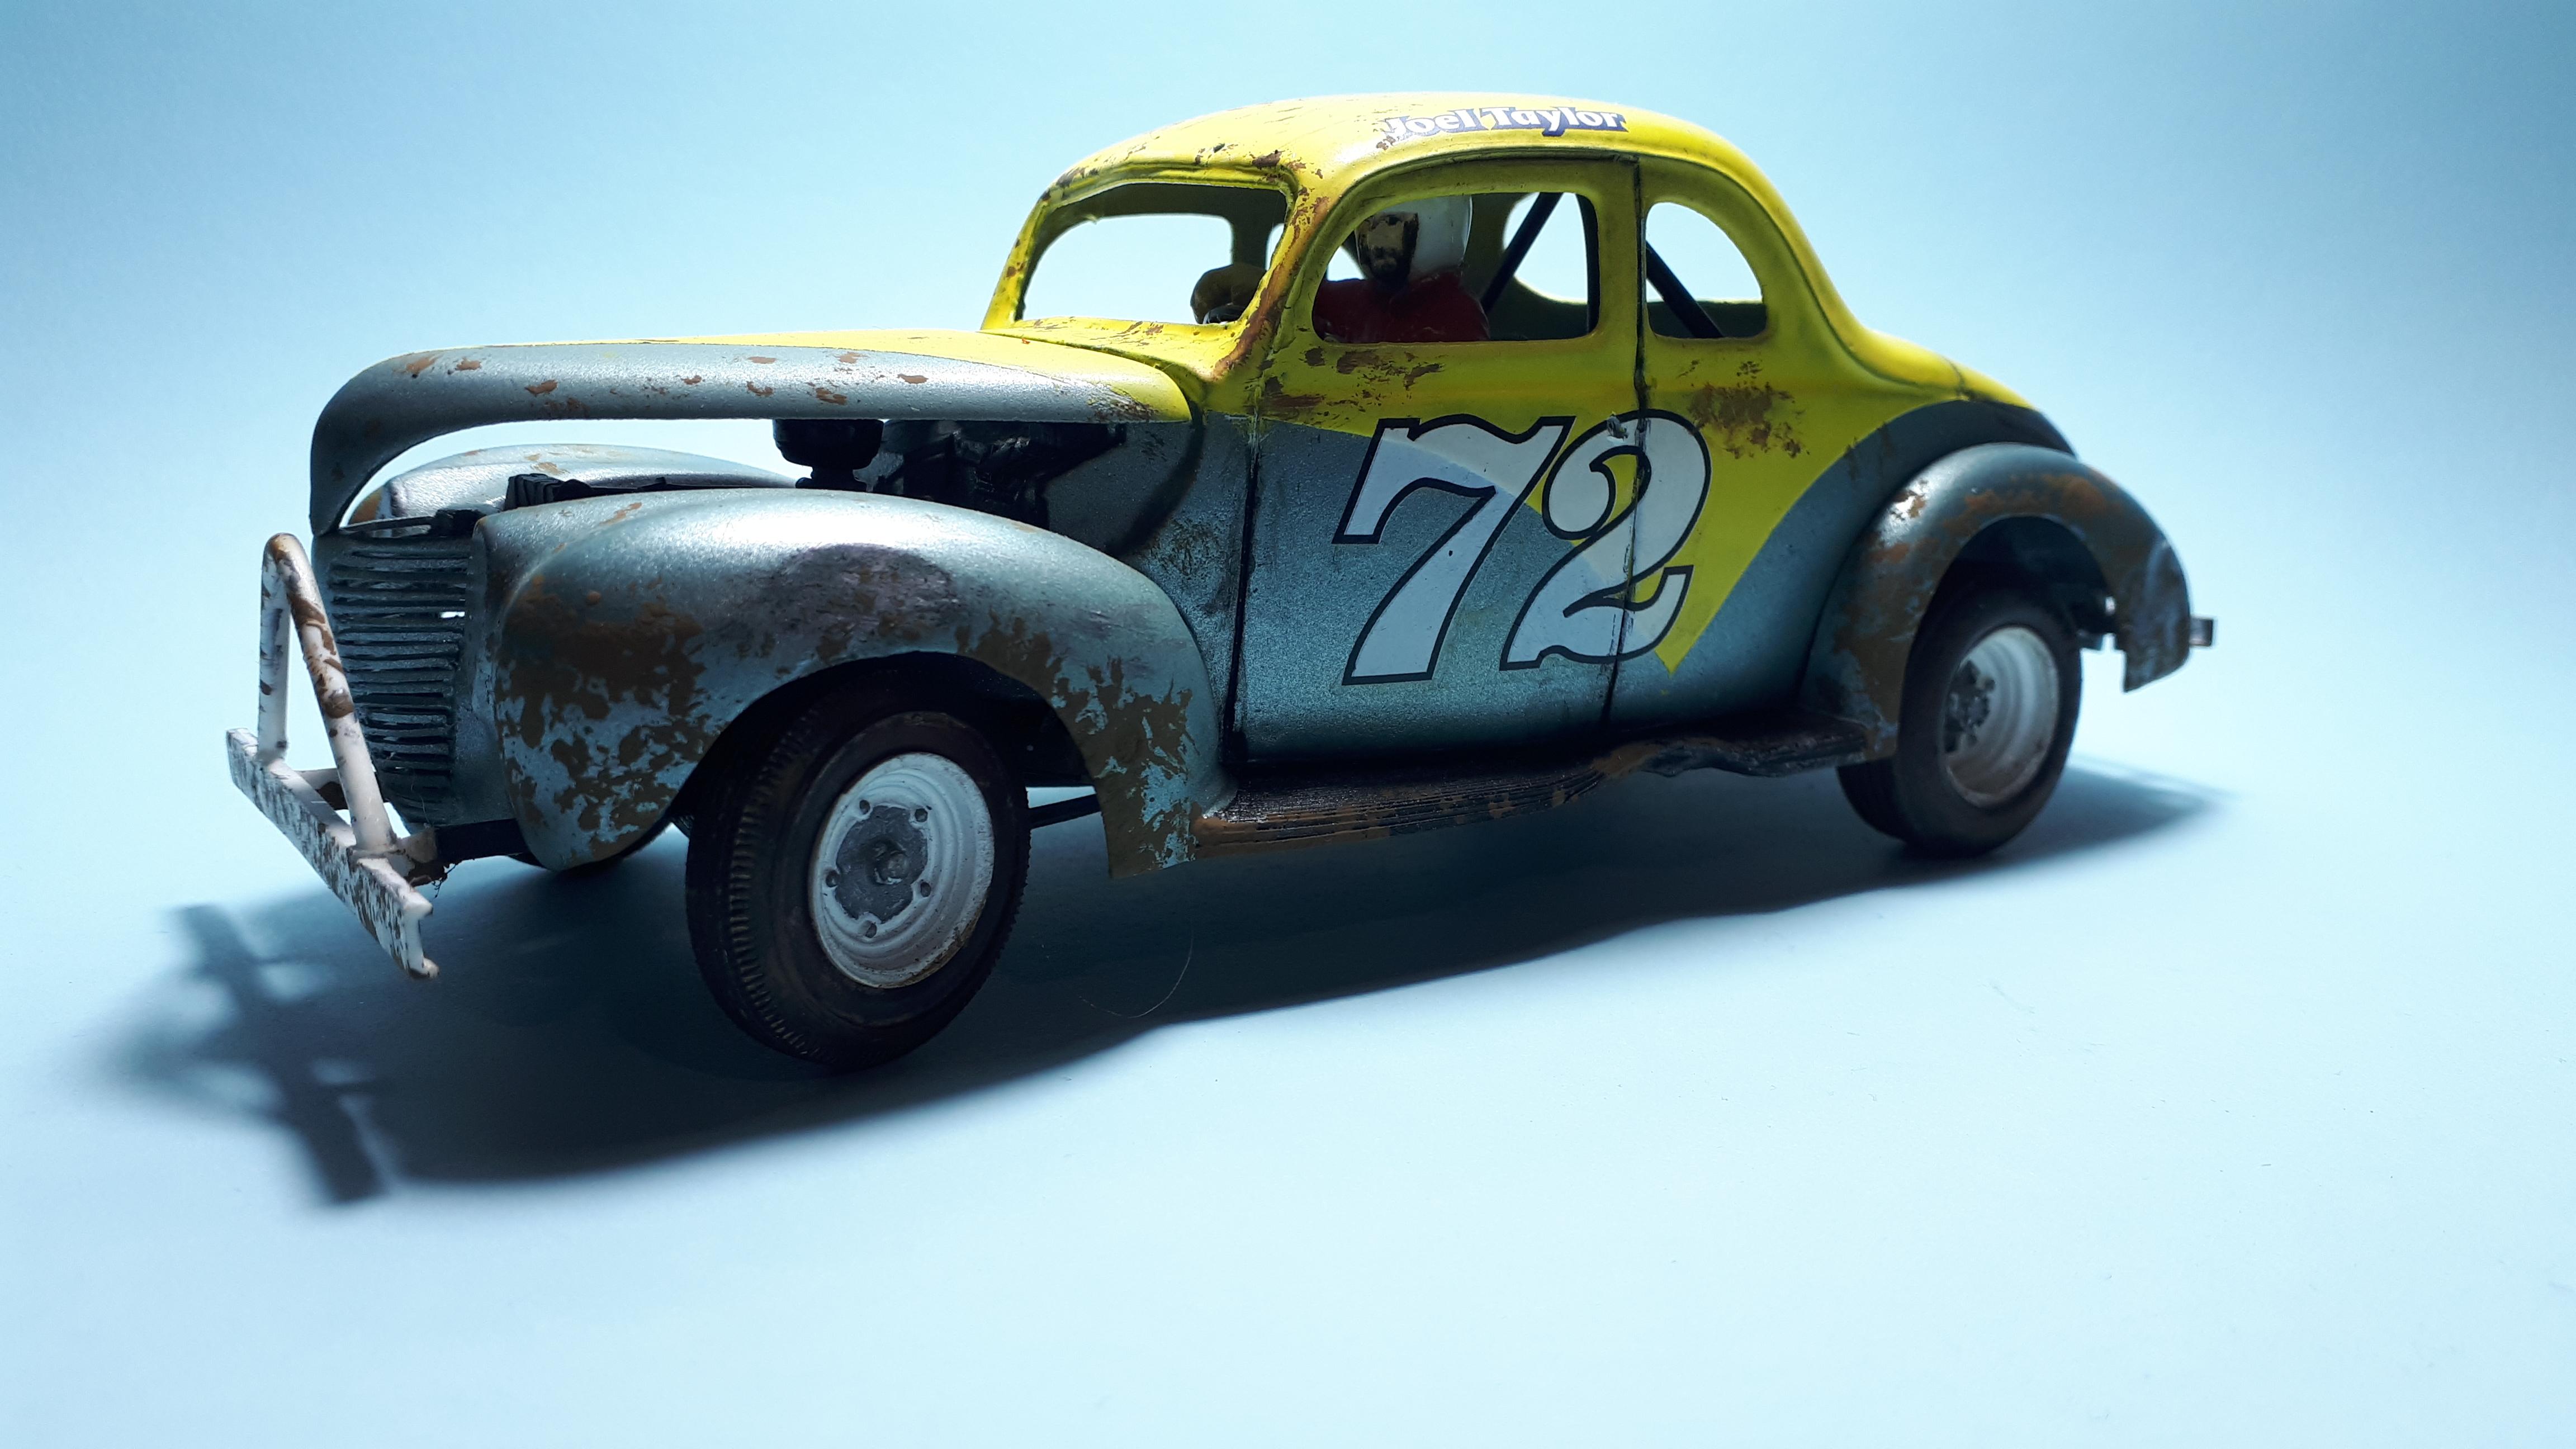
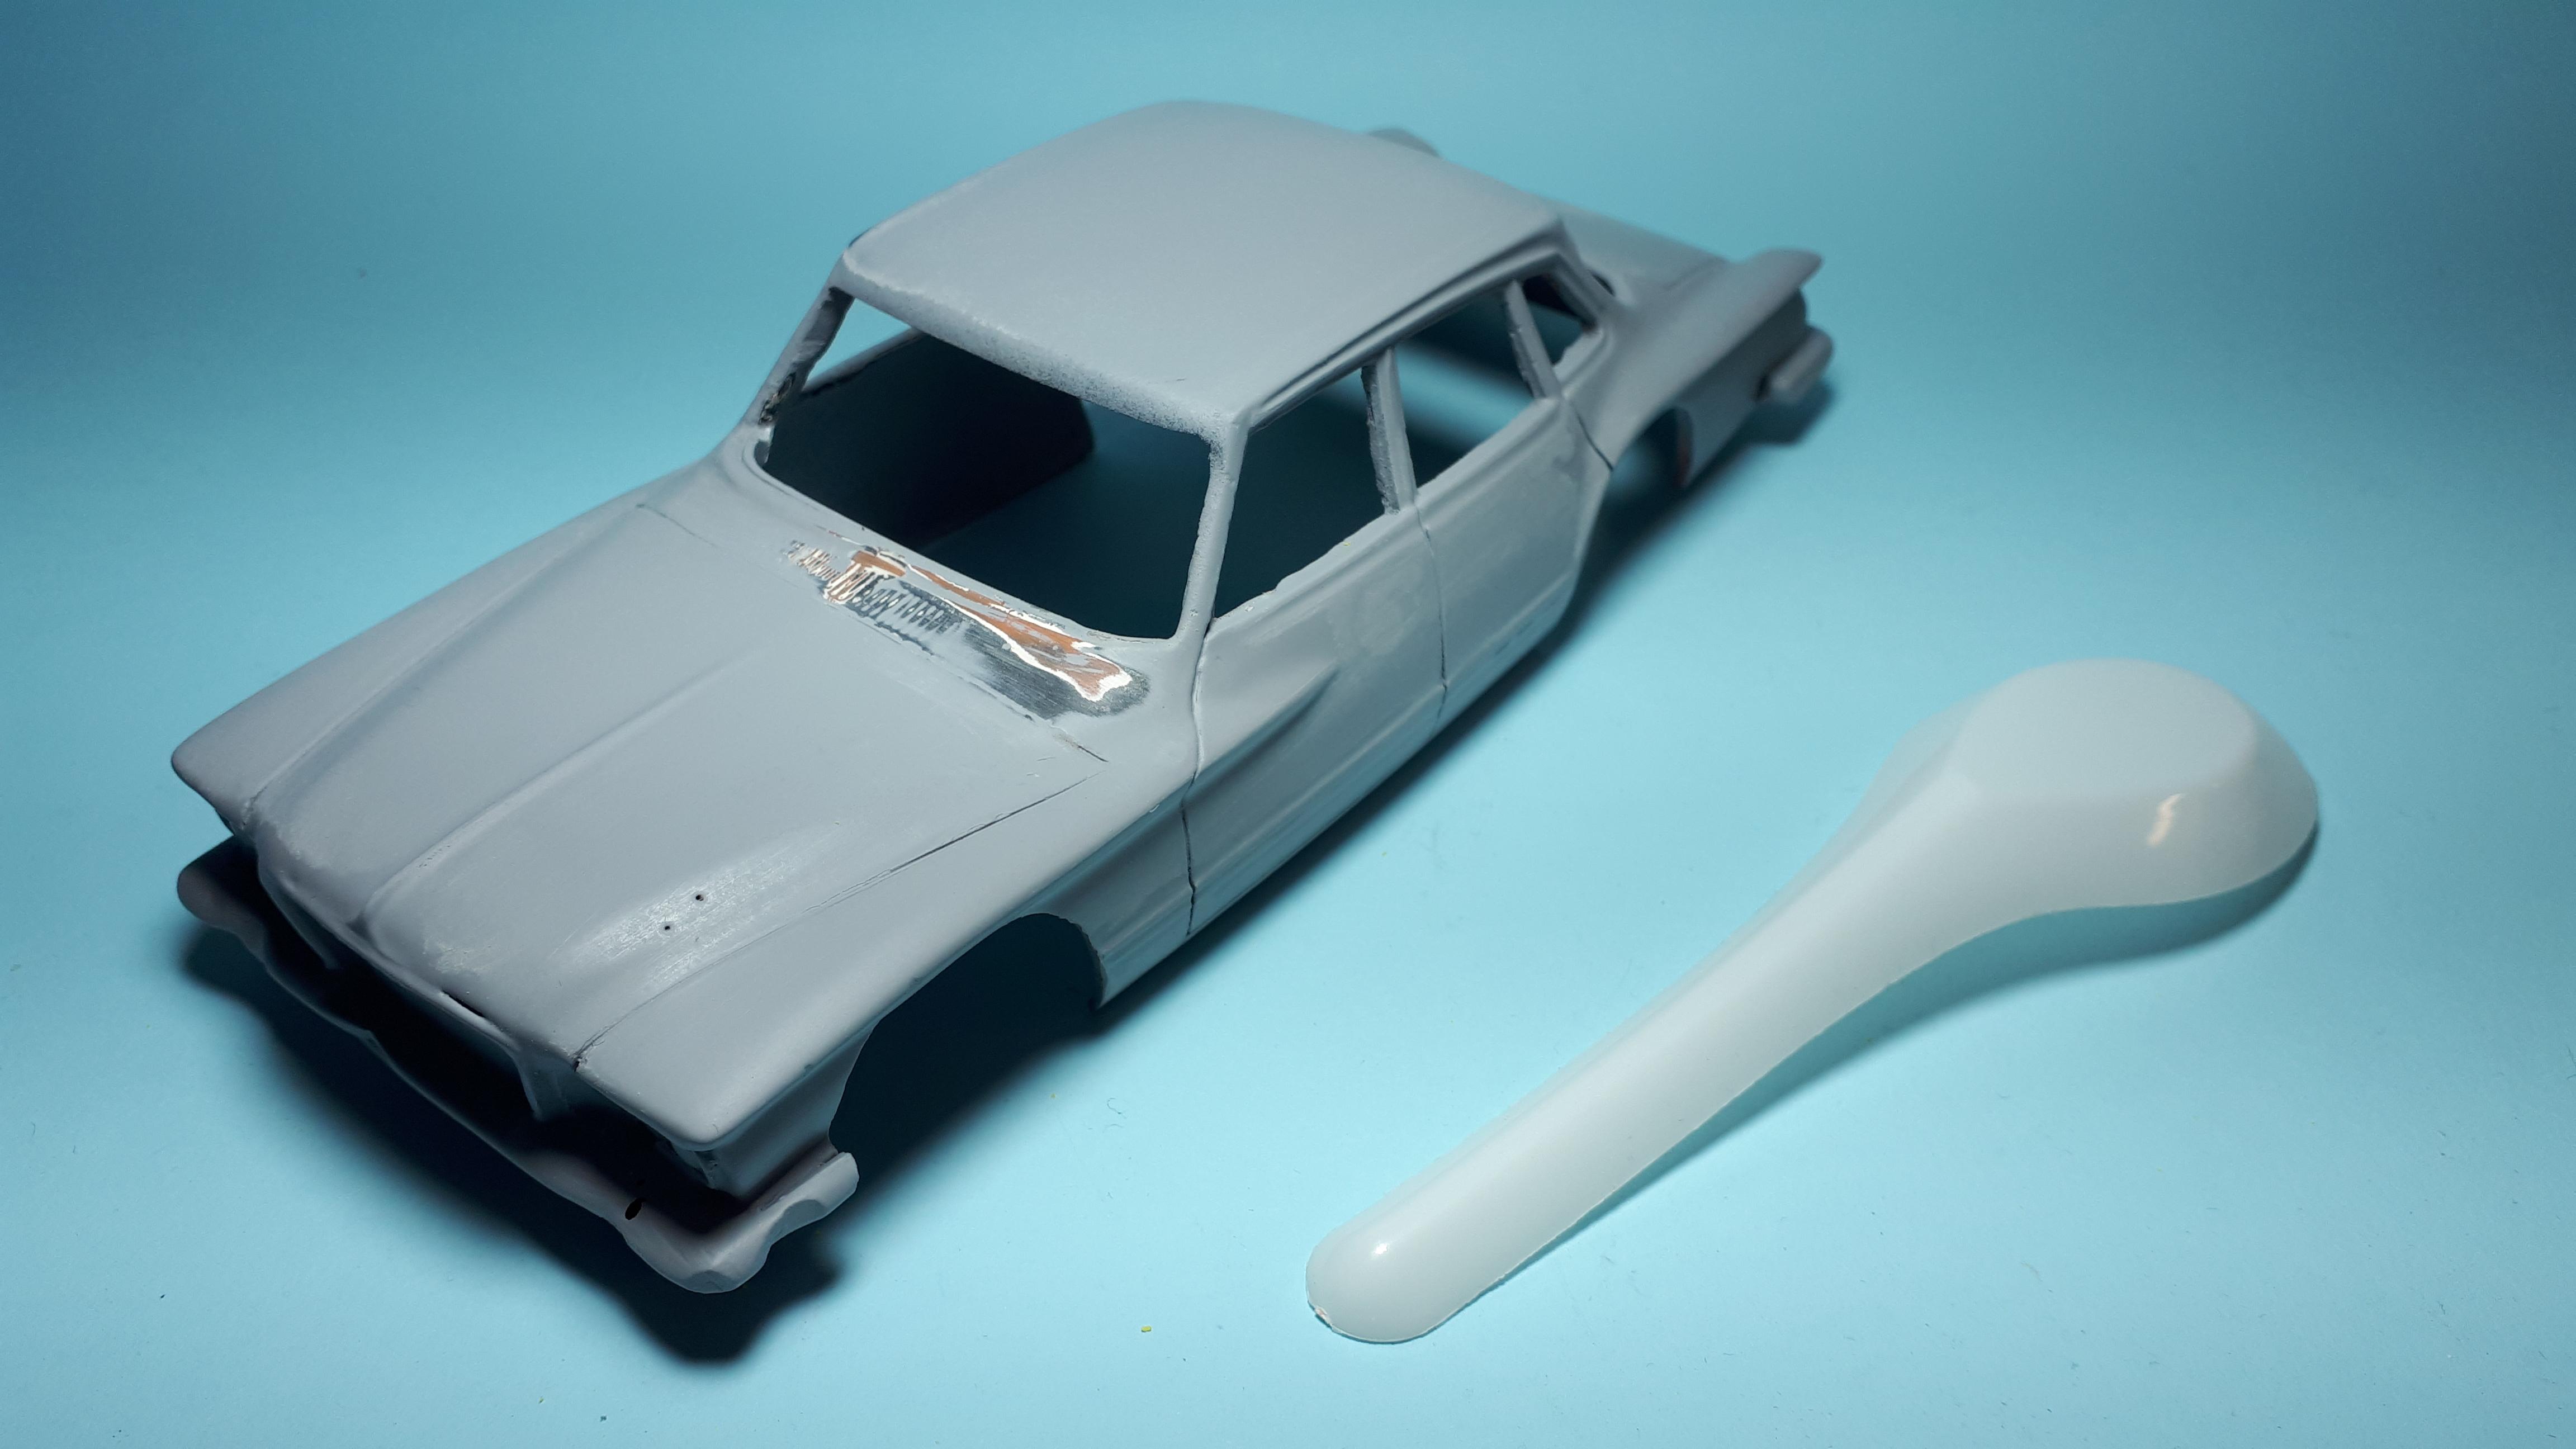
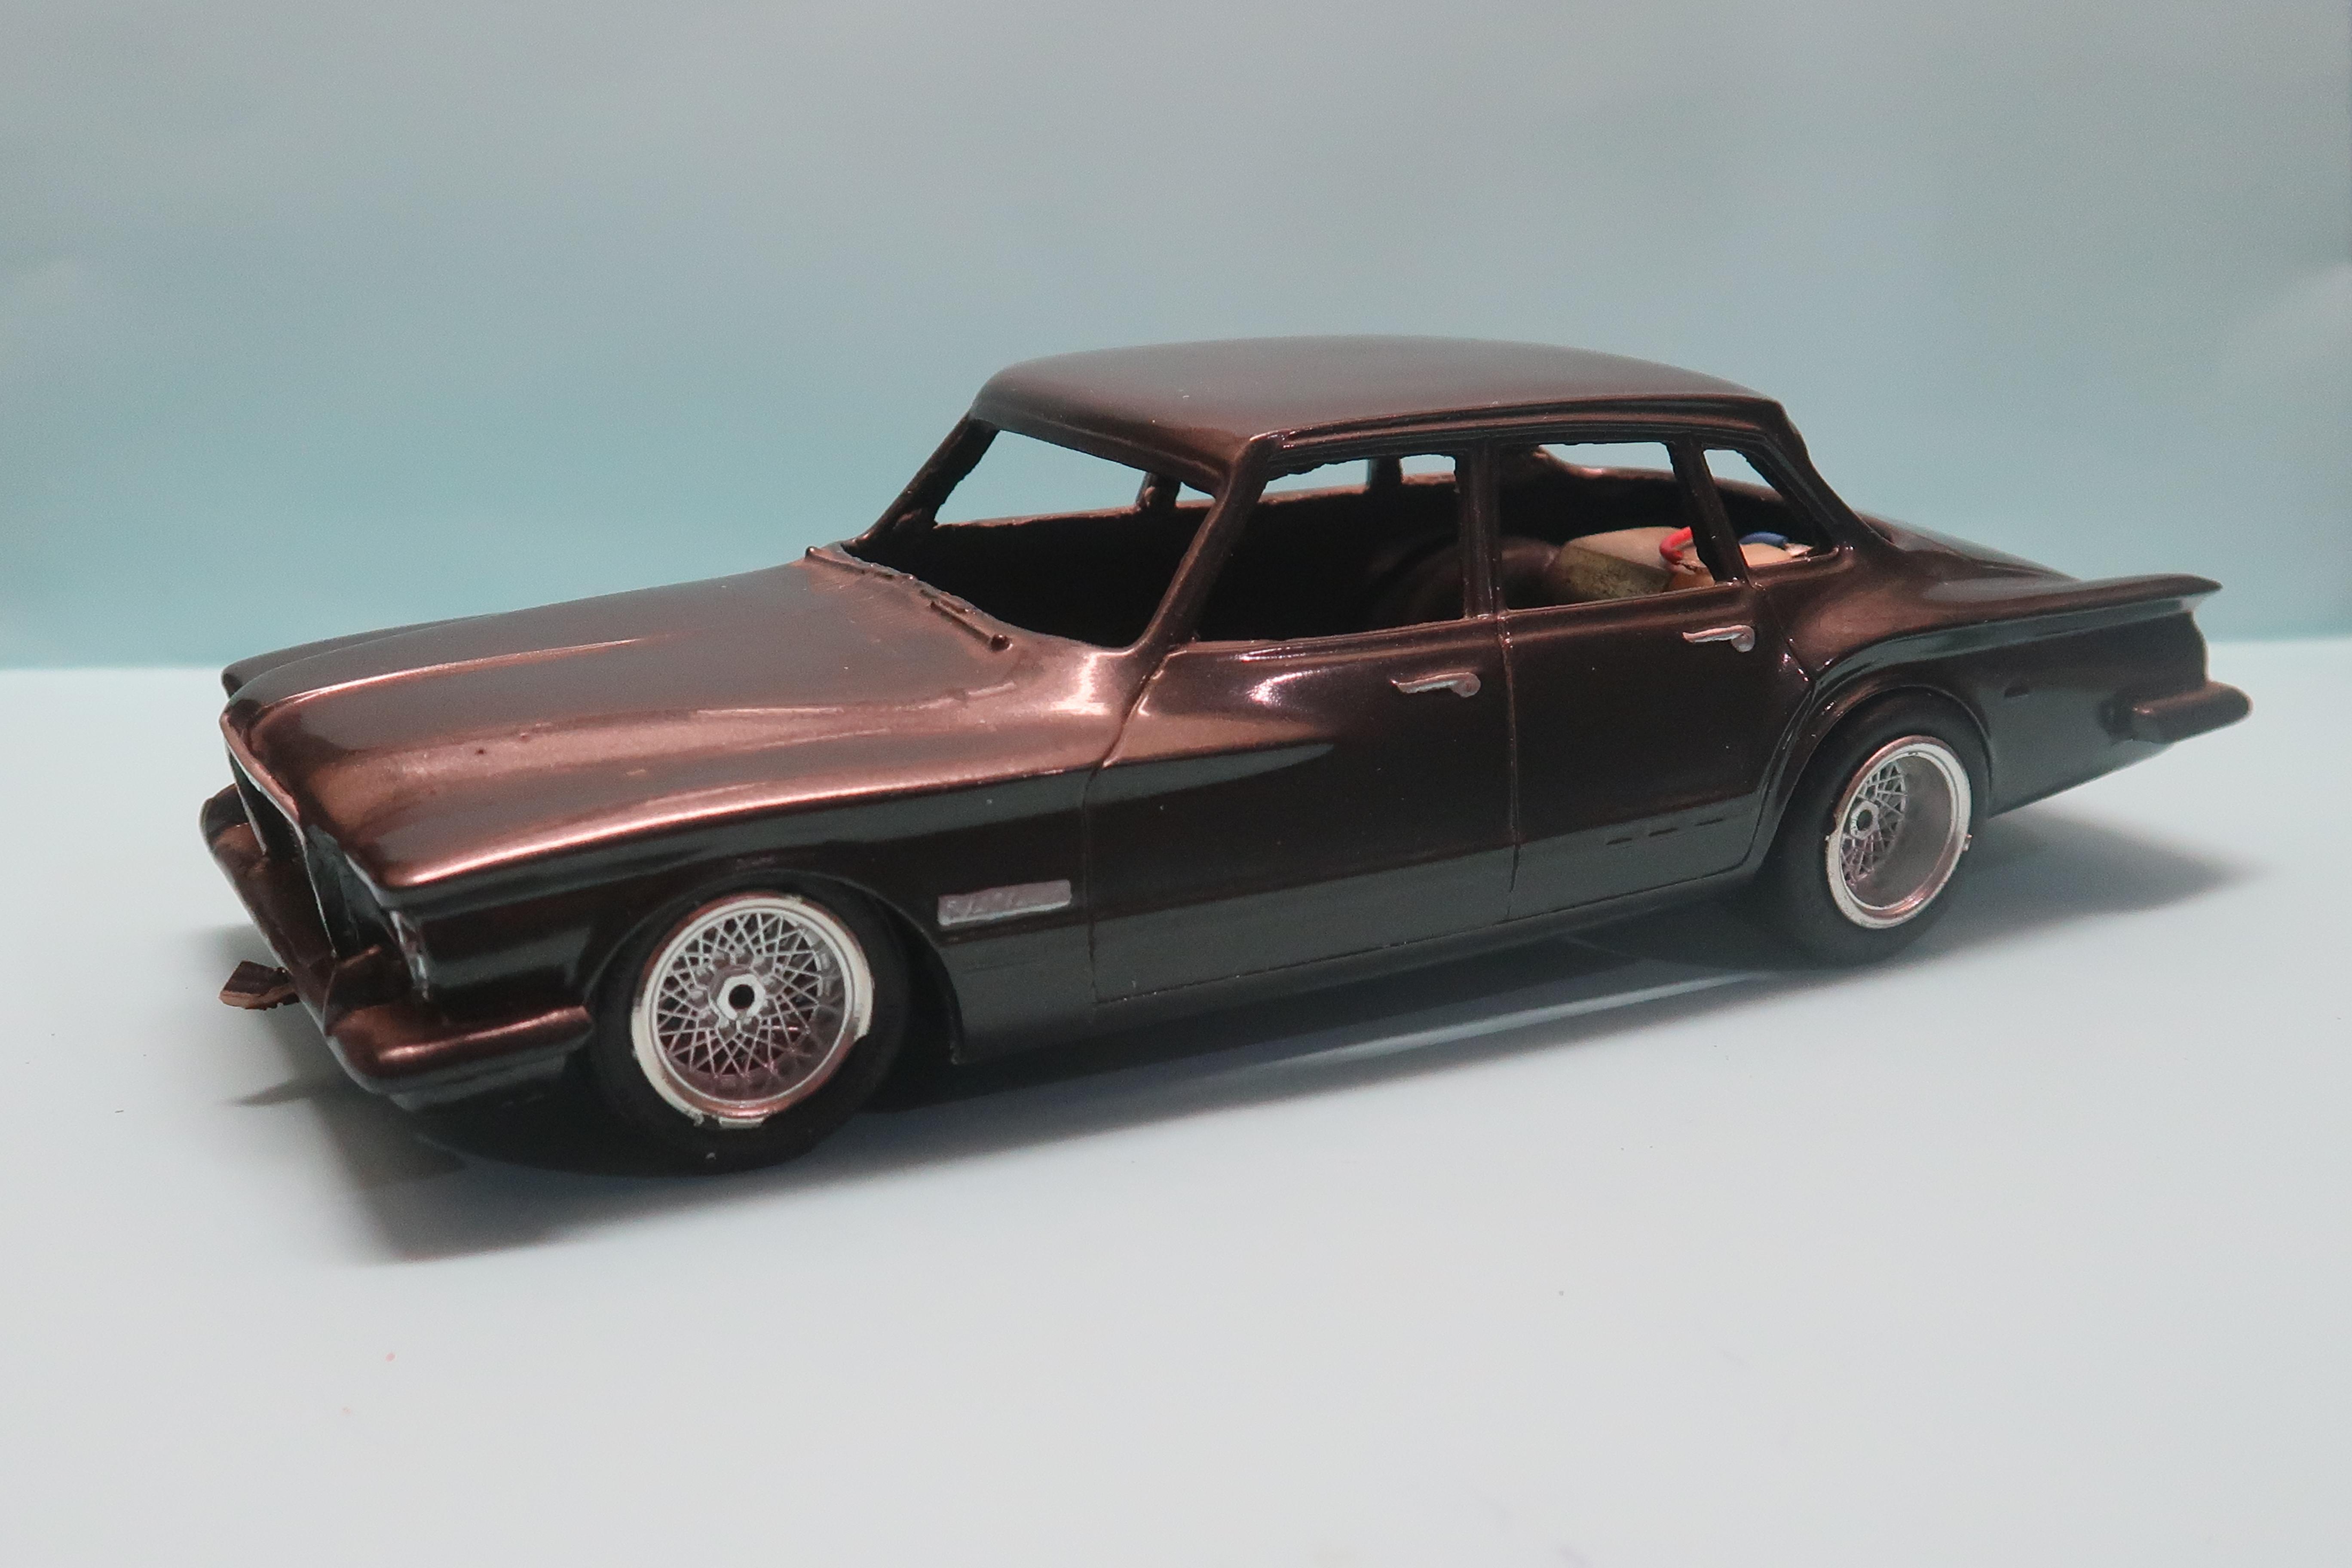
The model you see below began as a fibreglass shell purchased at least 30 years ago from an Australian aftermarket manufacturer, one of the first, in fact. I am loath to criticise a fellow modeller for his work but lets just say that fibreglass models are exceptionally difficult to work with. For those of you who have worked with a resin body ( other than Modelhaus!) then take all that extra prep and multiply it by, oh, a hundred times or so. It's sticky, it's weak, it's brittle and the thickness varies wildly. If the mould has air bubbles in it ( which this one did have) you get rows of ping pong balls under the bumpers, headlight eyebrows etc. Every time I build one I swear I will never build another but, alas, I still have about half a dozen or so in the stash. Until thepartsbox.cpm came on the scene some years ago with quality resin, Aussie modellers just had to deal with these issues if they wanted to produce models of Australian produced cars. I built the old Val a long time ago as a then contemporary street machine. It is very challenging to put interiors and windows in f/g bodies so I built it slammer style. And I hated it! This was a model that always lived at the very back of the darkest shelf in my cabinet. The paint was O.K. but the detailing was poor due to the casting issues, the colour did nothing for the car and the wheels were dated about five minutes after I installed them! One of my modelling themes is Australian speedway cars, or short track to you guys in North America, and while Valiants were not common on our tracks, the few that did compete were quite the weapon and made their mark on the local scene. With that in mind I decided it was time for a makeover. Having picked up a very cheap millenium edition of the Dodge Dart kit car made the decision easy. Here's what she looked like to start with.
-
That's pretty cool! I would have to agree with you about the front axle position another half an inch would make a huge difference to proportions. That chop is particularly smooth - I am envious! Cheers Alan