krassandbernie
-
Posts
227 -
Joined
-
Last visited
Content Type
Profiles
Forums
Events
Gallery
Everything posted by krassandbernie
-
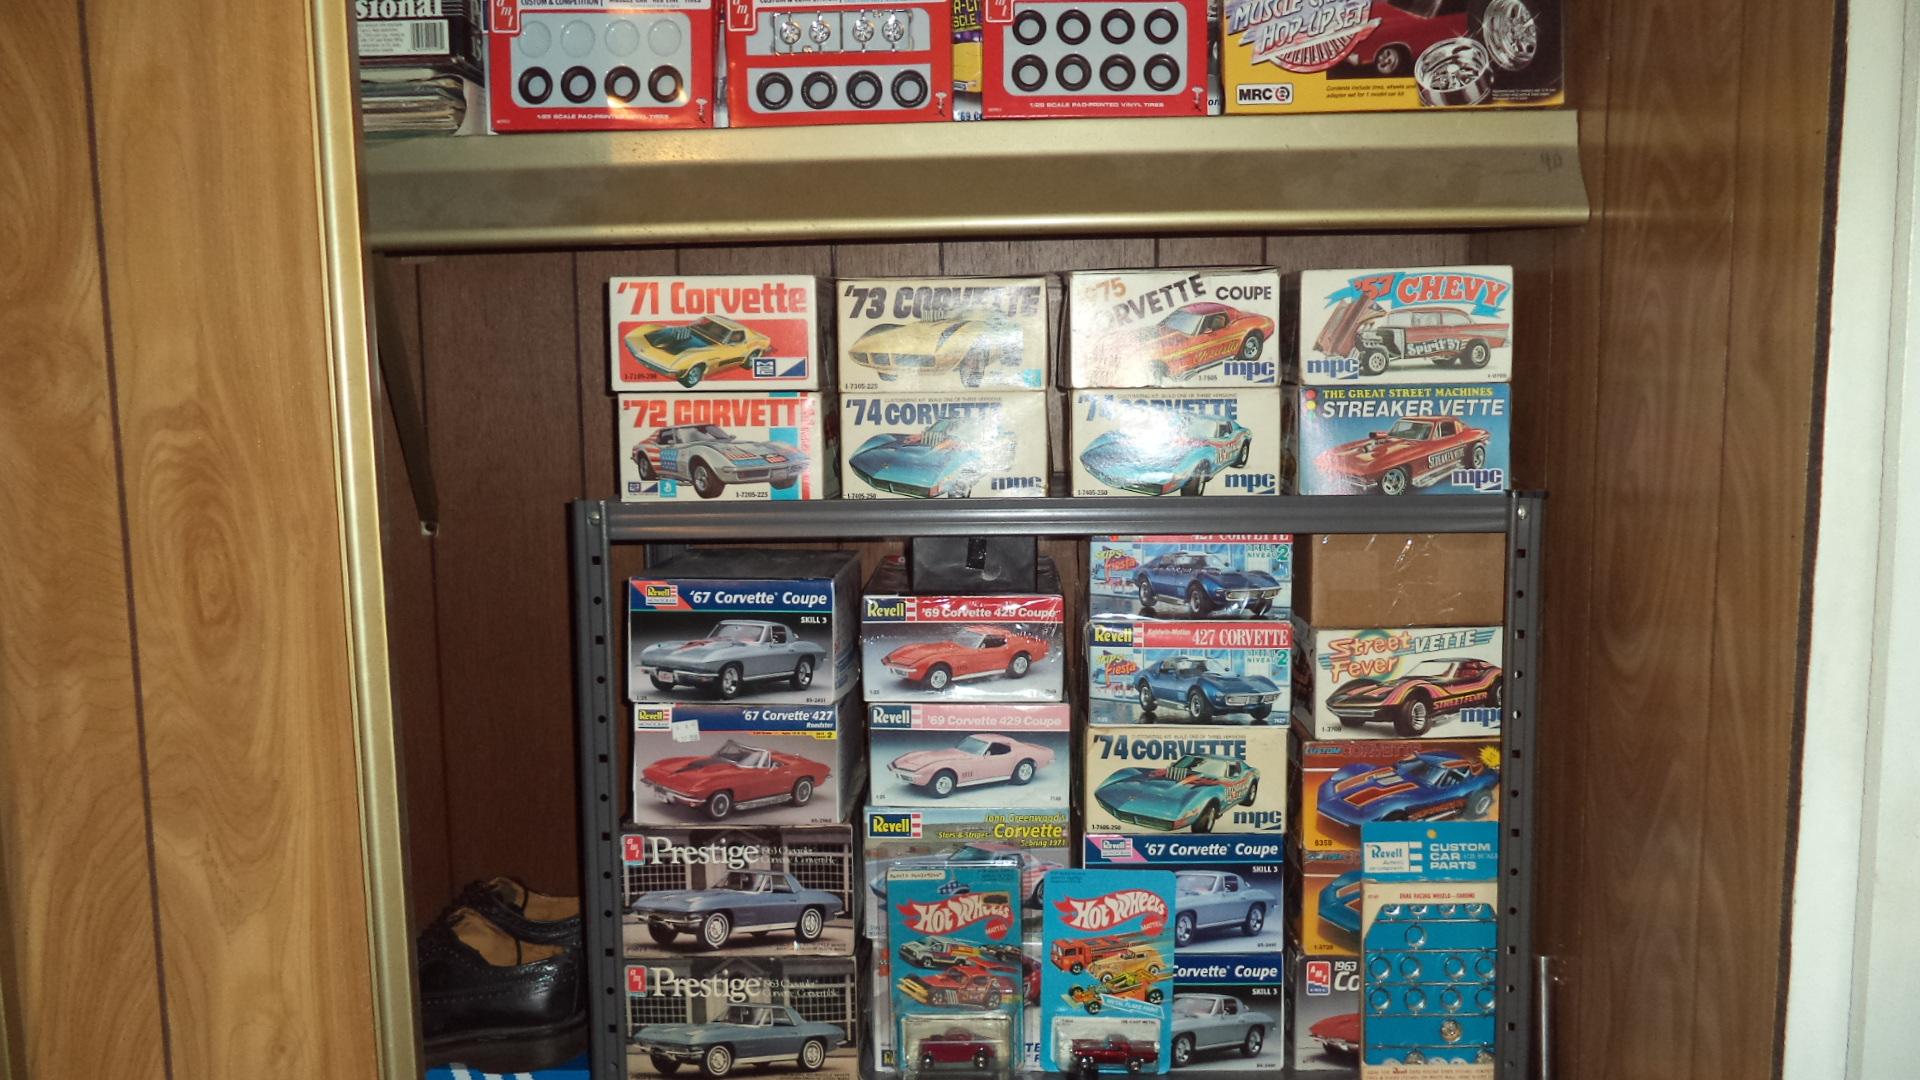
I molded these seats from the '72 coupe (MPC) a couple years back for my own personal use; but can easily cast more up. Send me a pm if you are interested. I won't bang you over the head. As you can see, I dig these old MPC annual Vettes too!

-
1/25 Revell '63 Corvette Sting Ray Coupe SnapTite
krassandbernie replied to Casey's topic in Car Kit News & Reviews
I will concede to your view point on the '63 snapper roadster body. I thought the bulges on the fenders looked like they might be the same as the Revell '67 roadster body based solely on photos I found on-line; but have not had the '63 roadster snapper in my hands to compare.......having sold the one I had many years ago. I do agree whole heartedly with your last two comments! LOL! -
1/25 Revell '63 Corvette Sting Ray Coupe SnapTite
krassandbernie replied to Casey's topic in Car Kit News & Reviews
On another note, I plan on building the Prestige '63 roadsters without messing with it; other than possibly converting one to a 'Day 2' '65 or '66. I've looked at them for enough years that it looks fine (or 'cool') as it is. If there's something off with it I don't care! LOL! The only thing I might look into is utilizing the chrome windshield frame from the Revell '67 roadster; which is also on the parts tree of all of the '67 coupe kits I think............so I should have half a dozen spares to play with for my other roadster kits. I think the height might be a factor; but I haven't measured it yet. My luck it will be the width! LOL!
-
1/25 Revell '63 Corvette Sting Ray Coupe SnapTite
krassandbernie replied to Casey's topic in Car Kit News & Reviews
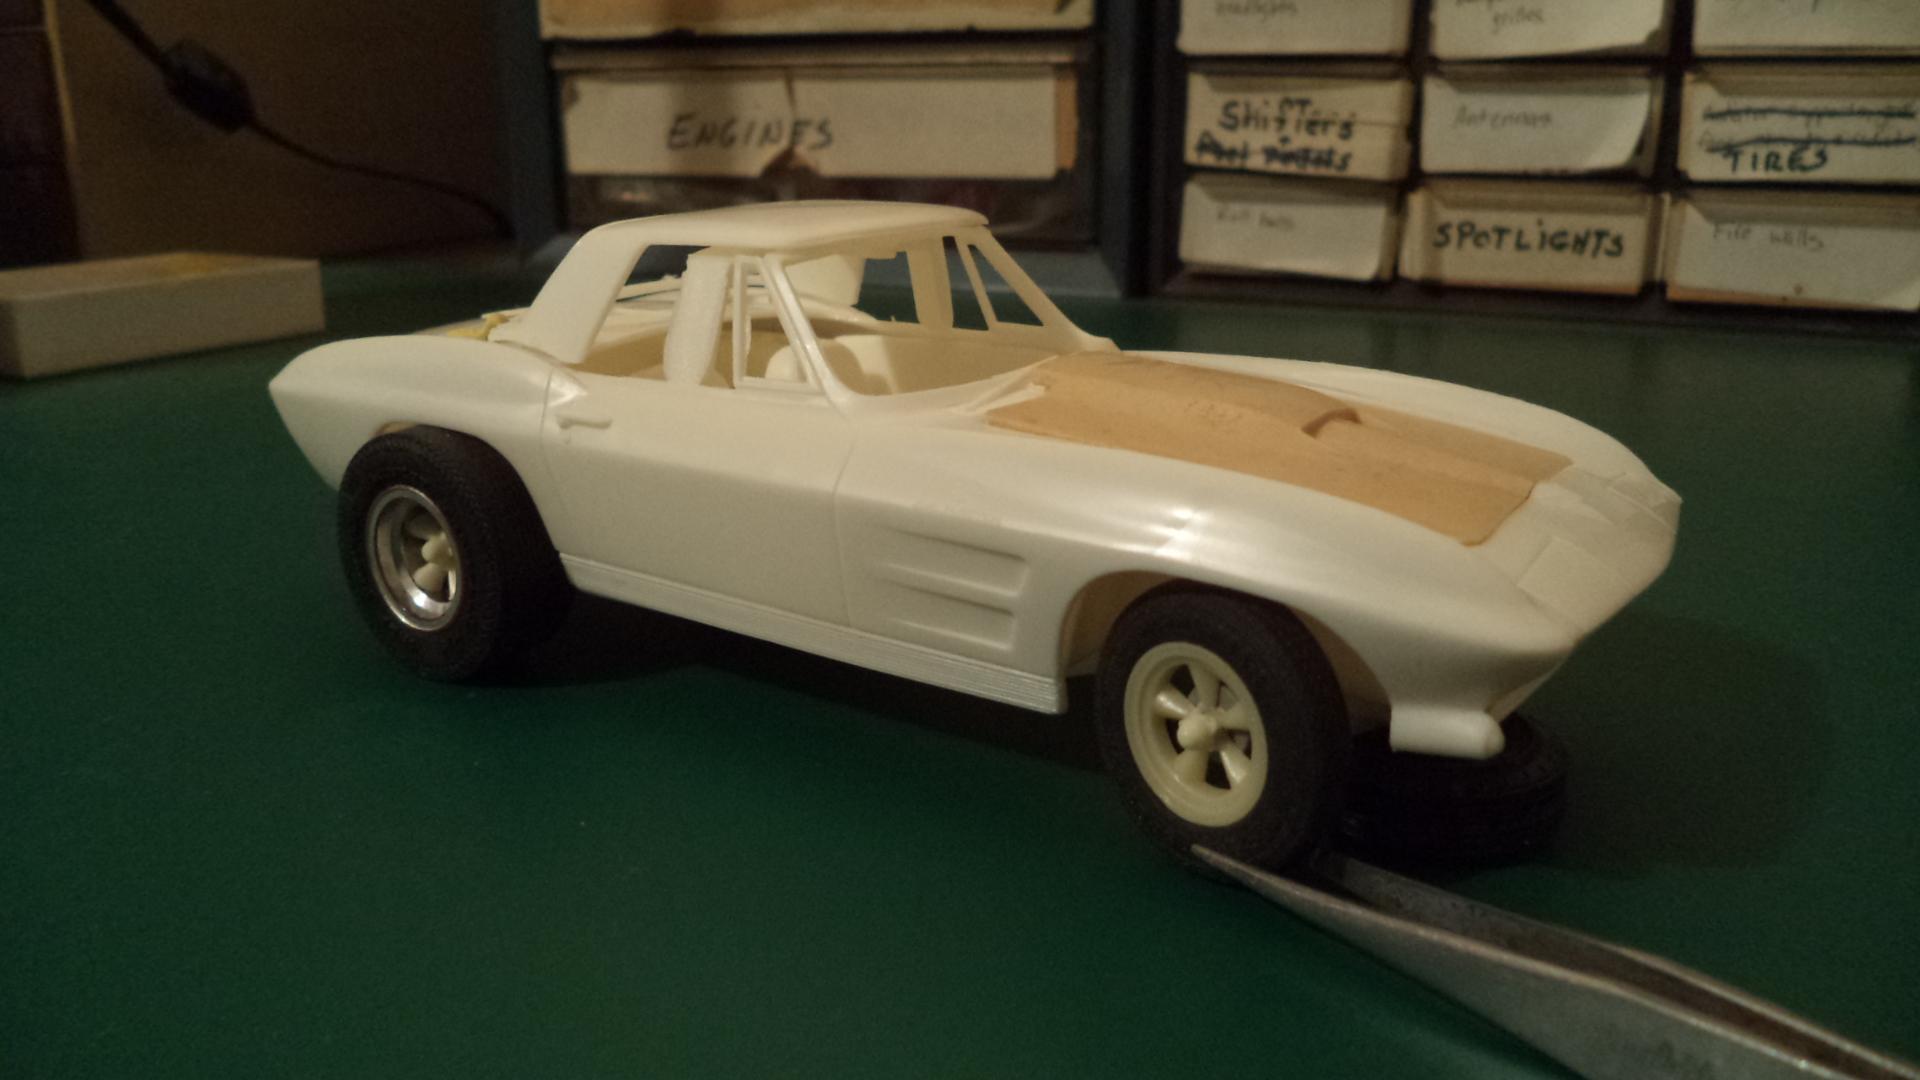
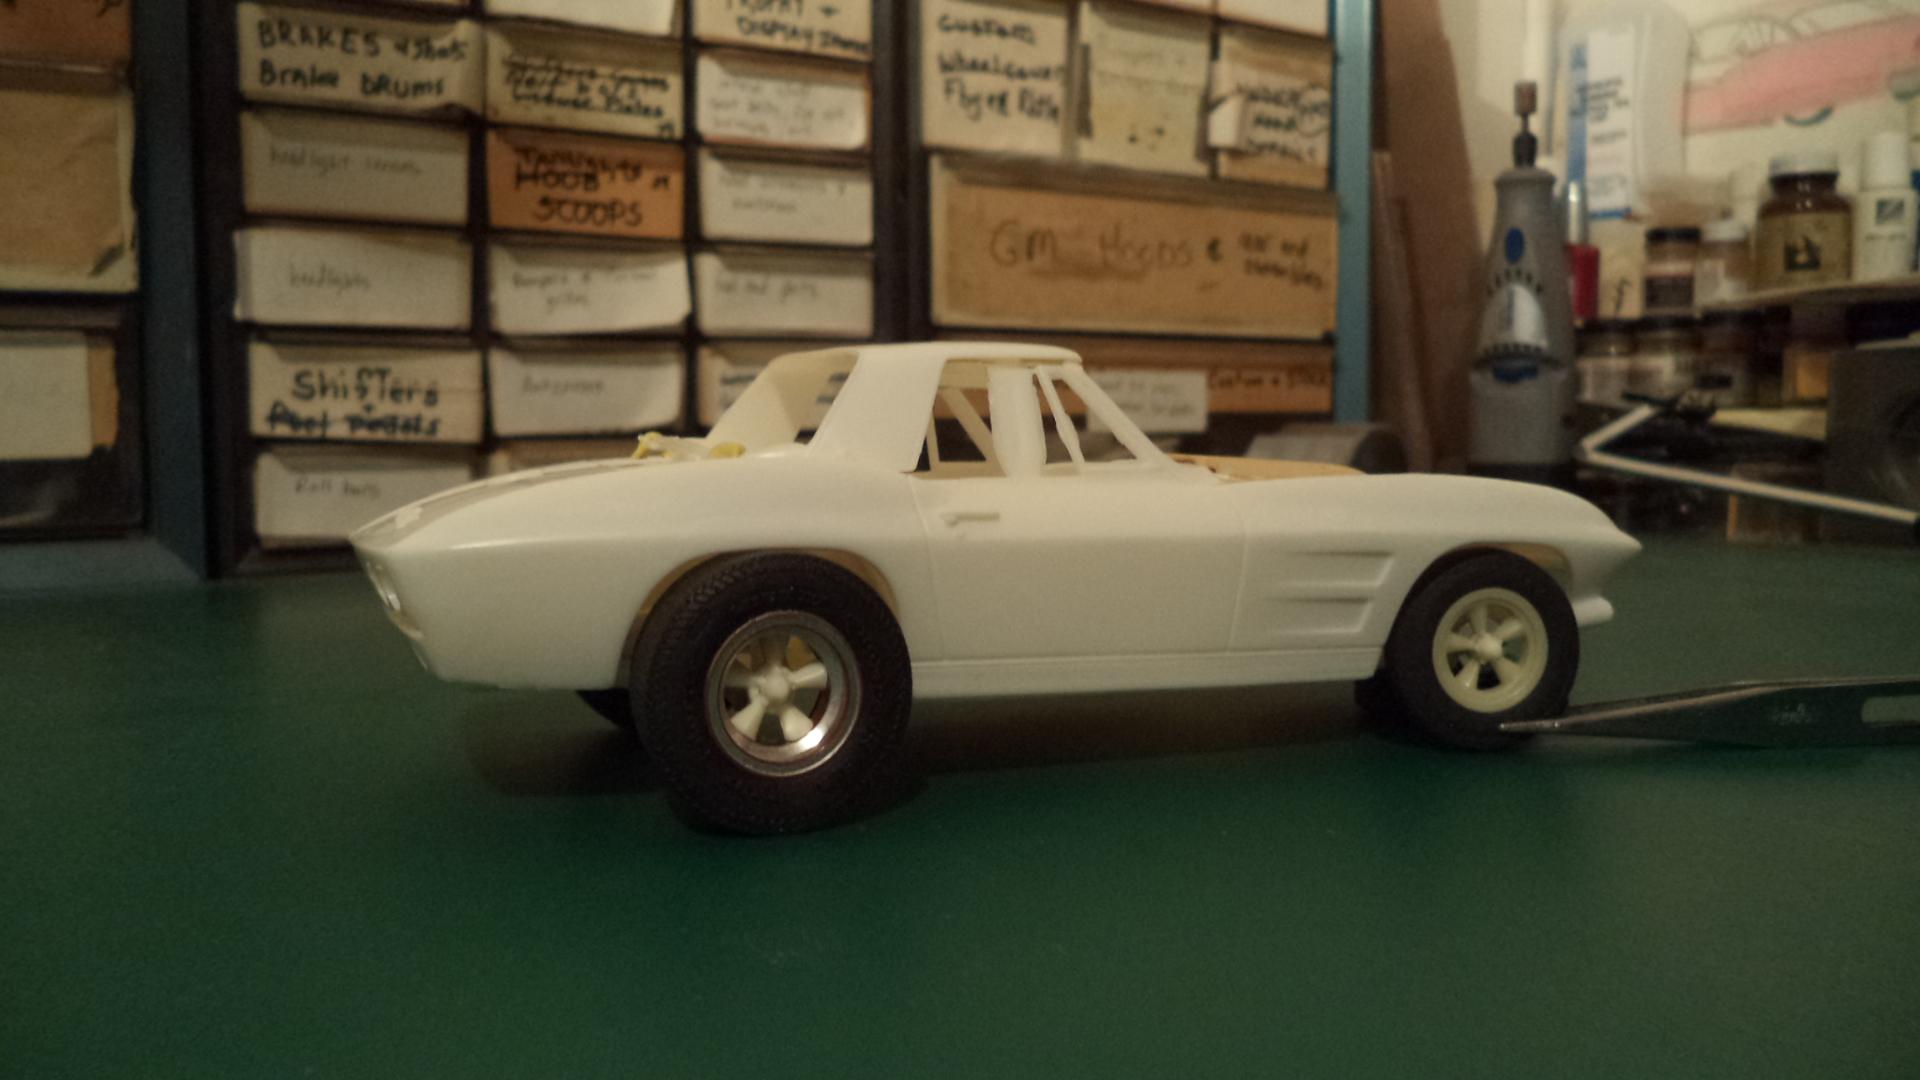
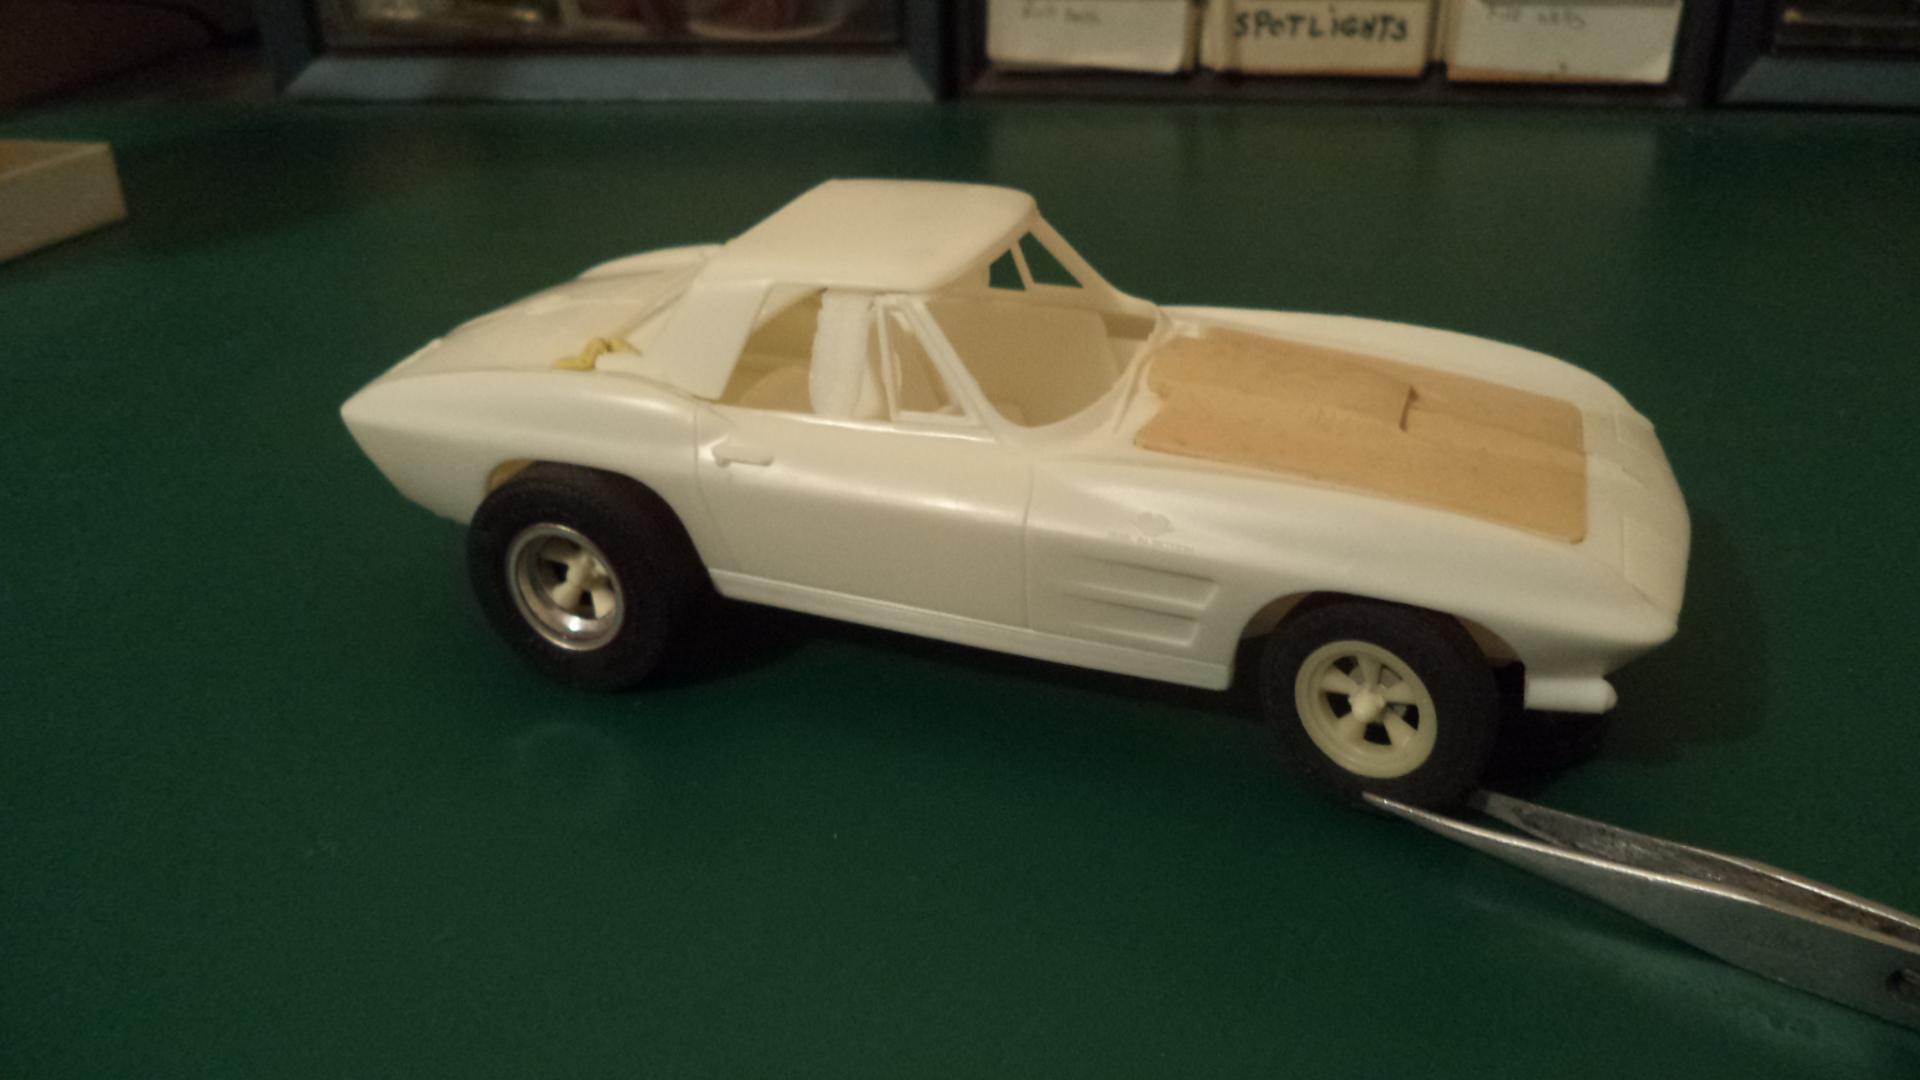
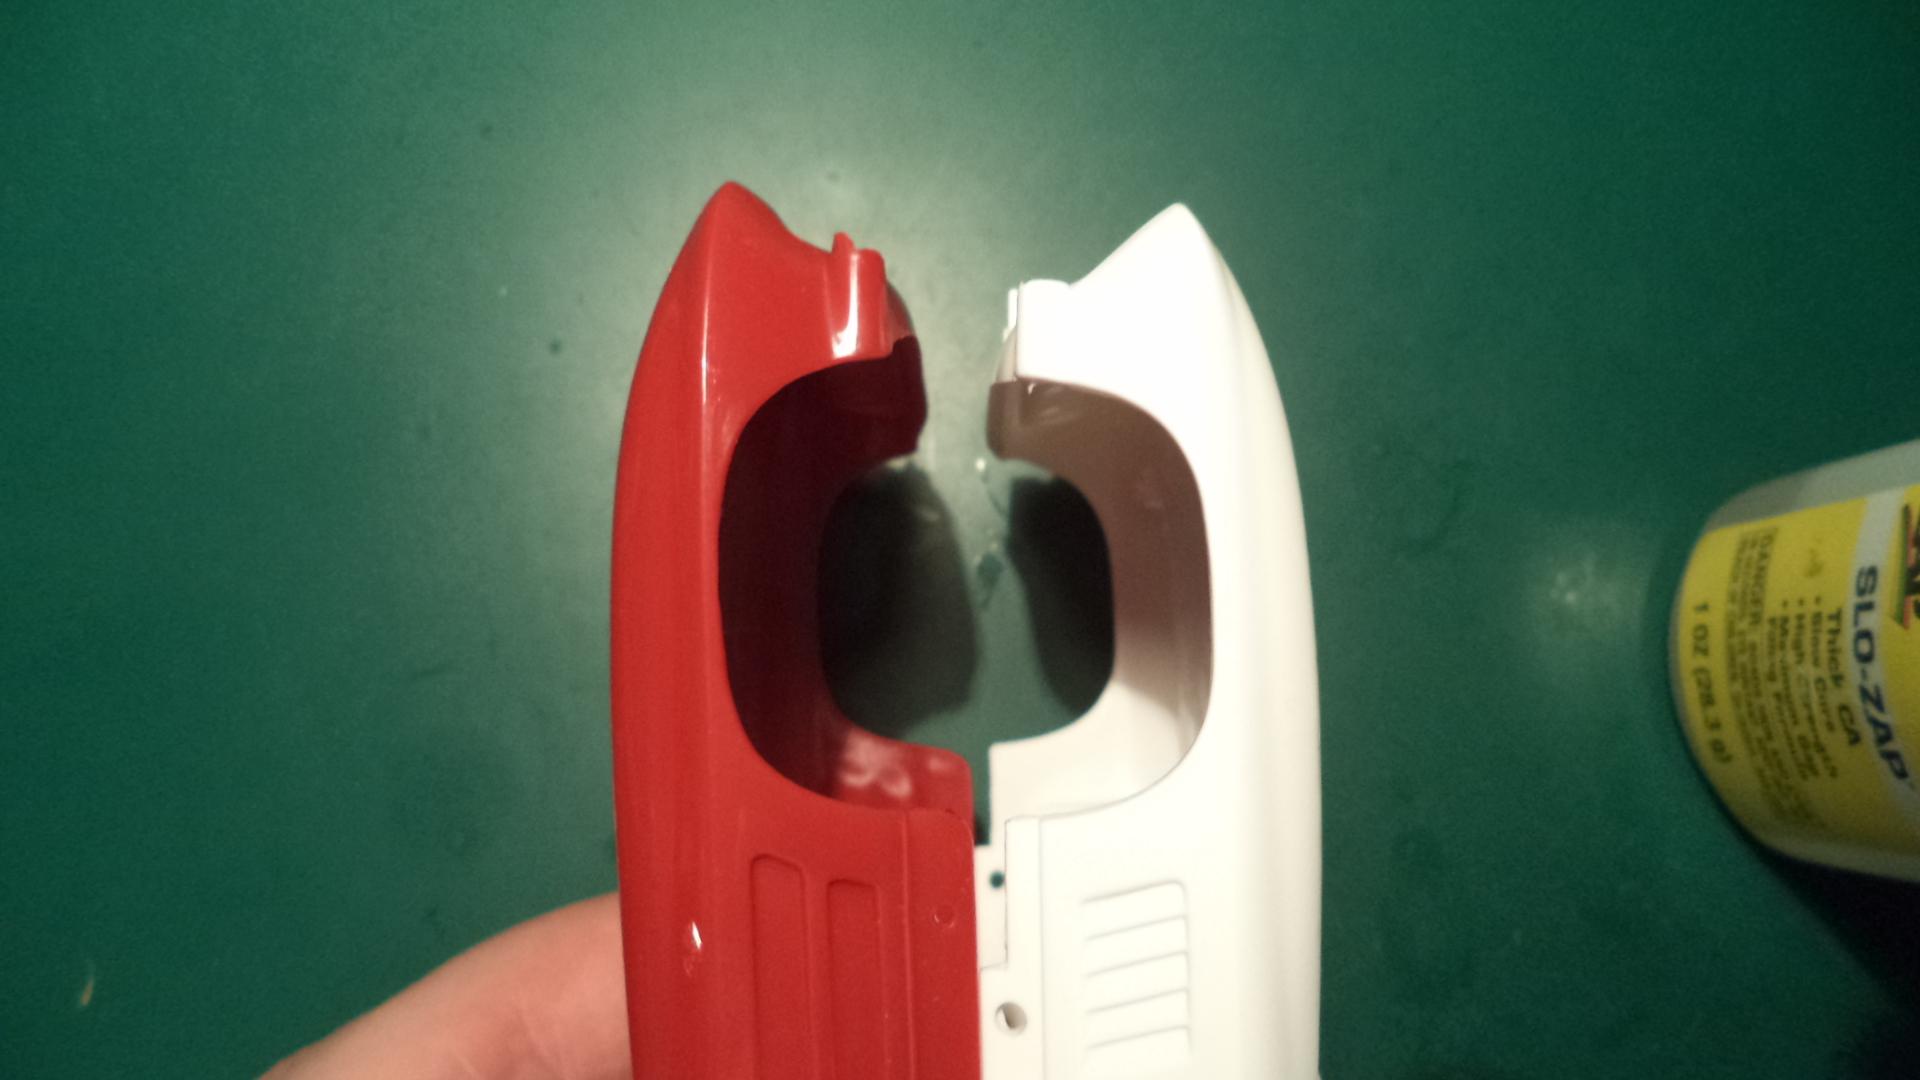
I agree, the Revell '67 roadster is horrible! The body has a wedge shape to it......getting noticeably more narrow front to back! The back end isn't even as wide as the '67 coupe. I still have plans on converting a '67 coupe into a roadster; but keeping the overall dimensions of the coupe by splicing in the rear deck between the quarter panels. The bulges on the fenders and top of the quarter panels looks odd on the '67 roadster too.........as if a caricature of a Corvette! LOL! I have compared the AMT bodies to the Revell '67 coupe; and if my memory isn't failing me, they're pretty close in overall dimensions. The front fenders just look too long on this '63 snap tite Vette (coupe). When looking at pics on-line of the snap tite '63 roadster I immediately saw the similarities to the Revell '67 roadster..........(goofy shaped bulges on the fenders and quarter panels)......which stands to reason if this '63 coupe and the '67 coupe are similar in tooling.........other than overall length. One thing I noticed after posting these photos above is that the roof on the '63 snap tite coupe is a bit longer; or at least overhangs in the front more to make it appear longer. I think with a little splicing the '63 snap tite coupe can be brought into spec a bit more. And yes, I am real sure that the '63 is too long.......and not a case of the '67 being too short.
-
1/25 Revell '63 Corvette Sting Ray Coupe SnapTite
krassandbernie replied to Casey's topic in Car Kit News & Reviews
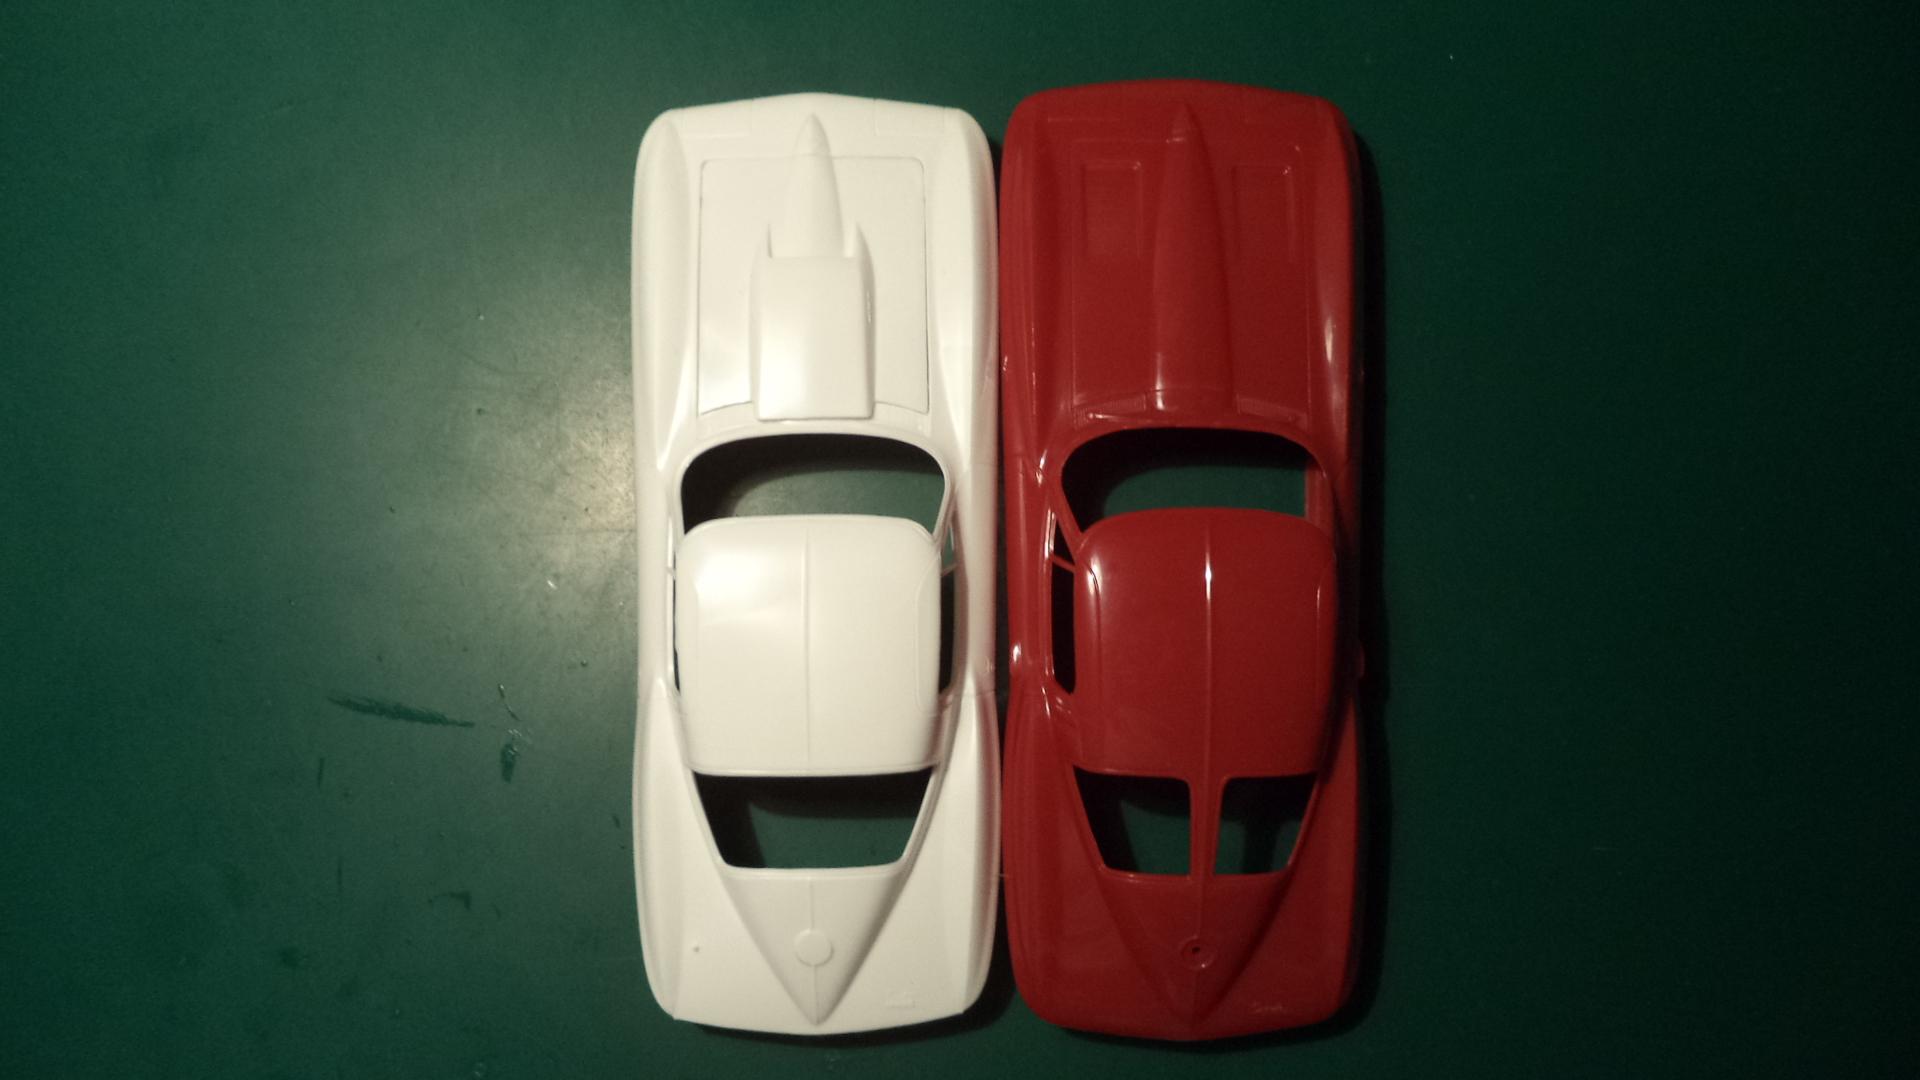
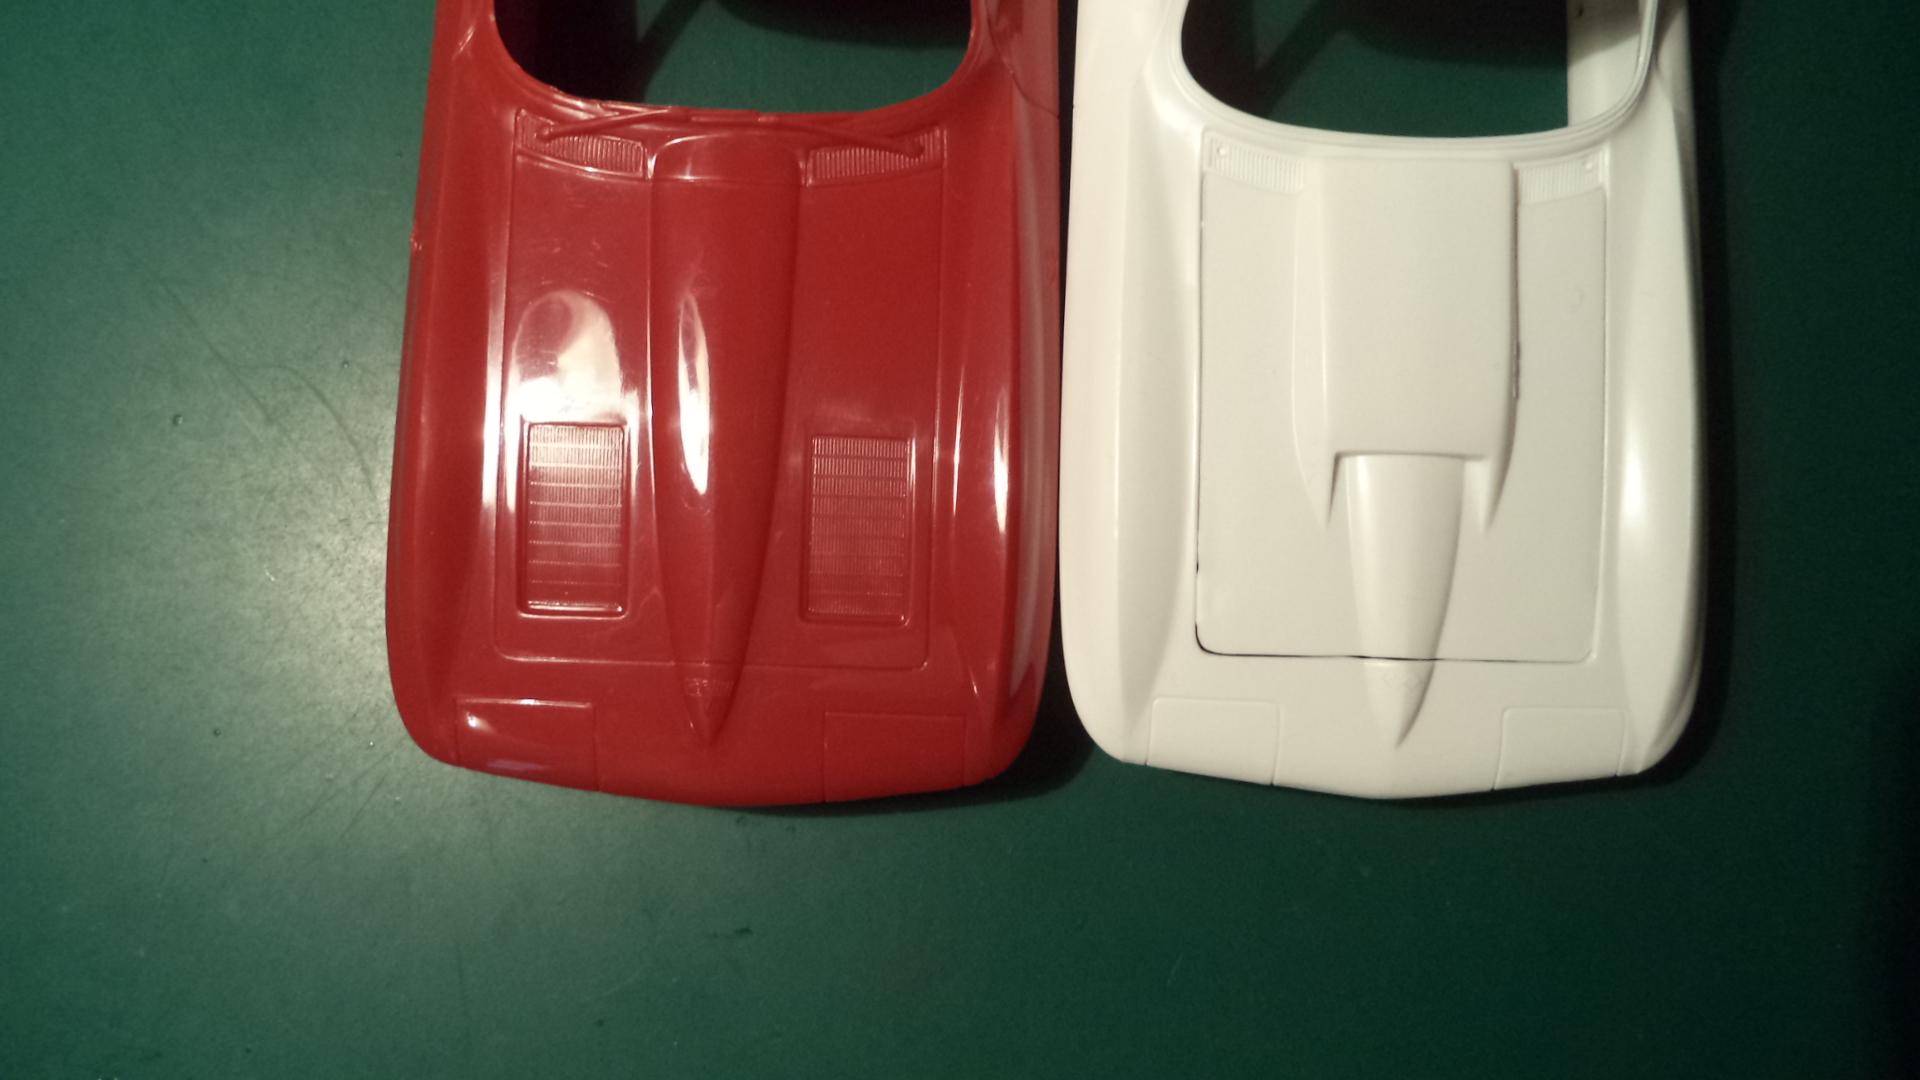
I just picked up the red version of this snap tite kit; and at first glance I was quite impressed and pleased with it. The first thing I did was compare it to the Revell '67 Corvette coupe body. They actually appeared to be from the same general tooling. However, I finally figured out what it was that my eyes were telling me was different (besides the obvious yearly changes like the rear window, front fender 'coves', emblems, etc.).............the darn thing is LONGER!!!!!!!!!!!!!!!!! Come'oooooonnnnnnnnnnn!!!!! It looks like the majority of the increased length is in the front wheel well, but it's also a little bit longer in the doors and behind the rear wheel wells. Here I was thinking it would be a direct swap for the '67 chassis and even the hood if I wanted to build a Day 2 car. I haven't studied the bodies any more than this quick once-over; but I'm hoping I can determine how to correct the '63 coupe body now.
-
"Bring Out Your Dead" Completion Build--ROUND 2 Is On!
krassandbernie replied to Snake45's topic in WIP: Model Cars
Pretty cool! I am 99% sure that the Revell hood does not need the sides sanded. I know that if you were to sand the back side of the hood until it drops into the MPC body ('68-'72 bodies anyway) that the shape of the front of the hood is still a hair off; and there's slightly more hood gap on the sides than what one would prefer. If you sand the front of the hood (and not the back) it will basically allow the hood to sit a hair further forward closing up the hood gap with the body on the sides. But my main concern here still is that by shortening the front of the hood you are screwing with the surface contour; and possibly end up with the hood sitting higher than the body at the front due to the contour of the hood. I will likely end up practicing with a couple of Revell hoods to see which works out better (sanding the front, or sanding the rear.....and having to add a thin strip down the sides of the hood then). btw, I cast the rally wheels from the MPC kits without the center caps. I also offer a deep dish rear version (that was mastered by a friend of mine)..........which to me, looks more like an 8" wheel. -
"Bring Out Your Dead" Completion Build--ROUND 2 Is On!
krassandbernie replied to Snake45's topic in WIP: Model Cars
I have a soft spot for the MPC Vette kits. I see that you incorporated a few of the newer Revell parts into it like the rocker trim and Motion Performance hood. I plan on doing the same (but use the L88 hood on an old MPC '69 resto project); and found that the Revell hood appears to fit nearly perfect if you sand the front (or back edge) down a smidge. But, I have not tried it yet due to time. If you sand the front of the hood to make it fit the MPC body it will also essentially make the front of the hood slightly wider taking up the minor hood gap that is otherwise present. But, I am not sure it the contour of the hood will match the MPC body where the front of the hood meets up. Do you recall if you sanded the front or the back of the Revell hood to make it fit the MPC body; and did you note an fitment issues? -
That is a vast improvement! I had eye balled that very same 'fix' myself; but kept thinking that there simply wasn't enough roof thickness above the drip rail molding to get away with it......and it would be compromised........leading to another issue. But, your remedy seems to have worked out quite well; and is the most corrected/accurate looking one that I've seen to date!
-
It is good that the roof line doesn't bother you like it does me........seriously. Something about it bugged me for years until I finally put my finger on it. Once I saw it I could not un-see it. It's night and day to me looking at the first photo I posted of the yellow Revell Camaro and the 1:1 green Camaro. I studied each of the model bodies I posted above; and compared them to each other and 1:1 pics; and took measurements. Simply rounding off the rear corner of the drip rail molding will not correct the overall 'die cast' lines of this roof; but it might improve it a little bit. There is absolutely no doubt in my mind that the Revell body's roof is slightly chopped at the front windshield pillars and the drip rail is perfectly flat where there should be a graceful curve. Revell is notorious for screwing up the roof line on almost every body they've come out with for the past 20 years. They also suffer from being too 'computer generated' and squared off where contours and lines should be more graceful. It is just something I can not look past. Having done my own master work for over 15 years now (for my resin business) has made me more aware of body proportions and more anal I suppose. When you have to pretty much scratch build an entire body you tend to make sure you have all of your proportions nailed down since one are of the body will throw off another. We all take something different or personal from the hobby; and some things bother one person and not the other......and that is perfectly fine too.
-
I'd be highly impressed if you are able to remedy this roof line on the Revell Camaro body! That first comparison photo I posted with the built yellow Revell Camaro really shows just how awful the roof line (or more accurately, the drip rail molding/window opening) really is. I don't see you nailing it without raising the windshield pillars a hair. I have confidence you will make an improvement in the roof line at the very least based on what I've seen of your work so far. You seem to tackle things in a similar manner (or thought process) to my own.
-
I really dig (and appreciate) the work you've put into this conversion so far! You really have to be in-love with a subject matter to labor like this. I've been there myself with numerous projects! Two things have always bothered me about the Revell '69 Camaro; and kept me from building one despite an otherwise superb kit. The roof is totally screwed up........flat across the top of the door windows (as far as the drip rail line is concerned), and even slightly chopped at the windshield pillars. The second issue is that the front end appears a hair too long over all......from certain angles. Yet, it doesn't seem to be as noticeable once built. Here are some comparison photos of a 1:1 '69 Camaro and the Revell kit; as well as the Revell '68 Firebird and AMT '68 Camaro. I know that angle of the photo is off for the '68 Firebird; but you can see that the roof is closer on the '68 Firebird (yet not tall enough over all), and the general shape of the AMT '68 Camaro roof is closer (from the side profile only). If you could figure out a way to put the graceful contour of the 1:1 roof lines back into Revell's '69 Camaro it would be a night and day transition! Revell's large scale Camaro kit (which I read the 1/25th scale kit was based on) did not suffer these maladies!
-
You know guys, I am still offering a reworked Revell Model A coupe body in resin.......with a much more aesthetically pleasing roof insert and firewall. I just figured I would pop in and let you know there was an alternative to waiting for the Chinese to regroup and bang out the second release.
-
Dyno Don Fairmont Pro Stock
krassandbernie replied to Plasticfanatic's topic in WIP: Drag Racing Models
Excellent job! This is one of the nicest examples of Scott's Fairmont I've seen yet! For anyone thinking of buying one of these PLEASE go directly to Futurattraction's web site (http://futurattraction.com/index.html). I am no longer casting this body for Scott (or the follow-up variation Scott made of this body with larger rear wheel wells); especially since it was pirated (stolen) by another resin caster and being sold on eBay as well as said resin caster's own web site. I warn you because it is not the same quality body that Scott provides you...........and just plain wrong. Scott invested countless hours (hundreds of hours in fact over many years) and dollars to make a Fairmont body available to the public. He deserves to recoup some of his investment; not have it stolen by someone who couldn't keep their hands off what didn't belong to them. -
I just ordered (and received) the '68 Plymouth Road Runner and GTX grilles today; and am highly impressed with them! I have ordered some 3D printed parts from Shapeways over the past couple of years; but wasn't expecting these grilles to be quite this nice! Thank you! My only 'gripe' is that it is going to take a fair amount of work to attempt to get the grilles (more appropriately, the headlights) to fit a Johan '69 Road Runner body properly. I would much rather back date a Johan '69 Road Runner to a '68 then work with that pile of BLAH_BLAH_BLAH_BLAH AMT/Ertl came out with. If you were to modify these '68 grilles to fit the Johan body I would surely order them! Ed
-
1964 Ford Galaxie Tear drop hood
krassandbernie replied to Nitrobarry's topic in Car Aftermarket / Resin / 3D Printed
Here's the one I still offer............will work with both the '63 and '64 Galaxie kits. -
1932 Ford Chopped 4-Door Sedan Conversion
krassandbernie replied to Dennis Lacy's topic in WIP: Model Cars
If you were to punch my name or the business name into a Google or Bing search you'd find my contact info all over the place! LOL! It's at the top of my Fotki albums, should be in my business card logo signature at the bottom of many of my posts in certain forums; and more recently through the business page on Facebook. Shoot me a line if there's anything I can help you out with! Ed lowcab36@epix.net -
Vince got these from me; but I no longer offer the W-30 Olds hood. It was one I had laying around from years ago that I gave him.
-
Model Car World Resin
krassandbernie replied to Snake45's topic in Car Aftermarket / Resin / 3D Printed
No problem on the info! Keep in mind (in case you didn't catch what was said earlier) Dave is no longer casting or running the resin business..........Mike from Wings, Wheels, and Waves out of Massillon, Ohio has taken over the resin business from Dave. I no longer have a web site; but you can see what I have to offer or what I am up to by going to my business page on Facebook. You can also send me a pm for the link to my Fotki albums where you can see more photos of my work. -
Model Car World Resin
krassandbernie replied to Snake45's topic in Car Aftermarket / Resin / 3D Printed
I ordered a '57 Nomad from Mike not too long ago rather than mastering one myself to build; and he was very prompt with my order. The quality of his castings are very high............I was very pleased; considering the amount of time he has actually been casting (something like 10 weeks he said). I have been doing this for over 15 years; and probably scrutinize over the quality of castings more than the average modeler. The only issue I had was something that was not really his fault; and that was due to how Dave made the body mold; which reflected in the castings as the mold got older. Basically, the body 'grew' in length front and rear by 1/16" overall due to the mold being made too thin and flexing from the hydraulic pressure of the resin as the mold became weaker over time. This altered the outside dimensions of the body. As soon as I test fit the donor kit hood I knew what had happened........having had this happen myself in the past; which prompted me to change how I design my molds. Since explaining to Mike what caused this over the phone he said he'd be willing to replace the body as soon as he makes a new mold. If his mold making abilities match up to his casting efforts you will all be in good hands when ordering from him! -
Baldwin Motion’s officially model builder
krassandbernie replied to Superbird McMonte's topic in WIP: Model Cars
Where did you get the wheels for the Moray and Manta Ray builds? It looks like you cast your own copies. I take it you started with the basic wheel and perhaps modified it to make a deeper version? Any help would be greatly appreciated! -
Sure thing Kevin! I can't wait to get your little 'gems' in my hand! Coupled with Joseph's carbs they're going to dress up any Wedge or Hemi engine like a girl on her prom night! LOL!
-
Simply awesome parts there Kevin! I should really get some off of you for a couple of my personal projects.
-
Resin hoods back on-line!
krassandbernie replied to krassandbernie's topic in Car Aftermarket / Resin / 3D Printed
I used to offer these particular hoods that you mentioned; but am testing the waters by bringing back this 'batch' of hoods first; which were some of my better sellers over the past 15 years. If sales don't amount to much there's no sense in grabbing more from my pile of hood masters to bring back on-line. I have around 30 other hoods that I would entertain molding again; while many others are not coming back for various reasons. -
Resin hoods back on-line!
krassandbernie replied to krassandbernie's topic in Car Aftermarket / Resin / 3D Printed
No interest here? -
This is one of our latest custom tuck’n roll interior conversions. It is designed for the AMT 1953 Ford F-100 pickup kit; and may very well work with the former MPC (now AMT) tilt nose ’53 Ford pickup kits as well. It consists of a reworked bench seat with pleated pattern and piping along the perimeter, two 100% scratch built pleated door panels, separate door handles, window cranks, and arm rests that can be pinned to the door panels for ease of assembly and painting, and an optional template should the builder decide to make a simple filler piece out of sheet stock to hide the back side of the firewall area on the inside of the cab. As usual, feel free to drop me a line at lowcab36@epix.net with your questions or to place an order. Thanks! Ed..........Drag City Casting.