David G.
-
Posts
11,326 -
Joined
-
Last visited
Content Type
Profiles
Forums
Events
Gallery
Everything posted by David G.
-

1:16 Gunze Sangyo 1937 Rolls-Royce Phantom III Sports Saloon
David G. replied to Anglia105E's topic in WIP: Model Cars
Wow David, that is quite a puzzle! I sometimes wonder if the designers of some of these kits have actually ever completed building one. I know you'll find a way to make it work. I find that sometimes setting the task aside for a few days allows it to simmer on the back burners of the mind yielding what I call the "subconscious solution". David G. -
Monogram's 1955 Lincoln Futura Concept Car: WIP
David G. replied to David G.'s topic in WIP: Model Cars
From the research I've done Bill, the original color was pearl white. Literally pearl white. In that thousands of seashells were ground up to make the paint. Quite an extravagance if you ask me. As I understand it, the green look in some of the photos was a result of some error in processing or printing the photos of the original pearl white car. The other correct color was red as seen in the movie "It Started With A Kiss". That was before George Barris got ahold of it, painted it black and made it into the legendary Batmobile for the old TV show. Your build looks good Bill, I think it's the only one I've seen built that's painted white. Most are some shade of pearl green. Thanks for taking the time to post the photos. David G. -
A fabulous outcome on this Nigel! I can't wait to see it in the Under Glass section. David G.
-
That's going to be a monster! Cool! David G.
-
It's all coming together quite nicely Bob. I love the copper colored mufflers on the chassis. I forgot that they used to do this, an effect of galvanization if I remember correctly. Anyway, I'm going to steal your idea for my next build that would have had mufflers like that! Cheers! David G.
-
Monogram's 1955 Lincoln Futura Concept Car: WIP
David G. replied to David G.'s topic in WIP: Model Cars
Very cool! Thanks for sharing this Bart, I've grabbed a copy for my file. It's tough to find a good rear 3/4 view like this. David G. -
Monogram's 1955 Lincoln Futura Concept Car: WIP
David G. replied to David G.'s topic in WIP: Model Cars
Yeah, I briefly considered painting this one red but given the body style I thought that it would be a little too much. Now black on the other hand... ...oh wait, that's already been done. Never mind. David G. -
You did a great job of hiding the damage when taking the photos. You have some nice Mercs there Phil, thanks for sharing them with us. That last one, the 1:1 is especially wicked looking. David G.
-
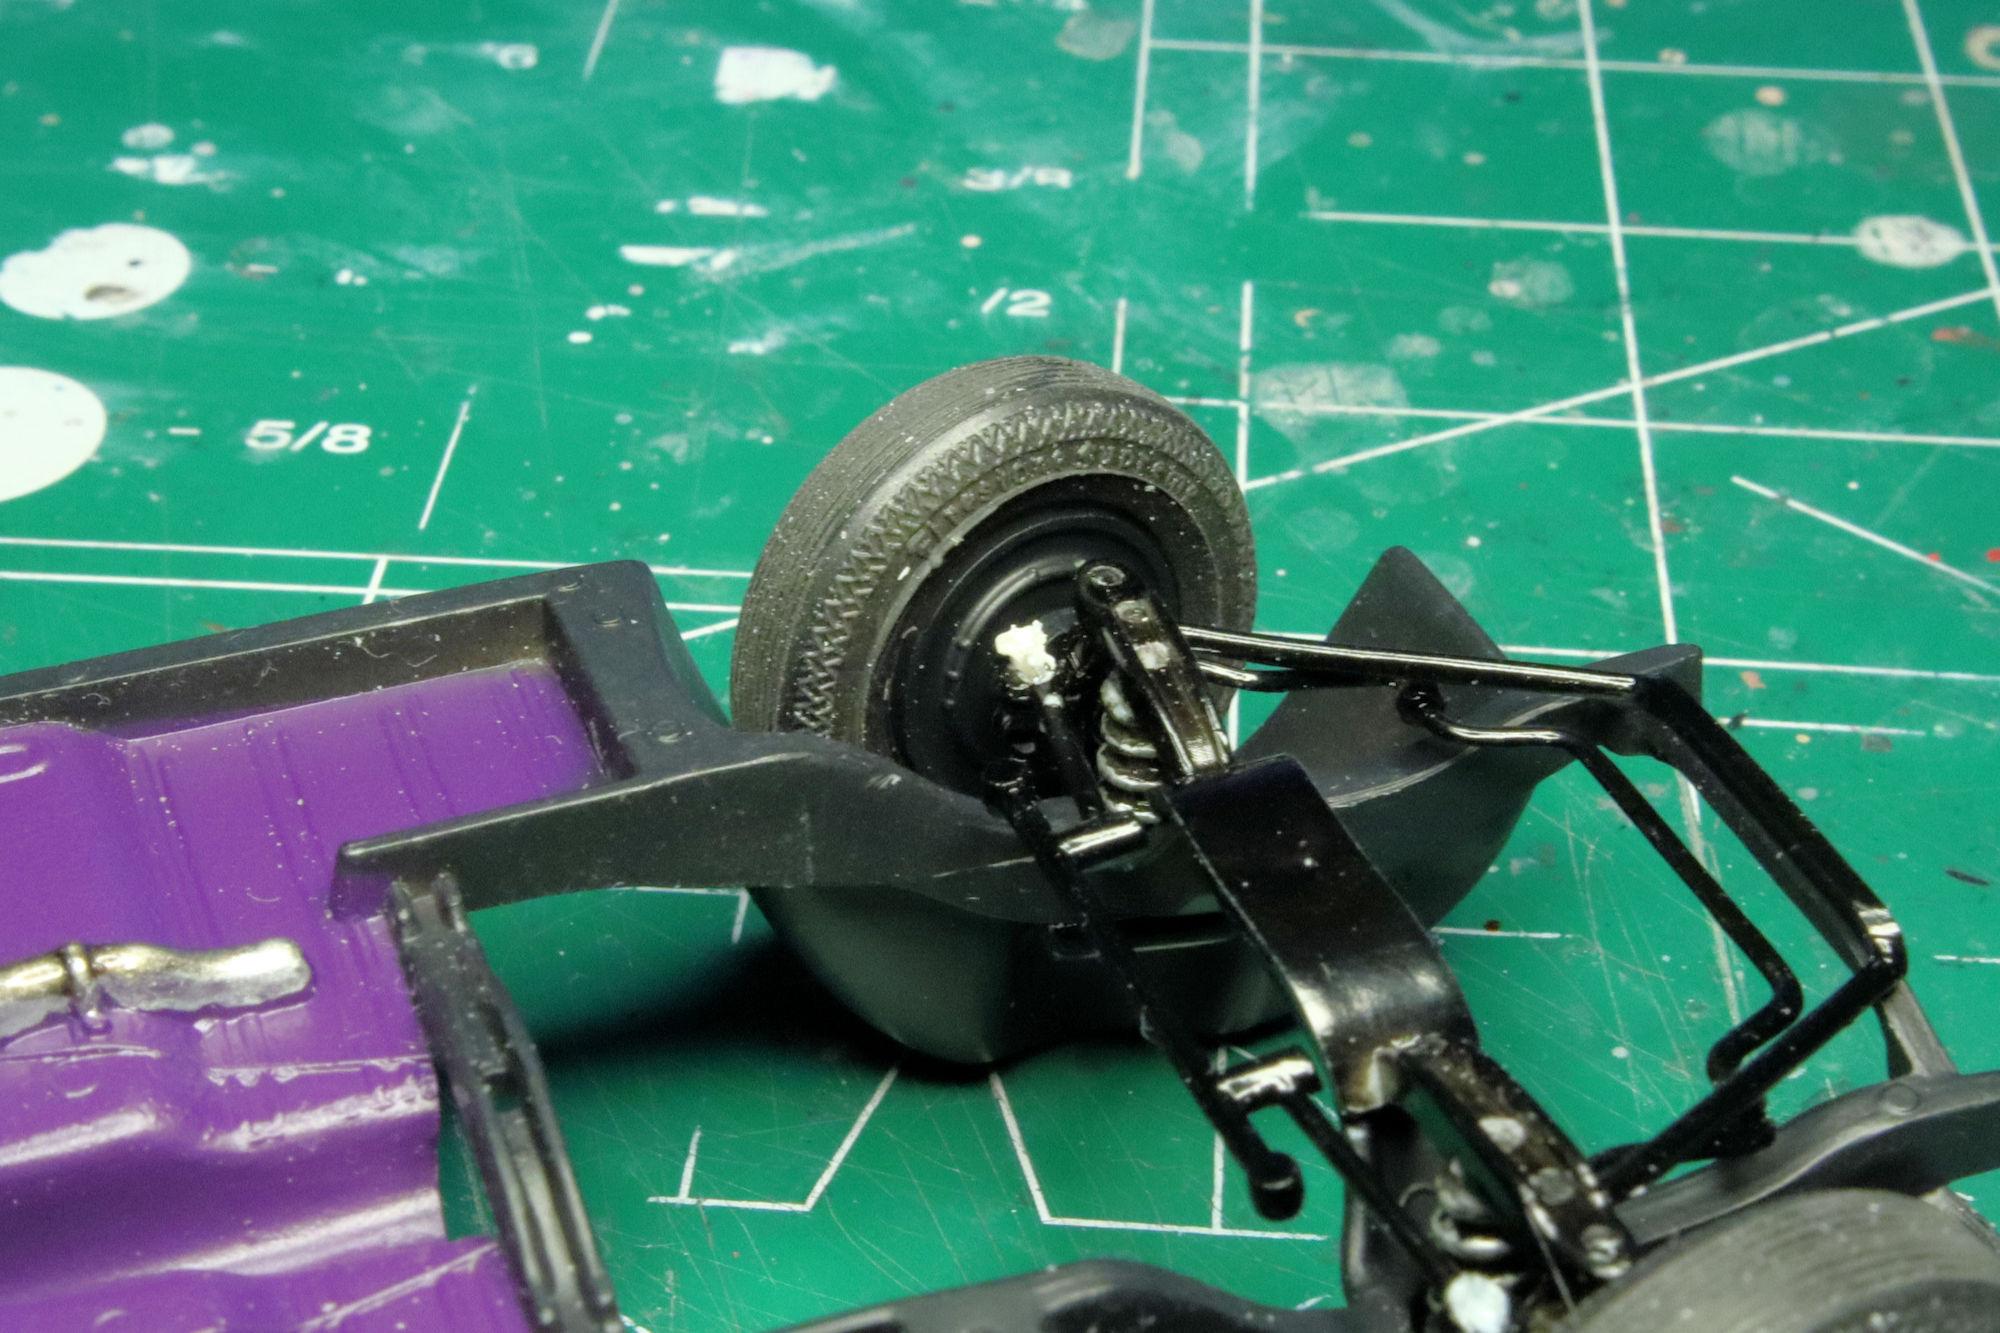
Hello Everybody! The front suspension on the Ford Galaxie has been using a lot of my bench time. Even the best poseable steering setups can be tricky to get right. The wear on the molds for one means a little more time and effort is needed to get it together properly. In disassembling and reassembling the front suspension multiple times I managed to break off one of the nubs that the tie rod snaps onto the steering knuckle. They're only meant to be assembled once and I assembled it one time too many. So to repair it I drilled out the steering linkage to accept a small piece of styrene rod, welded the whole mess up with some Tamiya Extra Thin Liquid Cement and let it cure overnight. After everything was cured, I used an old wood burning tool to carefully heat and flatten the top of the rod and essentially create a rivet head to hold the tie rod to the steering knuckle and maintain the steering functionality. With the application of a little touch up paint, everything is almost as good as new! With the front suspension knocked together, it's on to the next activity! As always, thanks for taking the time to look and please feel free to comment if you wish. David G.

-
Monogram's 1955 Lincoln Futura Concept Car: WIP
David G. replied to David G.'s topic in WIP: Model Cars
That is a great color for this car Bart. The green you painted yours is closer to the color I imagined when deciding the color for mine. Sort of a pale mint green. It's also neat seeing it side by side with the Barris Batmobile. I'll have to do a similar photo shoot when mine is done. Thanks for posting those photos Bart, I really enjoyed seeing them. David G. -
Nice detail work on the engine and a great color choice with excellent an paintjob. That's going to be one fabulous Fifty-Seven Bob! David G.
-
It's a beautiful build, the color, finish, construction and overall appearance are fantastic! Even after five years, it's a great build and I'm happy to have had the chance to see it. David G.
-
Monogram's 1955 Lincoln Futura Concept Car: WIP
David G. replied to David G.'s topic in WIP: Model Cars
Thank you for your comment Bill. Feel free to post a photo of yours here if you have one. I'd love to see it. David G. -
STRIPPER with LOTS of PICTURES * repainting a Beetle
David G. replied to Edward Gore's topic in WIP: Model Cars
Great progress on this Bobby! I'm really curious to see how this comes out. David G. -
The fall didn't do much damage, it looks good Anthony! I like the detail painting on the chassis. Hmmm... are those Cadillac hubcaps I see? David G.
-
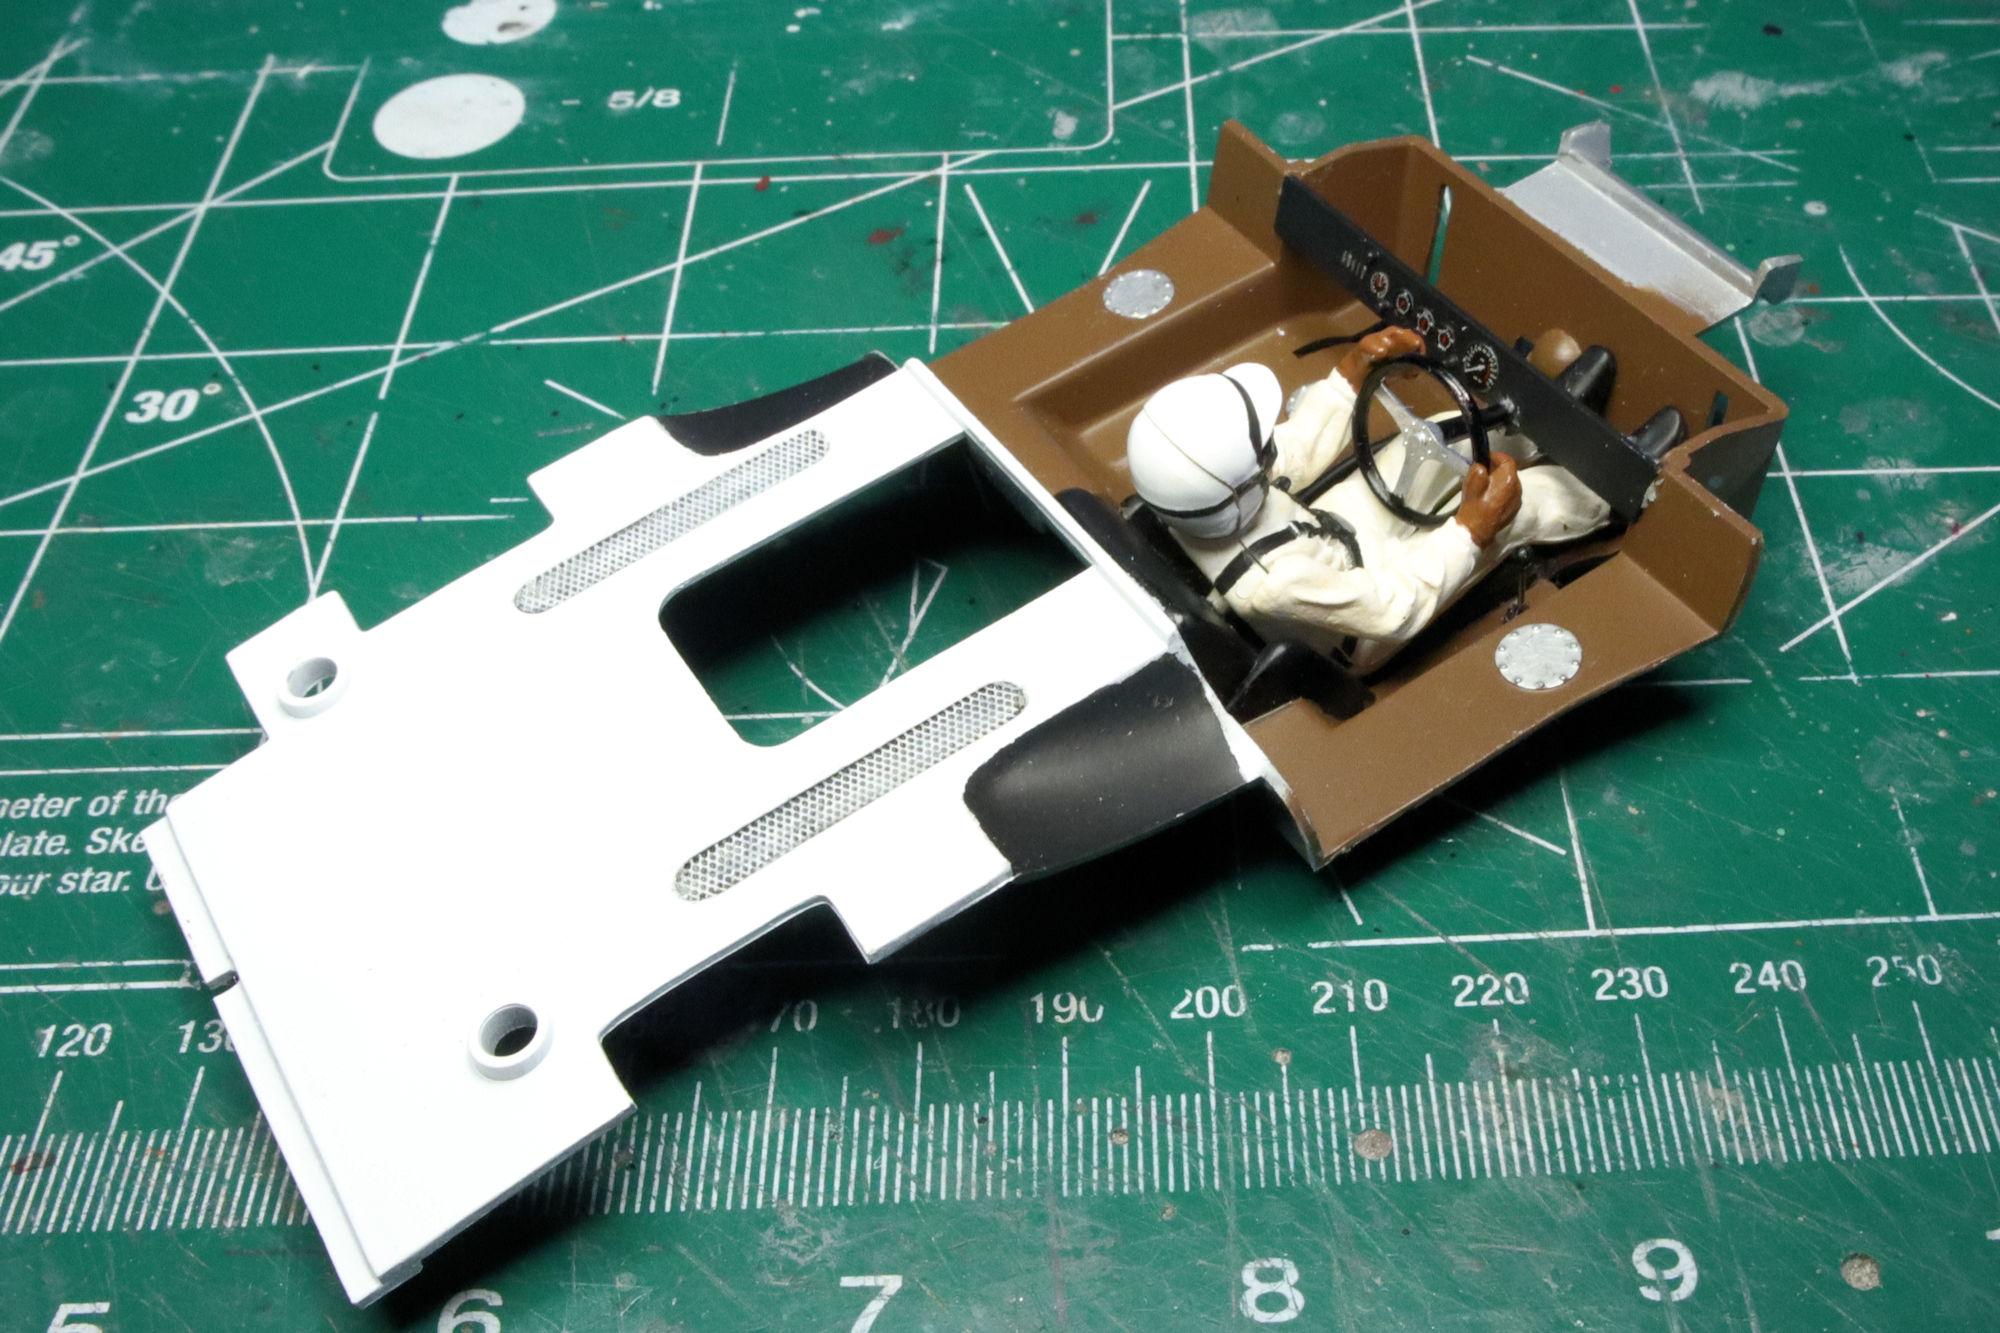
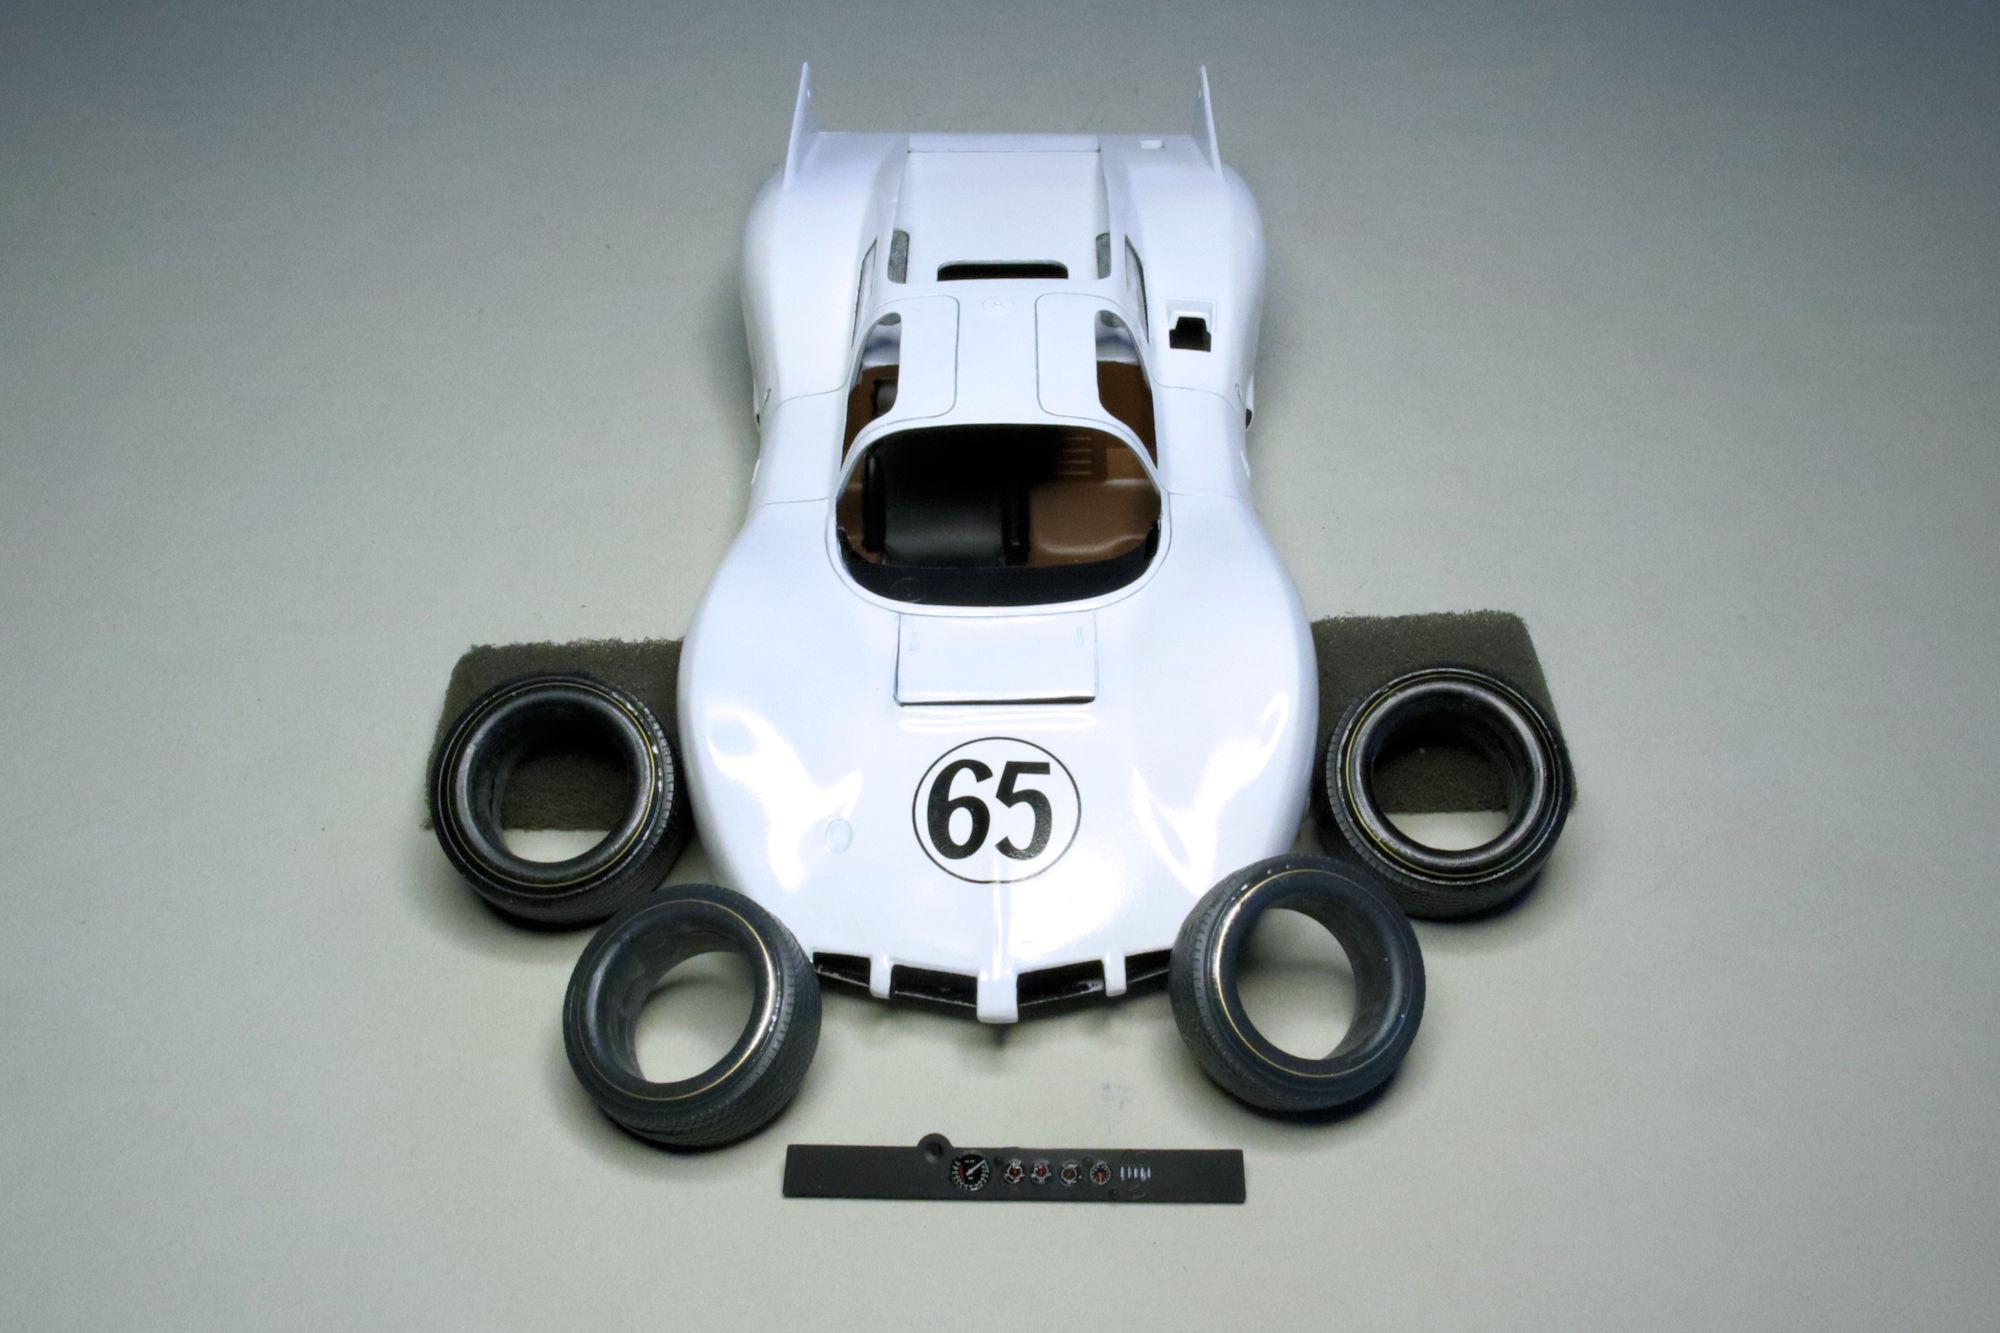
Hello Everybody! I'm just cranking along on this Chaparral, here's the next update! The interior is done! Monogram thoughtfully provided a pre-painted figure. They did a much better job than I ever could have. Monogram also provided the decals for the dashboard instruments. Nice! I love when model companies do that. I should have this one wrapped up pretty soon! Thanks for taking the time to look. David G.
-
Thank you Ken. Yes, I've done that too but it's less easy to predict the results than it it using a paint or pigment of some kind. For white bodies I used to use Tamiya's black panel line accent and then paint over it until I bought some gray accent. Using that it's easier to achieve more consistent results. David G.
-
1:16 Gunze Sangyo 1937 Rolls-Royce Phantom III Sports Saloon
David G. replied to Anglia105E's topic in WIP: Model Cars
Mr. Webb retires to his summer home. Maybe instead of scraping the plating off the radiator and risk damaging the plastic, you could strip it chemically. In the States we have a degreaser/detergent called SuperClean sold at most auto parts stores. I and many others use this as a paint stripper. Simply soaking the parts for a day or two will remove most paint or plating without damaging the plastic. For re-chroming the radiator there are a number of chrome paint products available that do a rather good job. Though I haven't tried it yet, Revell's Chrom Spray has been receiving favorable reports. And since it is I believe, acrylic paint, it should be easier to paint the dark accents the way you want them. The chassis is looking fantastic BTW. Especially seeing it under natural light. David G. -
Wow Daniel, that's some crazy detail with the decals for the axles! ? You're giving this kit way more than it was ever intended to have. Though it's difficult to see them, I do like the Firestones on the front. One doesn't see many of those today, which is odd because they were everywhere at the time. David G.
-
Monogram's 1955 Lincoln Futura Concept Car: WIP
David G. replied to David G.'s topic in WIP: Model Cars
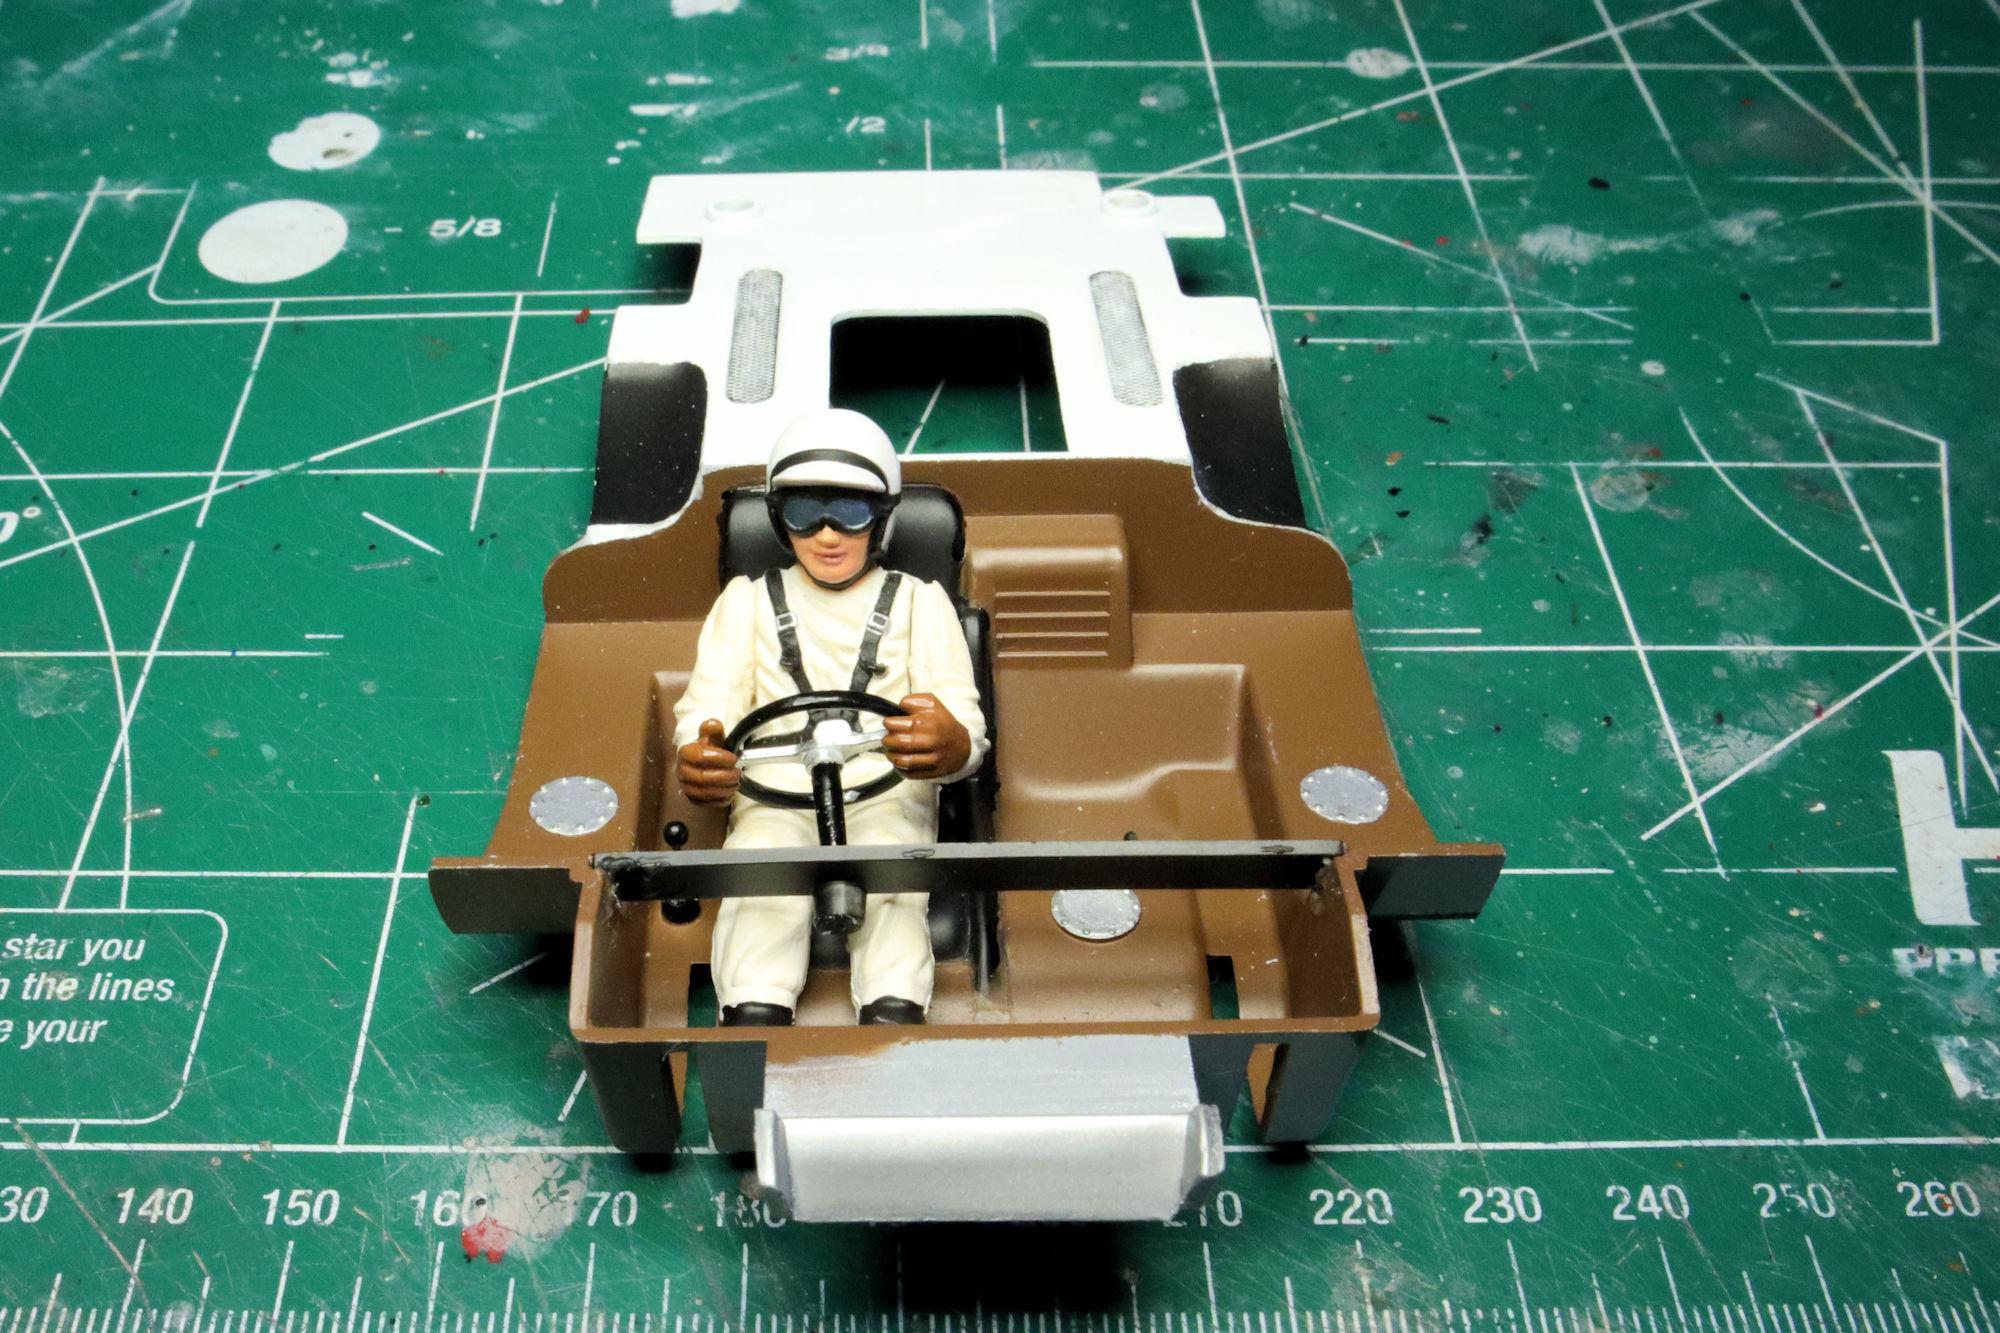
I know. I had to make the steering wheel removable. Otherwise the driver would have been trapped in the seat. -D- -
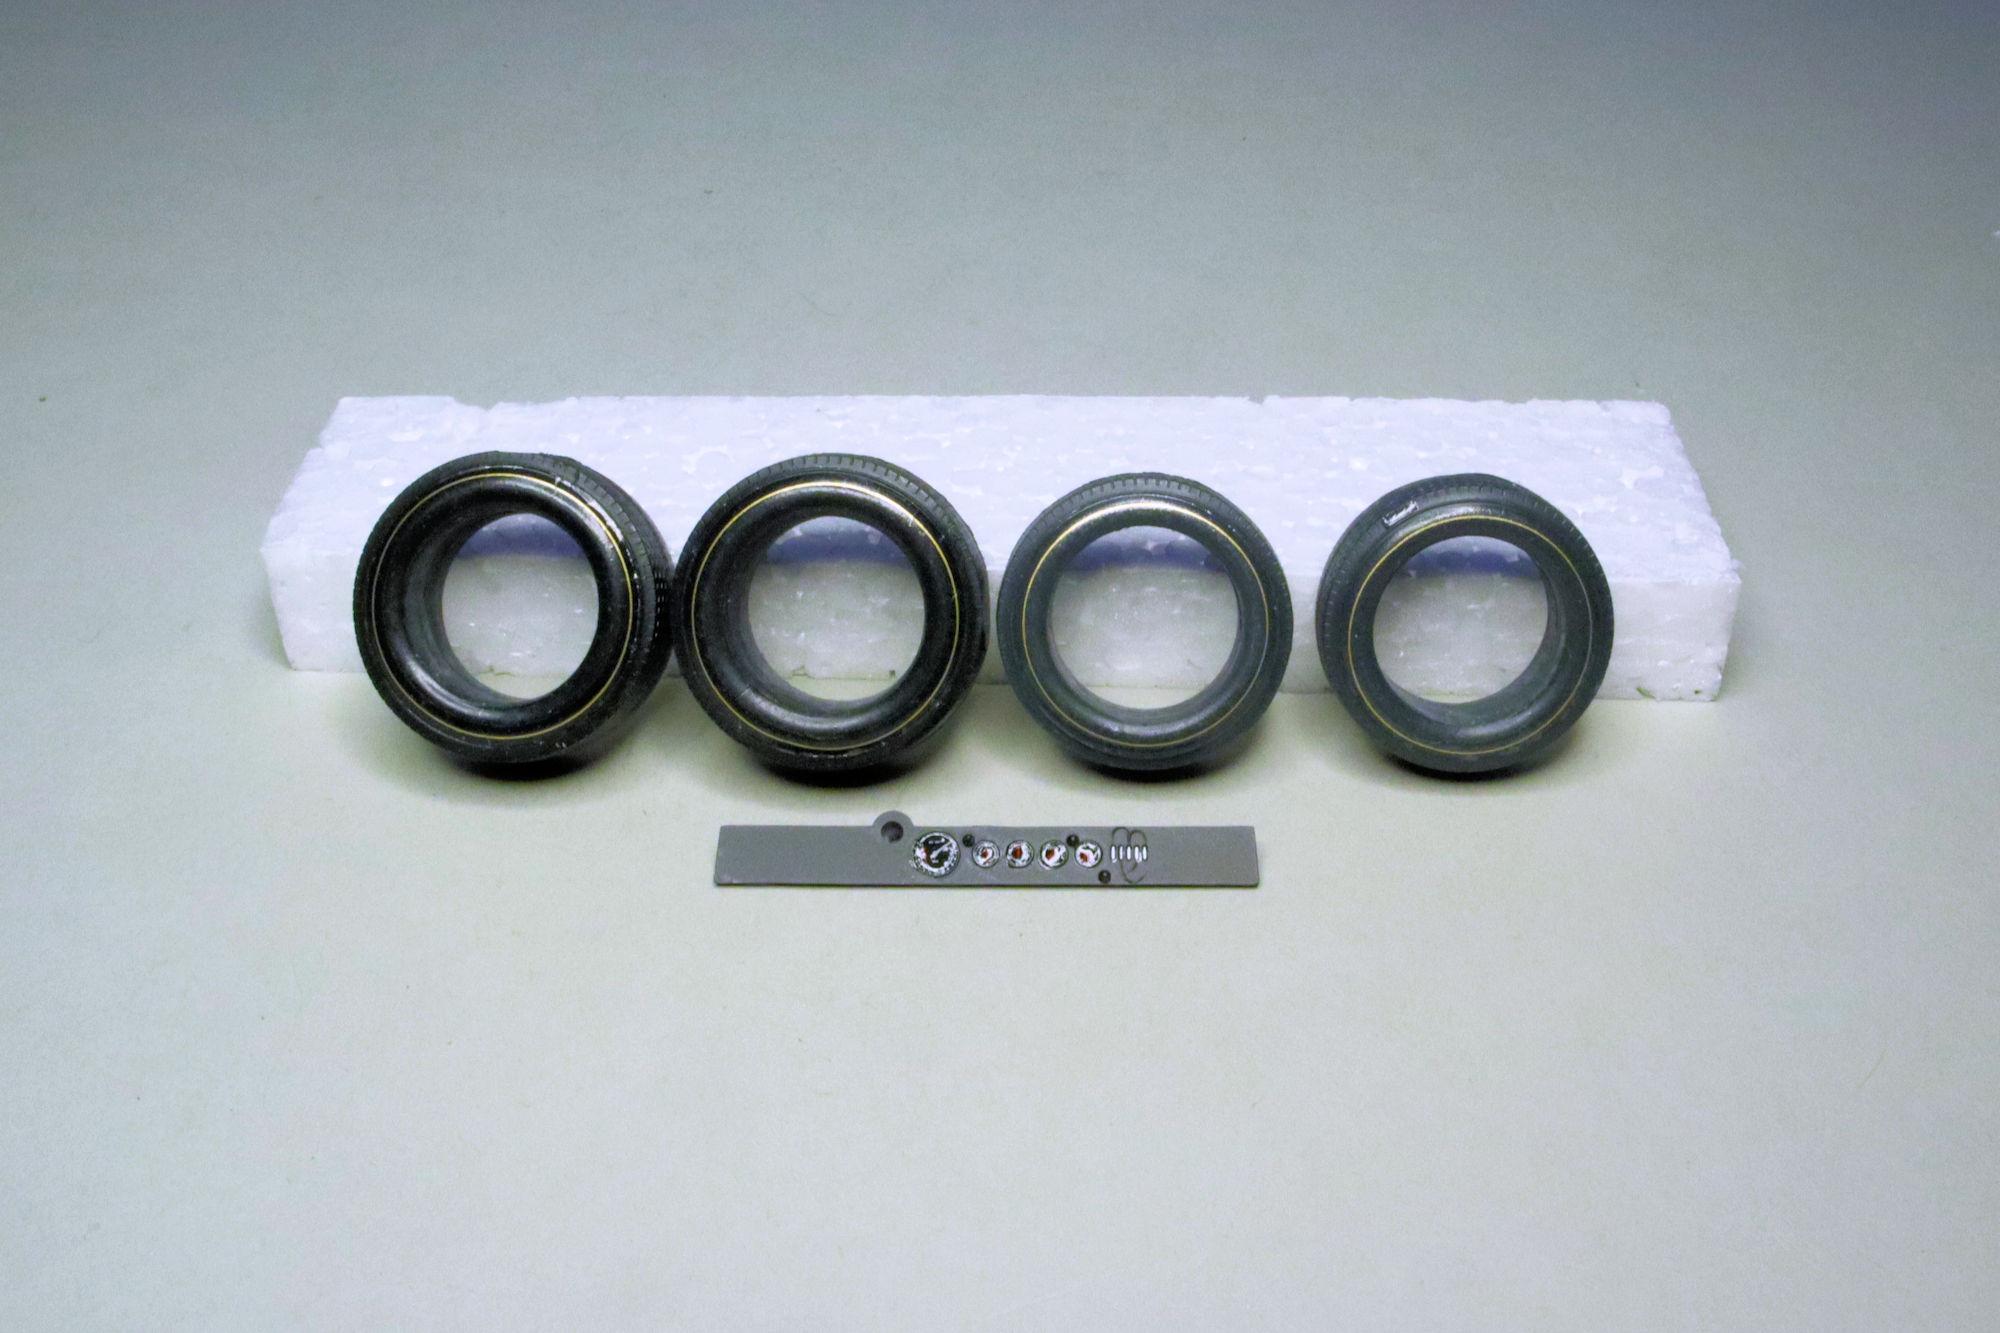
Hello Everybody! Here's the next albeit minor update. I decided to darken the panel lines just a little more using Tamiya gray Panel Line Accent Color. After that was allowed to dry and I got all the slops and blobs cleaned up I started throwing some decals at it. Here's a better look at the tires and dash decals. There's more to come... but I have to do it first. Thanks for taking the time to look and please feel free to comment if you so choose. David G.
-
Monogram's 1955 Lincoln Futura Concept Car: WIP
David G. replied to David G.'s topic in WIP: Model Cars
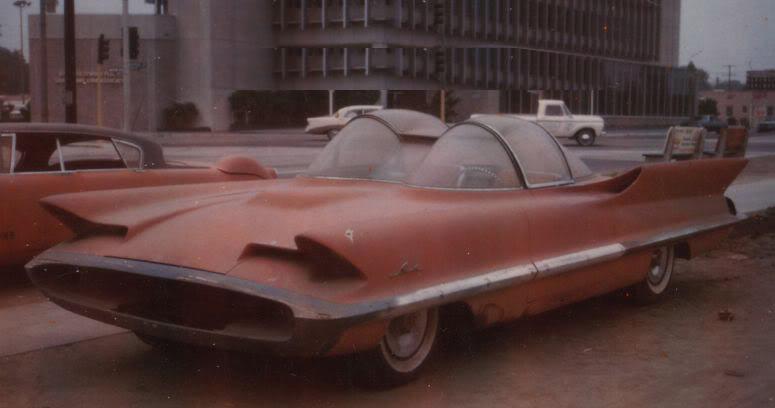
Thank you Jim. The figures will most likely stay with the car, I just don't like having my options limited. Thank you for your kind comments David. You are correct. The Batmobile from the 60's television show was built by George Barris using the Futura as a starting point. He bought it for the princely sum of $1.00. (That's $9.68 in 2024 dollars.) Here's a photo of what it looked like when Barris acquired it from Ford. Some people are of the opinion that Barris ruined the Futura when he made the Batmobile. I feel that he rescued it from obscurity. How many concept cars from that era are just ...gone. Faded from knowledge and history. I have considered a two tone paint scheme but I'm not sure I have the proper fashion sense to design an appealing pattern. I have no examples to go by as of yet. The 1956 Lincoln is of similar design but the body style differs. -D- It's interesting how we tend to go off on those tangents, isn't it Tom? Thank you. I'm glad you like the work I've done so far. Thank you Len. I'm actually pleasantly surprised by the favorable response to my color selection. I thought there would be more push-back with the "inaccuracy" of my choice. Thank you all, I appreciate that. David G.
-
The tires and shocks look good! David G.
-
1:16 Gunze Sangyo 1937 Rolls-Royce Phantom III Sports Saloon
David G. replied to Anglia105E's topic in WIP: Model Cars
Best of luck with that David. The radiator grille is one of the iconic features of this motorcar and it just simply must be right. But I'm sure that you know that much more than I do. David G. -
Monogram's 1955 Lincoln Futura Concept Car: WIP
David G. replied to David G.'s topic in WIP: Model Cars
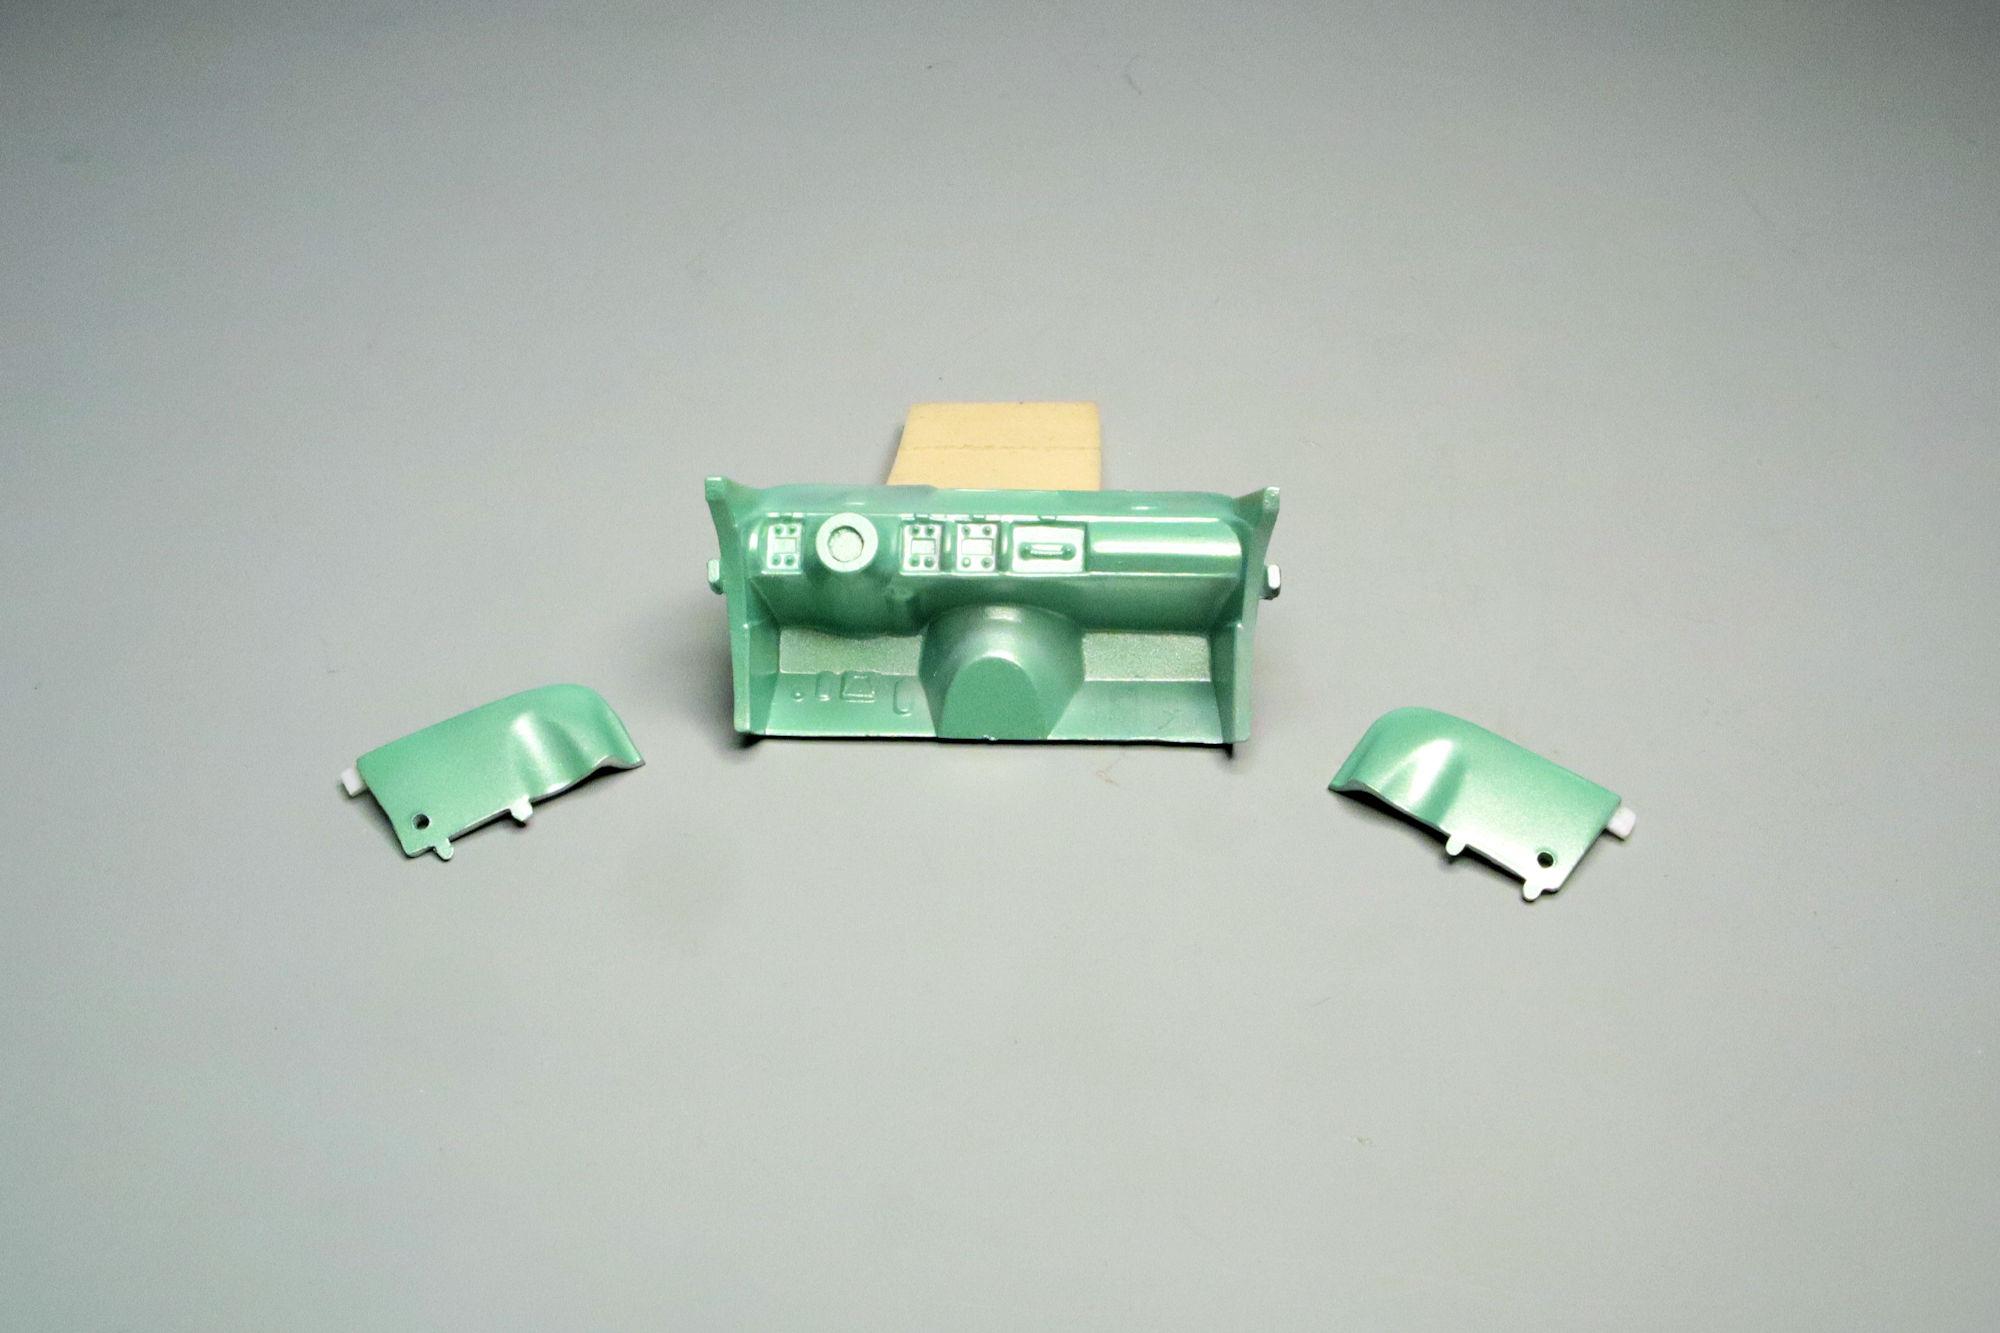
Hello Everybody! First color! I know that the original car was pearl white. Literally pearl white. In that thousands of seashells were ground up to make the paint. Quite an extravagance if you ask me. I'm also aware that the pale green color often associated with this car is due to an error in how some of the photos were rendered. But still, in my opinion the green is a much better color for this car. It just looks right for this car, right for the era. So much more than does the white. As always, thanks for stopping by for a look and please feel free to share any thought, opinions or comments. David G.