mrmike
-
Posts
5,324 -
Joined
-
Last visited
Content Type
Profiles
Forums
Events
Gallery
Everything posted by mrmike
-
I just tried to scrape a little of the paint off with a knife and it came off easily. Great! Now to wash off the hood of it nasty paint, let it dry, reprime and repaint
-
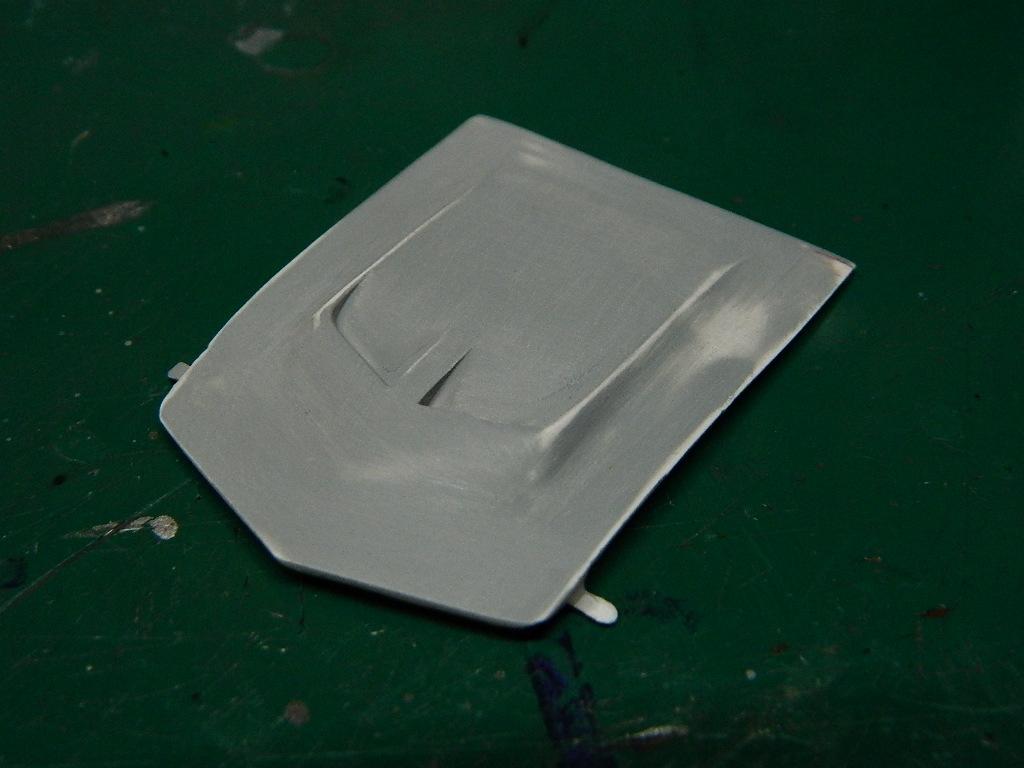
After much preparation, I added another coat of paint to the hood only to have fogging and pin holes in the paint! I knew I should have washed the hood first! But, then I discovered a crack in the paint. Now, this is not on the edge where I have added some styrene to extend the hood, but inboard about 1/4 inch from the edge. I have decided to toss the hood into a tub with some Easy-Off Oven Cleaner, remove the paint and start all over again! More Corvette to come...

-
I have been thinking about this kit for a few weeks and I should finish it. I may remove most or all of the BMF and start over again along with repainting and finishing the hood.
-
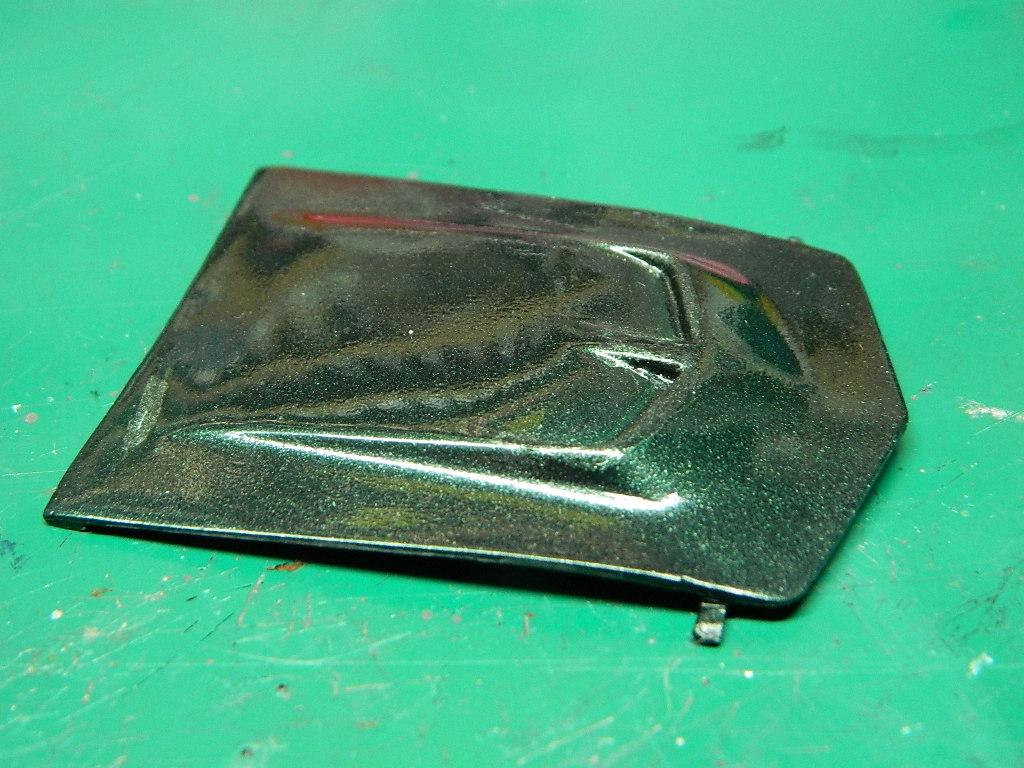
Actually, there was a scratch near the edge of the hood and my attempt to fill it with a little paint and a fine brush did not work out like I had hoped for. The burn marks across the top of the performance section of the hood was the worse of the two and I decided to repaint the hood instead of having the repairs display themselves.
-
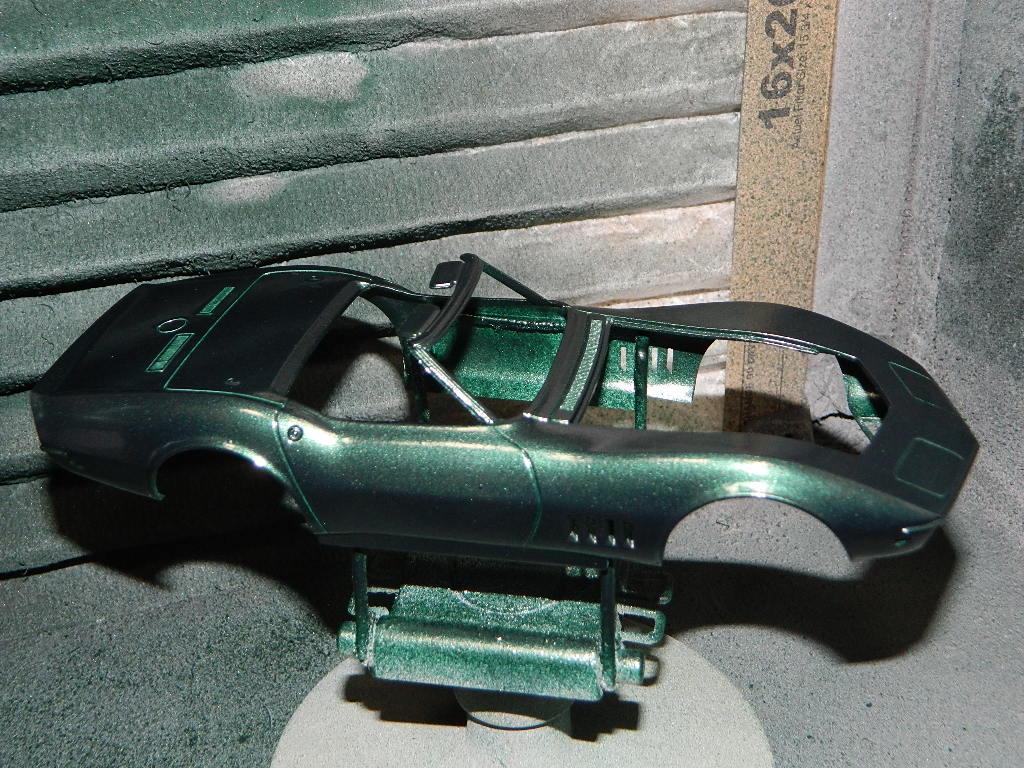
Thanks John! Forest Green Pearl does look great, especially after it has been clearcoated. Did I clear the paint? No. That was just polishing with Scratch Doctor Scratch Remover and Novus 2 which is a finer scratch remover.
-
I started polishing the Forest Green Pearl paint this morning. So far, I have the roof and the hood polished and the body is next. I burnt through in a couple of places on the hood and I tried to touch up those spots, but they stand out like a sore thumb! After repeated polishings, they still stand out, so the alternative is to repaint the hood again. More Corvette to come...
-
Thanks Carl! I found plenty of dark green Corvettes on Google and that is when I fell in love with this Corvette and it dark green color.
-
I started looking at the instructions again and then I Googled Corvette engine compartments and then I Googled expansion tanks and windshield washer tanks. With the help of my Revell '69 Corvette Yenko instructions, I figured the location of the expansion tank and the washer bottle and I installed them on the passenger side inner fender of my '68 Corvette. The expansion tank is not listed in the '68 Corvette instructions and the windshield washer bottle is not listed on the '69 Corvette Yenko instructions. This is a case of both maybe correct, but both are wrong for their exclusions. More Corvette to come...
-
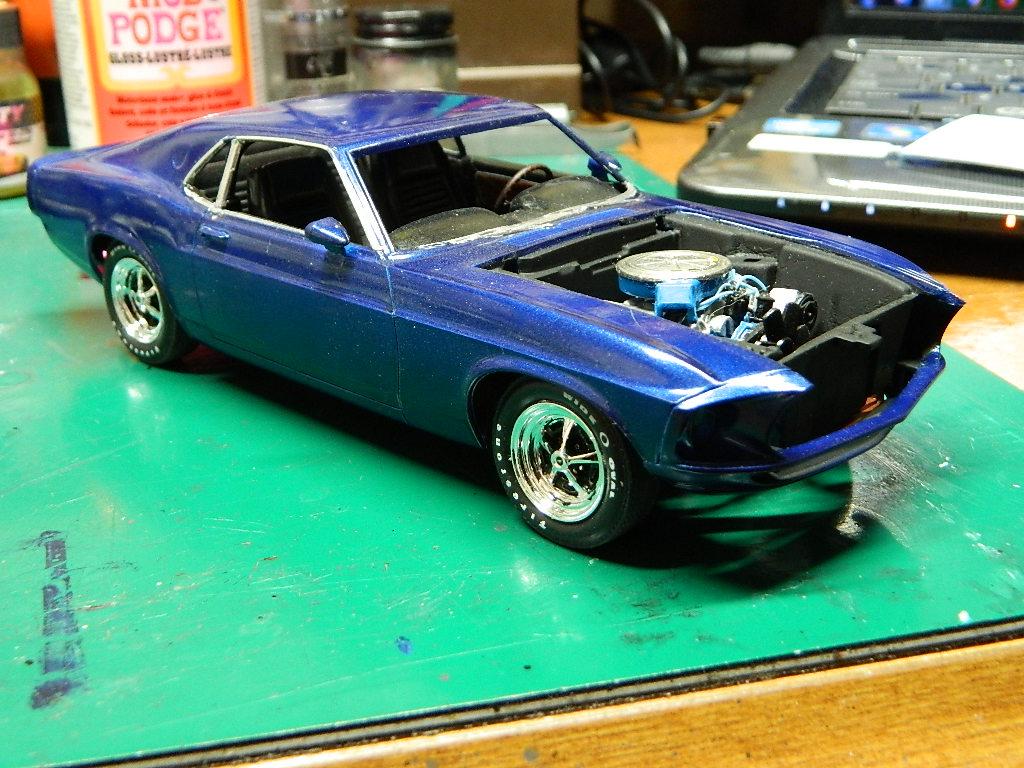
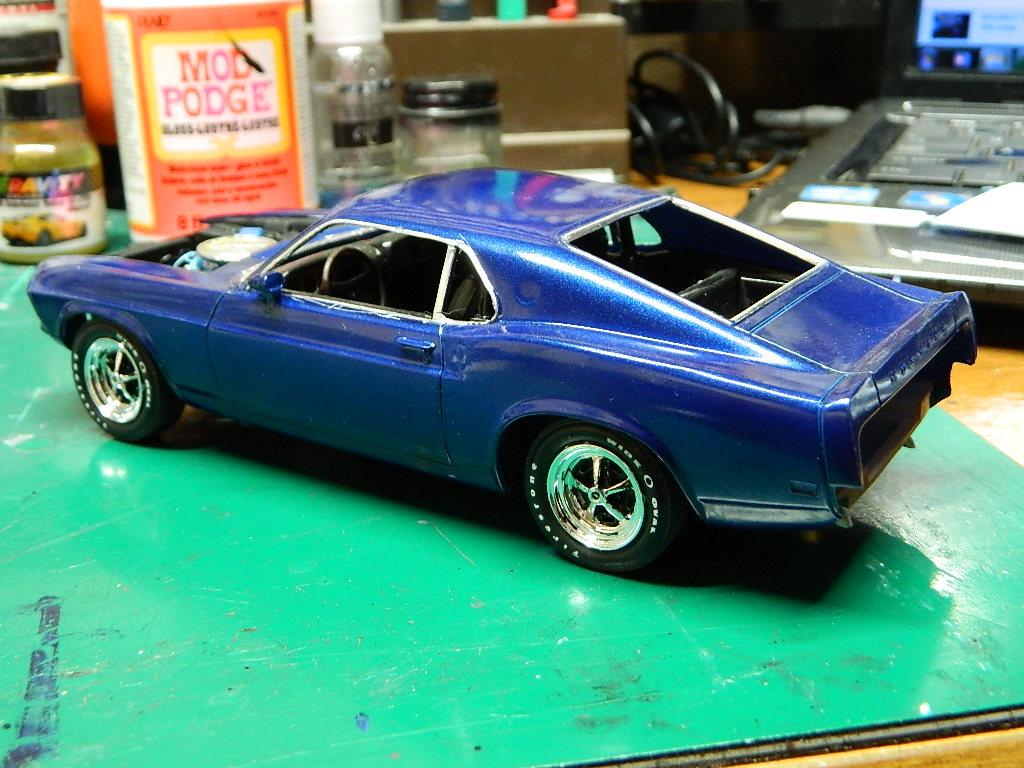
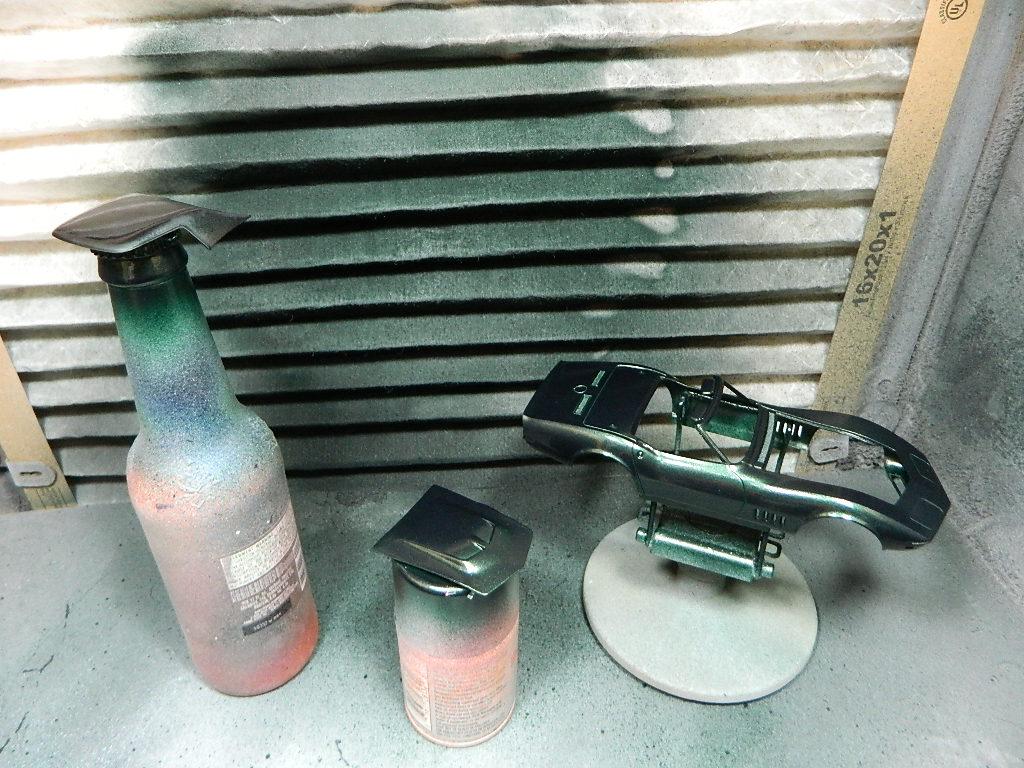
I painted the Corvette this afternoon with Dupli-Color Forest Green Pearl over Dupli-Color Scratch Filler & Primer. Came out rather well. Just a little blushing on the roof which will polish out. A good paint job! Now to let this dry for a couple of days and then polishing and clearcoat. More Corvette to come...
-
Thanks Jeremy!
-
Thanks Curtis! I suspected that this was originally used for another kit variation. Maybe for the kit that they said had a 429 in it! ? It shows just how badly they wanted to put a kit out in the market and some of the details were left out.
-
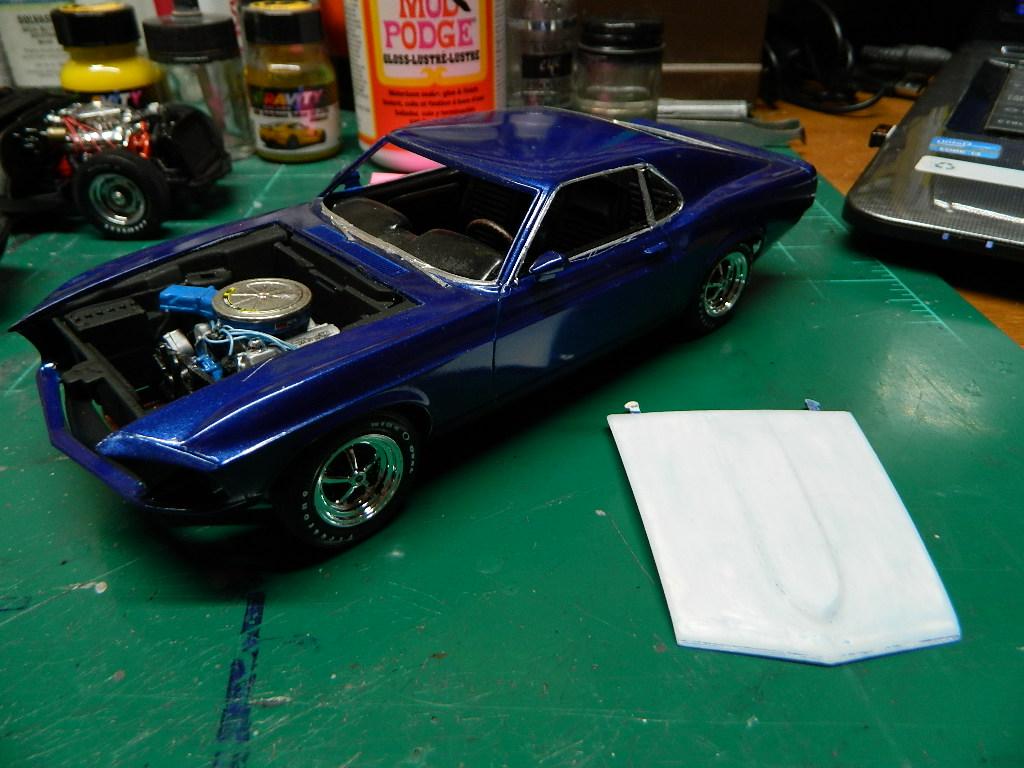
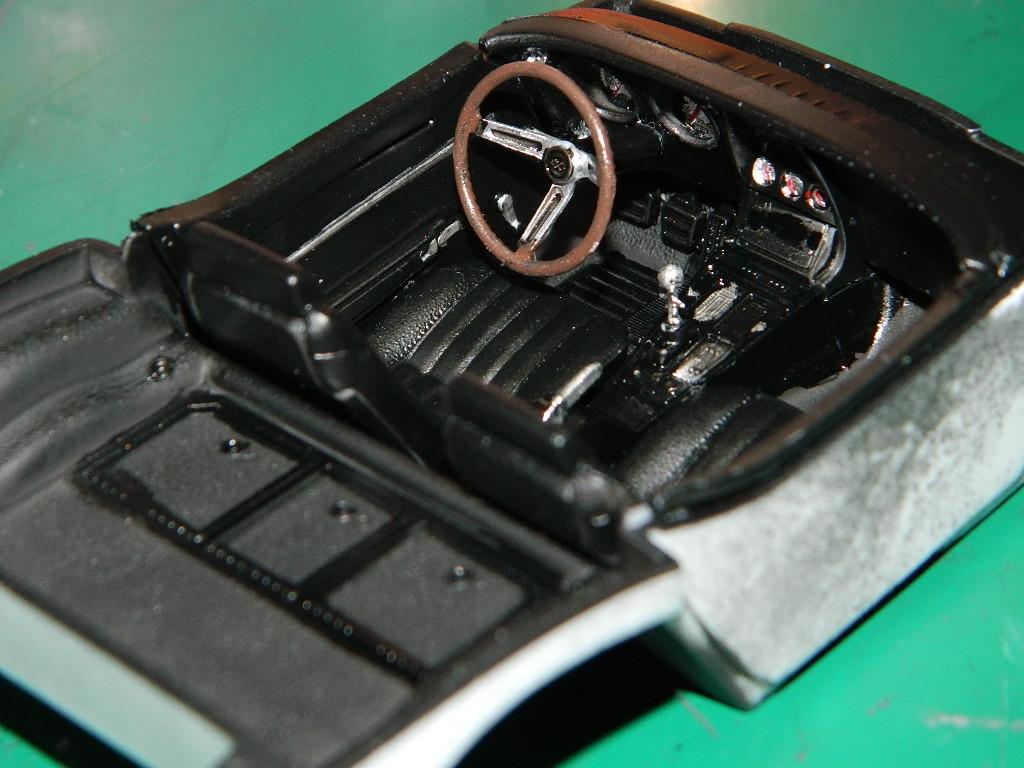
I have finished the interior of my '68 Corvette. Since this is a L89 car and not an L88, I tried to create a radio in place of the block-off plate that L88s have since they have no radios. More Corvette to come...
-
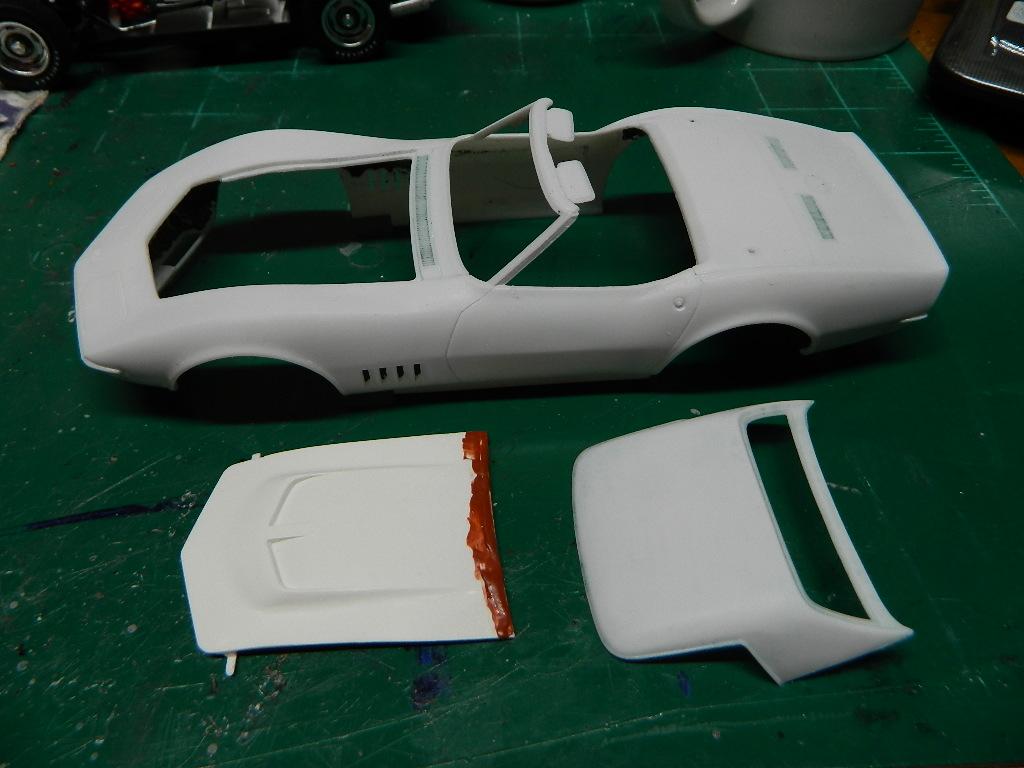
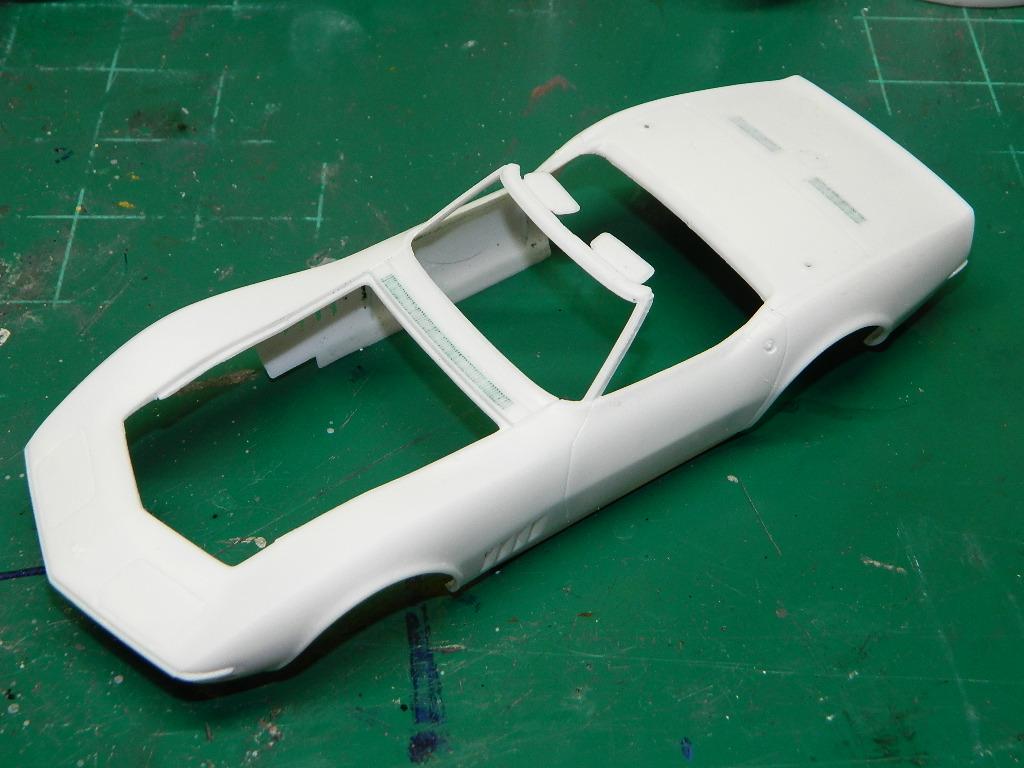
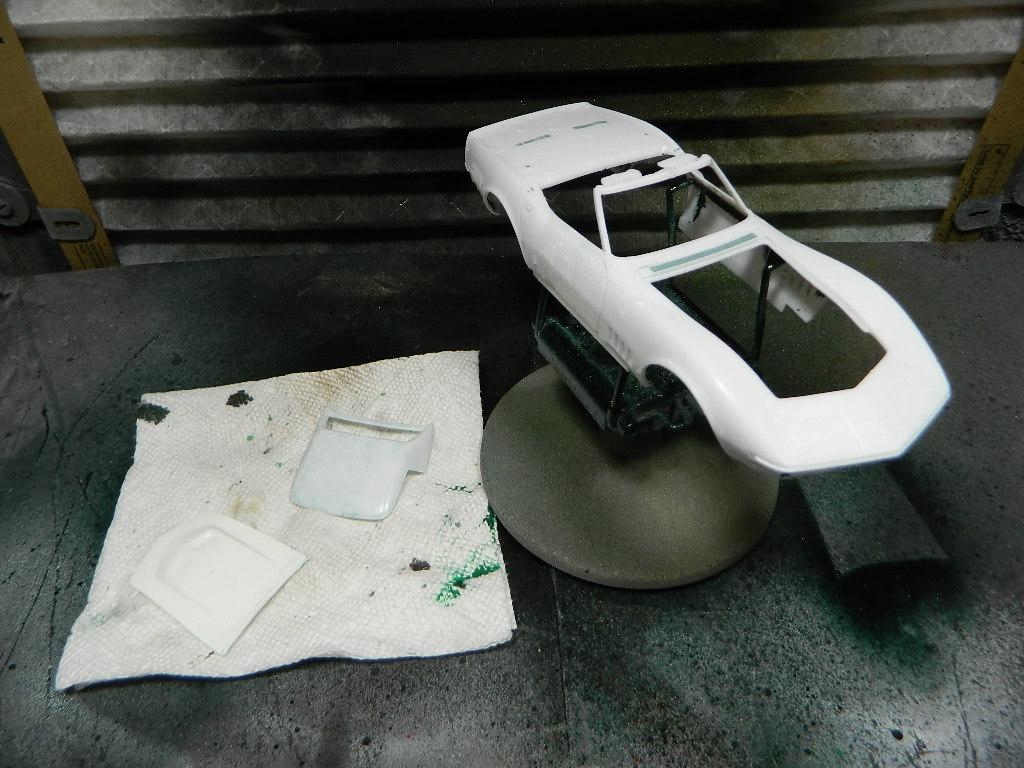
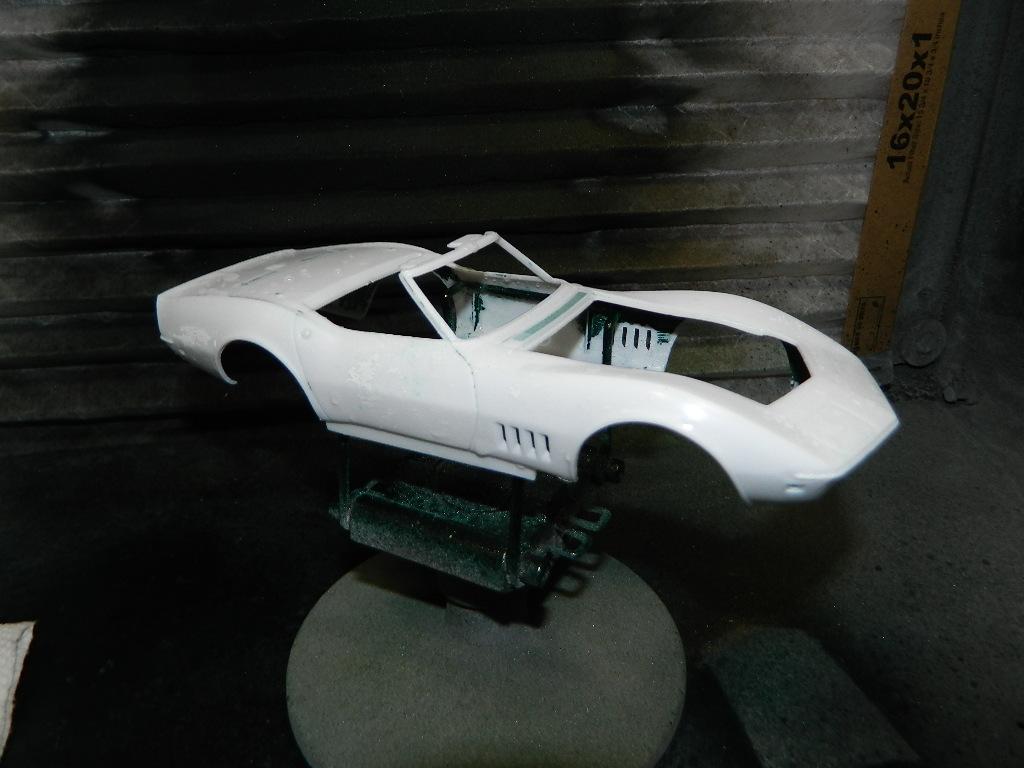
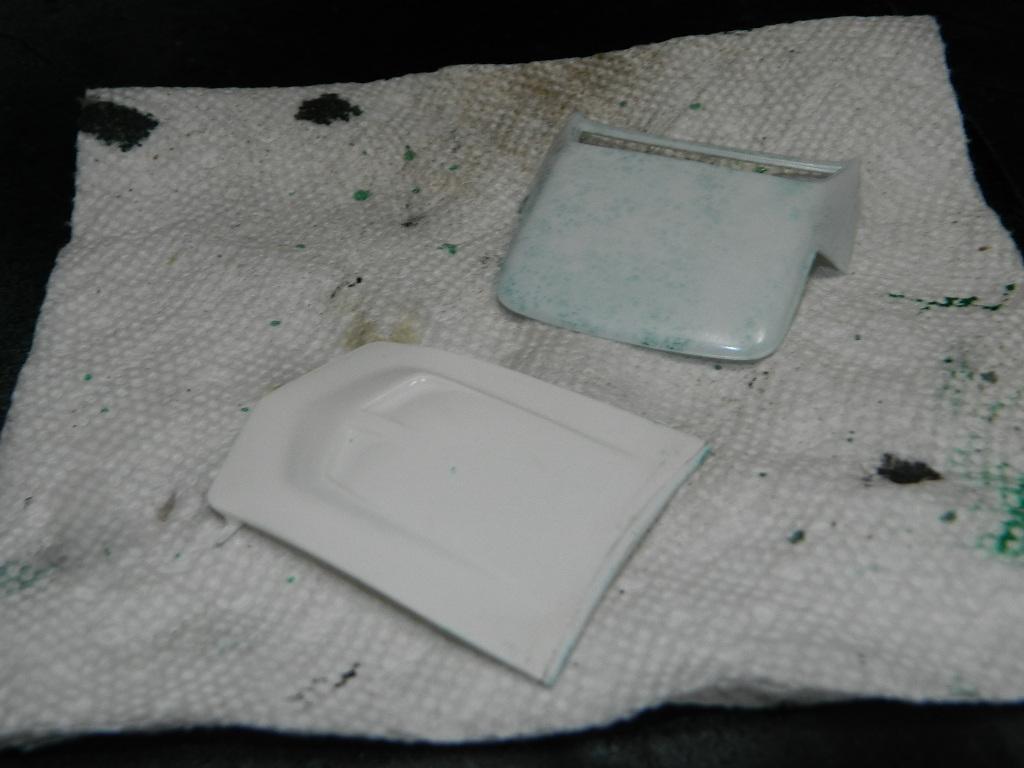
I don't like the instructions on this model! Parts are included, but there is no mention of that part being used. There is a fan shroud on the parts tree, but no where in the instructions is it called for. I included it on my Corvette! I have started sanding the primer coat on the 'Vette hood and in some spots, The primer ran so I made sure it was flush before I add another coat, a little more sanding and paint. More Corvette to come...
-
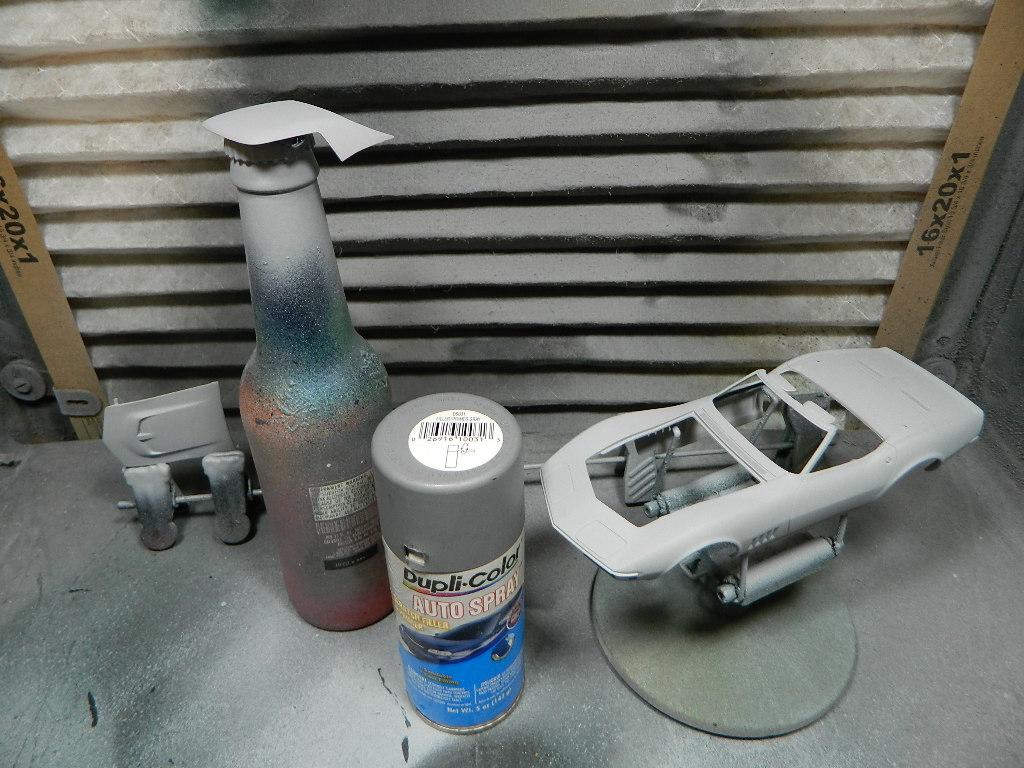
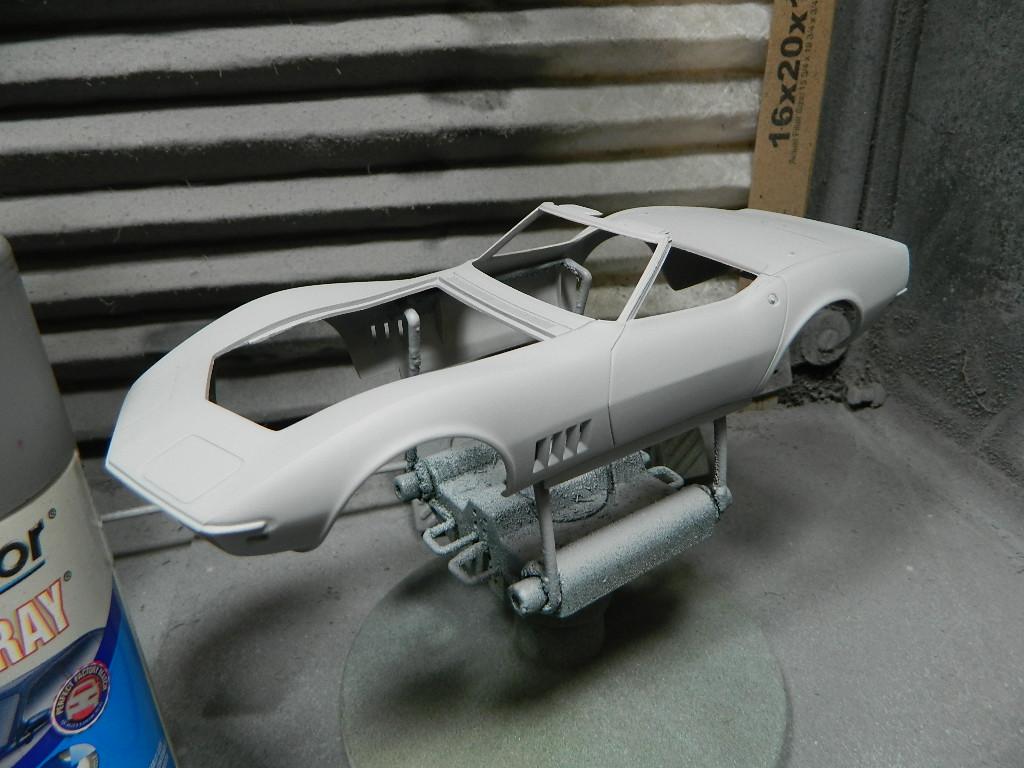
I added primer to my Corvette L89 this afternoon. Dupi-Color Scratch Filler & Primer.
-
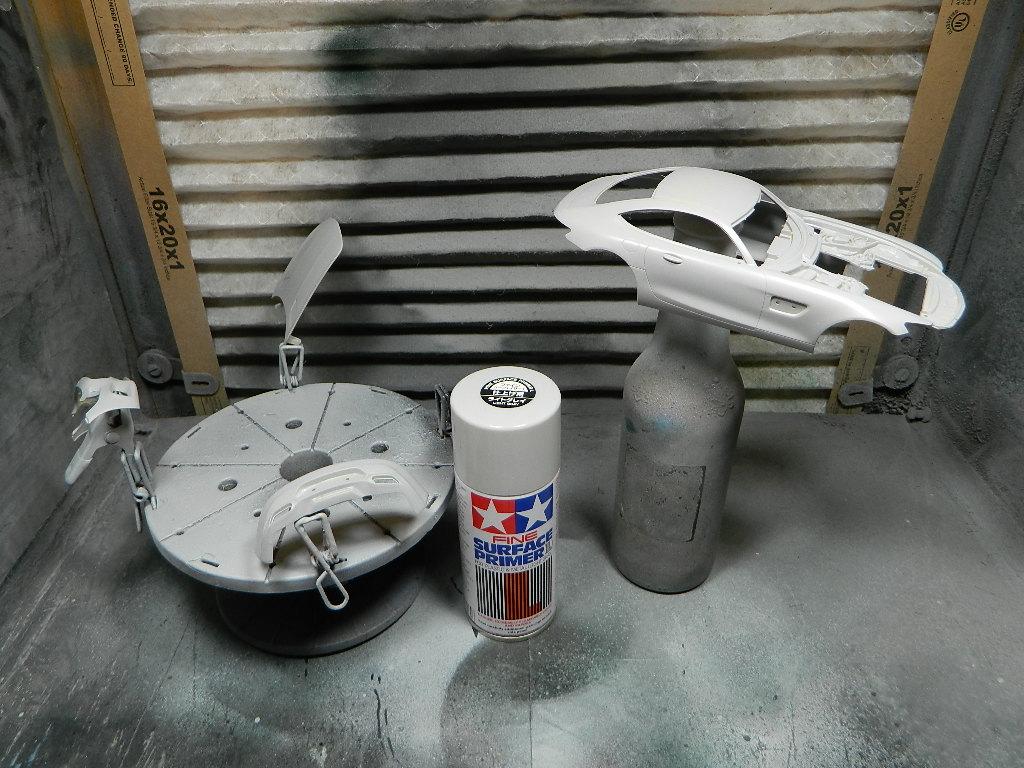
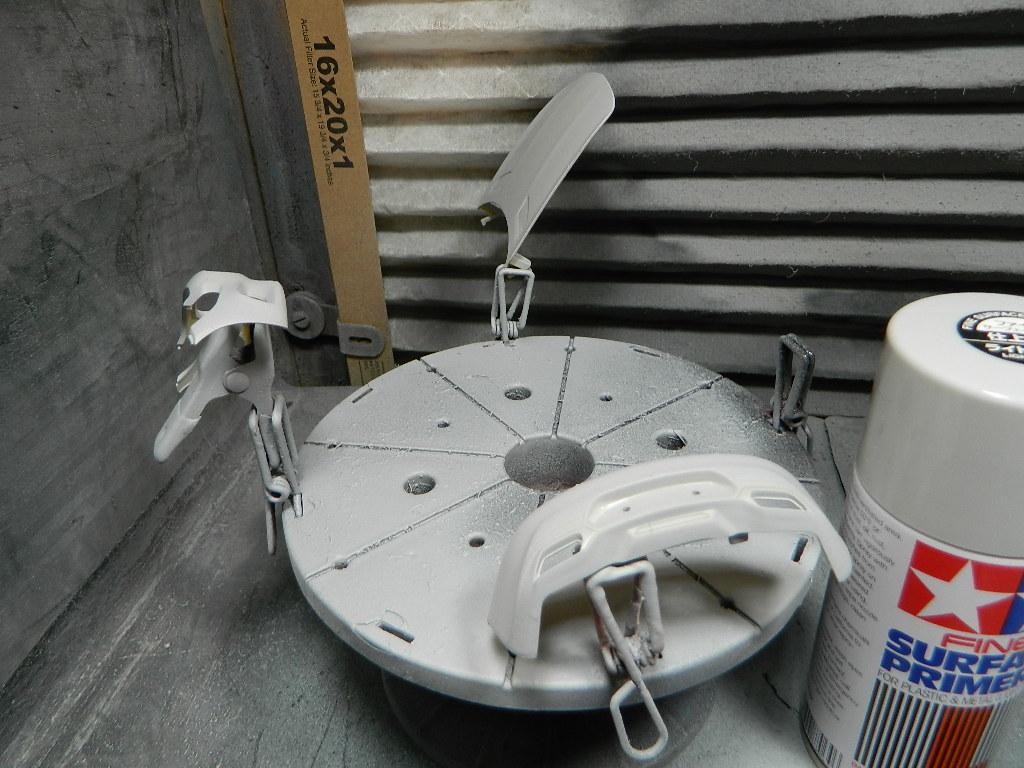
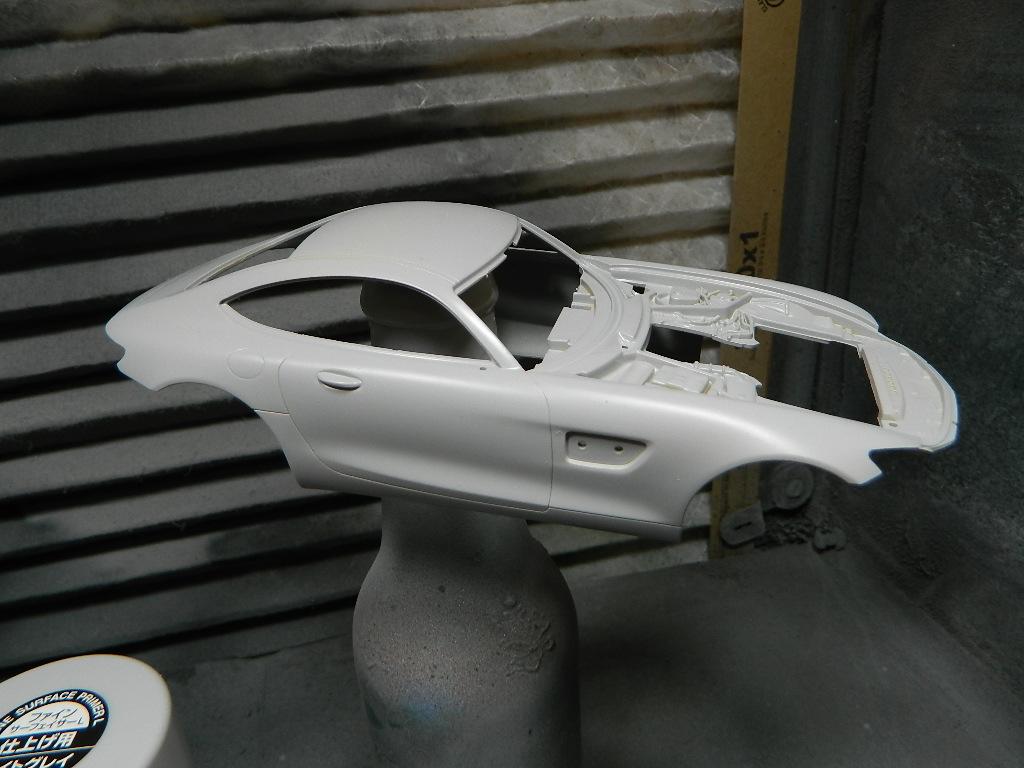
I have taken the first steps to painting my Mercedes-Benz AMG GT. Tamiya Grey Fine Surface Primer. More AMG GT to come...
-
Thanks Carl!
-
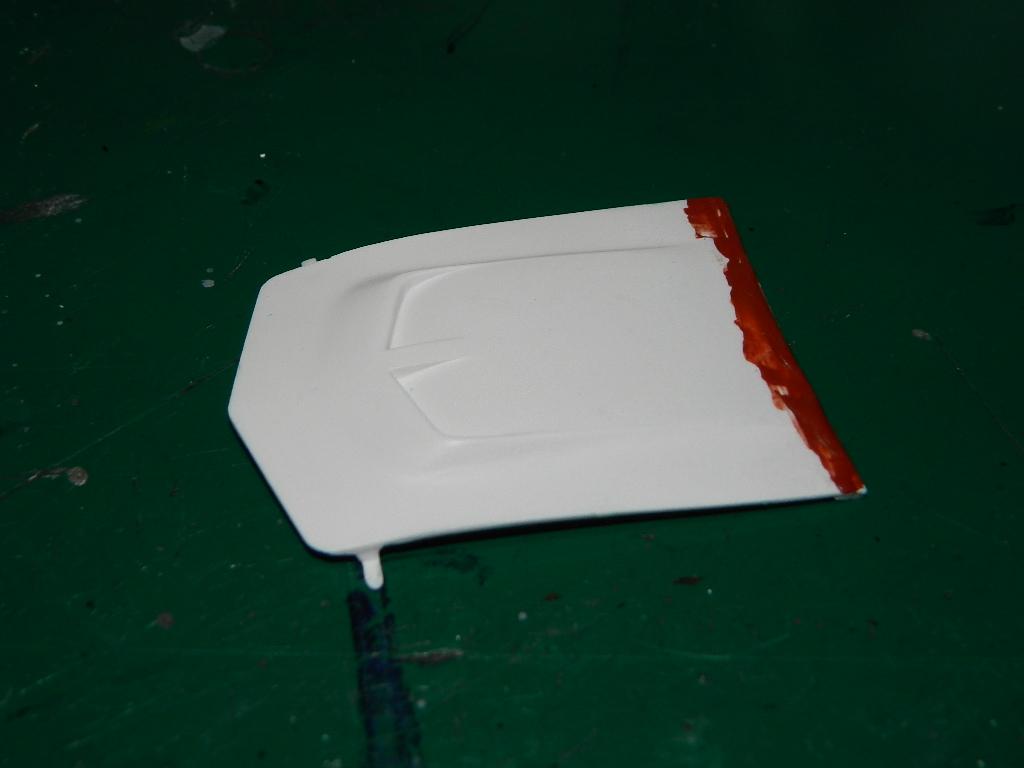
I started off this morning with several pieces of sanding film and I removed any remaining primer and paint. I traced all the door groves and vents with a pick and the backside of my No. 11 X-acto blade. I applied more Bondo to the hood edge that I had added previously. More sanding to follow and then primer and paint. More Corvette to come...
-
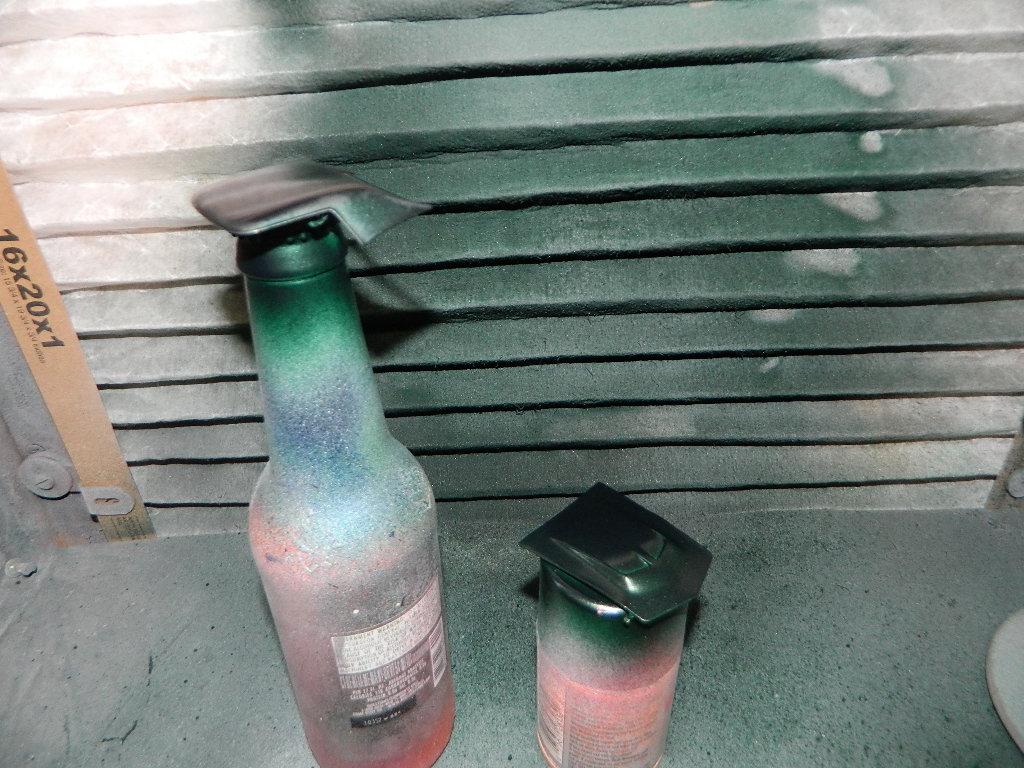
After sitting for a couple of days in Easy-Off Oven Cleaner, I washed the Corvette body, hood and roof and the old paint just came off with some Dawn Dish Detergent and a scrub brush. Now to pick and sand to remove any unwanted paint and then a new coat of primer. More Corvette to come...
-
Thanks Carl and Peter! I have gotten more of the Dupli-Color Forest Green Pearl and this is the color paint for my '68 Corvette.
-
Thanks JJ! The additional info really helps!
-

AMT '67 Mustang Fastback-Now in Under Glass Section
mrmike replied to mustang1989's topic in WIP: Model Cars
This is looking really good, Joe! -
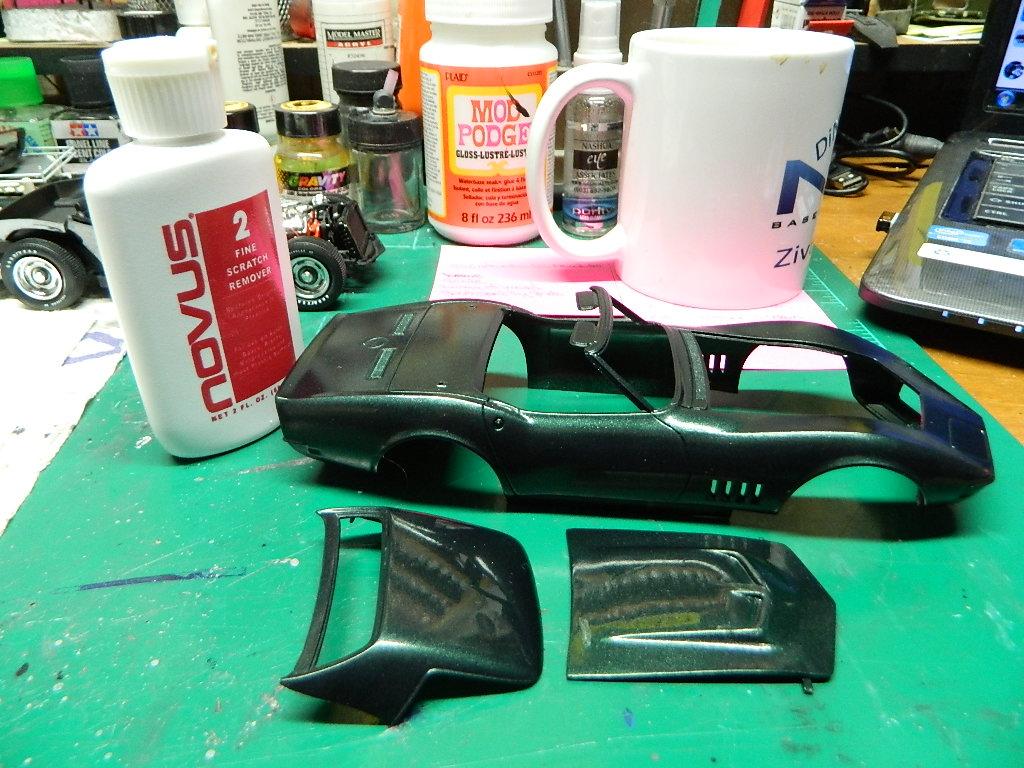
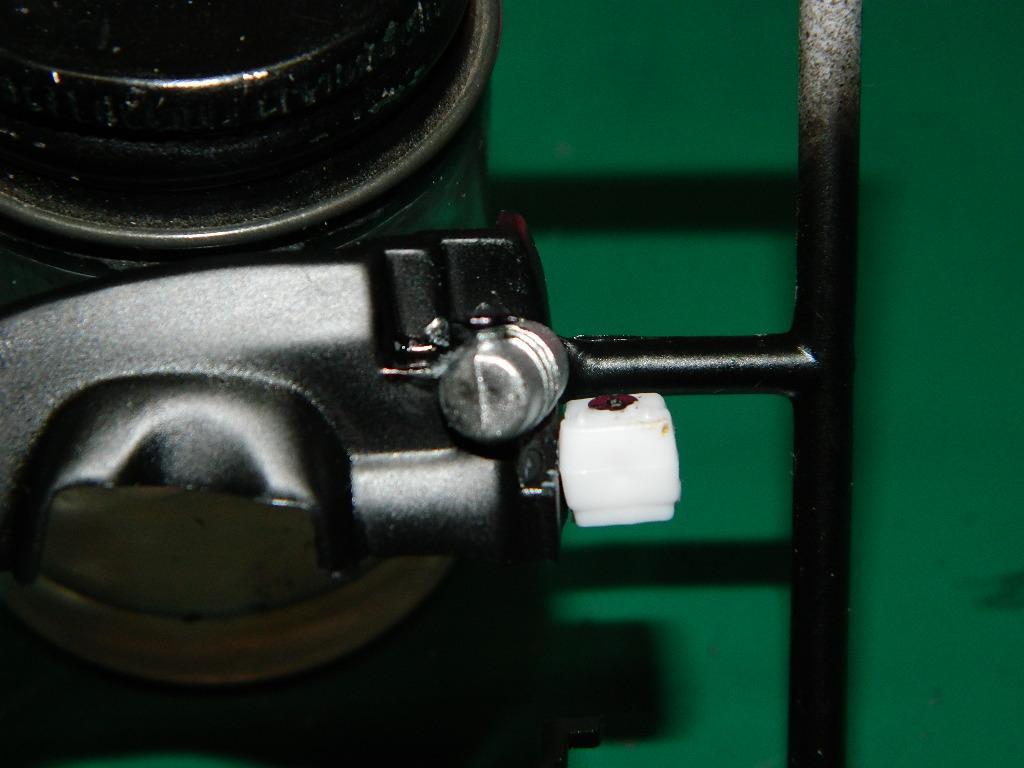
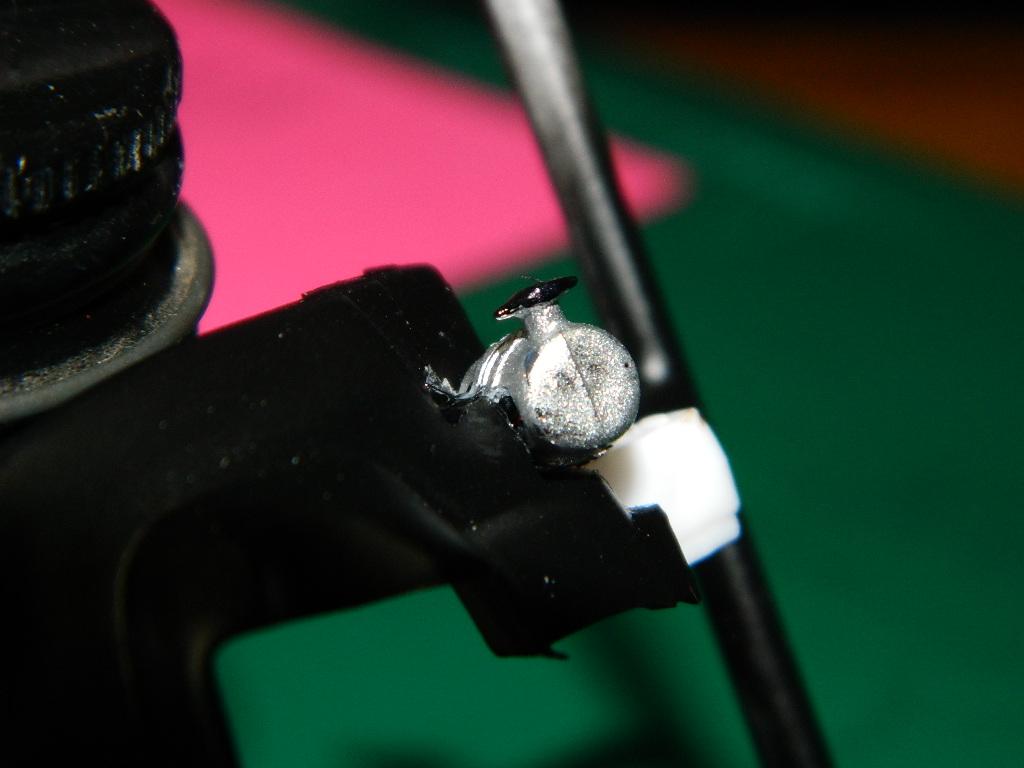
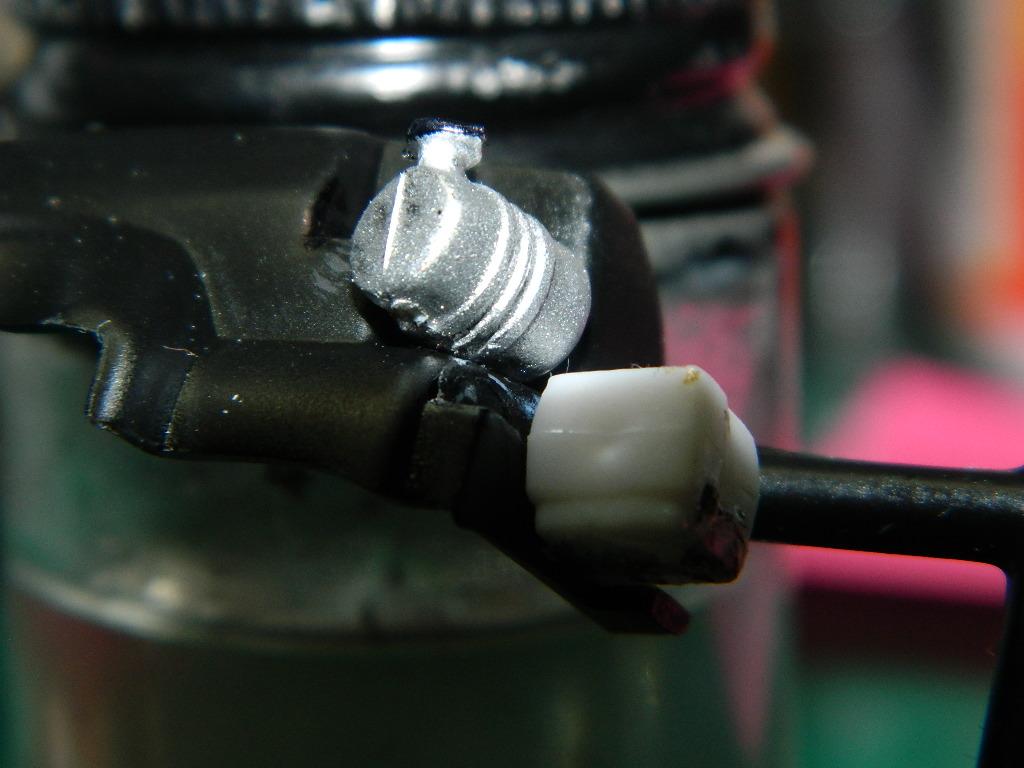
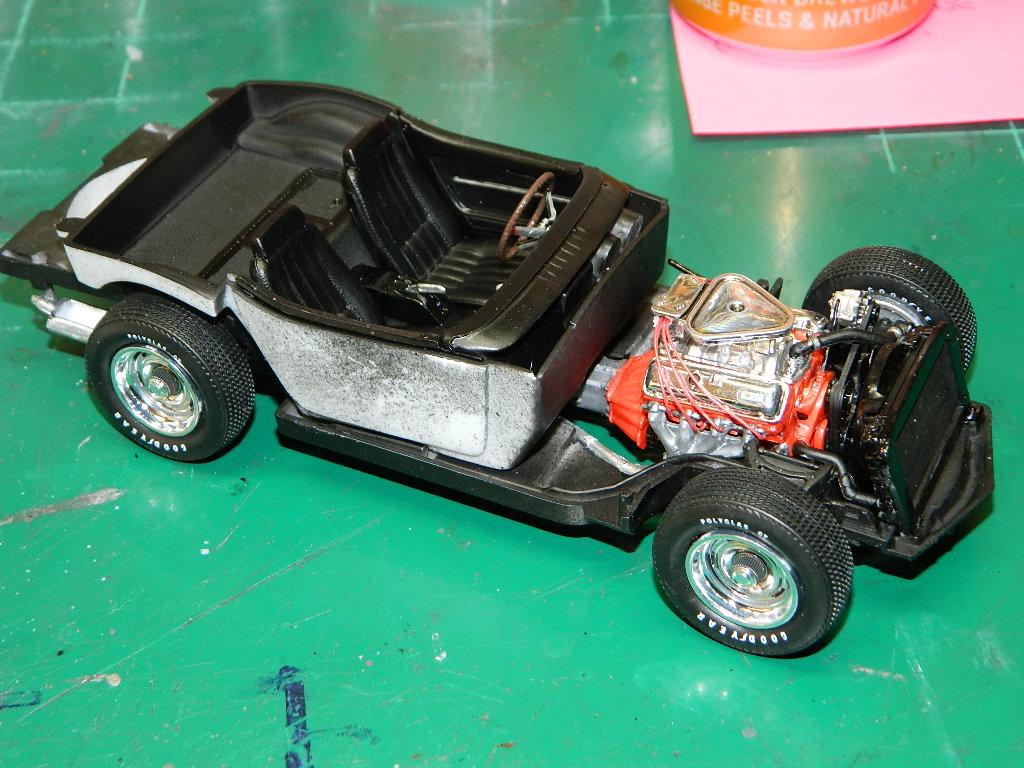
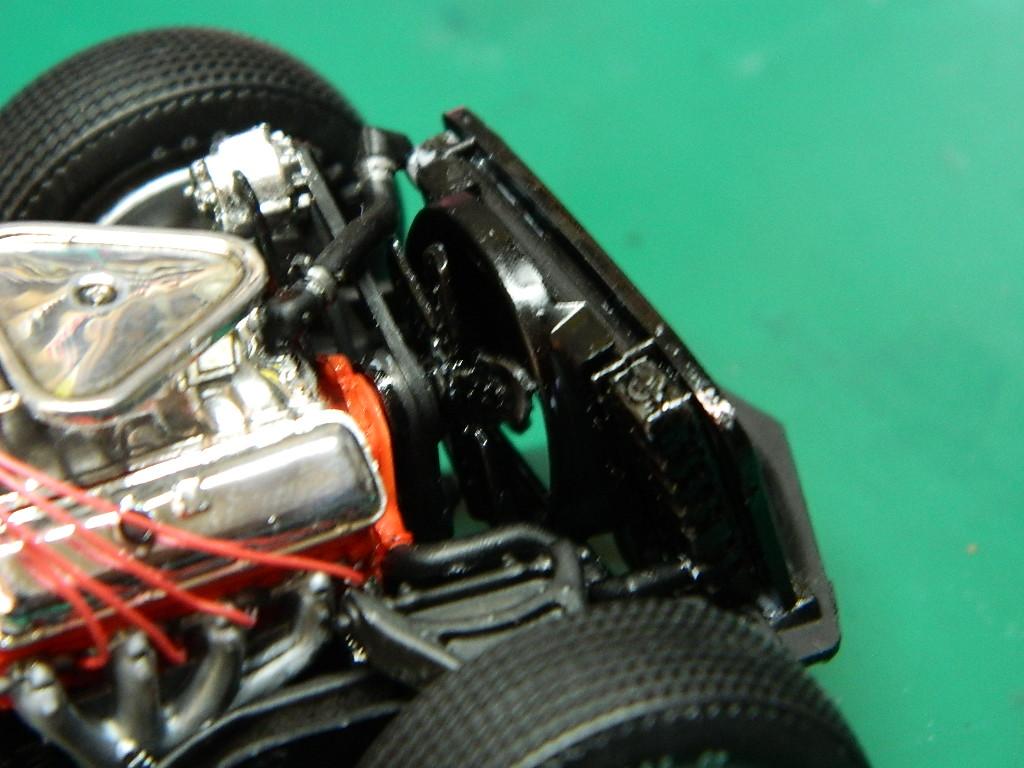
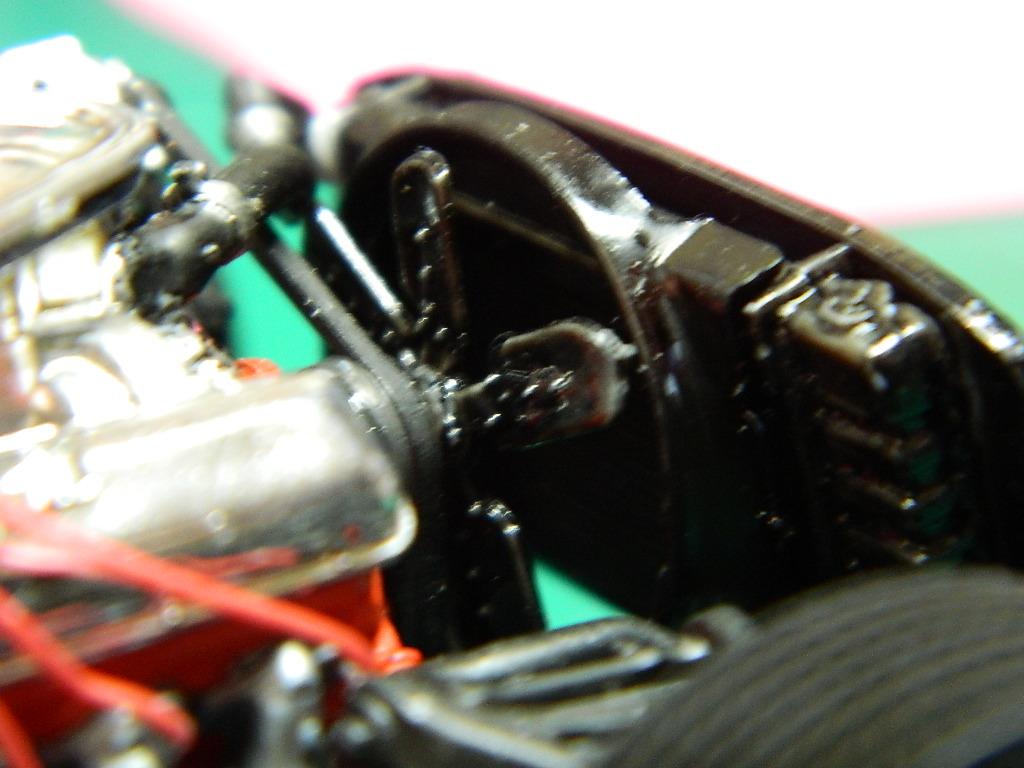
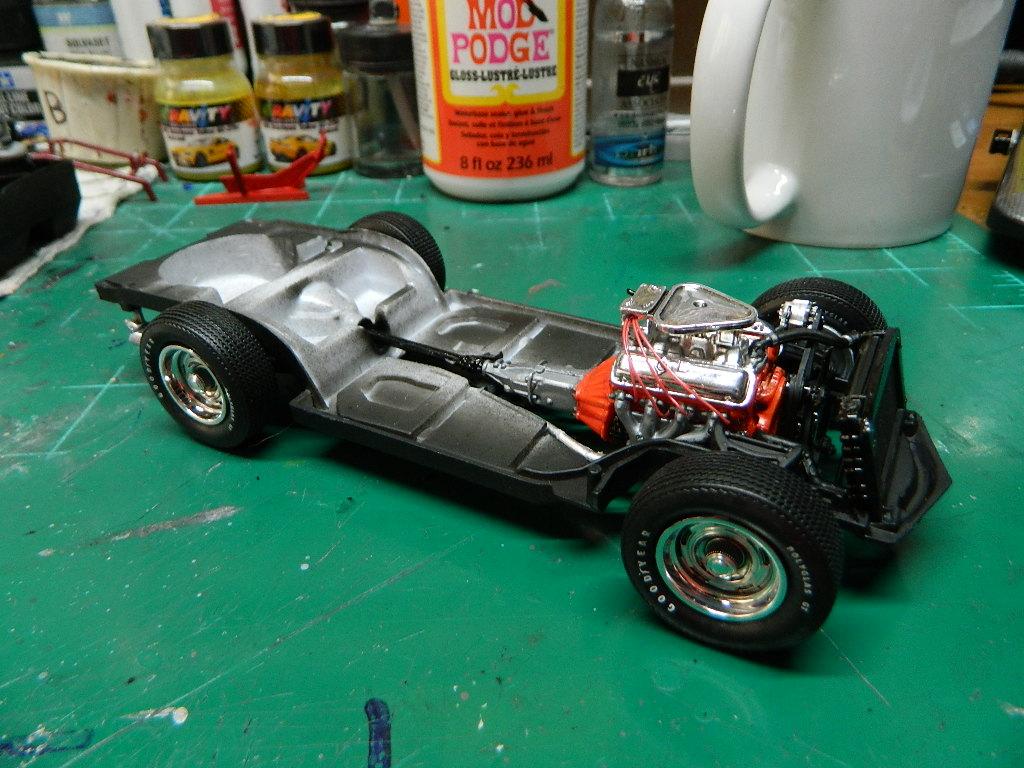
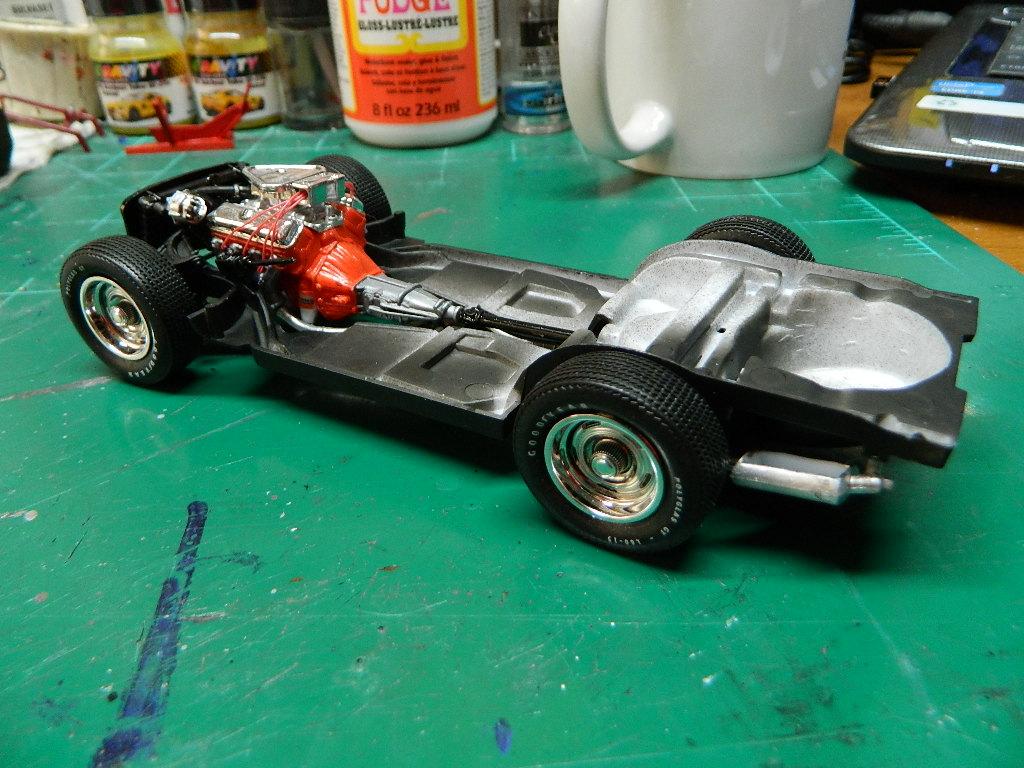
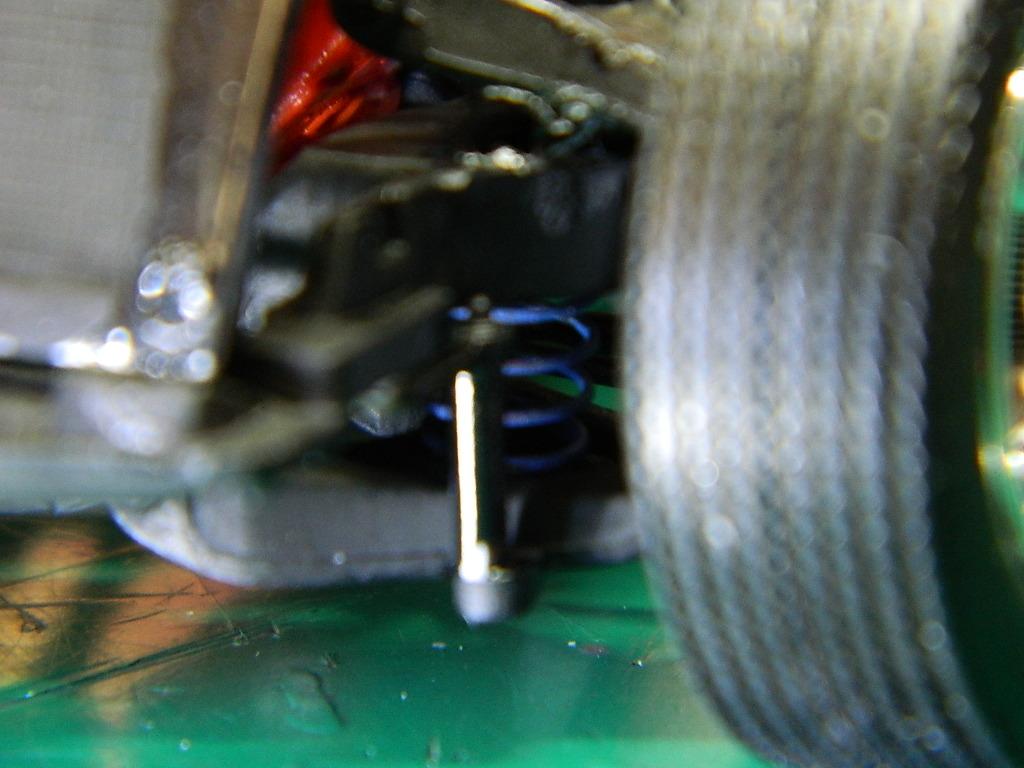
Thanks Richard! Just below the thin surface of the distributor cap was the pin and drilling the thin surface of the cap removed that pin. Adding a pin made from a piece of styrene rod with a larger rod to hold that pin made all the sense to me. Sometimes someone else will have the idea that we would otherwise not think of that as a solution to a problem. I am happy that you found my solution helpful! While the '68 Vette is taking a bath in Easy-Off, I decided on assembling the chassis. I replaced the kit tires with a set of white letter tires from AMT. The engine is wired with a triangular air cleaner over the single 4-barrel carburator. I replaced the kit front springs with a set I had found in my parts box and I paint them blue. I glue the front wheels on so the model wouldn't roll off the table. More Corvette to come...
-
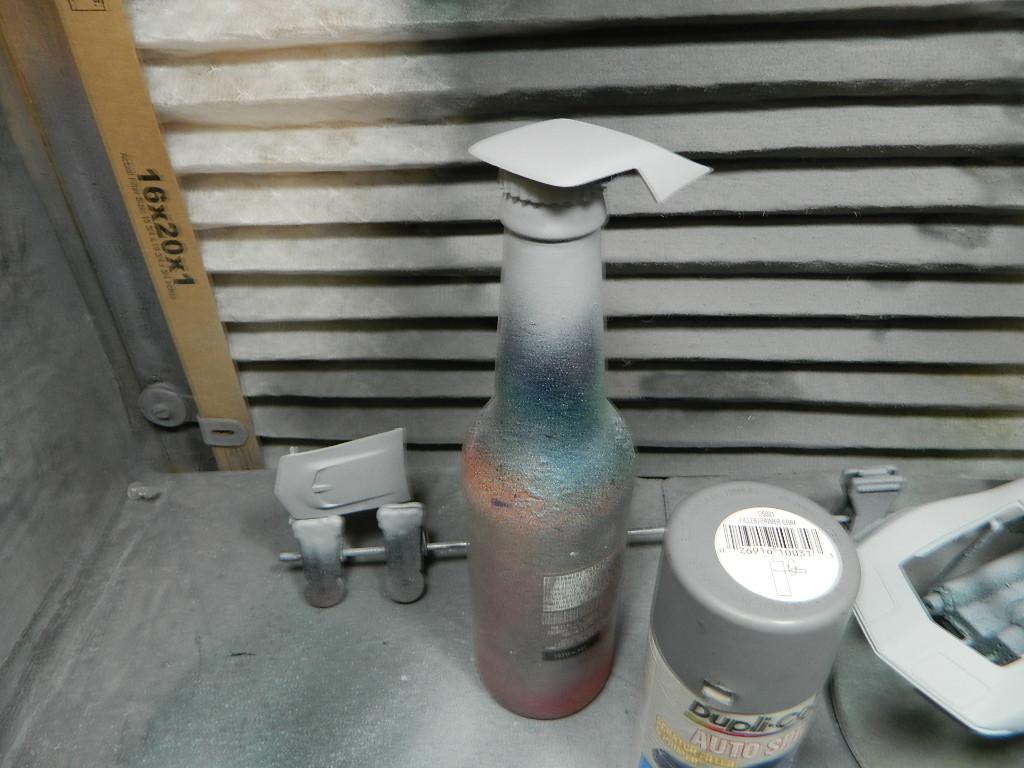
Thanks David and John! The enamel paint just didn't cover like it should and if I remember correctly, it may have been at least 10 years old. I did my usual method of body prep including sanding my primer and this was the result. At any rate, the body, hood and roof are in a bath of Easy-Off Oven Cleaner to remove the paint. I used that paint on my Spenser For Hire '66 Mustang and it came out perfectly. But, that was a long time ago. I bought some Tamiya Gold and Tamiya British Green and will try it out on a plastic spoon with a coating of Clear Green to see what I get for the combination.
-
Thanks Matt and Carl! I like the suggestion Matt and I will consider it when I get to painting this Mercedes. Carl, since this is new territory for me, I will go with what I know to try and make the job a little easier.
-
Believe it or not, I did primer the body! I think it might be the age of this enamel paint and the fact that it was enamel and not lacquer. The body, hood and roof are sitting in a tub of Easy-off Oven Cleaner to remove this awful paint job!