mrmike
-
Posts
5,324 -
Joined
-
Last visited
Content Type
Profiles
Forums
Events
Gallery
Everything posted by mrmike
-

Volkswagen T2 Bus
mrmike replied to mrmike's topic in Model Trucks: Pickups, Vans, SUVs, Light Commercial
Thank you Mario, Mike and Larry! Thanks Mario! I applied the whitewall decals and clearcoated them and let them dry. I installed the tires onto the wheels and a couple of decals came apart. I tried to fix the missing parts with my white Gelly Roll pen. The repair is really not that good. -
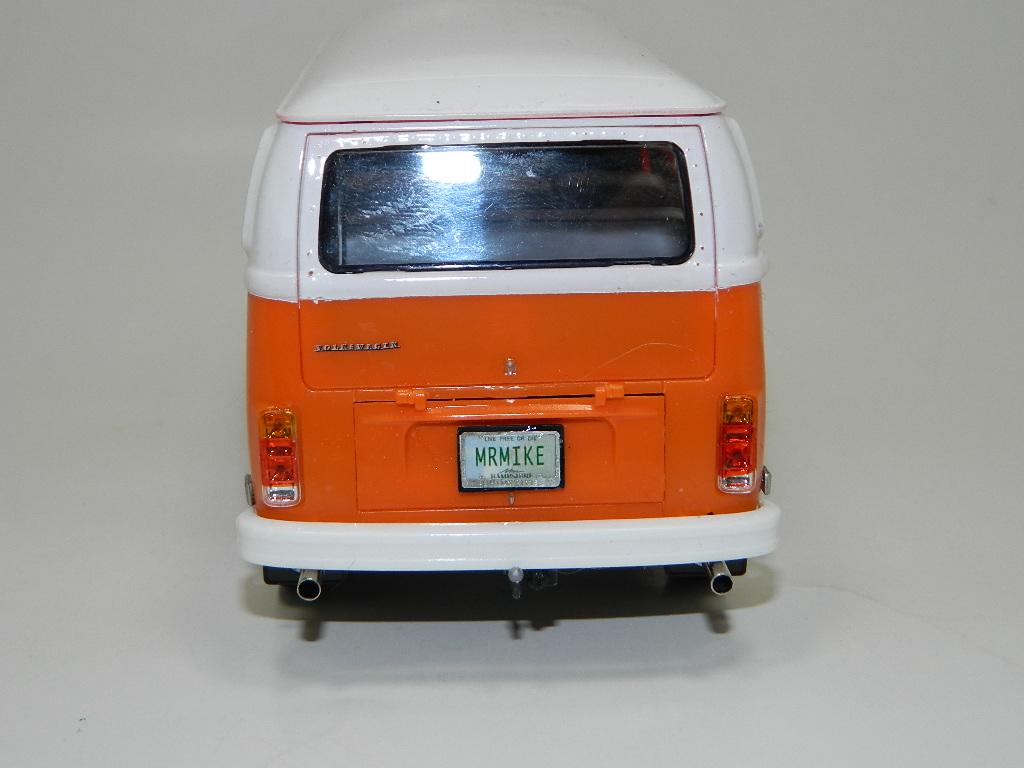
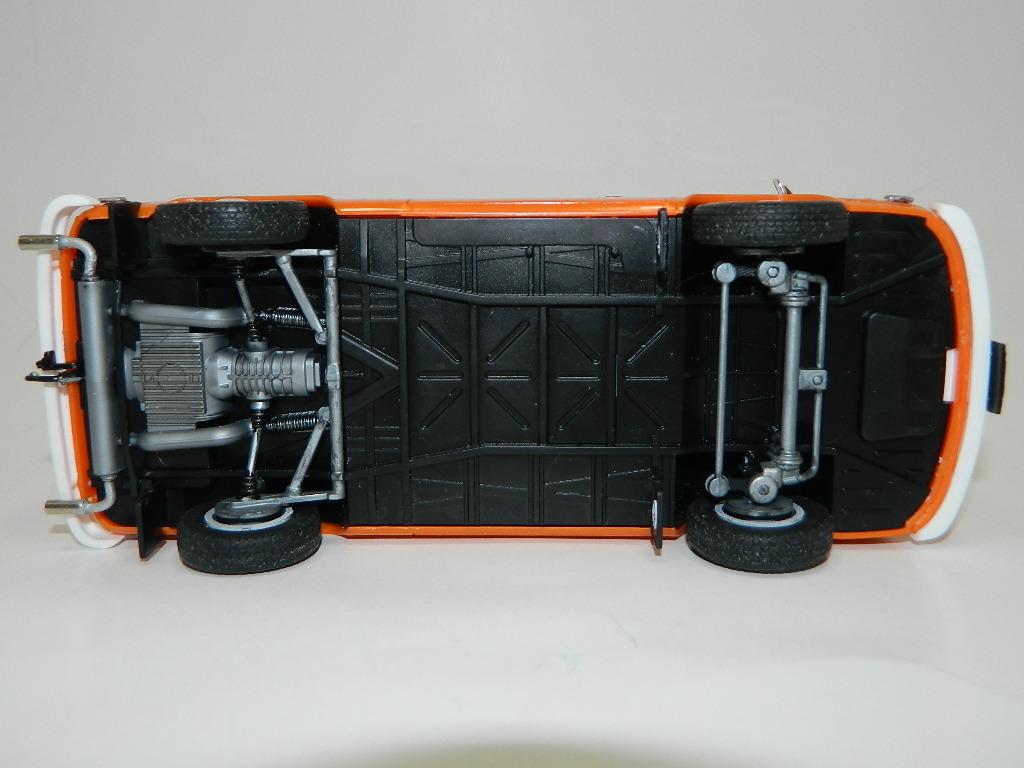
This is my Volkswagen T2 Bus painted with Tamiya TS-26 Pure White and orange kit plastic. I have whitewall tires, Hurst Lockout Shifter, dual tailpipes, inside mounted spare tire and side markers.

-
Volkswagen T2 Bus
mrmike replied to mrmike's topic in WIP: Model Trucks: Pickups, Vans, SUVs, Light Commercial
Thanks Carl! The VW Bus is almost finished. I just need to clean it up and give it a light polish. Completed pictures are posted in Under Glass. I would like to than all those who have taken the time to view and comment on my WIP. -
Thanks Randy and Andrew!
-
Volkswagen T2 Bus
mrmike replied to mrmike's topic in WIP: Model Trucks: Pickups, Vans, SUVs, Light Commercial
At this point, I go back to the instructions looking for bits and pieces that I may have missed or would want to add later in the build. I found 4 clear lenses on sprue I and I determined that they are the side markers. There are no holes in the body from these and their placement can be verified with a side view of the VW Bus. I think I will add these a little later in the build.
-
Thanks Carl!
-
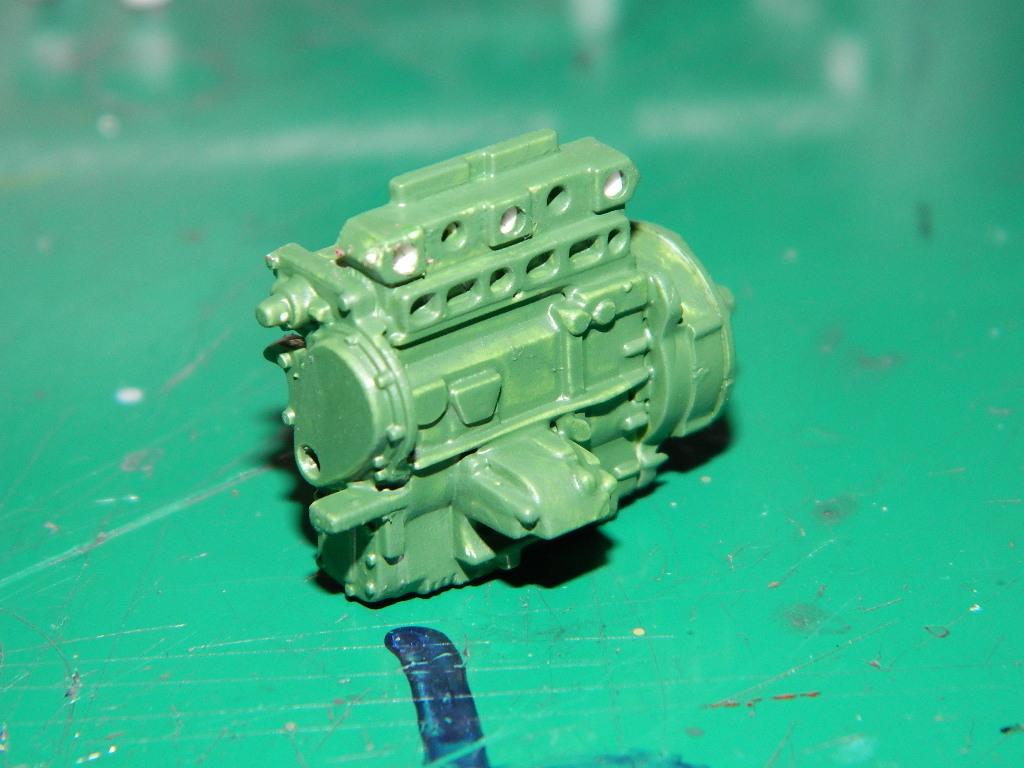
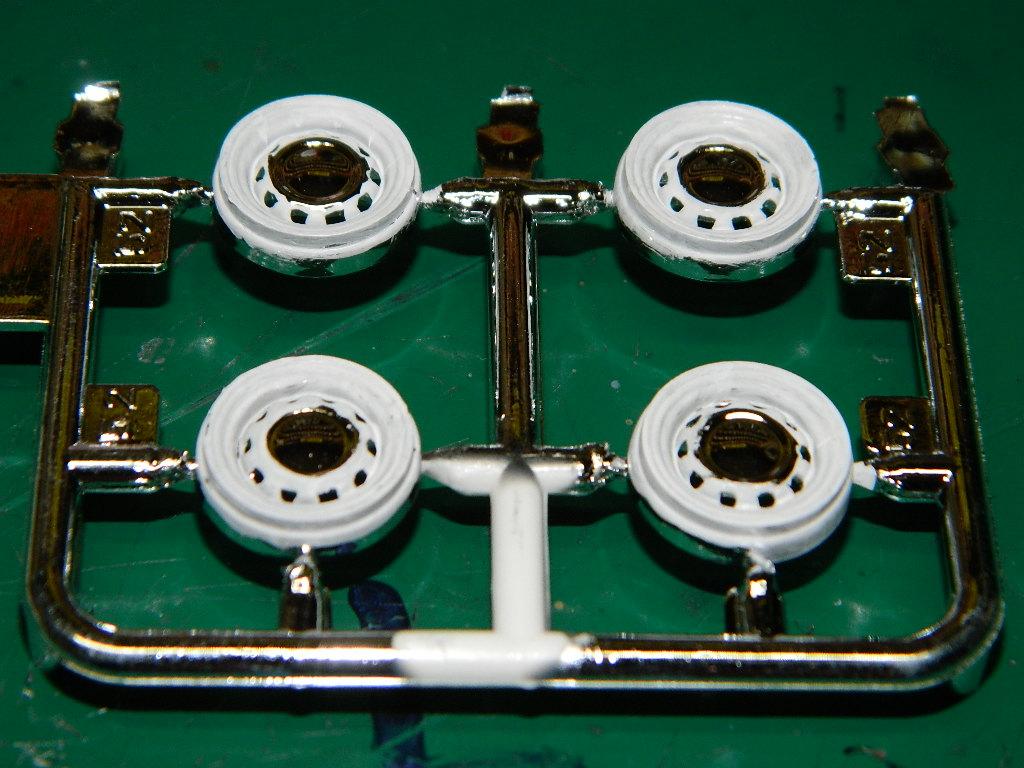
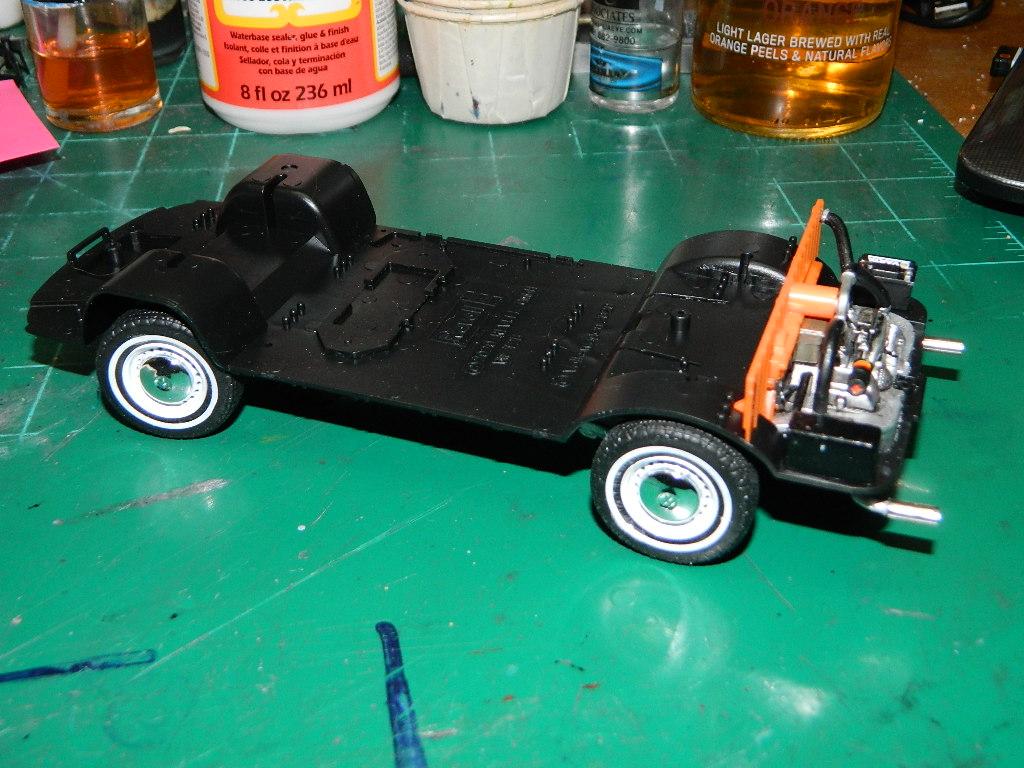
Thanks guys! I couldn't say since I have never seen the Tamiya kit up close. I started with assembly of the basic engine and I painted some of the parts needed for it with PollyS Dark Green. I also painted some pieces with gold, stainless steel, flat and semi gloss black. The wheels got a coating of flat white around the rims. I'll coat this with gloss clear in a few days. More Mini to come...
-
Volkswagen T2 Bus
mrmike replied to mrmike's topic in WIP: Model Trucks: Pickups, Vans, SUVs, Light Commercial
I have been picking away at the Volkswagen Bus. I installed the interior lights, the mudflaps with decals, the owners manual on the passenger seat and the trailer hitch, receiver and lights plug receptacle. More Volkswagen to come...
-
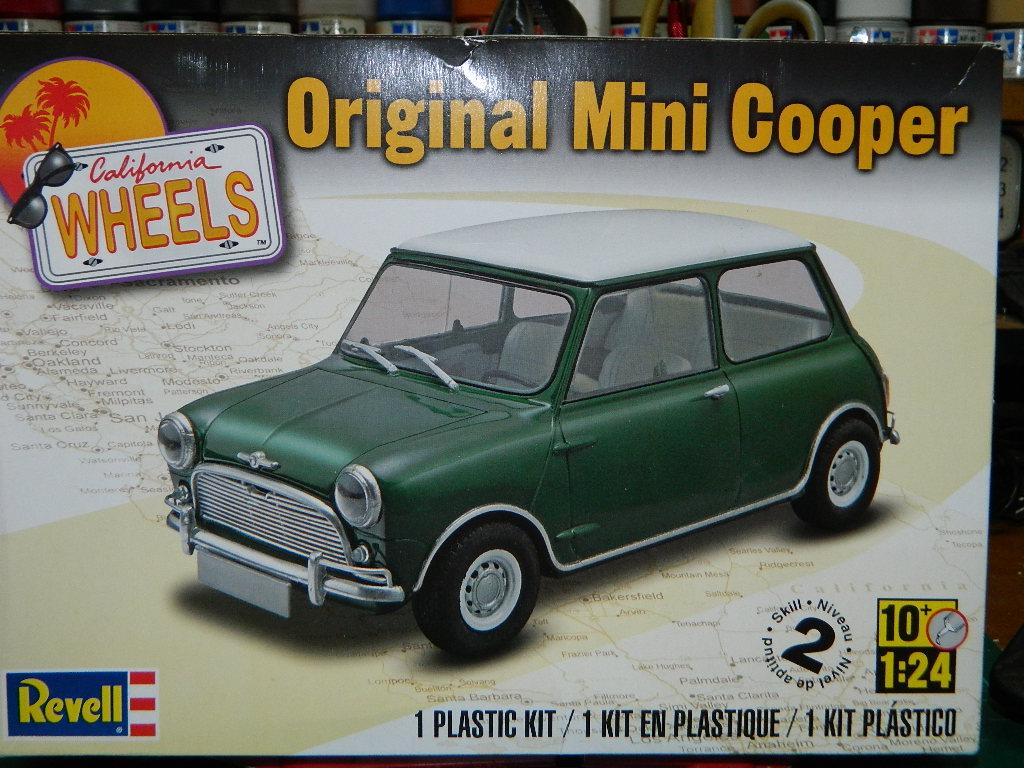
As my Volkswagen project winds down, my new project is the Revell Original Mini Cooper and while this kit has 128 pieces, this car is tiny when compared to the current modern Revell Mini Cooper which had less pieces when I built it many years ago. I plan on painting this Mini Tamiya TS-86 Pure Red with a Tamiya TS-26 Pure White roof. If I can scare up the materials, I may try to produce a Union Jack roof decal for this Mini. Other than the roof decal and maybe some engine wiring, this model will be built OOB. More Mini Cooper to come...
-
Volkswagen T2 Bus
mrmike replied to mrmike's topic in WIP: Model Trucks: Pickups, Vans, SUVs, Light Commercial
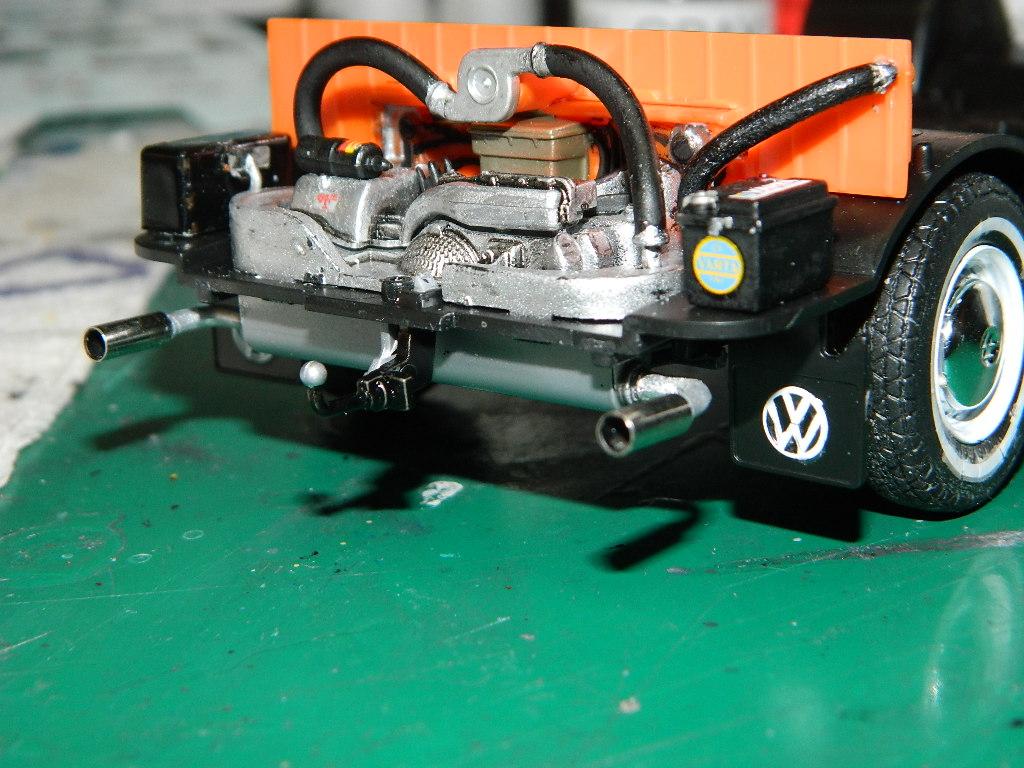
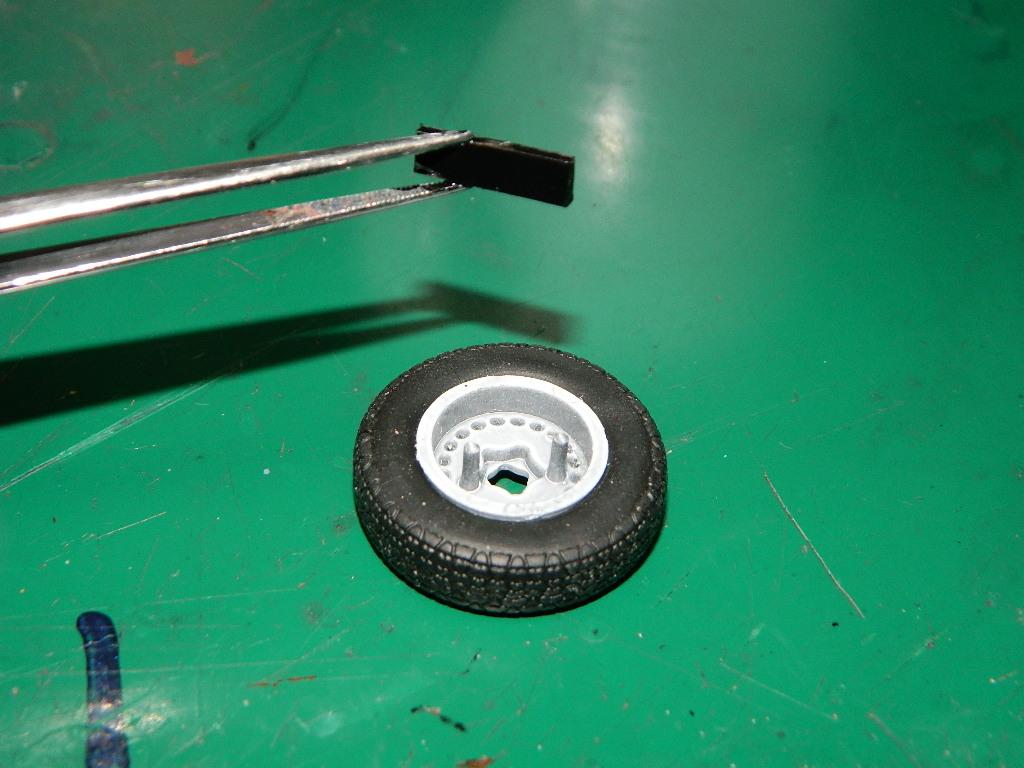
The seats have been repainted and coated with Tamiya TS-79 Semi Gloss Clear. This Tamiya clear is different from the Testors brand. I added the wheels to the tires and the axle inserts and the chrome hubcaps. More Volkswagen to come...
-
Volkswagen T2 Bus
mrmike replied to mrmike's topic in WIP: Model Trucks: Pickups, Vans, SUVs, Light Commercial
Thanks Carl! I have yet to see a VW T2 Bus kit in the USA packaging. Only in the RoG flat box. Keep hoping... -
Volkswagen T2 Bus
mrmike replied to mrmike's topic in WIP: Model Trucks: Pickups, Vans, SUVs, Light Commercial
Thanks Mike and Trevor! I got this kit for Christmas and my wife had ordered it from Scale Hobbyist which is about a 1 1/2 miles down the street from us. Good prices, too! https://www.scalehobbyist.com/ -
Volkswagen T2 Bus
mrmike replied to mrmike's topic in WIP: Model Trucks: Pickups, Vans, SUVs, Light Commercial
Thanks for the tip, Mike C. I'm trying to do as little as possible painting on this model. Some parts need a little bit of paint and some are not getting any paint at all. -
Volkswagen T2 Bus
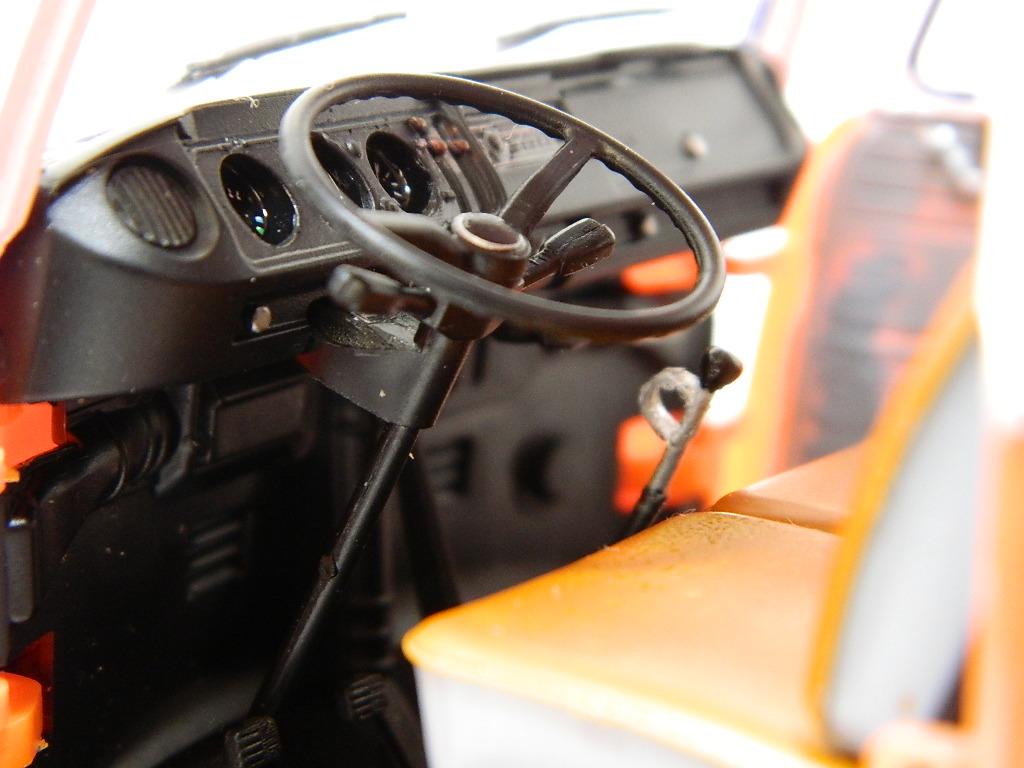
mrmike replied to mrmike's topic in WIP: Model Trucks: Pickups, Vans, SUVs, Light Commercial
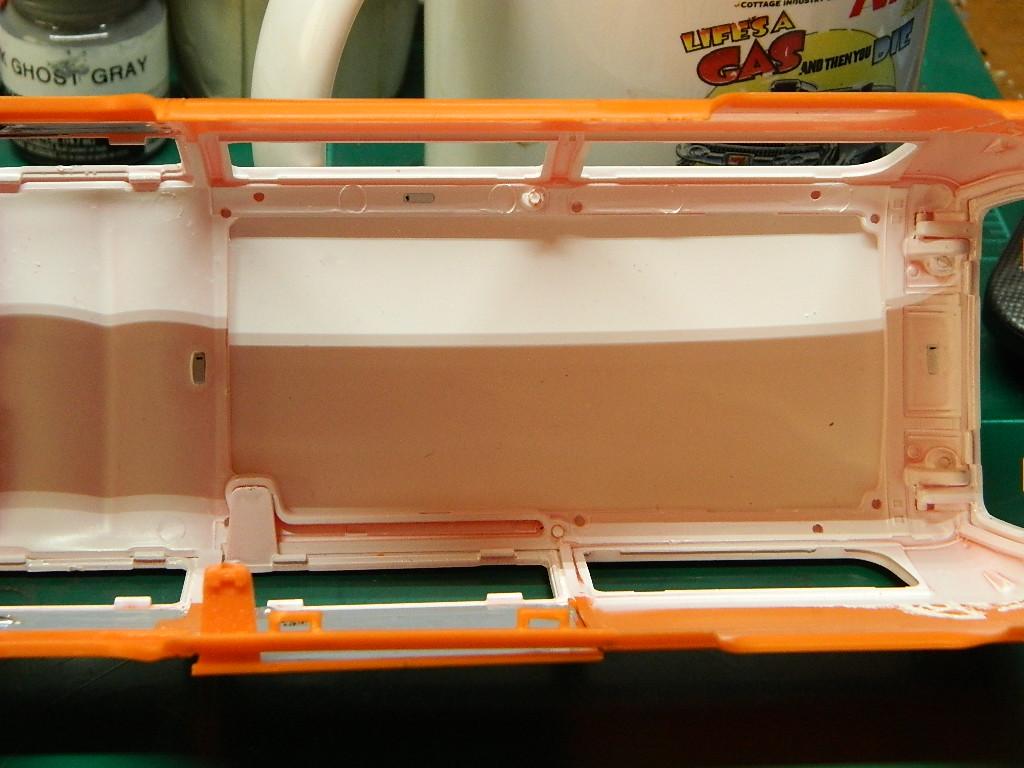
Yesterday, I applied the decals to the dash panel and then I added the steering wheel and column, the parking brake and dash panel support and I did a little paint detailing. More Volkswagen to come...
-
What did you learn to drive in?
mrmike replied to slusher's topic in General Automotive Talk (Trucks and Cars)
I learned to drive in my mother's '65 Buick Wildcat 4-dr and my father's '71 Mercury Cougar. Both were automatics and my first car was a manual. -
This is coming along just fine, John! Looking good! A former friend of mine had an Hugger Orange SS396 with a black vinyl top and a 3-speed trans. He got rid of the car after he was hit in the driver's side rear quarter. He traded it in for a dark green '71 SS with a 402 and a 4-speed.
-
Volkswagen T2 Bus
mrmike replied to mrmike's topic in WIP: Model Trucks: Pickups, Vans, SUVs, Light Commercial
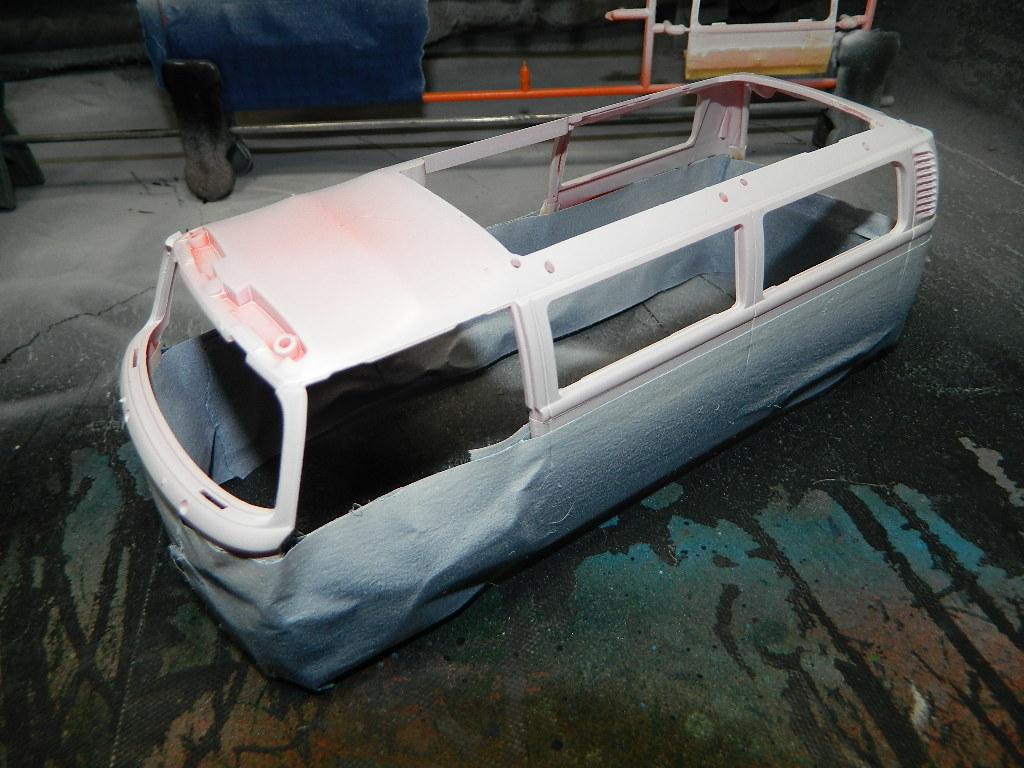
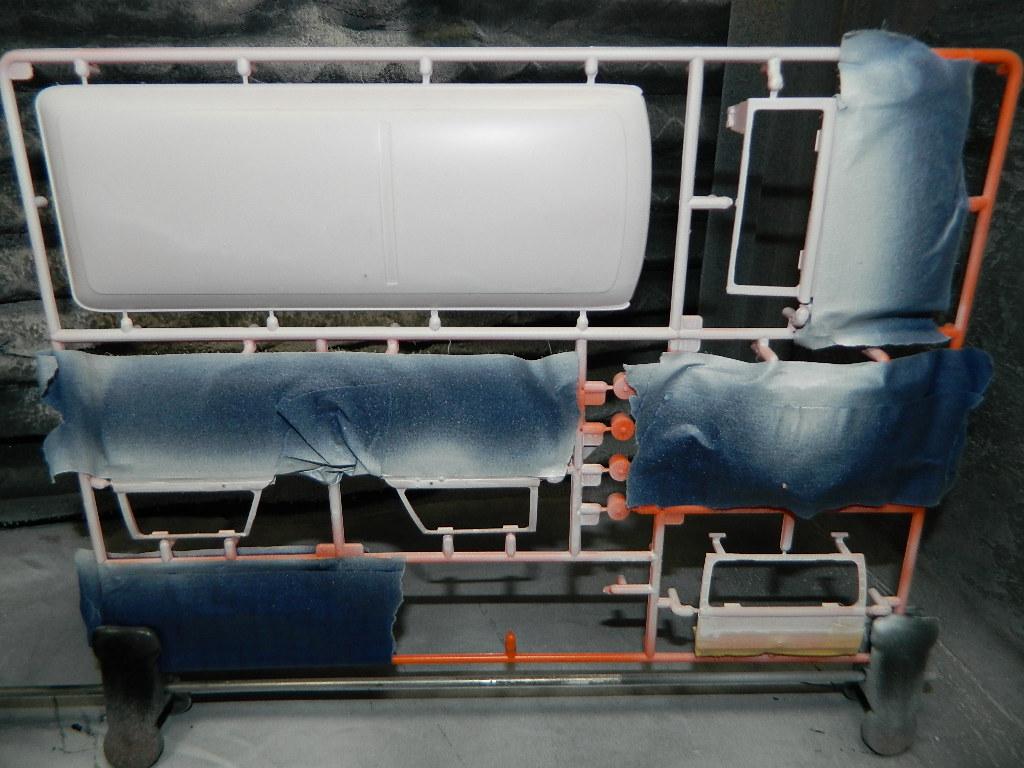
Thanks Carl! I hope for better results from these decals! I got the body, roof and doors in primer. Soon to be ready for Tamiya TS-26 Racing White for the upper half of the VW T2 Bus. The bottom half will get a coat of Tamiya TS-13 Gloss Clear. More Volkswagen to come...
-
Volkswagen T2 Bus
mrmike replied to mrmike's topic in WIP: Model Trucks: Pickups, Vans, SUVs, Light Commercial
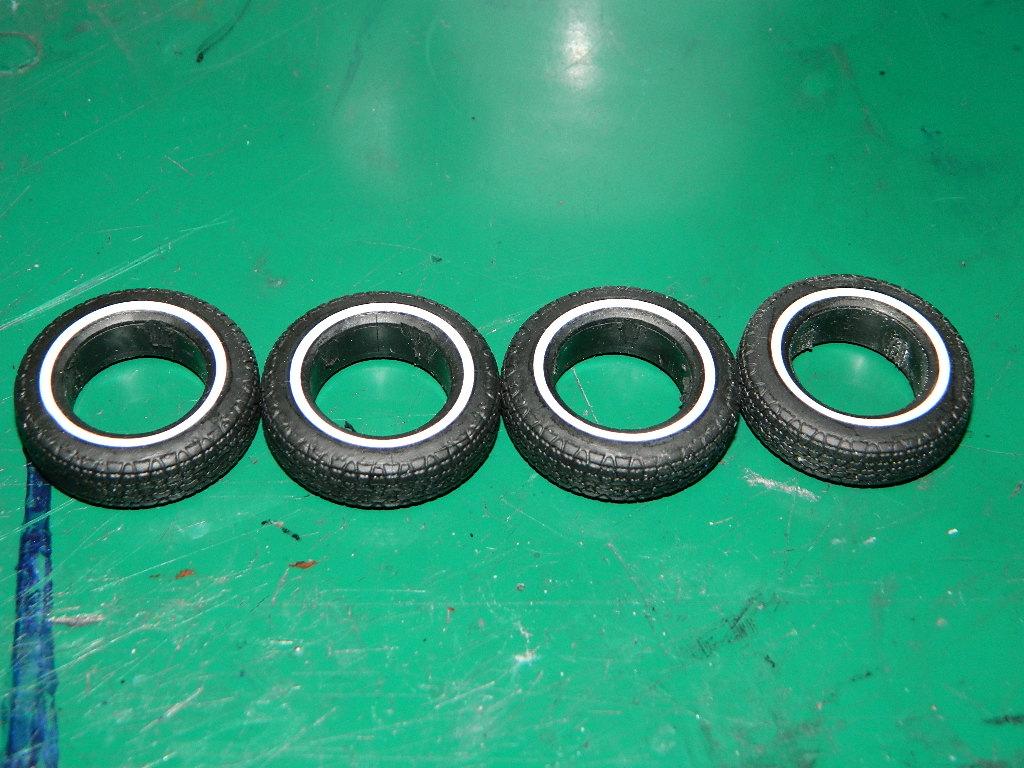
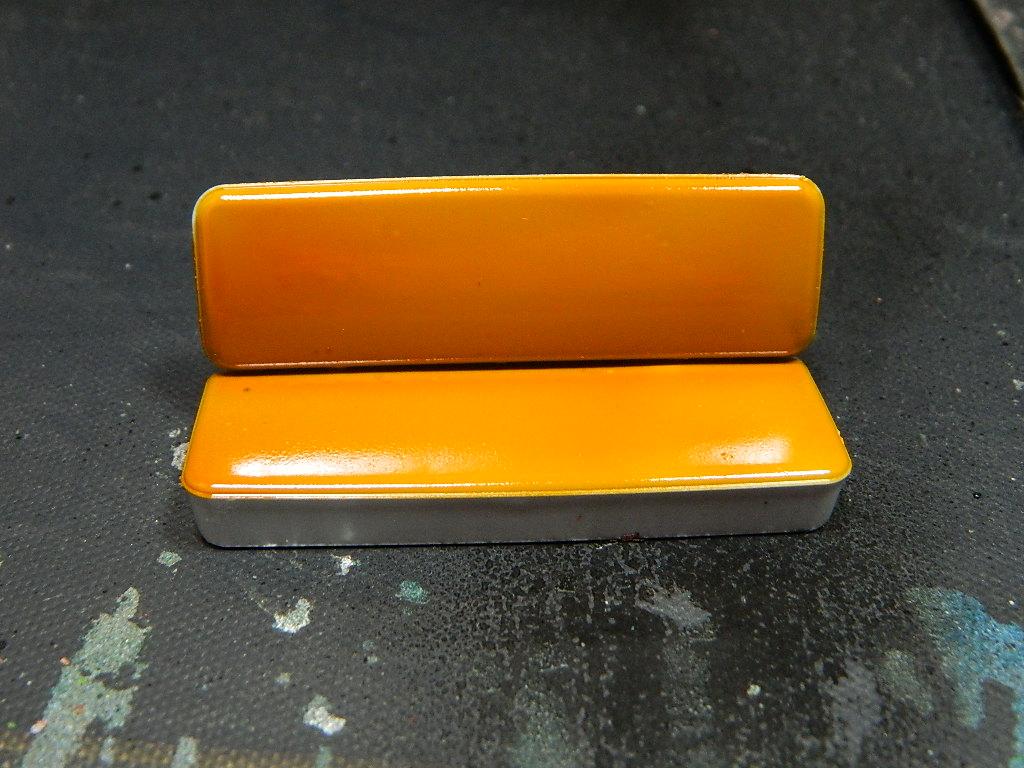
I found new whitewall decals in my parts box and I believe they came from the Revell '68 Dodge Charger R/T. I had mounted the spare tire on the left interior sidewall, but as I looked at it, I didn't like the fact that it was too close to the sidewall. I made a bracket to space the spare tire away from the wall some. This will allow some room when the body is placed over it. I used Model Master Semi Gloss Clear on the seats and the paint ran which indicates that the clear is too hot for the paint. I'll repaint the seats and use Tamiya TS-79 Semi Gloss Clear instead, which shouldn't be as chemically hot. More Volkswagen to come...
-
Thank you, Ron! Nice Dodge Monaco! Looks to be a Hot Wheel size die cast. Most likely a 1/64 scale. Thank you, Chris!
-
Volkswagen T2 Bus
mrmike replied to mrmike's topic in WIP: Model Trucks: Pickups, Vans, SUVs, Light Commercial
Thanks Carl! -
Volkswagen T2 Bus
mrmike replied to mrmike's topic in WIP: Model Trucks: Pickups, Vans, SUVs, Light Commercial
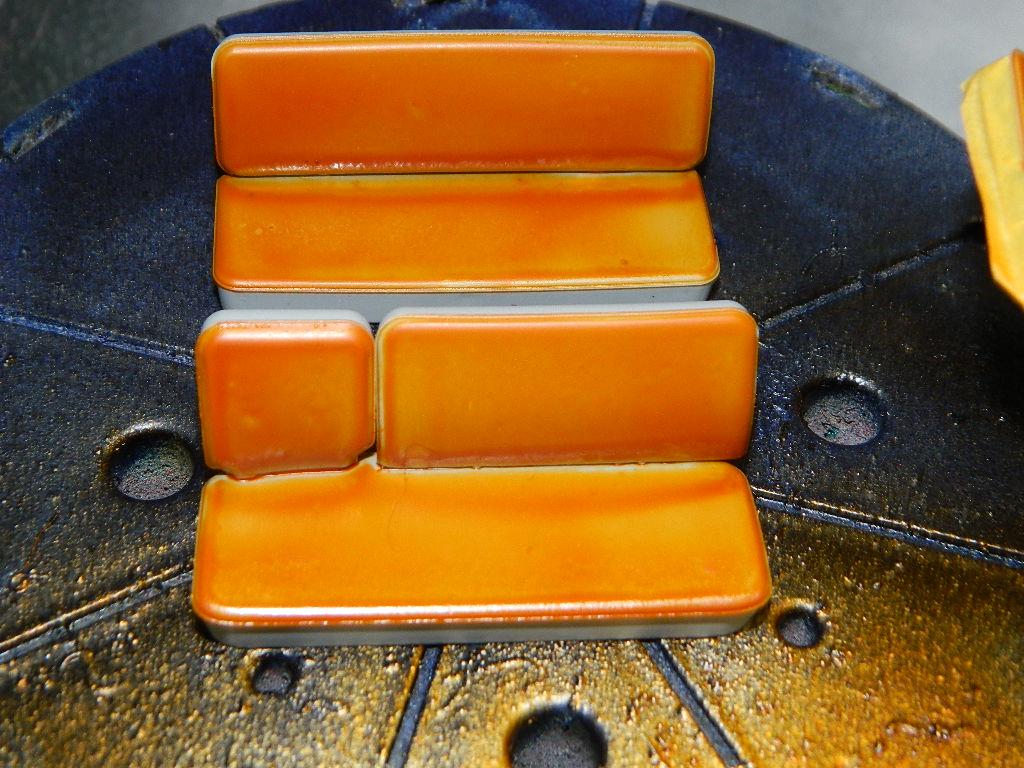
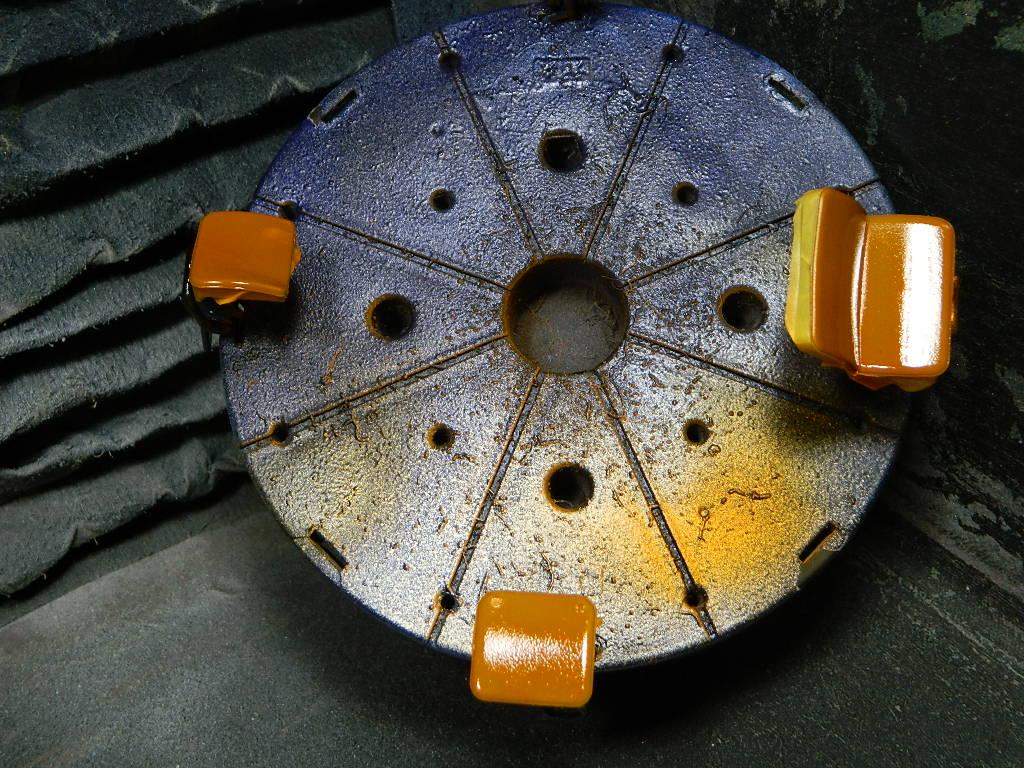
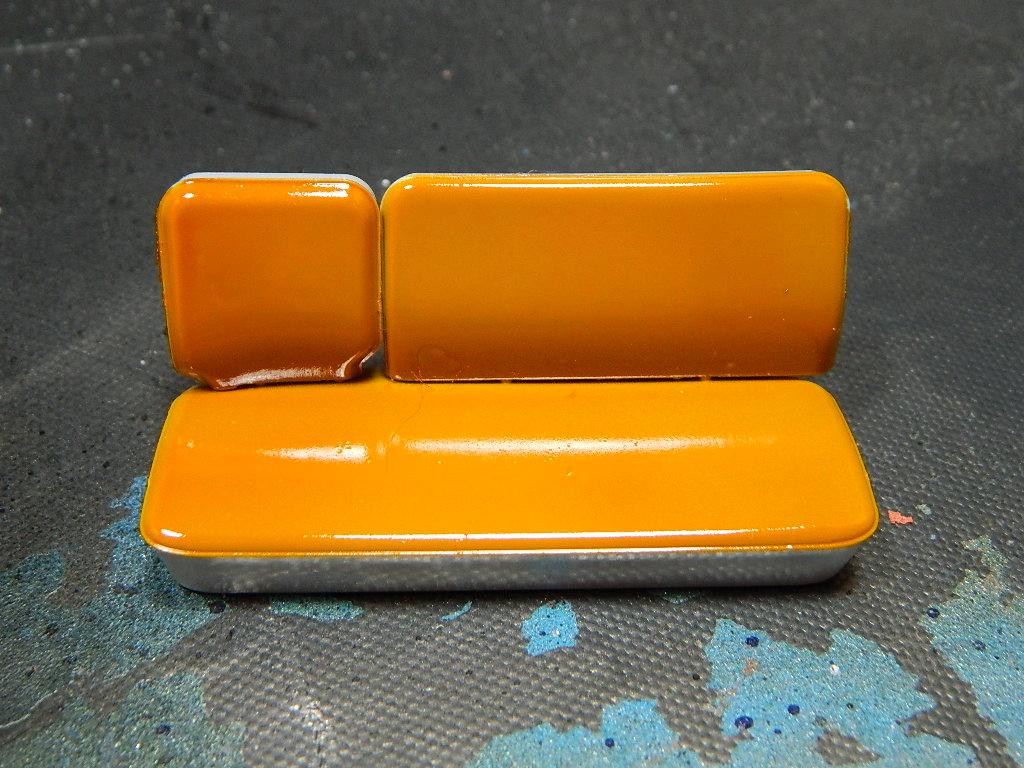
Thanks Scott and Mike! I'm not 100% sure of the year, but it really doesn't matter to me. I went and used Tamiya X-26 Clear Orange on the plain seats of the VW T2 Bus. This changed the look of the interior! I just need to tone down the glossiness with some flat or semi gloss clear. More Volkswagen to come...
-
Looks great! I built mine in the same color combination, but box stock several years ago for a Classic Plastic Model Club Expo Club Challenge.
-
Thank you David and Larry!
-
Thank you Larry!
-
Volkswagen T2 Bus
mrmike replied to mrmike's topic in WIP: Model Trucks: Pickups, Vans, SUVs, Light Commercial
Thanks guys! I want something a bit more graphic in appearance than the plain seats. I'll either get some graphic contact paper or paint the seats with a contrasting color.


.jpg.864ef63b20815b3161c512472c4fec12.jpg)