Cool Hand
-
Posts
2,087 -
Joined
-
Last visited
Content Type
Profiles
Forums
Events
Gallery
Everything posted by Cool Hand
-

62nd All Japan Model & Hobby Show (2025)
Cool Hand replied to niteowl7710's topic in Car Kit News & Reviews
Very interesting how Aoshima has gone all in on the snap kits, the 1/32 series is massive and the 1/24 series continues to rapidly expand. I guess the JDM are the main sales of those kits. Can understand why they are popular being quick easy builds with no paint required. Aoshima and Hasegawa seem to be leading the way for the future of the hobby Havent seen any other pictures. So I had to a do a screen shot from a Japanese lady Youtube vid. Aoshima doing another new LBWK Lambo kit. LB-Silhouette Works, Lamborghini Aventador GT Evo Ver.1
-
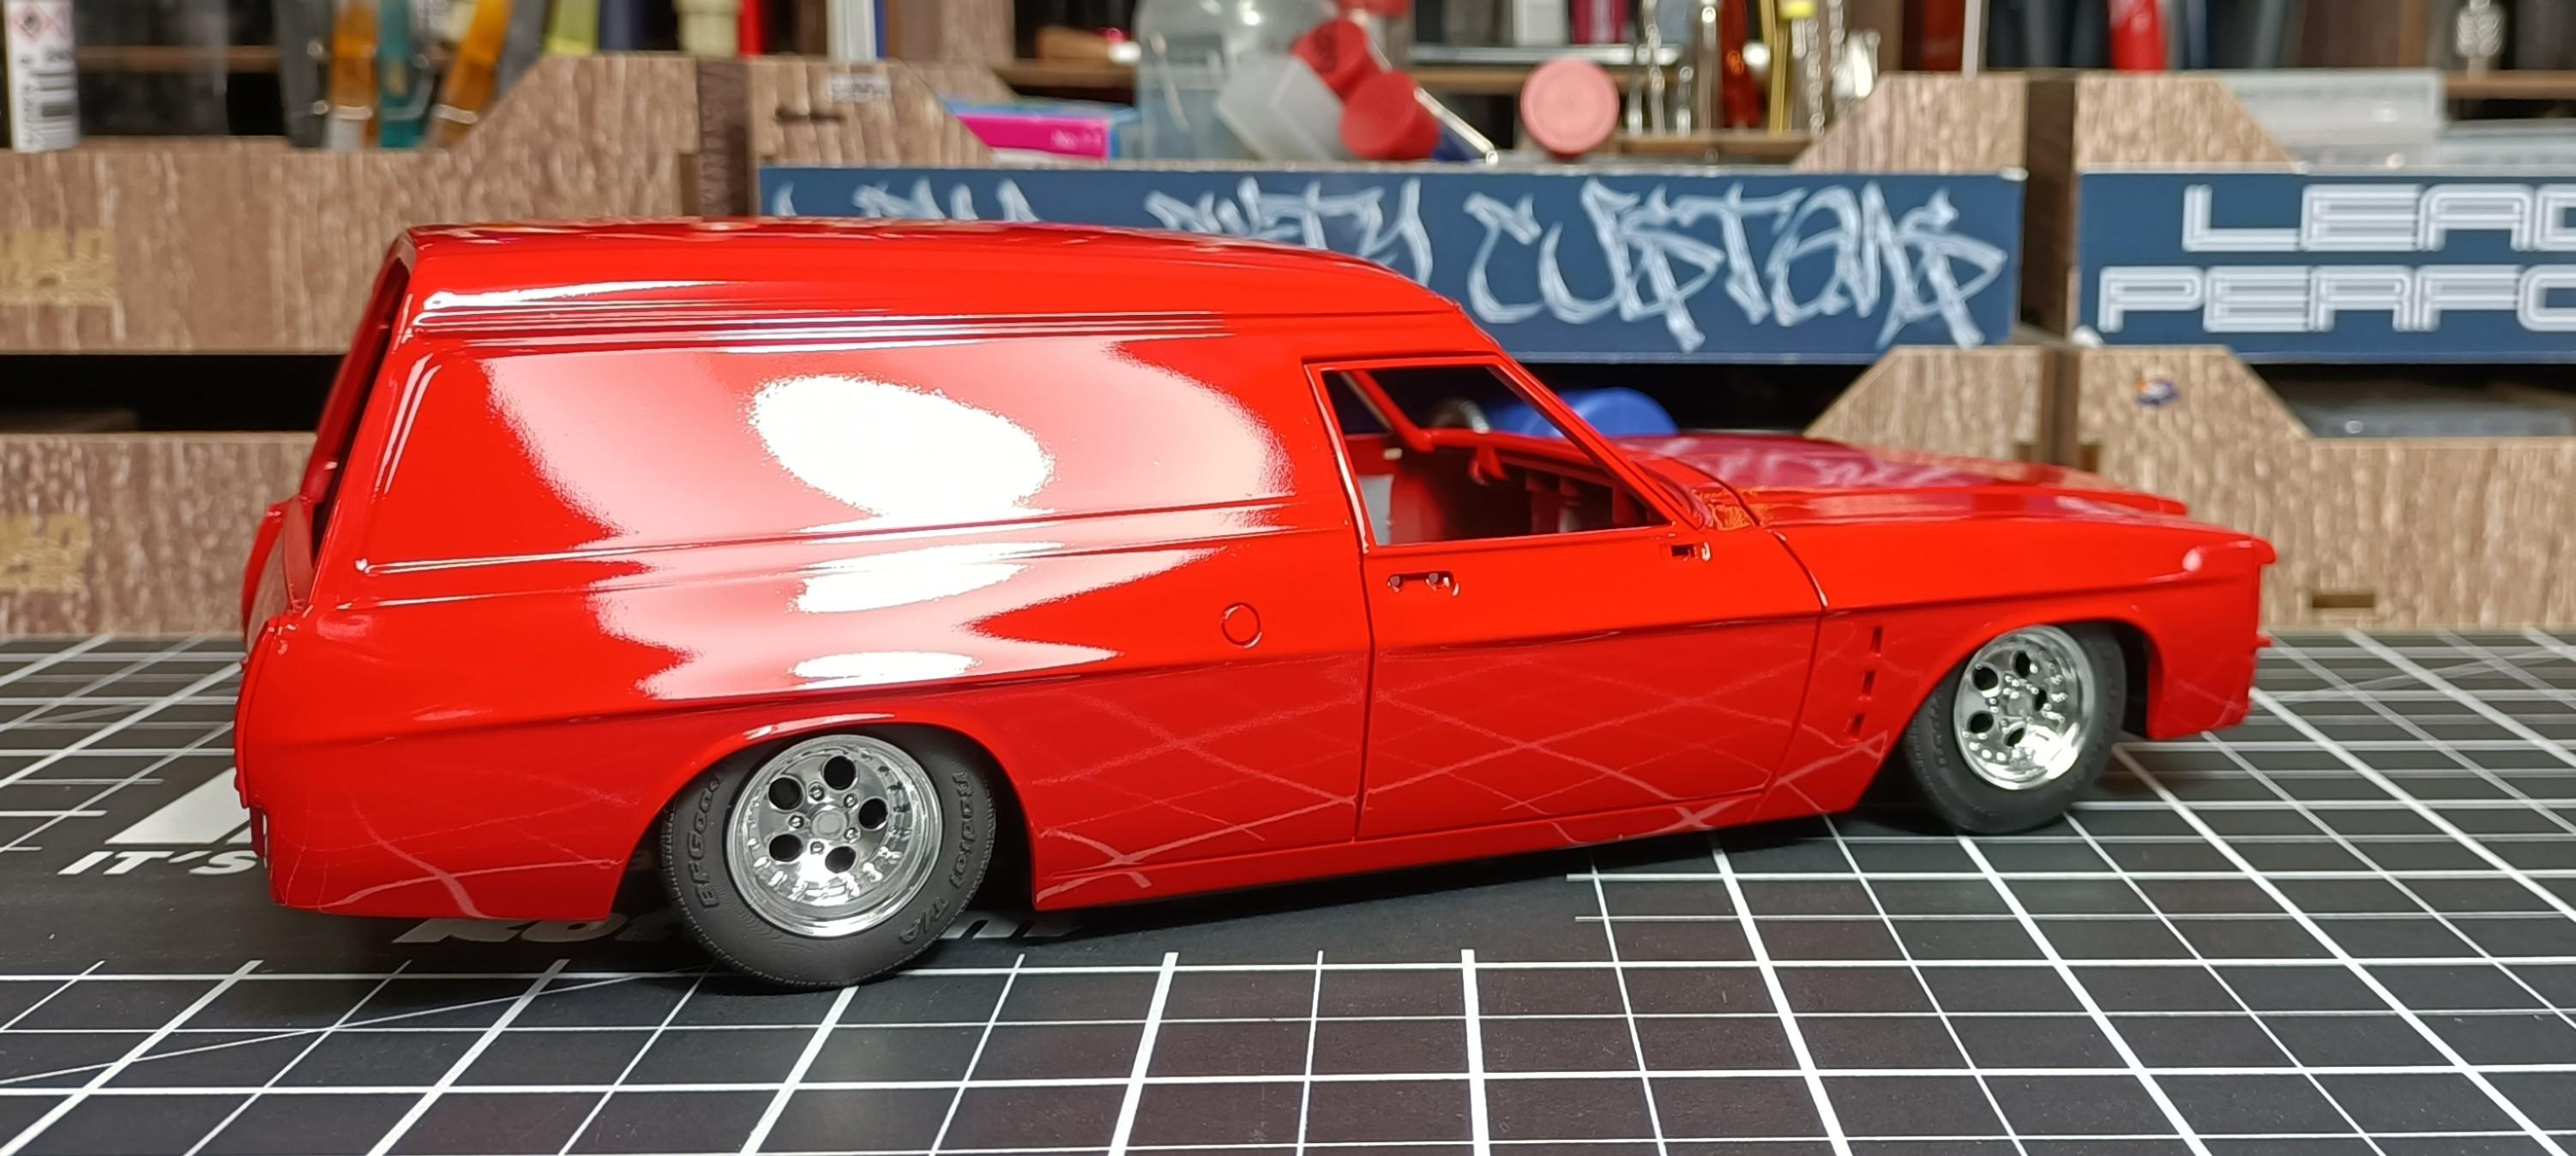
Tamiya TS-8 Italian red. Polished with Tamiya compounds.
-
Turned out great Stu, well done mate. You will have to build another one and do it up with the plans you had in mind.
-
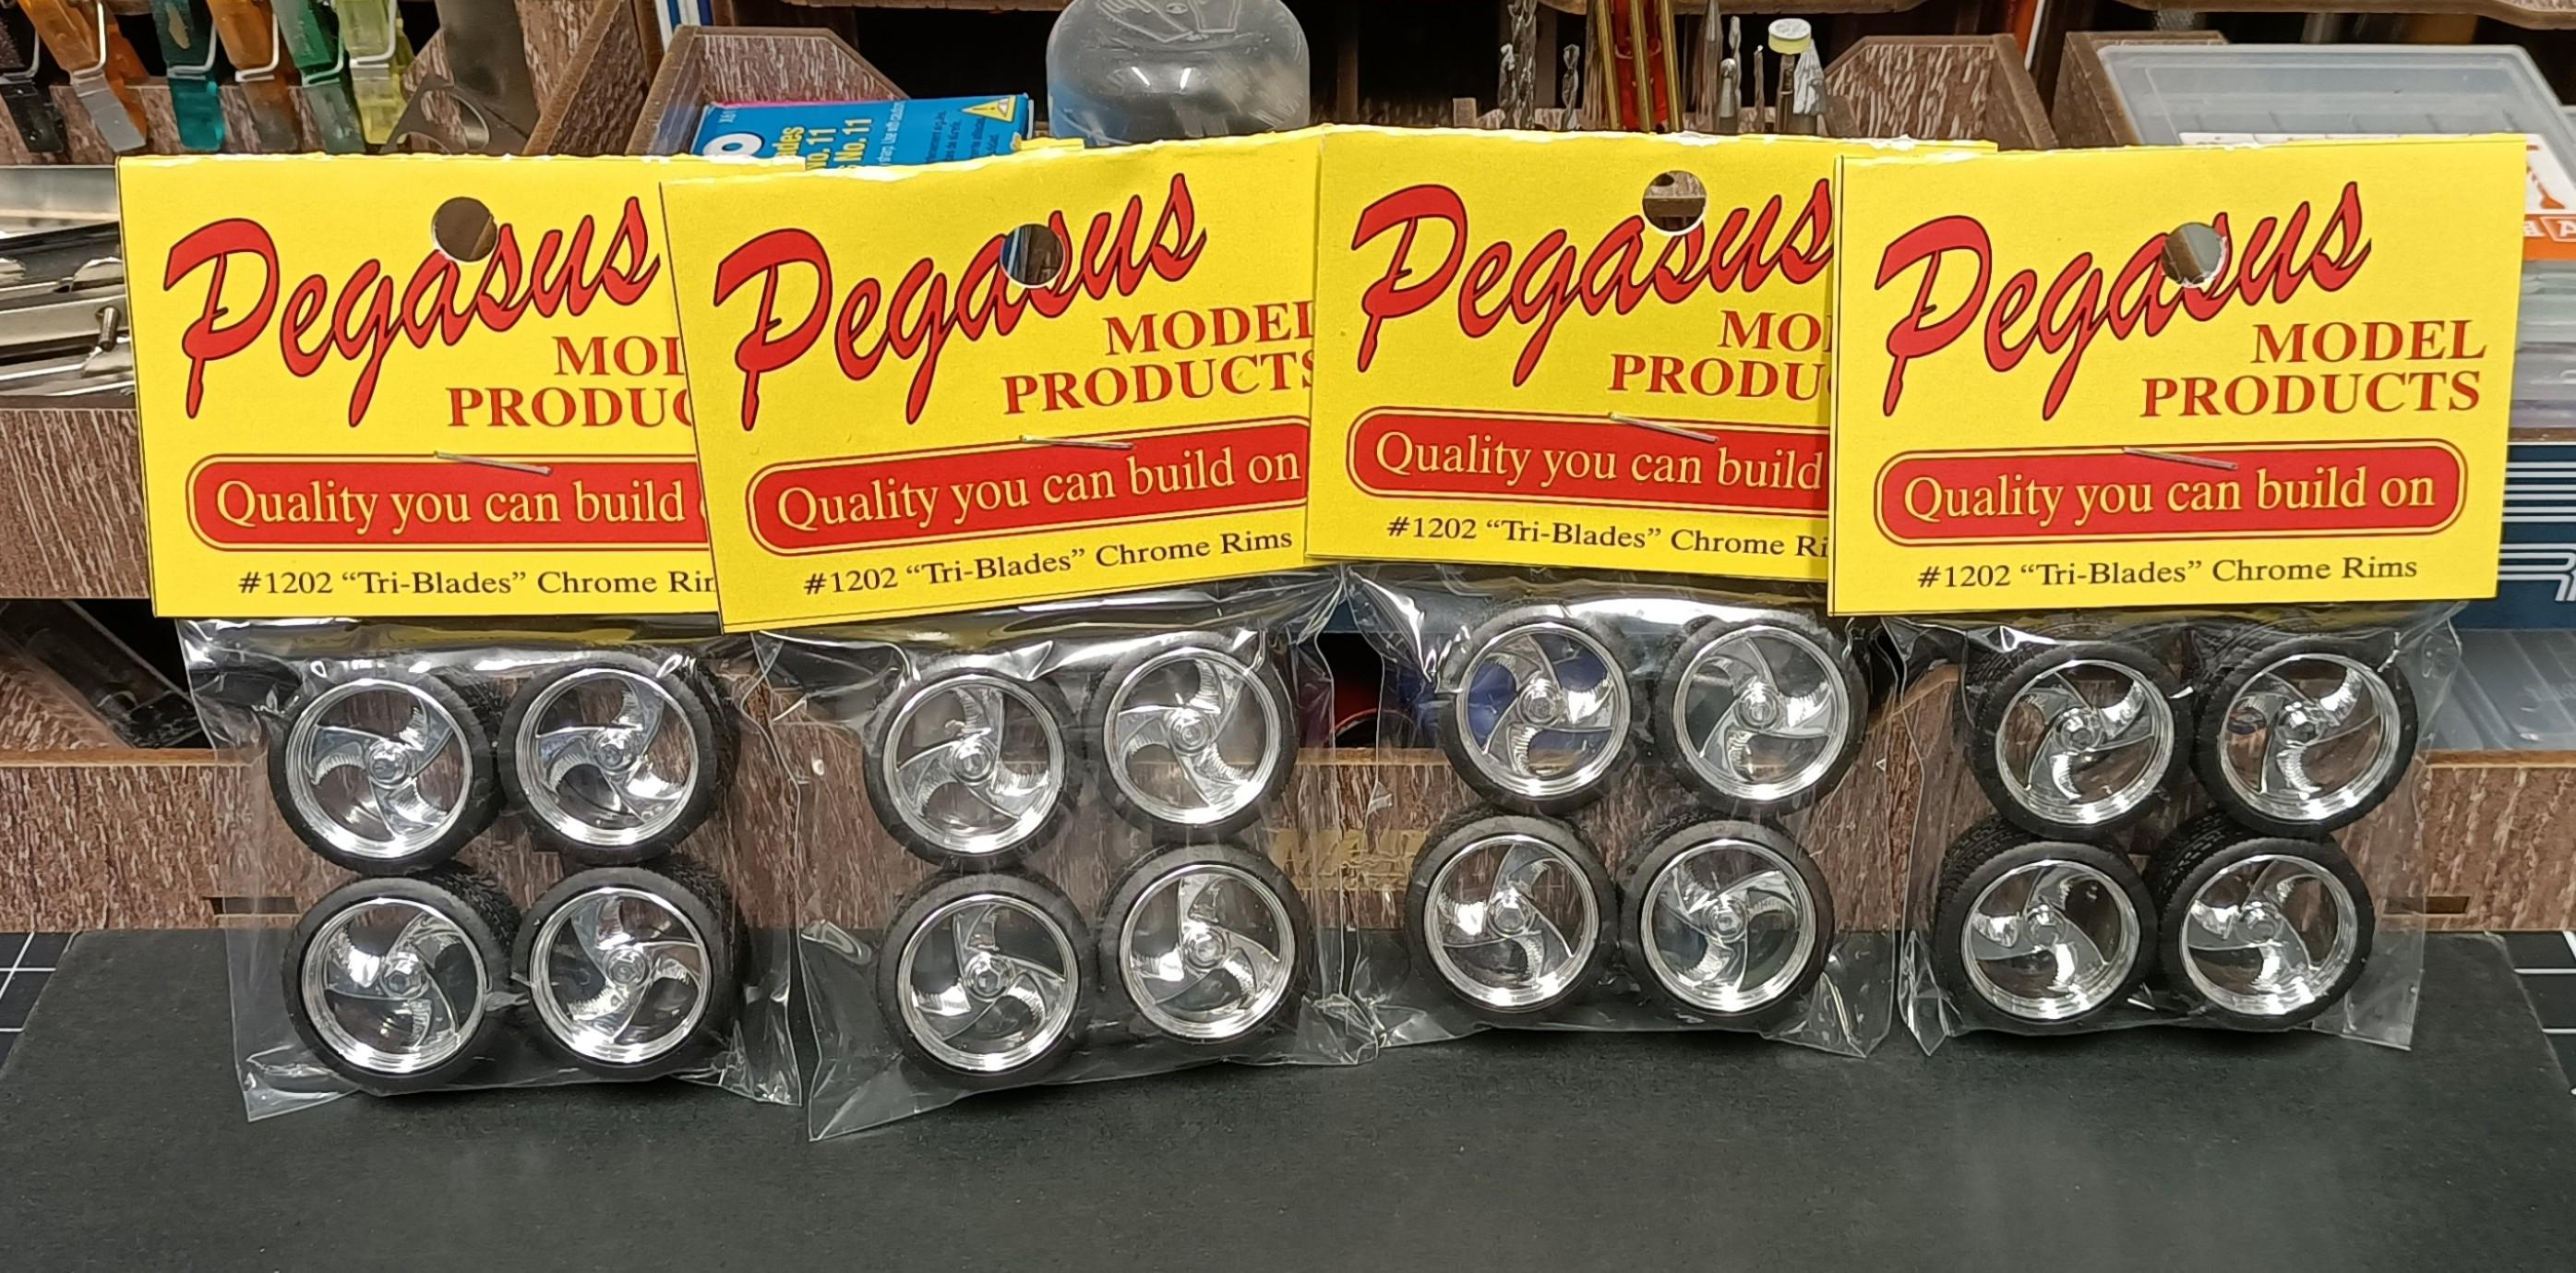
I wanted these specific Pegasus wheels and the only place I could find multiple sets was out of the US from Mark Twain Hobby Centre on ebay.
- 39,062 replies
-
- 4
-

-
- johan
- glue bombs
- (and 1 more)
-
I guess it depends, what is important and matters to you Monty. Close up macro pictures will always magnify the layer lines. The black resin used for the tyres looks to be a satin/semi gloss finish which also makes the layer lines stand out. Me personally I dont worry about tyres, the wheel rim is whats more important. I used a set of wheels and tyres from a well established vendor that had very visible layers. But 2 good coats of black surfacer made the layer lines less visible. Yes the tyre on the other side had a split, didnt care no one will ever see that.🤣 And once the tyres are under the model viewed from the table top and after it goes in the display case onto the shelf. The layer lines become totally irrelevant 😁 As the saying goes "each to their own" I build shelf models for fun that meet my own standards of approval.
-
Painting Car Bodies with waterbased acrylics?
Cool Hand replied to MackDrop's topic in Model Building Questions and Answers
Ive been considering investing in the new Dspiae airbrush and acrylics as another addition to the airbrush painting arsenal. It seems to be getting excellent reviews amongst the Gundam community. Would be interesting to see some pictures of your builds and the results that can be achieved using waterborne acrylics. I have seen some excellent paint work done with the Createx brand, certainly has an impressive line up of colours. Also out of curiosity what psi and tip size are you shooting the acrylics through the Paasche H ?? -
Why you would state a dual action has inconsistency due to varying trigger pull. Thats what the back stop is for.
-
Just when I thought I was going to settle and concentrate on a few builds. The inspiration strikes again. Jay is mental with the way he brings cars back to life, always enjoy his builds. And he is from my home state of South Australia so that makes it even cooler to watch. So of course I was straight to the stash and dug out the kit to check out the idea doing a wheel mock up. I will follow along with the Low Standards build and use it to inspire my own interpretation.
- 766 replies
-
- 4
-
-
- stalled builds
- quick builds
- (and 2 more)
-
Thanks Brian. Just some rushed work trying to achieve the visual look I need for the style of the build. Thank you Bob, the paint should bring it to life a bit more.
-
Im sure @stitchdup is fully aware of the situation and dealing with it accordingly.
-
3D printing in full color and other tricks.
Cool Hand replied to Brian Austin's topic in The Off-Topic Lounge
Its truly incredible to see how advanced 3D printing has become in such a short amount of time. Printing in colour with so much fine detail is unbelievable. -
Sidewinder “Snake Bite” Slant 8 Warplane
Cool Hand replied to Silvercreeker's topic in WIP: Model Cars
Great idea using the colour shift paint. I built a lot Tom Daniel kits back when I first started in the hobby, so I have really enjoyed this build thread a lot especially all the customizing you have done. Cant wait to see the end result when its all pieced together. Actually inspired me to buy the kit. -
Oven cleaner from Coles or Woolies. Nasty stuff, no good for the lungs, so make sure you wear your good respirator and gloves. Chuck the parts in a sandwich bag and spray enough of the oven cleaner into the bag to cover the parts, leave it over night. Remove parts from the bag and give them a good clean with dish washing detergent.
-
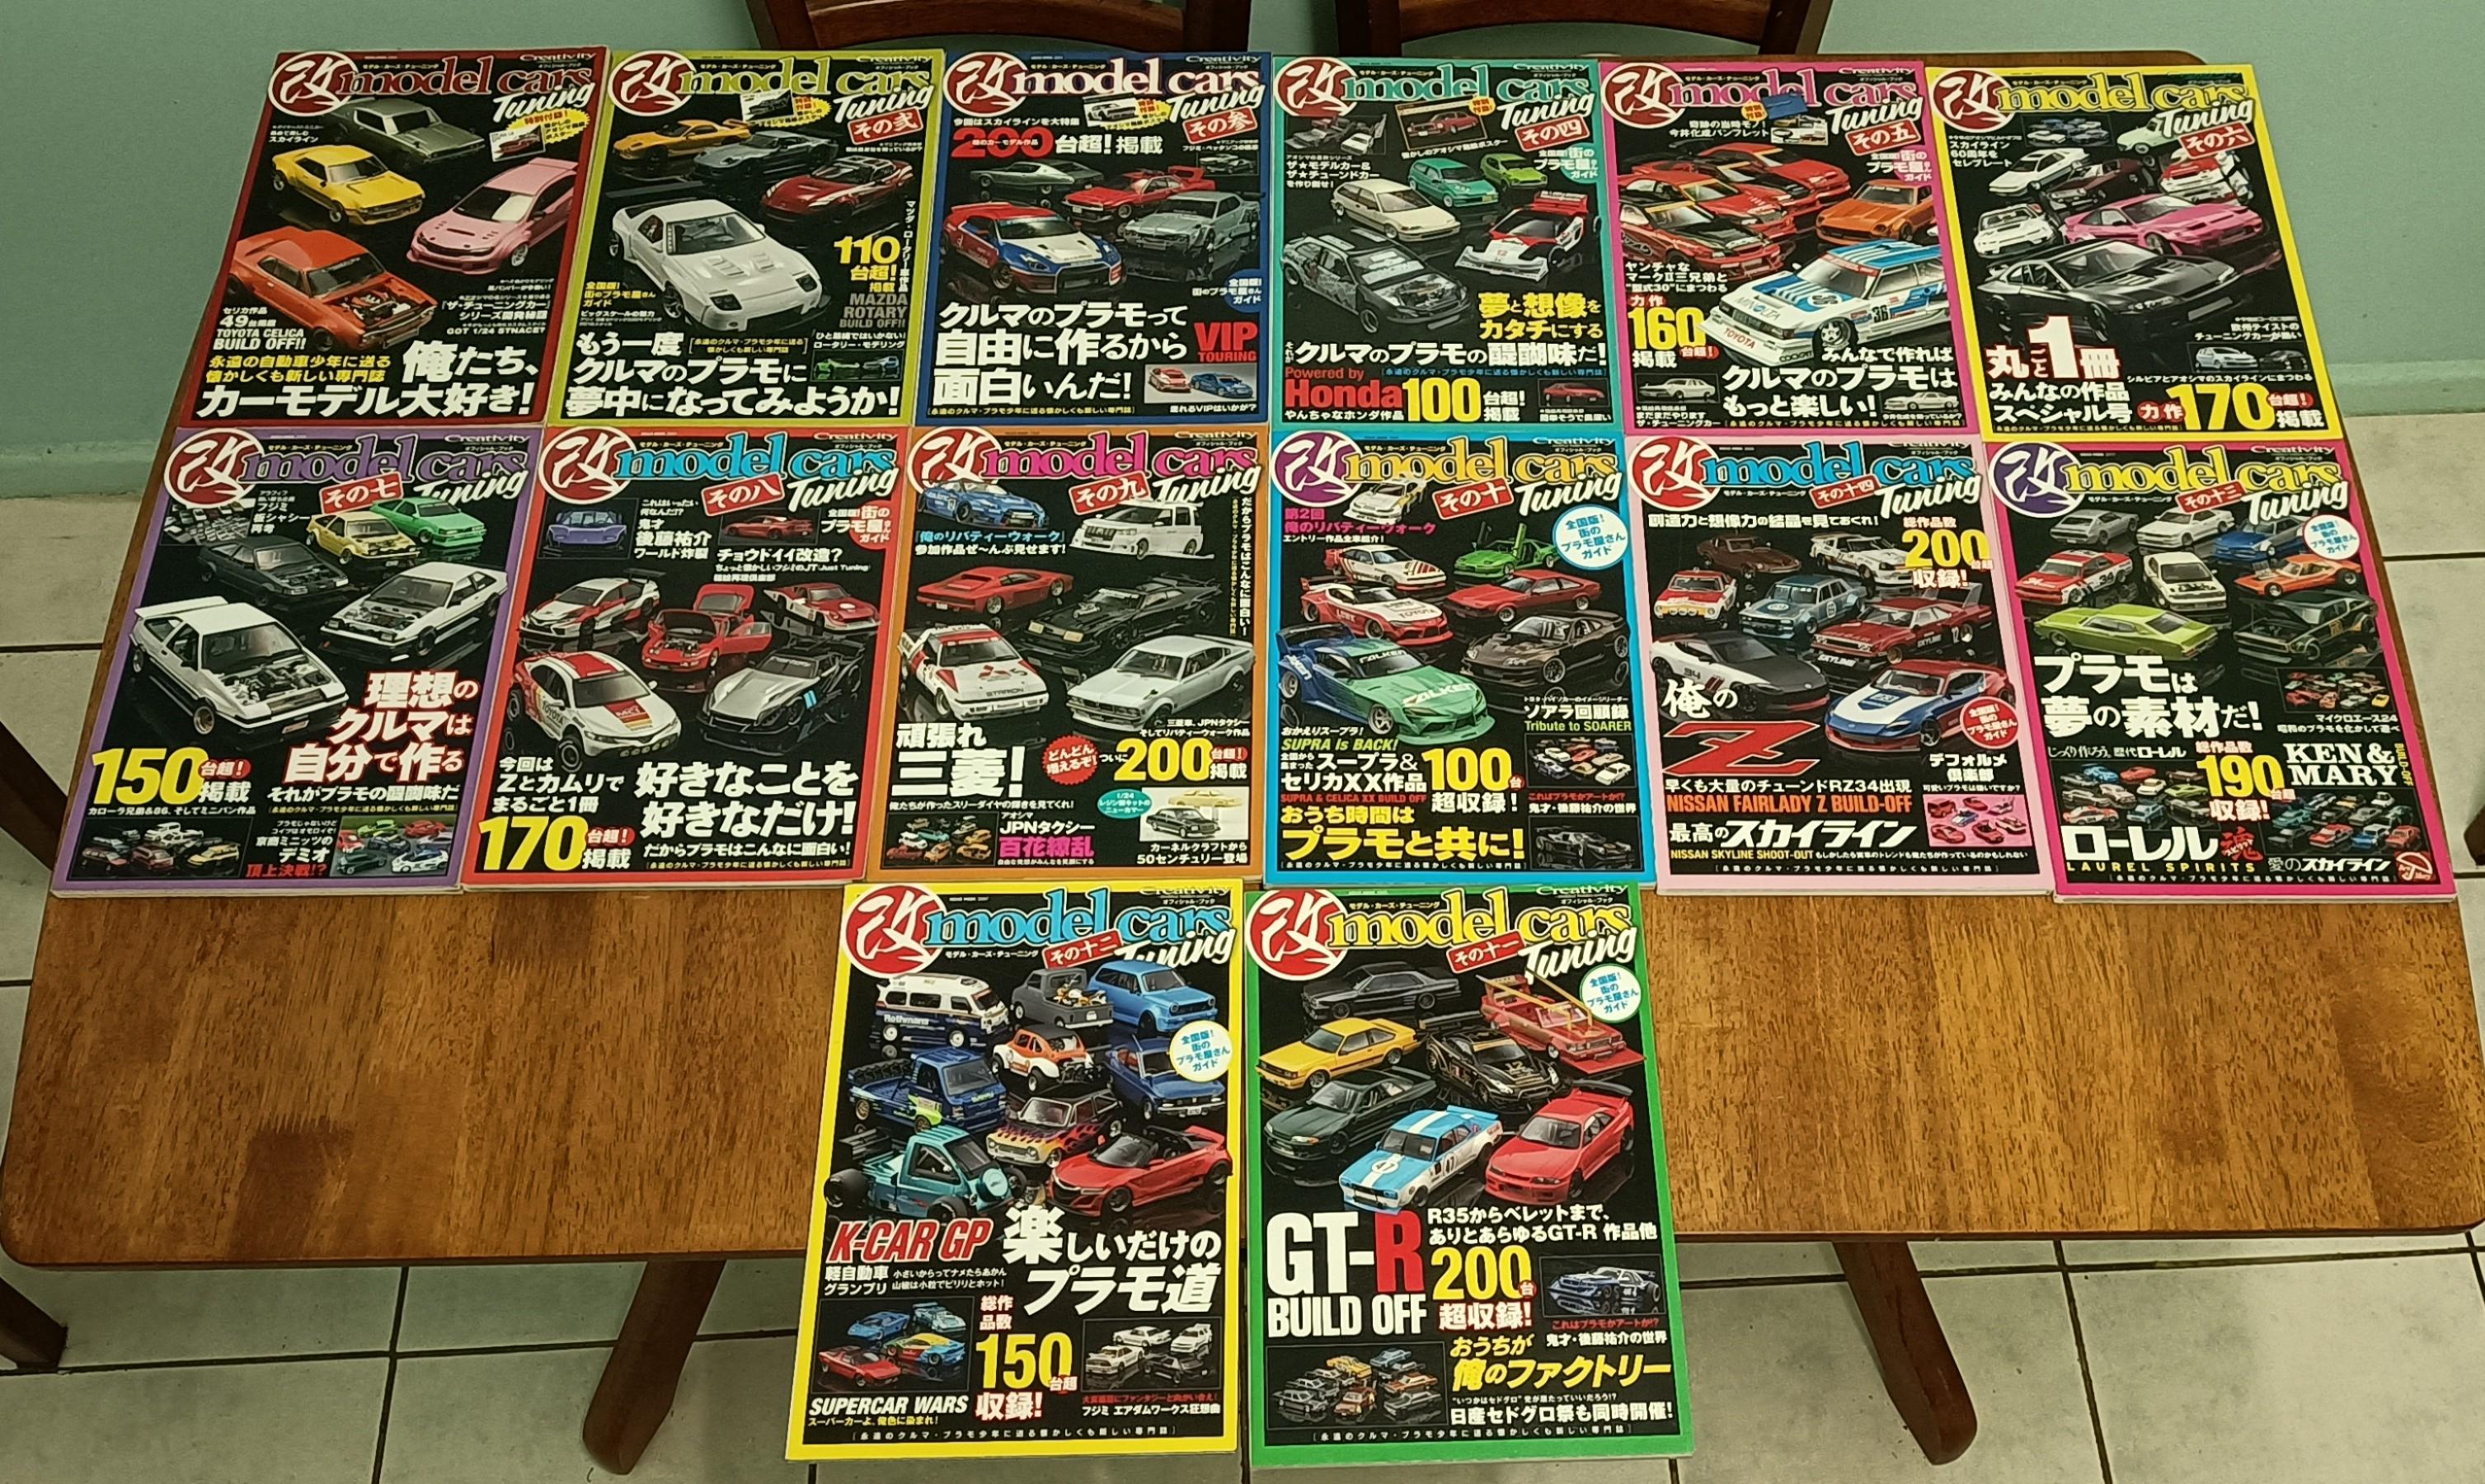
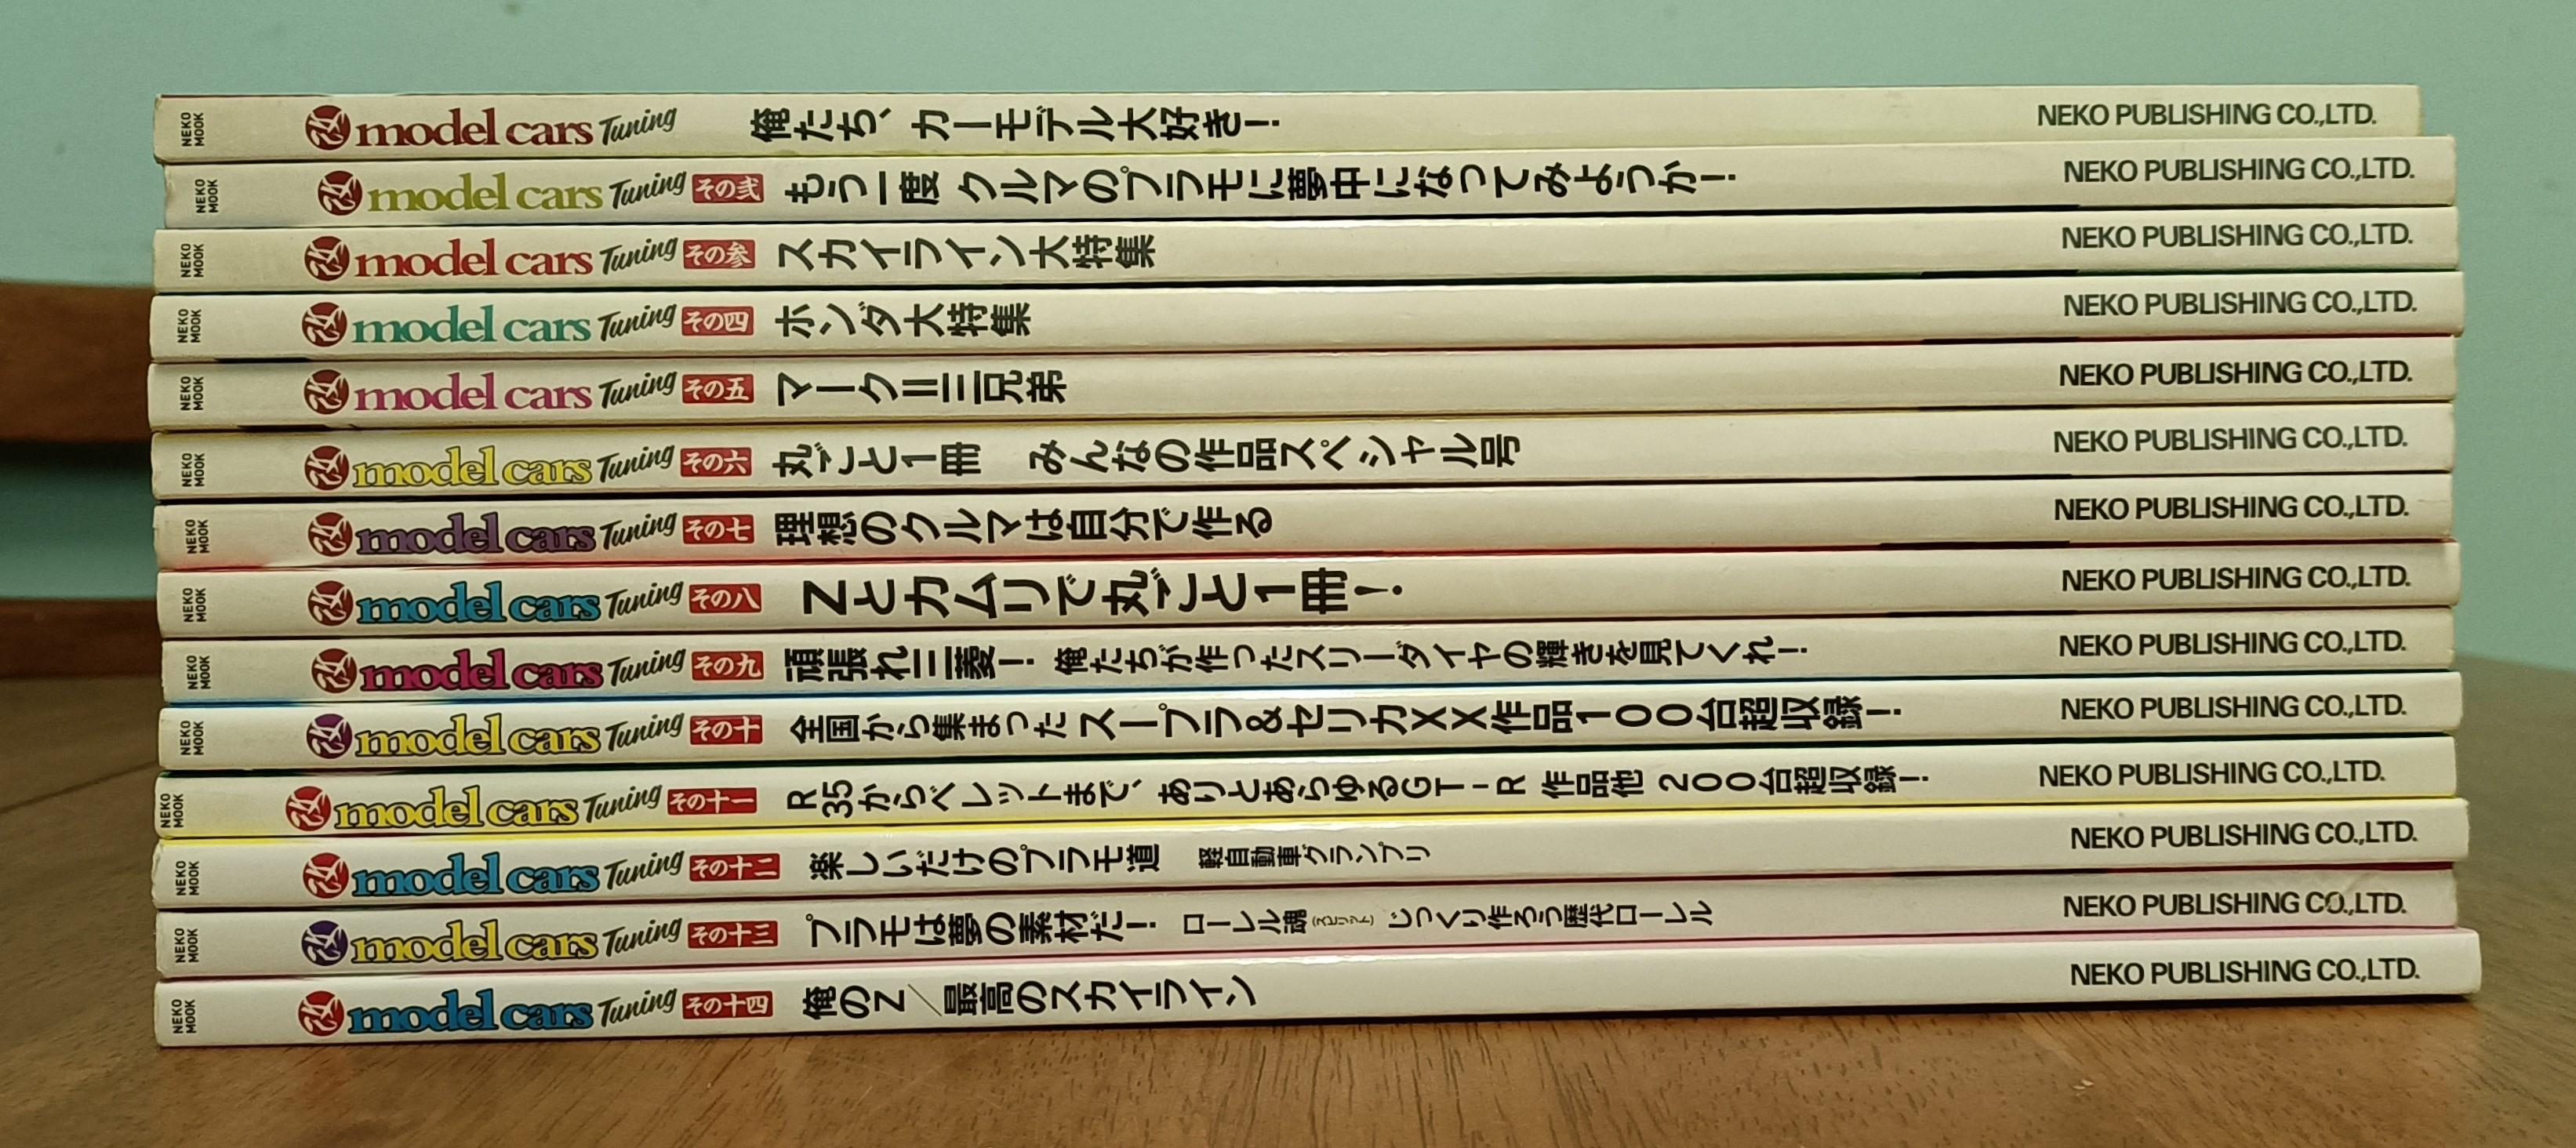
Full set of the Model Cars Tuning magazine/book from Japan. 😁
- 39,062 replies
-
- 11
-
-
- johan
- glue bombs
- (and 1 more)
-
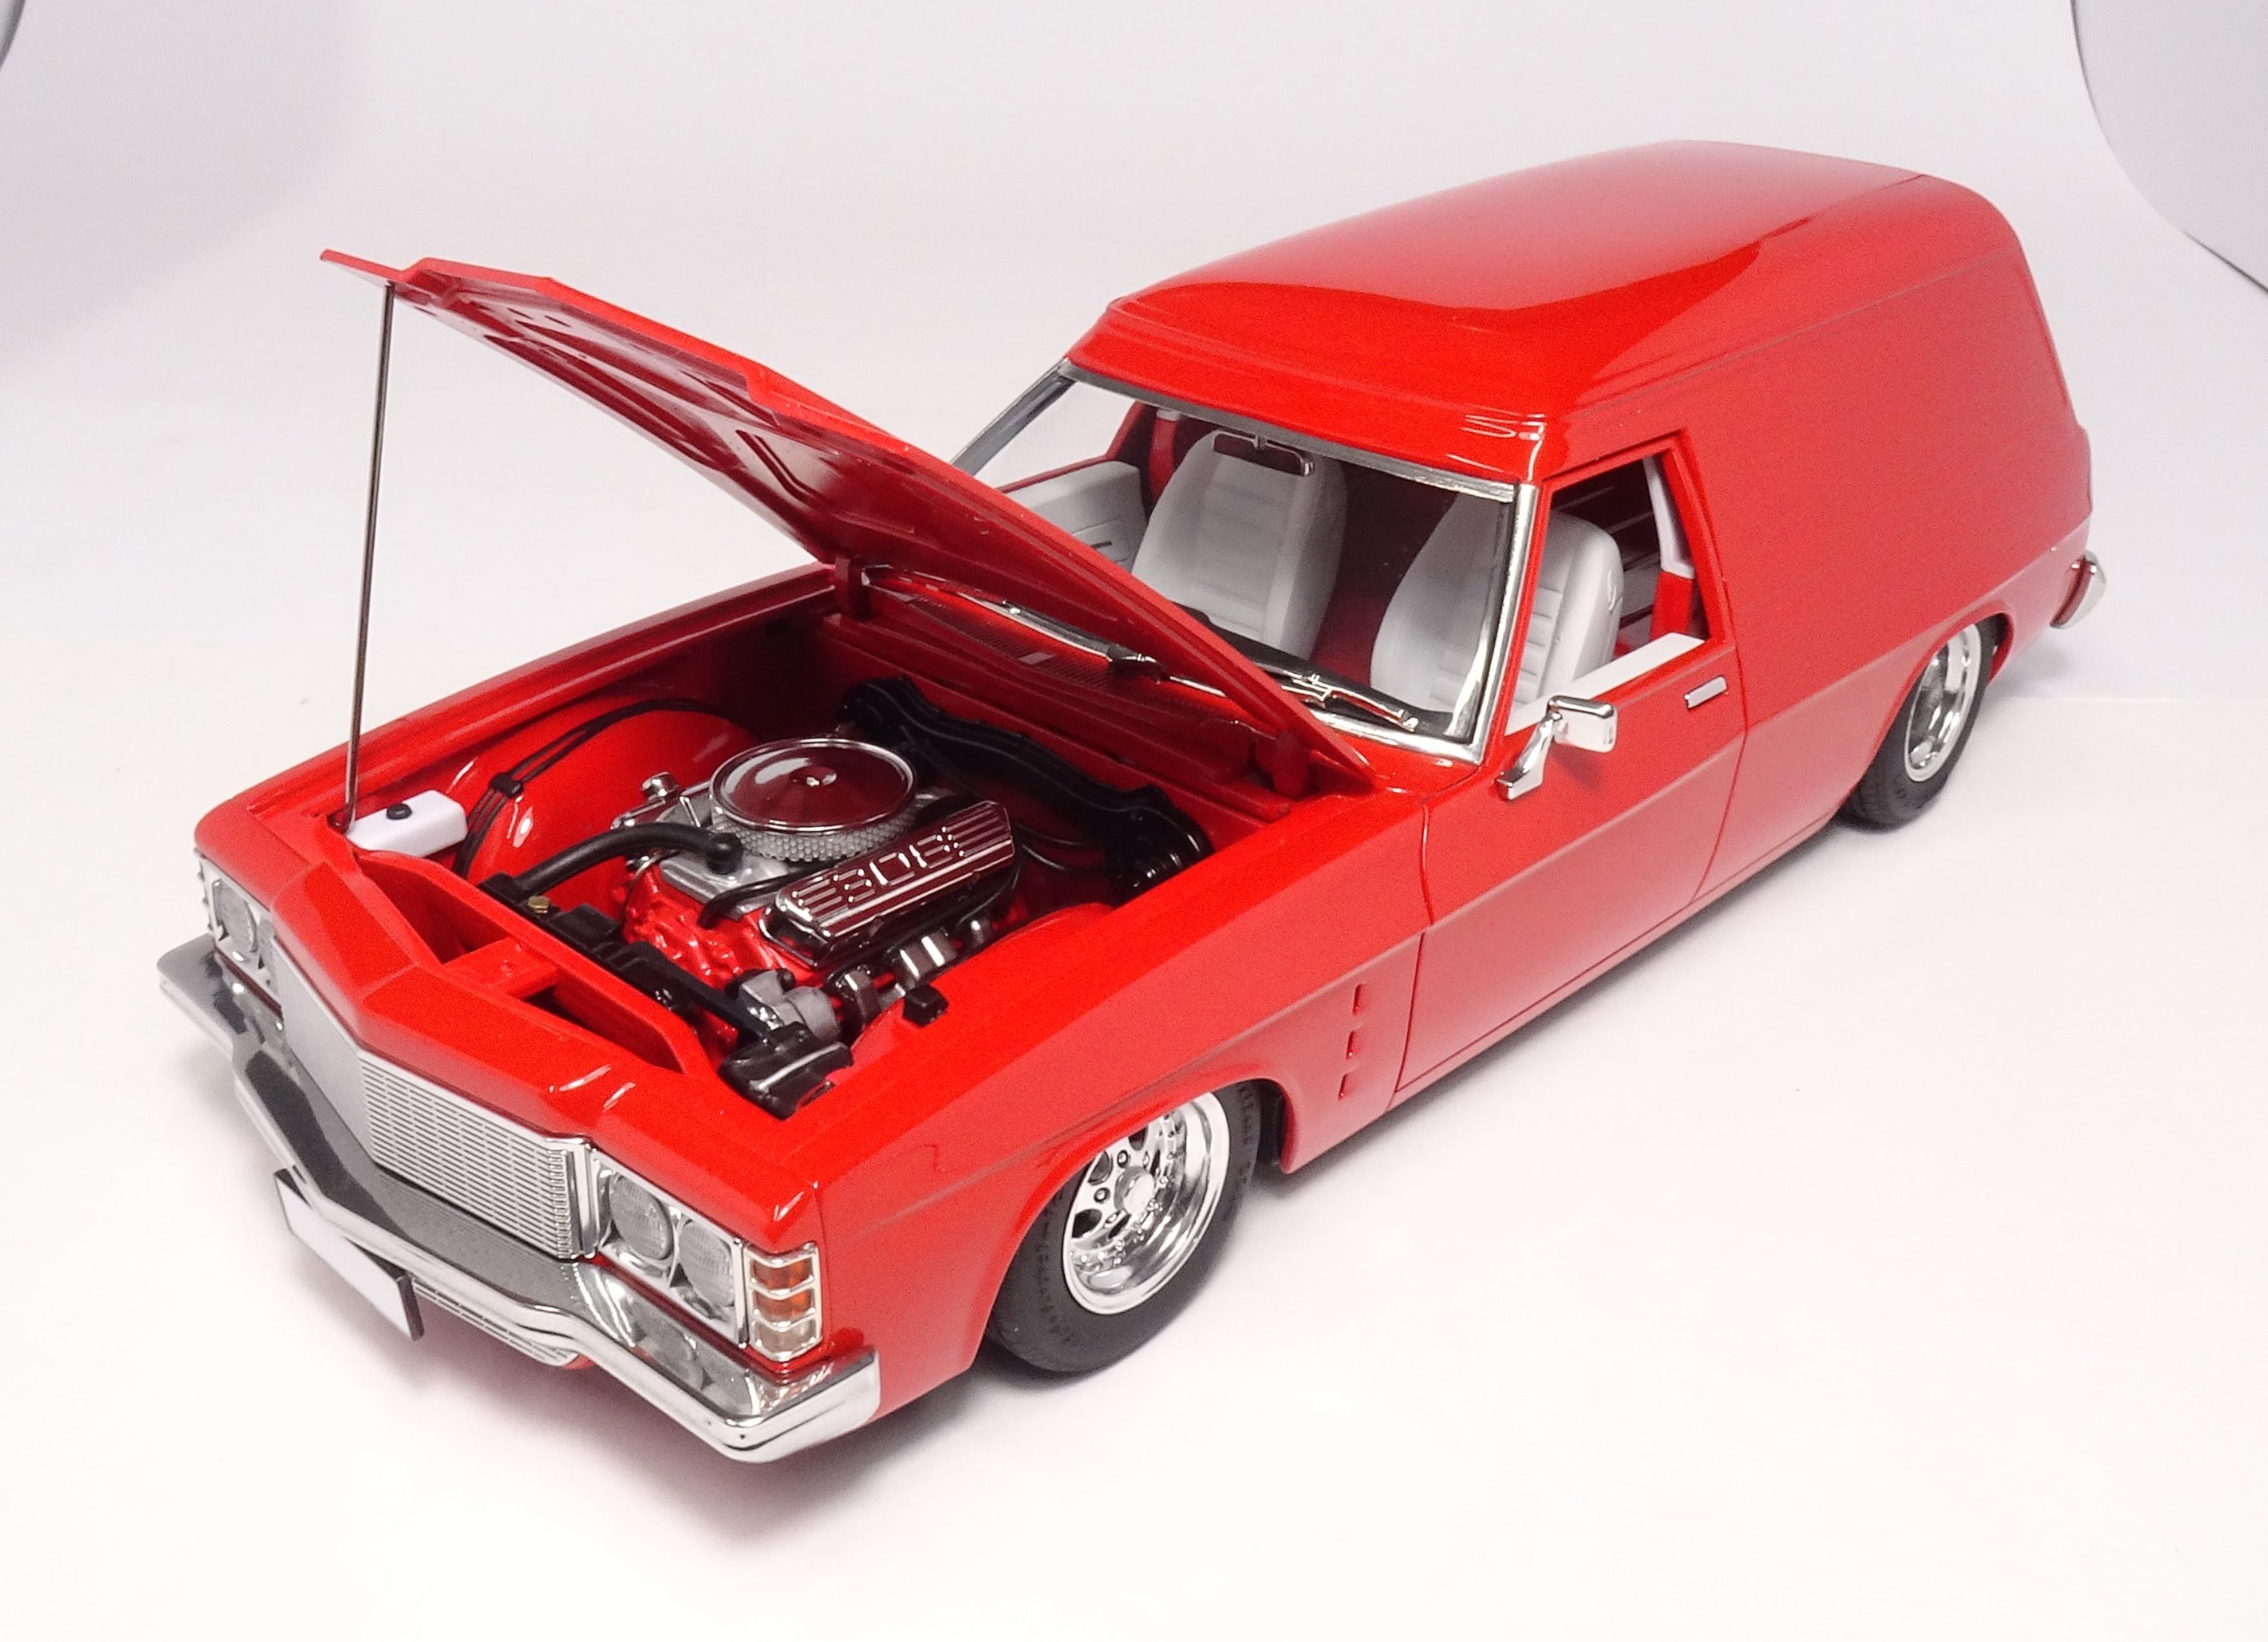
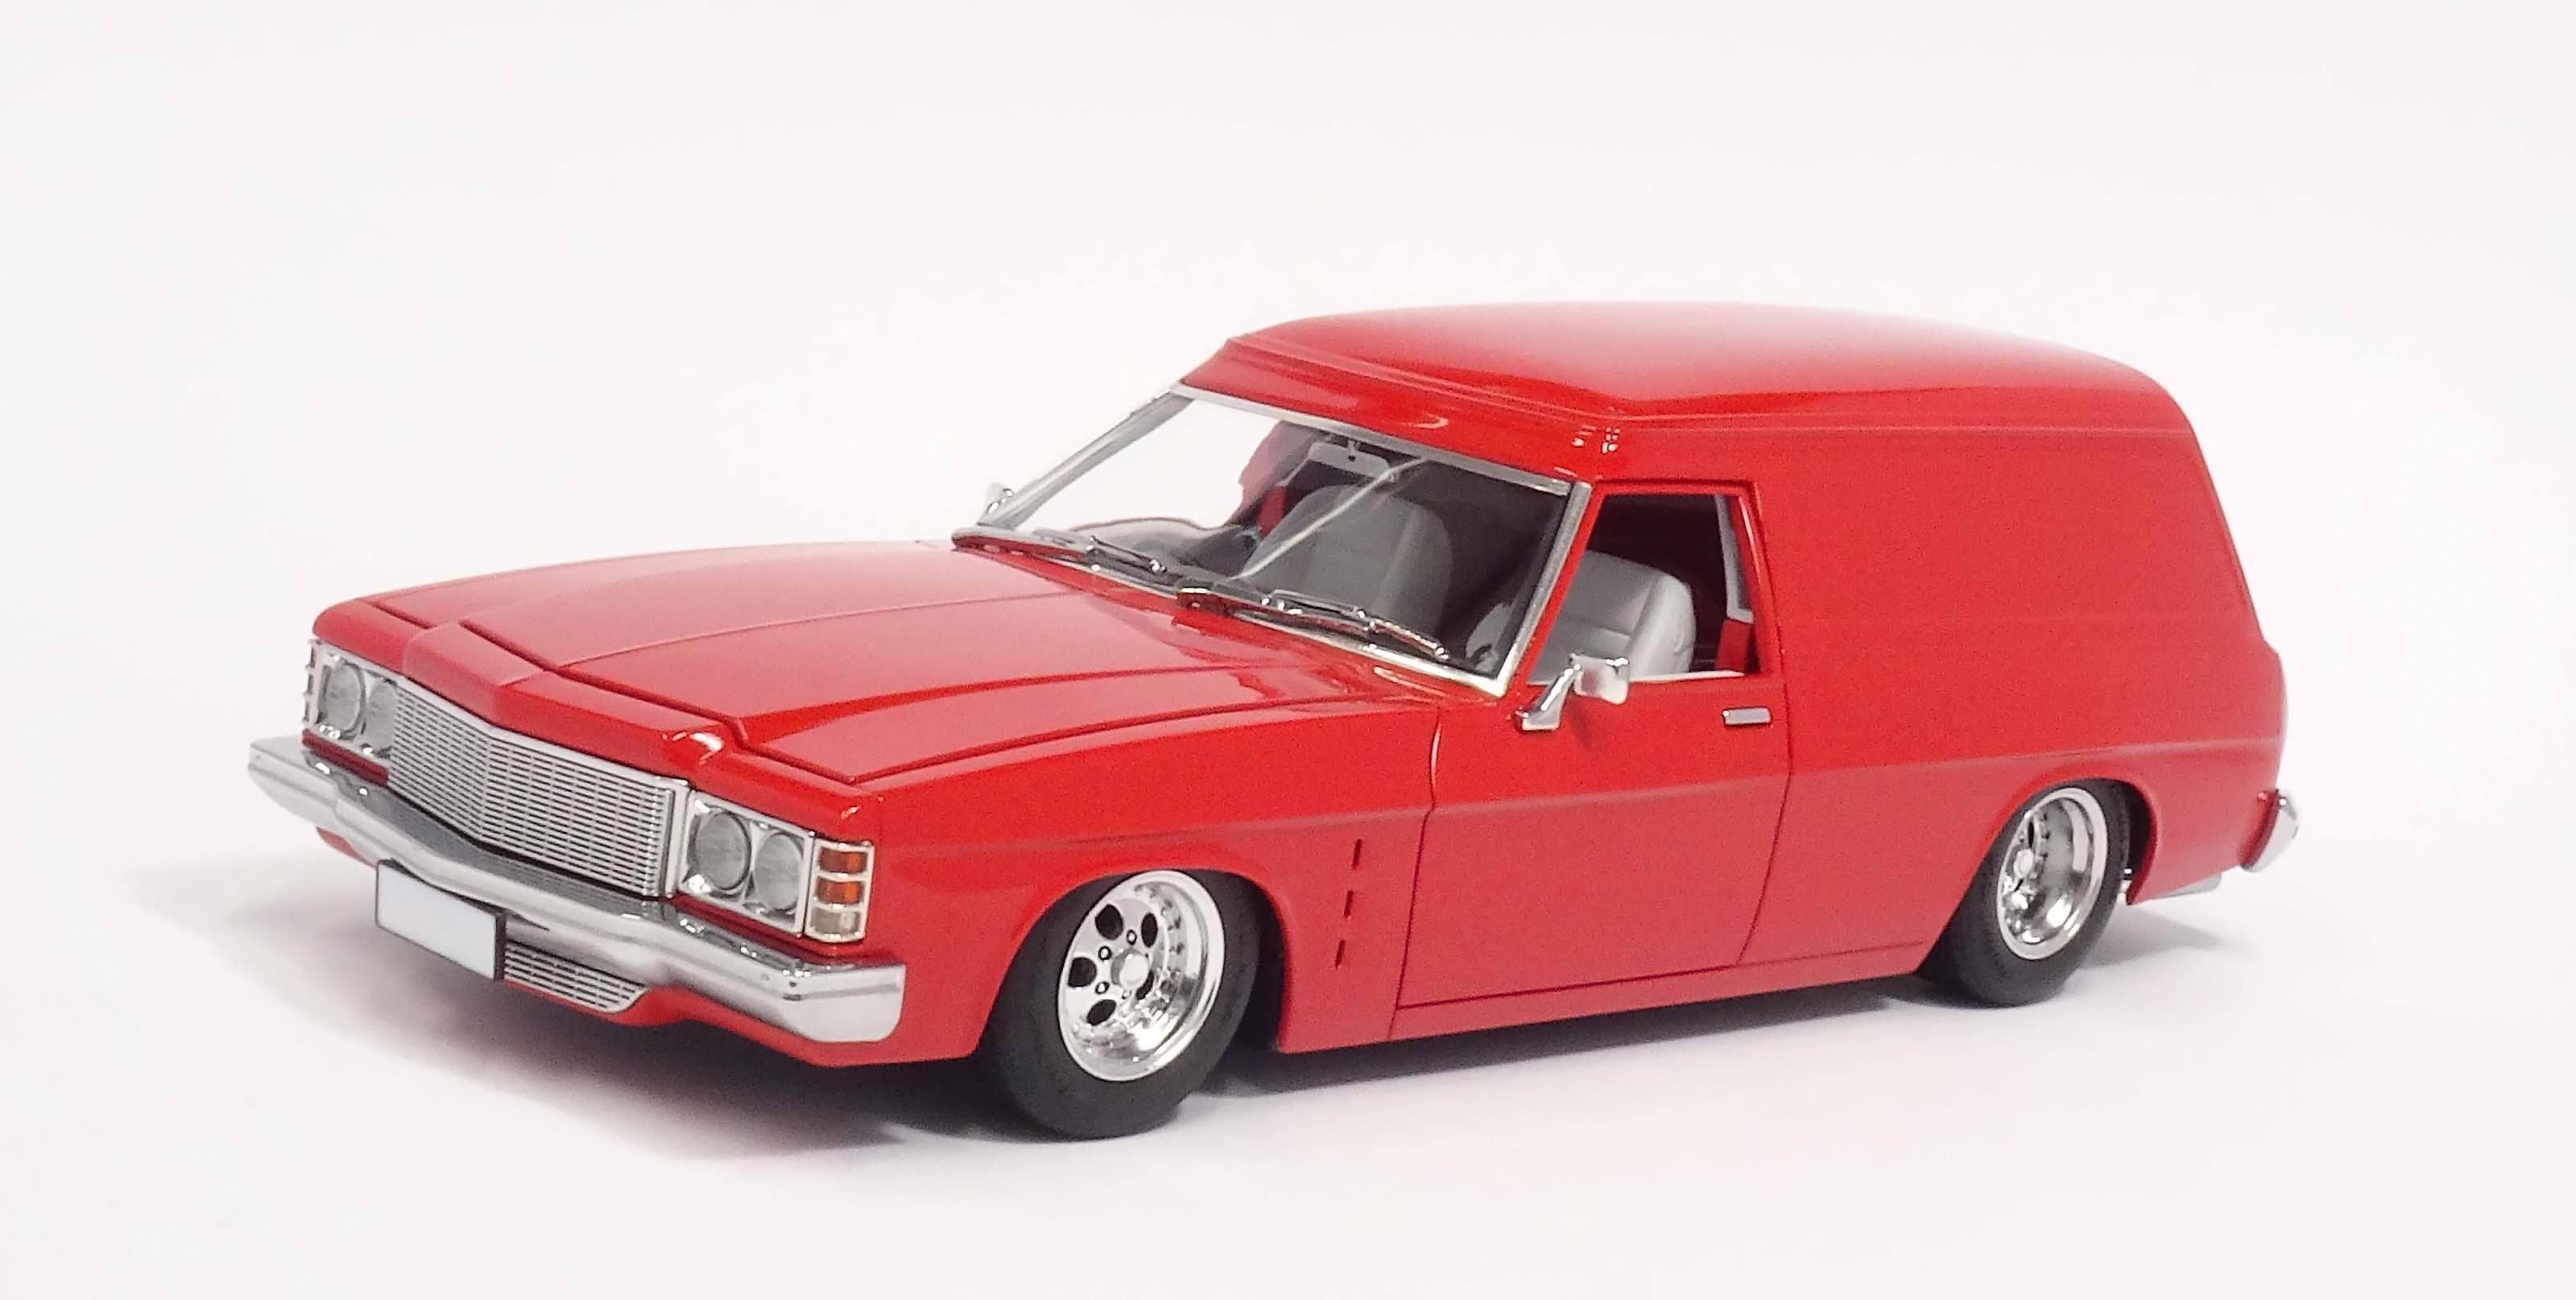
Engine bay, drive train tunnel and rear seat delete roughed in. Half roll cage is from the kit, but il add more to it.
- 766 replies
-
- 3
-
-
- stalled builds
- quick builds
- (and 2 more)
-
Starting to look the part now Mathias. Thanks Donny, it's a bit of process. Its helpful that I have had some practice modifying Aoshima kits. 🤣 They would nope, no chance. Too many modifications 😁 Im starting to get addicted to the patina style builds, way more fun, stress free and easier to crank them out. Cheers Stu.
-
Done well Stu, good to see you got chrome work sorted.
-
Thats a very interesting and clever combination, kind of like a modern day Mad Max with the Liberty Walk wide body styling. Well done Michelle.
-
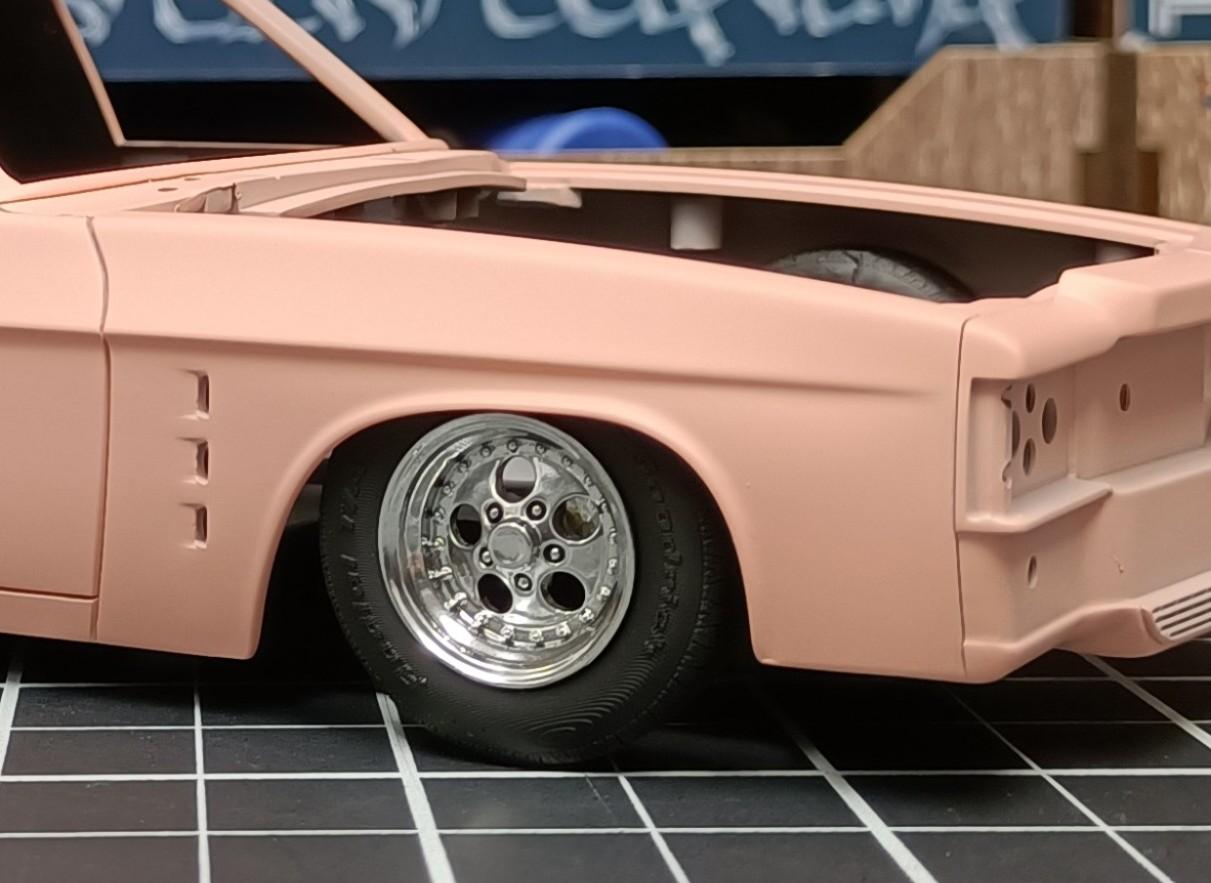
Got the engine placement situated in the Hako. Decided to use a high rise manifold. And of course it required some modifying and cutting Found a gear box in the parts stash, I think its from the Amt 04 Pontiac GTO, it had the same bell housing pattern as the LS3 and its a modern manual that will suit the build style. Rough shaped a fire wall. Next up I will do the engine bay, then the drive train tunnel and rear seat delete. Yep got that Aussie style
- 766 replies
-
- 3
-
-
- stalled builds
- quick builds
- (and 2 more)
-
Thanks for checking things out and commenting Donny. Skyline turned out as shiny as my bald head 🤣 Tamiya polishing compounds, do the job very well. Cheers Donny, close as I can get to looking the part. Always appreciate the kind words Bob, thank you very much. 🤣 Im not much of a professor, that title goes to another certain member of the forum. Im more of a mad scientist 🤪 always experimenting with styles and ideas. As the saying goes, " a jack of all trades but a master of none" all about having fun enjoying the creative process of building scale automotive models.
- 766 replies
-
- 3
-
-
- stalled builds
- quick builds
- (and 2 more)
-
Well thankfully this is not going to be as complicated as I thought.
- 766 replies
-
- 3
-
-
- stalled builds
- quick builds
- (and 2 more)
-
🤣 its all good Donny, I have plenty of spare time to build and I like to collect kits.
-
Gaahleri GHAD-68 Advanced Series Airbrush is a solid performer at a good price.
-
Couple kits and wheels from Model Round Up. And some kits from Plaza Japan.
- 39,062 replies
-
- 4
-
-
- johan
- glue bombs
- (and 1 more)
-
Sometimes new idea's need to be investigated immediately 🤣 My thought was, I wonder what a Hakosuka would look like built the same style as the Datto drift ute. So here we are distracted as usual, starting and planning out another build. Havent built this kit before. Have to use the same 3D printed wheels that I used on the Datto ute, so they were done first. Couple sets as I'm sure I will get another idea for this style of build which will need the Long Champs. Then fitted the over fenders and roughed in the stance. Now to try shoehorn the engine into position 🤪
- 766 replies
-
- 3
-
-
- stalled builds
- quick builds
- (and 2 more)
.png.013fa9dd43375531e1189c60e38cfc2d.png)
.png.82fef2a9dd13cca4aced592471f5b73d.png)