Cool Hand
-
Posts
2,087 -
Joined
-
Last visited
Content Type
Profiles
Forums
Events
Gallery
Everything posted by Cool Hand
-
Yeah going to be interesting to see if it works or will I have to strip the paint again 🤣
-
Always excellent quality products. I can print my own stuff, but I like Texas 3D Customs designs and the print quality is some of the best I have purchased. Thanks Charles.

-
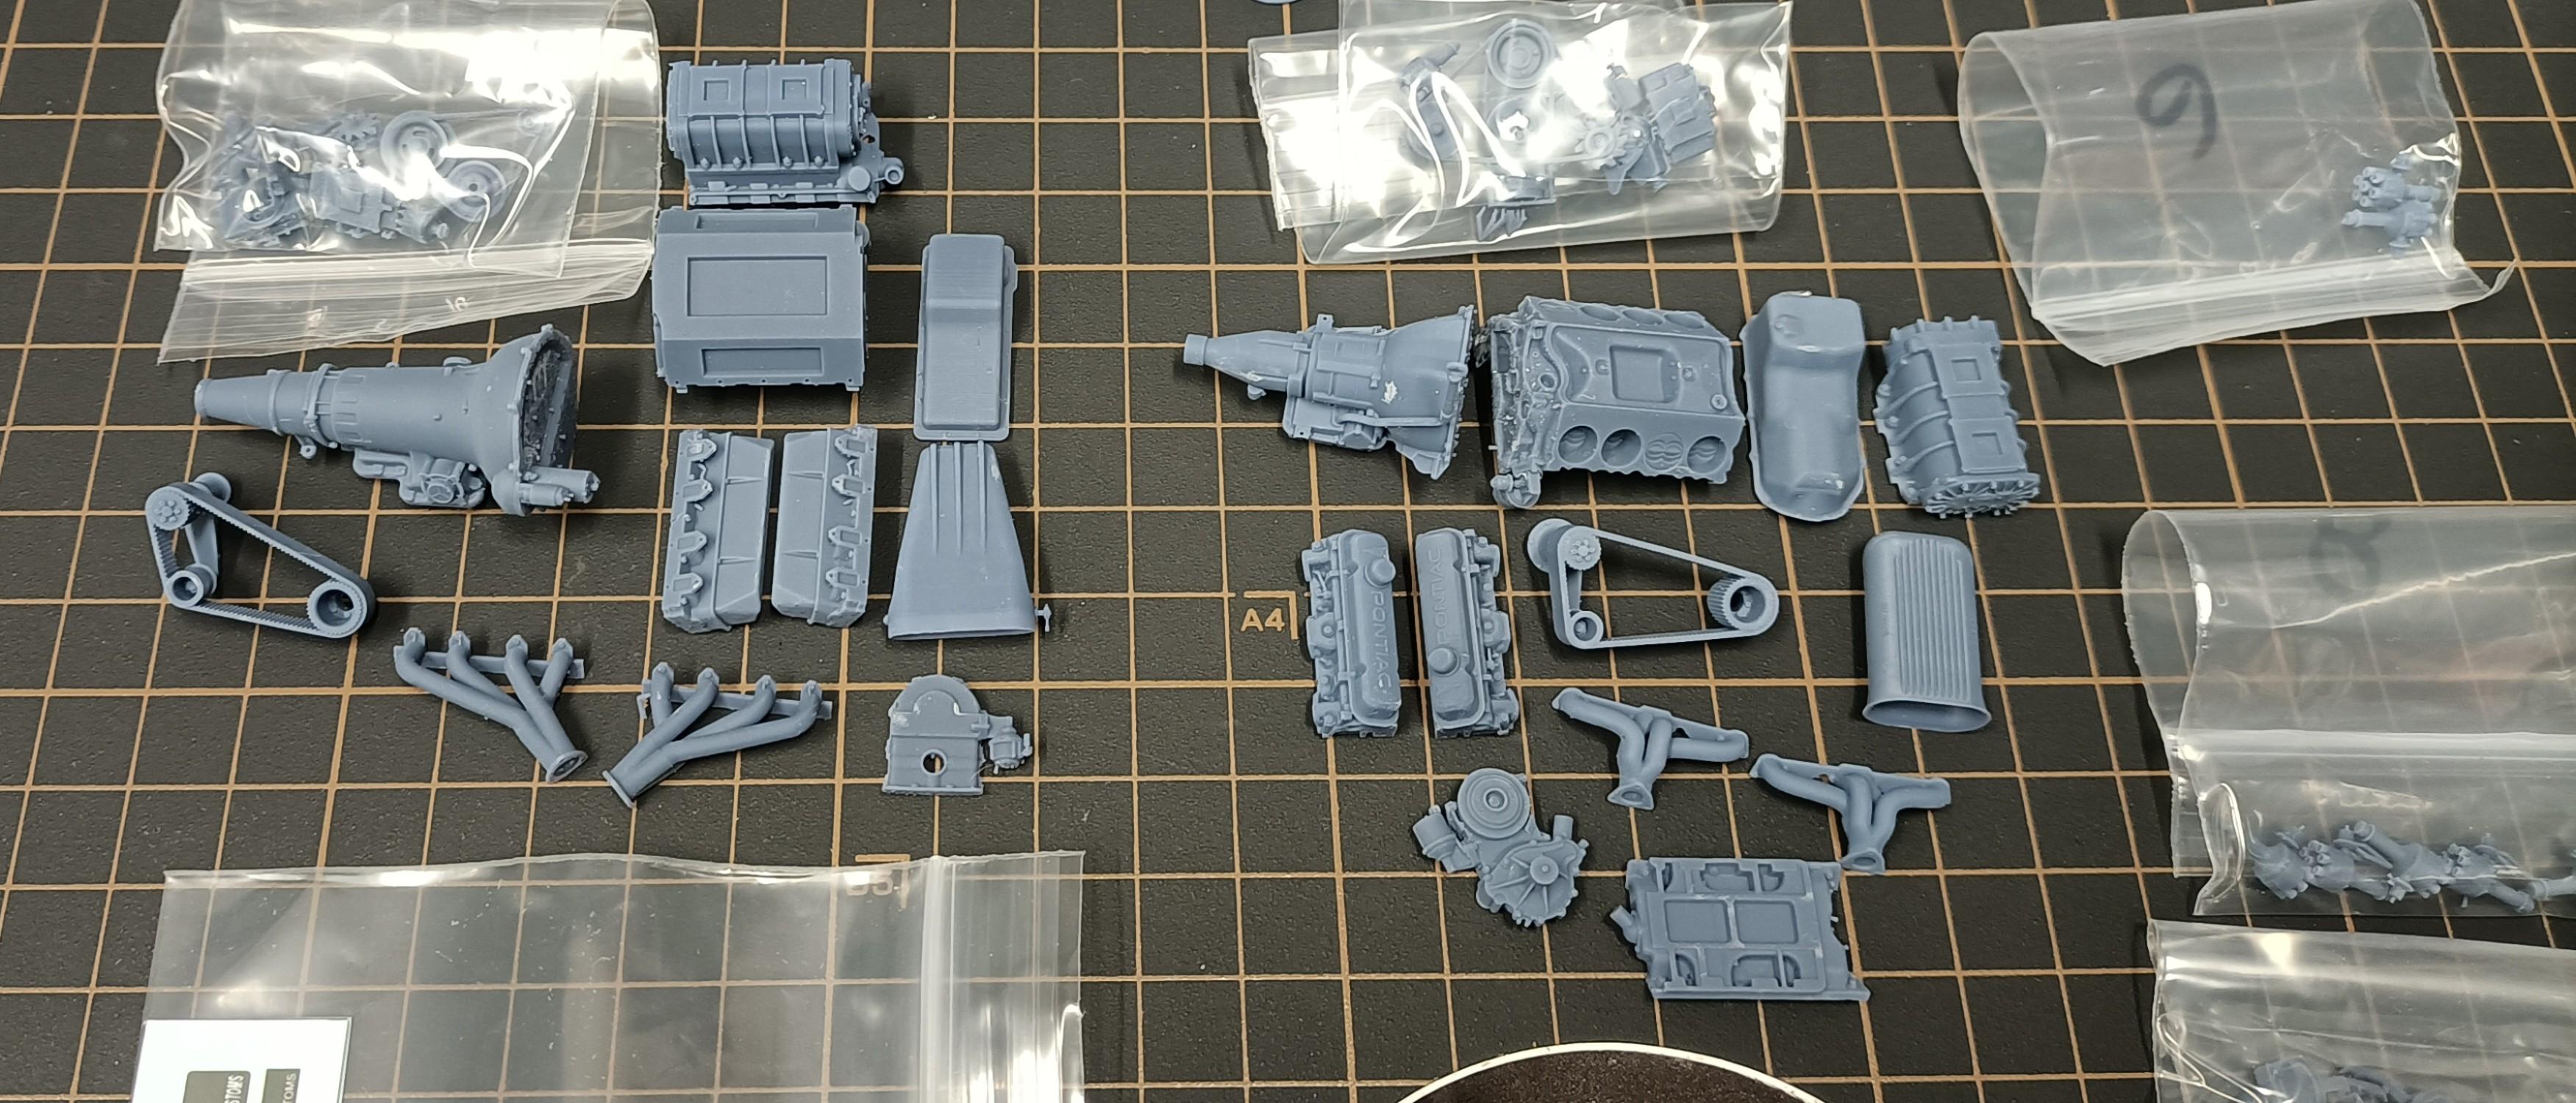
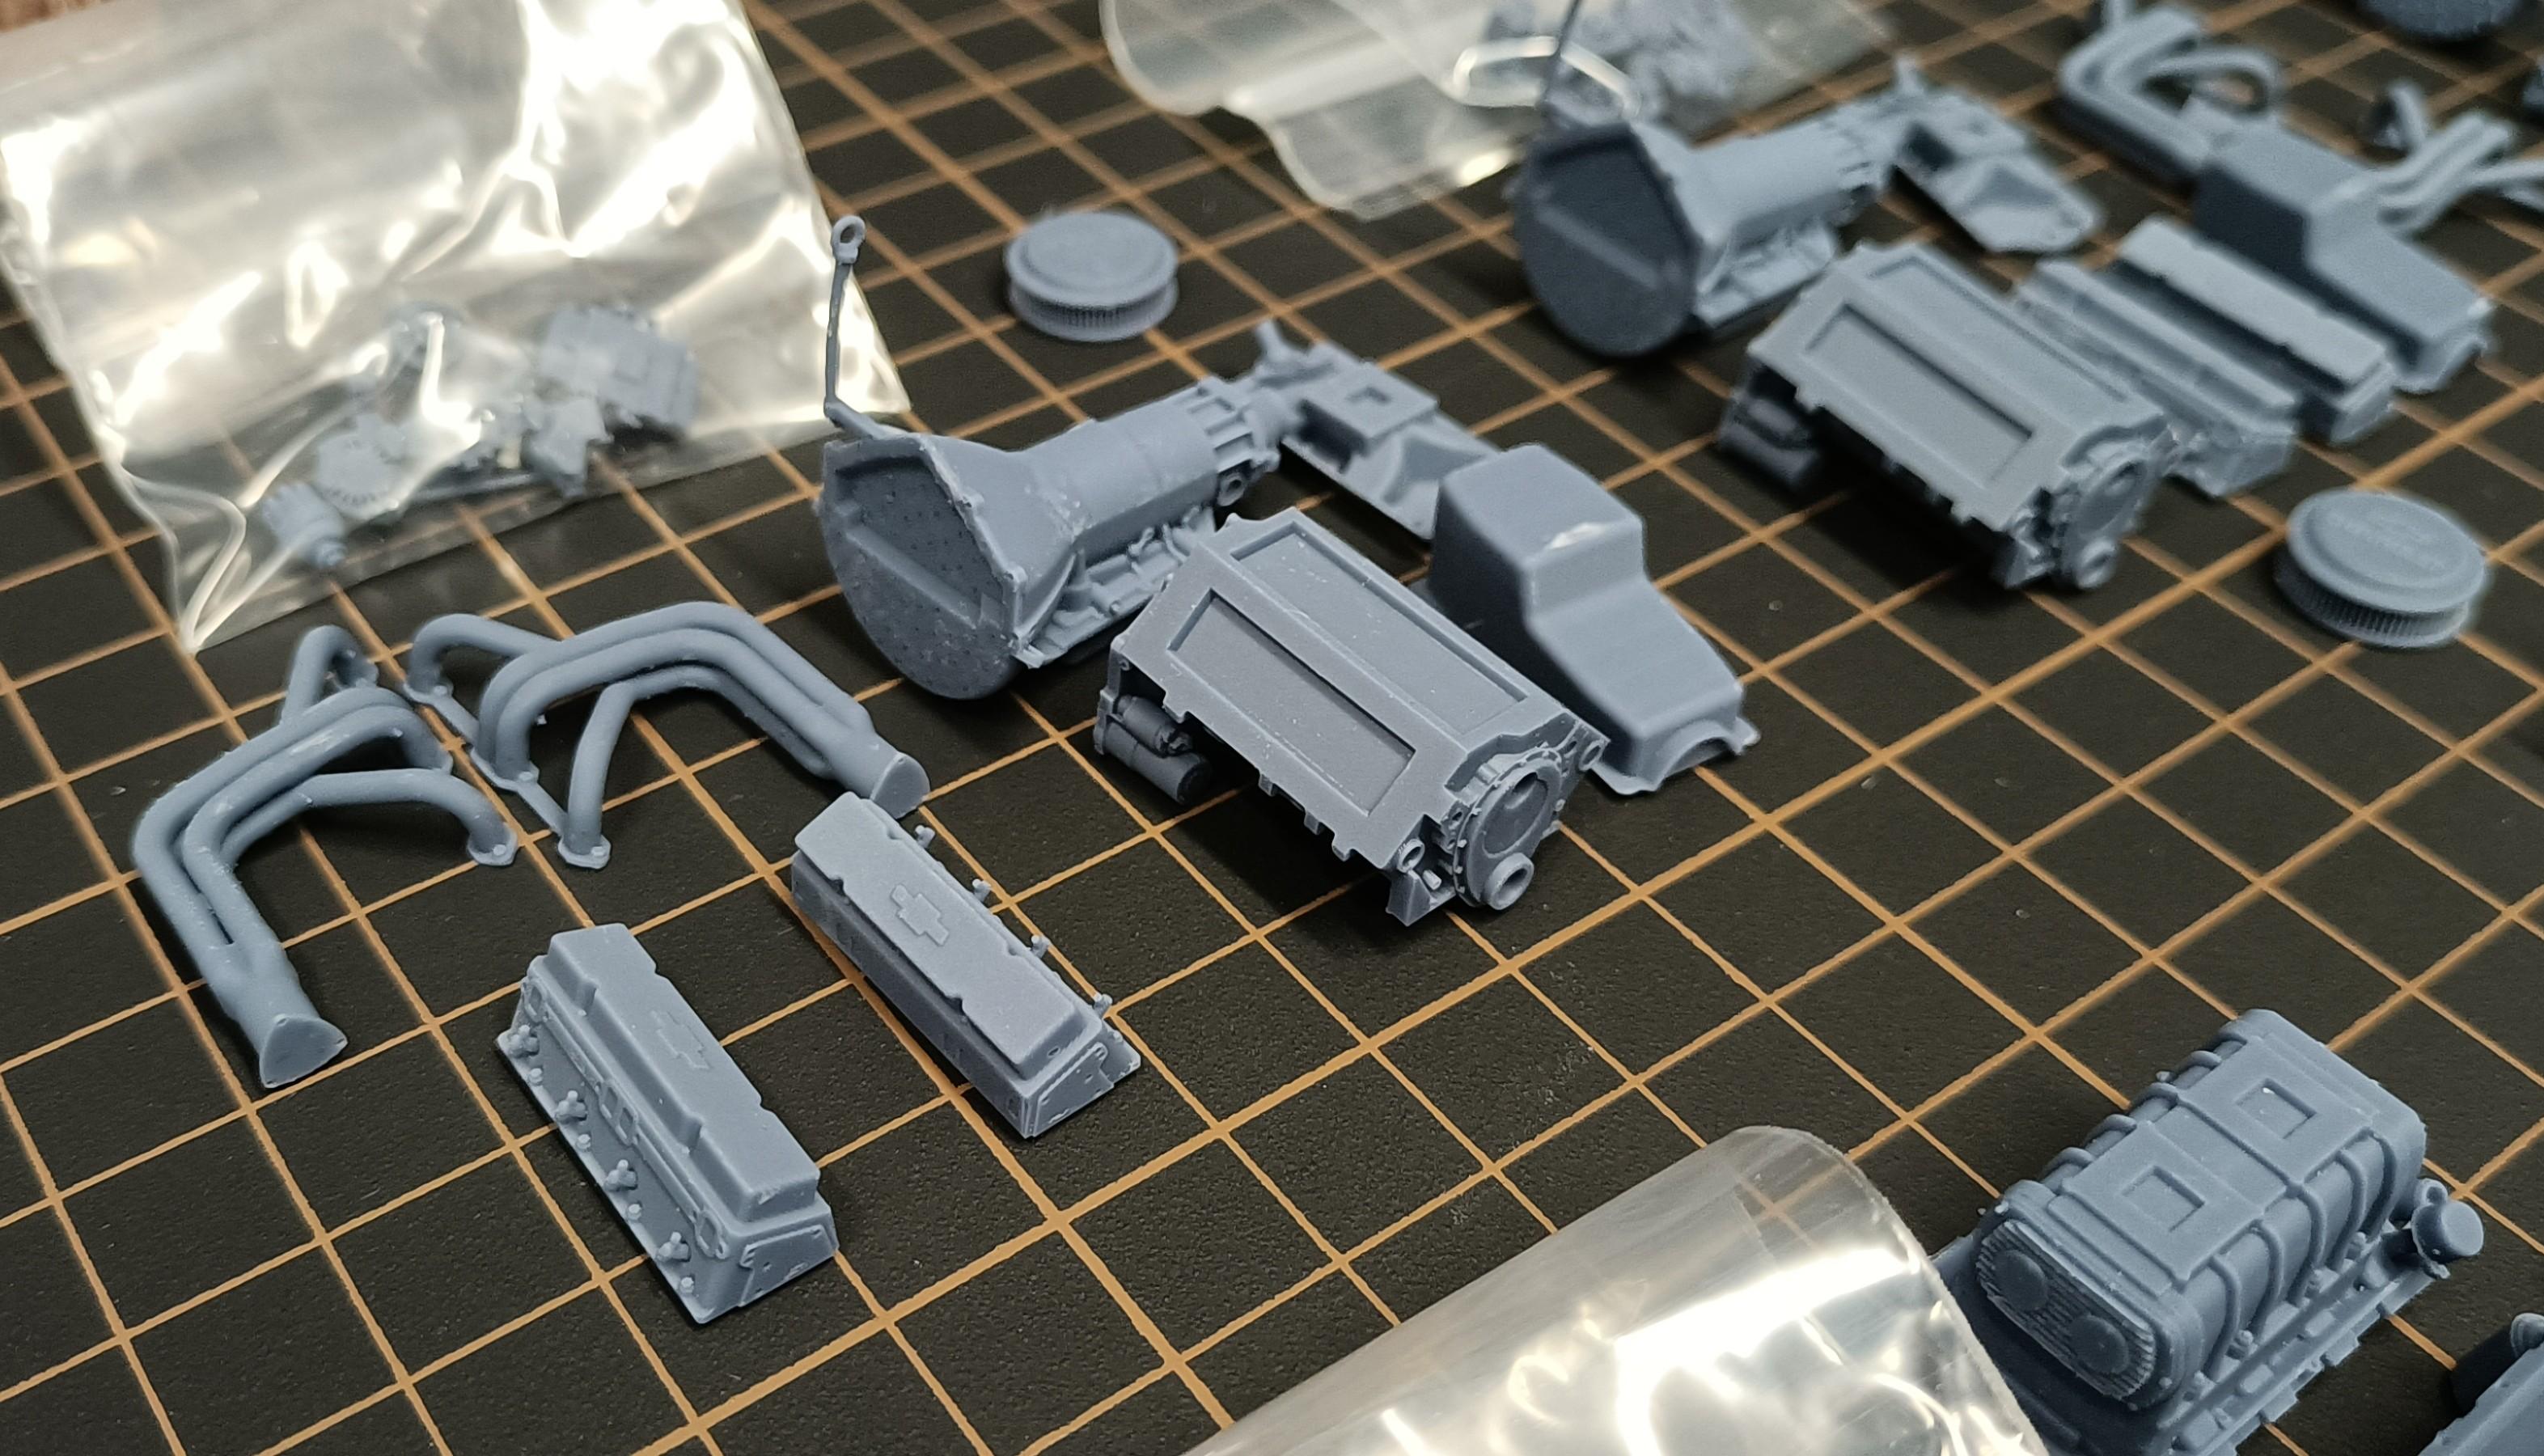
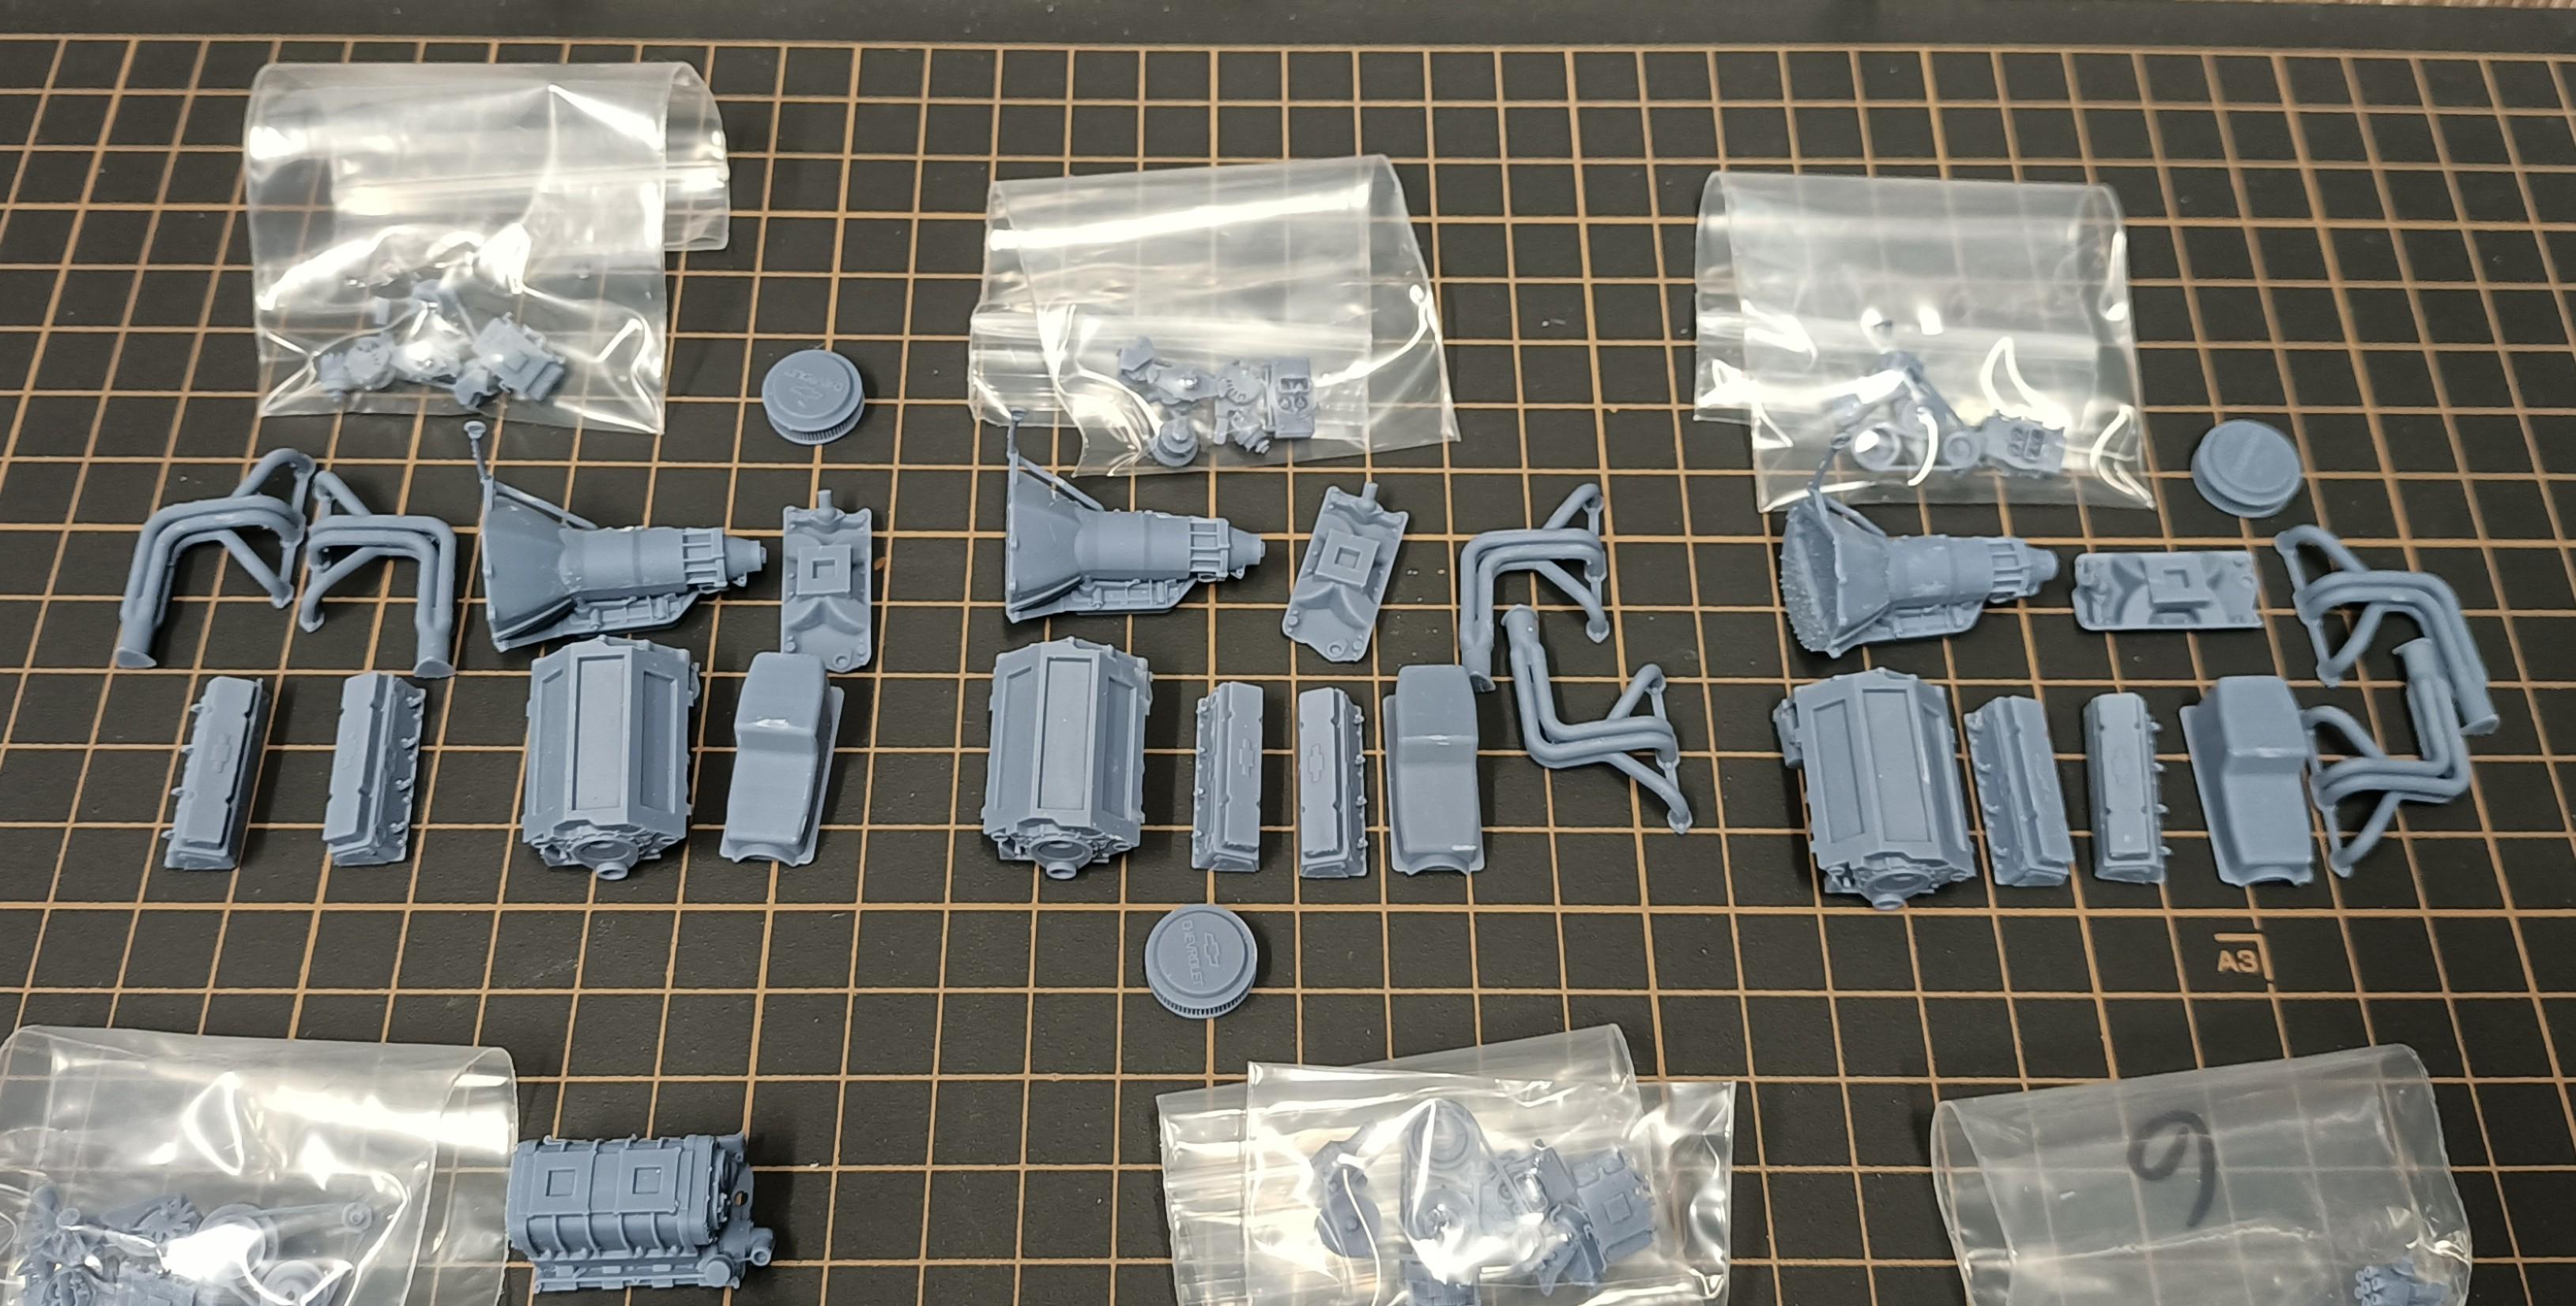
 Order from @Texas_3D_Customs x3 SBC, Blown FE, Blown Pontiac, 8 and 6 cyl distributors and some shifters.
- 39,062 replies
-
- 10
-

-
- johan
- glue bombs
- (and 1 more)
-
Well thats the thing isnt Pete, we all use different products, equipment and techniques. So results will vary from our own experiences. At the end of the day the only thing that matters is we as individuals are satisfied with the outcome of our own paint work.
-
Probably because in most circumstances the first coat is light and very thin and might not get full complete coverage, so a second coat medium wet coat is applied for full coverage and being a wet coat it will level out to a smooth finish. No product formulations are the same, so 2 coats would be desirable for peace of mind to achieve full coverage. 🤷♂️
-
1955 Ford Panel Truck
Cool Hand replied to Zippi's topic in WIP: Model Trucks: Pickups, Vans, SUVs, Light Commercial
Yep, another vote for titanium silver centers. -
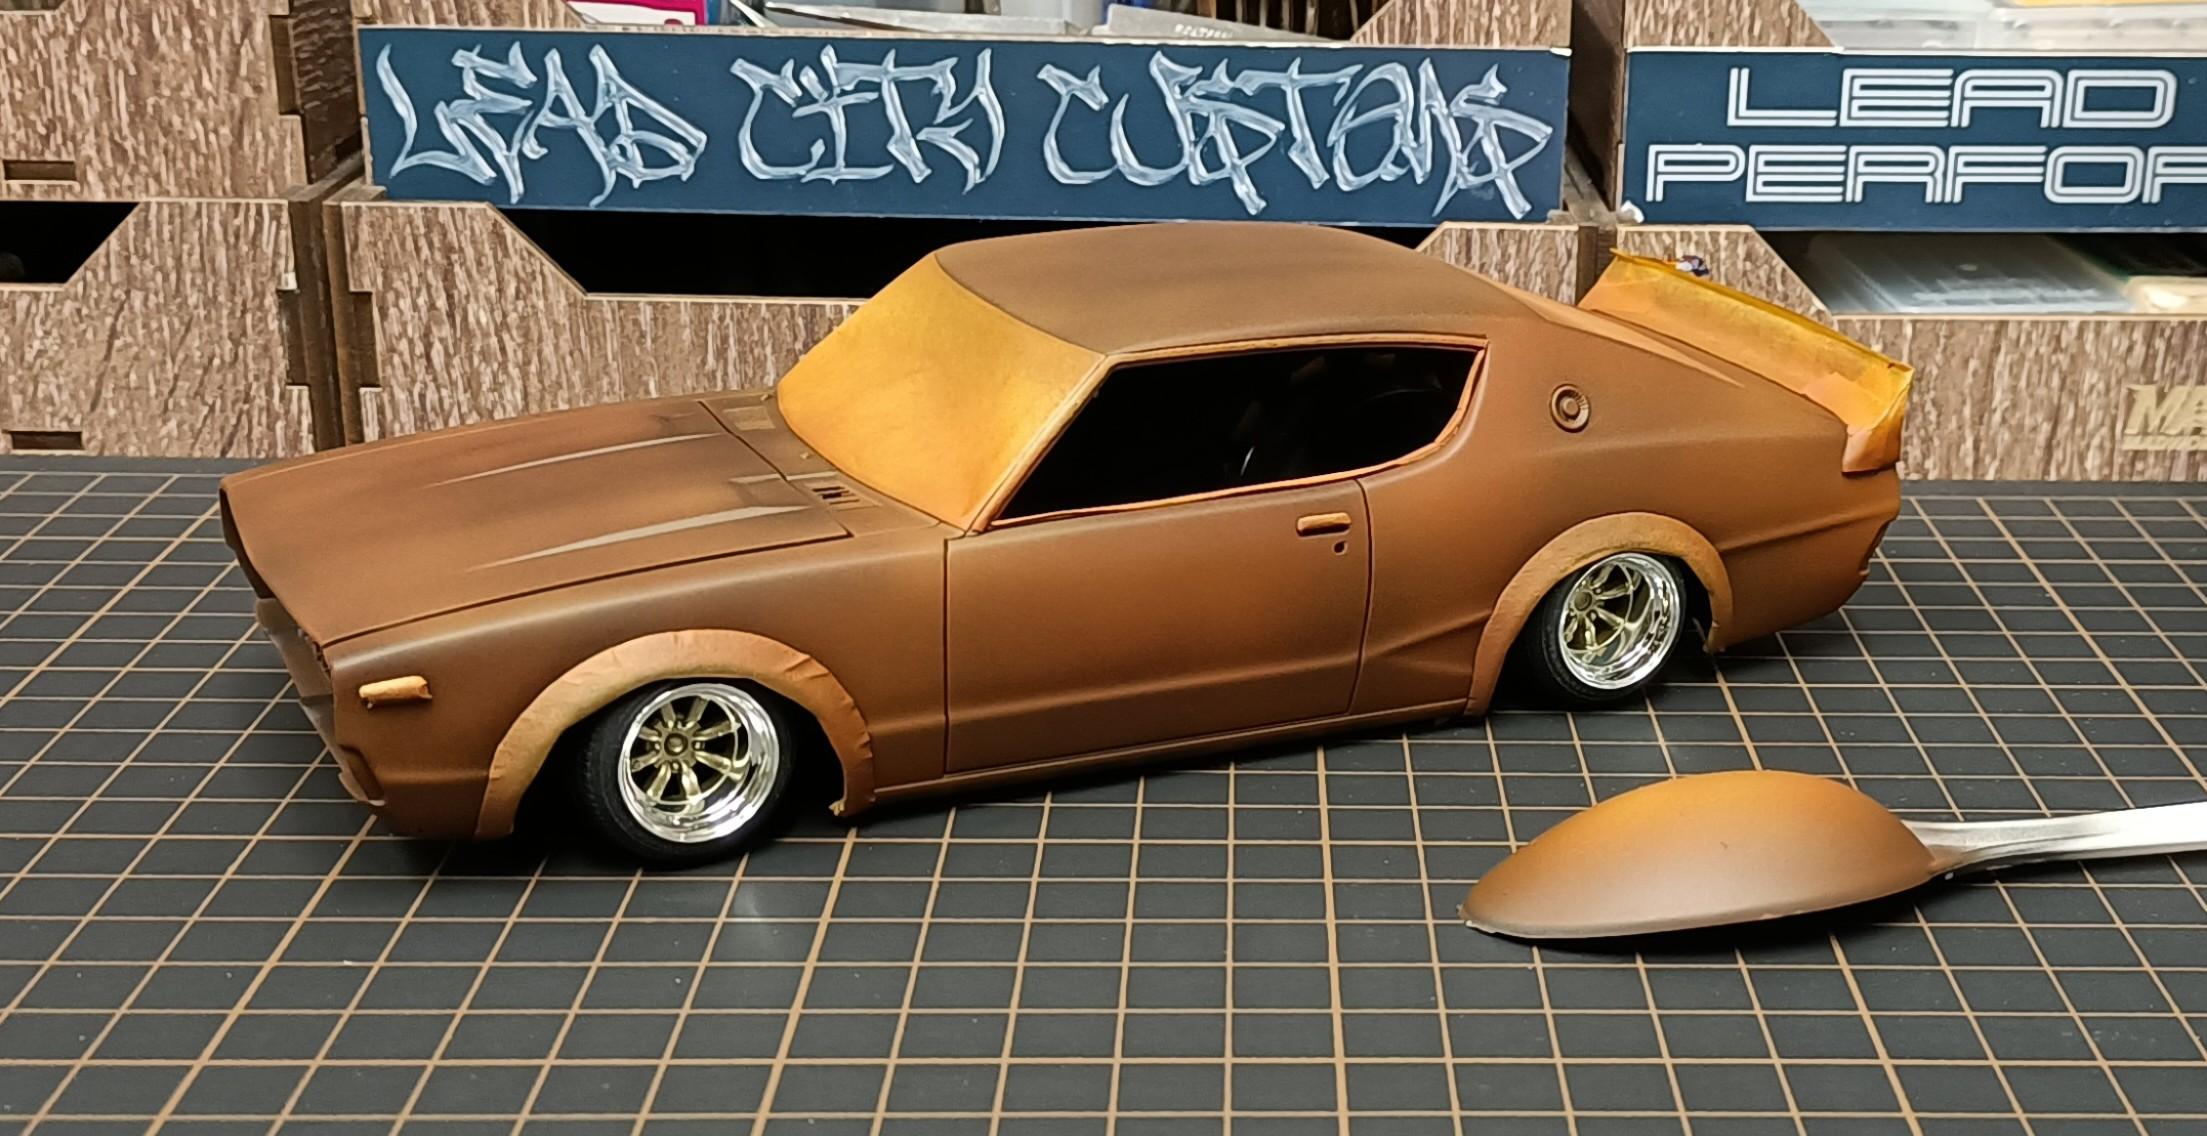
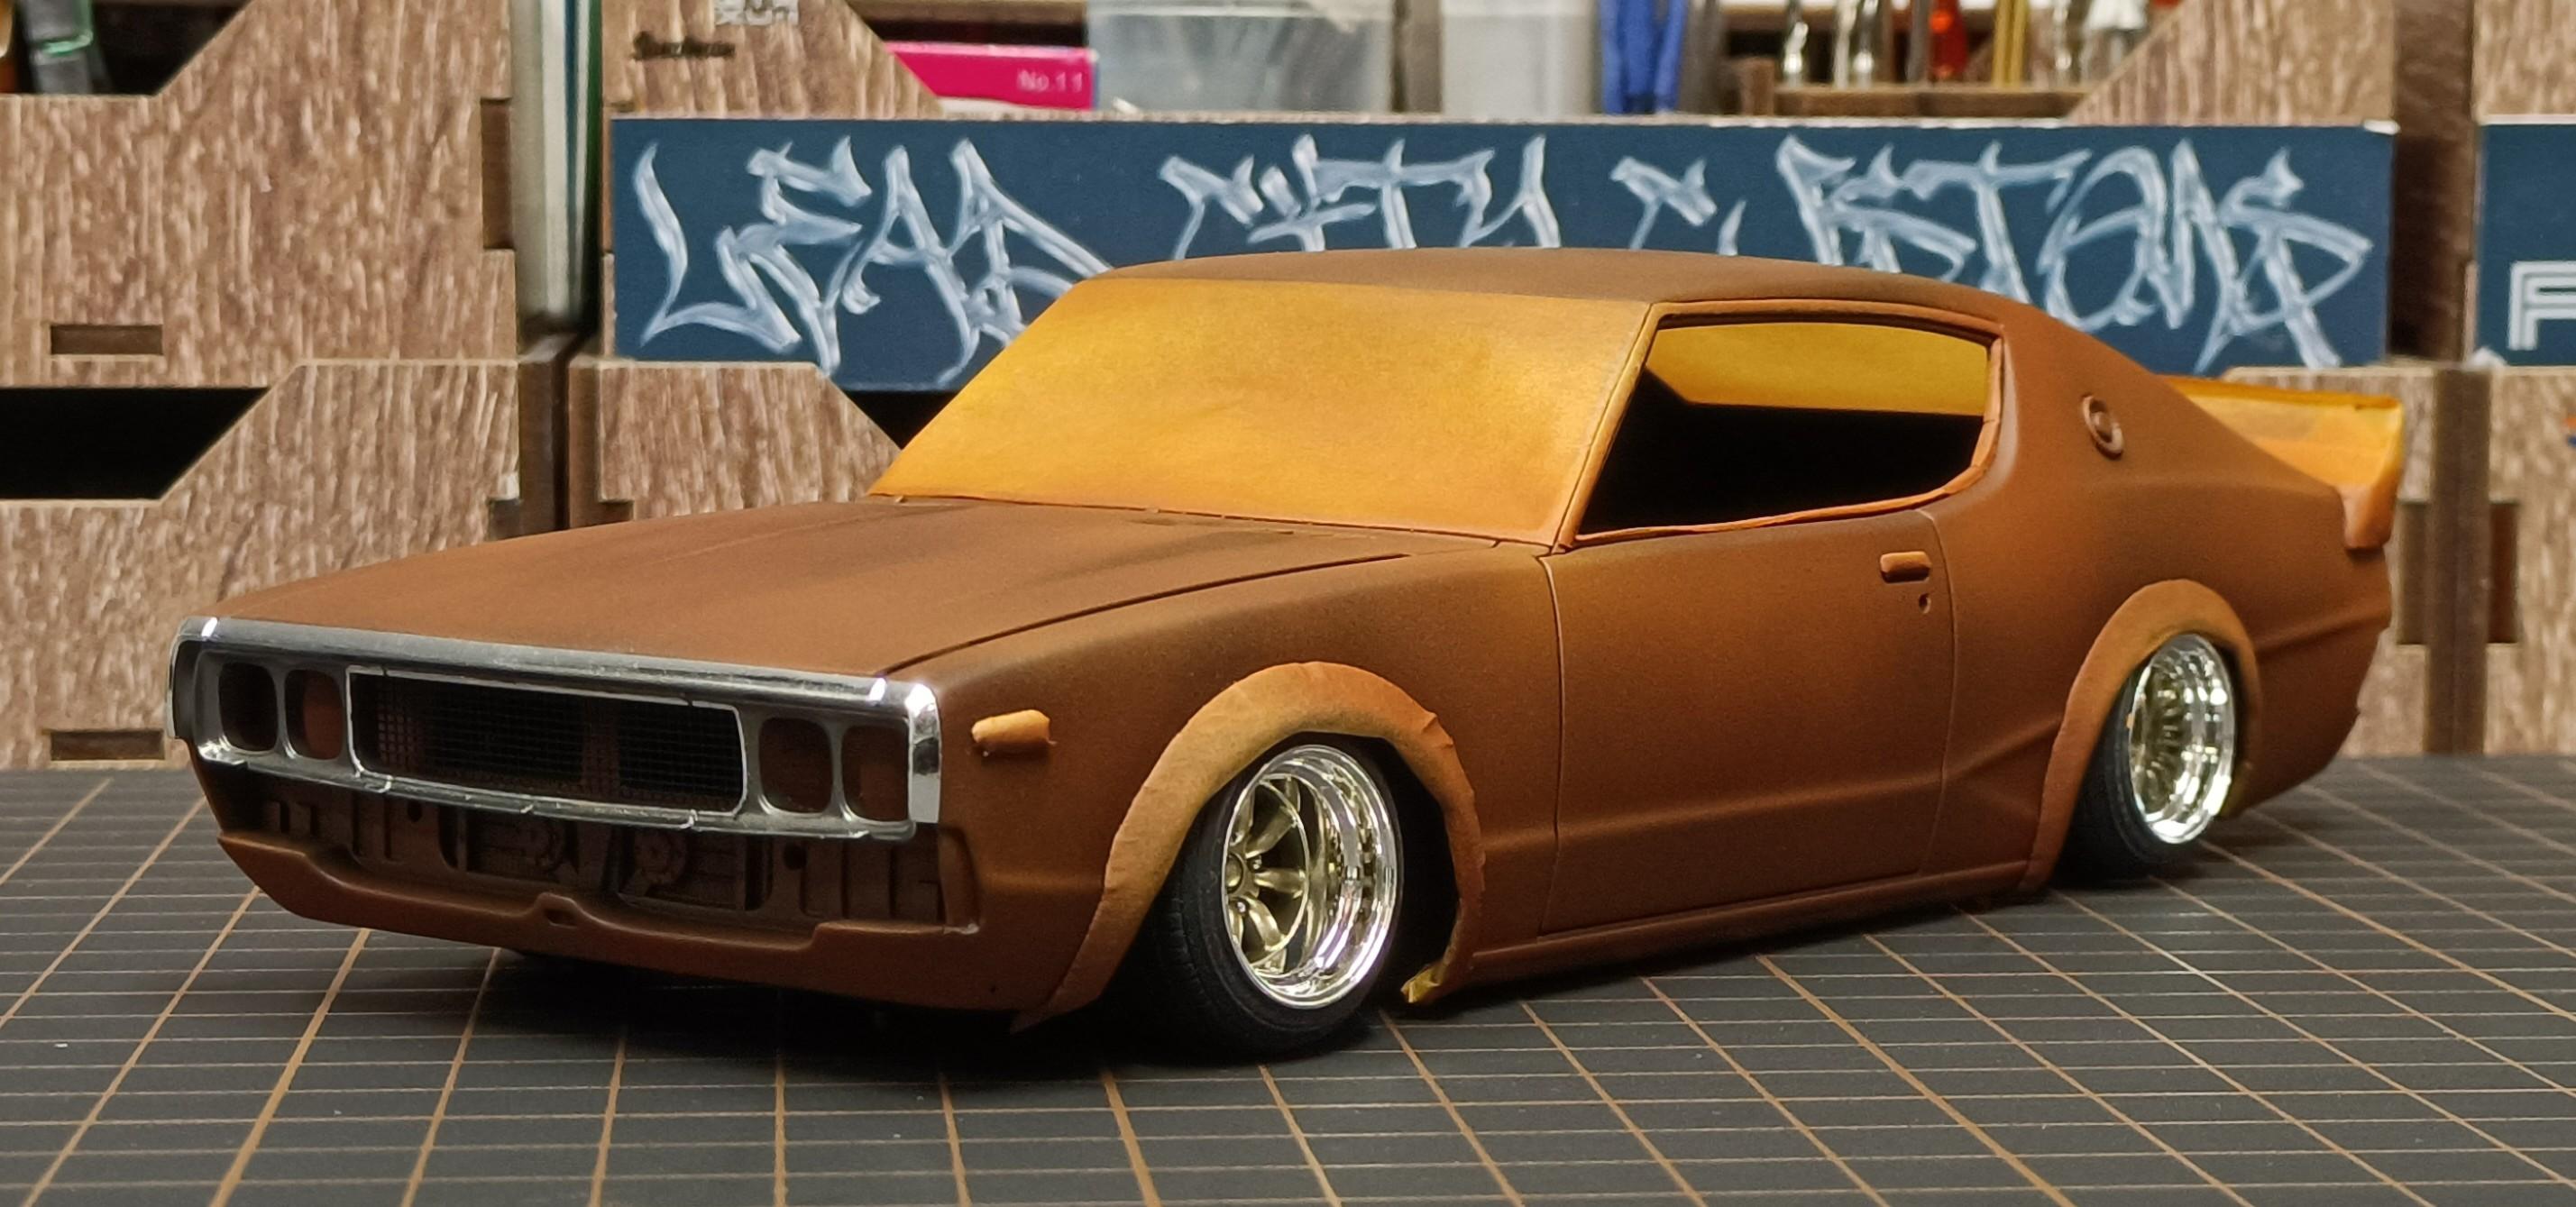
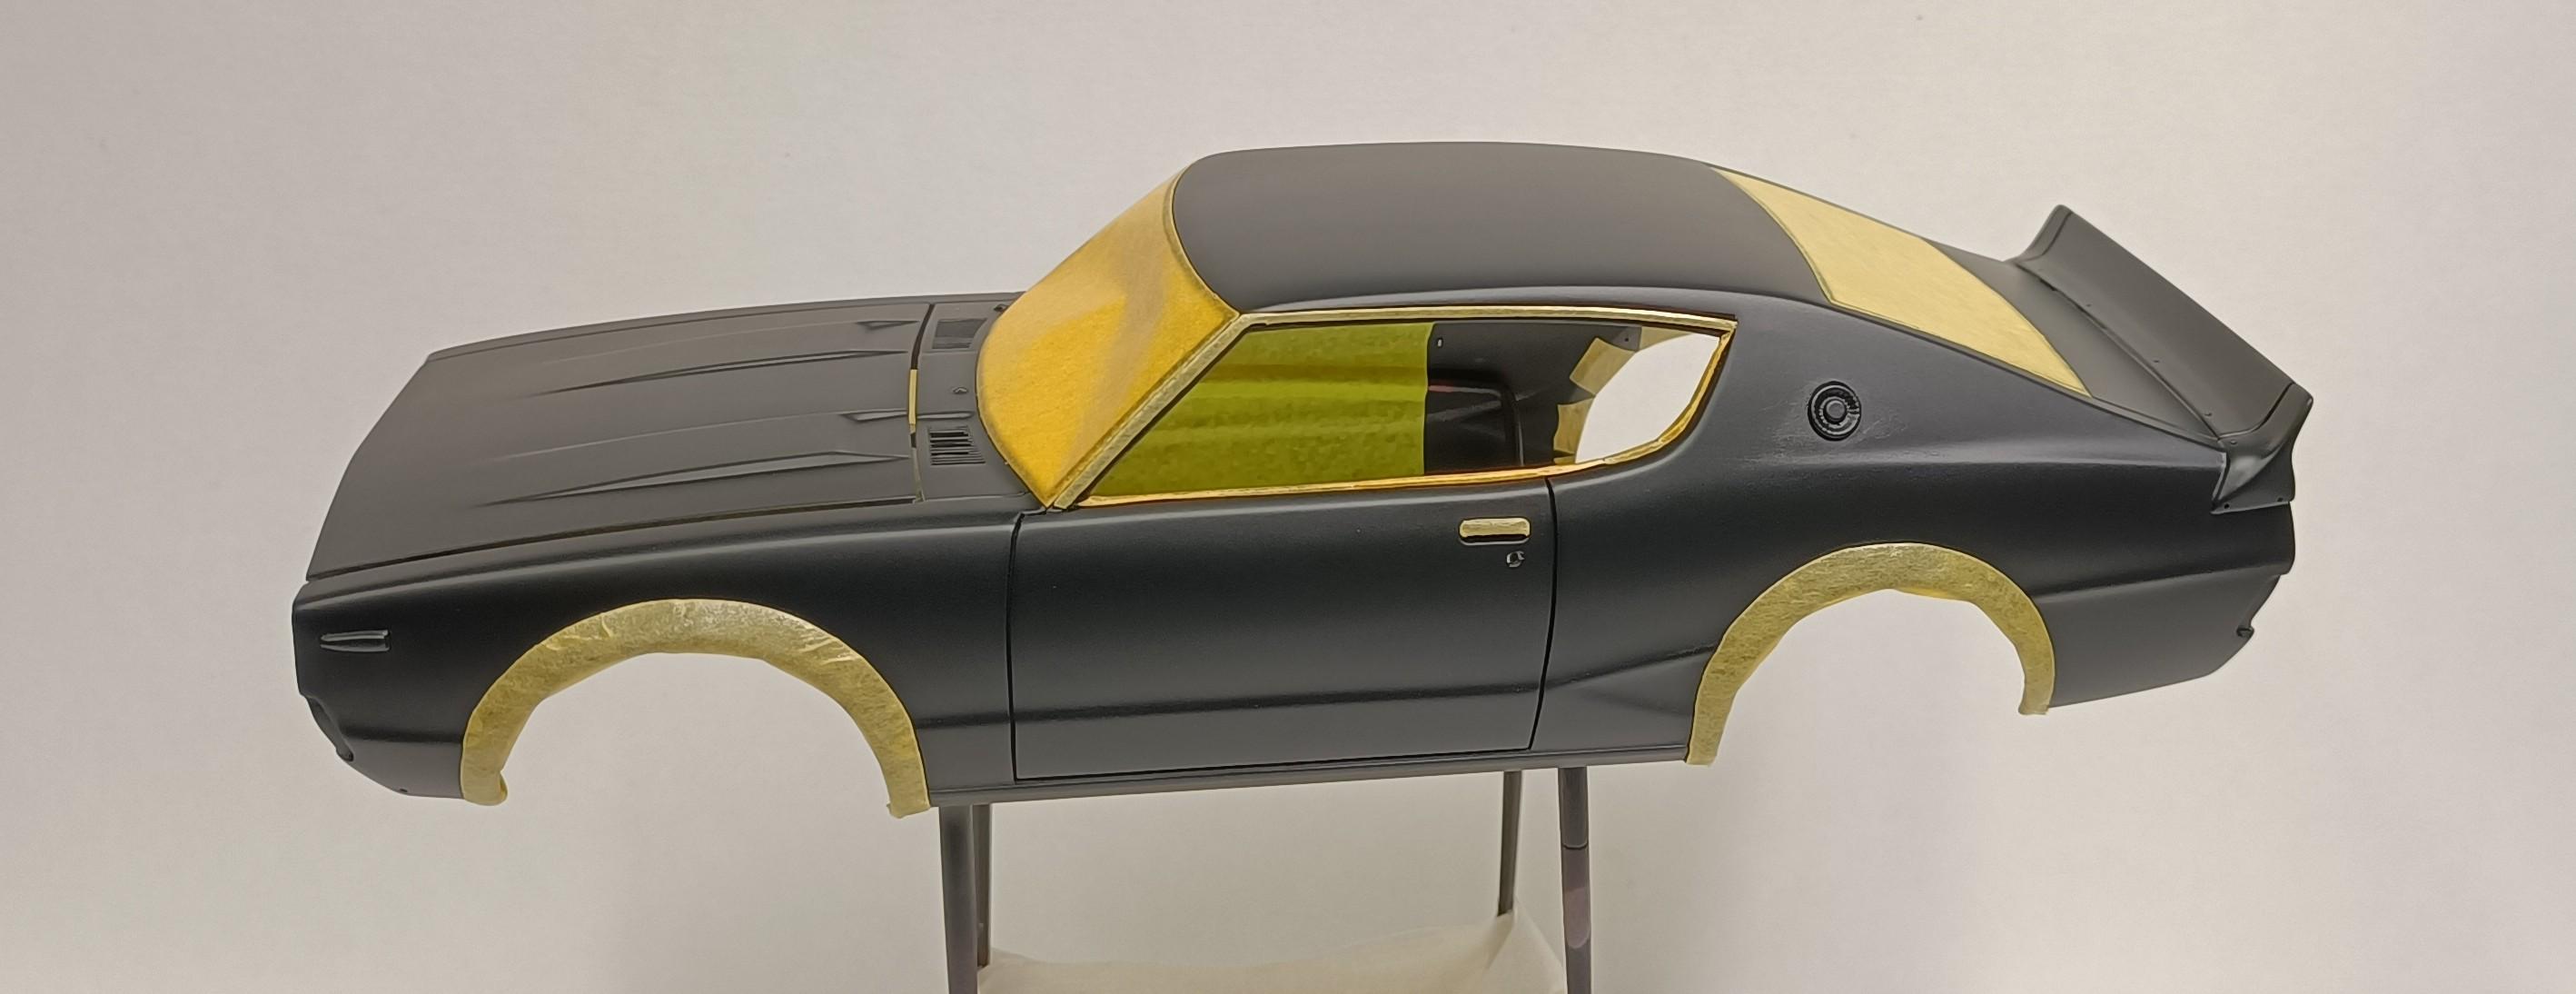
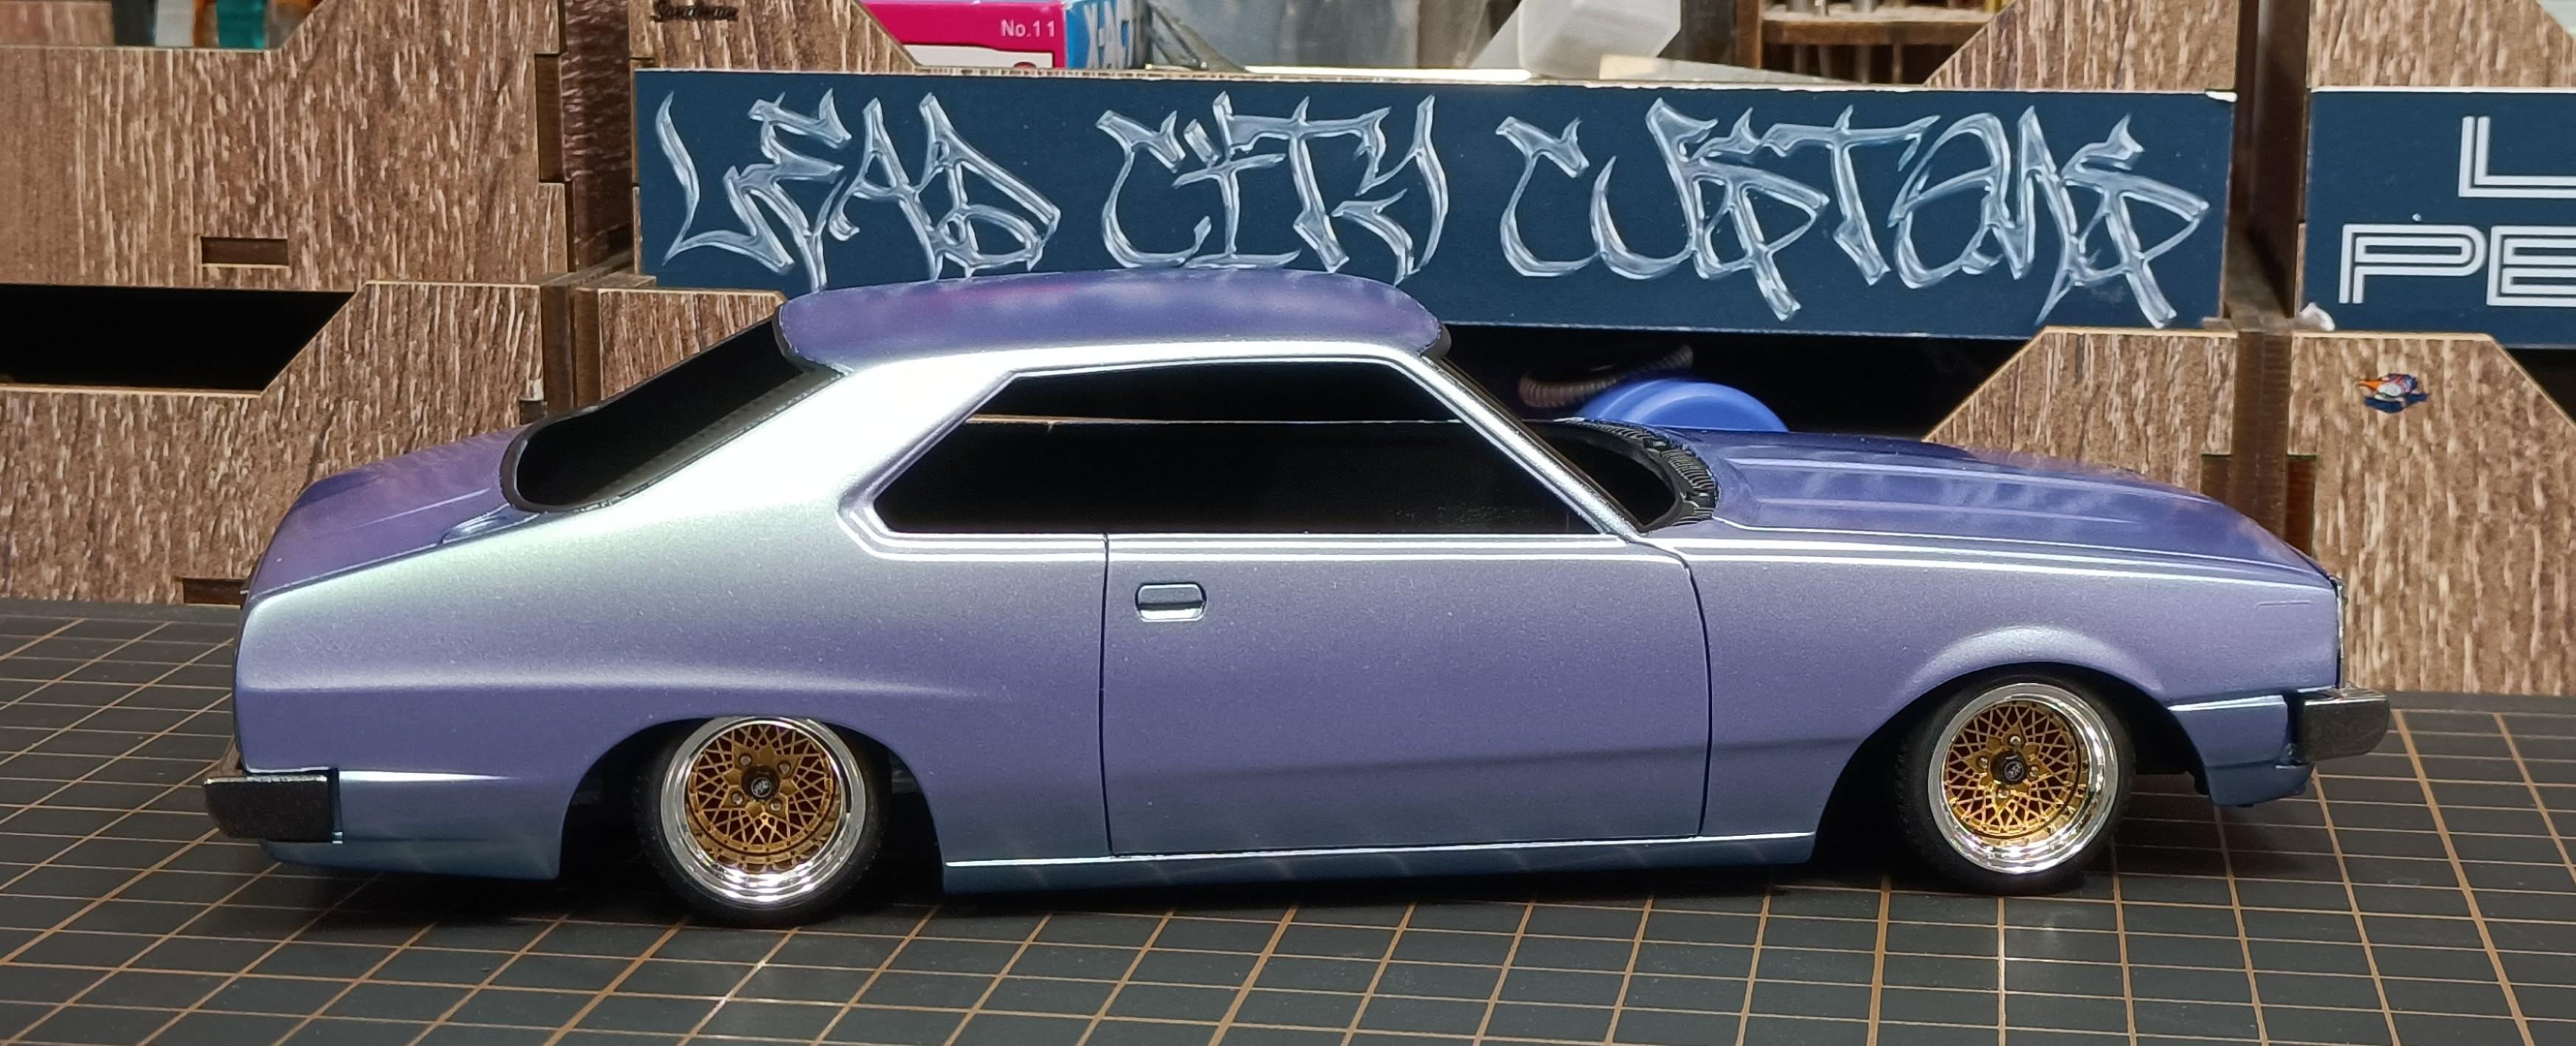
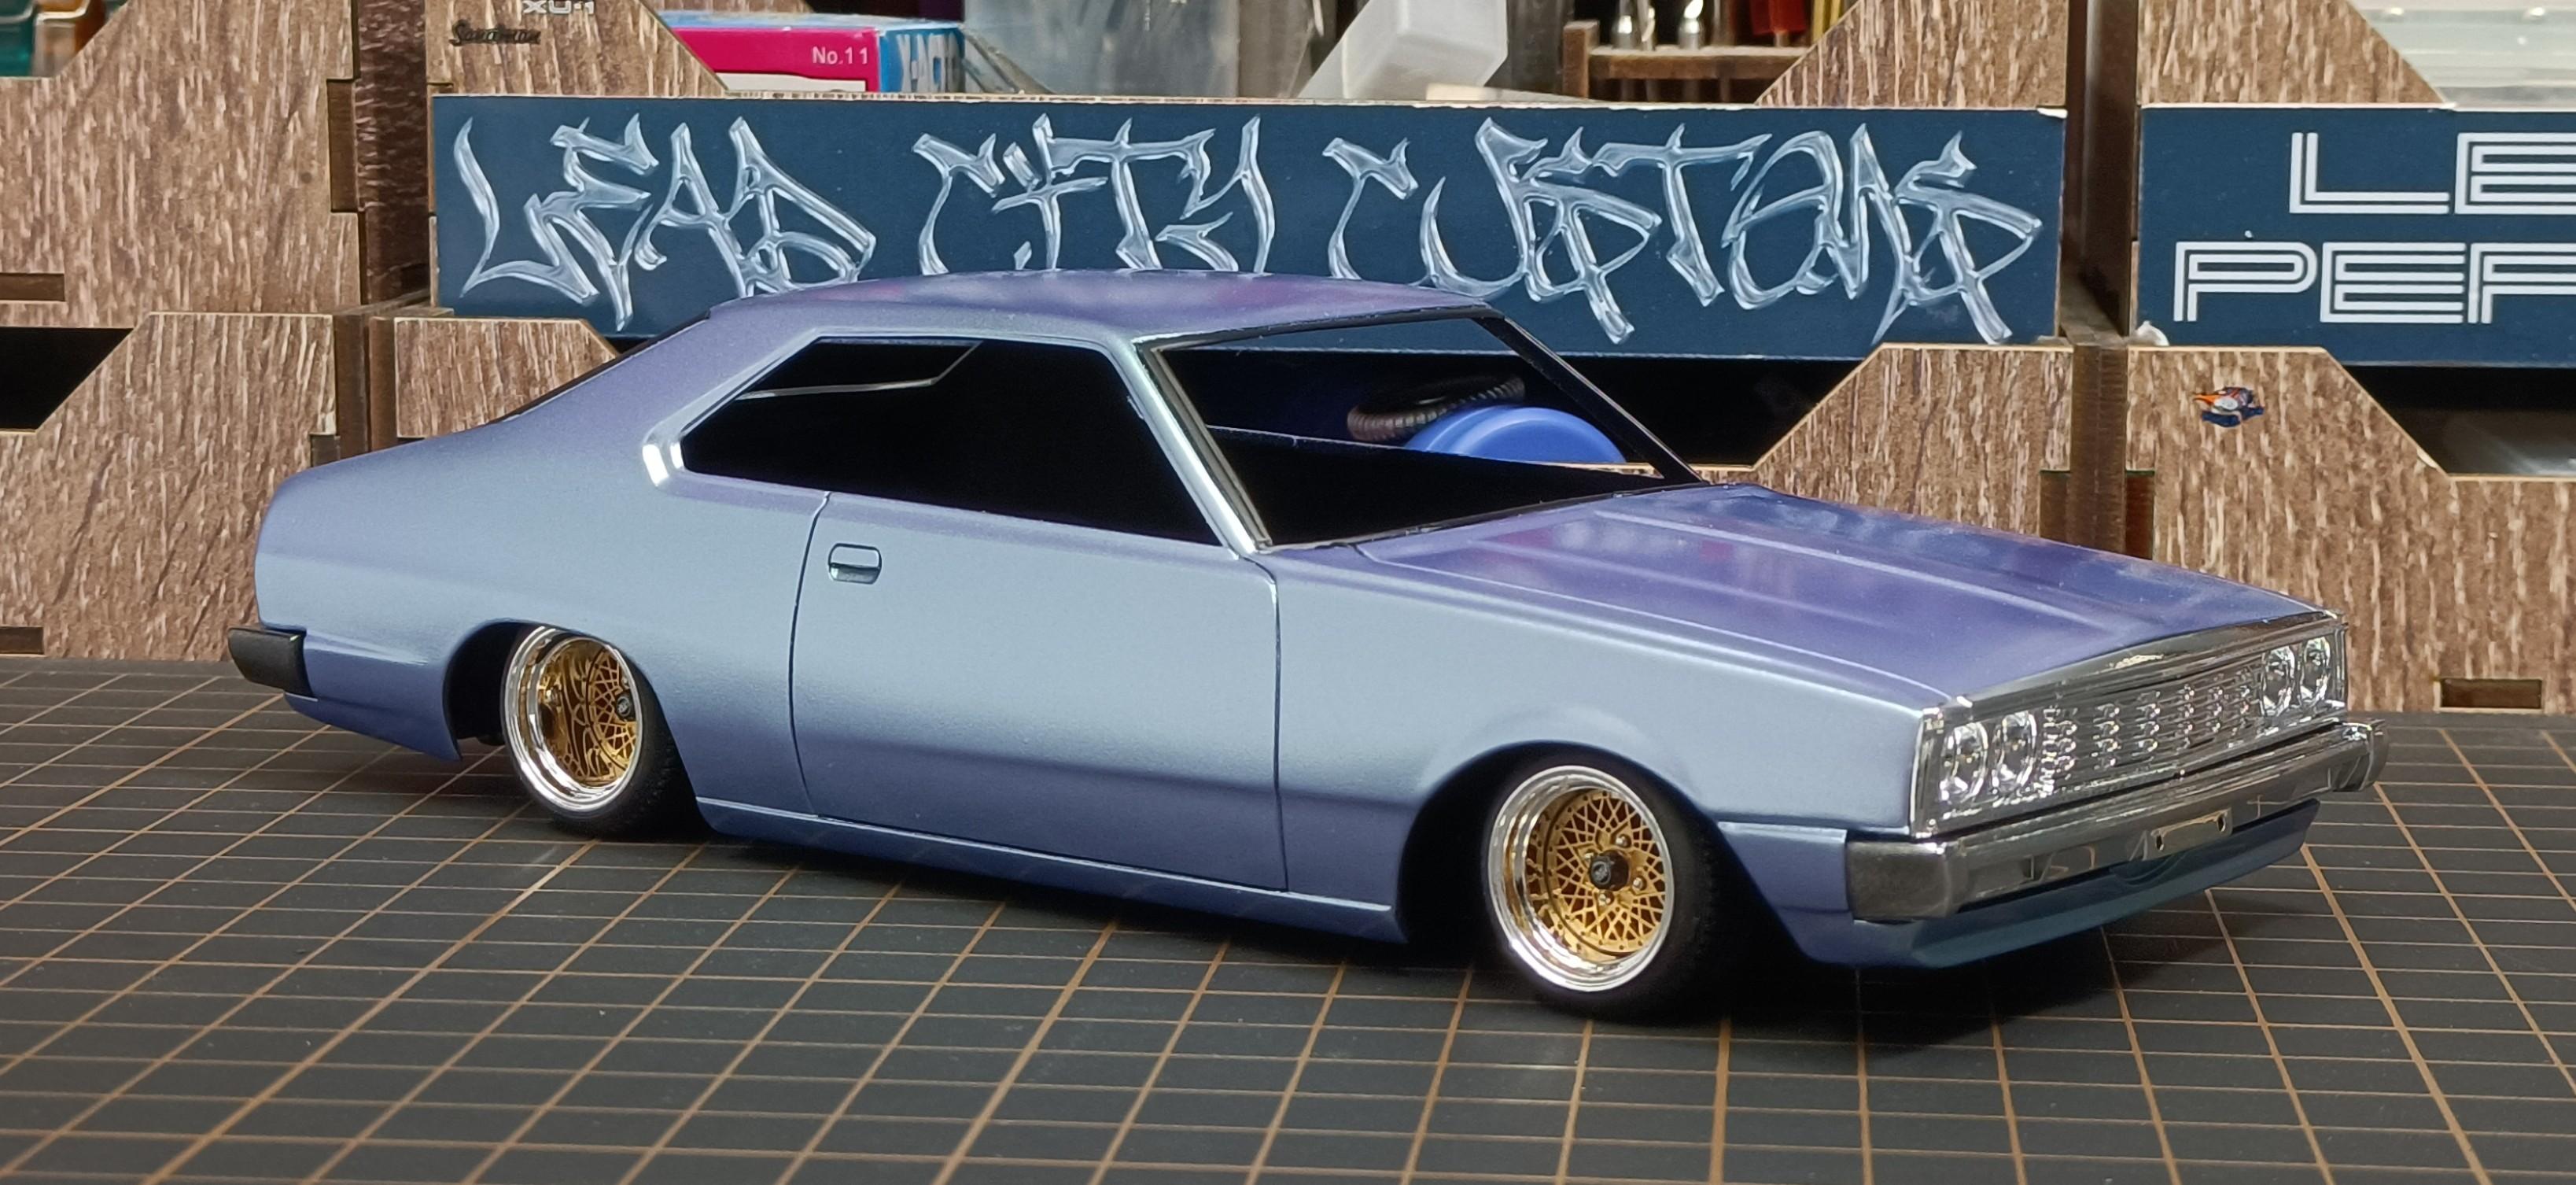
Update for the Nissan C110 Skyline. Decided to take a different route. And try something different that I havent done before. Bit of rust modulation done with the airbrush. Realized when I started spraying I forgot to tape the rear spoiler and front turn signal 🤦♂️ Sealed with a couple light coats of Mr Colour GX 114 flat clear. Next up will be the salt technique🤞
- 766 replies
-
- 4
-
-
- stalled builds
- quick builds
- (and 2 more)
-
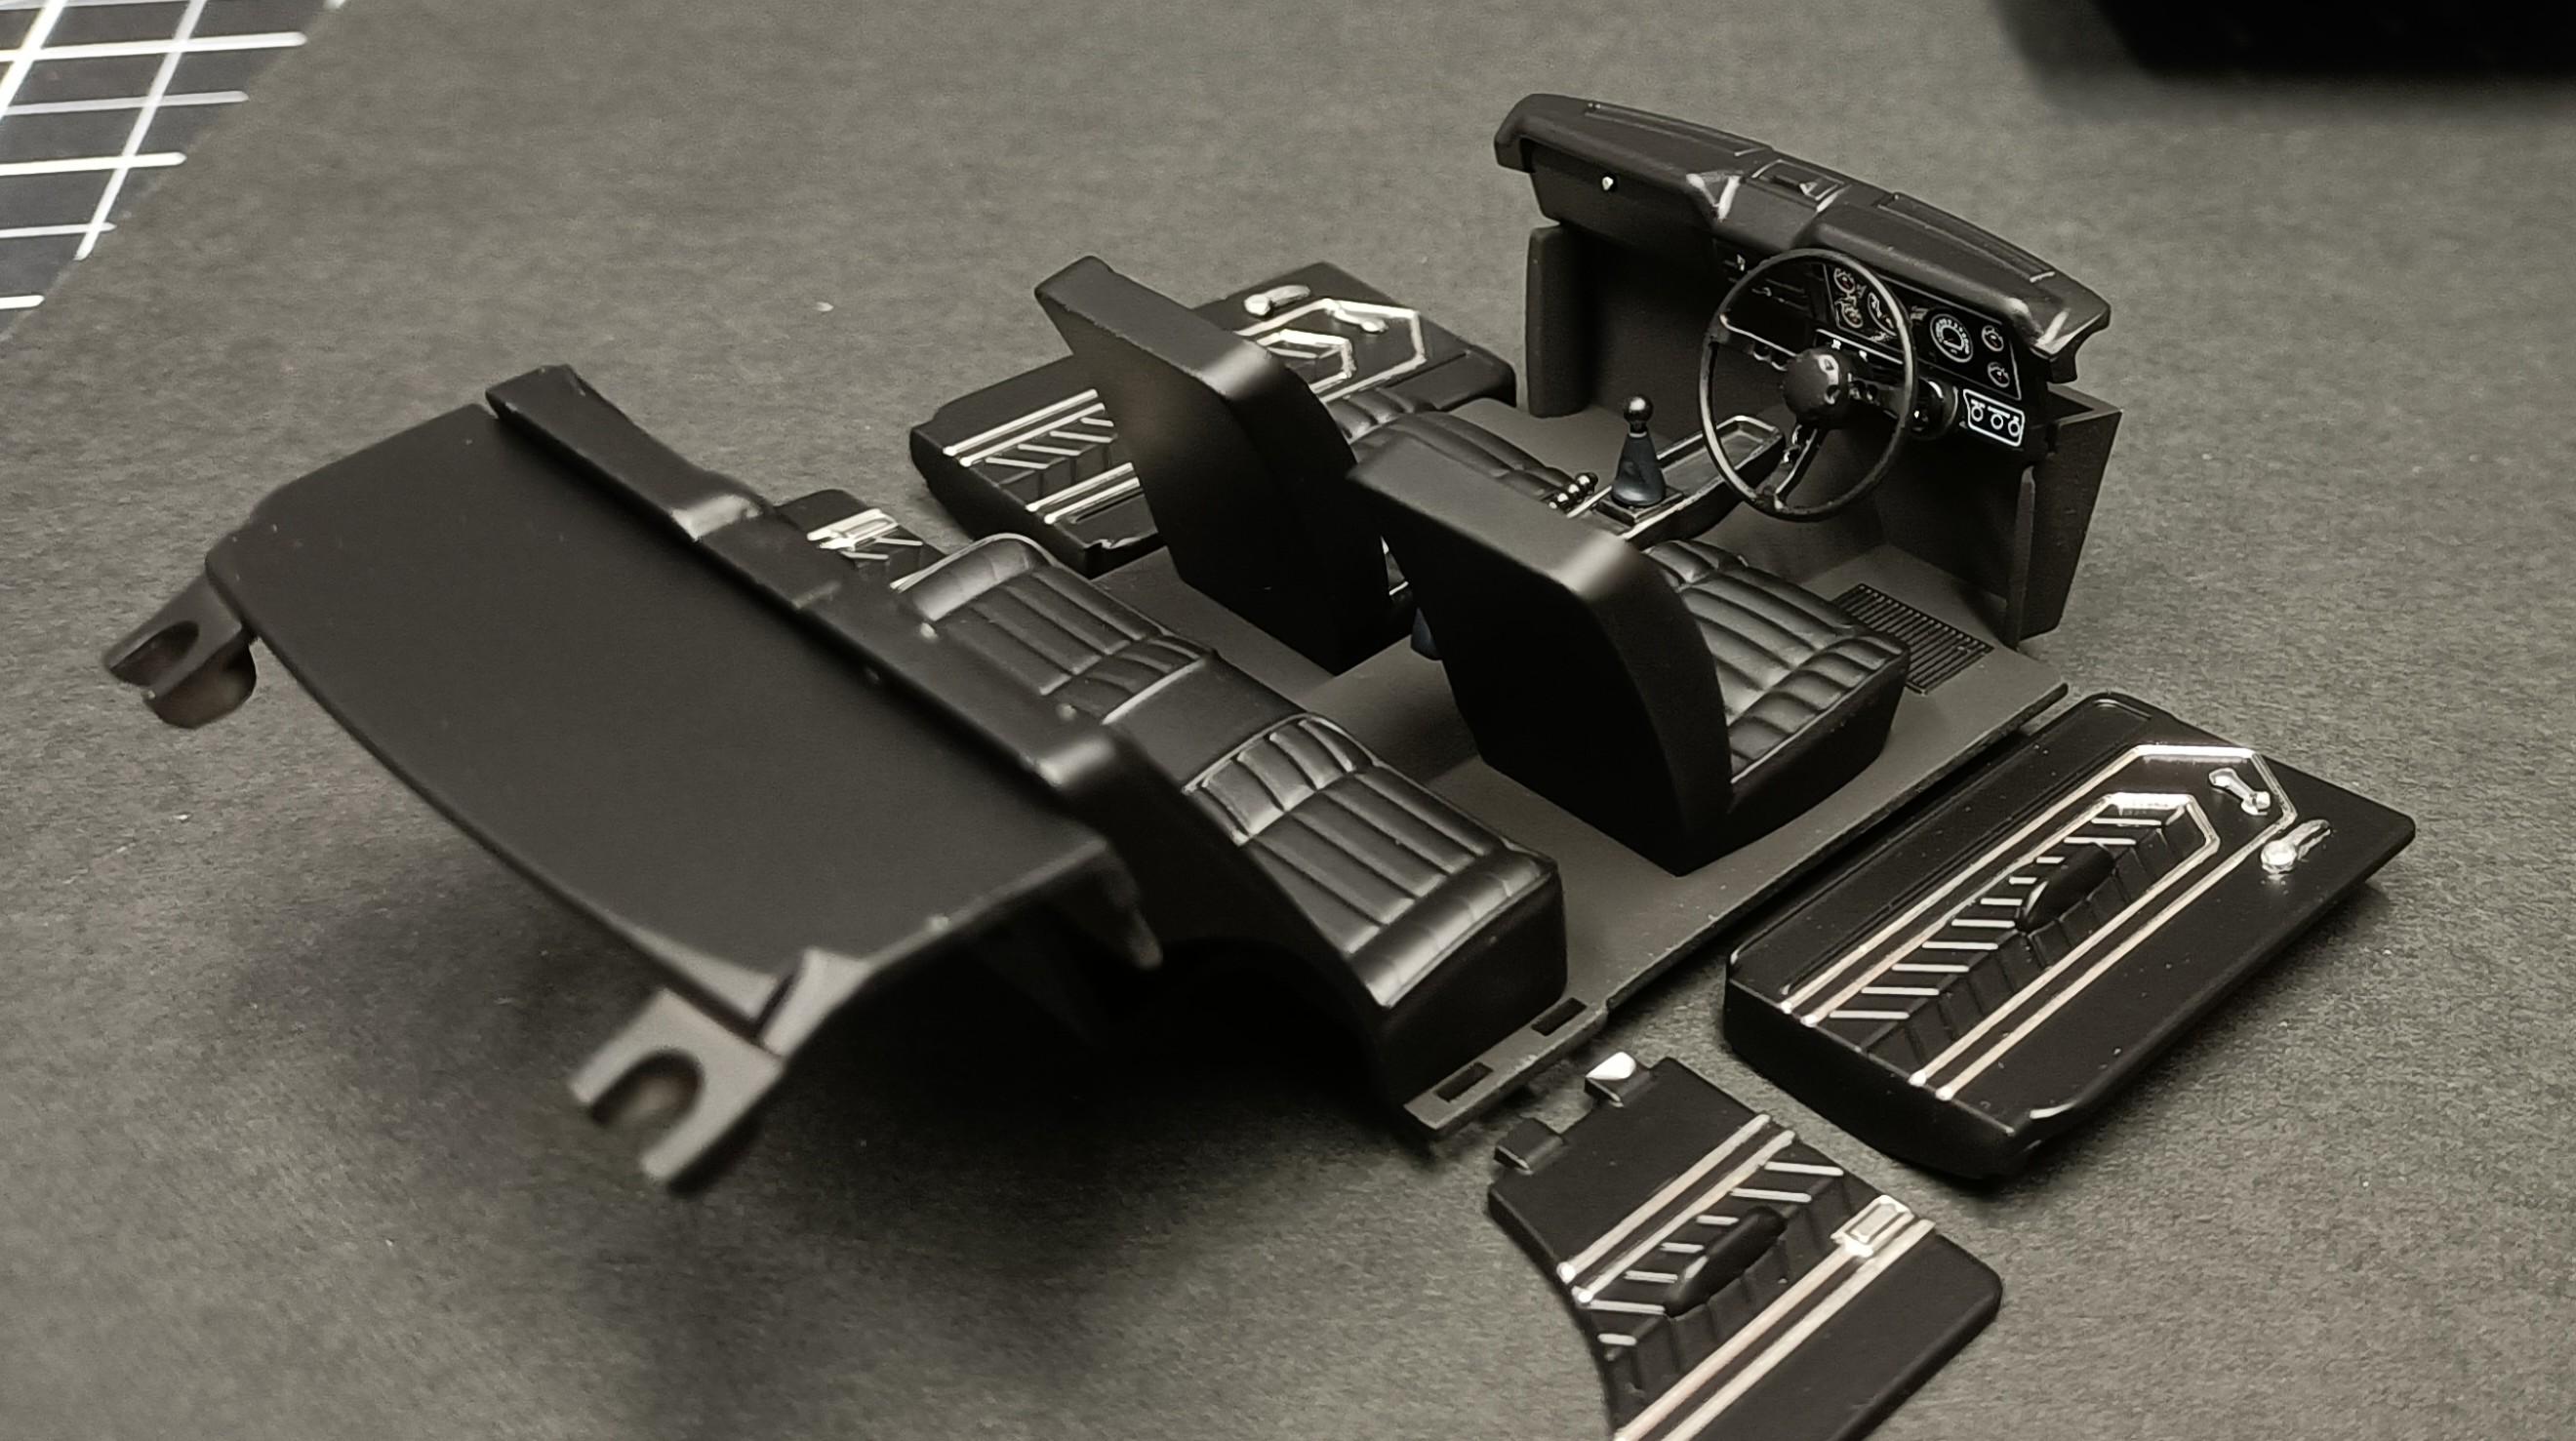
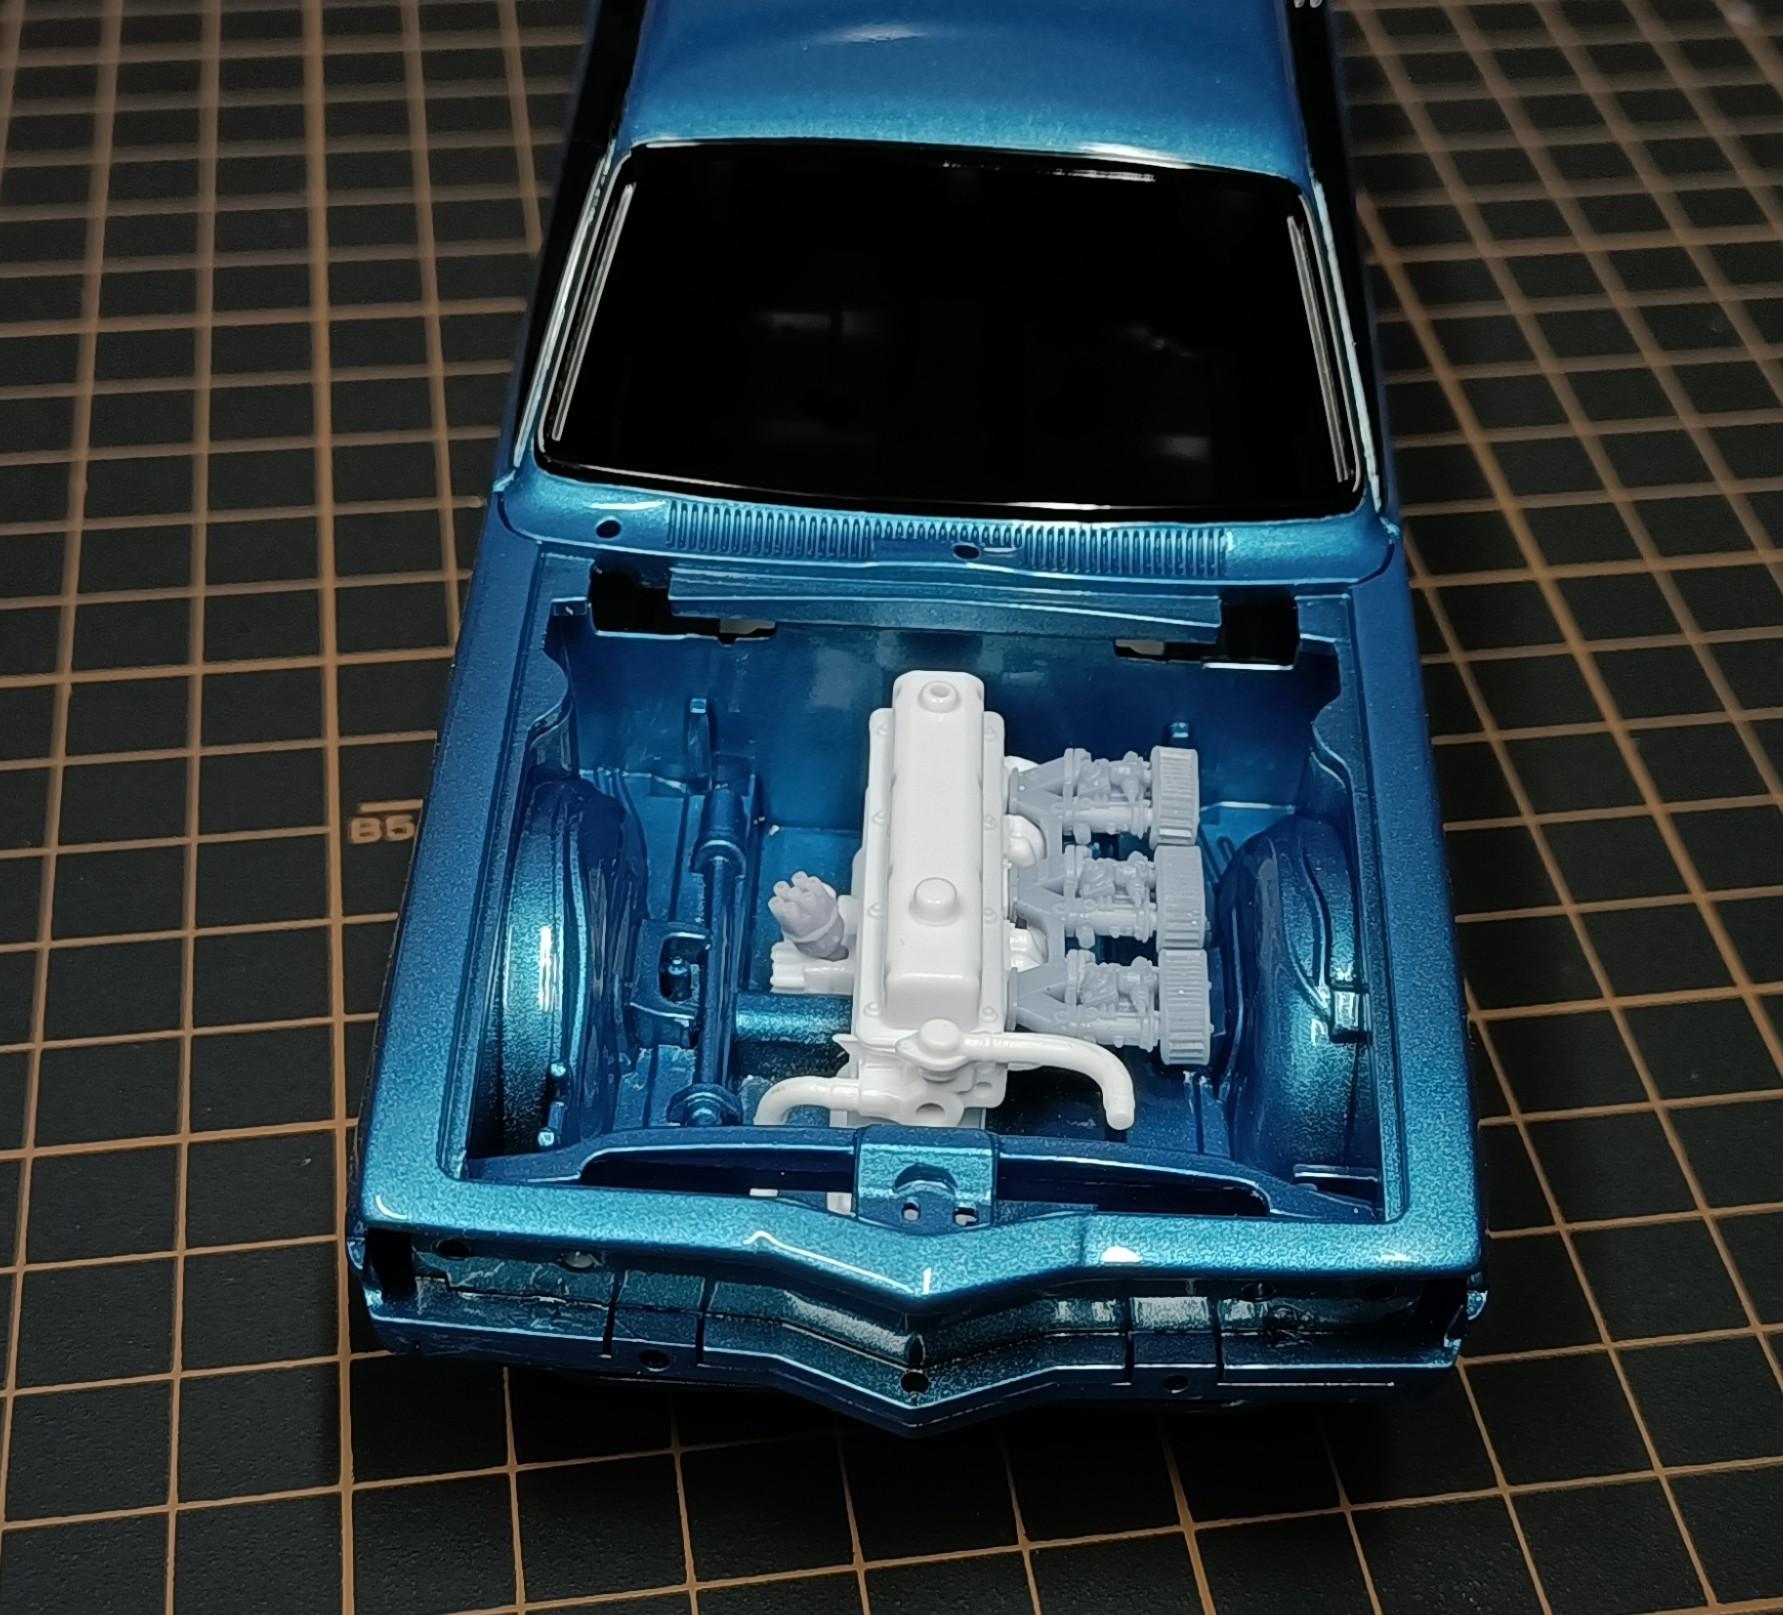
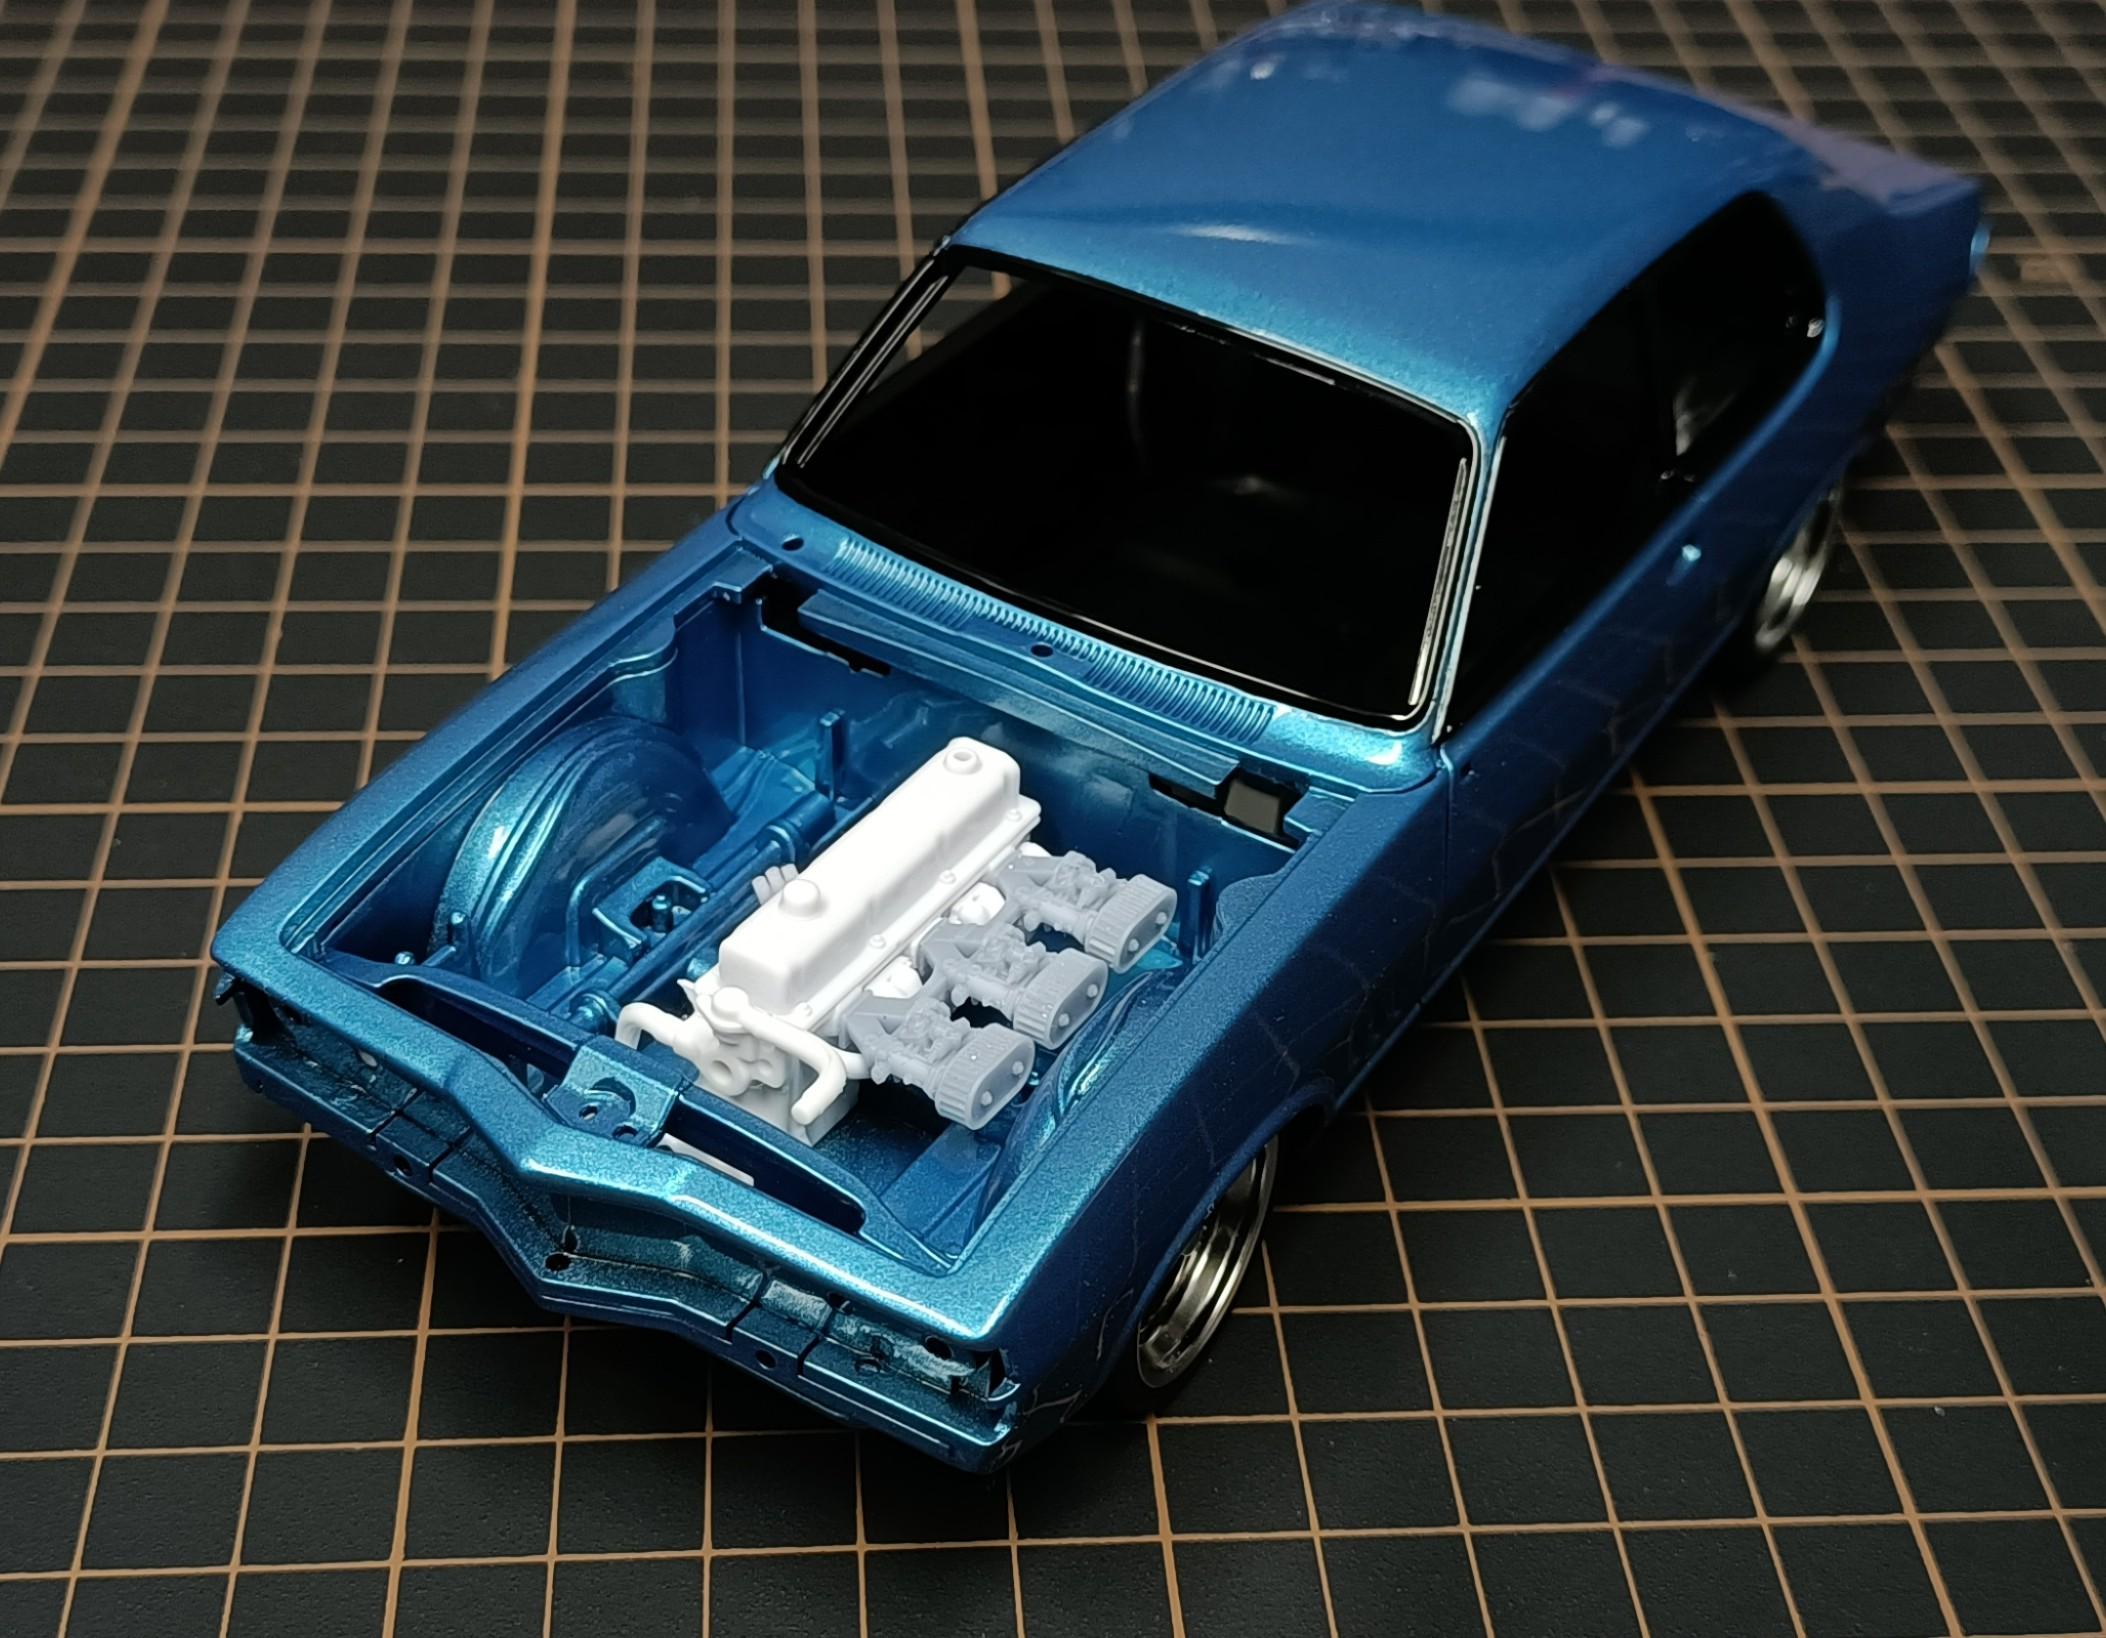
Update on the Holden LC Torana. Engine bay sub assembly complete. Interior components done.
- 766 replies
-
- 8
-
-
- stalled builds
- quick builds
- (and 2 more)
-
Yeah having owned a LJ so am I mate, once I catch up and get a few other wips completed its all I will build for a while. I have a good stock pile of LJ's in stash 😁
-
Good to see an update with the build Stu. Like how you detail painted the battery to represent the Century brand. Looking forward to seeing green applied.
-
Japanese modelers are on a whole other level. They are at the forefront of using modern products and techniques.
- 1 reply
-
- 2
-
-
Thanks for the education on the colours, I just associate the red doubles with all of the UK 🤣 But you would expect that from a foreigner 😁
-
Interesting. Why would they change the colour of such iconic buses.
-
Yeah sure I can, if you pay for me to get a passport, airfares, accommodation and a rental car. That should cover the cost of my time to educate you on how to post pics. 🤣 😁
-
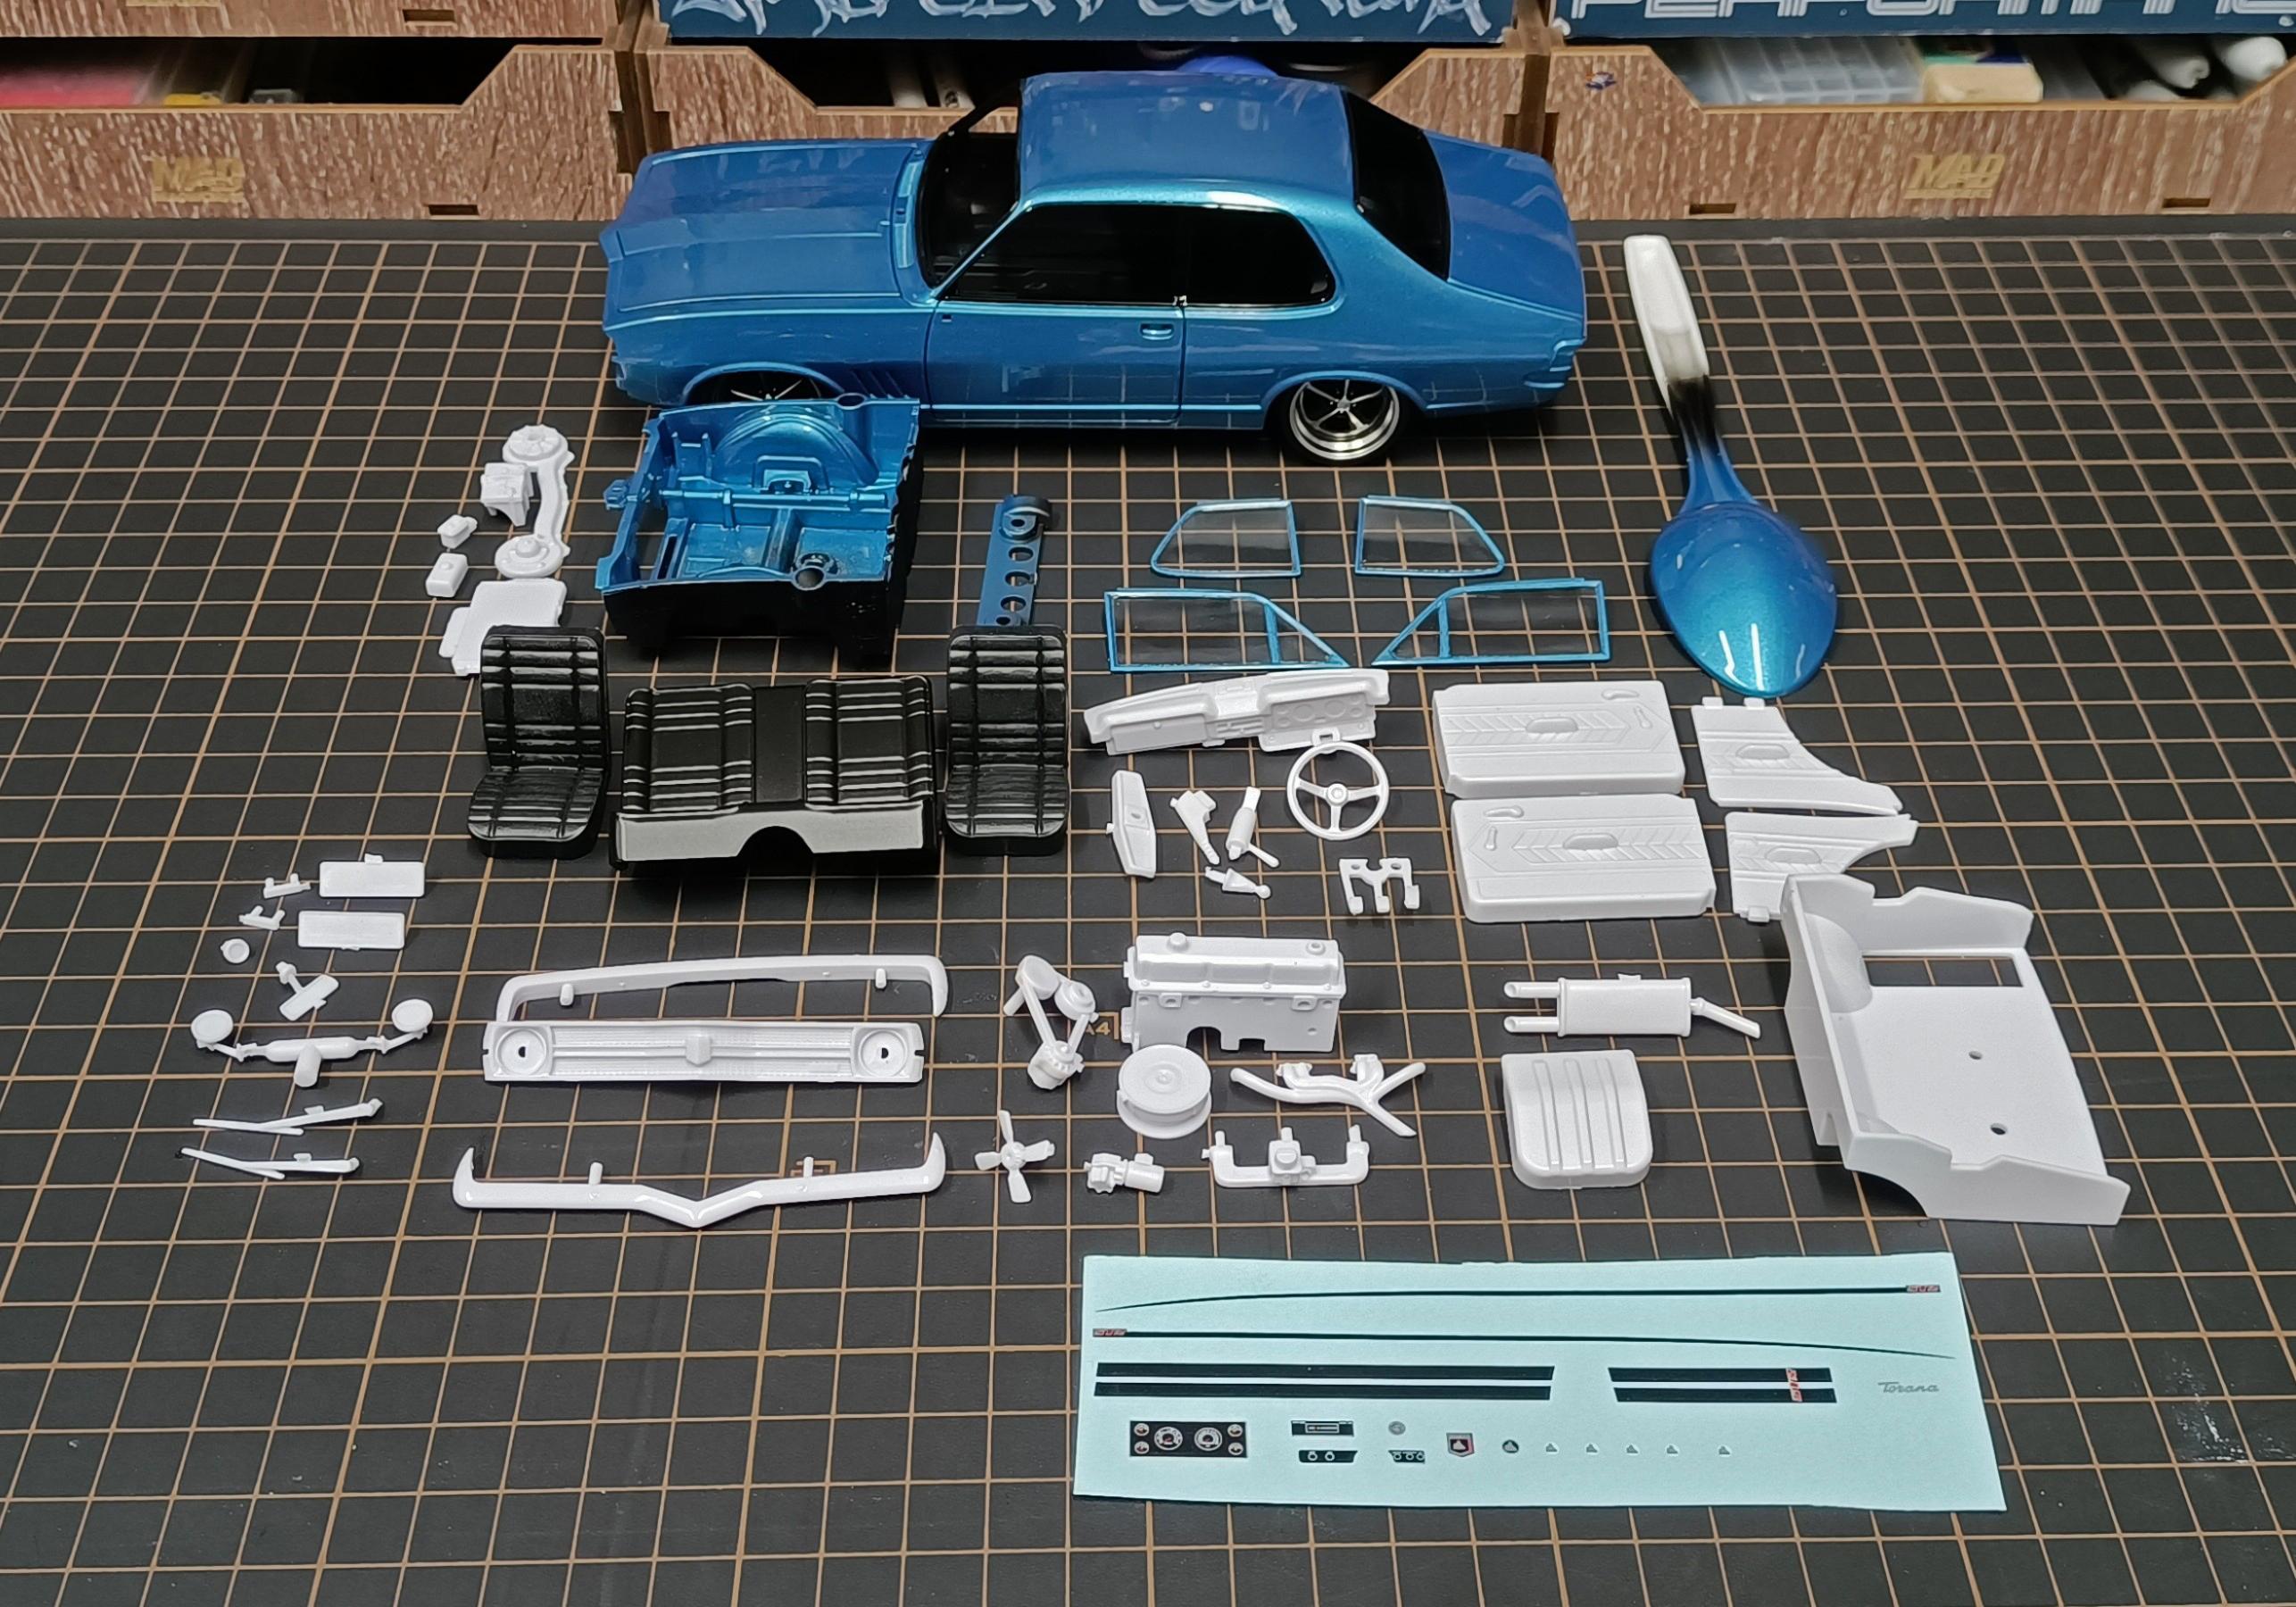
Lifes to short to build one model at a time 🤣 Bringing this one back to the bench for completion. Started planning out the engine with some 3D printed components. I printed the inlet manifold, triple webers and using a Iceman Collections 6cyl distributor.
- 766 replies
-
- 6
-
-
- stalled builds
- quick builds
- (and 2 more)
-
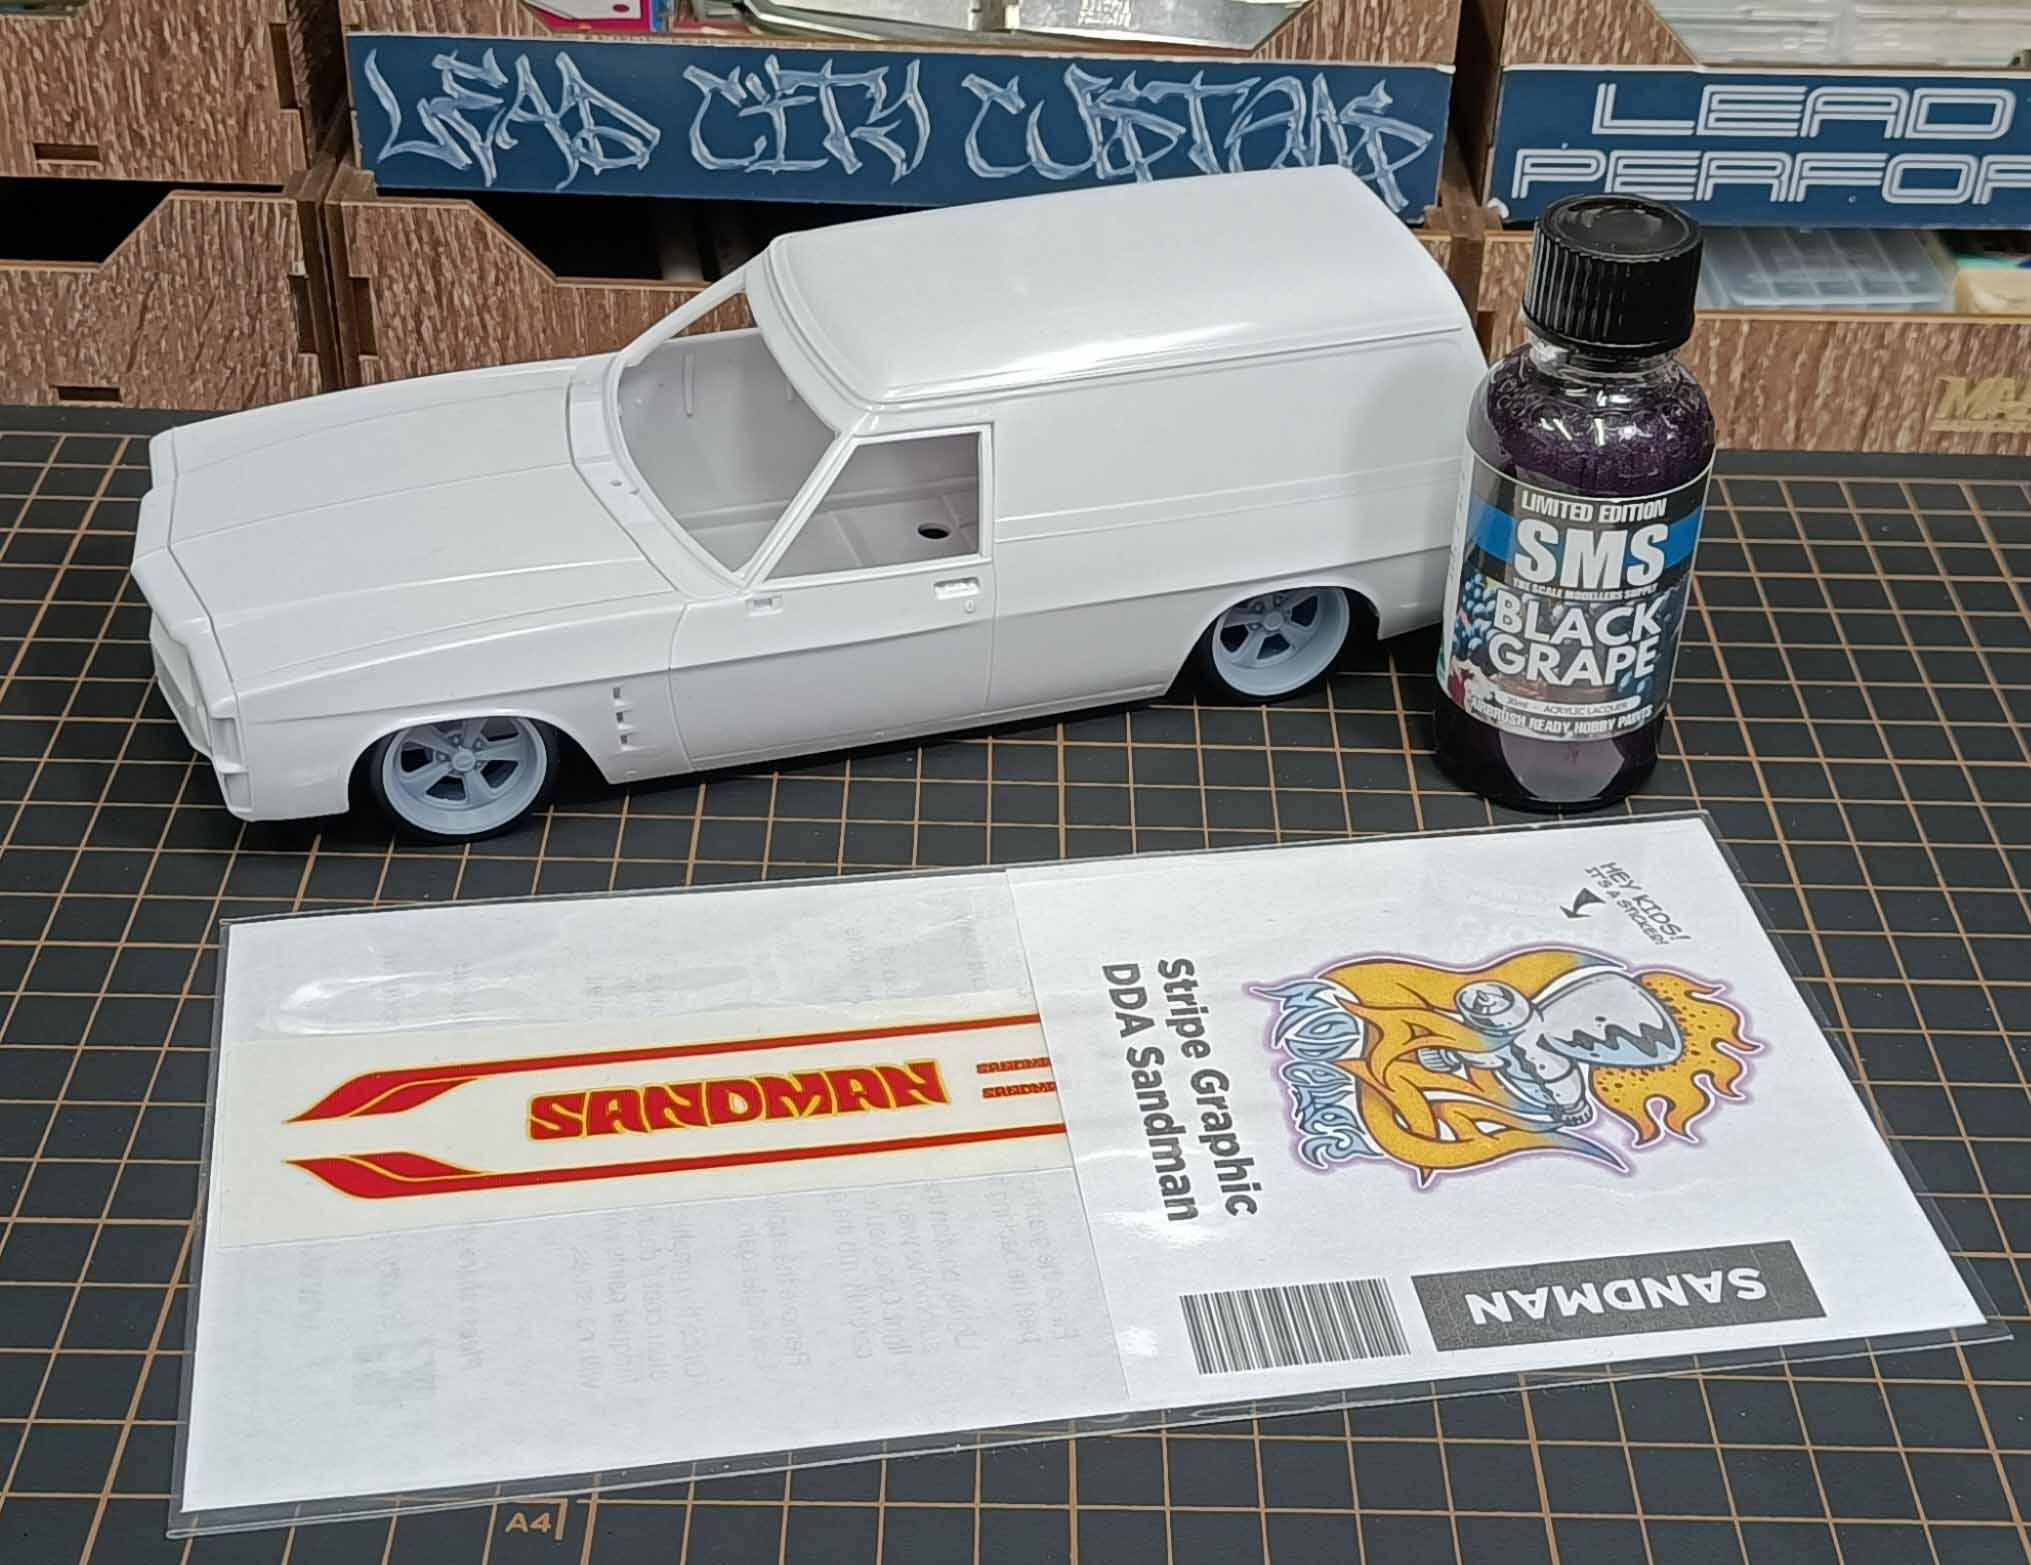
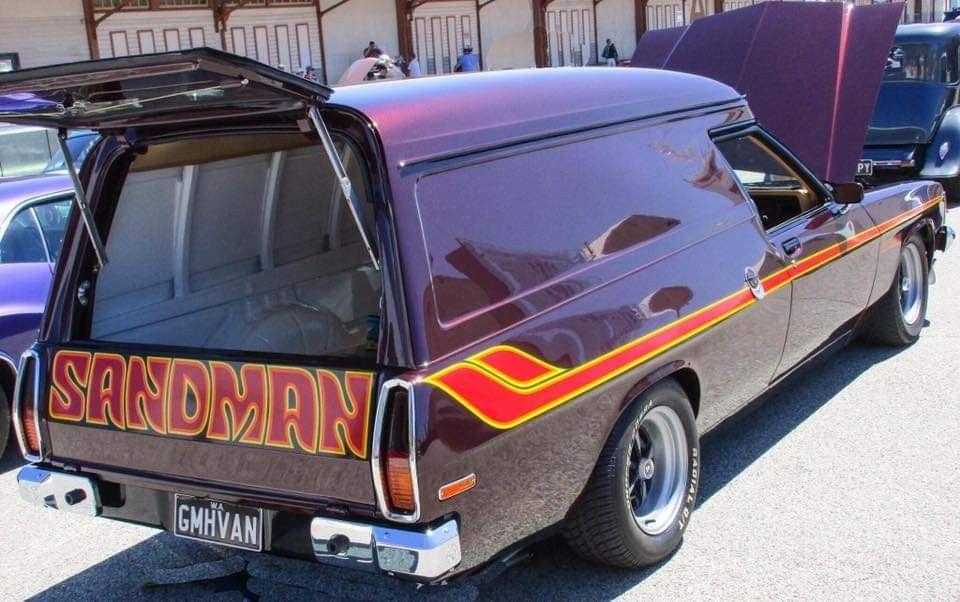
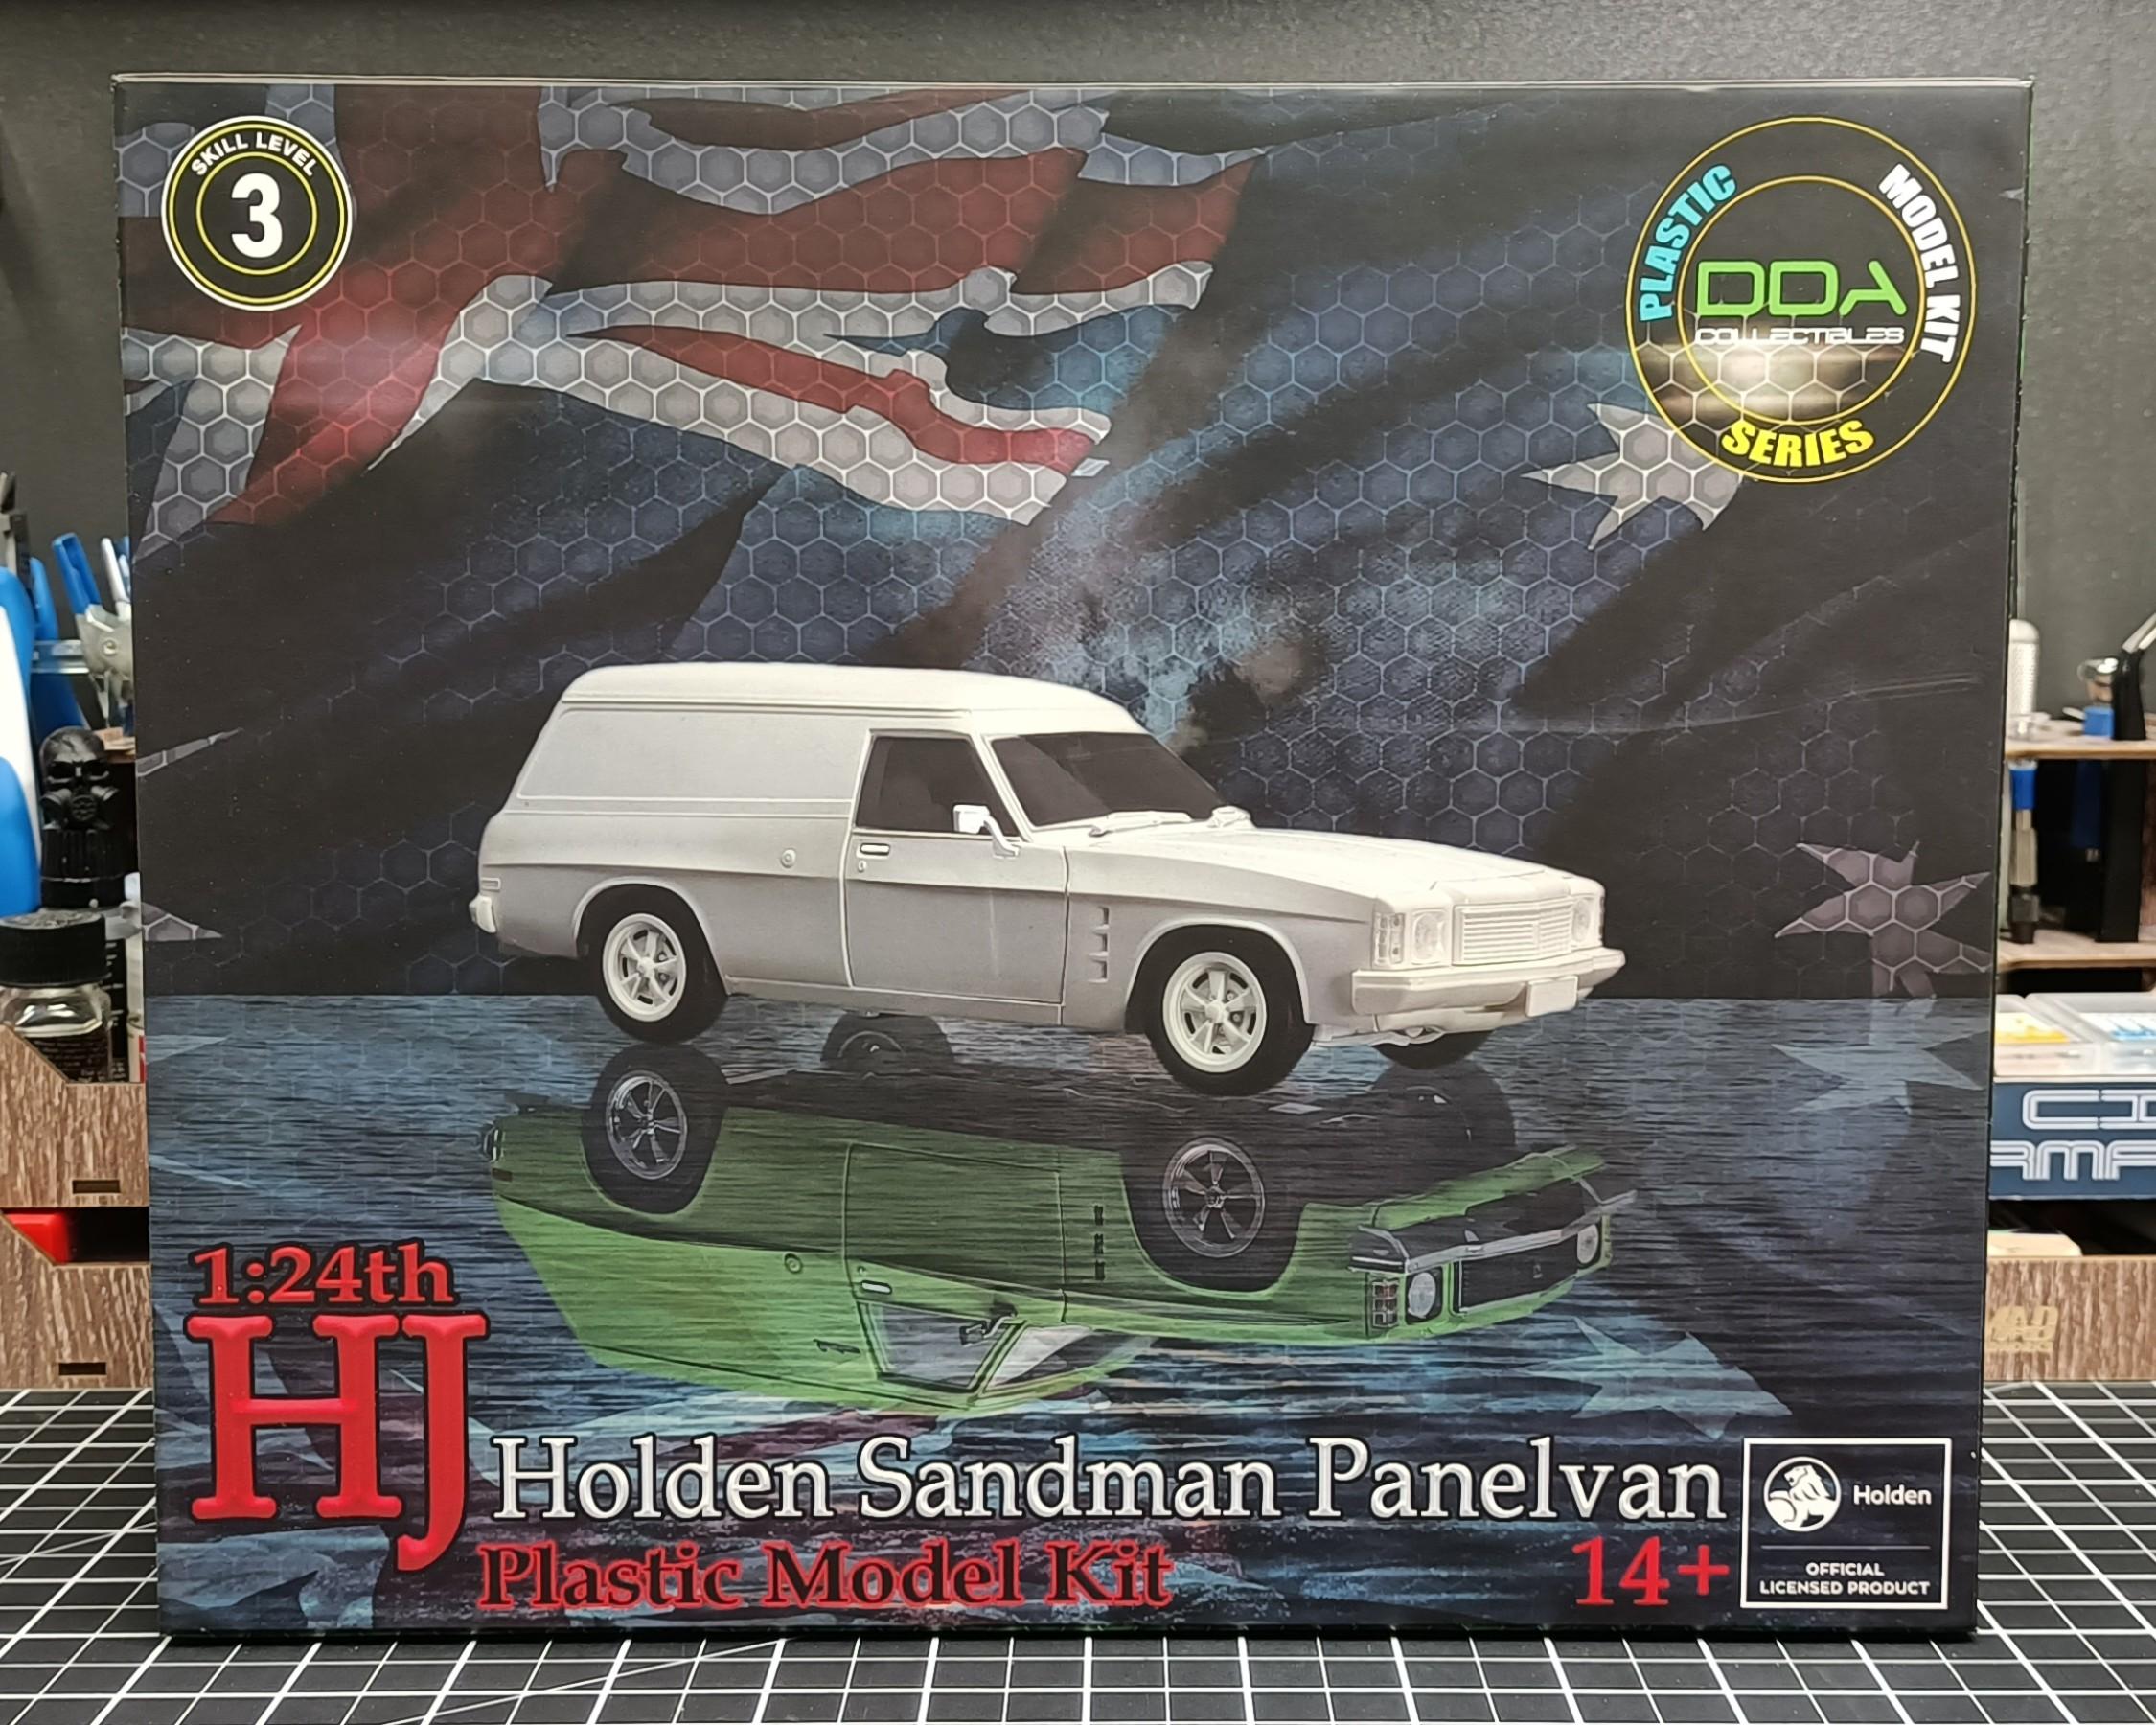
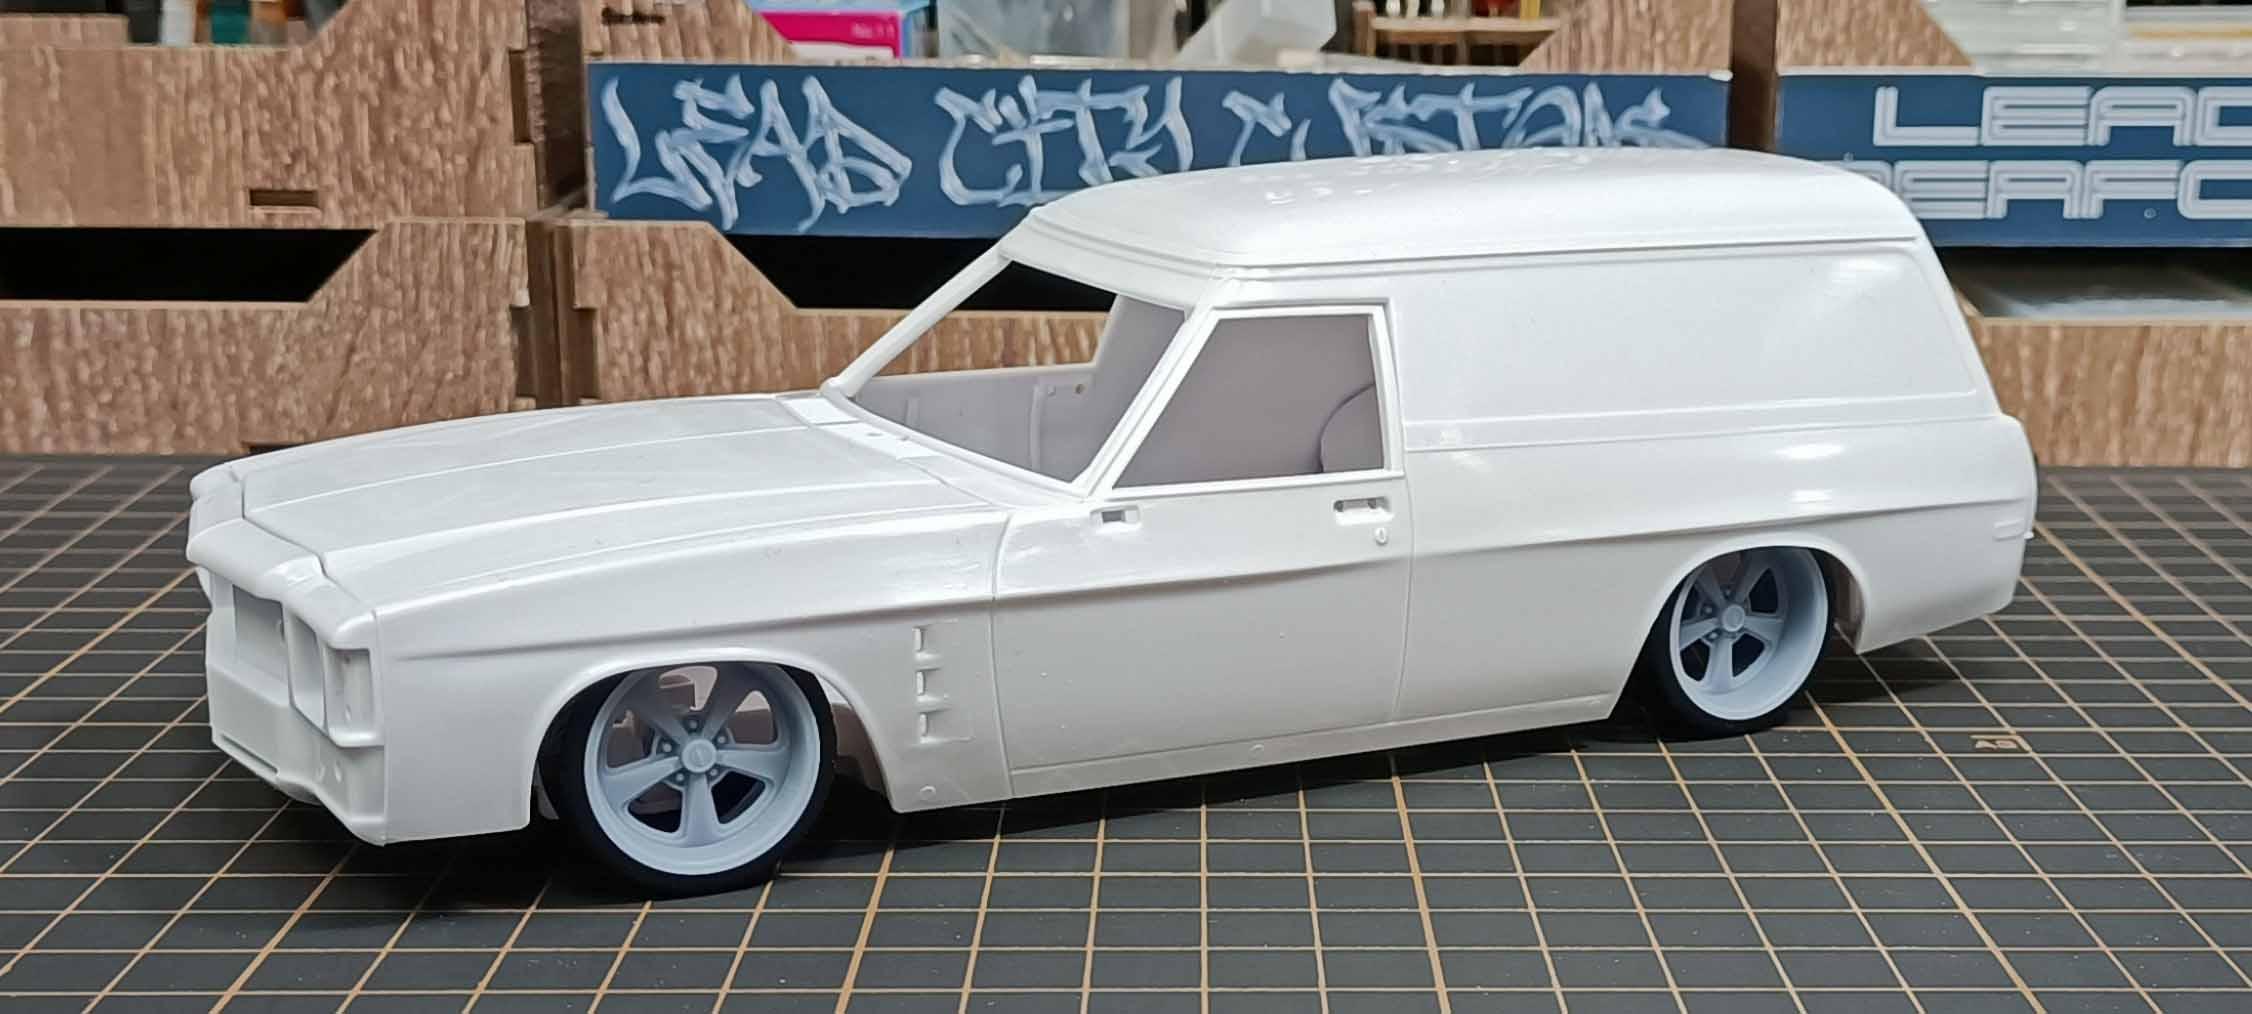
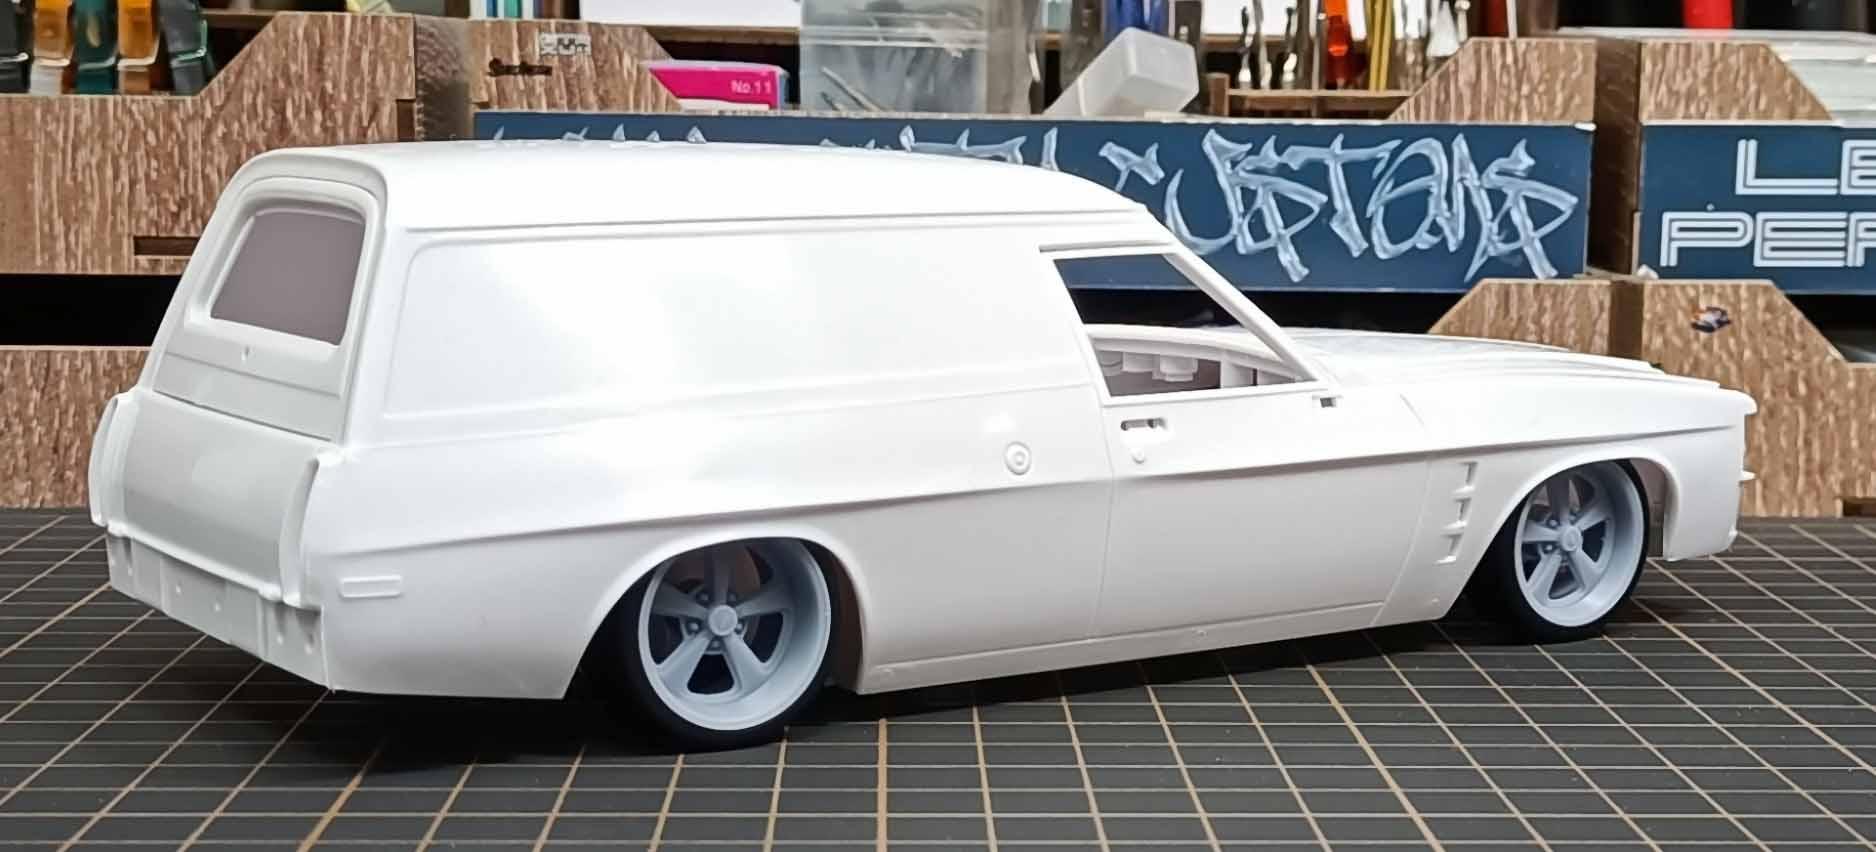
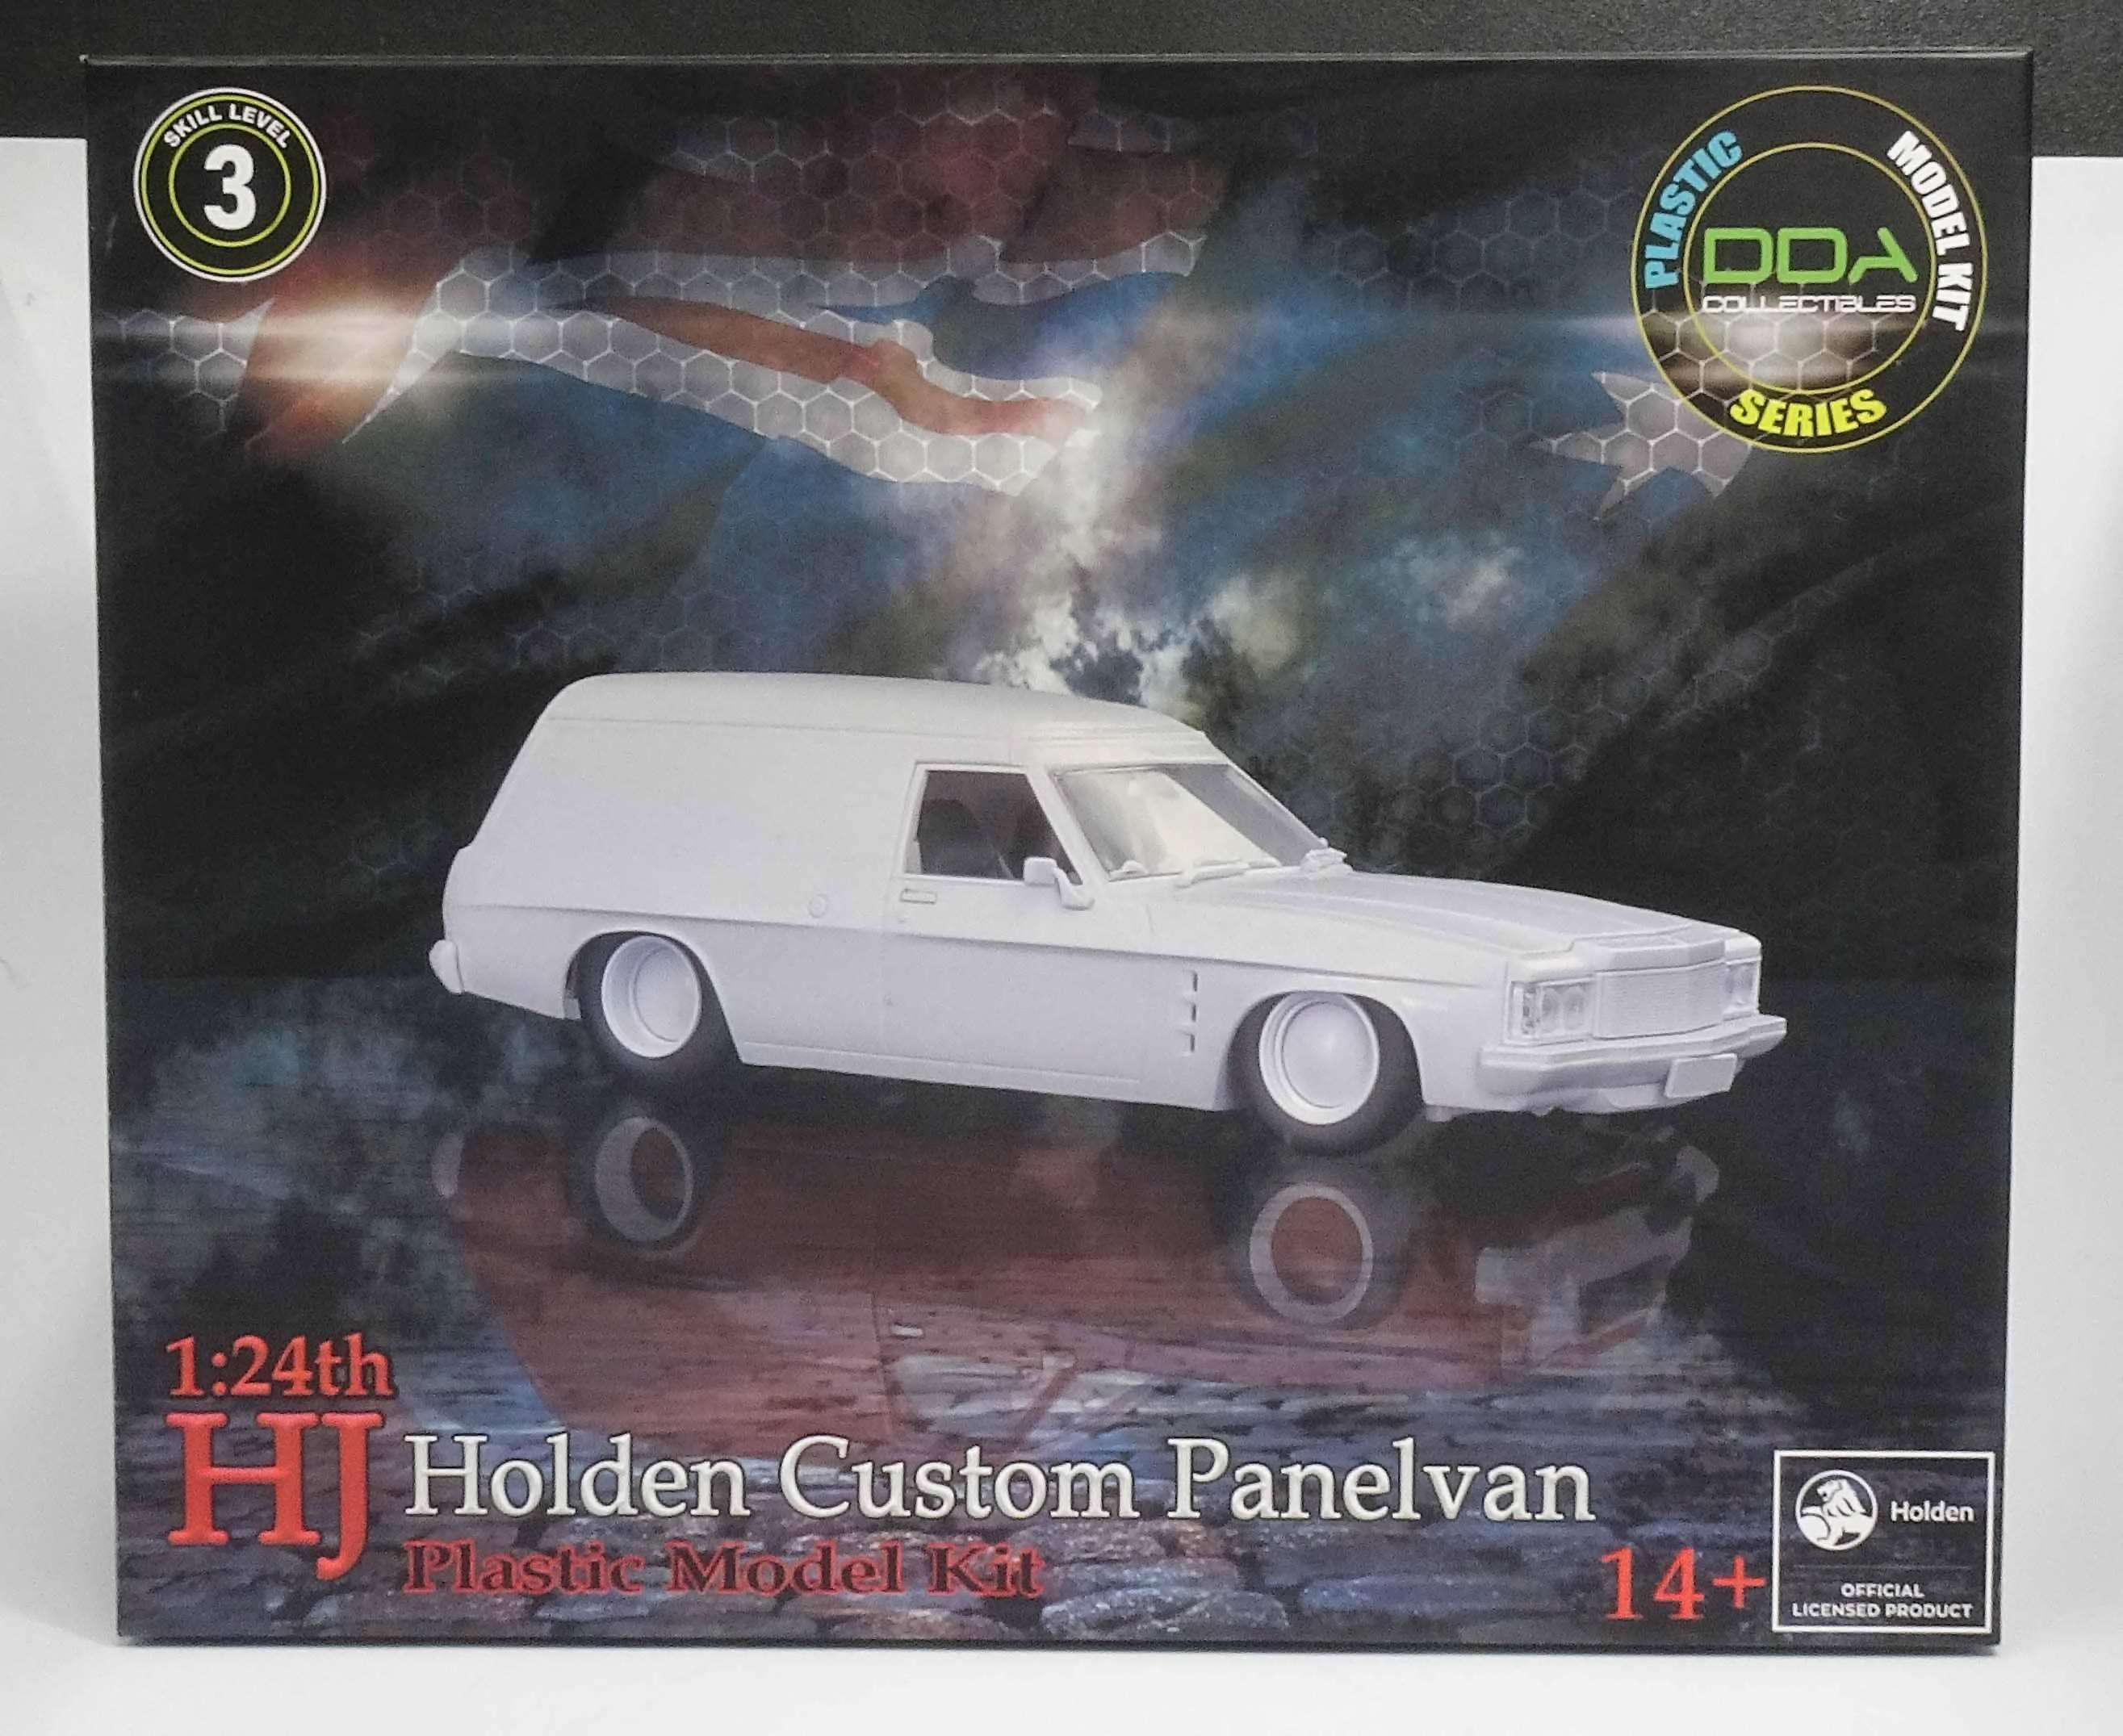
I really enjoyed building the Holden Panel Van I recently completed, so why not build another one 😁 So dug out another kit from the stash. I found this image a while back when searching for Holden Sandmans and it will be the inspiration for this build. A fellow Aussie modeler sourced the paint for me from a model show as it was a limited run only available at the event. And graphics were sourced from another Aussie company Lazy Modeller. I 3D printed some wheels that I got the files from Z Force Model Worx , they are pretty much the same as Holden GTS Sprint wheels. And have set the stance.
- 766 replies
-
- 6
-
-
- stalled builds
- quick builds
- (and 2 more)
-
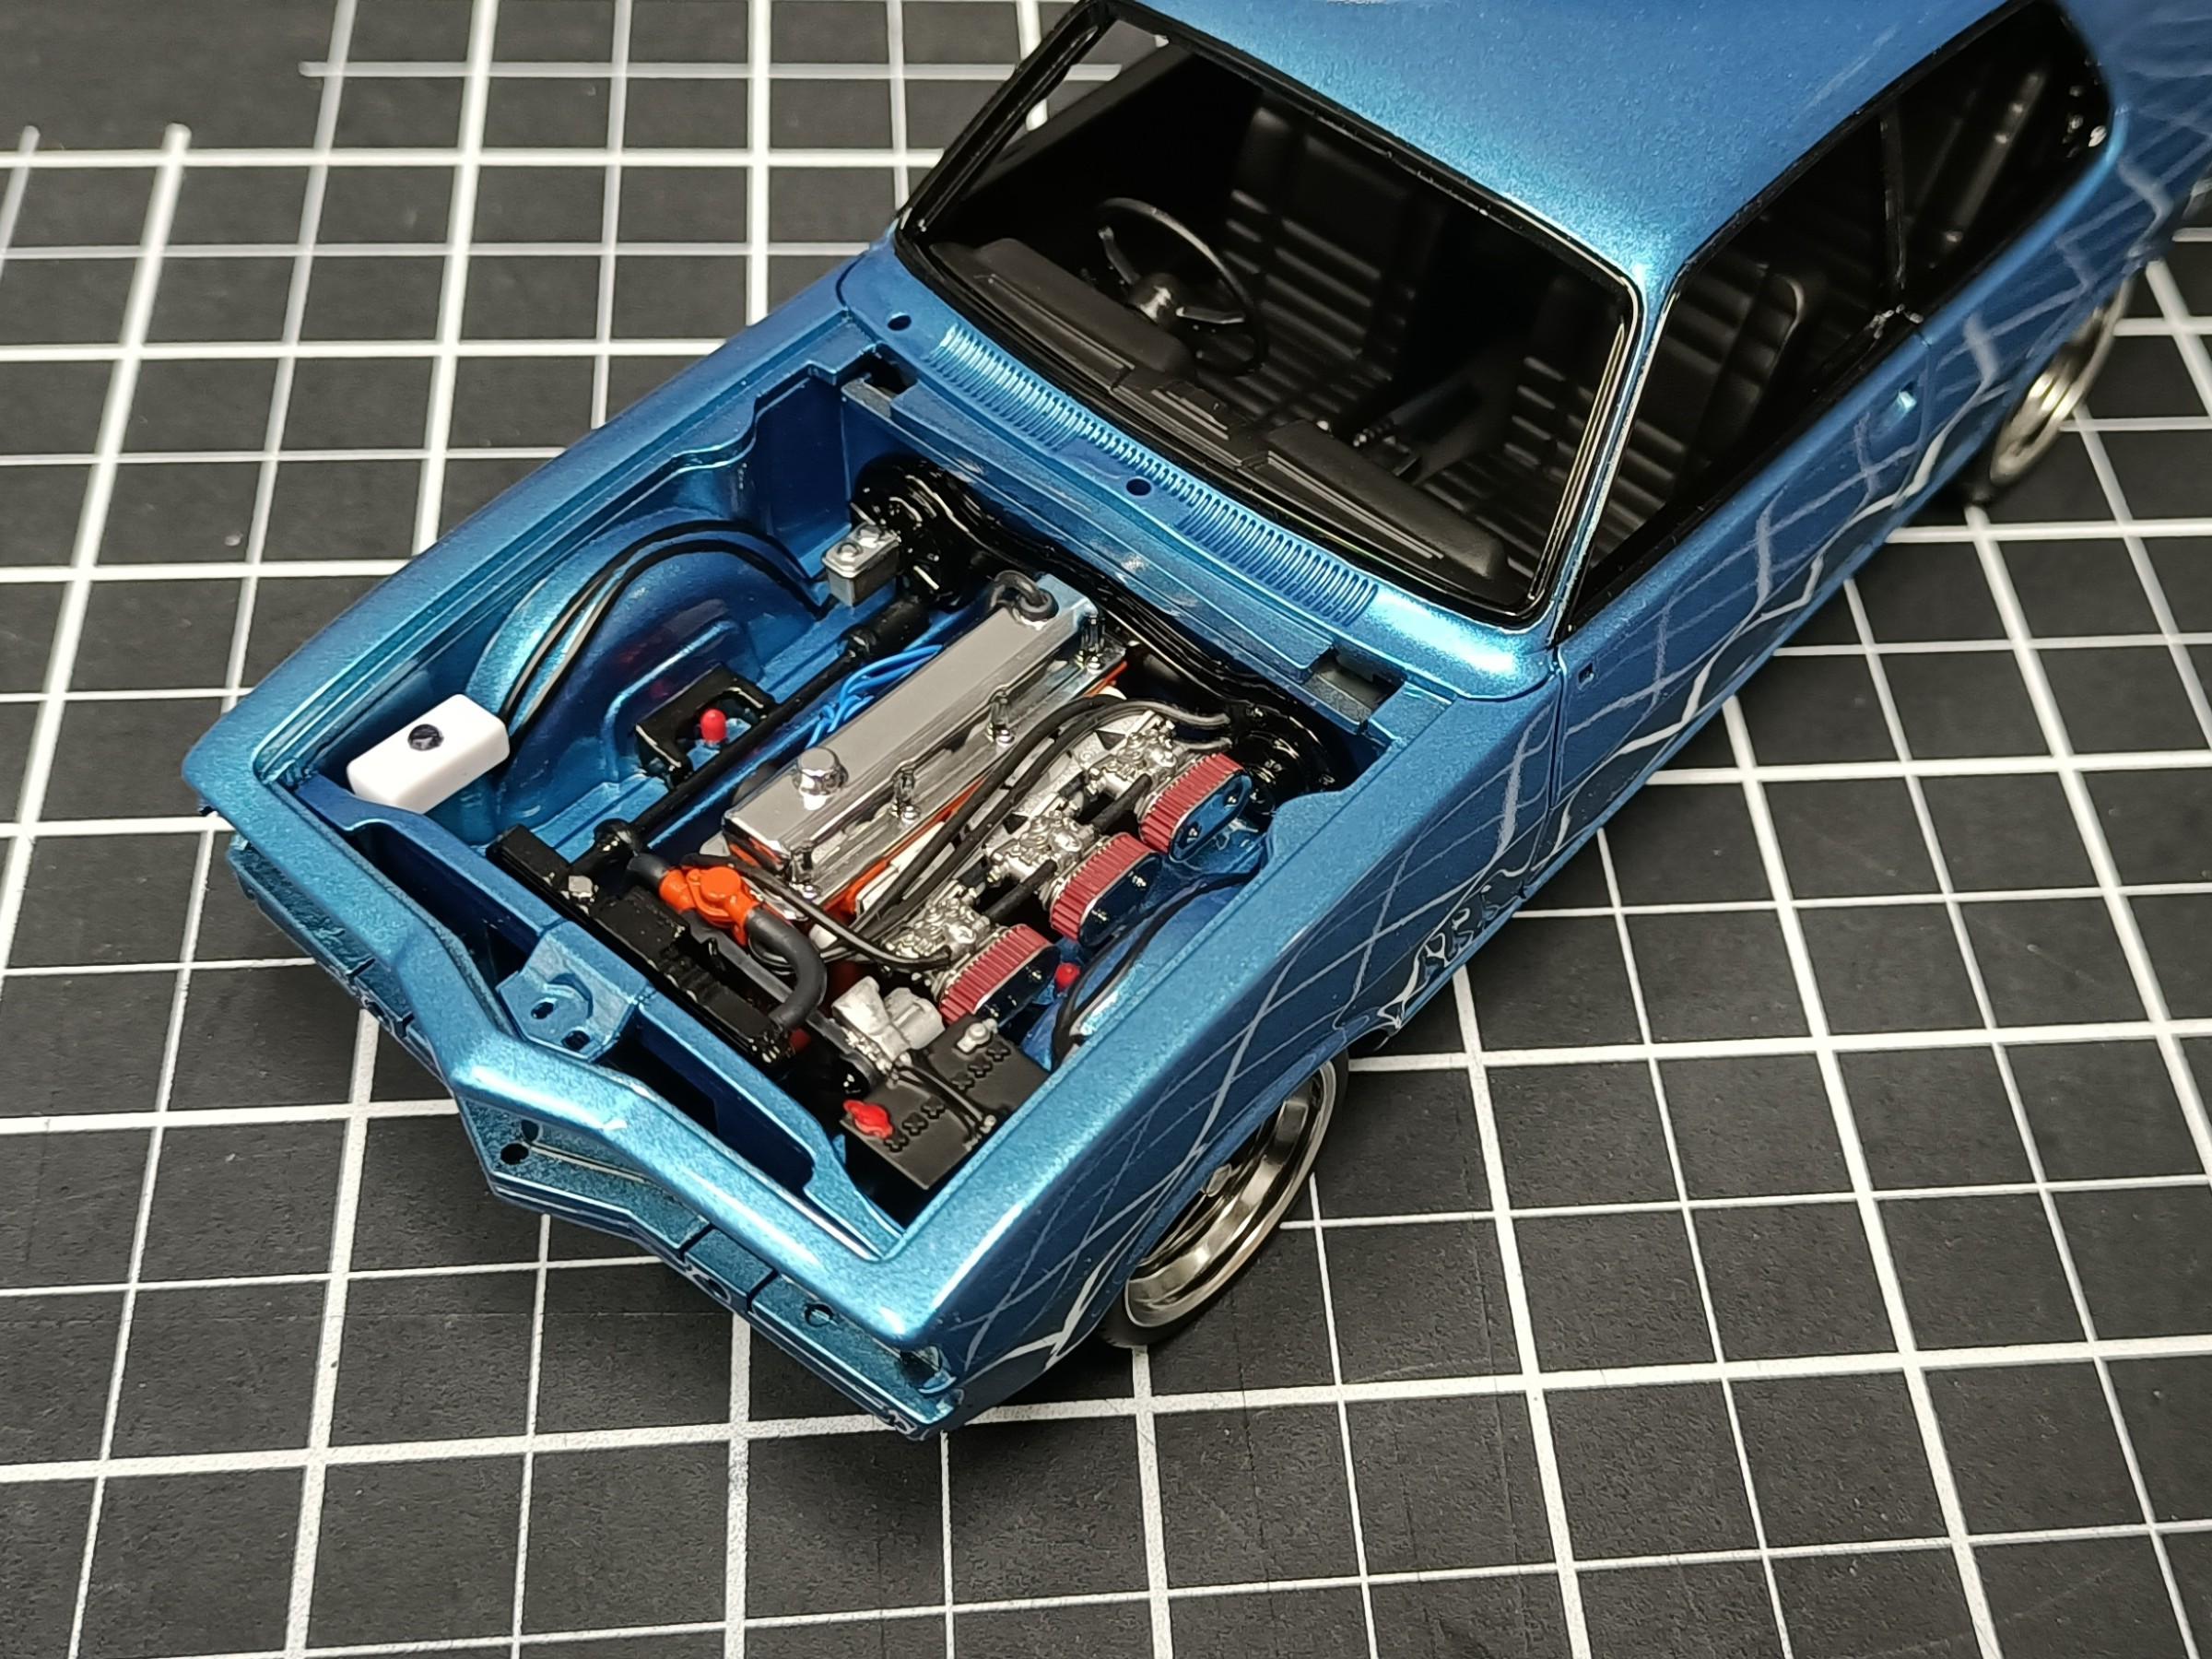
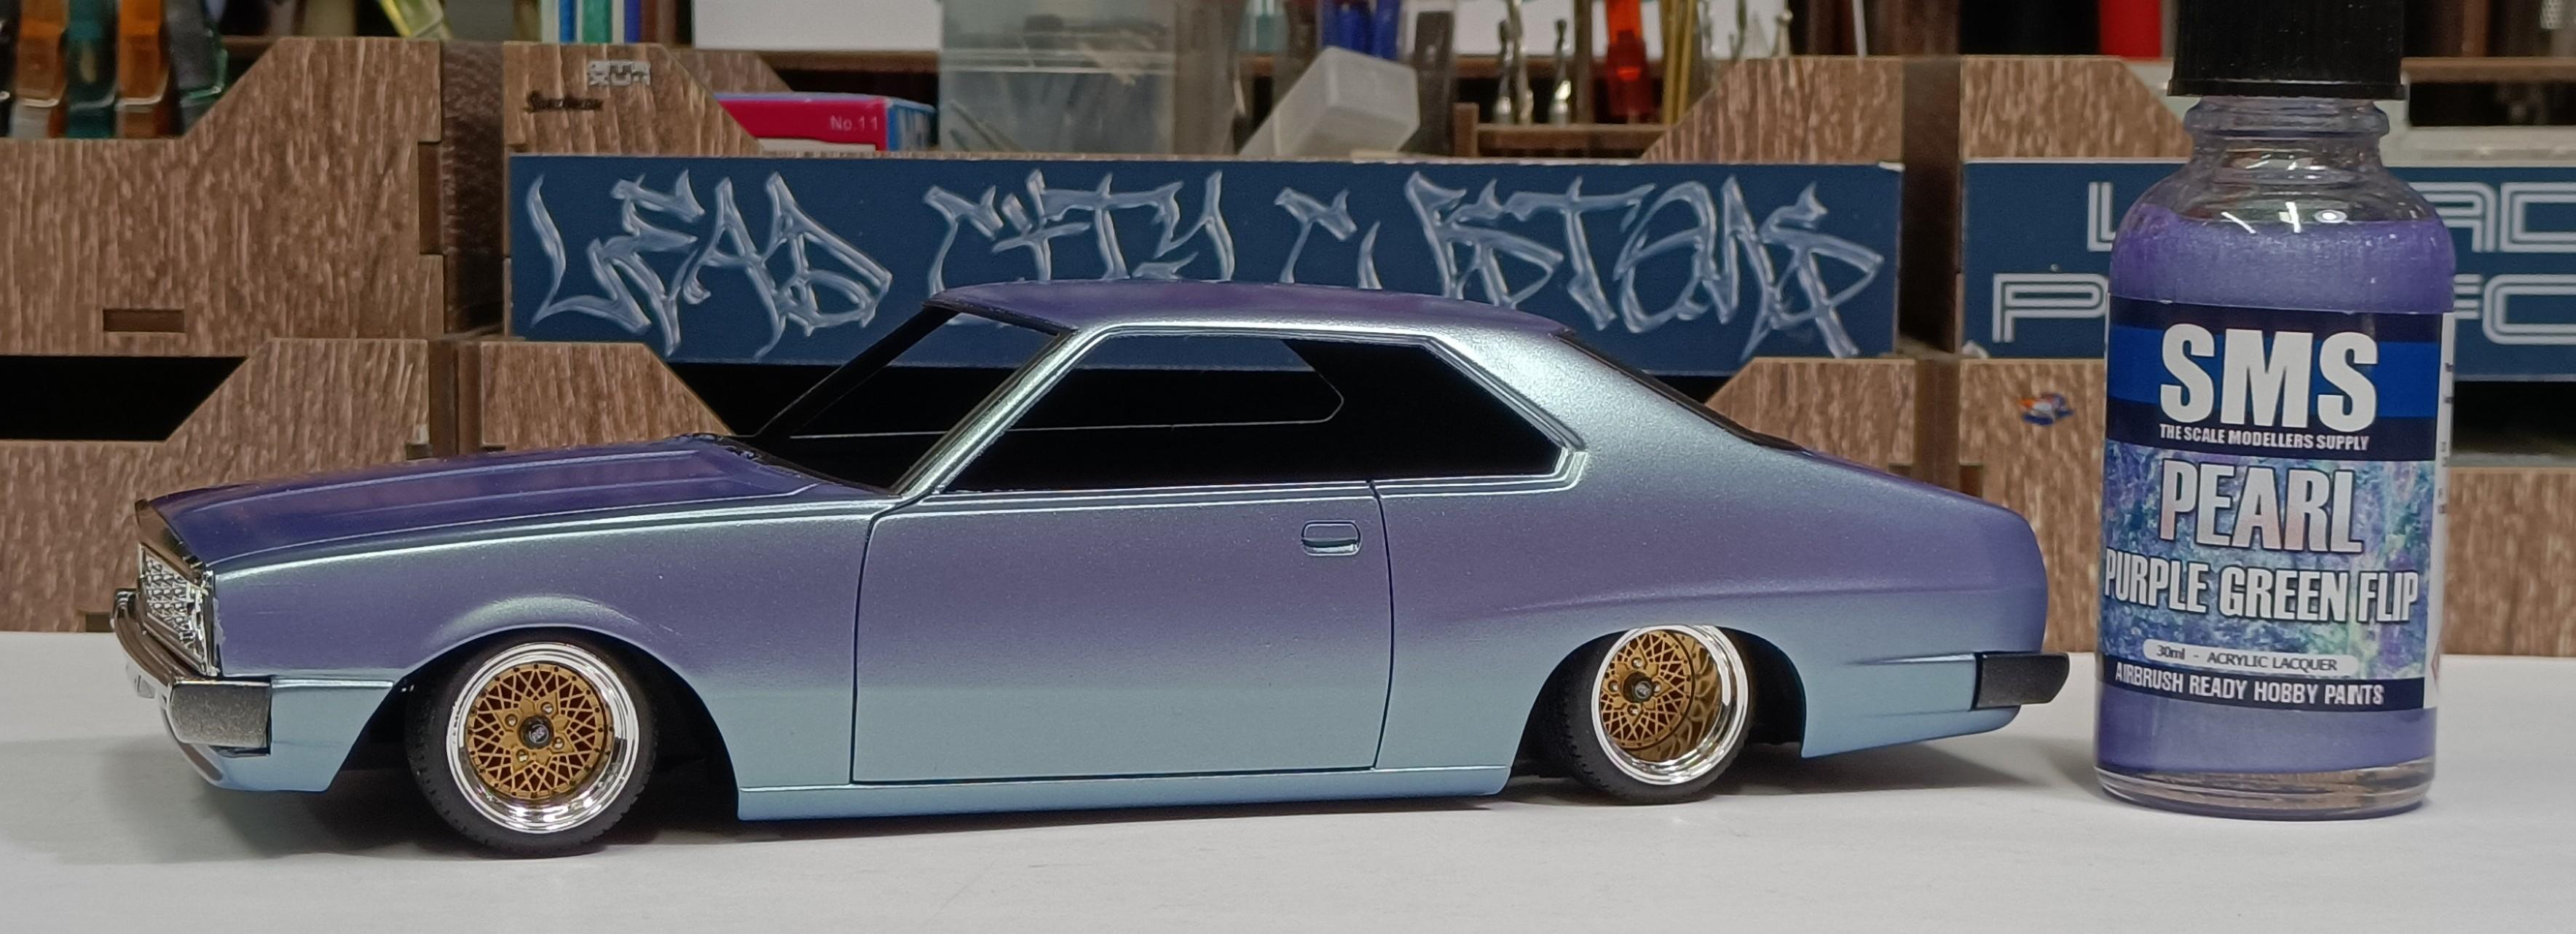
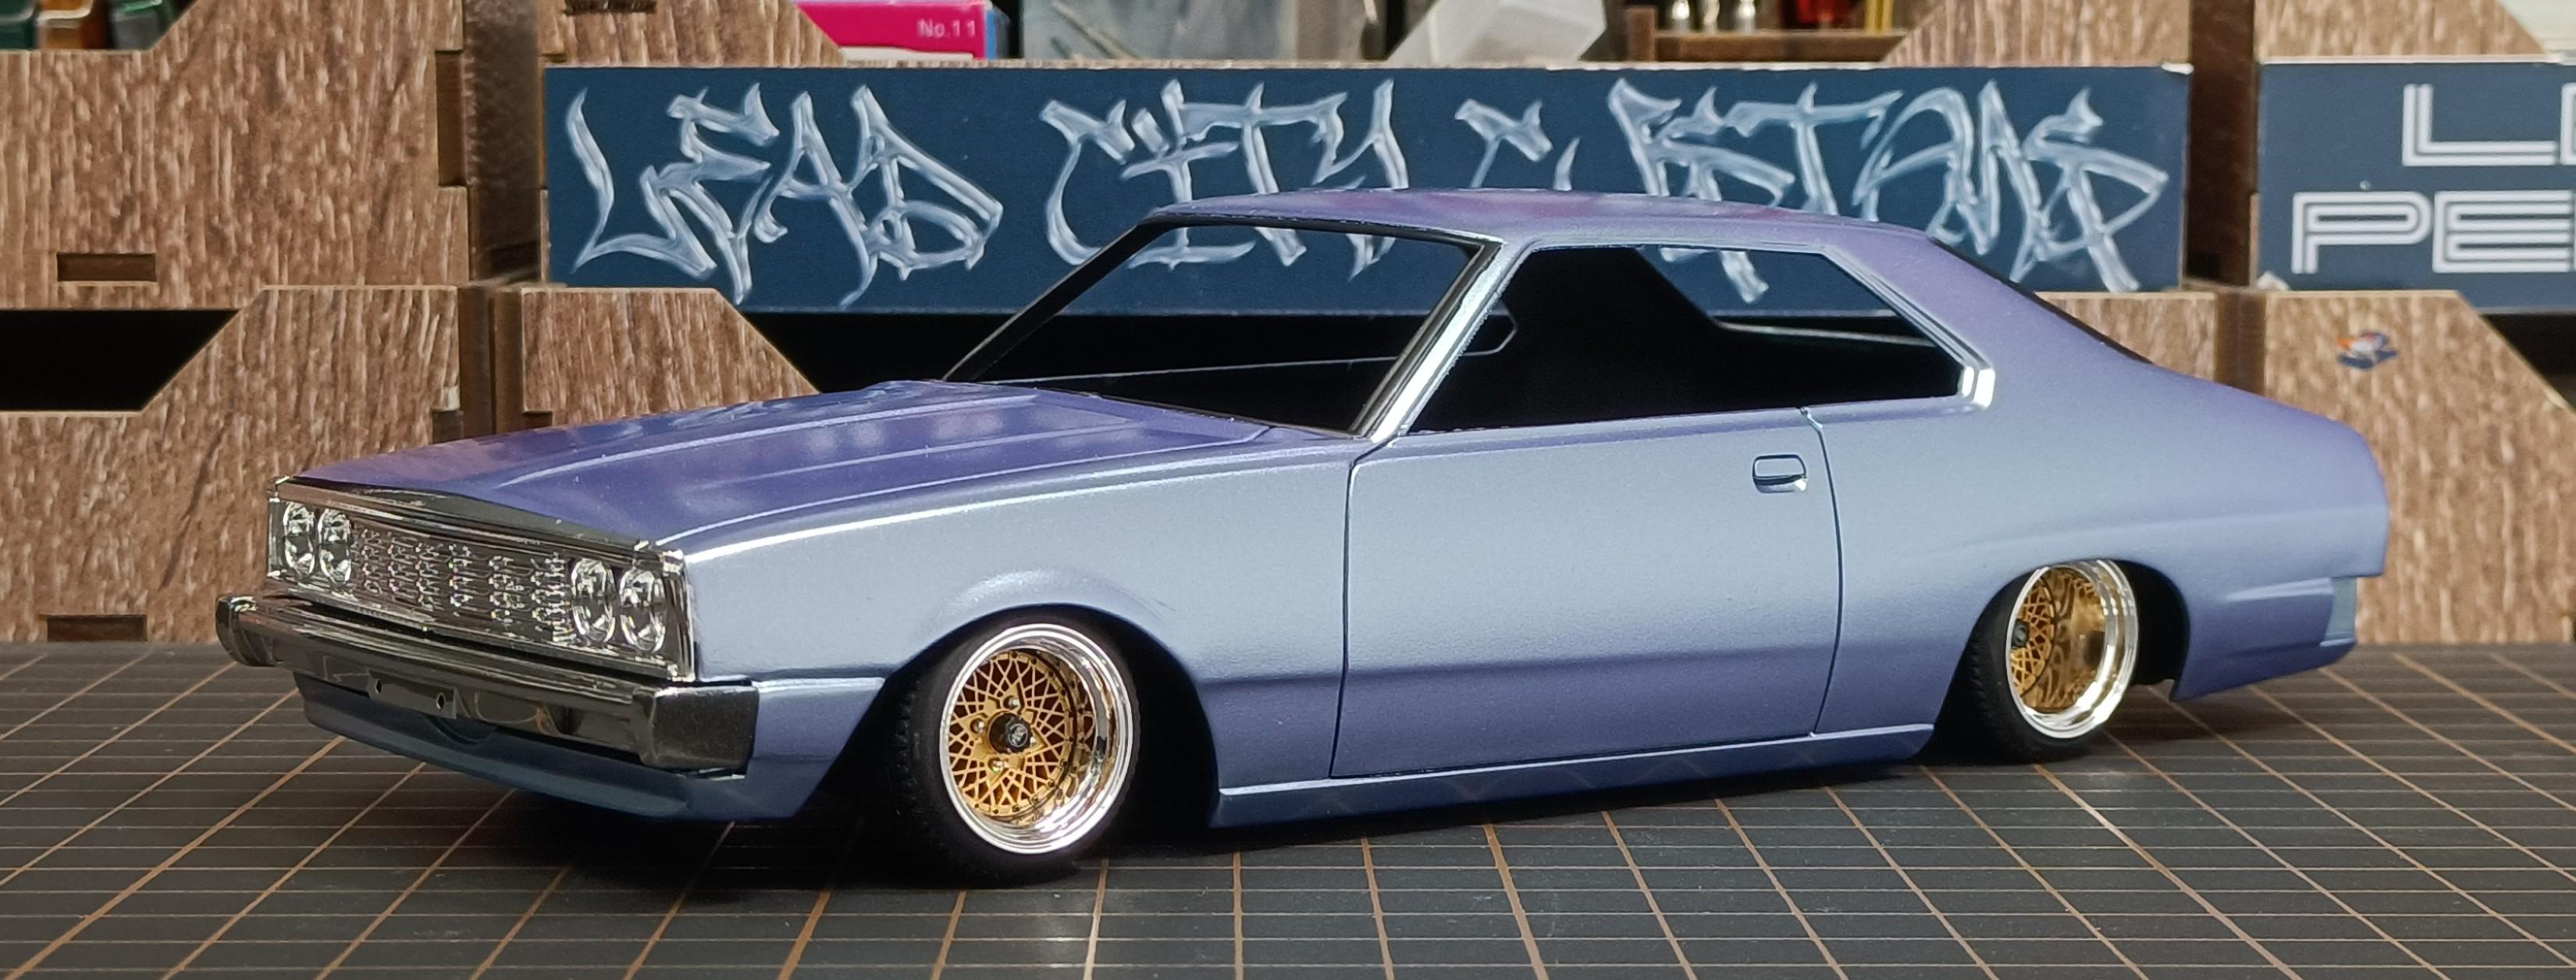
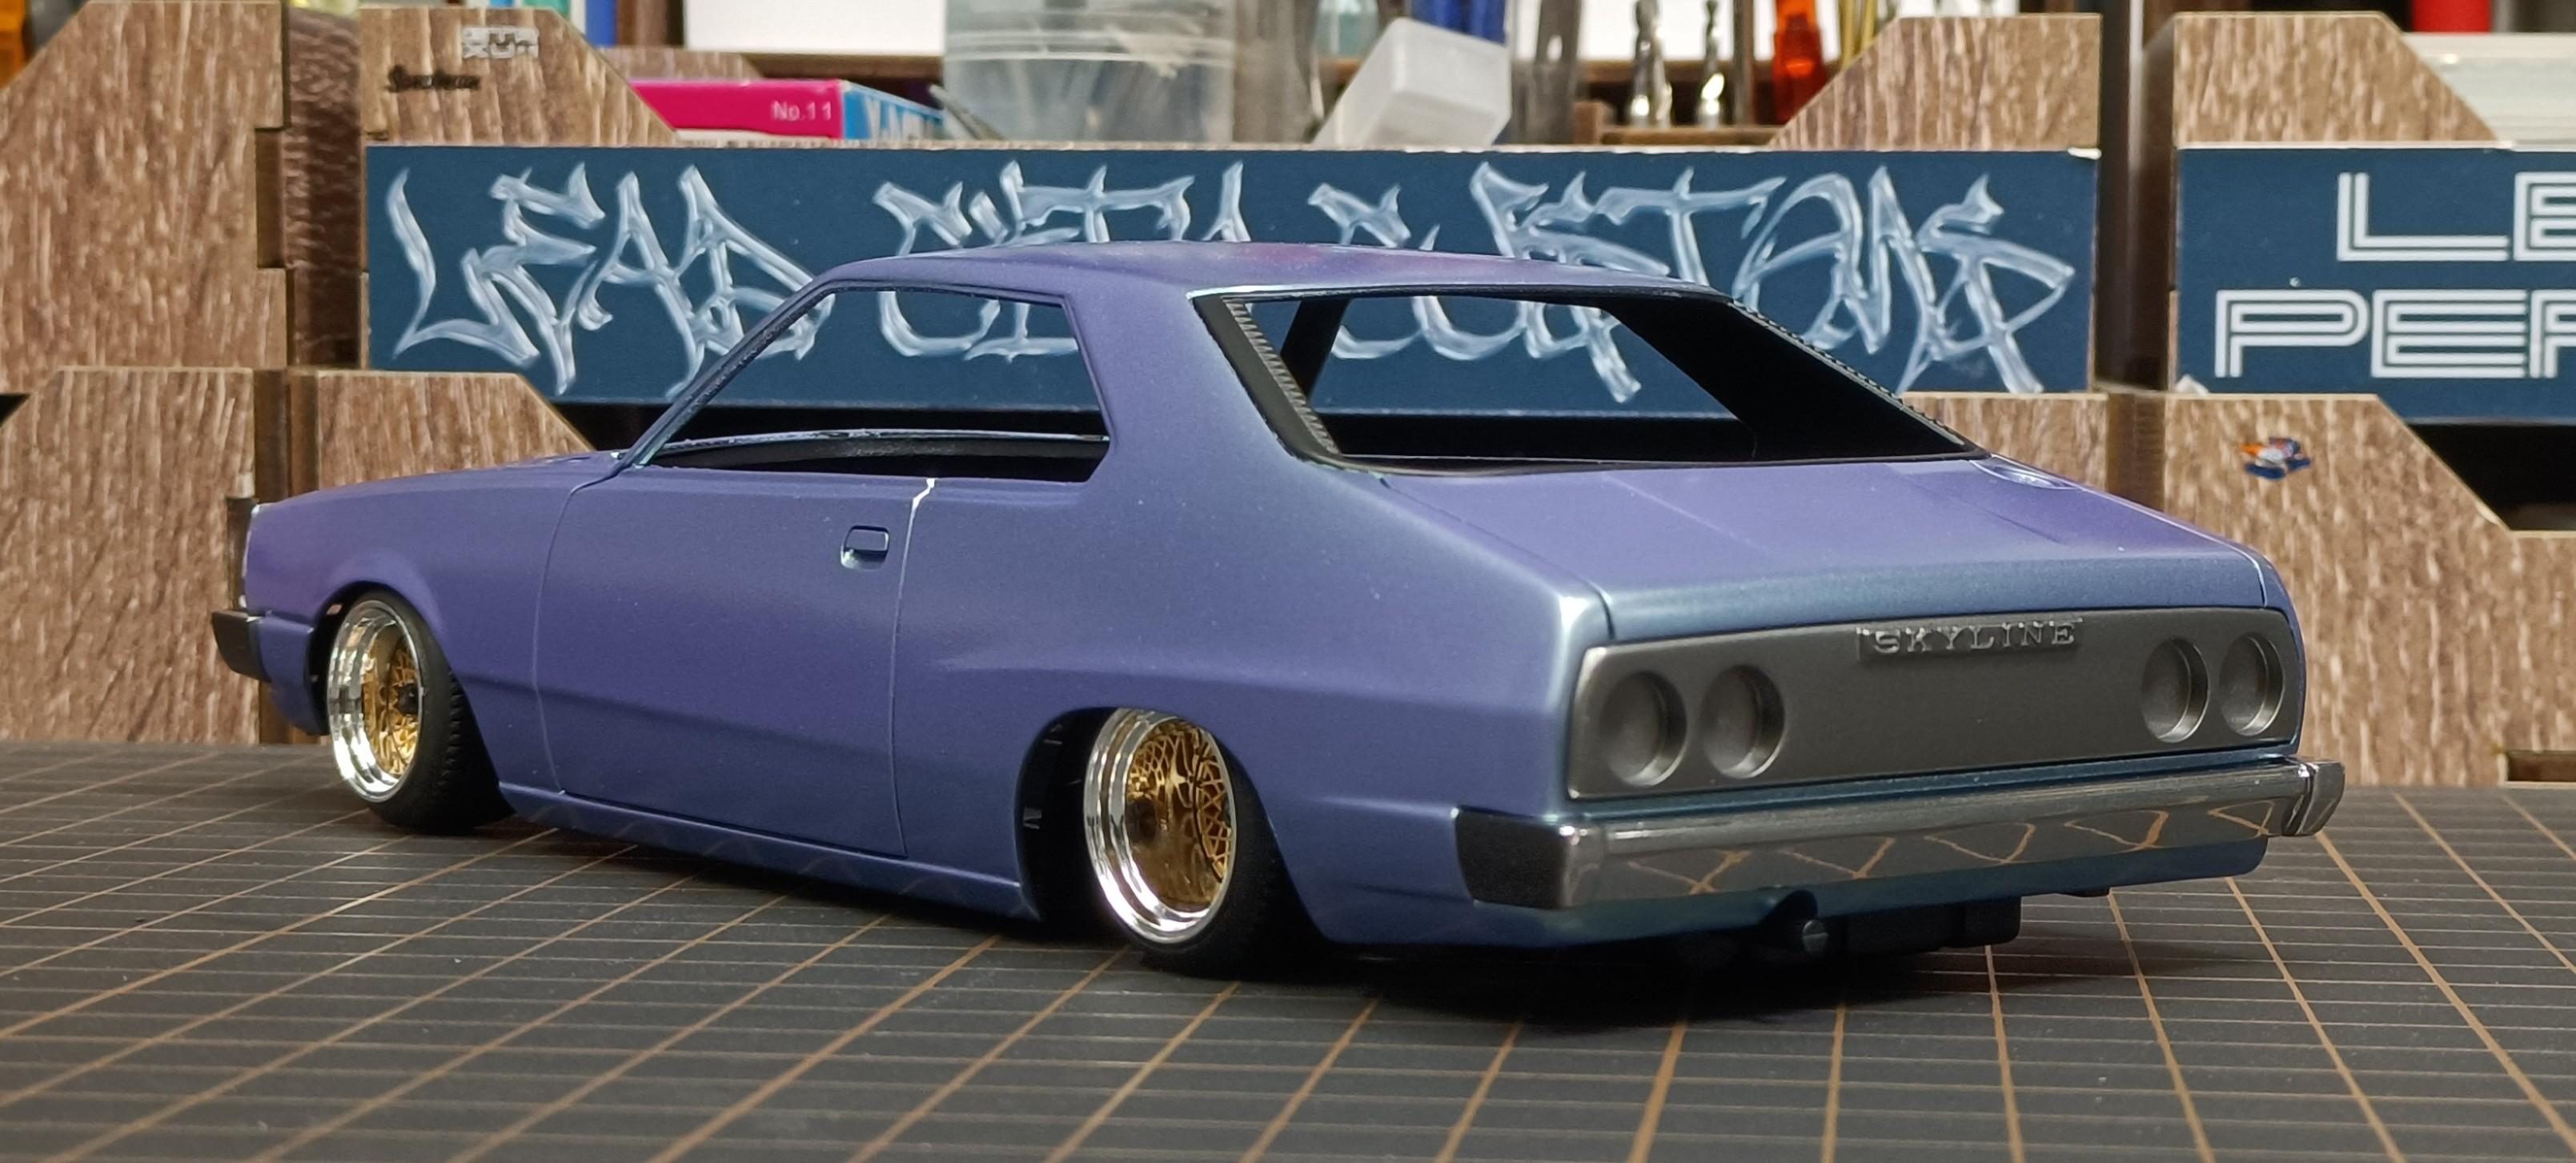
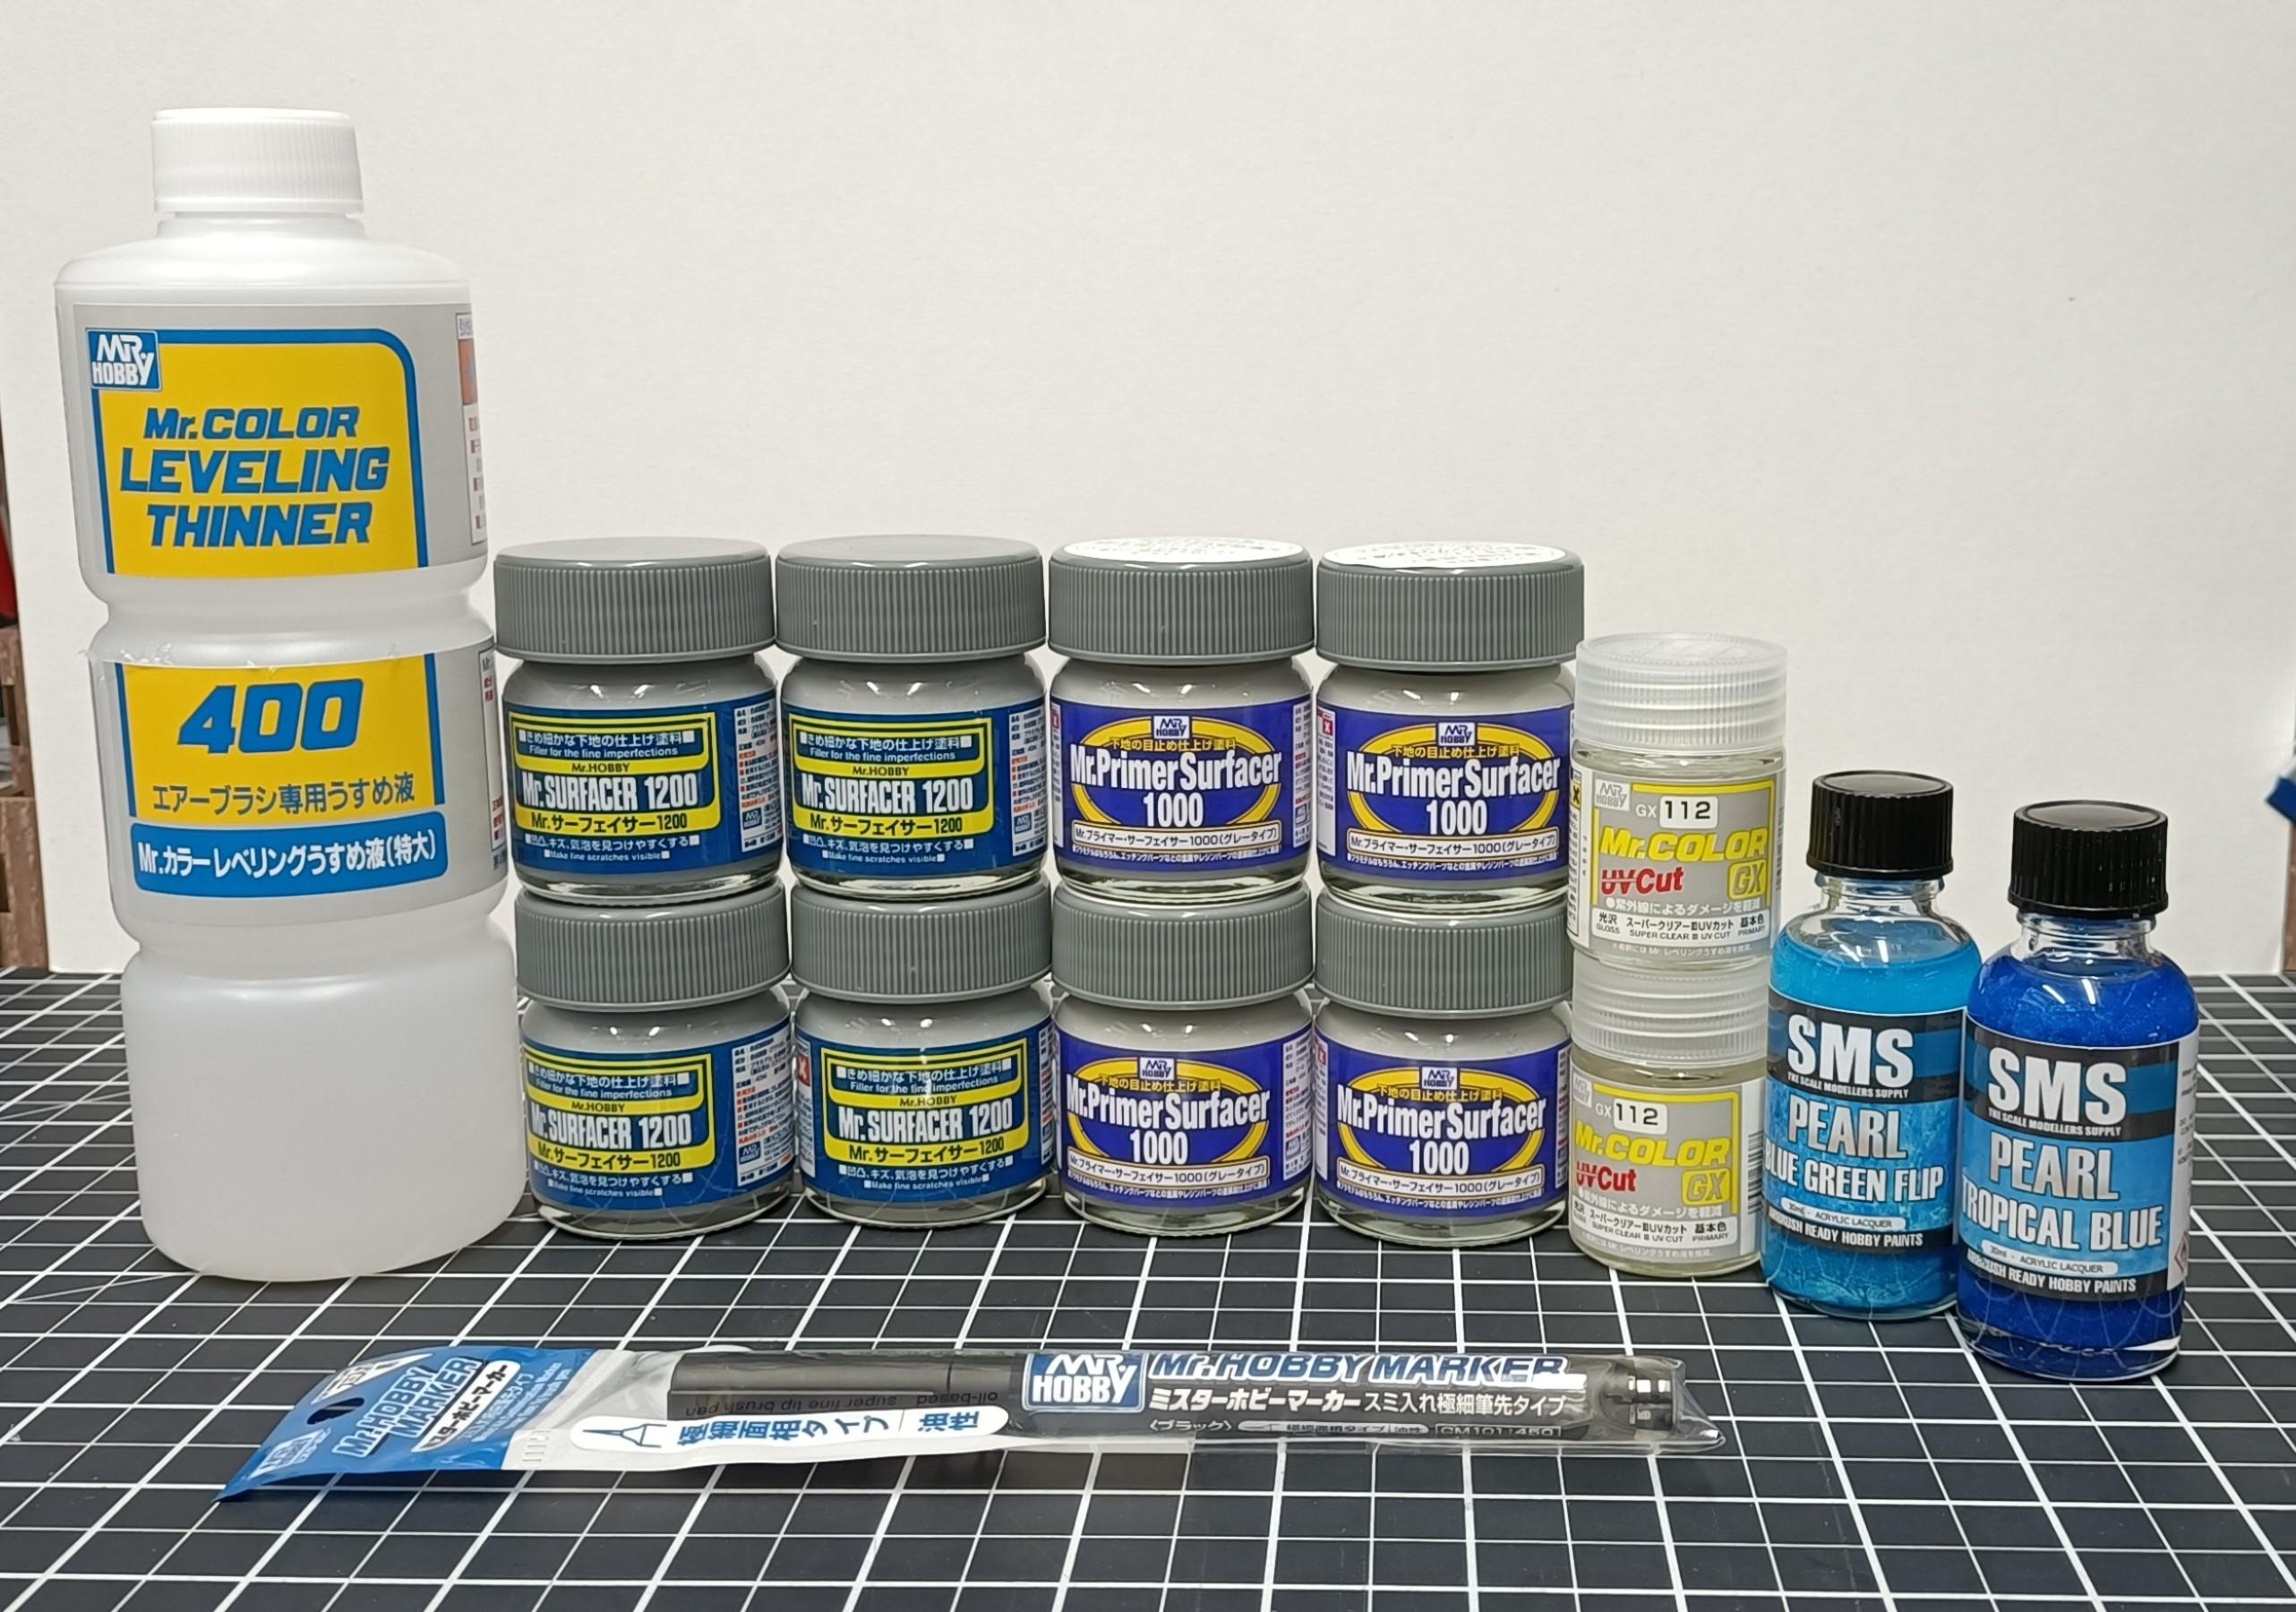
Applied a colour coat to the test mule. Apologize for so many pictures, I feel its necessary to show the colour shift 🤣
- 766 replies
-
- 7
-
-
- stalled builds
- quick builds
- (and 2 more)
-
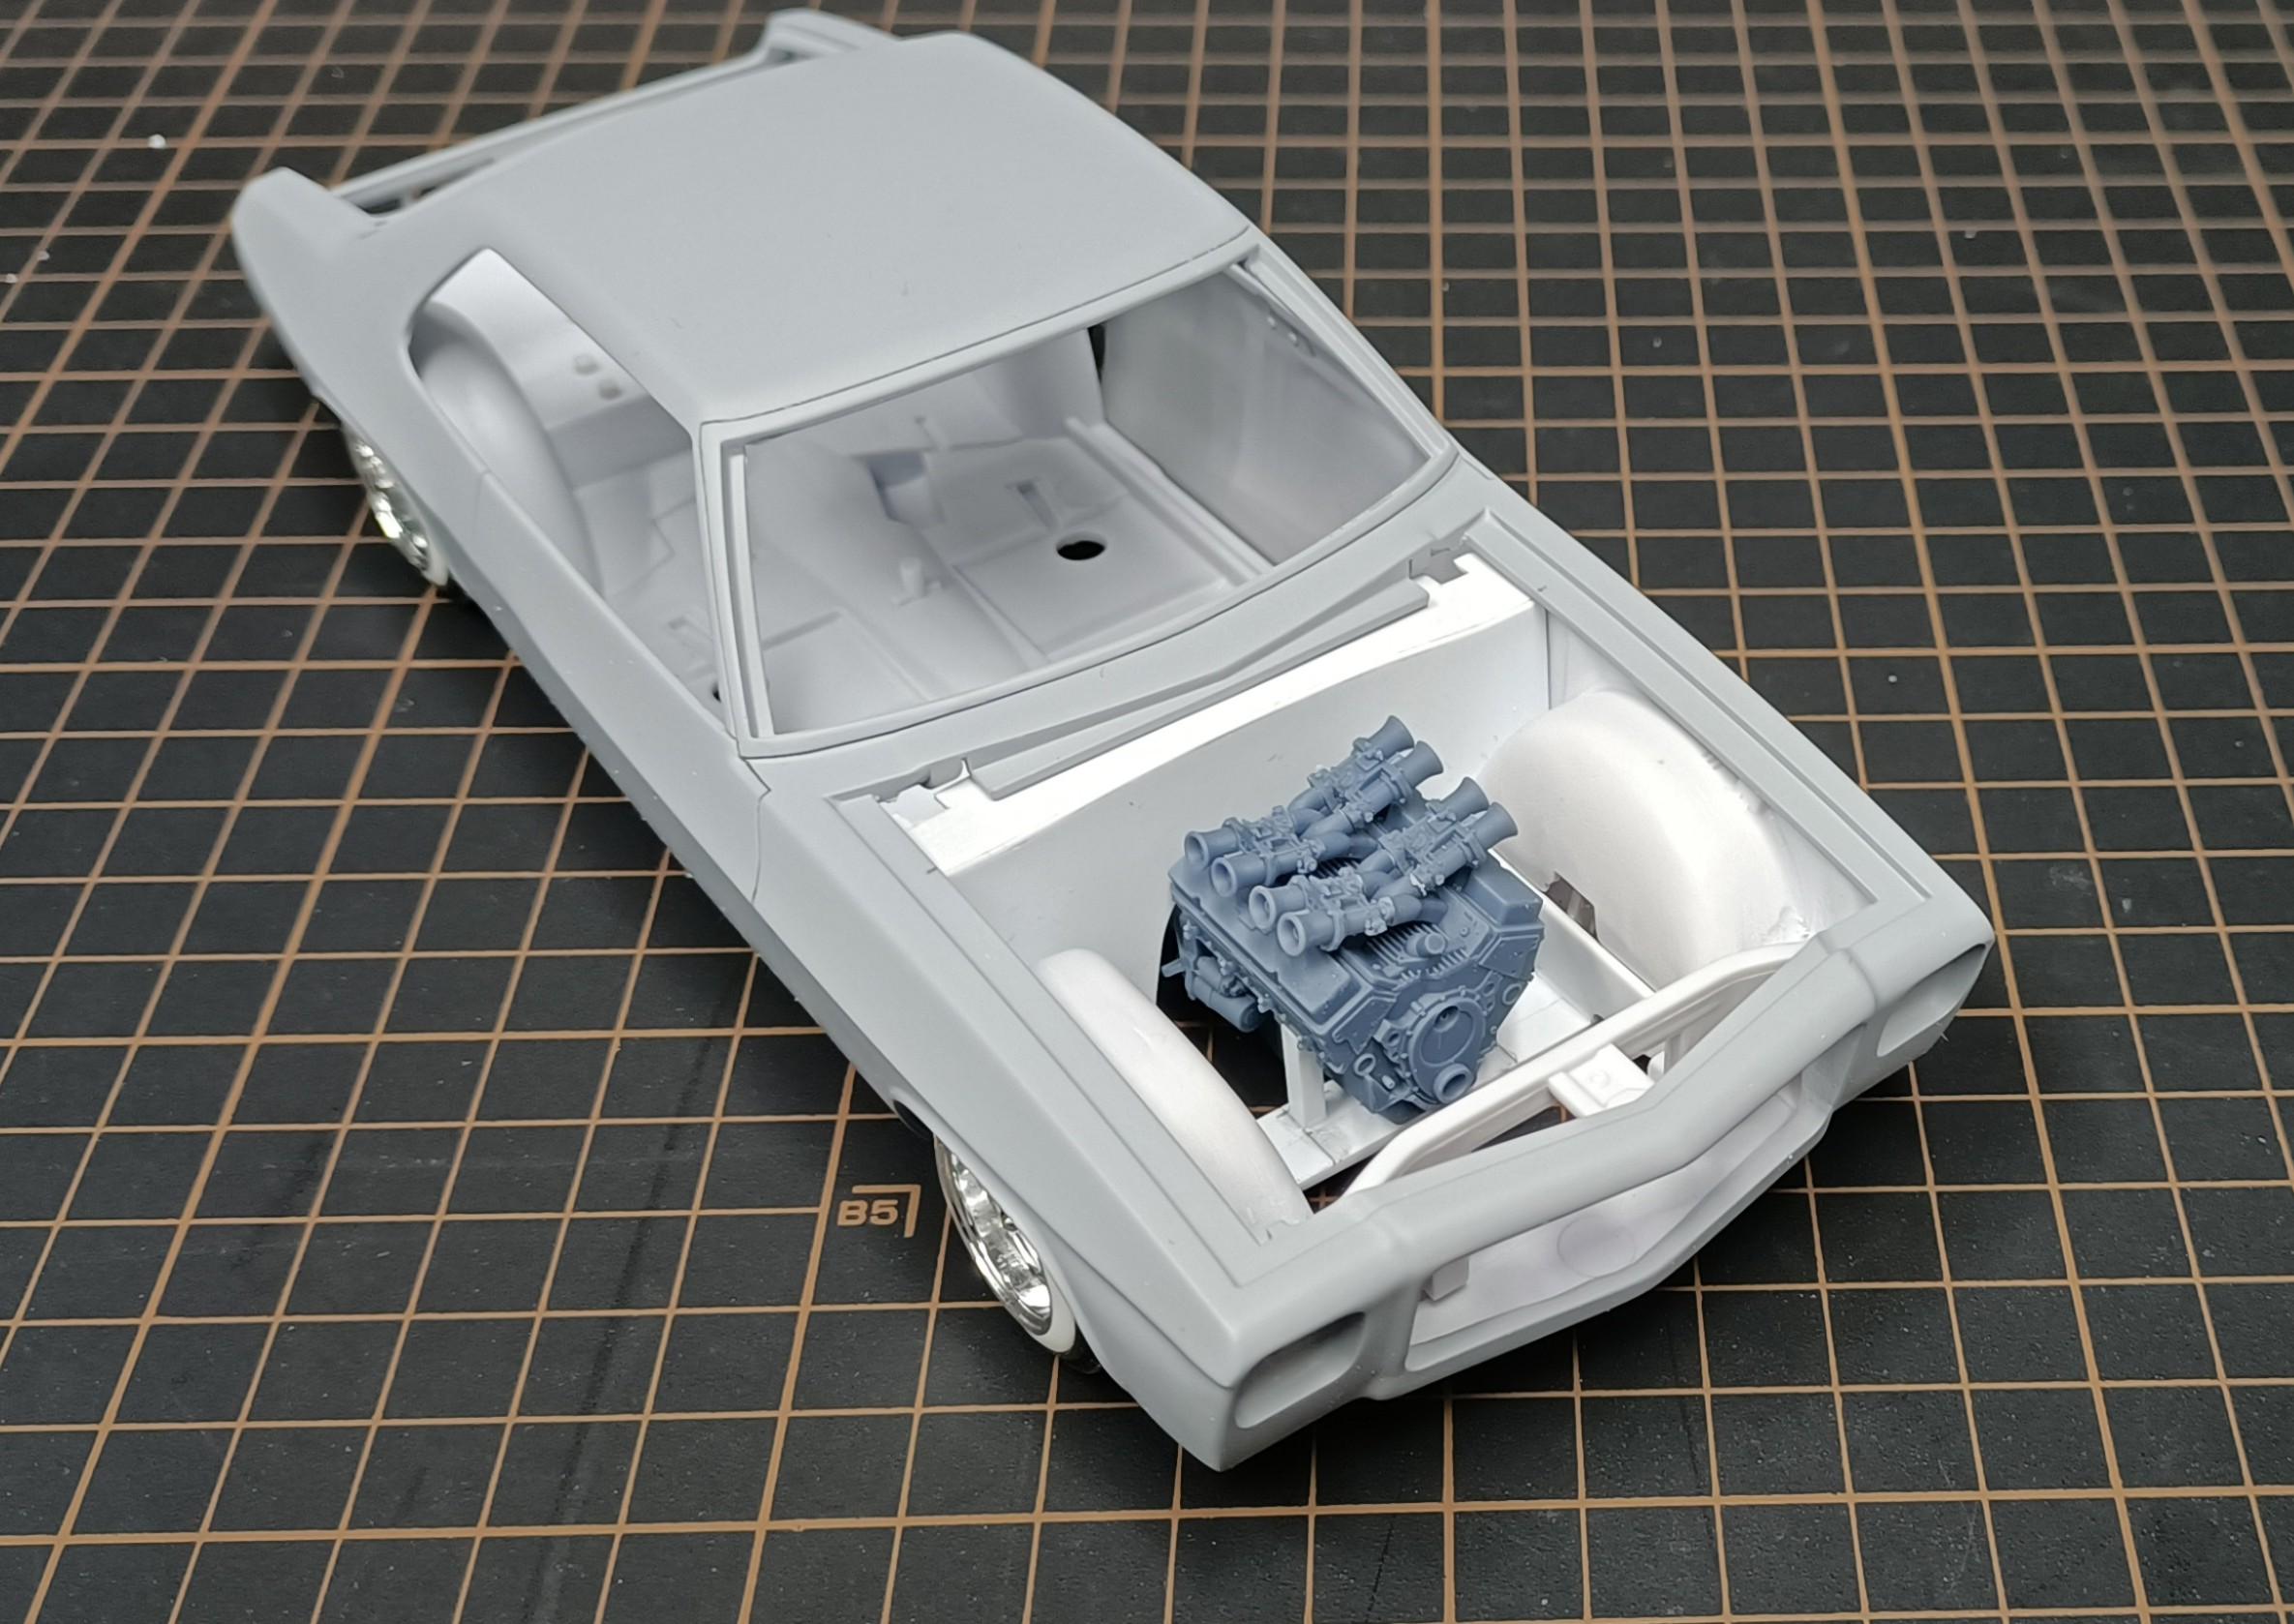
Thanks Bob, I decided the cross ram was the better option for an old school custom, was contemplating a LS3 with double stacked superchargers.
-
A fellow forum member critiquing how others post too many walk around style pictures in their under glass threads. I find that absolutely laughable when said member has never contributed a build in the under glass section. The walk around is the best way to show case all the details of the build and show the styling and shape of the vehicle from different angles. Standard display photography is front, front 3/4, side, rear and rear 3/4 and there can be left and right variants of those profiles.
-
If the payment system does become a thing, it would be good to see a sub section that features articles from the magazine.
-
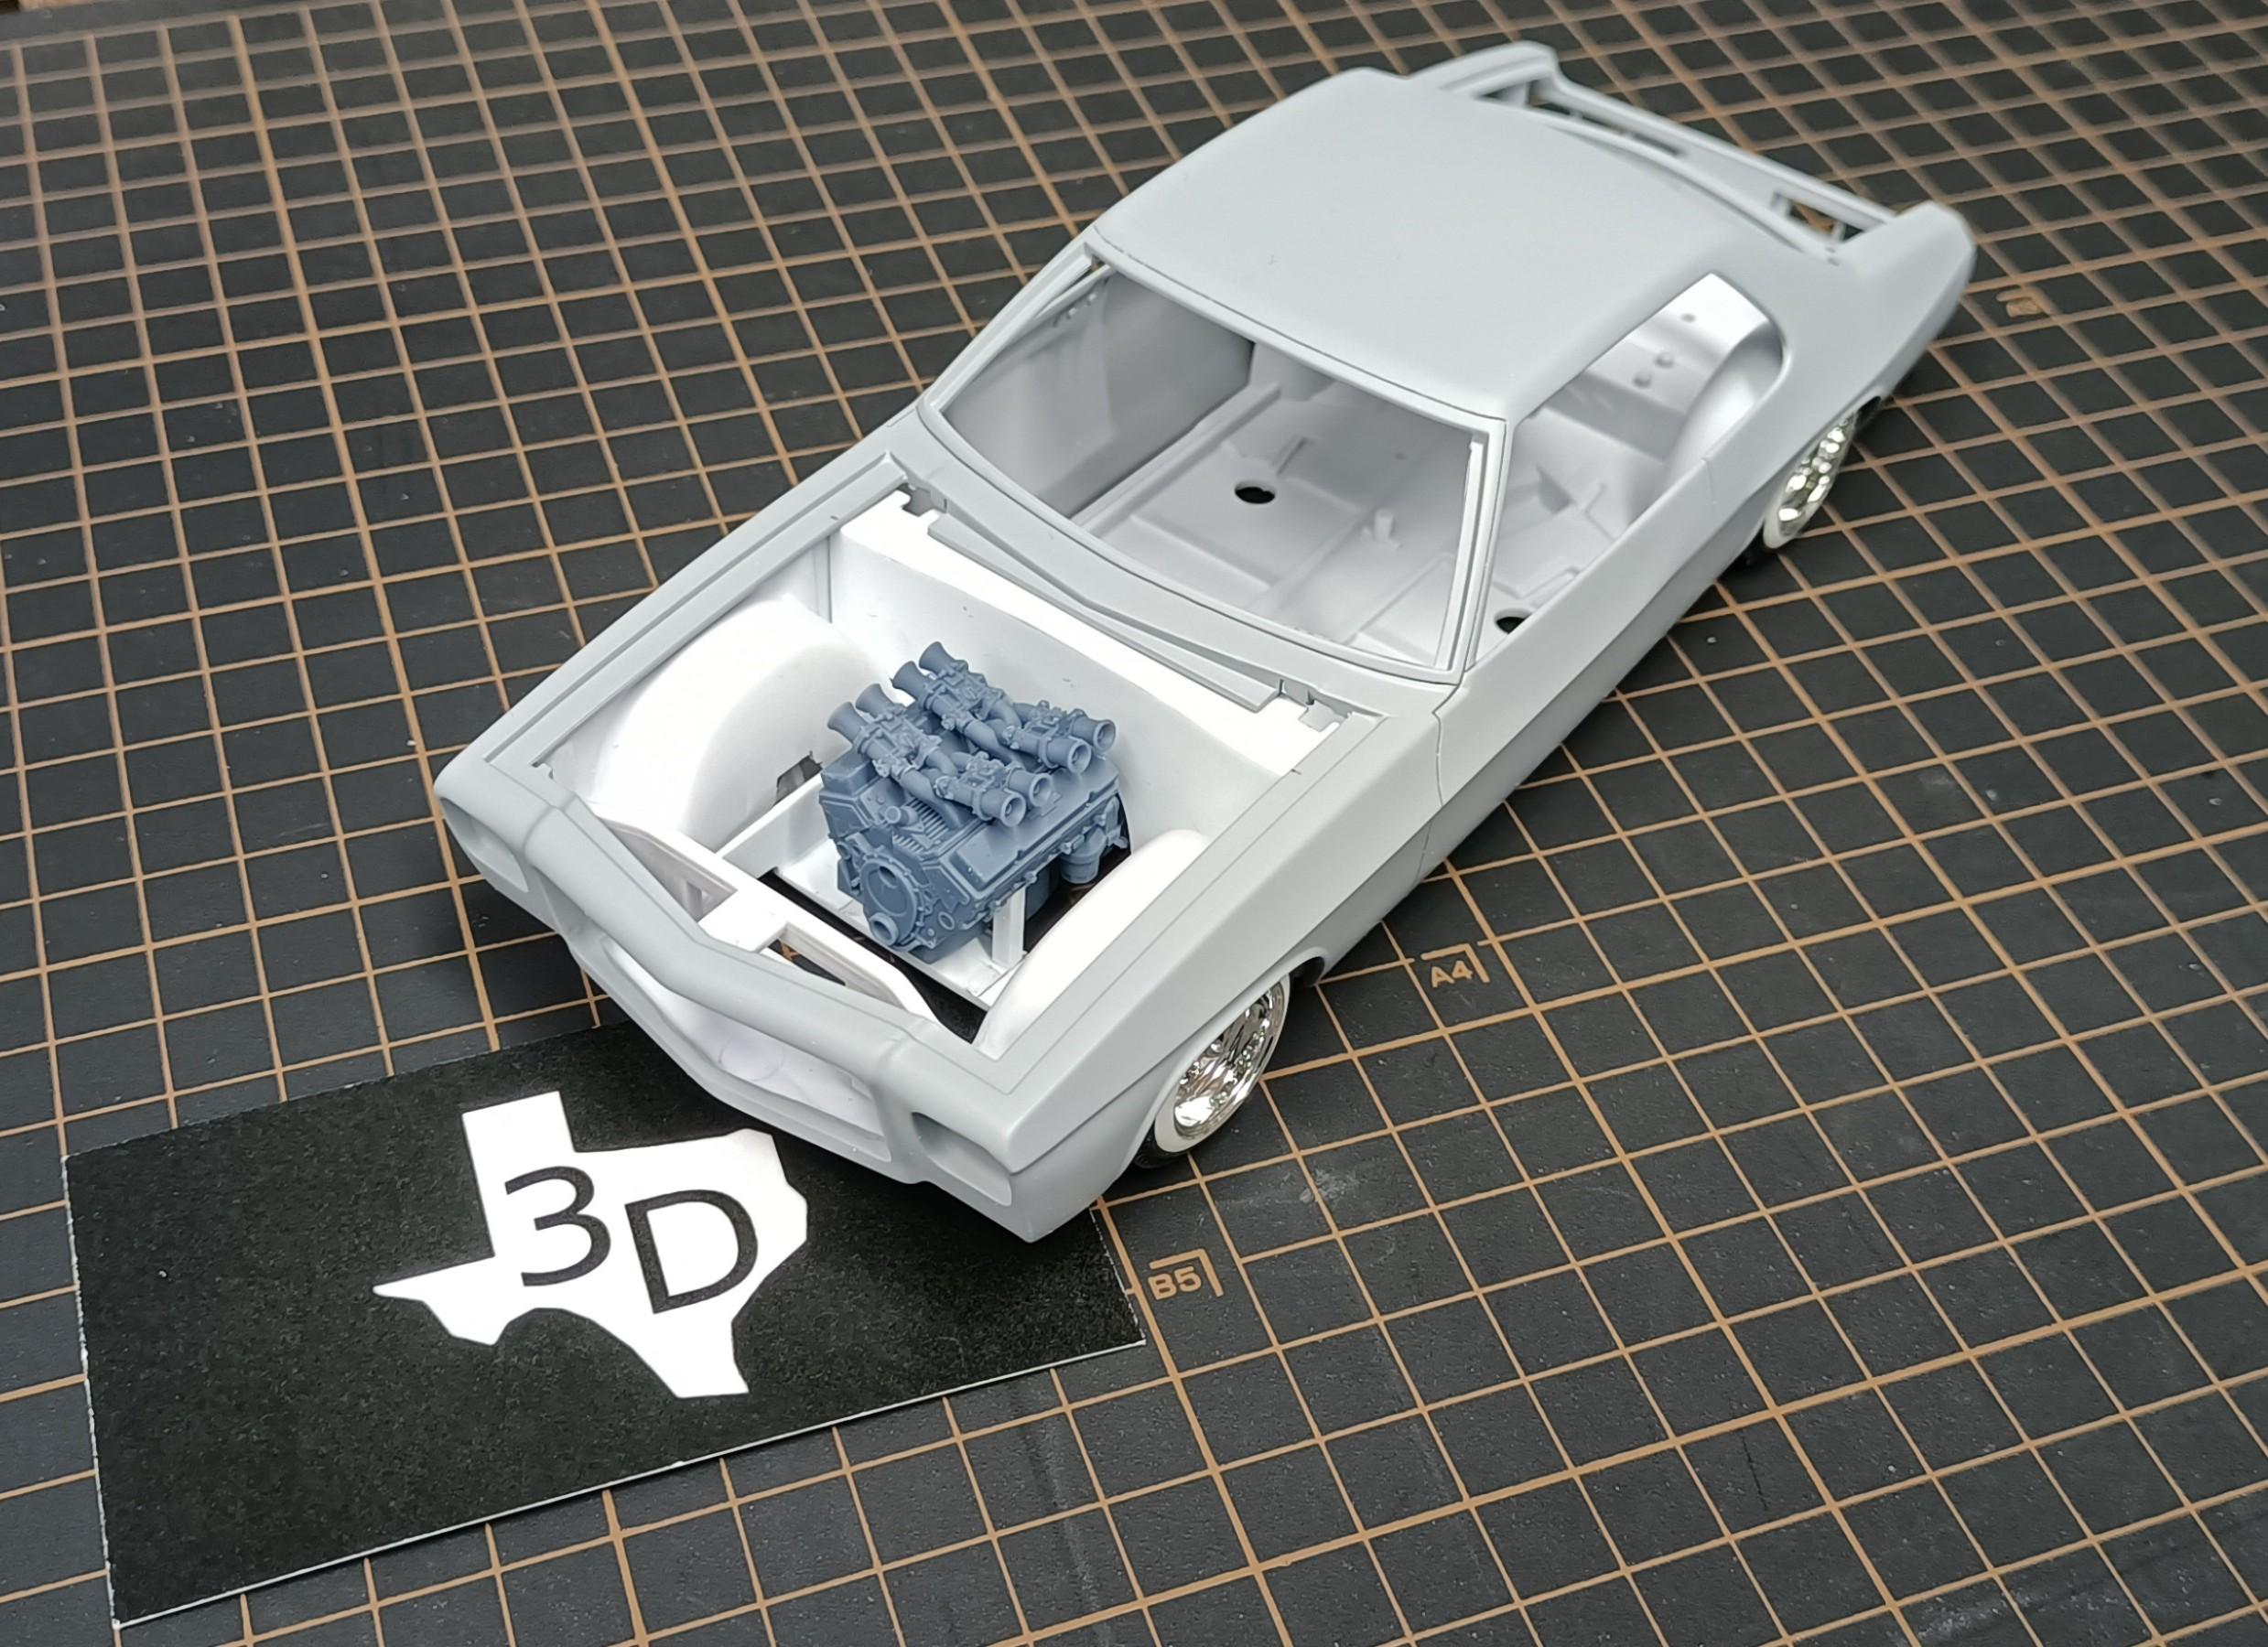
Progress update for the HQ custom. Modified kit engine bay and started the process of fitting an aftermarket engine. Texas 3D customs Cross Ram SBC
- 766 replies
-
- 4
-
-
- stalled builds
- quick builds
- (and 2 more)
-
Thanks Bob. Turned out okay for a 2 week build. Pano now Under Glass.
- 766 replies
-
- 3
-
-
- stalled builds
- quick builds
- (and 2 more)
-
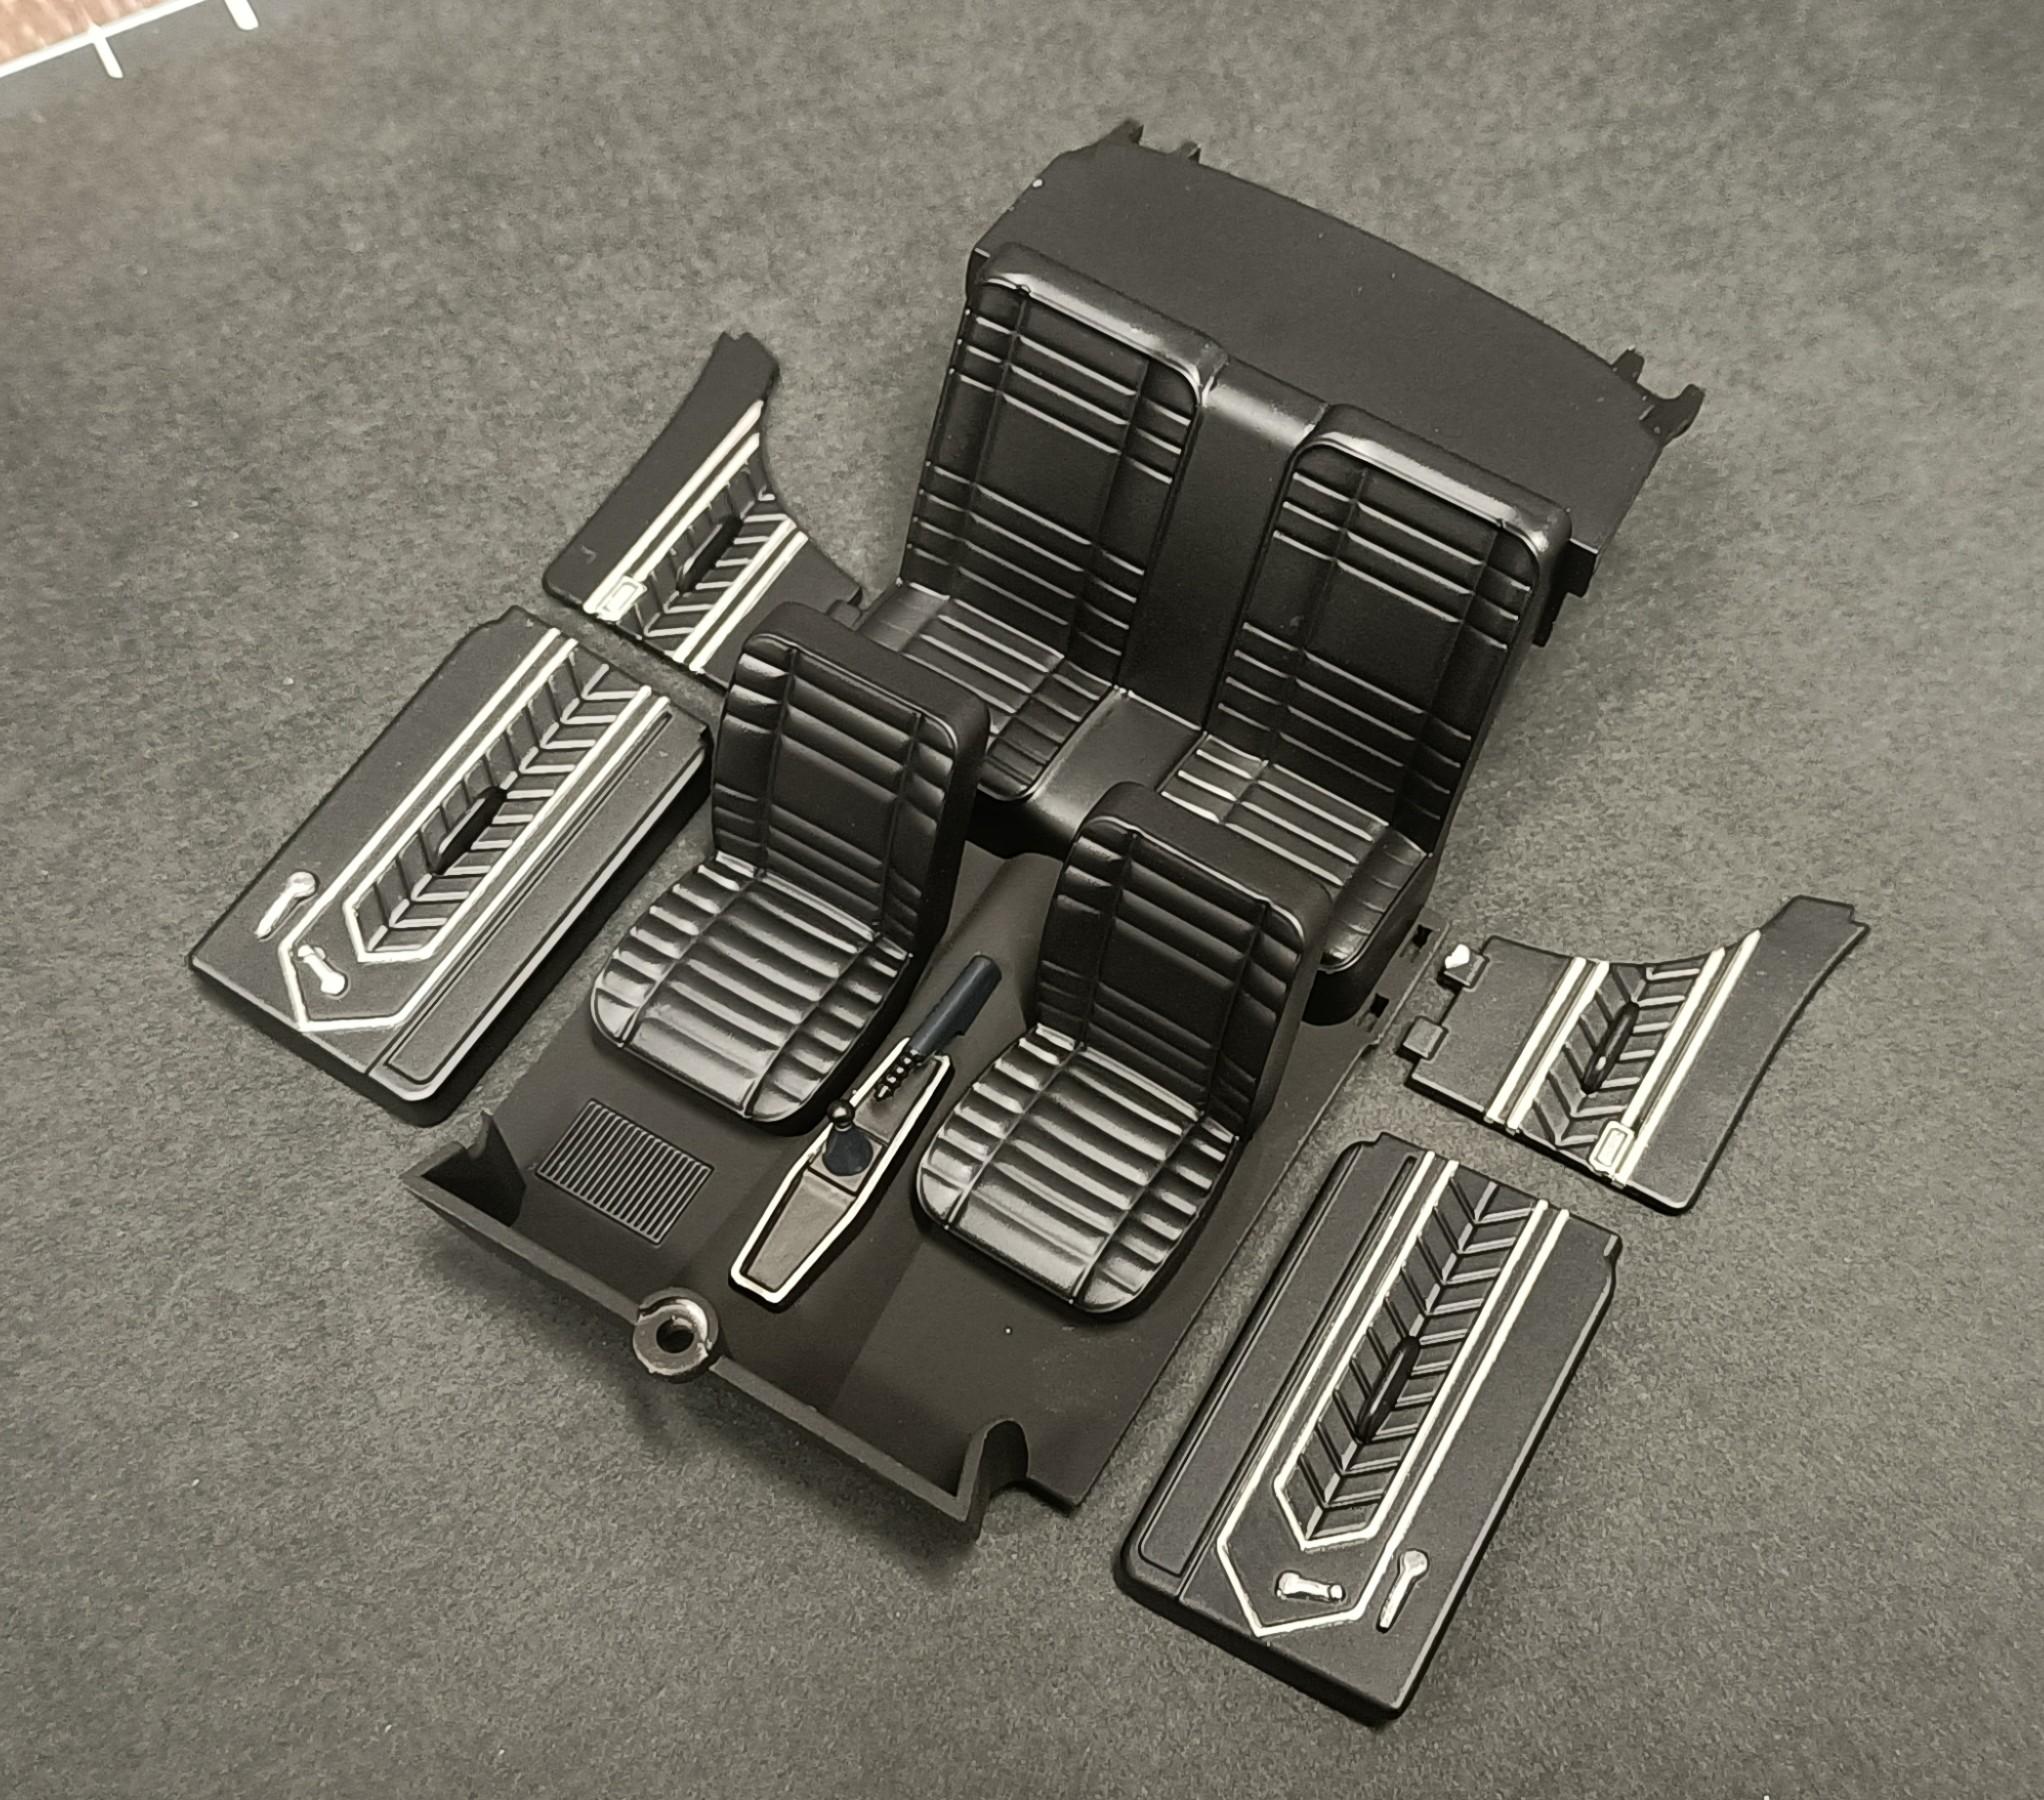
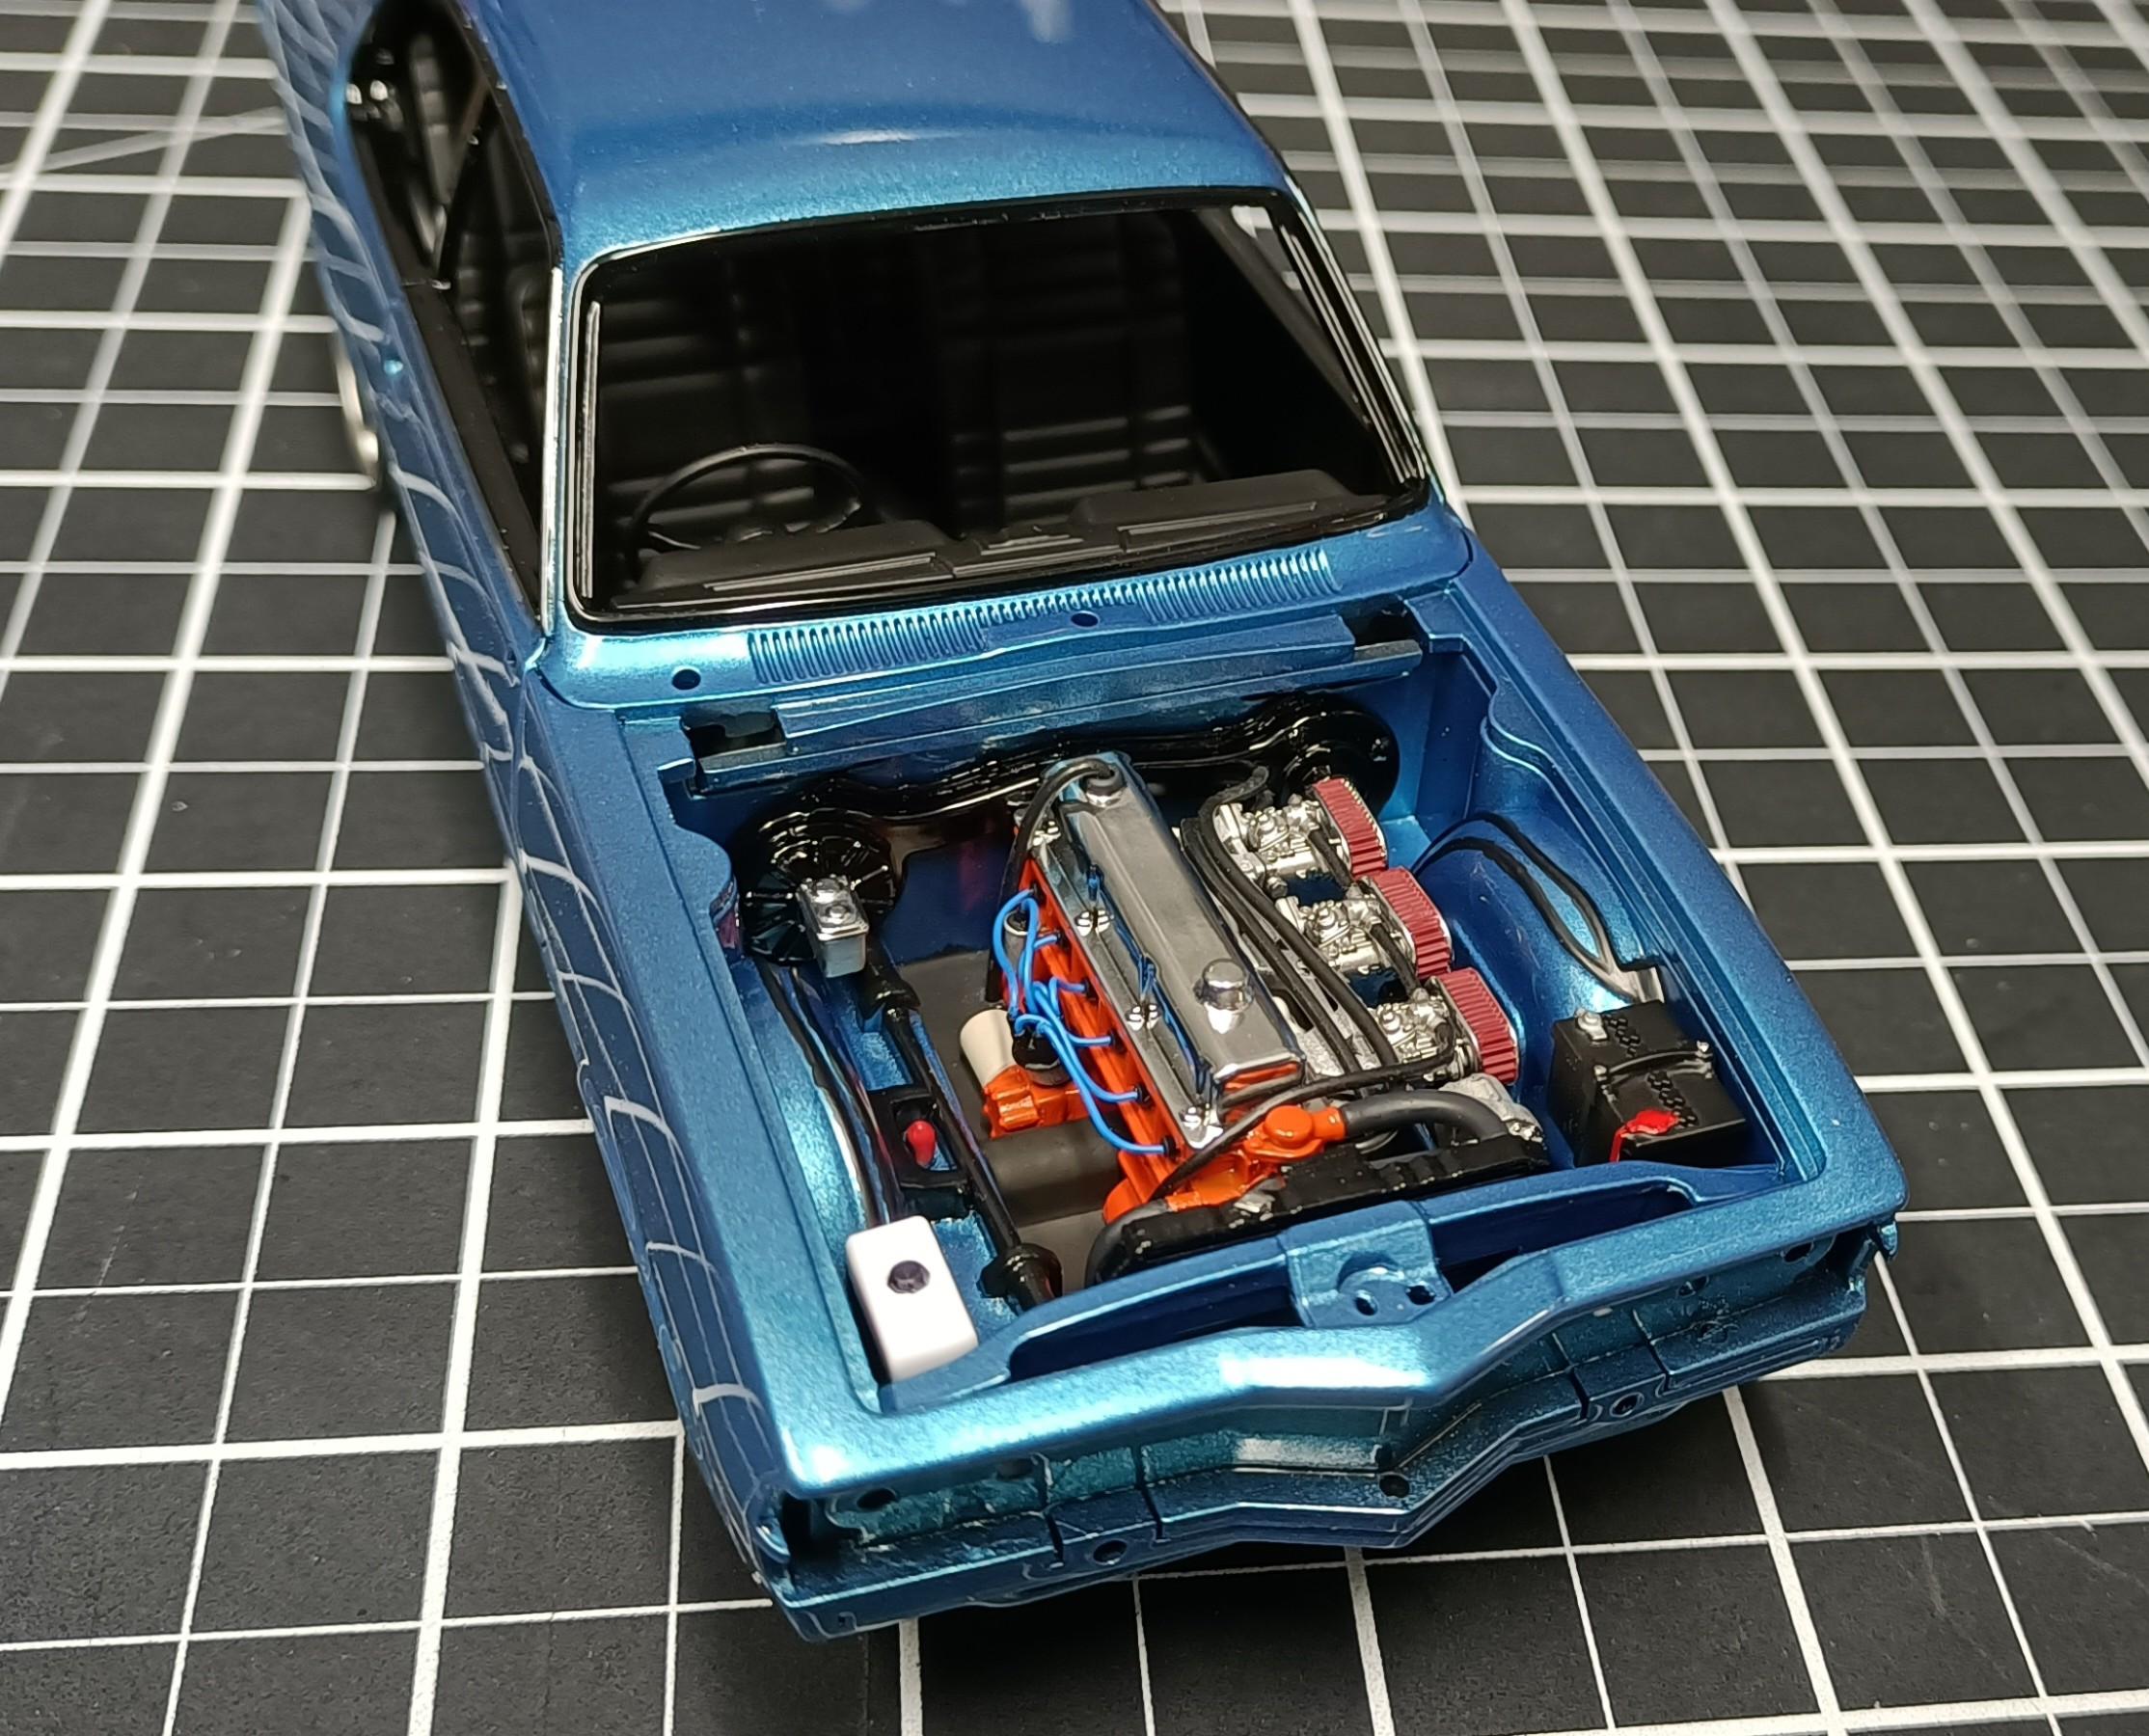
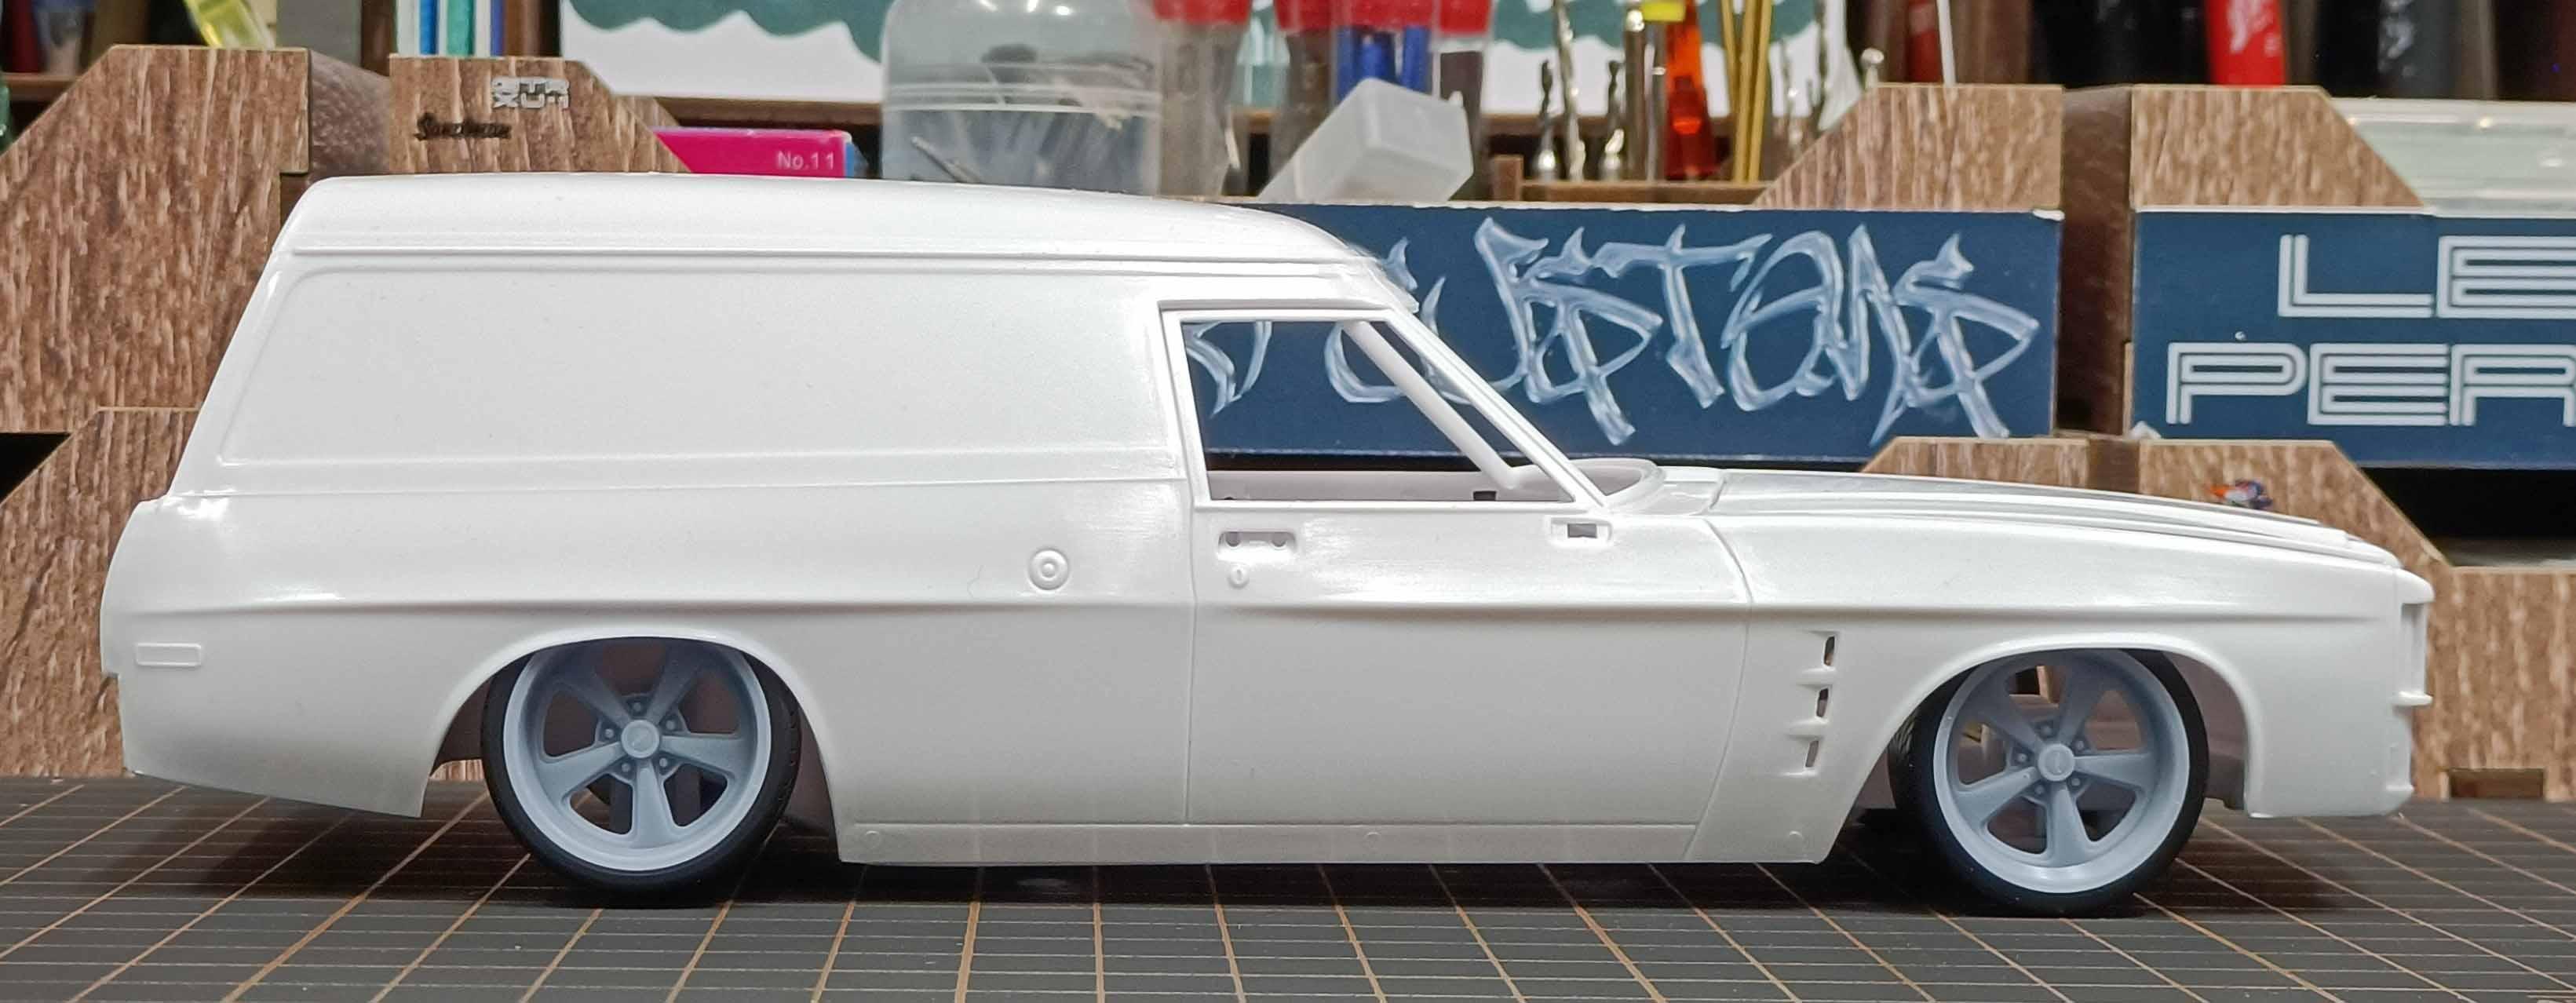
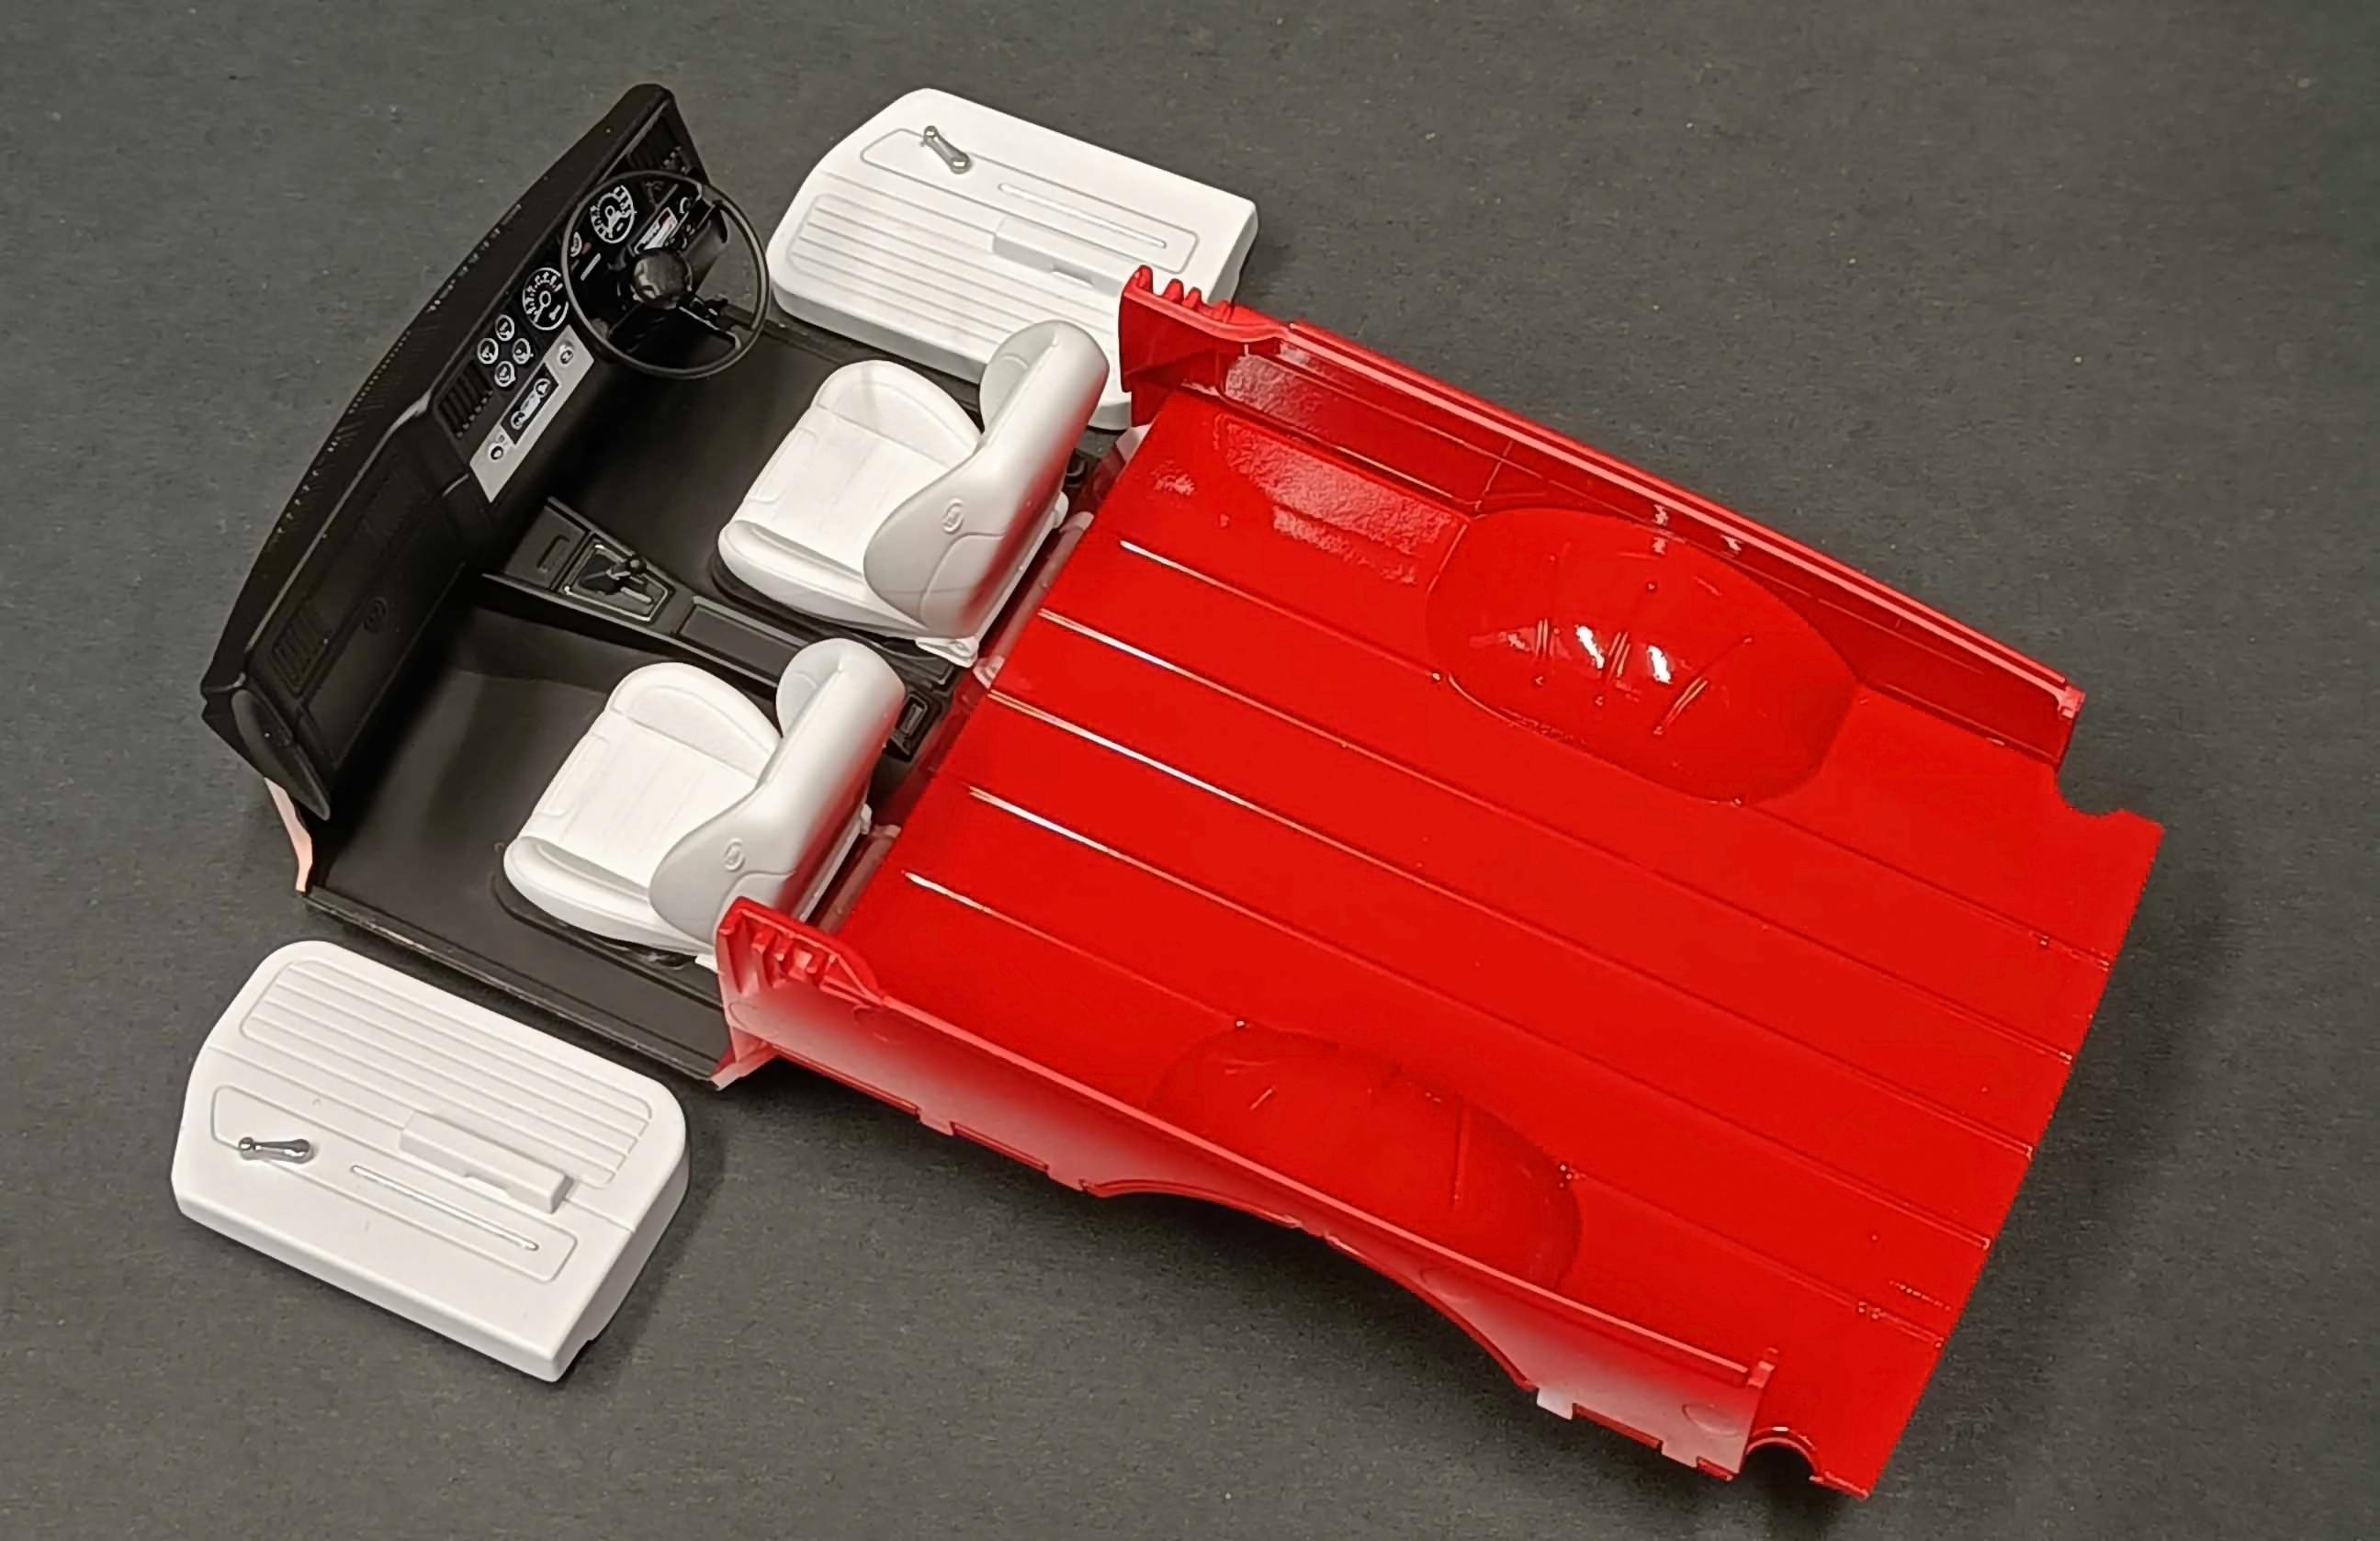
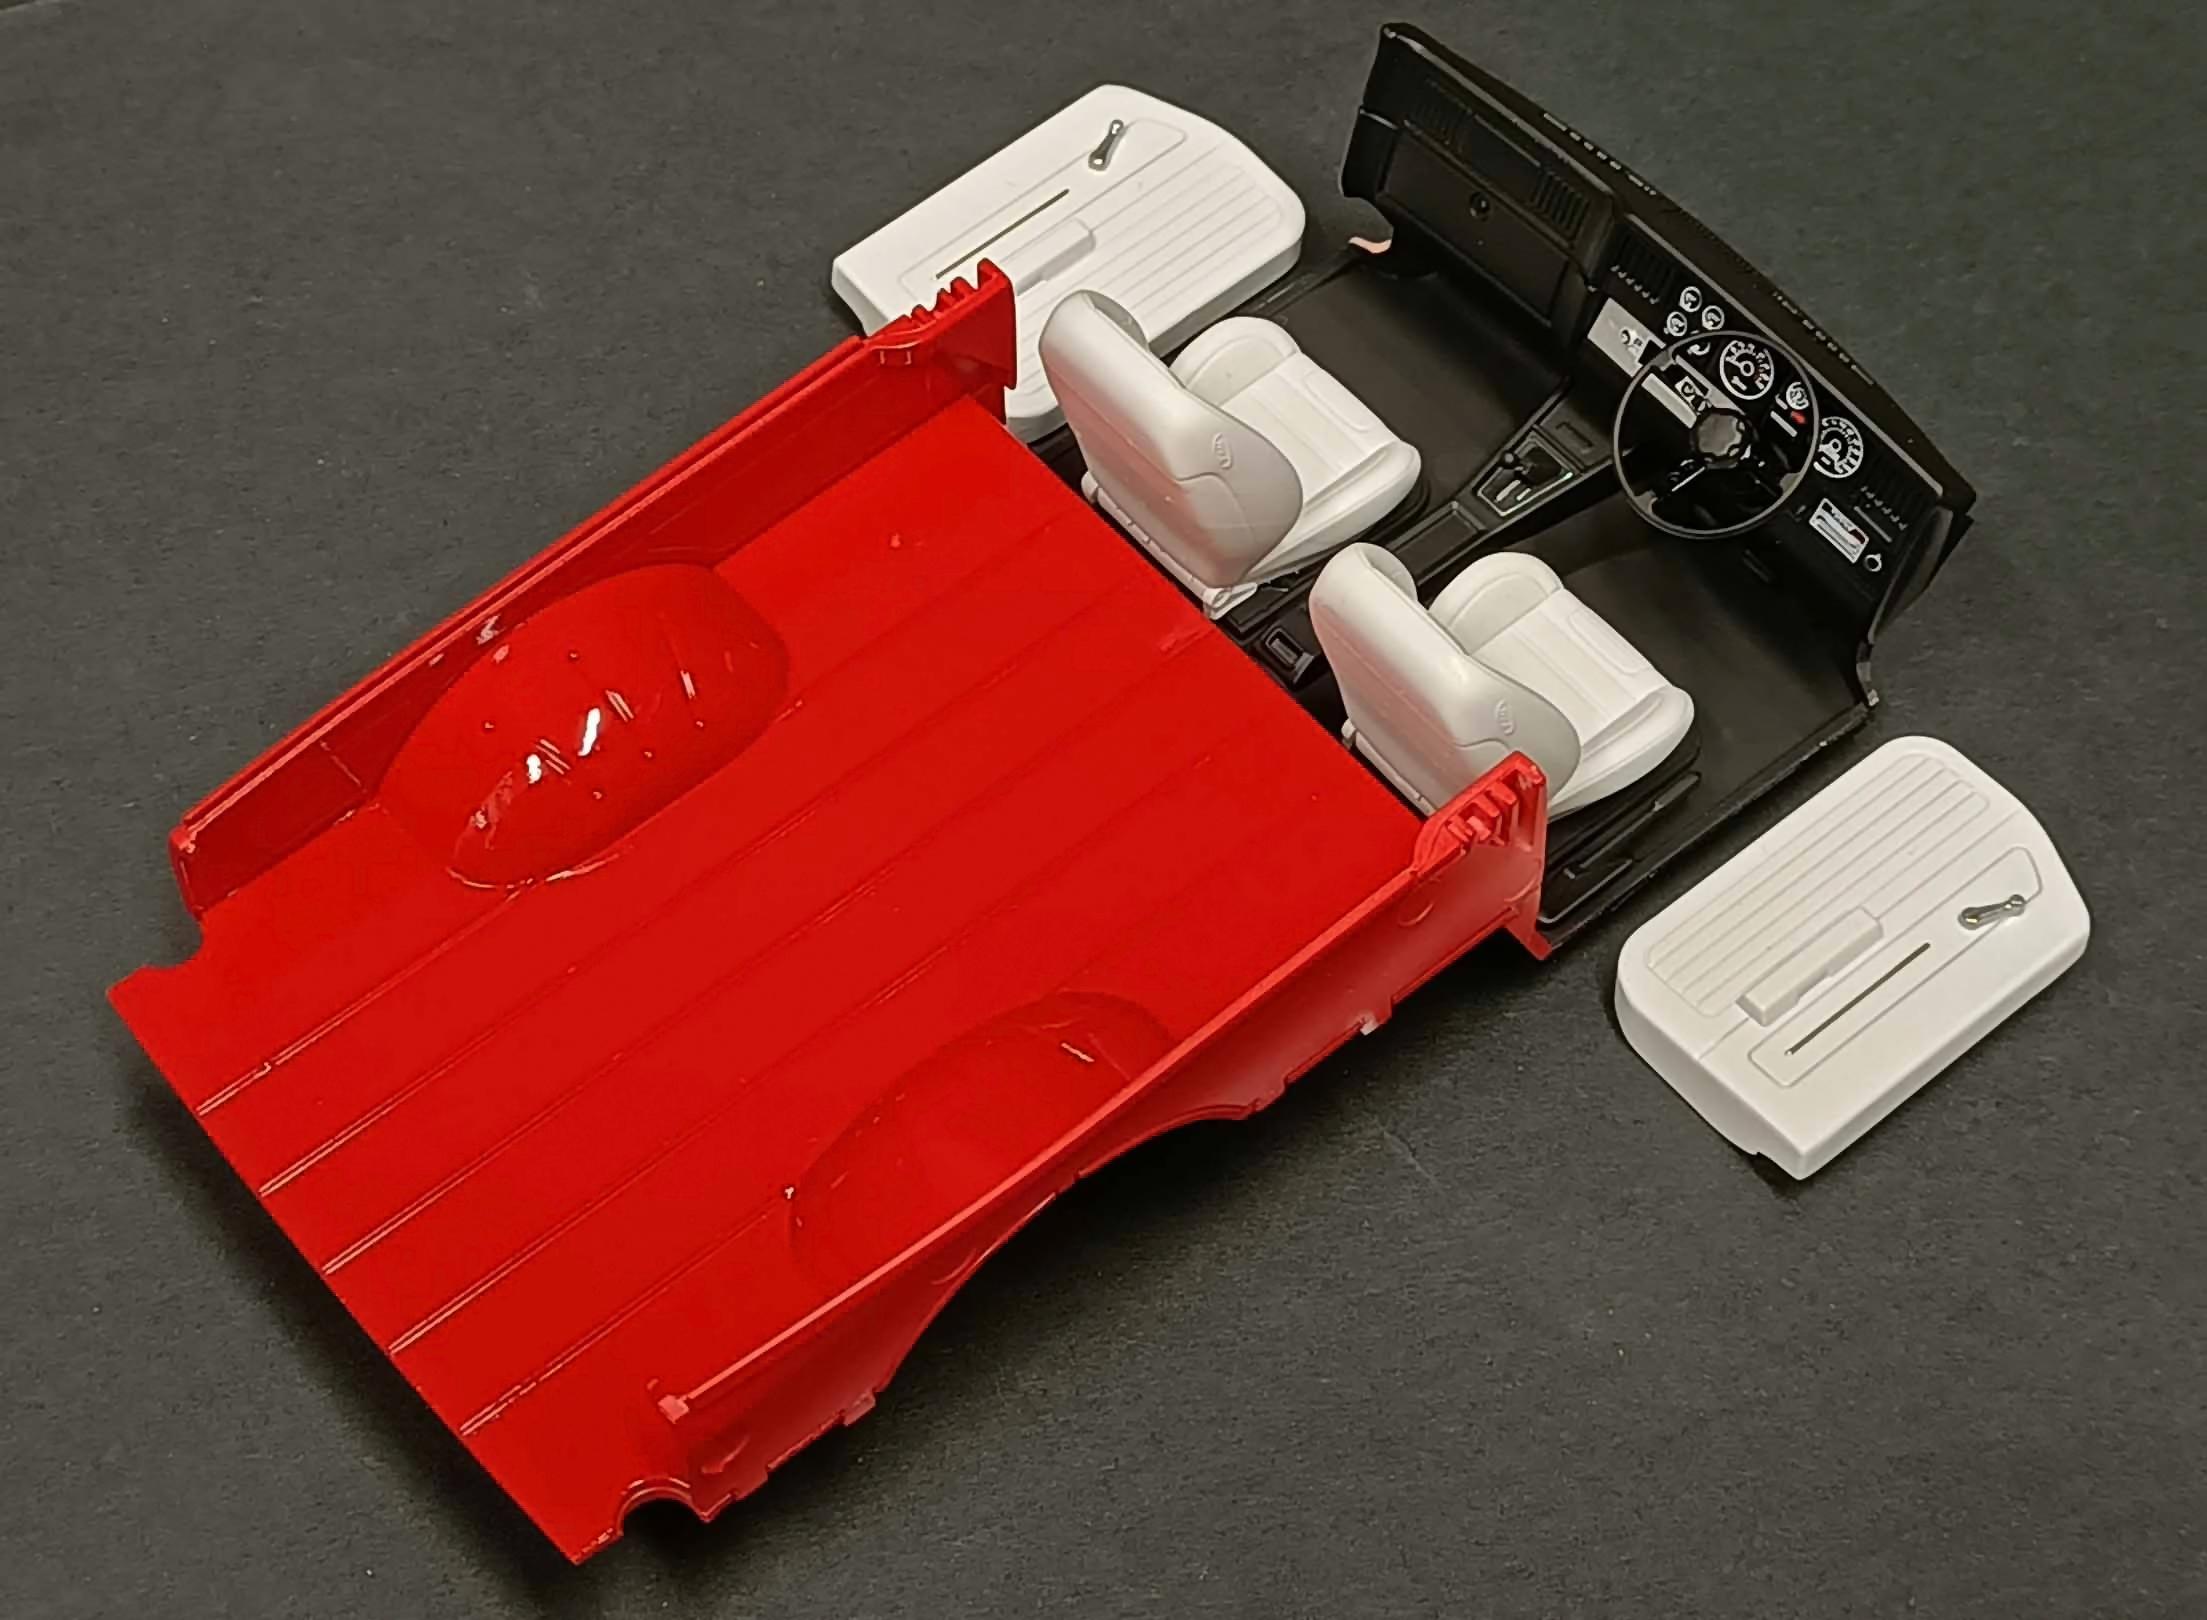
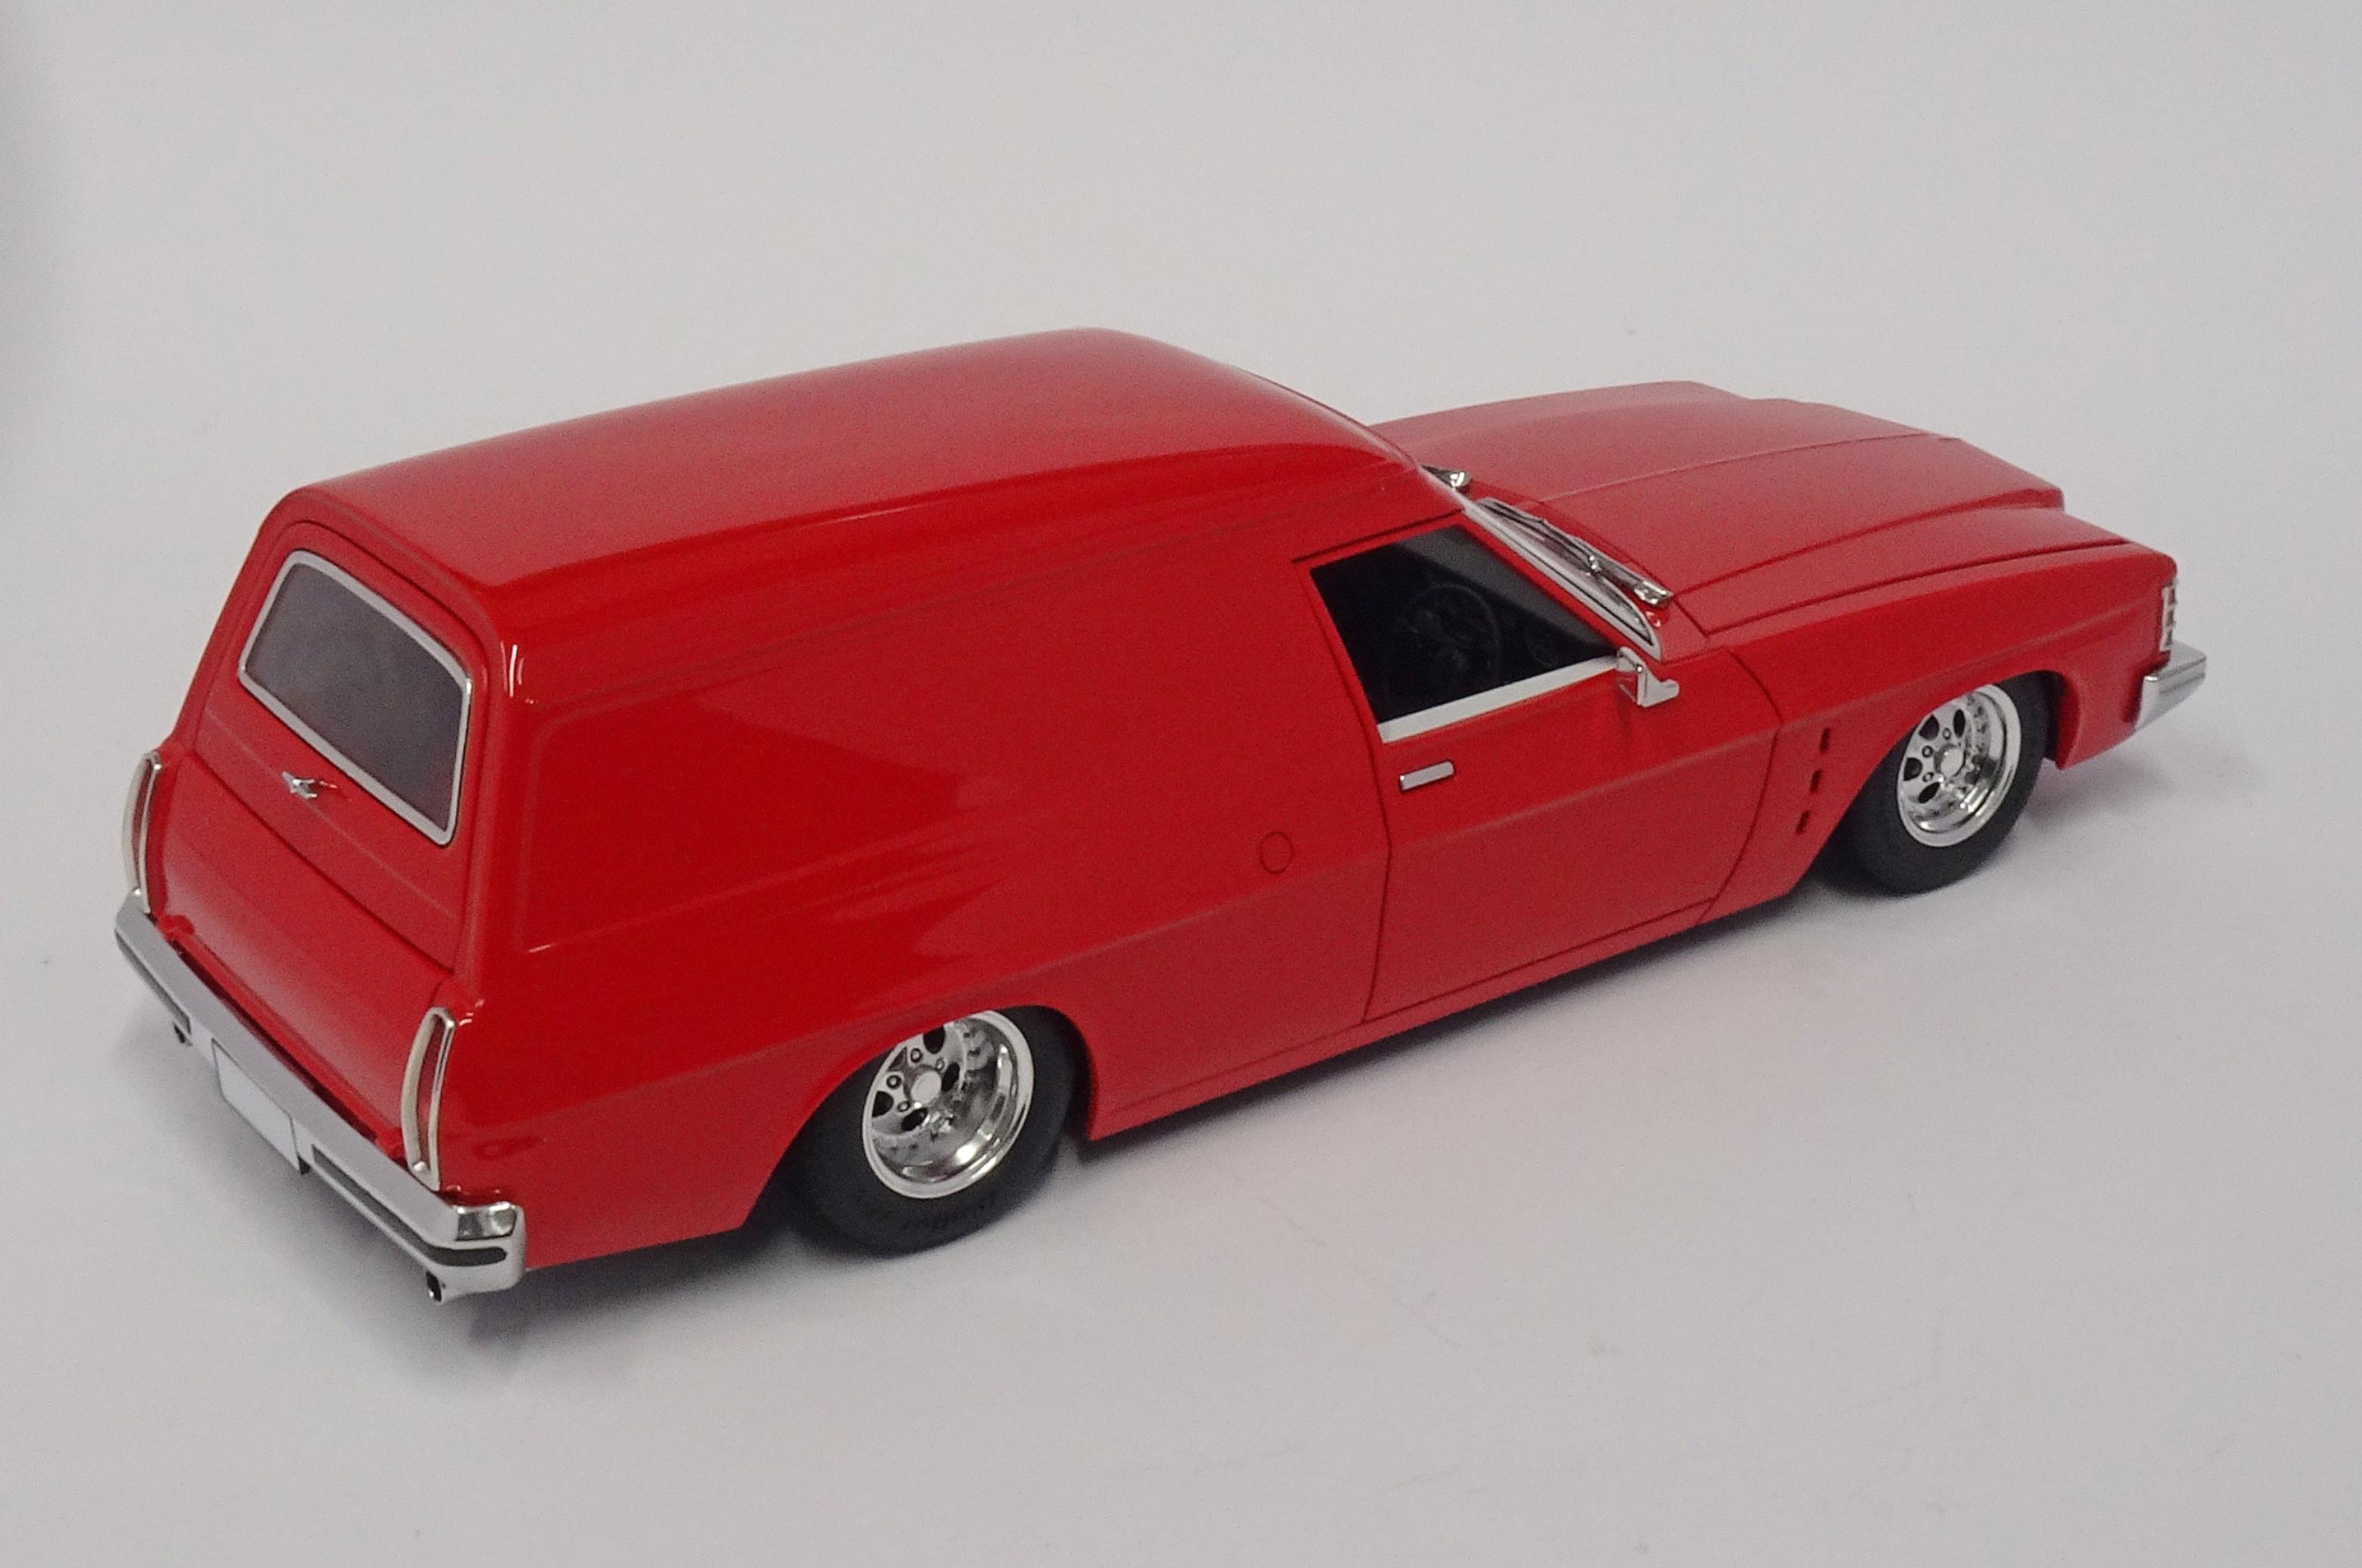
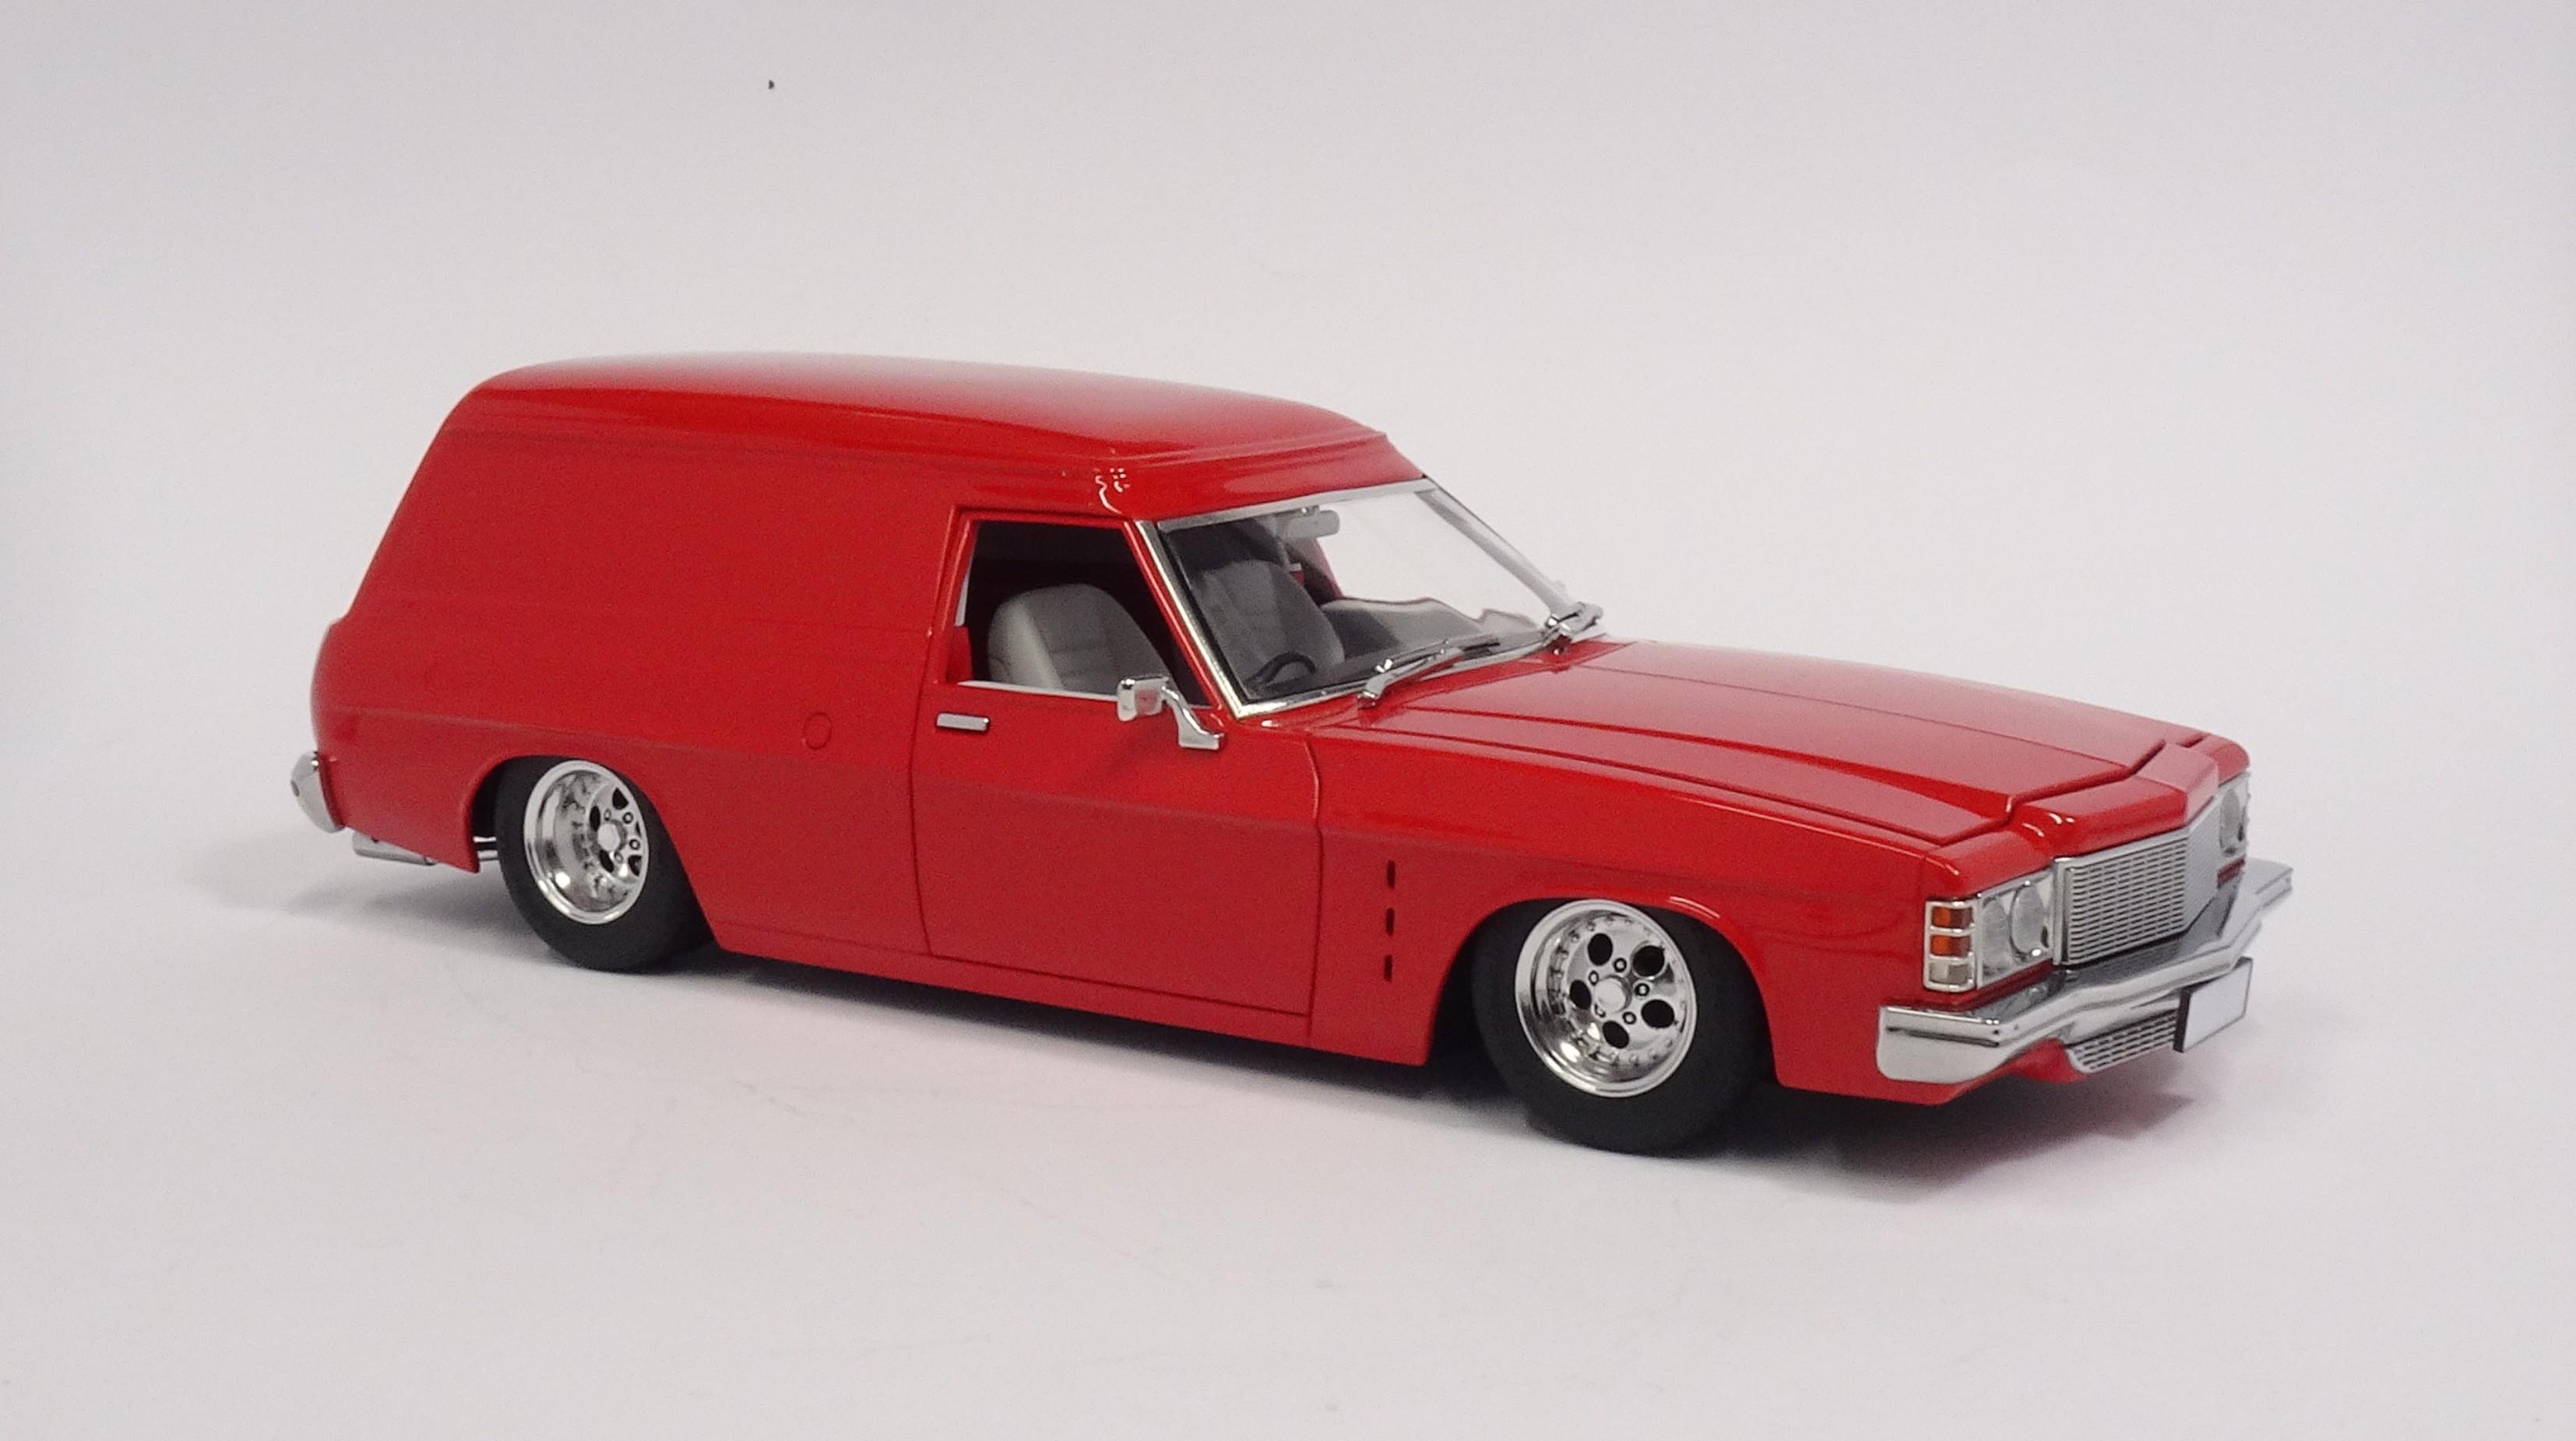
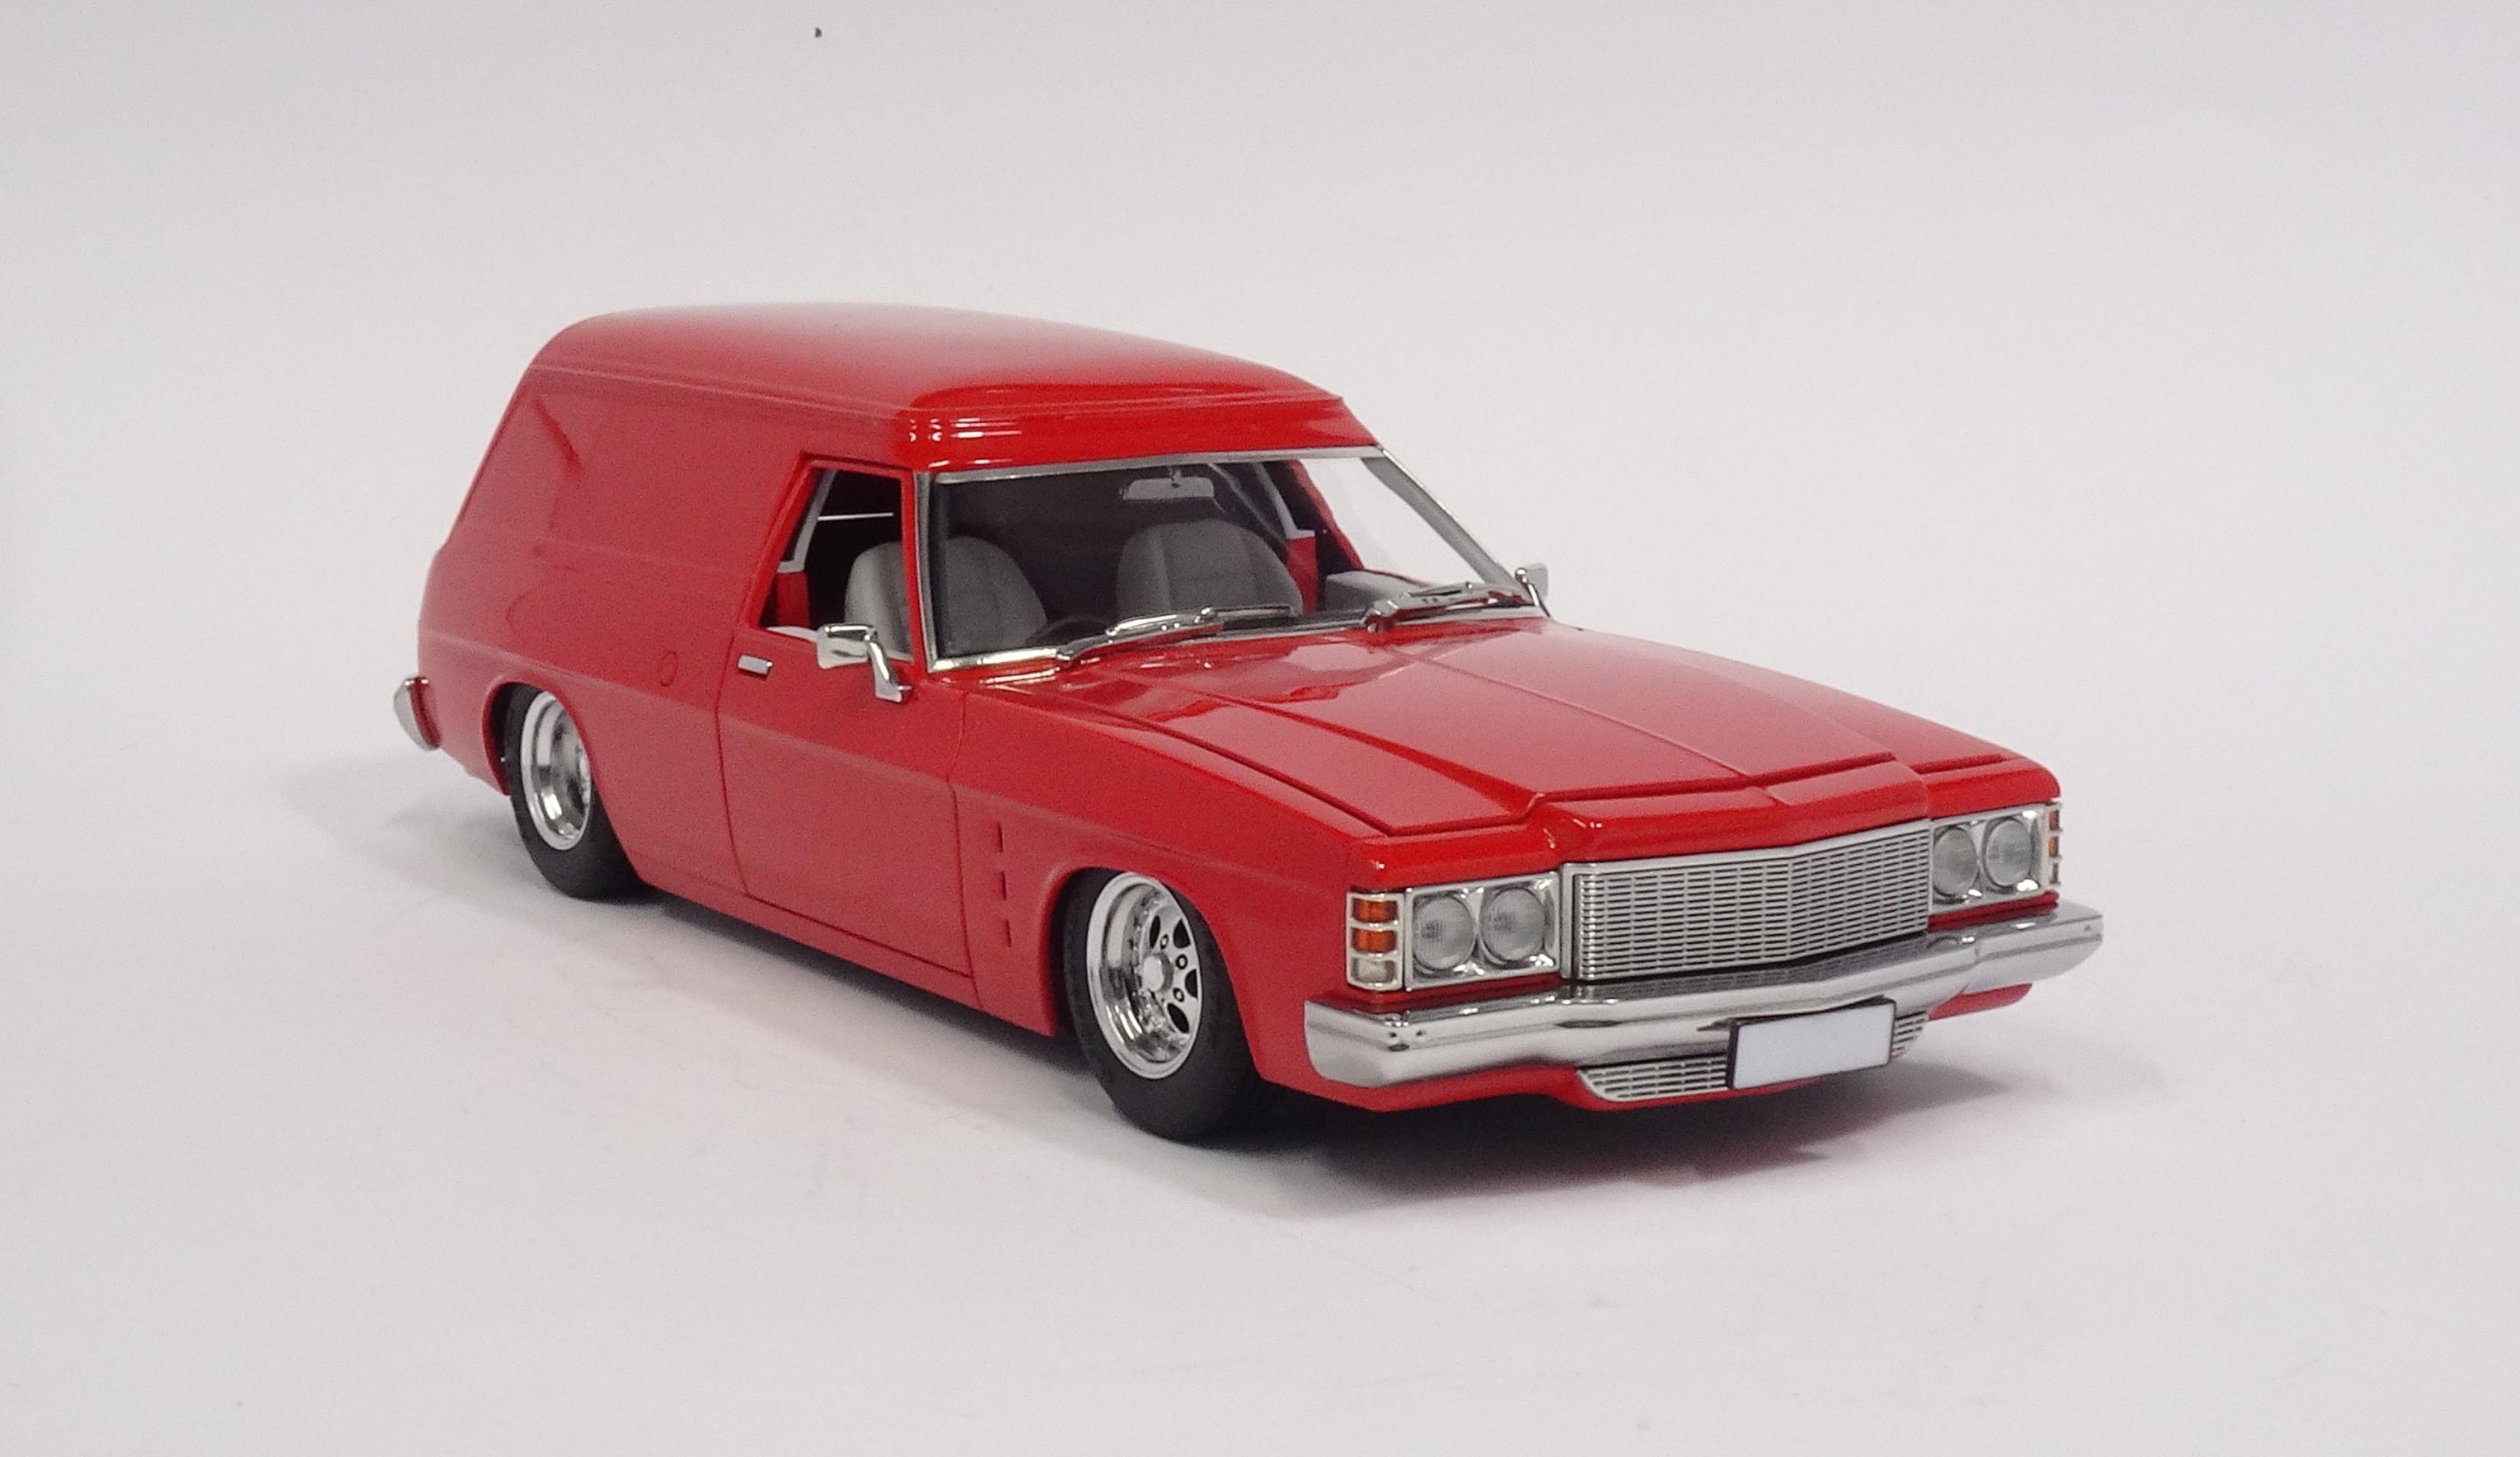
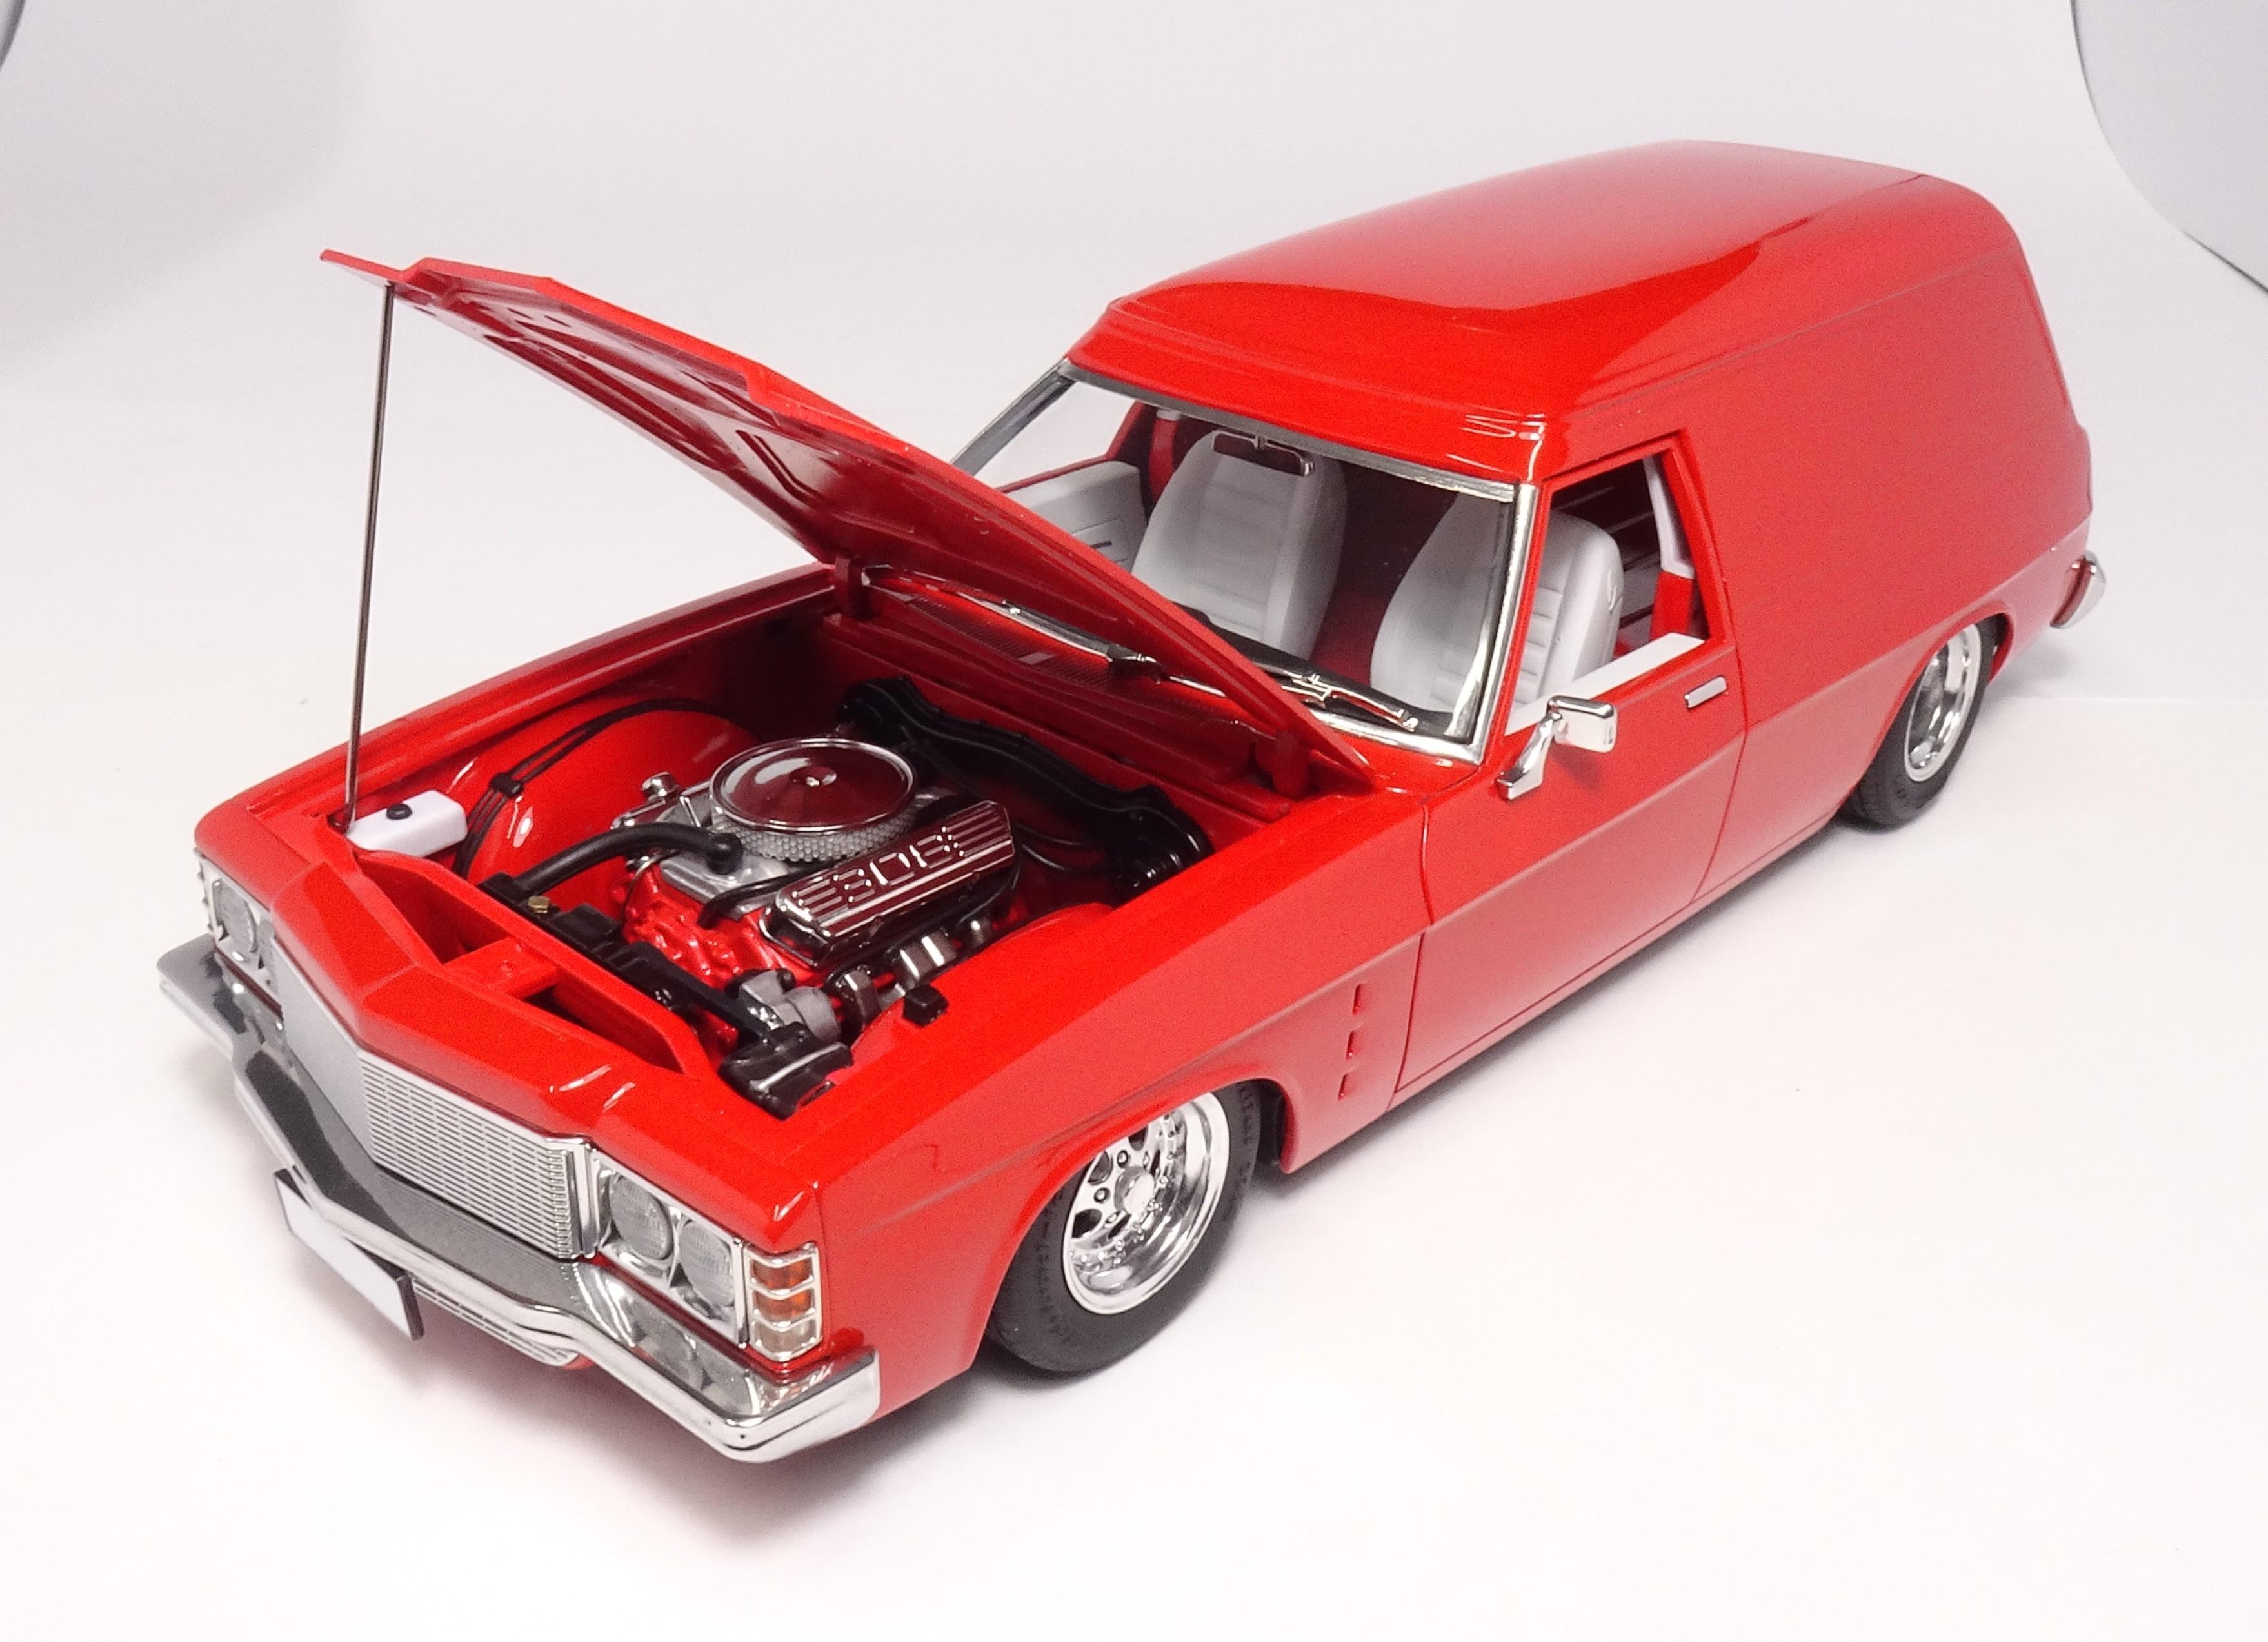
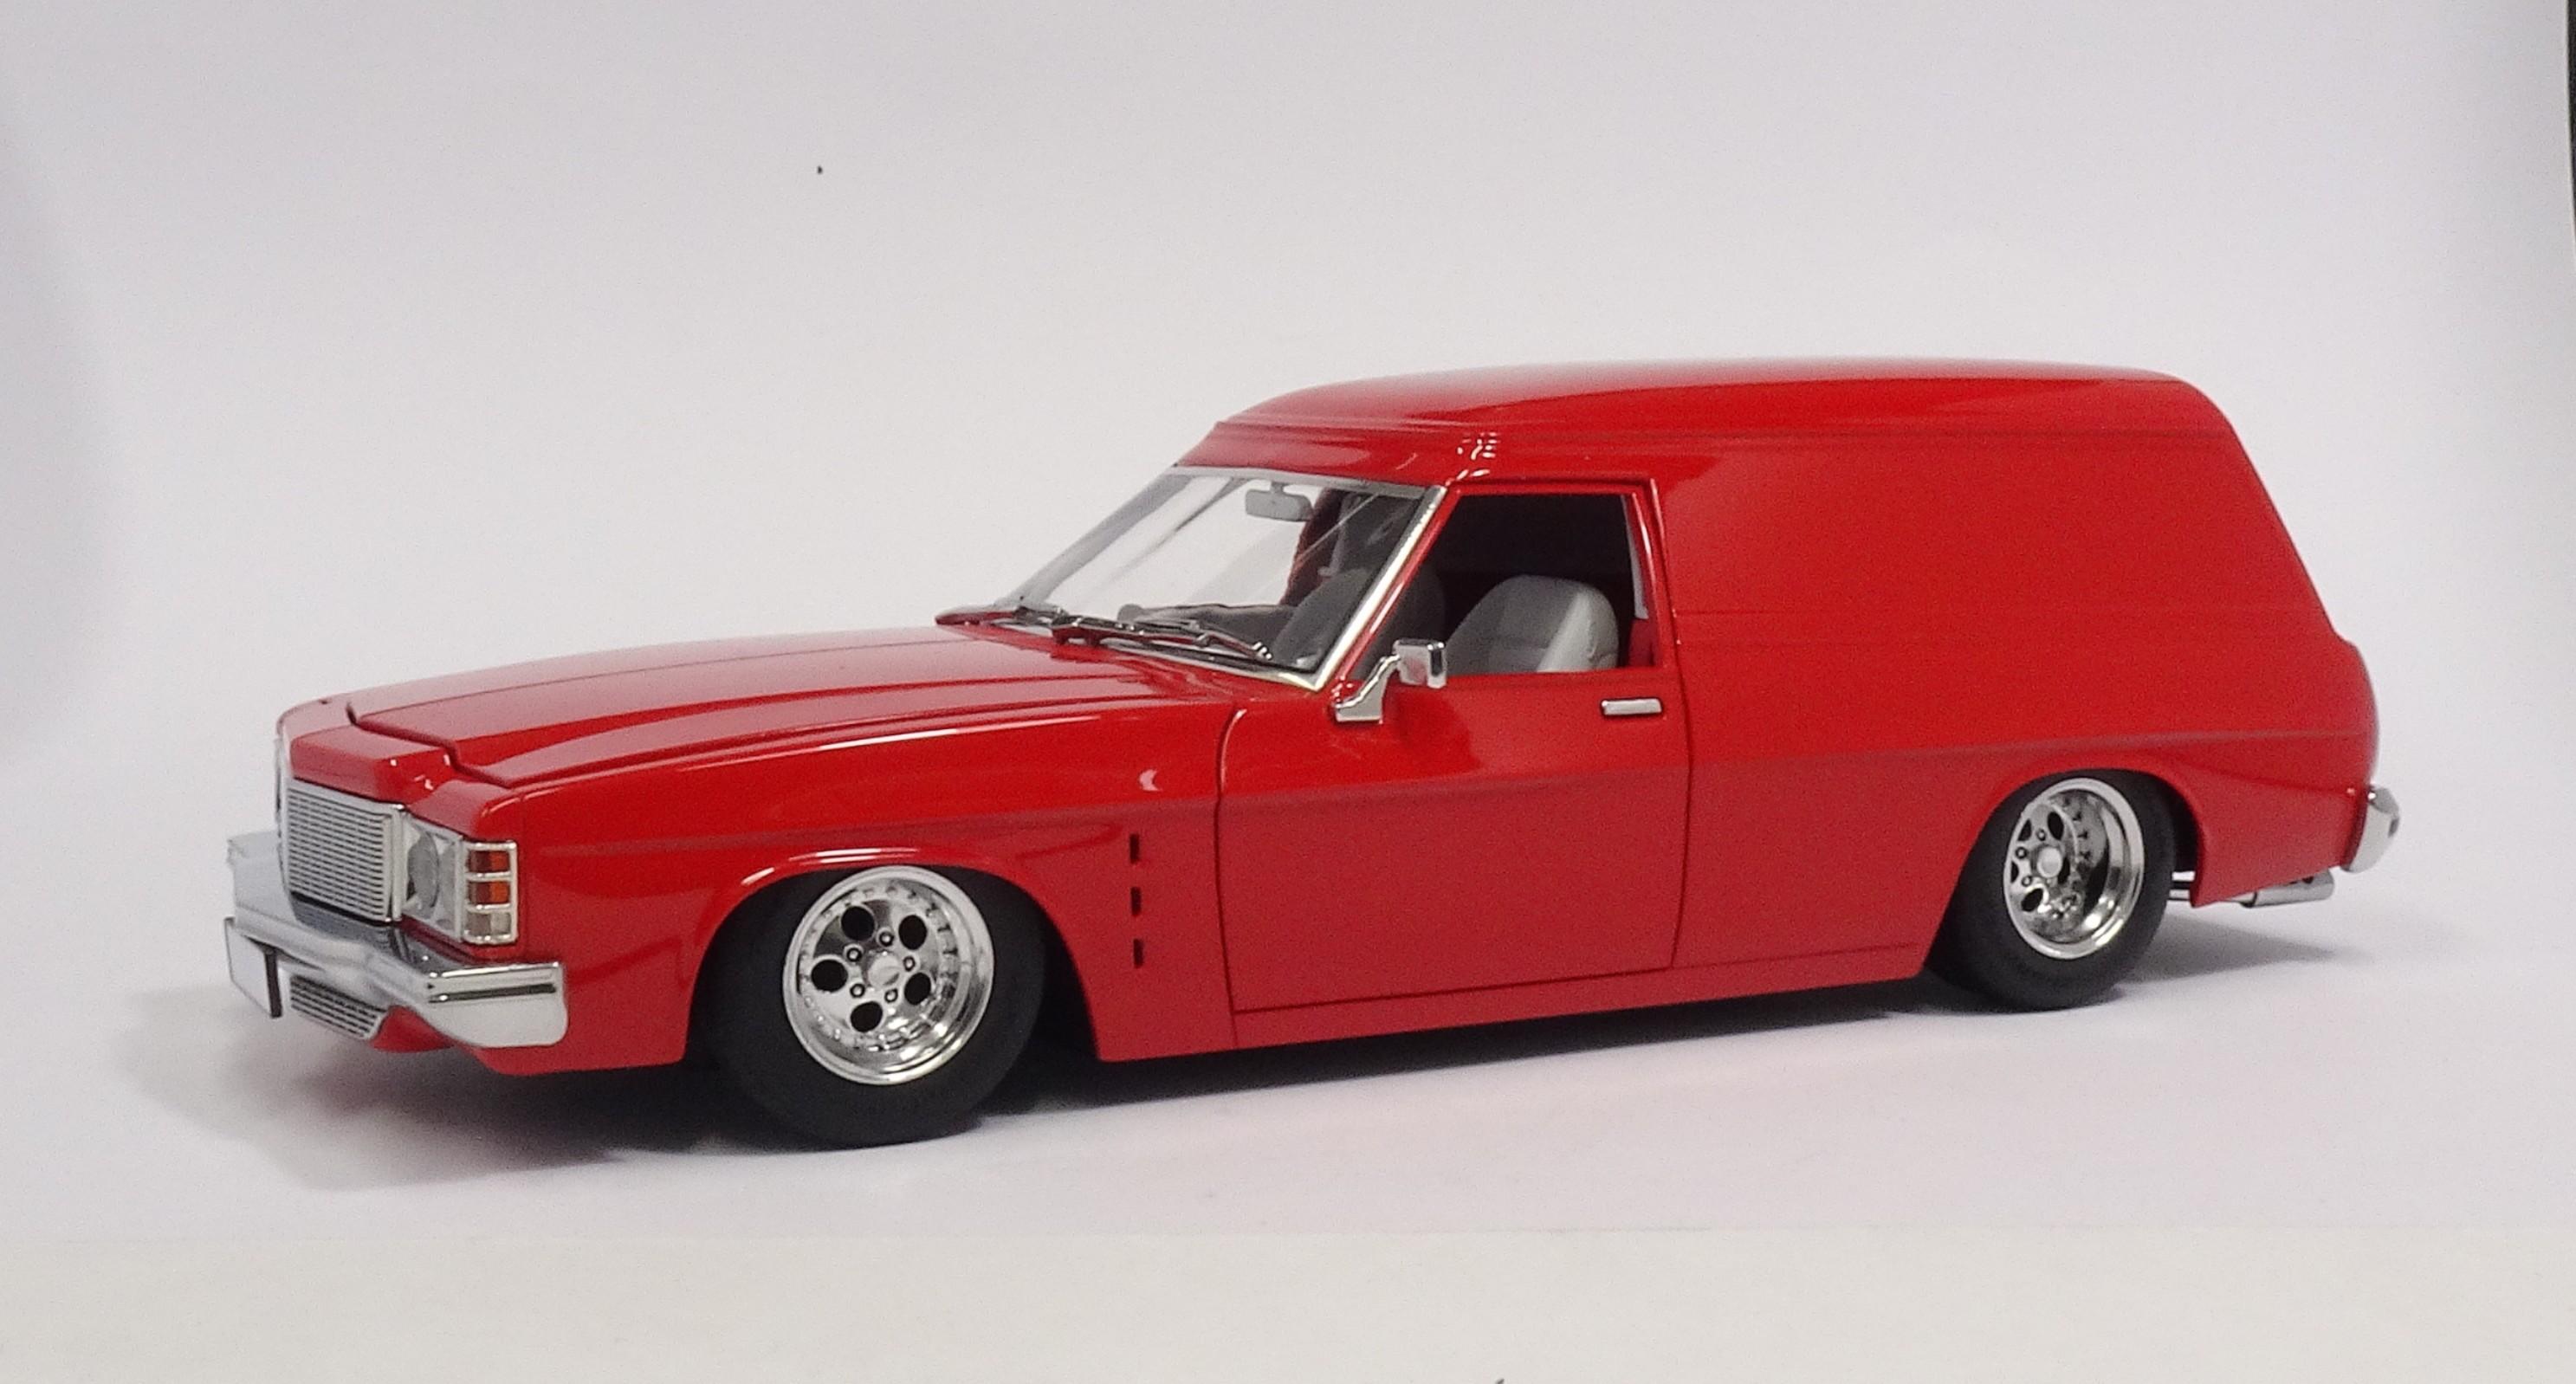
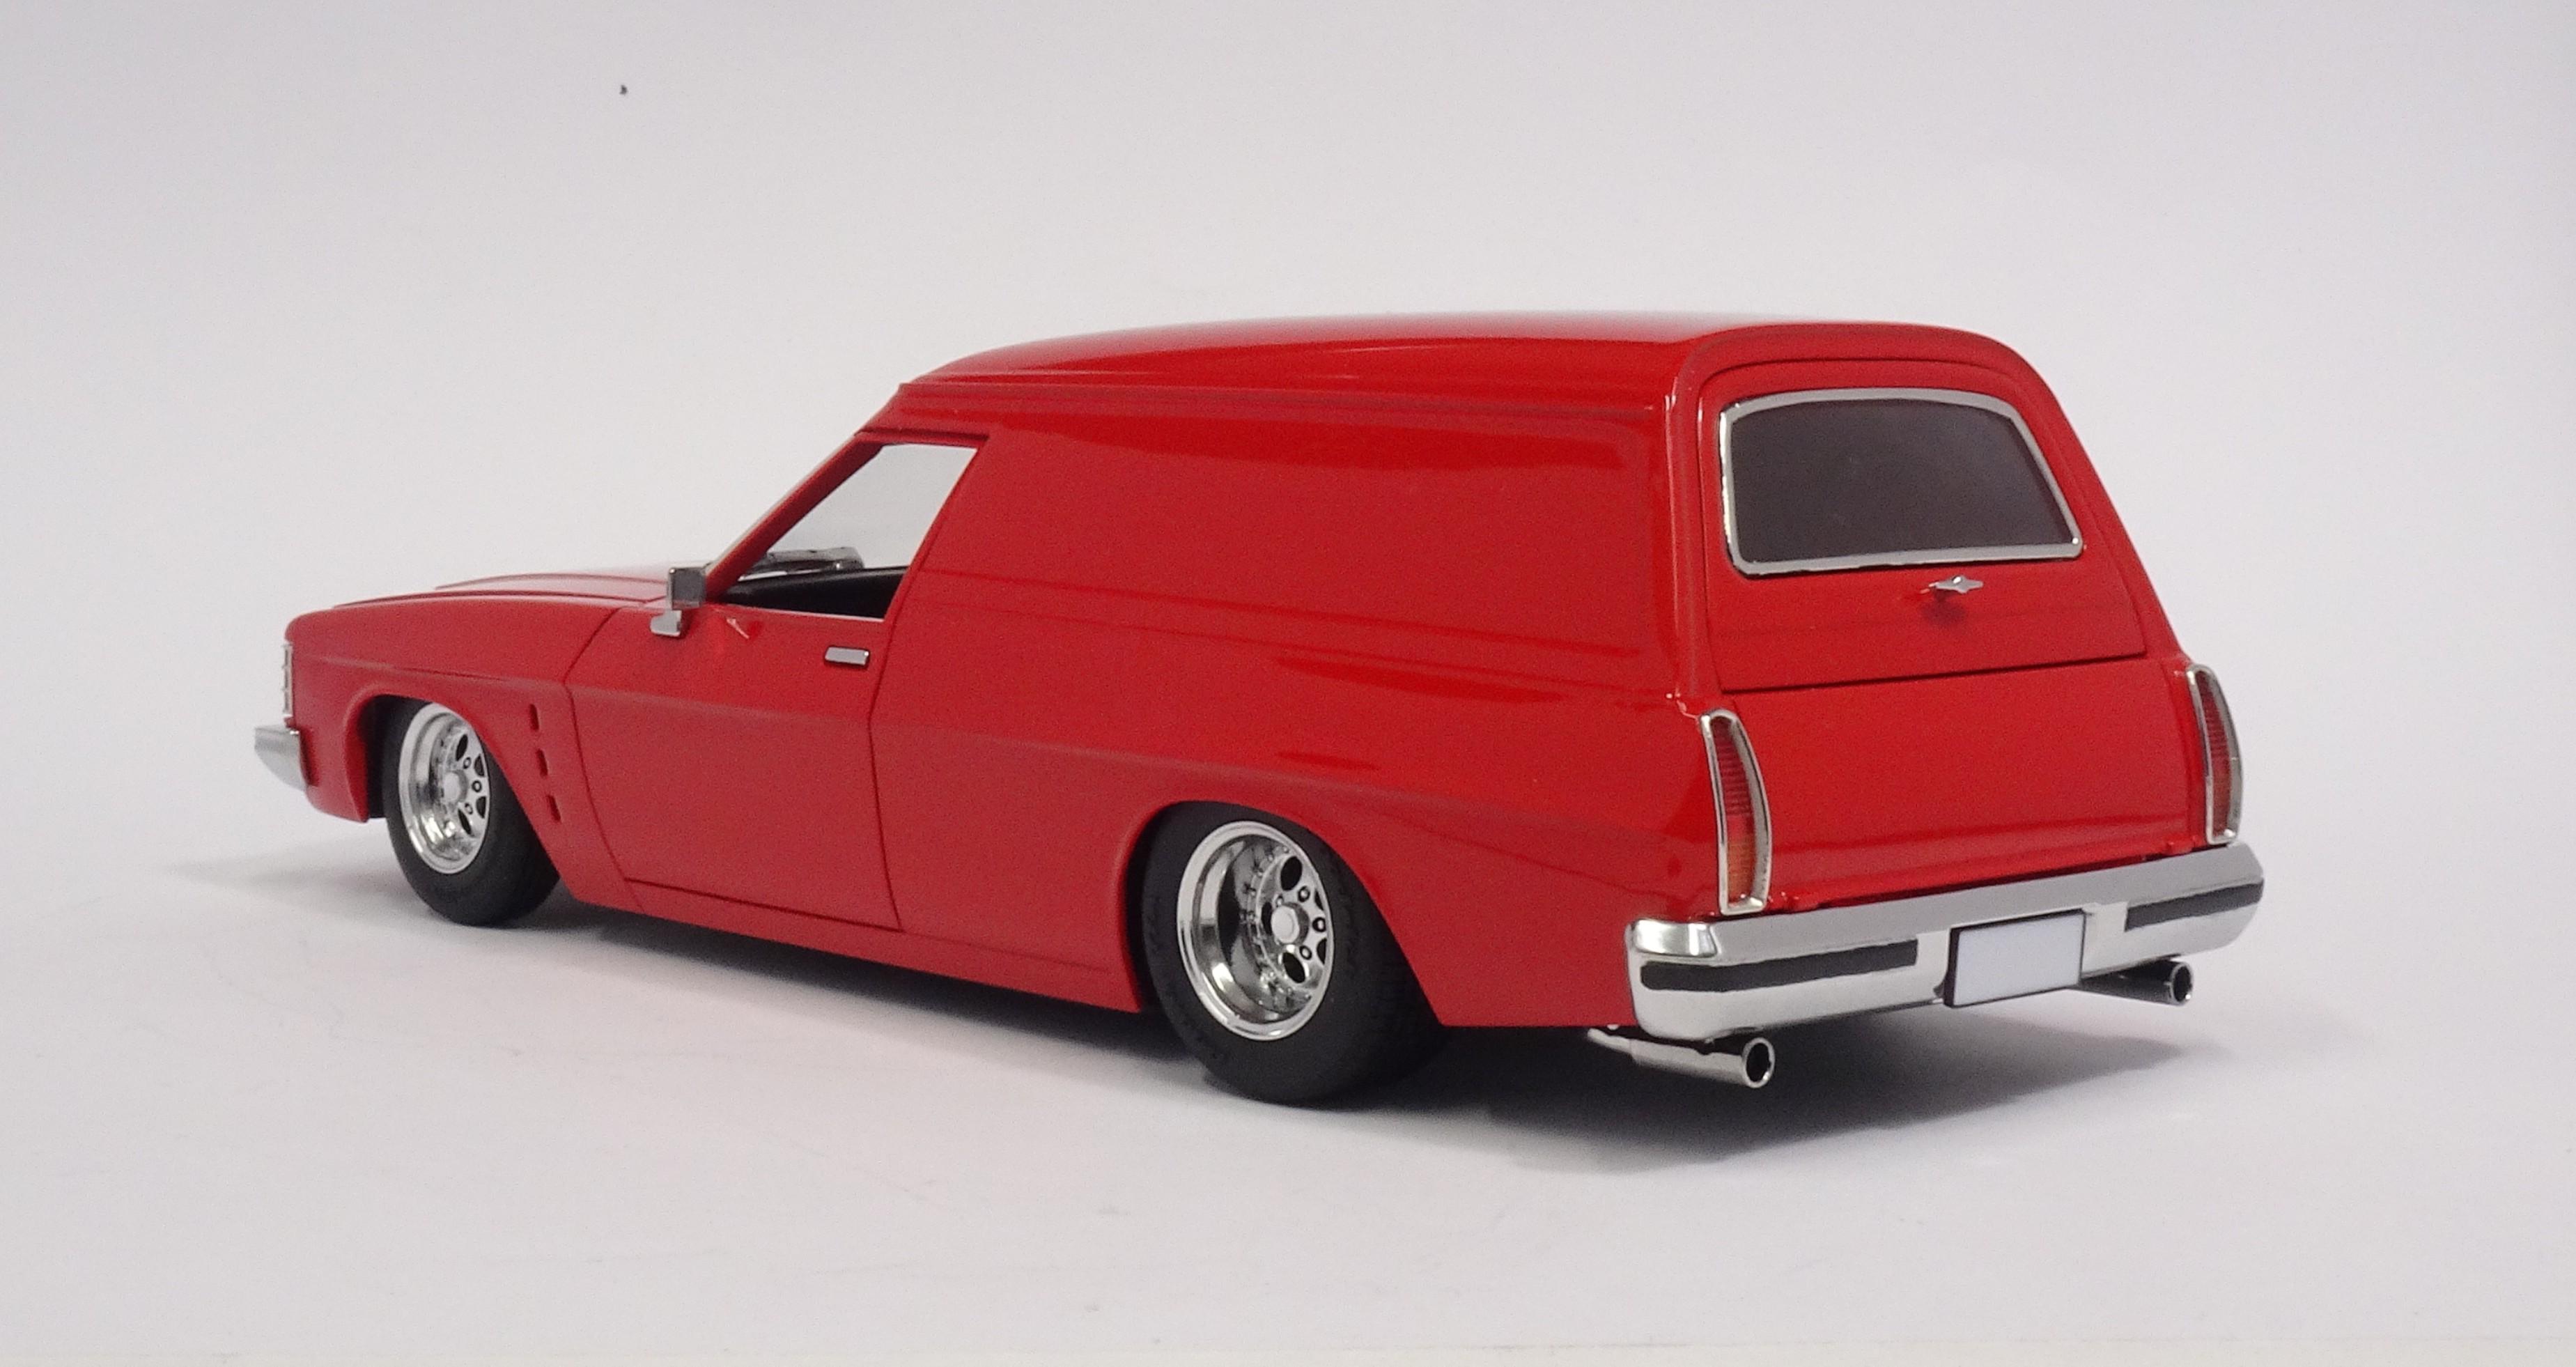
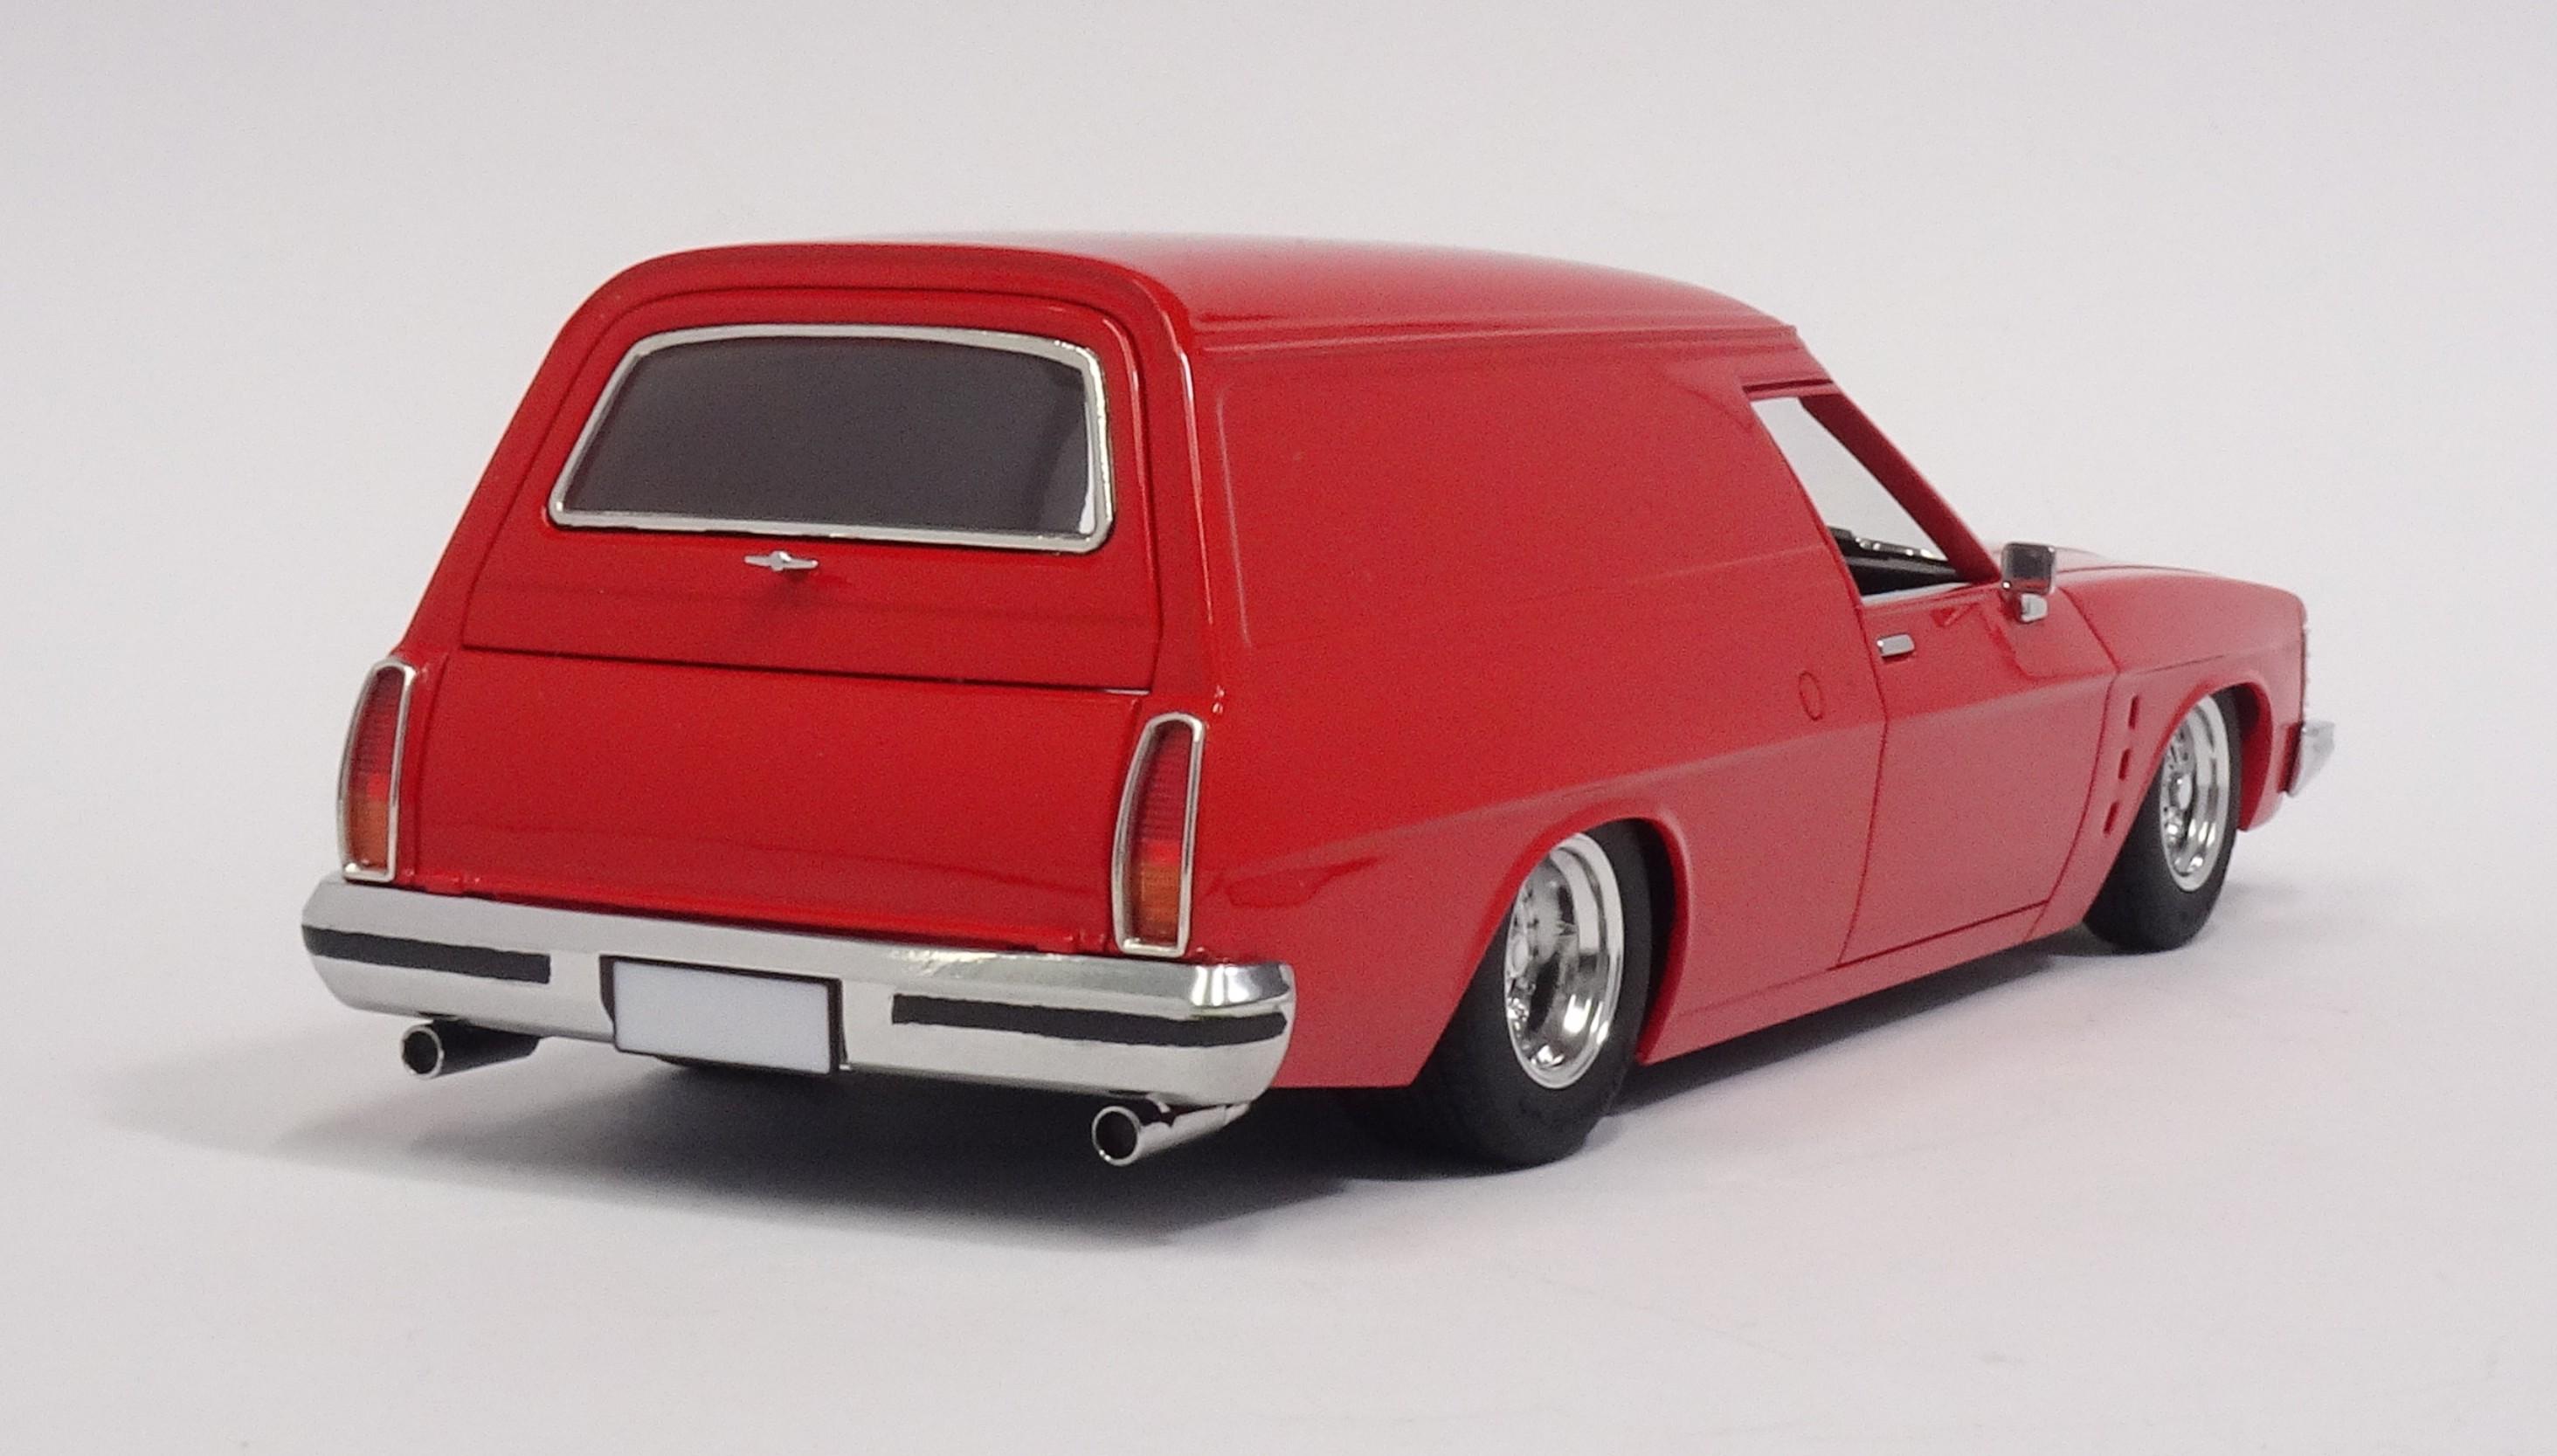
Back in the late 90's I went to trade school with a guy who had a HJ Sandman Panel Van. So this build is inspired by my memories of that Pano. I remember it being a twin headlight, so started with this kit. Not knowing the specific colour. I chose SMS paints Salamanca Red as it is similar to what I remember. Bumpers, grill, headlight surrounds, wipers, rear vision mirror, side mirrors, door handles, rear upper tail gate handle and exhaust tips are all painted with SMS Chrome Dark Tone. Bmf was applied to front corner indicators/turn signals, front and rear window trim and tail light surround trim. It also had Dragway Indy wheels, so after a search I found these American Racing Gambler rims which are very close to the same as the Indys. Painted with SMS Chrome Cold Tone. Could not remember the details of 1:1 interior, so went with some aftermarket seats that I 3D printed and painted them and the inner door panels Vallejo Mecha off white I recall the engine bay having some chrome dress up parts like the air filter and valve covers. So I modified the kit air filter cutting off the snout, painted with SMS Chrome Cold Tone and added some photo etch mesh. And I 3D printed the valve covers and again painted with SMS Chrome Cold Tone, which were sourced from Morries Kustoms. They are a true old school classic dress up part specific for Holden 308 engines. Just a mediocre build for the display shelf 🤣 jokes aside I'm very happy with it being a oob 2 week build.