Cool Hand
-
Posts
2,087 -
Joined
-
Last visited
Content Type
Profiles
Forums
Events
Gallery
Everything posted by Cool Hand
-

Datsun 720 Drift Ute
Cool Hand replied to Cool Hand's topic in Other Racing: Road Racing, Salt Flat Racers
Thanks for all the comments, much appreciated. And what a privilege to get a comment from @Ace-Garageguy thanks Bill 😁 -
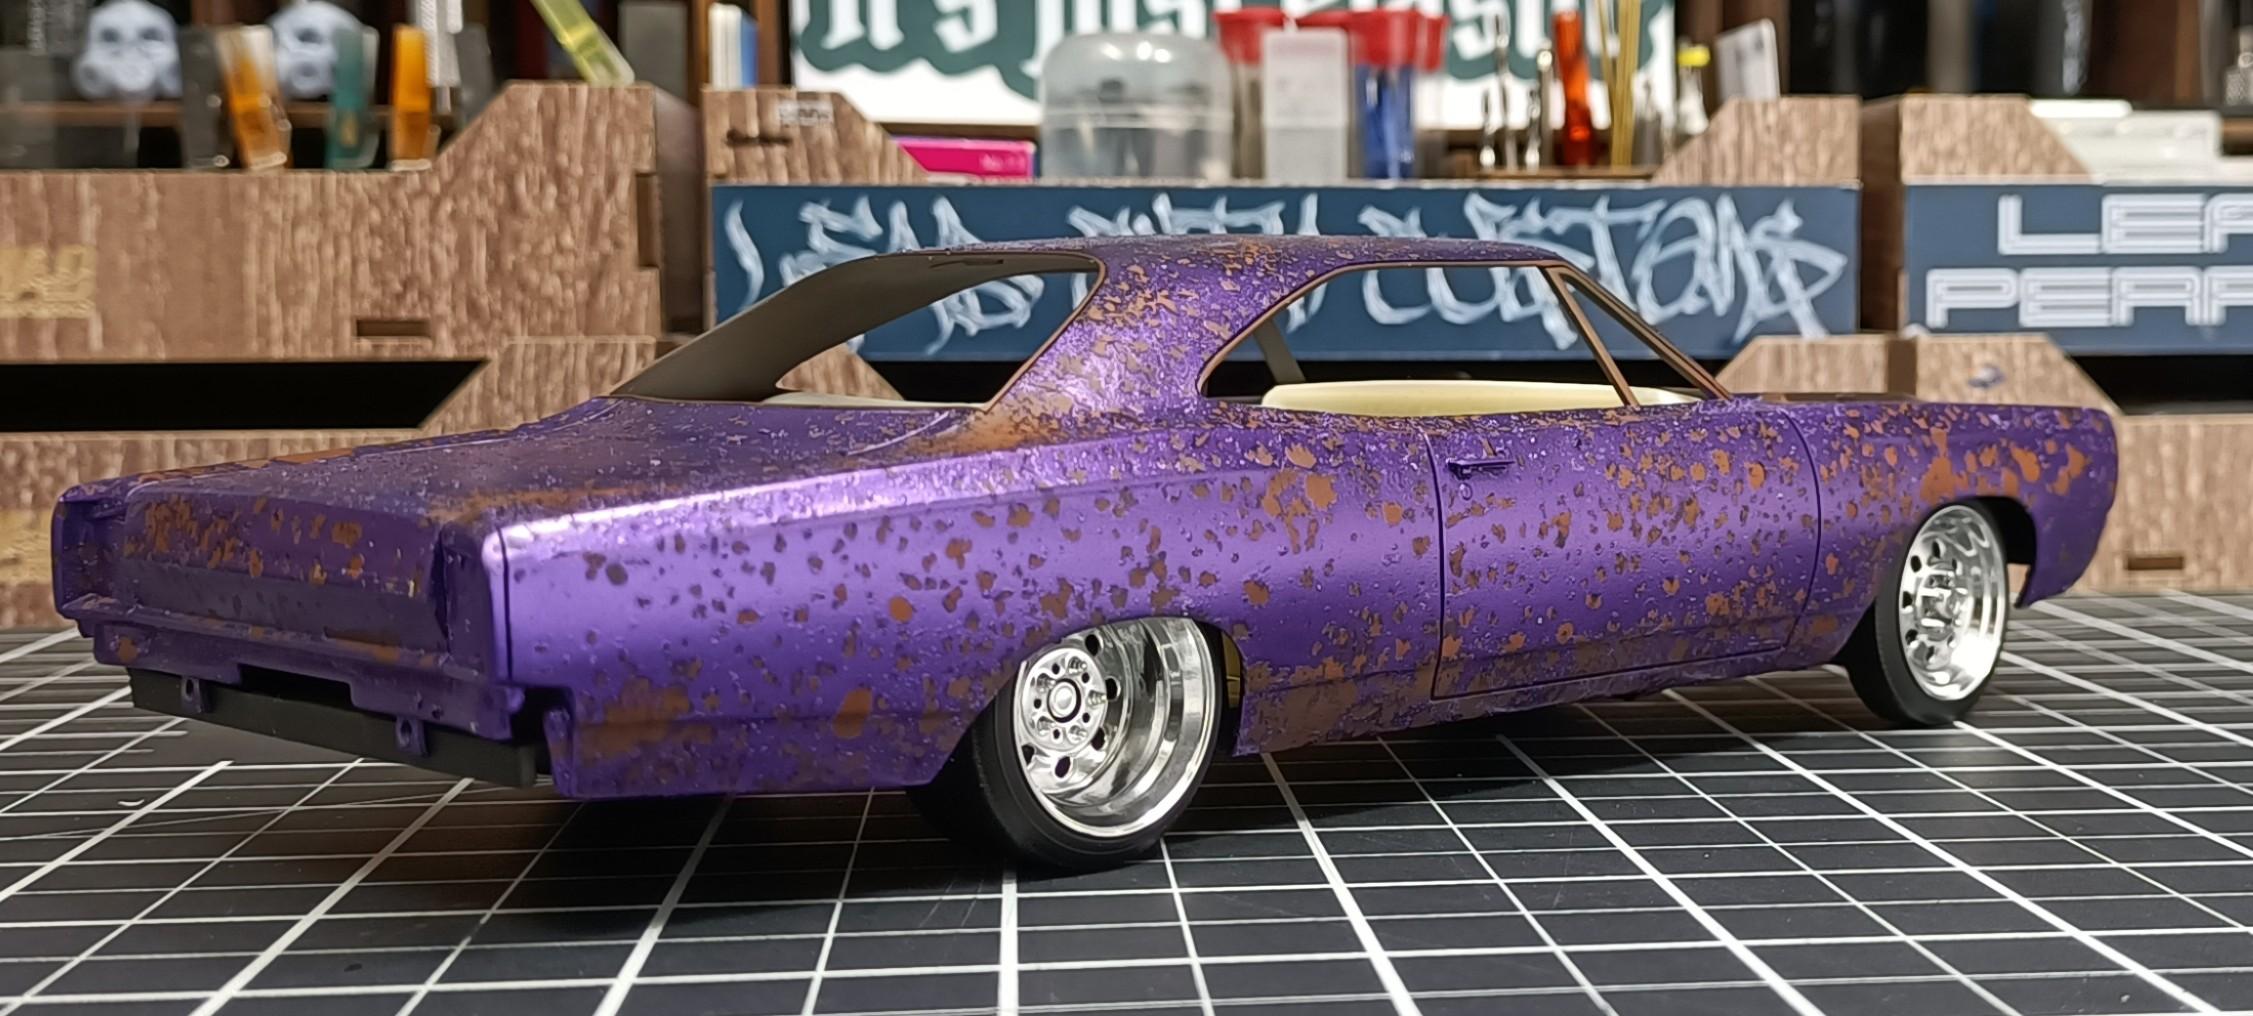
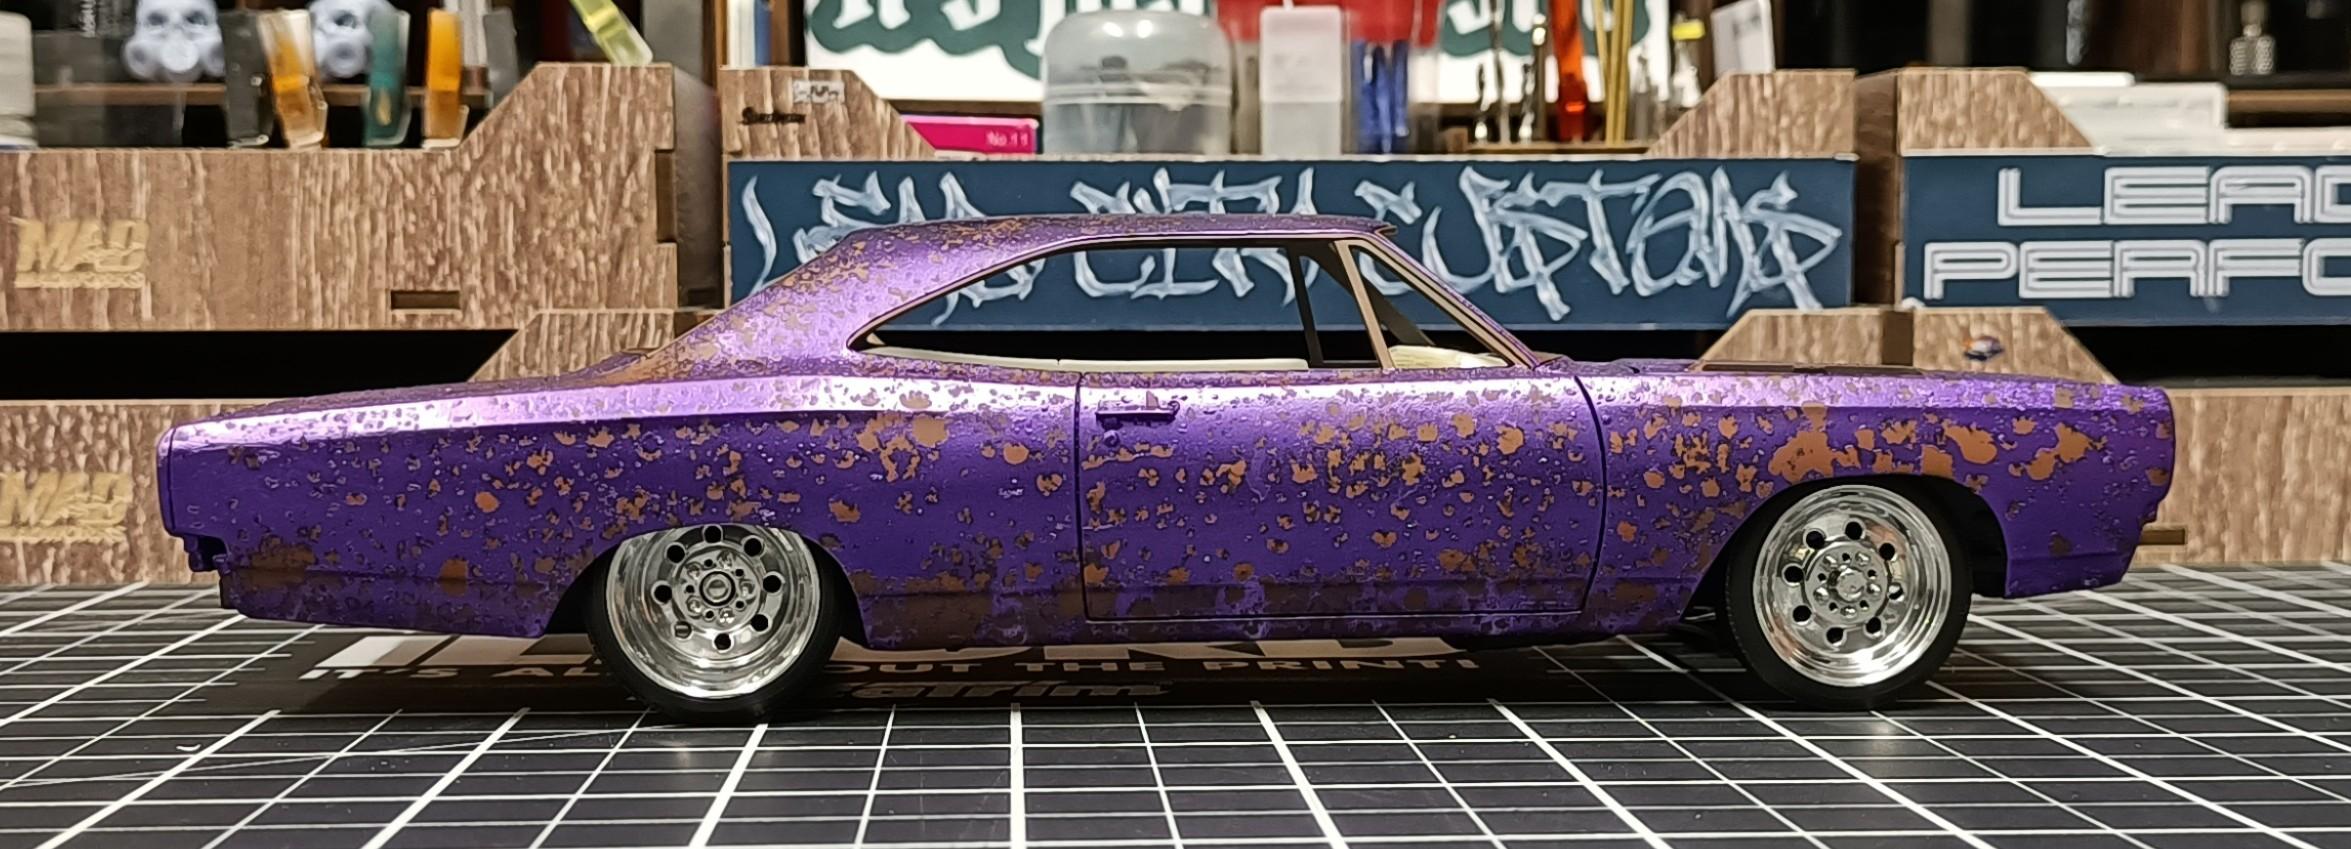
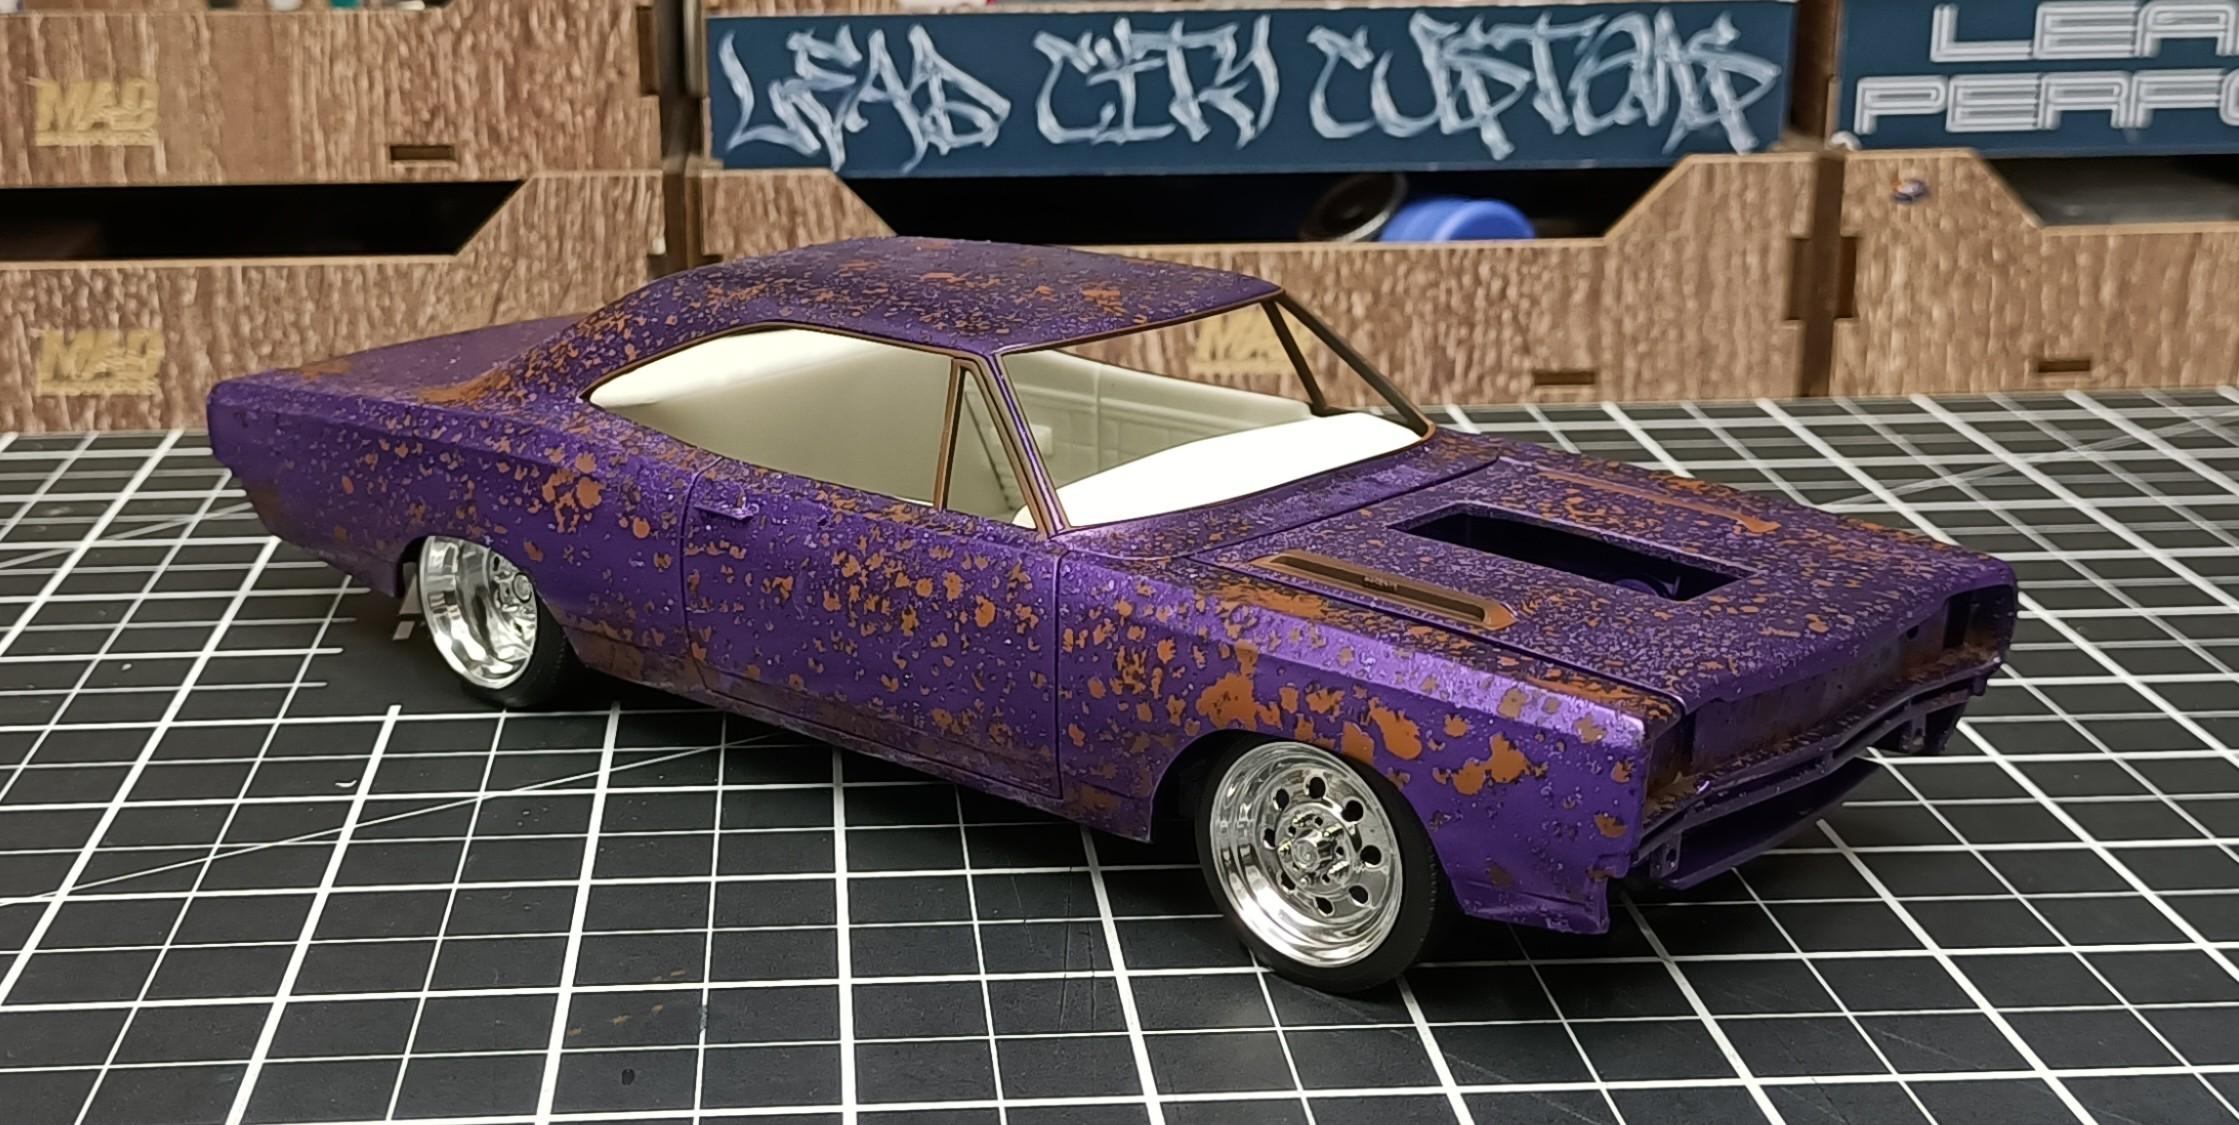
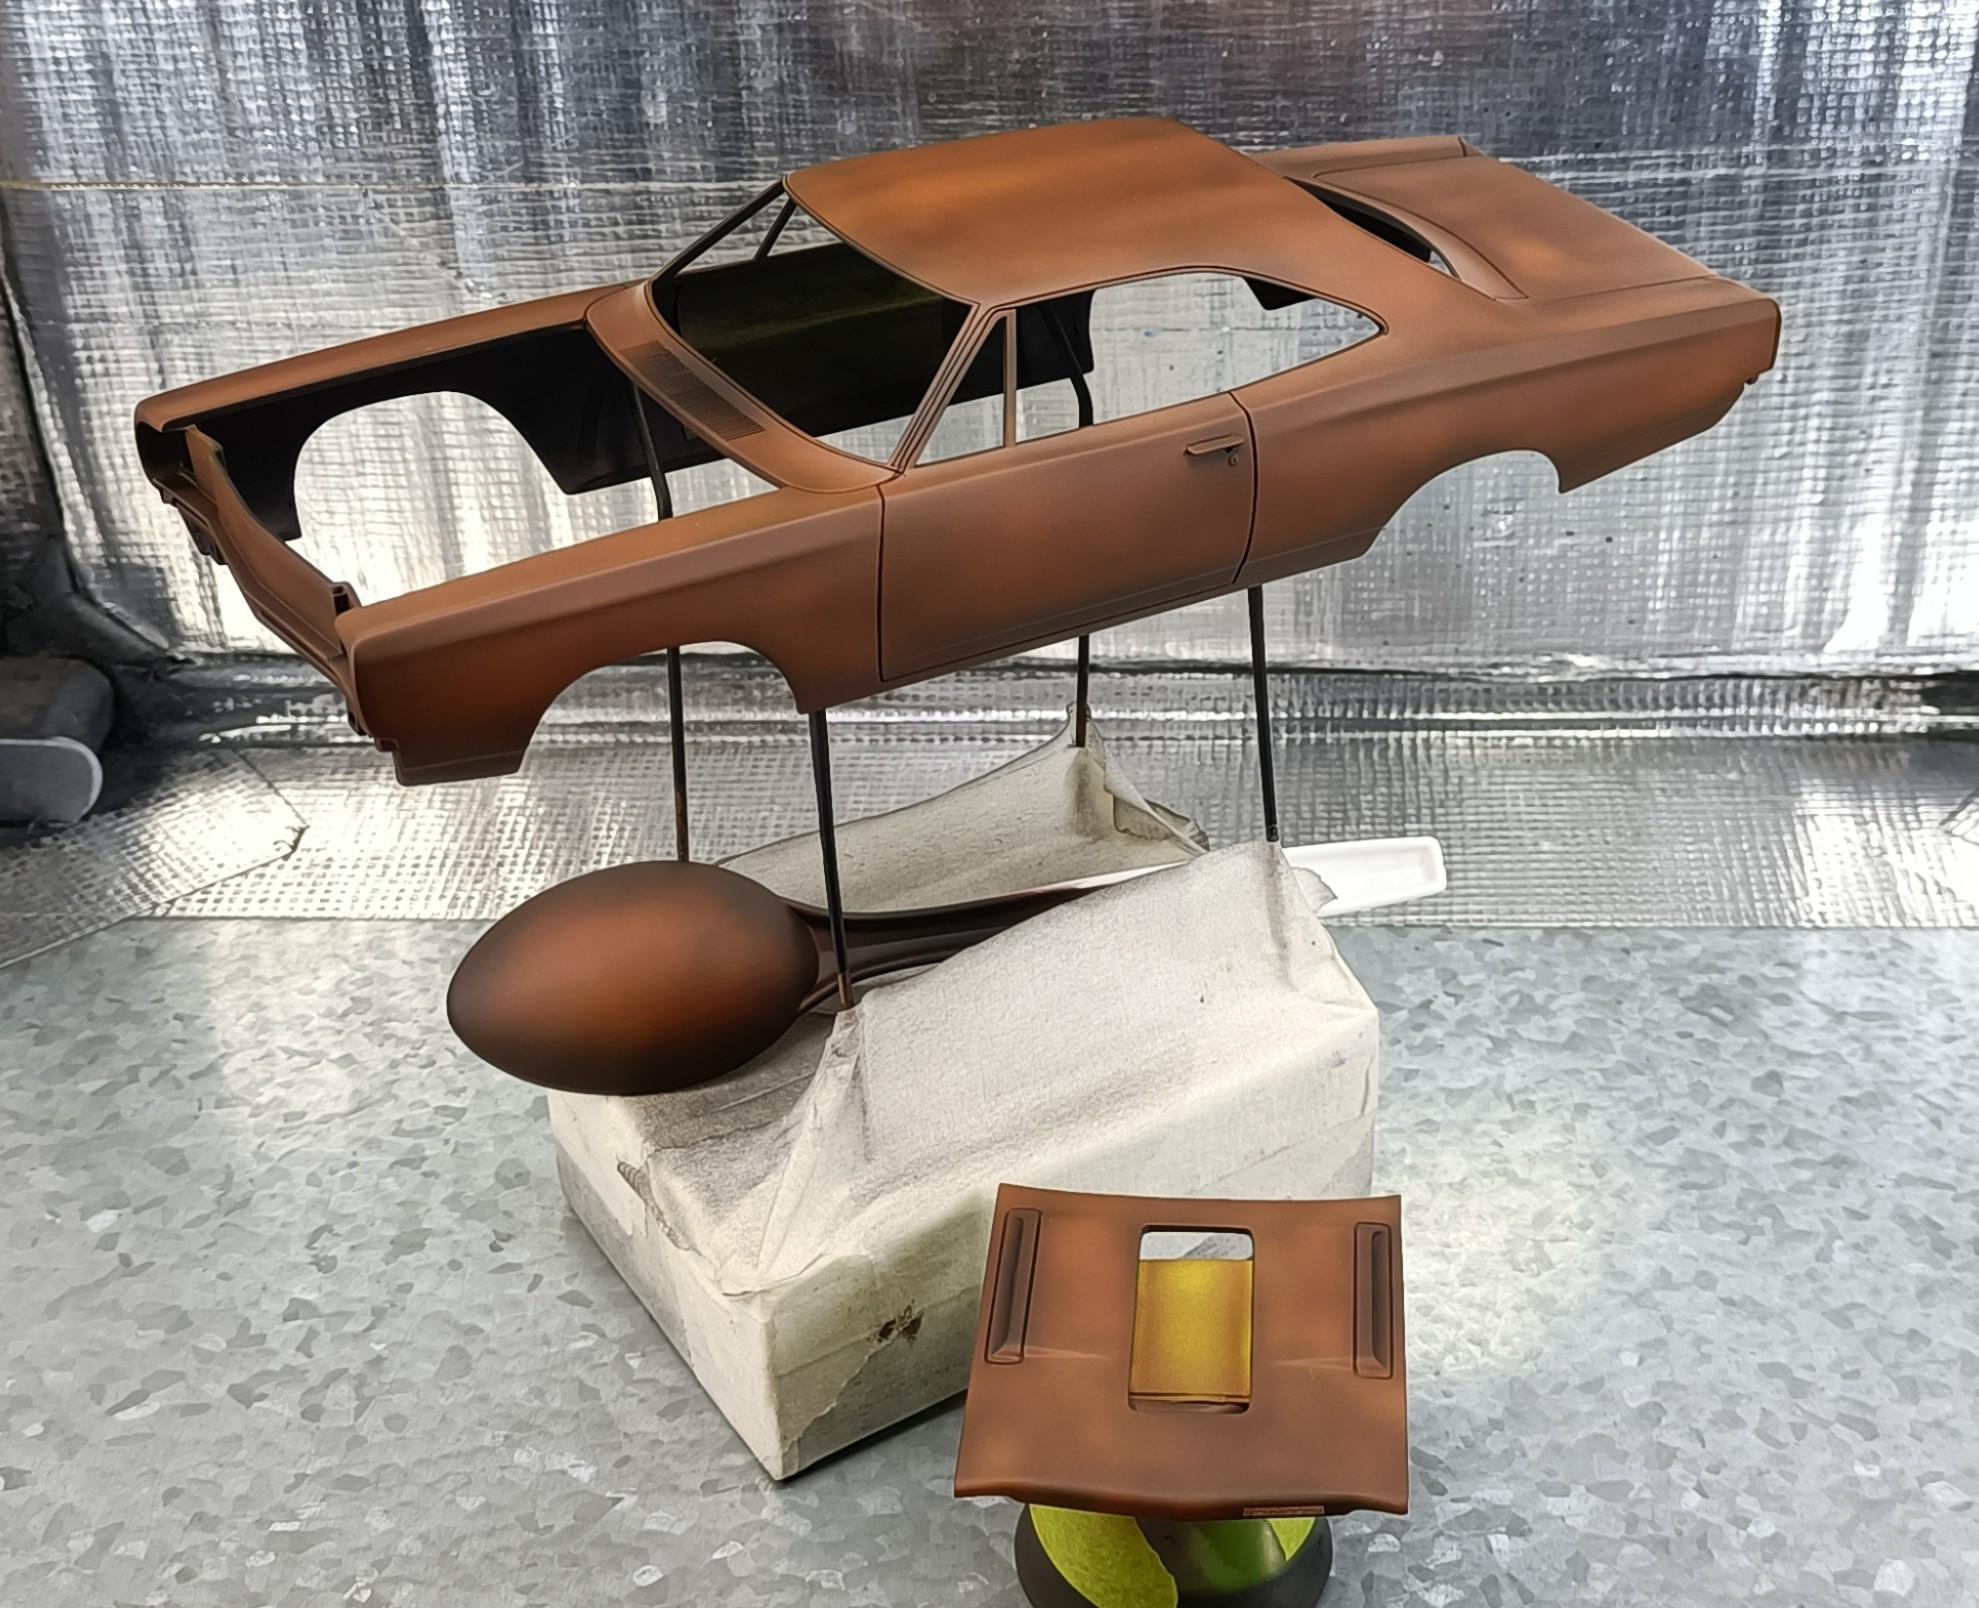
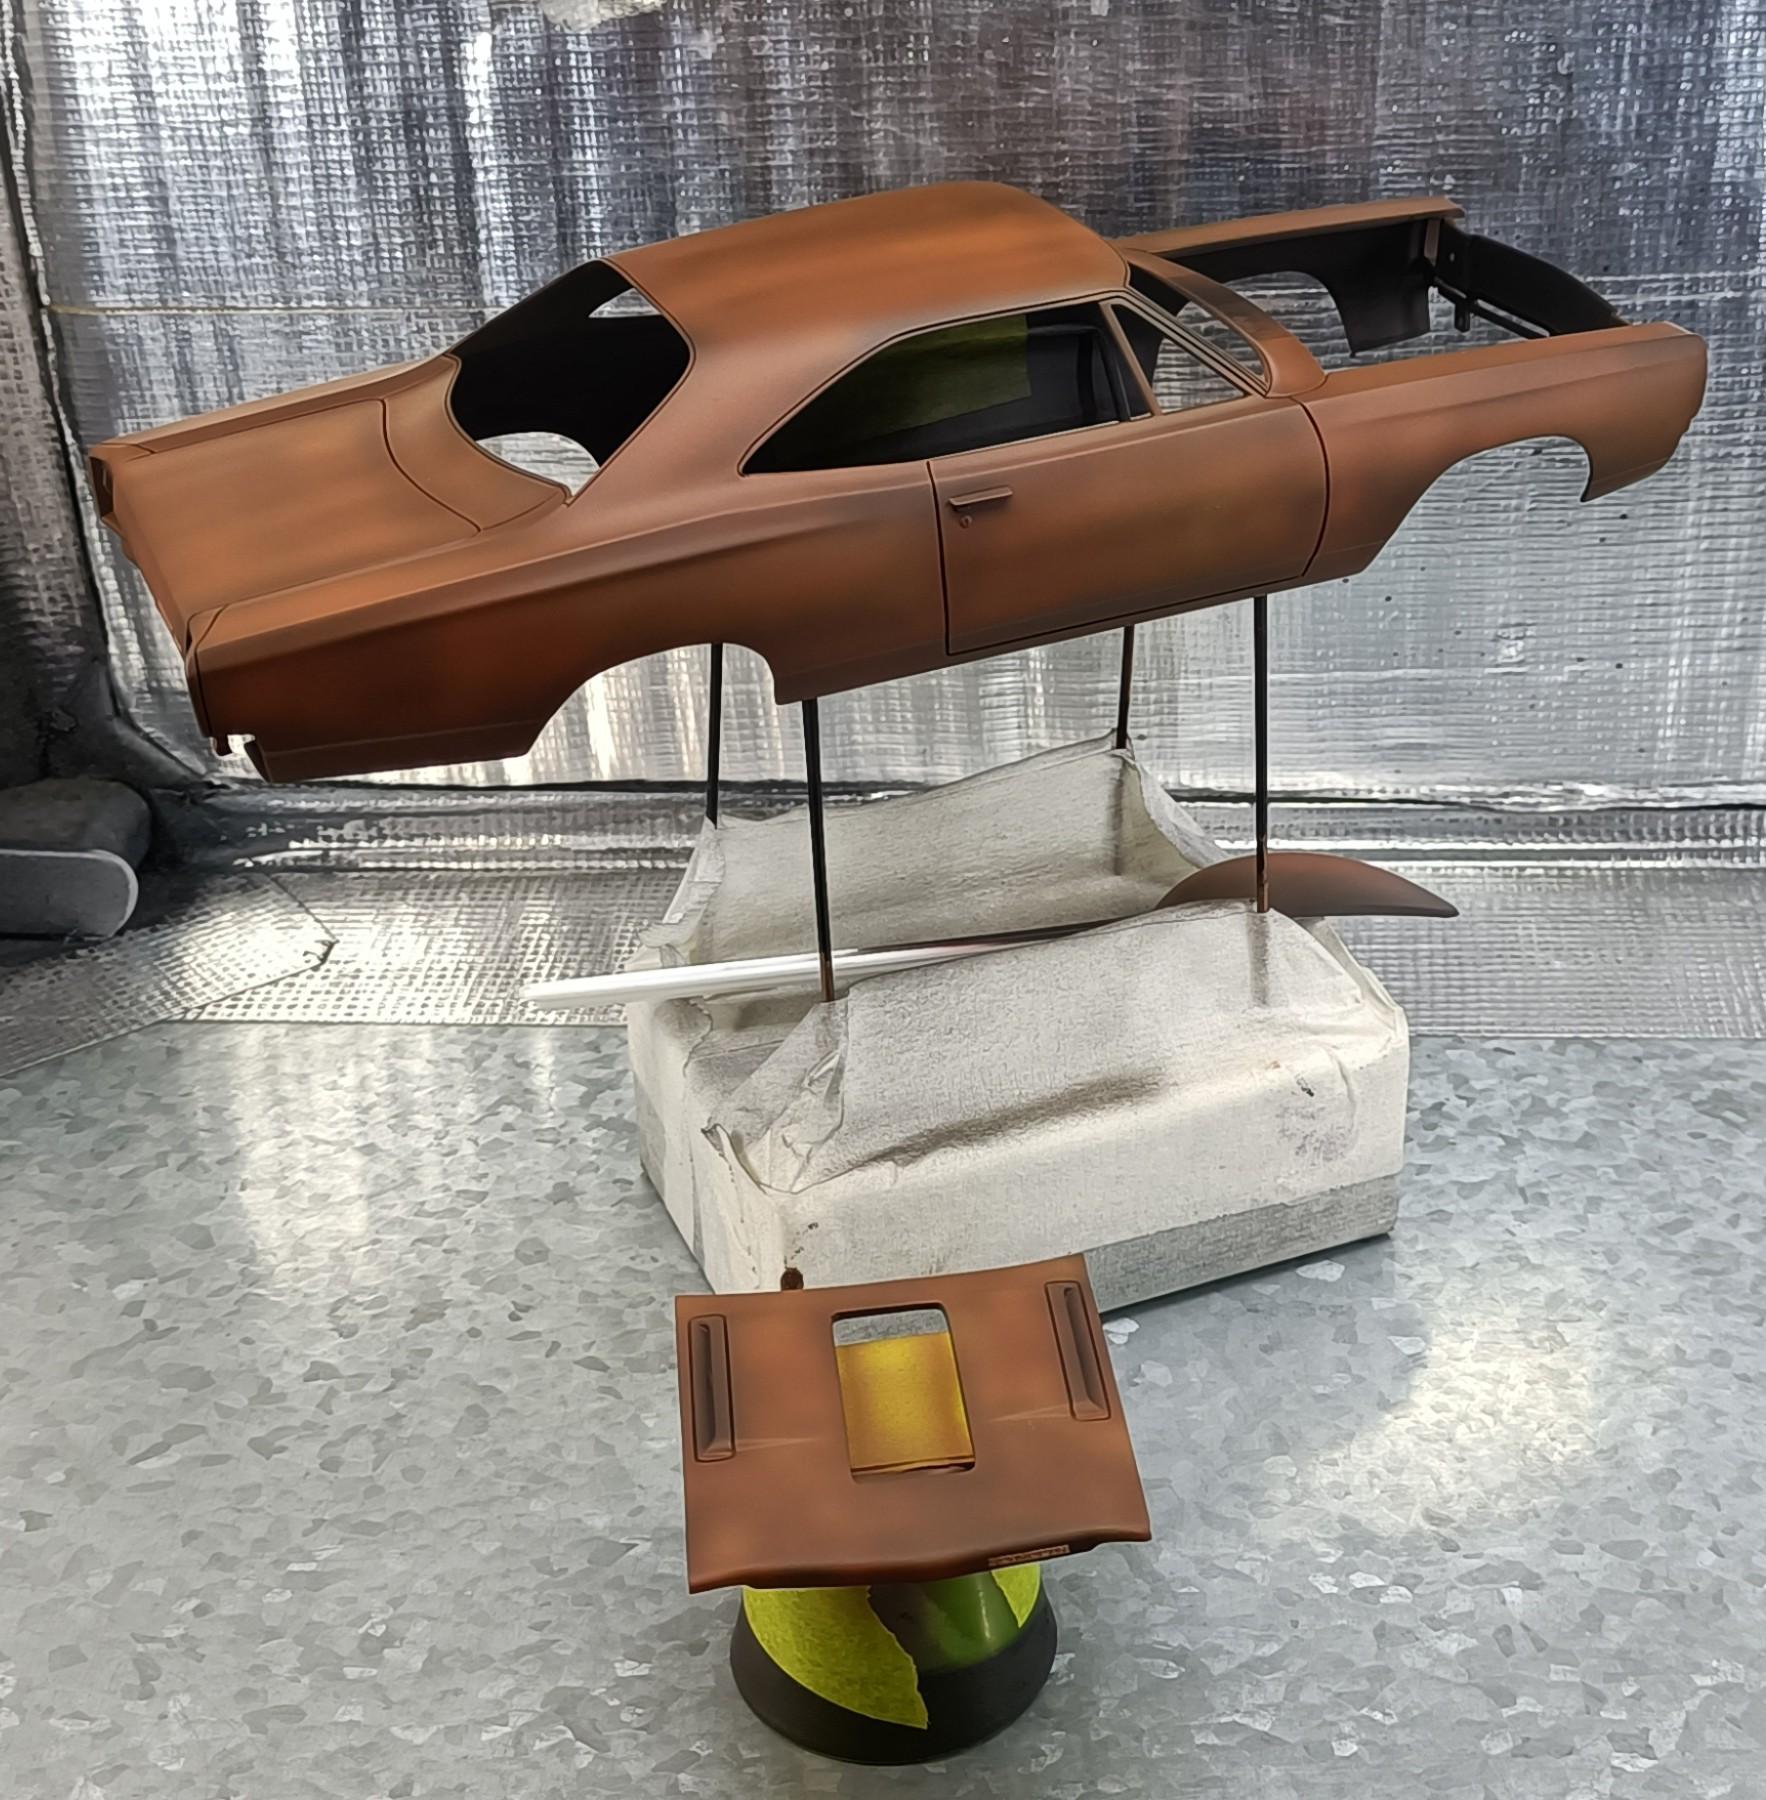
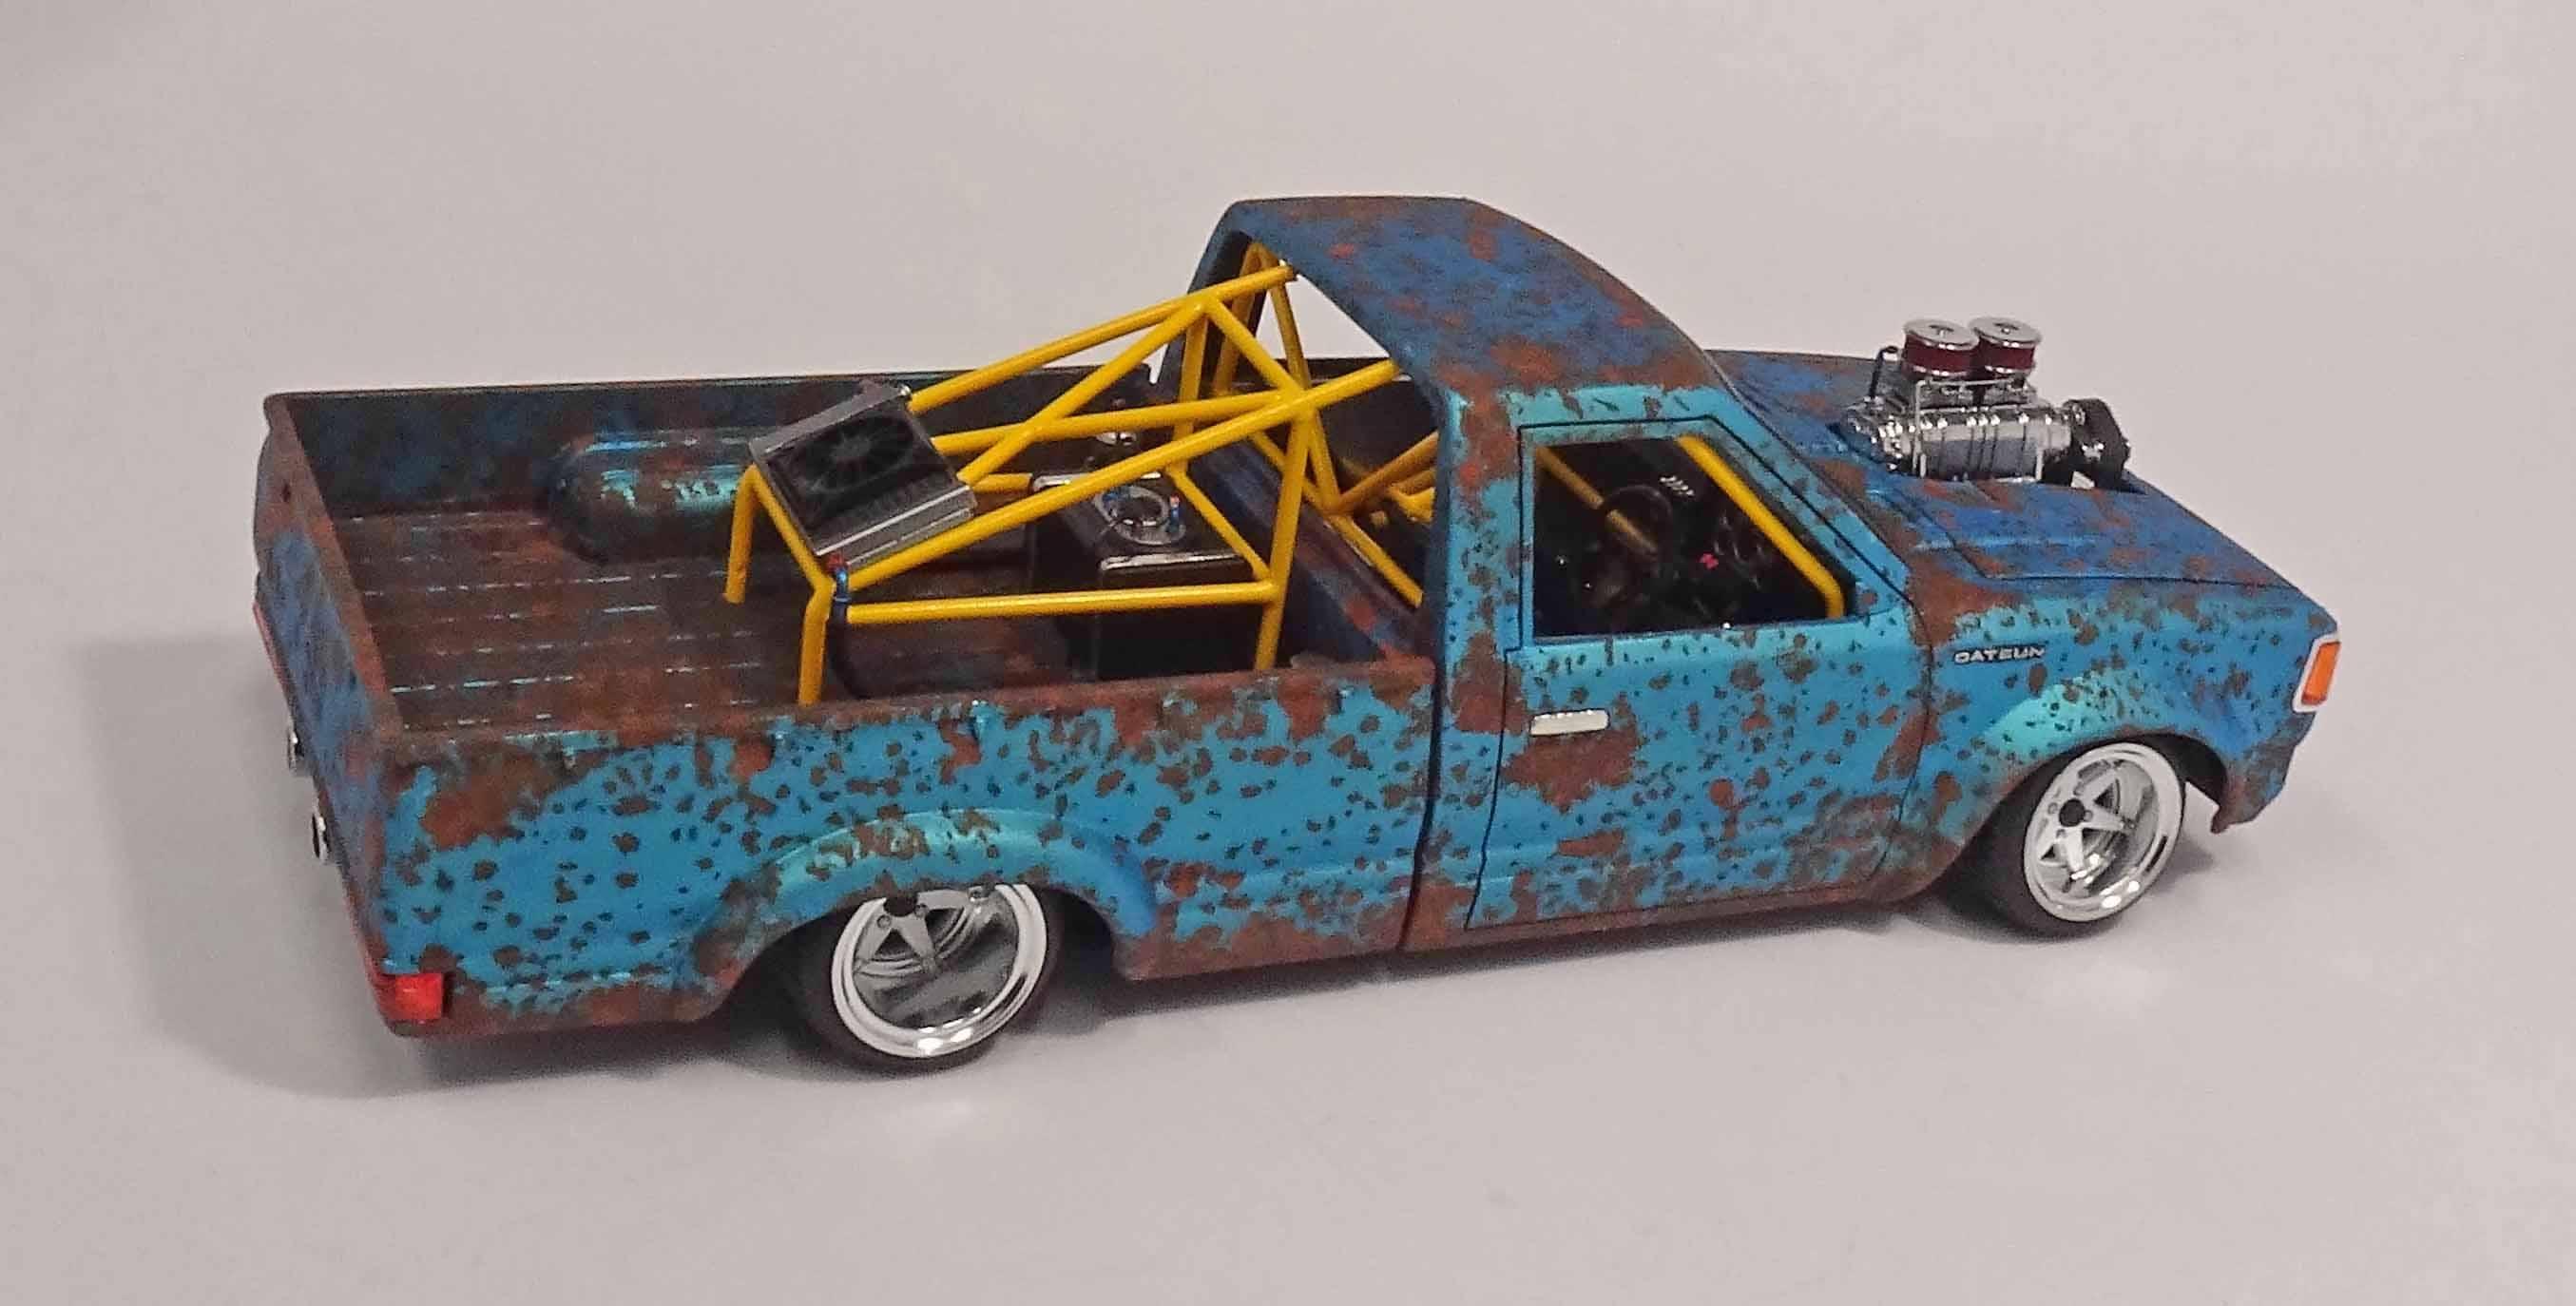
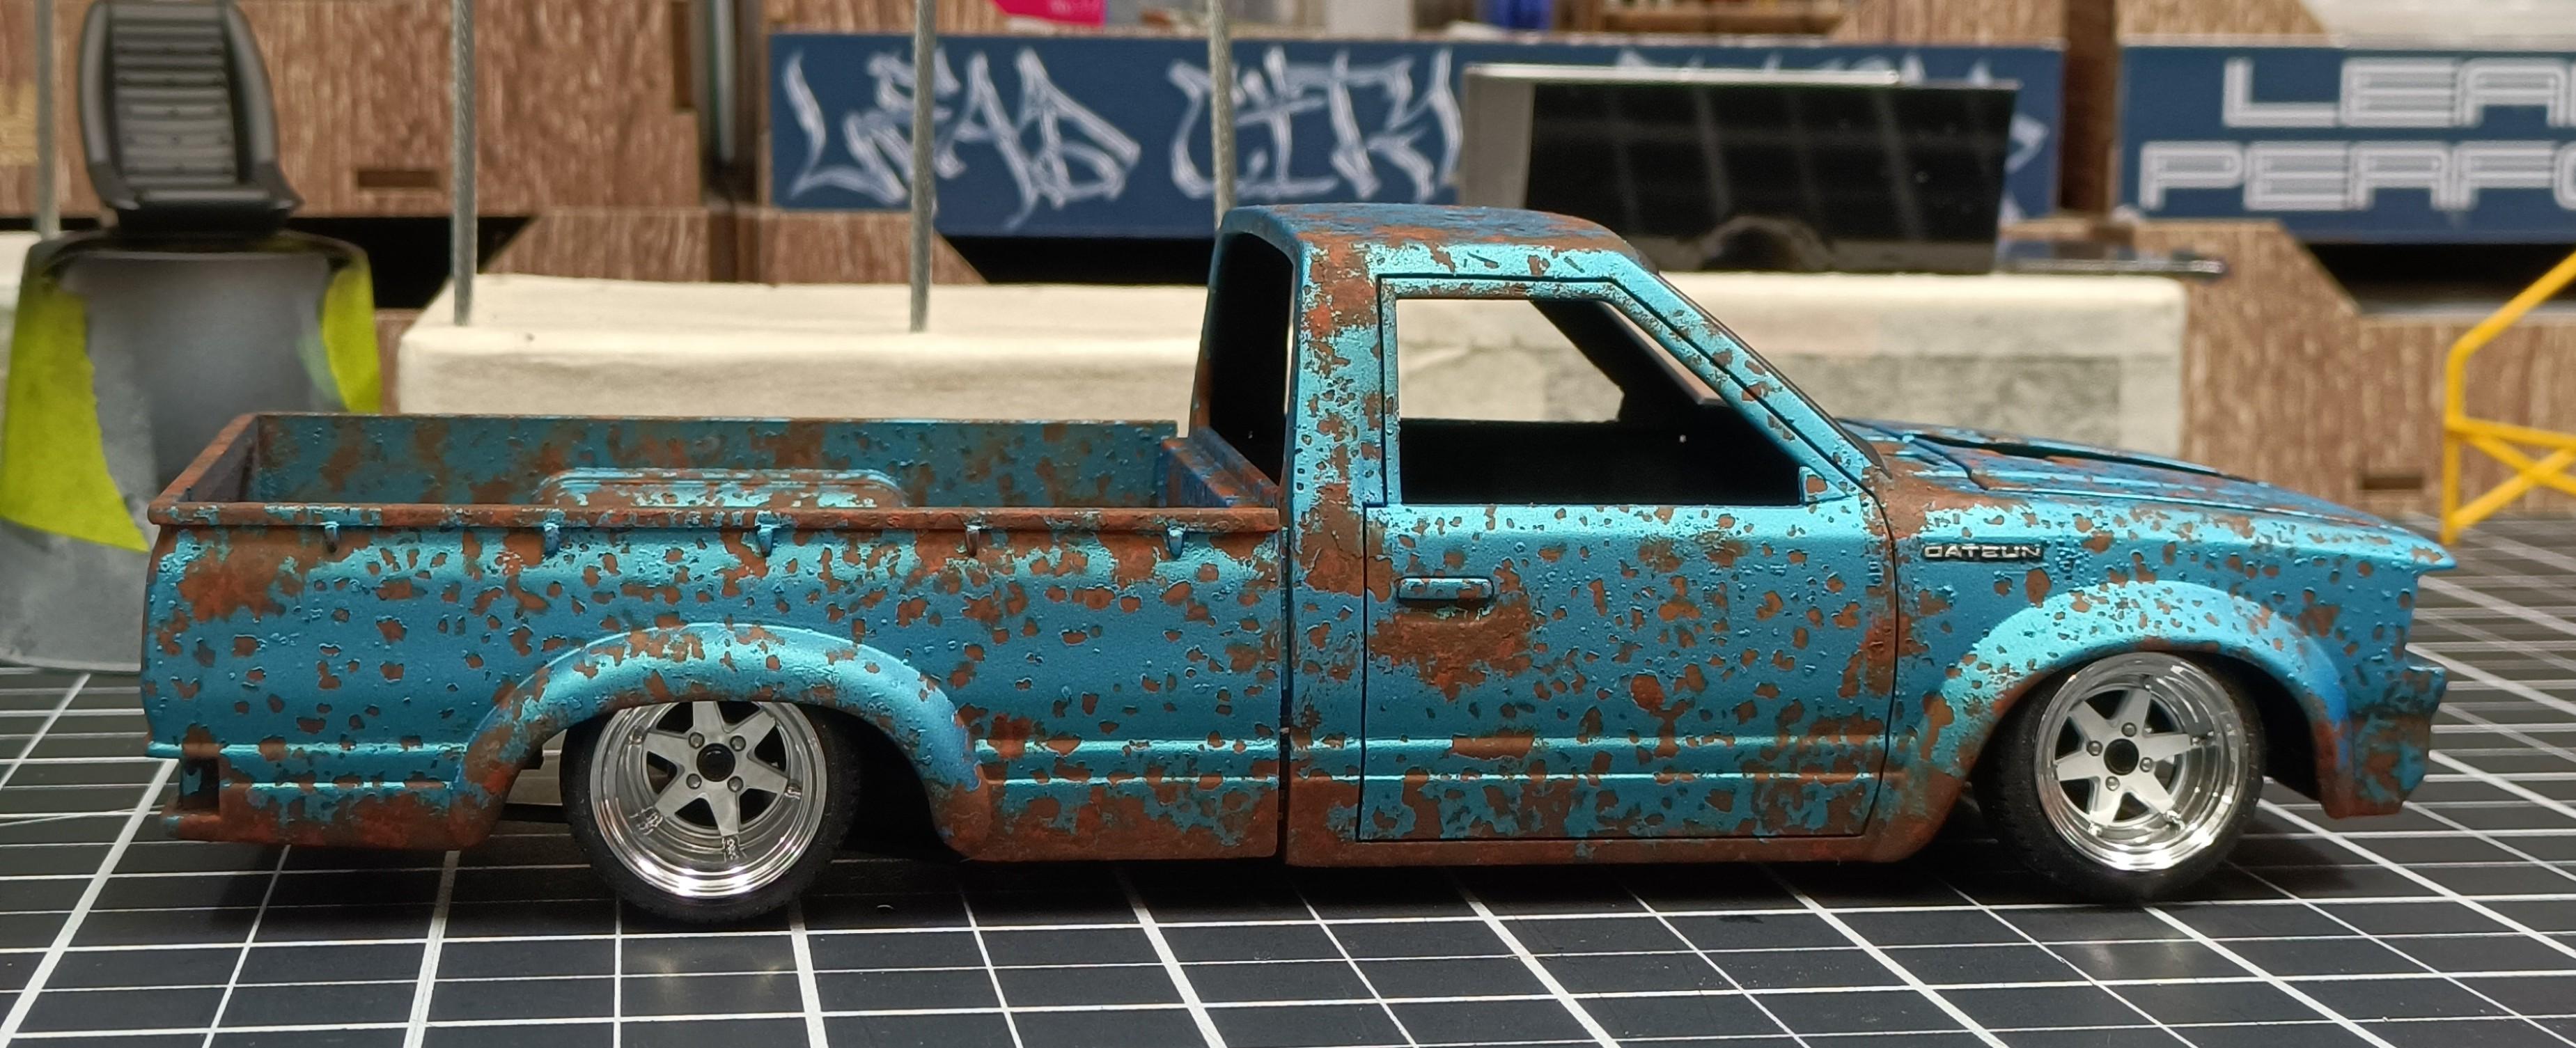
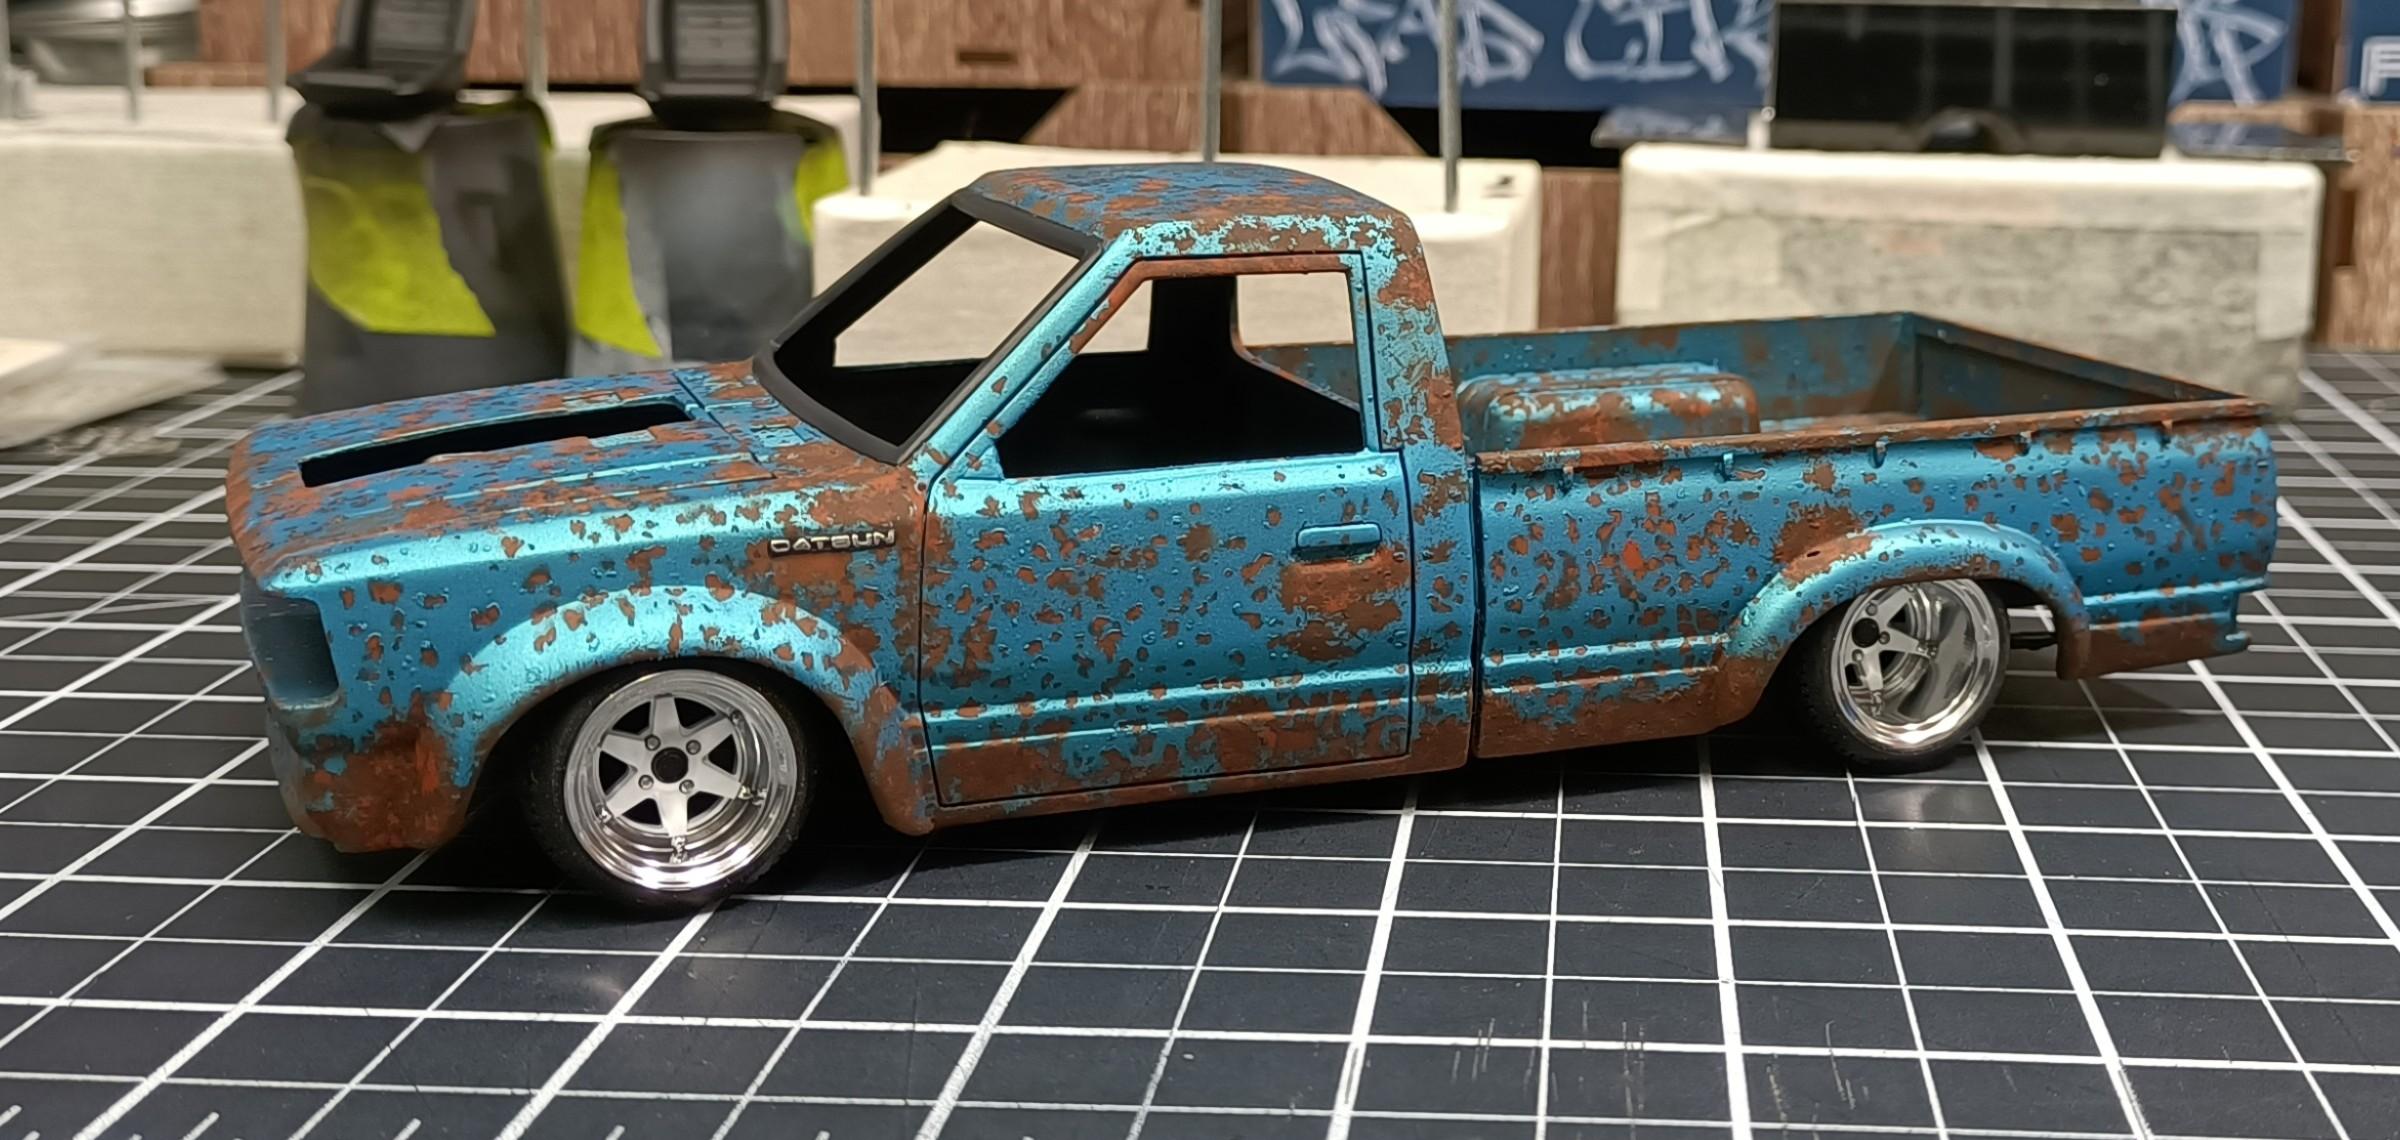
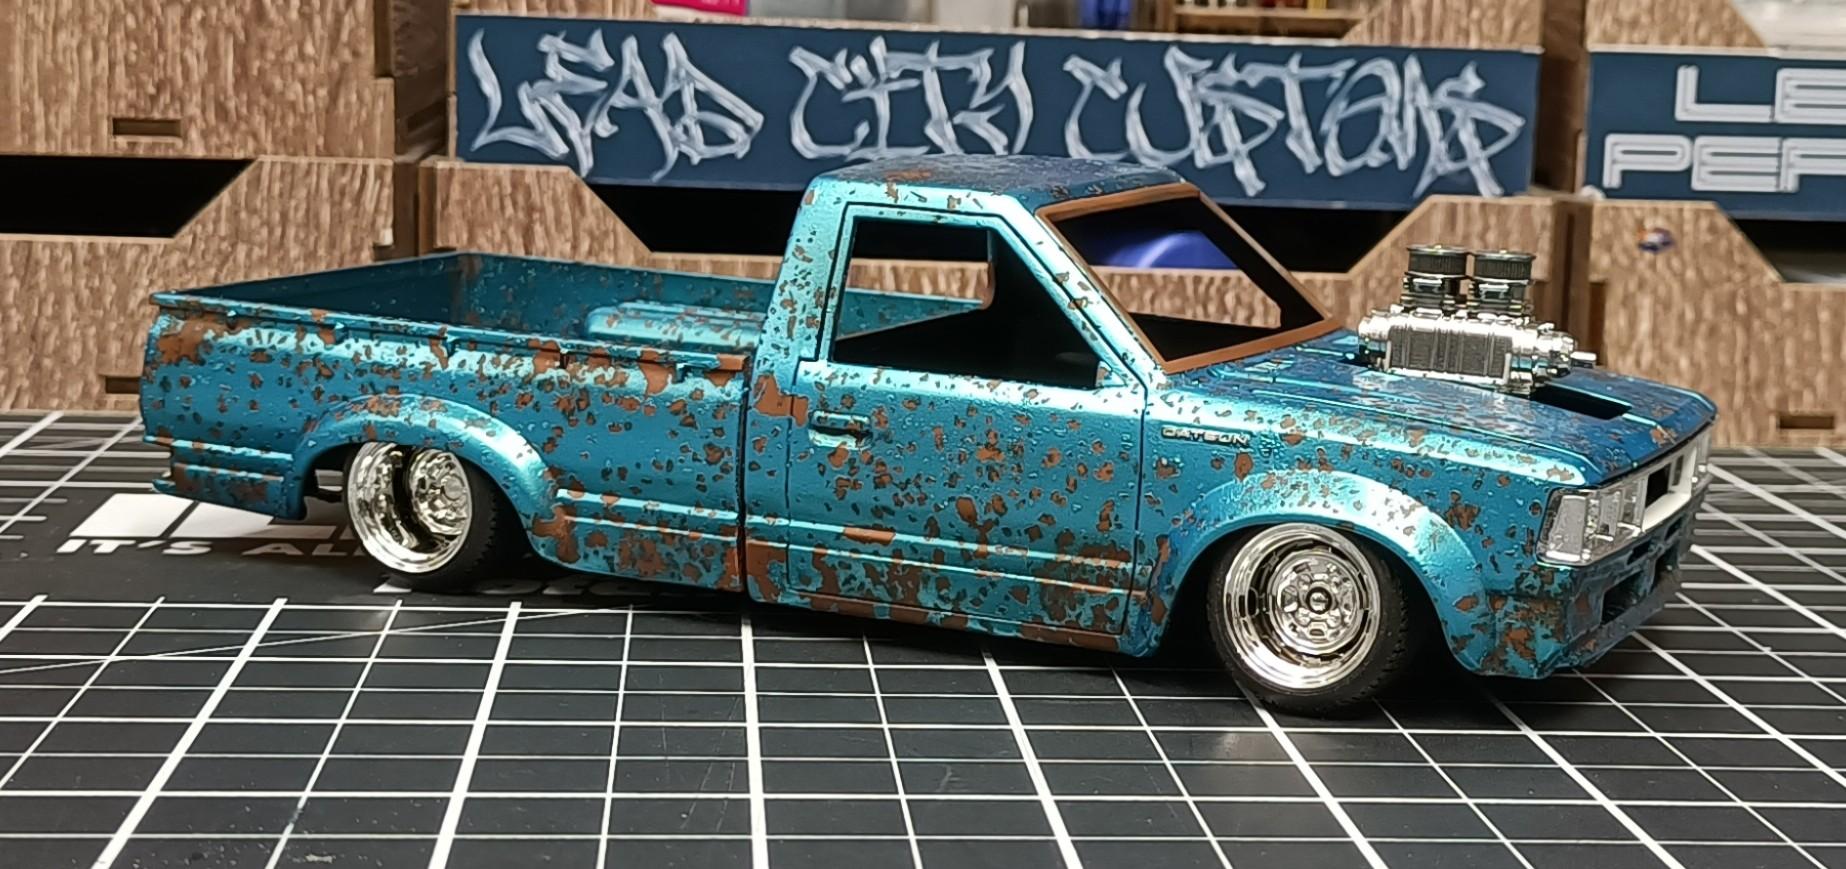
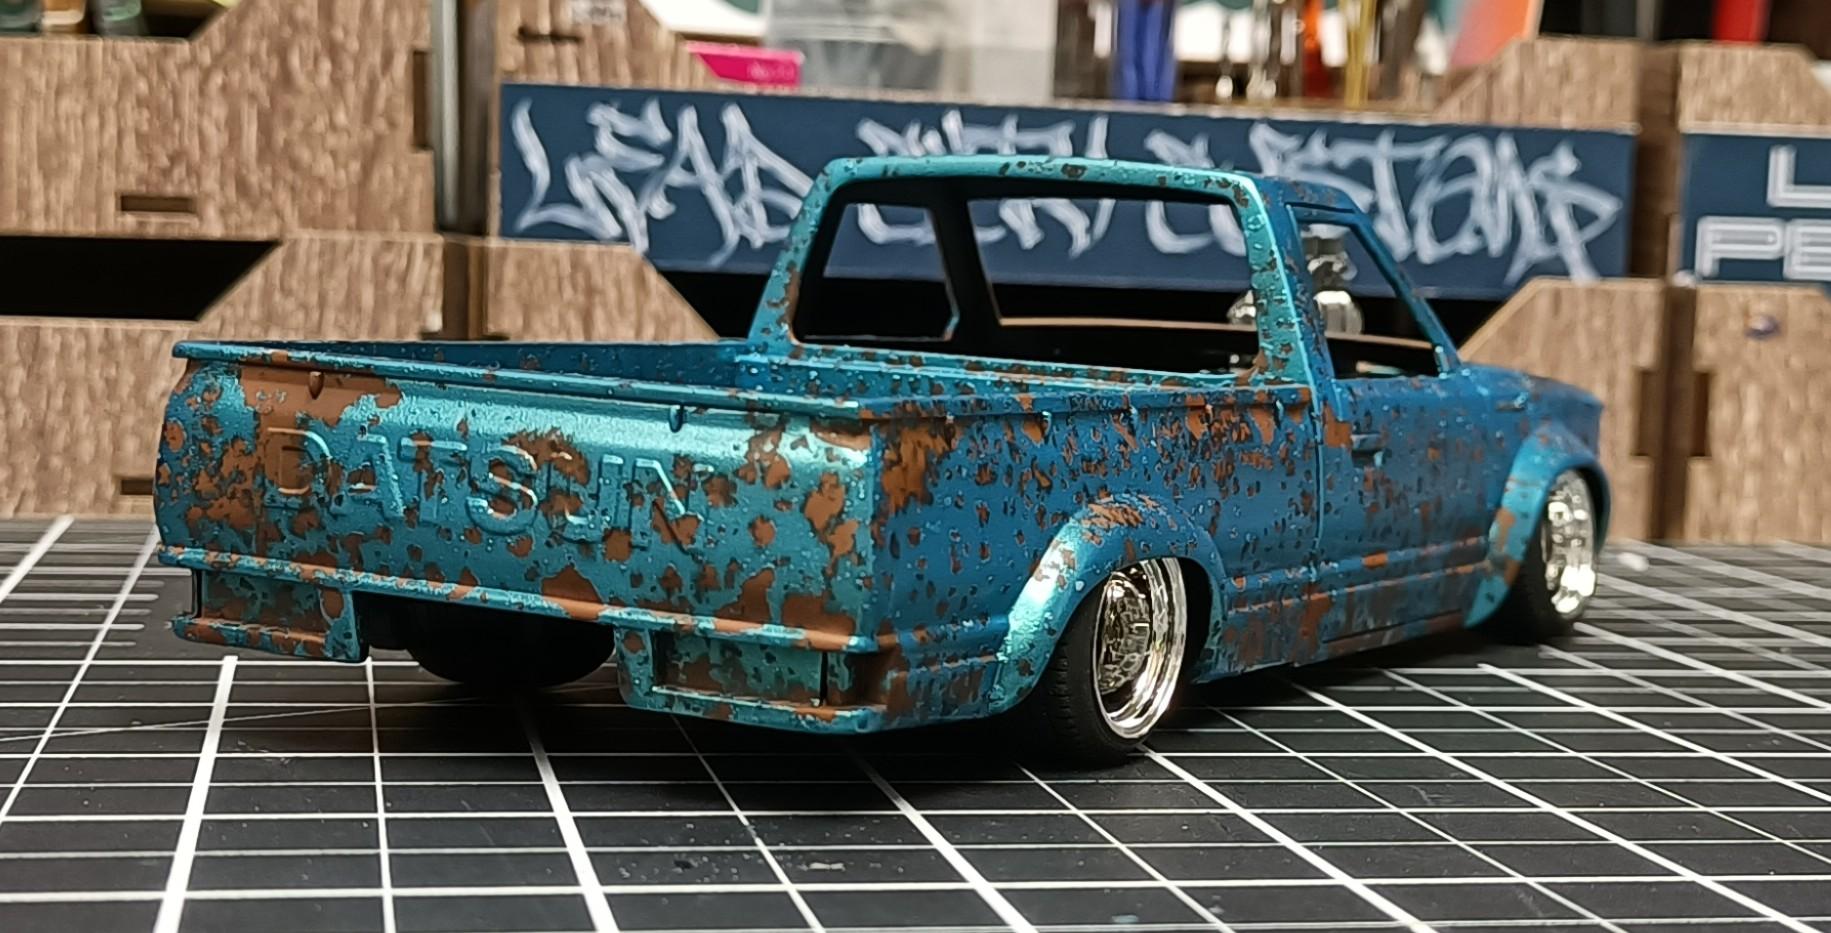
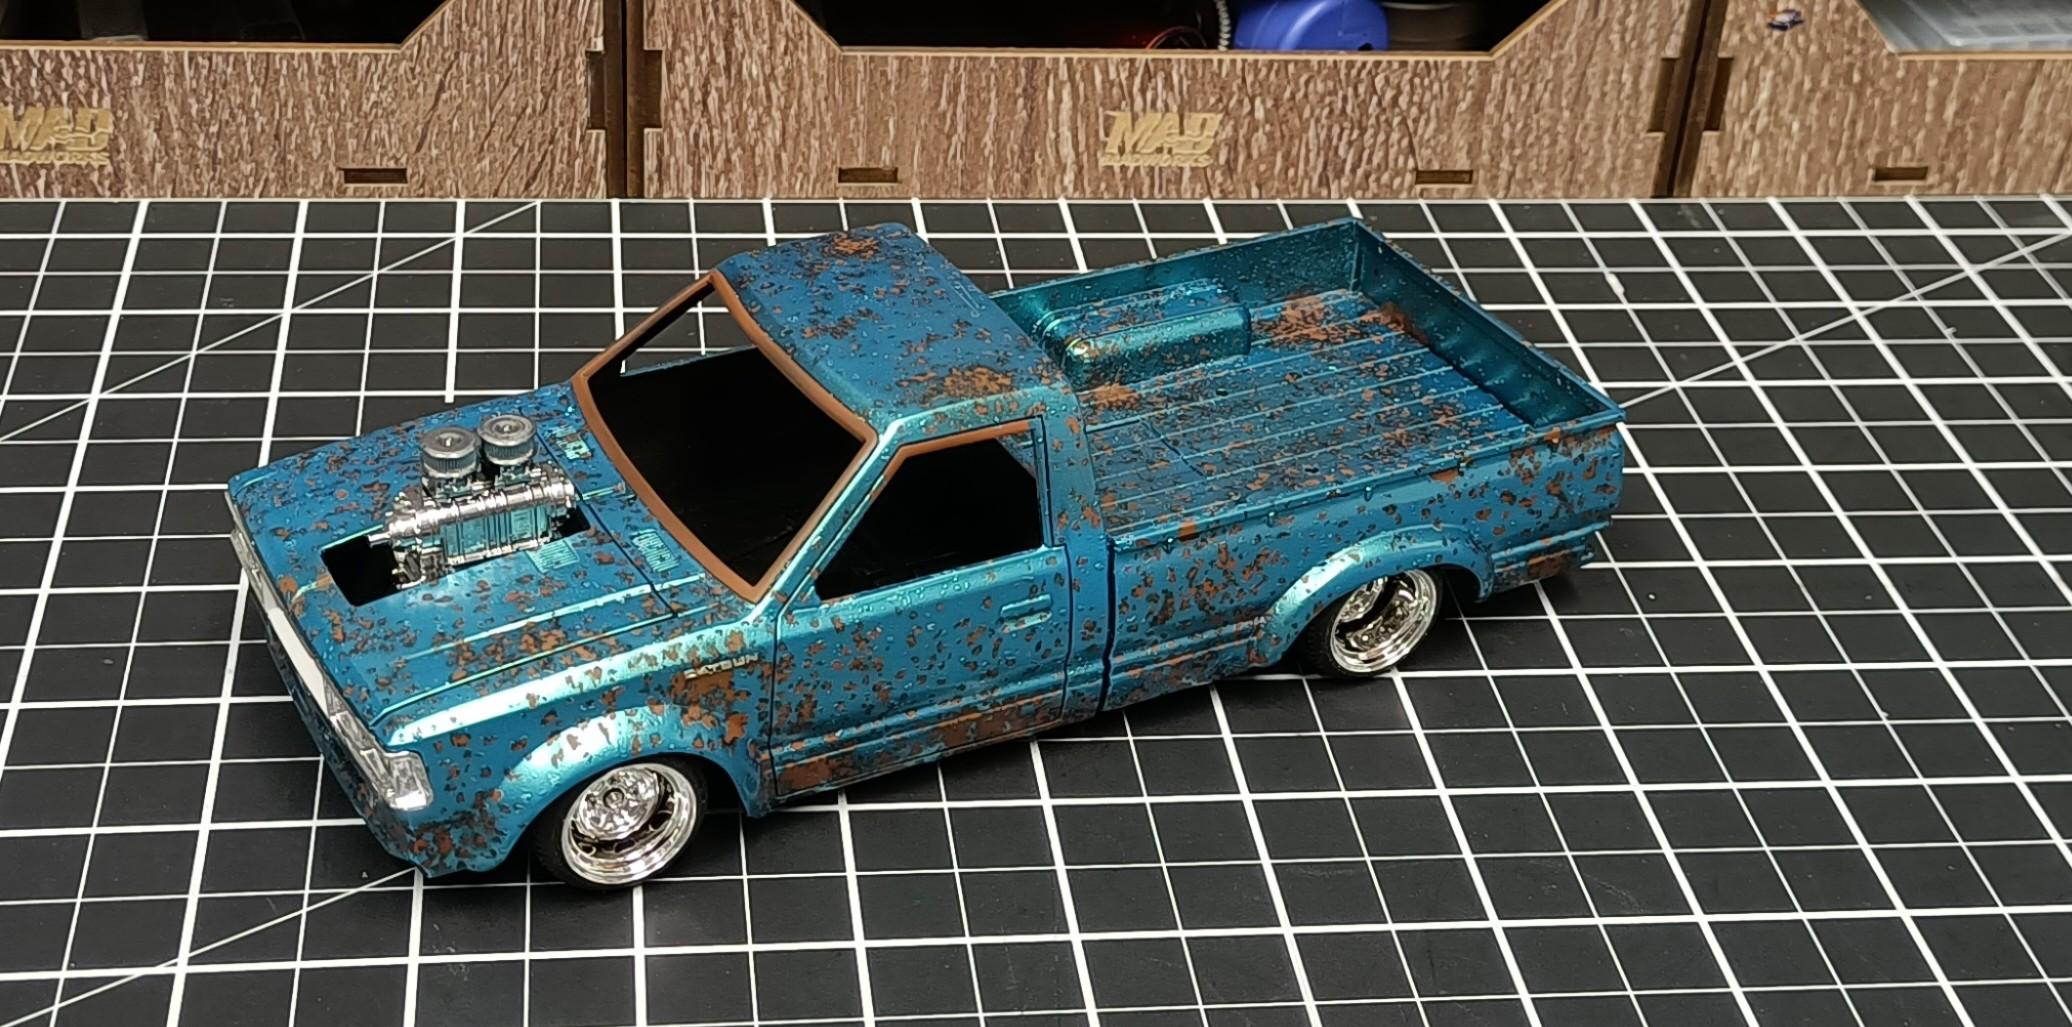
Salt work done and wheels chromed 😁 As per usual for me its seems I need to go back in and do some sponge work adding more rust to specific locations.

- 766 replies
-
- 4
-

-
- stalled builds
- quick builds
- (and 2 more)
-
🤣 I will make sure I go back in and add some extra rust on those lower quarters 😉
-
1955 Ford Panel Truck
Cool Hand replied to Zippi's topic in Model Trucks: Pickups, Vans, SUVs, Light Commercial
Nice one Bob. A well thought out build that all came together for a great looking American Pano. -
Smoked ties in with all the black trim 🤷♂️
-
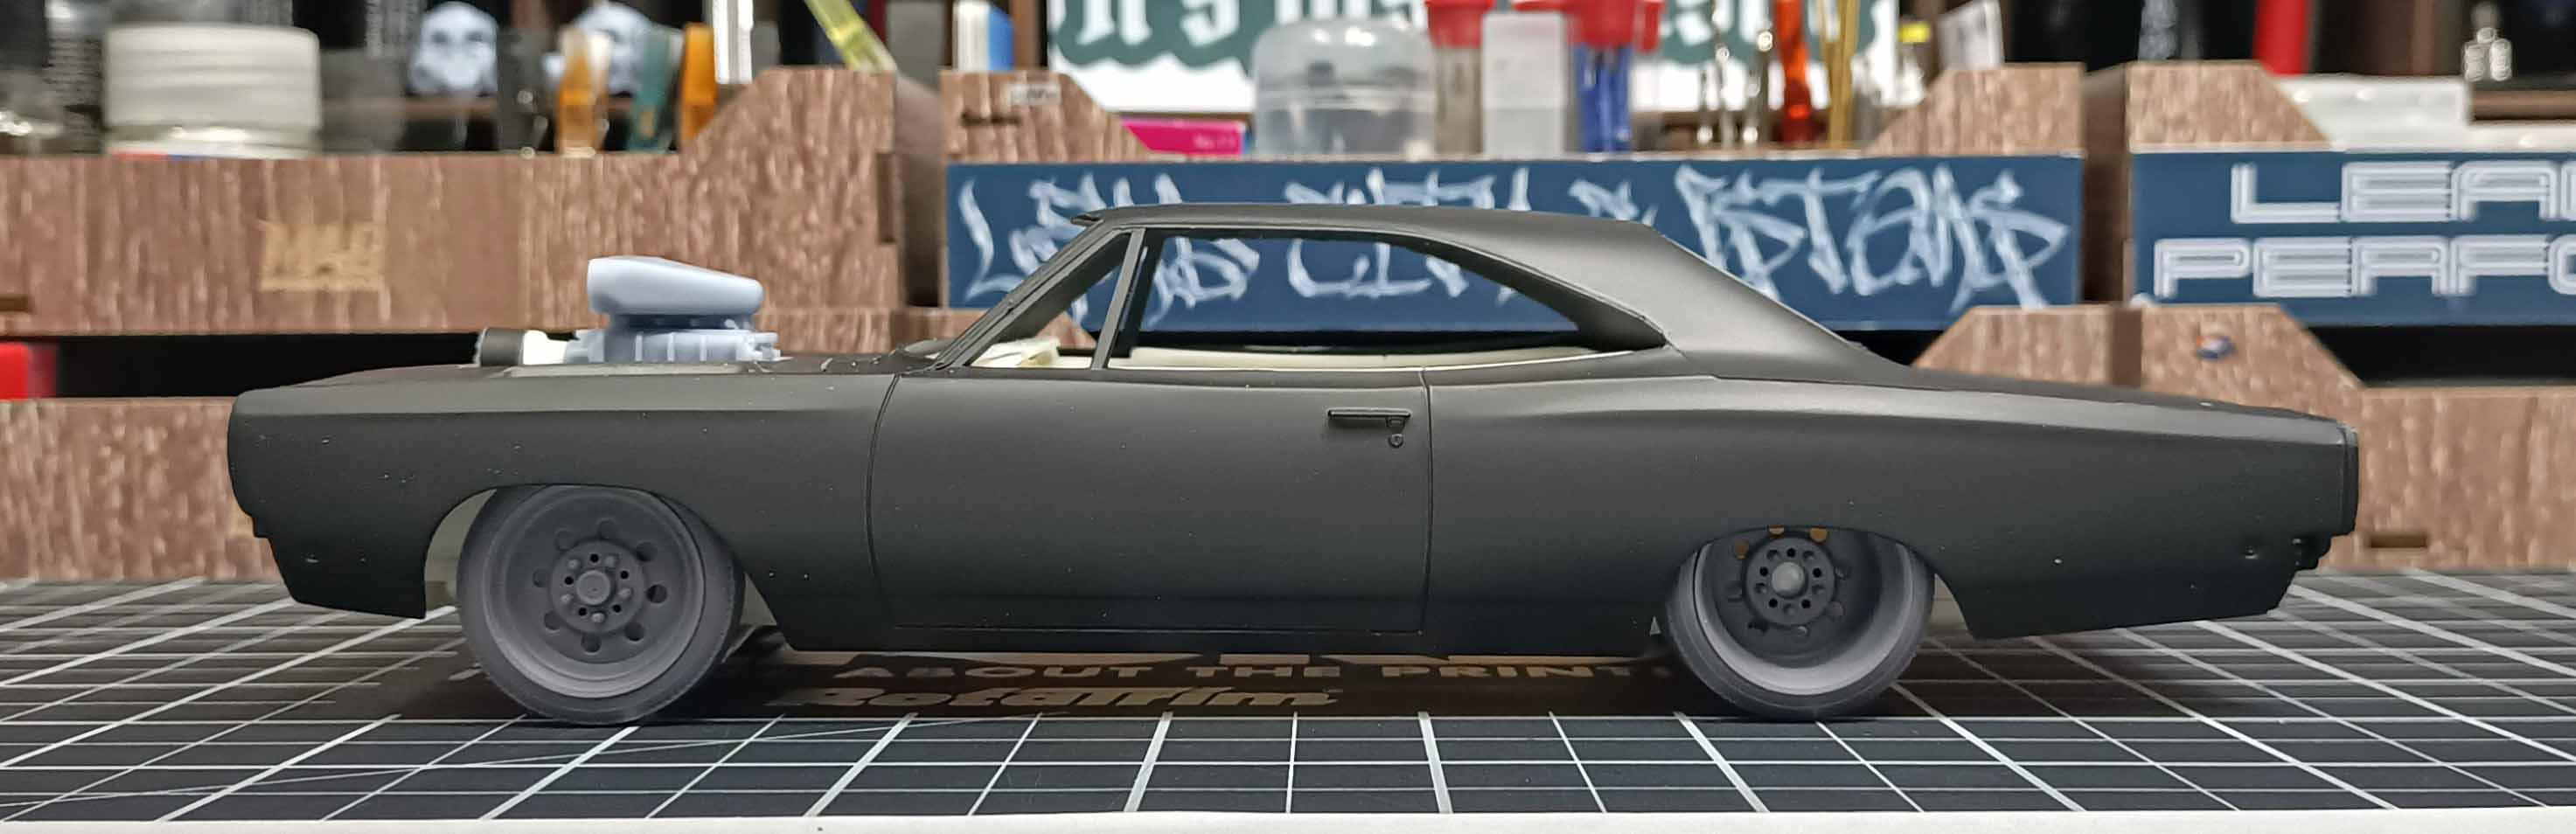
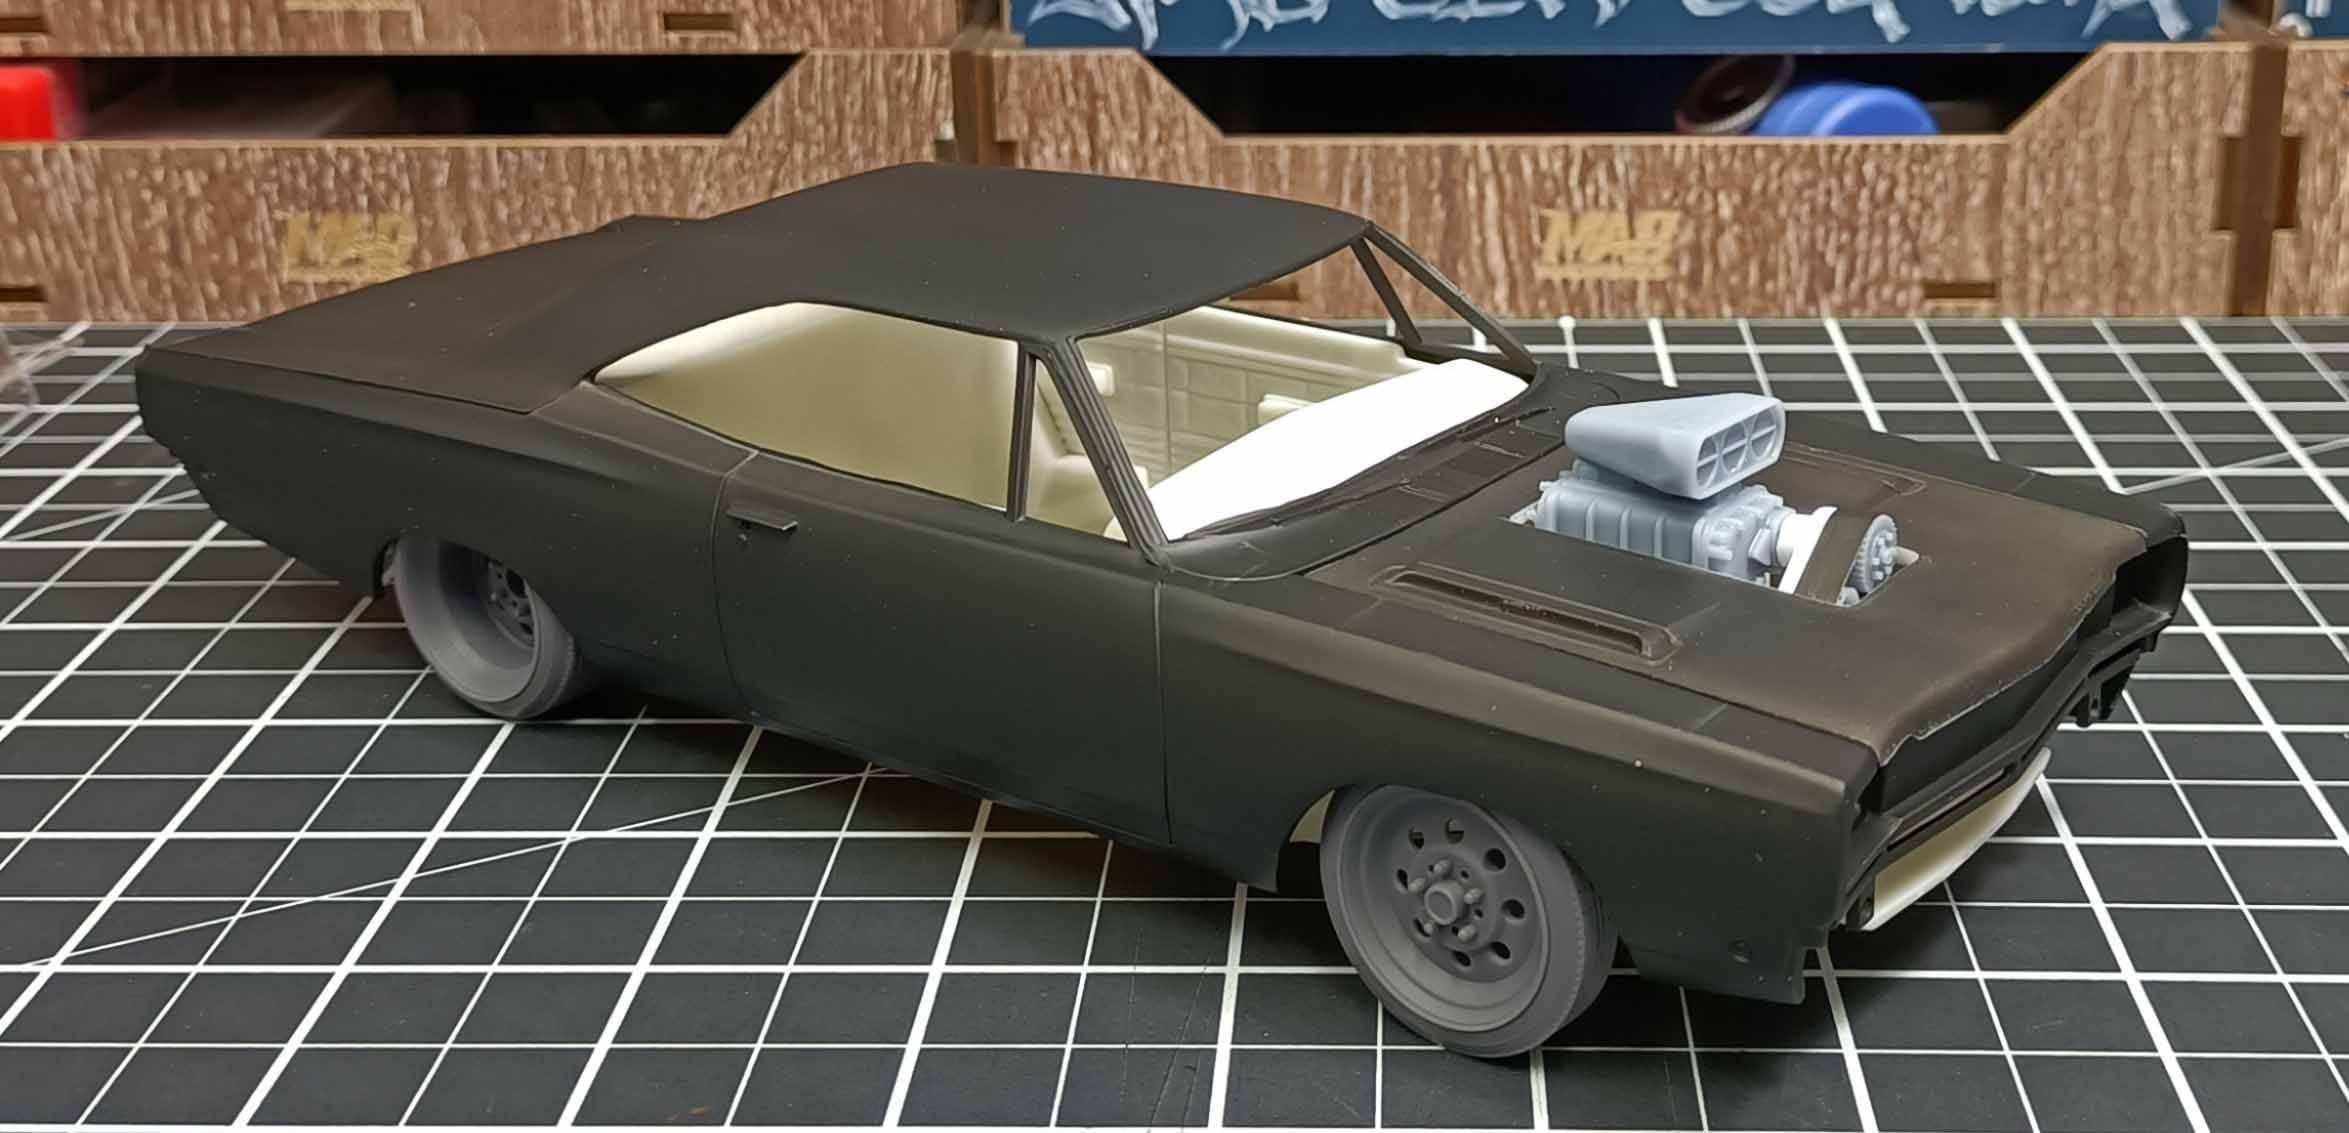
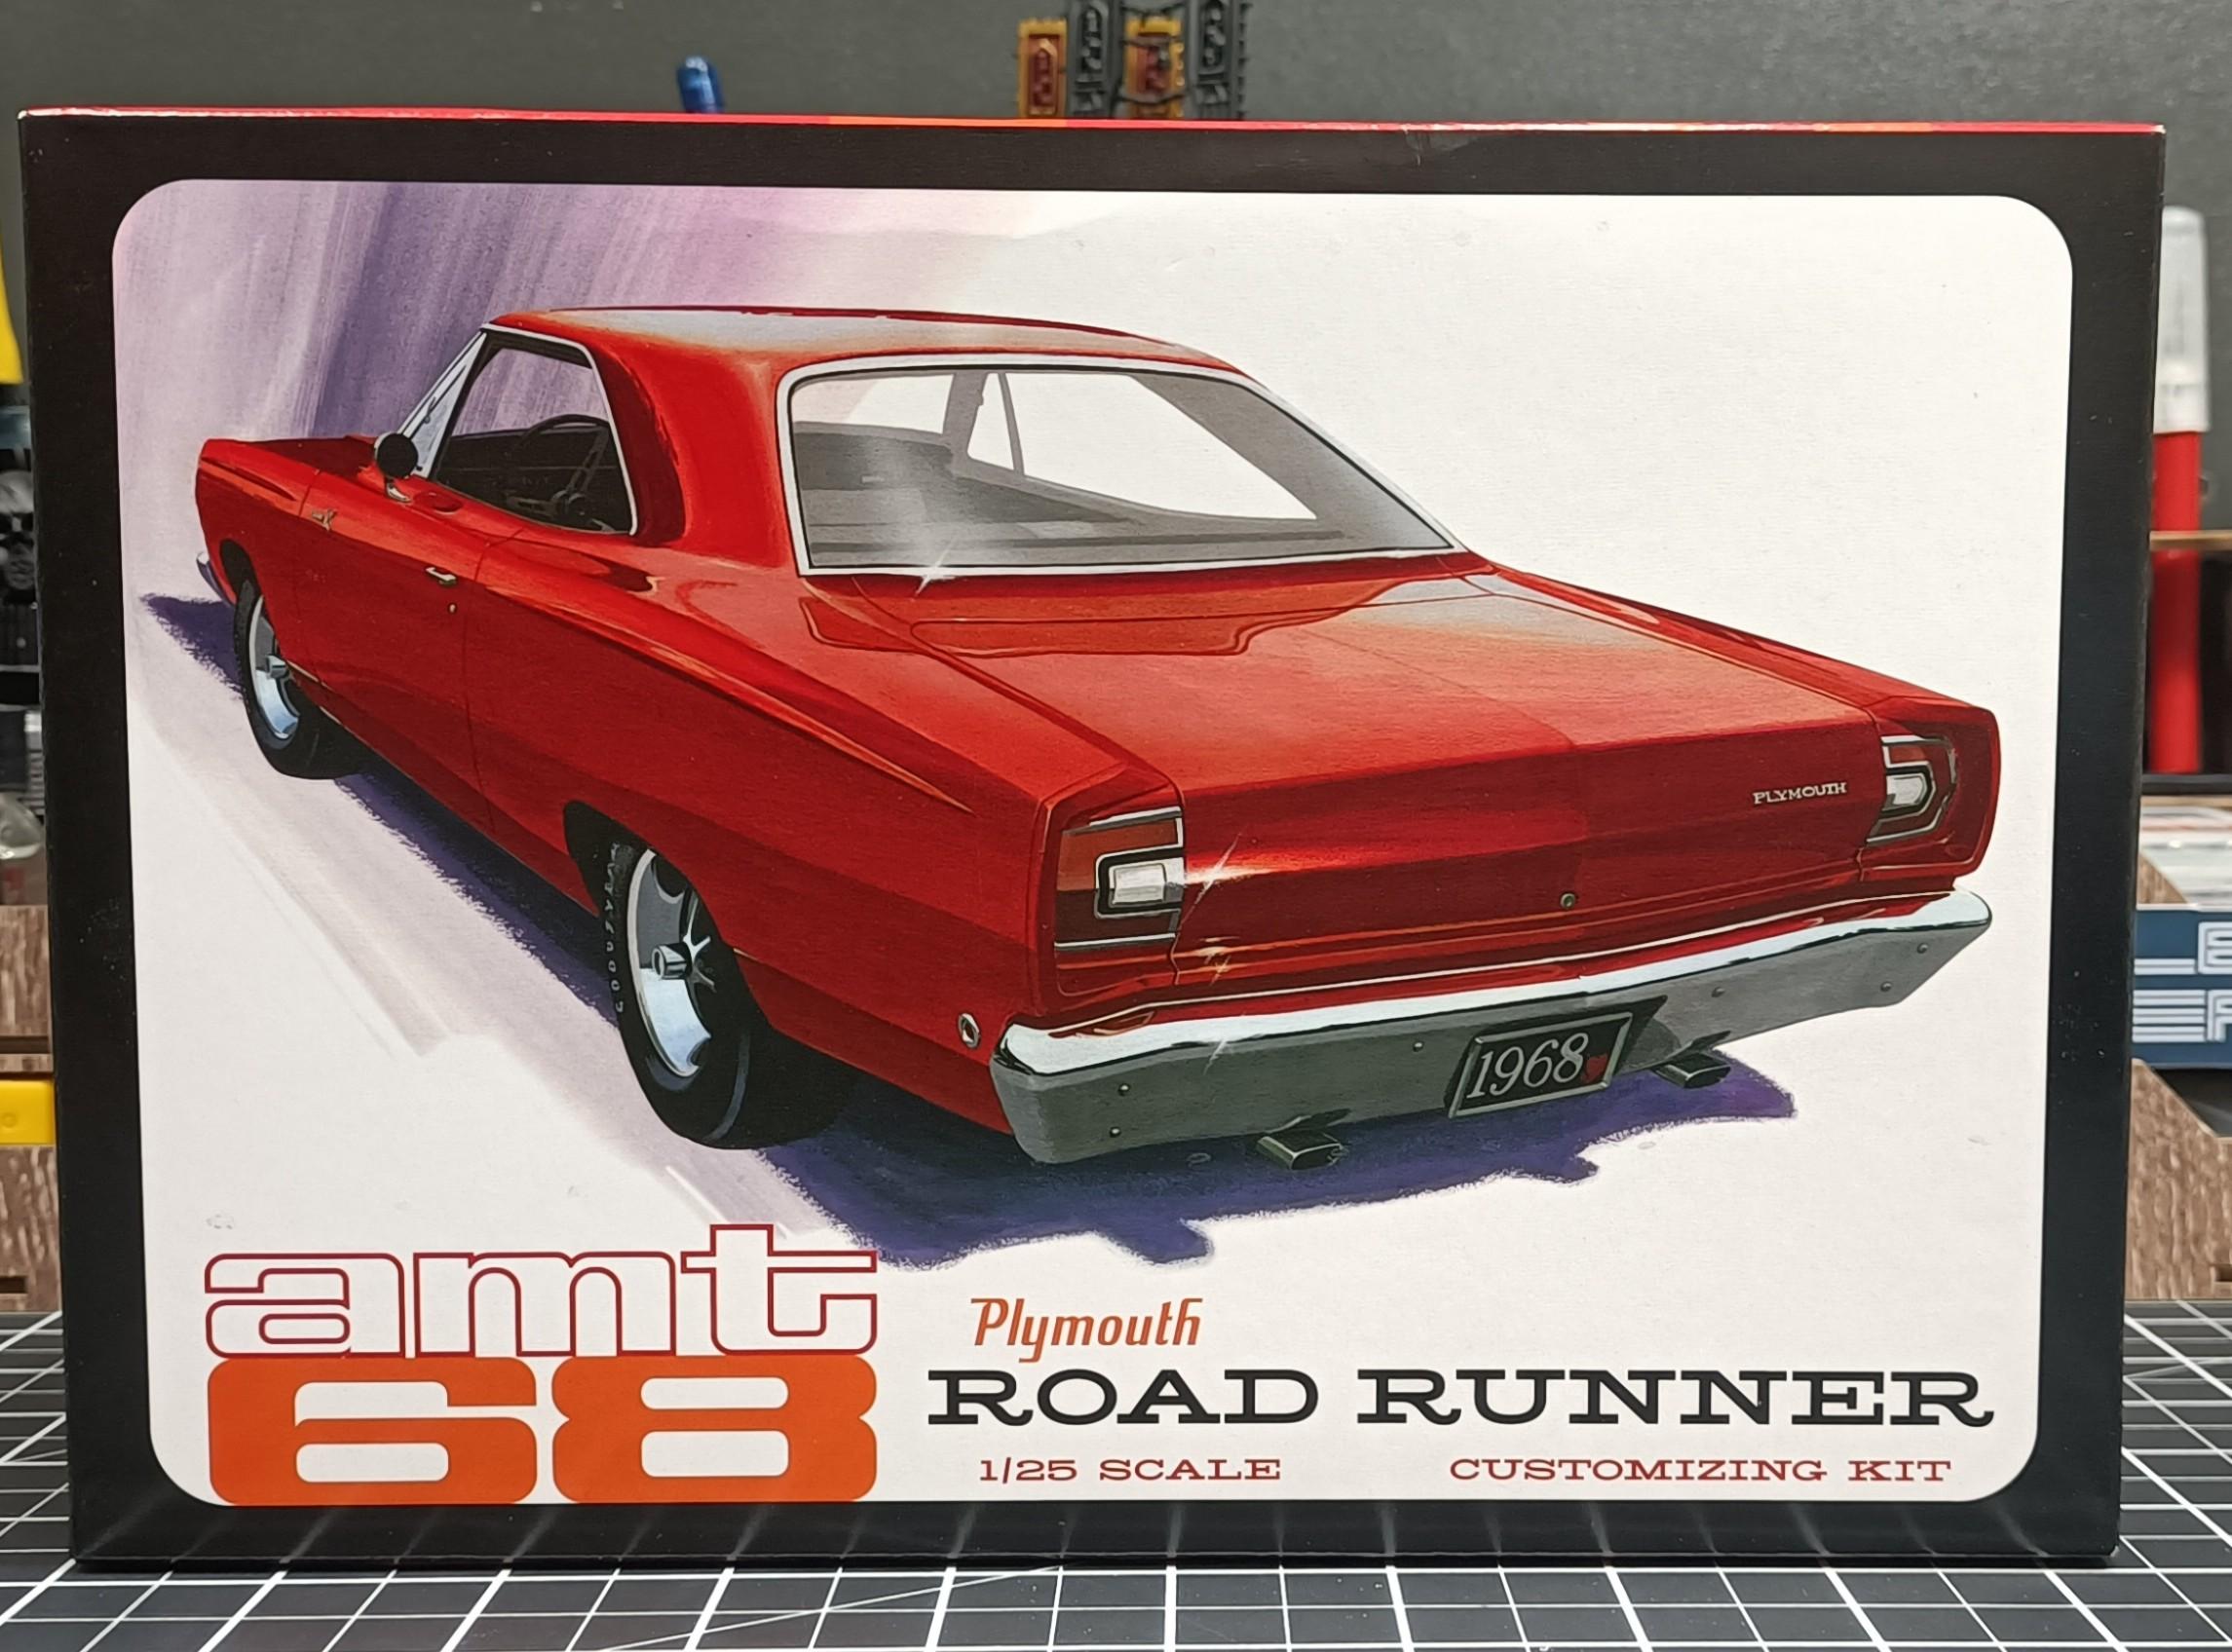
Pictures should explain the direction of the Plymouth build 🤣
- 766 replies
-
- 2
-
-
- stalled builds
- quick builds
- (and 2 more)
-
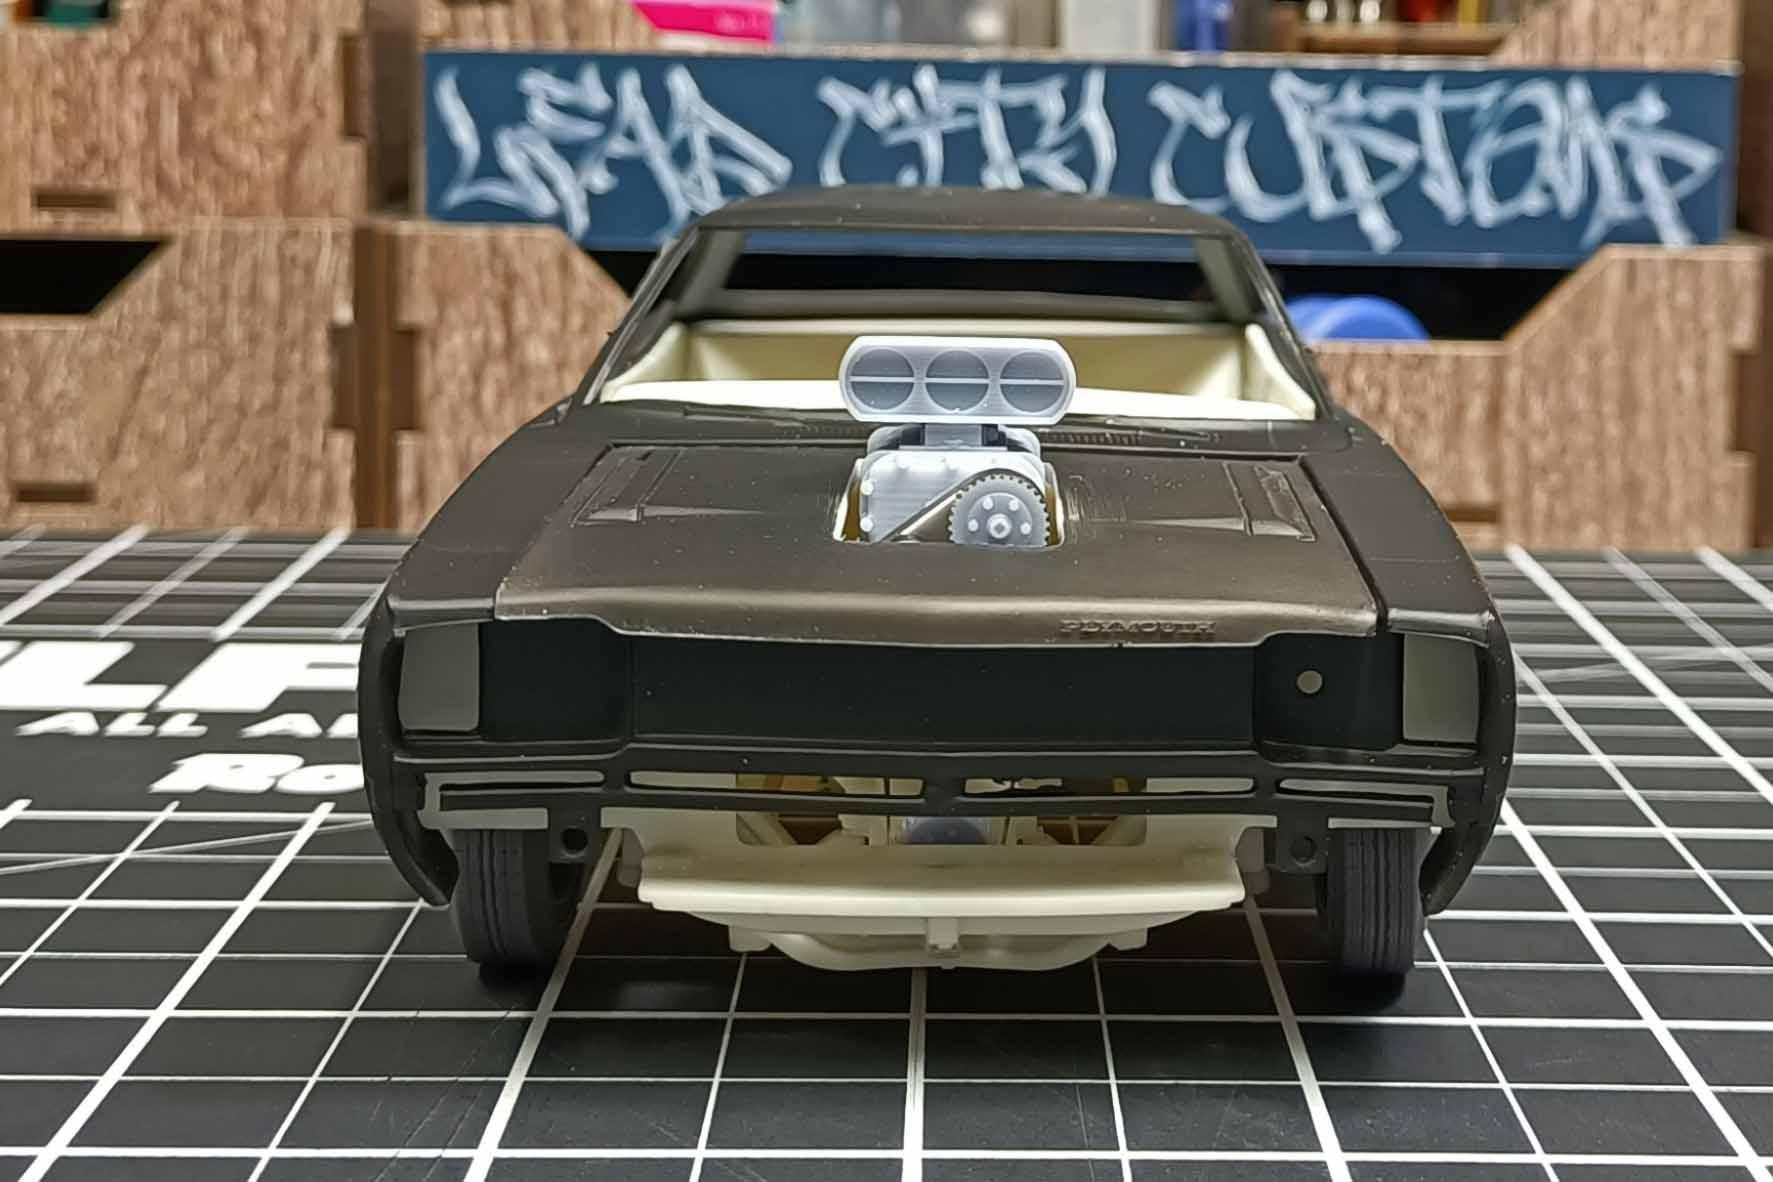
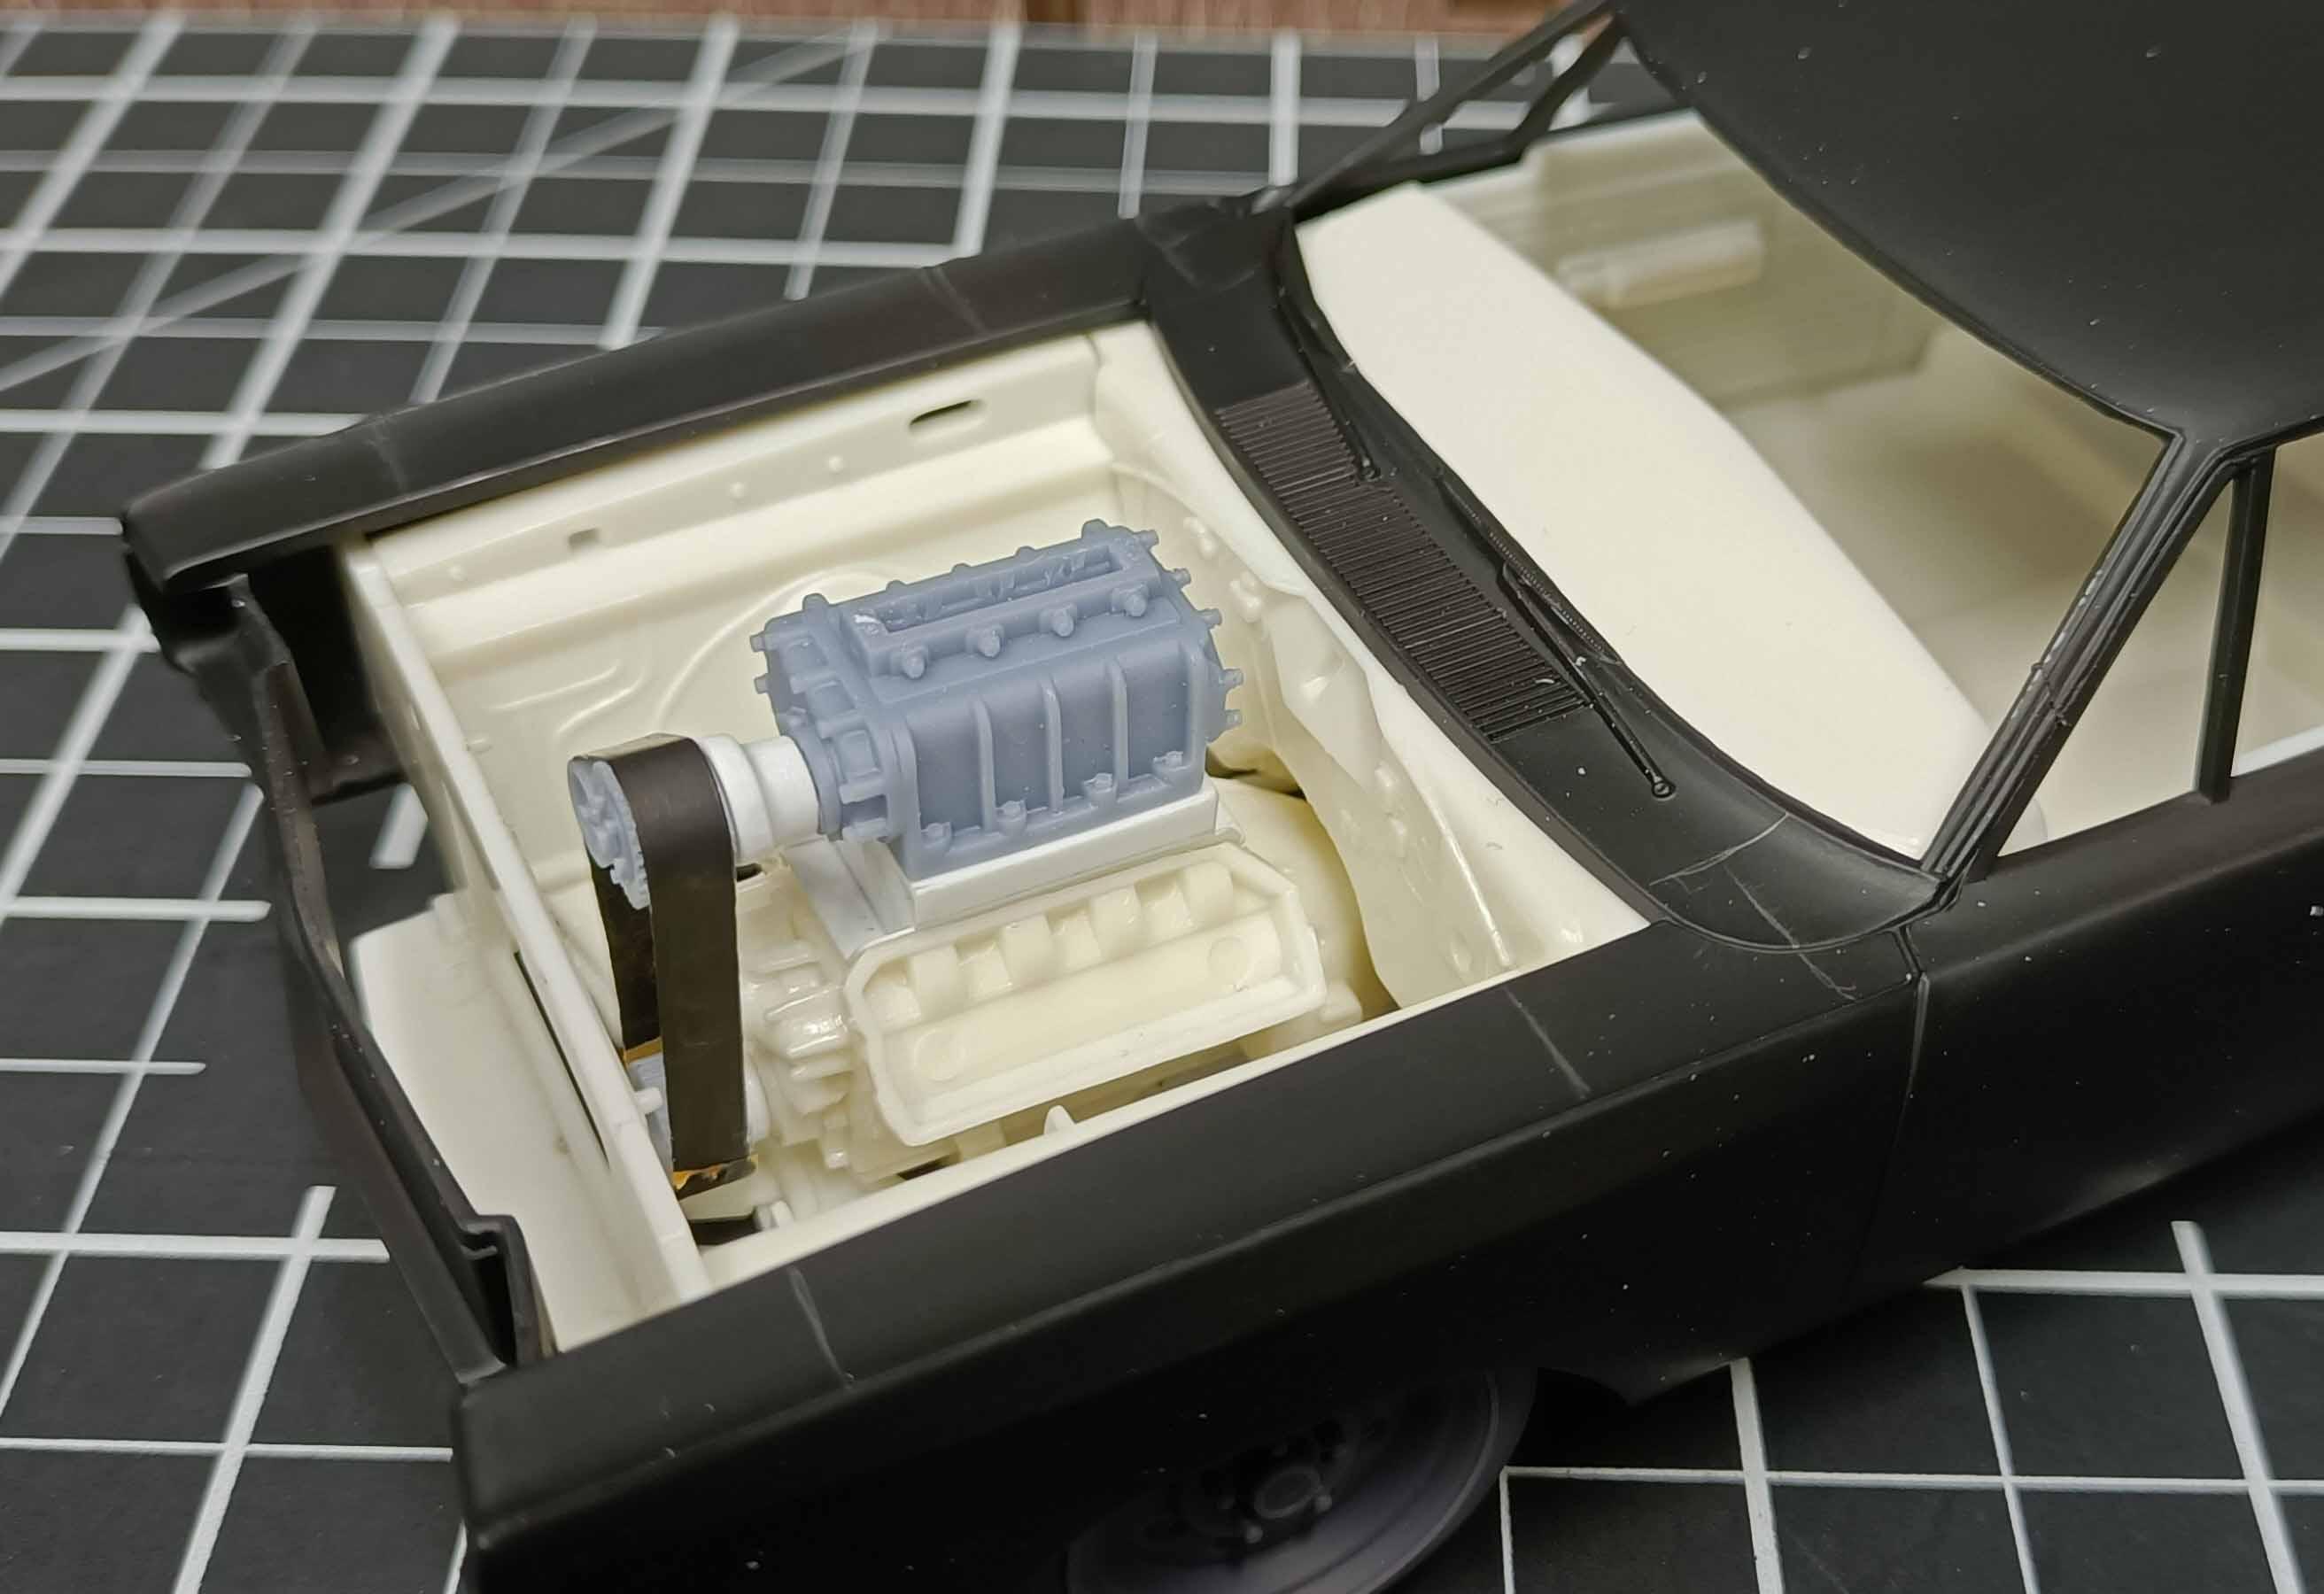
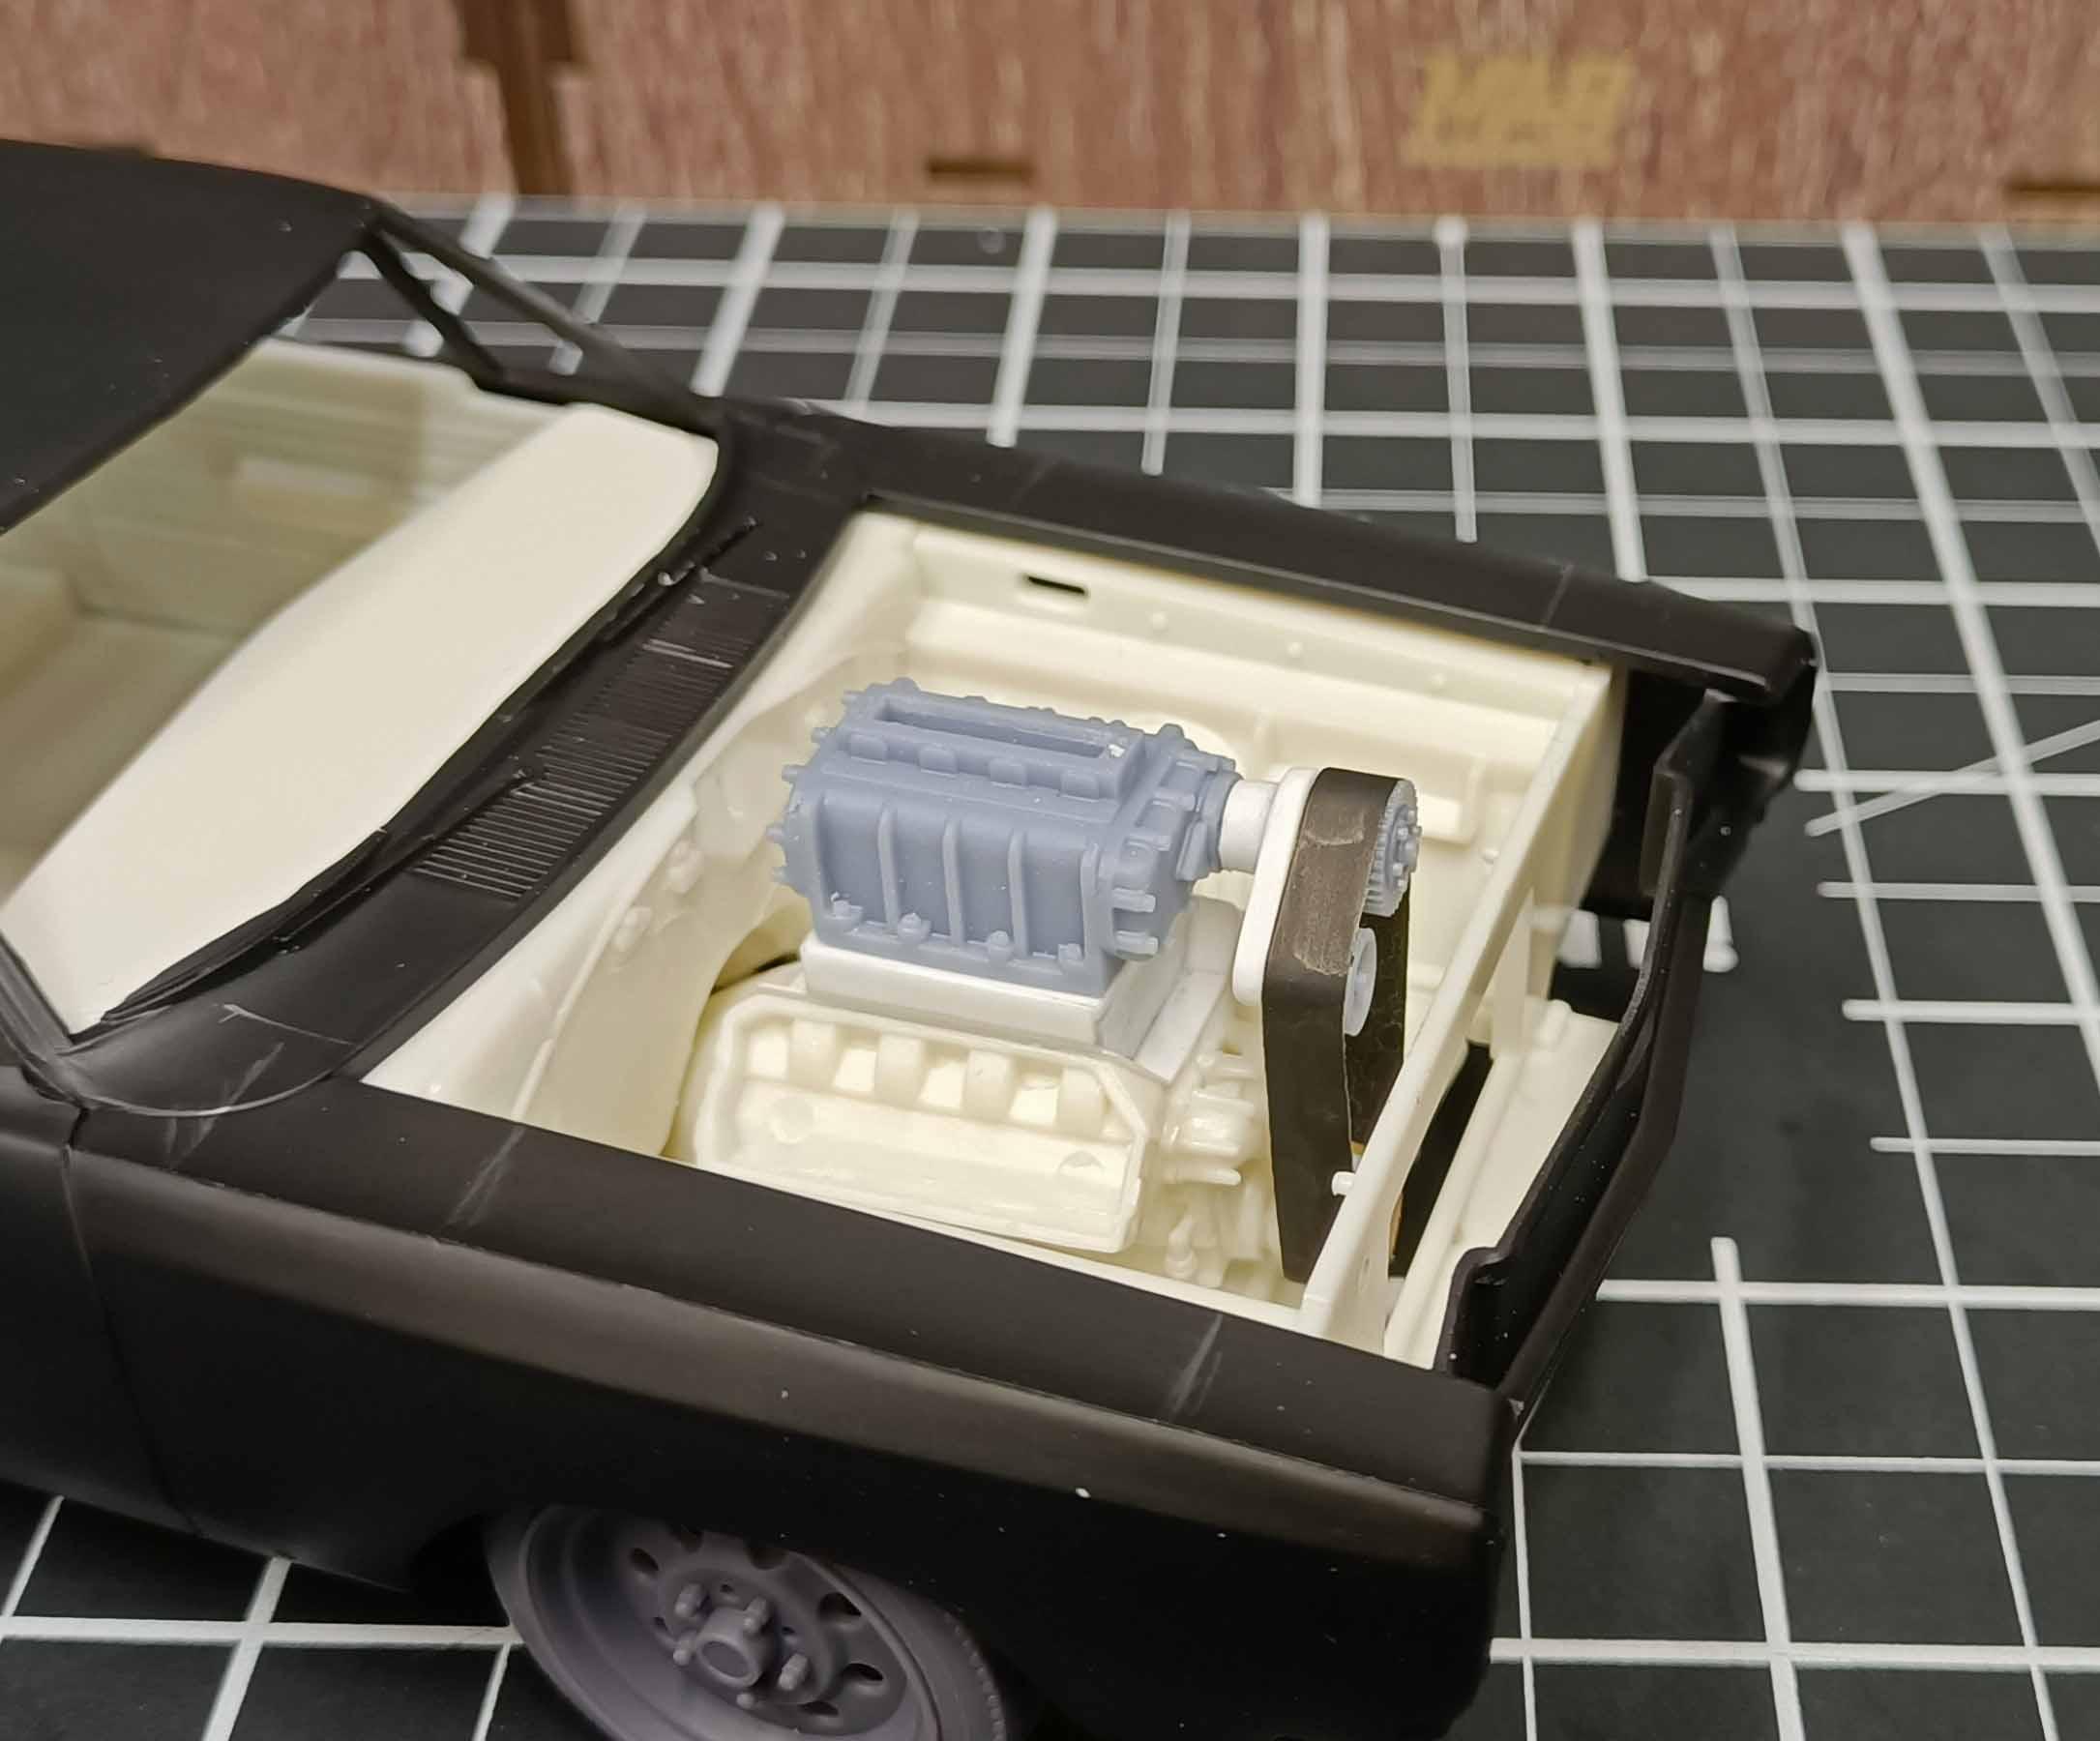
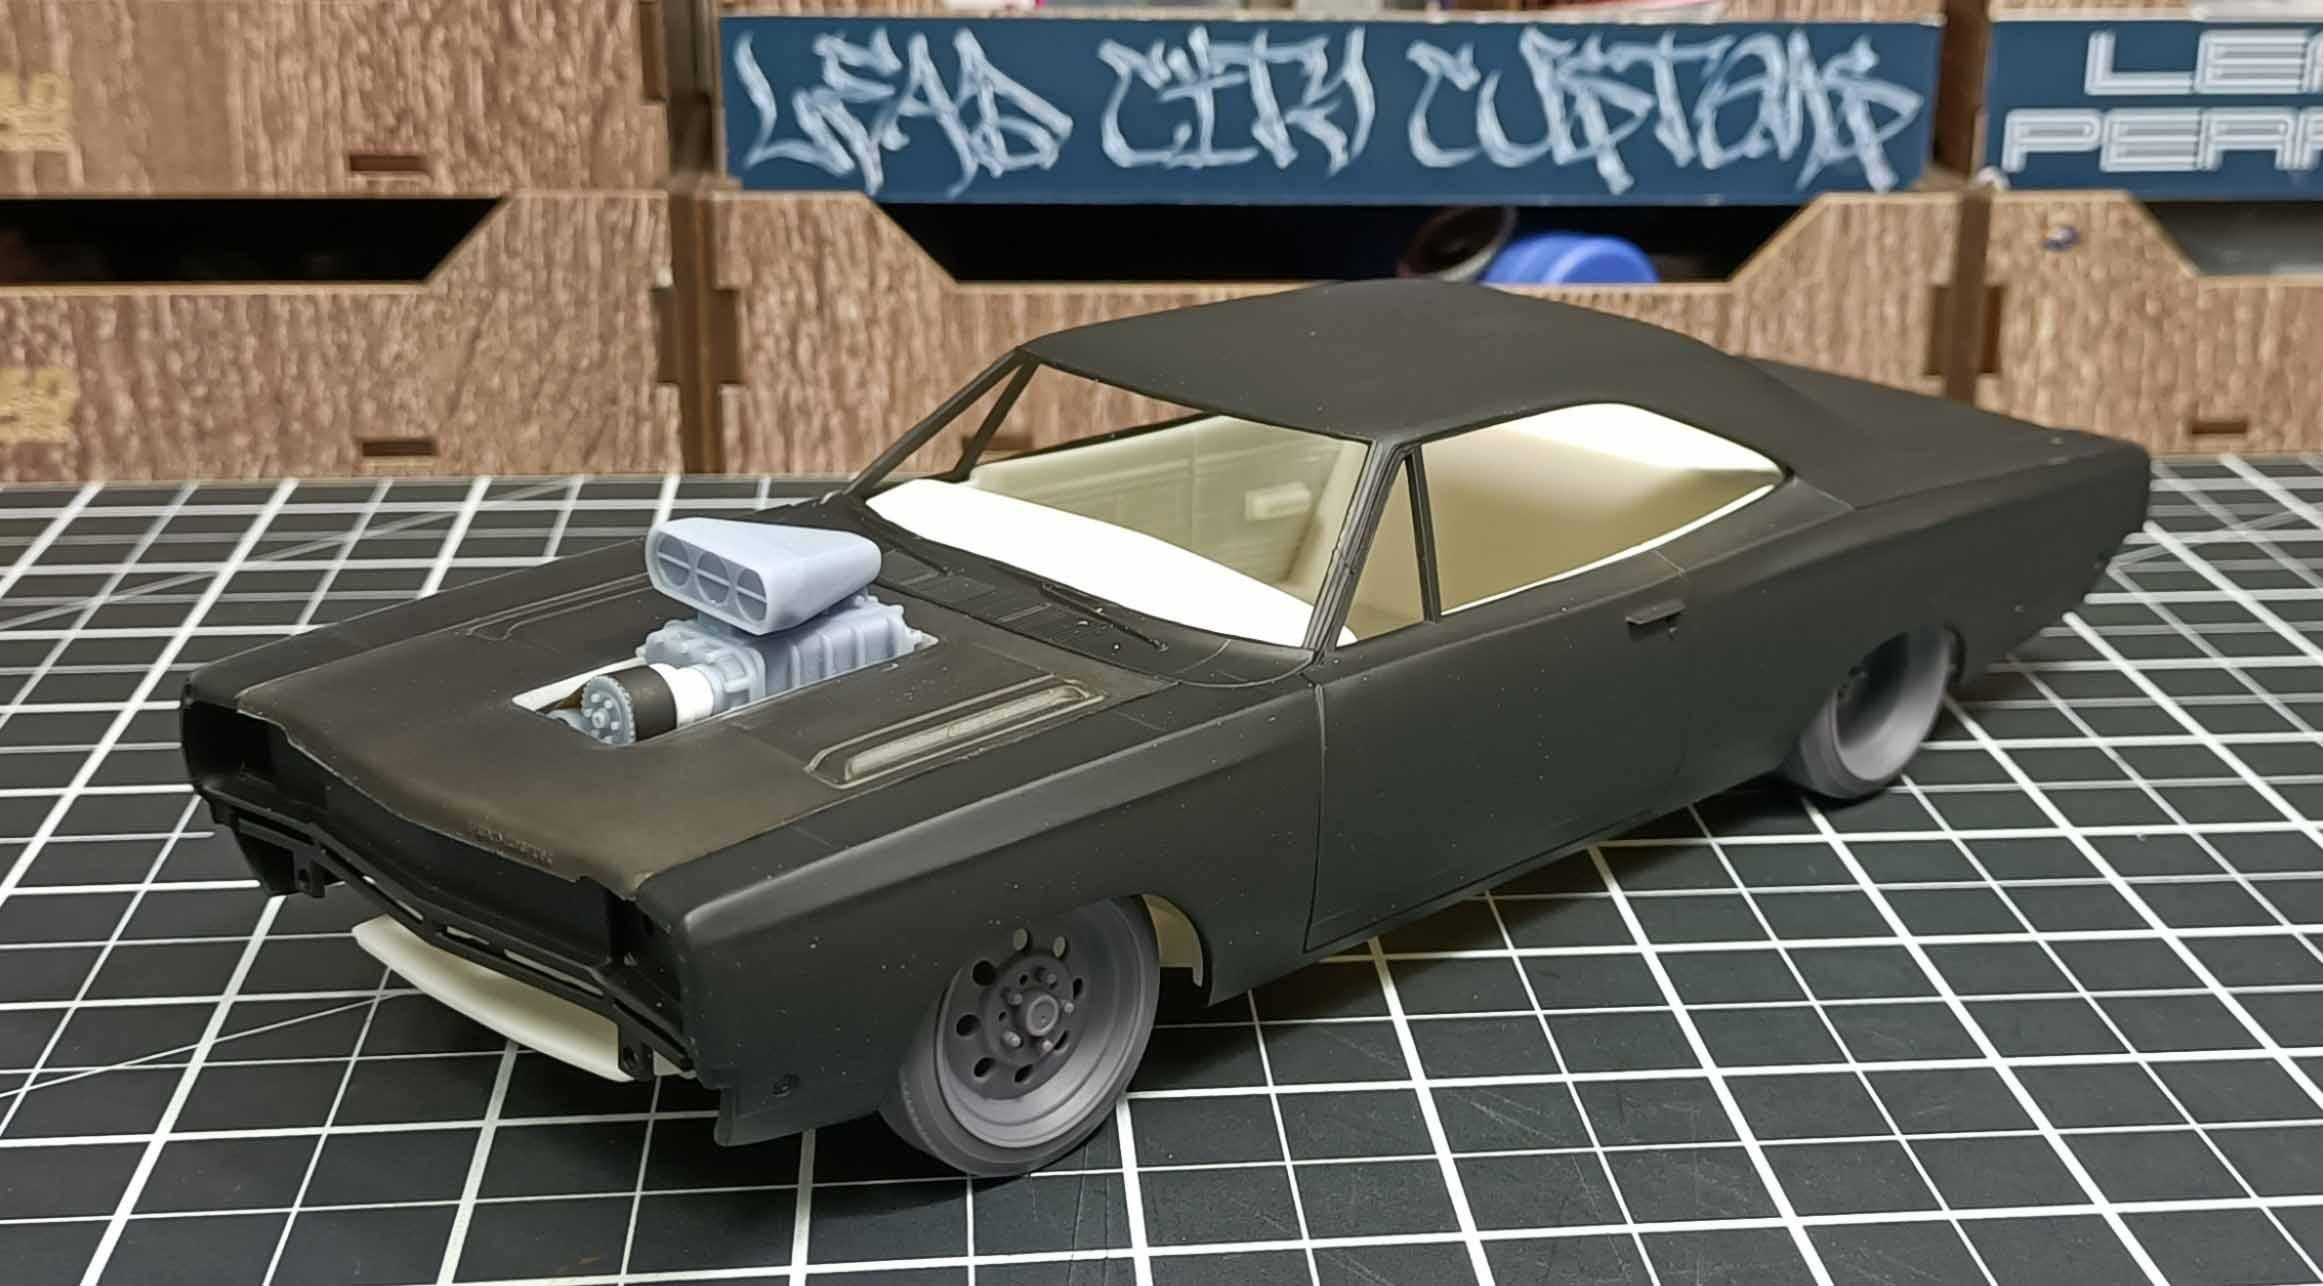
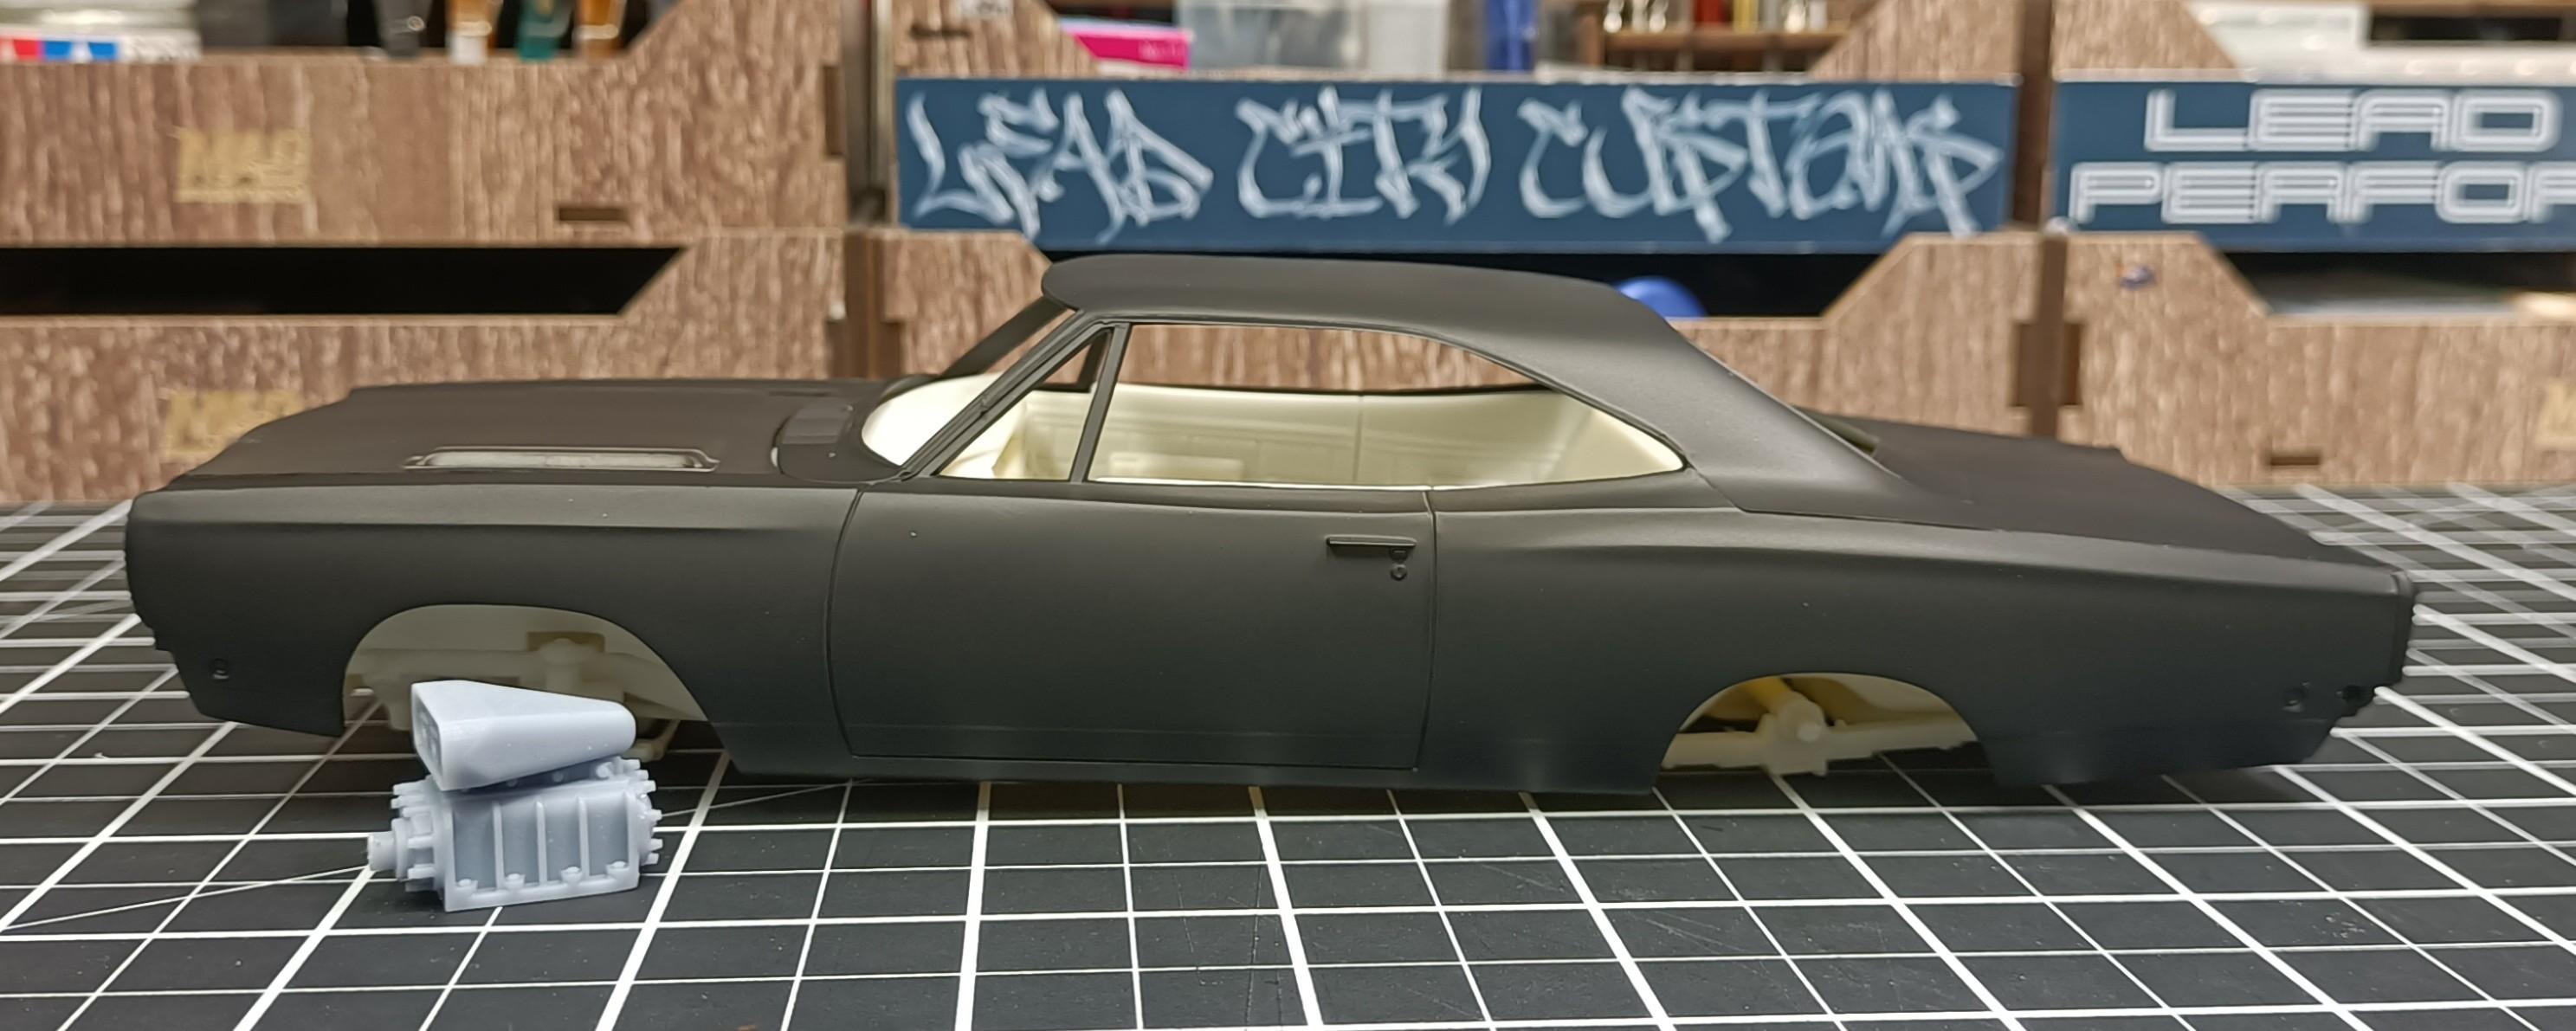
Stance adjusted. Scratch built an inlet manifold for the supercharger I 3D printed, increased the snout length and made the idler pulley bracket to mount onto it. Going to change out the Bird Catcher scoop and replace with some carburetor's
- 766 replies
-
- 3
-
-
- stalled builds
- quick builds
- (and 2 more)
-
Looks tuff. Excellent detailing work in the engine bay.
-
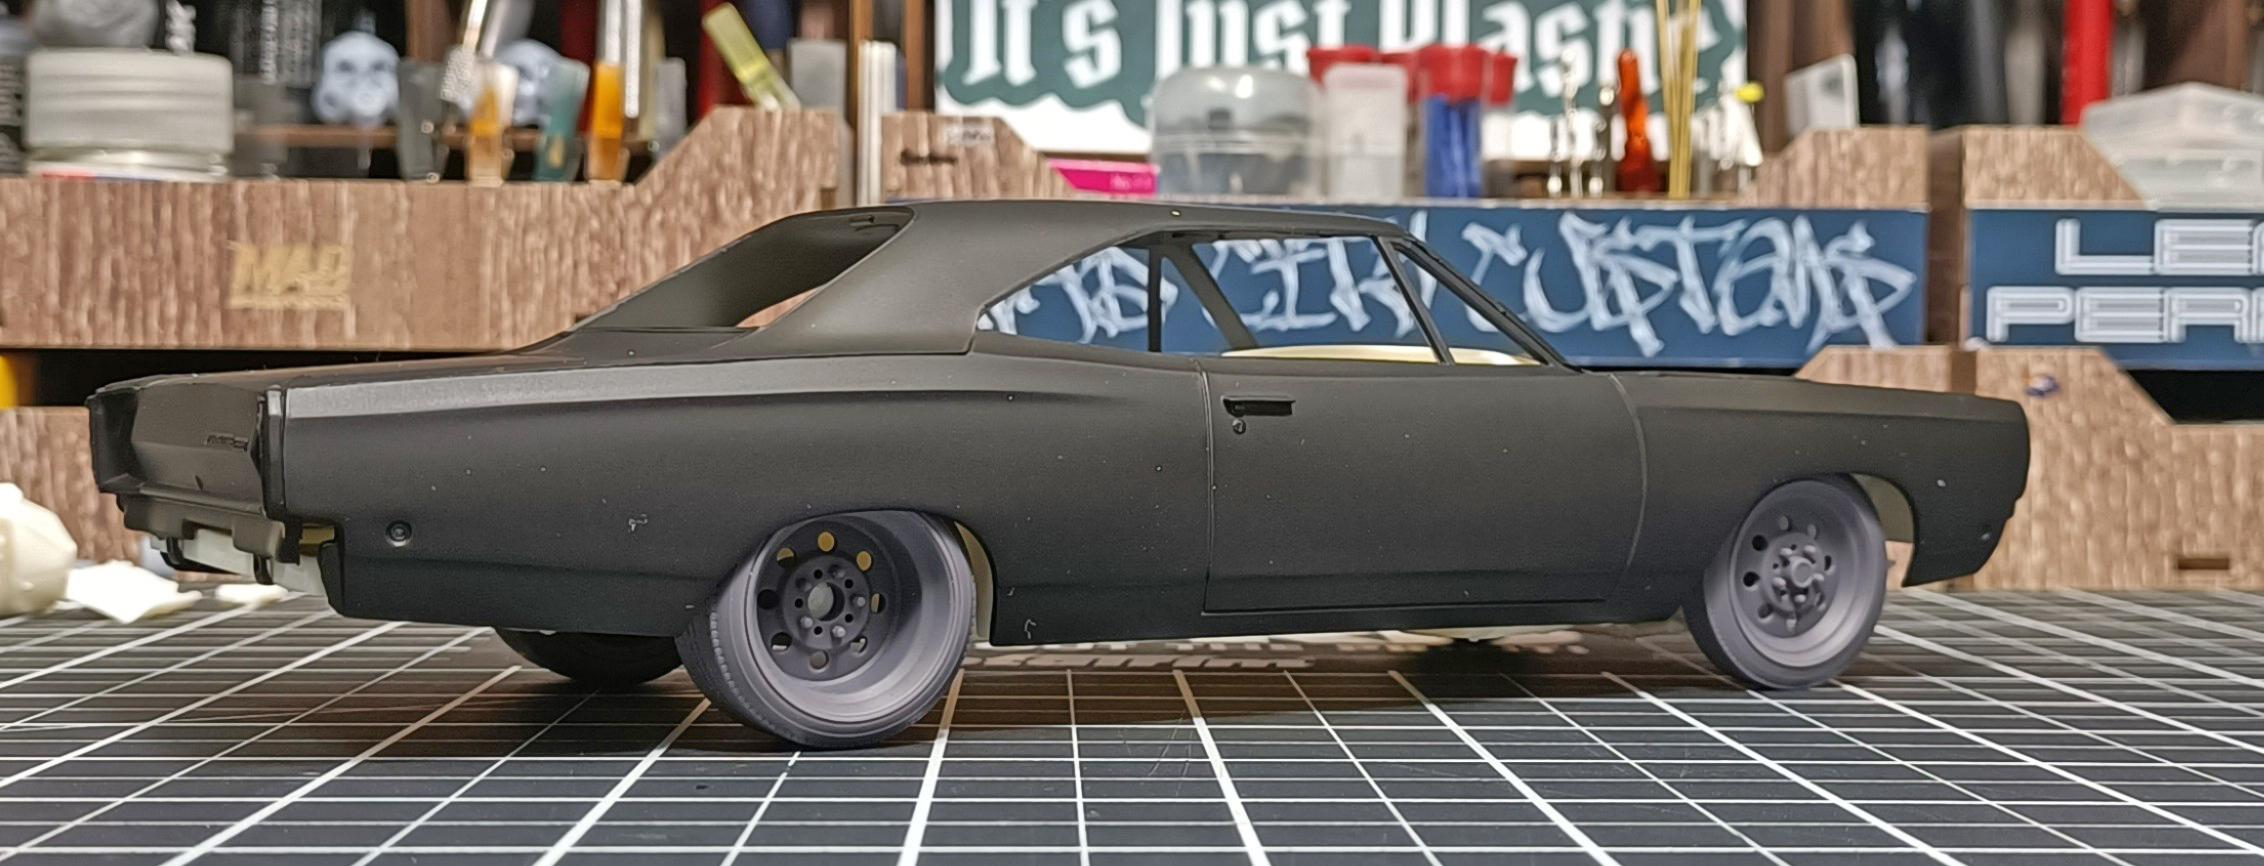
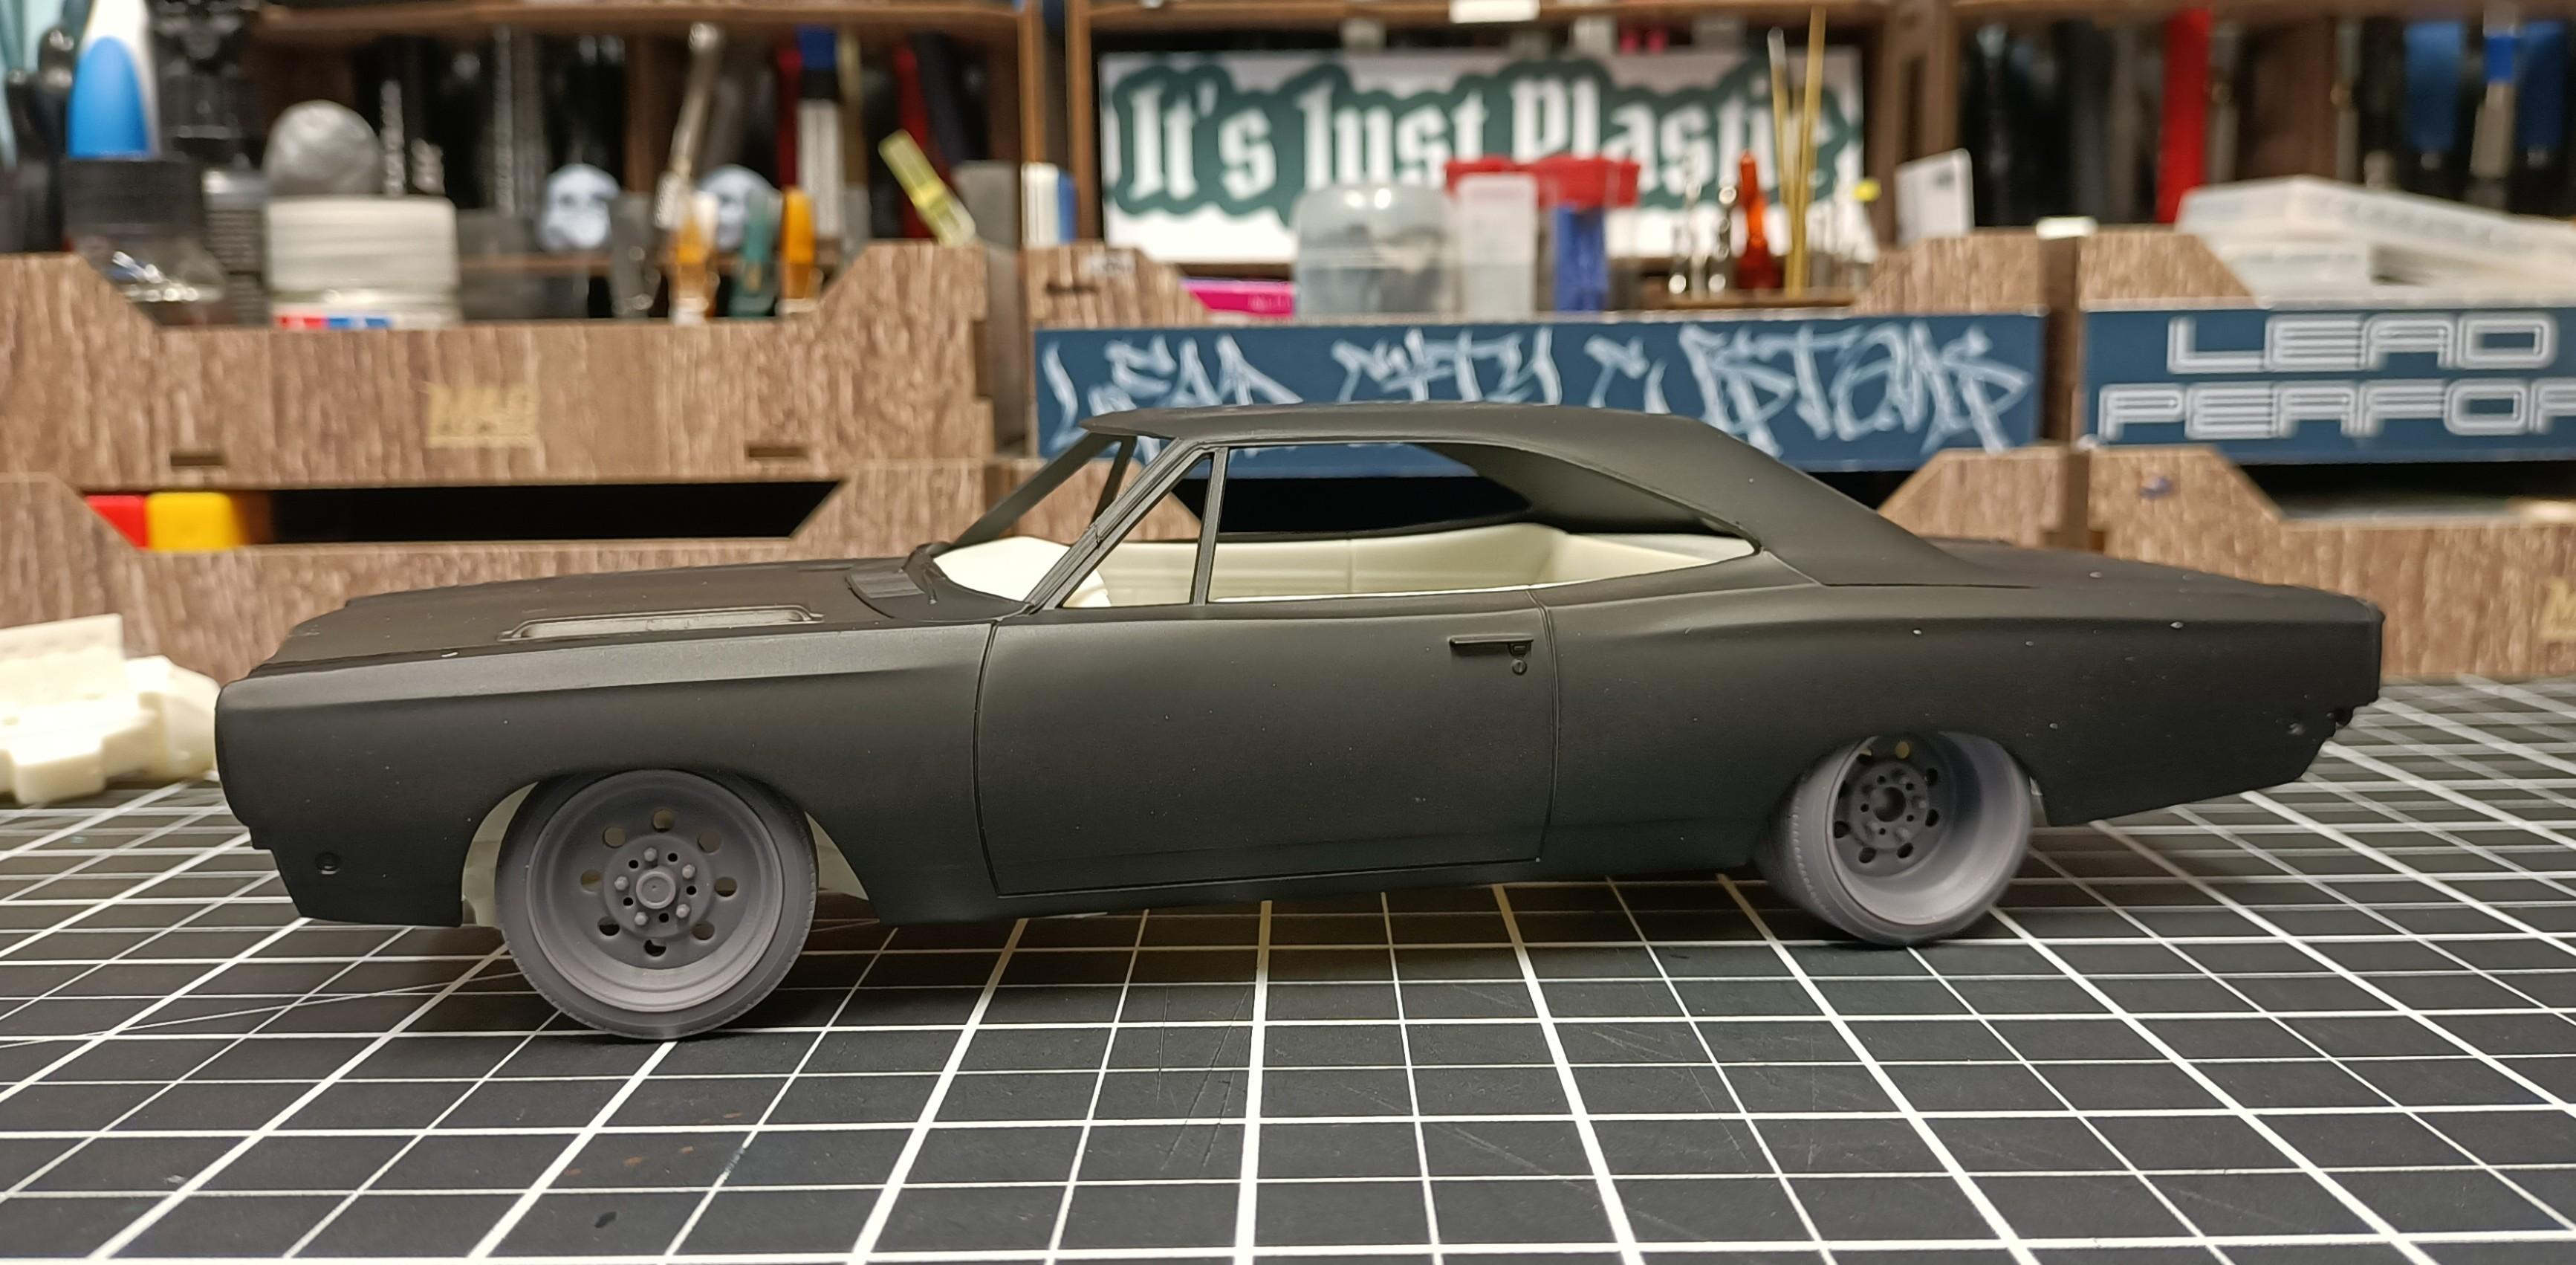
Wheel mock up, need to make some adjustments to the stance.
- 766 replies
-
- 2
-
-
- stalled builds
- quick builds
- (and 2 more)
-
🤔 Wonder what style I will do for this build. Guess we will find out once the wheels are finished 3D printing 🤣
- 766 replies
-
- 3
-
-
- stalled builds
- quick builds
- (and 2 more)
-
Yep agree, mentioned something similar back on page 2. Could also pay per view for specific content/article from the magazine.
-
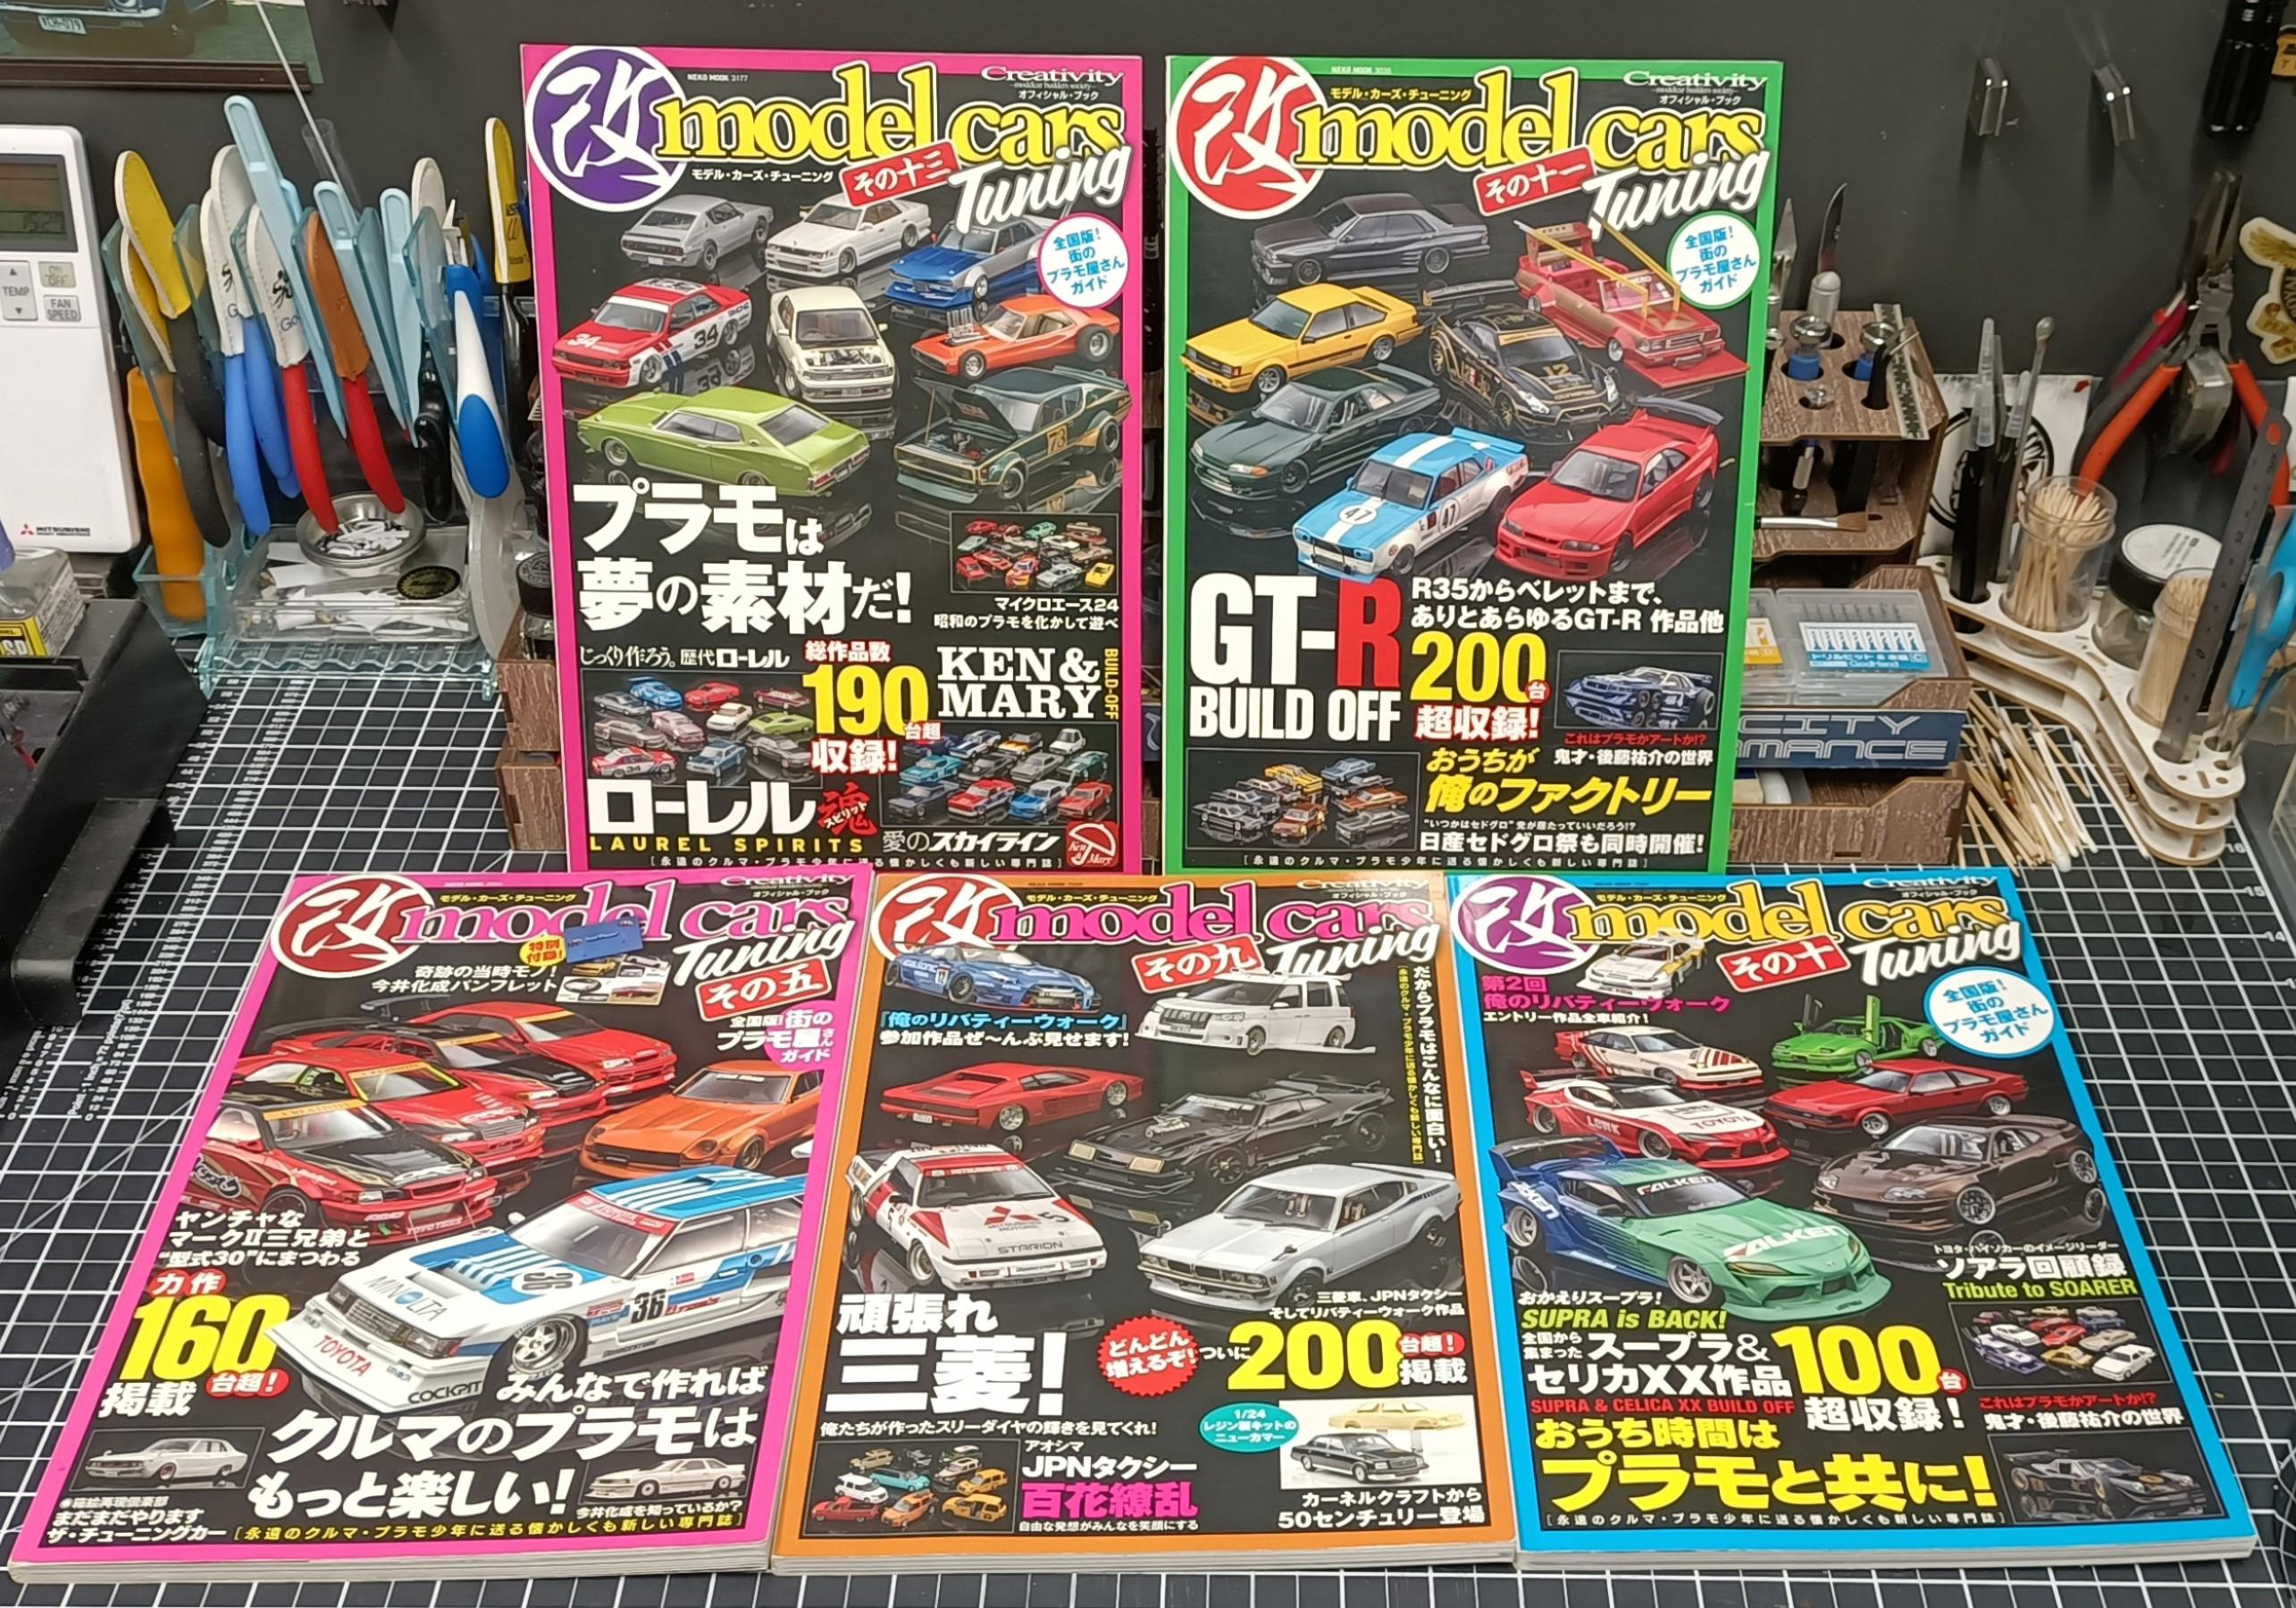
These arrived from Japan today, absolutely amazing model car magazines. Some of the best content I have ever seen.
- 39,063 replies
-
- 5
-
-
- johan
- glue bombs
- (and 1 more)
-
Datto Under Glass.
- 766 replies
-
- 7
-
-
- stalled builds
- quick builds
- (and 2 more)
-
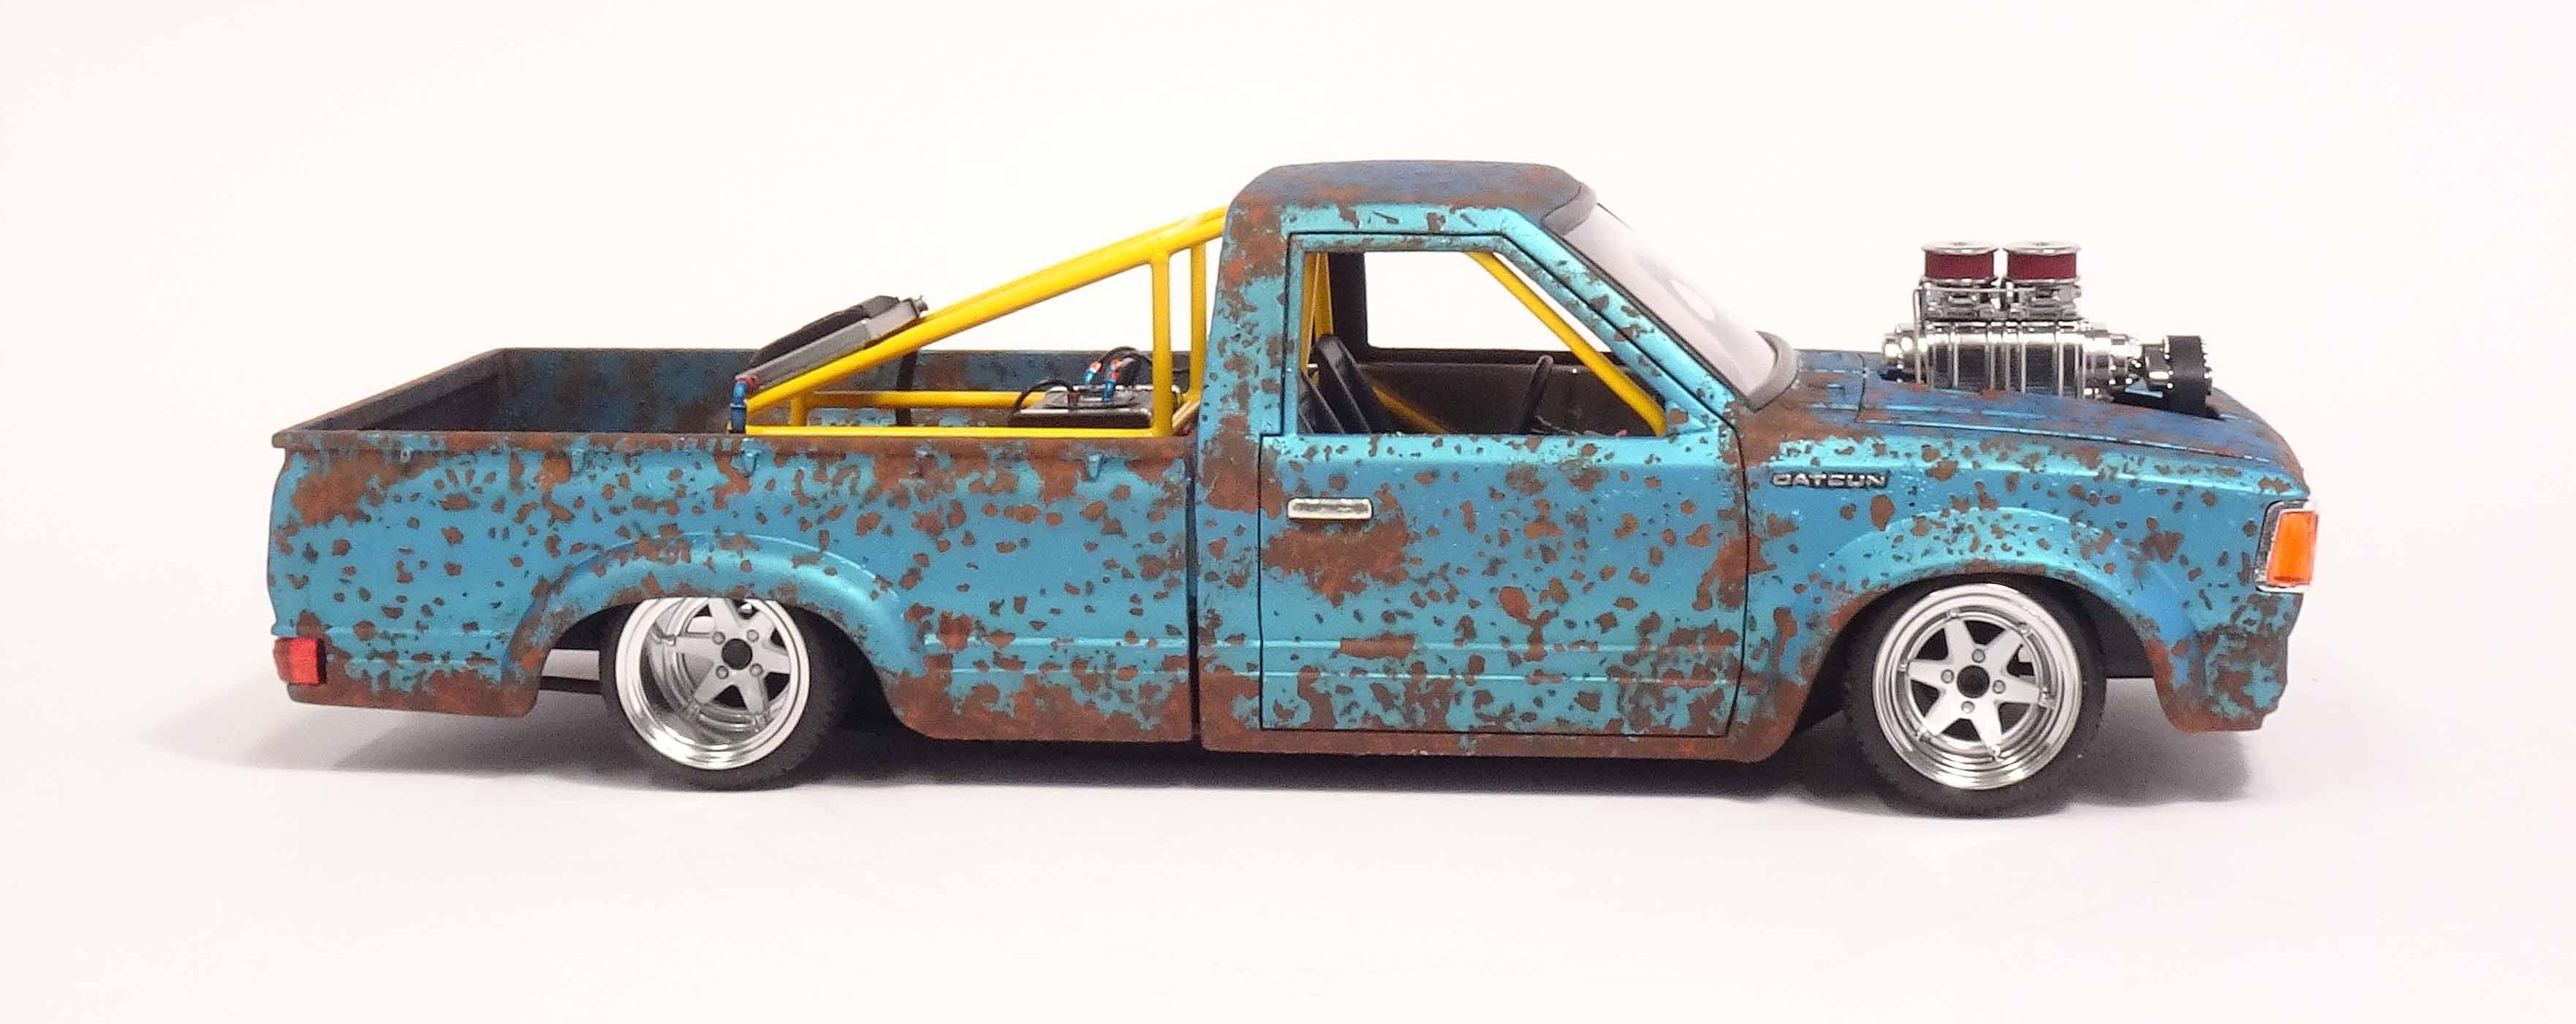
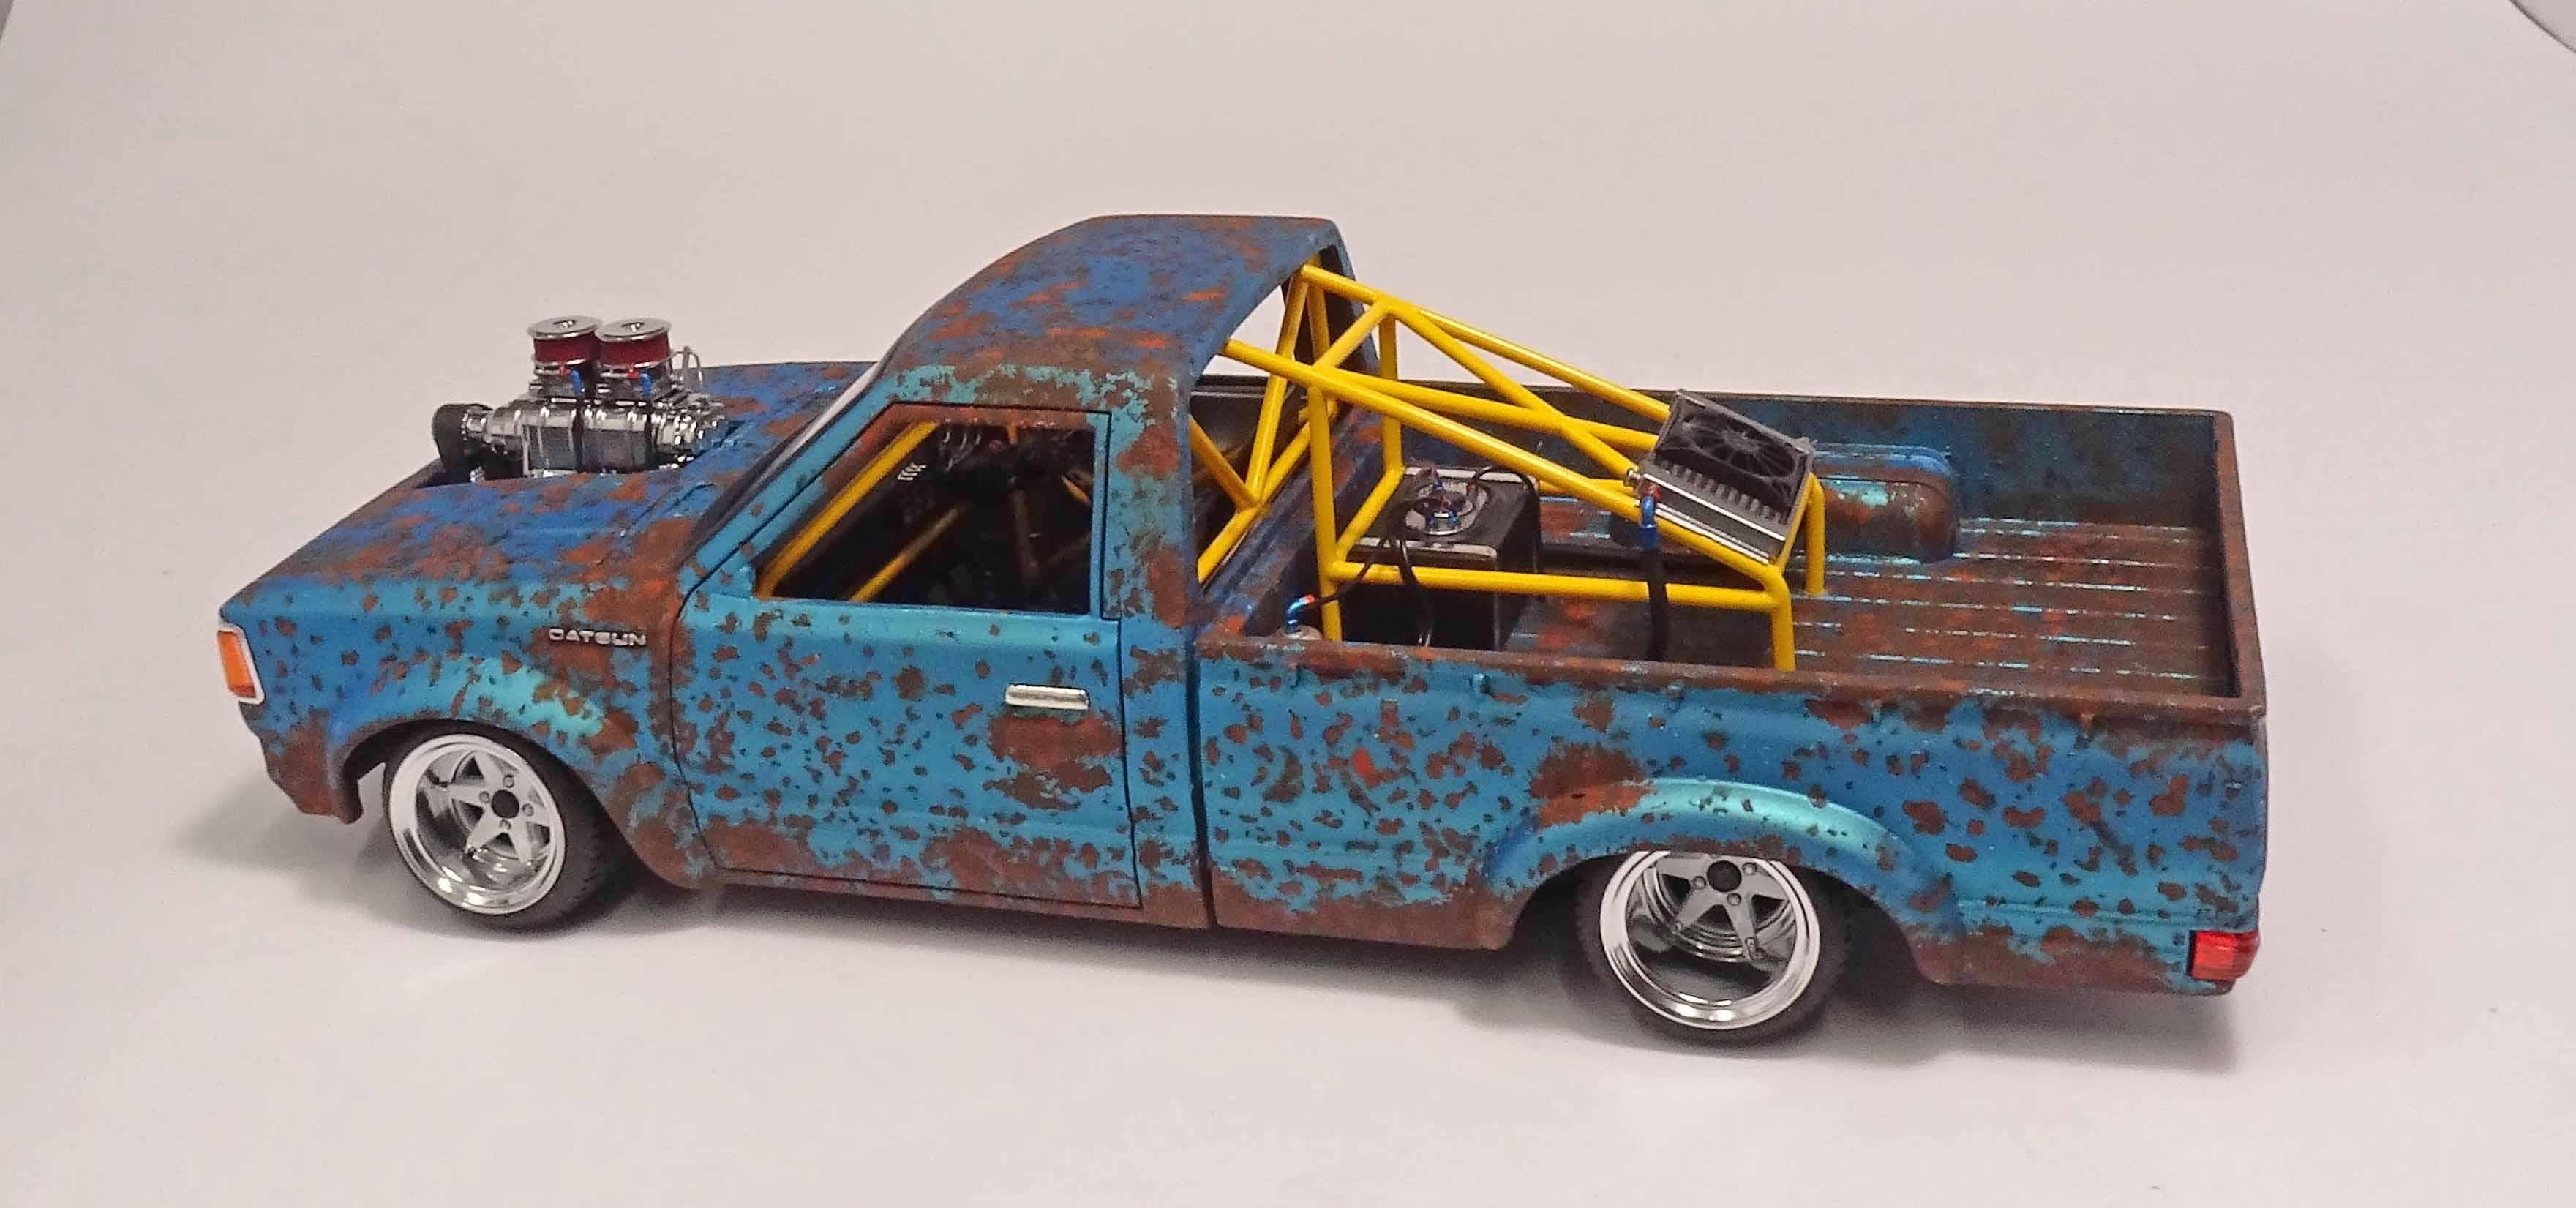
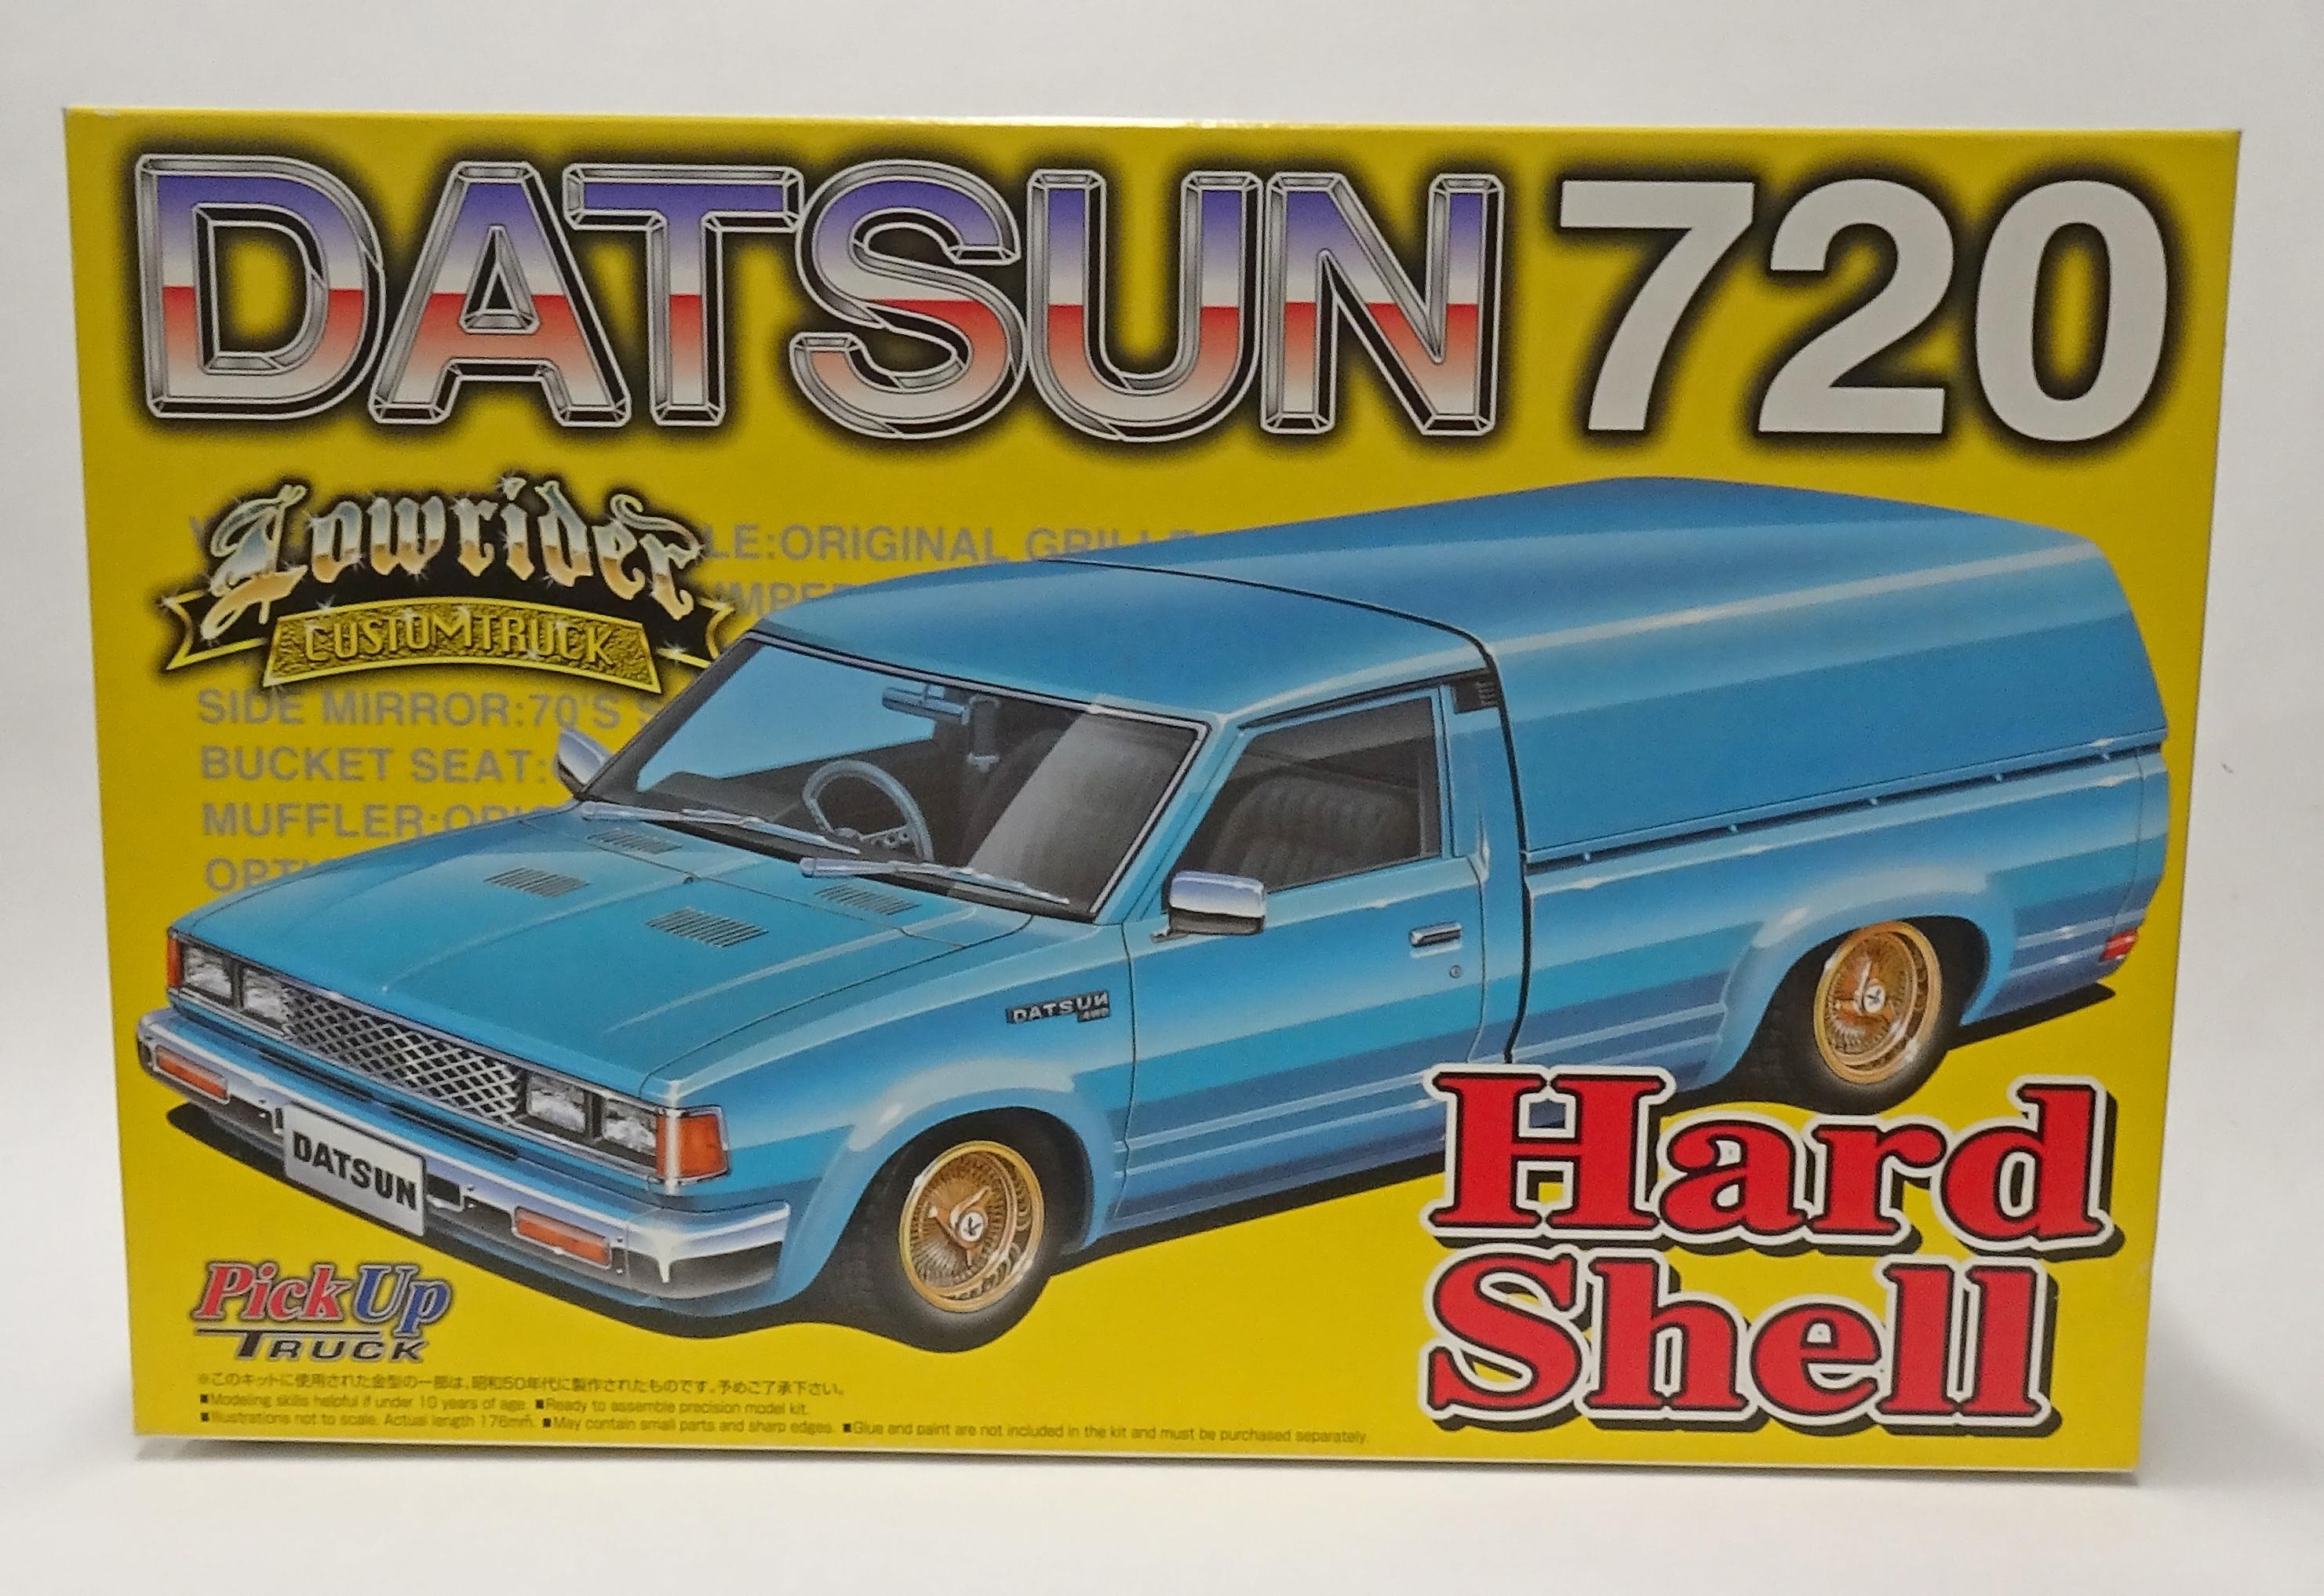
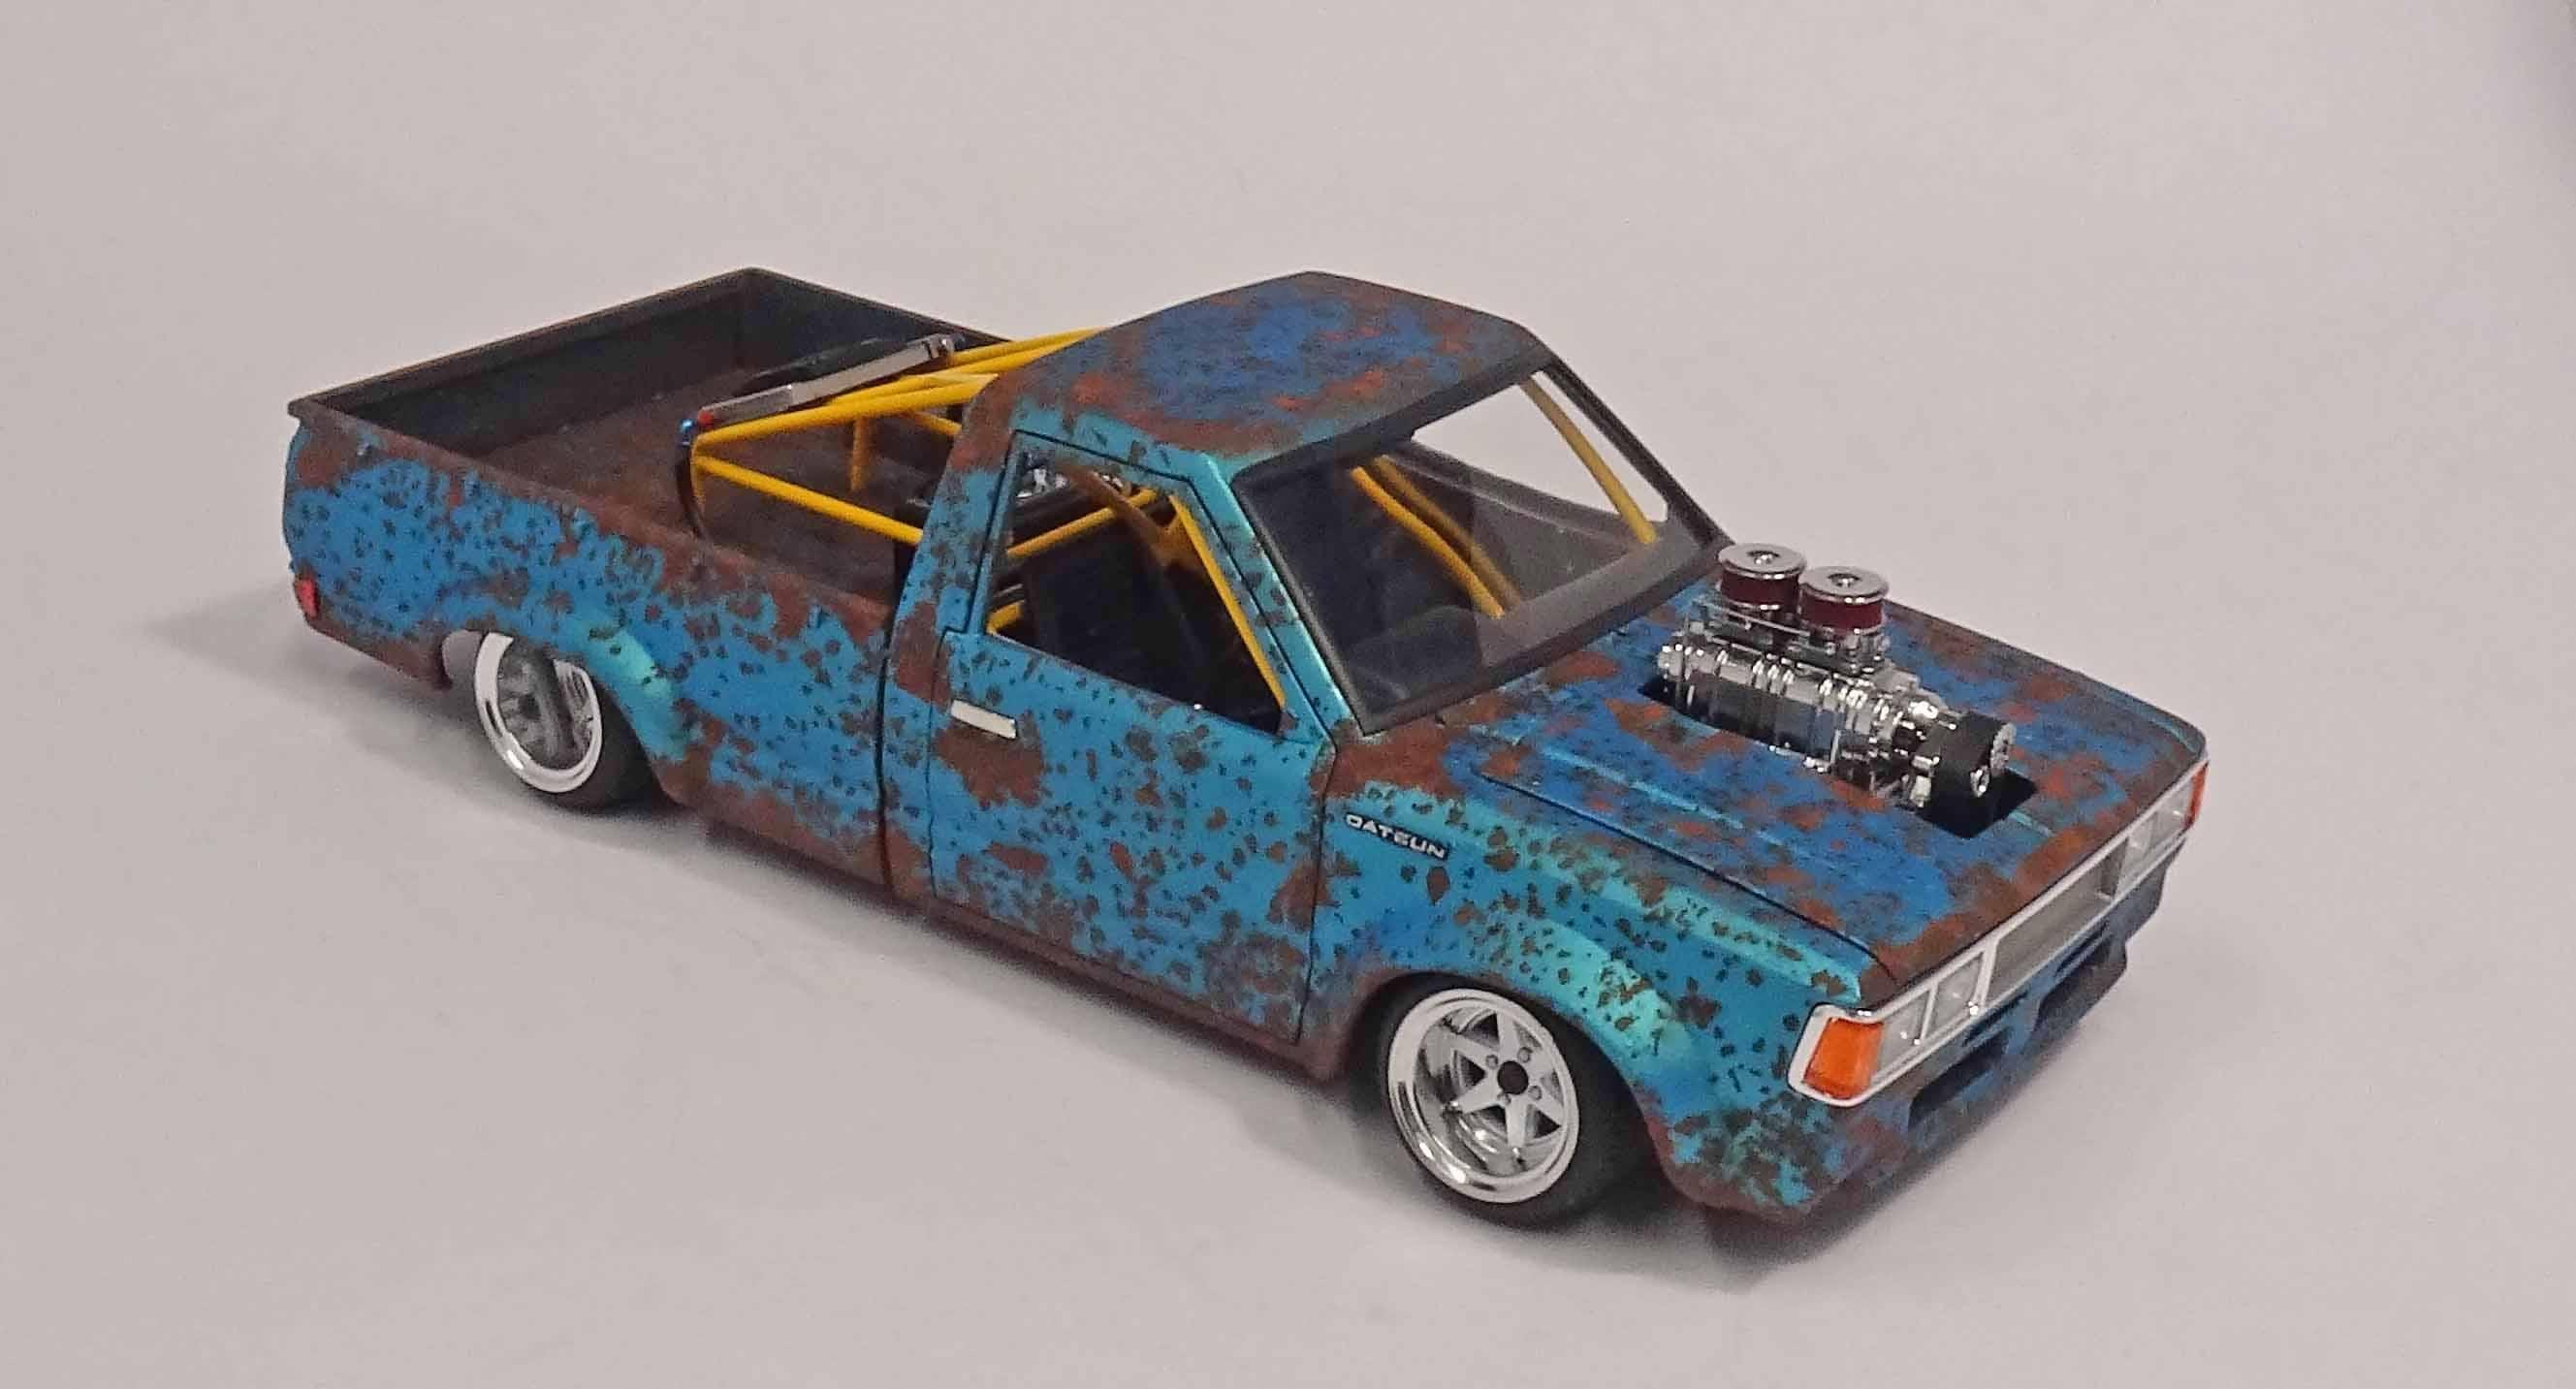
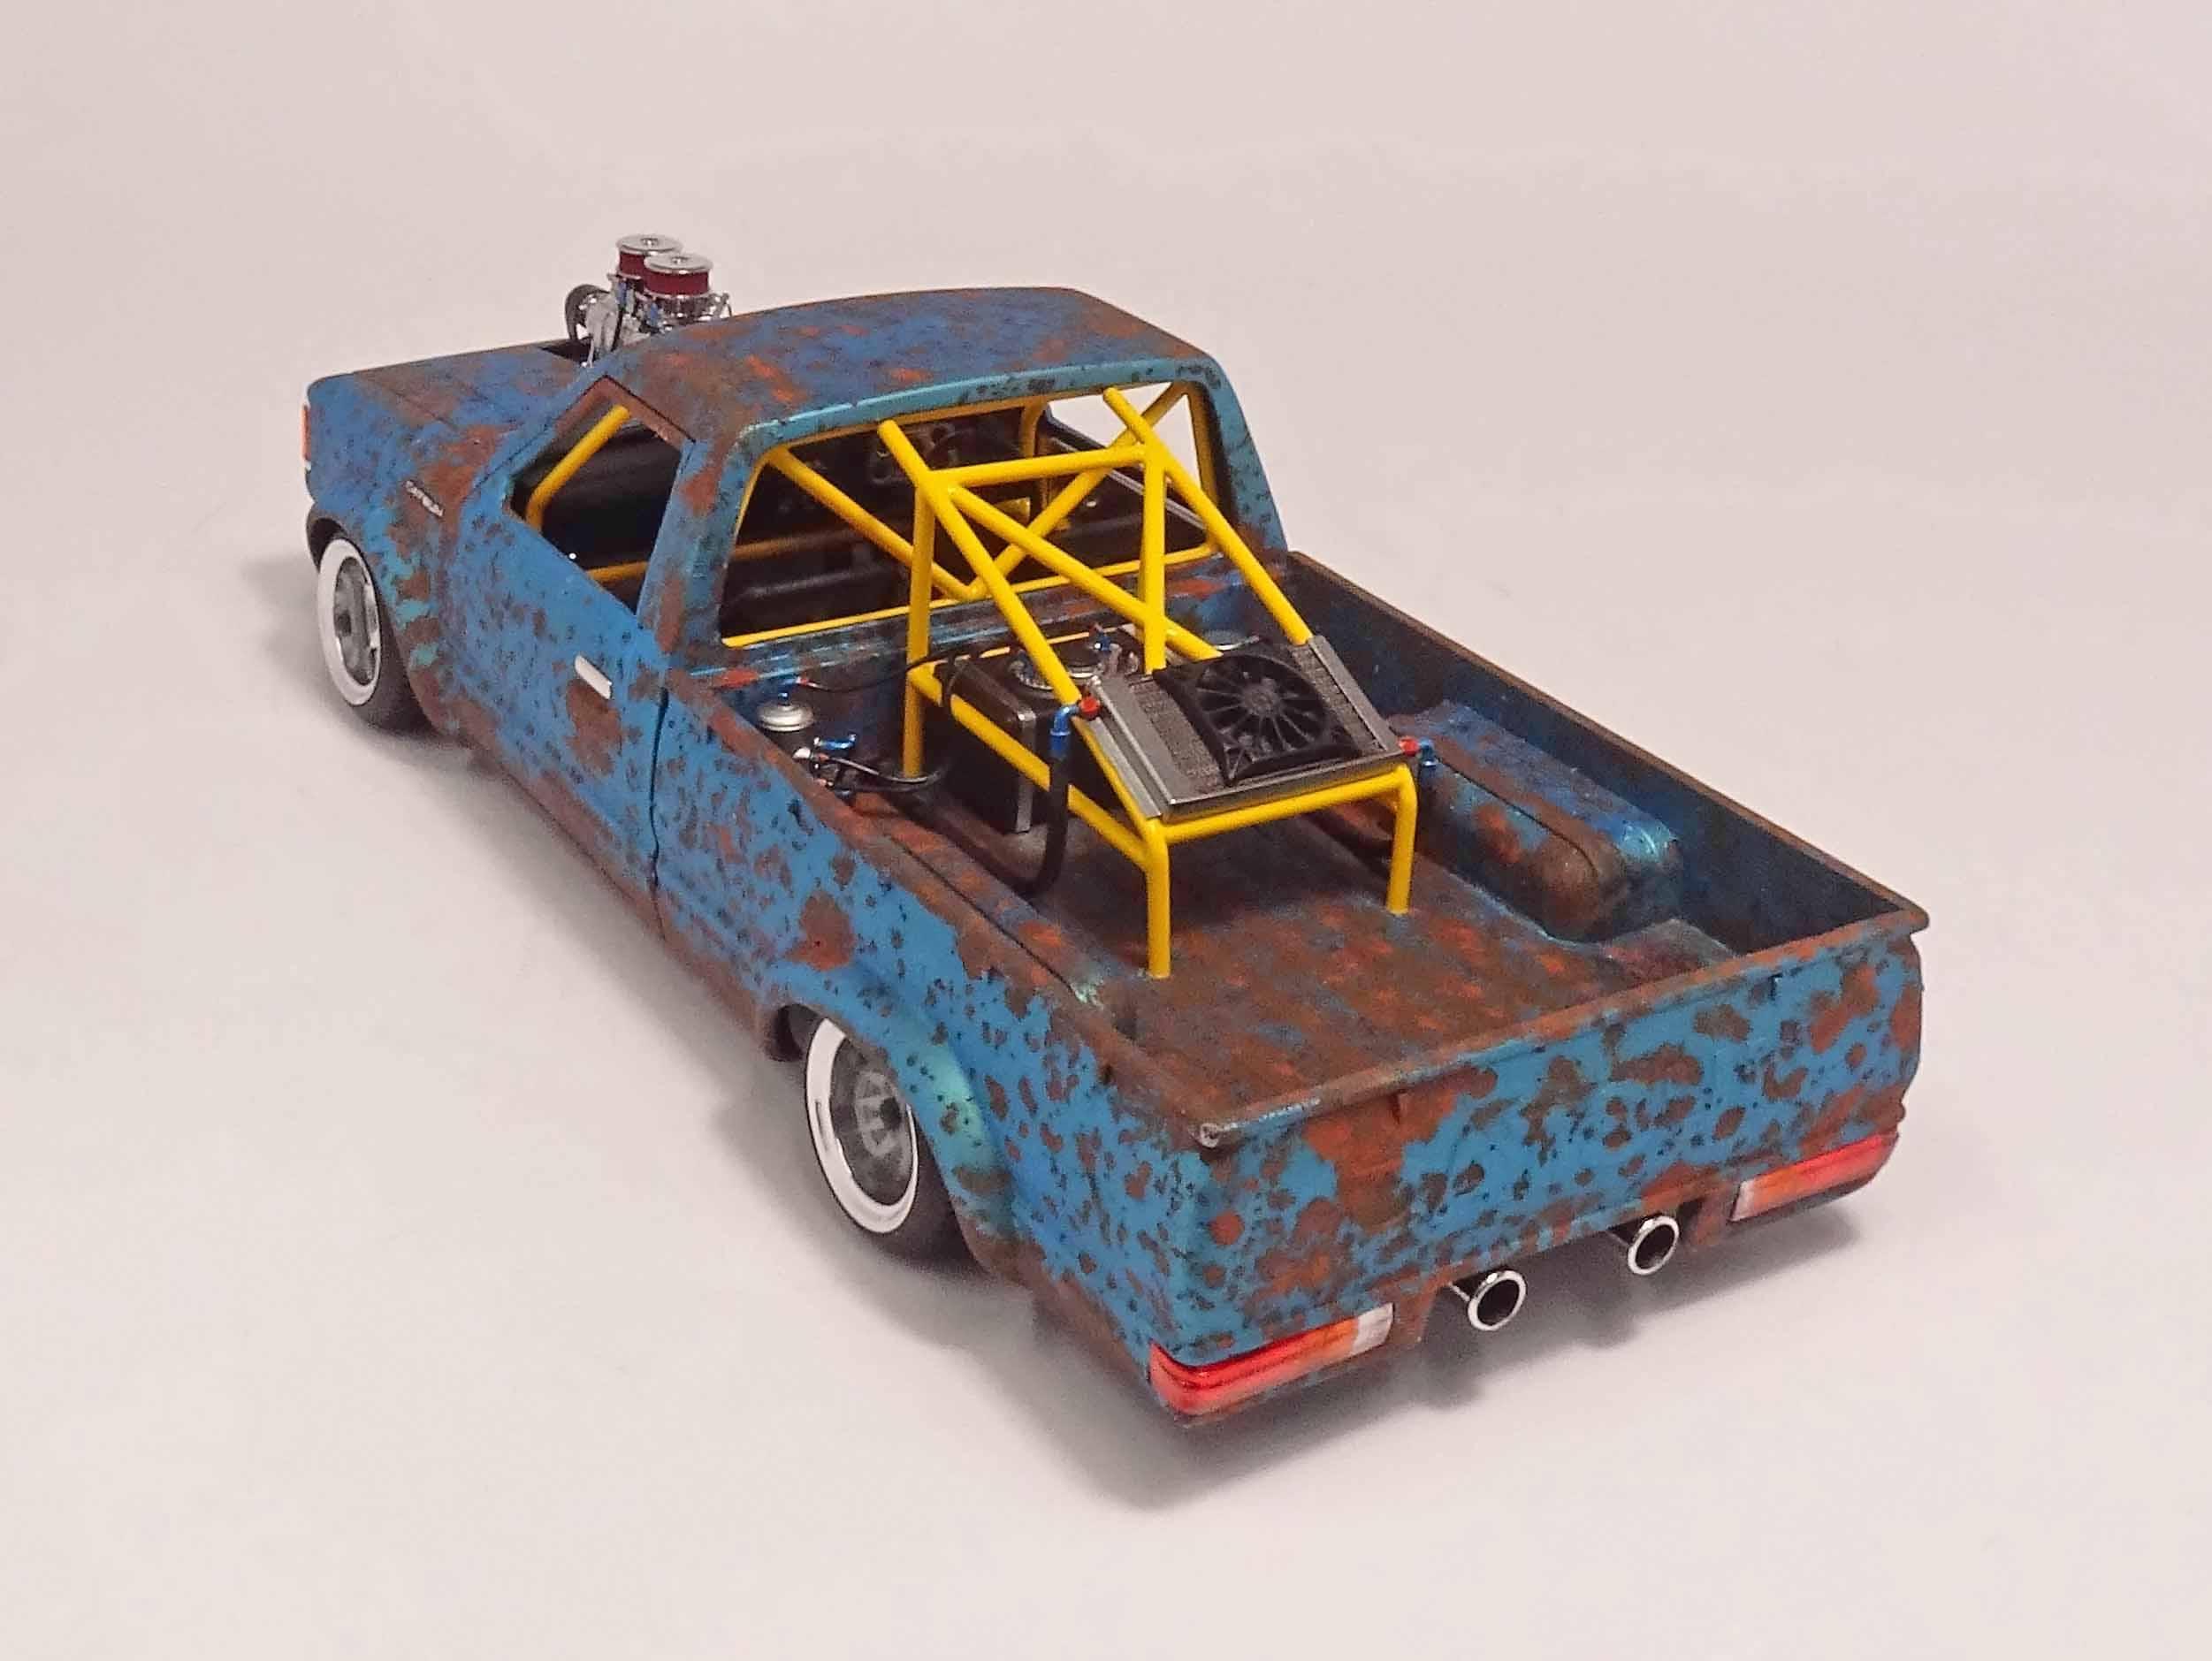
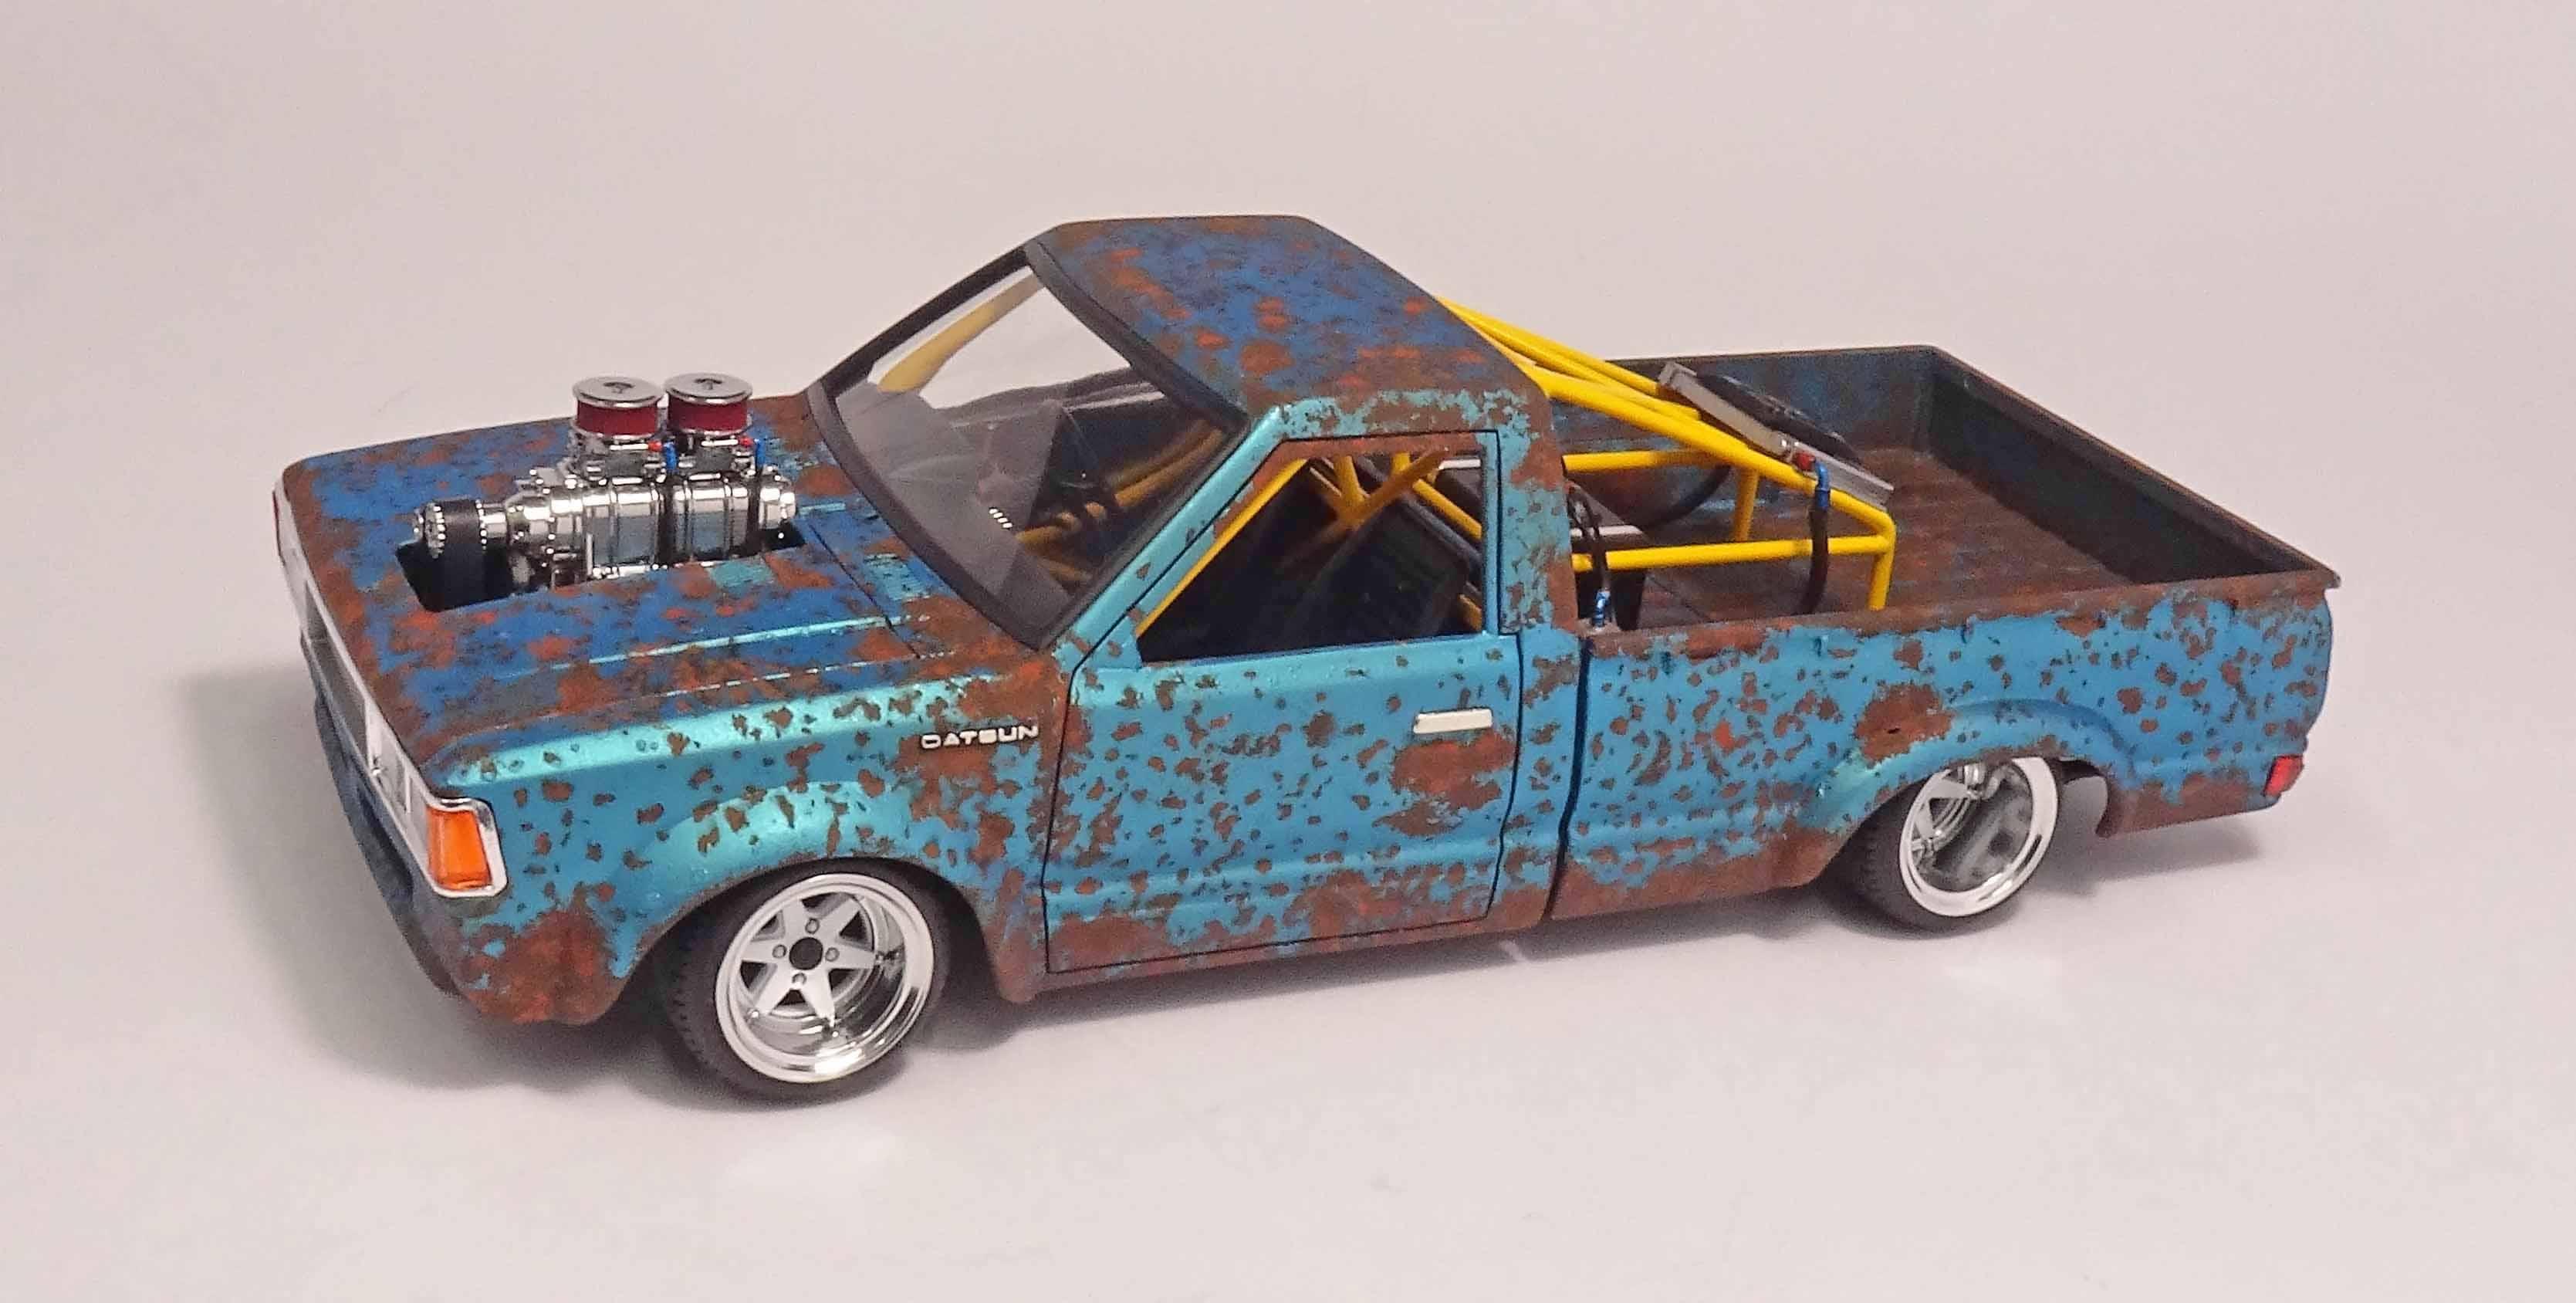
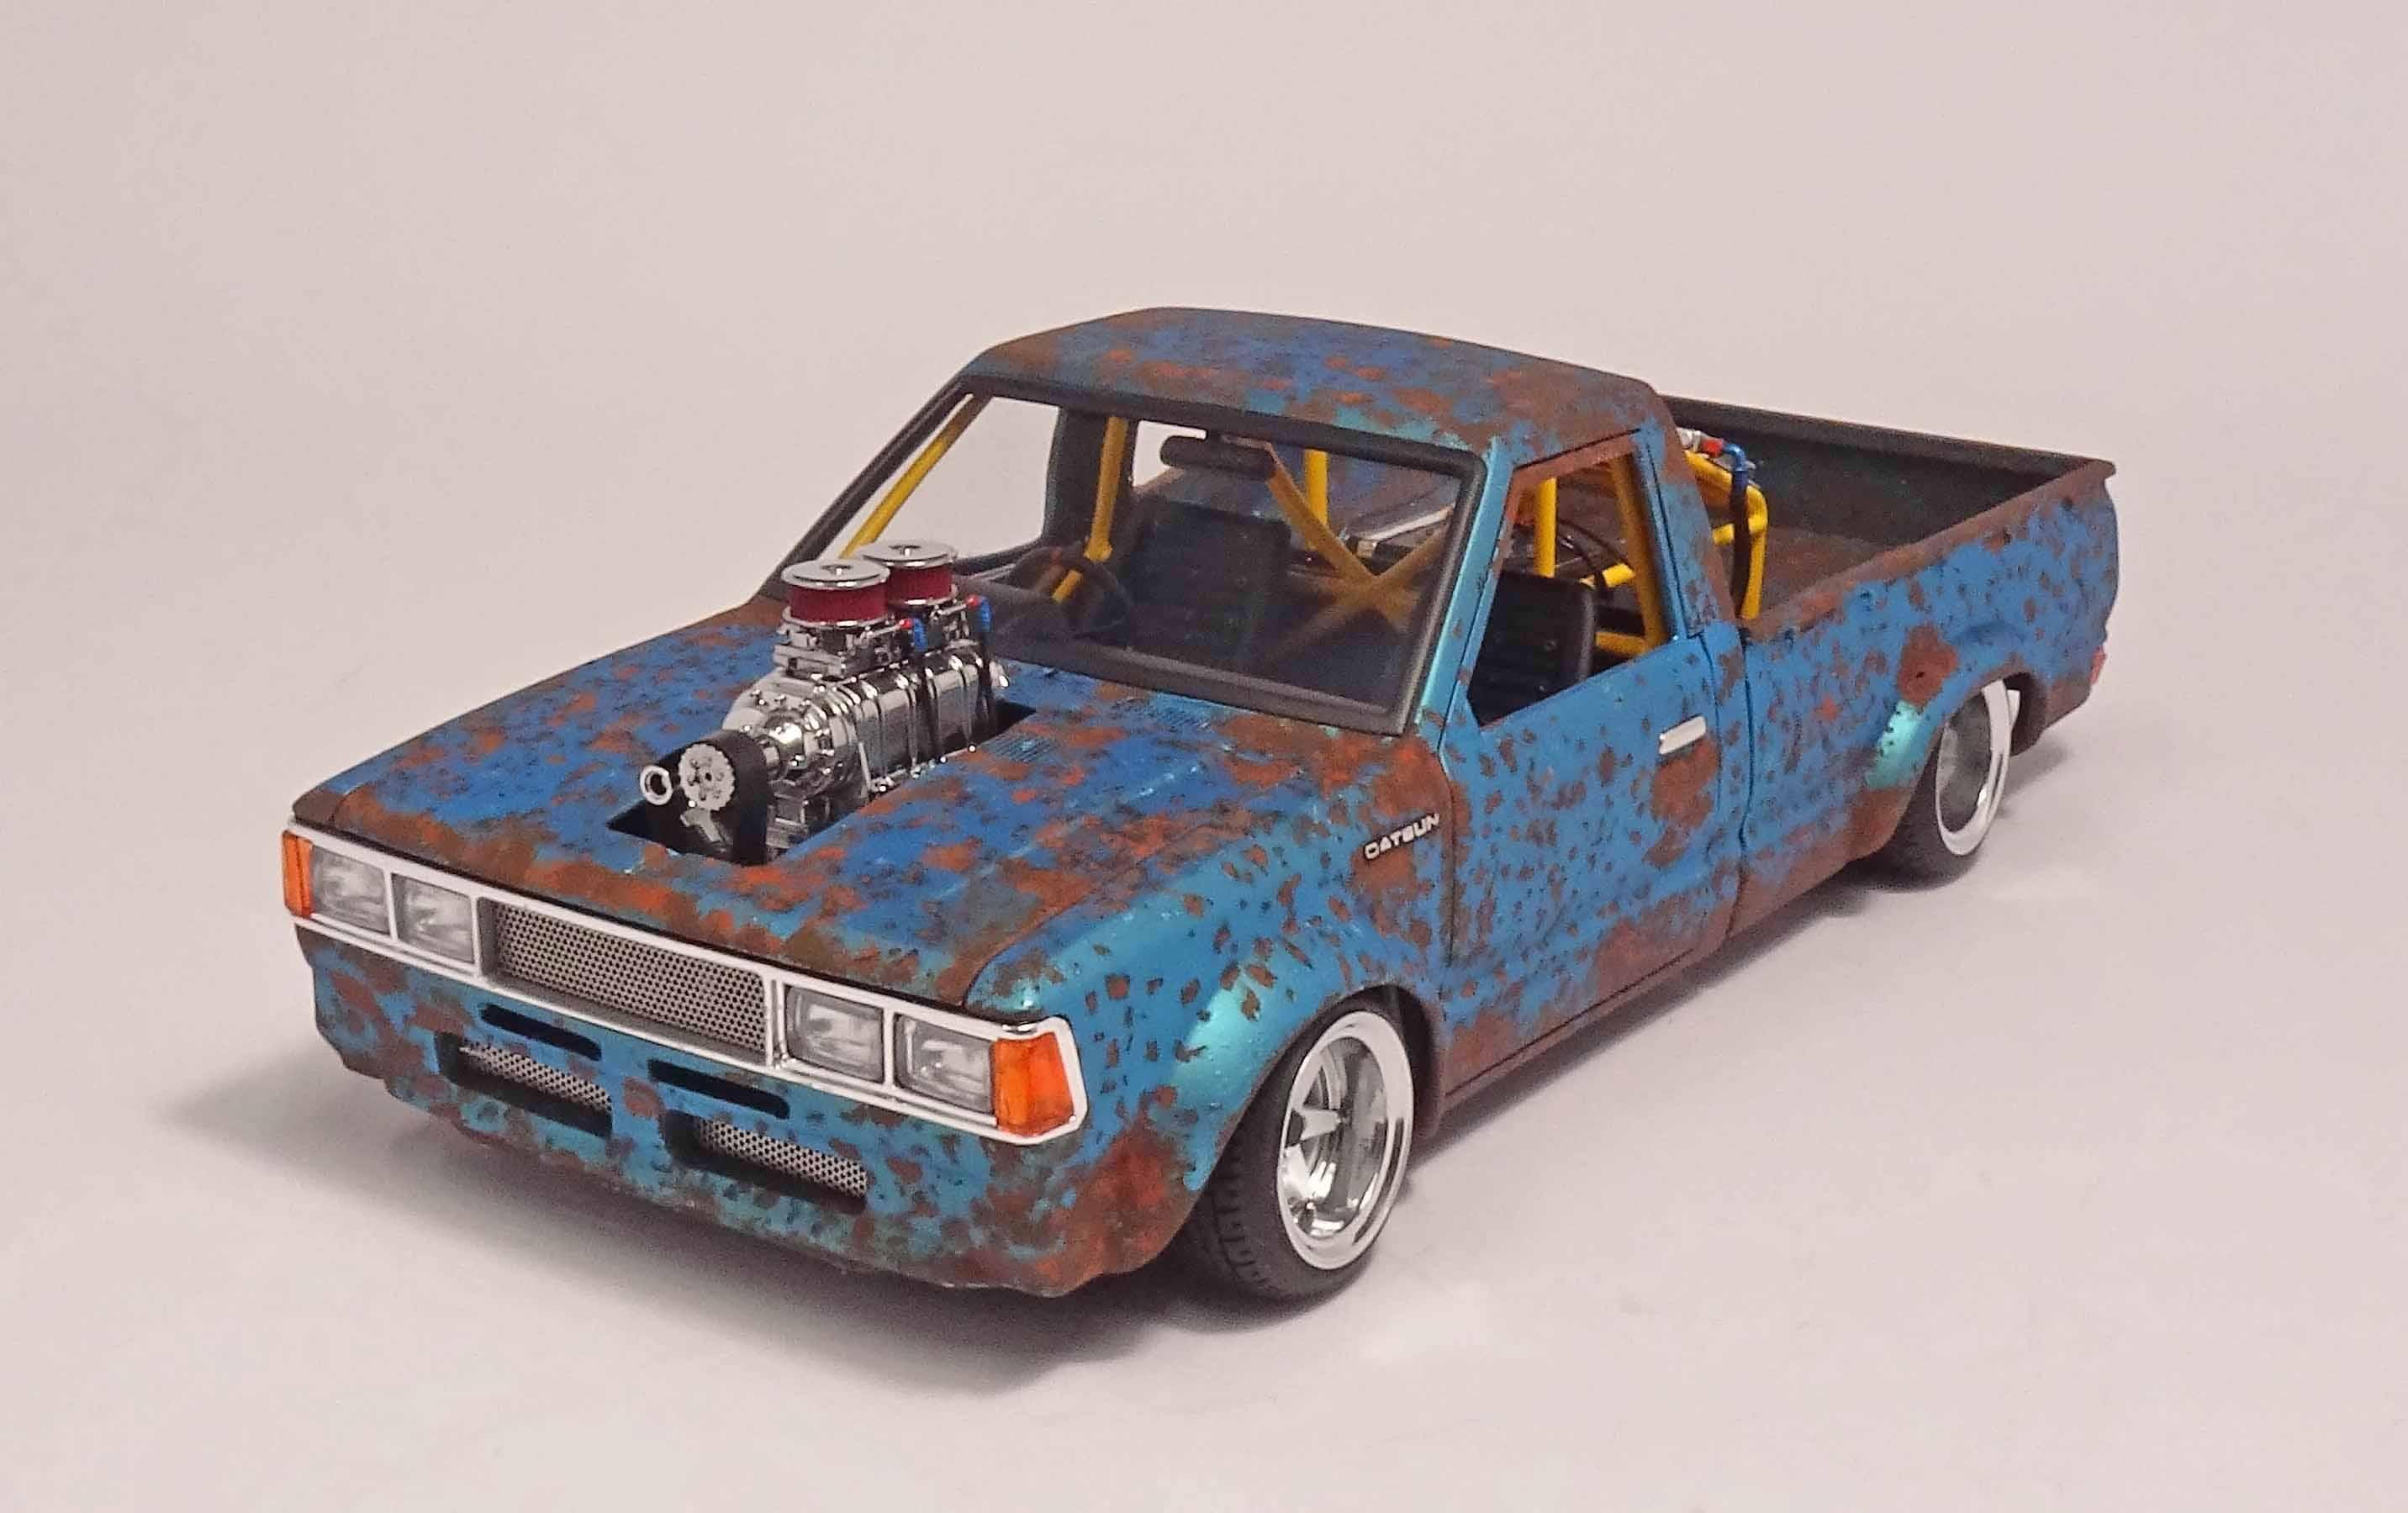
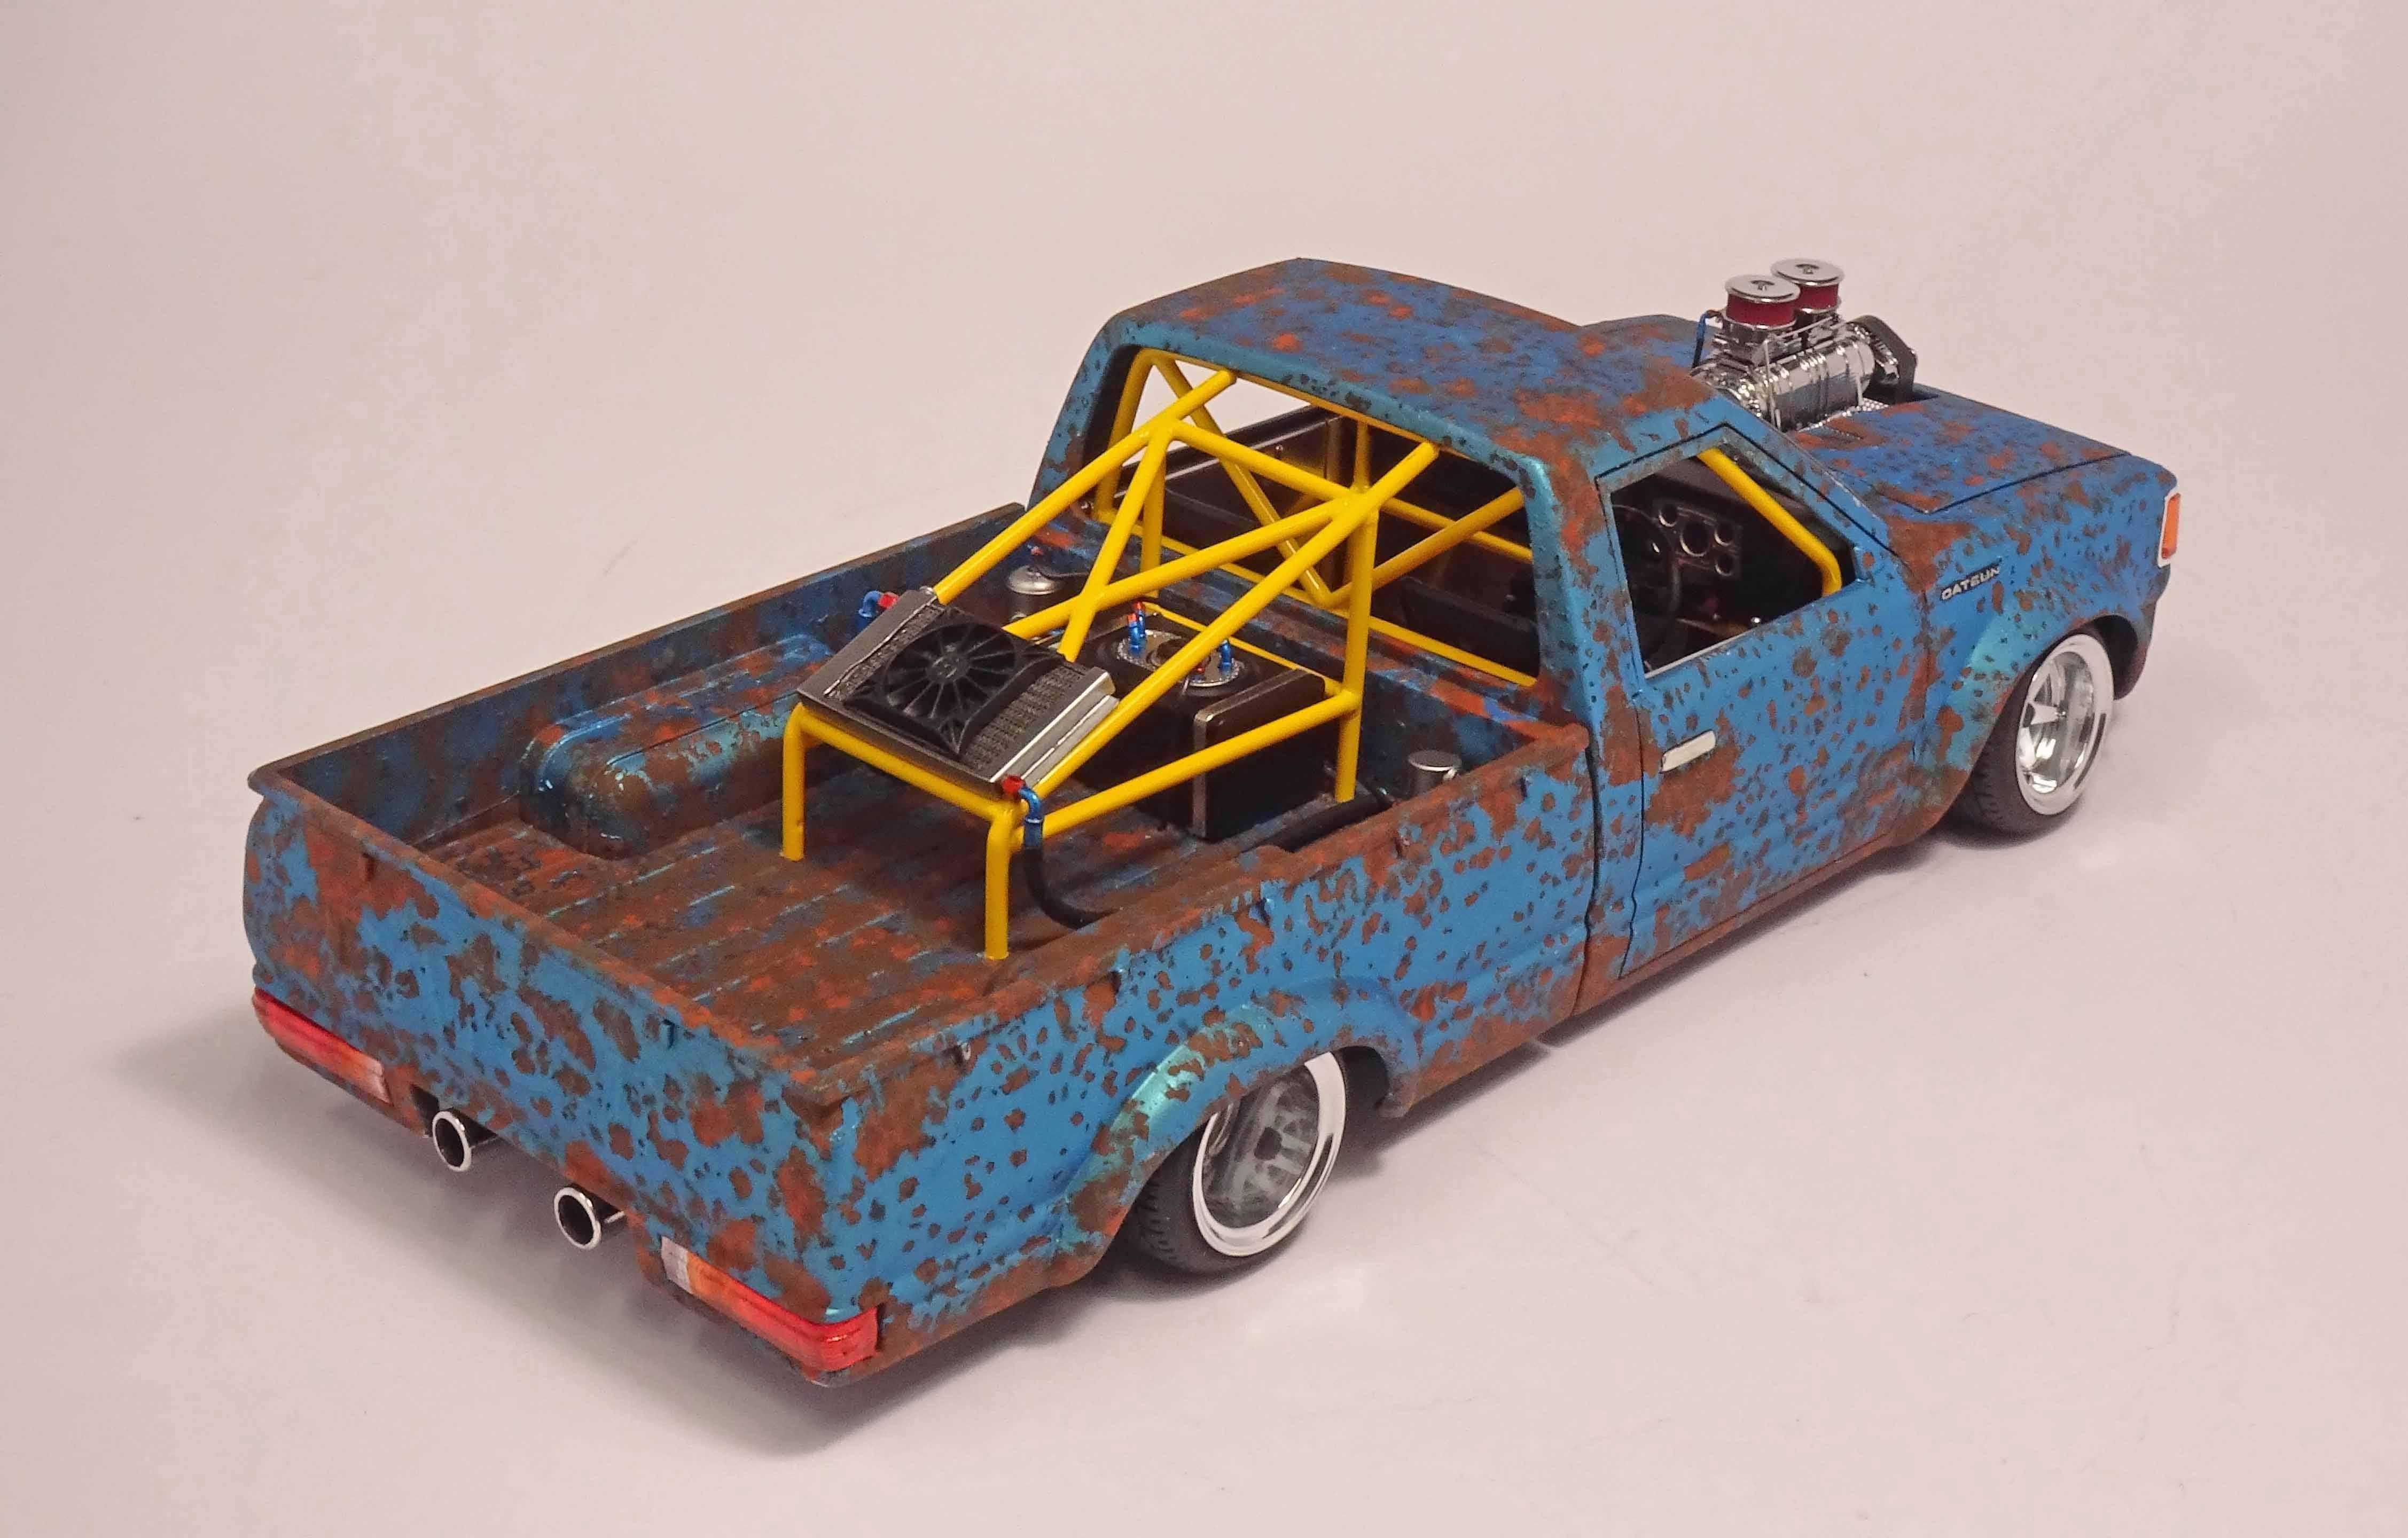
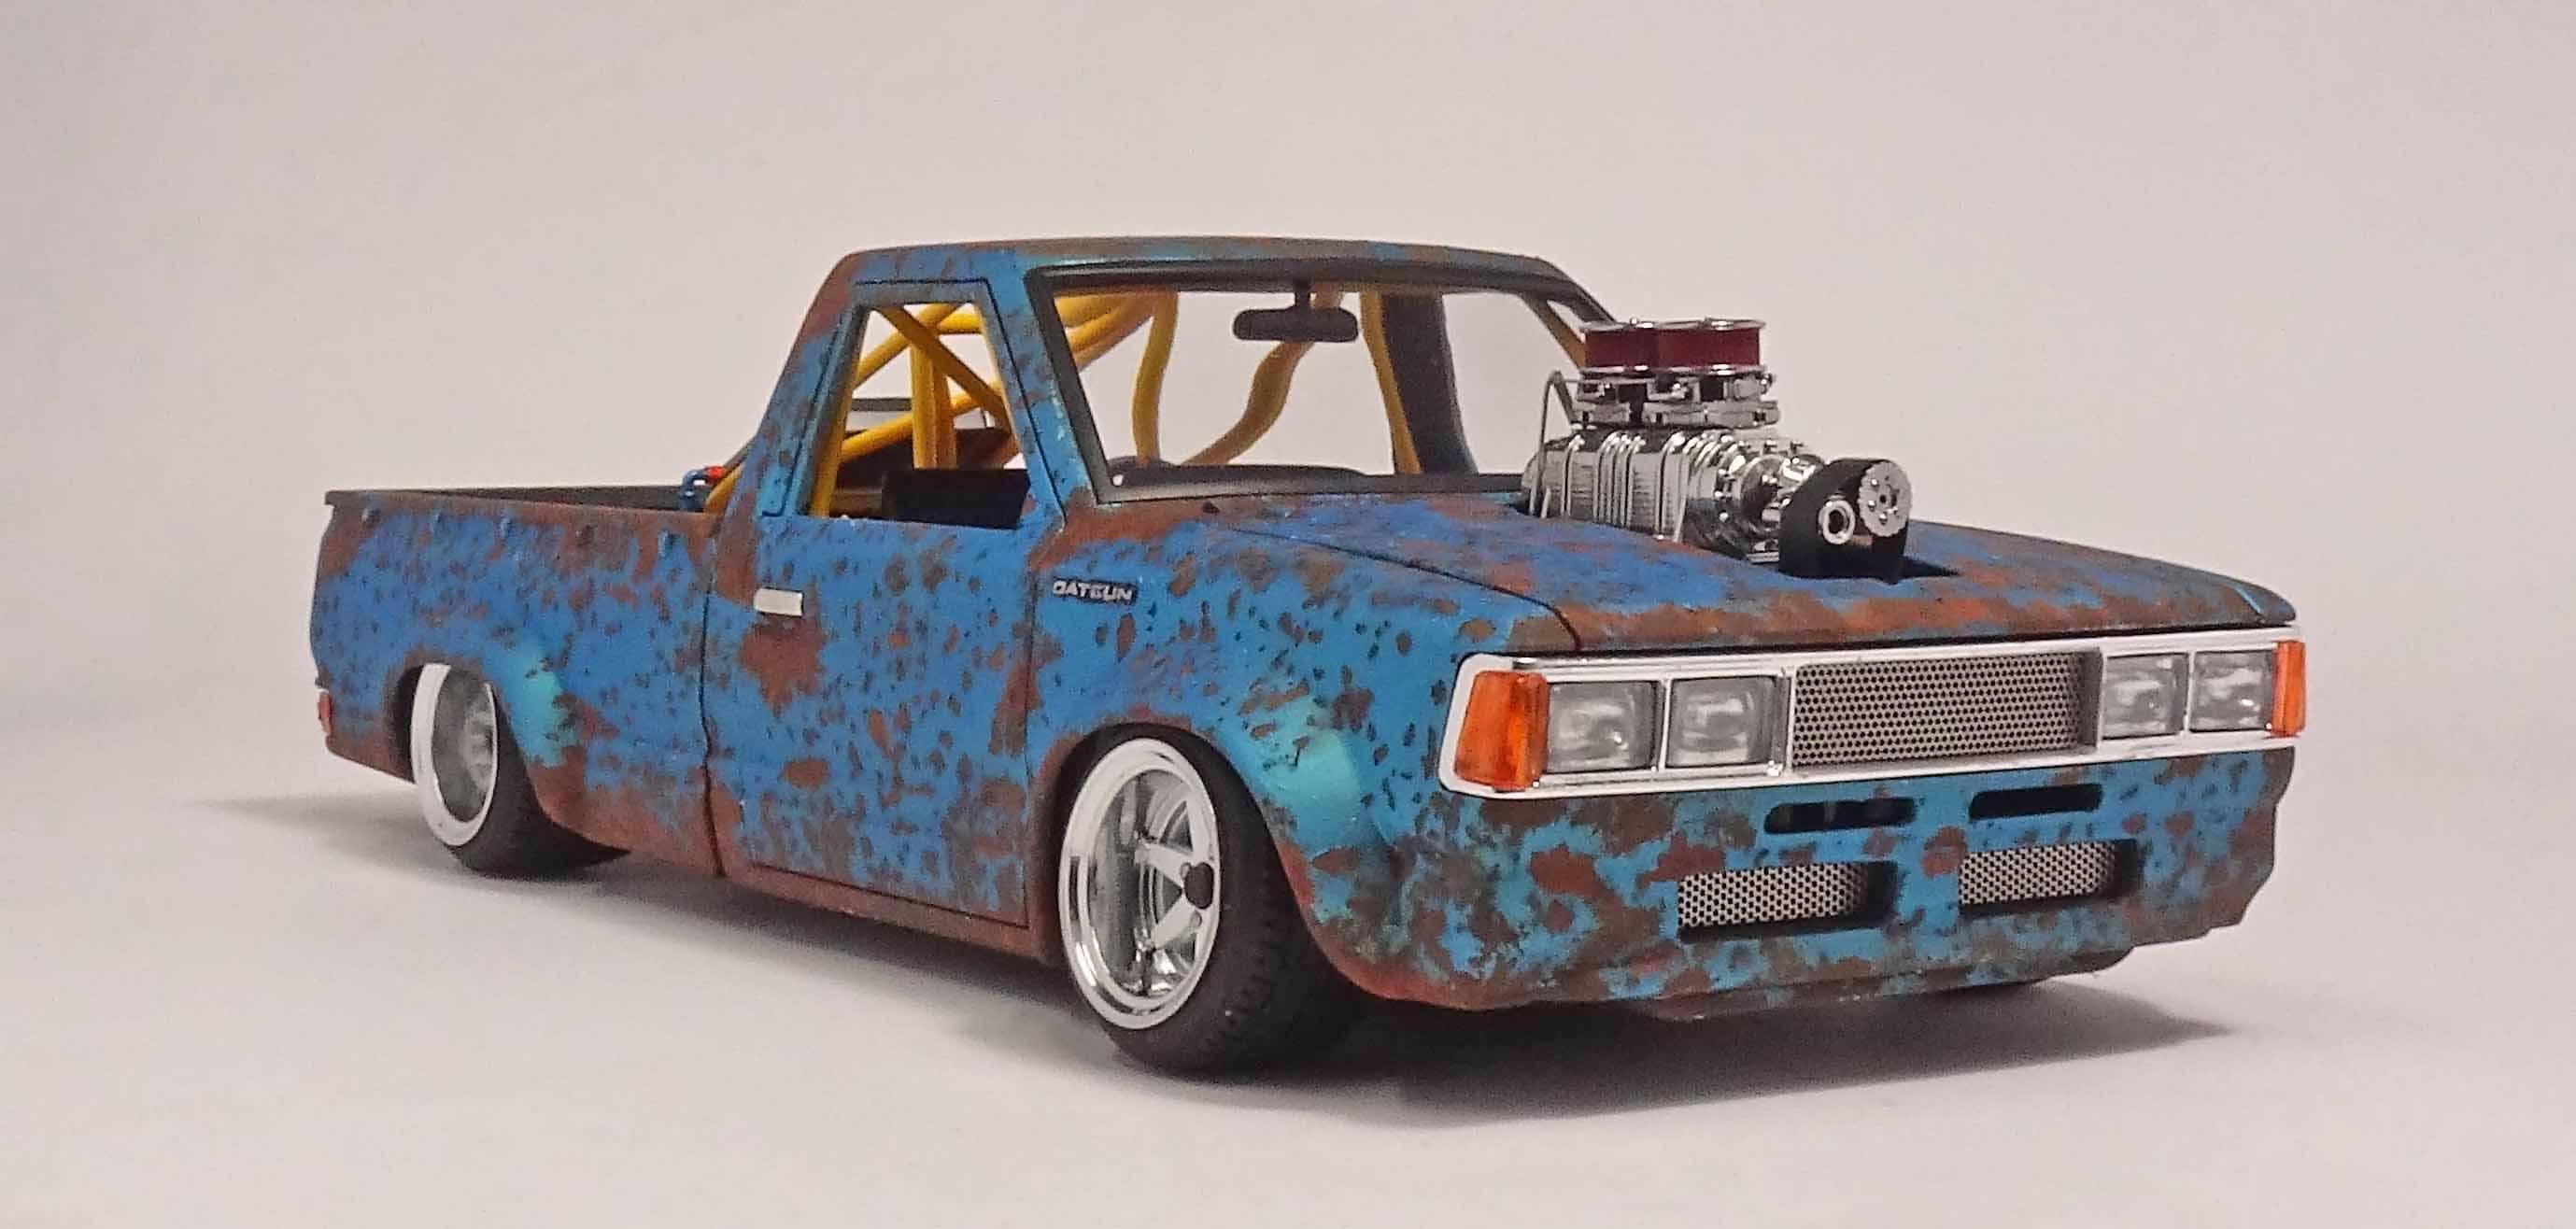
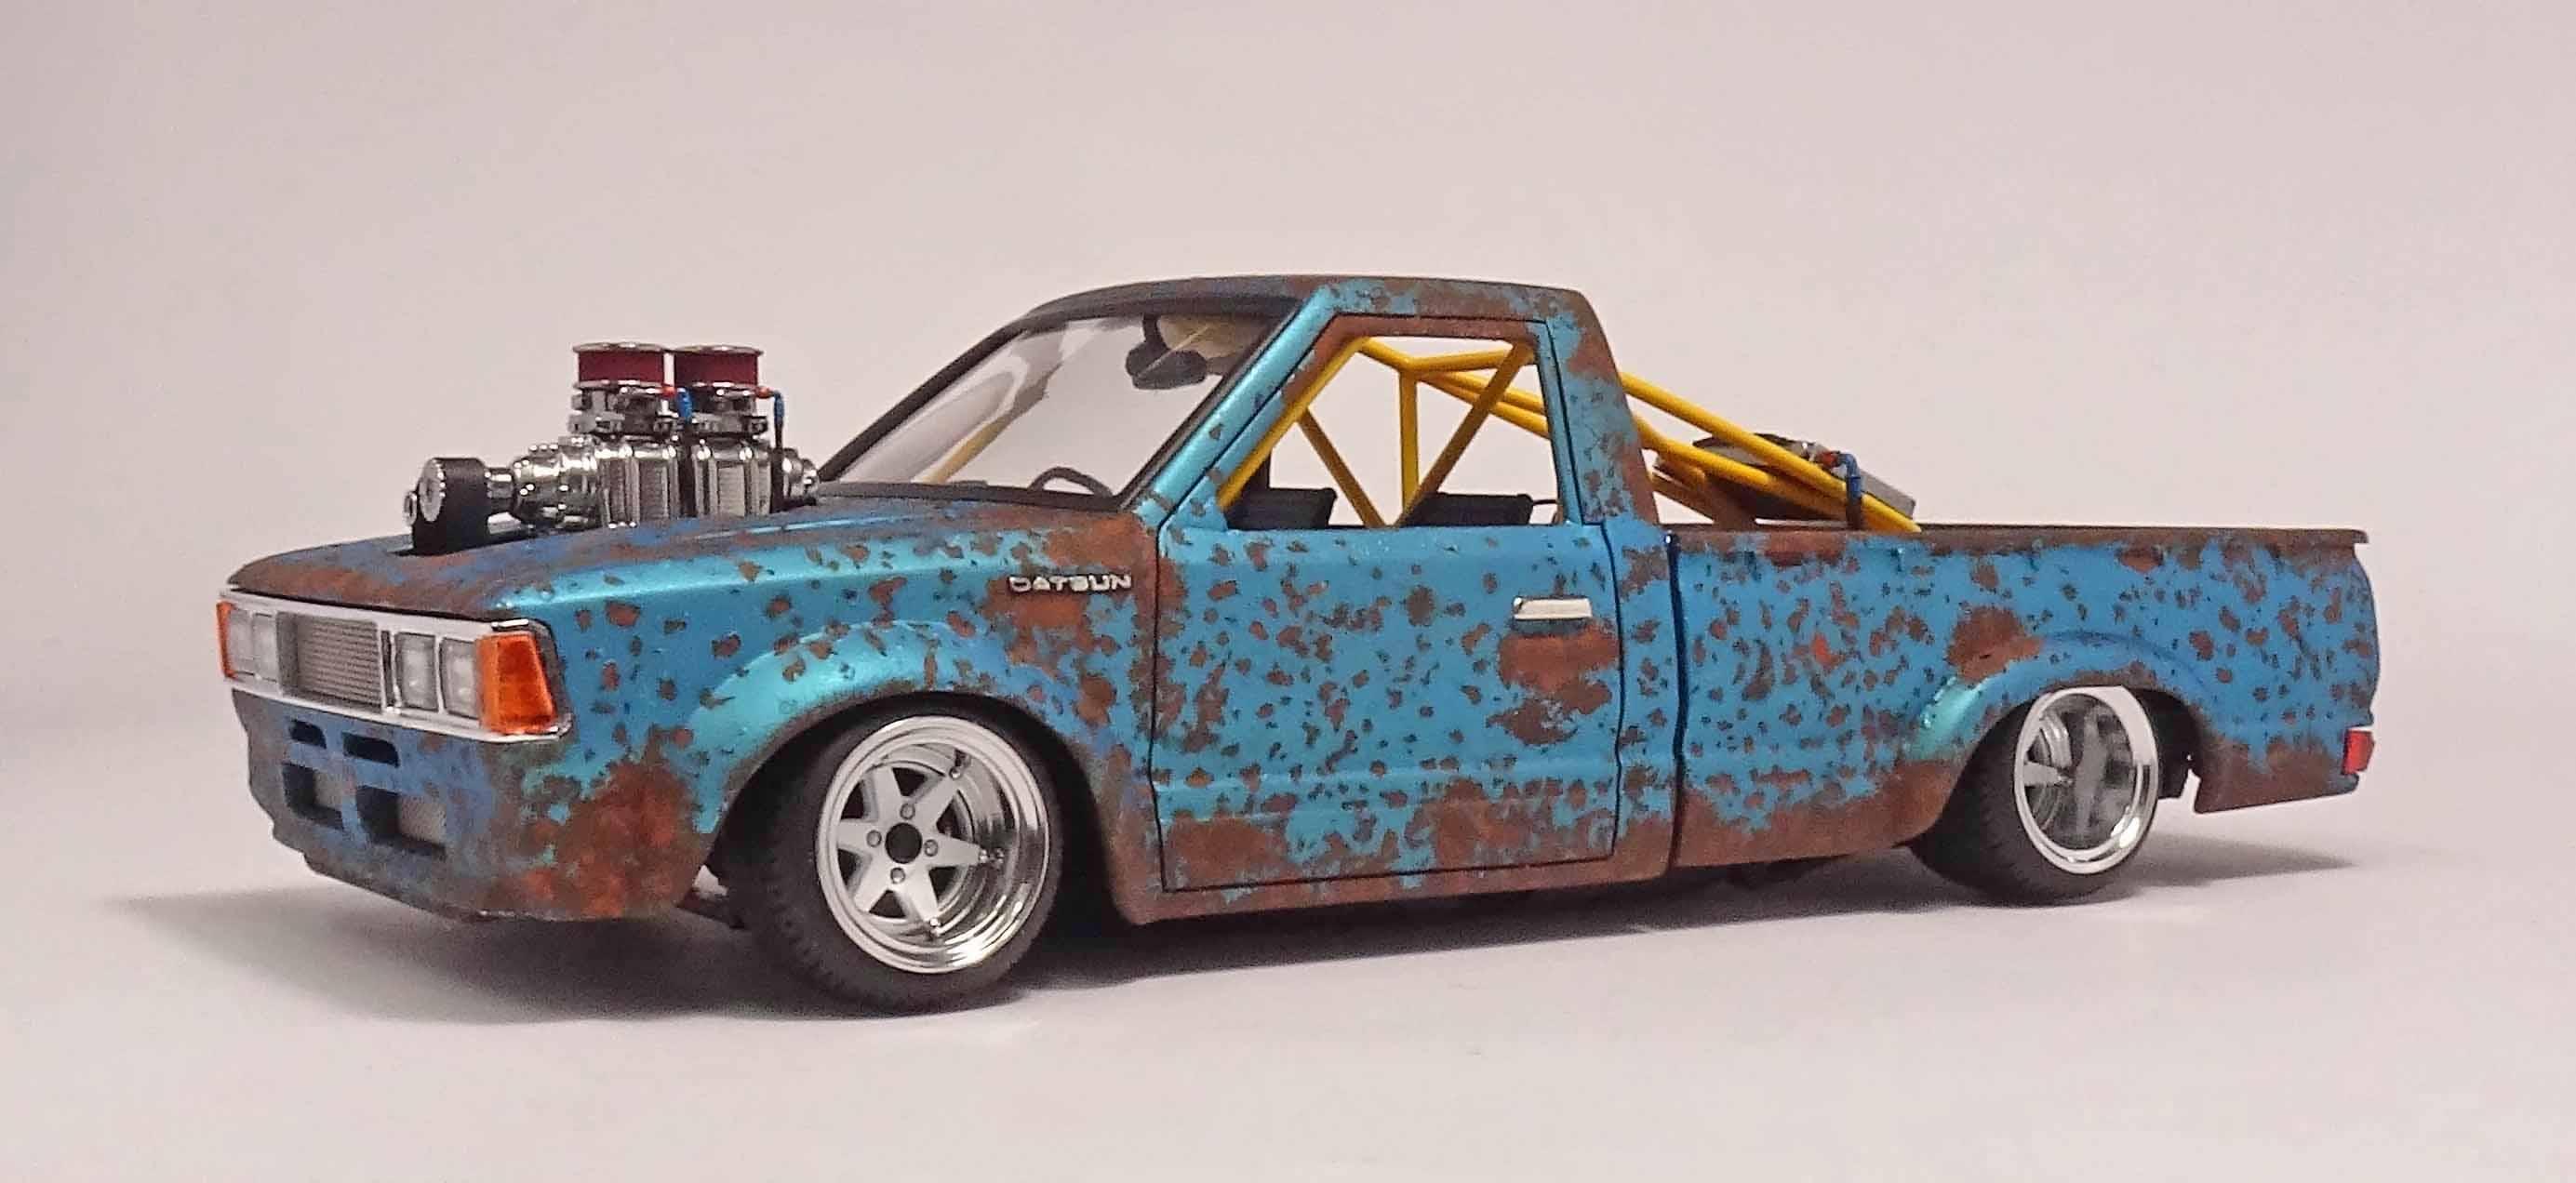
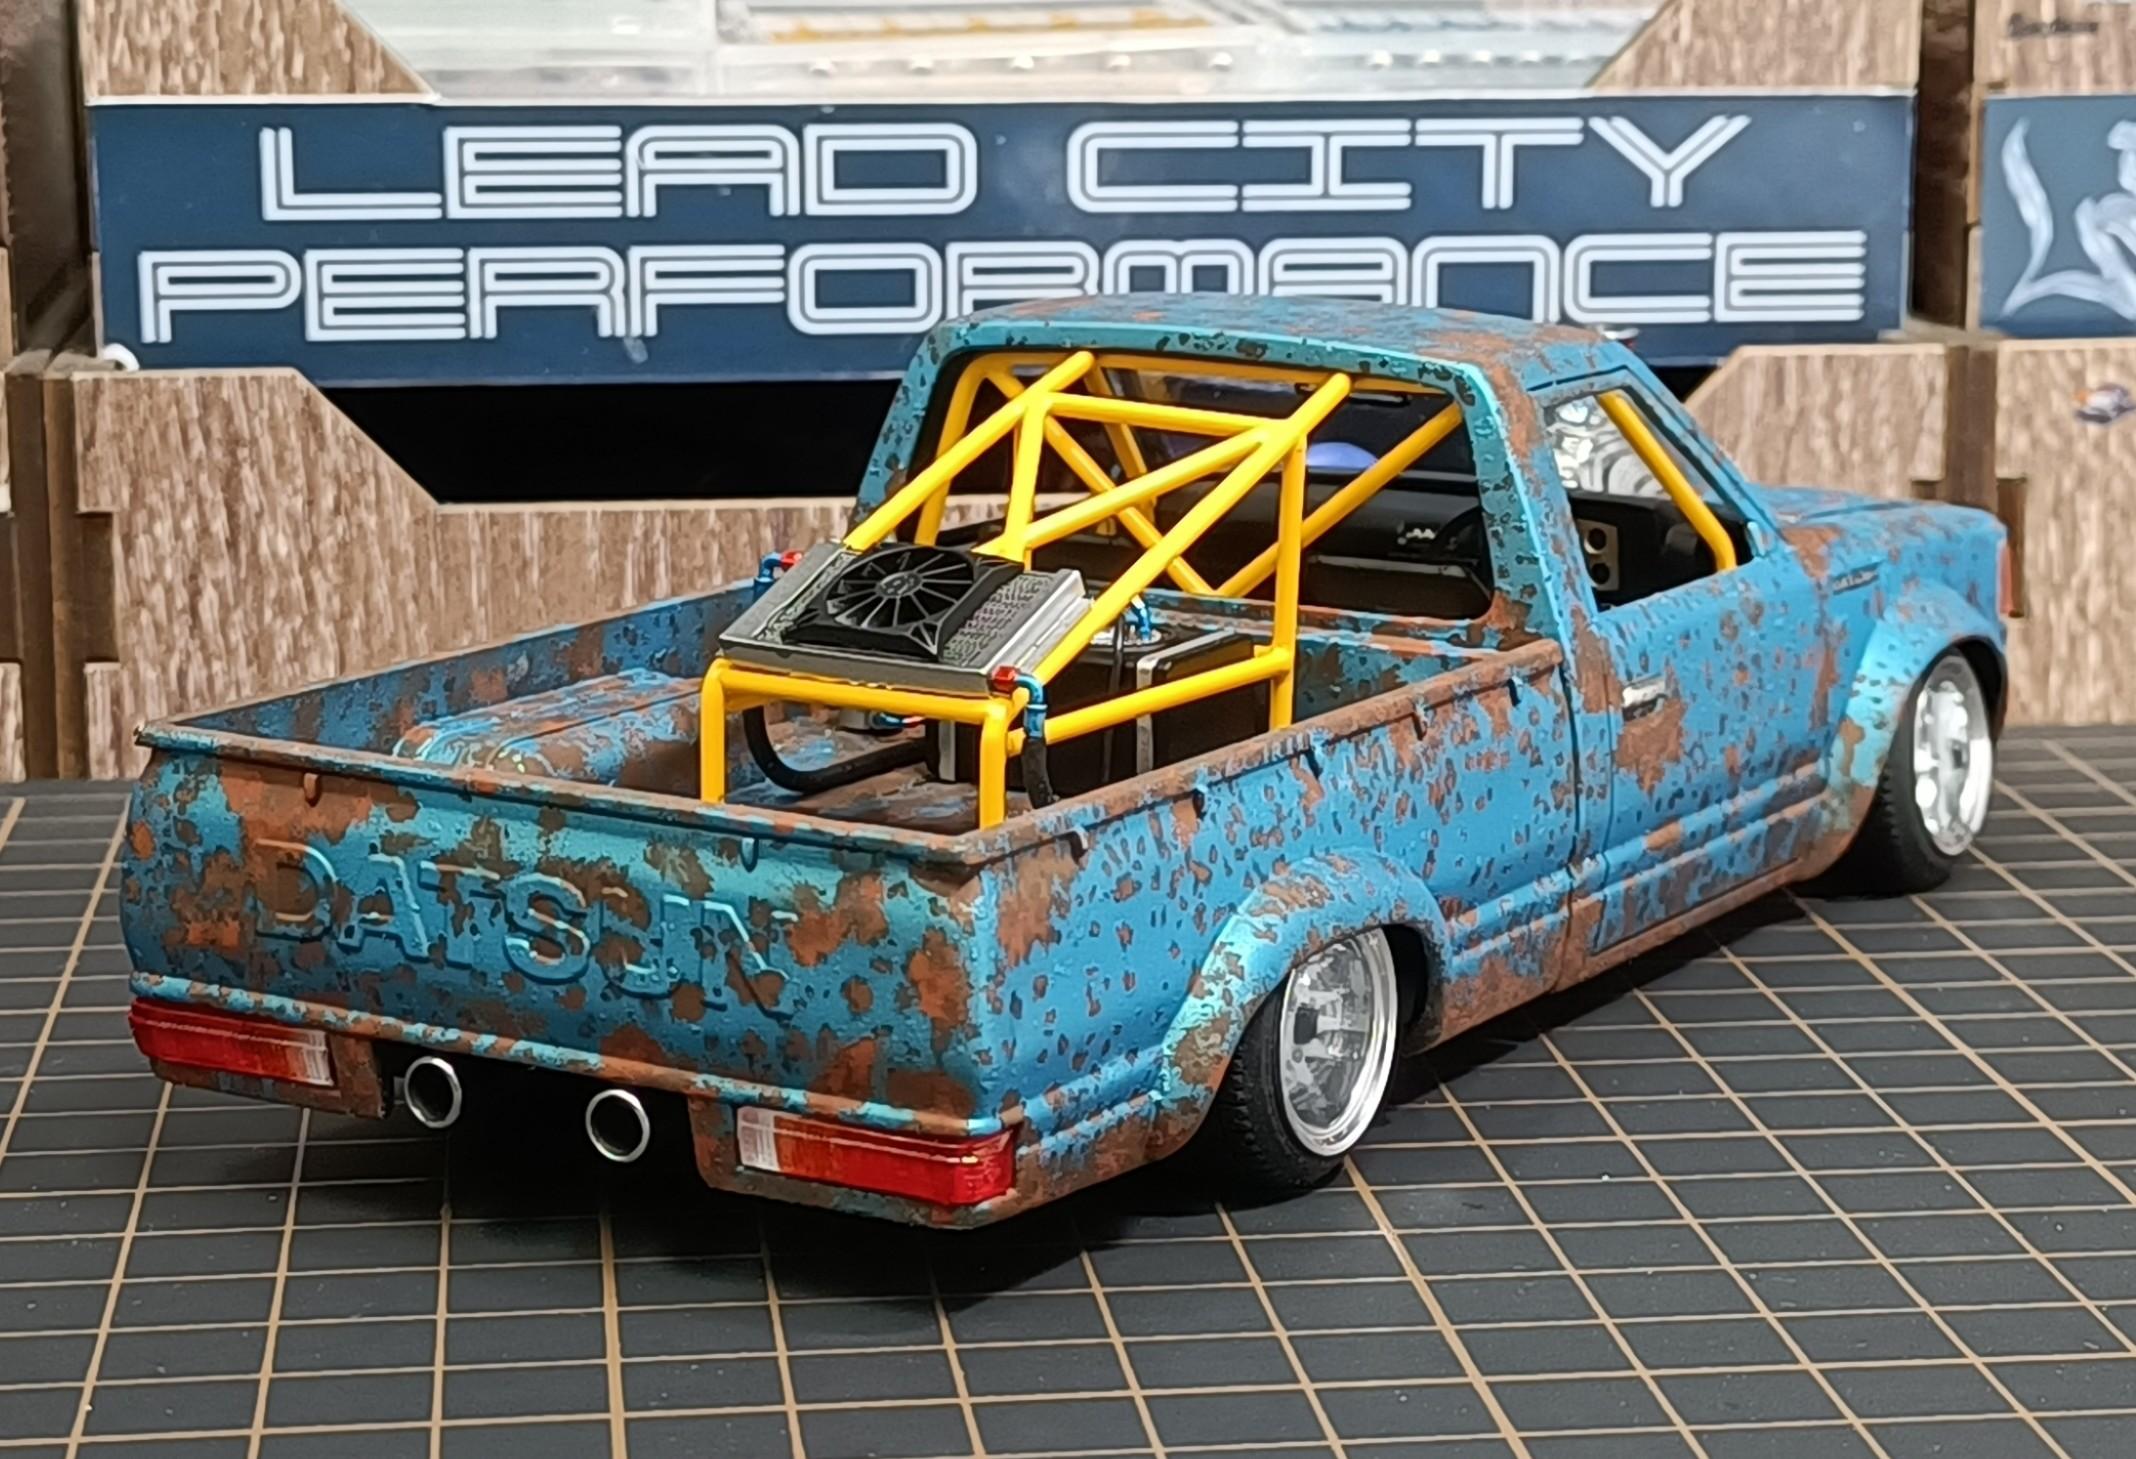
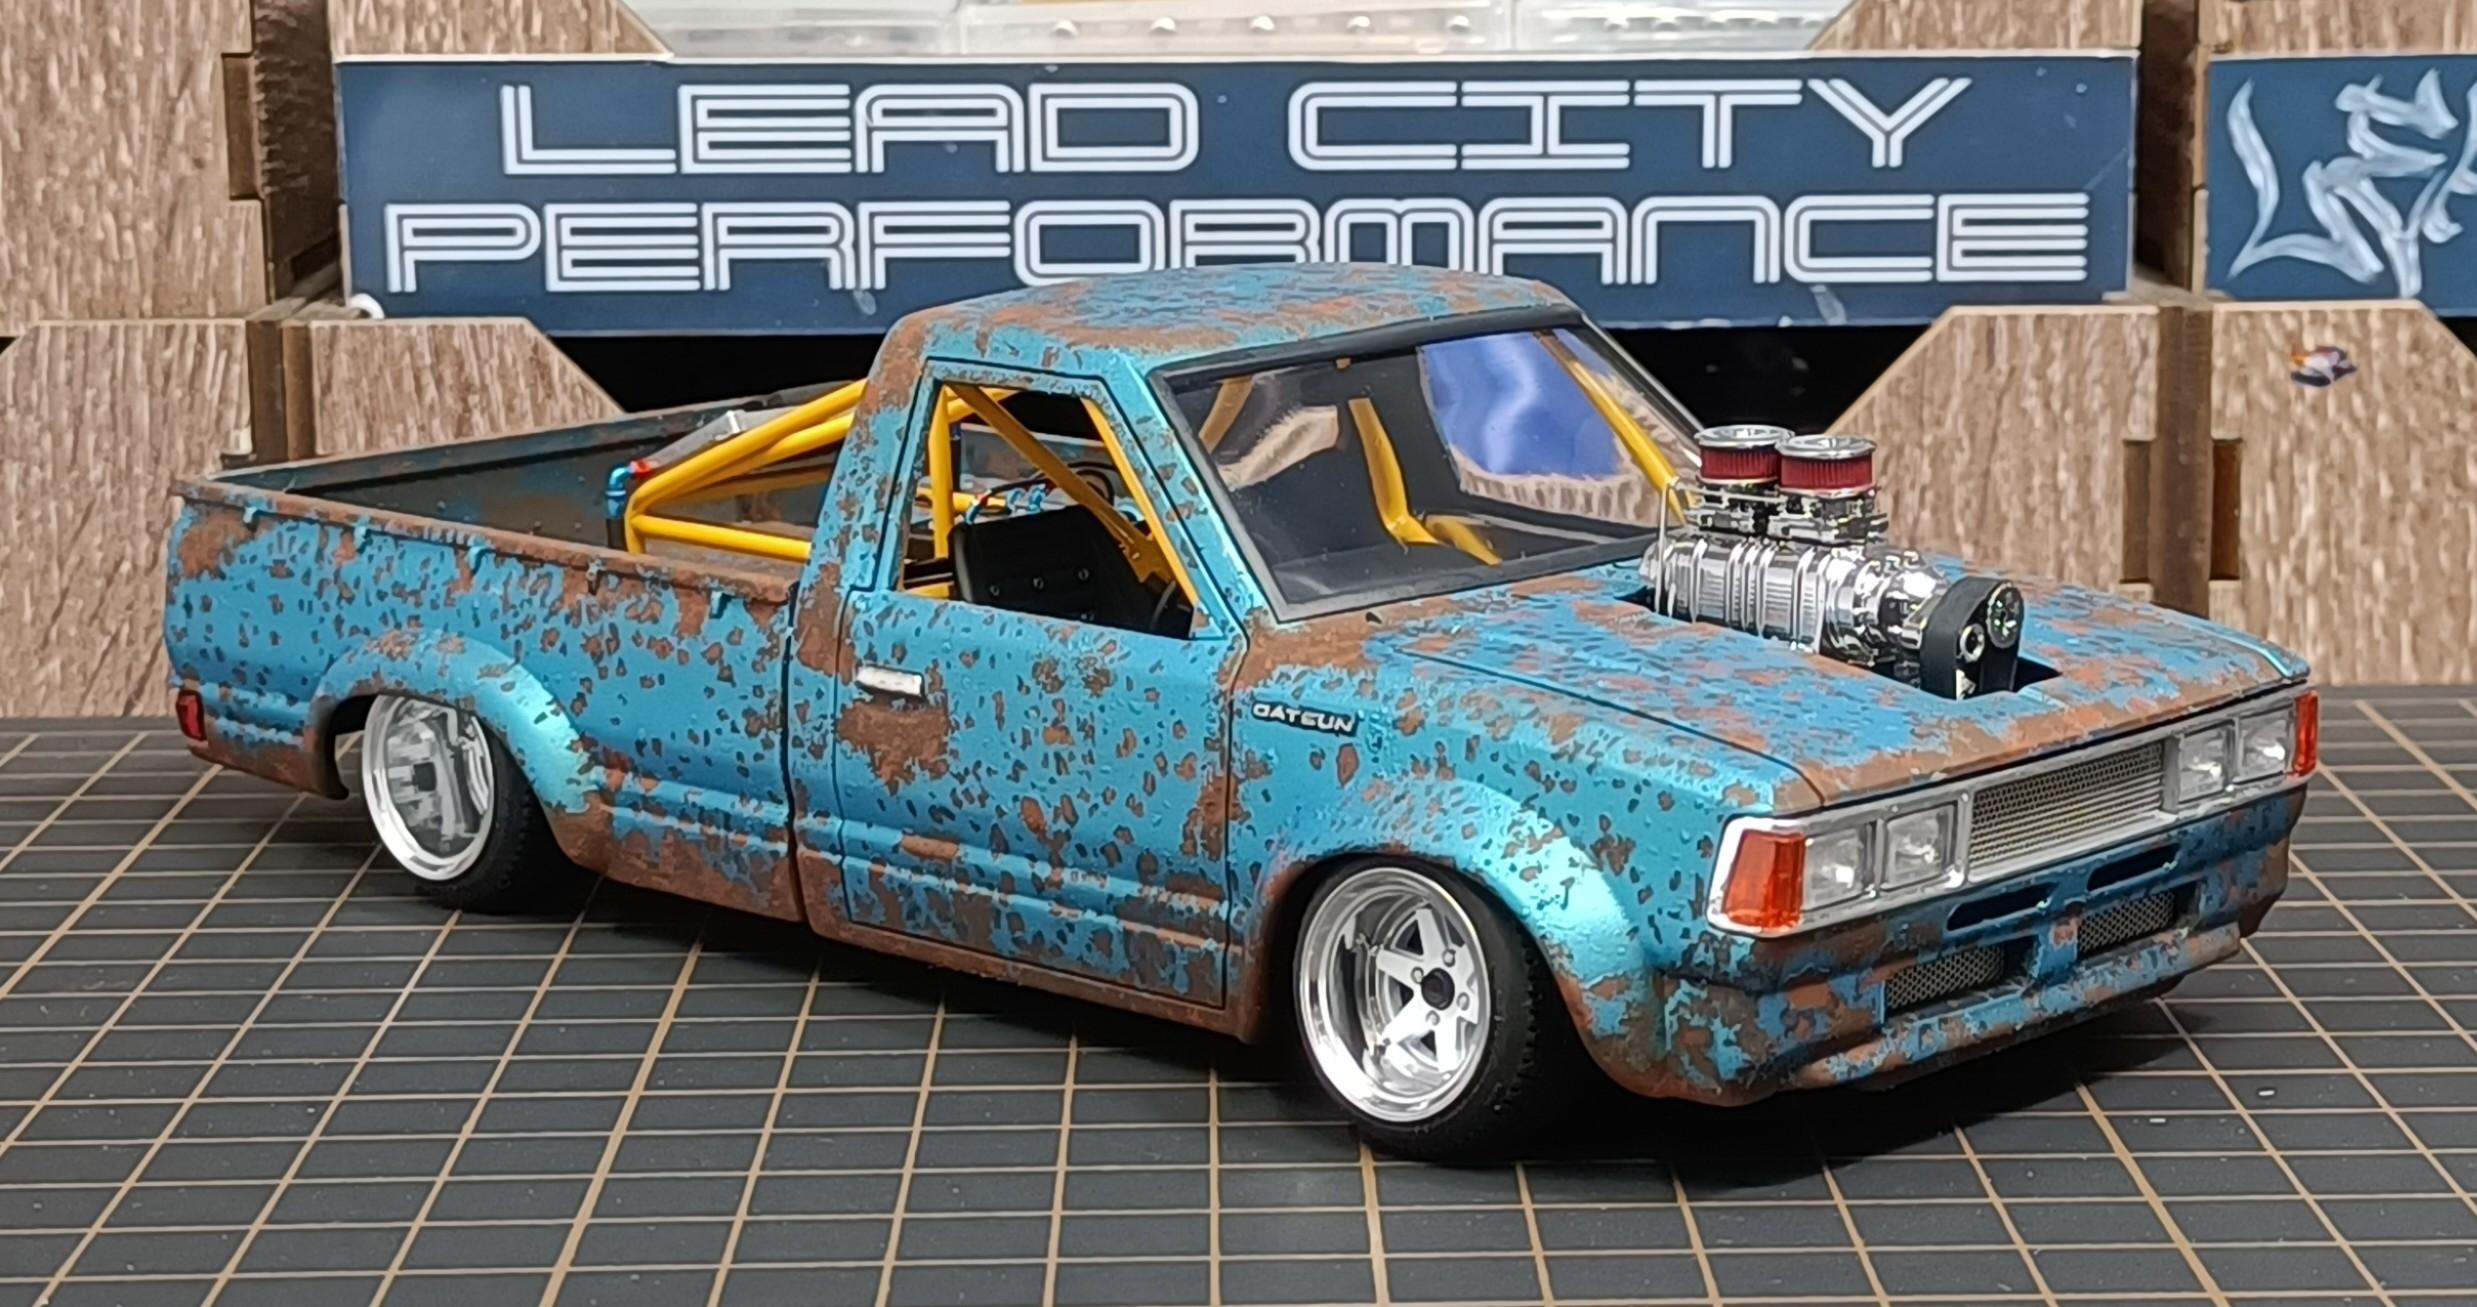
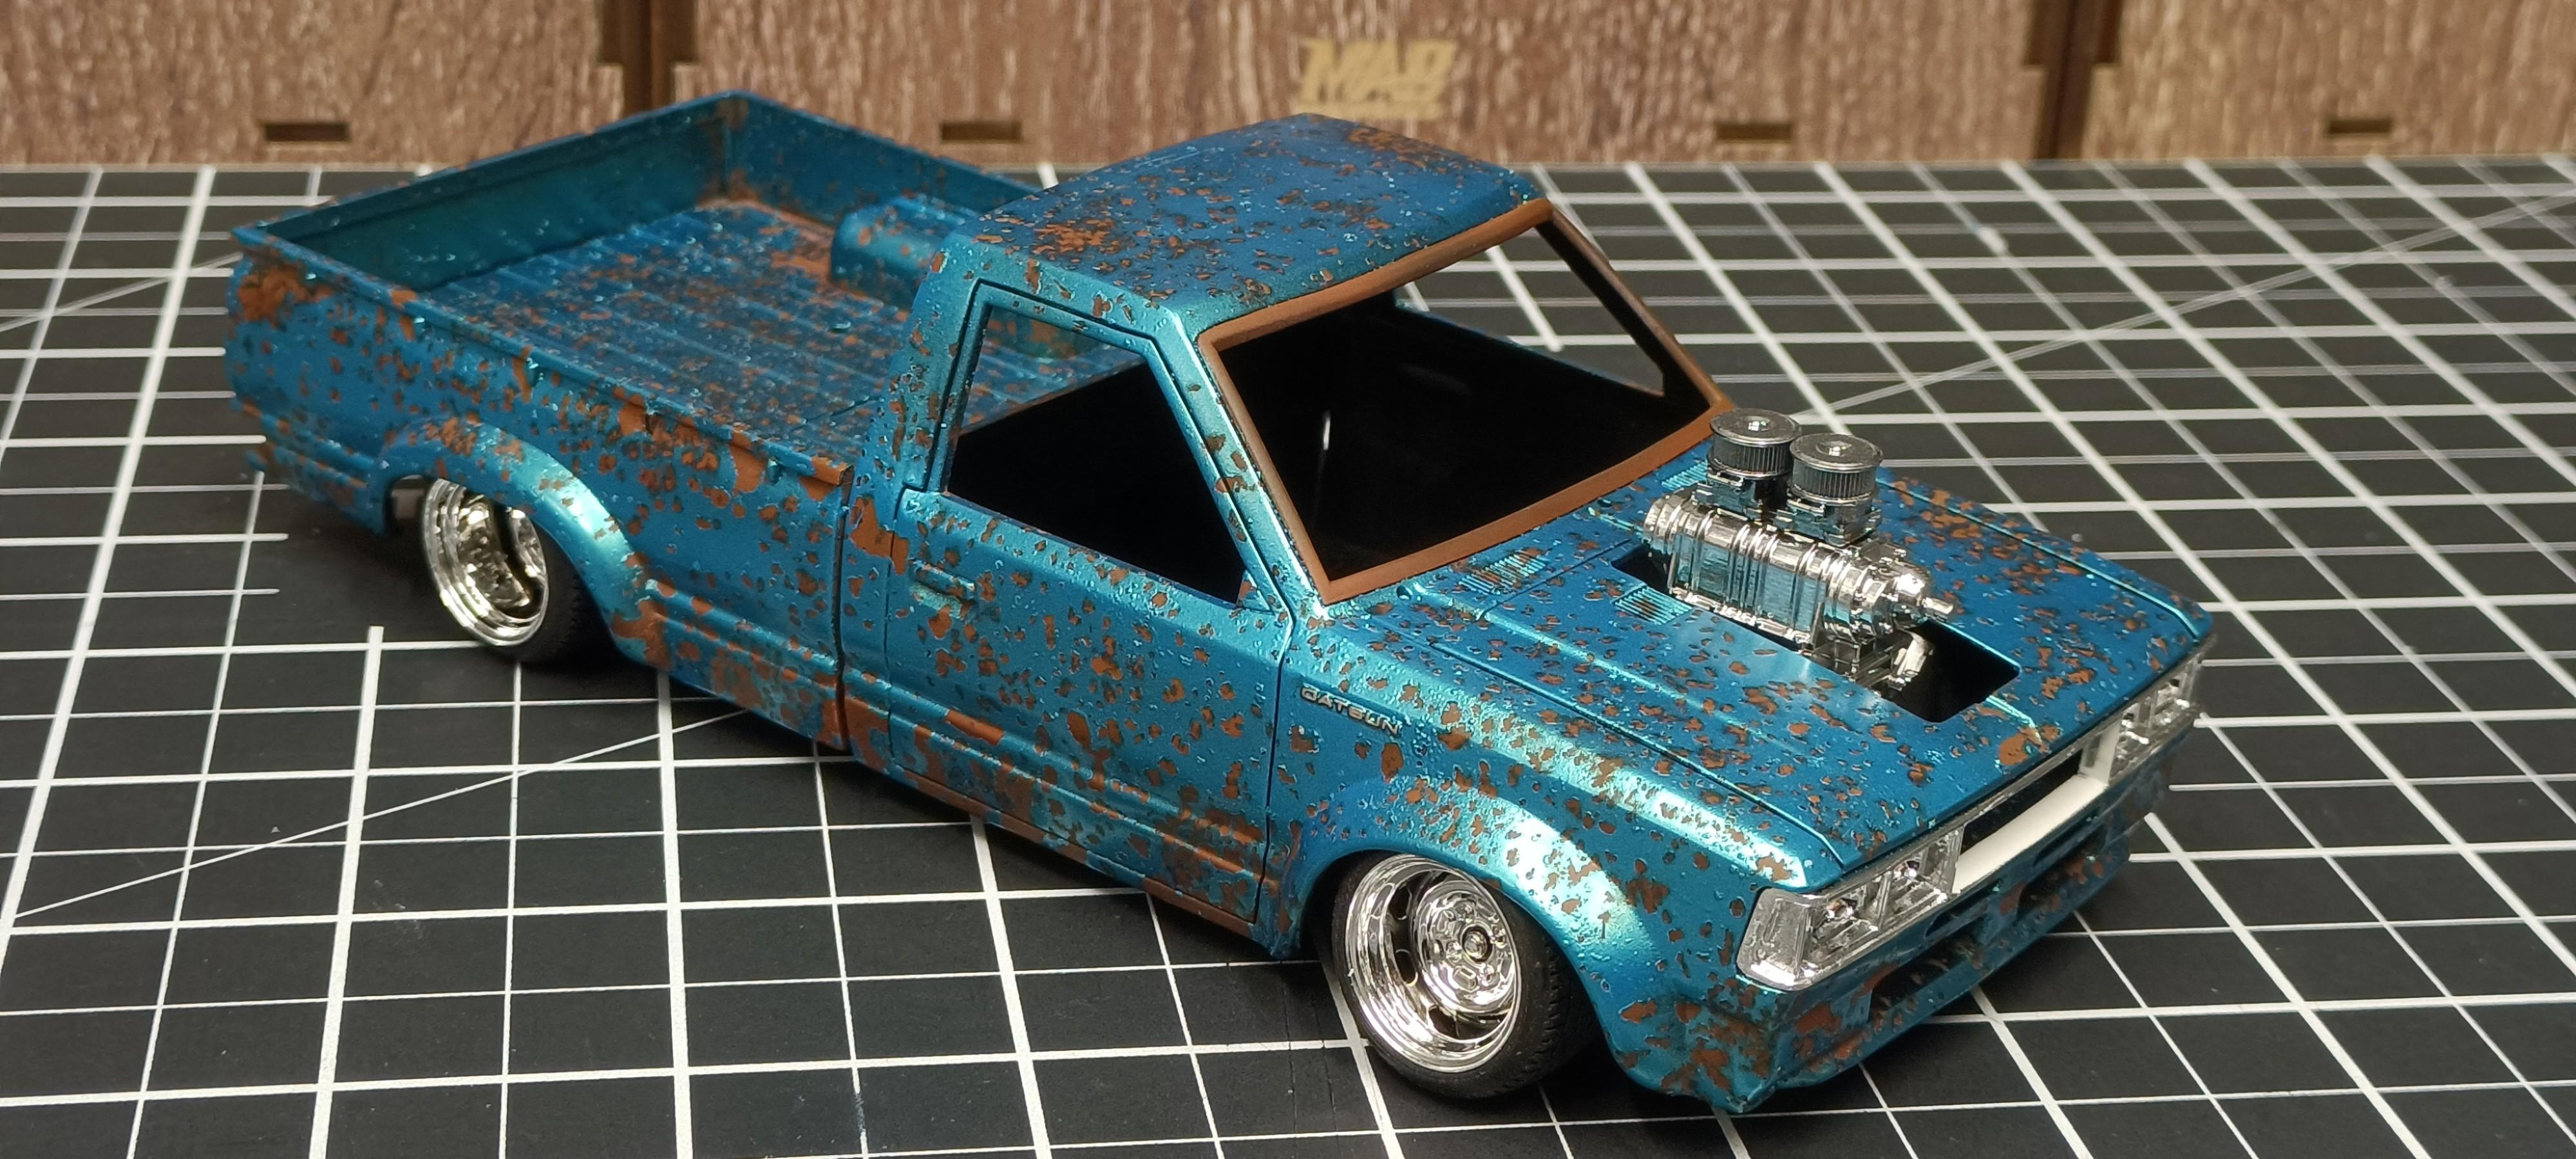
I seen another modeler of the forum working on a kit from this Aoshima series. And it inspired me to dig out a long ago stalled build. The idea for the style of this build is a Datsun ute pulled from a wrecking yard and converted to a drift car with a supercharged power plant. Paint work same technique I used on a previous Skyline build The supercharger was 3D printed, the file sourced from Slowys Models Scratch built interior tub and roll cage, I 3D printed fuel cell and radiator. Filled in the tail gate. Styrene tube for the exhaust. I 3D printed the wheels and tyres are Aoshima 14' stretch wall cambered. Crazy Modeler photo etched mesh used for the grills.
-
Datsun 720 completed.
- 766 replies
-
- 8
-
-
- stalled builds
- quick builds
- (and 2 more)
-
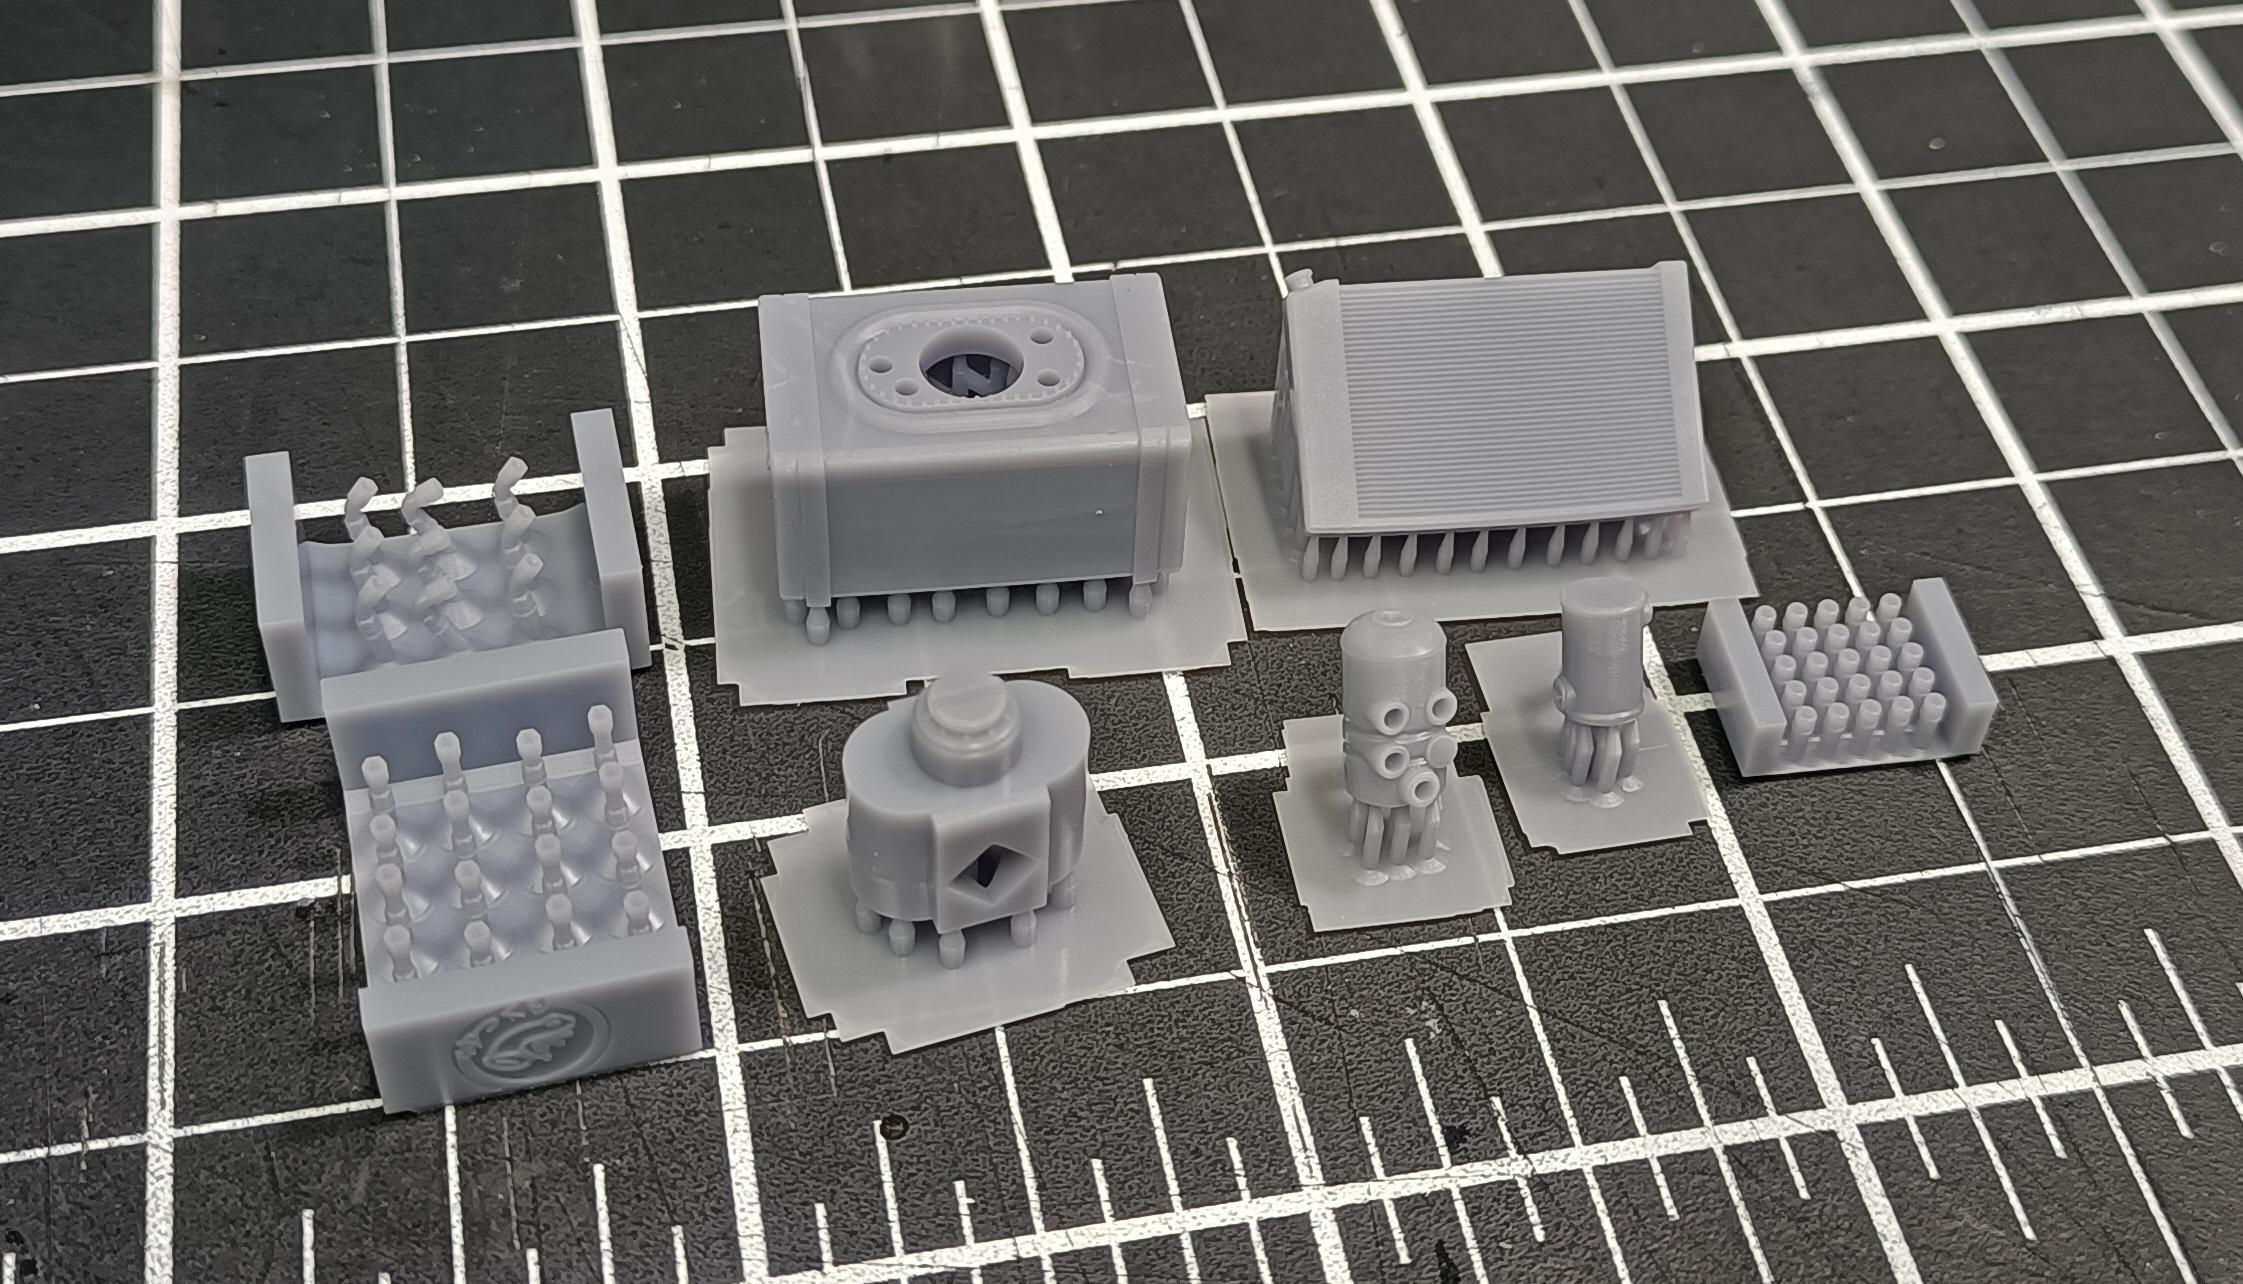
Printed a couple more components for the Datto.
- 766 replies
-
- 5
-
-
- stalled builds
- quick builds
- (and 2 more)
-
Thats the thing about fitting after market wheels, you are kinda restricted to what will fit. Thats why most people will kit swap wheels. After market wheels will sometimes require modifications. Either of these Pegasus wheels should fit the Imperial without too much modification. But no stock with Lazy Modeller. Have to shop around.
-
Another place to source wheels is Lazy Modeller they have some of the Pegasus range.
-
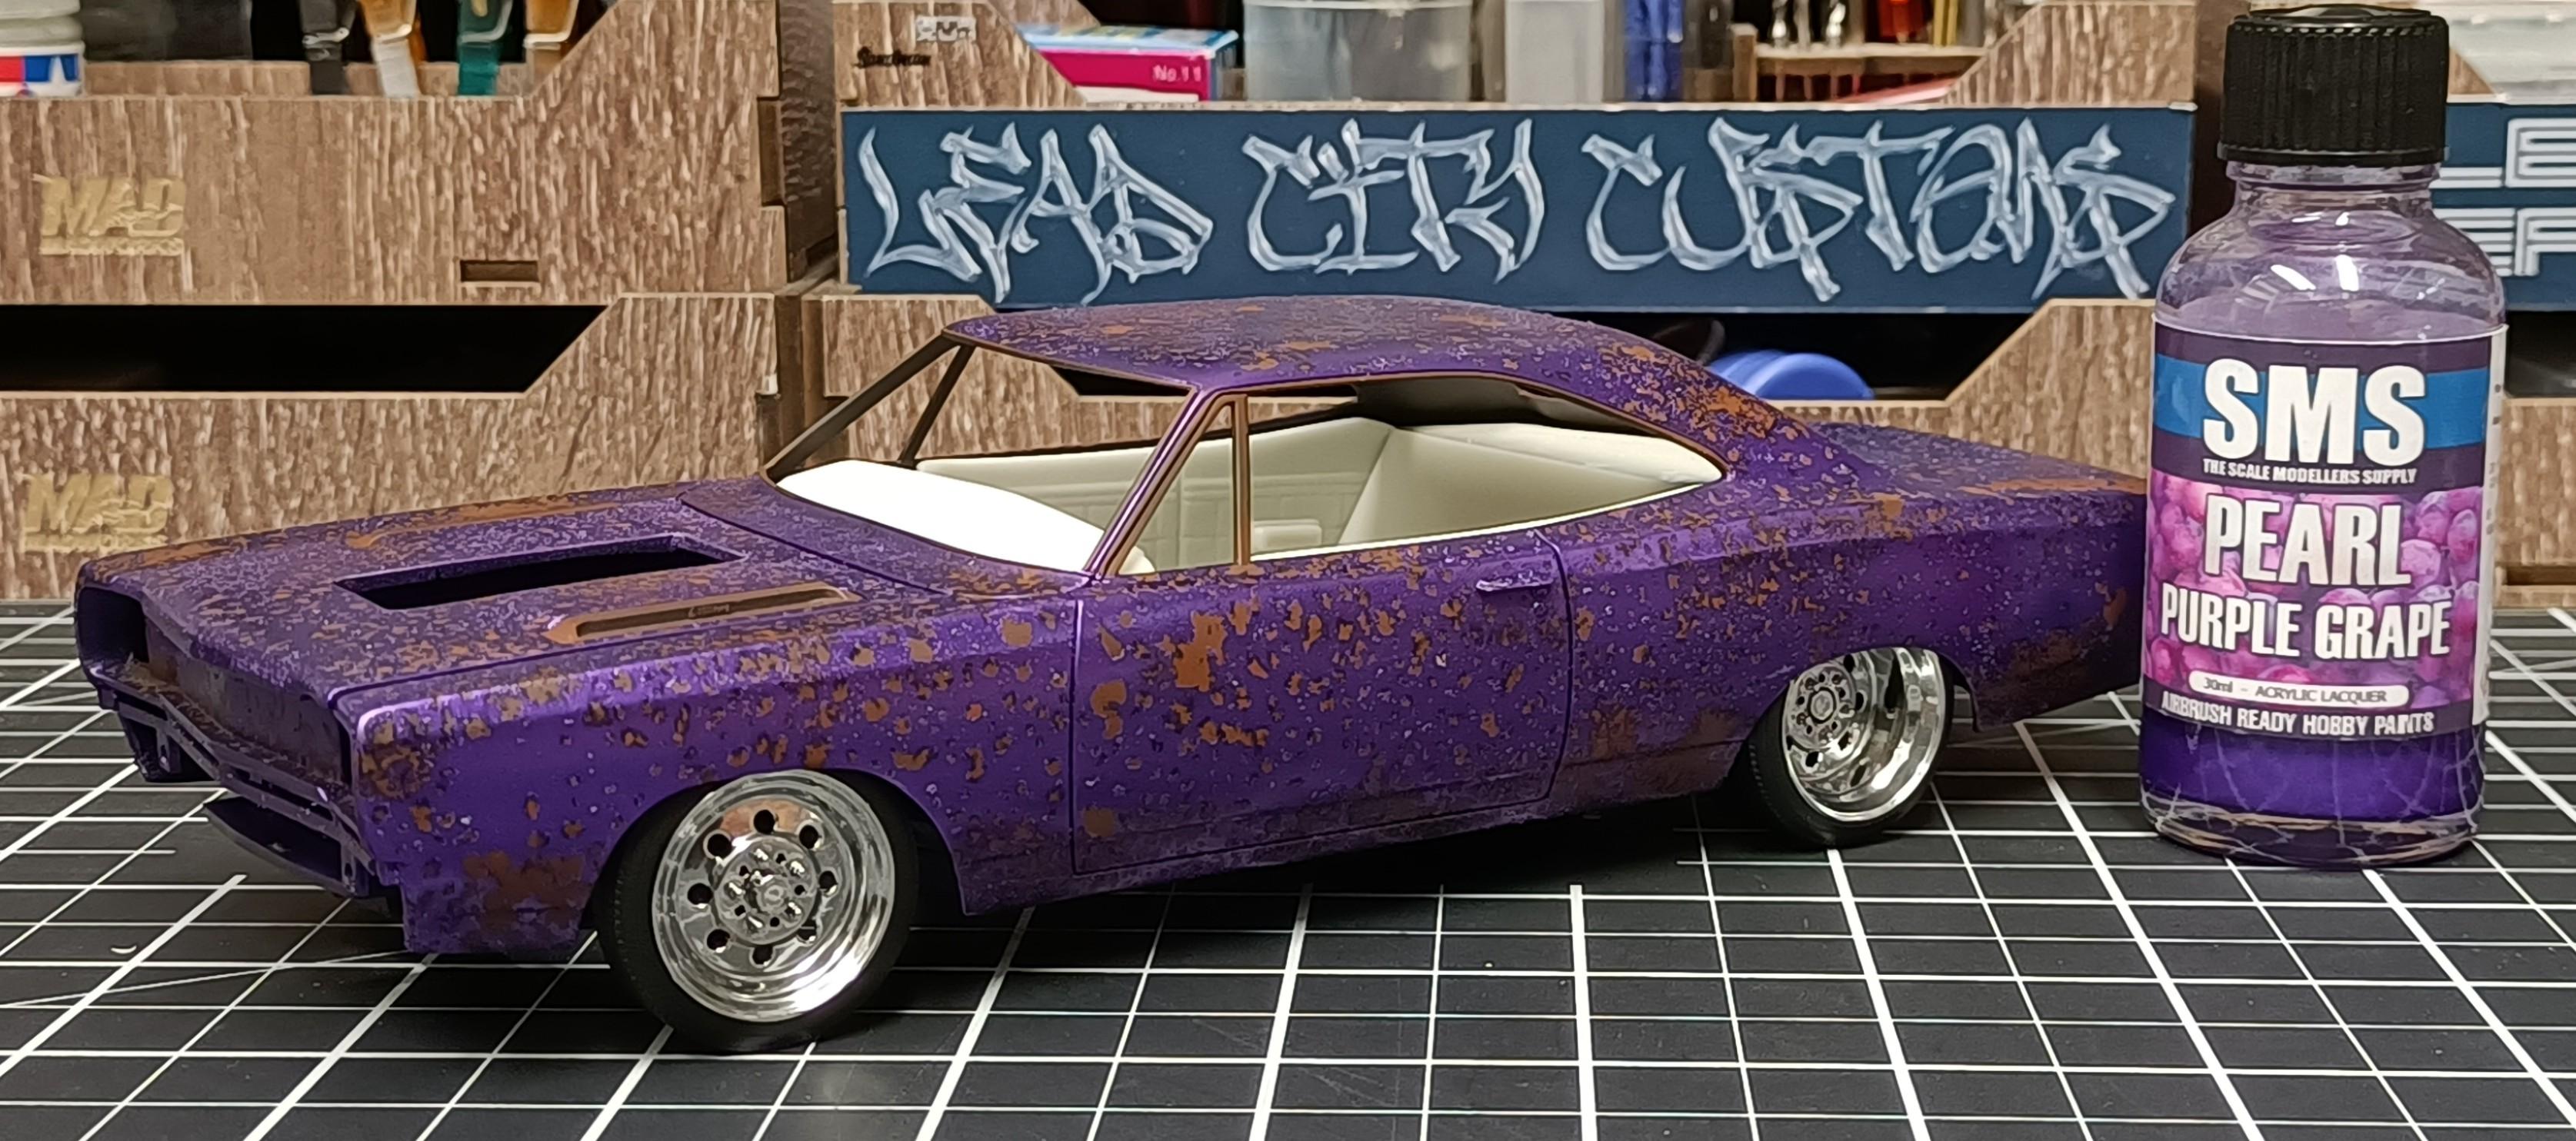
Finished the rusty/patina paint work. And assembled the wheels. 😁
- 766 replies
-
- 4
-
-
- stalled builds
- quick builds
- (and 2 more)
-
Yeah thats BNA Model World
-
Who doesn't love a mock-up? Let's see yours!
Cool Hand replied to Belairconvertable's topic in WIP: Model Cars
😁 Excellent, cant wait to see the next update -
Who doesn't love a mock-up? Let's see yours!
Cool Hand replied to Belairconvertable's topic in WIP: Model Cars
Interesting, look forward to seeing the engine mocked up. Supercharged ? -
I really liked the blue green colour shift and rust combo, so had to do it again. Used finer grain table salt and less of it on the Datto. But I will go back in and add some more rust with sponging technique.
- 766 replies
-
- 4
-
-
- stalled builds
- quick builds
- (and 2 more)
-
Thanks Bob. The Mr Color GX 114 flat clear lays down super smooth. I cant wait to see what the wheels look like, got them painted just need to let them dry a bit before I can do a mock up.