Cool Hand
-
Posts
2,087 -
Joined
-
Last visited
Content Type
Profiles
Forums
Events
Gallery
Everything posted by Cool Hand
-
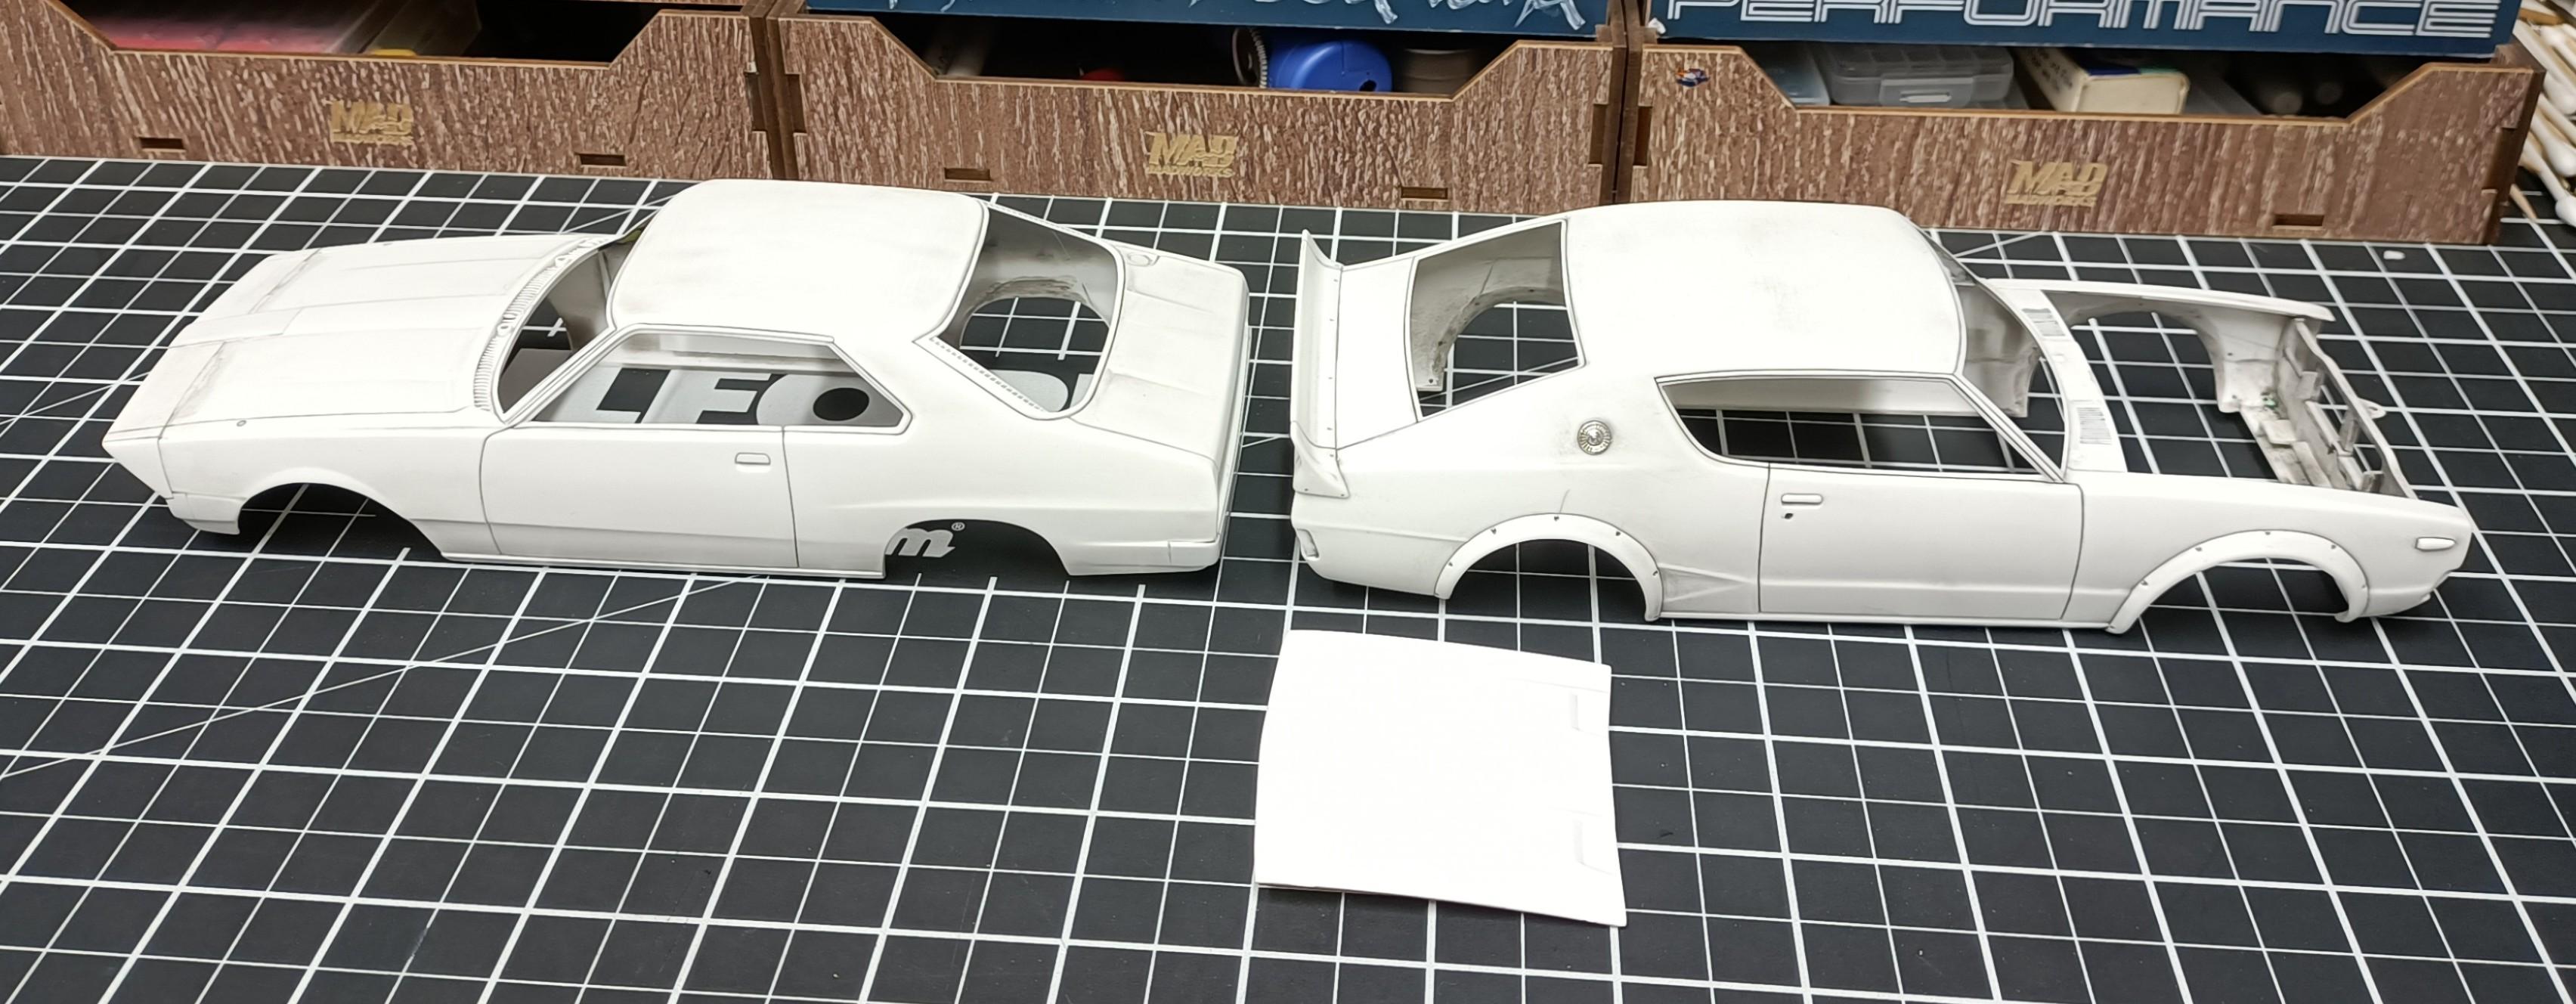
Yeah is what it is Bob, cant be successful 100% of the time. Always will be a paint job or 2 that go bad every once in a while. Thankfully it was only old style Aoshima kits being built as slammers, so no stress just deal with the situation, strip and repaint. Yeah definitely will only use Mr Colour GX-100 Super Clear III from now on. Both have are back in surfacer with check coat applied, As expected few spots will need some further work. Its odd the engine bay looks great no issues 🤣 Have to redo putty work on this one, lacquer thinner dissolved it. Now that spanner in the works is partially out the way, I can get back to the LJ Torana pro street.

-
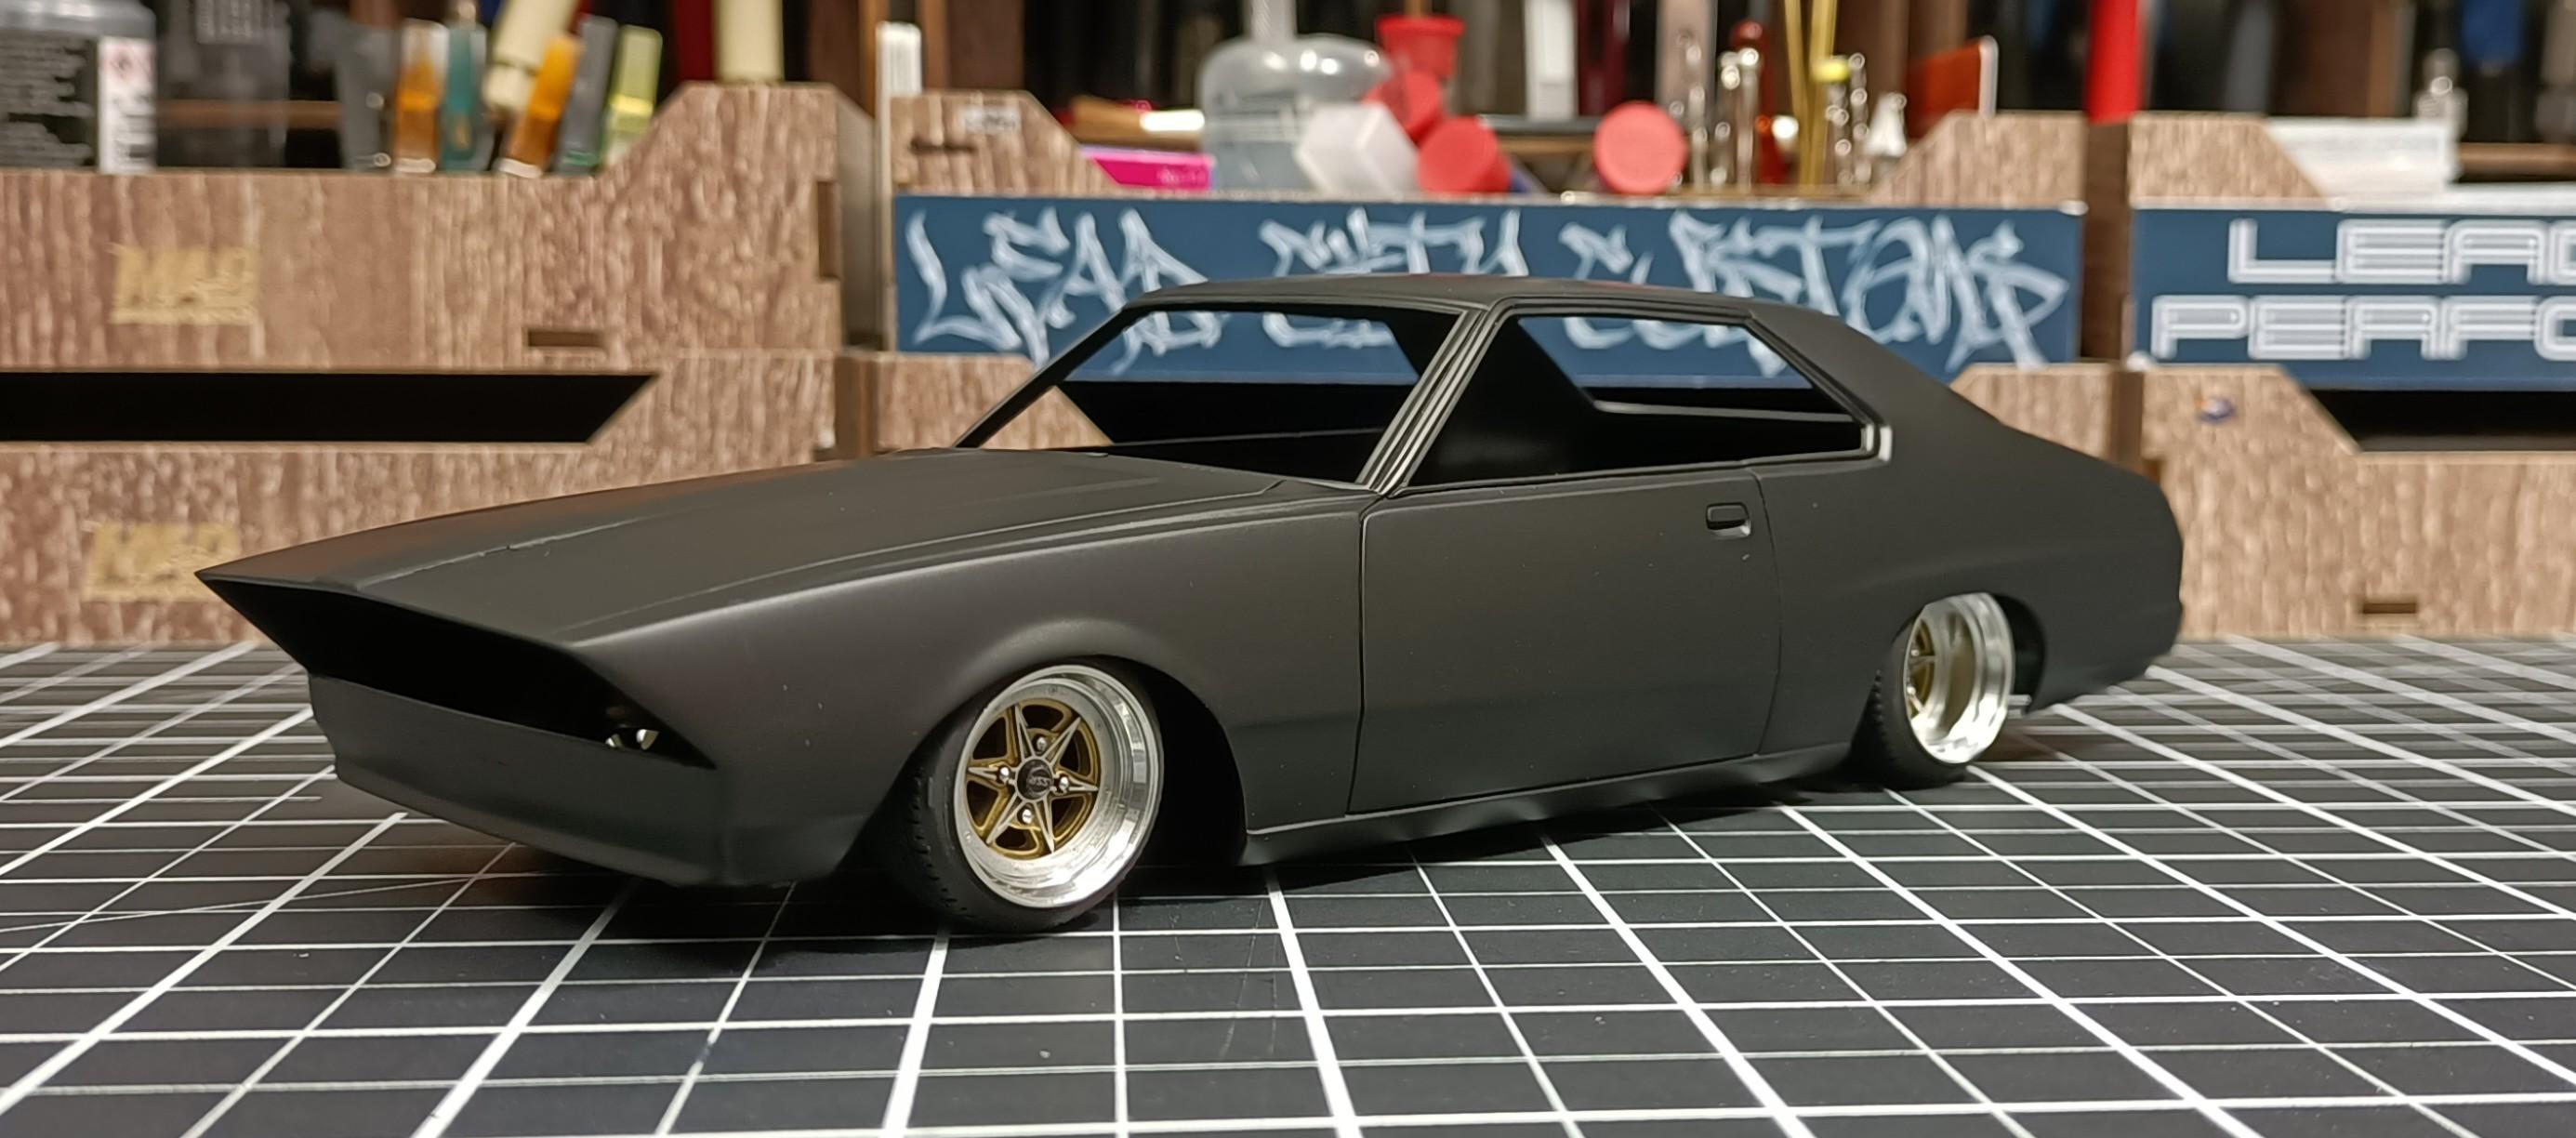
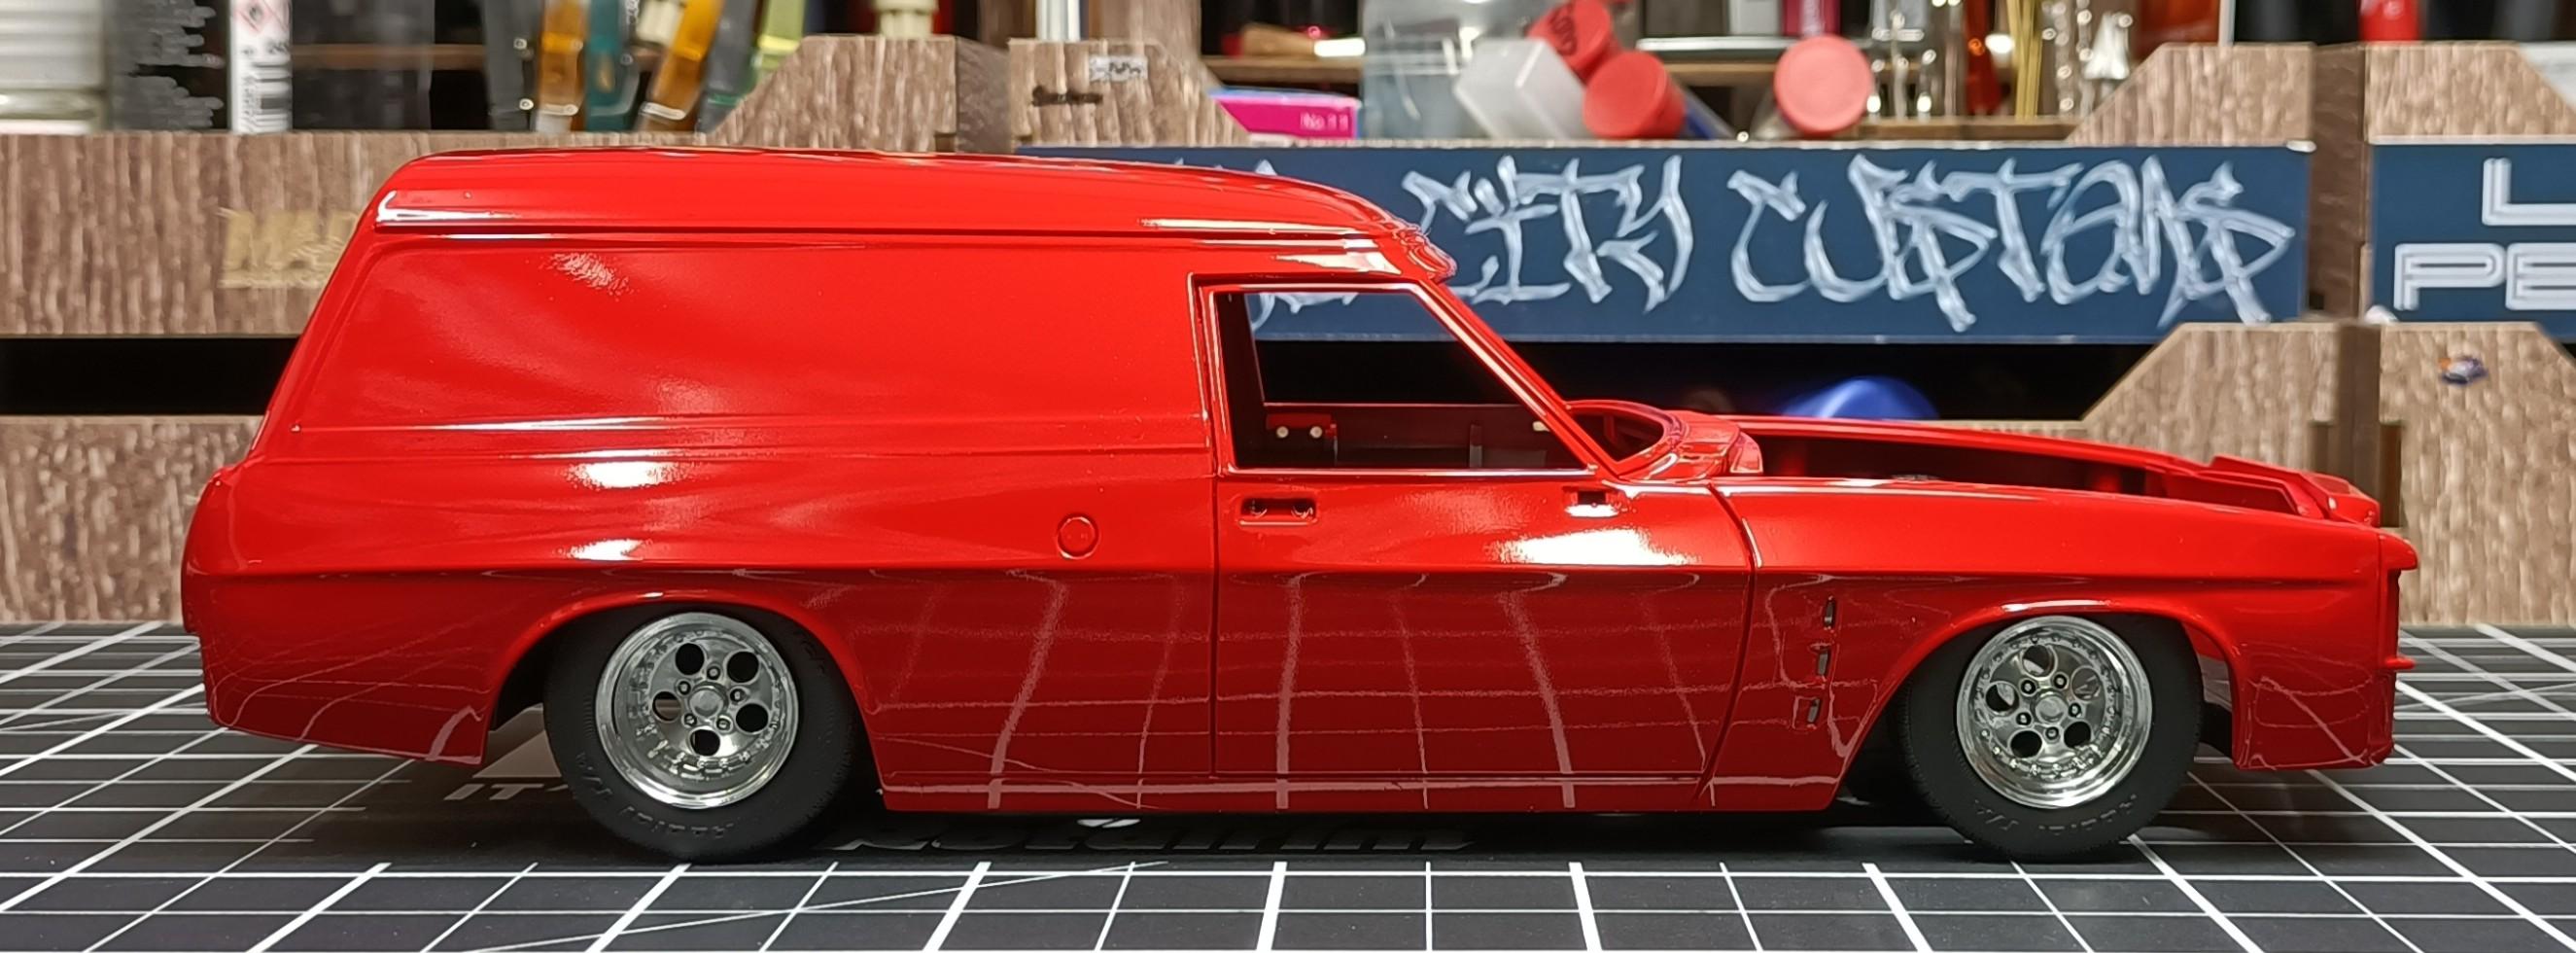
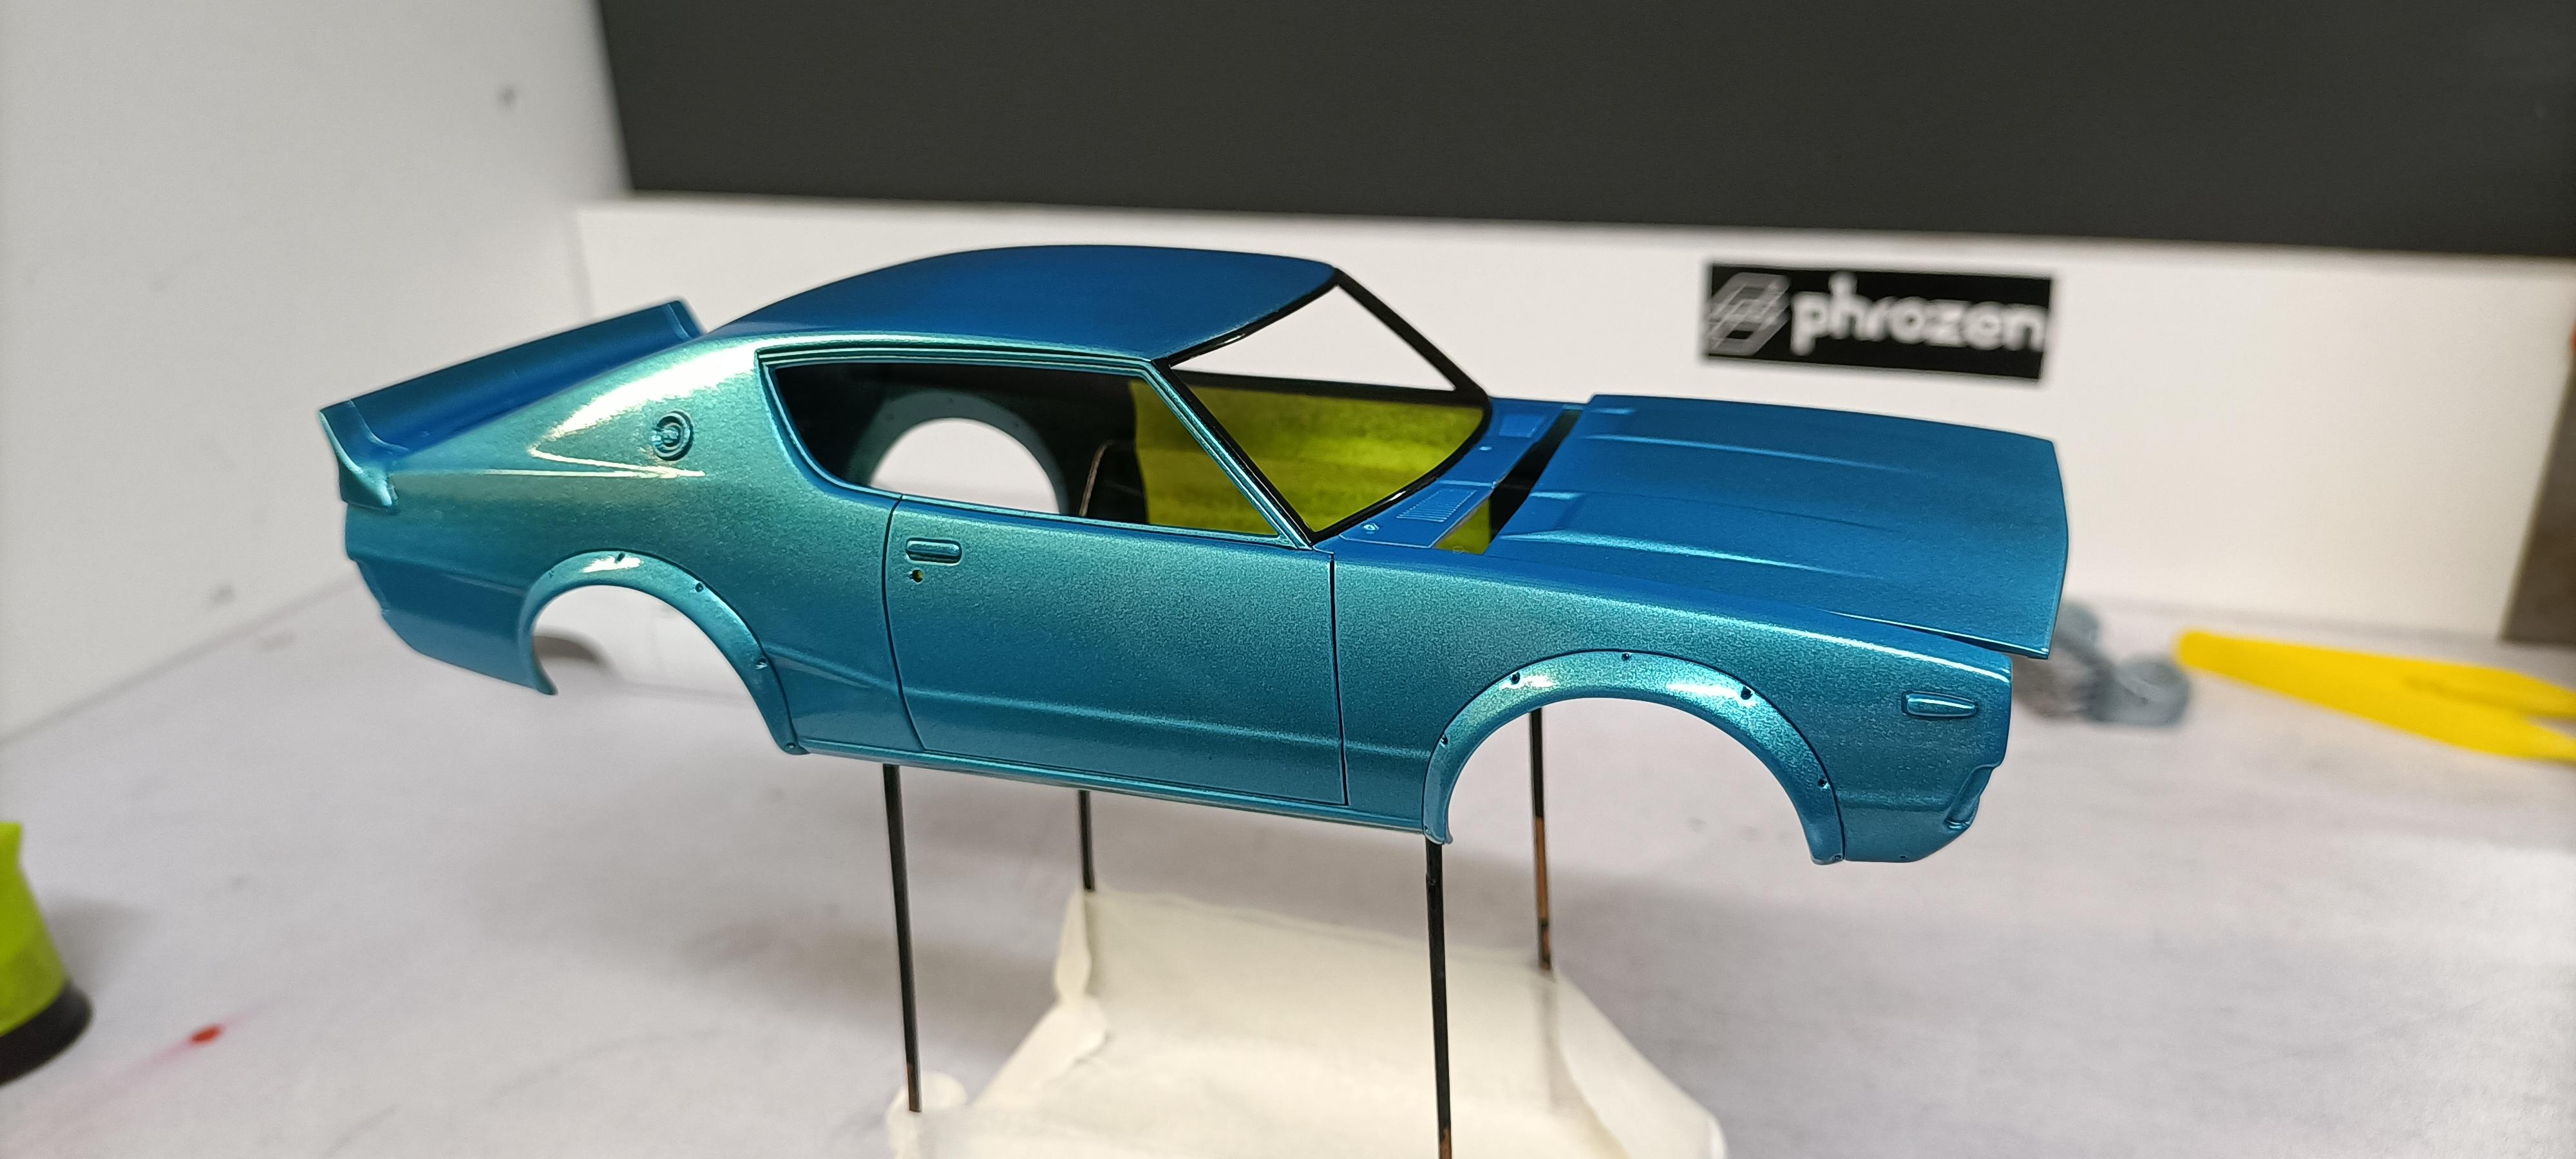
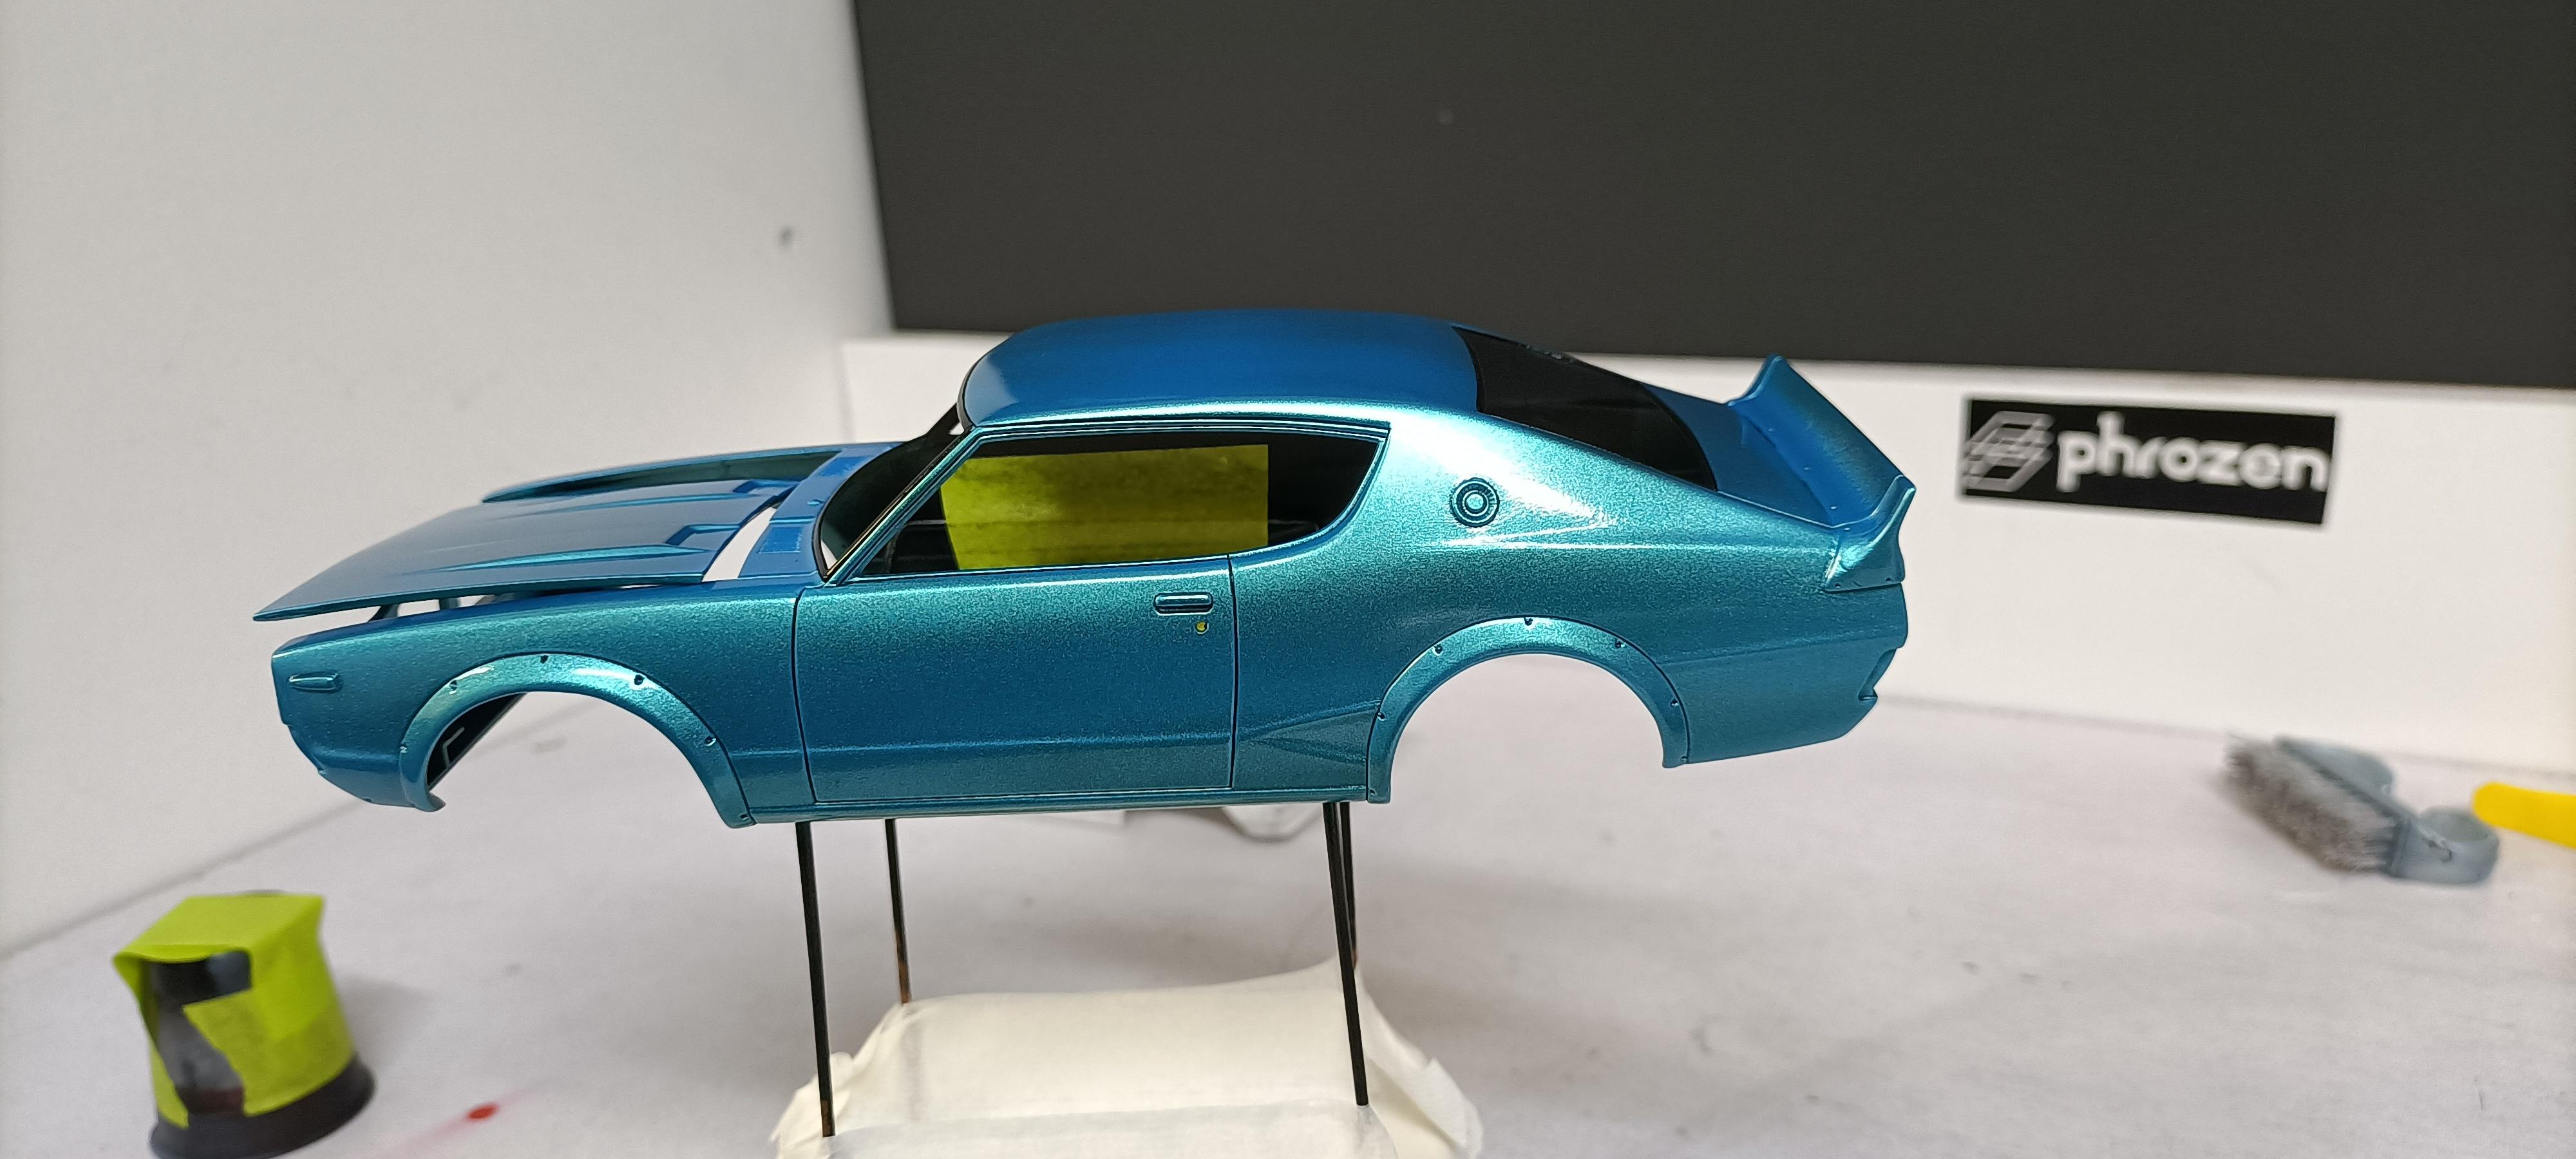
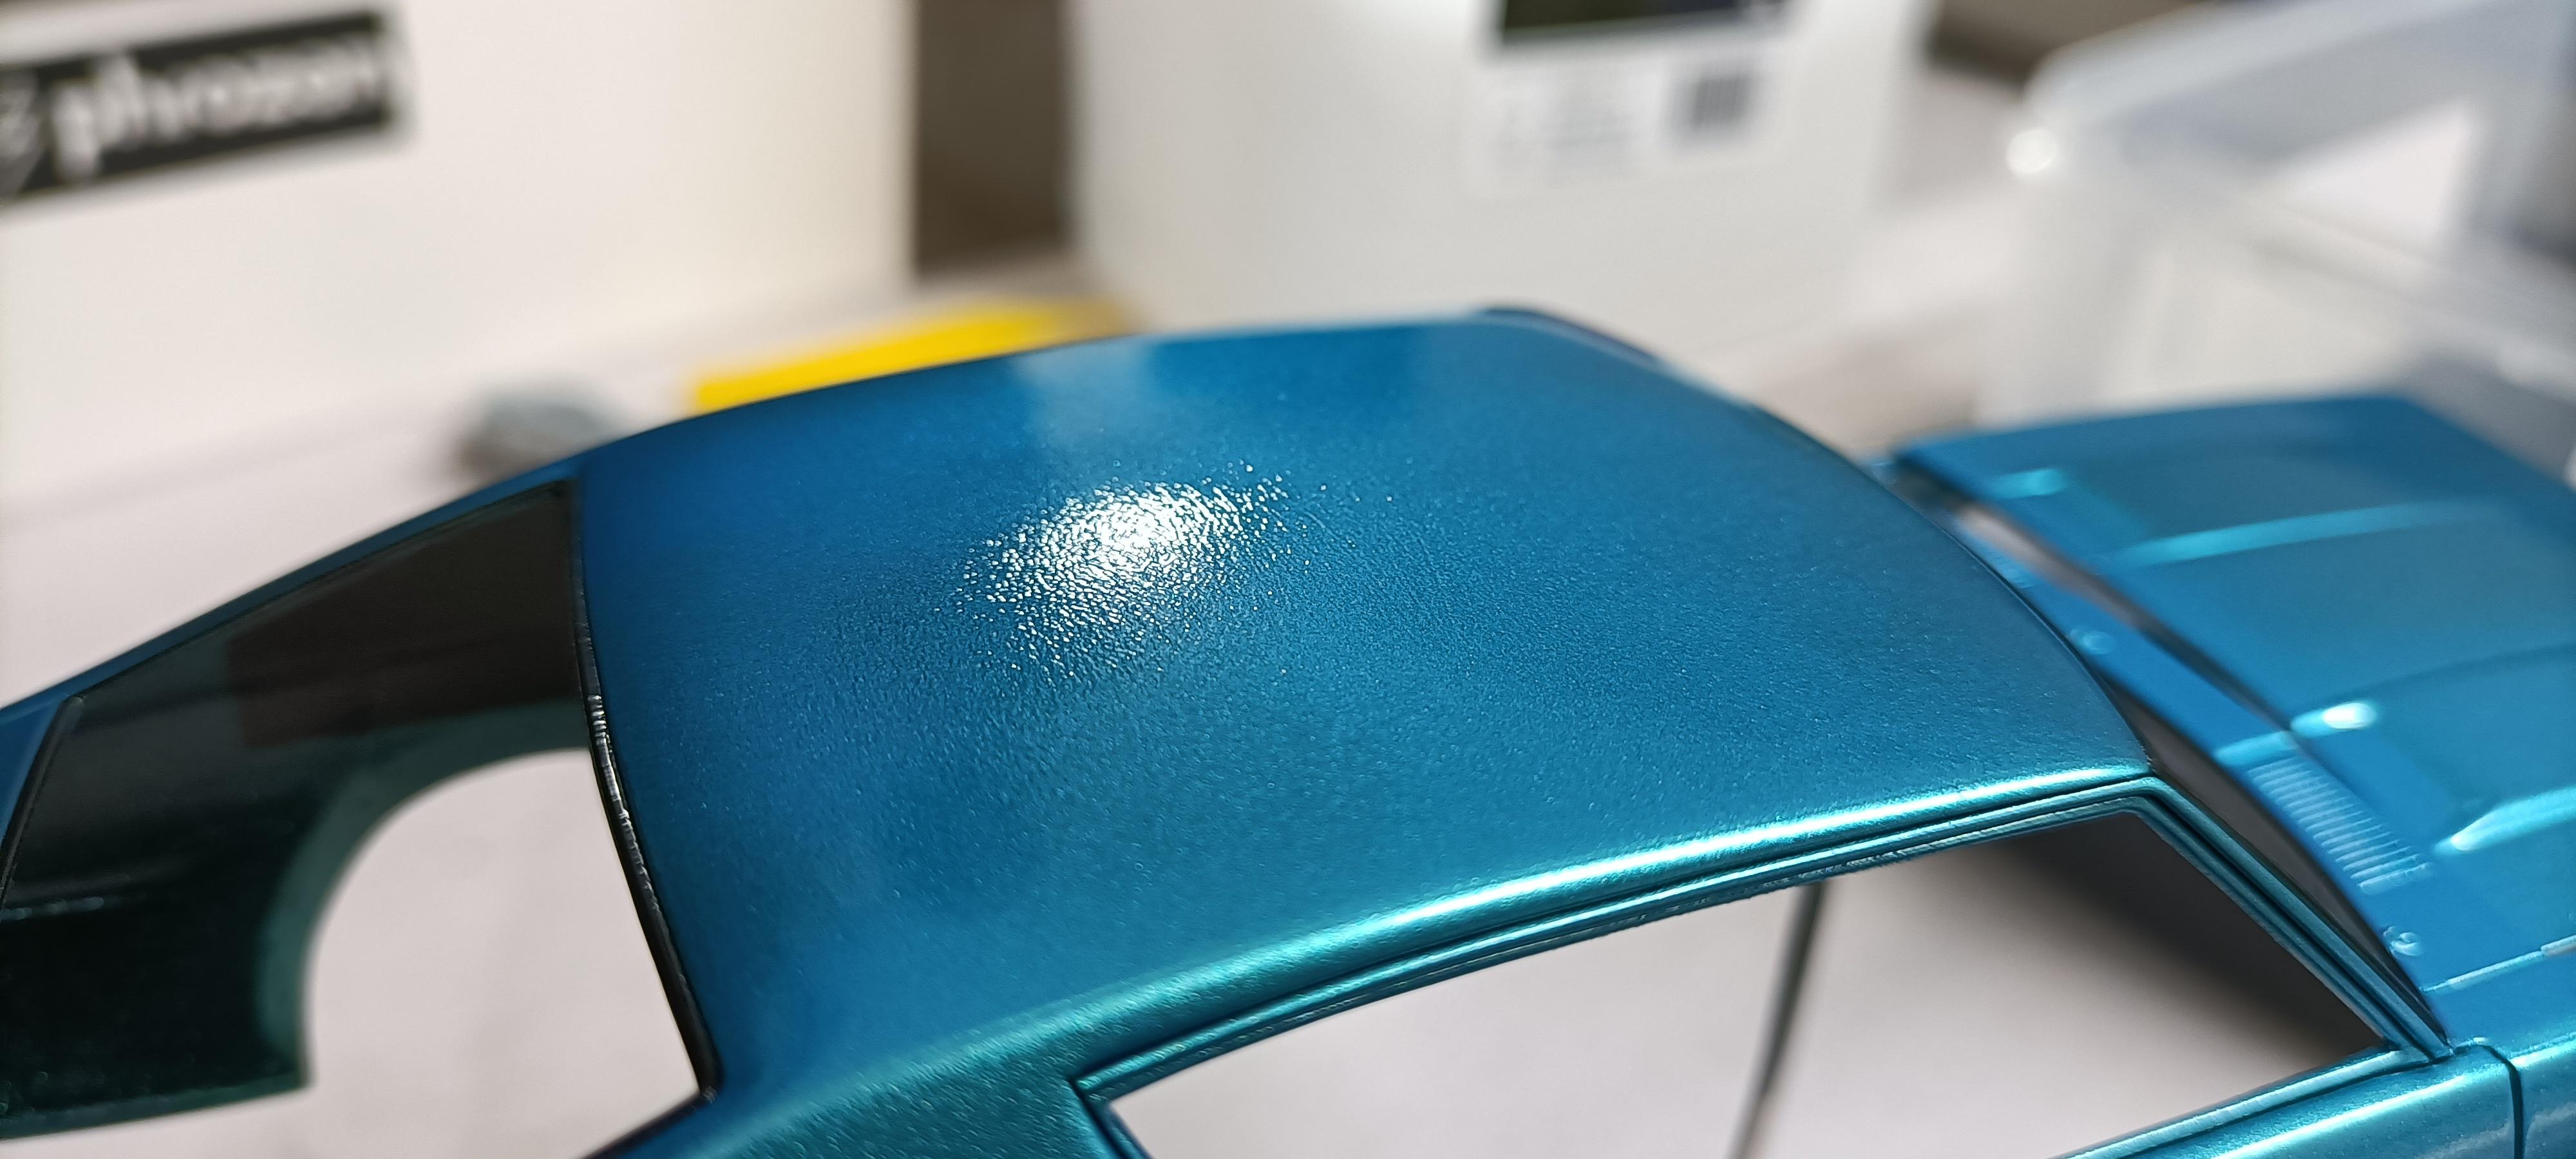
Other Skyline back to bare plastic. So time to reset and try again with these two. Thankfully the Pano clear coat turned out pretty good, I will let it sit and cure for week, then come back to it and get it completed. Has fine orange peel texture which will easily be sorted out with a light wet sand and compound polish.
- 766 replies
-
- 4
-

-
- stalled builds
- quick builds
- (and 2 more)
-
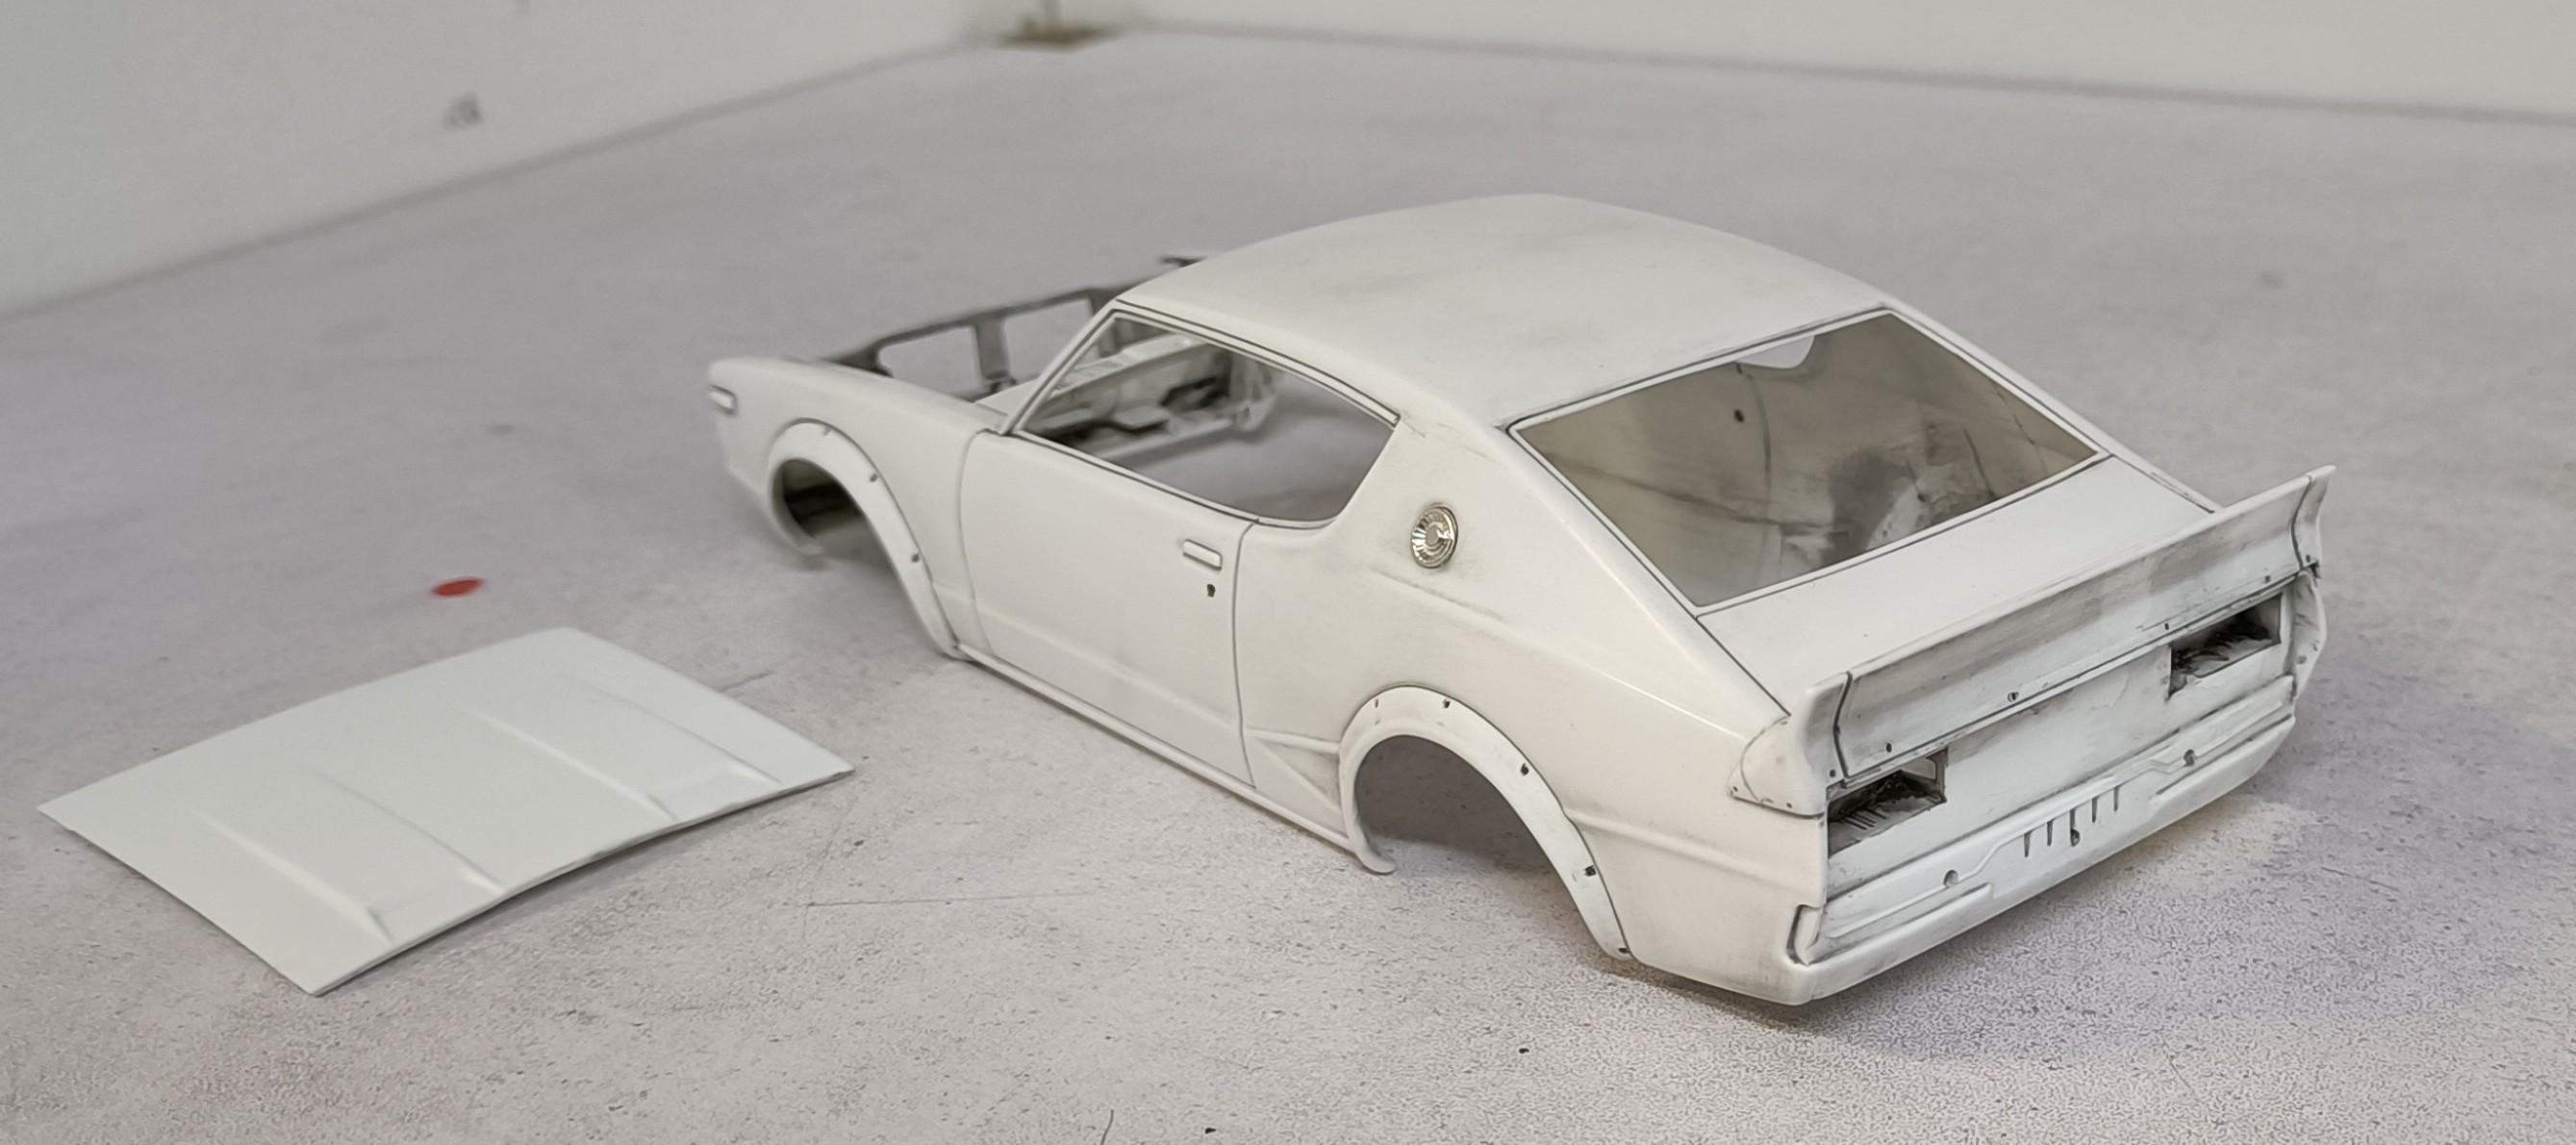
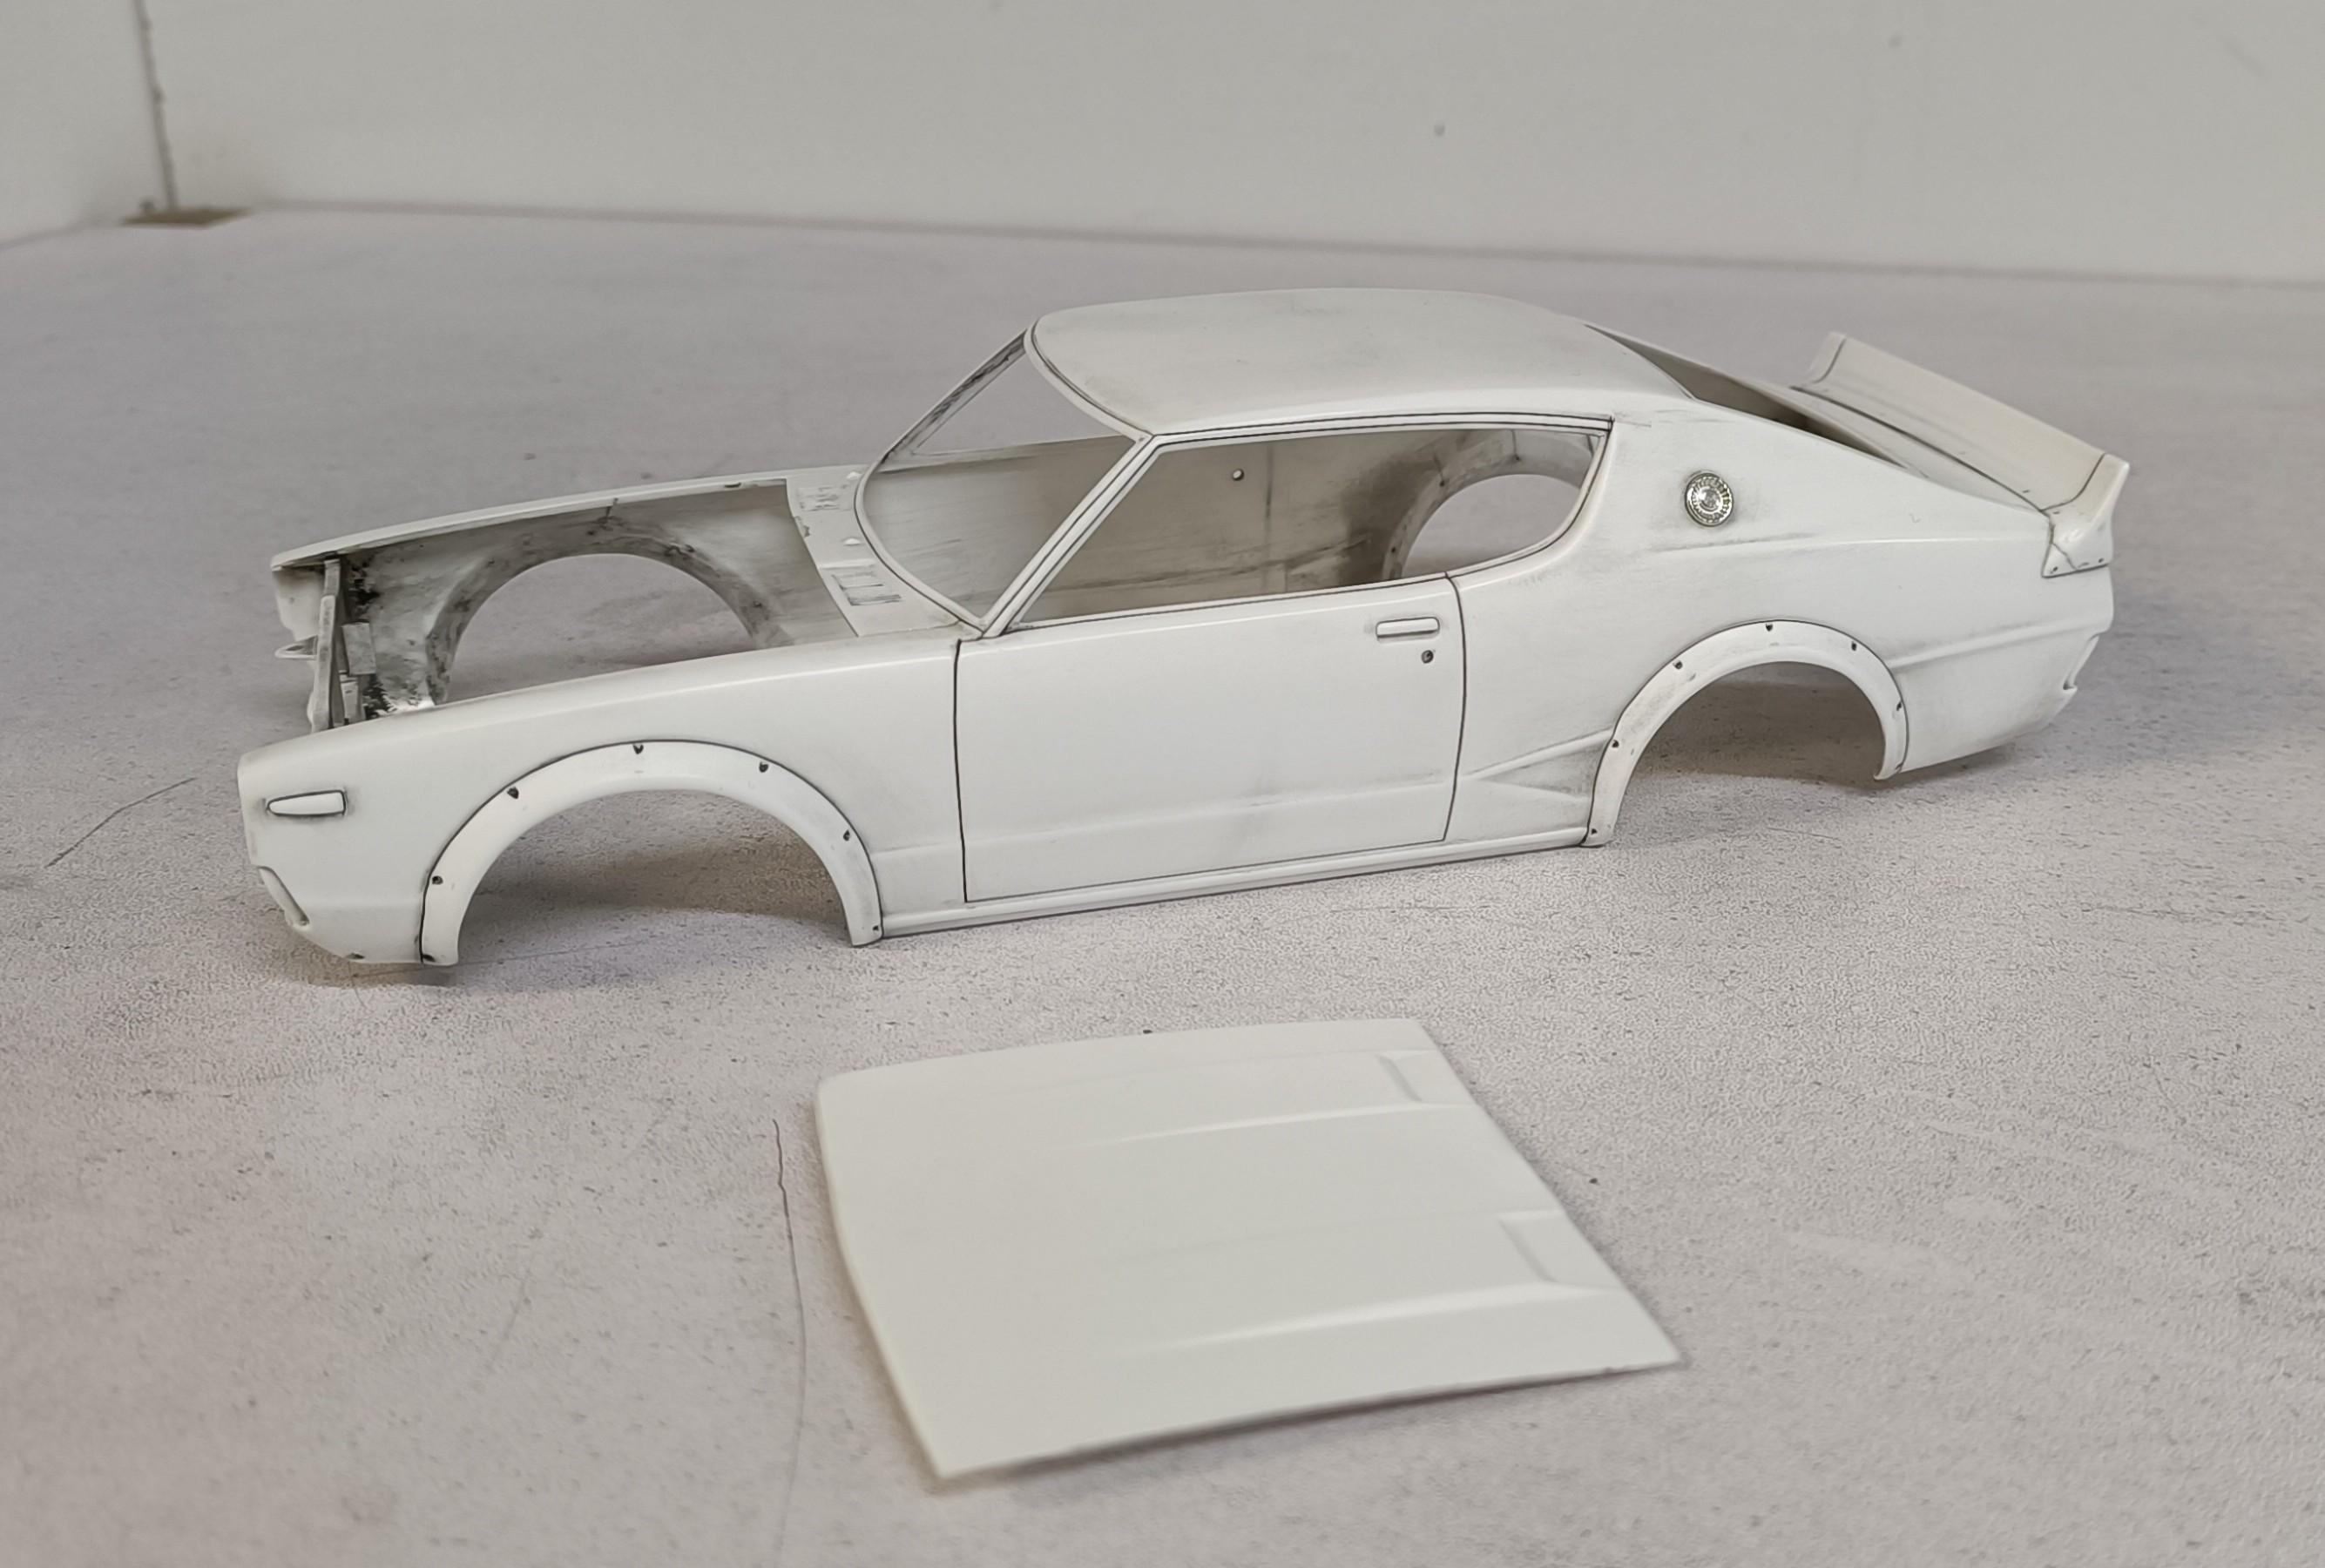
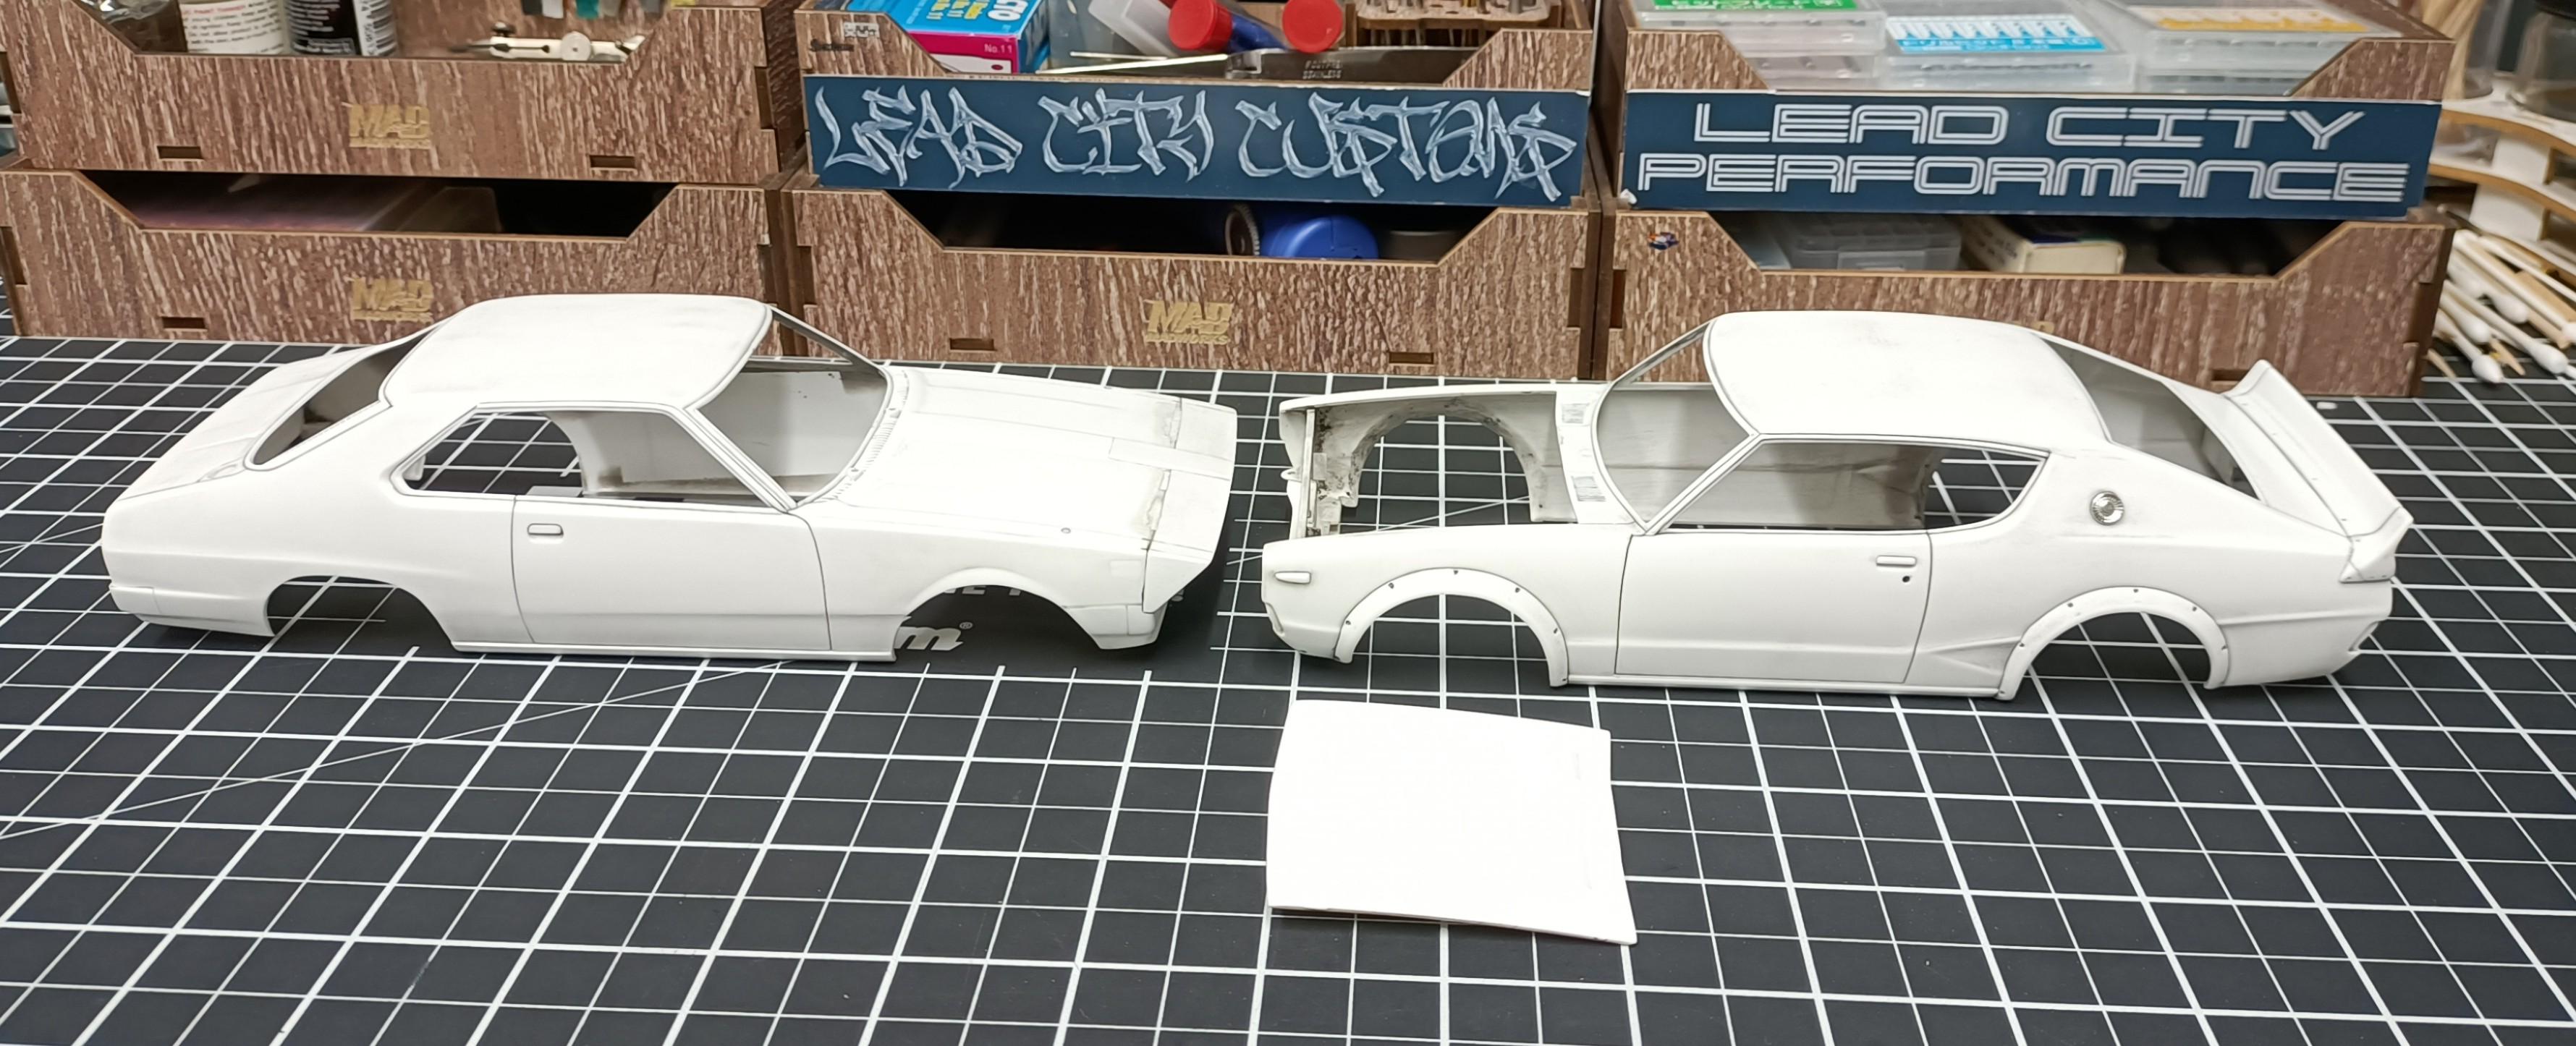
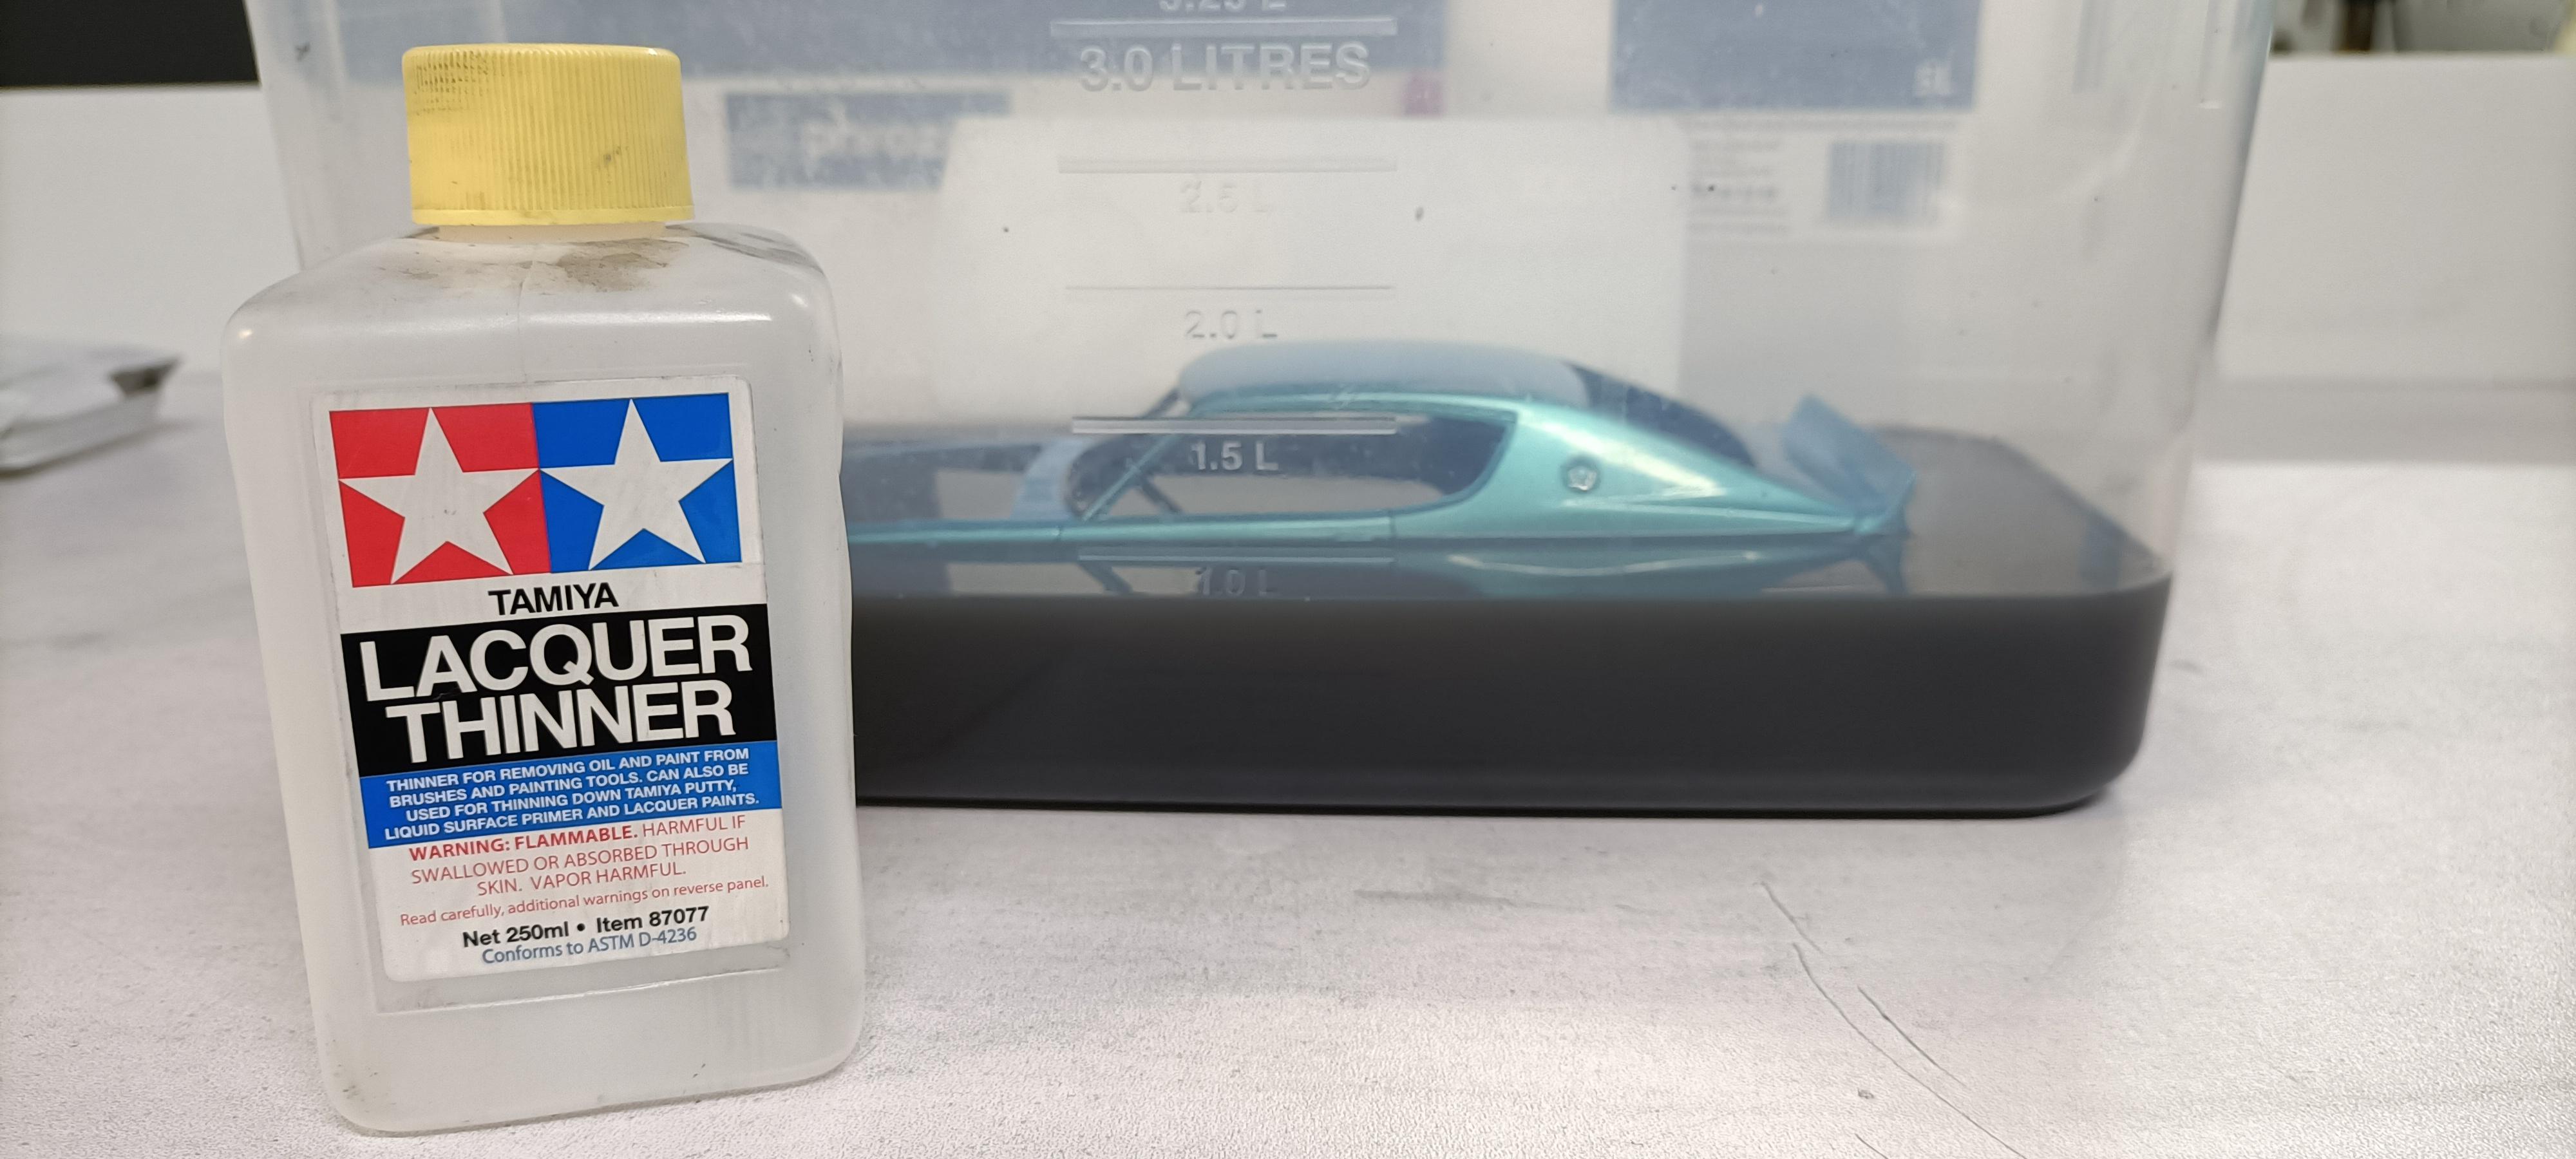
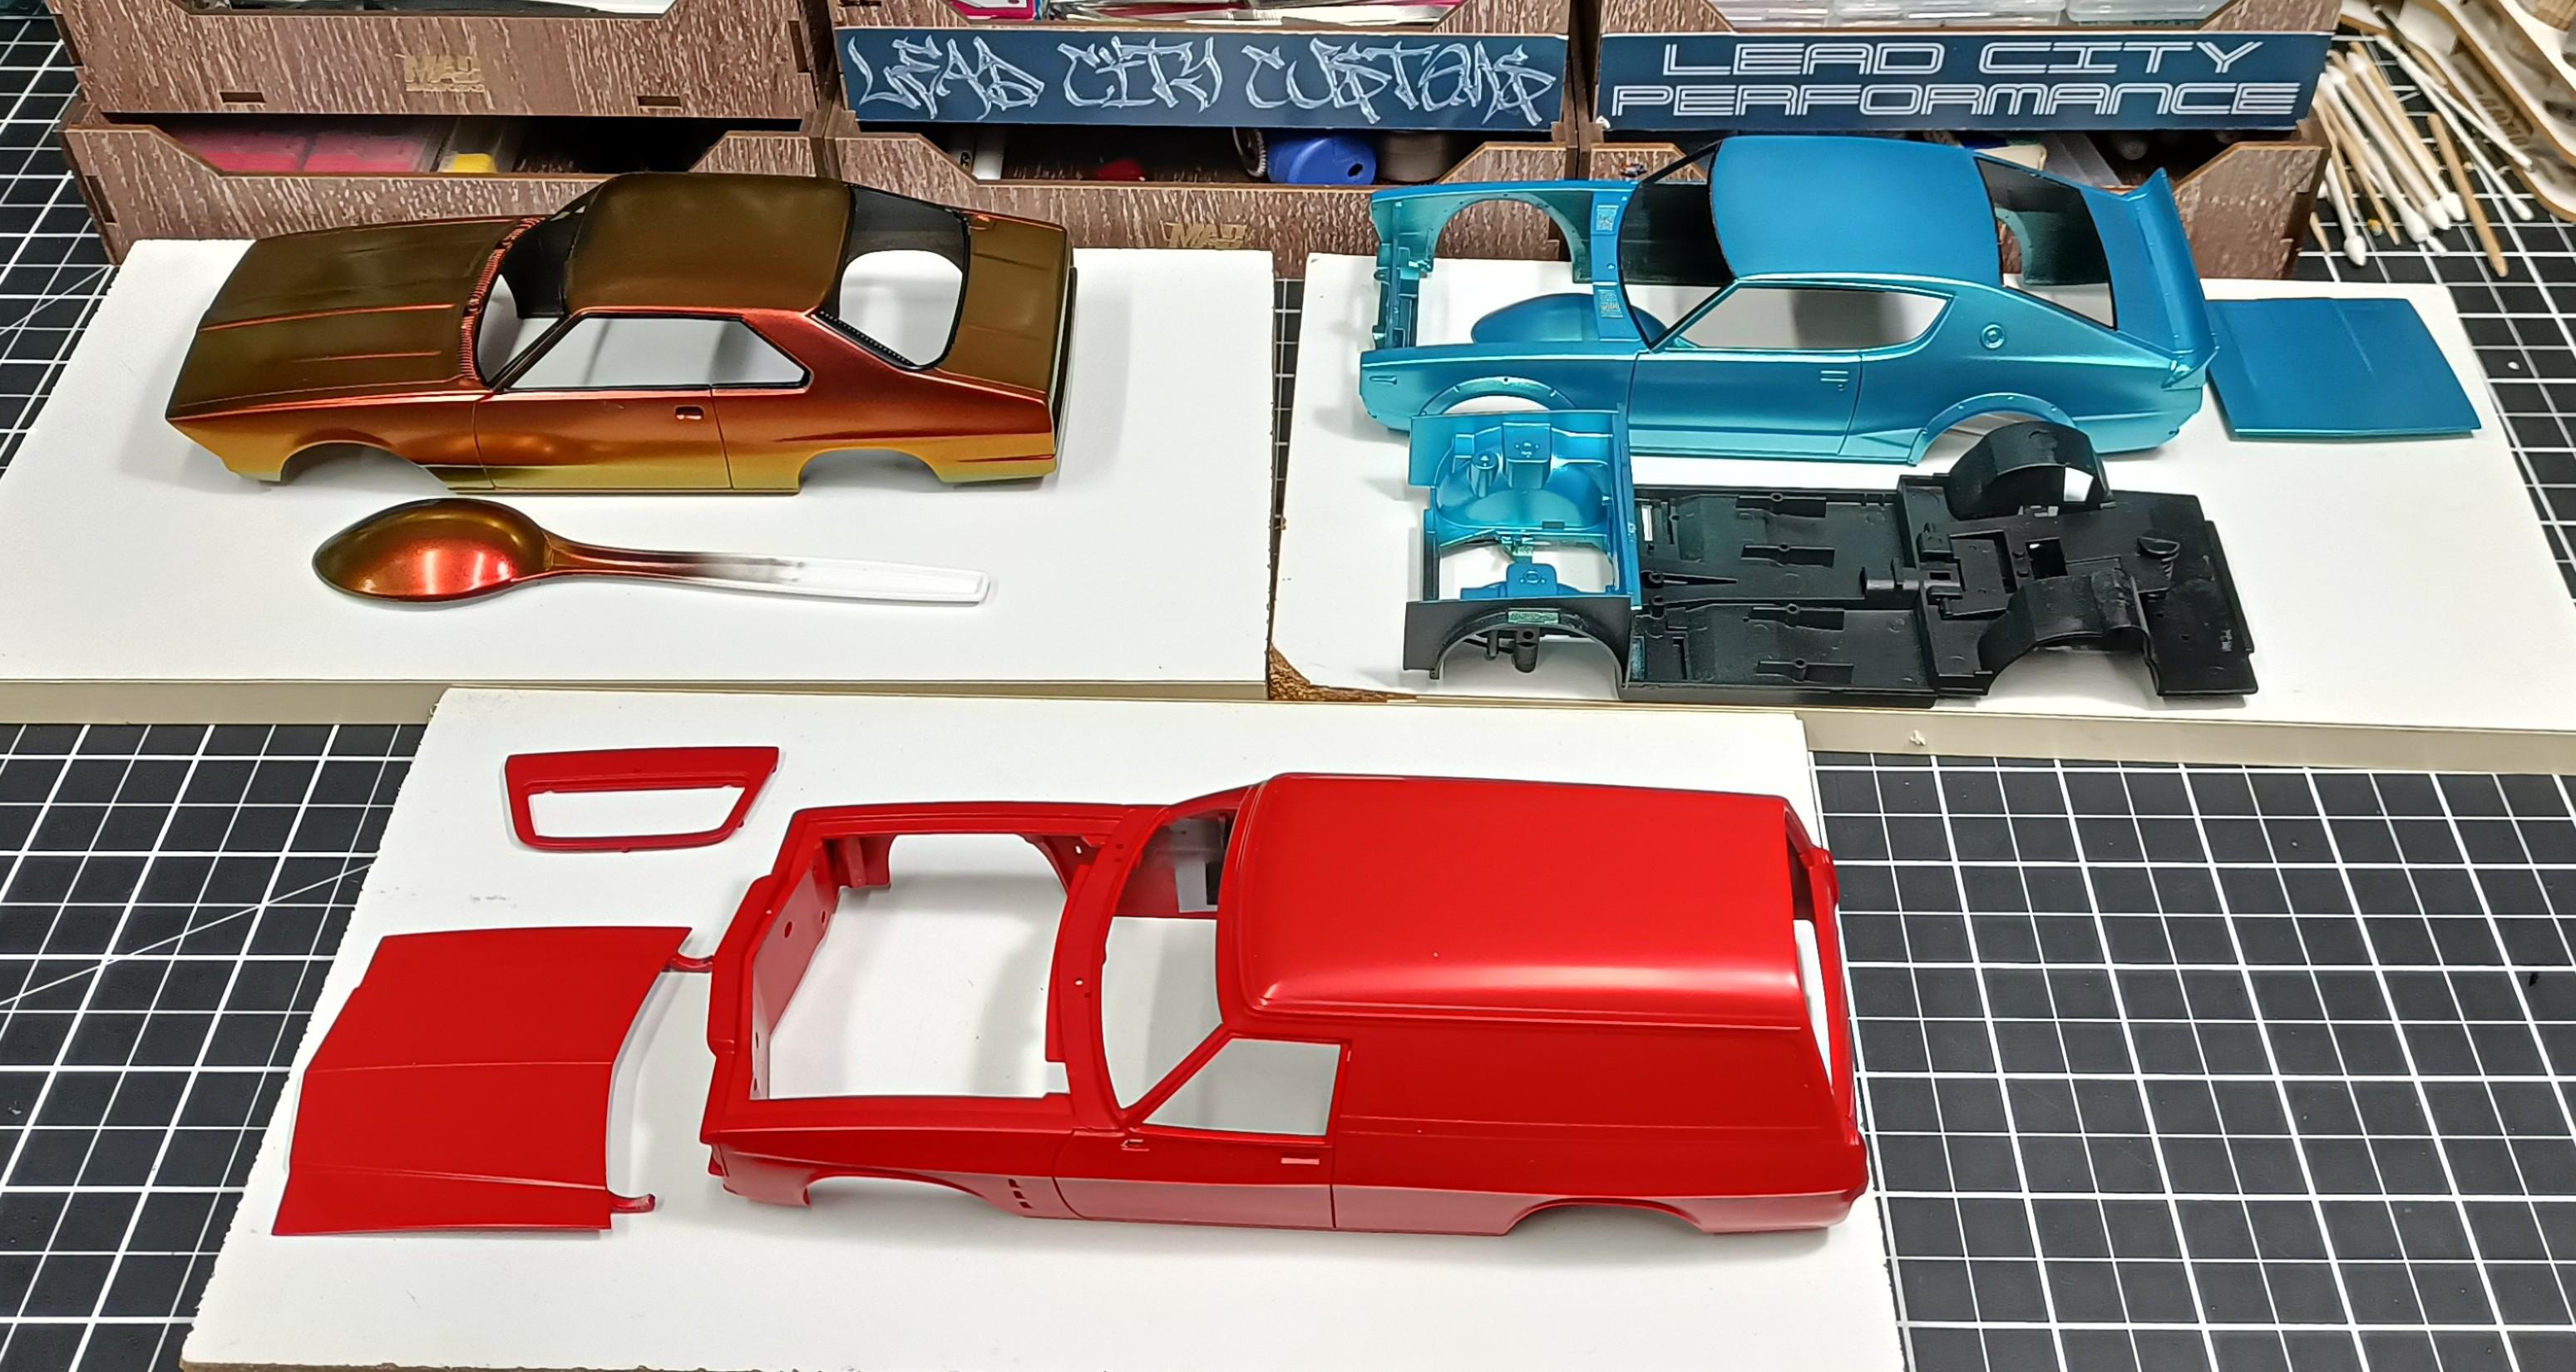
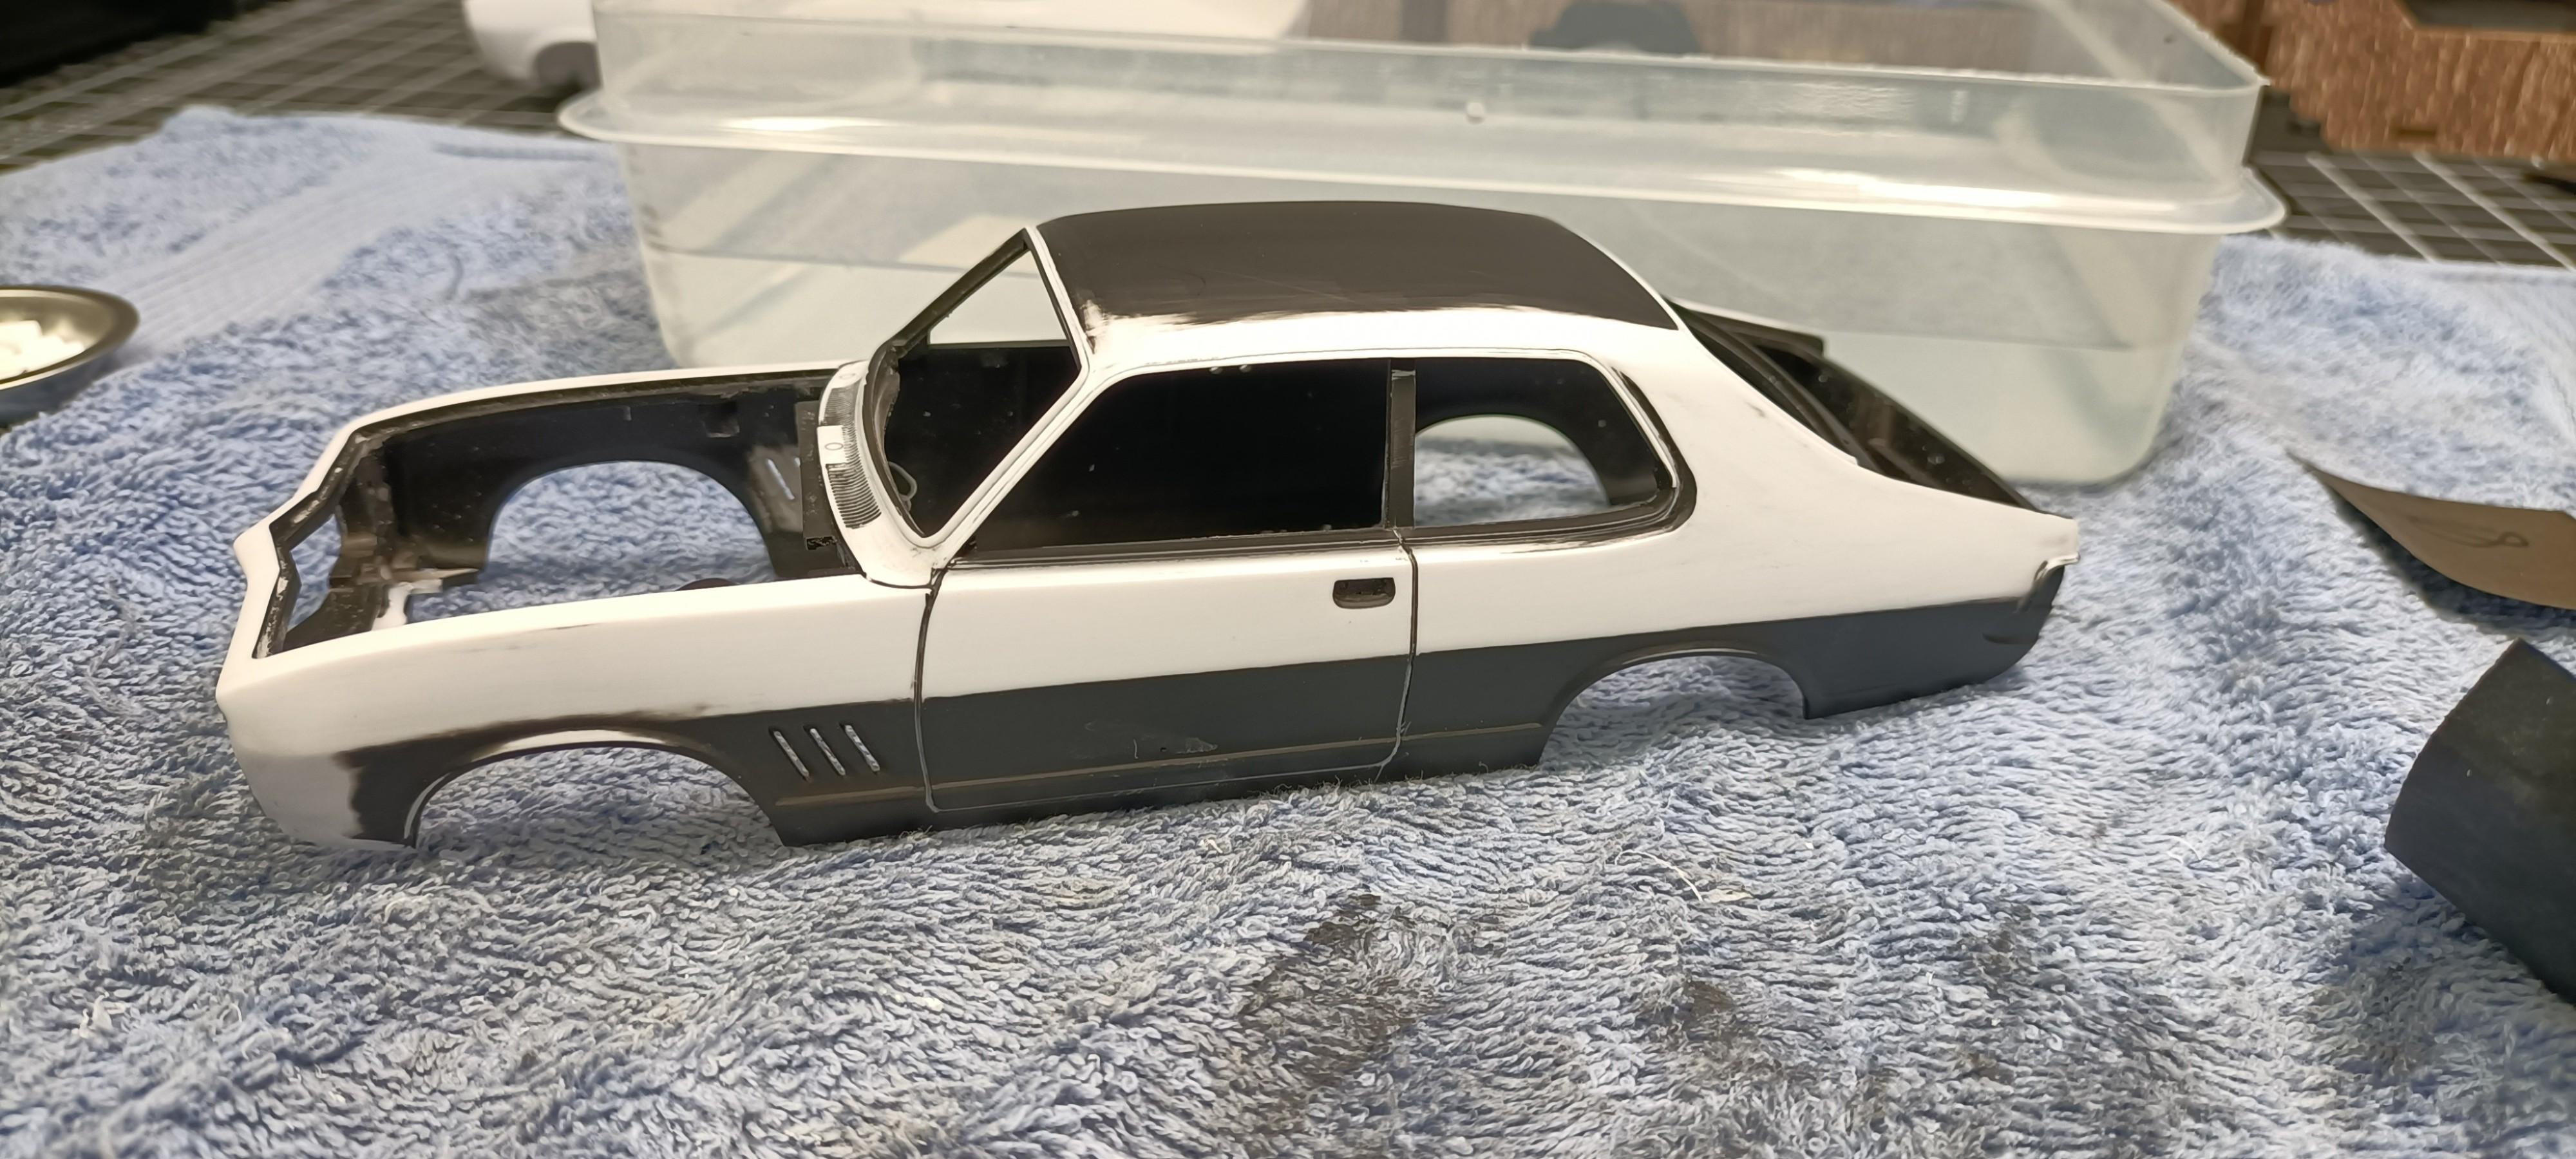
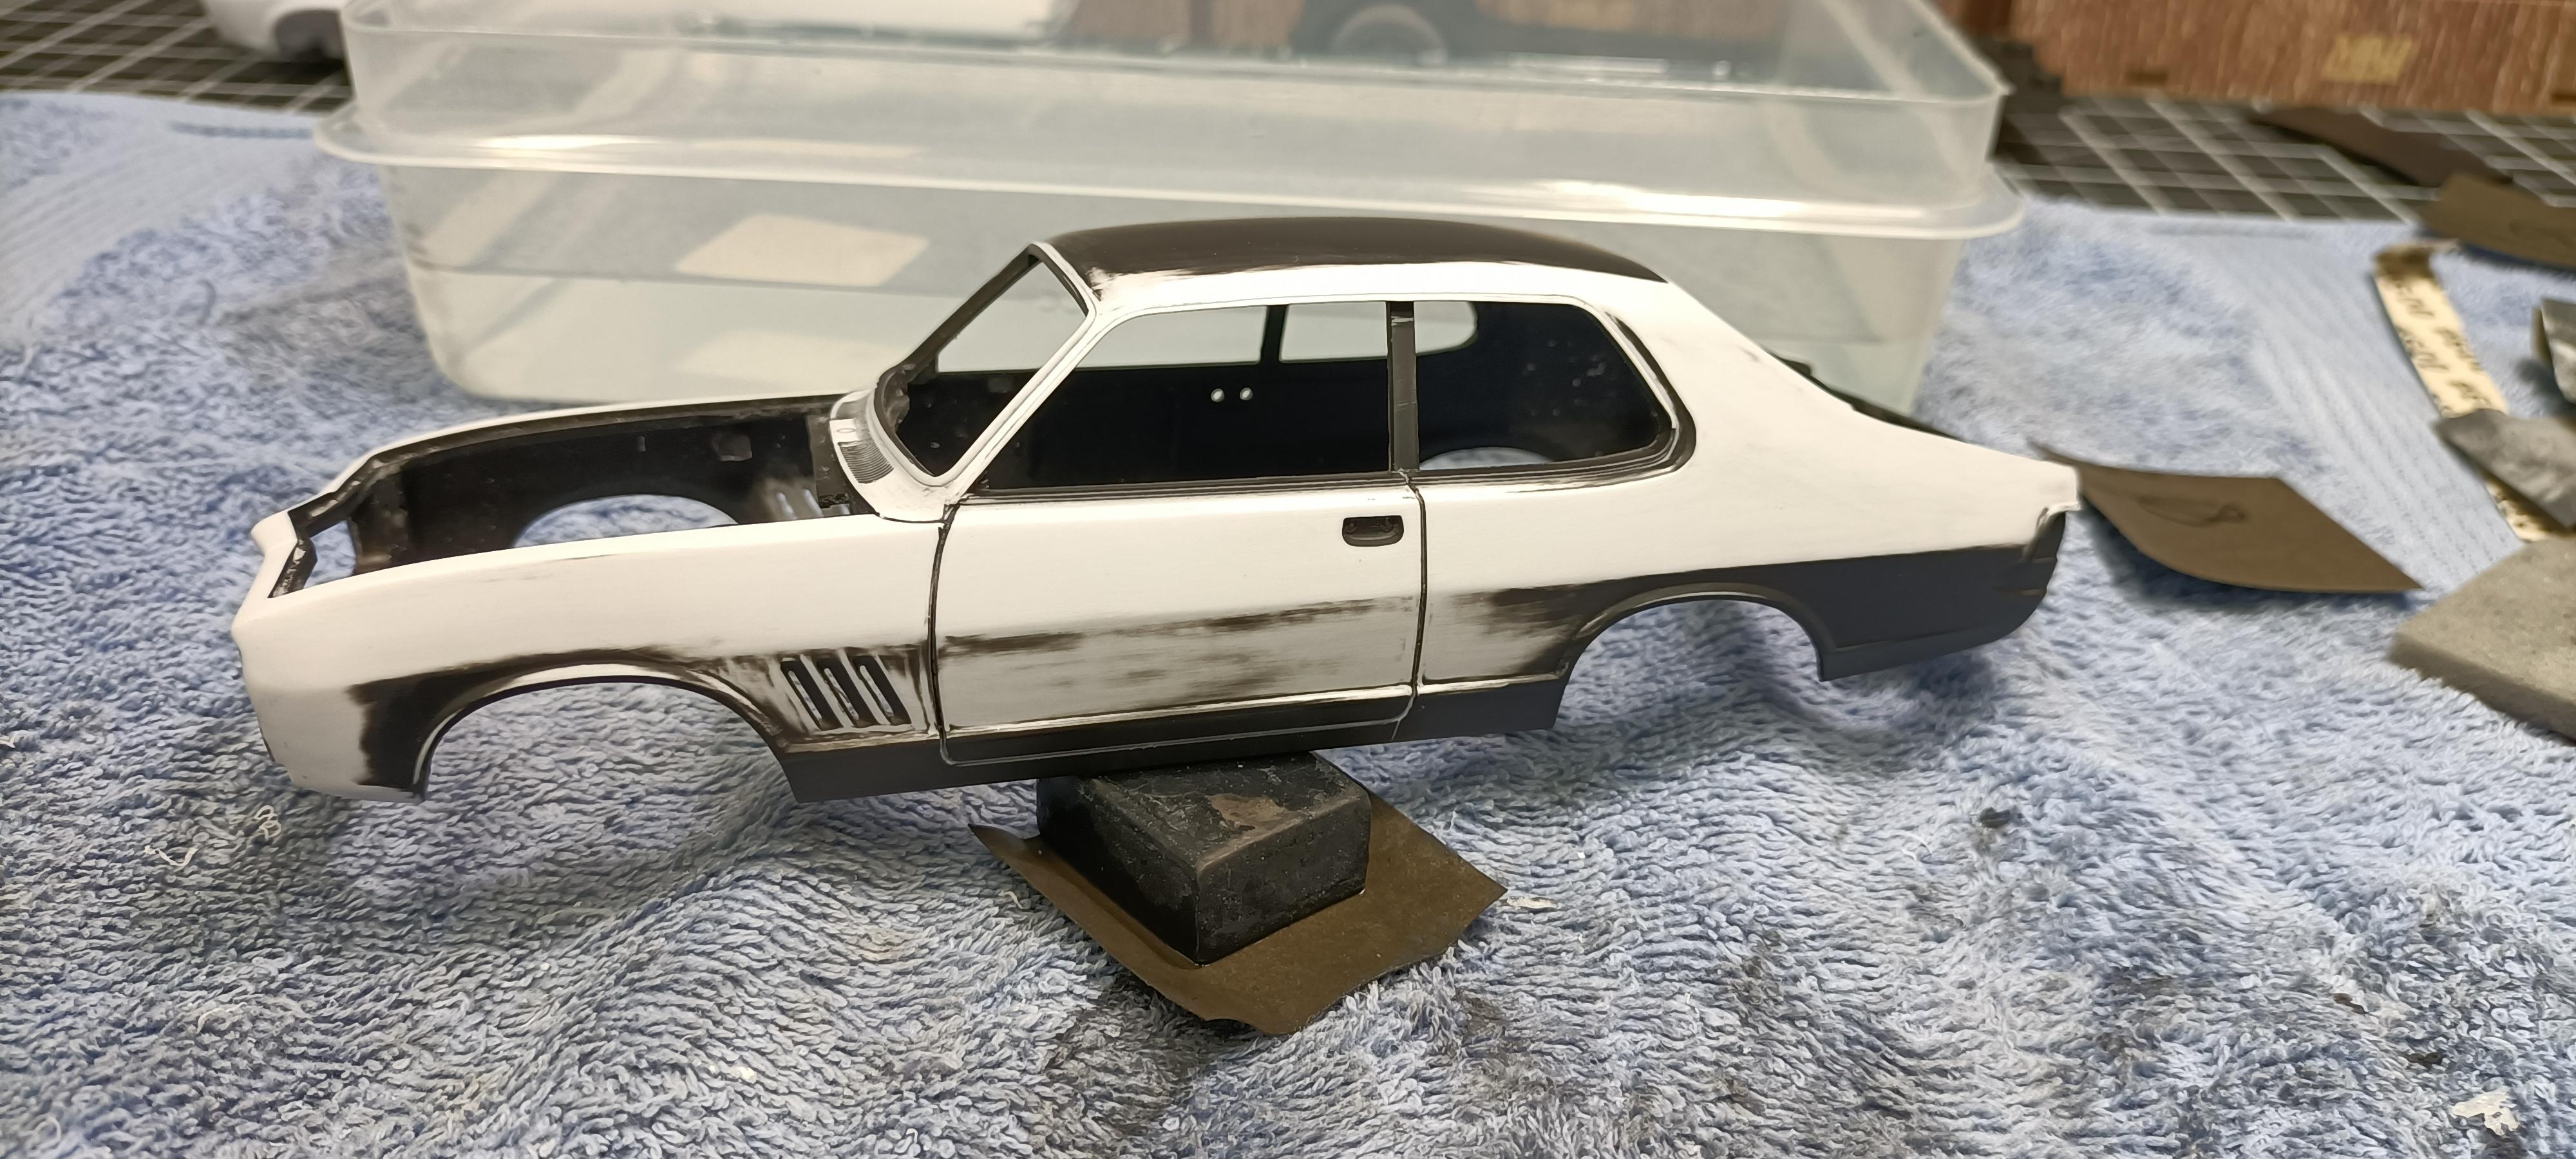
Well I payed the price for not using the clear that I always use. For some reason decided to use same brand clear as the pearl base coat, which I know from experience has a very hot thinner solvent. I must have put the last wet coat on a bit heavy as it disturbed all the pearl pigments and soaked right through to the plastic. Funny that @STU111 and I were mentioning clear ruining the paint the other day and he we are 🤣 Was a bit annoyed so straight into a bath of Tamiya Lacquer thinner. Problem solved and now back to bare plastic. Its just paint so easy to strip and start again. And the other pearl paint job was the same. Not as bad with the pearl being disturbed but soaked right in and ruined the under lying base coat. Slight bit of crazing the plastic on the roof, hoping that should sand out. So yeah it is currently having a Tamiya lacquer thinner bath. Sometimes the best lessons are learnt the hard way. Story of my life 🤣 More often than not modelling is about problem solving and recovering from a ruined paint job
- 766 replies
-
- 3
-
-

-
- stalled builds
- quick builds
- (and 2 more)
-
Yeah try find pictures of models painted the colour you are looking for, as that will give you a better idea of how it looks. Most of the TS paint tones a pretty close to the cap/lid, it just might be a shade darker or lighter. Yeah unfortunately the hobby paints will have strong fumes. Water based acrylics will work for certain applications, But the Lacquer and alcohol based acrylics will give the best results. With your condition it would be best to always wear a mask/respirator when applying paint even when using the spray booth or using spray cans outdoors. If you do small batches at a time it will be less overwhelming. For smaller parts I airbrush surfacer/primer, that way there is more control over the amount of primer being applied. And then airbrush the paint colours. Generally use less paint with the airbrush, as it provides more control with the coverage. Some parts would only require a couple drops of paint and thinner, flush the airbrush and move onto the next colour. Its okay, we will try help where we can. It will take you a couple builds to become familiar with the materials and processes.
-
Well got to make the most of the good weather today, so its clear coat time for these 3 builds.
- 766 replies
-
- 3
-
-
- stalled builds
- quick builds
- (and 2 more)
-
Looks like its going to be a great tribute. What decals did you use ??.
-
Closest would probably be Tamiya TS-49 bright red. And TS-46 light sand would look good for the interior seats and inner door panels, and carpet XF-59 desert yellow.
-
Going to look great once it all starts coming together, especially the chrome work. Bmf will be tedious, but certainly be worth the effort.
-
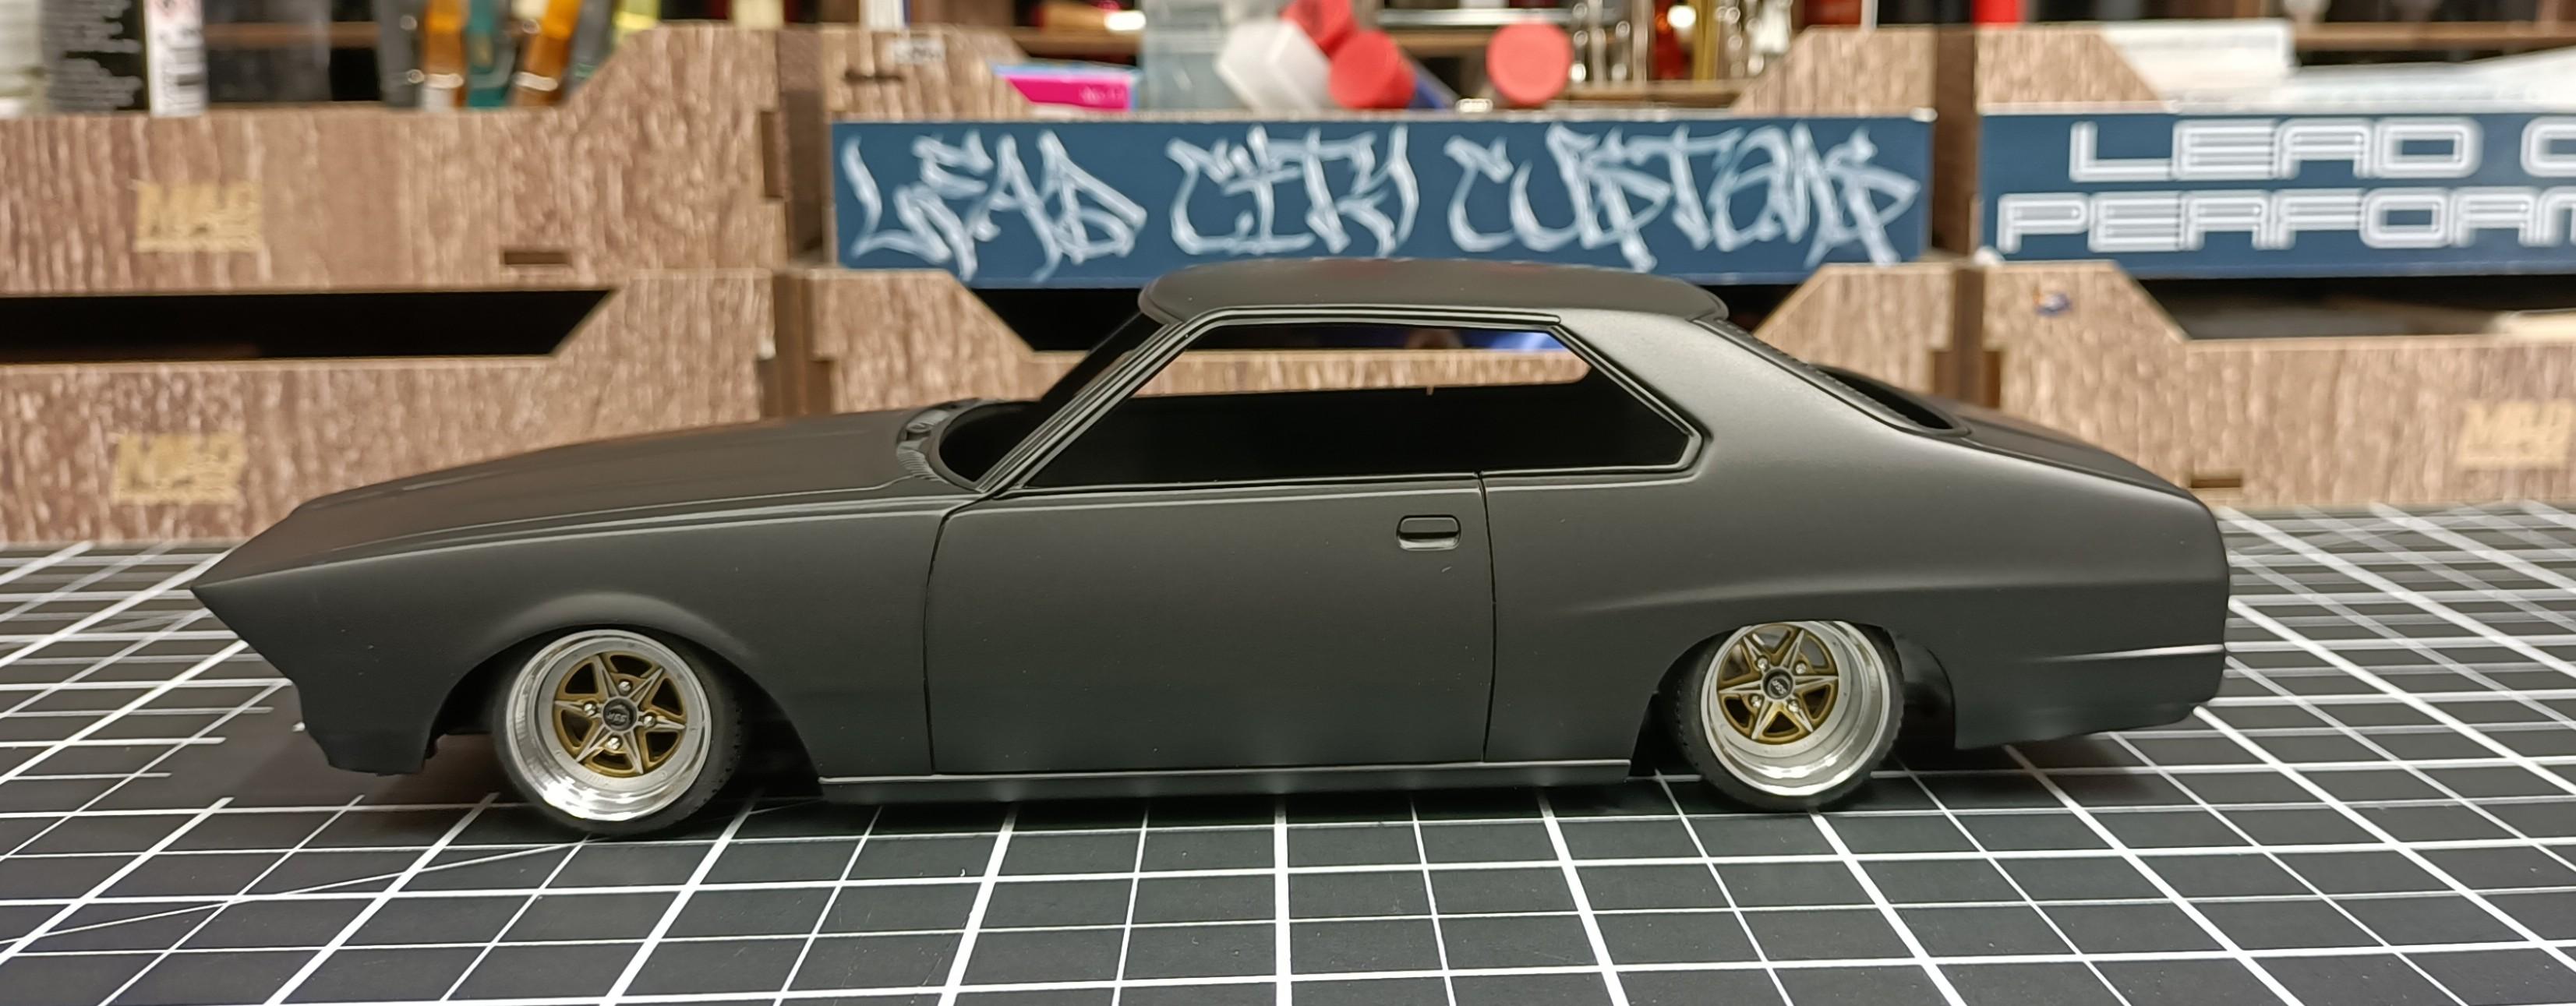
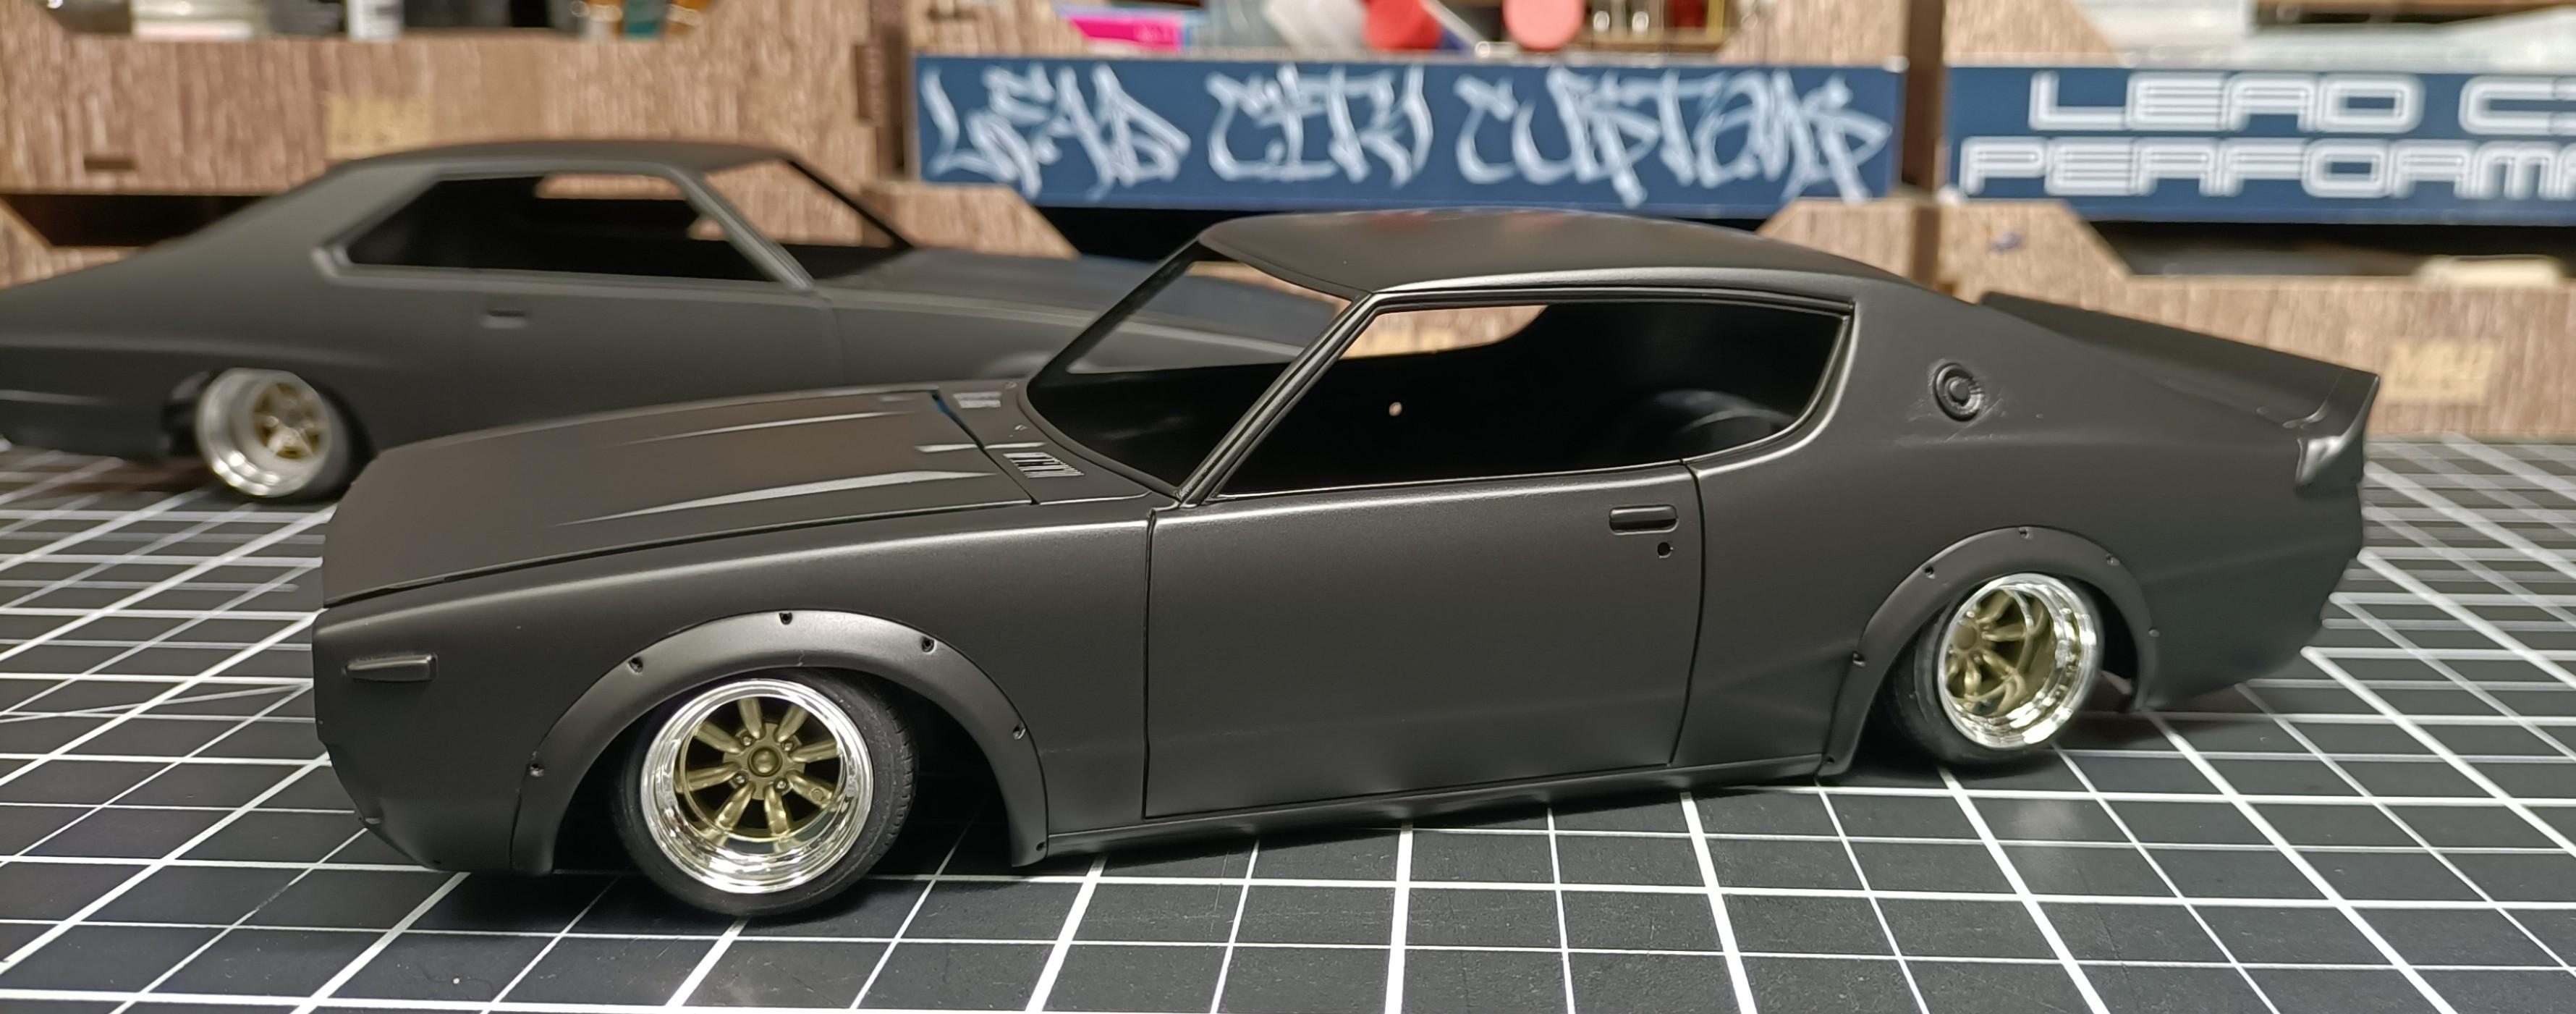
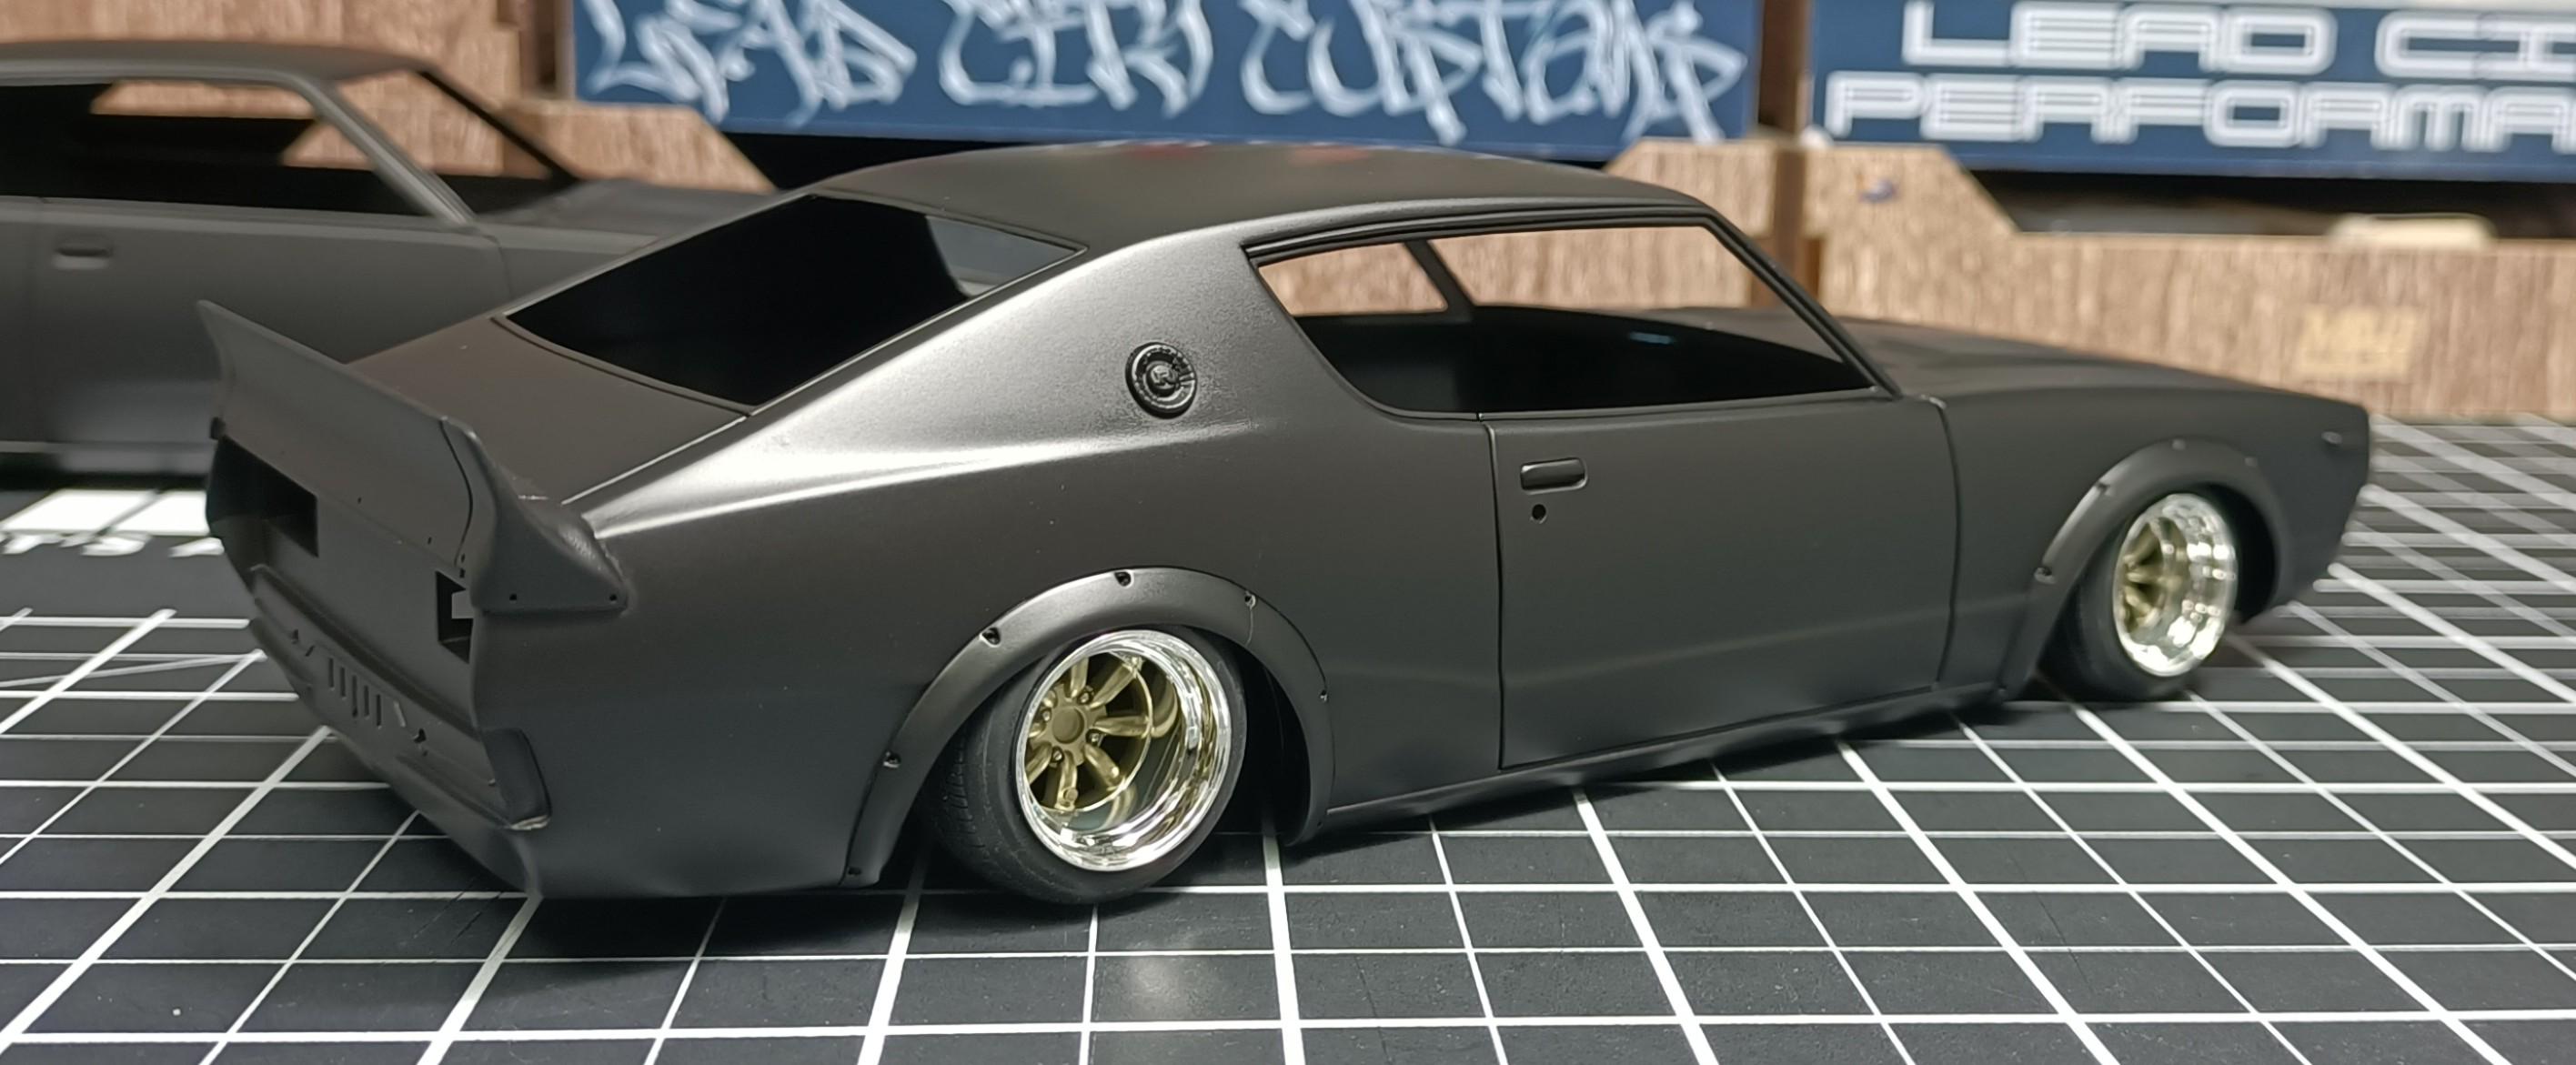
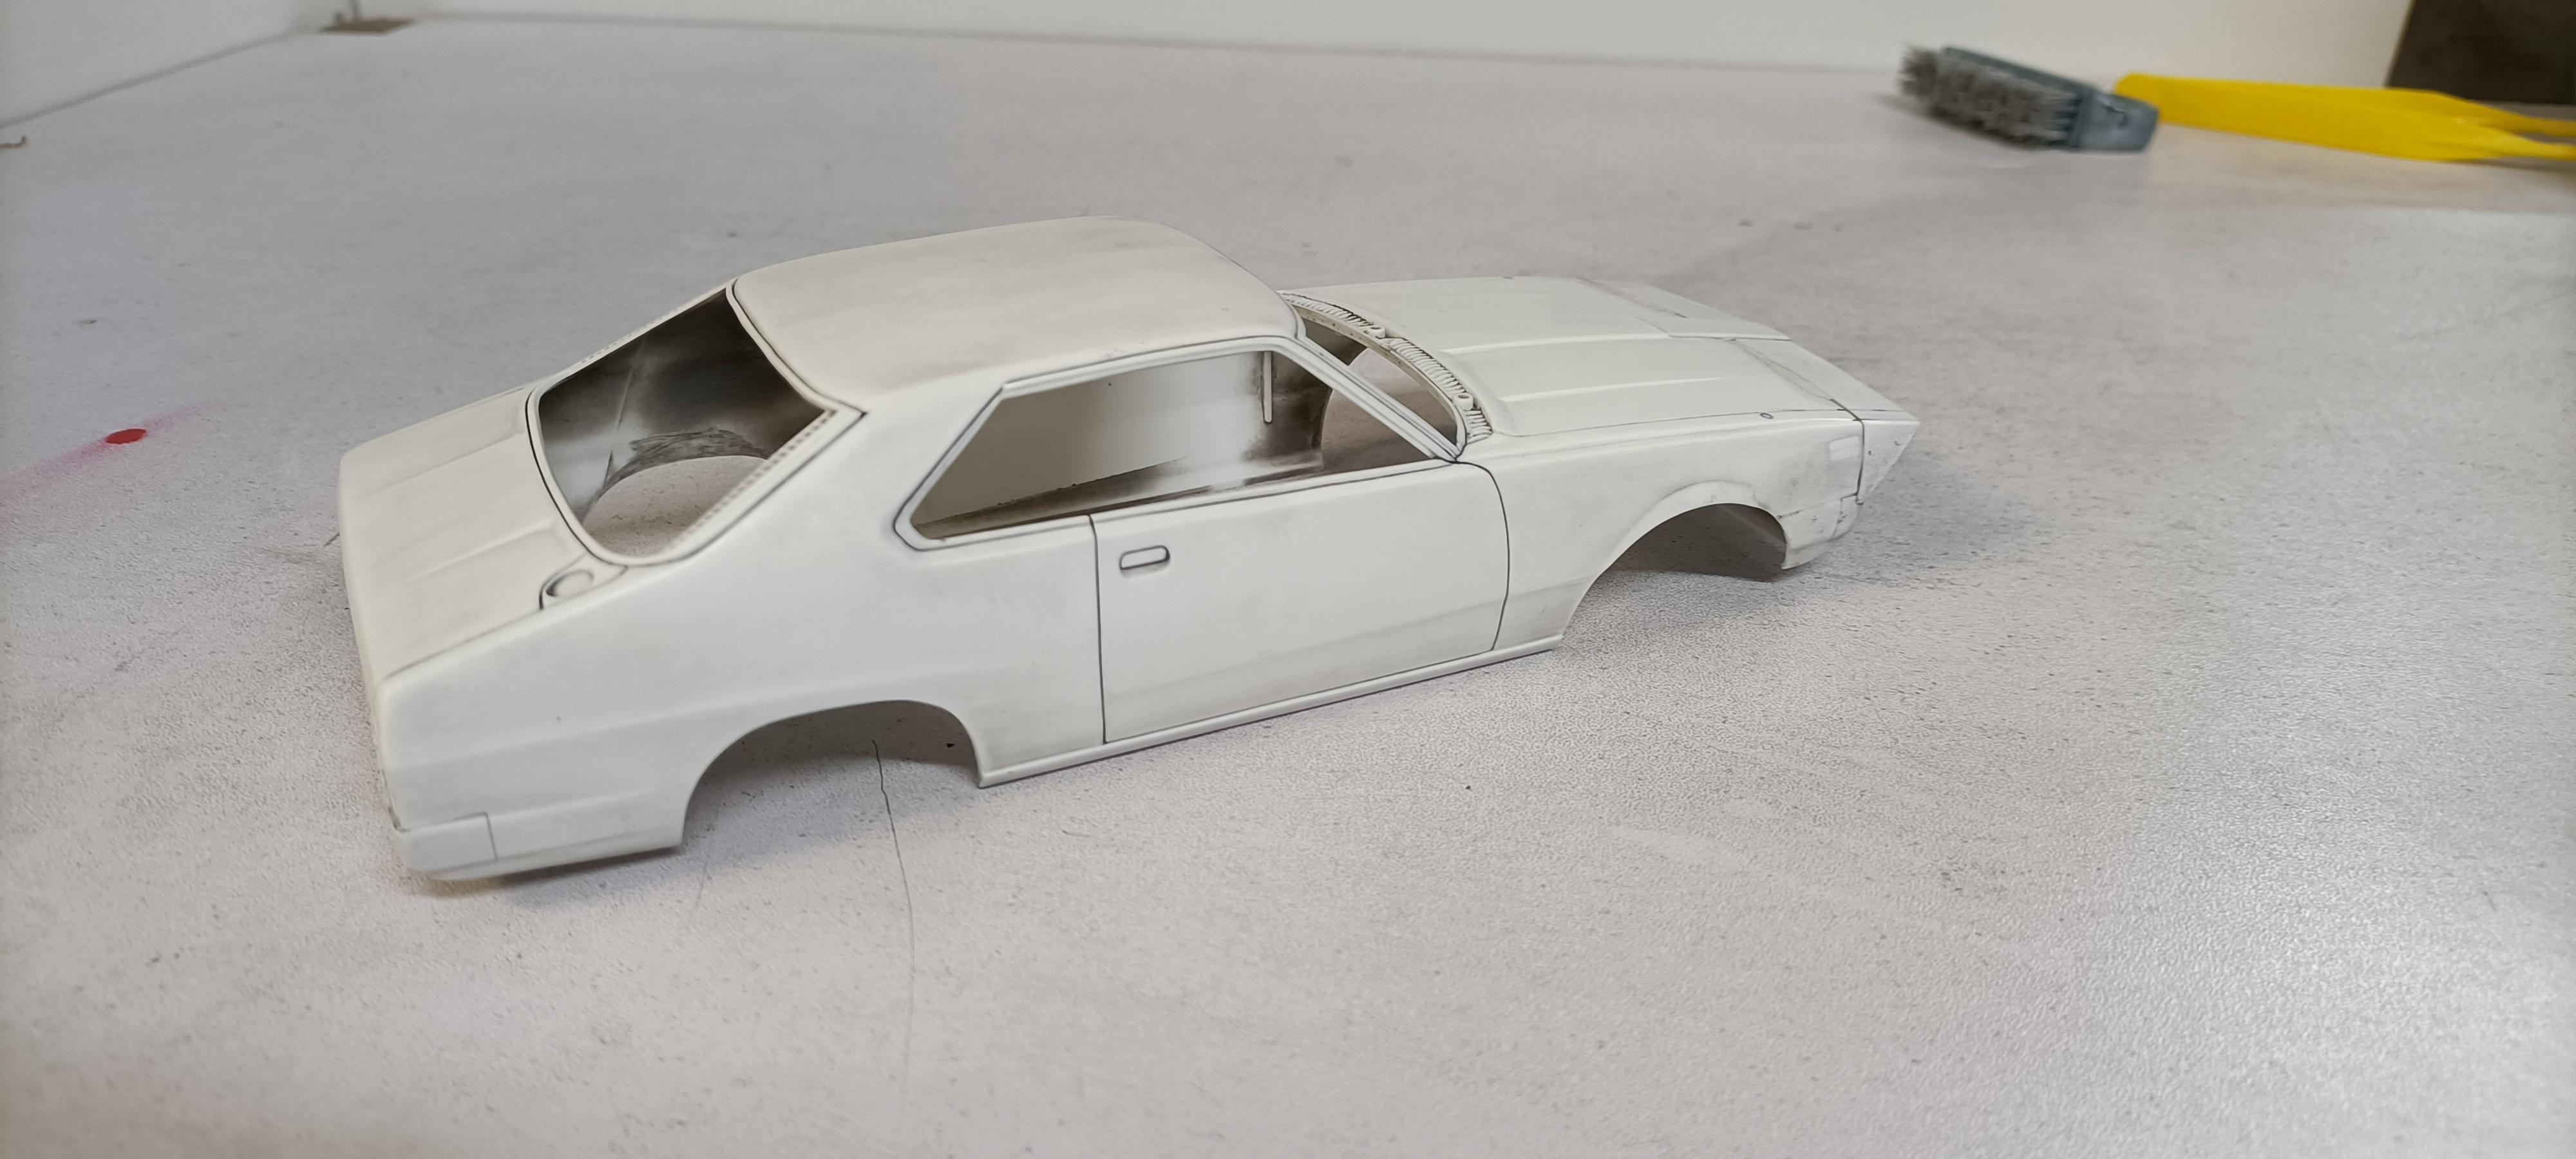
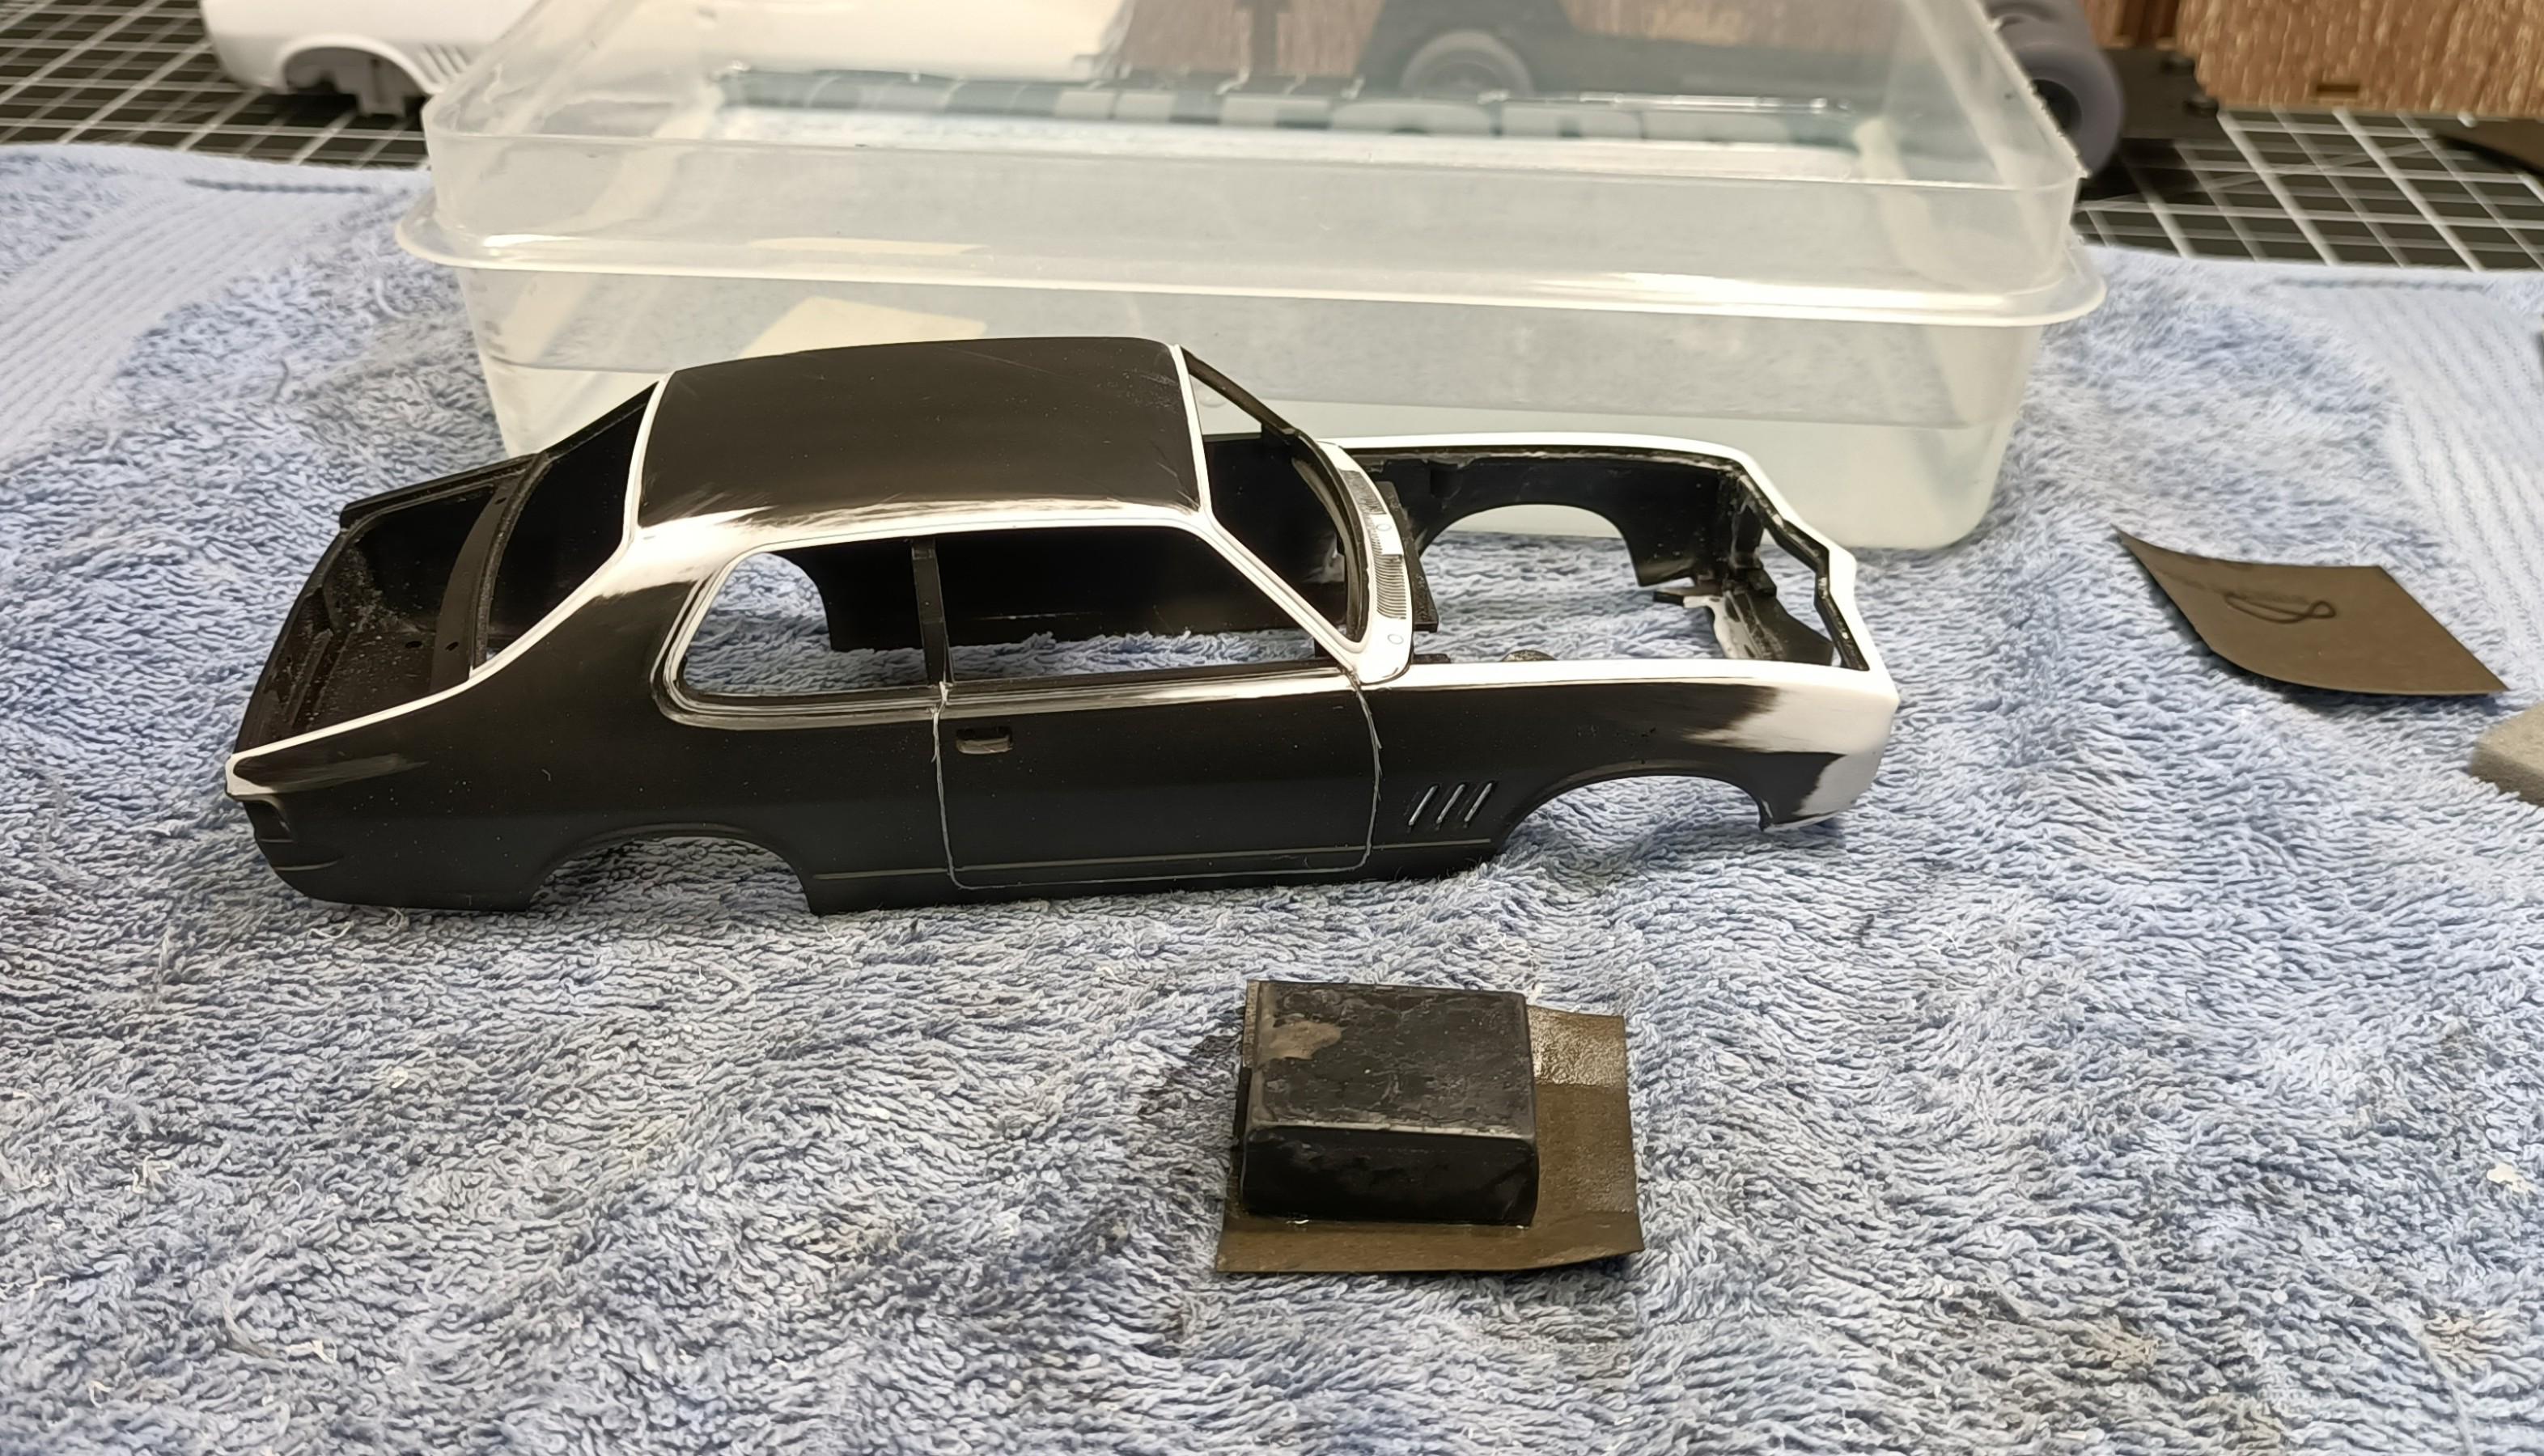
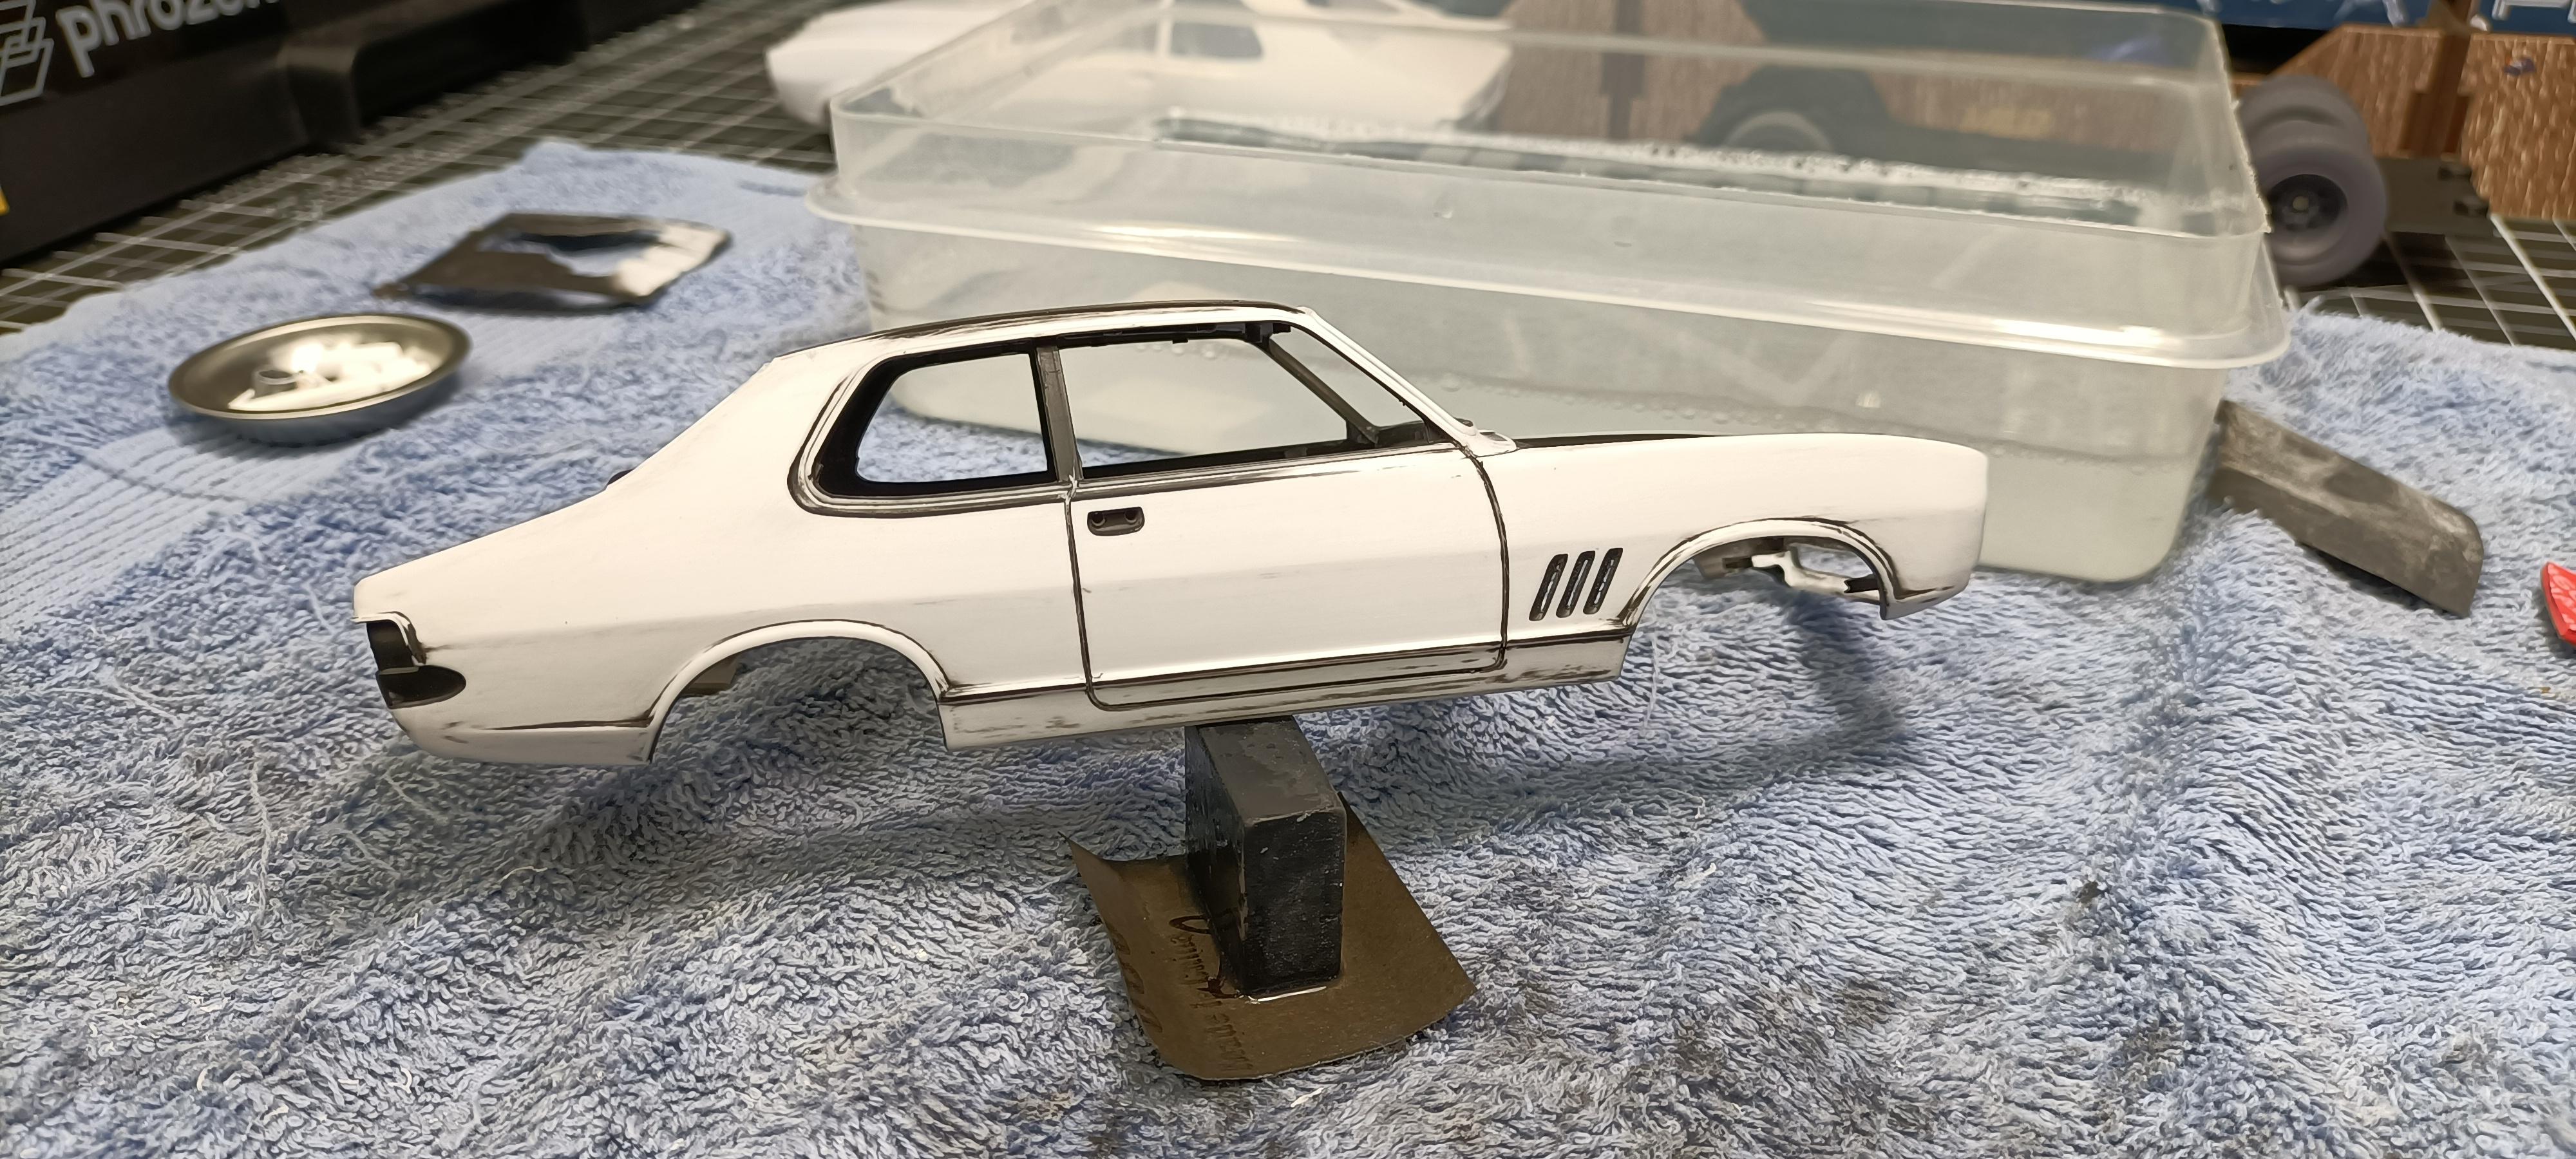
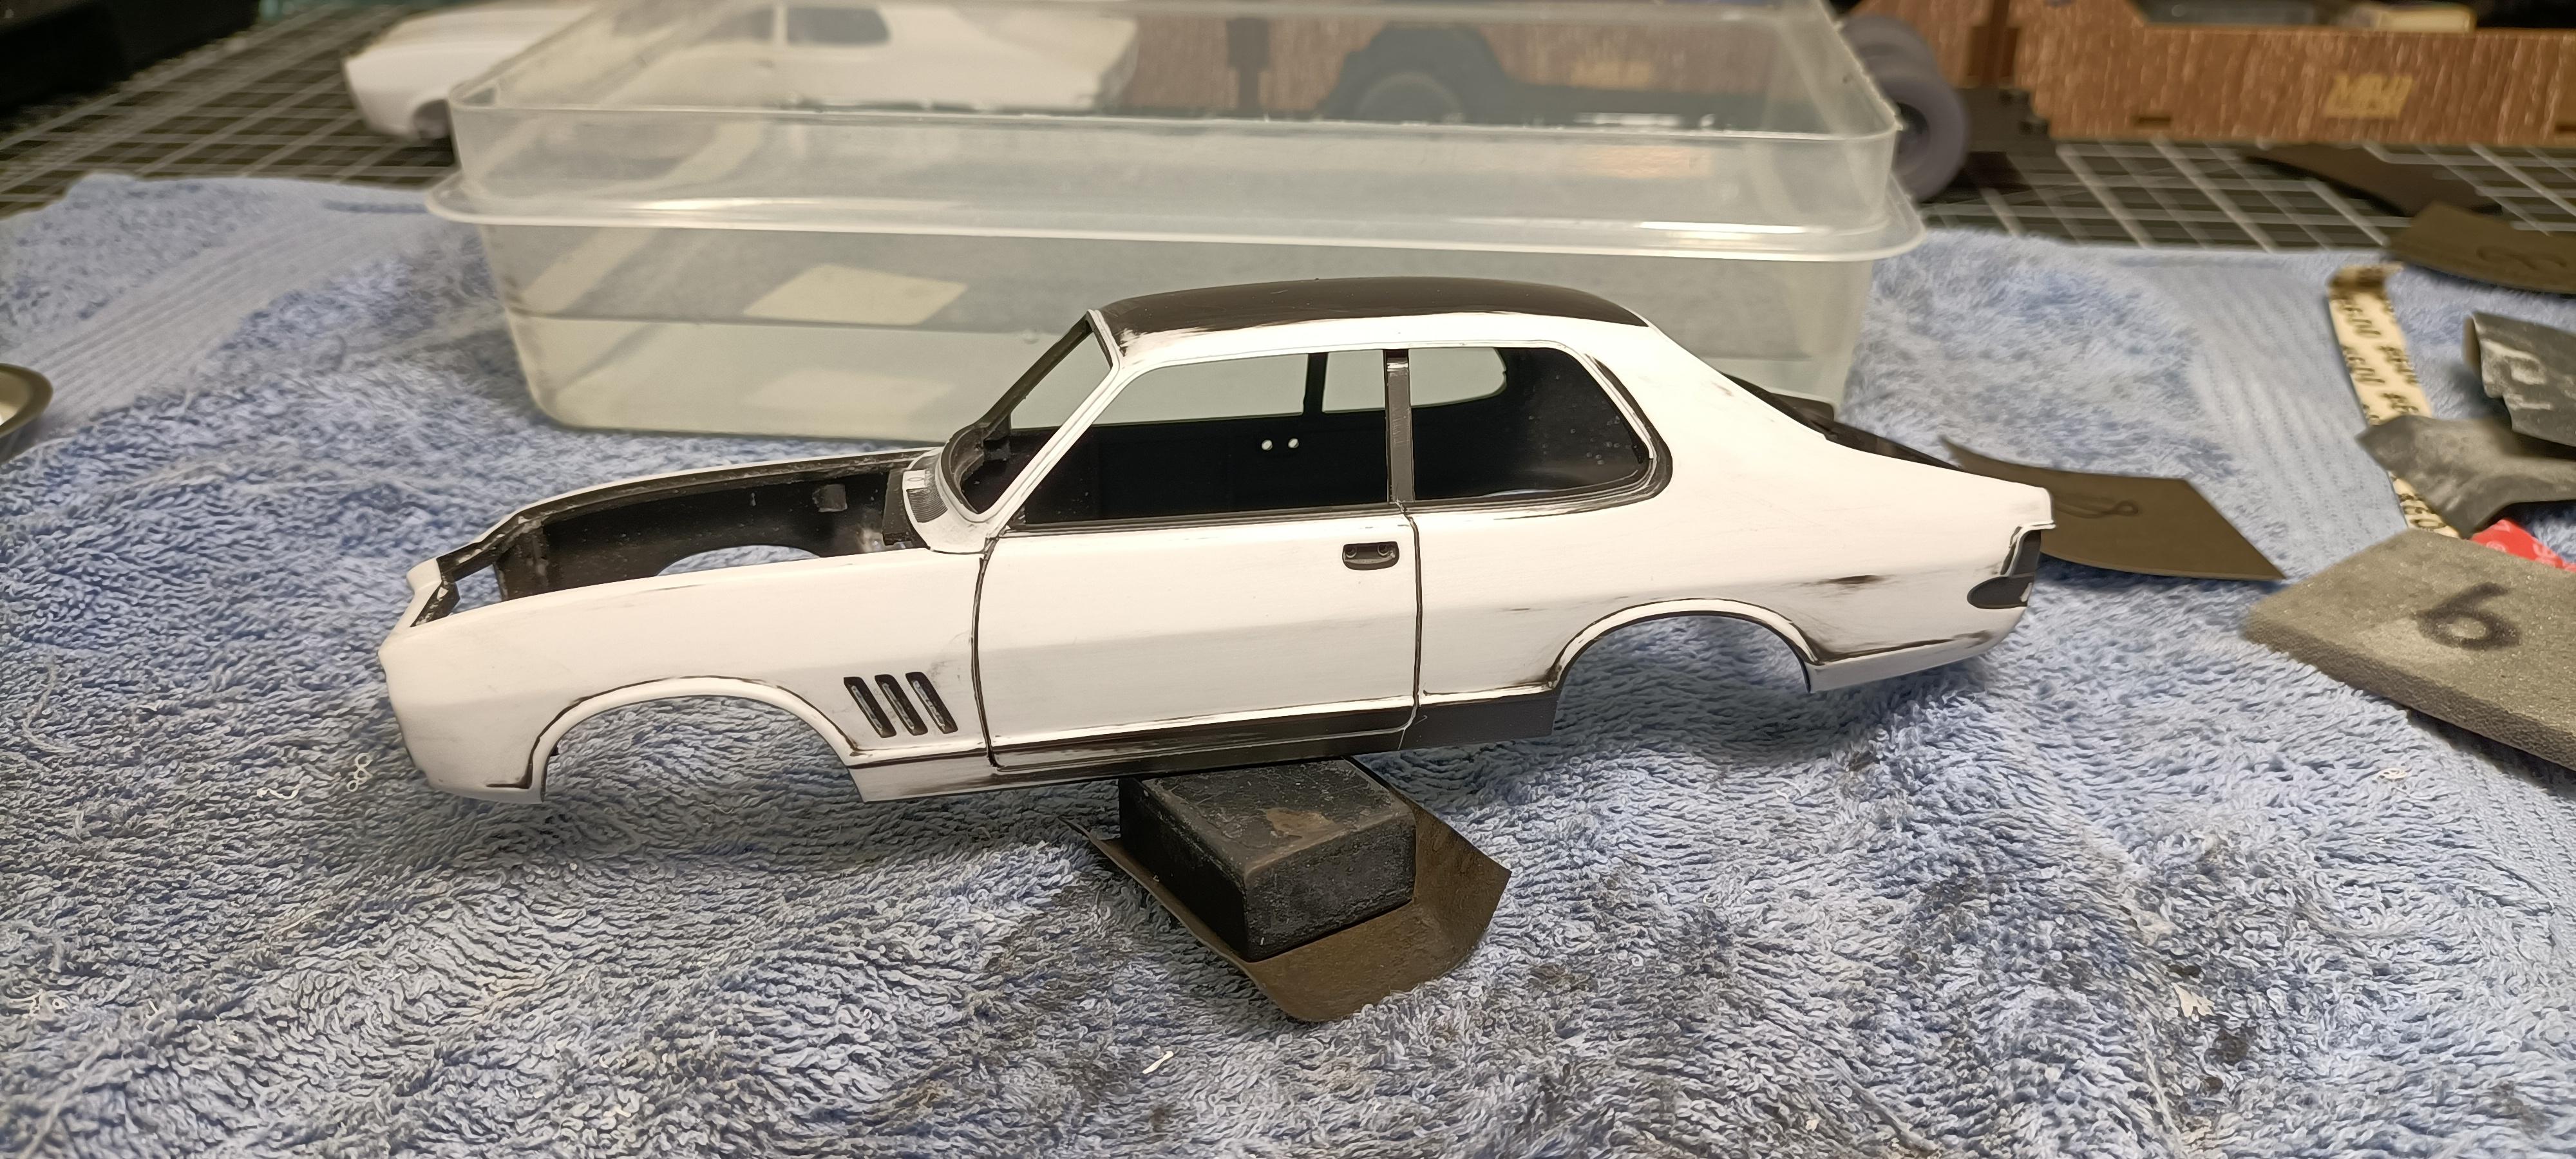
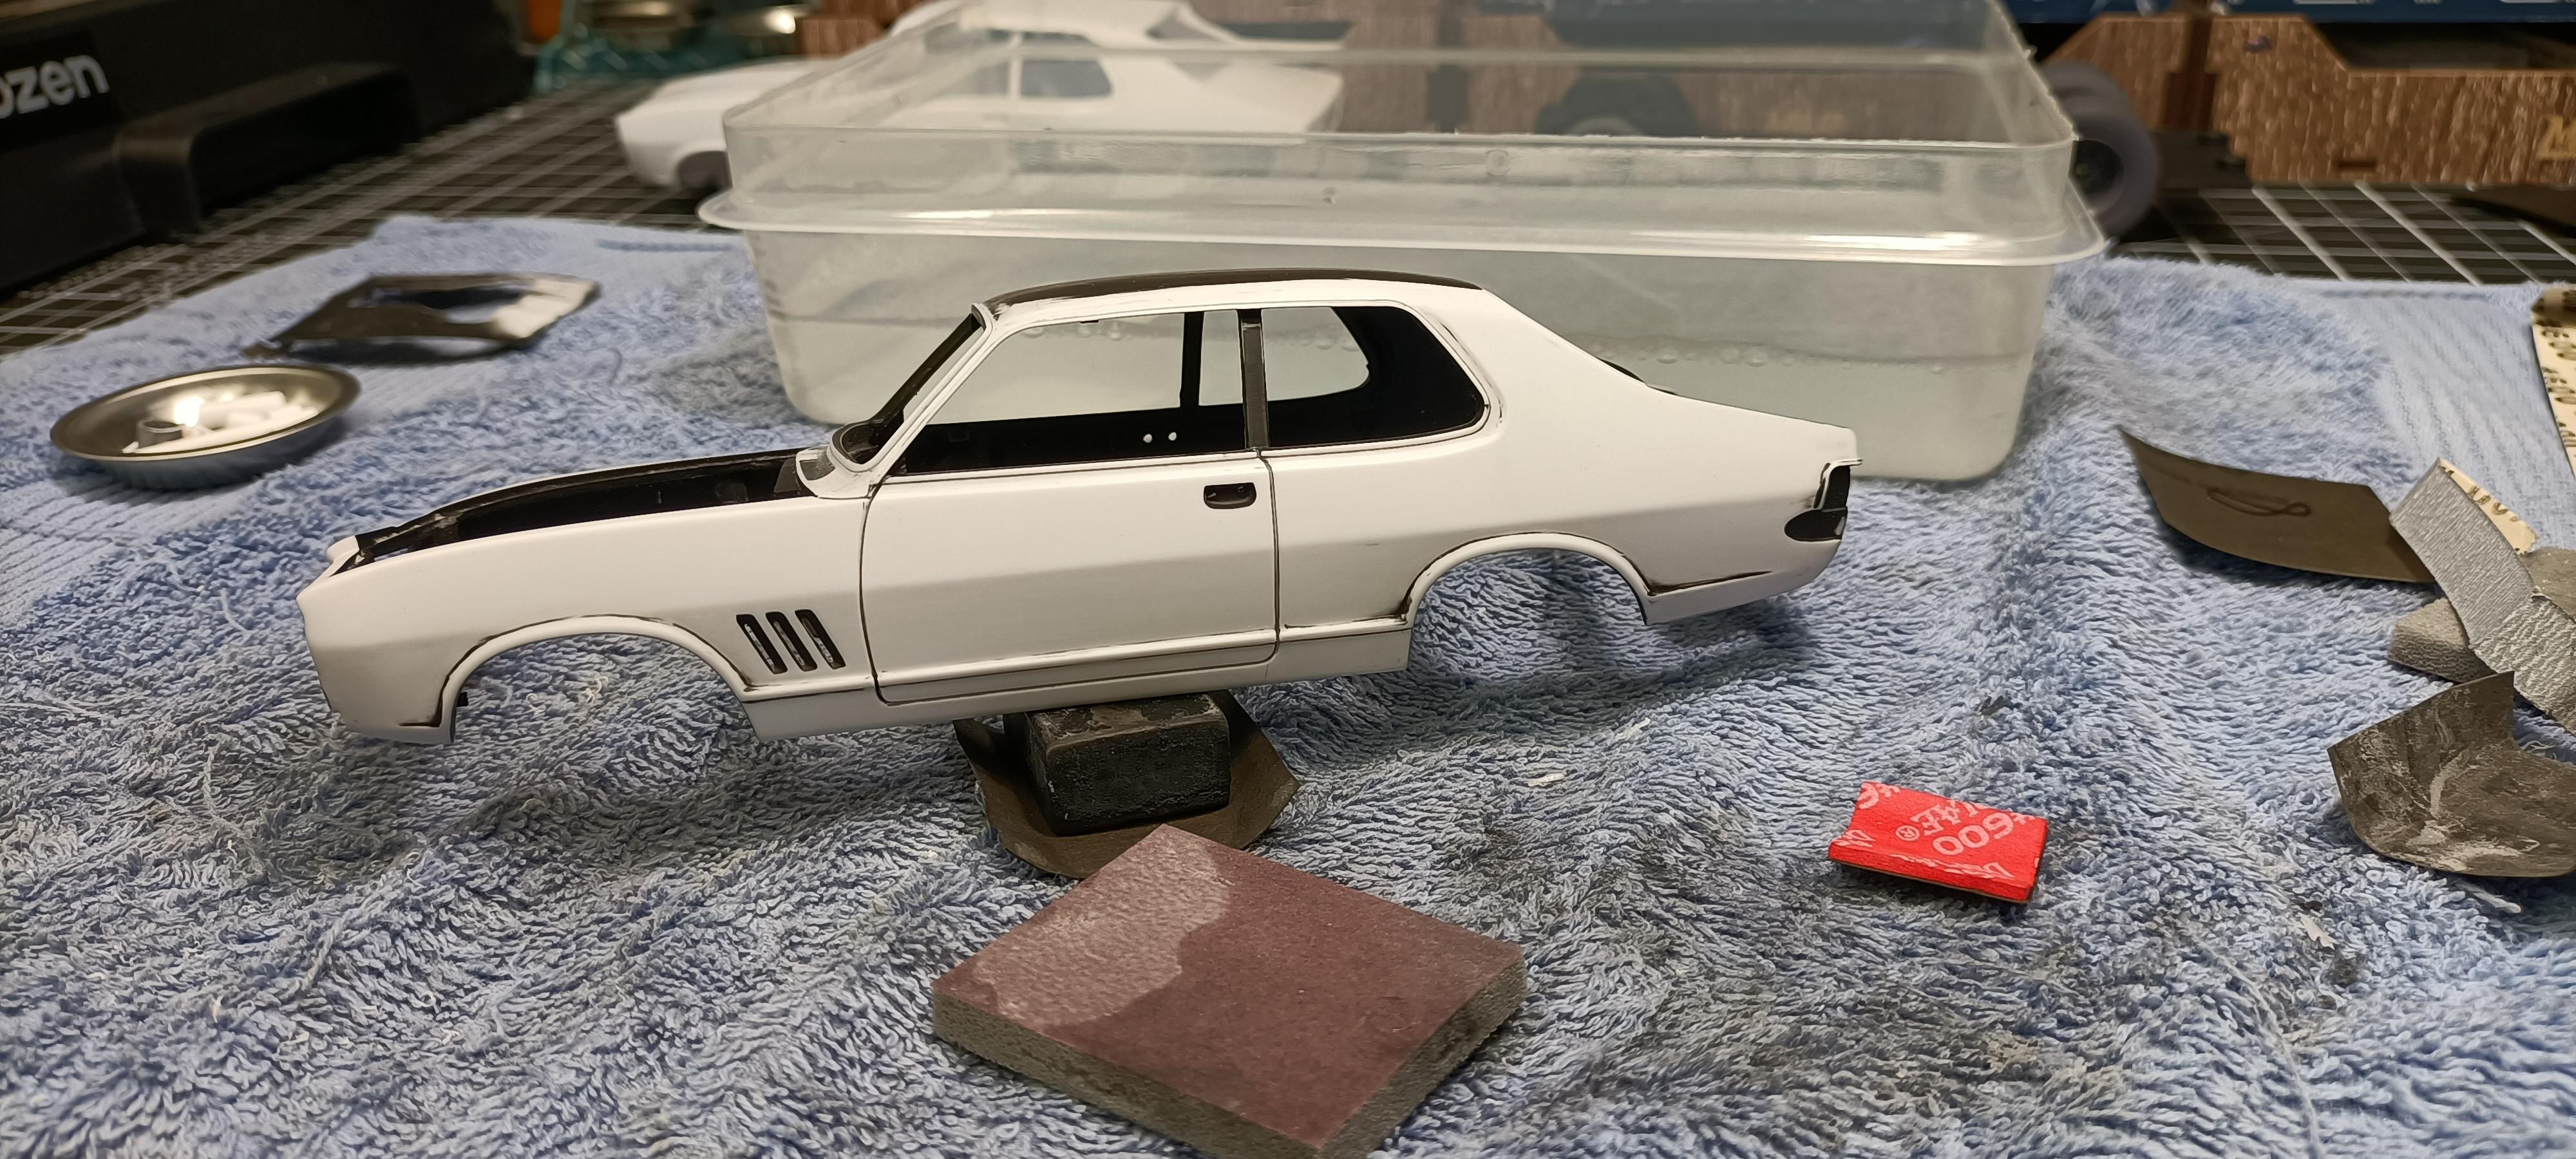
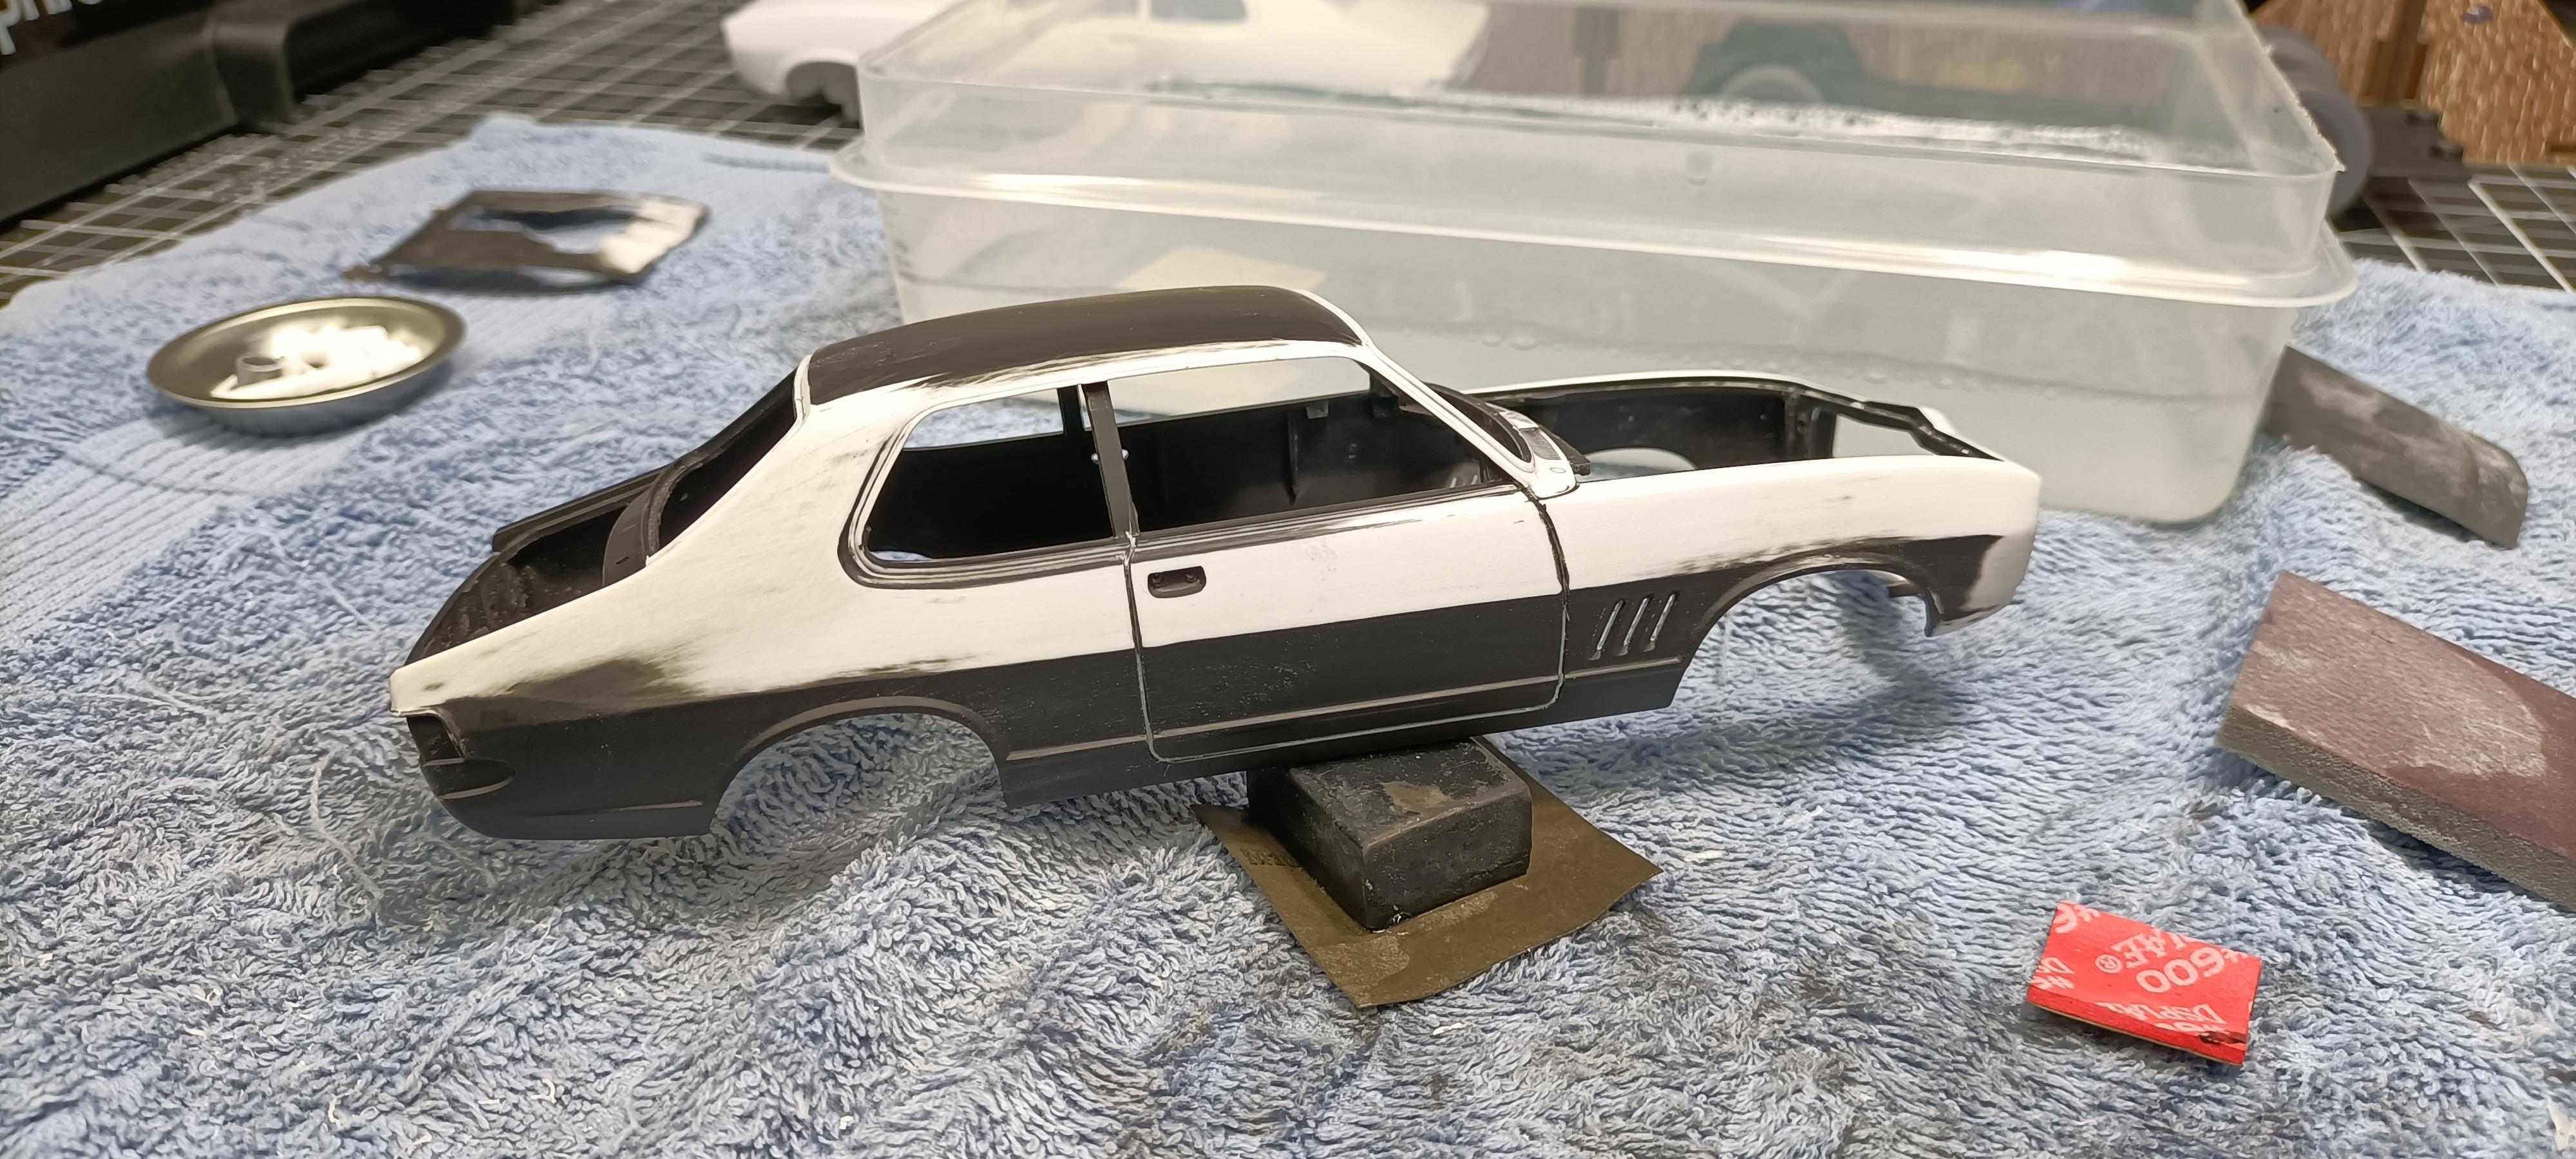
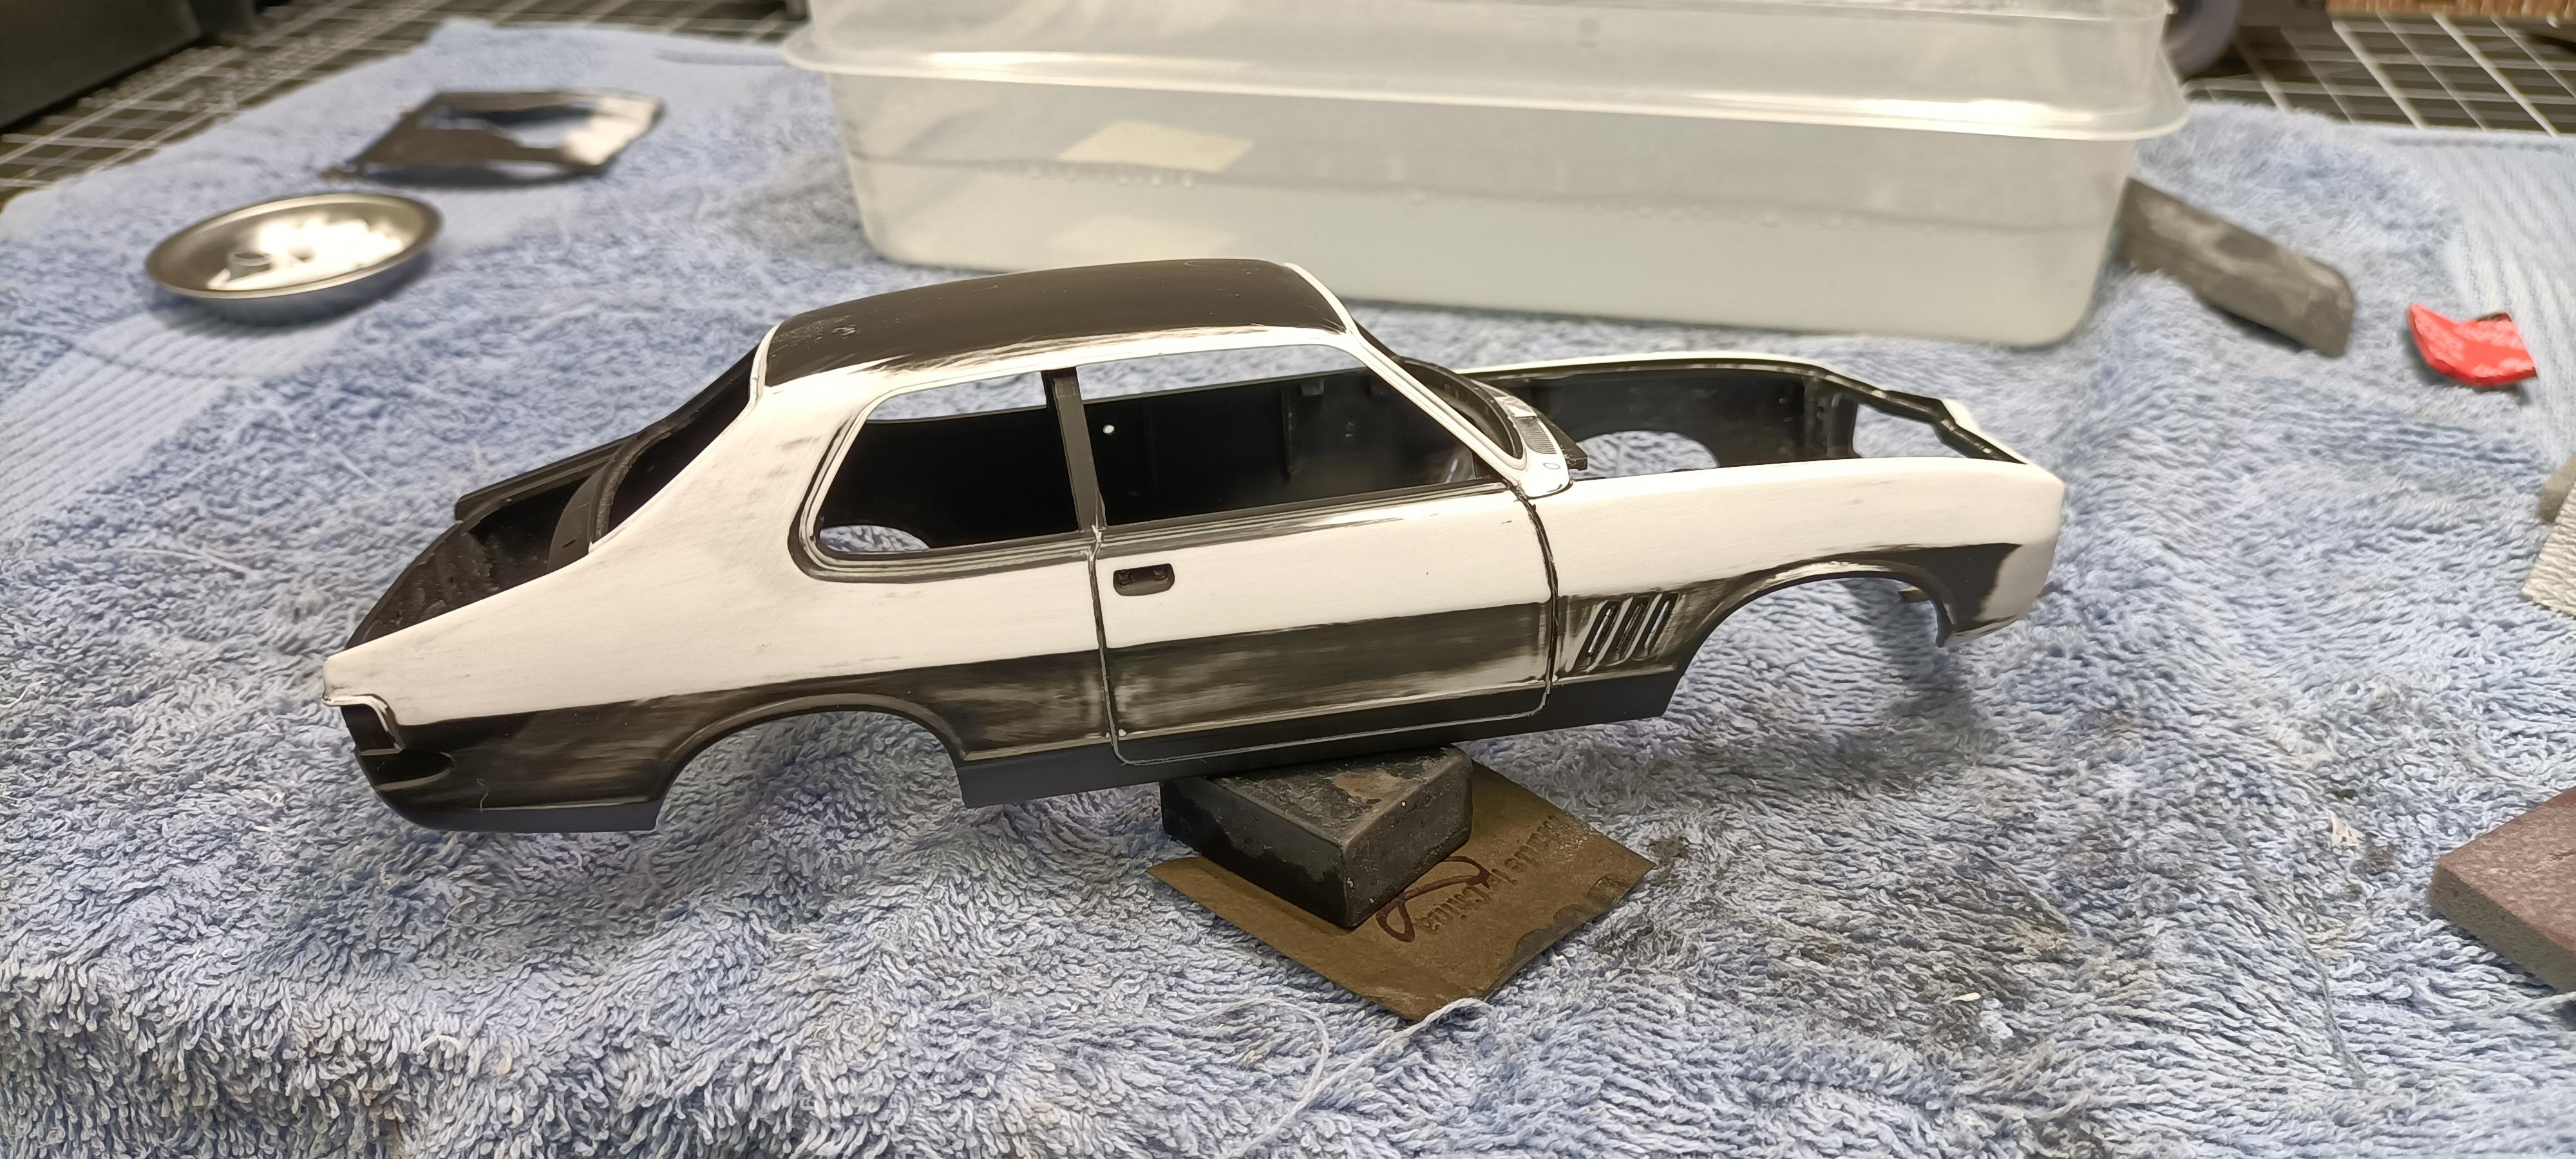
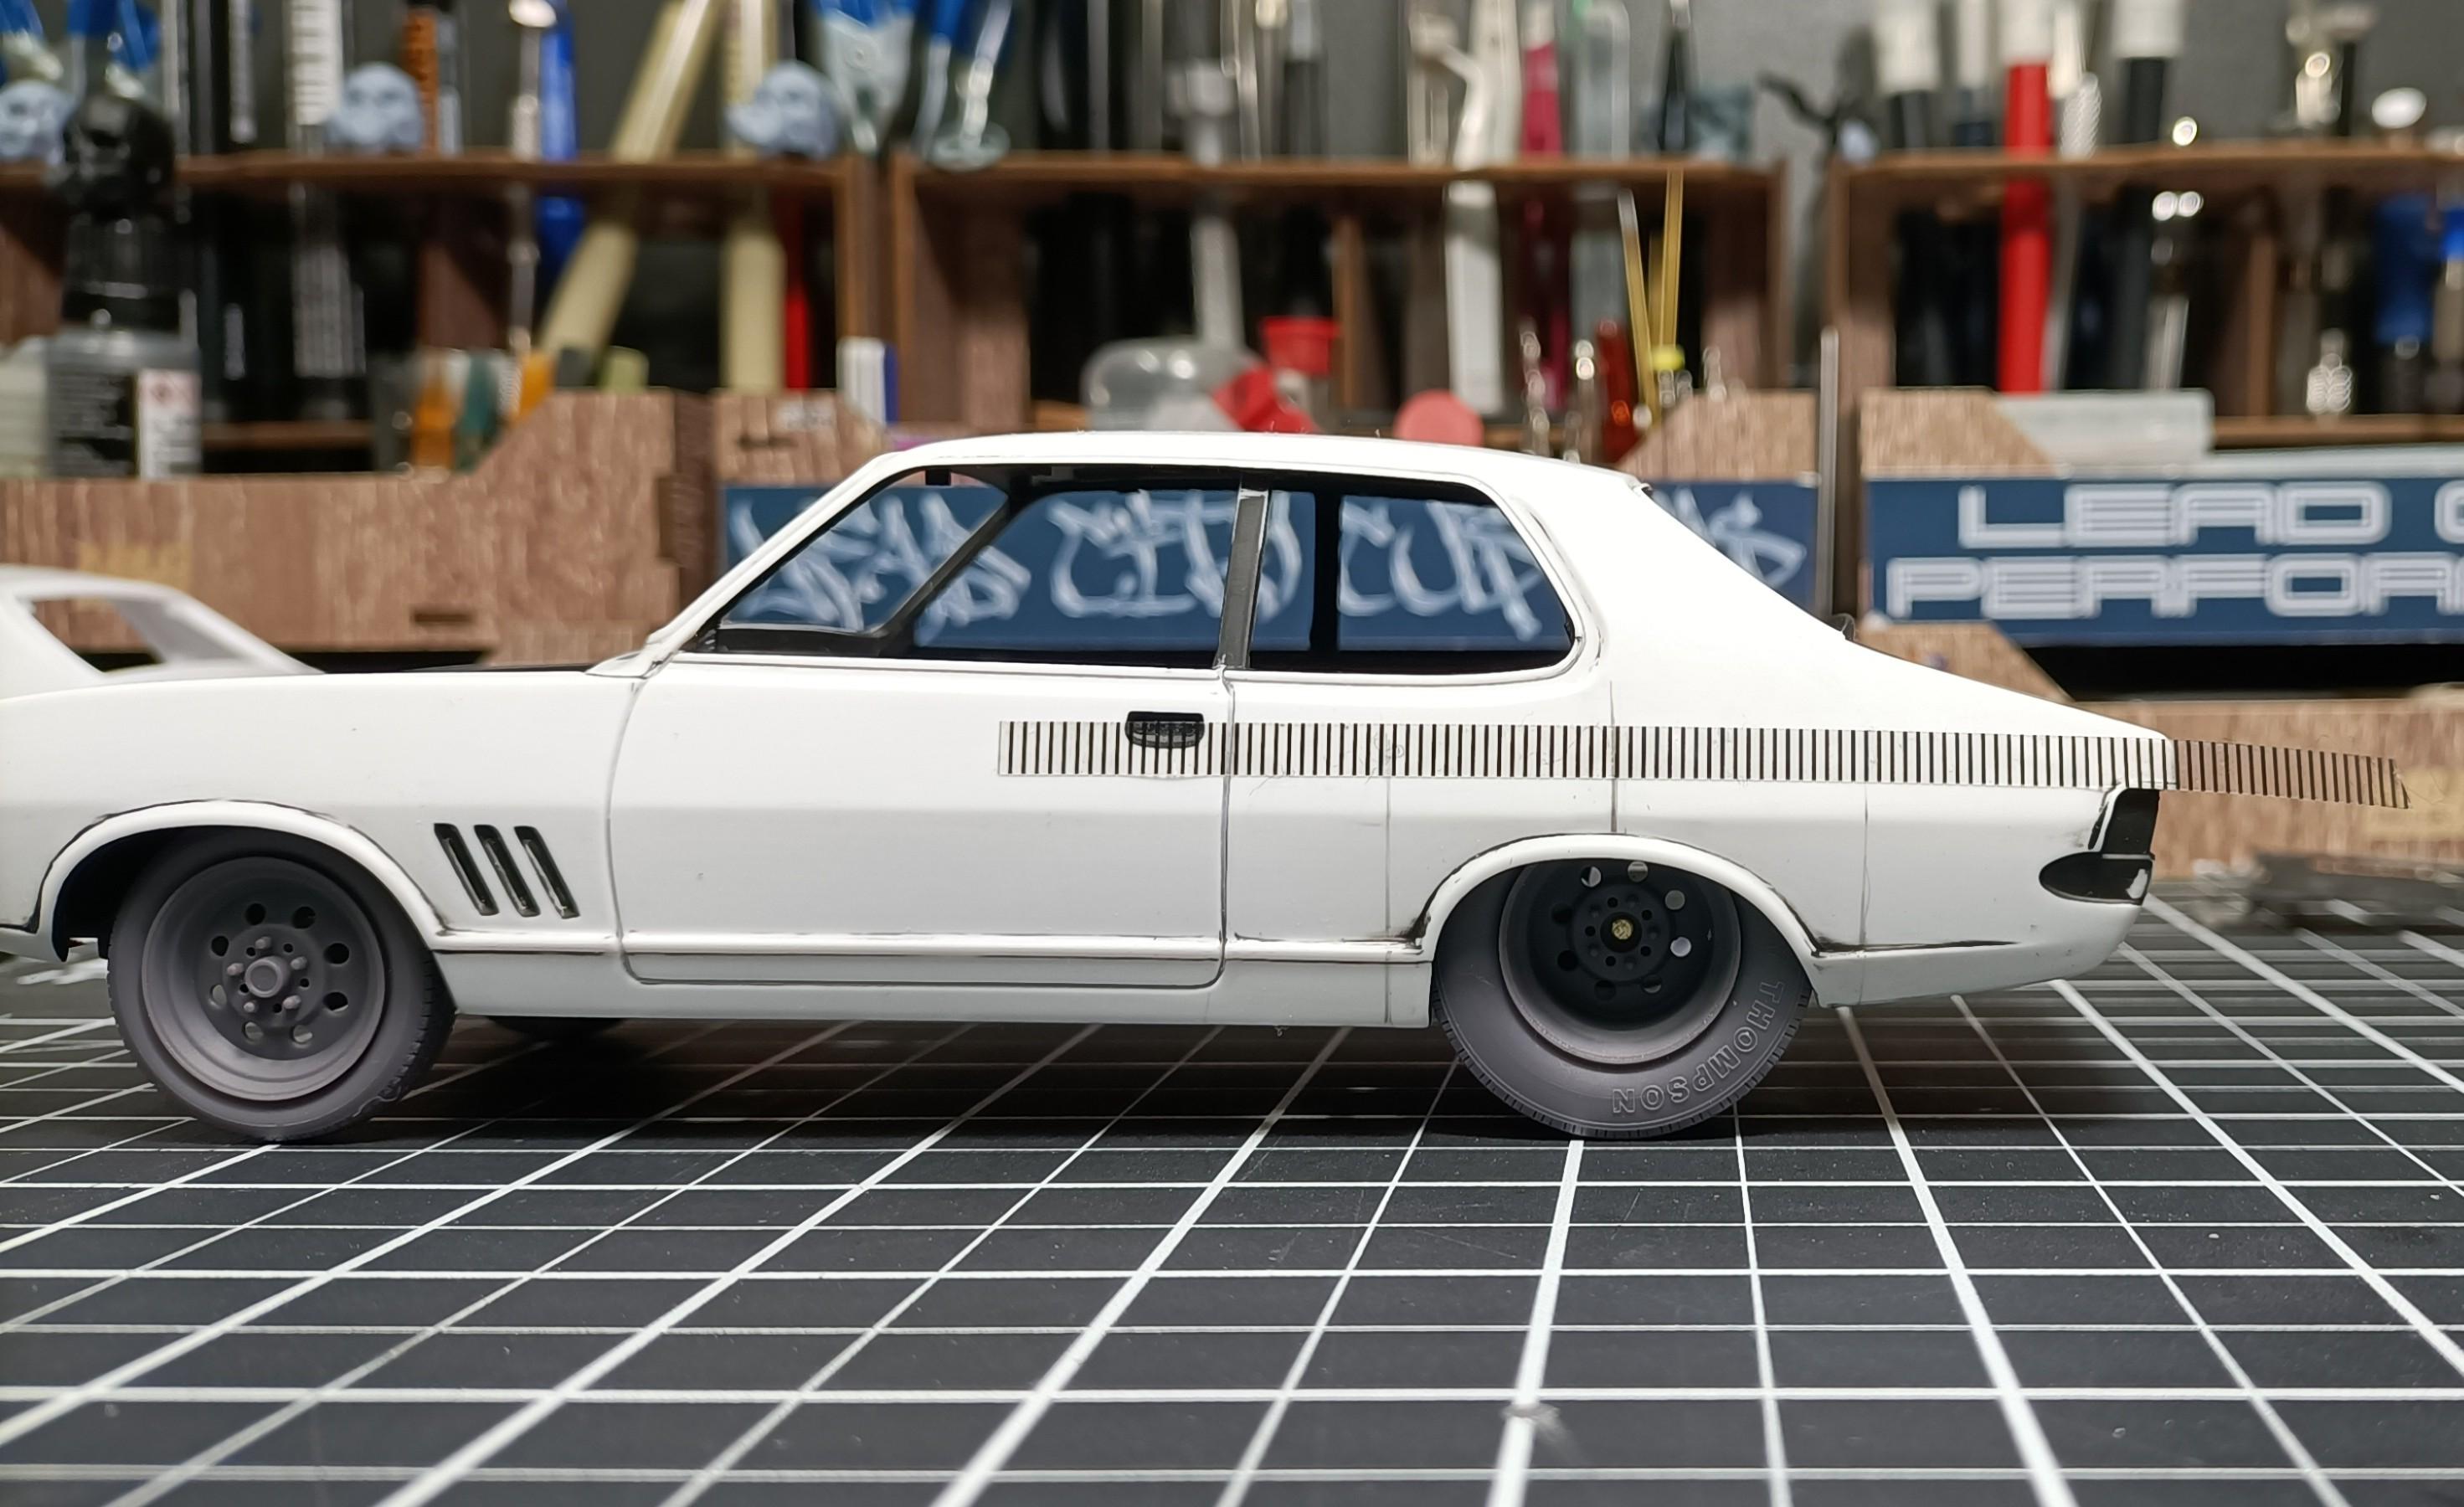
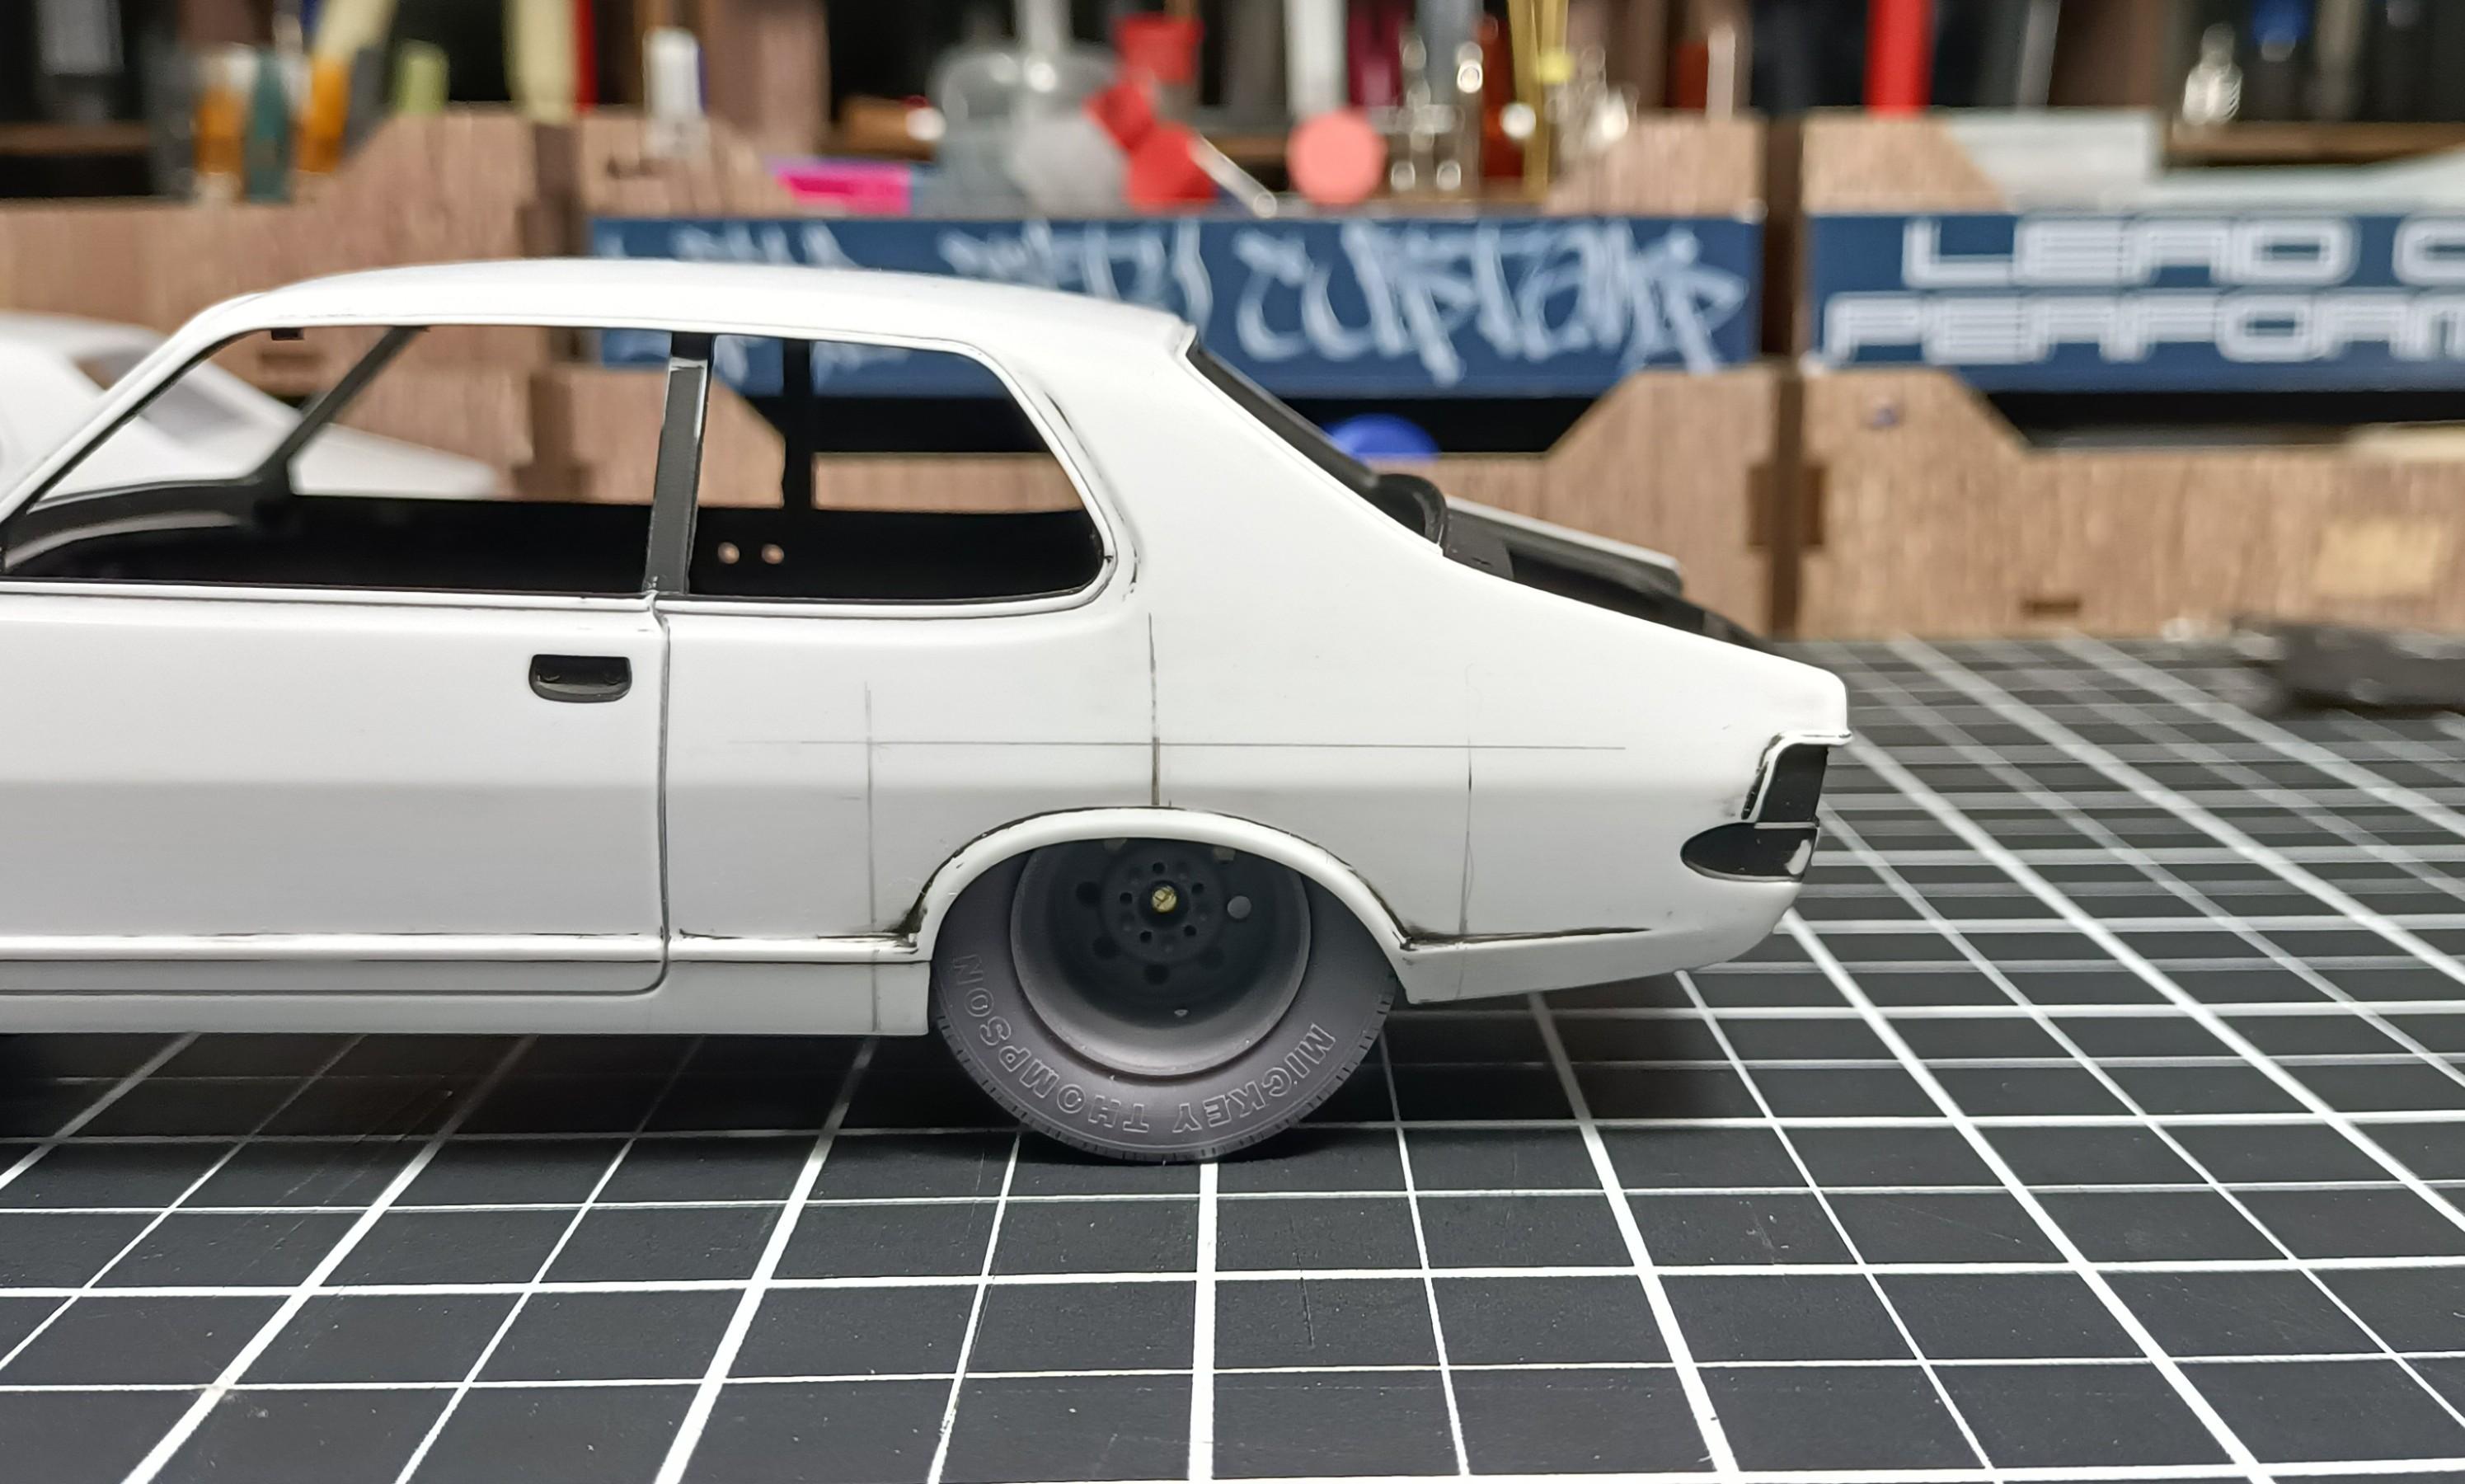
Back to working on the LJ Torana pro street. While I wait for the opportunity to apply a clear coat to the Pano. Need to get the basic body prep done, then I can work on modifying the rear wheel arch. So same usual process block sanding body, I like using the black surfacer makes it easy to see whats going on and keep track of the surface. Havent done this type of modification before so it will be interesting to see if I can stretch the wheel arch to suit the tyre.
- 766 replies
-
- 5
-
-
- stalled builds
- quick builds
- (and 2 more)
-
Thanks Stu, Pano's build up good and a few variants to choose from. Worth getting one for sure. The guys YouTube channel is also excellent, he is one of the pioneers of the Street Machine car culture in Australia. He built some brilliant show cars over the years. Very close, hoping to get the clear applied tomorrow. Then il let that settle for week or so. But yeah after that wont take much to get it completed.
-
Traditional style hot rod. The Maroon would look great Tamiya TS-11 Maroon is a nice colour. An example of that colour I applied to a 69 Camaro The street rod style, like the kit box art. The Red on 40 Ford will look good. Use the Tamiya TS spray cans, they are specifically formulated to use on kit styrene. And are much more user friendly
-
Have you decided on a colour ??
-
That primer coat is looking decent, should be a good foundation for the colour coats.
-
Paint the dash same colour as the body. Satin/semi gloss for the seats to replicate vinyl material. Matt/flat for the carpet. That should break things up a bit and separate all the components of the interior.
-
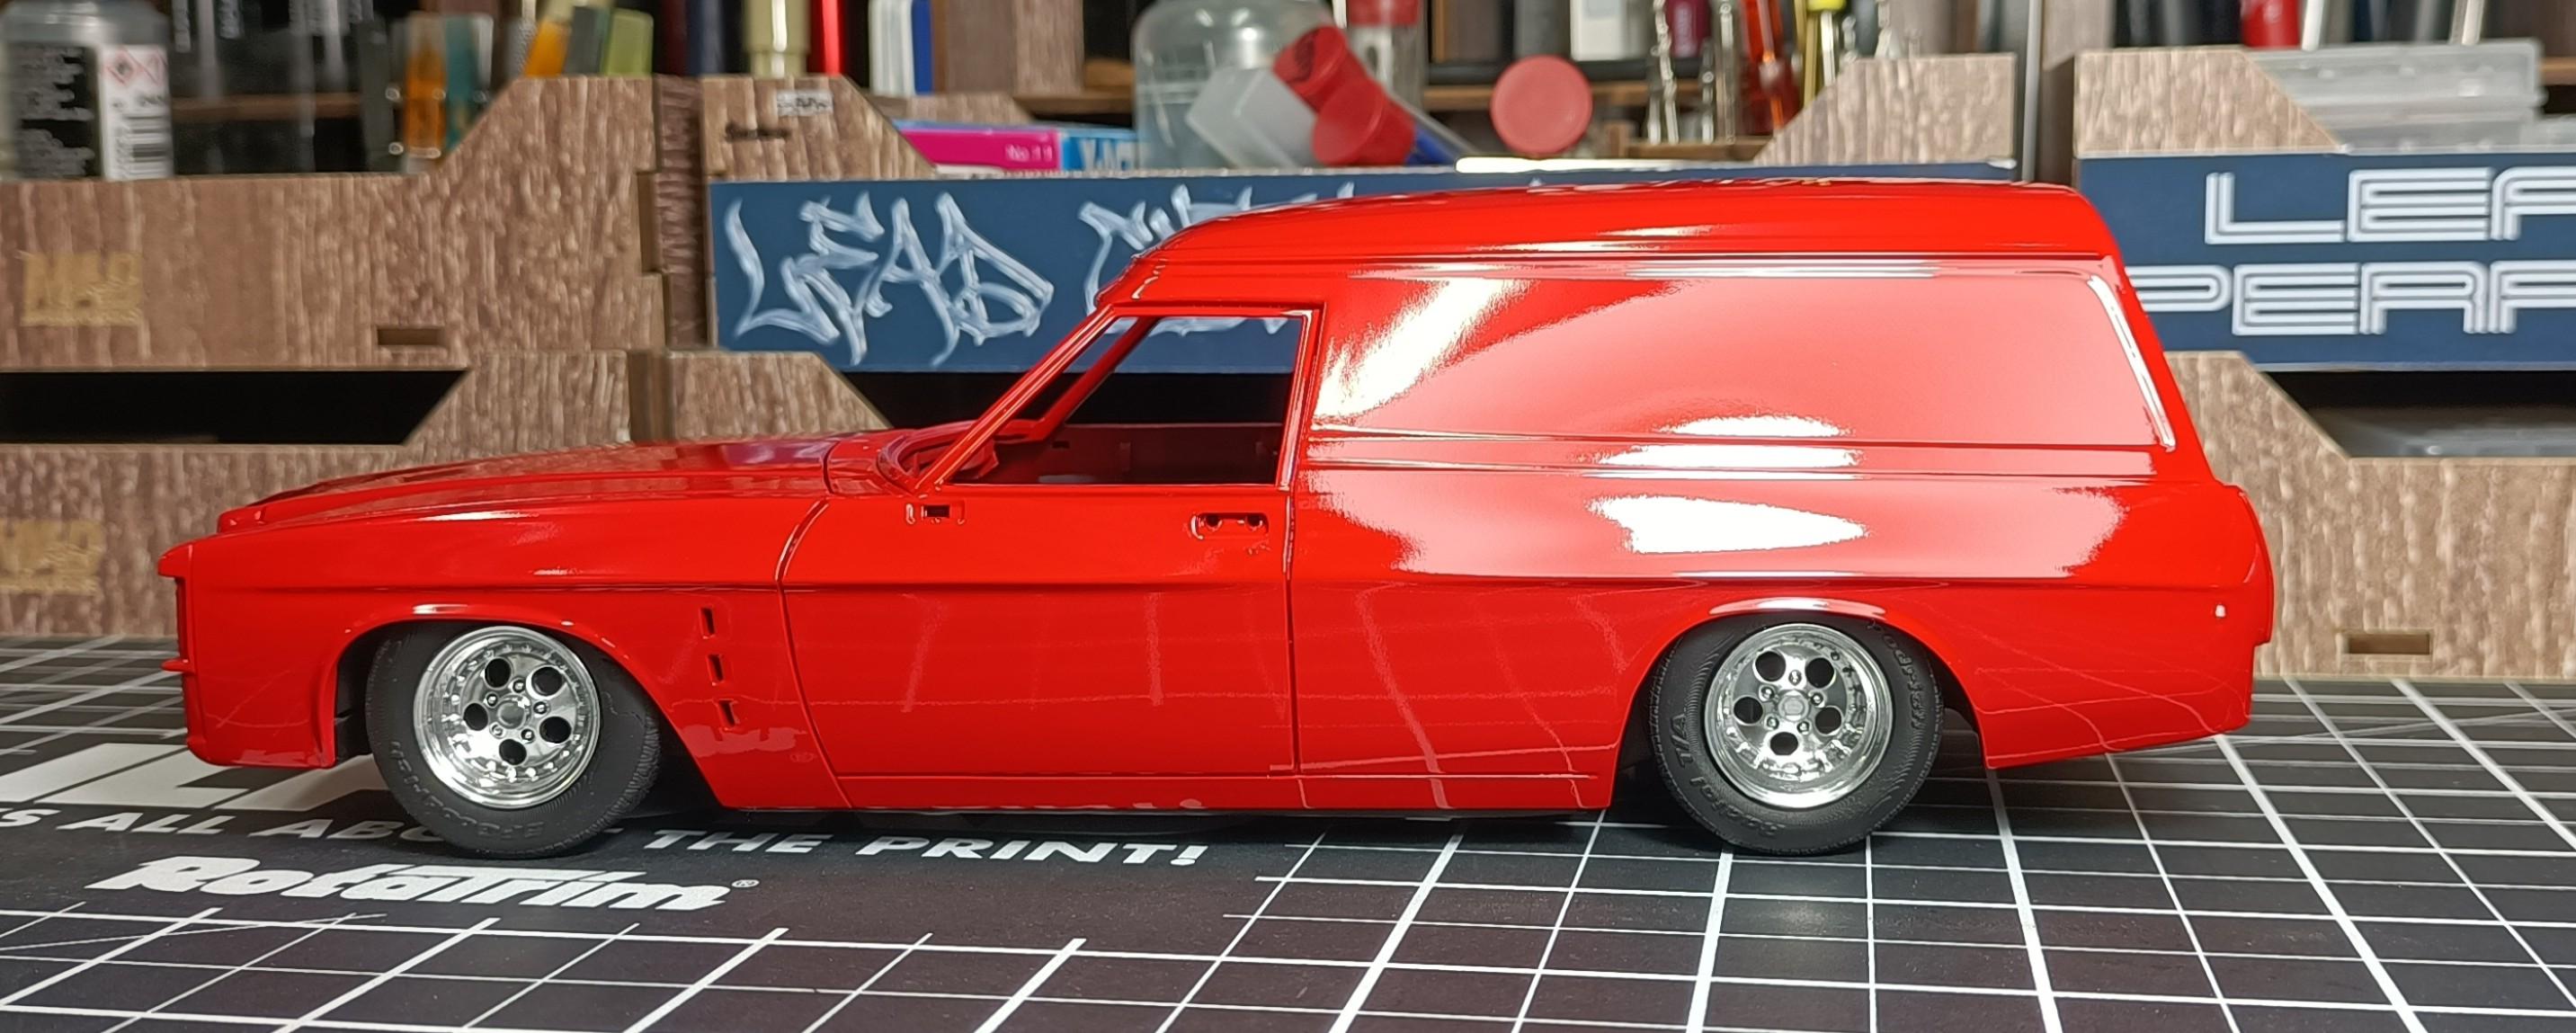
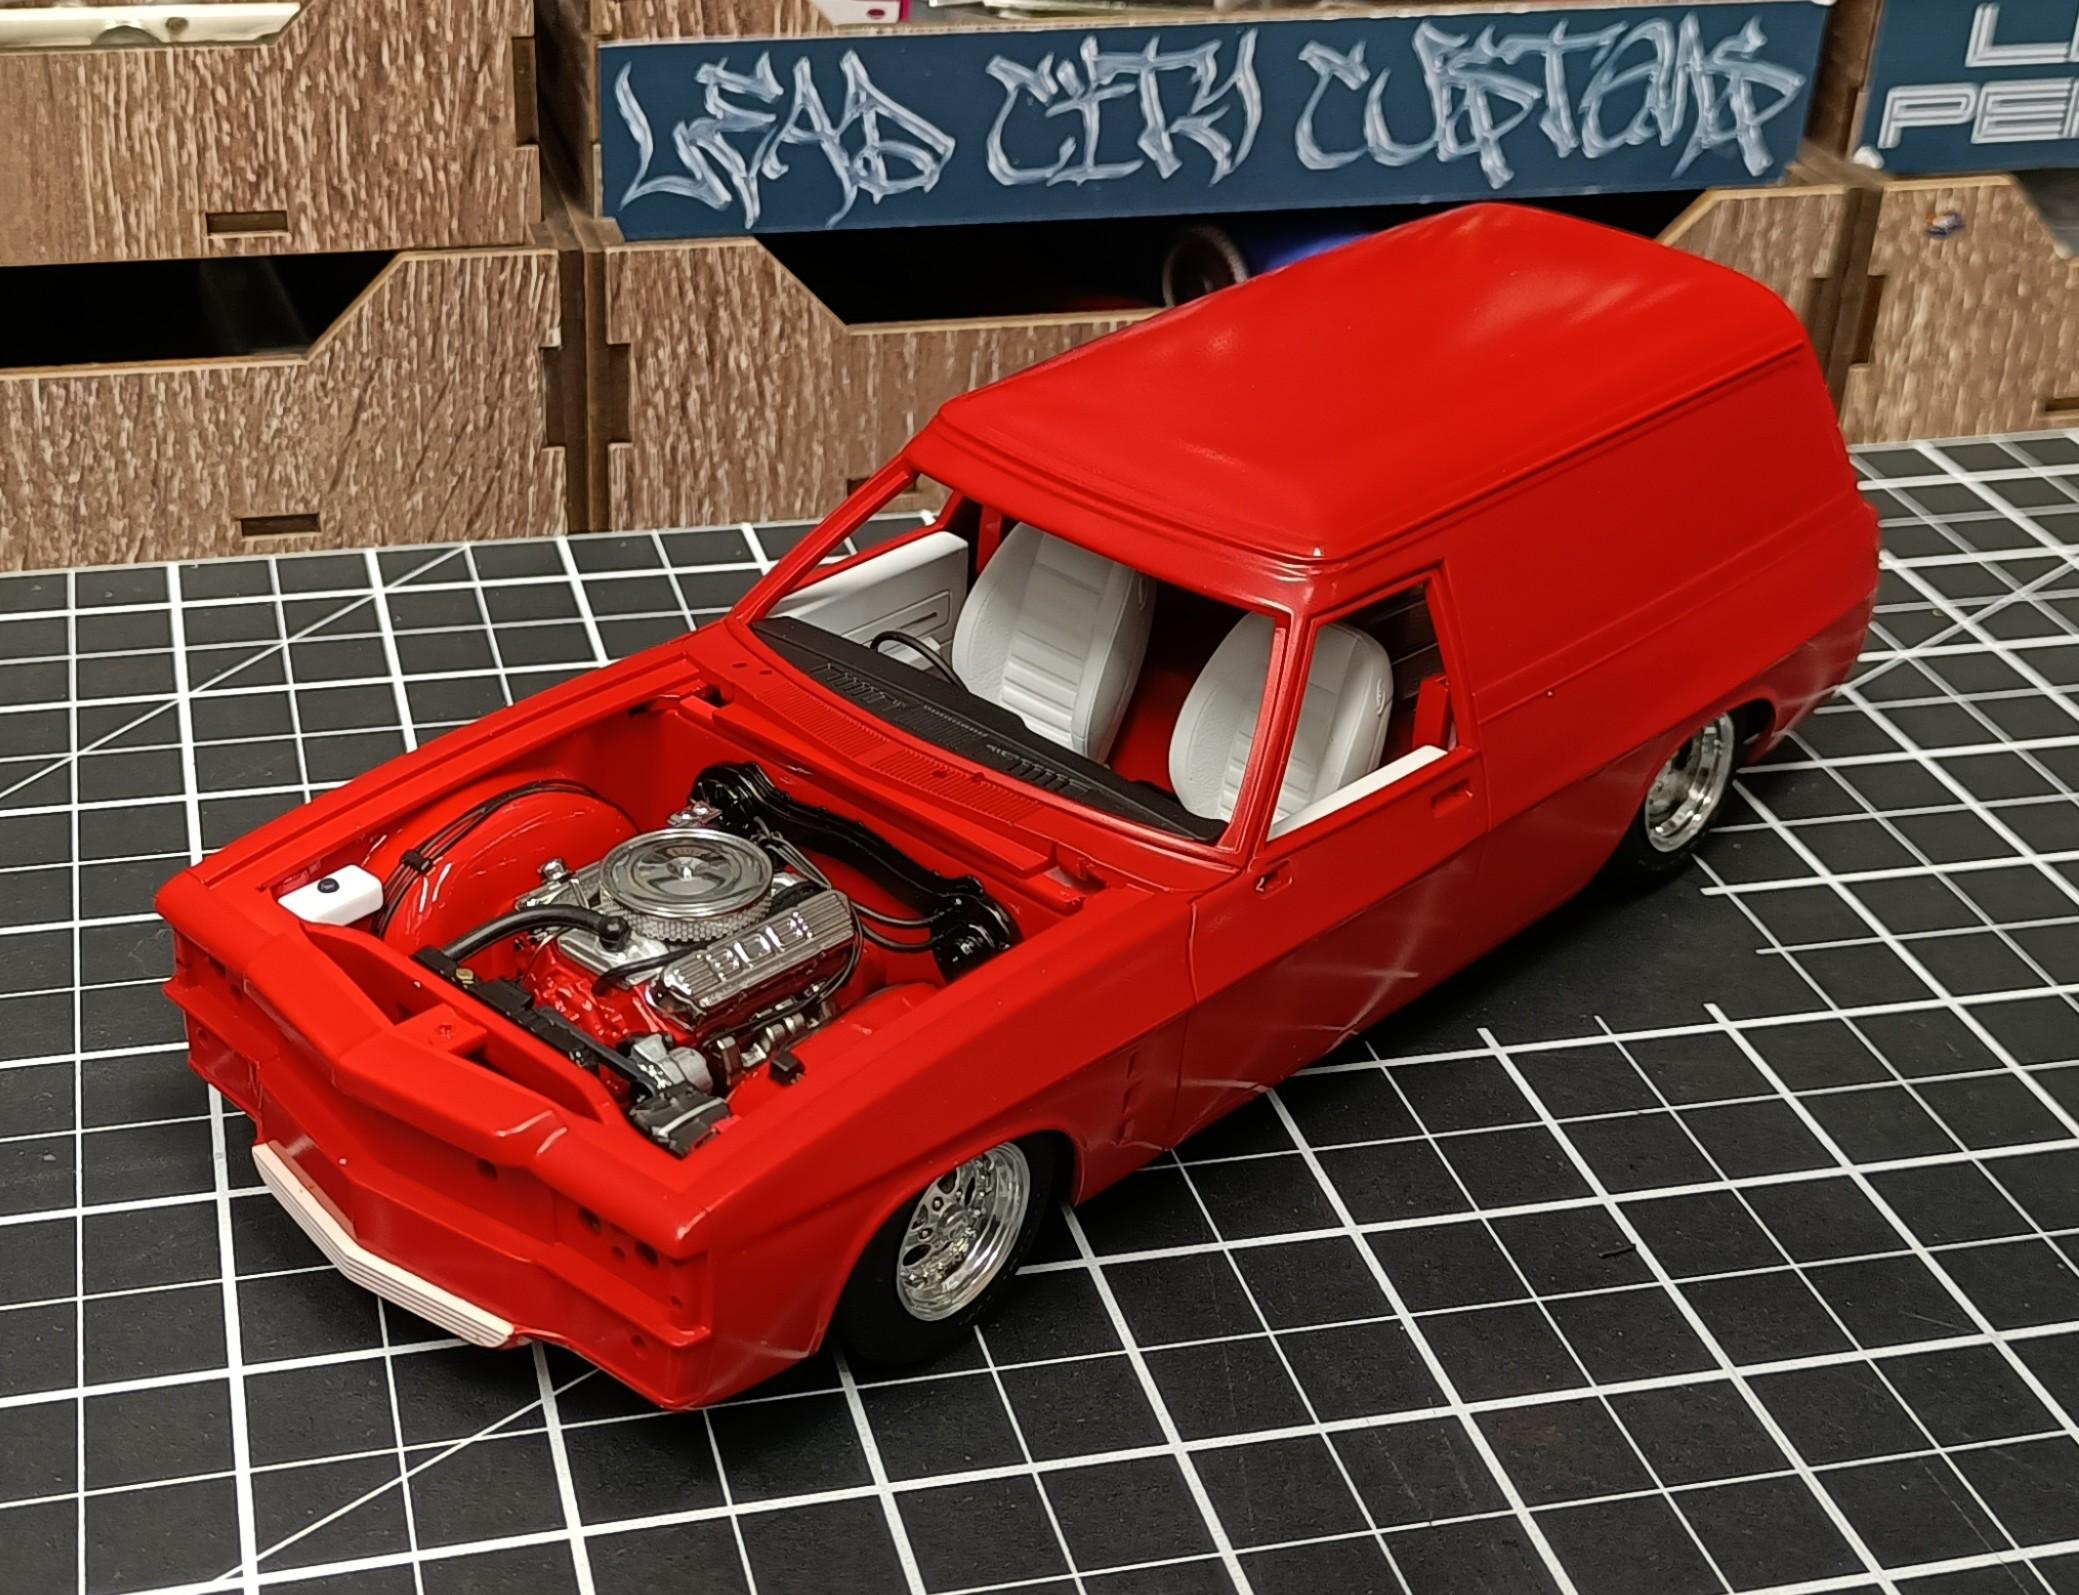
Thanks Mathias. Starting to look the part now. Thanks David. Its a very nice colour with excellent coverage. With some extra effort and details the engines in the DDA kits present well. That 50 Pontiac Sedan Delivery would be a rare sight im sure. The Panel Vans are a rare sight, but there is still a yearly show with massive culture
- 766 replies
-
- 3
-
-
- stalled builds
- quick builds
- (and 2 more)
-
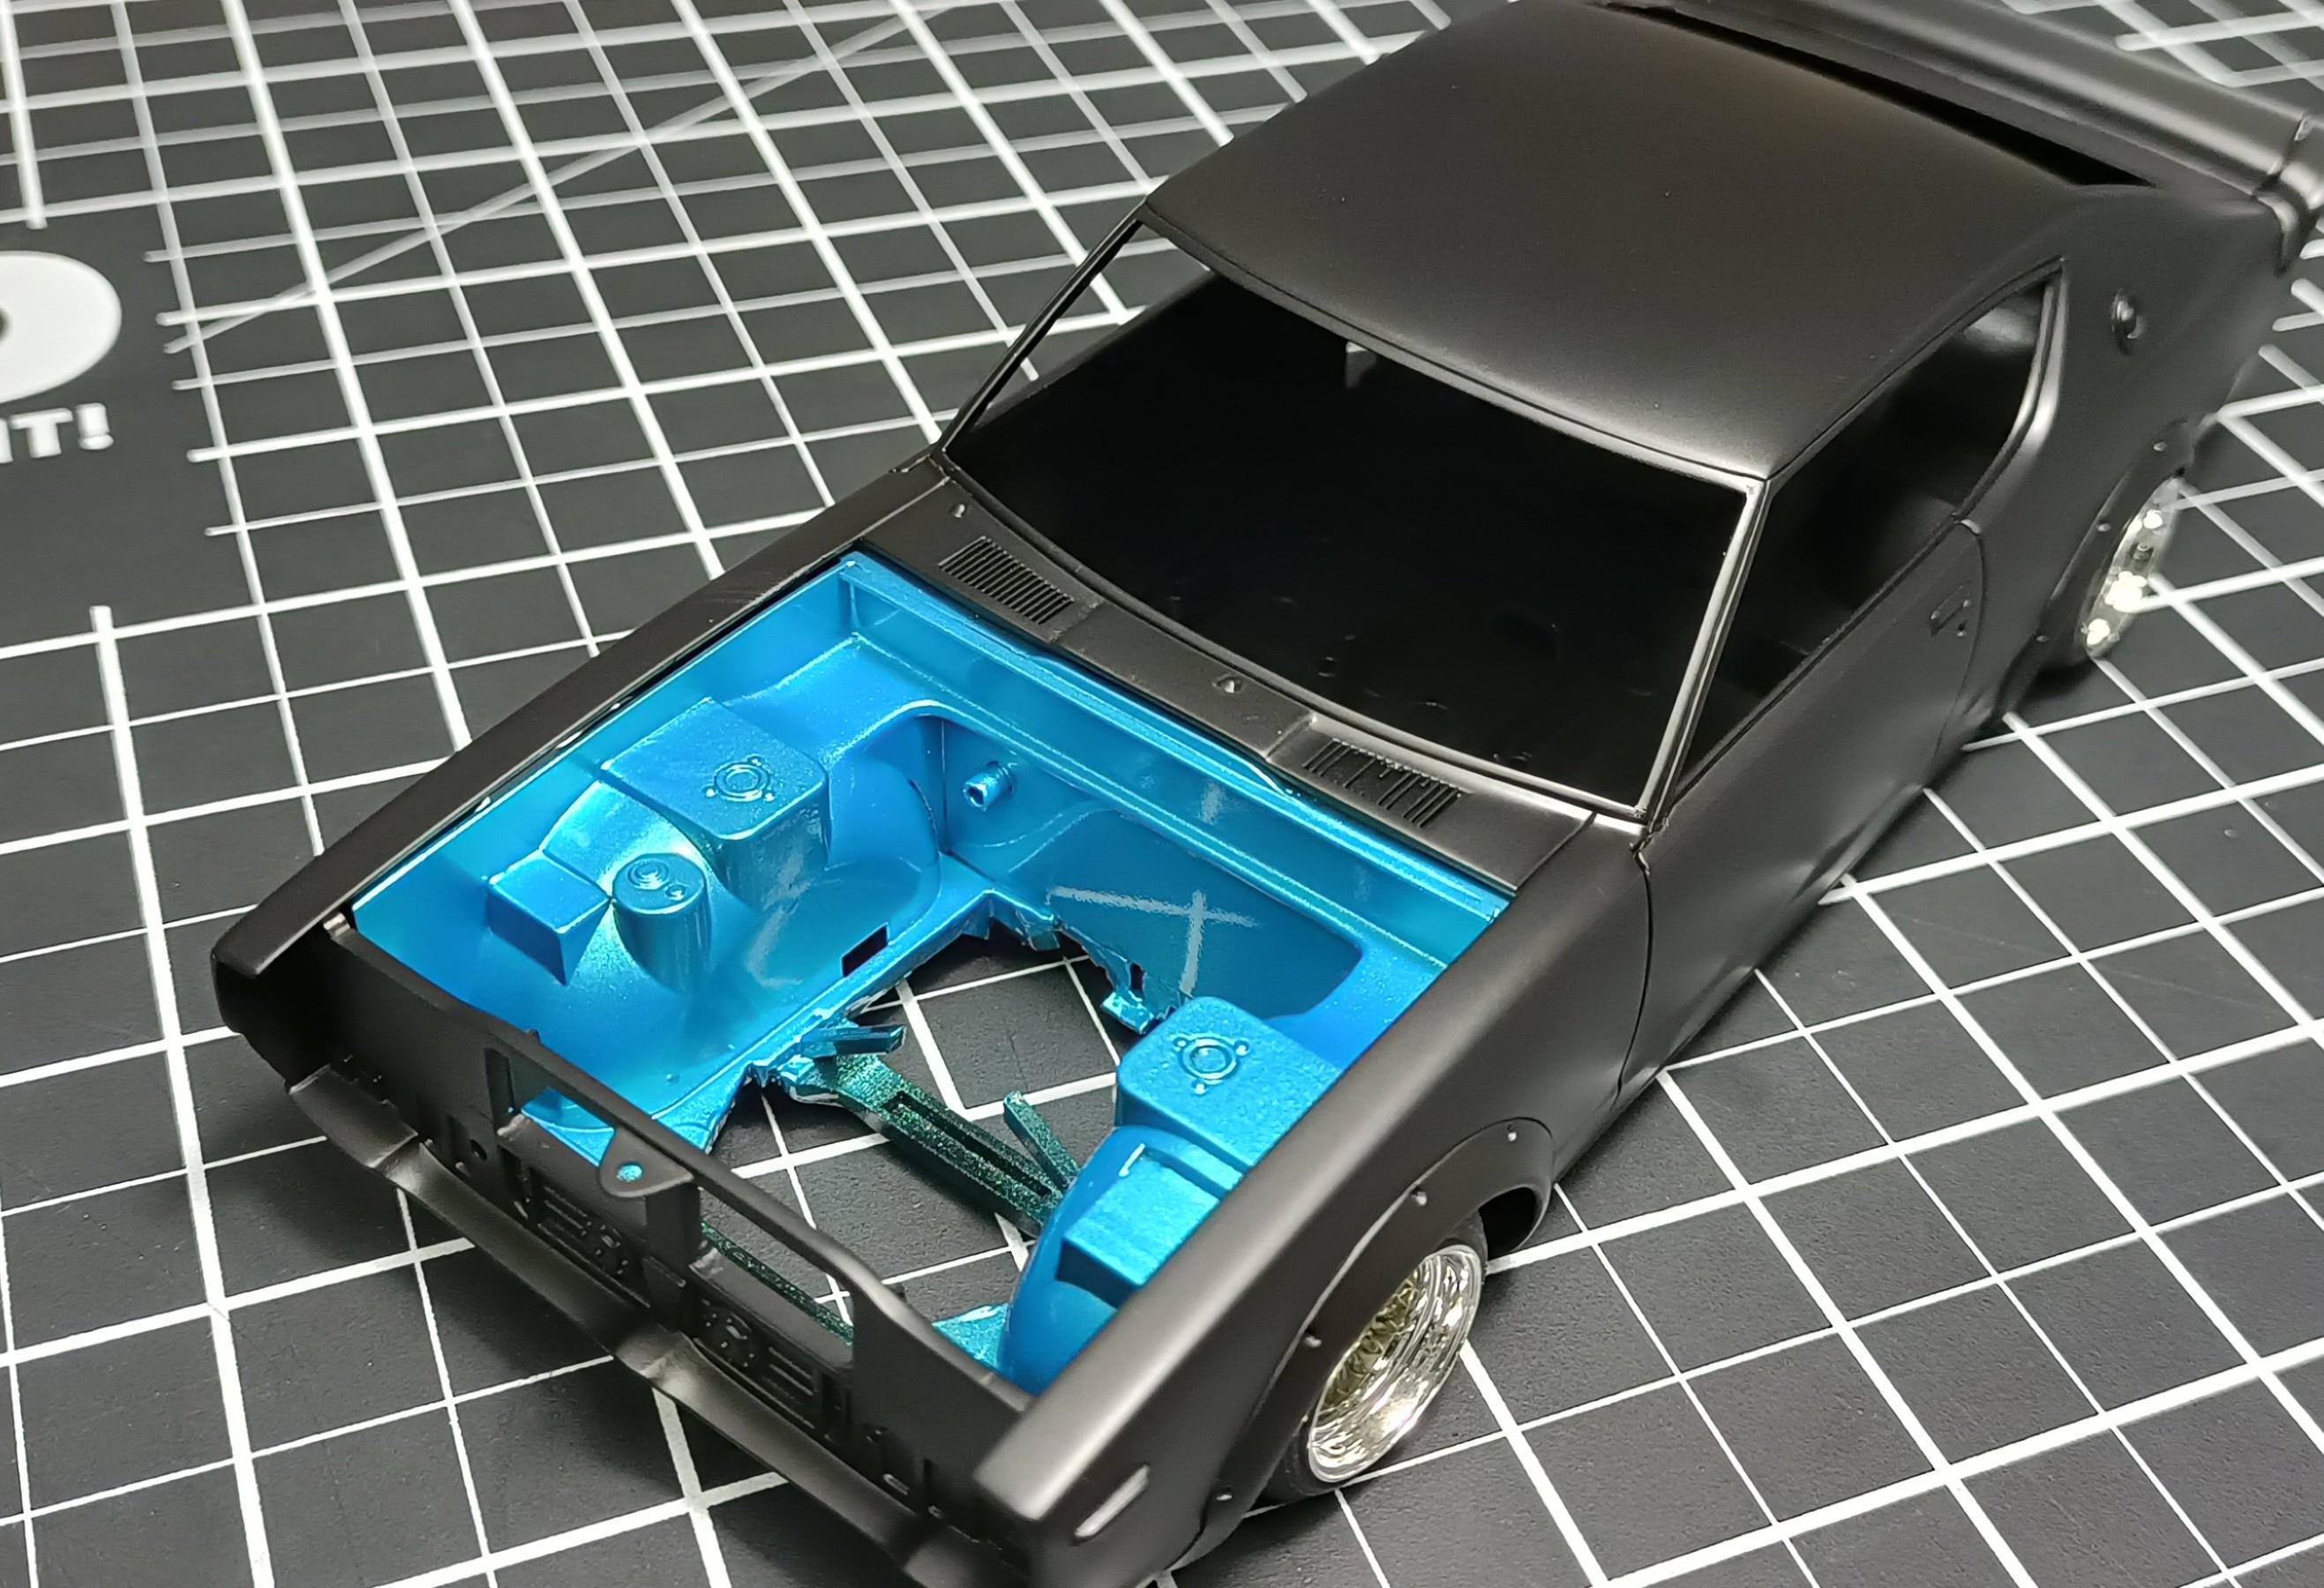
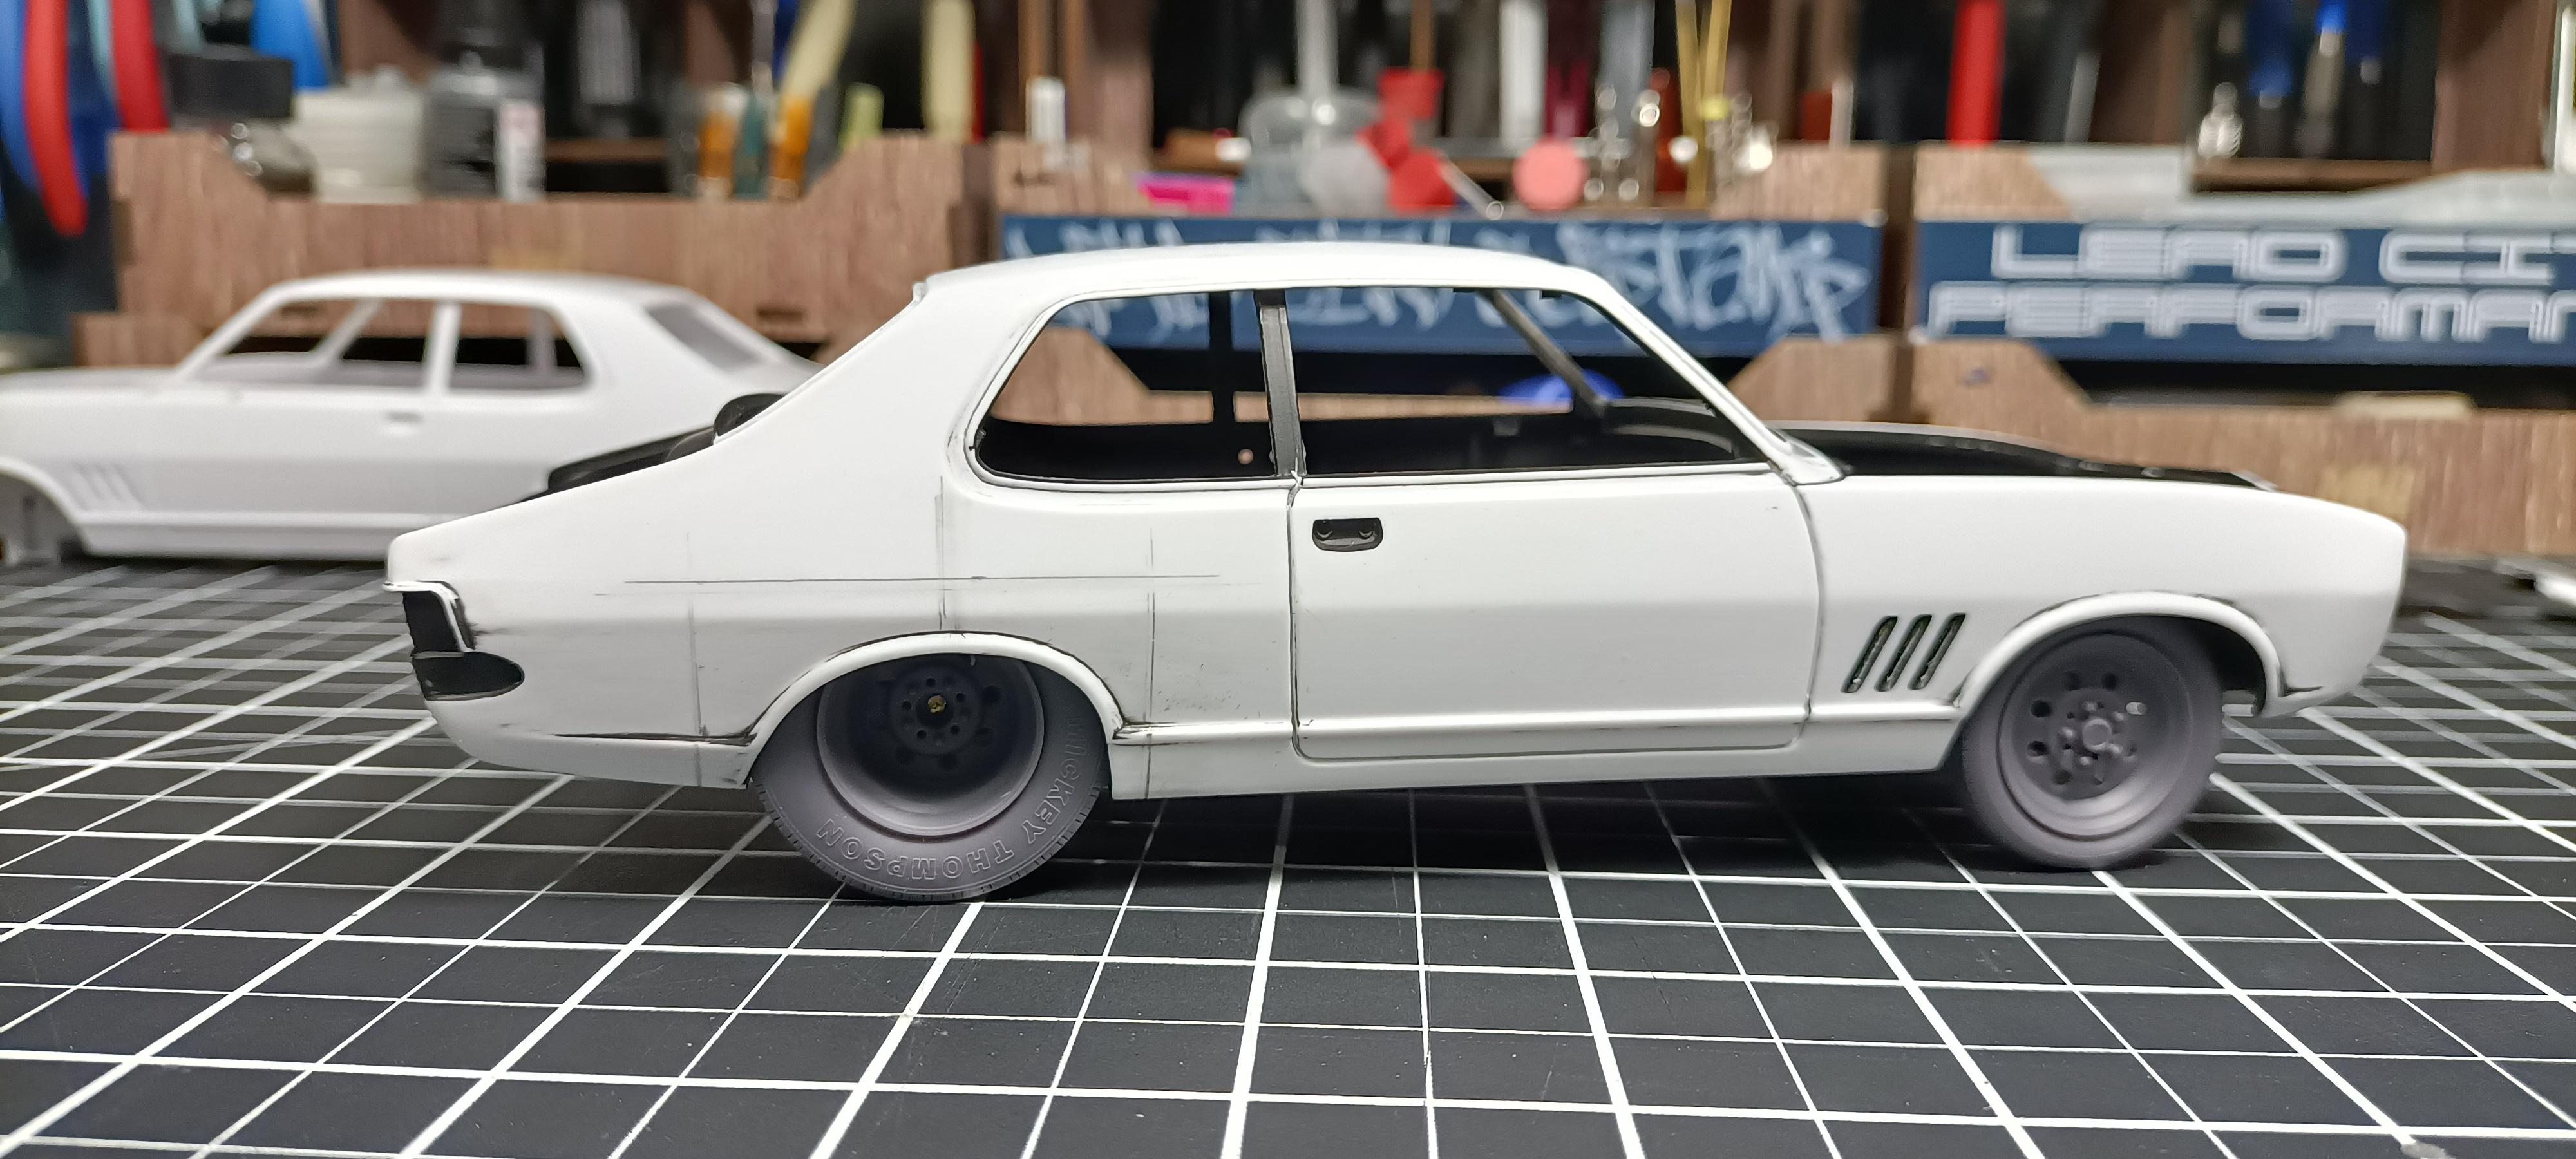
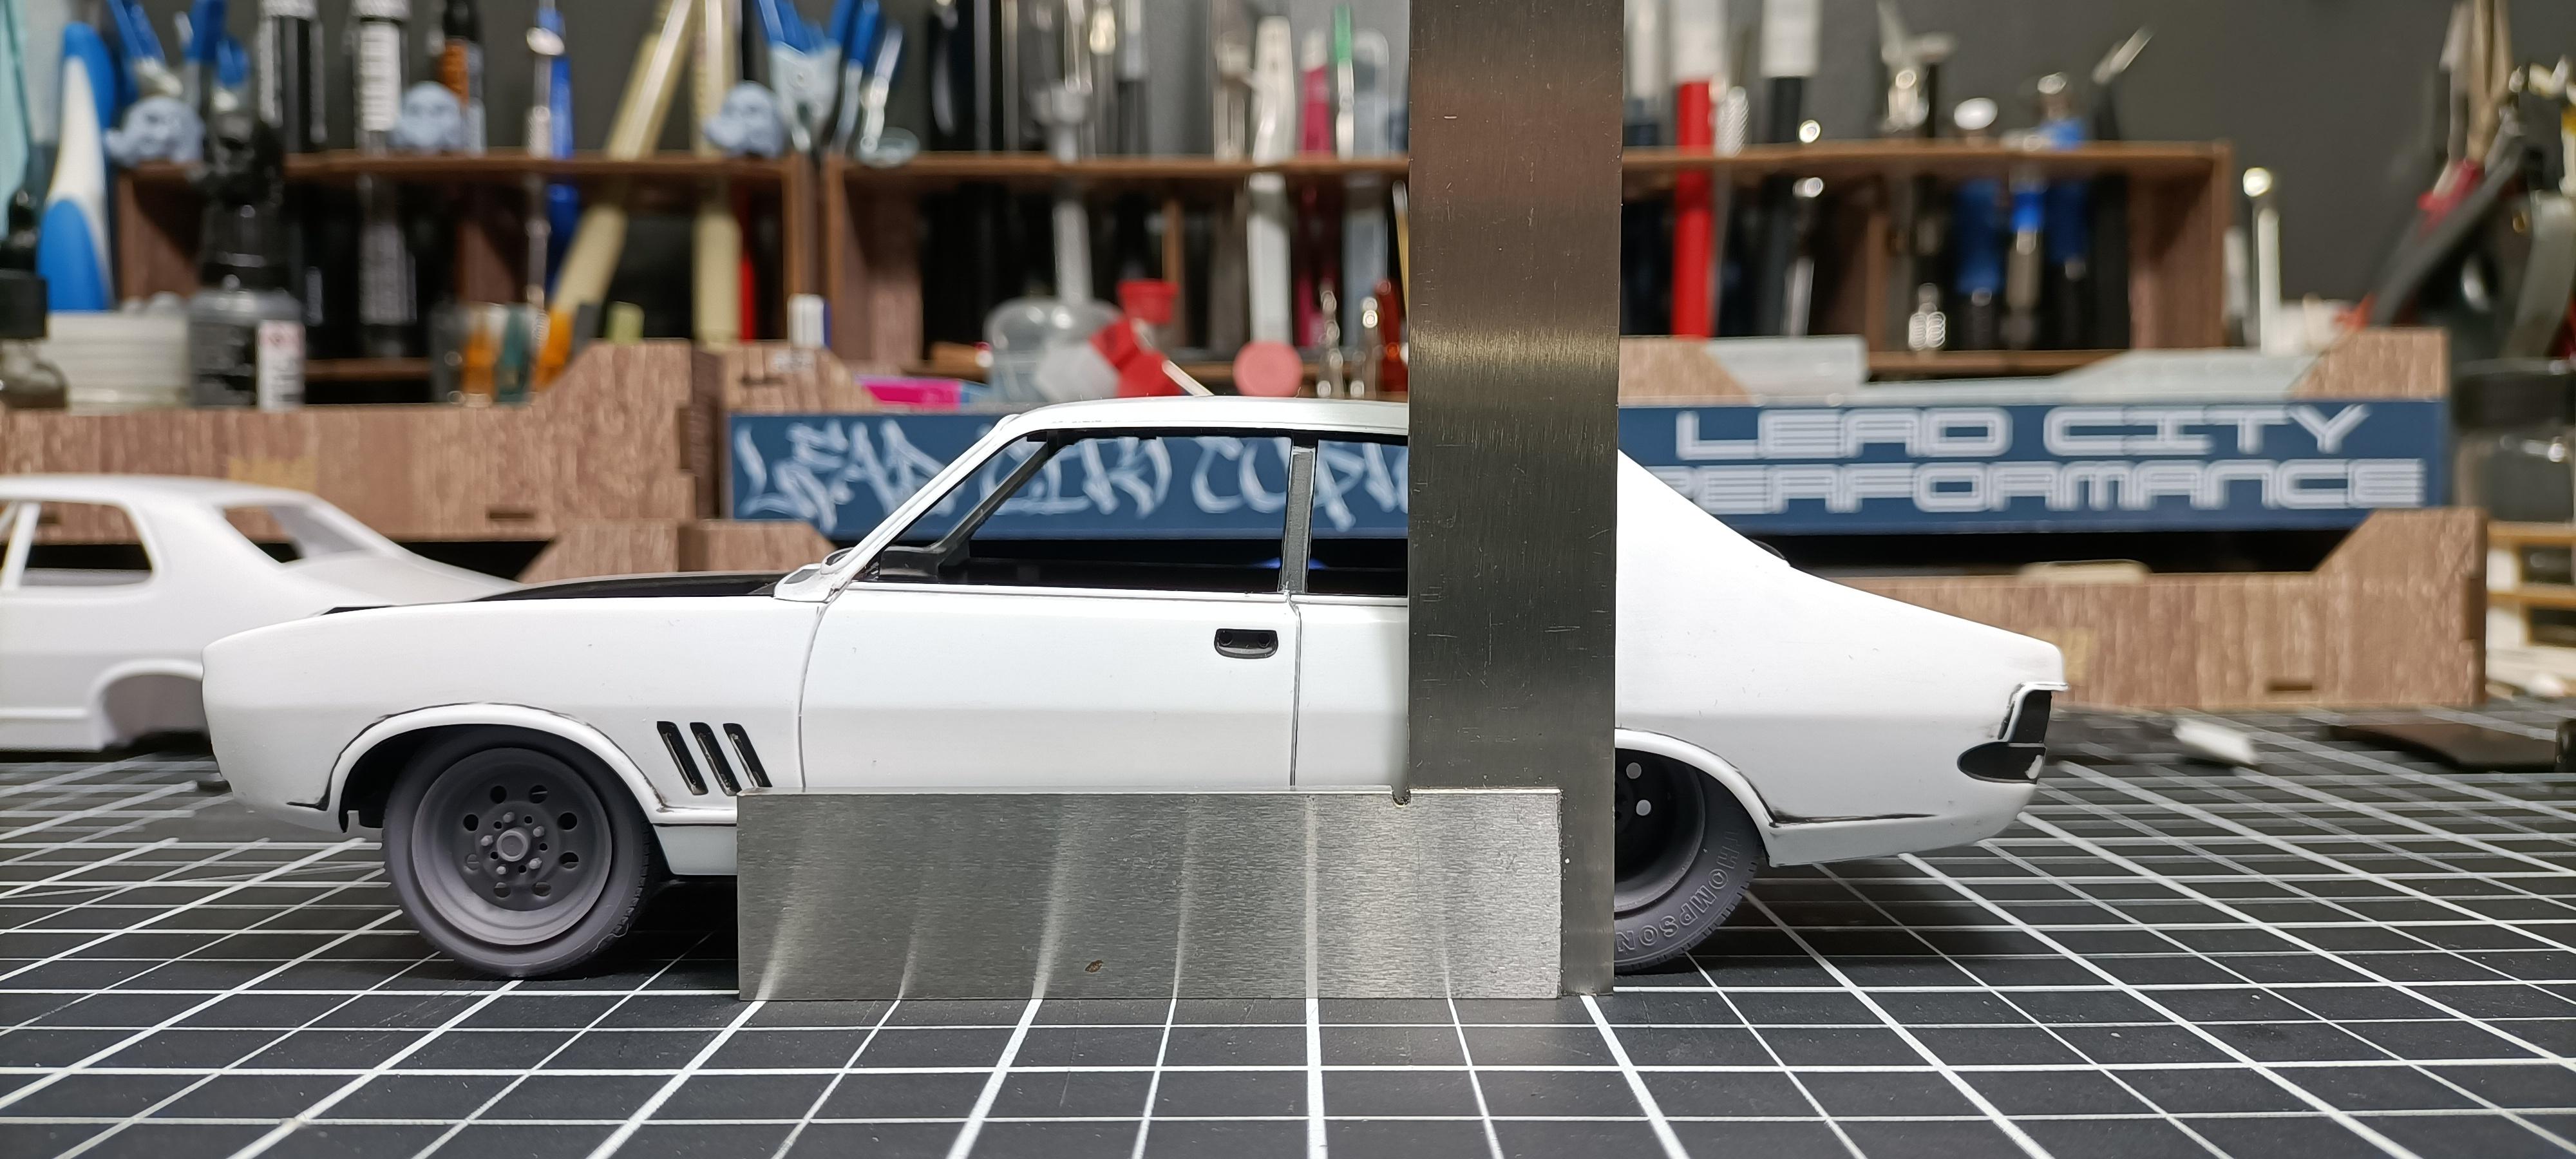
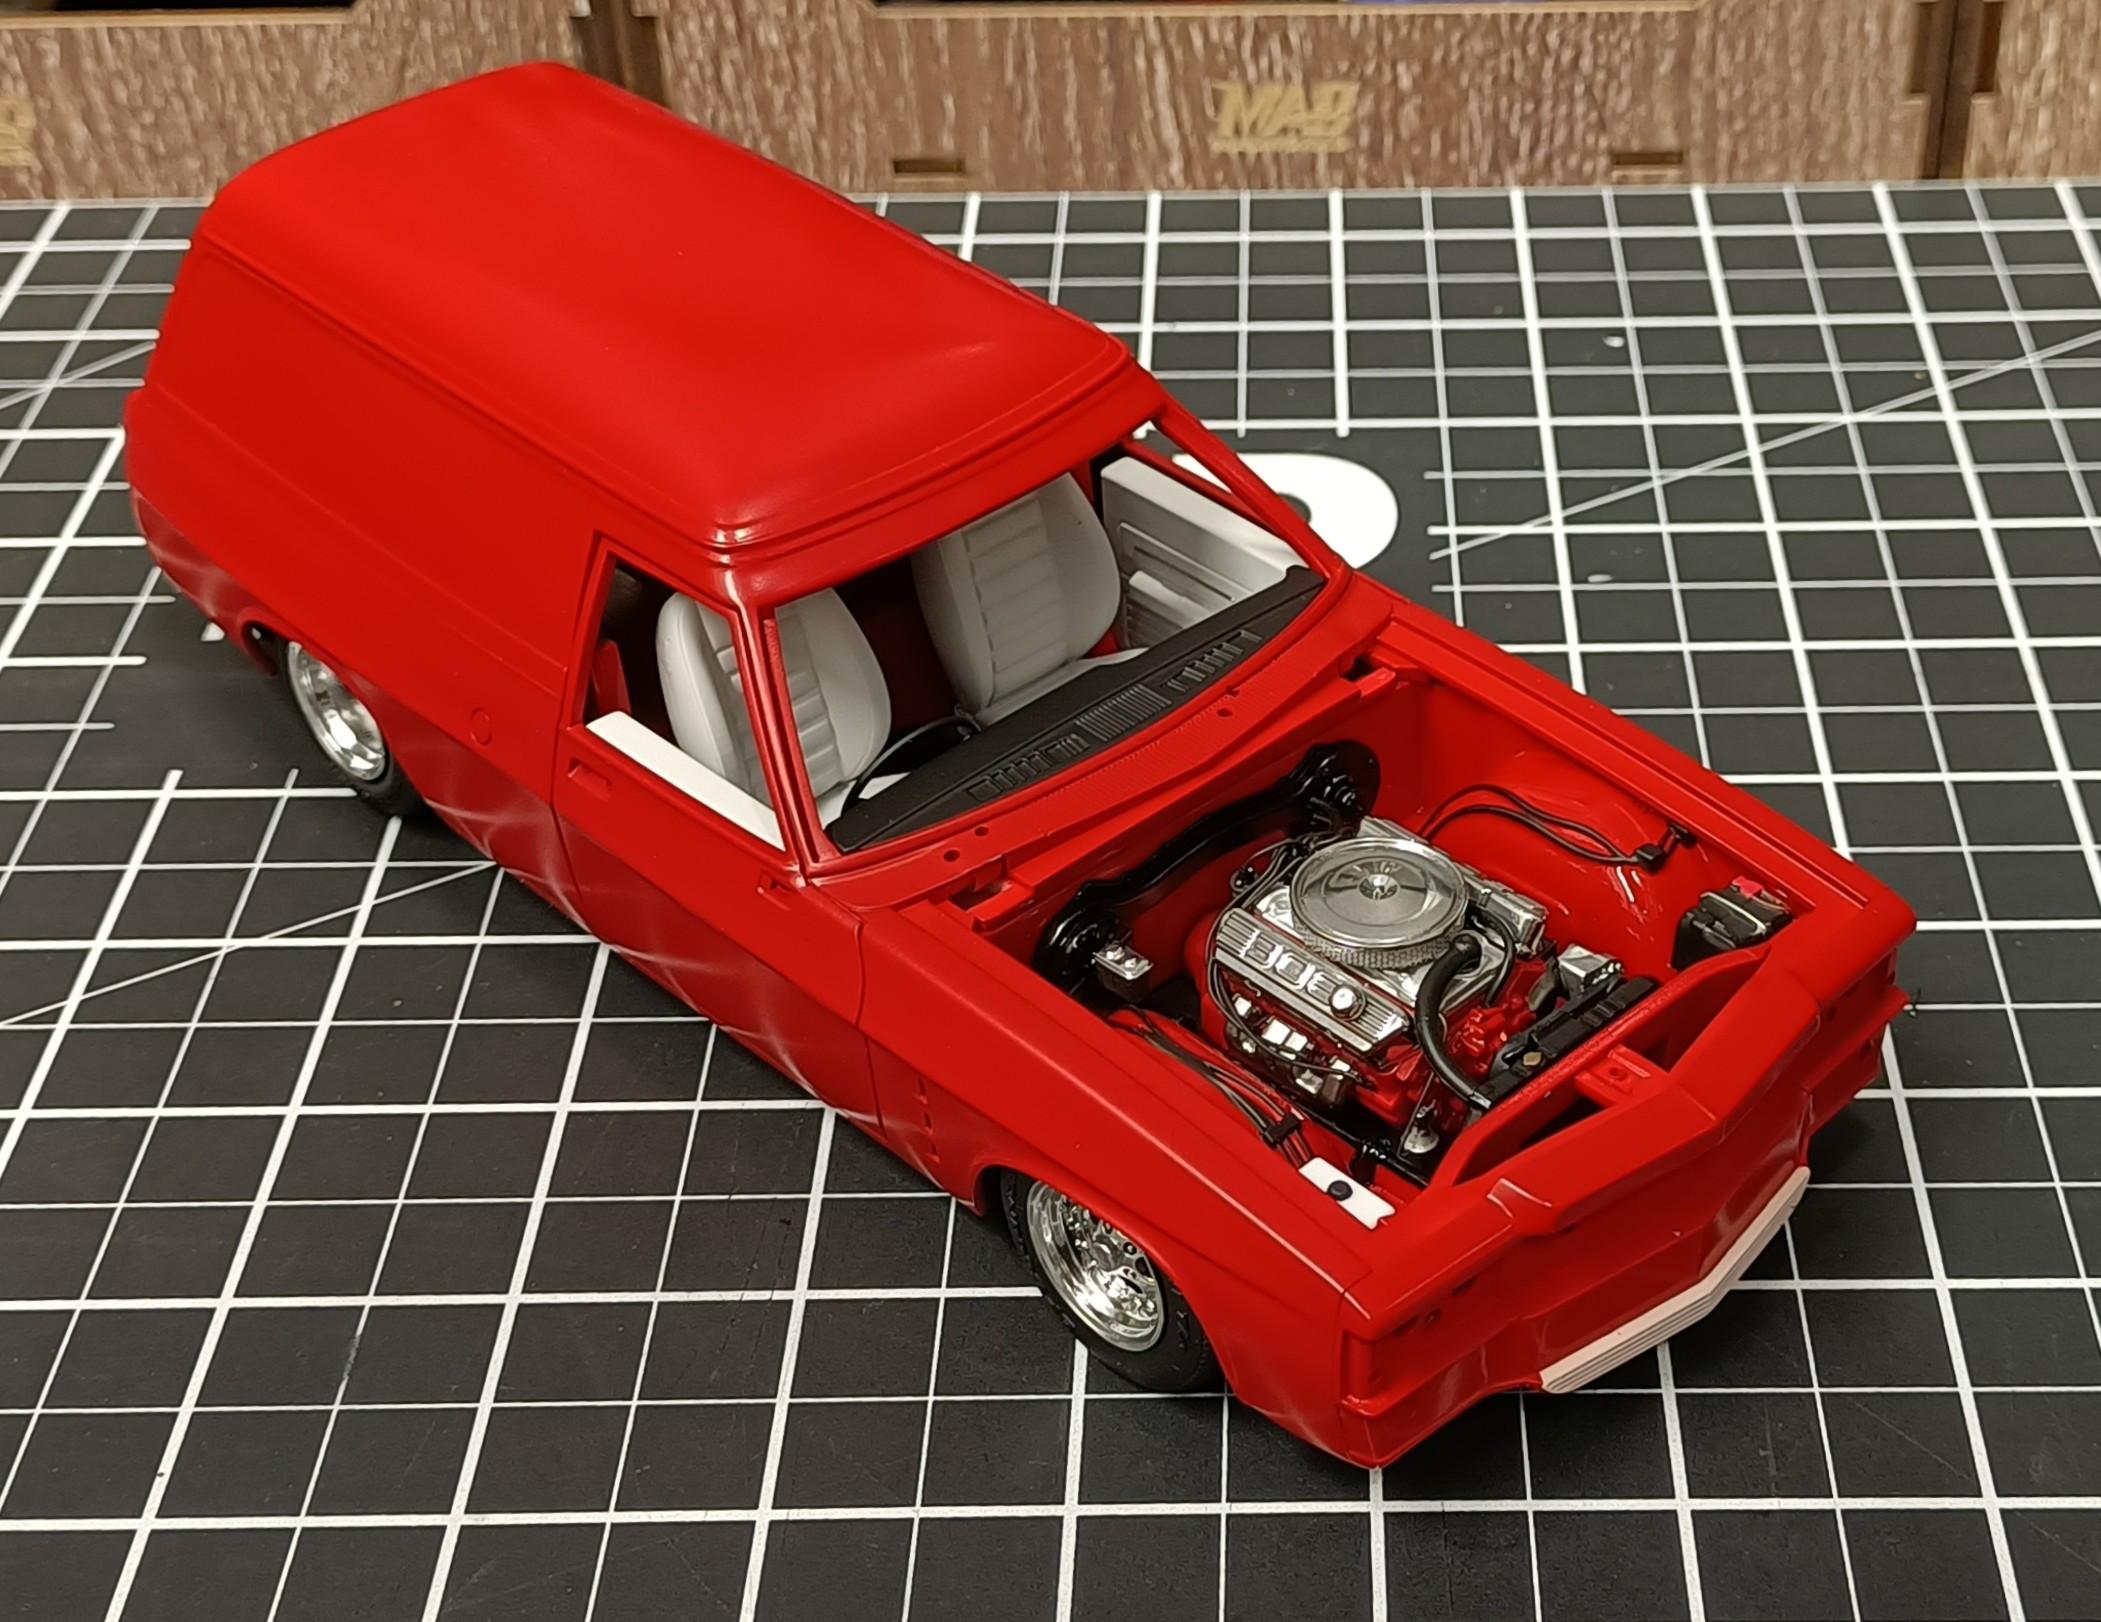
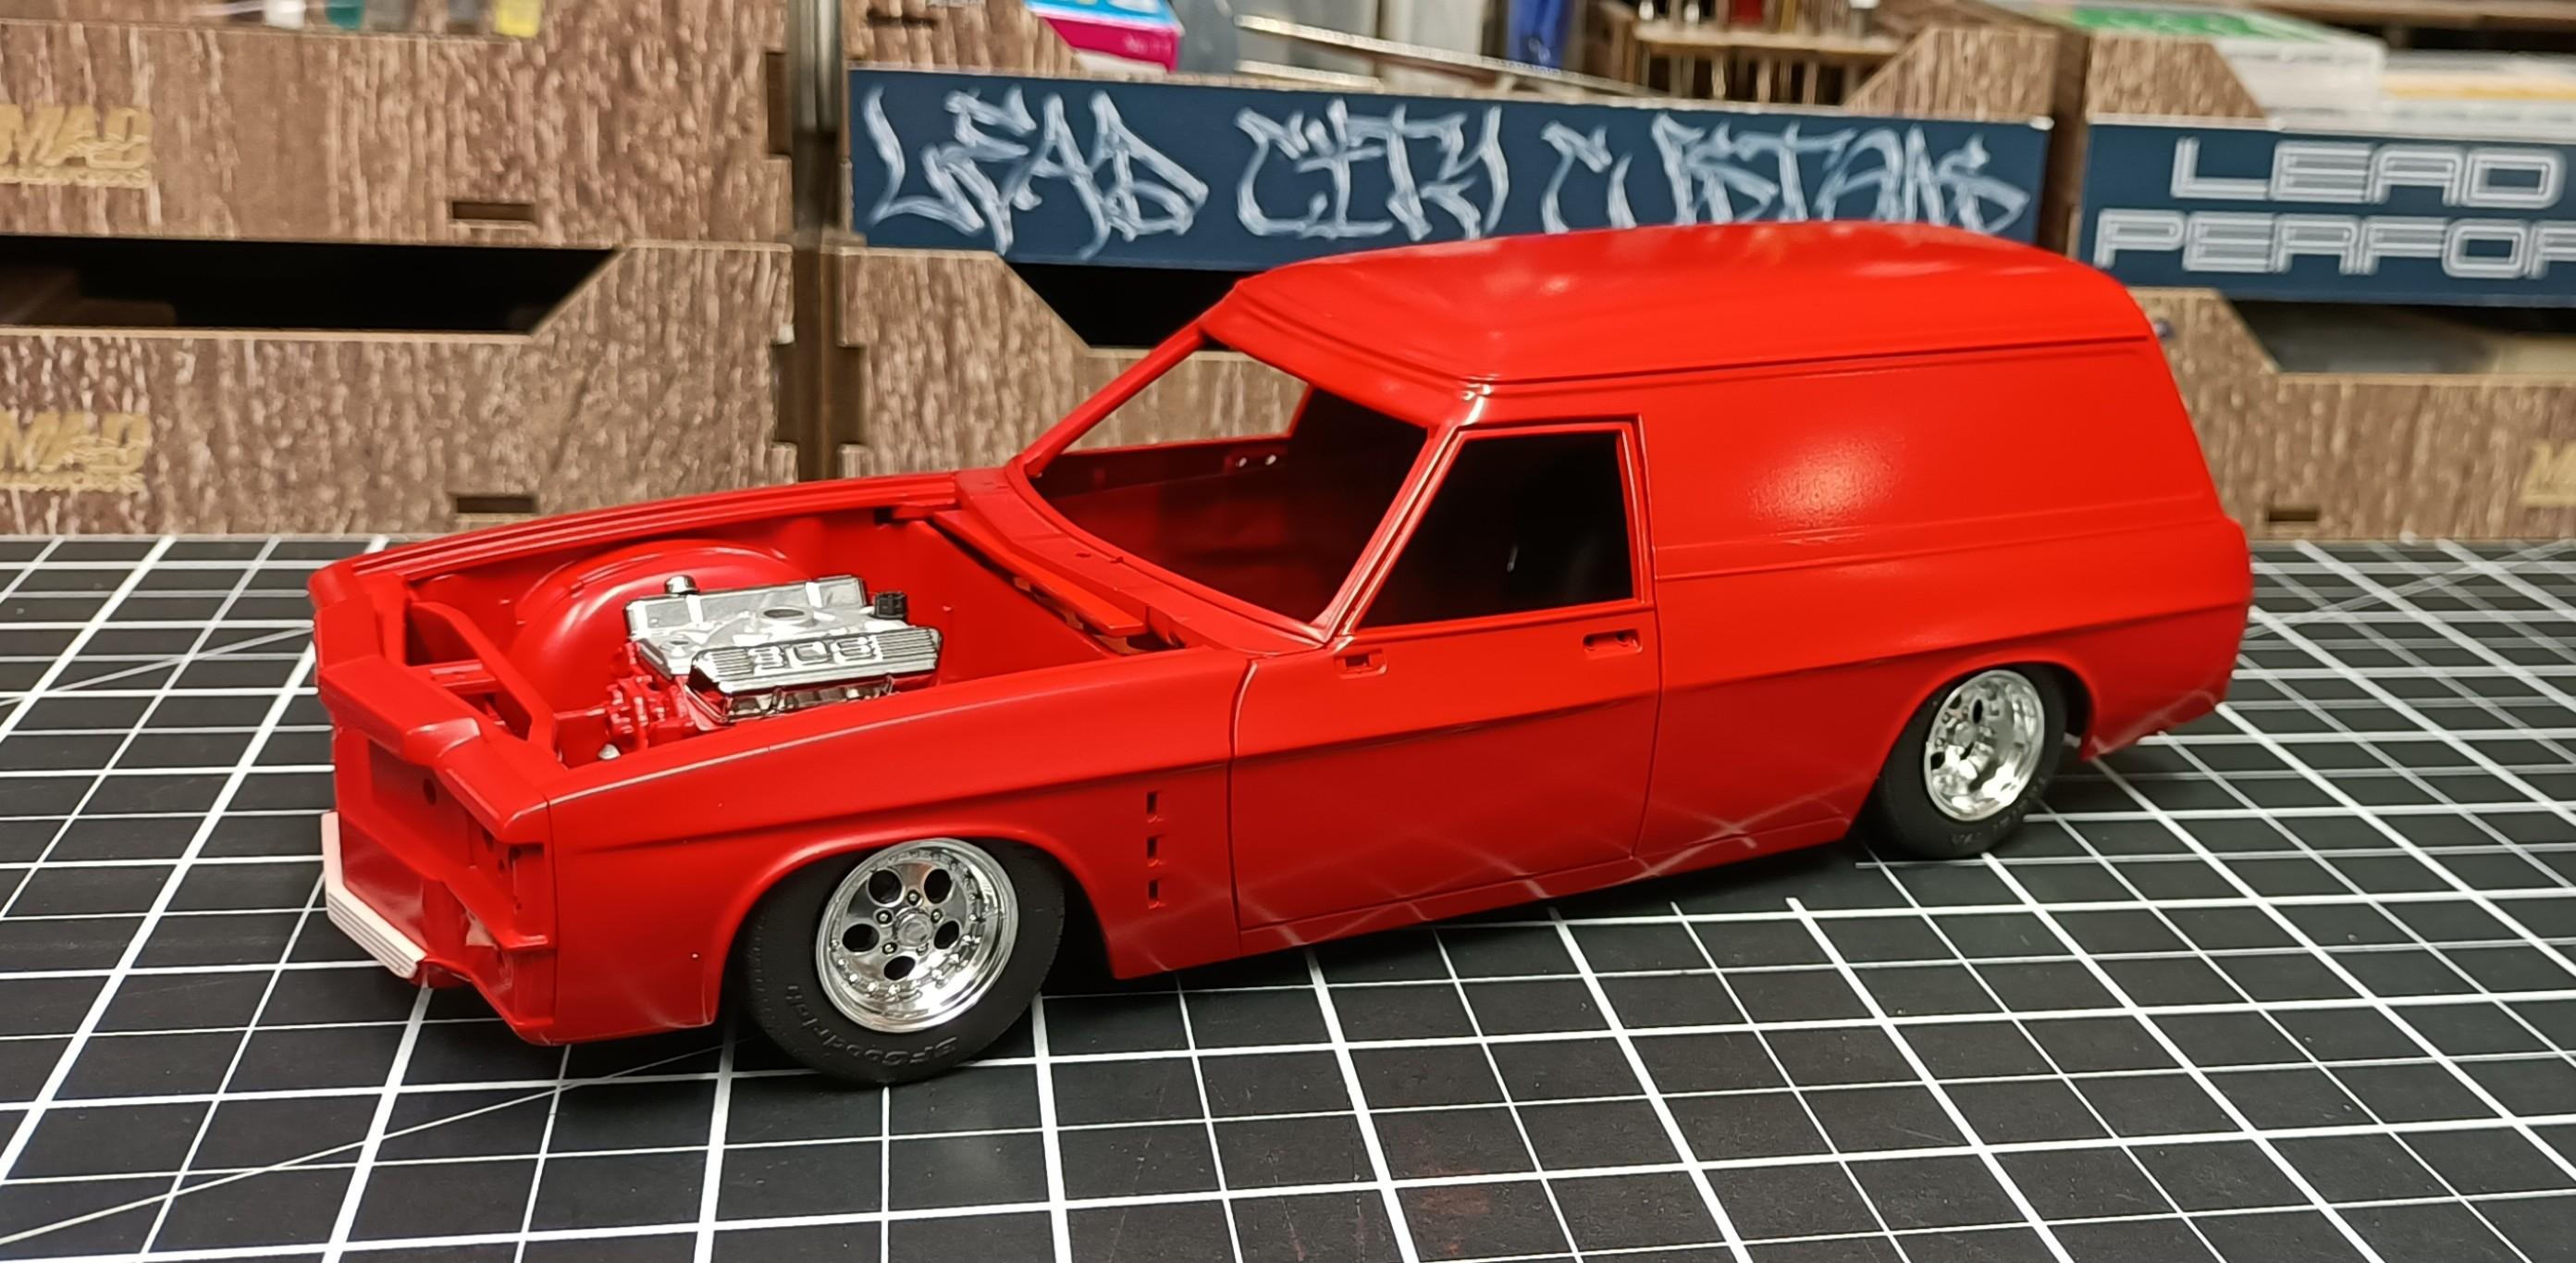
Engine bay sub assembly complete, and got some of the interior parts done.
- 766 replies
-
- 4
-
-
- stalled builds
- quick builds
- (and 2 more)
-
Thanks Bob. Should come to life a bit more once I apply the clear. Thanks Ken. Just trying build something different. There will always be Holden builds to see in my thread, so good that more kits will continue to become available.
-
 Another great build with very impressive custom work. Well done.
 -
Nice work on the interior Stu. Good to see an update.
-
- 766 replies
-
- 6
-
-
- stalled builds
- quick builds
- (and 2 more)
-
Any updates Stu ?? Or is it still too cold for ya.
-
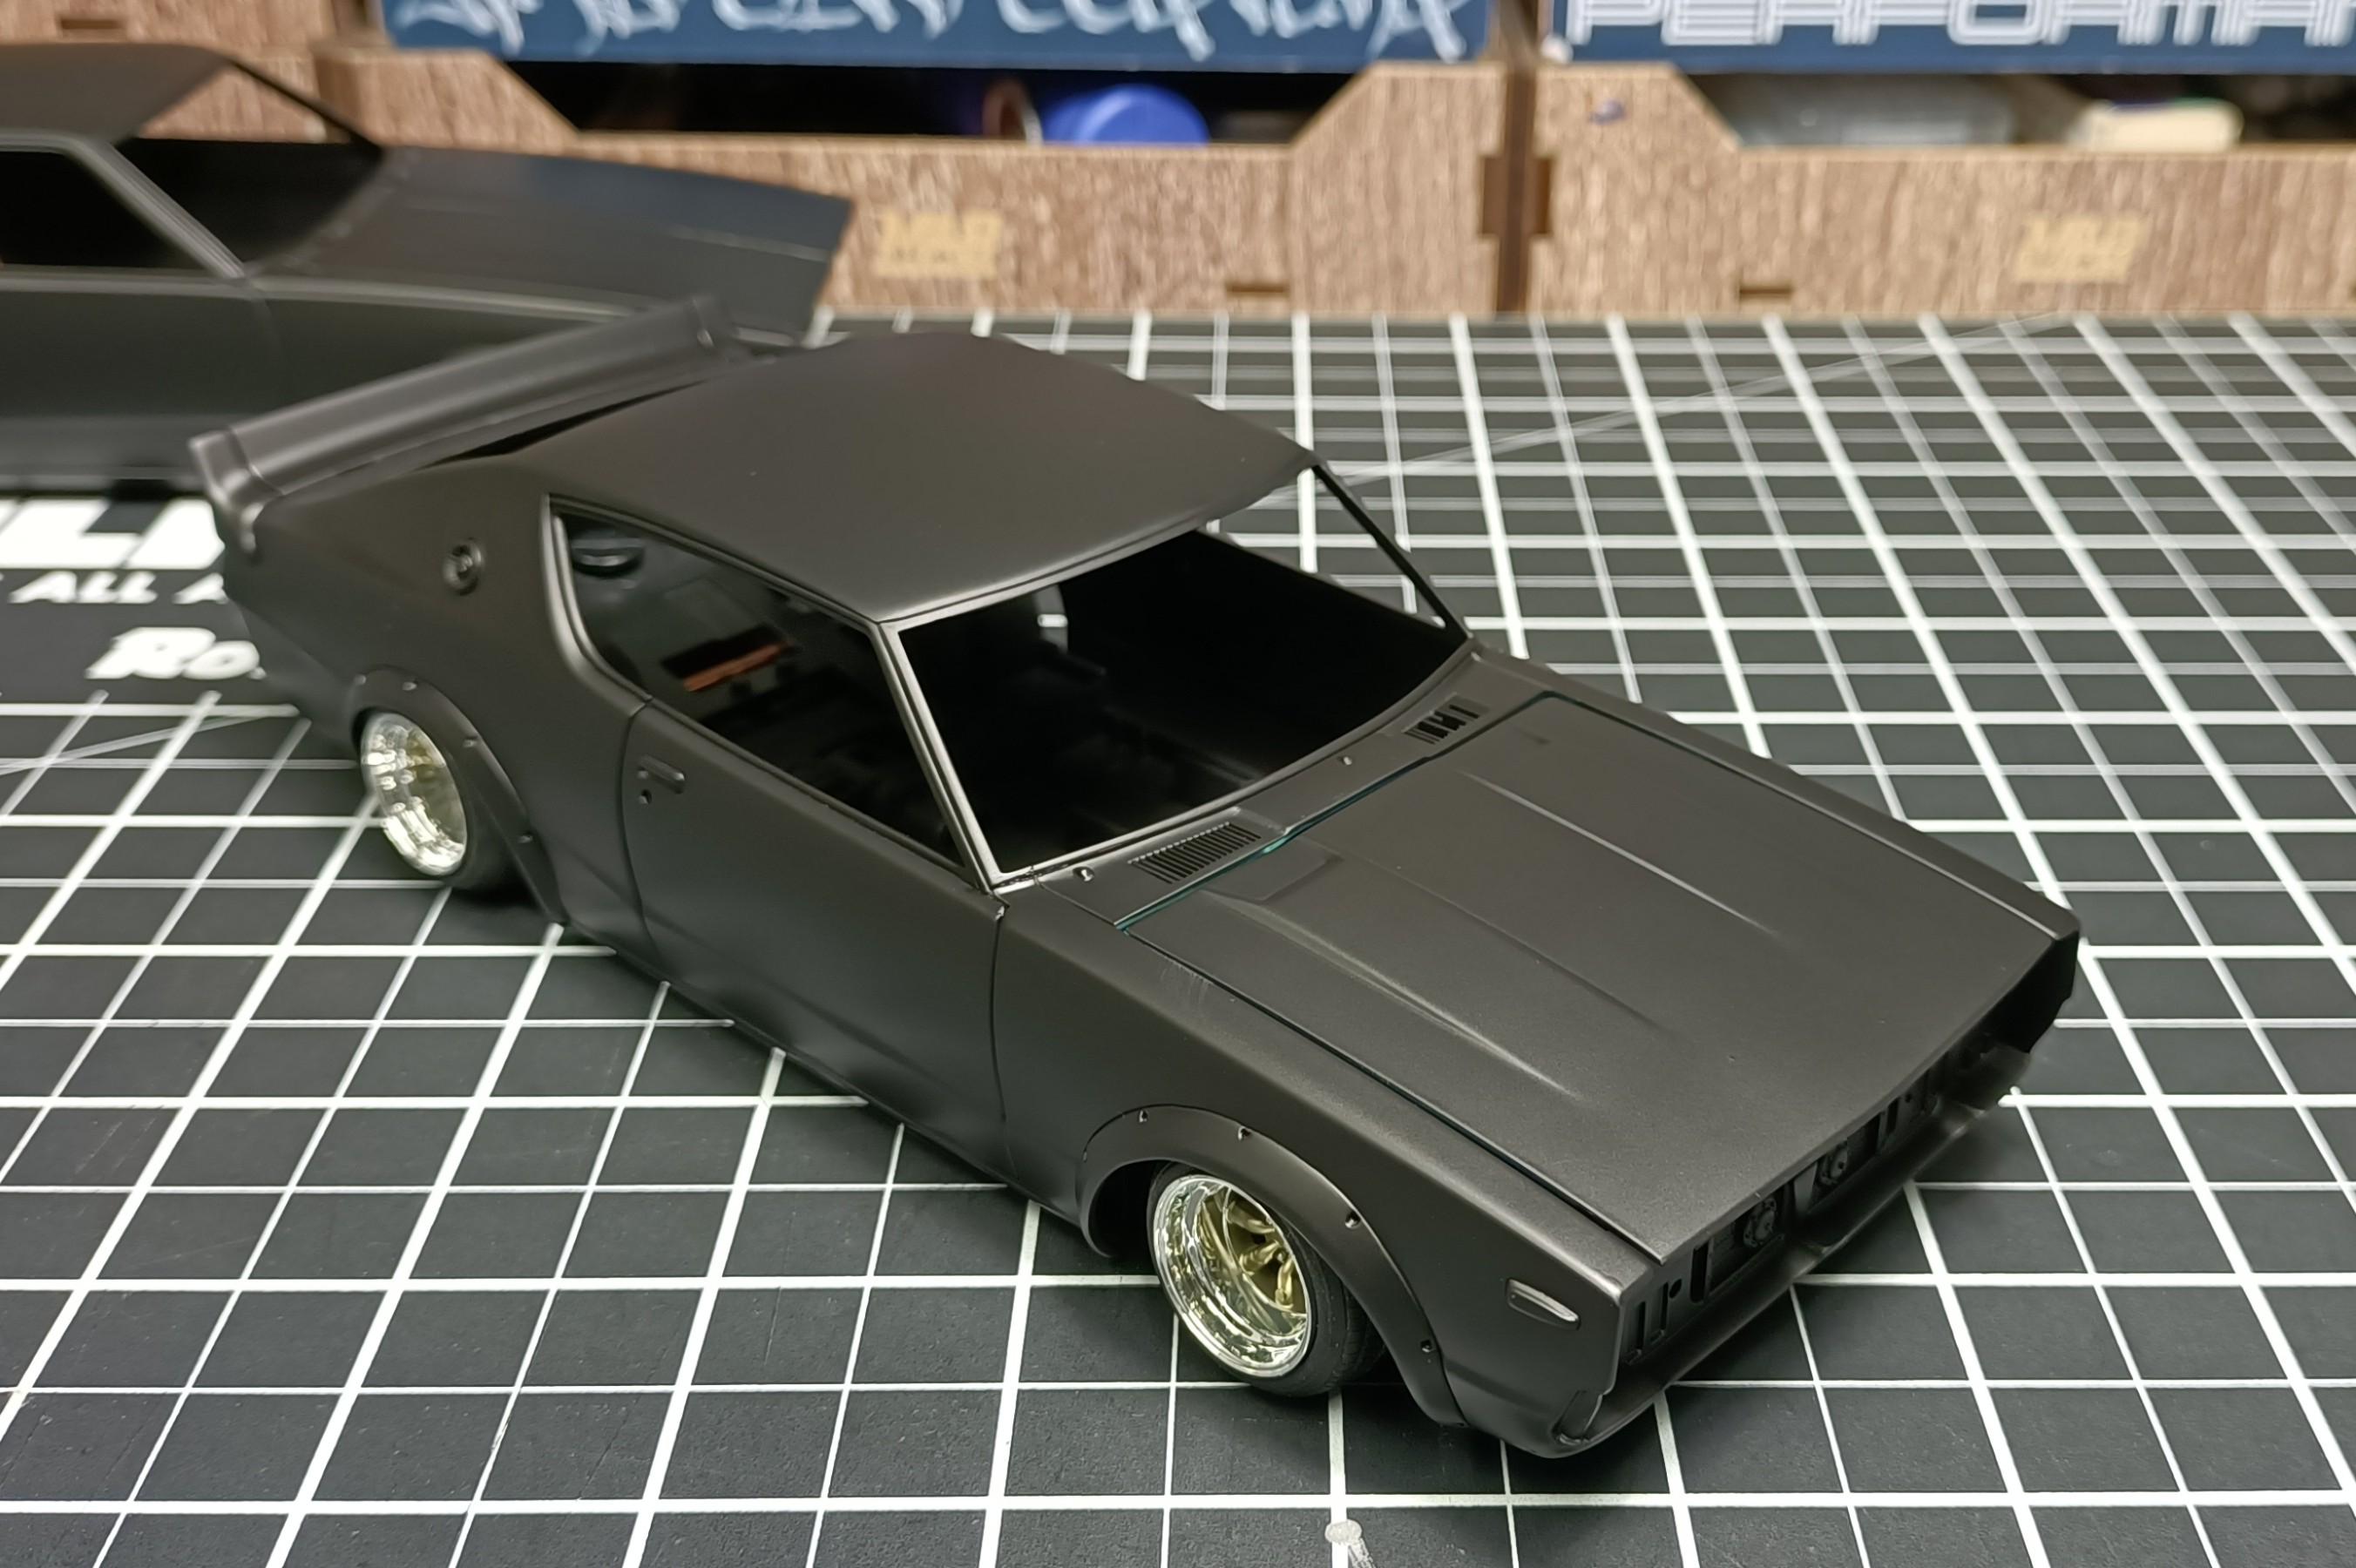
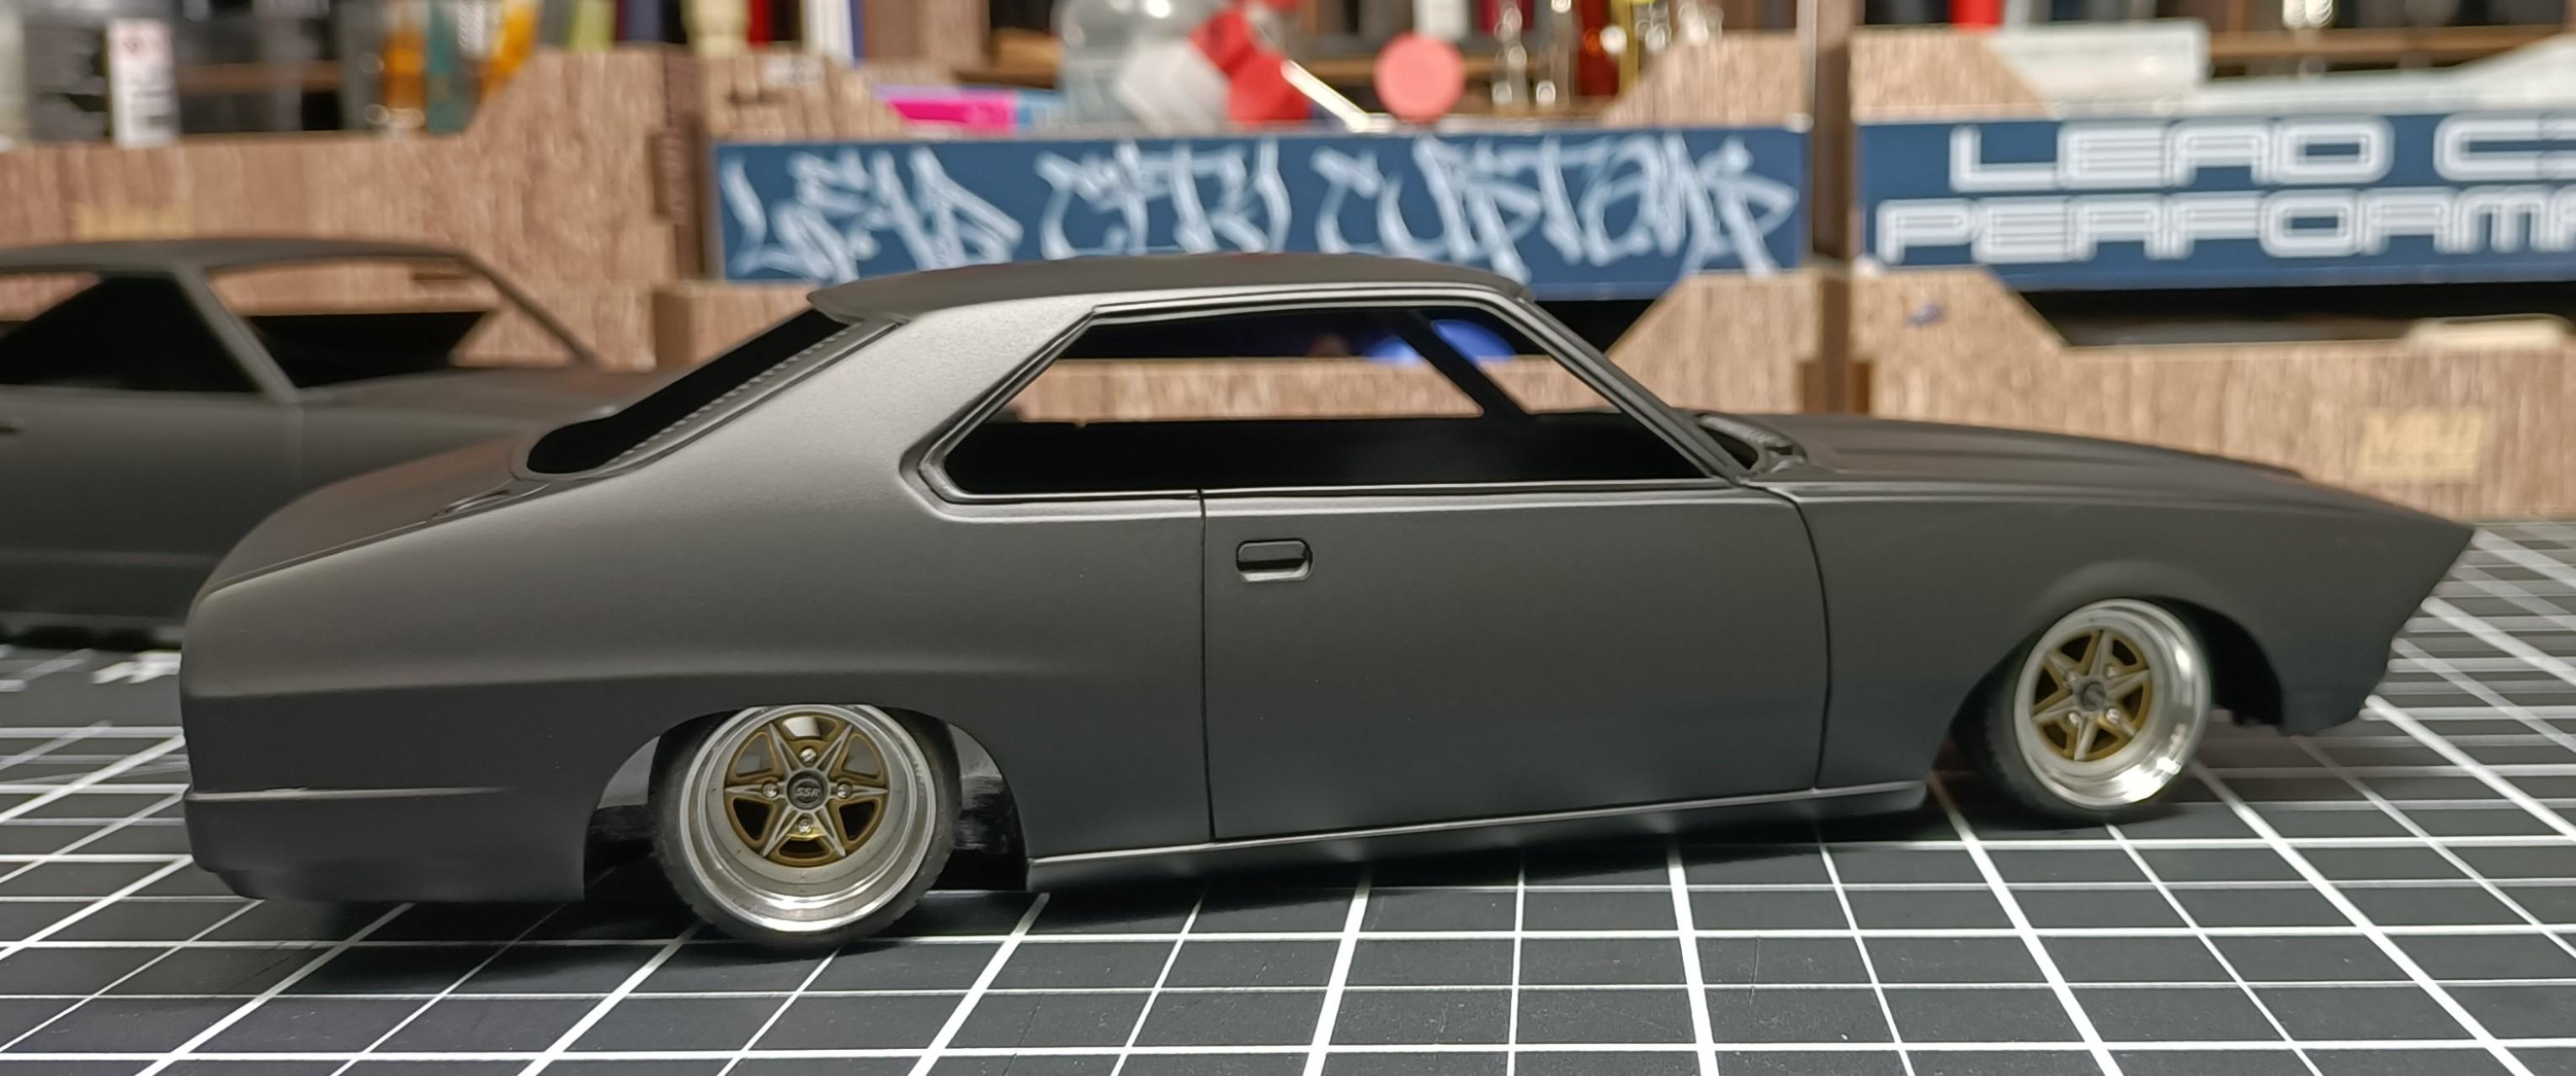
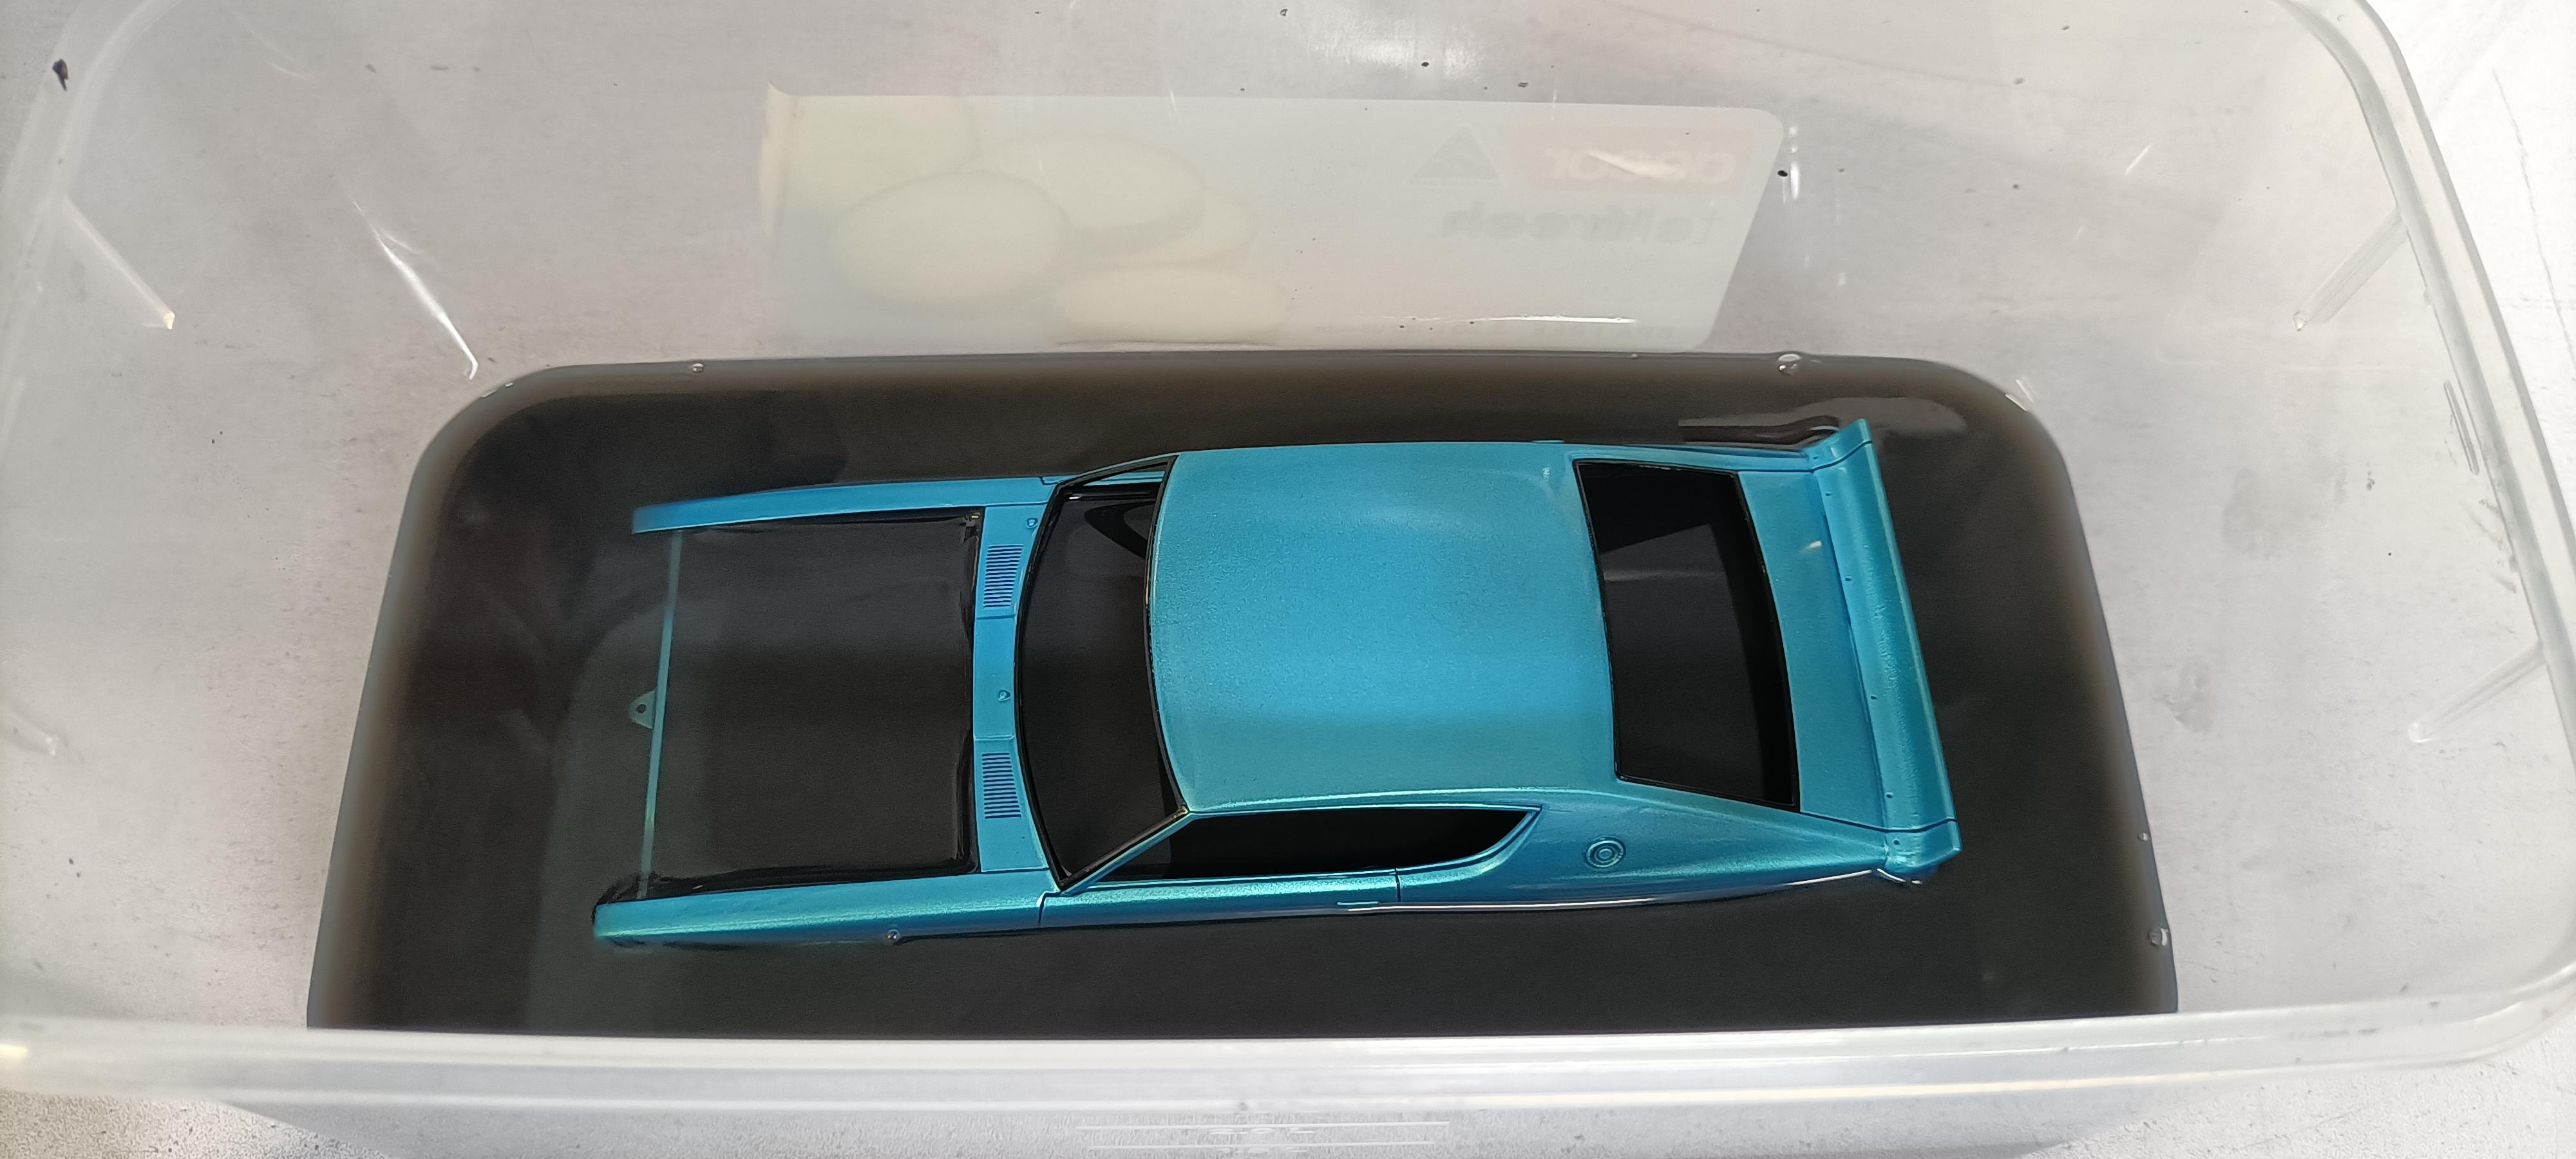
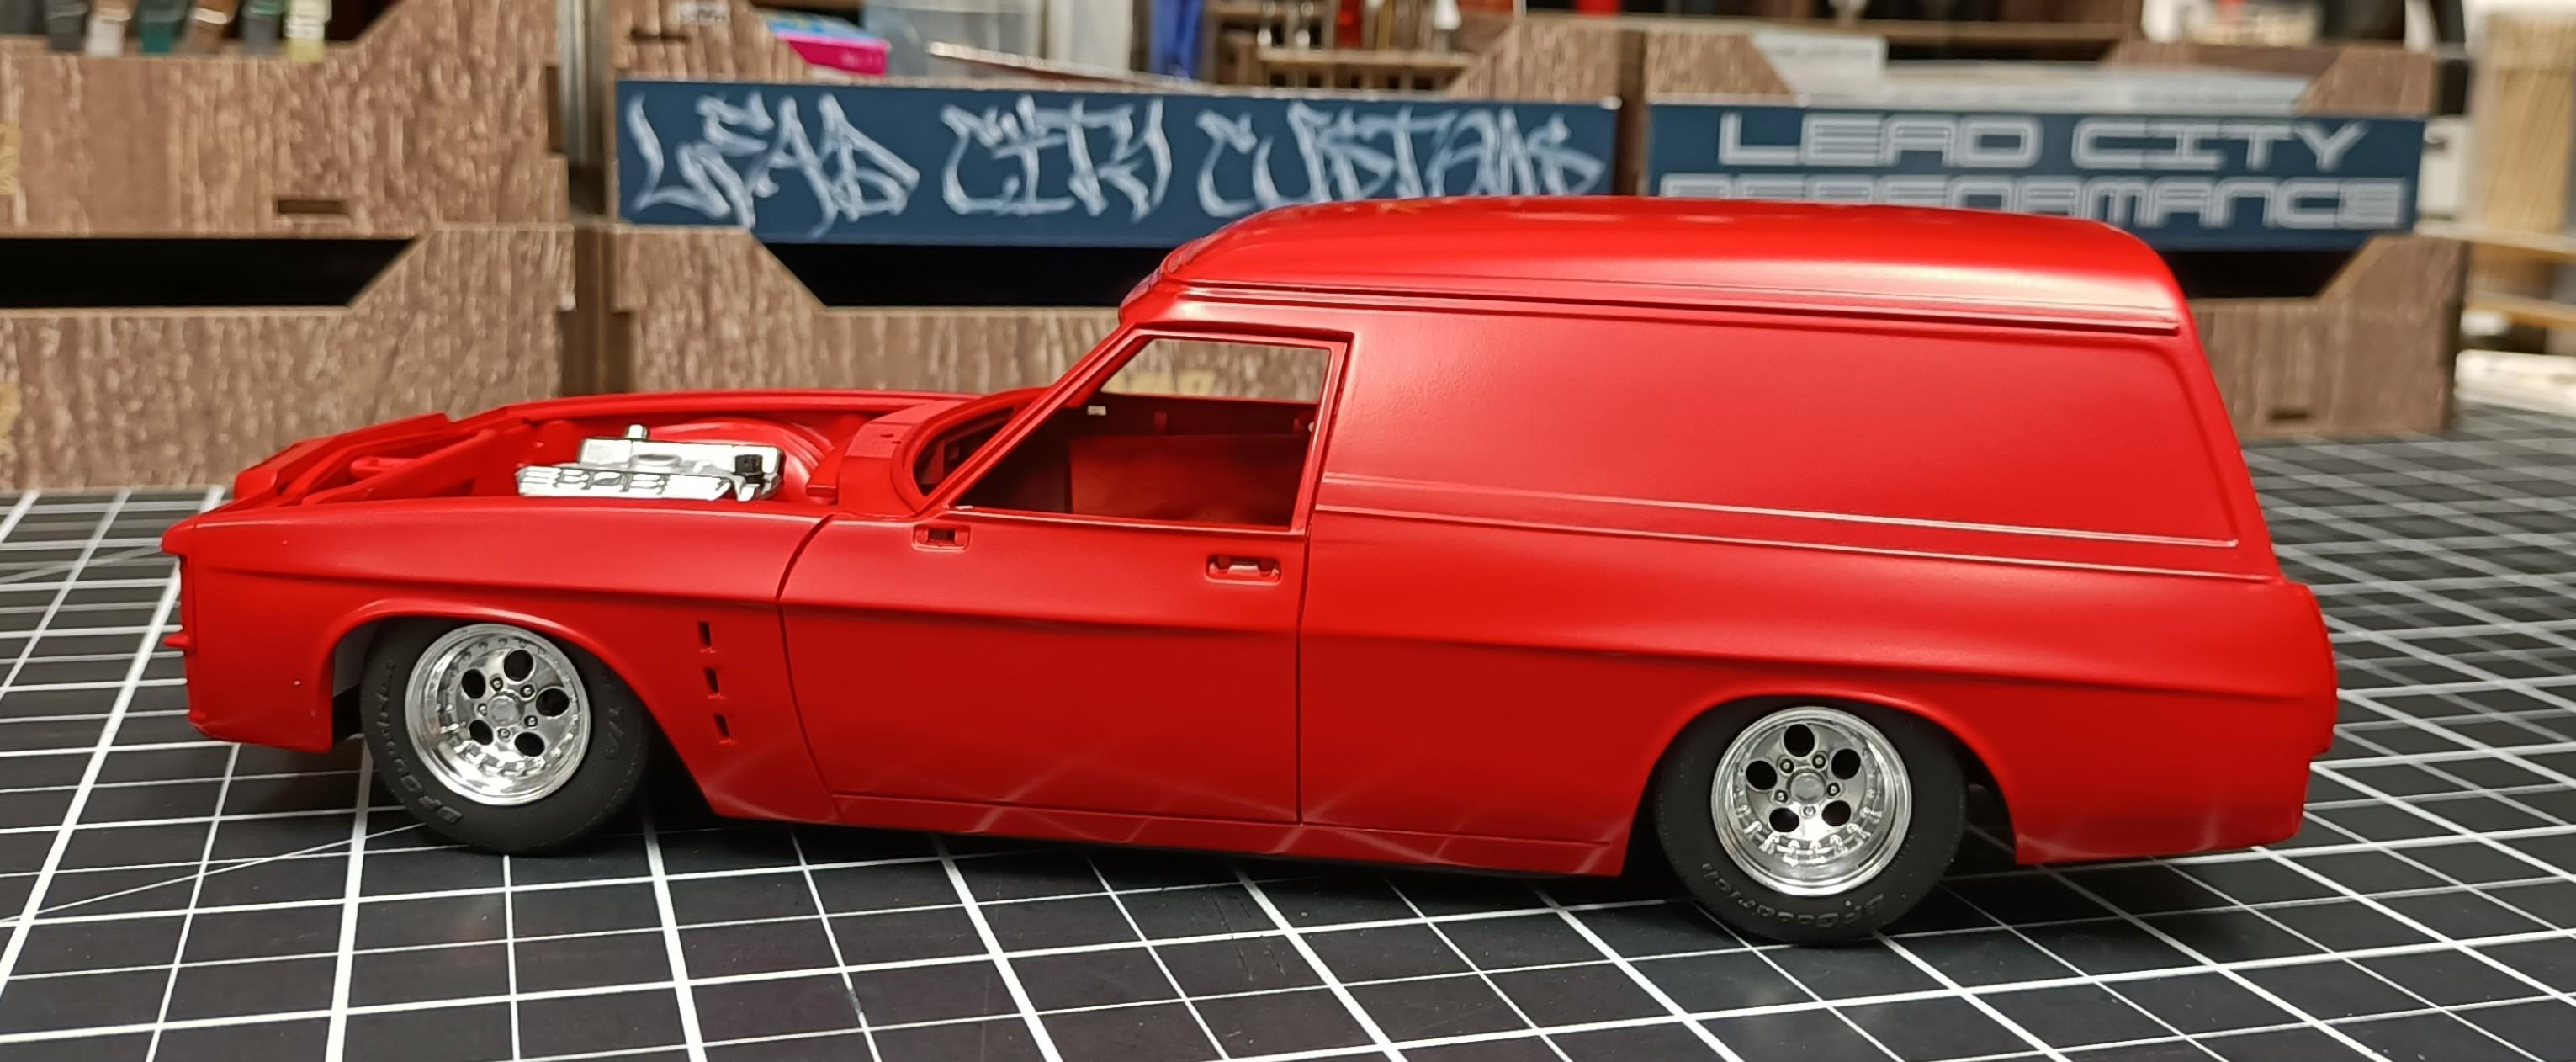
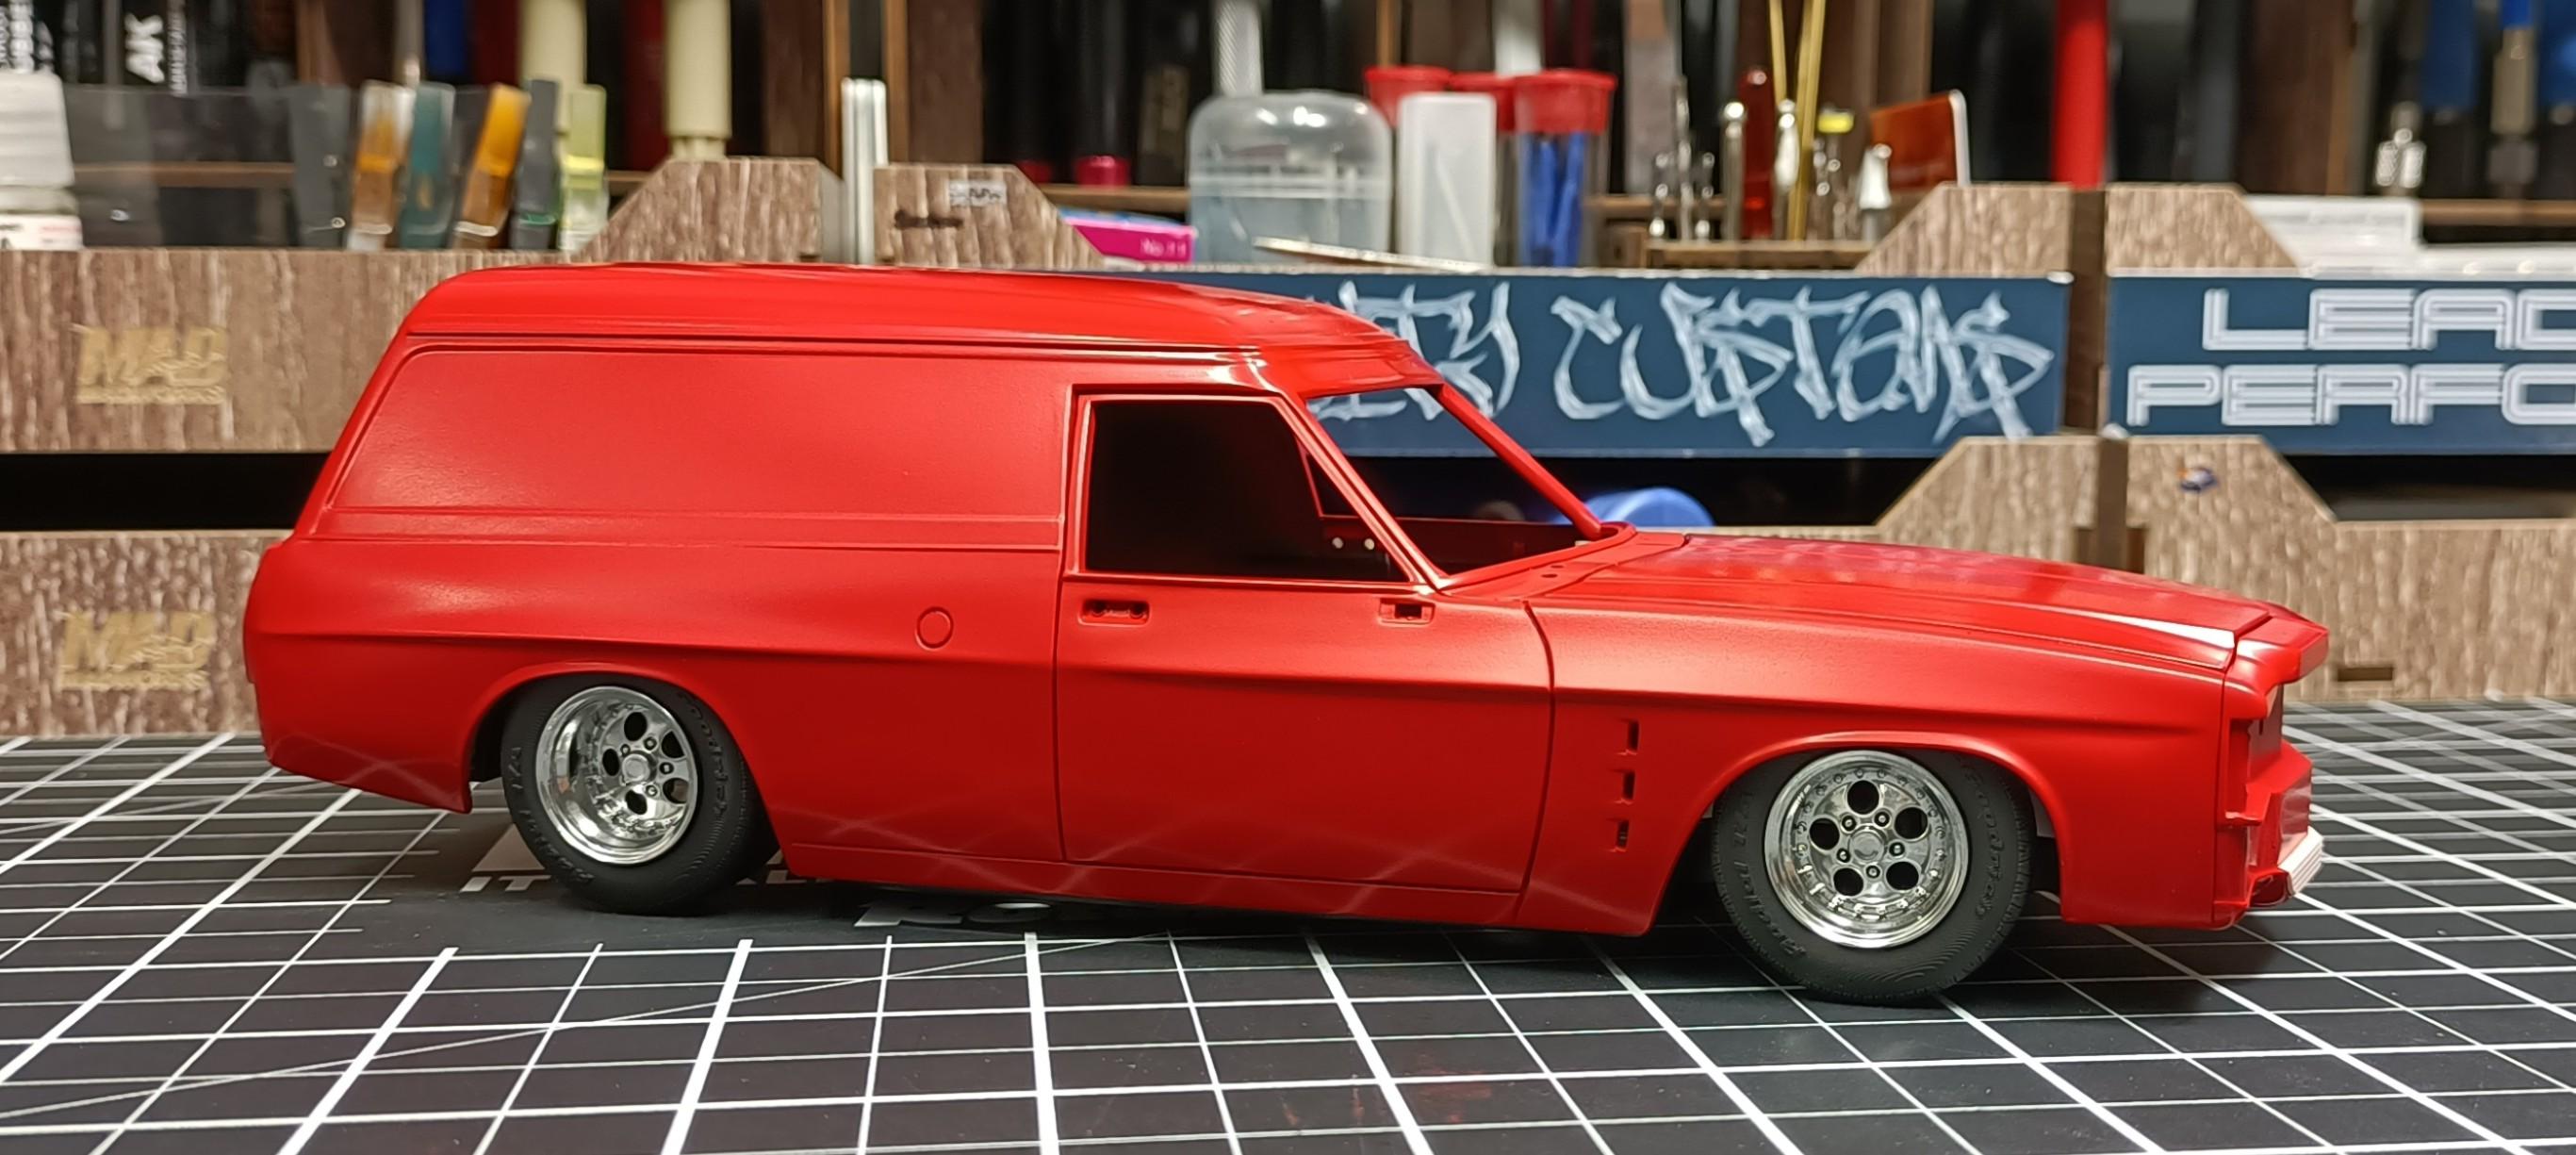
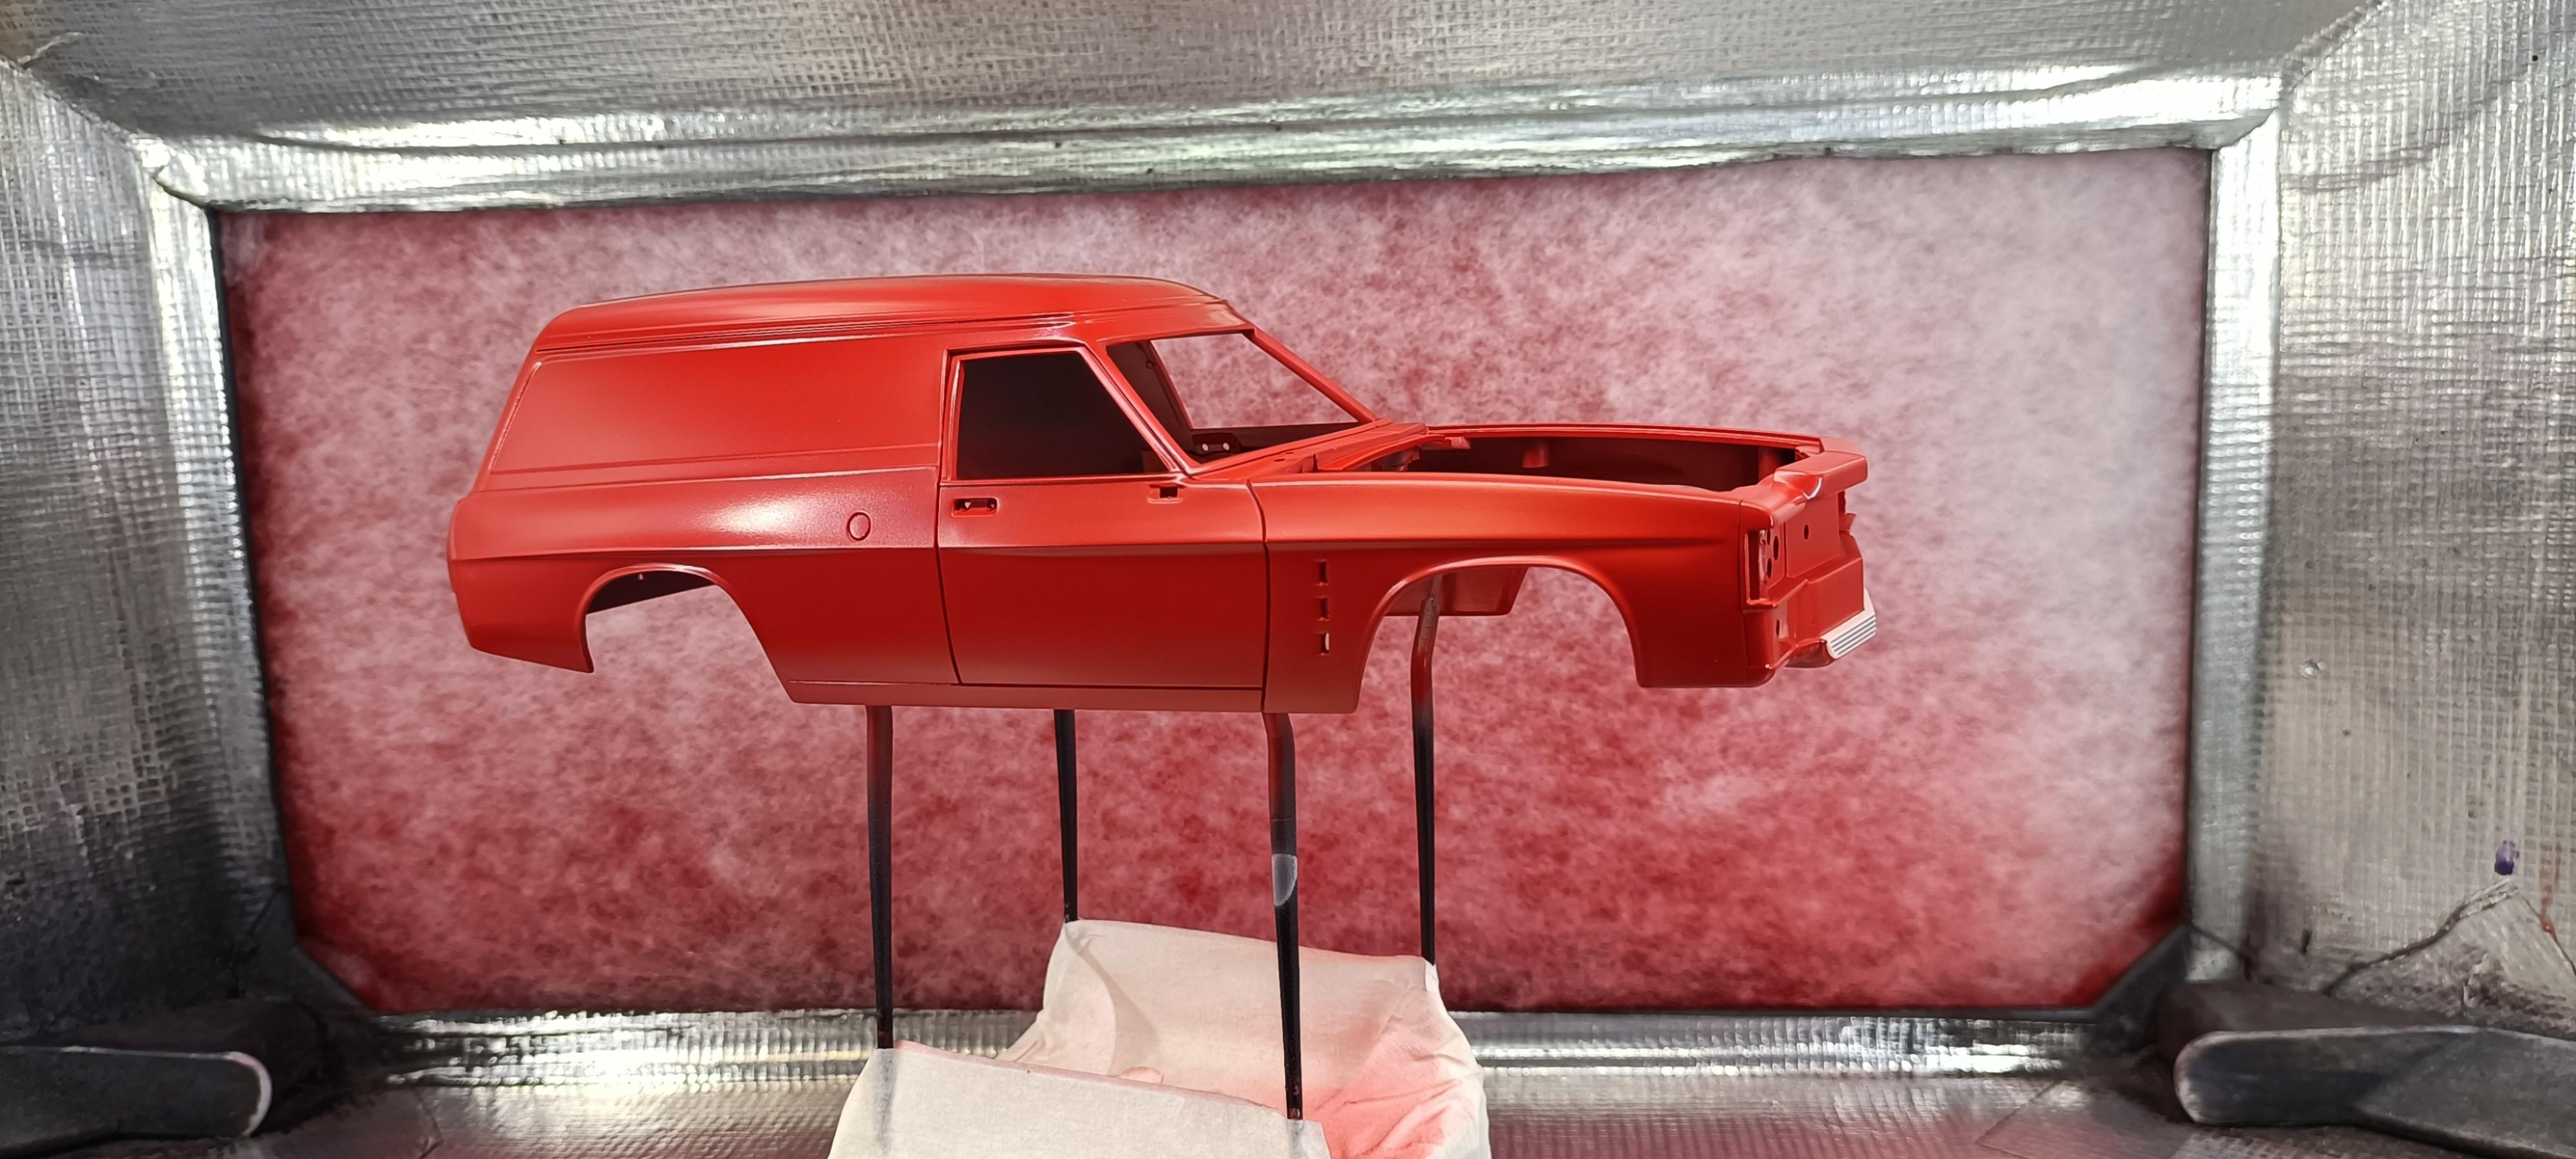
Just finished applying the colour coat. Have to let dry for bit, before I can do a mock up 😁
- 766 replies
-
- 3
-
-
- stalled builds
- quick builds
- (and 2 more)
-
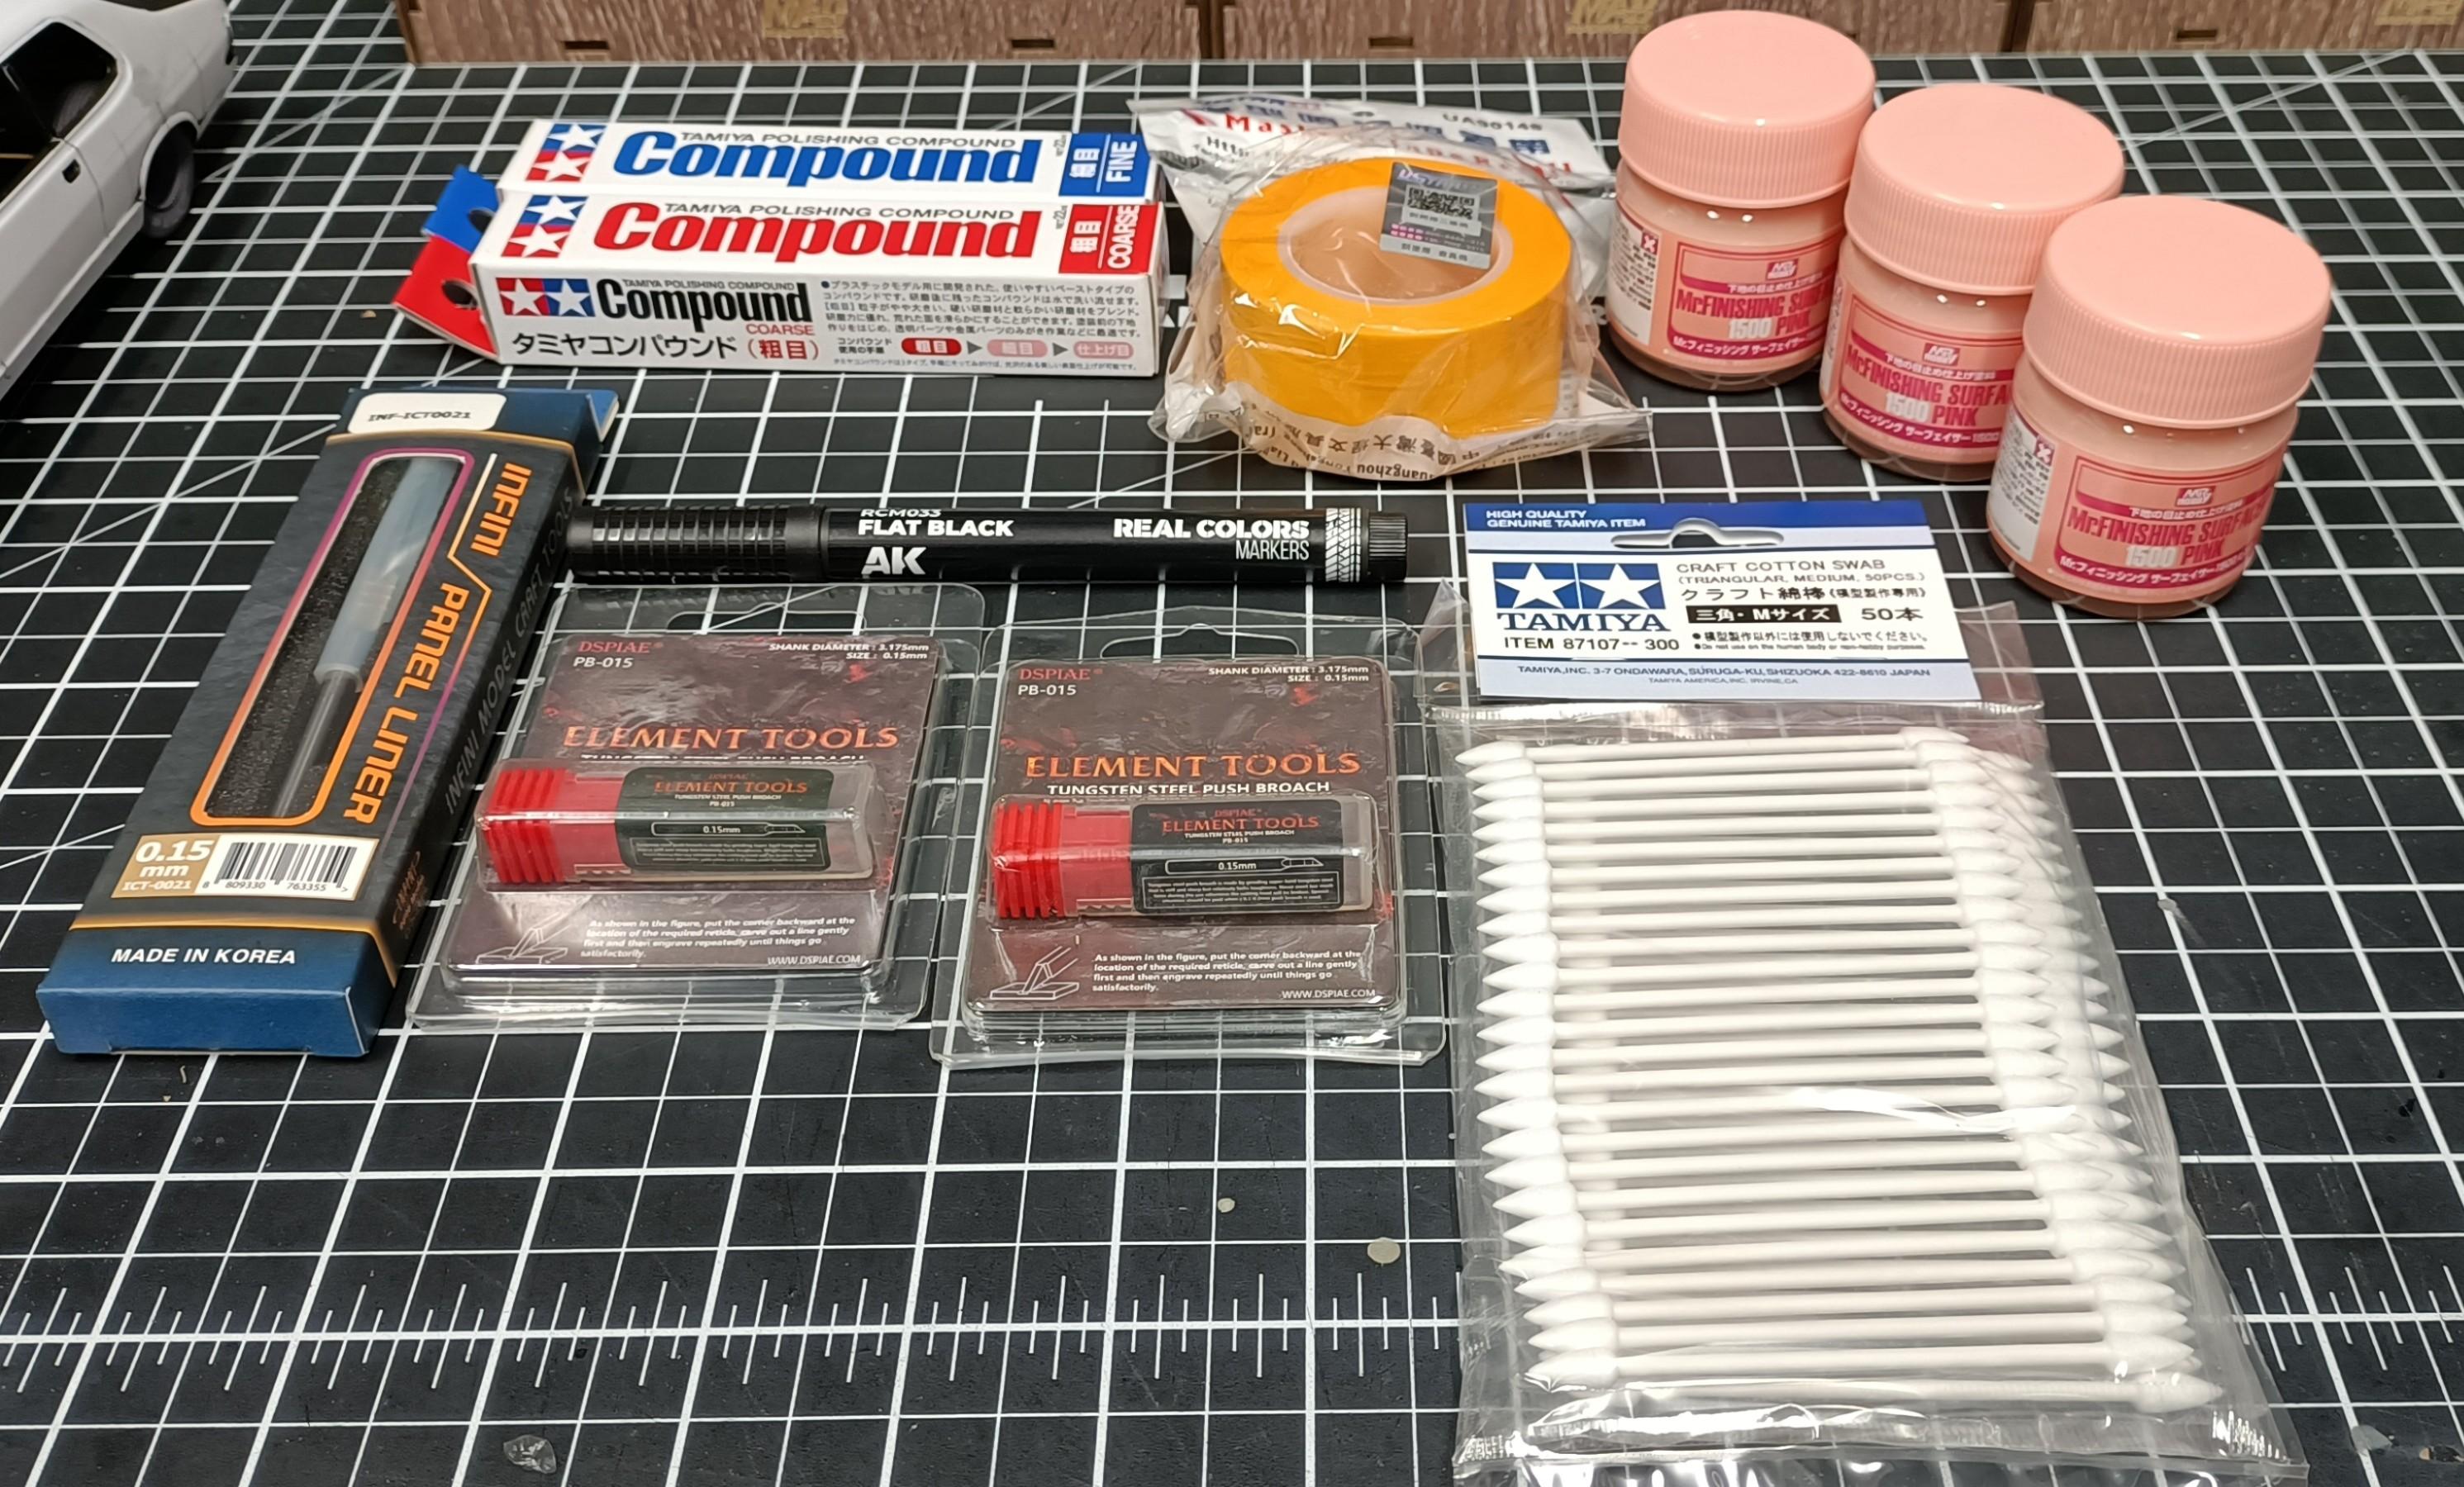
Yeah multi purpose vehicles. Also known as shaggin wagons back in the day 😄 Cheers for dropping in to comment Brian. Paint work all starts with the foundation, good prep leads to good paint jobs. It has taken me many years to learn and develop a system that helps me get consistent results. Mr Hobby 1500 Surfacers are excellent primers. Spray can or airbrushed it always lays down smooth once you learn how to apply it. Thanks Bob. Cant go wrong with the Mr Hobby 1500 surfacers, good stuff. It will be a trip back in time, to see the Pano all done.
-
Super clean build, well done.