Cool Hand
-
Posts
2,087 -
Joined
-
Last visited
Content Type
Profiles
Forums
Events
Gallery
Everything posted by Cool Hand
-
Thanks Mathias, end result should be something different, I hope. Have a few other components that will add some more visual interest.
-
MCV Products fittings
-
I will definitely be following along with interest, might be the inspiration and motivation I need to get my stalled LBWK Huarcan back to the bench for completion. Looking forward to seeing what you come up with.
-
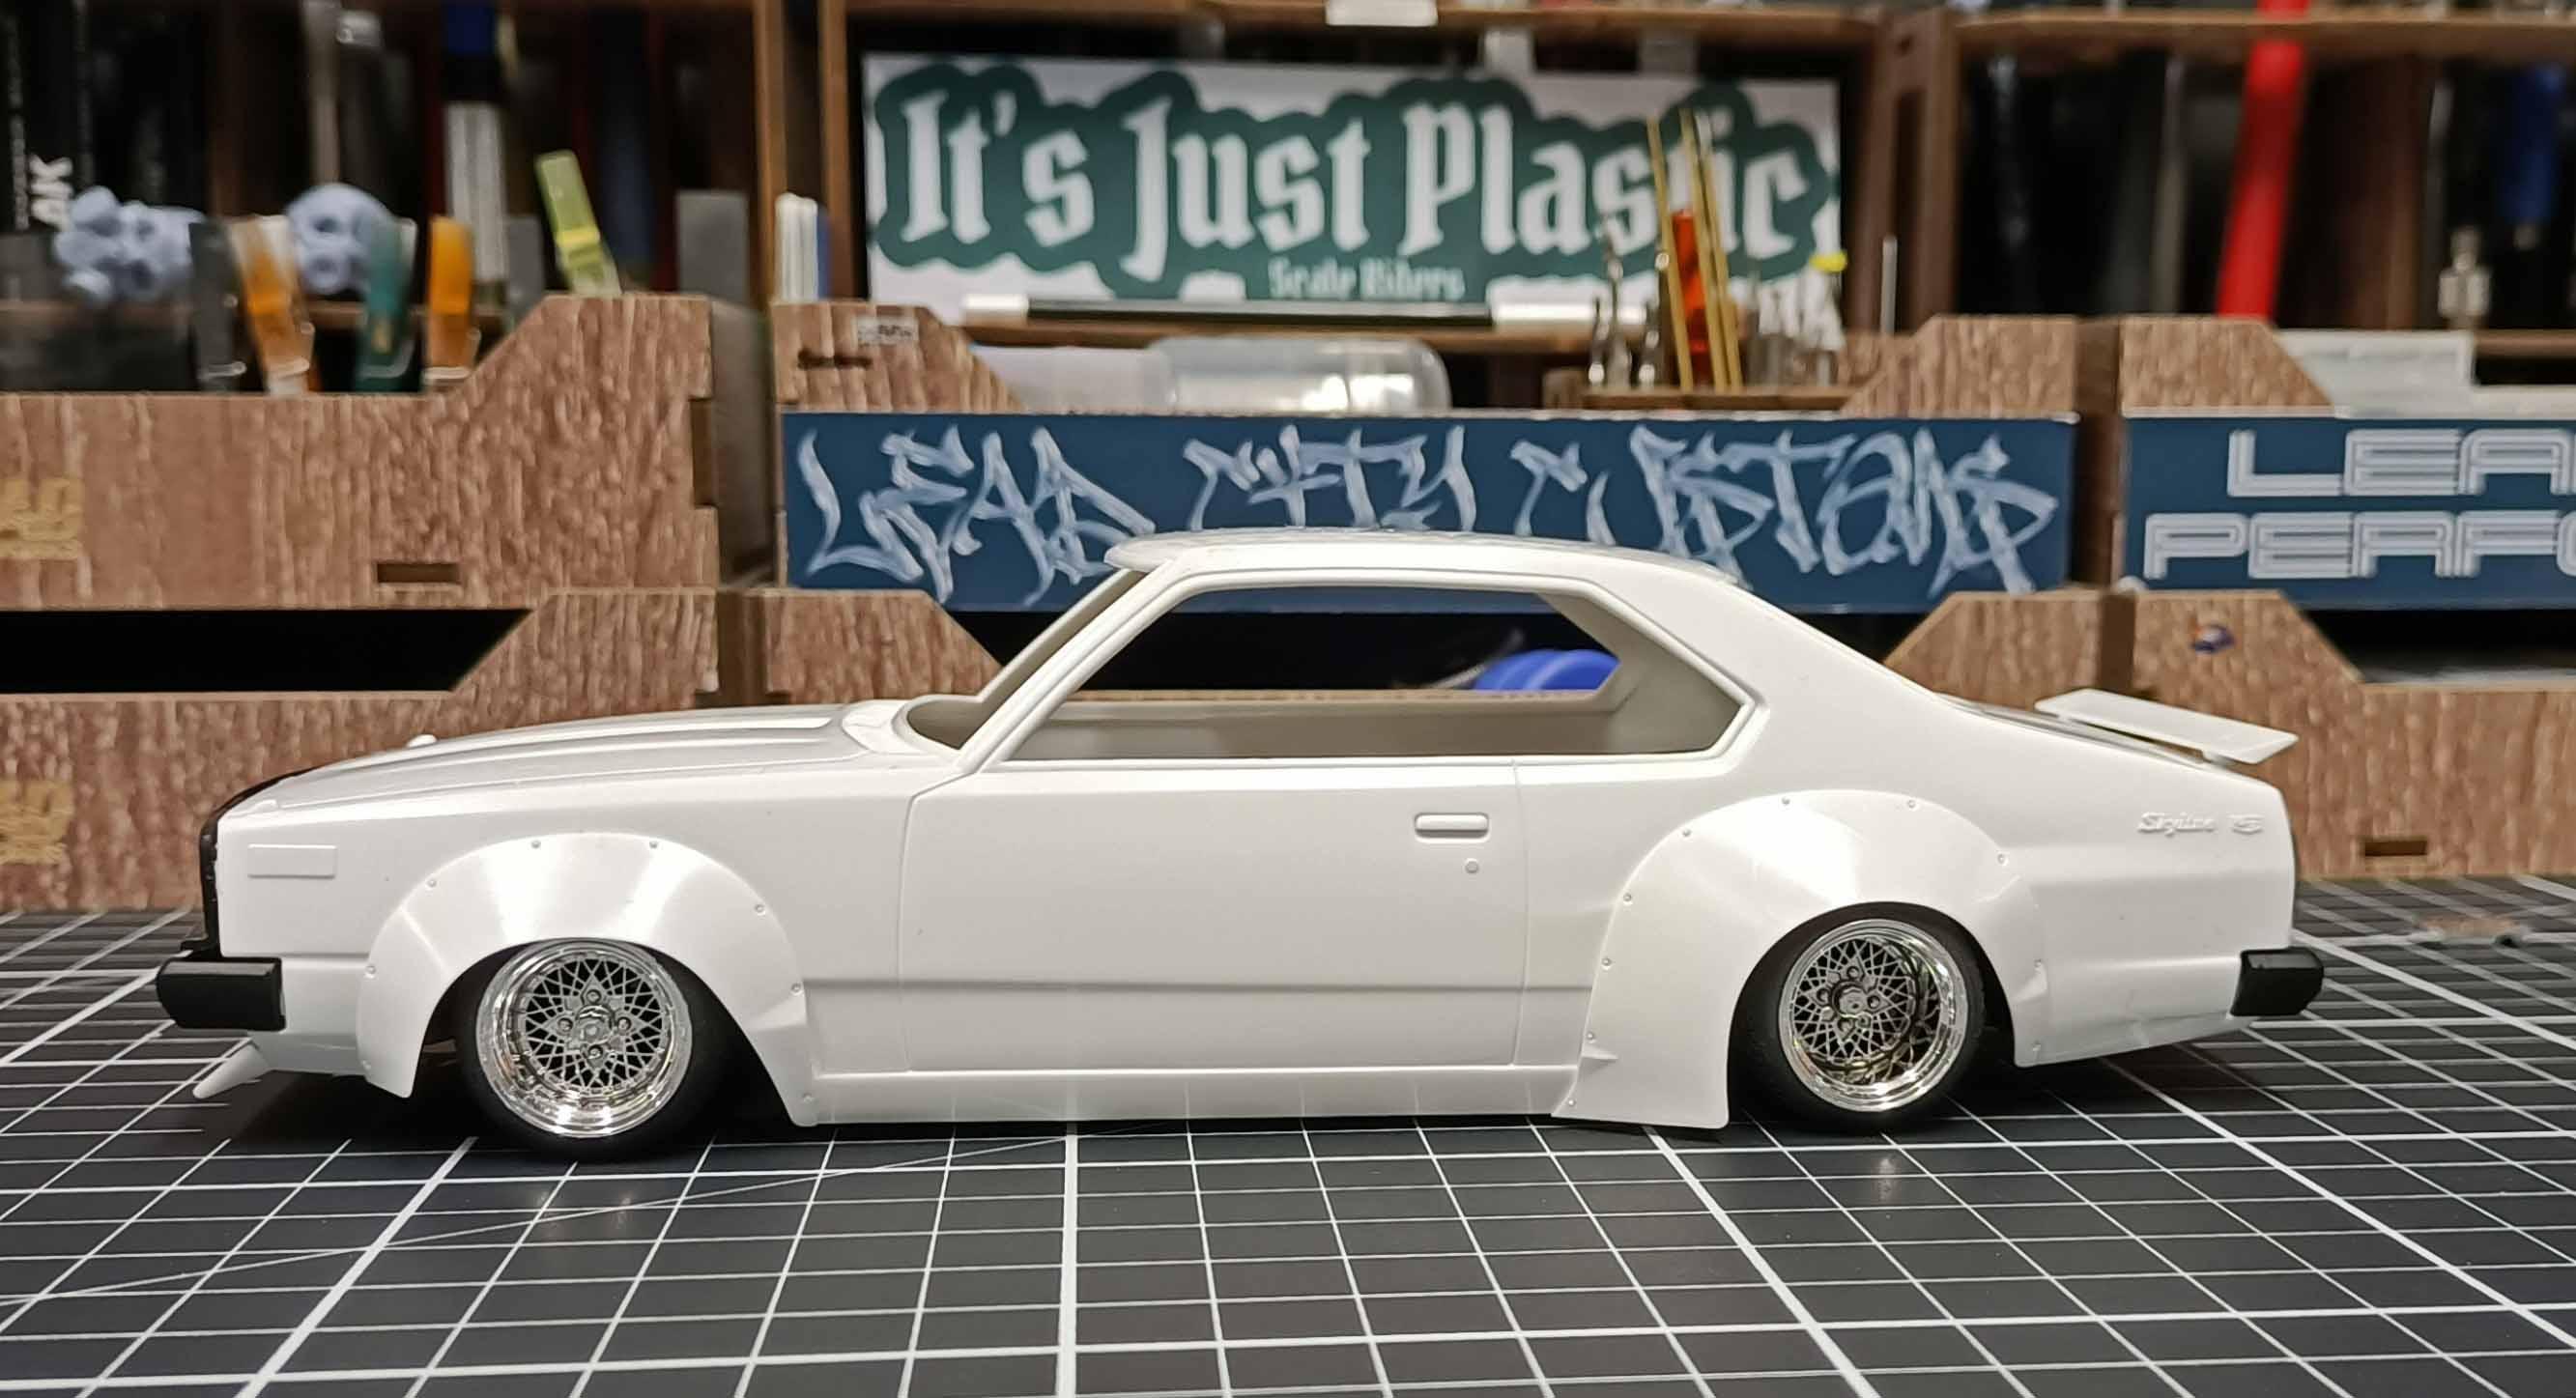
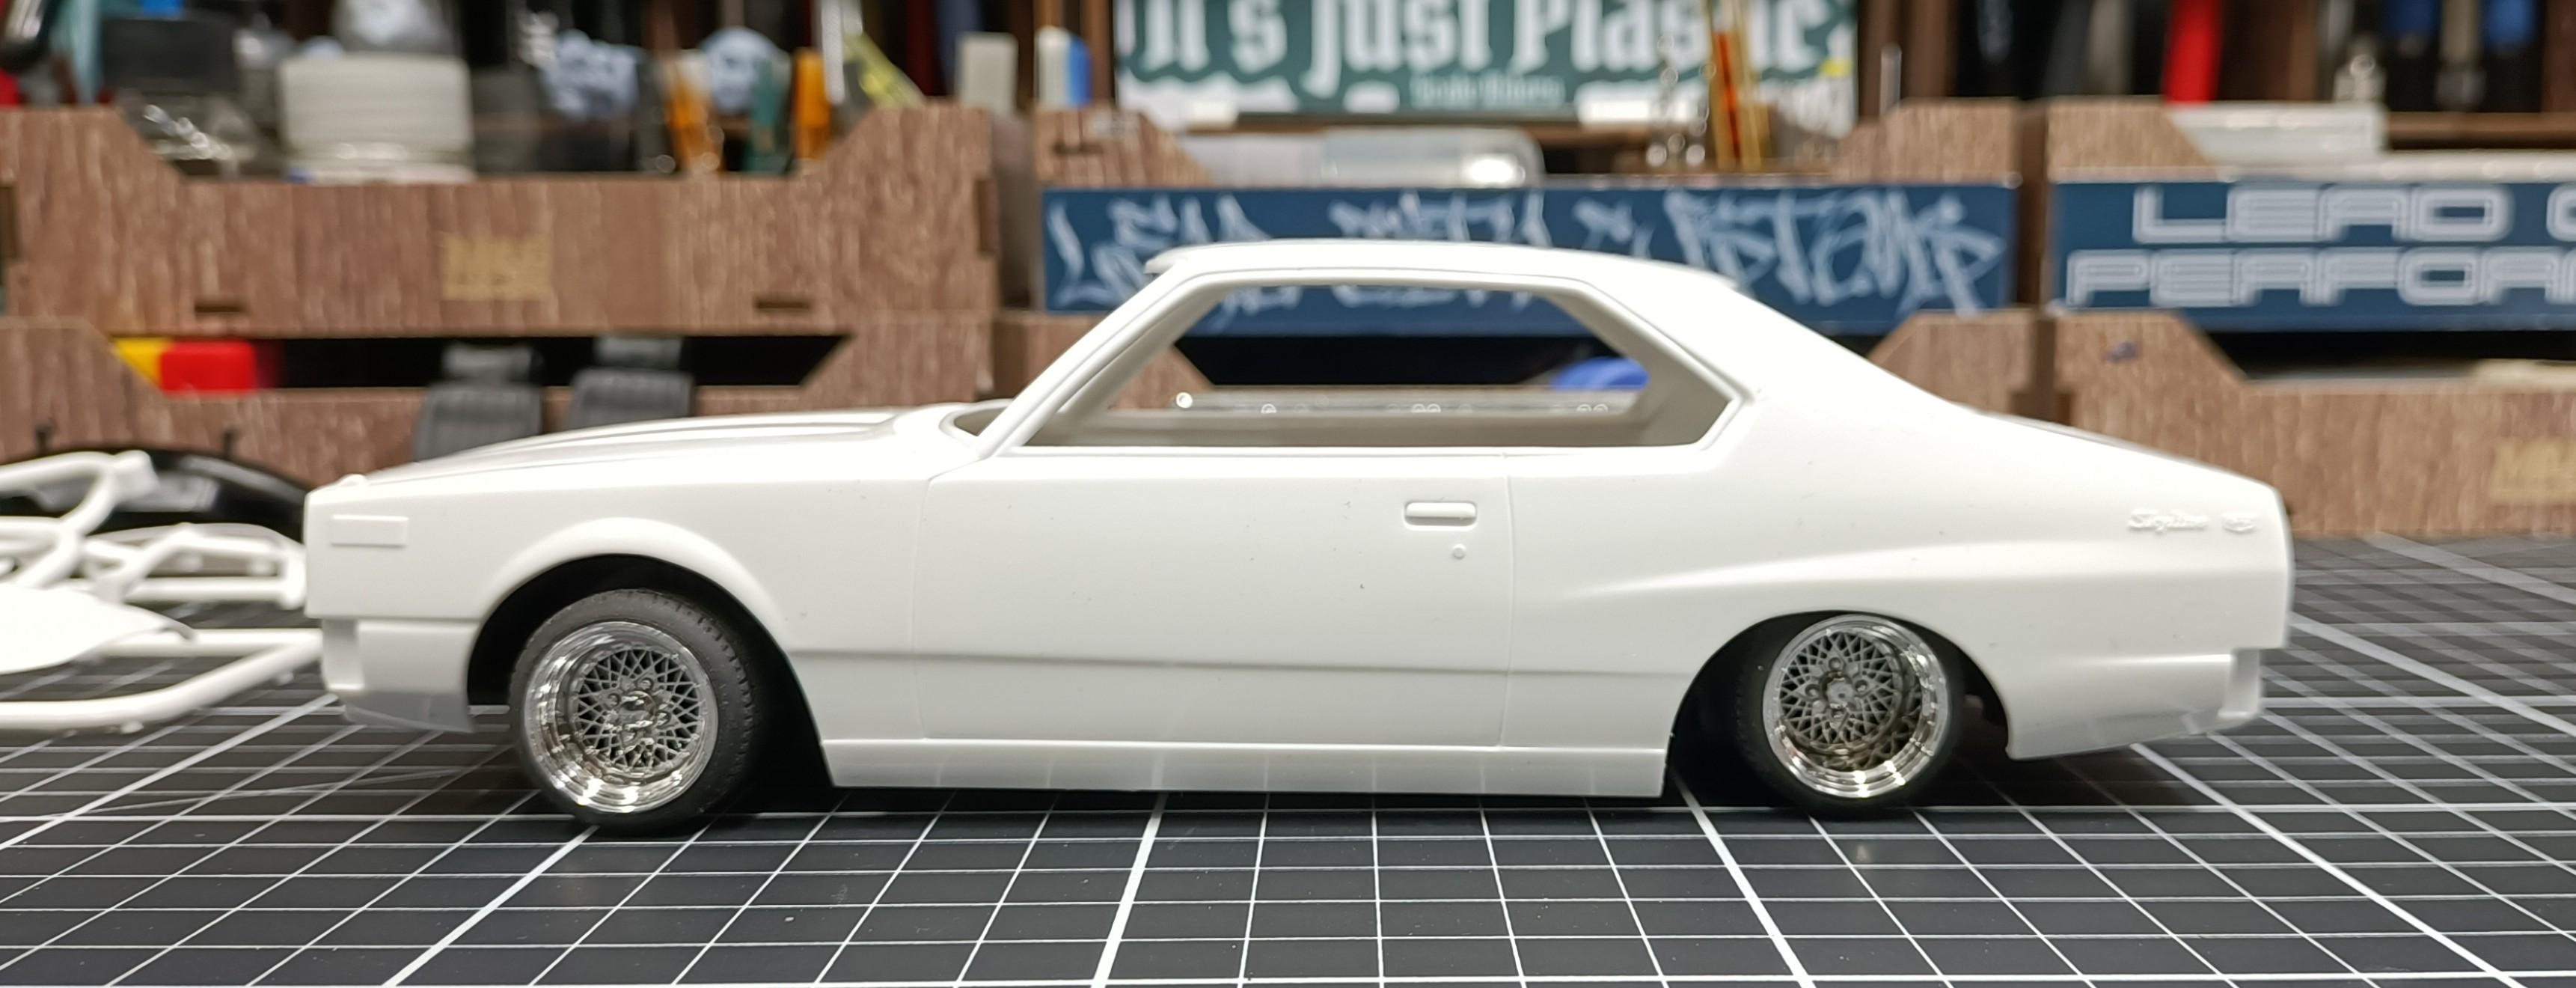
Applied the colour coat to the 211 Skyline. Also applied the colour coat to the C110 Skyline.
- 766 replies
-
- 2
-

-
- stalled builds
- quick builds
- (and 2 more)
-
Tamiya TS-14 Black applied over the bare plastic is another option. The majority of my HQ builds chrome work, I apply black surfacer, Alclad Gloss Black Base and used the SMS Hyperchrome Dark Tone. All about experimenting to see what works best for different applications.
- 766 replies
-
- 1
-

-
- stalled builds
- quick builds
- (and 2 more)
-
I use the same process as the owner Scott recommends. I have also used it over Alclad gloss black base, it can be used over white, blue or black for variations of tone. For best results it has to be a high gloss smooth base, any orange peel or texture will effect the reflectivity.
-
 🤣 What you explained is part of the reason why I enjoy building curbside now days, too many unlimited options and so easy to get carried away with all the 3D printed stuff.
 -
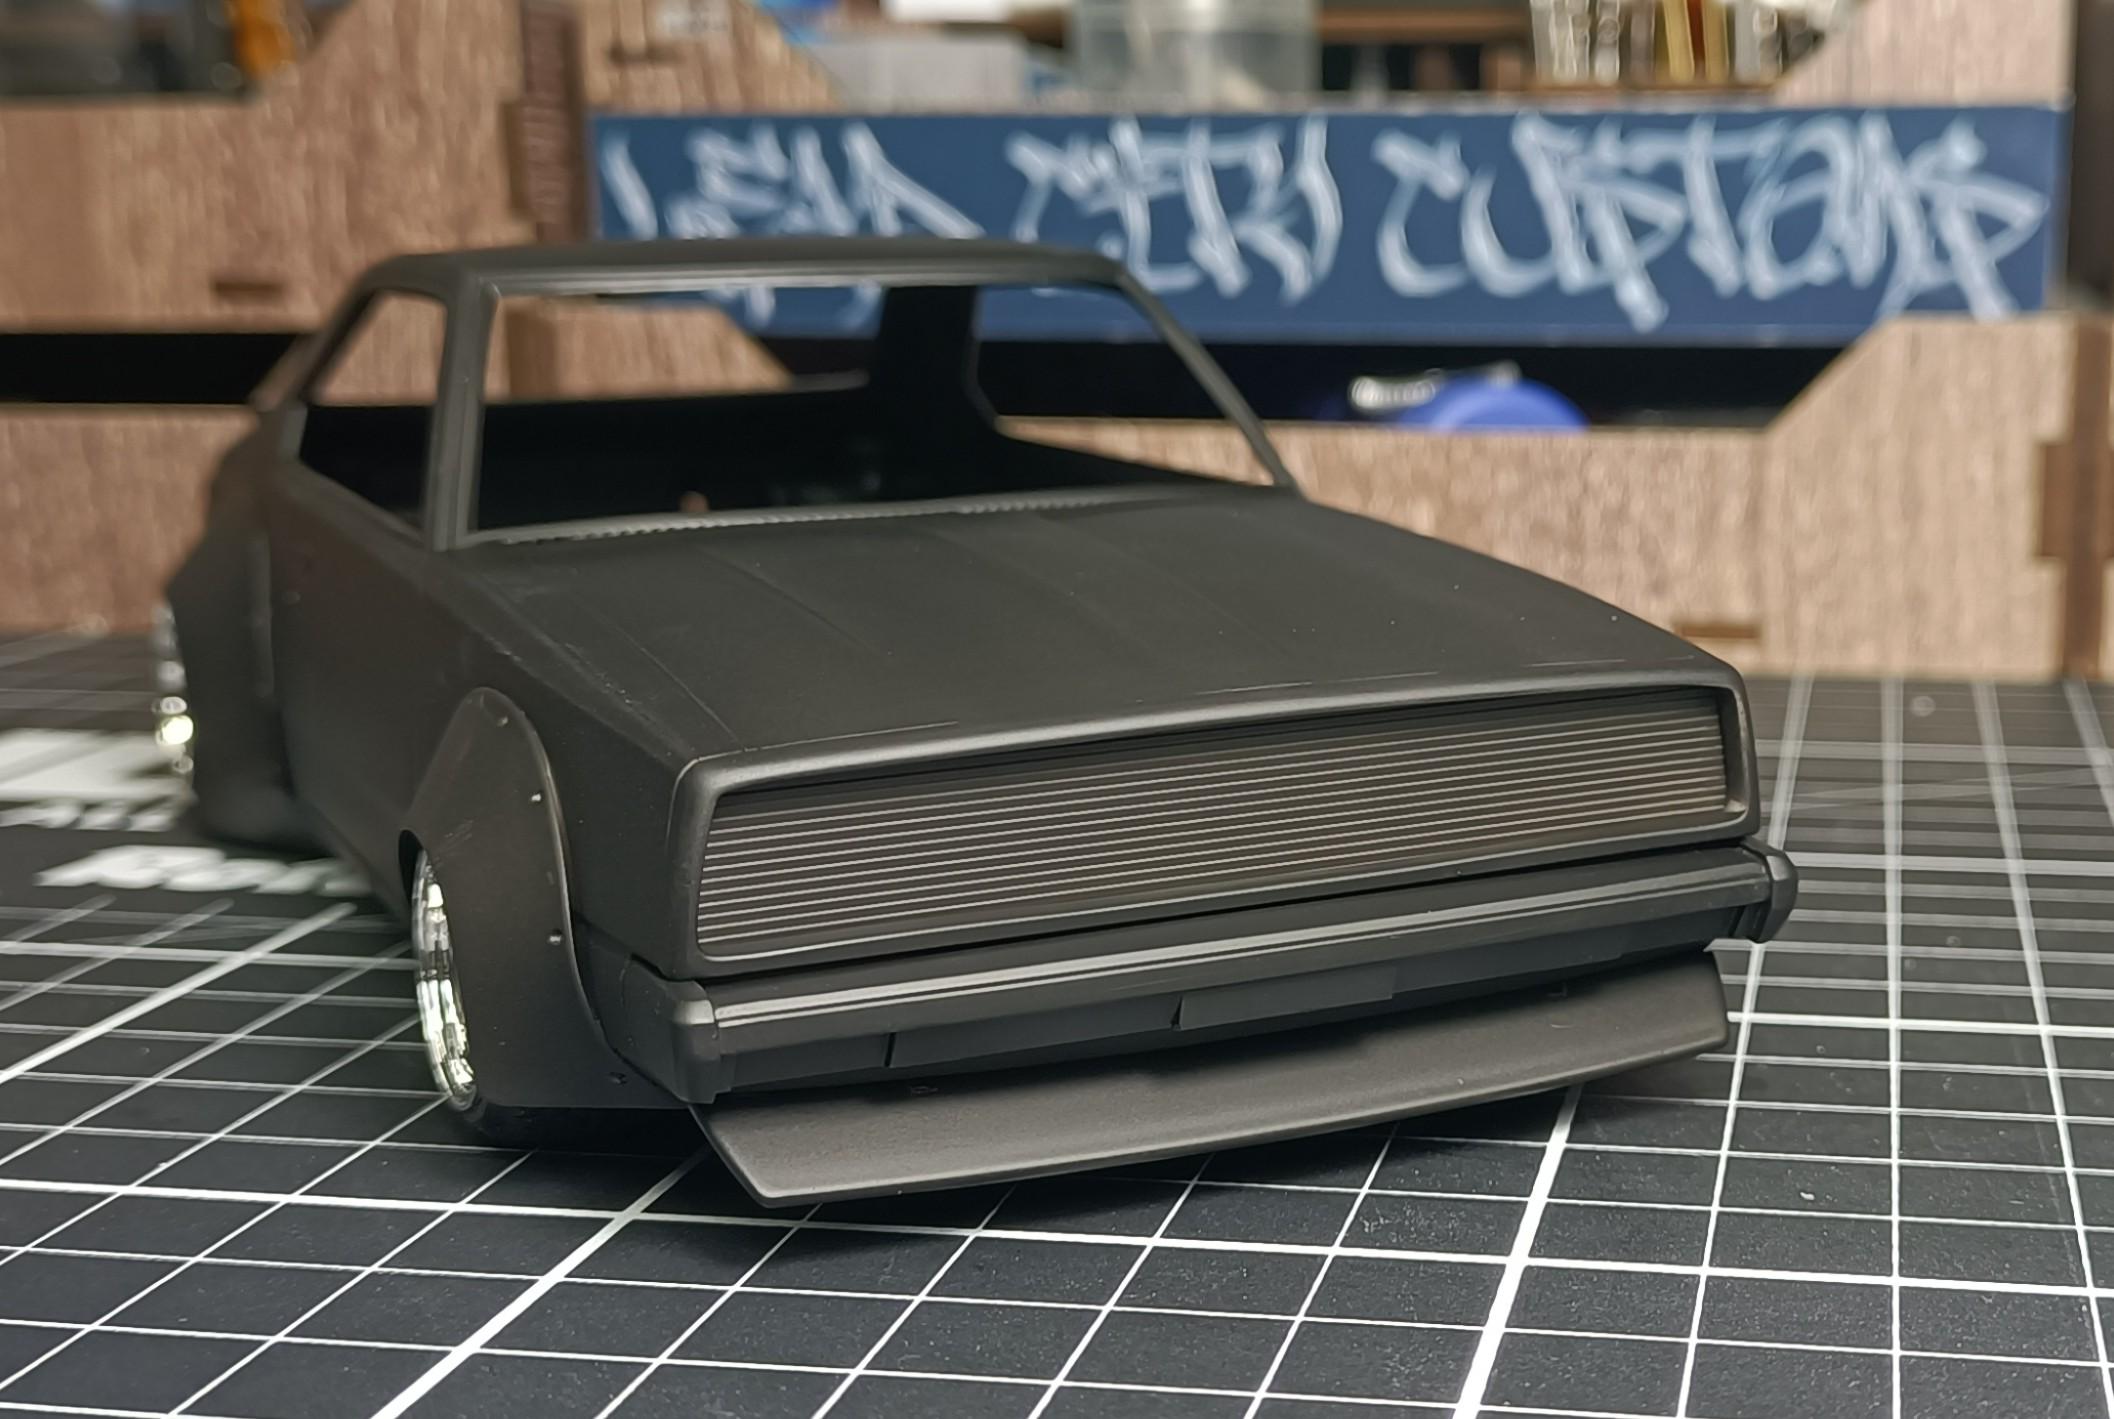
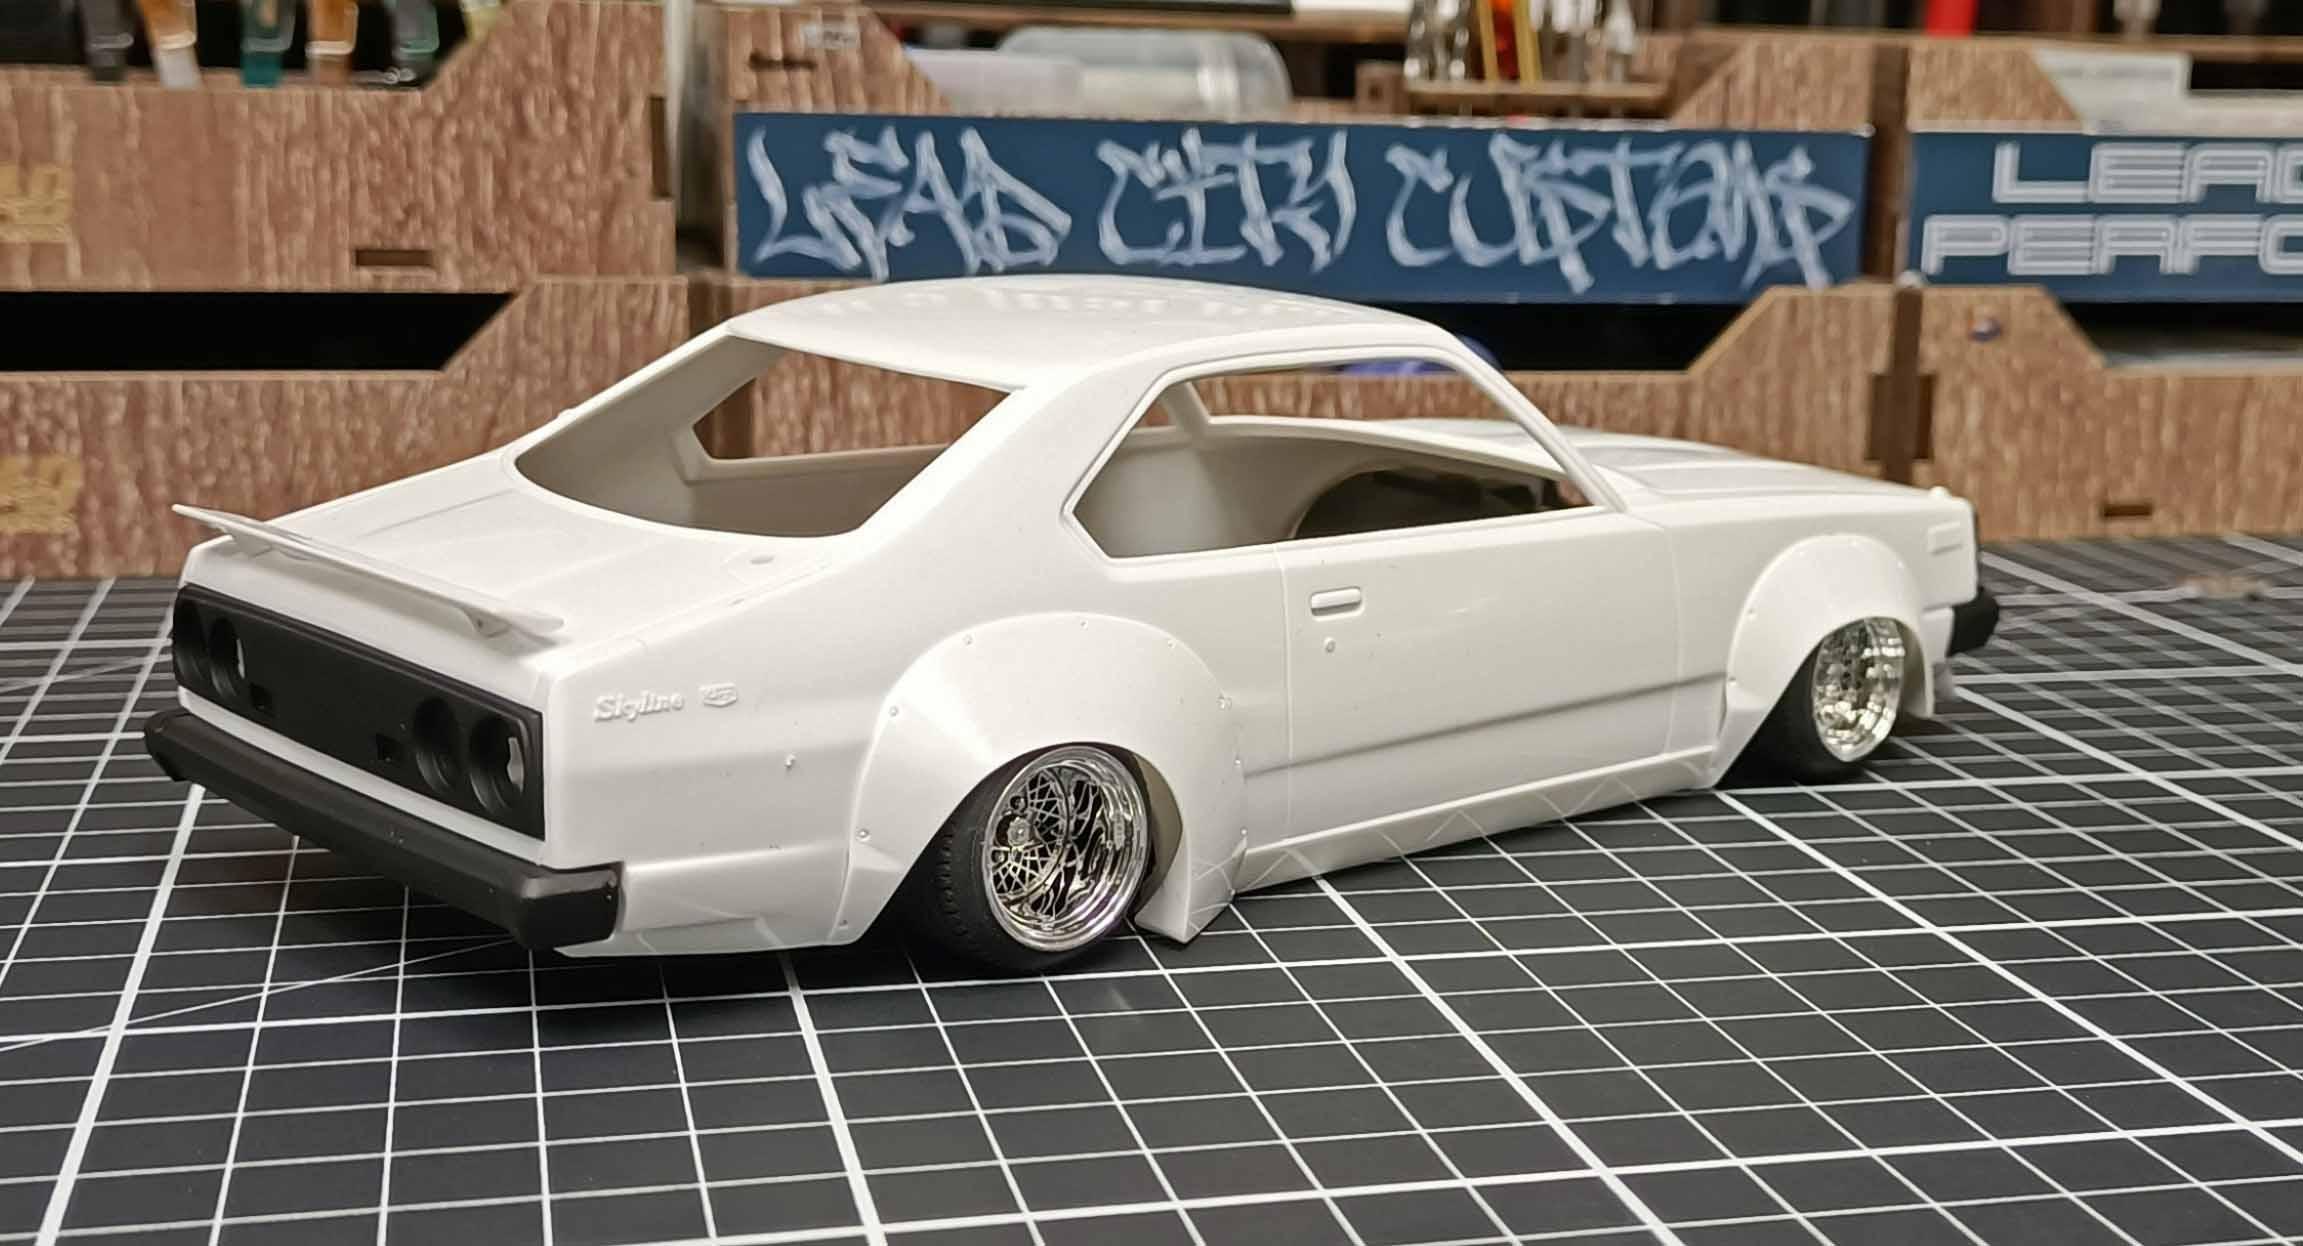
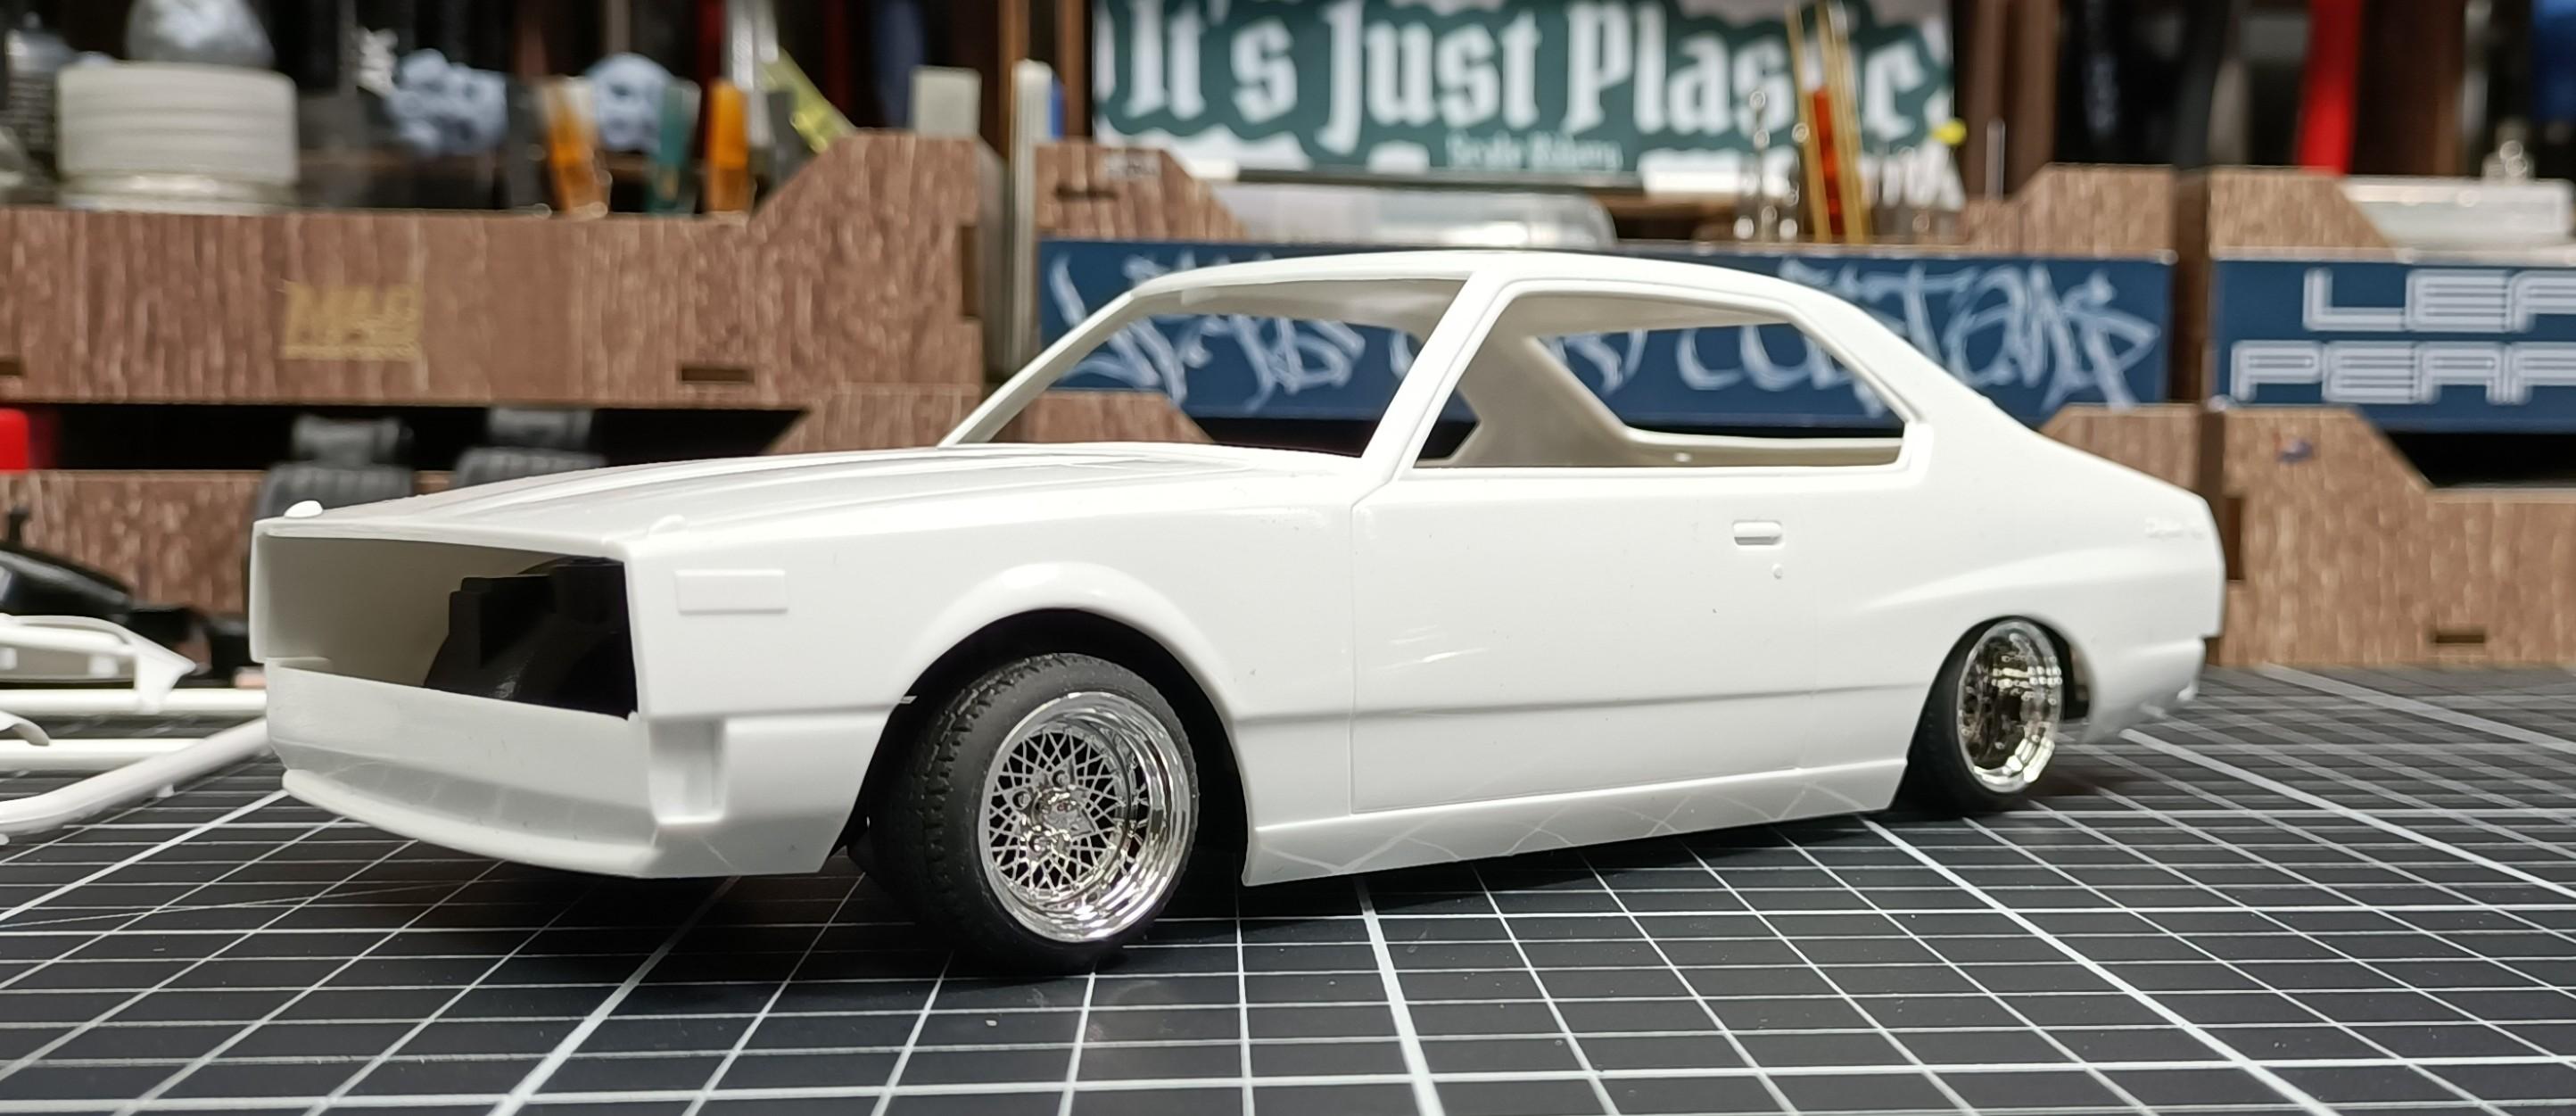
Hidden headlight grill roughed in and applied the usual check coat of surfacer. Full prep of the body next. Sorted out the look I wanted for the billet tri blades, also changed over to lower profile tyres and applied the SMS paints Hyper Chrome Cold Tone. Happy now, so il get the body prep done as well. Also while I was doing some chrome painting, I dug out some wires wheels that I 3D printed and done some testing to see if my current chrome painting technique would work on them.

- 766 replies
-
- 4
-
-
- stalled builds
- quick builds
- (and 2 more)
-
Thanks for pointing that out, never even thought to click on that to see what it does 😄 I find that very useful to double check that my text and images are in the correct order.
-
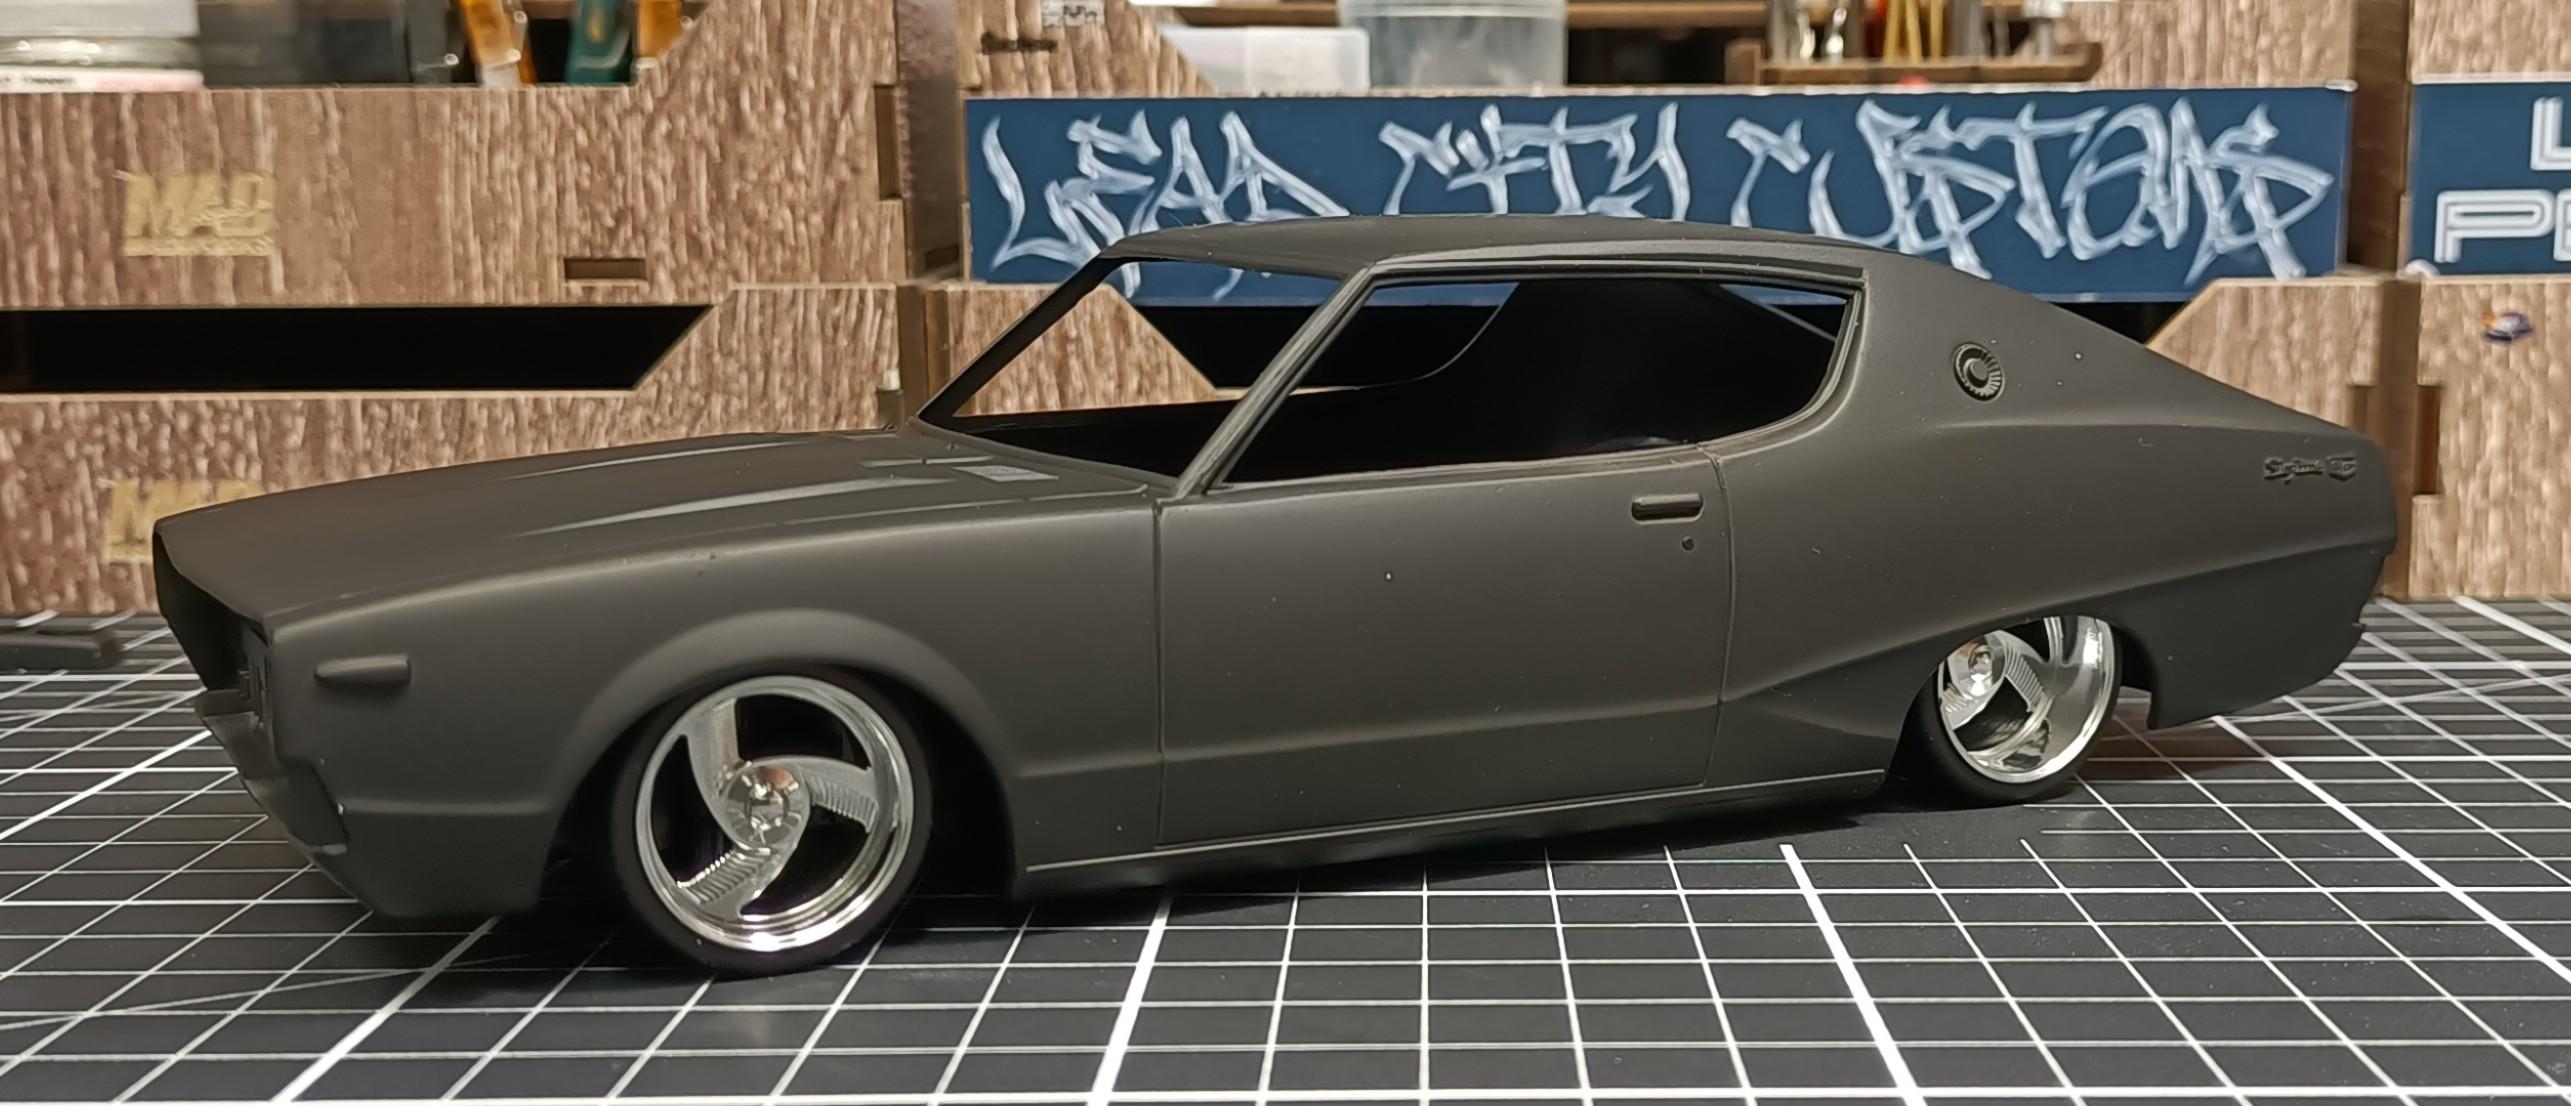
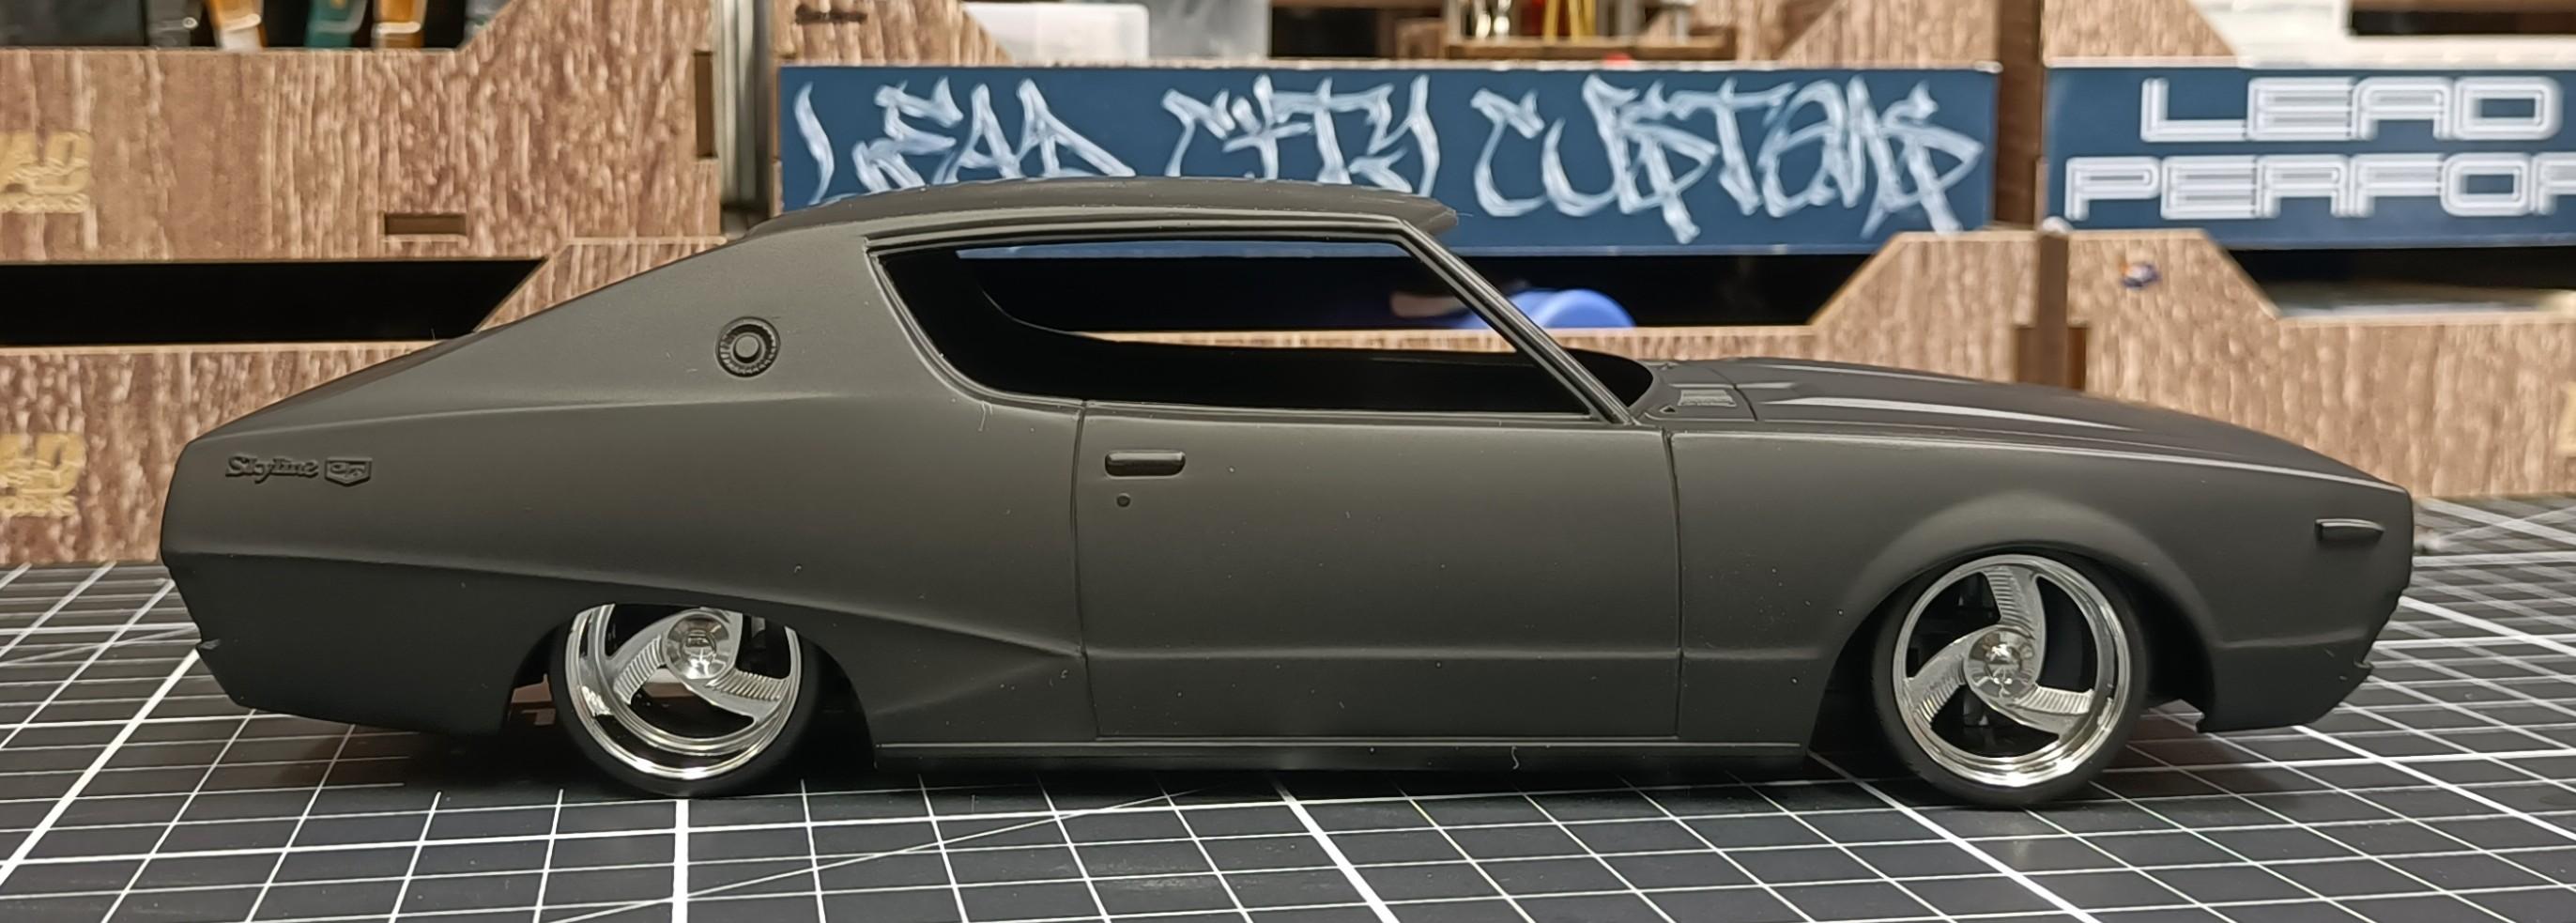
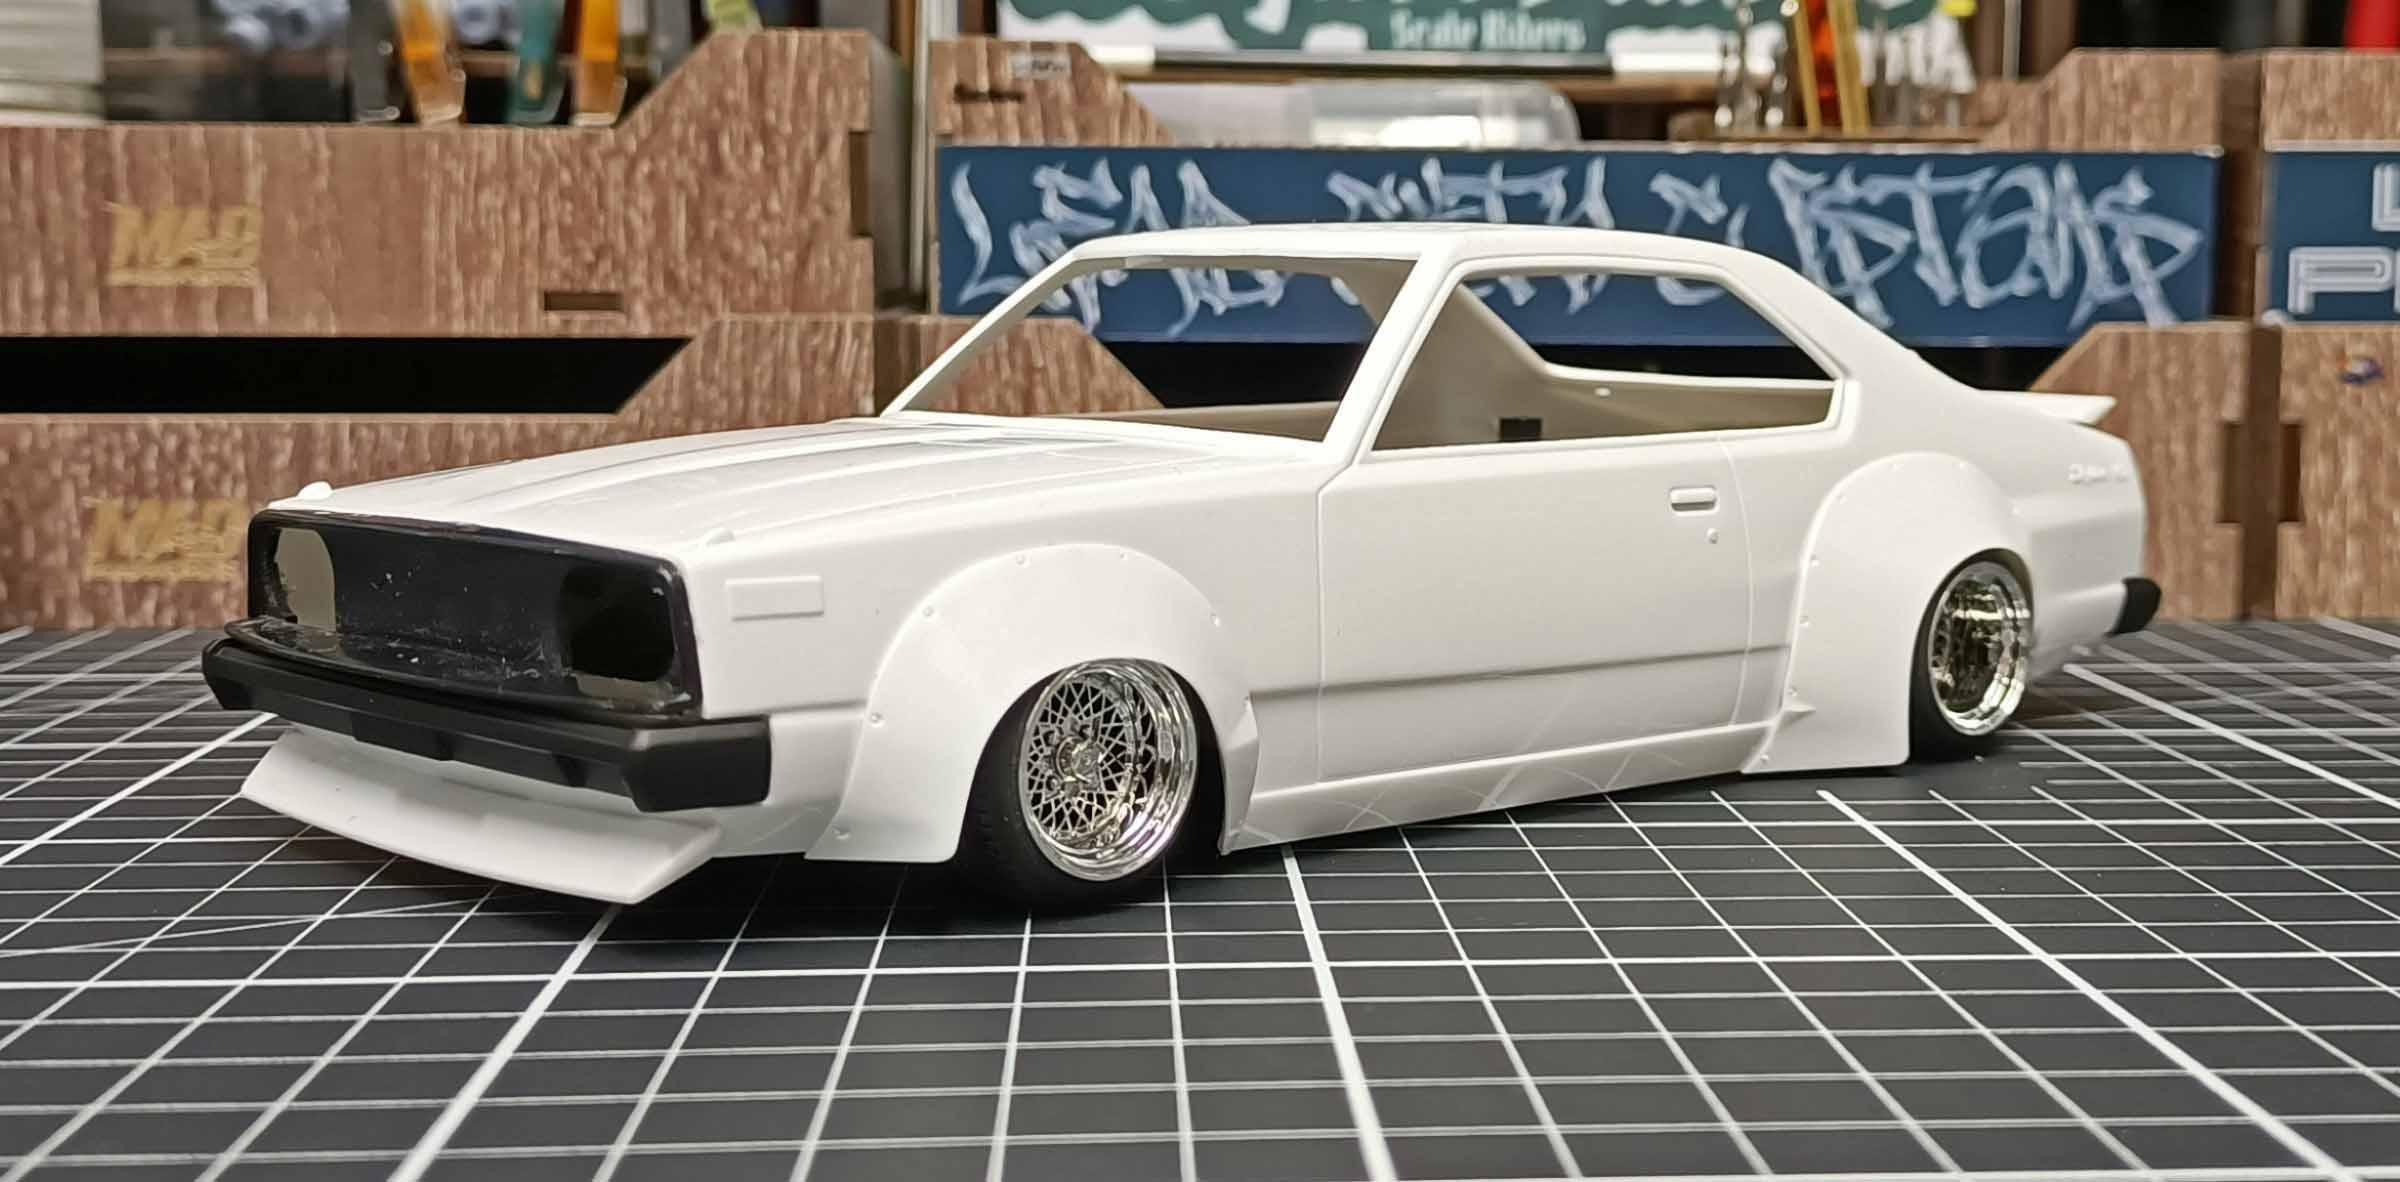
Over fenders attached to the body. Adjusted the ride height, Going to change the oob stock grill and headlights and replace with a hidden headlight style grill like I done on a previous 211 Skyline I stole the bumpers from another stalled 211 build, they have been modified to not stick out as much. Tail light panel is also from the stalled build and the number plate recess has been filled in. And while I was flicking through the Japanese Model Cars Tuning magazine I got recently, I came across this build. I really like the style with the billet wheels, but I dont have any of the Pegasus Tri Blade wheels. So I went and found some similar wheels on Cults3d and started messing around seeing how things looked.
- 766 replies
-
- 2
-
-
- stalled builds
- quick builds
- (and 2 more)
-
Yeah I did, but that was mainly meaning to stick with Tamiya spray cans for painting the bodies 😉
-
Yeah same, always have enjoyed the content. I have missed getting the last 4 years, so trying to play catch up when some become available on ebay in Australia.
- 39,065 replies
-
- 1
-
-
- johan
- glue bombs
- (and 1 more)
-
Topics of ignored members are still visible...
Cool Hand replied to Michael F's topic in How To Use This Board
Maybe just people wanting to shield themselves from people and things they dont like 🤷♂️ -
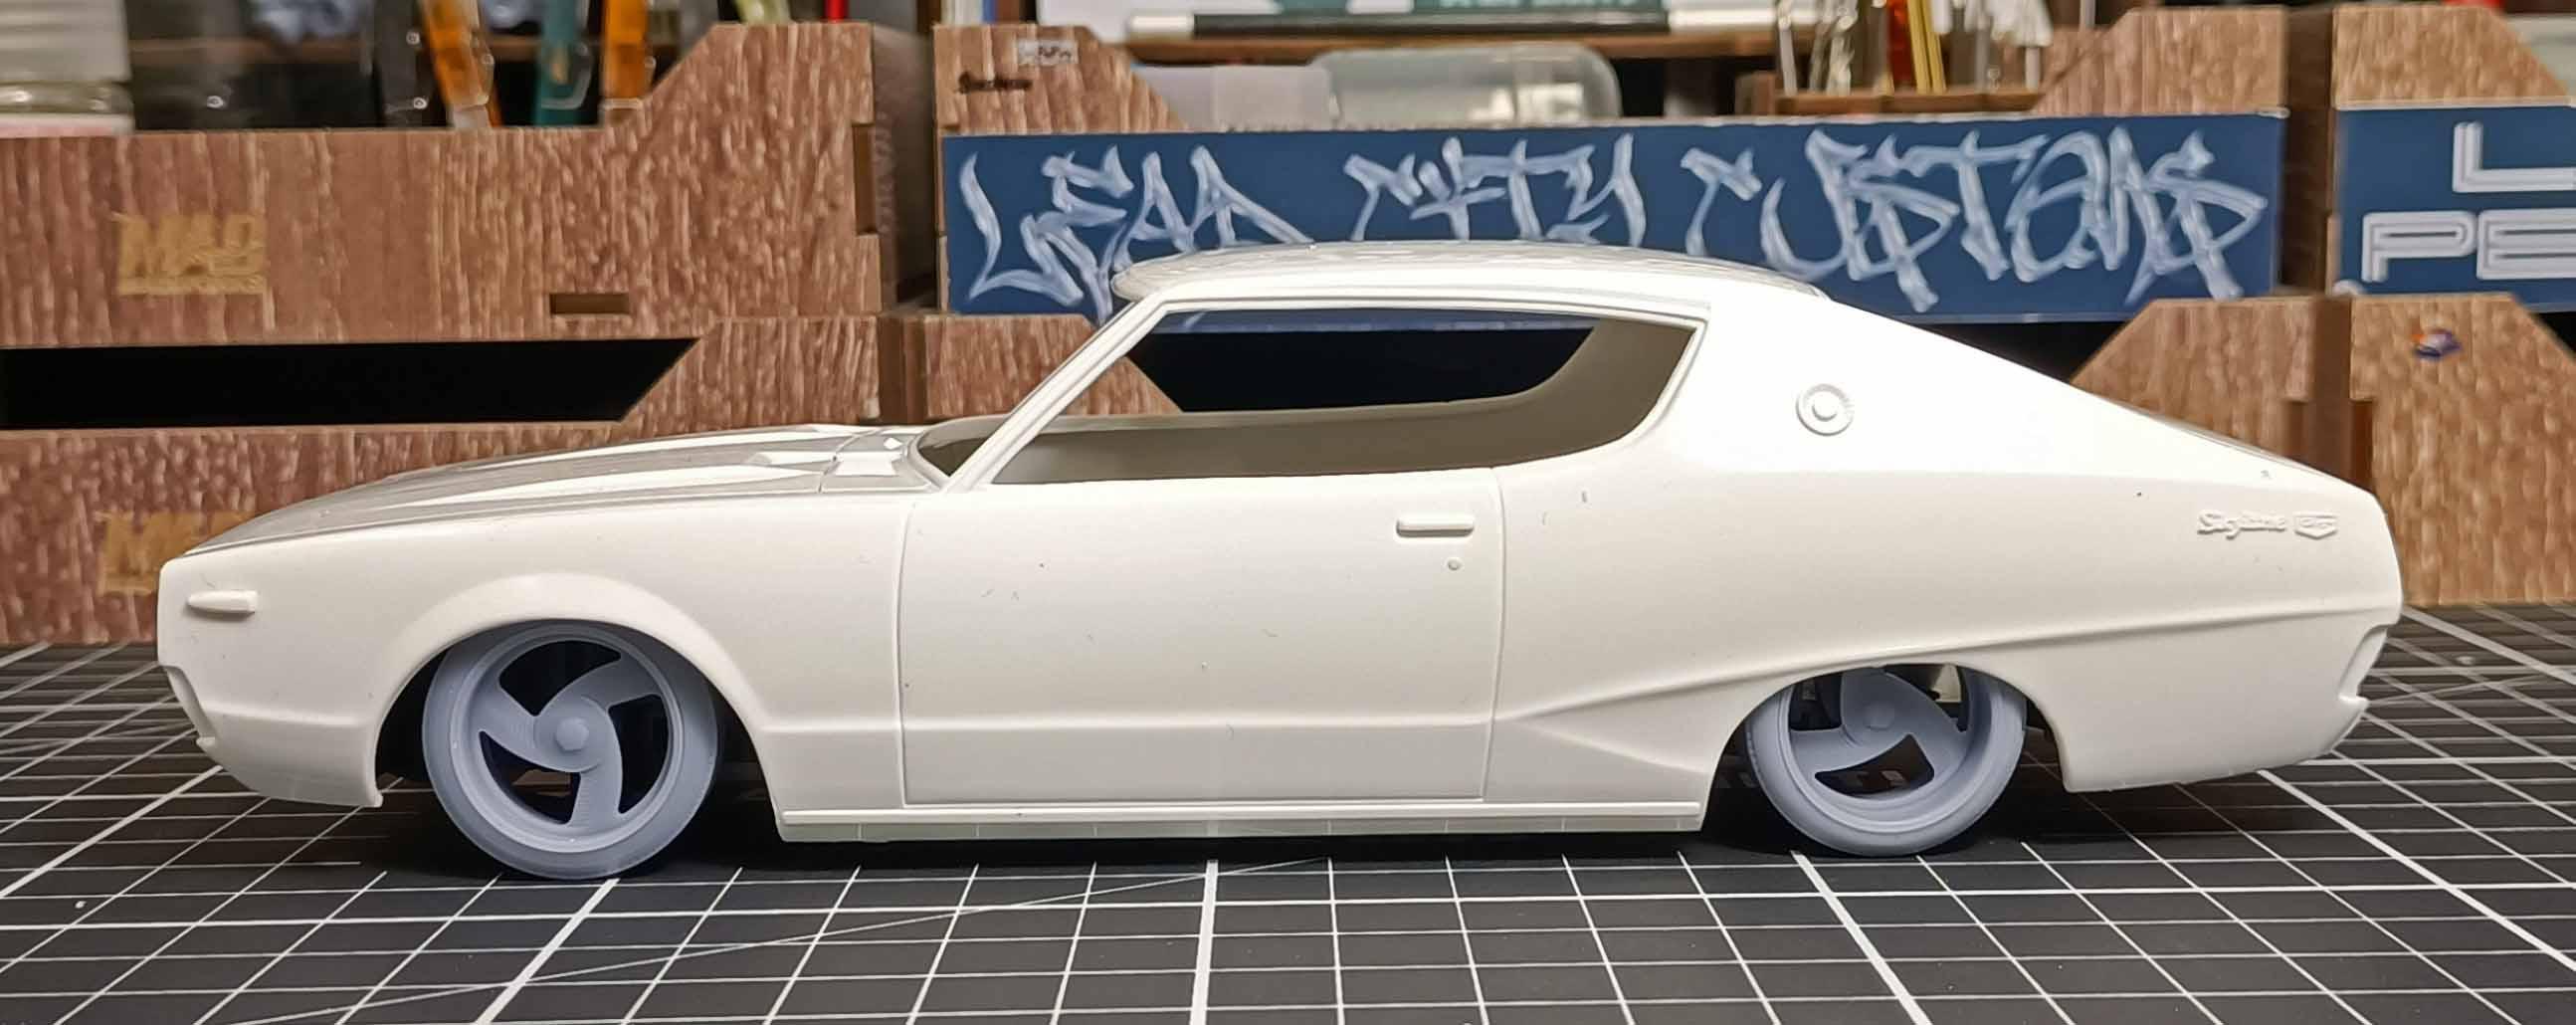
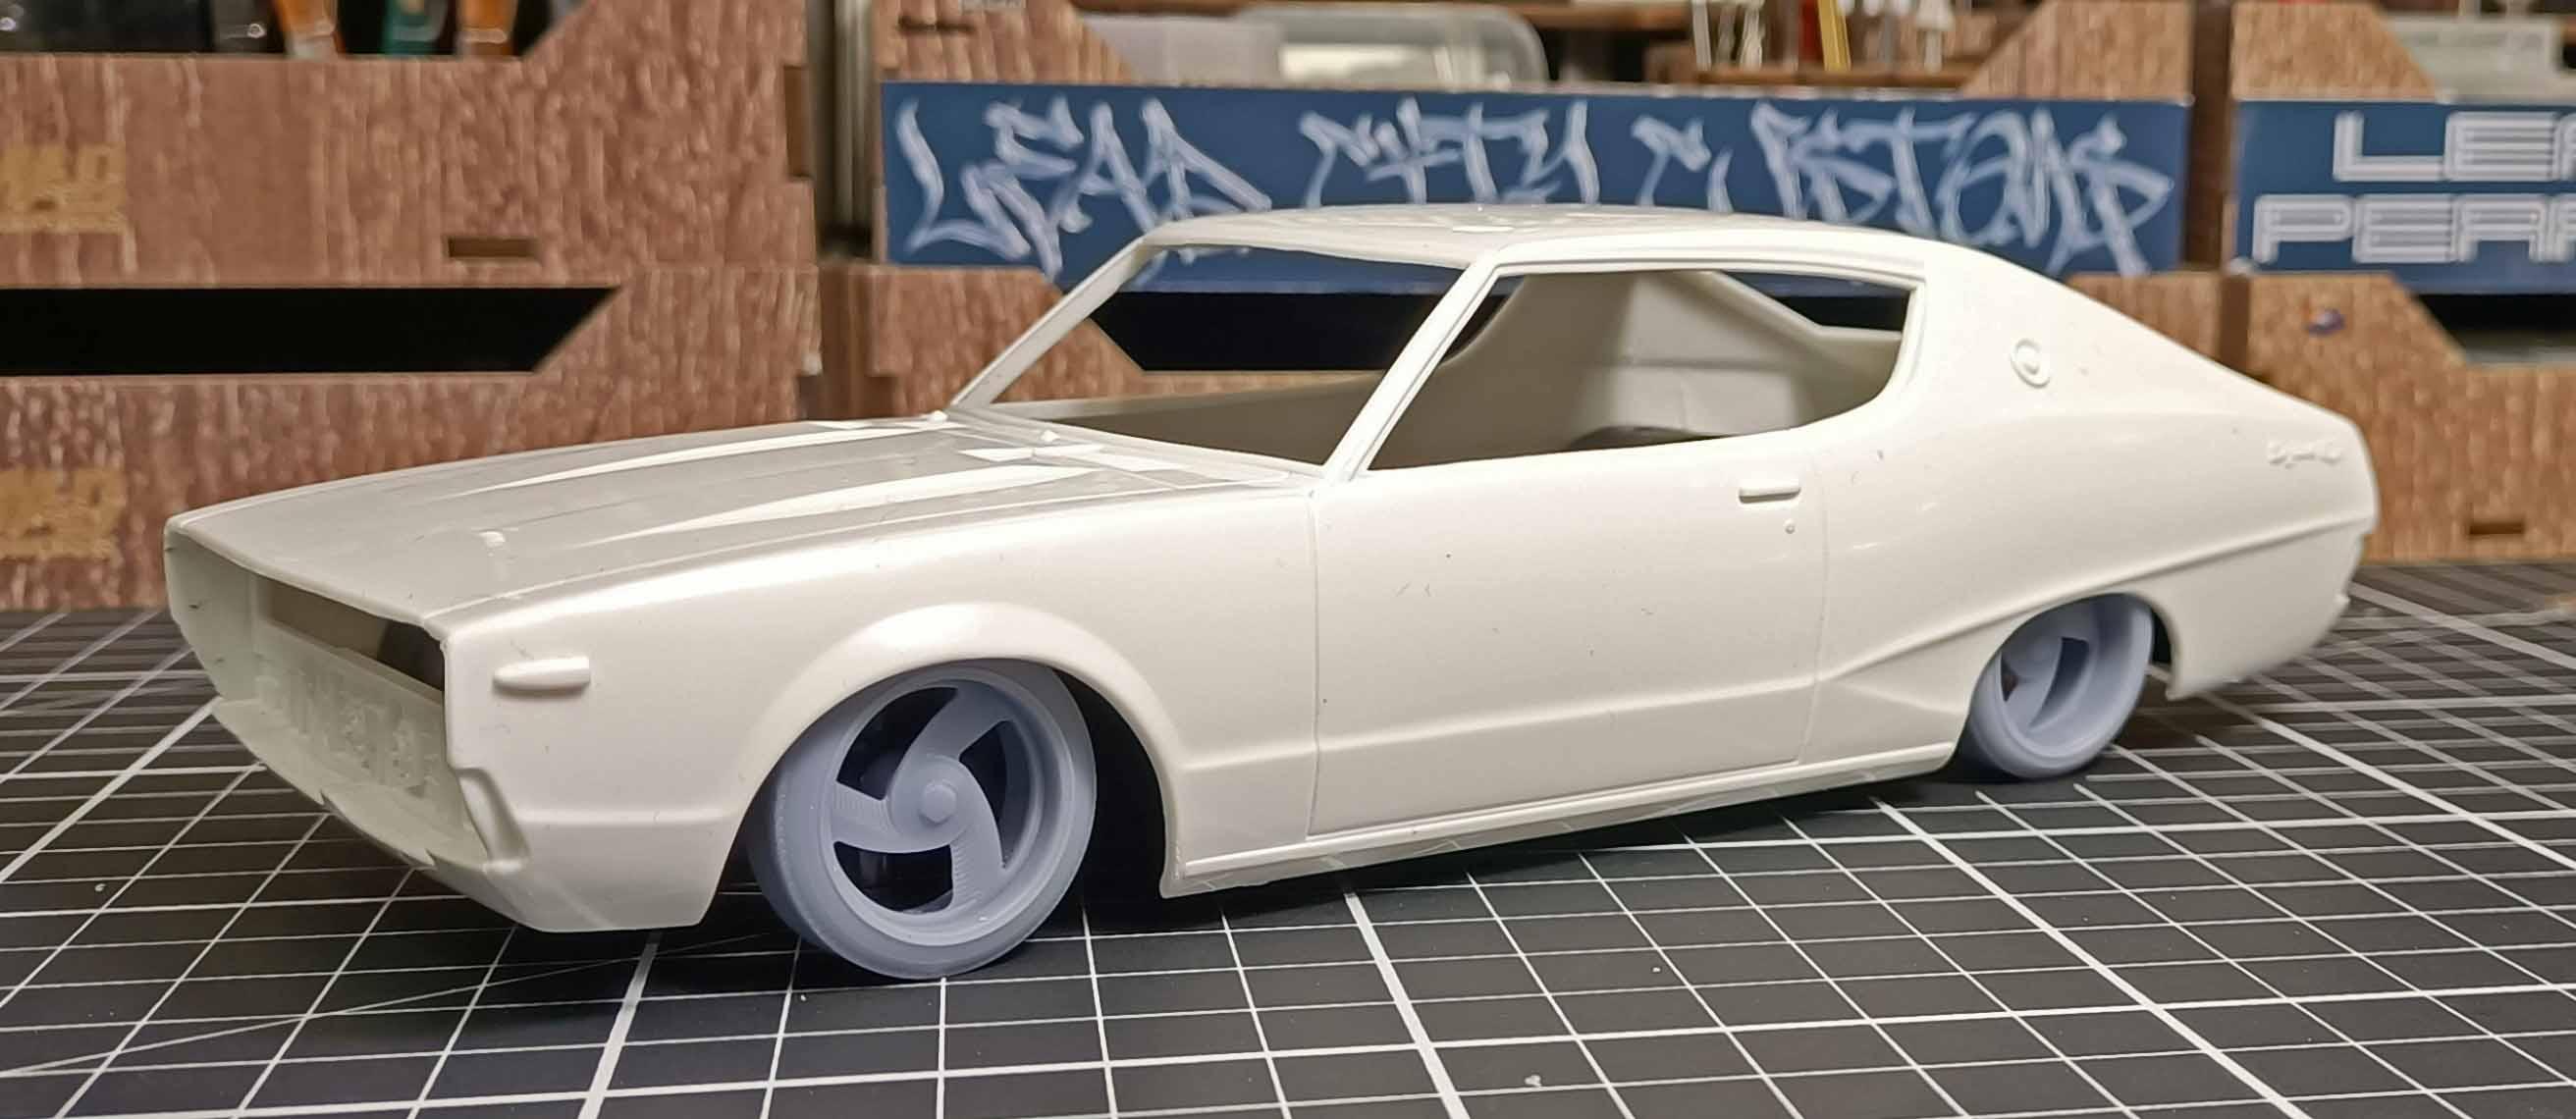
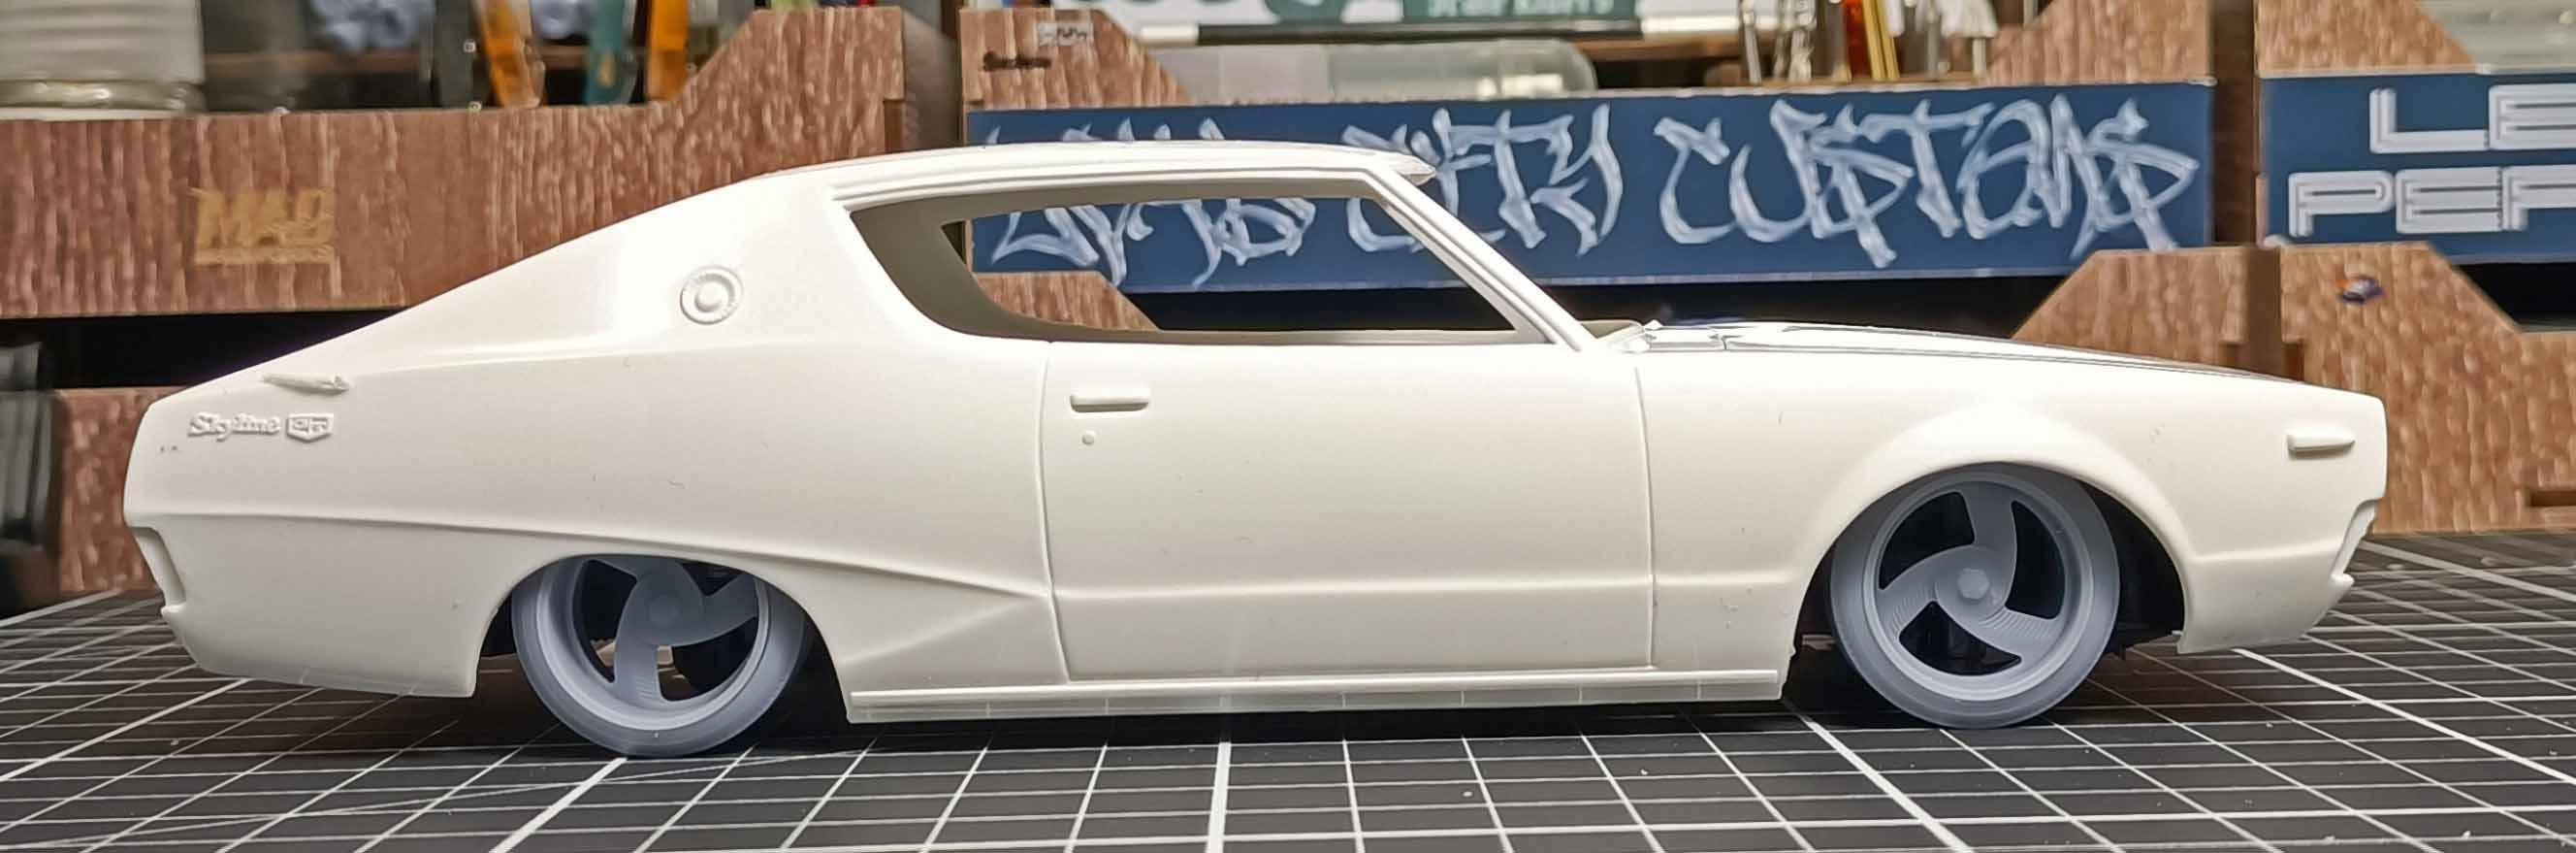
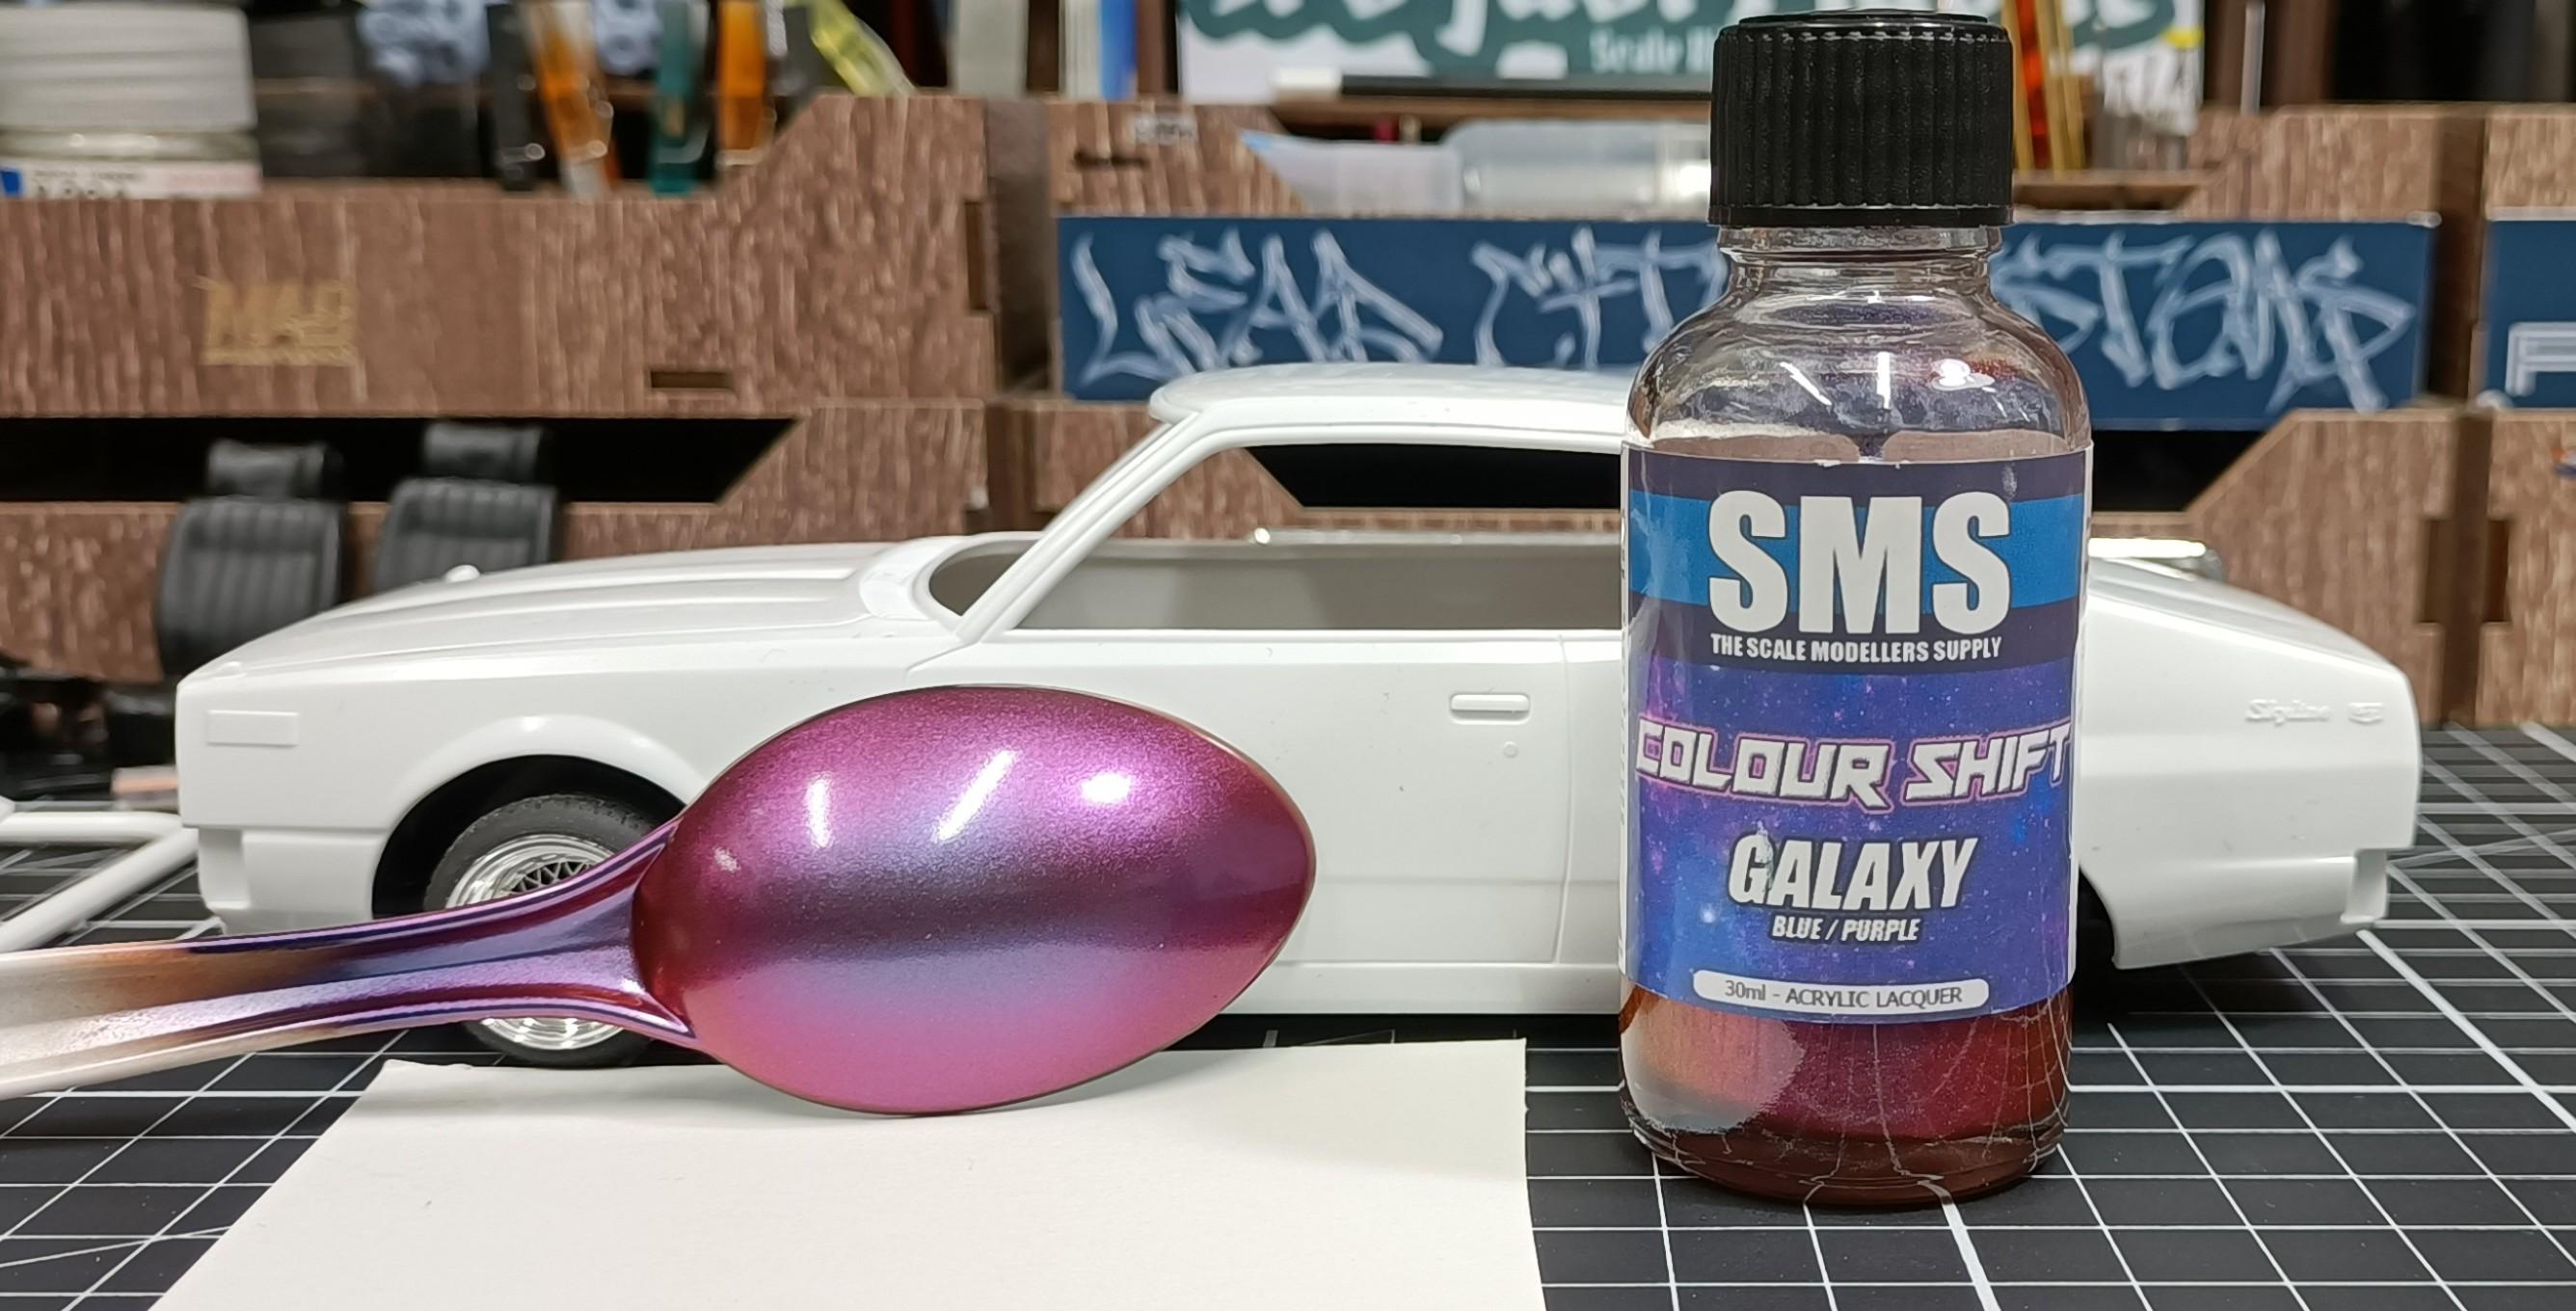
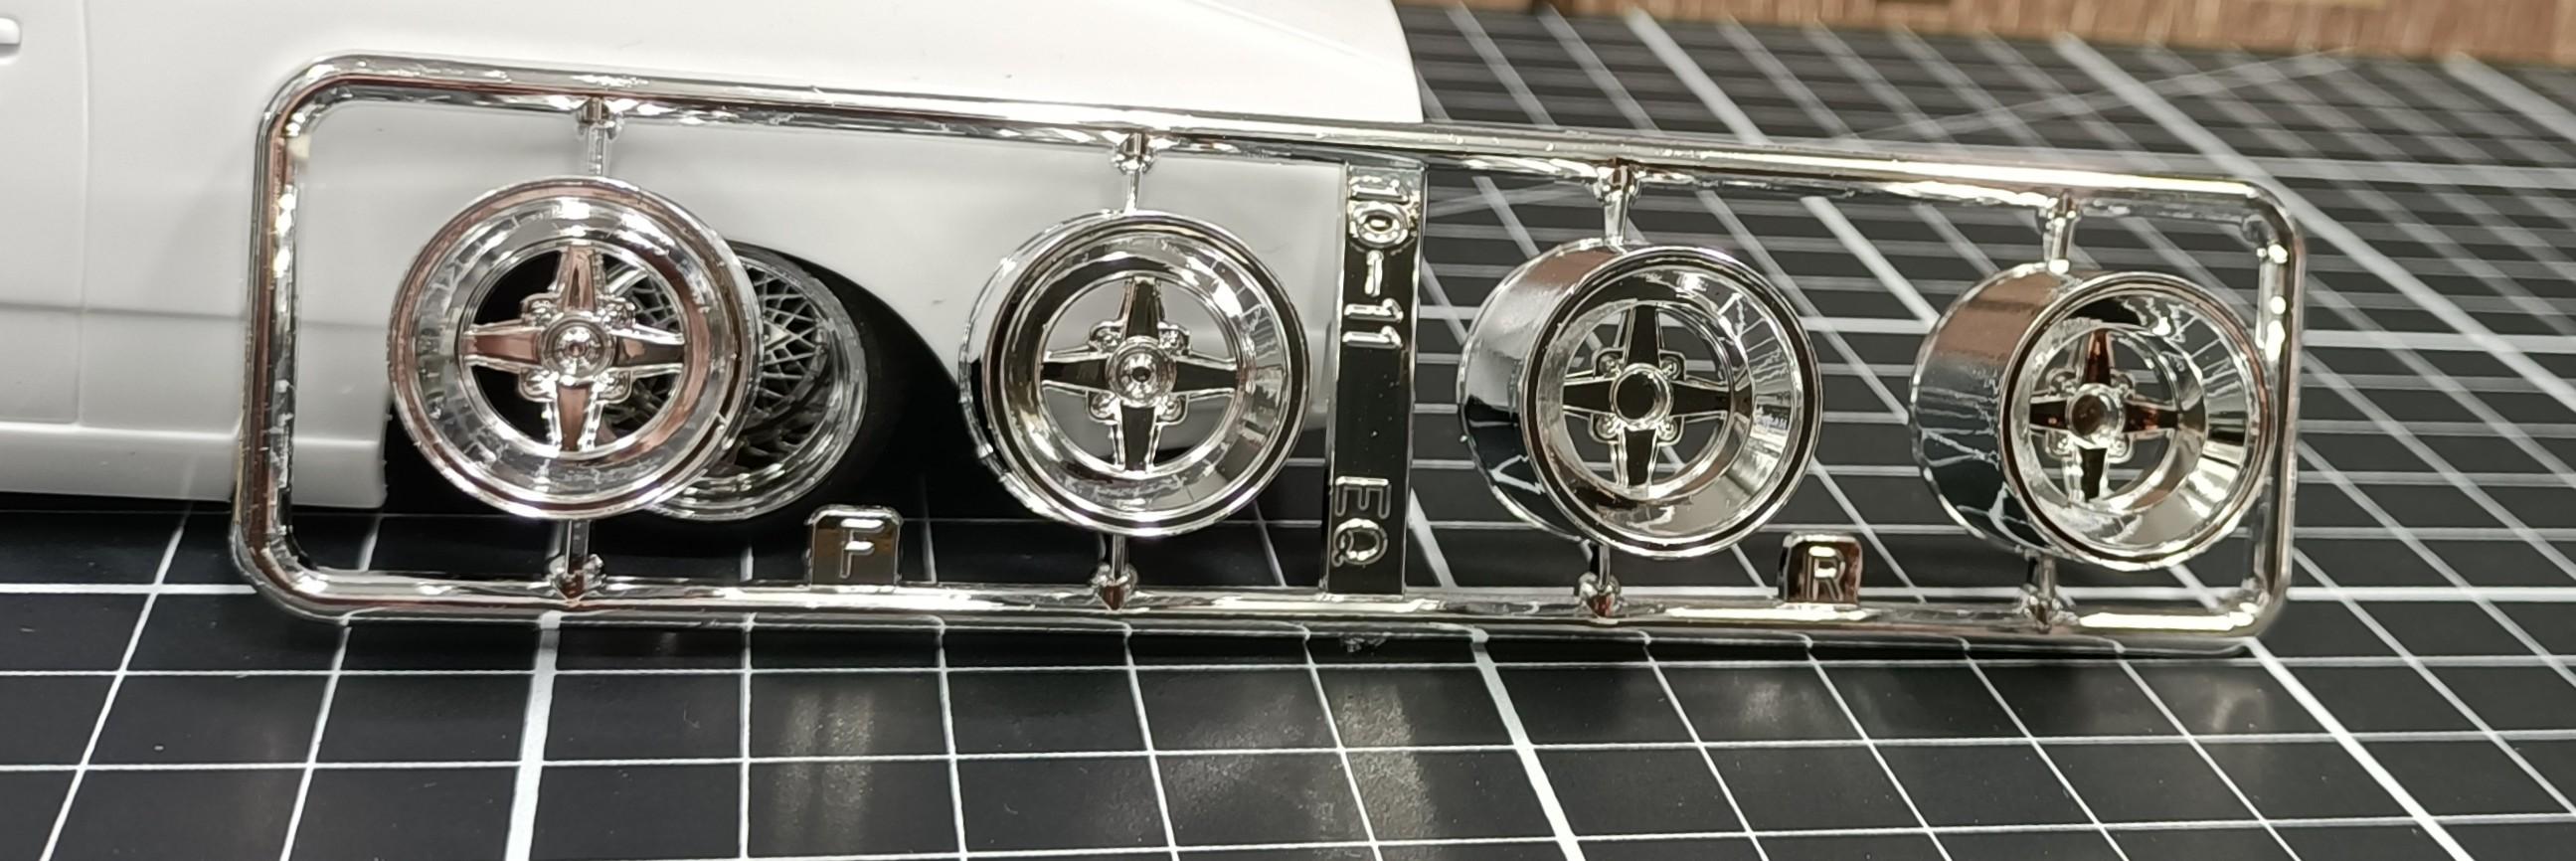
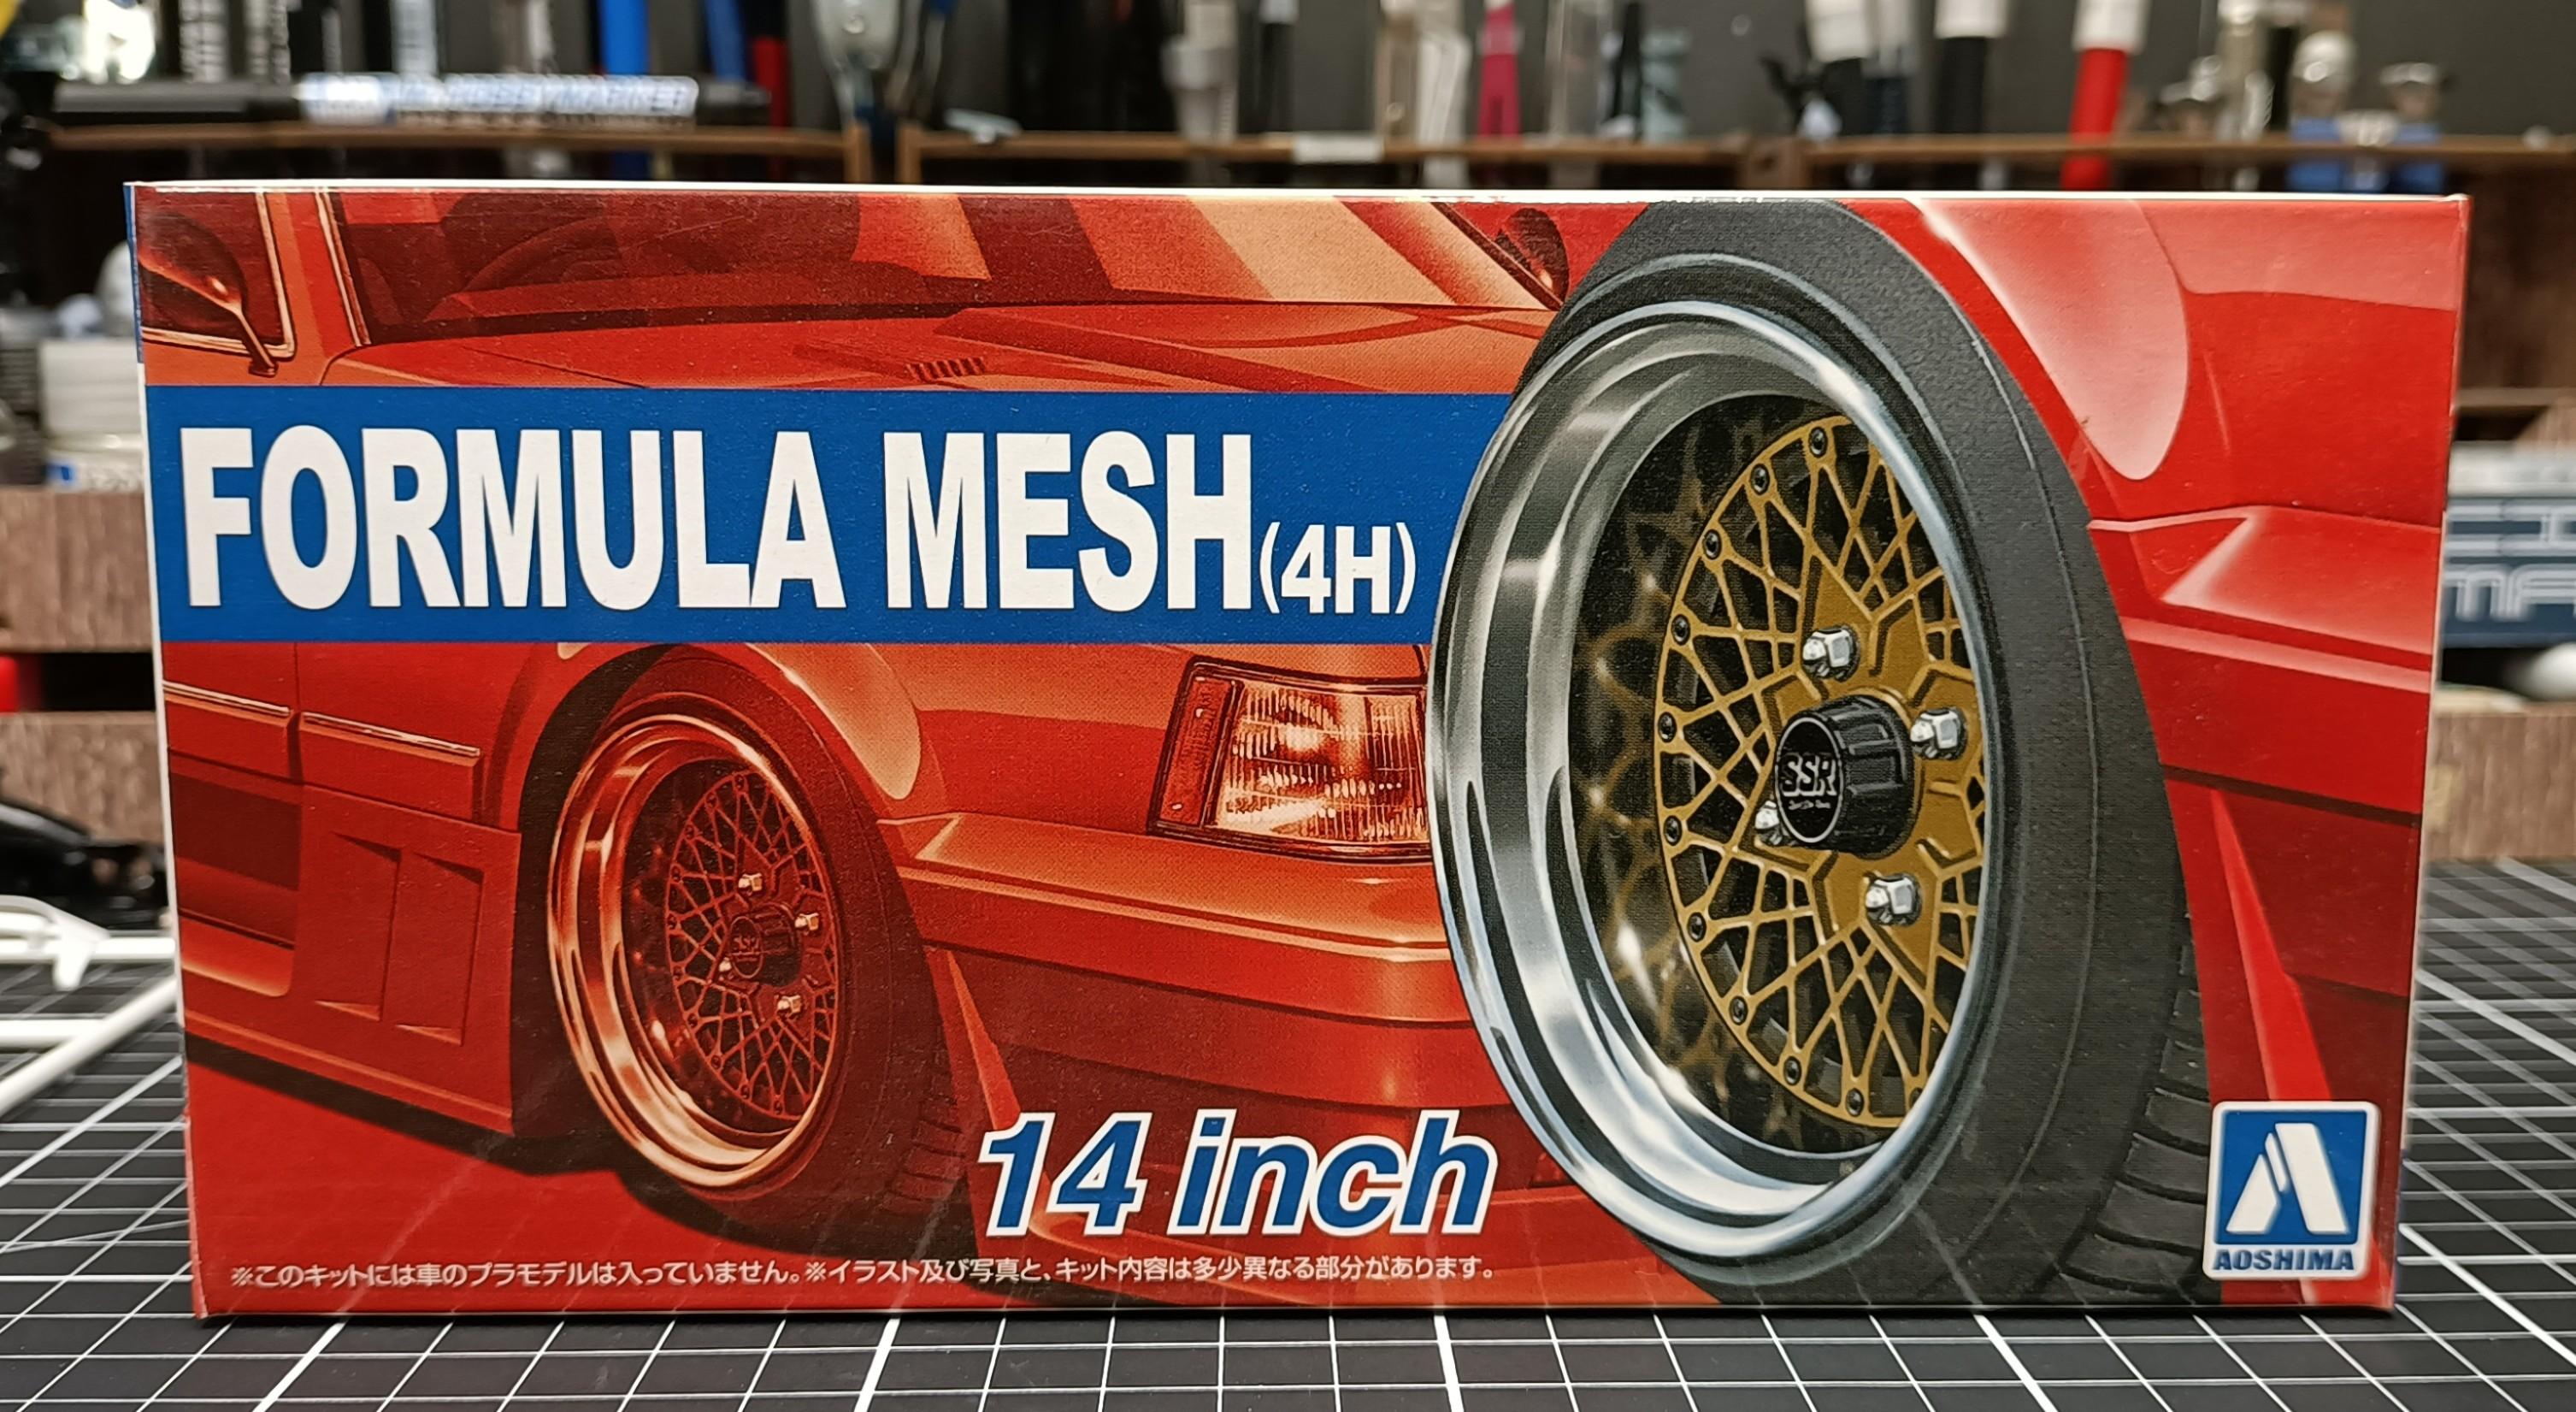
Next kit on the bench. Was doing some colour spray outs the other day and really liked the look of this colour shift pearl and it got me itching to paint something with it, so I will apply it to this 211 Skyline build. Decided to not use the kit supplied wheels. Will change out to Formula Mesh. Oob mock up. Now the fun begins 😁
-
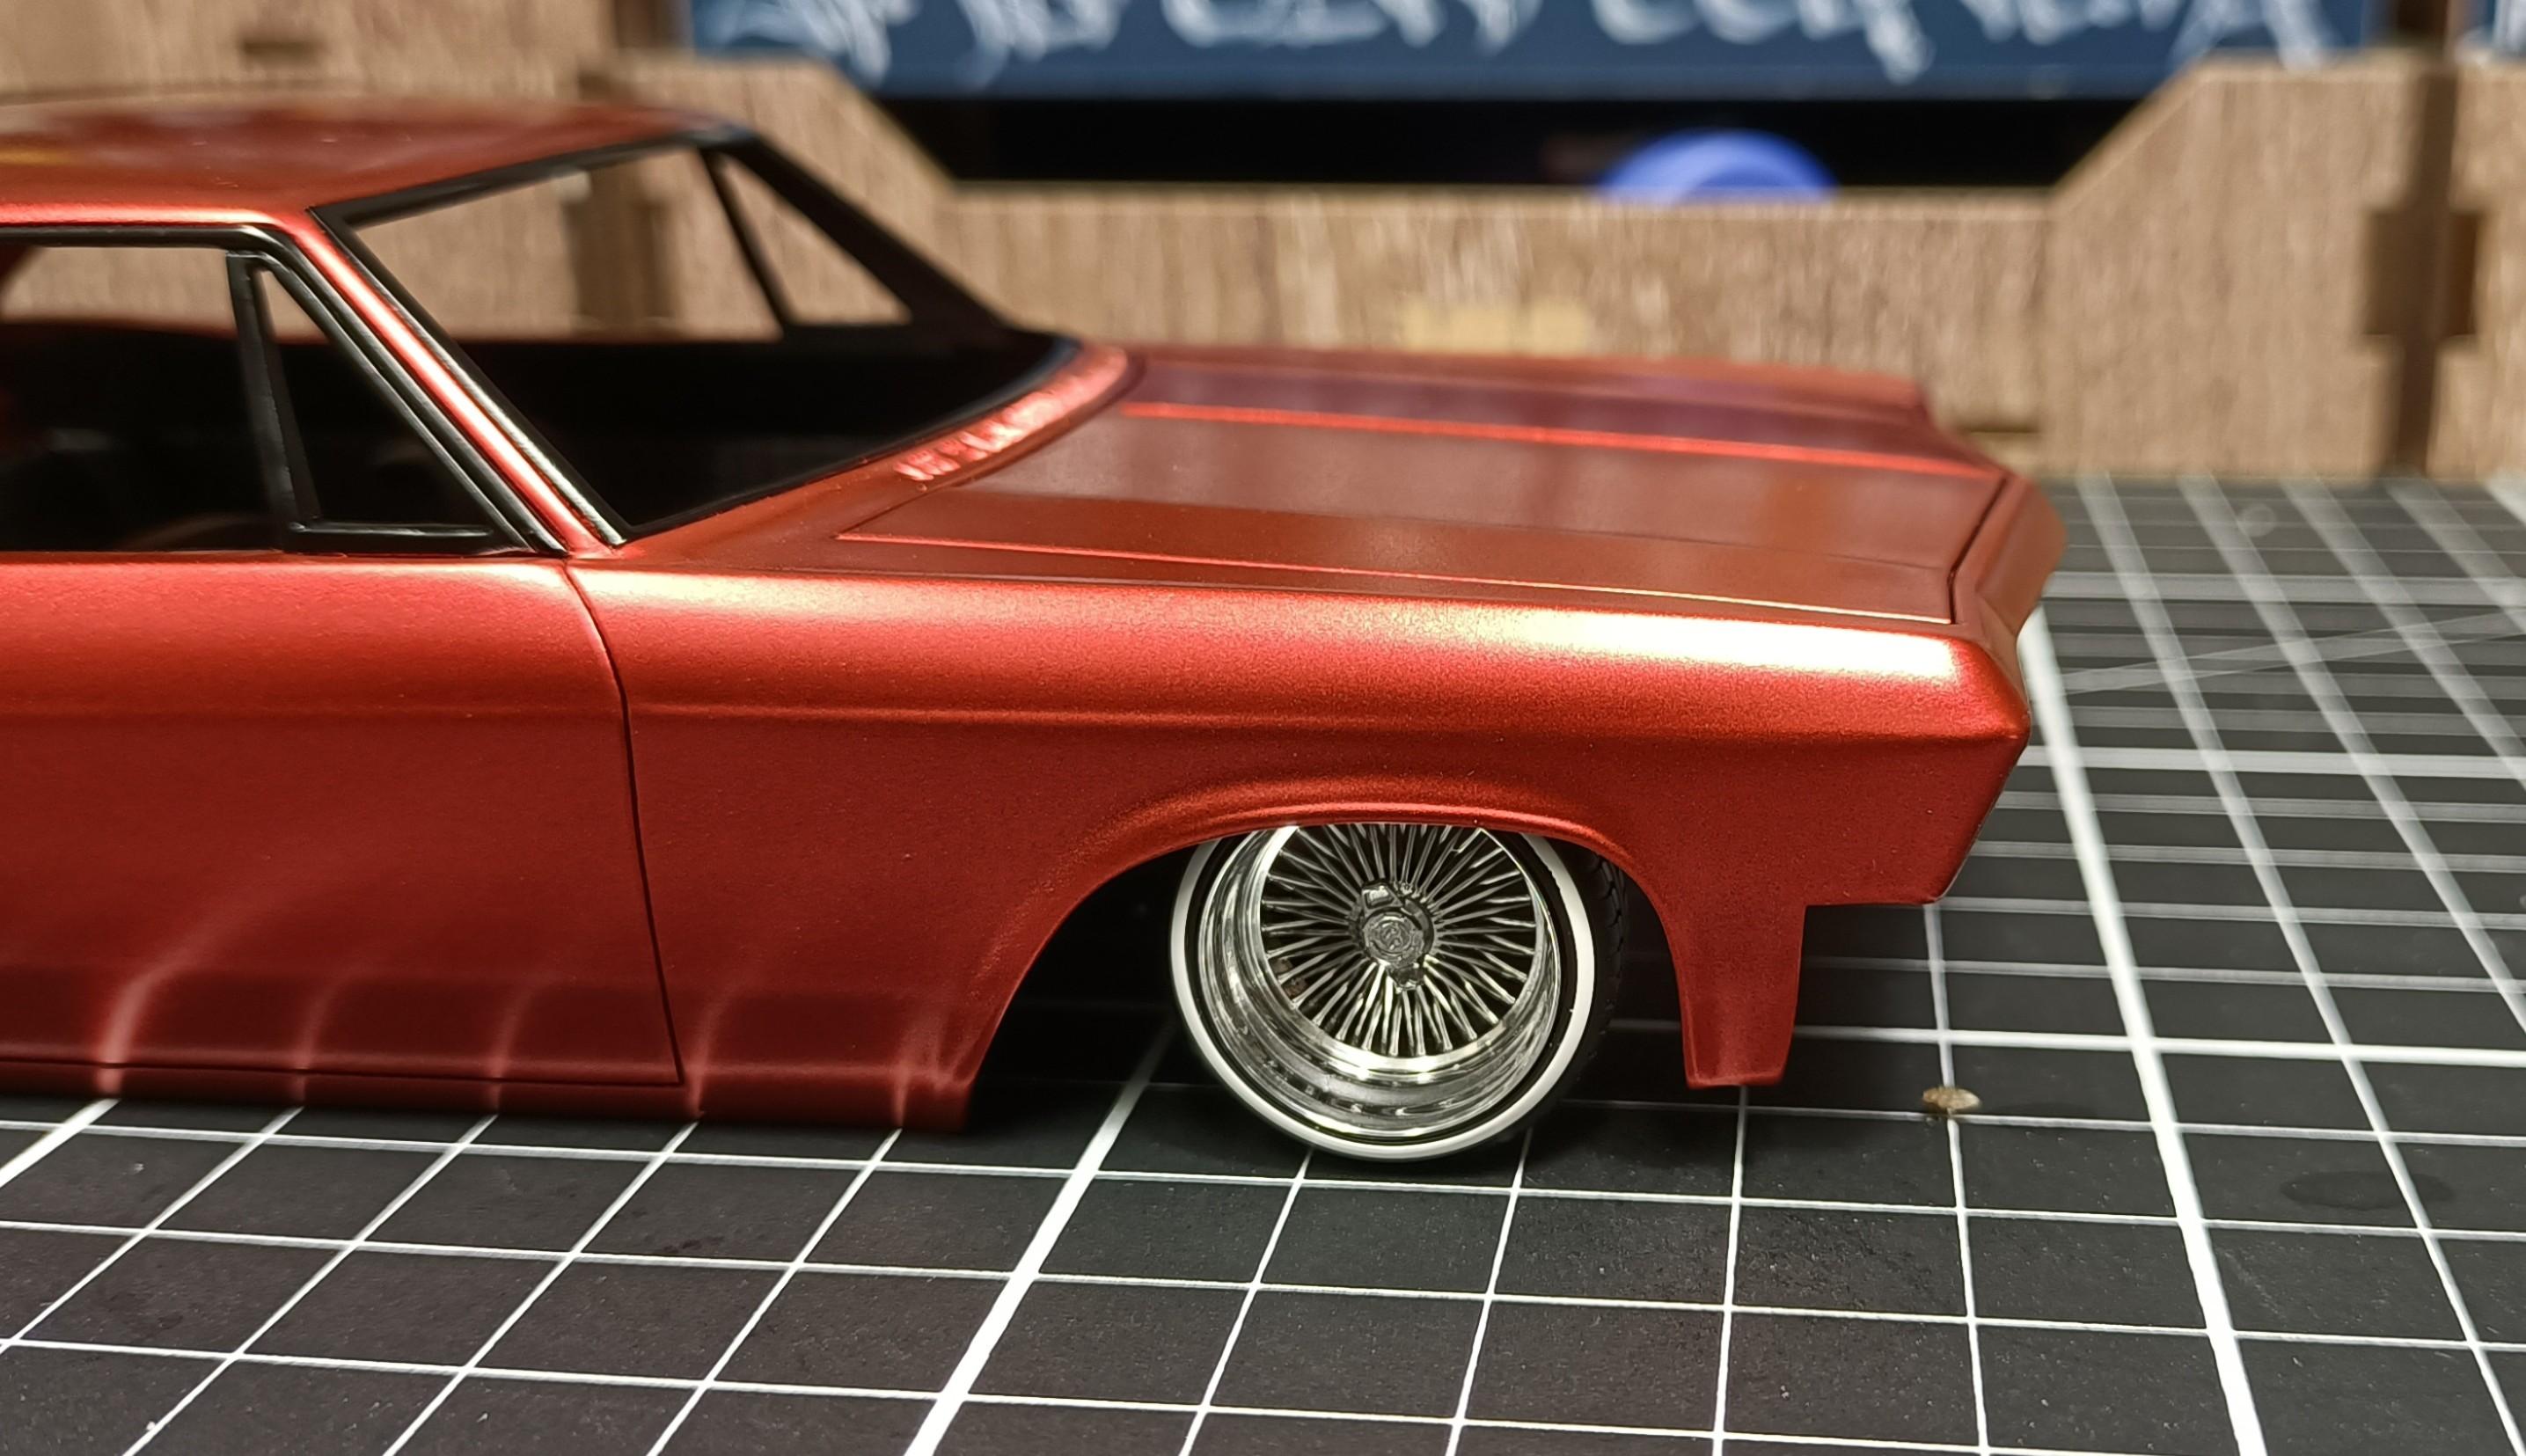
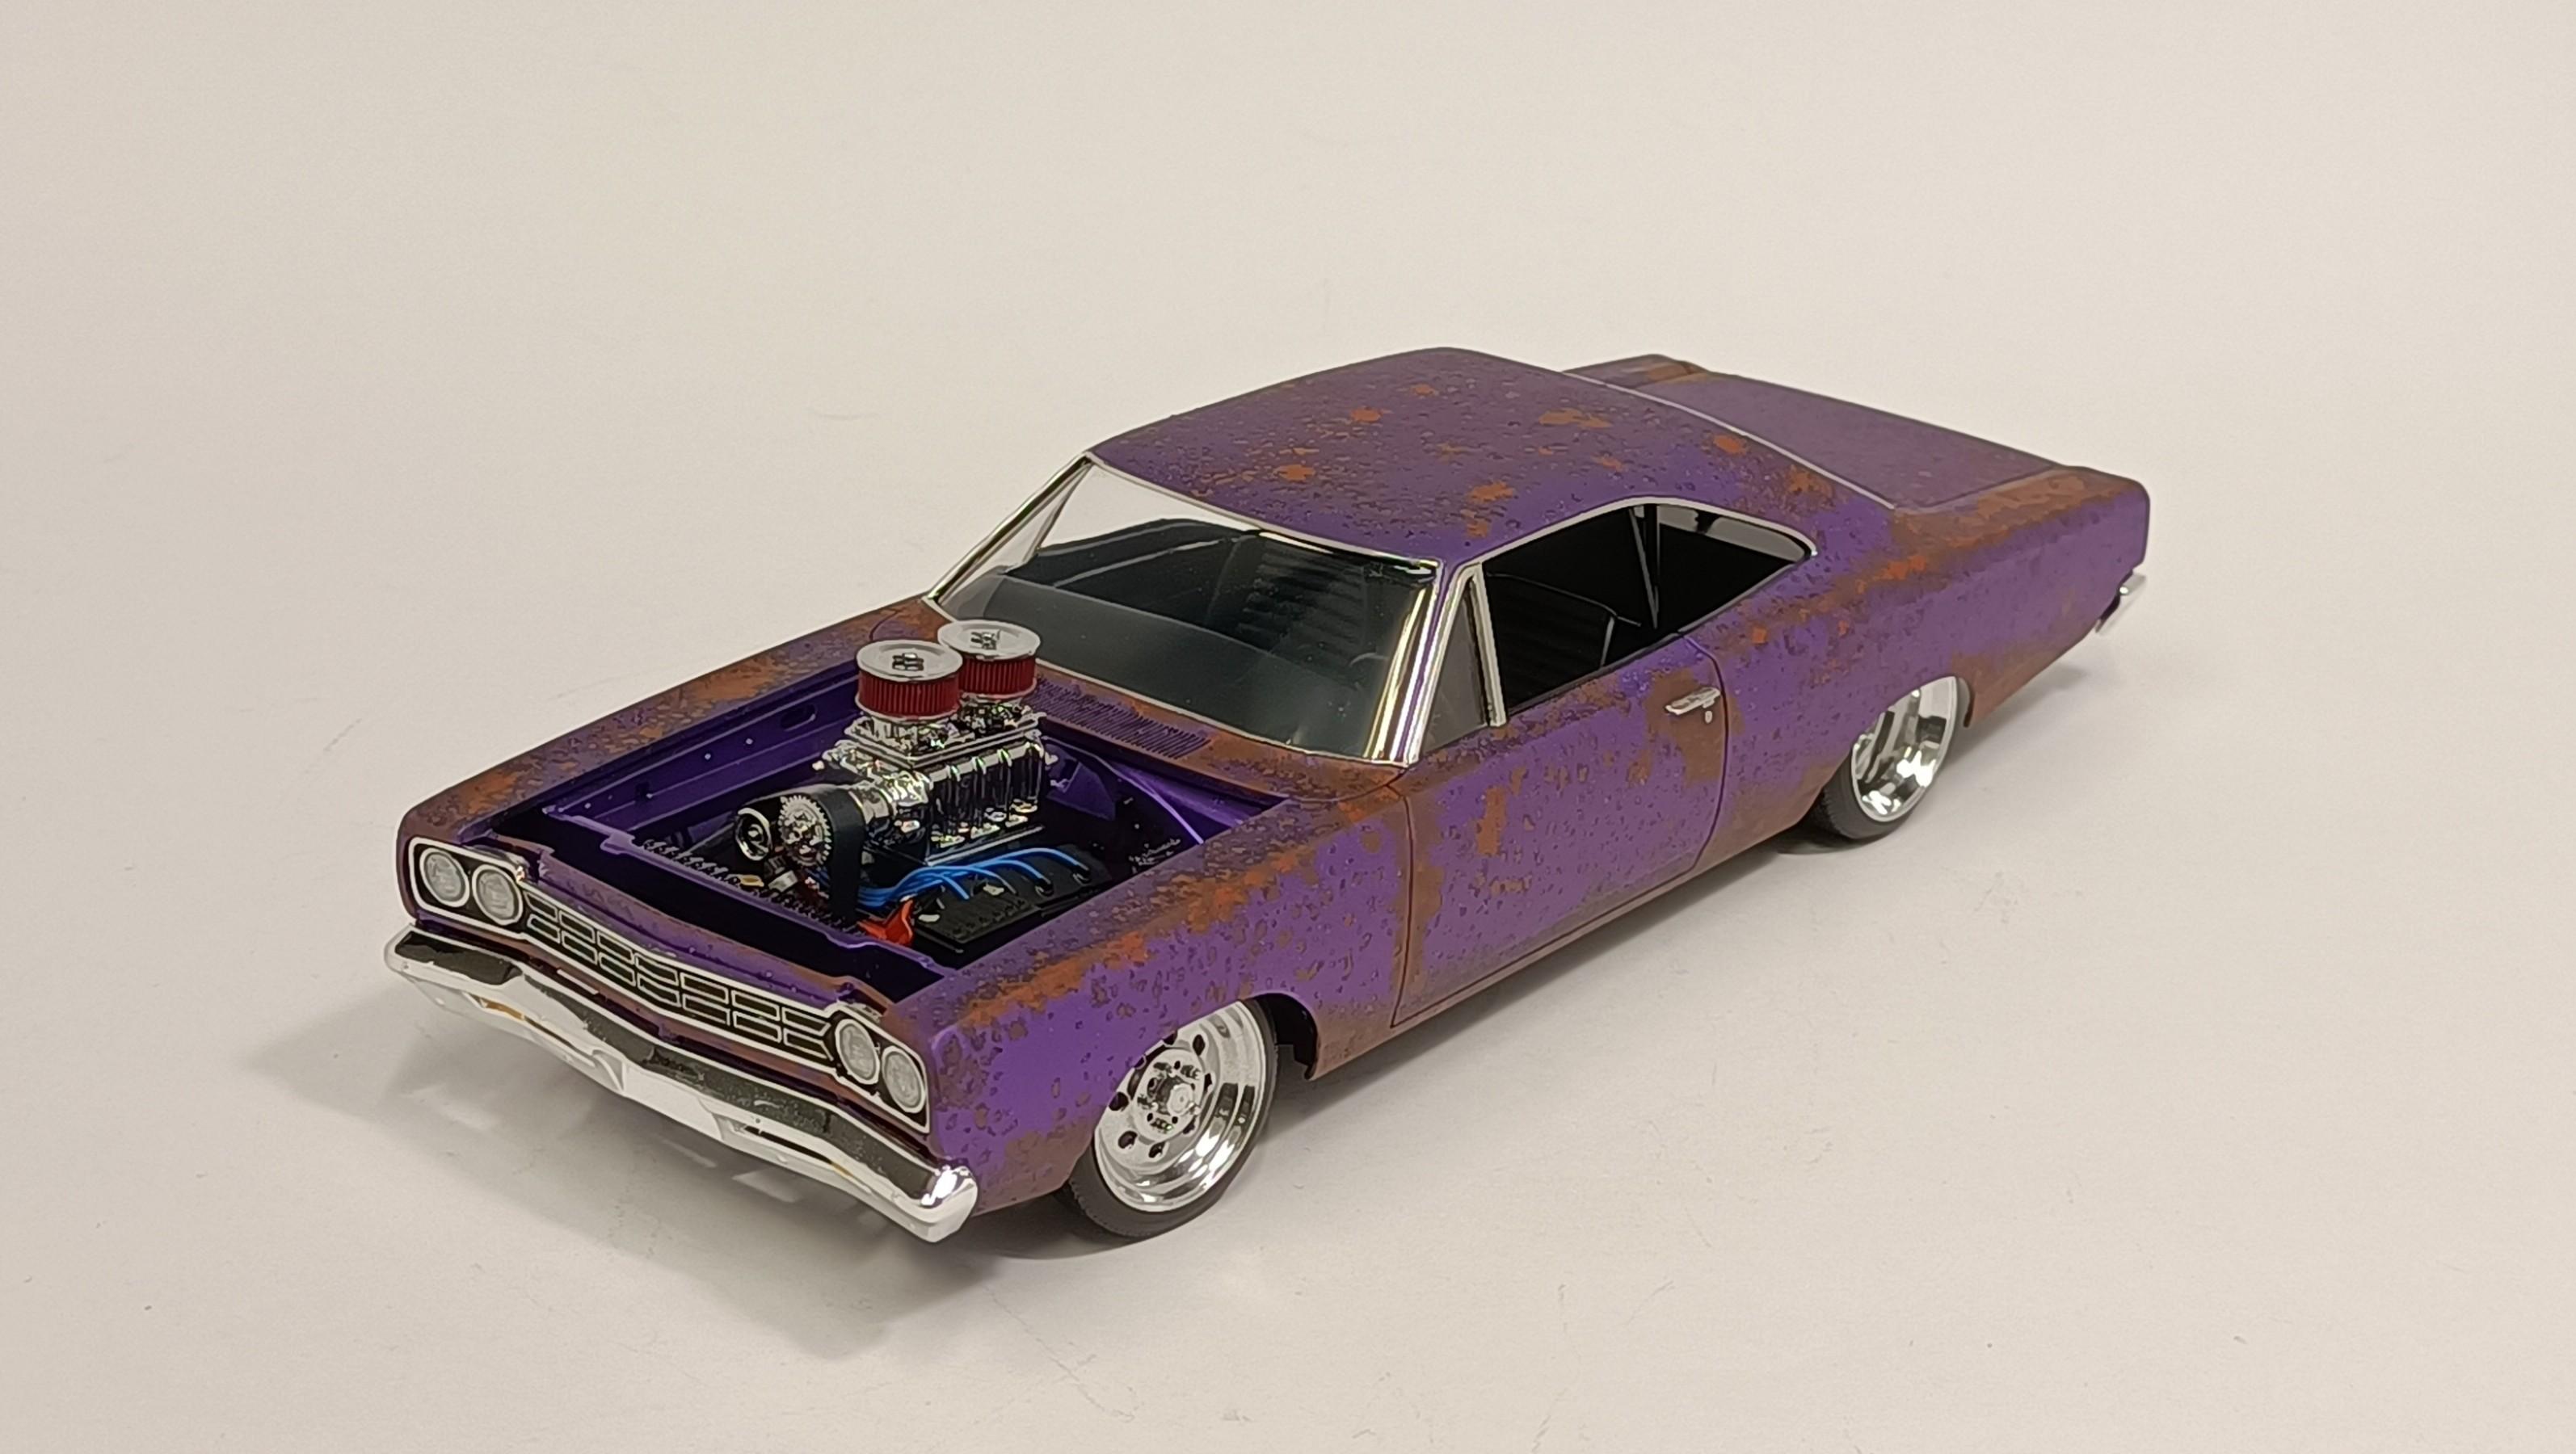
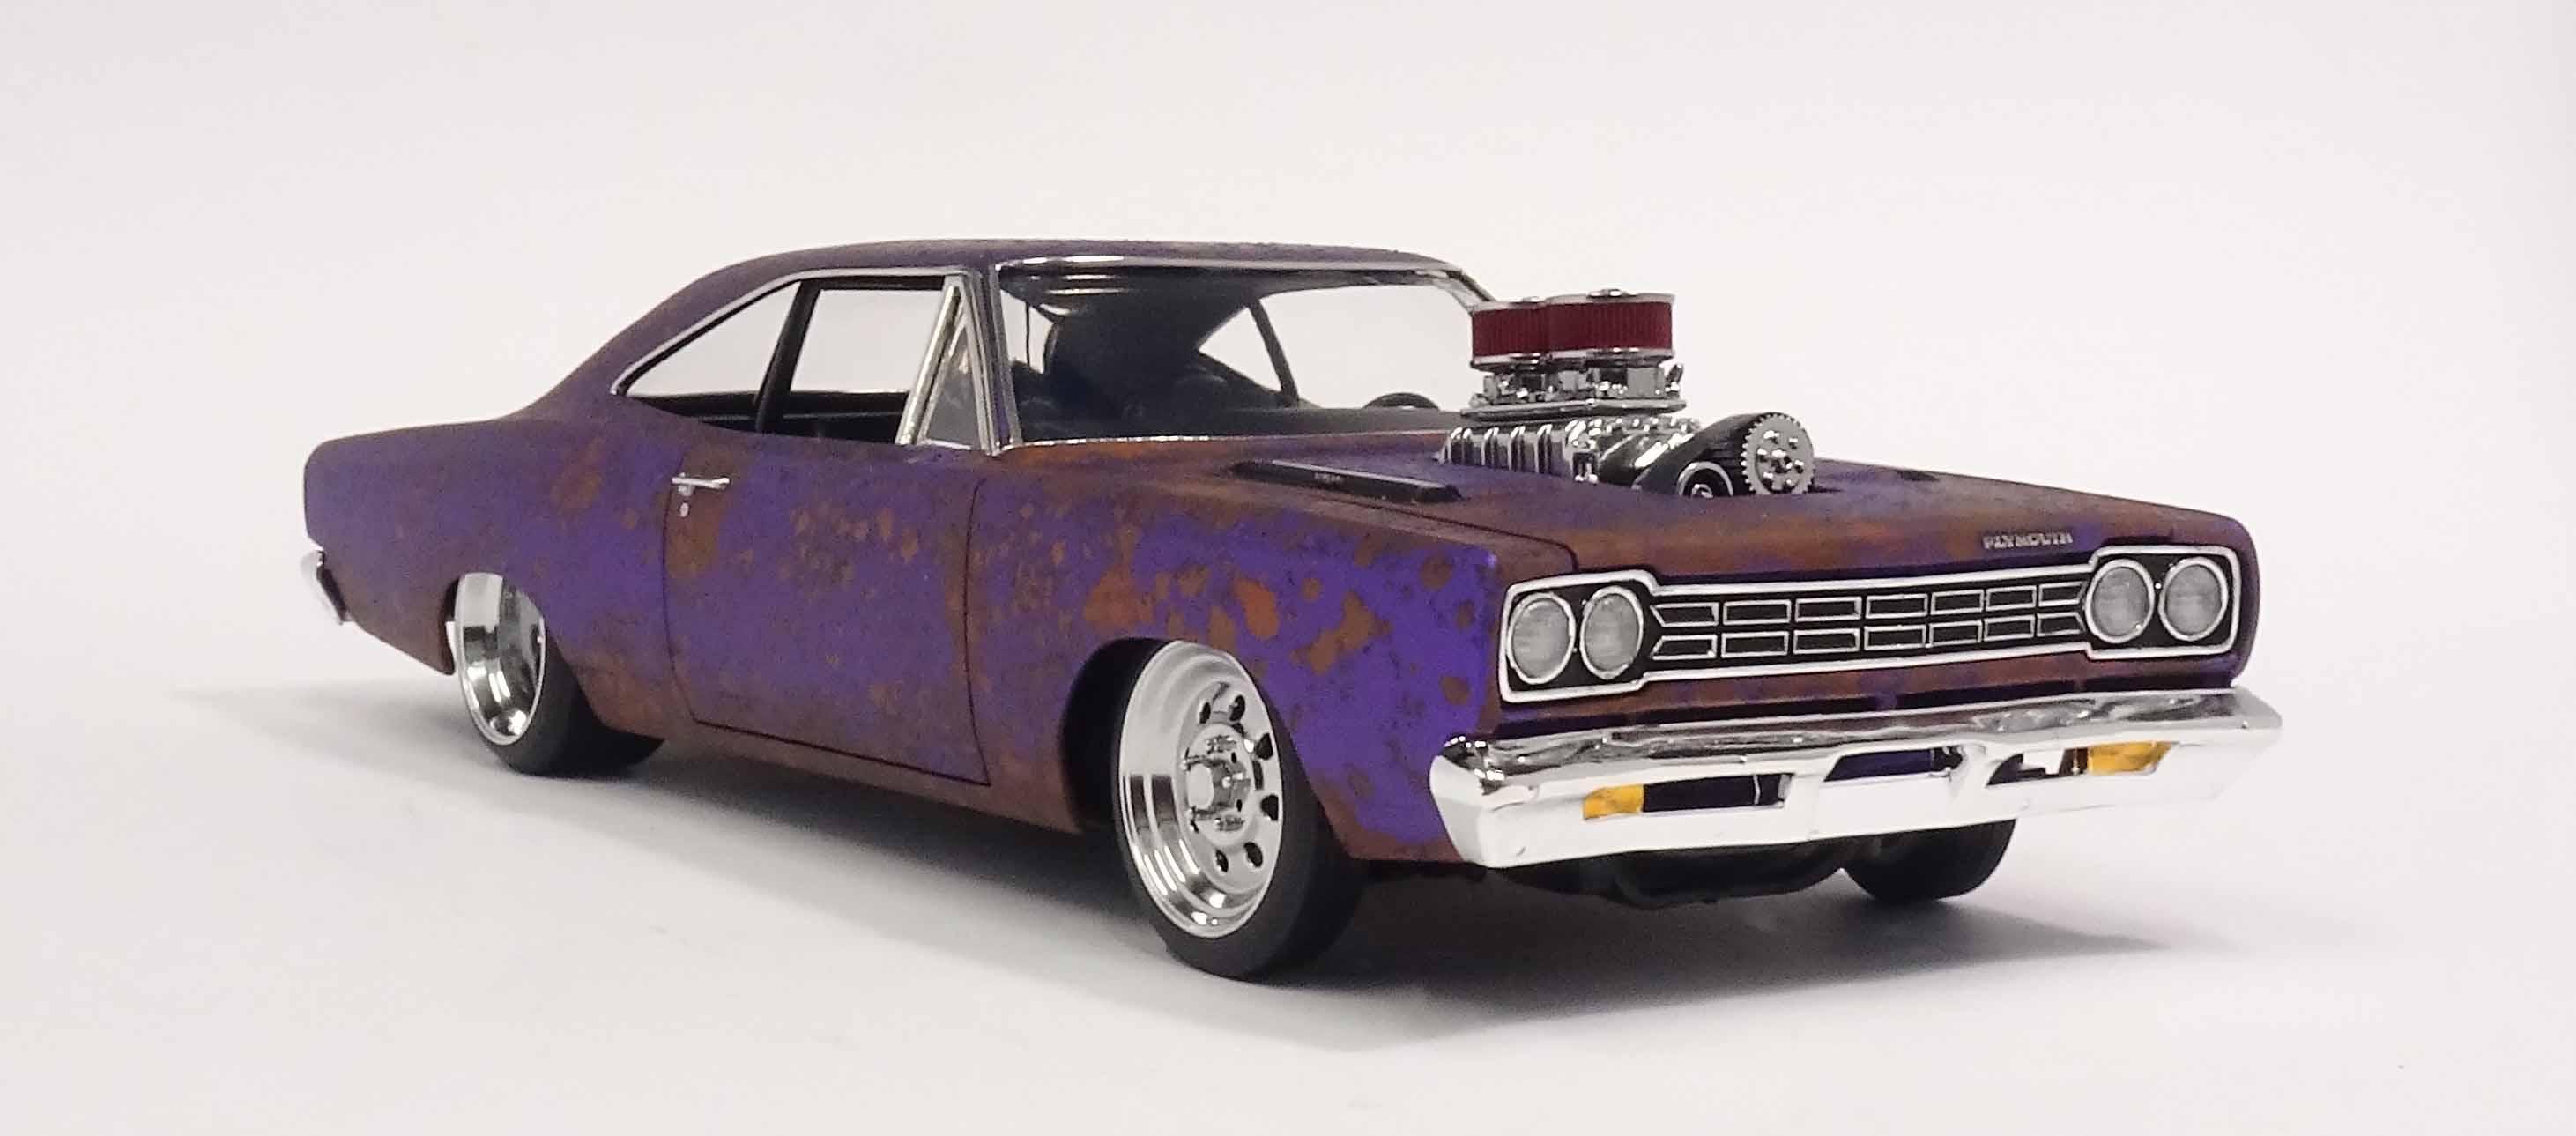
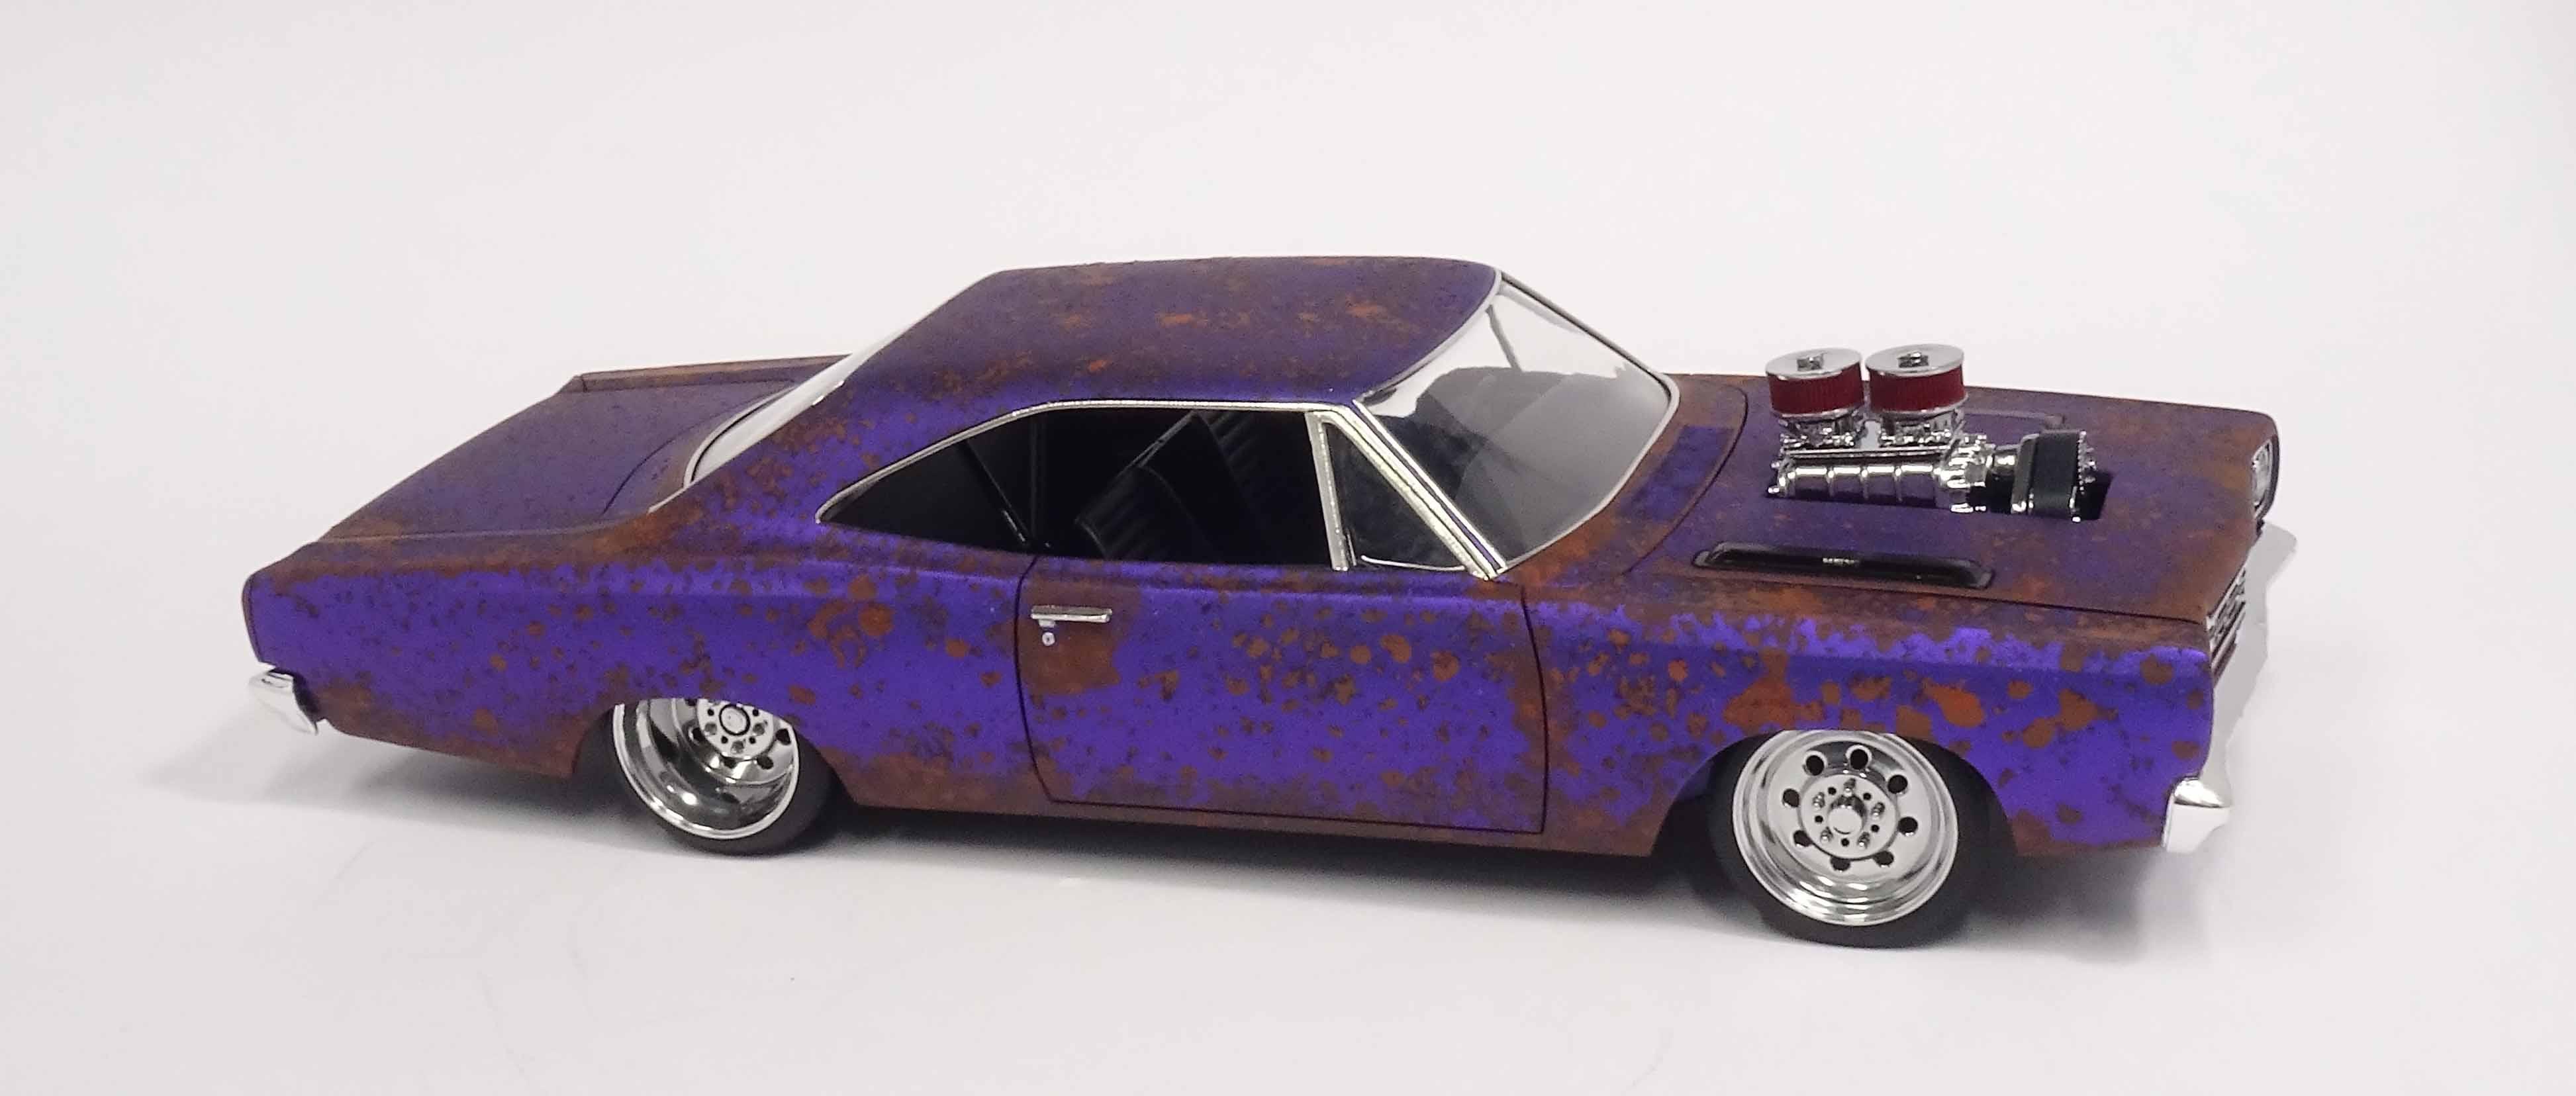
68 Plymouth now Under Glass. Very happy how it turned out for a 6 day build.
- 766 replies
-
- 5
-
-
- stalled builds
- quick builds
- (and 2 more)
-
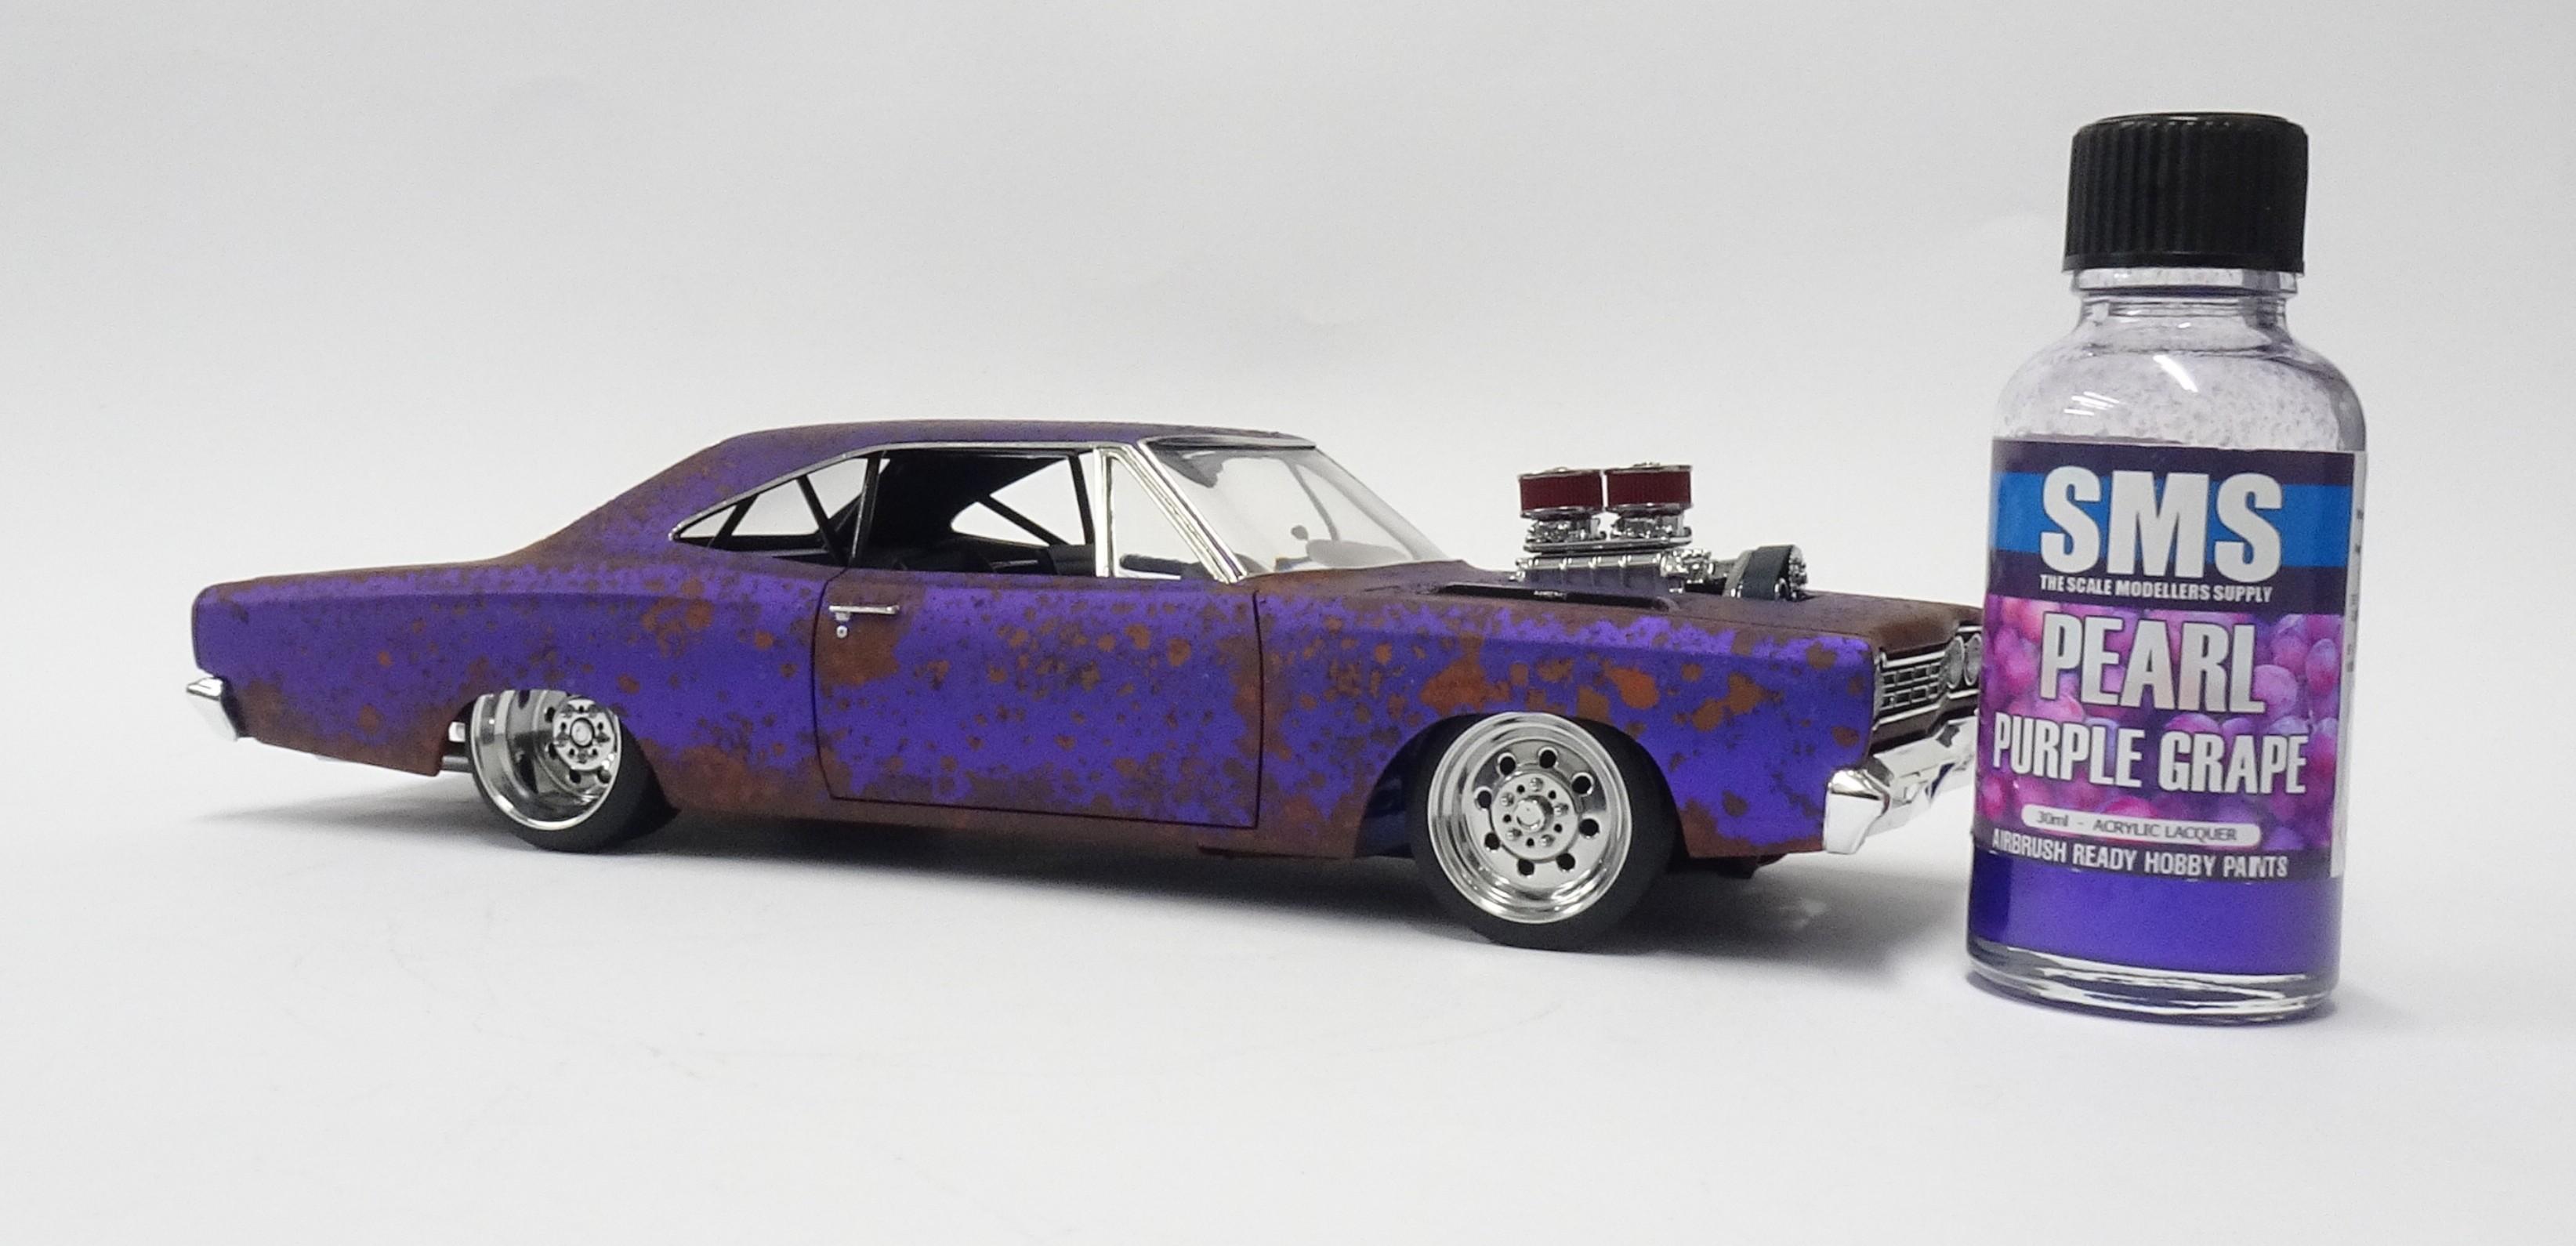
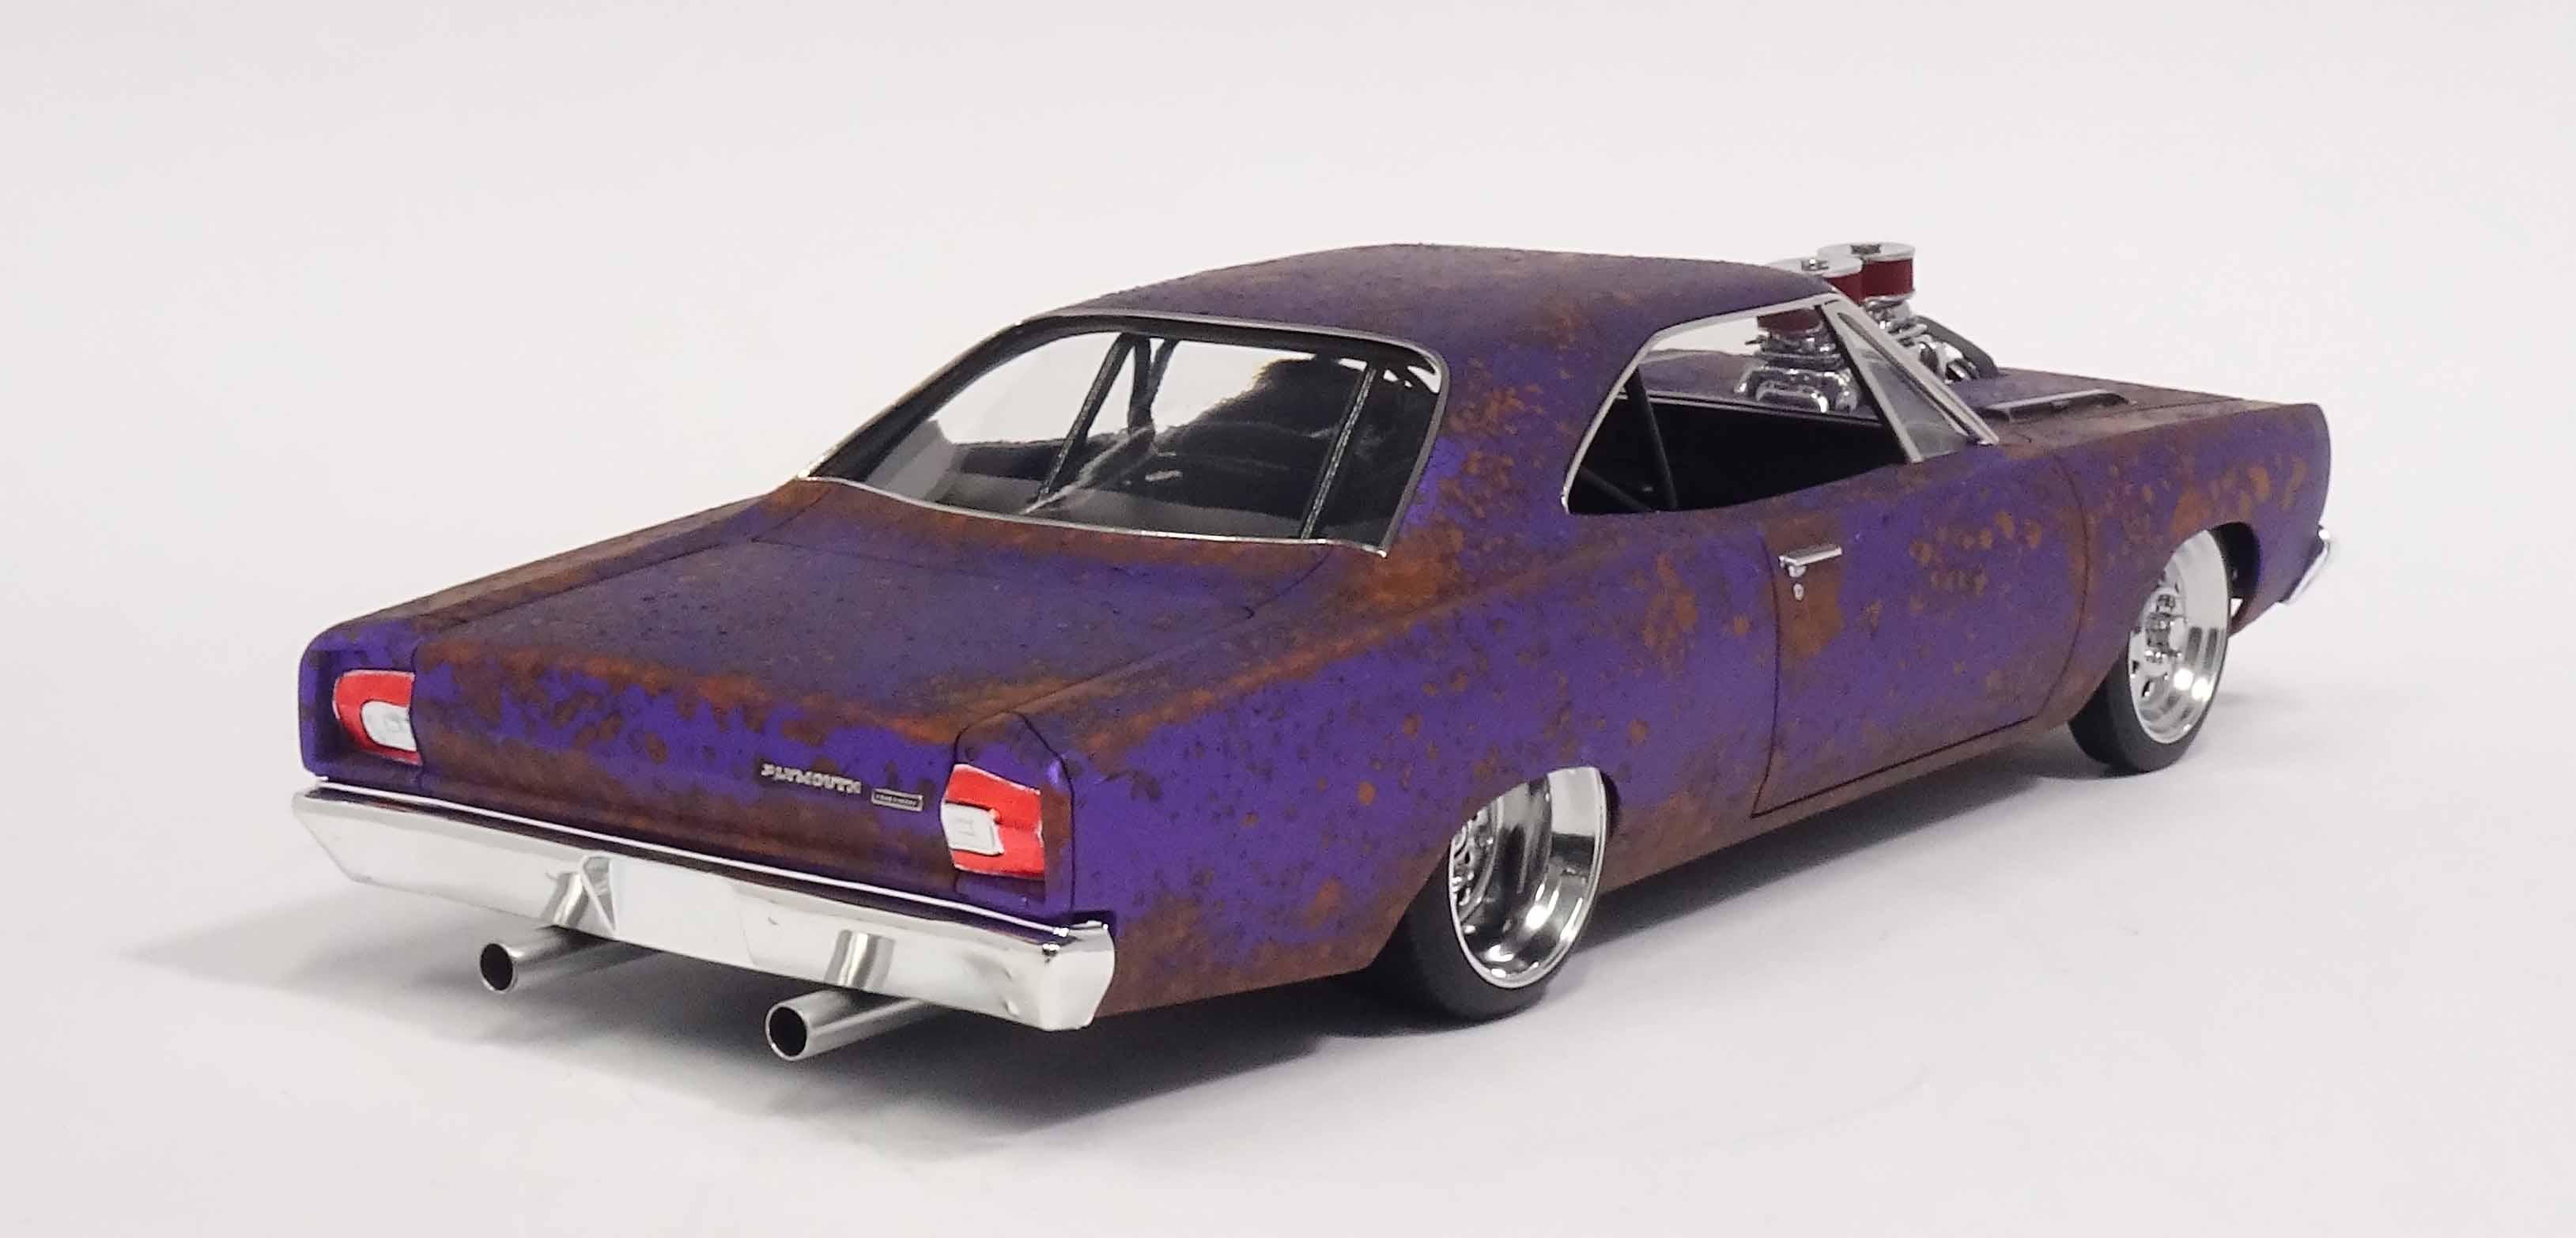
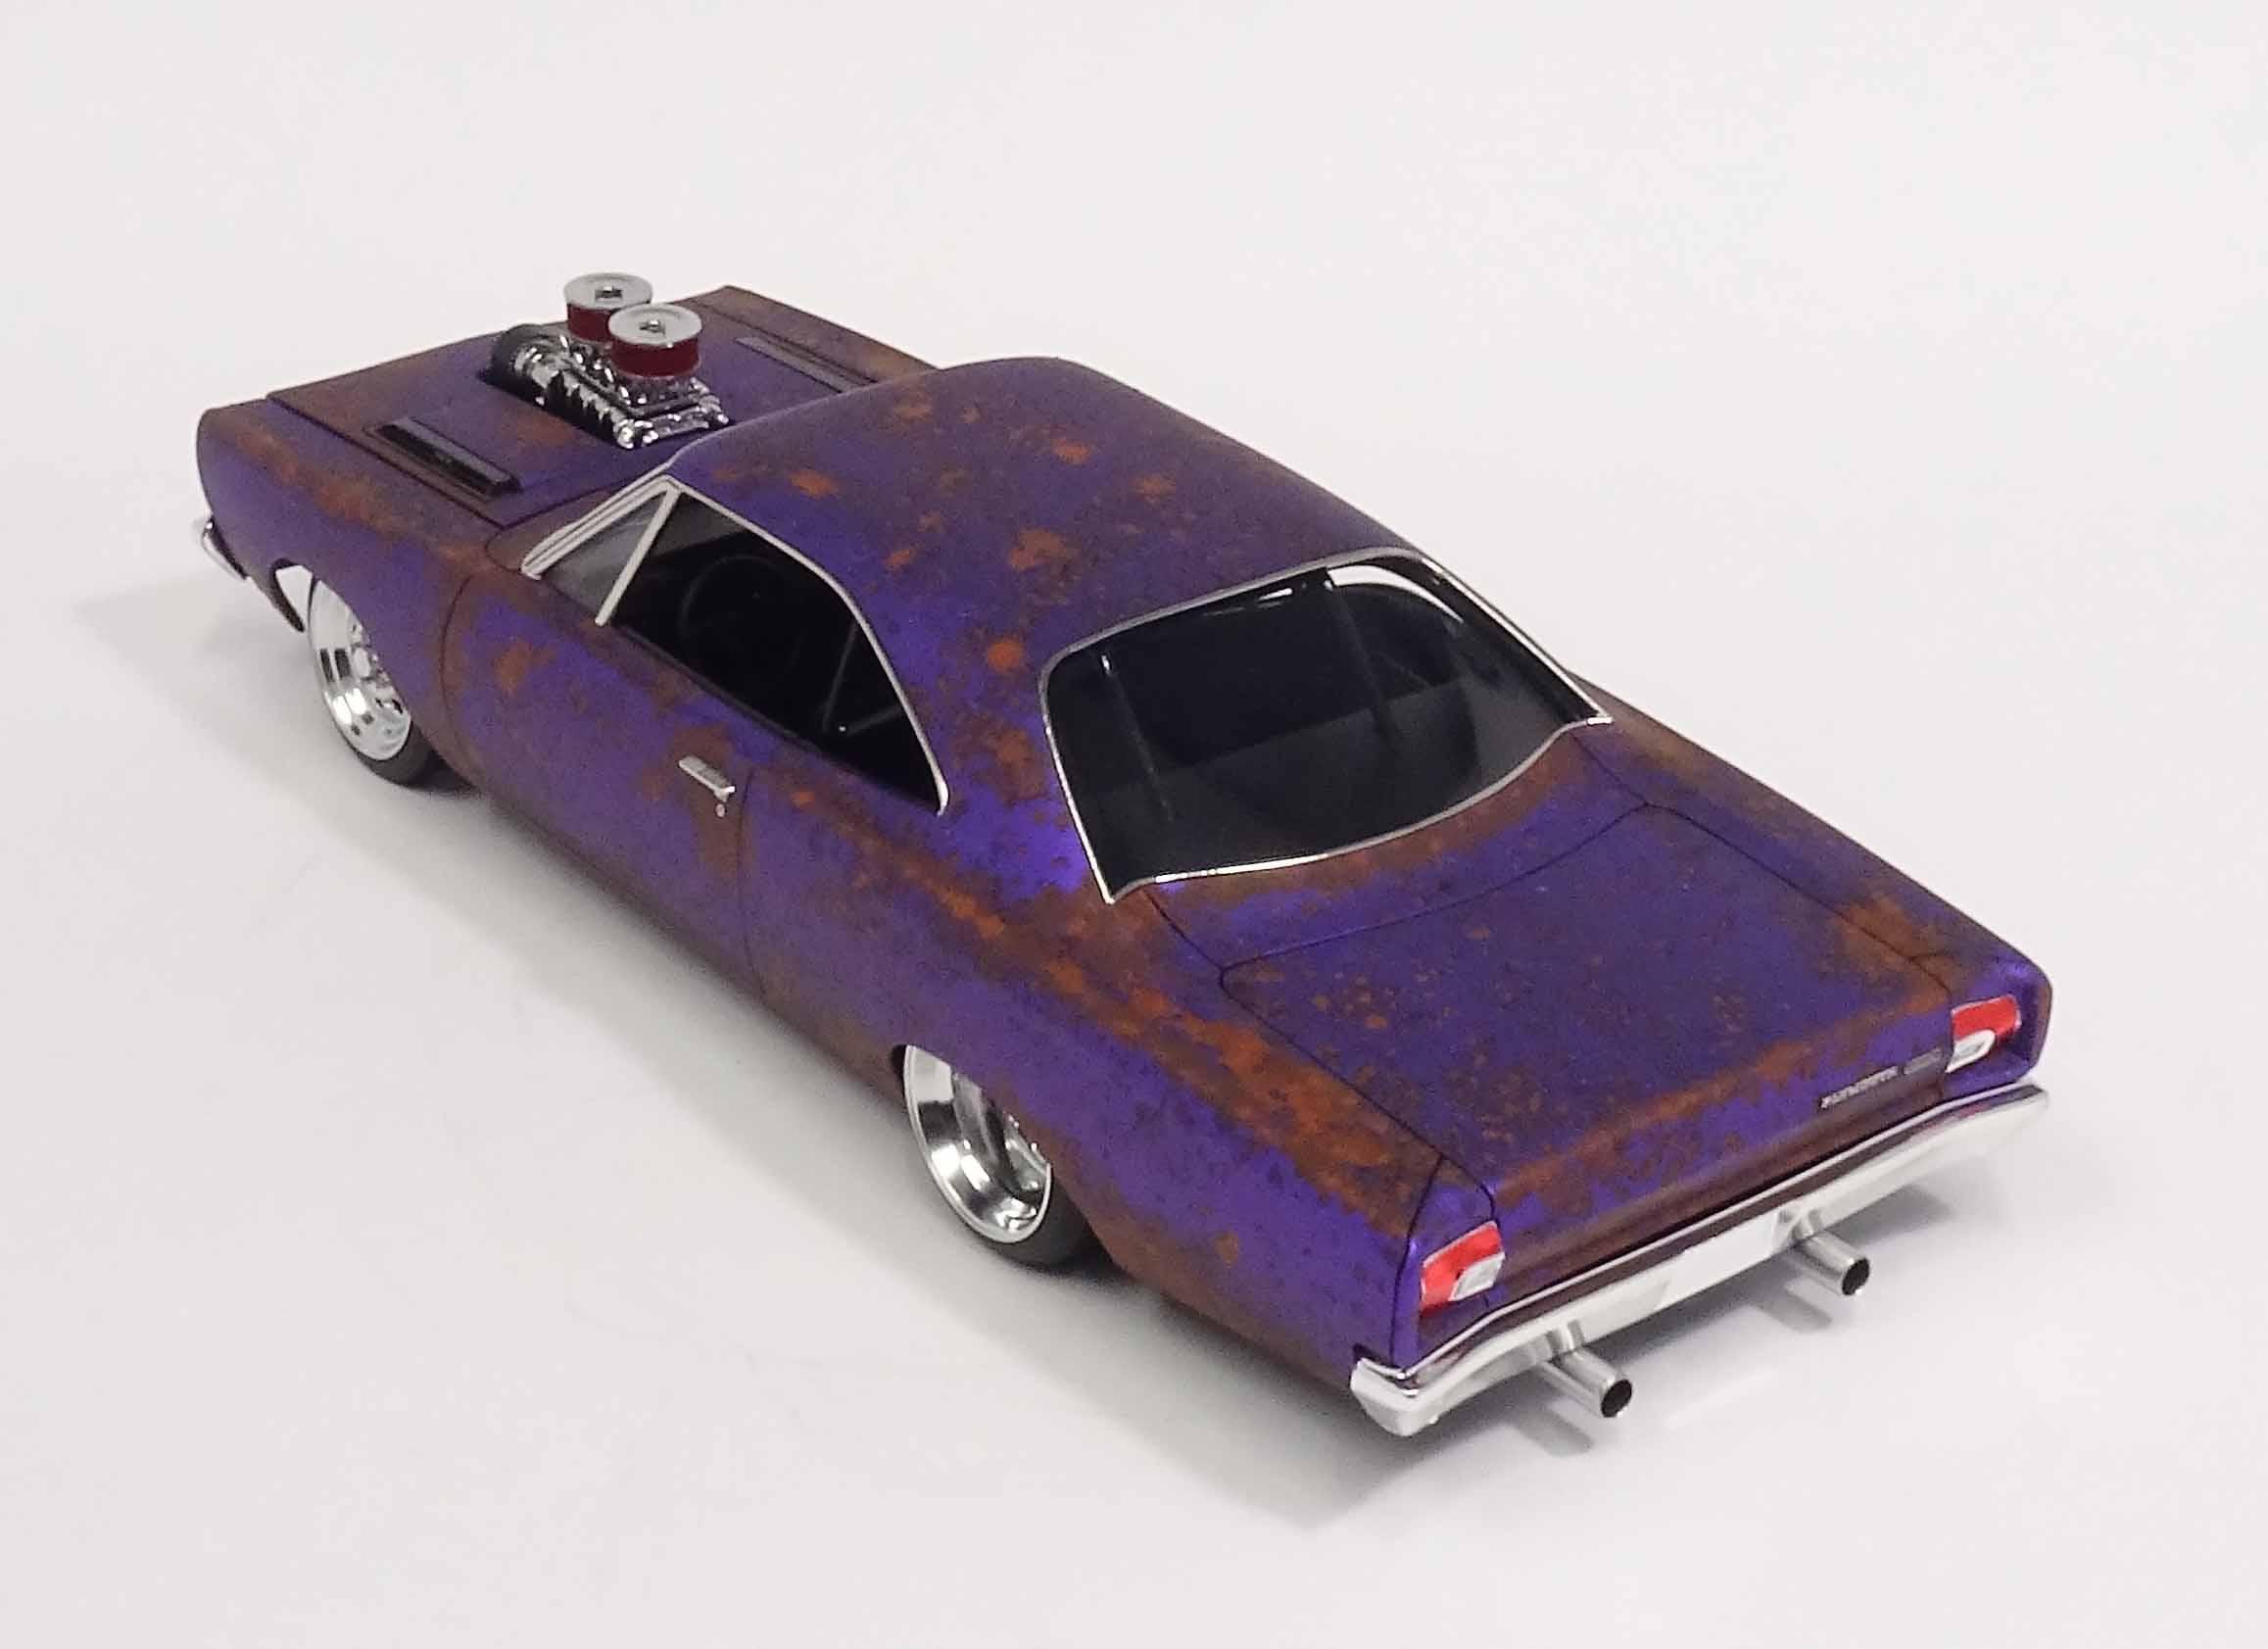
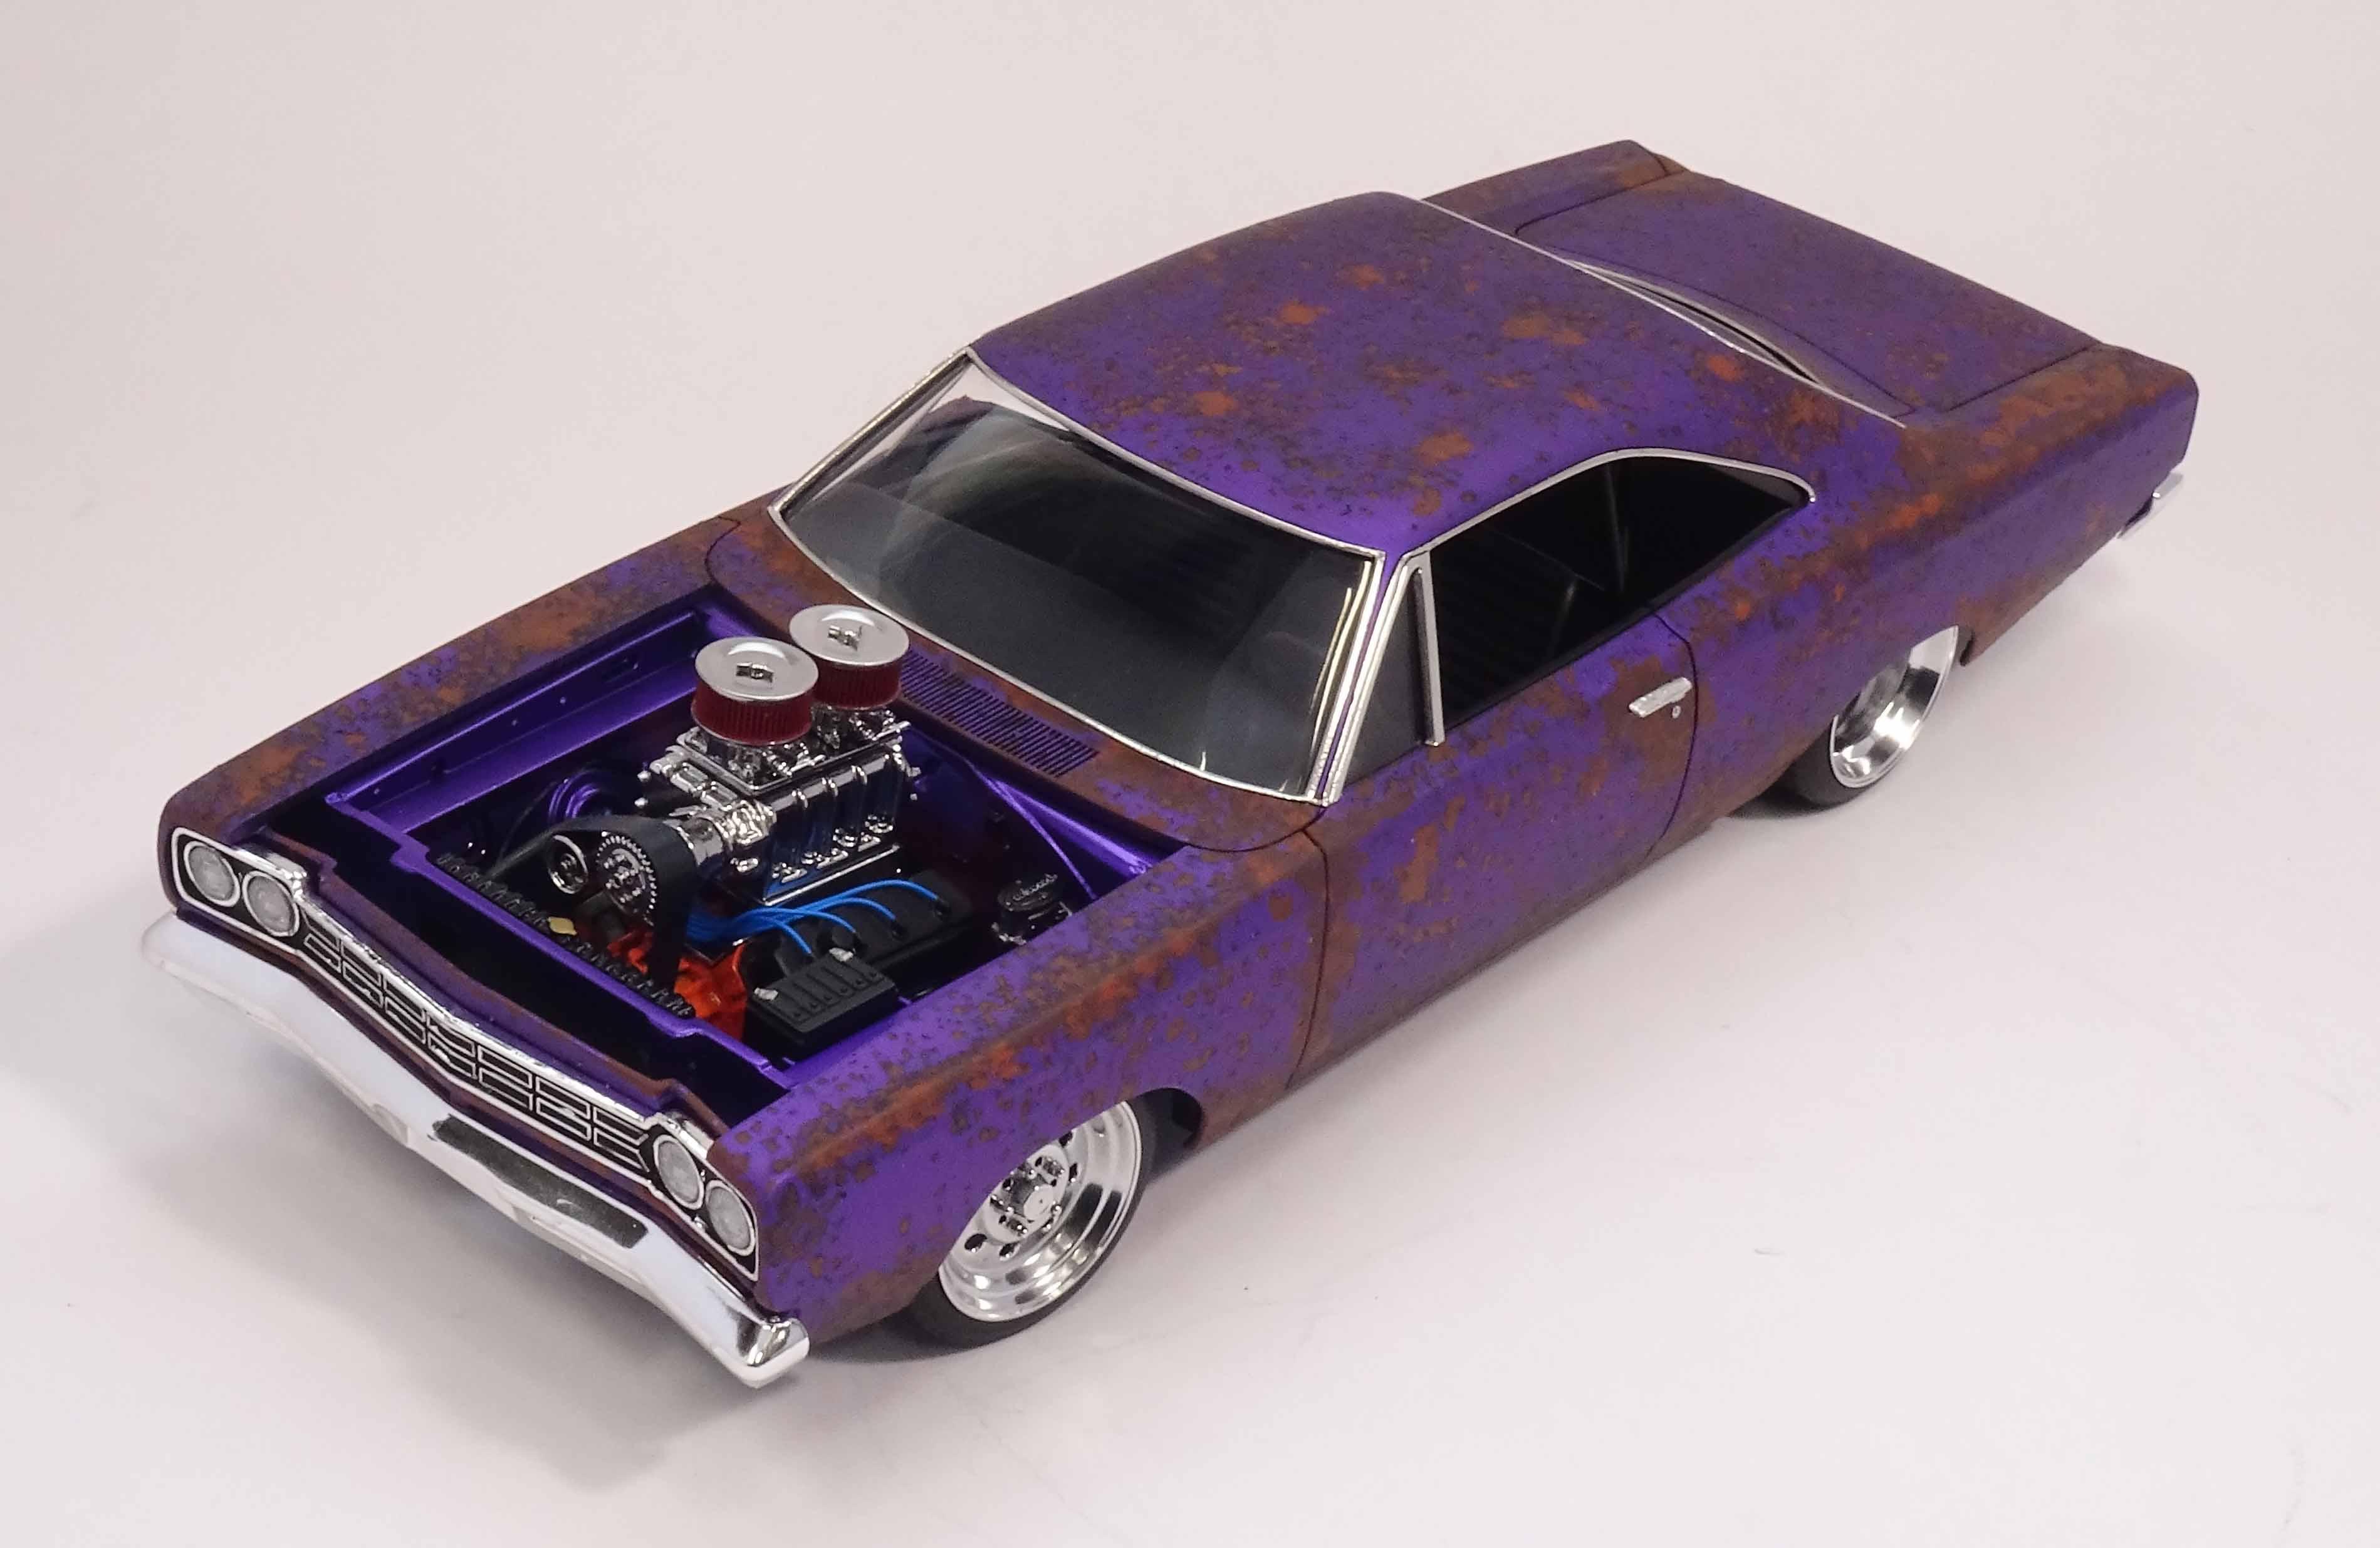
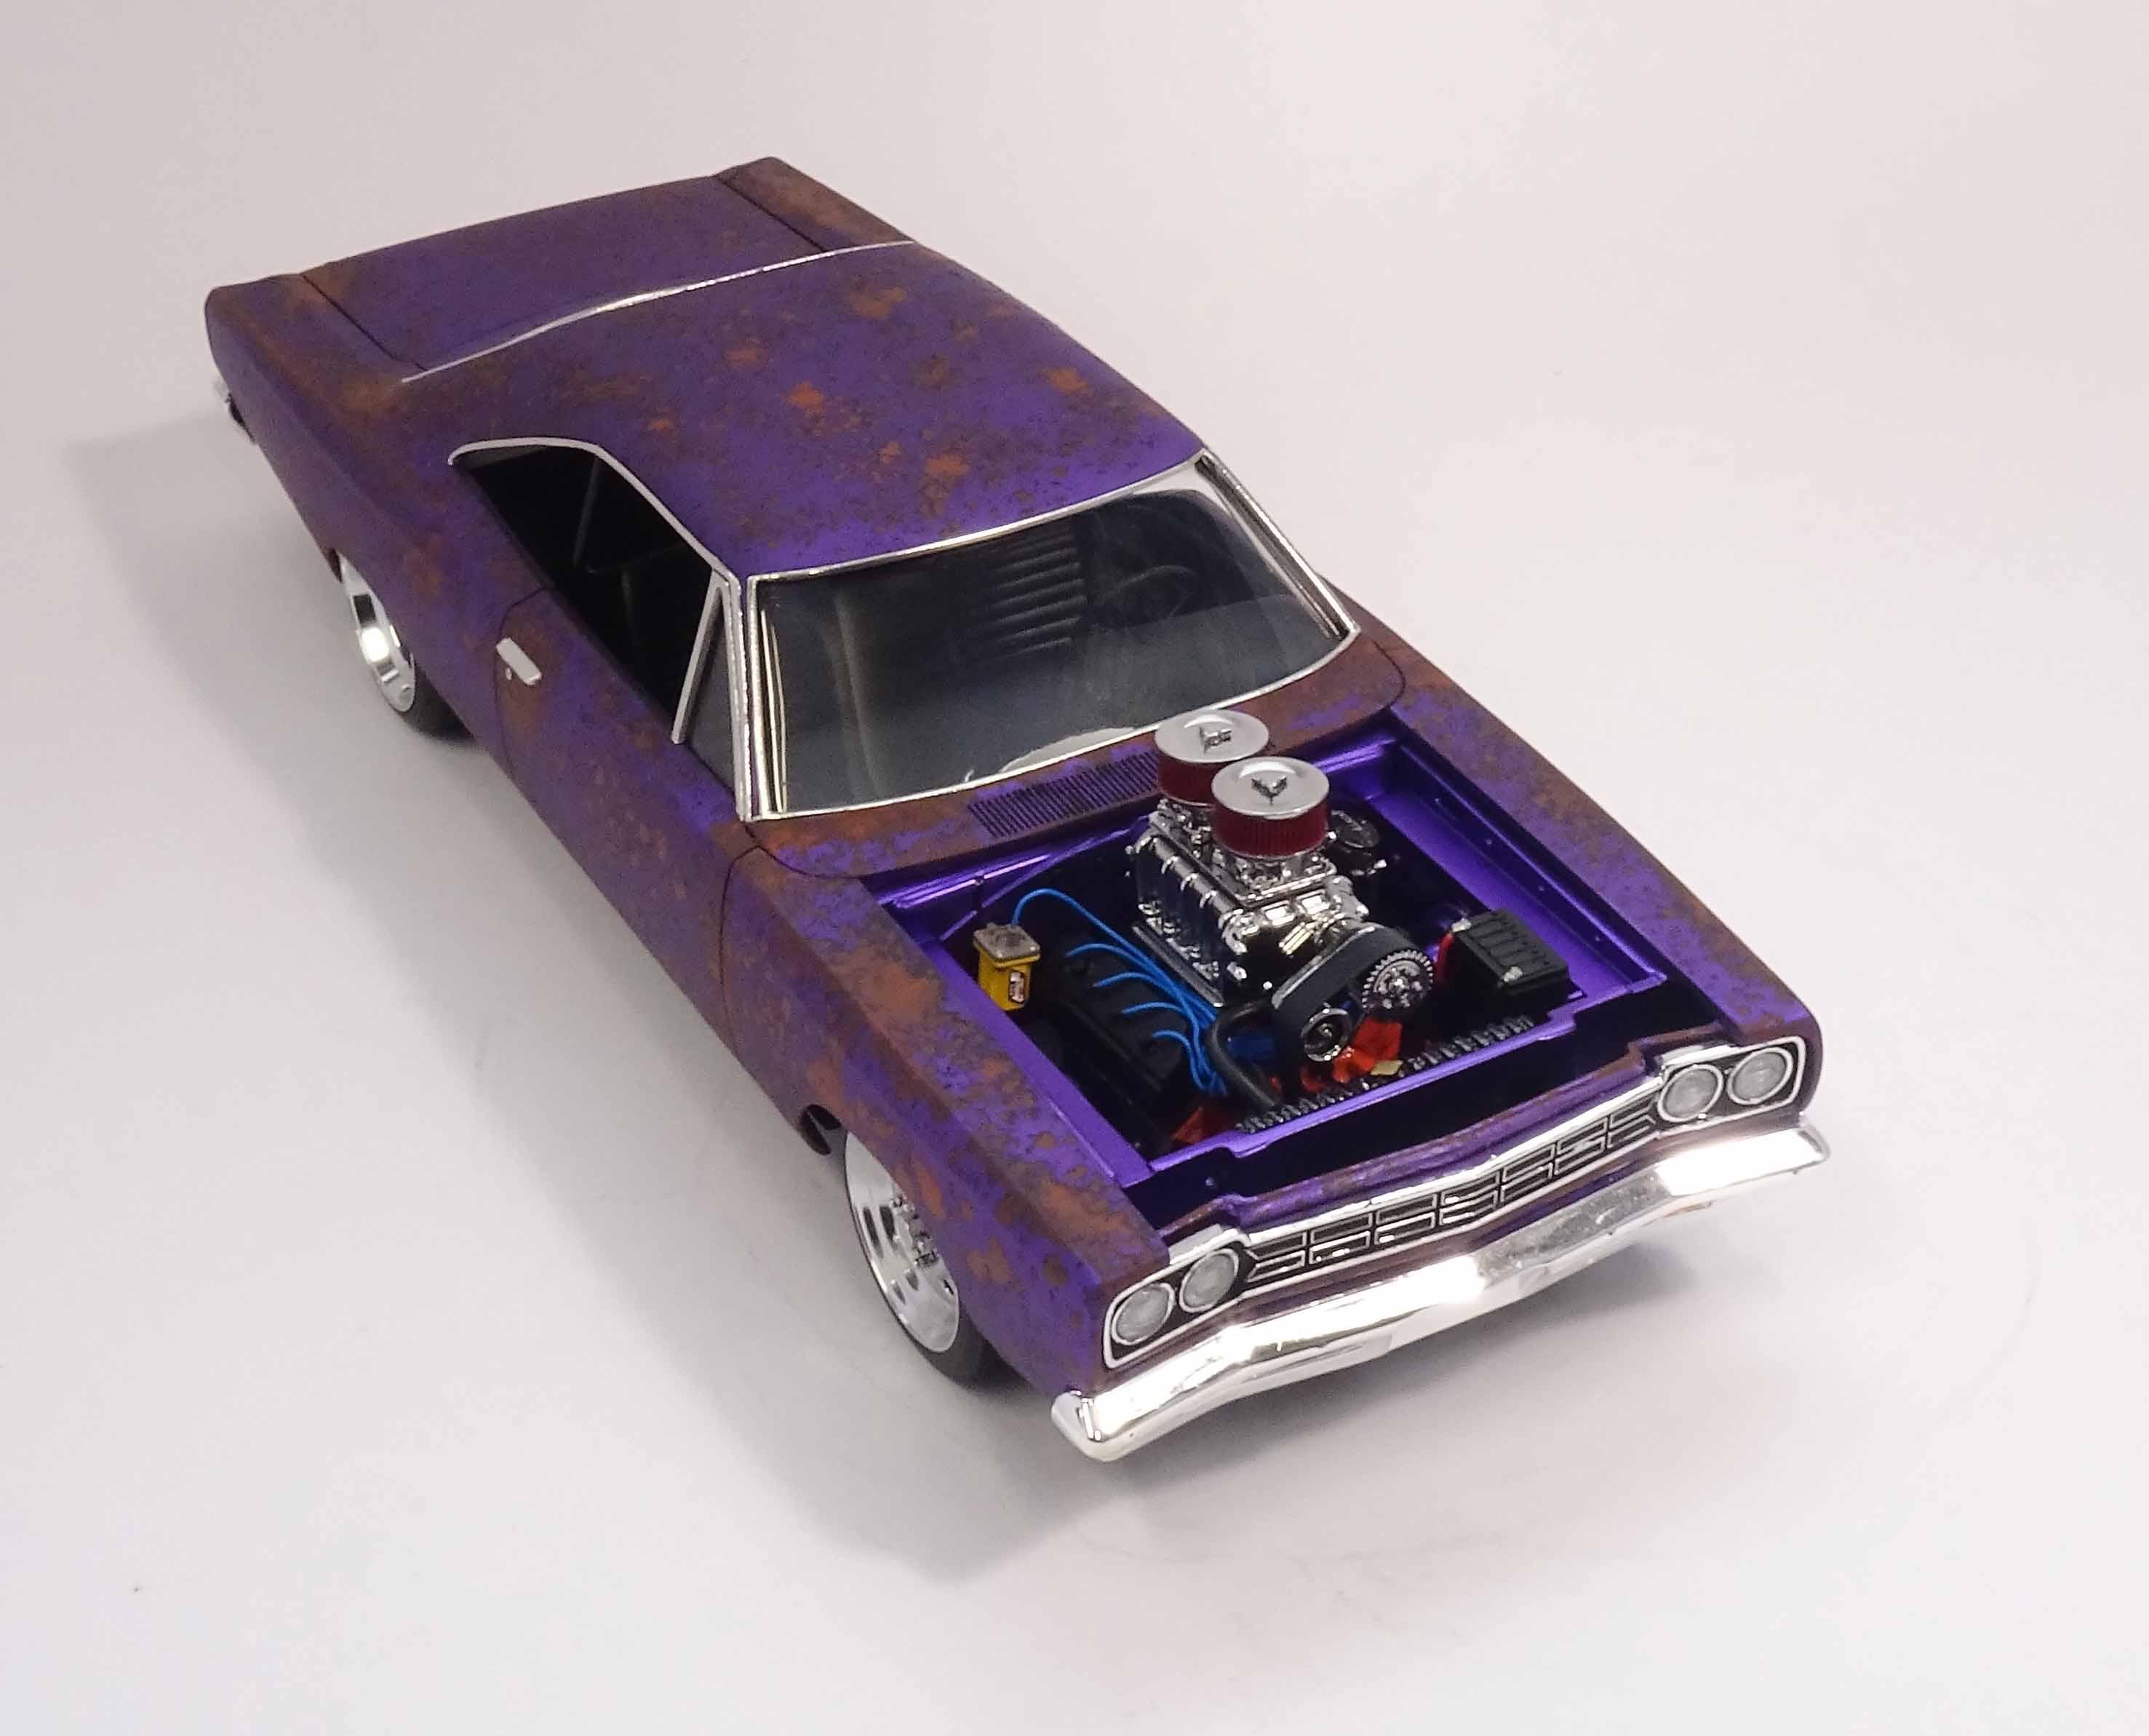
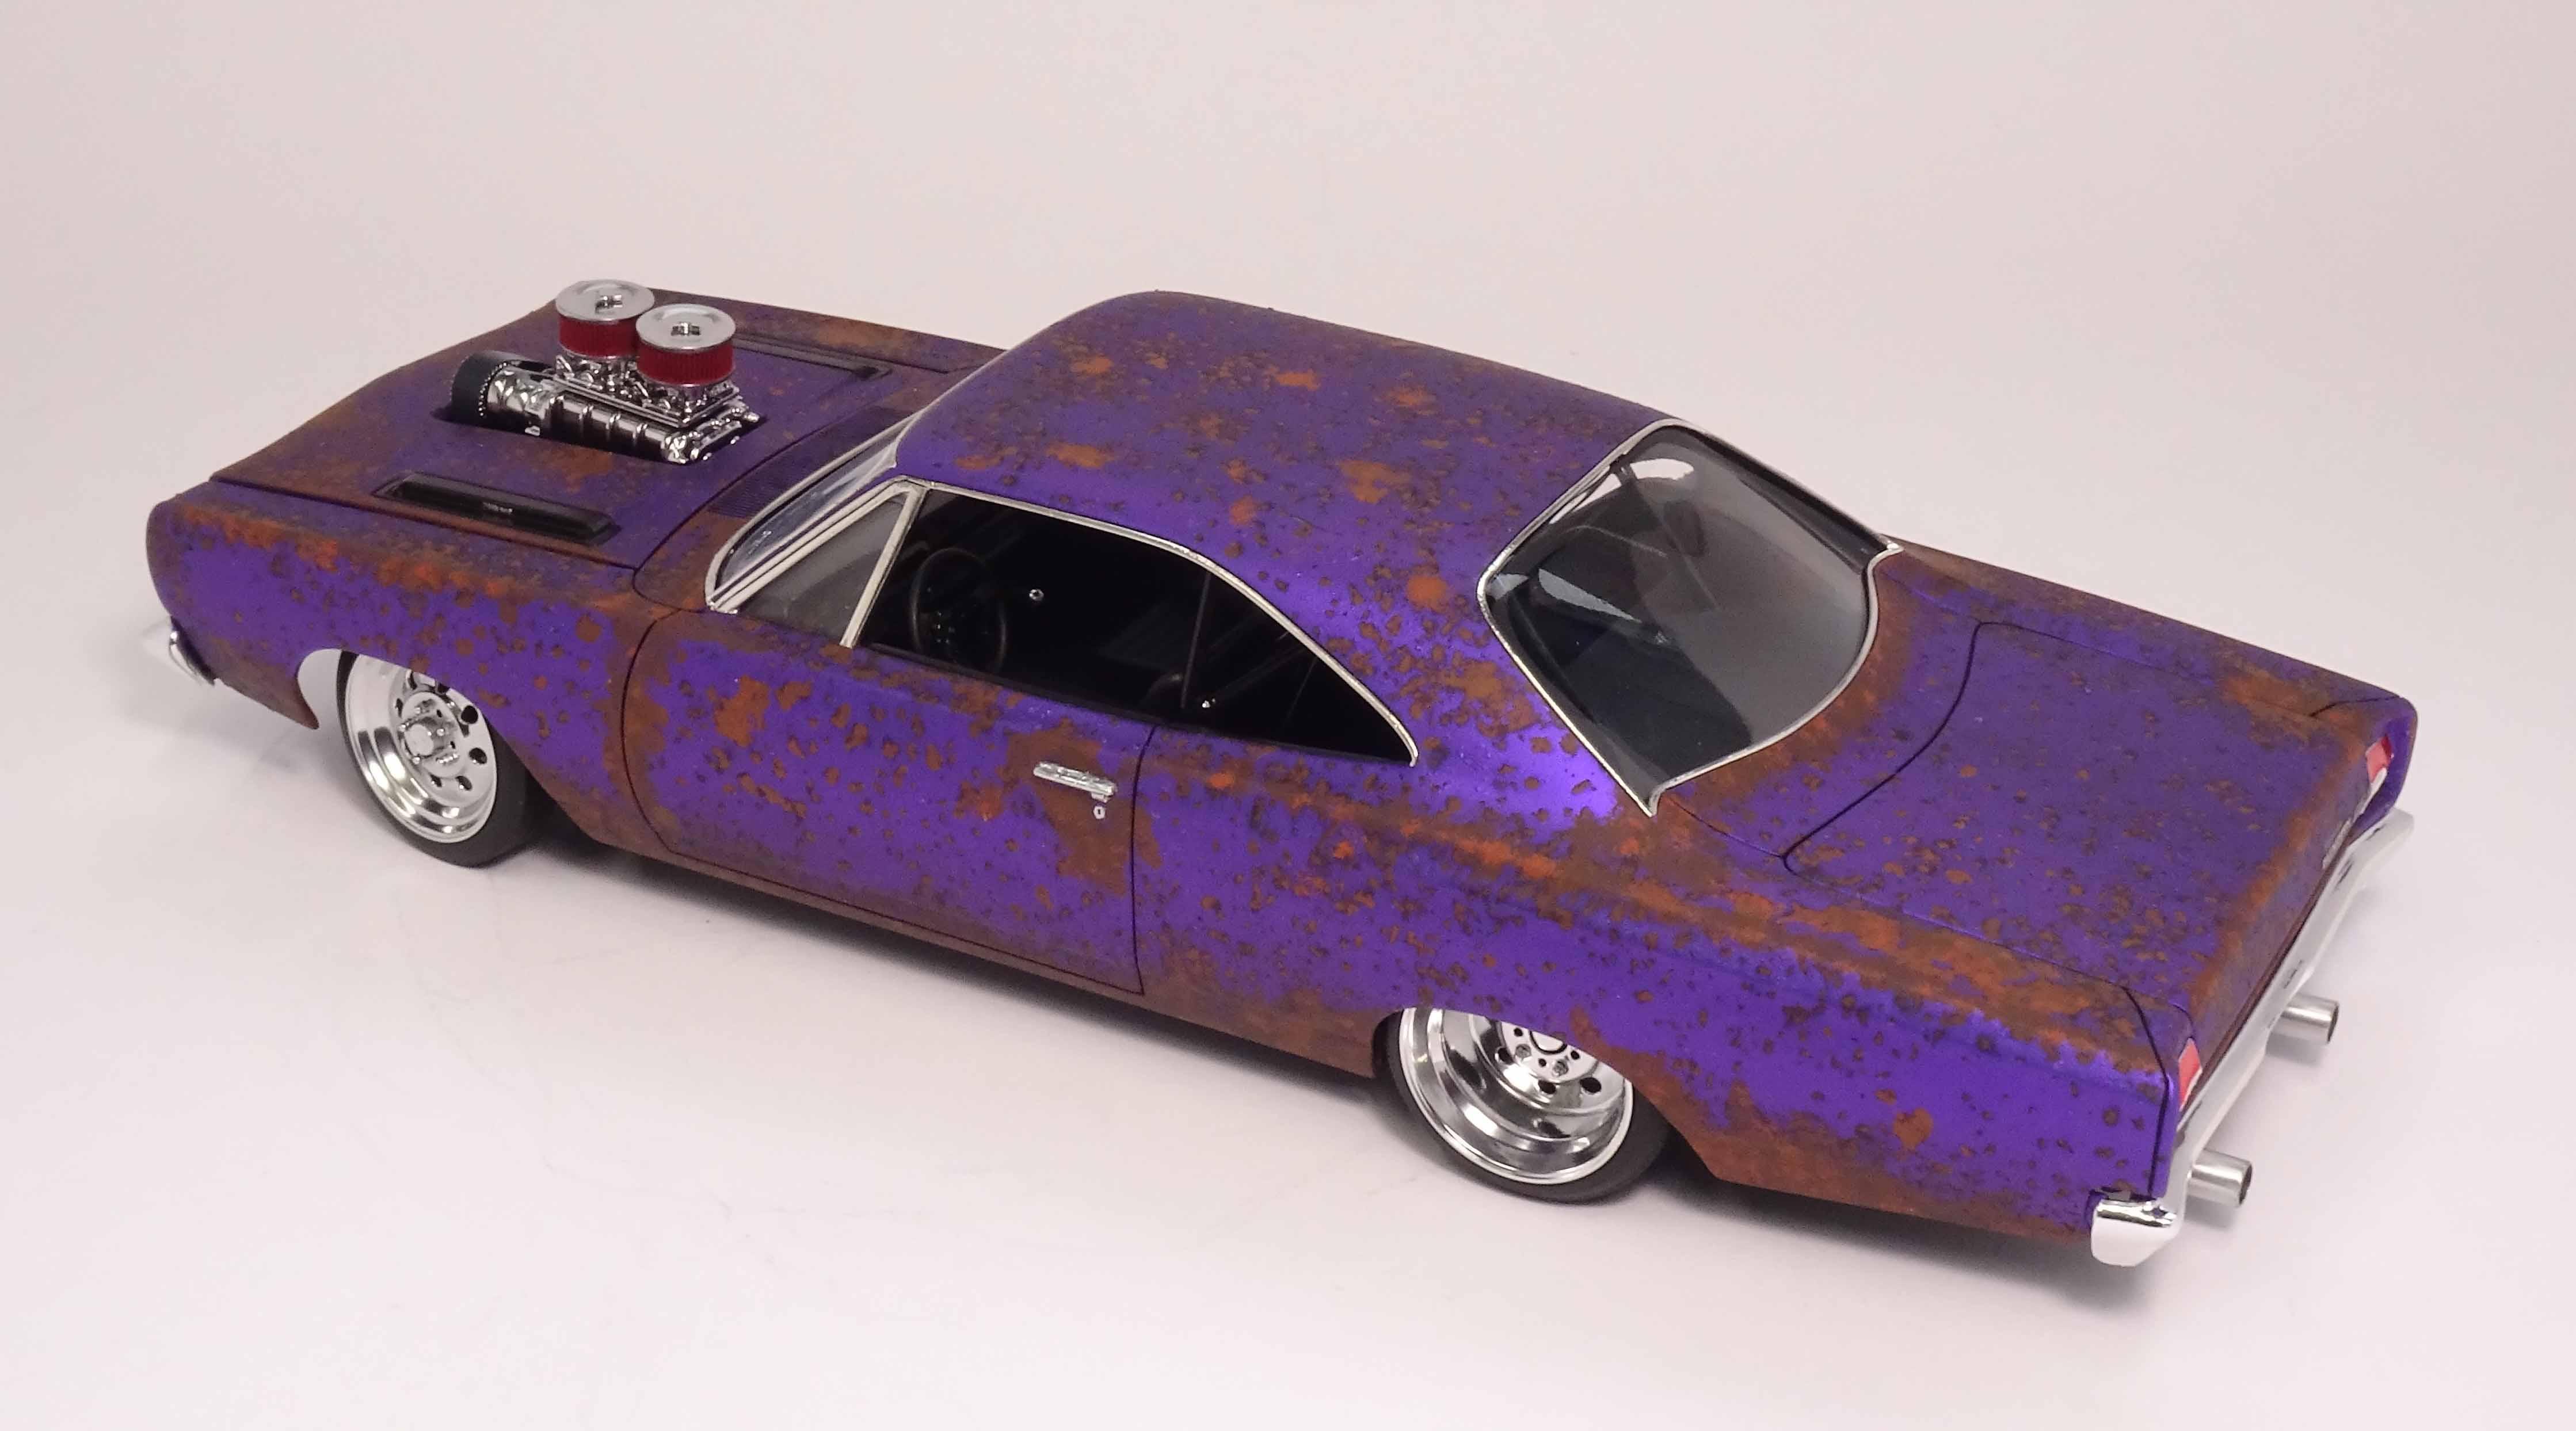
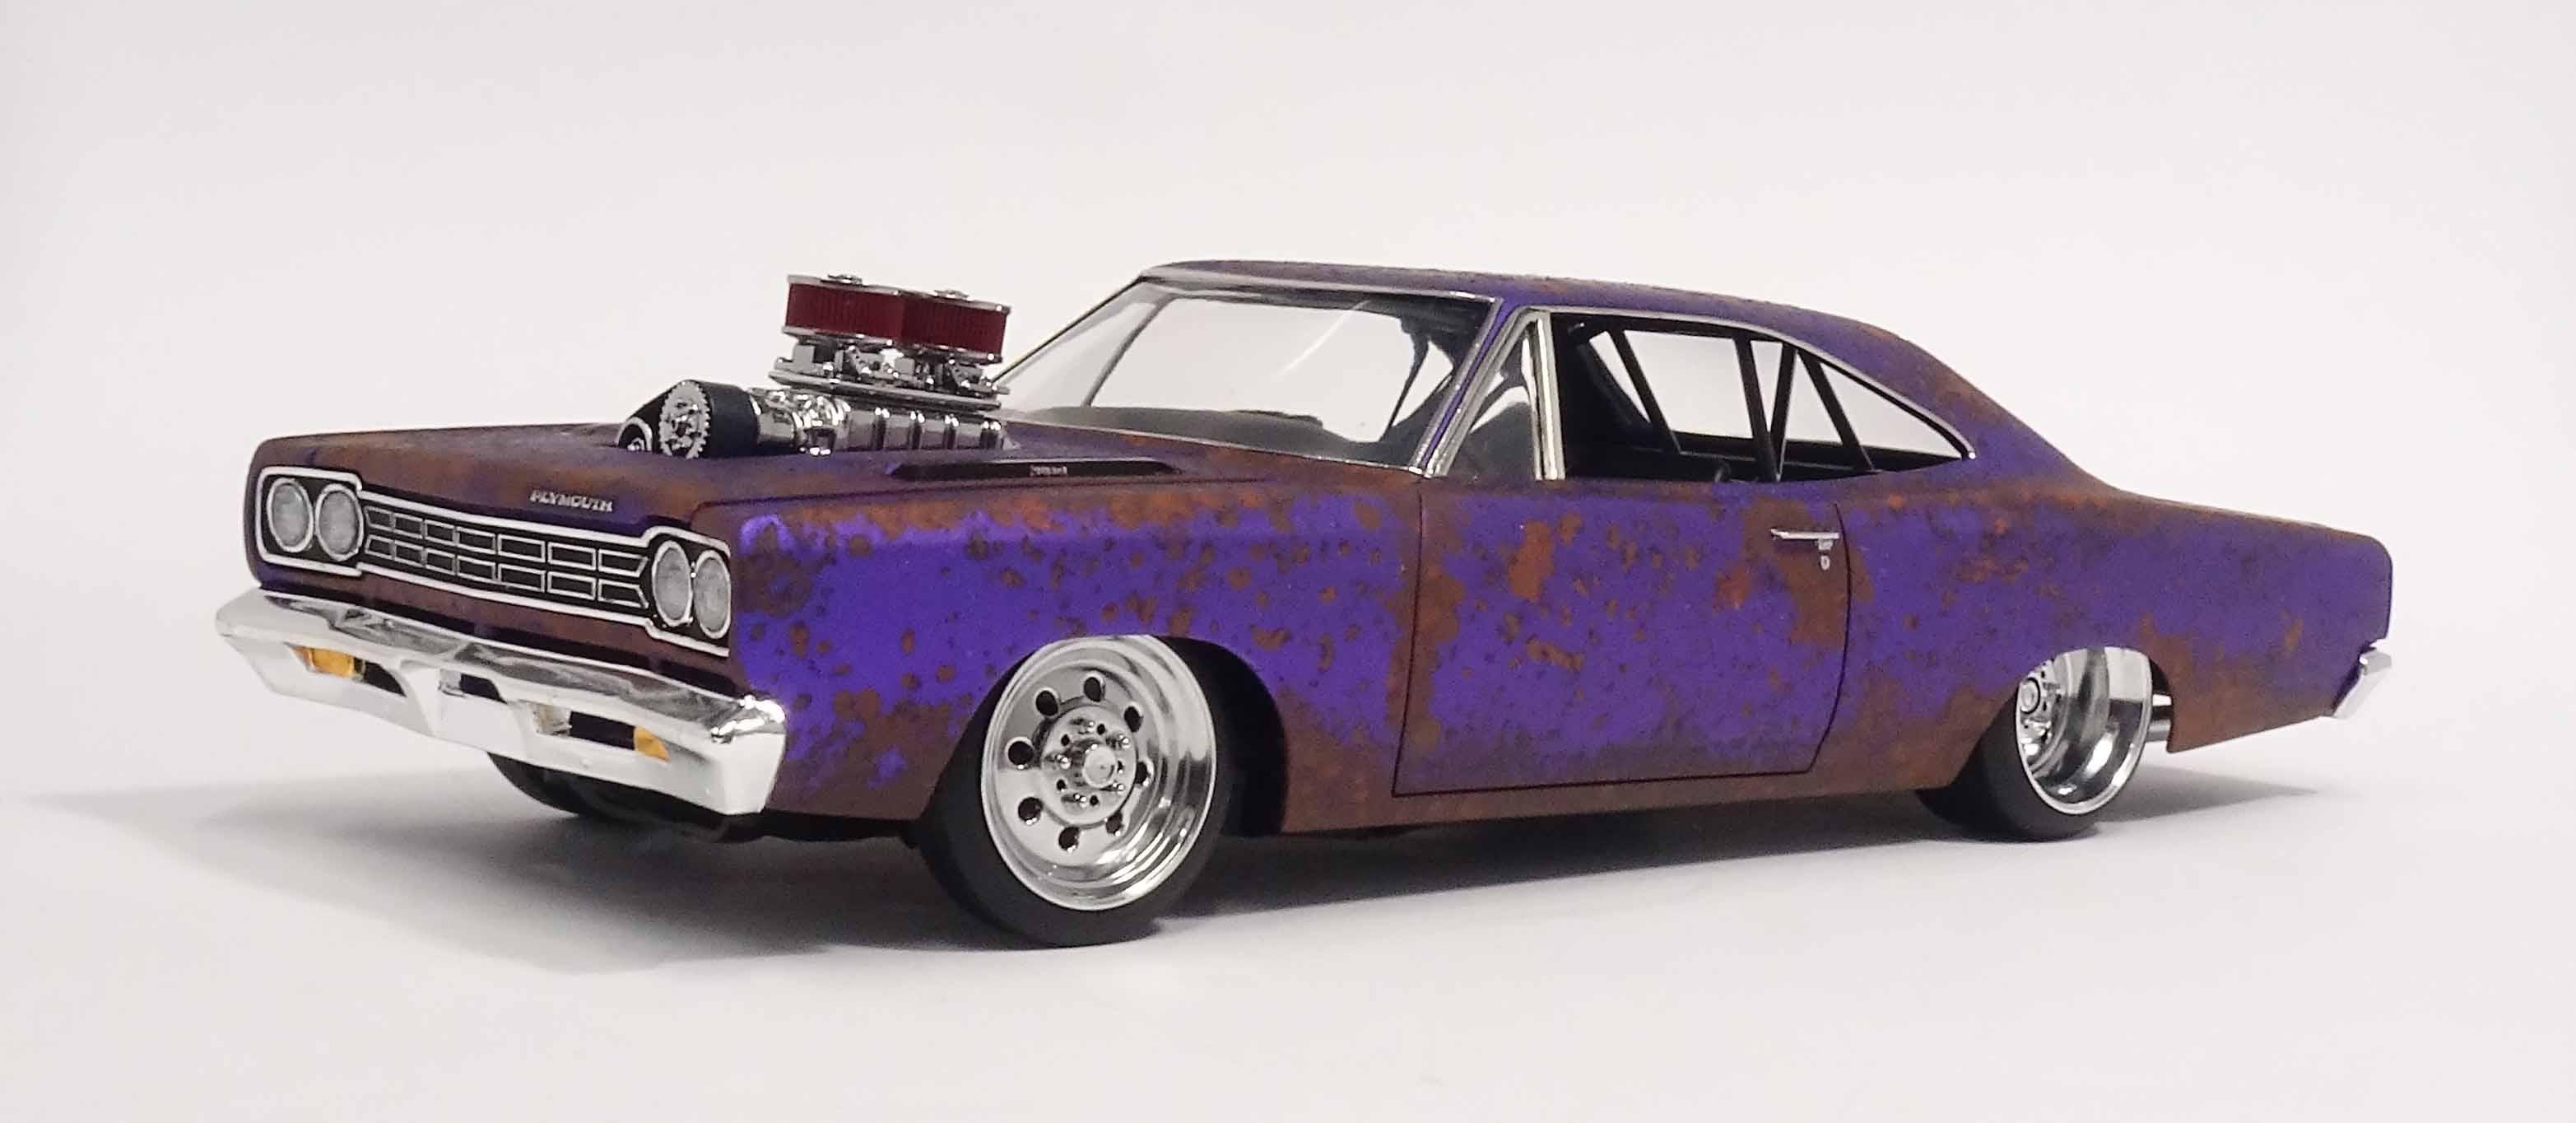
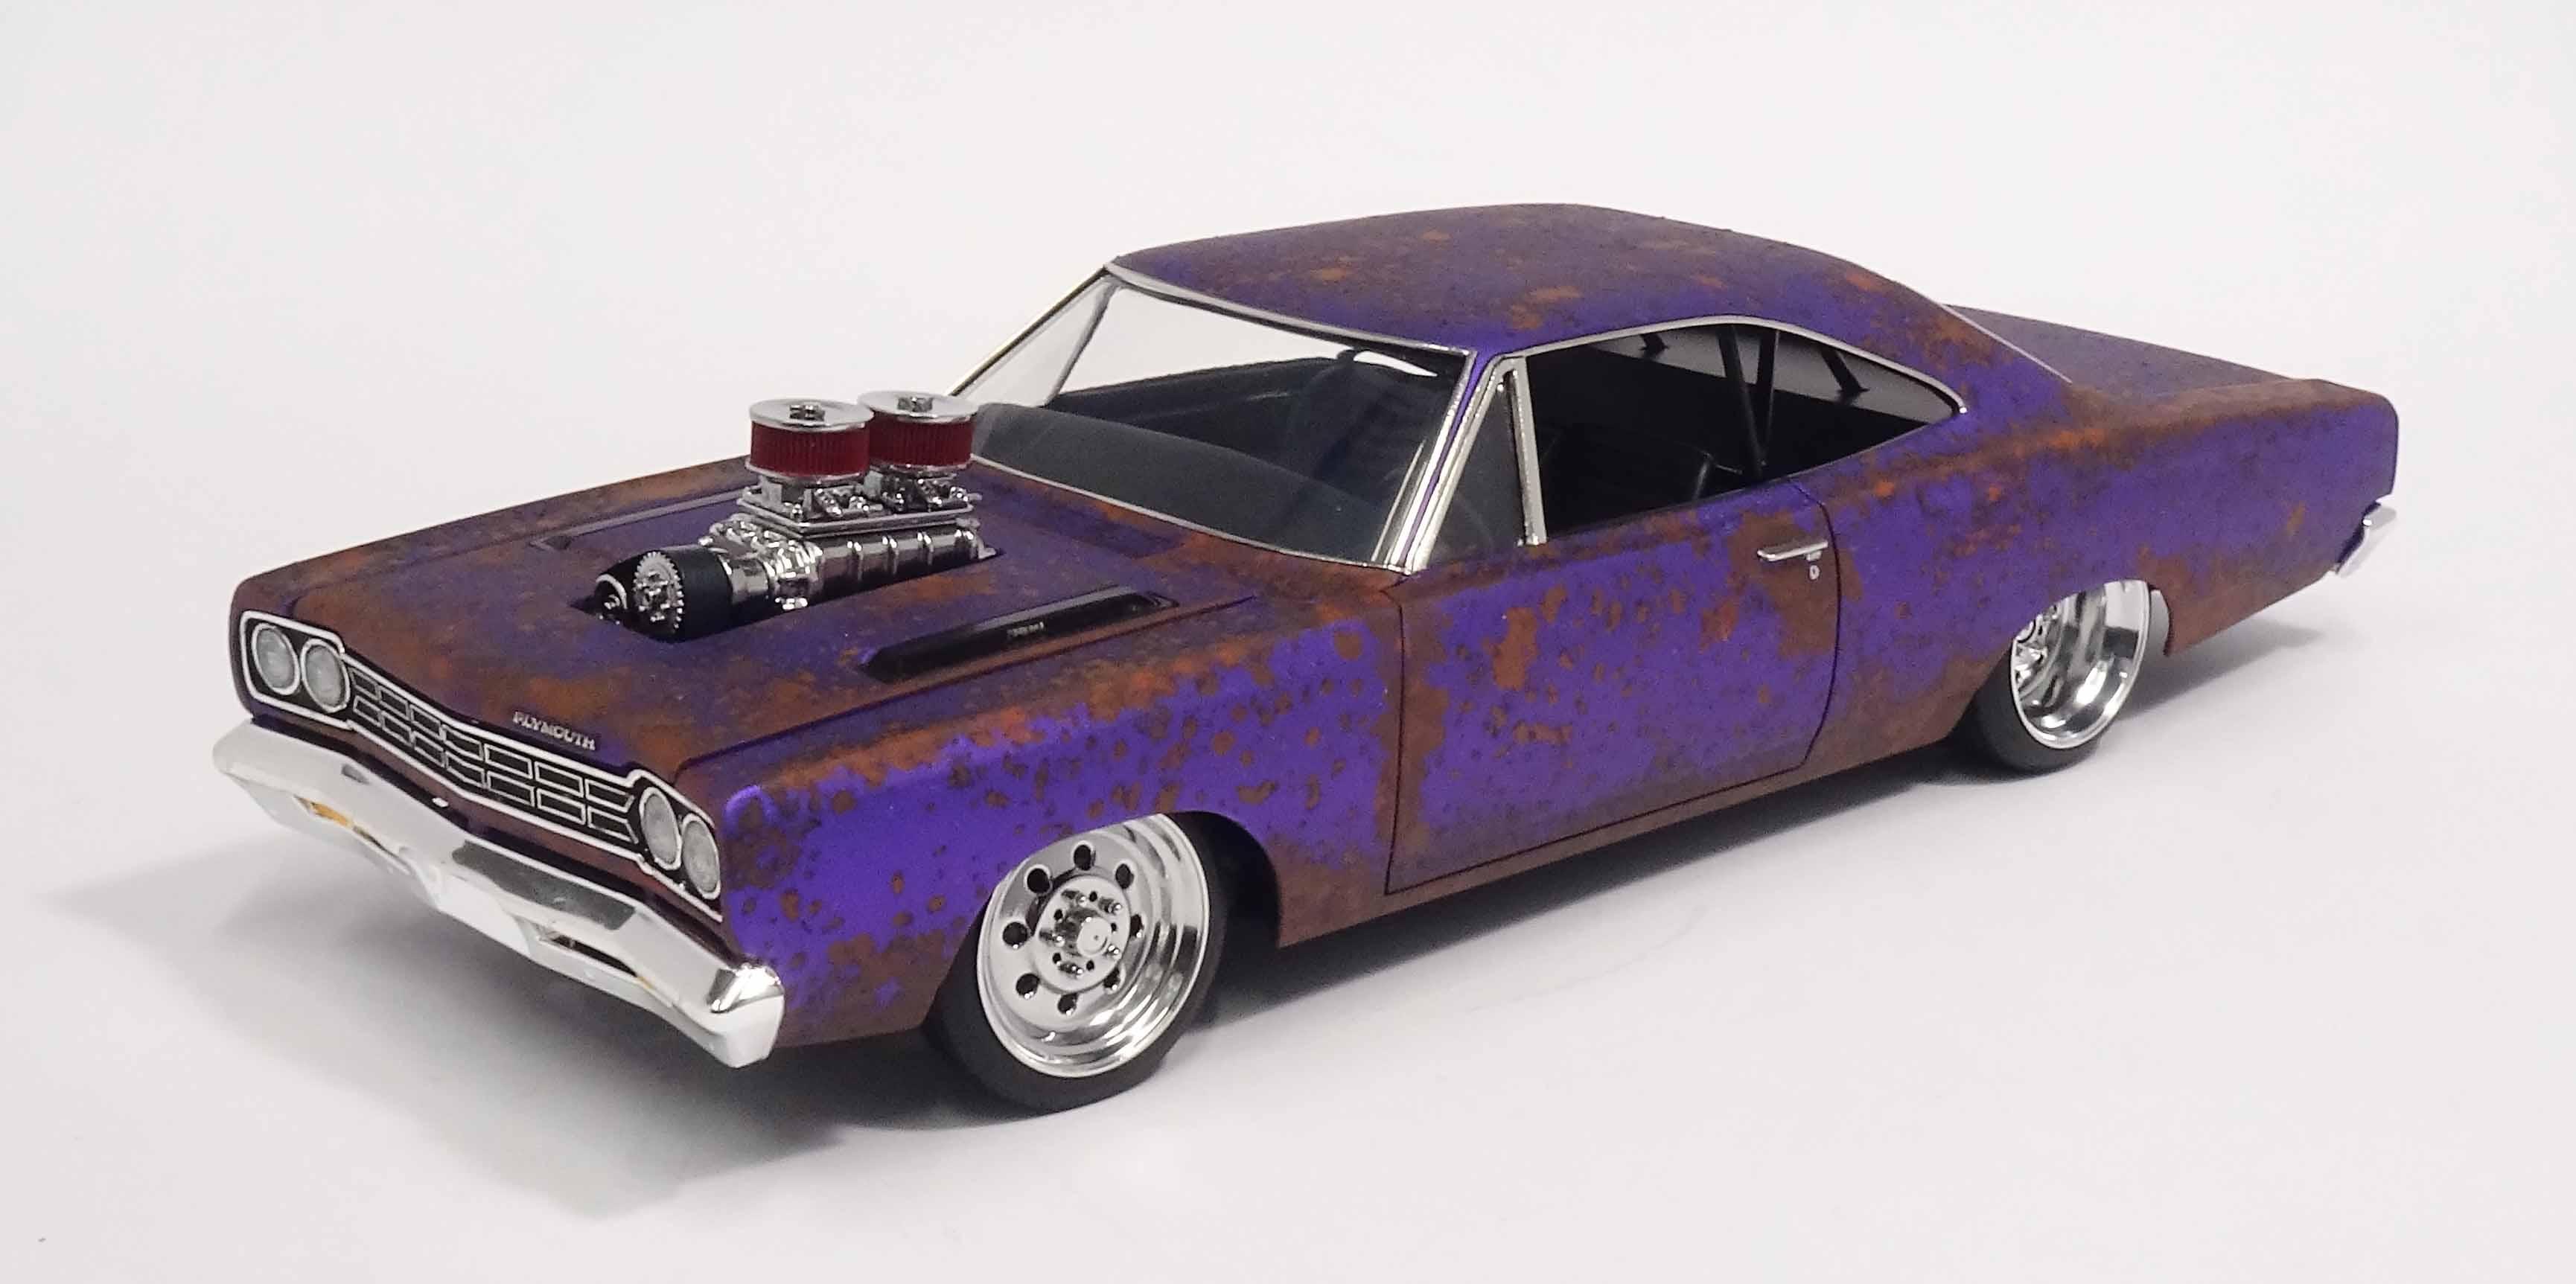
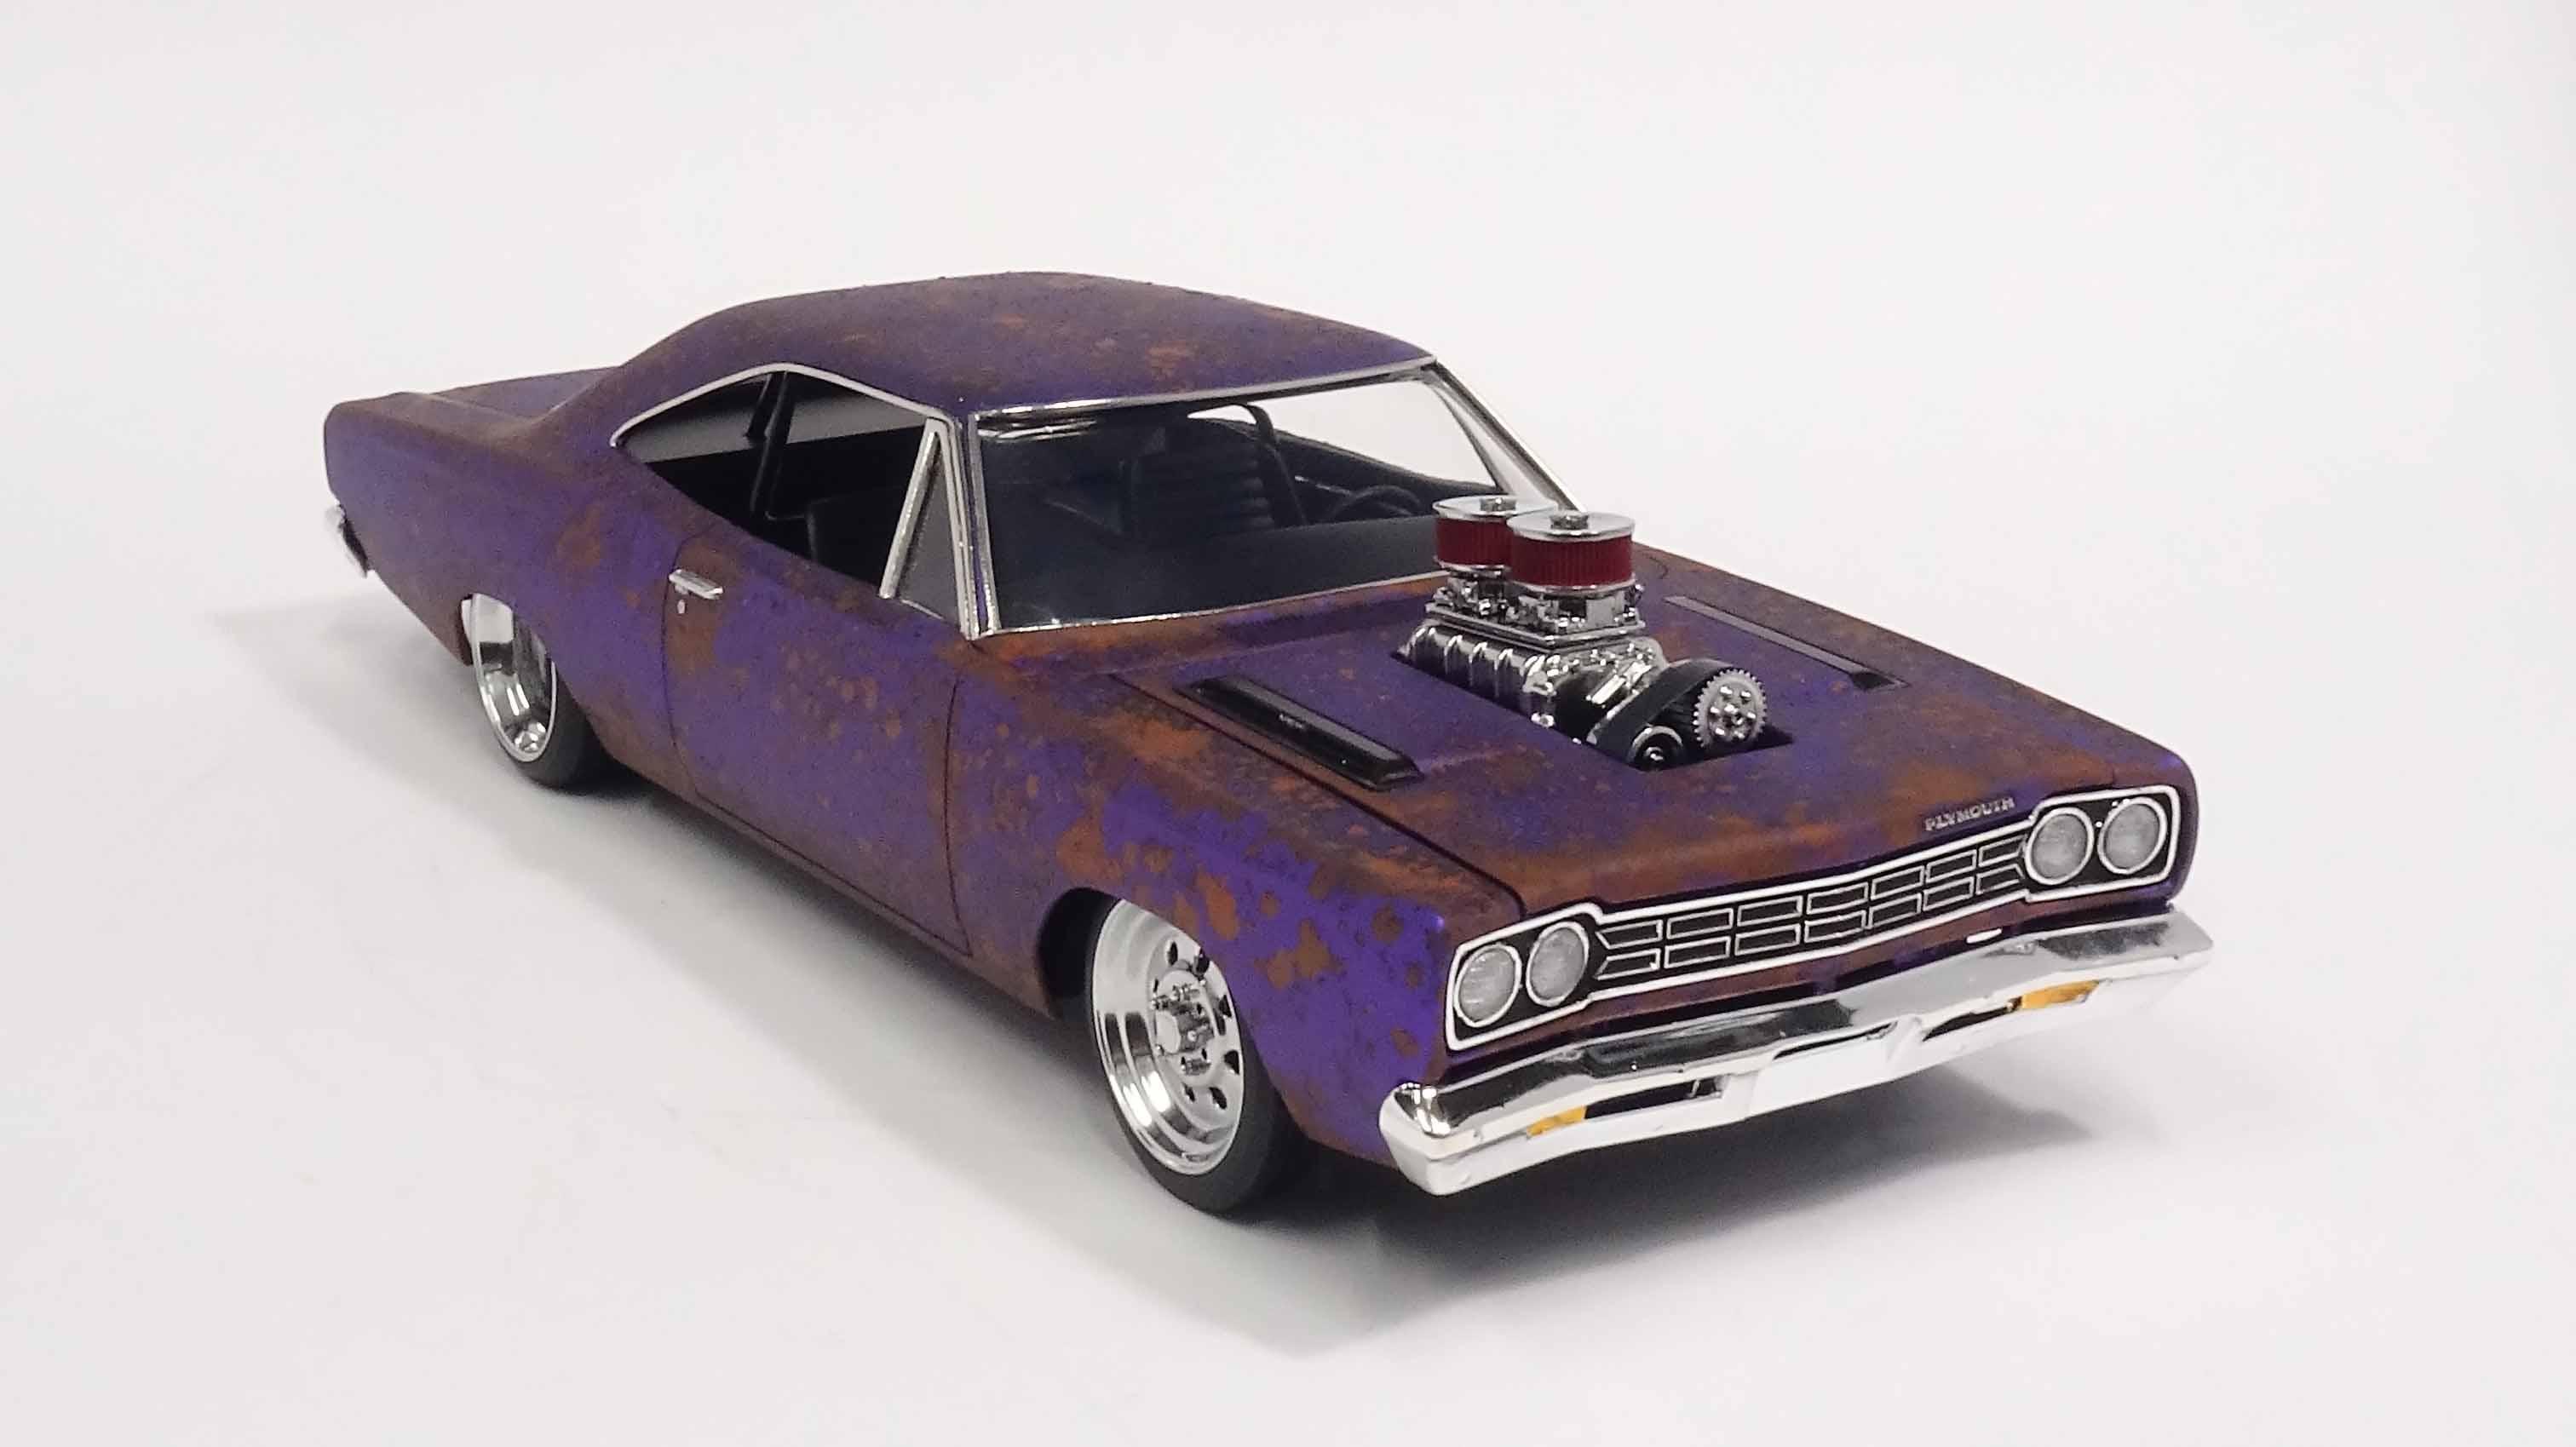
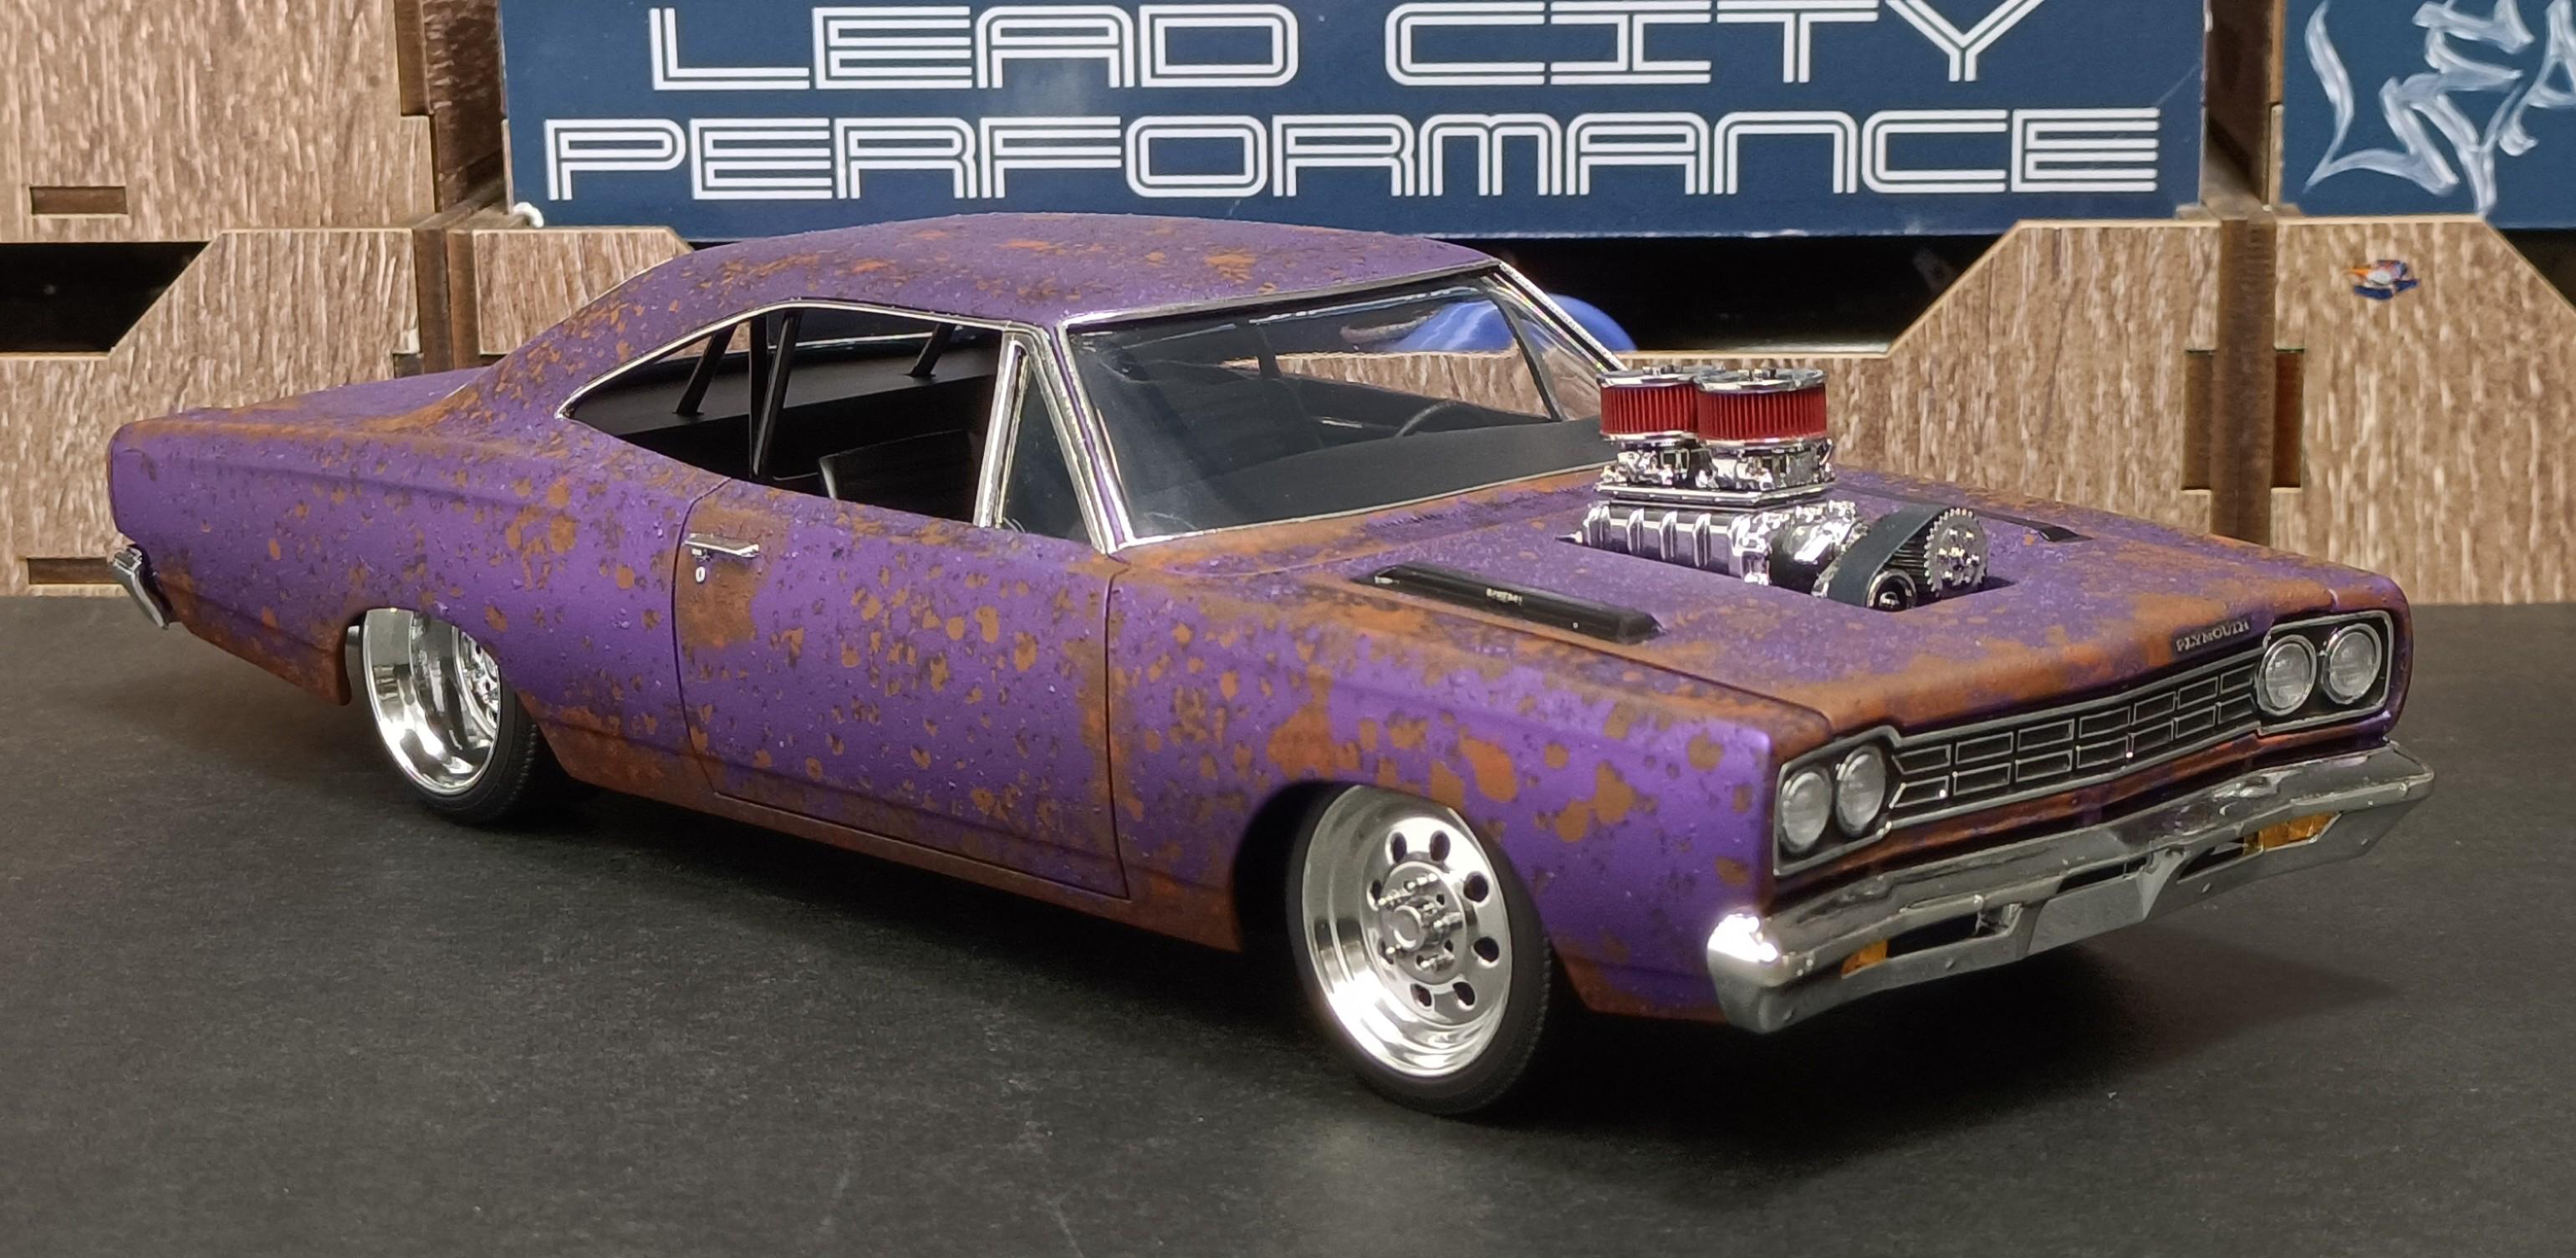
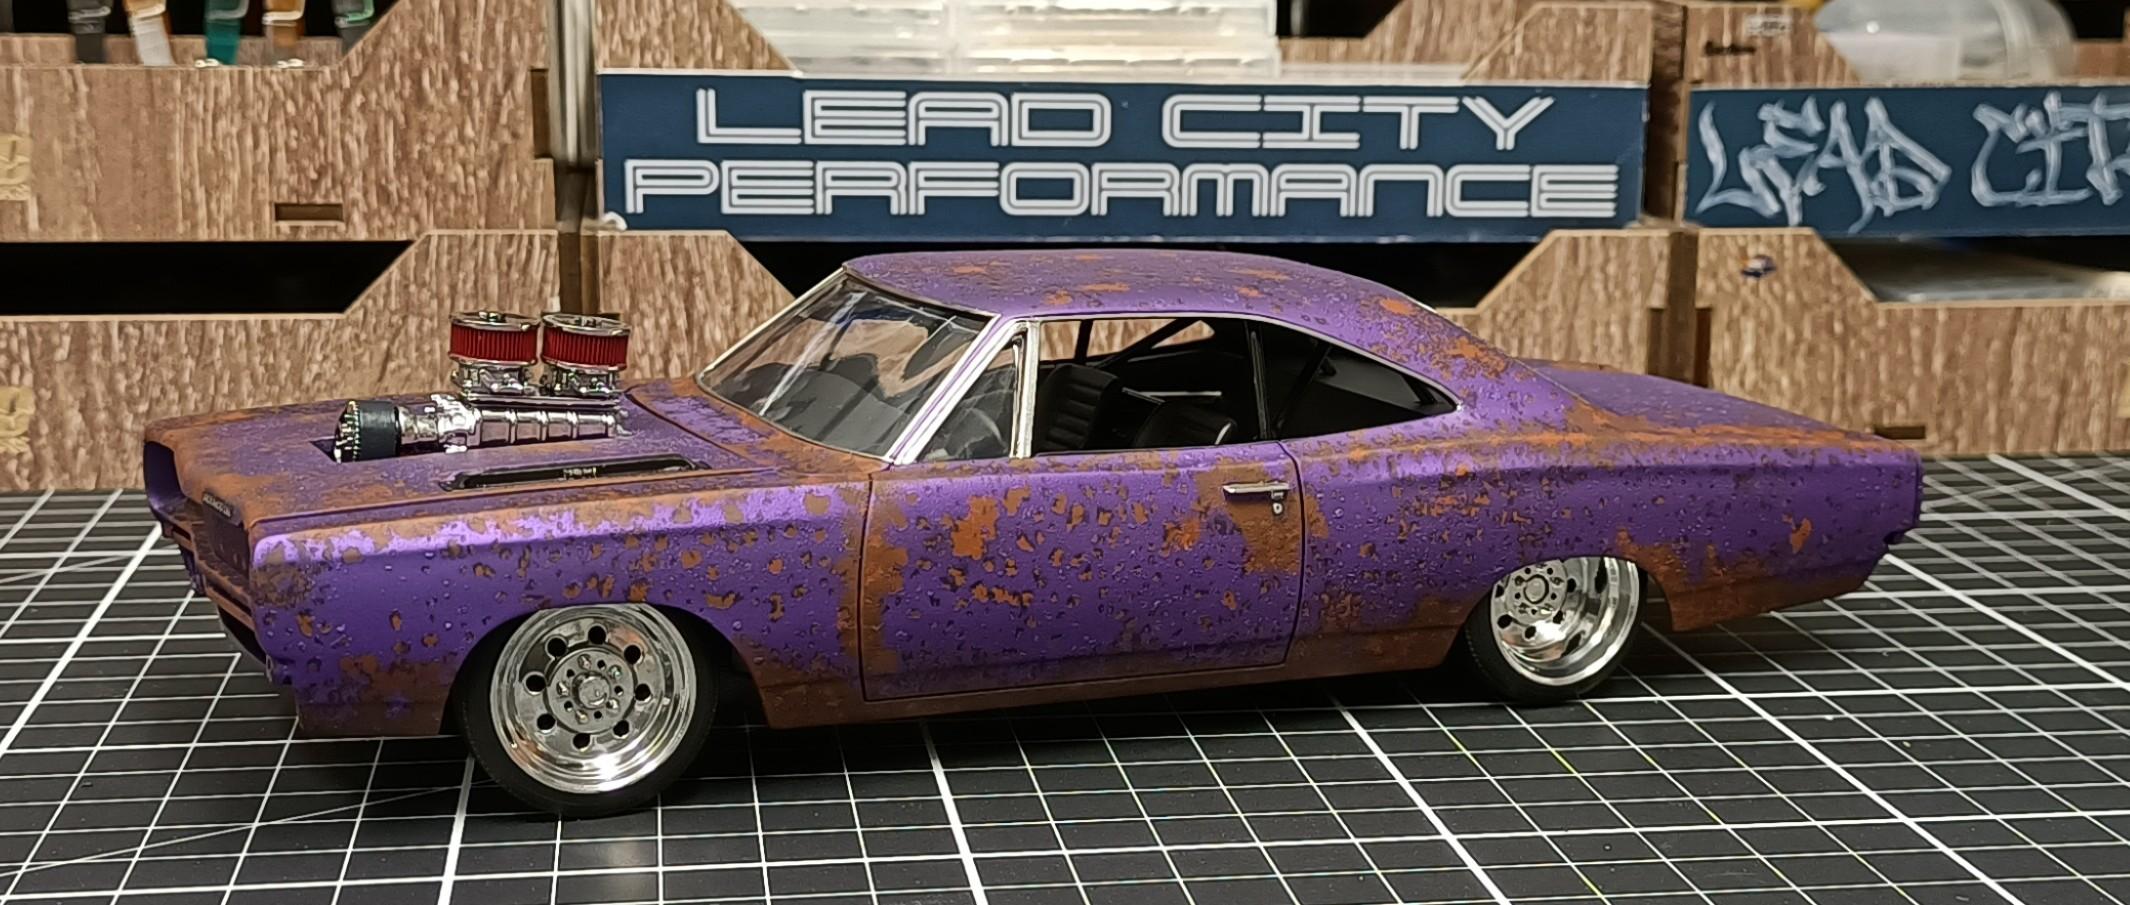
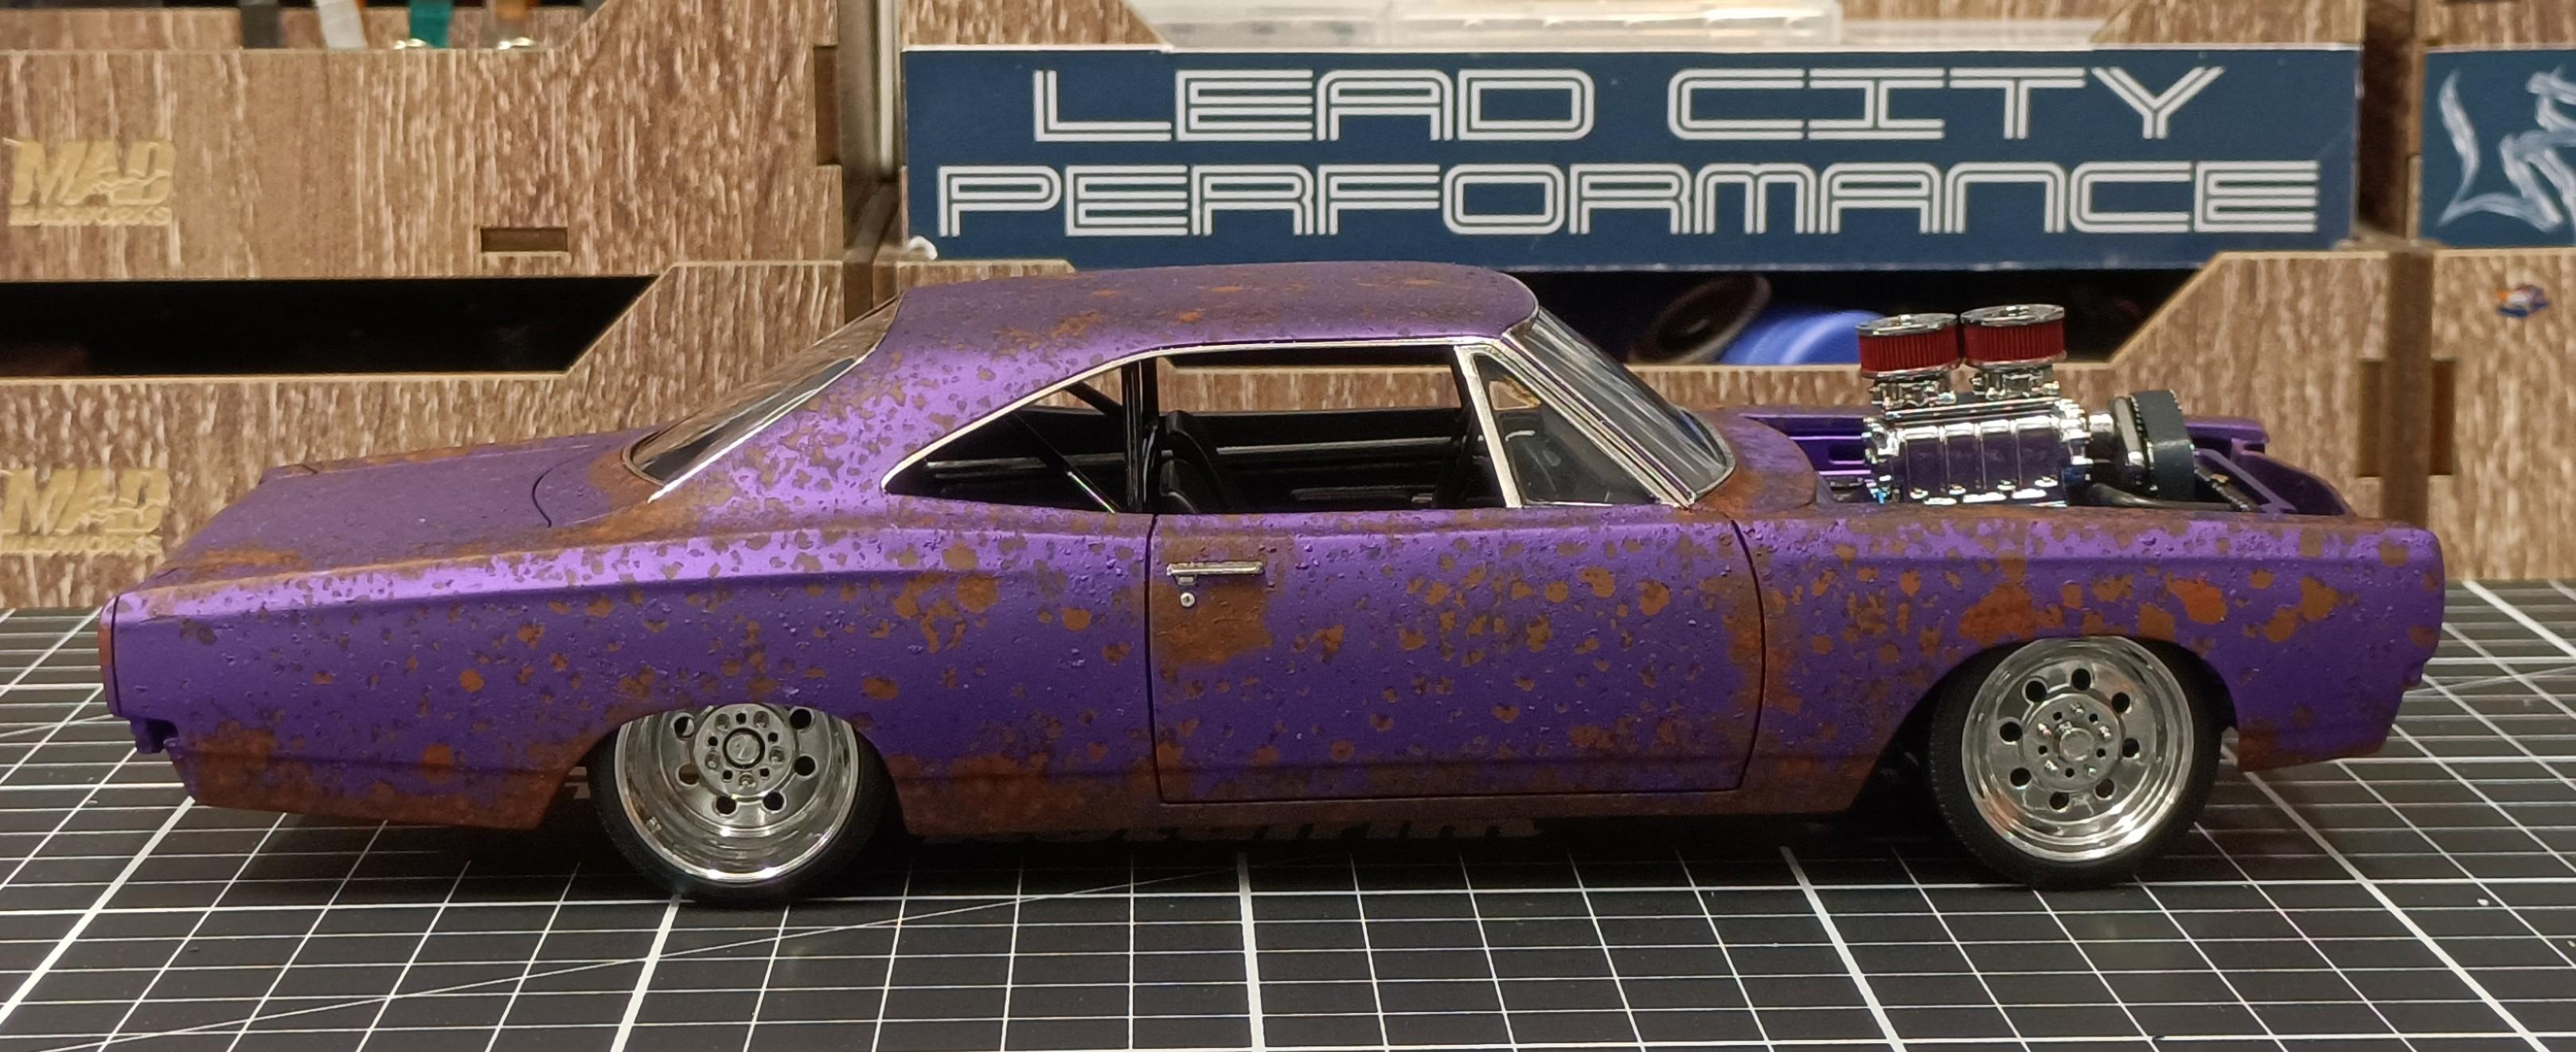
Another patina style. I really enjoy and have so much fun with this type of build. Just a good way to remain constructive and productive with my spare time at the work bench. Same technique I have used on the previous rusty builds. Dremeled out the molded in headlight lenses and replaced with clear lenses from my spare parts stash. I 3D printed the wheels, file is from Z Force Model Worx. Tyres are from Slowys Models Scratch built a half roll cage. Aluminum tube for the exhaust. Scratch built inlet super charger manifold, I 3D printed the super charger and file is from Scale Auto Model Works , I 3D printed the pulleys, which are a special one of design from Slowys Models, scratch built idler puller bracket. Carburetors and air cleaners are from Morries Kustoms. The belt was made from masking tape and painted with AK paint marker rubber black. I 3D printed the Accel Super Coil which is a file from Scale Auto Model Works also used his Willwood master cylinder. I 3D printed the Distributor file is from Slowys Models Radiator was moved forward to gain clearance from the blower belt and lower pulley.
-
68 Plymouth completed. Will post under glass asap.
- 766 replies
-
- 2
-
-
- stalled builds
- quick builds
- (and 2 more)
-
Well done Henri, some great detail work with all the typical lowrider features. Sometimes a build will put up challenges and we just have to persevere through the situations we face and push through to completion. The end result is always the reward for our efforts and each build is a stepping stone for the next. Look forward to seeing your next build.
-
Bit of a preview before the last stages of assembly and completion.
- 766 replies
-
- 2
-
-
- stalled builds
- quick builds
- (and 2 more)
-
Excellent, super crisp and clean, well done. You should post more of your builds.
-
As Stu has pointed out, that is the shape of the roof.
-
Me personally I would rather direct most my spare time to being at my bench being productive and getting results. Thats why I prefer to view the wips and underglass sections as thats whats provides me with inspiration and motivation to build. The off topic basement section is nothing more than a distraction that I really dont need to view, but I do just for 5mins of amusement.
-
I find it odd that people want to discuss other off topic matters on a site that is dedicated to building Model Cars. I visit this place to get away from all the noise and nonsense.
-
65 IMPALA PRO-TOURING: what to do of an unexpected gift?
Cool Hand replied to Claude Thibodeau's topic in Model Cars
Some great ideas in this build Claude, certainly nailed the modern pro touring style. Well done.