oldcarfan
-
Posts
2,868 -
Joined
-
Last visited
Content Type
Profiles
Forums
Events
Gallery
Everything posted by oldcarfan
-
I have a couple of tempered glass panes from an old jalousie window. I mostly use them for old Esci kits that have separate frame rails these days but they also come in handy for cutting tape into strips.
-
Ordering From Overseas Still?
oldcarfan replied to oldcarfan's topic in General Automotive Talk (Trucks and Cars)
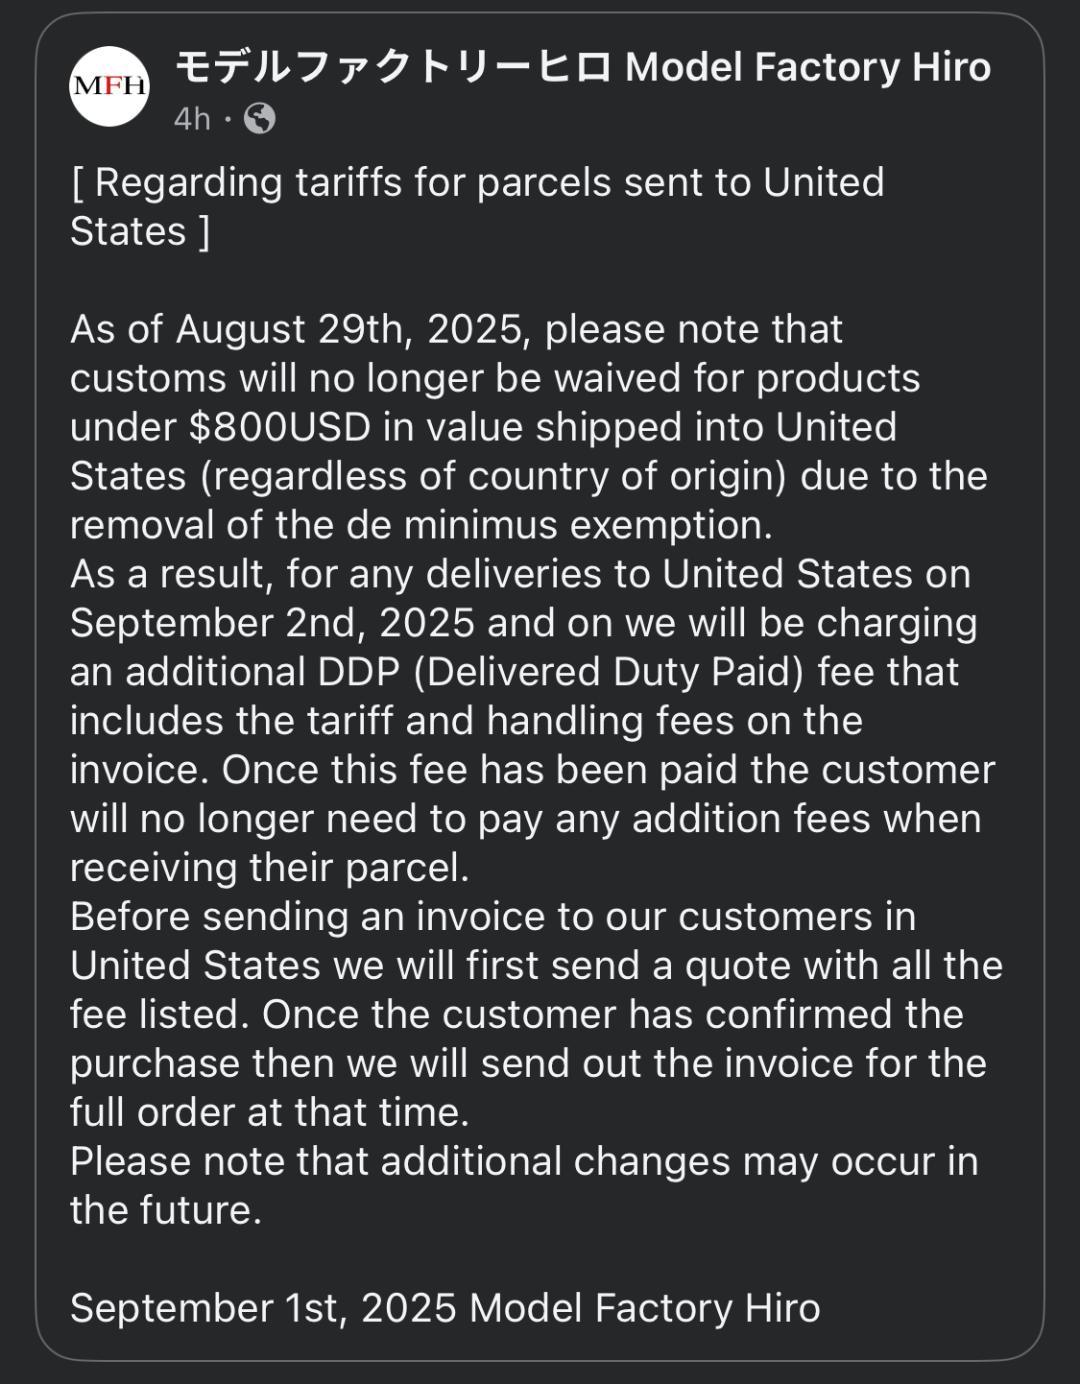
Reliable information is our best tool for this situation, so I hope this helps. This one is from Model Hiro. If we come across an official announcement maybe we can post them?
-
Ordering From Overseas Still?
oldcarfan replied to oldcarfan's topic in General Automotive Talk (Trucks and Cars)
They are good people. I've ordered from them several times and they have great products and service. -
Love it!
-
I used to like the full detail kits but as I'm getting older I've lost patience for lack of a better word for that sort of detail. What's worse, I've also lost a lot of my ability to concentrate, even to finish a book, and I used to read 2-3 books a week. Now I like curbside kits because I can do one before I get distracted.
-
Ordering From Overseas Still?
oldcarfan replied to oldcarfan's topic in General Automotive Talk (Trucks and Cars)
I saw this on a Facebook page, for what it's worth.
-
The local CVSs usually don't have much other than the Mopars and generic hot rods by every once in a while they surprise me. A while back they had the VW ID Buzz van and today I bought a Range Rover while picking up the wife's prescription.That's my routine, get the meds first and check the receipt for a coupon. Today's was 30% off any purchase.
-
'71-77, '78 Dodge Vans...
oldcarfan replied to ClassicDarts's topic in Truck Aftermarket / Resin / 3D Printed
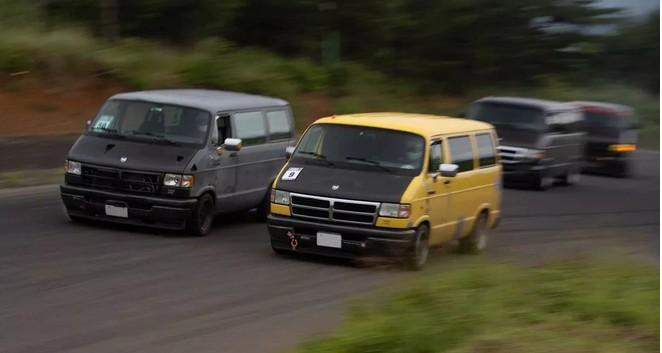
The Dodge van, either a new tool or a backdated old tool has been my one consistent request from Round 2. I'd buy plenty of them if they did an early 70s version with panel or window options. I've also asked if they might consider a newer early 2000s version so I can finally do a proper Dajiban. The diecast version is way above my budget. Maybe Moebius will do one.
-
Whatever else, the AMT Rabbit kit makes the Revell kit look state of the art!
-
Sidewinder “Snake Bite” Slant 8 Warplane
oldcarfan replied to Silvercreeker's topic in WIP: Model Cars
Cool start! Looking forward to how it shapes up. -
Crossing Scales For Extra Detail
oldcarfan replied to oldcarfan's topic in Tips, Tricks, and Tutorials
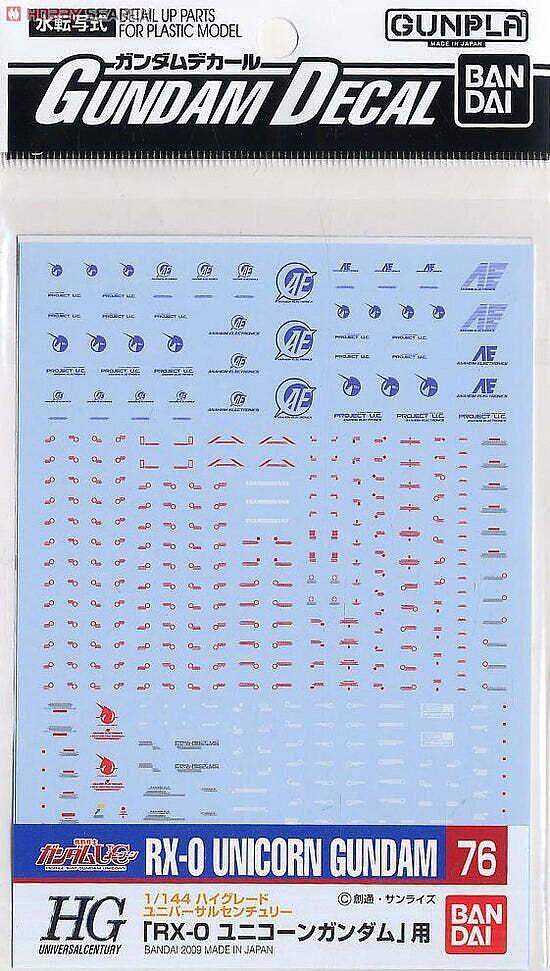
I also buy Gundam decal sheets for some fine detail. Many of the sheets have tiny Warning markings that you can put in various places to add eye interest. They have many different sheets some with numbers and some in different colors. Some of the insignias look pretty cool as door art on pickup trucks, too. The Toyota Hiace I just finished has two Tamiya of the 1/35 US Army ALICE packs that I painted bright colors. In 1/24 scale they are about the size of a school book bag. The rolled tarps and bundles work well on offroad trucks.
-
Ordering From Overseas Still?
oldcarfan replied to oldcarfan's topic in General Automotive Talk (Trucks and Cars)
I love SpotModel and have ordered a lot of stuff from them over the years. I'm guessing they are a small company and are overwhelmed with the new reality, the constant 'will they or won't they' of tariffs and the lack of solutions. I don't know what percentage of business the Asian and European companies get from US customers, but they may decide the sales aren't worth the trouble. -
Ordering From Overseas Still?
oldcarfan replied to oldcarfan's topic in General Automotive Talk (Trucks and Cars)
I was wondering if SpotModel was still shipping. I need some parts from them and emailed last night about shipping but haven't heard anything yet. -
Tamiya paints work well for me over both Tamiya and Duplicolor primers. It's may not be necessary, but I always use a white primer under lighter colors like red orange and yellow.
-
Ordering From Overseas Still?
oldcarfan replied to oldcarfan's topic in General Automotive Talk (Trucks and Cars)
Being cautious, these last couple of months I've been stopping at the closest hobby shop to stock up on Tamiya primers and paints when I'm in town. It's a 2 hour drive, but better safe than sorry. If nothing else, I'll go back to Duplicolor primers. As for kits I'm one of those guys who has hoarded kits for years in anticipation of retiring. -
I tried that, but we otherwise use the printer so little anymore it's usually not worth it. Do the decals you make come out pretty opaque? I've had some trouble with the laser printer making some colors a little transparent.
-
They are mostly homemade. I used some Gundam decals for a few things but most of it was done using Word with screen captures for some of the images such as the Area 51 and the OCP symbol. The lettering is mostly Word fonts that looked good. I put it all on a document and had a local copy shop print them on decal paper.
-
Ordering From Overseas Still?
oldcarfan replied to oldcarfan's topic in General Automotive Talk (Trucks and Cars)
I'm kind of tempted to place an order from Hobby Search/1999.co.jp or SpotModel and keep it under $100 just to see what happens. Maybe that's tempting fate. -
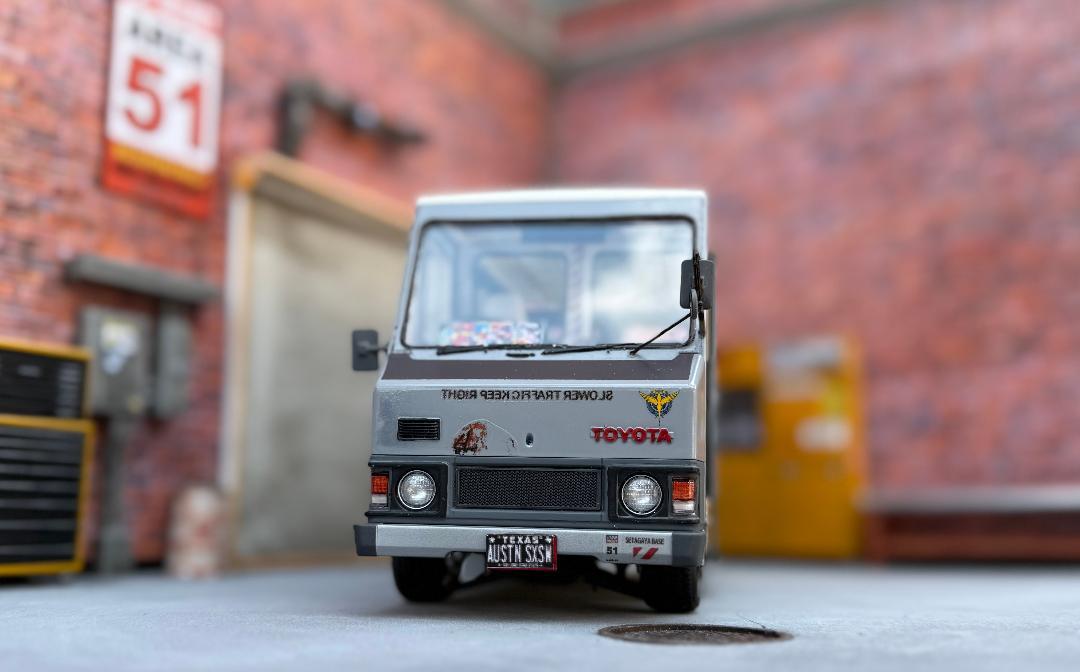
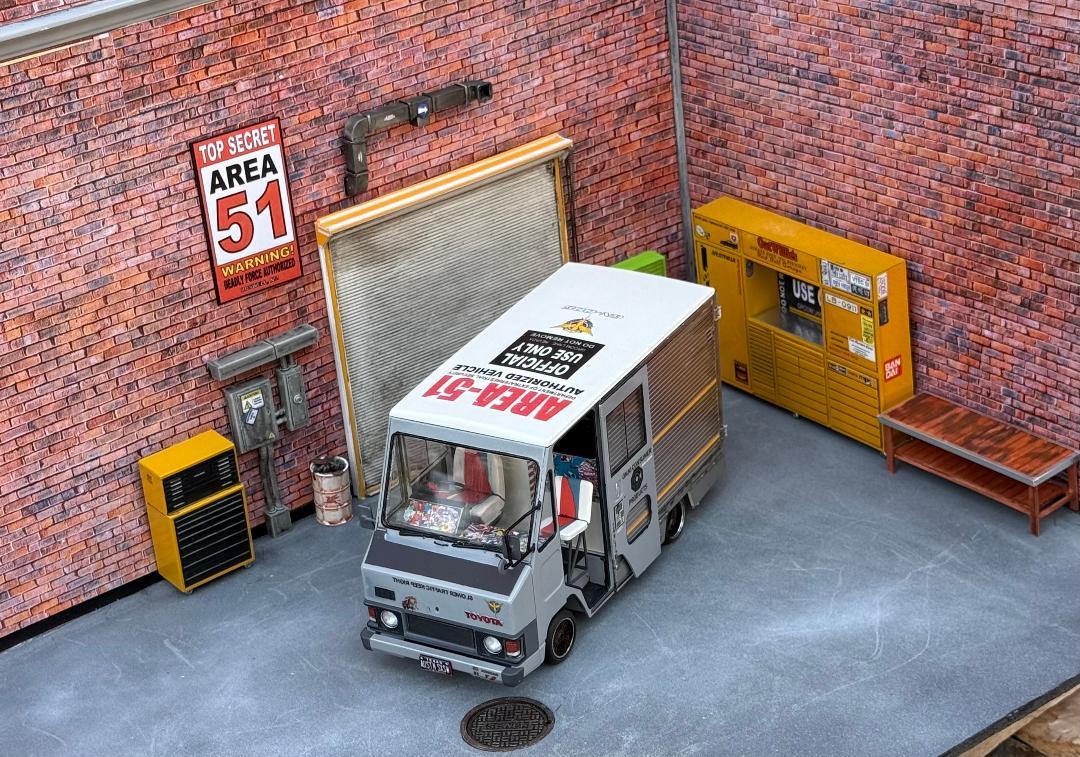
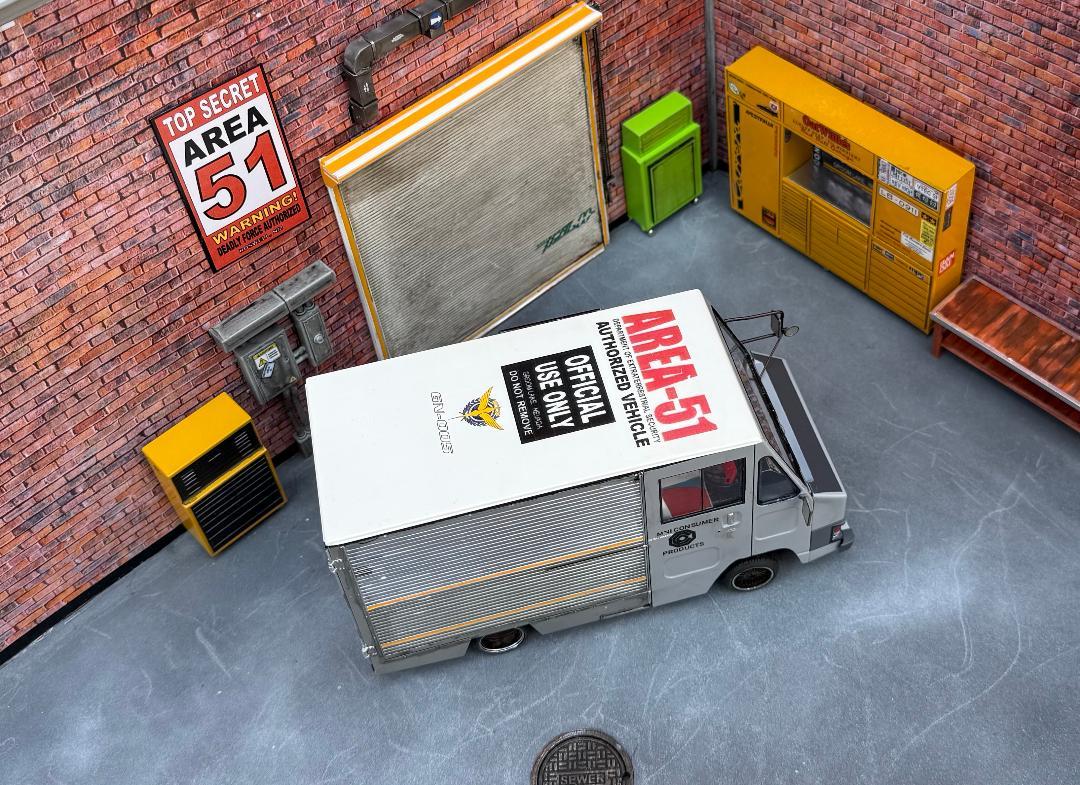
This my build of the Tamiya Toyota Hiace kit from 1983. Backstory, I bought the kit from the original owner at a hobby show in 2019. I promised the guy I would build it and not just let it sit on the shelf. I ended up getting to it just as COVID was starting. I got sick and put it away. Ended up having COVID three times, so that was great. The van has been on the shelf since then taunting me and I finally got it done. I finally pulled it down last weekend and started it as a shop truck. It was going to be Tamiya Blue but the first coat ate through the primer and left the finish pitted. Rather than put it away again I stripped it and started over. This time I finished it in grey and BareMetaled the sides. I planned to drop it a lot more but can't go any lower without major surgery. The wheels and tires are leftovers from the Datsun Box truck I finished last week. I used the lowrider wheels on the Aoshima tires. They look too small but I don't really want to change them. Maybe later. The decals are mostly self-printed. I was going for a used old truck that had been given a new life. Eventually I'll do some weathering on it. The interior is sticker bombed and the driver left his backpacks in there. The rear is was paneled with a stolen borrowed billboard. So that's that for this build. Now I need to see if I can find one of those Heller Citroen vans.
- 6 replies
-
- 11
-

-
I finished a long stalled project today. I started it during COVID and then got sick and put it away. It's the Toyota Hiace Van from 1983. It was an original issue that I got at a hobby show in 2019. The guy bought it new and saw the body had to be assembled and lost interest. He gave it to me for $15 so I can't complain. It's been on the shelf taunting me for a while so I pulled it down. I'll post some more pictures in the truck build section.
-
Ordering From Overseas Still?
oldcarfan replied to oldcarfan's topic in General Automotive Talk (Trucks and Cars)
I can delete if necessary, let me know. -
Please don't take this as political as I'm genuinely wondering. As of yesterday I saw a notice that many EU and Asian countries will no longer take packages bound for the US until the issues are worked out. However, and this is what I'm wondering, I also saw that mail and packages valued at less than $100 would still be accepted. Over the last year I've been ordering a lot of things from SpotModel and various Japanese shops. It sounds like that means that we can keep orders under $100 and still get stuff. My last order came in from Japan about a month ago with no problems. If this is too off topic, please delete. I'm not trying to start any arguments.
-
It's not hard once you know how...
oldcarfan replied to Ace-Garageguy's topic in General Automotive Talk (Trucks and Cars)
My dad's job in the Navy was to work on aircraft. I don't remember what the rating was called then. Later he was a civilian Army helicopter mechanic until retiring. He was always bringing home sheets of aluminum. This was back before they starting recycling and he could have all the 2x2 or smaller pieces he wanted. He had some impressive metal working skills. I remember him taking a sheet of aluminum, his hammers and big bean bag full of lead shot or something and turning out a small fairing for his motor cycle one afternoon just because he didn't want to pay for a store bought fiberglass one. -
For me, I hate to open a truly rare shrink wrapped kit. I have come into a few in my day and usually saved them and found either an opened kit to build or a built up to restore. Then I could display the finished kit in front of the still in box kit.
-
I haven't built a Salvino's kit but they use old Monogram tooling don't they? I used to build what were called garage resin kits, mostly ships and sci-fi. They had lots of flash needing plenty of clean up work. They generally had few locating pins and you had to use some improvisation get a good result. When I build an MPC kit I often think of it in similar terms.