crowe-t
-
Posts
1,965 -
Joined
-
Last visited
Content Type
Profiles
Forums
Events
Gallery
Everything posted by crowe-t
-

Most durable chrome painting option(s)?
crowe-t replied to crowe-t's topic in Model Building Questions and Answers
I did test some Alclad Aqua Gloss over the Alclad Chrome and it's durable. I tested it on spoons. Both spoons have the Alclad Chrome. I sprayed Aqua Gloss over the chrome on one spoon and it's only very slightly duller. It's worth the slight difference in appearance considering how durable the clear is. -
Most durable chrome painting option(s)?
crowe-t replied to crowe-t's topic in Model Building Questions and Answers
I'll have to try it. How durable is it? -
Do you use Duplicolor Sandable Red Oxide Primer? If so does it have a brown tint or is it more red?
-
Most durable chrome painting option(s)?
crowe-t replied to crowe-t's topic in Model Building Questions and Answers
Has anyone used the AK Xtreme Metal Chrome or Aluminum colors? -
There are a few chrome paints such as Alclad, Spaz Stix and Molotow and a few clear coats for going over chrome paint. I need to paint an exhaust system that will go through tubes in a frame so I need the chrome paint to be somewhat durable. I'd like the exhaust system to look like stainless steel. I've used Molotow but it's soft. I used Spaz Stix Ultimate Clear Coat over the Molotow but it dulls it a bit which is OK. I'm concerned Molotow might fade over time since it's an ink and not paint. Any ideas?
-
I spoke with the guy who prints the laser decals and he said the decal paper is a little over half the thickness of kit decals. This doesn't mean that much. The clear lacquer does reduce down for a while. I'm concerned over time it will reduce down and there will be a step where the decals are. The ALPS decals printed nice but there's a license plate that you can see a bit of the dot pattern on. It's only a single decal that needs to be applied. I'll have to think about it.
-
I've used decals on a few cars that I sprayed clear over to seal them after they are applied. Has anyone used a double layer of decals on a body and then sprayed clear on? The reason I'm asking is I had some ALPS decals printed but I might have them laser printed. The laser printer can print white but it's a separate decal. The laser printed decals will look sharper but I'll have to apply the white decal and then the decal with the graphic.
-
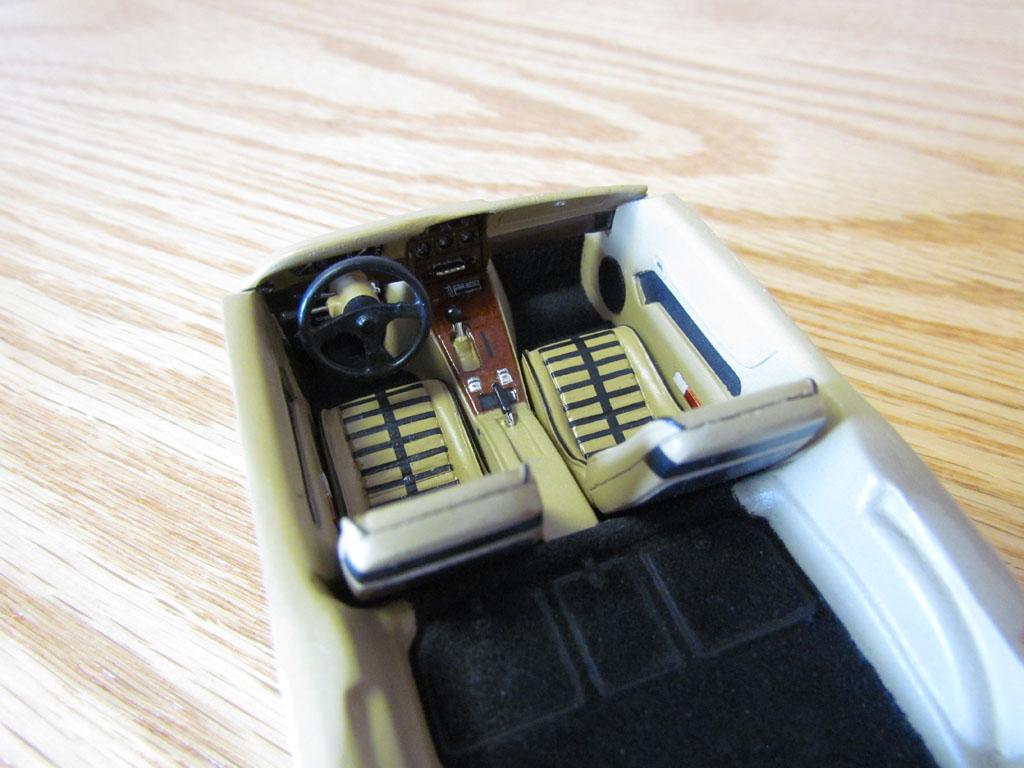
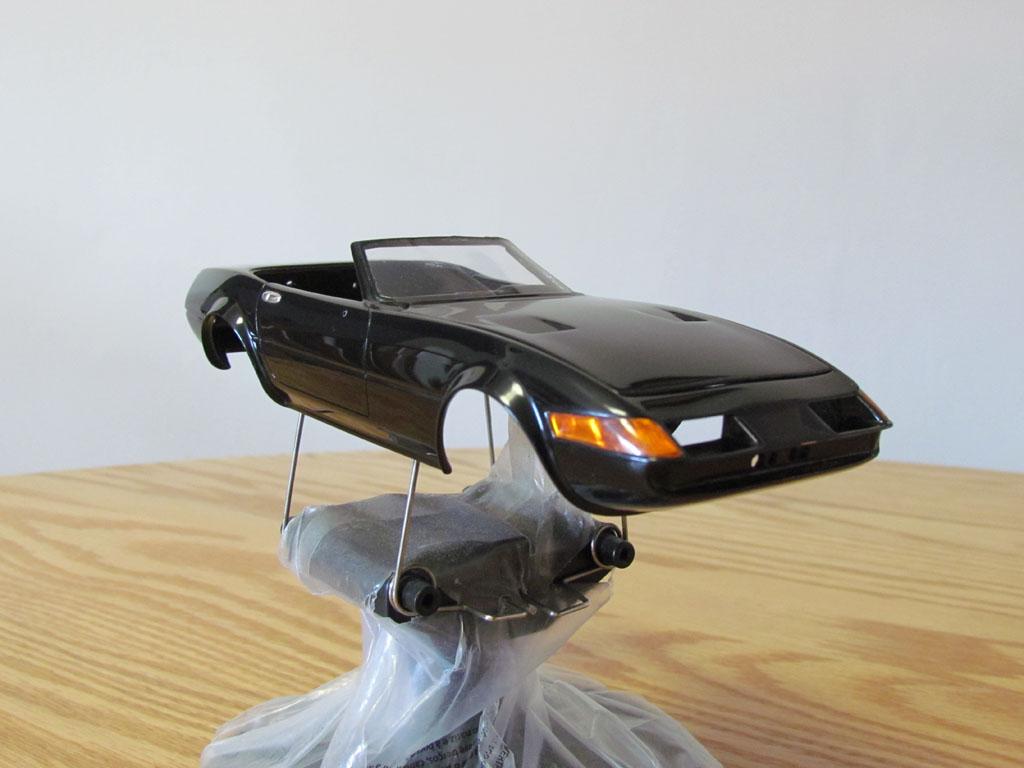
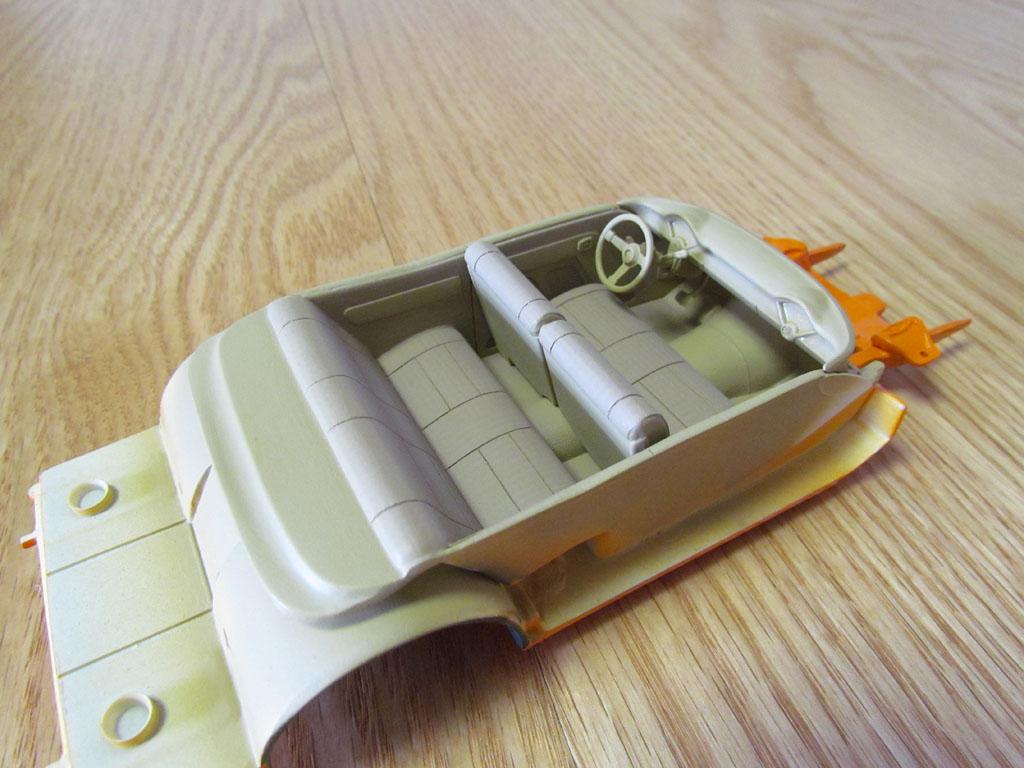
It's been a few months since my last update. I finished painting and assembling the interior. It's painted with a mix of 2 parts Tamiya XF-59 Desert Yellow and 1 part Tamiya XF-2 Flat White. I just have to paint and install the car phone. I used Microscale black decal stripes on the seats. The body has been painted, clear coated and polished. I used Gravity Colors Anthracite Black with Gunze Mr. Super Clear. I installed the front turn signal lenses which are painted Tamiya X-26 Clear Orange on the insides. I put Bare Metal Foil in behind the lenses. The Corvette kit's windshield was a bit thick and stuck out too much. It gets installed from the outside and looked out of scale so I made a windshield out of clear acetate. The chassis, suspension, exhaust and engine parts will be painted next. Thanks for looking in.

-
Is the Papilio Clear Aerosol decal Fixative Spray basically the same as Microscale Liquid Decal Film? Is it OK to use on decals that are applied to a car body and then spray clear lacquer over them? https://www.papilio.com/spray clear flexible decal fixative.html?fbclid=IwAR0QFlZr1GtgxAt3ABTFc0BMQQ0zGHKokjnsLpK9nve2gmUASyrbkX8X2_g
-
Do you have any pictures of the windows you installed using this tape? I'd like to see how it looks on the side where the window attaches. The recess where the window attaches is very thin. About 1mm. Will this tape hold?
-
I tried gluing the acetate window in the frame but had to remove it. Glue seeped under the window and made a mess. I cleaned it off and will try again. The problem I'm having is the window goes in from the front, unlike most model cars where the window goes in from behind. The glue was looking a bit sloppy. Should I thin the glue with water? Maybe I should make a thin frame to go around the window to cover where the glue is?
-
I have Formula 560 Canopy glue. I believe it's a stronger bond than Micro Krystal Klear and Testors Clear Parts Cement. Since i already have it I'll give it a try.
-
Is Aleene's stronger than Micro Krystal Klear, Testors Clear Parts Cement & Formula 560 Canopy glue? Will Aleene's hold clear acetate?
-
Either of these will hold acetate? What type of glue is Mod Podge and Aleene's Tacky Glue?
-
I need to glue a window made from clear acetate in place. The problem is the clear window goes in from the outside so clear 5 minute epoxy might not be a good option since it eventually yellows. Will Micro Krystal Klear, Testors Clear Parts Cement or Formula 560 Canopy glue hold the Acetate in place?
-
Very nice job converting this into the Oldsmobile. Did you modify the Dobbertin rear end?
-
Has anyone tried making the undercarriage of a Corvette look like unpainted fiberglass using the technique described above?
-
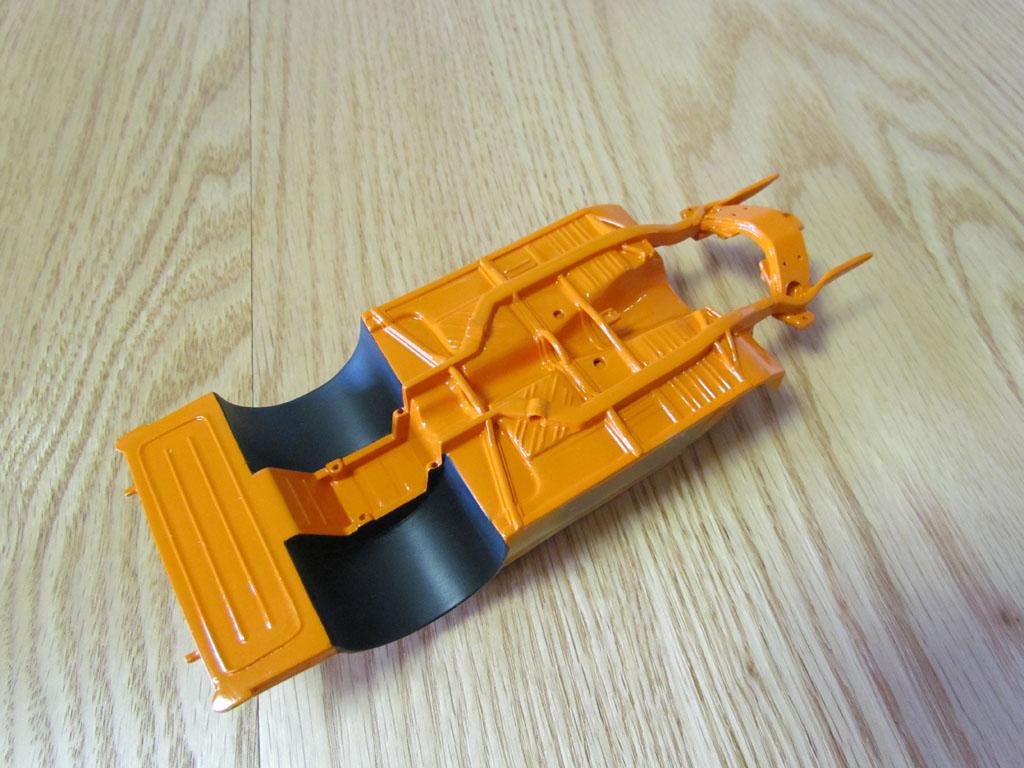
I forgot to include a few things in my previous post. The steering wheel is from a Monogram 78 Corvette, the steering column and brake arm are scratch built. The rubber brake pedal is a photo etch part from The Model Car Garage 55 Chevy Photo Etch set. I'll be using the photo etch grill from the set too. I put in a belly pan behind the rear wheel tubs like the real car. The picture below of the chassis in white primer doesn't have the belly pan. The picture of the chassis painted orange has it.
-
Thanks for the compliment!
-
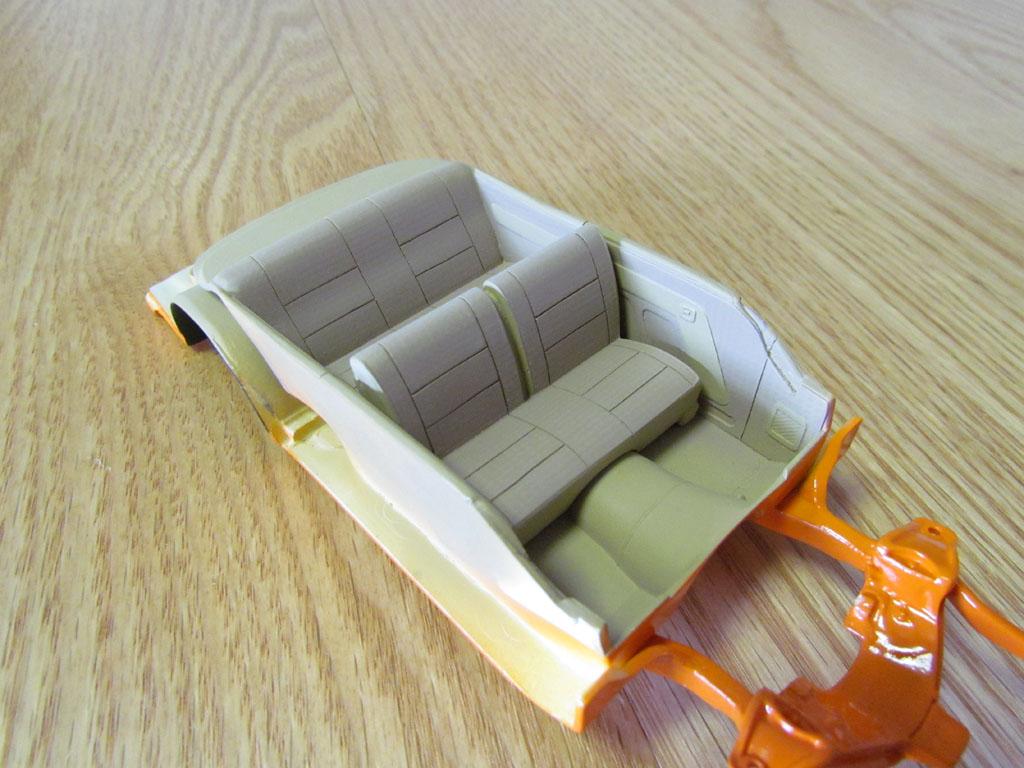
I've done some more work on this one. I finished the door panels and started painting the interior. The interior on the real car is vinyl with cloth on the door panels and the seats. I mixed 2 parts Tamiya Desert Yellow XF-59 with 1 part Flat White XF-2 for the vinyl and used Wooden Deck Tan XF-78 to represent the cloth. The cloth areas of the real cars' interior look a bit darker so the Wooden Deck Tan worked well. I had a fine sanding screen, used for sanding seams on sheetrock, that I used to spray on the Wooden Deck Tan. I sprayed some Testors Clear Acryl acrylic paint on the sanding screen to seal it so none of it would flake off onto the paint. I first sprayed the whole interior with the Desert Yellow/Flat White mixture and then sprayed the Wooden Deck tan through the sanding screen. After that I sprayed a very light coat of the Wooden Deck Tan over it so it doesn't look plaid. I think it helps it to look more like cloth using the sanding screen. I sprayed Testors Flat Clear Acryl on the interior. I still have to spray some Testors Semi Gloss on the vinyl areas. I also sprayed the orange on the chassis and body and painted the rear wheel tubs black. I'm waiting for a friend to make me the decal and license plate for the trunk lid. As soon as I get the artwork I'll have them printed and after they are applied I can spray the final clear on. Thanks for looking in.
-
Hi, Does anyone have a picture(s) of The Model Car Garage photo-etch Electric Fan and/or Detail Master photo-etch Electric Fan assembled? I'd like to see how these look assembled.
-
echoxrayniner - Will you be printing decals anytime soon? I contacted you about decals you were making for me and haven't heard back.
-
I really like how black looks with clear. After seeing all these great pictures I'm going to use a base coat/clear coat for the black car I'm painting.
-
The clear over the black doesn't make it look cloudy? Does it look richer?
-
You did a beautiful job! Do you have any pictures in daylight?