crowe-t
-
Posts
1,965 -
Joined
-
Last visited
Content Type
Profiles
Forums
Events
Gallery
Everything posted by crowe-t
-
Made a great trade with outlaw035(Neal). He's a great guy to trade with.
-
Does anyone have Hot Rod magazine, December 1988 and/or January 1989? I have these 2 but they are packed away in storage. They both have articles on Scott Sullivan's Cheez Whiz 55. Can someone here tell me if either one has any pictures of the Cheez Whiz 55's interior? If one does than I'll get the issue off of E-Bay. If not I won't bother since I do have these.
-
Thanks guys! I'm looking for some interior pictures of Scott Sullivan's Cheez Whiz 55. I can't find any that show the rear door panels and the seat pattern too well.
-
Here's some work I did on the body seam(molding) that runs along the fenders and onto the door. I removed the part on the door and thinned it out a bit towards the end.

-
Thanks Gilles! I started working on angling the 55's chassis rails in to meet up with the tubbed section frame rails. I'll post some progress pictures soon.
-
Thanks Dennis.
-
Alan, Great idea you have there. I have a chassis and parts from an AMT/MPC 69 Camaro. I should be able to graft the lower control arms onto the 55's frame. Thanks, Mike.
-
I was looking at the 1:1's chassis and I think I'll extend the tubbed section rails forward a bit onto the 55's floor and angle the 55's frame rails in to meet them. This way it'll sort of resemble the 1:1's chassis and I can run the exhaust through the frame's angled areas. I'll work on this in a couple of days.
-
Thanks guys! David - I thought about putting a 69 Camaro front subframe on the 55's floor. Cutting the Camaro's front subframe from it's floor will be the easy part since it doesn't matter what happens to the floor. However removing the 55's frame rails from it's floor and filling all those areas in will be a nightmare. I removed the exhaust and it was a big job. I had to back fill the area under the muffler and then cut off the exhaust and carve out all the floor's details. Some of the raised details where the exhaust was had to be added back. The frame rails take up a lot more real estate on the floor pan. I don't know if it's worth all that time. The 55's front part of the chassis lines up nicely and it has an adjustable ride height. There are 3 holes for the front spindles. I used the top spindle holes and it sits perfectly in front. The 70 Super Bee's tubbed rear chassis isn't exactly 100% correct to the 1:1 Cheez Wiz 55 but it also worked out great. The rear end is a 9 inch like the 1:1 Cheez Whiz 55 and it sits at the correct height. I didn't have to make any adjustments. It worked perfectly. I even cut the chassis rail from the rear of the 55's floor that the rear bumper attaches to and glued it on the ends of the Super Bee's(tubbed rear section) frame rails and it lined up perfectly. I'll think about it some more but I'll most likely use the chassis I modified. I want to concentrate on the details under the hood and the interior. I contacted Scott and asked about more interior pictures. It's hard to tell the exact pattern of the seats in the pictures I've seen online. I bought a set of the Motorwheel Flys Pro Stock wheels from Competition Resins. I contacted a friend on Facebook about making me a decal and license plate for the trunk lid. I'll see how that goes. The stock body on the right side in the pictures I posted above will also be painted like the 1:1 Cheez Whiz 55 and used on a drag slot car. The hood will be glued in place and re-scribed to match the 1:1. I'll post pictures of the slot car as well in this thread. I'll post another update in a few days. Thanks for looking in and Merry Christmas everyone!
-
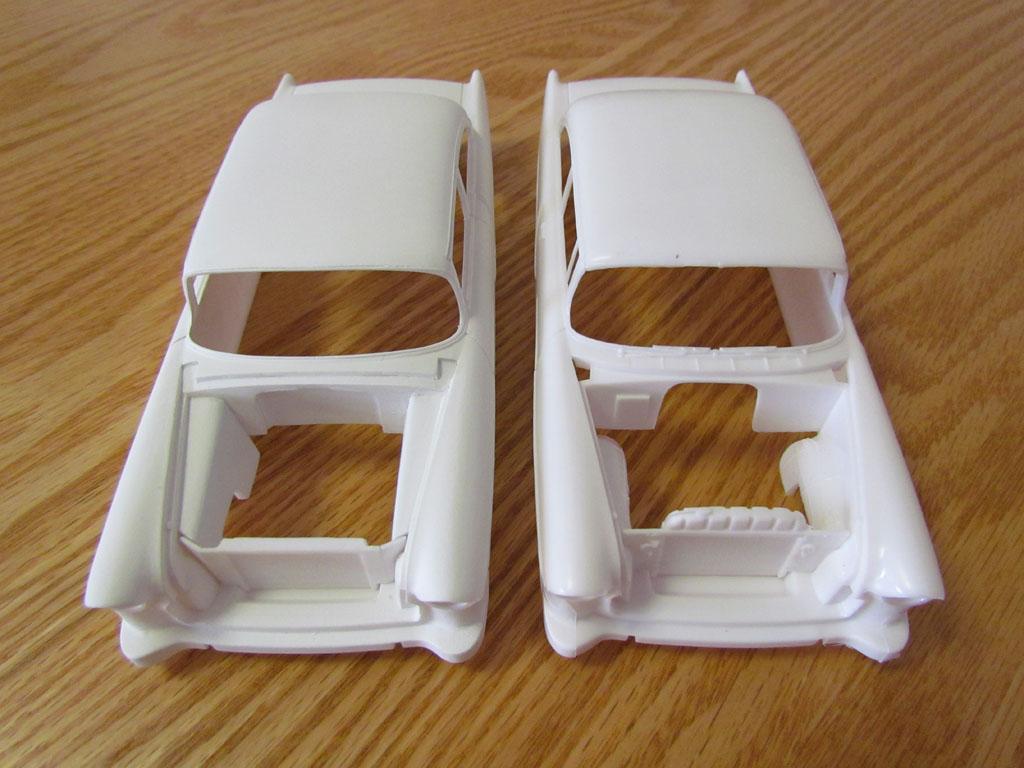
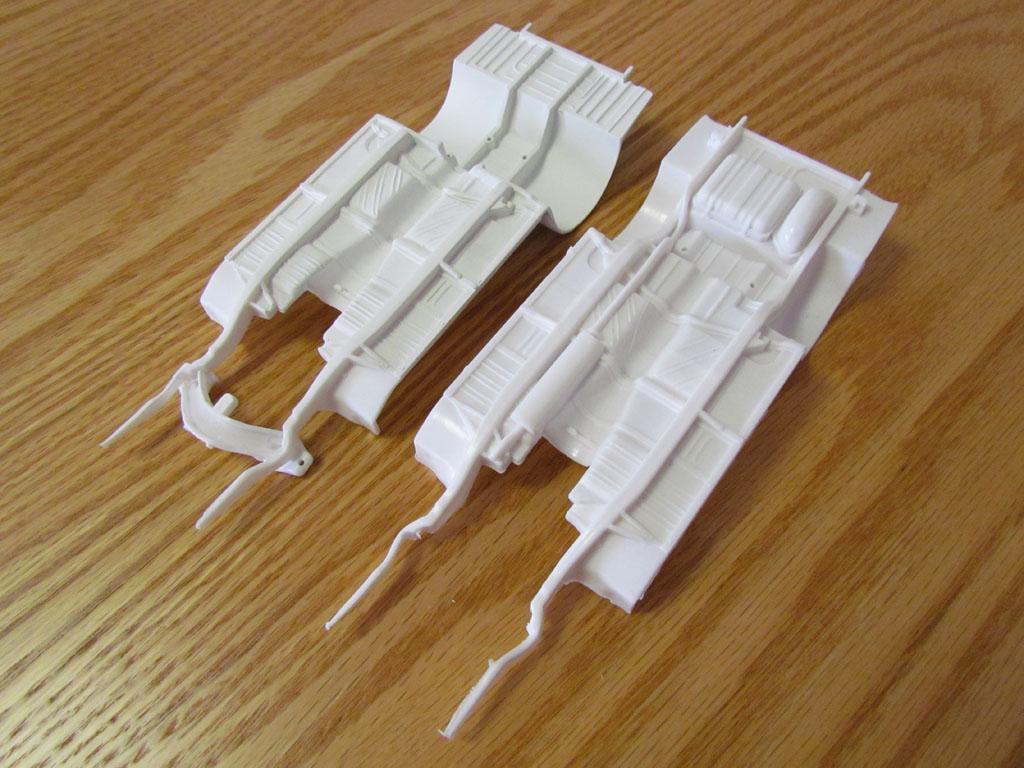
Scott Sullivan's Cheez Whiz 55 was always one of my favorite Pro Street cars. It's a very clean looking car and the color is beautiful on a 55 Chevy. I started building a model of his car using an AMT 55 Chevy. I used the rear tubbed section from an AMT 1970 Super Bee Pro Street kit that I attached to the 55's chassis. The 1:1 Cheez Whiz 55 actually has a 69 Camaro front chassis but it would be near impossible to remove the 55's frame rails from it's floor so this is the compromise. I re-shaped the hood and filled in the vents in the cowl under the windshield as well as removed the wipers and vent windows in the doors. I also added the half round molding under the side windows using Evergreen 1 mm half round rod. I angled the ends of the radiator support and cut the top of the radiator so it's level with the support. I covered the engine compartment inner wheel wells to make them resemble Scott's car and removed the molded in exhaust from the 55's chassis. I took some pictures of the modified body next to a stock body and chassis(modified on left, stock on right).
-
Khils(Kevin) is the best to trade with and a real nice guy!
-
Does anyone know if the back of the Cheez Wiz 55's hood is straight or curved? There are 2 tabs that attach to the hinges but the rest of the rear looks like it's straight up against the cowl.
-
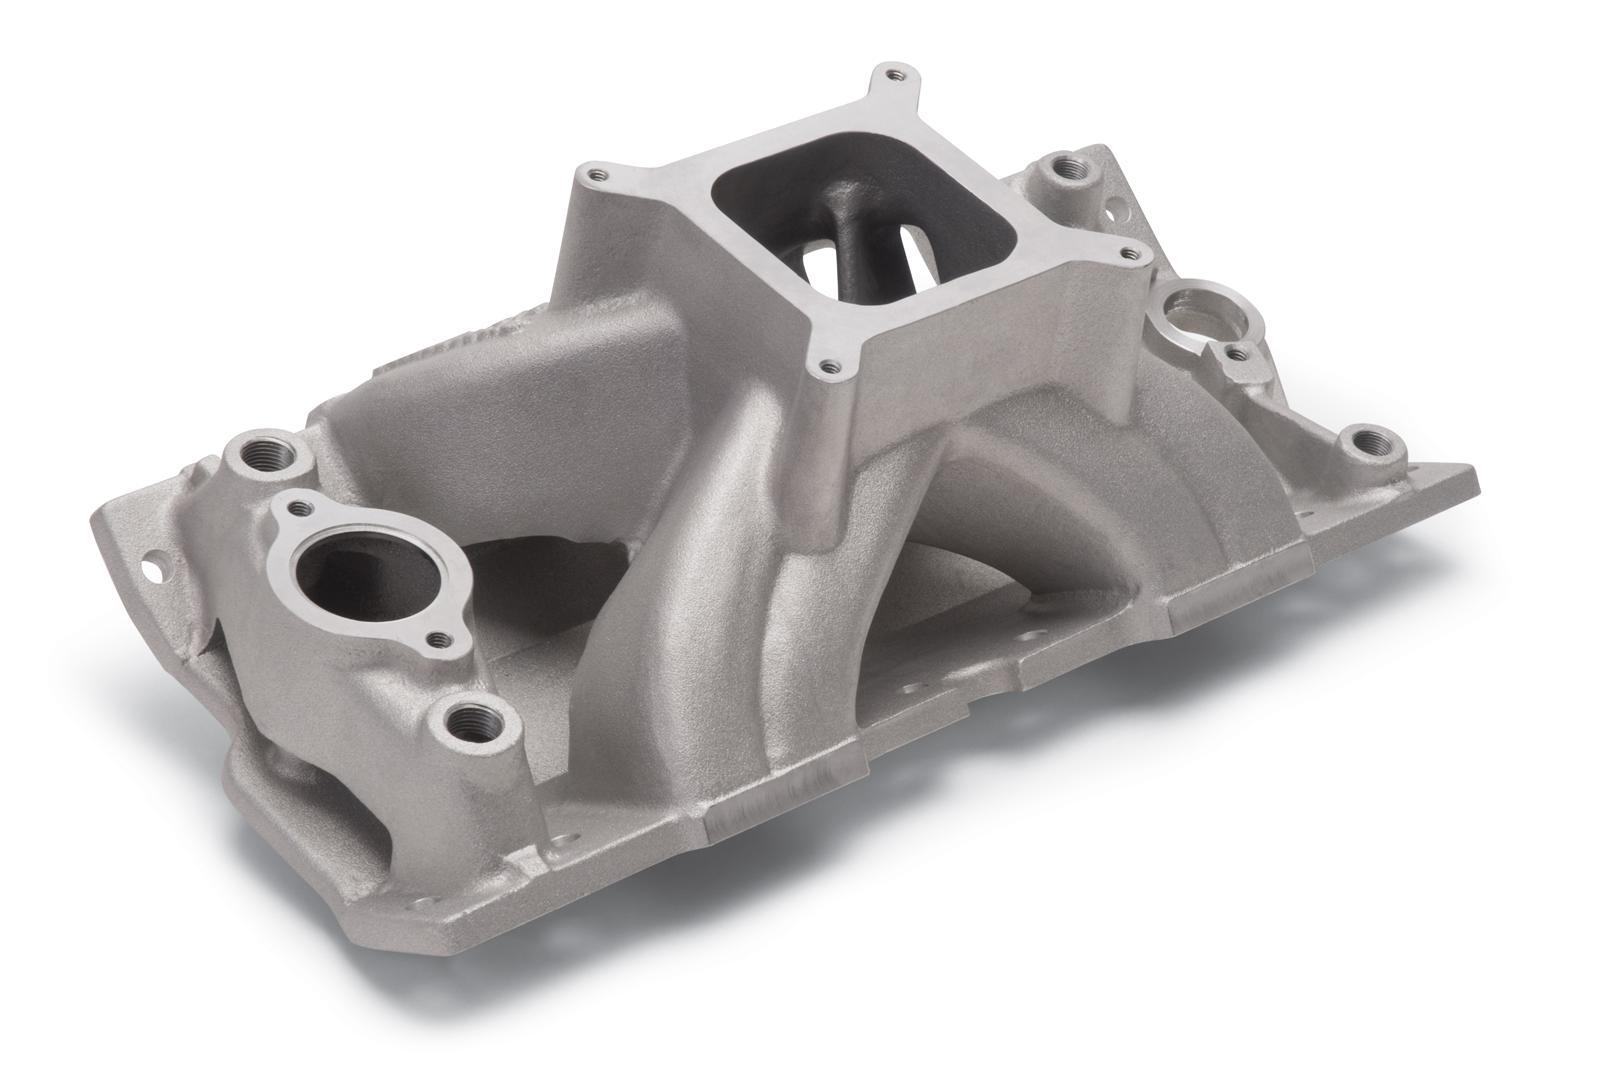
 Does anyone make an Edelbrock Victor manifold in resin for a big block Chevy in 1:25 scale? Or is there a kit this manifold comes in?
-
Pace Peacekeeper 24-Inch Mini-Plus? Any good?
crowe-t replied to crowe-t's topic in General Automotive Talk (Trucks and Cars)
I took advantage of the sale Pace is running so it justified paying a bit more for the larger fan. I did notice that I'm having a lot less problem with dust. I have maybe 1 piece of dust in the paint where normally I have several. I guess the airflow in the booth is keeping most of the dust from settling on the wet paint and the airflow could be helping the paint to start curing faster. -
Pace Peacekeeper 24-Inch Mini-Plus? Any good?
crowe-t replied to crowe-t's topic in General Automotive Talk (Trucks and Cars)
I plan on shortening the hose. I just set it up quickly that day to test it. The seal around the filter is solid. It's a great spray booth. I'm glad I got the larger(Higher CFM) fan. -
Pace Peacekeeper 24-Inch Mini-Plus? Any good?
crowe-t replied to crowe-t's topic in General Automotive Talk (Trucks and Cars)
Here are pictures of the Pace 24" Mini Plus with the 273 CFM fan. I have to cut the duct hose but I just wanted to test it out. So far it's great. The fan is quiet and takes all the smell out of the room.
-
Pace Peacekeeper 24-Inch Mini-Plus? Any good?
crowe-t replied to crowe-t's topic in General Automotive Talk (Trucks and Cars)
My Pace 24" Mini Plus arrived this evening. As I said in a post above I got the 265 CFM fan option. However the fan that came with it is 273 CFM so I guess that's better or basically the same. I'll set it up tomorrow and try it out. I'll post pictures and let you all know what I think. -
Will you be printing decals soon?
-
Jameston from Scale Finishes said all his paints are enamel based. I had asked him about his base his base coats.
-
Pace Peacekeeper 24-Inch Mini-Plus? Any good?
crowe-t replied to crowe-t's topic in General Automotive Talk (Trucks and Cars)
I ordered the 24 Inch Mini Plus with the 265 CFM fan upgrade. Bob (Pace) said he just has to make a mount for the 265 CFM fan but it will work nicely. He said he can't put the 265 CFM fan in the 24 Inch Super Mini, it won't fit, only the 24 Inch Mini Plus since the fan sits on top. He said the 265 CFM fan runs at 1,725 RPM and is very quite. The 148 CFM fan runs at 3,160 RPM. I can't wait to give it a try. -
Pace Peacekeeper 24-Inch Mini-Plus? Any good?
crowe-t replied to crowe-t's topic in General Automotive Talk (Trucks and Cars)
I spoke with Bob Pace and asked if I could buy the 24 Inch Mini Plus with the 265 CFM fan instead of the 148 CFM fan it comes with. He said he could do that but it will cost $85 more for that option. Will the 265 CFM fan make much of a difference over the 148 CFM fan? Will the 265 CFM pull more of the fumes out or does that have more to do with the length of the vent hose to the outside? I'll have the paint booth next to a window so I"ll use about a 1.5 - 2 foot length of 4" Aluminum Flex Duct hose that will be running straight with no bends. -
Pace Peacekeeper 24-Inch Mini-Plus? Any good?
crowe-t replied to crowe-t's topic in General Automotive Talk (Trucks and Cars)
Is this hose in the link OK? https://vent-works.com/collections/all/products/aluminum-flex-duct -
Pace Peacekeeper 24-Inch Mini-Plus? Any good?
crowe-t replied to crowe-t's topic in General Automotive Talk (Trucks and Cars)
Other than the shape and fan location is the only major difference between the 24 inch Super Mini and the 24 Inch Mini Plus the addition of the light? Is the $100 more for the 24 inch Super Mini worth it? -
Pace Peacekeeper 24-Inch Mini-Plus? Any good?
crowe-t replied to crowe-t's topic in General Automotive Talk (Trucks and Cars)
Dust is another concern of mine. Will the 24 Inch Mini Plus and/or the 24 inch Super Mini help to control dust in the air around where the model is being sprayed. -
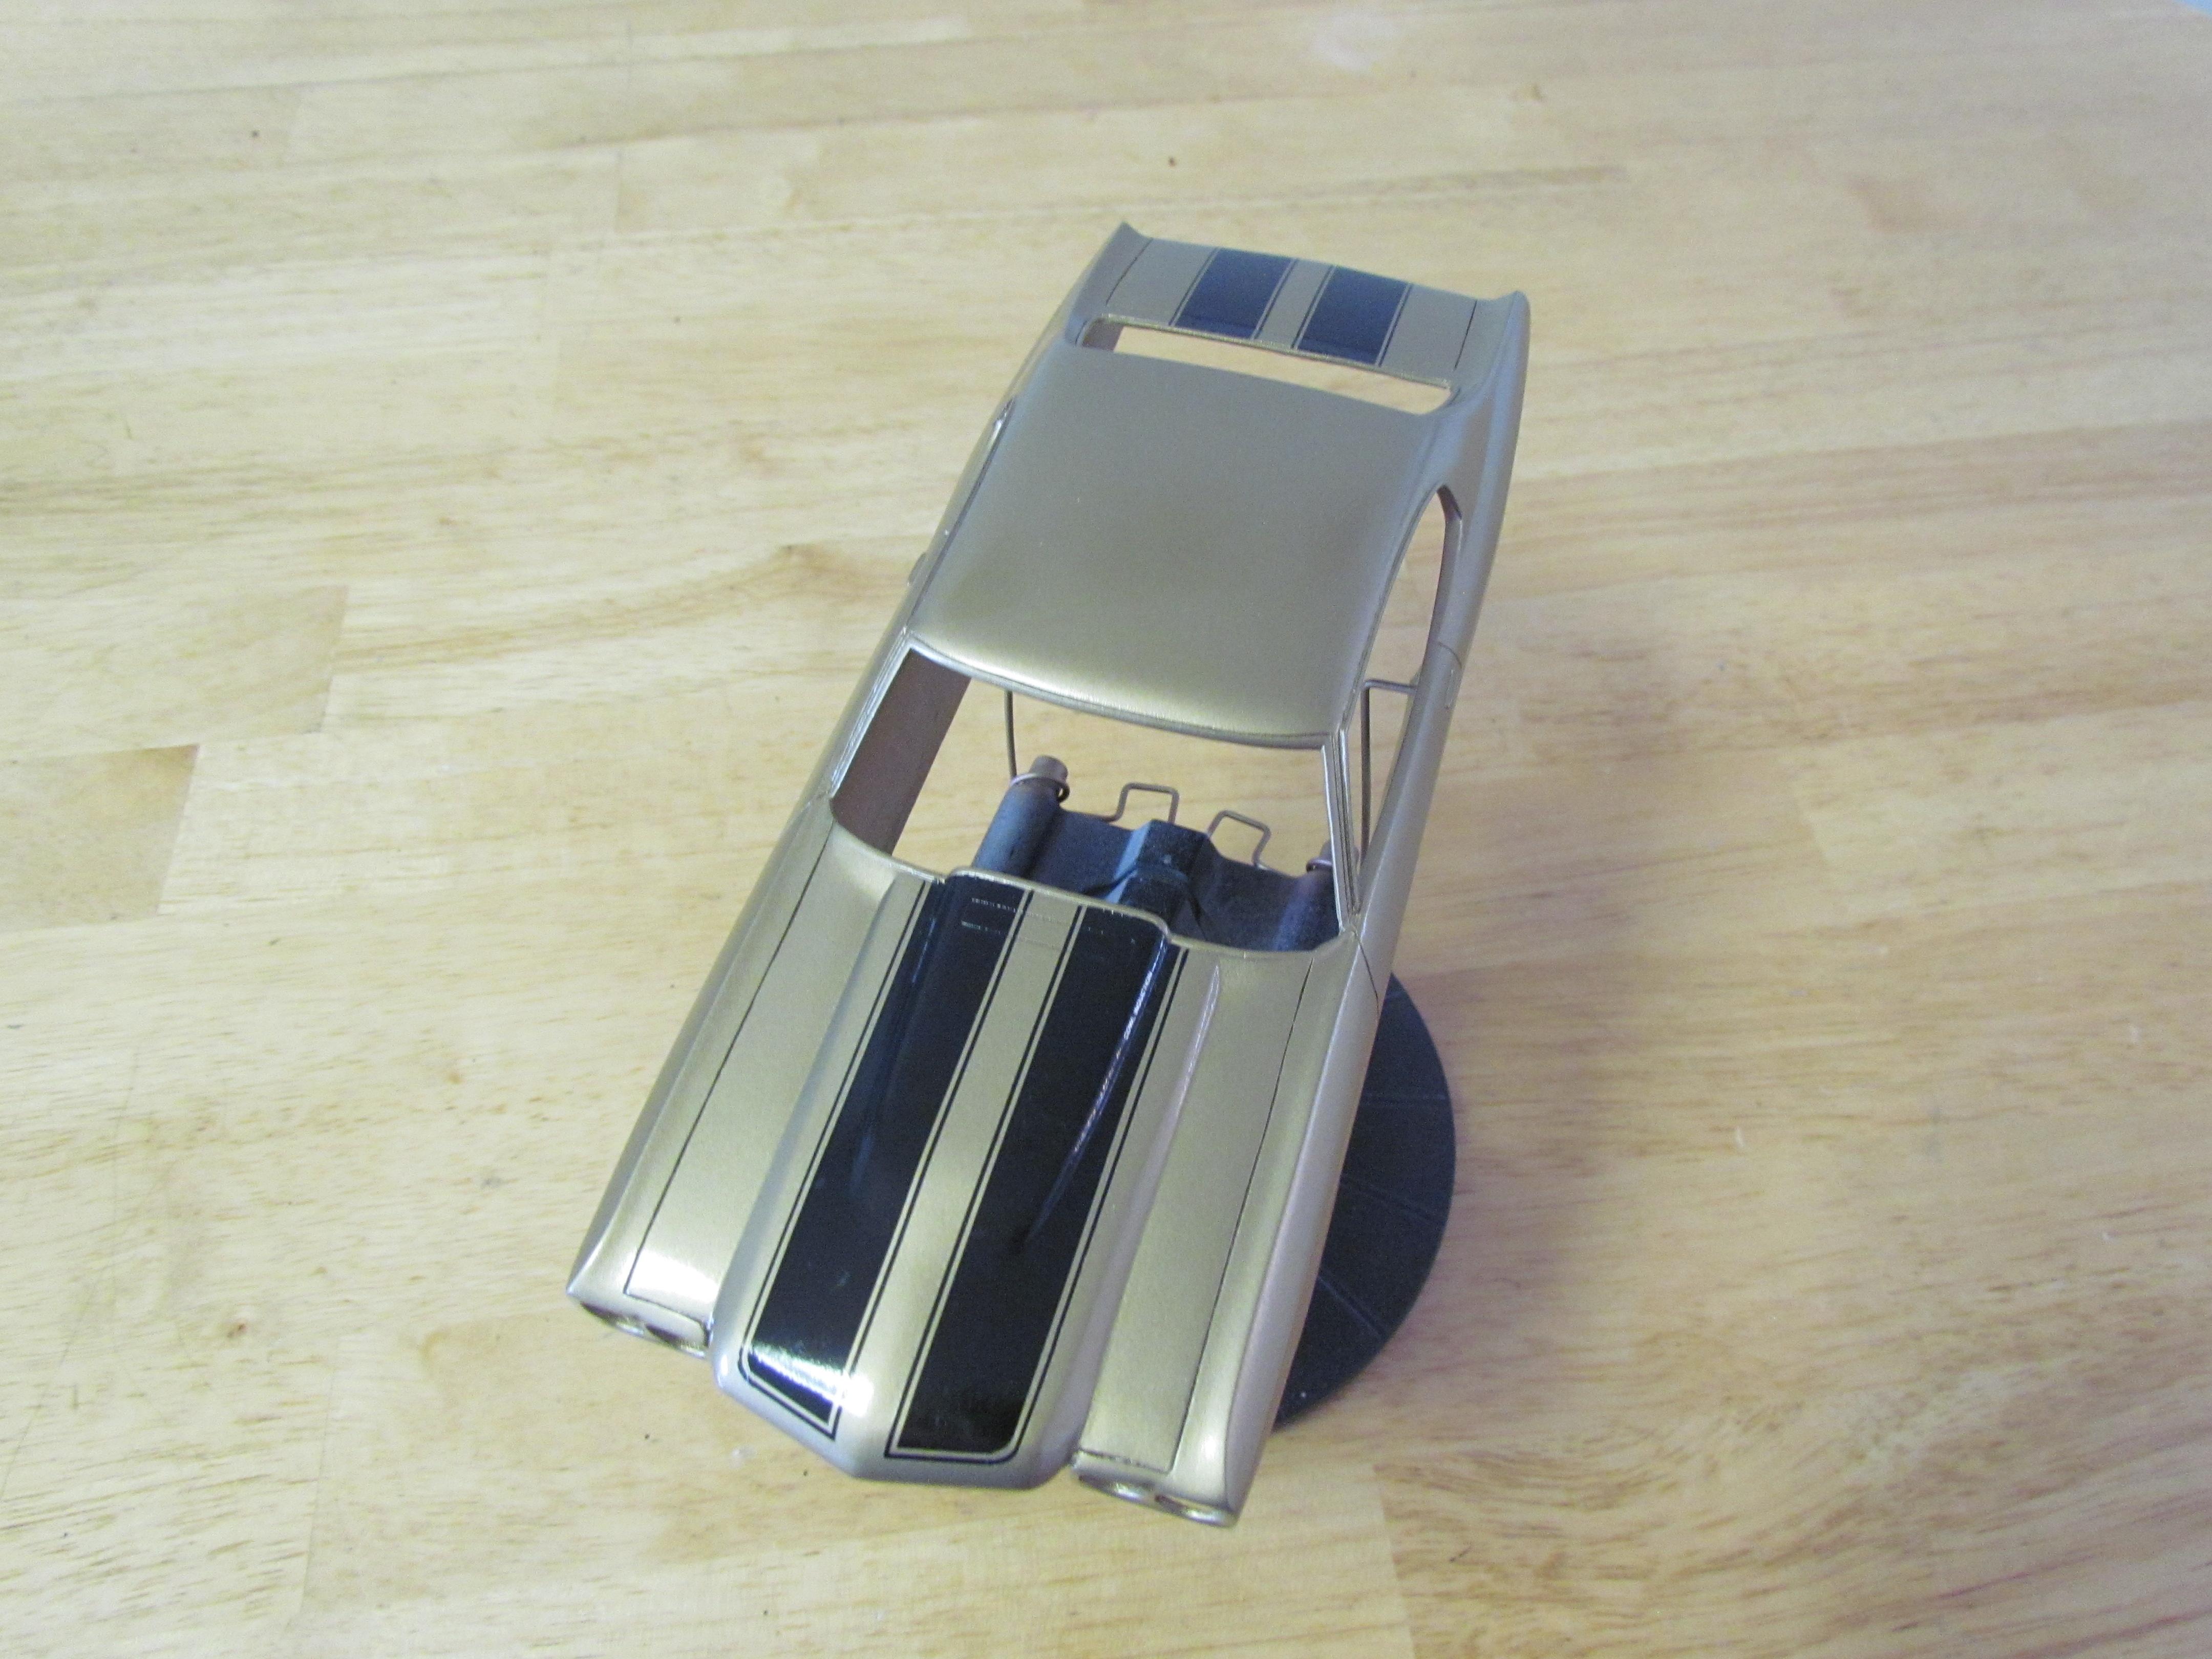
Thanks guys! I feel the AMT '70 Chevelle has the best overall shape of the available '70 Chevelle models. The fender/quarter panel bulges are the main drawback on the body of the AMT kit but with some work can be made to look closer to correct. A couple of months ago I painted an AMT '70 Chevelle body for a friend that he's going to be using as a slot car for drag racing. I modified the side fender/quarter panel bulges on that one as well. I used the kit stripe decals. I cut the hood stripes apart and narrowed the fronts so they lay down straighter over the hood hump. They aren't as accurate as the Keith Marks decals but don't look that bad. Here are a some pictures. With the original body this makes 3 that I modified. I guess it's starting to come easier, well sort of. lol


.jpg.5f6f8a43d2699b12d272215750d0320a.jpg)