crowe-t
-
Posts
1,965 -
Joined
-
Last visited
Content Type
Profiles
Forums
Events
Gallery
Everything posted by crowe-t
-

Painting Wood Grain - Not typical grain pattern - Burl Wood
crowe-t replied to crowe-t's topic in Tips, Tricks, and Tutorials
I have Tamiya acylic and Testors Acrylic(Acryl) paints. -
Painting Wood Grain - Not typical grain pattern - Burl Wood
crowe-t replied to crowe-t's topic in Tips, Tricks, and Tutorials
The problem is I'm using acrylics and they dry very fast. -
Painting Wood Grain - Not typical grain pattern - Burl Wood
crowe-t replied to crowe-t's topic in Tips, Tricks, and Tutorials
Your burlwood pattern came out perfect! Leave the first lighter color wet while dabbing the dark brown color? -
Painting Wood Grain - Not typical grain pattern - Burl Wood
crowe-t replied to crowe-t's topic in Tips, Tricks, and Tutorials
Thanks Greg! I's still like to get some more opinions and possibly see some pictures of what others have painted. Raymond - It's such a small area, I'm not sure a decal will work. -
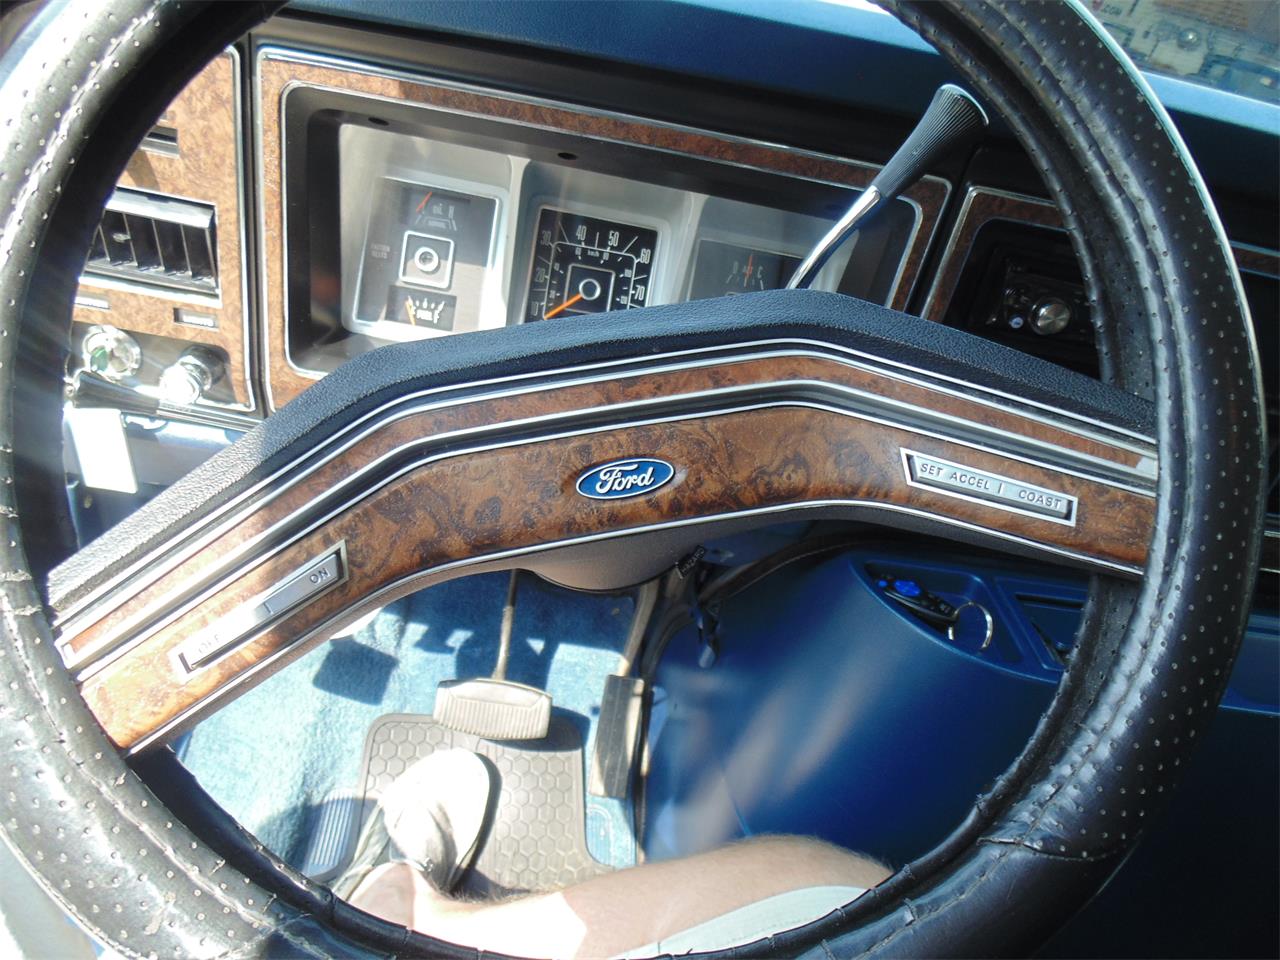
Does anyone have an idea(s) for painting wood grain as it appears in this picture from a Ford Econoline's interior? It's not the typical wood grain that can be painted with brush lines showing.

-
Thanks for all the nice comments! It's just a little something to make my wife and I feel good. The paw prints were sprayed on with a stencil I had made. I painted gold under my cat's decal since it was printed on clear paper. From some angles the golds looks more white like her fur was. Peter Lombardo - I did put a slight black wash in the grill. It shows better in person but it is there.
-
Thanks guys!
-
Here's the finished build in the Under Glass section. http://www.modelcarsmag.com/forums/topic/143924-revell-41-willys-street-rod/
-
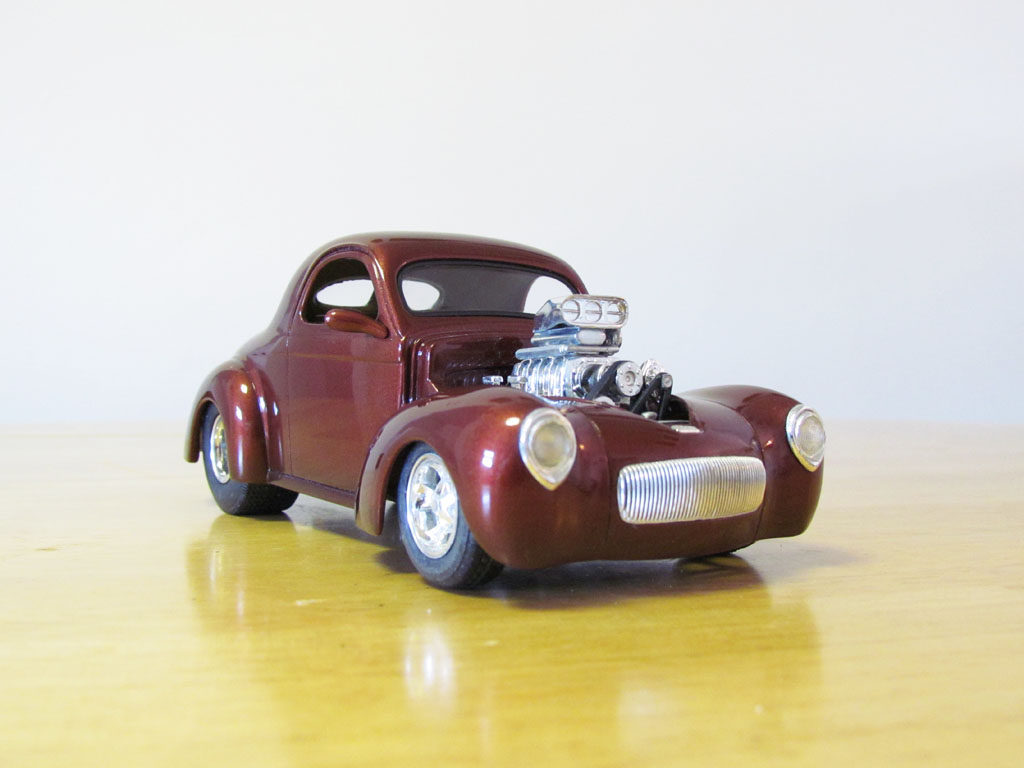
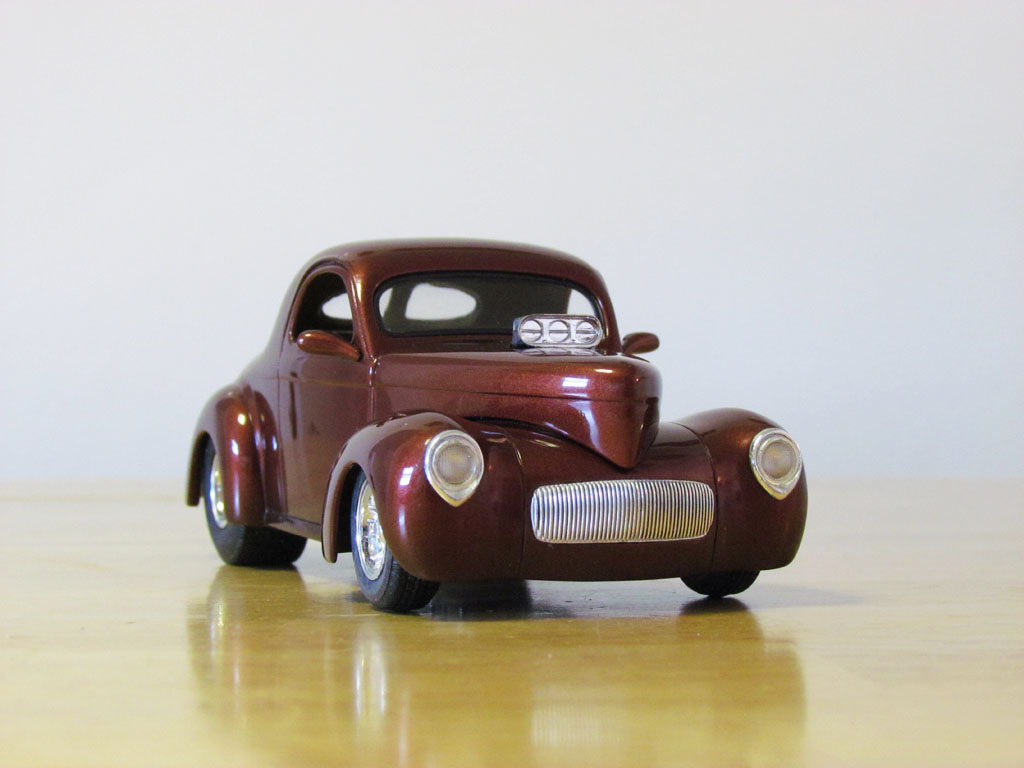
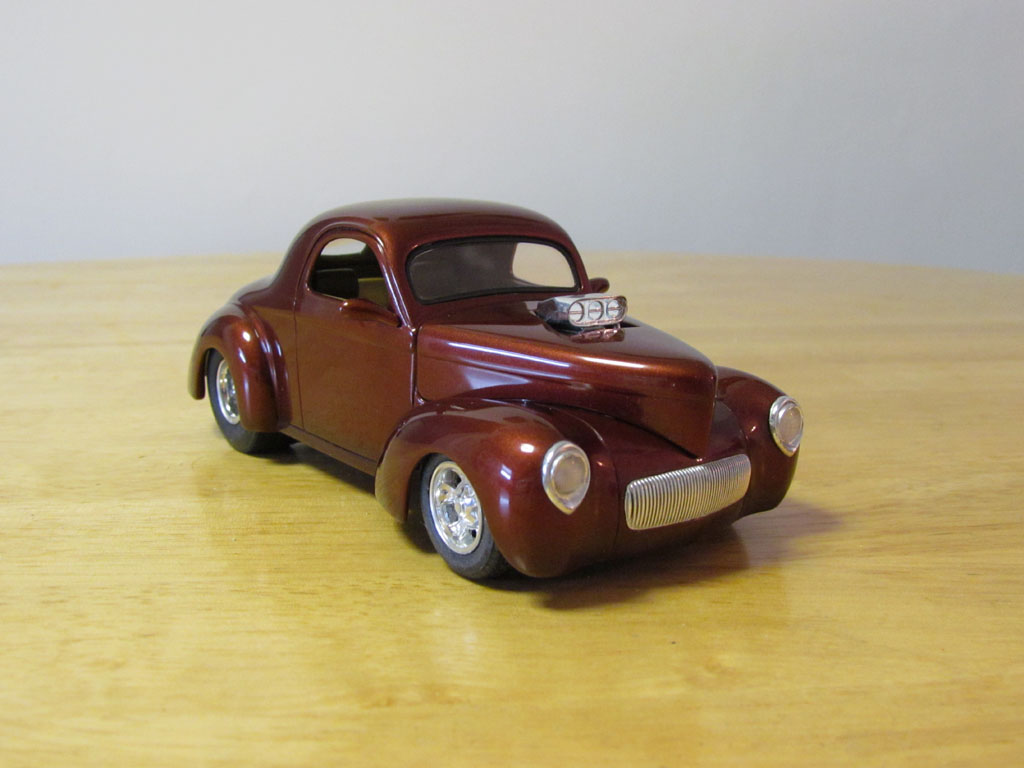
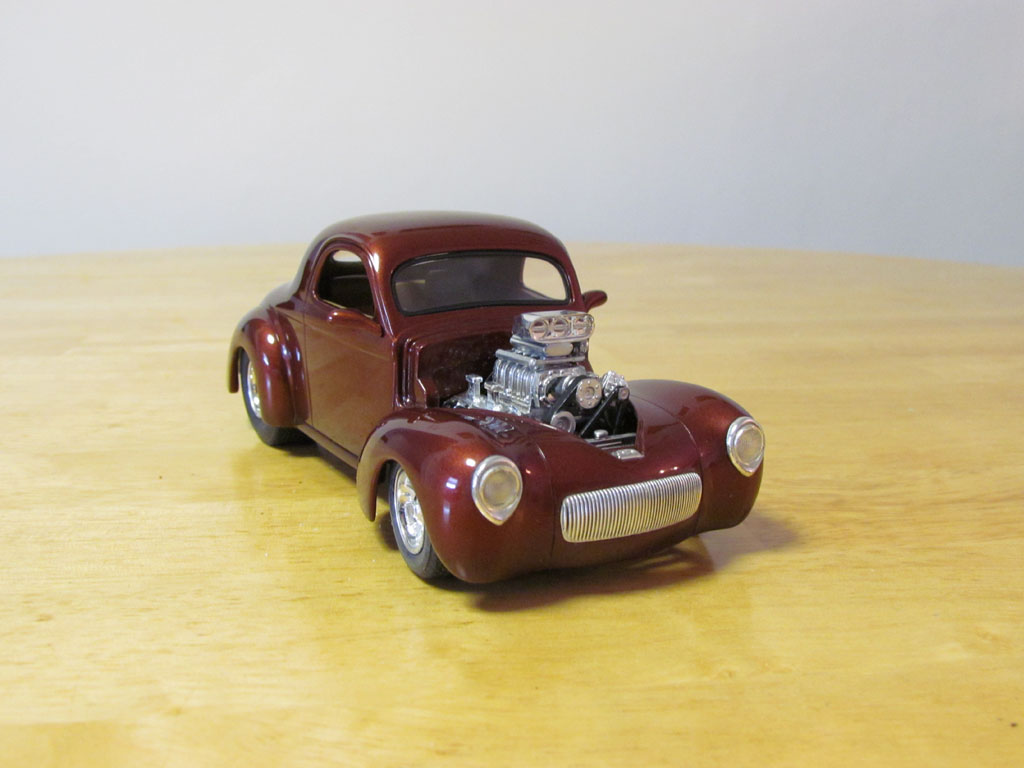
Here's a Revell '41 Willys I recently finished. It's inspired by a 1:1 reddish-brown '41 Willys I found pictures of online(pictures attached). The 1:1 has a picture of Marilyn Monroe on the trunk lid. I came up with the idea to put a decal of my cat Harley, who passed away 3 years ago, on the trunk lid and my wife loved it so I went with it. I also had a 1941 NY license plate made with her(Harley's) name. It's a cooky idea but I made this one for my wife and it makes her happy. The 1:1 Willys color was made custom to match the owner's wife's hair color and my wife also has auburn hair so this worked out well. Gravity Colors made me a custom color. It looks more brown in person but does look reddish under different lighting. I lowered the front end and moved the front wheels inward so they don't rub the fenders. The firewall is modified and the rear wheel openings are made smaller to resemble a '41 Willys body from Outlaw Performance. Since I built the firewall out I had to move the engine forward. The Enderle Bug Catcher injector scoop is from a Revell '68 Corvette and the front wheels are actually a set of rear wheels from a Revell 40 Coupe Street Rod. The front wheels that come with the Revell '41 Willys represent 13" in 1:1 so I changed them out. Below is a link to the online build. http://www.modelcarsmag.com/forums/topic/129255-revell-41-willys-street-rod/ Thanks for looking in!
-
Boss Hogg '70 Cadillac Deville Convertible
crowe-t replied to Andrew D the Jolly Roger's topic in WIP: Model Cars
Did you glue the hood shut? -
Very nice job! Where did you get the Resin grill and headlight mounts? What color green did you use?
-
Thanks for the pictures. It looks like you have the front shocks mounted to the inside of the trailing arms.
-
With the angle of the trailing arms the front shocks don't see to reach. I'll have to take another look. Where do the rear shocks mount on the axle? On top of the tabs or on the inside?
-
Hey thanks! Are the front shocks attached on the outside of the control arms or whatever they are called? Are the rear shocks attached right on the mounting blocks on the rear end or on the insides? It's hard to tell in the picture.
-
Did you ever start the Cheez Whiz 55?
-
Does anyone have pictures of a 3rd generation Ford Econoline's chassis that shows the location of the shock absorbers? Or a picture of the chassis(built) of an AMT or MPC Ford Econoline van will help. I'm building an AMT Phantom Ford Econoline and the instructions are not that good in pinpointing the location of the shocks..
-
Thanks Randy and Curtis! It looks like the sun will be out on Saturday so I'll take pictures. It's been overcast so it's making the color look dark red and not as shiny as it really looks. Here's another picture with the hood on.
-
Thanks guys! The lighting isn't so good today. I'll take more pictures and post in the Under Glass section as soon as I get some sun. Here's a quick picture with the hood off. This picture isn't showing the color to well or the darker fade along the bottom.
-
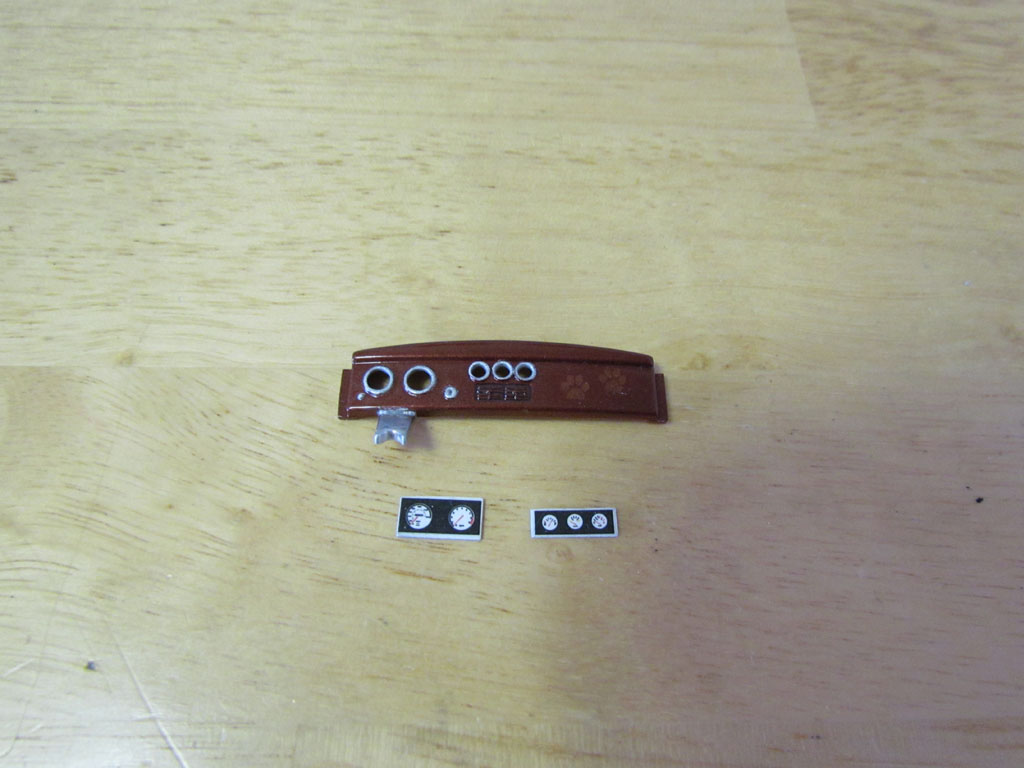
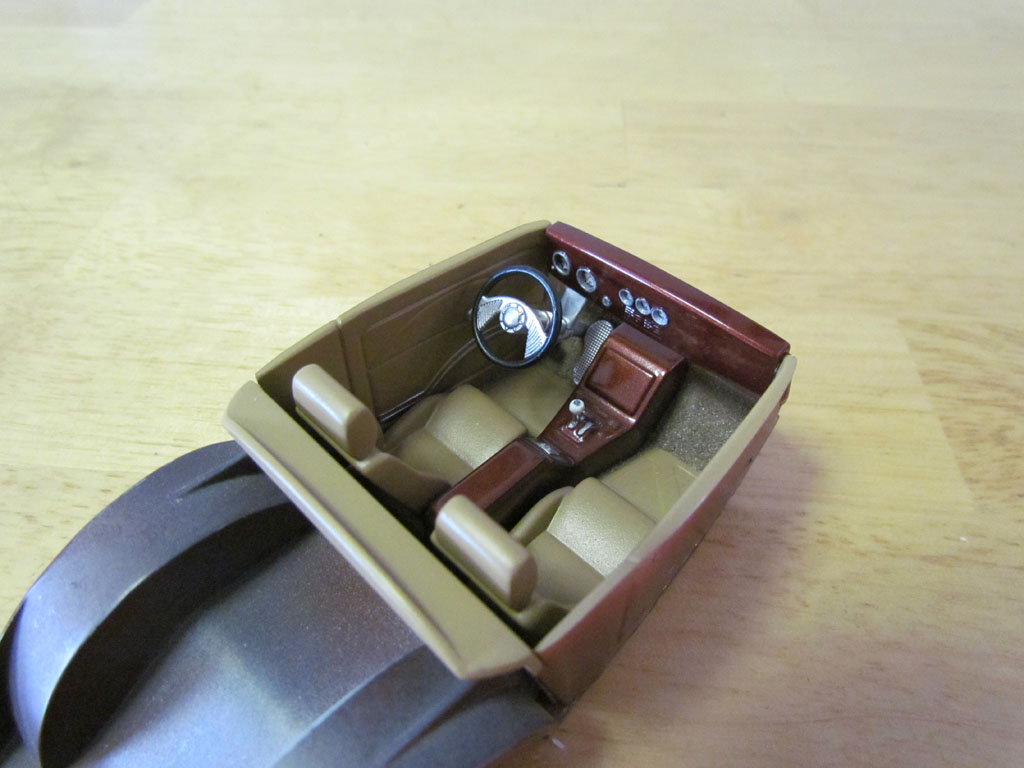
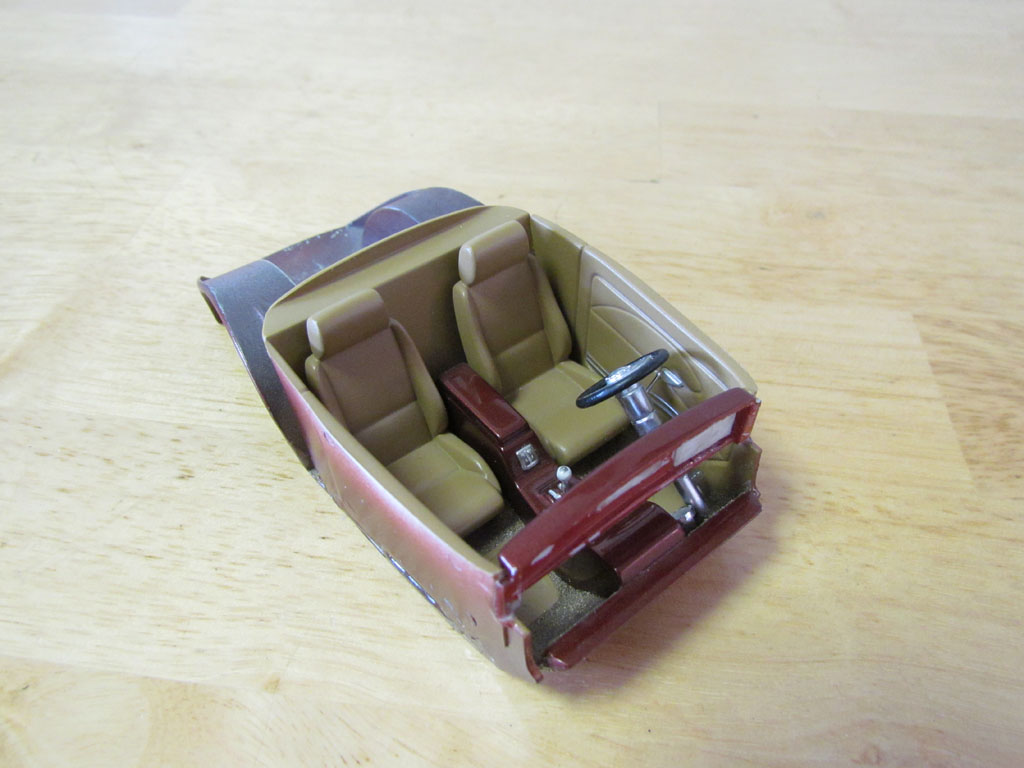
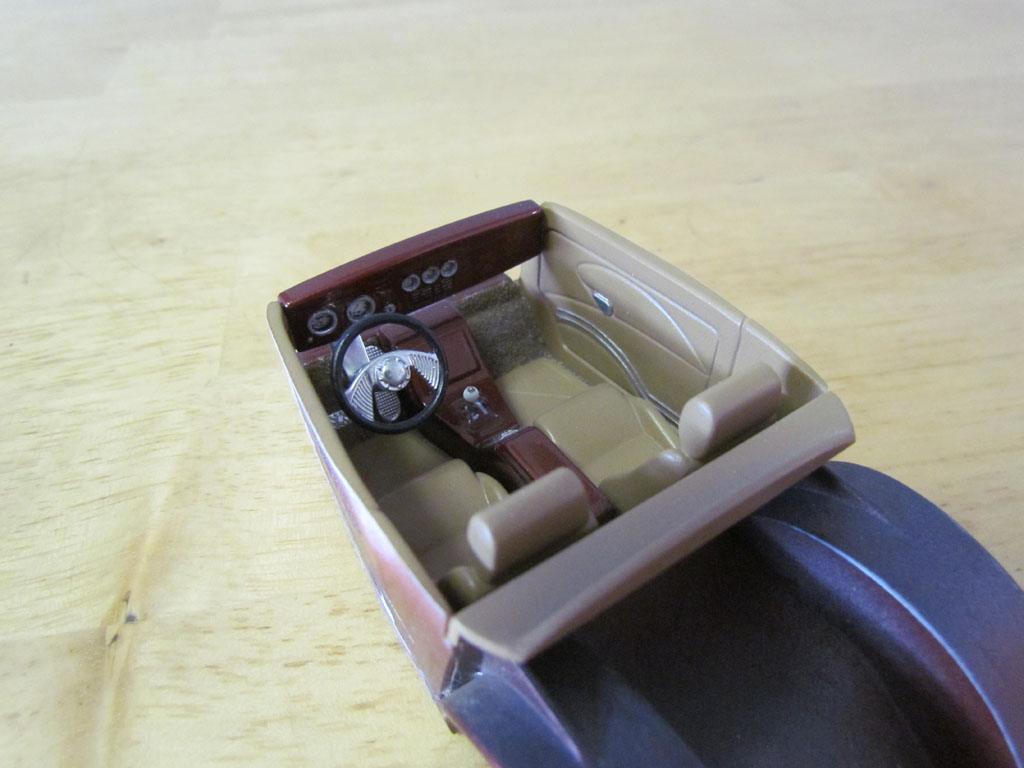
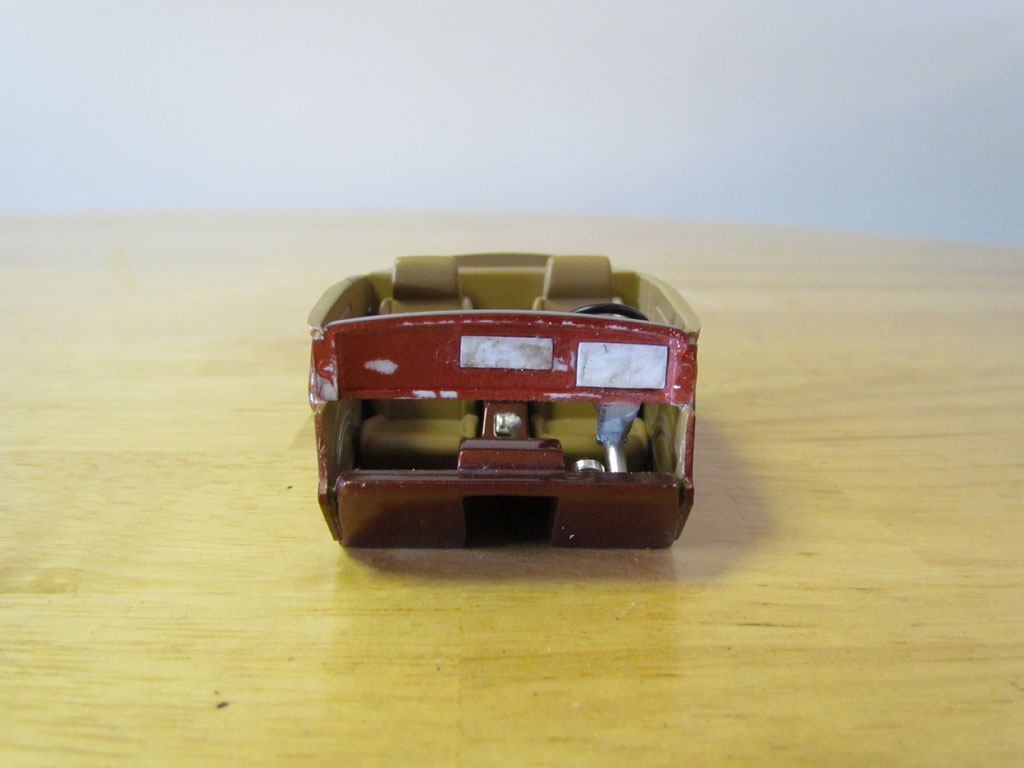
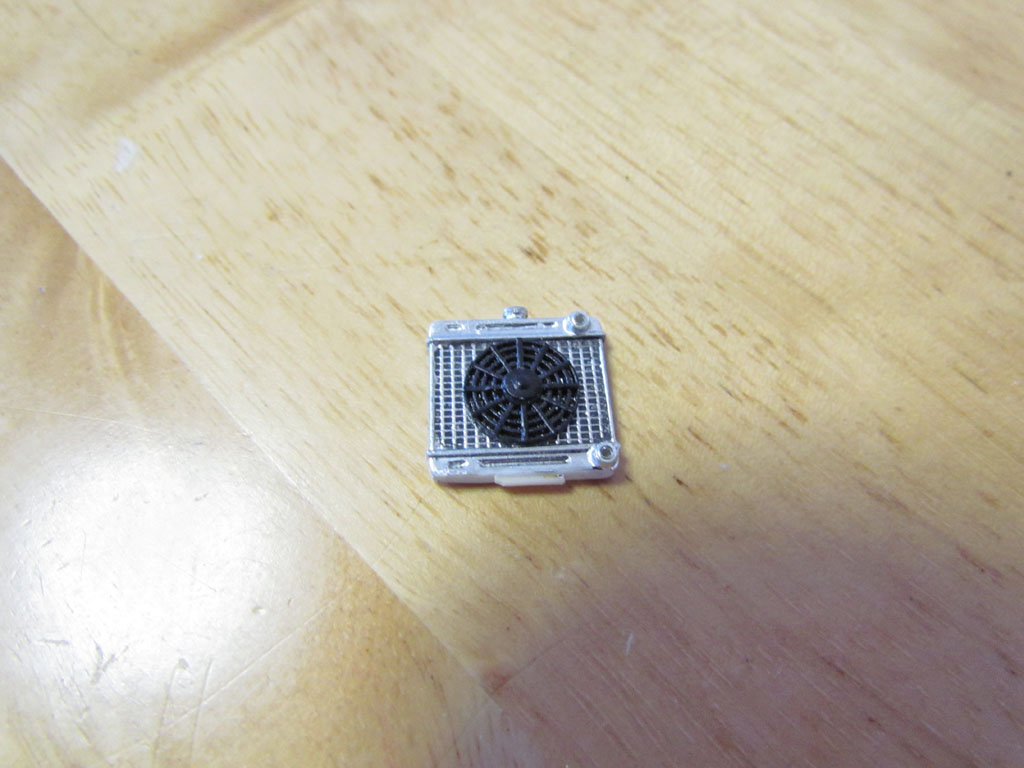
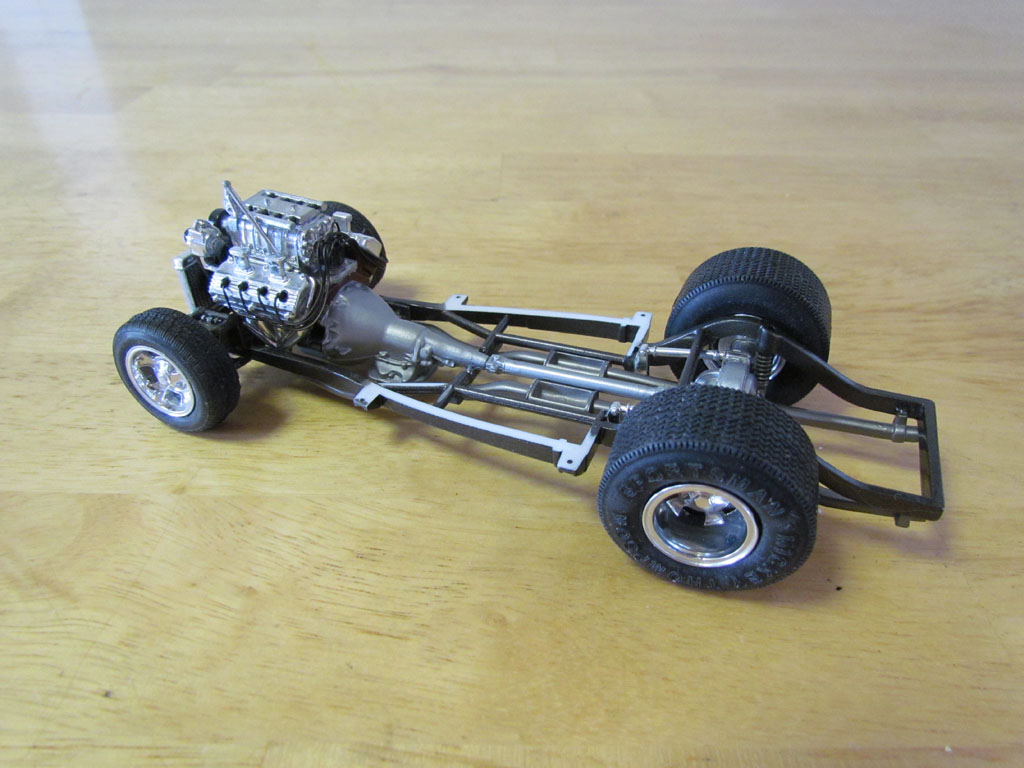
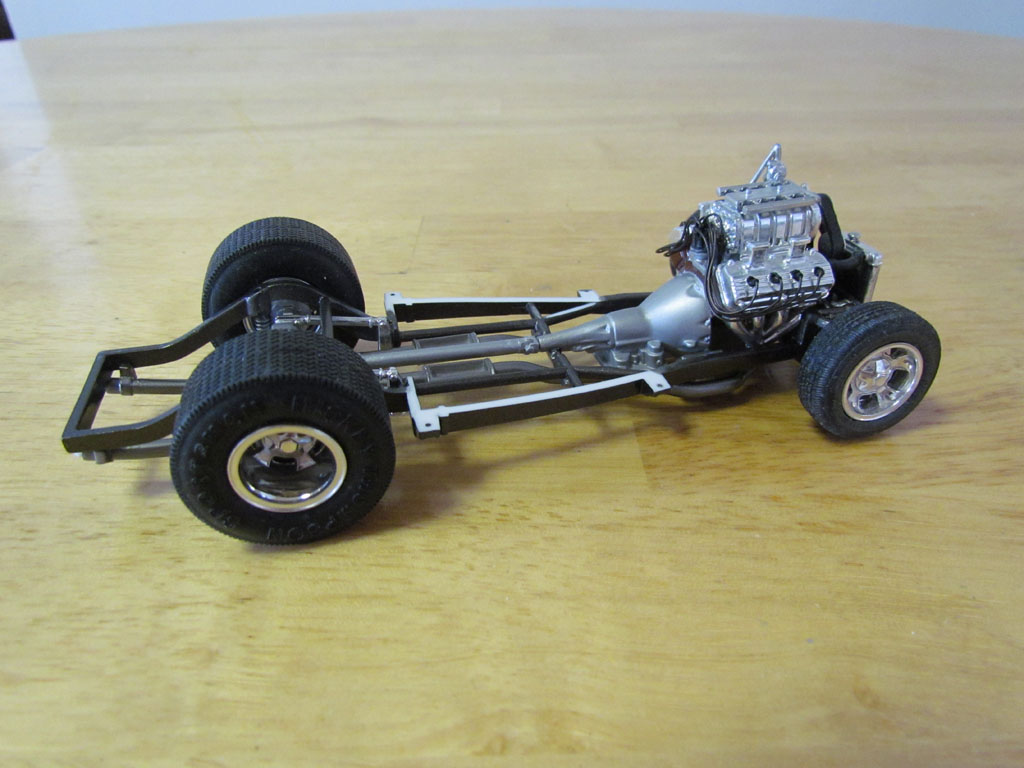
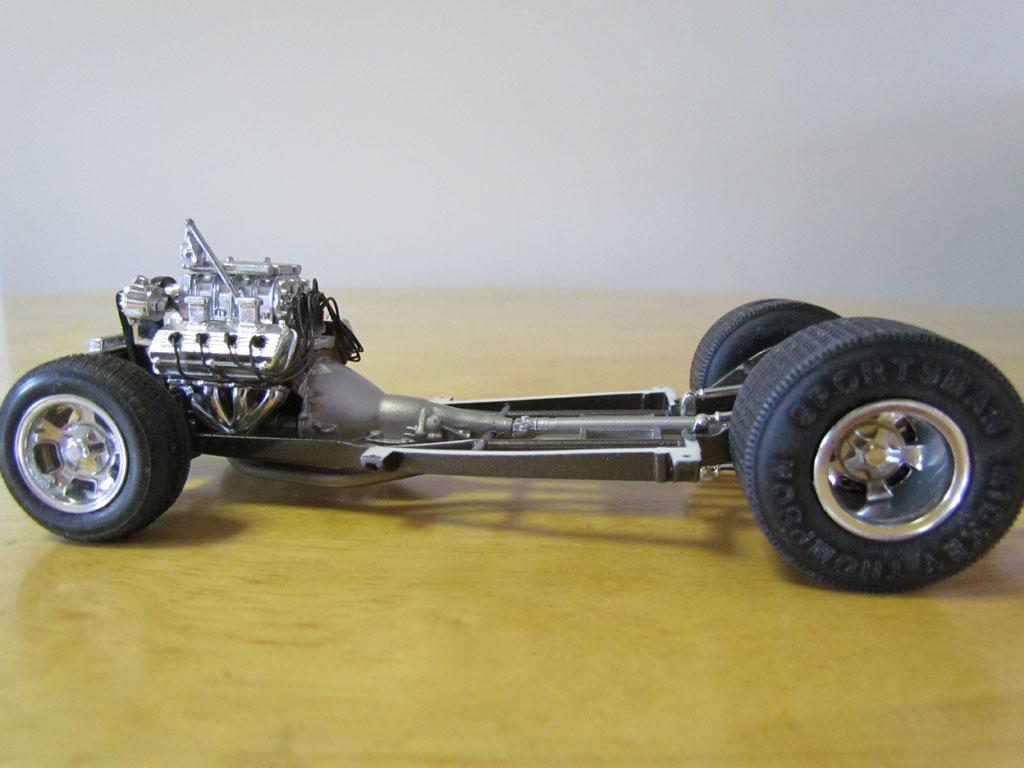
It's been a while but I'm finally finishing this one. The instructions say to cut out the dashboard gauge decals and not to dip them in water and glue in place. Instead I cut the shapes out of .5mm sheet styrene and applied the decals. I glued them in with canopy glue and used Testors clear parts cement to make lenses. The interior's center console and dashboard are painted the body color as well. It photographs almost red but it is a slight reddish-root beer brown color. The tan is Tamiya XF-59 Desert Yellow which is actually a nice saddle tan color. For the carpeting I used a Champagne color embossing powder I found at Michaels. The 1:1 Willys that inspired this build doesn't have a finished interior since the owner decided to sell it before the interior was finished. I picked saddle tan which seems to go really nice with the body color. The steering column, the center of the steering wheel and brake pedal are airbrushed with Molotow Chrome and clear coated with Spaz Stix Ultimate Clear Coat. I made the directional lever out of a straight pin. It looks a bit more in scale than the plastic one that was attached to the steering column. Since I built out the firewall I had to move the engine forward about 2mm as well as the radiator mount on the chassis. The body slopes down at the front so I shortened the radiator a couple of millimeters and modified the electric fan to fit. I originally lowered the front suspension about 3.5mm but when I test fit it I wanted to lower it another millimeter. I sanded down the top of the chassis rails that attach to the floor to lower the front some more. It worked out nicely. Another problem I encountered with the lowered front suspension was that the tires rubbed up against the inside of the front fenders. I shortened the upper control arms and the lower suspension cross member with the control arms. I moved the wheels/tires in about 1.75mm on each side. Now there's plenty of clearance and the wheels can steer. The front wheels in this kit represent 13" wheels in 1:1. They looked too small in diameter compared to the rear wheels. For the front wheels I'm using a set of rear wheels from a Revell 40 Coupe Street Rod. I had to cut the opening of the tires larger to fit them. It's basically all together now except for the Enderle bug catcher and the part that goes underneath which I had to re-spray with Molotow. It should be finished in a day or two and I'll post pictures. Thanks for looking in.
-
This is an absolutely beautiful build and great save! It's flawless in every way right down to the column shifter.
-
Boss Hogg '70 Cadillac Deville Convertible
crowe-t replied to Andrew D the Jolly Roger's topic in WIP: Model Cars
Andrew, Excellent work on all the repairs and headrests! I'm a Dukes Of Hazzard fan and love Boss Hogg. I have a '70 Cadillac Deville promo car that I might build as Boss Hogg's car if I don't find a '70 Johan Cadillac. I can't wait to see more progress. -
Which Hemi is in the Revell '41 Willys Street Rod?
crowe-t replied to crowe-t's topic in Model Building Questions and Answers
Thanks a bunch! -
Which Hemi is in the Revell '41 Willys Street Rod?
crowe-t replied to crowe-t's topic in Model Building Questions and Answers
The distributor's order goes clock-wise like a small block? -
Which Hemi is in the Revell '41 Willys Street Rod?
crowe-t replied to crowe-t's topic in Model Building Questions and Answers
I'm trying to find the firing order for the 392 Hemi -
Which Hemi is in the Revell '41 Willys Street Rod?
crowe-t replied to crowe-t's topic in Model Building Questions and Answers
Thanks Mark! I'm not too familiar with the early Hemis but it looks like a 392.